
Leaderboard


Popular Content
Showing content with the highest reputation on 10/01/21 in all areas
-
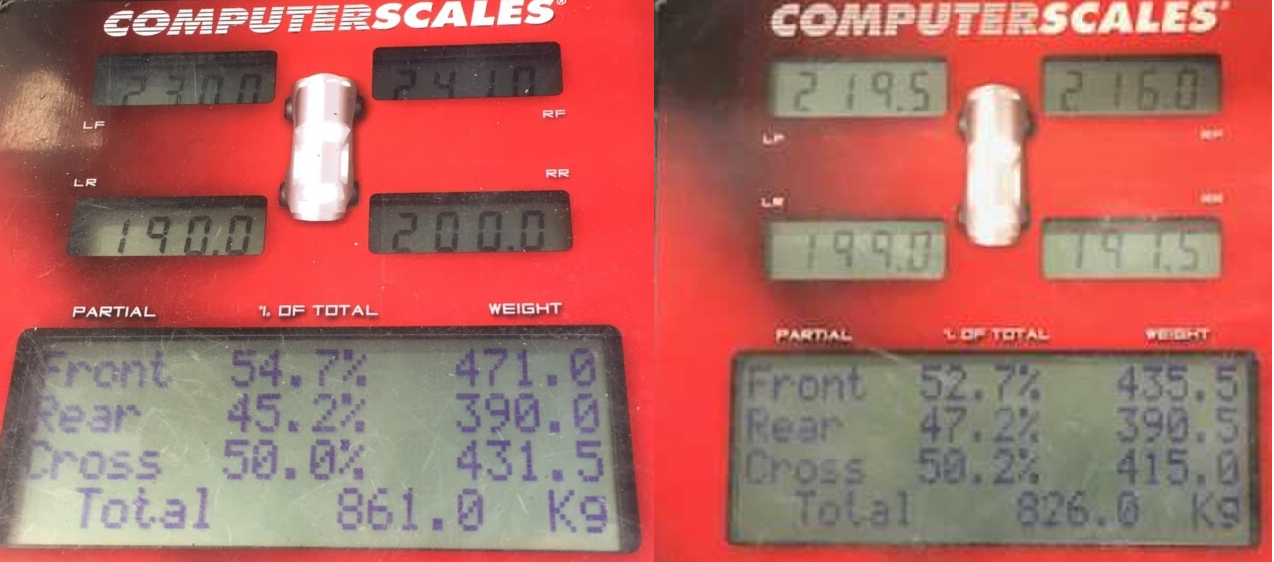
Last bits of major fabrication done (front swaybar, driveshaft hoop) and finally had it on the scales for corner weighting. Before on left, current on right: All fluids and 30+ liters of fuel on board. Little bit off my goal, but shows how hard it is to take weight out of something. Could probably get another 15kg by going to fiberglass hatch and doors, but that's just $$$ I don't need to spend at the moment. Very happy that 35kg has come straight off the front!
 9 points
 -
So a few different things ABS pump / wheel speeds I've not been able to make any progress on the ABS pump swap, because I cant get to an Auckland pick a part site to grab some other wheel speed sensors. Doesnt look like I will be able to any time soon. So for now I've put the regular speedo drive back in, and wired it up. Will just repin to suit standard ABS pump. Track day next Friday! Exciting. Traction control setup Since ABS setup wont work, I have setup a timer based RPM limit instead. If vehicle speed is zero, and you are over 90% throttle. Then the rpm limit changes to 4000rpm. and a timer resets to zero. As soon as it sees that the car has started moving, the timer starts and the rpm limit starts increasing along with the timer up to the normal max. So the idea is that if the rpm goes faster than what is physically possible for the car, it must be because of wheel spin. so a few quick ignition cuts then you're on track again. It's taken a bit of trial and error to setup, but its working good so far. Green line is engine speed and yellow line is the rpm limit. So ideally on a good grippy launch you stay just below the yellow line with no intervention needed. It's not ideal and I'll still pursue getting front and rear wheel speeds. But it's pretty good in the meantime. Rear disc swap It was only $65 at pick a part for an entire disc brake rear end including hand brake cables, ABS sensors etc. So cant complain about that. The only tricky part of swapping it in, is that you need to remove the exhaust in order to remove a heat shield, to swap the hand brake cables. Certainly not the worst swap of this sort I've done. Not sure if I'll get this swapped over in time for track day next Friday. Probably a good idea to get new discs and pads. Trumpet swap So far I've had the best powerband by using some rather long trumpets. They've been through a few iterations fine tuning the angle and lengths so they dont hit the bonnet or the radiator cross member. However the current iteration that I'd settled on still ever so slightly rubs on the bonnet when the motor is under extreme movement. It's only the slightest rub so I'm not actually concerned - and only on one of them. But long term I need an airbox over them and an air filter, so there's simply not enough room. So my only real option was to put a much more aggressive bend in the trumpet and then as a result they are a fair bit shorter. But also more clearance around everything. As a result you cant fit the bolt into the bottom hole anymore, it needs to be slotted So I went for a drive to see how the powerband would change, expecting some slight losses if anything. However so far results are looking better than before, considerably better. Not sure why though. To reach target AFR you can see the closed loop lambda was wanting to add a peak of 22.7% more fuel which is an insane increase. I added the extra fuel then reran, and it stayed on target with minimal trim. So that was interesting. But I'm not quite convinced this is consuming 22% more air with just a trumpet swap. However it's possible that the older trumpets were badly shrouded by the bonnet and the radiator cross member. It's now up to 69.9% duty cycle with the 2ZZ injectors. Previous best was 66%. Although thats only really an indication of what's happening at max rpm. My fuel map is looking increasingly comical. I think I need bigger dia exhaust and/or VVTI to reclaim that mid range. It would be pretty good to get some of that 4000ish rpm region beefed up. On the whole though, have been fixing up some minor issues but I'm as good as ready for track day. Cant wait!
8 points
-
Right so here I have this 1980 TT133 Toyota Corona. 180odd thou kms on the clock, pretty rusty but nothing too major. Just got rid of my 1981 4AGE carbureted KE70 Toyota Corolla to fund this and my set up, and to "fully" focus on this. The plan is to give it a medium ish restoration. Sure, that's subjective but I don't want to leave too many stones unturned but also want to be able to drive this sooner rather than later. (lets see how long that idea lasts) The good: The car is 99% complete and very untouched. Something that makes me personally so at ease and happy to work with. makes these jobs so much easier. (even has a nice photo of the car being a few years old too!) interior is in very good condition too. Apart from the classic giant crack in the sun baked dash. The bad: rust rust rust. main bad spots are in the firewall, bottom of doors and guards. most the normal stuff. underside need a full blast. All the suspension/brakes needs a good overhaul too. Has the original 2T engine in there but I do have a spare 3SGE (I hastily ripped out of an altezza I had for all of 5 mins) that I plan to put in there for a nice refreshing improvement. End goal is to make it a nice low and reliable old school cruiser/head turner that I can take out on weekends and even daily if need be. Untitled by Emmett Westwood, on Flickr5 points
-
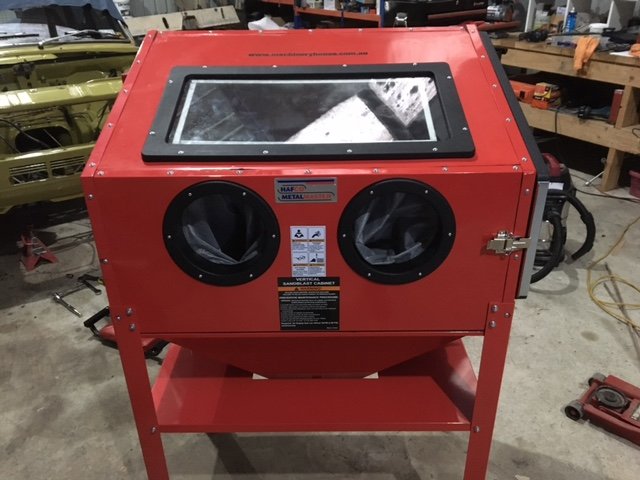
So maybe about 6 months ago I unpicked the boot and bonnet skins and had them sandblasted and etch'd. I plan to use epoxy primer on as much as I can from now on. Boot and bonnet frames are the worst parts of this lot. savable but going to be a good test for my skills remaking the shape on the edge of the frame. Plan to do this later into the restoration when my patch making becomes a bit better. Will focus on easier stuff until then. Wish there was a way to keep this lovely patina. Untitled by Emmett Westwood, on Flickr Untitled by Emmett Westwood, on Flickr Untitled by Emmett Westwood, on Flickr Untitled by Emmett Westwood, on Flickr Untitled by Emmett Westwood, on Flickr Untitled by Emmett Westwood, on Flickr4 points
-
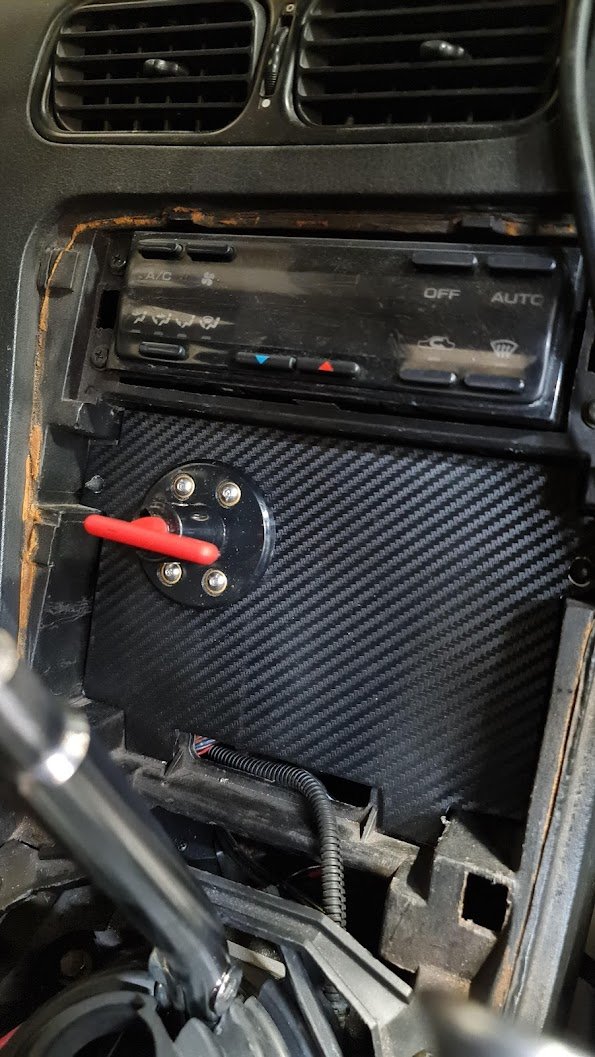
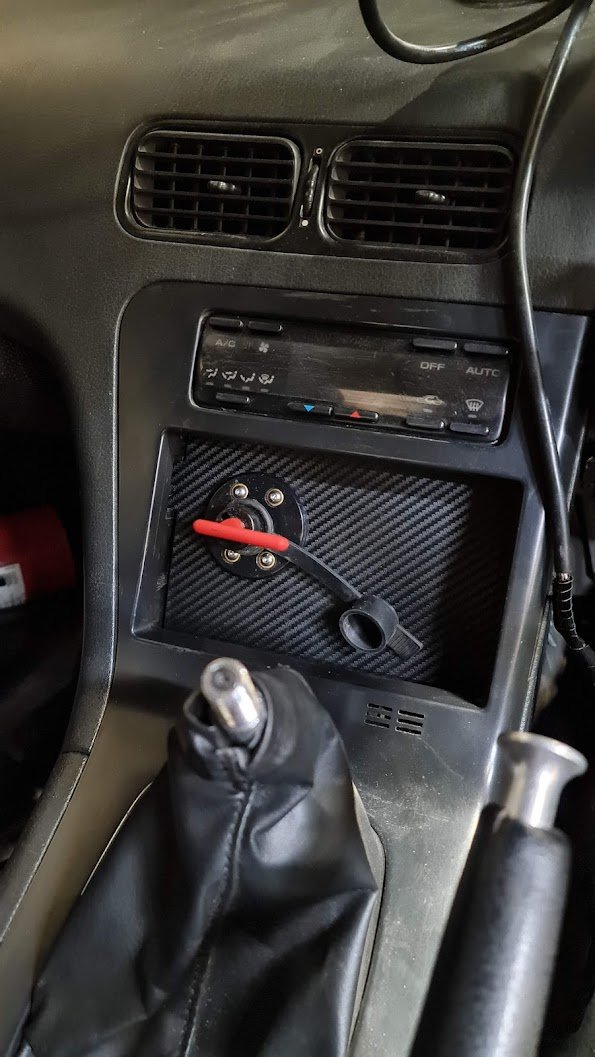
I've changed the power feed wires to the coils to a much bigger gauge all the way from the relay to coil plug pins. Thought maybe there could be resistance that got worse with heat? Made no difference at all. Still bloody fun to drive though... Maybe its something to do with the earthing? I have a huge list of things I've tried so far, one day I'll crack the bastard. ---------------- Bought a battery cut off switch thing ages ago so since I desperately need to be doing sanding on the mx5, I made this: I cut the power cable which goes to the battery behind the passenger seat and crimped on some lugs so it joins here. Made a basic plate out of aluminium and covered it in fake carbon wrap because it looks fast. Decided to have it set back a bit so there is plenty of room for gearshifts. It isn't actually finished, I was planning to drive it to work today but it was late and freezing. Just need to drill mounting holes then connect the cables and insulate etc.
3 points
-
Departure in t-15hrs. Fingers crossed its a cruisy and drama less day. Woot.3 points
-
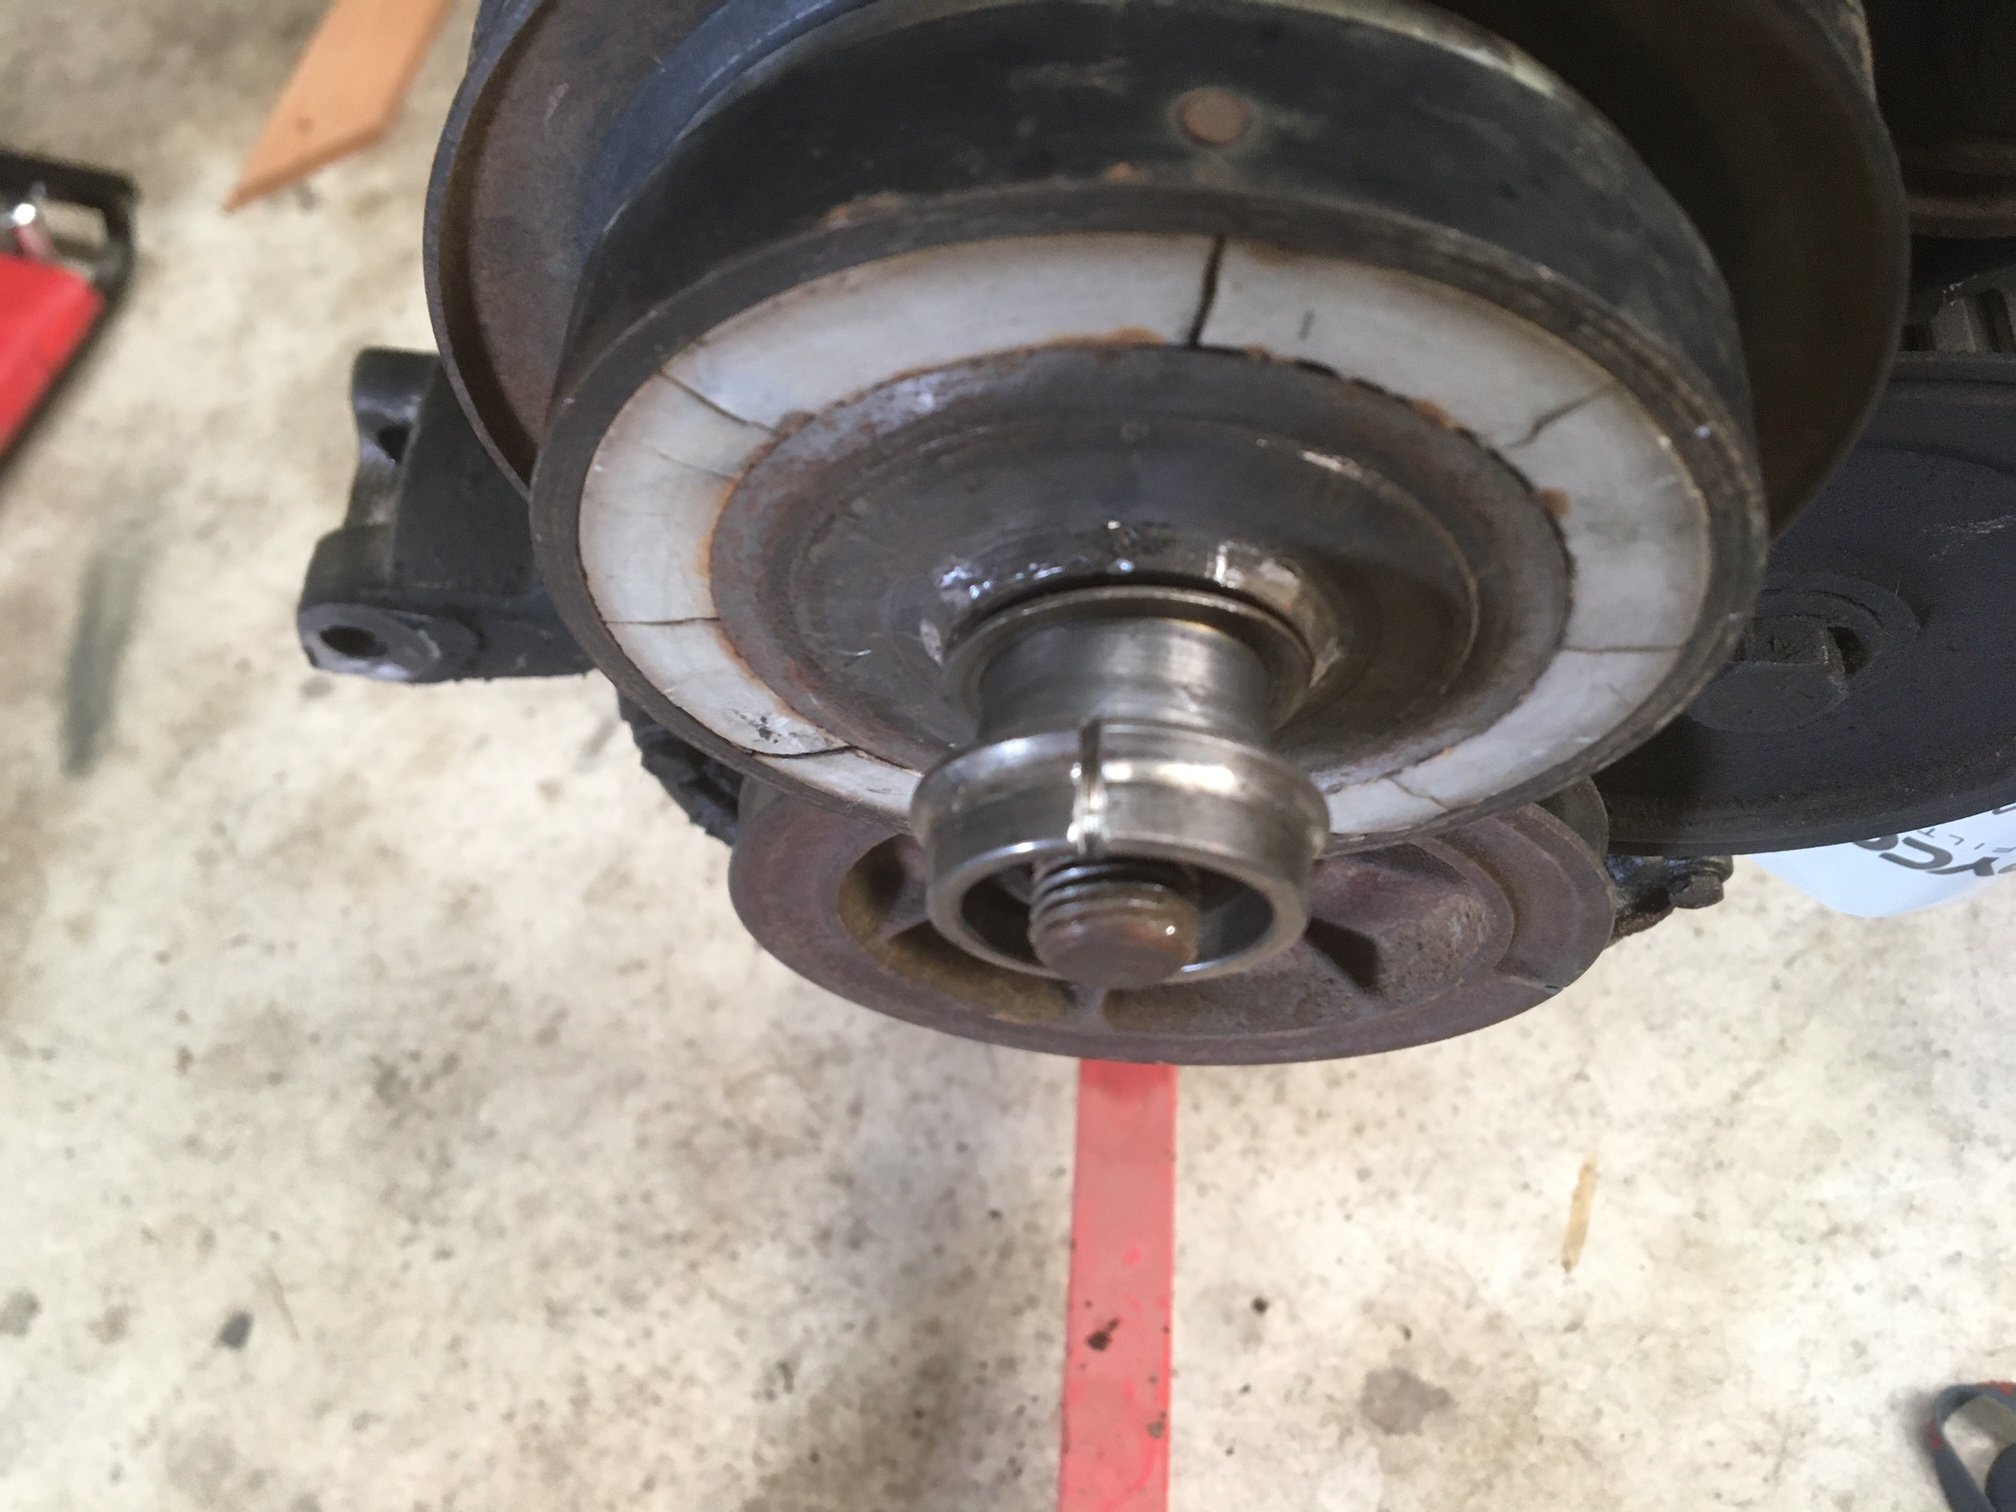
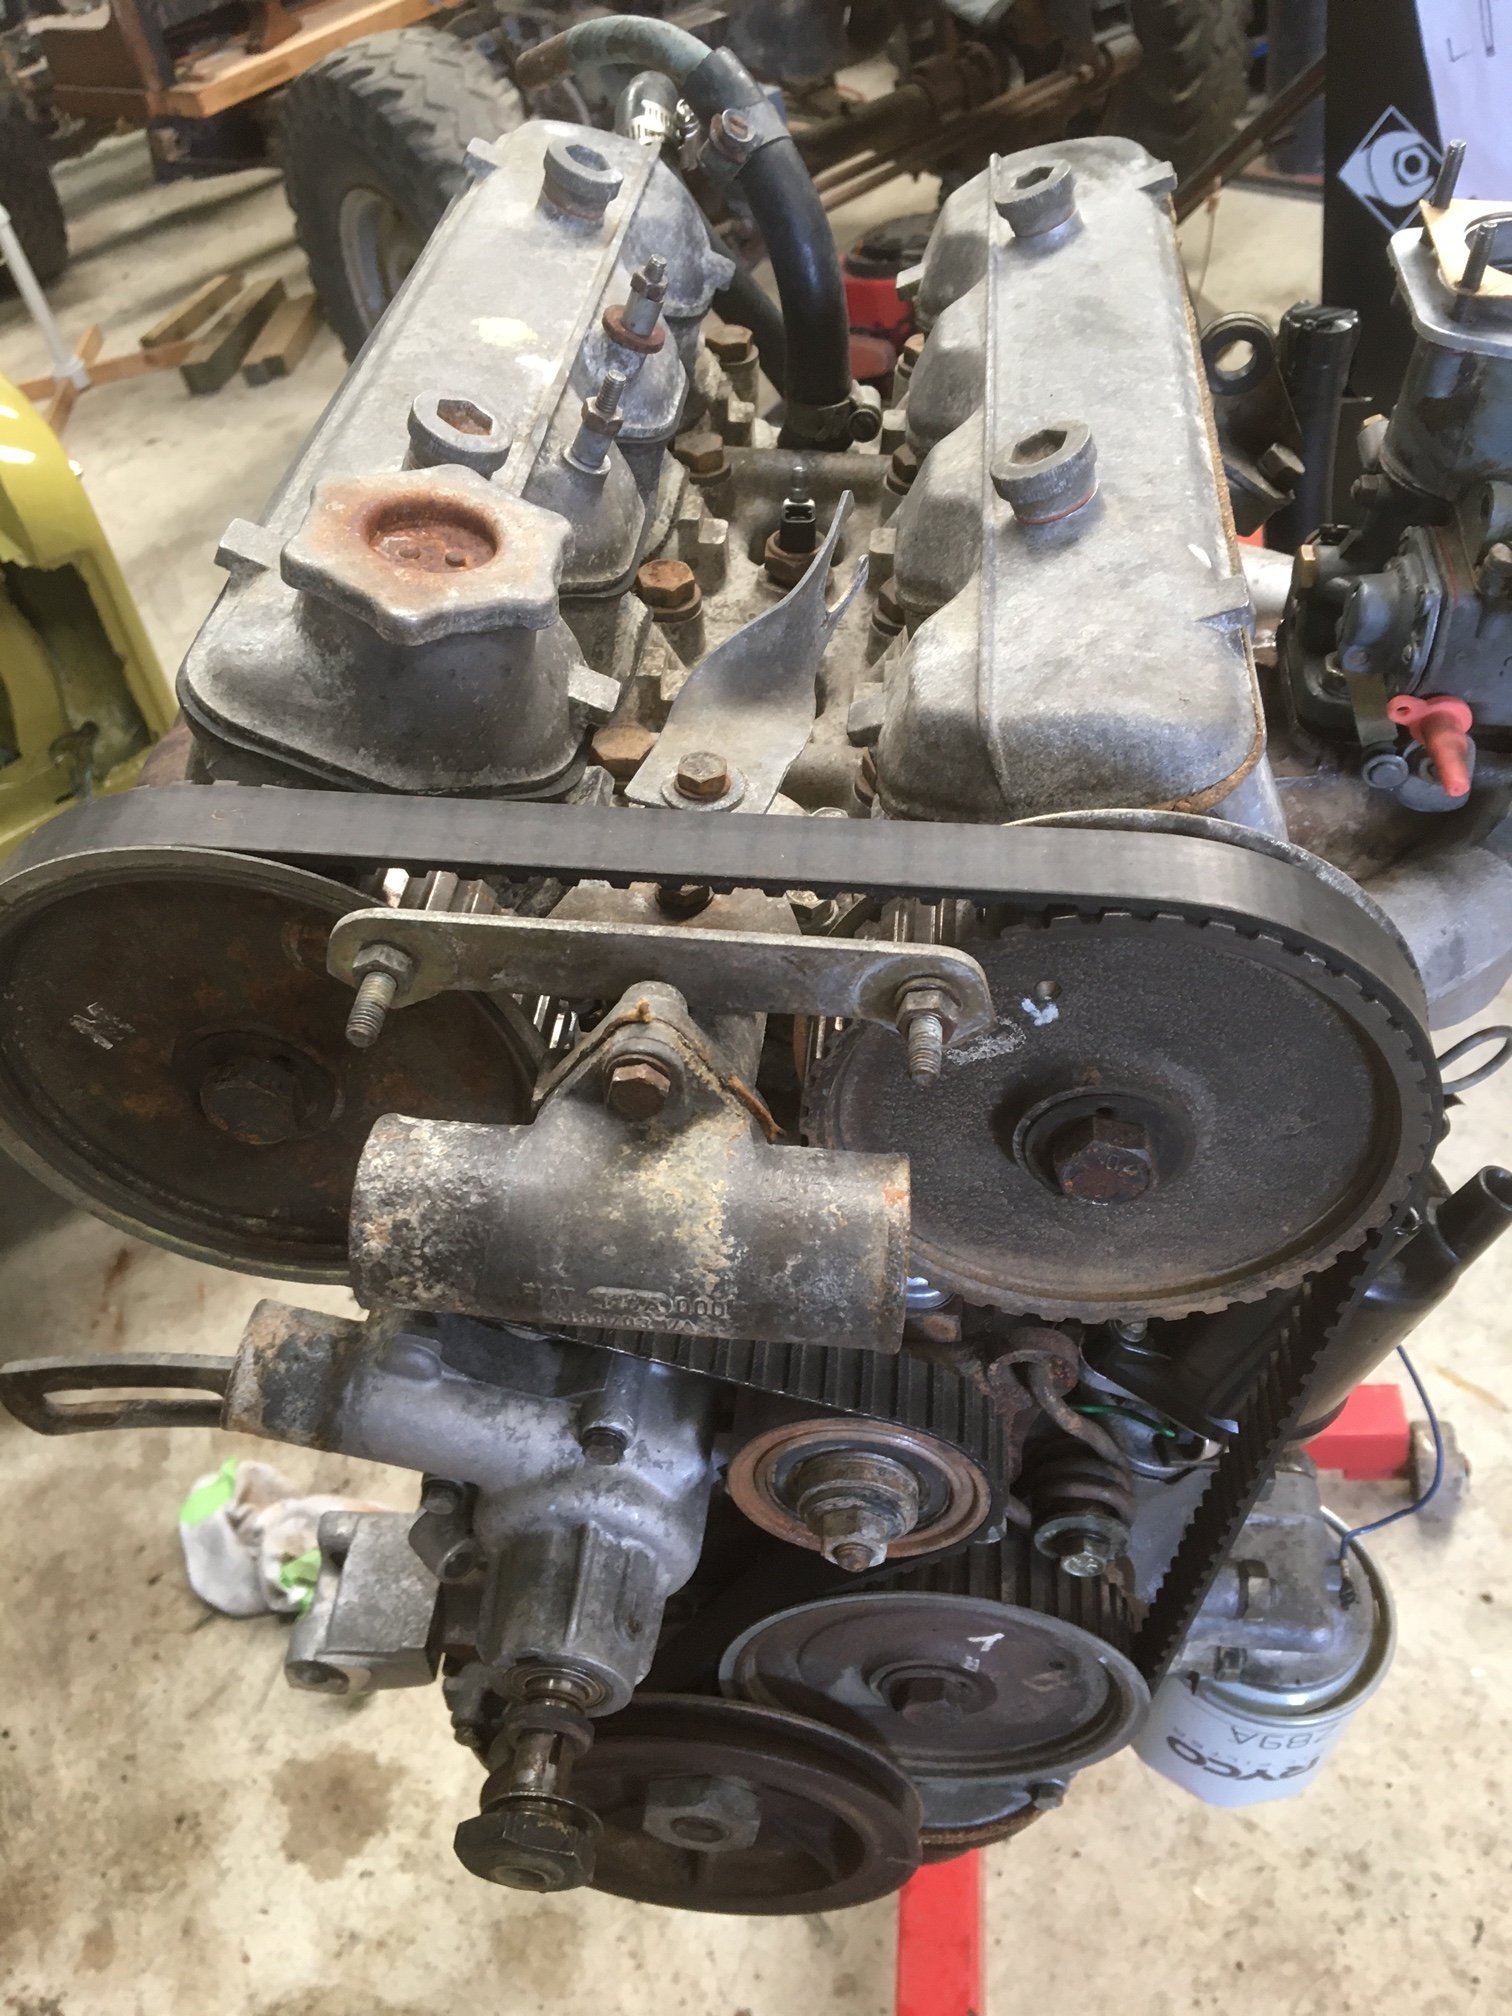
I had to cut the bearing race that was stuck to the water pump shaft. It was still hard work getting the pulley off the shaft and when it finally popped it’s obvious why. Rust! There was also something funky going on with the key. I popped the key out, cleaned the shaft and the bore of the pulley and slid it back on and what do you know…perfect alignment. The water pump feels ok, in fact it looks like a replacement, reinforced by the traces of silicone type sealer residue around the mounting face. It looks like what happened is a ham-fisted amateur, after replacing the water pump (with silicone gasket maker?!) got the key jammed on an angle which prevented the pulley from sliding all the way home and then just did the nut up gudntight anyway. This does not help the fact that the pulley itself is warped and has some crazy runout. Since the fan clutch is junk, and the pulley is riveted to the clutch I wonder if I need to get a water pump and pulley from a twin cam that doesn’t use a fan clutch like the 125. Anyway I thought it was time to clean the motor. I am planning on replacing all the seals and gaskets (not the head gasket because it’s not broken) and I hate working on filthy stuff. I can confirm being able to waterblast the engine upside down on the engine stand is great! I was shocked at how quickly the block flash rusted and also the alloy went powdery really quickly (within minutes) Clean motor:
2 points
-
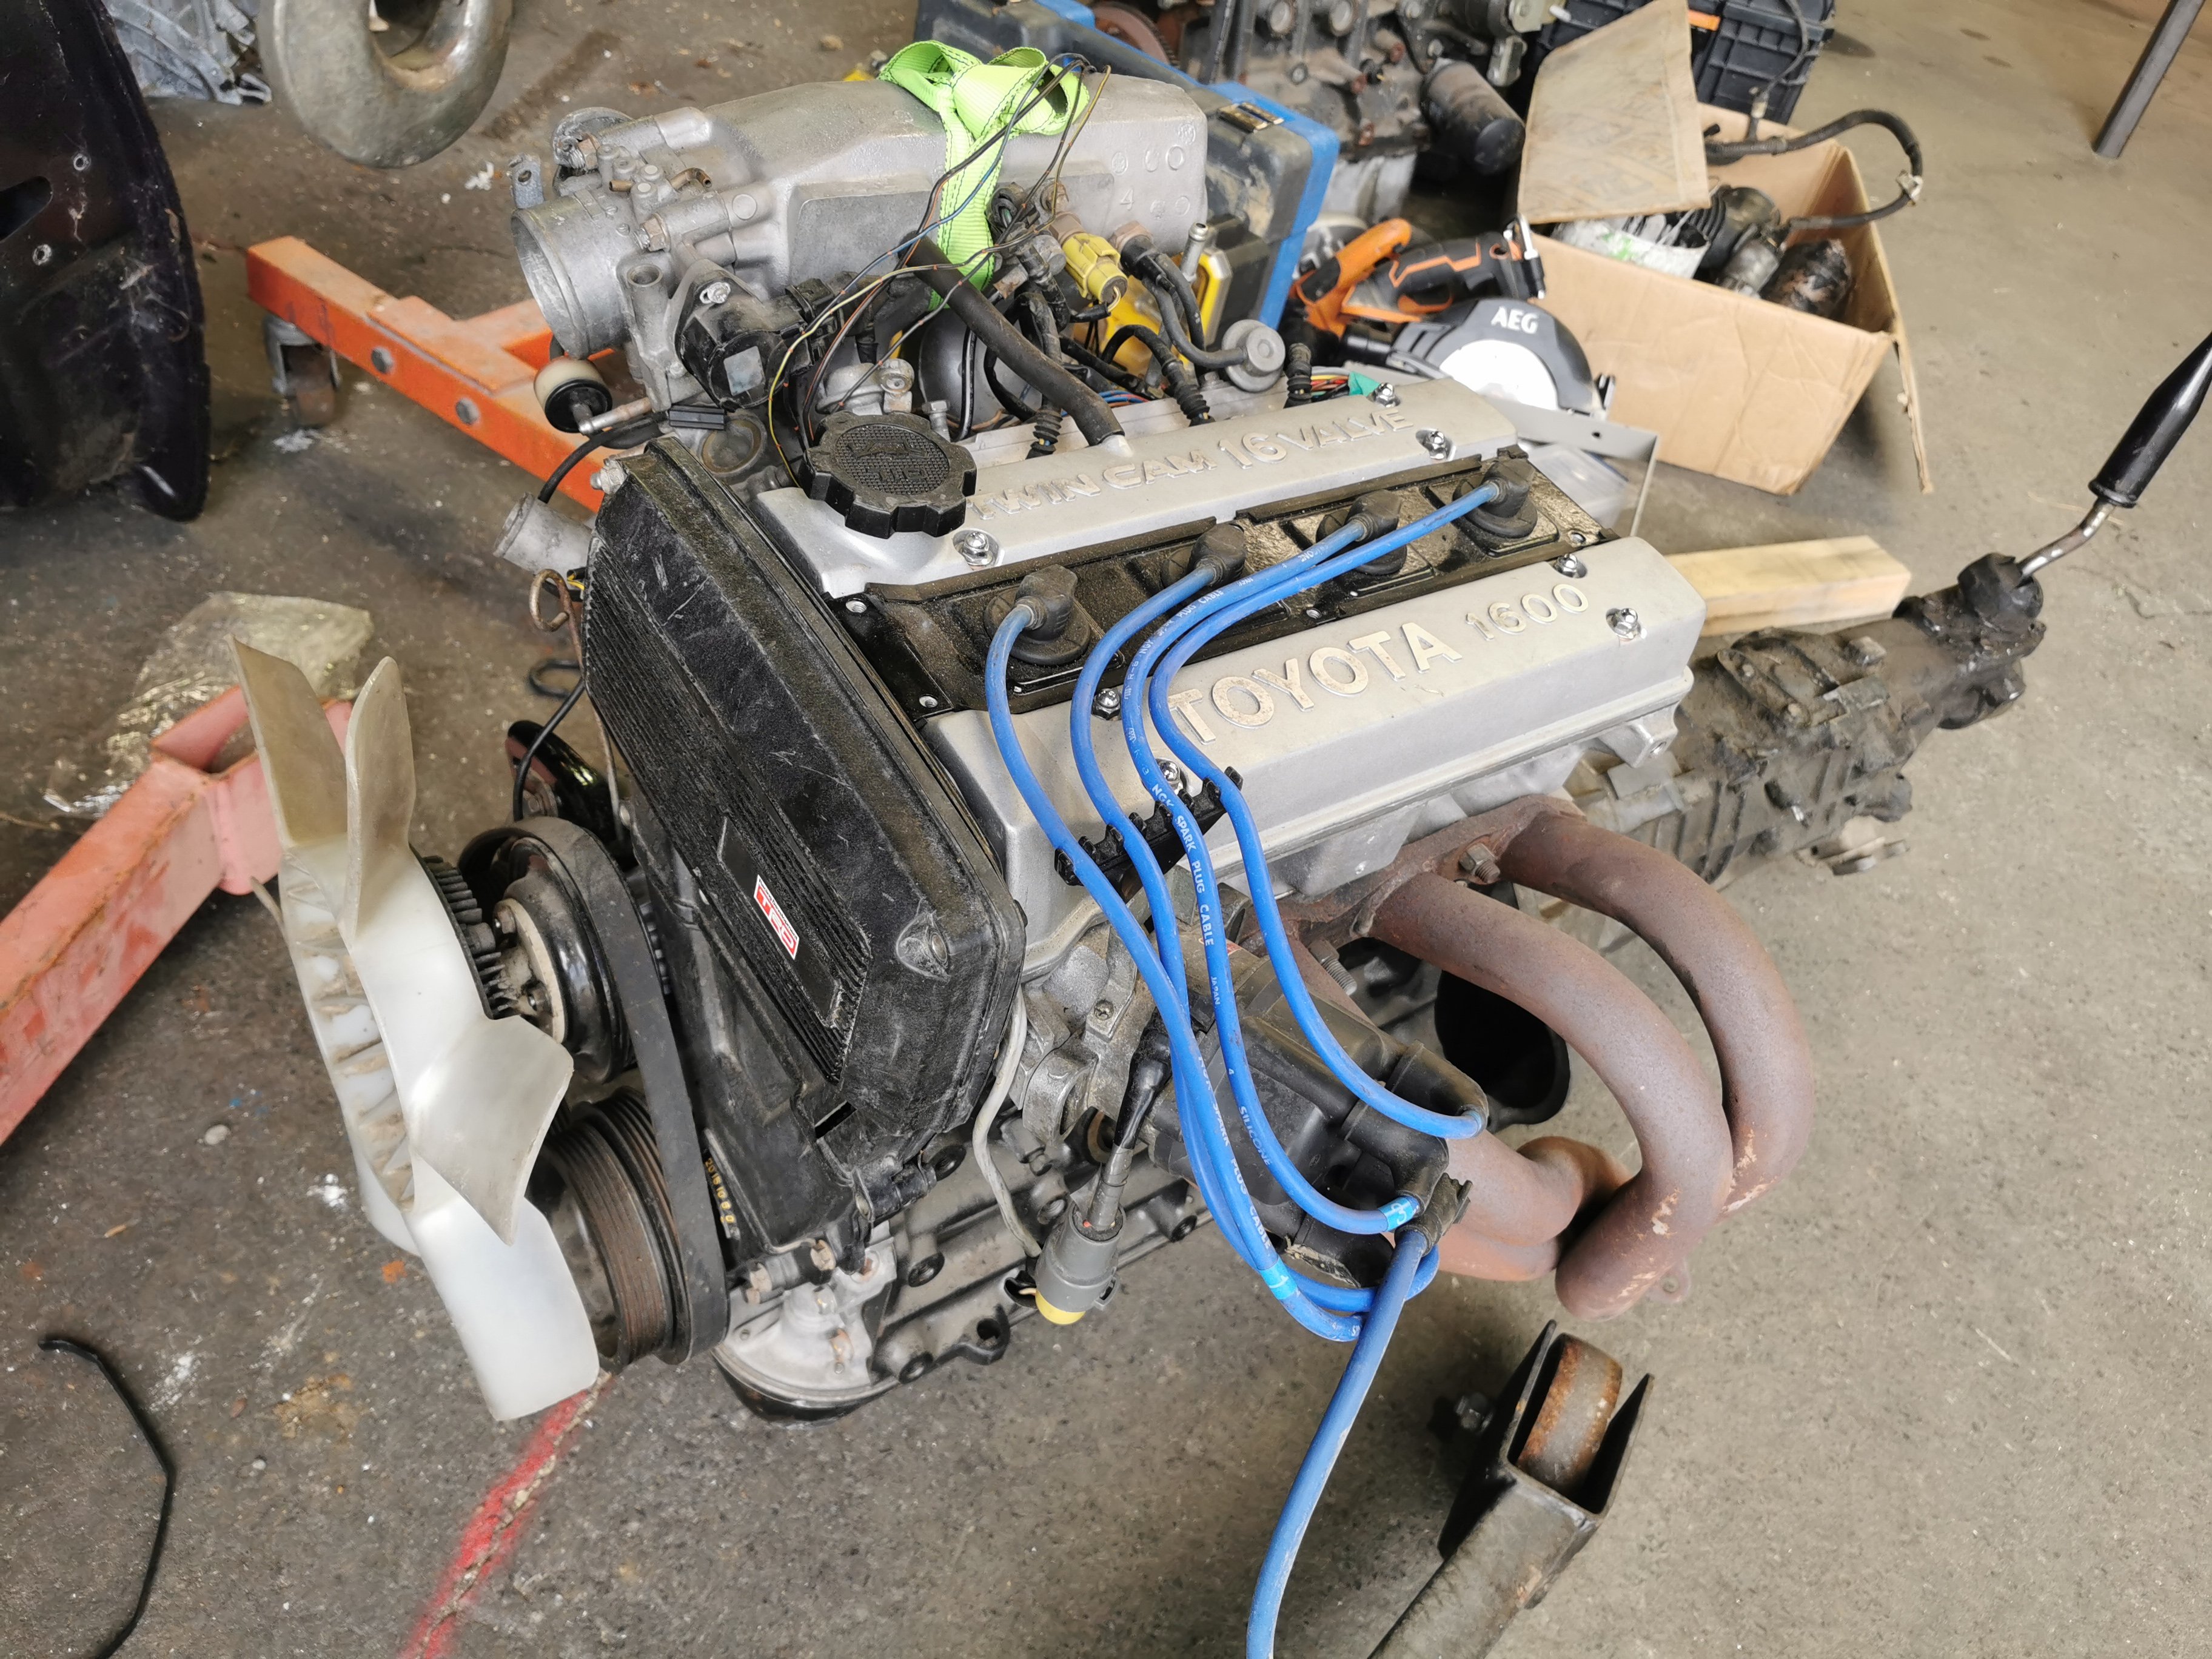
Oops, forgot to load up the engine details. So moving on from the 12a idea, I managed to snag up a rebuilt AE86 4age, stock spec (GER build). Then luckily got a complete T50 box for $500 which is unheard of these days. So I have a loom with it but it's a bit frightening to look at. I used to know someone that could do a loom conversion to have it set up as a 3 wire plug and play.. Contact details lost unfortunately. From what can tell, I will require the following : Clutch slave Yoke Clutch kit Engine mounts Loom work Speedo cable I have considered running it on carbs for simplicity. The cert tags cover a 4agze and T50. Should be a smarter option than a 12a tbh.
2 points
-
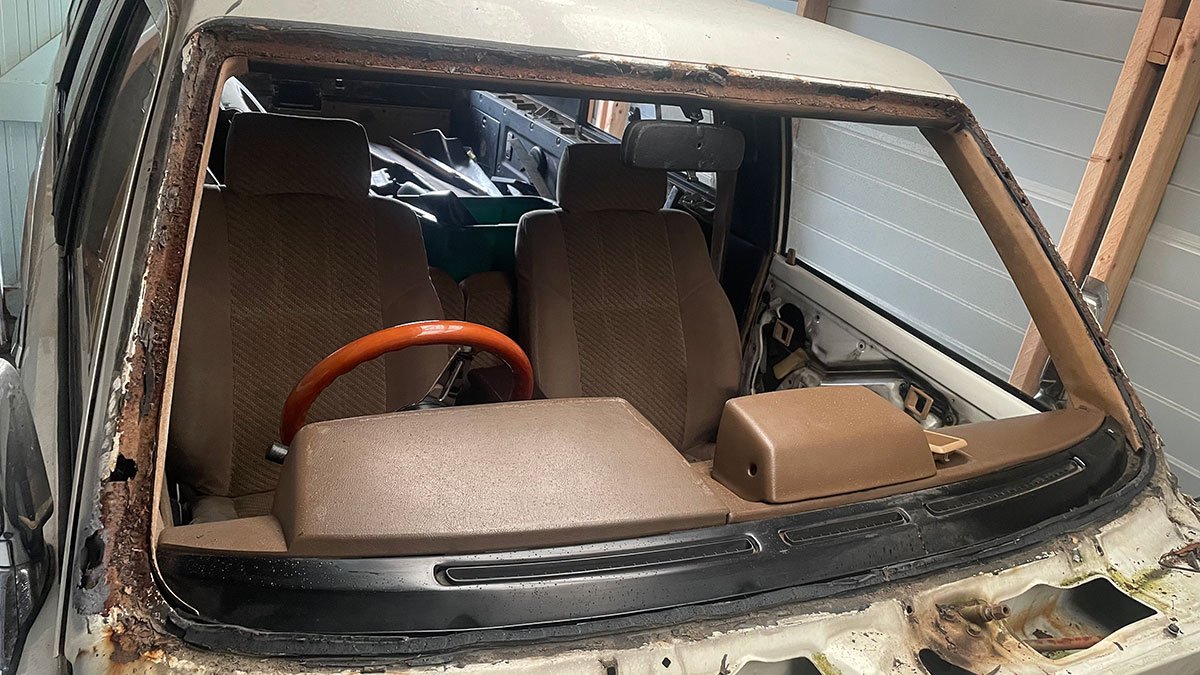
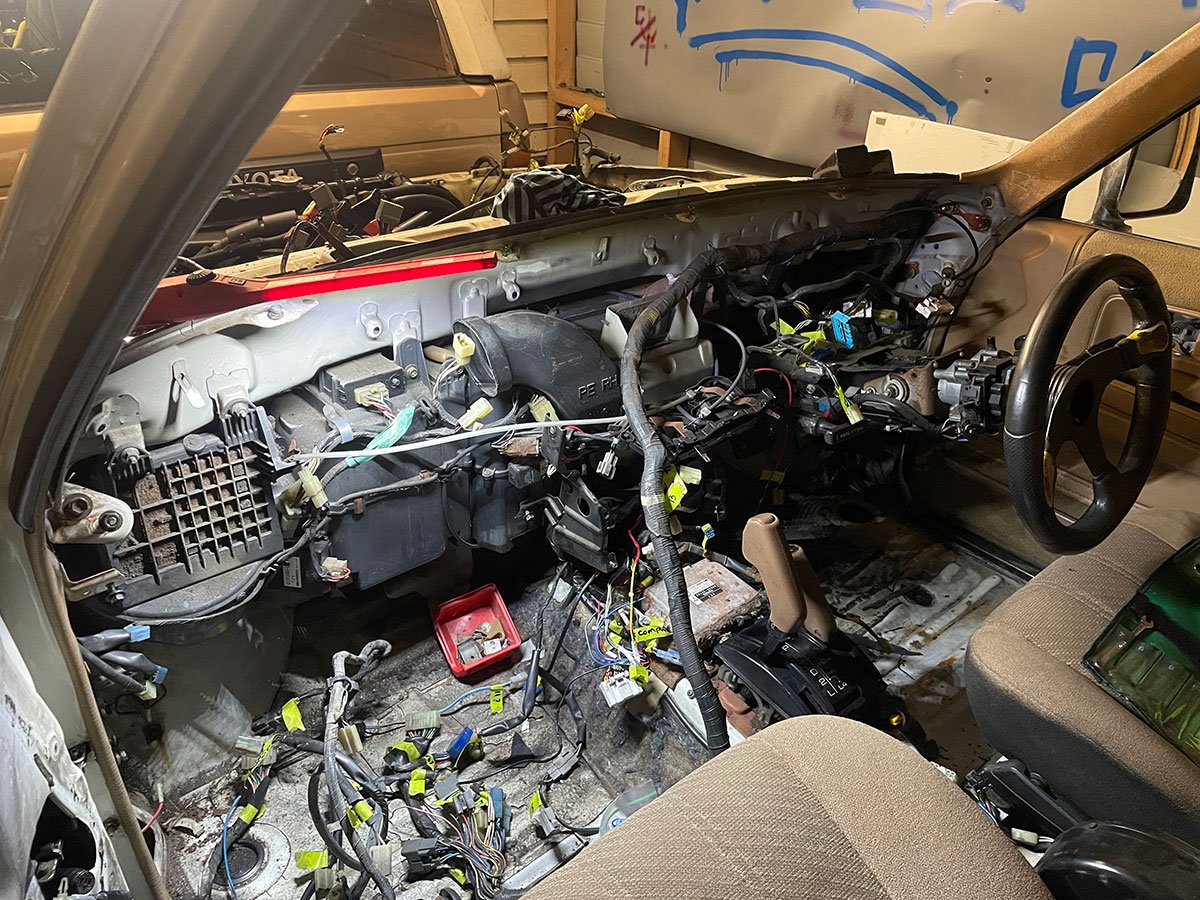
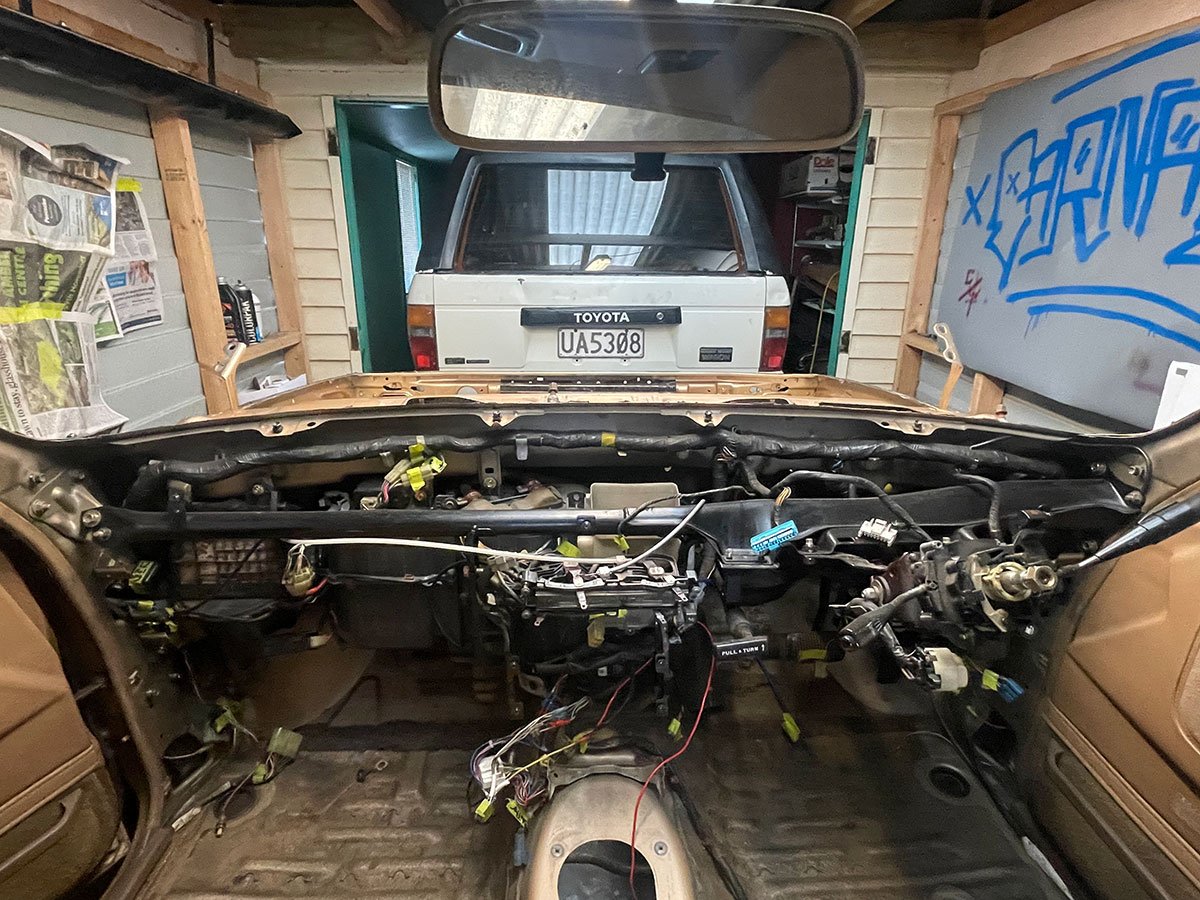
Had the front windscreen removed to make it easier to remove the loom and also because it needs to go into the gold body. She isn't pretty haha Then proceeded to remove loom and install into the gold body. Glad thats out of the way. So far there's 3 plugs that are different between the looms... The door light switches and the loom to the rear (tailgate, lights etc) nothing to major, hopefully thats all.
2 points
-
Dragged Hull home from work lockup where its been since March. Collected engine/fuel tanks/fishing gear from storage lockup. Life jackets out of the caravan (at same work lockup). Only thing I can't find is the anchor and rope. Currently impatiently waiting for Savebarn to open to buy rope and a grapple anchor. Workmate has given me an old sand anchor. Ran engine up last night once I remembered how to start it. Electrical check. Battery charged. Assemble anchor setup tonight Bring on next week. Here fishy fishy2 points
-
There shouldnt be any hate, that shit is cool. I have been pondering EV converting my townace ute for my next major project. Here is one i looked at a wee while ago, boy has done a super nice job.2 points
-
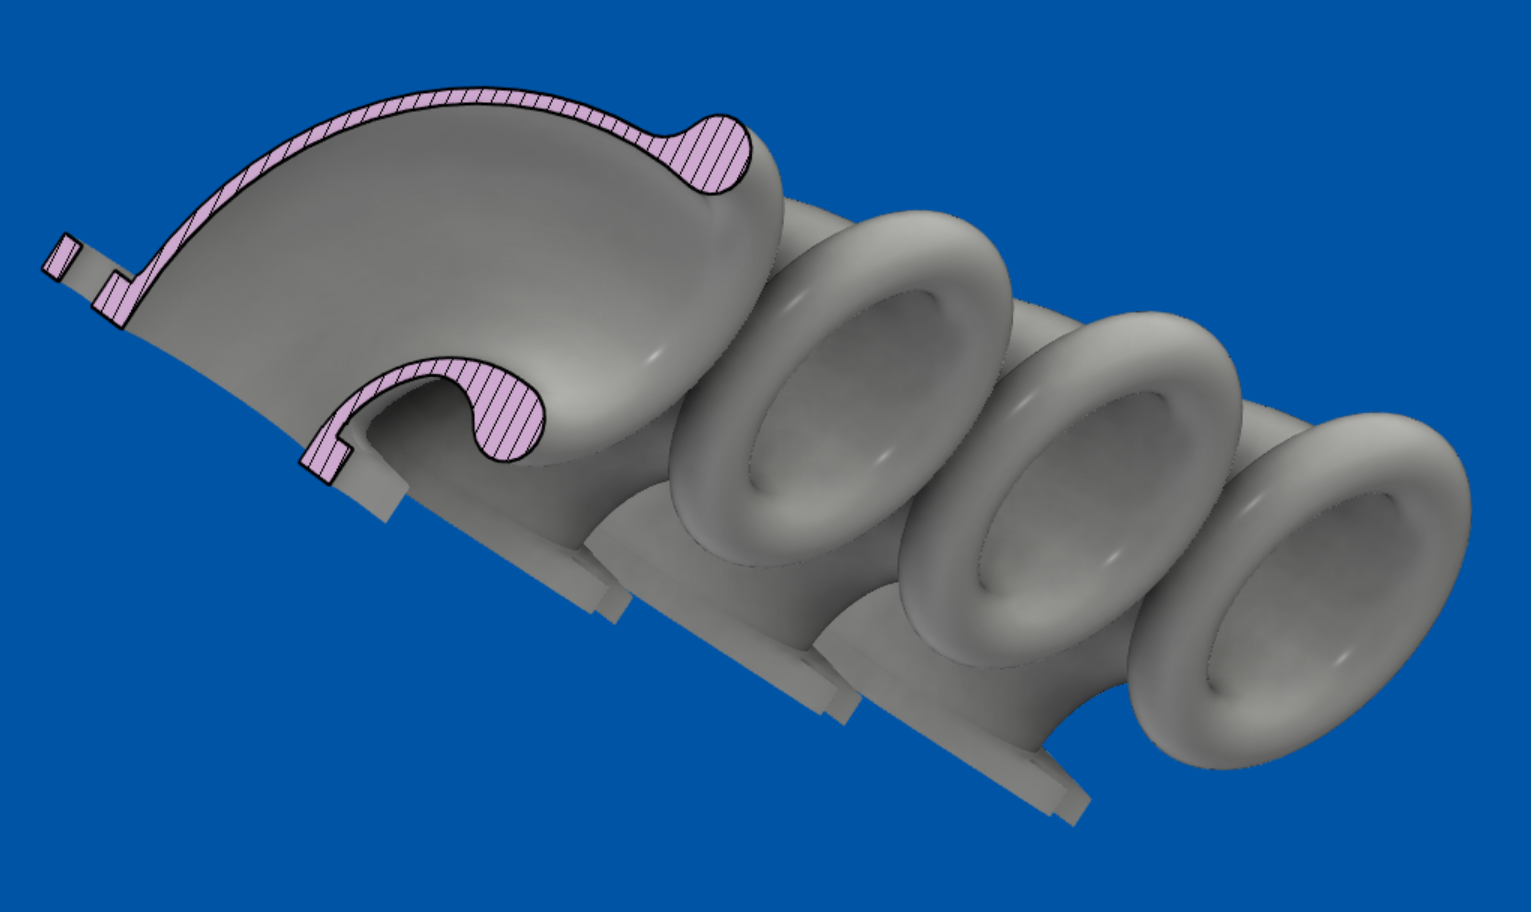
So managed to get it going finally after a bit of faffing around, Honda decided to helpfully change the crank sensor from EP3/DC5 K20a's to the CL7 K20a, that took a while to work out. First successful start. Starting it highlighted a weakness in the breather baffling I had done which meant oil was being pushed out. Here's Honda's original design: Here's version 1: New Version 2: Very tight fit and designed to force the air back on itself. Work has been done on the ducting into and out of the radiator and oil cooler. Radiator Exit: The oil cooler exit was a lot trickier, I needed space for the intake pipe, withour comprimising the ducting site. Pretty happy with how that's come out. Bonnet exits, still to be tided up. Big thing outstanding is the air intake, so been mocking up options. In the end I will go up with a straight simpler solution, plasitc pipe will be replaced with ali for smoothness. However I want to make sure it's got a cold air feed/box, so a bit of fabrication is going to be required around getting cold air from the head light. Here's a walk around of the whole car at the moment.2 points
-
Have personally delivered my leave form to my manager. Wait patiently to see what he has to say and anyone got a spare room?1 point
-
Arthurs Emporium will have some rope and anchor (as well as all other manner of stuff). Small boats are the best boats1 point
-
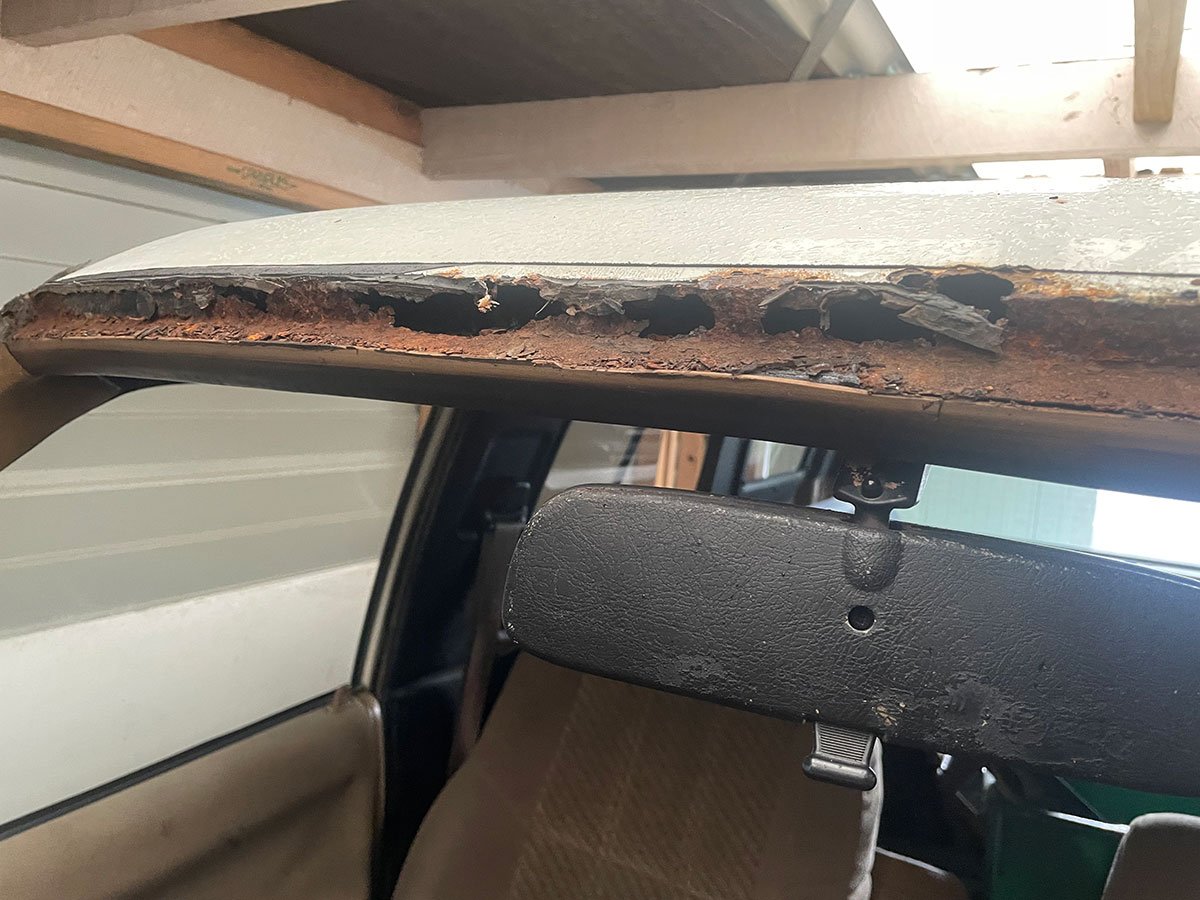
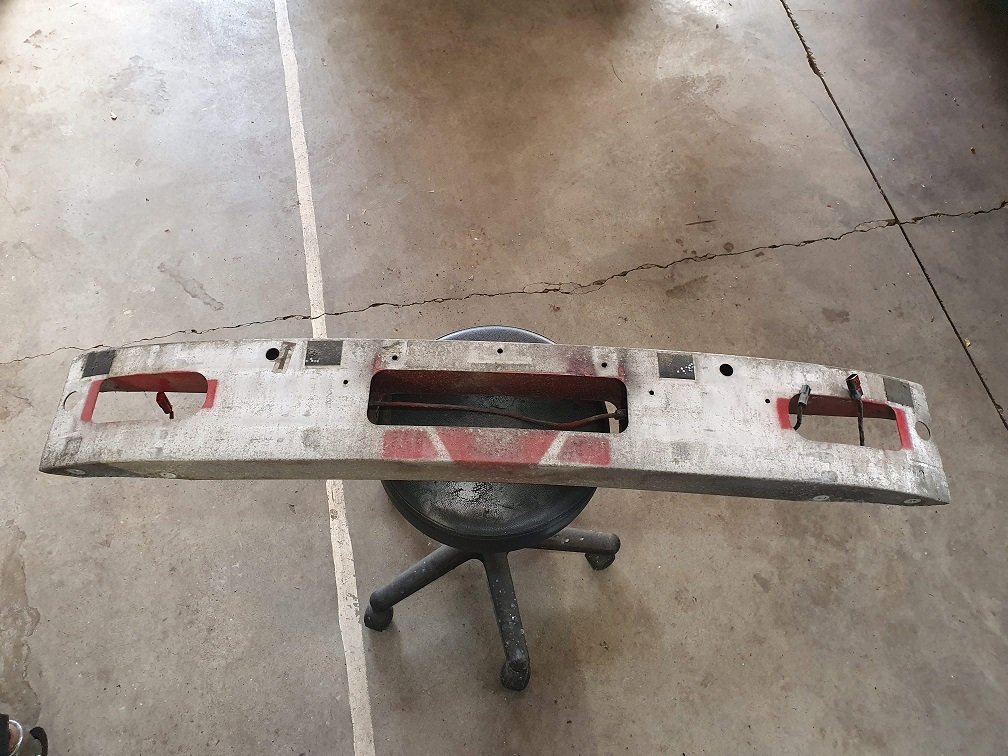
If the section outlined in pen is raised to match the section the rail sits on it will work
1 point
-
Right, the wallet hurts, but everything I need to rebuild the box is on the way (except a replacement diff, fingers crossed I don't need one). New bearings (steel cage where possible), seals, bolts, clutch, everything. Then once the box is done, I can start fixing the other issues with the car...1 point
-
im just as screwed as you are. my corona is living on a car trailer at my parents house and my entire life/workshop is packing into a shipping container while i try to buy a new house/bigger garage. its painful1 point
-
I spend way too much time thinking about things to do to it, I'm not sure it's healthy. IRL it's pretty fucking great too, so many people fizz over it. I parked up in Mitre 10 on Friday, when I came back out there was a man lying underneath, he sprang up and pretended he hadn't been. I had a good chat with him but fuck that cracked me up.1 point
-
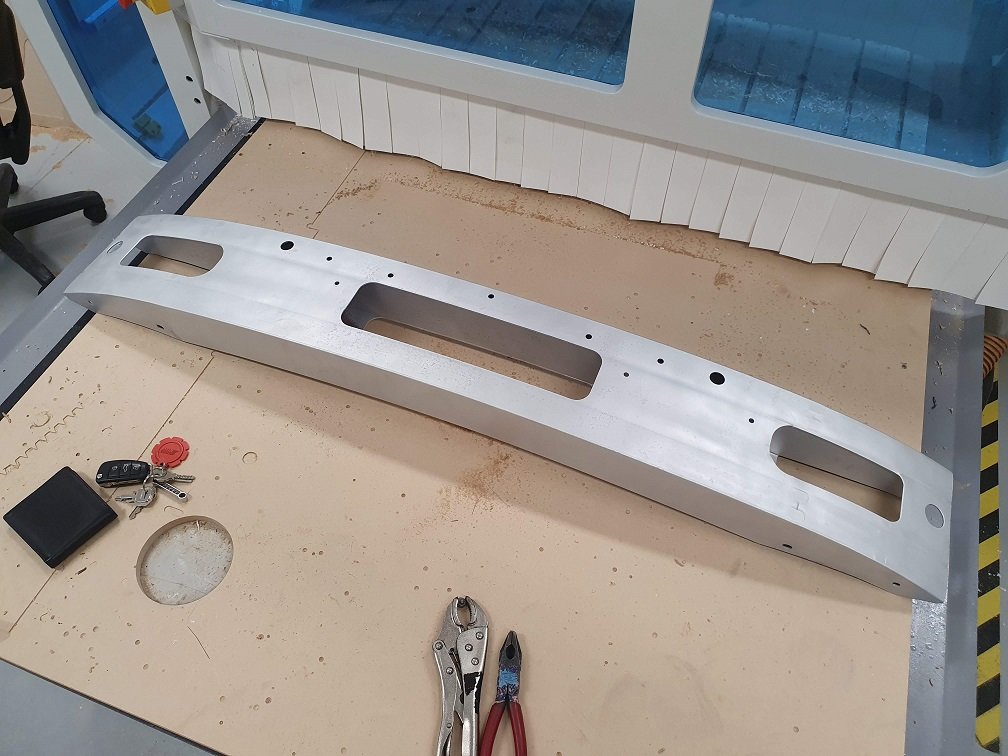
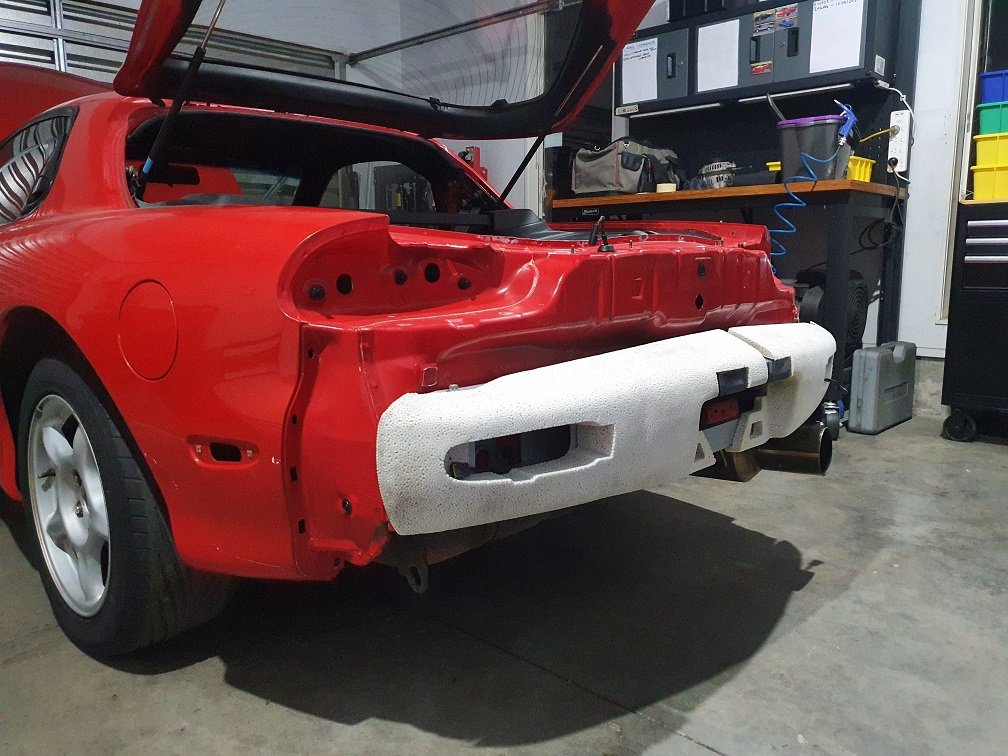
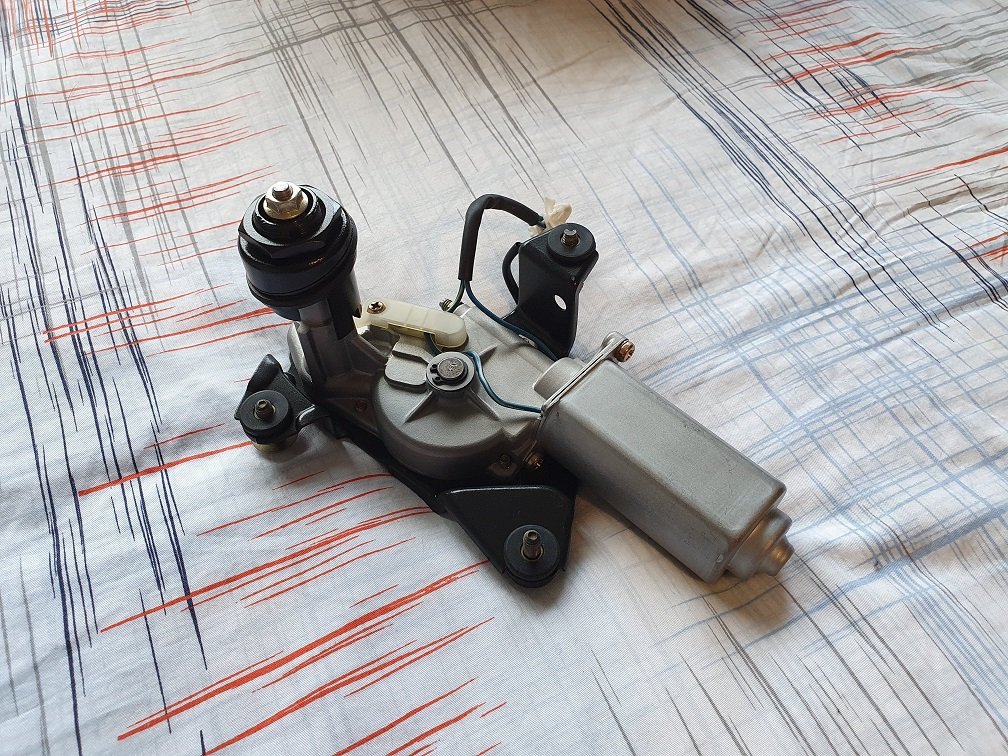
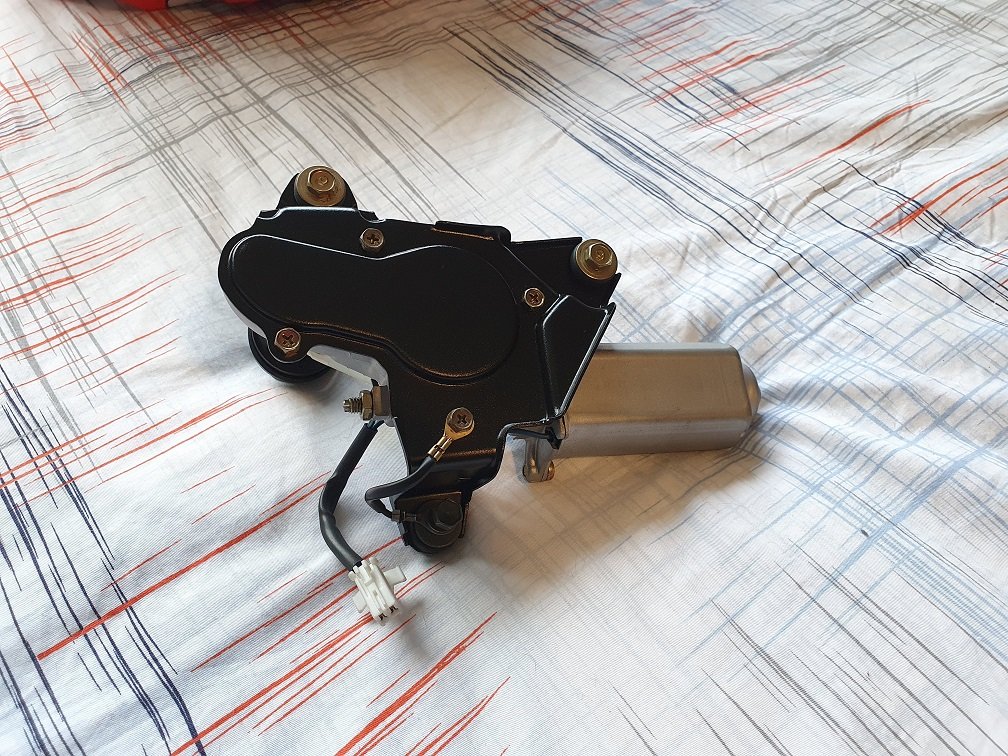
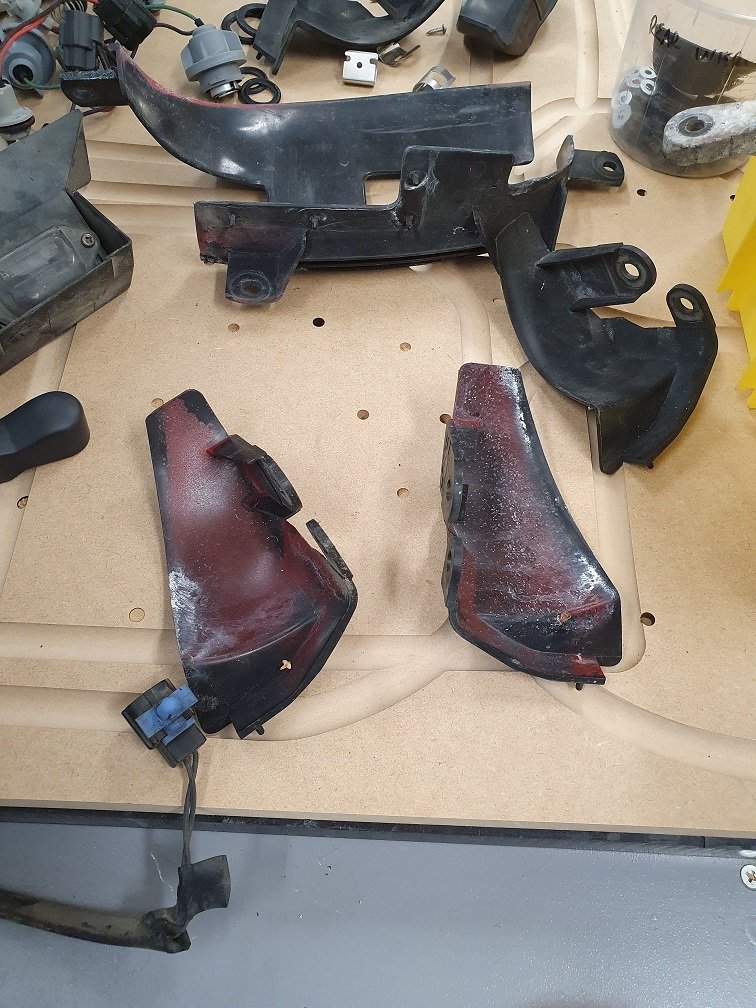
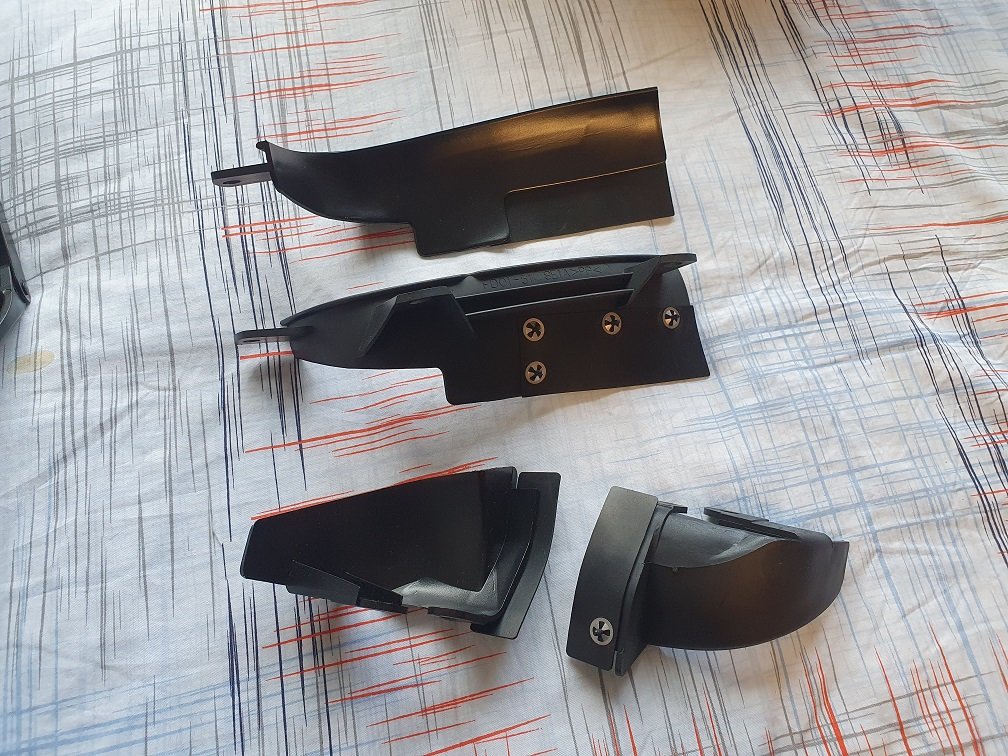
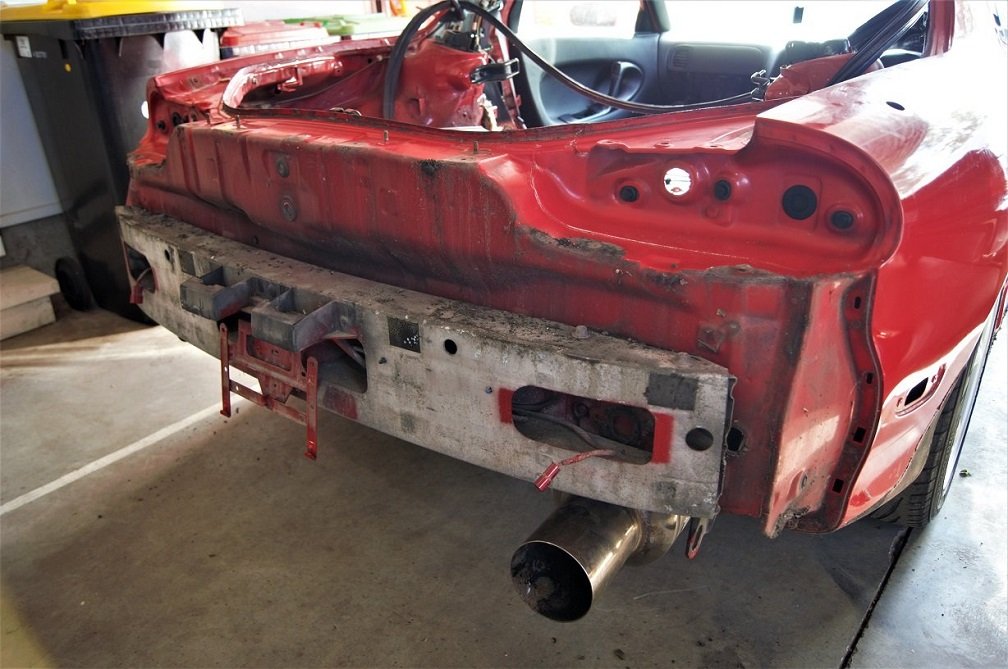
Have had a heap of work on over the last couple of months, so really haven't managed to get much done on the car. That contract winds up soon though, and I might take a break from the side hustle work for a bit and focus on making some progress on this thing. I have managed to find a little time this week to continue on with cleaning up the rear end though. I've also spent time researching and purchasing heaps of parts I know I'm going to need down the line. Had quite a bit of FOMO about stuff going out of stock and becoming NLA, so I've now got pretty much every single exterior rubber trim piece sitting in the closet for when it gets painted in a couple of years time. Wasn't cheap, the local Mazda dealer loves me, hah. I've got everything planned and ordered for the new EM harness, it's the last major piece missing that would make it a runner. I've been waiting 2 months for connector bodies and pins though, and the tracking is stalled in China, so I'm losing a bit of hope there, might have to reorder. I've never had anything not show up from Aliexpress, but a couple of times its taken 6+ months :-(. I'll eventually run an aftermarket ECU in this thing (Have a Link Fury sitting on the shelf gathering dust), but I'll build the harness to mostly factory spec (although much better materials) with a couple of additions for WB02 integration, and anything else I think of. Then I'll just make up adaptor headers if I want to change to another ECU down the track. I've got an original S6 ECU to get it up and running on, and a Power FC there also, so lots of options. Gotta say, I've never seen overspray like this thing has. It's everywhere and bloody ridiculous. The vapor blaster at work has been getting a work out this week! This is what it the rear looked like originally. A lot of the overspray is clearcoat that has dust and shit all through it. Terrible grainy texture and makes everything look permanently dirty. After some attention in the blaster though, looks much more betterer. I dismantled all the wiring too, cleaned, blaster and rewrapped it. Looks factory fresh now. Also the the impact foam, as it was basically black with a reddish tinge. Looking much tidier, you know for something you'll never see. In with my latest order from Mazda were the rear bumper brackets that had rusted into oblivion. One day soon I'll reassemble that and get the bumper skin back on there. I've been in contact with Racing Beat about their twin tip muffler, as it's the only muffler I want on this thing, and they're currently out of stock of the center section (which I also need). They said to check back later in the year. It'll be spendy to get it over here, but ultimately worth it I think as I'll never have to worry about an exhaust again. I sourced a replacement rear spoiler for this, another stock S6 one as I really like them. The one that was on there was cracked, and had been glued on with some terrible bathroom caulking like shit. I had to smash it to remove it, as it was the only way I could think of without risking lots of damage to the boot lid. As it is, the paint on the boot lid suffered, so will get a super dodgy touch up in the meantime. While I had the trunk trim off I chucked some power on the rear wiper motor. It drew lots of current, and was really slow. Popped it out and the was like a ball of rust inside, super gunked up. Blew it totally apart, gave everything in there the big clean, reassembled and now it's like a new one :-). Ready for refitting. While I was in the mood for a couple of little jobs this week, I grabbed some plastic trim pieces from the engine bay. The air guide pieces that go around the headlights were just awful. Red overspray and trapped dirt, with all the rubber pieces attached to them brittle and cracked. Disassembled, cleaned up the plastics and painted them with CRC Black Zinc, as I find it adheres really well to PP plastic as long as you do light coats, and gives a nice OEM looking finish. I scanned the remains of the rubber pieces, cad'd templates and laser cut some new ones out of some rubber sheet of a similar thickness, then put them all back together after tuning up the speed nuts a little so they would grip again. Also ready for refitting. While satisfying, none of these little jobs do anything to get the thing closer to running or driving! Really need that order of connectors to show up! Might have to bite the bullet and reorder from another supplier. If these ones show up later, I can always make another harness and sell it I suppose. Will be back into hiatus on this for the next couple of months while I 100% finish up this contract, then make some more progress over the Christmas break I hope.
1 point
-
Ahhh man, big success today! I got the car together enough to go for a run up the road. There are some big holes in the firewall currently from aircon stuff. So it's open to the engine bay. And when you go full throttle the intake noise in the cabin is so friggen loud that I think I need ear plugs. All of the loom and sensors are working well, new intake manifold with flipped throttles worked out perfect with SCP10 cable. LSD is doing LSD things! No single wheel peels anymore! The new gearbox is a little notchy into 2nd gear but its much much better than the other one. It's all a big relief, gearbox issues are/were main thing I was afraid would go wrong at this stage. Also not a peep out of the alternator! no more squeals. Hallelujah. I took it to the weigh bridge again. 830kg with half a tank of gas. Happy with that! Still on the heavy ROH wheels. So it's looking good to getting somewhere near my 820kg target for drags etc once I've swapped wheels. Swapping drivers seat for a bucket seat would probably be next easy win for some weight savings. Maybe eat a few less pies? Nah. Lots of small jobs to finish off but pretty relieved to have no major issues at this stage.1 point
-
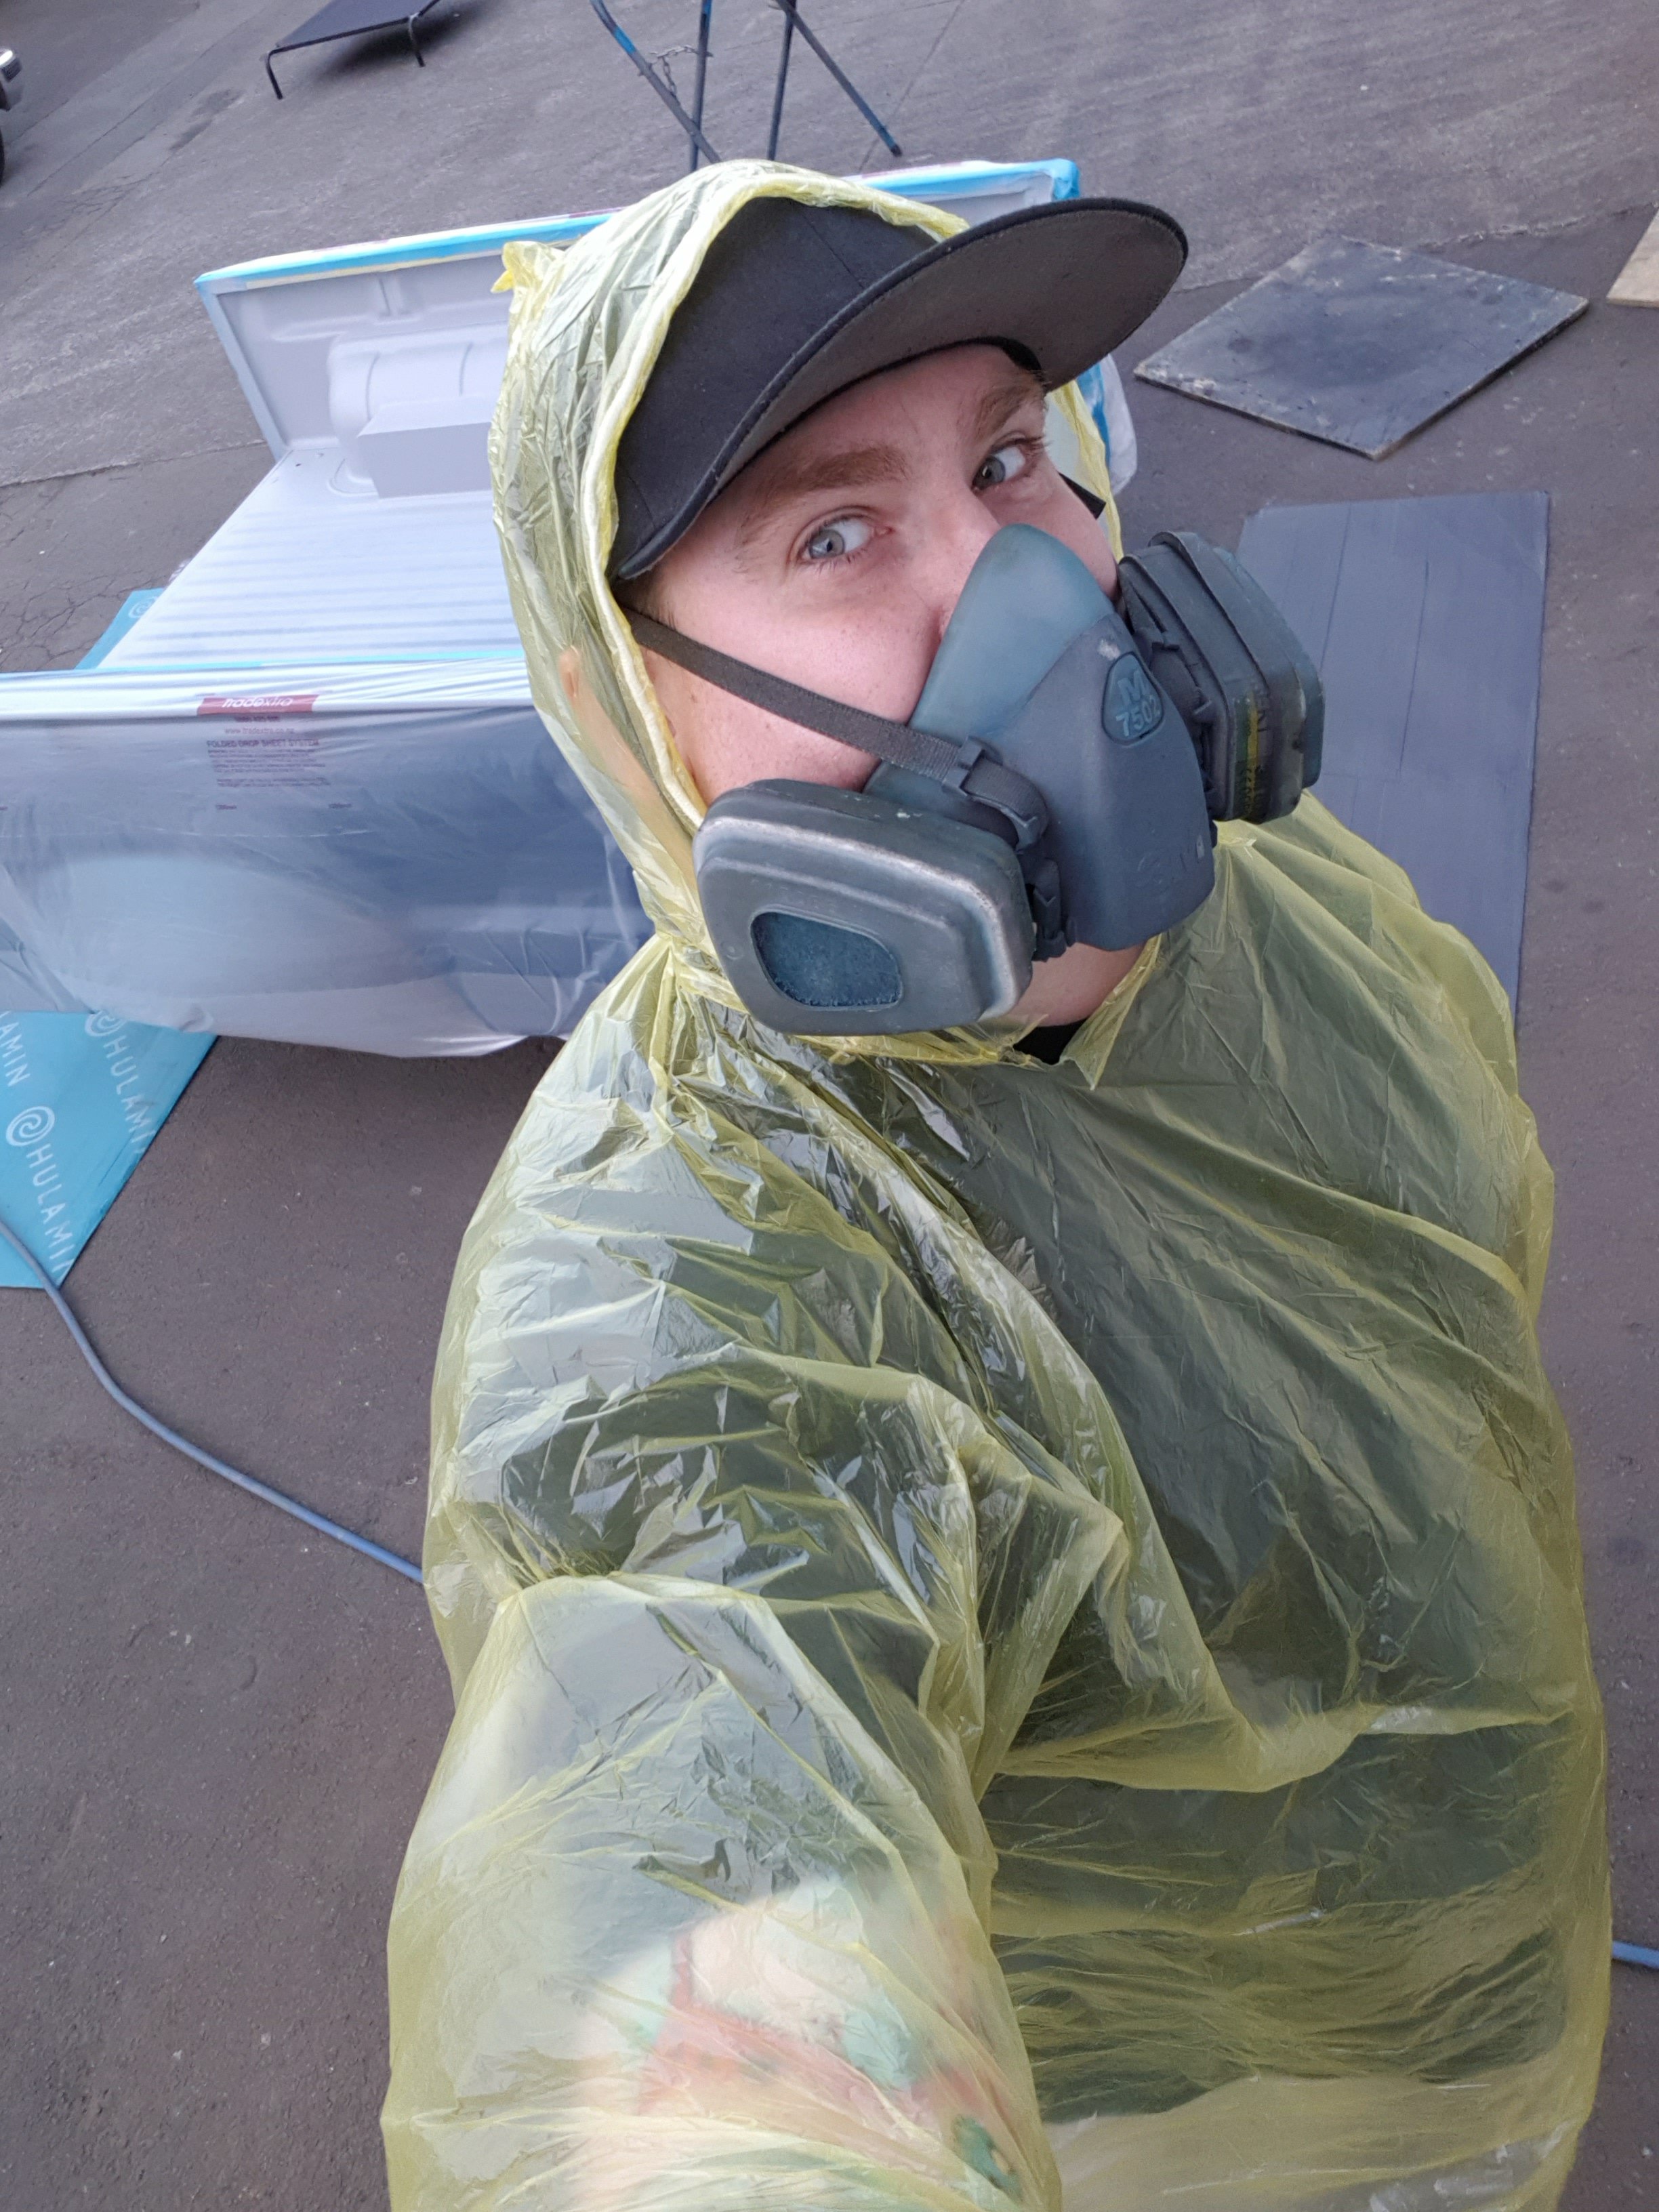
I've lined a fair few trays in my time, and one thing I have learned is that the hippo liner and underbody sealers make a horrible mess and make your clothes all sticky so I put my poncho on and got involved.
1 point
-
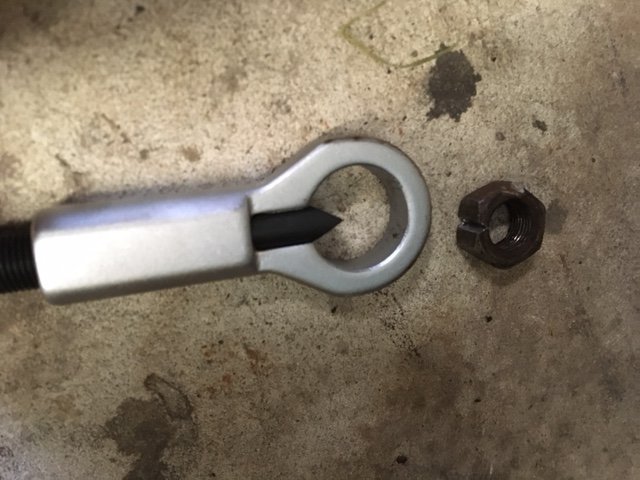
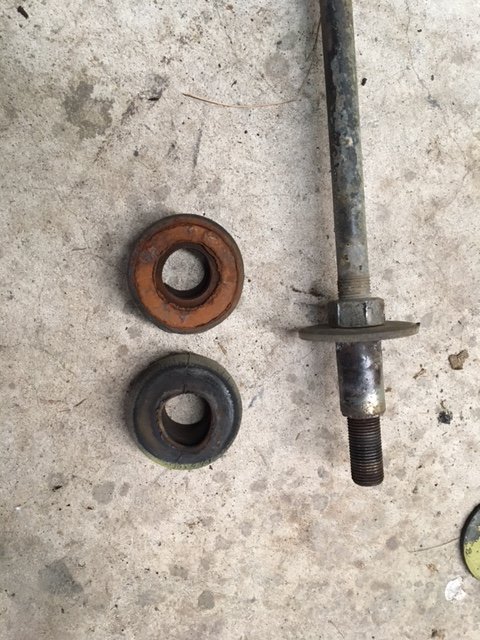
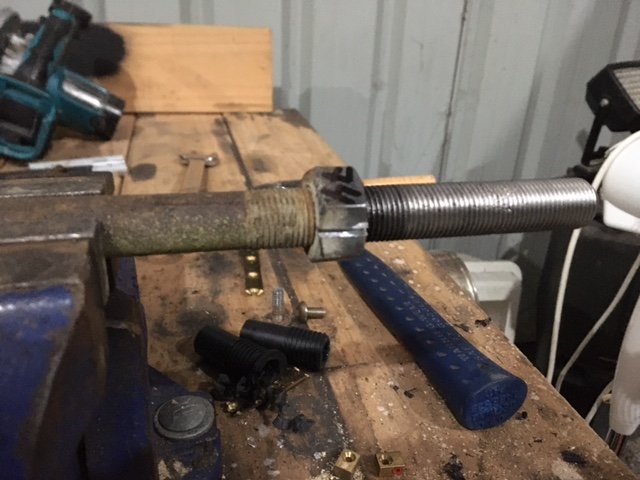
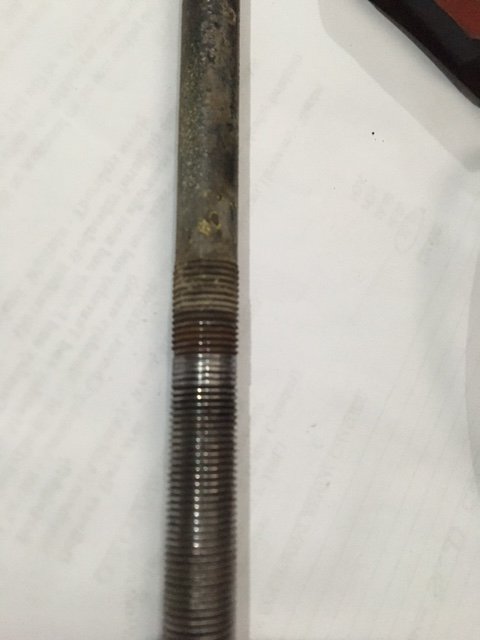
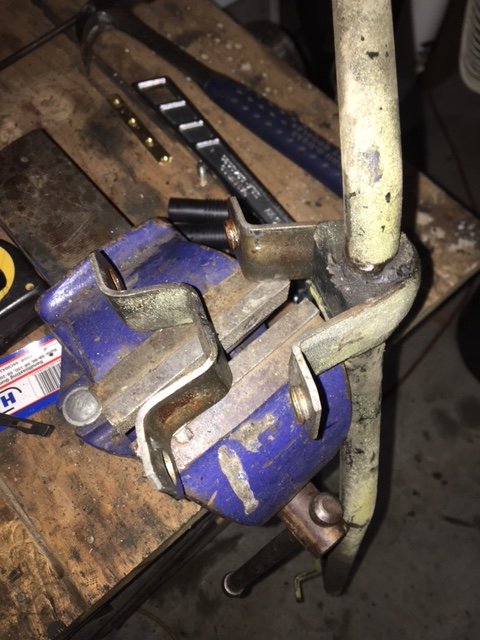
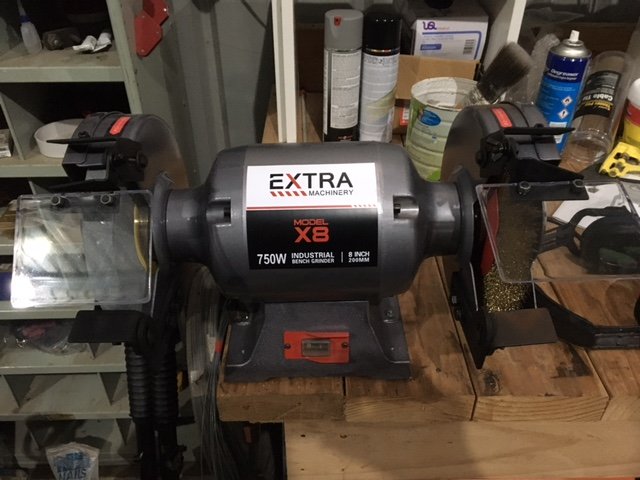
On with more serious work. Today I removed the castor rods (“thrust rods” in the manual). The nuts were no match for my new toy. The bushes are well past their prime: Then it was off to the vice to strip them. The spacer tubes came off far more easily than their crusty appearance suggested they would. Then it was time to remove the inner nut. Before attempting to wind them off, I employed my newest power tool to clean the threads. Say hello to my new friend. 8 inch bench grinder. My first mod was to buy a wire wheel for it. It’s great, but it makes it shake like MAD. I have stuff walking all over the bench whenever it’s running. Anyway, clean threads or not, the nuts wouldn’t budge. So, I cut a starter slit in the side of the nut And then finish the job with the nut splitter. My heart sank when I wound the nut off the right hand rod. The thread is absolutely stuffed. @azzurro, from all the 125s you harvested bits from, did you happen to keep any of these? Moving on, the swaybar is very easy to remove from the vehicle. I found the clamps on the inner (chassis) bushes very hard to split, but I got there in the end. It needed a beating with a sacrificial narrow flat bladed screwdriver. Now I’m looking forward to using my other new friend to clean up all the brackets and bits
1 point
-
This mornings trip was a pretty good test of skipper, first mate and the boat. Wind got up as well as the sea. Land disappeared in the troughs. First time Miss13 had been in open ocean. Pulled anchor like a champ. No signs of seasickness from either of us. Boat took it really well. Motor performed flawlessly. Daughter caught 3 undersize and I caught one so close to legal. Were out for an hour or so. We got drenched coming back up the estuary. Won a Garmin Fishfinder 140 off tardme. $55 plus ship. Won't see it as not going back into town next week, (if everything goes to plan) Pic for thread
1 point
-
12a bridgy, modgies, supertrapp1 point


This leaderboard is set to Auckland/GMT+12:00