
Leaderboard


Popular Content
Showing content with the highest reputation on 09/27/21 in all areas
-
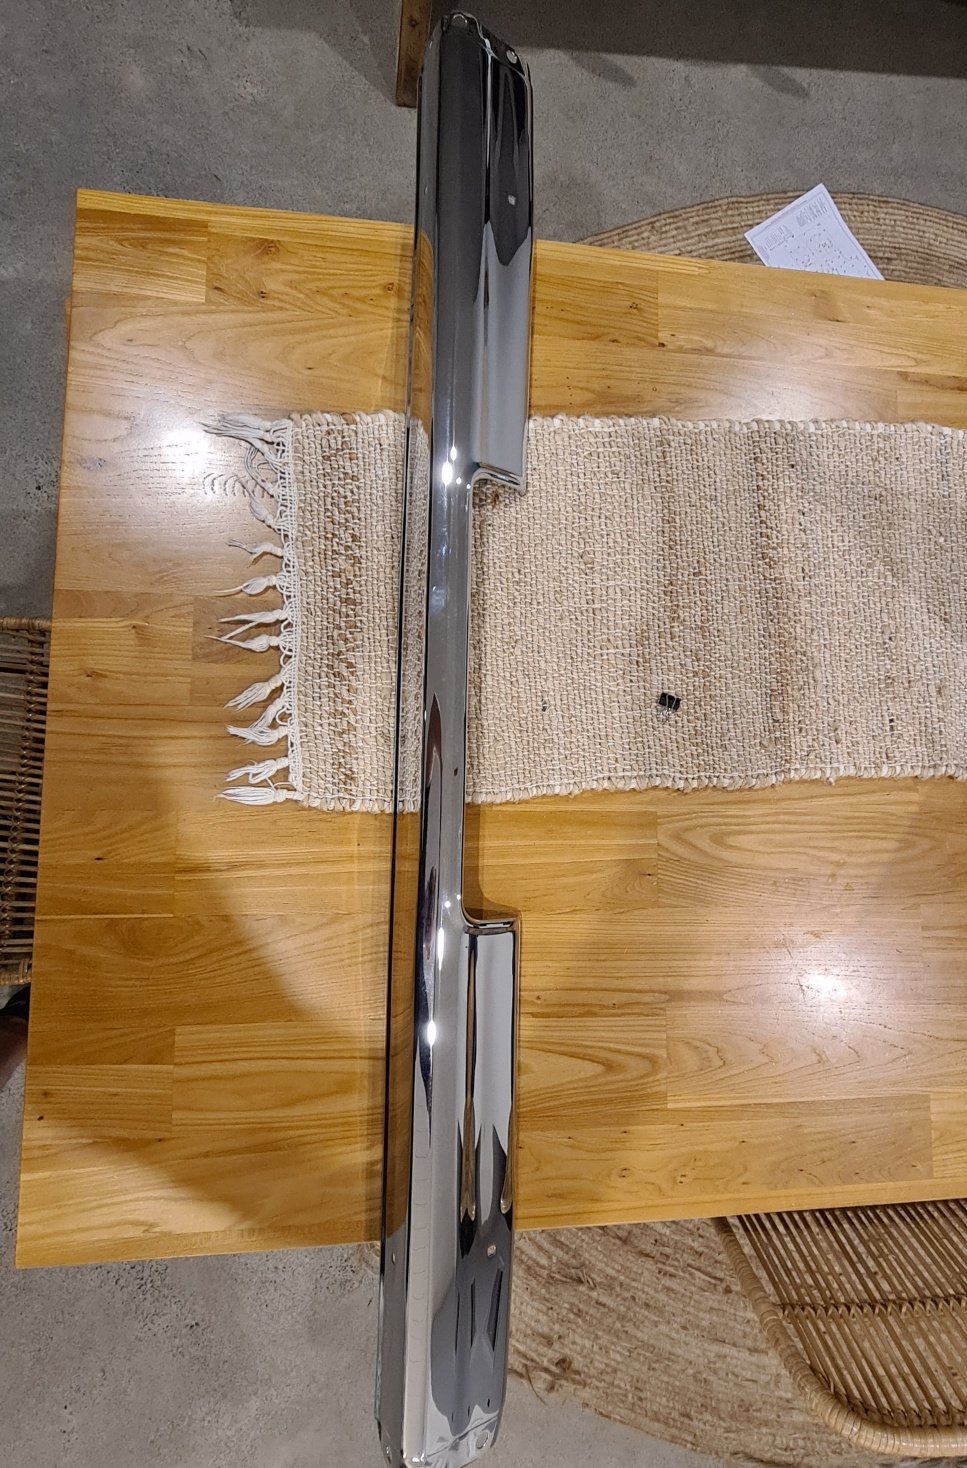
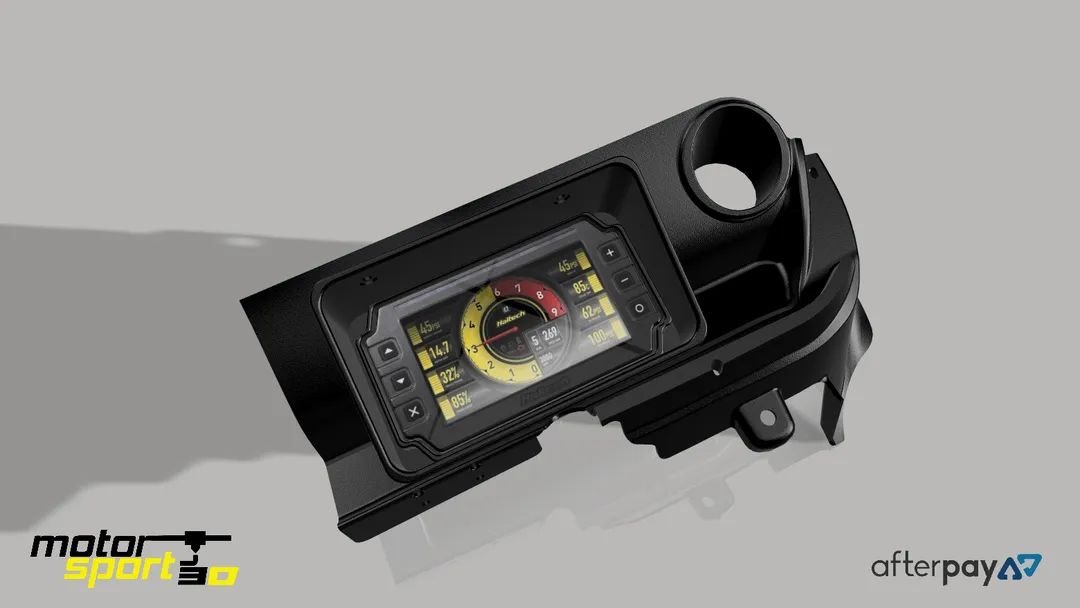
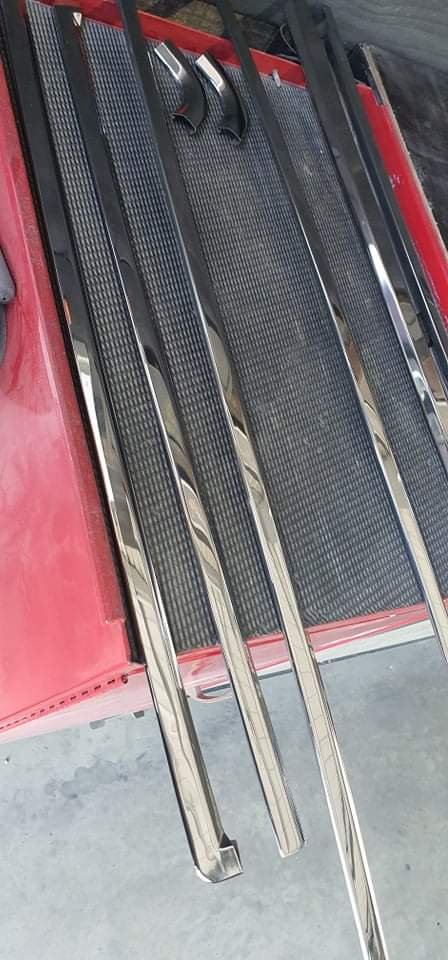
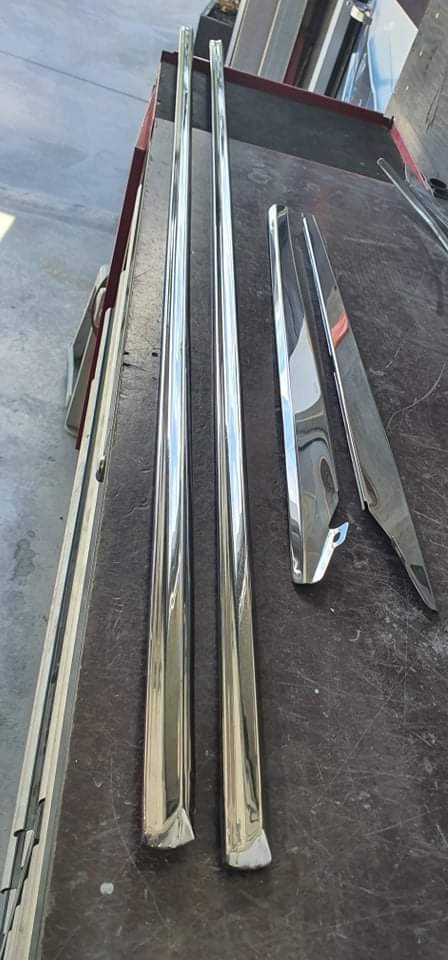
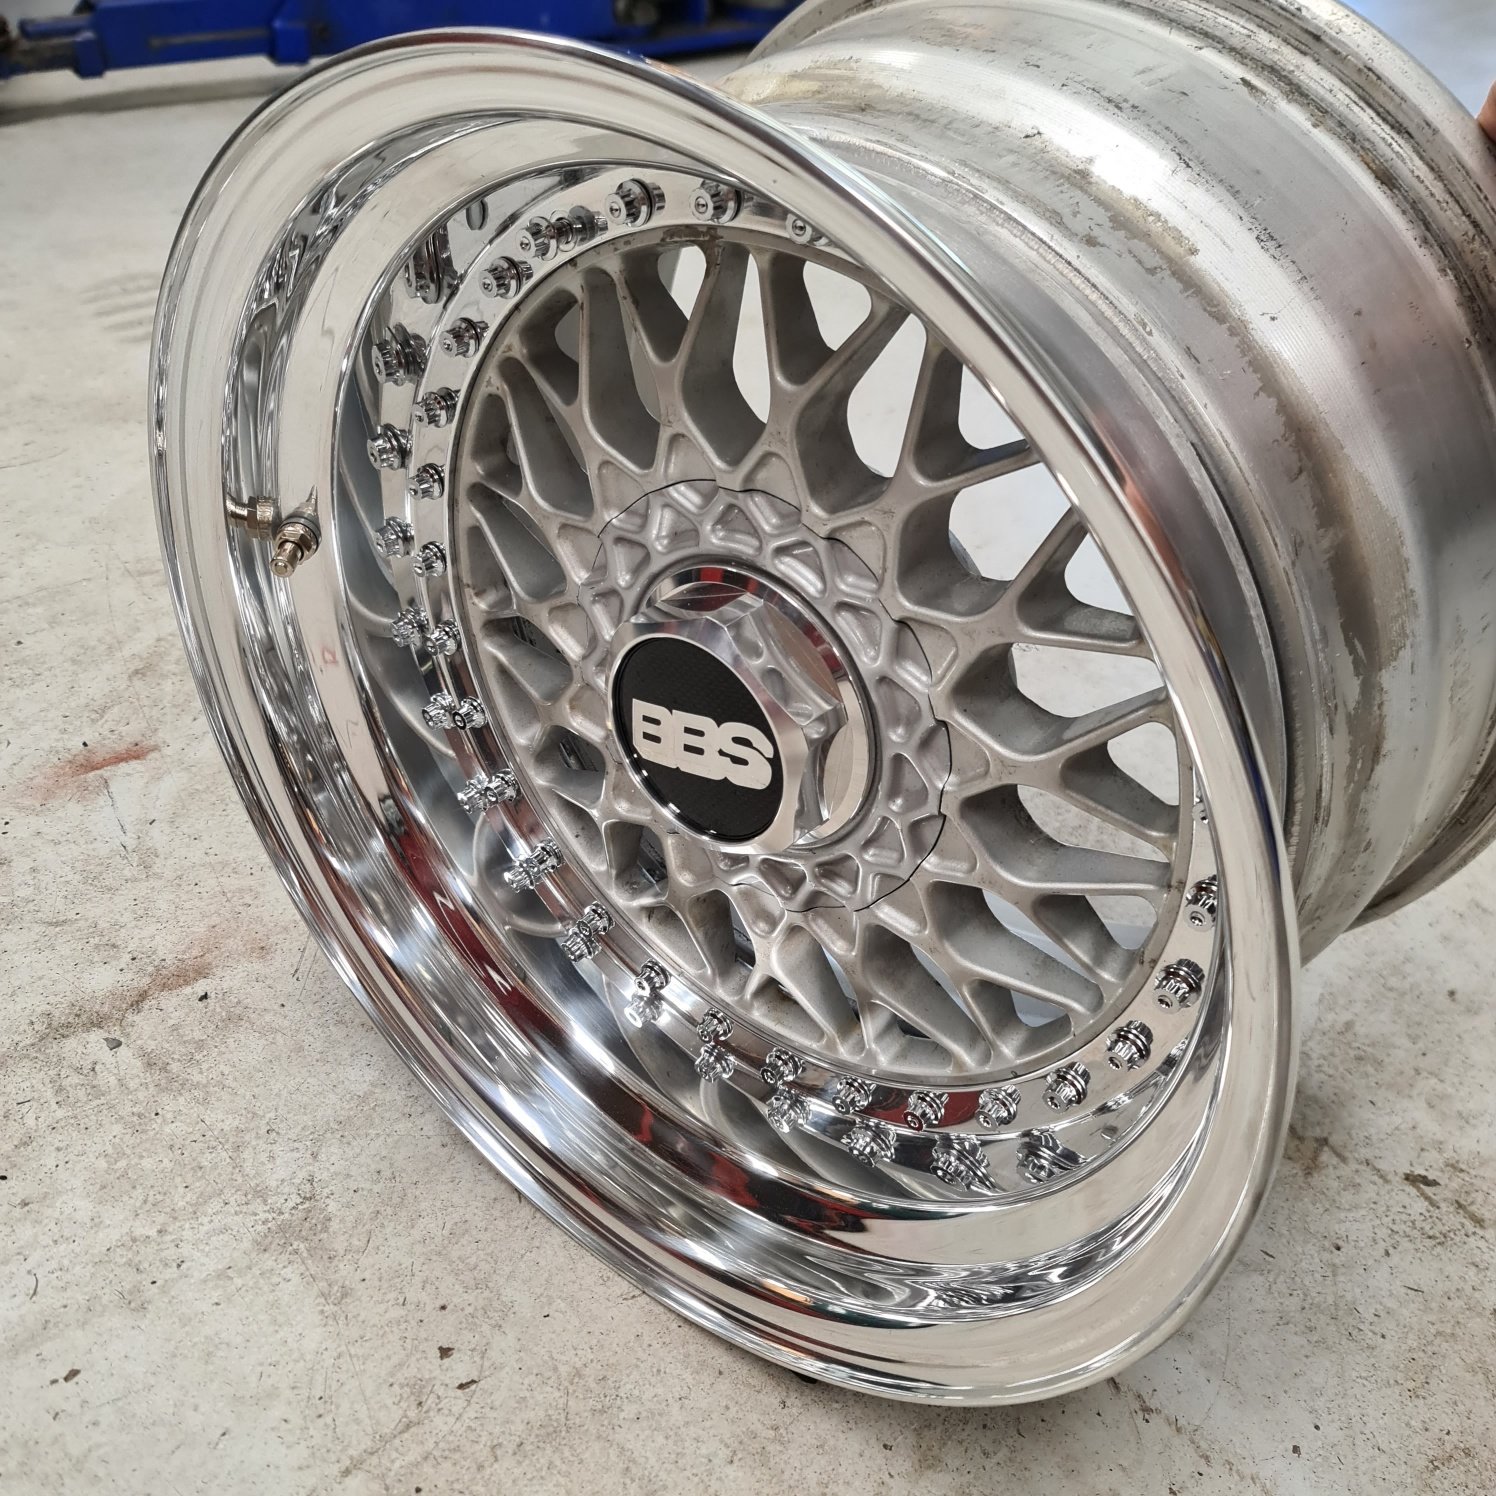
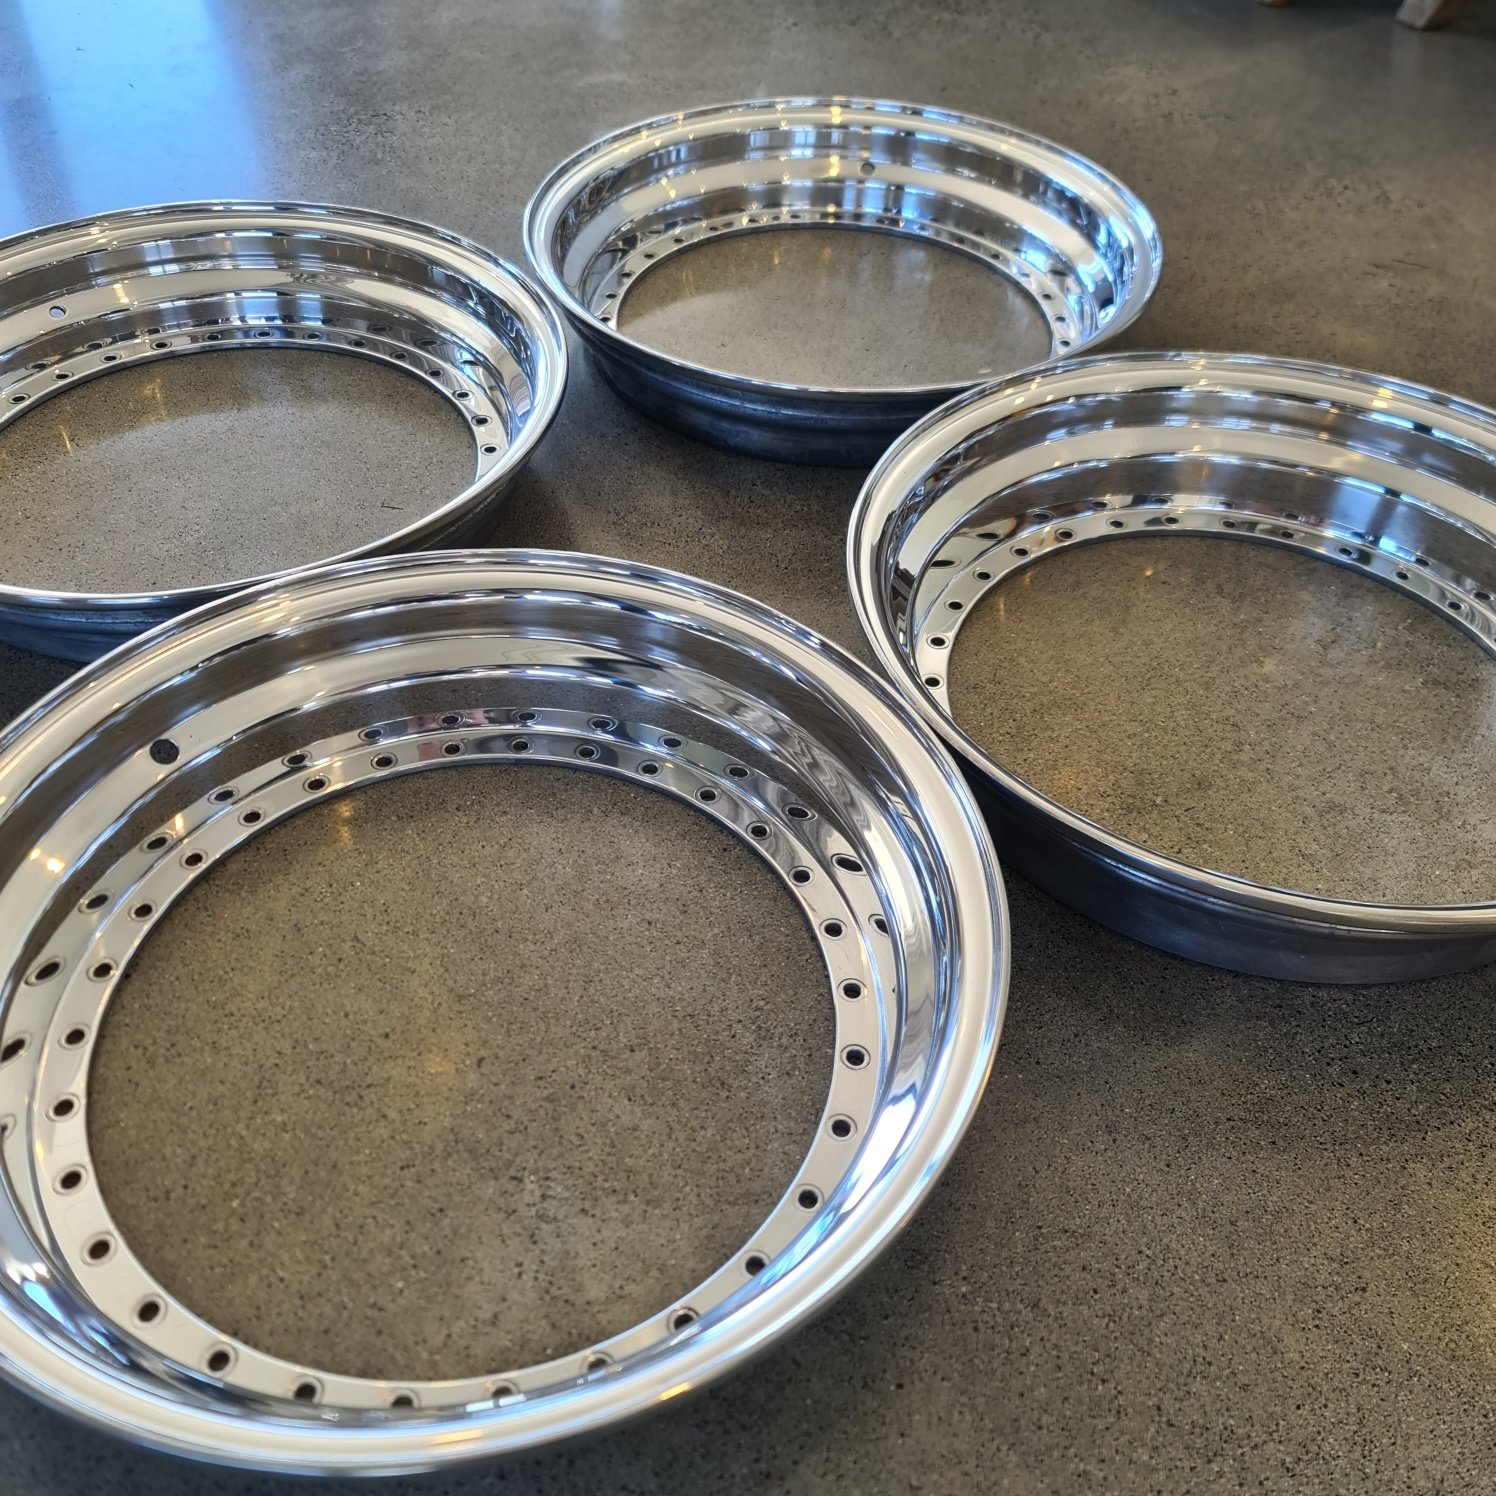
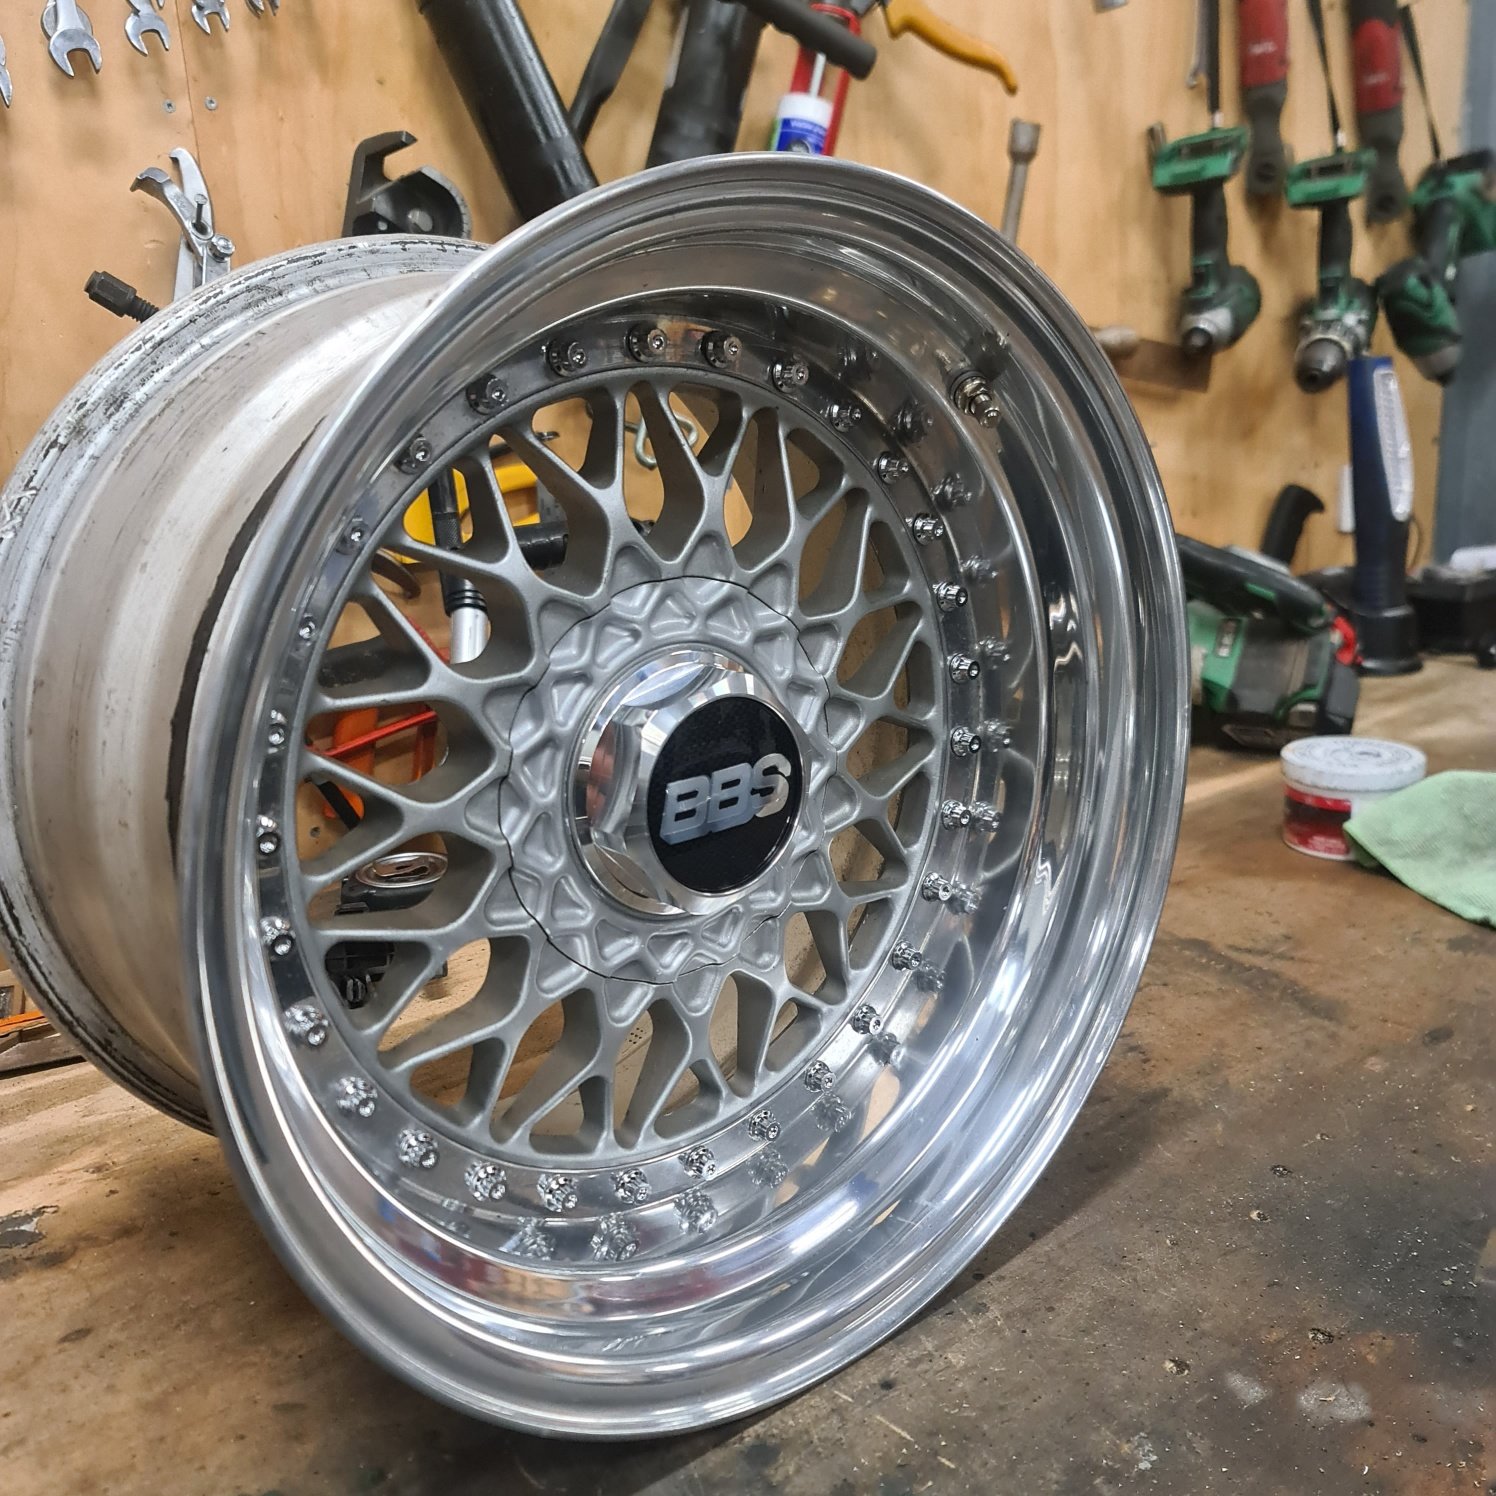
Its all go. Have had front and rear factory bumpers rechromed at Shiny Bits in Geraldine, came up mint as. Have ordered and awaiting a Motorsport 3D dash from aussie to fit the Haltech IC7. Fits in the location of factory gauge cluster so makes it nice and tidy location to mount the dash. Retains the factory air vent etc. Toby has polished my BBS lips and all my stainless trim for the car. So its all straightened and wrapped up in bubble wrap ready for when the cars painted. BBS Centres need a repaint still but all the new hardware and repolished lips are looking tops.
 21 points
 -
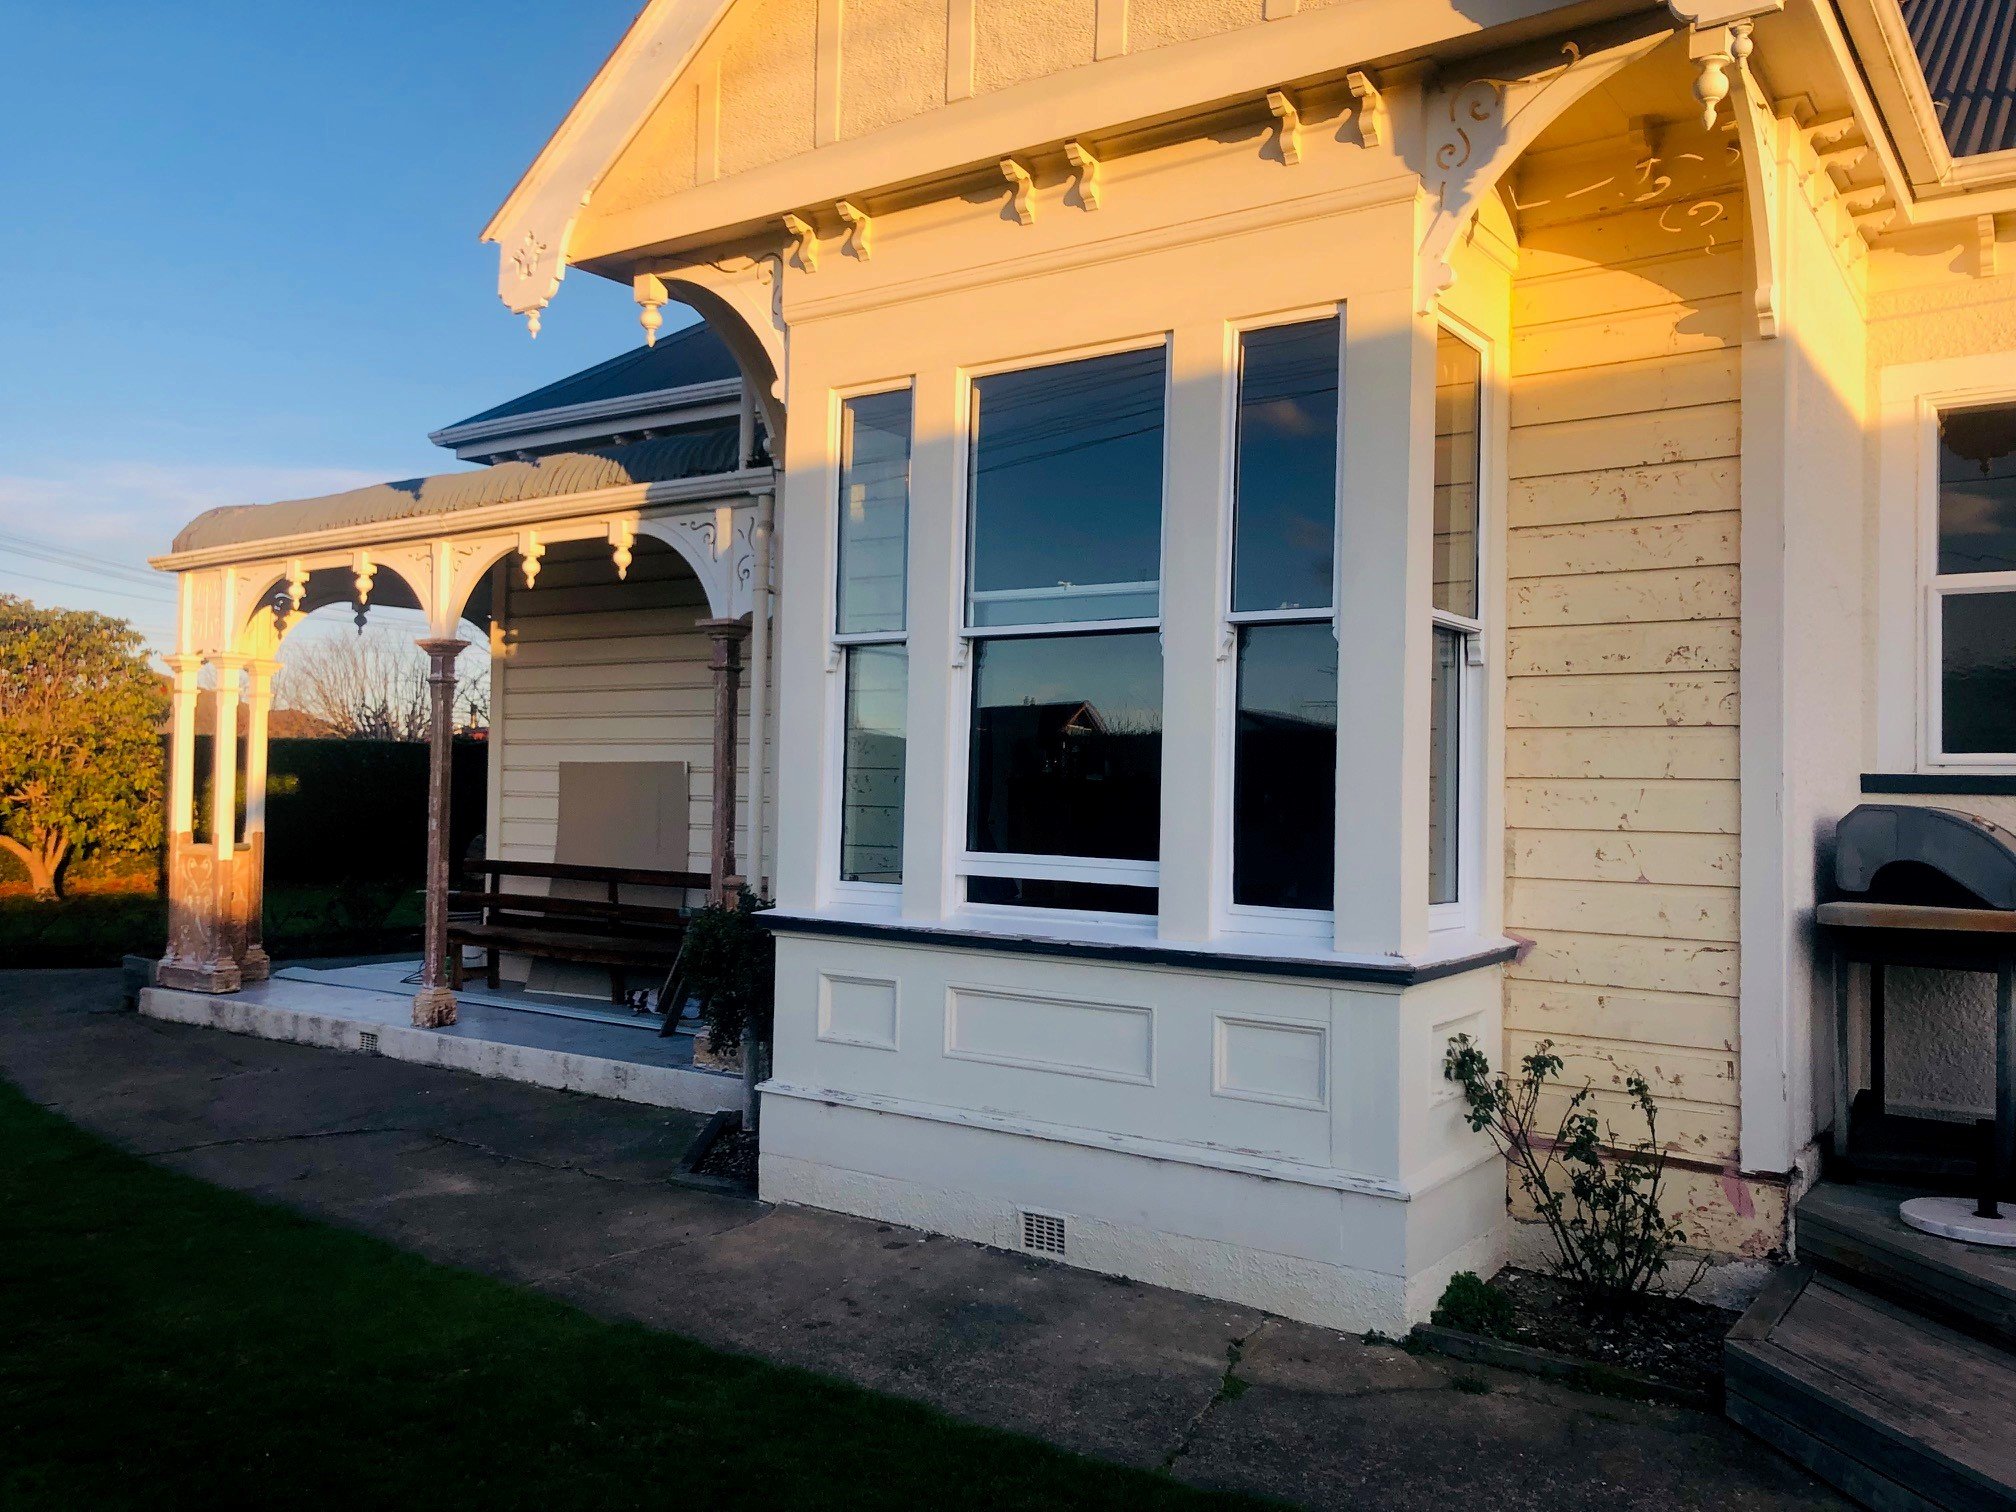
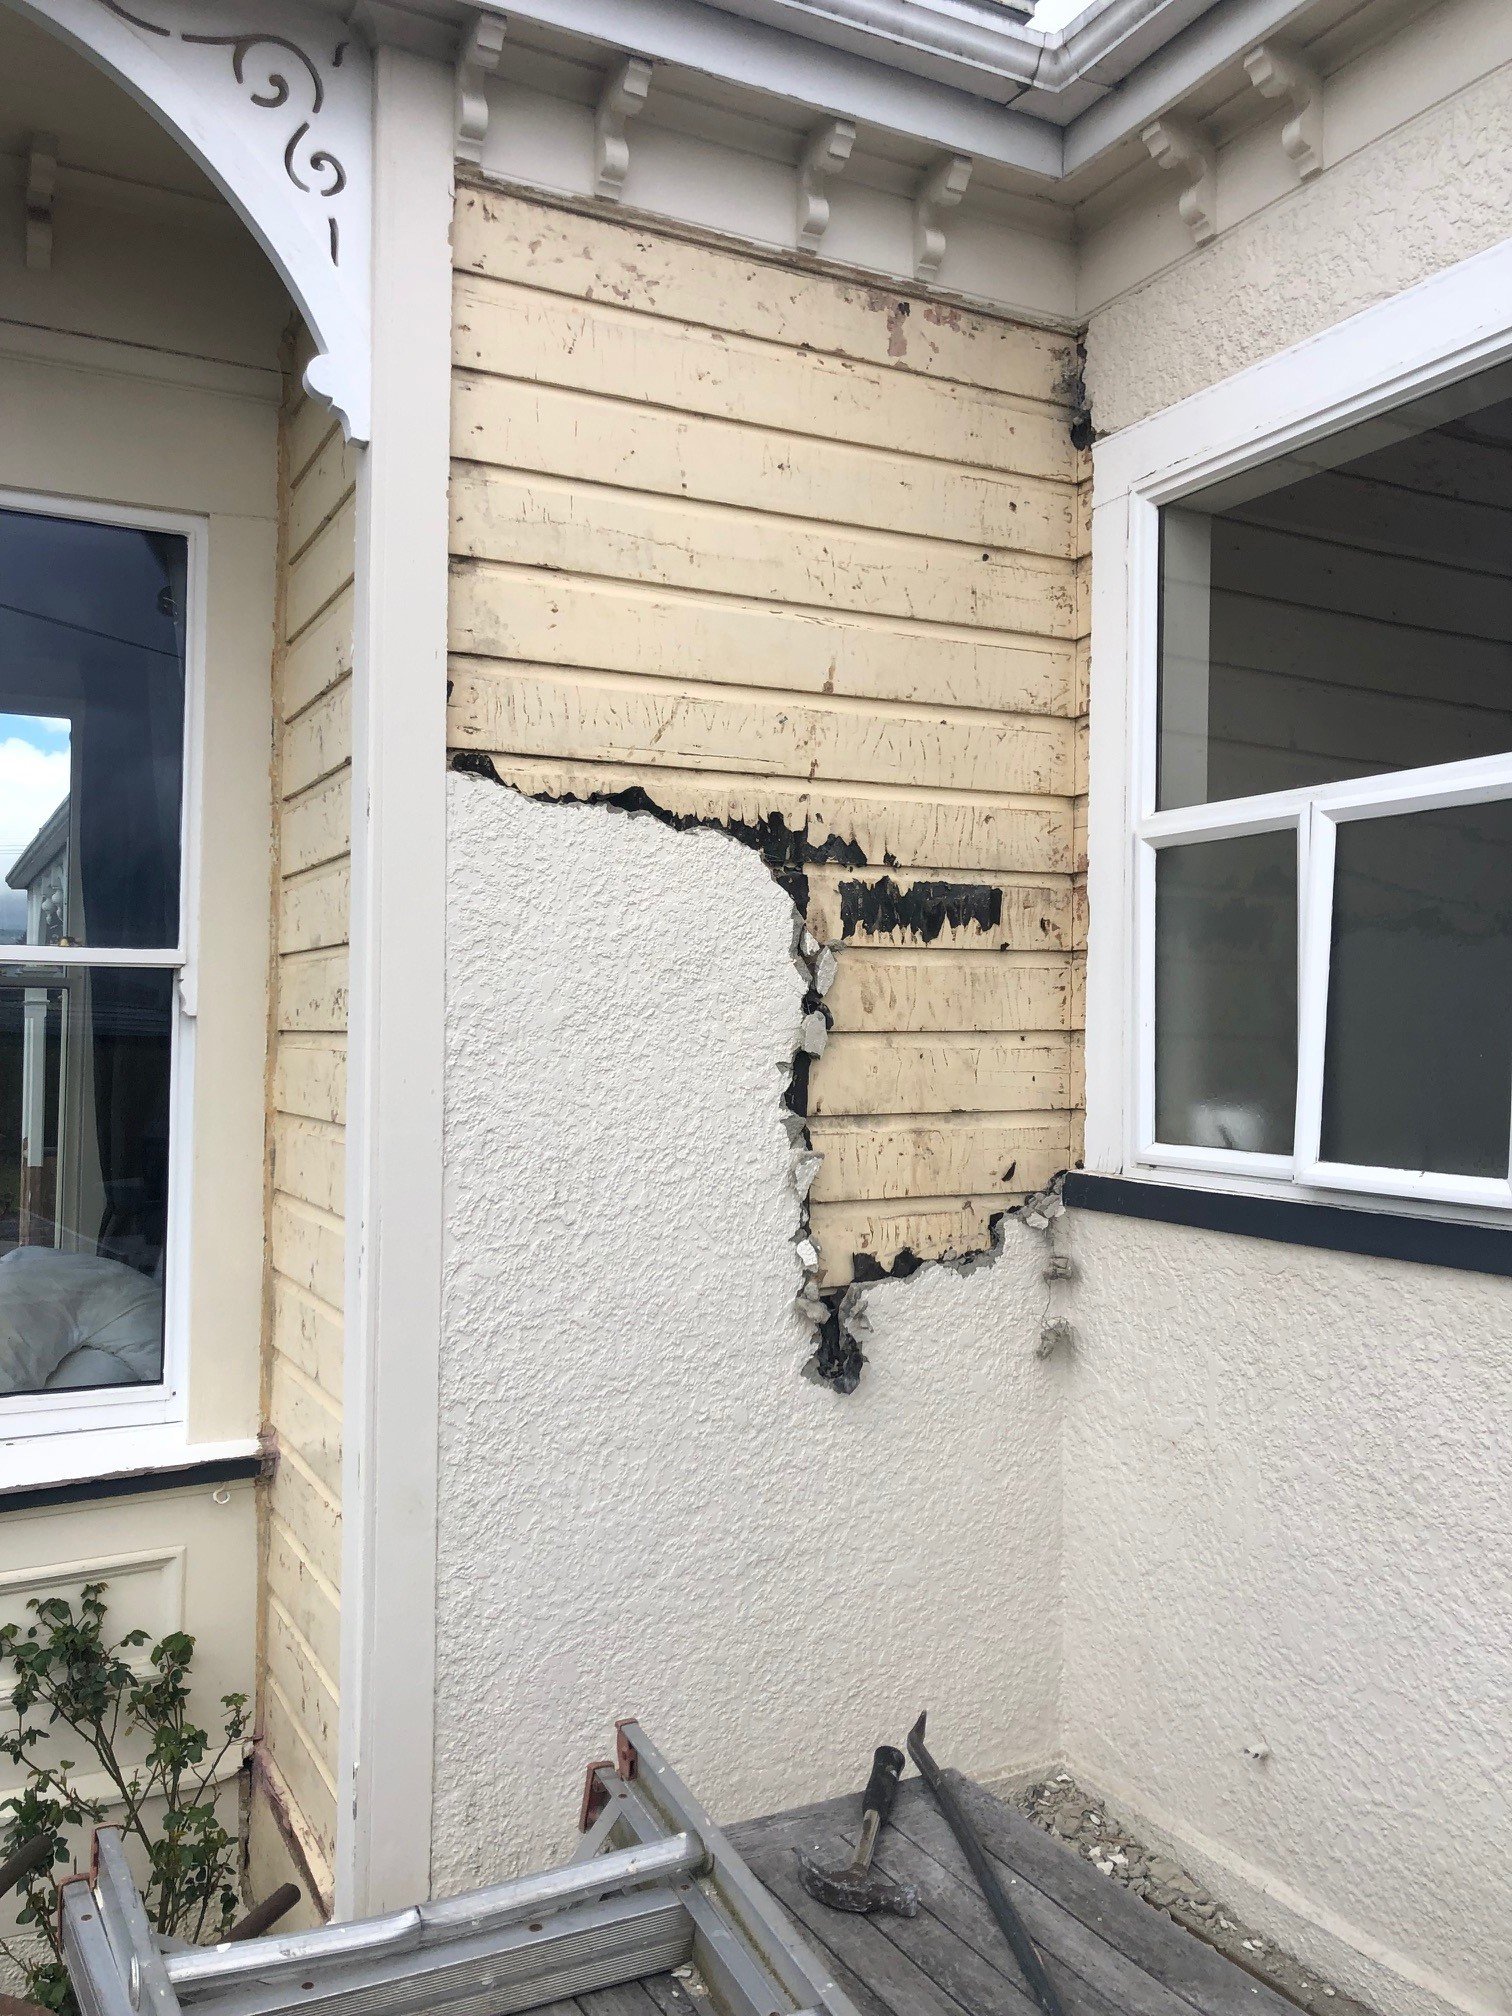
So all conditions have been met and title/council willing we'll be setted in mid Nov. Once its all paid I'll do a financial wash up of it all to show where the costs were. I mentioned earlier that the whole process as resolved in a decision for us to stay in our current house where we'll undertake a restoration of the existing villa and build an extension + new shed. I'll share some of the detailed plans once they've been drawn up but there is some DIY parts of this project I'll start with early... Unless it gets boring I'll just keep adding to this thread... One of the biggest bugbears I've always had with the house is the ugly roughcast which was put over the weatherboards in the 80s. There is nothing overly sophisticated in getting it off but it is very rewarding.... chuck on some heavy metal from my youth and go to town with the crowbar. The condition of the boards on this side are all pretty good (its the northern aspect) but the otherside I'm expecting to have to reclad.... I'll probably do all the work to get back to bare timber and then pass off to a profesh for painting.
14 points
-
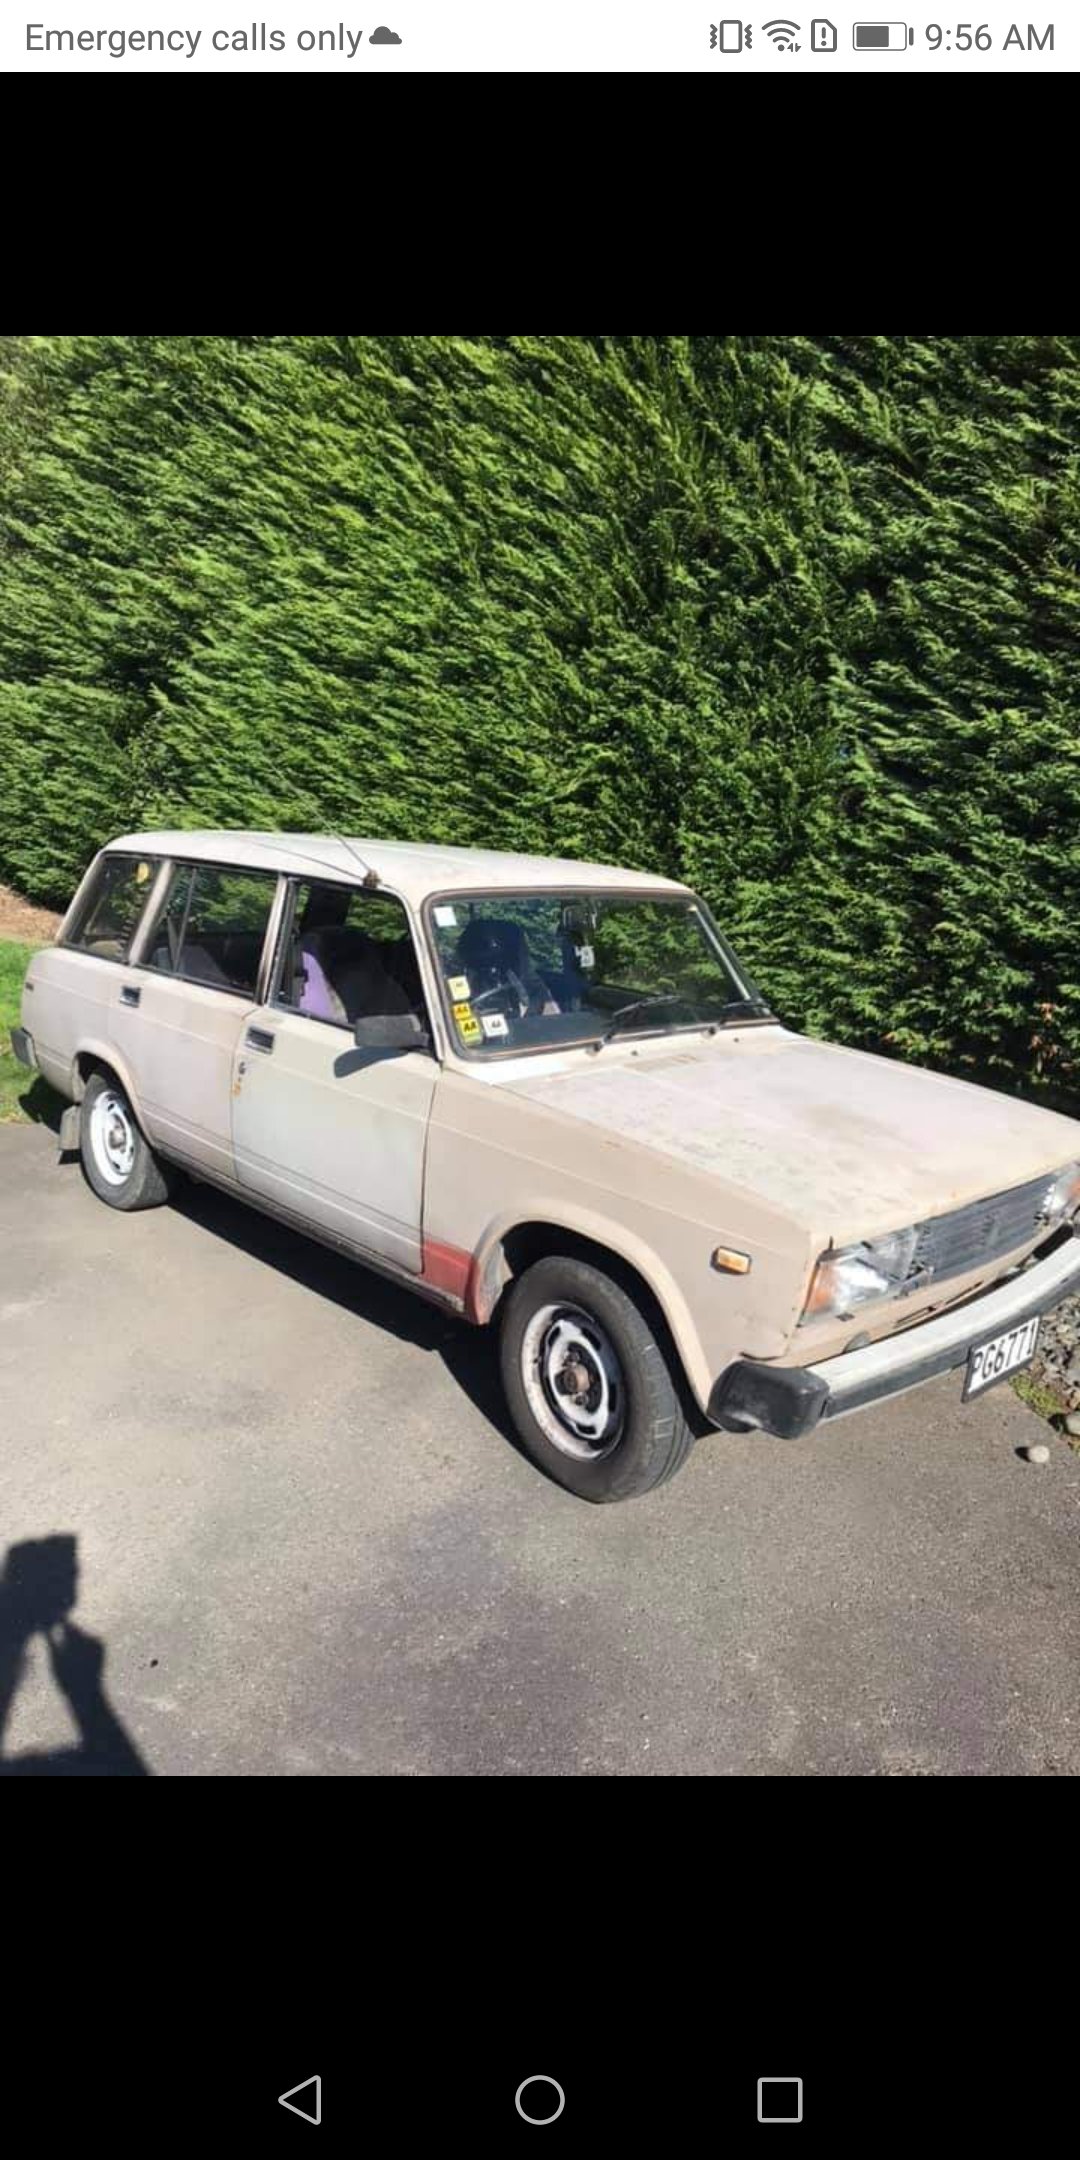
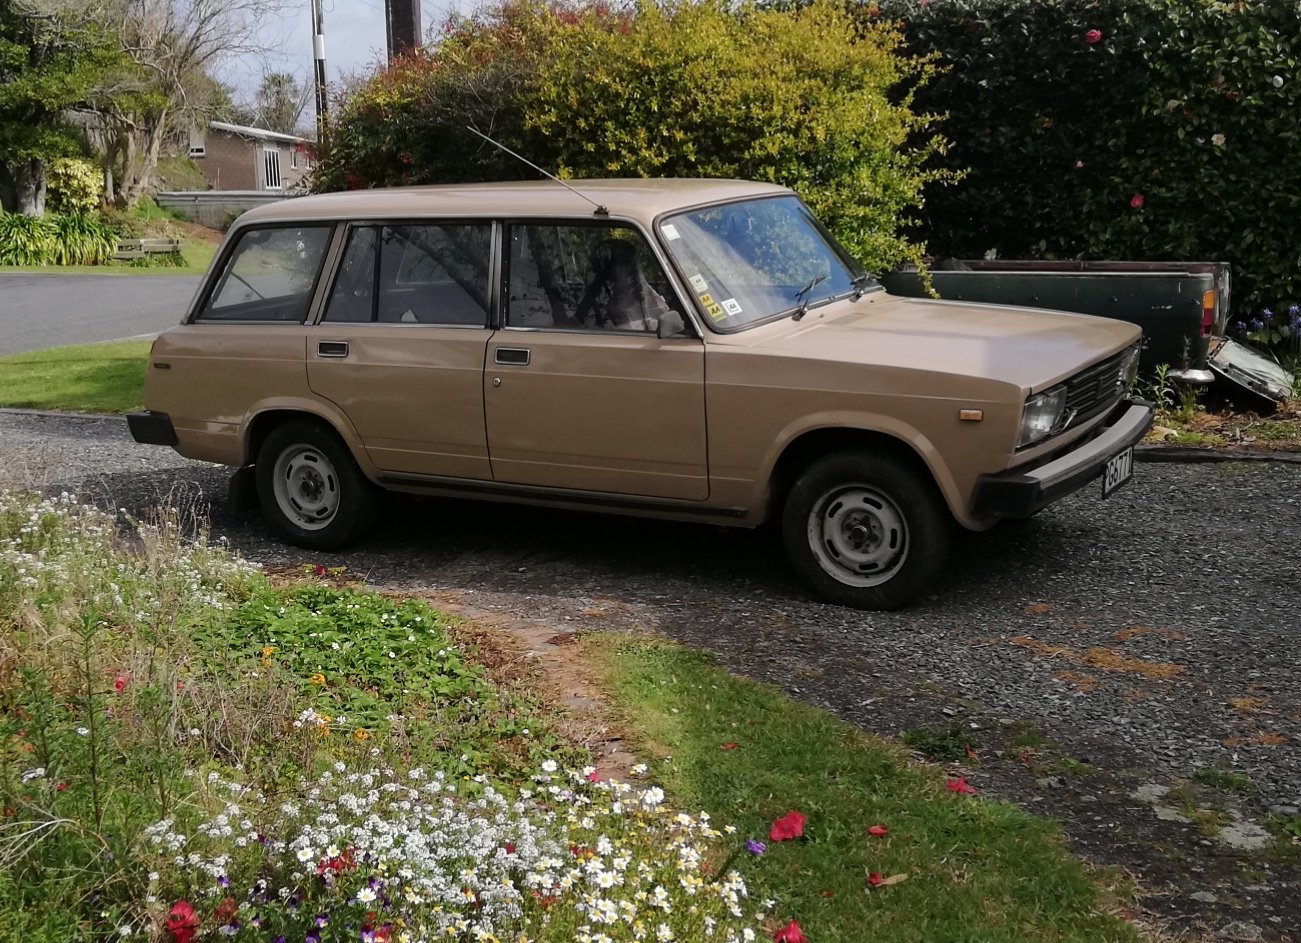
So I got another jalopy, I was searching for a decent triumph sedan when I saw this Lada for sale on marketplace. I thought "Hell, I haven't seen one of those for years!" so promptly went and got it to ensure I wouldn't miss out on the soviet driving experience. My impressions of the car are that it is great - for a car from 1970, by the time this one was made in 89' it was woefully obsolete. I understand they kept making them until 2010 in russia, and 2012 in egypt! The car had been in one family from new, and had been outside most of the time - very little rust and the interior is fine, but the paint was sunbleached to almost white from its original dark beige. I am rather enamored with its factory tool kit, with the tools all stamped cccp. I scoured the oxidation off a bit of the paint and found a good match, repainted it in the driveway, now just need to paint the windowframes black, swap the tyres onto a sweet set of fiat ward rims I found, then have some sweet proletarian adventures.
8 points
-
My old man helped me make up press tooling for the top parts Didn't get enough time to finish off the last piece this weekend though. Poor old girl8 points
-
Well, that didn't take long. I knew I was on borrowed time with the gearbox but didn't expect it would come around this quickly. So, I had the new tyres fitted yesterday (Yoko AD08r in the correct Turbo size), fiddled with the old brake light switch (since the replacement is AWOL) to stop the brake lights from being on all the time, and then went out to bed the new brakes in. The car was running great, it ran smoothly and was responsive. The brakes have good feel, with no shudder and the gearbox was shifting great. A few hard stops and a KM or two later I pulled over to check the wheel nut torque (not going to take the risk of not checking them after a brake job again, after the wheels nearly coming off on the Corolla). Of course, the wheels were fine, so I pull back onto the road, gave it a bit of throttle, the turbo spins up, boost comes in and then suddenly It just free revs. It felt like it popped out of gear, so I clutch in, into neutral, into second, let the clutch out, and nothing, just revs. Oh no. I roll to a stop at the side of the road and try a few more gears, nothing, I can let the clutch out with it in gear and nothing happens, doesn't even stall. I can push the car forward when it's in reverse, which is not good. I fire off a quick text to let my Wife know I might be a while and call AA to arrange a tow. "Yes, I am about 1.6KM away from home" I confirm with the rep on the phone... At least it looks good, sitting there, waiting. Whilst I waited I took a quick walk back to where I stopped to check the wheel torque A quick sniff test confirmed that was a nice trail of my fresh, rather expensive, Honda MTF gear oil. There was also a small amount under the car where it sat. After a fairly short wait, a friendly chap with a truck arrived winched the old girl aboard and dropped me home again. The Tomcat repaid his help by leaving a large amount of gear oil on the truck bed, and on the road where the car was loaded and unloaded. So what went wrong then? I jacked the front of the car up, confirmed it had no drive to the wheels and slid under to find out why. That'll do it. The shiny bit the arrow is pointing to should be inside the gearbox and shouldn't be visible. It also explains why the gearbox weed everywhere as the seal was wide open without the shaft to seal it. I did some careful levering with a prybar and popped it back into place. I'd be very surprised if this is a new issue... I suspect I'm not the first one to lever that back into the gearbox. Whilst under there I had a good look around. Noticed a couple of minor coolant leaks I will need to attend to, but also noticed this rear engine mount completely missing its nut. I found a new pre-loved nyloc nut that fit, and wound that on nice and tight. Who knows, maybe that will fix some of the movement in the engine. The driveshaft has quite a lot of radial (up and down) play when inserted back into the gearbox, which confirms my suspicions, both about the condition of the box, and why it popped out; the gearbox bearings are stuffed. These gearboxes do not tolerate being neglected, and being over a litre of oil down when I got it, I suspect it's not had a good time. When Rover had these boxes built, they chose to use hi-tech ball bearings with plastic to retain the balls. This probably seemed like a good idea at the time, and they worked well for years, as long as the plastic didn't get old and the gear oil could keep them cool Above is an example of the bearings used in the PG1 gearbox; uprated steel cage bearing on the left and stock plastic cage on the top right. Unfortunately, the bearings Rover used seem to wear badly no matter what (they tend to get pitting in the races and go a bit grindy), but when coupled with low oil and high temps, the plastic can fail, causing the bearings to no longer be sufficiently retained, as per this extreme example where the plastic has broken and the balls have all converged on the lowest point. This sort of damage is what can also break the flange off the diff center. So I suspect mine has either started to break down the plastic, or the races have worn to the point there is excessive play. The popping out drive shaft is the usual giveaway of bearing failure. With the driveshaft back in place, I have drive to the wheels again, so once I refill the gearbox with the cheapest oil I can get, the car will be mobile enough to get out of the garage and into the drive, where it will sit in shame waiting for me to rebuild the gearbox. I will be stripping the gearbox, replacing all the bearings, and oil seals. Uprated metal caged bearings will be used everywhere they are available. Whilst I'm there I will also be doing the clutch. I'm hoping to keep the Type A torsen diff, but I will need to check it's in good condition once the gearbox is split; if not, I will need to increase the budget and add a Quaife to the list. After that, the gearbox should be damn near bulletproof. I was really hoping to get more than a couple of KM (literally, I've done sub-10KM since I got it) out of the car before it seriously broke, but that's the British car game I play. Every day is a gamble.6 points
-
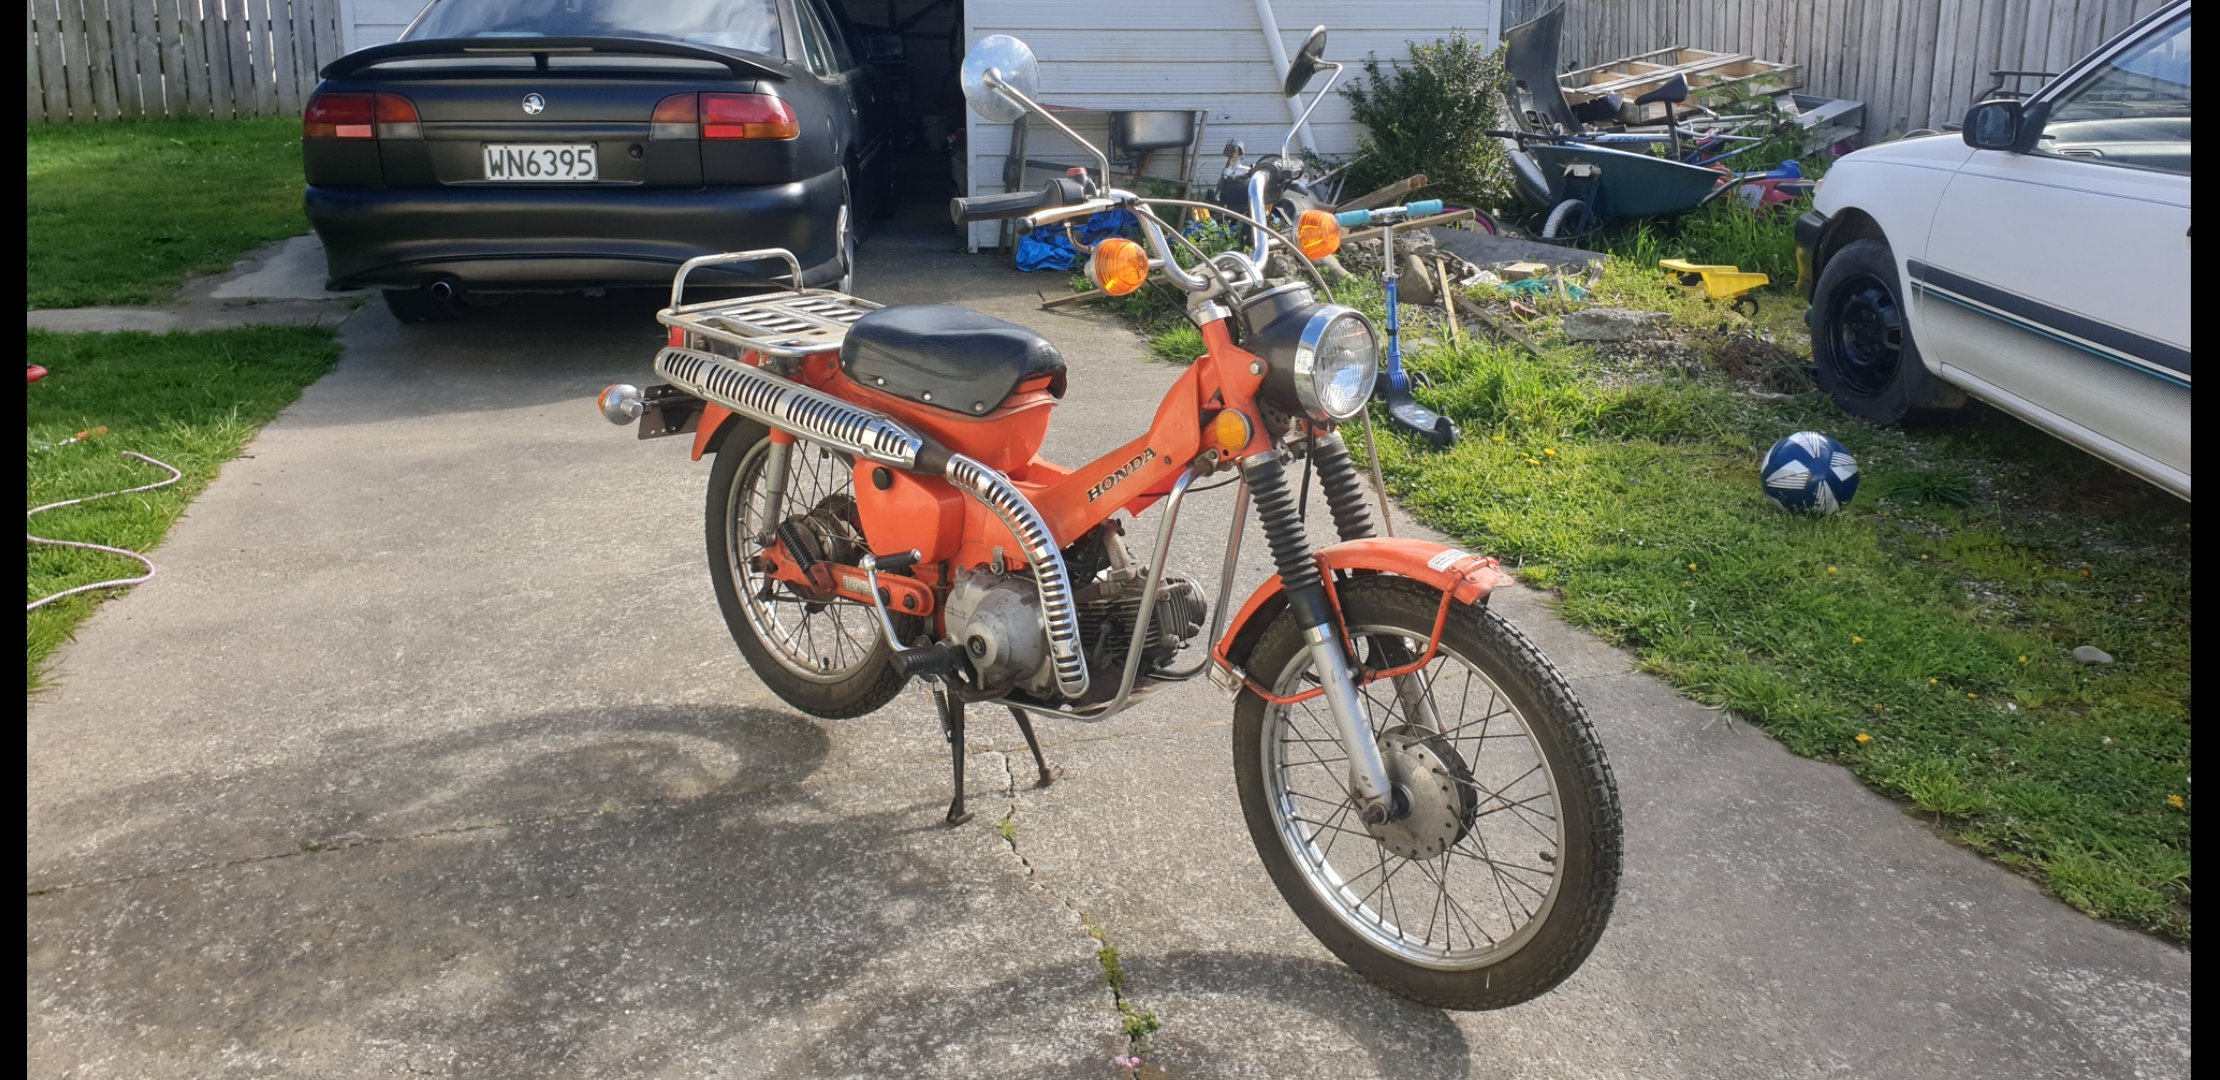
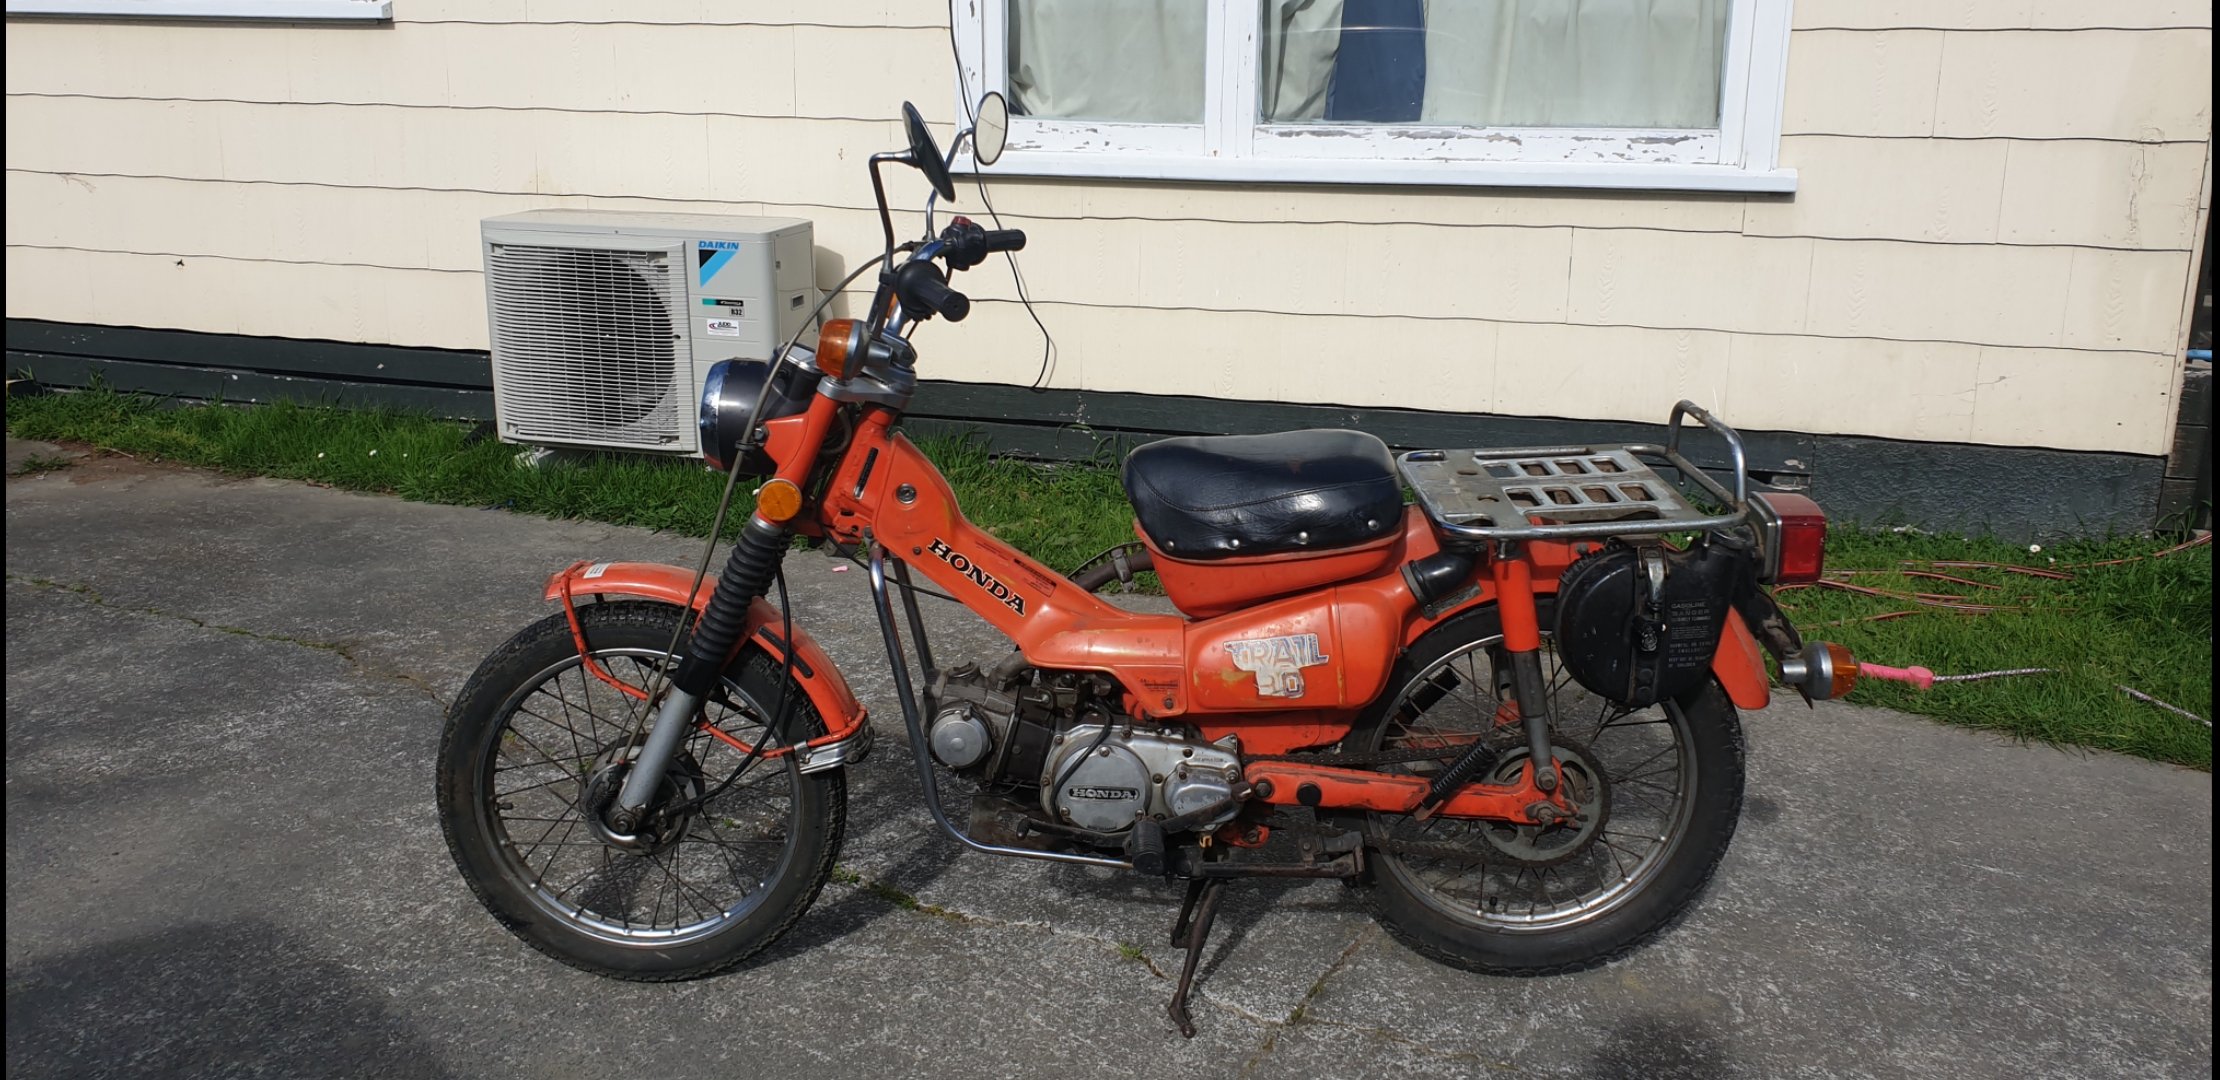
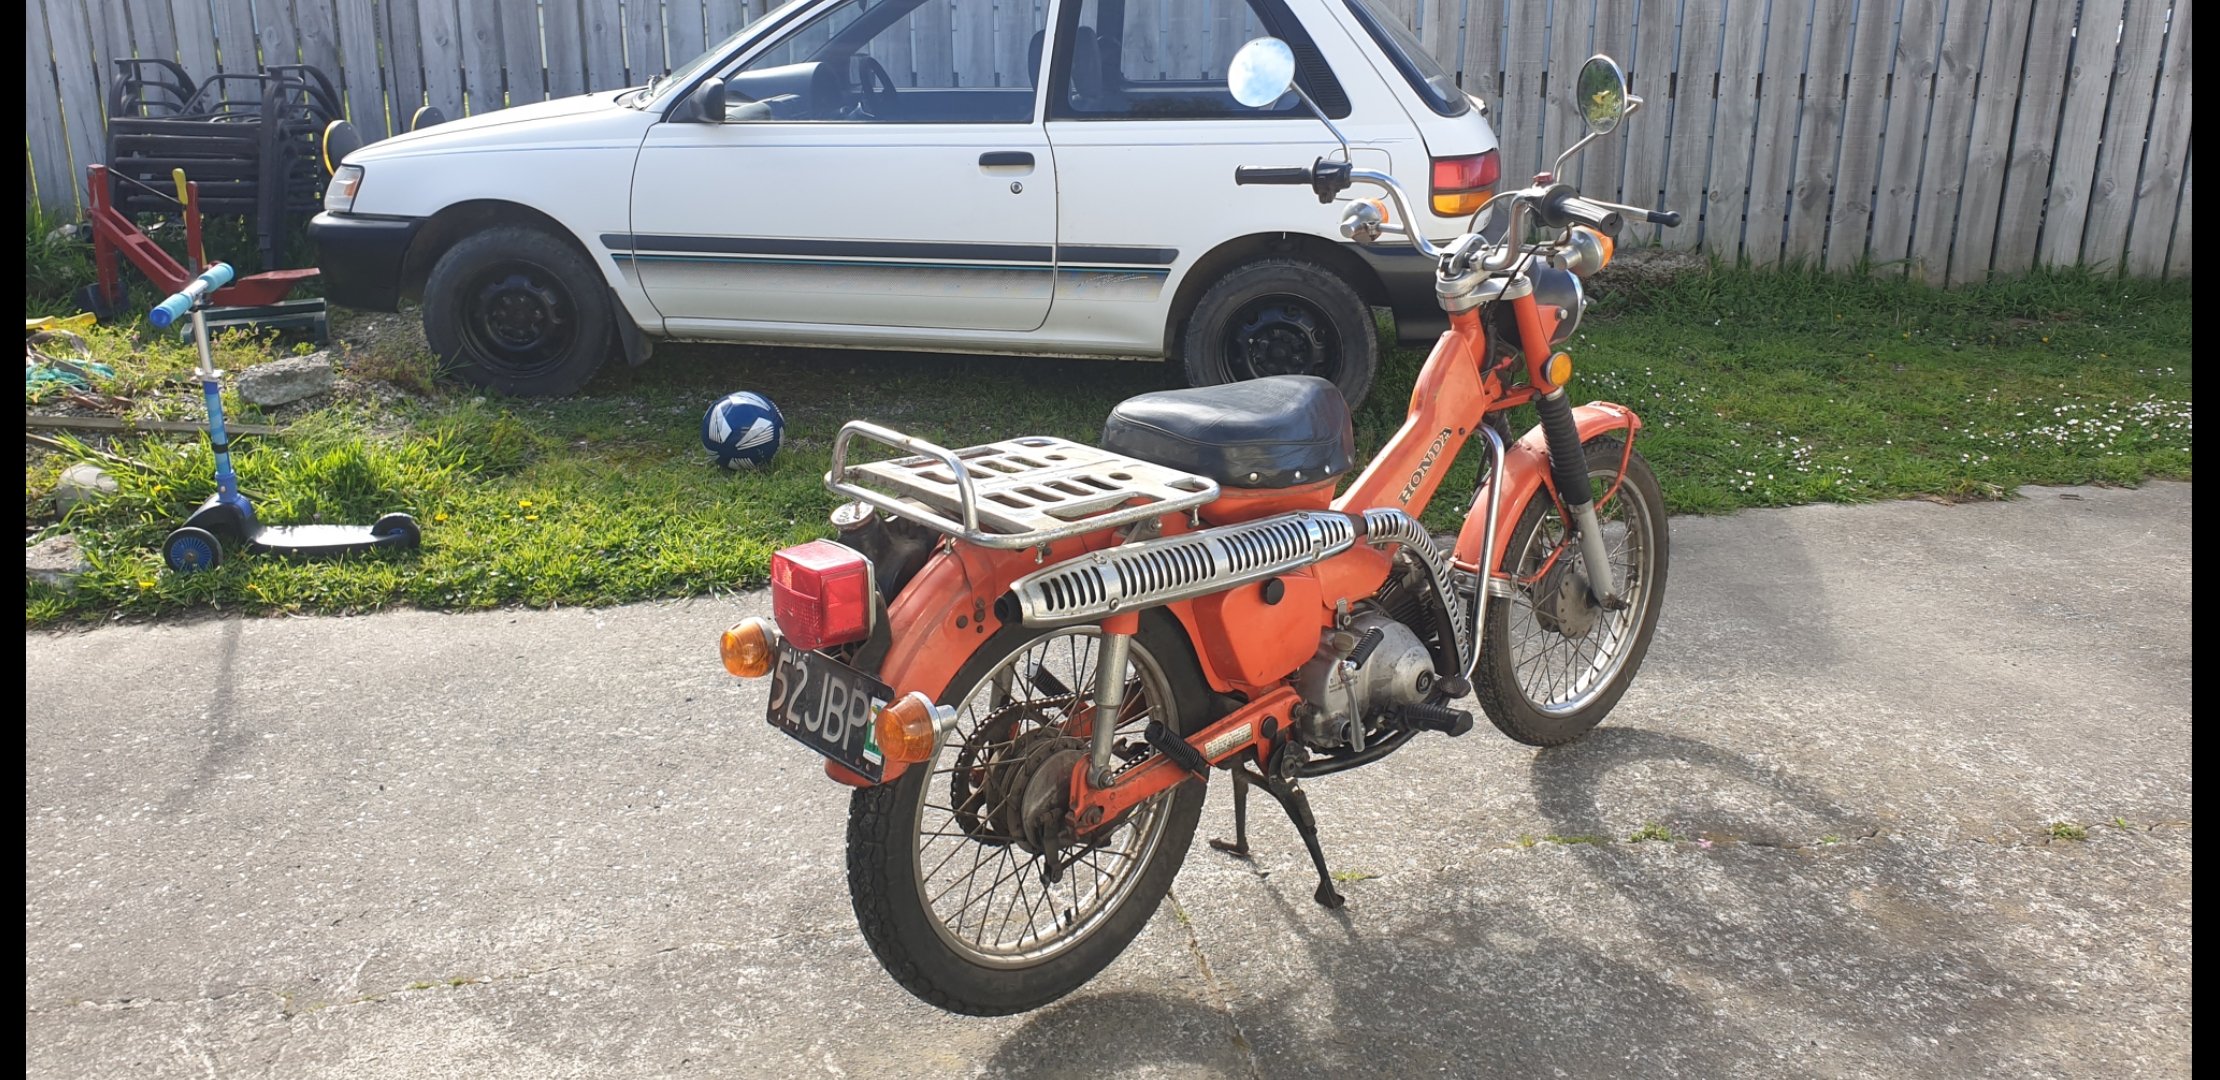
Ahhh done it agin ffs hahahha. Brought a 1978 honda ct90. Has og plate and papers from 78 good clean bike. Motor runs rides it needs bita tlc in the motor department soo. Im thinkn maby. A lifan swap or maby a electric swap to do something a bit different. Will play with its motor too see whats what.
5 points
-
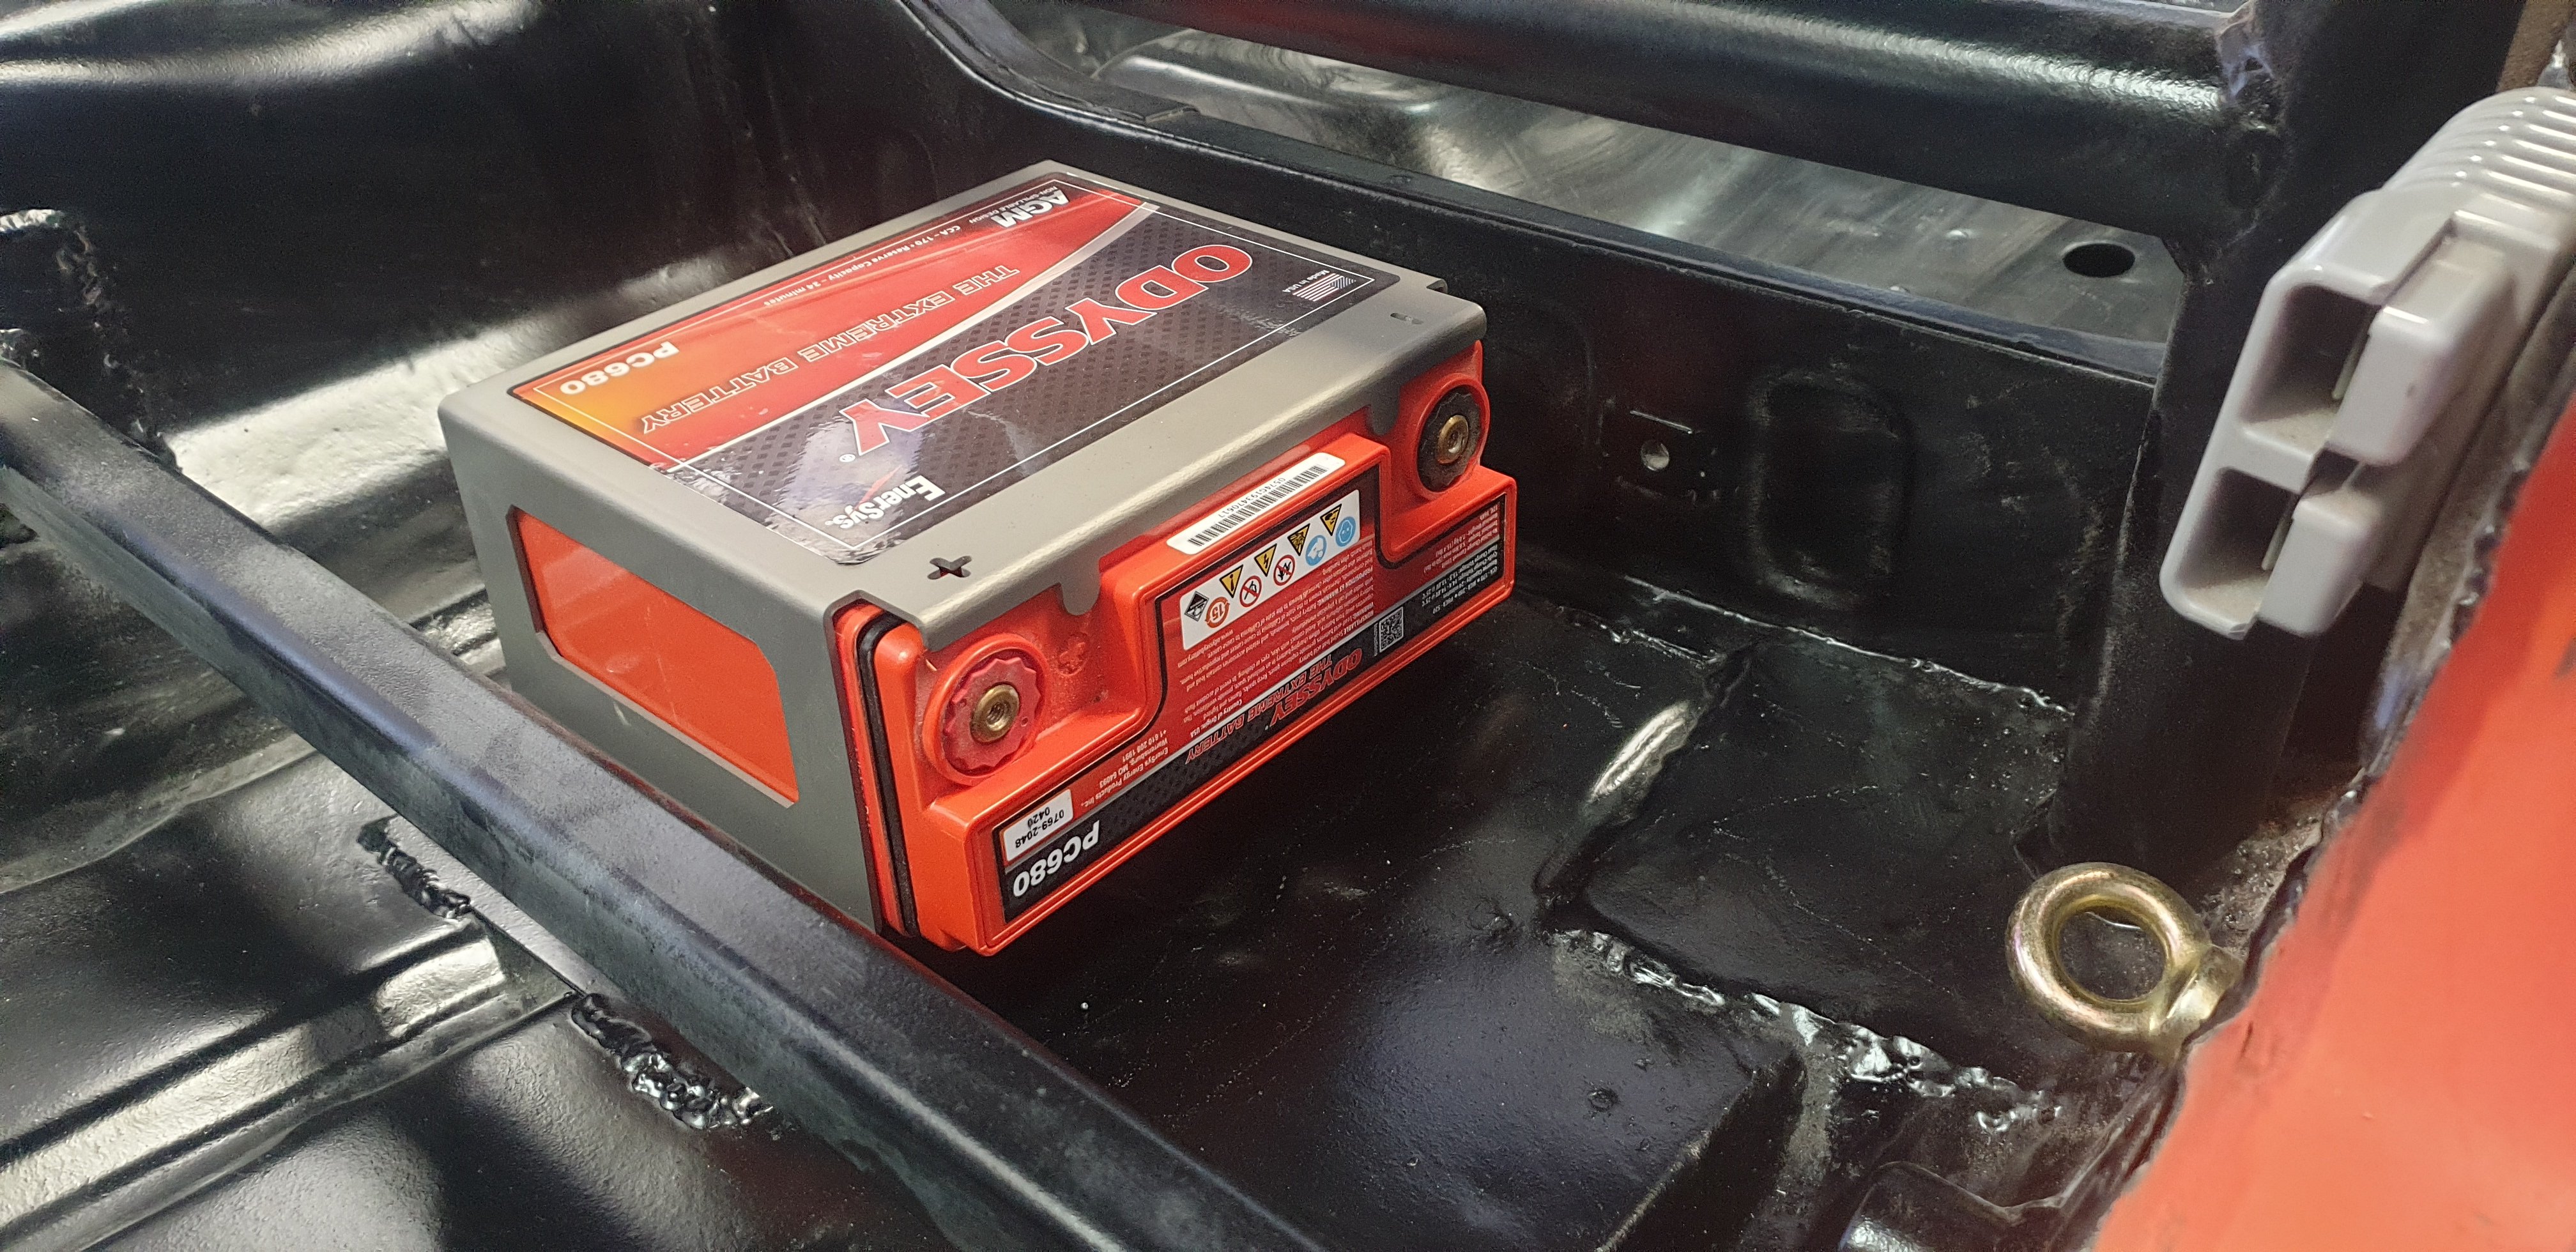
Also fitted the battery and mounting box. Happy with how this looks... Need to think about building a wiring look soon
5 points
-
i ordered a new intercooler ages ago but it was coming from auz and they went into lockdown right when i ordered it so it took 3 months instead of 3 weeks. anywho it turned up and i went about making it fit. its wider but not as high as the one that was on the car. a quick note about the intercooler that was on the car. its an R32 GTR intercooler that i put on the car about 2007 and it has been through hell and back and it took it all. it stoved the side of Spencer's soarer in, its taken literally hundreds of hits into curbs and driveways and fucking all manner of shit and its never had a leak or a broken tube or anything. this thing needs a place in the hall of fame. so yea, new intercooler will flow WAY better than the old one and the dyno will tell the story. i made a new bracket thing to hold the cooler and it had two mounting holes on the bottom but because i cant use the top ones i thought id add two more to the bottom just because. i only had a small piece of square aluminium so i made it round and welded them on. 3the new intercooler sits about 30mm higher than the old one too so thats a good. at some point imma make a front air dam for this thing. 2021-09-25_06-12-31 by sheepers, on Flickr 2021-09-25_06-11-50 by sheepers, on Flickr 2021-09-25_06-11-58 by sheepers, on Flickr 2021-09-26_05-10-21 by sheepers, on Flickr 2021-09-26_05-10-43 by sheepers, on Flickr 2021-09-25_06-12-12 by sheepers, on Flickr 2021-09-26_05-10-37 by sheepers, on Flickr5 points
-
I spend way too much time thinking about things to do to it, I'm not sure it's healthy. IRL it's pretty fucking great too, so many people fizz over it. I parked up in Mitre 10 on Friday, when I came back out there was a man lying underneath, he sprang up and pretended he hadn't been. I had a good chat with him but fuck that cracked me up.4 points
-
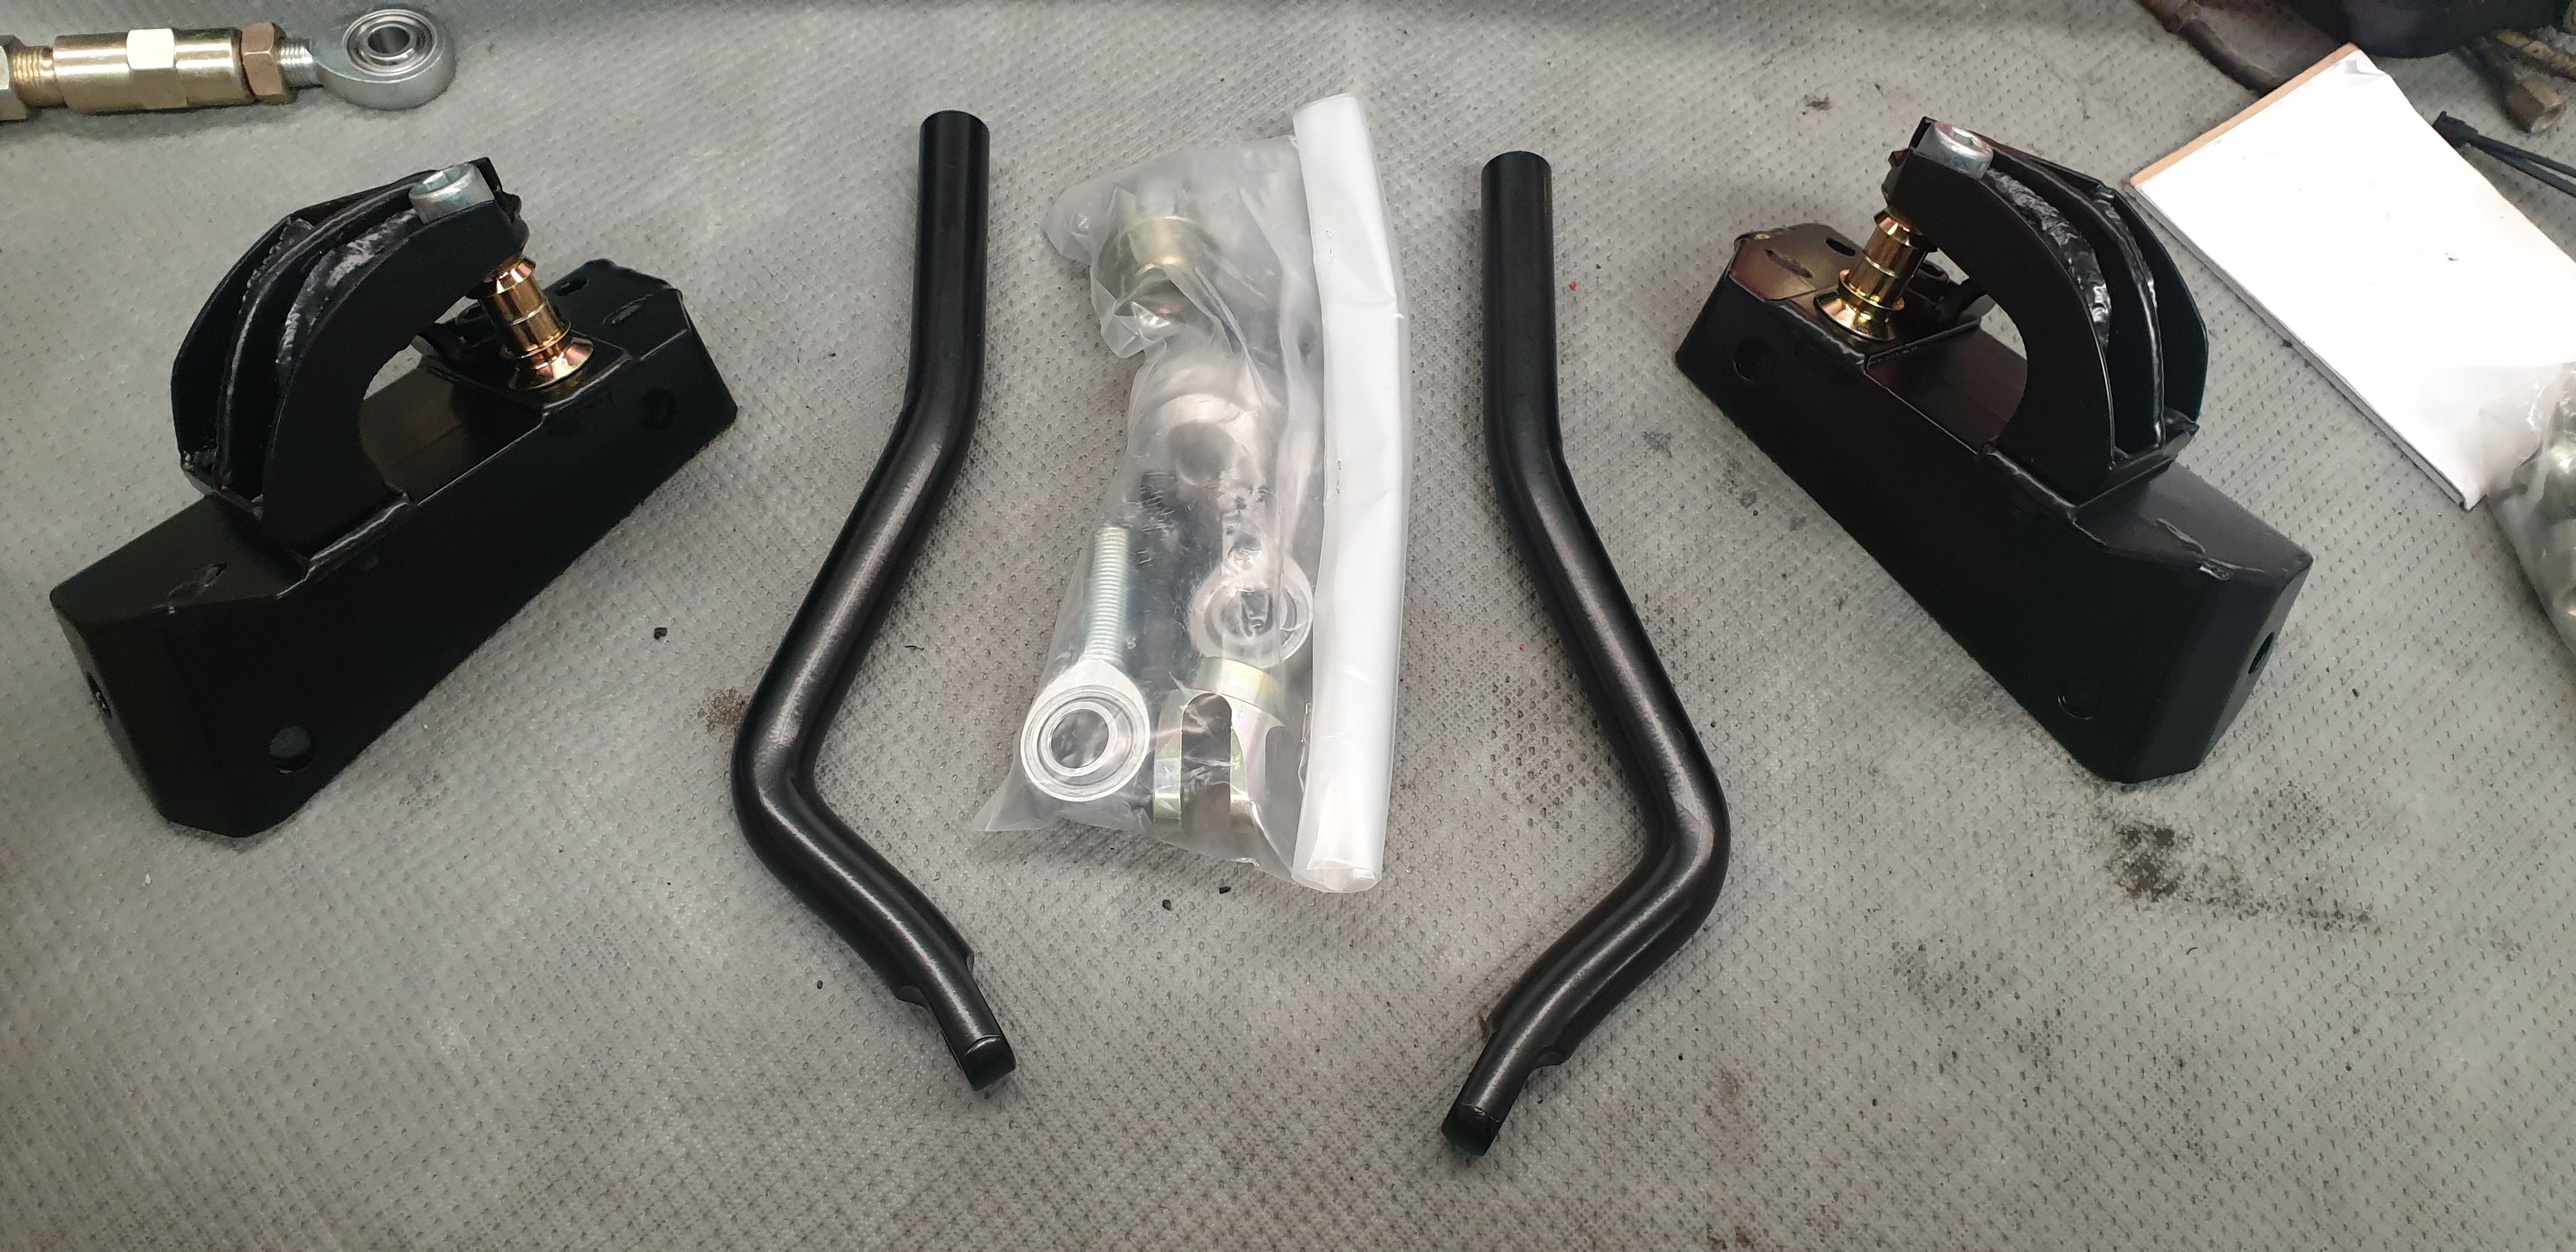
More goodies turned up today courtesy of Group 4 Fabrications in Ireland. Tension strut kit. Saved over $335 importing it myself..
4 points
-
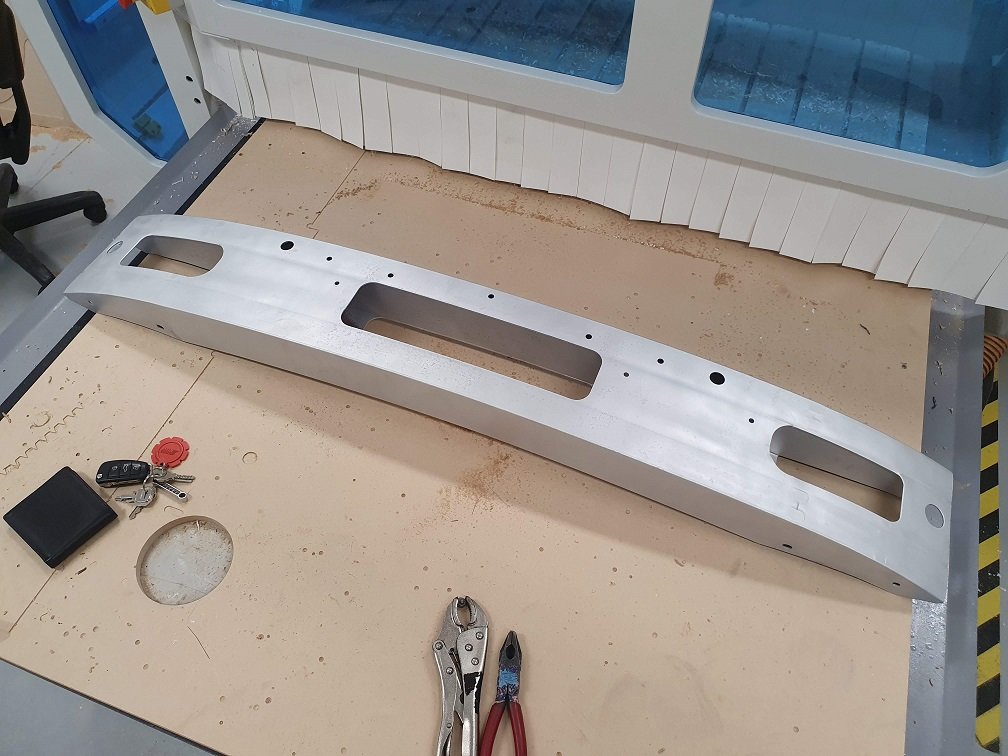
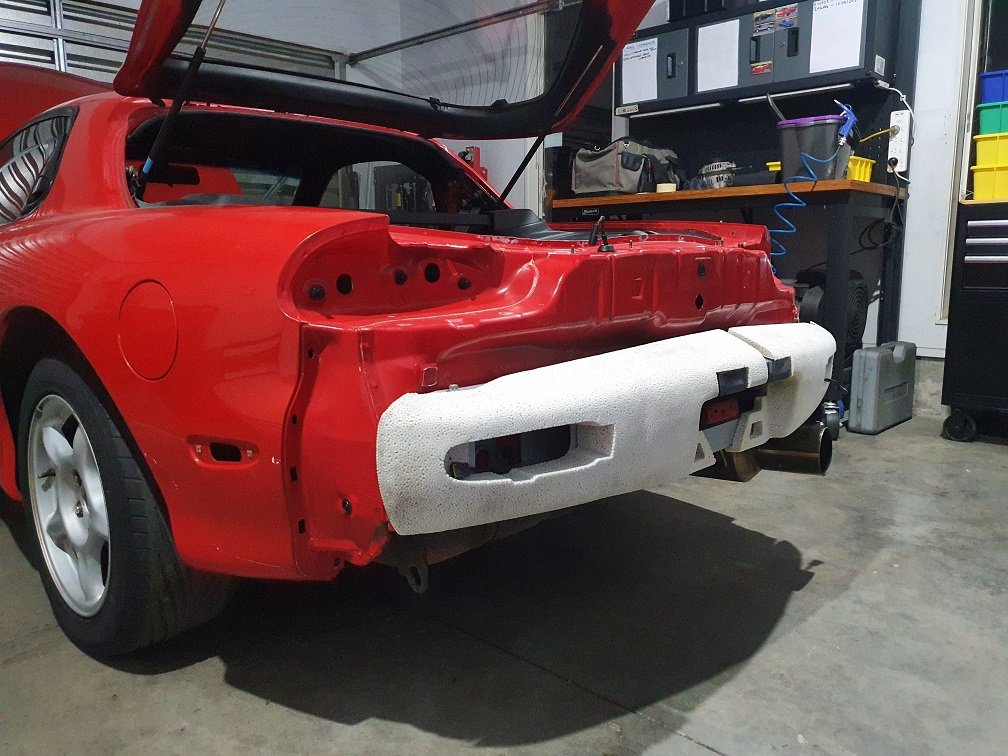
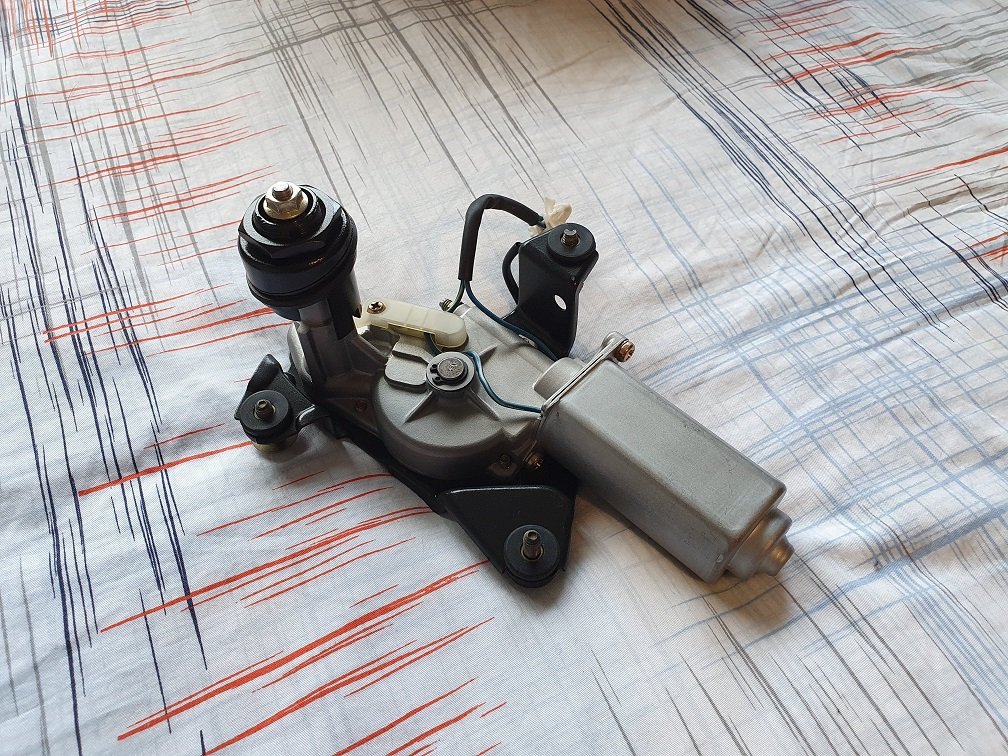
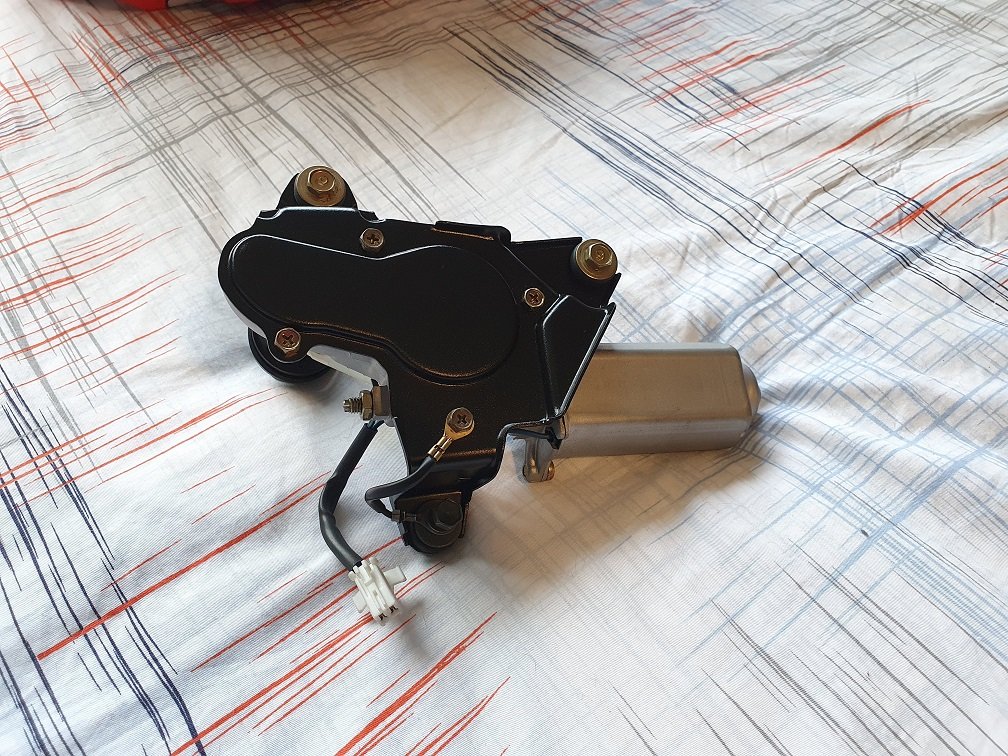
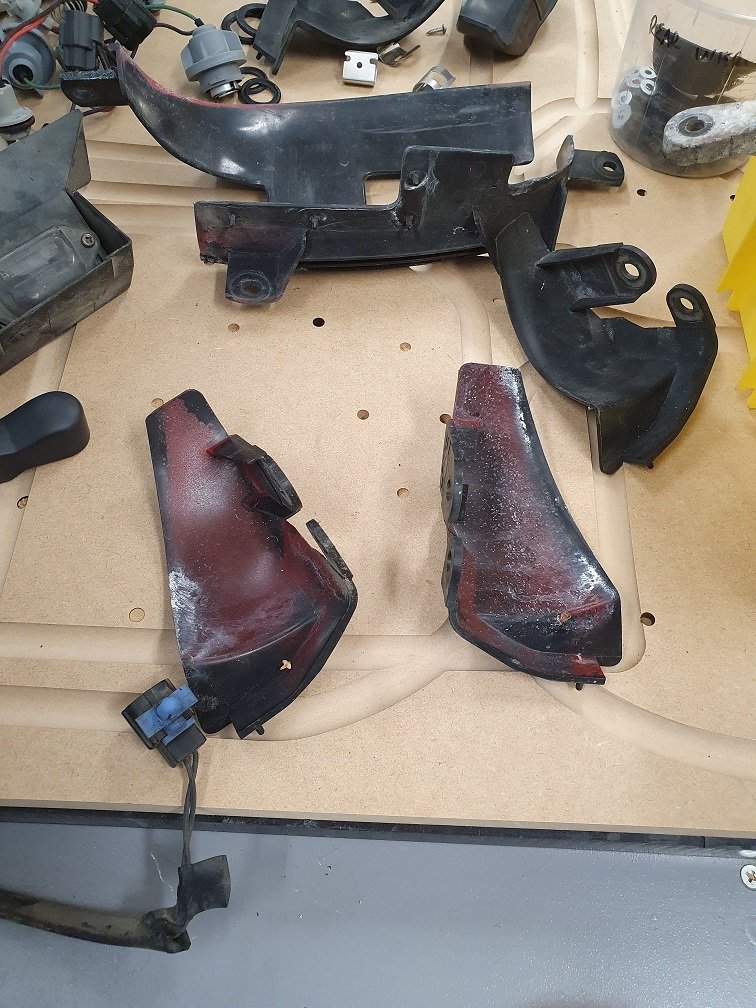
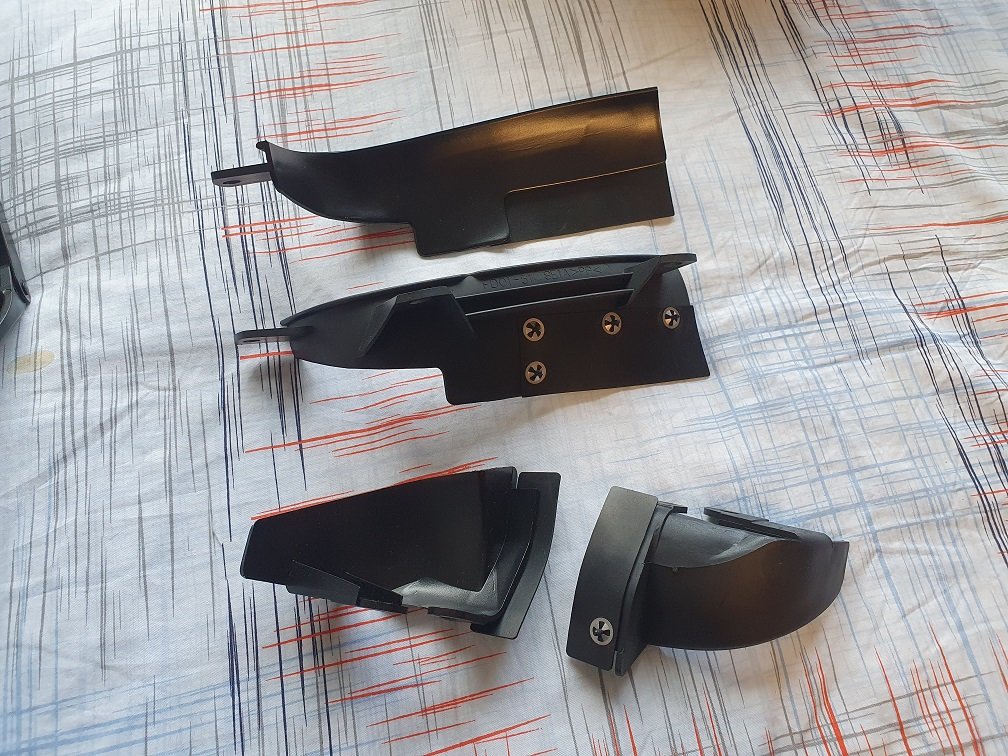
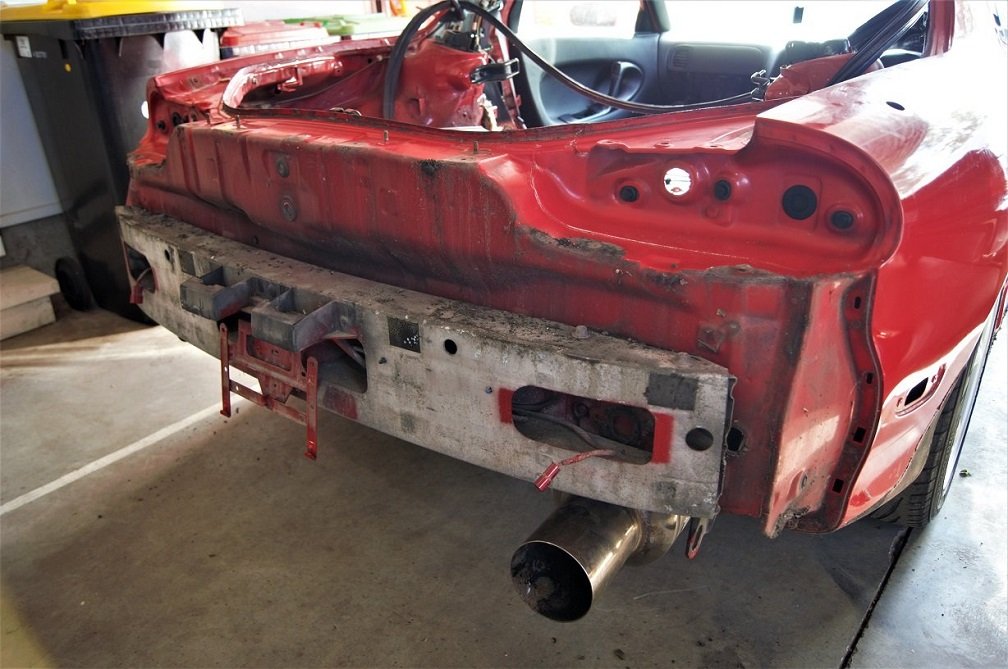
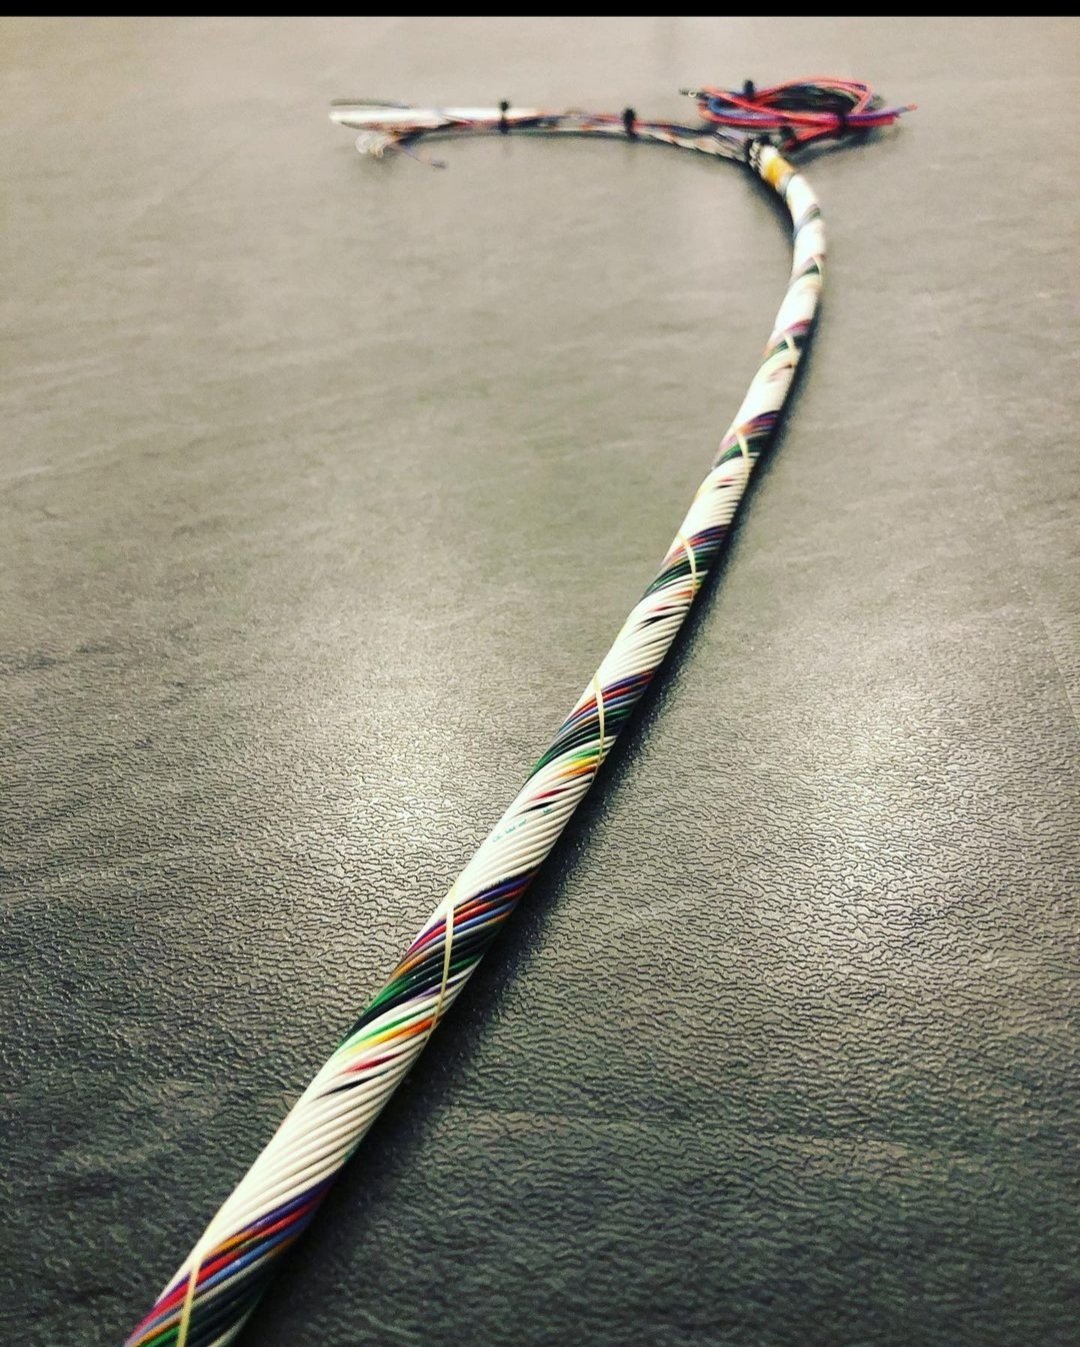
Have had a heap of work on over the last couple of months, so really haven't managed to get much done on the car. That contract winds up soon though, and I might take a break from the side hustle work for a bit and focus on making some progress on this thing. I have managed to find a little time this week to continue on with cleaning up the rear end though. I've also spent time researching and purchasing heaps of parts I know I'm going to need down the line. Had quite a bit of FOMO about stuff going out of stock and becoming NLA, so I've now got pretty much every single exterior rubber trim piece sitting in the closet for when it gets painted in a couple of years time. Wasn't cheap, the local Mazda dealer loves me, hah. I've got everything planned and ordered for the new EM harness, it's the last major piece missing that would make it a runner. I've been waiting 2 months for connector bodies and pins though, and the tracking is stalled in China, so I'm losing a bit of hope there, might have to reorder. I've never had anything not show up from Aliexpress, but a couple of times its taken 6+ months :-(. I'll eventually run an aftermarket ECU in this thing (Have a Link Fury sitting on the shelf gathering dust), but I'll build the harness to mostly factory spec (although much better materials) with a couple of additions for WB02 integration, and anything else I think of. Then I'll just make up adaptor headers if I want to change to another ECU down the track. I've got an original S6 ECU to get it up and running on, and a Power FC there also, so lots of options. Gotta say, I've never seen overspray like this thing has. It's everywhere and bloody ridiculous. The vapor blaster at work has been getting a work out this week! This is what it the rear looked like originally. A lot of the overspray is clearcoat that has dust and shit all through it. Terrible grainy texture and makes everything look permanently dirty. After some attention in the blaster though, looks much more betterer. I dismantled all the wiring too, cleaned, blaster and rewrapped it. Looks factory fresh now. Also the the impact foam, as it was basically black with a reddish tinge. Looking much tidier, you know for something you'll never see. In with my latest order from Mazda were the rear bumper brackets that had rusted into oblivion. One day soon I'll reassemble that and get the bumper skin back on there. I've been in contact with Racing Beat about their twin tip muffler, as it's the only muffler I want on this thing, and they're currently out of stock of the center section (which I also need). They said to check back later in the year. It'll be spendy to get it over here, but ultimately worth it I think as I'll never have to worry about an exhaust again. I sourced a replacement rear spoiler for this, another stock S6 one as I really like them. The one that was on there was cracked, and had been glued on with some terrible bathroom caulking like shit. I had to smash it to remove it, as it was the only way I could think of without risking lots of damage to the boot lid. As it is, the paint on the boot lid suffered, so will get a super dodgy touch up in the meantime. While I had the trunk trim off I chucked some power on the rear wiper motor. It drew lots of current, and was really slow. Popped it out and the was like a ball of rust inside, super gunked up. Blew it totally apart, gave everything in there the big clean, reassembled and now it's like a new one :-). Ready for refitting. While I was in the mood for a couple of little jobs this week, I grabbed some plastic trim pieces from the engine bay. The air guide pieces that go around the headlights were just awful. Red overspray and trapped dirt, with all the rubber pieces attached to them brittle and cracked. Disassembled, cleaned up the plastics and painted them with CRC Black Zinc, as I find it adheres really well to PP plastic as long as you do light coats, and gives a nice OEM looking finish. I scanned the remains of the rubber pieces, cad'd templates and laser cut some new ones out of some rubber sheet of a similar thickness, then put them all back together after tuning up the speed nuts a little so they would grip again. Also ready for refitting. While satisfying, none of these little jobs do anything to get the thing closer to running or driving! Really need that order of connectors to show up! Might have to bite the bullet and reorder from another supplier. If these ones show up later, I can always make another harness and sell it I suppose. Will be back into hiatus on this for the next couple of months while I 100% finish up this contract, then make some more progress over the Christmas break I hope.
4 points
-
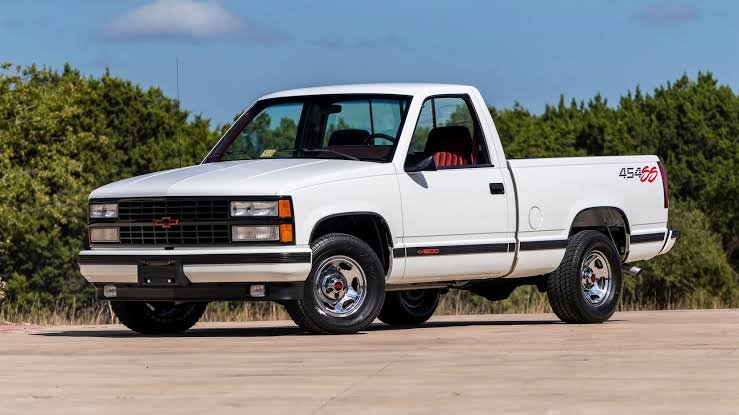
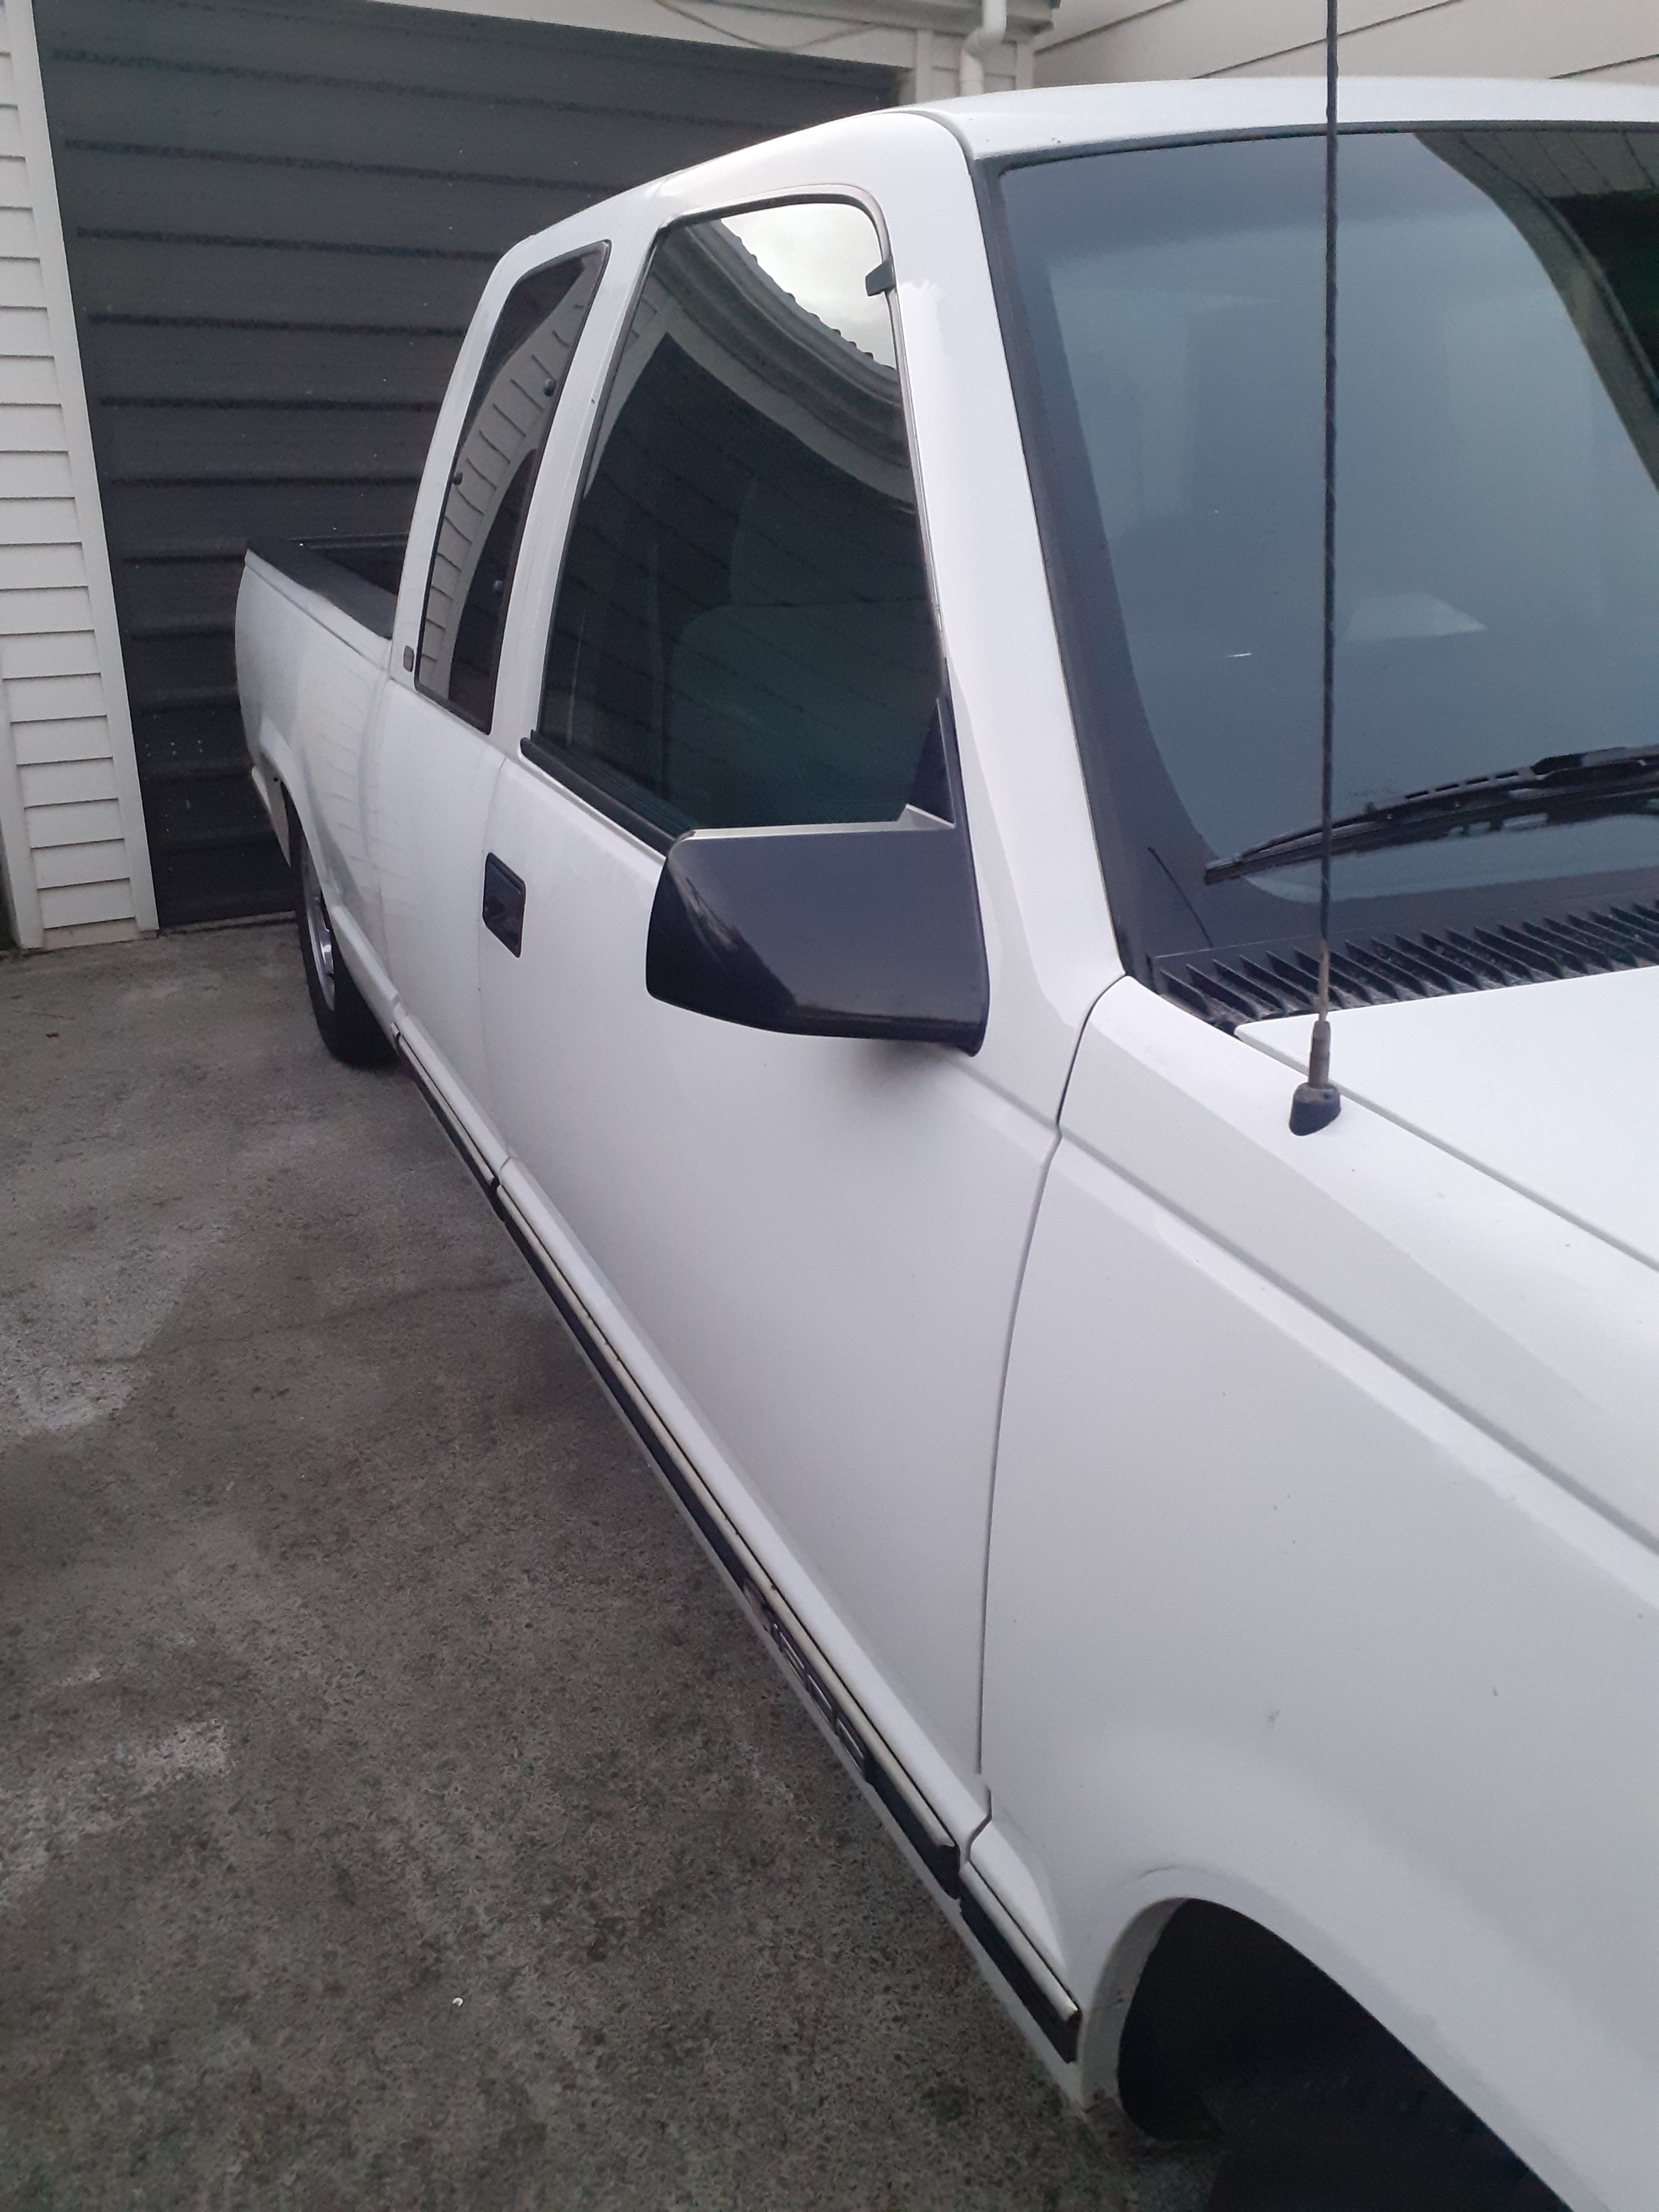
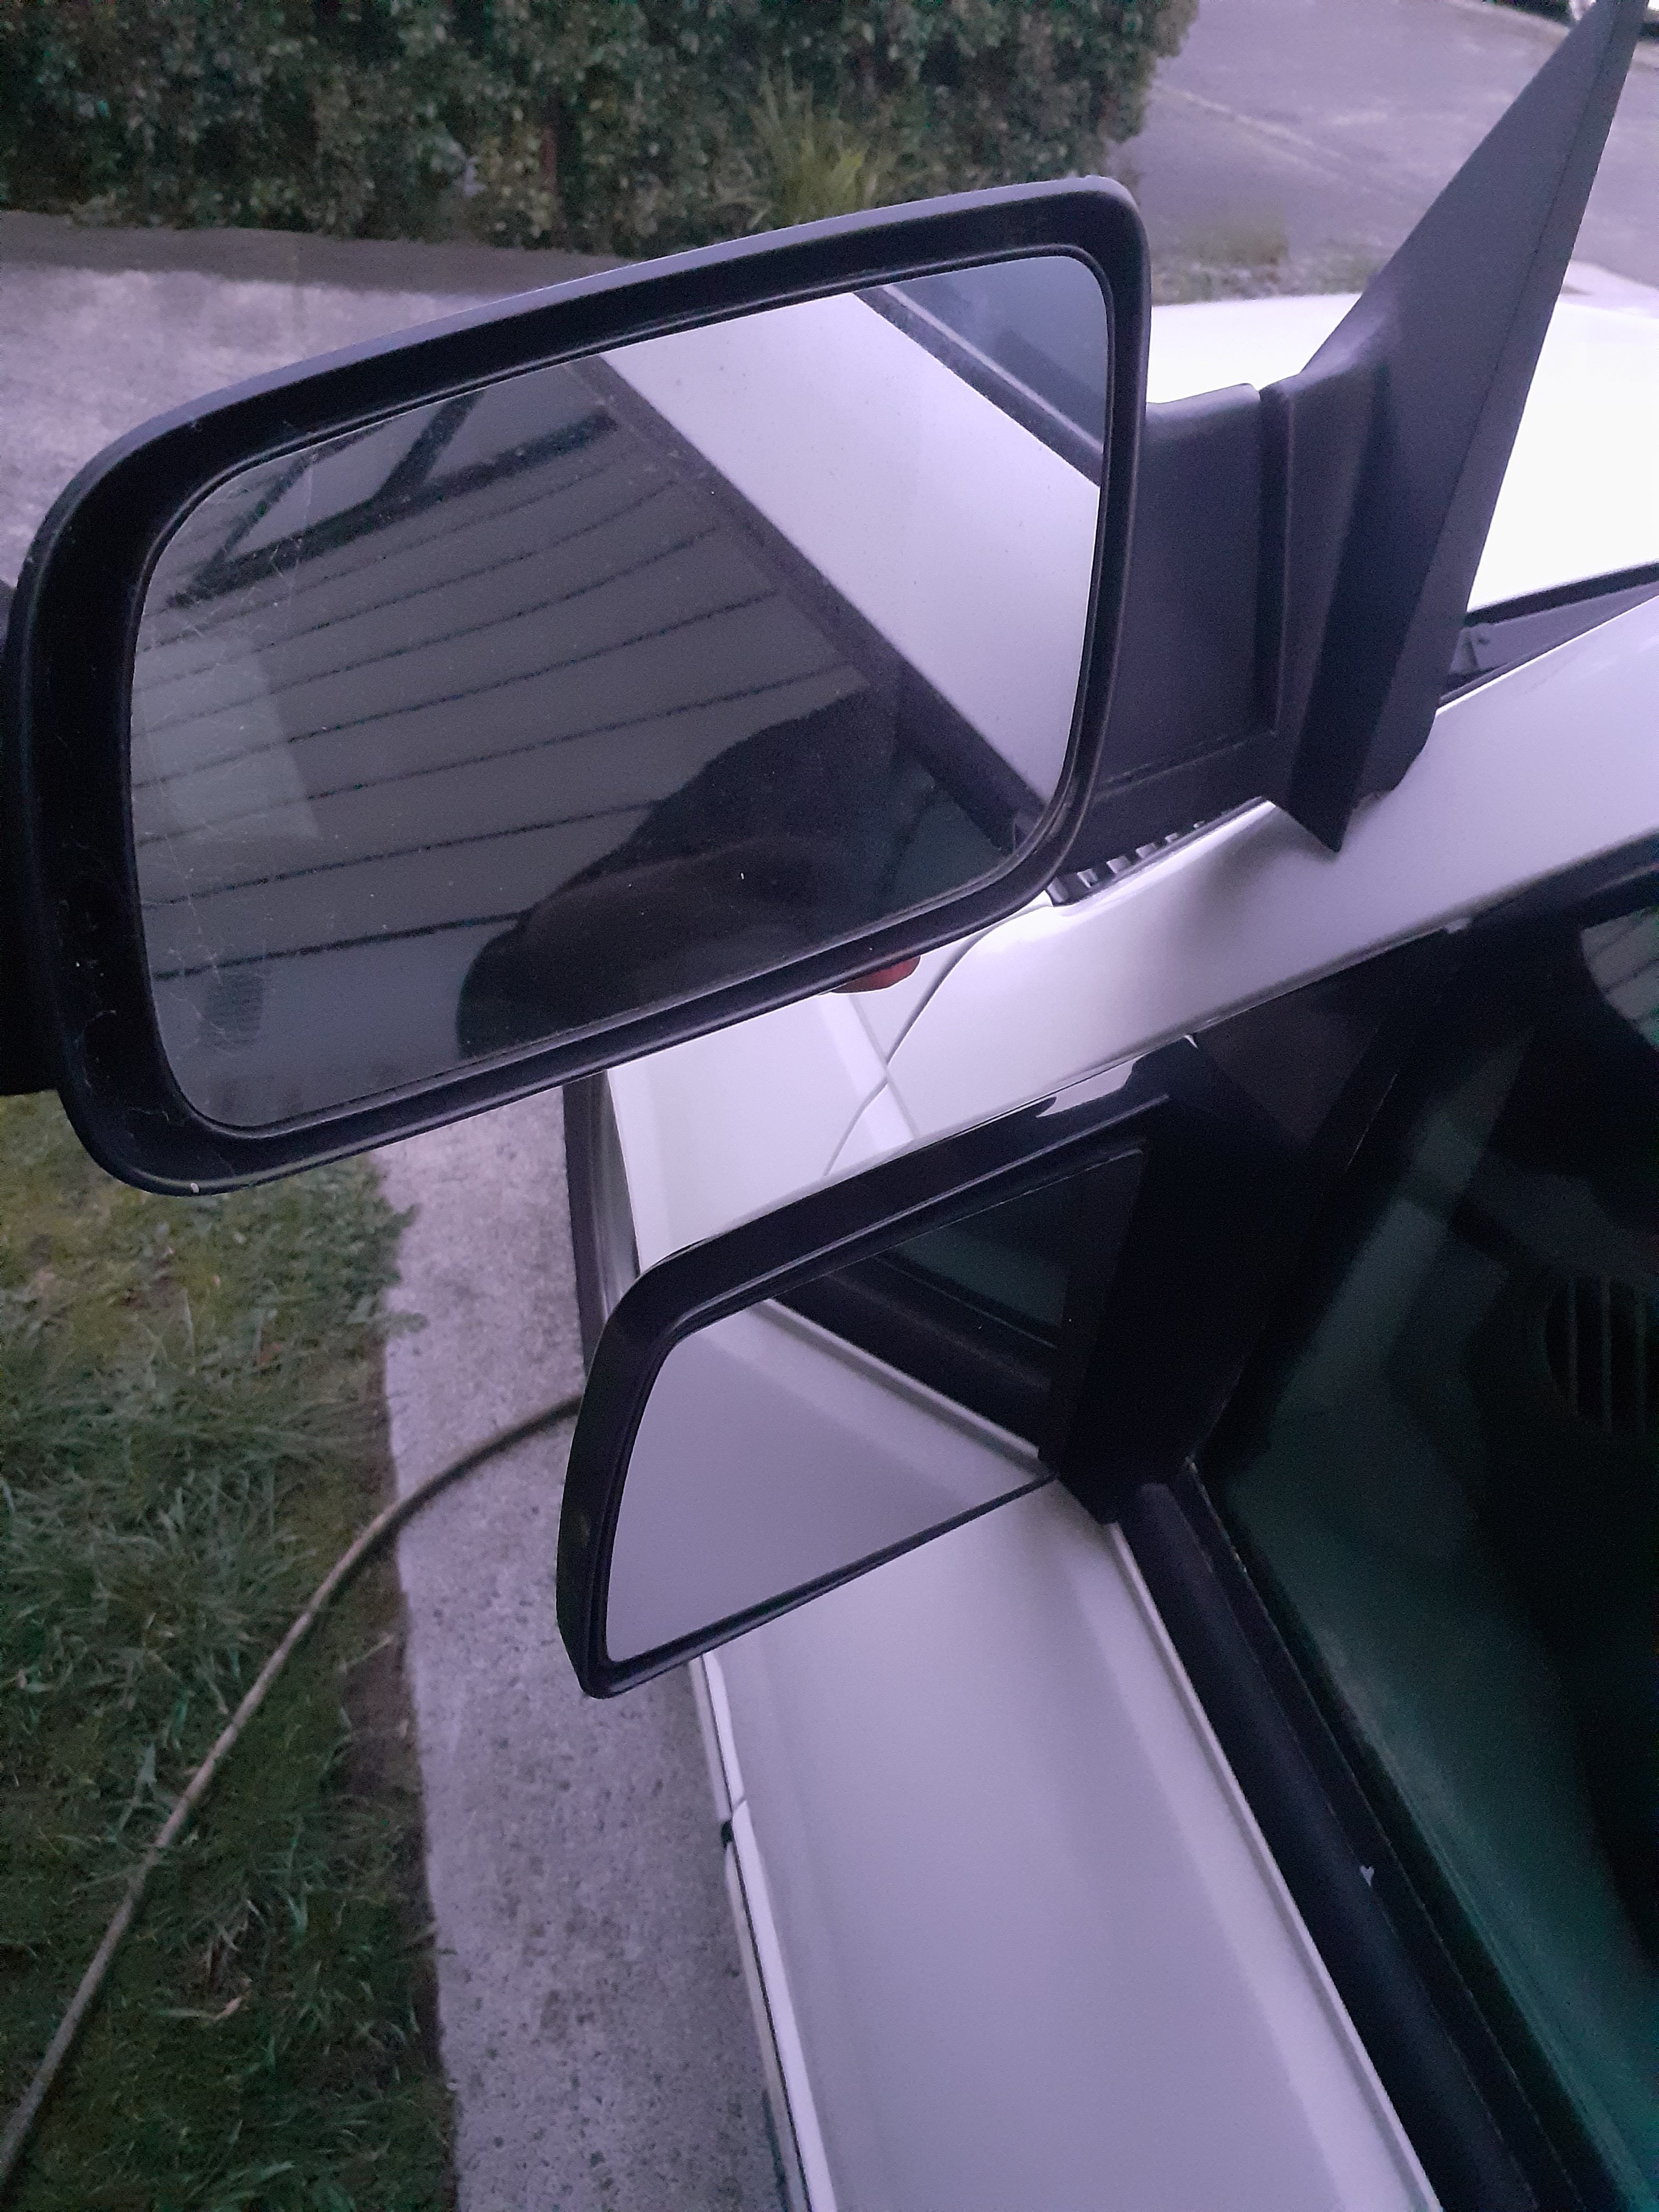
I got some different mirrors. These are "sport" mirrors. They were standard on 454SS trucks , with the powerful bathurst winning two hundred and thirty horsepower 7.4 litre engine coupled to a 3 speed automatic transmission. These were well known as being extremely fuel efficient, Toyota copied the fuel injection system for the first gen prius and were not able to get the same economy on petrol as the SS I have a theory that the SS's incredibly low fuel consumption is because of the small mirrors so I'm expecting to get a result where my 350 actually makes petrol go back into the tank. Also now I can't see behind me as good but I don't care because I'm not living in the past maaaaan
4 points
-
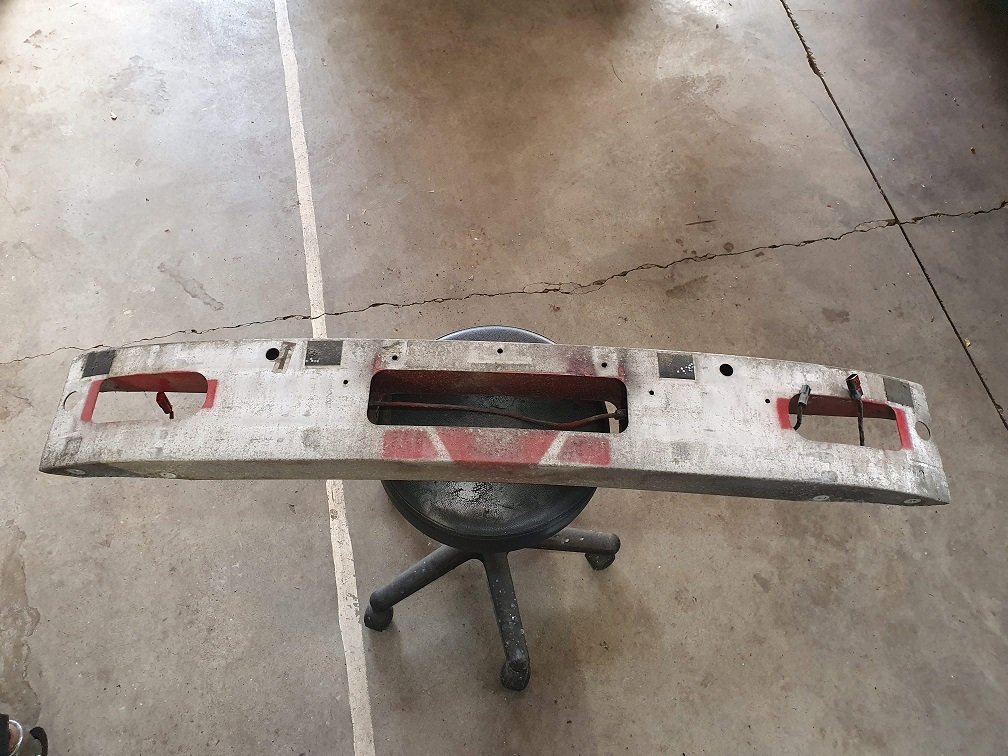
I have been chipping away at this over the years - latest job has been to undo the awful job I did install a brake booster. Putting the bulkhead back to stock and I'll find another spot for it.3 points
-
Having the receiver hitch front and rear with cunningly planned wiring means a single winch can be used for recoveries in either direction, with the winch just set up on the cradle. Was something I thought about with my project but decided to just go with the more usual bumper mount as I had the space.3 points
-
I should update the post to explain: The roof in one of my trucks leaks. My delightful staff members put my mulitmeter in a bucket and chucked it right under the leak, so I got a new multimeter sent over It was that new MM which was telling me 6v batteries had ~ 12v charge EVIDENTLY one needs to turn the knob to DC rather that AC (not that it says either DC or AC on the MM face) or else one will see roughly double the battery's voltage on the display I went back, retested the EV and have tentatively diagnosed one dud 6V battery (the one a 12V sprayer was hooked up to)3 points
-
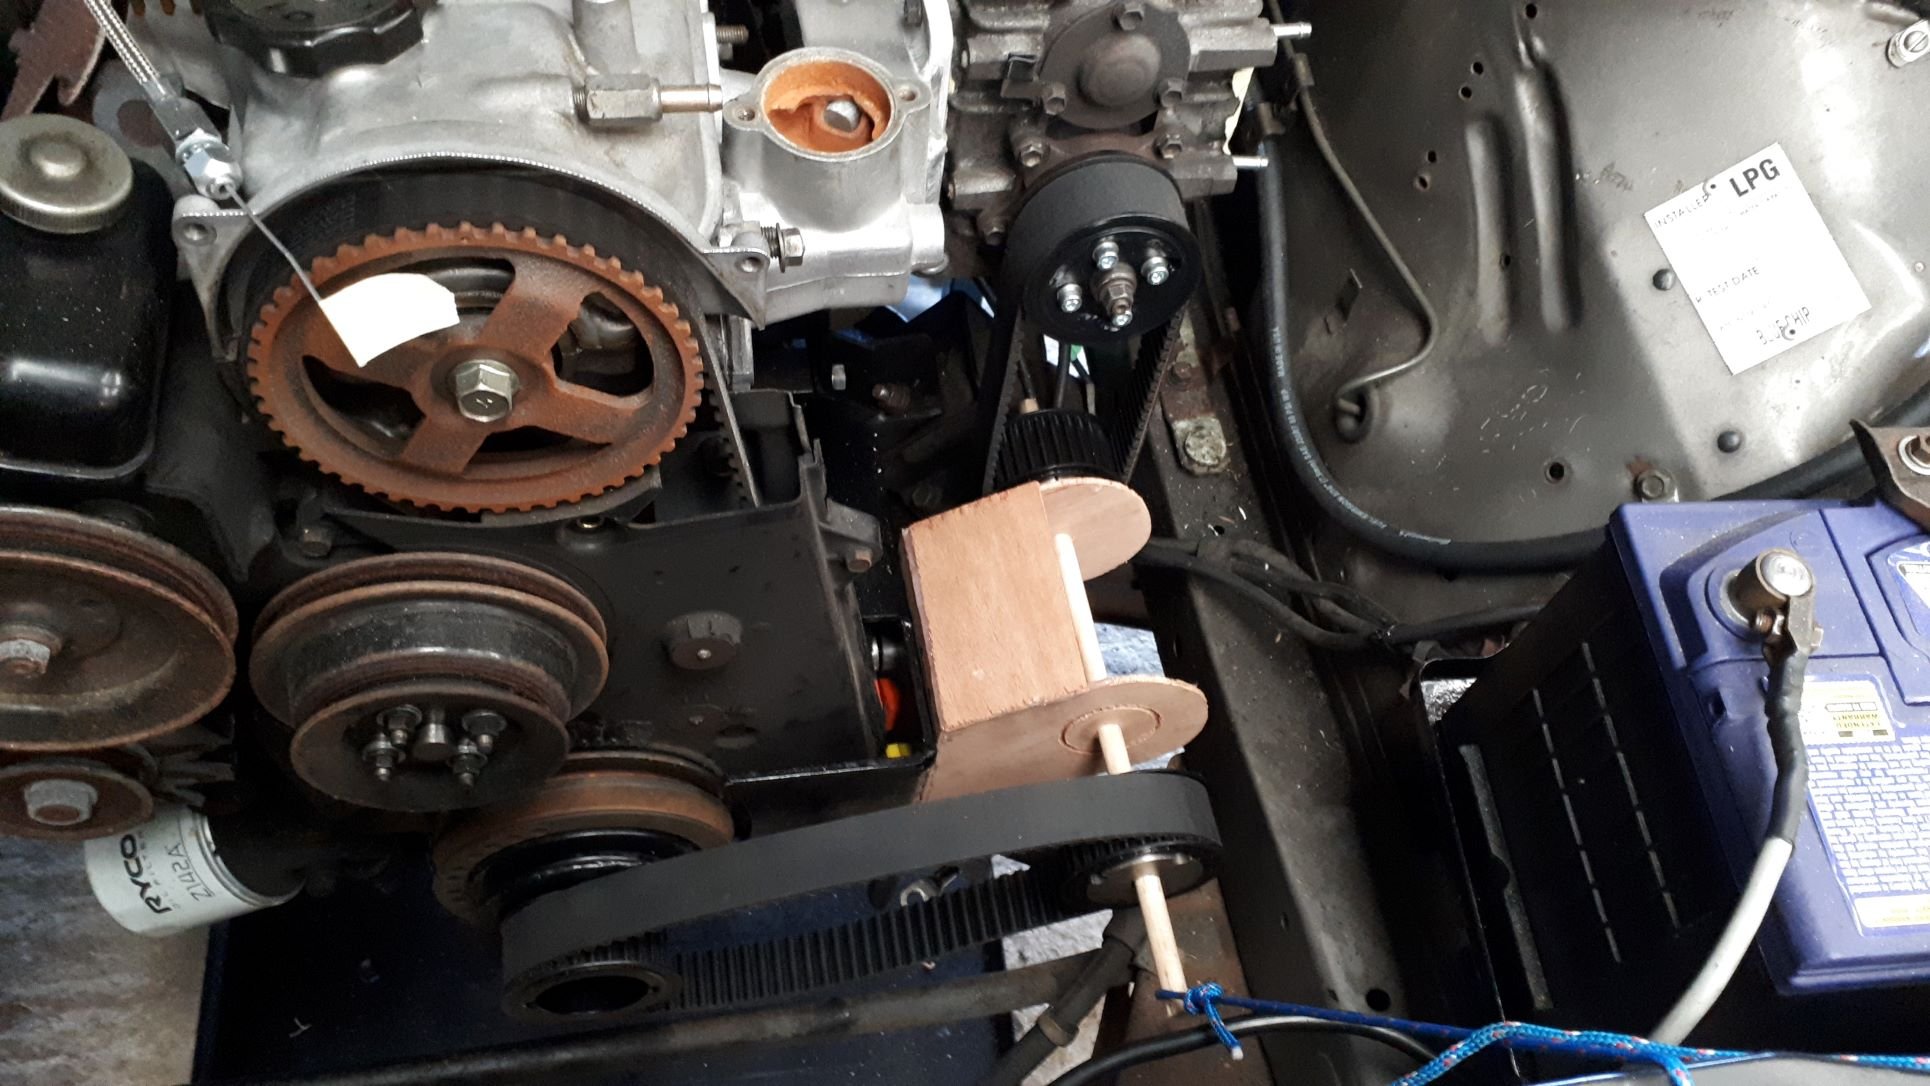
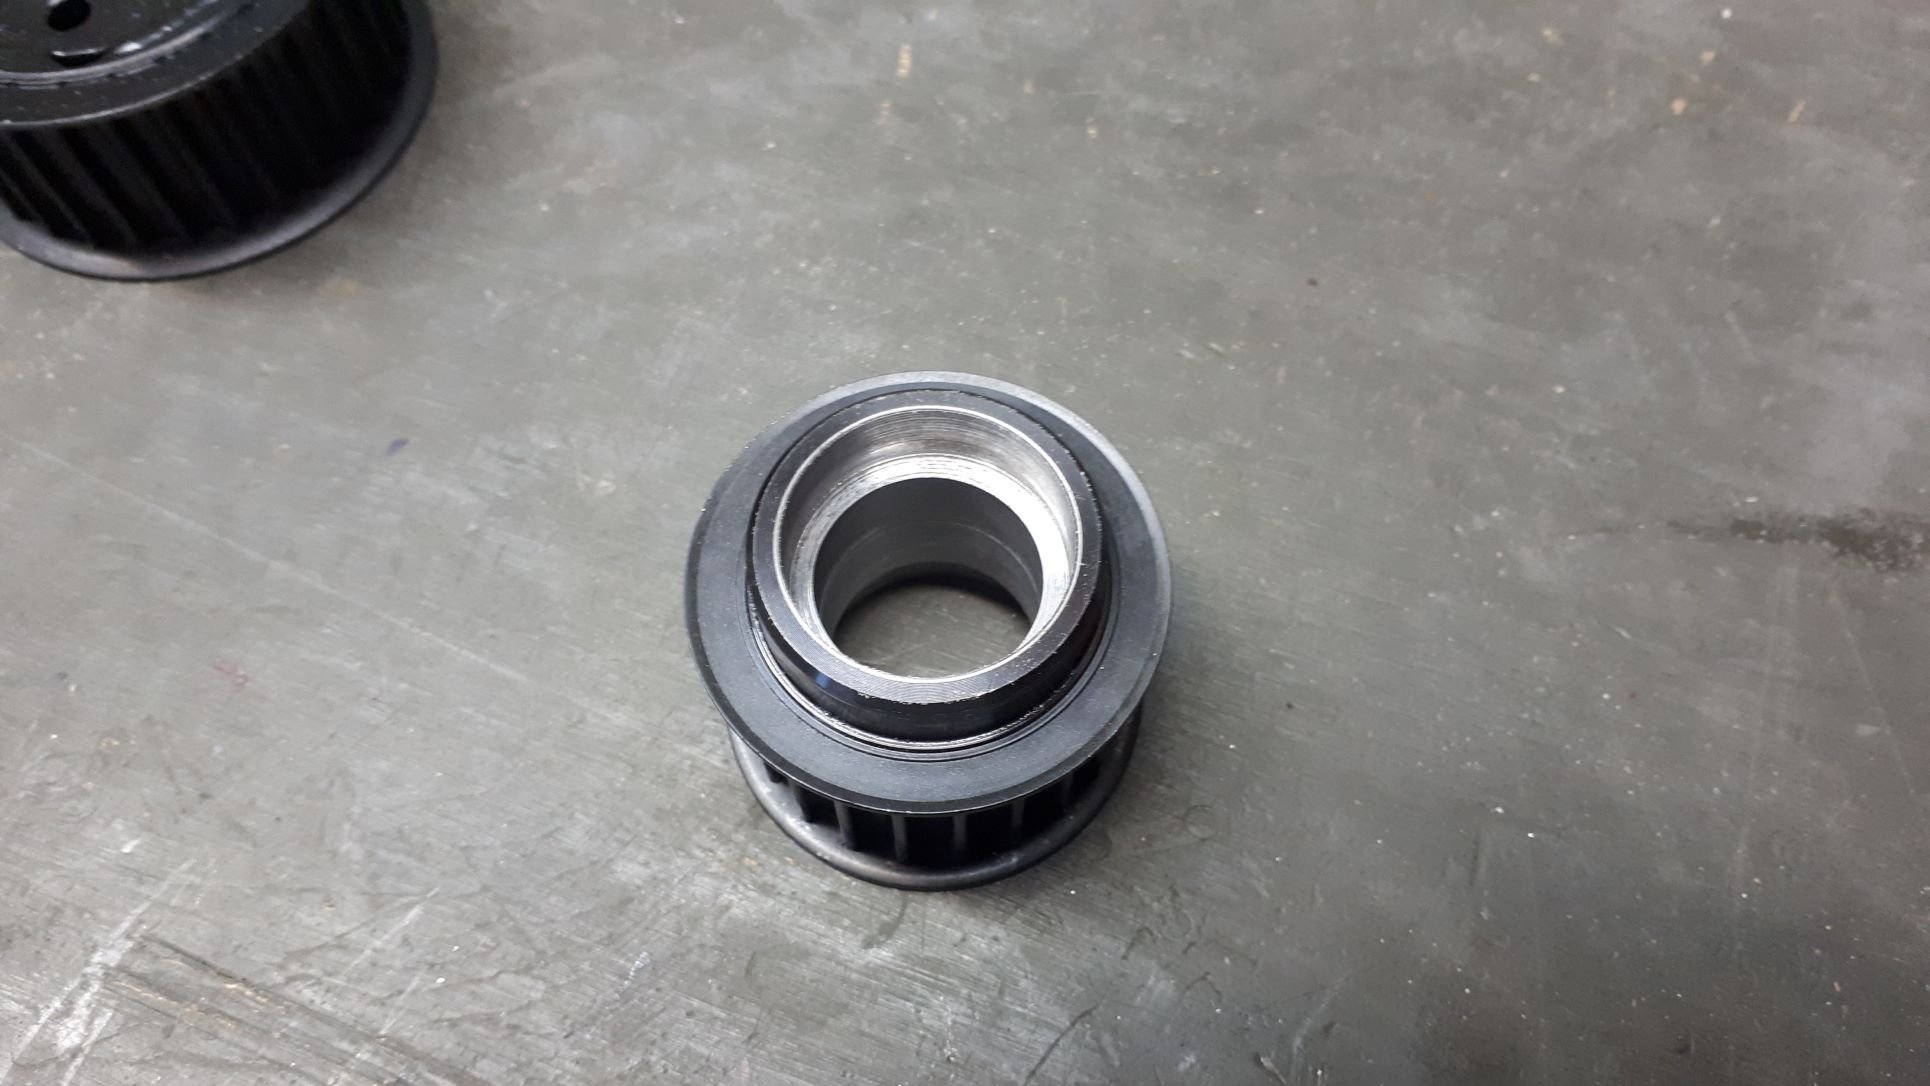
Now to figure out how to get drive from the crank to the supercharger. This was always going to be just a little Heath Robinson involving 2 belts and a lay shaft to bring the drive aft about 180mm. I mocked it up using thin plywood, hot glue and a piece of dowel and after a bit of mucking around I have the basic dimensions sorted. Now I can start fabricating something more substantial in steel. I also machined up a small pulley to accept bearings, this pulley will be the tensioner for the lower belt. The upper belt shouldn't require an additional tensioner as I can tension the belt when I position the lay shaft assembly. I am expecting this drive set up to be very noisy indeed!
3 points
-
There shouldnt be any hate, that shit is cool. I have been pondering EV converting my townace ute for my next major project. Here is one i looked at a wee while ago, boy has done a super nice job.3 points
-
Also this week I modded the towbar to be a receiver type, the towball was sitting a wee bit too high, the last time I hired a digger we had to fork the trailer up onto the ball. Now it sits lower and can be lower again if I need it, but the bare socket is no lower than before. Im just waiting for some pins to arrive.... Then as I had some 65x6 box spare I added one to the front, along with a shit-ton of bracing. If I ever get a winch I will just mount it to this. You can also see the extra strop hooks I added a while ago.. I have two separate leads on short blocks, if either comes through I will be cranking that rebuild.3 points
-
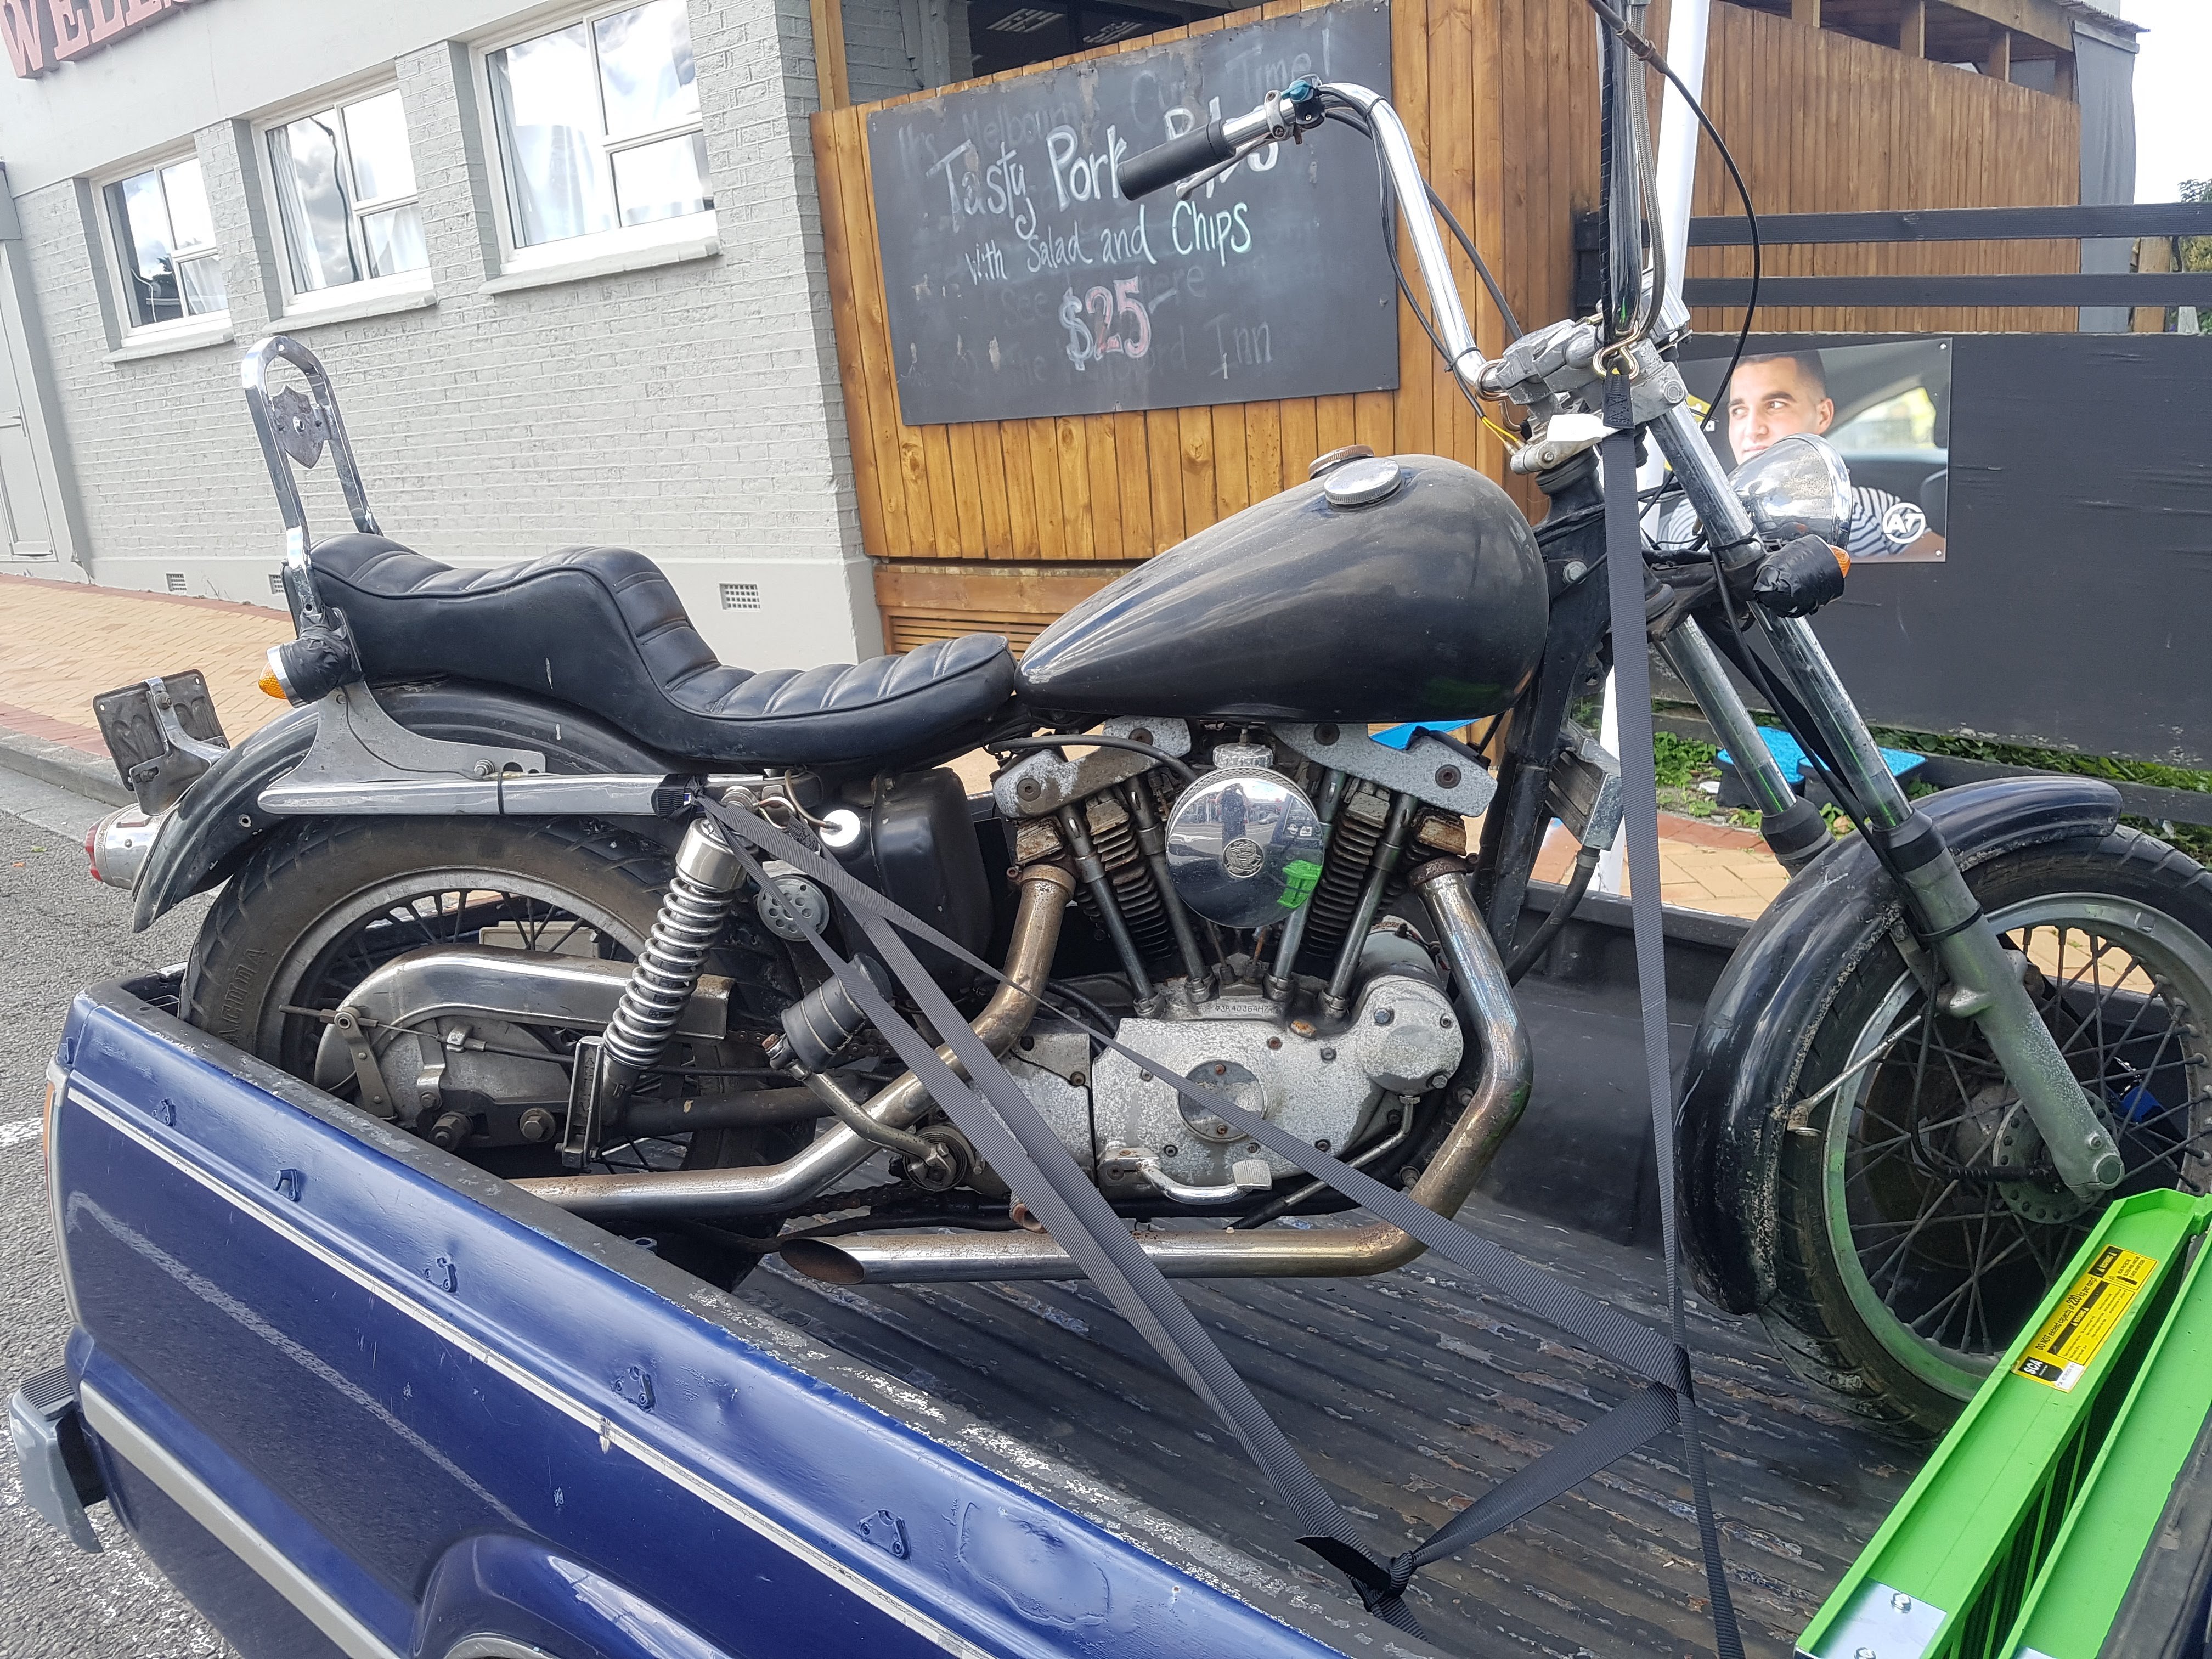
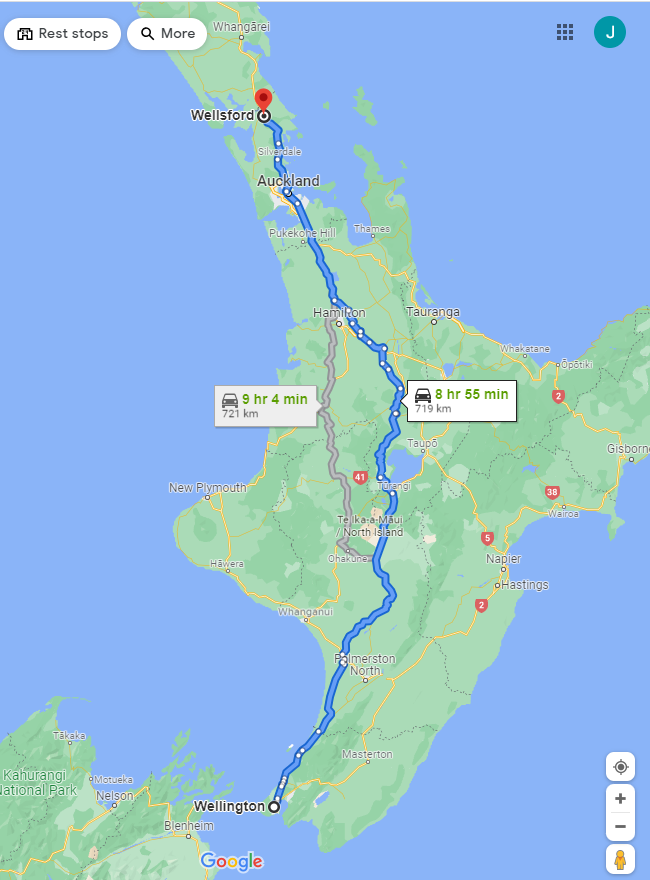
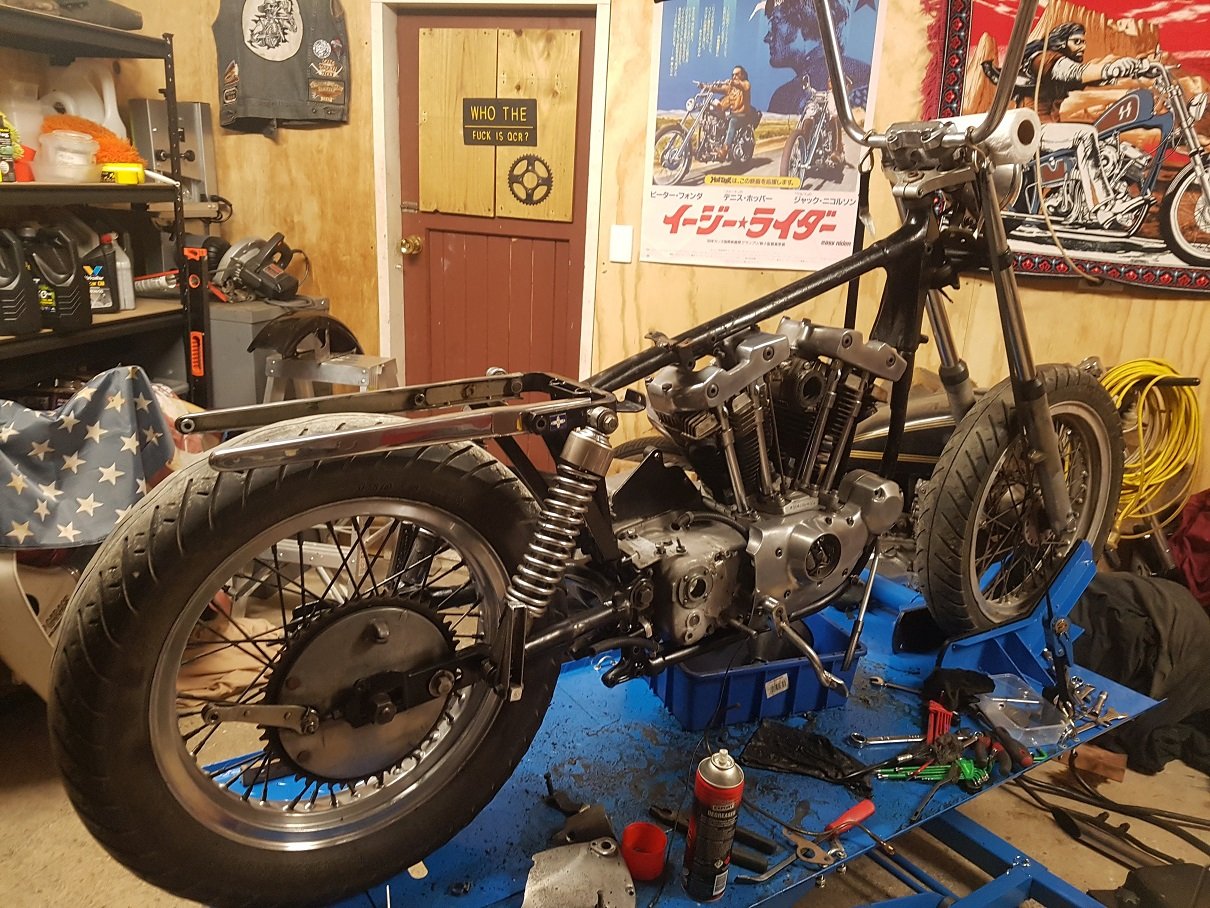
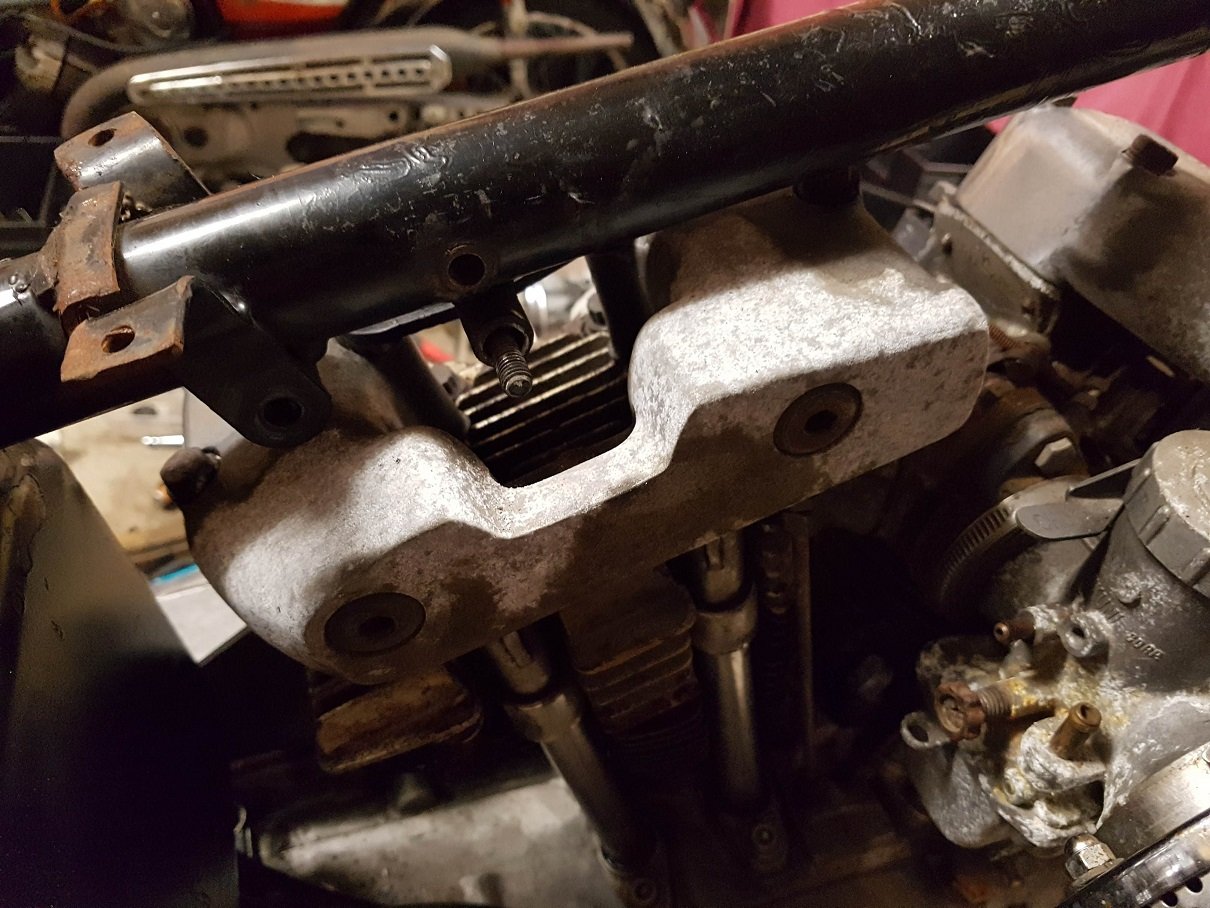
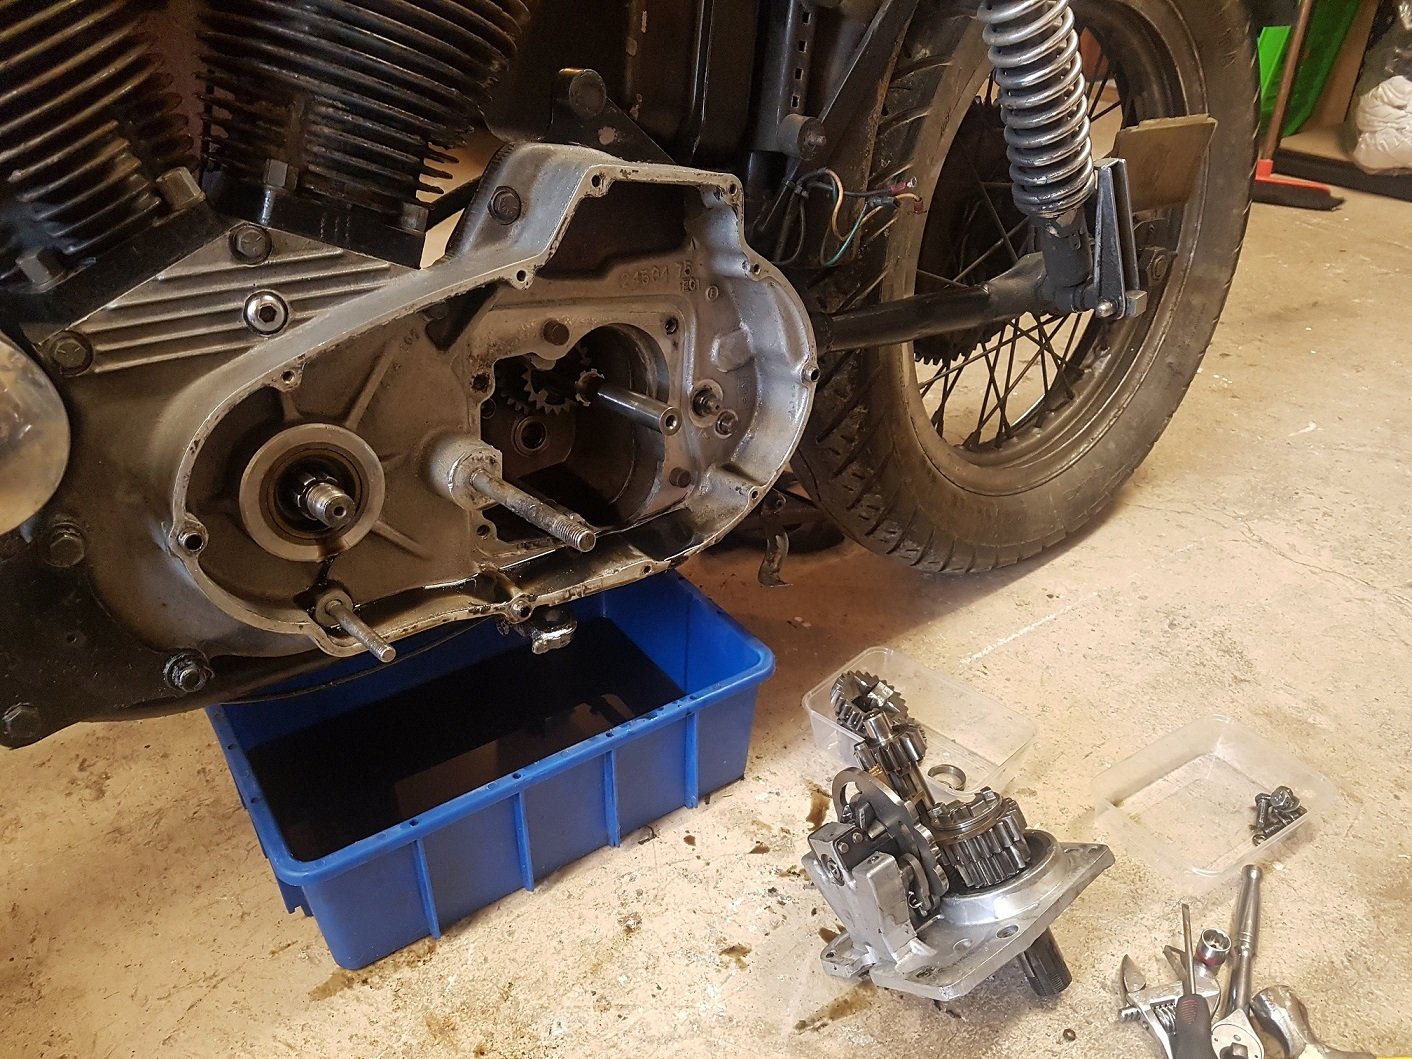
So yeah, many years ago I met this cool dude called Chris. He lives in Christchurch. Apparently he was a born loser, but I liked him anyway. It turned out he was a bit of a badass, and was into the devils bikes. He had an Ironhead Harley. A handsome dude with a handsome bike. I was in love. Every time I'd call in and visit Chris, id have to pop into his shed and sit on his Ironhead chop. It was just the coolest thing. I knew I had to have one. Fast forward a few years, and an auto bid on a friday night. And I had purchased this non running, broken gearbox, POS. Yay, just what I need. More projects. But I enjoy self inflicted misery. So yeah, cool one. nice. Took my shitter of a ute all the way from Wellington to Wellsford to pickup this turd. Had my dad rolling up with me. We share a love of misery, projects and motorcycles. So both were equally excited at the prospect of acquiring another non running project. Both of us never thought we'd see the day when either of us would buy a Harley! Low and behold, April 2021, I became a Harley owner. Who would have thought. Made it all the way home. What a mish. We stayed in cambridge. But boy, a lot of driving in a turd of a ute. A relief to have it back in the garage. I'm sure the Harley would appreciate its new stable, adorned with French vehicle memorabilia, and sharing its space with and Italian stallion Laverda, a Miata, and some of japans finest 2 strokes!
2 points
-
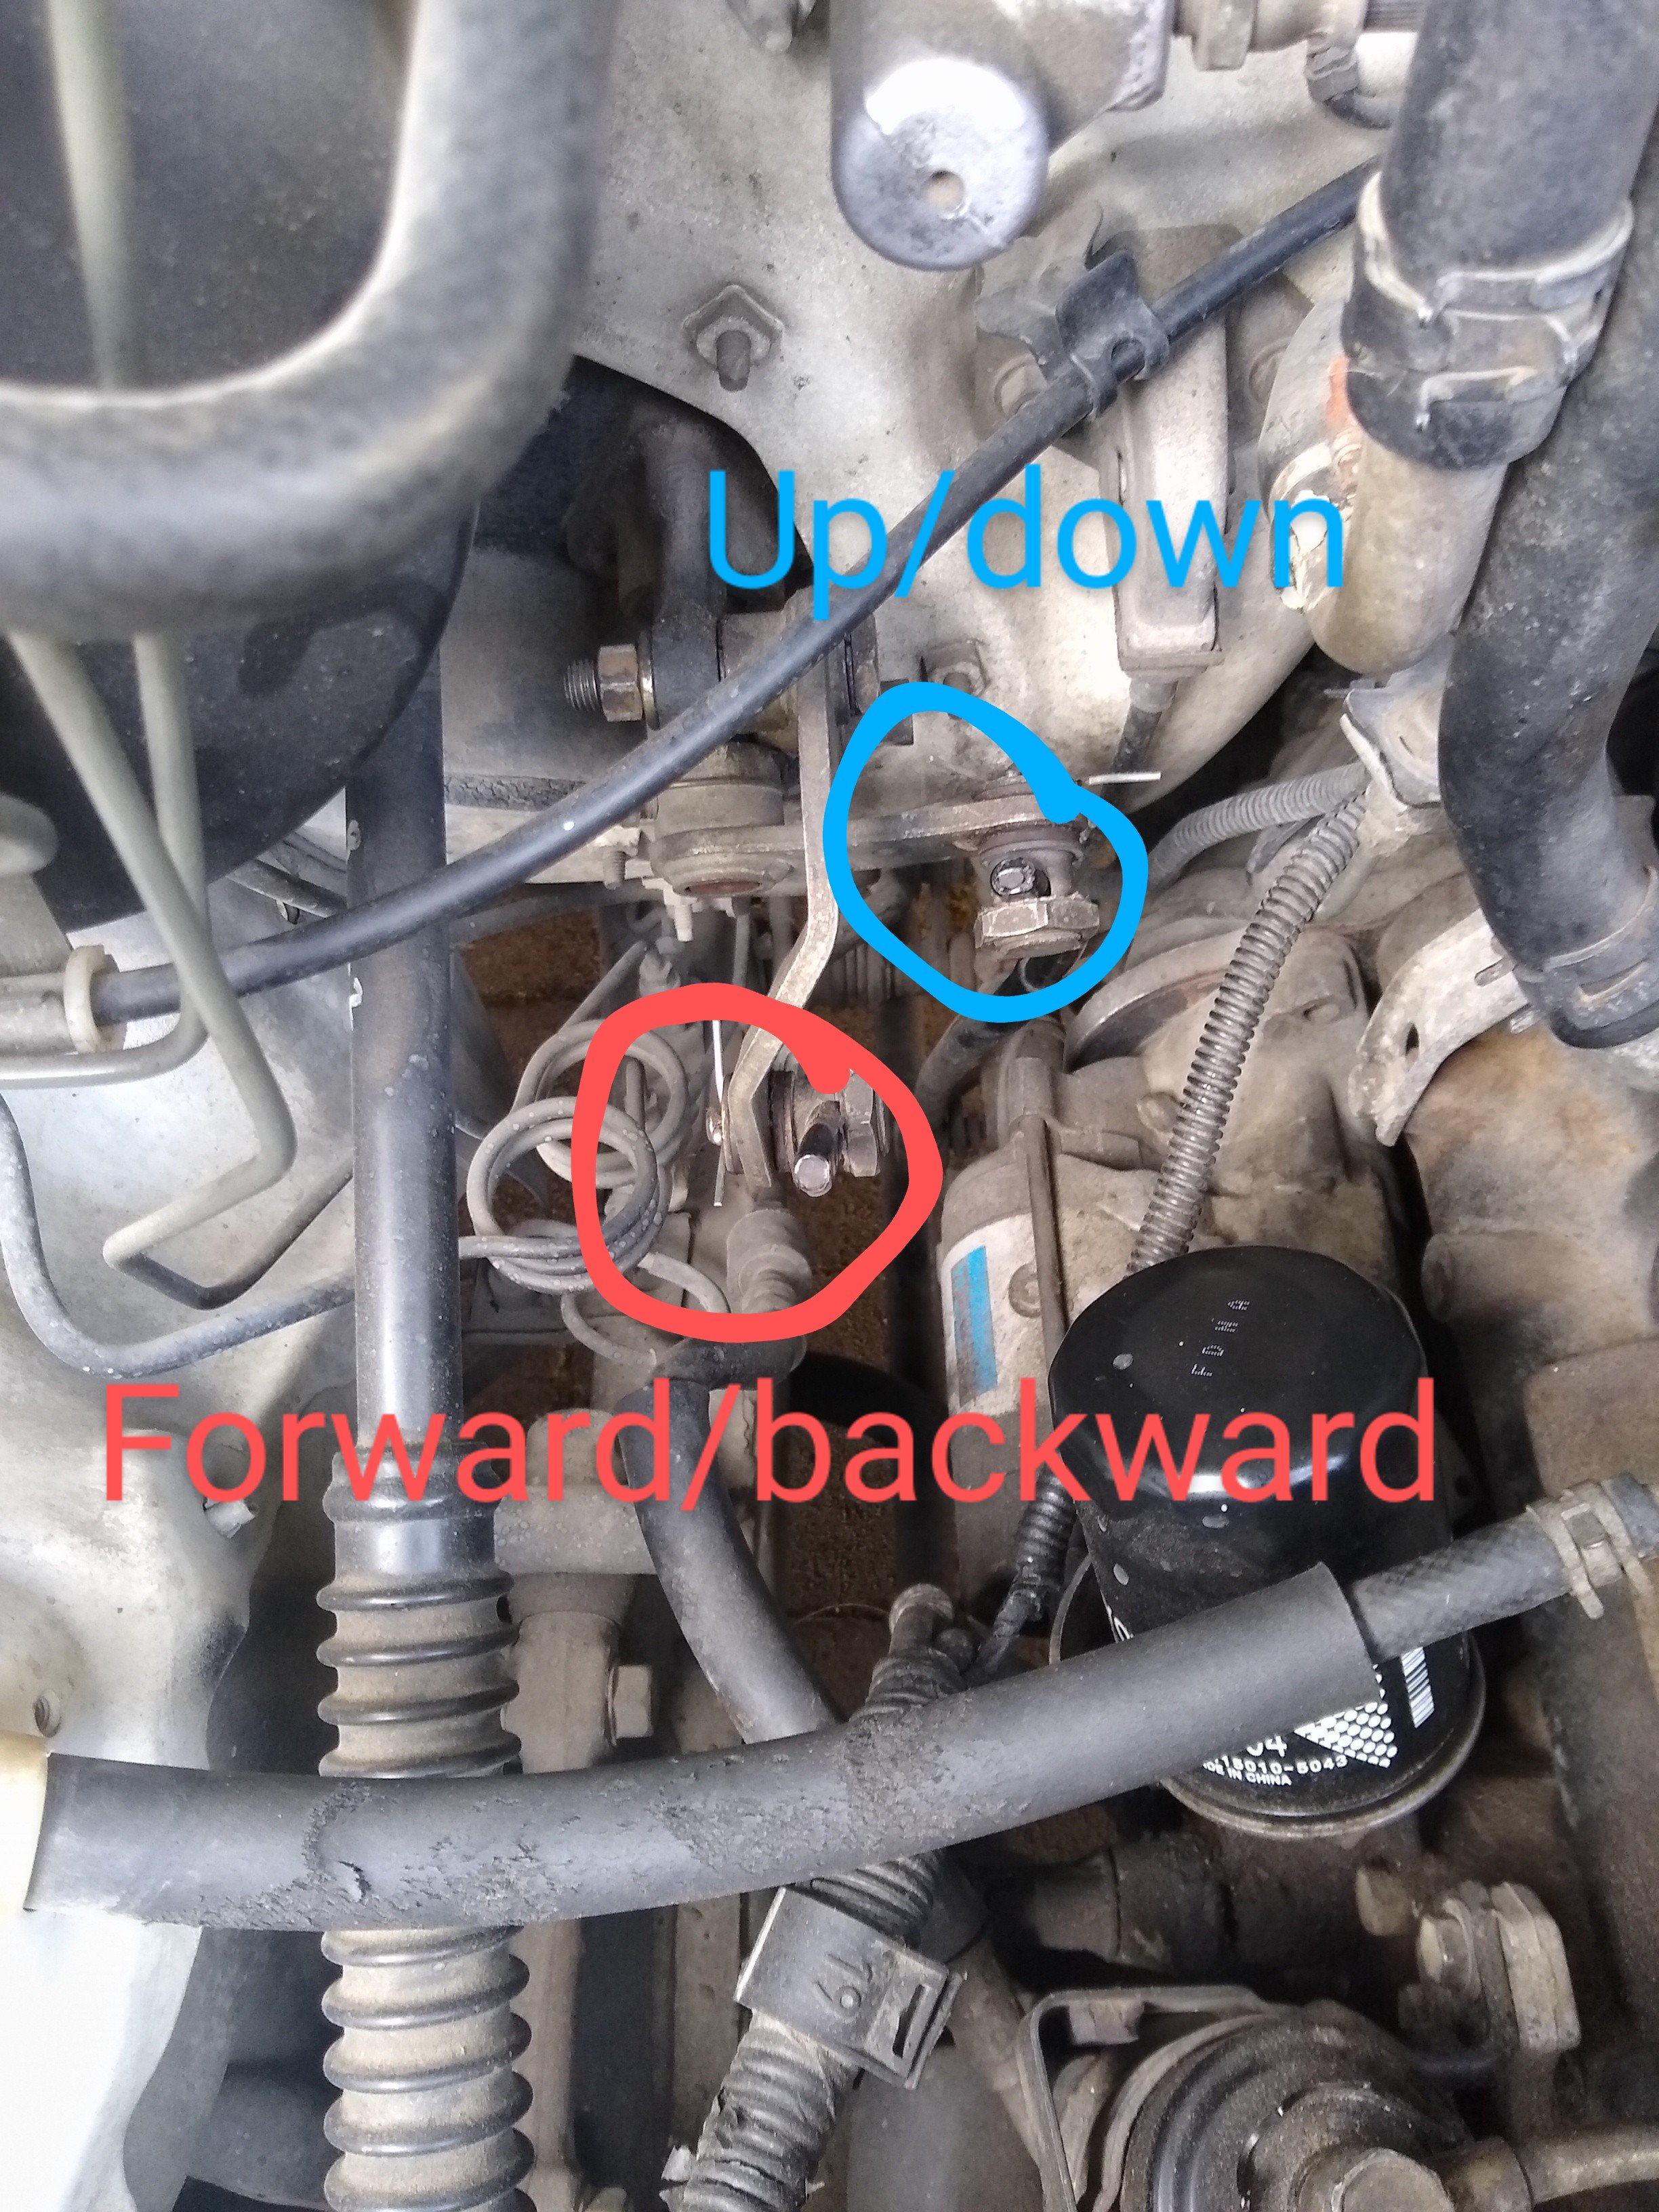
Fixed it. The linkages have just worn to the point that the gear selection was too far towards the dash and the shifter couldn't move far enough I just adjusted one of the shifter rods to pull all the gears closer to the driver (red). Now shifts beautifully Just used a 24 mm socket to loosen the clamp nut and pulled the rod up about 10 mm
2 points
-
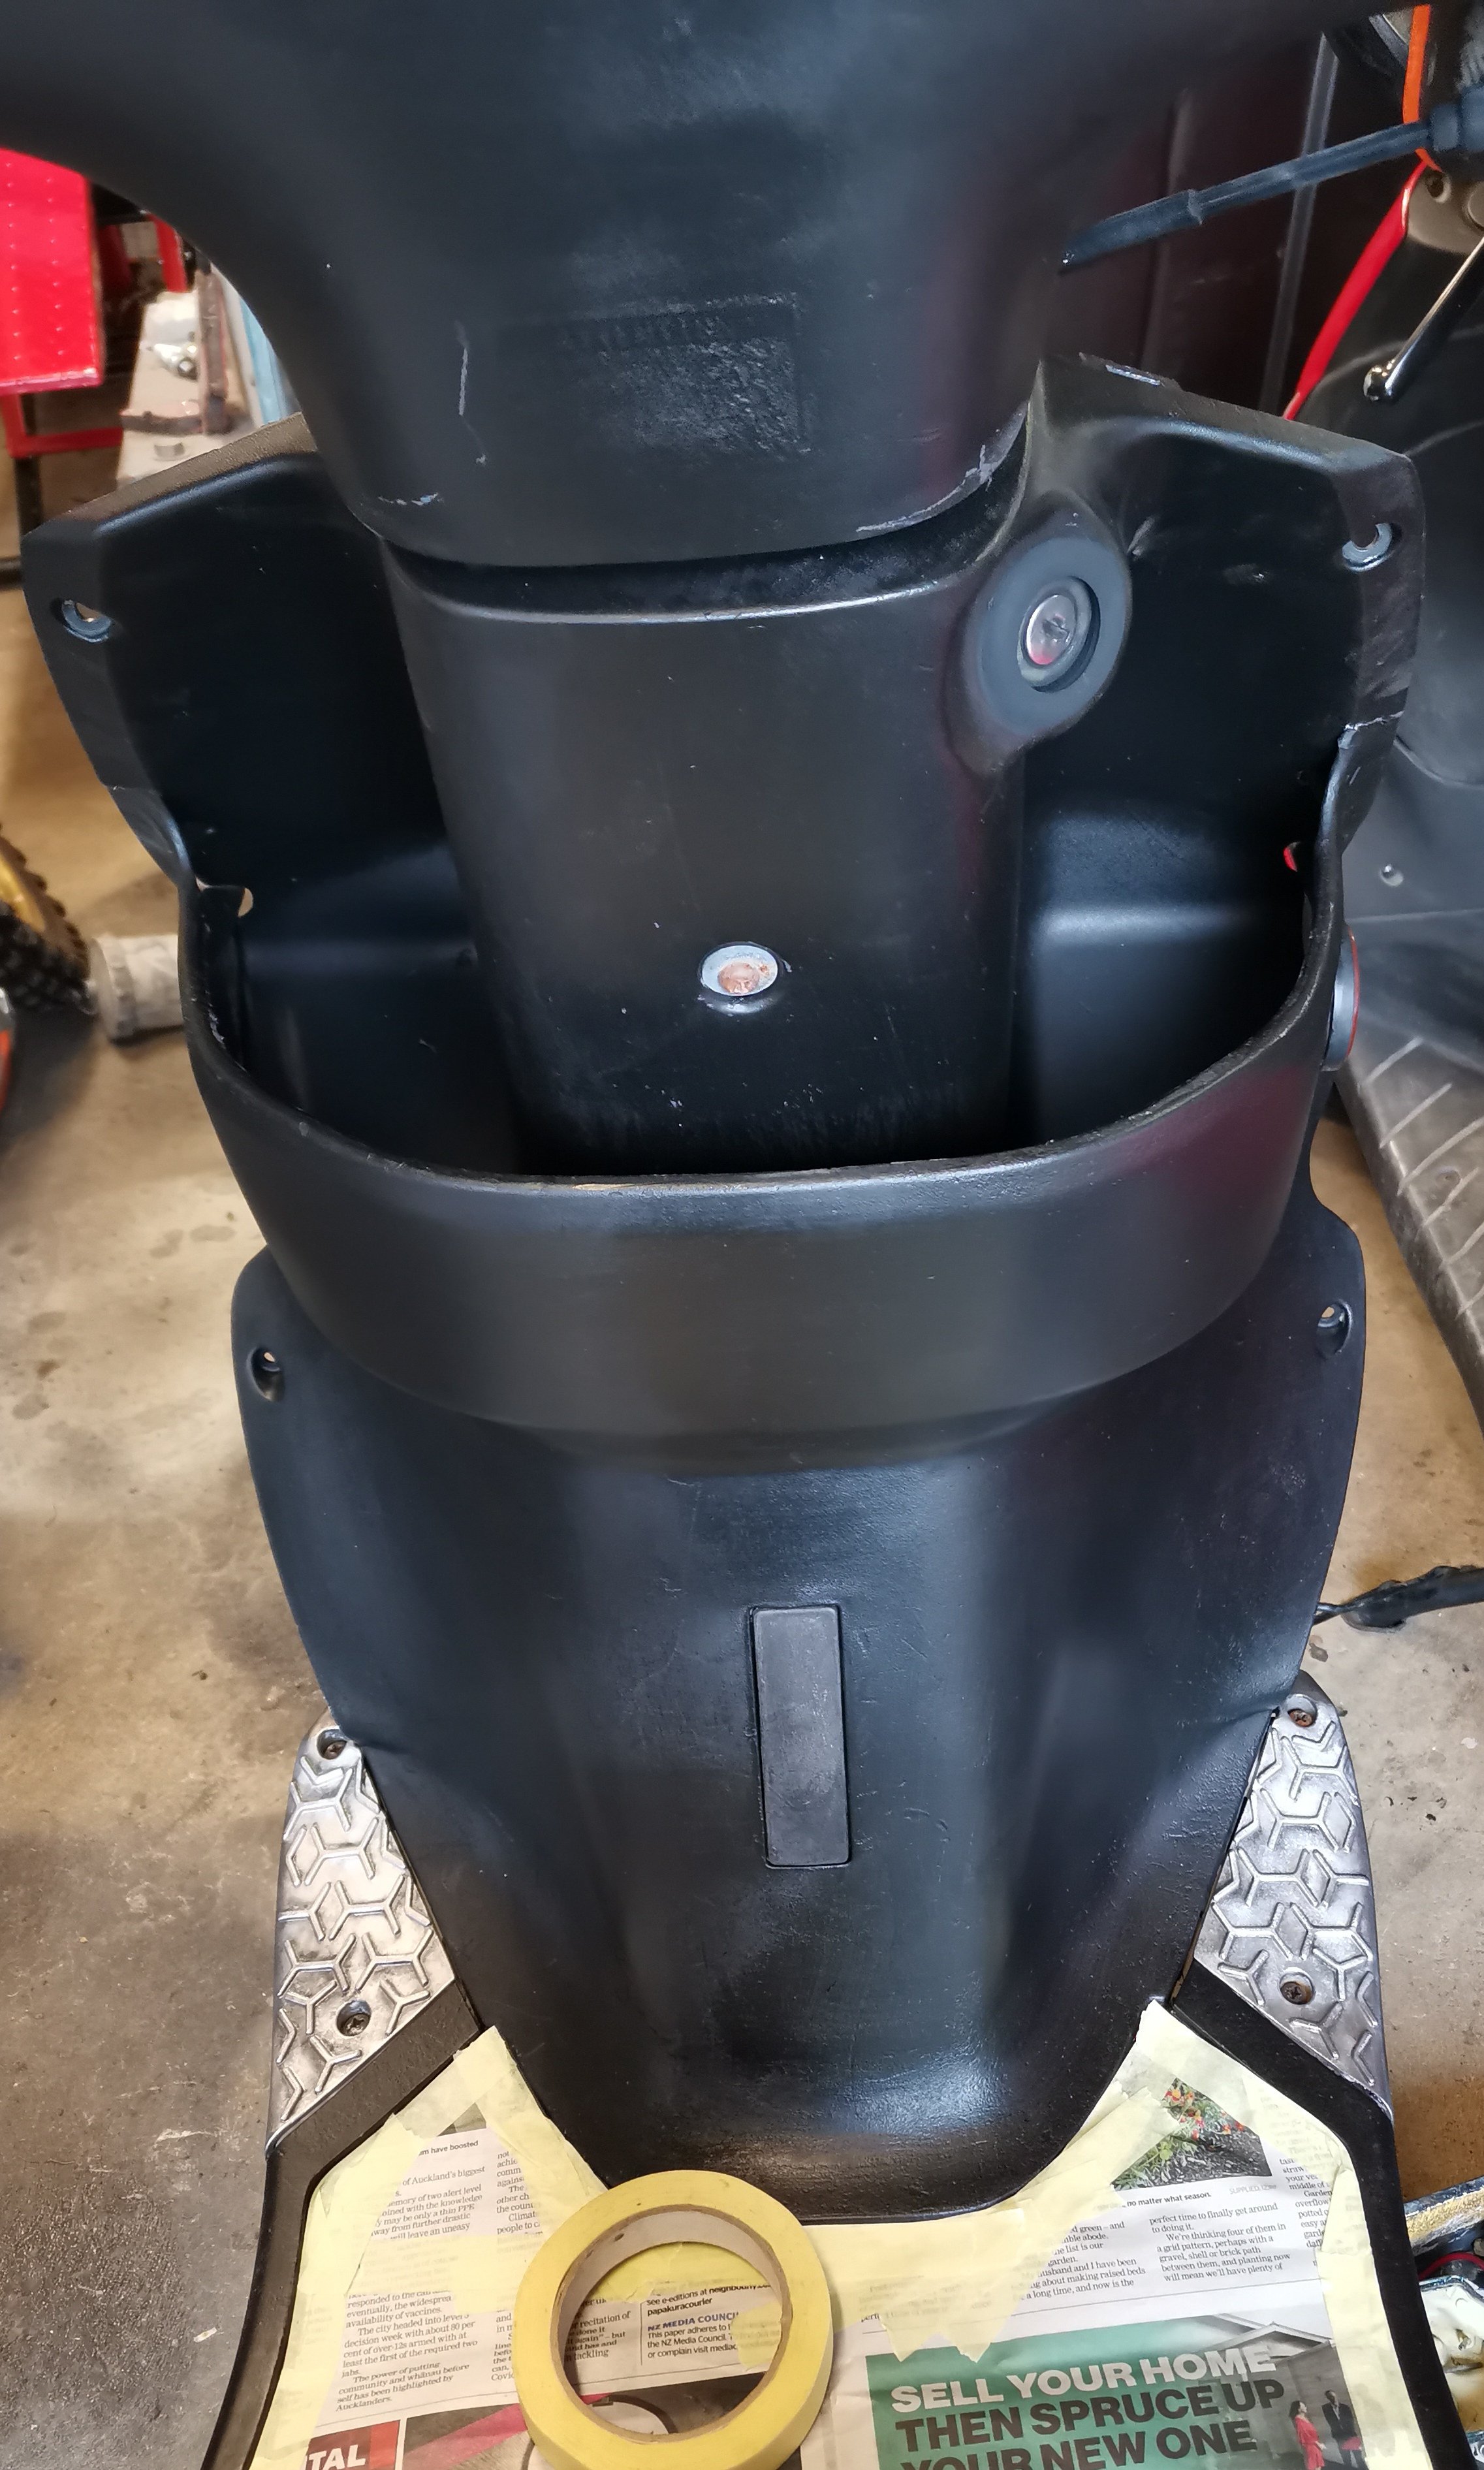
Will add some other photos in the sun tomorrow. But - my experience It smells like rotten eggs, but not once applied Some surfaces instantly turn black. Smooth stuff like the airbox took it really well, just barely a touch on the brush was enough to bring it back to deep black The other plastics were kind of hit and miss. Even plastics of the same kind and similar locations had slightly different results. This bike was real bad, faded fully to white in some areas, the indicators for example. Chalky finish. All I did was wash the bike with simple green, then brush the crc tyre black on. Soaked right into the seat cover and looks great. The inner Fender and air box, one coat. Everything else took 2 coats for good coverage, then a third to dab into the spots that didn't want to take it. Sometimes the additional coat would lift the previous, in little bits like sand. Streakyness wasn't much of an issue, it seems to self level and soak in. But as I mentioned, some places did need additional coats to hide brush marks I left it out in the sun all day, again a bit of a mixed bag, some stuck on really well (jialing Fender is 100% soaked in and won't scratch off) some I can scratch and leave a mark. Although most of this particular bike was chalky and would do that if you touched it, so for the most part probably the substrate, although some of the less faded spots will do the same. It can of course be touched up easily Did the seat by dabbing with a rolled up cloth, pretty good outcome Clean up with water, no remaining smell. Will give it a bit and then wash the bike down and see what happens Interested to see what happens if I spray it out of an airbrush
2 points
-
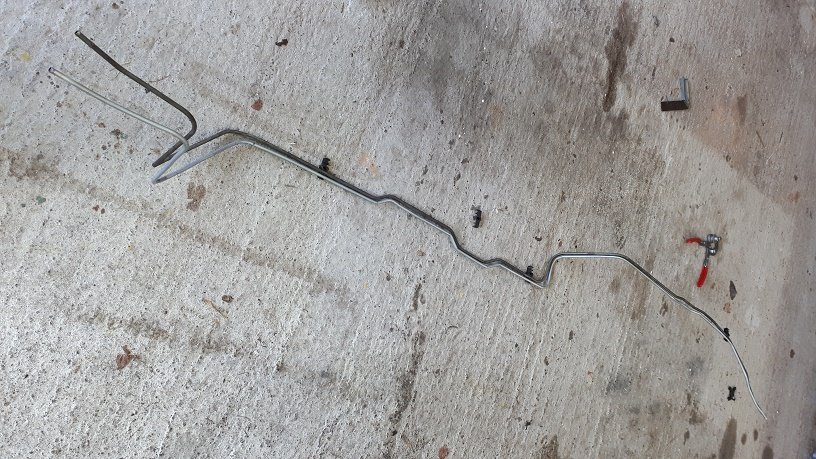
Man, making fuel lines sucks heavily! Was ok in the vice for a start, but vice is a metre away from everything in the shed and there’s like 5 metres of line.. cable ties and clamps as I went helped a bit.. At least the brake lines are copper-nickel and much easier to manipulate (he says, having not made them yet..) Also got the hood skin goo’d to the frame and spot welded back together. Used Bostic and it was fucking awesome! I quickly buffed and painted the throttle linkages, hood latch and a fuel tank vapour breather this arvo too, have some clips soaking in vinegar.
2 points
-
Have been a bit absent with updates here. Havnt done a lot in the shed since a pretty major back malfunction which looks like its going to require surgery to fix, i got a wee but done before it got quite bad so will fire a few updates through. For those of you interested in the XT250 soz but i had to PPSC it, ended up selling for a moonbeamish $5,000 pretty easily so was quite happy with that. I stripped it back to the frame and painted it, zinc plated just about every bolt and slapped all the NOS bits on that it came with, looked a million bucks in the end, probs why it sold for a million bucks. As far as the XR250 goes a had a bunch of parts turn up. this extra ginormous box turned up from the U S of A, it was 3/4 full of packaging and 1/4 full of this Clarke 16L tank. Pretty stocked with the quality. Also had a full decal kit turn up for once shes all back together. Blue '86 design seat cover also turned up from the states. Its since been shipped off to @64valiantfor some foam repairs and fitting to the seat. Shmancy Wiseco big bore forged piston turned up, this is a 77mm bore piston which gives a displacement of 277cc with every so slightly higher CR. it also came with a full top end gasket and seal set which was handy. Since im want to make it look all pretty tidy I decided to get the top end vapour blasted. im going to cerakote the engine side covers and couldnt be arsed spliting the bottom end so the cases can just get the scotchbrite treatment. Top end stripped and ready for blasting: Vapour blasting does such a lush job, its crazy how much it peens and seals up the alloy. After blasting I ran everything through @Flauskis ultrasonic cleaner. Its crazy how many beads still come out of thread holes and stuff when you think you already have it clean as, def a must do for any engine blasting I think. with the blasting all done I sent the head and cylinder off to my machinist and he did a bunch of stuff, started with boring the cylinder to the wiseco specs and doing ring gaps for me etc. then he surfaced the head, did a 3 way valve job on the valves and lapped them all in, the decided to tickle up the ports with the die grinder. Didnt get many photos soz but im tickle pink with the work. I've now put the engine back together, healthy doses of assembly lube, blue loctite and correct torque settings. man i love fresh zinc plated fasteners. Next up is restoring the plastics. this is a painstaking task and there is no easy way to cheat it, especially with white plastics. I tried cheating with the DA sander but it just doesnt do the job like straight line hand wet and dry sanding. Process to fix fucked plastics was razorblade - 320g - 600g- 800g - 1200g - 1600g- 2000g wet and dry. Then hit it with some cut on a medium speed drill wit polishing pad, wipe off cut then hit with a high speed fine polishing pad. just be careful to not hold for too long in one spot and burn though, I had to start from scratch in a few spots. Rear fender came up good enough, not amazing but will do. Sitting on the bike with new tool bag and rear indicators Next job is to do a DIY cerakote of the side covers and get the engine completely back together, then onto the rest of the plastics.2 points
-
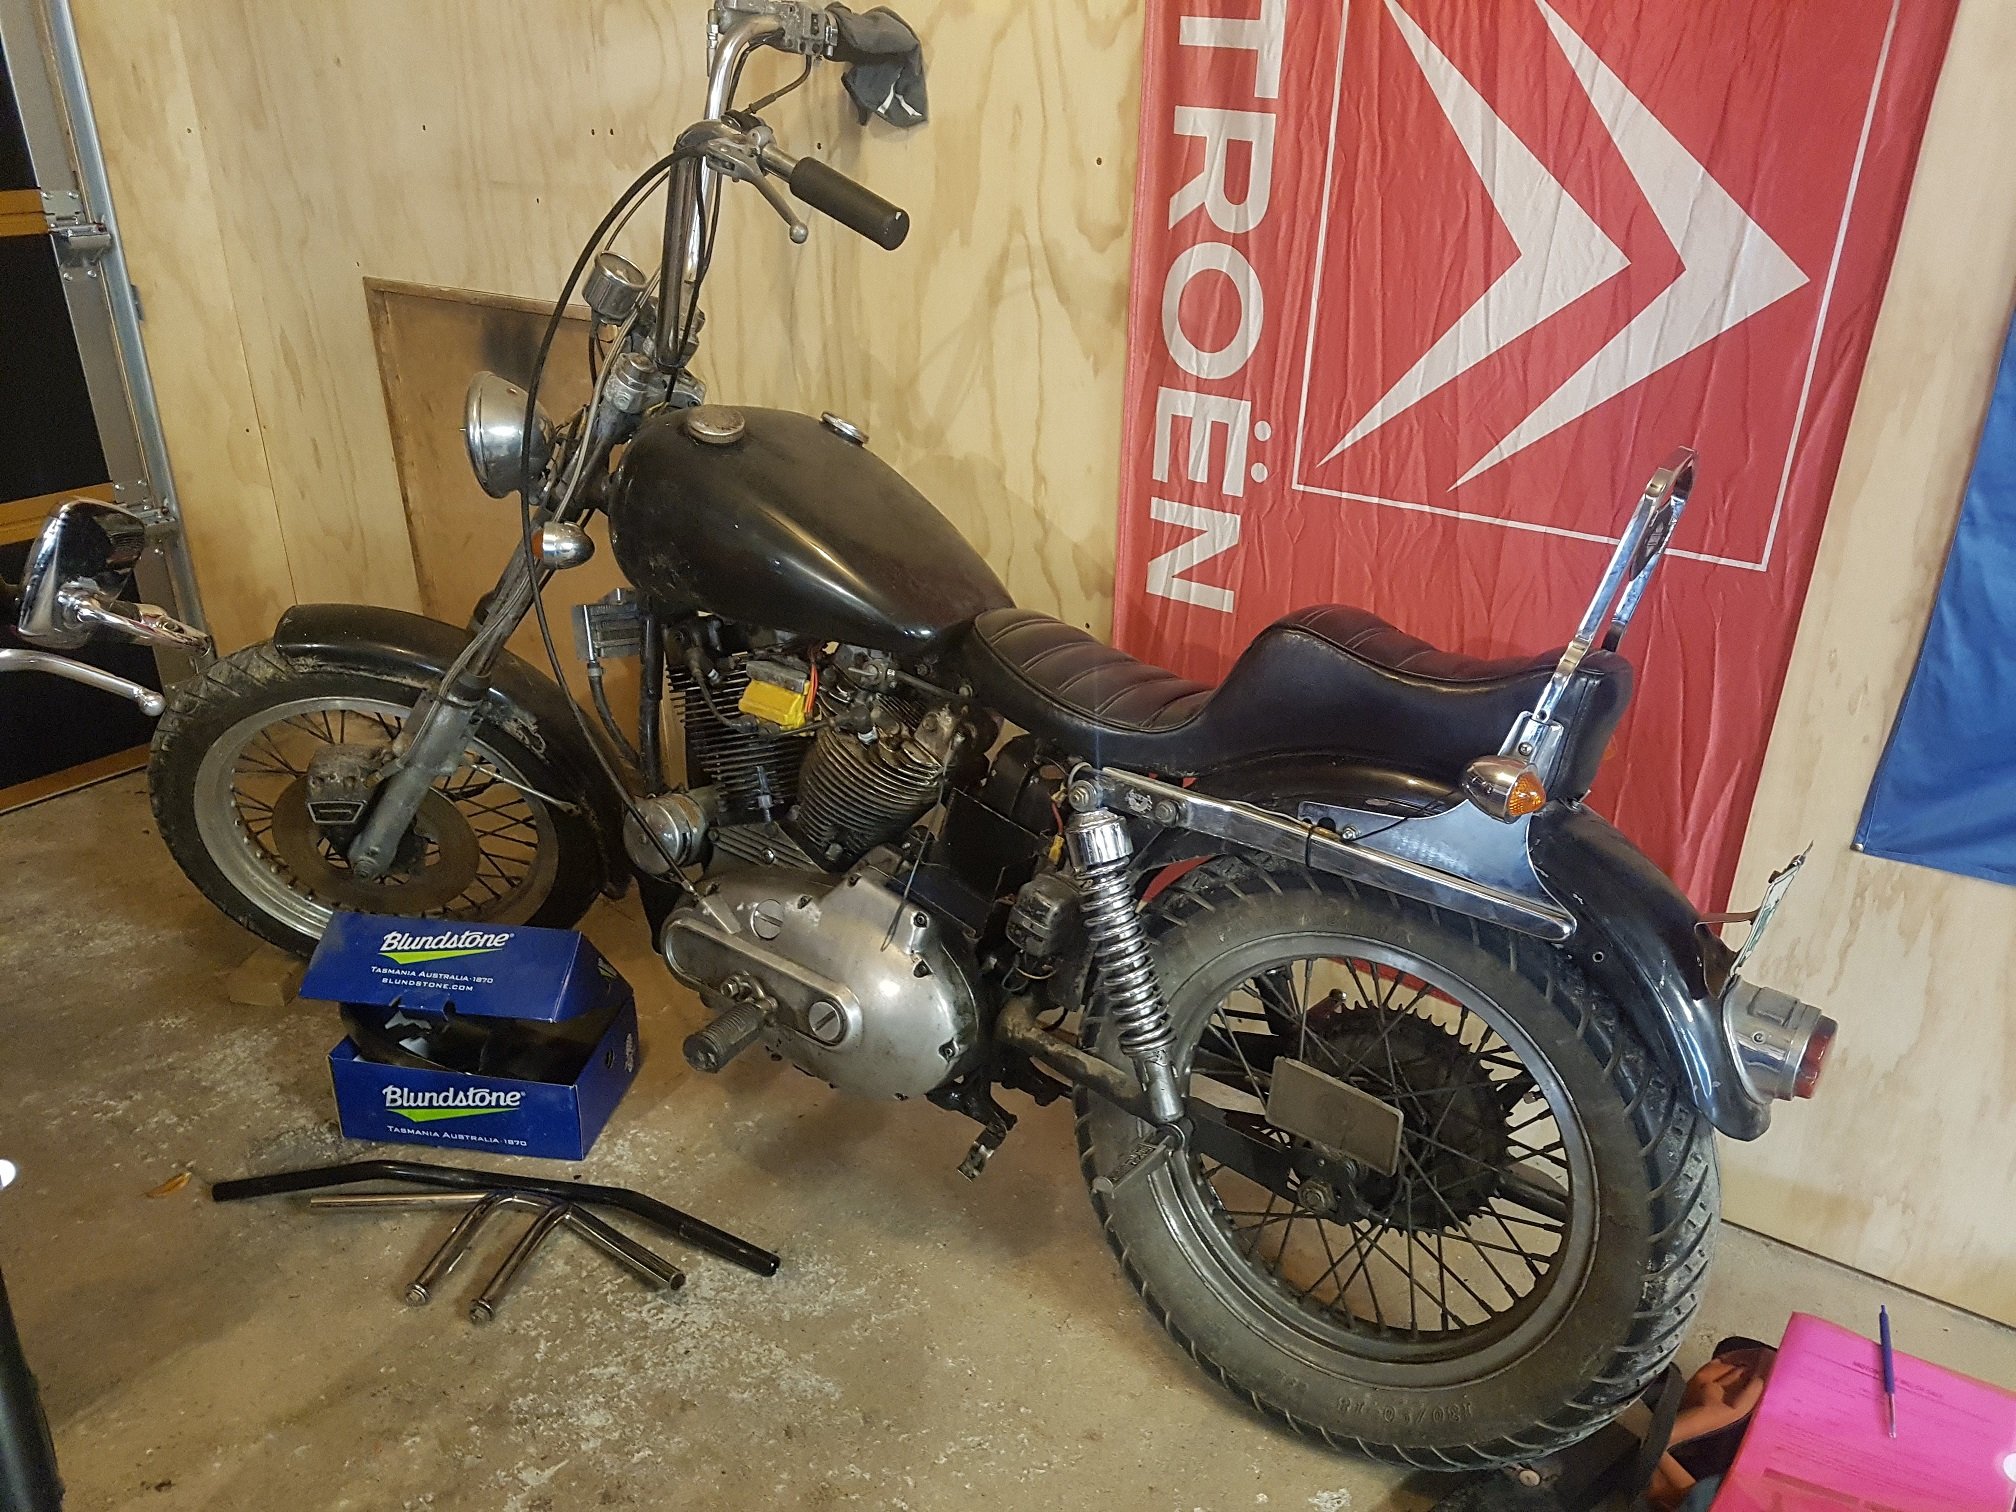
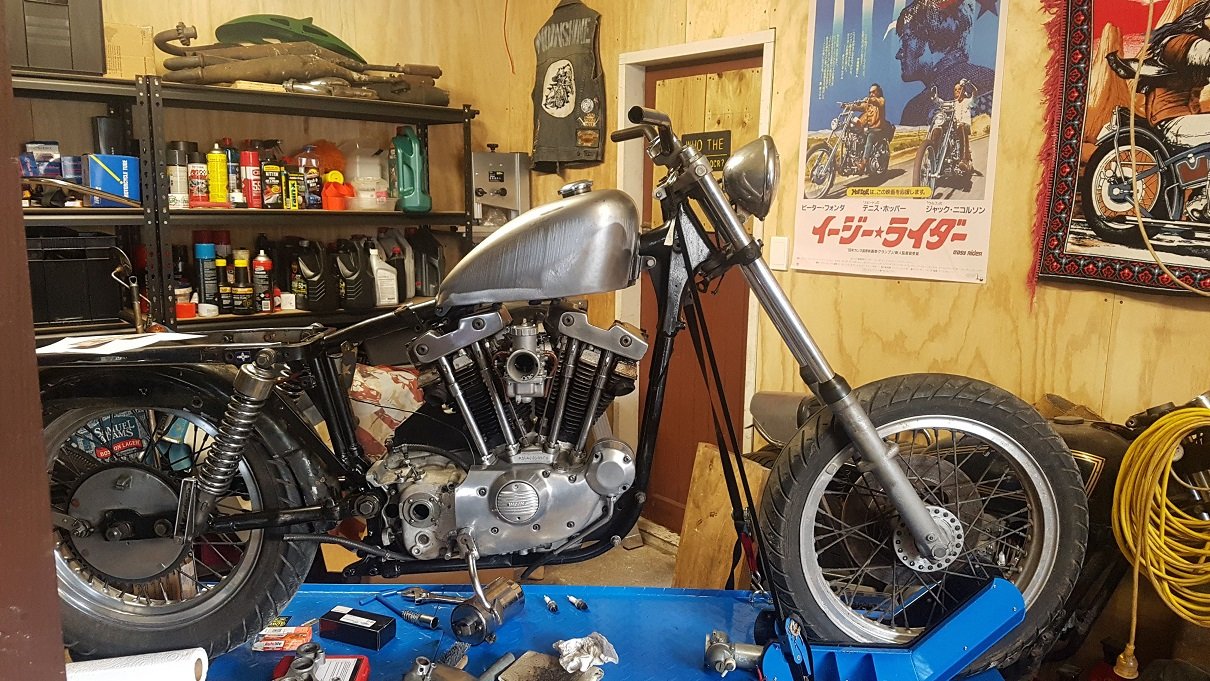
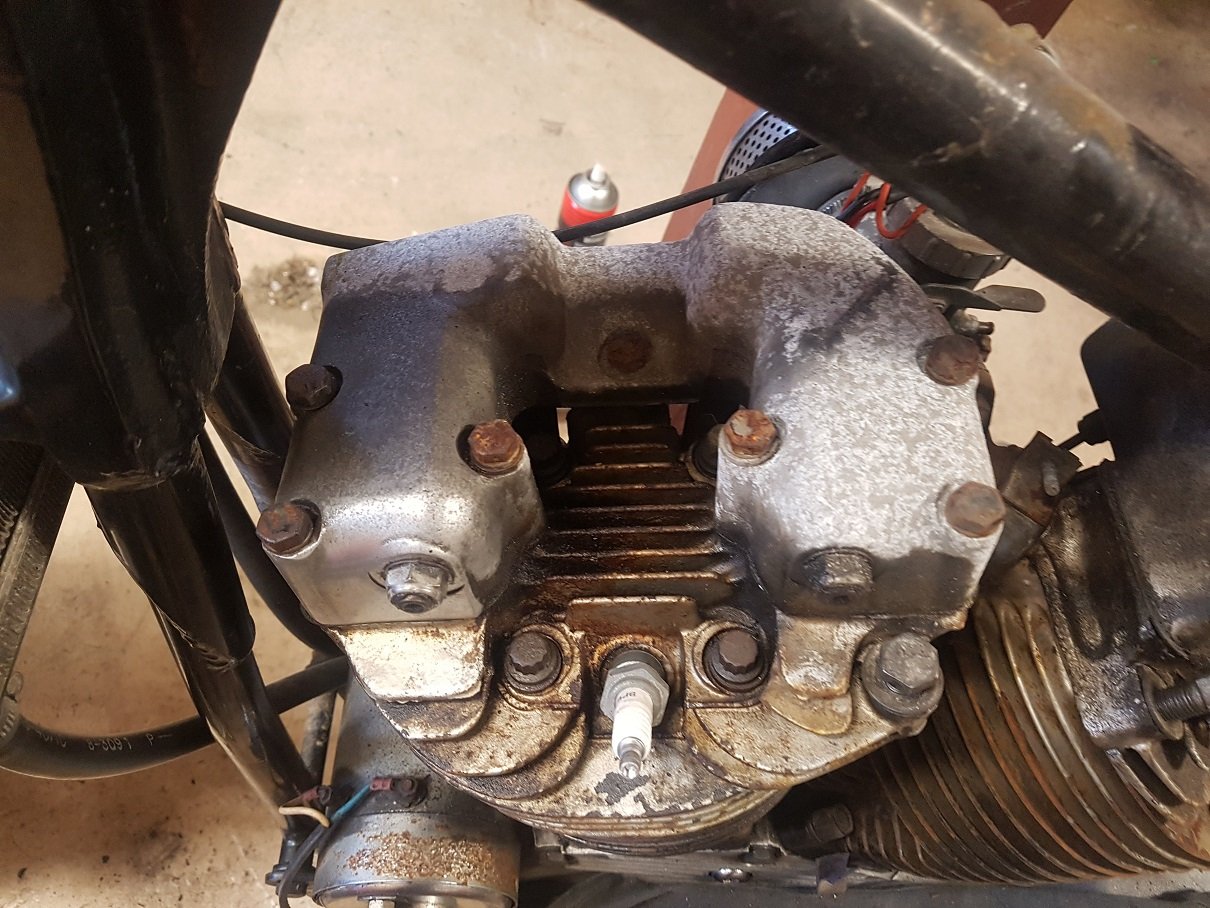
So yeah, kinda stopped taking pictures of things like wiring and the like. But fully rewired the bike. And installed an aftermarket regulator rectifier on the back of the oldschool generator. Also managed to get it running. What a cunt. Jesus, i've kicked over a few bikes in my time. But nothing as cunty as this. It can't be cos of the compression ratio, as these are like 8.5:1 or something. My japanese 4 cylinders kick over easy as. So must be the ratio or something. I'm not a small unit, and i can jump on the pedal only to bounce off due to it being on compression stroke. Mental. I gave the tank a quick satin black to get it complied. I have a full AMF sticker set in brown and orange to decorate the tank. So once its complied, i'll gloss the tank and pop the stickers on. Here is as it currently stands. I'm trying to get it complied in the next few weeks. Just chasing some paperwork misery. So will see how it goes. Once its complied, i don't know whether to cut it up straight away. Or enjoy it as is. Likely the latter, as riding it around the hood was a blast. Not only did i feel like a crim, it was actually really pleasant to ride. Will update my compliance process in detail as it unfolds.
2 points
-
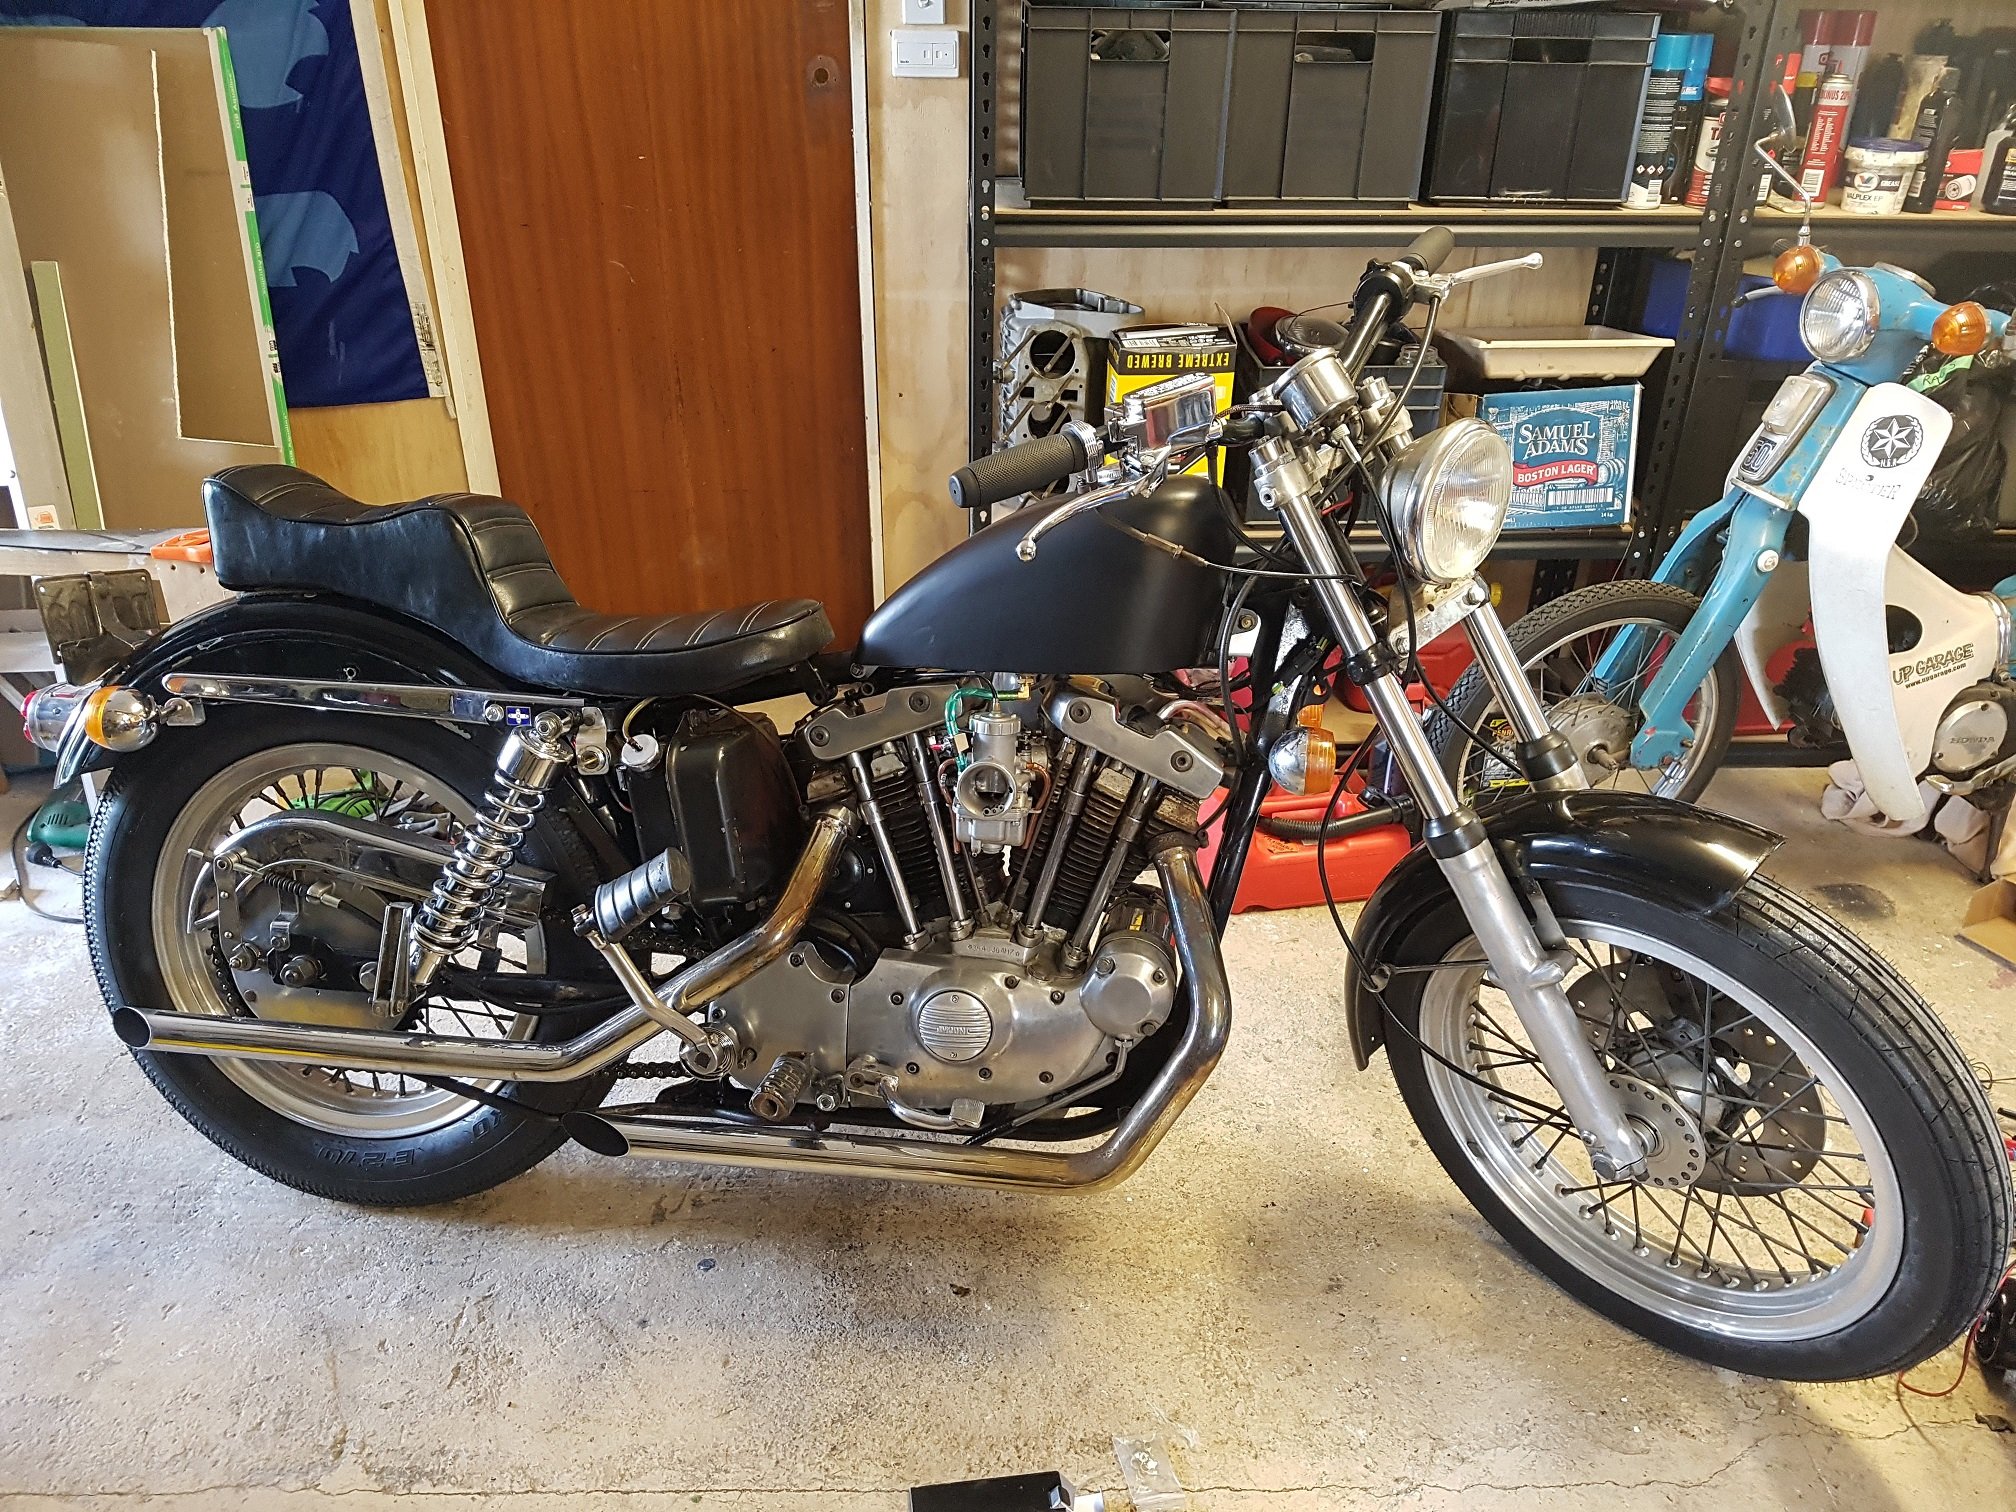
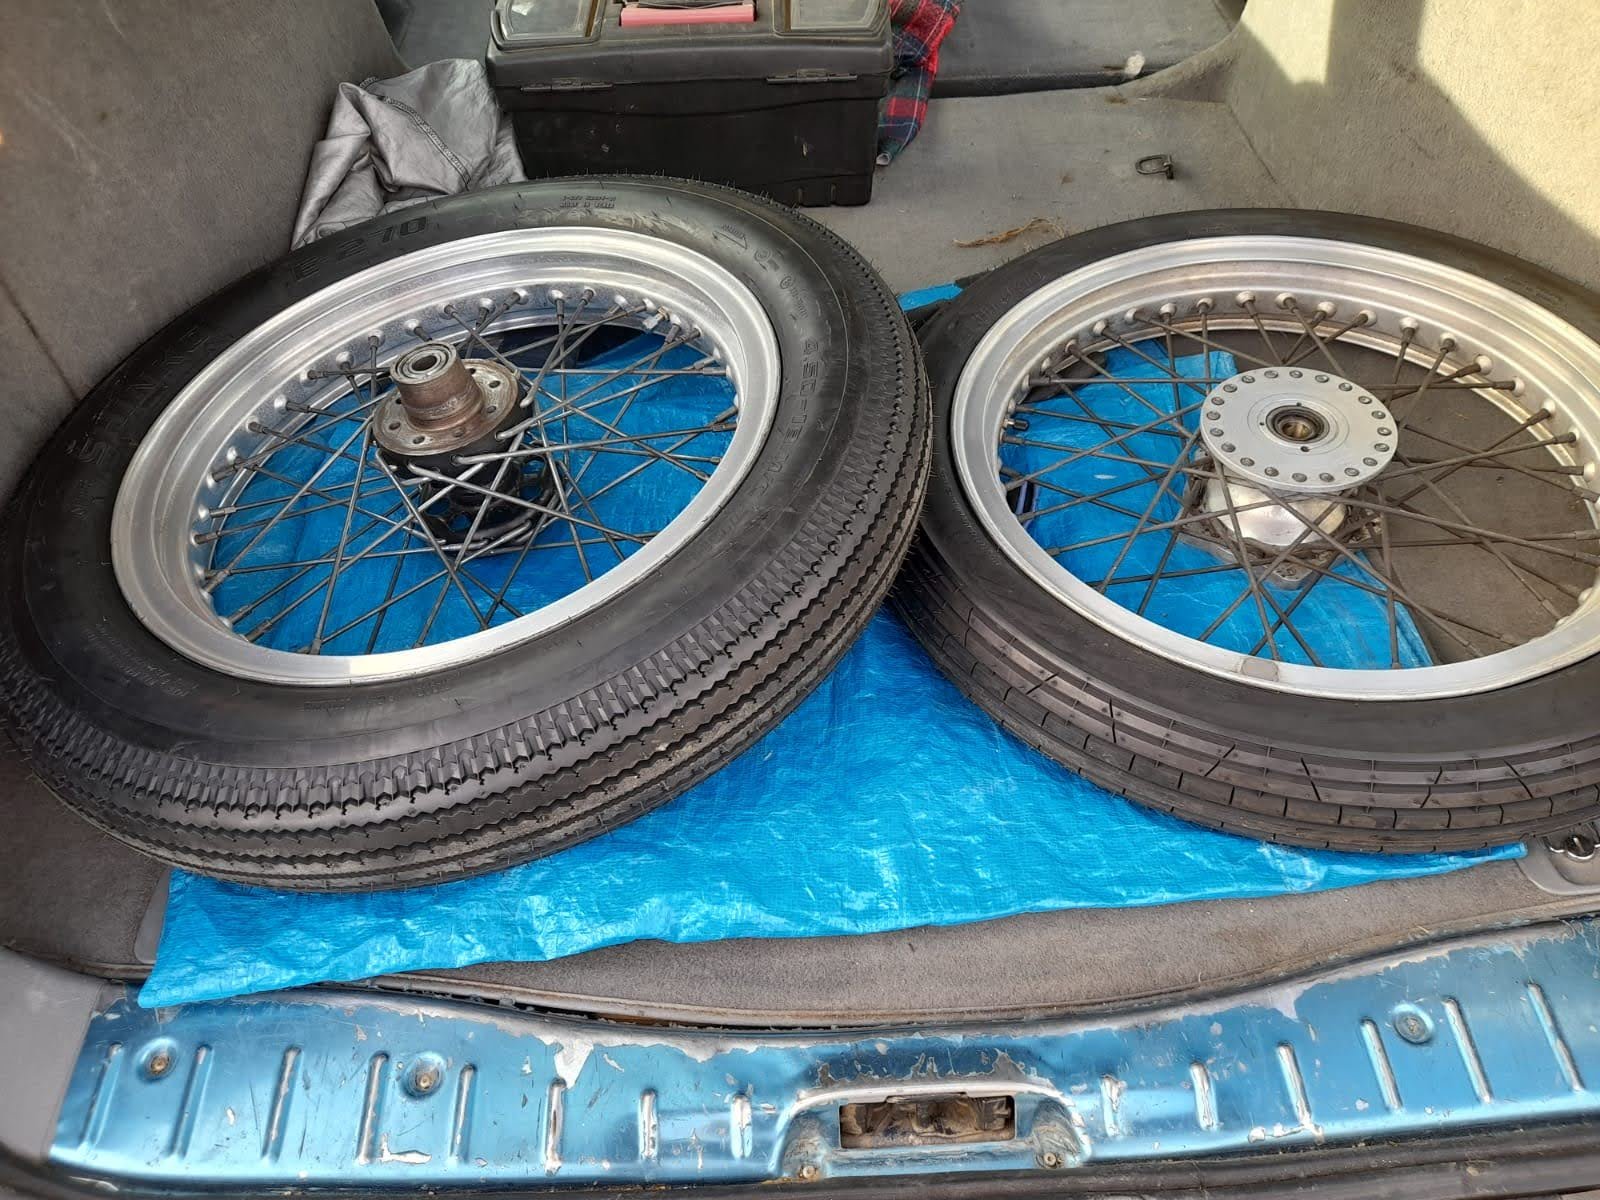
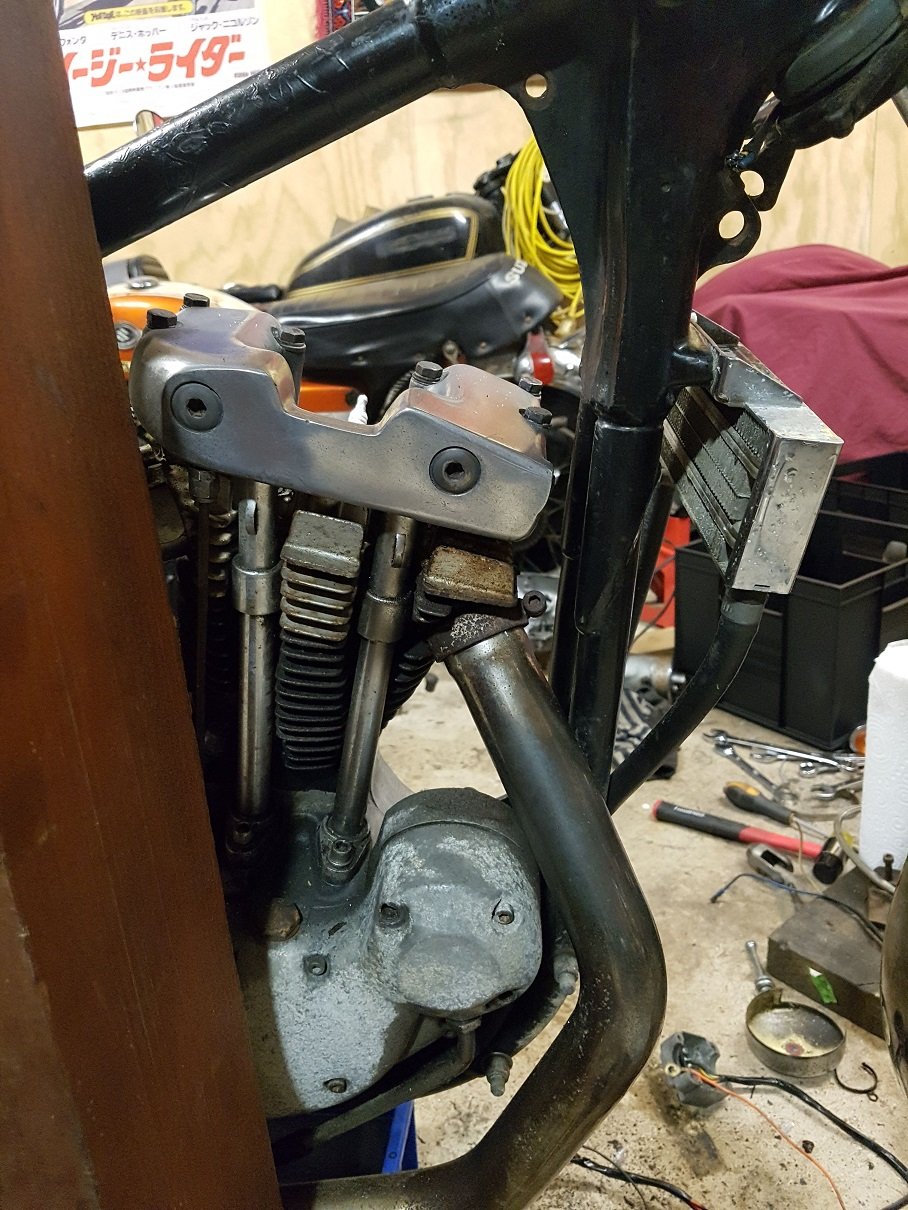
The tank this came with was so fucking yuck. I had to get rid of it. I just bought a repro factory sportster tank. As i just want to get this complied first. Then it will get the chop. So yeah, not a fan of the ape hangers. So pinched some bars from dad off one of his Bonnevilles (Hinkley not OG) which also have 1" bars. The front forks stanchions were rust fucked, and not a big fan of big rake bastards. So tracked down some OG one. Had to do alot of checking and cross referencing, as the 1977 is meant to have Showa (not grower eh Chris ;)). But this had Kayaba forks. Which were only on 73 and 74 models. So thankfully i checked and didn't pay heaps for the wrong stanchions. Looks good with flat bars (and new front and rear shocks)! You can see the sprocket cover and kickstarter installed here I also got some new tyres, which transform the bike. They're Shinkos, i'm too cheap for firestones and avons (i went that route with my XS650, and youch. not again!) I must say, i like the tread on the rear Shinko even more than the firestones! The sidewall transition is just perfect.
2 points
-
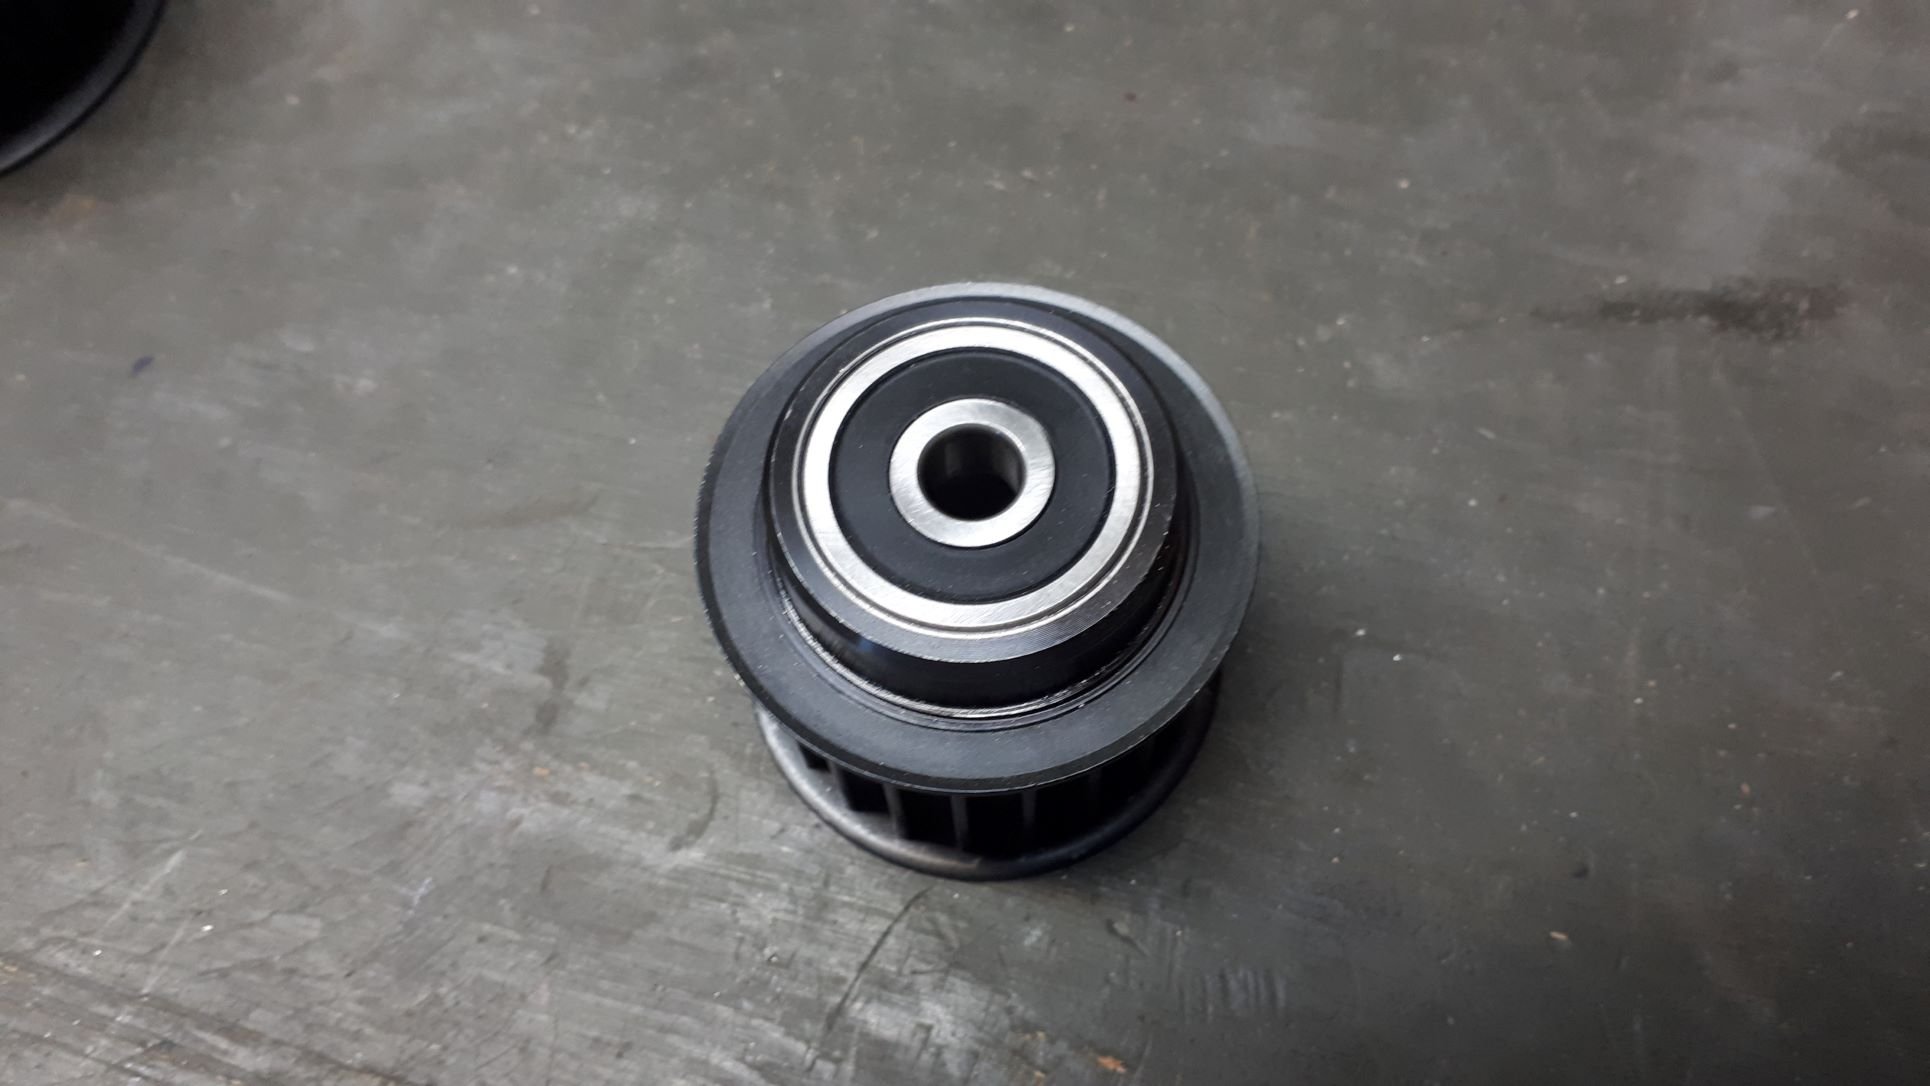
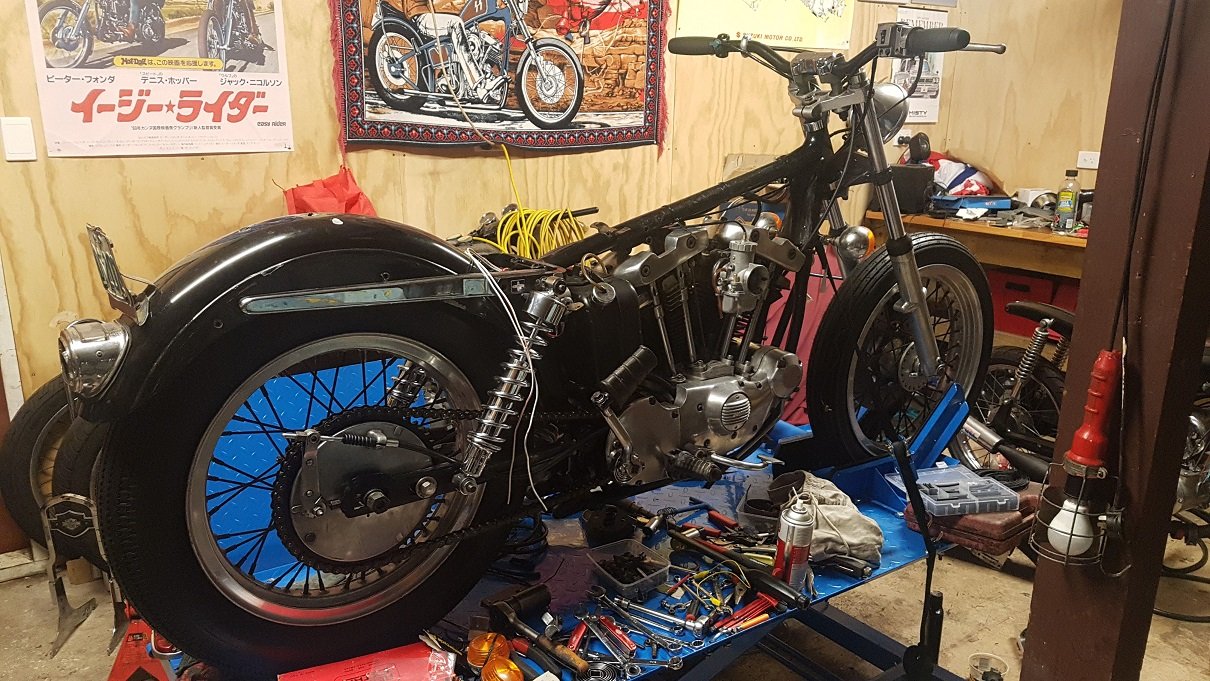
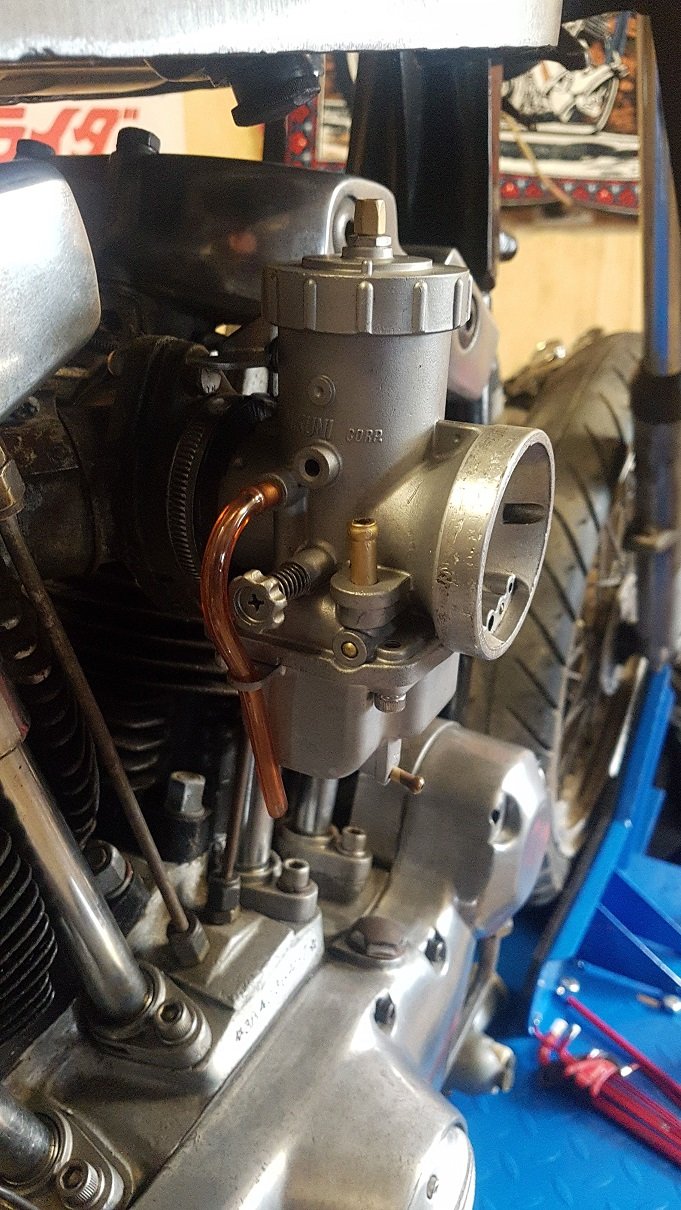
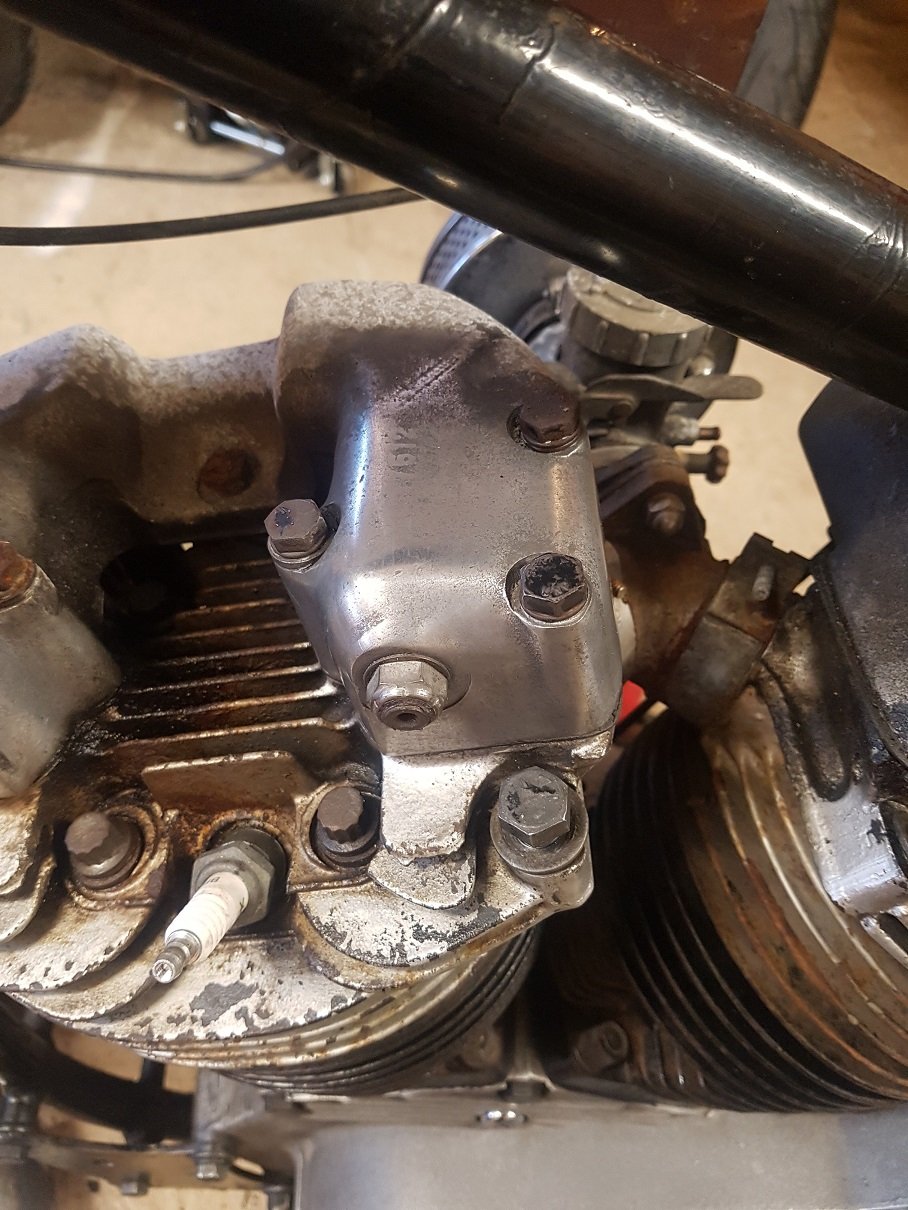
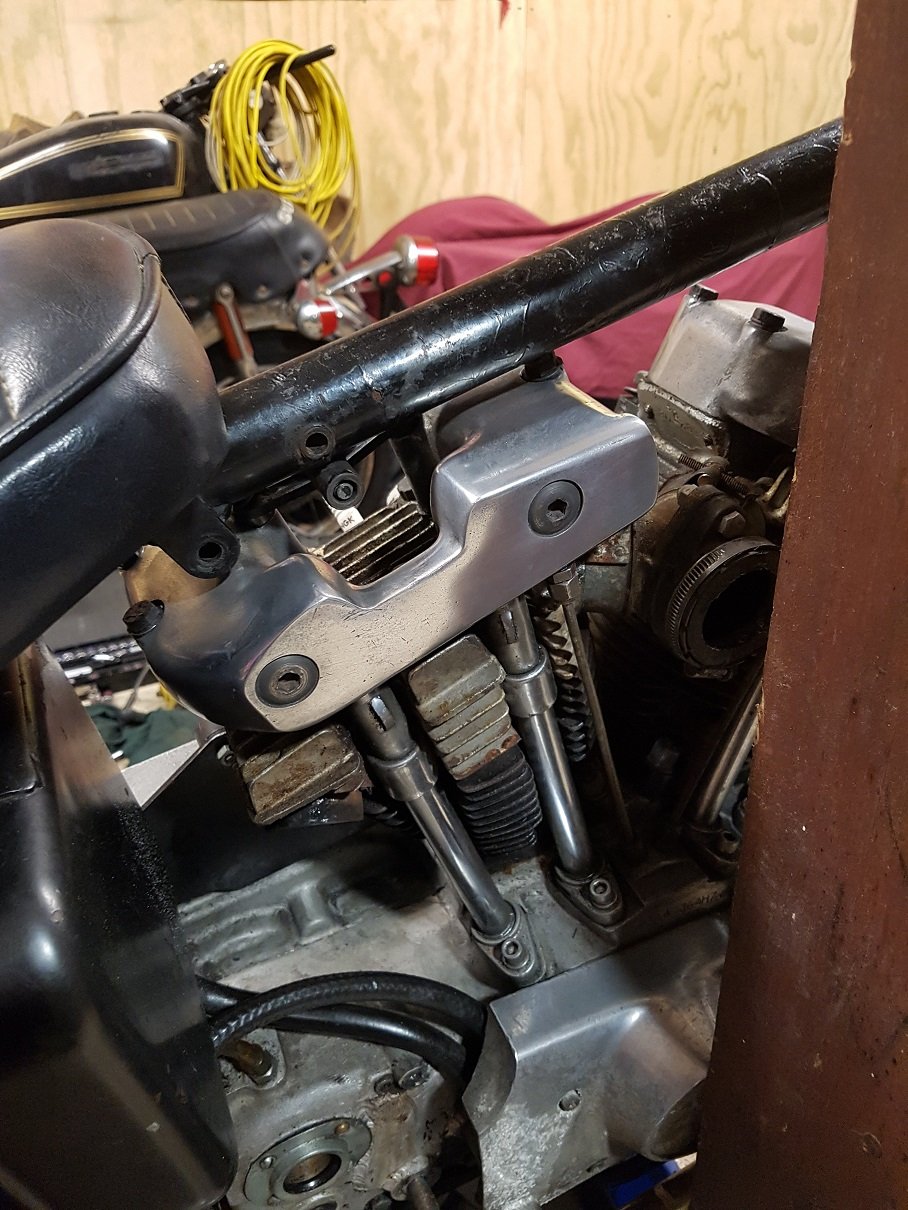
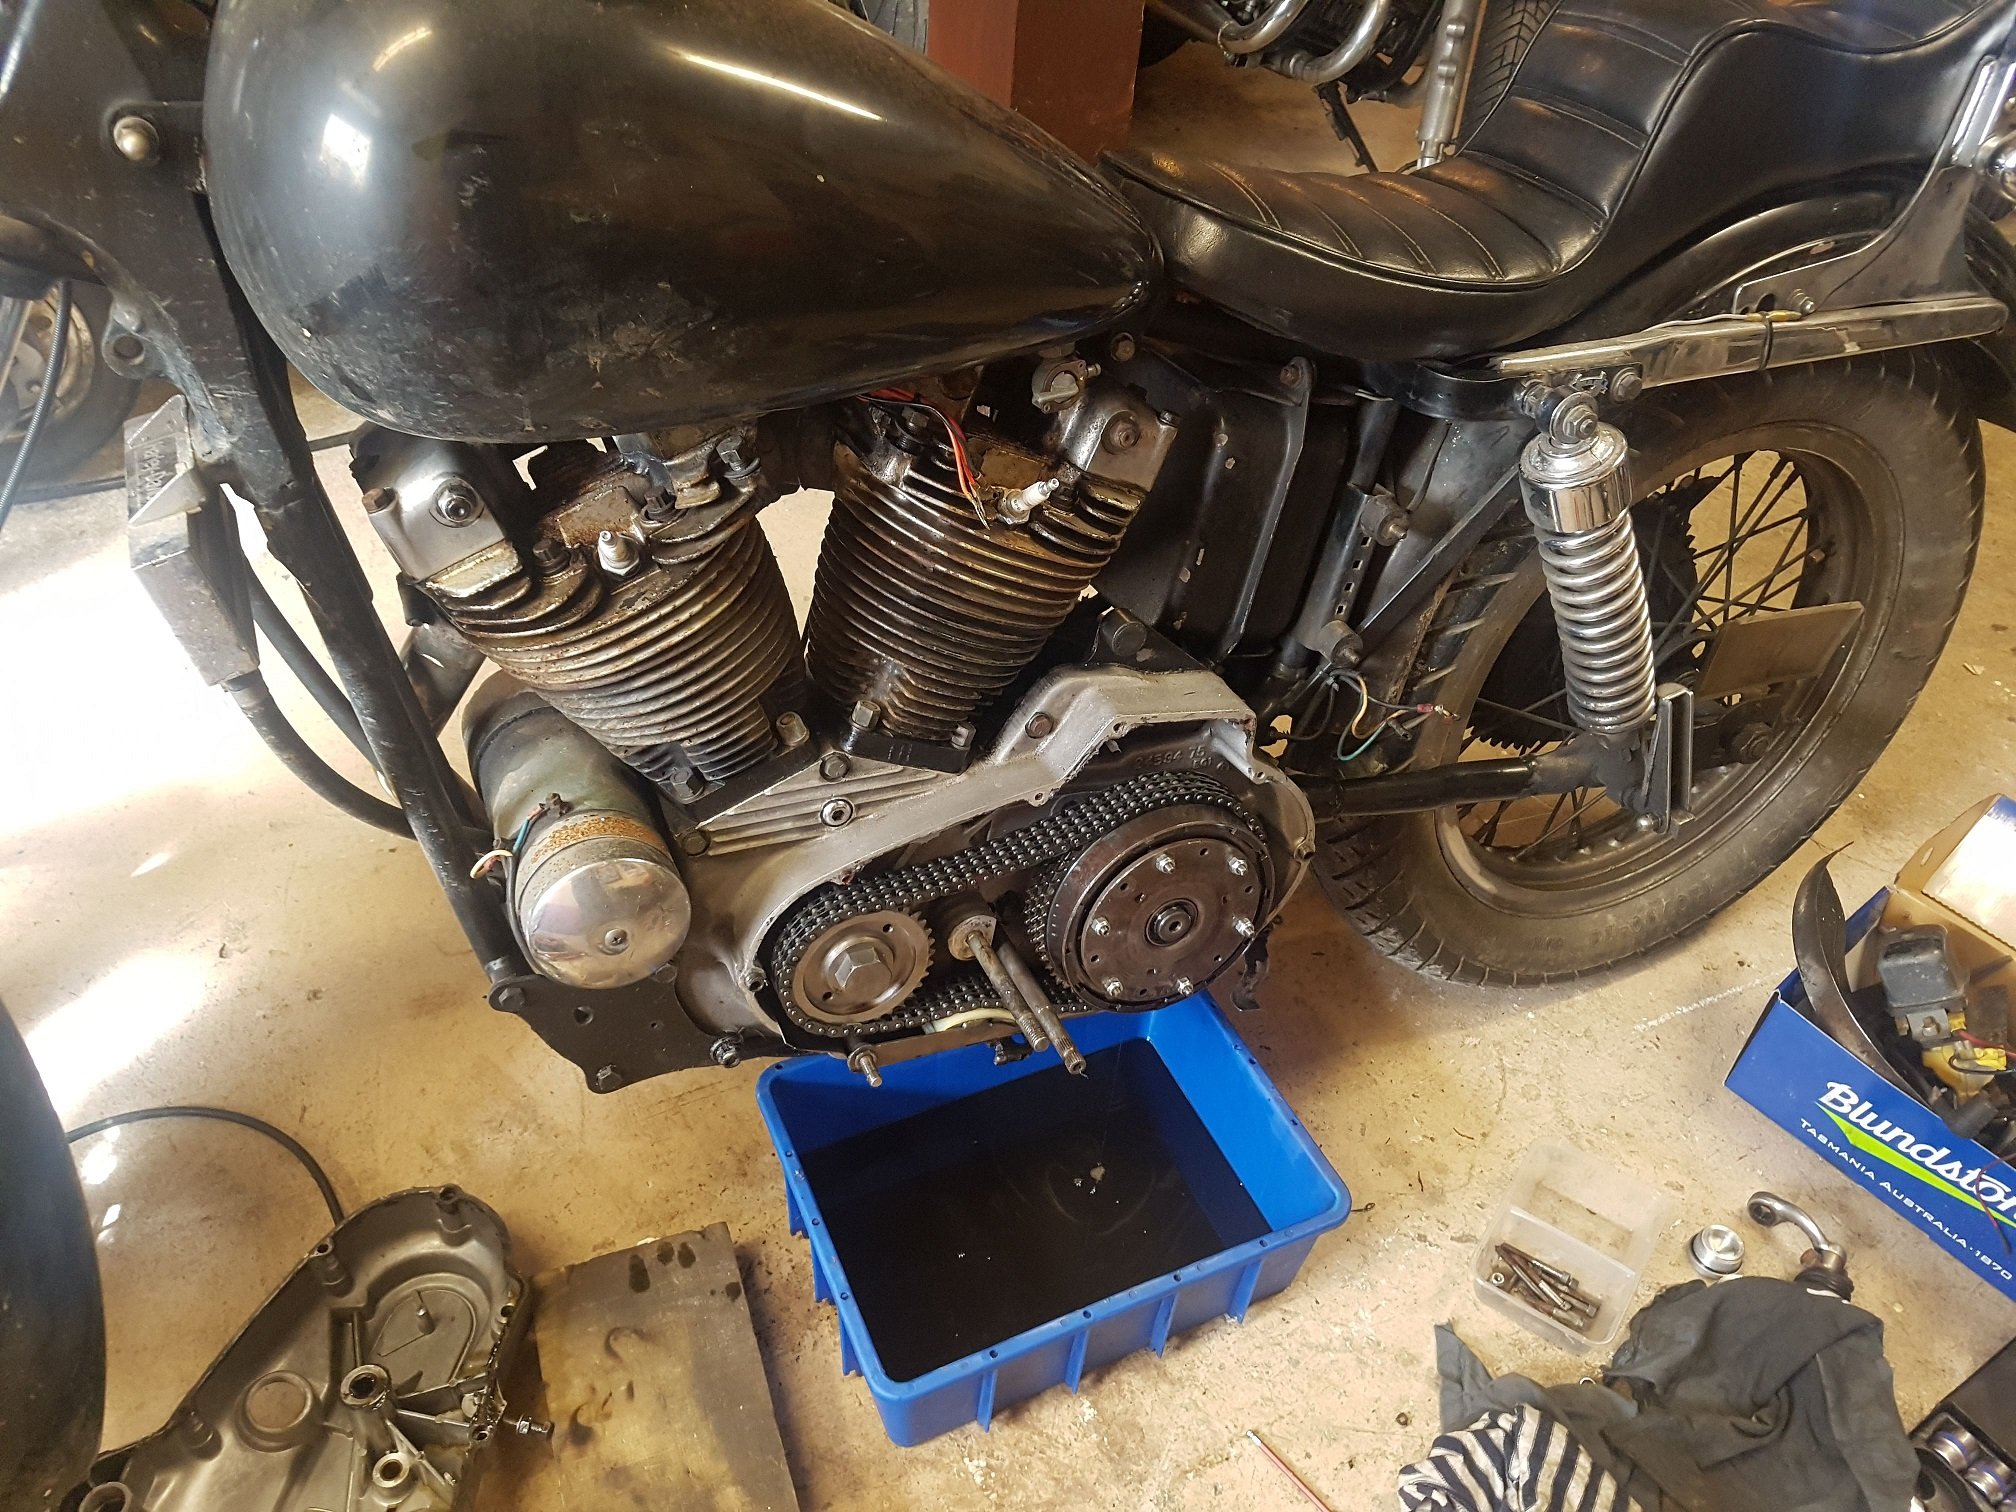
Had ol mate @kicker blast my carb in his cabinet. Oooohweee. Looks like a bought one. A few months later... with the covers all cleaned up, and now on a new bike table (why did i not get one of these earlier. My god what a difference), it was ready to pop the gearbox back in. Absolutely essential stuff had started to turn up from the states: Now there was a whole debarkle around the kickstarter. The setup on these is mickey mouse at best. These are such a cunt to kick over, and all the force it placed on this thin cast alloy sprocket cover. So they just shatter. Good thing this is an electric start model.... with all the starter equipment removed. yay! I ended up tracking down new kick start shaft, and a new sprocket cover. I made up a supporting bracket to help take some of the kickstarter force. So hopefully the cover should be good for a while anyways....
2 points
-
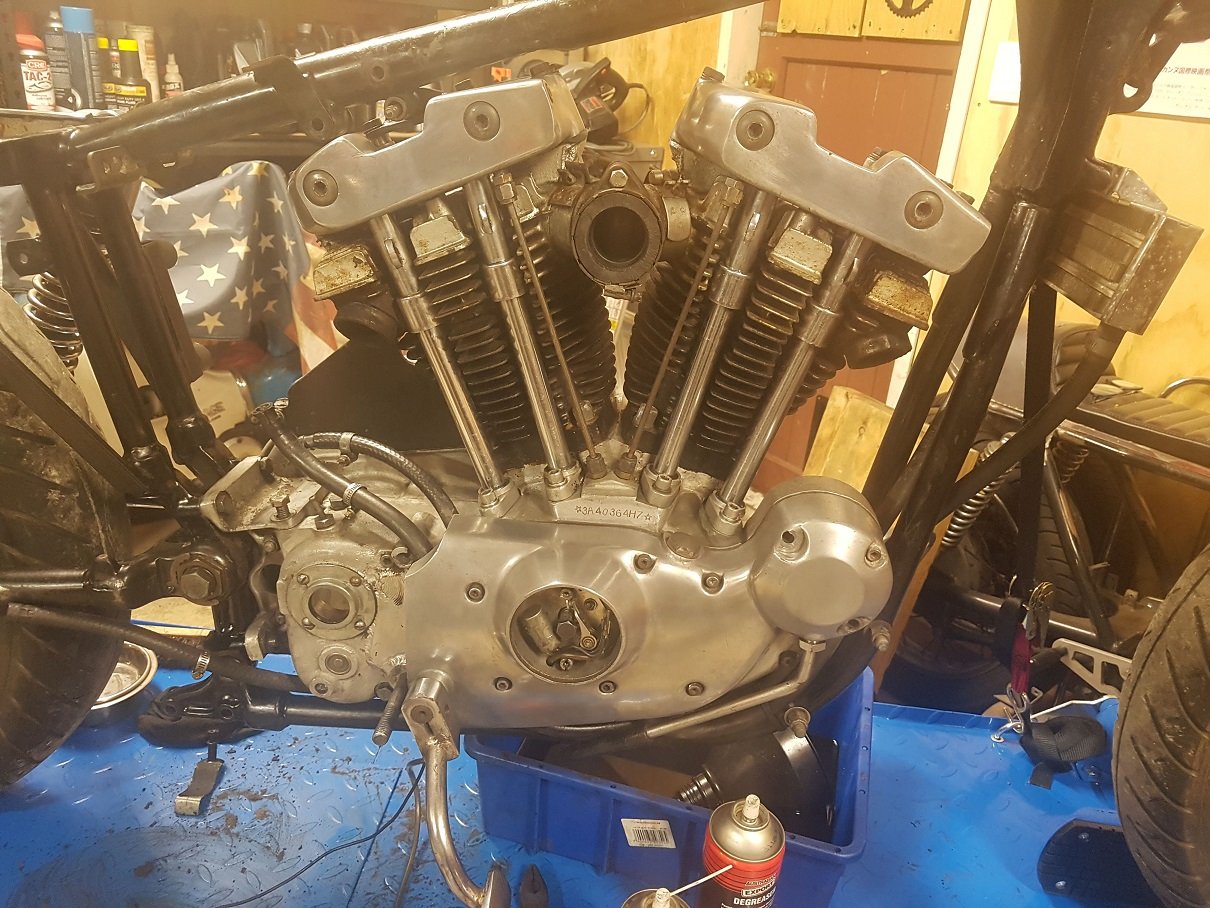
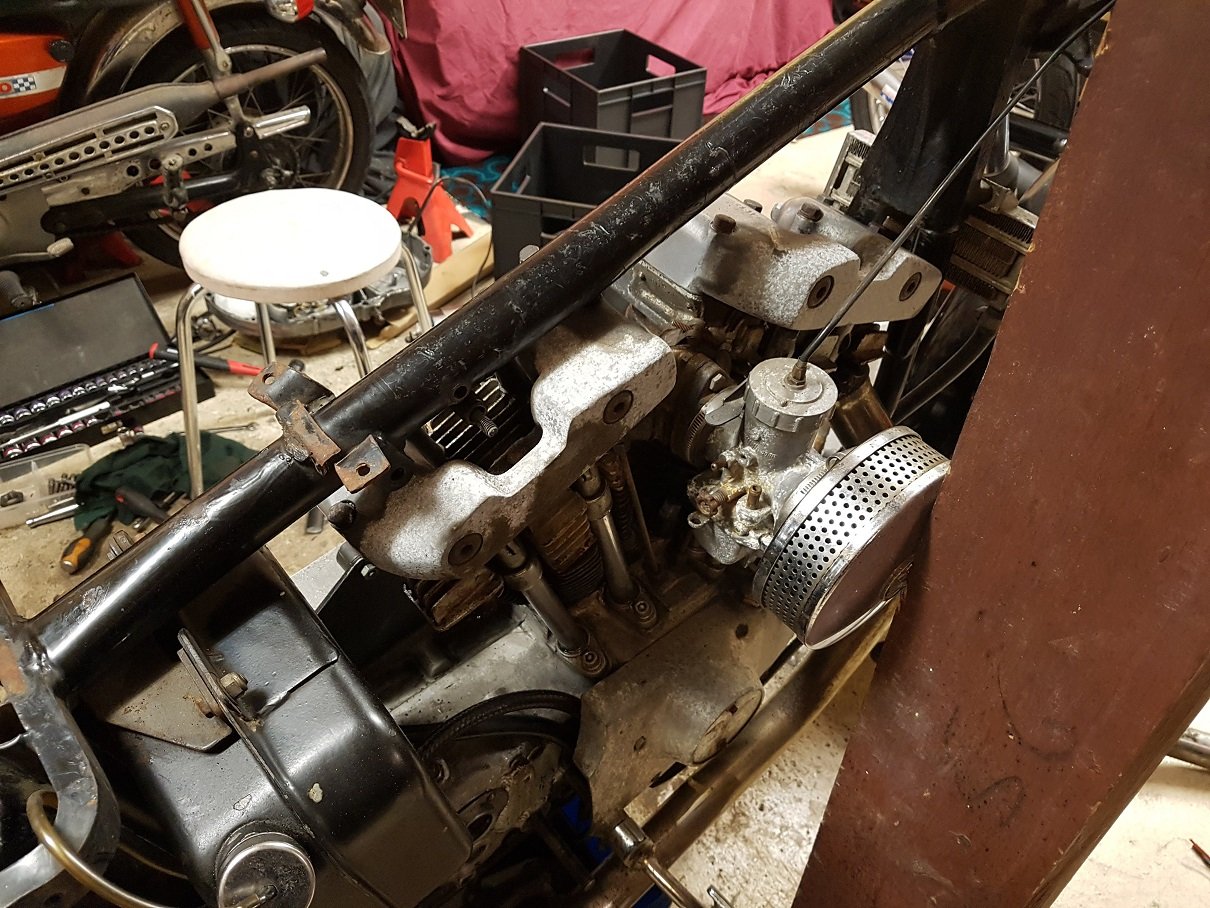
While waiting for the bits, i set to work cleaning up all the corroded engine. Well, just a quick pass to make it not look like it had been pulled out of the sea. Making a start. Looking good. Has potential. This was just a quick 400 grit with some CRC, then a quick going over with some autosol.
2 points
-
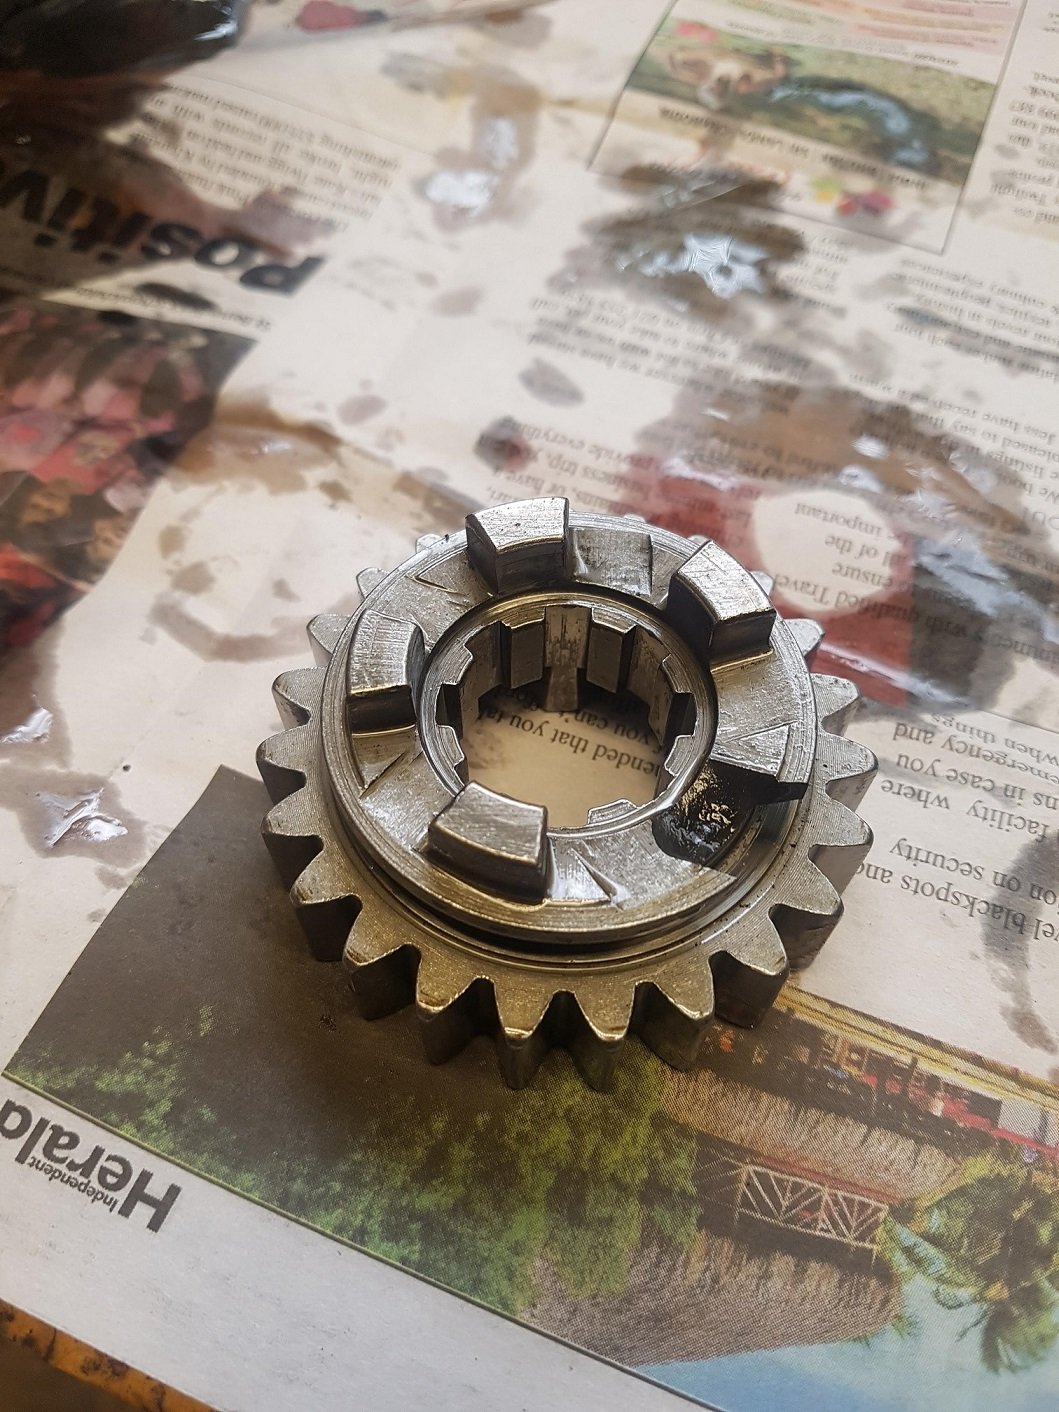
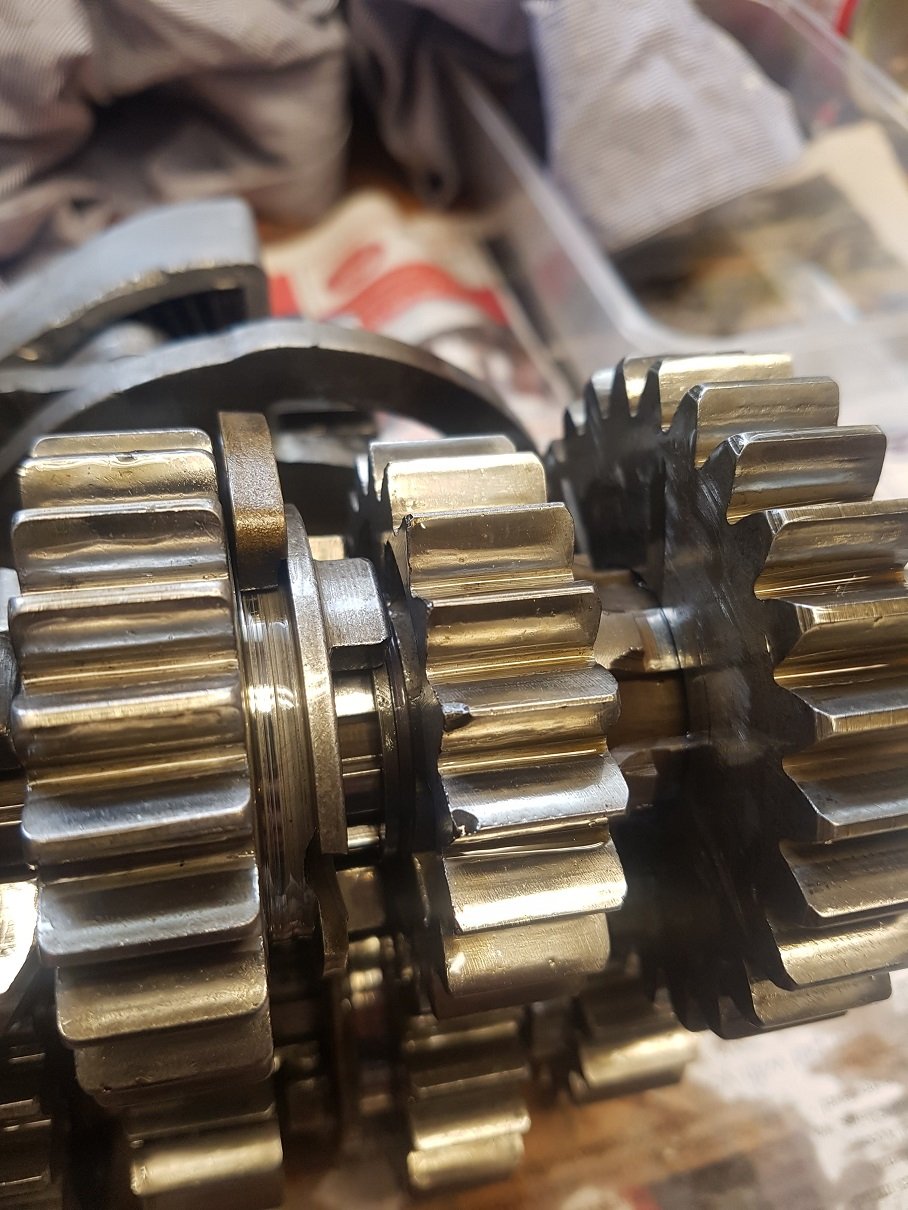
Gearbox out on bench, you can see the damage. Which must have happened previously. As there were no bits in the gearbox! Looks like the problem was the shifter rod had popped out of the shifter caddy. So Thats all the problem was. Yay. However, i wasn't happy with the condition of the gears.... This one was completely missing a dog! The others had loads of chips on them: I managed to track down all the gears i needed as NOS. Great. Were cheap as chips too. Howevere, it took almost 3 months for them to turn up from the states..... Project parked.
2 points
-
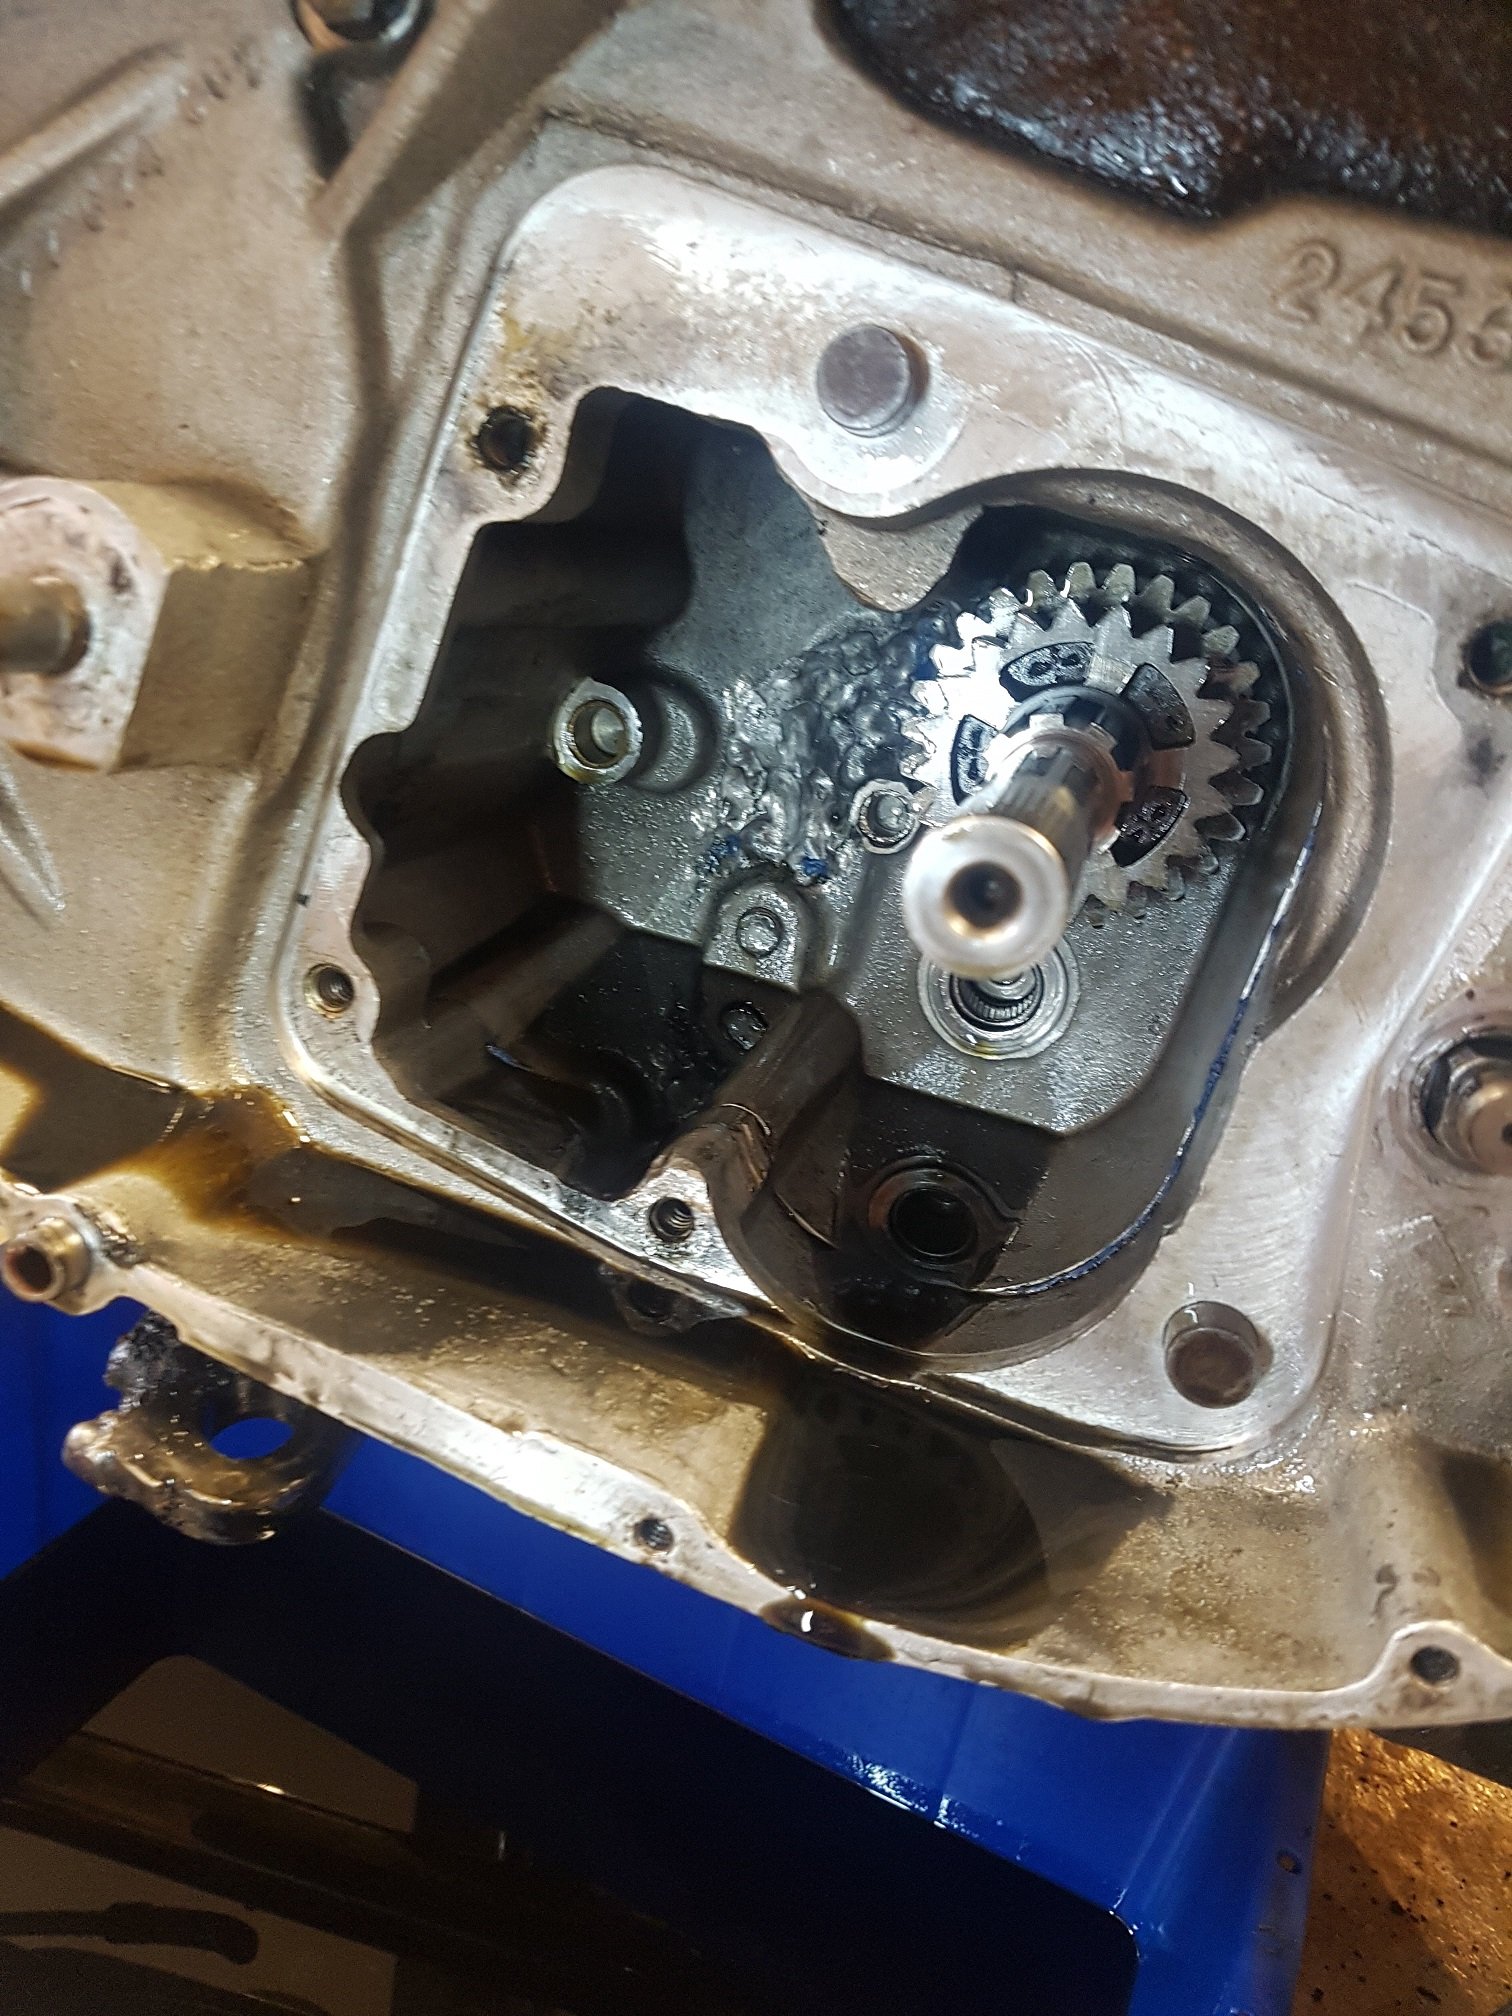
I got the gearbox out and could see what was happening: Still no chunks of metal. So that was good. Though you can see in the back of the engine cases someone has been in there to repair. So it has had a catastrophic failure at some point in its life.
2 points
-
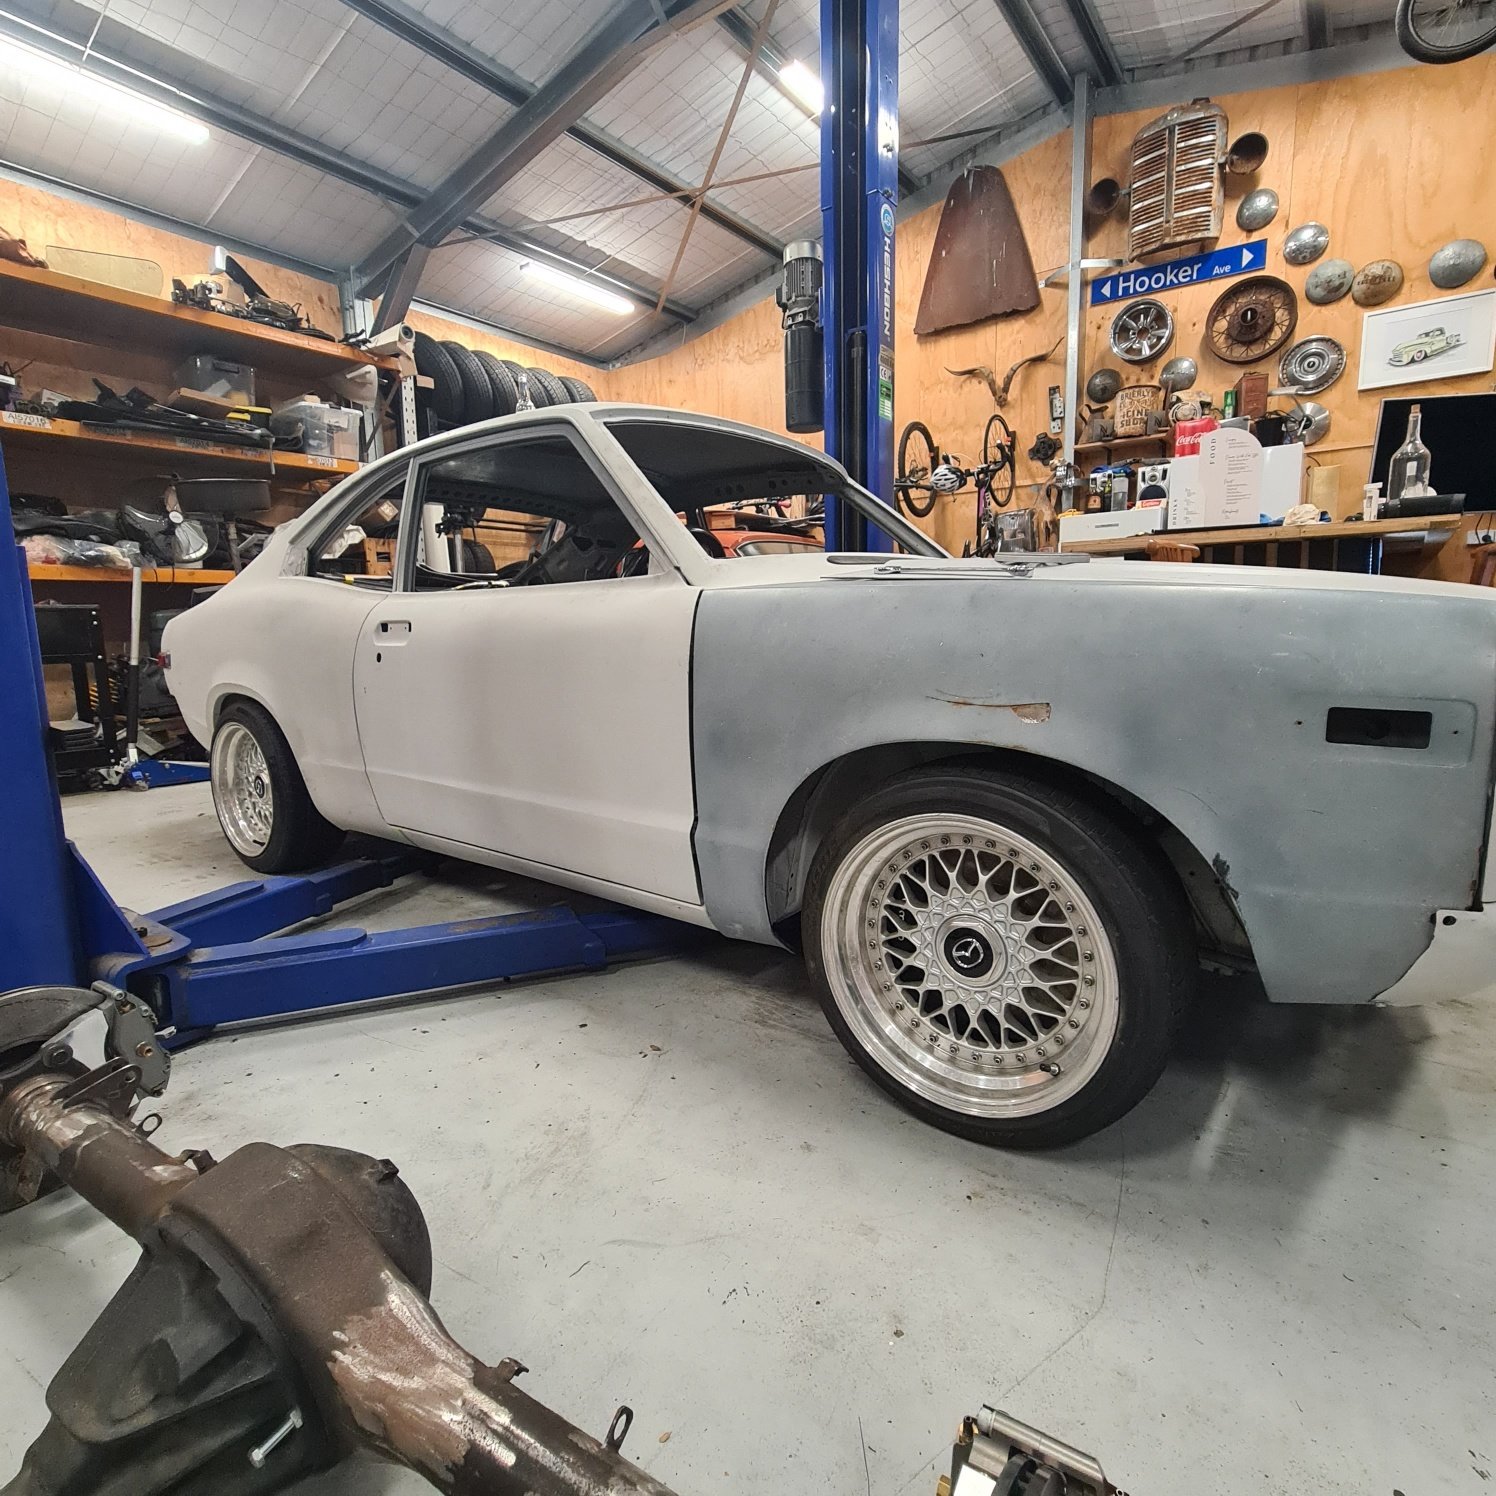
Lots of stuff happening, Got a few packages turn up from Azhar at PAC, Random rubbers, centre console, gear shift surround and RHD stereo surround all nice new and shiny, new RHD headlights and a heap of other miscellaneous bits. Ordered some new full height polished hexes for the BBS RS, New BBS centre caps and new chrome hardware so that all turned up so i dummied a rear wheel up. Lips have gone to polisher for the rears and need to decide centre colours before i assemble. Found this photo of when i test fit the 2 x 8" wides on one side (they are going on the front) and the above is a 9" wide to go on the rear. Fits perfect with the 4x114.3 diff (photo is a 8" on rear with a 4x110 to 4x114.3 adaptor spacer) Nice milspec engine loom being made up so thats already to go and the body loom being made up as well. Doors, guards and nose cone have been stripped to bare metal and epoxied, some minor steel repairs to be done this weekend too. then they are ready for panel beating. Grabbing the bonnet and boot to go to painter for prep this weekend too. Going to see progress on the body at fab on Sunday so no doubt will have more updates after that.
2 points
-
VTNZ are very good at being useless sometimes talk to land transport about it and see where that goes1 point
-
You may need to reapply it shortly, but it's cumulative and lasts super well1 point
-
Can get a Toyota OEM bellhousing to suit R154 also. The 2005-2012 Hilux came with a R150 behind the 1grfe.1 point
-
Yeah I like plaster (am an ex plasterer) but I'm fucked if I can understand why people put plaster over weather boards like that.1 point
-
Sorry guys, I really really really would love to attend but have got a very busy few summer months planned. I might just have to start building a bike for next year though!1 point
-
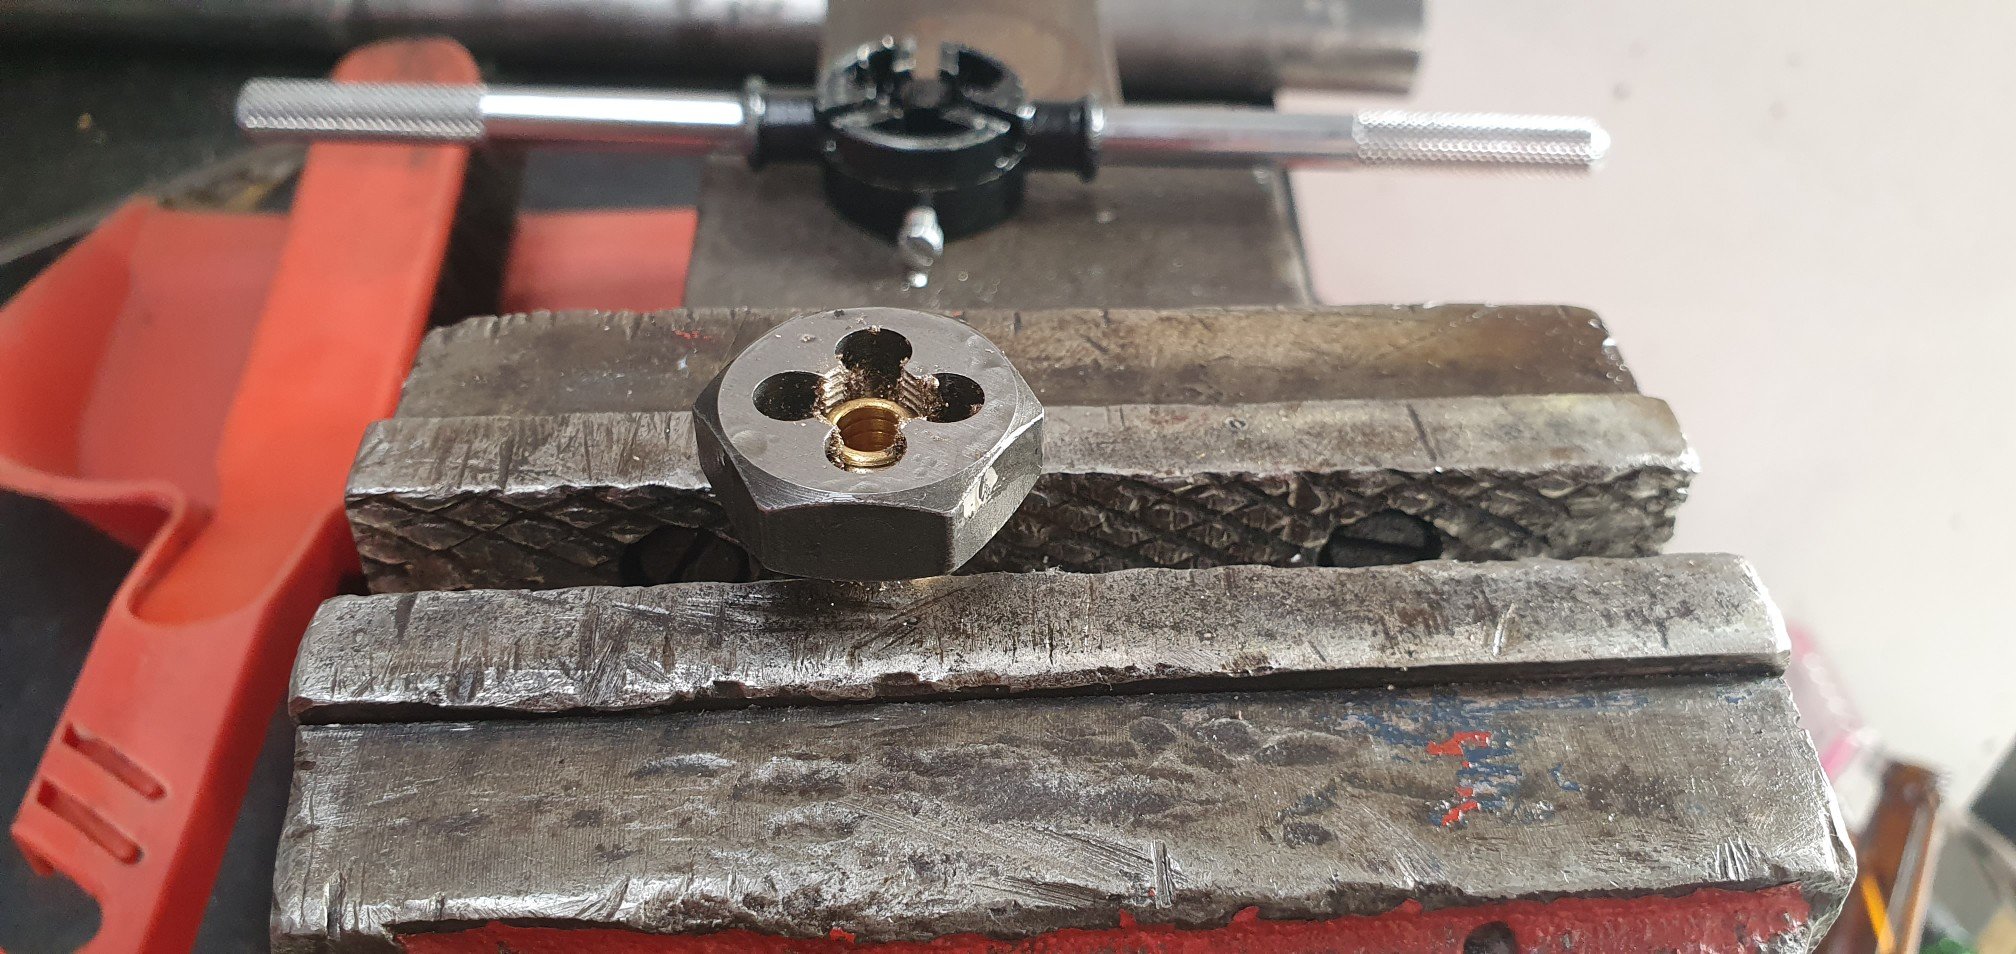
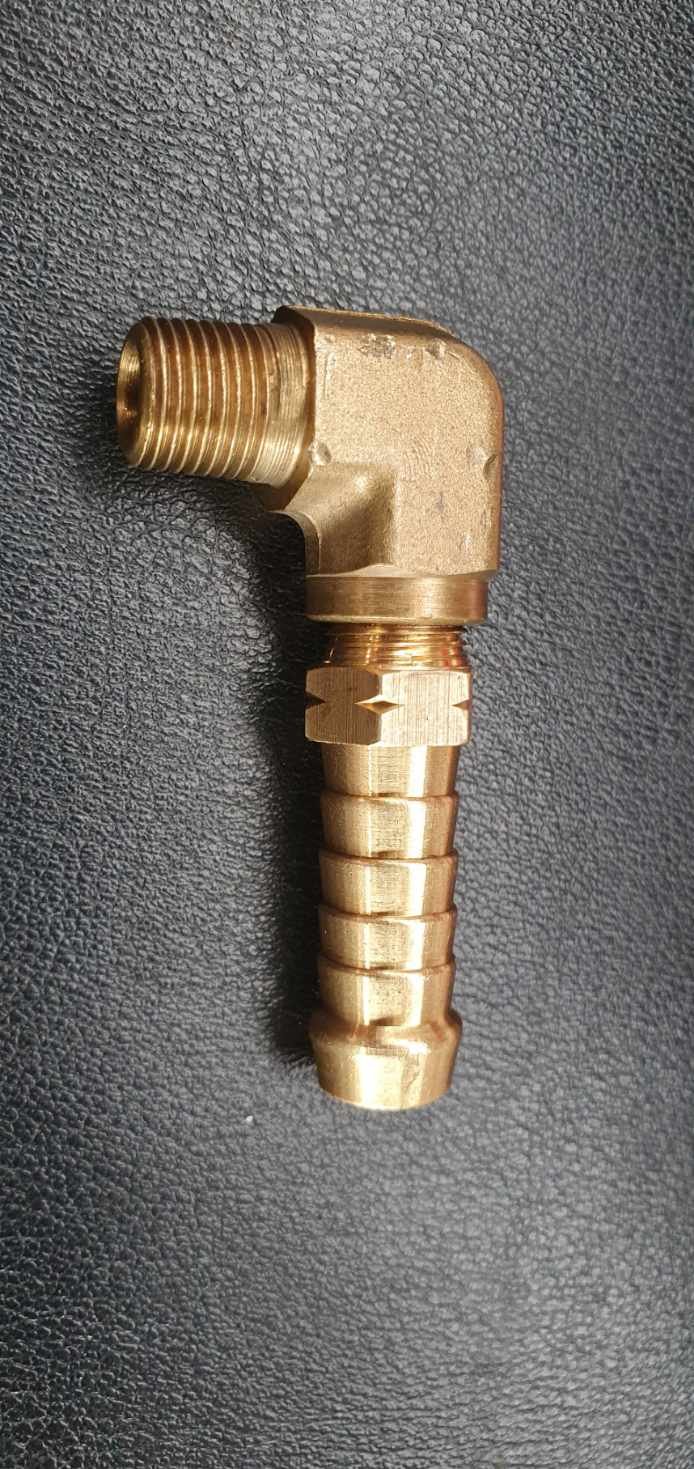
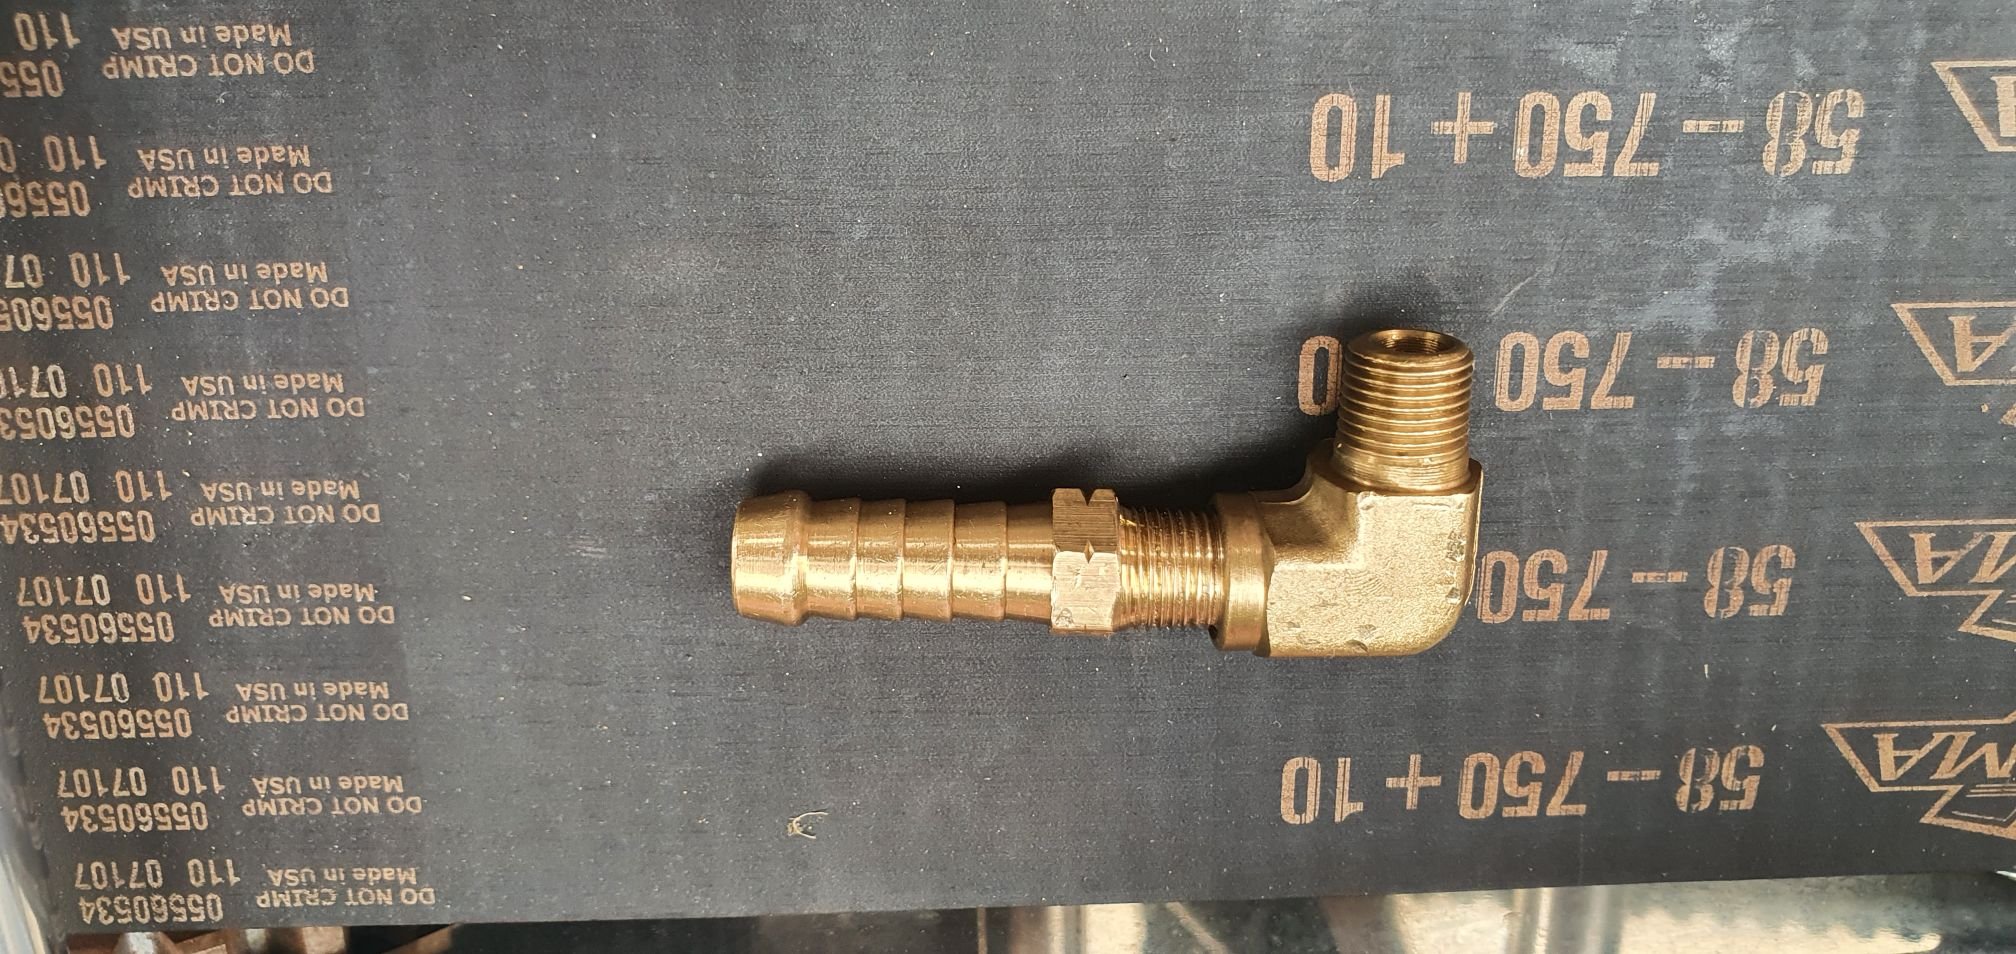
Had a weird situation. I brought 90° fittings for my oil tank, which is normal. But there's not enough space between them to be able to screw them in?? So I had to adapt some fittings to work: This should do the trick.
1 point
-
1 point
-
1 point
-
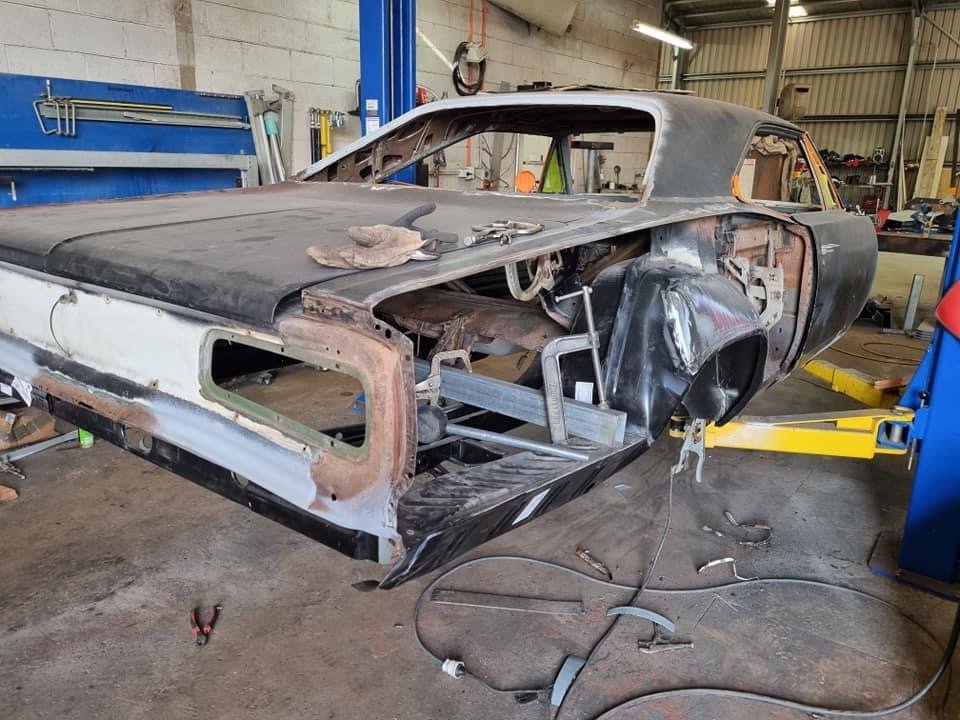
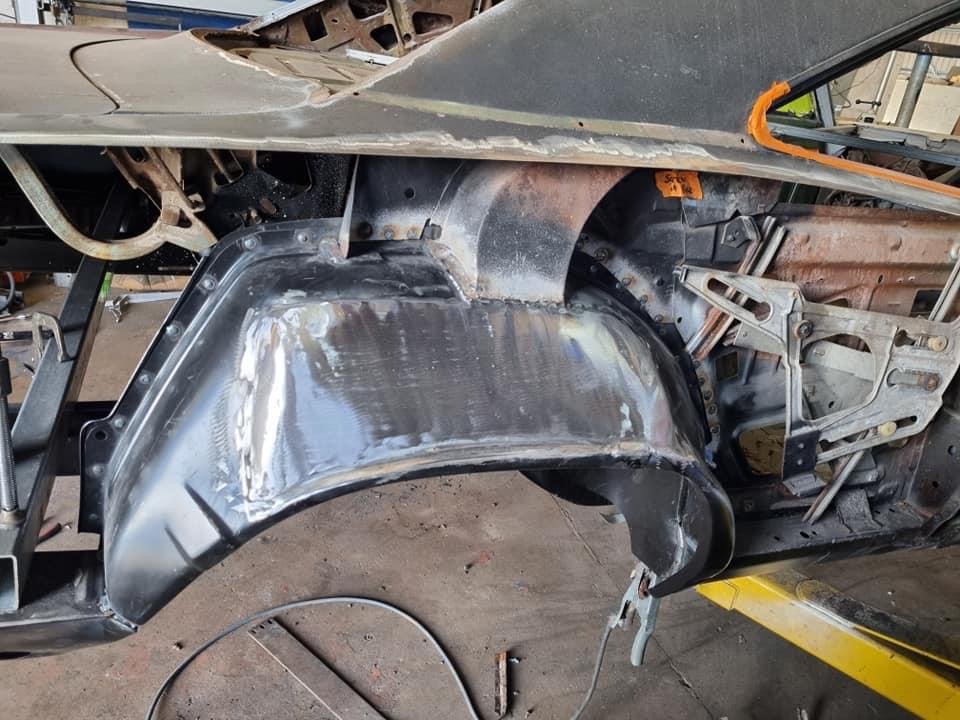
These two from my brothers phone didn’t make it onto the daily updates..just an after pic with quarter panel on
1 point
-
When it came out the side behind the wheel= louder than standard, it has a 3" pipe and a stainless straight thru muffler. My boss took it to a muffler shop to get the cat removed and headers fitted. The muffler guy cbf fitting the headers so cut the cat out and changed the muffler instead. Boss was a bit ?? Anyway When I lowered it I chopped it off at the muffler= very loud, made all the plastic on the rear cab wall rattle Side exit in front of the wheel= somewhere in between Eventually I'll re do the exhaust , fit the headers and probably make it a little bit quieter I disassembled the grille and painted the inserts black and fitted new headlights the other day, front looks a bit tidier I looked at new grilles on rockauto and they are pretty cheap ($180 ish) but freight was over a grand so nope nope nope this grille will be fine
1 point
-
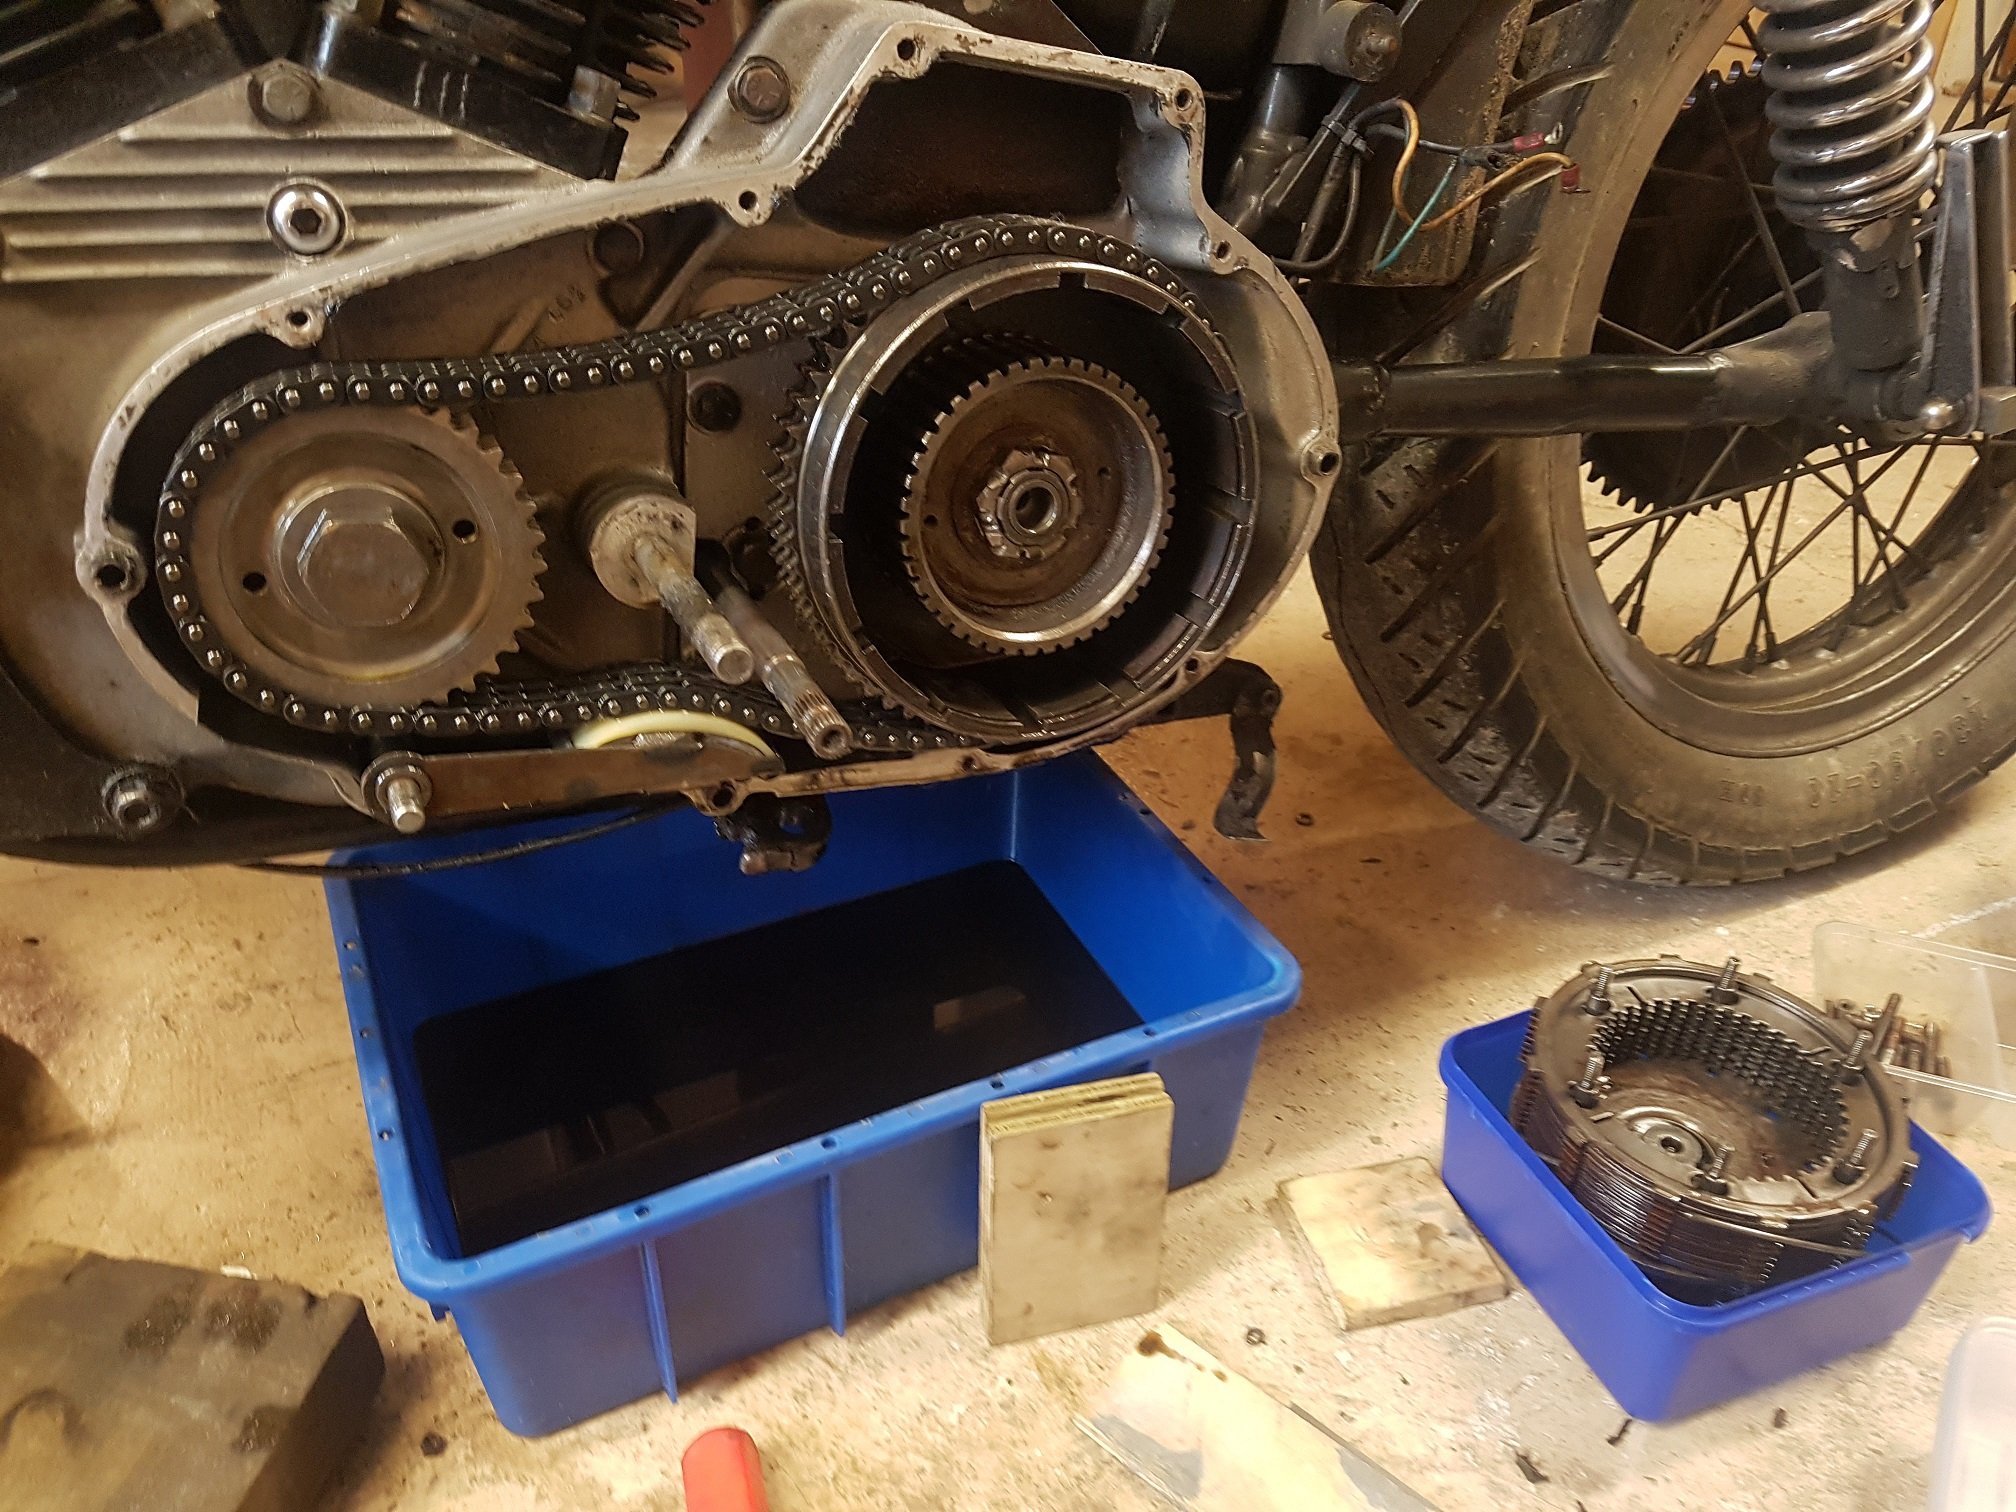
So the only description was that it was a non runner, suit parts. Gearbox broken. Cool, exactly what I was after! an expensive unknown on the opposite end of the island. Perfect. So first step was to try and figure out what was wrong with the gearbox It was stuck in gear and the clutch wouldn't disengage fully. Real easy to maneuver around. So whipped the chain off.: It was a shit to get the clutch out. But made some tools to help. The oil looked disgusting. But there was no broken metal (yet) so hadn't grenaded, good? i suppose?
1 point
-
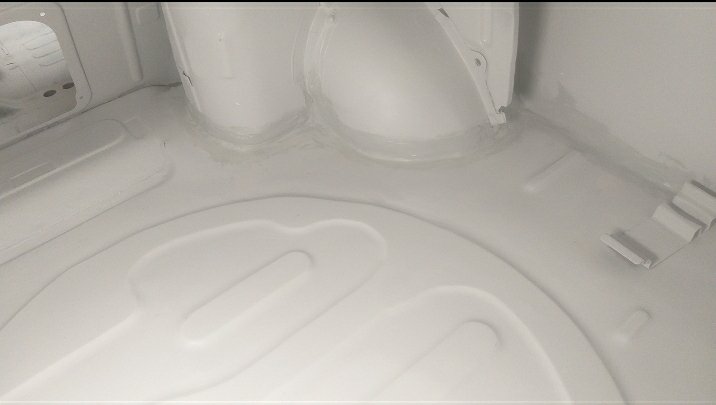
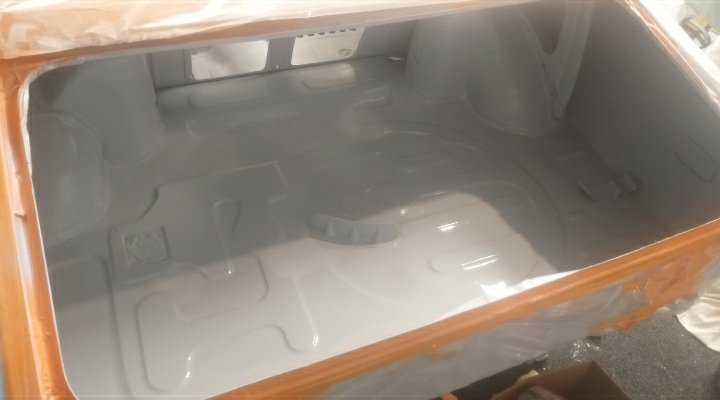
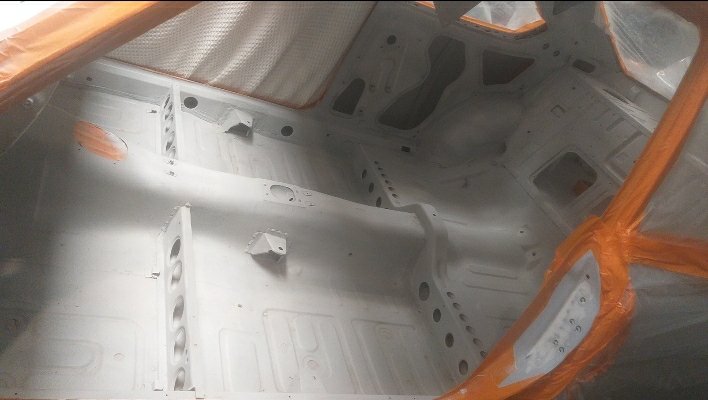
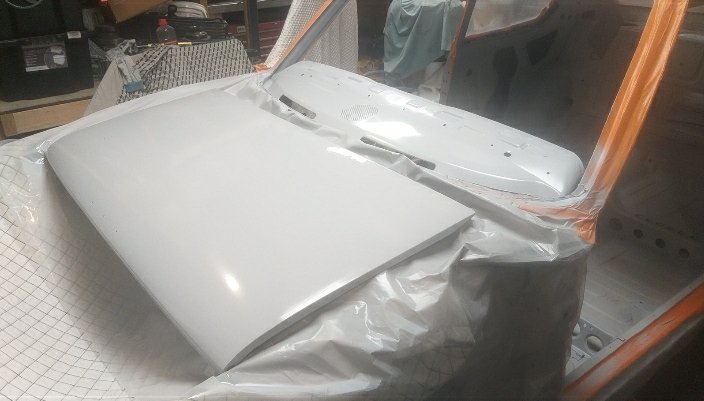
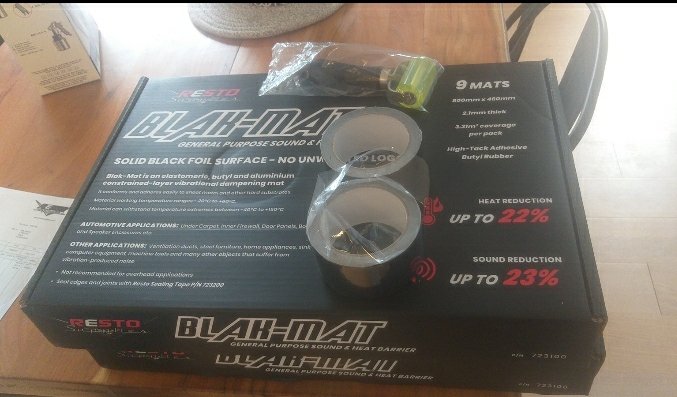
Still busy prepping boot have re-epoxied, seam sealed, and filler primer, all ready for top coat. Have also cleaned up cabin, ready for some colour to seal it off. Dash and boot lid filler primer applied also. Purchased a new elcheapo spray gun for top coating inside car, and settled on Blak Mat for sound deadening. Full kit of 2x packs, roller, and tape was $375, still cheaper than 1x dynamat pack so I'm happy
1 point
-
Still making progress on this thing. Have been a bit slack at taking detailed progress photos. Engine was dropped in a while ago. Radiator and overflow bottle finished up too. Fuel lines are done as well as the brake and clutch lines, they bleed up perfectly! Built the exhaust too. Went with a twin 2" stainless system and made the muffler as well. It's now fully welded and mounted properly. Swapped to the SSR MkII's Have put the original loom back in and hooked up most things again. Need to reroute the wiper motor plug, rewire the dash to suit the tacho cluster and redo all the wiring that runs through the front guards so it can be tucked away. Then I need to figure out how to wire up the engine with the Link ecu!1 point
-
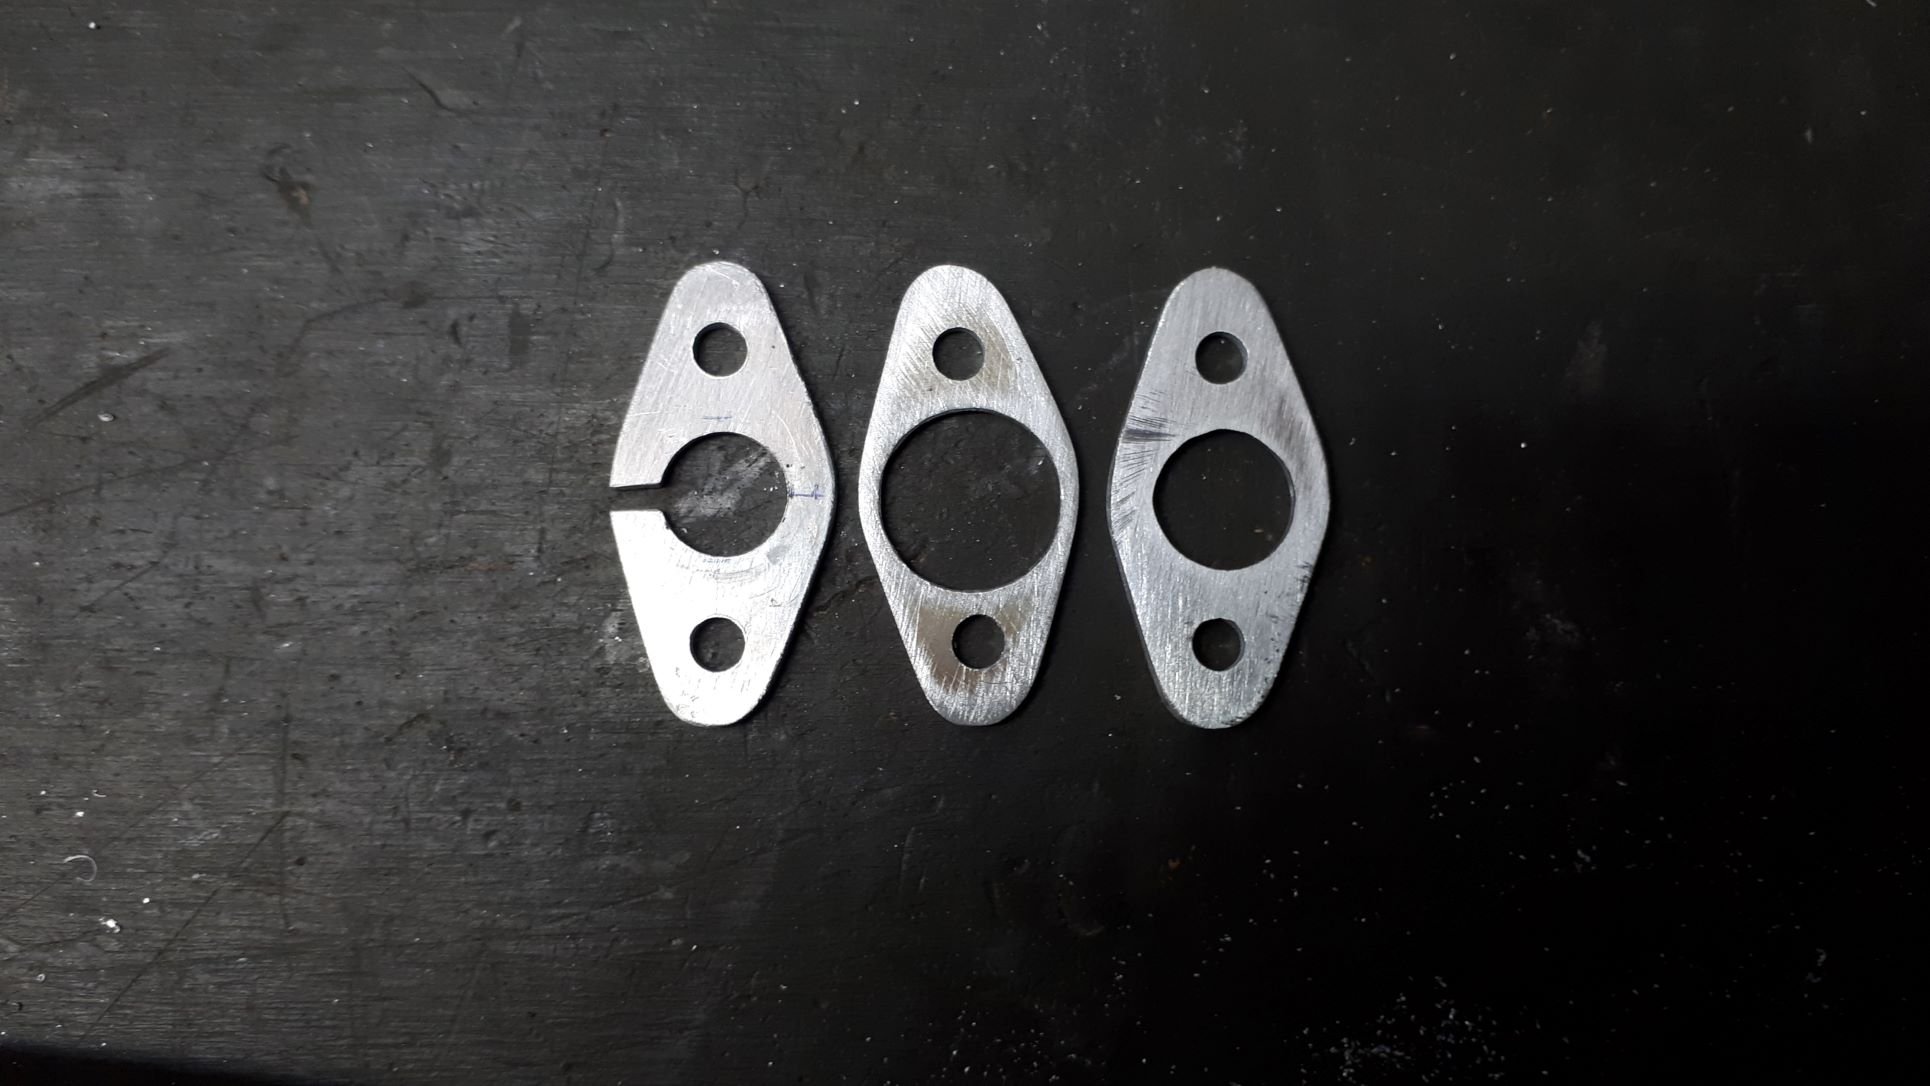
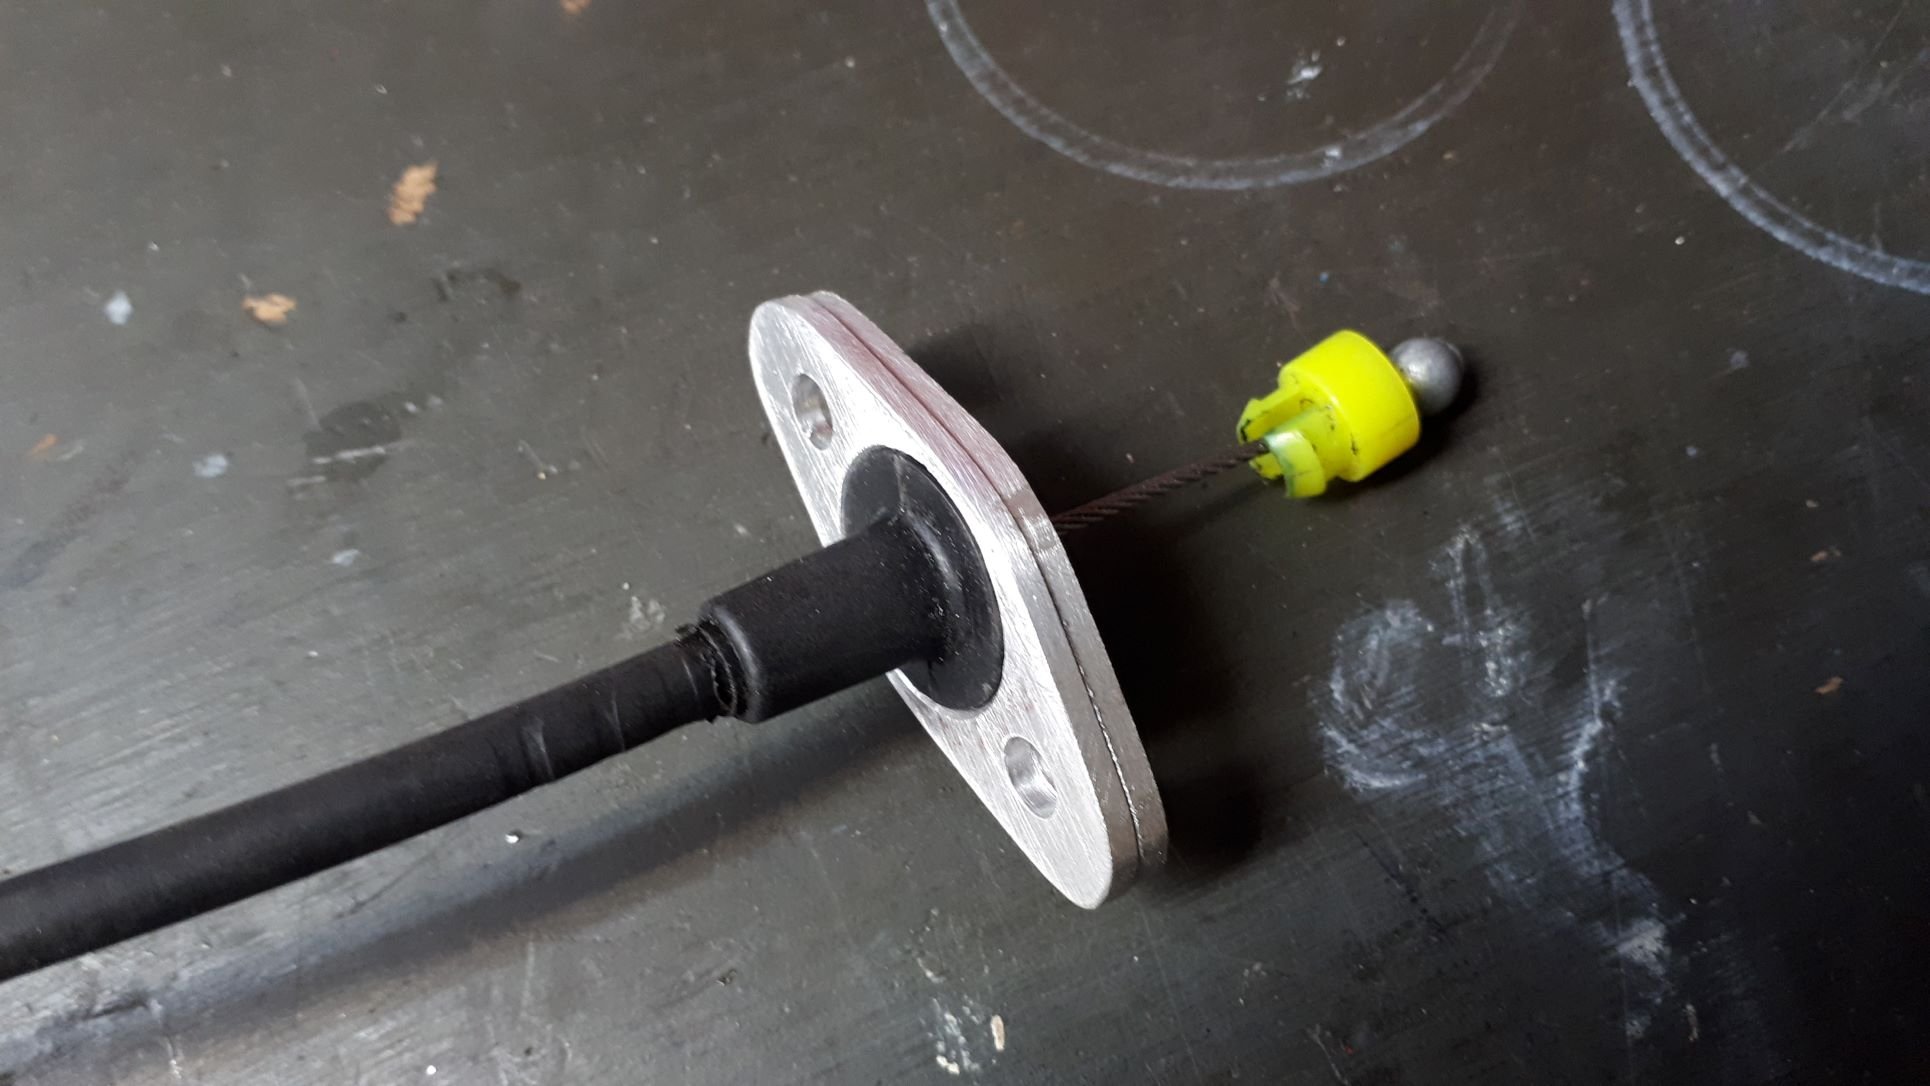
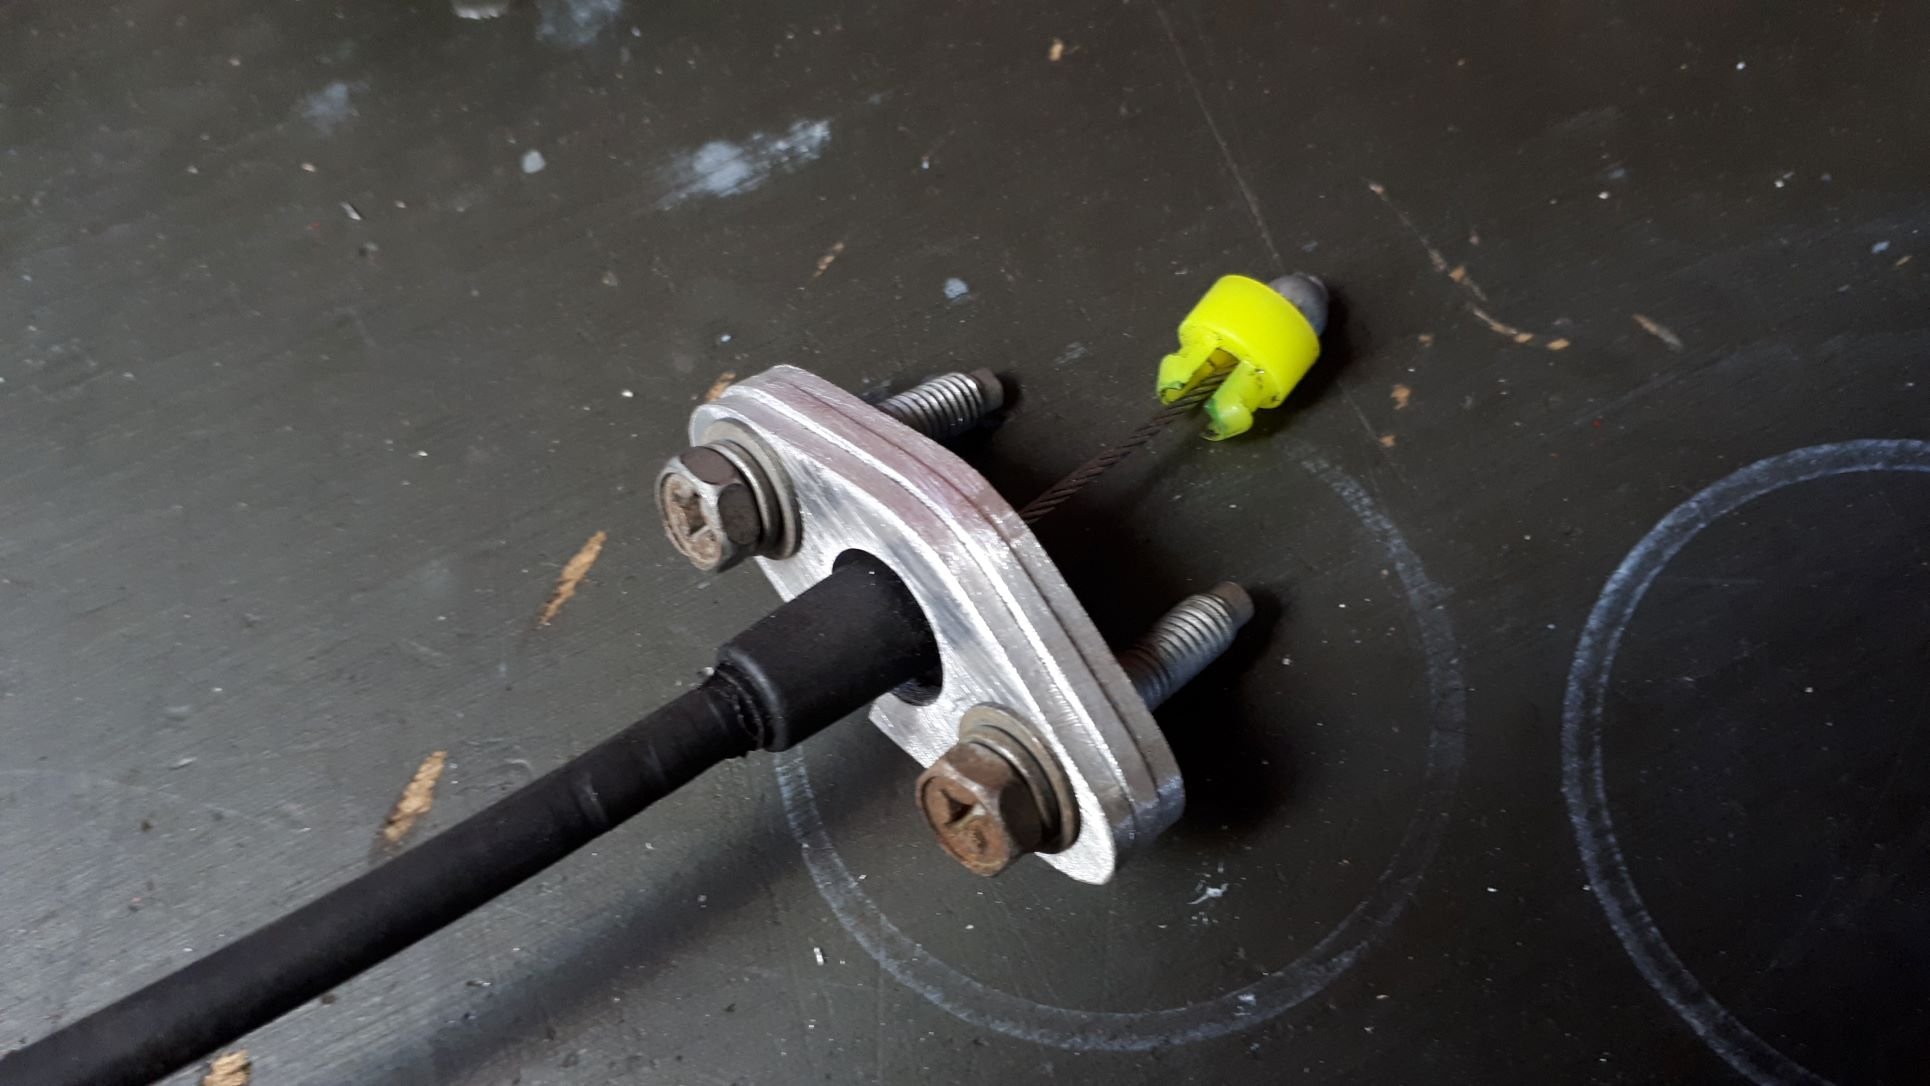
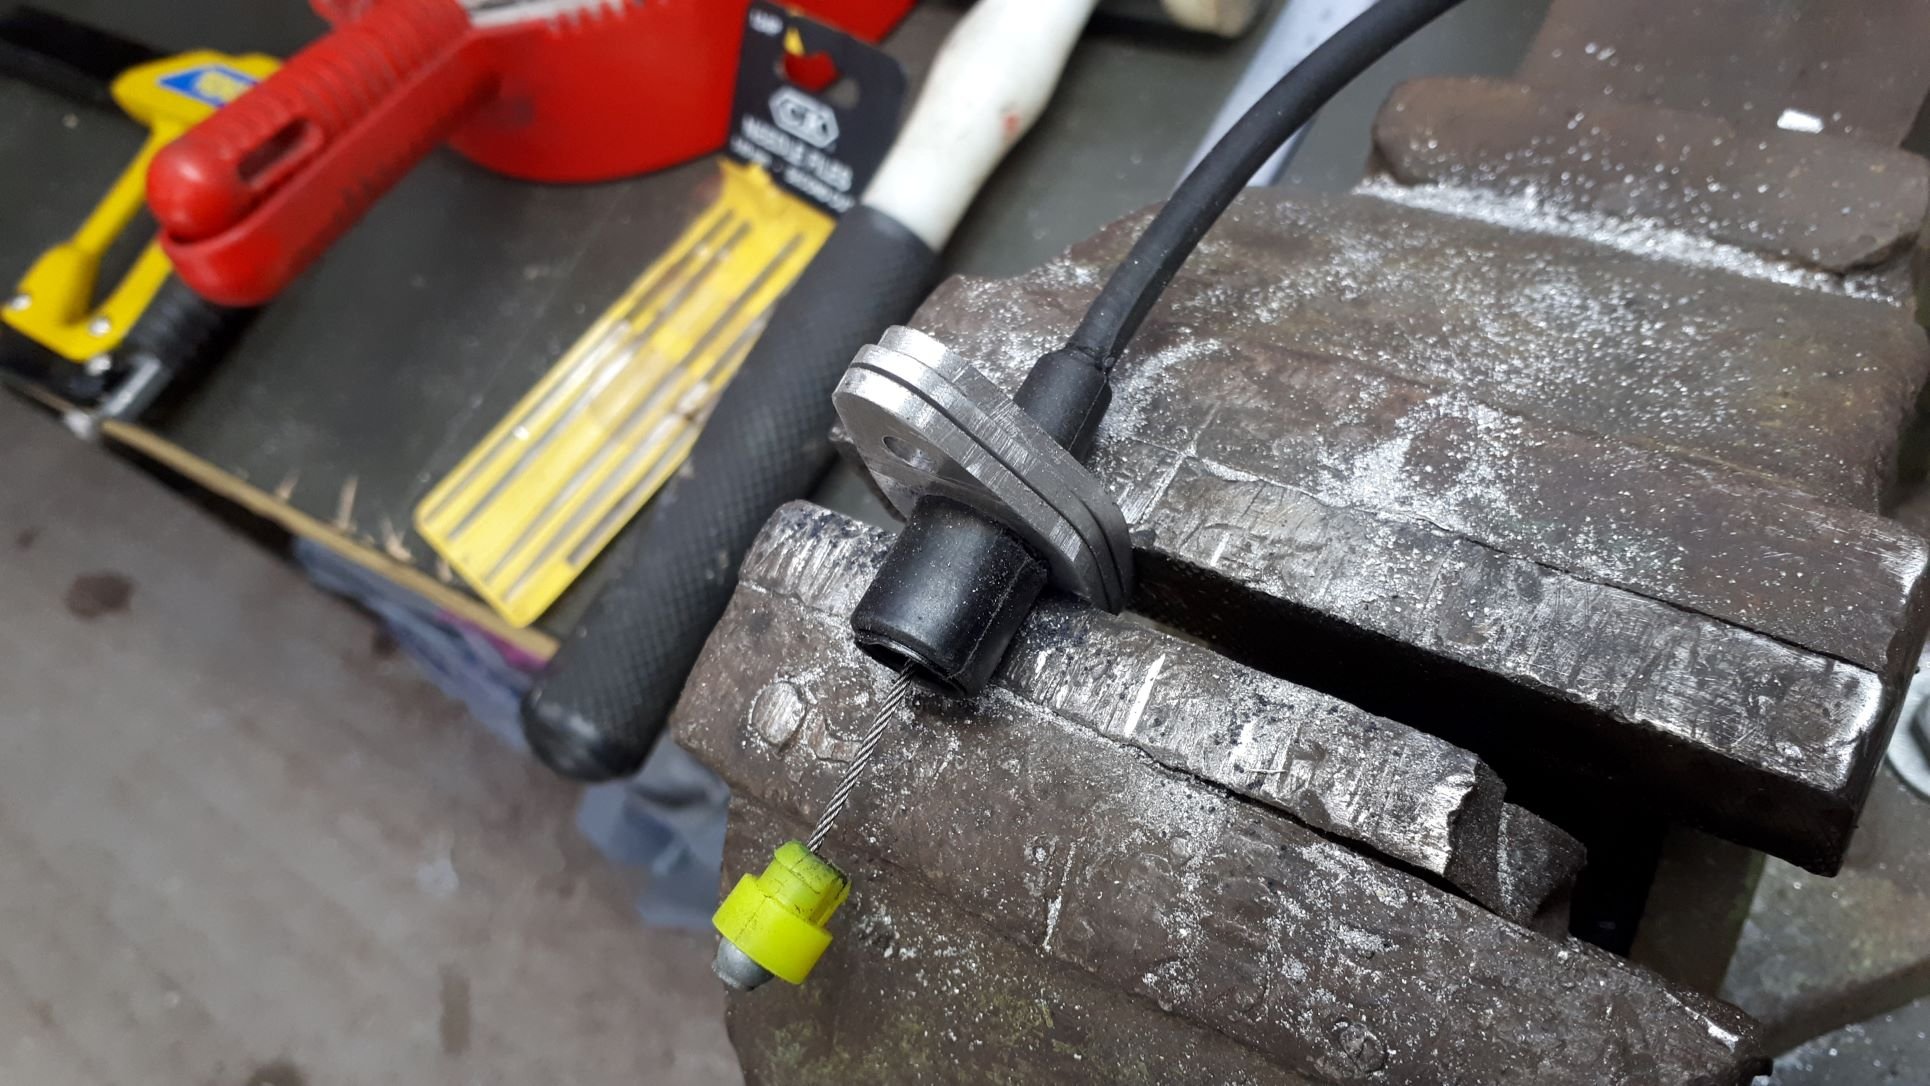
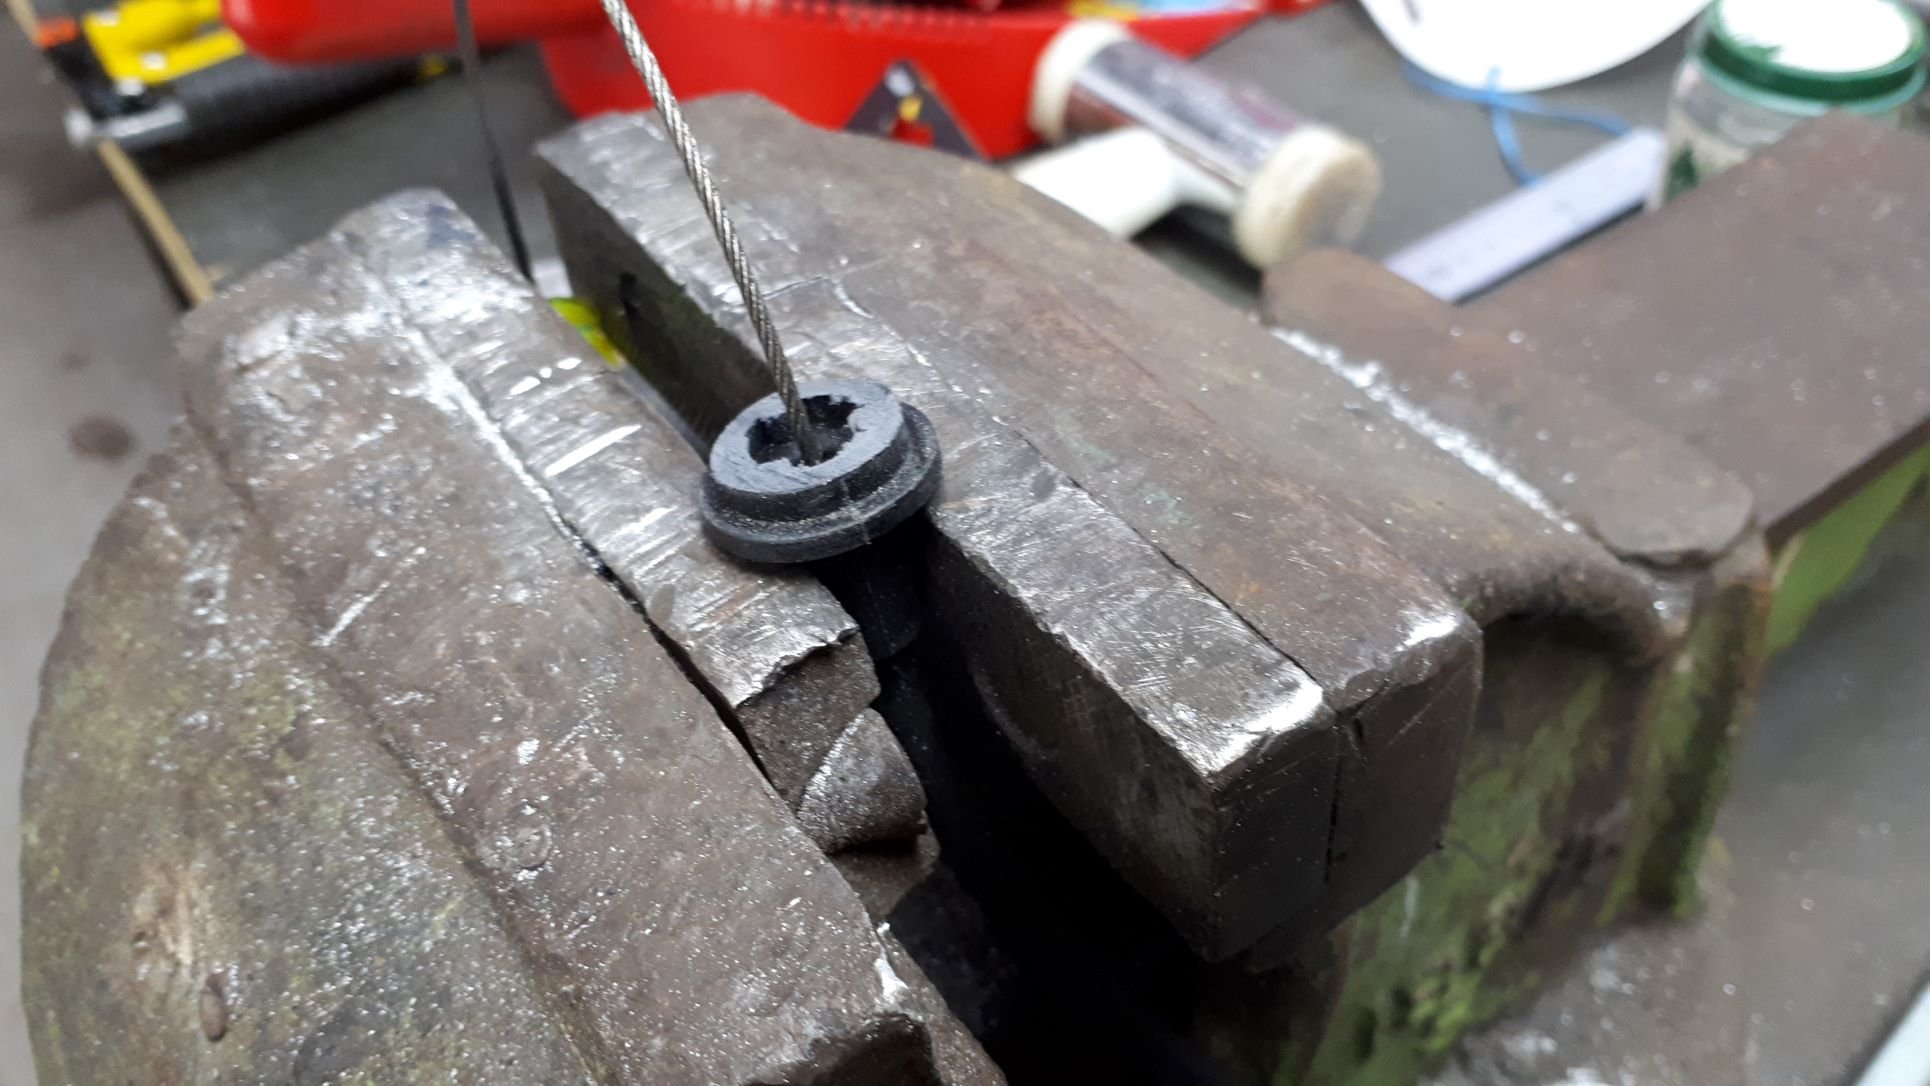
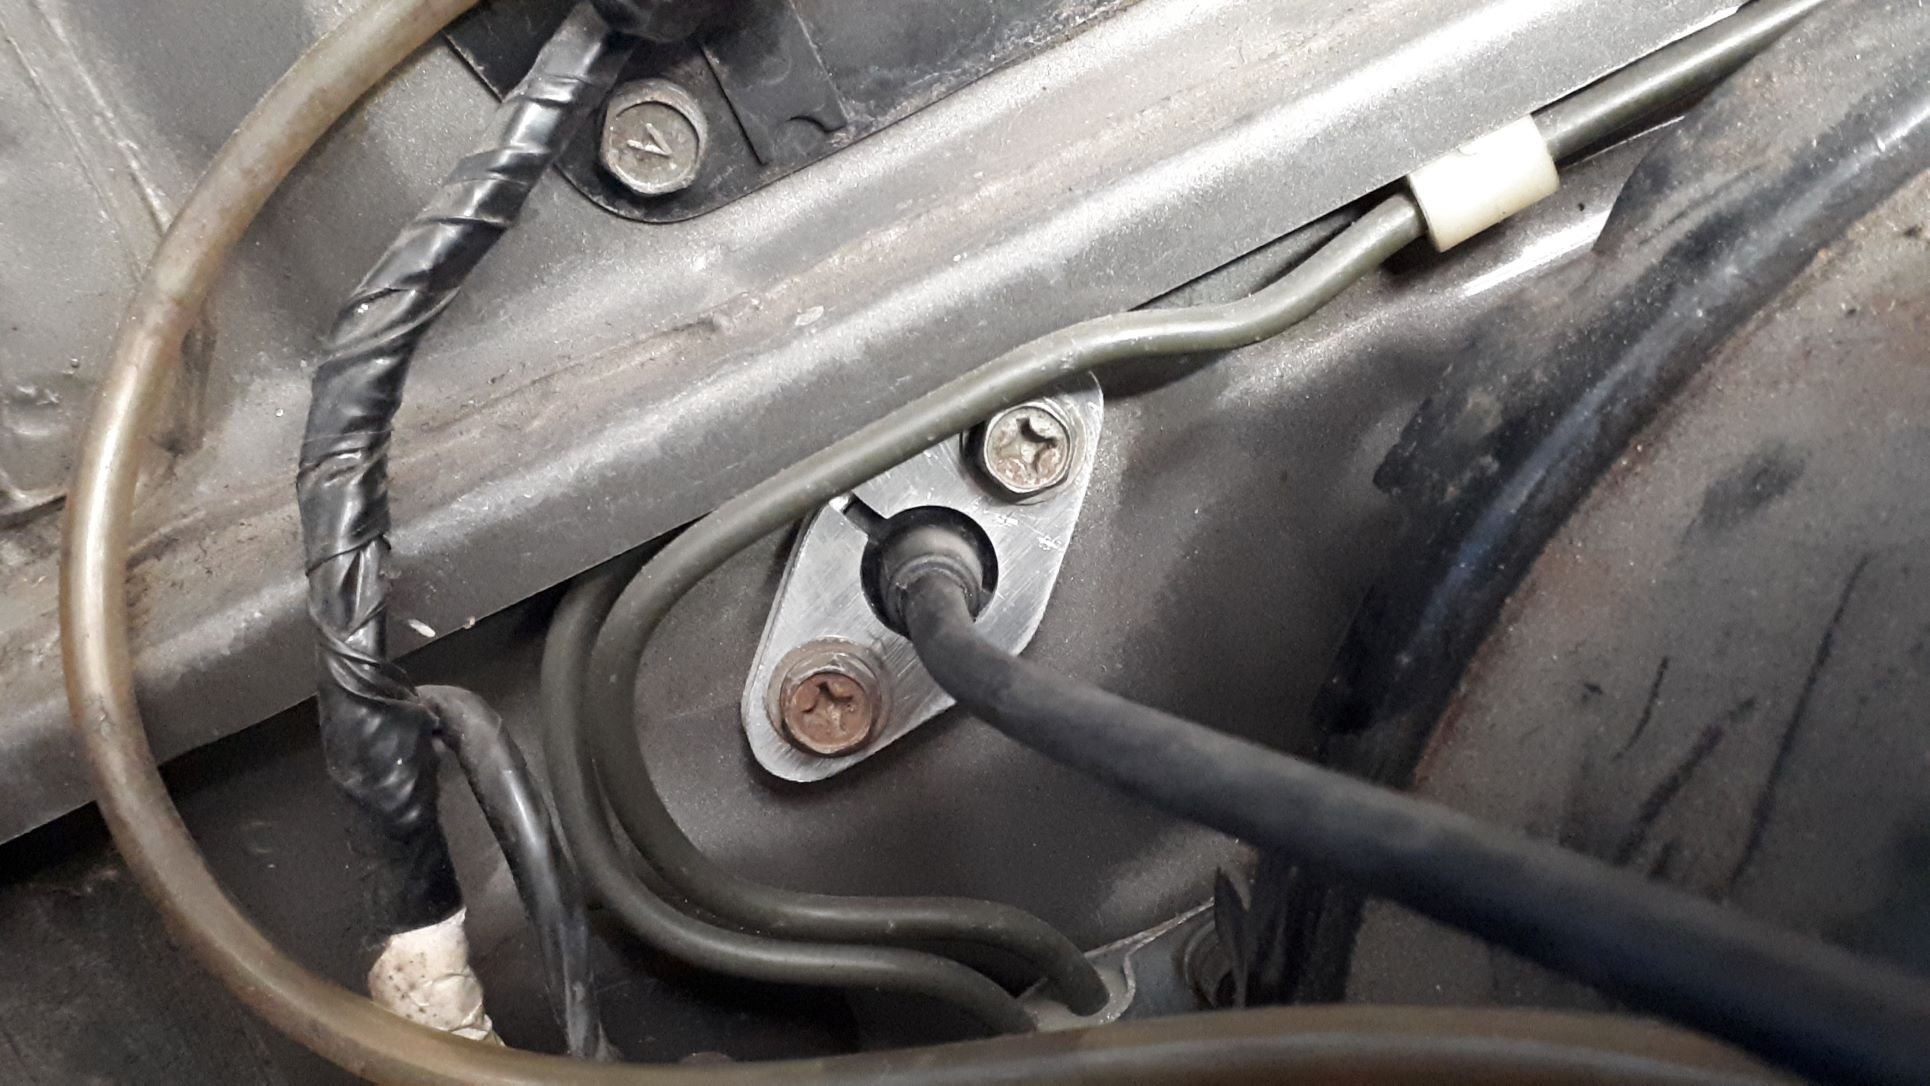
Here is a trick that others might want to use. VT-VY commodores have a good throttle cable that can be easily adapted to fit almost any car. I have one in my Valiant and now also in the Sigma. They are dirt cheap, a decent length and are available from any Pick-a-Part in NZ. You simply make three plates to clamp the cable at the firewall (with fastening holes to suit your particular car) and if required do a little trimming of plastic and it works a treat.
1 point
-
Tonight I modded the rack in preparation for spare tyre shenanigans, even got some paint on it this time. Yea nice rack. Badum tish1 point
-
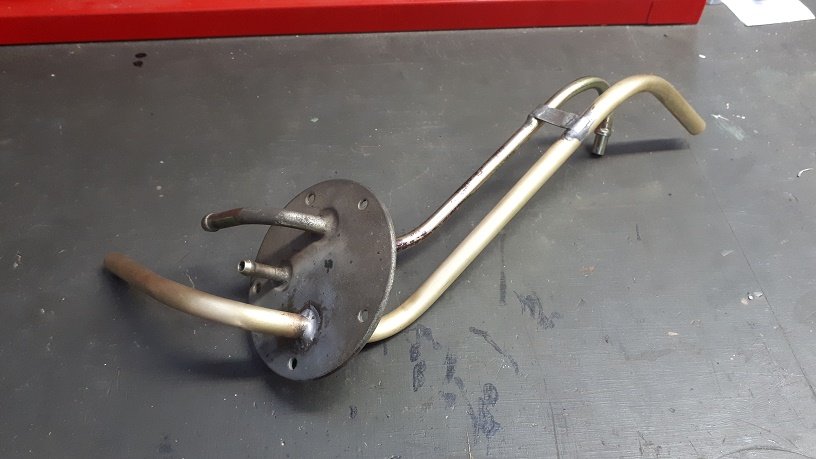
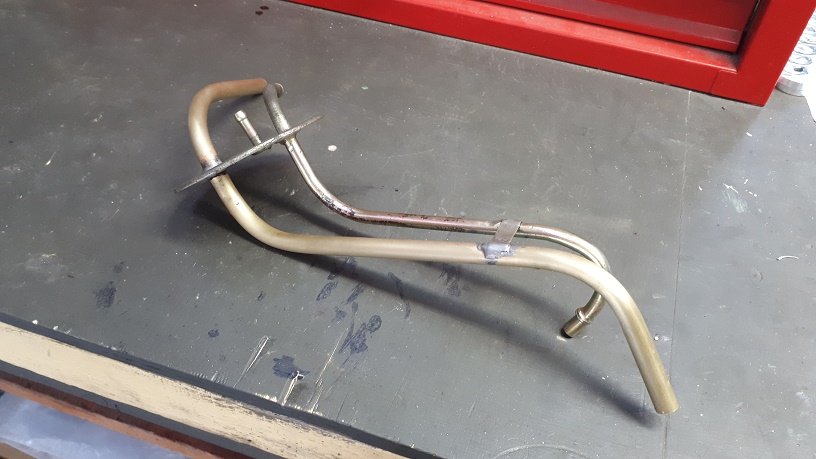
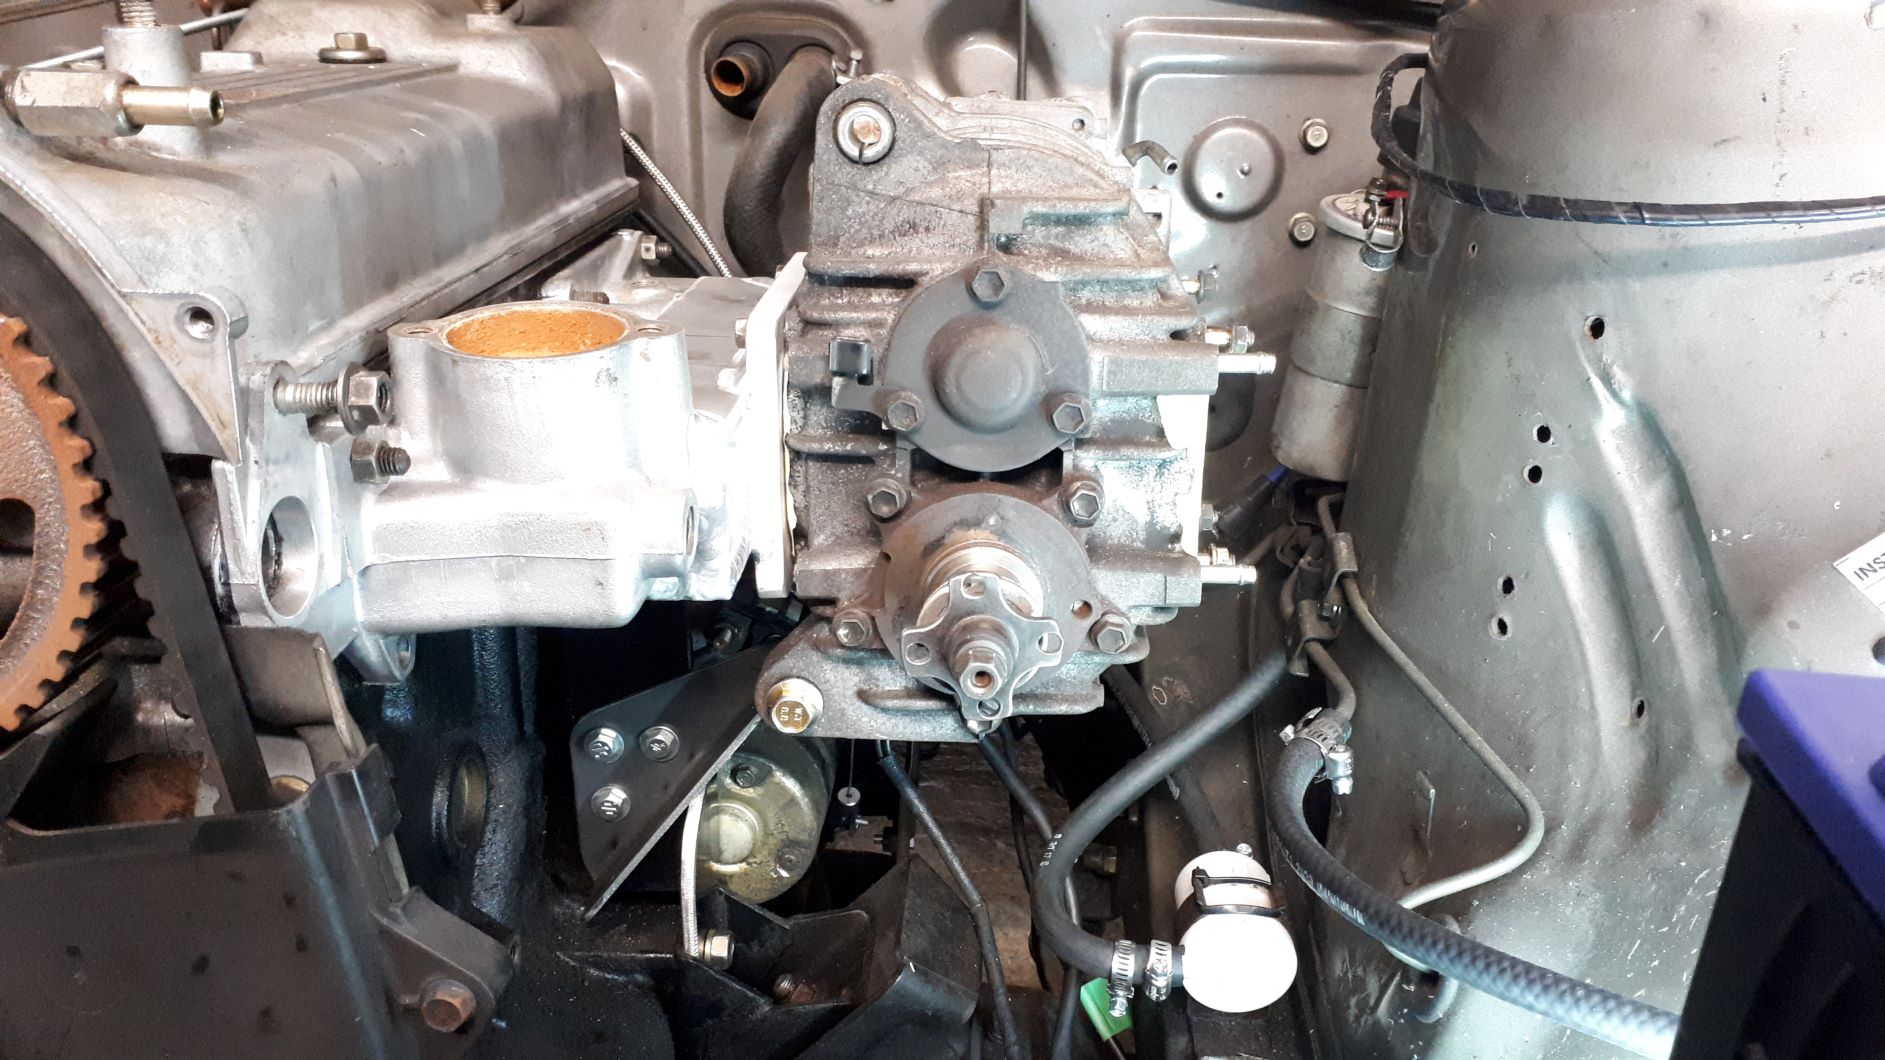
So I have been waiting for essential parts to arrive from overseas and have been keeping myself busy with little things. The manifolds are all fitting nicely and all I need to do is trim the carburetor flange to size so it looks a little more attractive. I will wait until I have the carburetor mocked up in place before I do this to make sure I don't run into any clearance issues with the throttle and transmission linkages etc. It all ended up fitting very neatly around the strut tower and the carb should end up in a reasonable position with sufficient hood clearance. I also decided to fit larger fuel lines as the factory ones seemed very small. This is probably more for the future but since I am installing an electric fuel pump now I figured it was best to do the fuel lines as well. I removed the factory 1/4 inch return line from the car, and from the tank pick up assembly, and replaced it with a larger line that will become the fuel feed line. The original 5/16 fuel line will become the return. Bending all that hard line into the correct shape to fit with the factory lines was a challenge but it all turned out pretty well and looks neat and tidy installed in the car. I had to pull the driveshaft out to get access but no big deal.
1 point
-
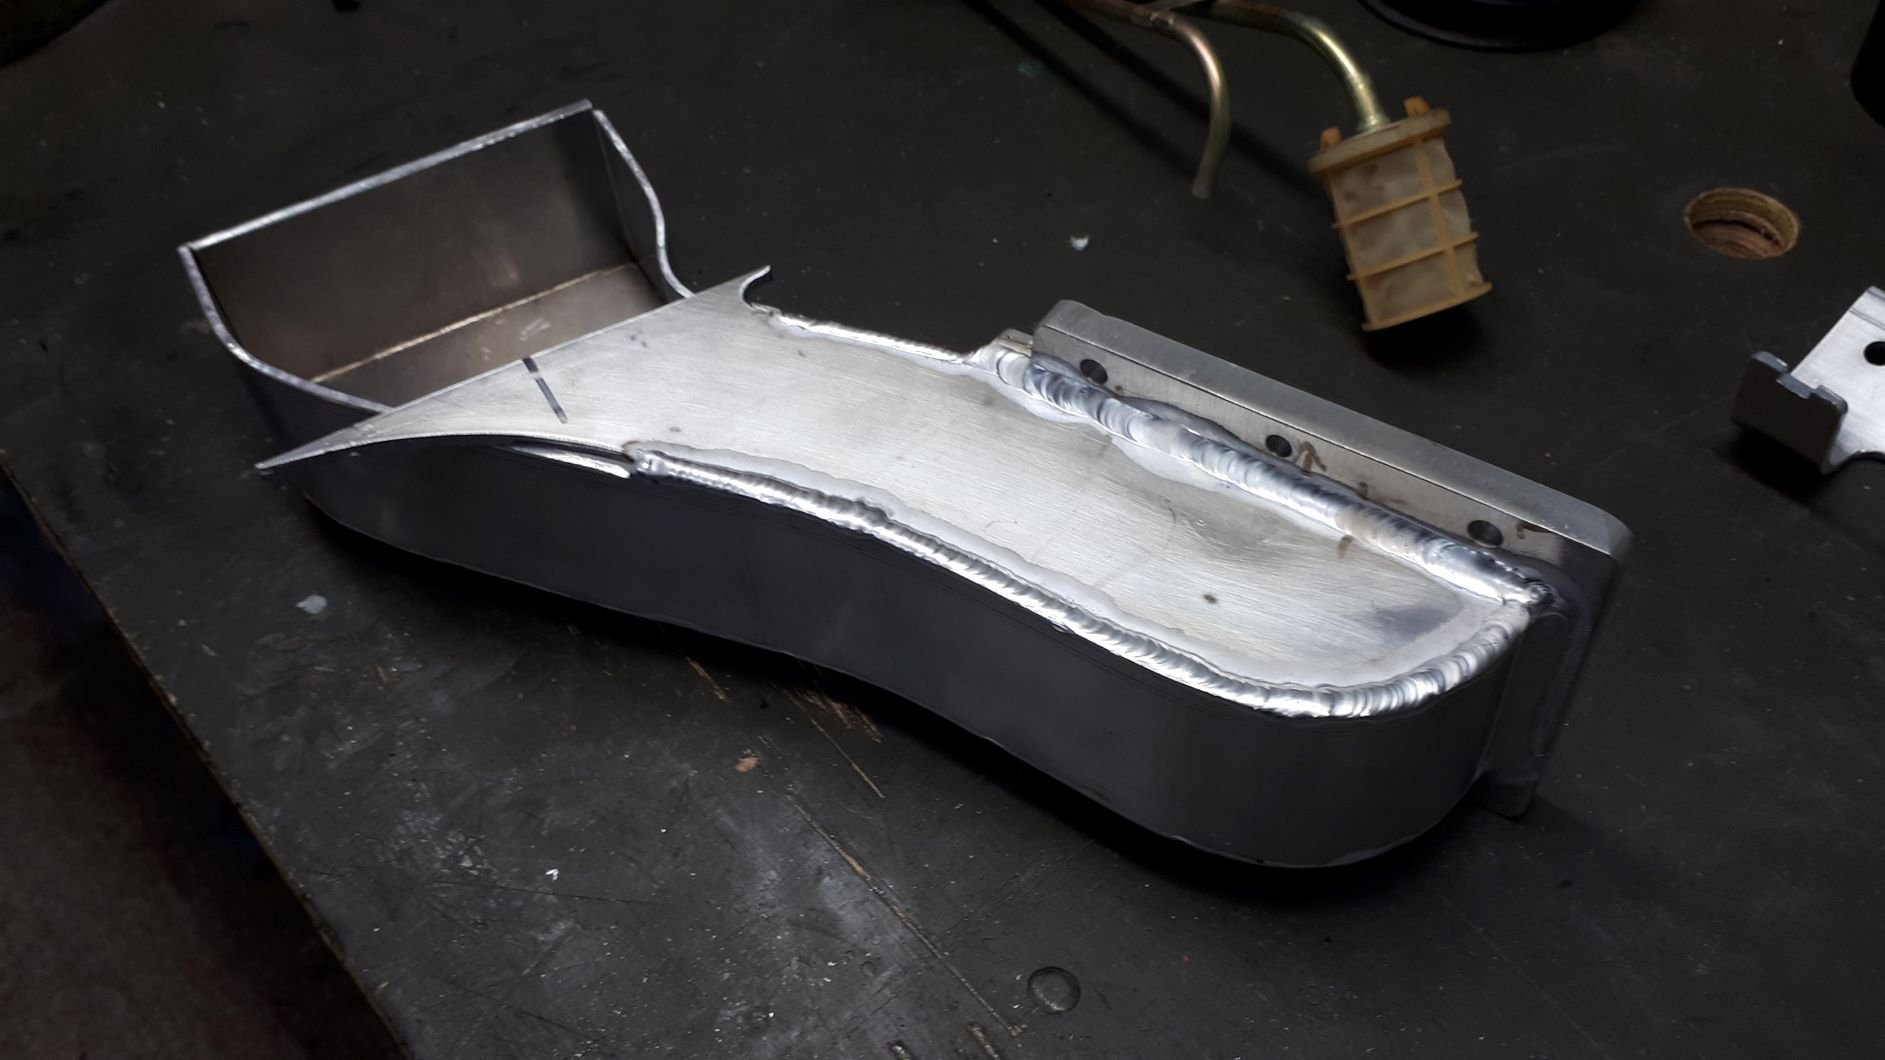
Another dozen Steinlager to the man with the aluminium welding skills and another little bit is stuck together.
1 point
-
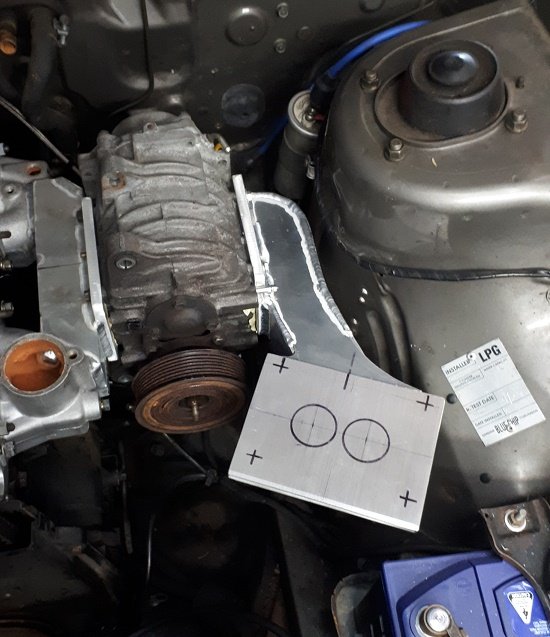
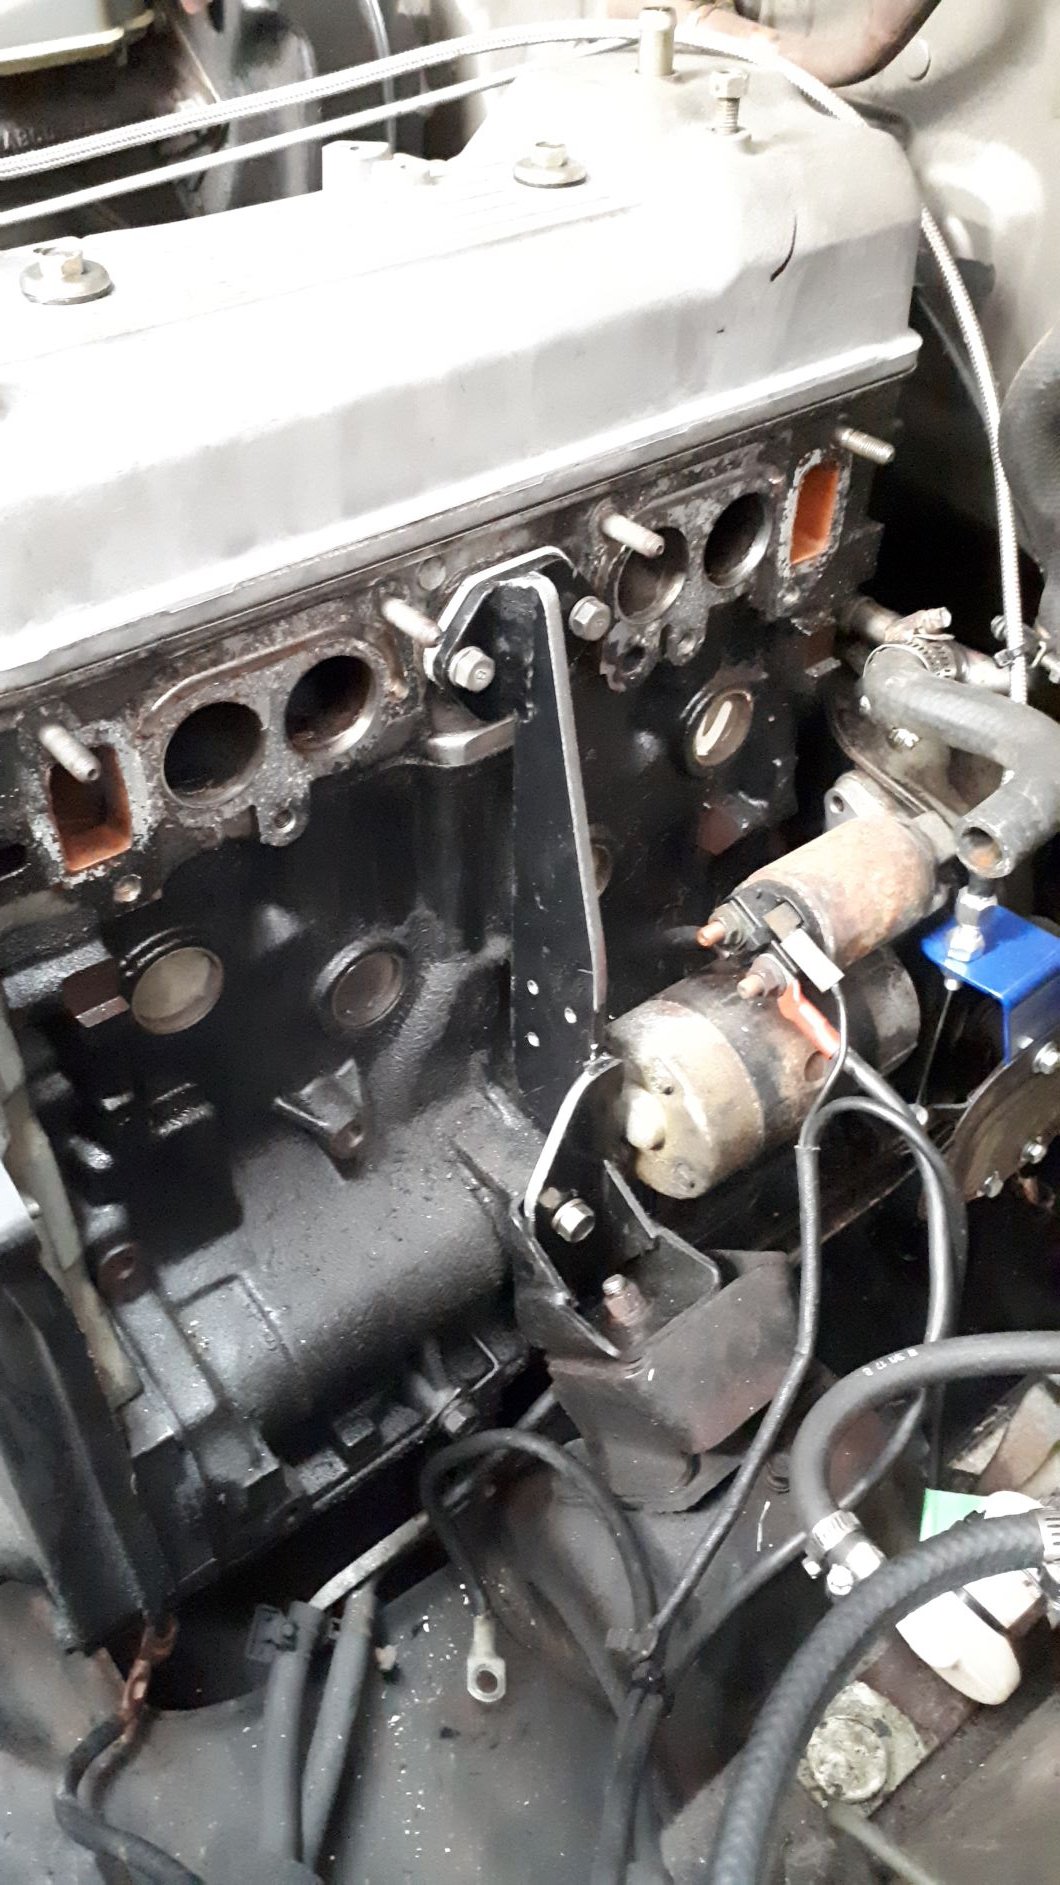
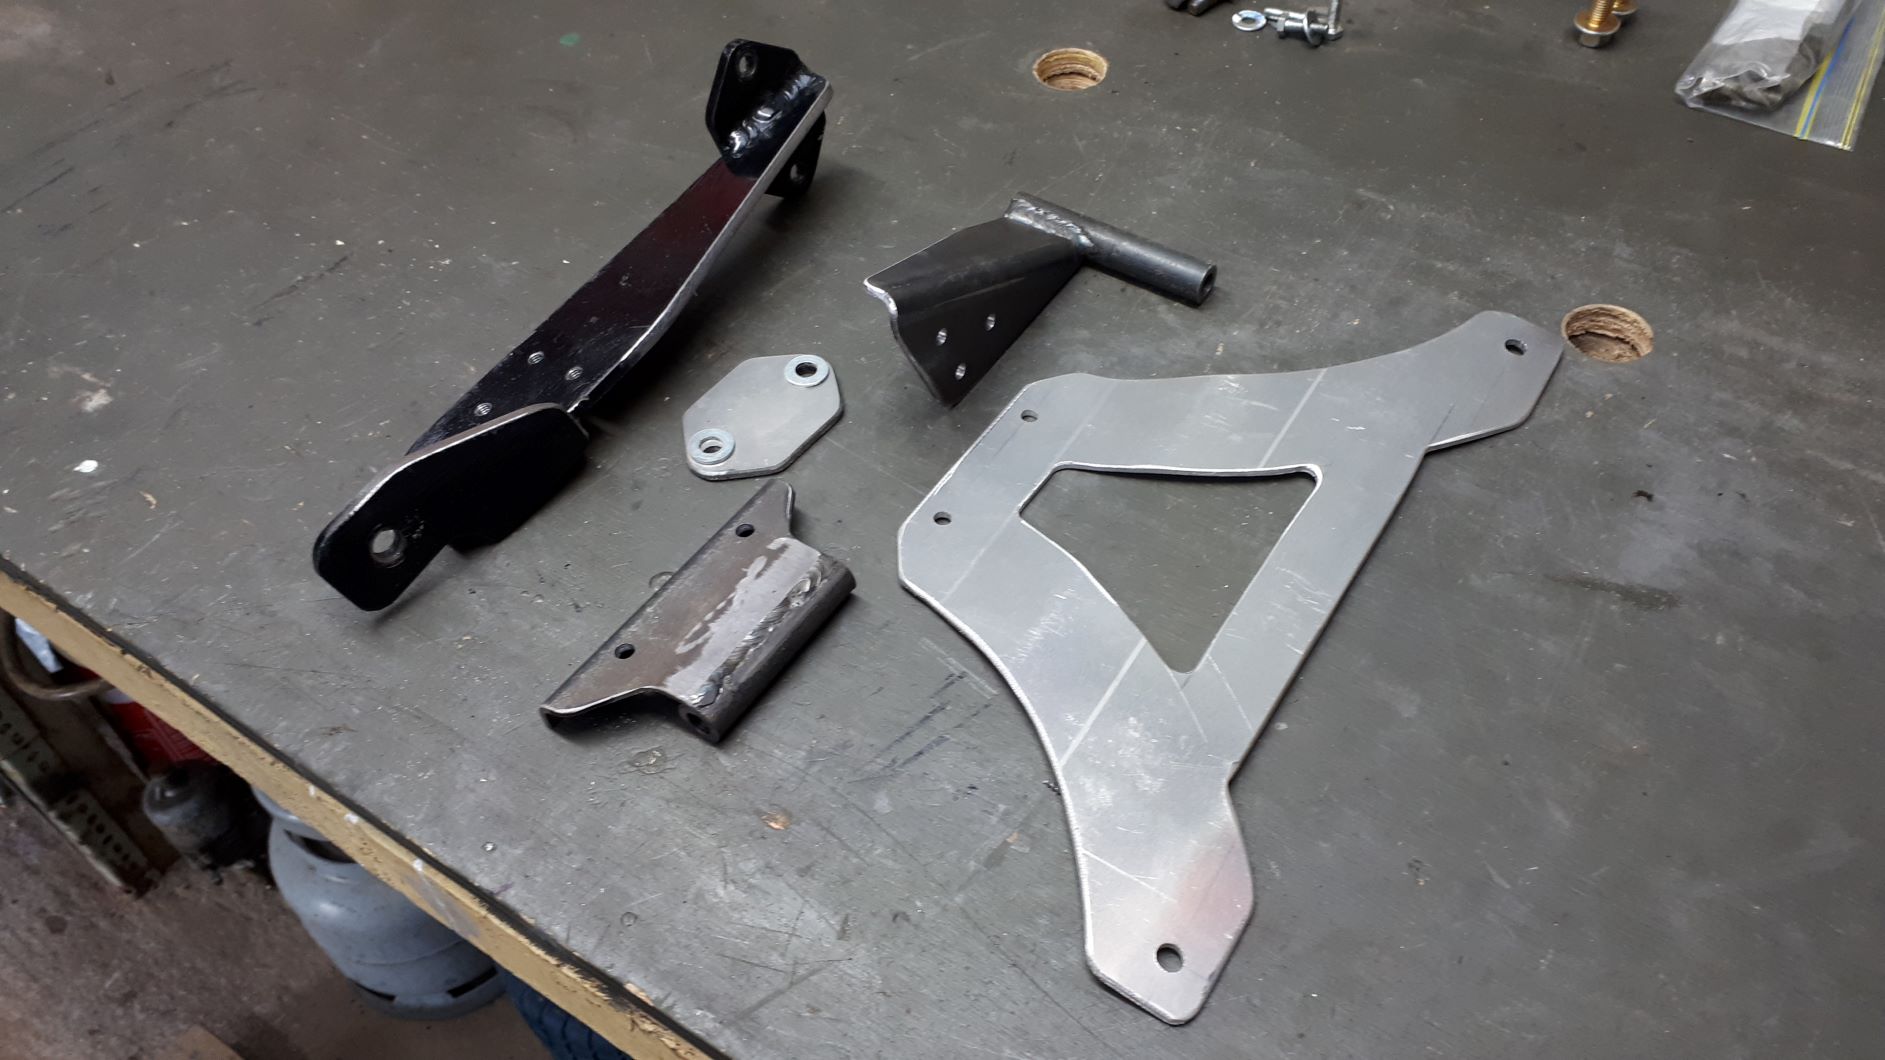
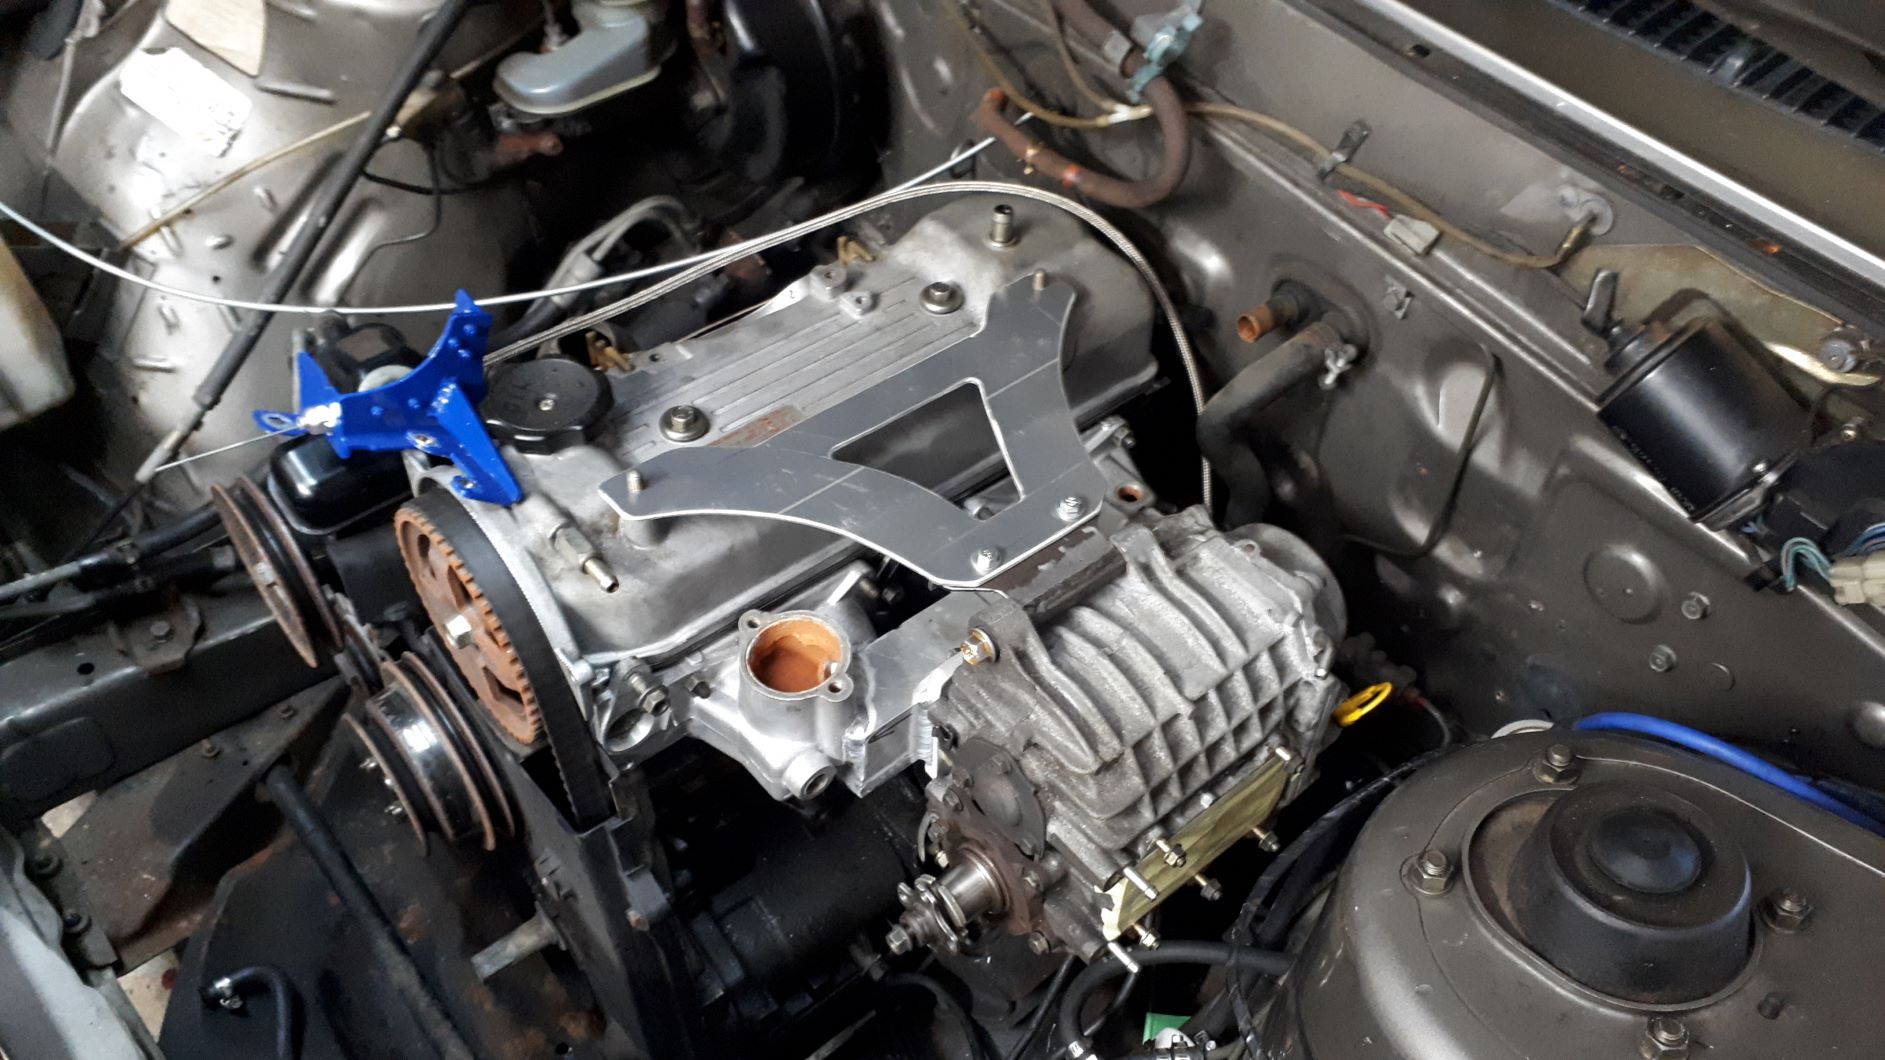
This weekend has been all about making some brackets so the supercharger isn't just dangling off the manifold. I am going to use an electric fuel pump so I decided to repurpose the fuel pump mounting location and made a bracket to support the lower supercharger mount. The upper mount is fastened back to a couple of studs on the engine that used to support the air filter assembly, I hope this is strong enough but didn't really have a lot of other options for this one.
1 point
-
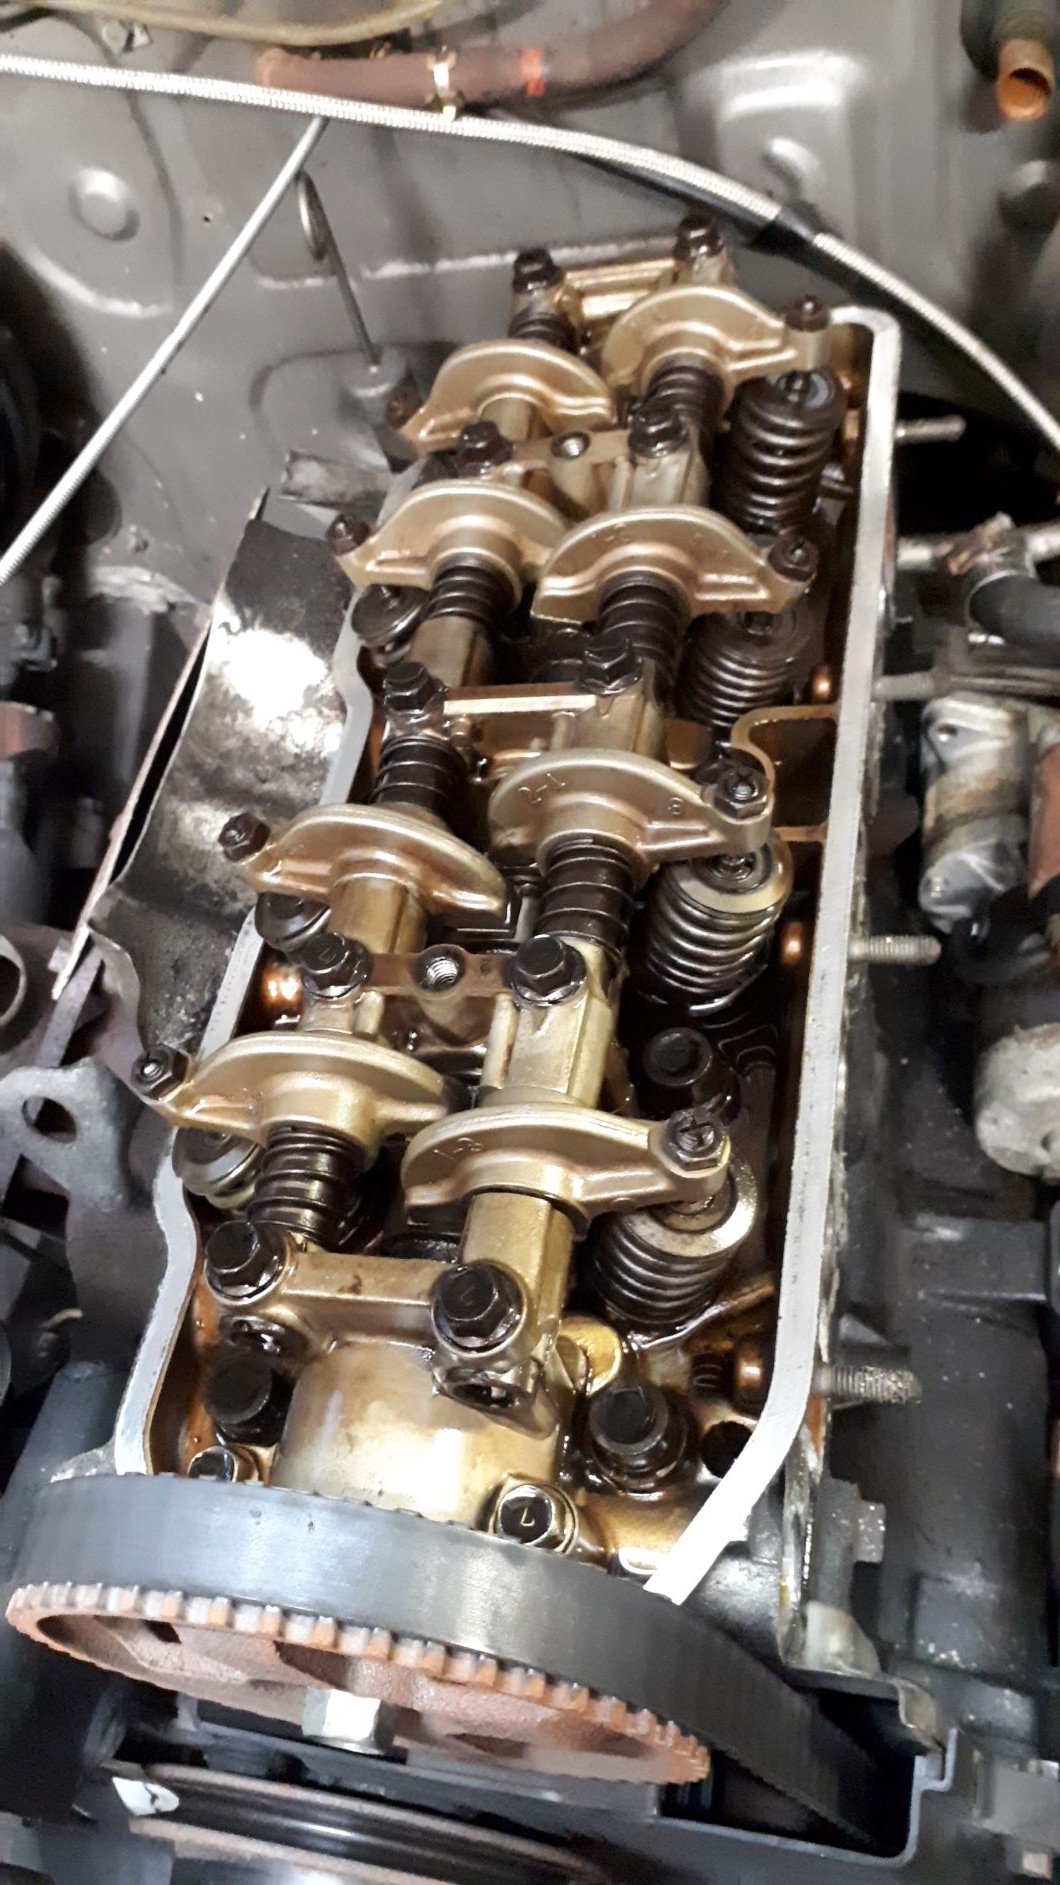
I figured I should probably have a look inside the engine to see if its actually worth the attention I am giving it. Good news is it seems to be in great condition, it's very clean so must have been well looked after over the years. It might even survive with the new belt driven intake. I am also having second thoughts about the carburettor choice for this set up. I have been doing a lot of research and it seems that the Weber is not well suited to a draw through application. It seems that a 350 Holley is a much better option (as previously suggested by @RUNAMUCK). There is plenty of info available on modifying the power valve for boost reference so I will probably put the Weber to one side and look for a Holley to play with. If anyone has a decent 350 Holley that might be for sale please let me know.
1 point
-
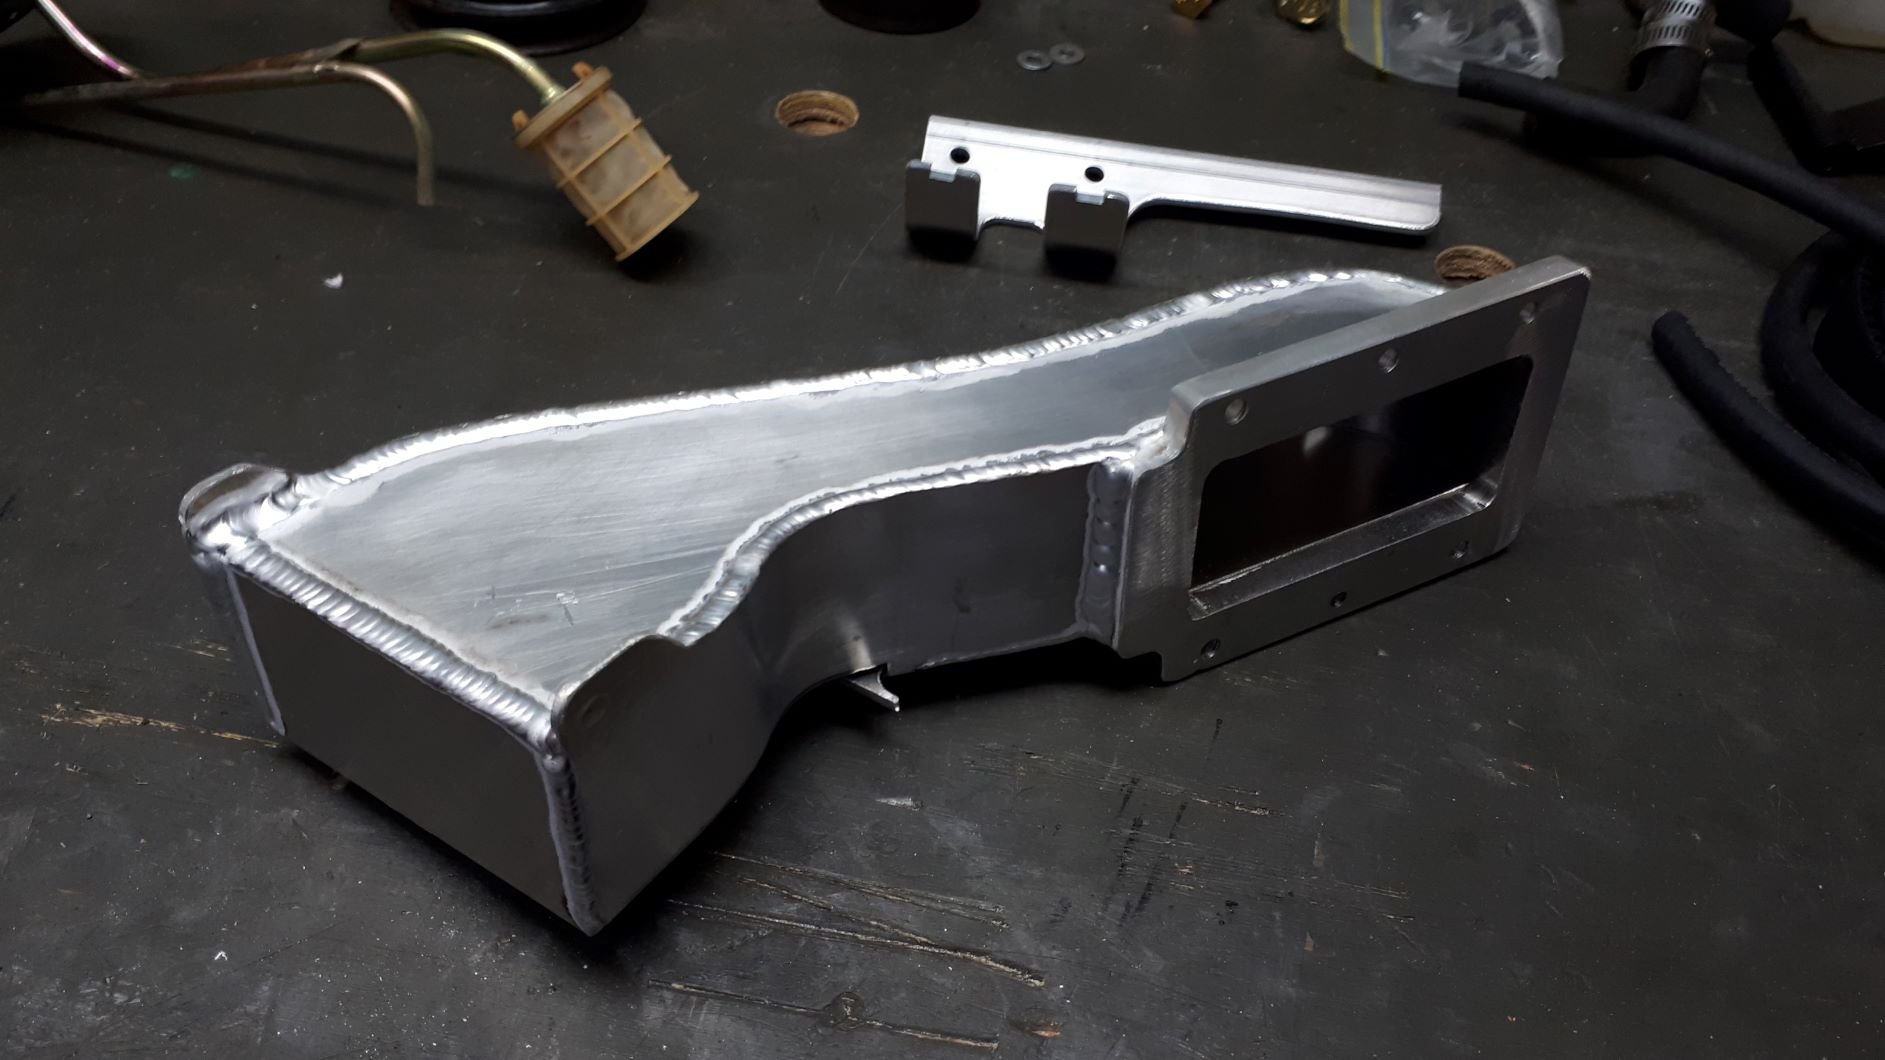
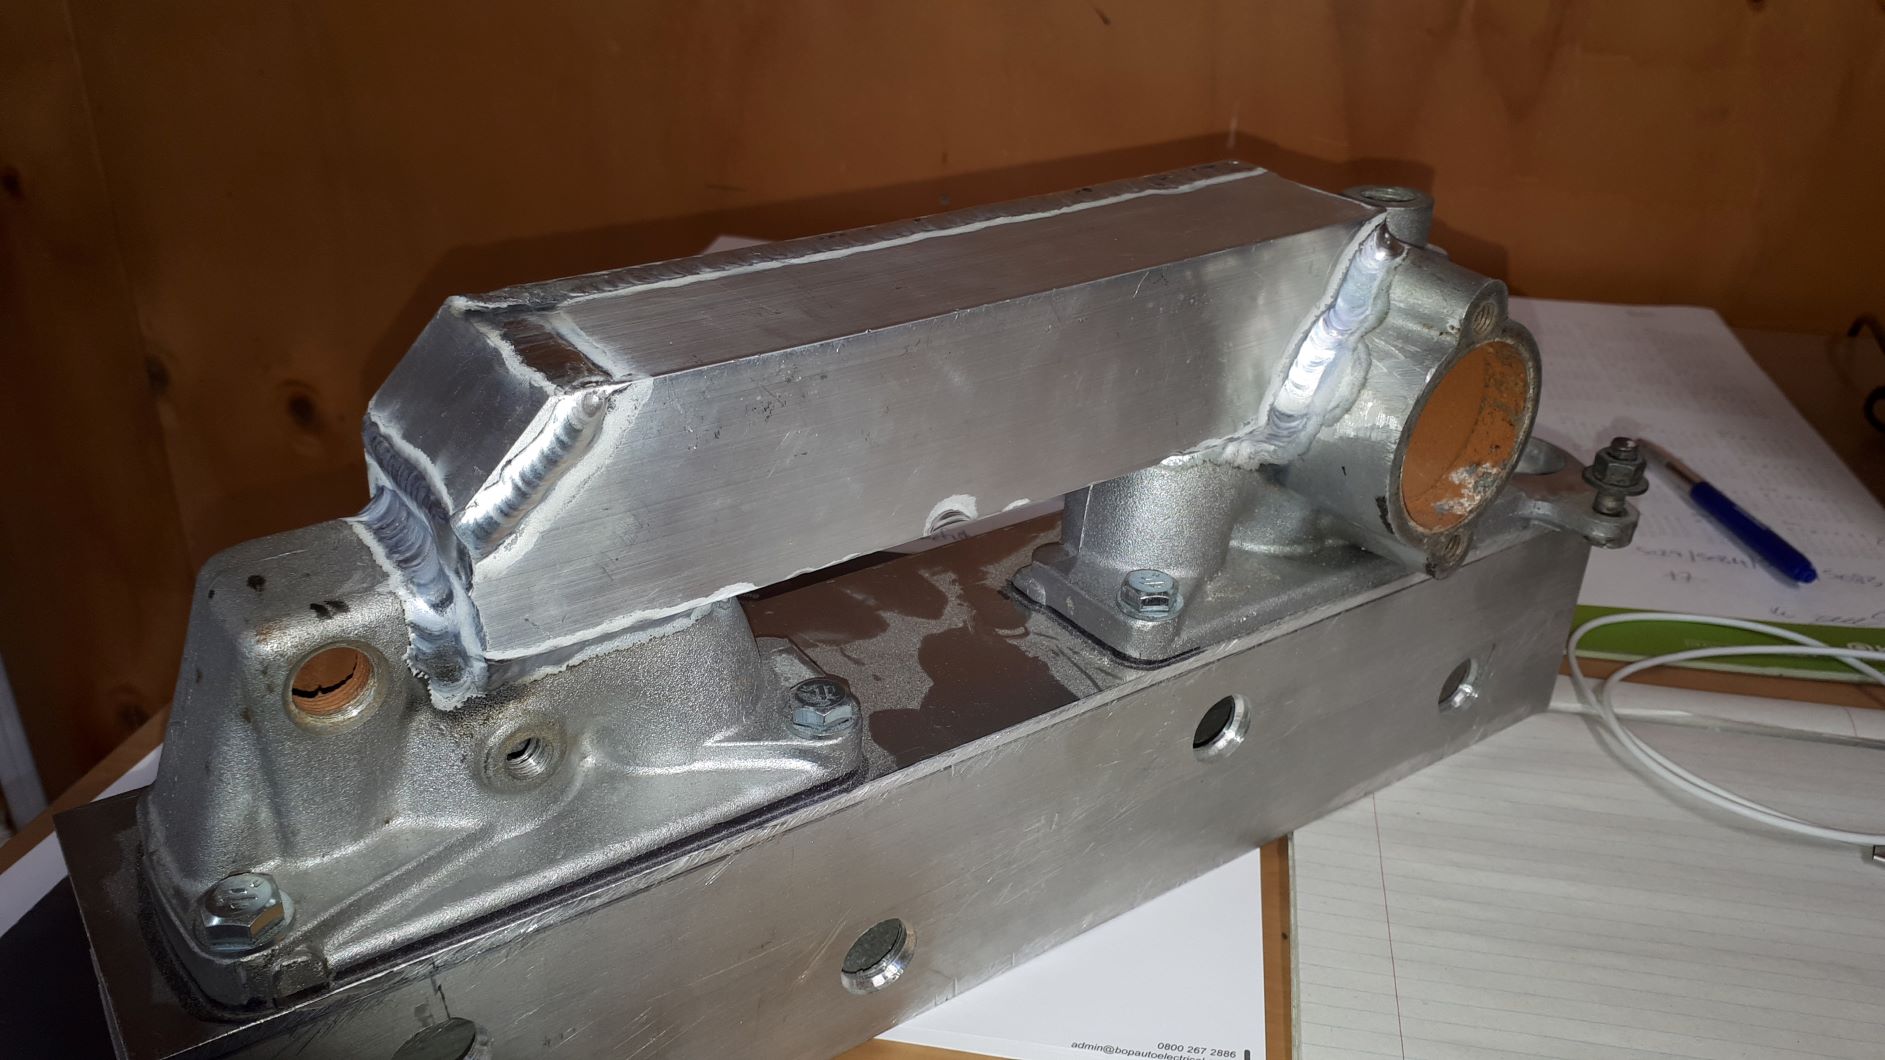
I got a bit more welding done on the manifold. I'm not welding this myself, I have a good friend that is a very good aluminium welder/fabricator and he is doing the welding for me. I am making all the bits and he is sticking them together for me. I certainly couldn't weld like this!! Now I need to cut a hole in it so I can attach a flange for the supercharger.
1 point


This leaderboard is set to Auckland/GMT+12:00