
Leaderboard


Popular Content
Showing content with the highest reputation on 09/14/21 in all areas
-
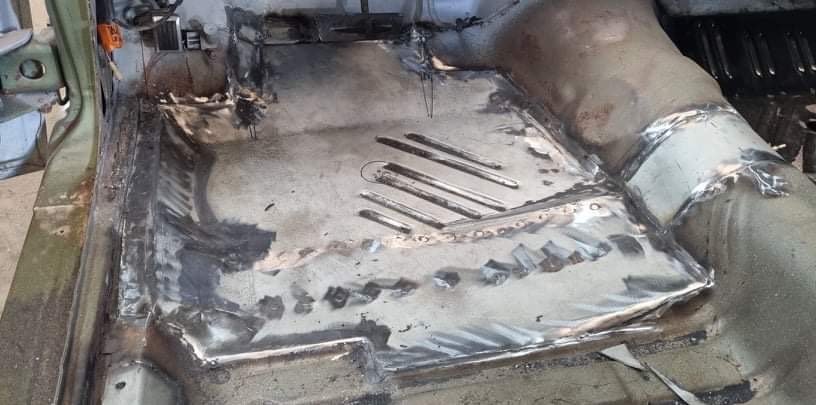
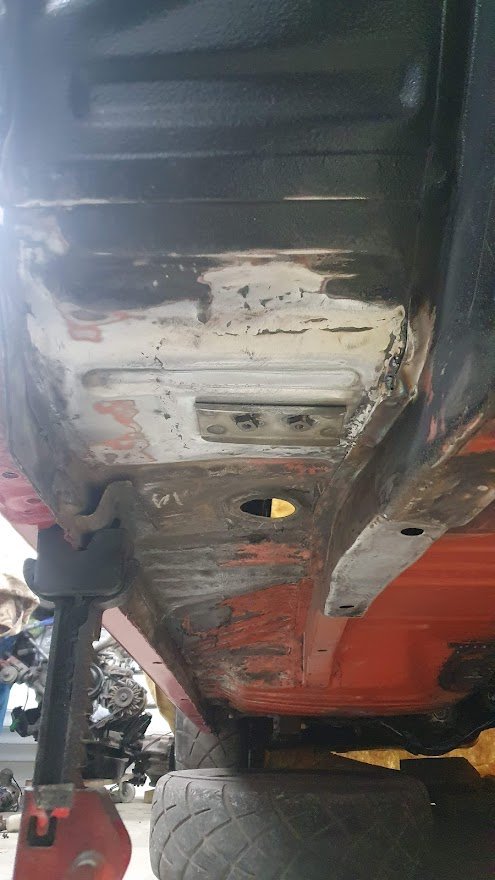
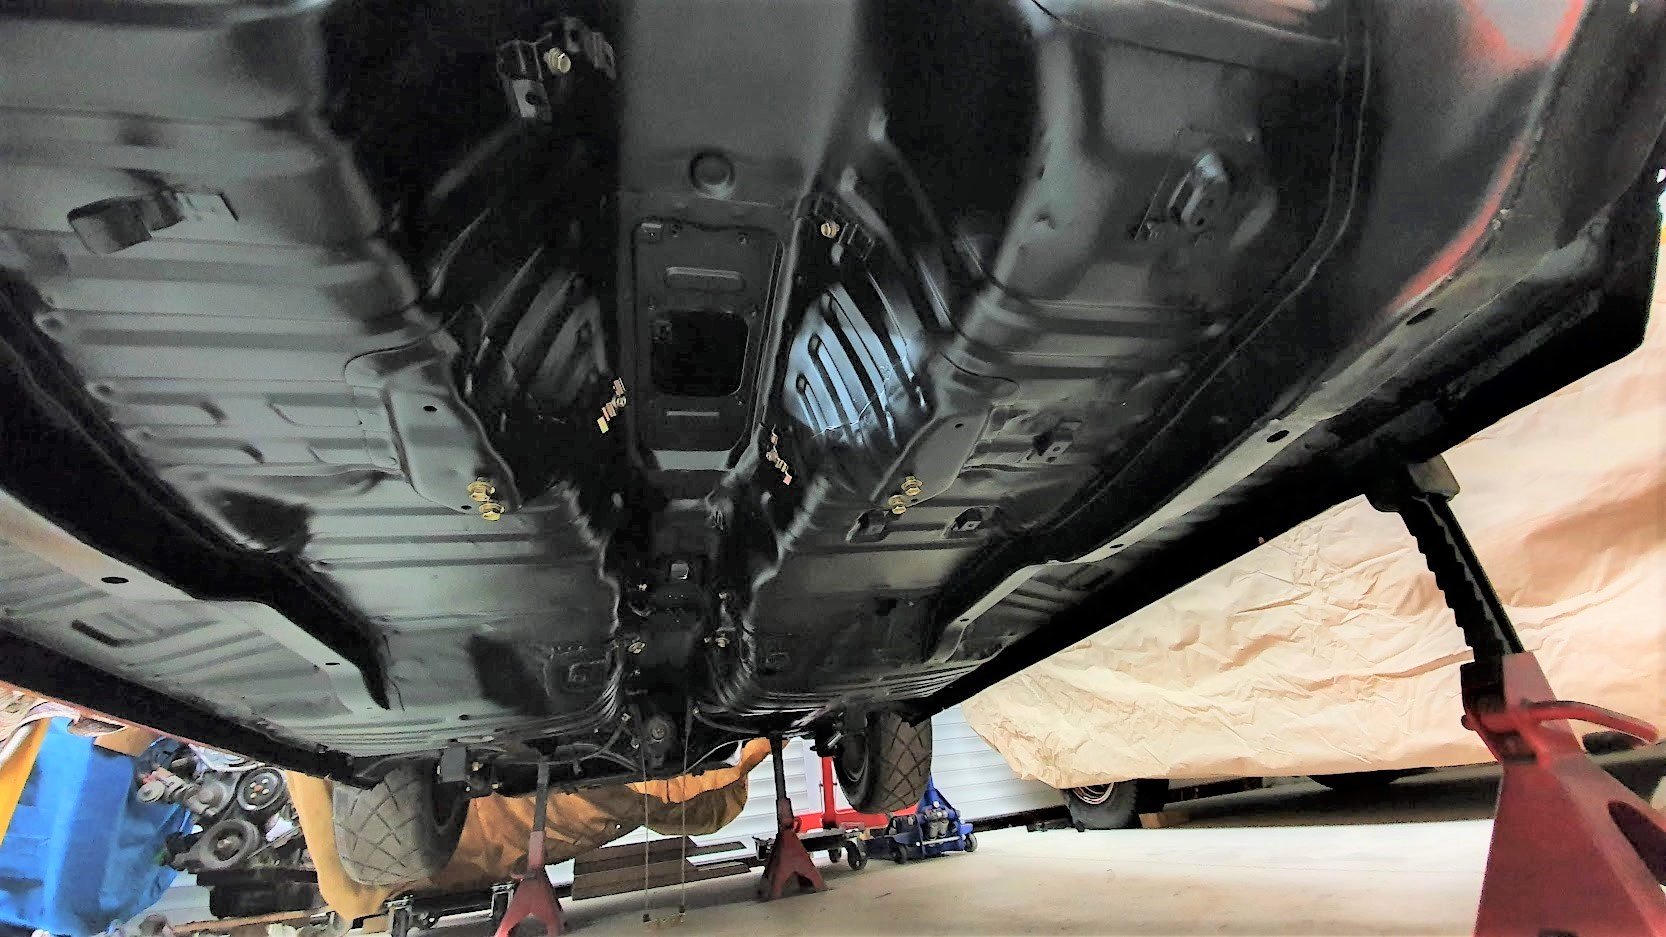
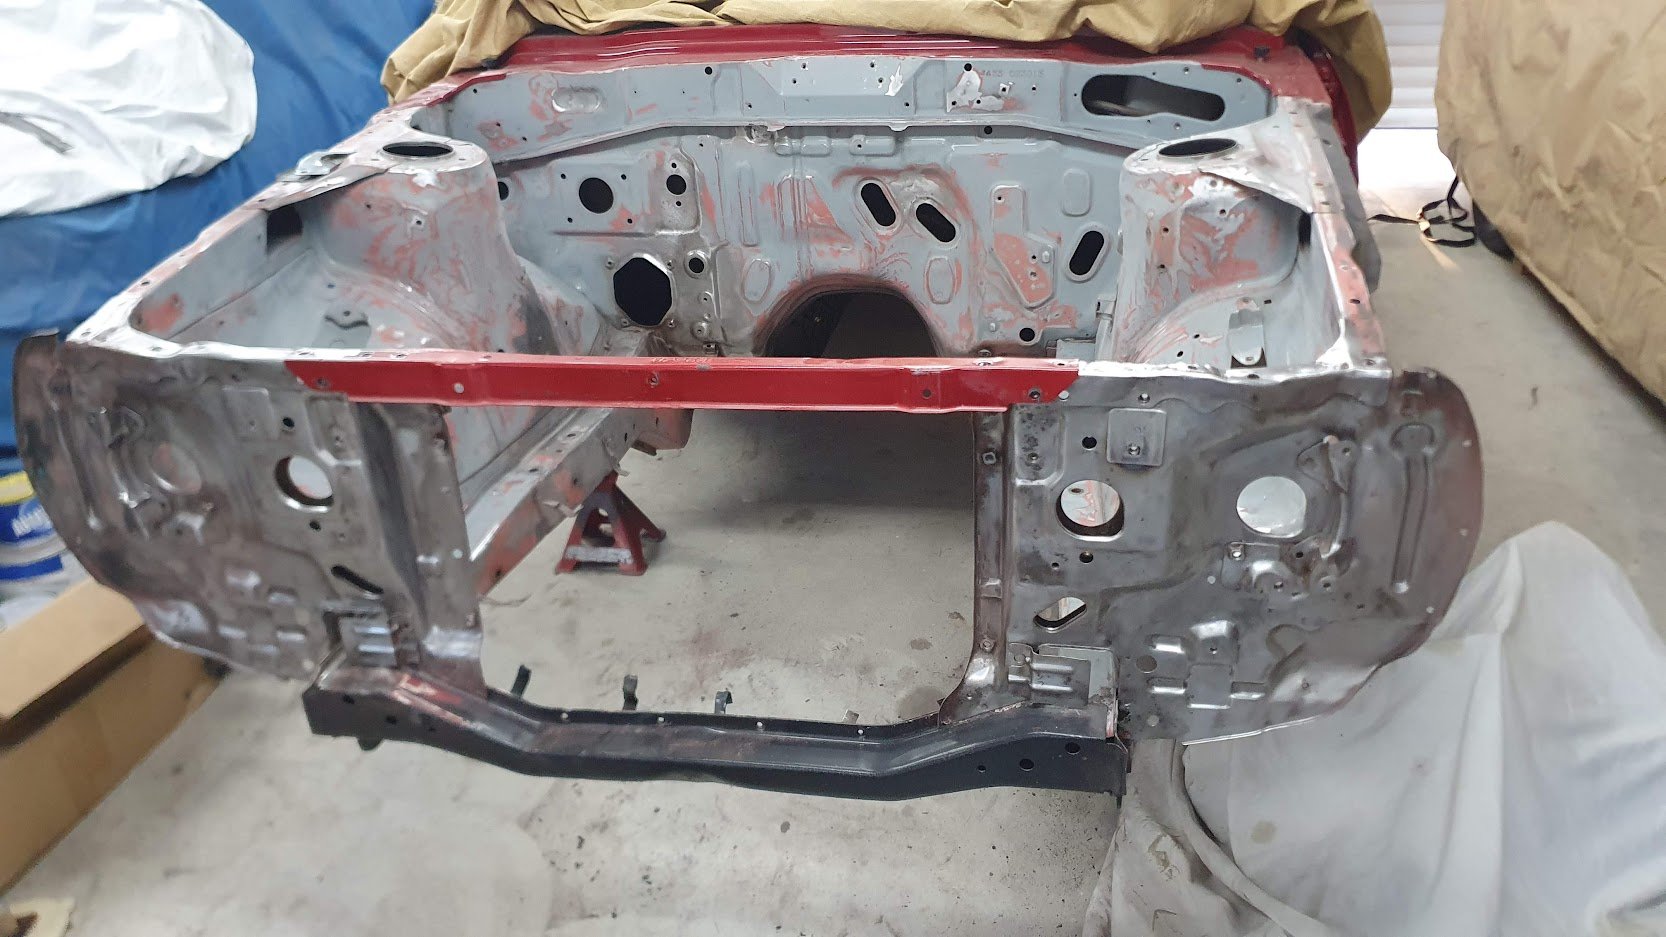
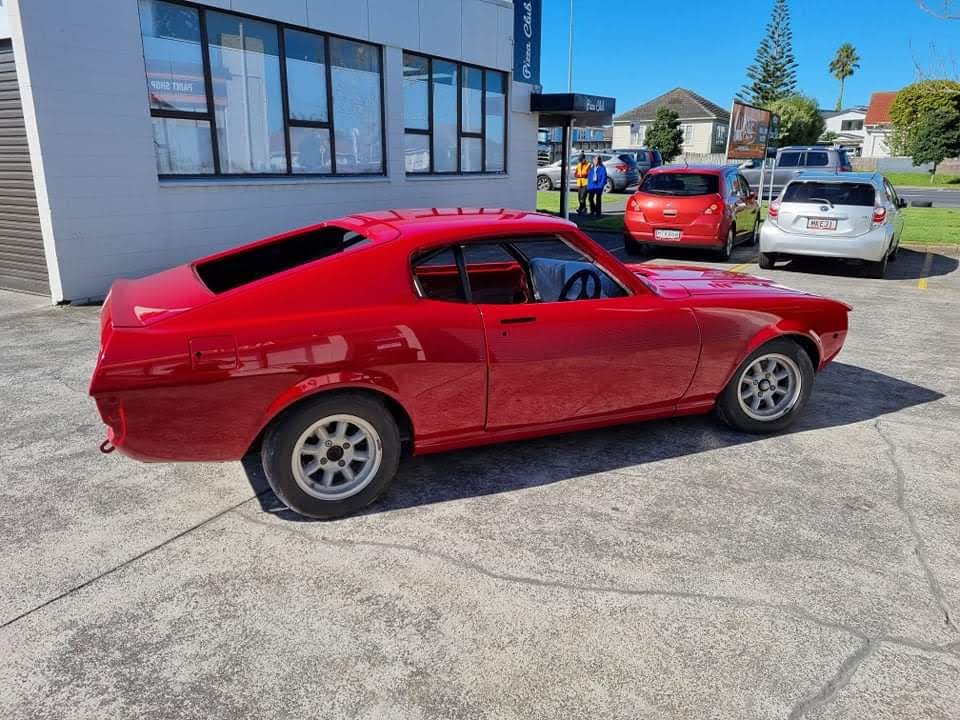
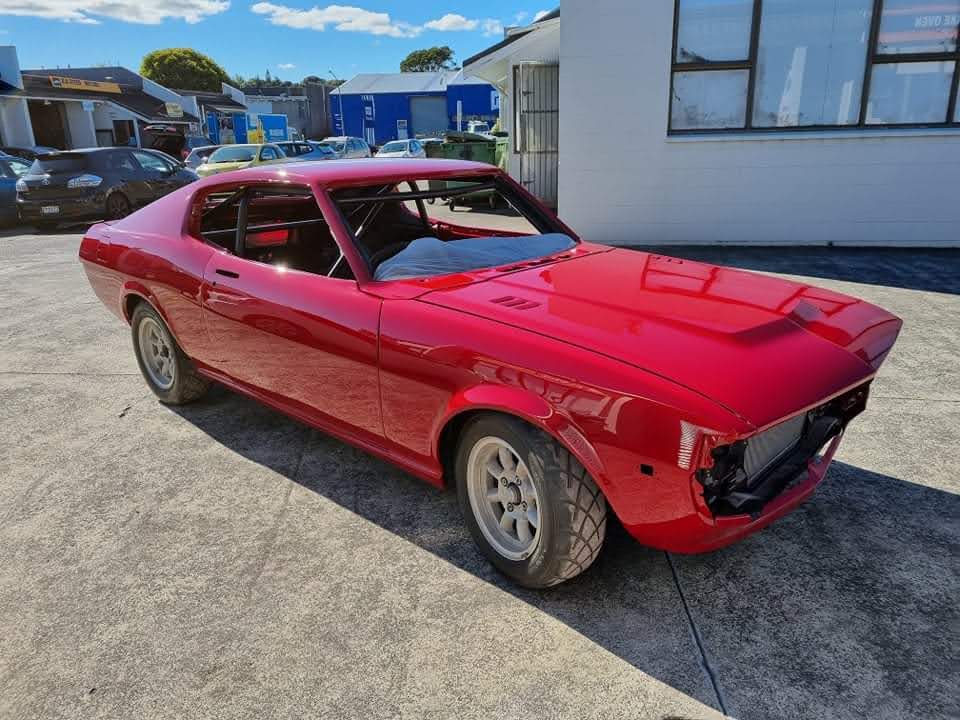
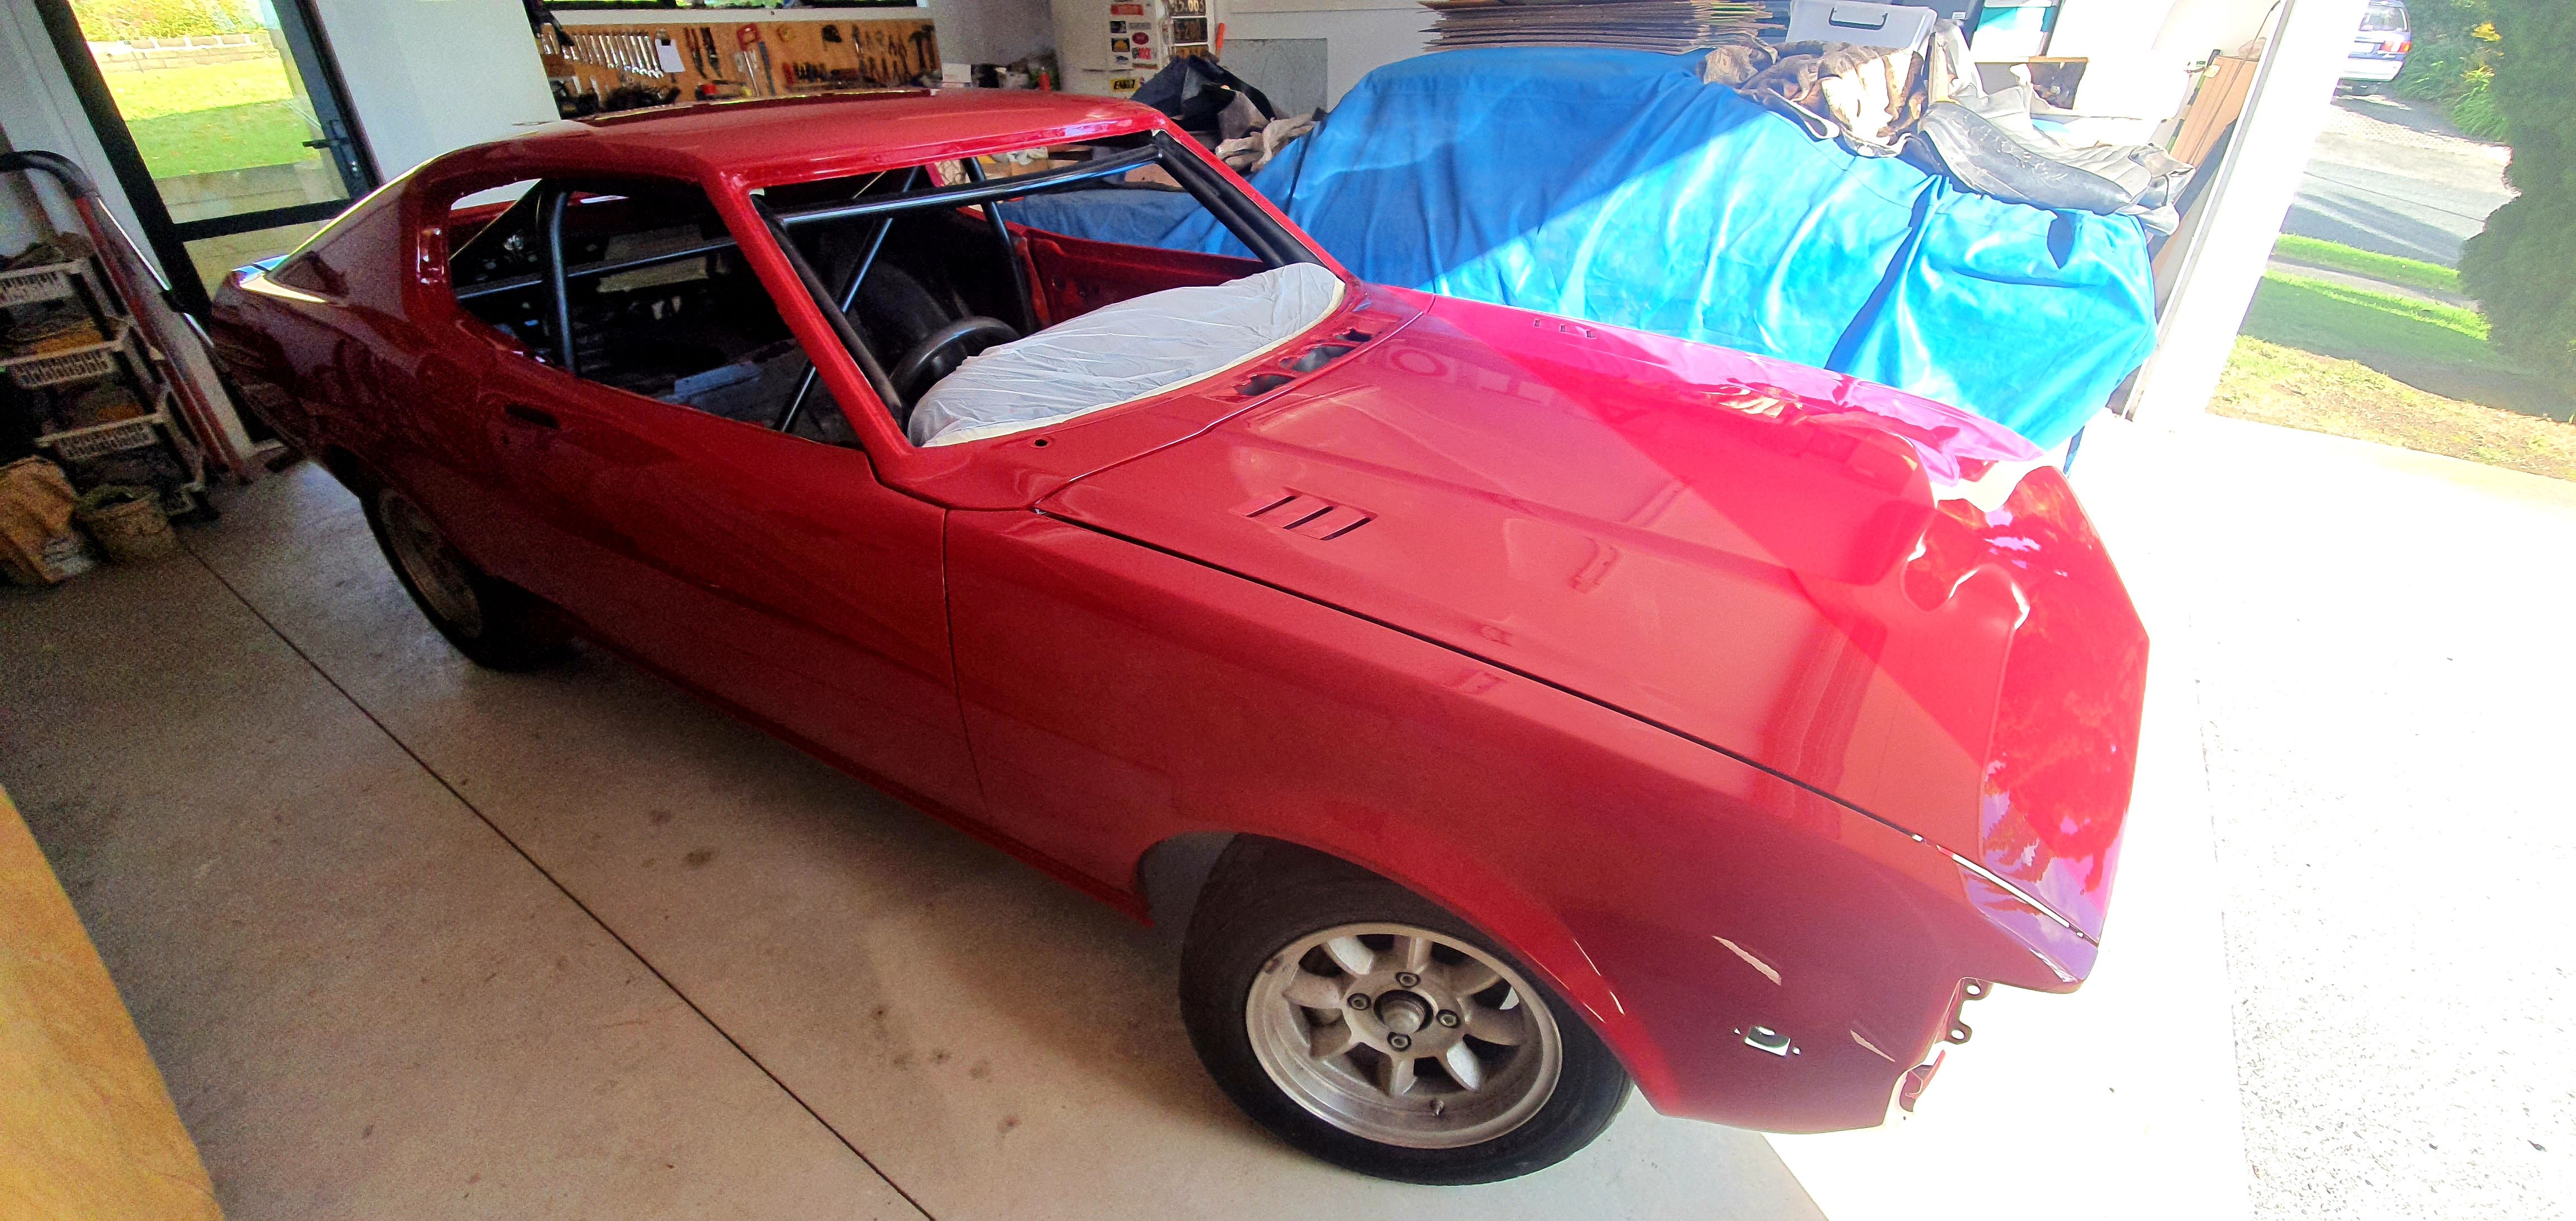
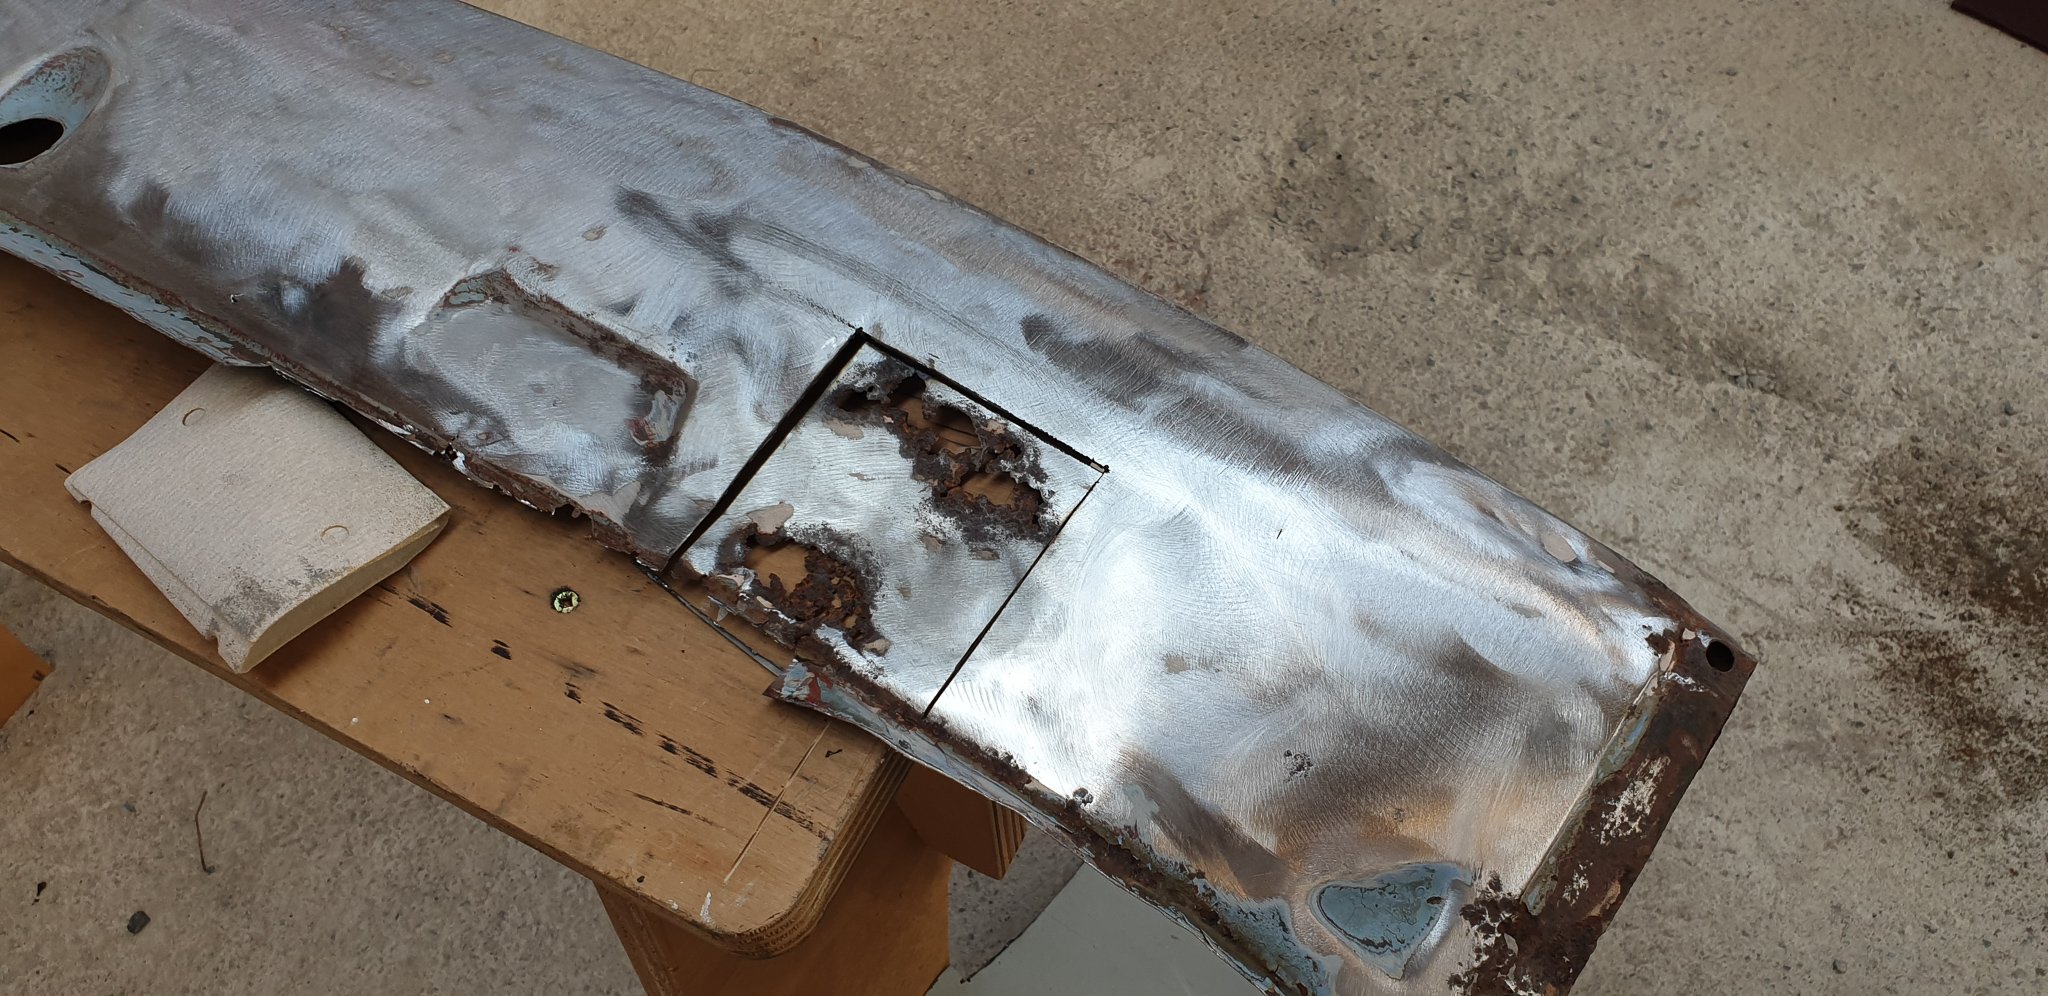
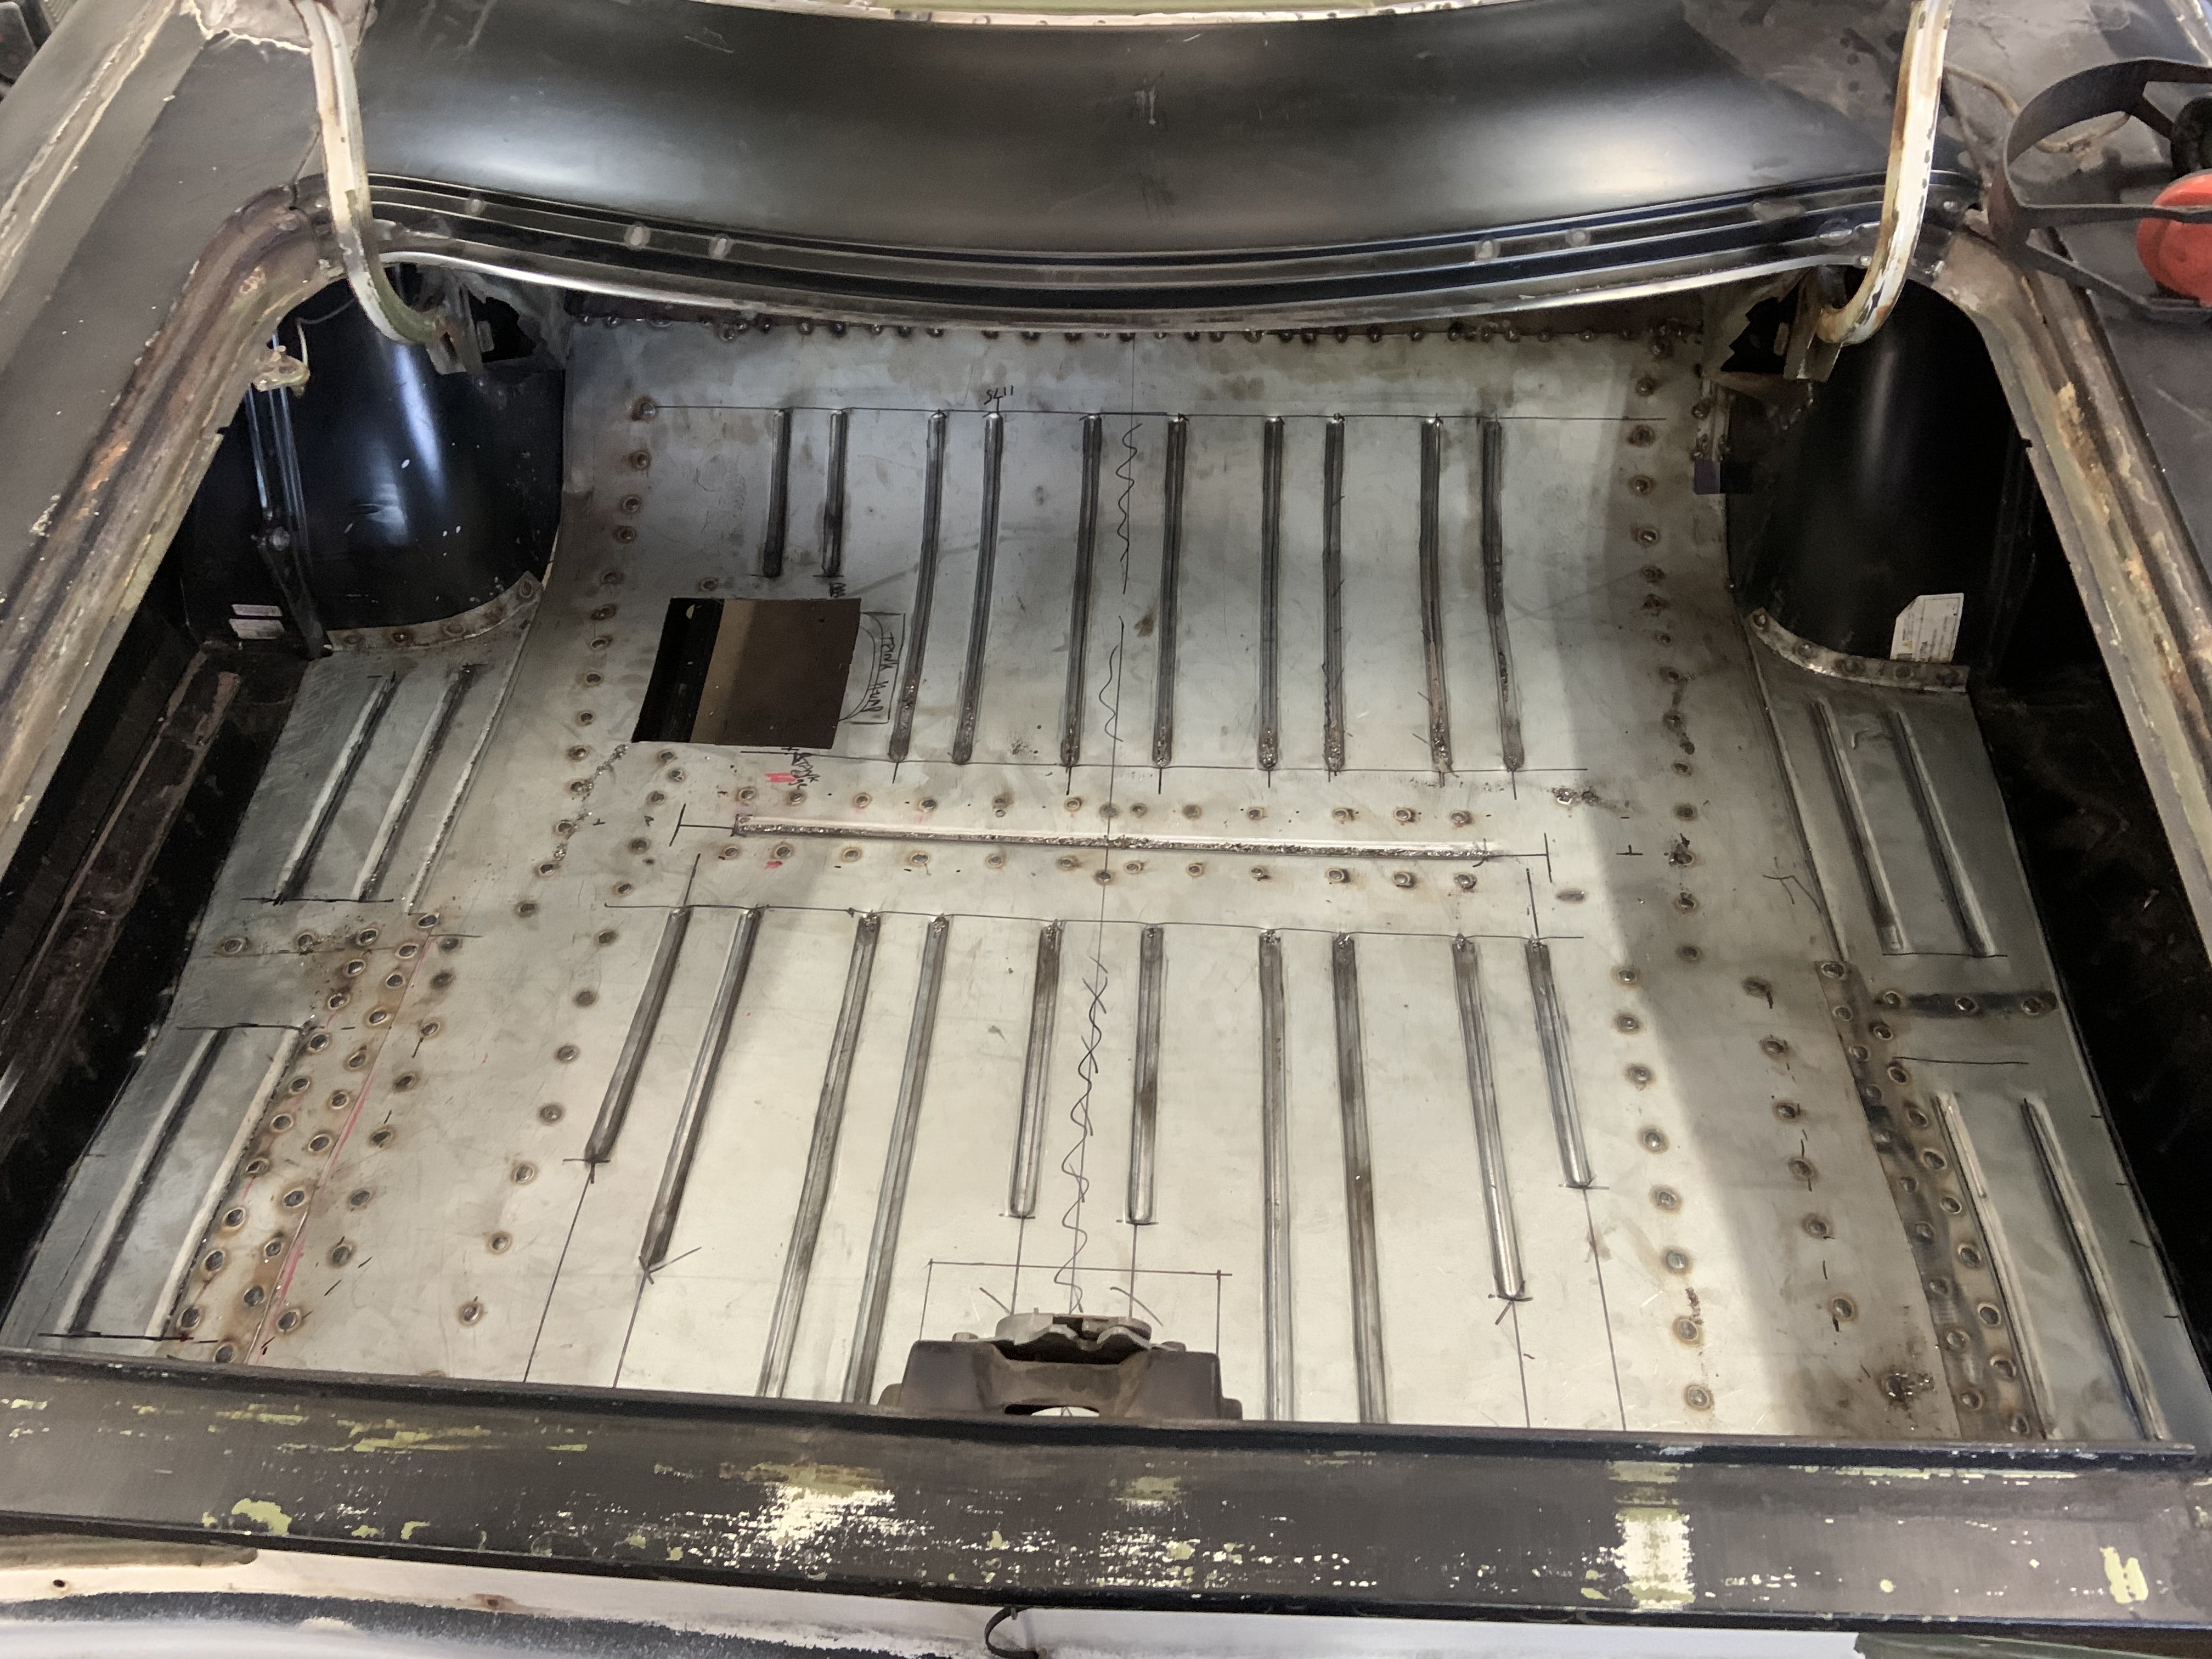
Just in from alexandra.. drivers floor pan, tunnel section and more firewall patches.. By my calculations, that’s all the main fucking holes filled, we have a god damn shell again!! Still some hours of checking it over, finishing spot welds and the usual completion stuff then we wait for the repair certifier to give us an inspection appointment
 15 points
 -
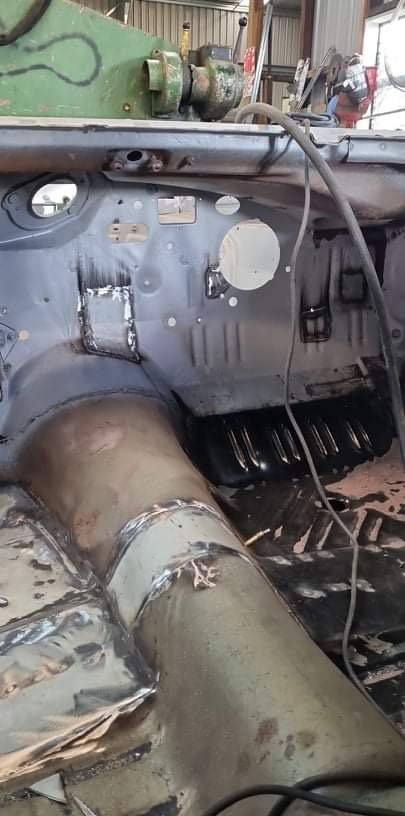
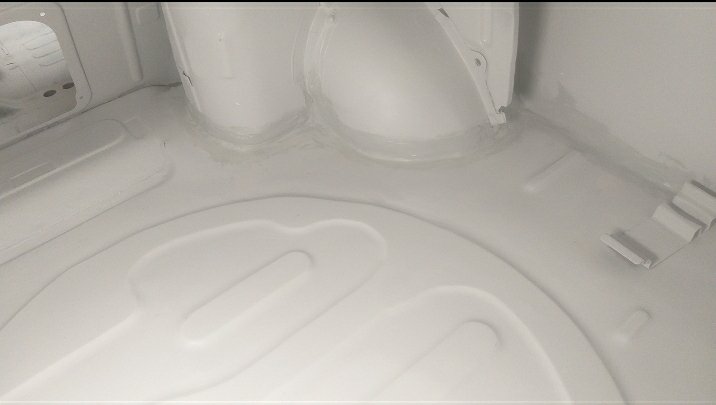
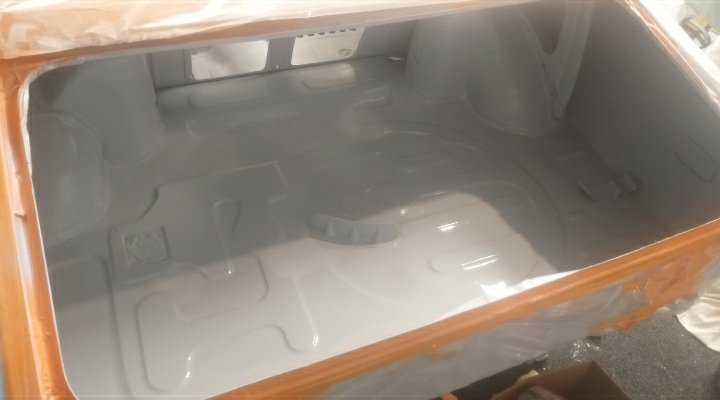
Still busy prepping boot have re-epoxied, seam sealed, and filler primer, all ready for top coat. Have also cleaned up cabin, ready for some colour to seal it off. Dash and boot lid filler primer applied also. Purchased a new elcheapo spray gun for top coating inside car, and settled on Blak Mat for sound deadening. Full kit of 2x packs, roller, and tape was $375, still cheaper than 1x dynamat pack so I'm happy
12 points
-
Starter motor time. I had bought a Subaru leone 1.8 starter from the fella I'd got the gearboxes and 1.8 ring gear from. Made sense to use all the same bits. Only thing I'd have to do was move the mounting face for the starter forwards towards the engine to suit the new ring gear position on my home made flywheel... Easy as I thought and I had it all planned out. I shall start at dawn! However that's not what happened once I got a friendly query from a fella about the starter motor turning the engine the wrong way. Oh yeah. Bugger. Of course it will do that. Yay. So after a few ideas and suggestions from various folk I had a few options. My first option was to mount the Subaru starter on the front of the bellhousing adaptor, facing backwards. Essentially turn it 180 degrees and it would spin the Honda engine in the required anti-clockwise direction I needed. But would it fit? Yes it does... It wouldn't be too tricky to mount and on extension the pinion almost lined up perfectly with the ring gear. It sat down in place quite low too. So this solution was a strong contender. But it had a couple of weaknesses that meant it went to the back burner. One: the ring gear would need turning around so the leads shaped into the teeth faced the pinion. Turning it round and having the pinion strike it from the opposite side then meant that the step I had machined into the flywheel would have been on the wrong side and the gear could potentially work off over time. I was reluctant about the idea I could add a few welds, as some folk will do, because it adds stress risers, could affect the balance. I really didn't want to muck about with the ring gear. Two: having a fairly large ugly starter motor plonked right there on the top of the motor was something I never had in my minds pictures of how I wanted the engine bay to look. It would be right where I might want some linkages for the itbs, possibly a centrally mounted plenum between the itbs and there was also going to be some water pipes around that area too. So back to the other options- the main one being to look for a suitable Honda starter that's mounted from the gearbox side or a starter from any standard clockwise rotating engine that mounts from the front. The pinion had to have the same pitch and ideally the same tooth count. I did some research and it seemed that all the Japanese cars of this era all shared the same pinion pitch and were all around the 9 or 10 teeth. This was handy indeed. Off to the wreckers then... I went through the various shelves of starters, starting with Honda and found a possible candidate within a couple of minutes. Feeling pretty satisfied with my find I still double checked the other shelves just in case there was something even better but eventually I was spotted skipping out of the door happy with my Honda Civic/accord starter. Back home I looked at my booty. Subaru one is on the left... They were so close but not close enough. The Honda item has a smaller diameter 'locating spigot' that centralises it in the hole on the mounting face of the bell housing. This was a better turnout than it being bigger than the hole though! I would machine the hole in the plate to suit the new starter, which I was going to have to do for the original plan using the Subaru one anyway. The holes for the starter mounting bolts, that go through the bell housing into the engine, were 5mm closer at about 115mm and they were also offset to one side, not in line with the starters centreline. This was handy though because I could then have separate bolts holding the bell housing and room to turn the Honda starter about its axis, having the solenoid positioned in the least obstructive way. A plan was forming in my head. I took some measurements, did some scribbles and it all looked like it should work ok... I had already bought a hefty bit of 12mm plate for the Subaru starter repositioning and luckily it was still going to work with the new starter. I swapped the 4 jaw chuck onto the lathe and set it up. Drilled a big hole... Bored the hole out to suit the Honda starter spigot... Marked and drilled holes to suit... Recessed and spot faced one of the holes for the bellhousing to the engine bolts that just happened to slightly clash with a bit of the starter casting. So I now had a plate that the starter fitted neatly into, with not a hint of slop. The bolt holes lined up perfectly with the bellhousing bolt holes so lining the starter up the correct distance out from the ring gear. Now I need to move the face of this plate closer to the engine... So I cut a big lump of alloy from the bellhousing with a grinder and a hacksaw... This allowed me to move the plate closer and let the pinion fully engage with the ring gear... I tested the fit of the starter... The height was good but I wanted it to be perfectly parallel to the face of the flywheel so I really had to mill it. Luckily I was just able to squeeze the gearbox into a position on the mill that allowed me to face it perfectly... I must have some pretty honed hacksaw skills because I only needed to skim off about .75mm to get it flat. Sweet. Now I bolted the plate in place, then the starter and tested it... Oh I forgot to mention that once I had decided I was going to use a starter mounted in the original position I popped a hole through the adaptor plate in line with the starter pinion. This was to allow me to check the pinion mesh... I was super happy with the mesh so I marked the excess on the plate to be trimmed off and gave it a hair cut in the bandsaw... I also milled out the back of the plate where it just clashed with the rivets and pressings on the outer edge clutch pressure plate. Bolted it back in and welded it up, taking lots of care to avoid any chance of movement or warping. It went well.. Added some little filler plates to tie it in neatly and gave it a tickle with a flap disc... Bolted the starter back in, stood back and admired it all, really happy that one of the trickier jobs had been completed and that the starter was sitting in there very neatly and tucked away nicely, no higher than the top of the bellhousing... Next step was to make a cover for the 'front' of the engine, adding a connecting link between the oil filter outlet and the main oil way into the engine, a filling point for the sump, a dipstick and allocations for engine mounts to suit a cross member. Still lots of work to do but I'm getting closer...8 points
-
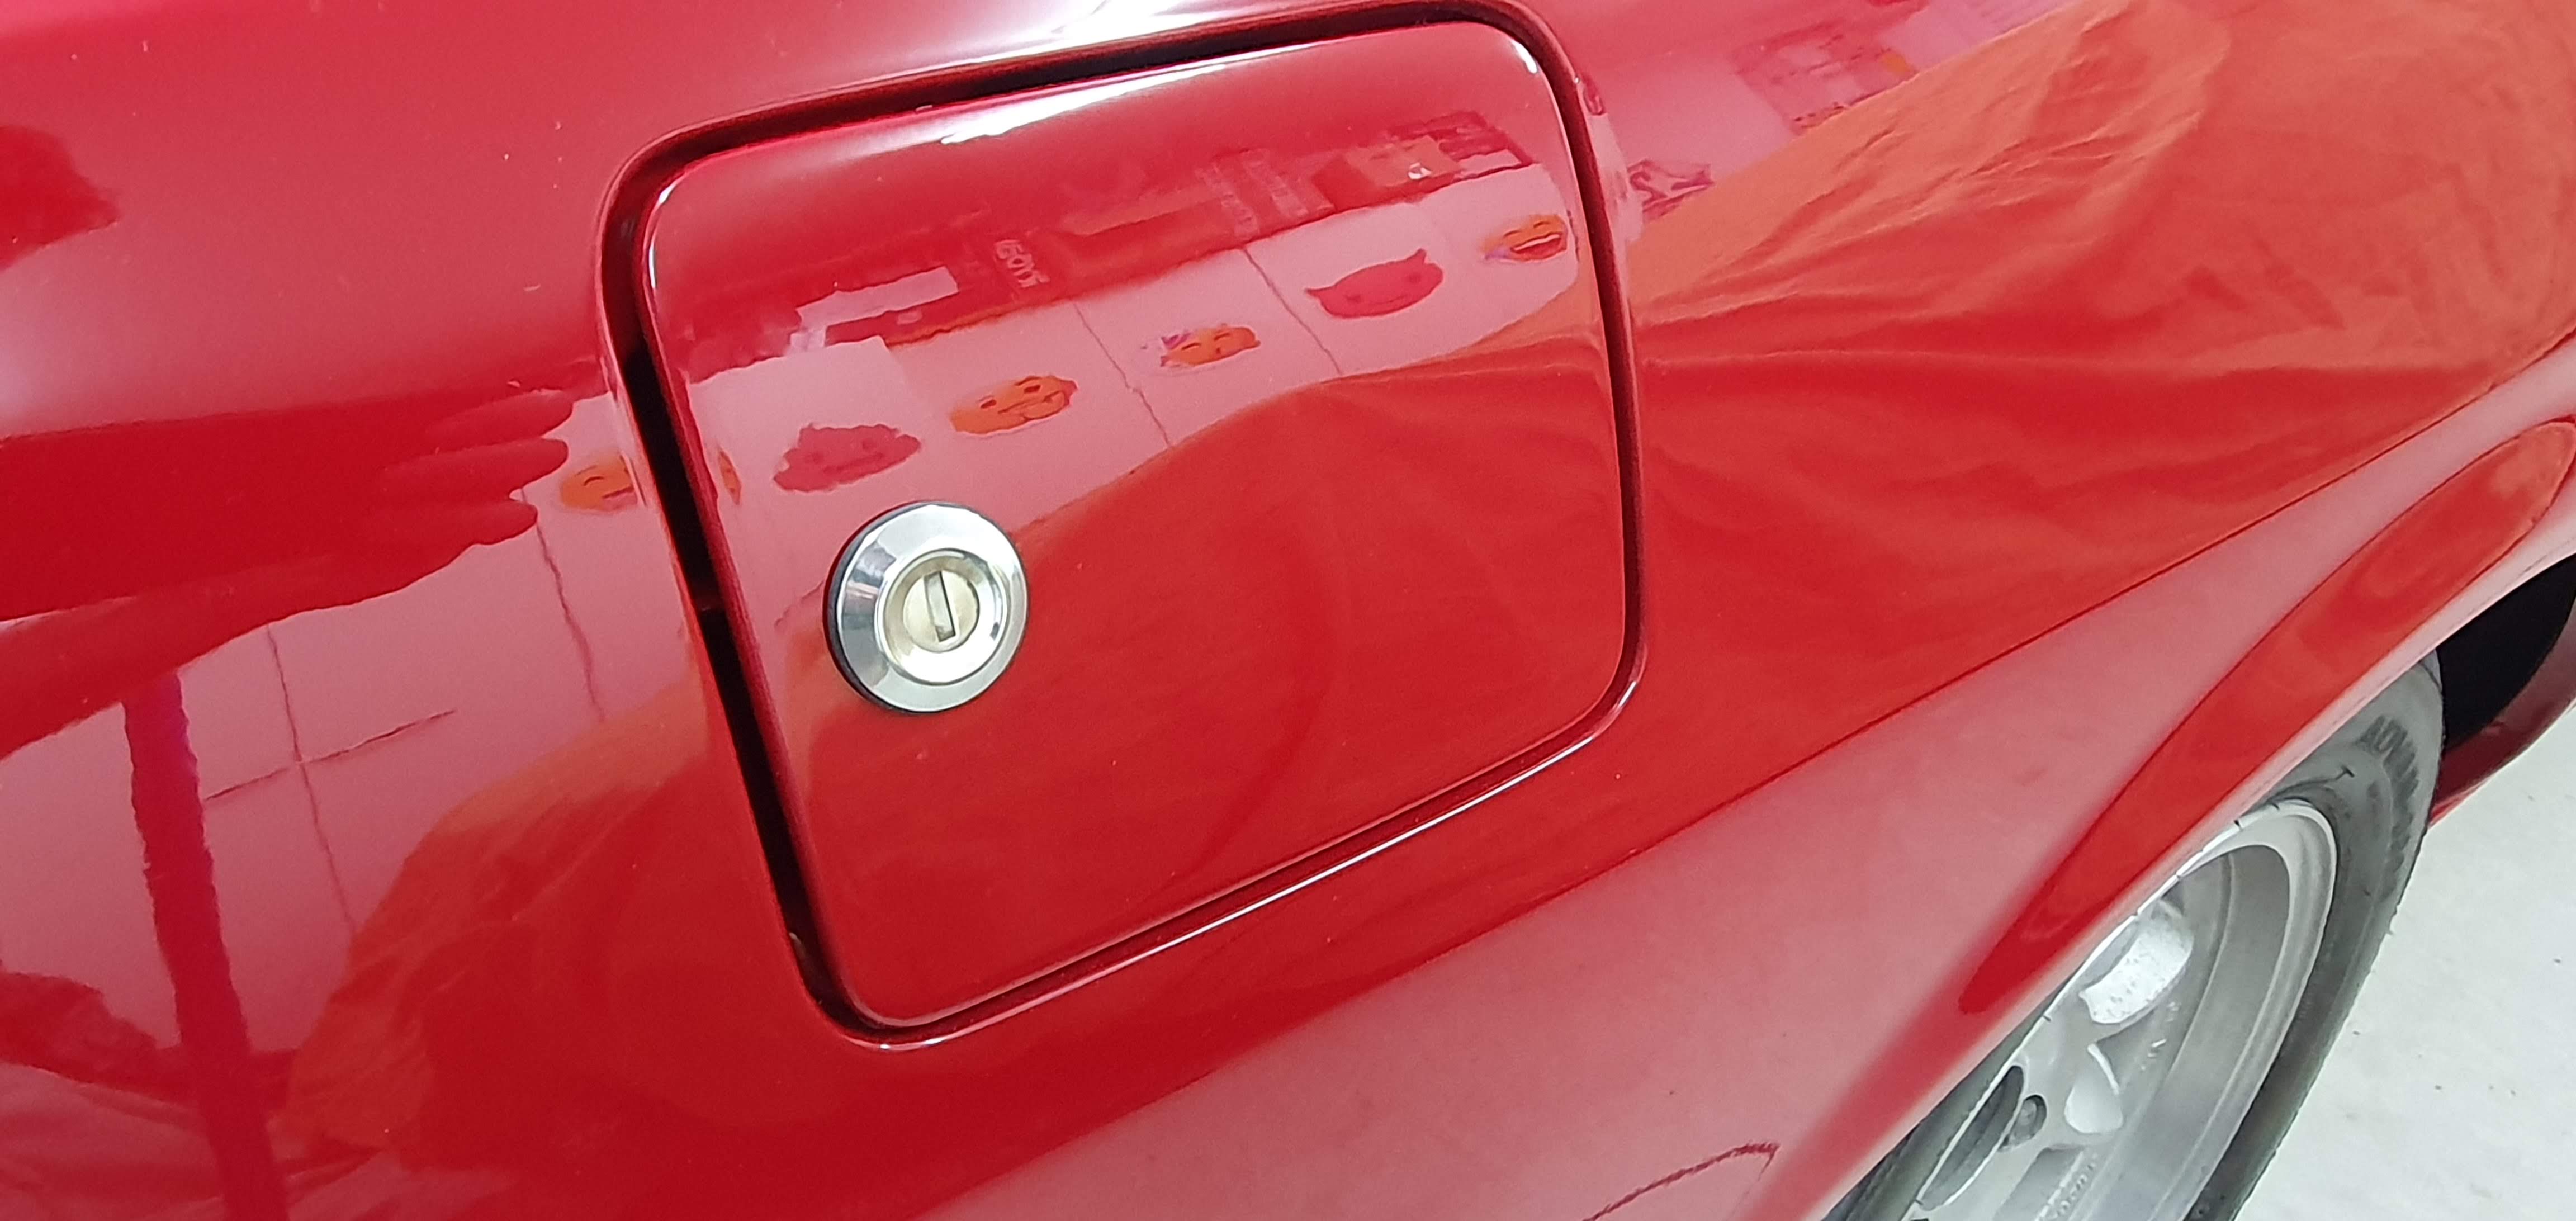
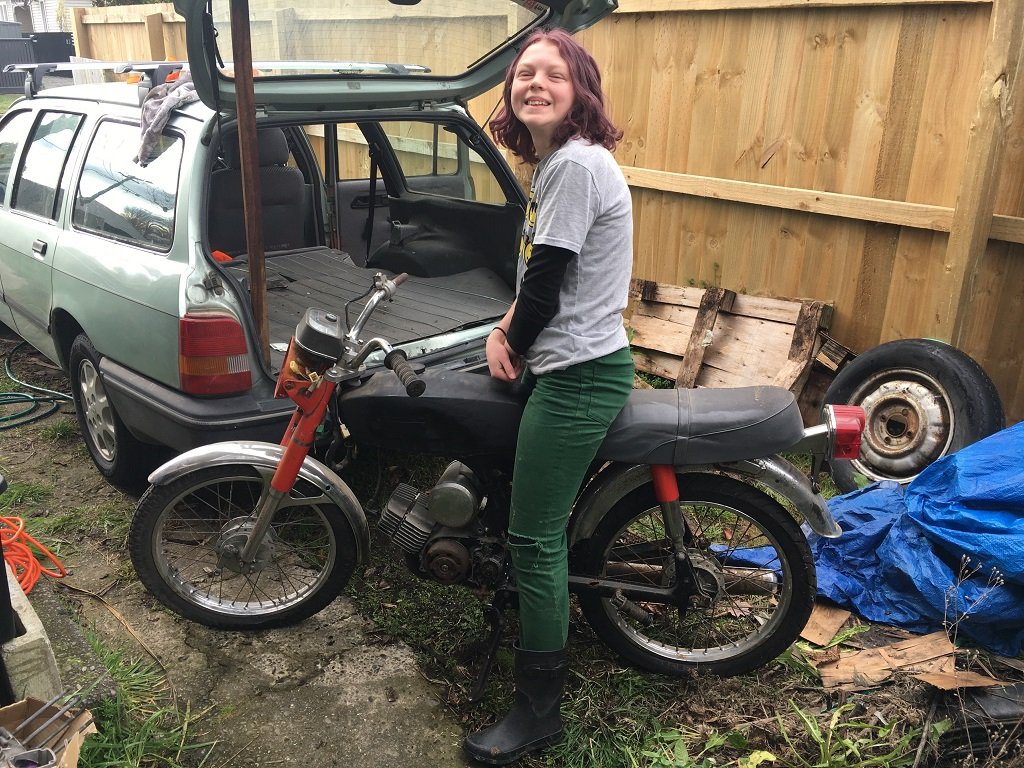
Note to Starion owners: there's only two more of these left in NZ...5 points
-
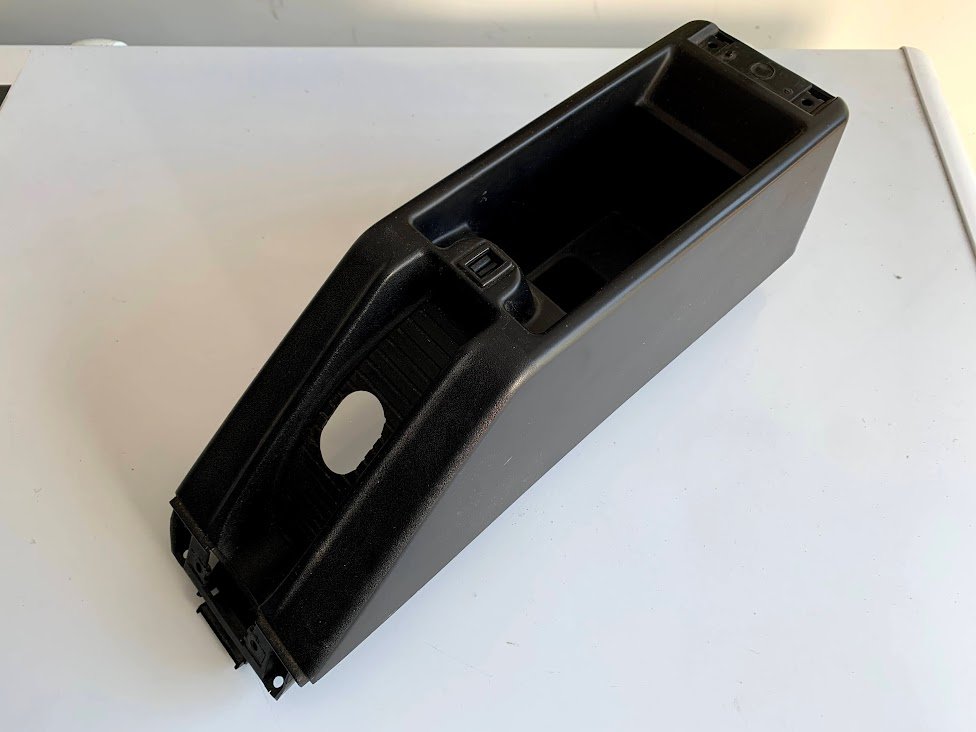
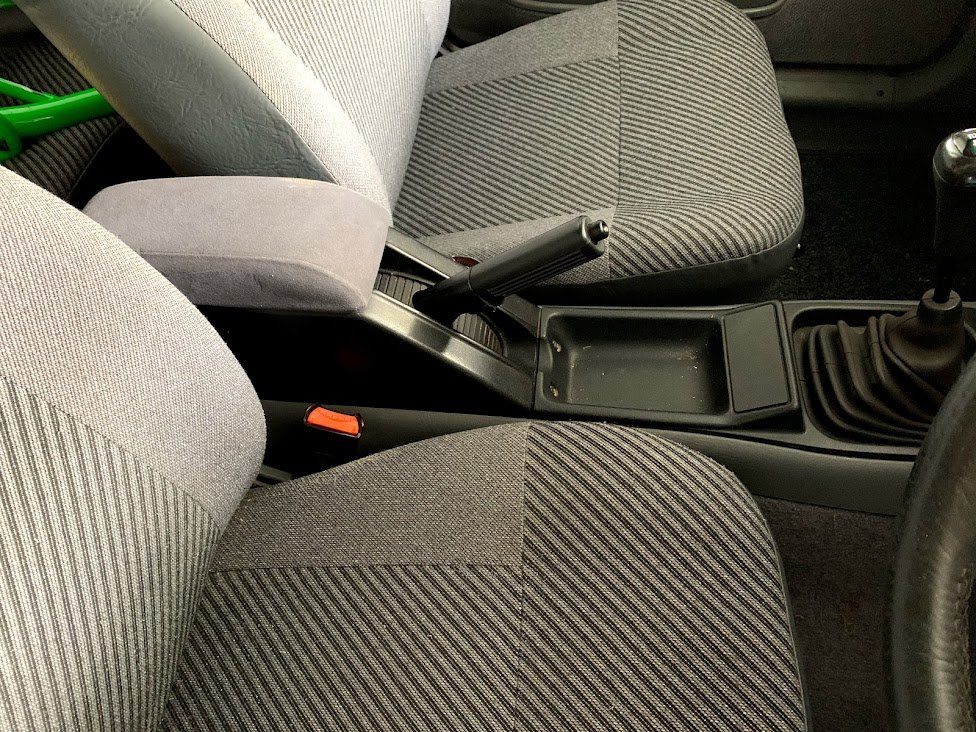
So... center console had no armrest. I'd really rather have one, I find it makes a car much more comfortable. I don't have a really good before picture, but this is the type of center console I had: Went through my parts and pulled out a grey center console which was from a later car. Had an arm rest and was all one piece. Tried it in the car and it didn't fit very well, possibly because it was from a car with an MT75 gearbox? Not sure. Regardless, the colour was off compared to the rest of the interior, twas a much bluer grey. So I had a look online and saw that there is an arm rest option for the split style console that was in the car. Couldn't find one locally so looked to the UK and found one advertised without the lid/armrest part. No problem, I have that part already, I can swap it over from the one I have right? Surely that part is the same, why would you make another one that looks the same? Saved me a boatload on the price too which was already more than ideal. After about a week of waiting, it arrived and I eagerly unpacked it and screwed on the lid I already had. It went smooth to this point, then I tried to close it. The latch was no where close to hitting the keeper, out by nearly 20mm. Not cool. Quick moment of despair, then resolved to making it work. What's 20mm? Managed to slide the arm rest back, remount the hinges into it and just get it to latch. Success! Now to get the handbrake to work with the concertina shroud thing which I new needed to be done. Cut a bunch of the existing plastic shrouding off the handbrake leaving just a small sleeve to cover the lever until it disappears into the console. A fresh new spot to lean. I think I'm out of level 4 things I can do to this. Need some freedoms so I can go get bits off the parts car. Near the top of the list are a set of Cossie Recaros in desperate need of recovering. Anyone got any suggestions for an auto upholstery places in Auckland? Keen to hear people's recommendations. That'll almost finish off the interior I think.
5 points
-
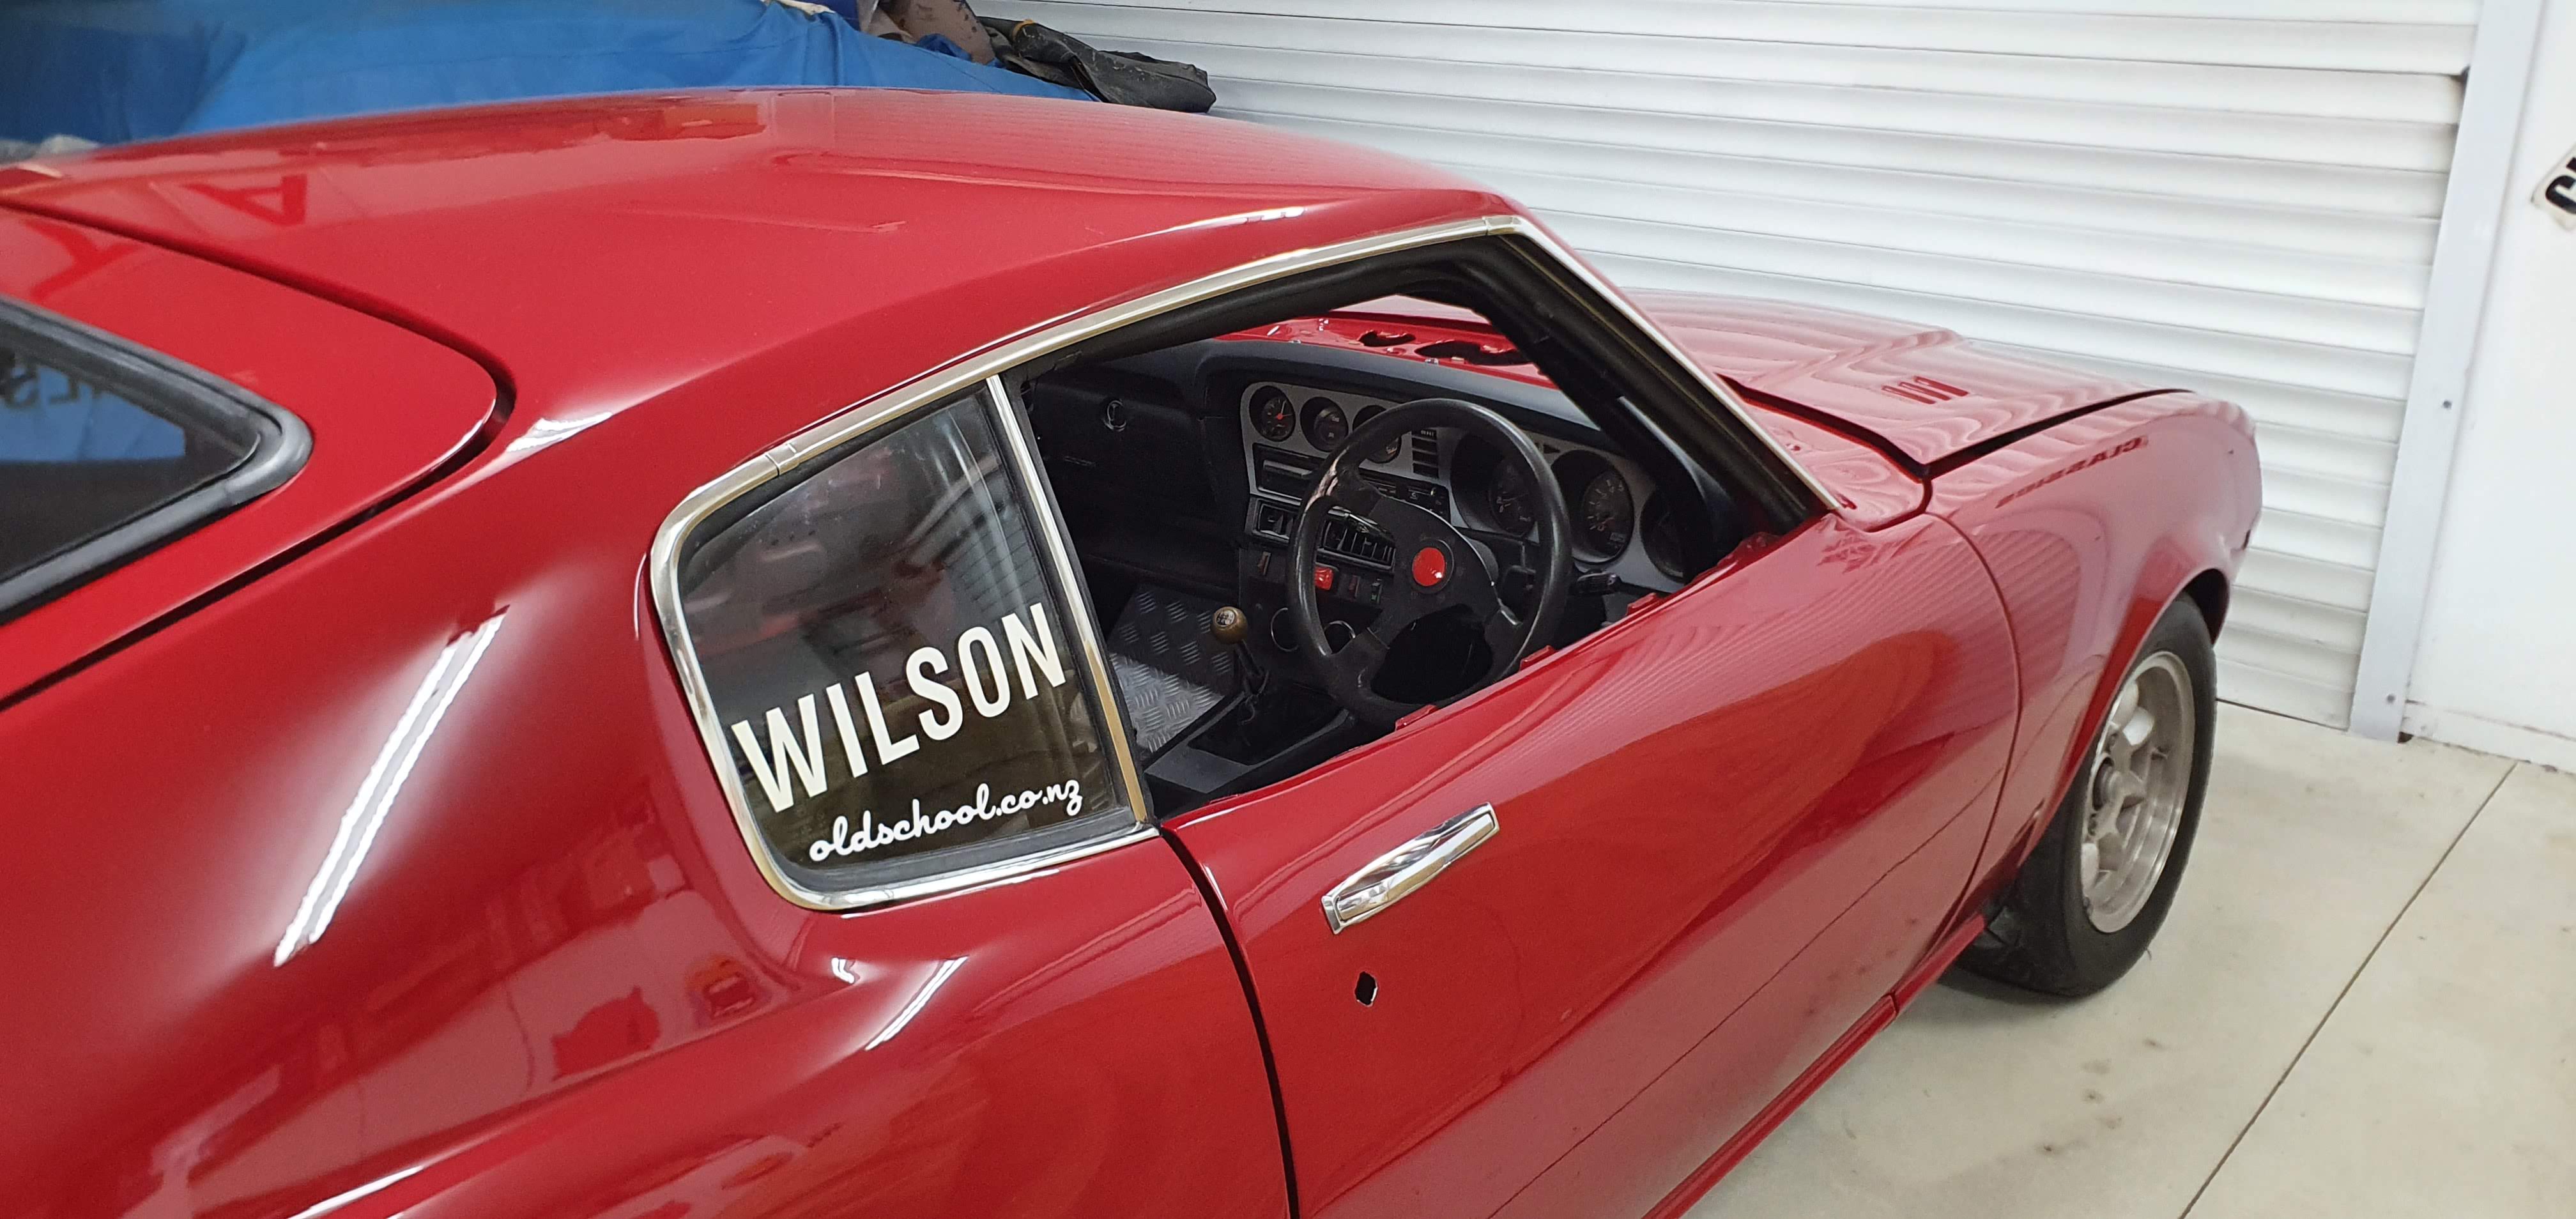
Protip Ensure that your vehicle is up to wof standards before taking it in for a wof5 points
-
And...look what turned up in my driveway while I was away for the weekend. Has the ole "Gearbox on the doorstep" somehow got more vincdictive, "A Ford on your Driveway"?? /Thanks to @avengertiger for the hard yards in teeing this up.
4 points
-
Loud pedal floor repair - now i can really mash it without fear of pushing it through the floor Cleaned all the remaining crap off the floor and blinged it up a little And sand, sand, sand all the engine bay paint
4 points
-
Still the daily driver with barely any issues! The auto trans is the main one still. Chucked the 3rd trans in after 2019 drag day. It's a bit slow changing from 2nd to 3rd and still seems to burn out if giving it some. Also has the same issue as before when you thrash it, it goes into limp mode so stays in 3rd. Bought a 300zx and ripped the 5 speed manual gearbox out of that to eventually throw in, just waiting for the Starlet to be back on the road. Drove it up to Beach hop 2020 and took out the best under 25 award! Dump of pics from the travels. Have been trying to do a bit of maintenance recently, fixing up some annoying things. At the start of the year the steering rack bushes basically disappeared, so I machined up some aluminium ones. They worked good but got sick of the vibrations at 100km/h, so put some poly bushes in. Next was the 4-link rose joints making knocking noises over every little bump. I had them on the chassis side of the 4-link bars and poly ones at the diff end, so swapped them around, and that quietened it down. The front tyres were down to the canvas on the inner edge, hoping most of that was just caused from the loose steering rack. Got some new tyres on and repainted the whitewalls. Made them a bit wider and more proportionate front and rear. The steering makes a horrible groaning at low speed turning occasionally too. Hopefully it's the bearing in the column, otherwise I have a new powersteering pump sitting there, but that's a front clip off job so that can wait until the manual swap.4 points
-
I have no recommendations, but my, what a lovely motor vehicle you have3 points
-
Have registered. will apply for leave this morning. Now to shall try get accommodation at said places unless people have empty beds or want someone to spoon with, can be big or small spoon to sweeten the deal.3 points
-
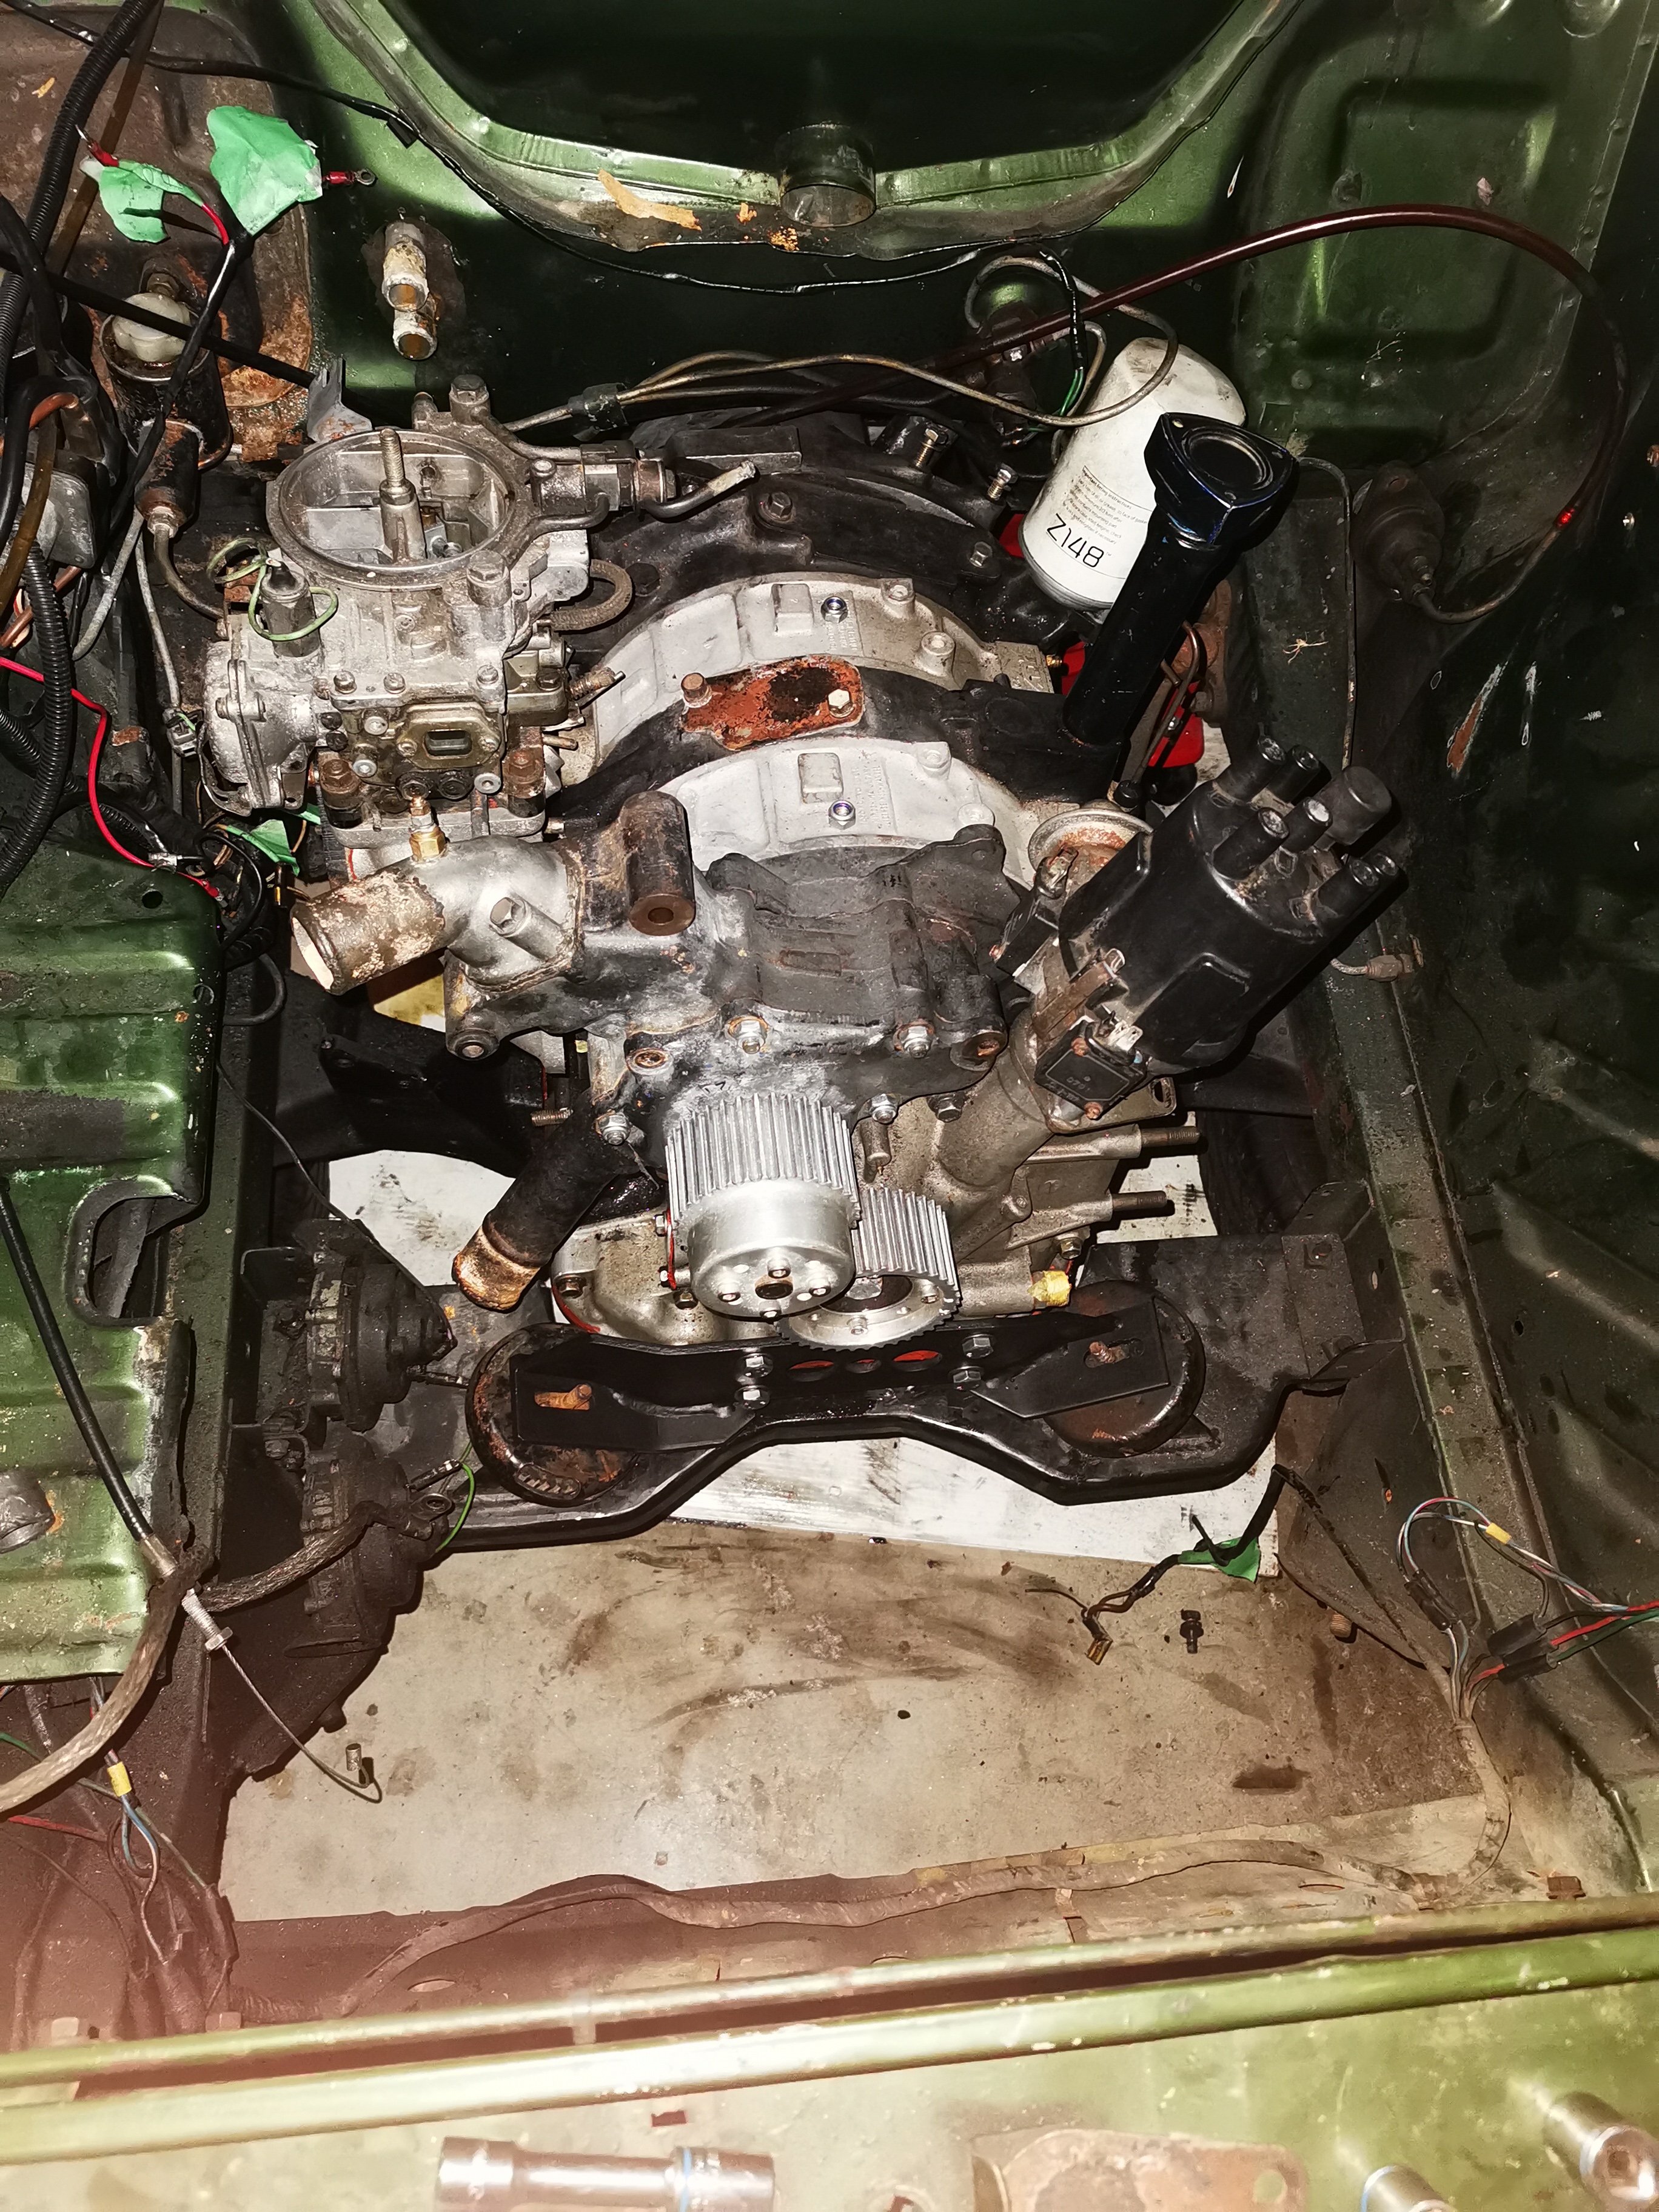
Picture less update... But had the dizzy and modules off to a sparky who is only 2 doors down from the shop, he checked it over and gave the all clear to 2 out of 3 modules.. Chucked the dizzy in with some eyeball timing, some crude wiring with jumper cables etc, tipped in some fuel.. A few cranks and it popped into life.. Had it pulsing away for about 30seconds before shutting it down. Then virtual high5 fist pump pat on the back dealio, then started going through the hunter wiring. Made a new dizzy loom. Ran the gauge wires to the sensors. Only need to connect an Acc power source to the coils, reroute the alt wires and make up a new starter cable. Have ordered the rest of my exhaust components and a driveshaft hoop. All gaskets for the water pump, carb manifold and exhaust. Need a ton of P clips for the fuel line so I can finish that side of it off.3 points
-
Still making progress on this thing. Have been a bit slack at taking detailed progress photos. Engine was dropped in a while ago. Radiator and overflow bottle finished up too. Fuel lines are done as well as the brake and clutch lines, they bleed up perfectly! Built the exhaust too. Went with a twin 2" stainless system and made the muffler as well. It's now fully welded and mounted properly. Swapped to the SSR MkII's Have put the original loom back in and hooked up most things again. Need to reroute the wiper motor plug, rewire the dash to suit the tacho cluster and redo all the wiring that runs through the front guards so it can be tucked away. Then I need to figure out how to wire up the engine with the Link ecu!3 points
-
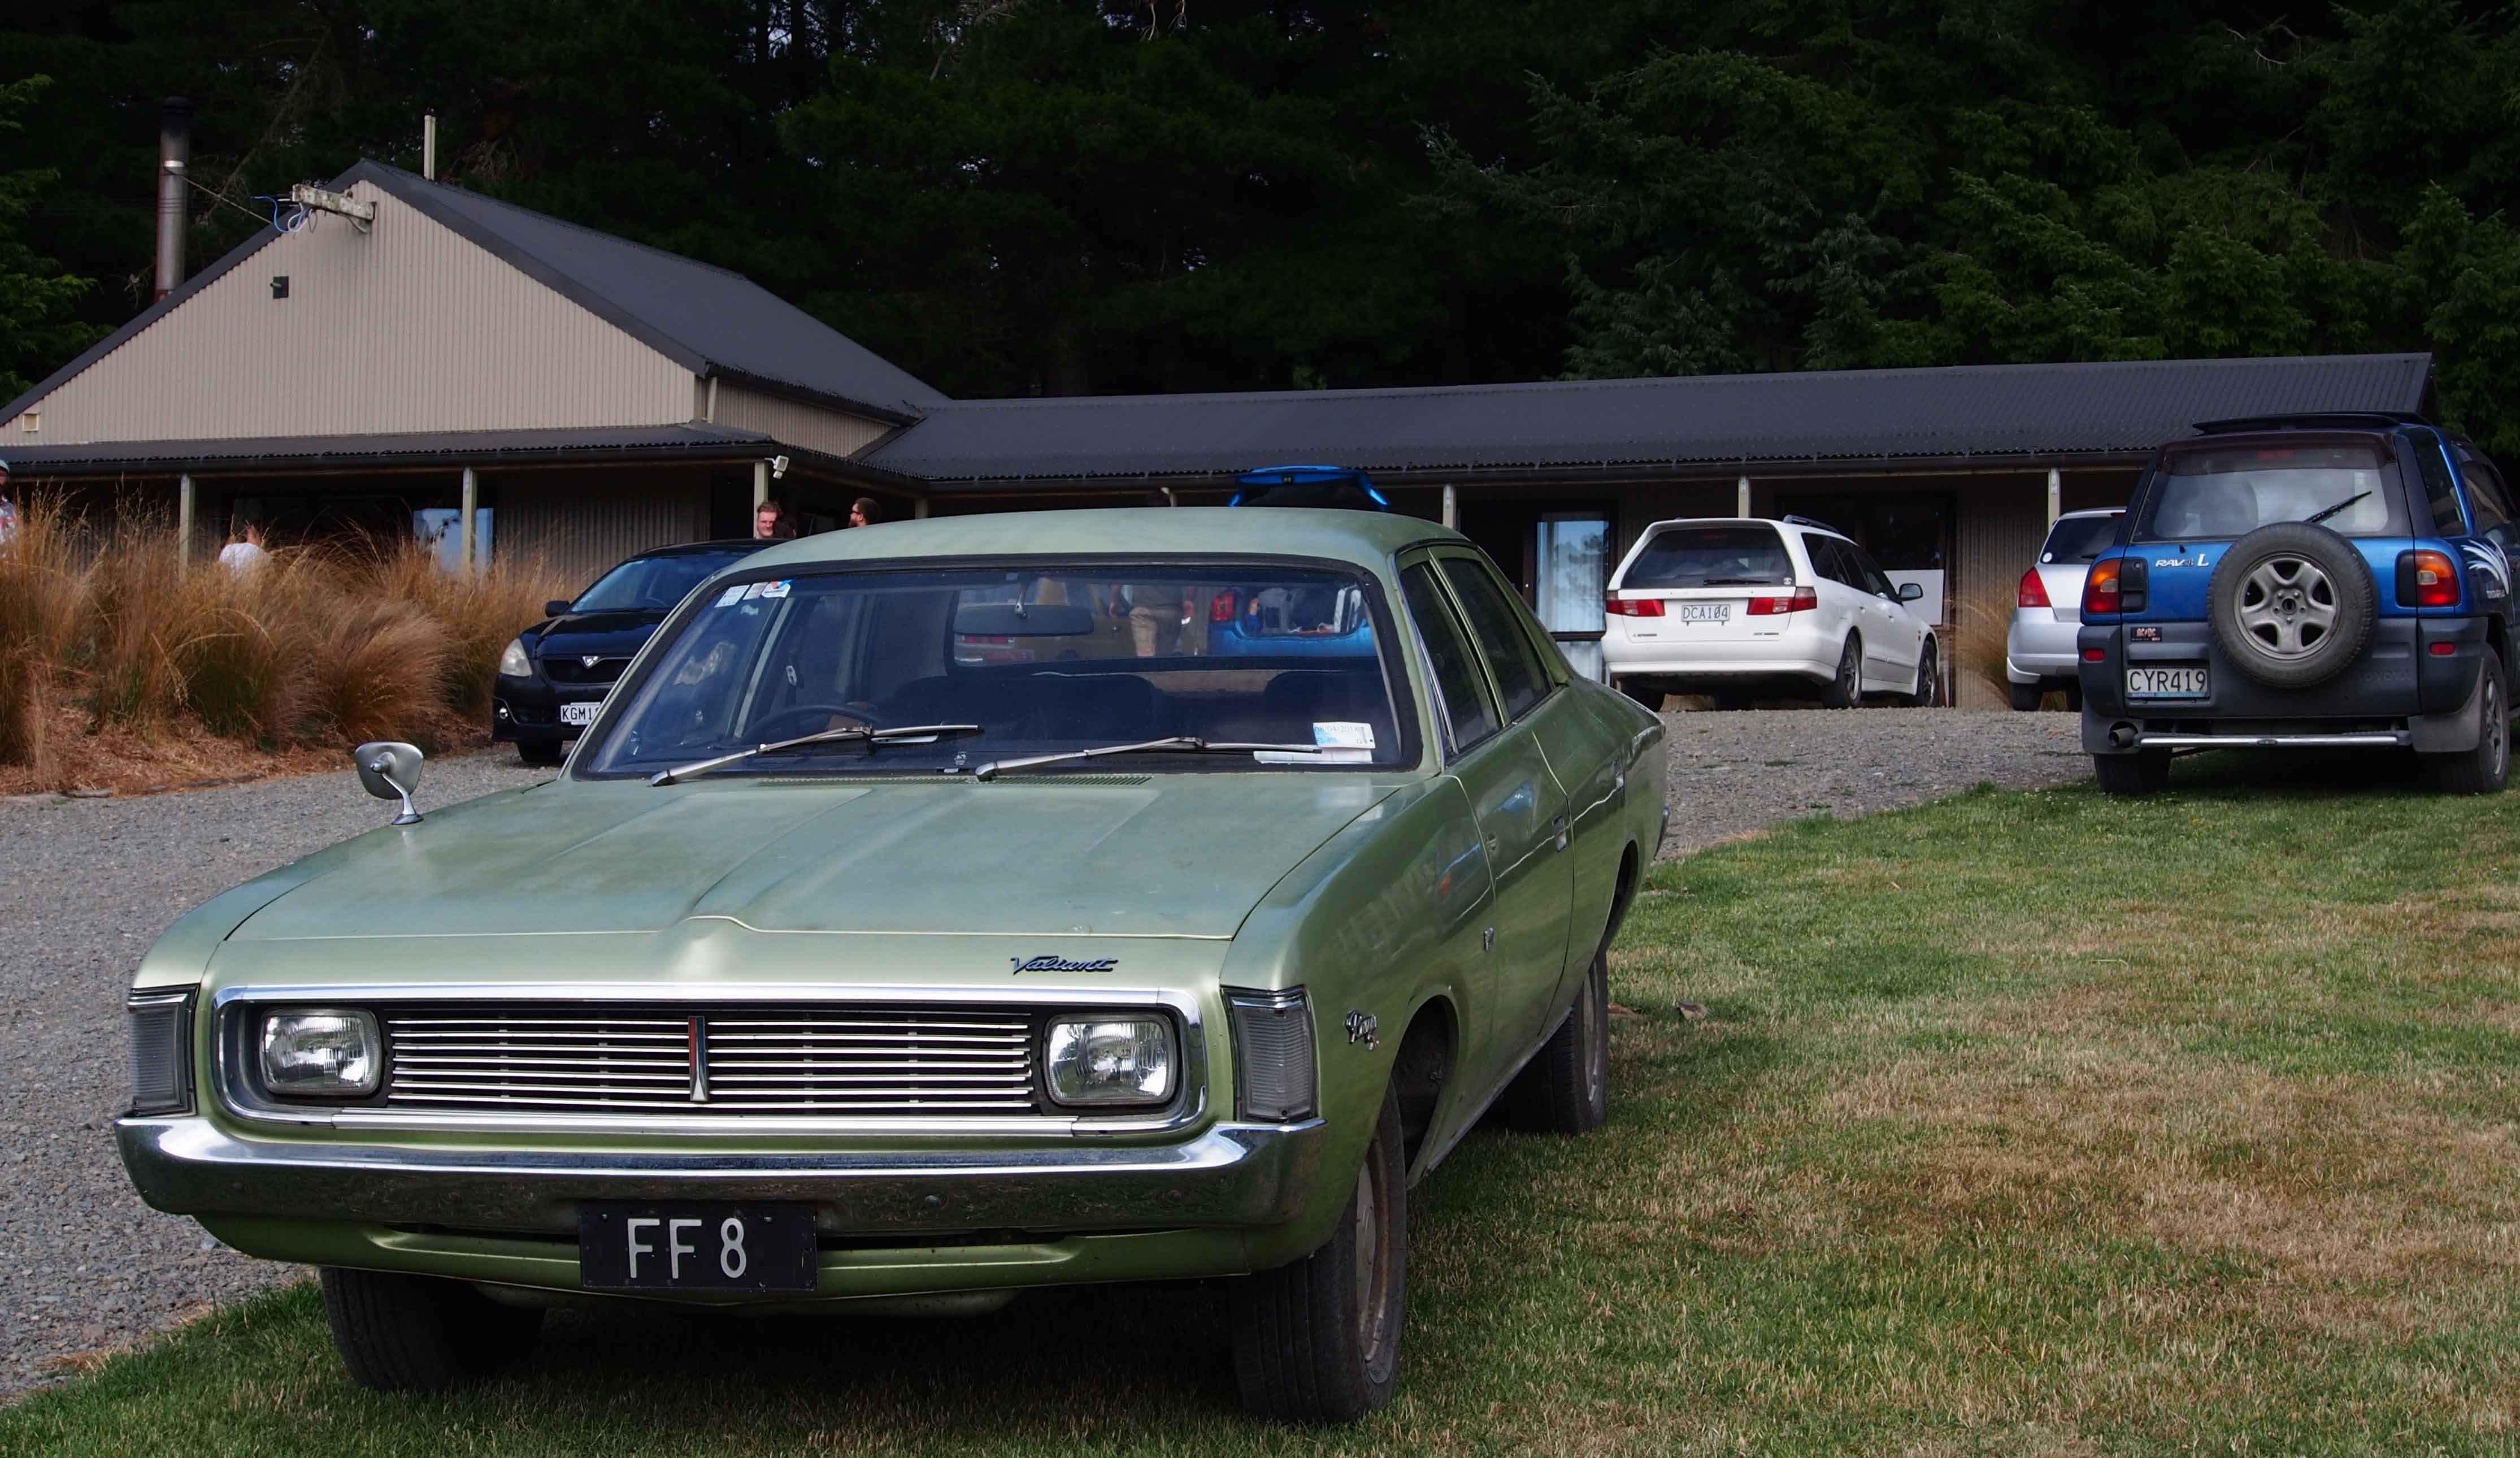
And that’s my last day on it, back to reality next week. brother still has a wee list of holes to fill but she’s bloody close! Diff back in, wheels on and rollin! rear valence almost dialled Hard to scale but that’s a big pile of cast-off Chrysler3 points
-
Hi team, have a few things coming up in summer that would be cool to have this going for, just having a sudden burst of motivation to get it out of the shed. Looking for workshop recommendations, have been a bit hesitant in the past as I'm really looking for a place that won't crush my sills/leave car parts leaned up against it/leave head torches on top of the aircleaner that ding the bonnet when you shut it (true story). Needs a crack in the radiator welded up and a transmission leak located and repaired, had a big puddle of ATF under it when I wheeled it out last. Not necessarily looking for a super cheapy box-o-piss old-school-hookup backyard Barry bodgy bog over, happy to pay the money to do it right but yeah just the priority is getting it back without me having to look at old photos to work out if that ding was there when I dropped it off...thanks team.
2 points
-
I have just realised that as I typed that I'm actually wearing an almost identical top and I've got my thick rimmed glasses on. Oh dear.2 points
-
Scored this book locally from the book of face market place. $15 bargain. Some interesting and useful stuff inside. The dude who wrote it looks like a good honest fun barry to have along for a bbq...
2 points
-
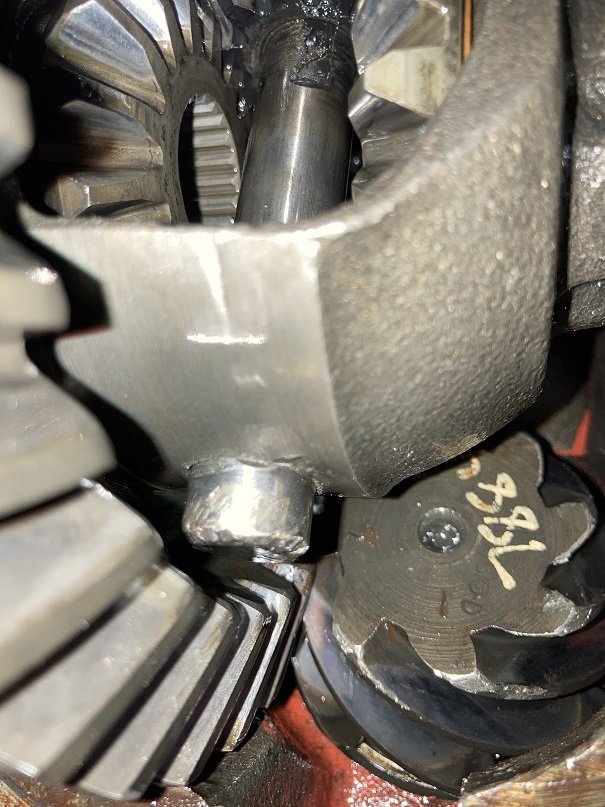
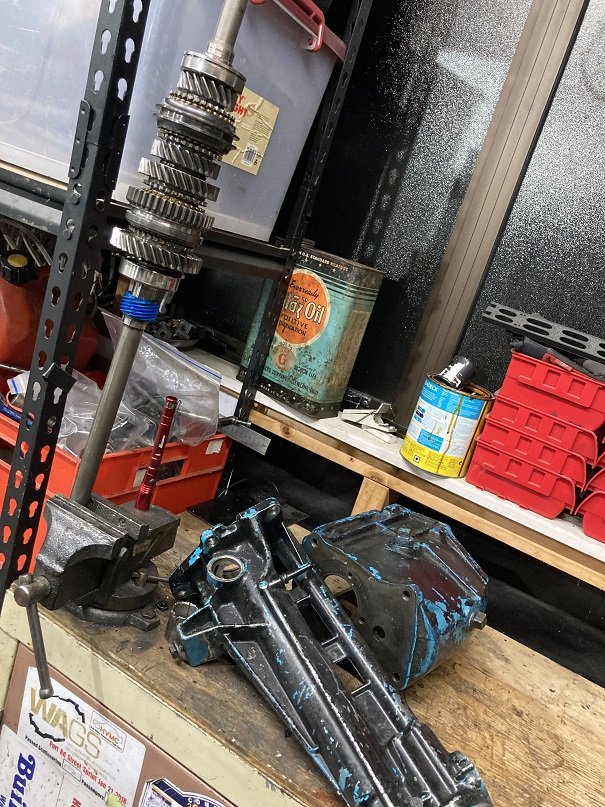
Well those two posts cover 2019-present day fairly well. Car got a new WOF after the exhaust was done and then on the way home the diff center pin worked its way out again, i was about 2 blocks from a mates place so limped it there and came back with the trailer. Unfortunately this time it had contacted the pinion and taken some chunks out. I pulled the center out of the diff hoping that I could replace the crown wheel and pinion with better spares I had but unfortunately one of the thrust washers had come out and been chewed up so I decided to quit there and find a replacement that hadn't been messed with, ideally in a 3.9 ratio which would be less revvy at 100K, Fortunately a local guy noticed I had asked for a shipping price on a diff in Auckland, messaged me and said he had just pulled one out to install an LSD and we did a deal. Whacked a new pinion seal and diff gasket into it for good measure and into the car it went. Much nicer at 100k now and really didn't notice much of a drop in acceleration. In June we moved house, currently renting while we build and the Cortina made the 45 minute drive without a hitch although that damn vibration was coming back with a vengeance. The car now lives on a set of roller dollies and gets pushed over to the side of the garage without a door so getting it out it a little bit of effort but hasn't stopped a bit of progress. During some Level 4 boredom I had another crack at the diff and gearbox angles and made the vibration better but it was still apparent. I did some more research and found out the gearboxes have a bush in the rear housing that is prone to wearing out and causes vibrations of the driveshaft that increase with speed. This prompted me to go searching and I found Burton Power in the UK stocks them. Next thing I know my original noisy gearbox is in pieces, turns out to get the bushing out the entire gearset has to be taken out so I ended up ordering every bearing, seal, gasket and a new bush which arrived about 5 days later, some parts were fiddly but I managed to get the thing back together after paint stripping the casings and giving everything a really good clean. I had to wait for level 2 to be able to buy some paint to pretty it back up. I also found out while looking through the Haynes manual that the box is a GT unit with closer ratios just for a bit of cool factor. Spent most of this weekend swapping the rebuilt gearbox back in, had to modify the exhaust slightly as this box didn't require as bigger spacers to get the angles right (see above in the exhaust pic) and while I was under there I also tended to a little bit of surface rust and gave everything a good check over, Road tested last night and absolutely over the moon with my silent and smooth rebuilt gearbox. Feeling quite motivated to keep up the build now, I came on here this morning and read through my build thread and was cool to see old pics of what I had done so far and thought I would update. Next job I am going to tackle is the starter solenoid is playing up so I have sourced the correct style starter and ordered a new external solenoid to wire in. Hoping to do that over the next week or two ready for its next WOF at the end of the month ready for summer cruising.
2 points
-
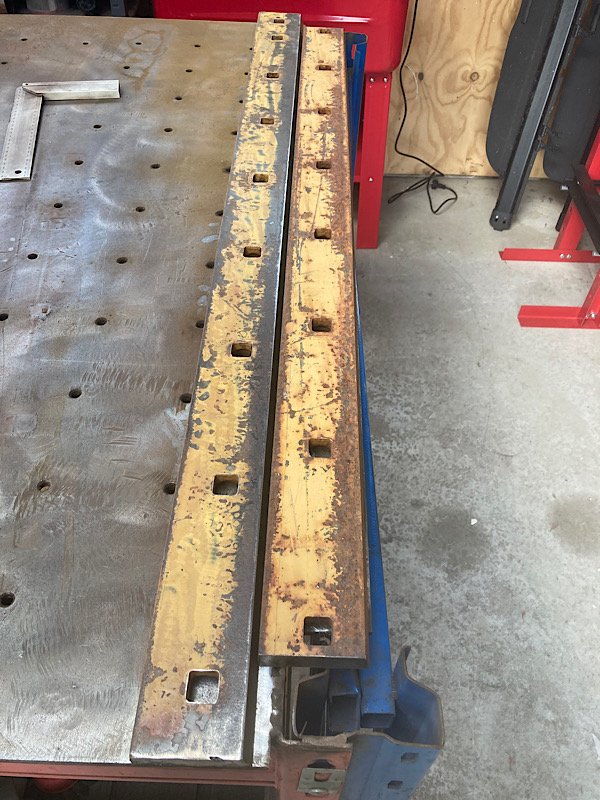
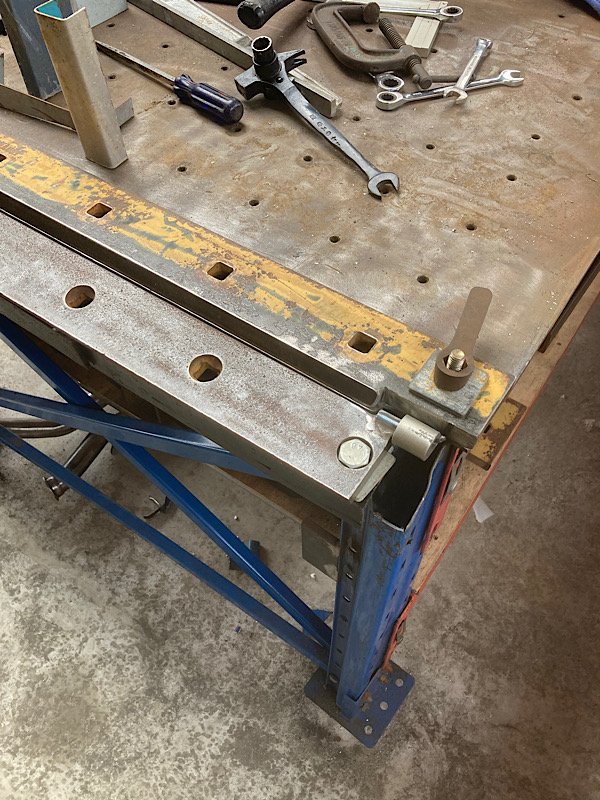
Built a ghetto sheet metal folder thingy on the end of my welding table 2 sections of grader blade from the scrap bin at work and some gate hinges from m10 +angle iron for handles+ random bolts and some old handles from my hoard - also has some cut spring from a fox 40 bicycle fork so it springs back up for loading and unloading Not bad radius on the bends may need to reinforce and tension the middle of the blades
2 points
-
Couldn't help myself. Needed to ditch those heavy cast iron leak prone calipers and replace all the brake lines anyway. Splashed out a little more for the 6 pistons up front (even though they visually look like a 4 pot). I need to replace the rear leaf spring and sort out the play in the rear wheel bearings before I can swap them on.
2 points
-
10 days ago it emerged into the sunlight .. very bright and shiny Delivered to the shed and straight into reassembly
2 points
-
Always been intrigued by these pressed steel frame 2 strokes, and with the forum filled with small bike shinanigans decided I might try it for a laugh. Inspiration was always this S90 posted somewhere else here: @Yowzer's huge fire sale made me think of taking the plunge. Although the thought of getting a bike to the 03 from the Tron seemed near on impossible, he did point me at @ThePog who was holding a couple of bits bikes for him. So a deal was done and the Sierra was duly dispatched to drag the carcasses home.....to where it met with an appreciative audience who no doubt will end up being the owner. So here we are......I'm putting together an initial shopping list to at least get it going, namely both levers, throttle, starter and gear pedals, chain, rear sprocket, brake pads, engine cover, headlight etc.....all available and doable if Ali and EBay are to be believed. Probably wont have it ready for the Molesworth but one can dream. Oh, and this would be nice....
1 point
-
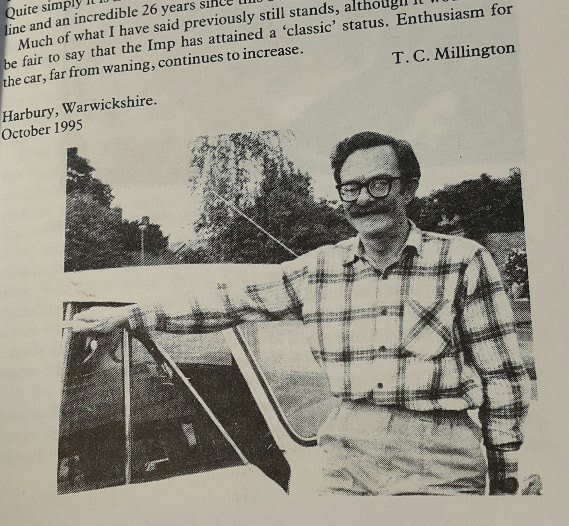
Imagine the look of crippling disappointment on his face if he learned of how you've ruined your beautiful imp......1 point
-
Ned Flanders......1 point
-
+1 for what Clint said. I have delt with Sheffield Crescent auto center with my Valiants and found them to be very helpful.1 point
-
Good, I like short entry forms.1 point
-
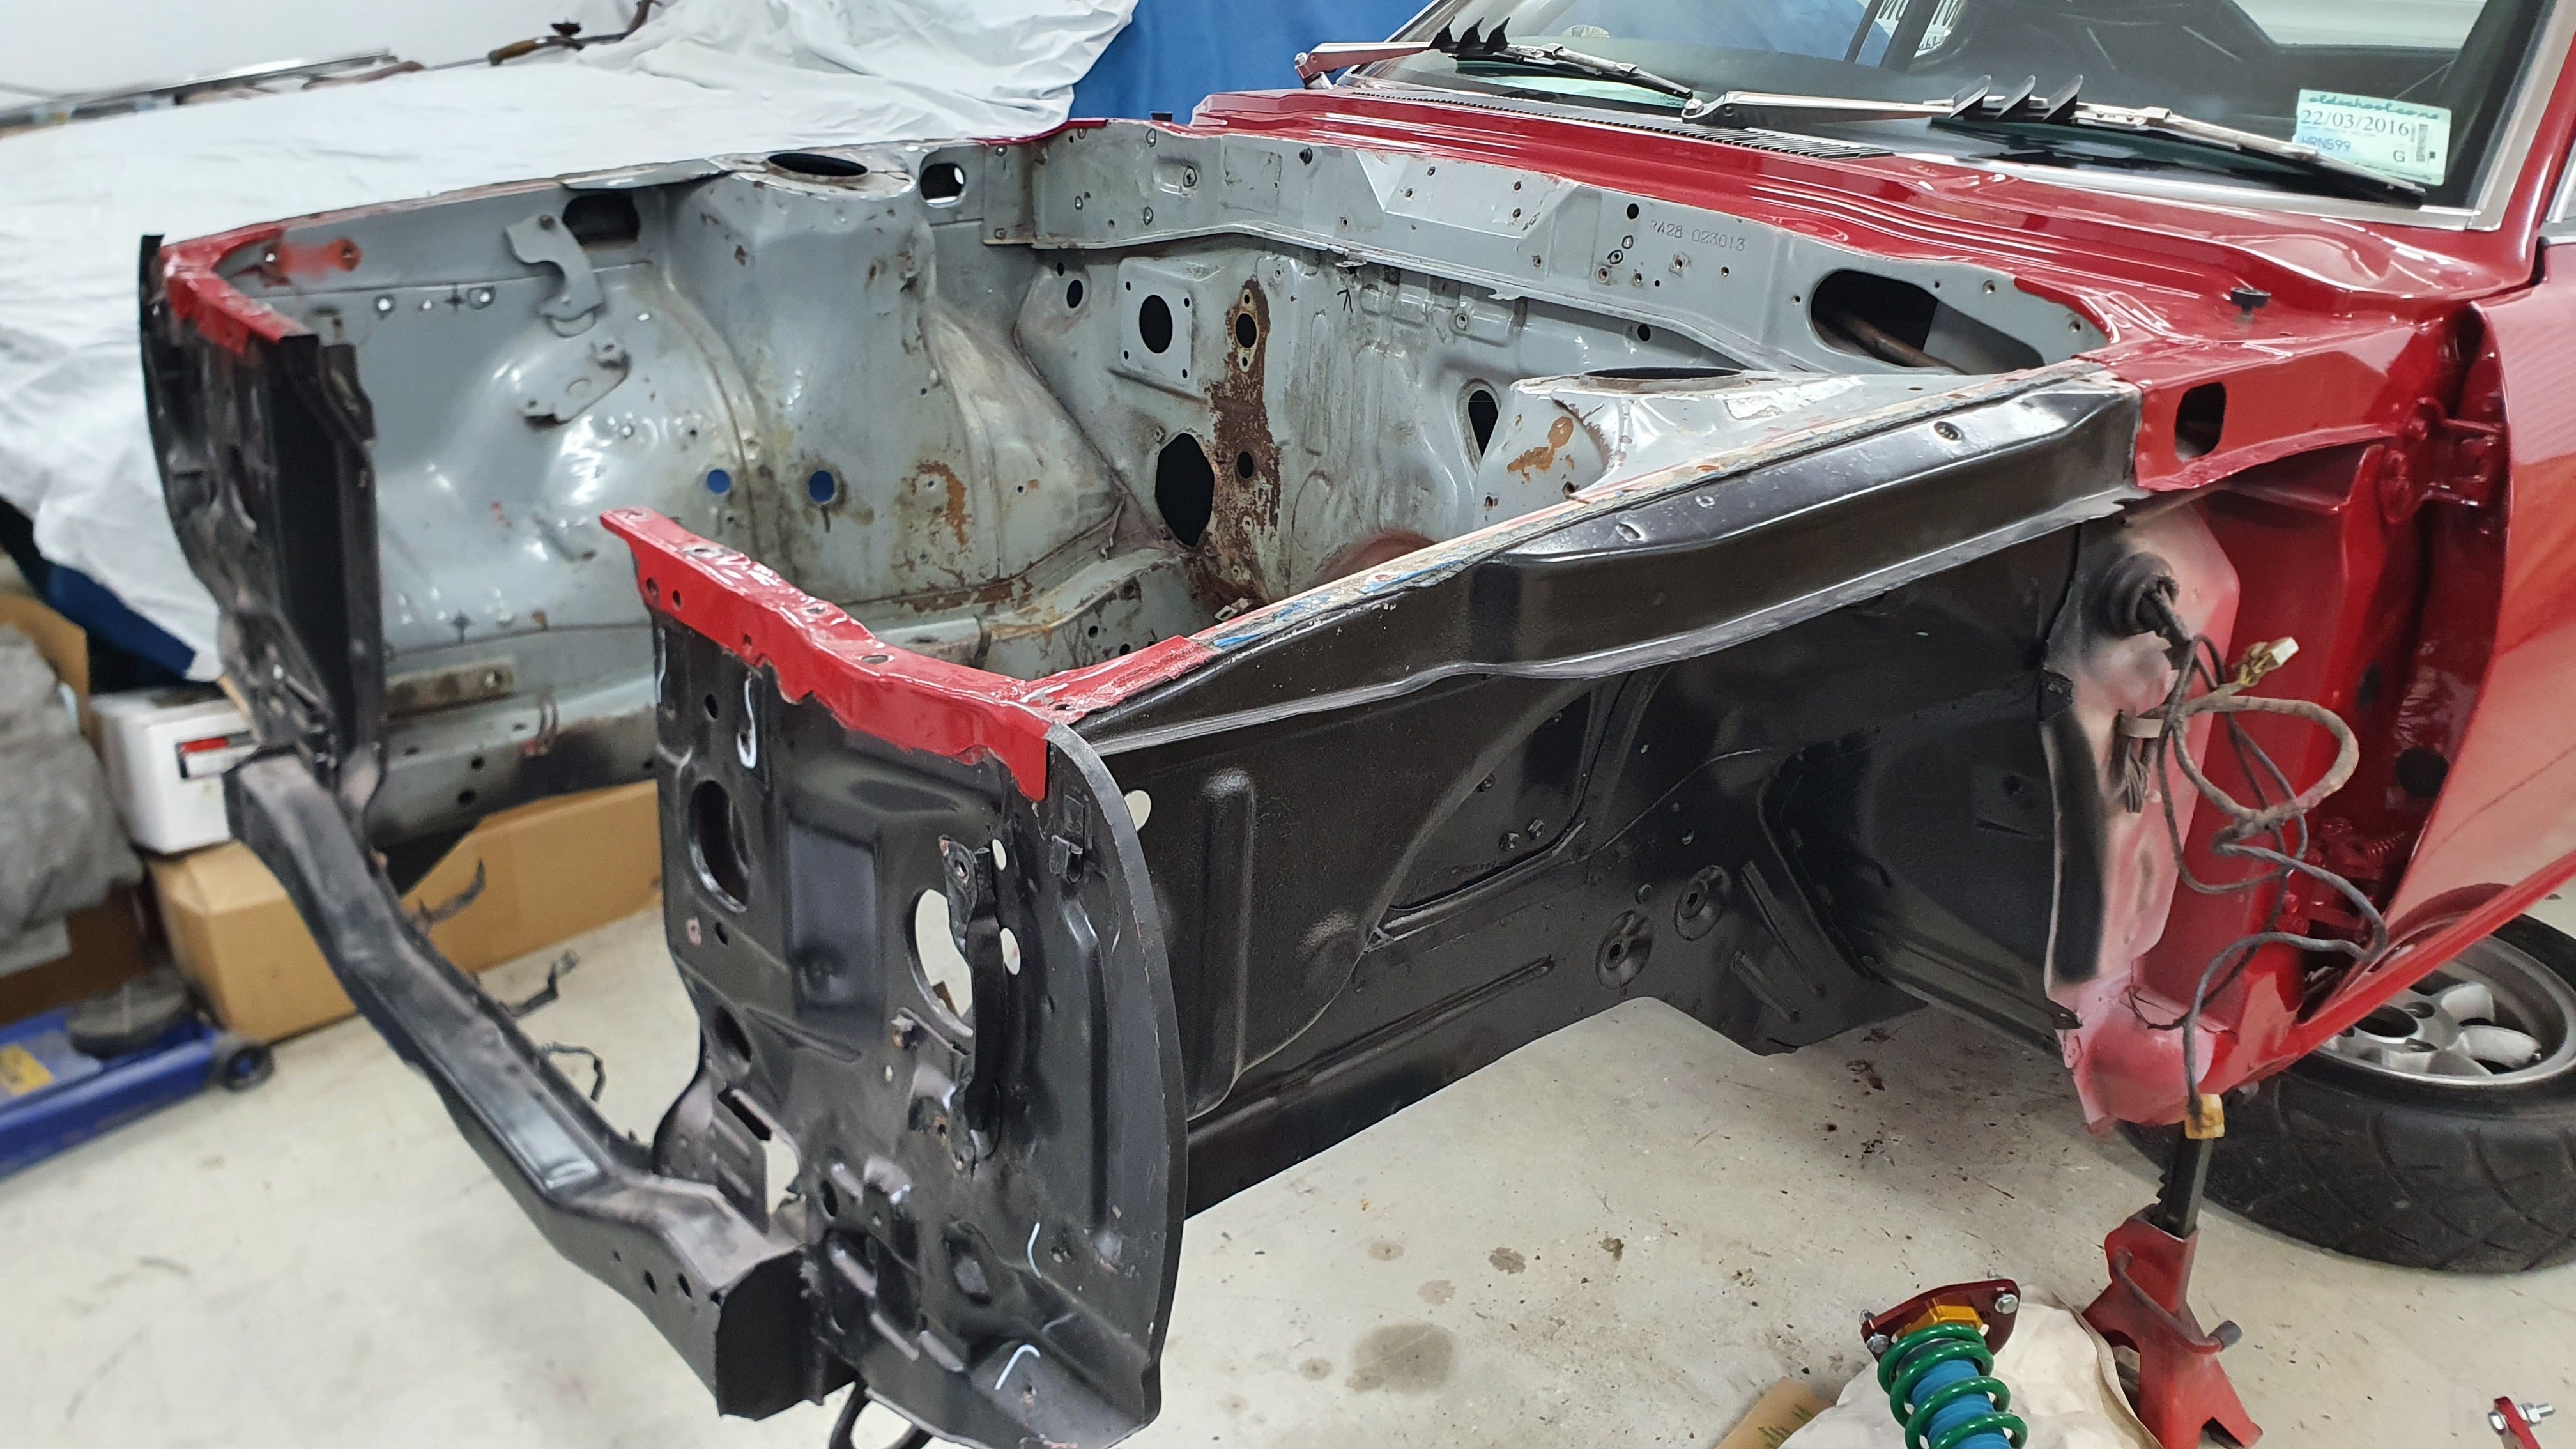
Few more photos from months ago... front valance had some nasty rust. Cut and patched up as well as the lip on the bottom. Bare metaled it and sprayed in black for now Stitched back onto the car. Discussion:
1 point
-
so oil seals done and oil cooler bolted back down. time to clean up the intake and parts so i can assemble the engine. a sweet before hand hit the tubes with a wire wheel and then a scotch bright from under the kitchen sink and after hit the intake manifold with a scotch bright as well to clean it up. ideally i wanted o get it vapor blasted but no one was open and i really wanted to get it back together so this will do for this time round. gave the twin port intakes a quick scotch bright as well. and after started to get a little bit over the top with my cleaning and cleaned the external of the fuel pump and alternator and then started to assemble the engine. had mentioned in a group chat that id like to hide the wires a bunch more and would like some spark plug wire holders to clean up. @flyingbrick said he had some anodized pink ones i could have, a quick flick of black paint and look good again. now i could try make the carb fit. turns out it liked to touch the alternator so i had old mate @Geophy make me a 10mm spacer giving me that little bit of room i needed it needed a bit of fine tuning to match my average tolerances but very good!!!!! fast turn around as per normal. boom that on and looking good with the tolerances i needed. now it was to make the linkage for the accelerator. had me thinking for a bit as its backwards to pulling how my previous one was. again we chatted about it and @Kimjon had a few good ideas which prompted me to end up making the final design. i had shot to the vdub shoppe to grab some other parts and i got this which had a big rod in the middle of it for adjusting. i didn't need it to adjust and a bunch shorter so i just welded it together and made it none adjustable. next i needed something to leaver the top and bottom, i had previously cut down a spanner so i drilled three holes in that. the accelerator cable will go in the bottom hole and the thingy i modified above will go on the top and will pivot on the center hole. make it look something like this as you can see i have also made a bracket off the bottom of the carb that has a small bolt with a couple of nuts on it so the cut down spanner can pivot on. actually here is a video of it working. the top image you can see I've put a spring on the back side to help with some resistance and making sure it pulls back to idle. with this all done i chucked the engine back in and fired it up. and fuck me i was pissed. engine still making a fucken rattle! so again i removed the fan belt, yup the fan was un balanced and causing some racket, so guess what i did. engine back apart. i wasn't so happy to have this apart. but again a quick visit to the vdub shoppe and a new one purchased also found my gen strap was a bit sad and had a big crack in it. hit that with the welder and grinder that fixed and time to chuck that back together All done, I managed to paint the engine bay cleaned up a few other things including some loose wires. here is what it looked like before hand psych, only kidding! thing was running like a bitch, so took it out to vdub shoppe to get paul to give me a hand tuning it. was pinking really bad and was maxing out the timing so i put a stronger spring rate in it. now its running at around 30-32 degrees. no more pinking and running really good, Paul also made it a it richer to try fix the down low stutter i was having. ive also repaired the coil bracket. welded that back together and painted it black, had already repaired the other side a while ago. also swapped out my J pipes for some vintage speed steeped down pipes keeping the heat away from the heads. here you can see the difference with them stepped down. put them on and had an issue with the exhaust gasket been to large which must be designed for bigger ported heads. you can see here these are stepped and the gasket wasn't sealing against the head. so standard exhaust gasket fixed that issue. welded up my bump stop brackets haven't put them in yet been to lazy. might try put them in next few weeks when i have some time off. and my favorite mod/addition i have done is putting in the front bunk bed that goes over the front seats for Tayla for camping. pretty happy with been able to steel that from a mate as he doesn't use that in his bus. That's that for tonight's post. kept me occupied for a hour or so. if you want to yarn about it head on over to the chat fred.1 point
-
So managed to get it going finally after a bit of faffing around, Honda decided to helpfully change the crank sensor from EP3/DC5 K20a's to the CL7 K20a, that took a while to work out. First successful start. Starting it highlighted a weakness in the breather baffling I had done which meant oil was being pushed out. Here's Honda's original design: Here's version 1: New Version 2: Very tight fit and designed to force the air back on itself. Work has been done on the ducting into and out of the radiator and oil cooler. Radiator Exit: The oil cooler exit was a lot trickier, I needed space for the intake pipe, withour comprimising the ducting site. Pretty happy with how that's come out. Bonnet exits, still to be tided up. Big thing outstanding is the air intake, so been mocking up options. In the end I will go up with a straight simpler solution, plasitc pipe will be replaced with ali for smoothness. However I want to make sure it's got a cold air feed/box, so a bit of fabrication is going to be required around getting cold air from the head light. Here's a walk around of the whole car at the moment.1 point
-
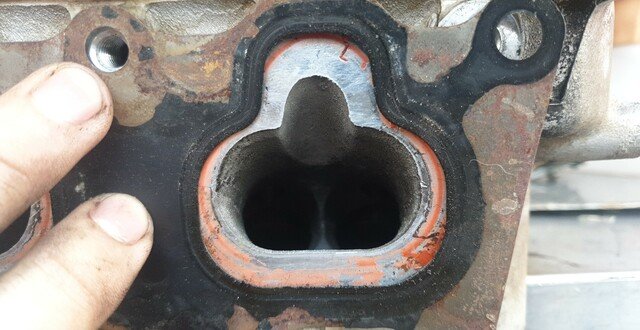
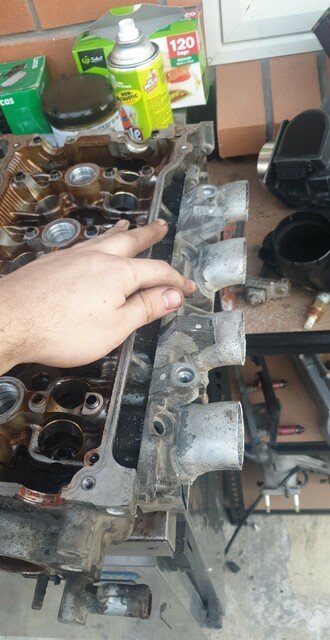
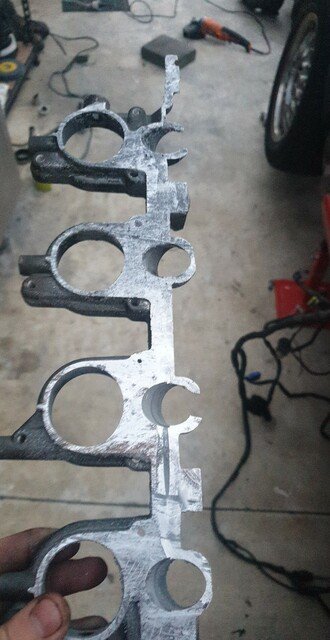
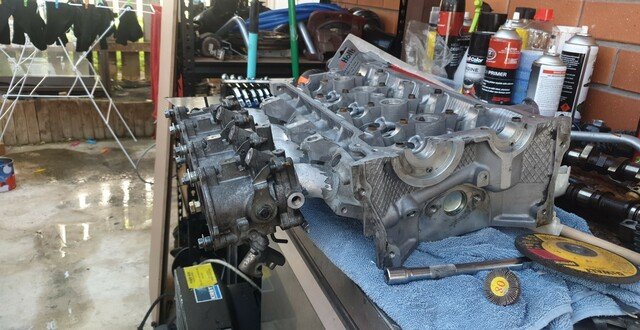
So now that we have the head and it is somewhat clean (actually maybe I did not clean it until later, but still) we need to look at what this head is and why it is being used. The elephant in the room is that the ZL-VE head came FWD only, in a Familia. Specifically around 2001-2003 is what I could find, but there are also the 2.0L Familia's, the 1.6L ZM-DE and the 1.5L ZL-DE. The ZM-DE (Z6) head had been done in the thread linked above (2012). The benefits of the head were larger but steeper port angles, shallower combustion chamber and a few others. I assumed the ZL-VE would have the same steeper port angles and large ports which it did. The lower displacement of the ZL-VE motor was entirely in stroke, but similar compression ratio meant there must be either a difference in pistons or lower combustion chamber volume (both are true). Intake: Here is the ZL-VE intake gasket on the stock B6 head. There was no longitudinally oriented engine with the same intake/exhaust ports. This meant custom intake, custom exhaust and likely more. I hunted around for a little while for some ITB's from a 4age, as in my mind an ITB adapter would be easier than an intake plenum for a singular throttle body. I chopped up a 4age intake manifold with a hacksaw (never again...) and chopped up the stock ZL-VE intake manifold with a mixture of angle grinder and hacksaw. We are on our way to an intake manifold. I used JB-weld to attach them together for testing, and skipping forward a few months ended up tig welding them together. I have a HF DC-TIG welder but no AC-TIG, so aluminium welding cannot happen at home. If you spot JB-weld, it was temporary. If you spot shit welding, thats because I'm a shit welder. Intake manifold complete (ish).
1 point
-
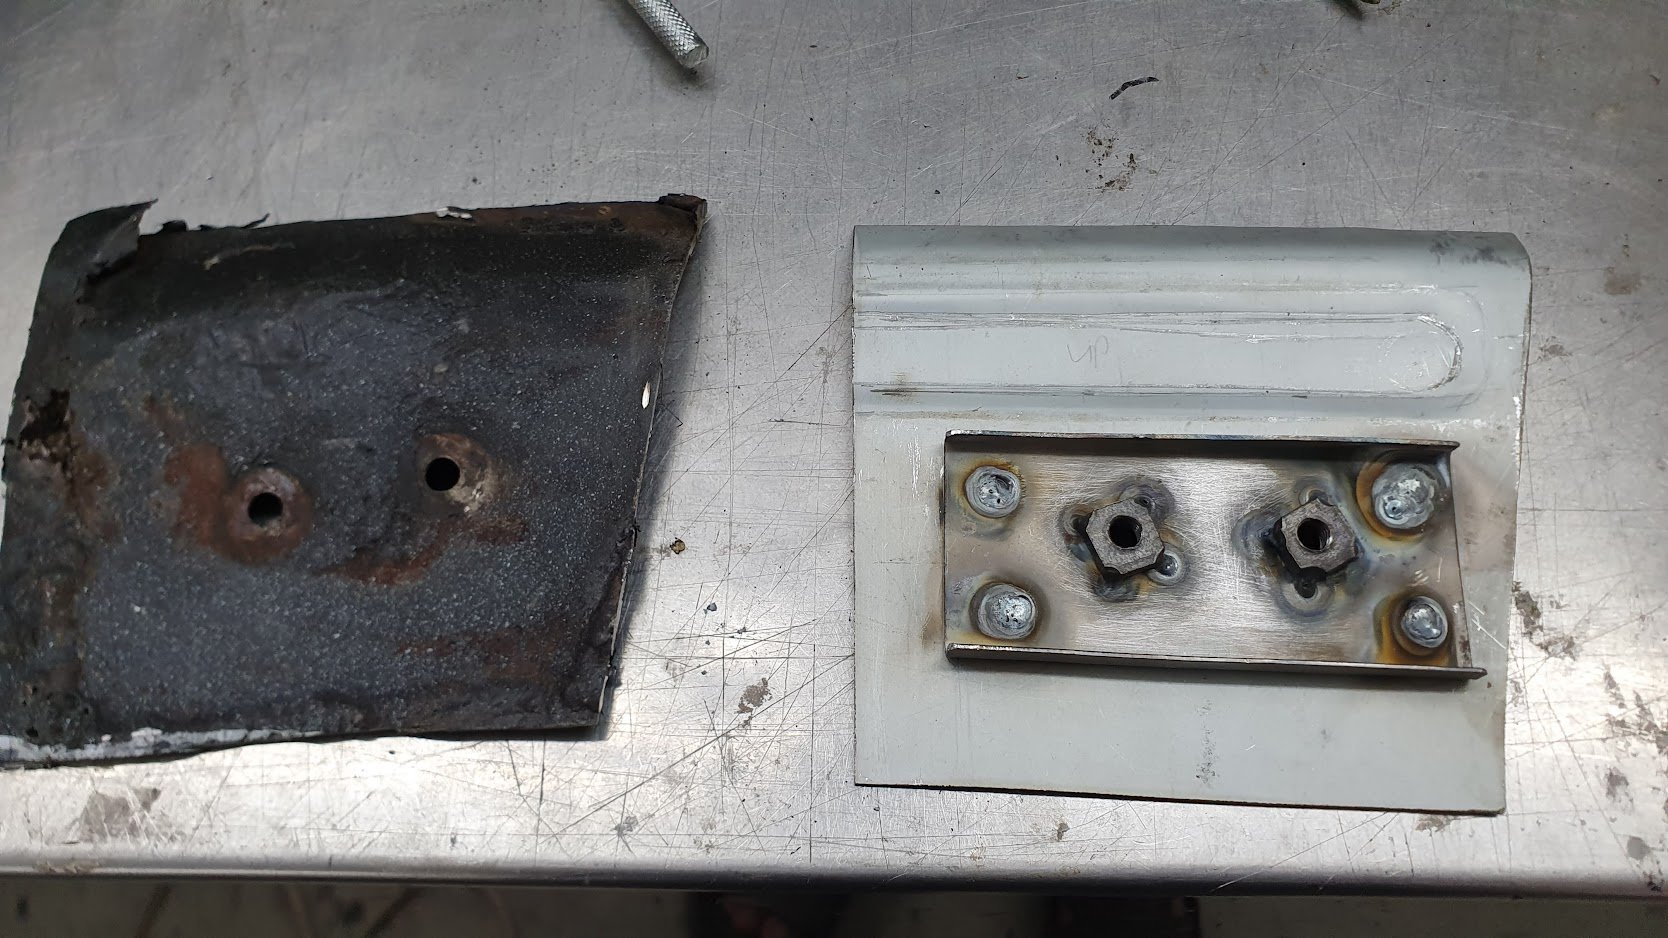
Back on track! When you have a waterjet on site, rooted shackles are no problem! order number workshop the middle of the rear panel is holey so they waterjetted a profile for the pullmax and hooked into it! made a full length piece but wasn’t worth the potential hassle as it’s a w shape so just chopped bits out. the underside piece was shit so replaced with disruptions and great difficulty here’s a wee bit where ya feet go I made yesterday raised this portion wrongly stamped in the Chang 1/4 The dumb floor was too small in all directions so trying to transcribe it.1 point
-
1 point
-
@yoeddynzyeah that’s the 69-73 rear. They changed thru 74-79 and again in 80-82. In my opinion the 80 shape lends itself the most to mods as it has nicer flares and arches, but sucks cause the interior is pretty heinous and the engines are absolute smog spec. I reckon a set of superlites/wats marched flush to the guards, sitting super low is the way. There’s a dude on Insta “hellvette” in aus that has one on air suspension. Pretty sick
1 point
-
sweet. Good score. I think they are choice cars but yeah I know what Clint means- they seem to attract a certain type of driver. Time will change that though and prices surely can only go up. Here's a nice one I spotted locally. I don't really know much about them though - so this is an earlier car eh? But looks kind of the same and I just love this shape...
1 point
-
sweet. I dunno why corvettes are not more popular, they are pretty affordable for an older American car, and look sweet slammed on some decent wheels probably because they have a reputation as a car for people who wear heartbeat of America hats, jean shorts and new balance shoes. they probably just need some cool Instagram kids or that joker in japan that puts wide guards on porsches to do some cool stuff to them and bingo, decimal point gets moved *I know they are turds as far as a 'sports car' goes but who cares, vettes are a nicely shaped turd1 point
-
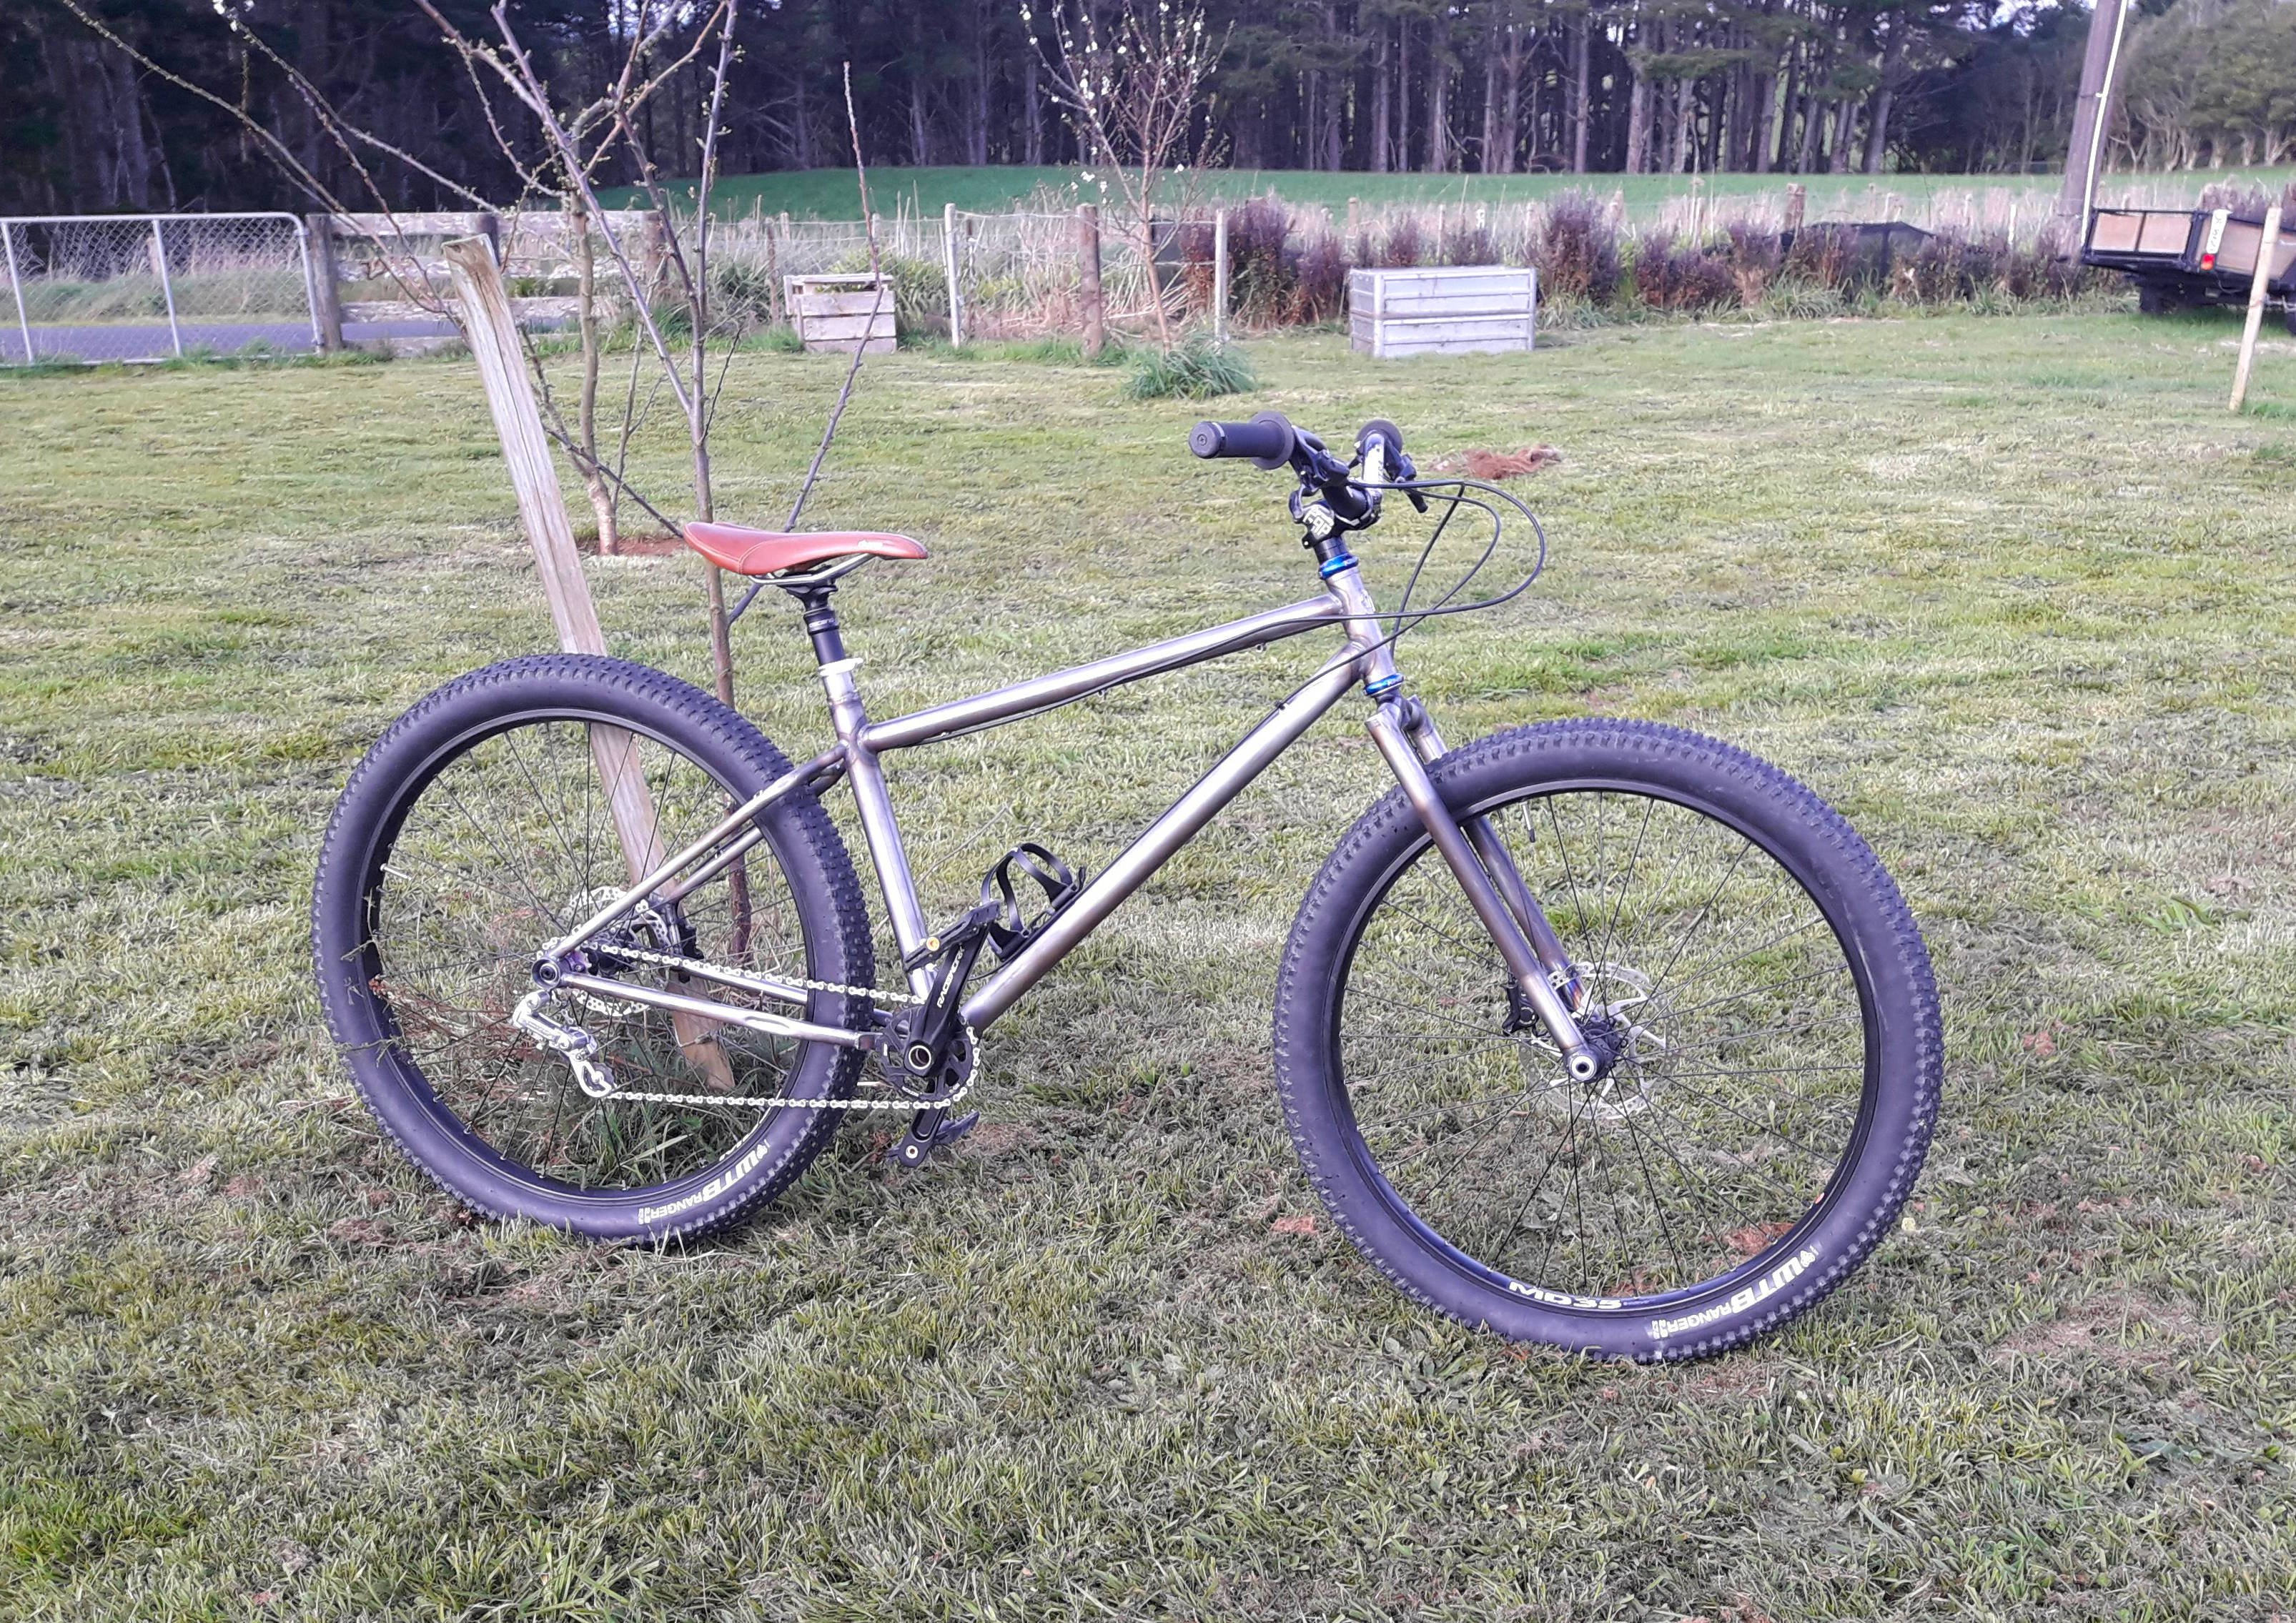
At this point I had enough bits and pieces to assemble the bike and take it for a ride around the yard. Albeit with only one brake, a slipping singlespeed drivetrain and the seatpost at maximum highpost position. The latter issue was solved with a sanding drum on the dremel to bring the tight spot down to size then I was able to get full insertion. Of the seatpost. I know what you were thinking I'm pretty happy with that. Took it for a hoon around the yard and did some jumps and the forks didn't snap or anything silly. The high offset forks mean that the front end loved to dart into corners, but taking it up to speed down the road it doesn't feel unstable and seems to behave itself well. The handlebars will be getting replaced with some wider bars (780mm) high rise bars. That will help me to do more of an apples to apples comparison with the geometry in relation to my other mountain bikes since I am not used to the narrower bars that it has at the moment. In terms of playfulness with the longer chainstay length it is definitely more difficult to get on the back wheel, will have to see how it is on the trail as that is always a bit different to mucking around on the flat. Next on the agenda is painting since all the other stuff has been finalised now.
1 point
-
That's enough productivity for the week Both front lower arms and front shocks replaced with new (to the car) parts. Changed engine and gearbag oils. New (to the car again) zebra radiator and thermostat. Rads in. I thought it was sitting lower than it should, its the same size as what came out Hmmm Hmmm That might just do it... Reused moubts and called it good. Wanged some rad flush in and replaced the rear wheel bearings and parking brake hardware It's a million times easier to fuck around with the drums with the hub/bearing assembly out of the way Rock autod the brake stuff. Landed pads, parking brake shoes and two wheel bearing/hub assemblies for the price of one bearing/hub assembly here. Doesn't get hot, the fans cycle and do what they should and the 'noisy tyres' are fixed with new wheel bearings. Wof shop can fit the tyres when they do the wof1 point
-
That'll do it Didn't think I did it up that tight Had another second hand sump in stock and some honda bond1 point
-
It appears I have a case of penis fingers That's from the crank pulley area1 point
-
Installed shiny bolts. Lost the others so will tidy up and see where they went1 point
-
May as well add the new addition to the fleet here. Picked up a 06 accord wagon for cheap off fb. Was a trade in deal and was cheap as it needed a set of tyres engine mounts and lca bushes for a wof according to the seller Because I'm a scumbag I grabbed a couple of mounts and the lcas off a car at zebra. Got lucky and someone had already taken the mounts out for me. There was a set of mudflaps I've been wanting for my daily accord which was a nice surprise. The reason it was traded in was made apparent when I was stuck in traffic It didn't get any hotter than that. It needed a litre of water and the cap was looking suspect so zebras finest cap to the rescue and I'll test it again1 point
-
Got to save some grams in bolts to make up for the kilos of sound deadening that's going to be installed Titanium dizzy cap bolts arrived on the courier along with the fuel rail fitting1 point
-
I decided the engine bay looked crud against the new paint, soo... engine out, strip the front suspension and steering etc.
1 point
-
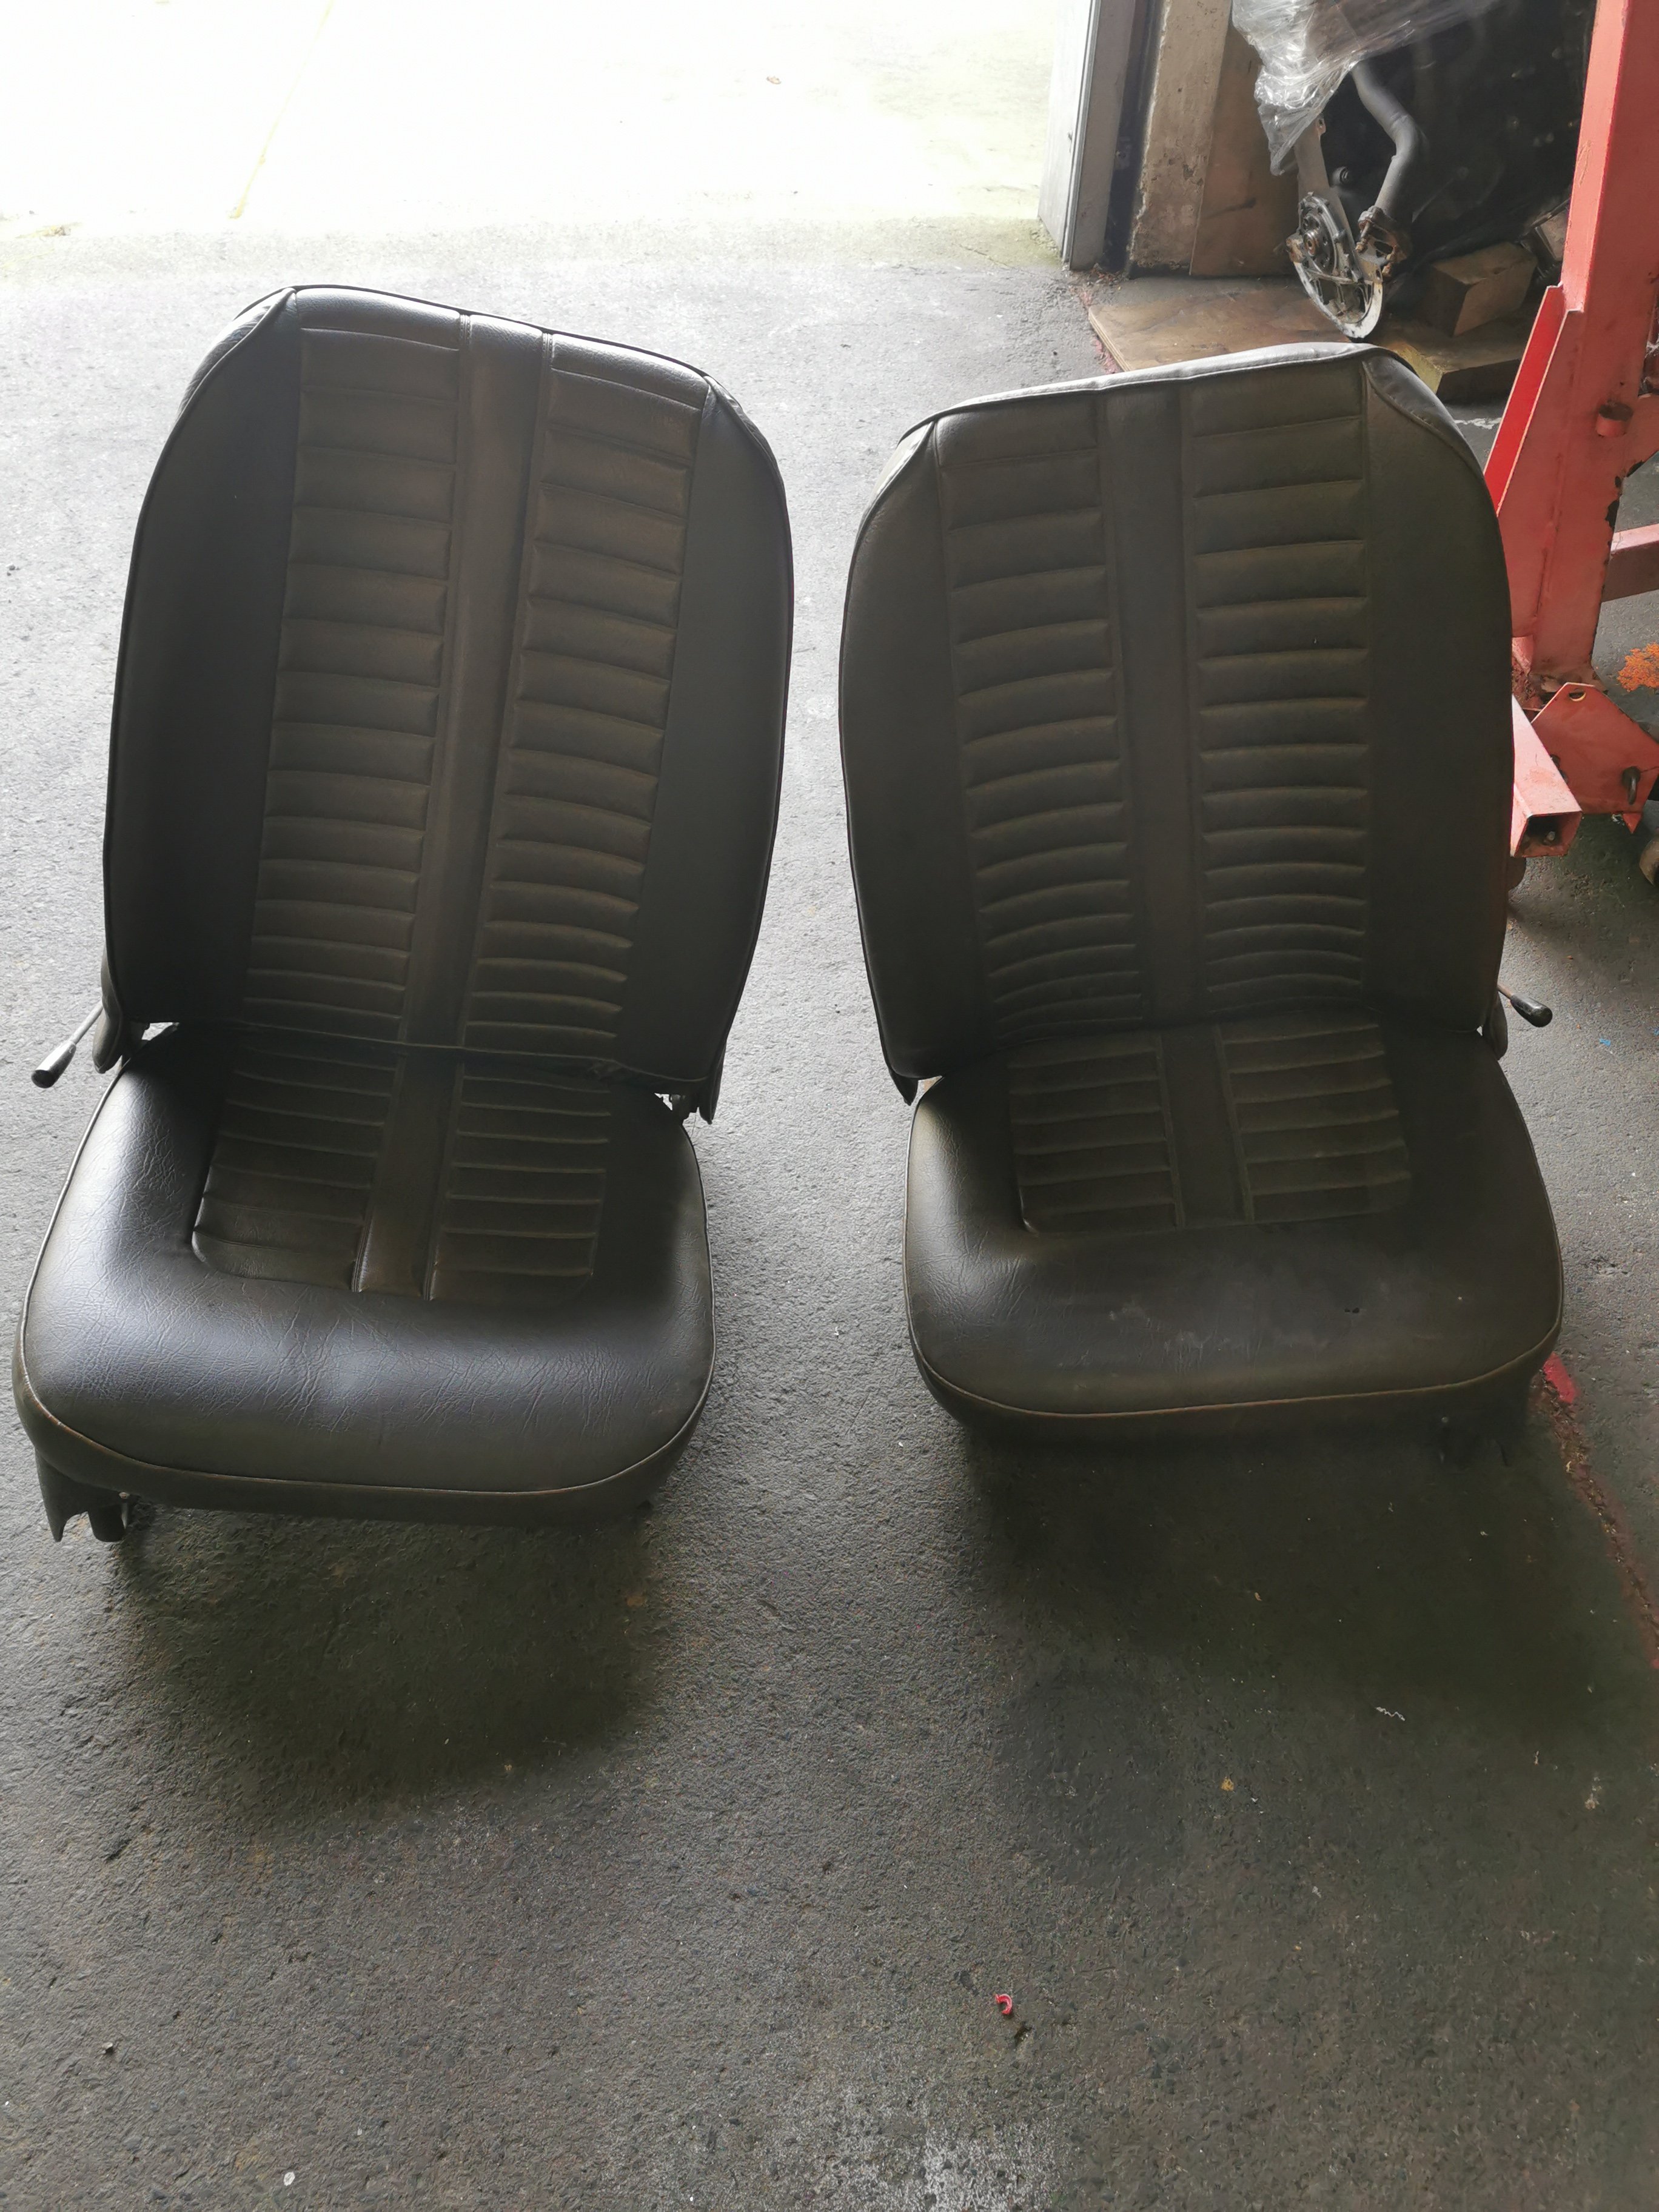
The seats are immaculate in this car.. Its a shame to sell them and put race seats in it.. But oh well, skids If anyone is after a full set of matching seats, front and rear, door cards, door tops and under dash pad, I'll flick them up on trademe. Reclining High back super seats. Pic for you @cletus
1 point
-
Popped down to Wellington a few weeks ago for a family get together and squeezed in a quick pick a part trip. Grabbed a intake manifold I've been looking for for ages. Honda Barrys say its the best stock factory manifold and has similar performance to the spenny aftermarket manifolds. Had a nosey around and found a rover civic thing that had a interesting rocker cover so I grabbed that. Motor had only done 57000 km so seals etc were mint. (not leaking as much as what's on there now). I also found the correct dizzy for the motor that's in there now so I'll have timing in the right spot and have more than one bolt holding the dizzy in Wanged the rocker cover on over the weekend1 point
-
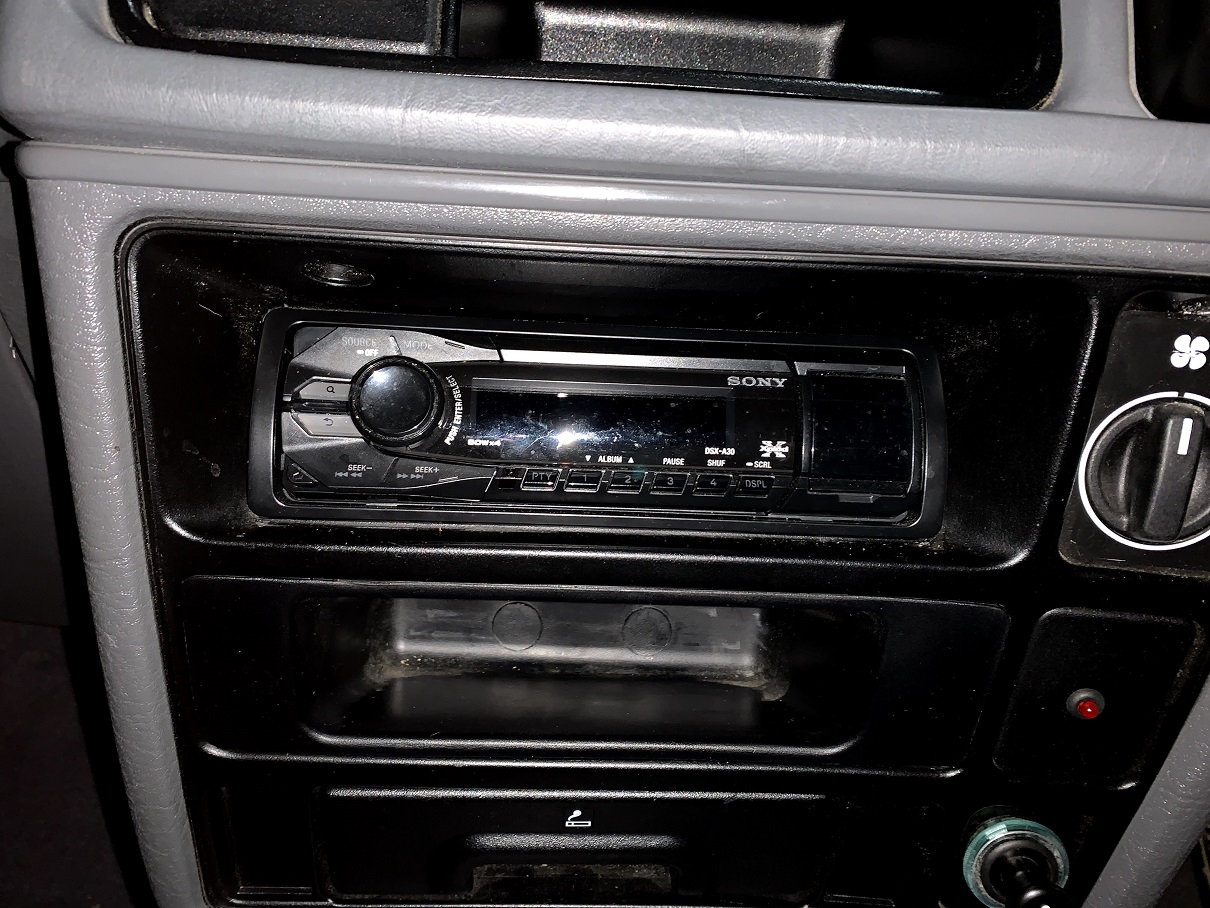
Another weekend, more rain and a sick daughter conspired to provide me with a few hours this afternoon to tinker away on a few minor things. First thing to go was the bulbous wind deflector on the drivers window, it was massive and didn't look right only being on one side of the car. Other thing that managed to sort was the radio, had an ancient Sanyo tape deck in it which had power but no sound from the speakers. Swapped in a spare mechless Sony unit I had in the garage and got sound coming out of the fronts. Apologies for the rubbish photo. Highlighted a few things; first the front speakers are horrible and need to be replaced and second, it really needs some rear speakers. One step at a time though.
1 point
-
More reassembly progress
1 point
-
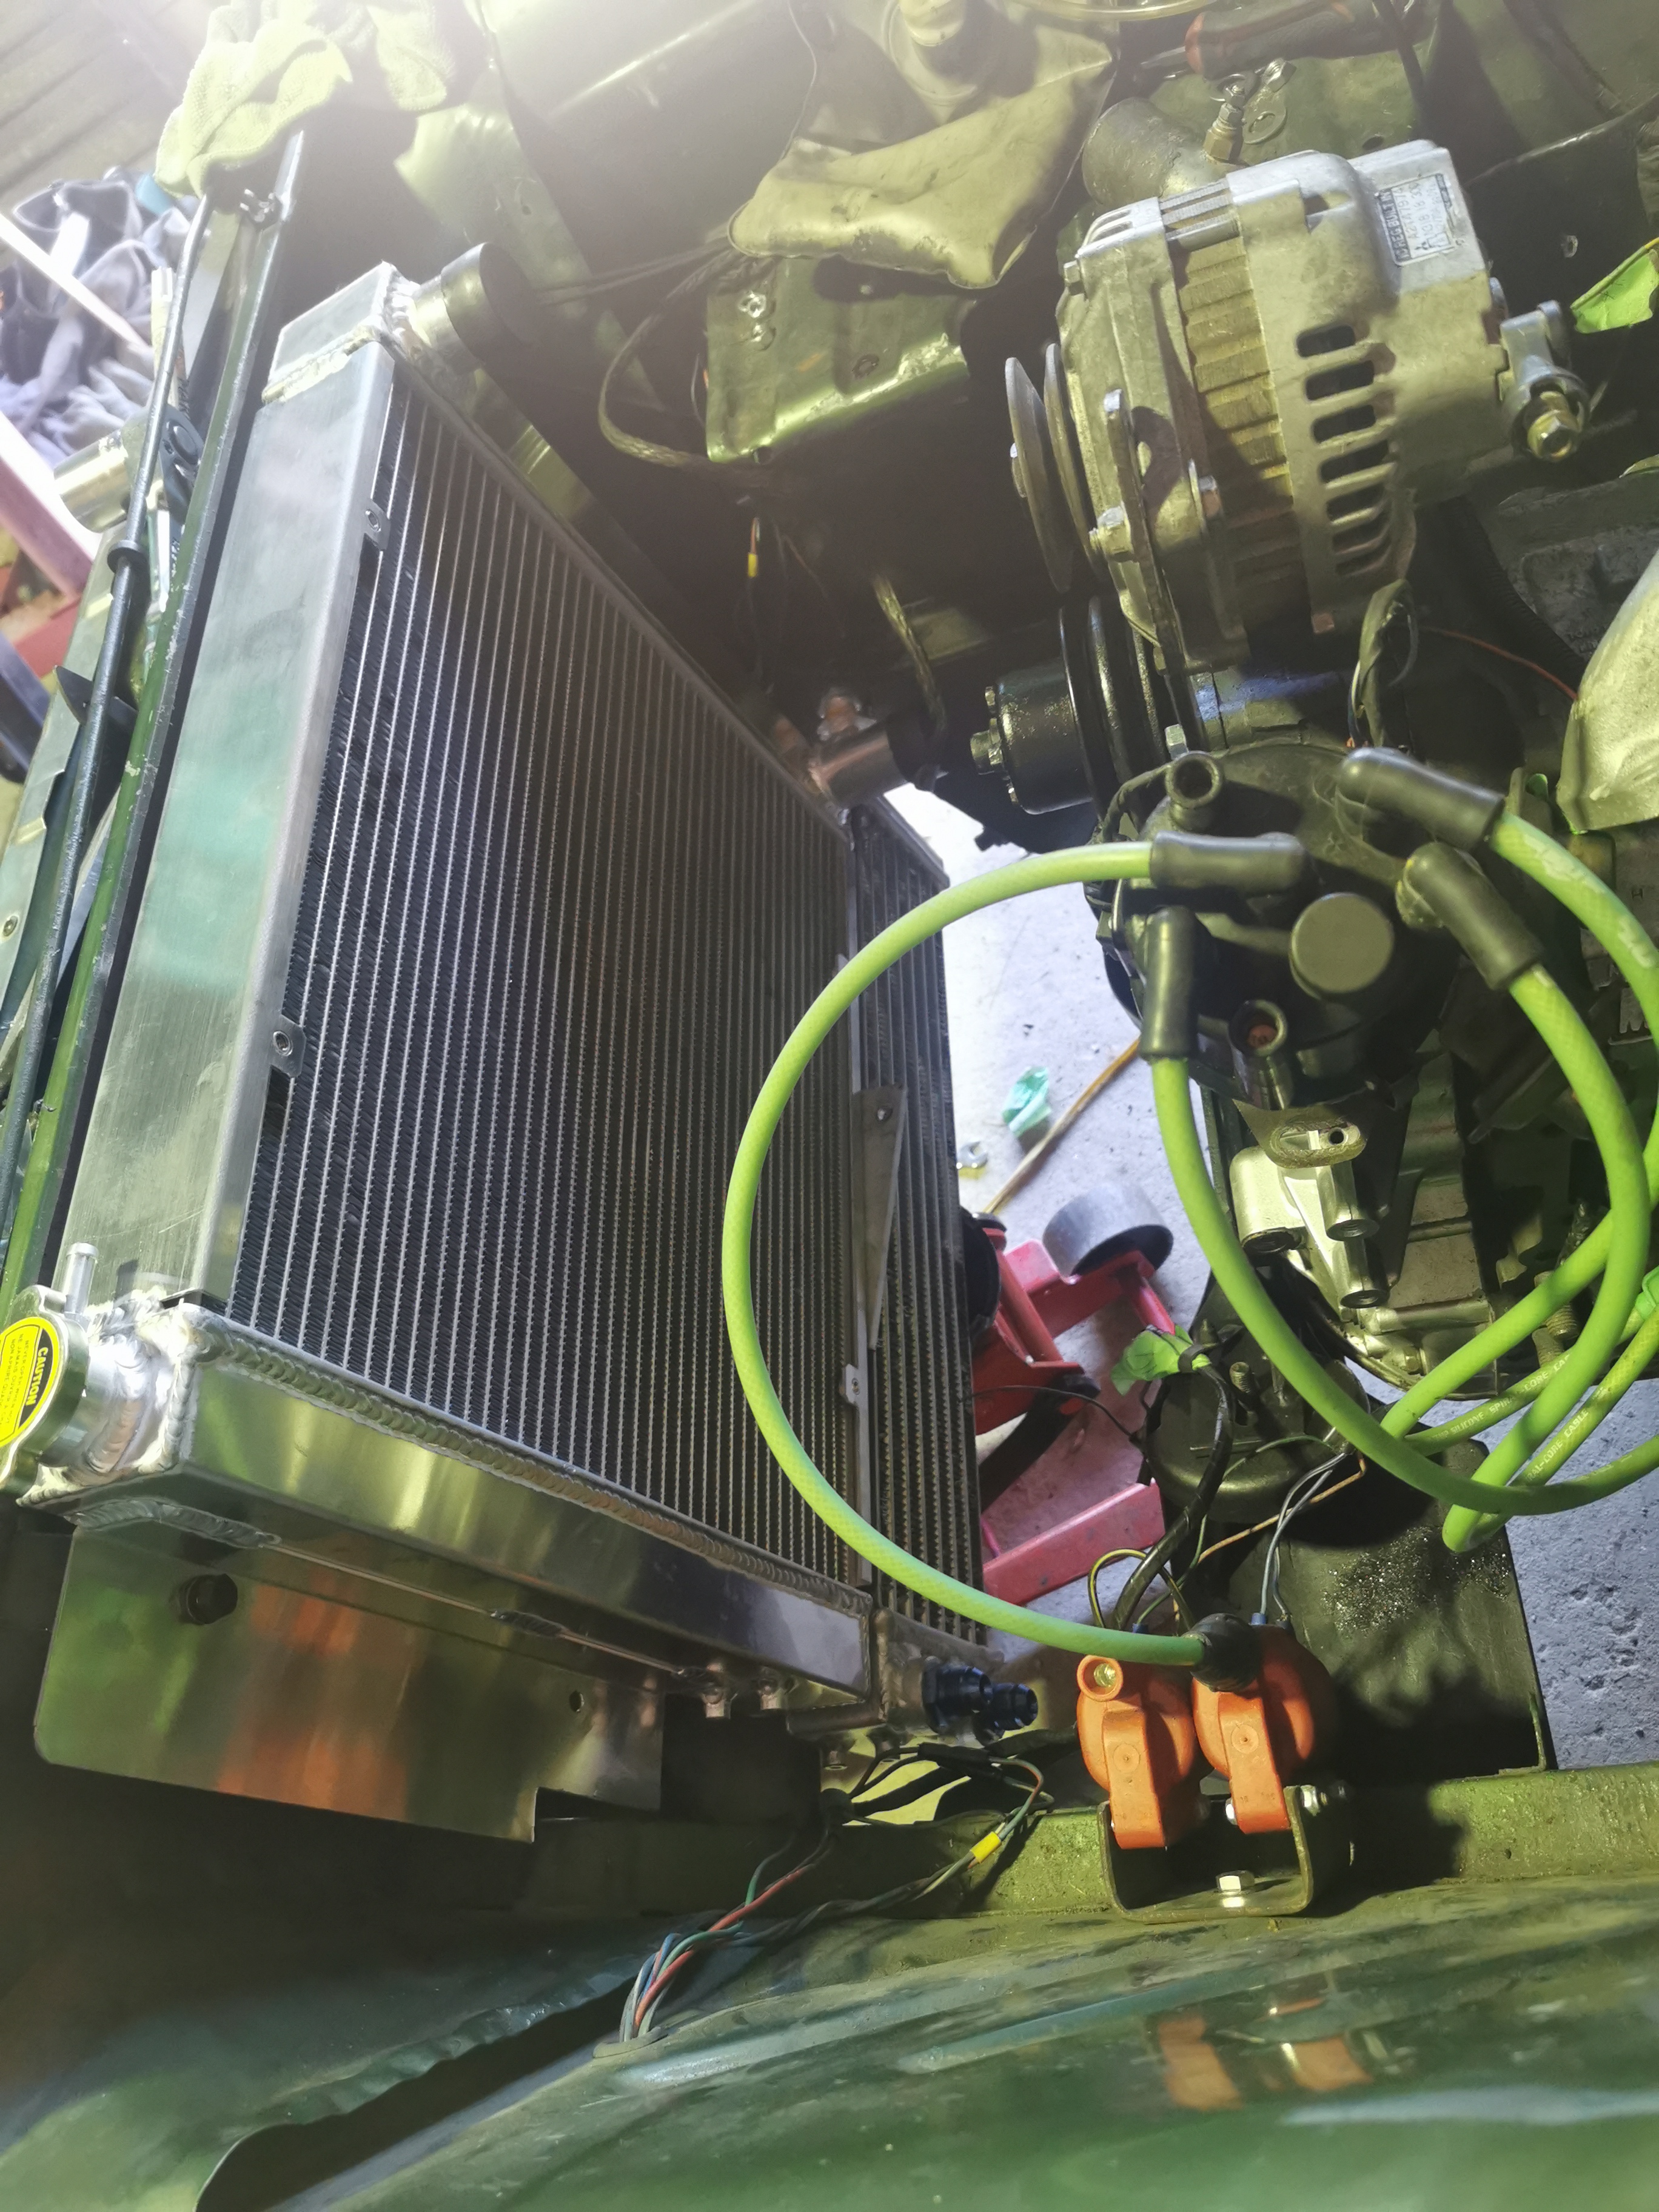
Radiator mounted, dummy fitting oil cooler.. Oil cooler is wider than the radiator so is a bit of a pig, not alot of options to mount this
1 point
-
Engine and box is mounted. Does need to come back out so I can chop off the factory mounts, thump in some clearance for the fork and slave 10mm if that. And remove the reverse switch. And believe it or not, the hunter gearbox mount bolts directly to the rx7 box. No mods at all on the gearbox crossmember or mount. Dafuq..??? Rx7 radiator practically bolts directly to the hunter bolt holes too. Just need to cut 100mm of the shifter hole out and spin it round.. Too easy. I would like to space the crossmember down 10mm to see if it gives enough clearance for the slave, and a slightly better yoke angle.
1 point
-
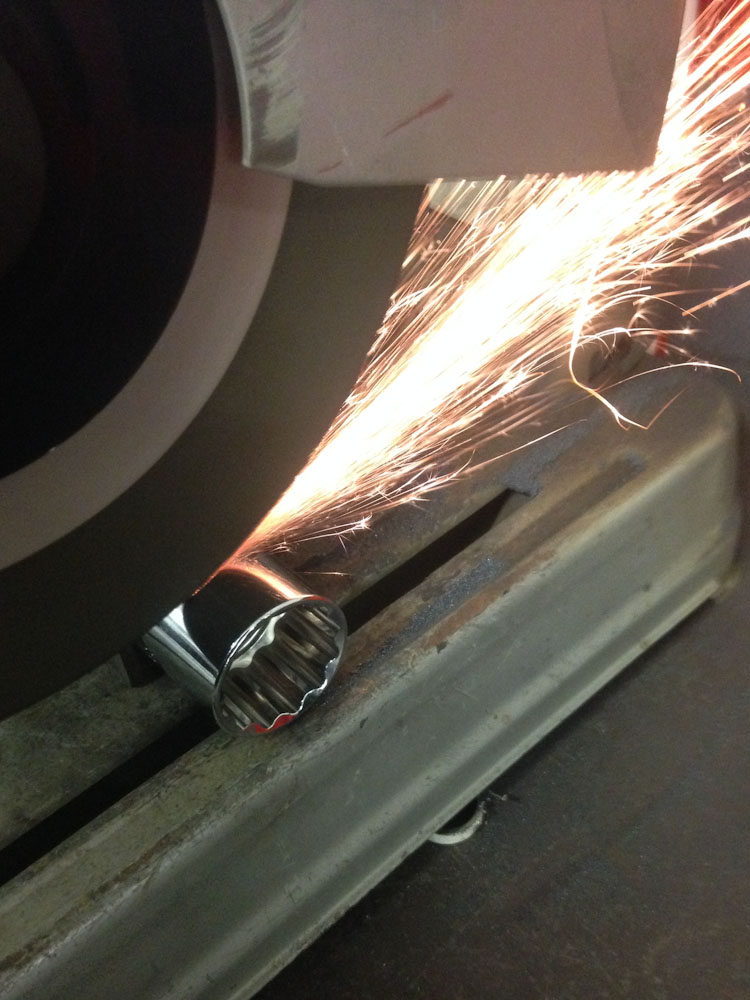
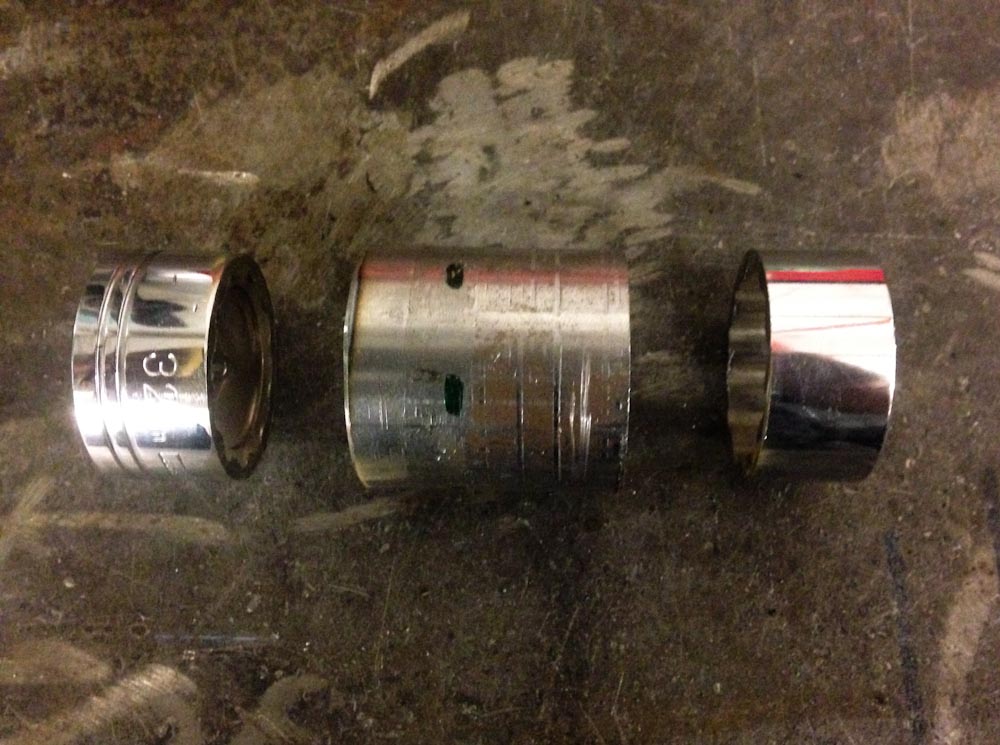
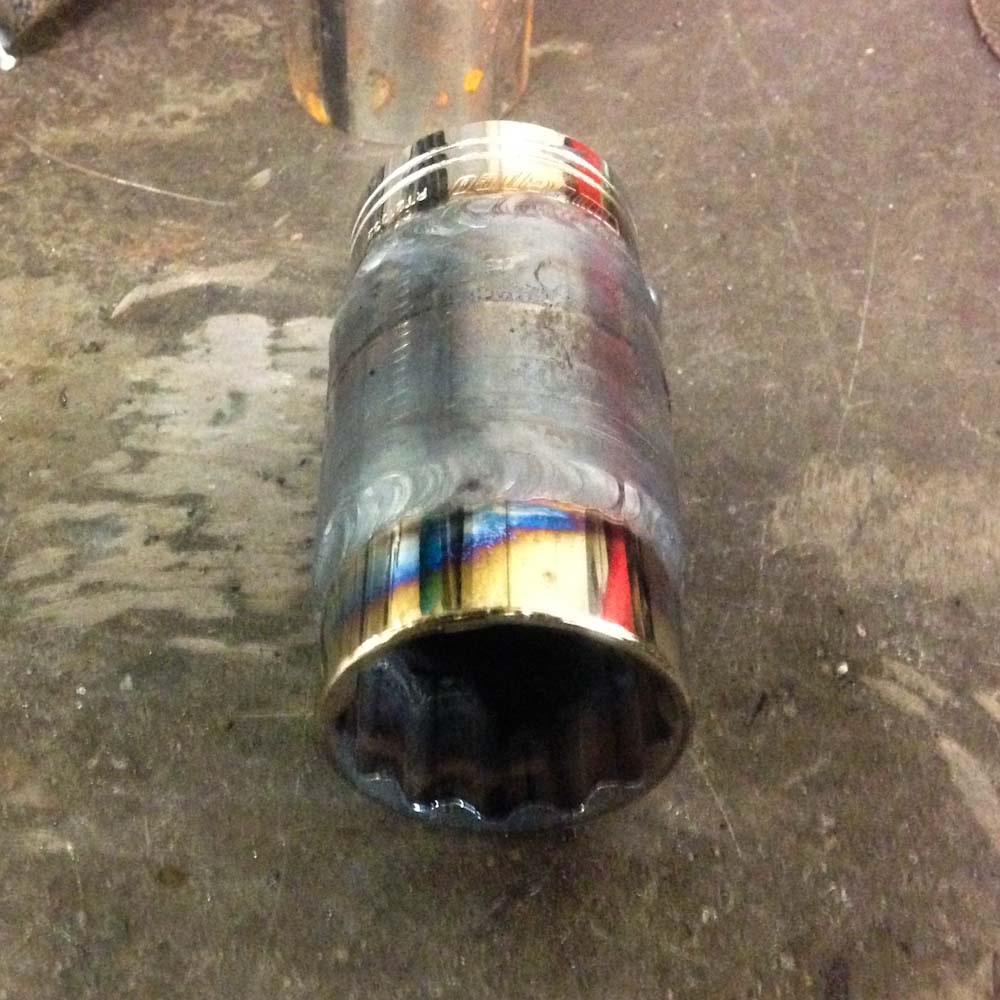
Well my urgent call has turned to be not so urgent, we had planned to leave tonight to head out hunting, with the current weather we've decided to wait it out and try again tomorrow, fingers crossed the rivers go back down and we can get out for a walk! Also I messed up, after Mof's great help getting me a decent socket that worked I couldn't find a torque setting in my rush and so guessed from gearbox drawings and that its a M14 thread that I could give it death and be ok, what a silly mistake that was! while re-fitting the TC I found the gearbox didn't spin freely, back to my web-page copy folder for notes on niva gearboxes and sure enough there is a small note, 'torque to between 60-80Nm, careful to check for binding' bloody muppet! Not wanting to push my luck asking to use the socket again I called into repco on the way home and picked up a 32mm socket to do this: Cutty Cutty Insert scrap pipe here And a quick bit of hot glue So if anyone is rebuilding a lada gearbox and needs a deep 1/2 drive 32mm socket, give me a call!
1 point


.thumb.jpeg.384ff72c8d2b0ee0d34a7bdedb55bdcf.jpeg)


.jpg.84d59b2cd1e7f926b8f3f712020fc07c.jpg)

.jpg.9b091efc13947ee87d3595144e90376c.jpg)

This leaderboard is set to Auckland/GMT+12:00