
Leaderboard


Popular Content
Showing content with the highest reputation on 08/04/21 in all areas
-
Runner system pattern complete. Re sprayed everything with the better mould release. All patterns ready to go now. Next will be testing out the new sand resin system to figure out ratios and work times. Dont really want to go all in with a 200kg batch first go!21 points
-
15 points
-
12 points
-
Oh yeah! Rebuilt and sleeved to standard spec by Powerstop, so hopefully we should feel ALL the dual-diaphragm assisted Chrysler luxuriousness a poor man needs
 9 points
 -
Advan spam
7 points
-
Yeh so I haven't driven the off-roader since a week or so before the initial covid lockdown, and still haven't finished the trailer, but I did just make a terrible financial decision, probably induced by severe sleep deprivation, but hey, these things happen. So a customer of mine offered me an unused pair of 10" travel FOX factory racing remote res coil overs, at basically half the new cost. I then priced up a second pair to match, and the eight springs I need to go with them. Not surprisingly it got very expensive. The new second hand shocks, plus another matching pair, plus all the required springs was going to be north of $3600. I also thought about doing a mixed set up with FOX air shocks on the front, and these coil overs on the back, but my OCD wouldn't allow it. So, I've ordered a full set of FOX 2.0 10" travel air shocks (Basically the cheapest decent shocks you can get for this sort of application) and you don't have the added cost of springs. These are way too flash for this thing, but I have a cunning plan. So because I am basically going to cut the front and back ends off the current offroader for all these suspension and drive line upgrades, and because the cockpit is a little small for me, I've decided I will build a new frame from scratch, and then sell the current offroader to possibly pay for a more modern (EFI hopefully) engine (or just use the spare 600). Because SXS's have become so popular, a few motorbike parks are having SXS days, so I will actually have legit places to use this, which makes me happy. Now to finish the other trillion jobs I have to do, so I can play with this thing sometime in the future. Regards, VG.5 points
-
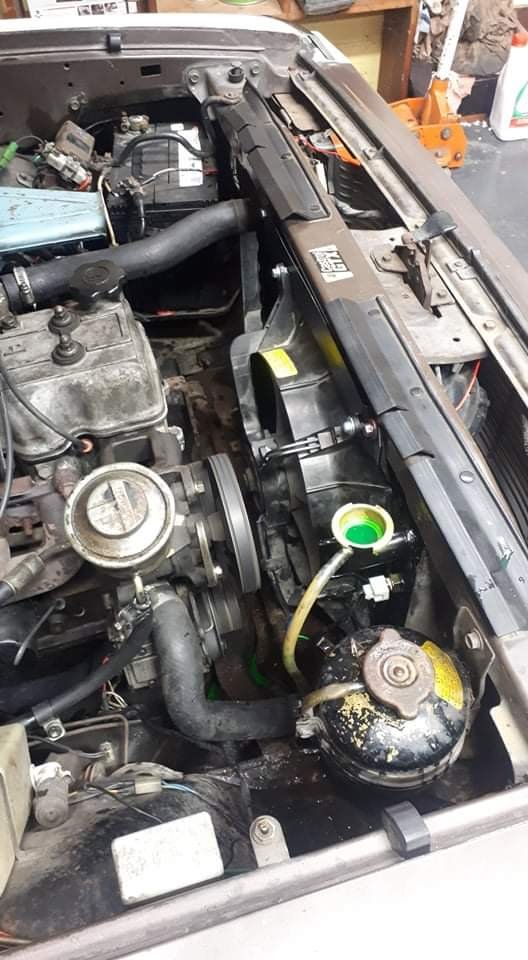
I havnt had a fan on this for a while as all my viscous are either siezed or nof doinh anything so i took it off so it didnt sound like a van Carfully route planning and nof sitting in traffic was the key to not overheating it. Anyways. I had the radiator record recently and at the same time i got the shop to put a bung for a temp switch in. So tonight i put an electric fan in it Its actually out of a 1992 galant out in field
4 points
-
Keep him doubting so we can all claim a handy4 points
-
/some 3mm tyres for the daily4 points
-
Thanks buddy. Just spend that money on another box of grommets next time mate.4 points
-
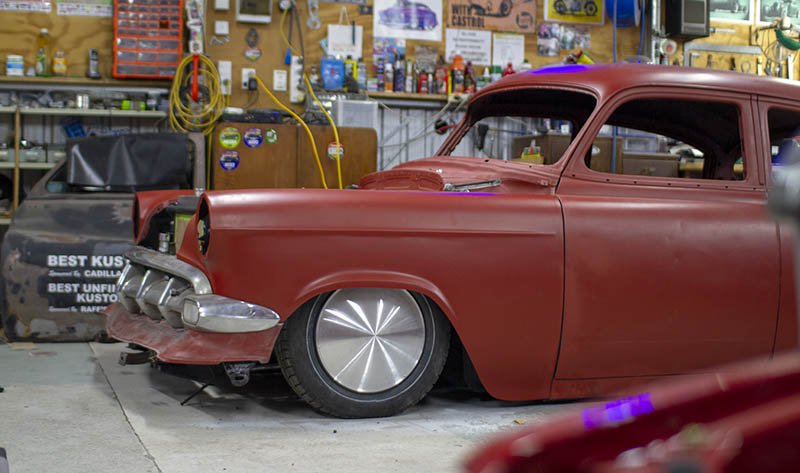
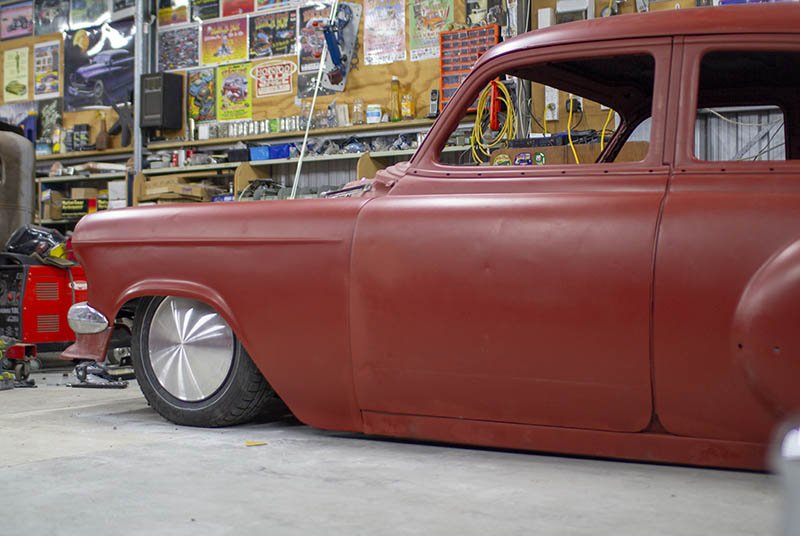
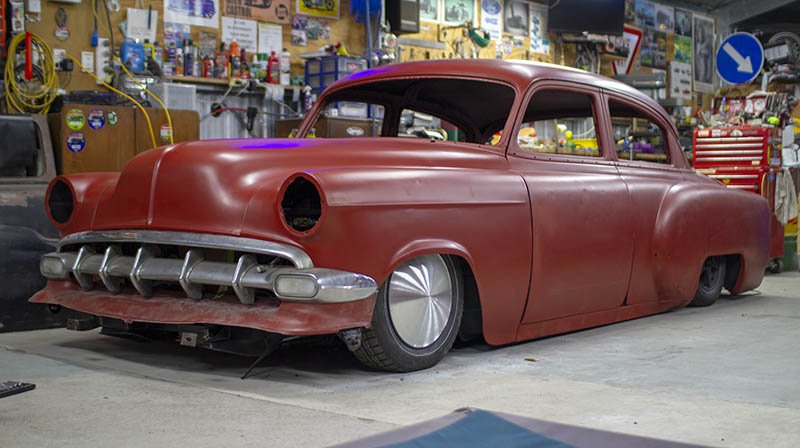
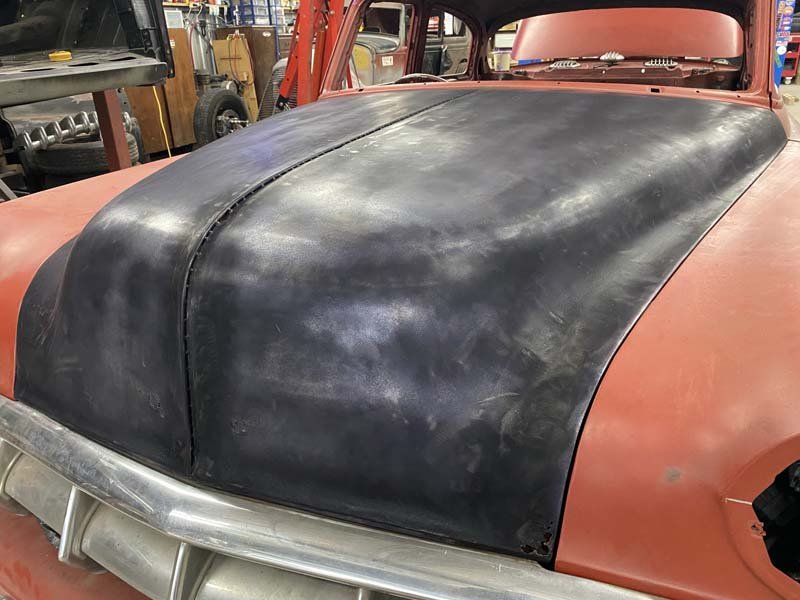
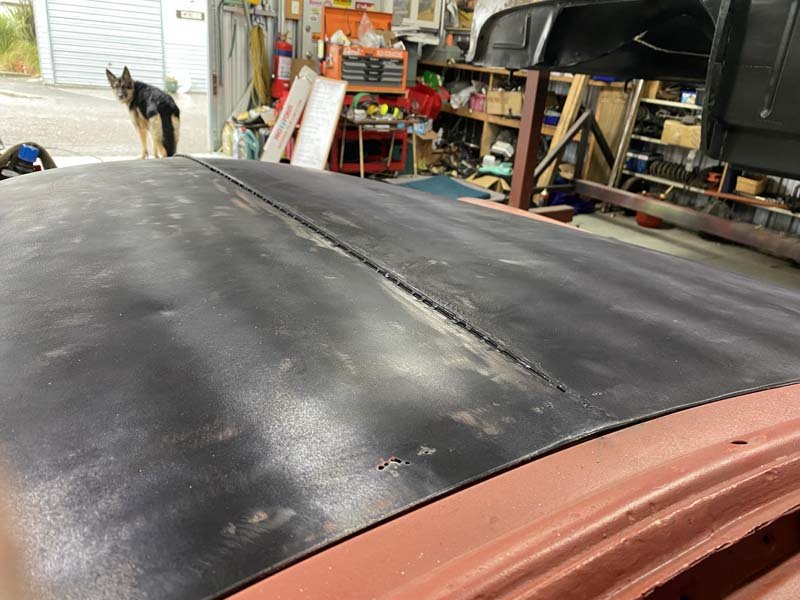
Fenders Painted and Fitted Up. Fitted up a moon disc to the alloy wheel too. And the Painted peaked bonnet.
4 points
-
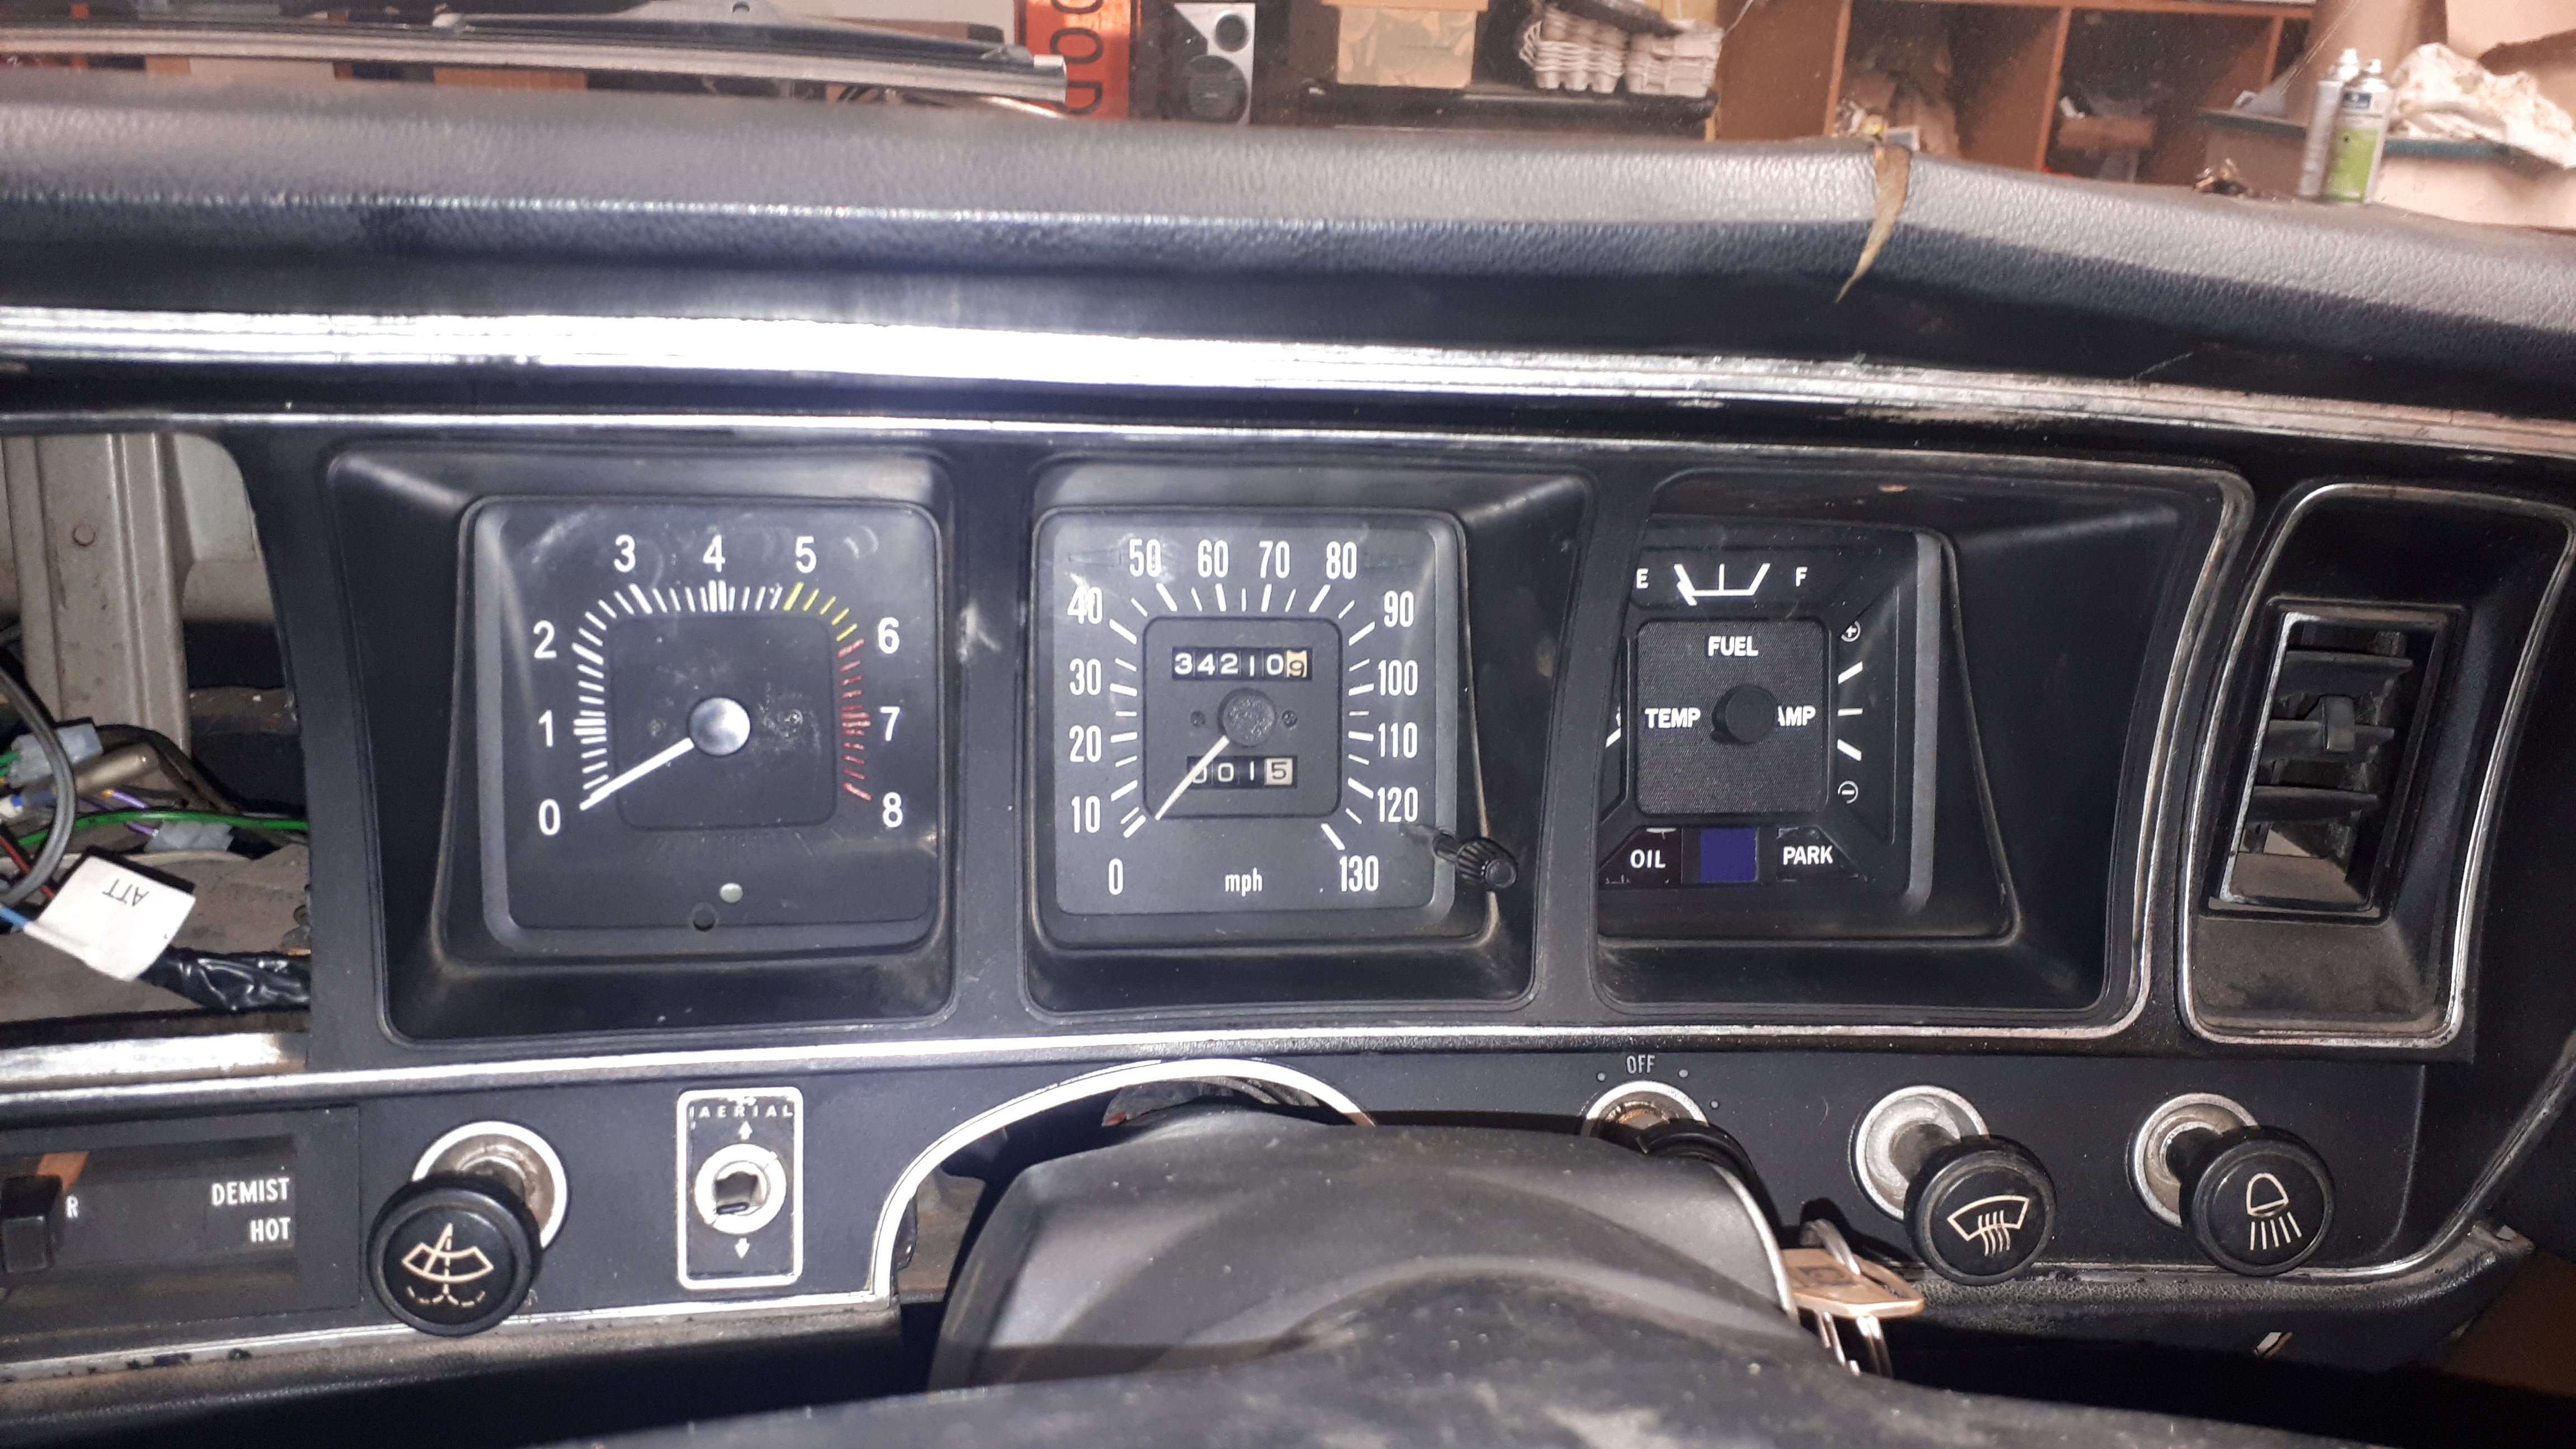
Dash is in. Tacho works ok. Not accurate but looks the part.
3 points
-
Thanks OS! A box of grommets was just delivered. Not sure who you are? Not latex rubber/silicone for a change. (Which is the norm for mystery packages from OS users)3 points
-
Oh and who'd have thunk it but Hubcentric wheels don't vibrate....3 points
-
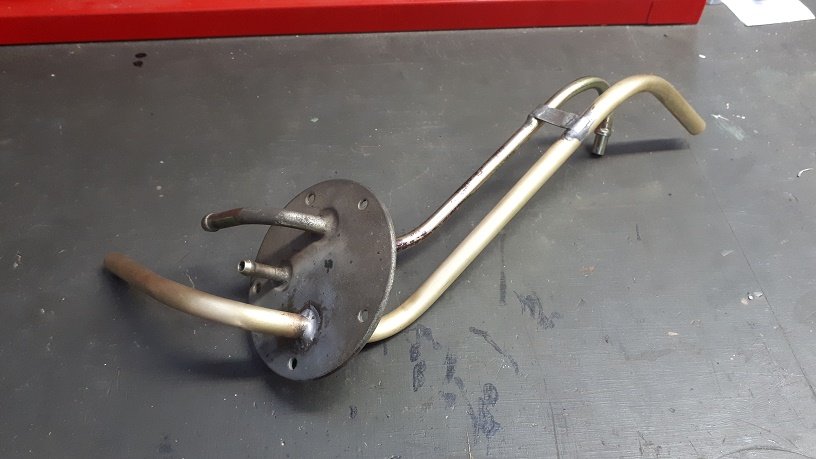
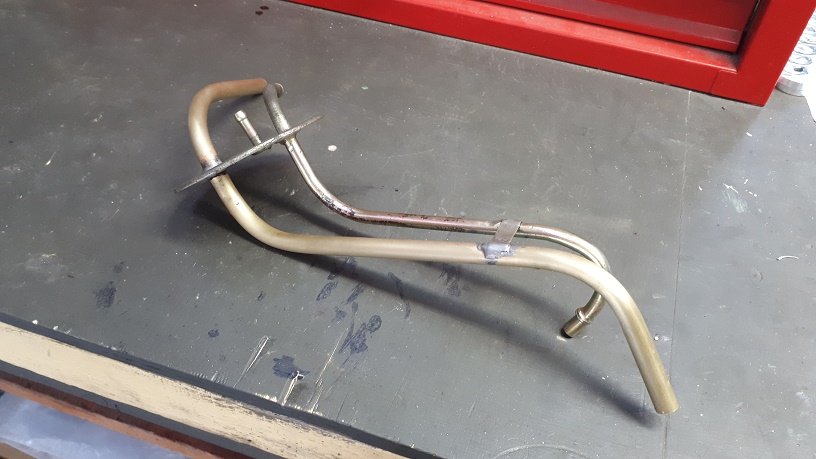
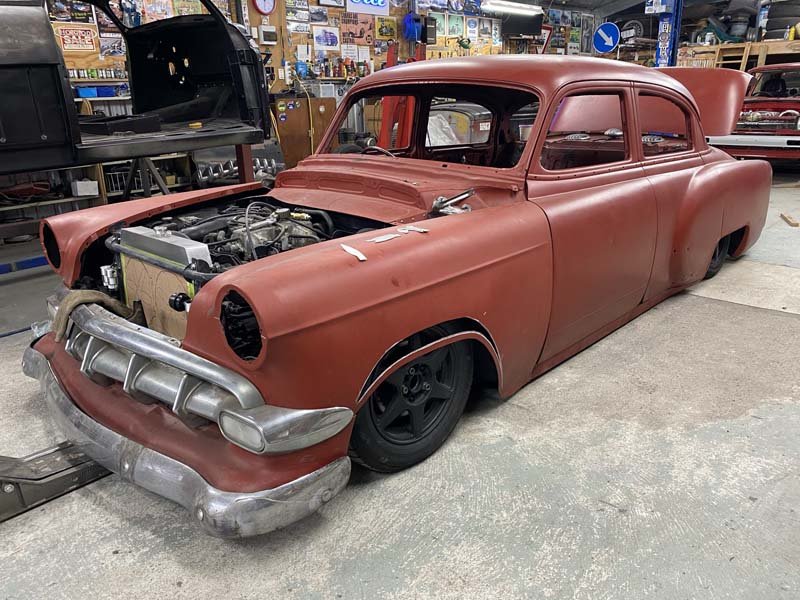
So I have been waiting for essential parts to arrive from overseas and have been keeping myself busy with little things. The manifolds are all fitting nicely and all I need to do is trim the carburetor flange to size so it looks a little more attractive. I will wait until I have the carburetor mocked up in place before I do this to make sure I don't run into any clearance issues with the throttle and transmission linkages etc. It all ended up fitting very neatly around the strut tower and the carb should end up in a reasonable position with sufficient hood clearance. I also decided to fit larger fuel lines as the factory ones seemed very small. This is probably more for the future but since I am installing an electric fuel pump now I figured it was best to do the fuel lines as well. I removed the factory 1/4 inch return line from the car, and from the tank pick up assembly, and replaced it with a larger line that will become the fuel feed line. The original 5/16 fuel line will become the return. Bending all that hard line into the correct shape to fit with the factory lines was a challenge but it all turned out pretty well and looks neat and tidy installed in the car. I had to pull the driveshaft out to get access but no big deal.
3 points
-
I think you're doing Y10 all wrong. I find the key to successful Y10 ownership is to neglect them in every aspect. It seems to create some kind of automotive "treat em mean keep them keen" situation.2 points
-
Bart, the pain of you skulking about to get some grommets, when an entire box can be delivered to you overnight, is unbearable2 points
-
Whoever you are I hope you stole them off your employer, and used one of their courier bags to send it. /guess i owe someone a handy/panhead?2 points
-
I think these were H4, it's like being in a fort for adults2 points
-
Good read this: https://i.stuff.co.nz/life-style/homed/garden/123971912/grooves-up-or-down-nzs-fierce-decking-debate-finally-settled2 points
-
D pillars are 4x6" speakers as well, and in my old one didn't even have any wires to them in the factory loom. Thanks nissan2 points
-
Yay! updates! I hang out for updates on this thread aye. Love your work.2 points
-
This brace wasn’t bracing shit any longer. It’s quick and ugly cause it’s largely hidden by vents2 points
-
Made a start on the rear quarter/rear arch - the arch has had me nervous for a while, pleased with how it's come out so far.
2 points
-
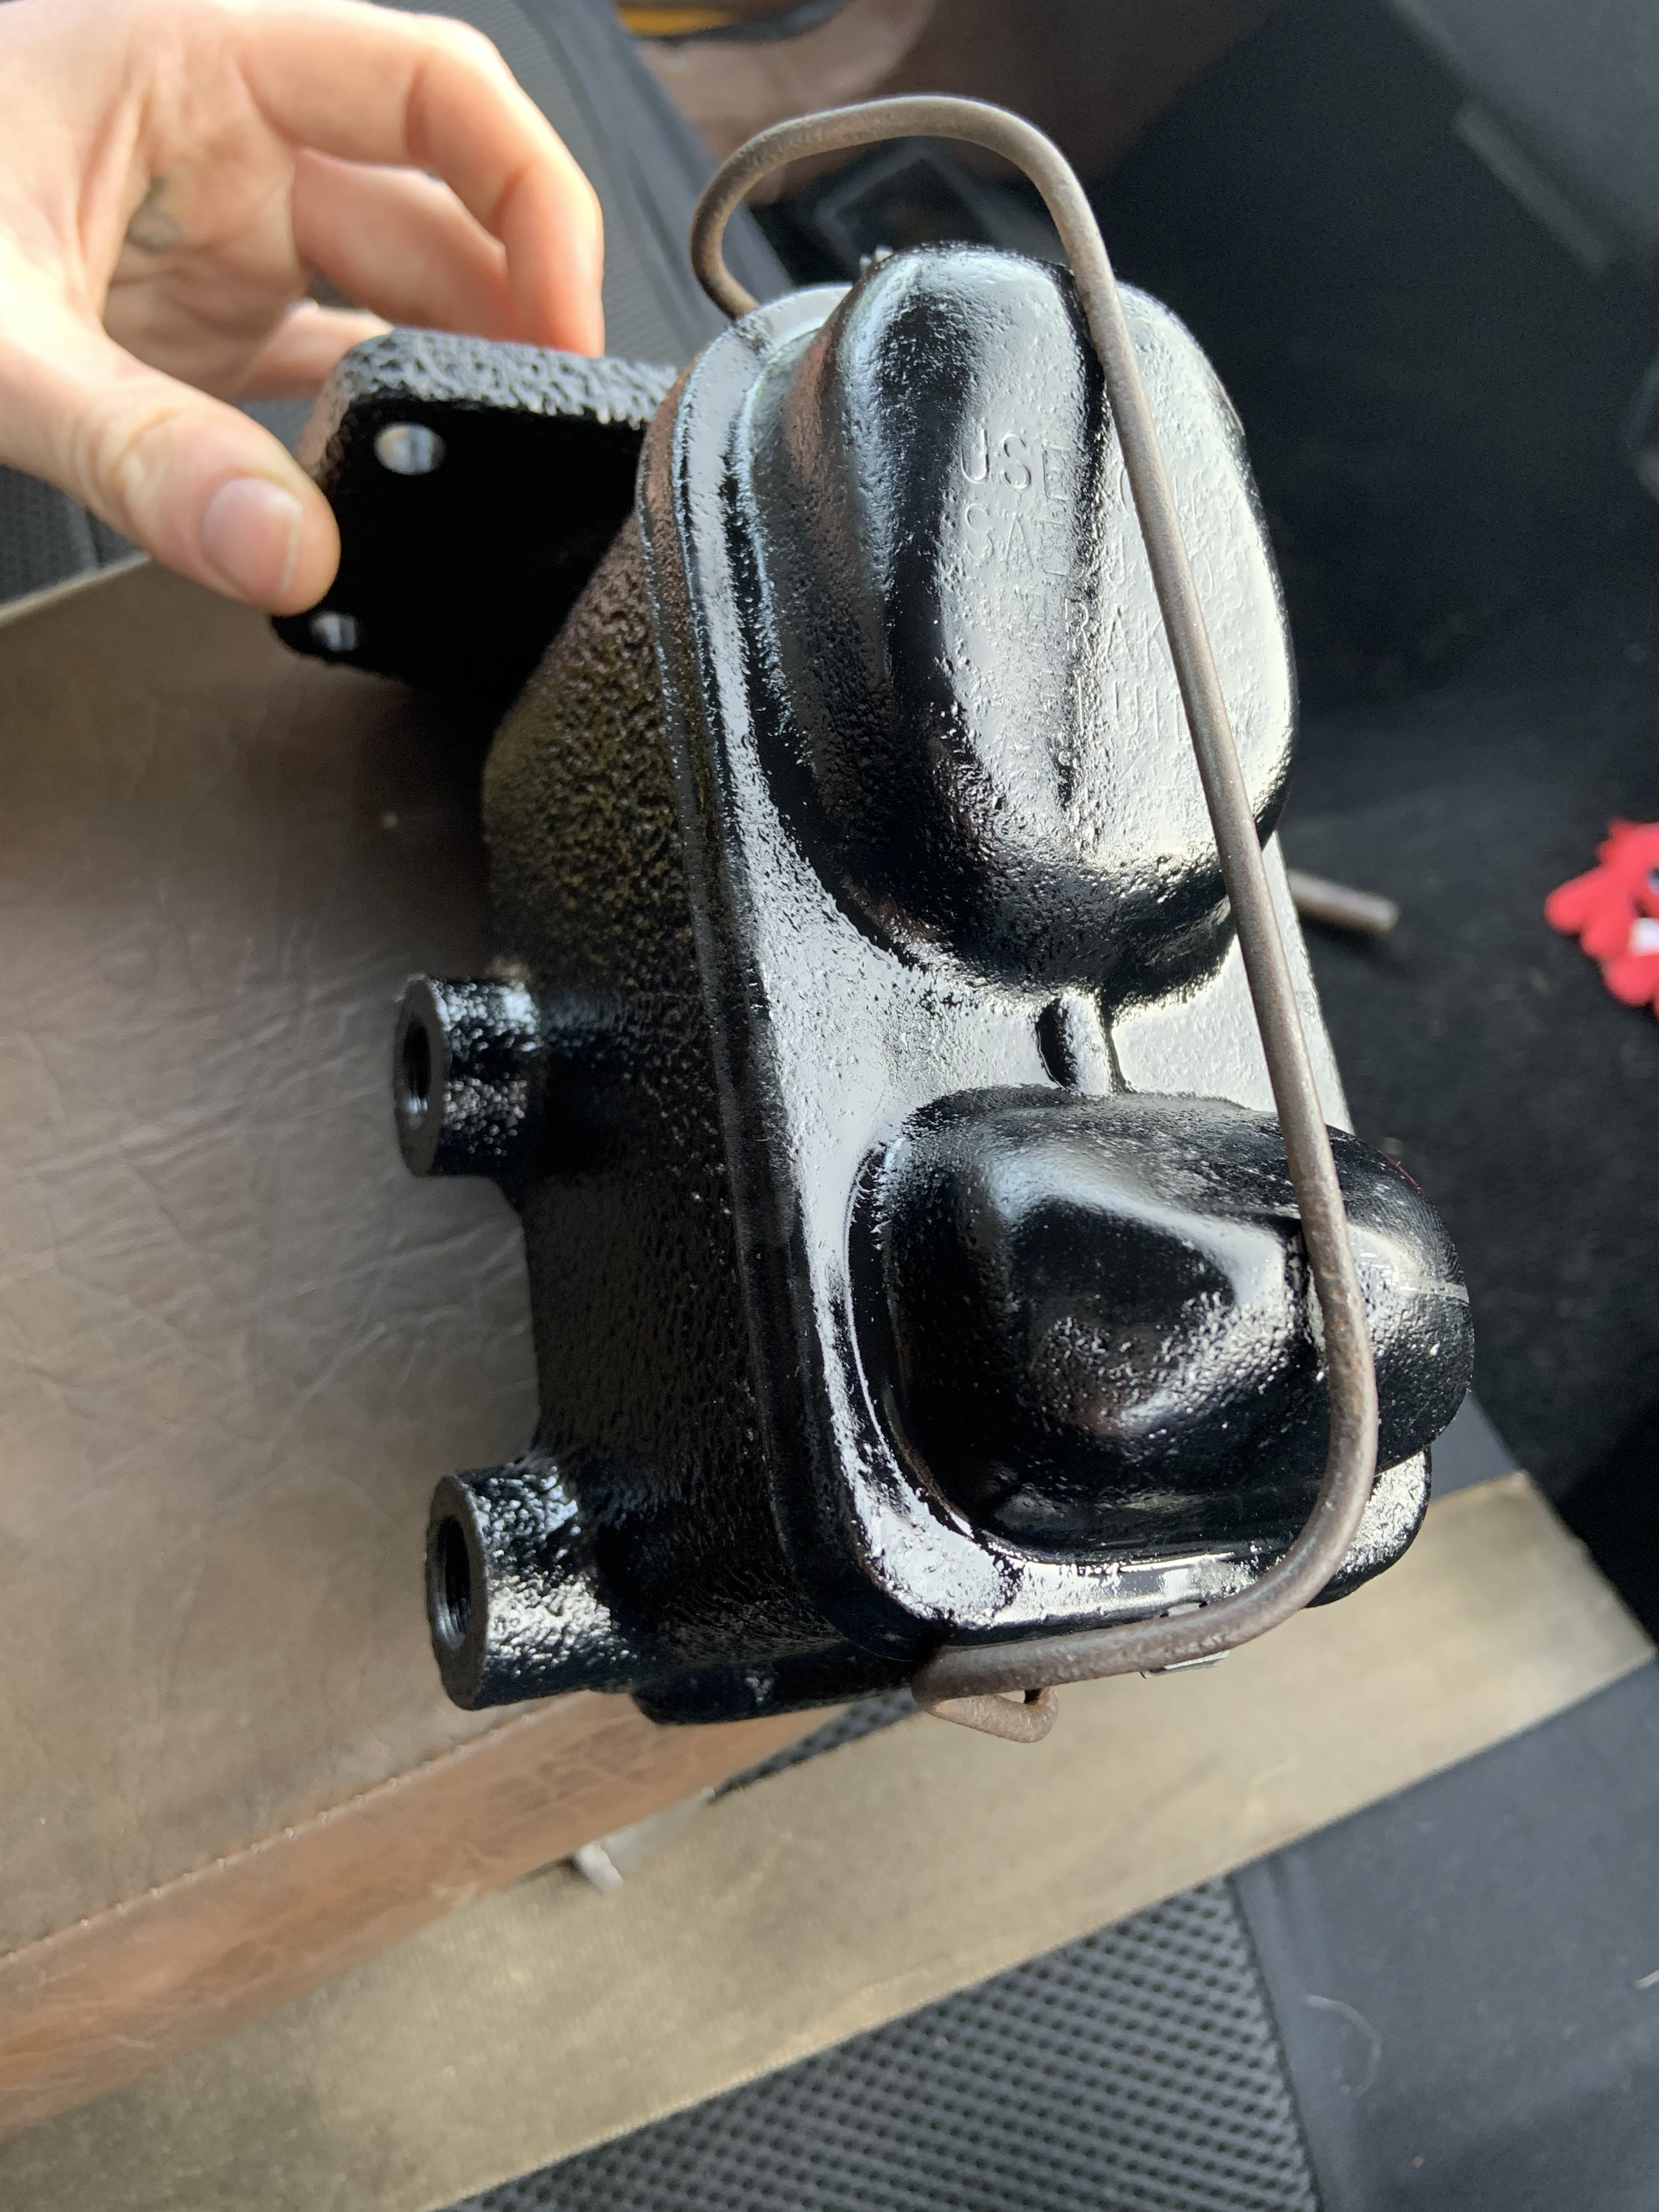
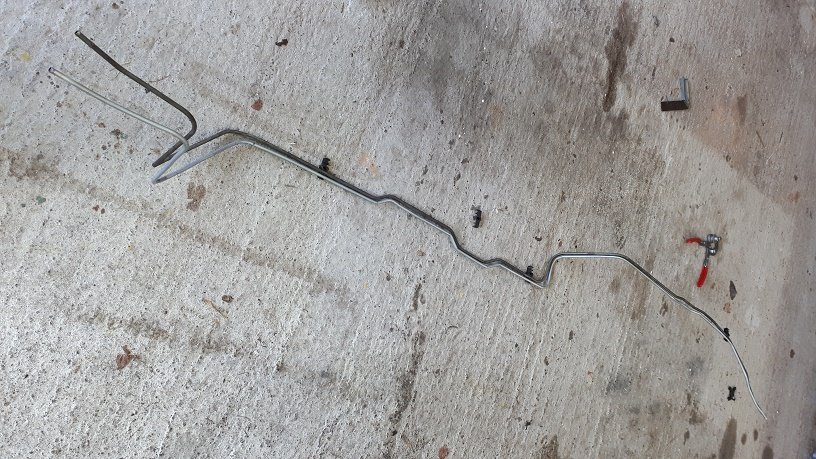
Remember how my master cylinder was rooted and pulled all the fluid into the booster? shane at powerstop brakes cleaned it up, reassembled and tested it after another shop tore it apart and quoted the earth to repair. He’s sleeving the master for me too. I’ve ordered another pcv valve. super stoked, Look him up for classic and modern/ABS brake solutions!2 points
-
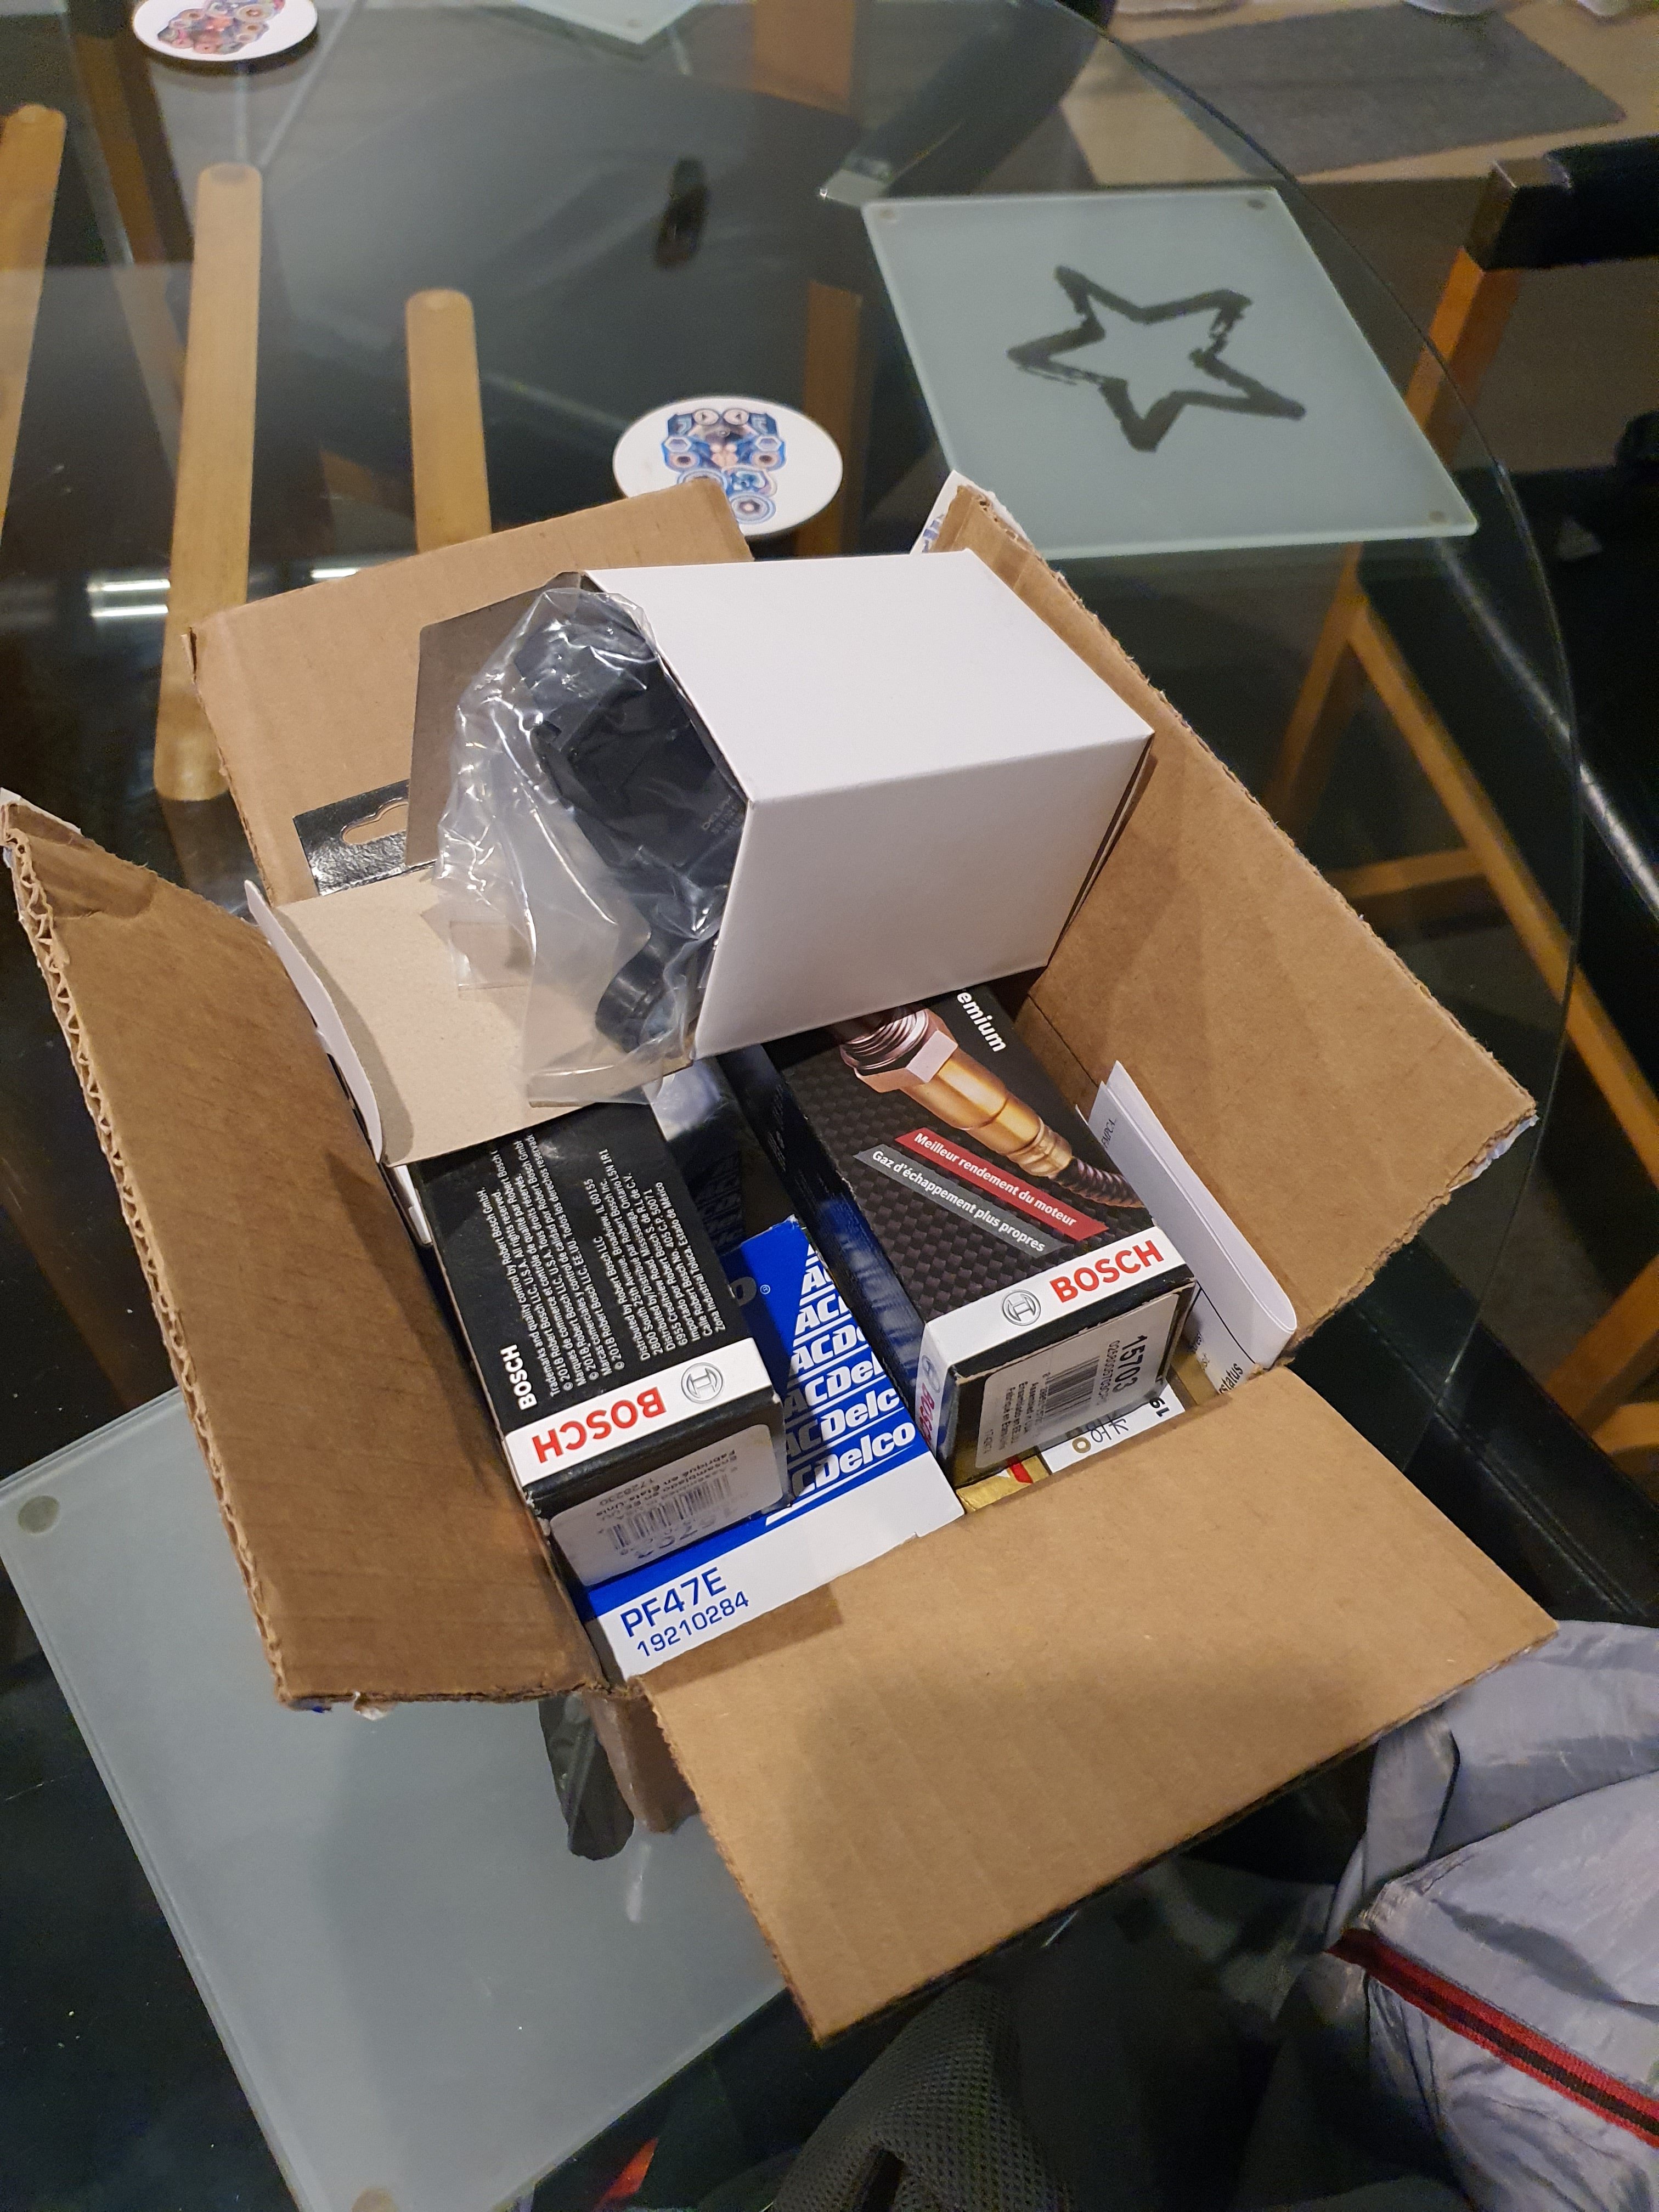
Some new parts from Rockautoparts.com and some new sensors from @vk327 Should get things back on track, Will look into setting up a Wideband when i redo the exhaust soon so i can do some proper tuning once i get the new engine in.
1 point
-
A hug, A high 5, And a handjob.1 point
-
Just got Council contribution fees for the subdivision, works out to be ~10k....1 point
-
And the debate continues.... are the grooves really to 'breathe', the increase in surface area would be marginal. Final touch ups this week (I see alot of post it notes everywhere) and have finally been able to lodge title. Was suppose to be a month ago but hopefully that doesnt hold us up.1 point
-
Yeah as above I was also about to say. The grooves were originally used down so the timber could breathe and didn't rot between the connections. Somewhere along the line some suit decided it was good for grip and is now policy to have it up. From my experience it can be fucken dangerous when wet with less surface area for your shoe to grip, especially when in a shaded spot. Hardwood is even worse and on some jobs we've had to put put sand down to make it safe (while we're there anyway). We used antislip tape along the front edge of any steps when we built our deck, mainly for oldies.1 point
-
Installed more shiny bolts and took a crap photo of them Fridge magnet order arrived so I pulled the other rotor off to be skimmed1 point
-
pics Haven't done much glue sniffing lately, finished the 88 mm, just the weathering to do now but apart from that, nuffin. /pics Needs a diorama so I guess that's next.1 point
-
Short answer: no they wont, totally different port spacing/bolt patterns/engines. Easiest way would be to put a 32/36weber downdraft on with an adaptor plate. Otherwise custom manifold1 point
-
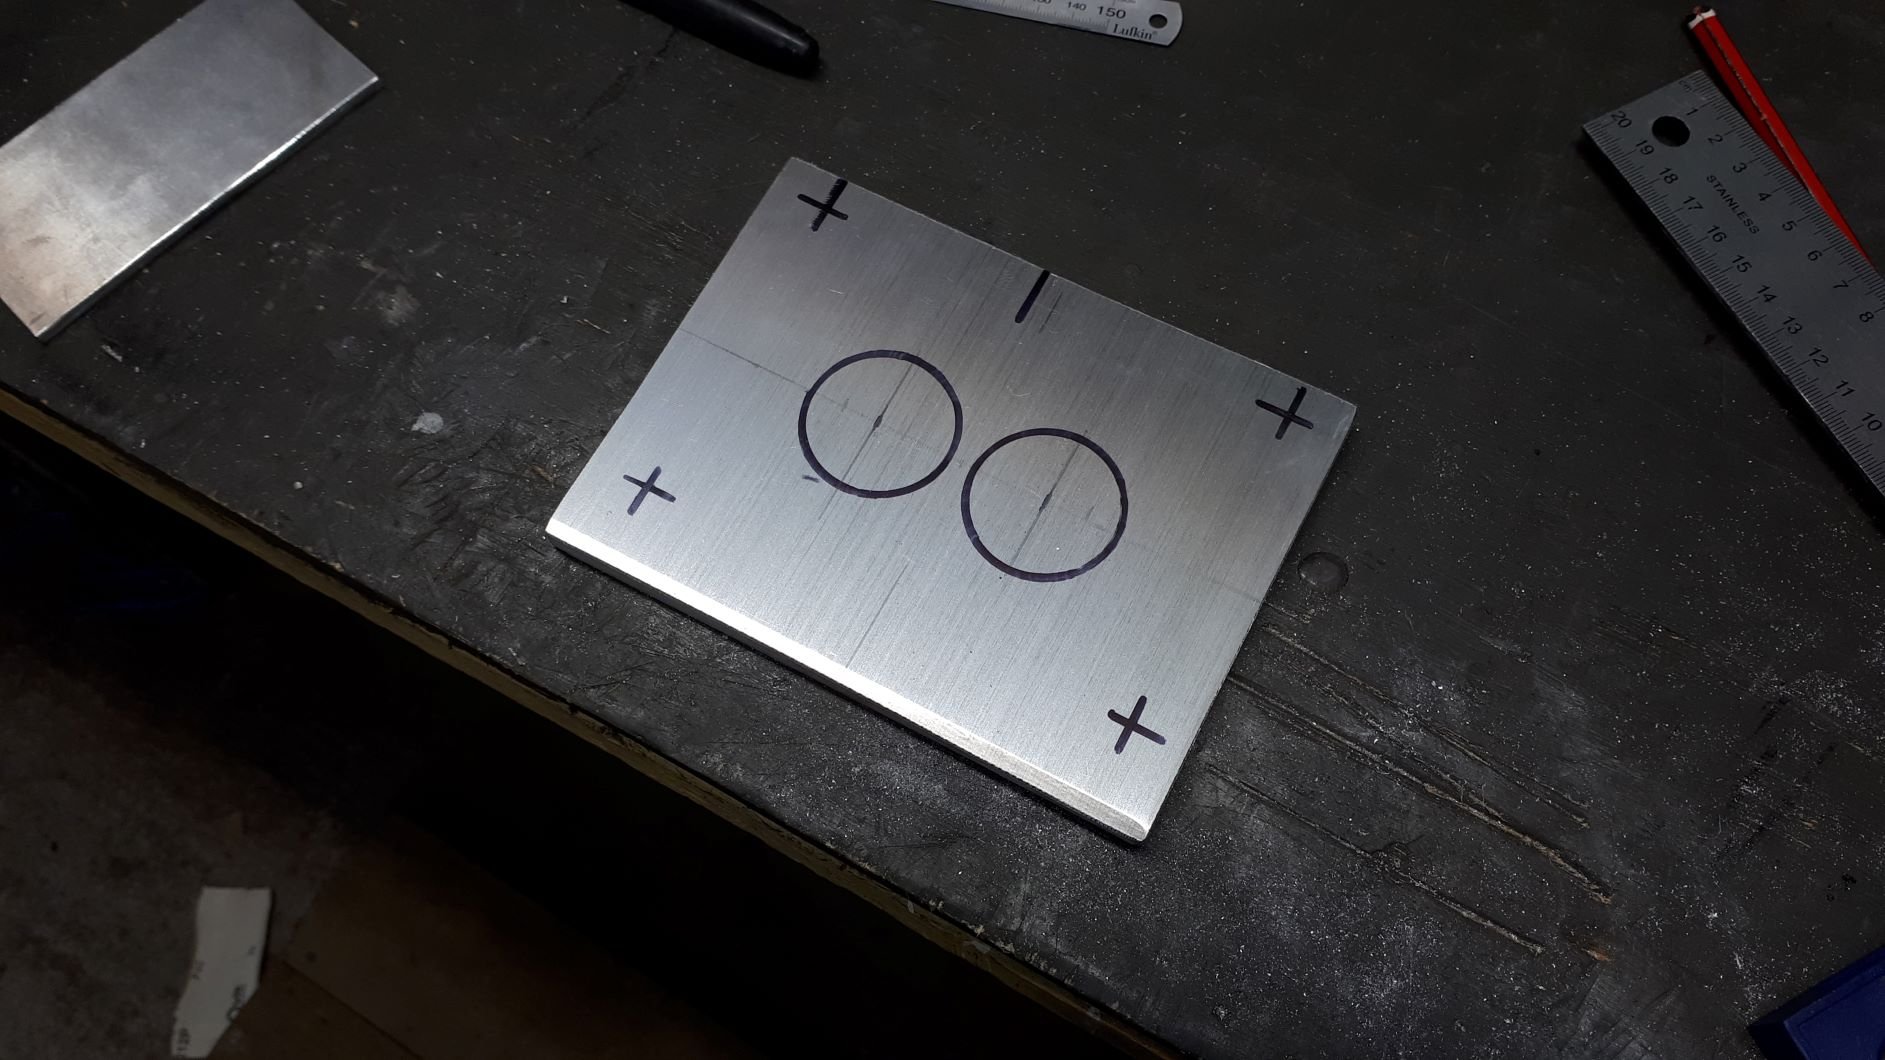
Doing 2 sprues/filters on this one which each feed one side of the casting. There will be more volume but also the mould is higher with no basin which will give more pressure. Completed the box. Quicker and cleaner than the last one. Next will be the runner system pattern/box.1 point
-
Time to have another go Got almost a ton of sand, new resin system and a new insulating spray for the moulds (meant to help big thin castings). Planning to use a concrete mixer to do larger batches. Doing some repairs to the damaged patterns. Drilled holes in the print and injected concrete epoxy. Also adding a few bond on thread plates to hopefully get a slide hammer on.1 point
-
Got some more things fixed she's getting better I got an entire manual conversion but keeping her auto for now. Today is fixing small things like alarm made it hard to start sometimes must be a loose connection then door lock was jamming locked and suspension knock which was wheel bearings
1 point
-
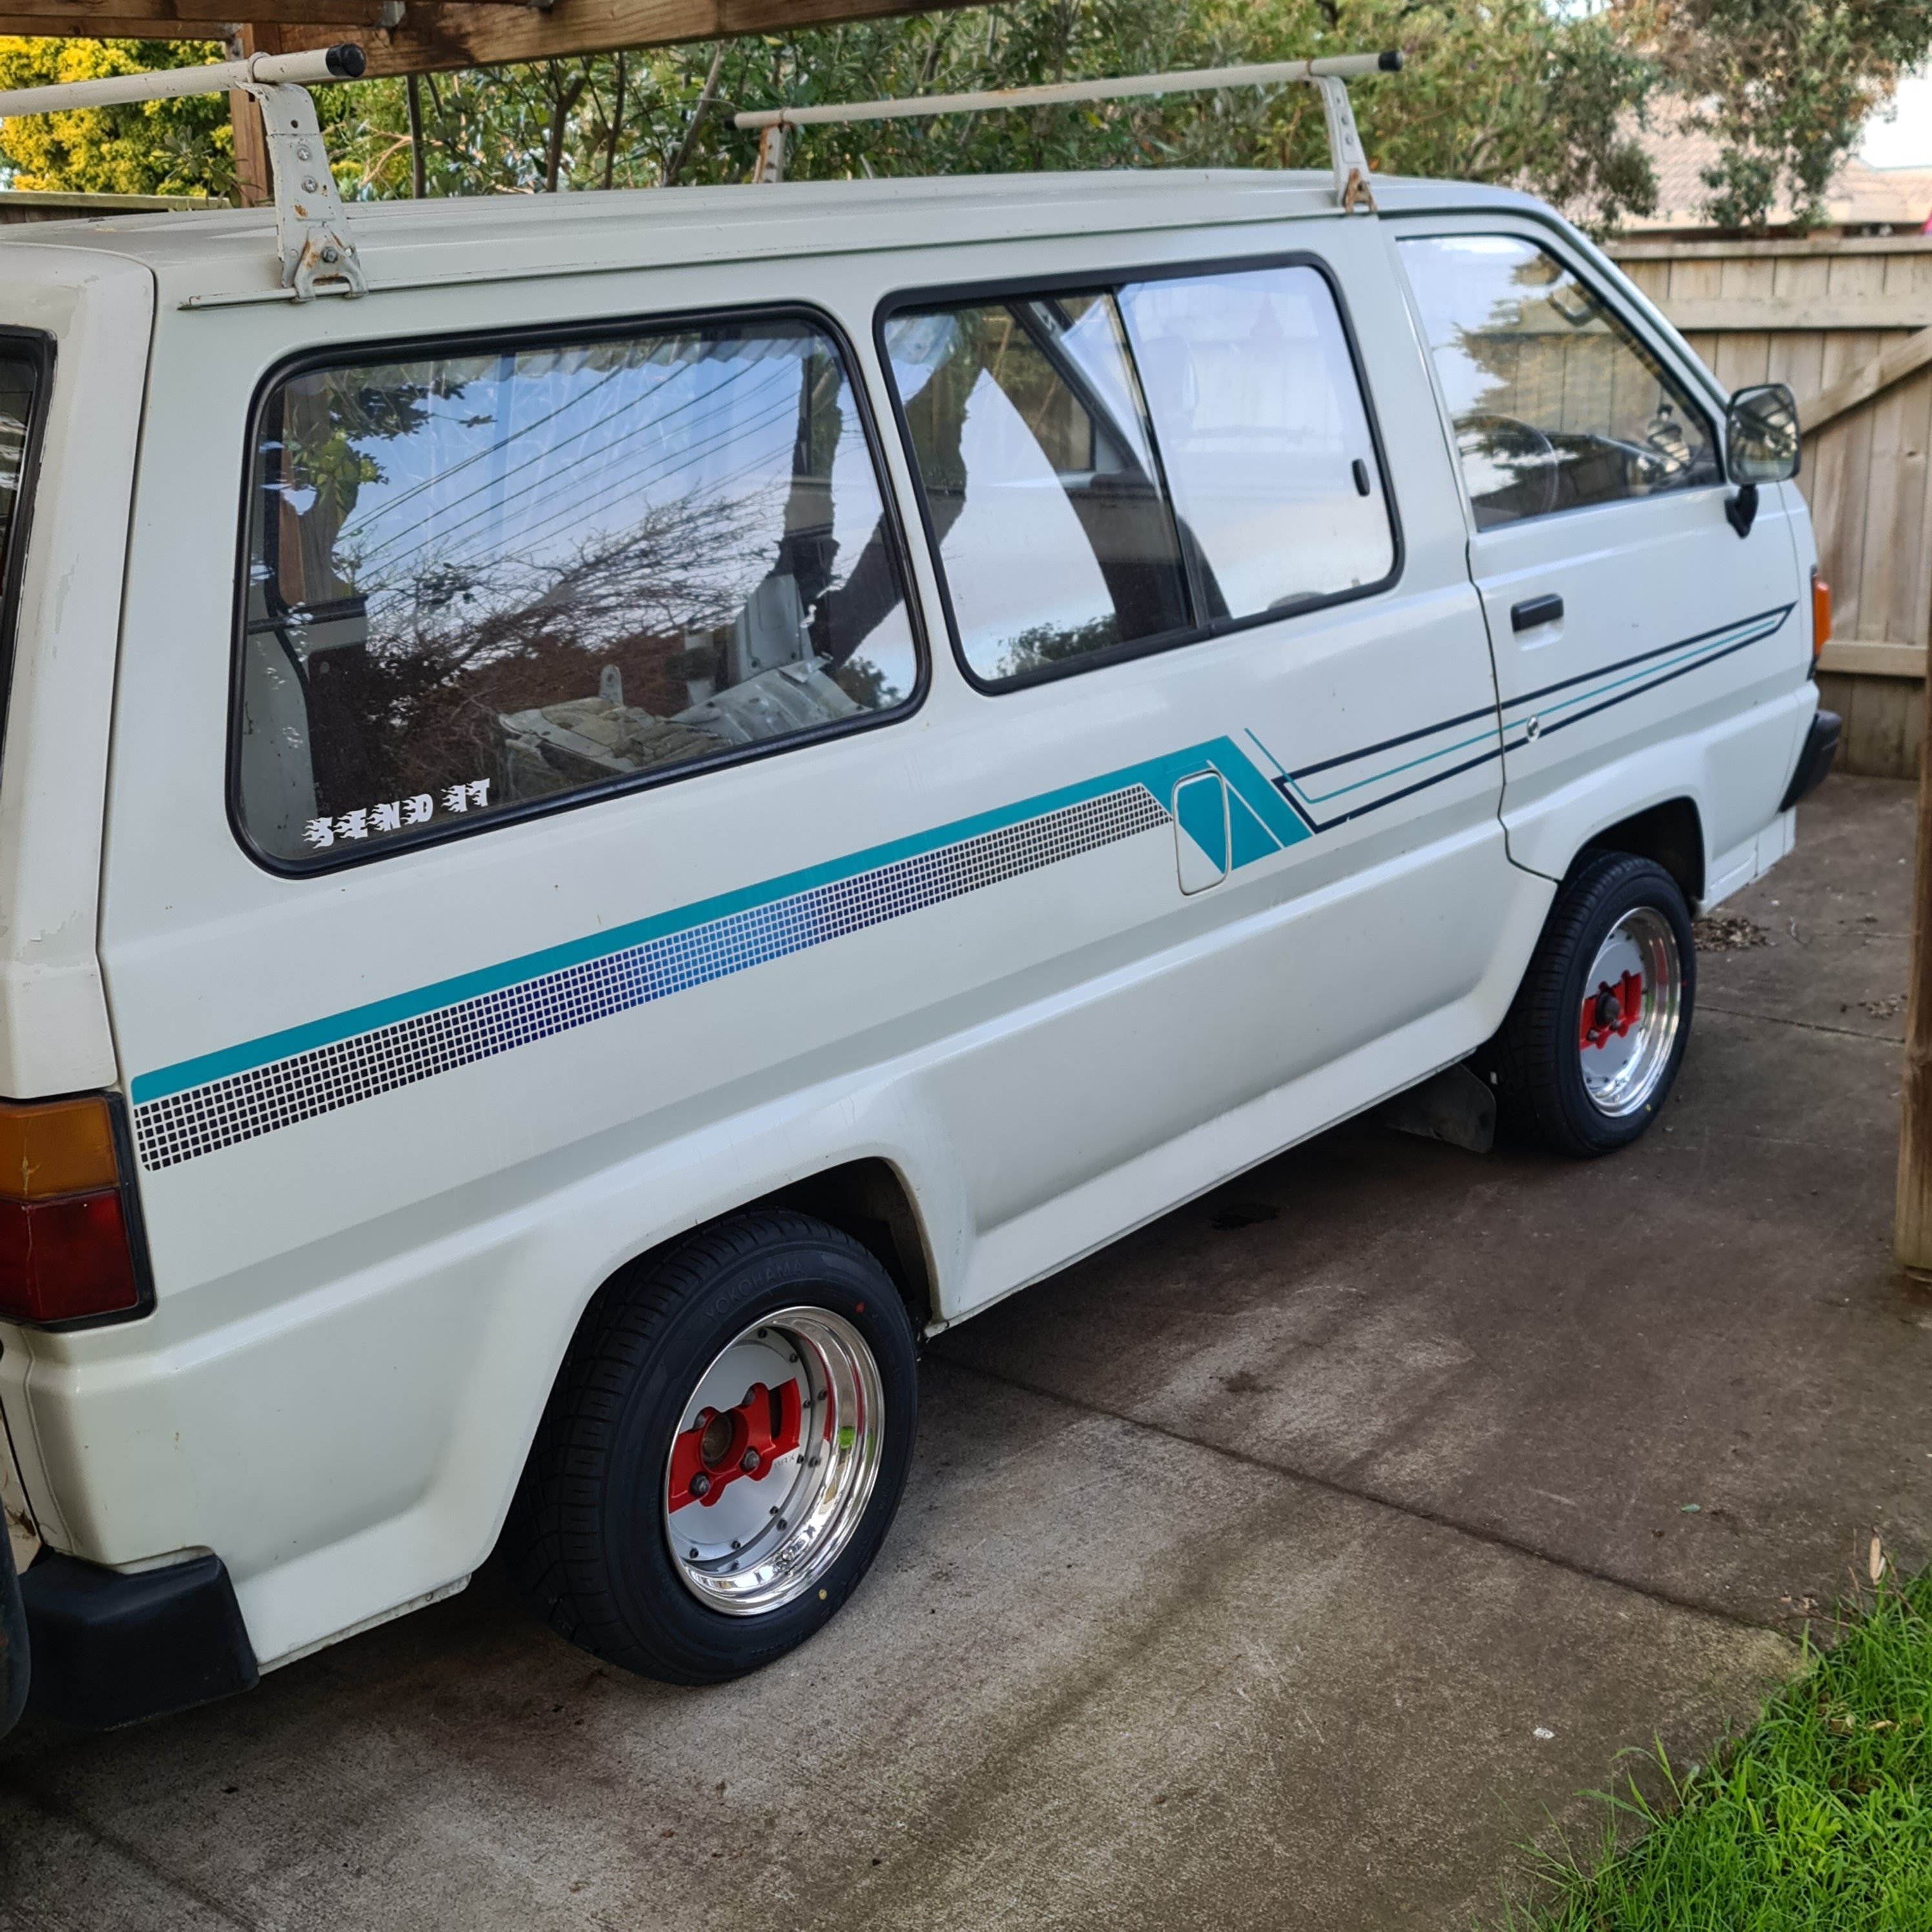
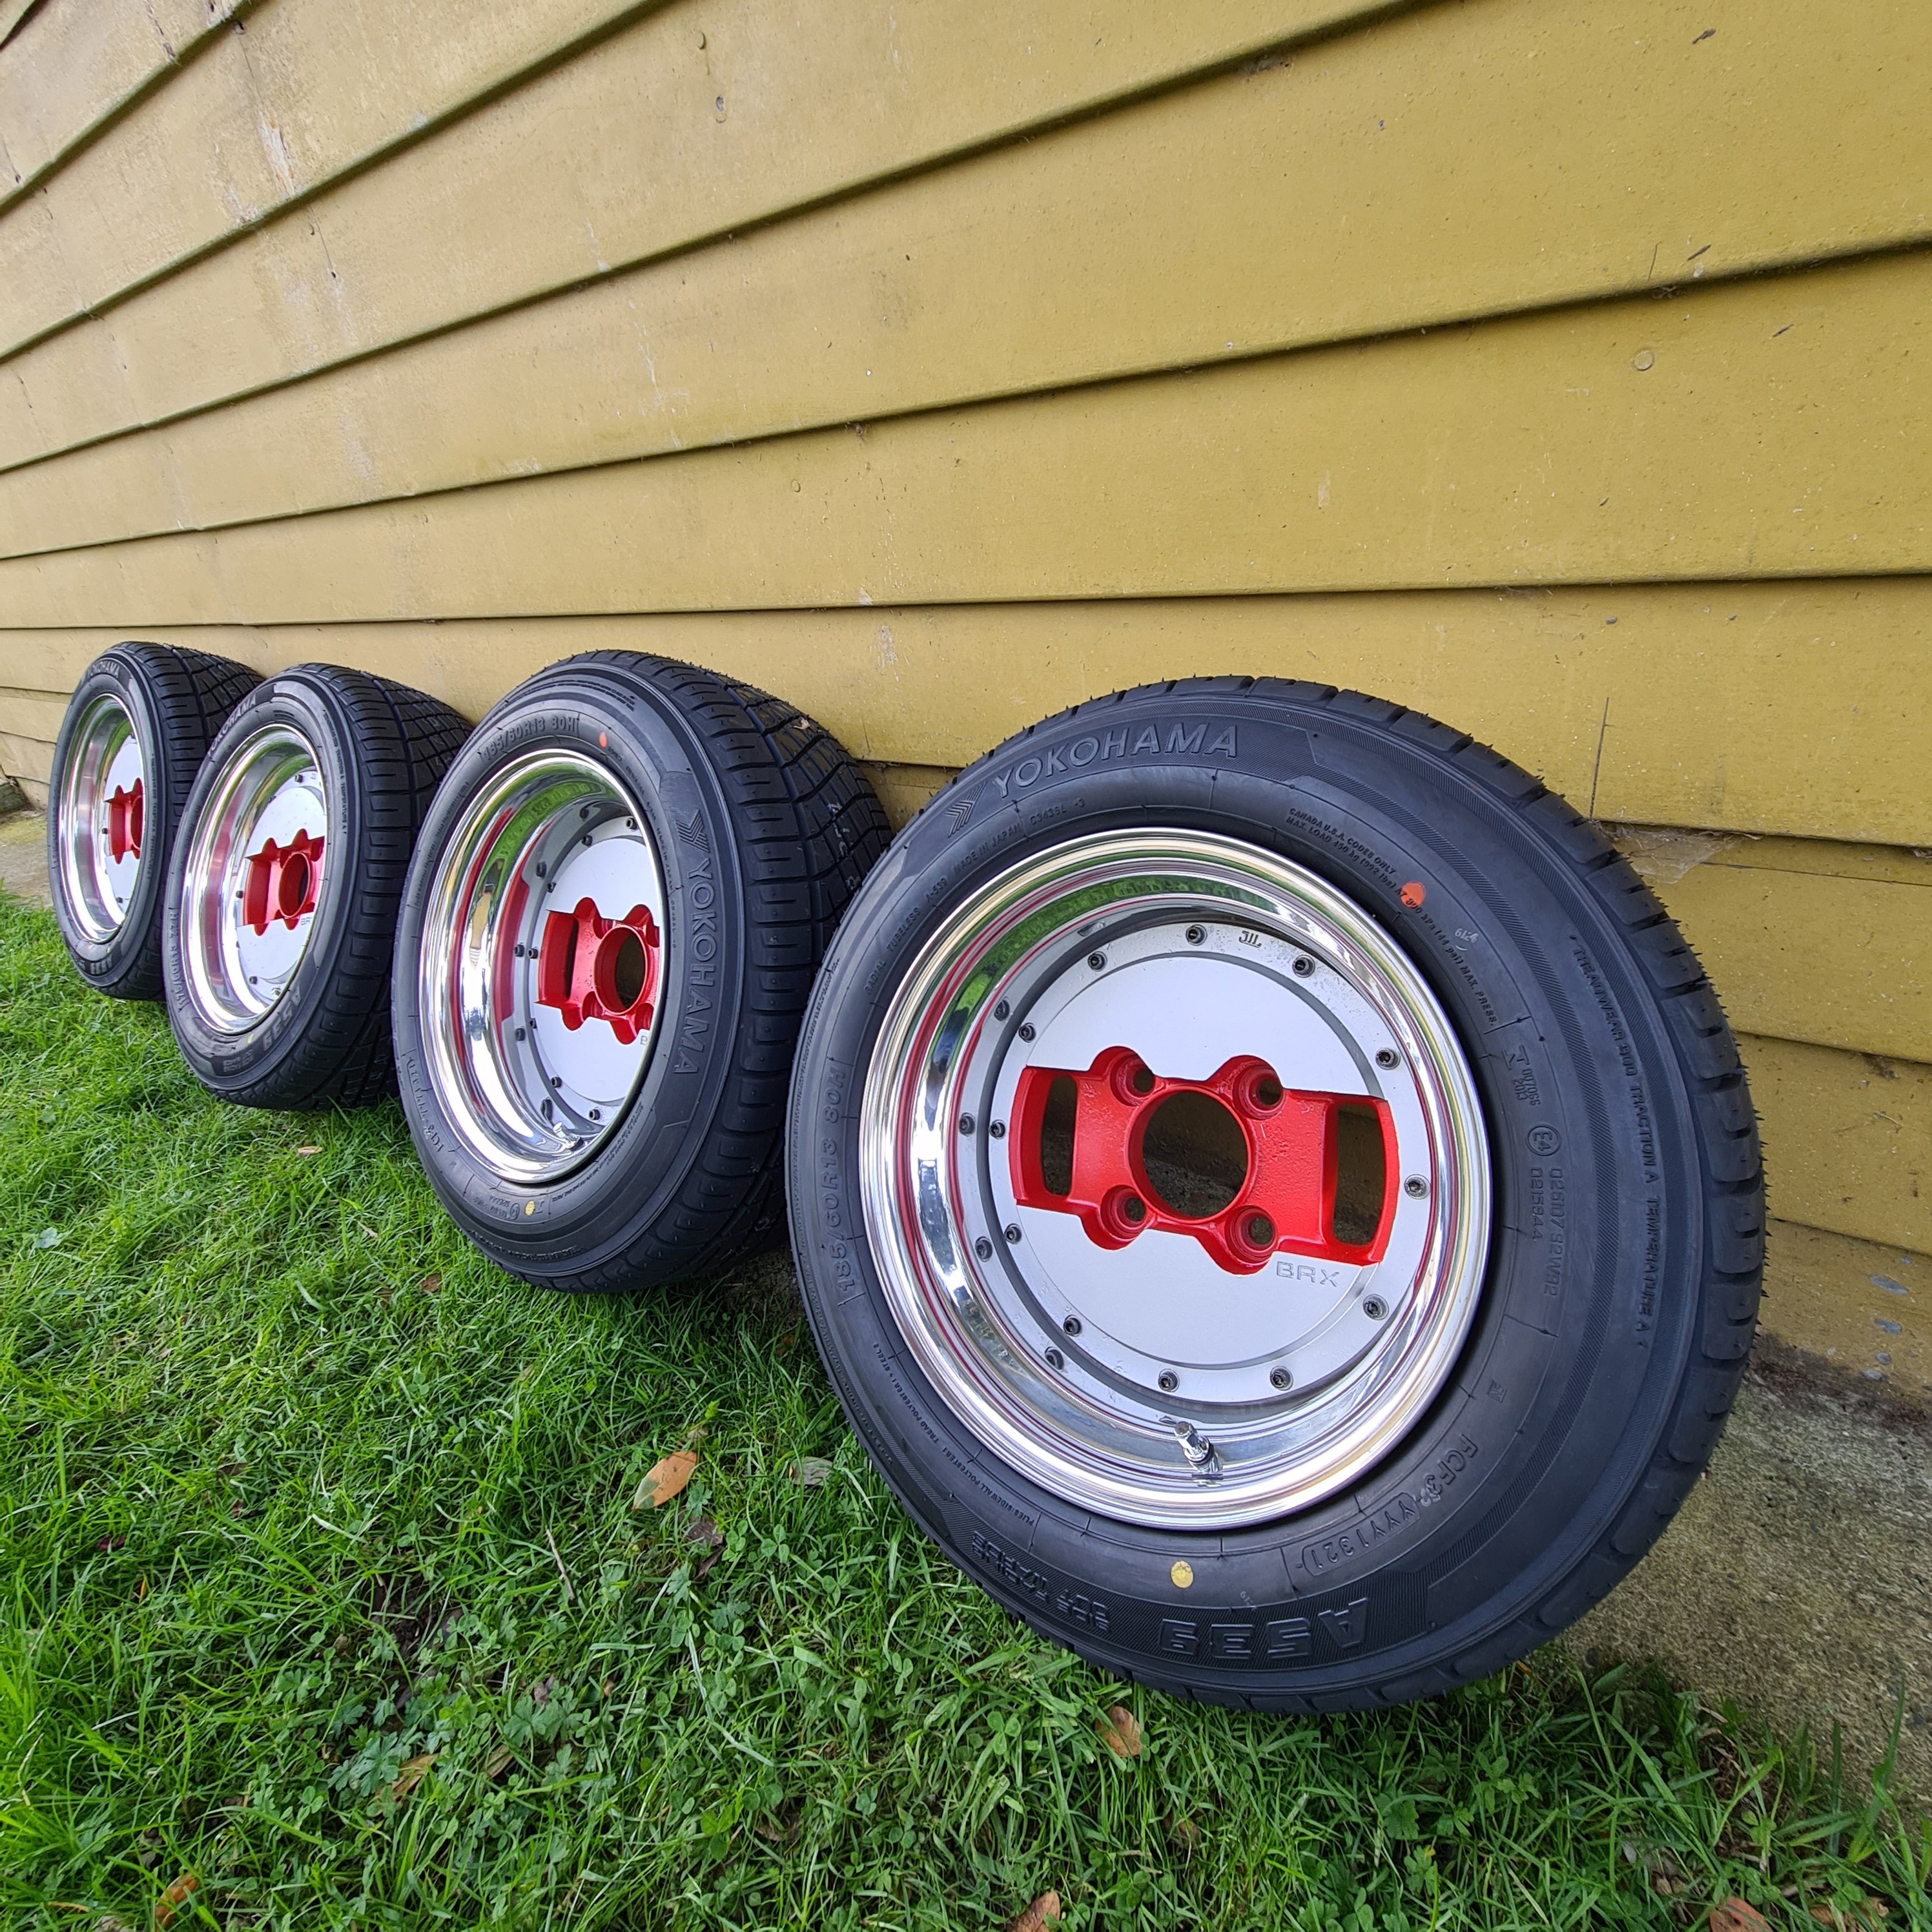
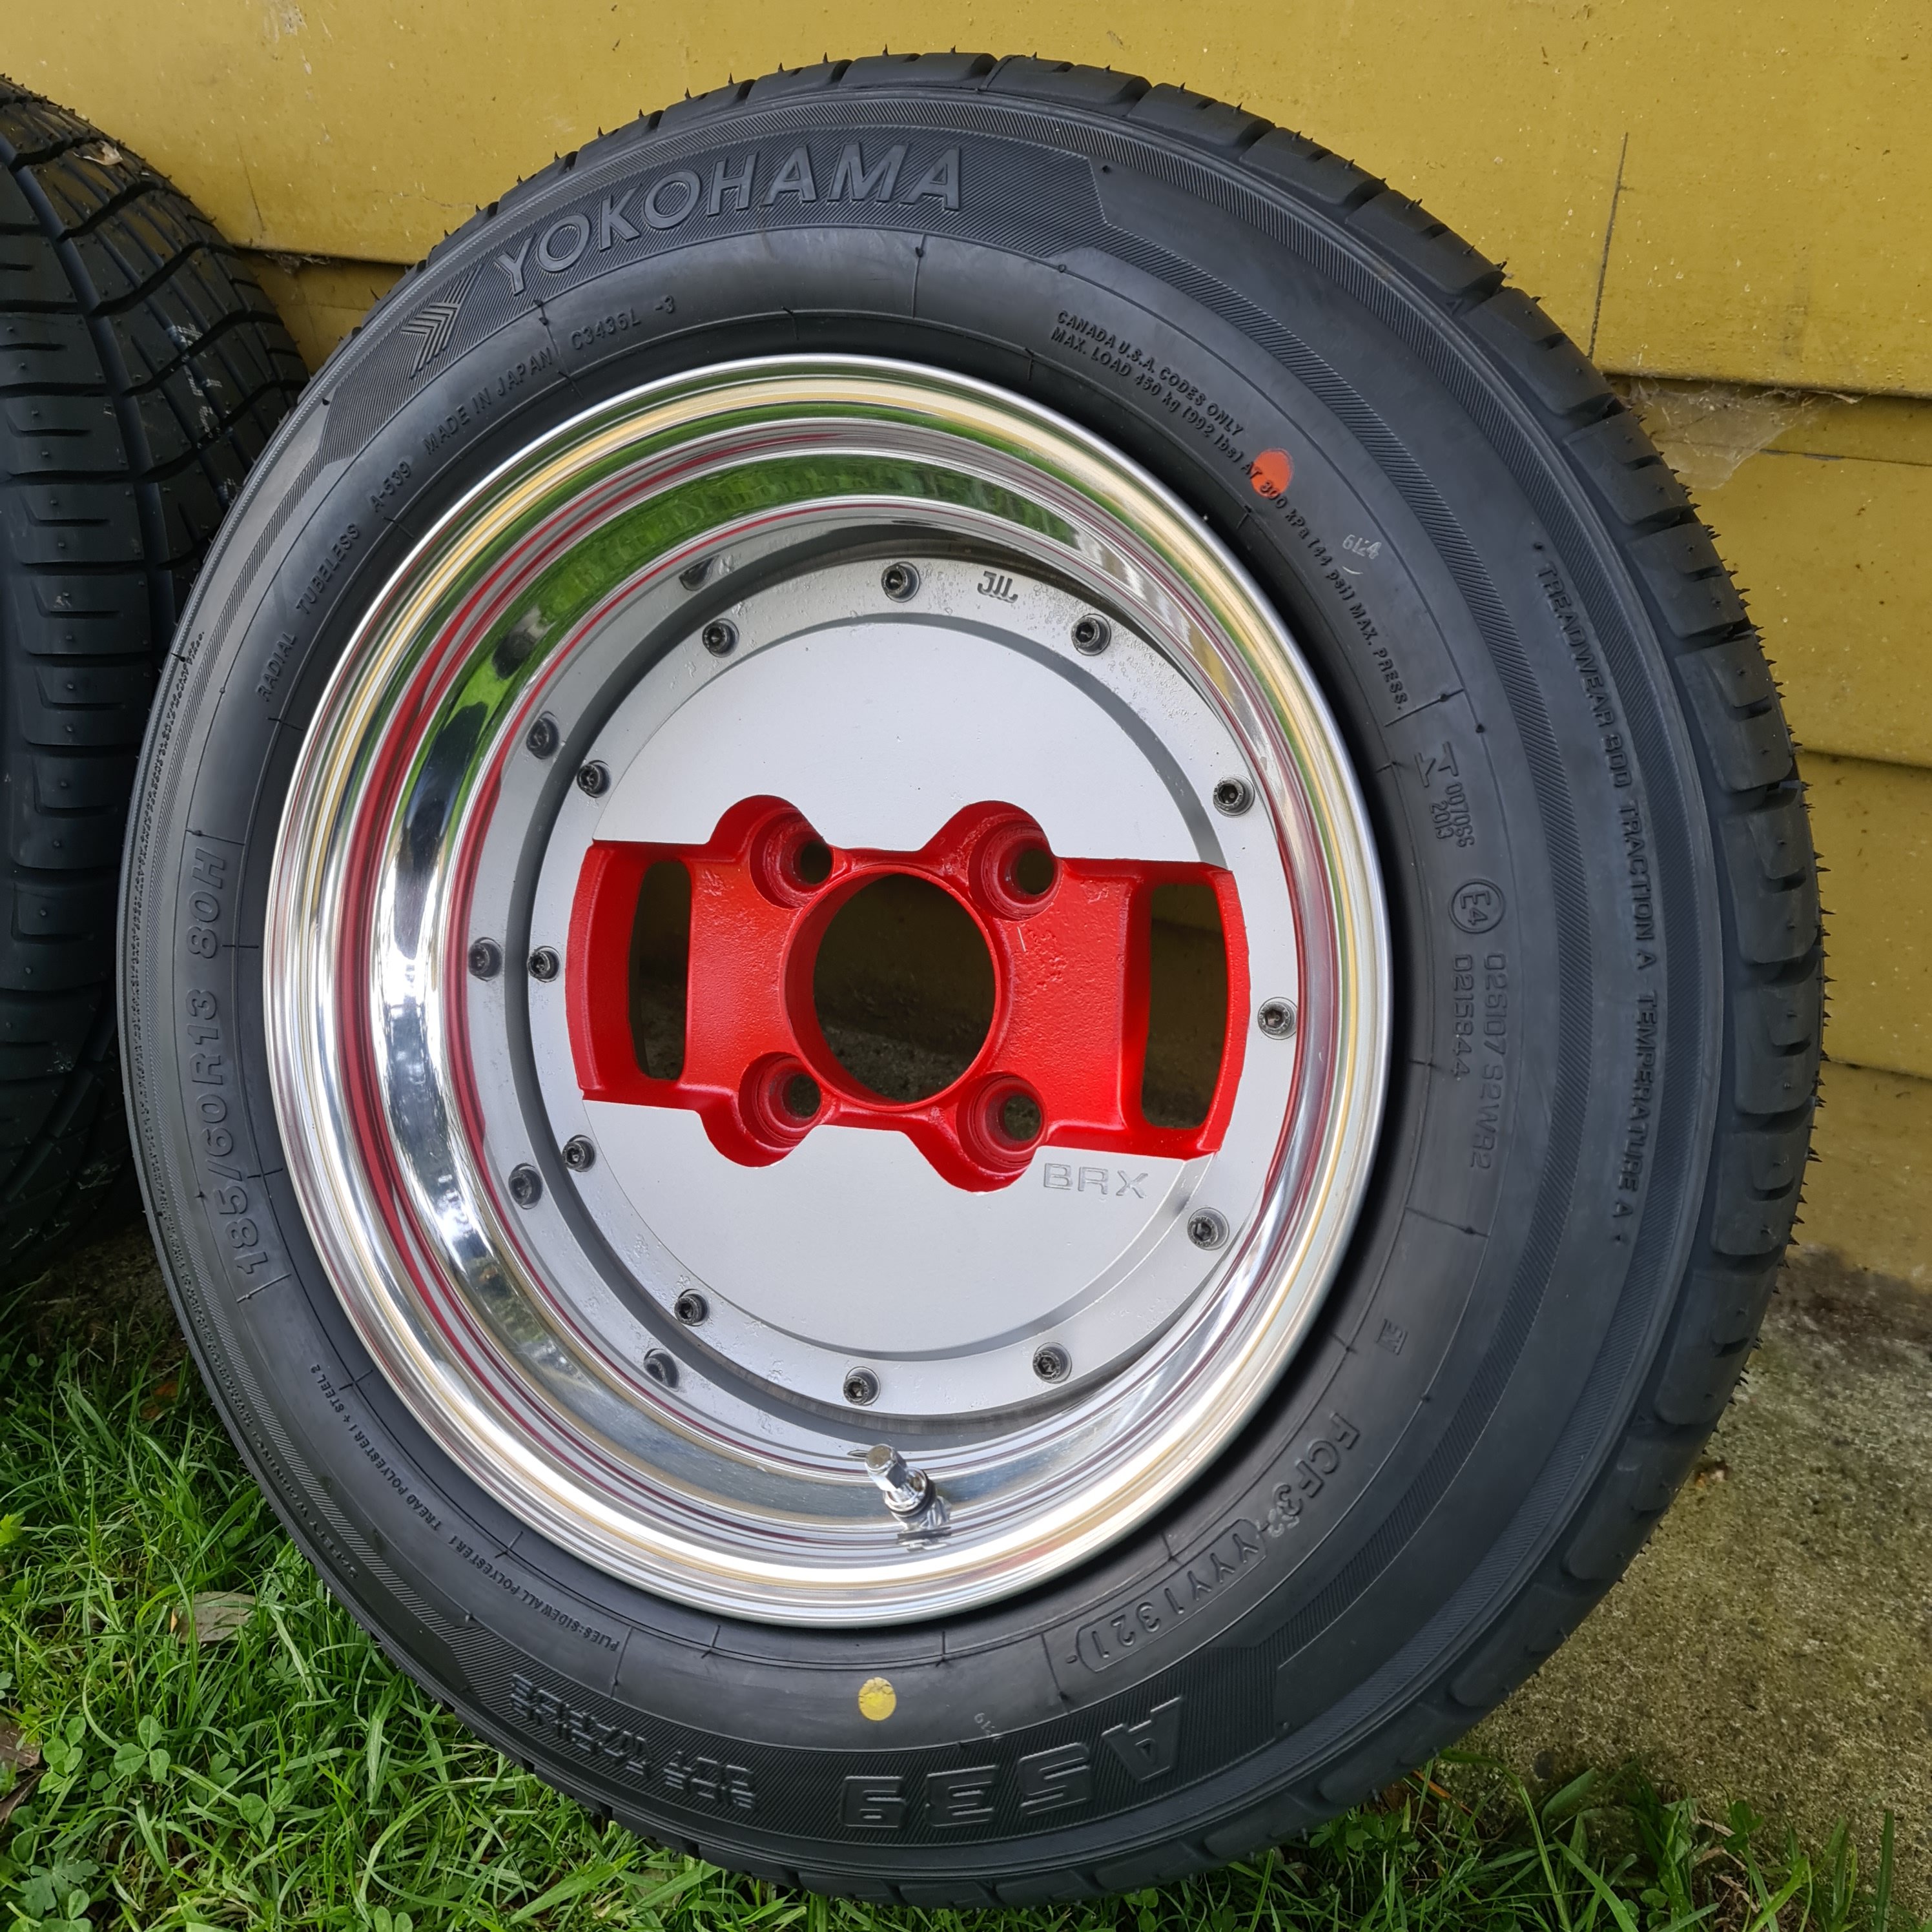
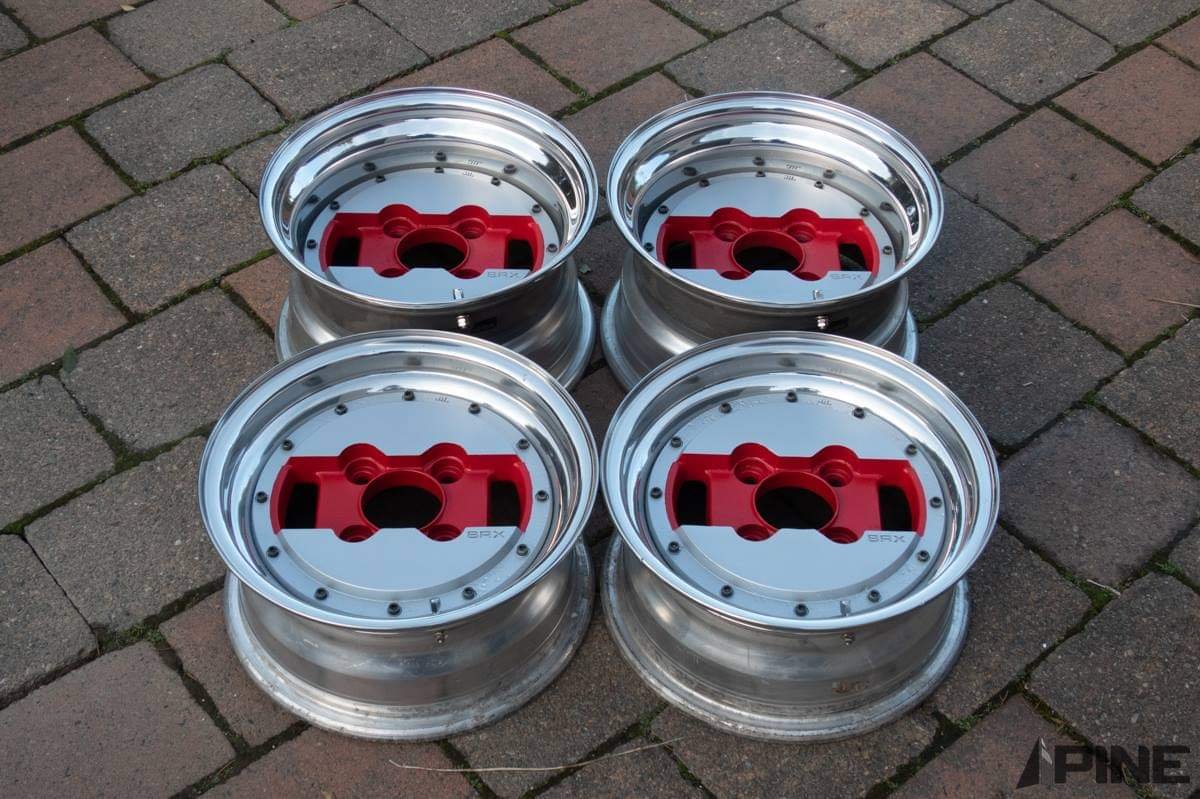
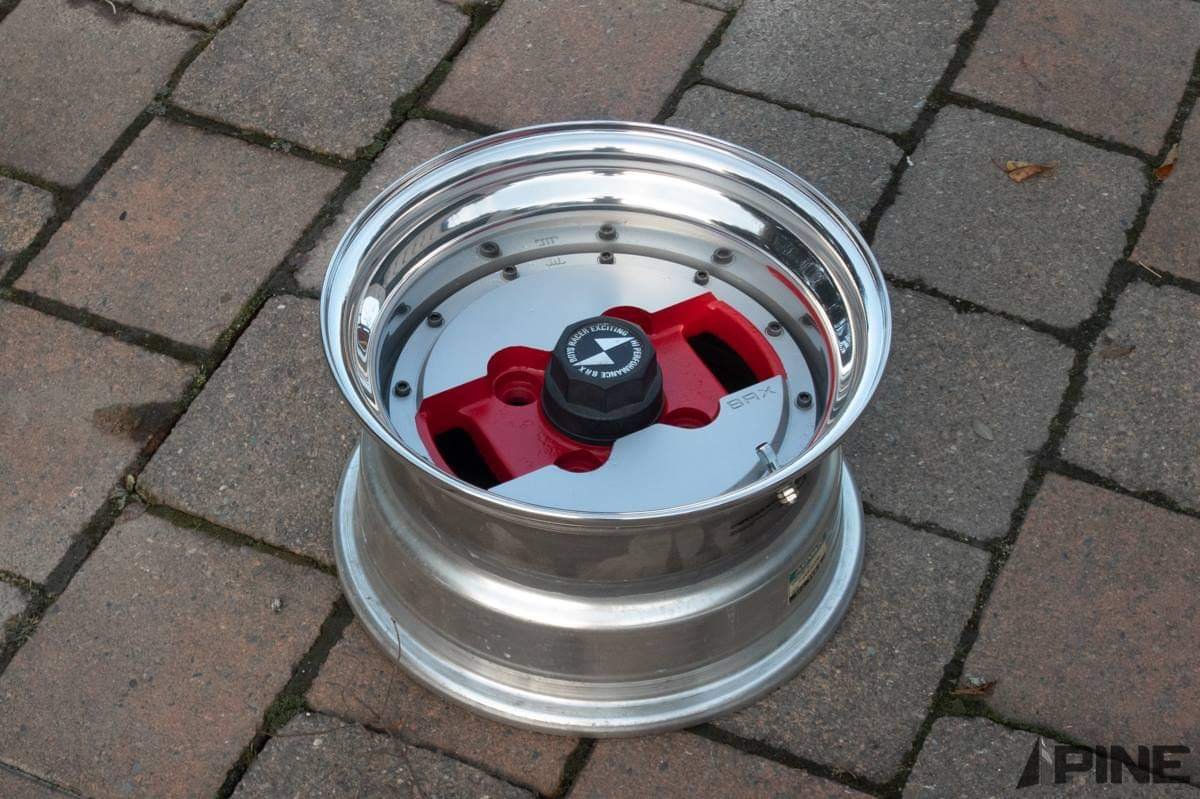
I did not complete the two week challenge but I'm still chipping away. Aidan at Pine Engineering sent me these photos of the br-x completed last night @BobbyBreeze was kind enough to lend me a centre cap to replicate also which are just off being anodized I have a new set of Yokohama A539 in 175/60 and 185/60 at home ready to go also
1 point
-
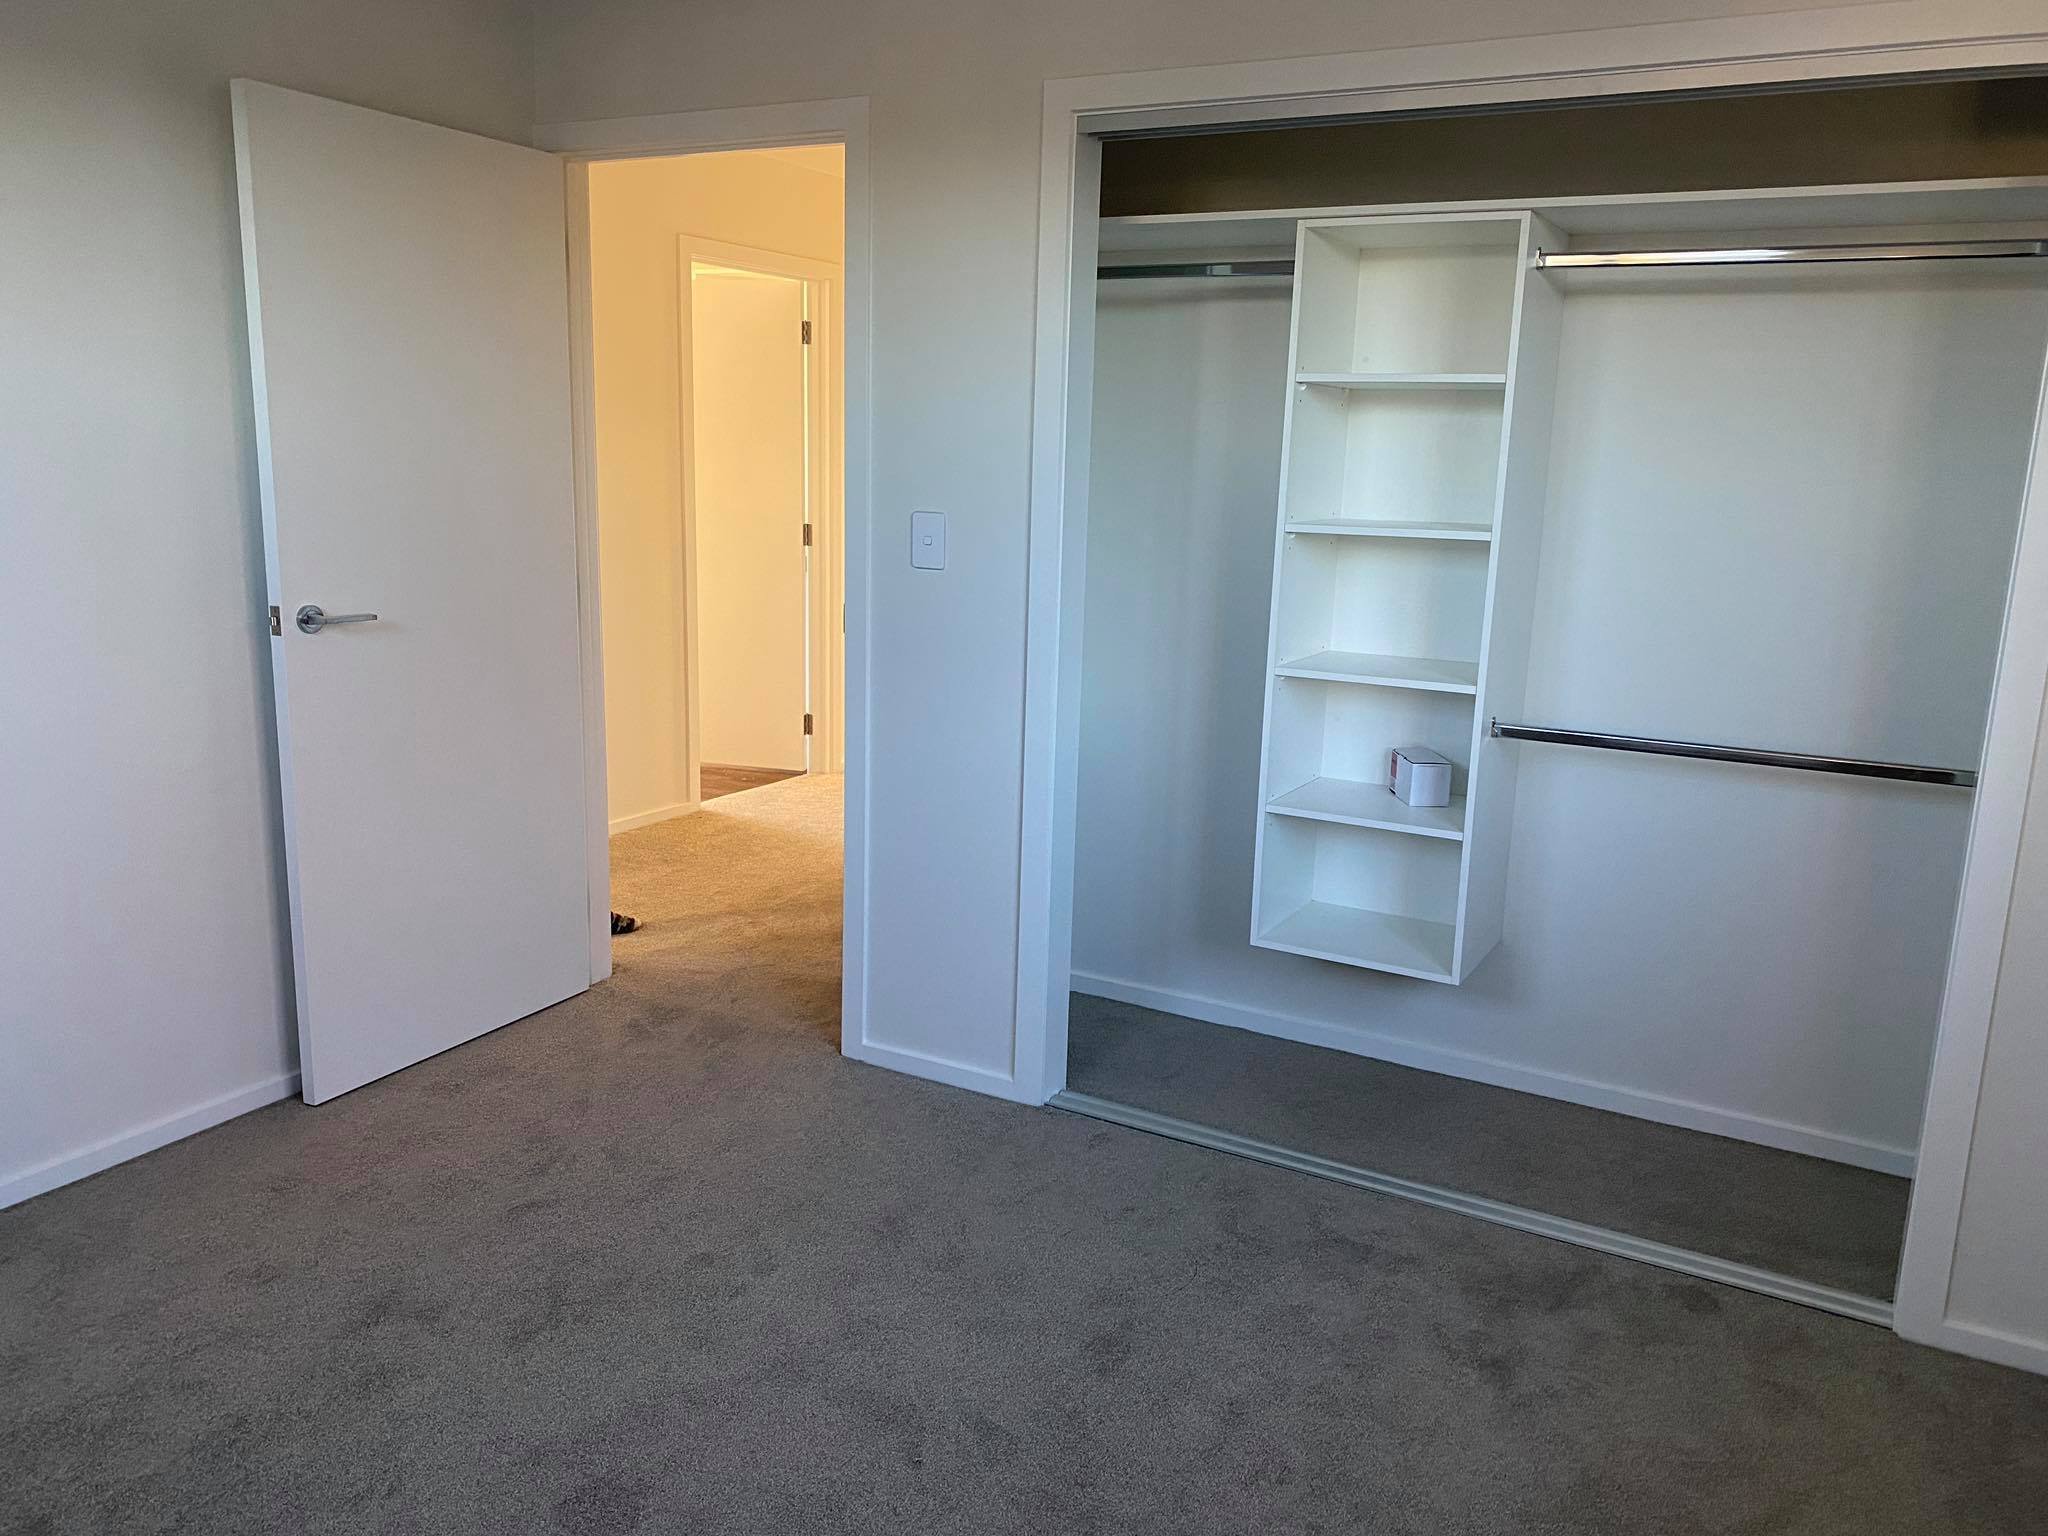
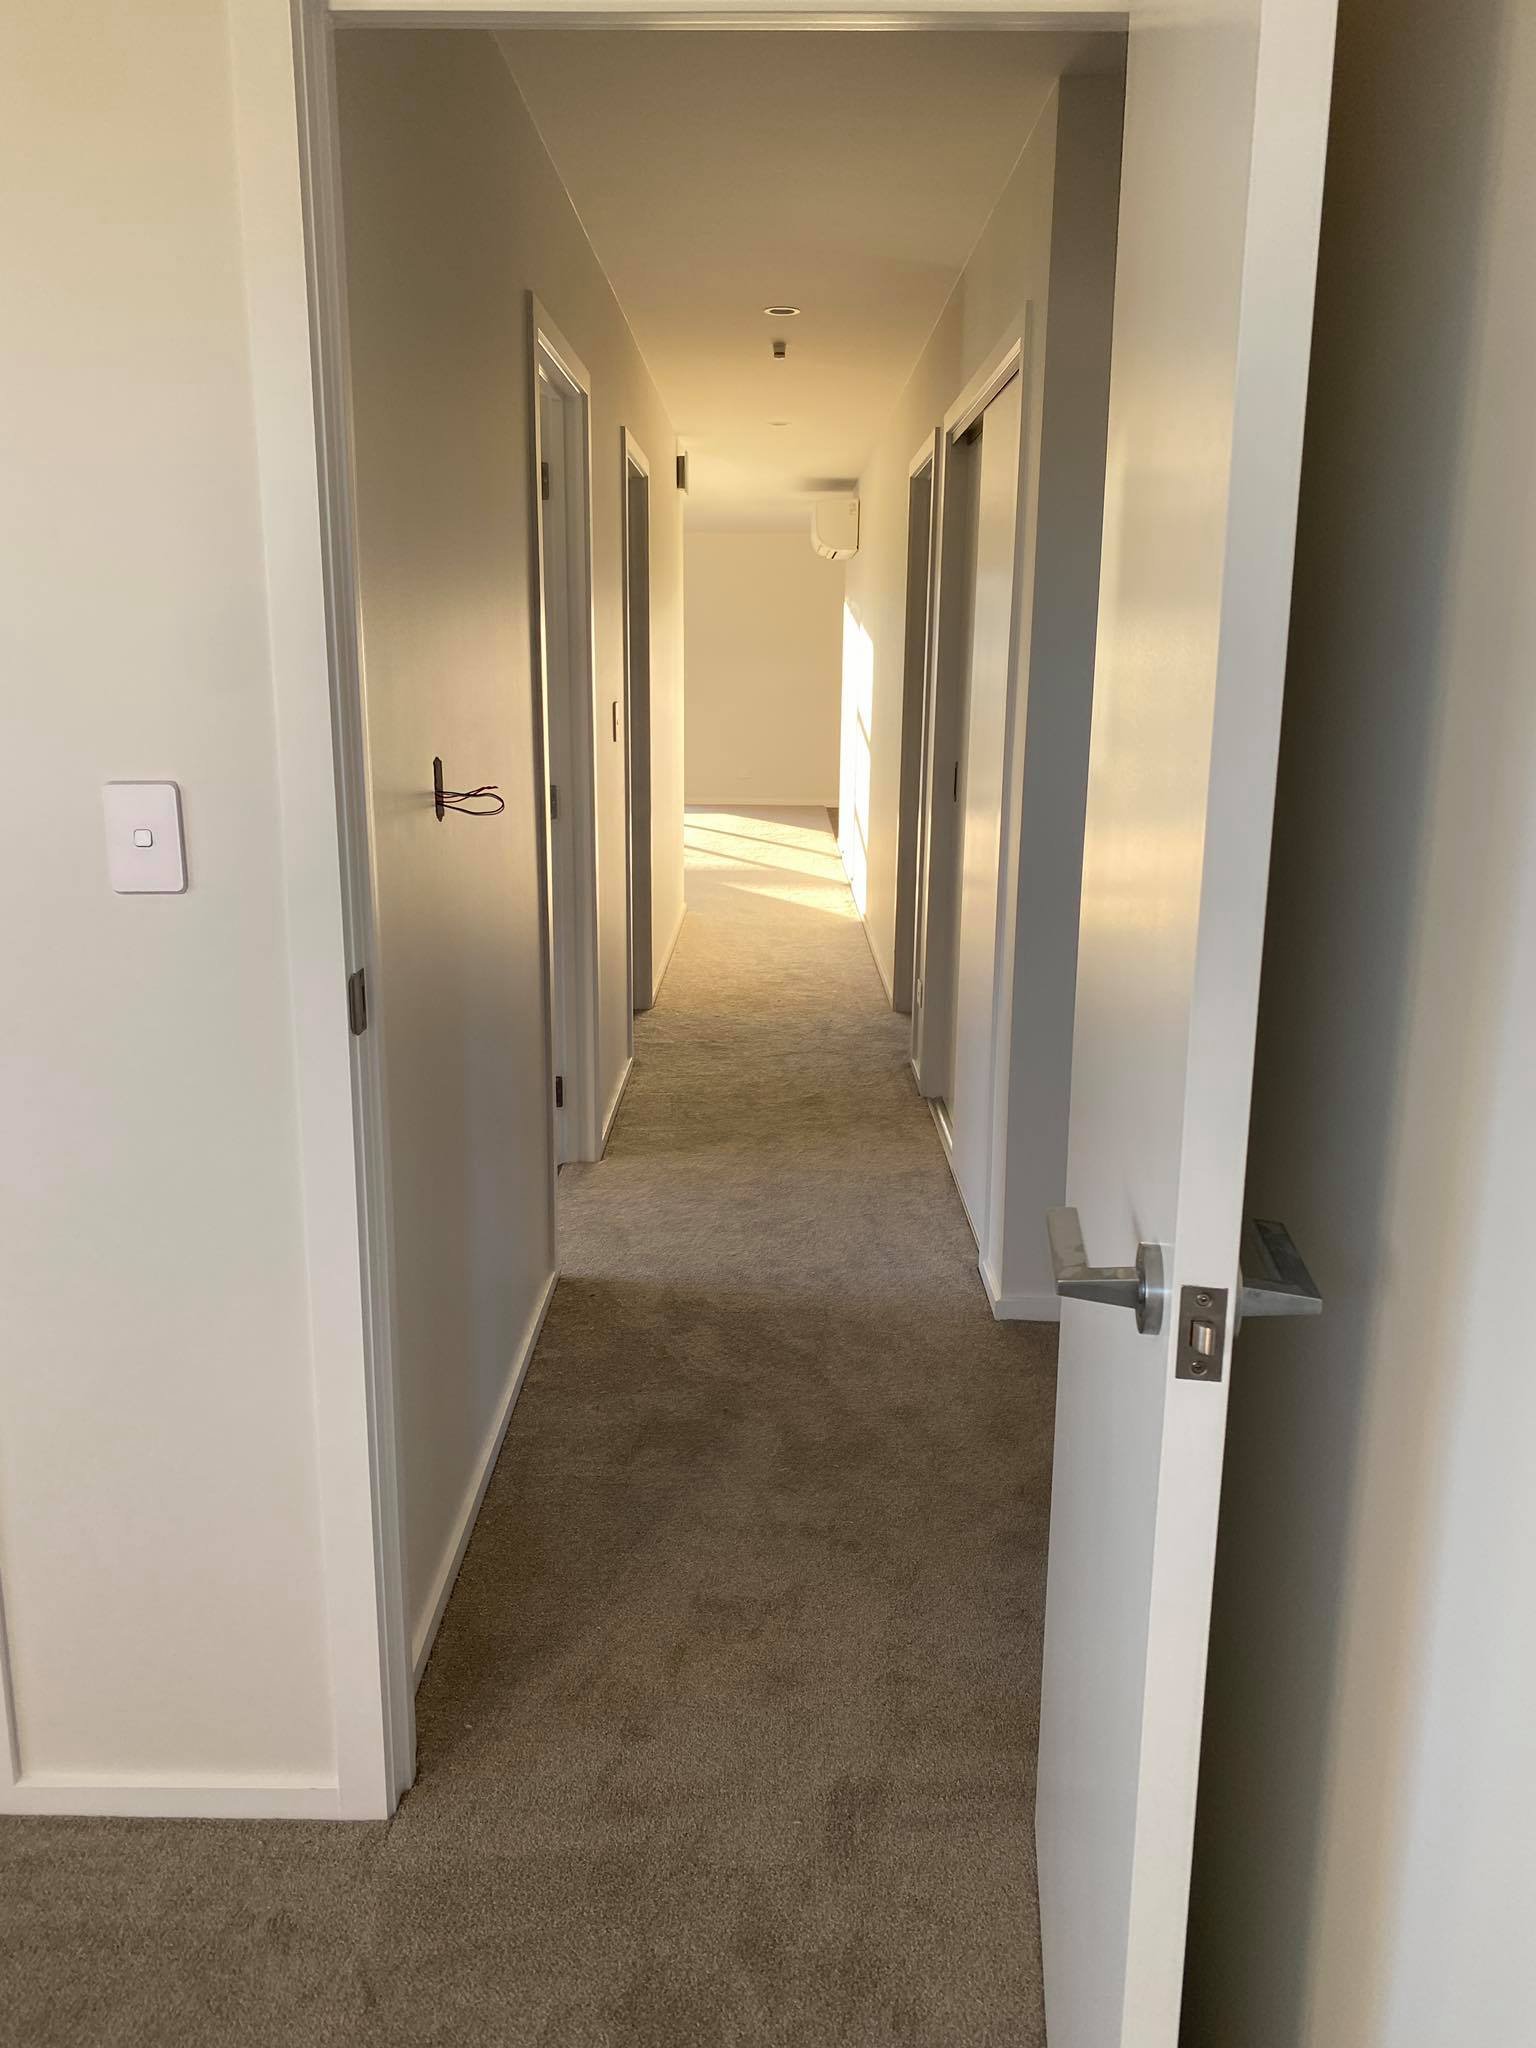
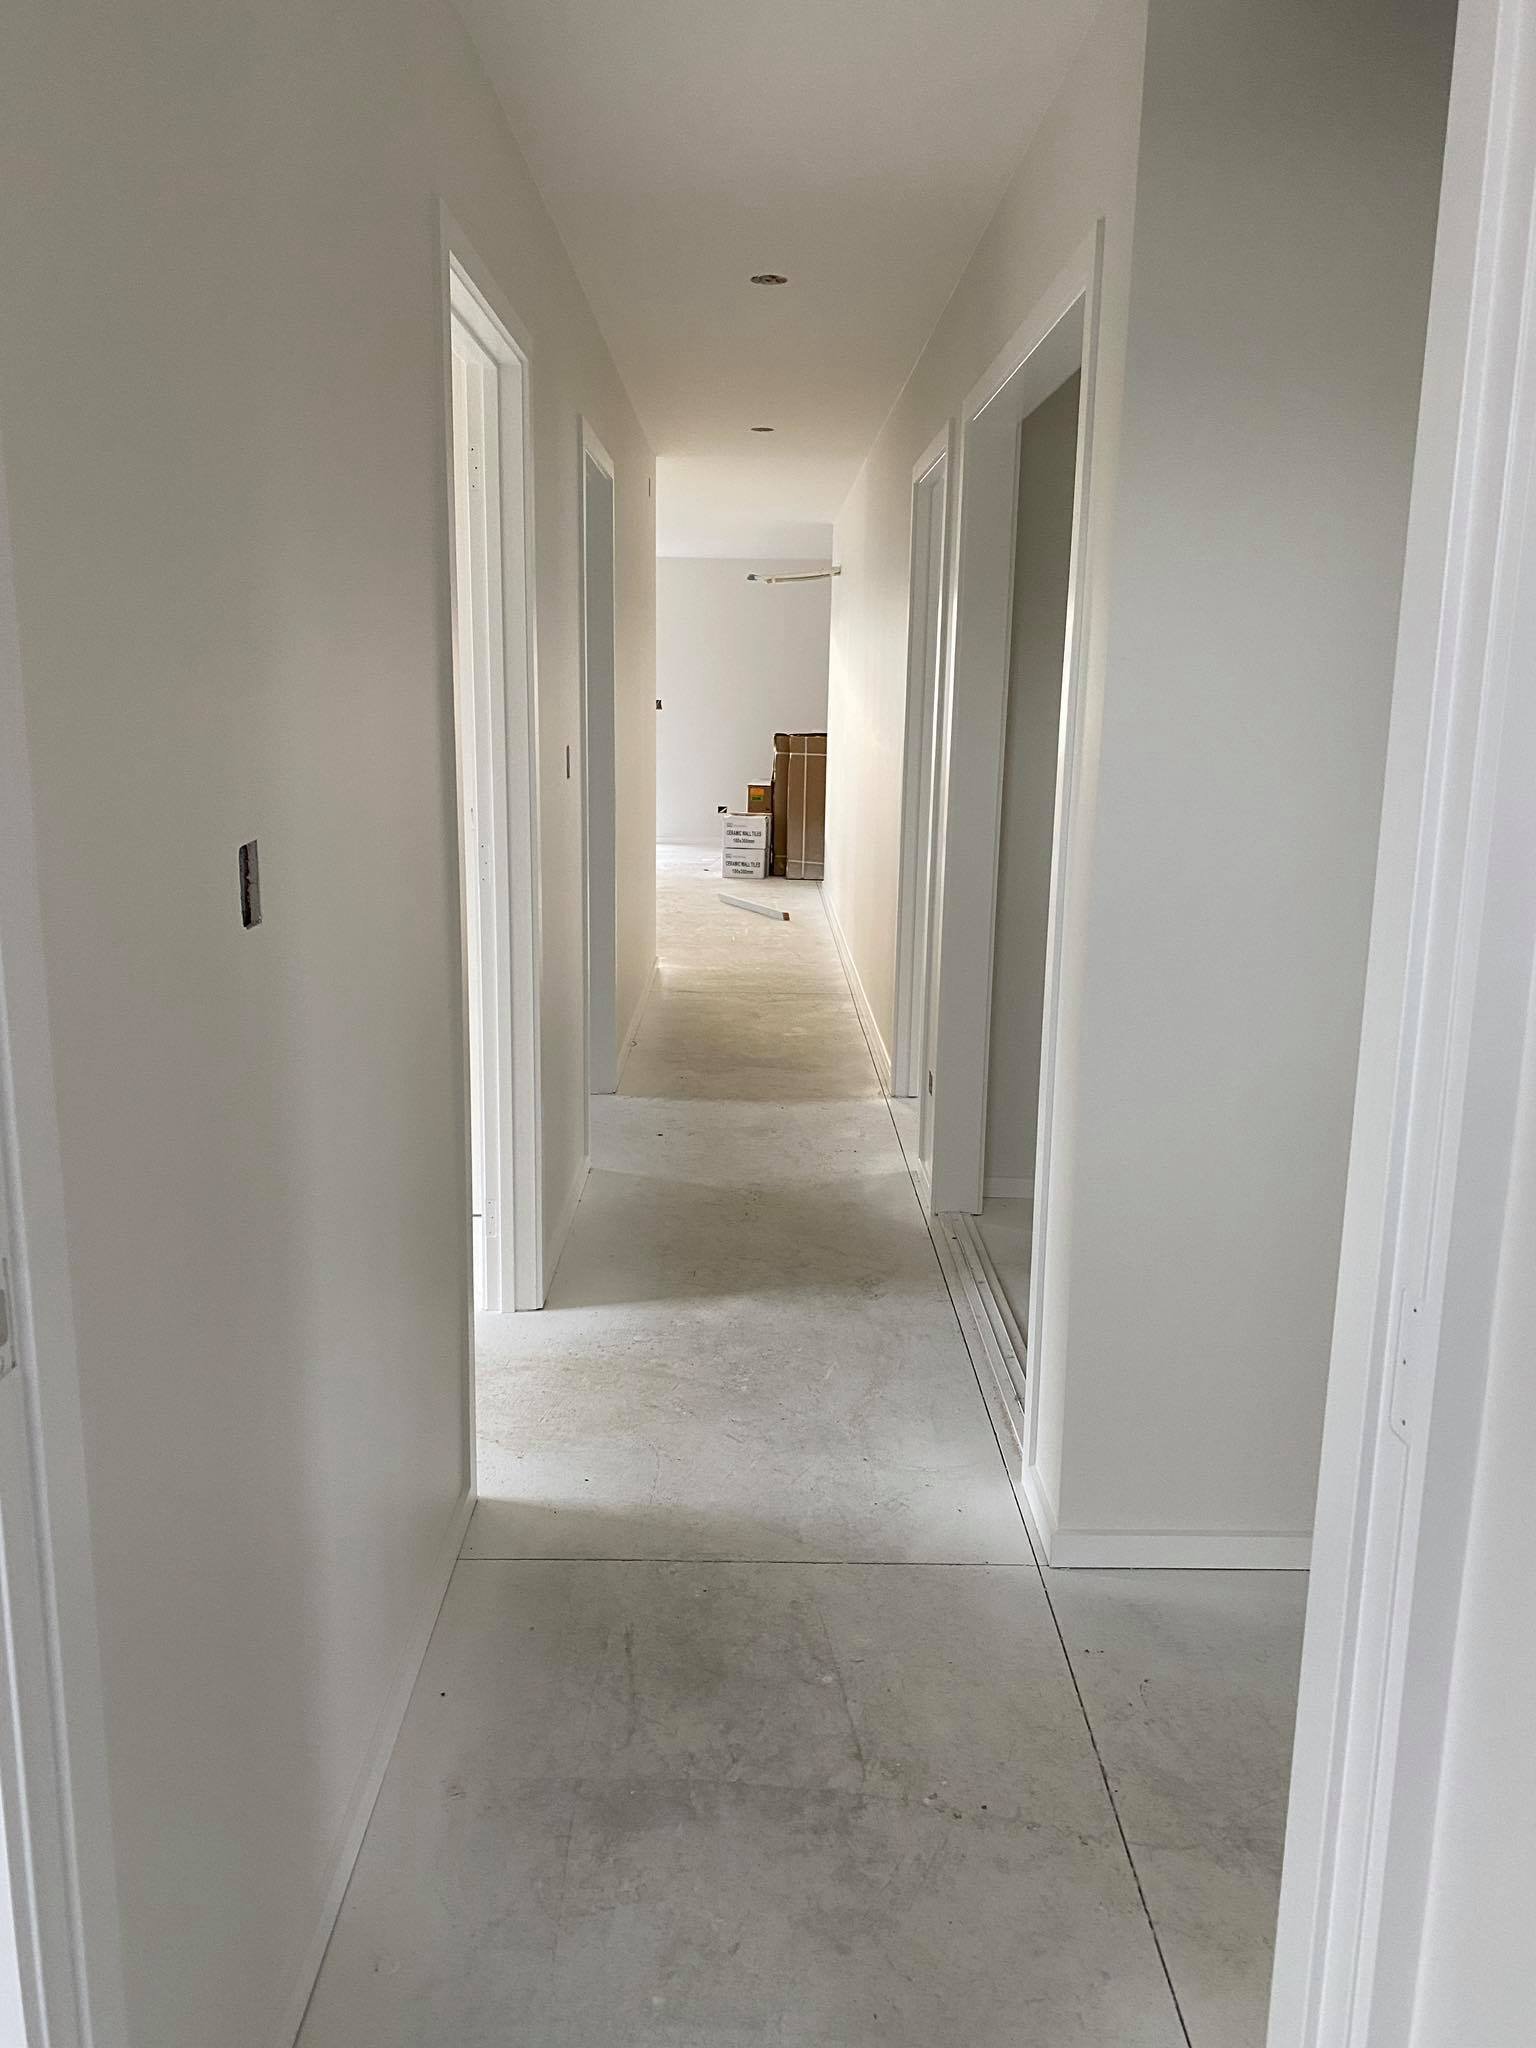
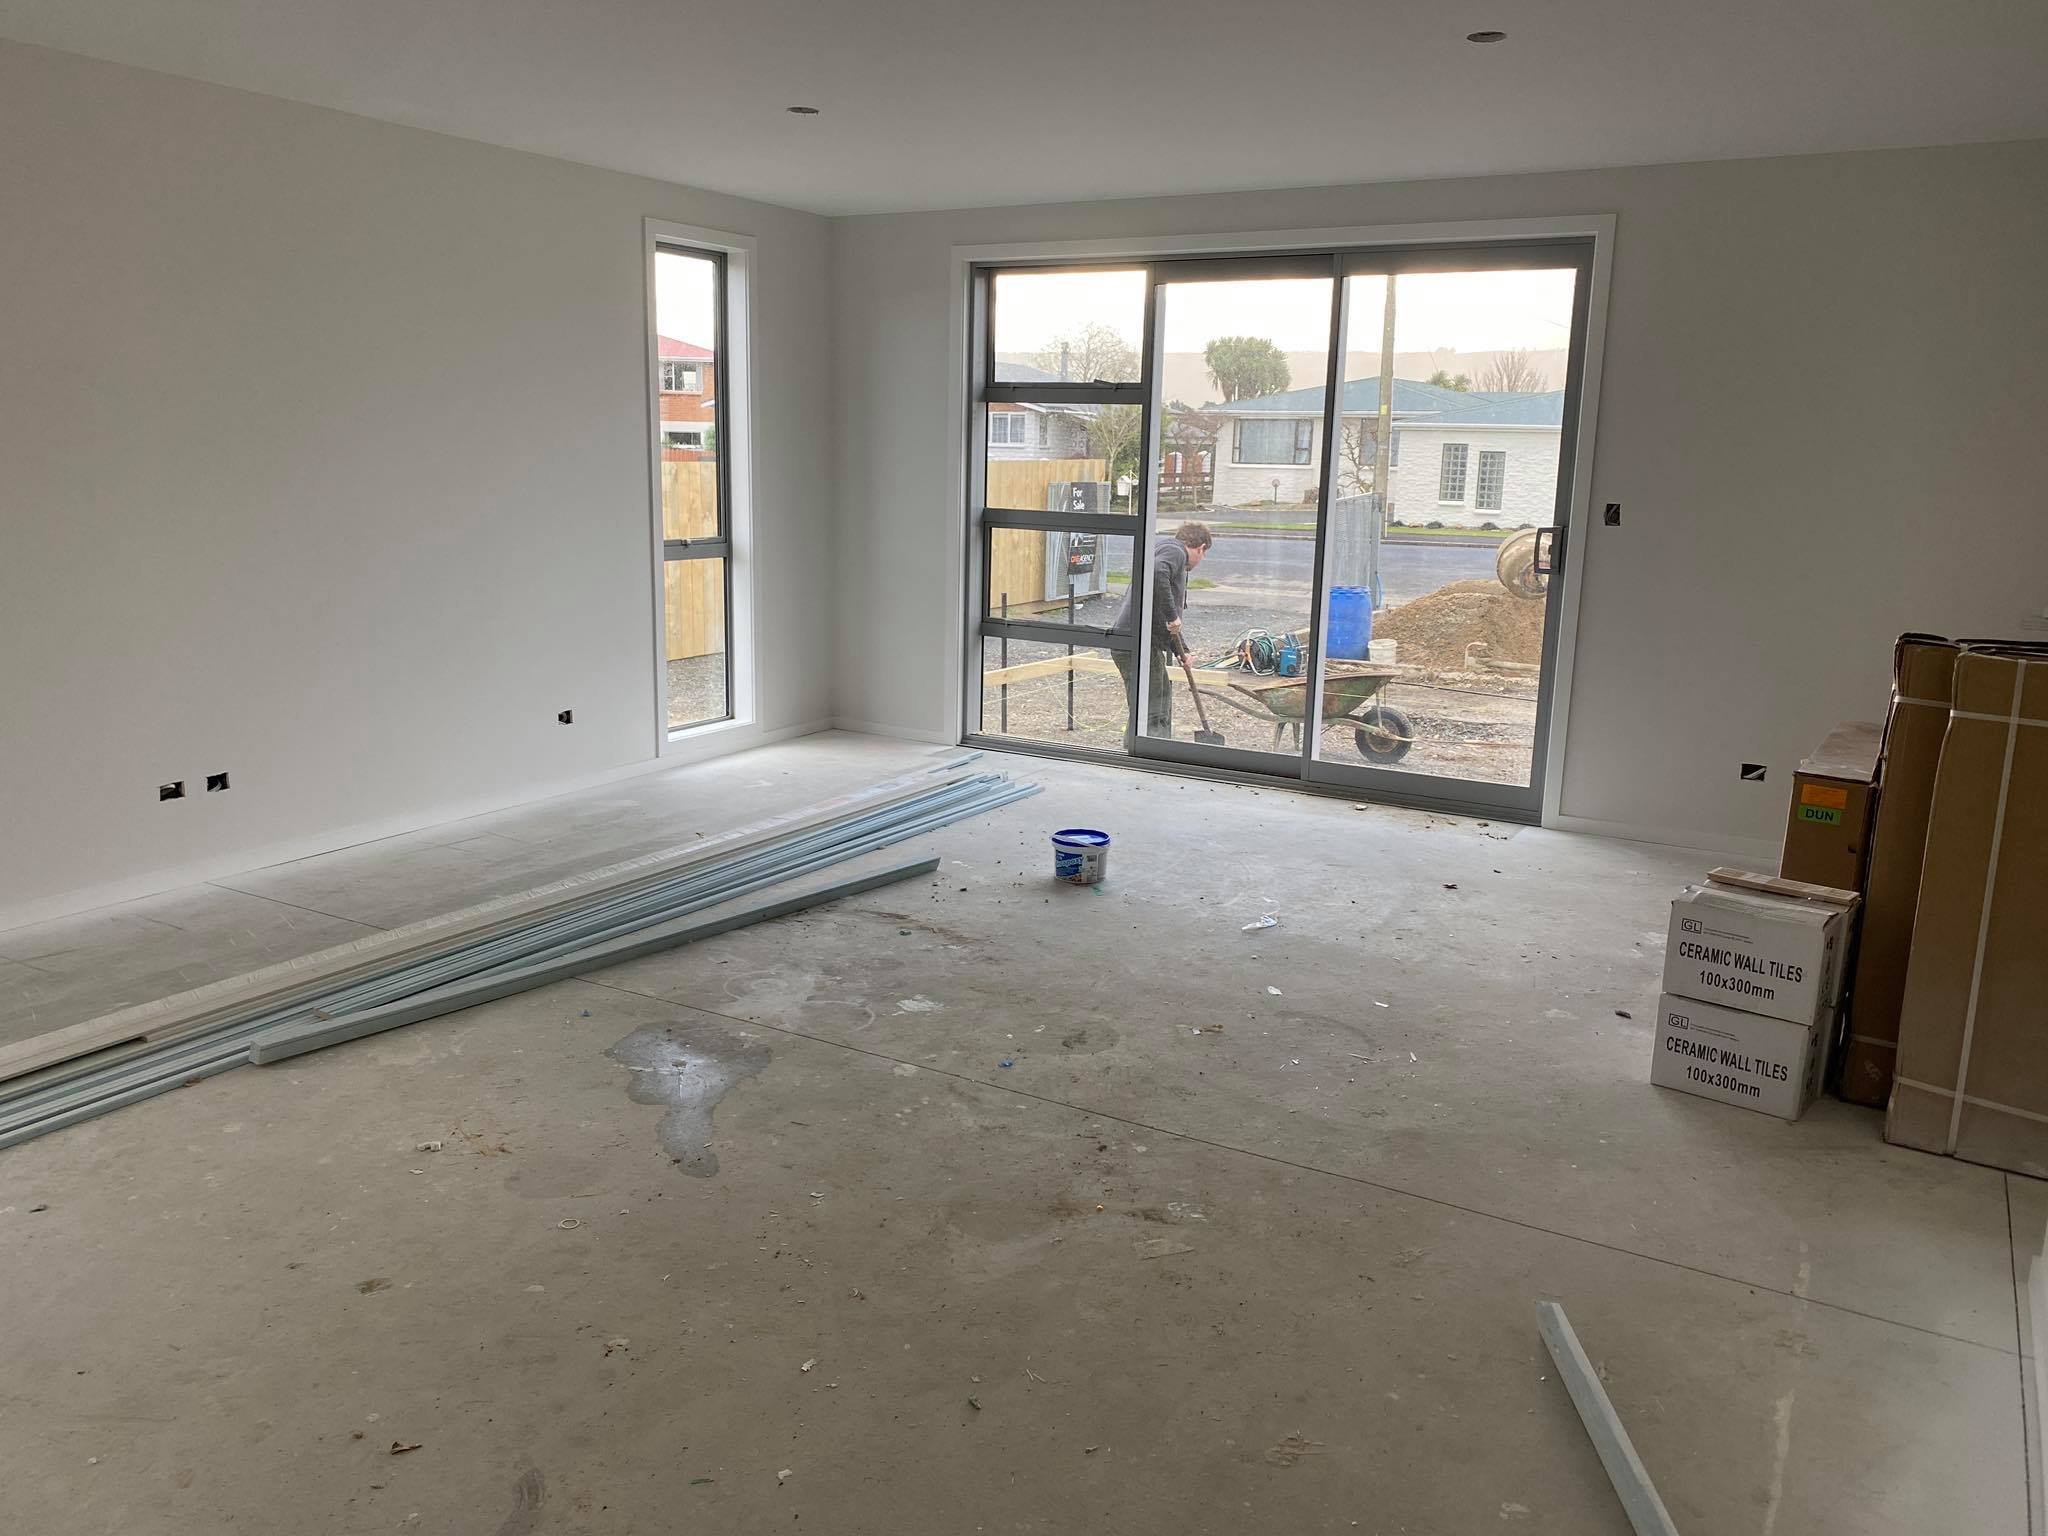
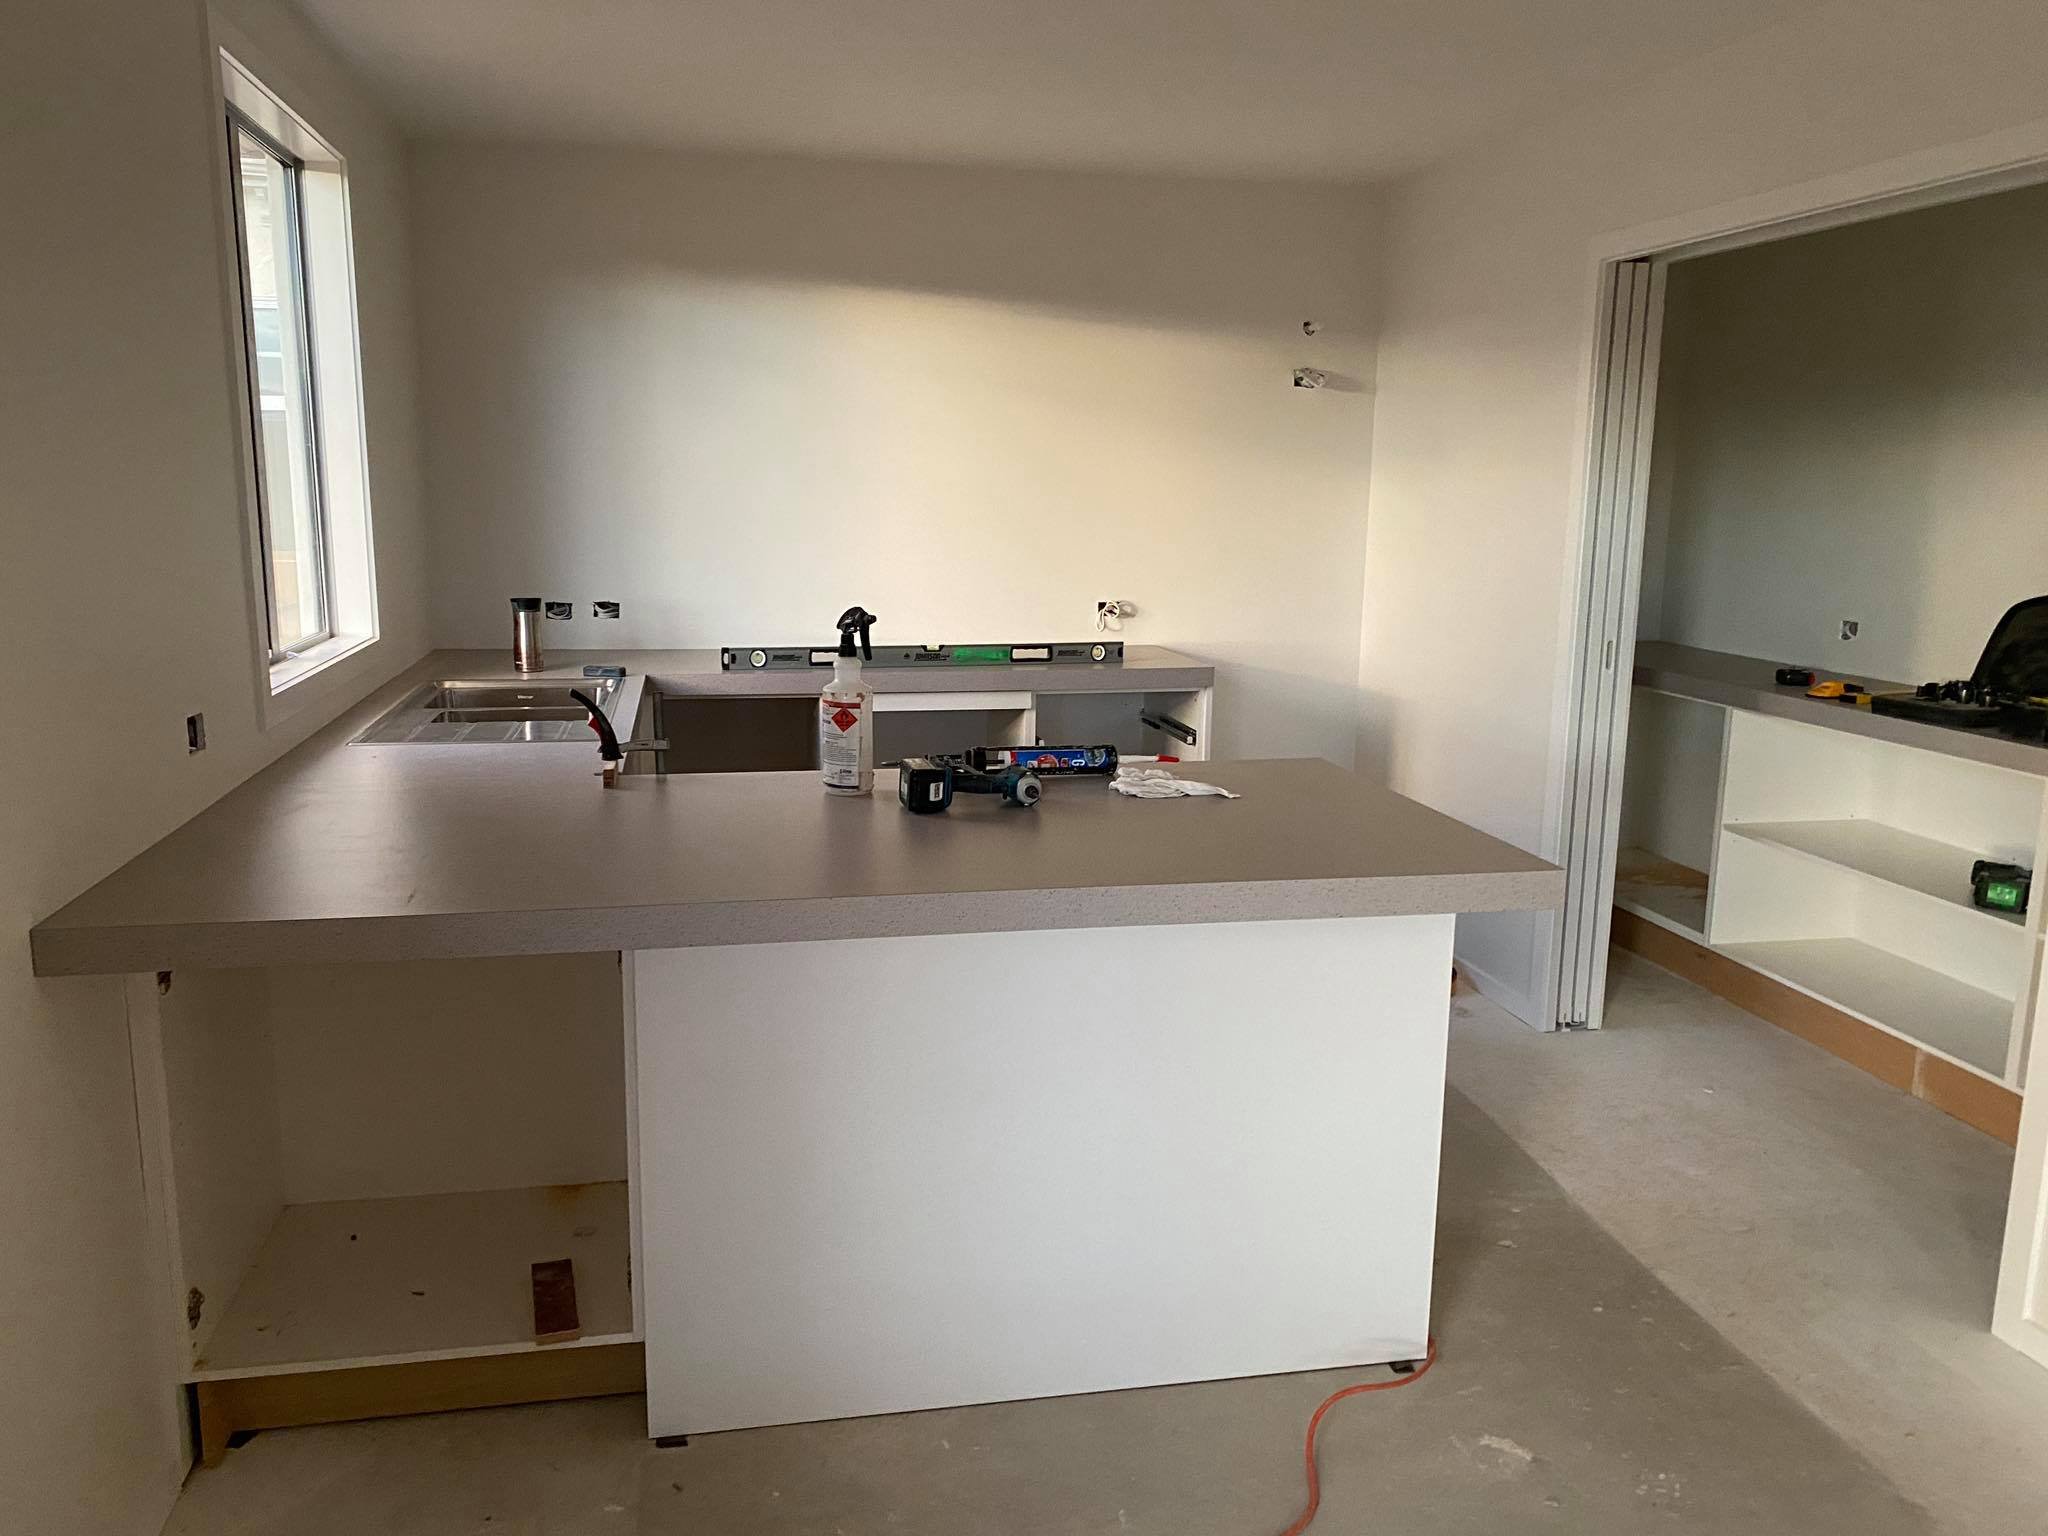
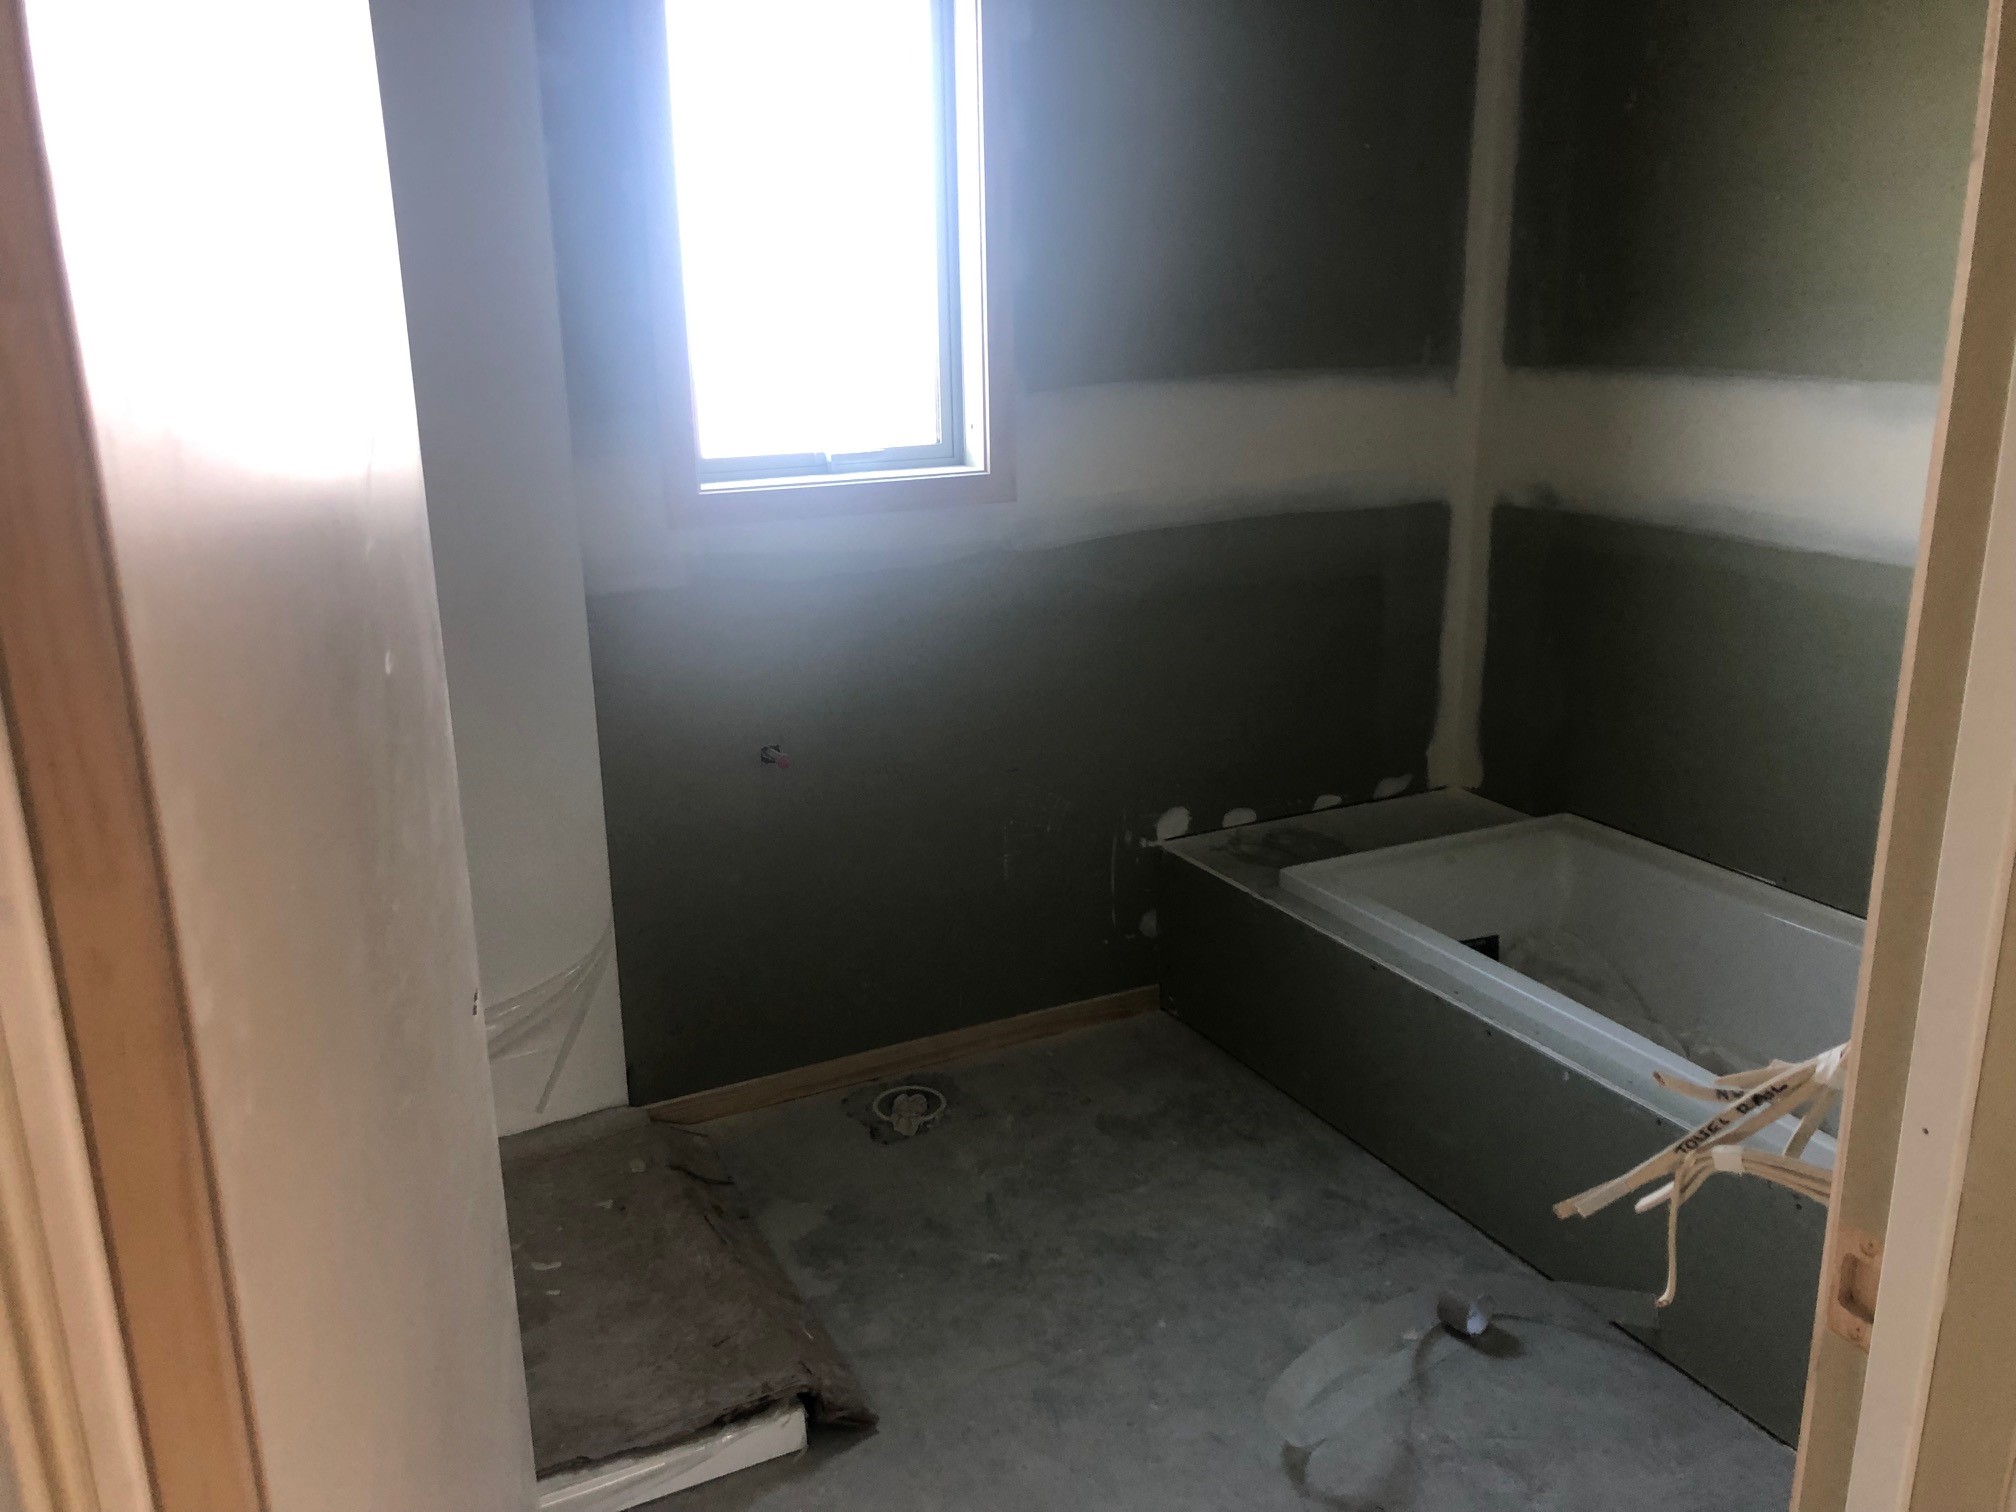
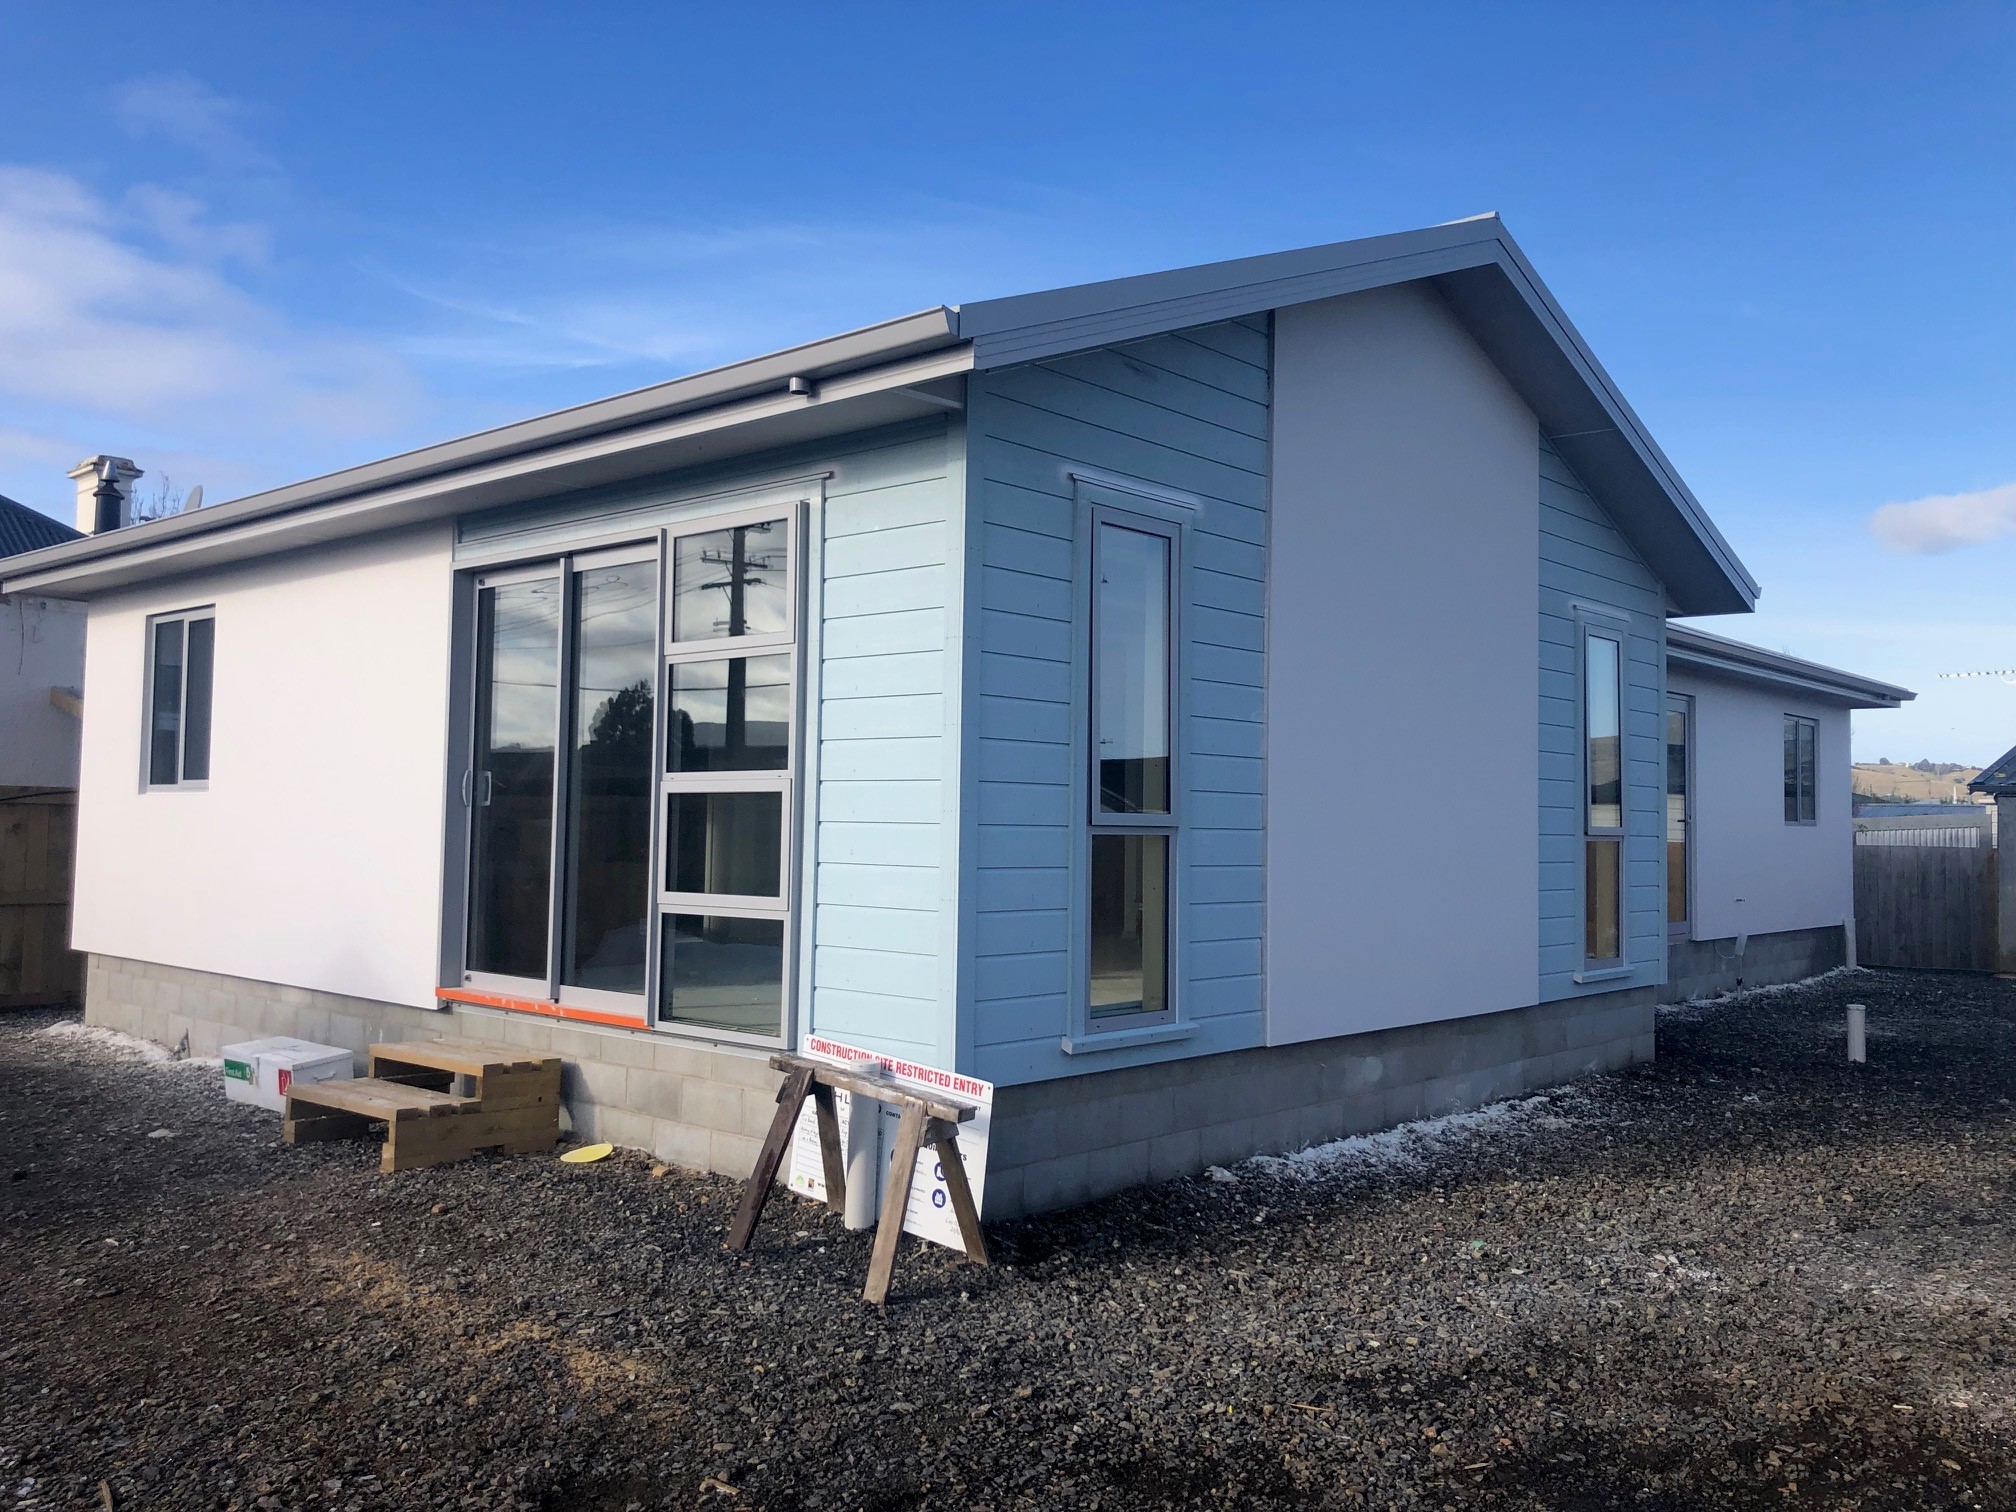
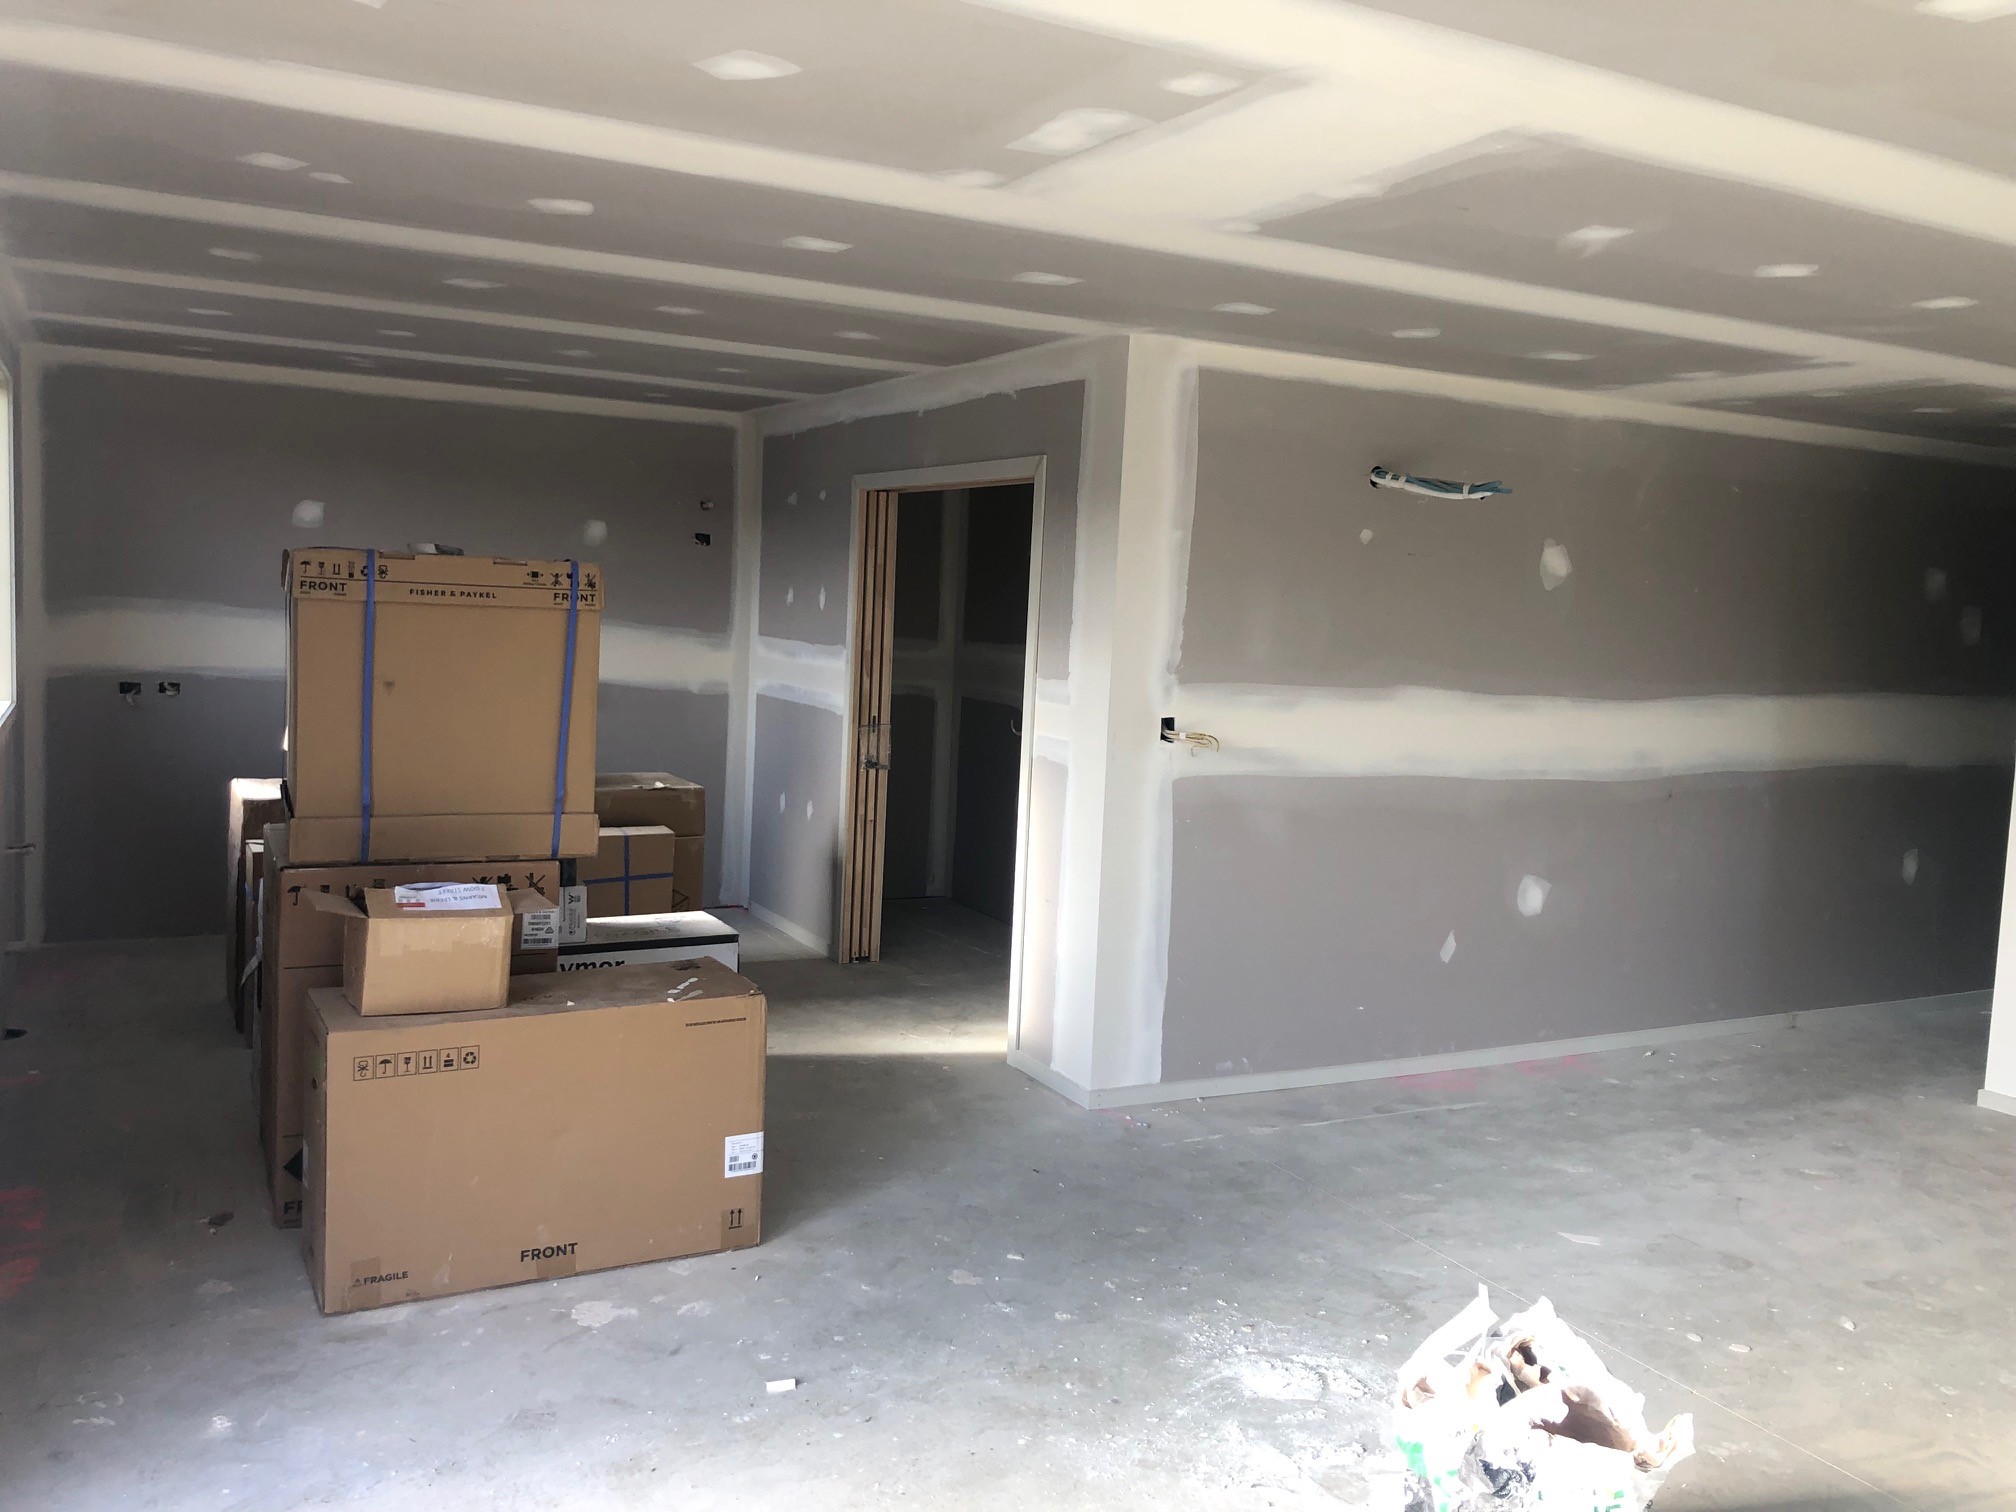
Some more progress this weekend, alot of the interior fit out is well progressed.
1 point
-
@nzstato might be a /ling but always puzzles me why driveway and landscaping aren’t part of CCC. Did your contract with the builders include lawn and a drive or did you agree to exclude these and do yourself? When we value shit off the plans it’s always tricky when we do completion reports to release all the funds and they have no lawn or pathways, and are still using a pallet as a front doorstep … house isn’t exactly “complete”1 point
-
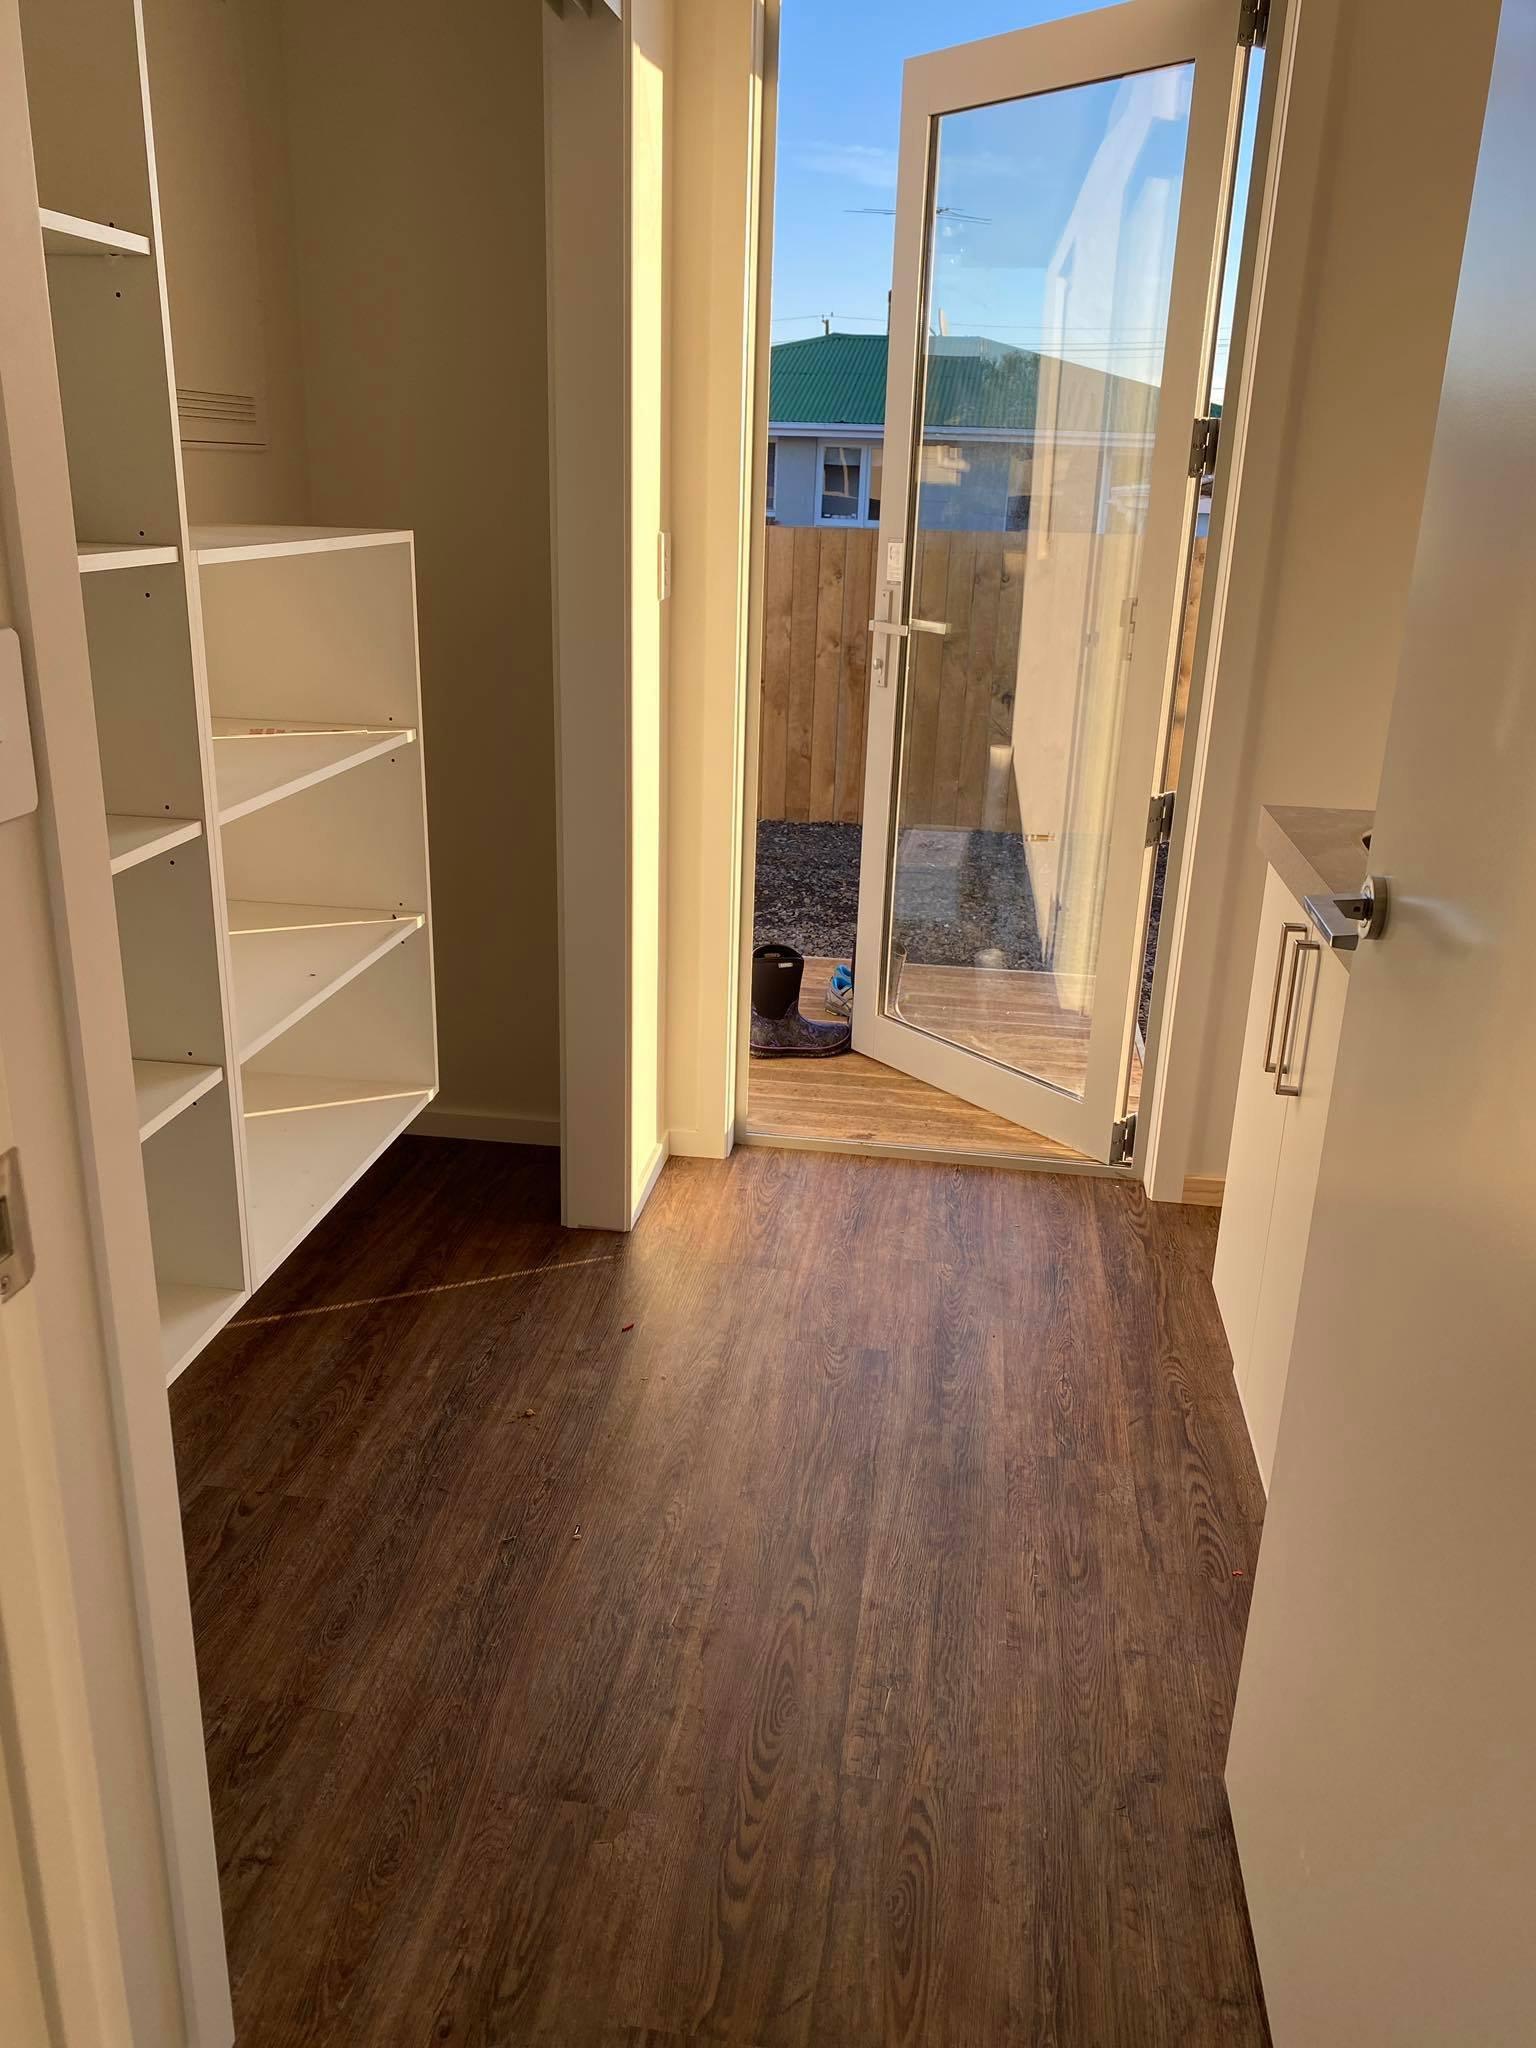
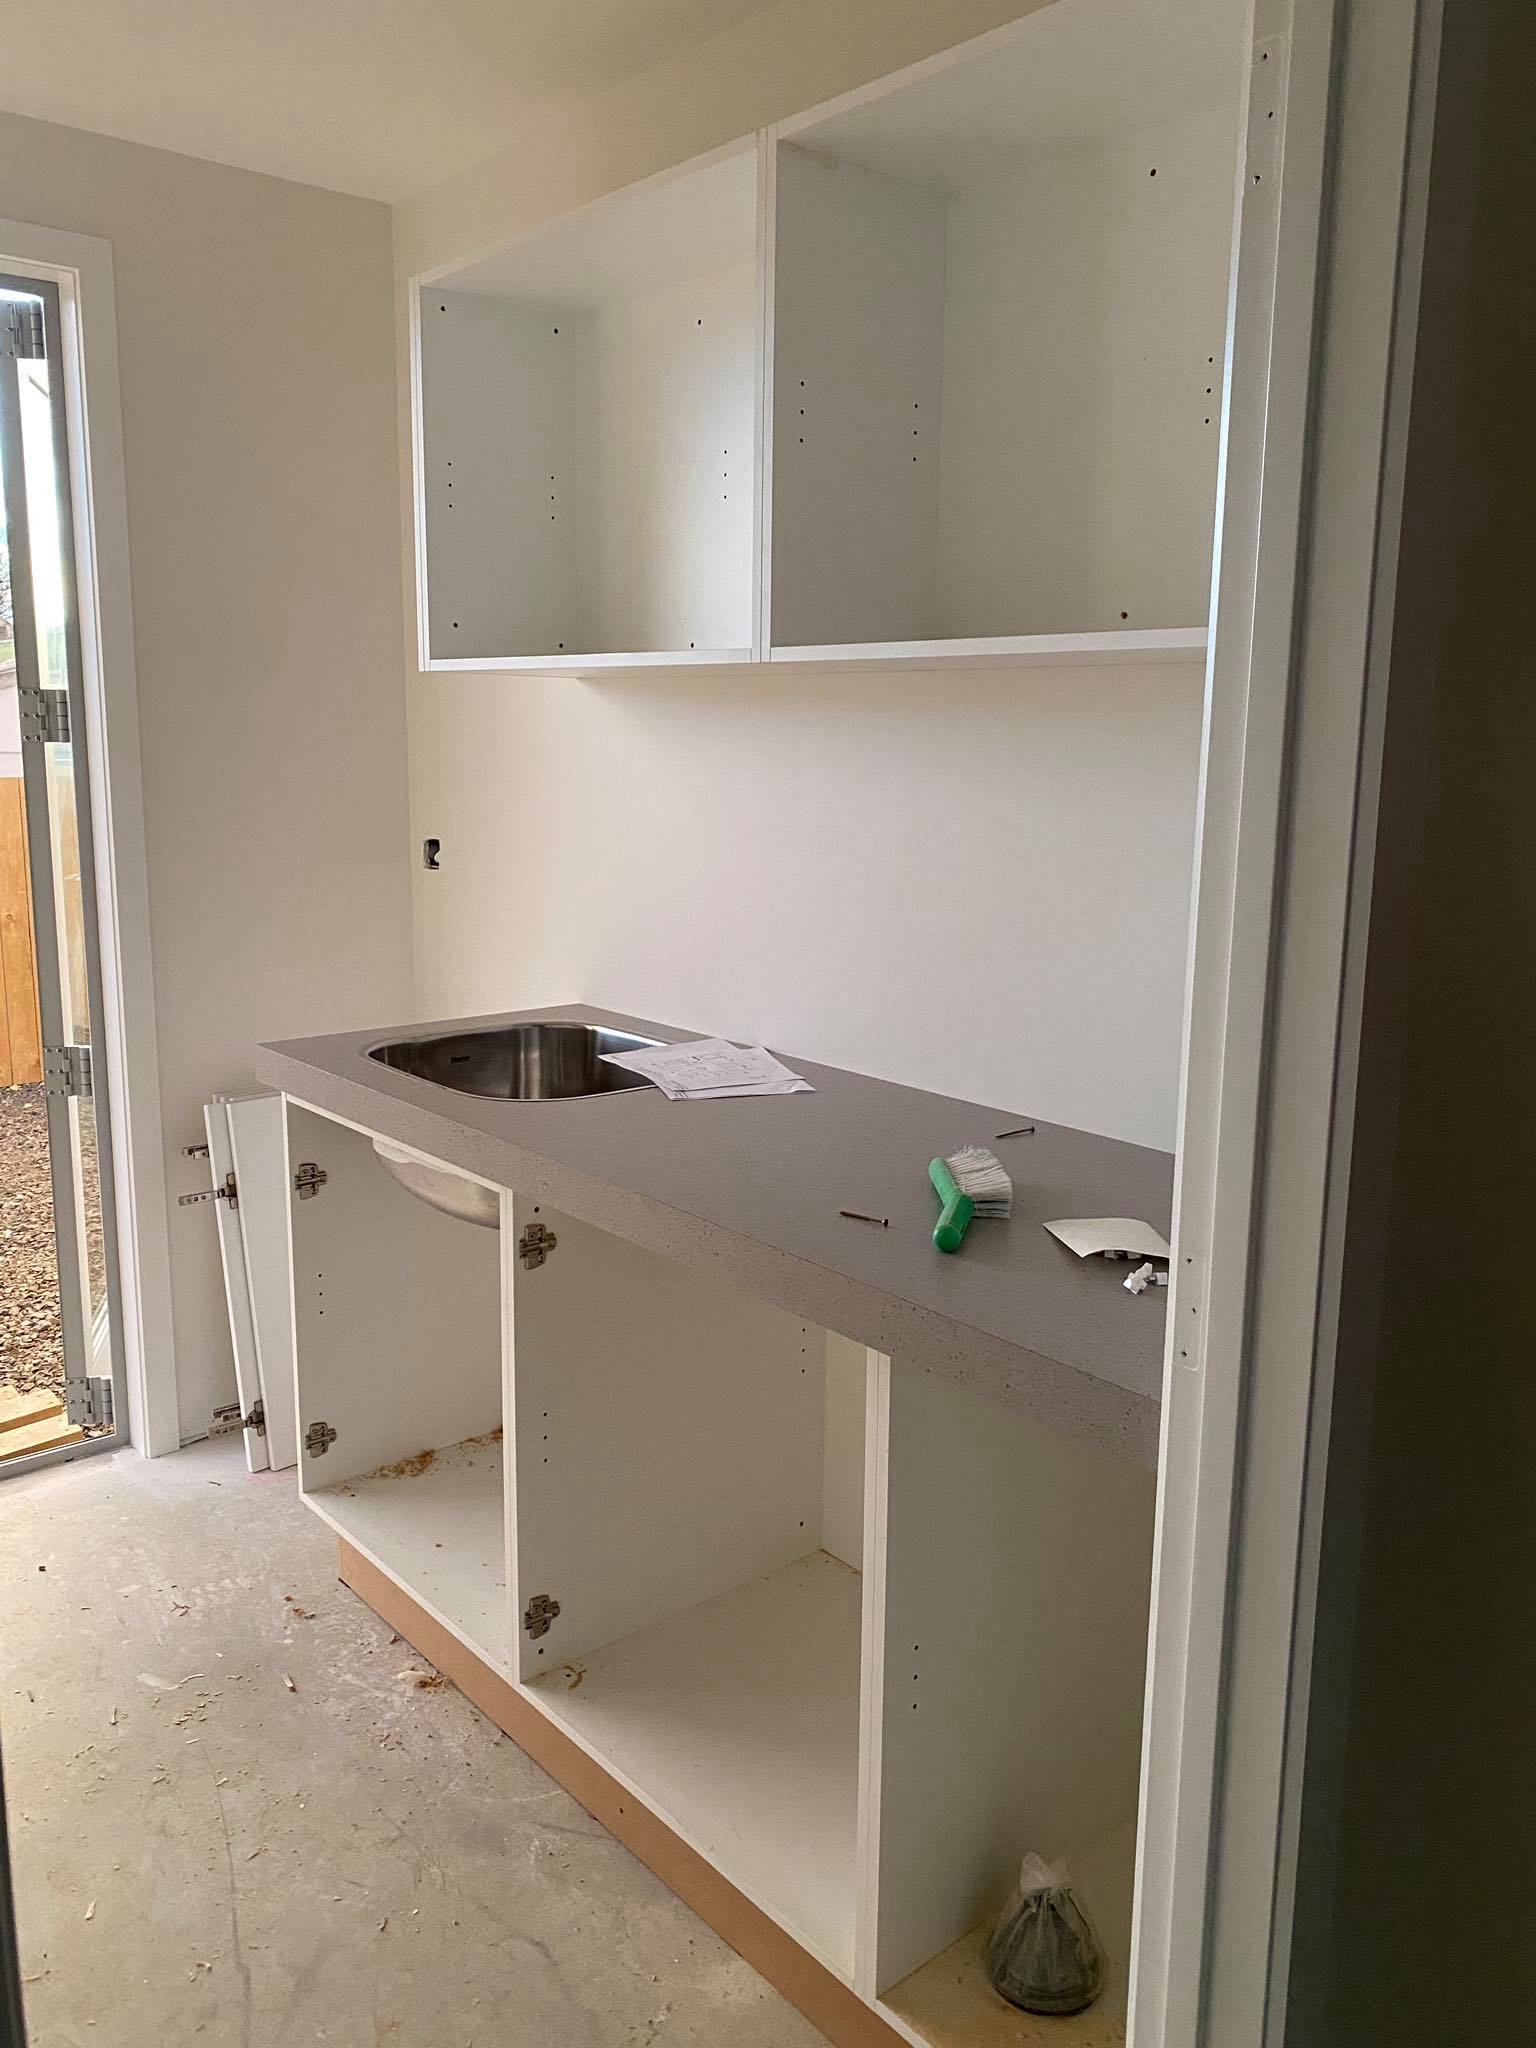
Interior is all painted, and they've started on cabinets. Old boy and I have been working on the decking, landscaper is booked in for end of the month and asphalt after CoC
1 point
-
Another dozen Steinlager to the man with the aluminium welding skills and another little bit is stuck together.
1 point
-
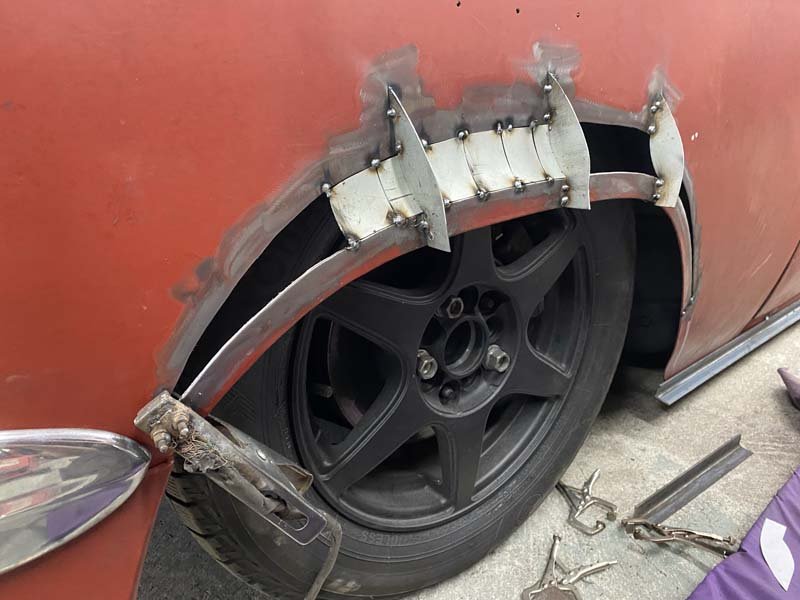
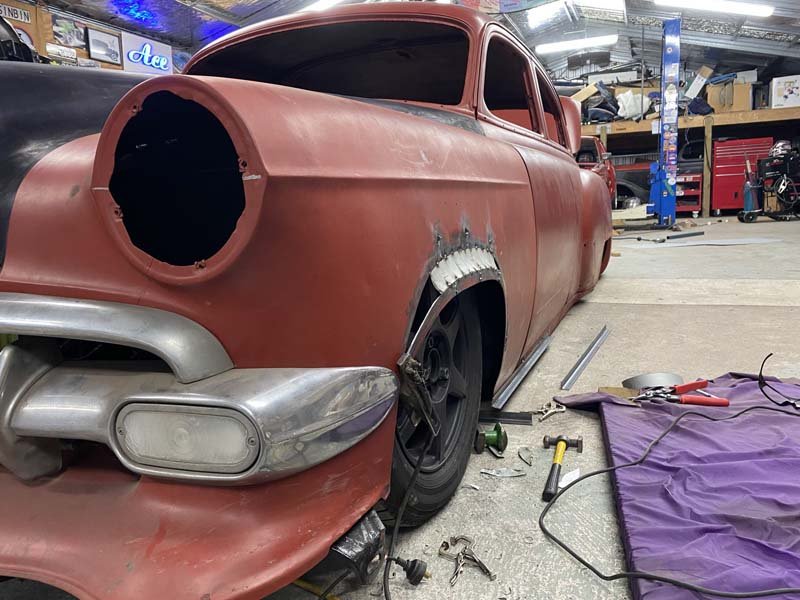
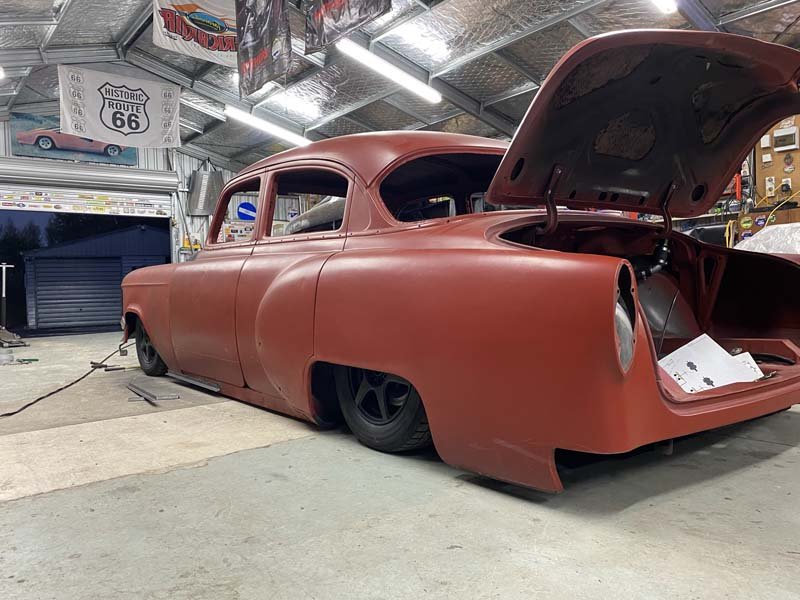
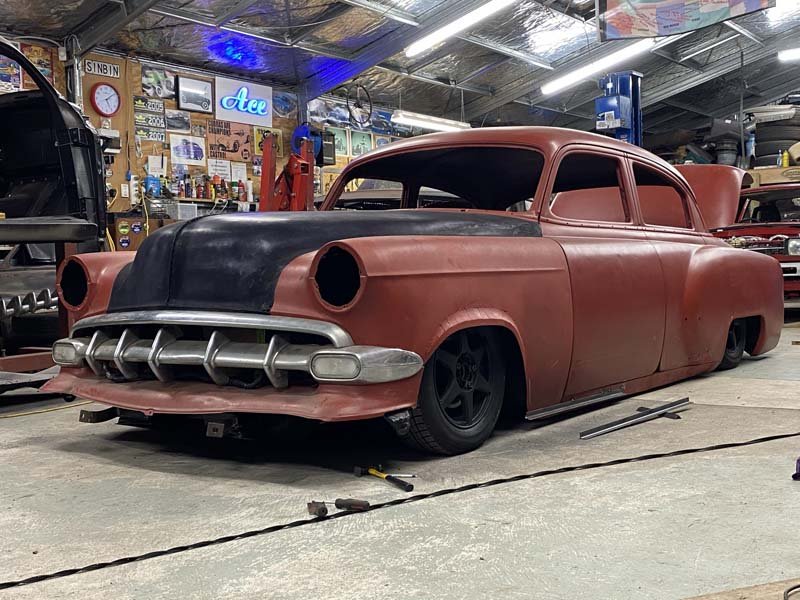
Used some 1/4 inch rod to make a start on a basic hood peak. After stripping it of primer again. The black is CRC aerosol rust kill. Its so easy to use and seems to work really well. Bit the bullet and put the sabre saw through the fender, to try and create some more wheel clearance. After some pondering I bluffed my way through filling it in. Sprayed some primer over it, temporarily to see how it went. And pretty happy with the result. Its not perfect. Like the rest of the car. But its not terrible.
1 point
-
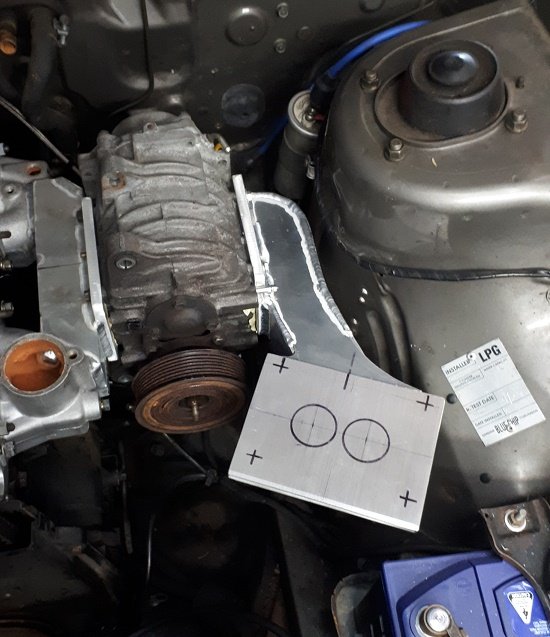
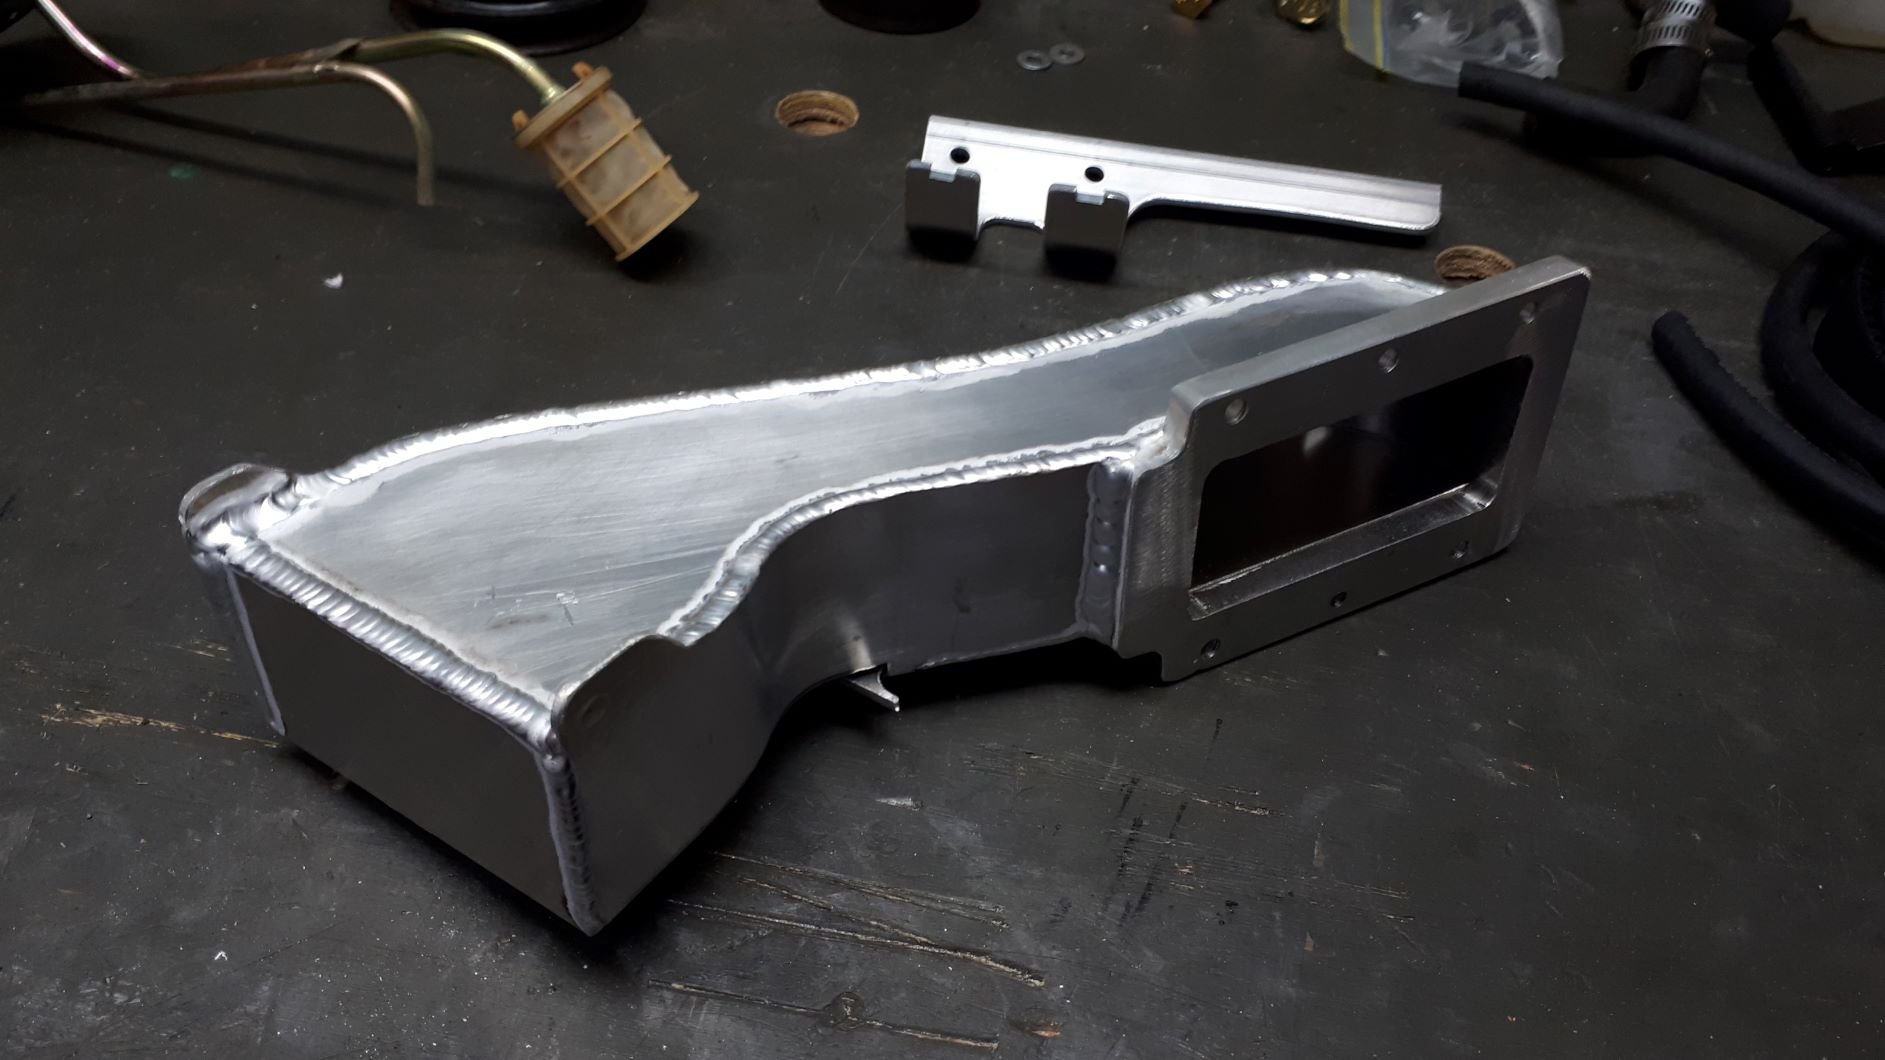
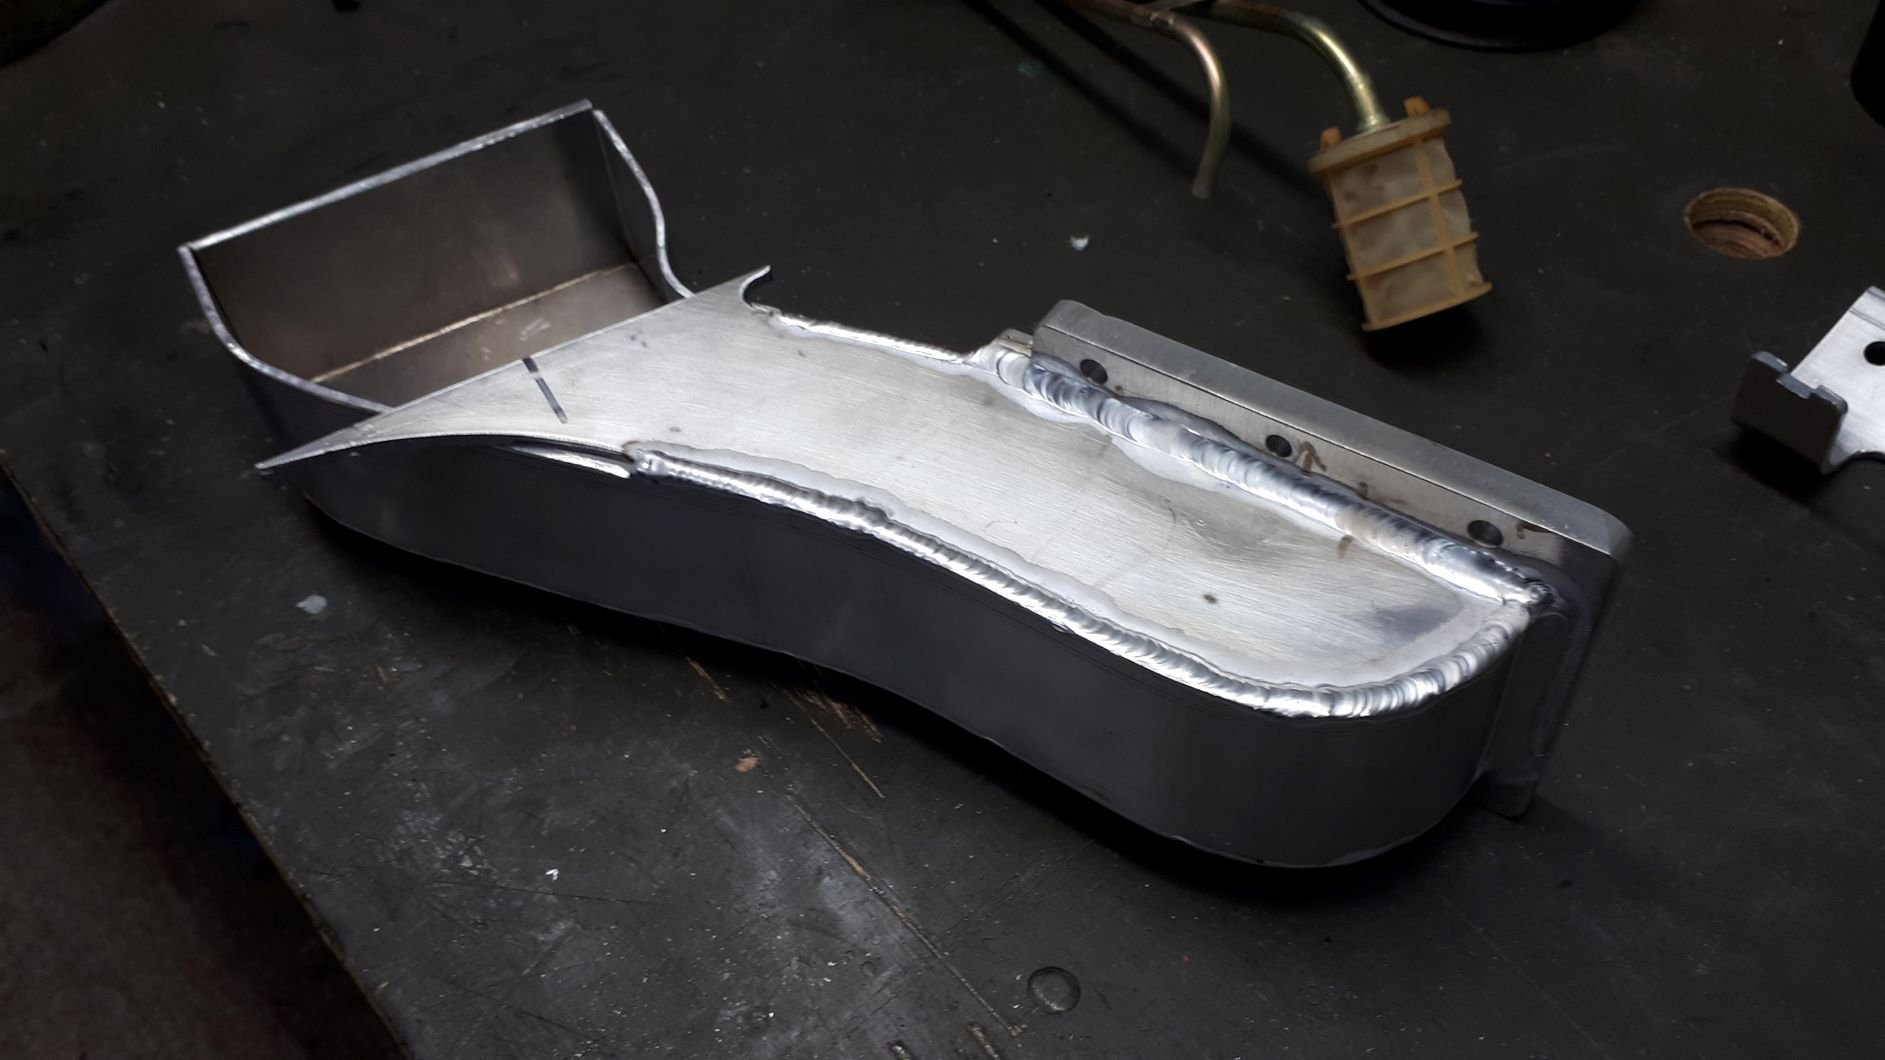
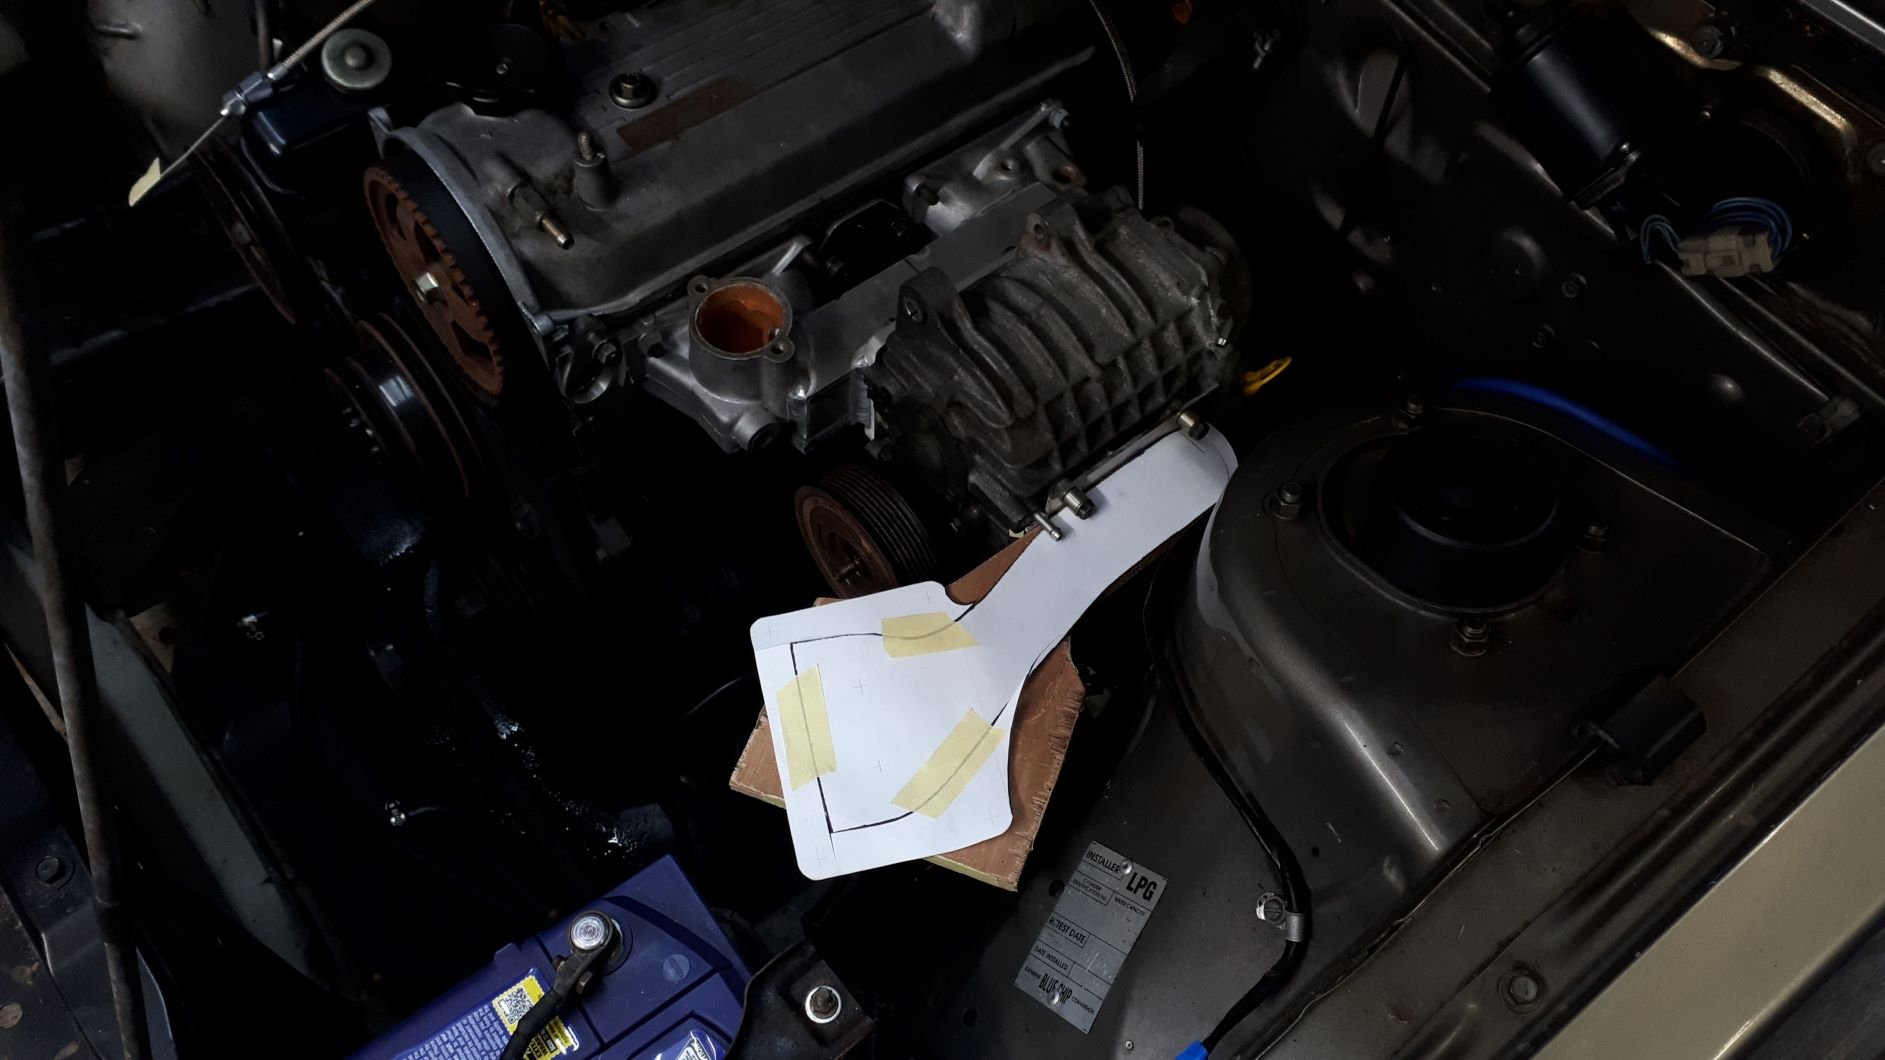
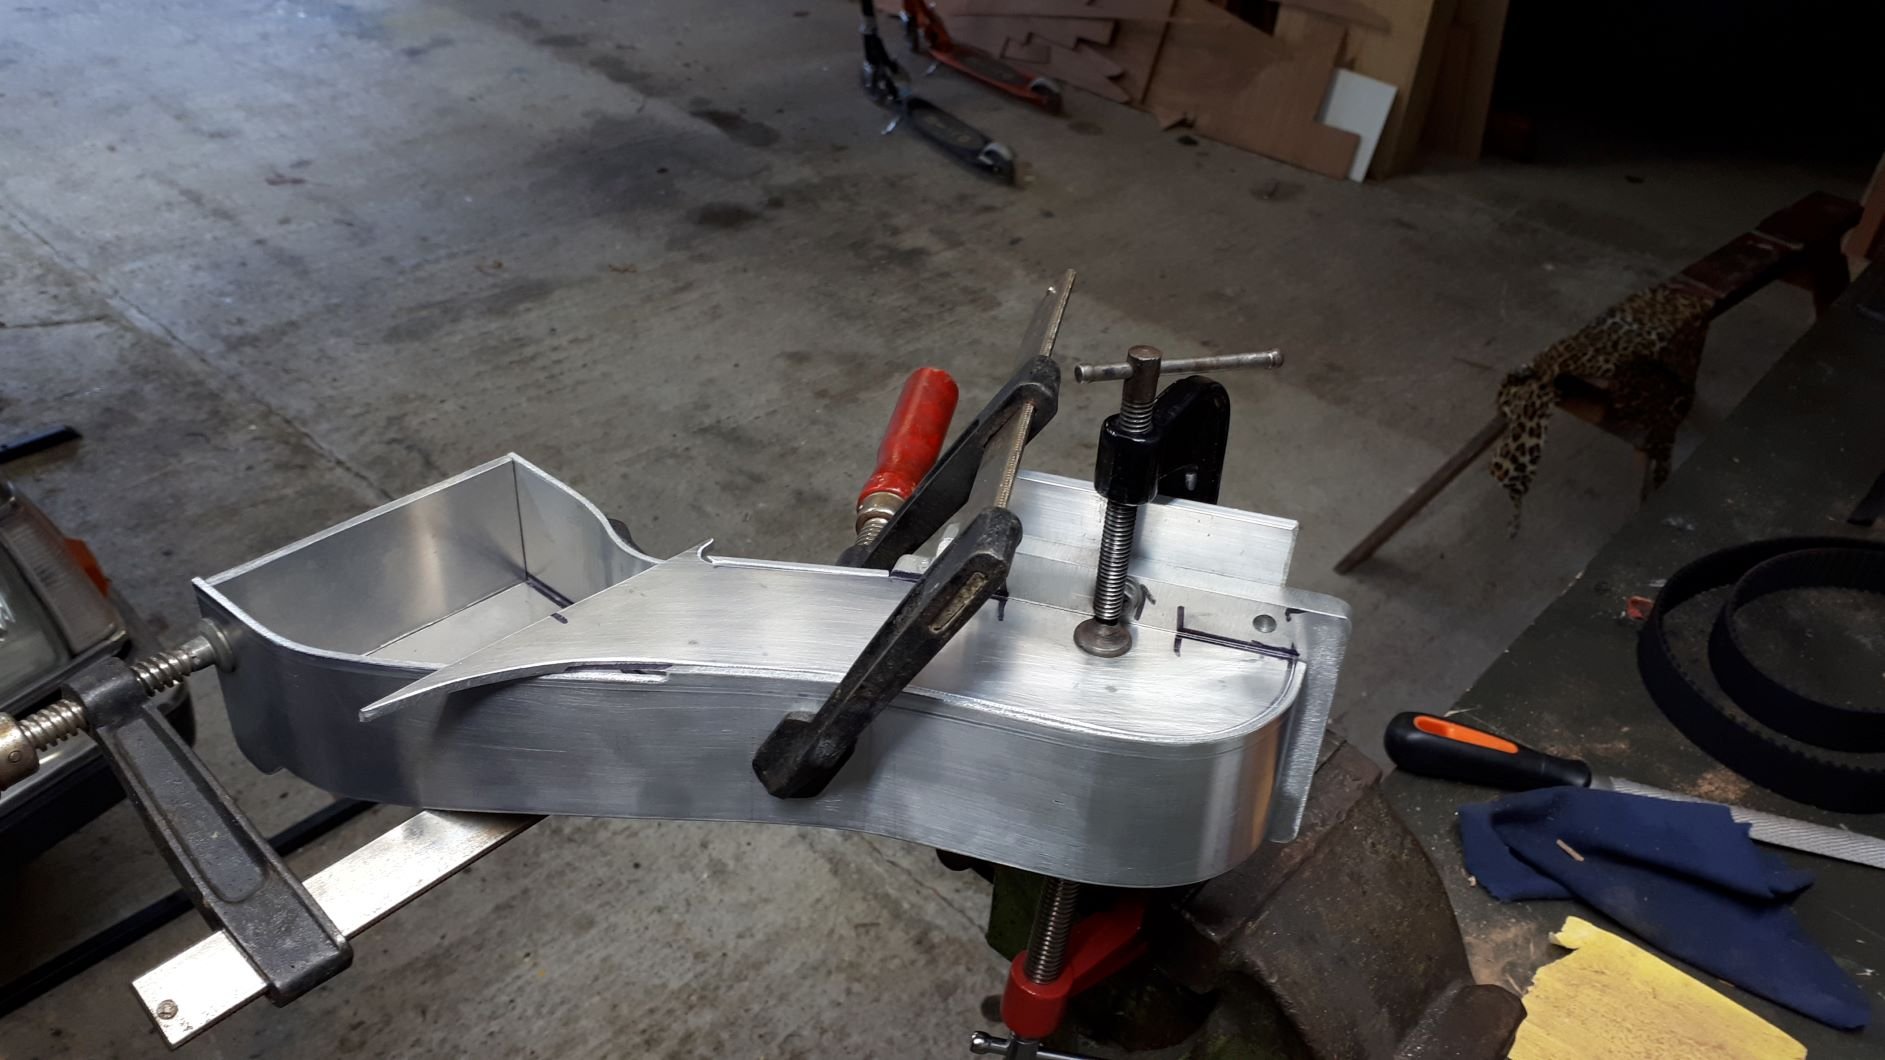
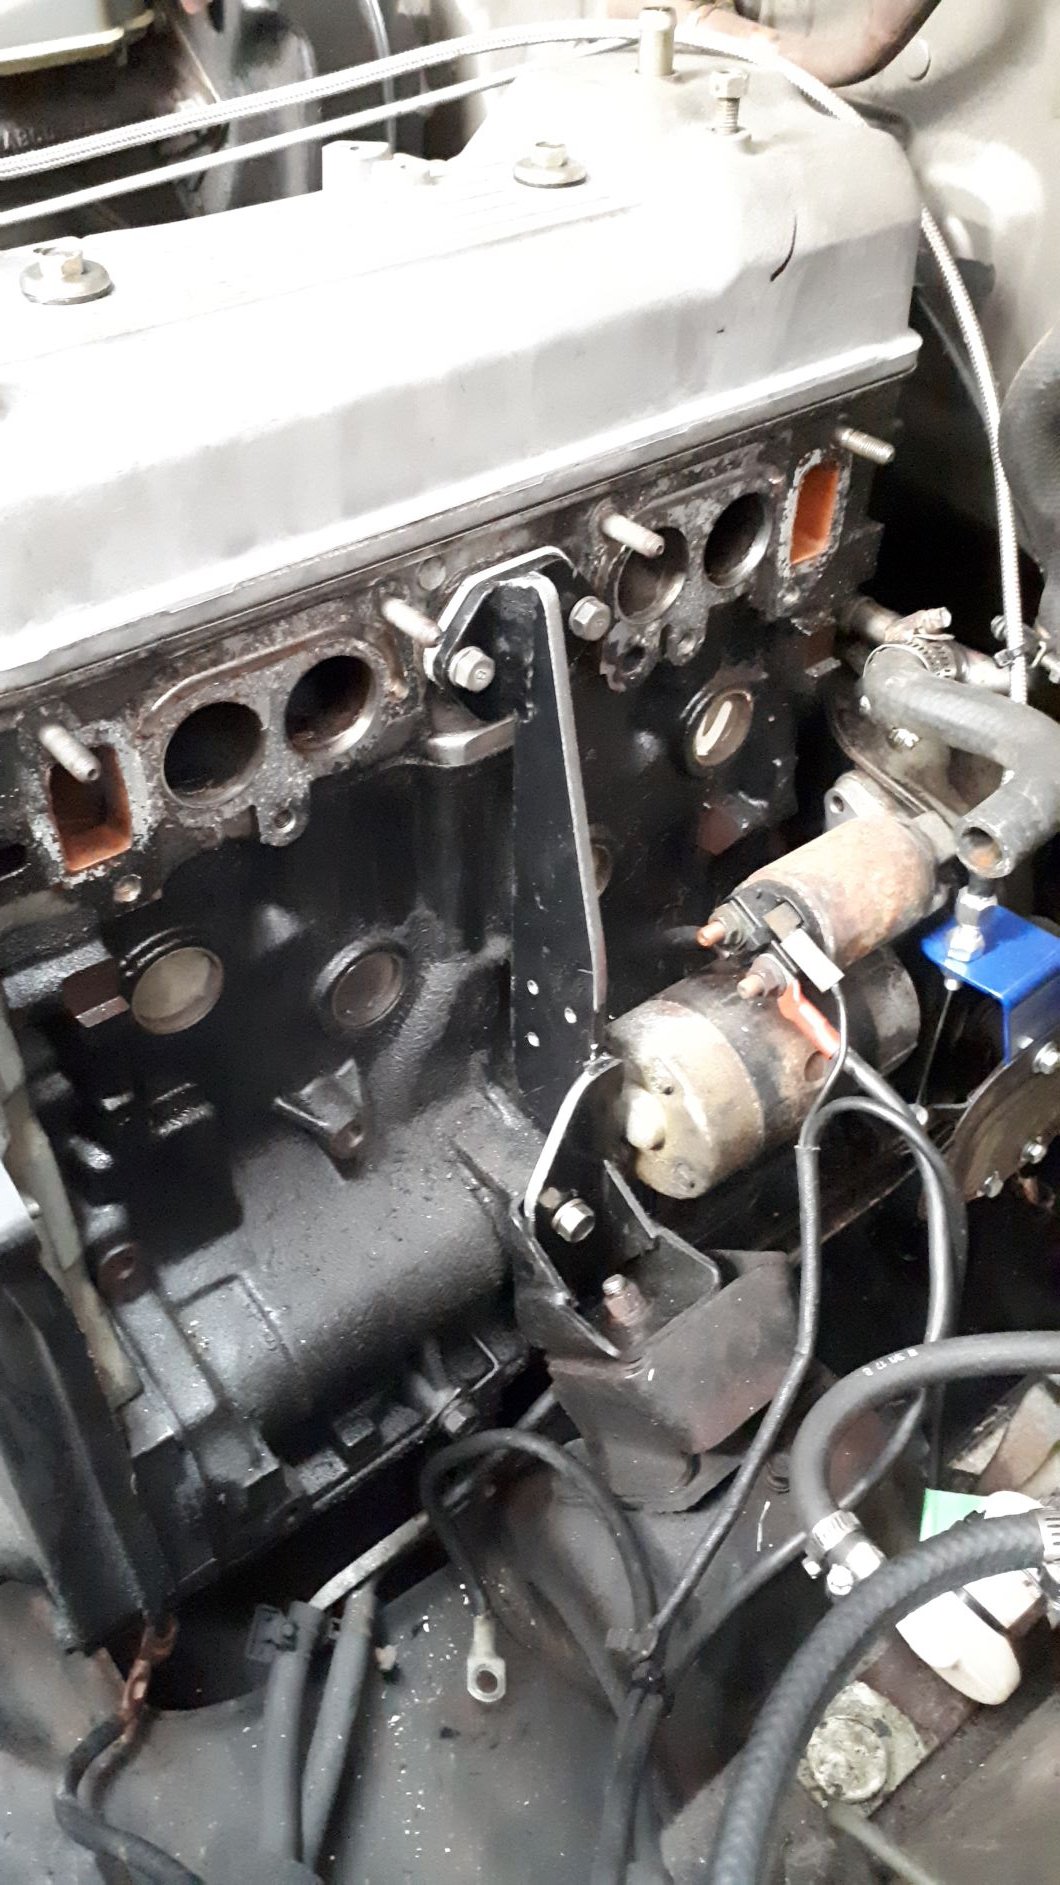
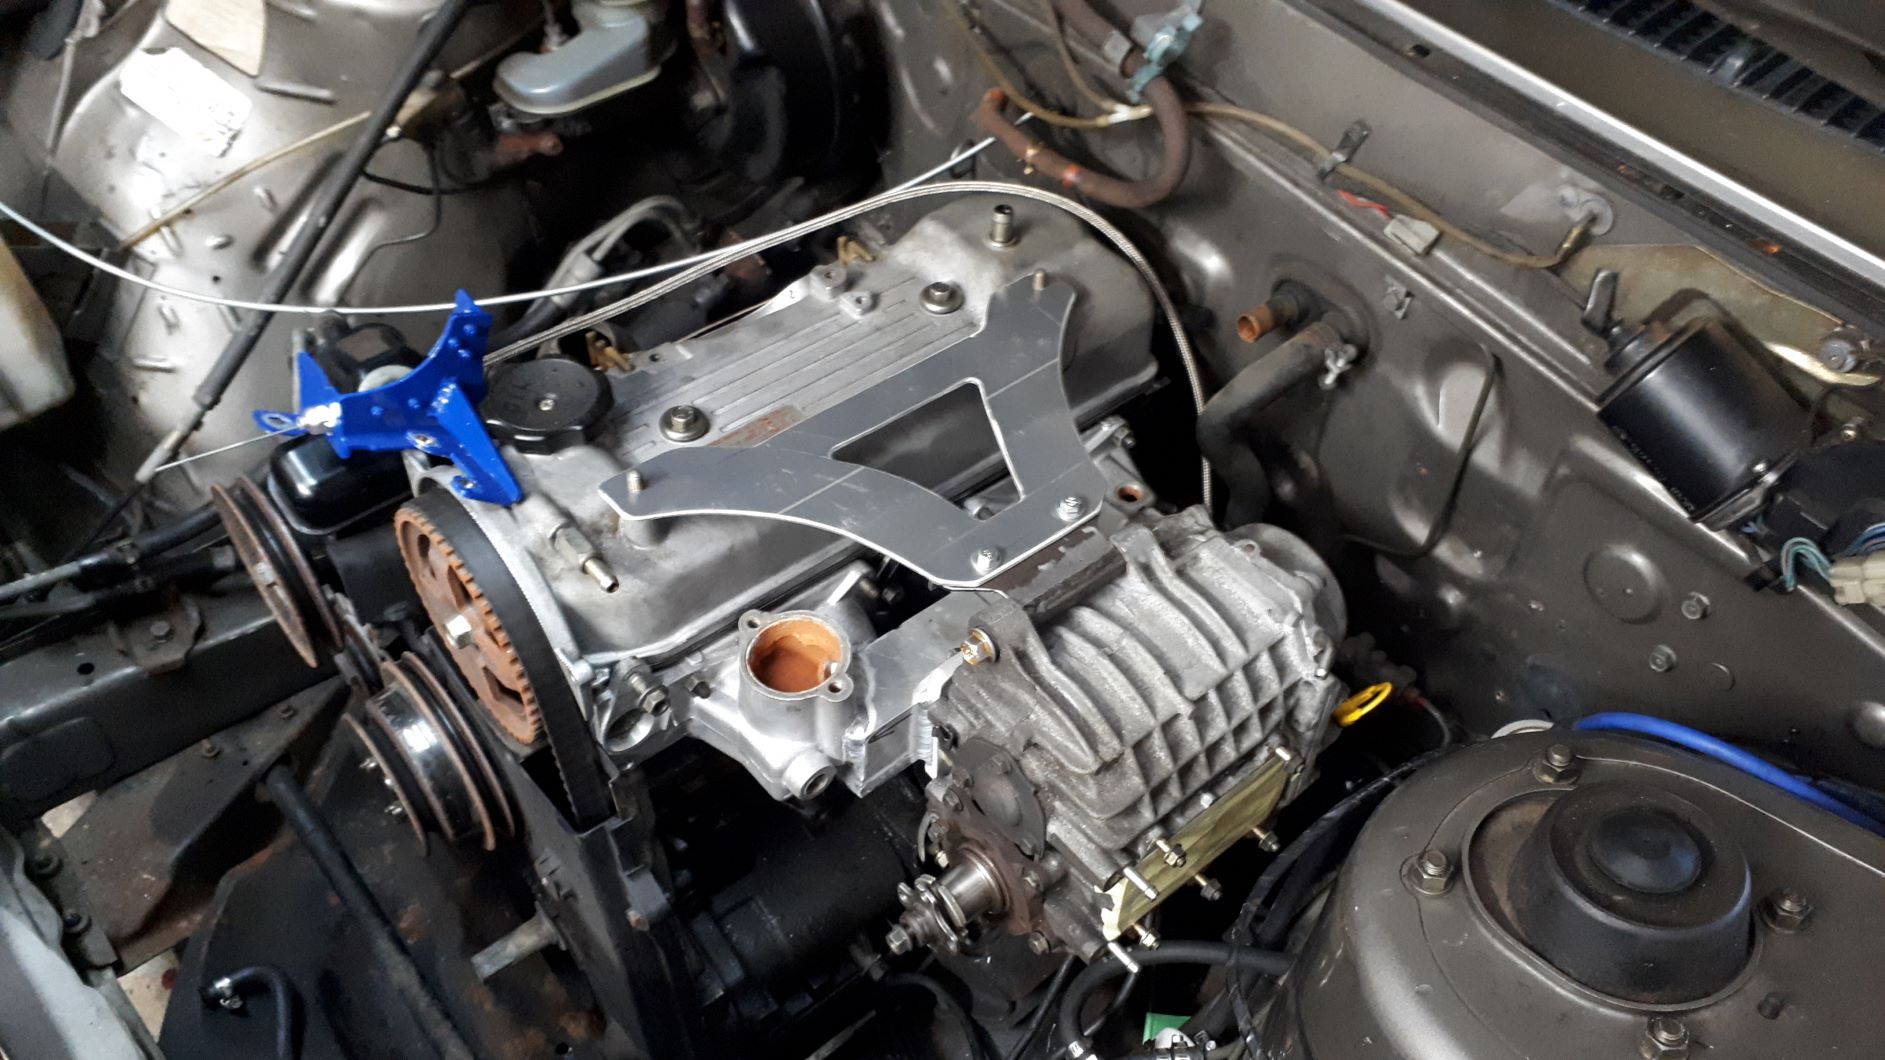
The next challenge is to figure out how to get the fuel/air from the fuel delivery device to the supercharger. Space is kind of tight so I decided to build a manifold that comes forward of the supercharger otherwise I will be cutting a hole in the bonnet. After a lot of head scratching and mocking up with paper, cardboard and plywood I arrived at this solution. Shaping the metal is a real challenge but it is coming together alright. I started to make the flange for mounting the carb but I ran out of weekend before I got very far. It will be kind of large to accept a Holley 2300 flange but I am sure I will be able to trim it down when I have the exact position of the carburettor sorted out.
1 point
-
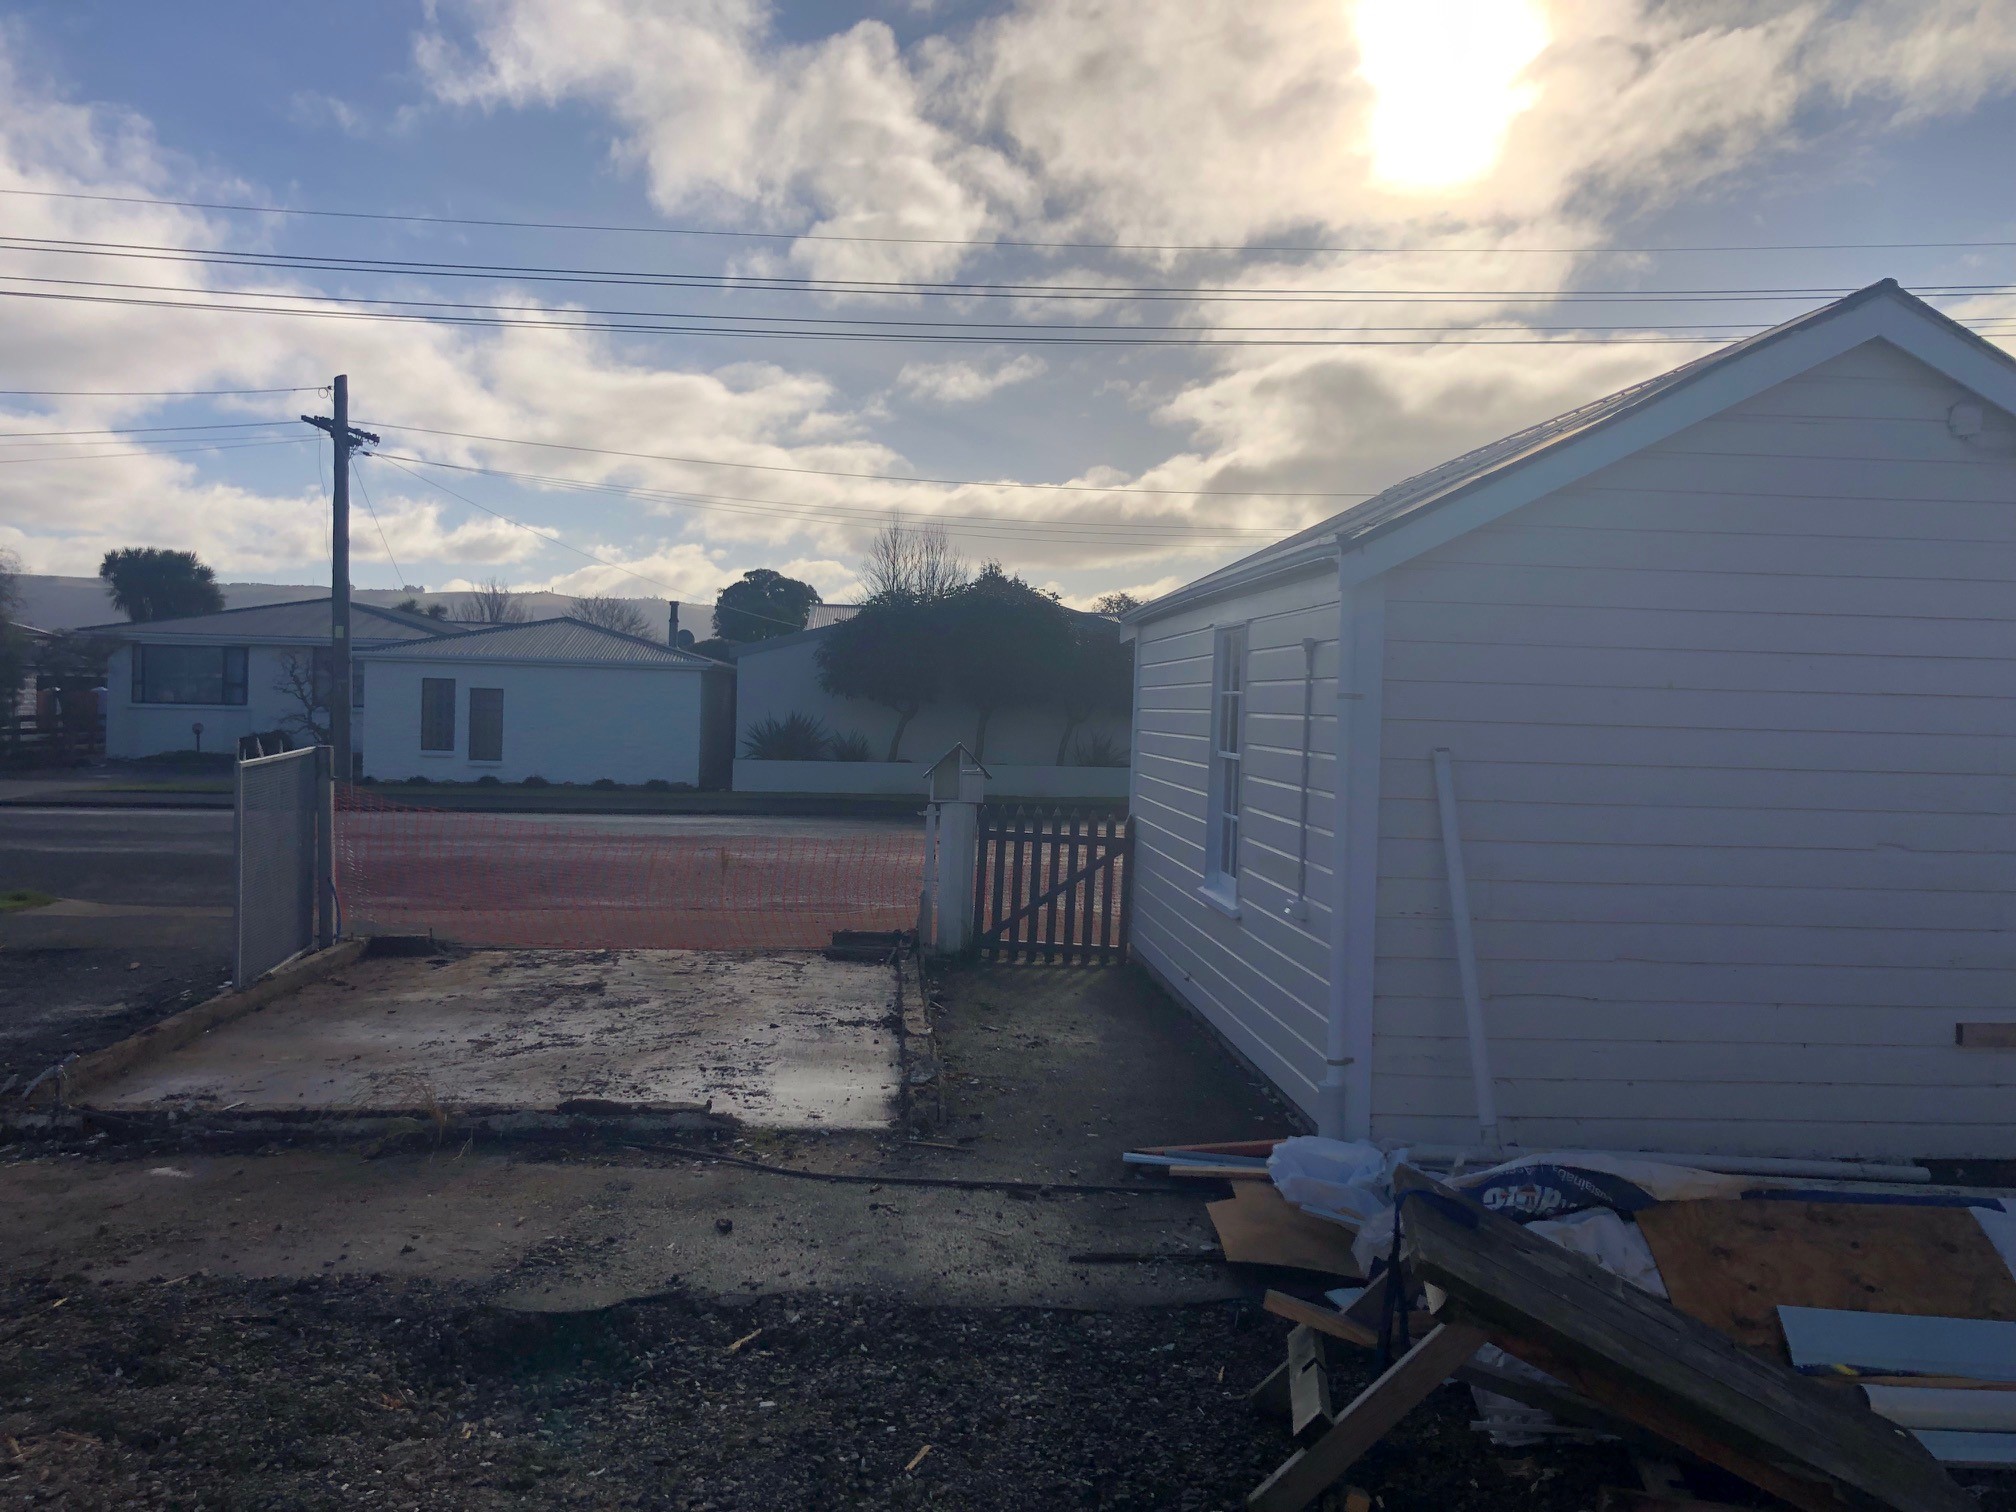
Pic updates, jib done. Painters should be here next week. Also kerb/channel will be done and the nib walls on the old shed can be removed, then can get some new seal down.
1 point
-
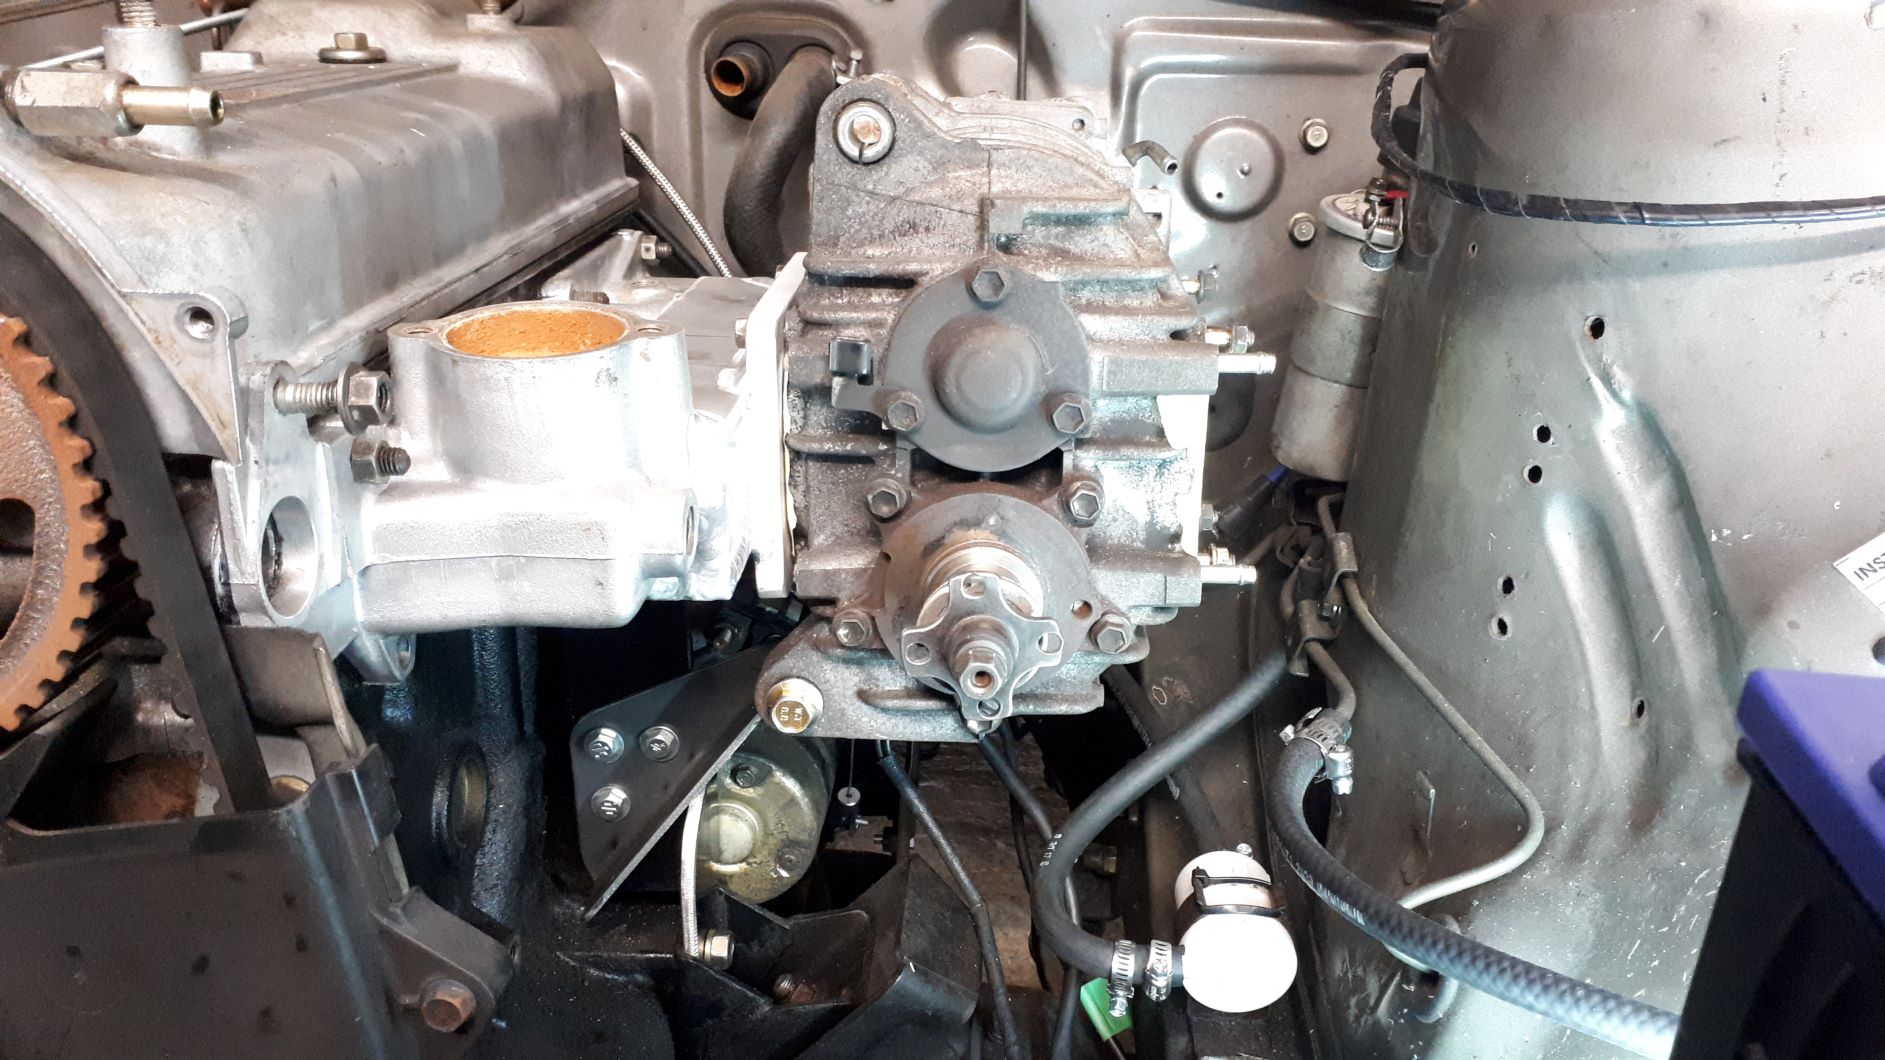
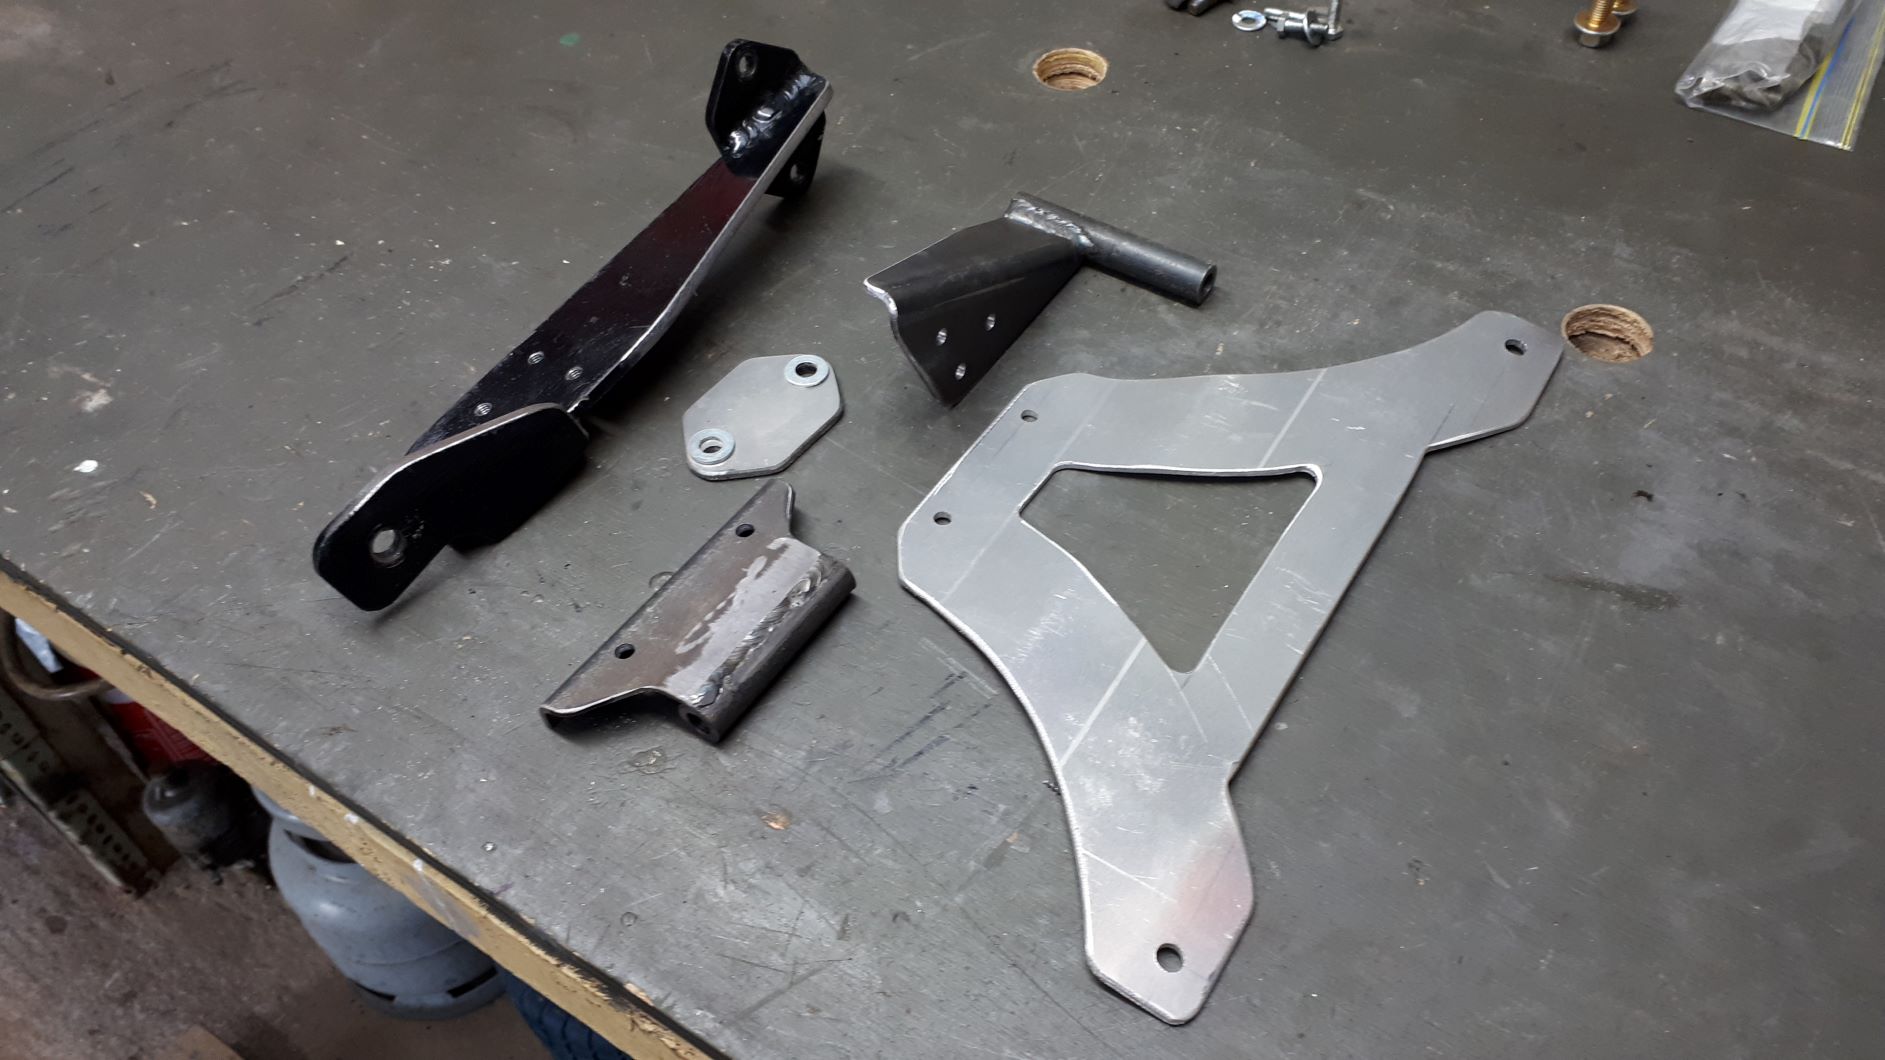
This weekend has been all about making some brackets so the supercharger isn't just dangling off the manifold. I am going to use an electric fuel pump so I decided to repurpose the fuel pump mounting location and made a bracket to support the lower supercharger mount. The upper mount is fastened back to a couple of studs on the engine that used to support the air filter assembly, I hope this is strong enough but didn't really have a lot of other options for this one.
1 point
-
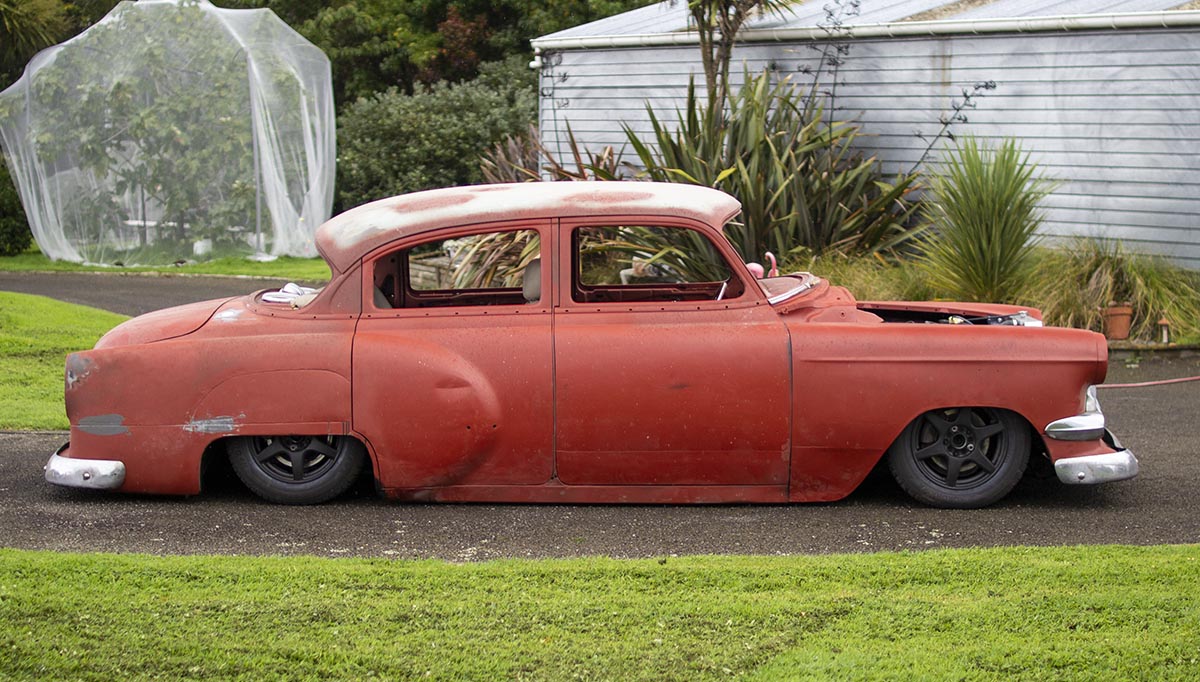
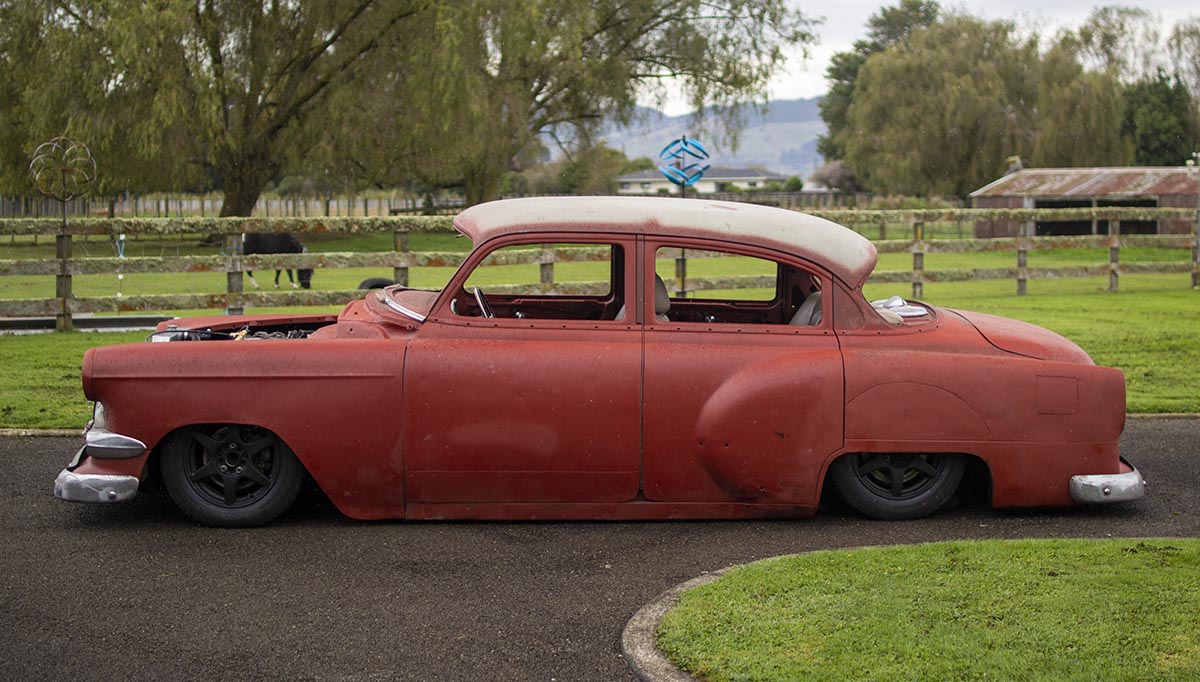
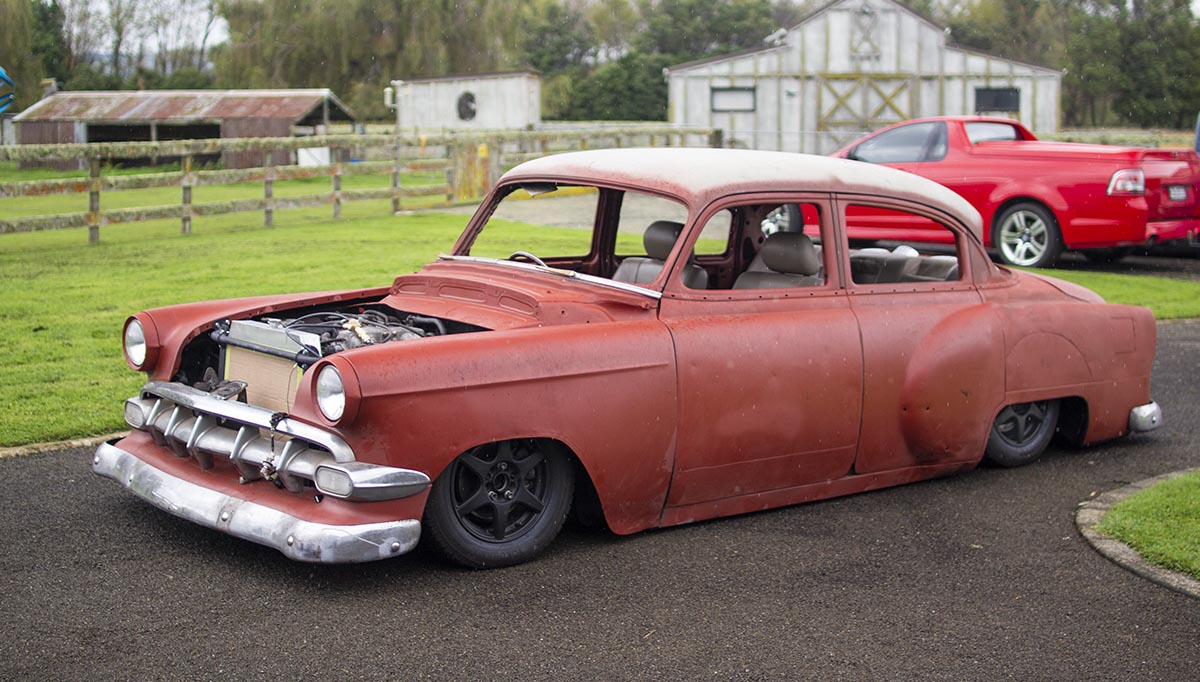
Finished and loaded up. Probably the most expensive and elaborate way to lower an El Camino! Looks like we'll see how good these bump stops are!1 point
-
Are you talking about just using the lap part only? Not the shoulder belts/ball squasher? That wouldn't be legal either as a belt has to be used as a set. I had a quick look for lever latch style belts if that's the look you are after but couldnt find any with a standard marking Your other potential problem is there is a rule to do with lap belts in the front of cars, post 55 should be lap and diagonal, apart from the vehicles that meet the requirements for not having to have an upper anchorage . One of those exemptions is, in some cases, a car can retain it's original lap belts if they are in good condition, but as soon as you fit a replacement belt then it has to be lap and diagonal. Have had that come up a few times where someone with a mustang or camaro thinks they are doing the right thing by fitting nice new lap belts but that tips it into needing upper anchorages fitting and cert1 point
-
FYI Moondiscs are coming soon.
1 point


.thumb.jpeg.384ff72c8d2b0ee0d34a7bdedb55bdcf.jpeg)
.thumb.jpeg.e0a4bff61111e0c8c7396950fcc94da1.jpeg)


This leaderboard is set to Auckland/GMT+12:00