
Leaderboard


Popular Content
Showing content with the highest reputation on 05/16/21 in all areas
-
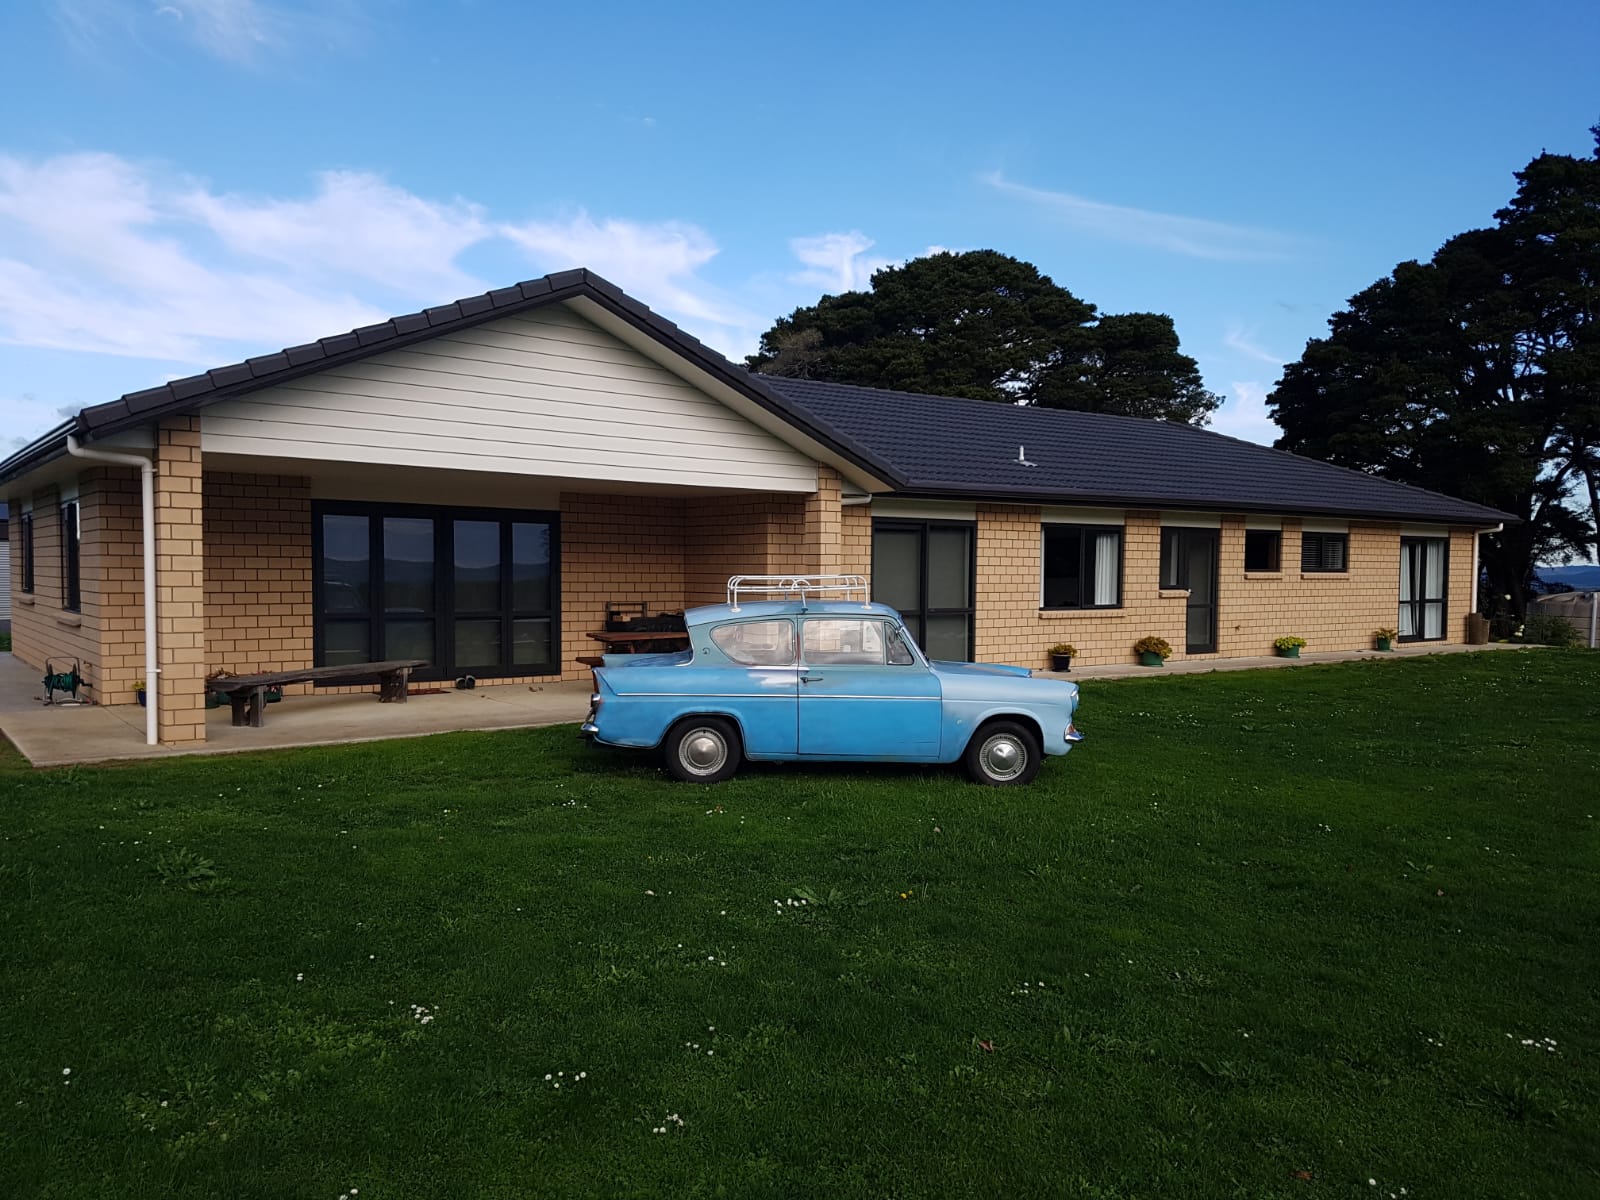
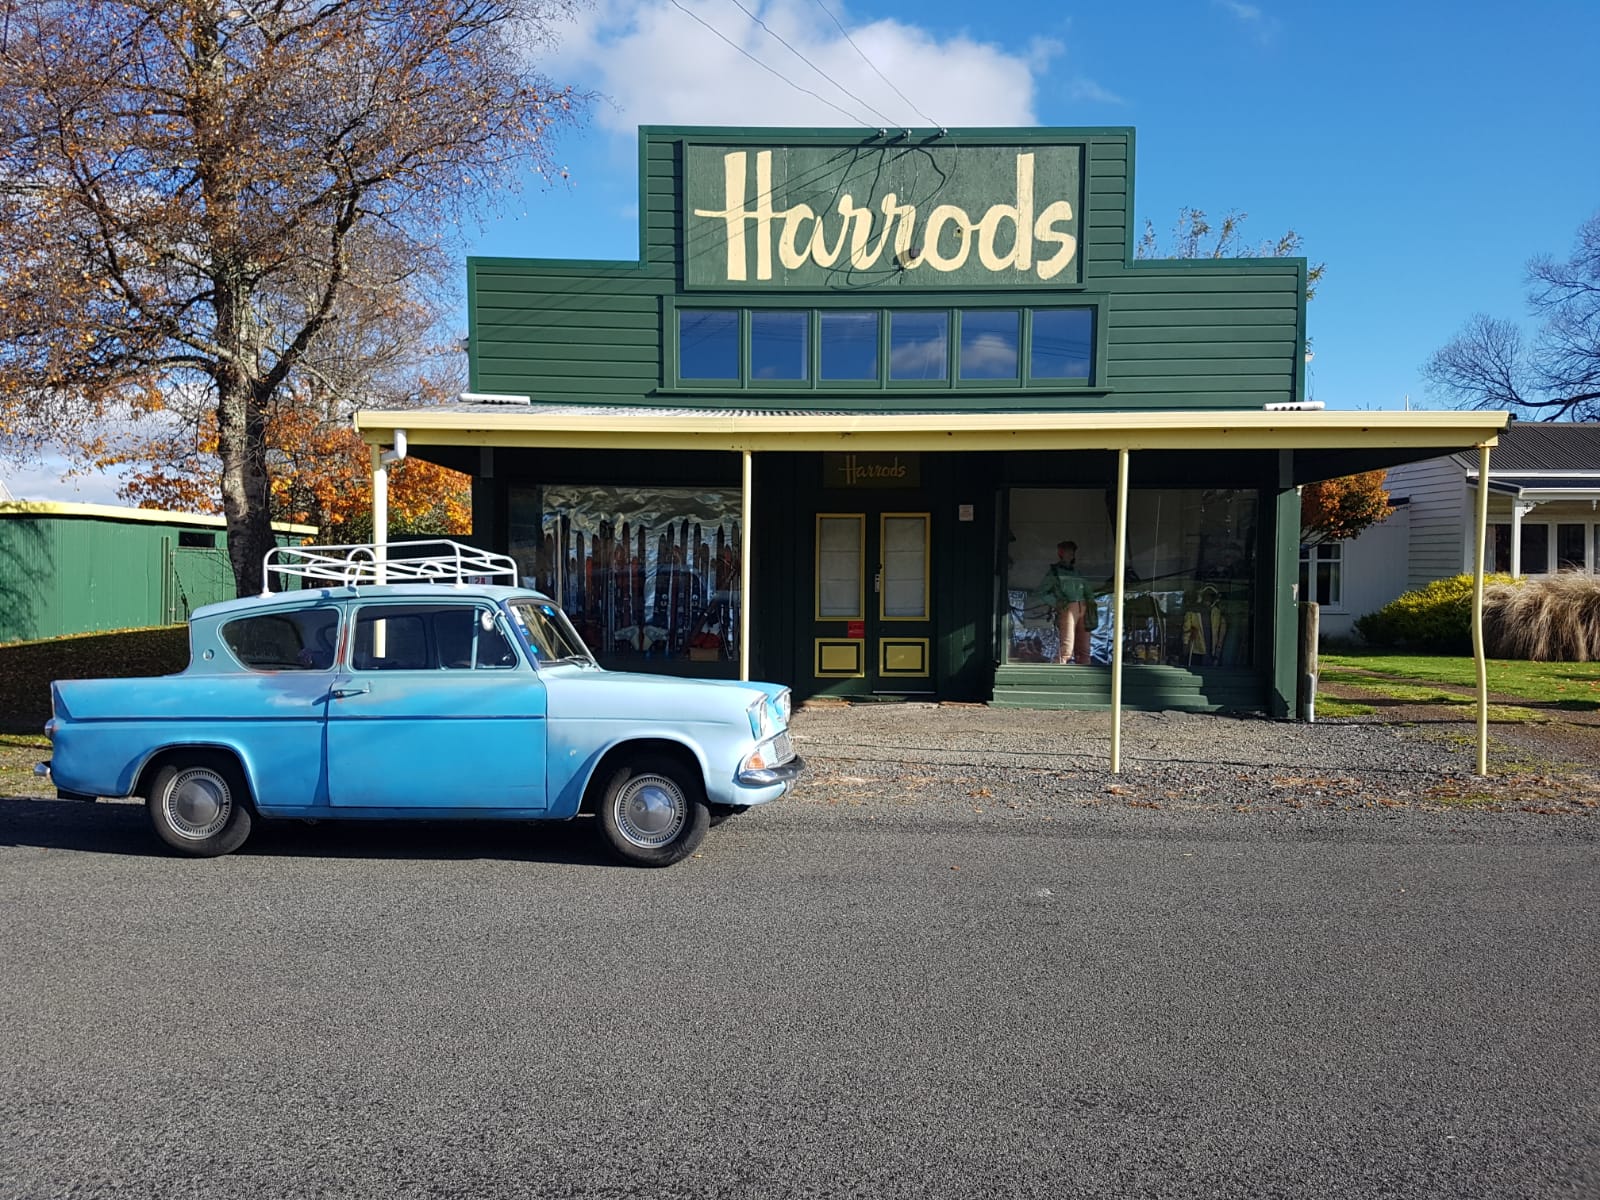
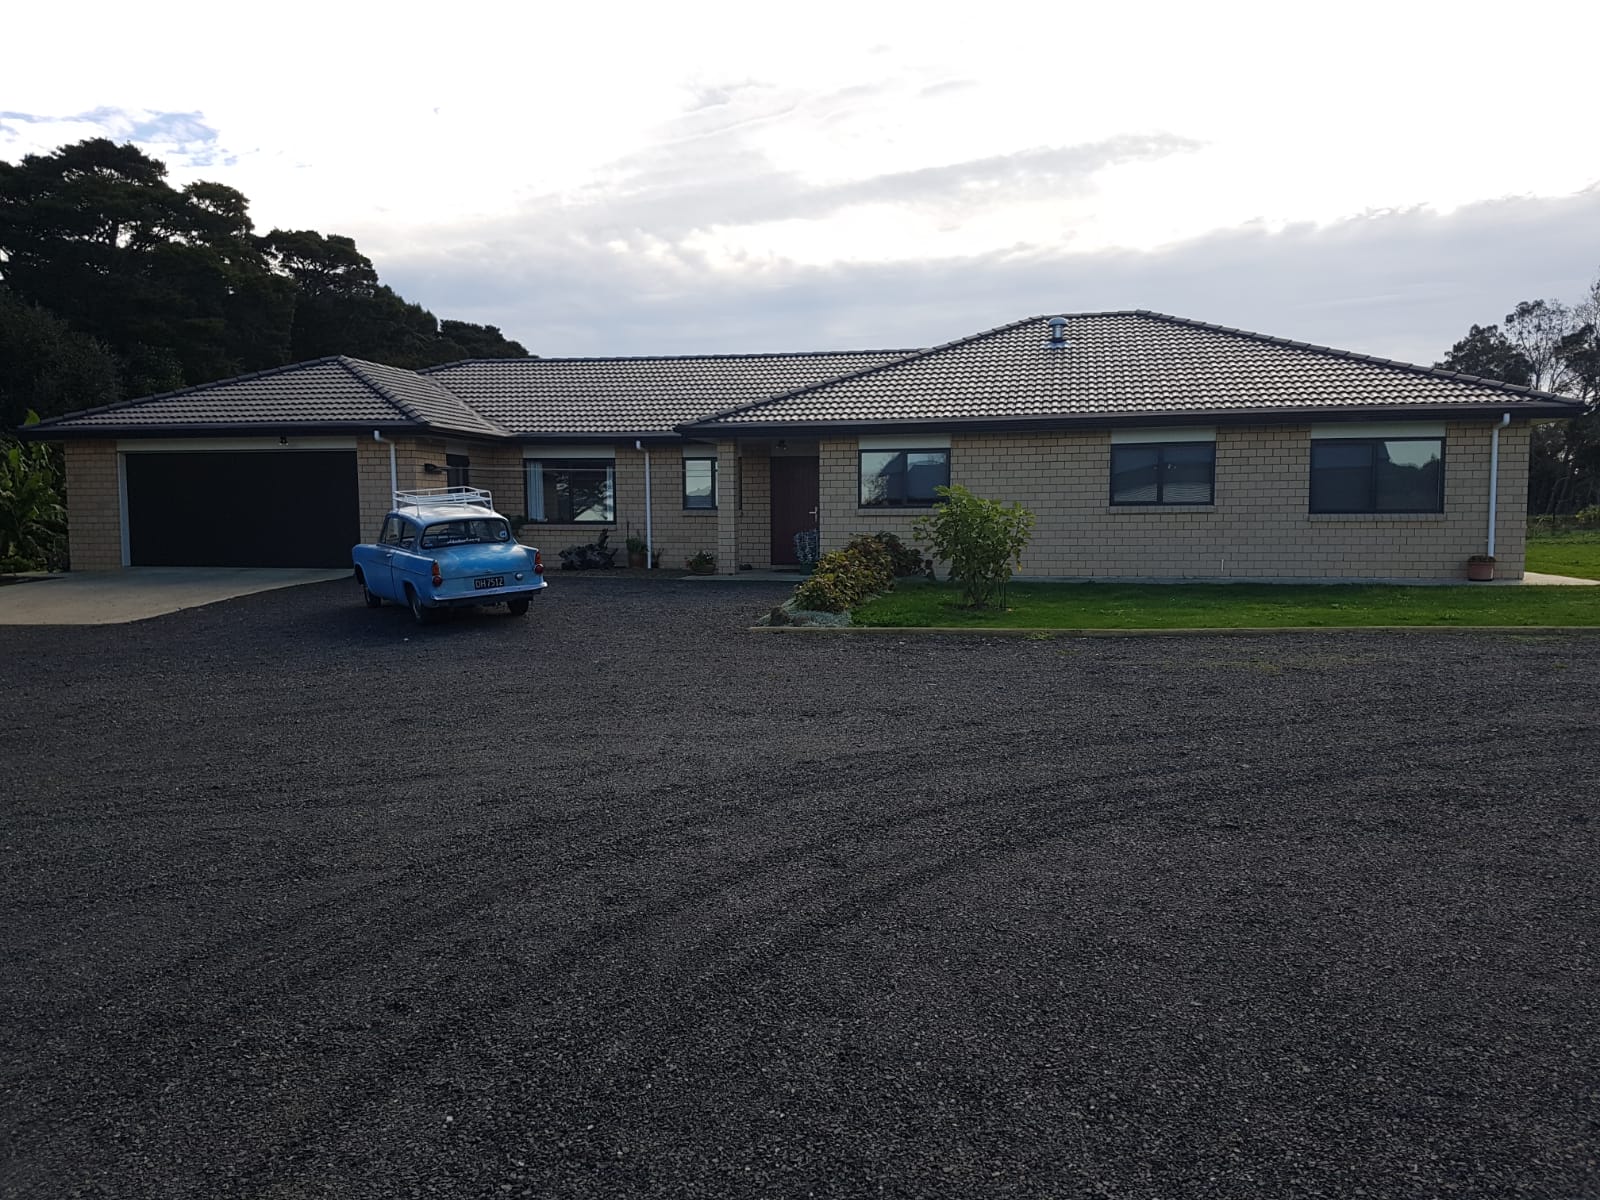
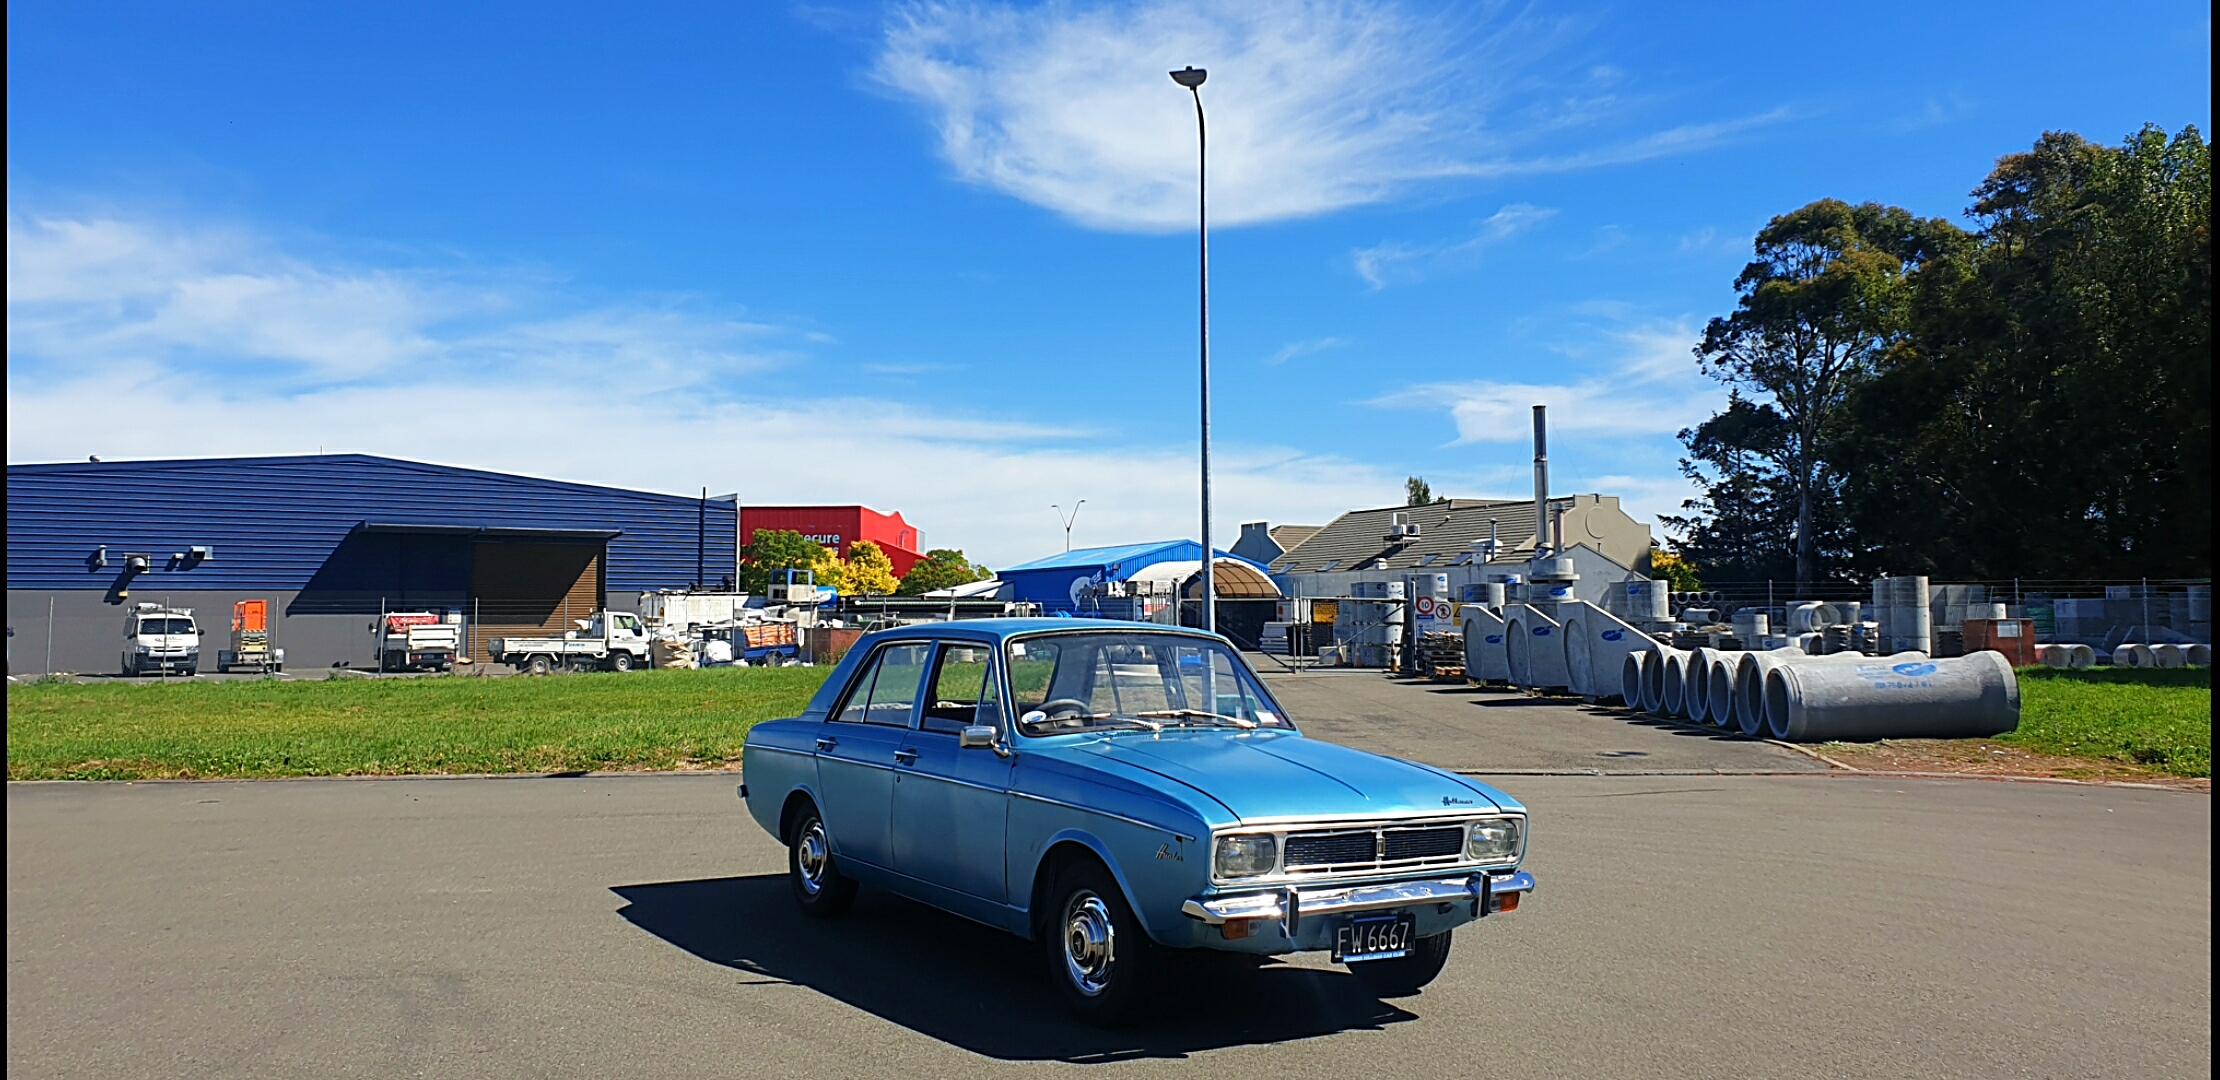
went for a cruze. it was great. 2021-05-16_03-06-24 by sheepers, on Flickr17 points
-
Okey dokey, because its a bit rainy and glum outside we are chilling out inside and enjoying just lazying back in the comfy sofas and cosiness of our new pad. I have just taken some pics of the kitchen (some of which show off my superb culinary skills at the fine art of perfecting toast) Here is pretty much the most essential culinary toasting device... and a most essential coffee thing... The serving hatch (is that the correct name?) needed a nice surround. Remember that lovely bit of acacia timber we found in our pile of rimu? Well it was perfect for the job and looks sweet... Still loads to do but its now a nice usable kitchen and way bigger than any van/truck kitchen we've had before. We'll make a roll out pantry to fit beside the fridge, yet to be bought. Cupboards and drawers are the next thing to build though. The doorway, kitchen closed off... Whole lot opened up.. Looking down the hallway, bedroom door on the left... Super happy with the door, another bargain from a recycling centre. This one I have mounted on rollers and it opens into a hollow wall... I have ensured that there was enough storage space above the bedroom roof to fit a Lancia Stratos windscreen for my planned future dream LMP styled sportscar build. I can get a screen now and store it up there. This I see is a sort of way to commit myself to actually building said car (but a fair way in time before I can start that) Currently there is a Bedford TK headlining stashed up there - not really quite as exciting as a Stratos screen.... We also need to build a toilet setup in the space here. Will be a small vented composting setup which will mainly be there for emergencies/night time use because the existing outdoor bathroom is working so well.16 points
-
Since the last update work had continued making the studio area a bit more finished looking. Boxed in the ugly steel framework and finished the ceilings. This really made the place feel more like a house and less like a shed... Few more little bits to add, trims around the chimney. Really looking forward to selecting paint colours and getting some colour in there. So we've now moved out of the little cabin and into the workshop mezz. The cabin was getting a bit chilly, the bed a bit tiny now that the cat has decided he wants extra warmth and snuggles in between the pillows. Plus its getting boring walking from the shed after watching a movie, late at night, in the cold or rain, to a cold cabin. So we have continued on at full steam building the frame work and a bedroom. First thing was to suss out the position of the doorway frame before we started the main framework. We rummaged around in one of the woodsheds outside where we had stashed a few old doors. Picked out this one here... We'd bought this and another door for $20 together. Bloody bargain because this door is brand new, never having had any glass fitted nor any door locks or handles. Solid cedar, made in NZ. Would have been an expensive door back in the day... I scribbled some pencil lines on the floor... thus working out where the door would work best because it was going to have three positions it could be left in. Then we started frame work... insulation... Then plywood lining. Now that there was framing in the way we had to get the plywood upstairs another way. We couldn't use the stairway. I knew this was going to be an issue, along with future furniture, fridges, ovens, pianos etc. I allowed for it like this... Sorted I didn't take any pics of the plywood going up onto the walls but you can probably use your imagination. I had an idea on how to frame up and hide the steel framework in the bedroom and also set the drawers in under the kitchen benches so that way we had maximum amount of bedroom space around the bed. Its not a large bedroom but big enough to sleep in! Pretty nice to finally have a bedroom you can stand up in. Opulence for a couple who have been living in vans/housetrucks/cabins for the last 20 years. Bedroom aint finished yet but works. Rimu trims to add, wardrobe to build and some bedside shelves/cabinets. But Kevin loves it and its his go to place to feel all snug. It has a cat door the leads from the kitchen into here, past his doorway. A bit of wiring went in to suit various lights, sockets and we had to work out a suitable doorway point for our boss, sir Kevin fluffcat. He likes his new cat door with a plank he has to walk across from the bank outside.. With a cat hole sorted we brought in one of the two stainless benches we had stashed away outside. One bought cheap for $40 and the other gifted to us by a customer. Sensible choice stainless bench and sink. No pissing about. They just work forever. I cut the splashback down removing the bit with two old wall mounted tap holes and then cut a new hole to suit a shiny new mixer tap... The kitchen is almost finished but for drawers and cupboards which we will custom make ourselves to suit. I'll snap some pics of it tomorrow. Damn its nice to make a cup of coffee/cook without going downstairs or up to the cabin. Not long from finishing this project and I can actually hook back into that flat six sitting on the bench under a sheet Whoop. Oh and also I suppose I could do some more actual paid work, which there is quite a long list of jobs from patient customers up on the whiteboard yay. Shed was well utilised over the last two days. There's a Triumph 2500 wagon that's been with us for over 14 months due to covid lockdown among other things stopping the new owner from collecting it. On Thursday four likely lads flew down from Auckland and after two days of solid tinkering, carb fettling, mild levels of bodging and number 8 wire thinking they got the old girl on the road and took off today to drive back to Auckland. The movie theatre got utilised last night with many old car adverts and classic racecar youtube clips being watched. Fun times.12 points
-
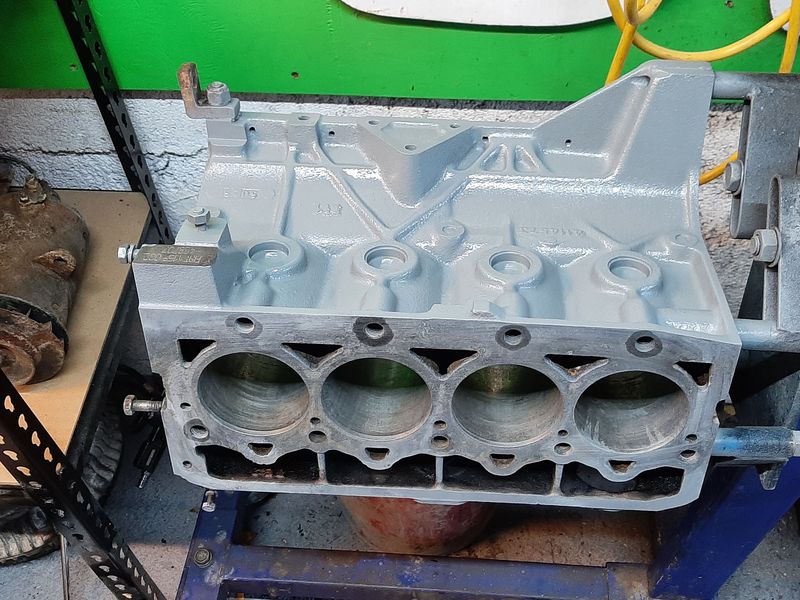
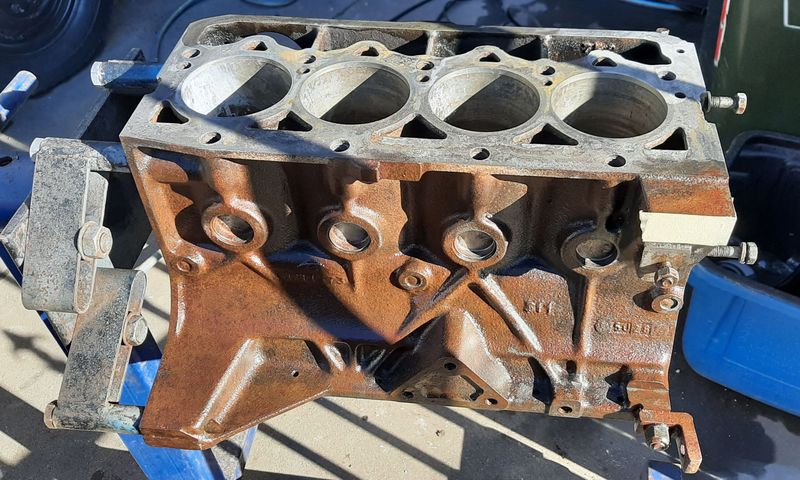
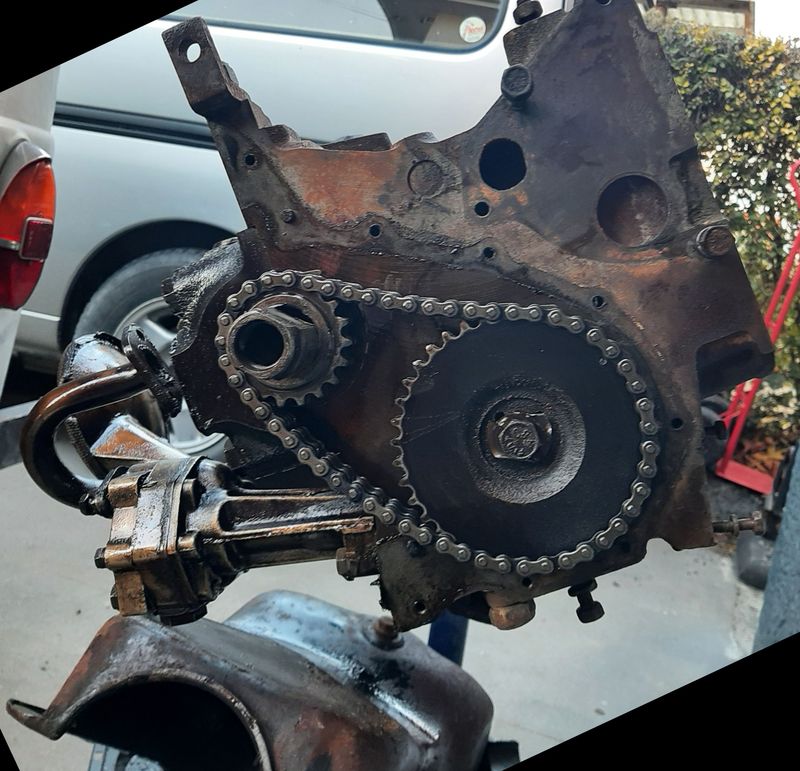
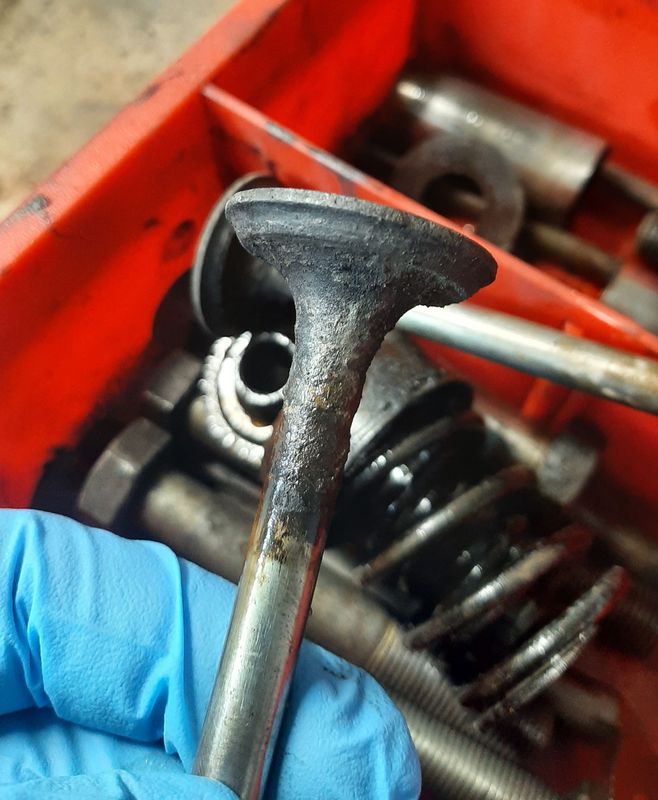
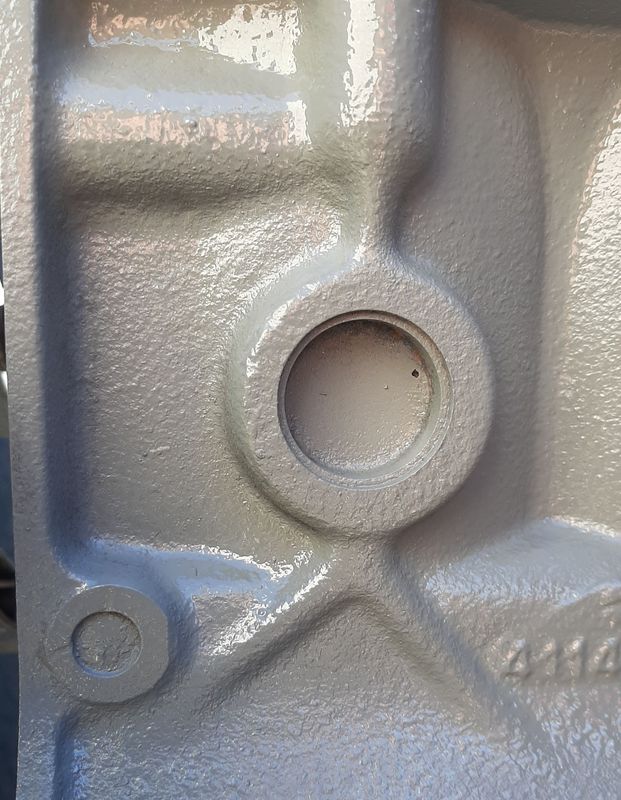
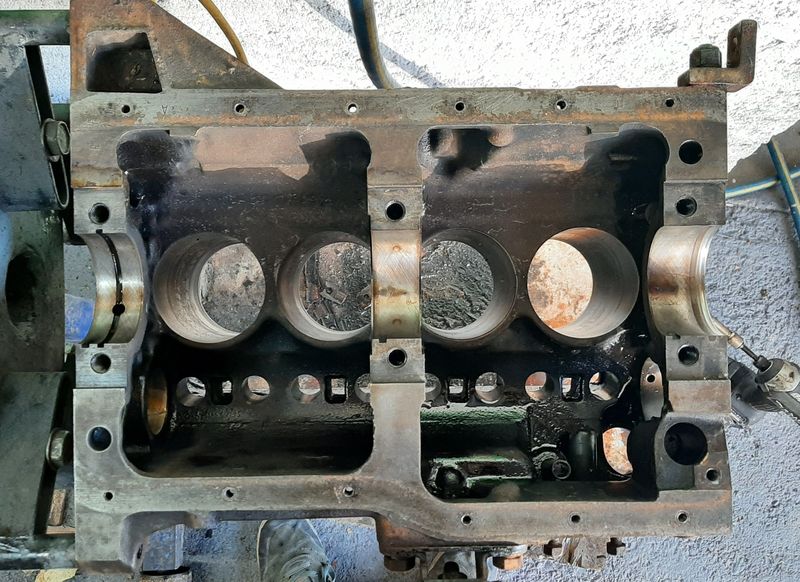
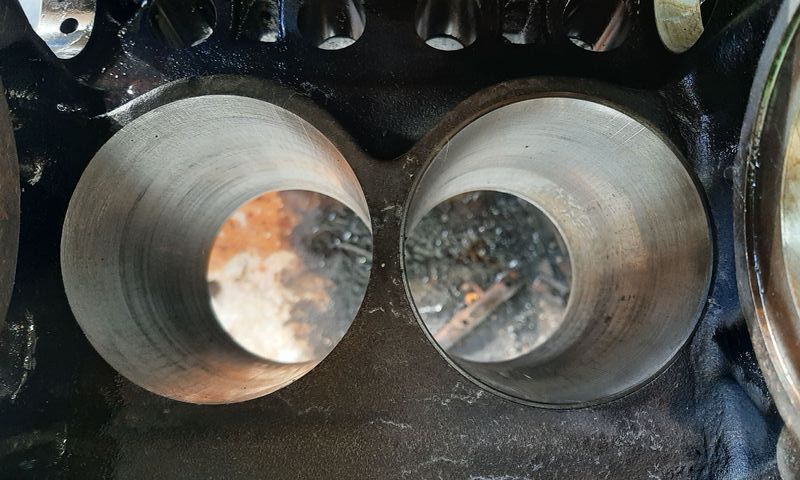
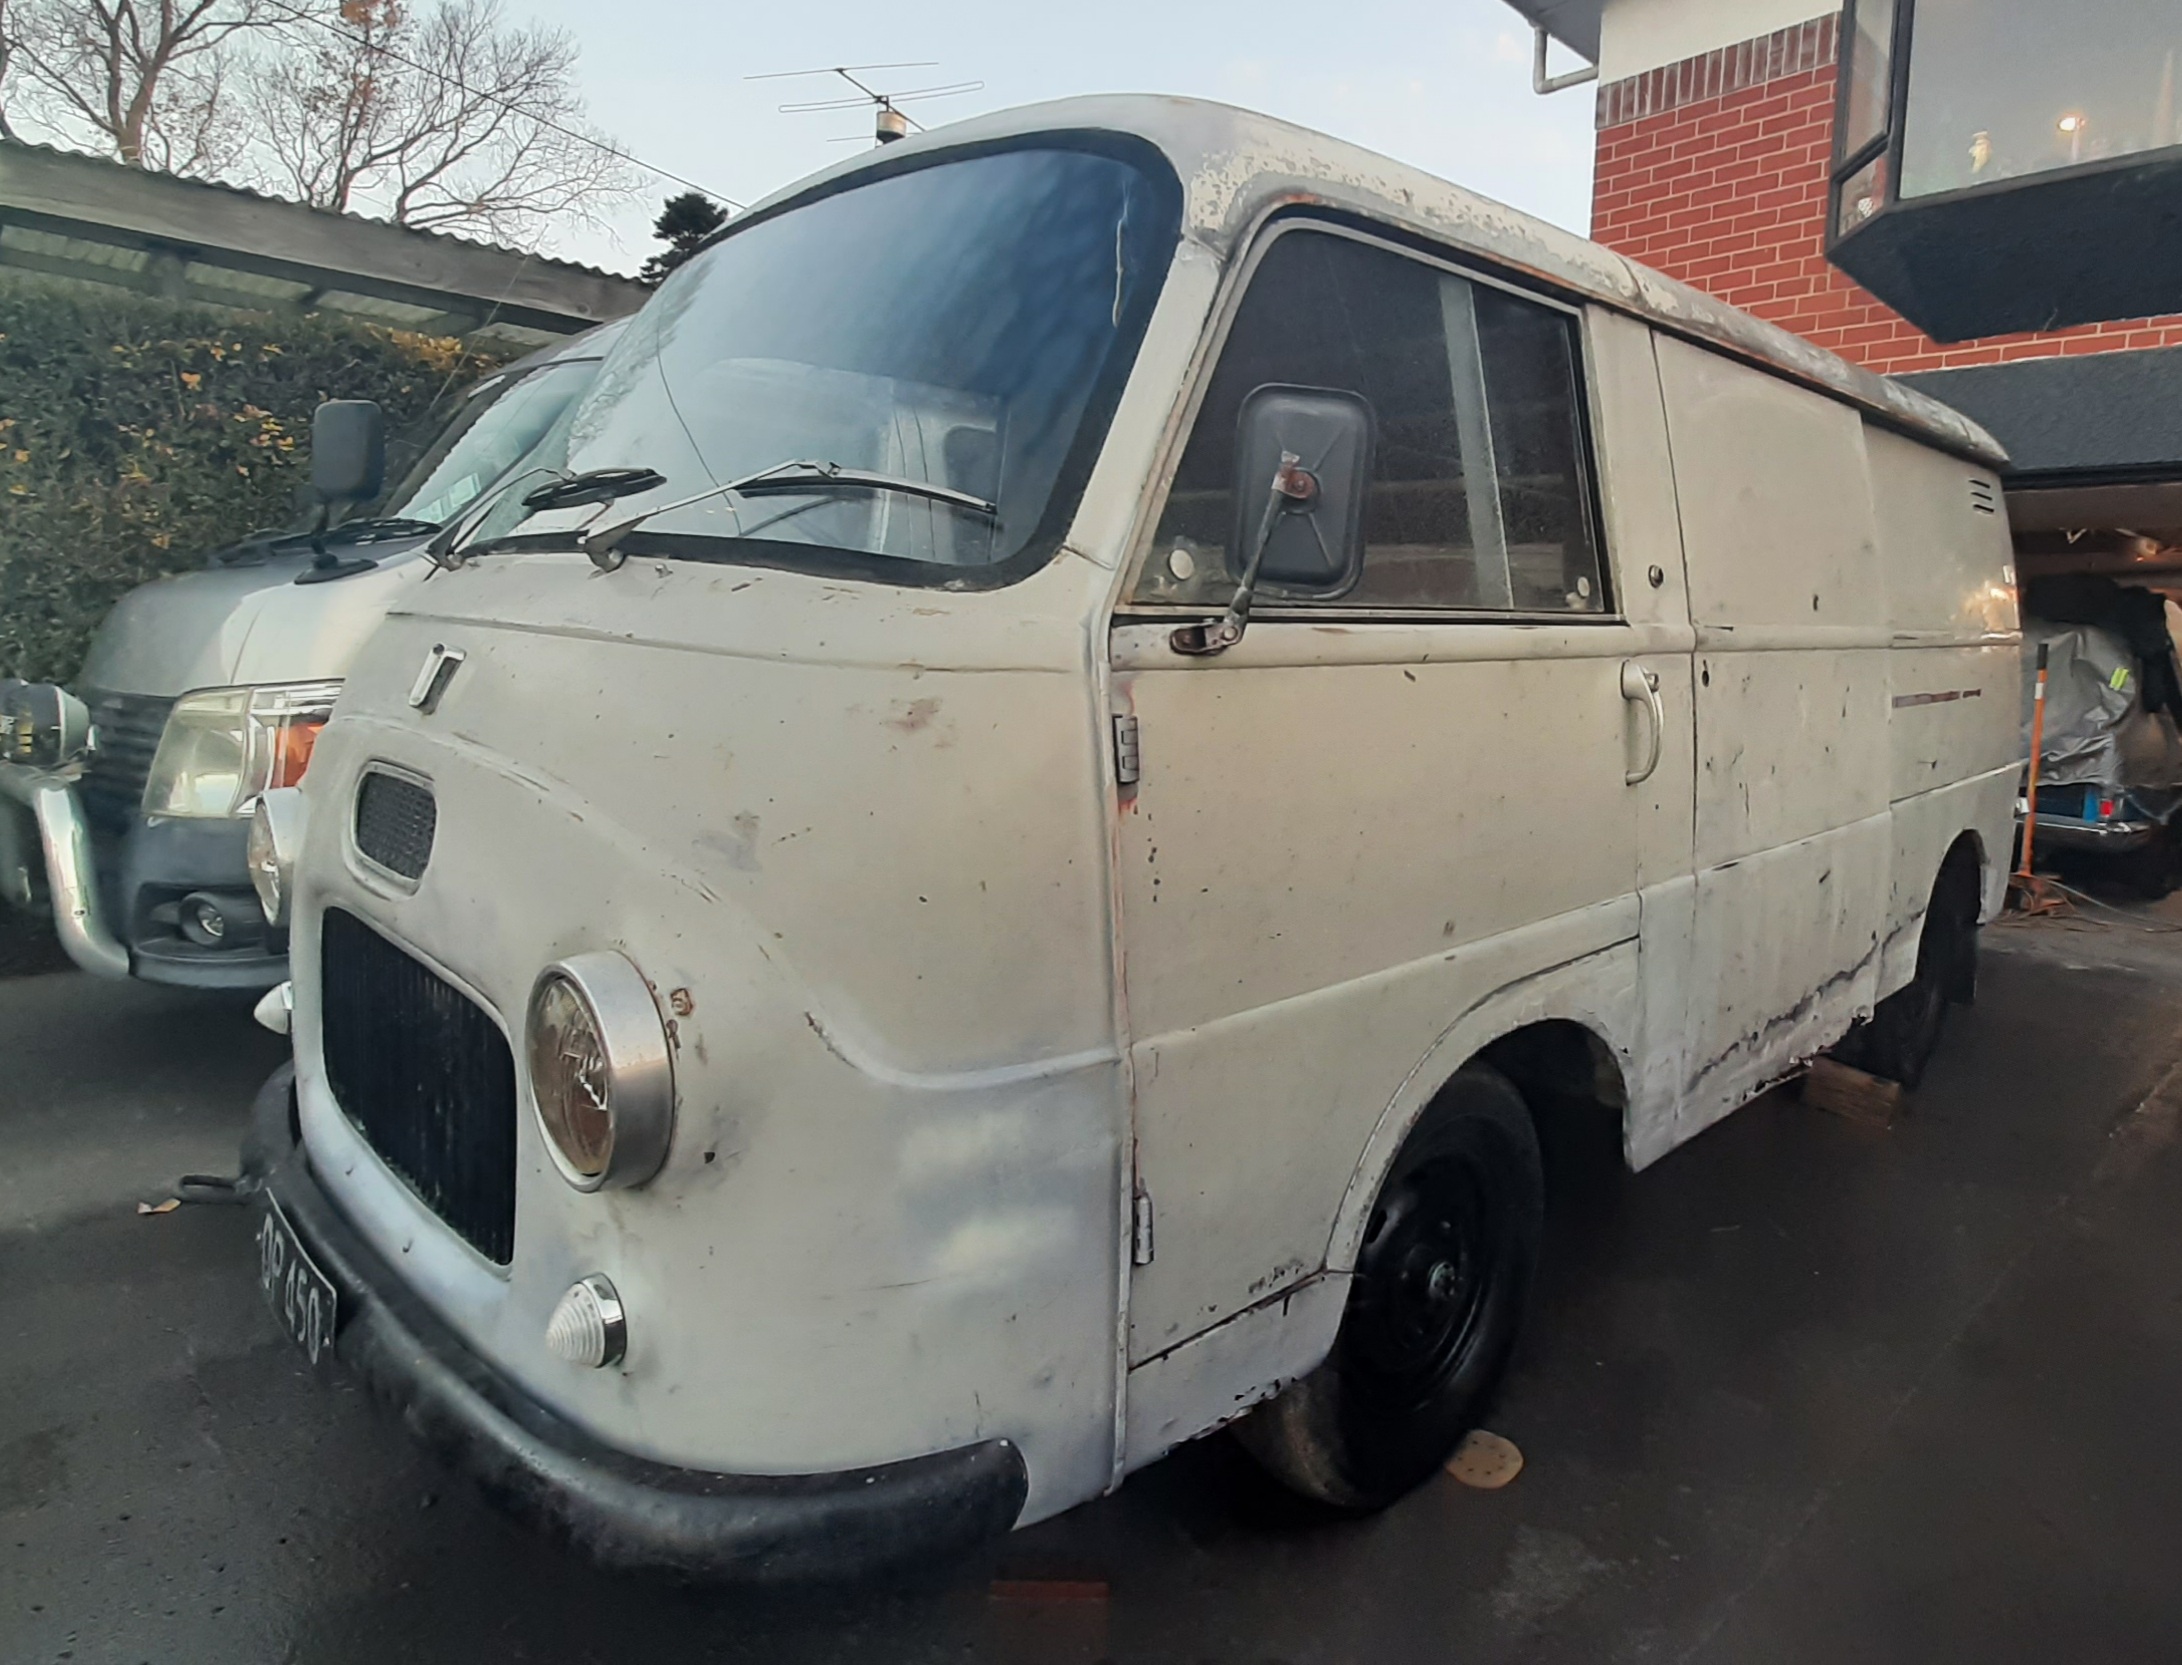
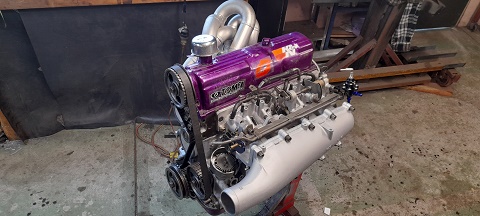
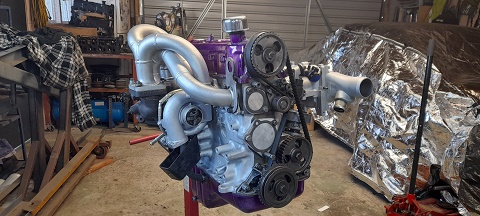
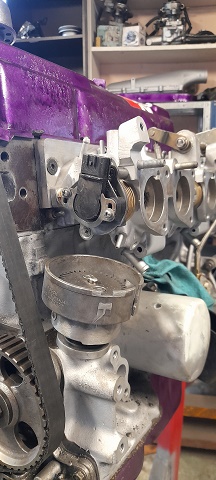
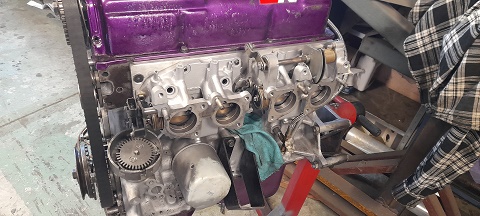
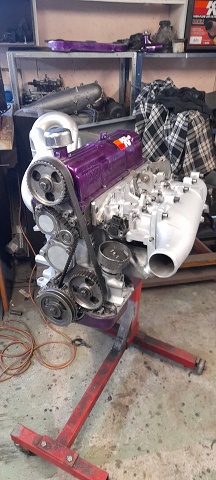
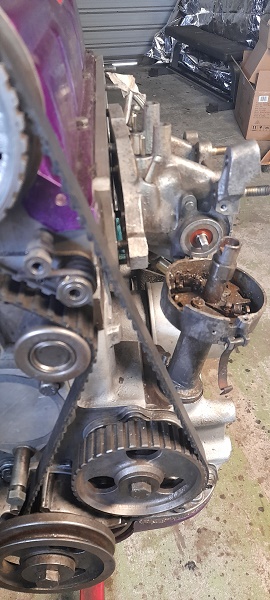
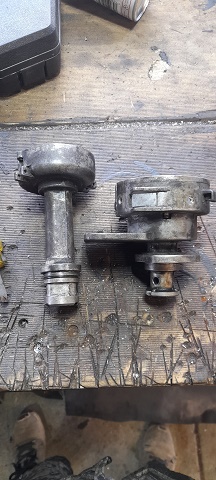
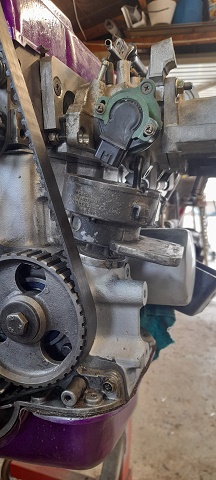
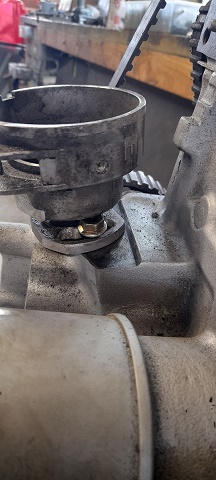
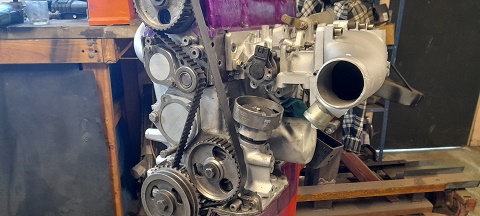
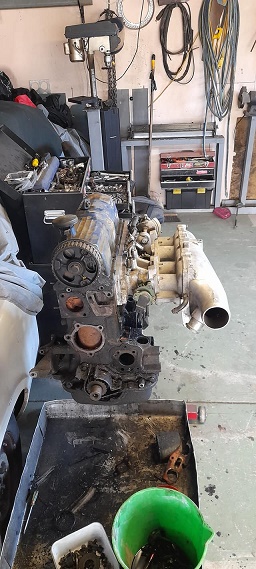
Disassembled the engine a bit more using the lights in a garage after work. Cam chain pretty loose. Is a FIAT stamped one so probably original. The chain stretches a bit over time but the main source of increased tolerance, is the gears themselves wear. The chain had been slapping the inside of the aluminium cover too, and has actually worn a hole in one spot. This will be the source of the metallic crud in the centrifugal filter (which is on the end of the crank nose) Took the head apart, Something ive not seen in any of the old Fiat engines ive dismantled before, pretty bad valve recession on several of the intake and exhaust valves, a couple of the seats are also similarly rounded too. Some of them are also fine. Its pretty weird. Hopefully the head on the engine in the van is better. The block disassembled next, camshaft and crankshaft are good, piston big ends look new, main bearings could do with replacing. Pistons all look new as well, and all the rings freed up pretty easily. Cylinder 3 looks to have a liner installed and the cylinder itself looks the same but has F45 cast on it compared to the other ones which have F35. I wonder if the new head bottom end gaskets and very good condition piston bearings and bores are evidence of some work at some point? Could have had head issues too (dropped a valve maybe?) and they slapped a worn out but 'known runner' on the refreshed bottom end? Anyway, decided this bottom end looks pretty good and given the other engine is seized ill probably run this one, hoping that the other head is in better nick. Bit of a tidy up with some Phosphoric acid on the outside and the water blaster all up and though that to get all the rusty shite out of the block coolant galleries Put some engine enamel on the outside, which is good for at least 10 HP and because its smoke coloured on the outside the engine hopefully wont smoke as much from the inside Dang nang it! Better now than on the first start up i guess.
 11 points
 -
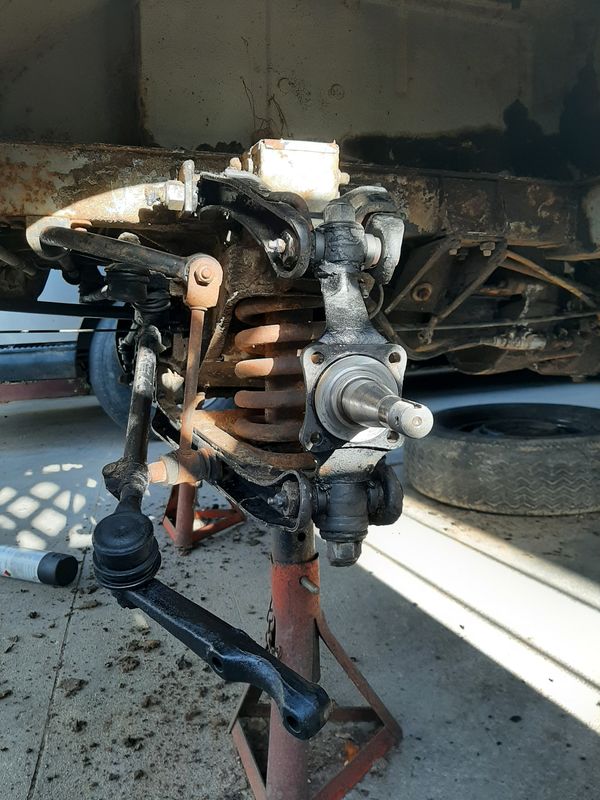
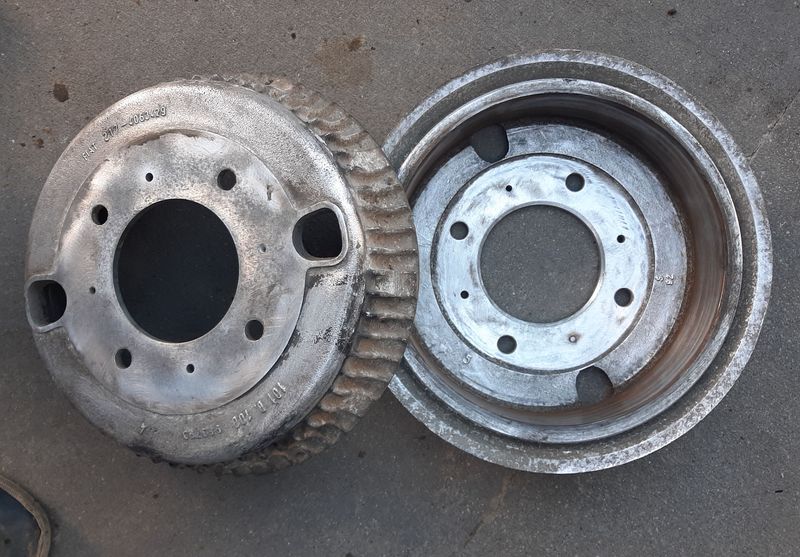
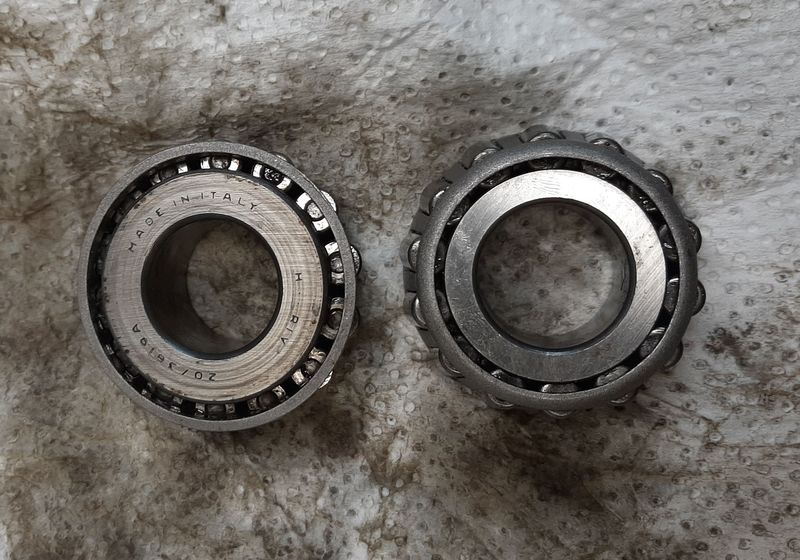
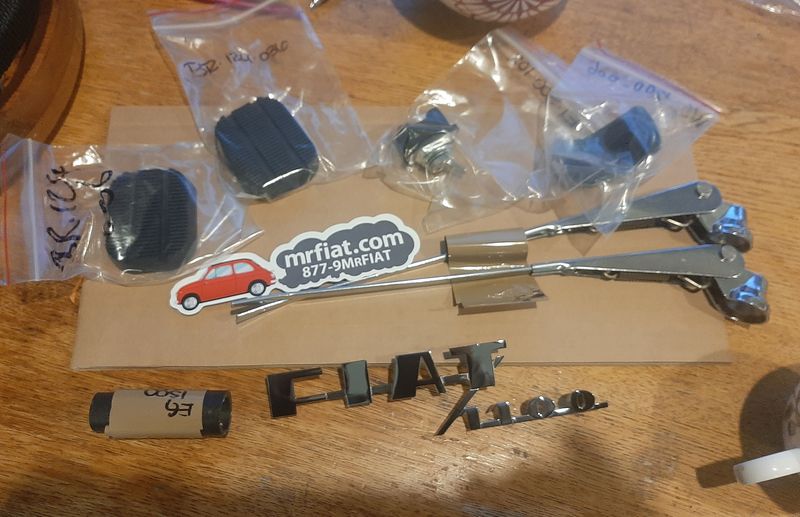
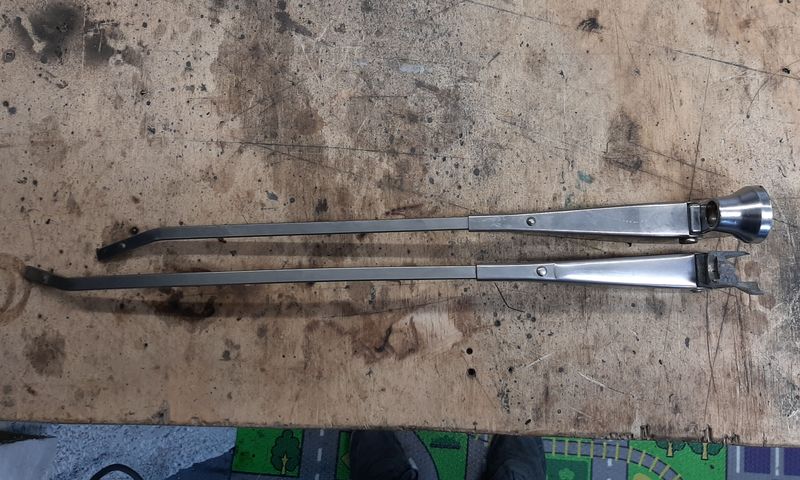
Took a bit of a break from the engine to get the front hubs back together because I want to turn it around, so its easier to drop the engine and box out with the crane on the drivers side, and dragging the whole lot into the garage. Hubs looked ok, wheel bearings are Italian so probably original - races look ok too, but one has an issue from rusty water sitting, will be ok for getting it rolling anyway. Had to very carefully smash the hubs off the drums, they a very tight fit on the centre bore, no way the M6 bolt though 5mm of aluminium was going to press them off. They cleaned up ok, one has some scoring but both are hardly worn at all. Will probably get them vapour blasted or something Scraped the 20mm thick grease and dried dirt off the suspension and pushed more grease in all the zerks and wafted some satin black around. This runs a king pin style knuckle and there are about 20 tie rods in teh steering linkage. Im gonna need some replacement boots! I got some for my 2300 from some guy off ebay will try him again Drivers side back together. I left the drums off as there's no brakes anyway and they are tight as feck to get on and off the hub - i think they need a tiny bit of a clearance on the centre bore. Possibly the outside of the hubs need a tidy up too as that lip got a bit of a hammering Mostly finished sanding off the crappy paint Some of the panels are just fine and had hardly been prepped so the paint basically just fell off, like the driver side behind the front door. However , others like the sliding door and the had been sanded with 40 grit and a hammer from the inside and had 3 layers of different primers and some bog for good measure. Anyway it looks marginally better and has confirmed that other than the obvious bits shes pretty bloody good for what it is! Had an order show up, took about 3 days from the US, mostly small things, rubber stuff, wiper arms, a badge and some switches Wipers are for an 850, and a LHD one at that, so the arm is too short and bends the wrong way. What i really wanted was the part that connects to the wiper spindle, and the plan was to gring off the pin that holds the skinny arm and swap that over but the pressed SS part style is slightly different and feels cheaper than the orginal, so I ground off the pin at the pivot and just swapped it over as well as the new spring and hook, using a small M5 bolt for now* (lol)
11 points
-
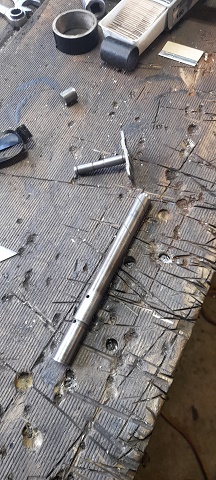
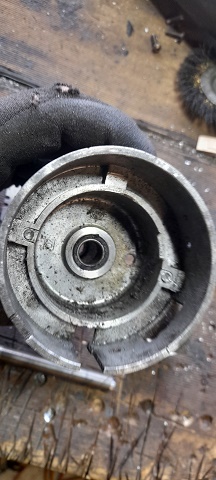
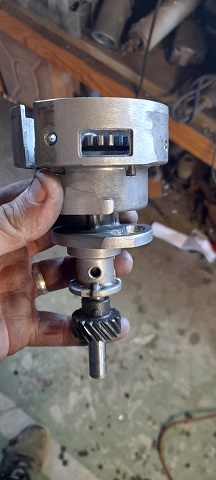
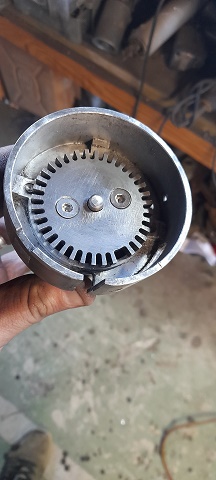
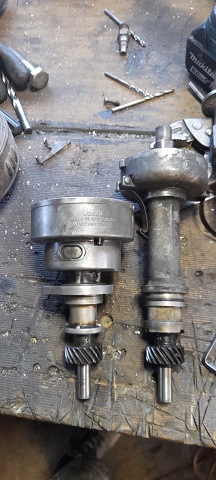
so, everything is out and I've puled the bush out of the gearbox. i had to make a tool to bash it out. i measured 0.06mm float between the driveshaft and the bush. i dont see this as being an issue and i cant see how this amount of play would cause the lip seal to leak as soon as you drive at motorway speeds. got any ideas as to why it keeps pumping oil out the rear gearbox seal? the seal i put in it isnt a directional one to be fair, however it is the correct size and ive put 3 different ones in it and its shit itself every time. there is no drive line vibration at all. the gearbox is less than 5000Ks old i dunno what else? also im not happy with the clutch so i going to try something different. 2021-05-16_03-07-03 by sheepers, on Flickr 2021-05-16_03-06-54 by sheepers, on Flickr 2021-05-16_03-06-49 by sheepers, on Flickr 2021-05-16_03-06-42 by sheepers, on Flickr 2021-05-16_03-06-36 by sheepers, on Flickr10 points
-
Stripped the many layers of paint off the roof today.
9 points
-
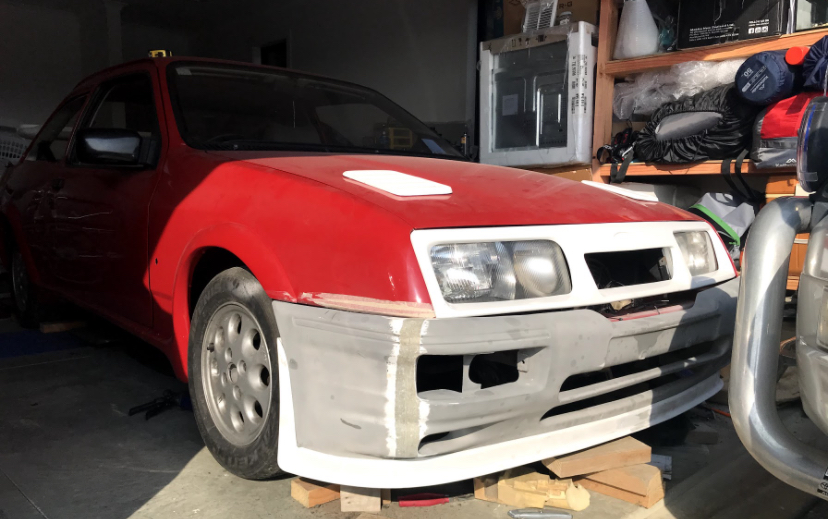
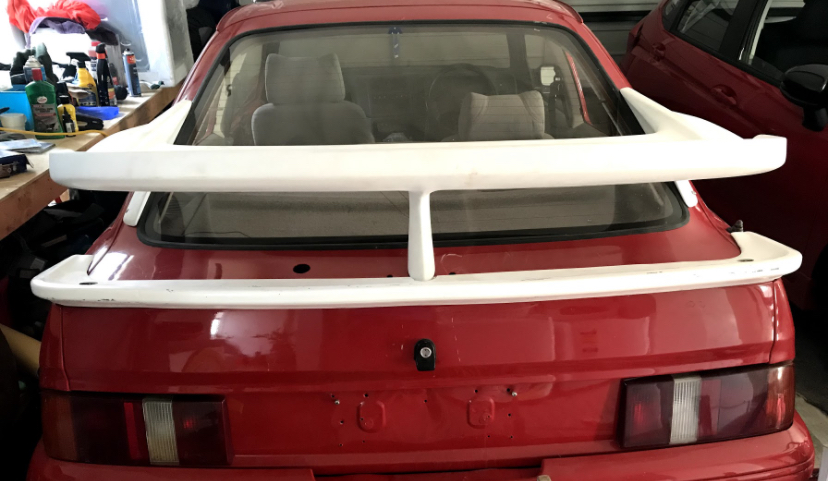
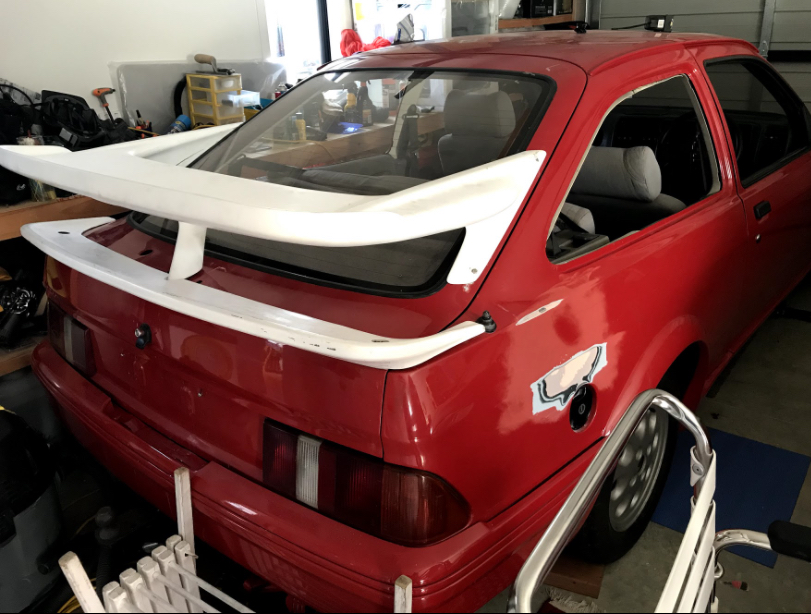
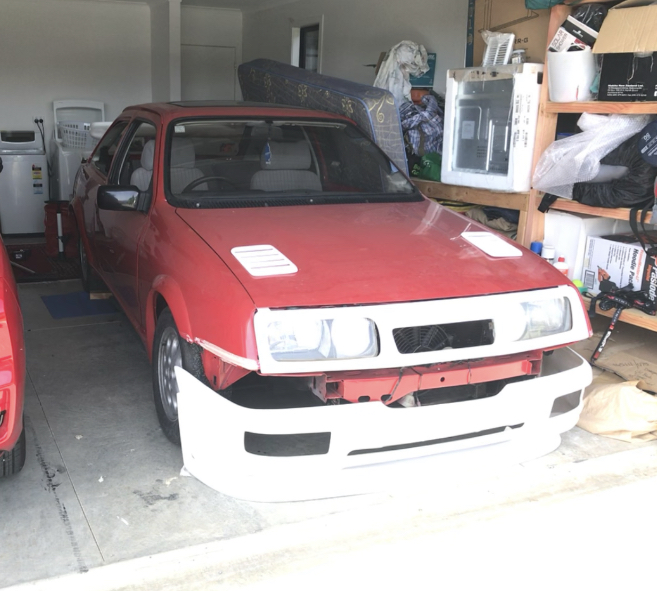
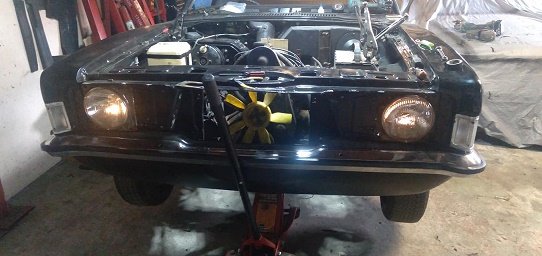
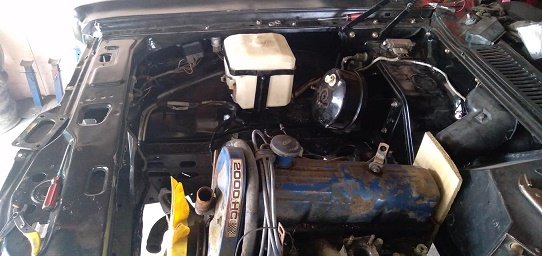
Lovely wee car- I remember driving it at Hanmeet once. It just needs some widened steels and lowering by about 4" and it'll be fucking awesome! Please put some discs on the front. Drums suck. They'll always be a bit shit. Just swap in some appropriate bits from an escort and possibly just a slightly larger bore MC (someone fordy on here will know which bits work) I'm sure there's bits that swap straight in and it would be a period correct swap that no wof station would either notice or probably even give a fuck Oh and btw...
8 points
-
6 of these so far!8 points
-
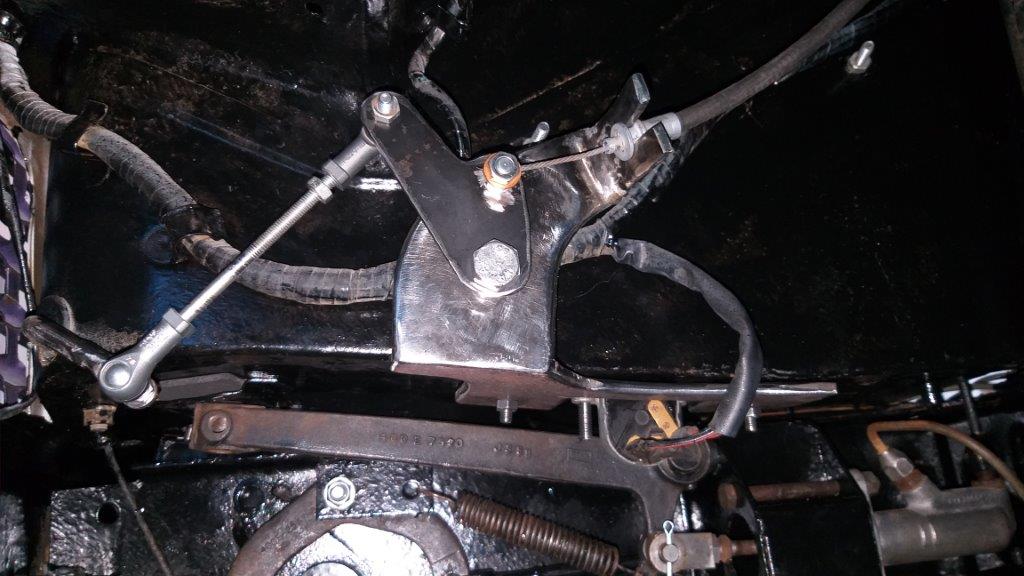
Looks like I've finally nailed the accelerator movement with version 3.5 of my cable bracket Spent a bit of time yesterday cutting, grinding and welding. Fitted it all up this morning and still wasn't happy as the pedal movement still felt short. Crawled under the van for a think and a bit of mucking about and I've learnt another valuable lesson. Contrary to what the actress said to the bishop it's not so much the length of the long arm, but the angle at which it is applied that hits the sweet spot. So I ended up making another version of the pivot plate with the longer arm at less of an angle to the shorter arm. I also cut and shut the length of the Thames accelerator rod and lengthened my little intermediate rod and the Thames accelerator pedal now travels a total of 100 mm from rest to full throttle. Next step is to shorten the HiAce cable as its currently got a lot of excess looped around the engine bay and then I'll chuck a bit of paint on the new bits. I'll also pick up a nice bit of stainless steel threaded rod on my next visit to town for that added bit of bling. Thanks for reading.
7 points
-
another cool find VF - 12 -1 ? these are probably the least thrilling bits to see in full. I’ll order some corners for the bottom of the rear window aperture because they are like $30 each and that will give me a good reference to start on. Will have to deconstruct the rear deck and have a tidy up. at least the rear panel is fairly flat /basic?6 points
-
The other fridge sadly didn't cool (coil holed where someone had enthusiastically de-iced it), so I pulled the gubbins out and gave it a quick sand and paint job... Nice vintage mint colour, I rate these spray bomb primer/paints, so easy... Squeezed it into the garage... And it's running an Ali STC-1000 controller, works well... This will be a bottle conditioning fridge and should work well enough over winter.. Will free up the other one for fermenting... Whacked some labels on while I was shifting botts over. A Barry forum told me to use milk as an adhesive, works bloody well... Mix of 500ml, 745 and 750ml bottles... plus a label on the top with brew info... And important safety message...6 points
-
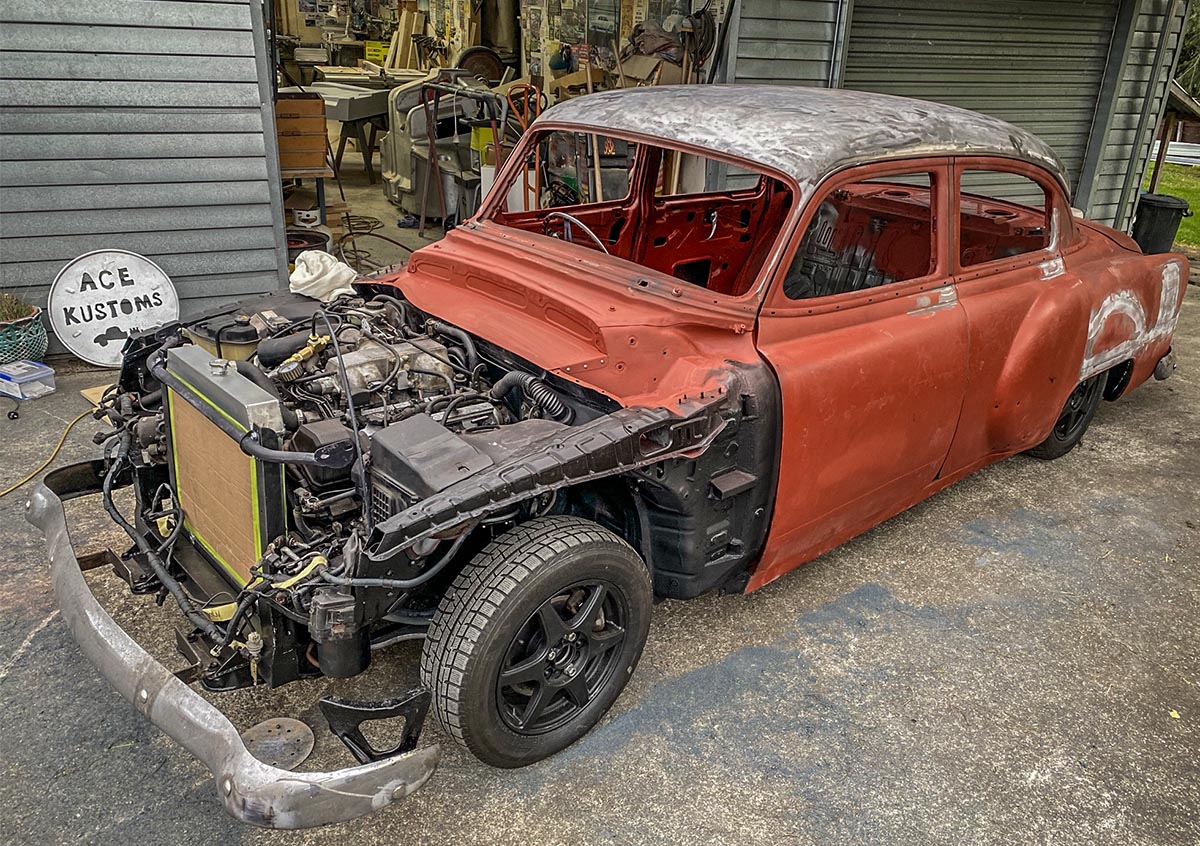
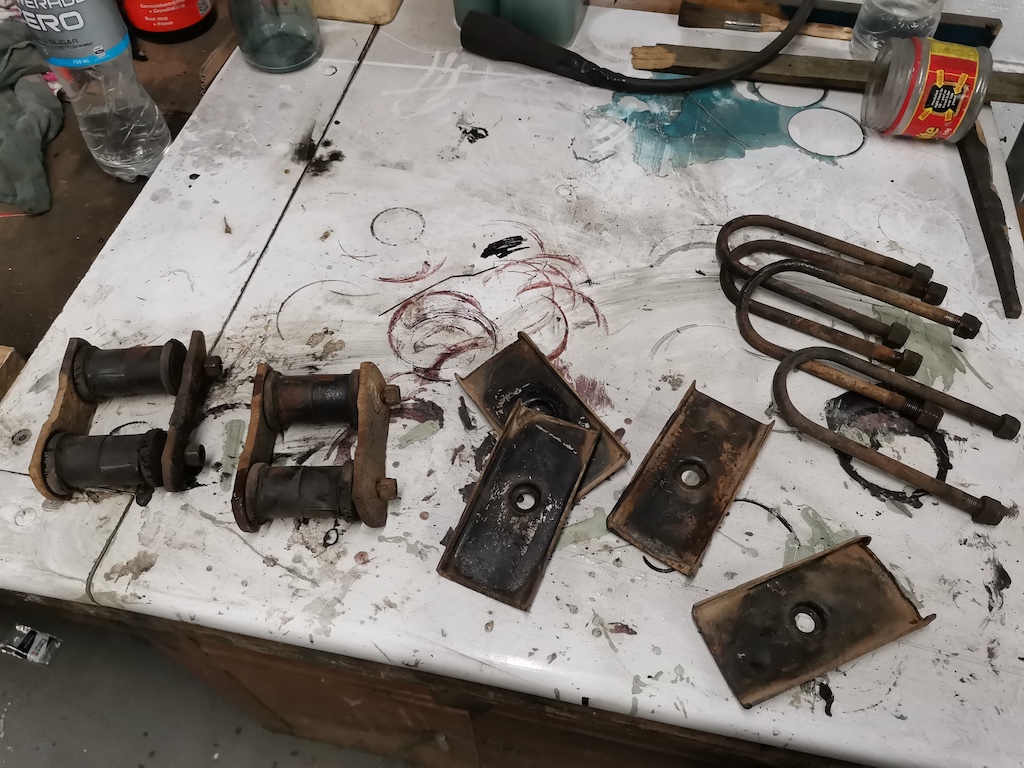
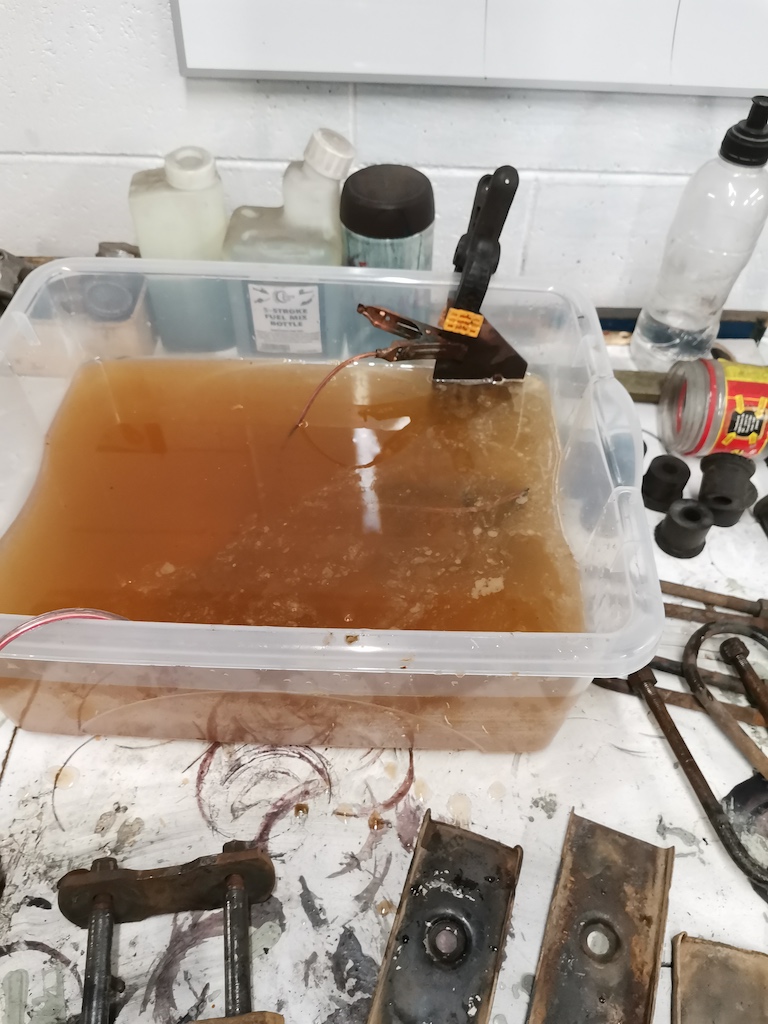
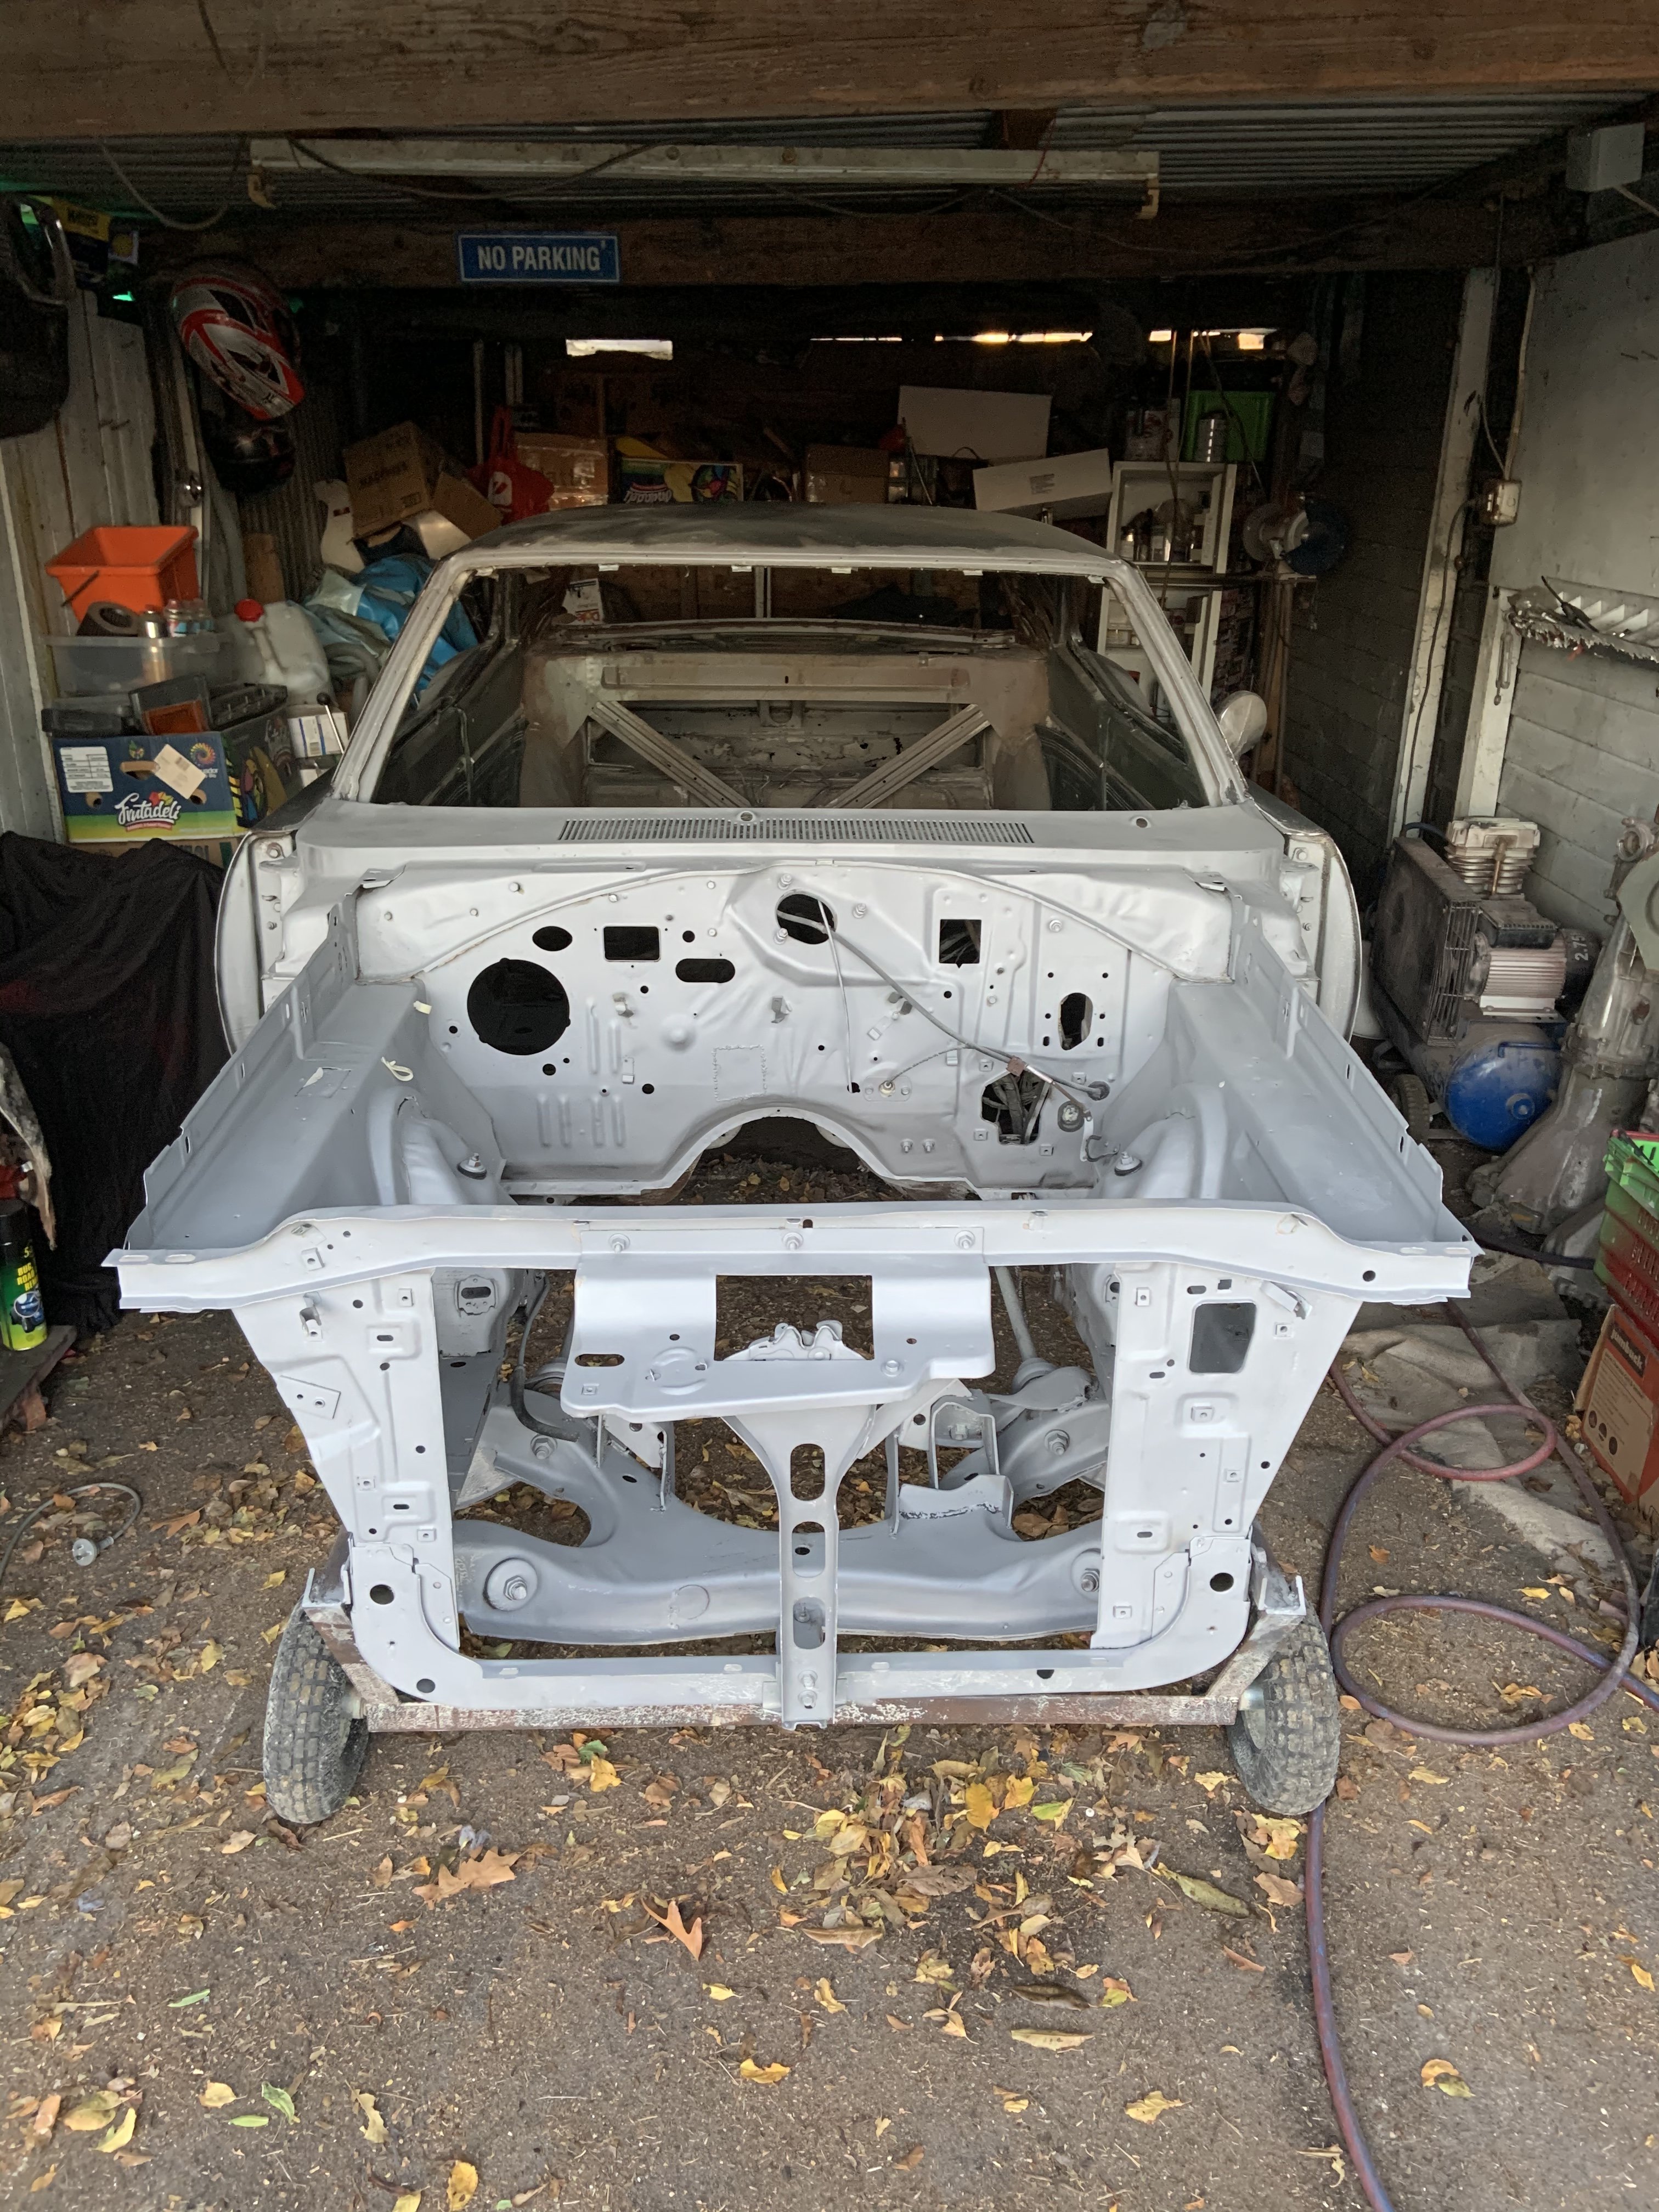
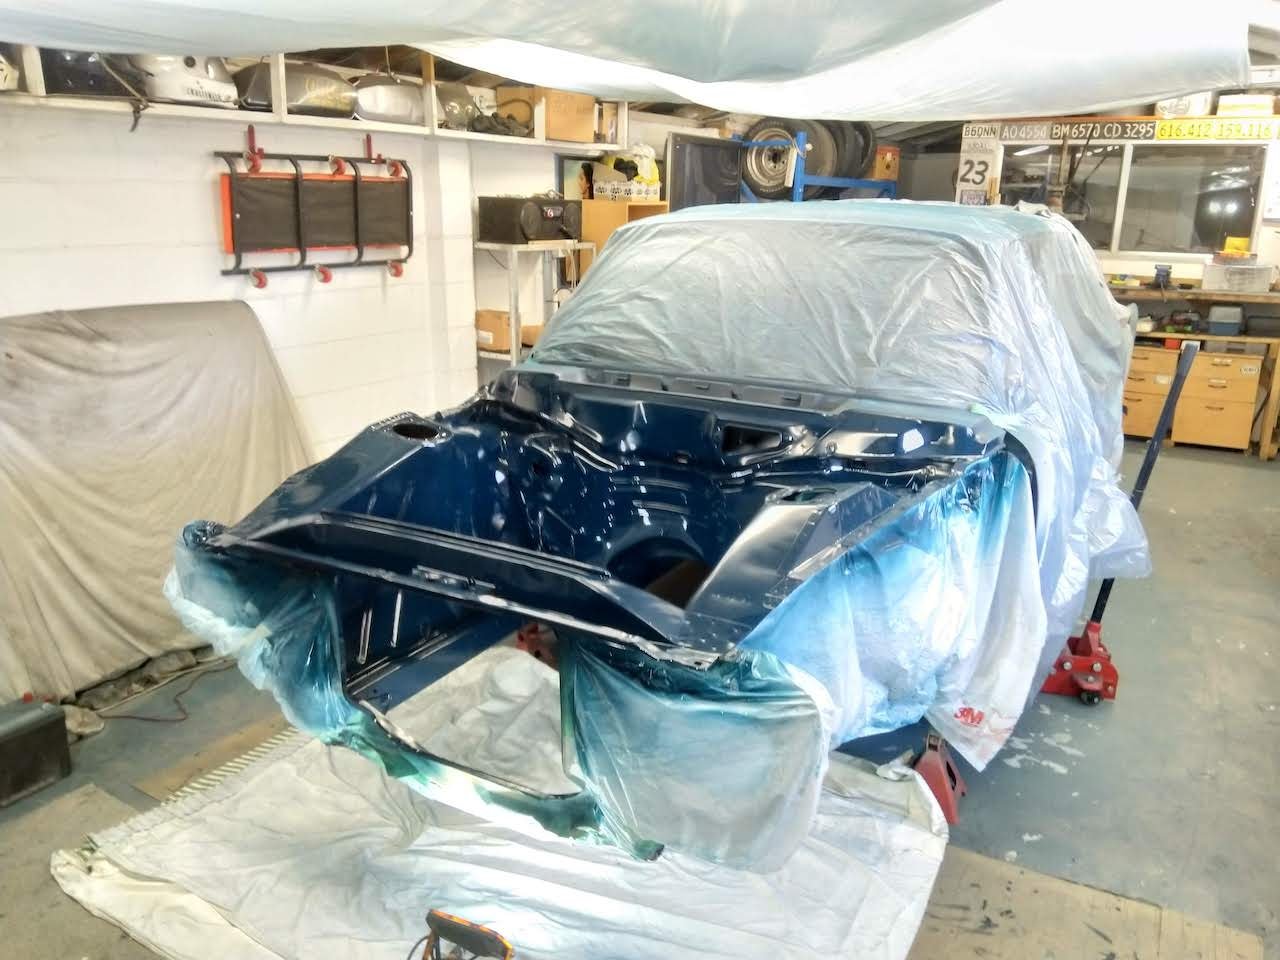
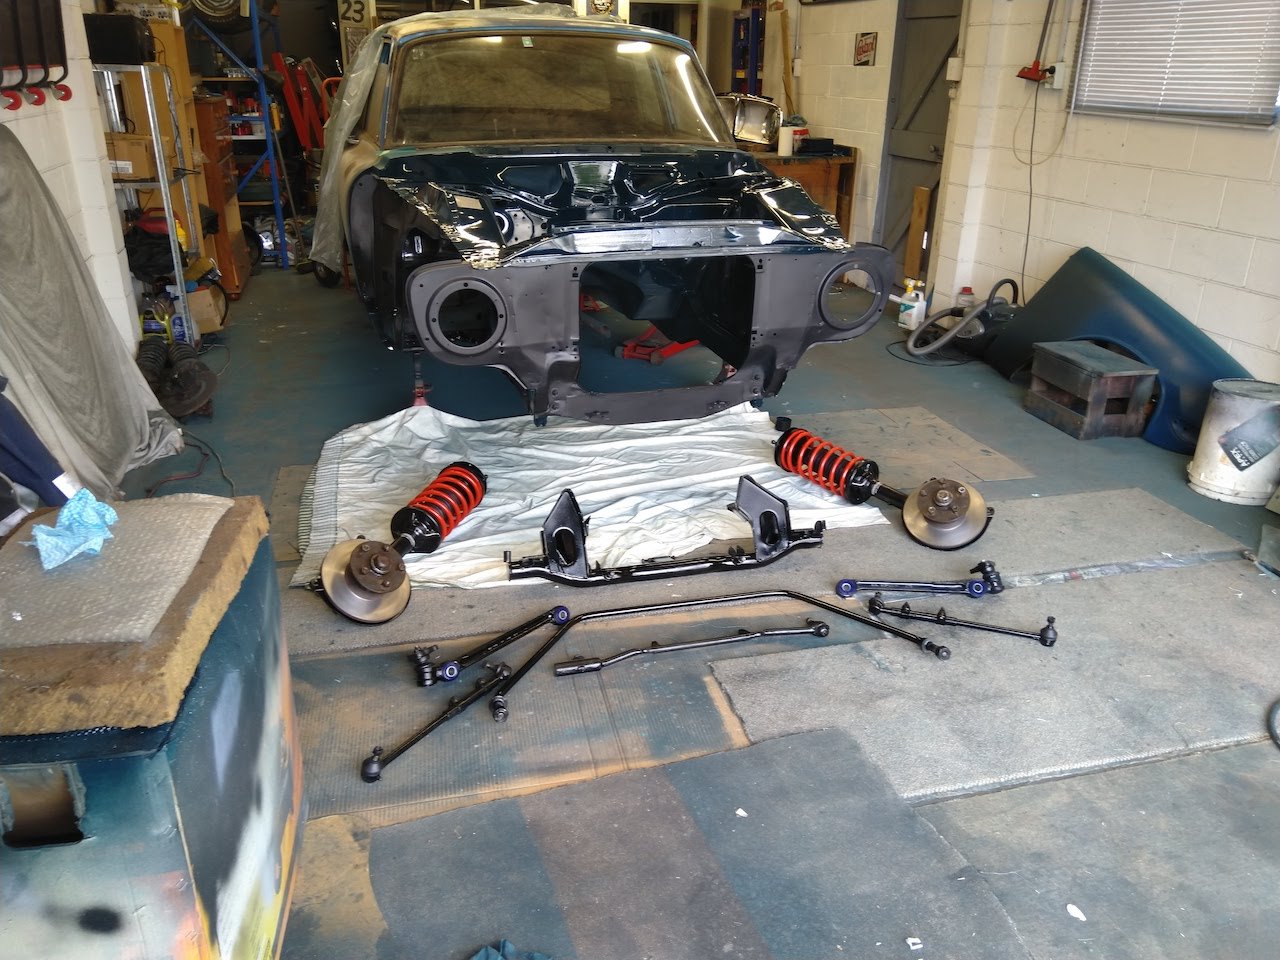
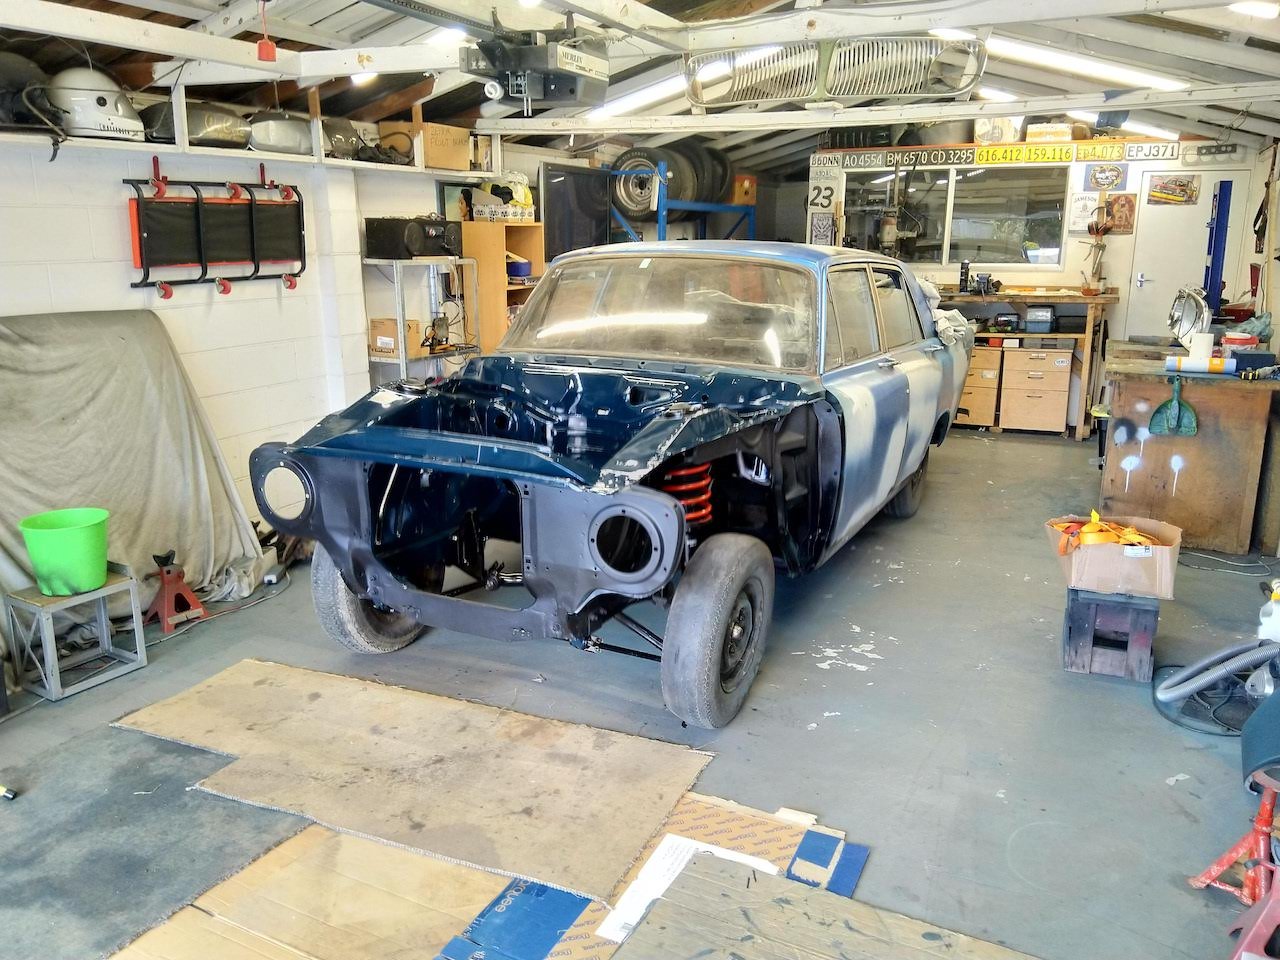
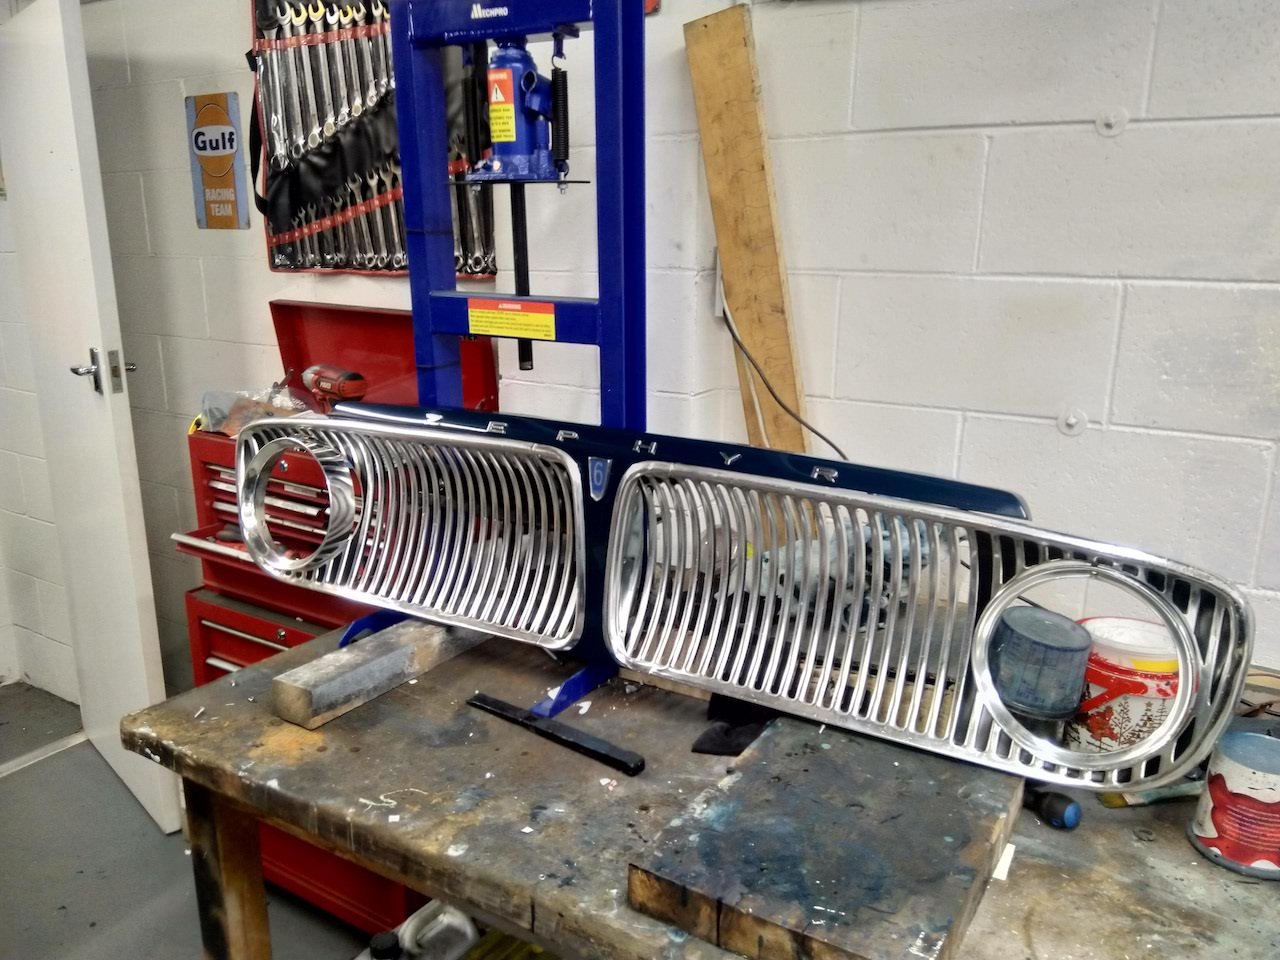
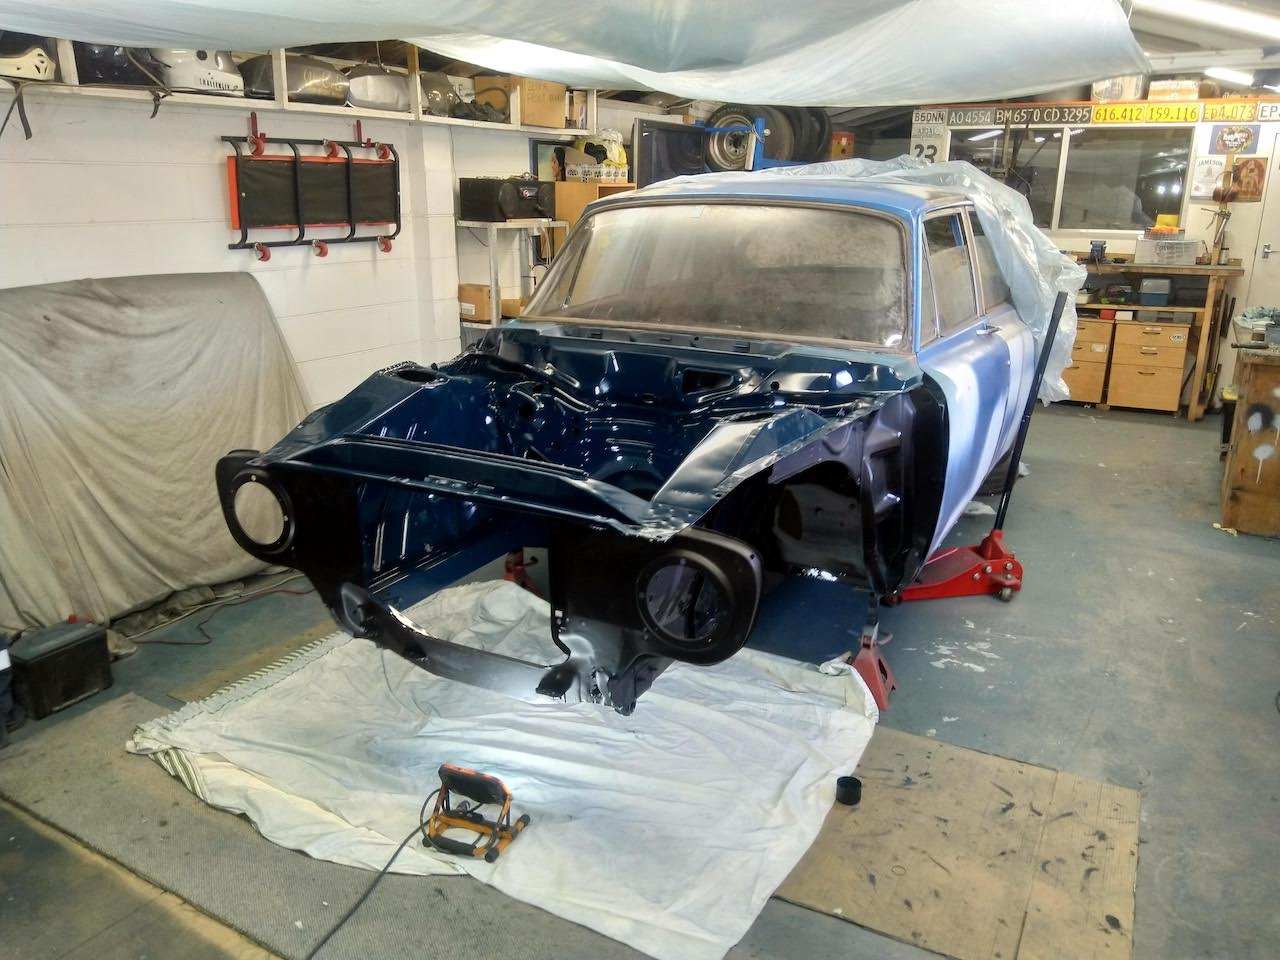
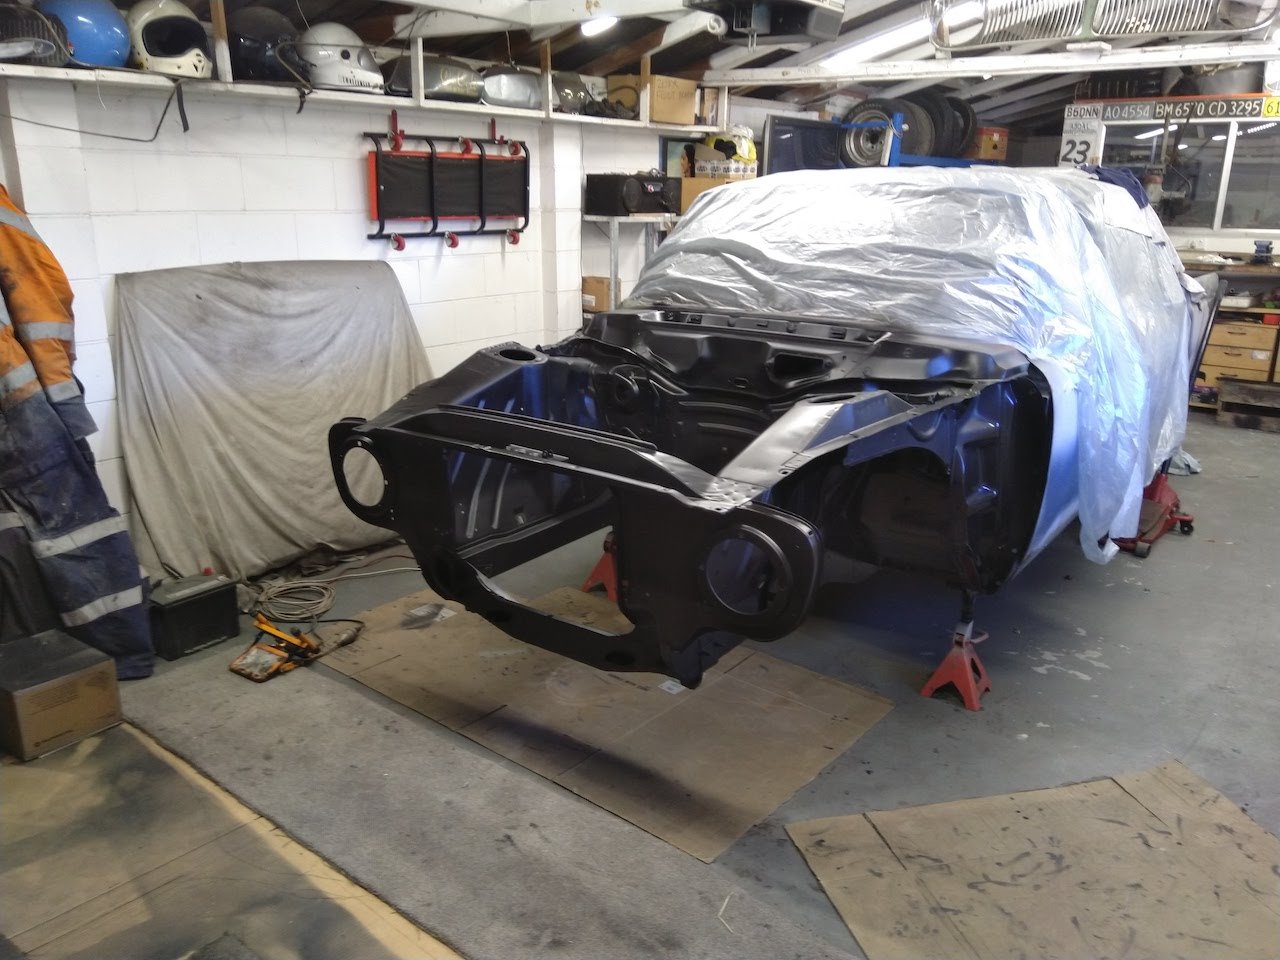
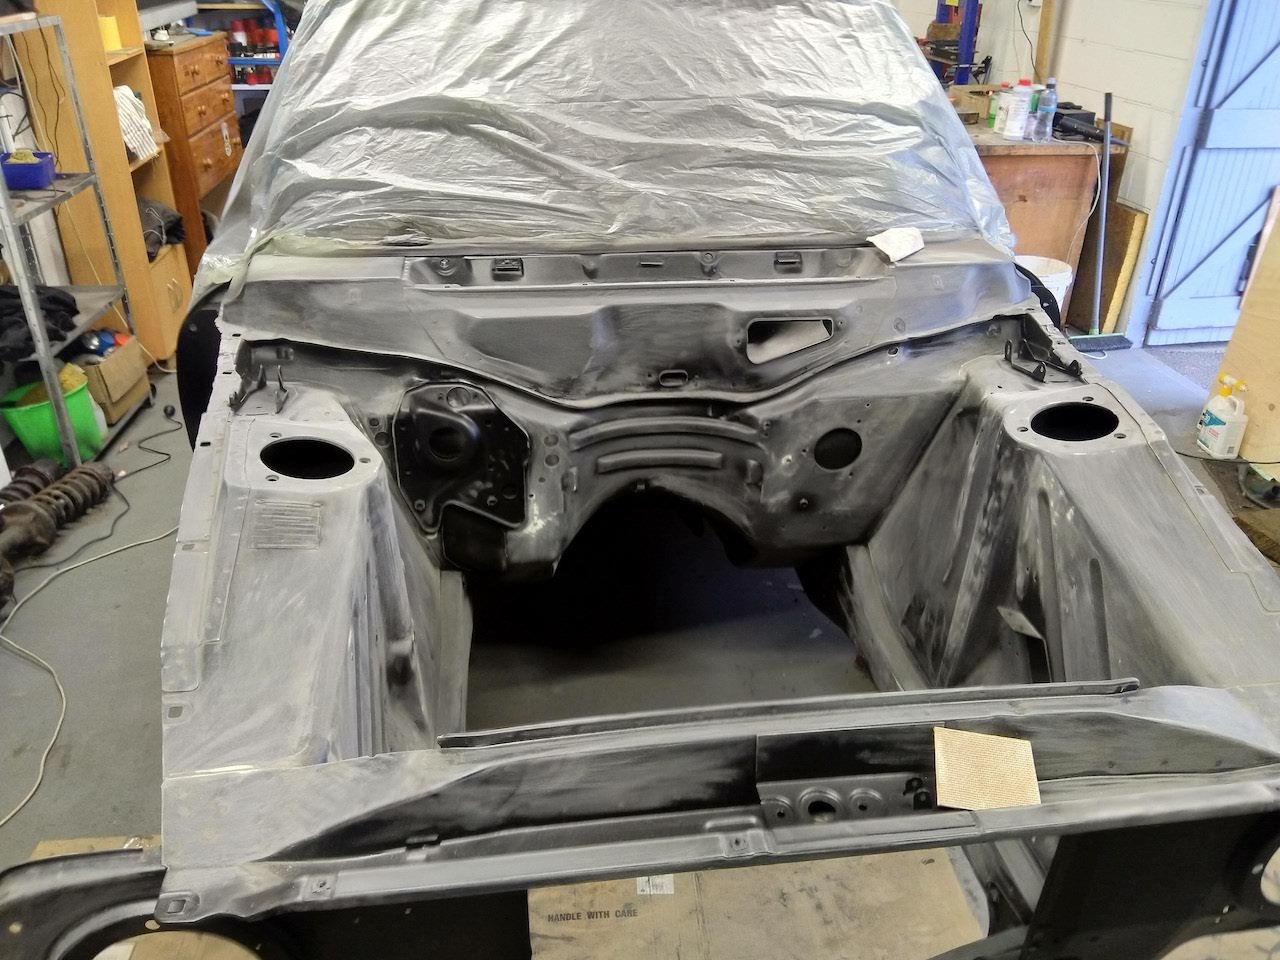
Got the fuel tank painted in 2K black. Took the front and rear windscreens out and doors off. Fortunately no rust around the window frames which I was a bit worried about. Now working on the boot area. While I'm removing paint, sound deadening and rust I've got some of the diff mounts in the electrolysis bath to clean up.
6 points
-
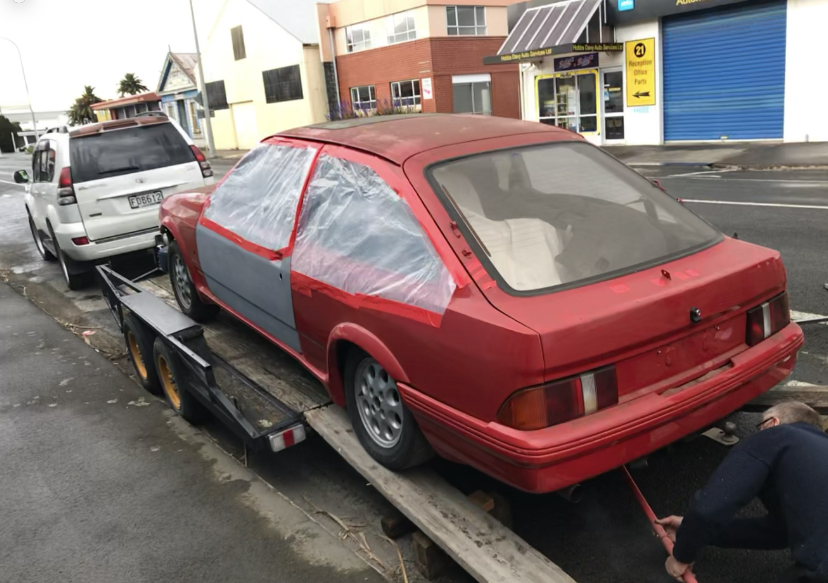
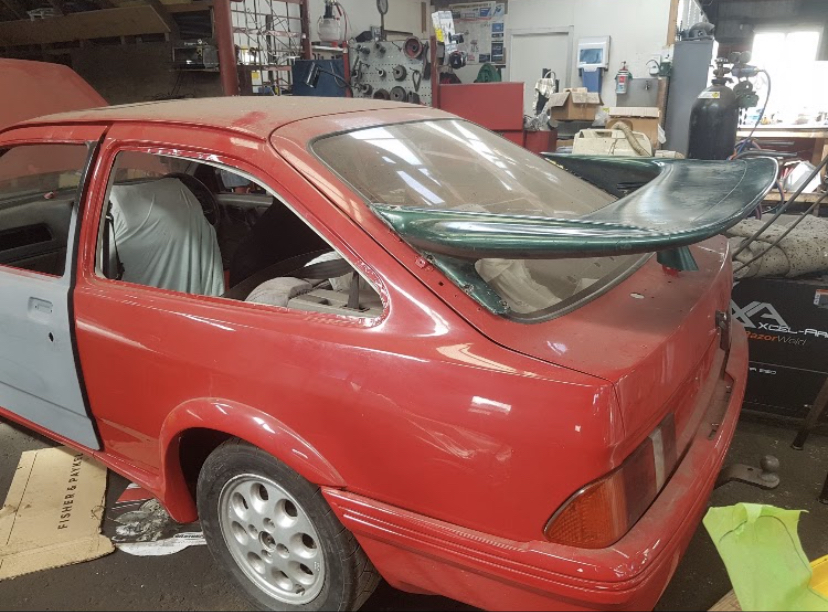
So after getting this home and then taking count on what I needed,I got on line and ordered me a RS500 body kit. When it got here I was quick to UN pack and mock up in place. I found out it didn’t fit to well, Especially the front bumper And the rear wing was badly warped I spent quite a lot of time cutting and fiberglassing and making brackets to hold everything on Plus trying to get all the gaps right on the front bumper. mais you do I spent quite a lot of time Looking for parts on the computer I managed to find a person selling a parcel tray on trade me I told him what I was trying to build and he told me he has 2 Parcel trays and if I want one then I’d have to buy 2 and he also told me that he has a fiberglass RS500 English made front bumper as well.......and because my NZ one didn’t fit to well ....... I’m now the proud owner of 2 parcel trays and two front bumpers. here’s a few pics of mock up
5 points
-
Fuck man, looking epic.. Can't wait to have one of my shit boxes in there haha. Love this portal.5 points
-
What a whore of a job. A comedy of non-stop misgivings and survivalism has it etch primed where it was bare. it looks just the same cause the epoxy is grey3 points
-
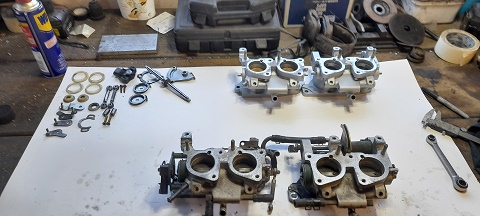
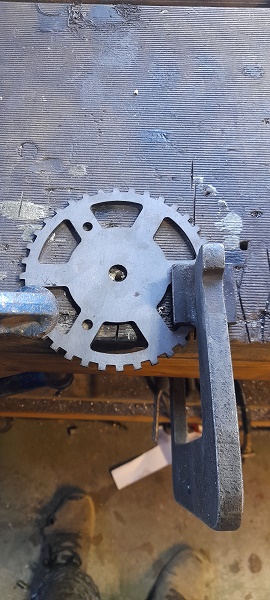
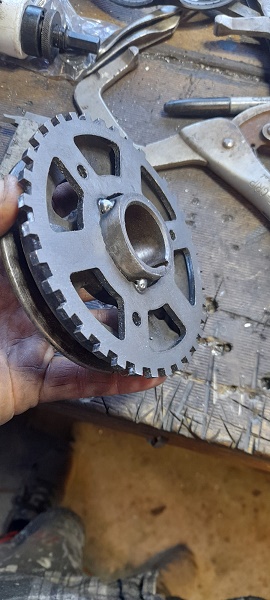
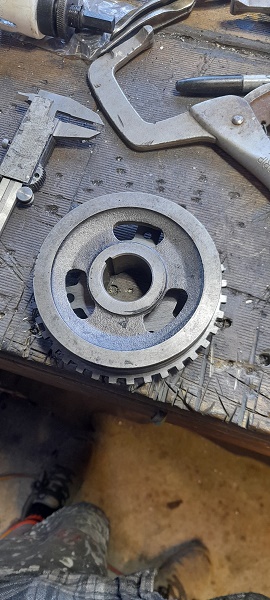
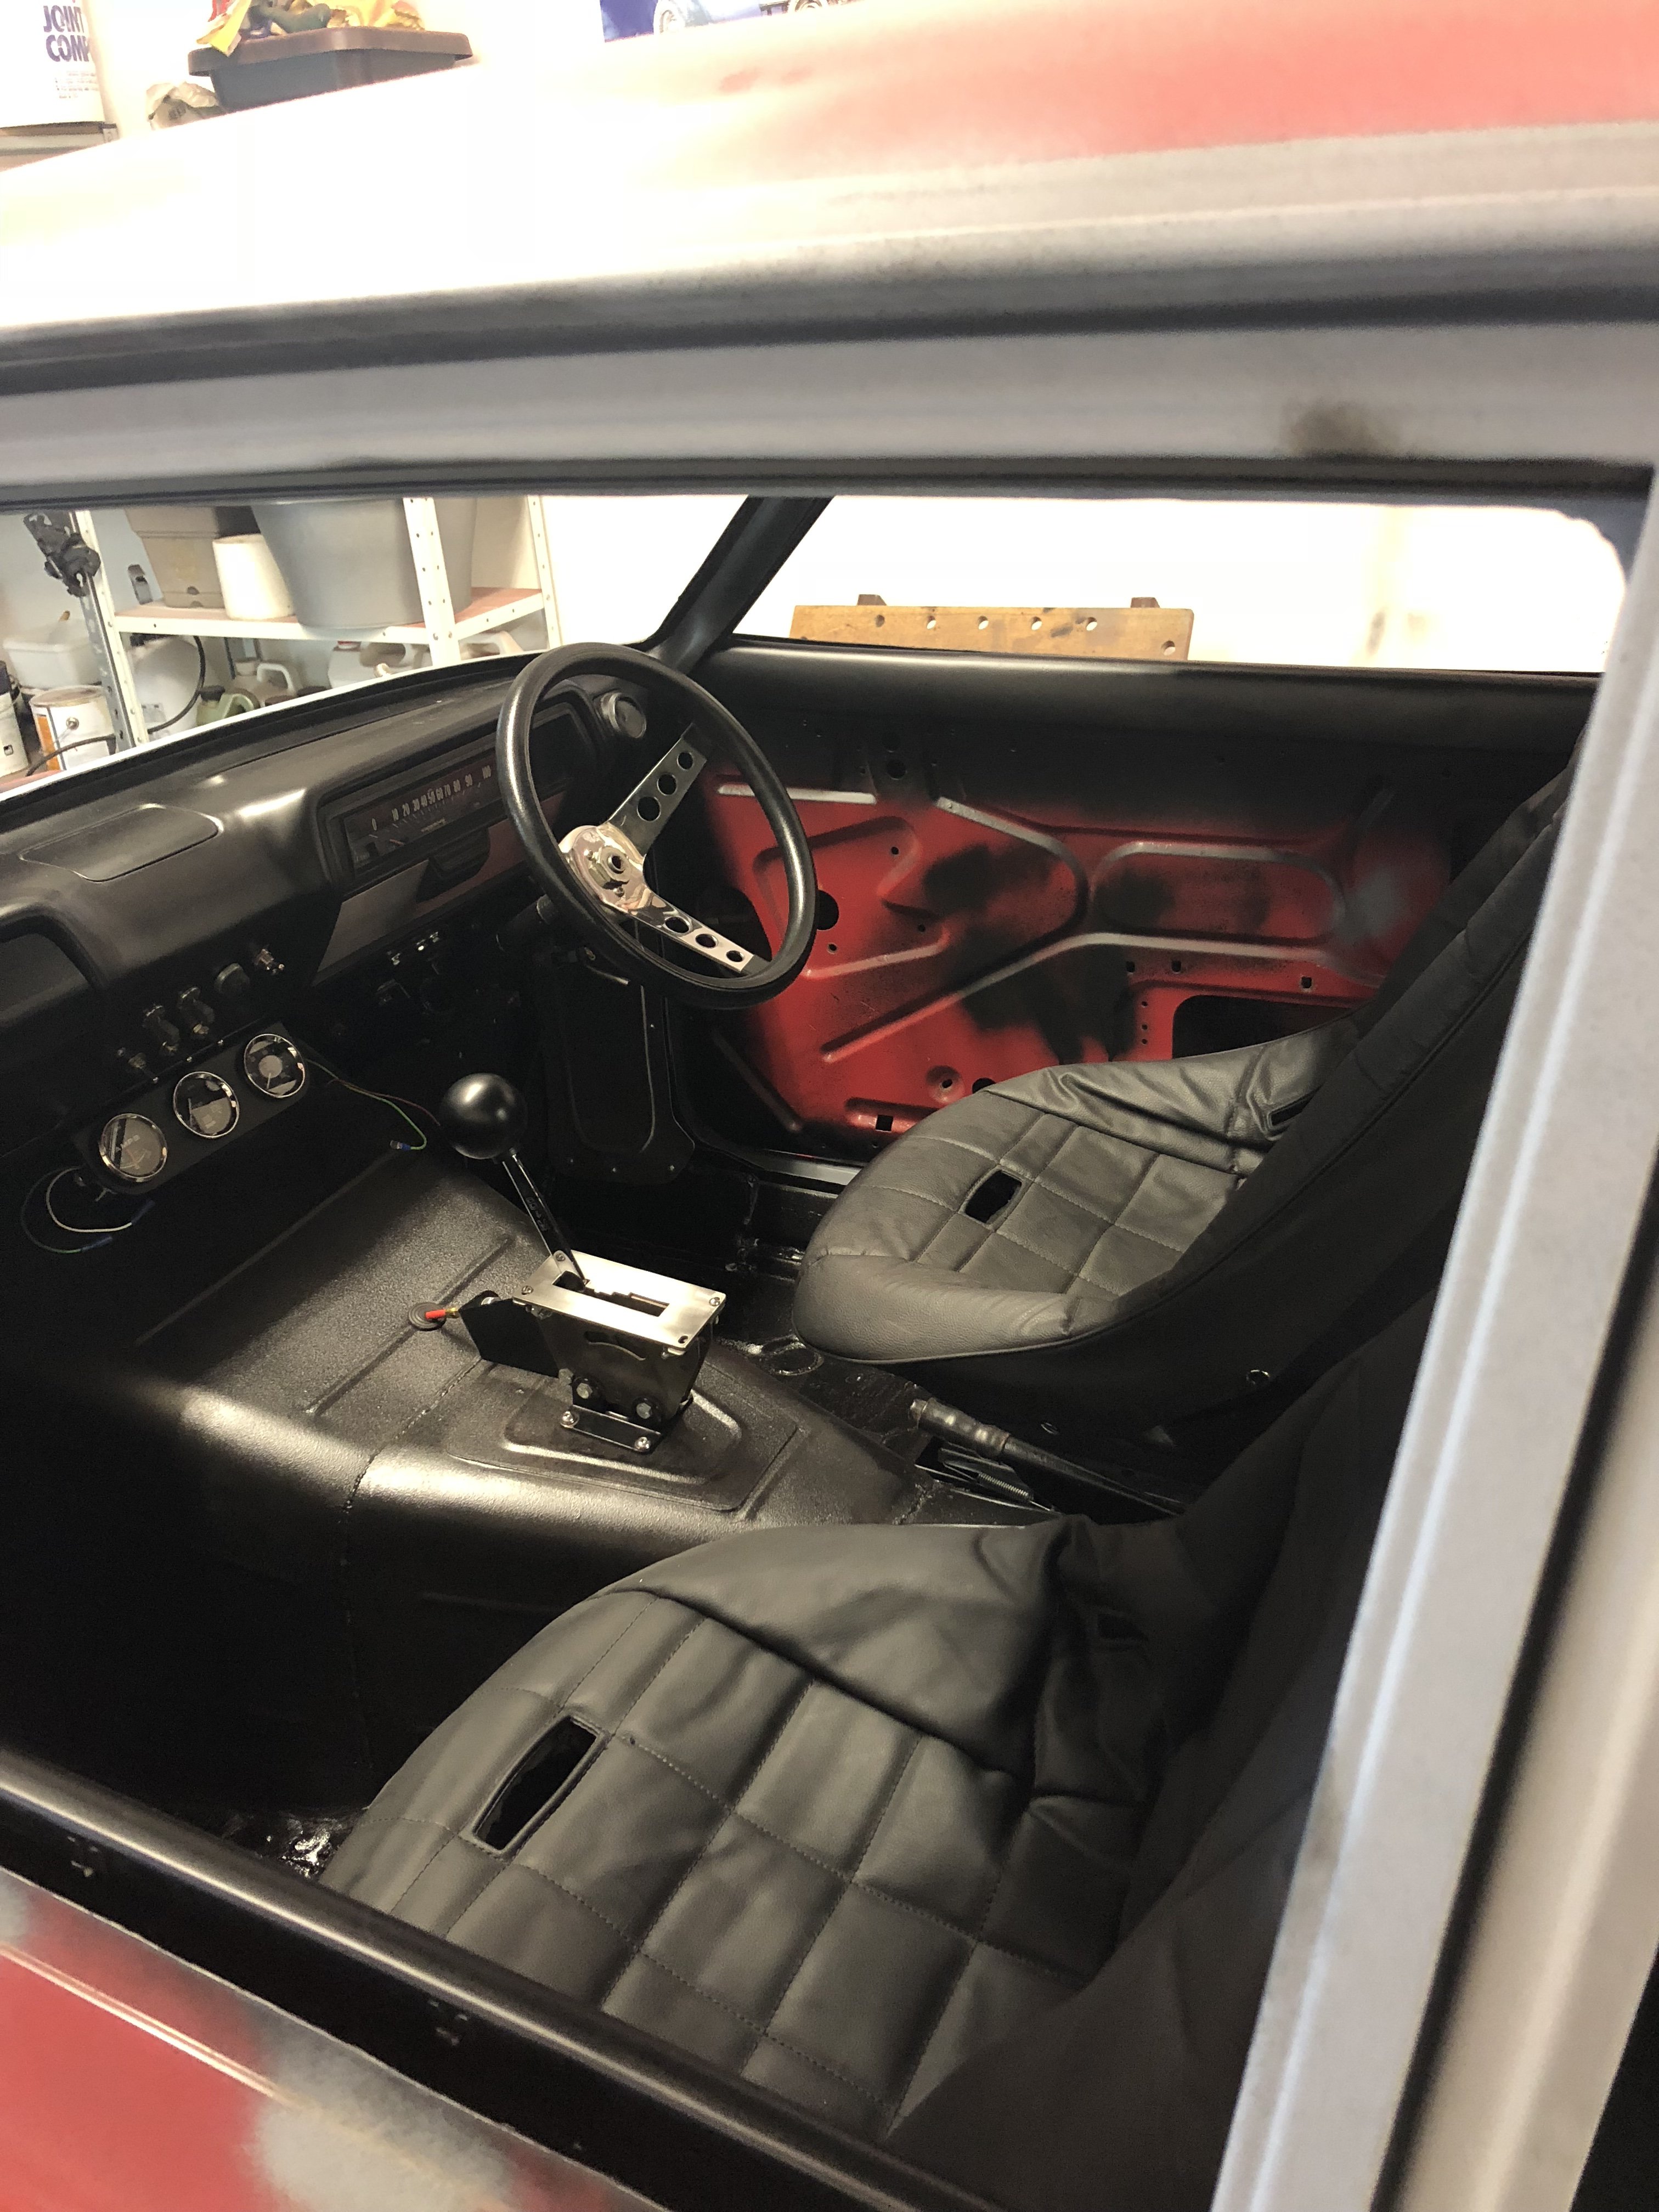
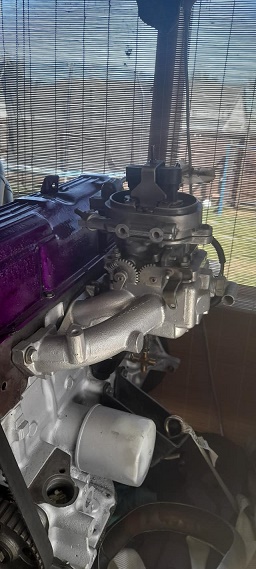
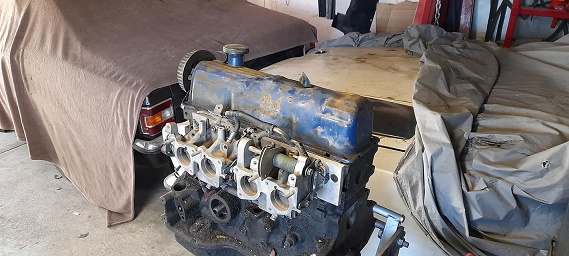
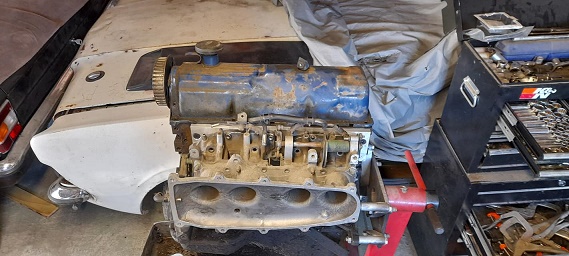
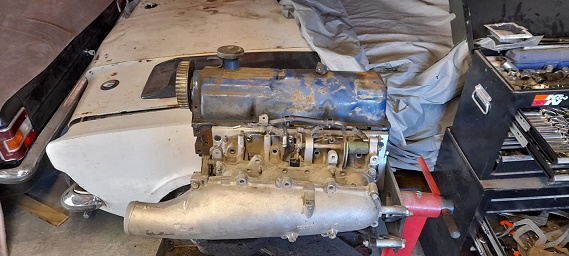
i got a few things ticked off the list today. trigger 1..i bought a 36-1 trigger wheel for the pinto but it bolted in front of the pulley and i didnt like the look of it ...so i made the hole bigger and mounted it on the back...just a few tacks for now till the sensors turn up and i decide where to mount them. then it was on to trigger 2..i bought a 63mm 36-1 trigger wheel as it was just small enough to fit inside the pinto dizzy buuuuut.....didnt even think about the dizzy to inlet manifold being a problem....well it turns out it is. i thought about cuttng it down but remembered i had a xd falcon dizzy on the shelf that i had gutted and used with a drill to pump oil around the 4.1 in the other cortina. turns out it fits the hole in the block for the dizzy and it a wee bit smaller .so i trimmed all the stuff not needed off it and made a slot on the side to be able to bolt it down...i then cut the pinto dizzy shaft down and made a bush for it in the falcon dixy....made a mount to bolt the wheel to and all done...)will make a cap when the sensors turn up and i sort out mounting)....was told i could just use a 1 tooth wheel so see how the sensor works with this small wheel first. both triggers in place i also stripped cleaned and rebuilt the intake manifold repositioned the dipstick got the factory vacuum all together so i can even plum the brake booster in. managed to turn the full TPS setup upside down aswell for more room. still got to sort out idle air control.....the injectors are on the way and i need to mount the coil packs and also sort out a breather for the block under the inlet manifold .....and im thinking some sort of brace for the manifold aswell. but its strating to look pretty good.
3 points
-
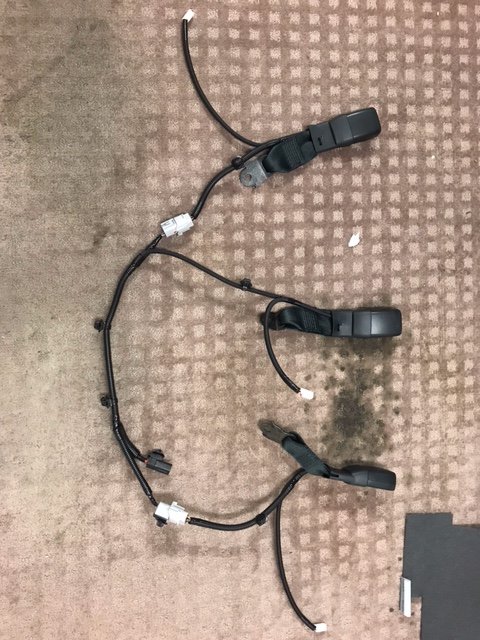
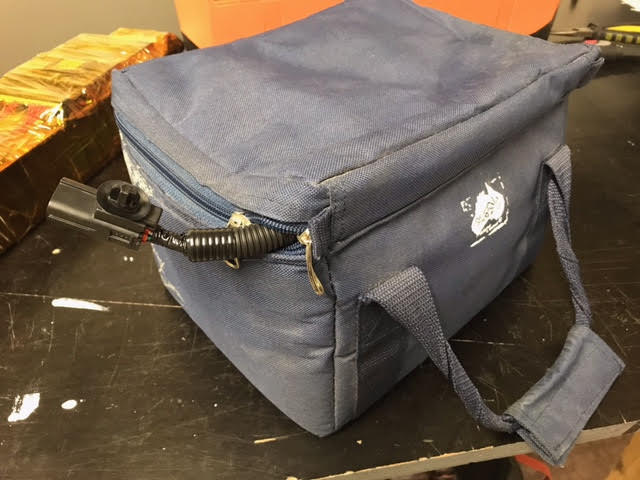
Hi Guys, So just an update on a solution for our rear sear removal. After testing and looking at the wiring. The rear seat harness that my unhelpful Toyota parts guy couldn't find is actually a part of the middle seat belt buckle. This middle seat belt buckle harness also plugs into the left and right seat belt buckle wiring. So for order for us to drive out vans without the rear seats installed. we must have all 3 buckles plugged into the rear seat connector. (the 3 seat pressure sensors not needed.) For those who only need the rear seat a few times a year this is perfect. simply remove the rear seat. flip it upside down. remove all 3 buckles. its just 2 x 14mm bolts and a few harness retainers. 10min work if you only have half an idea of what you are doing. connect them all together throw them zip up lunch cooler bag, have the main seat plug hanging out. plug it in to the van side of the seat harness. and bobs your uncle. I will need to remove and install the seat more frequently. so I'm going to price new buckles so i don't need to remove the buckles every time. Cheers Brent
3 points
-
Seats all finished up and mounted for the last time.
3 points
-
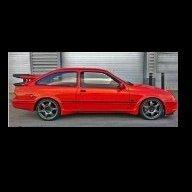
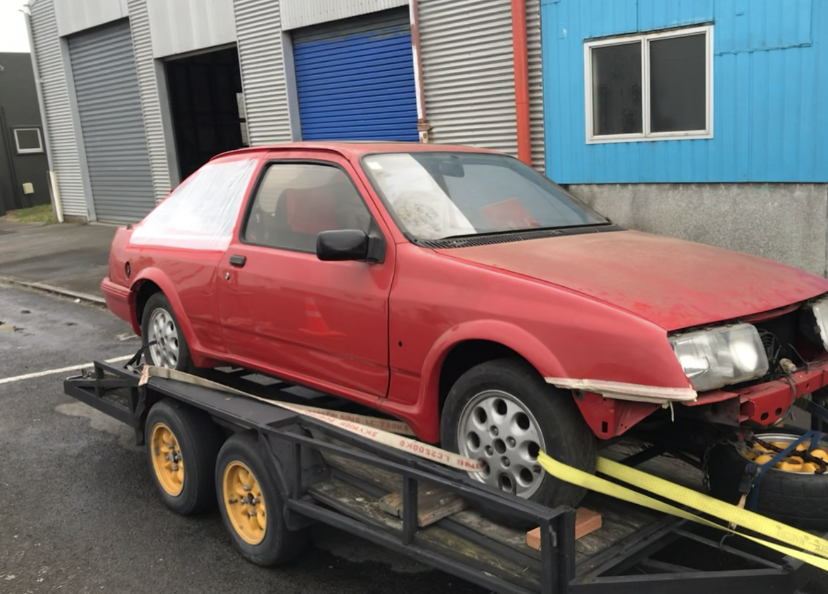
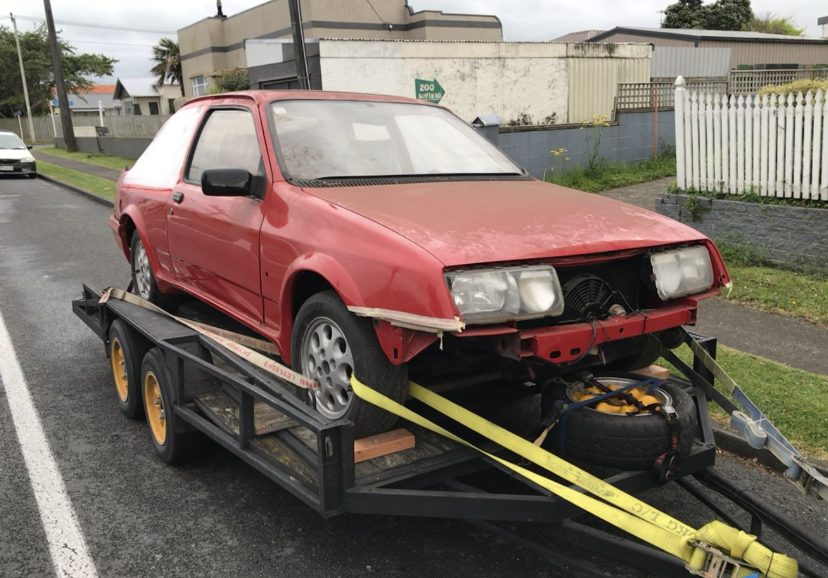
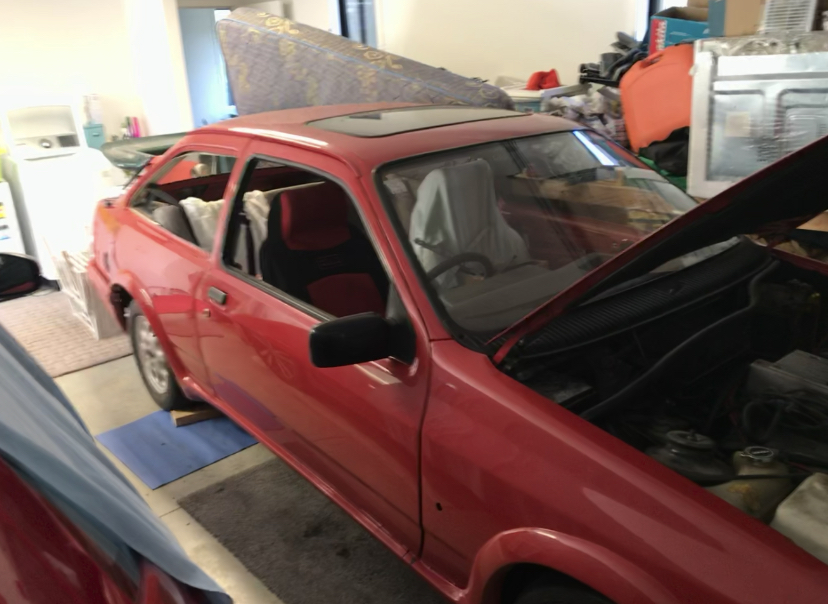
So a year and abit ago I was looking on trade me and someone was trying to sell a ford Sierra project and after looking and wondering I brought it next step was to get to the north island to get it ,so packed up the family and away we went and I got this!!! Its a Ford Sierra xr4i it has a 2.8V6 cologne engine the person I brought it off was going to make it into an RS replica so I’m going to continue with this theme
2 points
-
Gather round for a sharn boys Me and the ol miso soup went for a trip around Northland at the start of the year and camped out of her old mans AU wagon which was lush. While it was a robust and practical Australian sports car, it was cramped and not a functional camper. We caught the bug for camper life and started browsing trademe with mild enthusiasm and wild pinterest-fuelled dreams. The first takeaway i got from van shopping - fuck vans are expensive. In our budget all we were hoping for was a flogged out ex-tradie L300 with 500xxxkms. Until one night this bad boy popped up on trademe - the skylite roof piqued my interest immediately. It had everything we needed: fully self-contained, electric cert, wof and reg and a boot full of camping gear and was in our budget! I enlisted the service of fellow 3Y enthusiast @HighLUXto go kick a Kelly 70 for me, and confirmed it went hard for what it was. So we made a spur of the moment decision to go pick it up from Rotorua the next day. Its a lush spec import Liteace with pop-up skylite roof and is well specced up the front with monsoons, power windows and steering and a fully hektik JVC headunit run straight off the battery in true SCA carpark installation fashion. The 3Y-EU injected 2 litre donk actually doesnt disgrace itself on the flat, though it dislikes maintaining reasonable speed up hills. Suits me though, wagon time ain't no crime. Have taken it to TGA for a weekend since buying and it was smooth and comfortable but by gum it drinks 91 like Sumpson at Nats 13. It is an ex-backpacker rental van which explains why everything has been done legit - no doubt its seen a fair few dogging spots in its time. The interior was setup for a single with a tiny bed, which needed to go. Other amenities include a sink unit with water and waste, a compostable toilet and electric chiller. The electrics setup is pretty lush - battery and inverter setup with adventure kings solar panel thing, along with power point for camp grounds, complete with RCD and 3 pin outlet to run the breadmaker. There must be nearly a grand worth of electrics alone in this thing, stoked. I then set about the task of building a double bed, adopting a @Beaver approved design from his Vanette. A slat bed with additional pull-out frame so can be used as a single seat during the day, and pull out for double bed at night. I made it out of decking timber and ripped down some fence rails, as it turned out to be the most economical solution amidst this nationwide timber shortage. so its a little chonkier than i would have liked. I had an uneven number of slats so had to double up on long bois. Still, for a bumpkin with fuck all carpentry skills im sure Stevie Wonder would approve. OCD trigger warning I dismantled the old bed and left the electrics in-situ and then when i built the new frame had to play electrician and figure out how to put the RCD and gear back together. Tidied up a few cowboy spec installation foibles while i was there. Pretty stoked with its functionality, and still some room underneath for storage of bits and bobs. Next mission will be to build a storage solution on the otherside of the van to maximise space in this compact little rig. will be sure to document that too. The hugs and kisses is currently making some lush 70s floral print covers for the mattress squabs to give it a nice lil retro vibe. Then what? go dogging i guess oh and maybe slam and wheels hehe2 points
-
Bottled first brew and it's conditioning while I impatiently wait to try it. My cheap bottling wand was a ballache, took 2 1/2 minutes each bottle, which sucked, but got there. The bottle tree was a great investment... And made some ply shelves for both fridges, varnished them as there is no treated 12mm ply available apparently... After a few days the plastic PET bottles had pressurised and sediment settled so looks promising... And after 7 days I cracked one as a quality control exercise. Way too early but keen to see if it was shit... It wasn't too bad. This was a dedicated test bottle, the dregs from the bottling bucket so not surprised at the cloudiness. But best thing was it tasted pretty good, wanted another afterwards which is a good sign, and at 4 standard drinks the single bottle gave a slight beer buzz...2 points
-
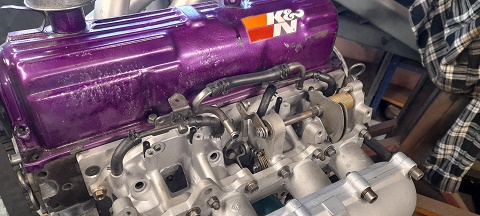
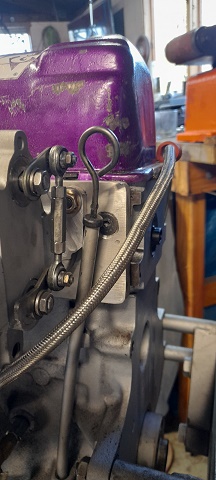
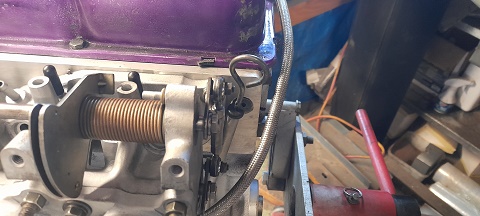
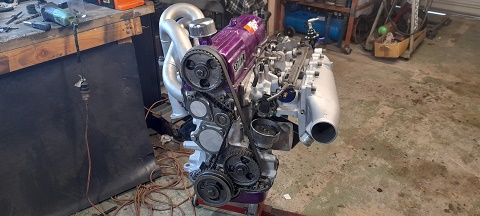
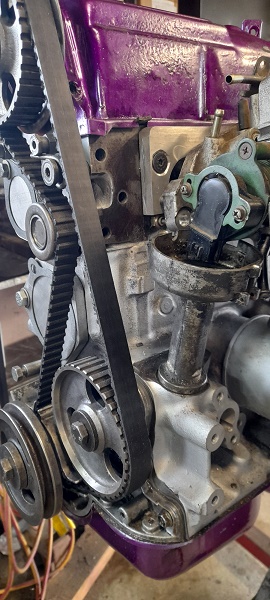
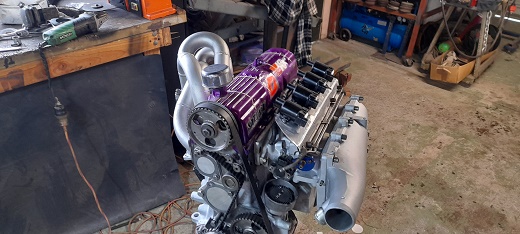
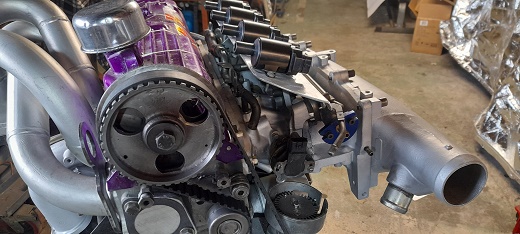
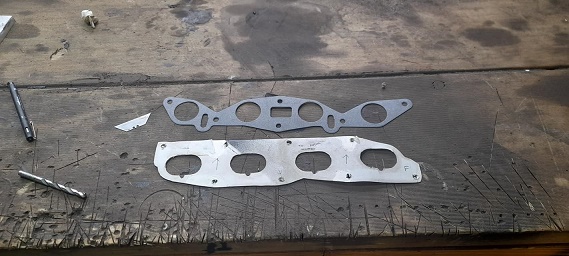
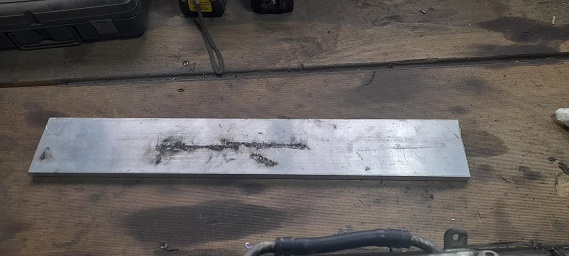
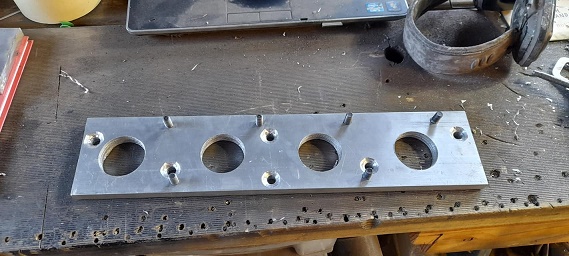
coil packs ..i went for GM/LS cop (coil on plug) with built in ignitors ..just to get things simple lol i looked at the motor for hours wondering where to mount them as the throttle linkage is in a funny place and having 4 intakes theres a lot of moving parts and i had to think about wiring as well. so ended up with this.
2 points
-
^^ Only two??2 points
-
It sounds a lot better now the valve shims are done, it sounded like it had a cam chain rattle before. I desperately need to sort a shed. My workshop entrance is way to small to get the big bikes in and out.2 points
-
After a week or so of driving around with my newly confidence inspiring and robust cooling system I got all excited and transferred my tools into the drawer. This showed up the limitations of my home made drawer sliders, which I kindof expected but was disappointing when the drawer no longer opened after a drive on a gravel road. So I bought some proper sliders and fitted them up; These are better, although they are not as chunky as I wanted due to space limitations. However, this extra weight caused things to list slightly to one side. I had previously bought a high lift jack that is useful to brace the body when using the crane, and that was just sitting in the back, so I thought it would find a spot where I could use it's chunkyness to offset the tools. A couple of hours work and we had this; It is pinned at the bottom and has a trailer hitch at the top so can't really fall off.... This had the desired effect, it sits nicely as you can see. It also now has a UHF cb with a chunky antenna, it's quite fun driving around with it in auto scan.2 points
-
They made it back to Auckland. They did 2000 miles and only had to put petrol in it. They didn't even have any tools with them. He once put a little oil in and then realized the car was sitting on a slope, so it now has a little too much in it. I believe there are a lot more pictures to come.
2 points
-
things are pretty great with this car. just got to sort out the seats and some carpet but thats for another day. i bought some new rear disks for it a while back because the ones i had were turbo fucked. minimum thickness is about 11 mm and one was down to 9. so yea, in they went. not a big job but still. 2021-05-01_12-59-34 by sheepers, on Flickr 2021-05-01_12-59-28 by sheepers, on Flickr2 points
-
Had a design in mind for the wall up to the lounge from very early on. Was gonna take a bit of time but I thought it would be well worth it. Cut and planed lots of batons from Rimu off cuts Its not a techy thing. They went up along the wall and are spaced just so that as you enter from what will be a hallway it sort of looks like a solid wood wall. Then as you walk in and past you can see the orange paint through the gaps... Neato. Much neater. I like the effect. But I also had this planned... and all the colours in between Today we went to the big smoke (Nelson..) and met up with @CPR Sierra who gifted us loads more leftover timber plus loads of insulation from a house build. Top fella- thanks so much Morris! This is just what we need to now continue on with the kitchen smoko room and bedroom sickbay build.2 points
-
WINDOWS UPDATE Yep- more windows. Yay for more light and some extra views. But before that happened we made the mezzanine a safer place to be by finally making some bannisters and removing the chance of plummeting 2.4 metres onto very hard concrete (or worse- a rusty car?). I had a particular style in mind from the very beginning of the build to tie in with the minimalist steel/wood thing going on. Started like this. We made a variety of steel uprights to suit... Ripped down a selection of nice Rimu timber, planed it, sanded it... Bolted up in place and we instantly felt safer... Next up was the stairway. Really didn't want to add too much here because I'm trying to keep it looking really clean and simple. But had to have something- especially for those nights when local friends are here and our brains are a bit addled... It was super fun going through the Rimu timber selection and picking out bits with nice grain to make rails from. Then the lower hand rail that had to be curved quite a lot to follow the stairs. Ripped down some 5mm thin strips of Rimu and laminated them, clamped to a jig welded in place on the big steel bench... Woke up the next morning and had a very strong curved rail to plane and sand down... Then mounted in place and given a lick of varnish... Really happy with it! We have decided against adding any extra steel work for now- its a nice strong rail that doesn't clutter up the stairway. Next thing was some more windows. One for the kitchen and one for the bedroom. These we chose from a pile of second hand windows from the local aluminium window place and they made new frames to suit our shed walls. Cheap way to do it. Cut a hole... New view... Stoked! Its really going to make the kitchen a nice light place to be (for when I make my super fine selection of cheese on toast creations... yep, I'm a bit of a chef like that..) View this evening looking down the space with new windows fitted... Here's a look at how the lounge is now set up. Scored some bloody nice Italian leather sofas cheap from a fella in Nelson. Totally the simple clean style (in elastoplast beige to boot) that we wanted. Wont be going back to cloth sofas when we own a very fluffy white cat. The sofas fit beside each other so you can sit 5 across in real comfort for movie nights (more can sit on bean bags etc in front). The sofas are light enough to very easily shift downstairs into the studio area if need be too. There will be some super plush carpet added in the lounge (oatmeal in colour because ginger/white cat...) and a couple of floor standing reading lights etc but otherwise keep it simple. More soon. Looking forward to the kitchen/bedroom build next.. its so fun!2 points
-
So the ol hillman been siting a couple months due to she keepd buring the points. In frustration i left aside worked on other projects. After the kids constant naging for a drive. I just replaced all the points condenser ect again. Shes driving well again. Hopefully for longer this time haha1 point
-
Nekkid! more tomorrow
1 point
-
So I got the bike all together and dropped it down to Danny, Hayhole and the team at Watermark Signs in Wellington. What a bloody transformation! I gave danny a bunch of photos of the original Rothmans Dakar NXR750 along with what vectors of Logos I could find. Danny drew up the vectors that I couldn't find, color matched everything and sized it up. Hayhole did all the application. Im absolutley blown away, its come out far better than I ever imagined. Its still not 100% complete. I still need to get the sump guard and crash protection on. This wont happen for a week or two though as the tank needs to come back off so I can install the new choke plungers when they arrive from Japan, less than a week before the rally, eeek. I'm cheesin. Will get some lush photos done of some of the cool details once its all back together properly. I do find the before and after photo quite mesmerizing.\1 point
-
Water temp gauge works now, so does the oil light.. Some moron flat peaker switched them round... Plugged vac line 21 into its home, so now it idles better and may sort its other issues out.. He reckoned it had a blown turbo... No smoke, but wouldn't full spool... Turbo flap actuator not plugged in.. Penis1 point
-
I did Alexandra to Whangarei in a 40 year old lancer that hadn't been driven in 5 year1 point
-
Thanks for sharing ur dads trip in the Angry Box. Its great to see her doing what she loves.. Long drives. My best trip was to Marton from chch in her1 point
-
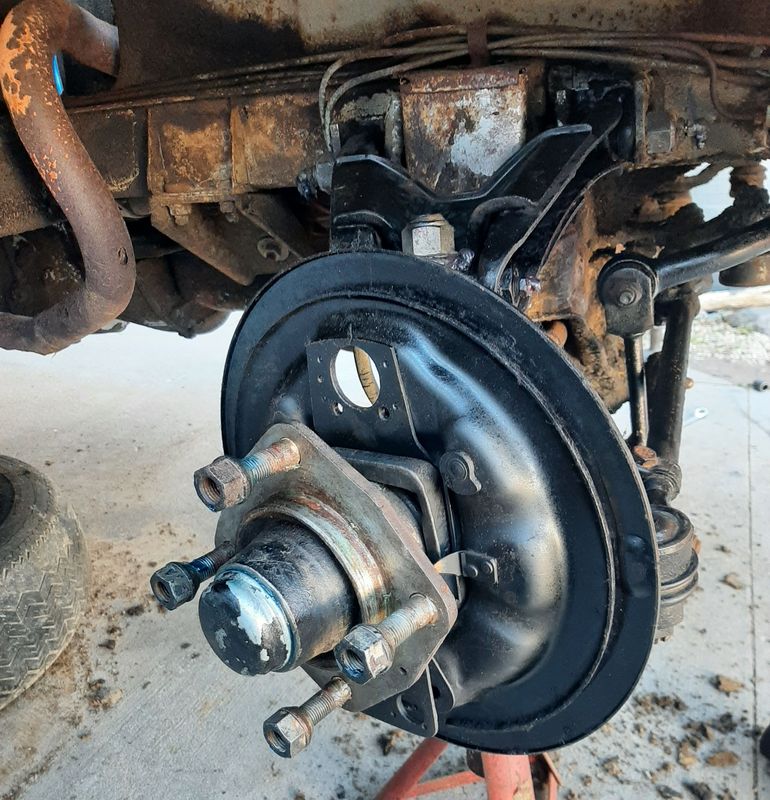
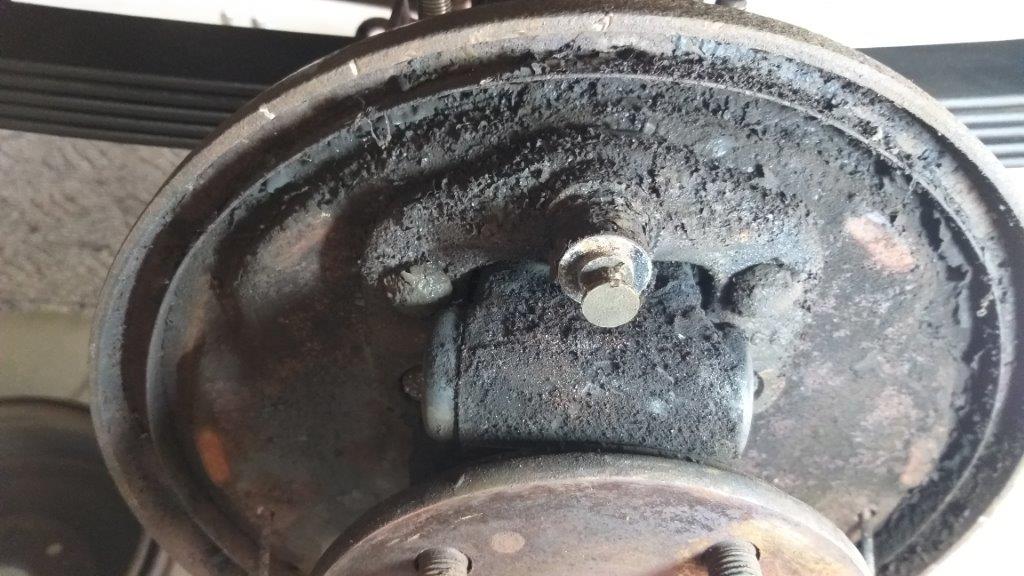
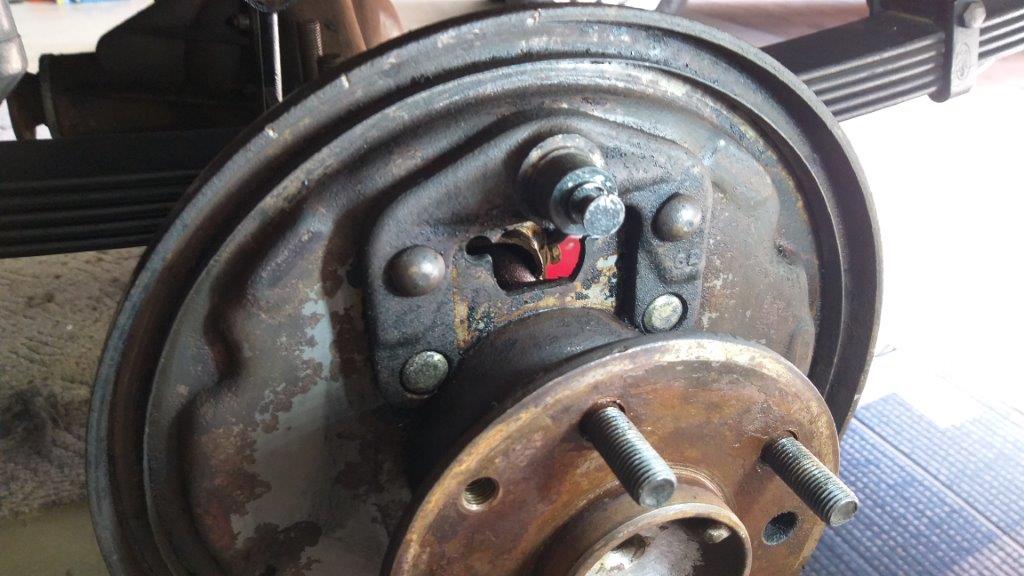
Today's task was to fit new rear wheel cylinders. I did a bit of a quick and nasty job of it as I plan to do a full strip down and paint when I replace the rear wheel bearings. I'll leave that till after some road testing as I might need to change the diff ratio at the same time. I've got a few centres with different ratios stashed away including a LSD centre that I'm tempted to fit. Anyway, I've been putting off this brake job for a while as its real fiddly. The original right hand side cylinder was seized and the left one looked a bit crusty. Did a quick de-crud job while I was at it. The shoes have probably got enough meat on them for now, so I'll save the new ones for when I do the full axle rebuild.
1 point
-
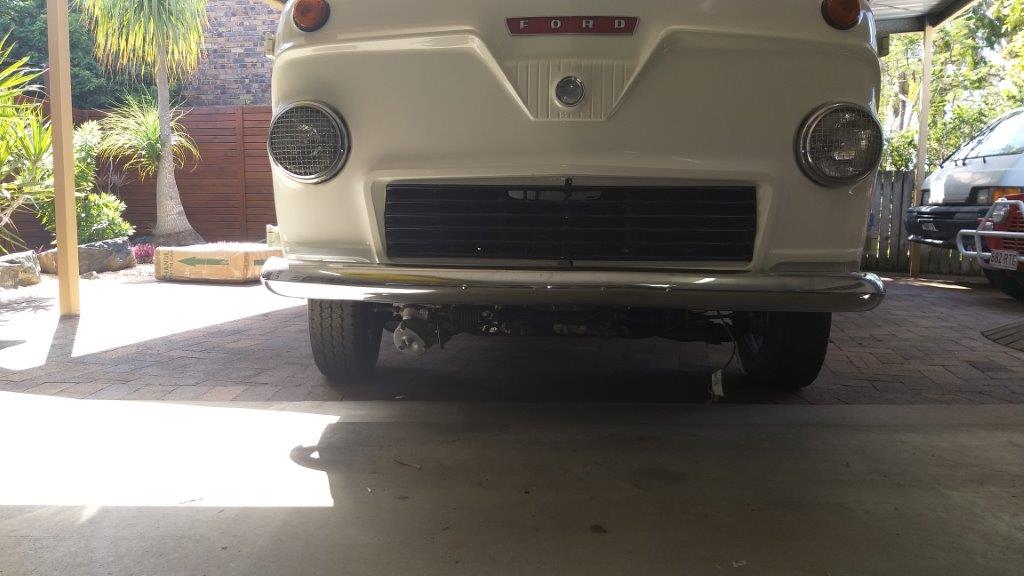
Managed to get the Thames back on its front wheels for the first time in a few months. Pushed it out of the shed so I could give the floor a good sweep. Looking at the Thames front on the L300 steering angle box hangs lower than the front valance, but it's a small price to pay for the vastly improved steering setup. Even with two leaves removed from the back springs, the van has still got a bit of a nose down stance. Perfect for that 70s look that I am aiming for. Thanks for looking.
1 point
-
hhmmm page 6 ay... pretty slack. sorry for lack of updates but in my defense i haven't done any work ...at all on them...due to a small health issue and my body letting me down on more than 2 occasions .. and i have taken this year off the cars to get some stuff done around the house.....and if i try and do that and find time to work on cars ill just get fucked off...so year off. the cars are still there i have been playing with pintos tho as less room and just keeps my mind ticking over. i had sorted the falcon CPI for fuel injection and was starting to make a hat for that for boost. .....but ive had a nissan gtir inlet sitting on the shelf that i was planning on using on my focus.....but it got the better of me and i had to see.....(now it does need some cleaning up and i need to do some port matching but this was all by hand with a battary drill...and the socket head bolts cost more than the inlet manifold0 i had a pinto gasket and i made a cardboard one for the gtir..they do share a common bolt hole so that was enough for me. i had some 10mm alloy so i sorted the pinto part first. once i port match the head it will be fine....only had a 44mm hole saw then sorted the gtir side tryed it on the turbo motor......looks awesome.....love it i just need to find a better tool to port match gtir to pinto and back and find a fuel rail and maybe some bracing .....and thats good to go. cheers
1 point
-
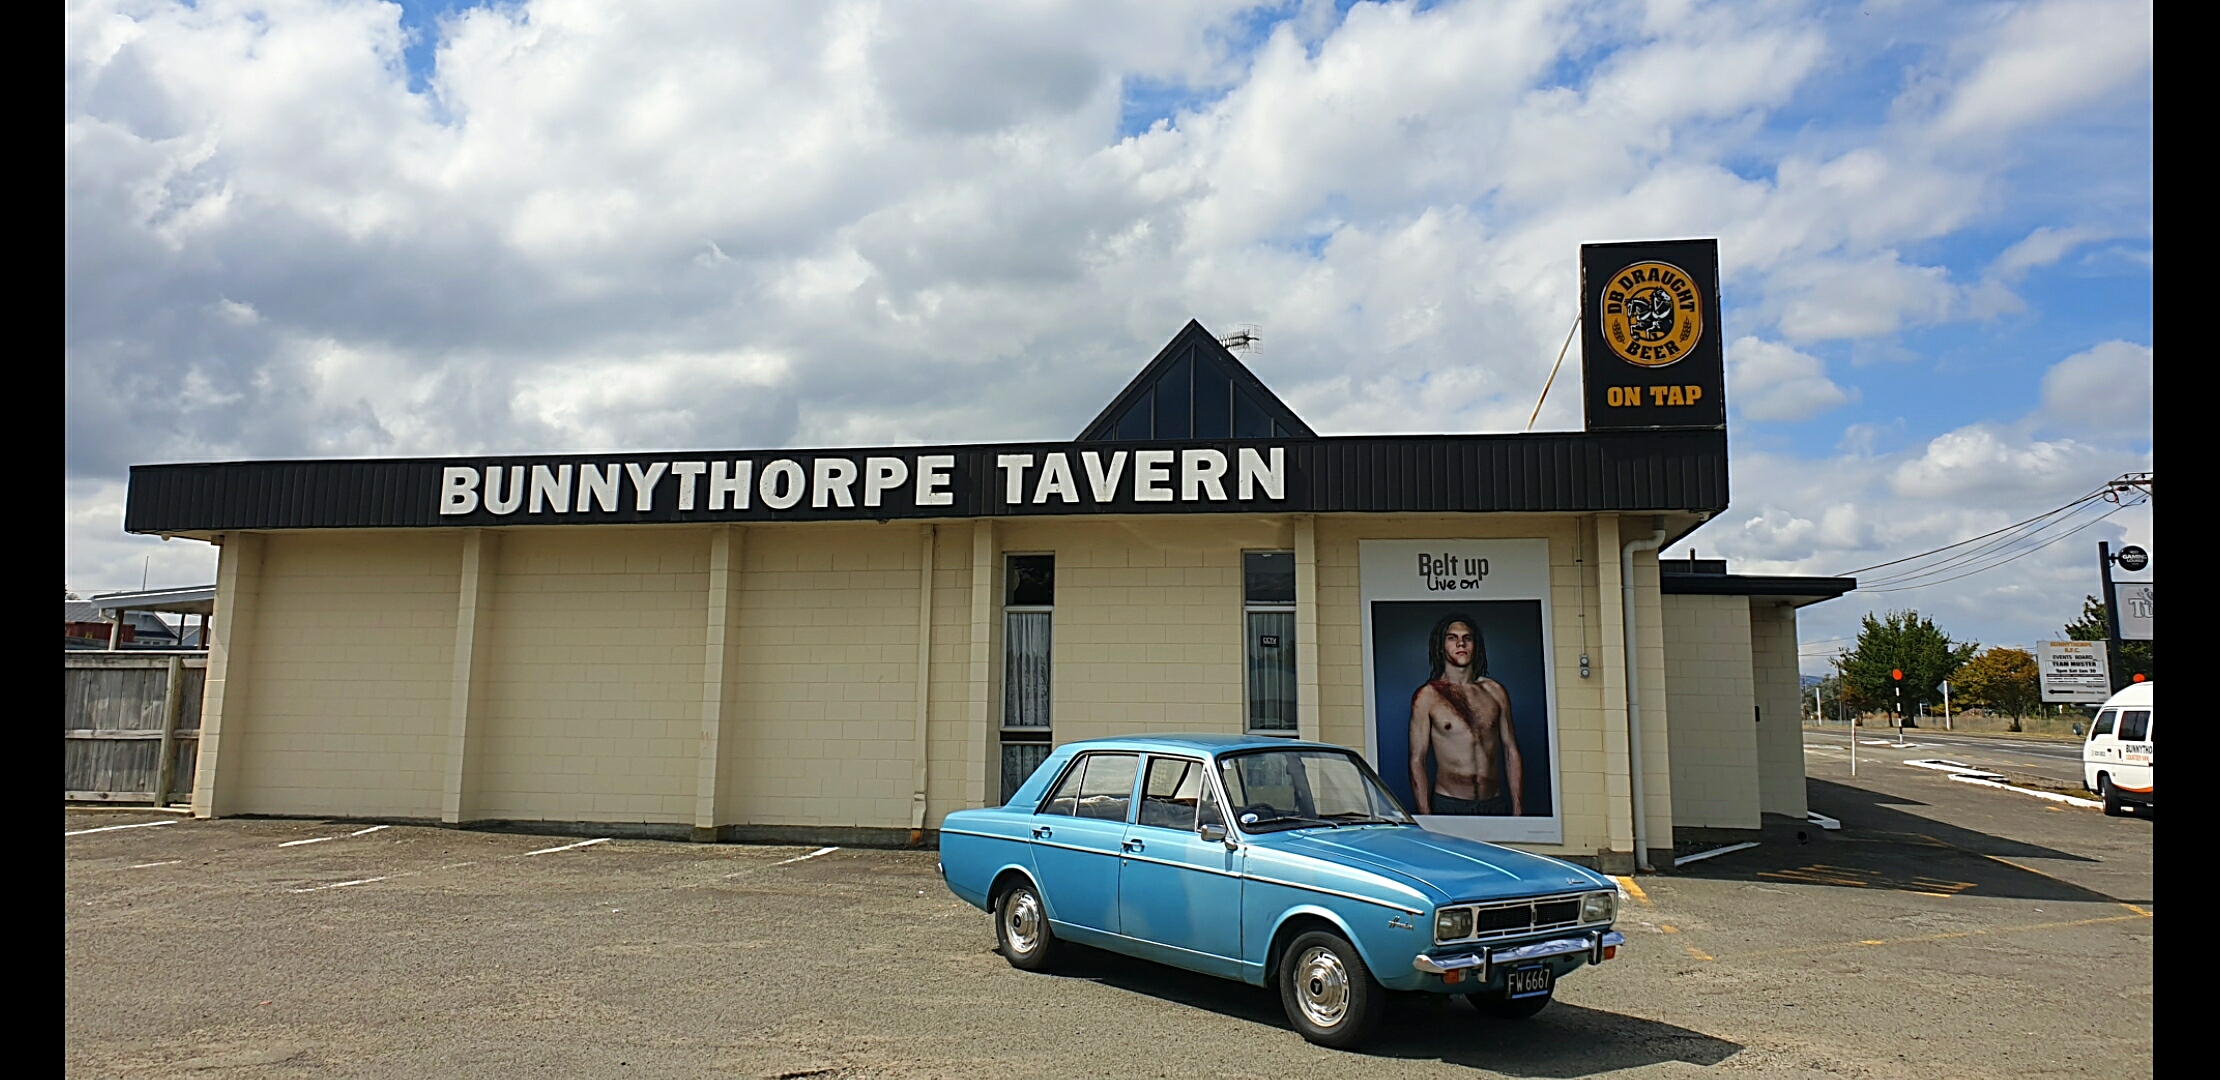
Oh we had our 1st little outta town trip. Just to bunnythorpe and bak down the back way back to palmy behind airport. Never got hot or any issues prety happy. Felt solid.
1 point
-
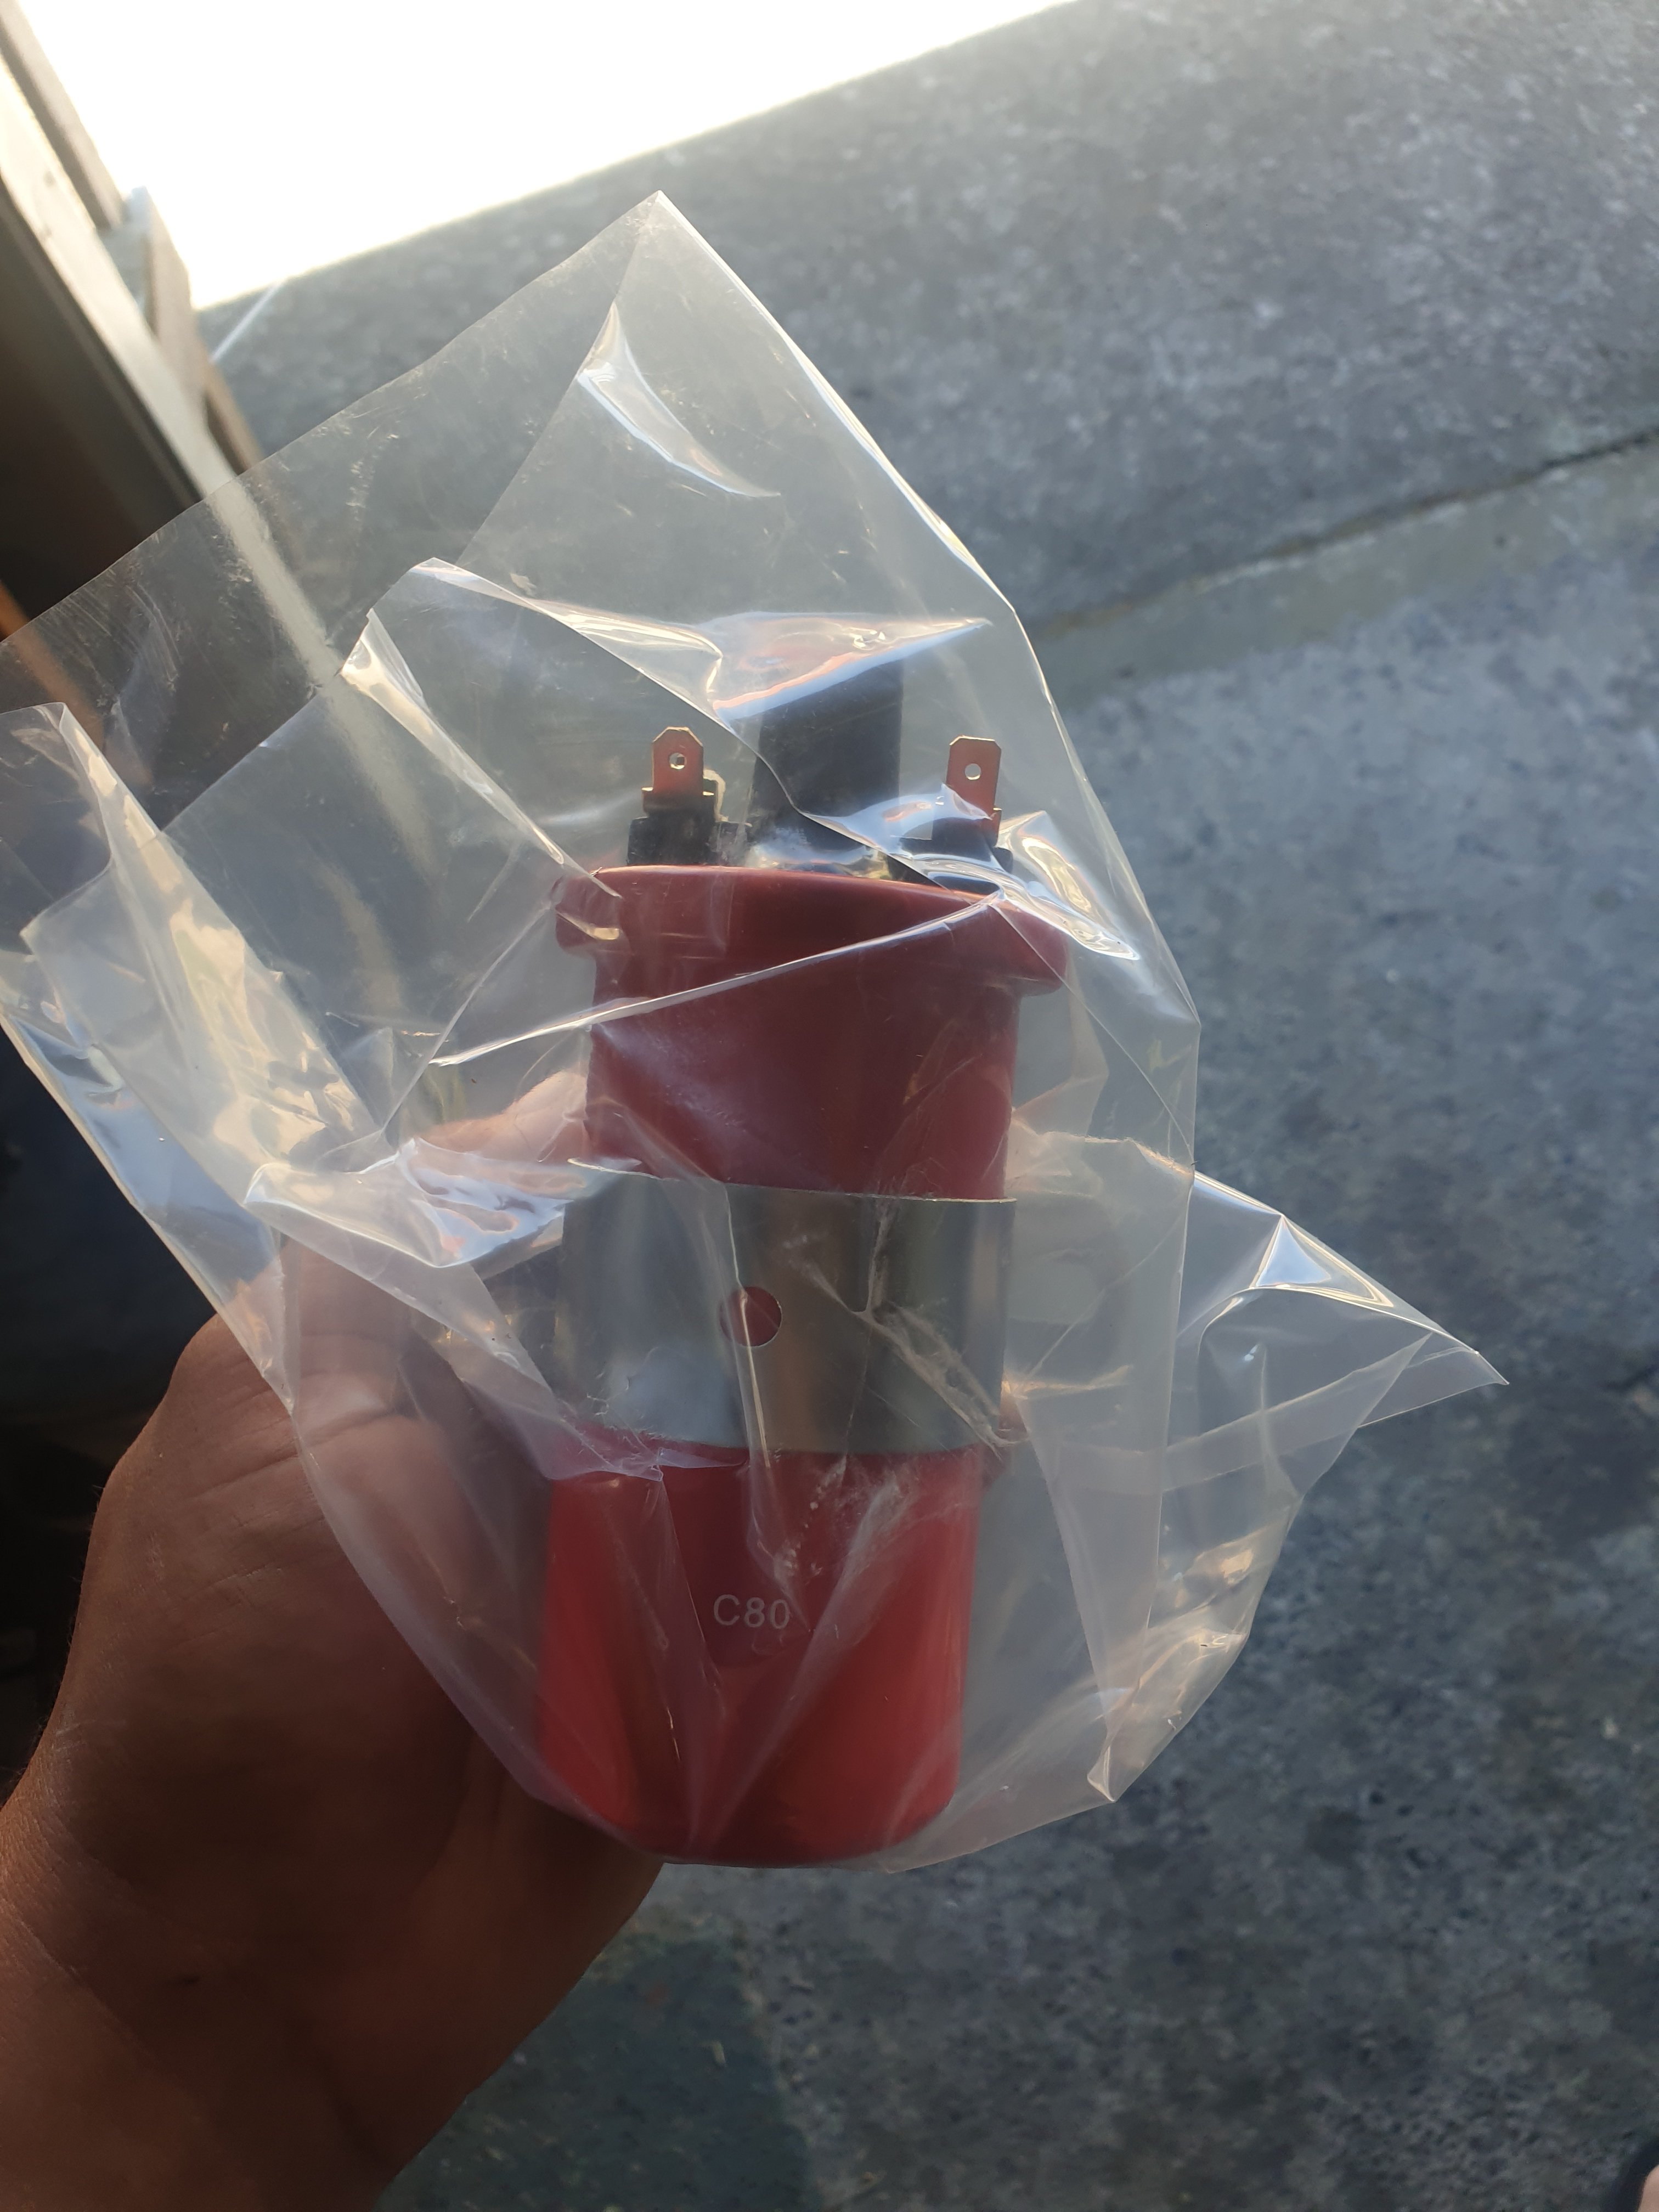
New coil in Just wating on leads to arrive. Shes running realy decnt super stoked. Did a good lil drive today ran well no issues. Needs to do a oil change also
1 point
-
New metal
1 point
-
bit more done on the black mk3... got the engine bay loom all in ( with new mounting points...all removed by previous owner).. park.head.and high beam lights work now...wipers.( both speeds.) and starter. heater is down an earth and no bulbs to try indicators yet... not bad considering rear half of the loom is missing where i had to cut it ........figure the front out and then make the rear from there its never had a loom since iv had it and the lights and loom from the rusty old sat since 84 wagon.......make it very steve kings christine like
1 point
-
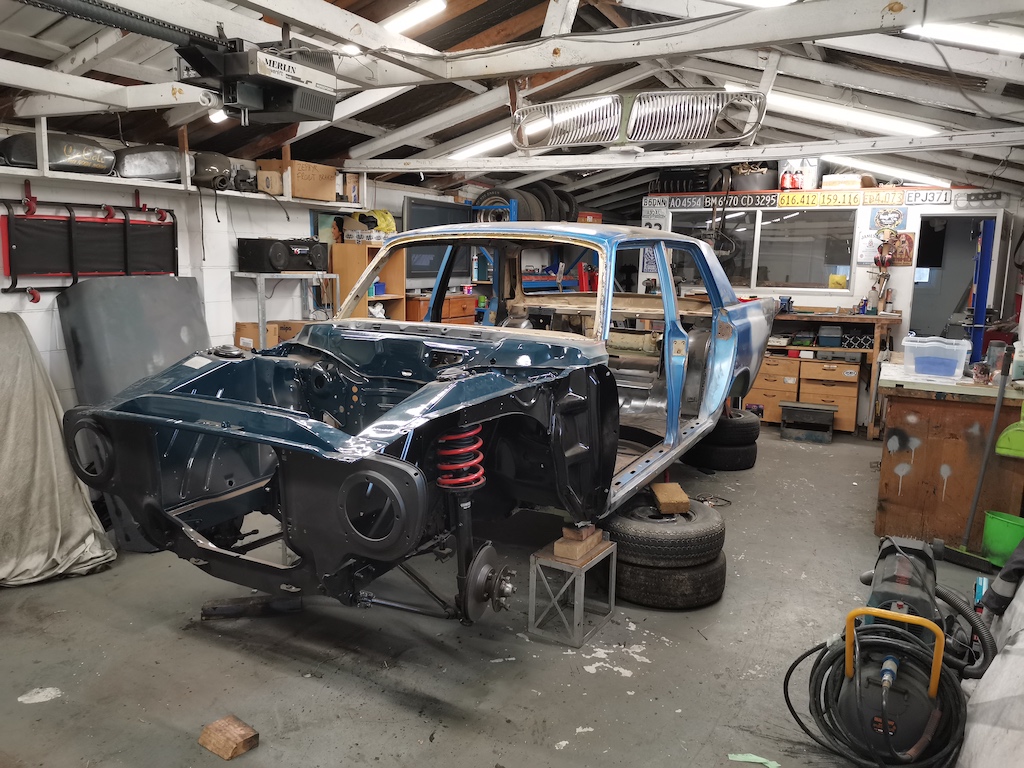
Got the engine bay and front grille into colour I've reassembled the front suspension, car kinda rolls now. No steering components yet. Next plan is to pull the diff and exhaust and start to tidy up under the car.
1 point
-
Got the engine bay into high build primer, first round of sanding under way. Also been working on a horn button for it. It's got an aftermarket steering wheel with no horn button. Quite like the steering wheel, so I'm going to 3D print one
1 point
-
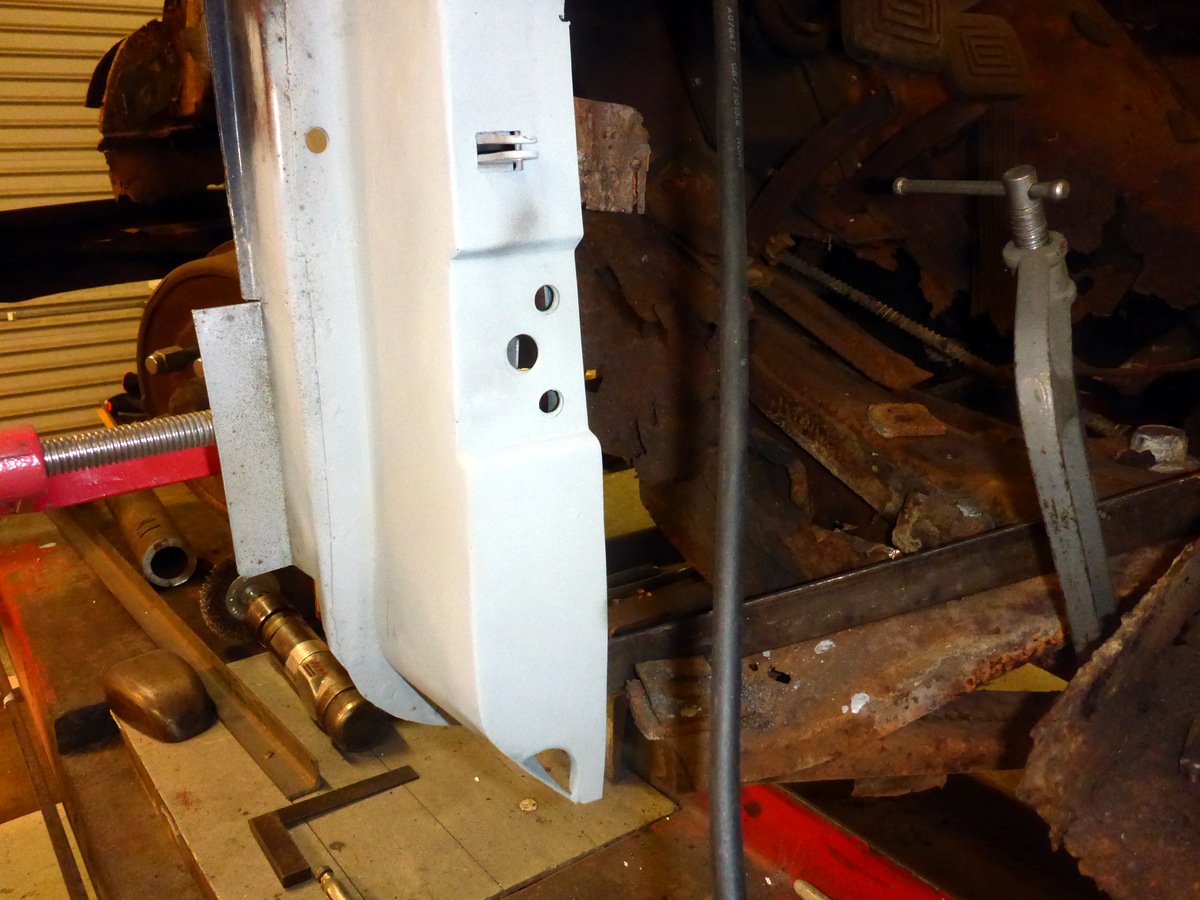
Lower hinge area is a double skinned piece Inner reinforcing section first Then the outer part
1 point
-
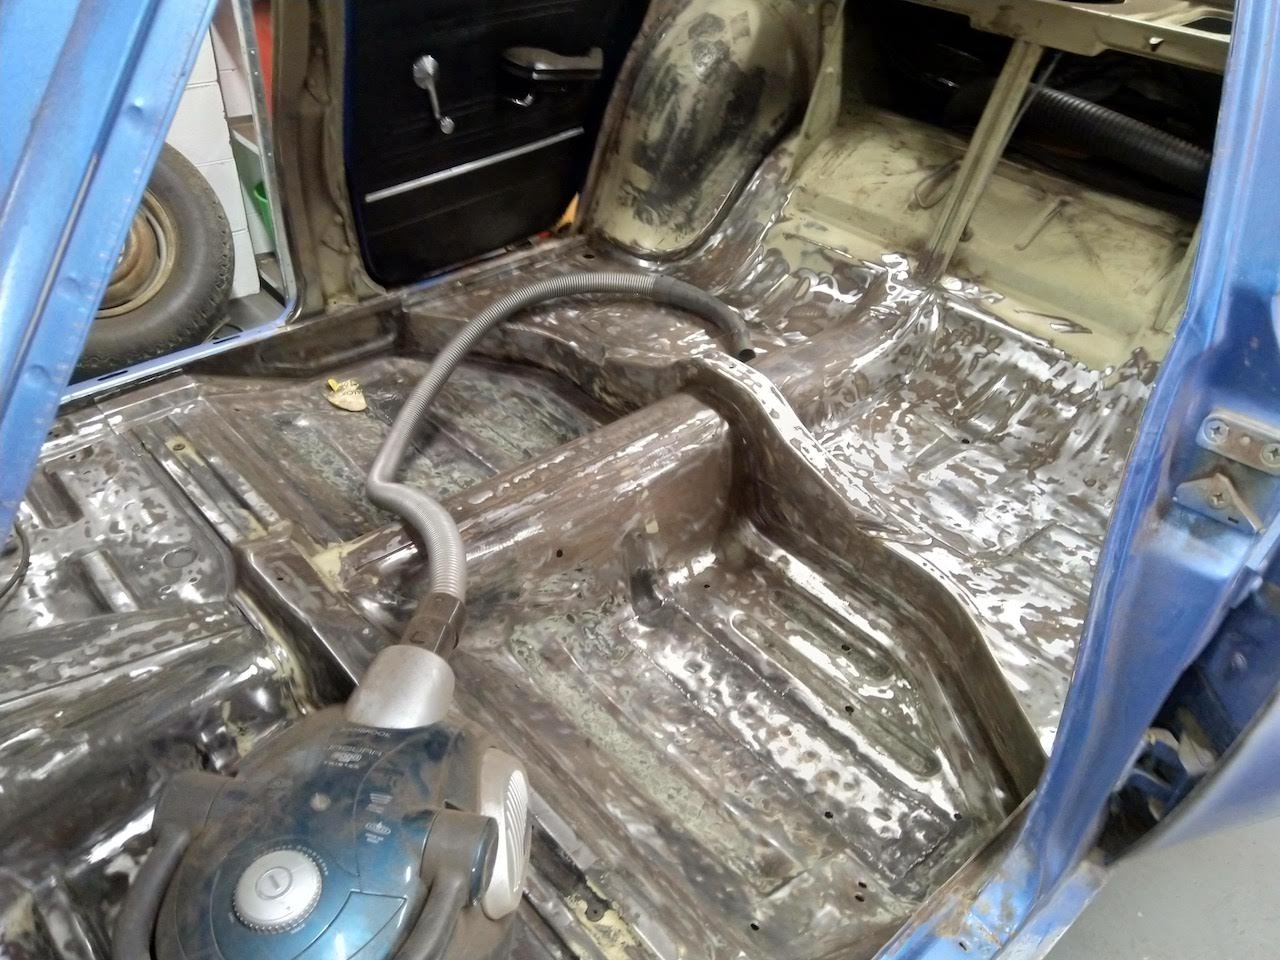
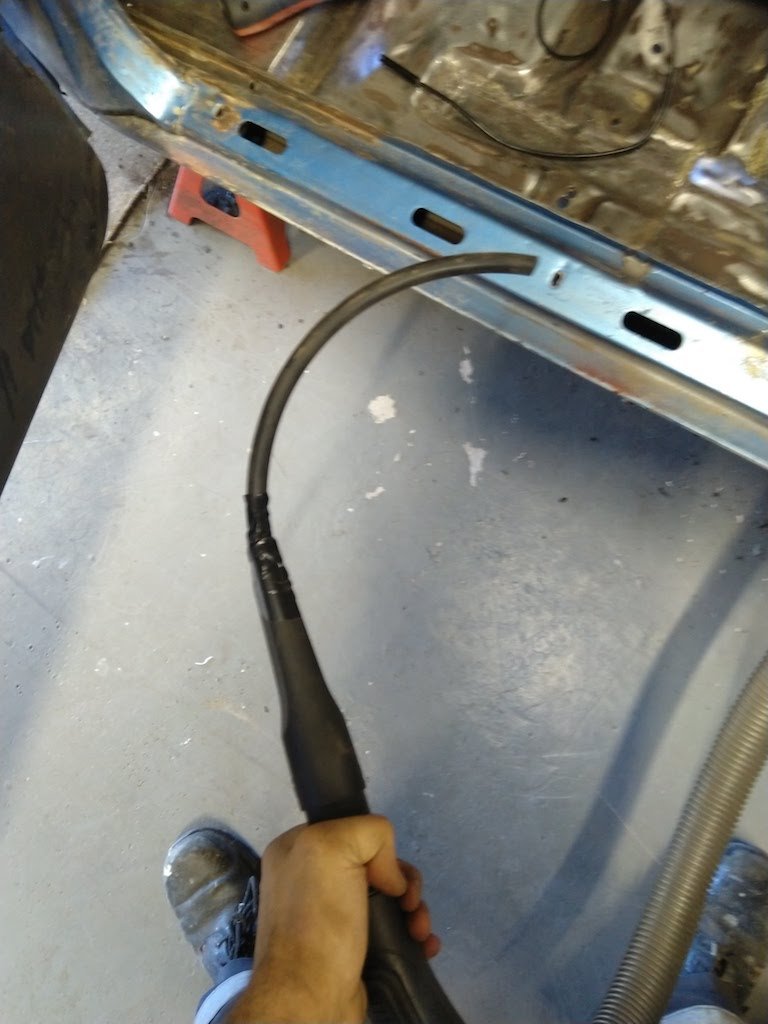
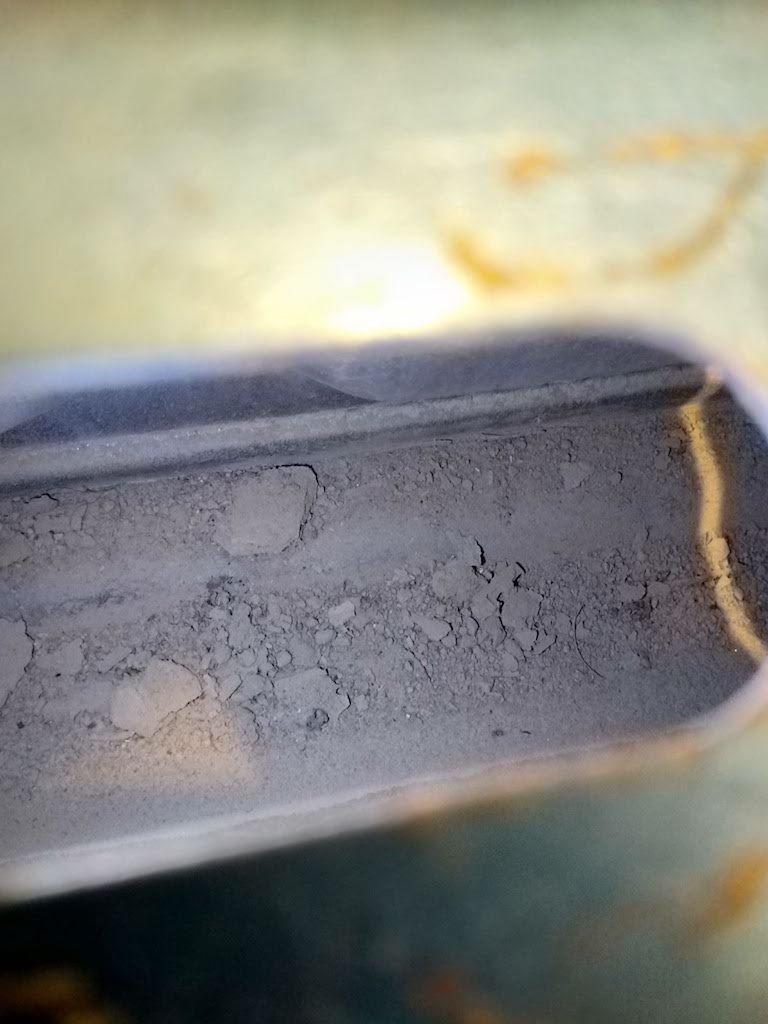
Still chipping away at stripping and sanding the floor pans. Decided to blow off some dust with some compressed air, I was surprised at how much crap came out when I poked it into the sill. I used my aliexpress special inspection camera, which worked surprisingly well. Rigged up a hose on the vacuum cleaner, worked a treat to clear it out. Fortunately no serious rust, once I've got them painted I'll fill it with cavity wax.
1 point
-
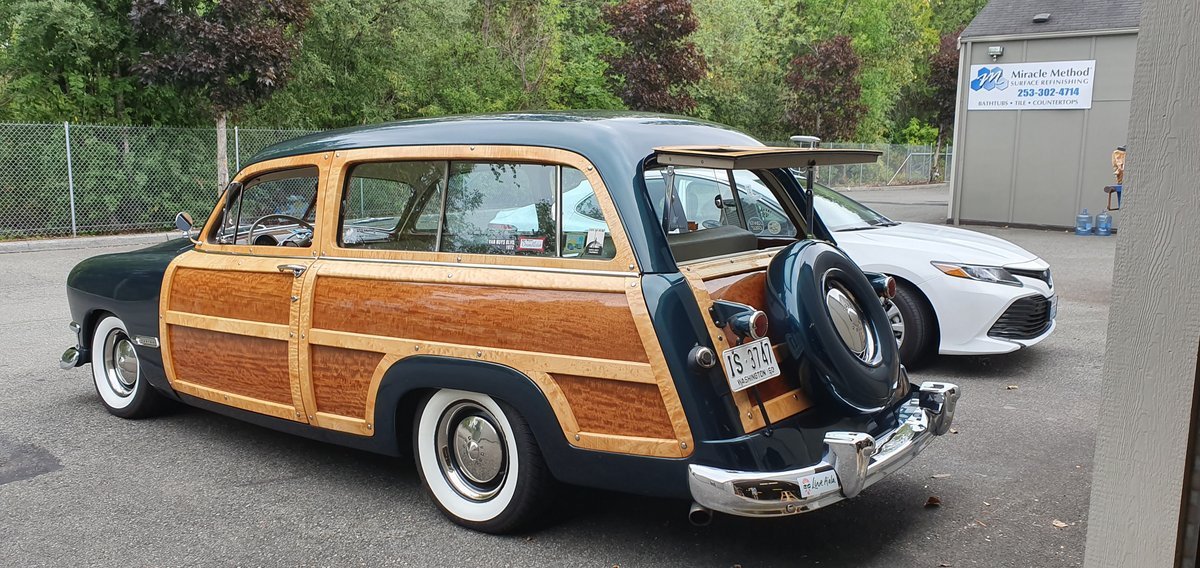
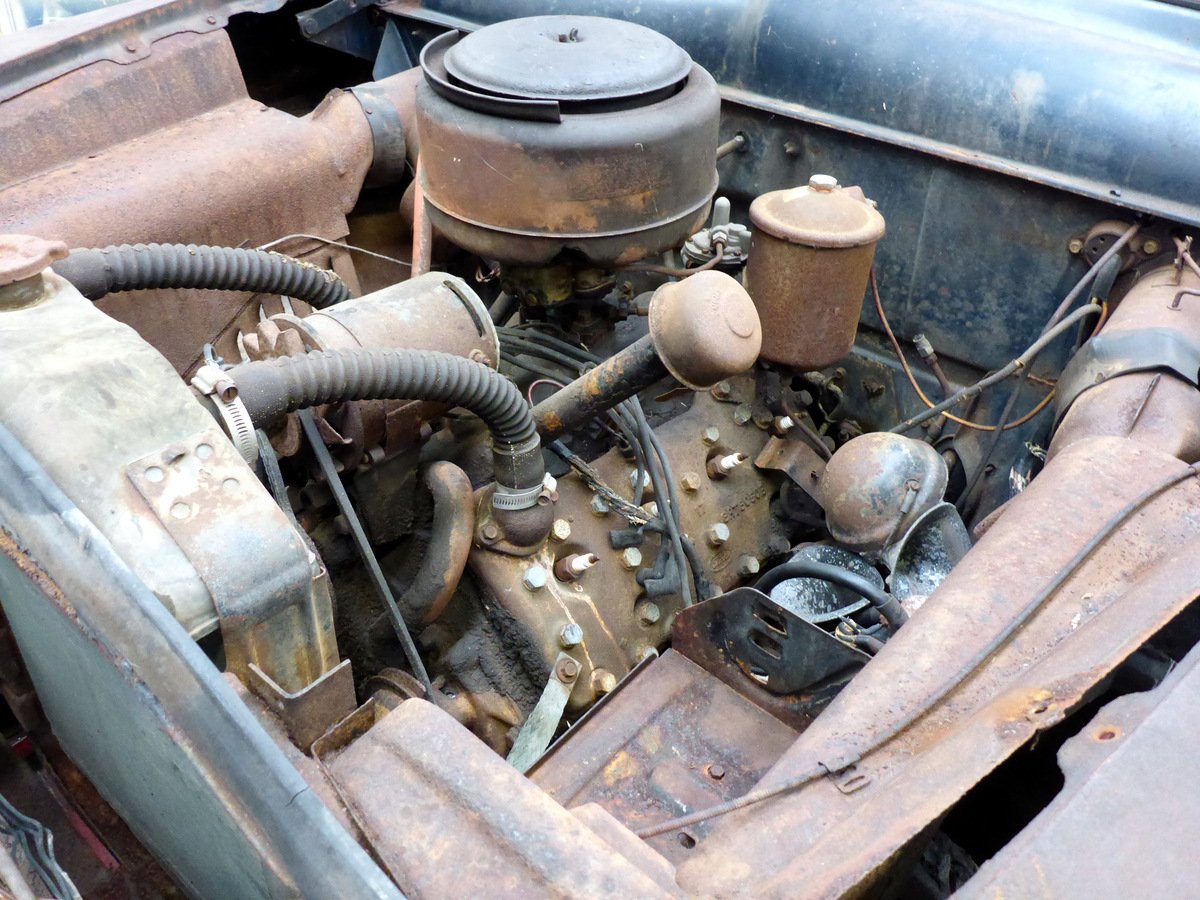
So, this car needs a lot of wood. Henry Ford bought ~300,000 acres of timber land in the Upper Peninsula of Michigan and built a town, sawmill and hydro plant. The wood was used in Model T's and later Ford cars right up to the end of real Woodie production in 1951. Here's a history snippet: After WWII station wagon building resumed at Iron Mountain and all of the Ford and Mercury staAfter ttion wagons and Sportsmen convertibles were built here. The station wagons were four-door and lasted until the new 1949 model which was only available as a two-door. With the introduction of the "New Generation" Ford, the amount of timber used in the station wagons was cut around 85 percent. No structural wood was required as the wagon bodies were steel structured with mahogany-skinned panel work and maple framing. Mercury also used the same body for their wagon but the doors were cleverly restyled to flow into the wider front sheet metal of the Mercury. The new design was the work of E.T. "Bob" Gregorie and his team at Ford. The steel body structures were built in Detroit and then shipped by rail to Iron Mountain. Here the wood panels were installed and the bodies were painted. The work required a lot of hand assembly to make the doors and side panels fit cleanly. The panels for these New-Generation wagons were assembled using advanced fabrication methods with one of the first microwave curing processes. Some section framings were created out of six loose layers of ash with a two layer overlay of maple. The door and side panels were then formed in a press using loose wood-plys topped with a thin layer of Honduran mahogany. This jig-formed panel was then put into a micro-wave bonding oven under pressure. At the time, this process was referred to as "radio frequency bonding." The new process cured the panel in five minutes rather than the 48 hours it normally took! Once the bodies were completed they were shipped out by rail to assembly plants around the country. The final run of Ford's "wood" Station Wagons looked somewhat similar from 1949 to 1951; however, there were many small differences in the wagons. These were the years of the "single and twin-spinner" Fords and in 1950 there was an attempt to lower the production costs when Ford dropped the wood graining on the tailgate and replaced it with a painted tailgate. The rear quarter windows were eliminated, the interior trimming was changed, with wood-grained Masonite door panels and a painted dash board replacing the wood graining. Other running changes were made with some items re-introduced and then dropped again on the 1951 model. As so many minor changes were made to this series of station wagons, restorers have a hard time determining exactly what a correct year model should or should not have. Around October 1950, the mahogany paneling on the station wagons was replaced with Di-Noc plastic vinyl sheeting bonded to steel panels. Chrysler had been using this trimming idea on their Town and Countrys since 1948. Chrysler dropped Di-Noc and converted over to body color panels and wood framing in mid-1949. Ford continued building the Ford and Mercury station wagons at the Iron Mountain plant until December 1951, when the plant was closed and 3,500 workers were laid off. To take up the loss of production of Ford and Mercury station wagons, production was moved to Mitchell-Bentley in Ionia, Michigan. While in the USA for work last year (we won't be back there for a while I suppose) we visited Rick Mack. He's probably the best supplier of this type of wood. As noted above, the frames were laminated in the original ford design. This because there is a lot of curve in the pieces as the come up over the upper parts of the door 'skin'. If they were bandsawed out from a timber blank then the grain would weaken the structure. Rick doesn't use a microwave bonding but laminates the wood strips into forms using a press. Pic below is Rick's personal woodie. End result of the visit was an order for a full wood set. :
1 point
-
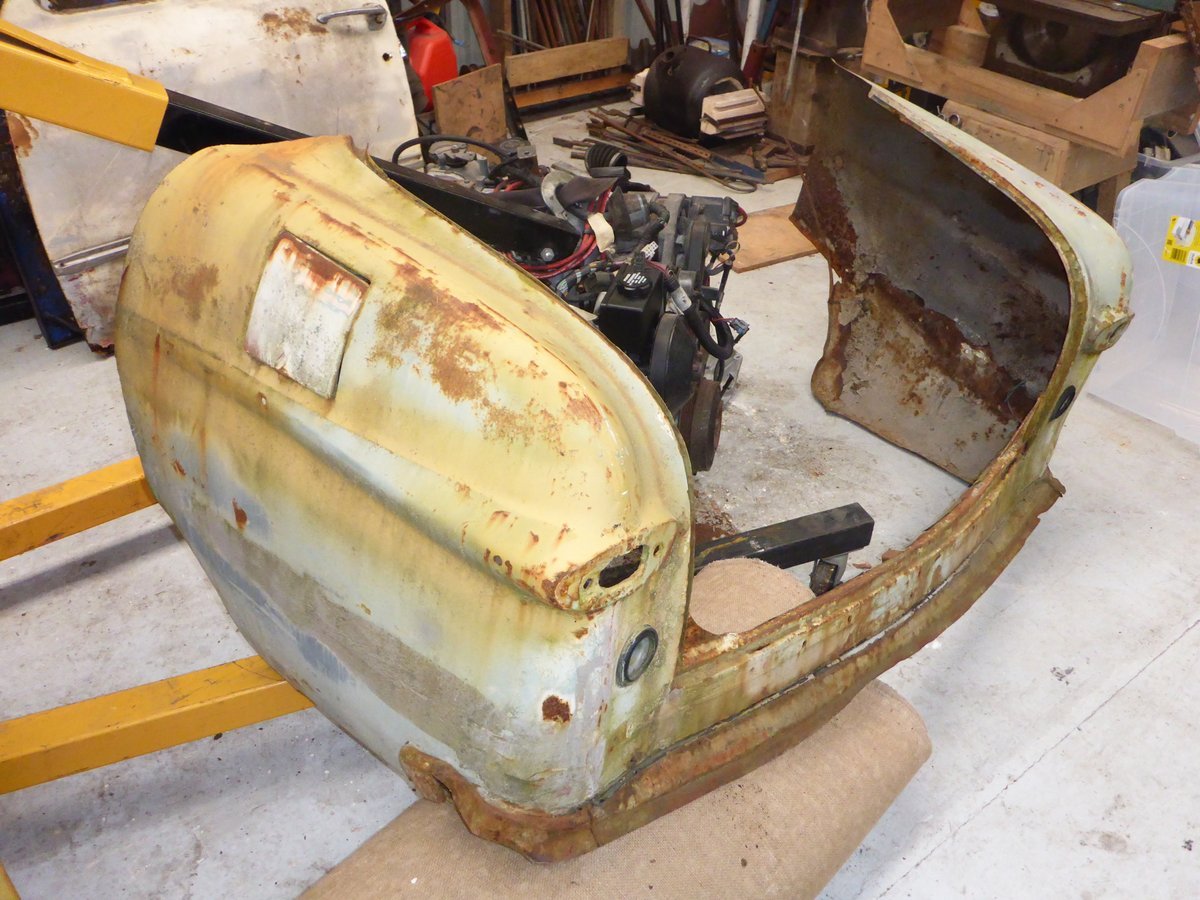
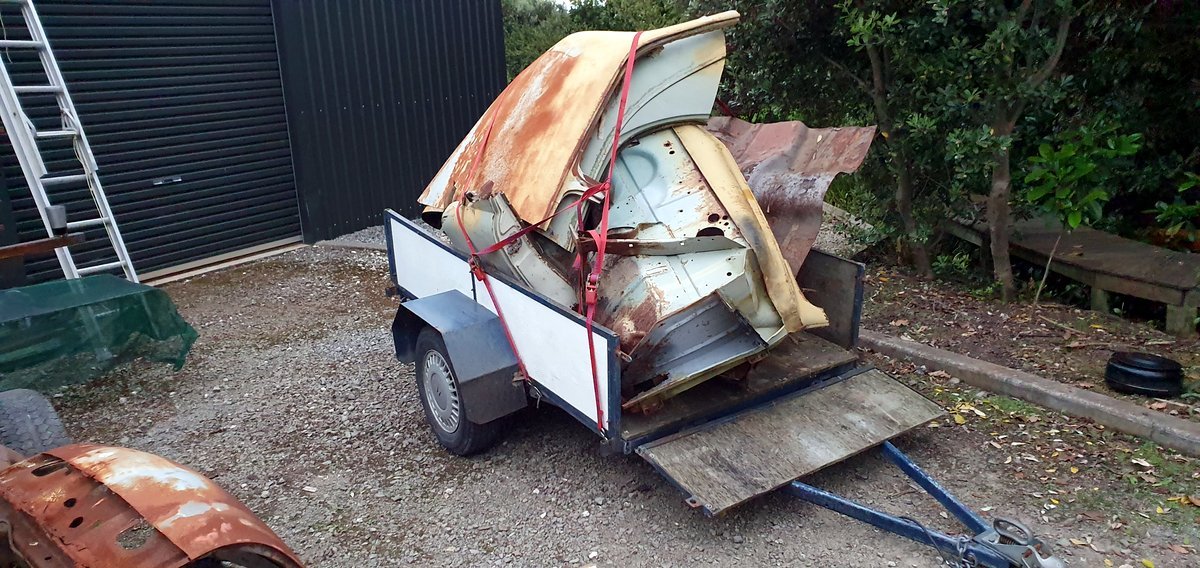
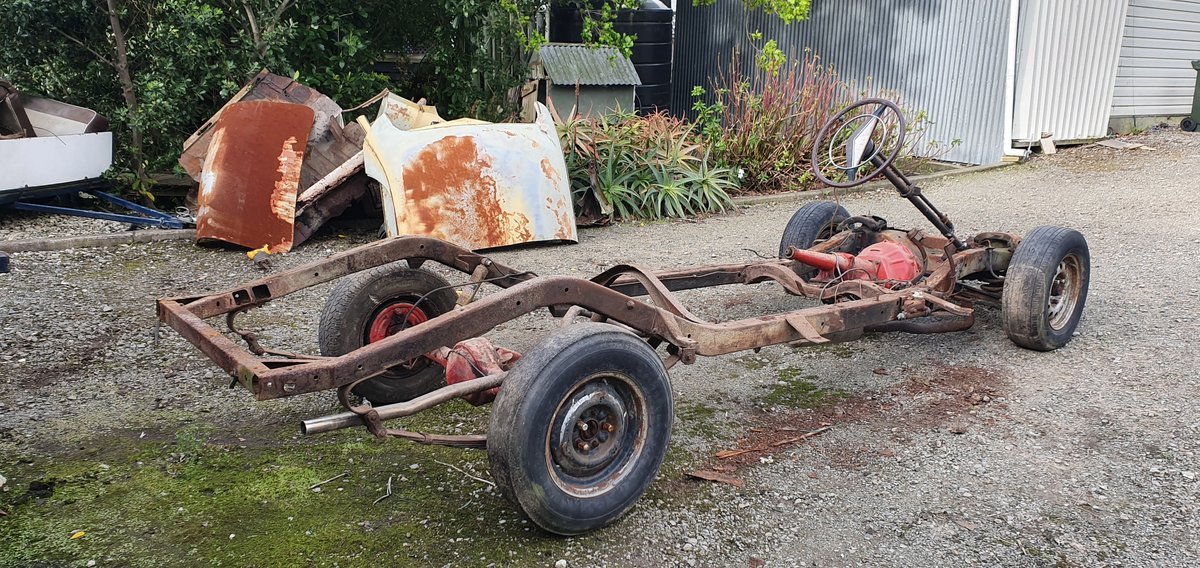
I was going to keep this rear section for a 'one day' (/never) couch build but after advertising the seats on FB, @Cbomb came down and took most of the 4-door parts away. The rest of the shell went to scrap, although I heard later that some local whanau cherry picked some bits to be used in an art project of some sort. Also, the owner of the chassis needed some cash after buying too many motorcycles, so I ended up buying it so it's still sitting in the driveway. It's RHD, but might be useful for some parts or to use as a temporary body support (although I suspect the woodie chassis may be different in some way)
1 point
-
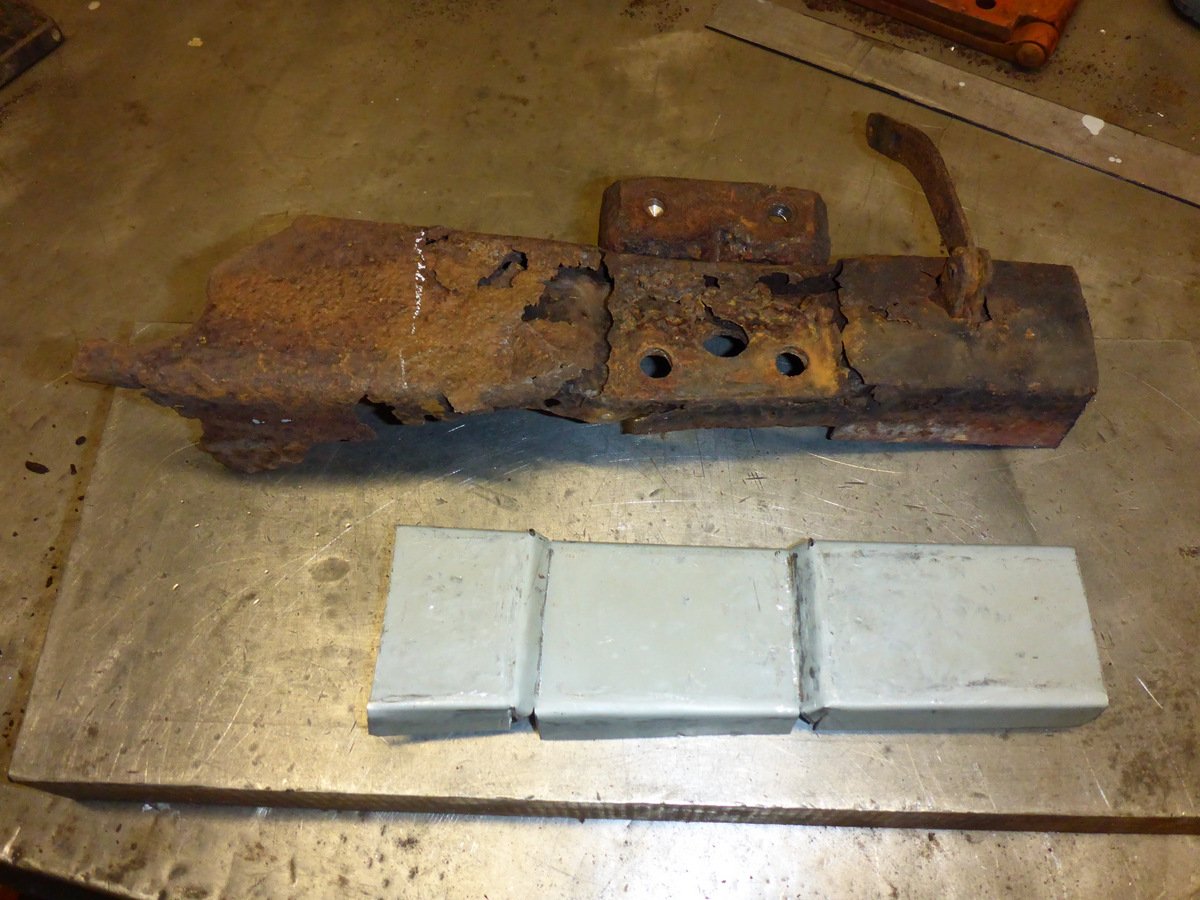
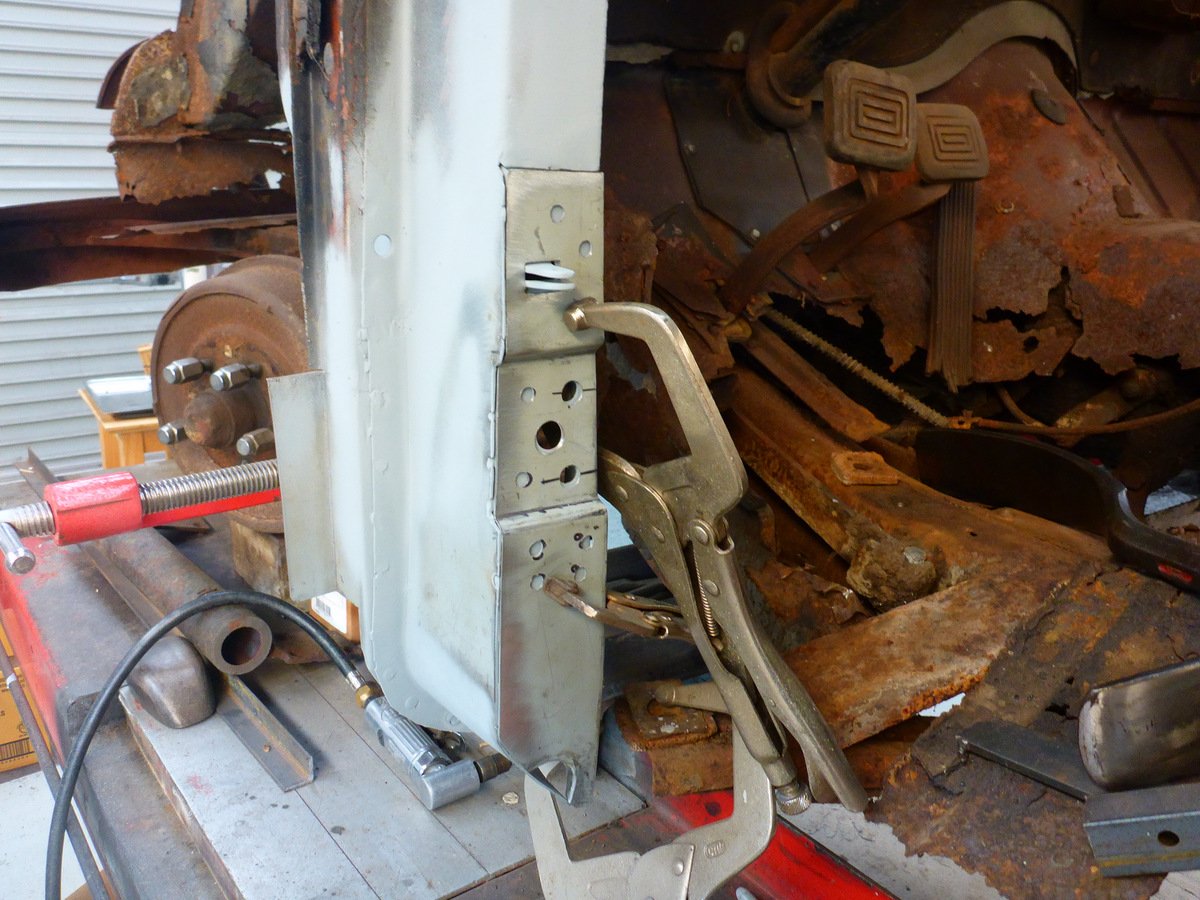
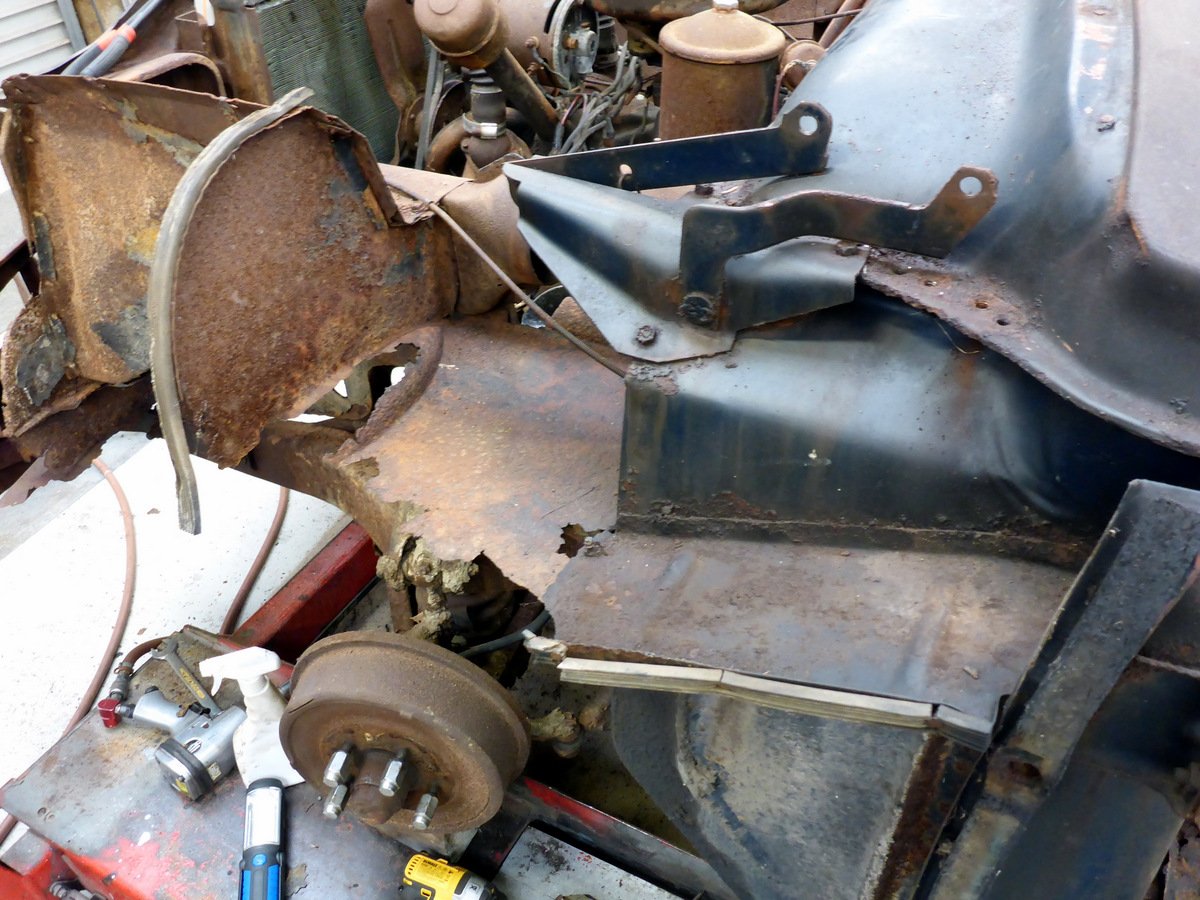
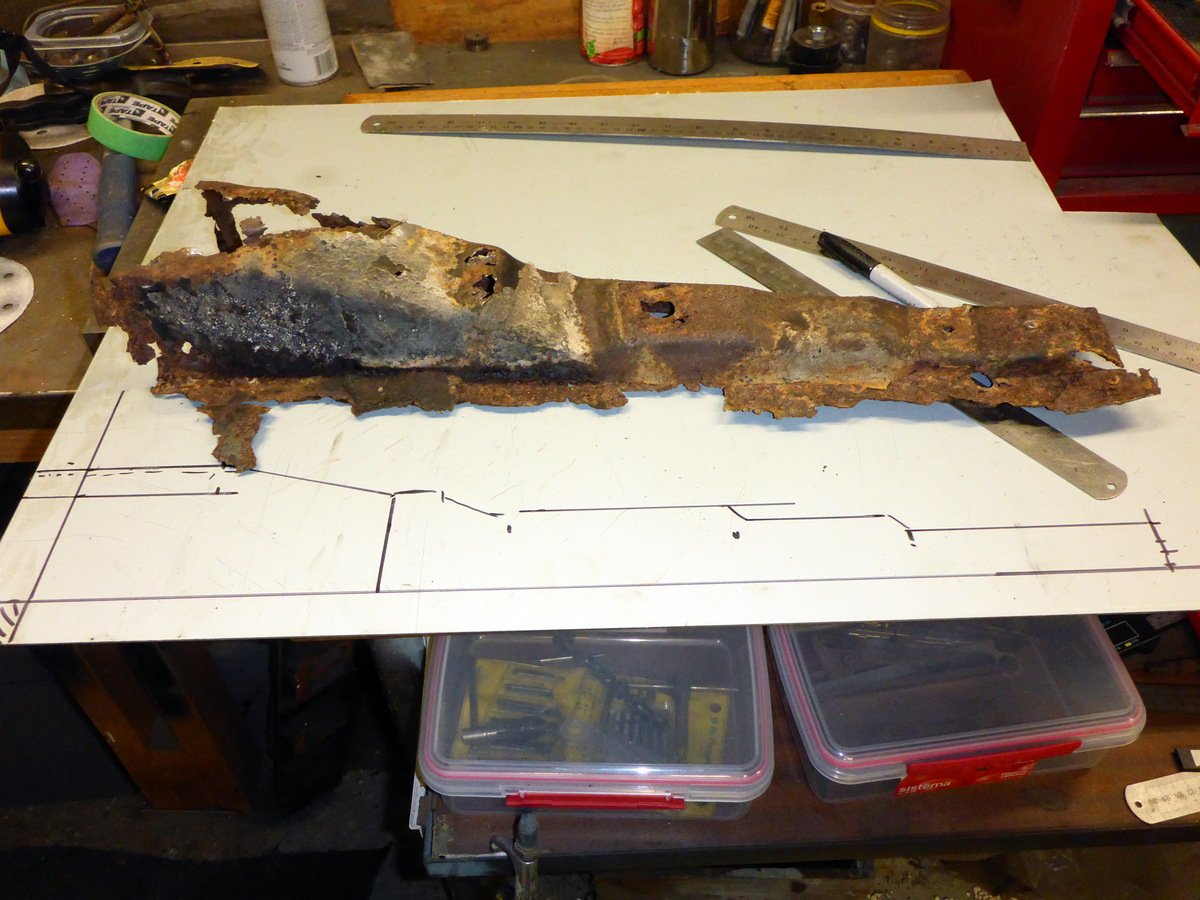
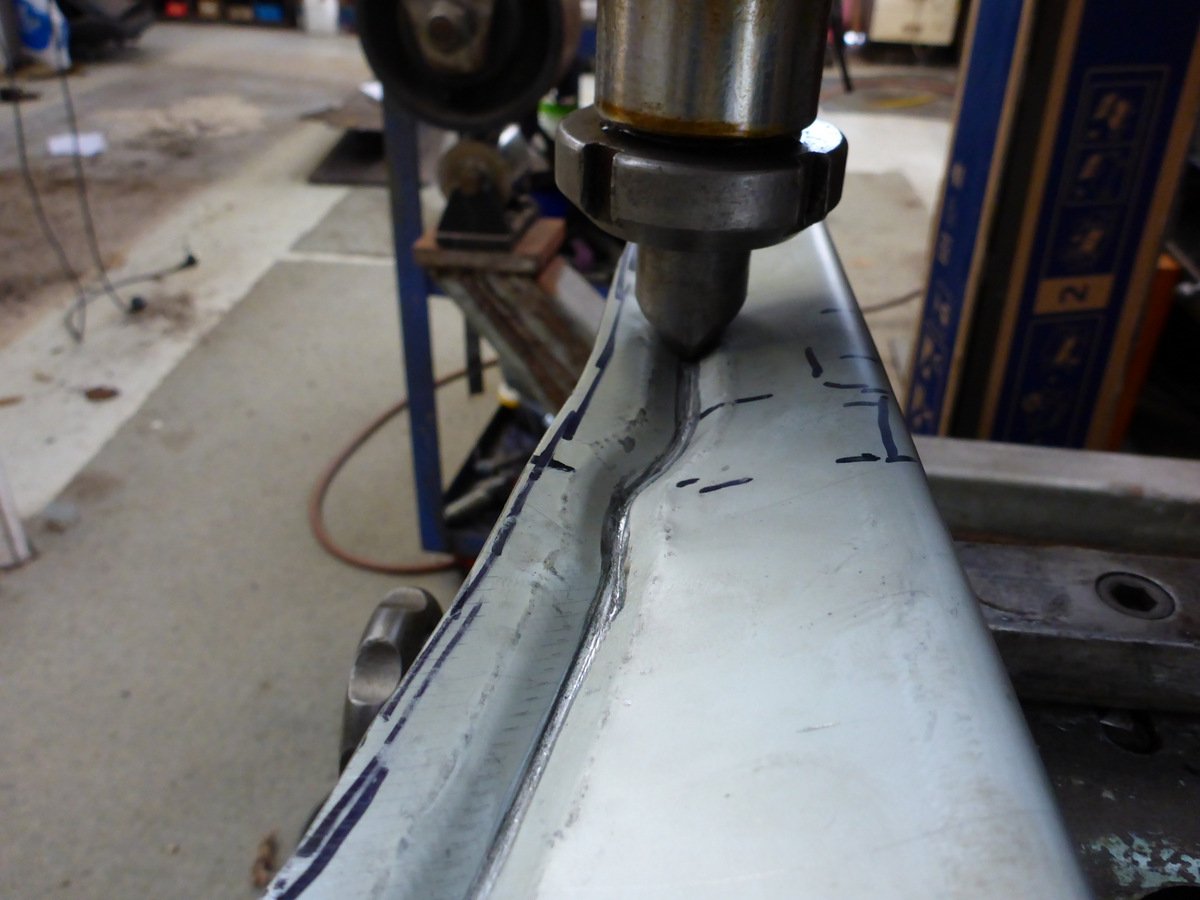
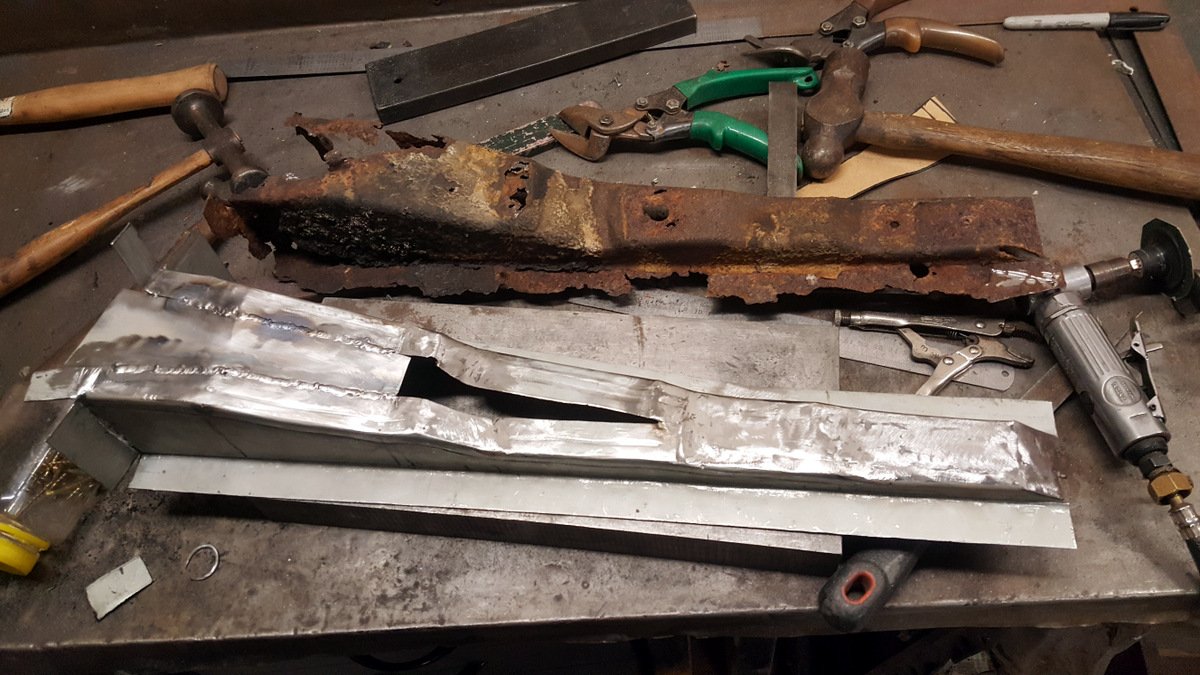
I have had a VIN assigned for the woodie so it's properly recorded in LANDATA for the future. I also had the local Repair Certifier come down and take a look before I did anything. He confirmed that it's OK to go ahead and start work replacing the rot myself. He's since passed this project on to the new owner of the shop. so I'll have to get him down for a look sometime soon too. After that I felt it was OK to do a little dismantling. Removed the hood (floppy) and some of the grille bits and the drivers side guard for access to the A-pillar. Also had a go at replicating the front under-floor support. It was hard going in 16g, I made the sides separately using the nibble to fold the bend over as a flange then welding sections into the base. Turned out 'OK' but might end up making it again now I've had a practice run.
1 point


(Medium).jpg.ebc5369fd726c1818f08fc5c88bfea6d.jpg)
(Medium).jpg.767f55aa456b16db87b134a9254dc3cf.jpg)


.jpg.4f0224d1f1f04e757e6751d4da006bb8.jpg)


This leaderboard is set to Auckland/GMT+12:00