
Leaderboard


Popular Content
Showing content with the highest reputation on 05/15/21 in all areas
-
After a week or so of driving around with my newly confidence inspiring and robust cooling system I got all excited and transferred my tools into the drawer. This showed up the limitations of my home made drawer sliders, which I kindof expected but was disappointing when the drawer no longer opened after a drive on a gravel road. So I bought some proper sliders and fitted them up; These are better, although they are not as chunky as I wanted due to space limitations. However, this extra weight caused things to list slightly to one side. I had previously bought a high lift jack that is useful to brace the body when using the crane, and that was just sitting in the back, so I thought it would find a spot where I could use it's chunkyness to offset the tools. A couple of hours work and we had this; It is pinned at the bottom and has a trailer hitch at the top so can't really fall off.... This had the desired effect, it sits nicely as you can see. It also now has a UHF cb with a chunky antenna, it's quite fun driving around with it in auto scan.20 points
-
Since the last update work had continued making the studio area a bit more finished looking. Boxed in the ugly steel framework and finished the ceilings. This really made the place feel more like a house and less like a shed... Few more little bits to add, trims around the chimney. Really looking forward to selecting paint colours and getting some colour in there. So we've now moved out of the little cabin and into the workshop mezz. The cabin was getting a bit chilly, the bed a bit tiny now that the cat has decided he wants extra warmth and snuggles in between the pillows. Plus its getting boring walking from the shed after watching a movie, late at night, in the cold or rain, to a cold cabin. So we have continued on at full steam building the frame work and a bedroom. First thing was to suss out the position of the doorway frame before we started the main framework. We rummaged around in one of the woodsheds outside where we had stashed a few old doors. Picked out this one here... We'd bought this and another door for $20 together. Bloody bargain because this door is brand new, never having had any glass fitted nor any door locks or handles. Solid cedar, made in NZ. Would have been an expensive door back in the day... I scribbled some pencil lines on the floor... thus working out where the door would work best because it was going to have three positions it could be left in. Then we started frame work... insulation... Then plywood lining. Now that there was framing in the way we had to get the plywood upstairs another way. We couldn't use the stairway. I knew this was going to be an issue, along with future furniture, fridges, ovens, pianos etc. I allowed for it like this... Sorted I didn't take any pics of the plywood going up onto the walls but you can probably use your imagination. I had an idea on how to frame up and hide the steel framework in the bedroom and also set the drawers in under the kitchen benches so that way we had maximum amount of bedroom space around the bed. Its not a large bedroom but big enough to sleep in! Pretty nice to finally have a bedroom you can stand up in. Opulence for a couple who have been living in vans/housetrucks/cabins for the last 20 years. Bedroom aint finished yet but works. Rimu trims to add, wardrobe to build and some bedside shelves/cabinets. But Kevin loves it and its his go to place to feel all snug. It has a cat door the leads from the kitchen into here, past his doorway. A bit of wiring went in to suit various lights, sockets and we had to work out a suitable doorway point for our boss, sir Kevin fluffcat. He likes his new cat door with a plank he has to walk across from the bank outside.. With a cat hole sorted we brought in one of the two stainless benches we had stashed away outside. One bought cheap for $40 and the other gifted to us by a customer. Sensible choice stainless bench and sink. No pissing about. They just work forever. I cut the splashback down removing the bit with two old wall mounted tap holes and then cut a new hole to suit a shiny new mixer tap... The kitchen is almost finished but for drawers and cupboards which we will custom make ourselves to suit. I'll snap some pics of it tomorrow. Damn its nice to make a cup of coffee/cook without going downstairs or up to the cabin. Not long from finishing this project and I can actually hook back into that flat six sitting on the bench under a sheet Whoop. Oh and also I suppose I could do some more actual paid work, which there is quite a long list of jobs from patient customers up on the whiteboard yay. Shed was well utilised over the last two days. There's a Triumph 2500 wagon that's been with us for over 14 months due to covid lockdown among other things stopping the new owner from collecting it. On Thursday four likely lads flew down from Auckland and after two days of solid tinkering, carb fettling, mild levels of bodging and number 8 wire thinking they got the old girl on the road and took off today to drive back to Auckland. The movie theatre got utilised last night with many old car adverts and classic racecar youtube clips being watched. Fun times.16 points
-
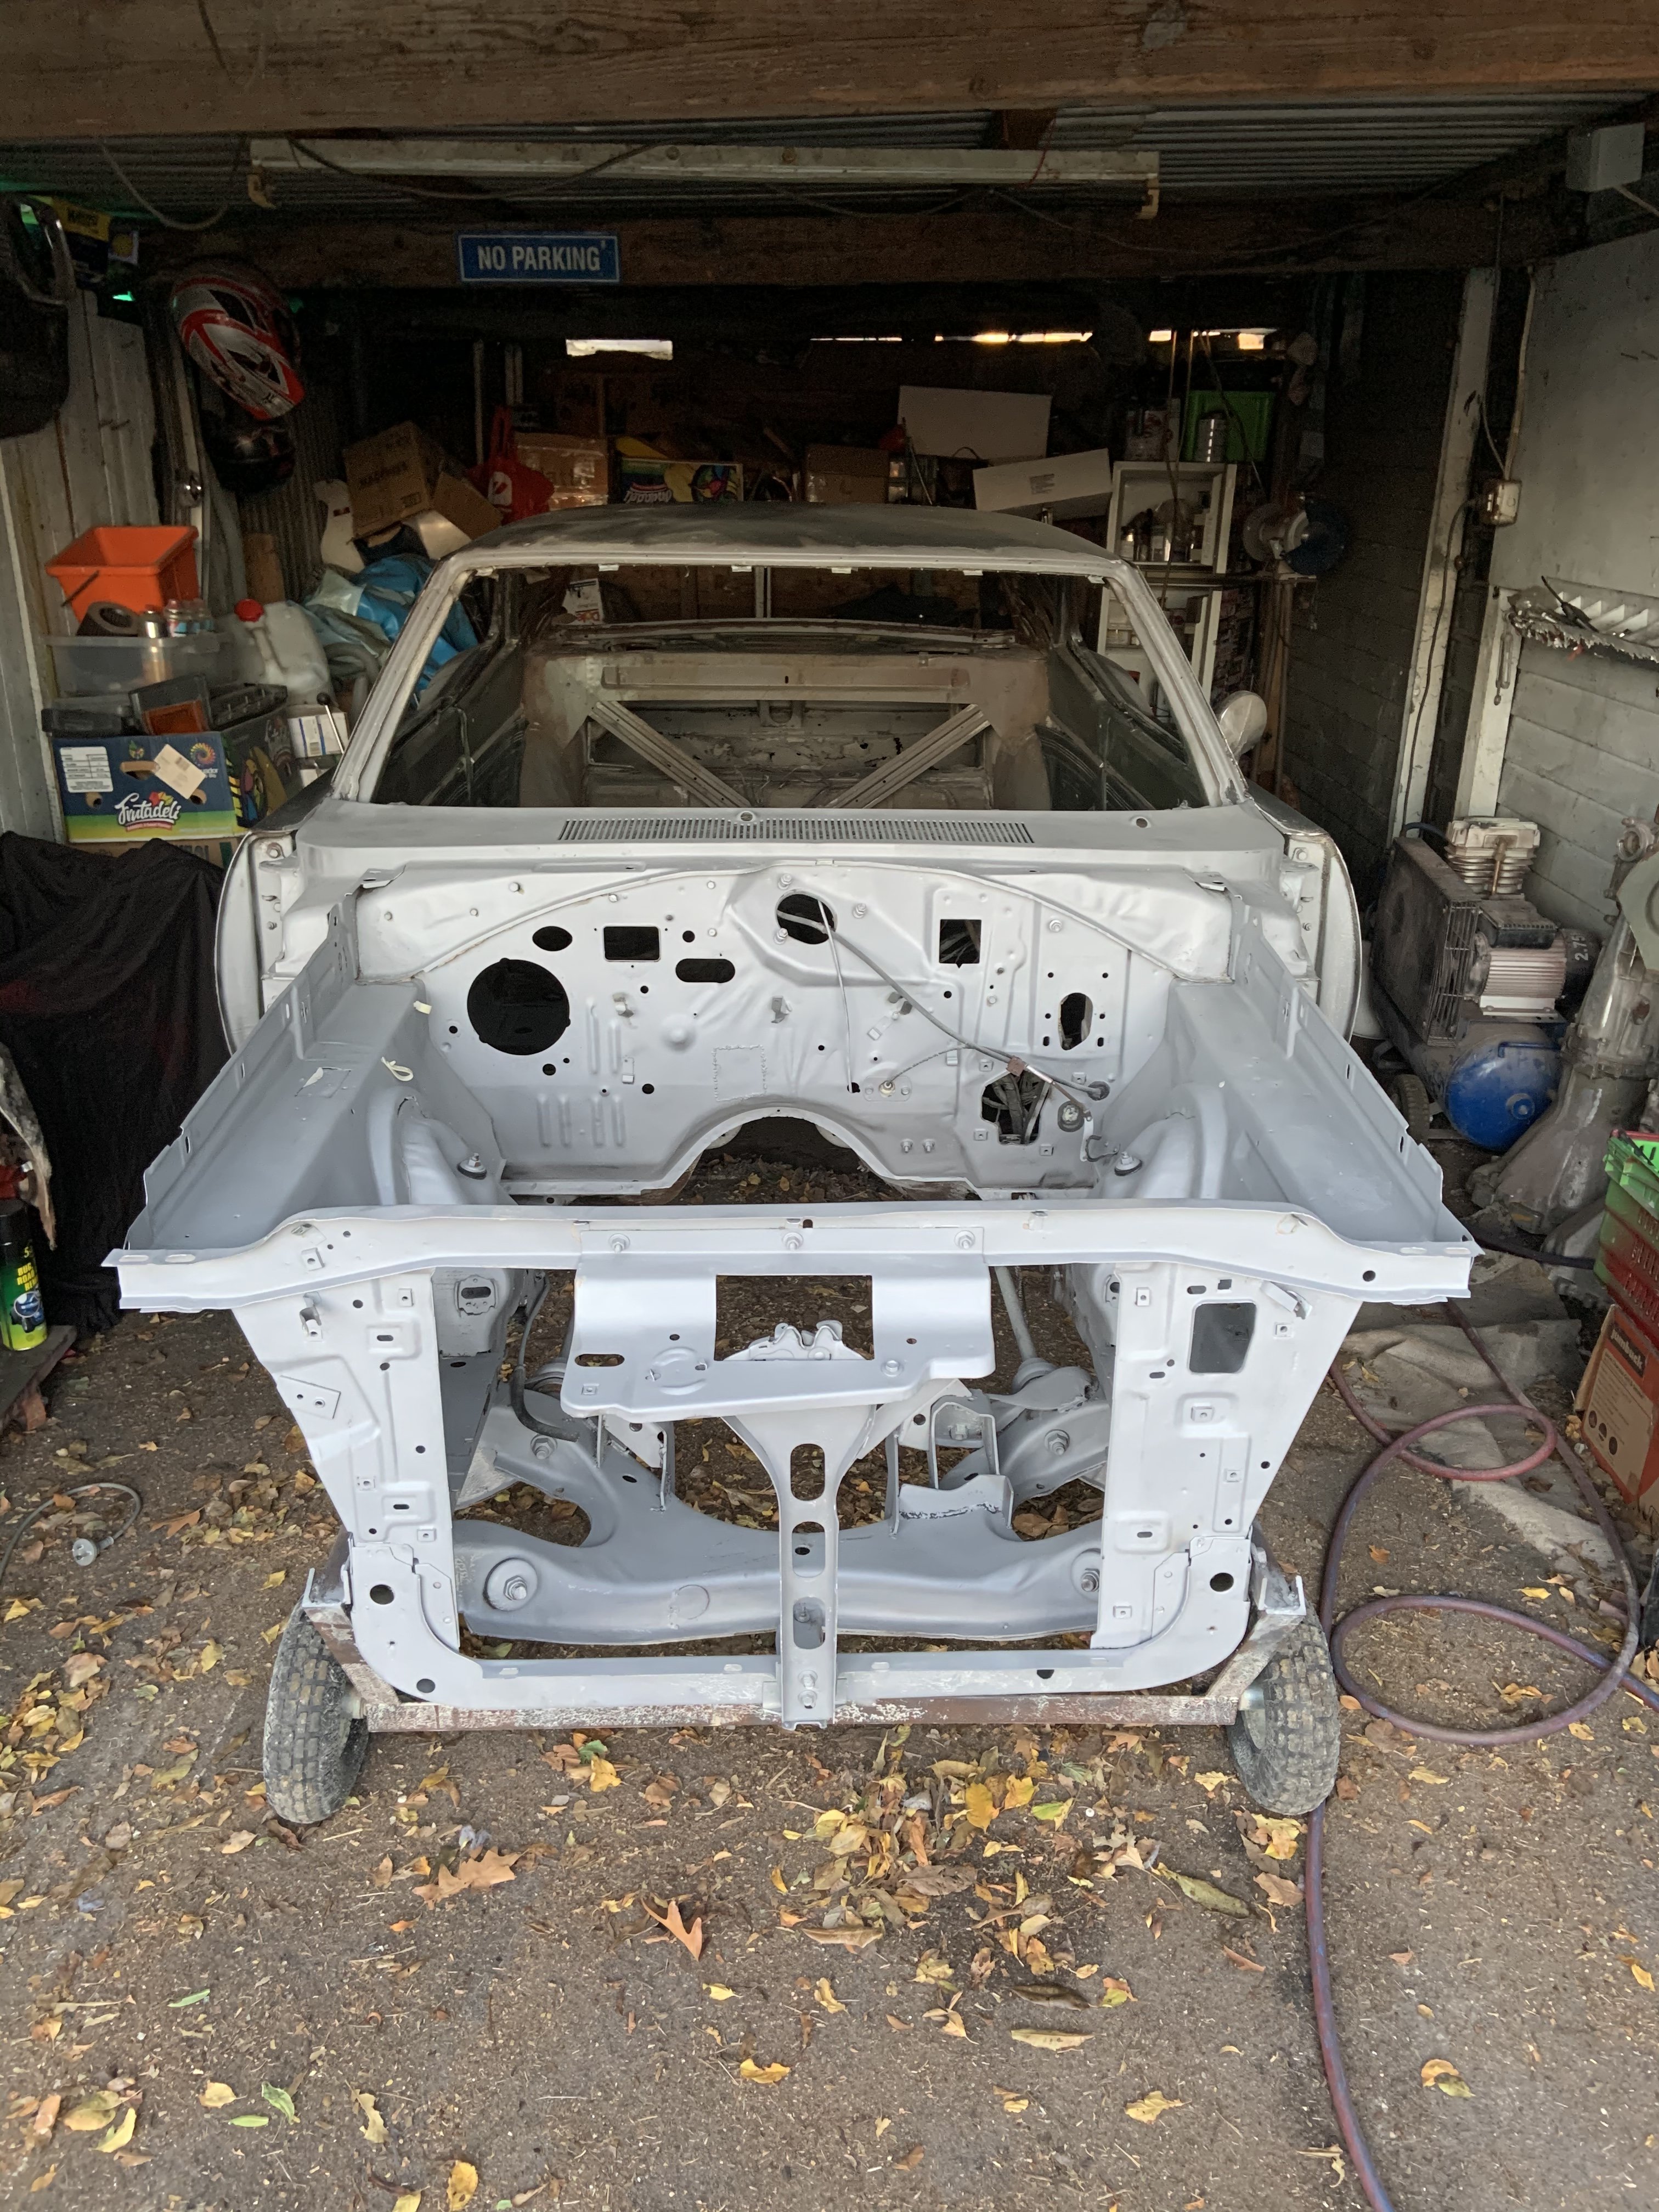
Nekkid! more tomorrow
 16 points
 -
Gather round for a sharn boys Me and the ol miso soup went for a trip around Northland at the start of the year and camped out of her old mans AU wagon which was lush. While it was a robust and practical Australian sports car, it was cramped and not a functional camper. We caught the bug for camper life and started browsing trademe with mild enthusiasm and wild pinterest-fuelled dreams. The first takeaway i got from van shopping - fuck vans are expensive. In our budget all we were hoping for was a flogged out ex-tradie L300 with 500xxxkms. Until one night this bad boy popped up on trademe - the skylite roof piqued my interest immediately. It had everything we needed: fully self-contained, electric cert, wof and reg and a boot full of camping gear and was in our budget! I enlisted the service of fellow 3Y enthusiast @HighLUXto go kick a Kelly 70 for me, and confirmed it went hard for what it was. So we made a spur of the moment decision to go pick it up from Rotorua the next day. Its a lush spec import Liteace with pop-up skylite roof and is well specced up the front with monsoons, power windows and steering and a fully hektik JVC headunit run straight off the battery in true SCA carpark installation fashion. The 3Y-EU injected 2 litre donk actually doesnt disgrace itself on the flat, though it dislikes maintaining reasonable speed up hills. Suits me though, wagon time ain't no crime. Have taken it to TGA for a weekend since buying and it was smooth and comfortable but by gum it drinks 91 like Sumpson at Nats 13. It is an ex-backpacker rental van which explains why everything has been done legit - no doubt its seen a fair few dogging spots in its time. The interior was setup for a single with a tiny bed, which needed to go. Other amenities include a sink unit with water and waste, a compostable toilet and electric chiller. The electrics setup is pretty lush - battery and inverter setup with adventure kings solar panel thing, along with power point for camp grounds, complete with RCD and 3 pin outlet to run the breadmaker. There must be nearly a grand worth of electrics alone in this thing, stoked. I then set about the task of building a double bed, adopting a @Beaver approved design from his Vanette. A slat bed with additional pull-out frame so can be used as a single seat during the day, and pull out for double bed at night. I made it out of decking timber and ripped down some fence rails, as it turned out to be the most economical solution amidst this nationwide timber shortage. so its a little chonkier than i would have liked. I had an uneven number of slats so had to double up on long bois. Still, for a bumpkin with fuck all carpentry skills im sure Stevie Wonder would approve. OCD trigger warning I dismantled the old bed and left the electrics in-situ and then when i built the new frame had to play electrician and figure out how to put the RCD and gear back together. Tidied up a few cowboy spec installation foibles while i was there. Pretty stoked with its functionality, and still some room underneath for storage of bits and bobs. Next mission will be to build a storage solution on the otherside of the van to maximise space in this compact little rig. will be sure to document that too. The hugs and kisses is currently making some lush 70s floral print covers for the mattress squabs to give it a nice lil retro vibe. Then what? go dogging i guess oh and maybe slam and wheels hehe15 points
-
6 of these so far!9 points
-
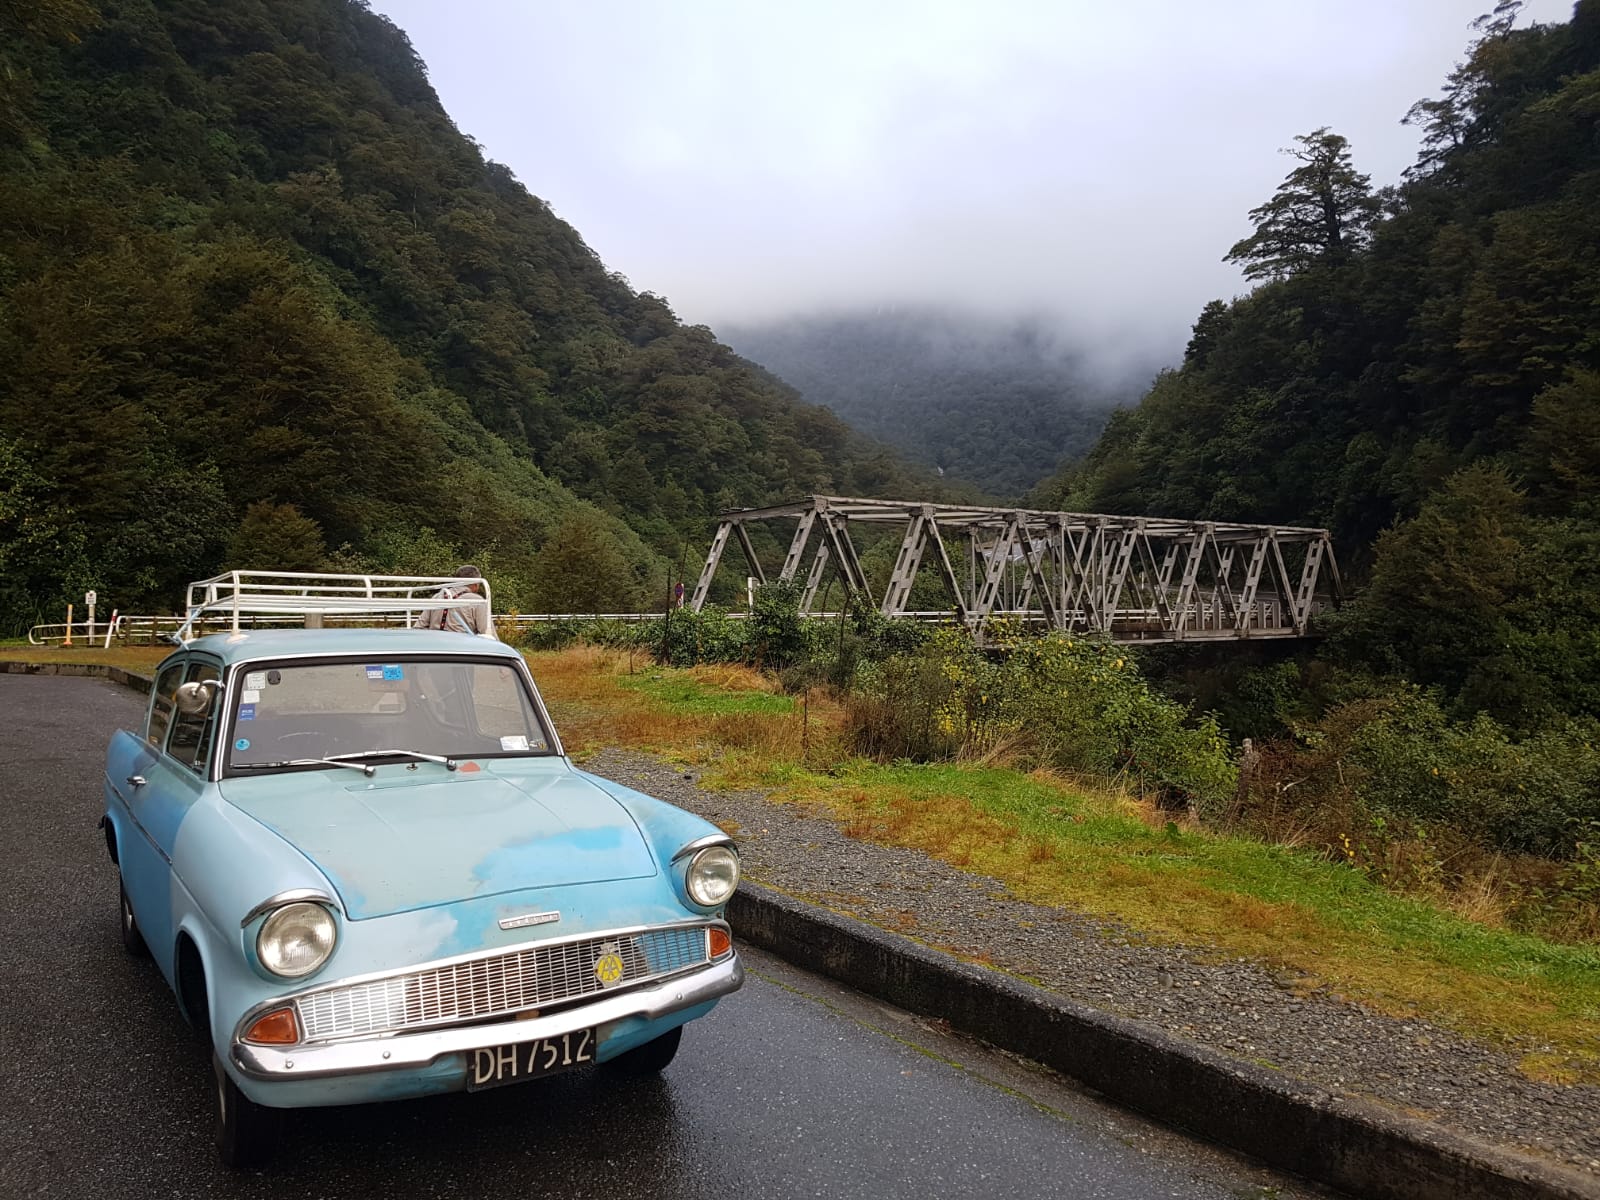
They made it back to Auckland. They did 2000 miles and only had to put petrol in it. They didn't even have any tools with them. He once put a little oil in and then realized the car was sitting on a slope, so it now has a little too much in it. I believe there are a lot more pictures to come.
8 points
-
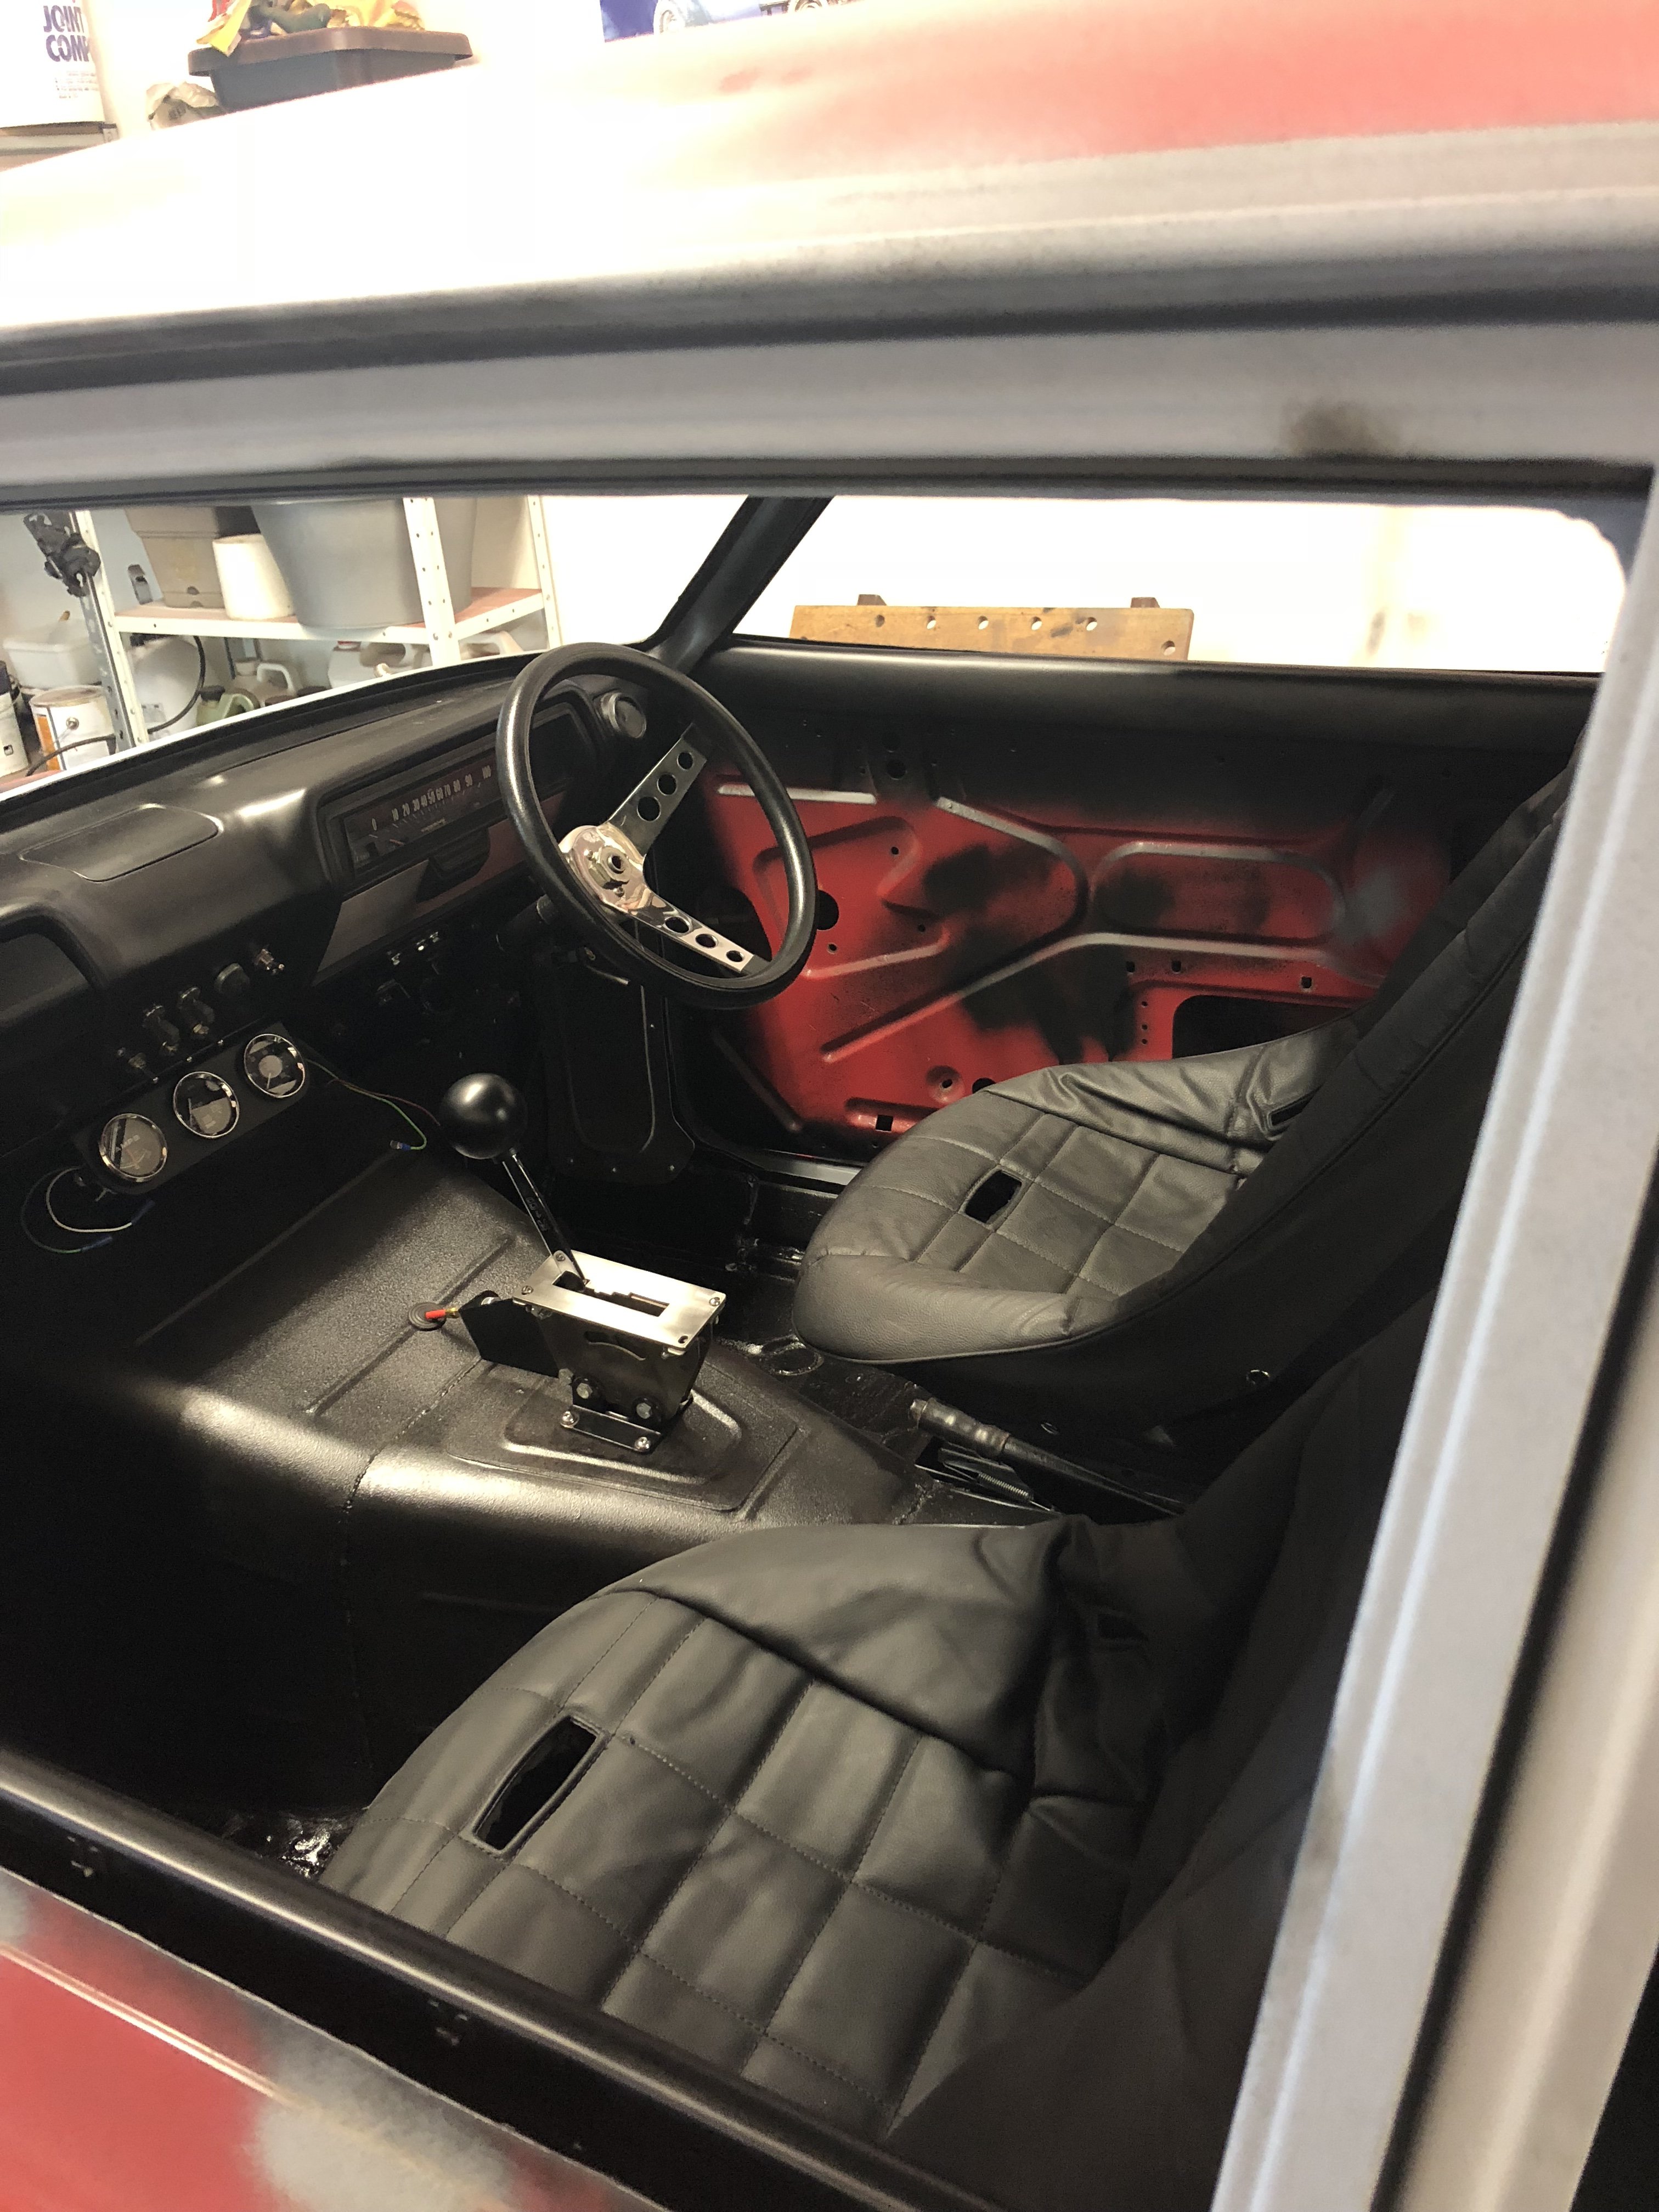
Seats all finished up and mounted for the last time.
5 points
-
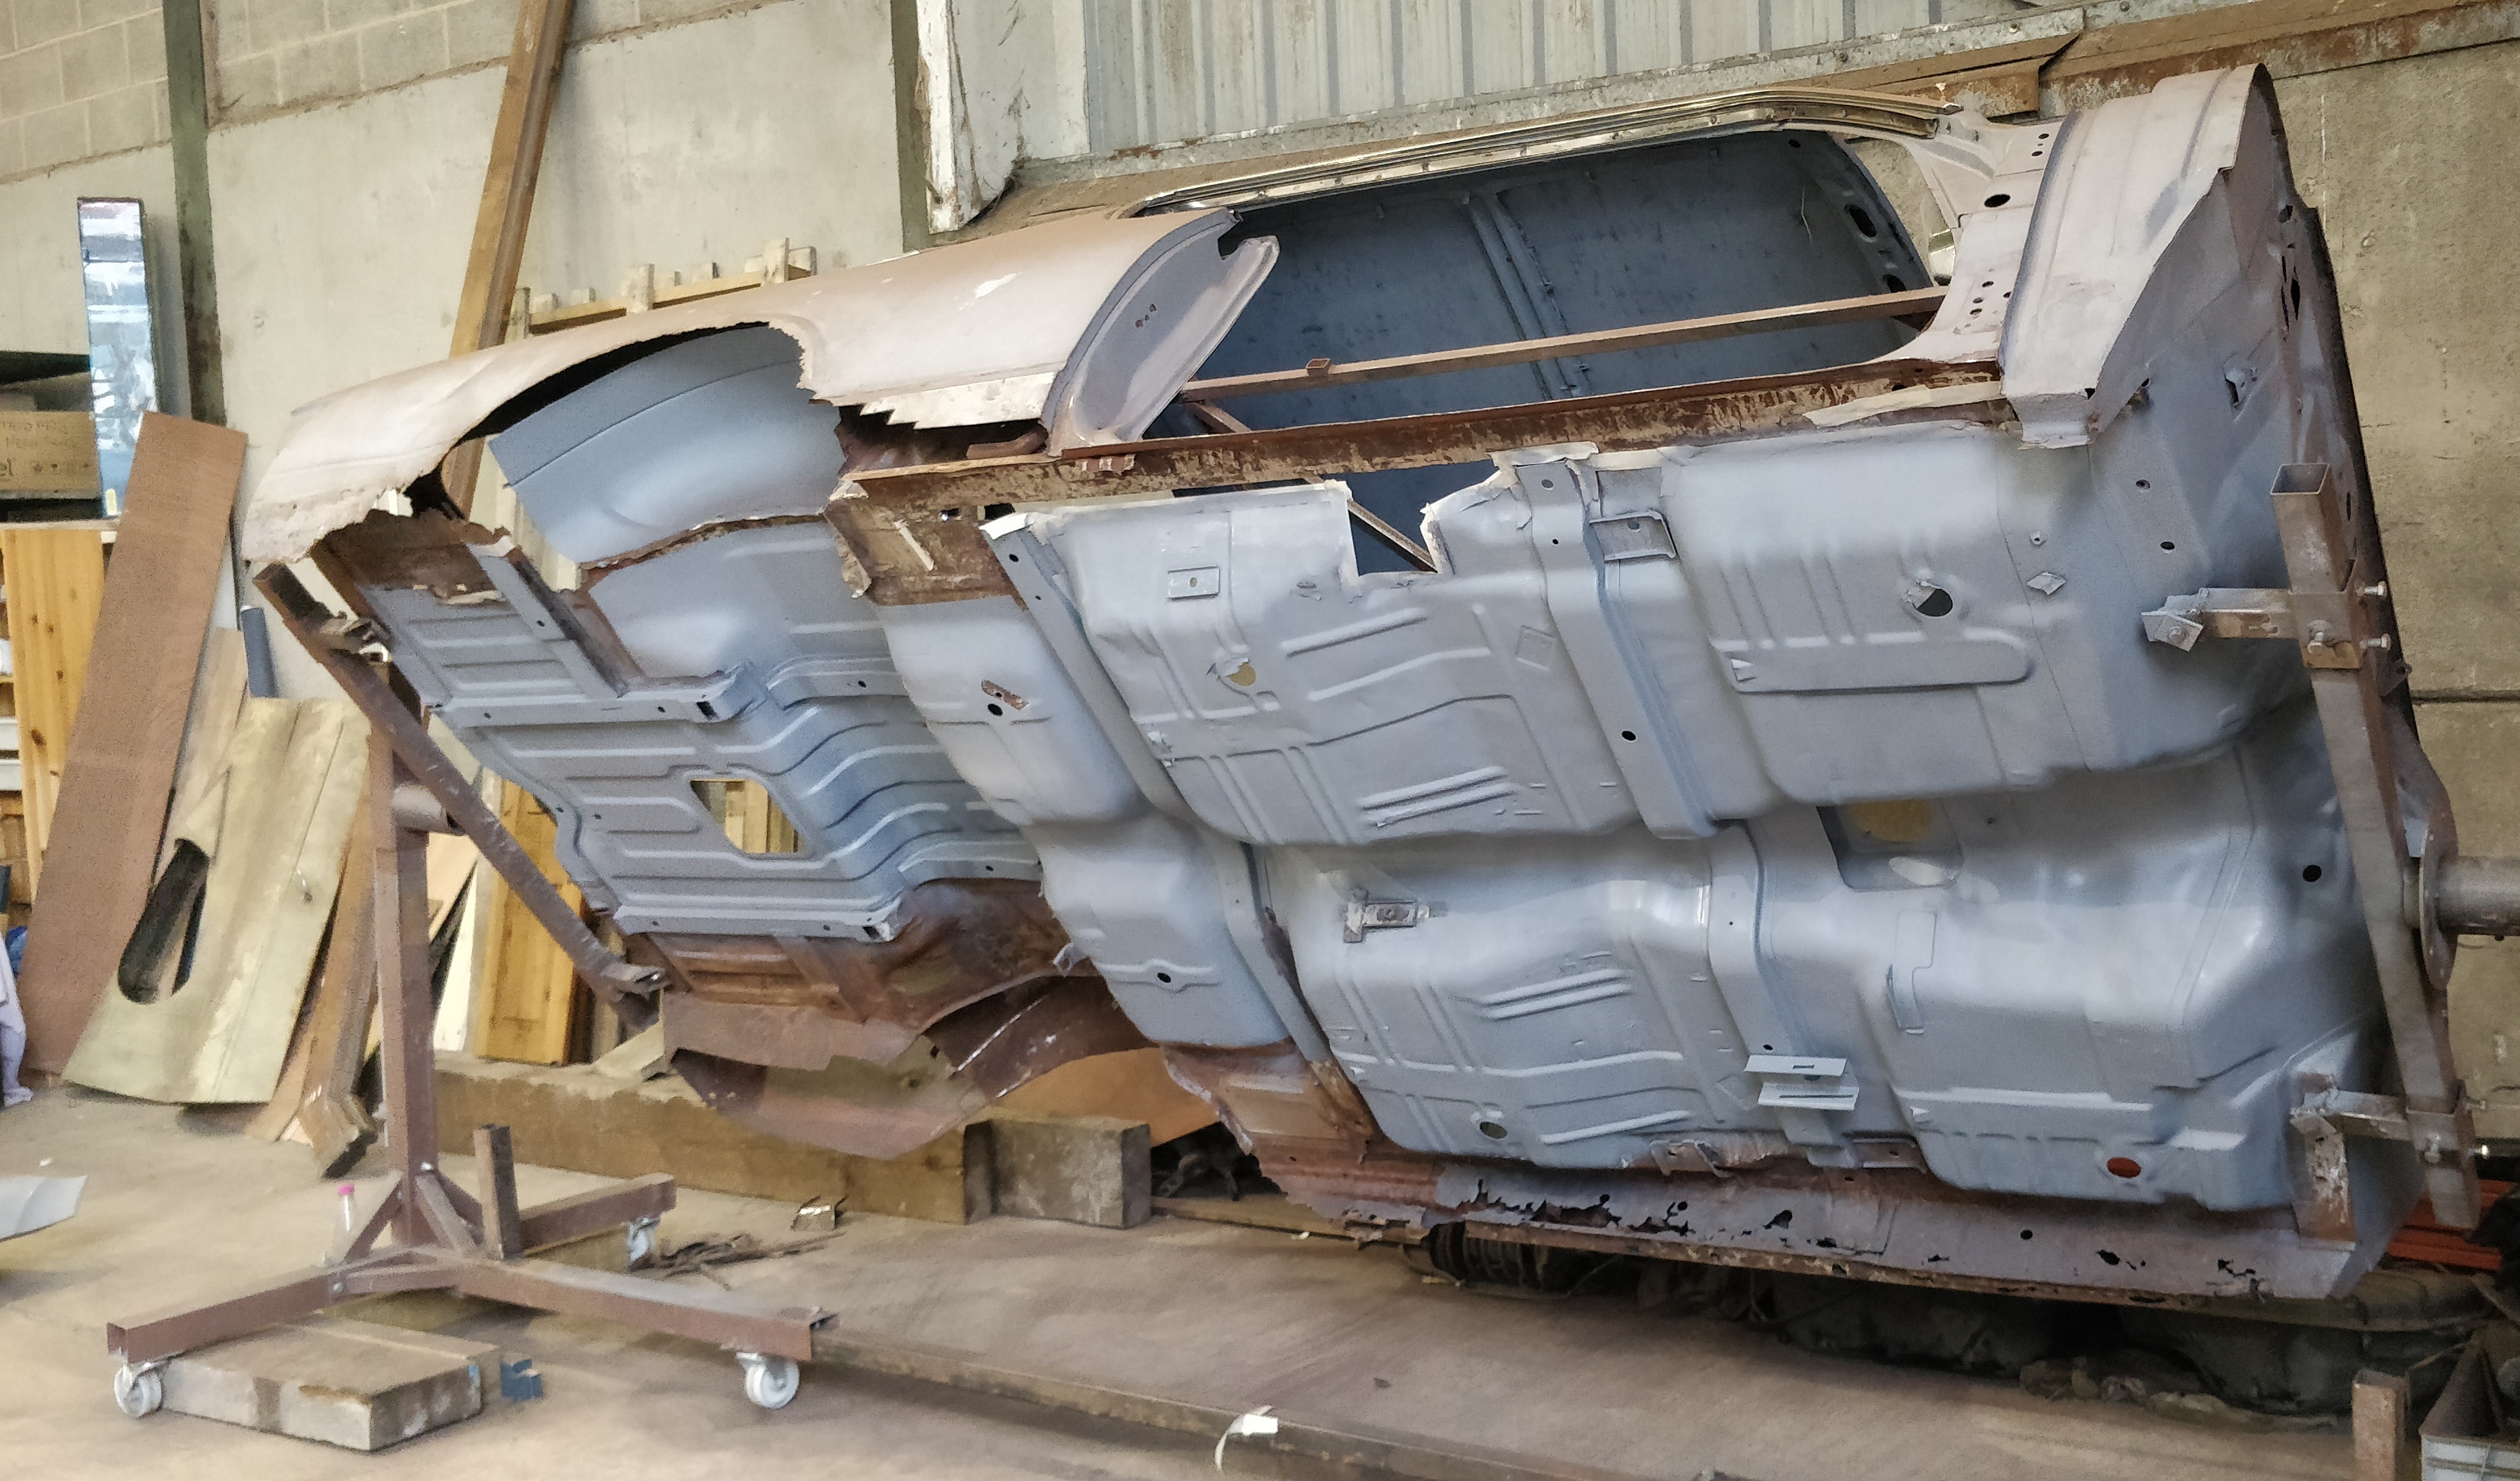
Slowly but surely...
5 points
-
Lovely wee car- I remember driving it at Hanmeet once. It just needs some widened steels and lowering by about 4" and it'll be fucking awesome! Please put some discs on the front. Drums suck. They'll always be a bit shit. Just swap in some appropriate bits from an escort and possibly just a slightly larger bore MC (someone fordy on here will know which bits work) I'm sure there's bits that swap straight in and it would be a period correct swap that no wof station would either notice or probably even give a fuck Oh and btw...
4 points
-
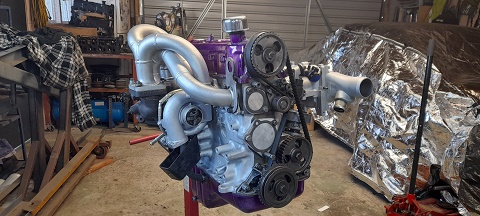
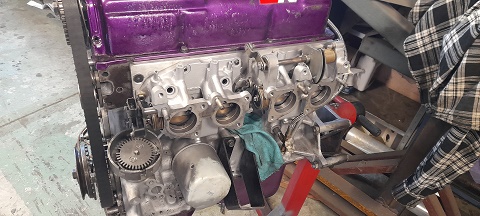
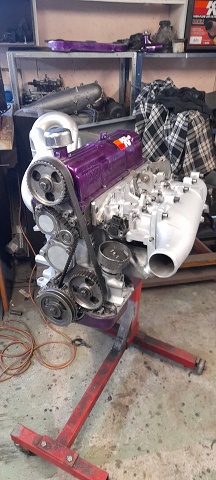
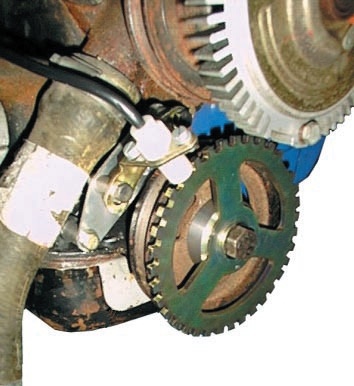
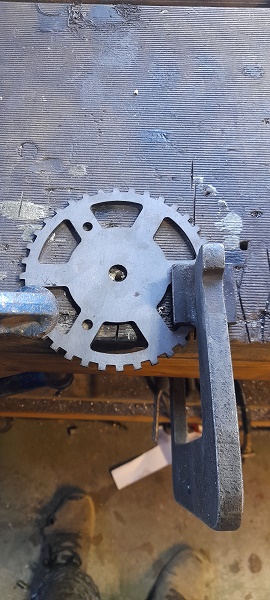
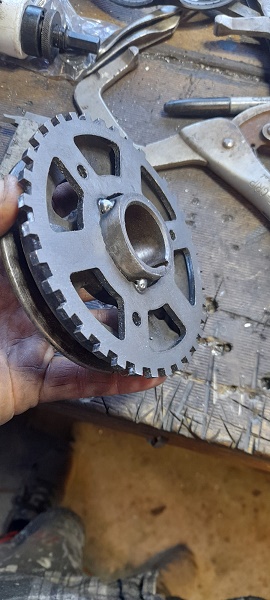
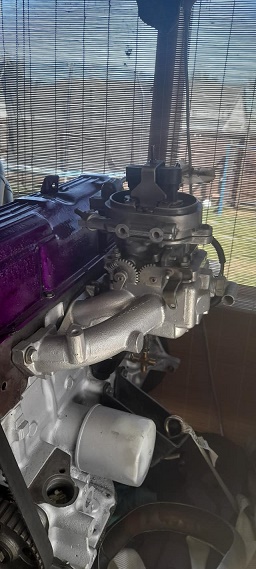
i got a few things ticked off the list today. trigger 1..i bought a 36-1 trigger wheel for the pinto but it bolted in front of the pulley and i didnt like the look of it ...so i made the hole bigger and mounted it on the back...just a few tacks for now till the sensors turn up and i decide where to mount them. then it was on to trigger 2..i bought a 63mm 36-1 trigger wheel as it was just small enough to fit inside the pinto dizzy buuuuut.....didnt even think about the dizzy to inlet manifold being a problem....well it turns out it is. i thought about cuttng it down but remembered i had a xd falcon dizzy on the shelf that i had gutted and used with a drill to pump oil around the 4.1 in the other cortina. turns out it fits the hole in the block for the dizzy and it a wee bit smaller .so i trimmed all the stuff not needed off it and made a slot on the side to be able to bolt it down...i then cut the pinto dizzy shaft down and made a bush for it in the falcon dixy....made a mount to bolt the wheel to and all done...)will make a cap when the sensors turn up and i sort out mounting)....was told i could just use a 1 tooth wheel so see how the sensor works with this small wheel first. both triggers in place i also stripped cleaned and rebuilt the intake manifold repositioned the dipstick got the factory vacuum all together so i can even plum the brake booster in. managed to turn the full TPS setup upside down aswell for more room. still got to sort out idle air control.....the injectors are on the way and i need to mount the coil packs and also sort out a breather for the block under the inlet manifold .....and im thinking some sort of brace for the manifold aswell. but its strating to look pretty good.
4 points
-
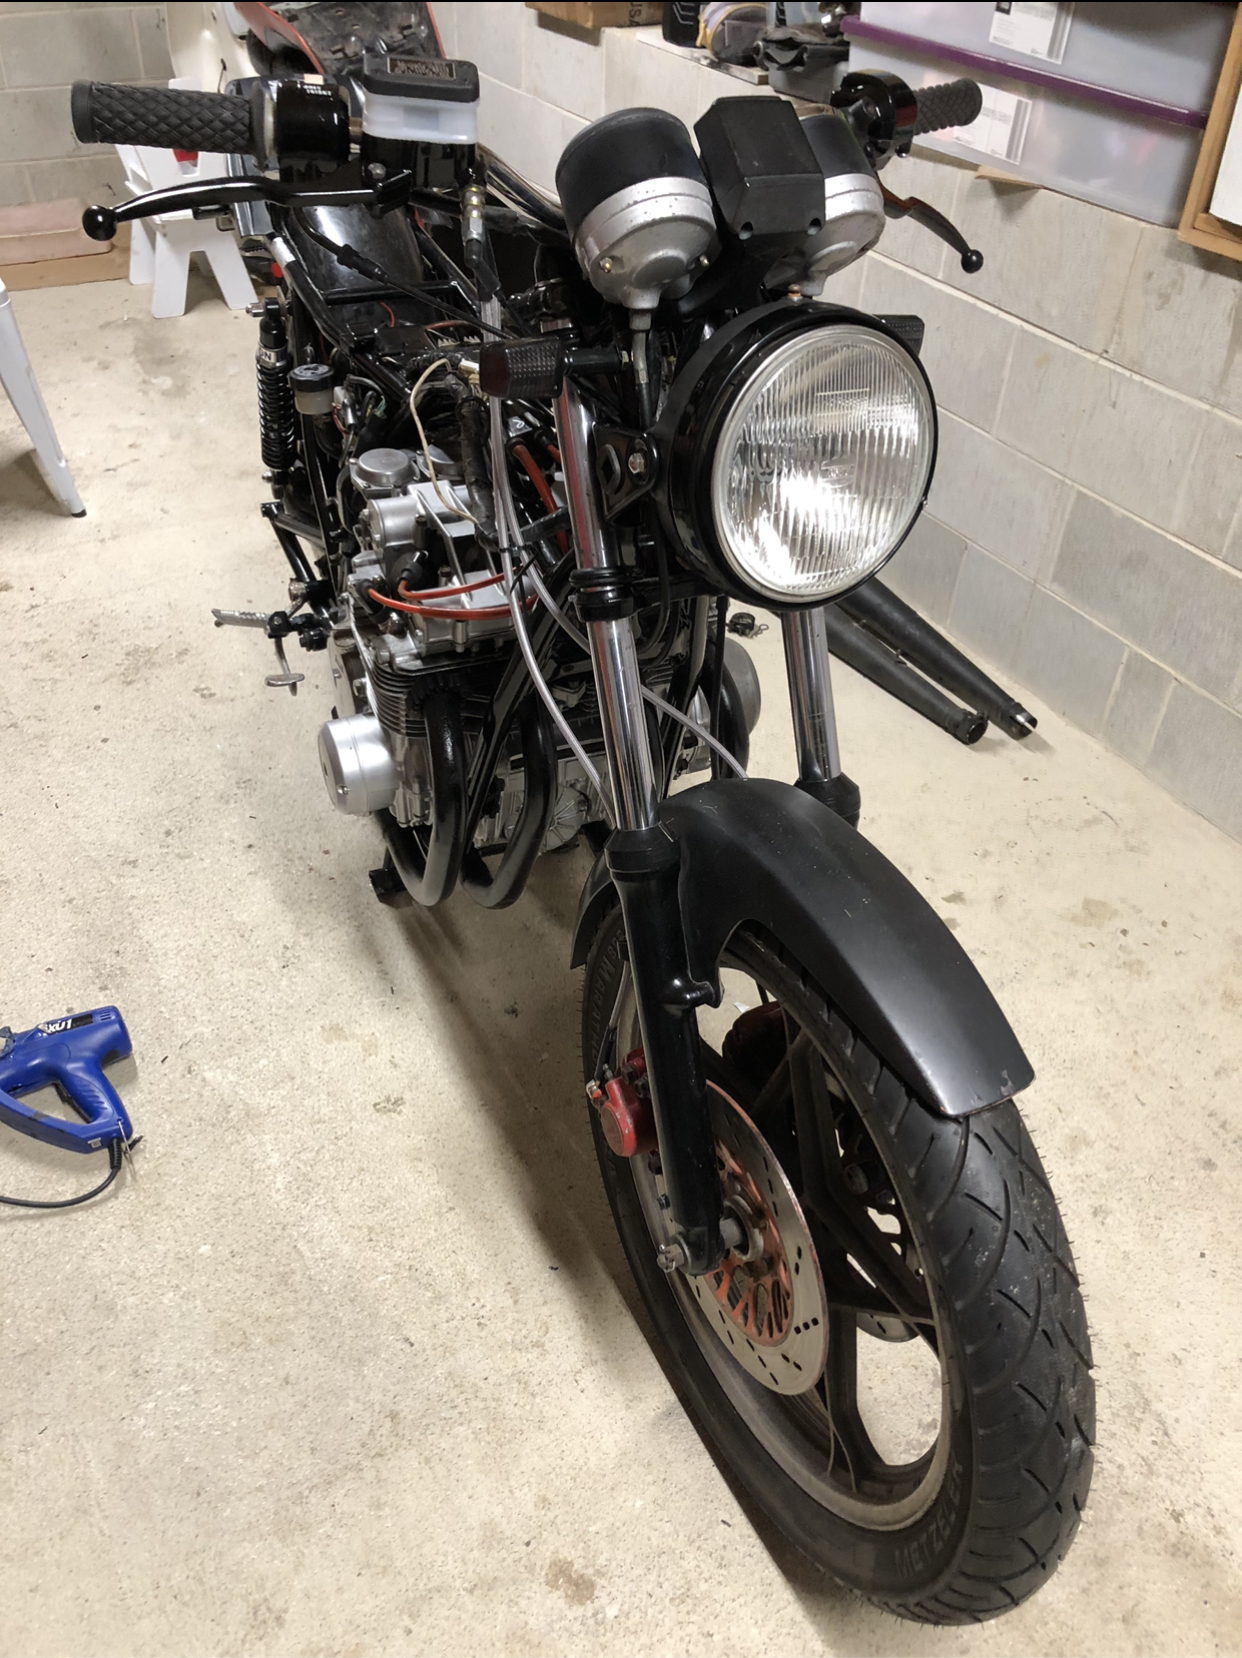
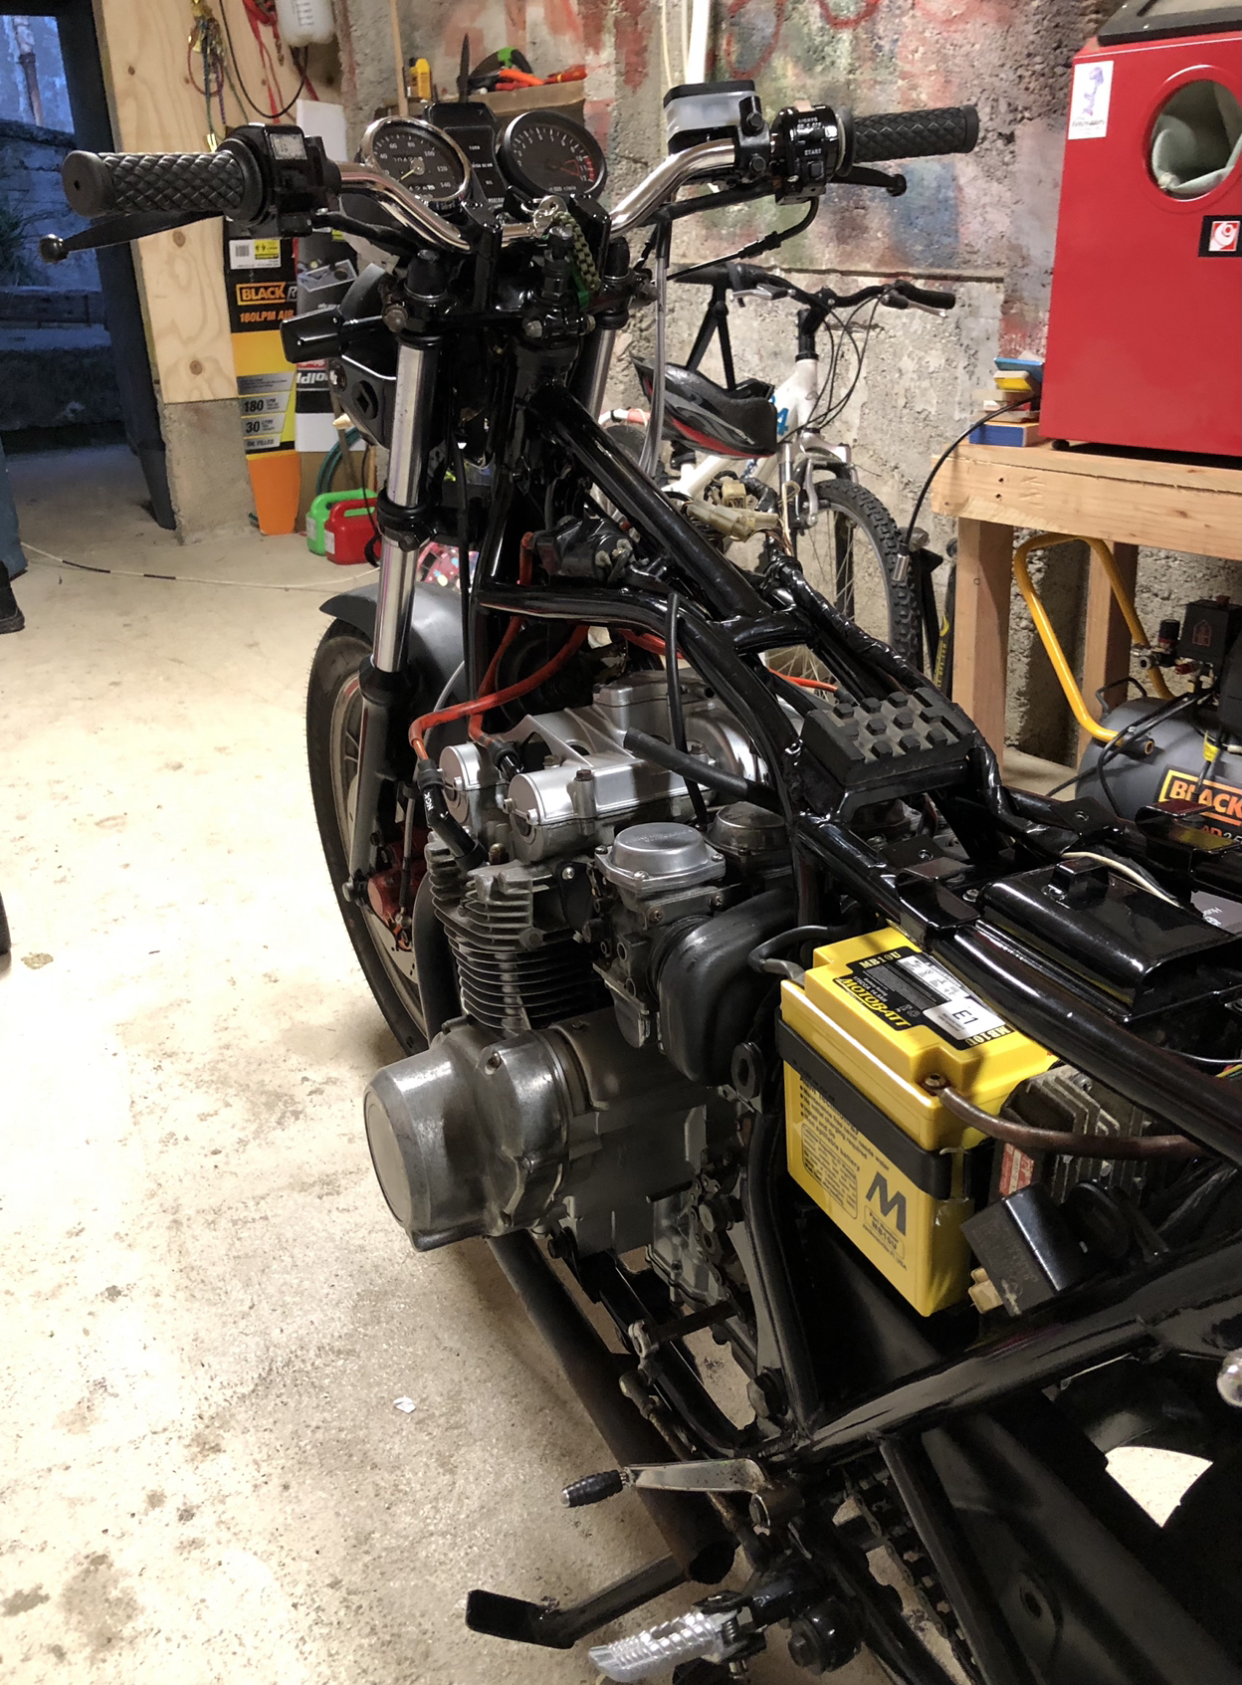
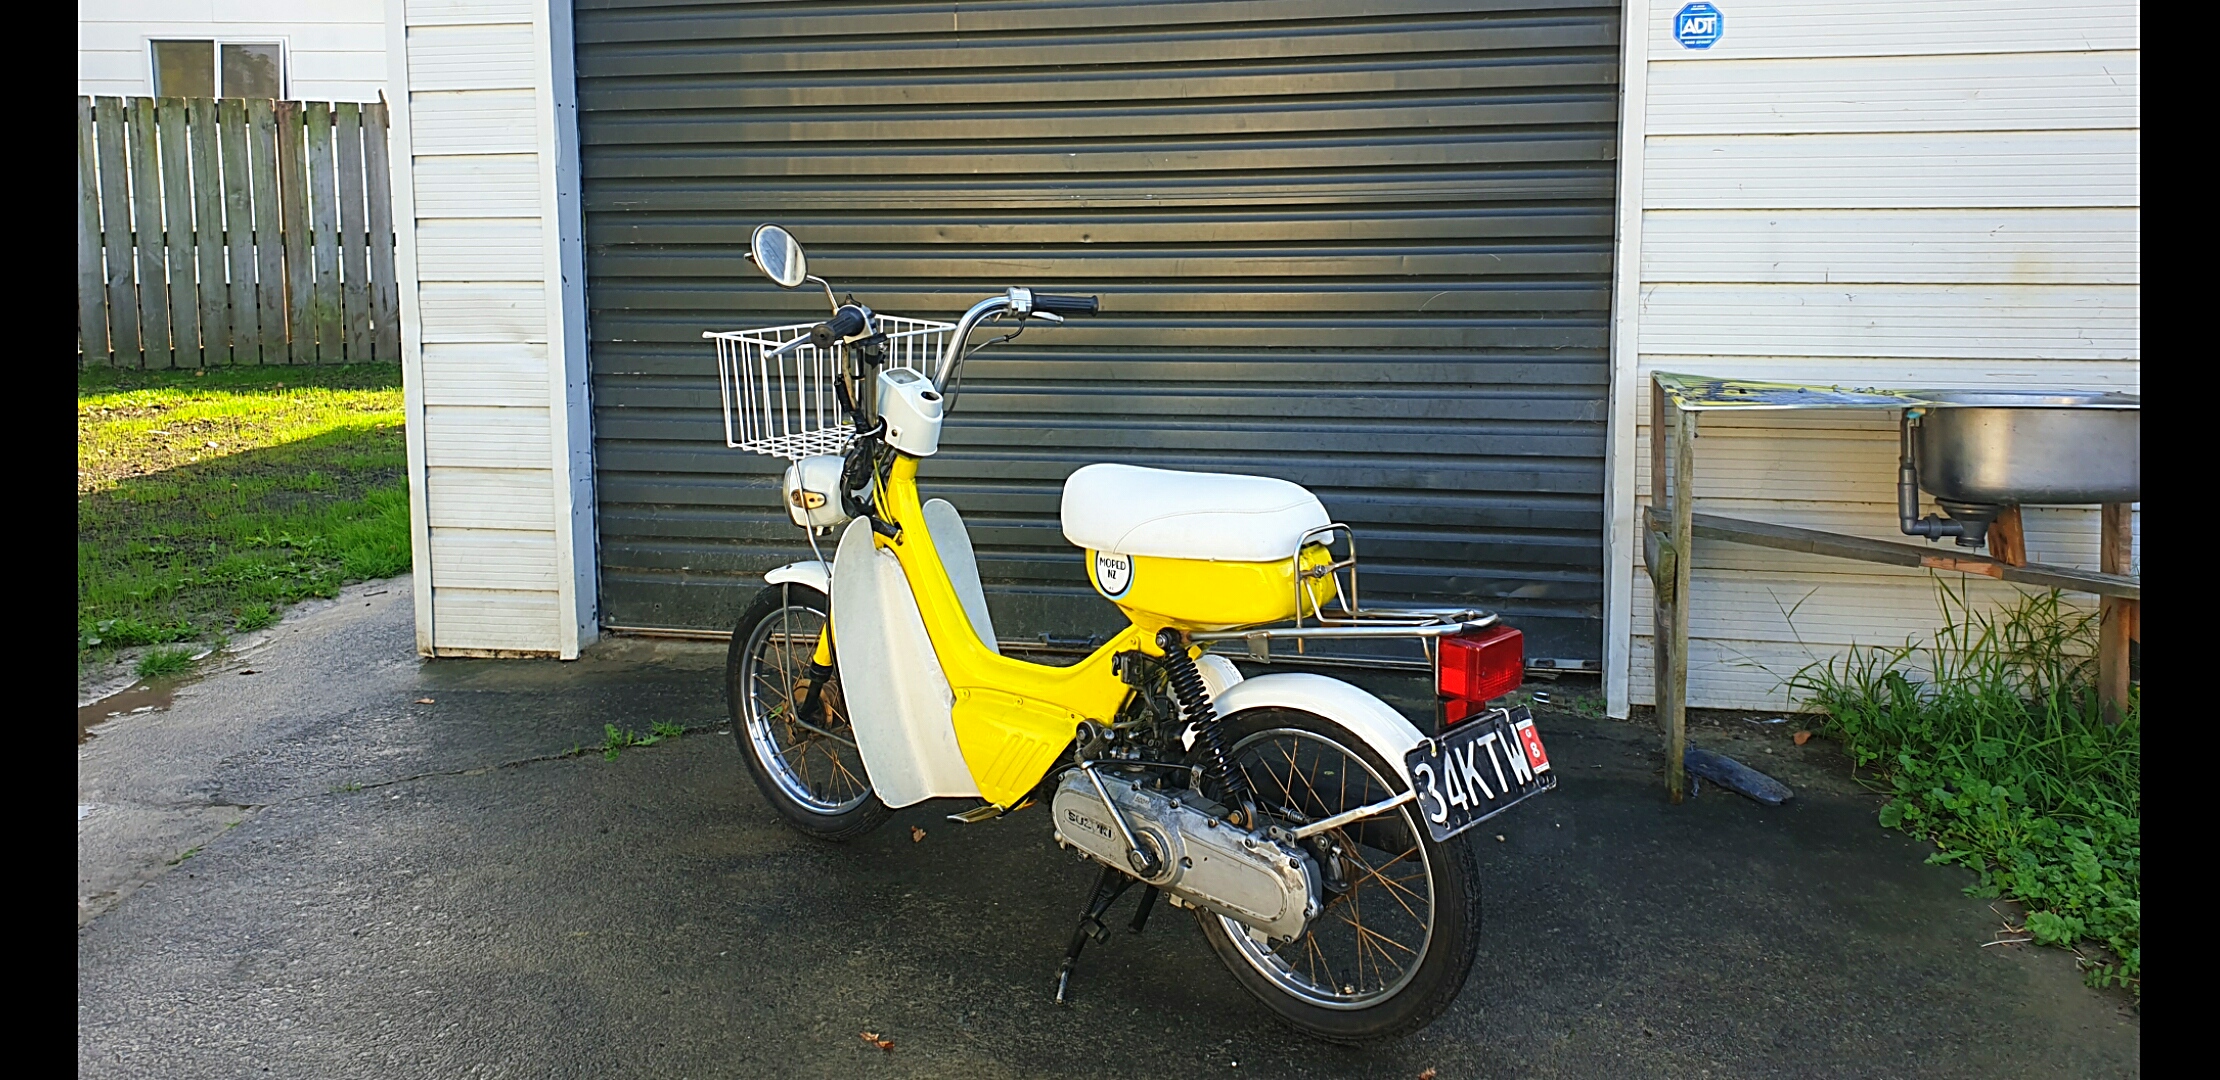
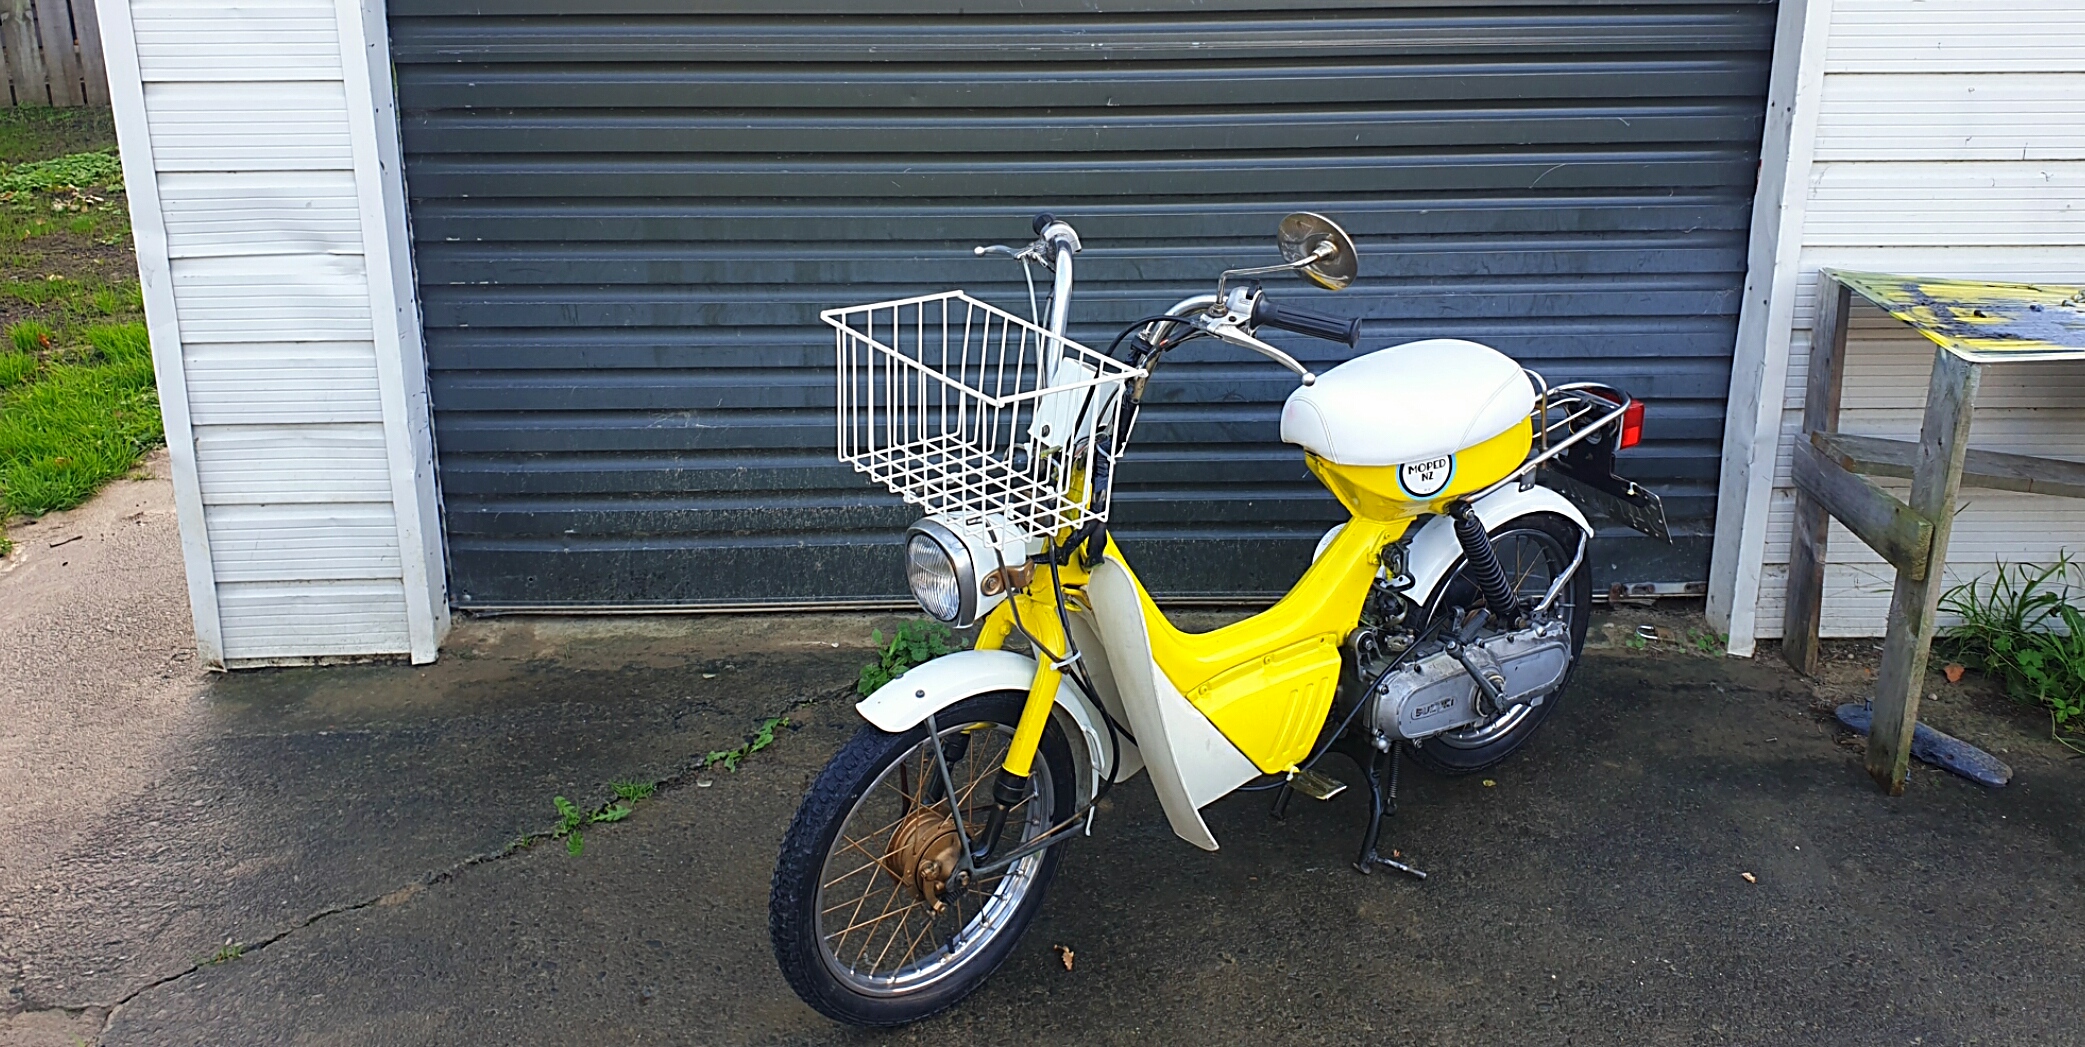
Minor update. New handlebars and new brake lines. Indicators installed, led bulbs in dash. I put a pressure switch banjo bolt in for the brake light. Genuine Suzuki intake boots and replaced some o-rings and rubber plugs in the carbs. I really really want a 4-1 for this thing and the only one I want is from Cycleworks in welly but that means riding there!
4 points
-
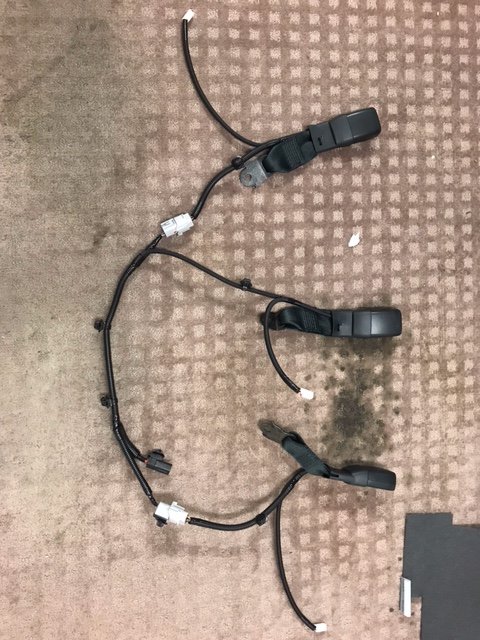
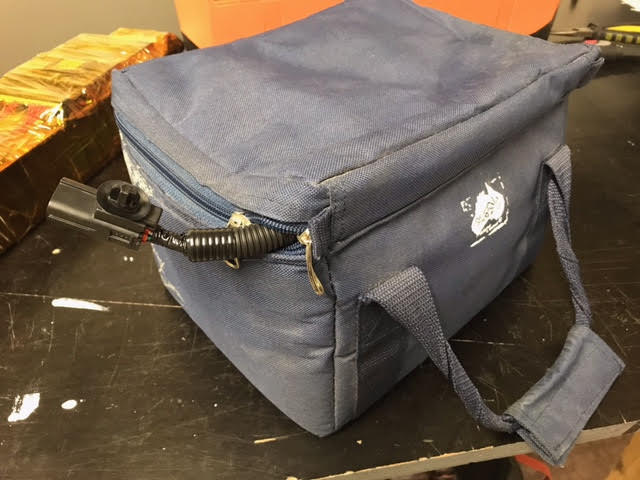
Hi Guys, So just an update on a solution for our rear sear removal. After testing and looking at the wiring. The rear seat harness that my unhelpful Toyota parts guy couldn't find is actually a part of the middle seat belt buckle. This middle seat belt buckle harness also plugs into the left and right seat belt buckle wiring. So for order for us to drive out vans without the rear seats installed. we must have all 3 buckles plugged into the rear seat connector. (the 3 seat pressure sensors not needed.) For those who only need the rear seat a few times a year this is perfect. simply remove the rear seat. flip it upside down. remove all 3 buckles. its just 2 x 14mm bolts and a few harness retainers. 10min work if you only have half an idea of what you are doing. connect them all together throw them zip up lunch cooler bag, have the main seat plug hanging out. plug it in to the van side of the seat harness. and bobs your uncle. I will need to remove and install the seat more frequently. so I'm going to price new buckles so i don't need to remove the buckles every time. Cheers Brent
3 points
-
After asking if anybody wanted the rotisserie I made and having no takers I decided to turn it into a mechanics creeper. bit of mdf should finish it of and help save my back.
3 points
-
Shit yeh good stuff. Advice for the bed, get something hard to lay on top of it under the mattress, like 2 sheets of MDF or something so your little white boi hips don't get reamed by the planks through the mattress.3 points
-
Got wheels powdercoated, 235/60/15 front, 245/60/15 rear. Looks ridiculous now, lowering is required sooner than later. I think its actually got lifted springs in the front, they have eibach branding on them and its higher than other stock ones I've seen pics of I might go up a tyre size all round, if it doesnt rub when slammed
3 points
-
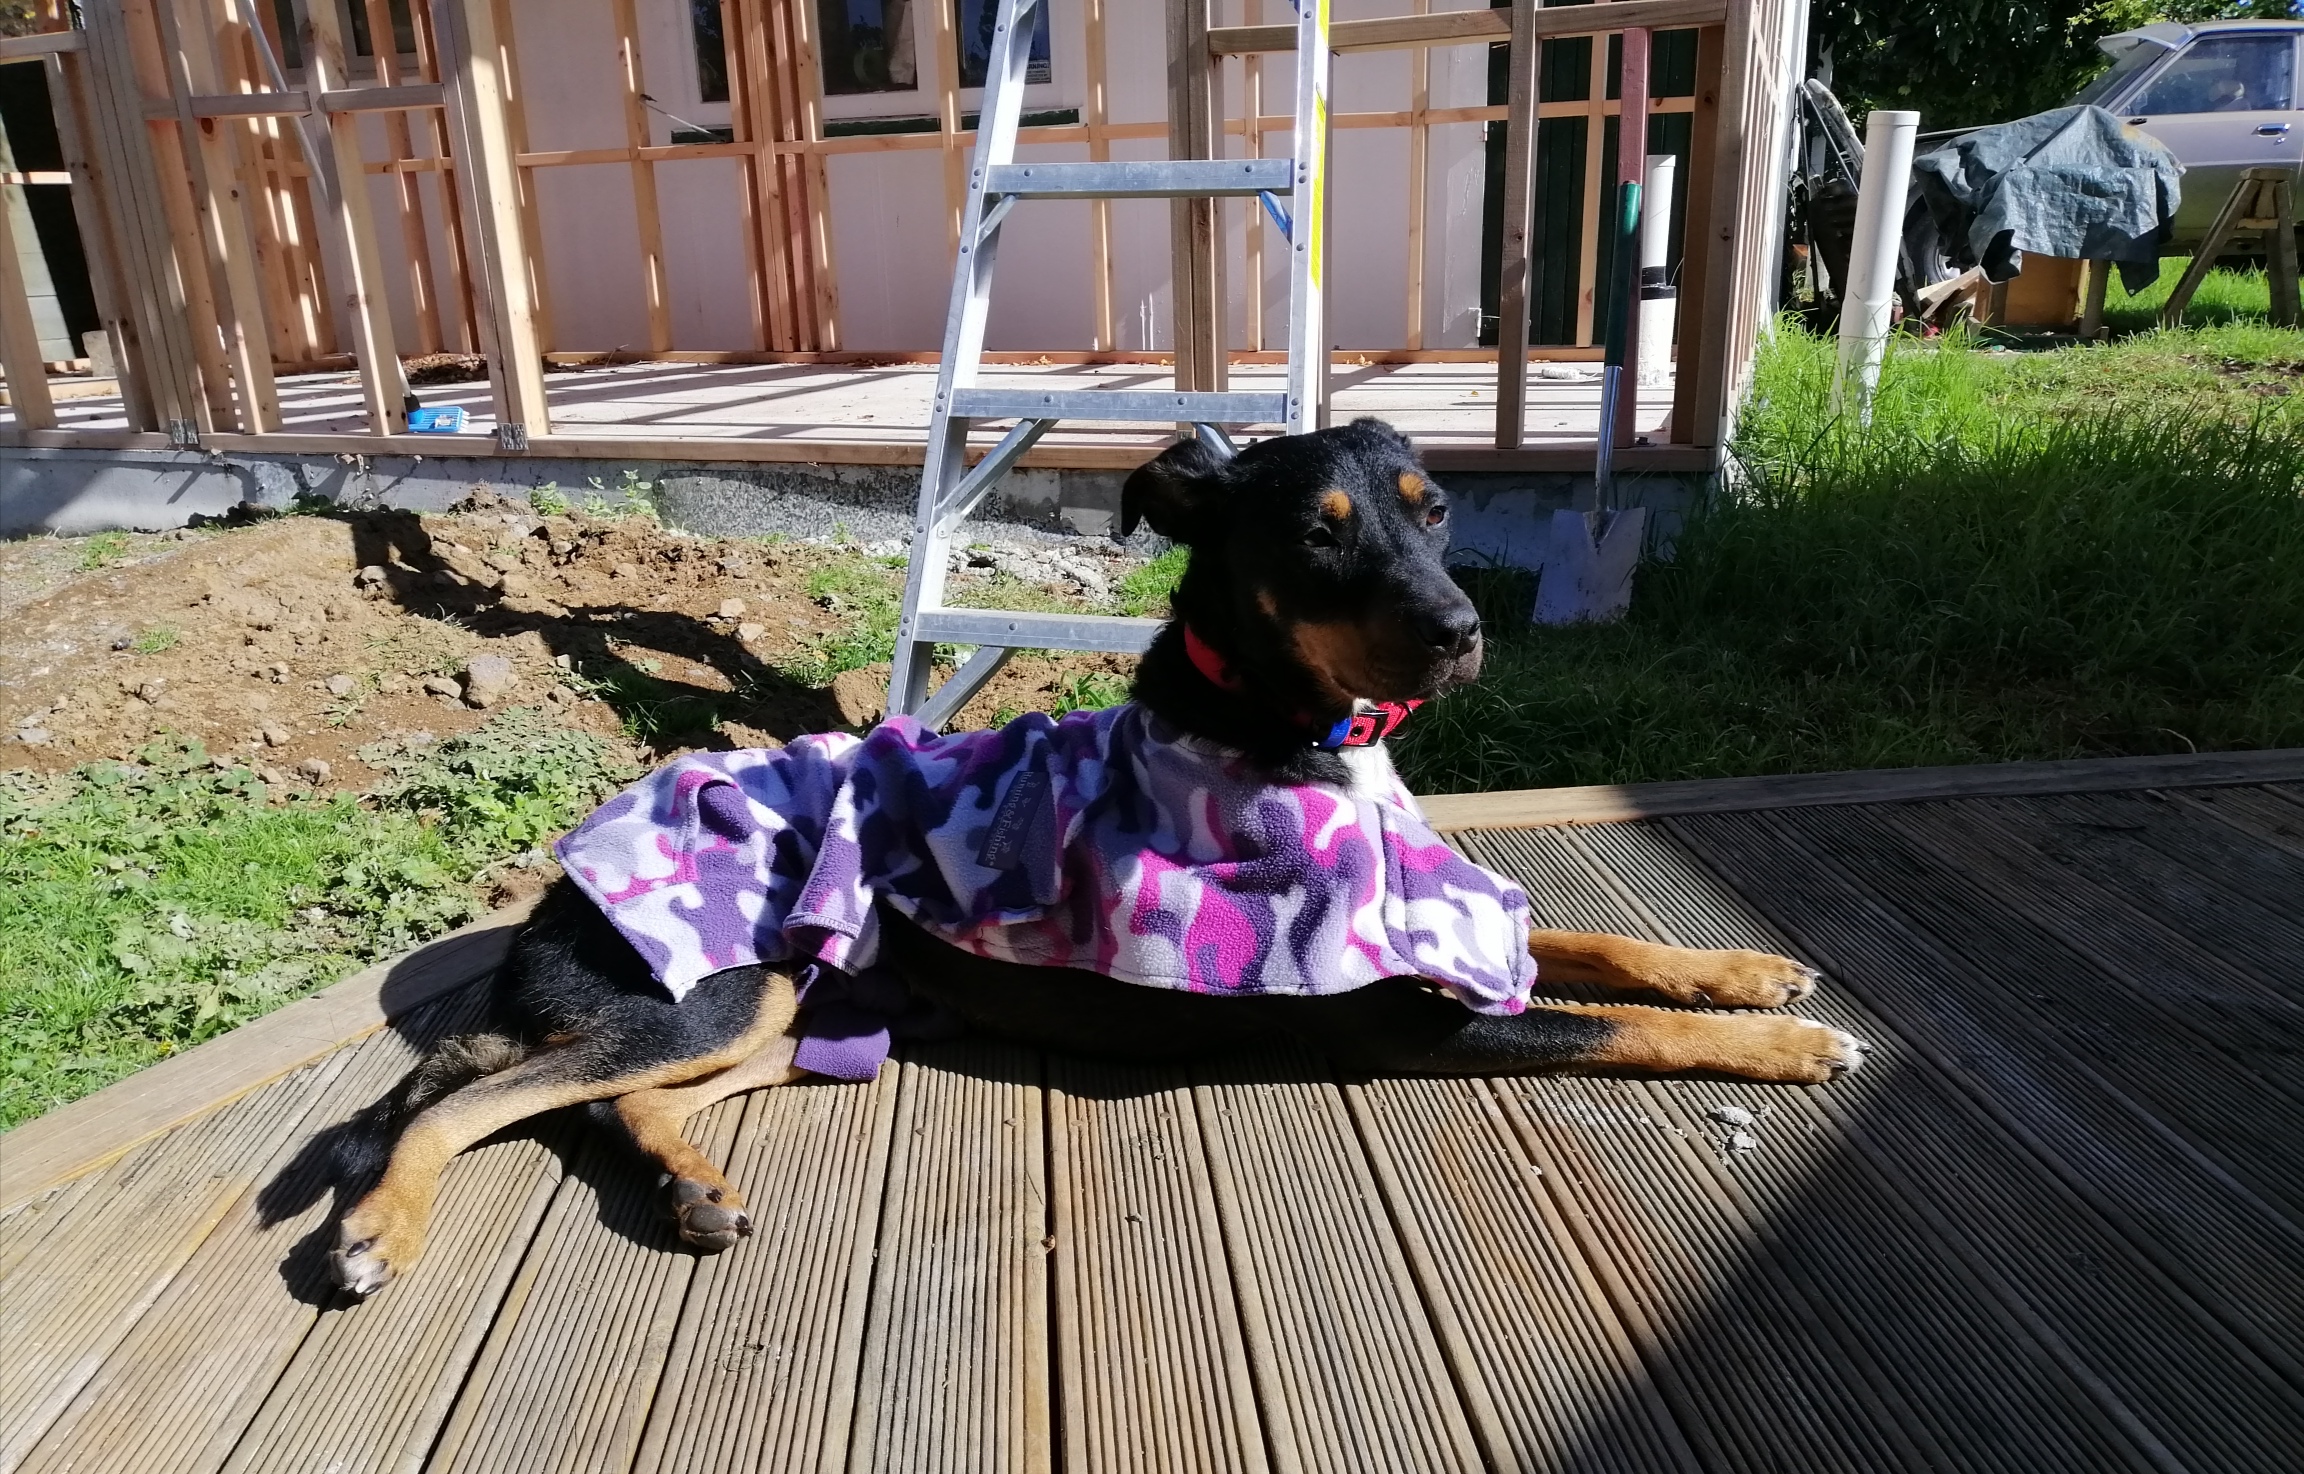
Turned wife's hoodie into dog cloak Needs a bit of velcro for the belly strap and I think I will fold the front bit over, but otherwise not bad
3 points
-
Water temp gauge works now, so does the oil light.. Some moron flat peaker switched them round... Plugged vac line 21 into its home, so now it idles better and may sort its other issues out.. He reckoned it had a blown turbo... No smoke, but wouldn't full spool... Turbo flap actuator not plugged in.. Penis3 points
-
You'll never cry with a 3Y. Random fact, there is some significant ECU difference between these and the Hilux version. Base timing is 12 deg for this and like 8 deg on Hilux, setting timing to 12 just results in mega pinging2 points
-
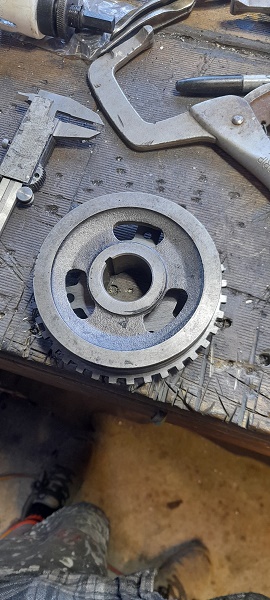
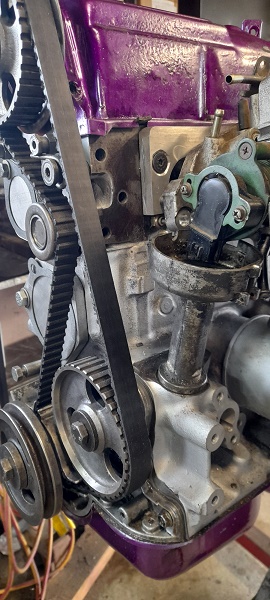
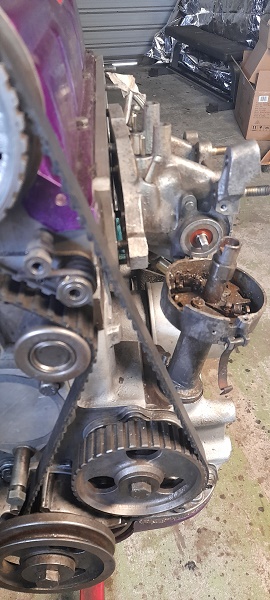
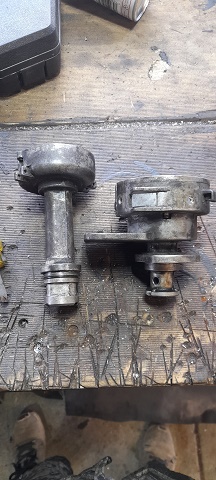
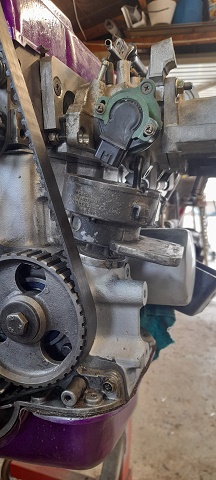
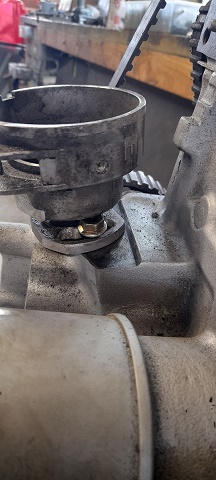
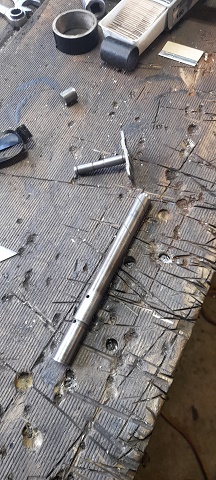
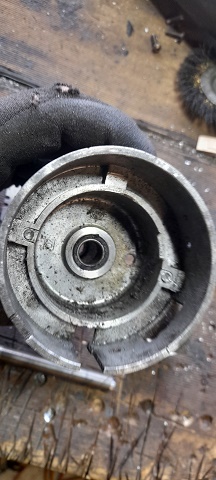
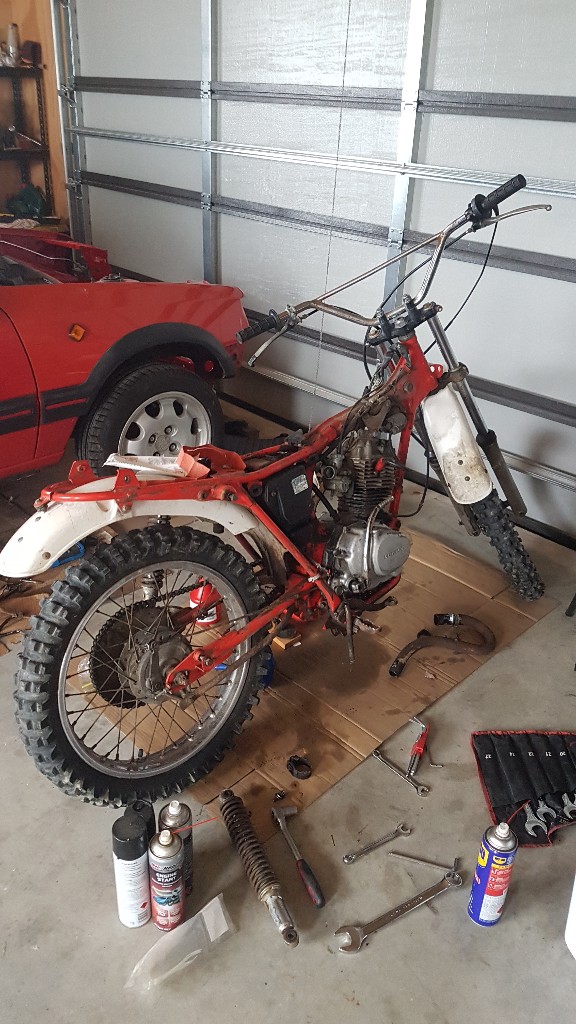
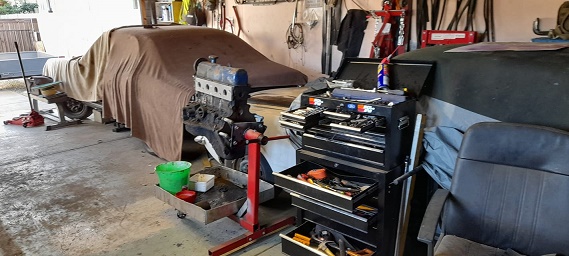
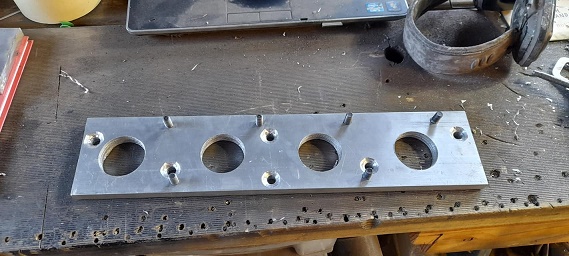
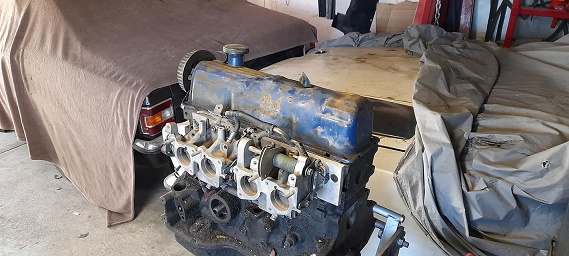
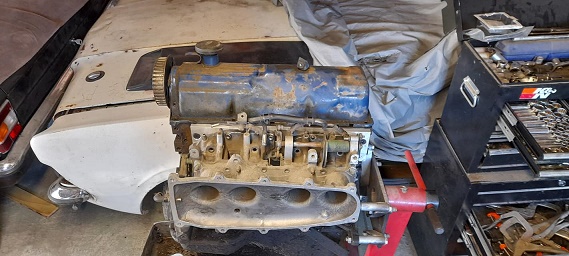
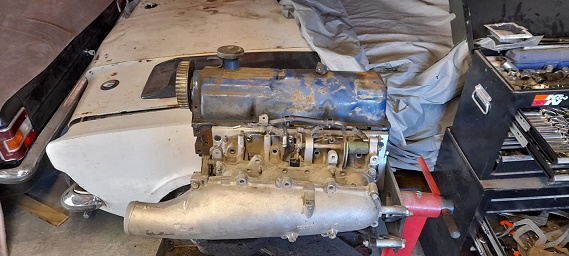
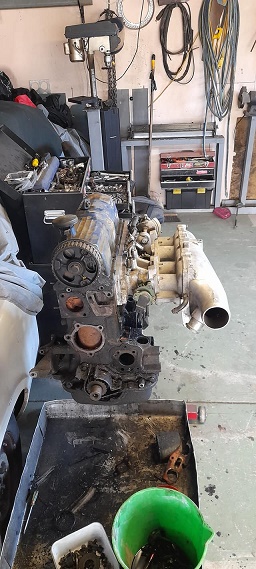
First step was to clean out most of the grease and grot so I could remove and properly inspect it. Then engine out and cleaned up the top end that had bits floating around after timing advancer flew apart.
2 points
-
I think this ones done 70,000ks, I want to make it the daily. Hopefully I can get that many ks out of it2 points
-
Shit yeah solid looking bike now! Matching 1pce leather suit I hope??2 points
-
2 points
-
Yeah she's got drovers boots I don't look at the wife's dog credit card statement and she pays no attention to the car parts piling up2 points
-
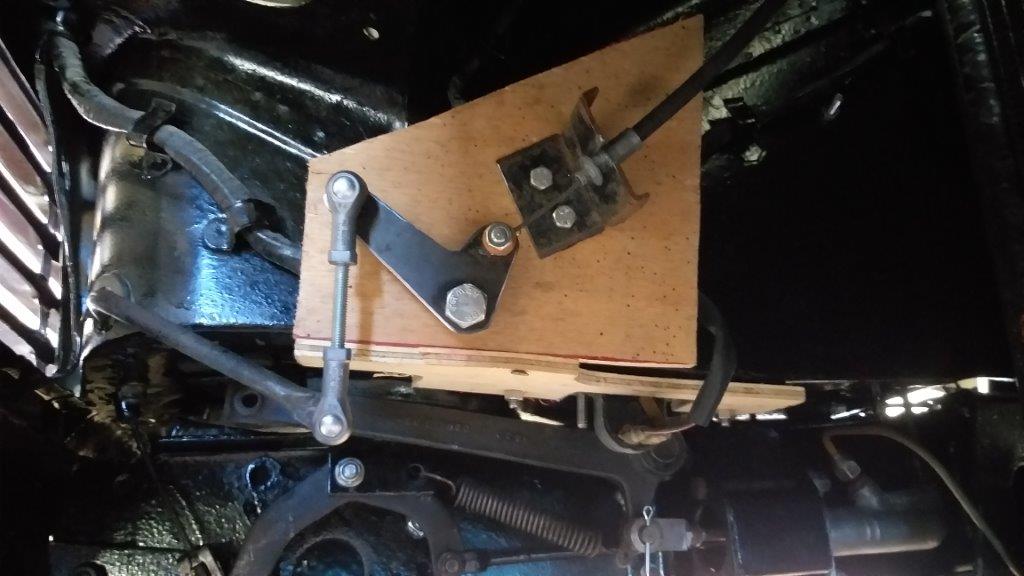
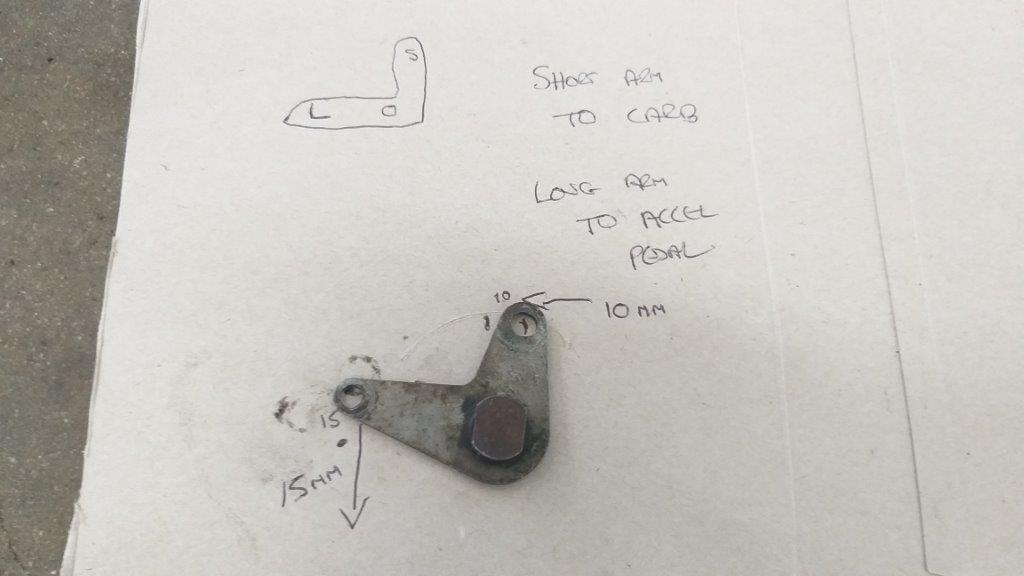
Because my life is pretty sad, I spent a few hours building this working mock up of version 3 of my HiAce to Thames accelerator cable bracket. Stole the mini ball joints off the ends of my gear shift cables for the intermediate shaft, so I'll need to order in some replacements. Even went as far as to make a longer pivot lever so the accelerator pedal is now nice and soft with heaps of travel. Should make for nice smooth acceleration. So all that's left to do is to replicate this mock up in something tougher than a piece of dirt old plywood. I'll hopefully make the finished article a lot more pleasing on the eye. Thanks for looking.
2 points
-
So I got the bike all together and dropped it down to Danny, Hayhole and the team at Watermark Signs in Wellington. What a bloody transformation! I gave danny a bunch of photos of the original Rothmans Dakar NXR750 along with what vectors of Logos I could find. Danny drew up the vectors that I couldn't find, color matched everything and sized it up. Hayhole did all the application. Im absolutley blown away, its come out far better than I ever imagined. Its still not 100% complete. I still need to get the sump guard and crash protection on. This wont happen for a week or two though as the tank needs to come back off so I can install the new choke plungers when they arrive from Japan, less than a week before the rally, eeek. I'm cheesin. Will get some lush photos done of some of the cool details once its all back together properly. I do find the before and after photo quite mesmerizing.\2 points
-
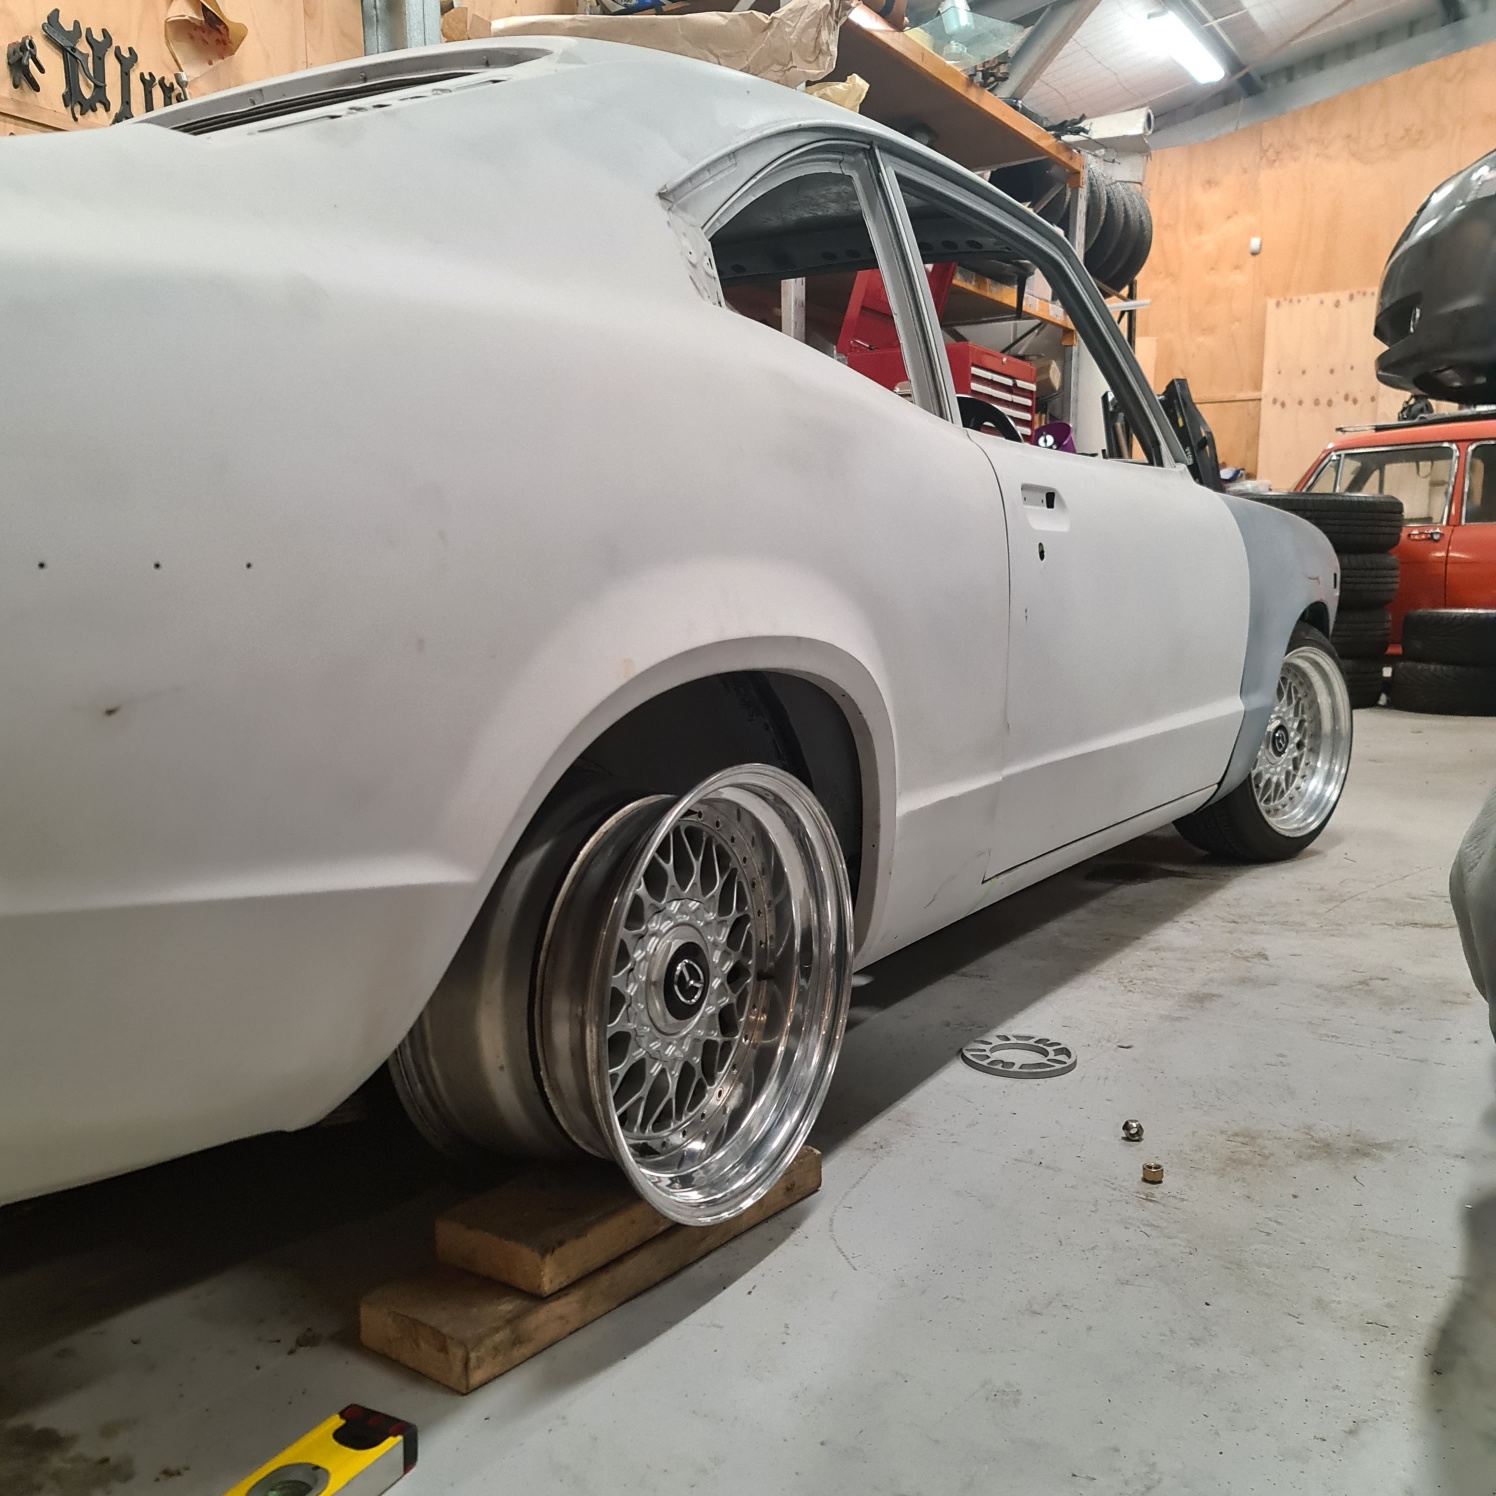
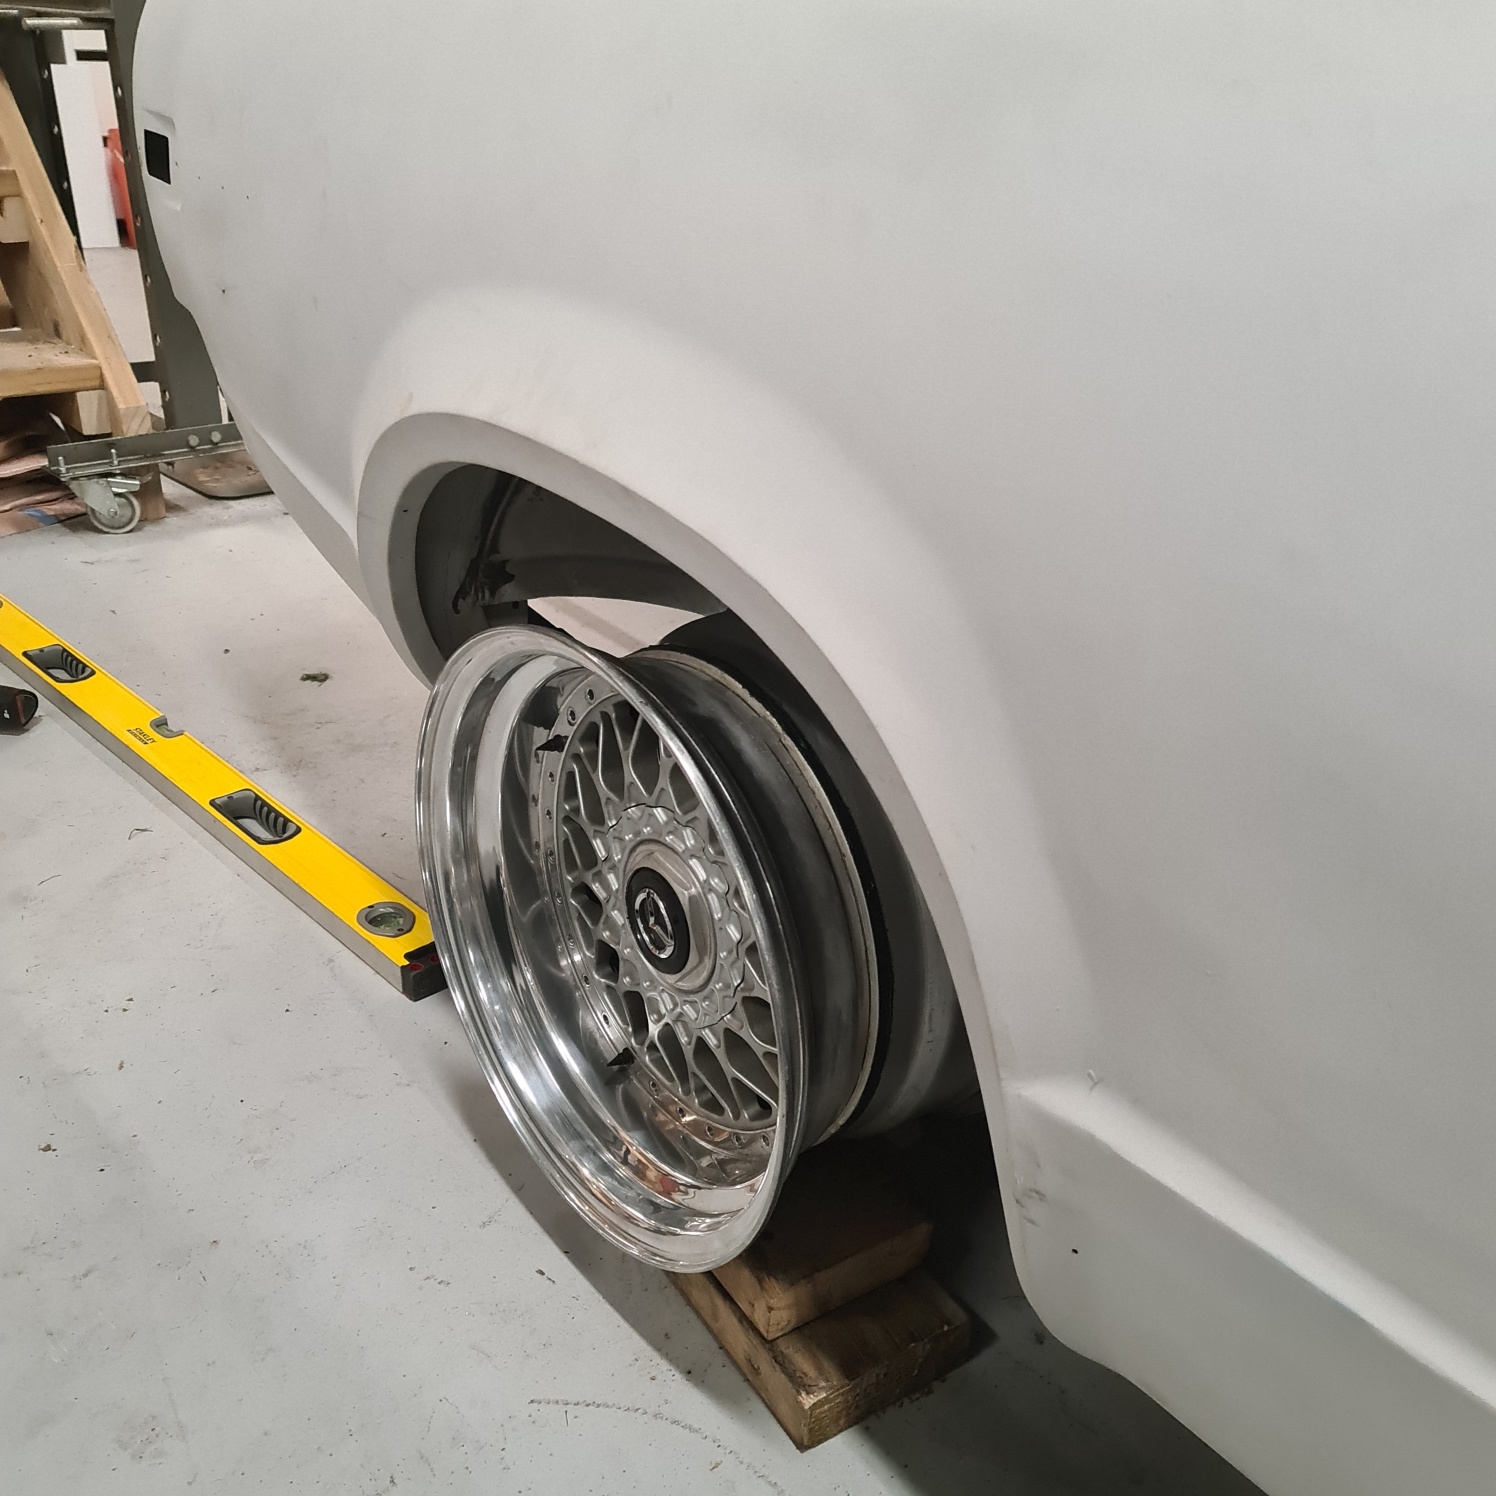
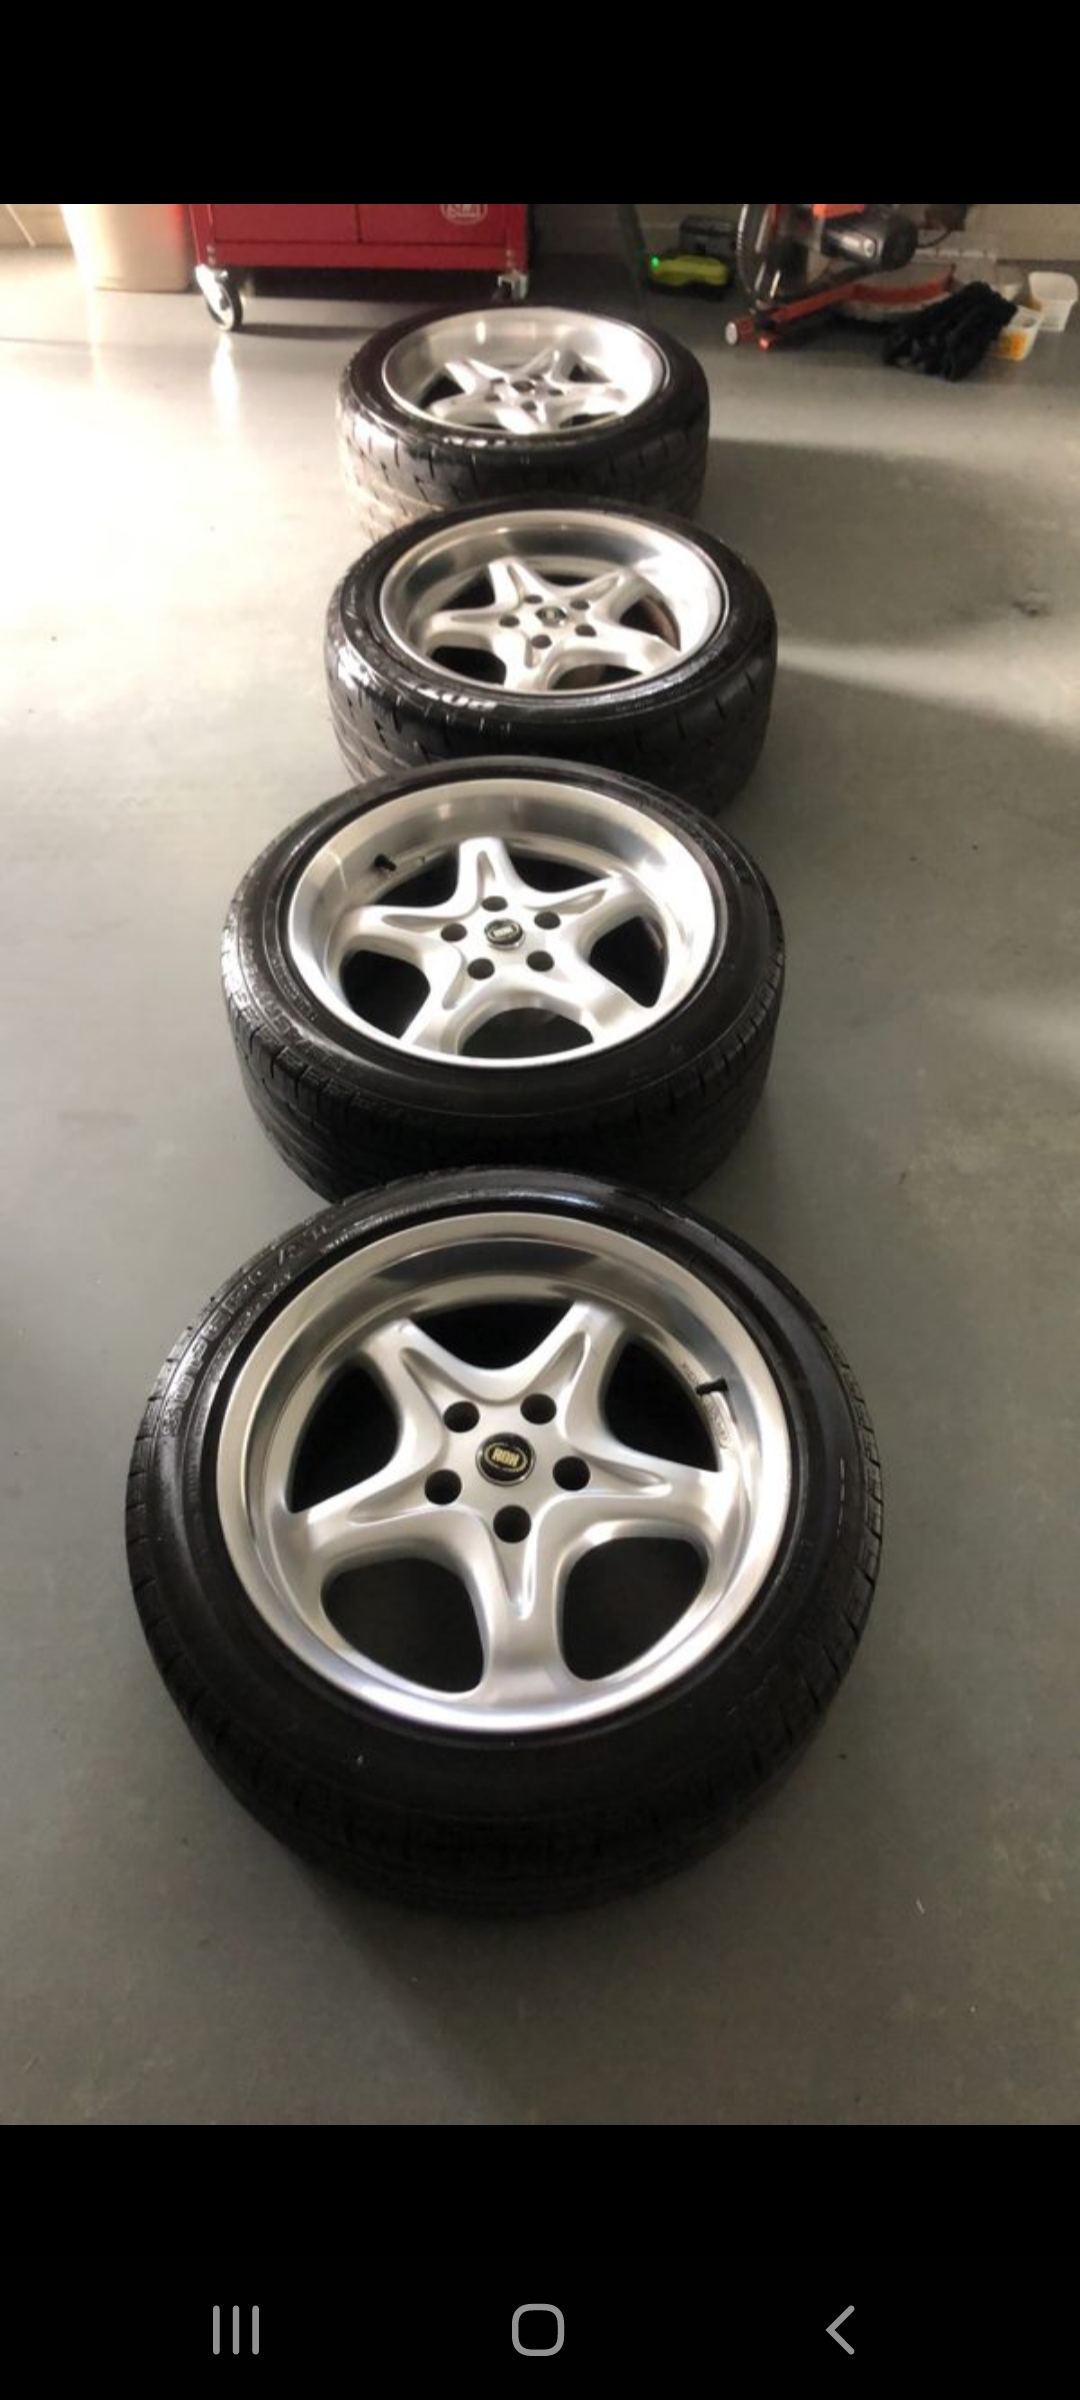
Purchased a full rubber and seal kit for the car from Azhar so thats here ready for when it goes back together. When i sold the 808 i had a pair of BBS RS in 15x11 with 5.5" dish and a pair of 15x8 with 3" dish which i kept for a rainy day. Heres a pic of the 11 on the back of the RX3 for a laugh, shows how big the flares had to be to make them fit on the 808. Anyway was browsing market place and stumbled across a set of 3.5" lip 30 hole BBS lips by chance. A quick measure up and they look to be perfect once guards are rolled to fit on the rear with the narrowed diff. Will give them a full recon, repowder coat centres, new hardware, full height hex centres and repolish lips once i decide on car colour. Fit front and rear with basically next to no spacer so thats a bonus too. I also found a set of mint 5x114.3 17x8.5 ROH Z'S. The 8.5" only came in 5 Stud AFAIK and have a huge dish compared to the 7.5" 4 stud versions. Unsure if they will fit on the front but will definately work on the rear with a 4x114.3 to 5x114.3 adaptor spacer. So will wait for these to get up from down south and i can work out what of these i will run front and rear and then get Toby to give a set a polish up. Have decided to sell the SSR Mesh and the 5.5" BBS lips as im not going to be needing either of these any time soon and iv got too many wheels it seems haha.
2 points
-
Now the eagle eyed amongst you will notice that the arms are slightly different lengths. I setup a little "test bench" using an old cereal box. Poked a hole through the box for the pivot bolt and ran a little experiment. For every 15 mm of travel on the long arm the short arm travels 10 mm. If my maths is correct this works out to a ratio of 1.5 to 1. Adding my original pedal movement figures of 45 mm to 30 mm into the mix, this just so happens to be the exact ratio that I require. If I was to connect the short arm to the cable and the longer arm to the pedal activating rod, I'm thinking that the pedal will need to travel further than it currently does and hopefully the longer arm will slightly reduce the force needed on the pedal to move the cable. Please shout if there are any glaring errors in my theory. Anyhoo, in order to give this a try I've got to fabricate a MK 3 version of my cable bracket, so that is the plan for tomorrow. Thanks for reading.
2 points
-
2 points
-
And this as well, which I filmed halfway through the process. This was cos i am now under serious pressure to provide content to my now 189 youtube subscribers, fuck you for suggesting I enter that competition.2 points
-
Had a design in mind for the wall up to the lounge from very early on. Was gonna take a bit of time but I thought it would be well worth it. Cut and planed lots of batons from Rimu off cuts Its not a techy thing. They went up along the wall and are spaced just so that as you enter from what will be a hallway it sort of looks like a solid wood wall. Then as you walk in and past you can see the orange paint through the gaps... Neato. Much neater. I like the effect. But I also had this planned... and all the colours in between Today we went to the big smoke (Nelson..) and met up with @CPR Sierra who gifted us loads more leftover timber plus loads of insulation from a house build. Top fella- thanks so much Morris! This is just what we need to now continue on with the kitchen smoko room and bedroom sickbay build.2 points
-
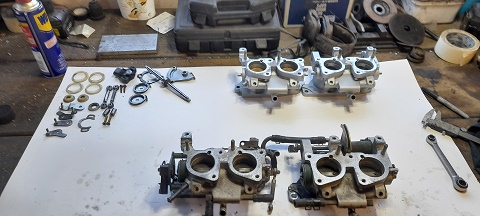
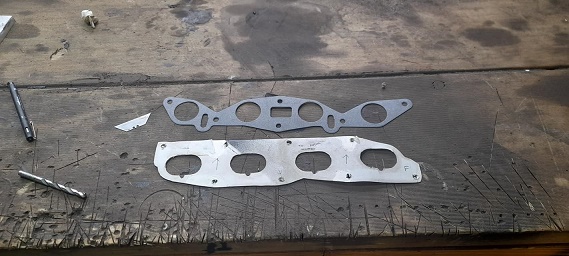
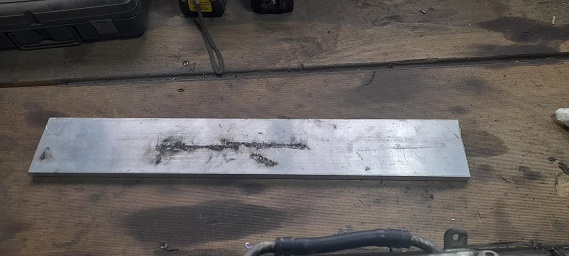
hhmmm page 6 ay... pretty slack. sorry for lack of updates but in my defense i haven't done any work ...at all on them...due to a small health issue and my body letting me down on more than 2 occasions .. and i have taken this year off the cars to get some stuff done around the house.....and if i try and do that and find time to work on cars ill just get fucked off...so year off. the cars are still there i have been playing with pintos tho as less room and just keeps my mind ticking over. i had sorted the falcon CPI for fuel injection and was starting to make a hat for that for boost. .....but ive had a nissan gtir inlet sitting on the shelf that i was planning on using on my focus.....but it got the better of me and i had to see.....(now it does need some cleaning up and i need to do some port matching but this was all by hand with a battary drill...and the socket head bolts cost more than the inlet manifold0 i had a pinto gasket and i made a cardboard one for the gtir..they do share a common bolt hole so that was enough for me. i had some 10mm alloy so i sorted the pinto part first. once i port match the head it will be fine....only had a 44mm hole saw then sorted the gtir side tryed it on the turbo motor......looks awesome.....love it i just need to find a better tool to port match gtir to pinto and back and find a fuel rail and maybe some bracing .....and thats good to go. cheers
2 points
-
So I did a thing and sold the stockcar. Then got itchy and somehow joined the Pukekohe car club, and impulse bought an RS legacy.. The actual f##k right??? Have a cage kit ordered, picked up 2 knock off bride seats for mock up. The body of this car is mint, really straight, and primered ready enough for the colour I'm sending in.. The engine is a bit meh, water temp gauge no go, oil light on, cat light on.. Gearbox is good though. Still has a wof, reg just ran out. Plans: Update reg Give some jandal on the roads to find any quirks I don't like Coilivers Gut it out Cage Seats and belts Gauges so I can actually see how bad its dying Then go full send on some club events.. Will try and get the Mrs to jump in the drinkers side, she's done a couple of tarmac sprints before, so here's hoping. Ideally I'd like to biff the twin turbo IN THE Bin! And run a WRX turbo set up, keep the top mount too.
1 point
-
Tail light ekkkkkk school girl skerch from fat bogan man
1 point
-
i lost like 4kg from swapping in the lithium battery. so with the rear wheel swap, indicators, guard chop, and tail light swap, oh and im sure my pannier rack is lighter than the stock one, i must be doing alright.1 point
-
Potentially, people should be getting out more for sure but there's many limiting factors some mentioned above. I'd love to be retired so I could drive around constantly though. How good?1 point
-
Took some more shots since it was out of the shed. She’s now at the blasters. Cancery upskirt1 point
-
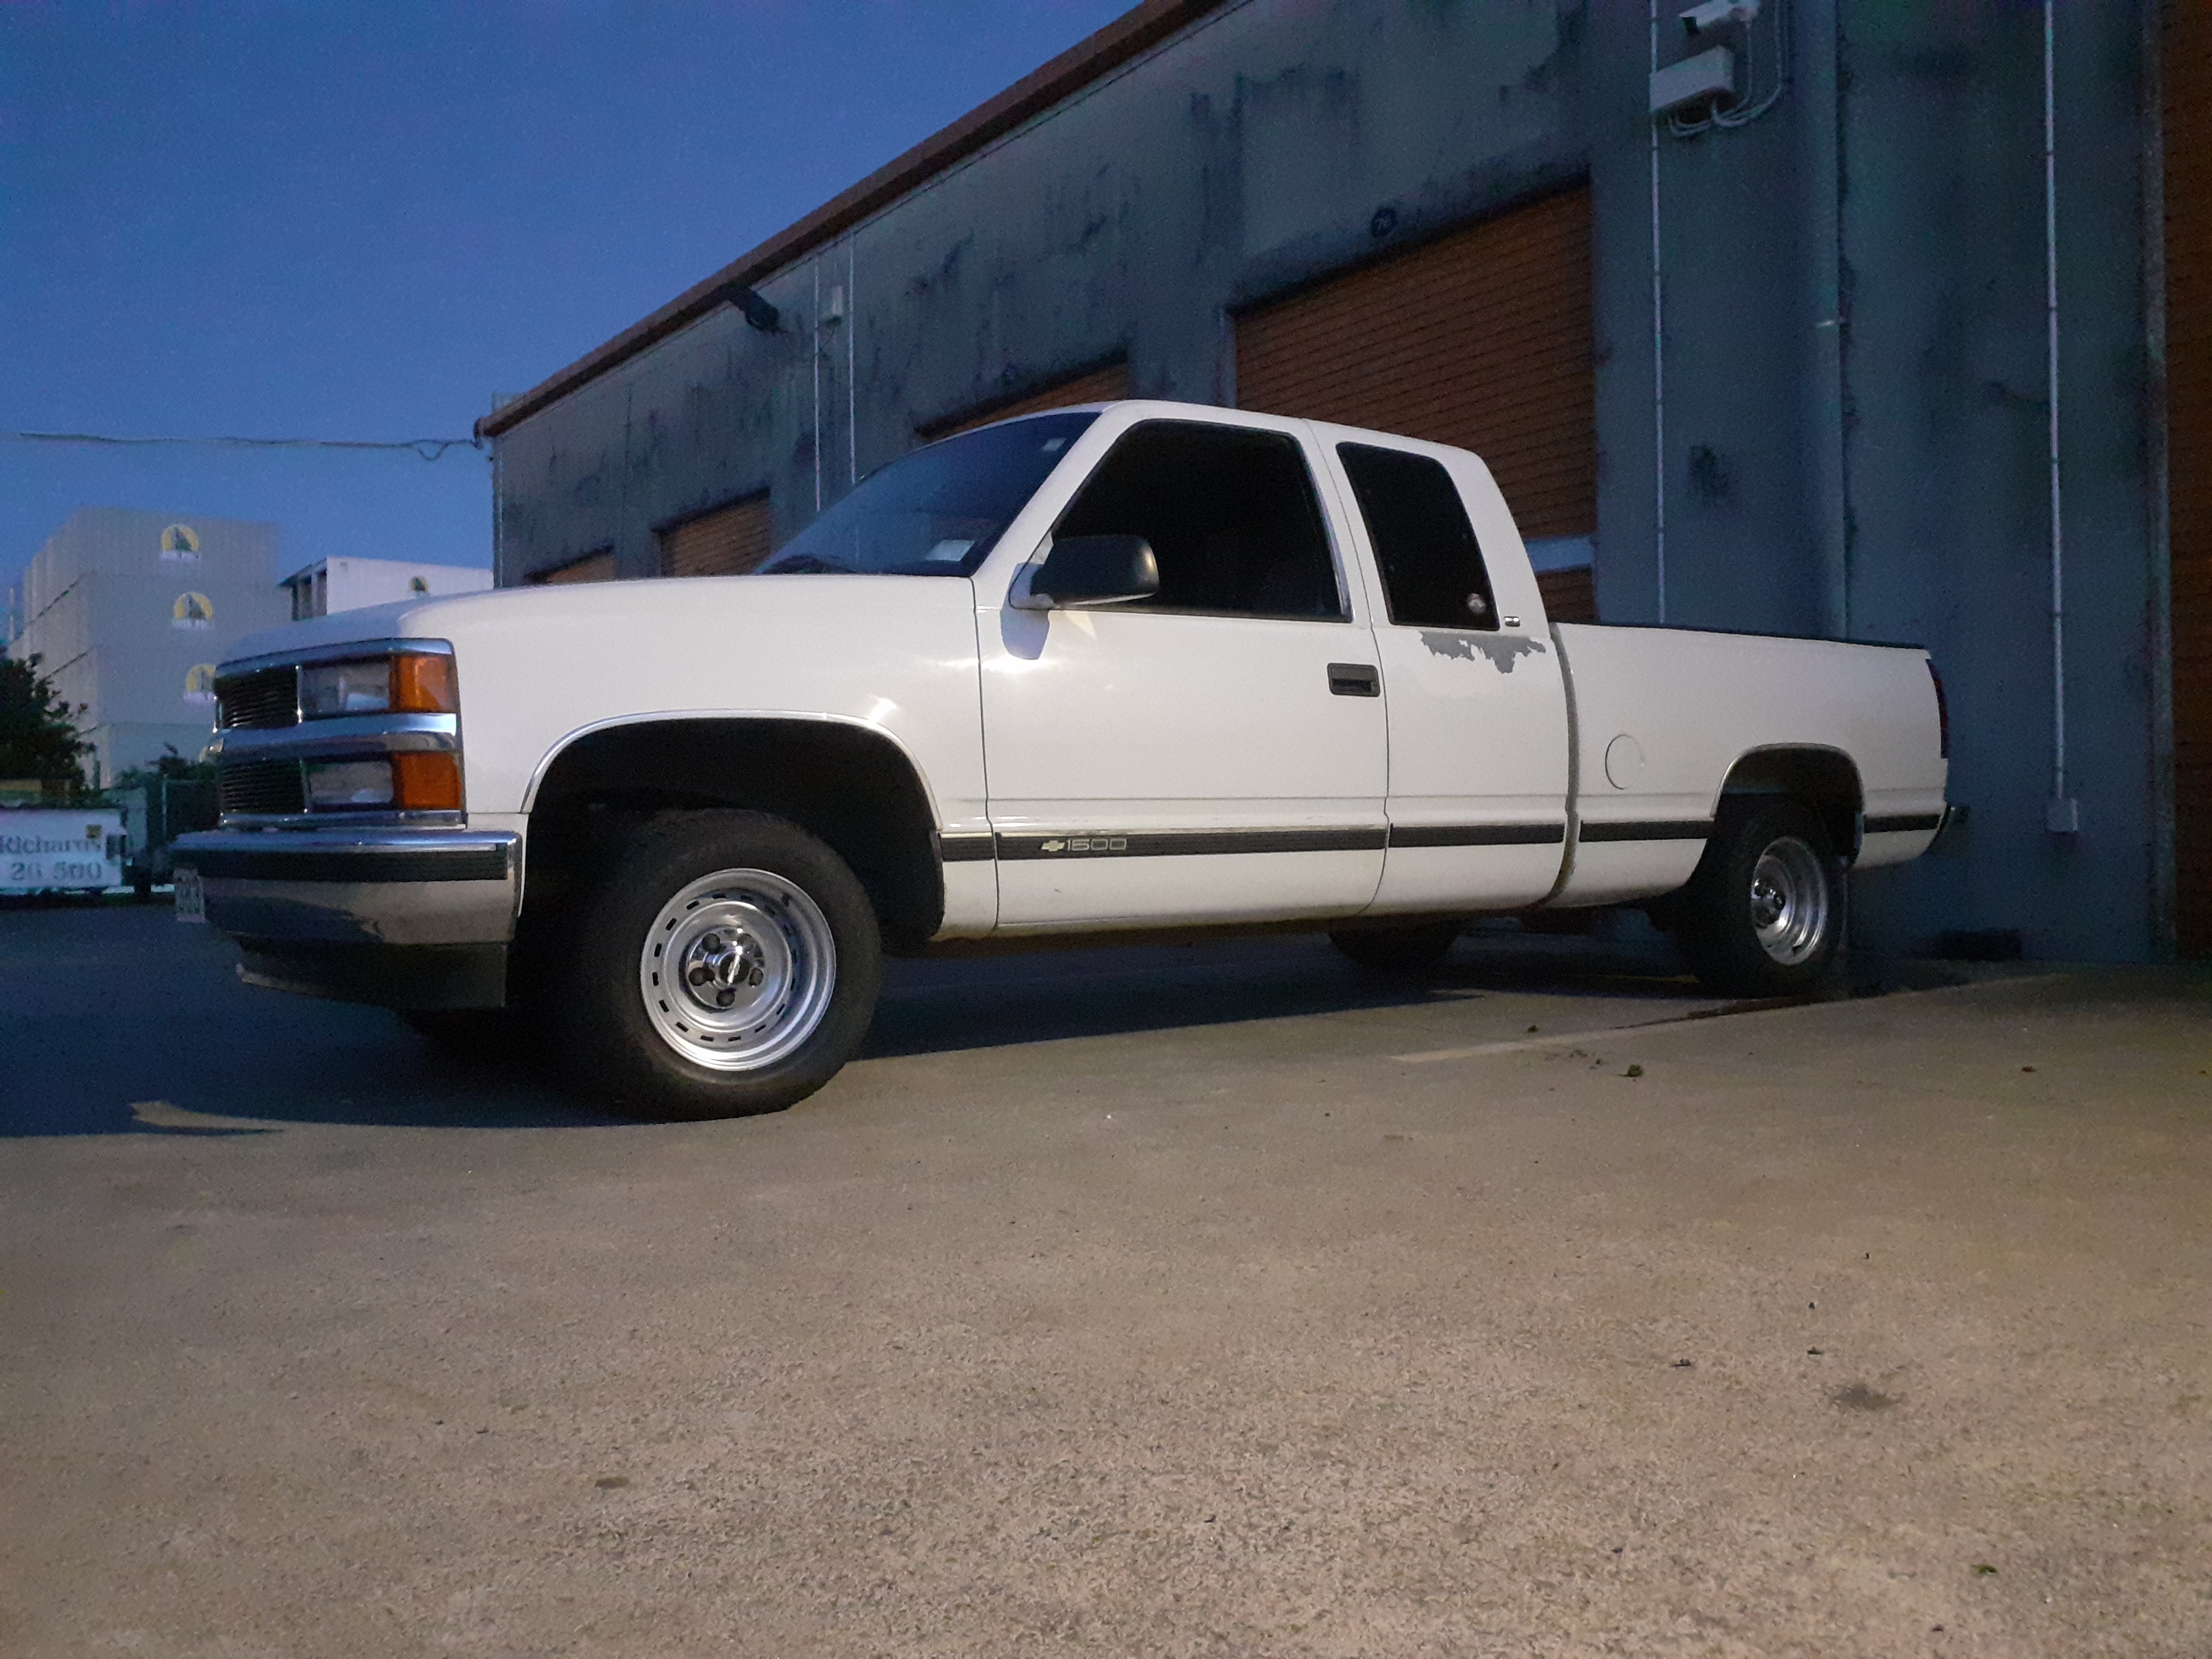
They've begun their trip north now. I think they are in Hokitika tonight. My dad said it hasn't lost a drop of engine oil so far. I call BS. He reckons someone wanted to buy it from him in Wanaka but died when he stated his asking price
1 point
-
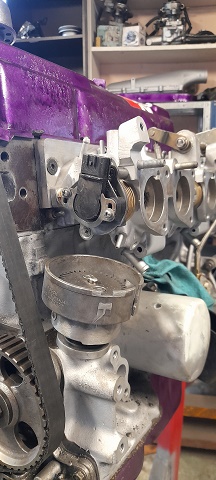
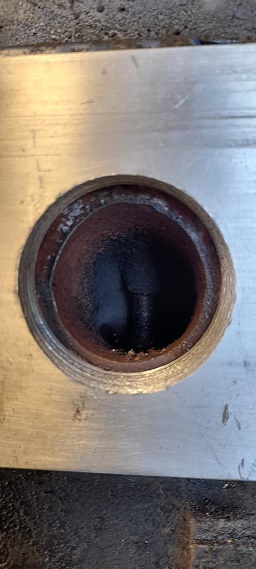
was thinking about temp sensor for the ecu and where to put it.. couldn't put iy in the factory position as the factory sensor was there for dash temp gauge.. thought about the hole in the head between #3 and #4 inlet port but there is no way with the linkages for the inlet manifold... so then i thought about the frost plug at the rea of the head...there is about 30mm from the rear of the head and the fire wall and when i popped the plug out and measured the depth i had ..that was 60mm from head surface to 34 cylinder wall...........and the temp sensor itself is 60mm long. soooo i garbed a new front plug....gutted it and got some thick pipe and cut that to size and then a washer.....welded it all up and fucking back.......sorted.. andits about 10mm of the cylinder wall. and as paranoid as i am with it leaking and being in a spot that the motor will have to come out if it does....i plasty dipped it twice. tapped it into place and it should be fine. also trimmed the adapter plate for factory temp sensor. .port matched it to the inlet manifold.. port matched the head to the adapter plate (will do for now ...this motor is to only get it all running..i don't have hope for it lasting long)..gave to surfaces some belt sander love ..some lock tight on the socket head screw.....a gasket and some extra sealant and bolted it on the last time .....(well till she epode's ) cheers
1 point
-
I'm going to start spamming your you tube channel saying things like "we need to see the sexiness behind this voice" P.s... Clean your workshop, I'm not mad... just disappointed.1 point
-
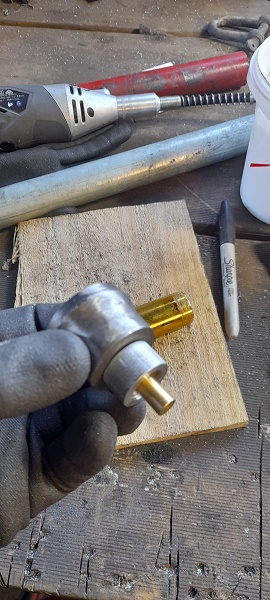
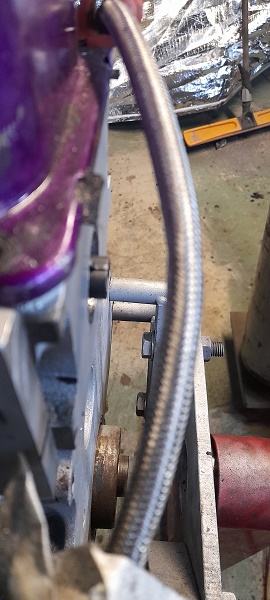
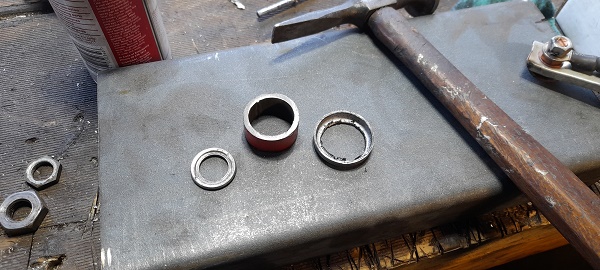
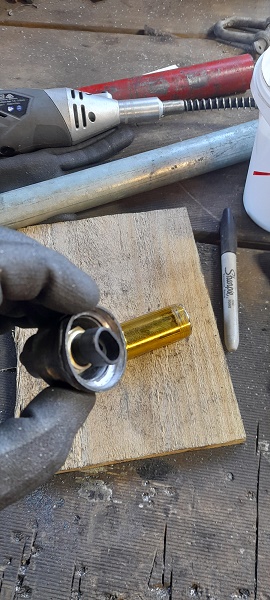
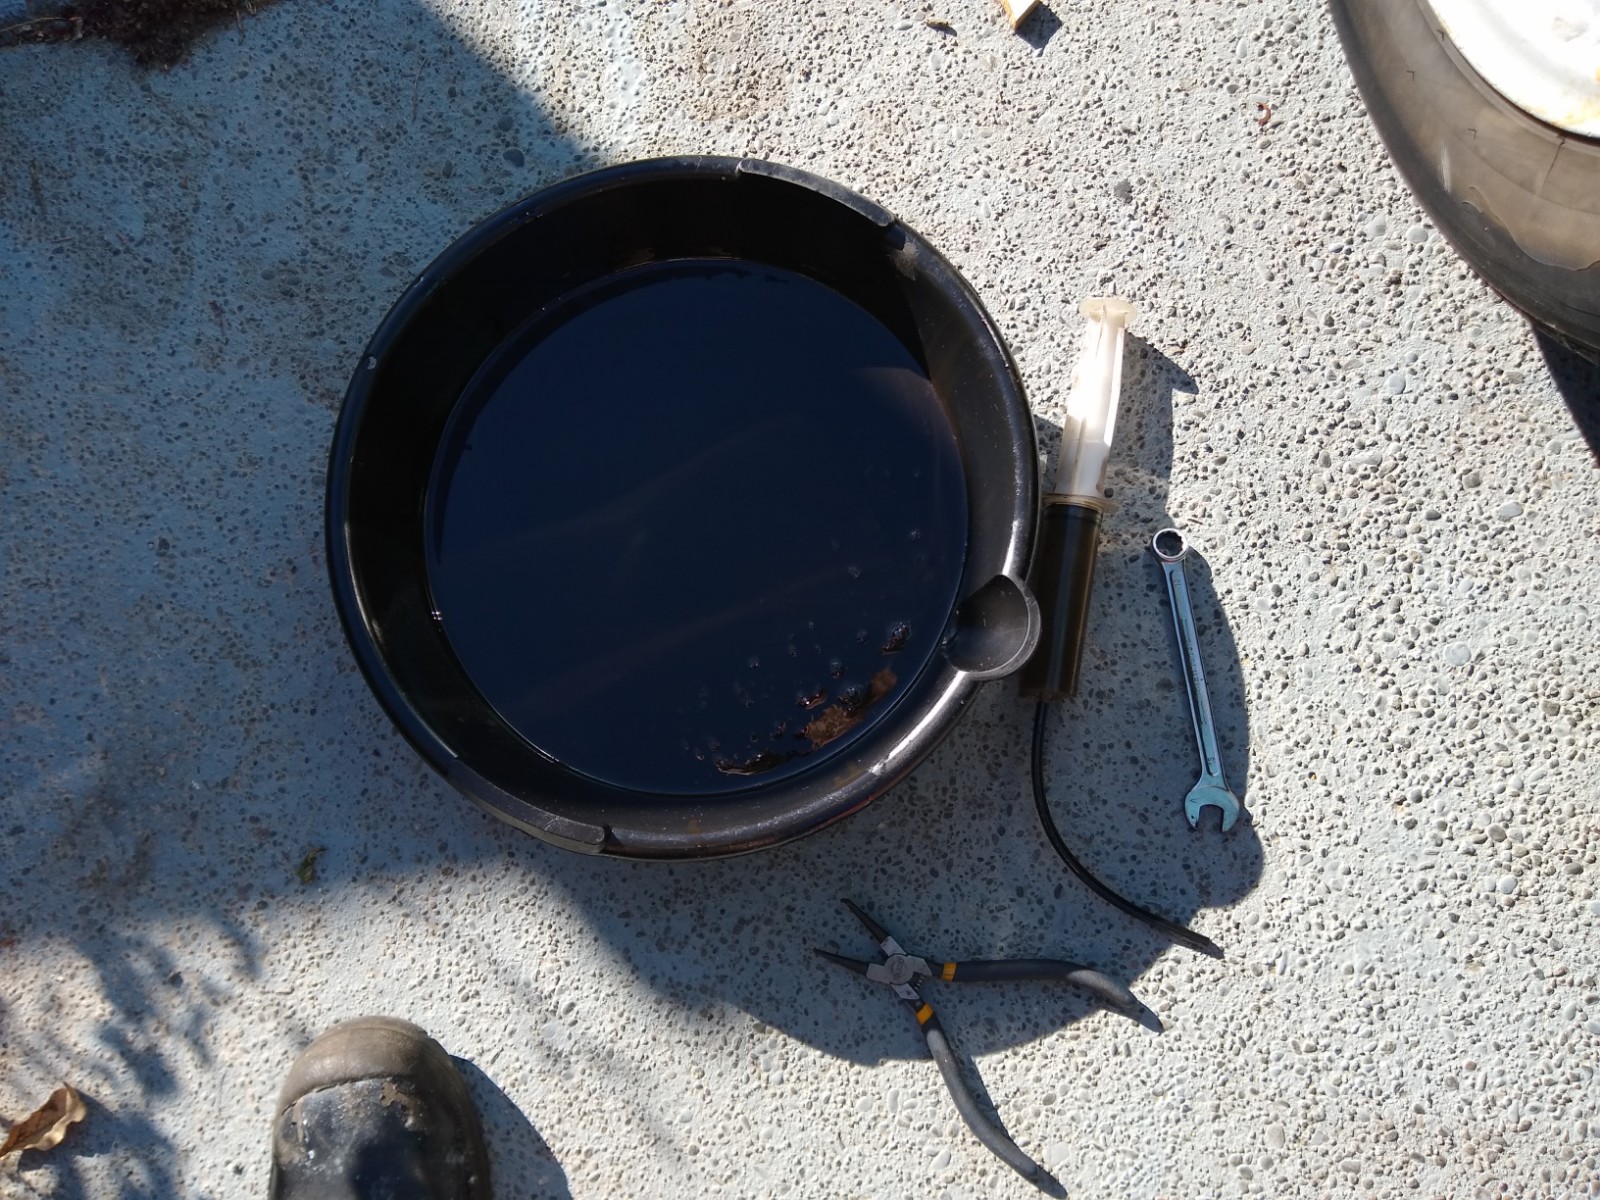
Right o, the latest round of fuckery. As discussed, I decided that a second rad was going in, regardless of you fuckers who said not to worry. Basically the thing bouncing off the electric fan just by hitting 100kmh for 2 mins or after a hard pull was not giving me the lovelies. After a measure up I scoured the internet radiator catalogs for a suitable donor. Unsurprisingly a Hiace van rad was pretty much bang on if maybe a little tall. I ordered one from my rad man and when it arrived presented it up. A minor forward tilt had it sitting in a good place. The top inlet pipe was a stupid angled thing so I took it back to rad man to change it for a straight inlet. I made some bottom mounts that hooked in to existing chassis holes, then fudged up a top mount. I had to grind off some unnecessary brackets and such but that was no drama. Then I spent quite a while rejigging the stainless pipework to point in the general direction of the rad pipes. I dragged the old fan and viscous clutch setup out of the container, however the 450mm safari fan was going to be pretty tight in there and probably going to hit the engine cover. Some google-fu resulted in the purchase of a TD27 fan, as it had the same mounting but only 420mm diameter, perfect. I then somehow spent nearly a week of evenings fucking around creating a shroud that would miss everything but still do ducty good things.. I have no idea what it took so long, but it did get remade 3 or 4 times. It's a bit dodgy, ie made out of some old flashings that were the only really thin steel I had lying around, but it appears to duct adequately. So today I finally filled and bled the cooling system and took it for a spin, and holy shit what a huge difference! It basically gets to 1/3 of the way up the gauge and stays there absolutely rock solid. This is where it sat when doodling around town previously. I did a long run at 100kmh, then went up a steep hill that had always made the big fan come on and it didn't move the gauge at all. Super happy with that.... It also appears the thermostat now has a temperature range it can work with, as the wee fan and aux pump cycle on and off which tells me the thermostat is choosing to open and close rather than stay open all the time in an attempt not to blow the engine up. So all in all that was a worthwhile exercise.1 point
-
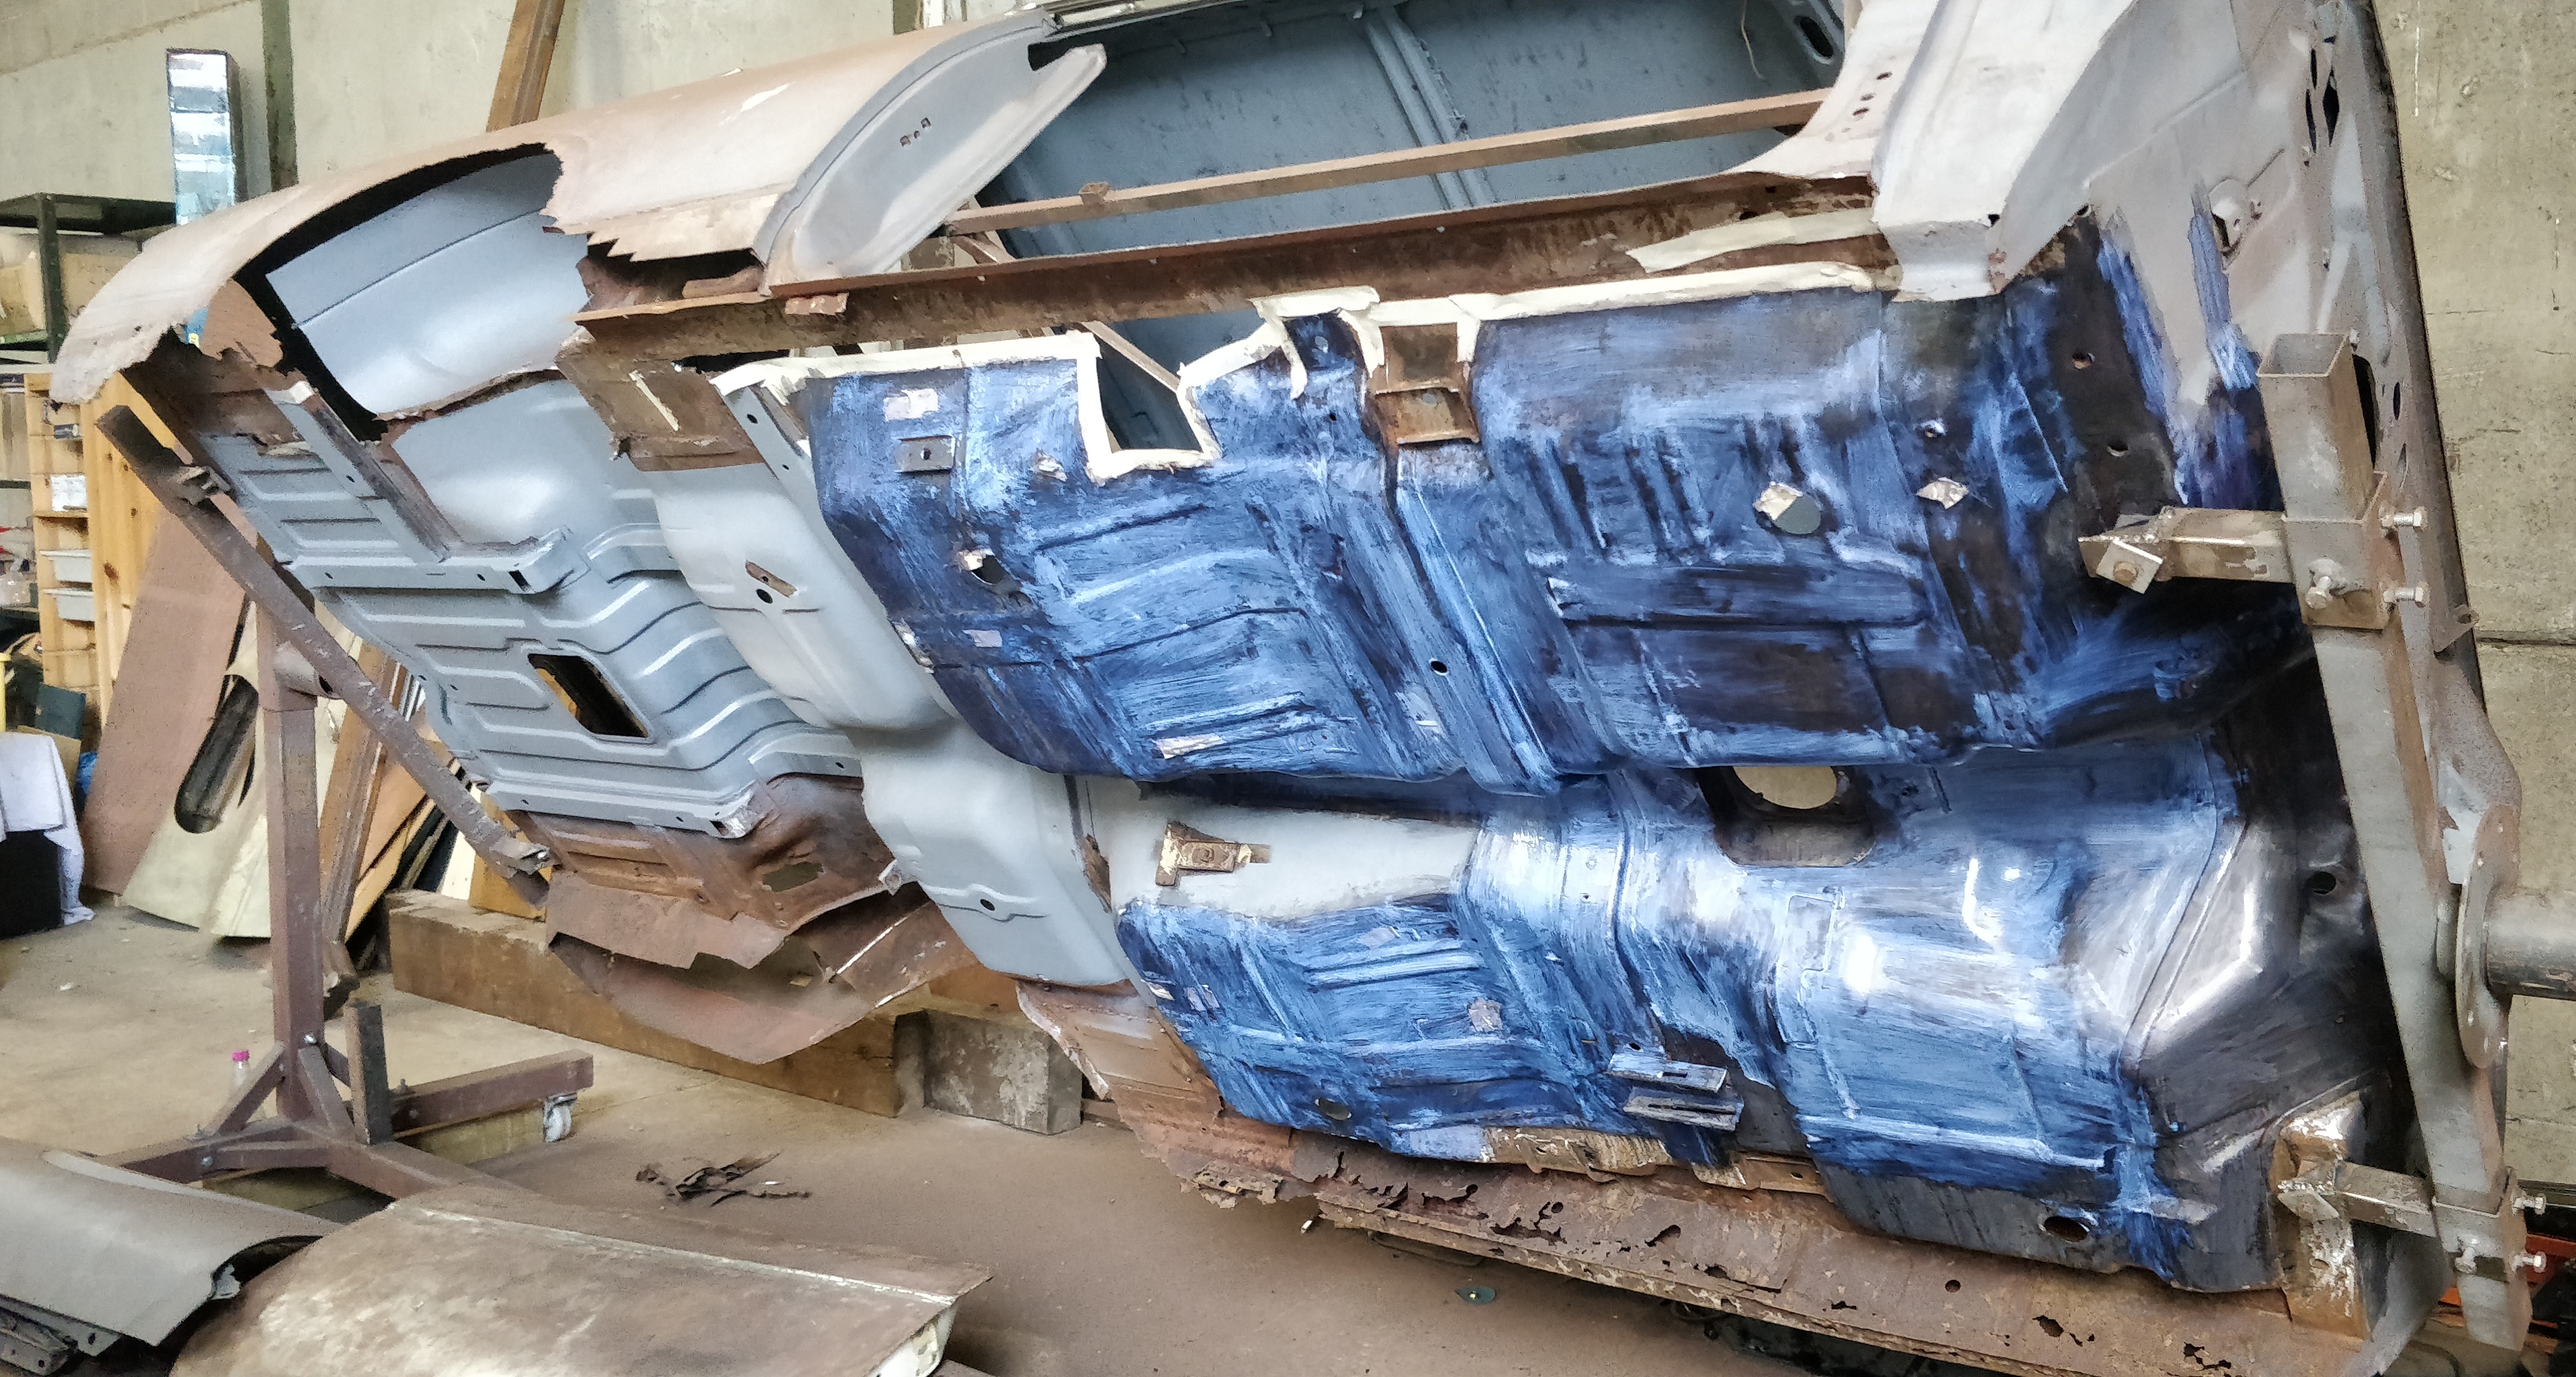
More dismantling has been done. I have pulled the dash out and the carpet back. These cars are prone to rusting under the windscreen inside where the wiper assembly is housed. This car is no exception however the rust is not as bad as i was expecting and allot of it is probably treatable with a sand or wire brush and some rust treatment paint. The left air vent is probably one of the few places i will have to add some metal. right hand vent just needs a clean up. in general its pretty mint behind the dash. I have pulled allot more off the car than i originally planned but have to make sure its a proper jigsaw to put back together. Now i have started degreasing the engine bay. Then will be cleaning up all the rust patches and getting the front ready for some paint.1 point
-
Managed to get the Thames back on its front wheels for the first time in a few months. Pushed it out of the shed so I could give the floor a good sweep. Looking at the Thames front on the L300 steering angle box hangs lower than the front valance, but it's a small price to pay for the vastly improved steering setup. Even with two leaves removed from the back springs, the van has still got a bit of a nose down stance. Perfect for that 70s look that I am aiming for. Thanks for looking.
1 point
-
Sill tinkering away. I have removed the brakes for disassembling and cleaning. I also removed the front subframe assembly. i was considering a brake upgrade but to be honest the 5 stud starions have always braked pretty well and with a good set of pads they should be fine. this isn't going to be a track car. Once they were out it was time to tackle the front guards. I have been a little concerned about this part and also knowing i have to cut the guard off the side skirt, but unable to decide where to cut i ended up cutting straight down from the front of the front doors. the passenger side was the first side i did. it wasn't too pretty but could be allot worse. The body isn't too bad. The guard has the majority of the rust but it is hidden behind the fiberglass so the repairs don't have to be to pretty. Drivers side next and for the first time ever for myself the second side was better. i was actually able to unbolt this one and the guard itself was in pretty good knick as well. That's the majority of removing parts for the time being. Now i can get onto cleaning, rust treating and repairing surfaces.1 point
-
Ok so here's what we do with drum brakes. We don't have a brake roller at work so on light stuff it's purely based on whether it pulls or locks a wheel when it shouldn't. On the heavy stuff that requires a CoF it has to go to VTNZ, which do have a roller. So we take the vehicle for a spin and get the brakes nice and warm. 9/10 times once they're hot, the imbalance is gone.1 point
-
Drum brakes are just shit, difference between hot and cold can give imbalance, I wouldn't get too antsy with the wof station over it. $20 on them being out again next week.1 point
-
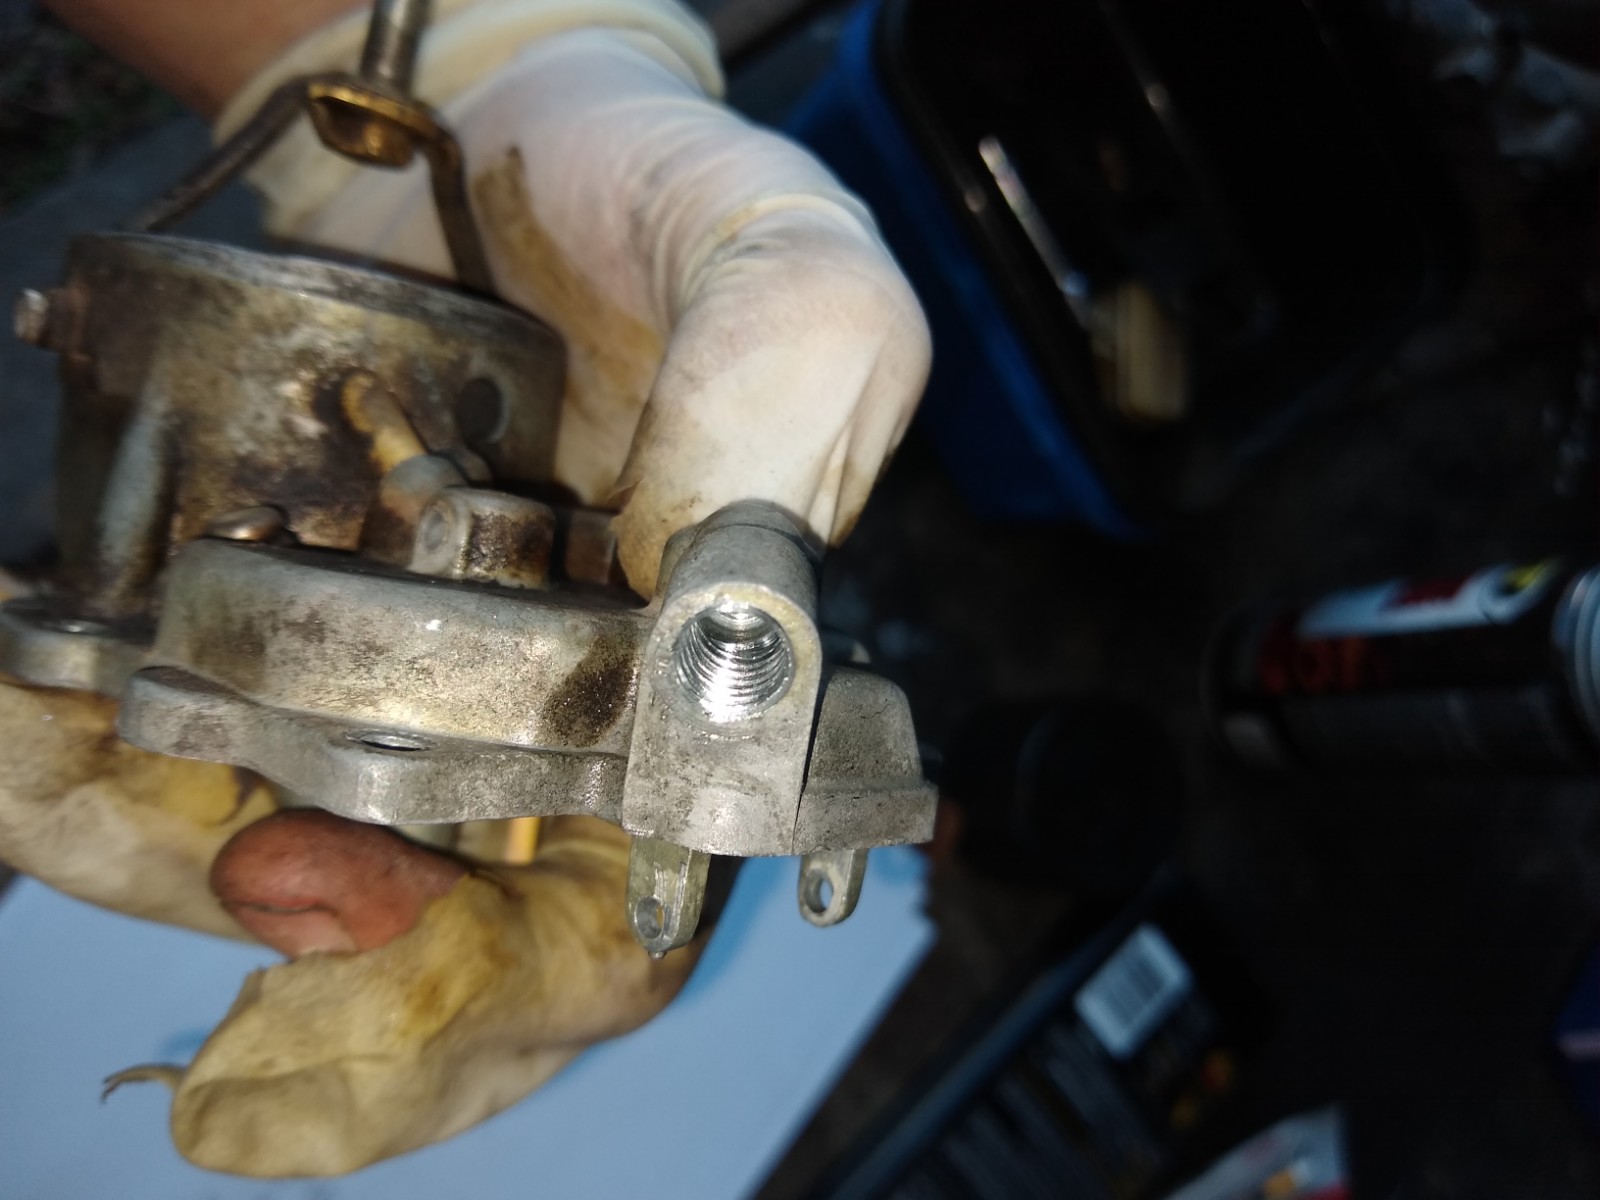
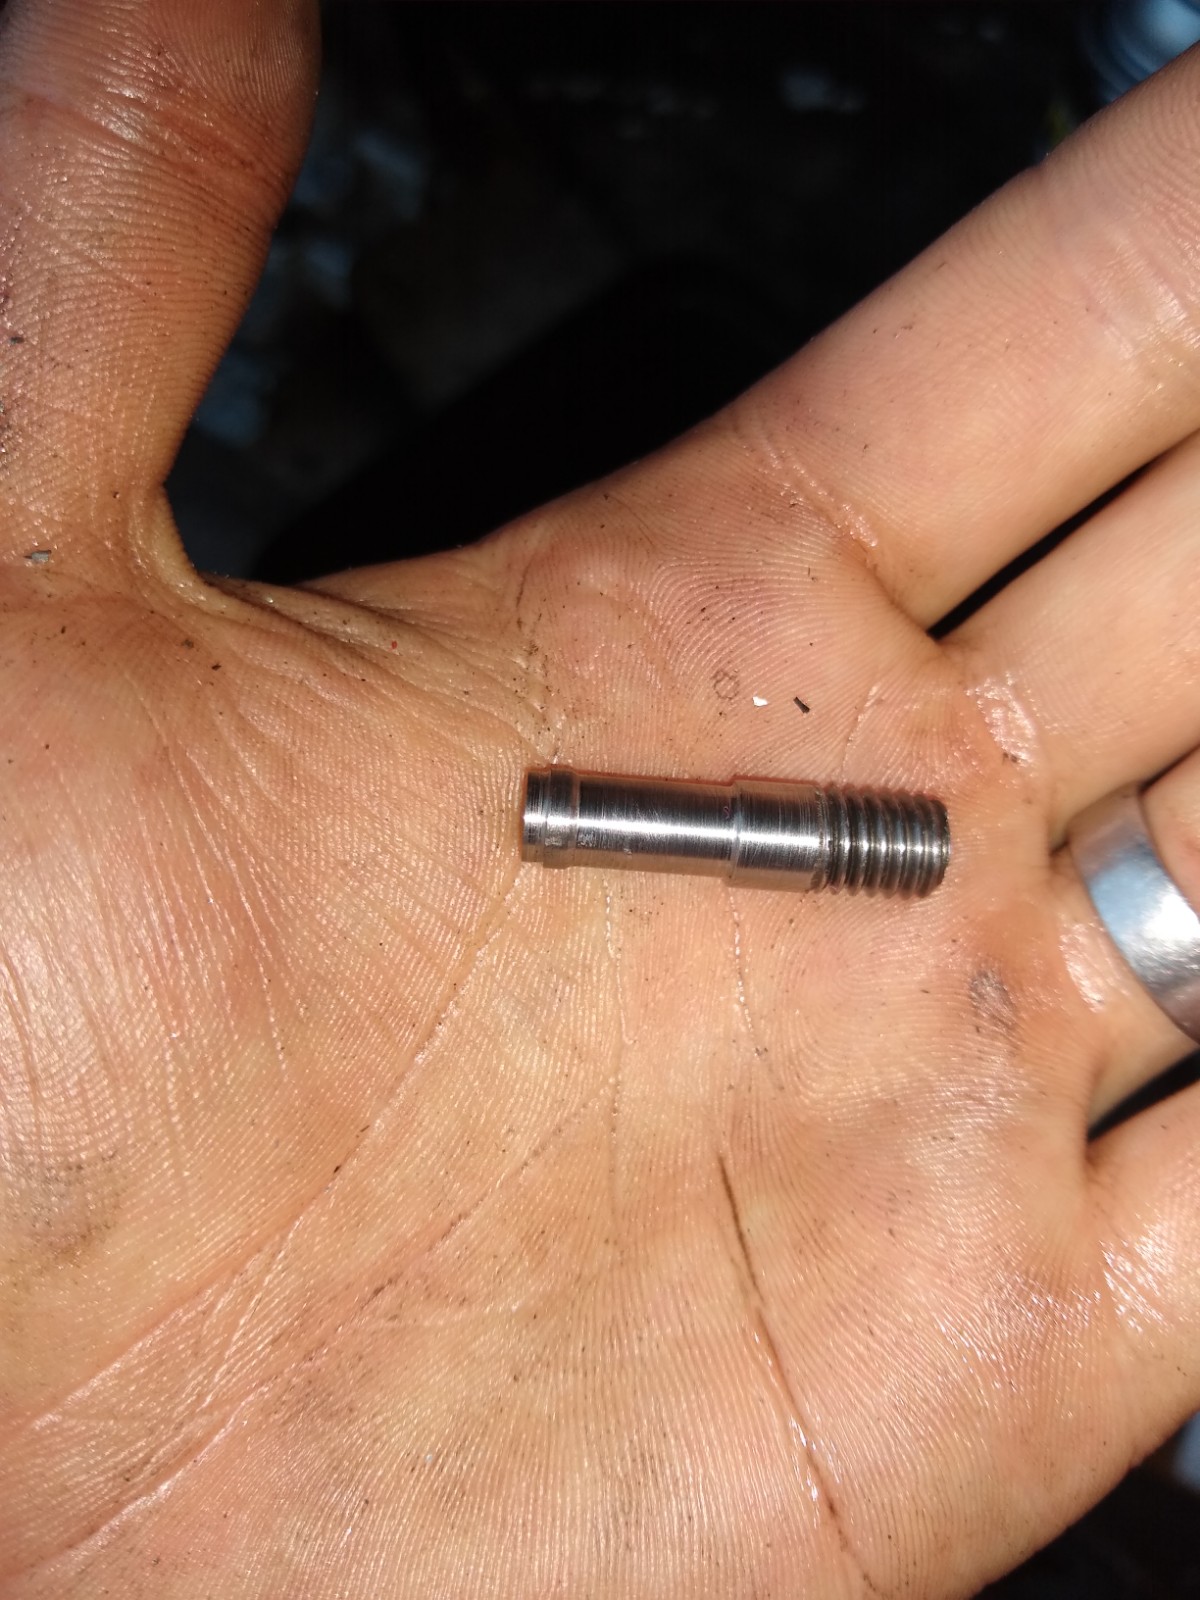
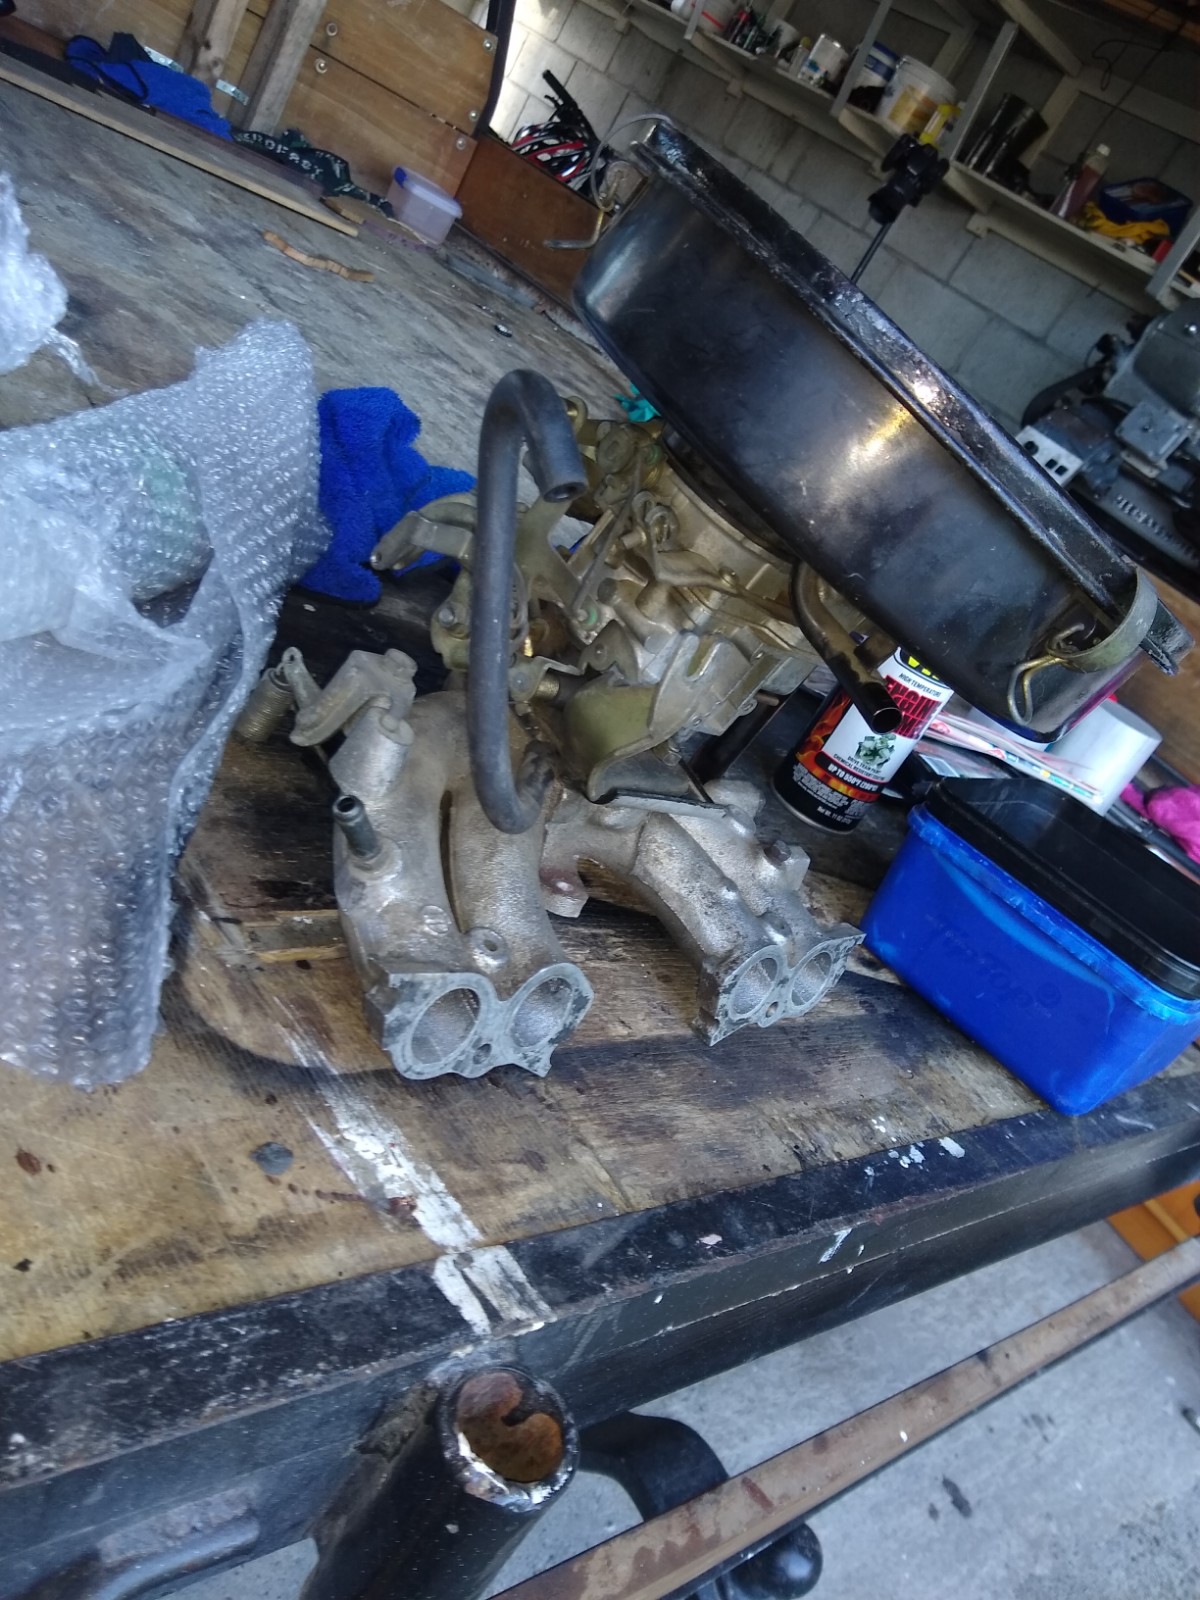
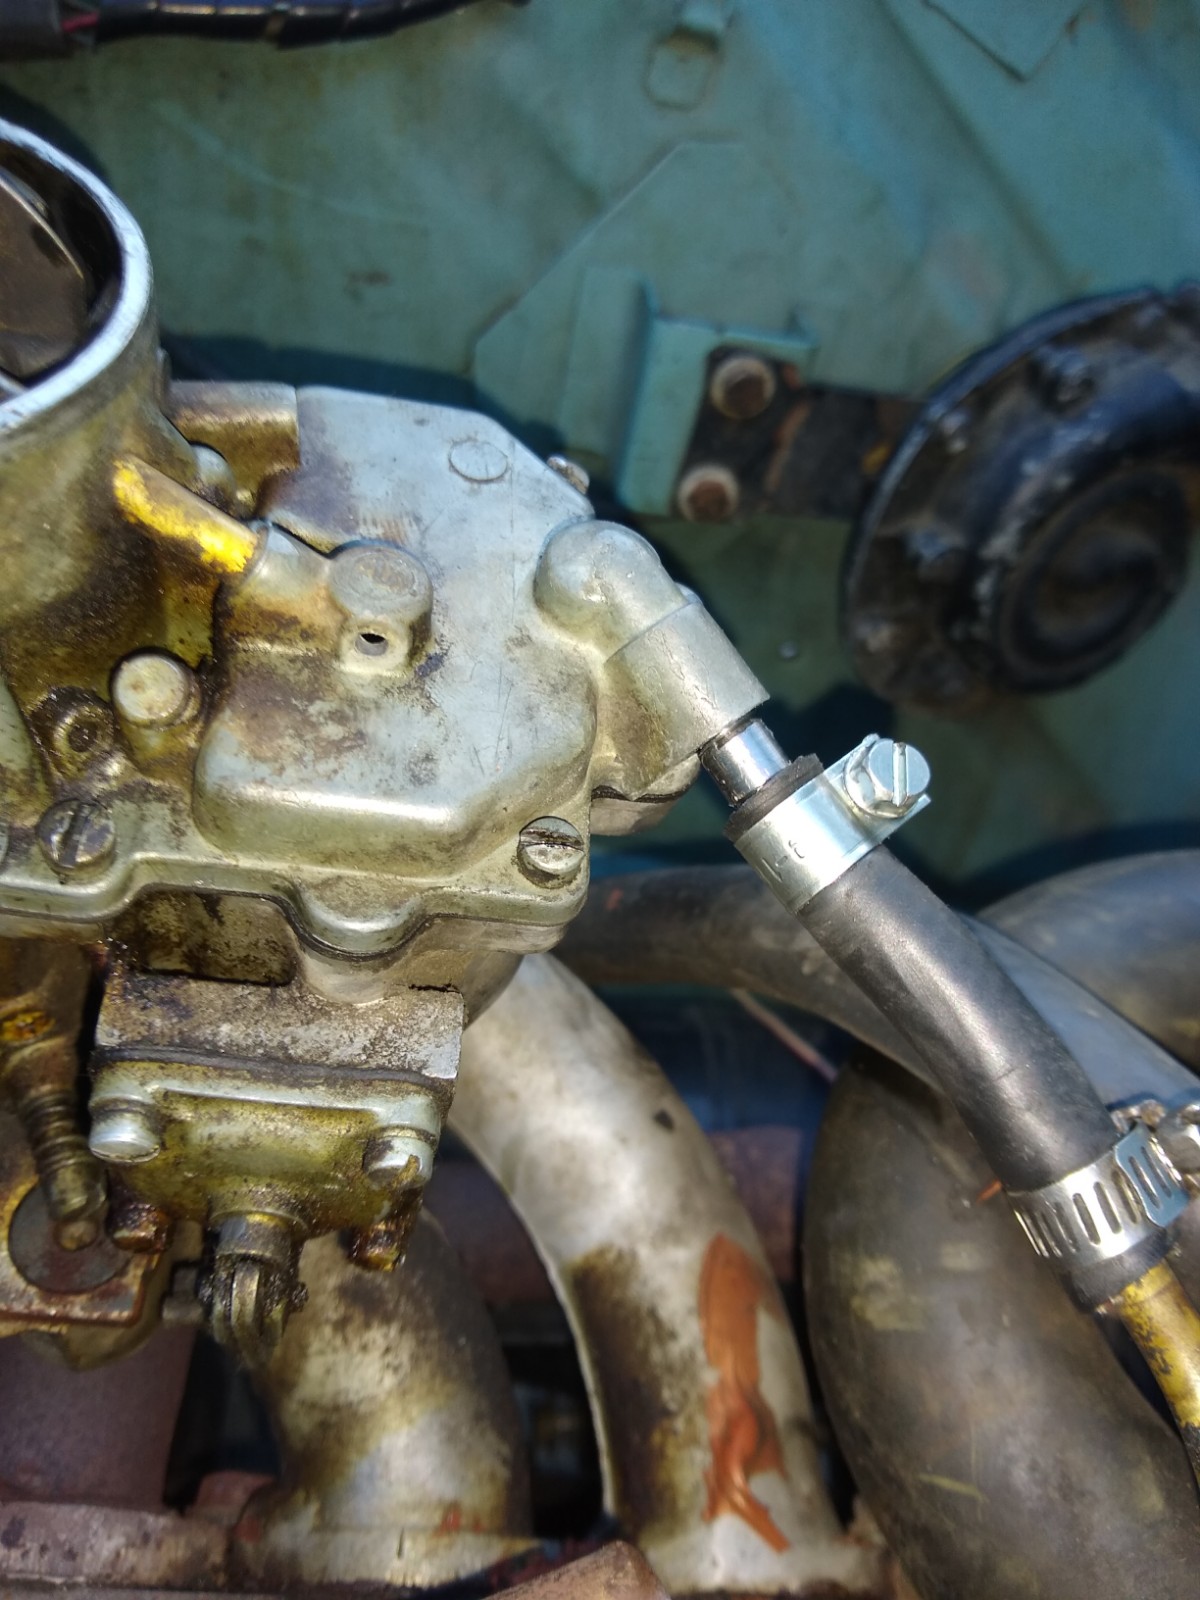
Gave this thing a good tune-up today. But before I go into the details, I would like to publicly shame the place that gave this car a WoF last week before I bought it. Nothing against Felixx, it's the WoF shop's job to ensure something is safe. Harewood Vehicle Inspection Centre - 580 Wairakei Road. They should not have given this vehicle a WoF, there were two serious safety problems that they missed. The first was the serious brake imbalance - the car would pull hard to the right under heavy braking. The second was the substantial fuel leak from the carburetor (straight onto the exhaust manifold). After my engine fire, I have no tolerance of any kind for fuel leaks. I've fixed these now, but I am seriously considering reporting the testing shop to NZTA. There were also a few other items that are dubious, but they aren't safety concerns so I'm not really worried about them. Anyway, back to the scheduled programming. This evening's plan involved adjusting the valve clearances and changing the diff oil. In preparation I decided to get a new valve cover gasket, so I figured Butler Automart would probably be the place to go for old stuff like this. The guy behind the counter knew the part number off the top of his head and sold me a gasket for $13. I was pretty happy with that. I adjusted the valves to the following specifications on a reasonably warm/hot engine: IN: 0.009" EX: 0.017" A few of the exhaust valves were slightly tight and one was really loose. That would explain the flutter I could hear while driving. Most of the intake valves were fine, a few needed a little adjustment. I also hammered the valve cover bolt hole areas flat to try and minimize any warpage. I didn't use any sealant on the gasket, I'll see how it goes. I also gave the cover a quick lick of paint. While I was adjusting the valves I thought I should probably look into the rather petrolly smell that follows this thing around. I saw the side of the carburettor was completely soaked in fuel. The fuel hose was so loose it was practically flapping in the breeze. I tightened it up, but it still leaked. So I replaced the section of hose. It still leaked. I tightened it more. It still leaked. At this point I got a little concerned that the carburettor might have a crack or something, but just to be sure I pulled the top off and checked the gasket - it was fine. I then put some soapy water around the inlet pipe and closed the float valve then blew into the inlet. Bubbles were coming out around it - I had found the culprit. Some pliers easily removed the pipe. Not wanting the screw around too much and being on a rather tight schedule (Jane needs the car to drive to band tonight), I decided my most reliable solution would be a complete redesign. I drilled the hole out for an M8 thread and used a taper tap to thread it. I then jumped on the lathe and made a new fitting out of silversteel then applied a little loctite and threaded it into the carburettor top as tight as I could. Note the new fitting has a barb, this should hopefully help hold the fuel hose in place. My 4K carb was giving this thing the death stare the whole time. It looks like it would probably fit on reasonably easily, but the Anglia doesn't use a throttle cable - it has one of @yoeddynz's favourite types of linkage systems. Anyway, I put it all back together and checked for leaks. It seems to be fixed now. After that photo I hit the carb with a little brake cleaner to tidy it up. Hopefully the thread doesn't start to leak. I probably should have peened it in place after threading it in. While I was in the engine bay I decided I would try and get the vacuum gauge connected again. this involved replacing a couple of sections of vacuum hose and fitting the T connector between the distributor and the carburettor. The distributor rotated about 40 degrees while I was pulling the old hose off - it obviously wasn't clamped down. So I reset it back approximately where it was then used the timing light to check the approximate timing and set it to about 10 deg BTDC at idle. It doesn't seem to ping and runs a lot better at the current setting than it did before. I also tightened the clamp. Now onto the diff oil change. It turns out that the British motor industry was way ahead of it's time - using filled for life diffs. There is no drain plug, yet they expect the owners to top the fluid up every 5,000 miles. These things must leak a lot... Also, the fill plug is a male 1/2" square. I ended up just using a syringe to suck as much fluid out of the fill hole as I could. At one point the hose fell off of the syringe, inside the diff. I had to use circlip pliers to fish it out. After that I filled it up with some Penrite GL5 gear oil until it started to flow out of the fill hole. Should be good for another 5,000 miles I guess. The result of all of the above work is an engine that runs smoothly now, doesn't smell like petrol, doesn't tick like a clock, and a working economy gauge. I'm pretty satisfied with the outcome. Next jobs: -driver's door latch -clean all that red RTV off of the random shit in the engine bay -maybe replace the muffler that has heaps of rust holes -clean the inch thick layers of grease off the bottom so I can figure out how bad the transmission and diff leaks actually are -fix the heater system -bodywork? -computerised ignition? -better lights behind the speedo
1 point
-
I had such high hopes when you mentioned tang n desprang.1 point
-
1 point
-
Slammage....?1 point
-
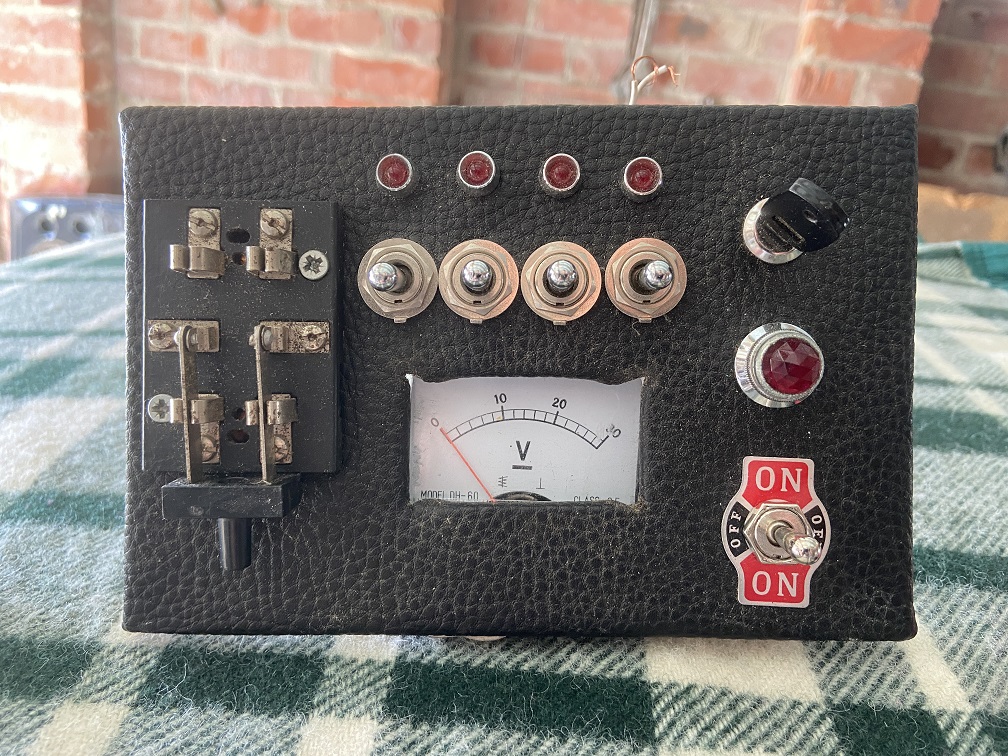
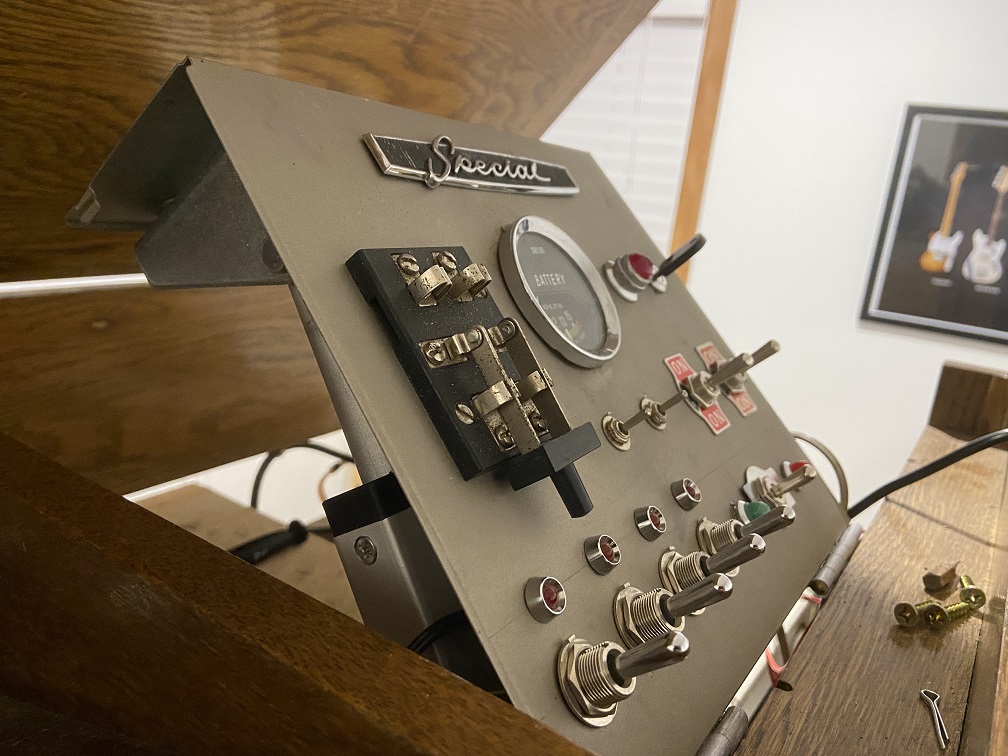
Fast forward half a decade, and not much had changed. I put microswitches into the cupboards so that the lights actually turn off when you shut the doors, and I continued puzzling about what I should put in the radio hole and how I should control it. I decided I wanted a retro-style control panel, so I tried to make one out of a piece of wood covered in the vinyl wrap from the guitar amp case. I got to this point and decided it was rubbish and unable to be saved: One of the problems (besides using wood, the wood being too thick, me not having a drill press to line up the holes etc etc) was trying to sit that modern-style voltmeter behind the panel to hide its age. So I went to Kumeu and bought a voltage gauge from an old car, and started on version 2 of my control panel. The panel was always going to sit in the top of the cabinet somewhere, but I thought it would also be cool if it rose up automatically when you opened the lid, for no good reason. So I bought my first linear actuator, in giant overkill size, without thinking it all through too much. Here is the mock-up of control panel v2 in its raised position. All of the stuff is just sitting in place and is not wired up. I'm gonna cover the panel, most likely in leather, then I'll start deciding what all the switches do and wiring them up. I'm basically an electronics magpie, and over the last few years I've been buying any shiny things for this project that catch my eye. I can't be bothered acquiring the knowledge to create anything too clever with them; I'm just aiming to create a simple retro/steampunk-inspired display that's hopefully not entirely lame. After all, it would be nice if this project actually got finished within a decade of being started....
1 point


(Medium).jpg.ebc5369fd726c1818f08fc5c88bfea6d.jpg)
(Medium).jpg.767f55aa456b16db87b134a9254dc3cf.jpg)


.jpg.2c3492693f786143c1820d132a7275ab.jpg)
.jpg.74f74e0b06892d5a5a9022a53ed4170a.jpg)
.jpg.9b4e4f5a2a91f5f4c81babcd06be6c27.jpg)
.jpg.0e6a4298a464a5498127fe6e03e1a699.jpg)


This leaderboard is set to Auckland/GMT+12:00