
Leaderboard


Popular Content
Showing content with the highest reputation on 05/13/21 in all areas
-
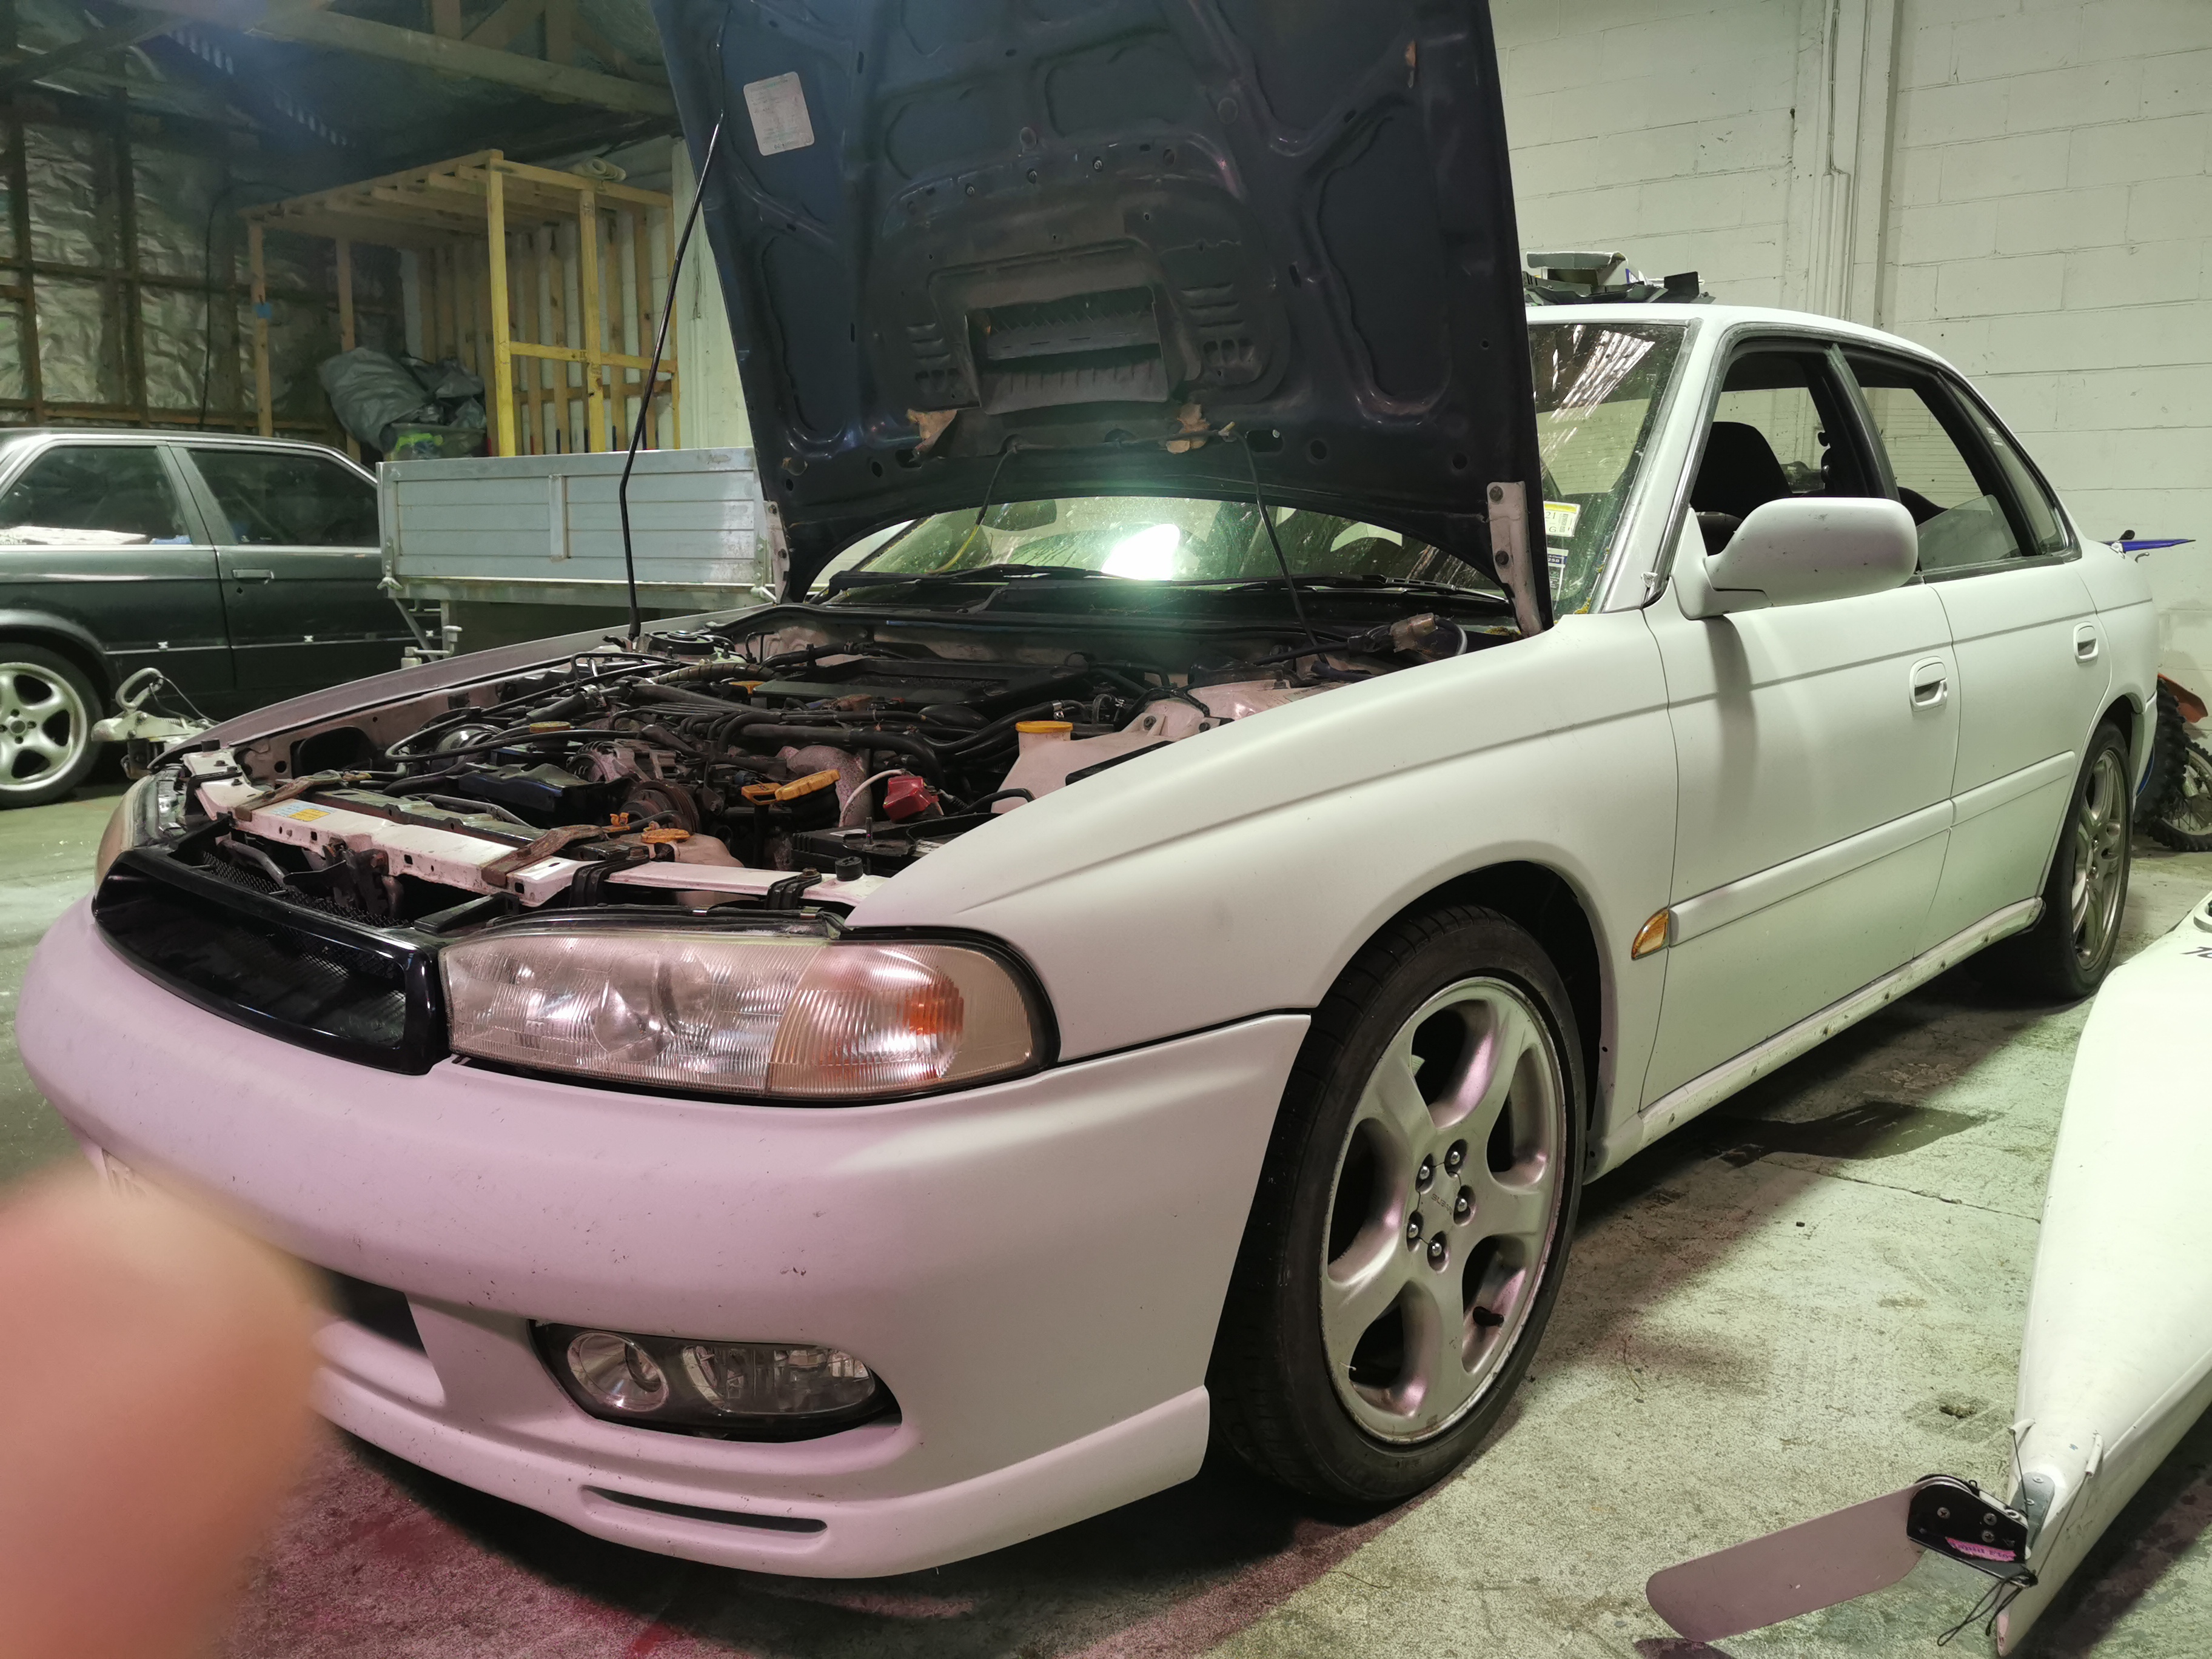
So I did a thing and sold the stockcar. Then got itchy and somehow joined the Pukekohe car club, and impulse bought an RS legacy.. The actual f##k right??? Have a cage kit ordered, picked up 2 knock off bride seats for mock up. The body of this car is mint, really straight, and primered ready enough for the colour I'm sending in.. The engine is a bit meh, water temp gauge no go, oil light on, cat light on.. Gearbox is good though. Still has a wof, reg just ran out. Plans: Update reg Give some jandal on the roads to find any quirks I don't like Coilivers Gut it out Cage Seats and belts Gauges so I can actually see how bad its dying Then go full send on some club events.. Will try and get the Mrs to jump in the drinkers side, she's done a couple of tarmac sprints before, so here's hoping. Ideally I'd like to biff the twin turbo IN THE Bin! And run a WRX turbo set up, keep the top mount too.
 9 points
 -
Water temp gauge works now, so does the oil light.. Some moron flat peaker switched them round... Plugged vac line 21 into its home, so now it idles better and may sort its other issues out.. He reckoned it had a blown turbo... No smoke, but wouldn't full spool... Turbo flap actuator not plugged in.. Penis9 points
-
Just hooked up an electric water pump to control via ECU. So uses a spare output with varying duty cycle at 500hz to control the pump speed. Then the pump has another pin where it can output the pumps actual speed back to the ECU. So for testing I hooked it up to vary the speed with throttle position. So looks like below 20% and pump stays off, then above 70% it's flat lined at full speed. It looks like if it thinks there's an error/pump jammed (as seen below 20% part) it zings out a high pump speed number. So will see what options I have to hook these up to a "pumps fucked" light. But then also it will be interesting to see what axes on a table will be meaningful to control the pump speed. I've added a radiator temp sensor too, so maybe an ECT / rad temp table Or maybe ECT / injector duty cycle, because the more fuel you're using either means high load at low rpm or high rpm. Both of which likely require more pump speed
5 points
-
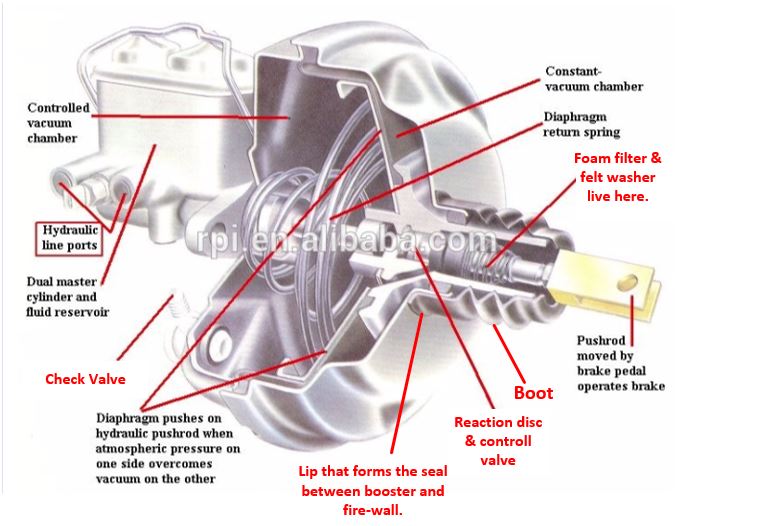
Sorry for the delay in replying - it is a bit of an unusual one for sure. One of the big improvements a Mastervac booster has over the older Hydrovac (remote) booster design is that it introduces the atmosphere from the inside of the car ( the drivers foot well) as opposed to the engine bay. I’ll just mention here that the major improvement was not relying on a single pushrod seal that the failure of which would often result in a total loss of braking – great innovation guys! The filter usually consists of two parts, a coarse foam doughnut and a felt washer where the pedal pushrod enters the unit. The filter sits in the valve body held in place by the felt washer which in turn is held in place by the rear boot. Sadly a lip on the boot forms the seal between the booster and the firewall and to access it you have to remove the booster and master-cylinder (sods law strikes again). I’ve doctored up an exploded diagram of similar Nissan booster for clarity, (alterations in red). Have to say that at this stage I’m clutching at straws with this one. Nothing new here; the more interesting diagnoses are usually the most baffling at their onslaught! Although an obvious conclusion to jump to I’m not comfortable with a 10 year old booster somehow “digesting” both filter and felt washer through overly vigorous brake bleeding. The ports in the control valve are small and the only Mastervac filters I’ve ever seen fail have been from early 70’s boosters that have lain unused for decades? I have seen boosters with a small perforation in their diaphragm still performing to spec but needing far more atmosphere than usual to be introduced to the rear chamber. It could well be worth pursuing this, I’d suggest pulling the master-cylinder back a little to see if it is leaking fluid into the booster, on many cars you can manage this without releasing the hydraulics. Please keep the thread going and let us know what you find.
5 points
-
Time for new thread and figure out a good root for 5th year anniversary? Keen to do a mix up of the OG route but unfortunately we wont have use of the bach anymore. There is ol m9 Bill at the Te Araroa camping ground who would appreciate our business though4 points
-
4 points
-
Yeah I think you're on the money there. I'd like to do a bit of looking at that alternate option you guys took on year 2 between Gisborne and Tolaga Bay-ish3 points
-
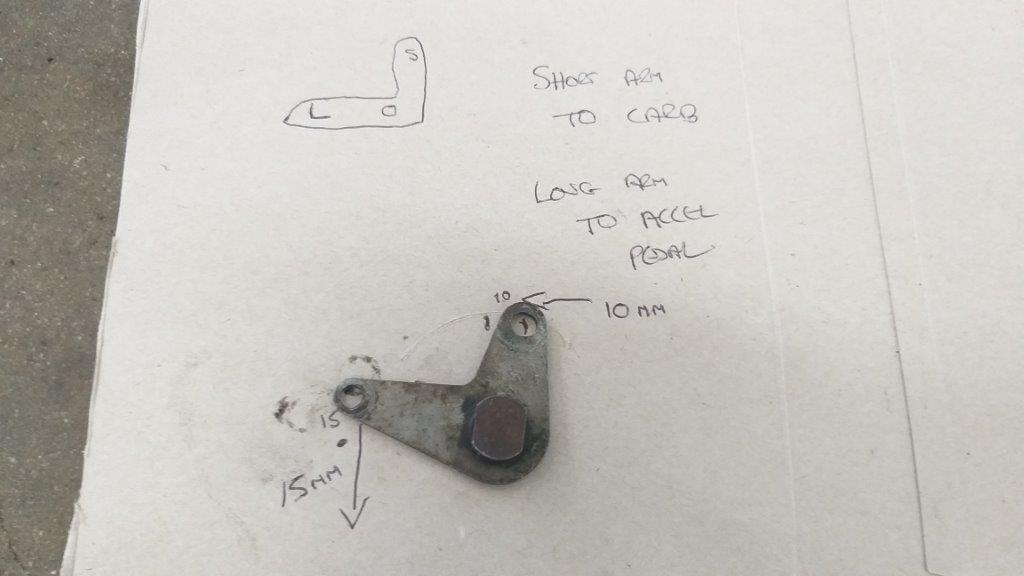
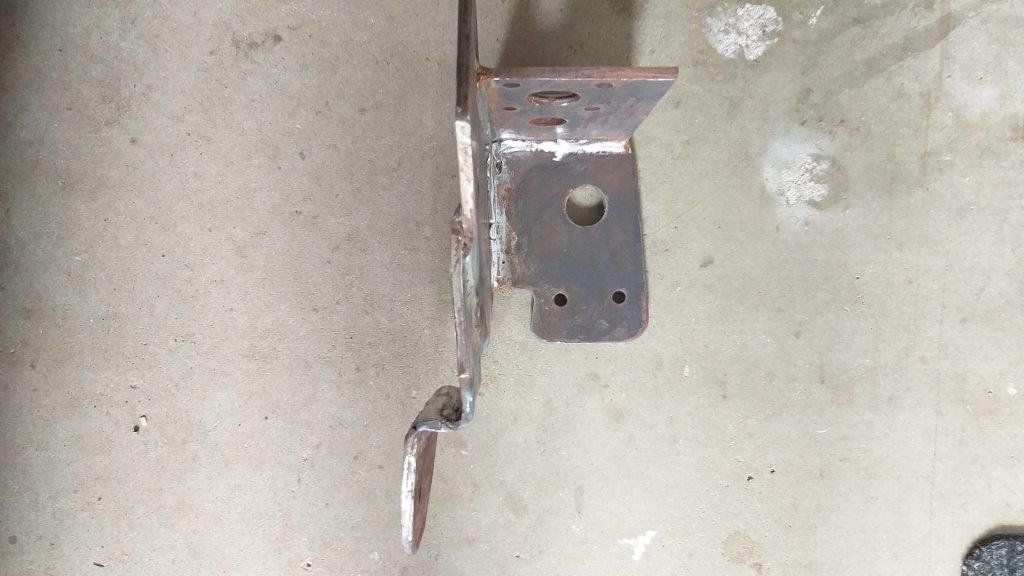
Now the eagle eyed amongst you will notice that the arms are slightly different lengths. I setup a little "test bench" using an old cereal box. Poked a hole through the box for the pivot bolt and ran a little experiment. For every 15 mm of travel on the long arm the short arm travels 10 mm. If my maths is correct this works out to a ratio of 1.5 to 1. Adding my original pedal movement figures of 45 mm to 30 mm into the mix, this just so happens to be the exact ratio that I require. If I was to connect the short arm to the cable and the longer arm to the pedal activating rod, I'm thinking that the pedal will need to travel further than it currently does and hopefully the longer arm will slightly reduce the force needed on the pedal to move the cable. Please shout if there are any glaring errors in my theory. Anyhoo, in order to give this a try I've got to fabricate a MK 3 version of my cable bracket, so that is the plan for tomorrow. Thanks for reading.
3 points
-
Gidday, me again with the crappy volkswagen. so last time we left off that i got it out side. WAHHOOOO the next thing on the list was tires and to dial in the ride height. i had messaged seedy al a we while back and asked what size tire he ran on the front and i run these also but this time i fired him a message to see what he was running on the back, and yikes it was a small tire compared to what i was running, which was a 205 70 14, i done some tire comparisons online to find something that would give me a smaller tire but nothing to small. I ended up with a 205 60 14. this is 22mm smaller in the side wall, allowing me to go a little lower with out having to ram the tire up into the guard. but since going lower i now have a lot more toe in, now causing the tire to catch on the spring plate adjuster. so i got some shims from bunnings, yes bunnings stock shims for vw kombis (washers). what i needed to do is shim the spring plate out a bit from the arm to help correct the toe in being this is one solid arm with no adjustment. this required a bit of fucking around, with the 1st attempt having to much toe out. so i removed a shim (washer) and put it all back together and it seemed pretty much bang on. So i got my 3 meter straight edge and drew some lines to the front and back and chucked a tape measure over them. i had the wheel alignment 5mm toe in. this measurement was comparing 2 meters behind and 2 meters in front of the wheel. so i thought my 5mm was pretty bang on for something that is not really adjustable. picture of the solid arm which i placed shims on to correct my toe in issue ^^^ this is the rear i placed spacers where the arrow points With that all done i was able to actually drive it out side and down the road a couple of times. was good to finally have it out side. I was using it a bit here and there to see if anything was an issue or i would need to adjust anything a bit more. My biggest issue was i was not able to select gears that well, i was really starting to get pissed off about this. got talking to the guys at v-dub shoppe and they gave me a bush to replace in the gear linkage system close to the gear box. fucked one this little guy was toast, it was ment to be solid and have no movement but it had about one 8th of adjustment in it causing it to no select gears correctly. replaced that and OMG what a change! while i was up there i got this image of it all done. next up i proceeded to loose my drivers side hub cap about 4 times with in 10kms from home, found it each time which was a bonus. next i needed to sort some shocks out for the front, while i was out at @Fuckedifiknows house i was talking about what i needed to do and he passed me these. and then i got some shocks but i was going to need to do something as the shaft was to big for the bush on the shock. well we had @Kimjon pop in and take my vespa for a ride and he suggested he take them home and chuck it in the lathe and take a few mm off it to make things easier. finished result! next up i needed to tap the shock tower so these could go into them. she was a tight squeeze but we made it work. time to make some bump stops for the front and the rear. front ones go a little like this. put some holes in them make sure the holes line up then you get them lazer cut and leave them for 2-3 months back ones go a bit like this remover rubber dog chew toy (way before we started this) Get smaller rubber chew toy make small rubber chew toy screw into metal thing thanks to @Geophy make metal thing that rubber chew toy screws into be one with George the kombi glad i still know how to melt metal together not that well. so paint metal thing black and screw little chew toy in also removed the big cup thing off the rear control arm for more clearance so i have a bit more travel before bump stop hits, this was only held on with 2 little tac welds so i feel like i done good here. now when it touches a good solid peace that wont fall apart. done some other things to make clearance issues not an issue but i wont show those as i didn't take photos....... but here is a photo of it allll done. do you guys like the no hub caps? or with the hub caps? visited my mates out at the v-dub shoppe to show of and thank them heaps for all their help. and our next adventure was to the bay of plenty to see some vdub people and inquire about getting the kombi checked over for a wof. the bay of plenty was great to us. chilled out with beth and tayla before visitng the wof place. re done my wheel bearing while i was at the wof place cause it was making some noise and then headed out to catch up with a vdub mate brought some rego and went to take a comparison photo when i got back home. thats it for now. next time on adventures with the 64valiant family and George the kombi we head to beach hop and vw nationals. stay tuned3 points
-
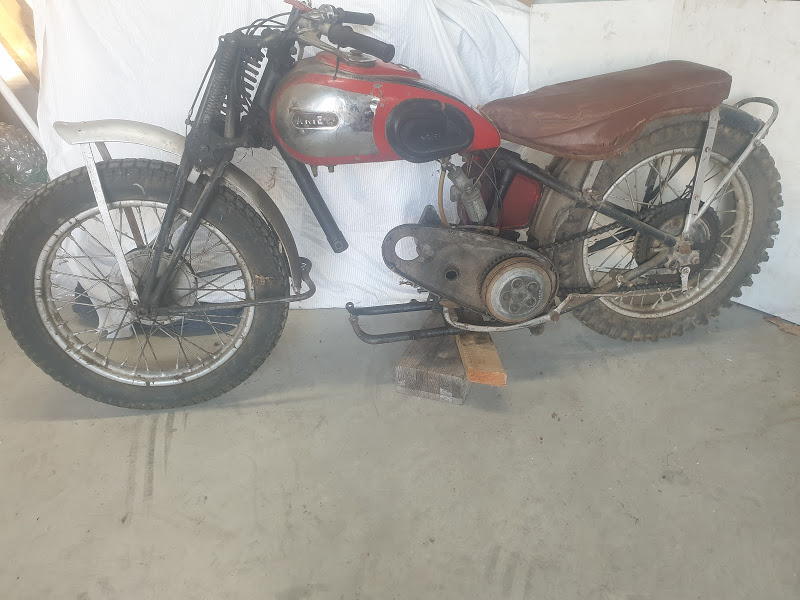
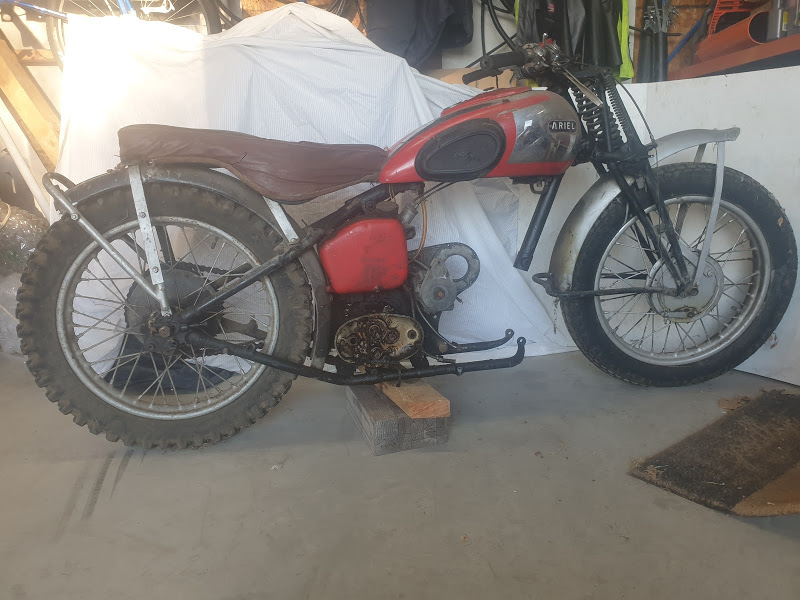
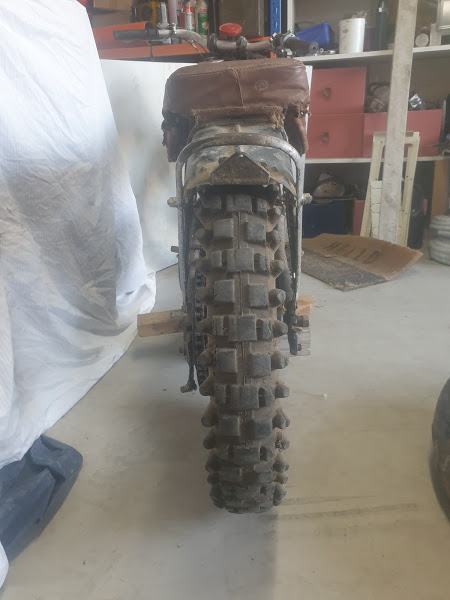
Thought I would put up a build of my Ariel, have been lurking on here for a while and have really enjoyed reading the builds posted, both cars and bikes. I've always been interested in motor bikes and had a few in my earlier years, mostly Yamahas, and had always wanted an older bike. Many moons ago where I worked in Ch-Ch there were quite a few guys in the VCC. A couple of them went to Wellington and bought up a heap of bikes from an estate (Brook or Brock Motorcycles?) One guy got a bunch of AJS/Matchless stuff, and the other guy a bunch of Ariels. I had a look through the Ariels and chose a bit of stuff that would be the grounding of a 1937 Ariel Red Hunter. Engine was 1937 and not too bad, frame is about 1946 from memory. Pretty much enough for a complete bike plus extras, but everything needing work. Back then I got a few bits done, girders straightened, oil pump over hauled and most importantly got the engine done. Had it re-bored to suit a wiseco piston from a 350 Chev and new chev valves to suit. Didn't get much more done due to moving towns, young family, seperating from wife etc. etc. Usual shit. So recently life has settled down a bit and I have come into possession of another Ariel. This is a pretty much complete, bit rough, ex farm/hoons bike that has been hidden in the back of a shed for at least 40 years. It's a 1939 500cc Red Hunter. Frame and engine numbers show it as a 1939. It had been used on a farm for a bit here in Ashburton and thrashed, blown up, piston shattered! Then sold, engine removed and stripped, stashed in the back of a shed until a few weeks ago when I got it. Most parts from 1937 & 1939 are all the same. Will post a couple of pictures of the 1939 bike as I got it, 1937 is in bits and all over the place in my workshop.
2 points
-
i lost like 4kg from swapping in the lithium battery. so with the rear wheel swap, indicators, guard chop, and tail light swap, oh and im sure my pannier rack is lighter than the stock one, i must be doing alright.2 points
-
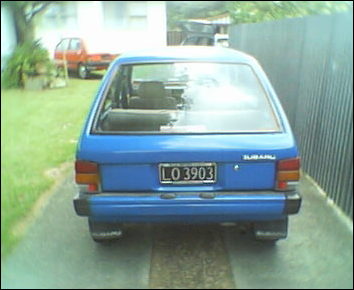
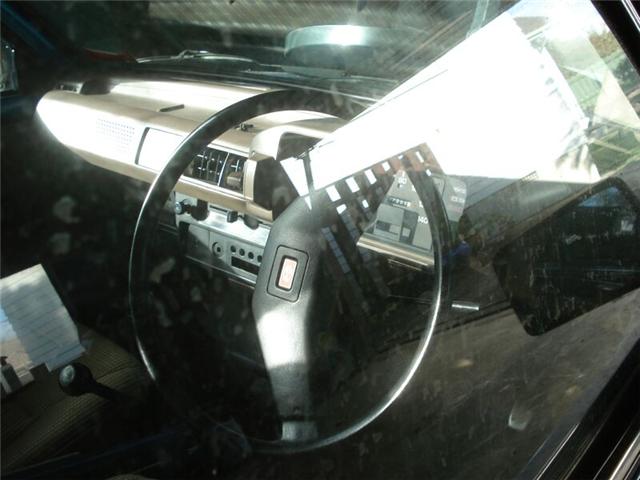
Hi Team, New to the site and found this topic about the mighty KF3 Subaru Rex 700. I've owned 3 of these out of the 100 that arrived on NZ shore's back in the days. Late: 1983 ( 50x ) Early: 1984 ( 50x ) ( 83' Fanta Orange 700. ) ( 83' Gold / Champagne 700 - Parts Car. ) ( 84' STi Blue 700 - Runner, Mint really before it's 12 year storage. ) All 3 vehicle's above were " Super Deluxe " Model's also! I've got an entire car under my house safely hoarded away and would like to move the parts onto a new owner as one day soon I will be moving house and do not wish to take all the parts with me. I also have in my possession an EXTREMELY RARE! Genuine 1983 Subaru 700 Workshop manual, Owner's manual and Warranty booklet. These are insanely RARE and you will NEVER find these ever again. Please message me, I may take a while to reply as I am much older these days than my youth racing about in a twin firing mad 31kw & ( 160 km/hr ) Modified 83' Subaru Rex I once owned in Fanta Orange. ( You may see this hiding in front of the Blue 84' one which is now resting in peace under my feet as I type this. I have many many RARE parts as my last 84' Subaru Rex had to come with me in pieces due to me pilfering the Rear brakes off it one afternoon for the Orange Rocket. Well that... and the fact the 150km motor was out and on the garage floor for the past 10 years since it had a spun bearing and slightly worn crank. Although I didn't bring the engine with me, I do believe I have alternator / starter / coil blah blah bolt on parts. Anyways hit me up for parts, I will gladly give parts to those in need or ask you for a kind donation to my next mortgage. Thanks, Scott
2 points
-
Morning. Finally got the right stickers on my old van and next job on the list is going to be doing the window and door rubbers and sound deadening/insulation to make the drive a little less like sticking your head in a concrete mixer. See Kilmat comes up a fair bit on here via Amazon but lots of people are still building their stuff. Any feedback from a before and after perspective using it? Because my motor sits between the front seats I'll prob go real thick Dynamat on the doghouse but I'll need another mortgage to do the rest of the tin can in that. So price wise Kilmat looks less painful. Cheers!
2 points
-
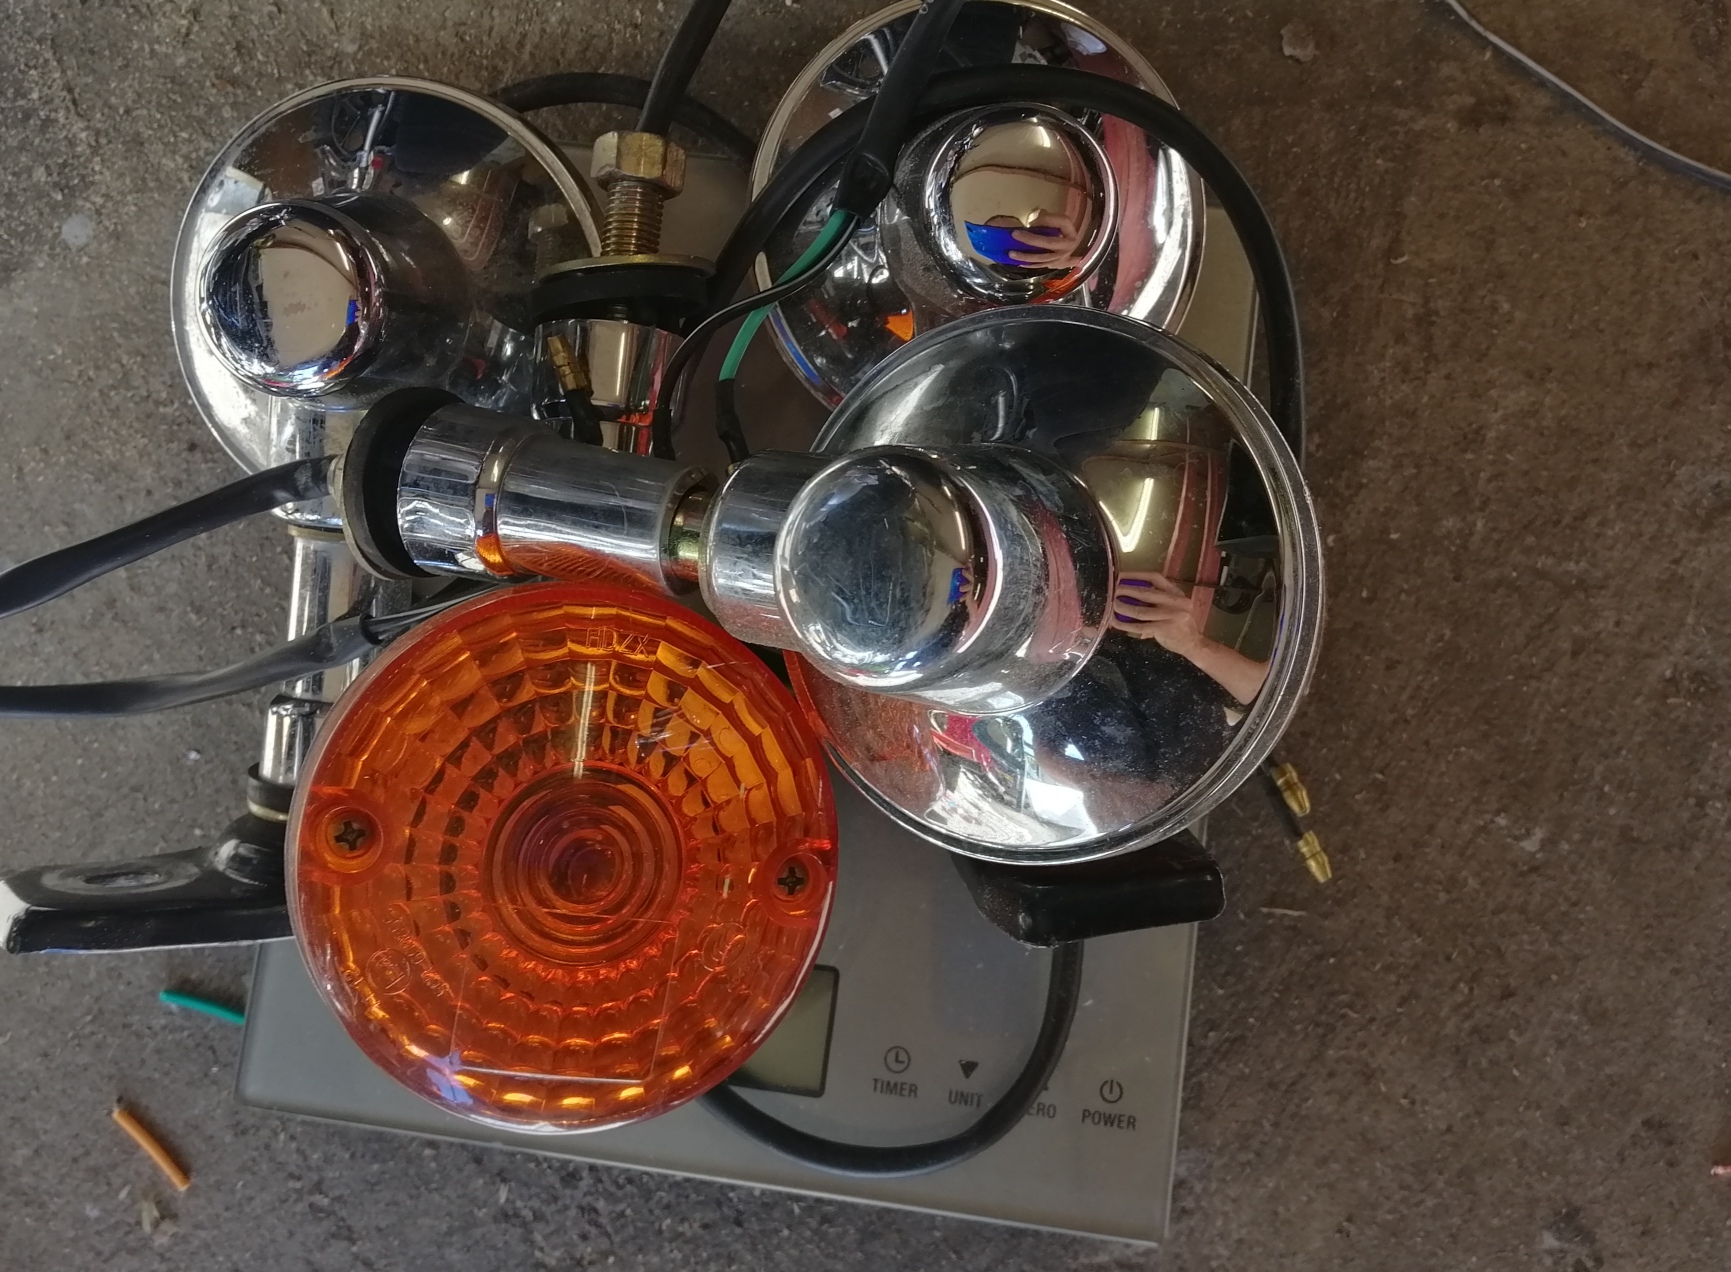
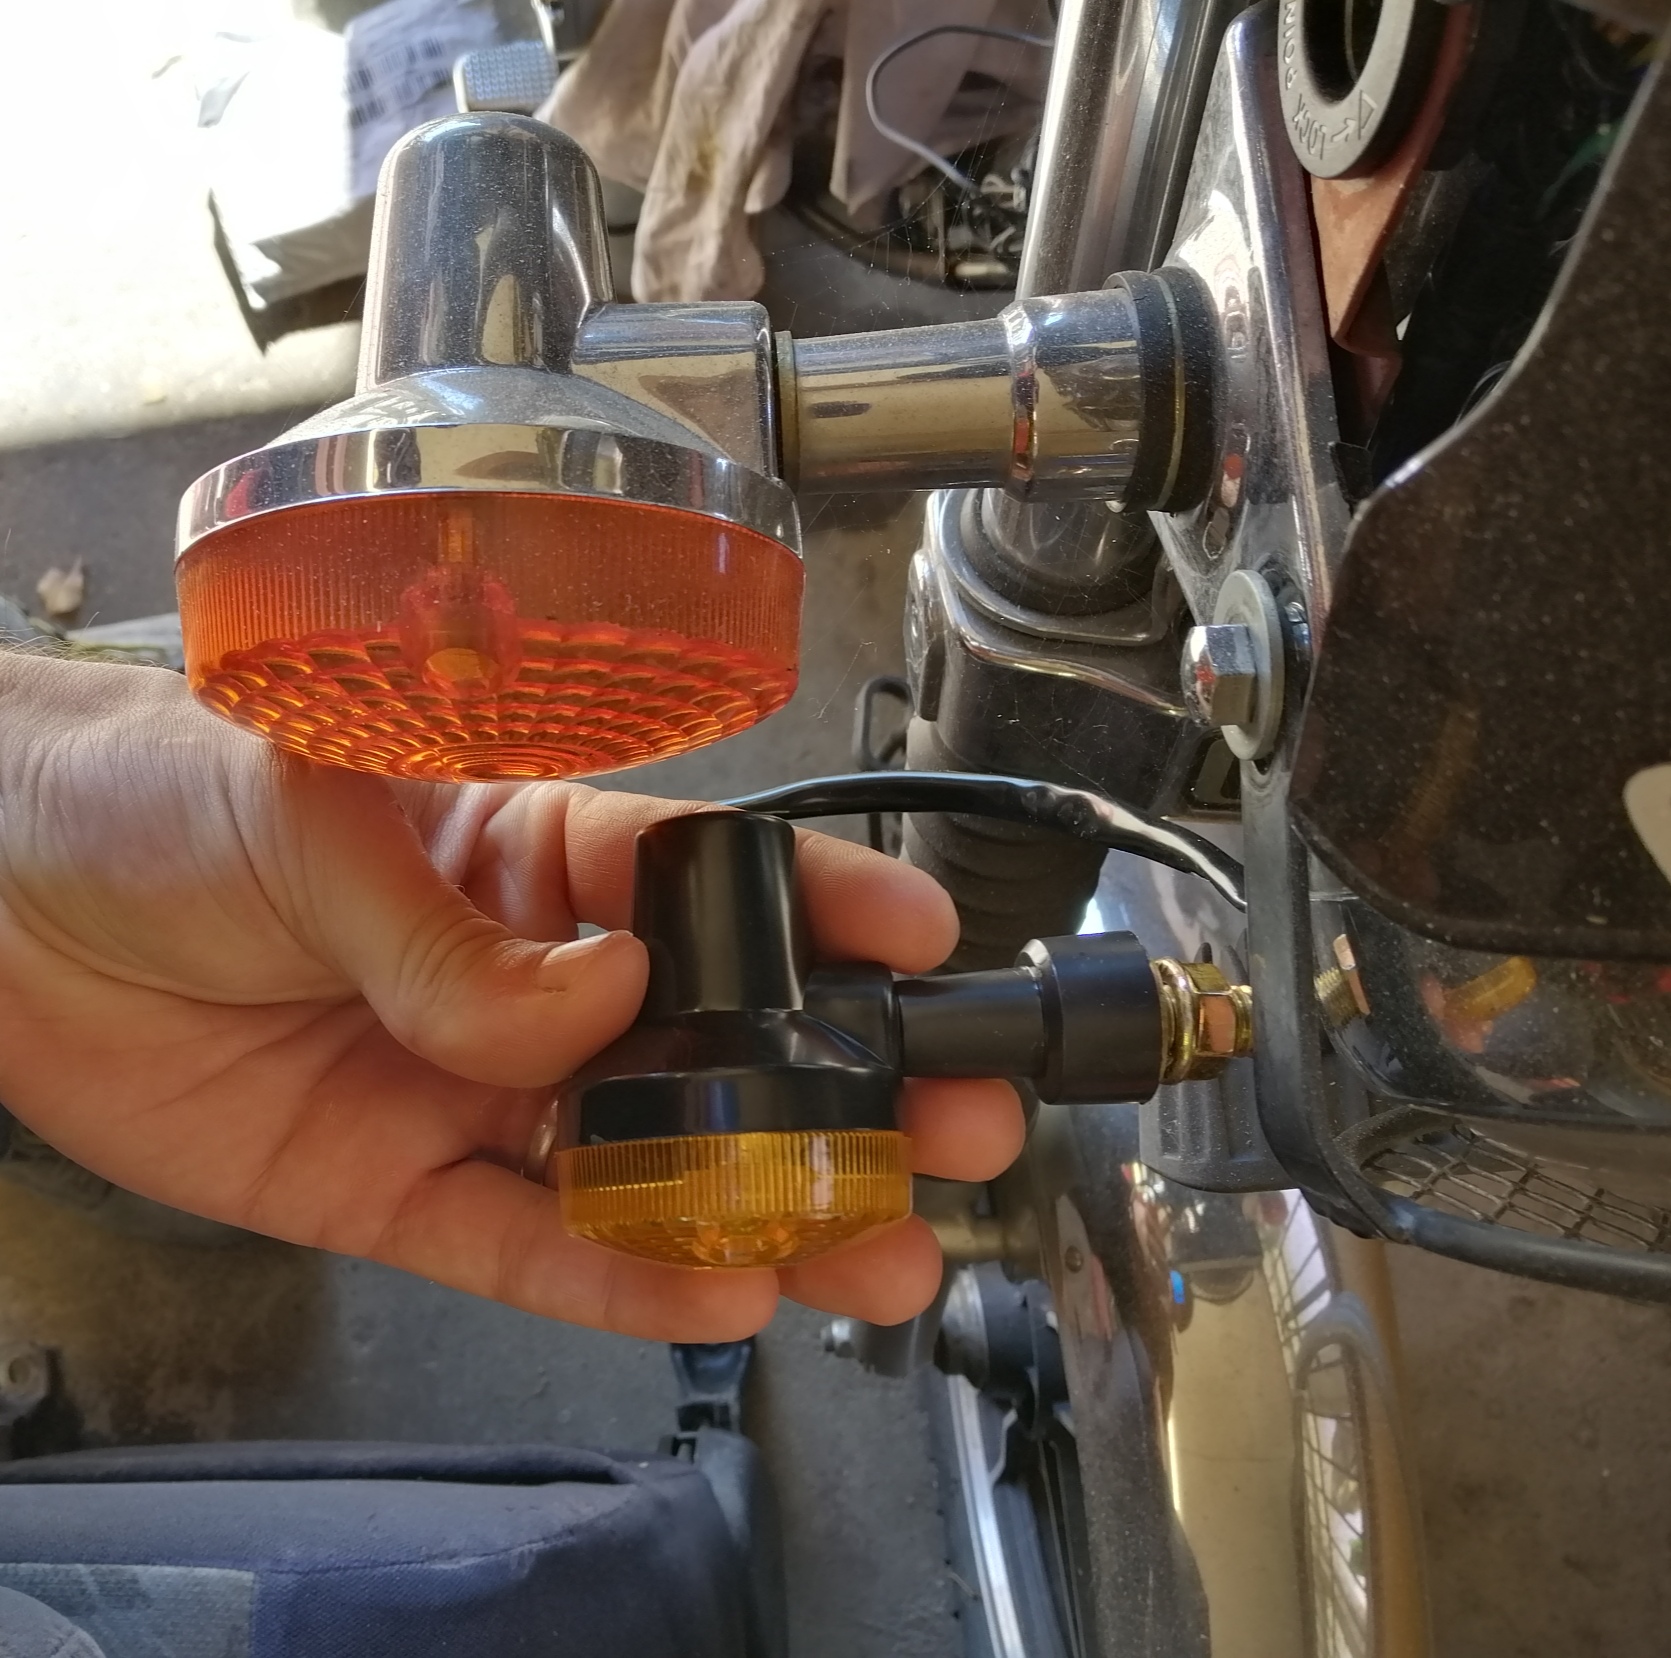
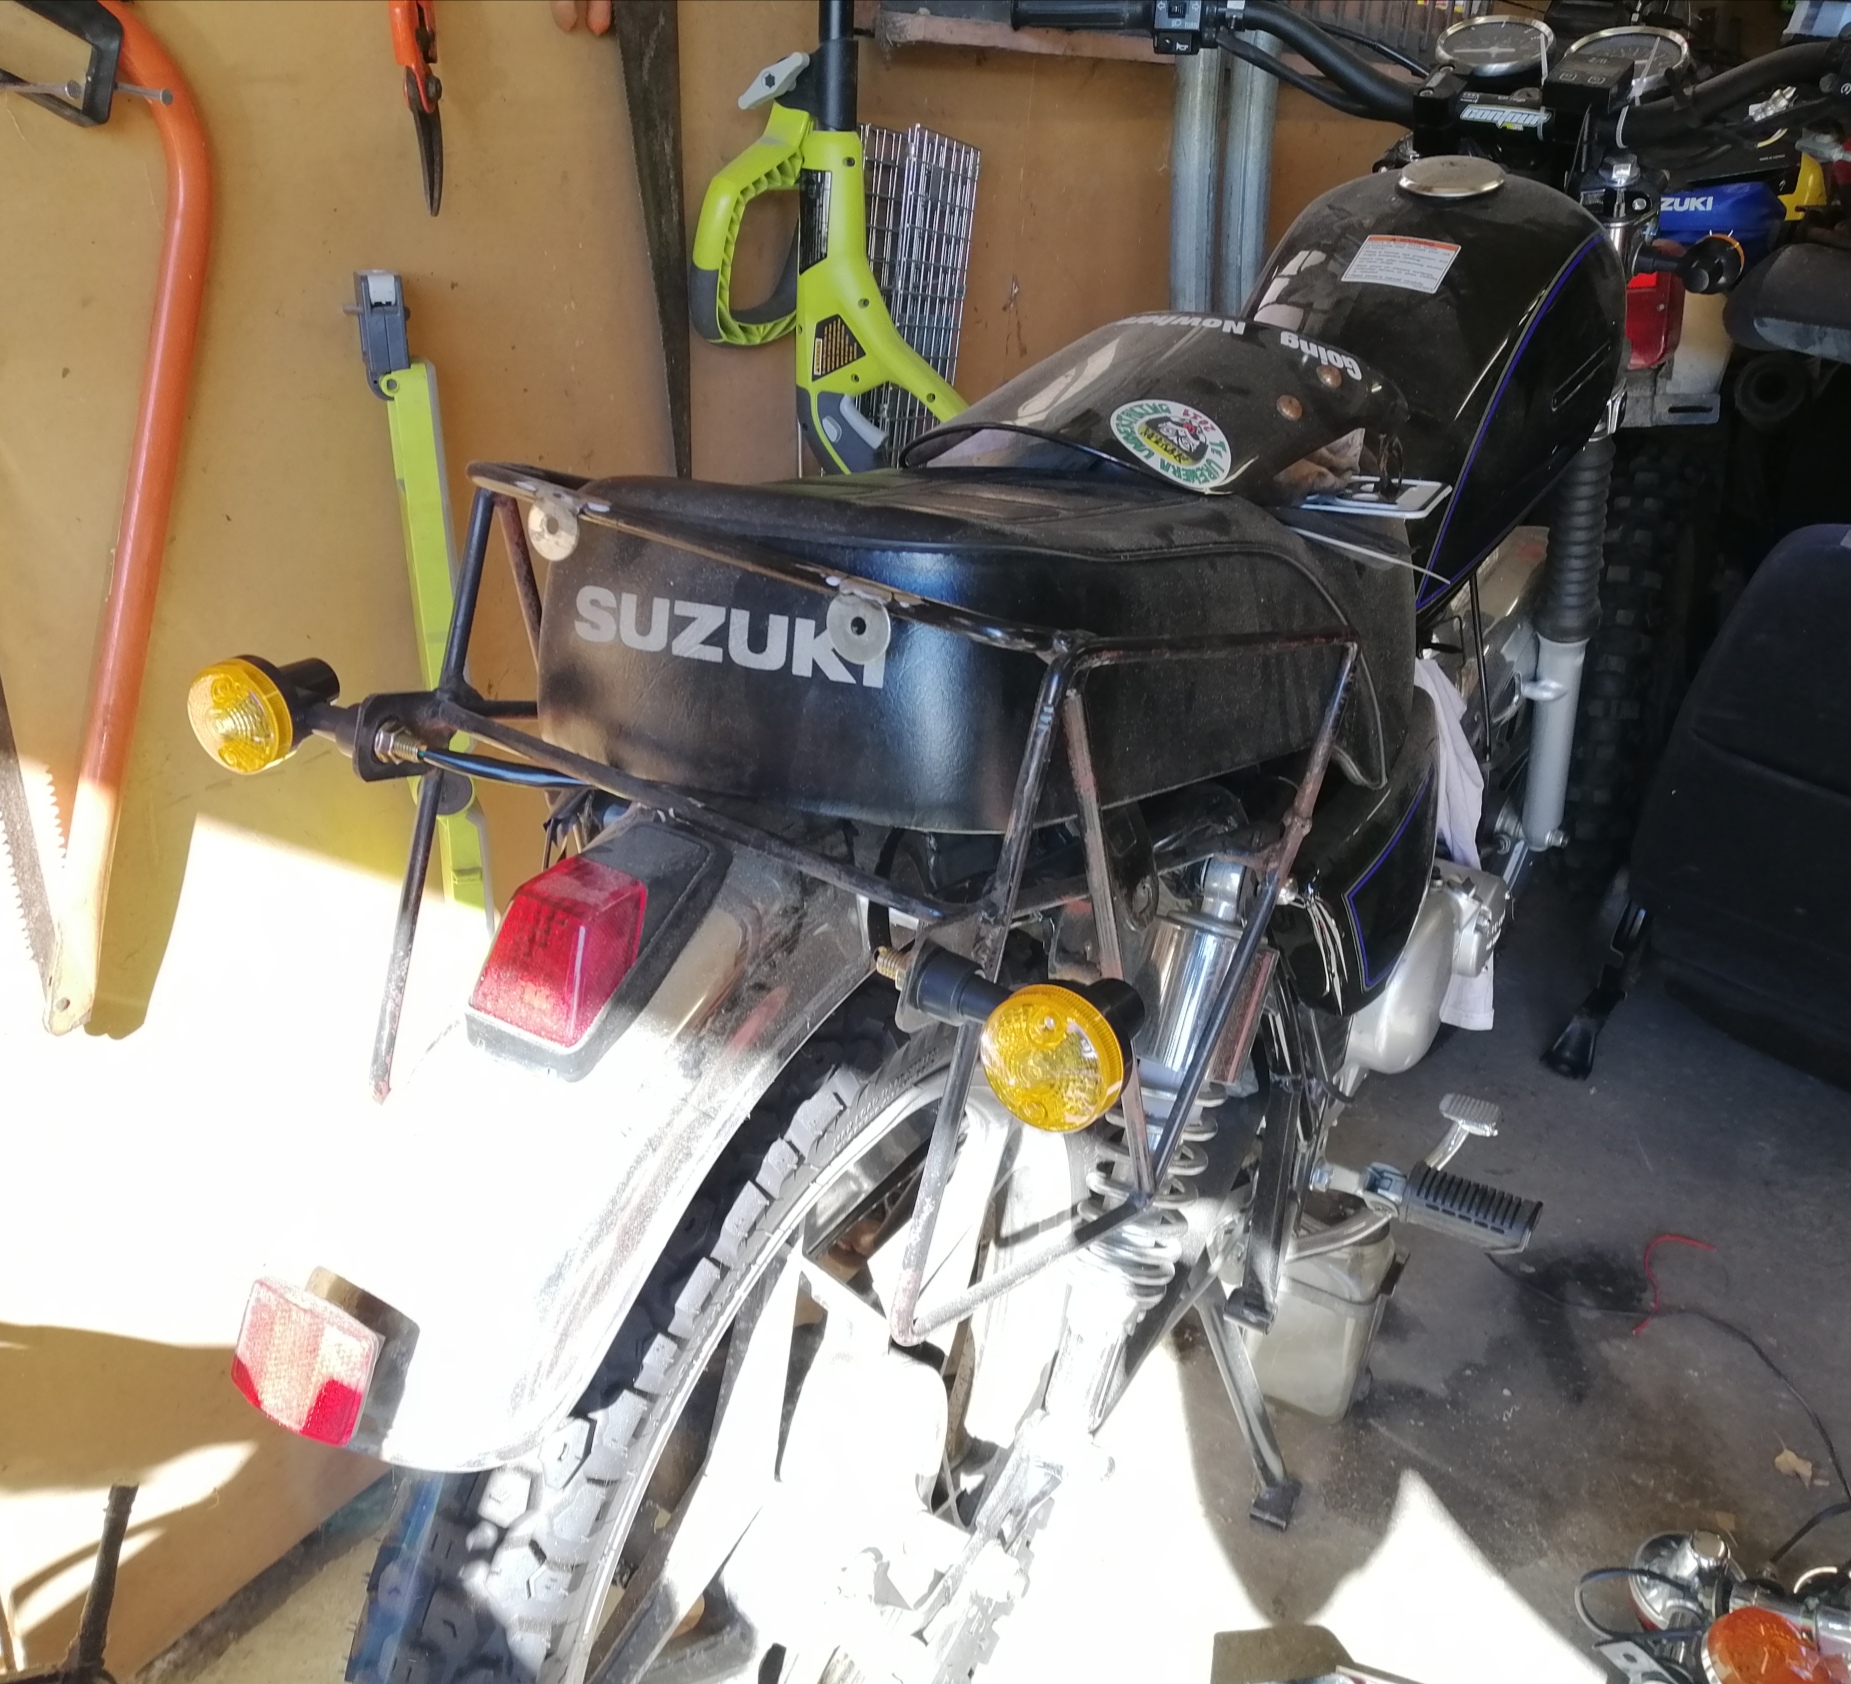
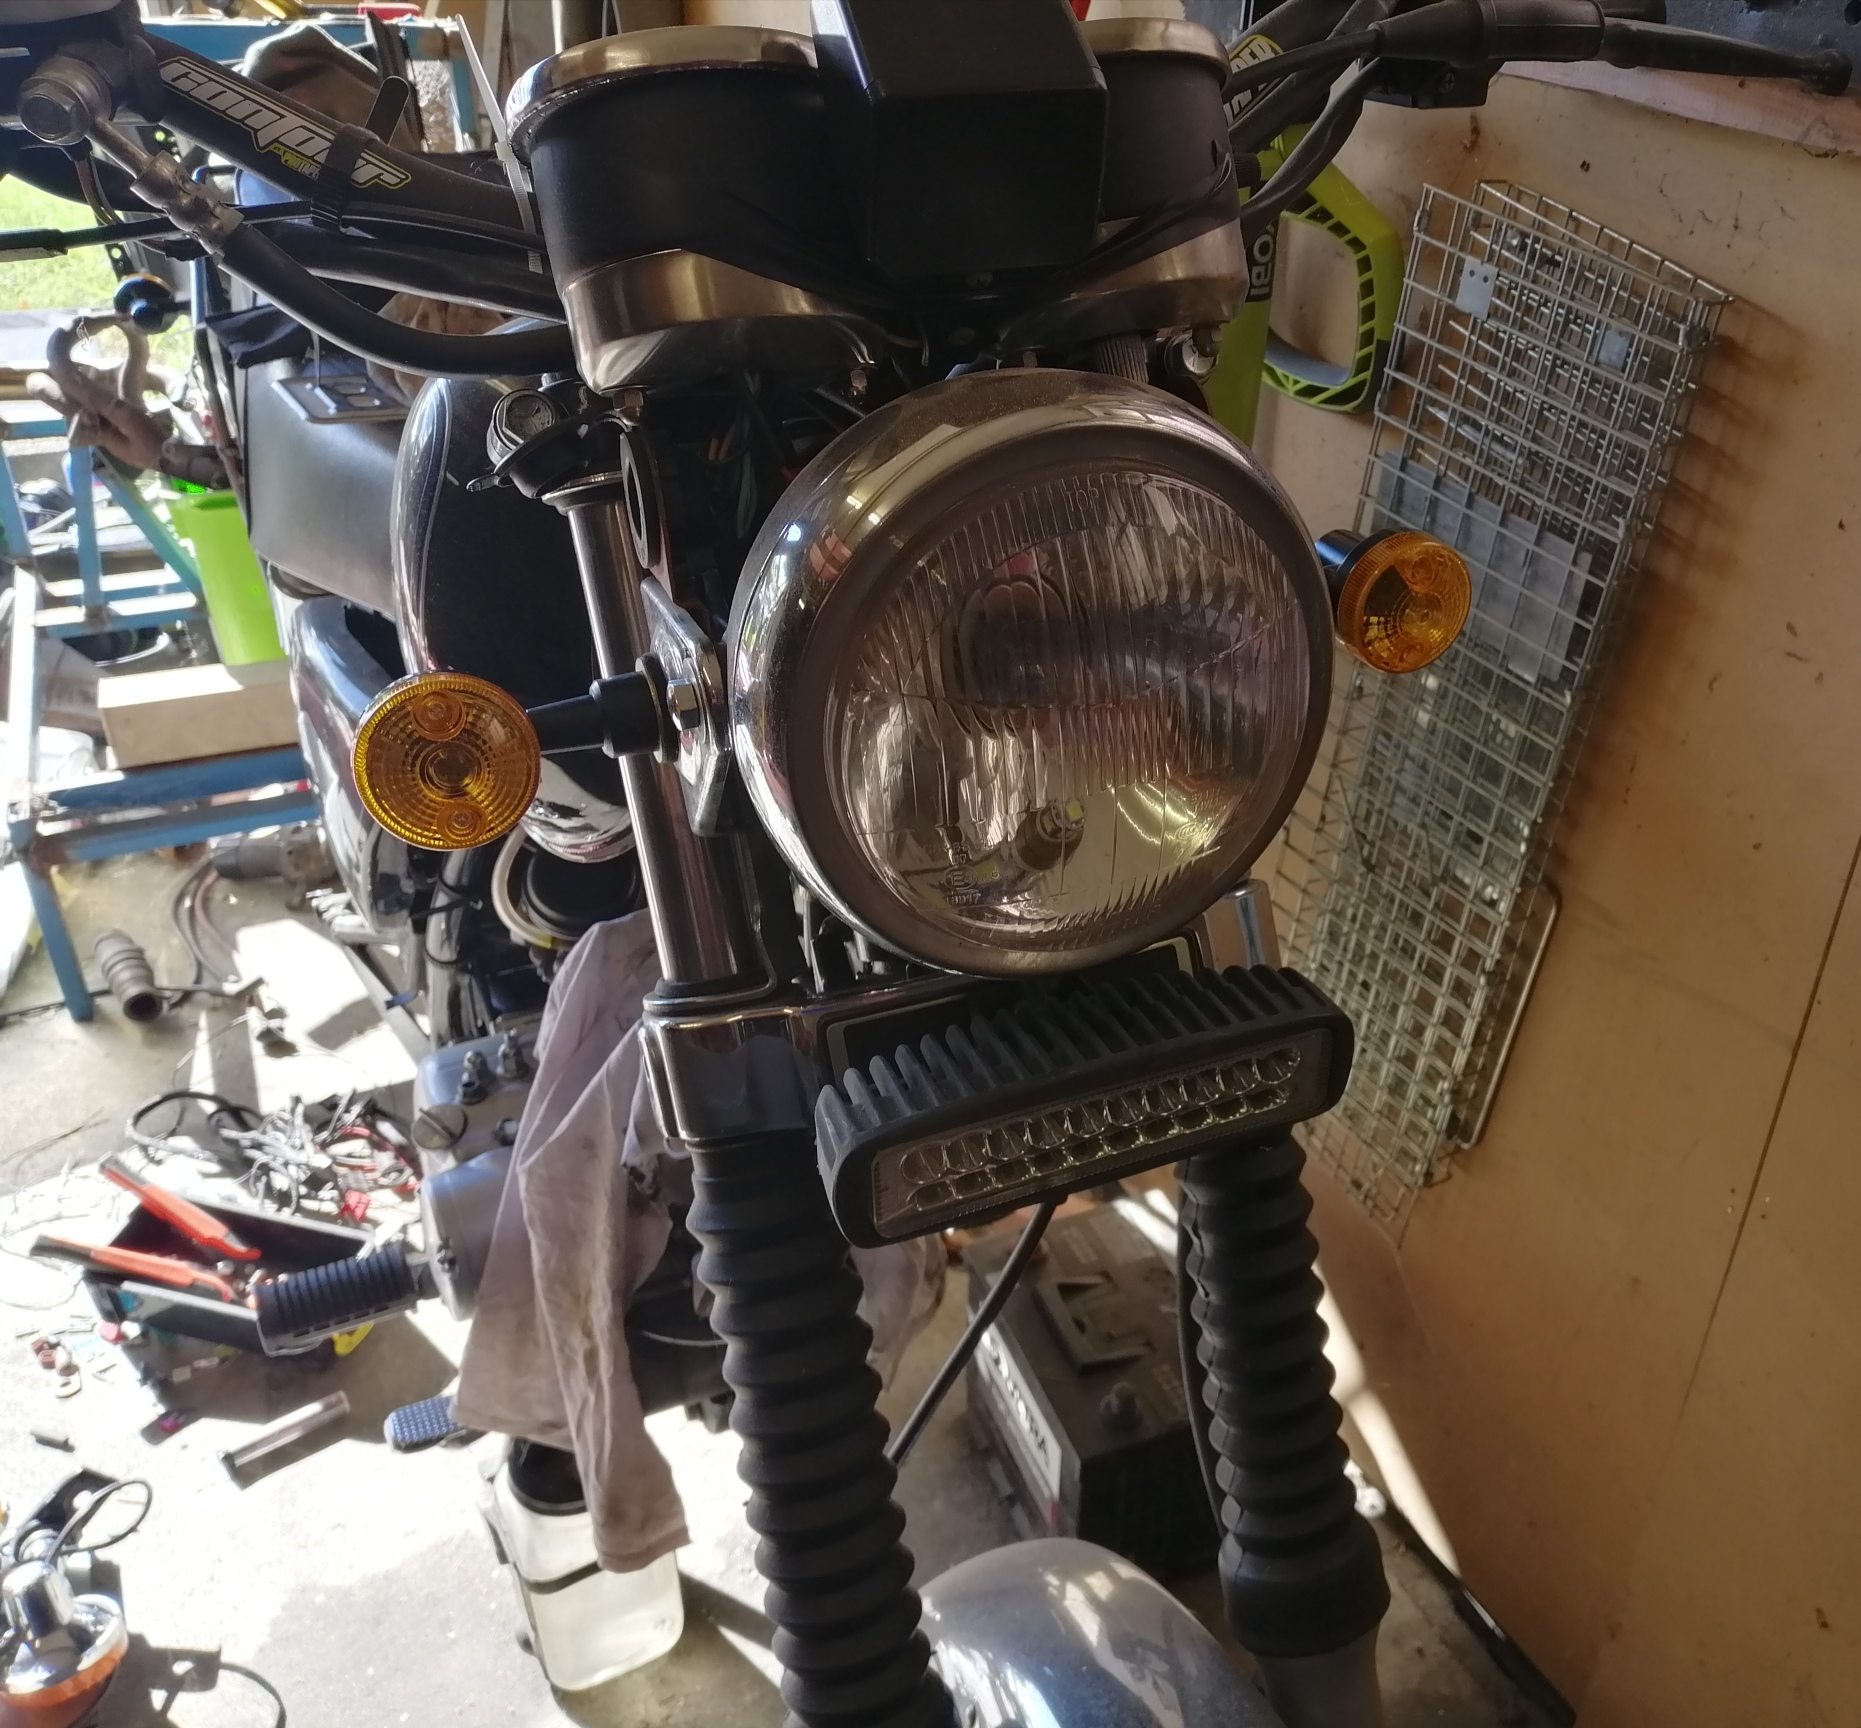
Happy little accident. Ordered some gn125 indicators off aliexpress, they arrived and are about 1/3 the size they should be. So I'm taking the originals off the advgn, painting them black, and putting them on another bike. So that means the GN gets small indicators. Originals Massive 914g New ones 220g Looks OK (can't bring myself to say a GN looks good) Quite a bit of weight off it now without really doing anything
2 points
-
This guy knows brakes2 points
-
Time to go fishing....
2 points
-
@yoeddynz, you should start building it, your shed's big enough. That set-up in your video is pretty cool, 203 views now. Shigeyuki Mizuno is indeed a fellah and as you say, and a seriously skilled one. I was thinking about the whole super realism thing having looked at some stuff on the model forum and I reckon we get more demanding as we get older. As a kid you're happy to let your imagination fill in the gaps in your talent (or blank out the shag pile sticking through your train set rails). I think there's a ceiling to the realism, after that it's down to clever photography. I'm not a train person but was certainly impressed with Rod Stewarts layout.2 points
-
things are pretty great with this car. just got to sort out the seats and some carpet but thats for another day. i bought some new rear disks for it a while back because the ones i had were turbo fucked. minimum thickness is about 11 mm and one was down to 9. so yea, in they went. not a big job but still. 2021-05-01_12-59-34 by sheepers, on Flickr 2021-05-01_12-59-28 by sheepers, on Flickr2 points
-
Somewhere on the dash there will be a button or dial with a label "Vol+" if you increase this setting the problem should go away, if its still there then increase the setting a touch more. Hope this helps2 points
-
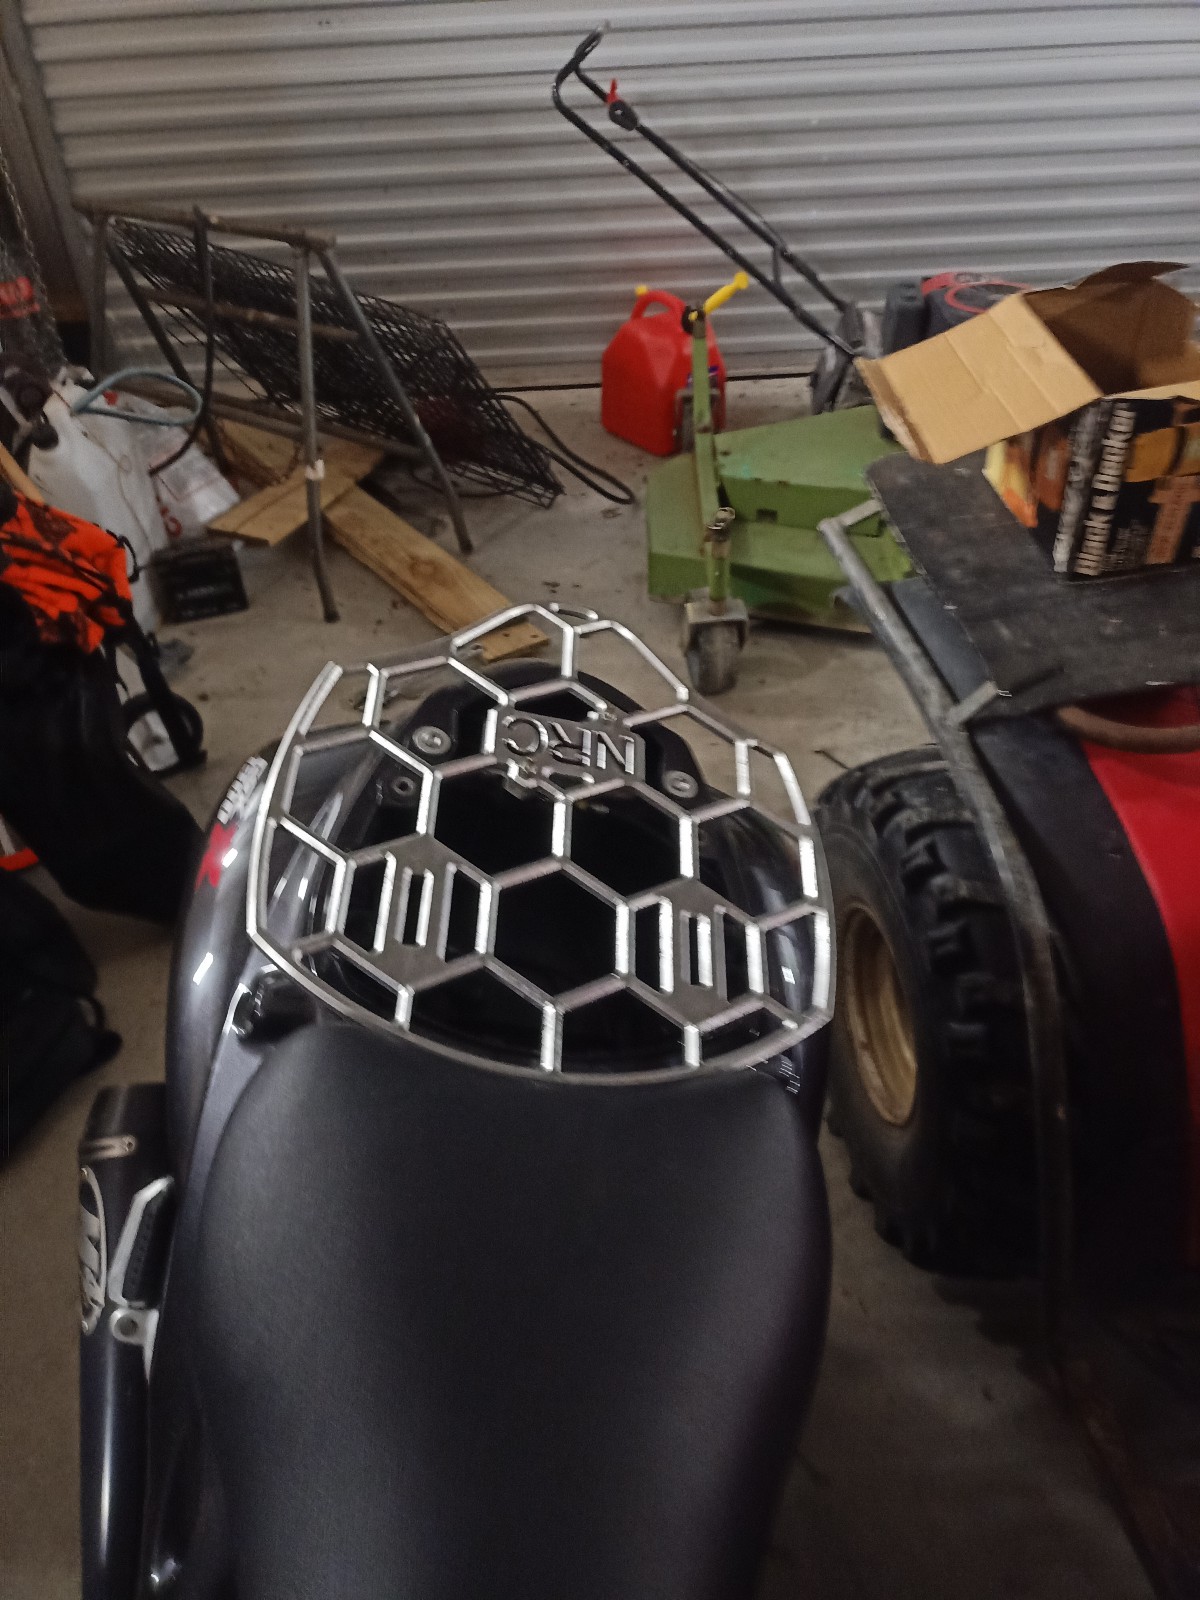
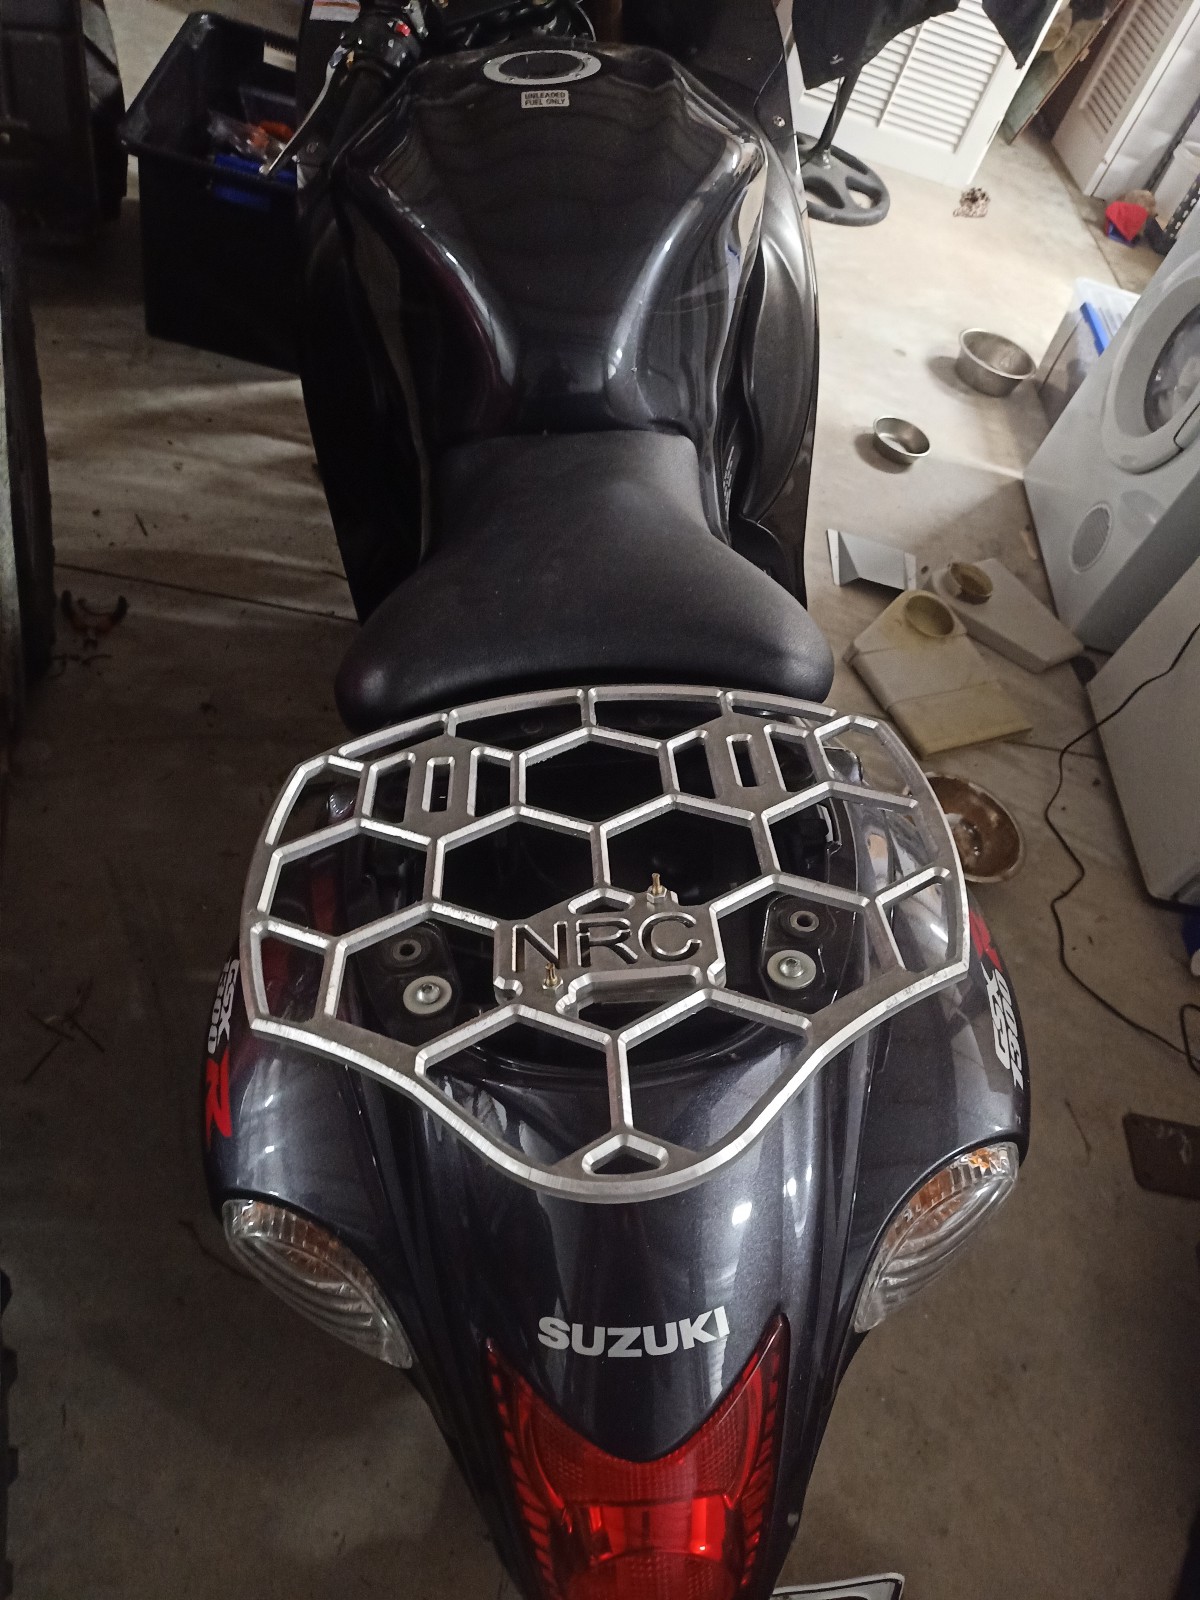
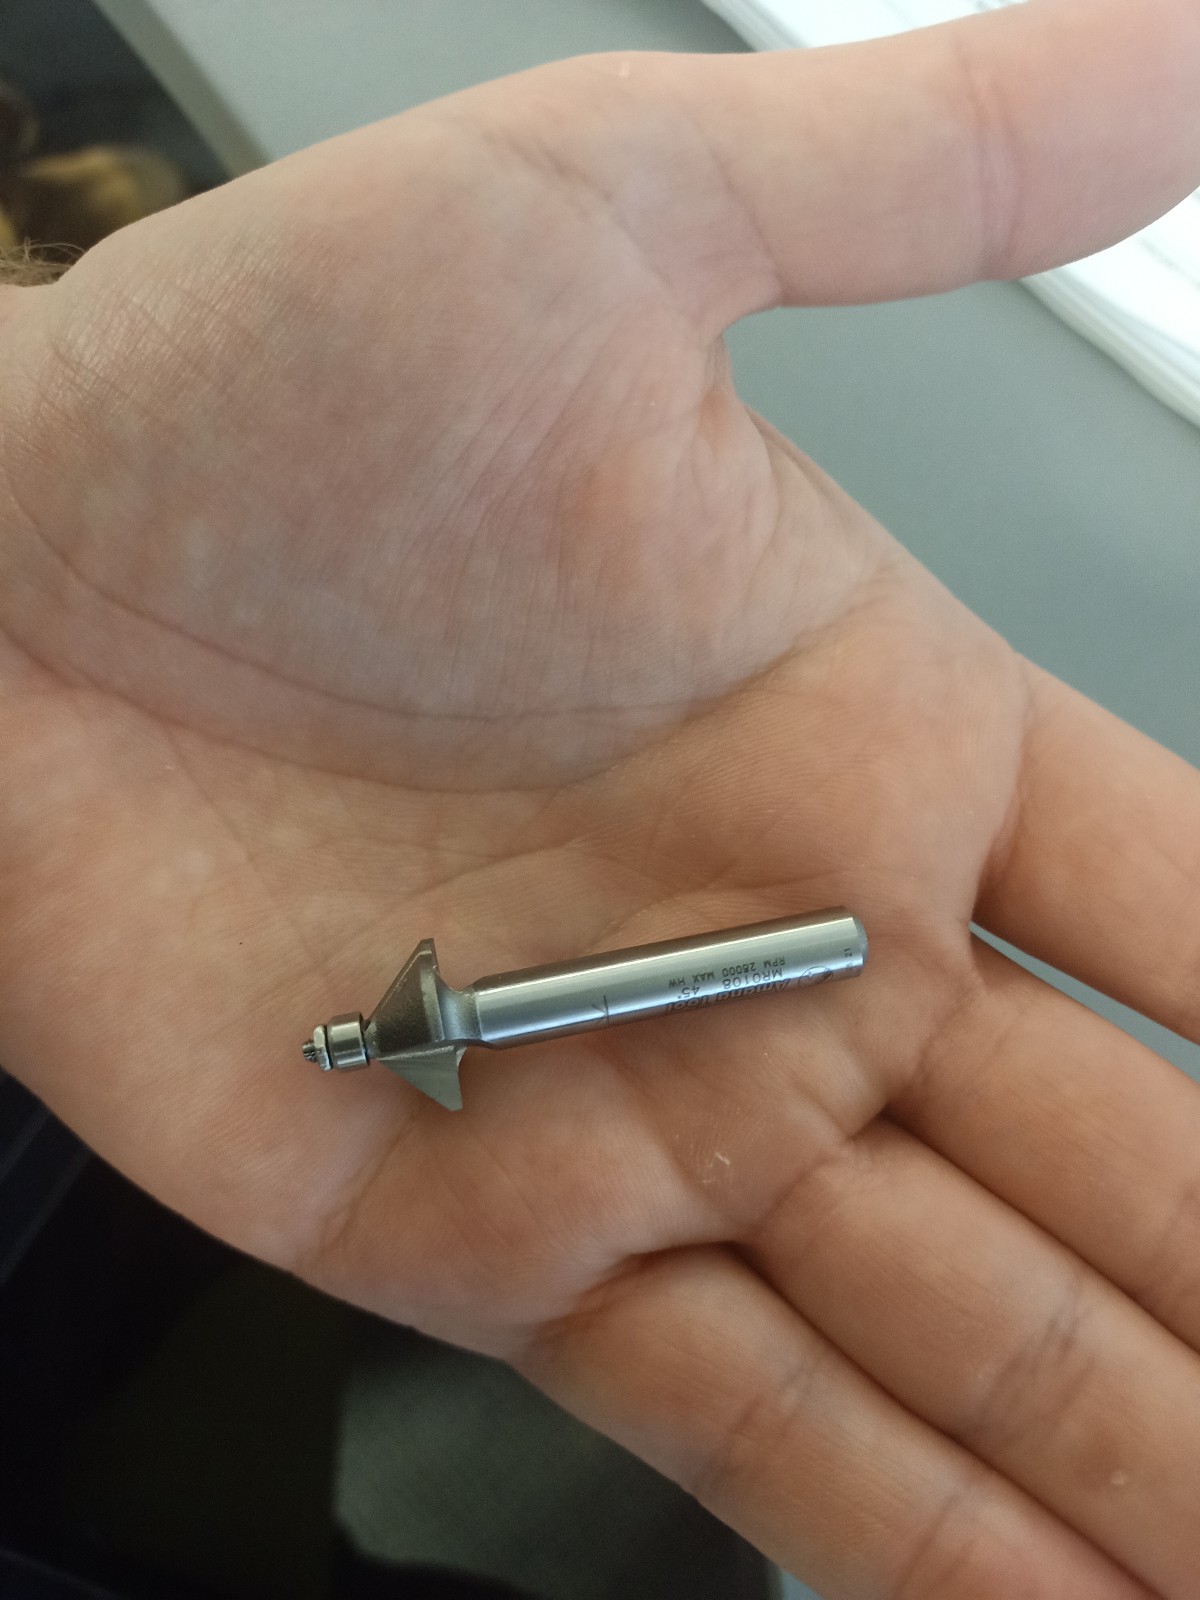
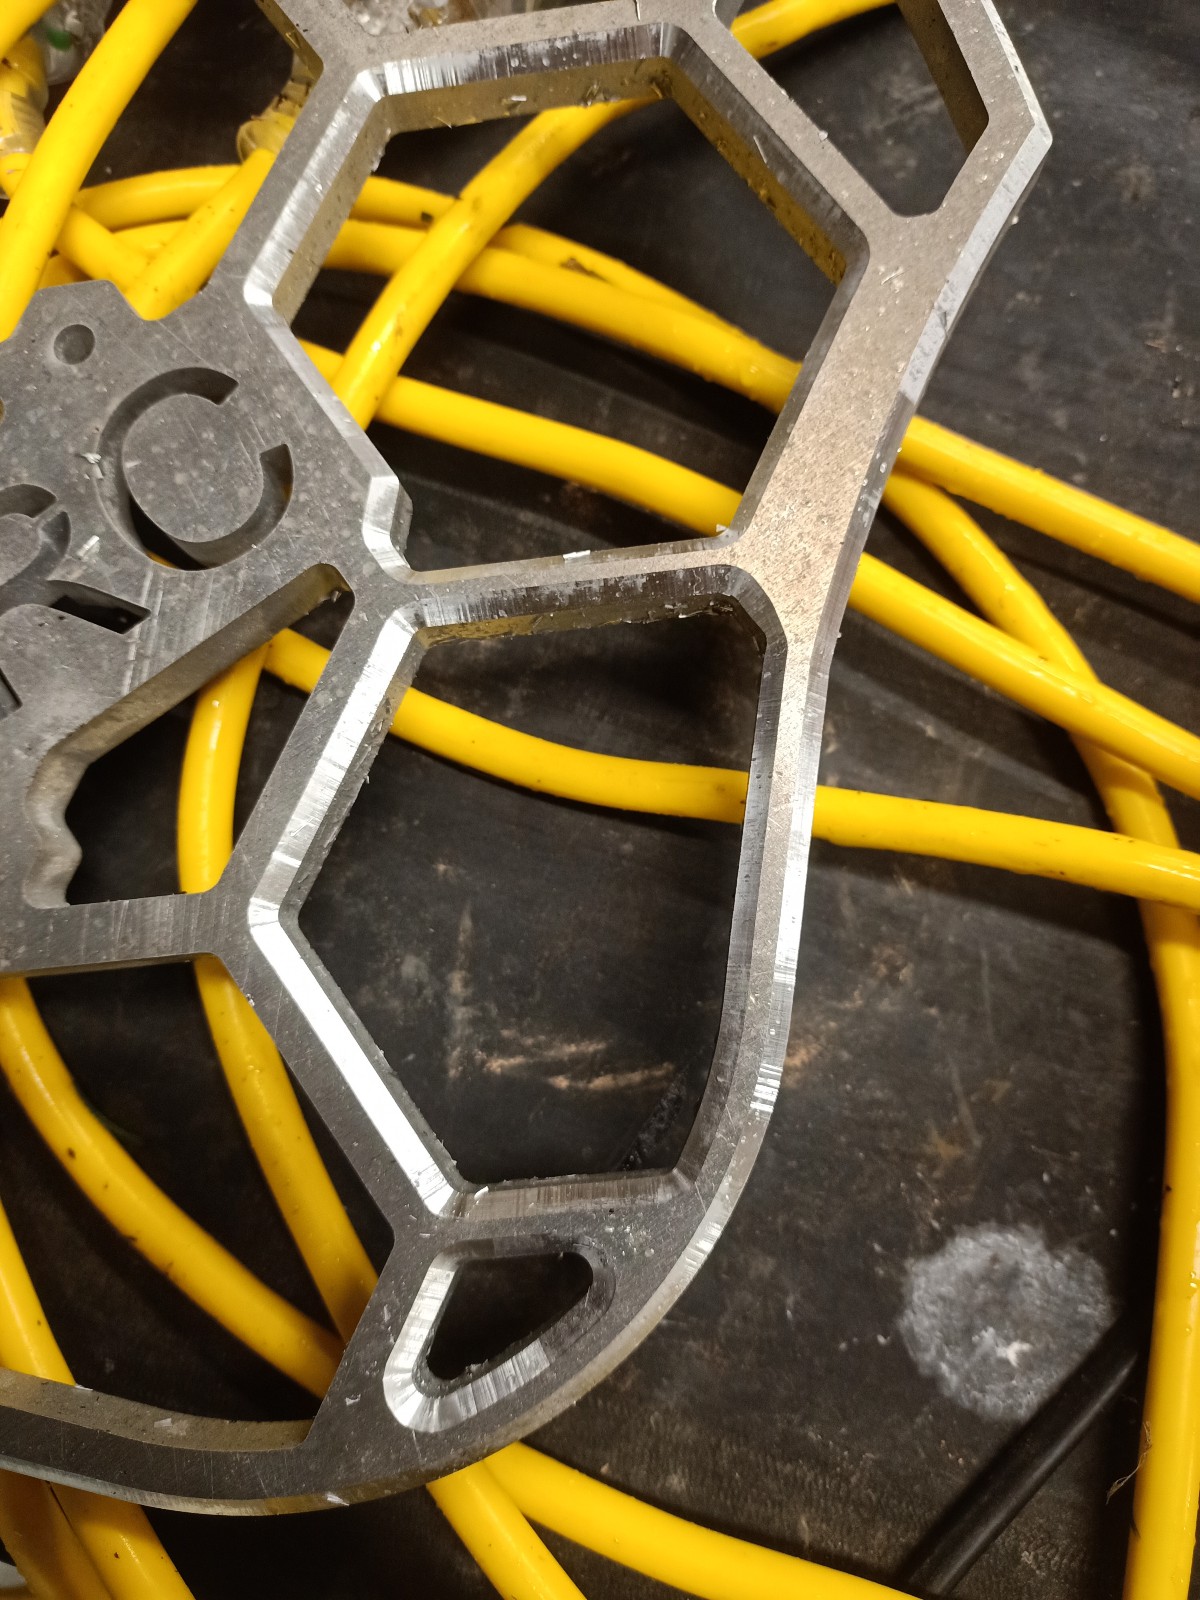
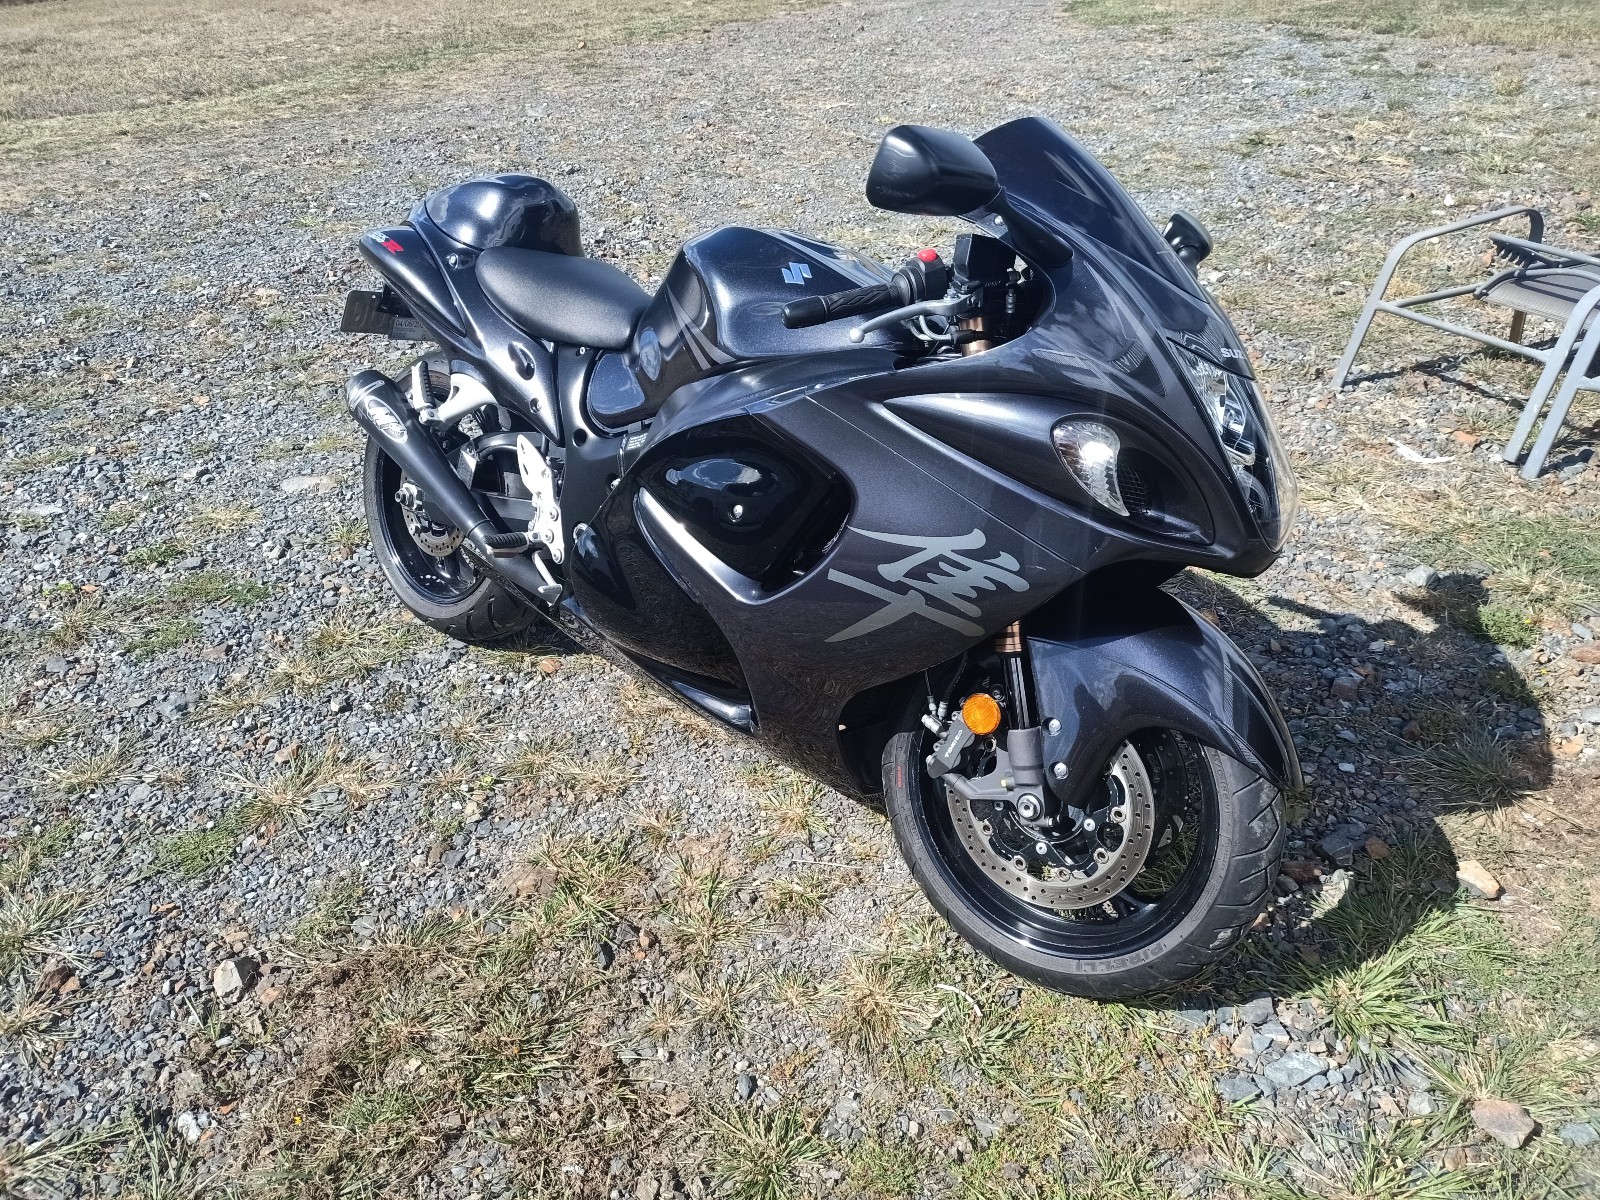
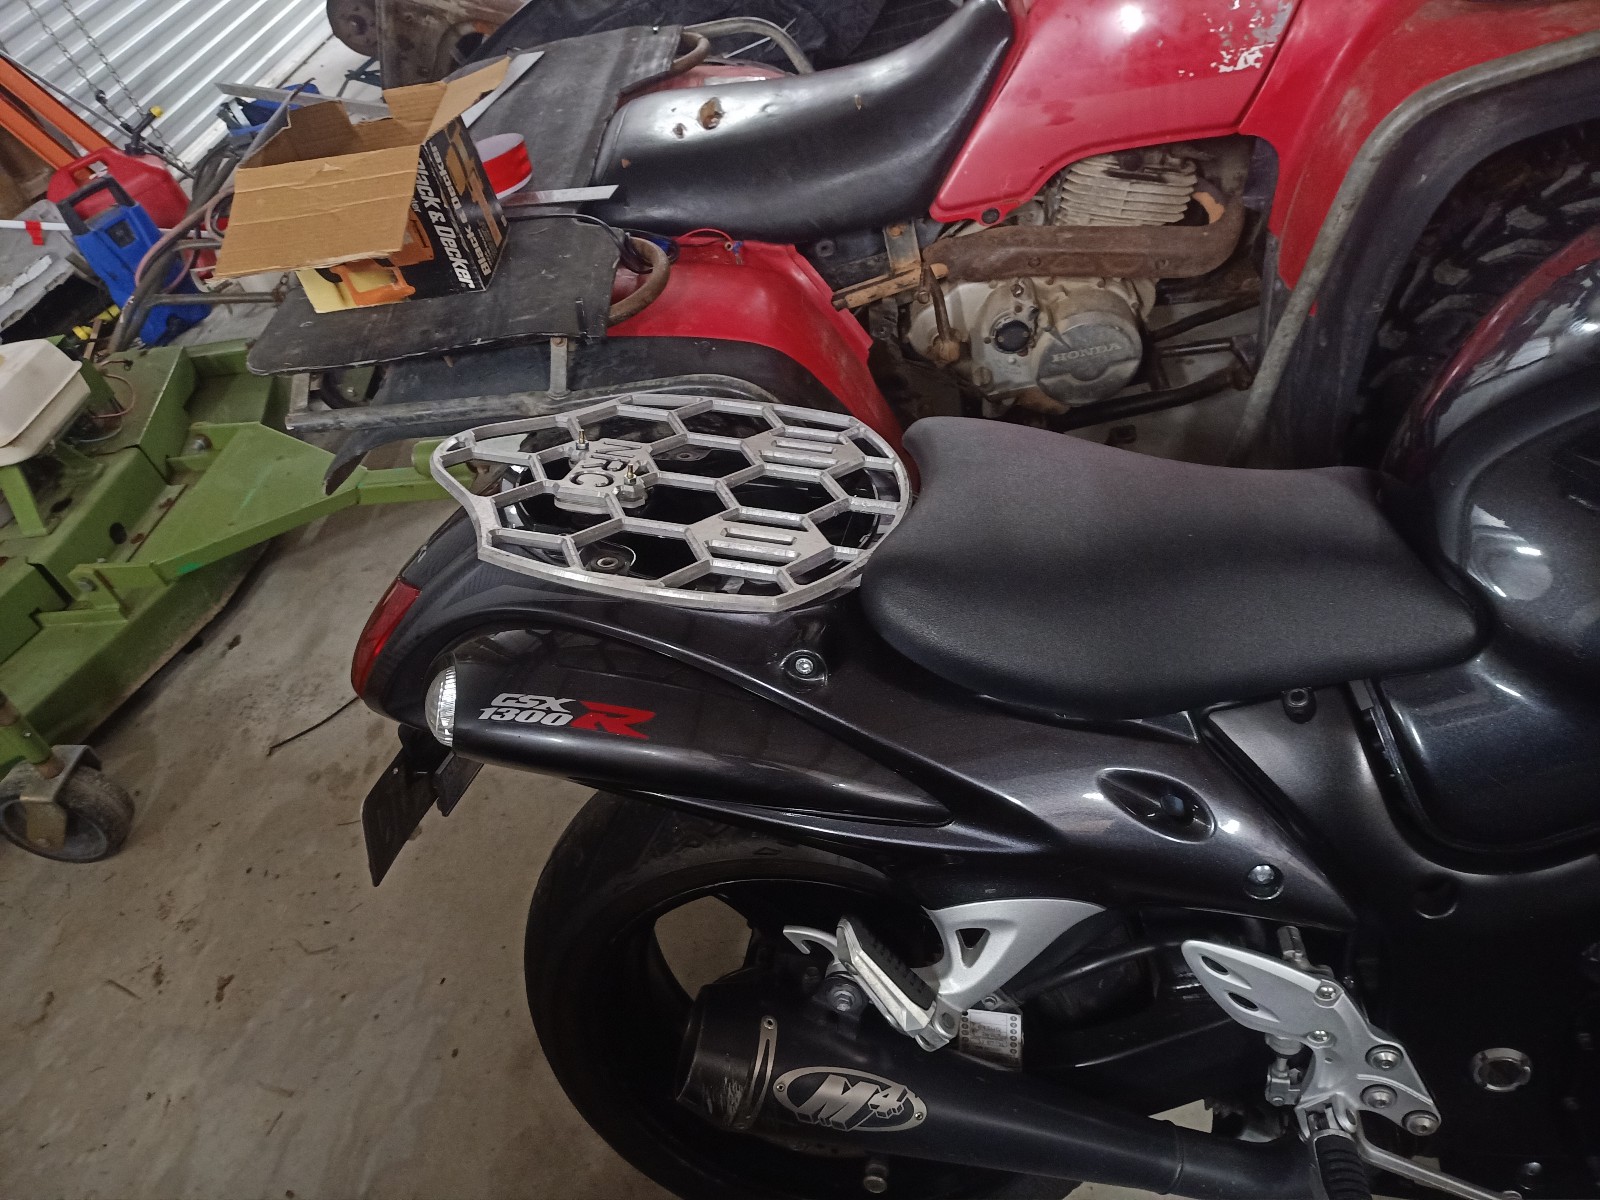
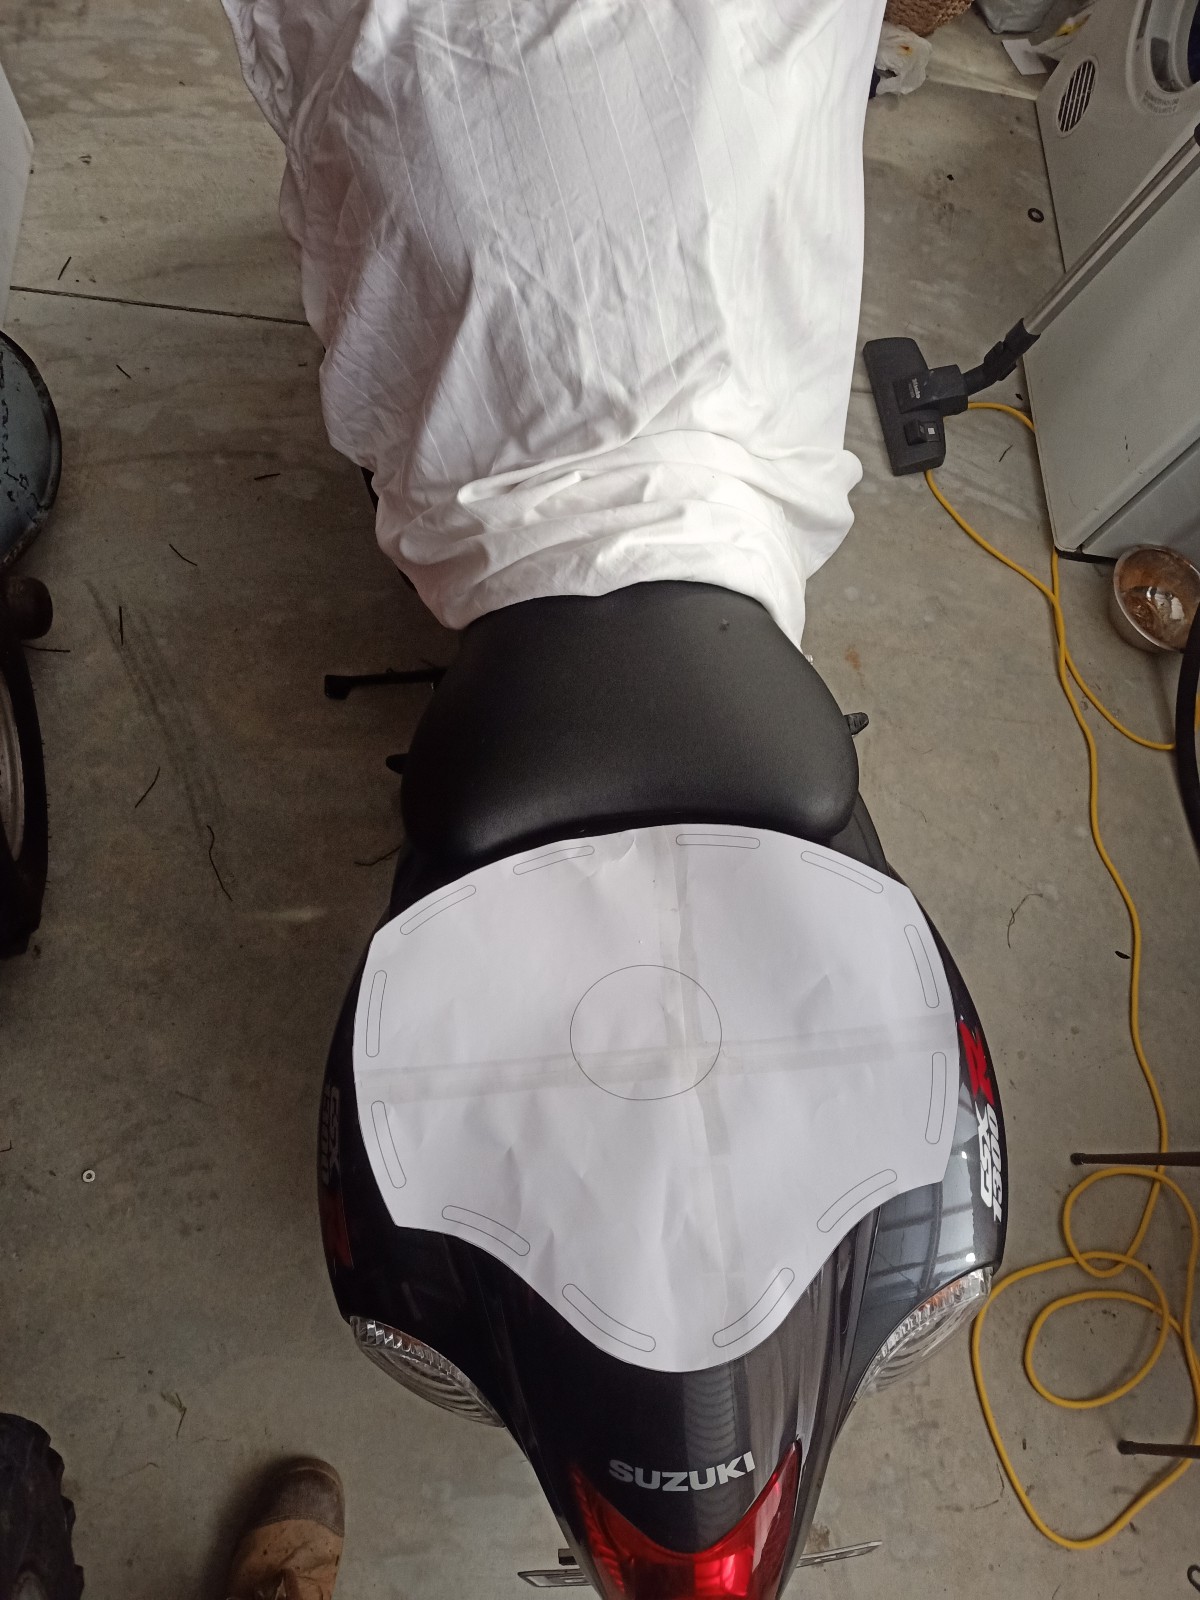
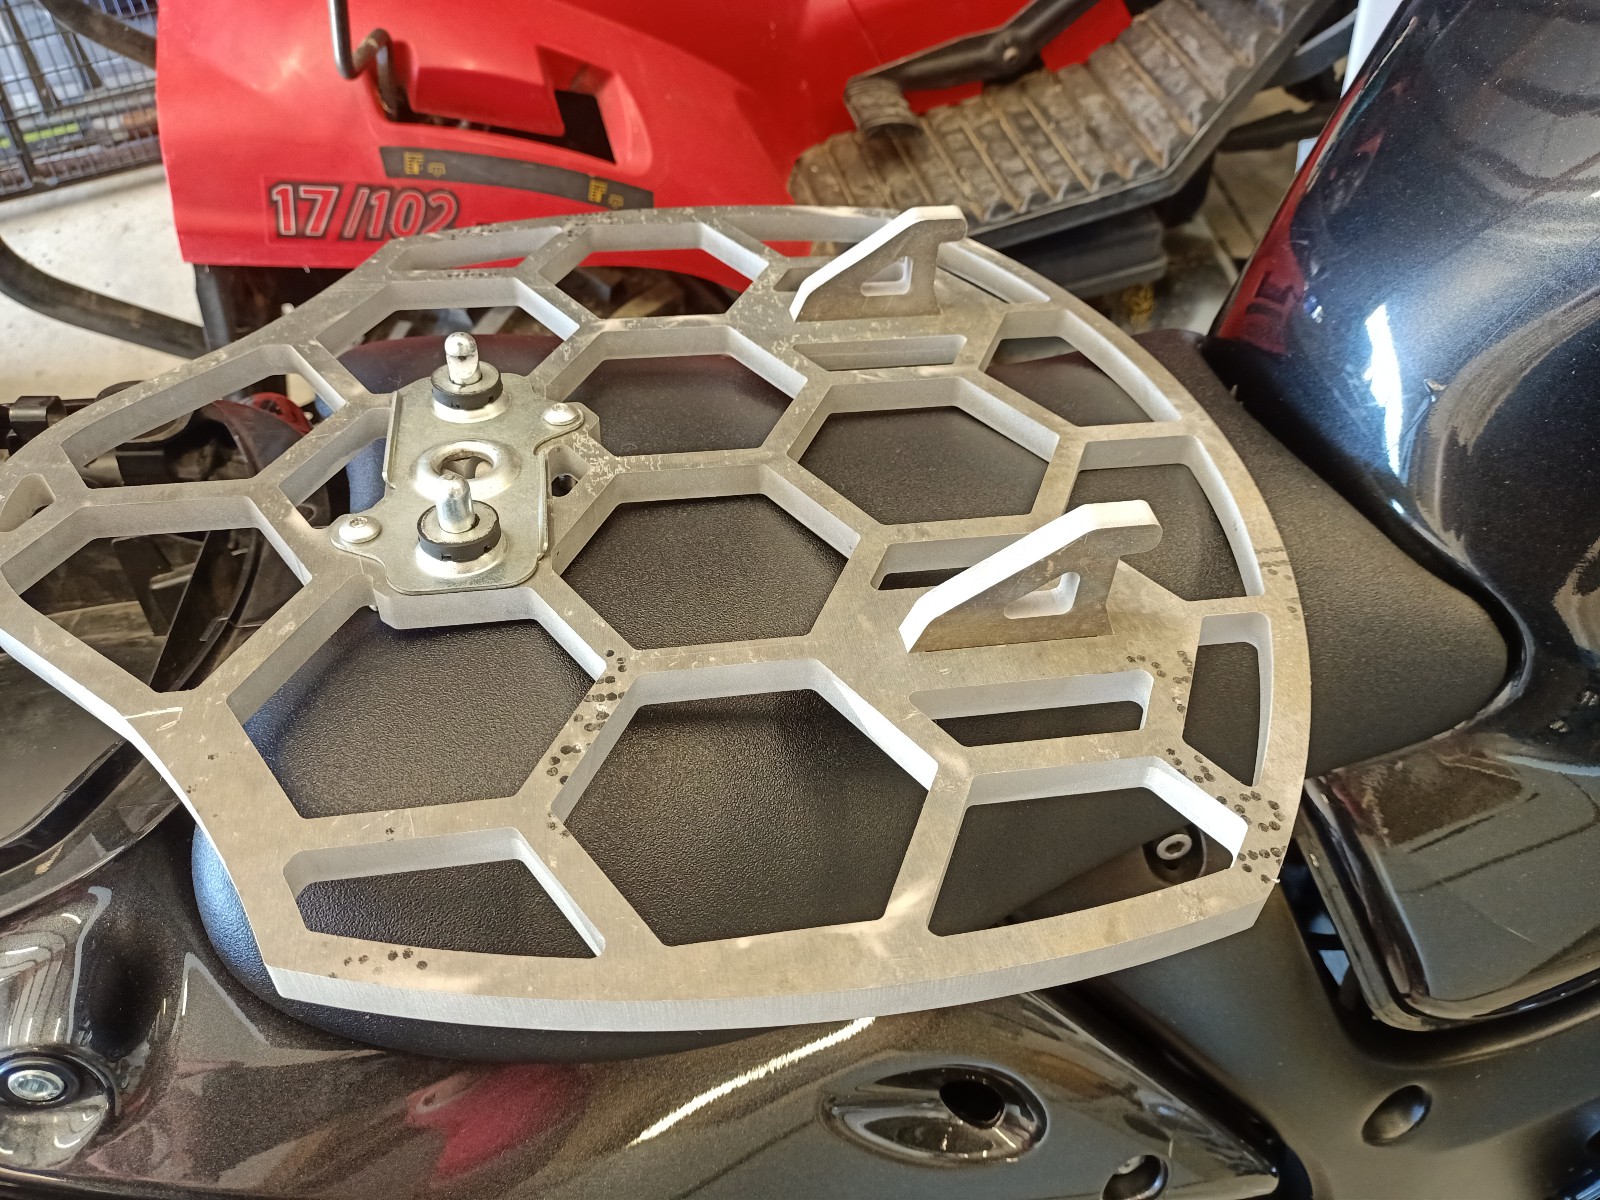
Got my cast off 1.5 weeks ago and have had bike out for half an hour since then. Have been pretty cautious as after 12 weeks restrained there was very poor muscle control and it felt super super fragile, but grip strength is improving very rapidly. We know this, but god damn shits amazing. In general I don't speed, but like acceleration and the sense of unlimited power- and this thing delivers for sure. Also very easy to see why these end up with huge kms on them compared to most 600-100cc superbikes-so easy to live with and manage. Big trip coming up and so of course i had to make the acquisition of a luggage rack far harder than usual. I had time on my hands and like a challenge, plus thought I could make something a little more aesthetically Drew outline in cad and printed/test fit then made alterations. Had a good friend cut from alloy. Ended up being done from much thicker aluminium than originally planned but this gave me the confidence to get a bit artistic with the design and weight removal. Then got a tiney router bit with tiny 4mm guide bearing and ran it over both sides to cut a sweet chamfer. Its had a fair bit of finish sanding/filing since these pics to remove hard edges, but now want to DIY anodise it dark grey/black. Its turned out pretty good so far I think. Swaps between aero hump/passenger seat/rack in a few seconds just with a key (all other racks use bolts, but they do allow a pillion where as mine doesn't, and they are also big square things with no real thought given to design) Also started it last weekend and had a really loud and alarming clutch rattle. Shut it off pretty quickly, opened up the clutch and ended up loctiting and torqueing all of the fasteners (this particular year omited factory loctite and loose bolts there is a problem) Sounds gone now but research tells me that these things are renowned for having rattles there due to their variable clutch torque limiting shit being pretty sloppy. Anyway, until next time Bye.
2 points
-
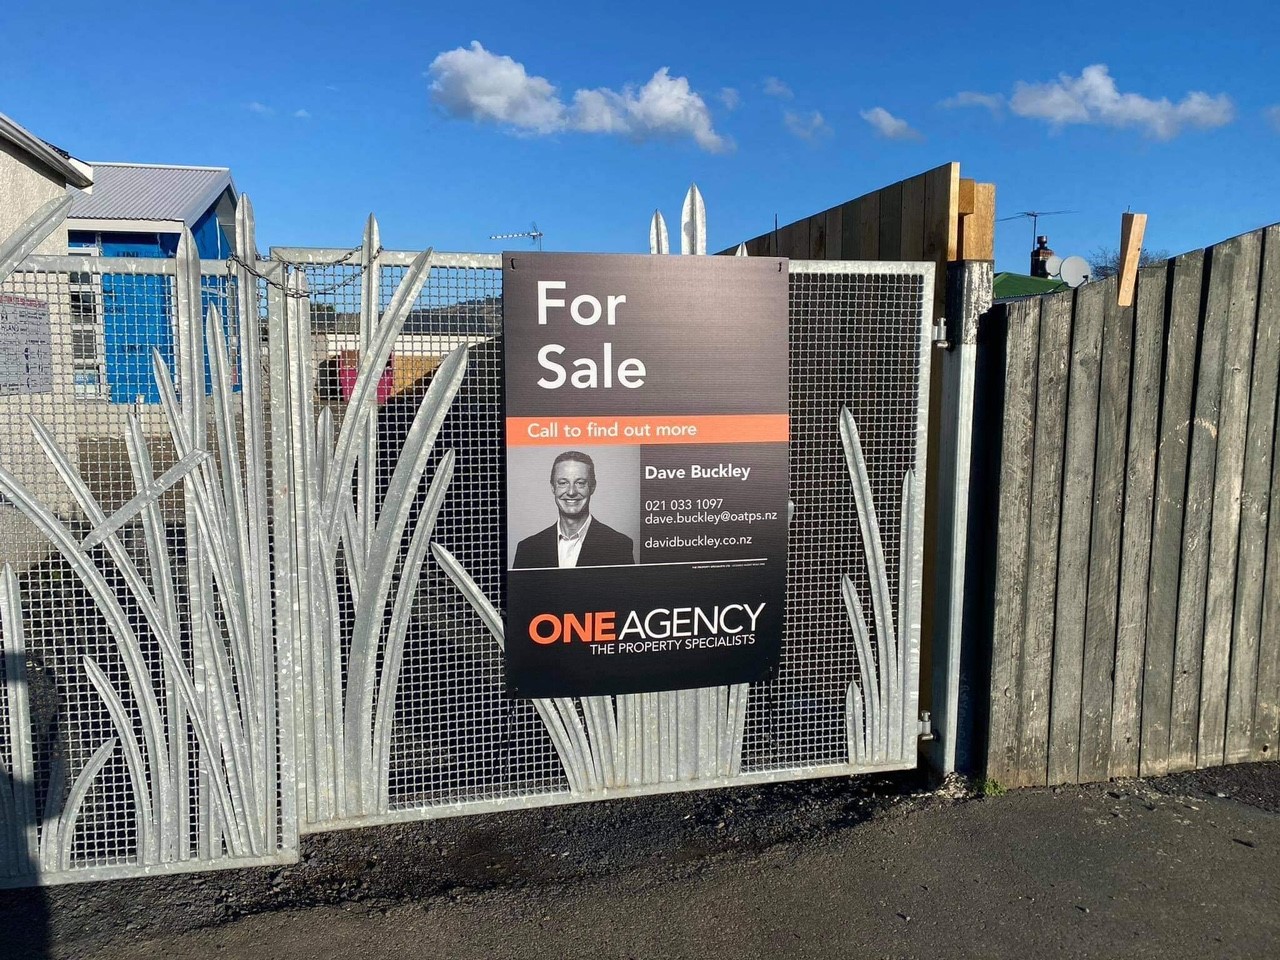
So here’s my big on selecting an agent, and a bit on our strategy for selling this thing. First disclosure, I don’t have a background in RE but my day job is in corporate sales and know a fair bit about the area (various programs, training ppl etc). Also, salespeople are people too mmmmkay. Knowing what I know, I’m able to engineer the following process to the outcome I want. Quick tip, sales is 100% built on information, be transparent with information and sharp with questioning and you can have them eating out of your hand (or visa versa…) I don’t really know any agents personally, so I decided to go to a few open homes ran by local agents who look to be successful. Posing as a buyer I was able to get a bit of an understanding on how they operate from the other side. Honestly a lot acted as professional clip board monitors, because the market is so hot right now, they’re sitting back and waiting for the deals to come to them – we want someone proactive but not pushy. It was a pretty easy shortlist (3) to make, the ones that bothered to call me back and ask some questions….. I asked these ones to come to a visit of our place, and provide an appraisal on potential value and marketing strategy, at this point I’m letting them to try and ‘sell’ to me All agents will give a market appraisal where they show comparable sales in the area and how they see that reflected in your property, they aren’t doing a favour here, they have to do that… Be wary of agents who will look to ‘buy the listing’ by appraising your place super high as an attempt to wow you with greed. At this stage I noticed already differences in offering, Agent #1 was very bubbly and talking a lot about how strong the market was, how well it would sell and how good they were at negotiating. Agent #2 was more casual, walking through the different ways in which we could look to sell and asking questions about what’s important to us. For me, this meeting had nothing to do with getting an appraisal (just say “yes, ok, that’s great” a lot), it was a case of gathering information about who they were, what drivers they looked to use so I could use that again in the next discussion. I left each of these meetings outlining that I would be calling them on when we would speak next, but being clear that I would speak to them before making a decision. (if you are clear on YOUR actions and YOUR timeframe, you wont have them badgering you with calls). Next meeting I’m flipping the script, I’m the one in control and asking all of the questions, the reasoning being that previously the agents are excited about the opportunity and this puts them on edge and more easily persuaded. I’ve defined that the strategy will be to do a quiet listing on the house before it is finished – purpose to capture buyers now and when they might be thinking in a few months, also to do so during winter when new build listings (competition) are low. If we don’t get an offer of something we like then we can pause to finish it complete and try again…. In any RE deal you’ve got 3 levers to pull in the negotiation – price, timing, and conditions. In our situation, the second two are easy for us to be flexible in order to achieve the best possible $$$. So here, I’m very much in control of the convo and the agent is the one saying yes to me, with their ability to manage the buying process being the key feature. It then gets onto commissions…. They both start that the standard rates are 4.5/2.5% but for me selling 2 houses they will get me a ‘deal’…. During this step, it is key to shut up, have long pauses before answering and show zero emotion (Chris Voss styles). Agent #1 did start with “what do you think a fair rate”? after which there was some fumbling to do some quick math that their offer was 2%, but that I should indicate what I thought was appropriate. For all the banter about being trained negotiators it didn’t take long for them to drop their rates with little encouragement. Agent #2 was a bit cooler about the whole thing, straight up a fixed cash price for a sale followed with some questions on if there was anything presented up until that point that we were unhappy with or needed more questions answered. I have picked Agent #2, namely because he listened to understand what was important to us, what we feel the strategy should be and what expectations should be. I have also said to him that I’d like to add to his commission, whereby as well as the fixed rate, if he gets over a certain $X then will receive an additional % - key is to align the incentive schemes of you and your agent…. Agent #1 by accounts is good at what they do, they were top in sales in their office and has lots of listings. I feel that is due to be a hard hustler rather than an active negotiator, so the skills fit really wasn’t there. Lots more I could go into the theories behind this process, but it’ll end up getting into sales101…2 points
-
car went to the paint shop to get the runs out of it and get the final cut and polish. i went and picked it up last night and it looks amazing. anywho, today i wanted to fix the exhaust where the flex joint had worn through because its the lowest point and its had a fucking over judder bars and whatnot and subsequently has a hole it in. step 1 - jack up your car. this is where things went wrong. 2021-04-25_02-55-42 by sheepers, on Flickr car slid off the jack on the way up. given what could have happened i got off extremely lightly. it bent the radiator support up and bent the bottom of the radiator real bad. it also bent the bottom of the front bumper. however, the radiator isn't leaking and the crank pulley is unscathed which is a fucking miracle given what happened. i was able to bash the rad support back down and i got most of the bend out of the bumper so it looks fairly normal again. fuck it could have been WAY worse.................. so yea, after dealing with that i moved on to fixing the zorst. cut out the fucked bit, made a new bit, tacked it in place, remove zorst from car and fully weld, add 4mm thick bash plate and put zorst back in car. 2021-04-25_02-55-49 by sheepers, on Flickr 2021-04-25_02-55-55 by sheepers, on Flickr 2021-04-25_02-56-02 by sheepers, on Flickr 2021-04-25_02-56-09 by sheepers, on Flickr 2021-04-25_02-56-21 by sheepers, on Flickr then it was time to wax the newly polished paint. that went well. it looks pretty ace tbh and yea, i cant take a photo that justifies how good it looks. but it looks good. take my word for it. 2021-04-25_05-34-27 by sheepers, on Flickr 2021-04-25_06-18-48 by sheepers, on Flickr 2021-04-25_06-19-23 by sheepers, on Flickr 2021-04-25_06-32-09 by sheepers, on Flickr2 points
-
I just ride the Vespa in arseless leather chaps...2 points
-
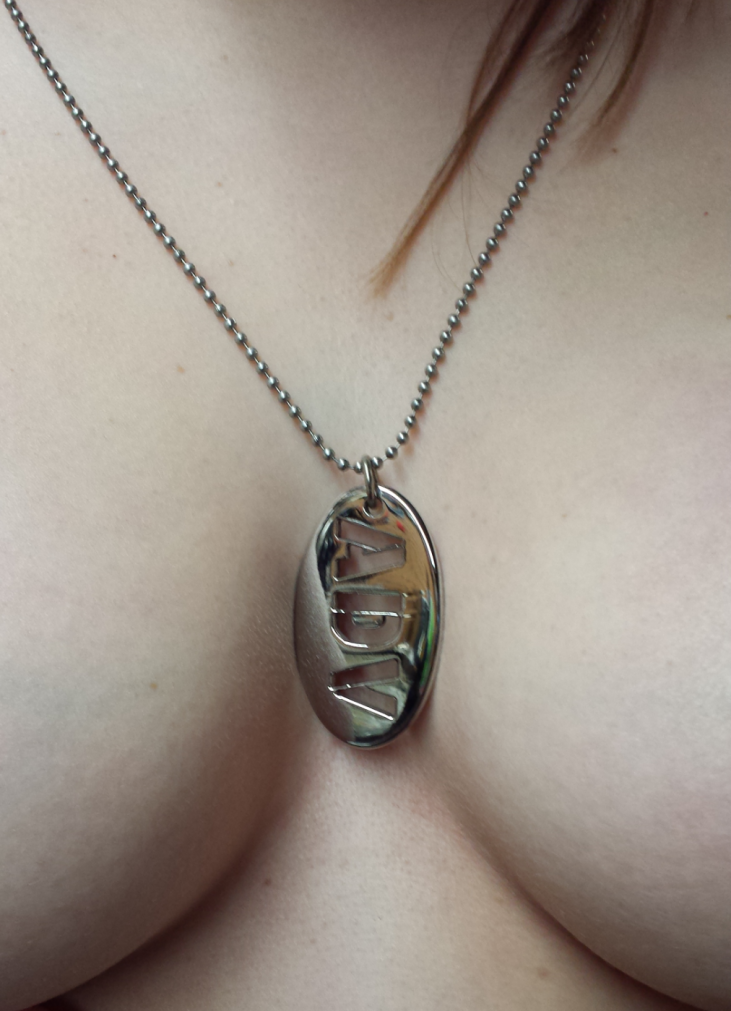
ADVGN merch
2 points
-
I did see a comment from someone that these have a groove for tie wire, but I think I may have used that groove as a cut guide when I trimmed the ends off.1 point
-
Stripped off the rocker covers, throttle body and manifold from throttle to supercharger for a trip to the parts cleaner at work, bit greasy externally but internally everything's tidy especially the rocker covers. Pretty sure this engine has had a leaking power steering pump or hose failure which has showered the engine in oil attracted dust and not been cleaned up. No warning bells so far everything looks good. Going to port the throttle body and inlet manifold to the supercharger as there's meat to spare for sure.... maybe a v8 throttle body if i can find one with a cable.1 point
-
yea the oxford ones aren't that thick but i too had trouble with the superglue. i listened to the internet and used gorilla glue as its rated for heaps of heat and expands as it dries so makes a real tight fit. just need to cut them off when the wear. The sportbike ones that you have are the same as mine, they do actually wear quite quick but all the other designs were too long for my bike.1 point
-
You can use foam underlay like in a house, but unless it's closed cell foam it will all absorb water. And that foam underlay will hold it longer than underfelt. If you are thinking the under felt is going to get that wet I probably wouldn't be putting carpet in it. I would look at rubber/vinyl matting. But really depends how often you plan on getting the carpet and underfelt saturated. 10 times a year? Cause dehumidifiers work a treat in closed up vehicles to dry out carpet.1 point
-
110kg wet i think it was and im aiming for 100. basically there but yeah, like 2% of the bikes weight is just in the stop light and indicators everything is built solid to last (except the frame)1 point
-
Great advice. Thanks mate. Mirrors are cheapies. Check out West Coast Jr on eBay or amazon. They're already starting to rust but I'll paint them anyway, too shiny for this old thing. The arms have been shortened up a lot as they were a risk to pedestrians and cyclists! Only half joking...1 point
-
so you have 2 things going on here add weight to the panel to stop drumming i.e dynamat stuff on wheelwells, flat panels but then you also want something to absorb the sound so you want to use something like automotive underlay or a dense closed foam sheet product if you have stuff rattling you use thinner foam sheets or fabric tape dynamat will help with tinnyness, give the doors a nice thunk when you close them, but you gotta have something else as well to help with muffling noise1 point
-
they have like a double wall construction so tie wireing them on doesnt really work, they are way thicker than normal grips1 point
-
I travel long distances in my van. I used kilmat, el cheapo and dynamat. The best results I got were from heavy shagpile carpet in the empty deck area and over the doghouse I put some thick beach towels folded up. Being a commer, I can't put fitted carpet as I need to get into the engine bay frequently. Where did you get those wing mirrors? I love them.1 point
-
no. I would recommend going to buy some under felt from a local supplier. usually 50 bucks a meter 1.8 or two meters wide. probably wouldn't put that under carpet as you might find it able to compress and movable causing it to brake down where under felt is a lot more hard wearing. I would put this type of product on a fire wall or on a ceiling.1 point
-
On my dirt bikes I glue and wire tie them on. They can still twist from holy shit hope this isn't going to end bad (holding on for dear life)1 point
-
My accelerator setup seems to be the gift that just keeps on giving. Although I’ve solved the issue of the cable pulling at an angle I’m still not happy with the overall feel of the pedal. The first issue is that the force required on the pedal feels a lot harder than it should be. The second issue is that the overall pedal travel feels pretty short to me. First thing this morning I grabbed the HiAce accelerator pedal and after hooking up the standard HiAce cable to my carby I was able to confirm that the HiAce pedal travels a total of 45 mm from idle to full throttle. In contrast my current setup results in around 30 mm of travel. The HiAce pedal also feels a lot lighter. Good to know that I wasn’t just imagining the issues. So I dusted off my trusty piece of old house carpet and crawled under the Thames for a bit of a lie down. Well it may have seemed like that for any one observing, but I find that the creative juices flow better when I’m actually looking at the problem. Now as a young un I was never any good at science and maths, but lying under the van I had a sudden thought that maybe some type of uneven lever between the cable and the Thames pedal might solve both my issues in one go. Okay, let’s go down that path I thought, and because I’m a bit of a lazy sod I started scratching around for something to repurpose rather than building it from scratch. The first thing that I turned my attention to was the loud pedals from my donor vans thinking that I may be able to scavenge something suitable from the innards of each pedal. Sadly, no such luck. Then I cast my mind back to the original Thames throttle linkage that was made up of a number of rods and pivots. So after a bit of hunting around I found it languishing in the pile of cast offs sitting in the back of the Starwagon. Pulled it out for closer inspection and as luck would have it there is a nice little pivot lever at the very end of the mechanism.
1 point
-
Just me then ? Oh well, I should probably give up the modelling bit & just stick to sniffing the glue and thinners. It's nice. Got an hour in tonight, sunny weather & lots to do is not exactly helping. / pics Going back up-country again in a couple of days so will bring the 1/24 Caddy back & have a bash at that.1 point
-
This van makes me happy. Thanks for a cool thread.1 point
-
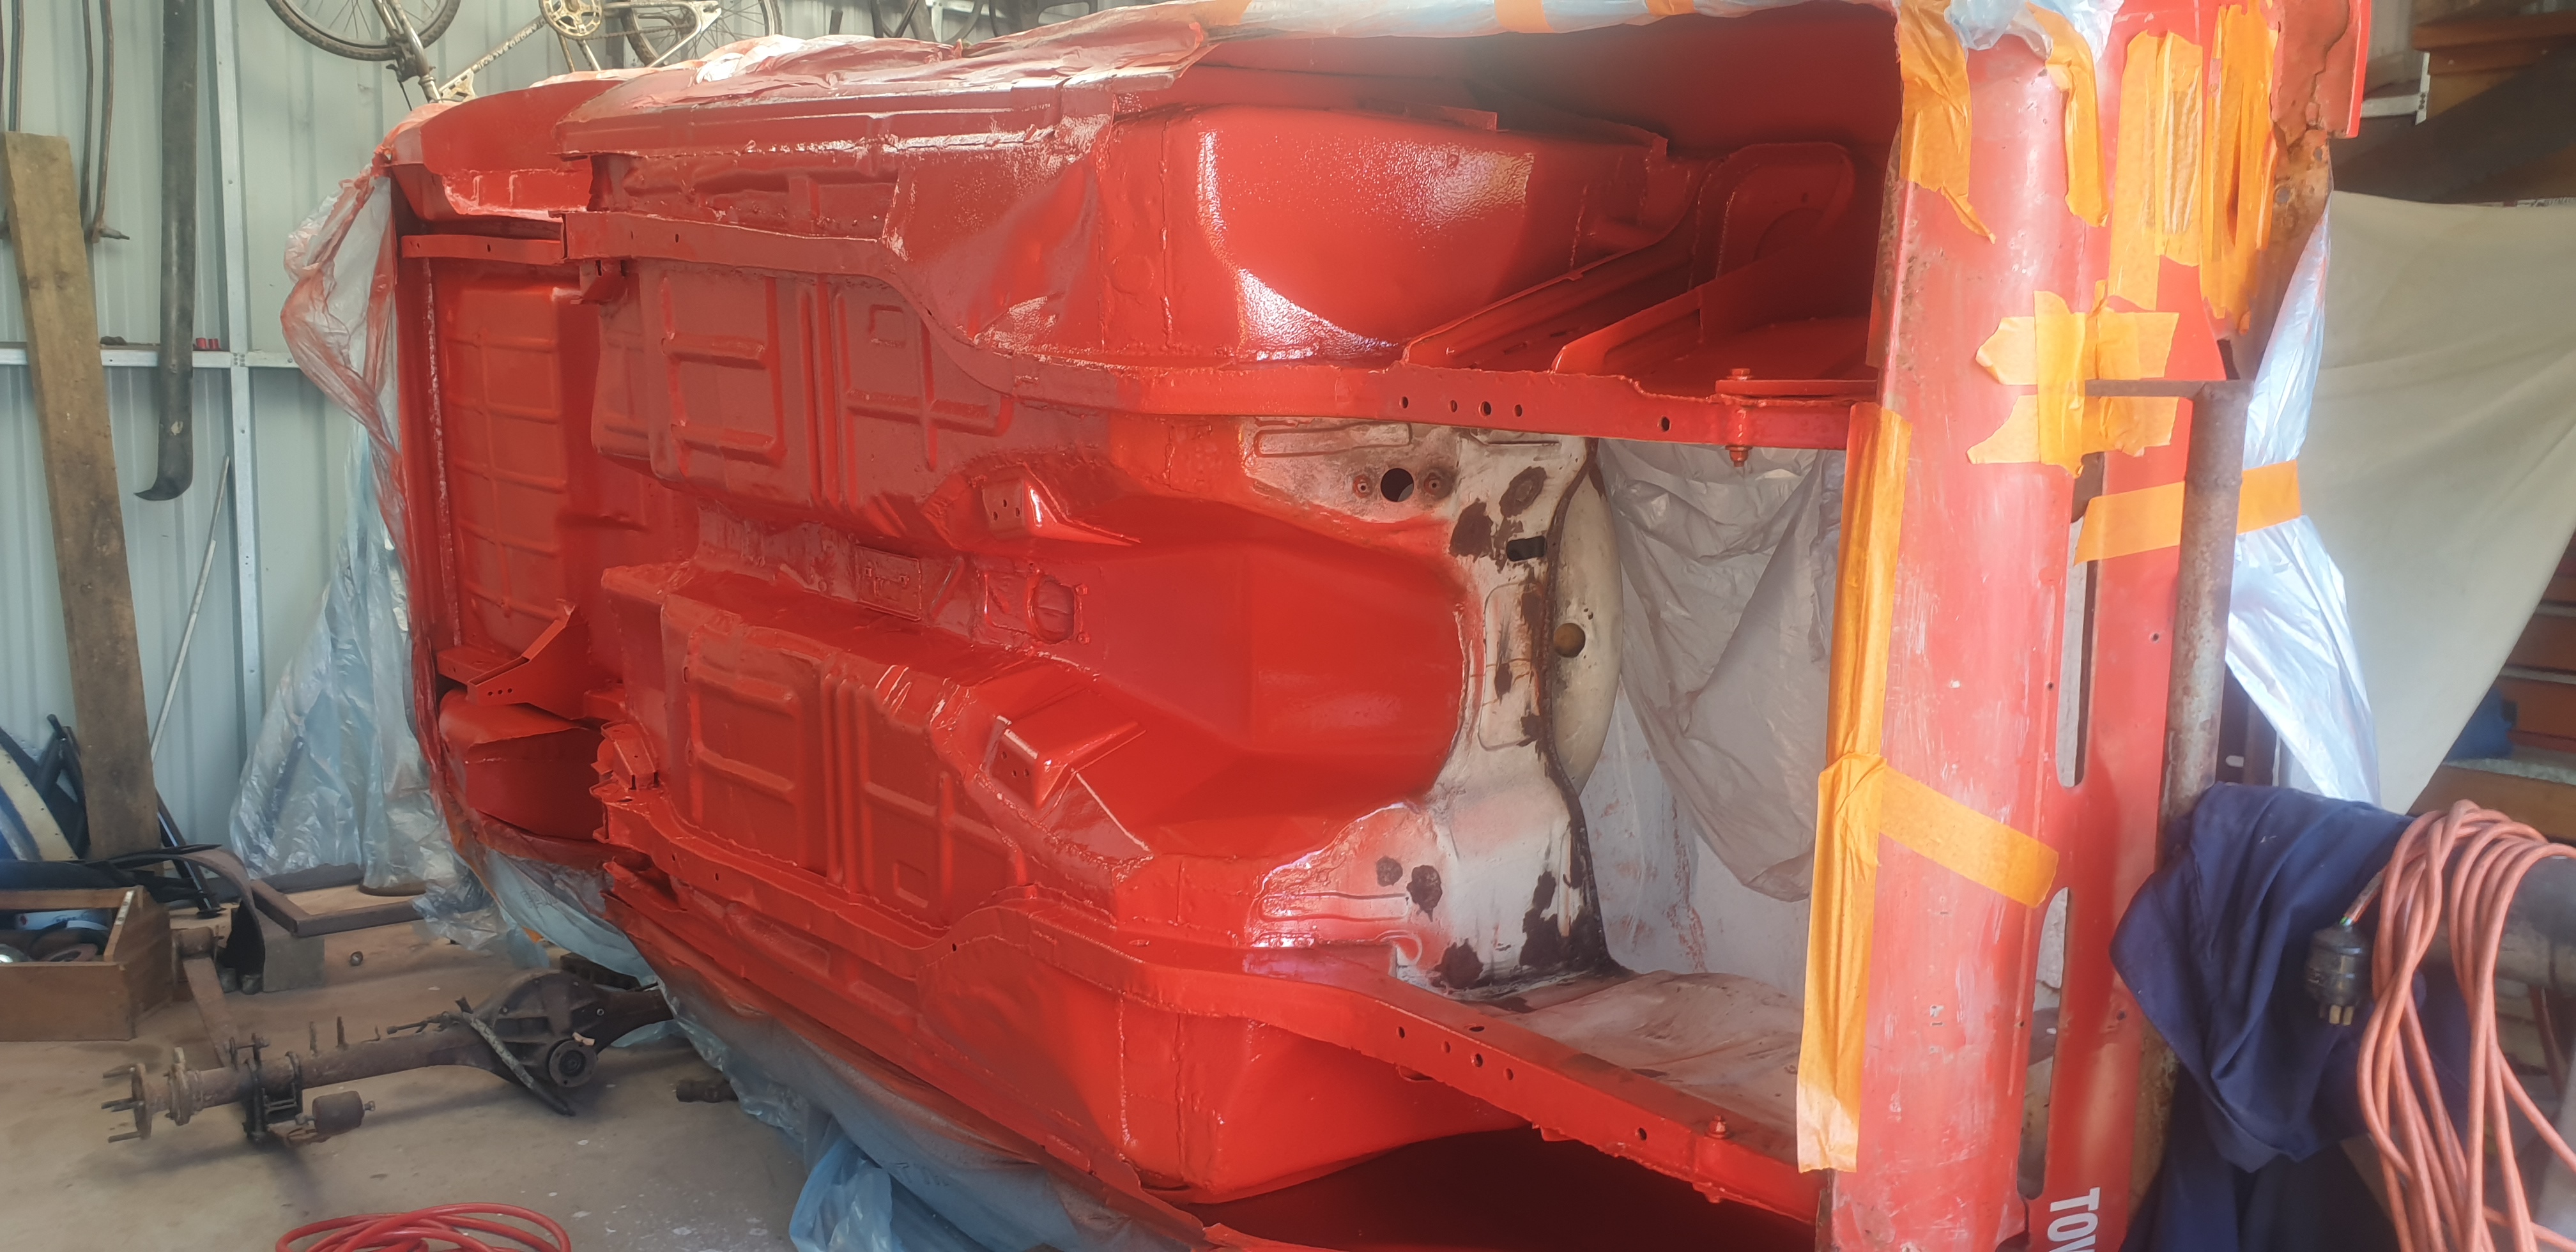
It came from the states with new quarters screwed onto/over the existing ones. Great idea instead of trying to jam them inside then have them chaff through your interior etc/ slide into the glass but it sure did a great job of masking the despair aye
1 point
-
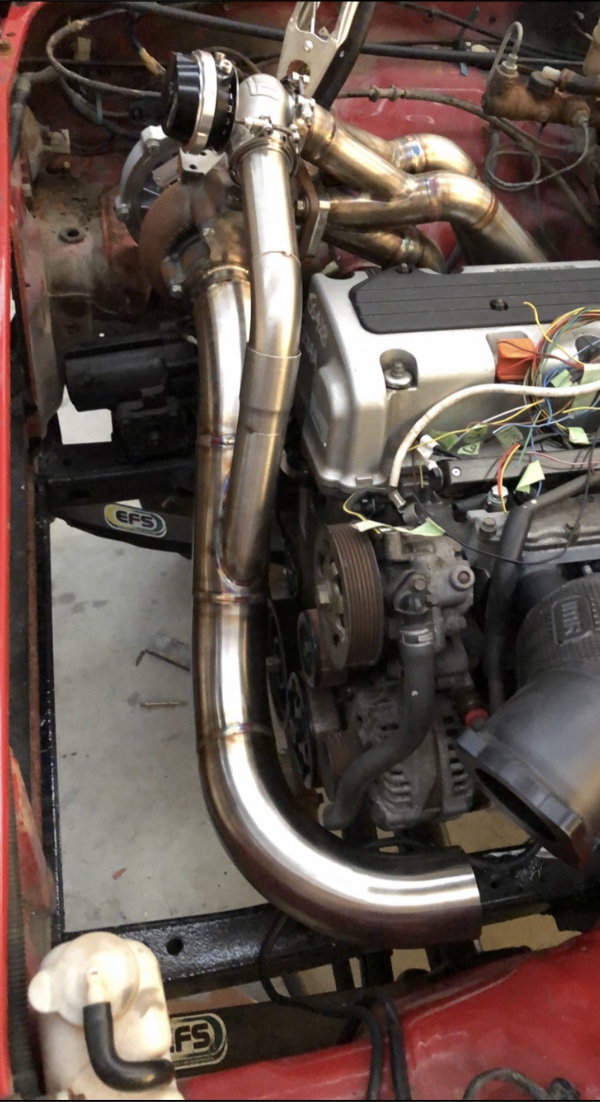
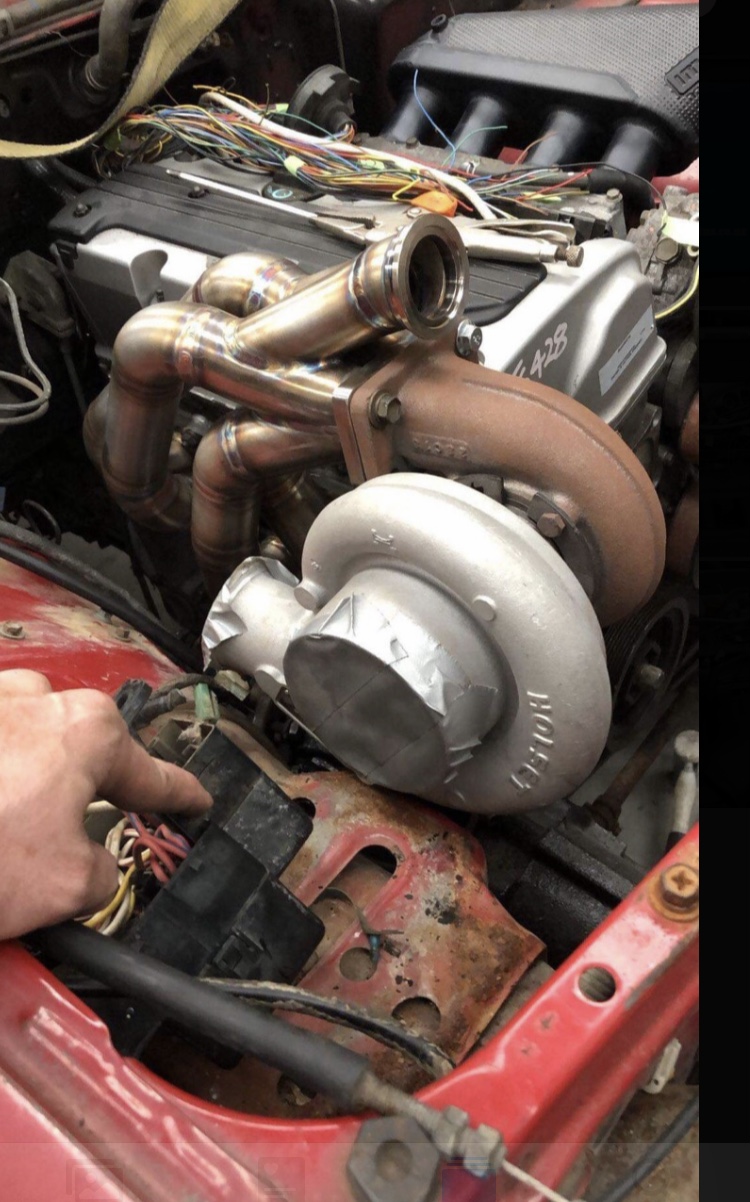
Gotta start thinking about rad and intercooler soon
1 point
-
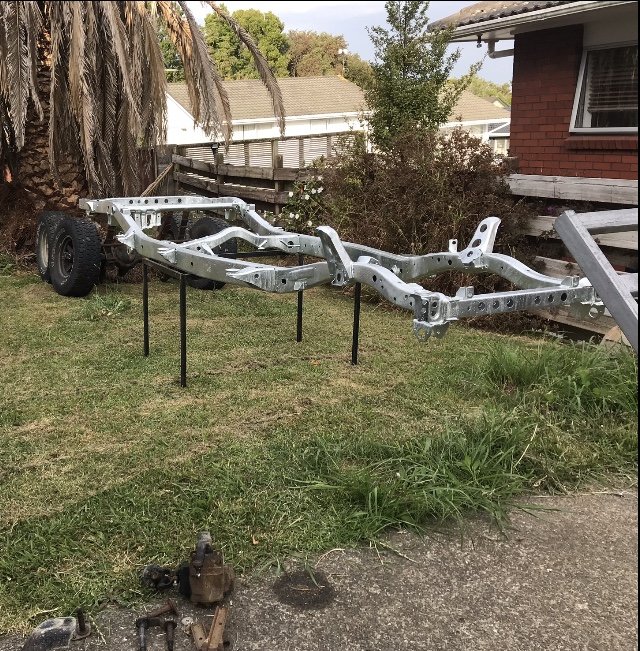
Took some more shots since it was out of the shed. She’s now at the blasters. Cancery upskirt1 point
-
so, I'm thinking we should get back into monthly meets, its been a while, Unfortunately I'm no longer able to do Wednesday evenings. what other evening would potentially suit?1 point
-
Got some more fittings machined up, next will be welding them on various parts, not much else as lifes happening, here's a pic of another resident of the van
1 point
-
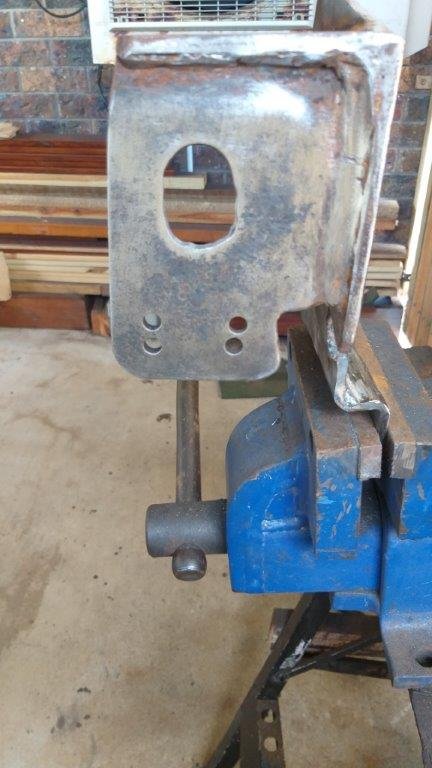
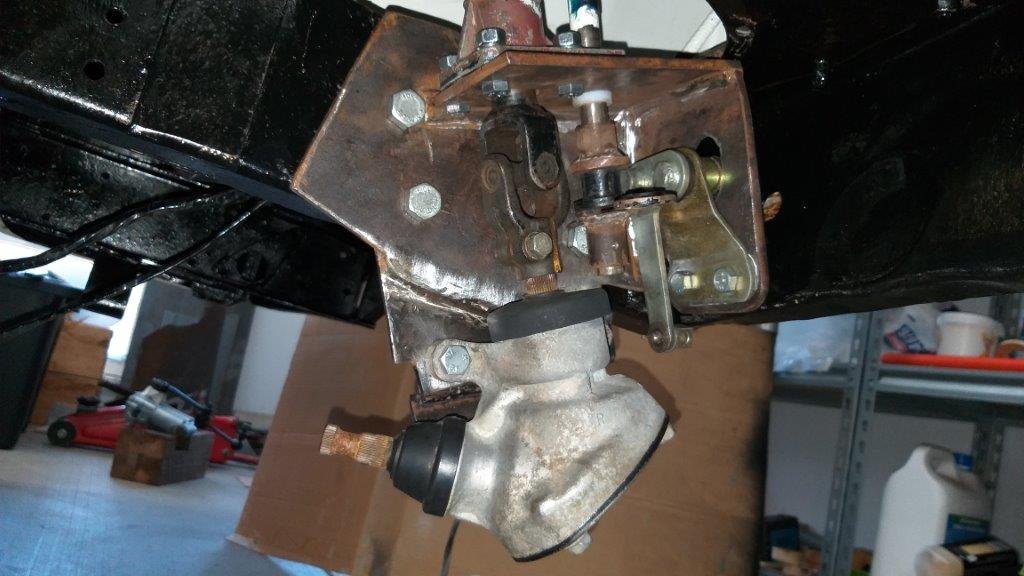
Happy New Year ! Thought I'd start 2021 off by test fitting my combined steering bracket, so chucked it on with a few random nuts and bolts. Although the rack isn't connected up yet, the movement of the steering shaft and angle box is nice and smooth. Whilst putting the gearshift pivot arm through its paces I noticed that the shift cable rubs up against the chassis leg at full arc. Not ideal, so I decided to do something about that. Pulled everything apart again and have now re-positioned the mounting holes for the arm slightly lower. Meant I needed to elongate the hole in the bracket that the pivot pokes through. The elongated hole doesn't look that pretty, but it does the job. Fitted everything up again and the cable now has plenty of clearance. The steering bracket with all of its attachments looks like a busy little office, but there is space between the various components so hopefully it will all work out okay. Thanks for looking.
1 point
-
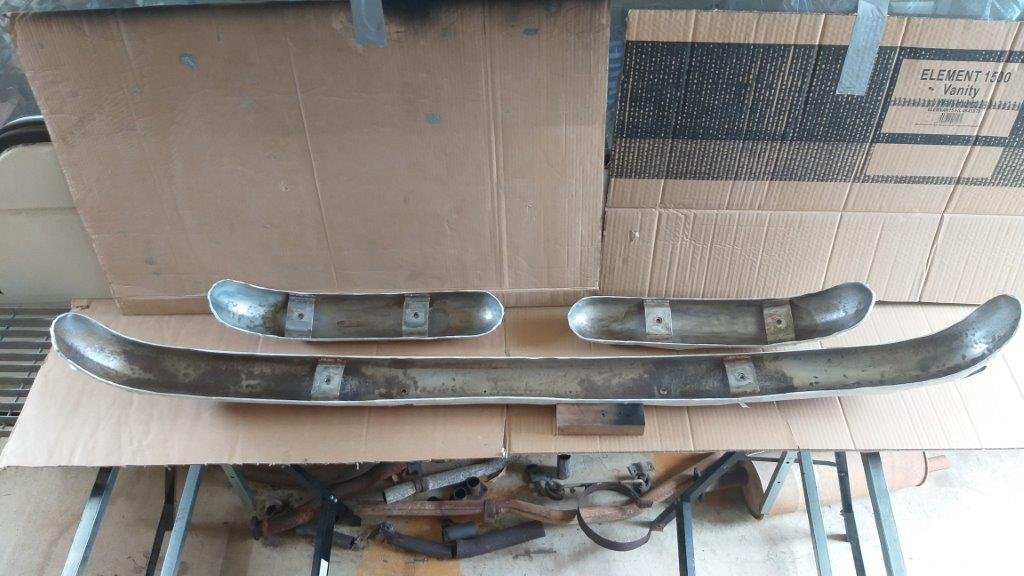
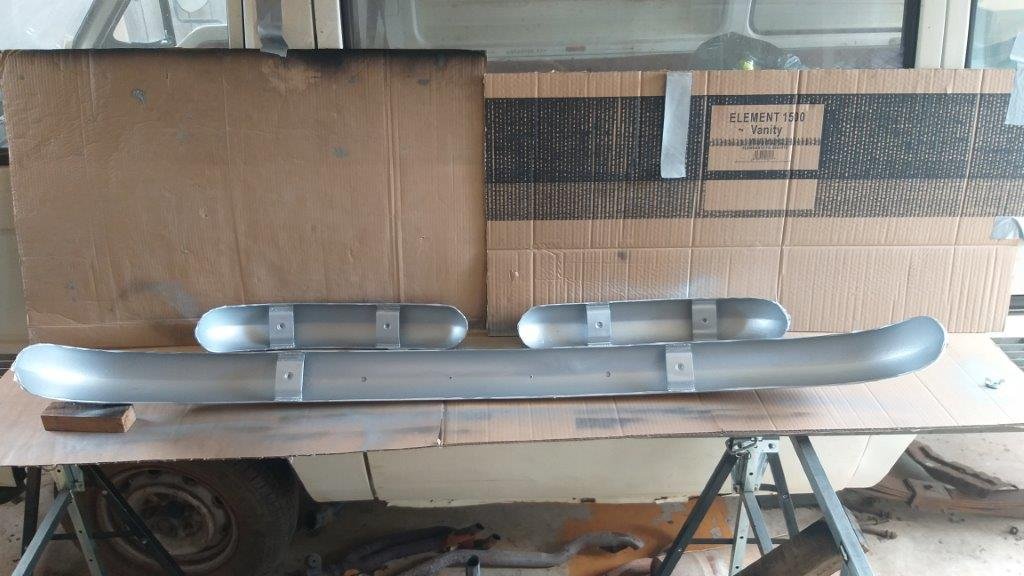
I'm still donkey deep in cleaning and painting all of the smaller parts before final assembly. After spending a bit of time sanding down the backs of the bumpers I declared them as good as I was going to get them. Chucked on a few coats of combination rust converter / primer followed by top coats of galv paint and I'll call them done. Hopefully that should protect them for a few more years.
1 point
-
Then tackled one of the rear shock boxes. Looked like grease at first but turned out to be stuck on real good, so I'm thinking maybe road tar. Anyway lots of wire brushing and liberal applications of petrol and I eventually got it clean enough to make out the manufacturer's name in the casting. Made by Armstrong interestingly enough. One down, one to go.
1 point
-
track car? get some fitted ear plugs and save the weight1 point
-
Pretty much underlay. They might have a bit more movement in them so not that stable/rigid. If you were to ask me what I would actually recommend, i would say go buy some from an upholstery shop. I sell it for $50 a meter at 1.8 wide. You won't need 2 meters for a car or 1.6 for a ute, pay cash for a peace the guy has had under the bench and get it a bit cheaper.1 point
-
Time to get the taps out.. picked up my air comp from a mate so I’ll hopefully spray it at some point over the next week
1 point


This leaderboard is set to Auckland/GMT+12:00