
Leaderboard


Popular Content
Showing content with the highest reputation on 05/02/21 in all areas
-
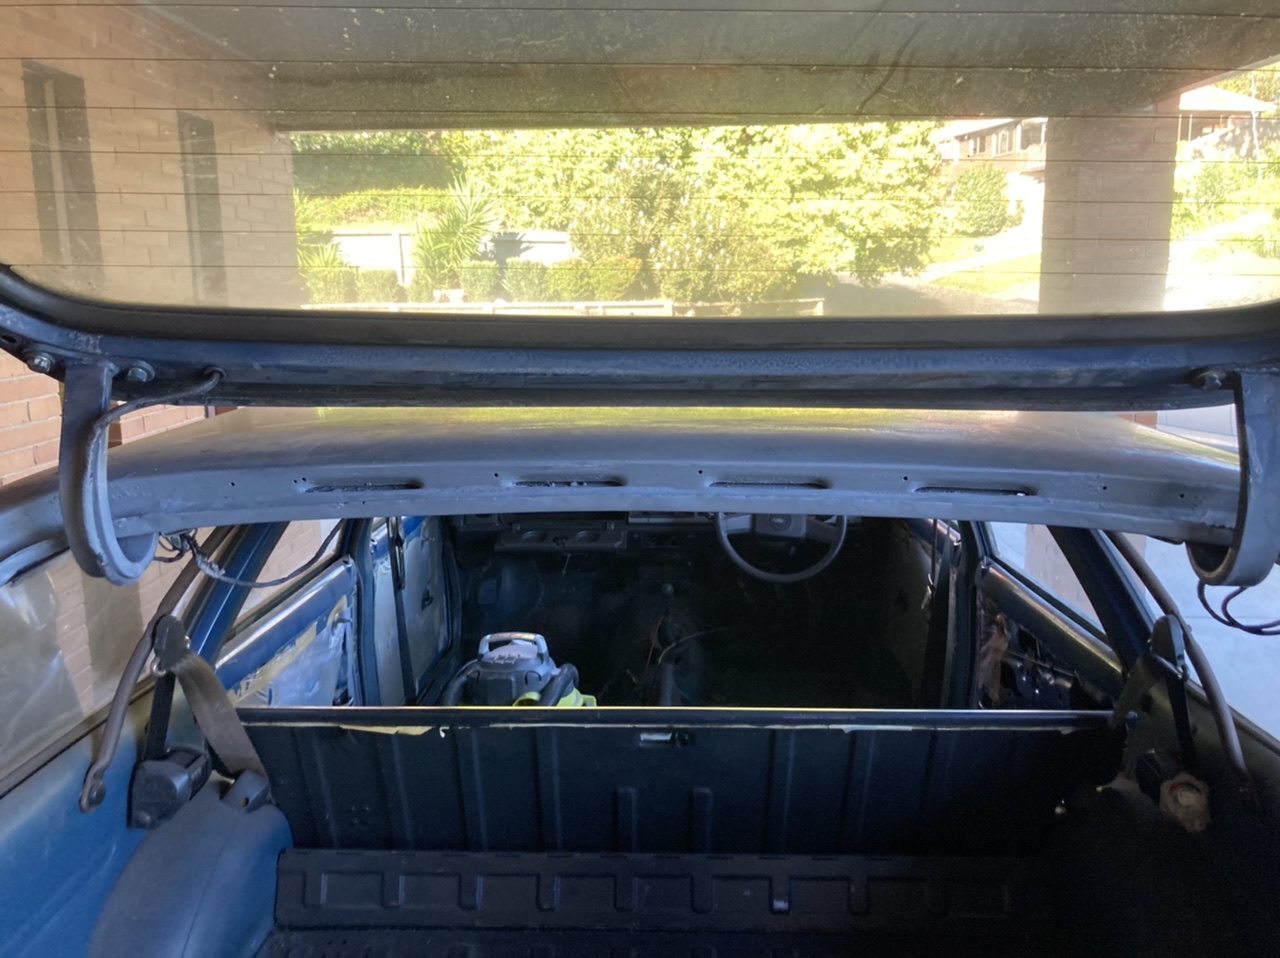
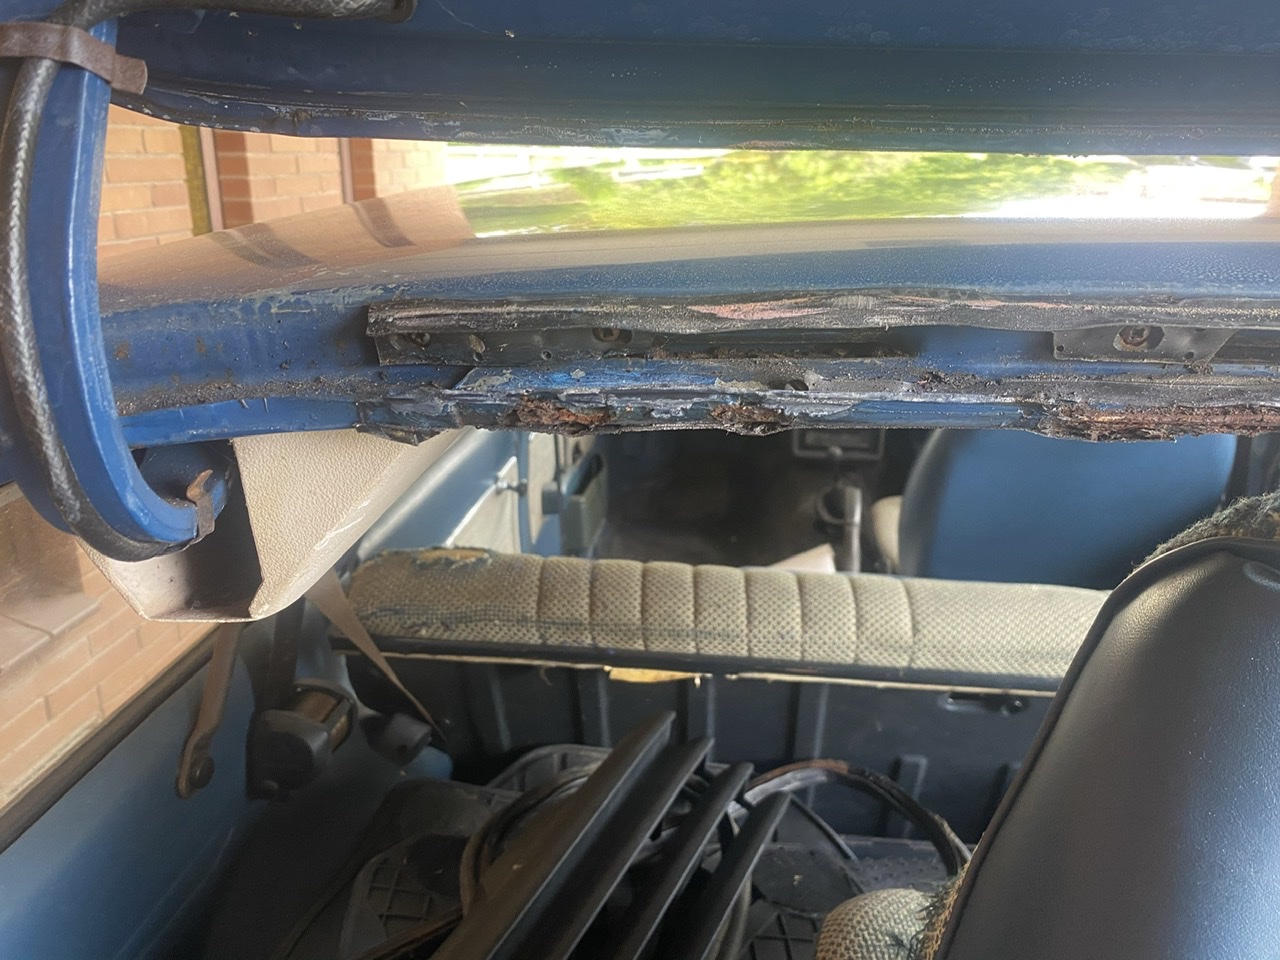
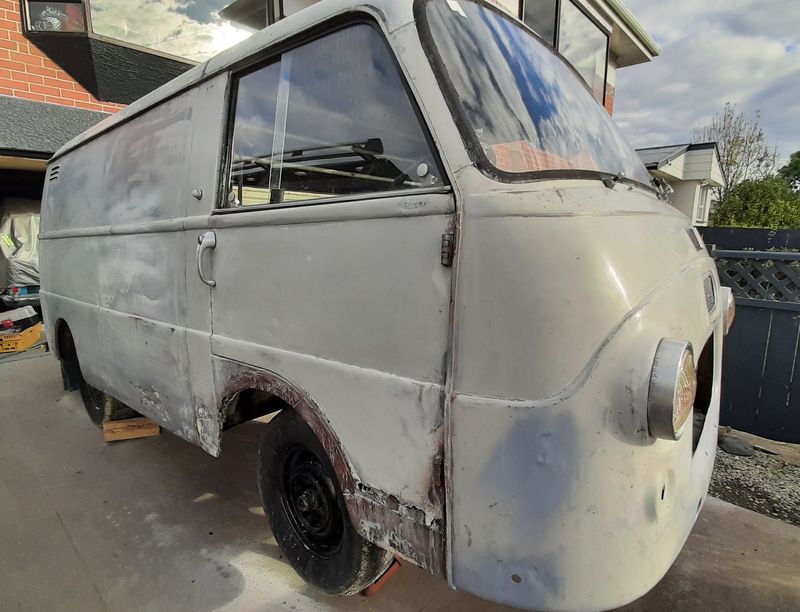
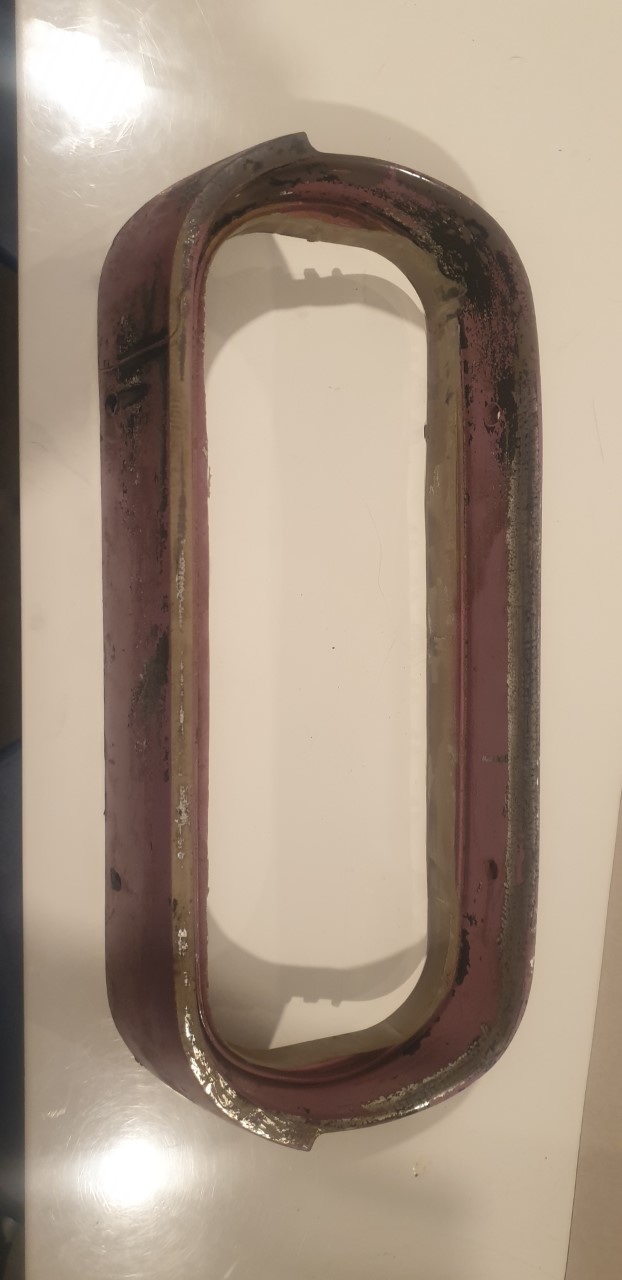
Rust removed and new lip welded in.
 13 points
 -
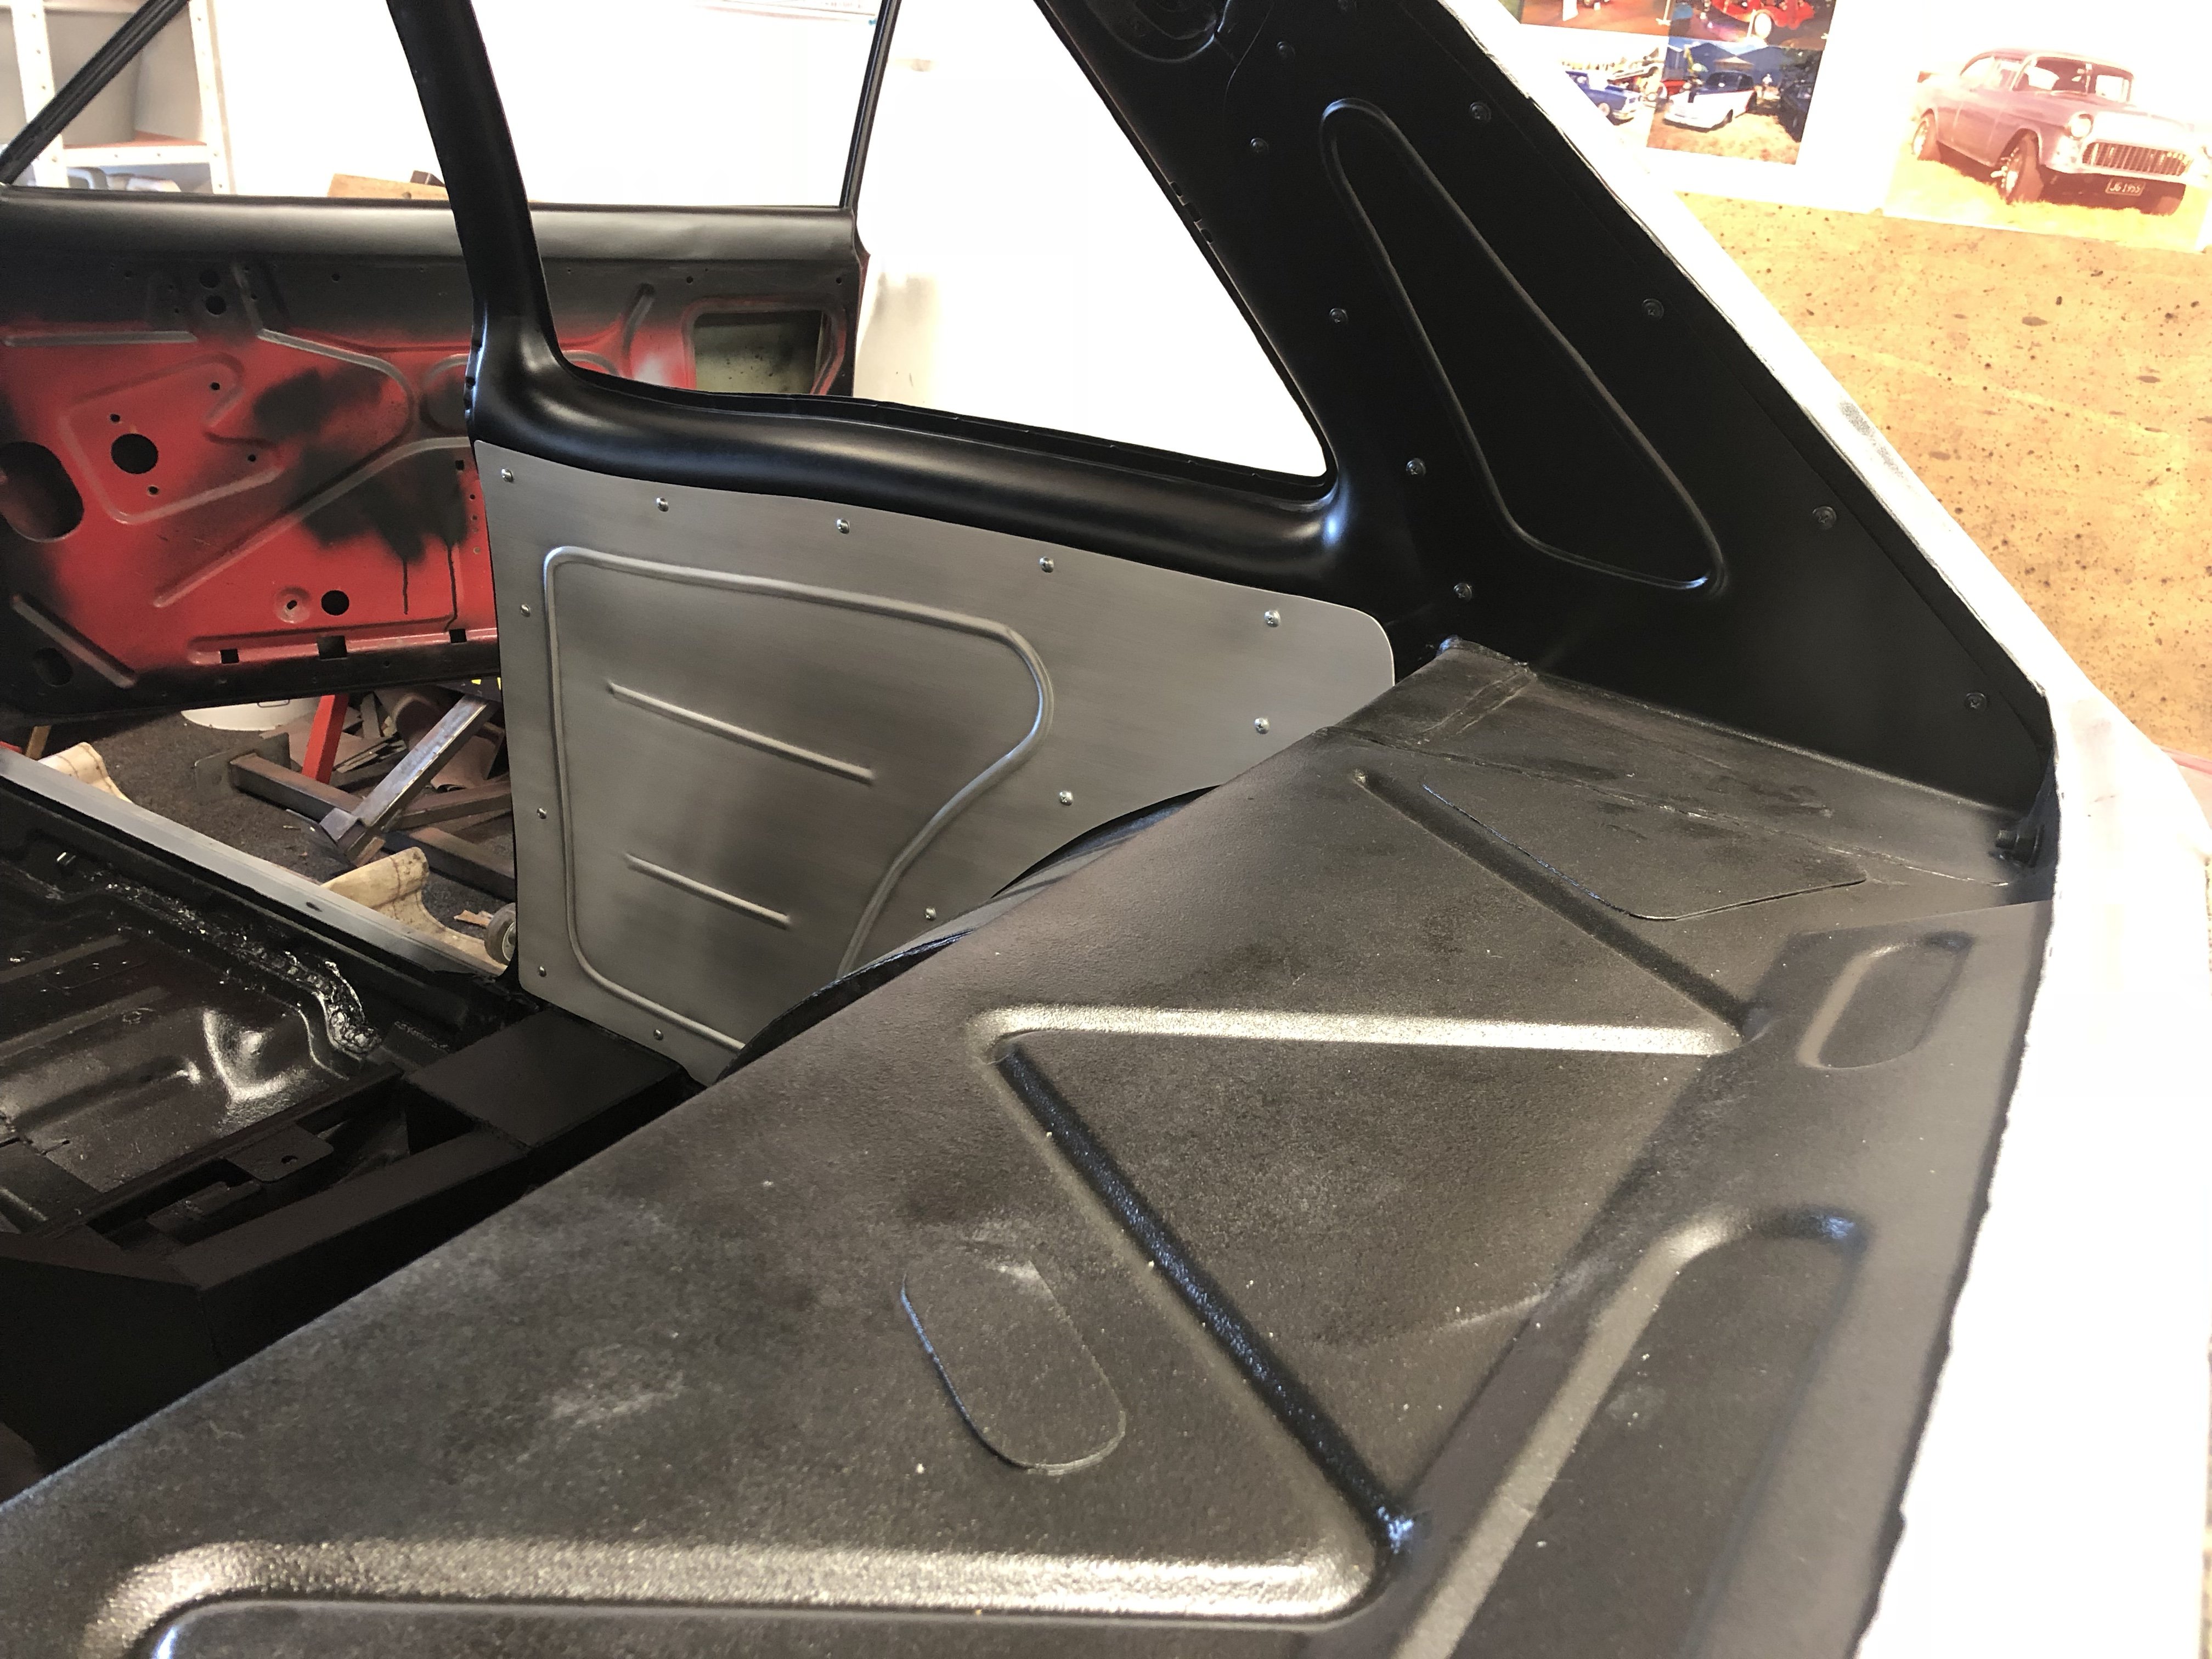
Then i assembled it all together in the dash, although the speedo needs rebuilding everything else can stay. Now onto the centre console....
11 points
-
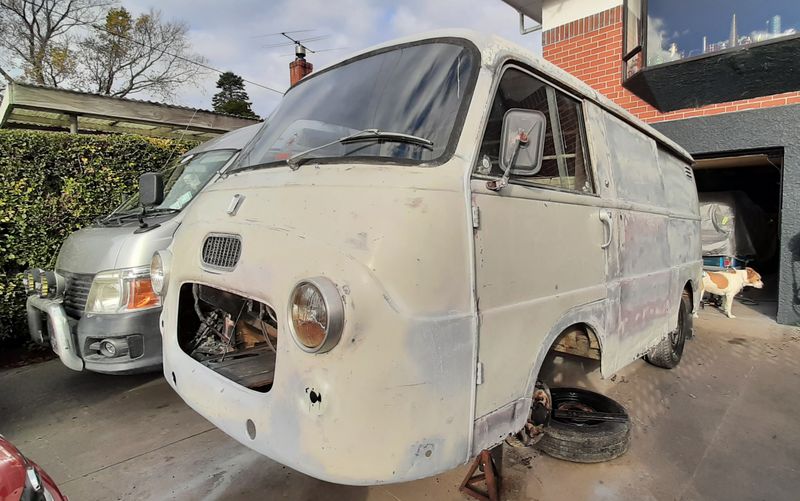
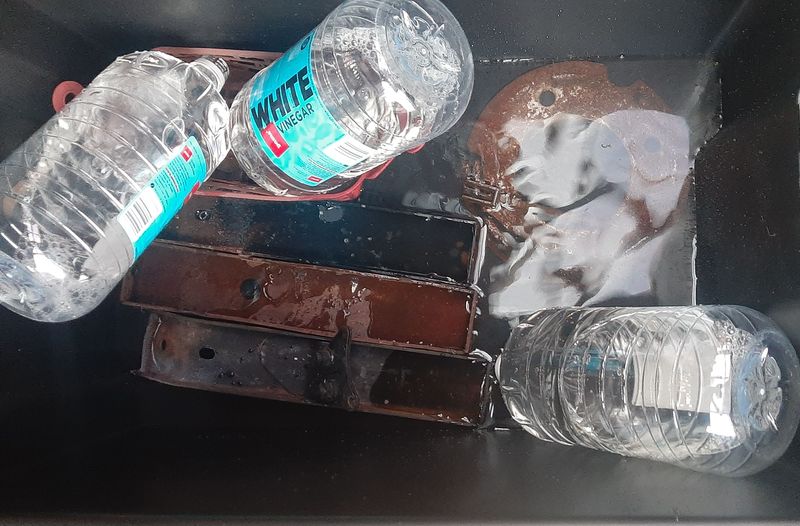
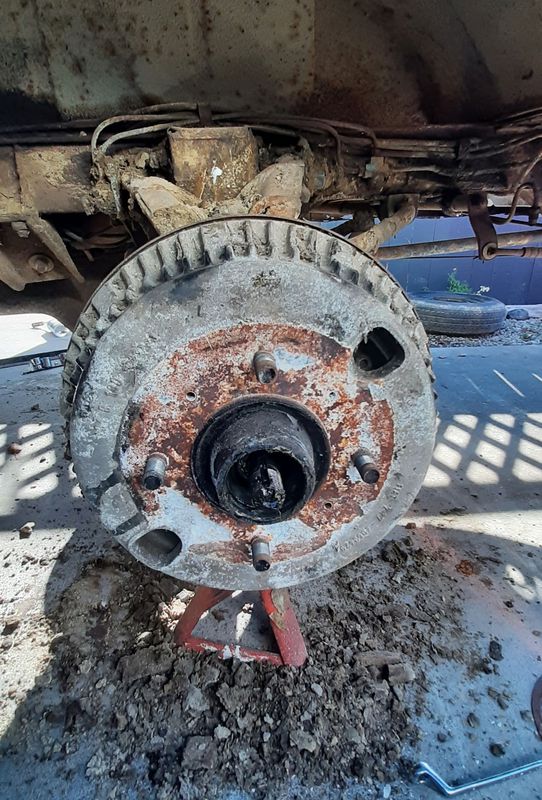
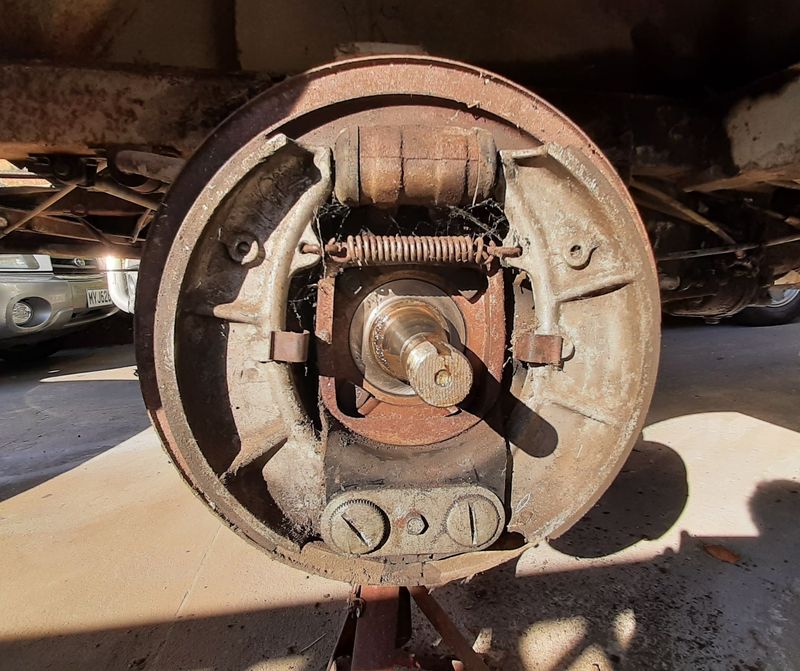
Bit more progress on this, Did some more panel beating of the front end, it had been chinned quite badly on the passenger side especially, and had a sharp bend just below the round bumper mount holes. Now its pretty even and roundedish, way better than before. Once the front bumper is on it will be hidden anyway. Again very finding very little rust holes, there is some, obviously, as well as surface rust, and there are a couple of tears as well, but its held up very well considering. Removed the handbrake mechanism so i could tidy up the handle, and the lower mechanism was scraping on the valance, so that all got removed for a clean paint and grease. its crossmember also got a light sand of the surface rust and a squirt of 'not quite body colour' spray paint as a test, pretty happy with that! Check out the factory cut out for the end of the mechanism, it as all chewed up around the tip of the pivot before Looked good, so did a bit more sanding Its starting to look way less shitty. Still shitty, just less I also got onto the brakes, i needed to pull the fronts to inspect and start parts hunting. 10" Aluminium drums front and rear. Check out the pile of dry dirt and grease i chipped off - its caking everything that pile is just off the backing plate. Ive only done the fronts so far, ended up having to pull the hub off, as the drum had differentially welded itself to the steel hub and the puny M6 spacer plate retainers that get moved to another set of holes were not going to shift it. Got it off in the end and its all clean and dry and no damage. Im glad the drums especially are ok they are simply NLA. Cylinders are rusted stuck tho but they are quite cheap, shoes less so (rears are cheap, fronts are $$$) I bought 16l of vinegar for about $24 and started chucking bits in after i water blasted them, ill check them in the morning. Someone had already taken one of the rear brakes apart already so i have those bits in a shopping cart already. The Brake and clutch master cylinders were already removed too, but praise be, they are not seized. The clutch master and slave is the same as my 2300 wagon, ie Lada stuff can work, so that's good. Im very very happy the brake master cylinder is ok. It is available but not cheap, because its a part that is shared with both Ferrari 330 and Lamborghini Espada, lol https://www.okp.de/xtc2/Ferrari/45-Brakes/Master-cylinders/Brake-master-cylinder-Ferrari-330-1-series-4-holes-flange::19478.html?language=en
7 points
-
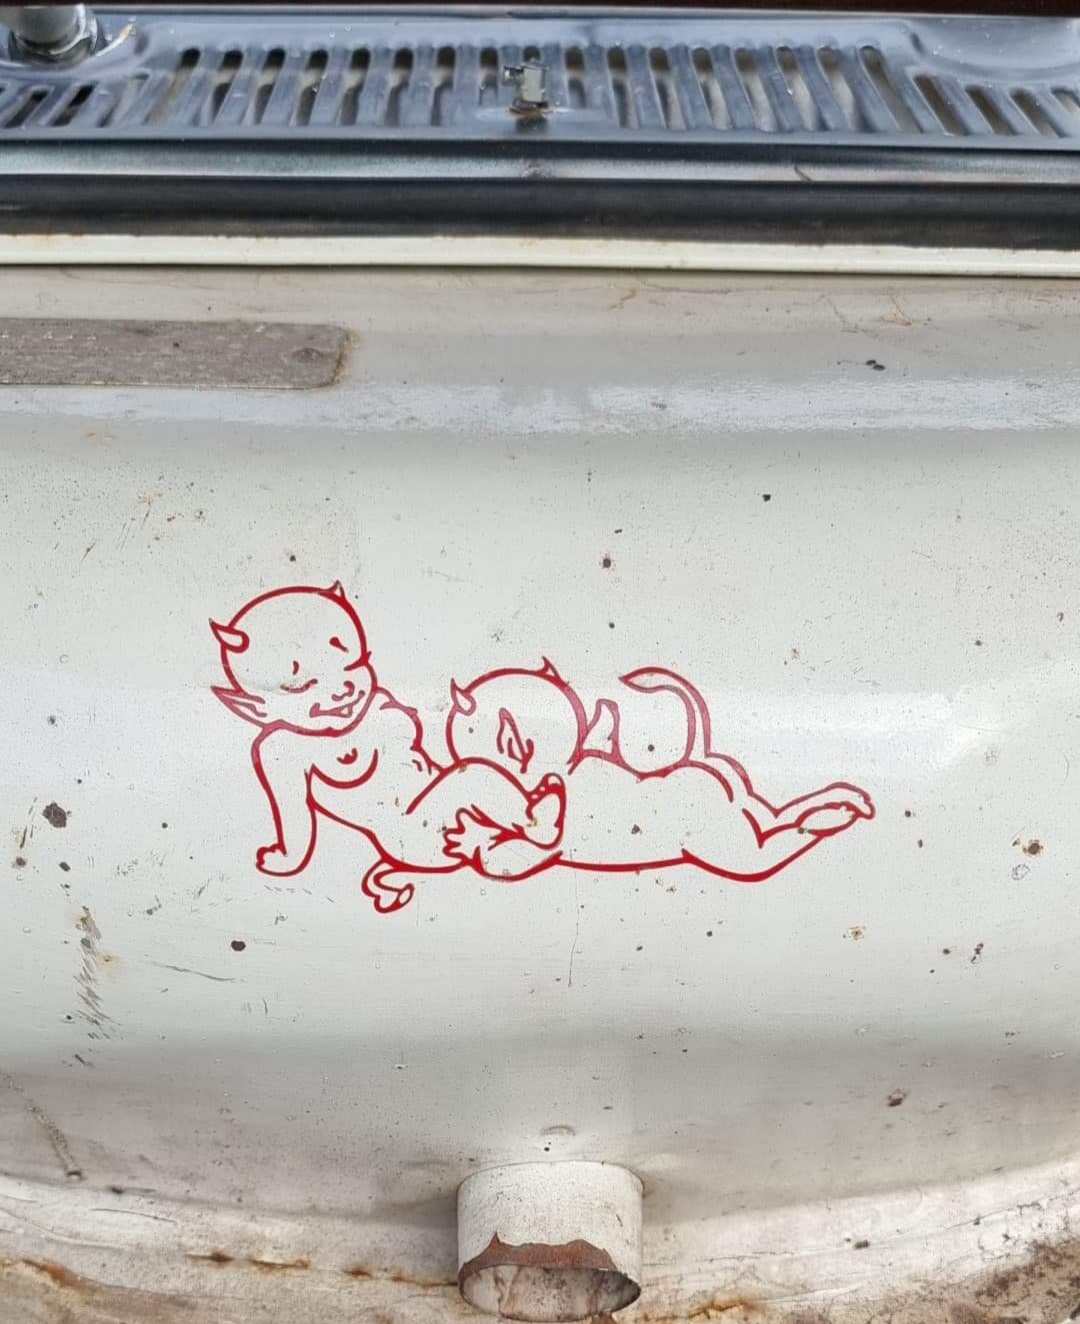
Then this happened !
7 points
-
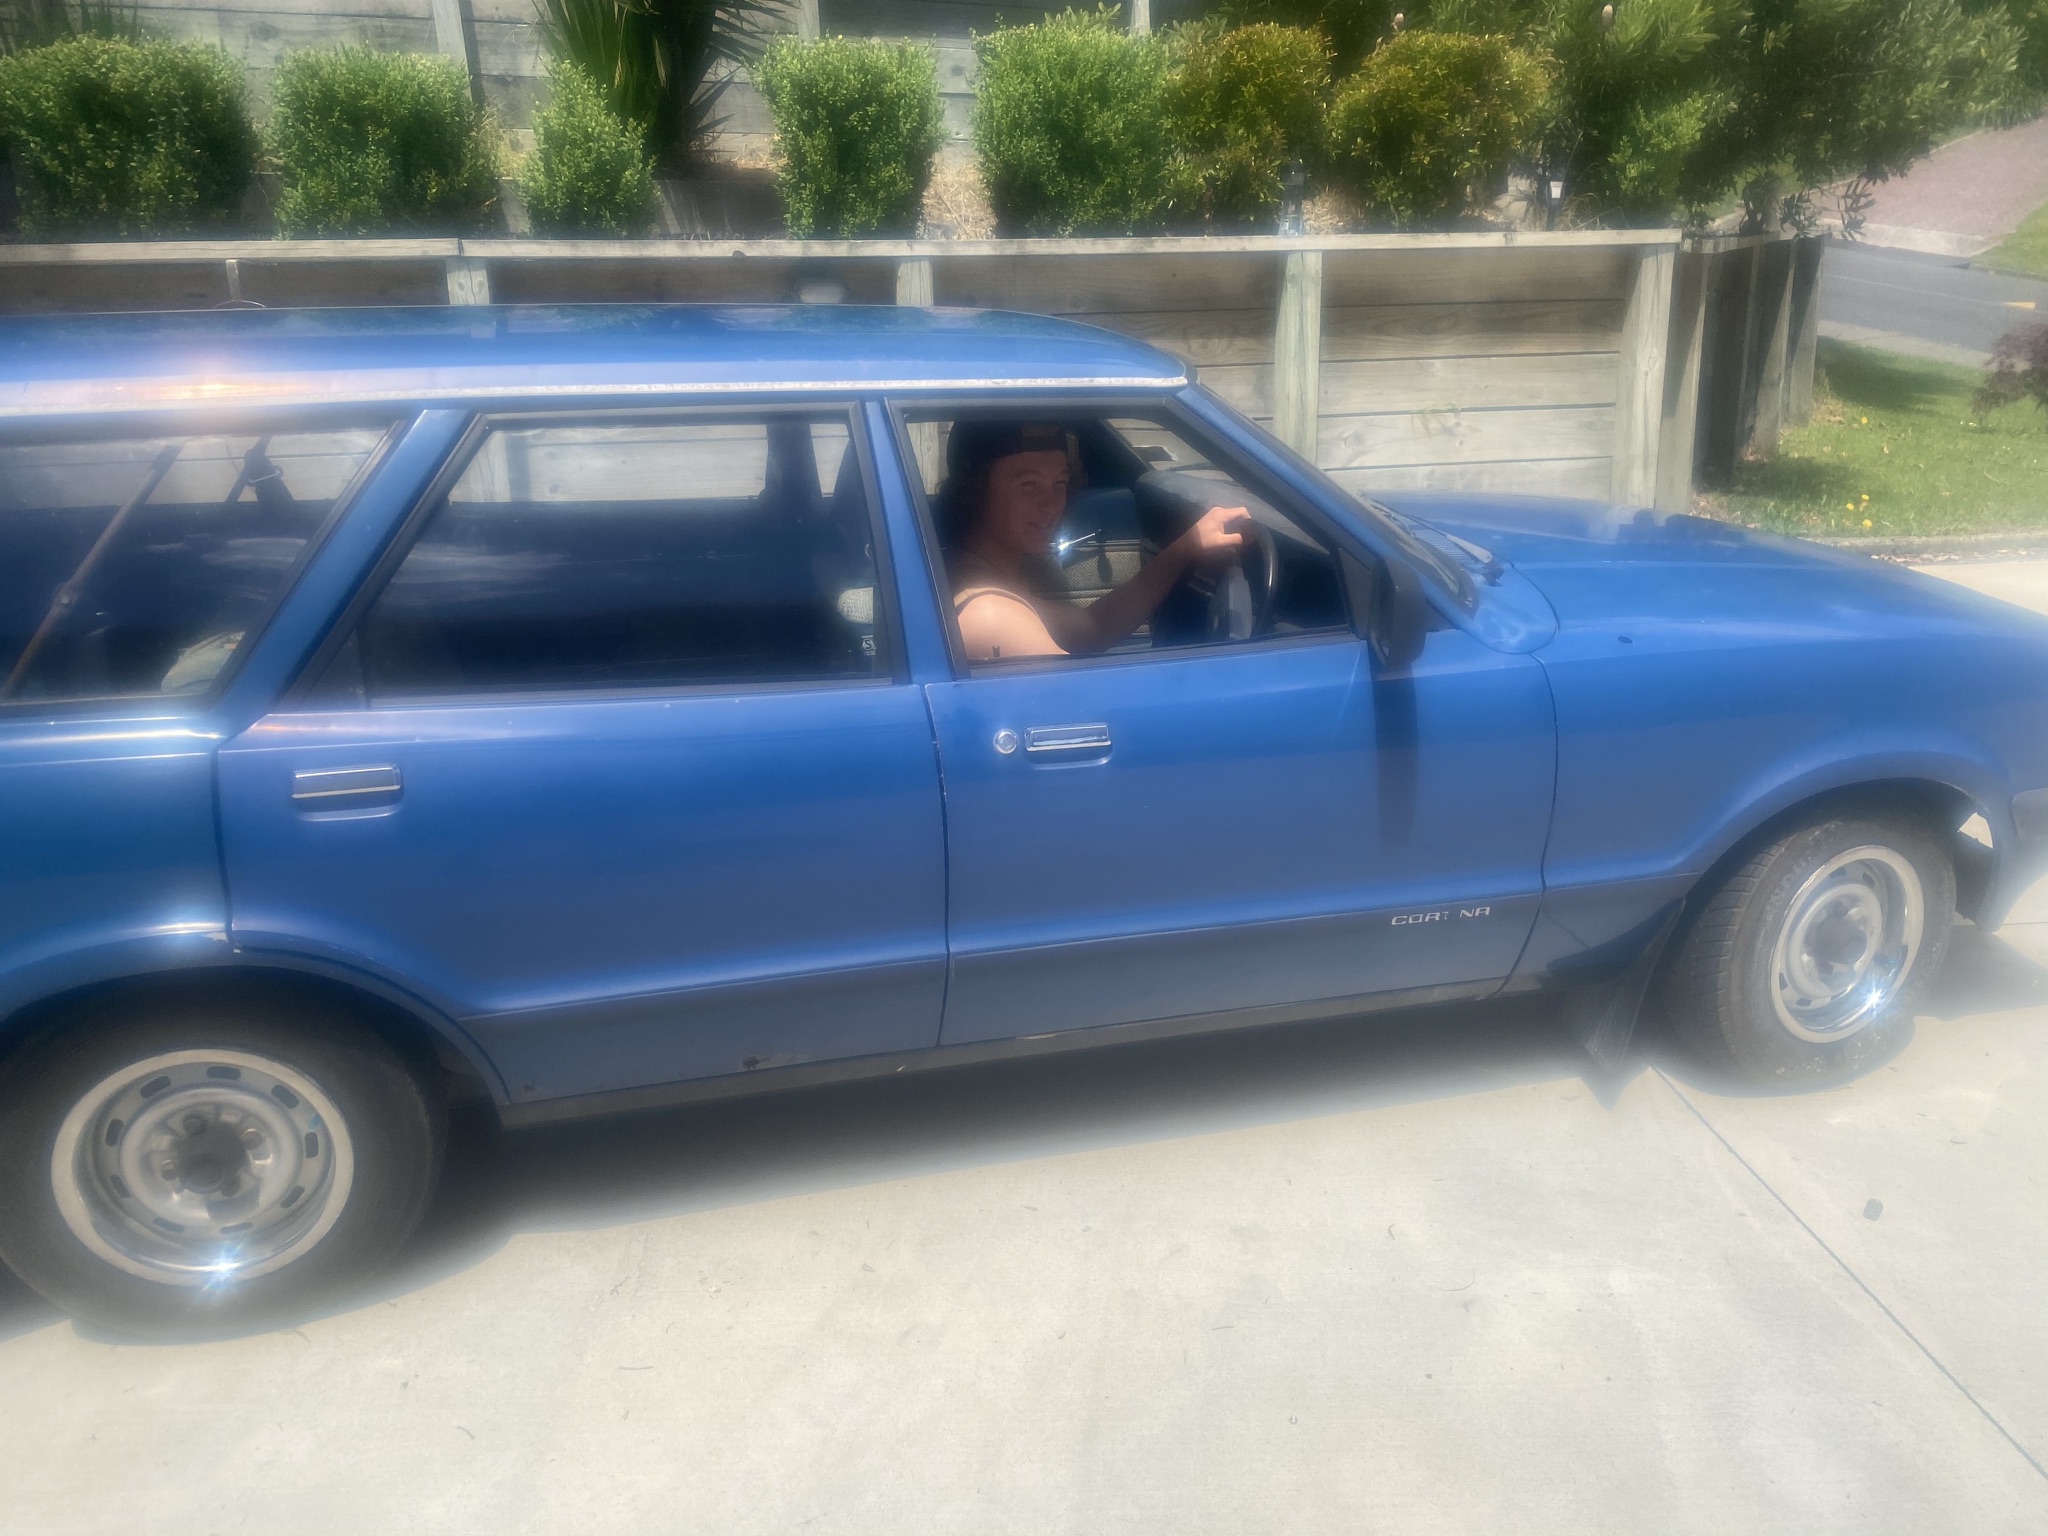
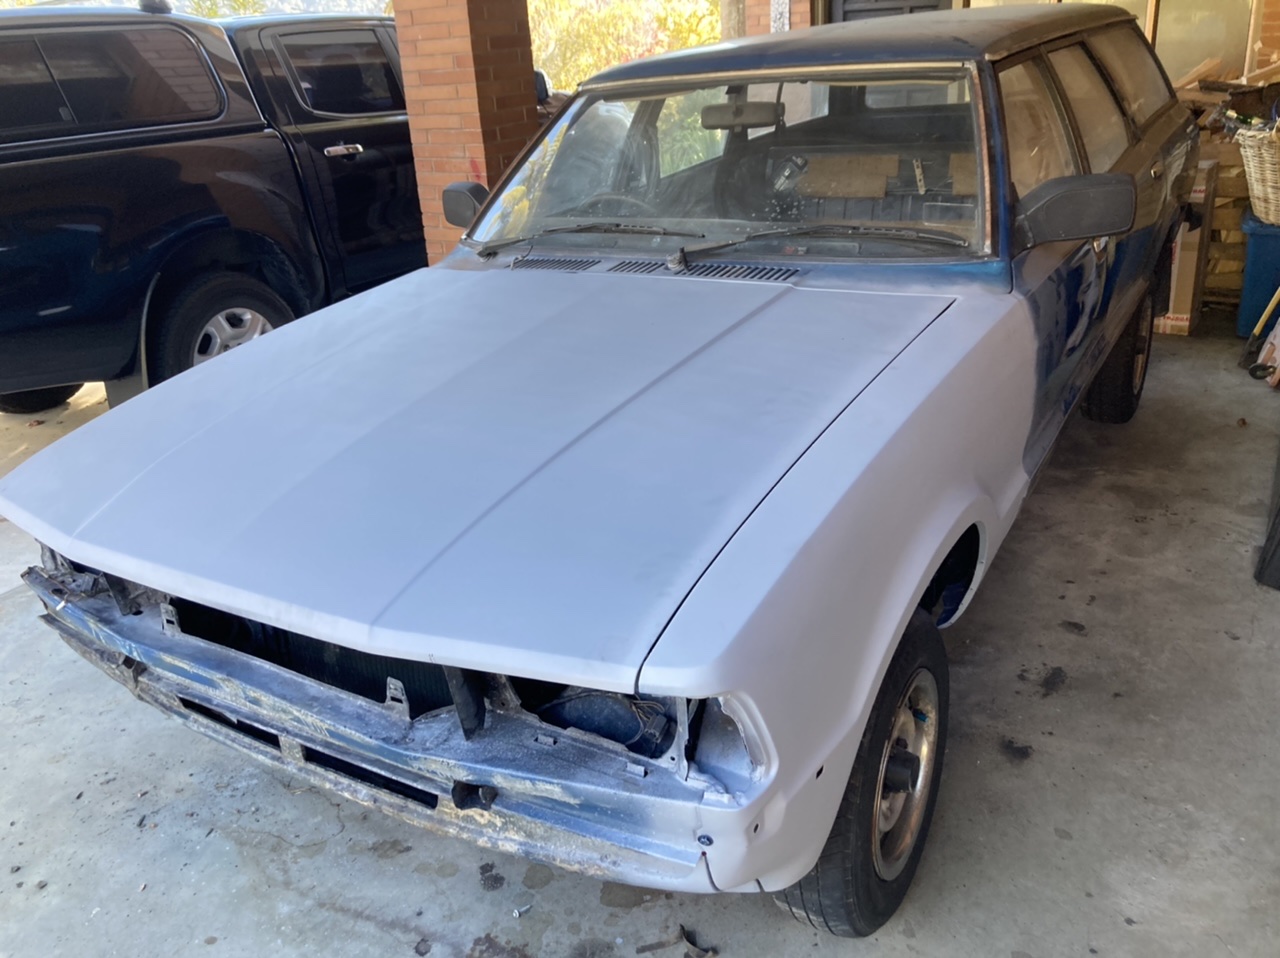
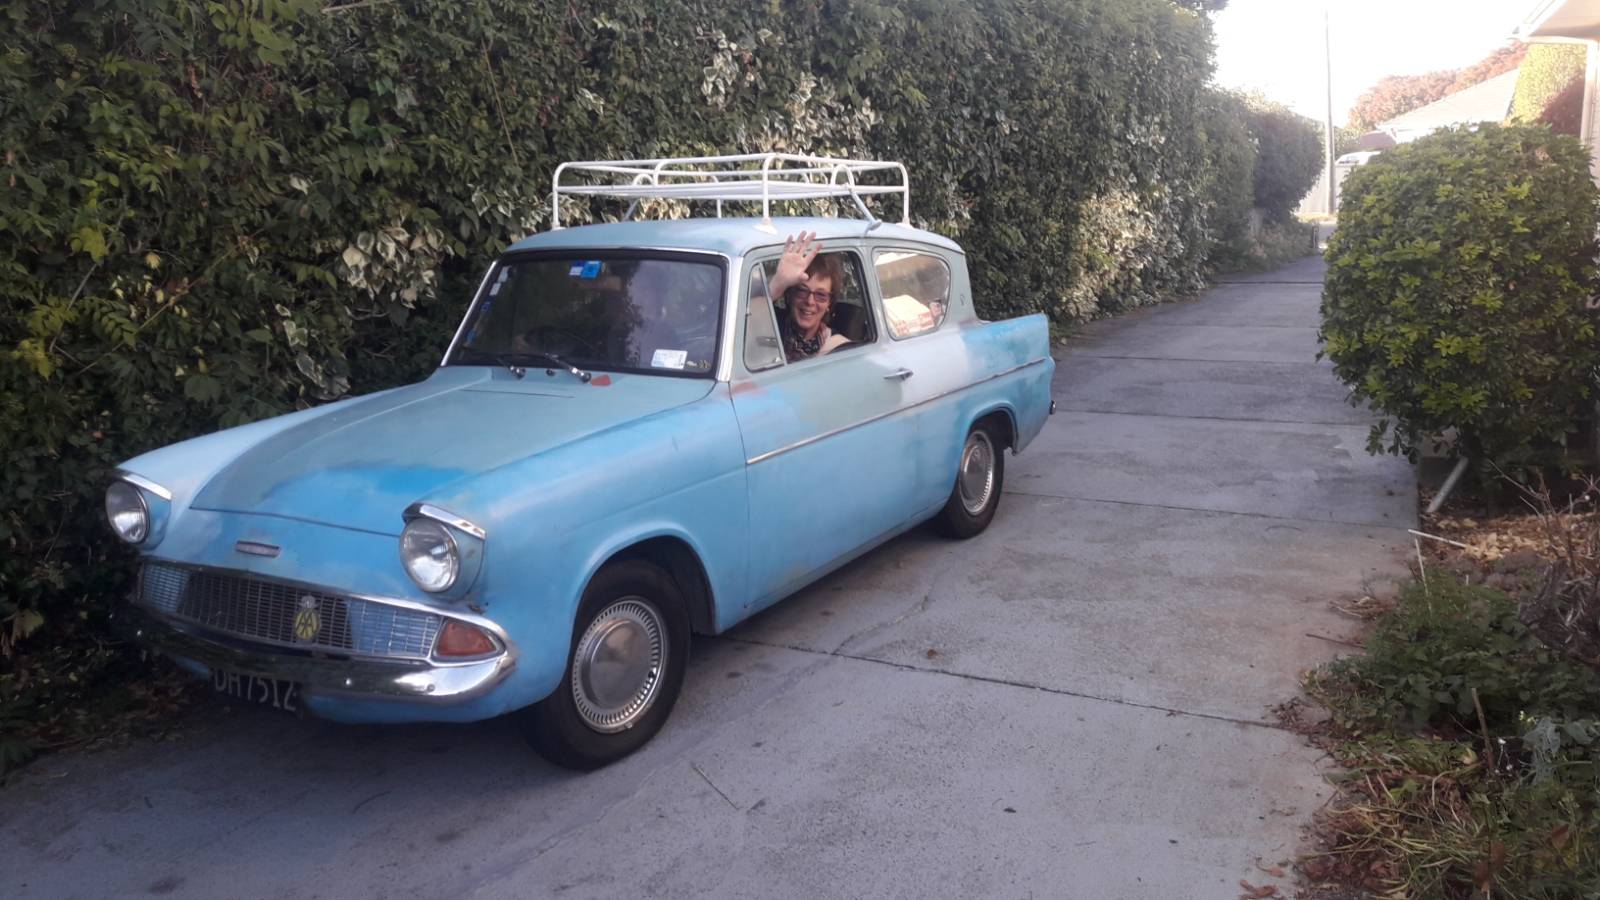
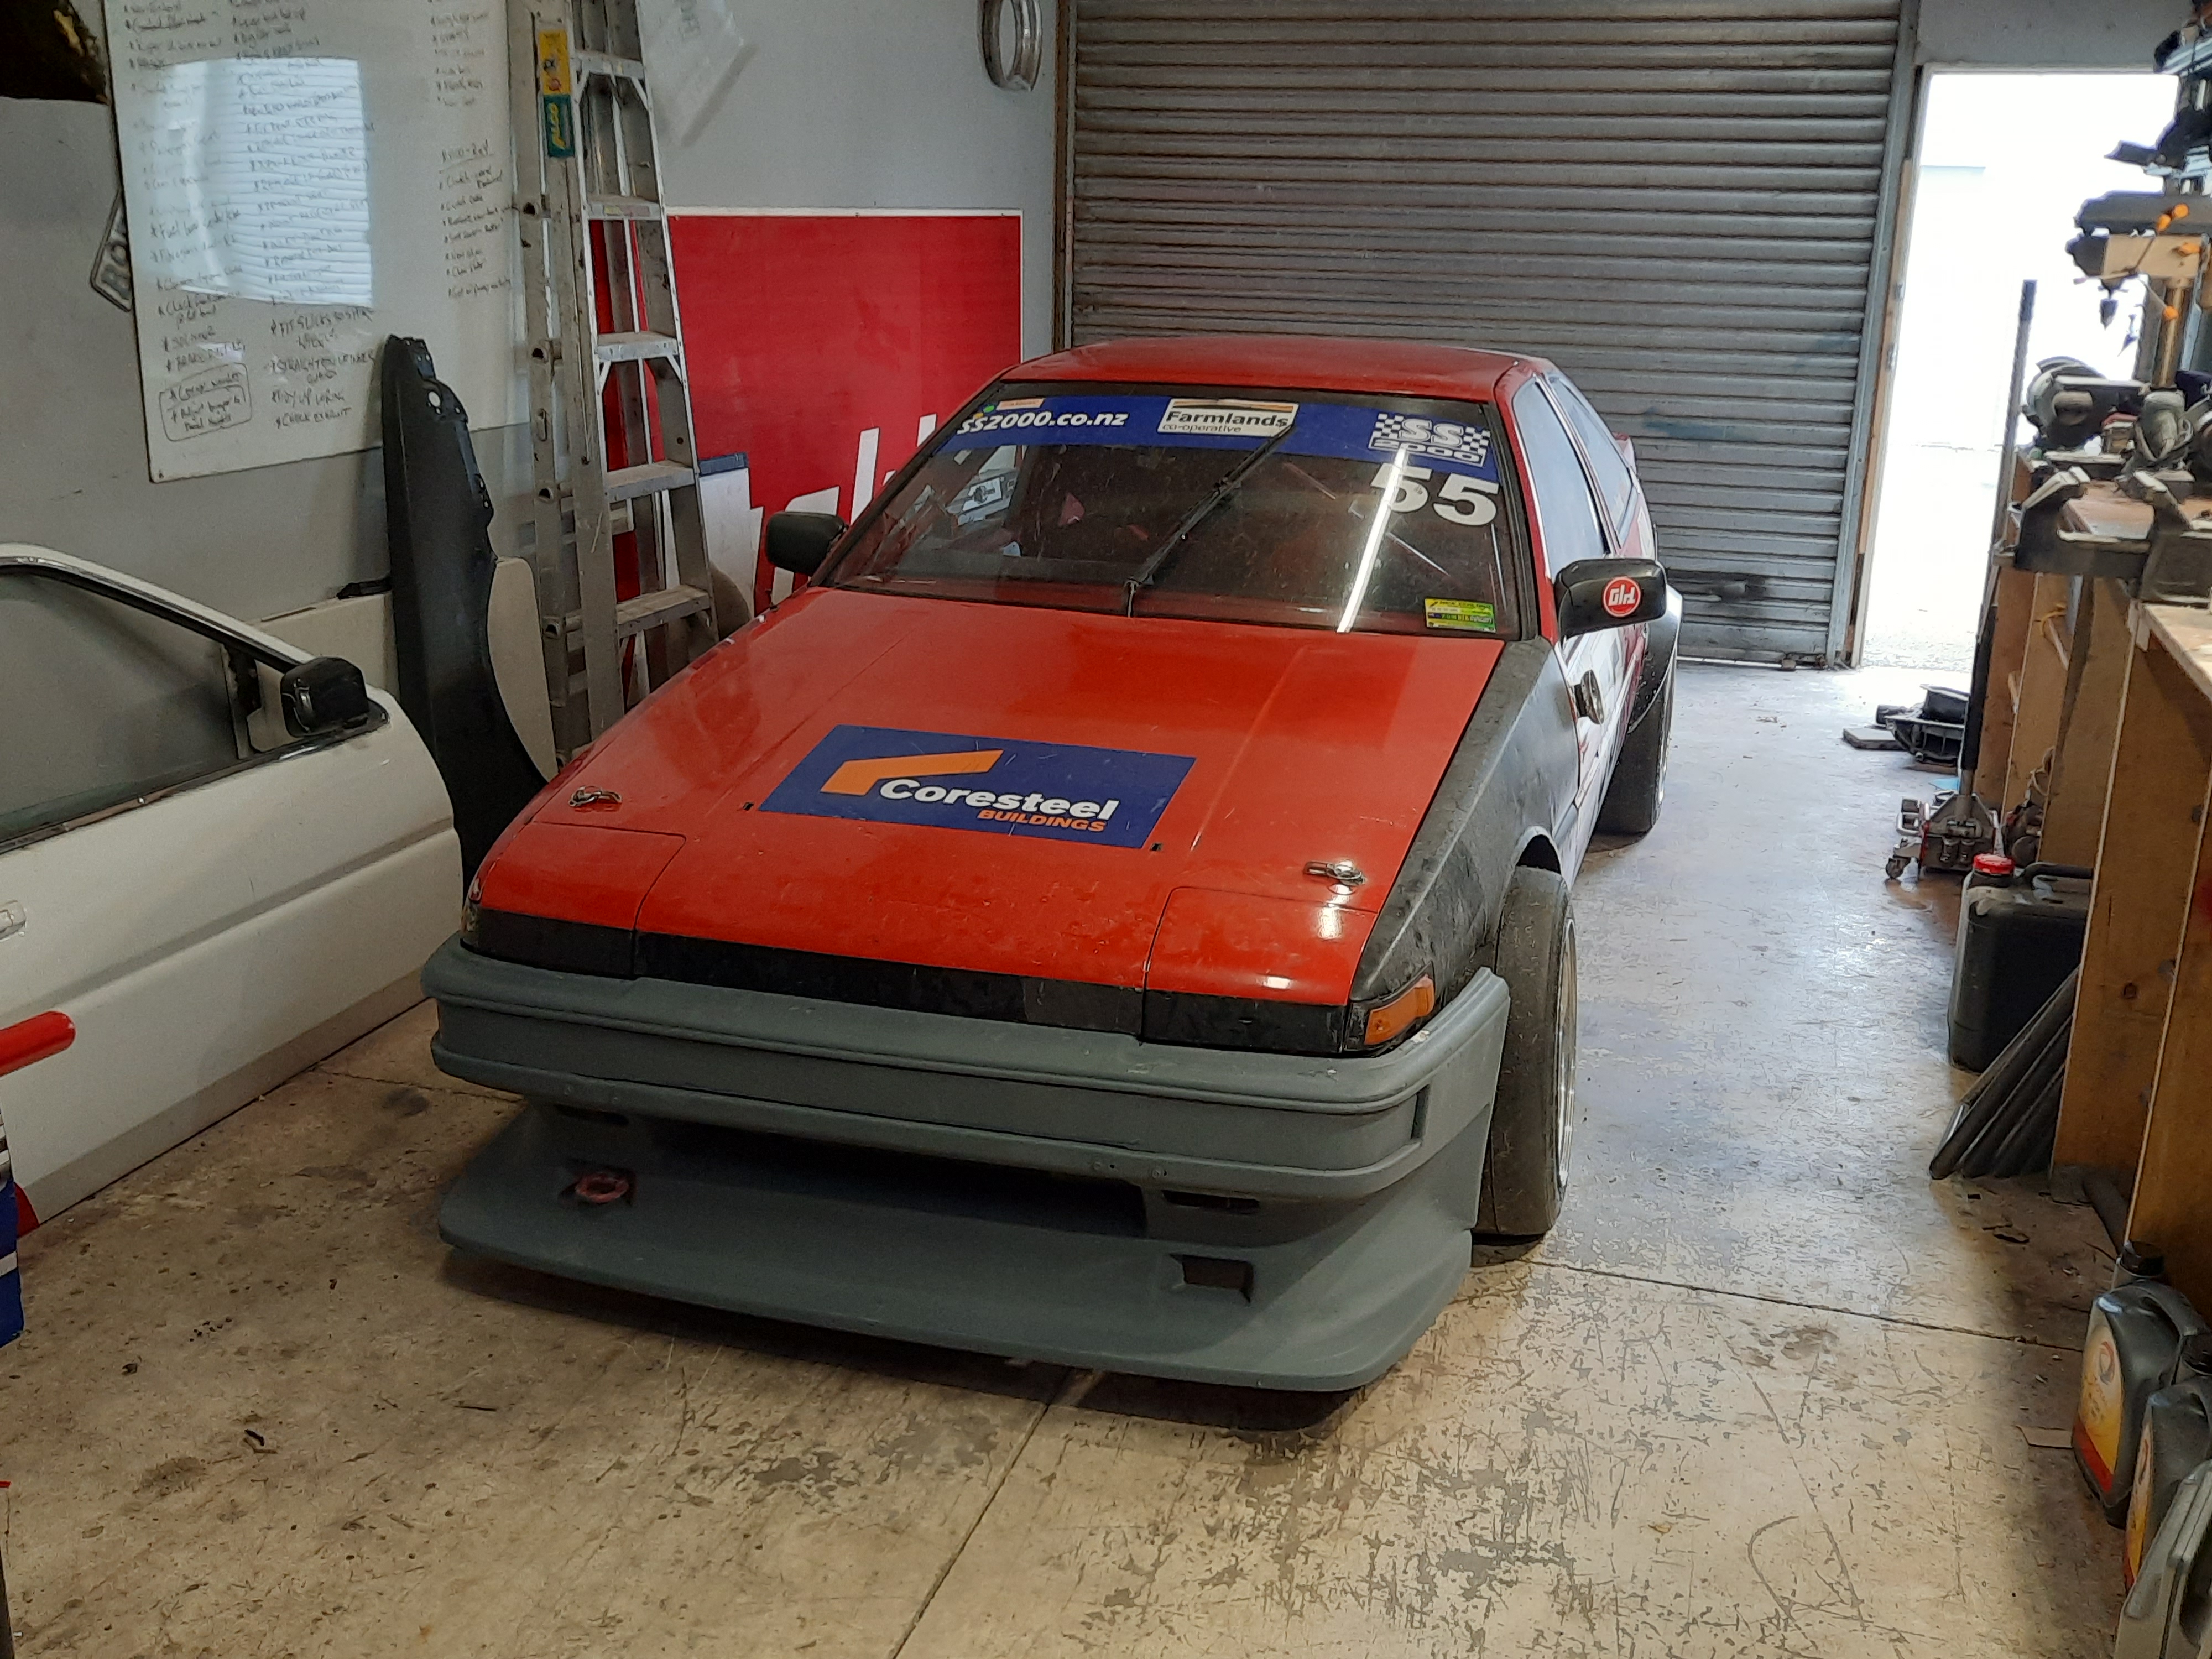
My son bought his first car. A 1981 Mk5 Cortina. He is 15 and we are going to restore it together. In other words I’ll be doing up a car.
6 points
-
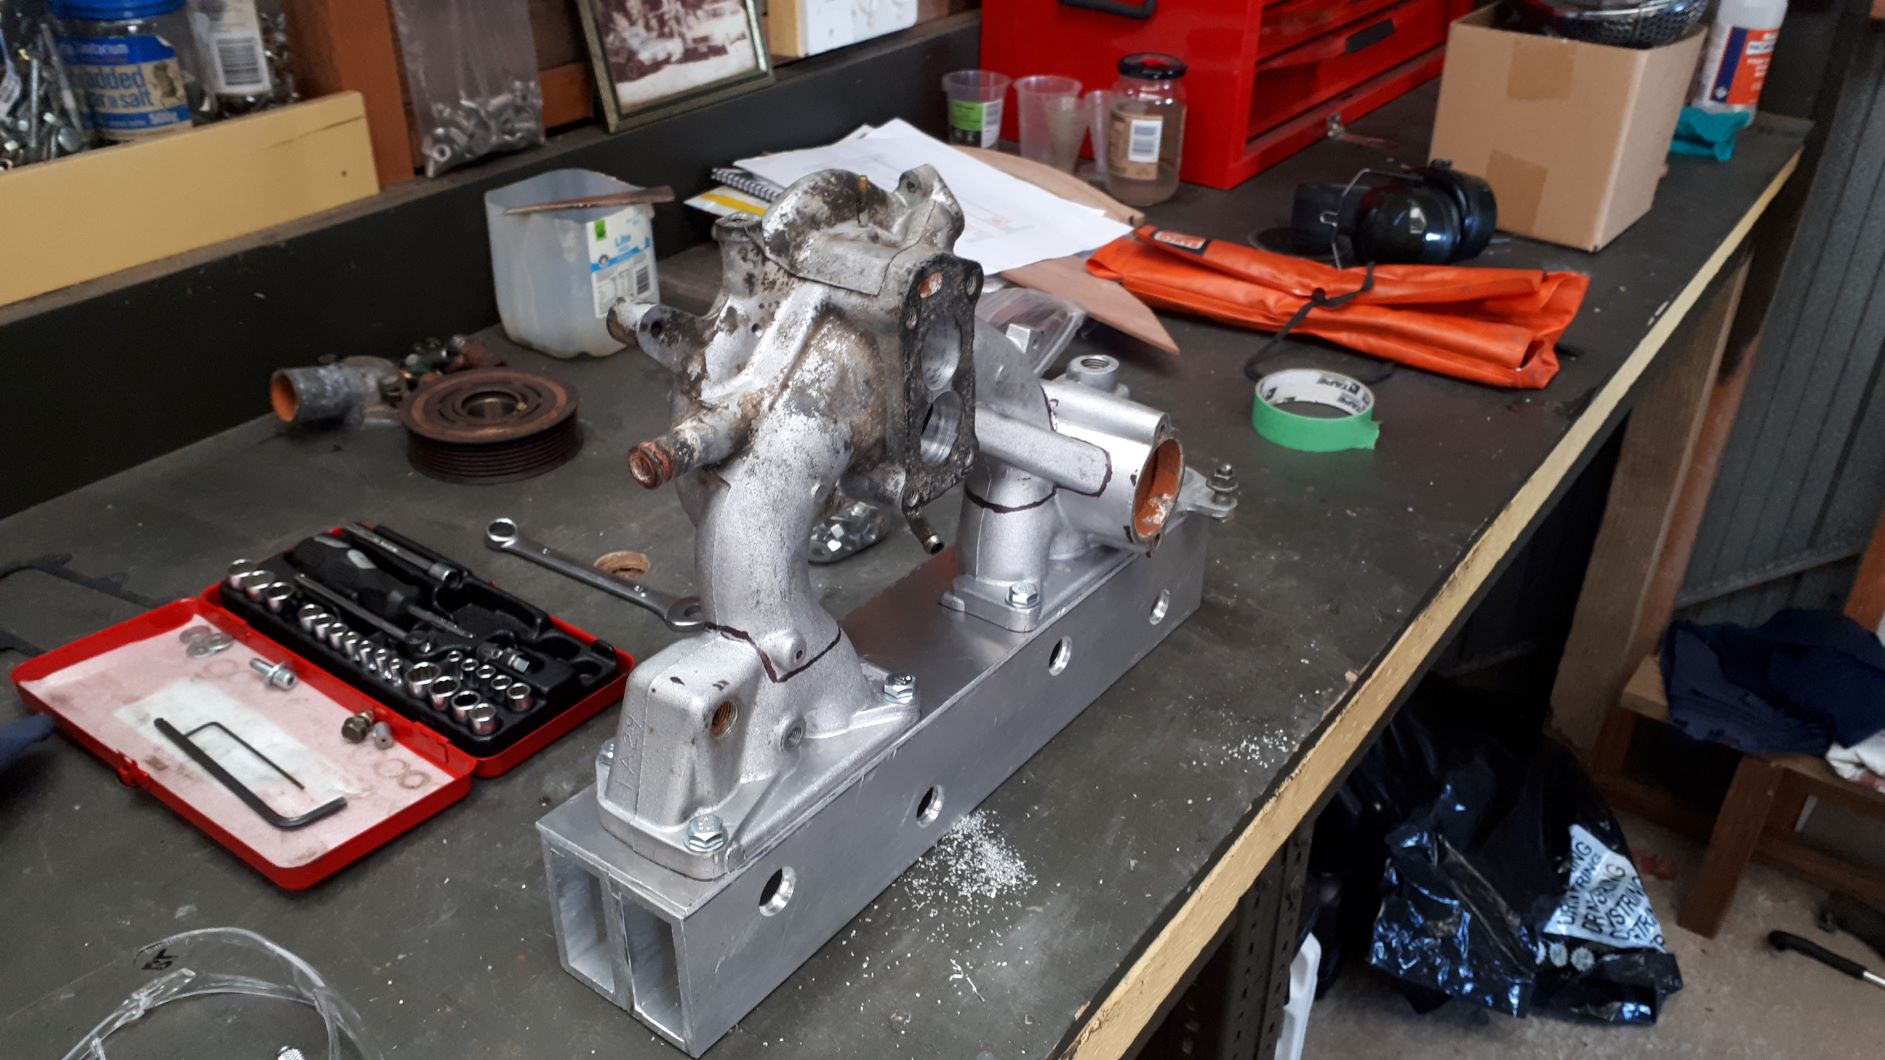
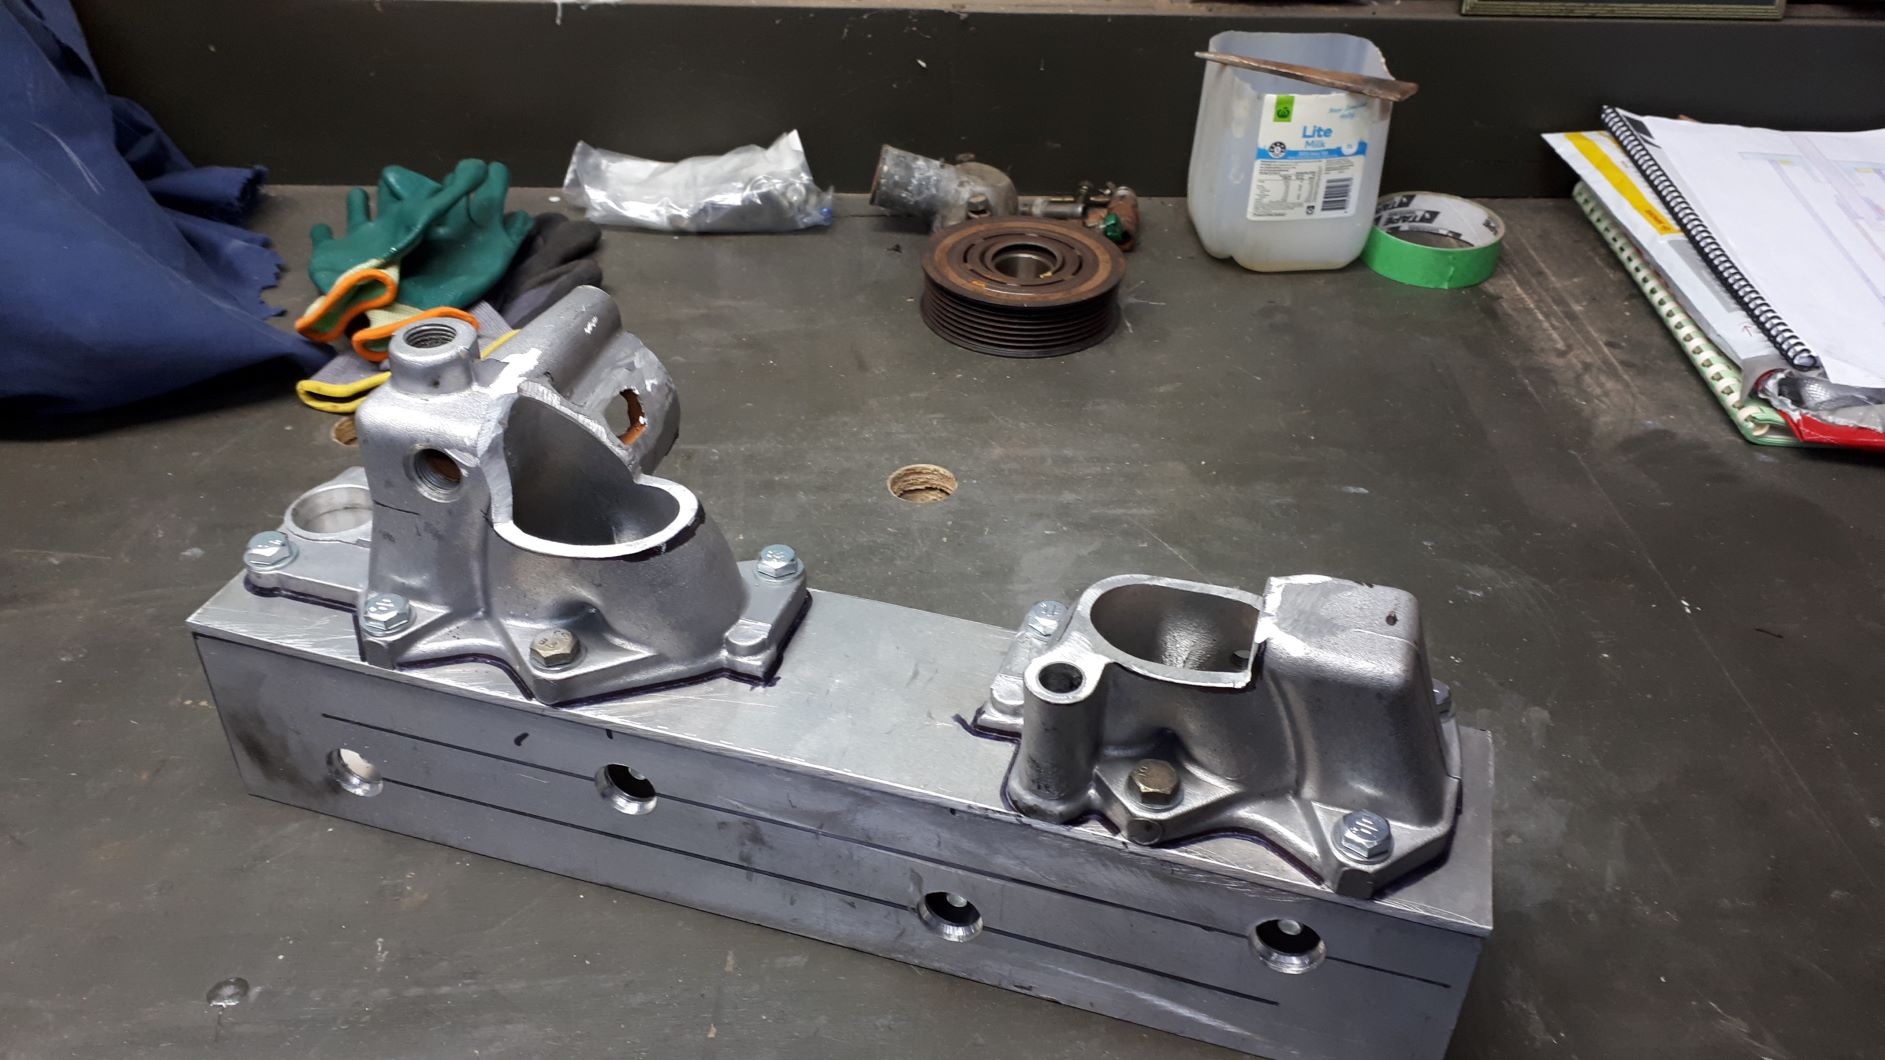
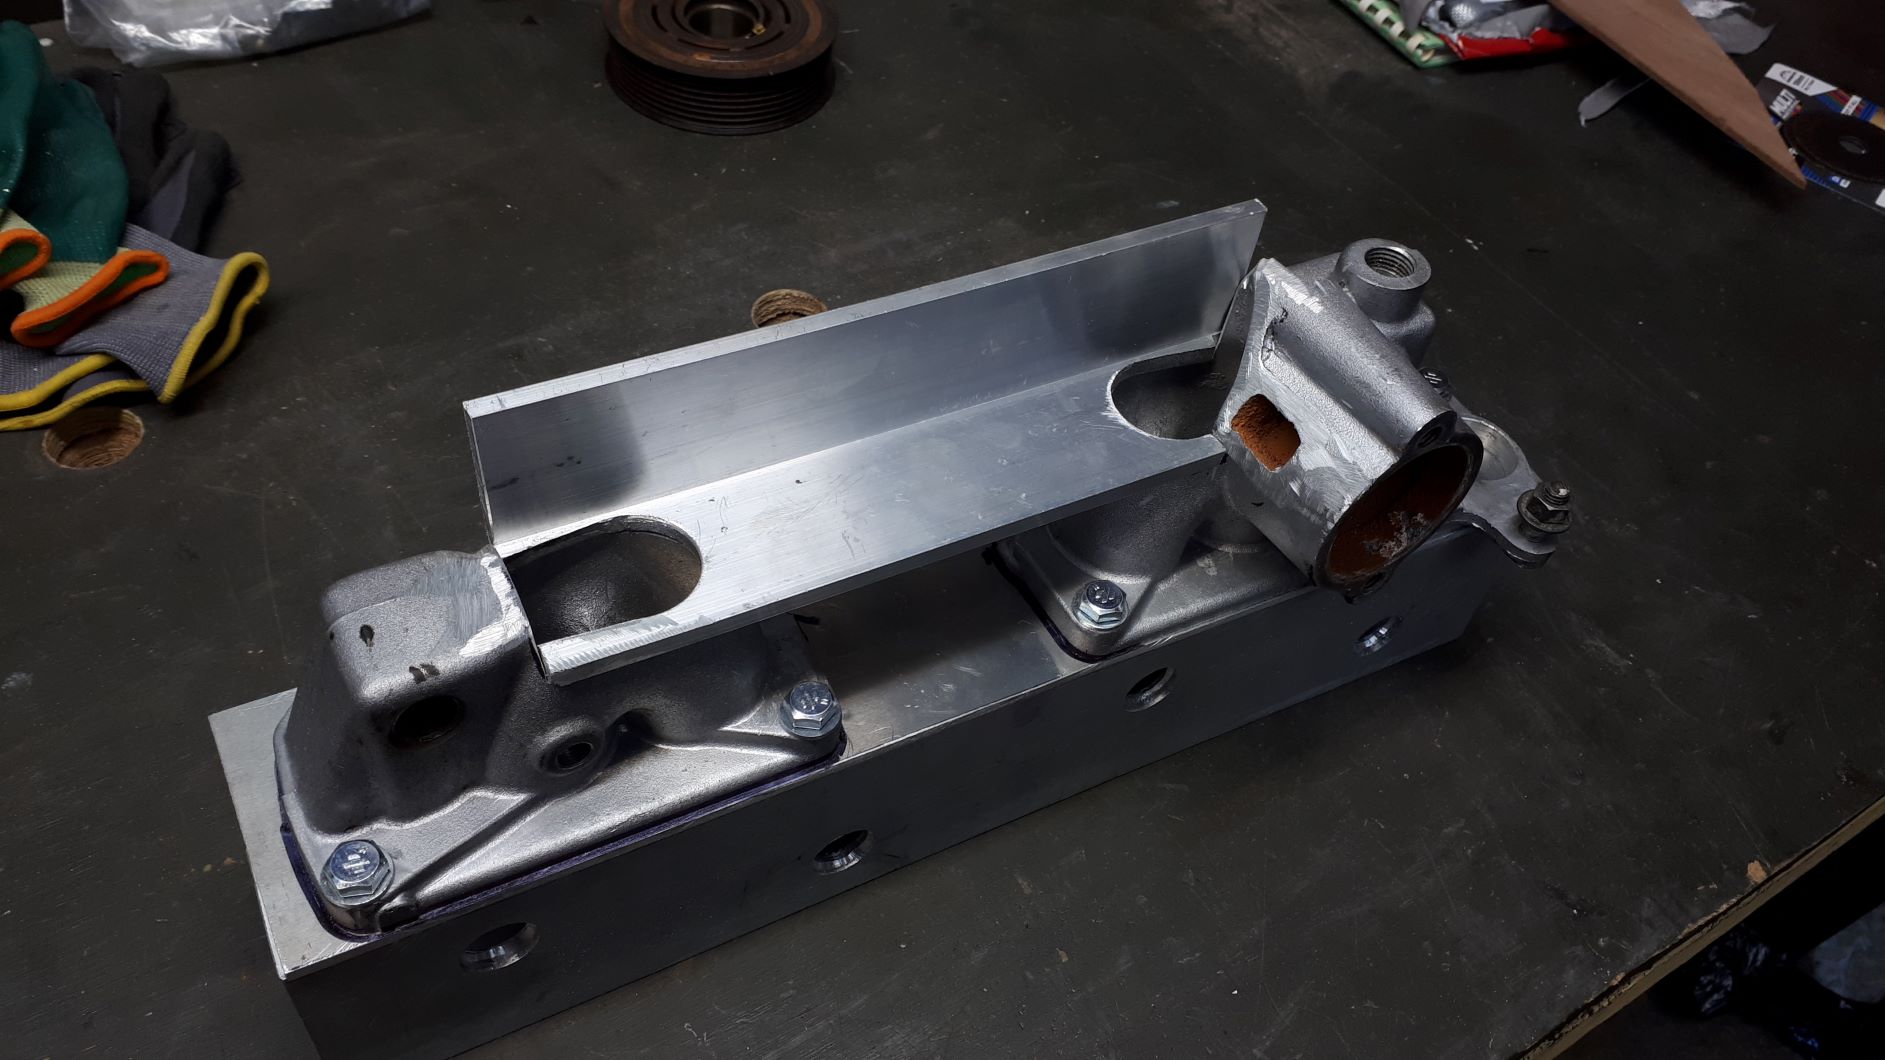
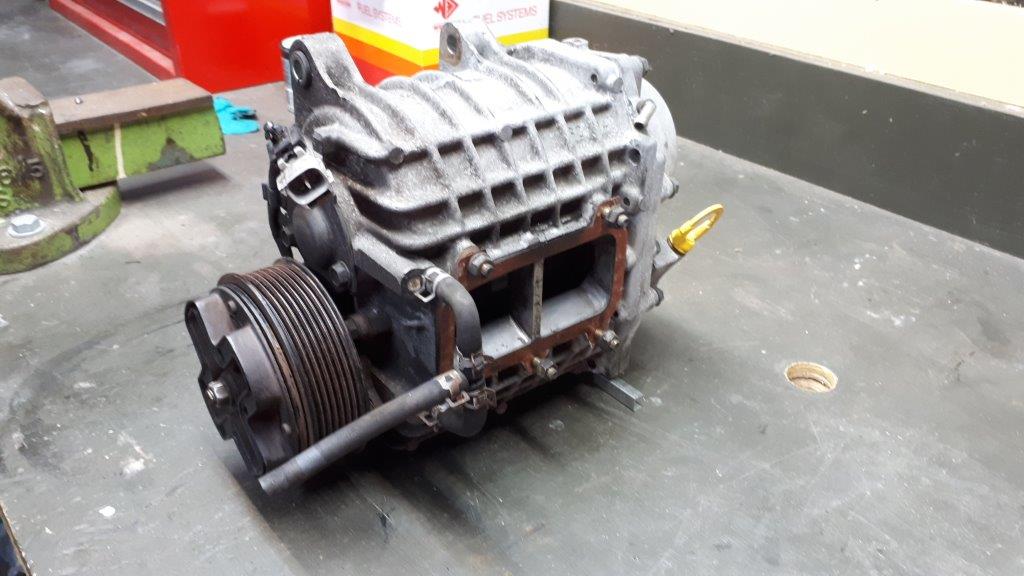
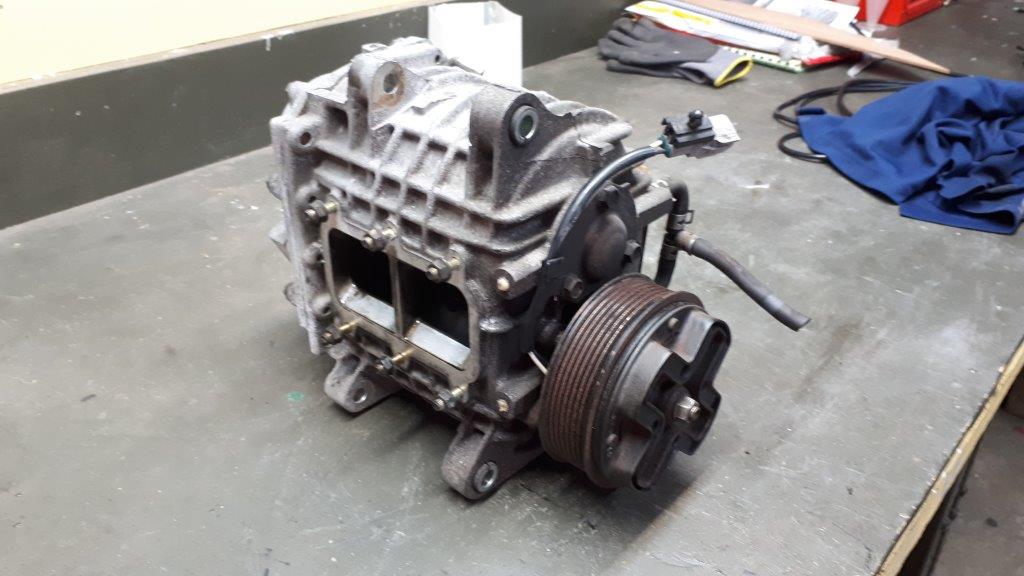
Big thanks to @MaxPower for helping out with a spare manifold from one of his vans. I checked online and for some reason you can buy a supercharger manifold for your Corvette or Mustang but there is no off the shelf option for your 1982 Mitsi Sigma. I will have to make one, what could possibly go wrong? I will post more pictures as the manifold comes together
6 points
-
I'm willing to ignore the fact that an XR100 doesn't tang, and that it got ran over after Arnie saves John Connor on his potato bike (the ultimate shame)5 points
-
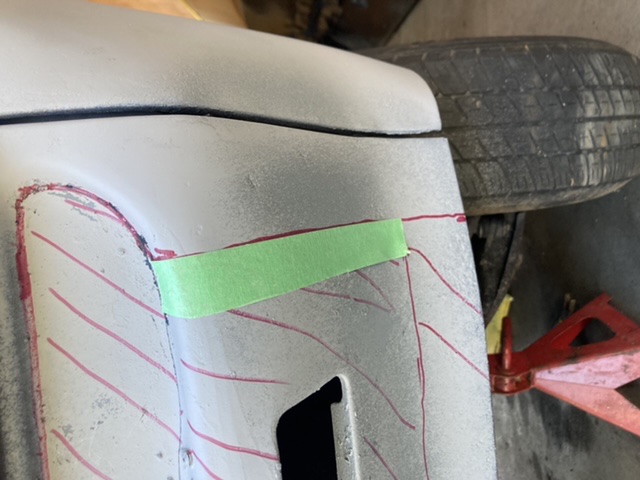
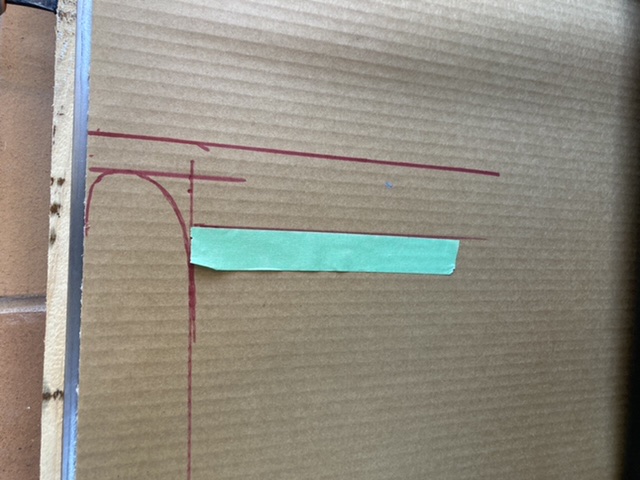
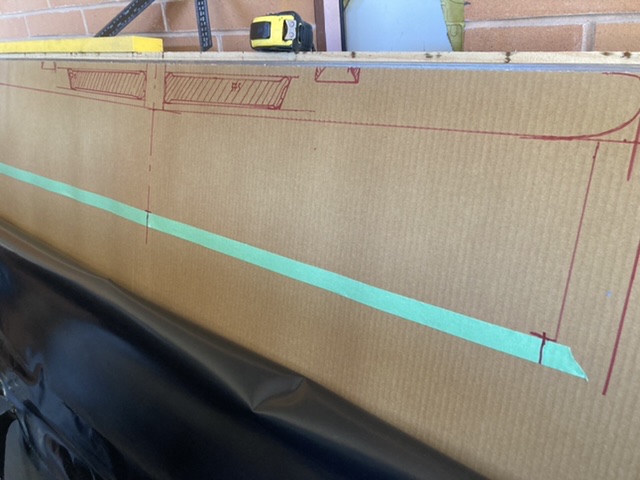
Templating the Valance. This is going to be hard! Might take a few goes I think.
5 points
-
Sanded back to nearly metal and etch primed.
5 points
-
The blue fork boots on the 185 had disintegrated after being ridden for the first time in 20 odd years. IMG_20210426_140223_1 by John Bell, on Flickr AliExpress to the rescue, they're not quite long enough but will do for now. IMG_20210501_131214 by John Bell, on Flickr Annoyingly the rear shocks that I had rebuilt at somewhat of an expense don't seem to dampen very well again, no oil lost so I'm guessing the gas has left. Might have to look to AliExpress for this also. Would like to keep the blue springs though. Have only travelled about 400km on this since reviving it. The jetting on china carb is still a bit off, so will have to experiment sometime. Is nice enough to ride around on though, not fast by any means but would probably tour around at ~80km/h quite happily, will do 100km/h but tach is at 9k by then. Found a gate open close to home and drove up a hill. IMG_20210426_163748 by John Bell, on Flickr IMG_20210426_163800_1 by John Bell, on Flickr IMG_20210426_163817 by John Bell, on Flickr IMG_20210426_163829_1 by John Bell, on Flickr5 points
-
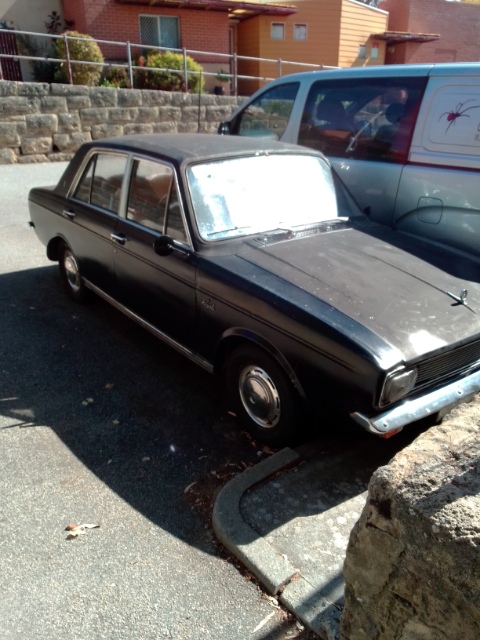
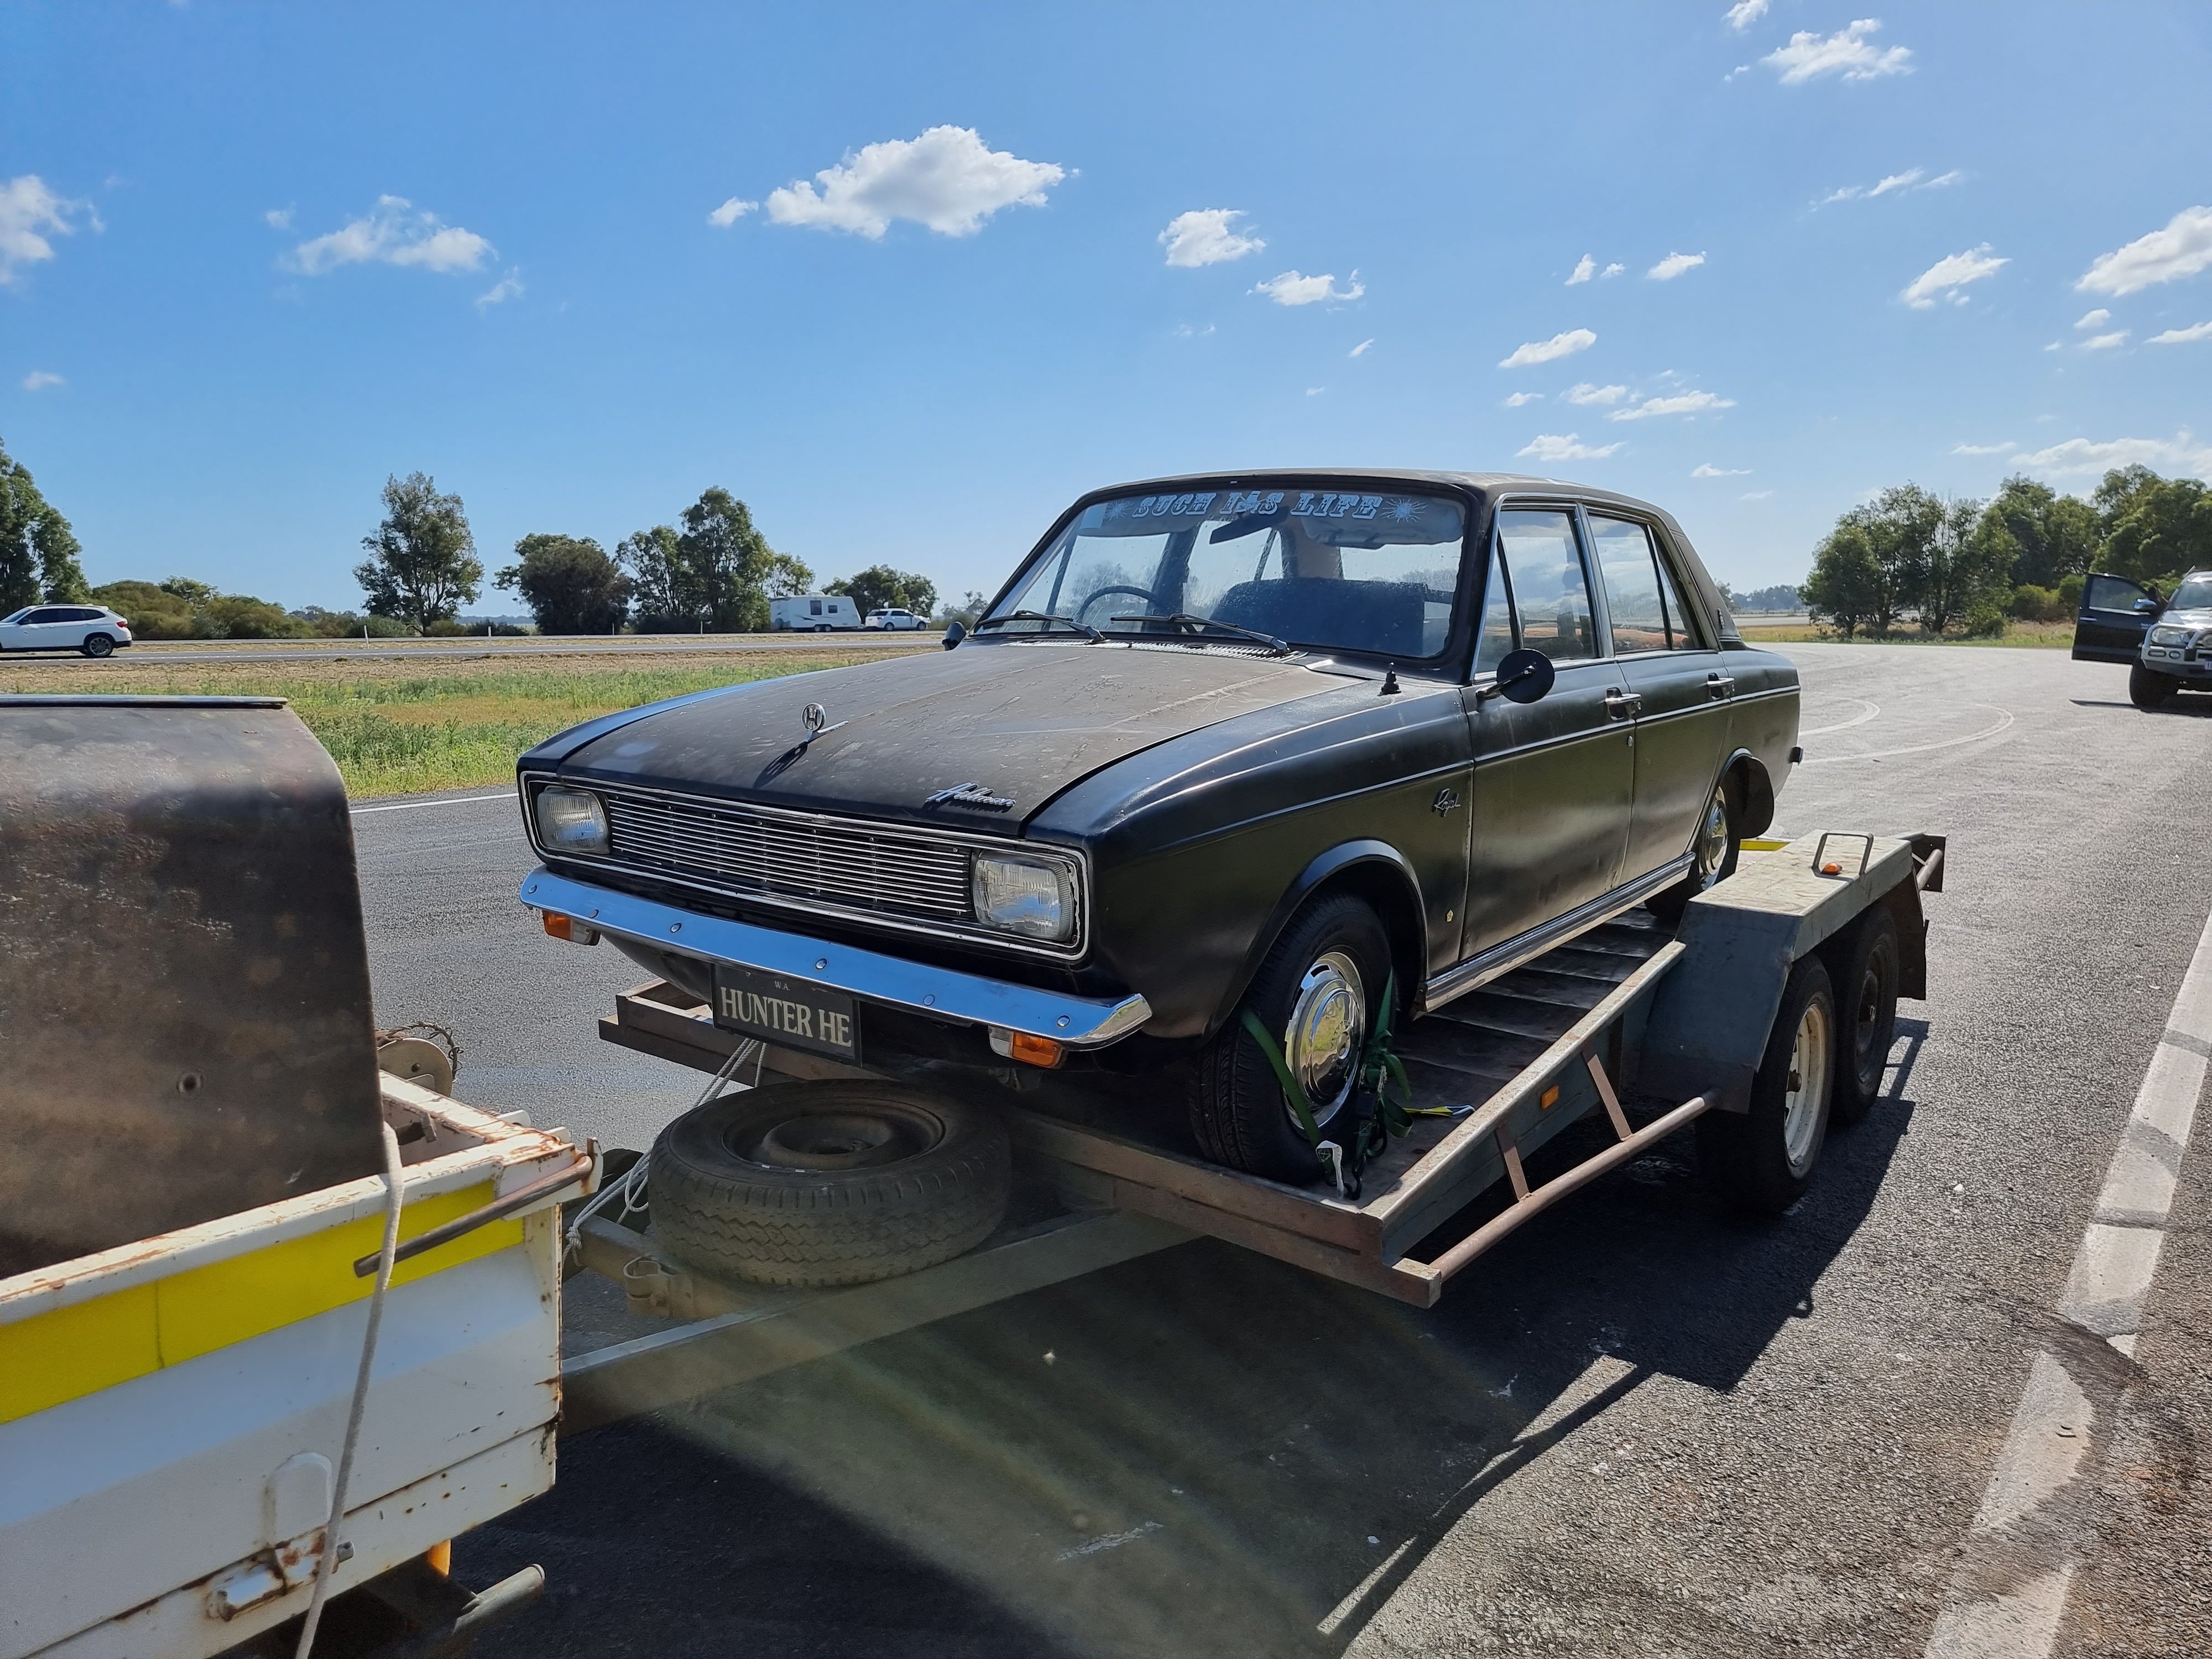
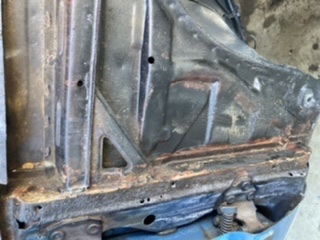
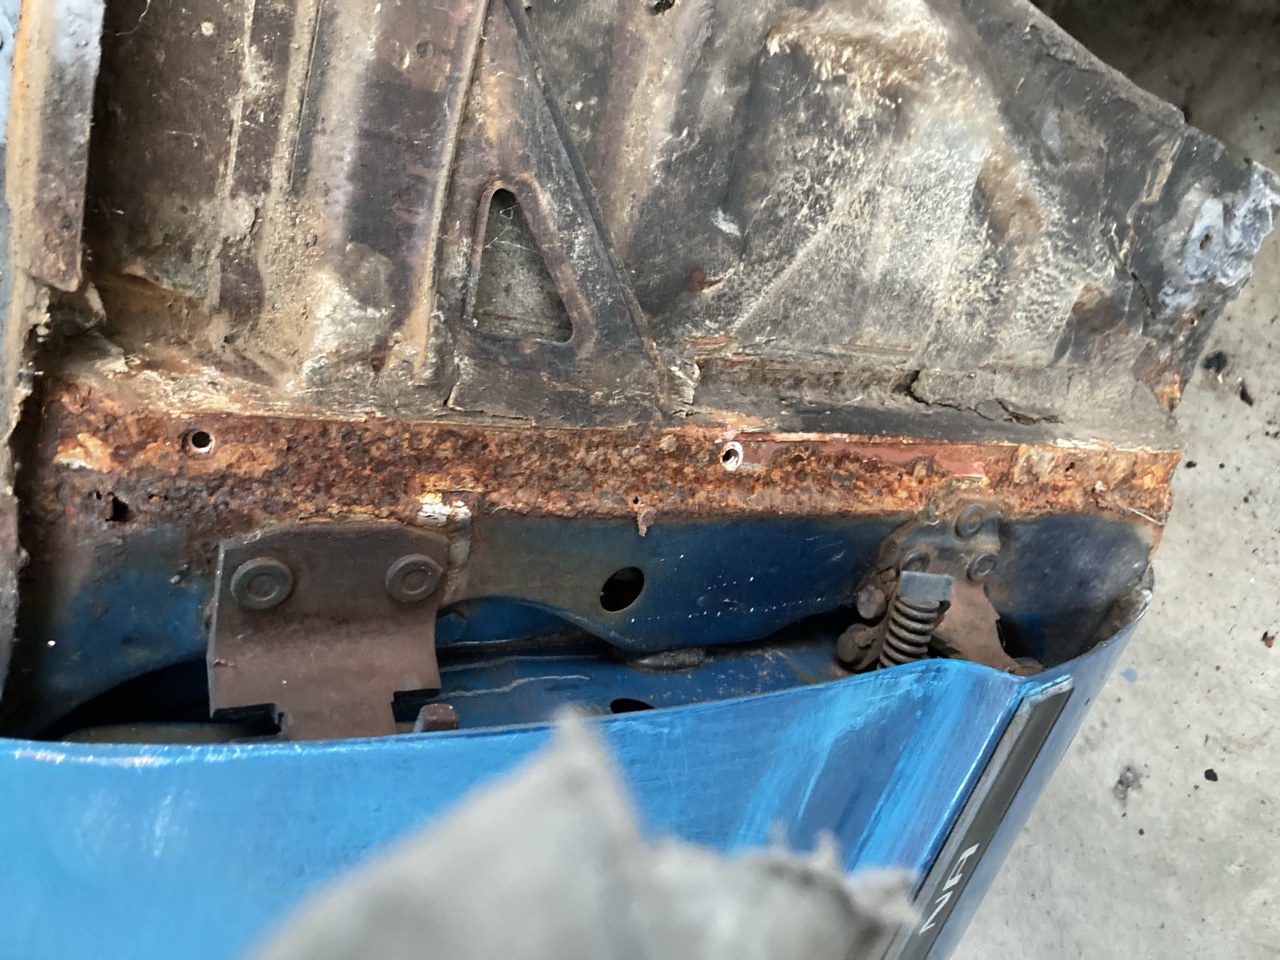
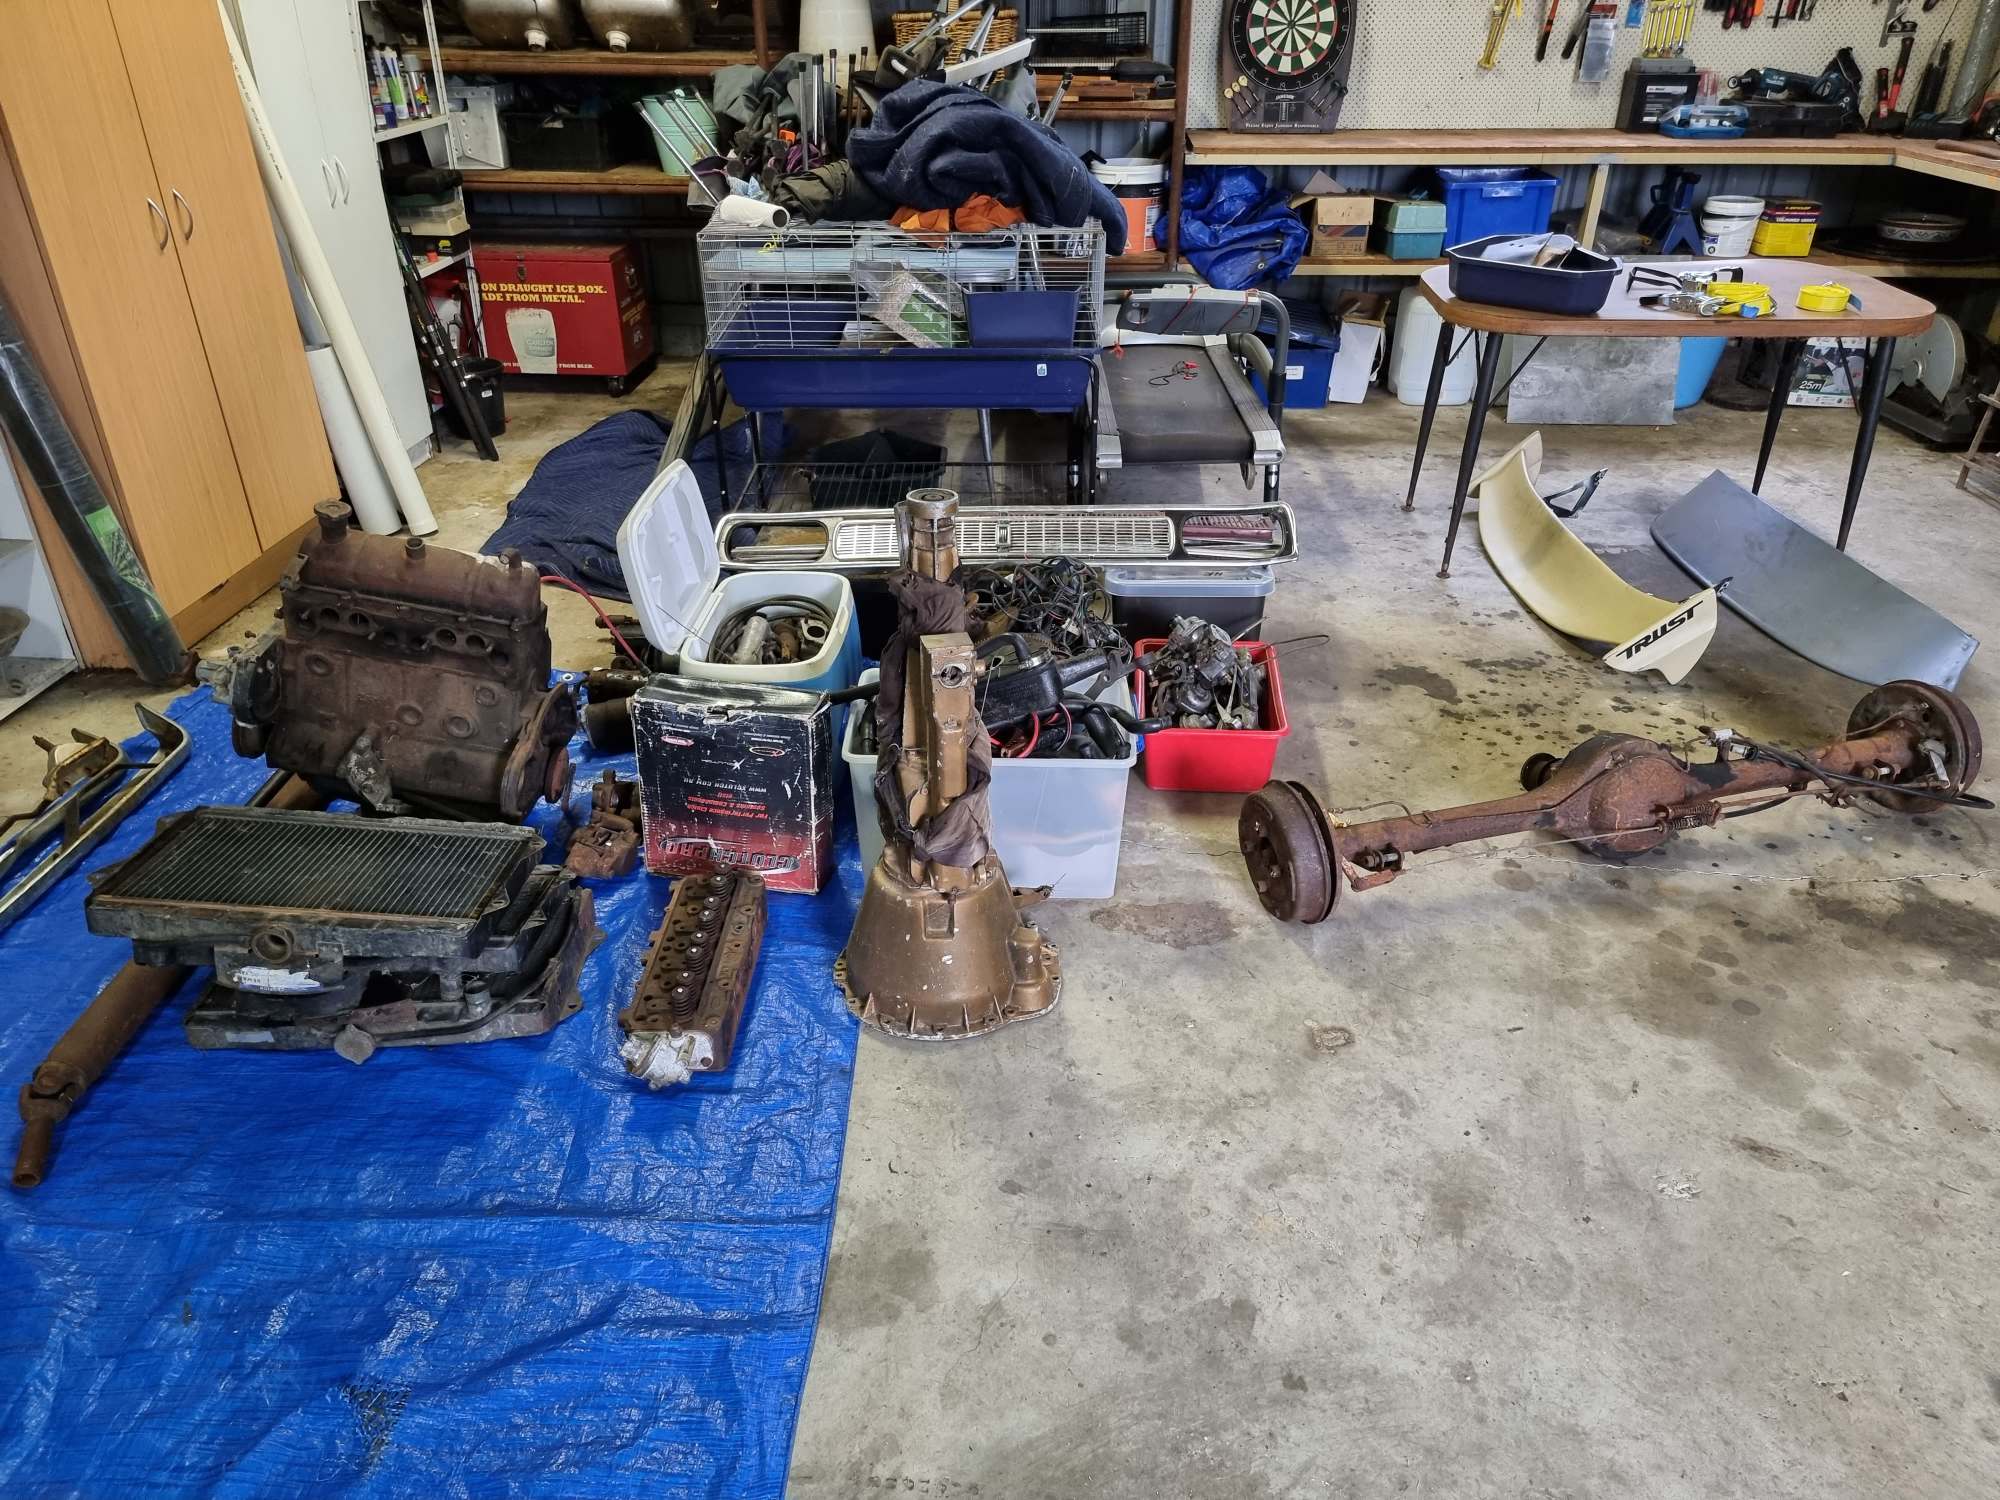
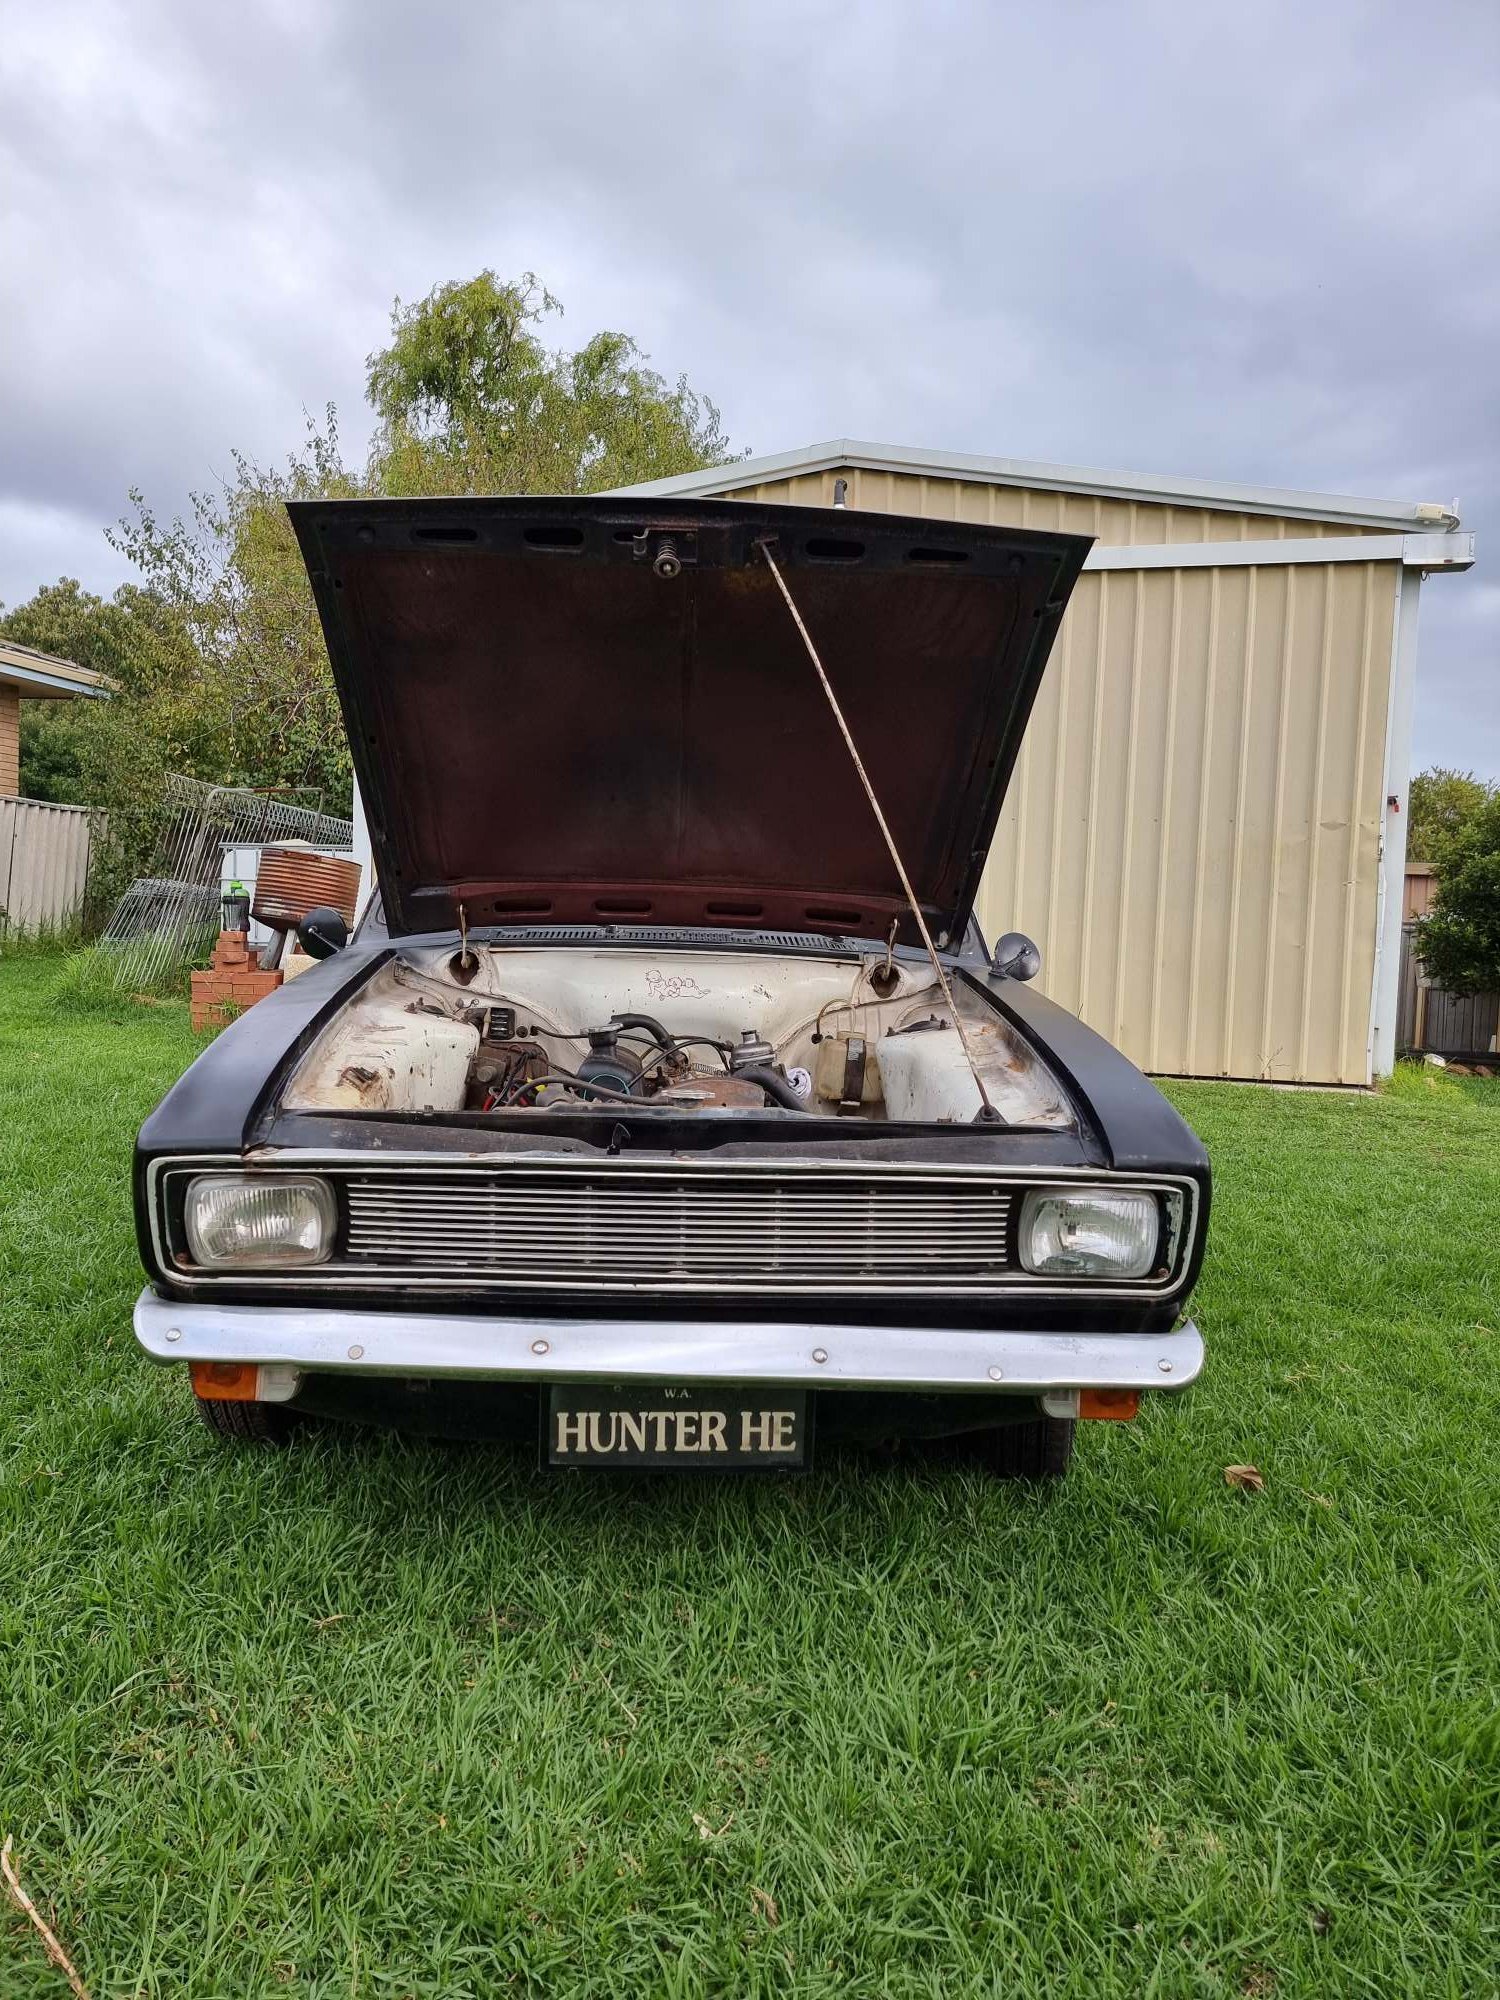
So its been awhile still in WA australia and sold both my escorts, bought a house with a good sized shed thats empty... thought you know what goes in here well. Junk. So I ended up getting this 1970 Hillman Hunter Royal HE of this guy up in perth thats had it for 20 years collecting bits and pieces but got cancer and needed it to move on to someone who will do it up. Its a matt black spray can jobber someones slapped a wing on it for god knows what reason. Came with all new doors, front end, bonnet, boot lid, engine, transmission, and boxes full of unused and used parts aswell as badges lots and lots of badges so if people need parts and dont mind it coming from over here might be able to help So here it is in all its glory and the amazing bit of engine bay art Heres the discussion Forgot how to post and dont have a computer to bare with me
4 points
-
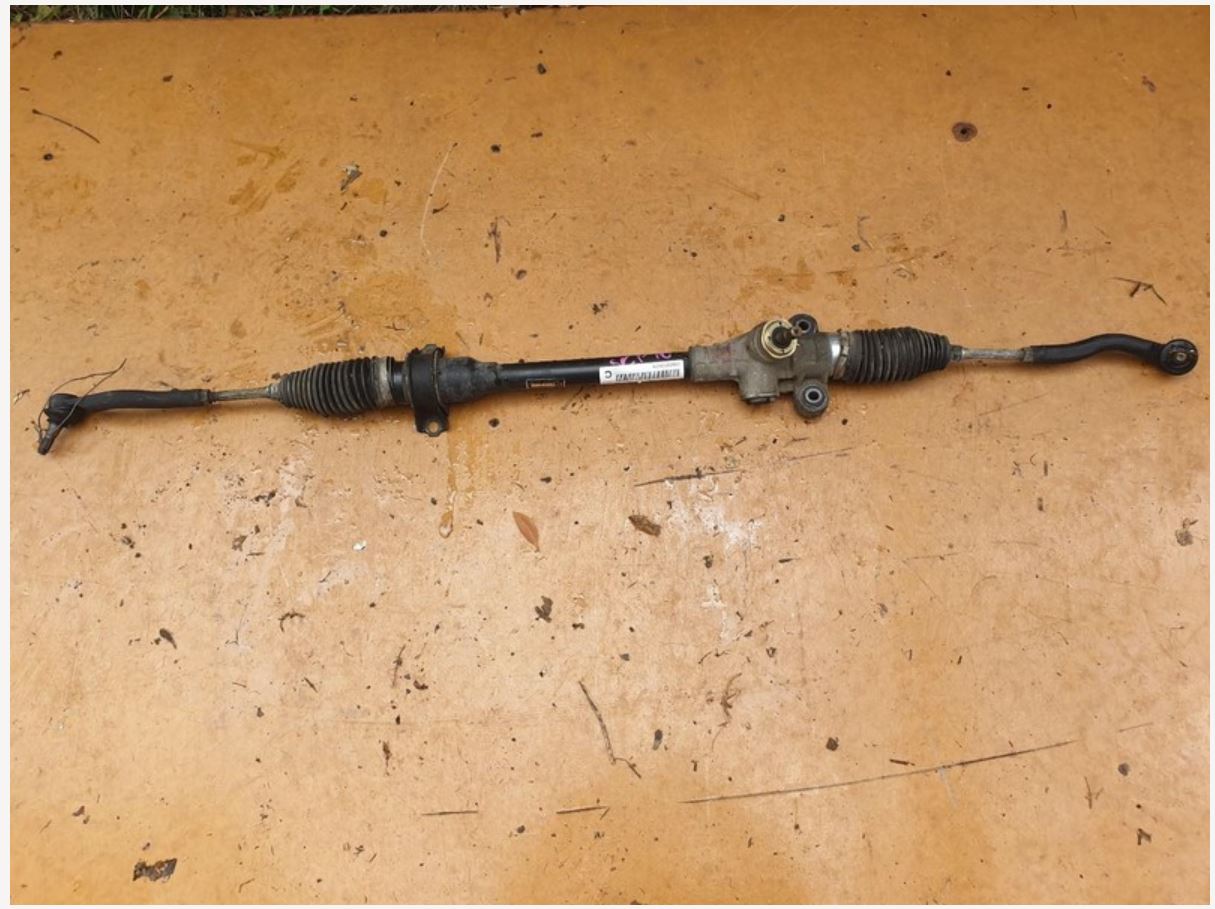
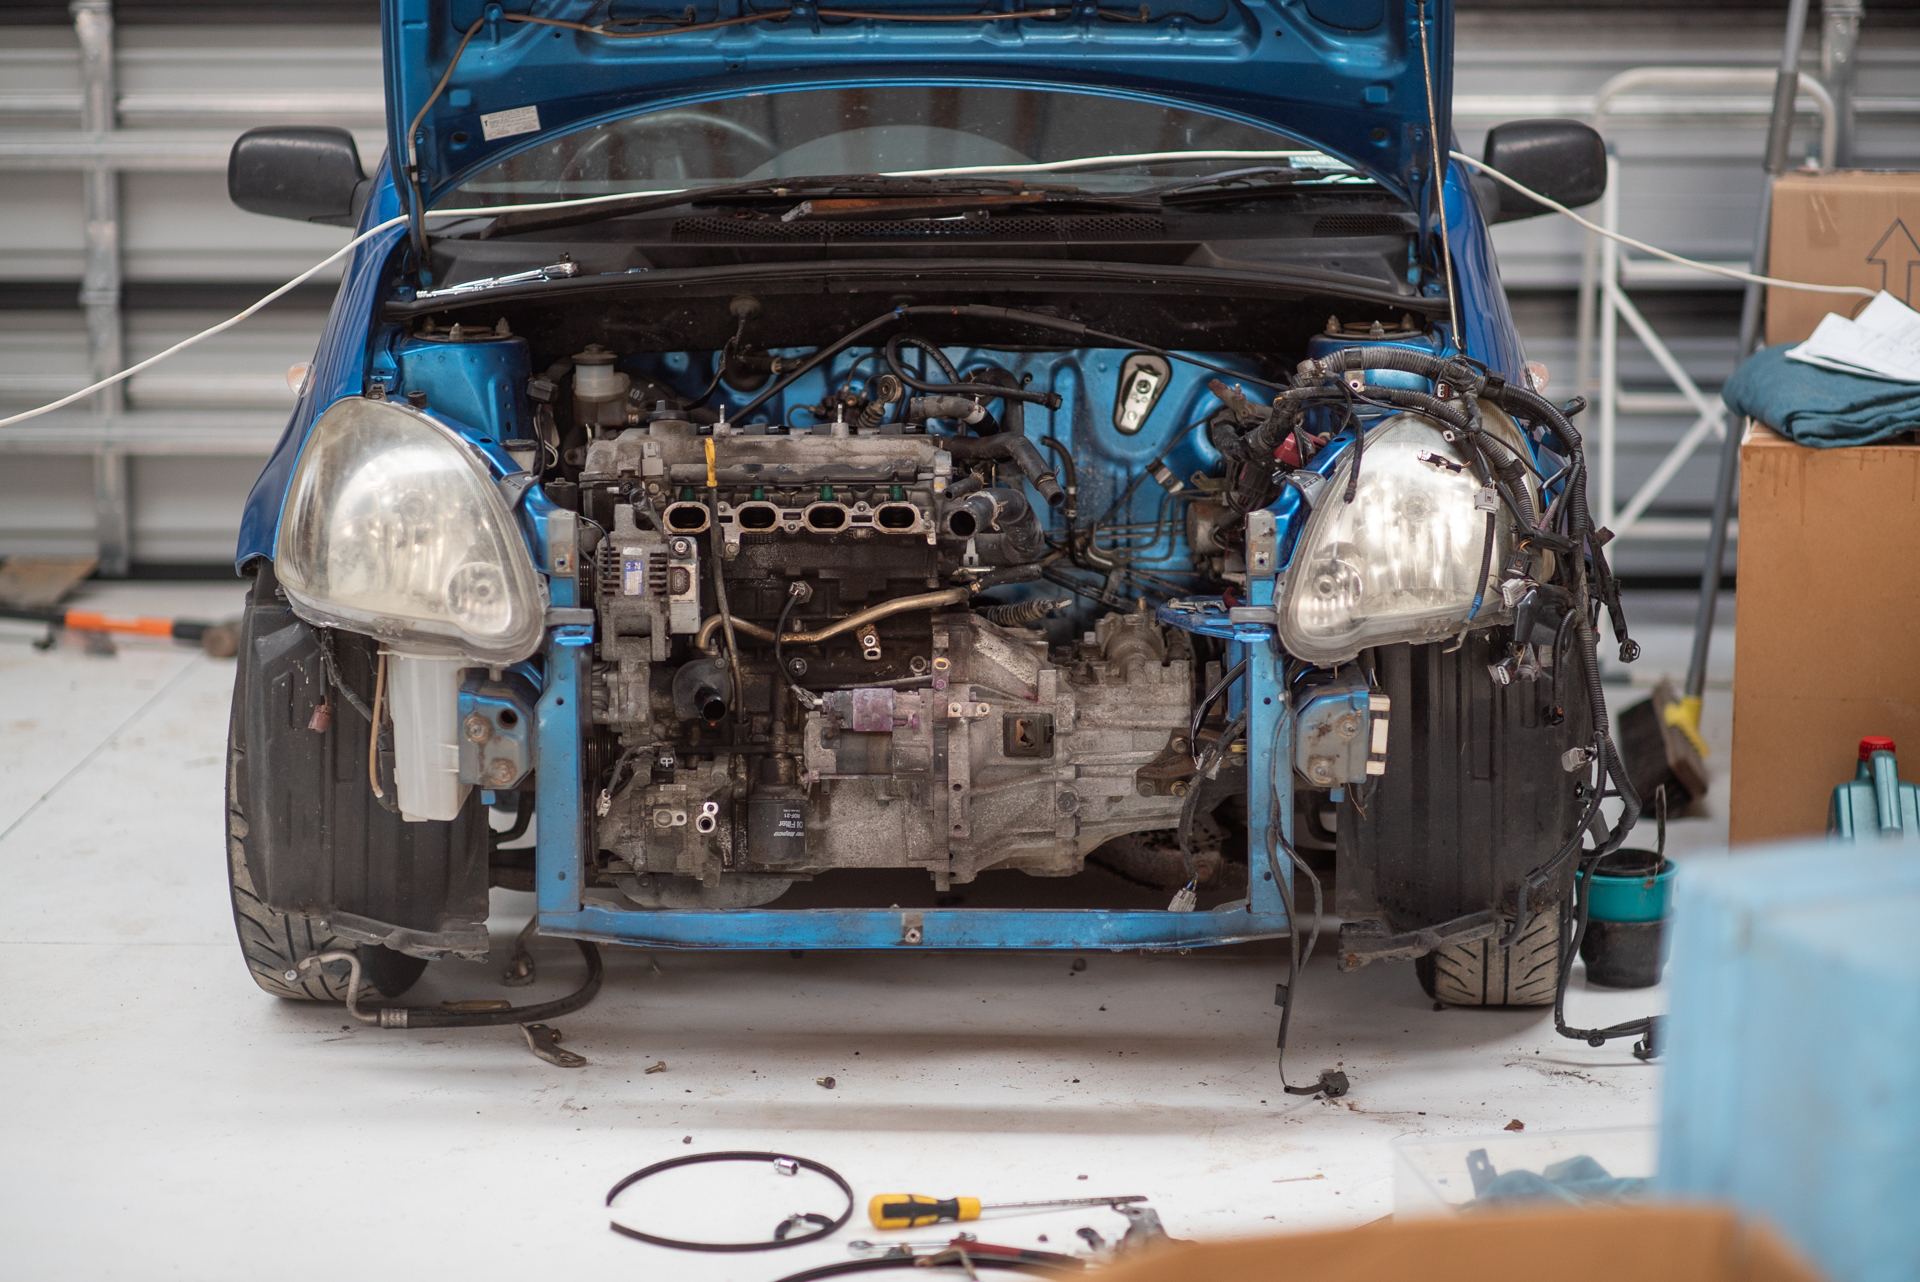
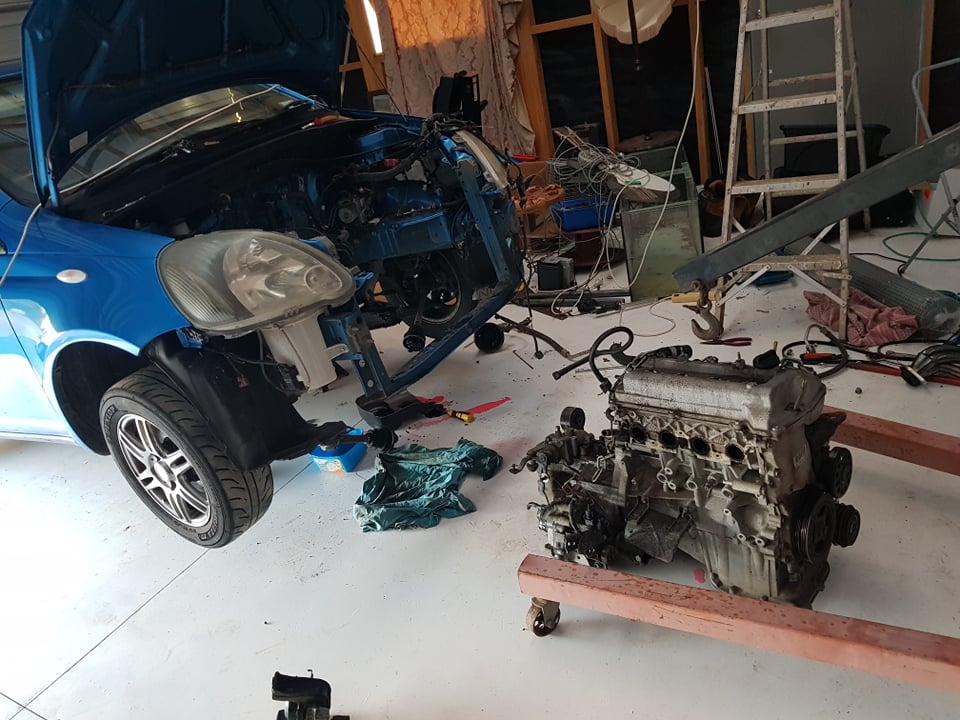
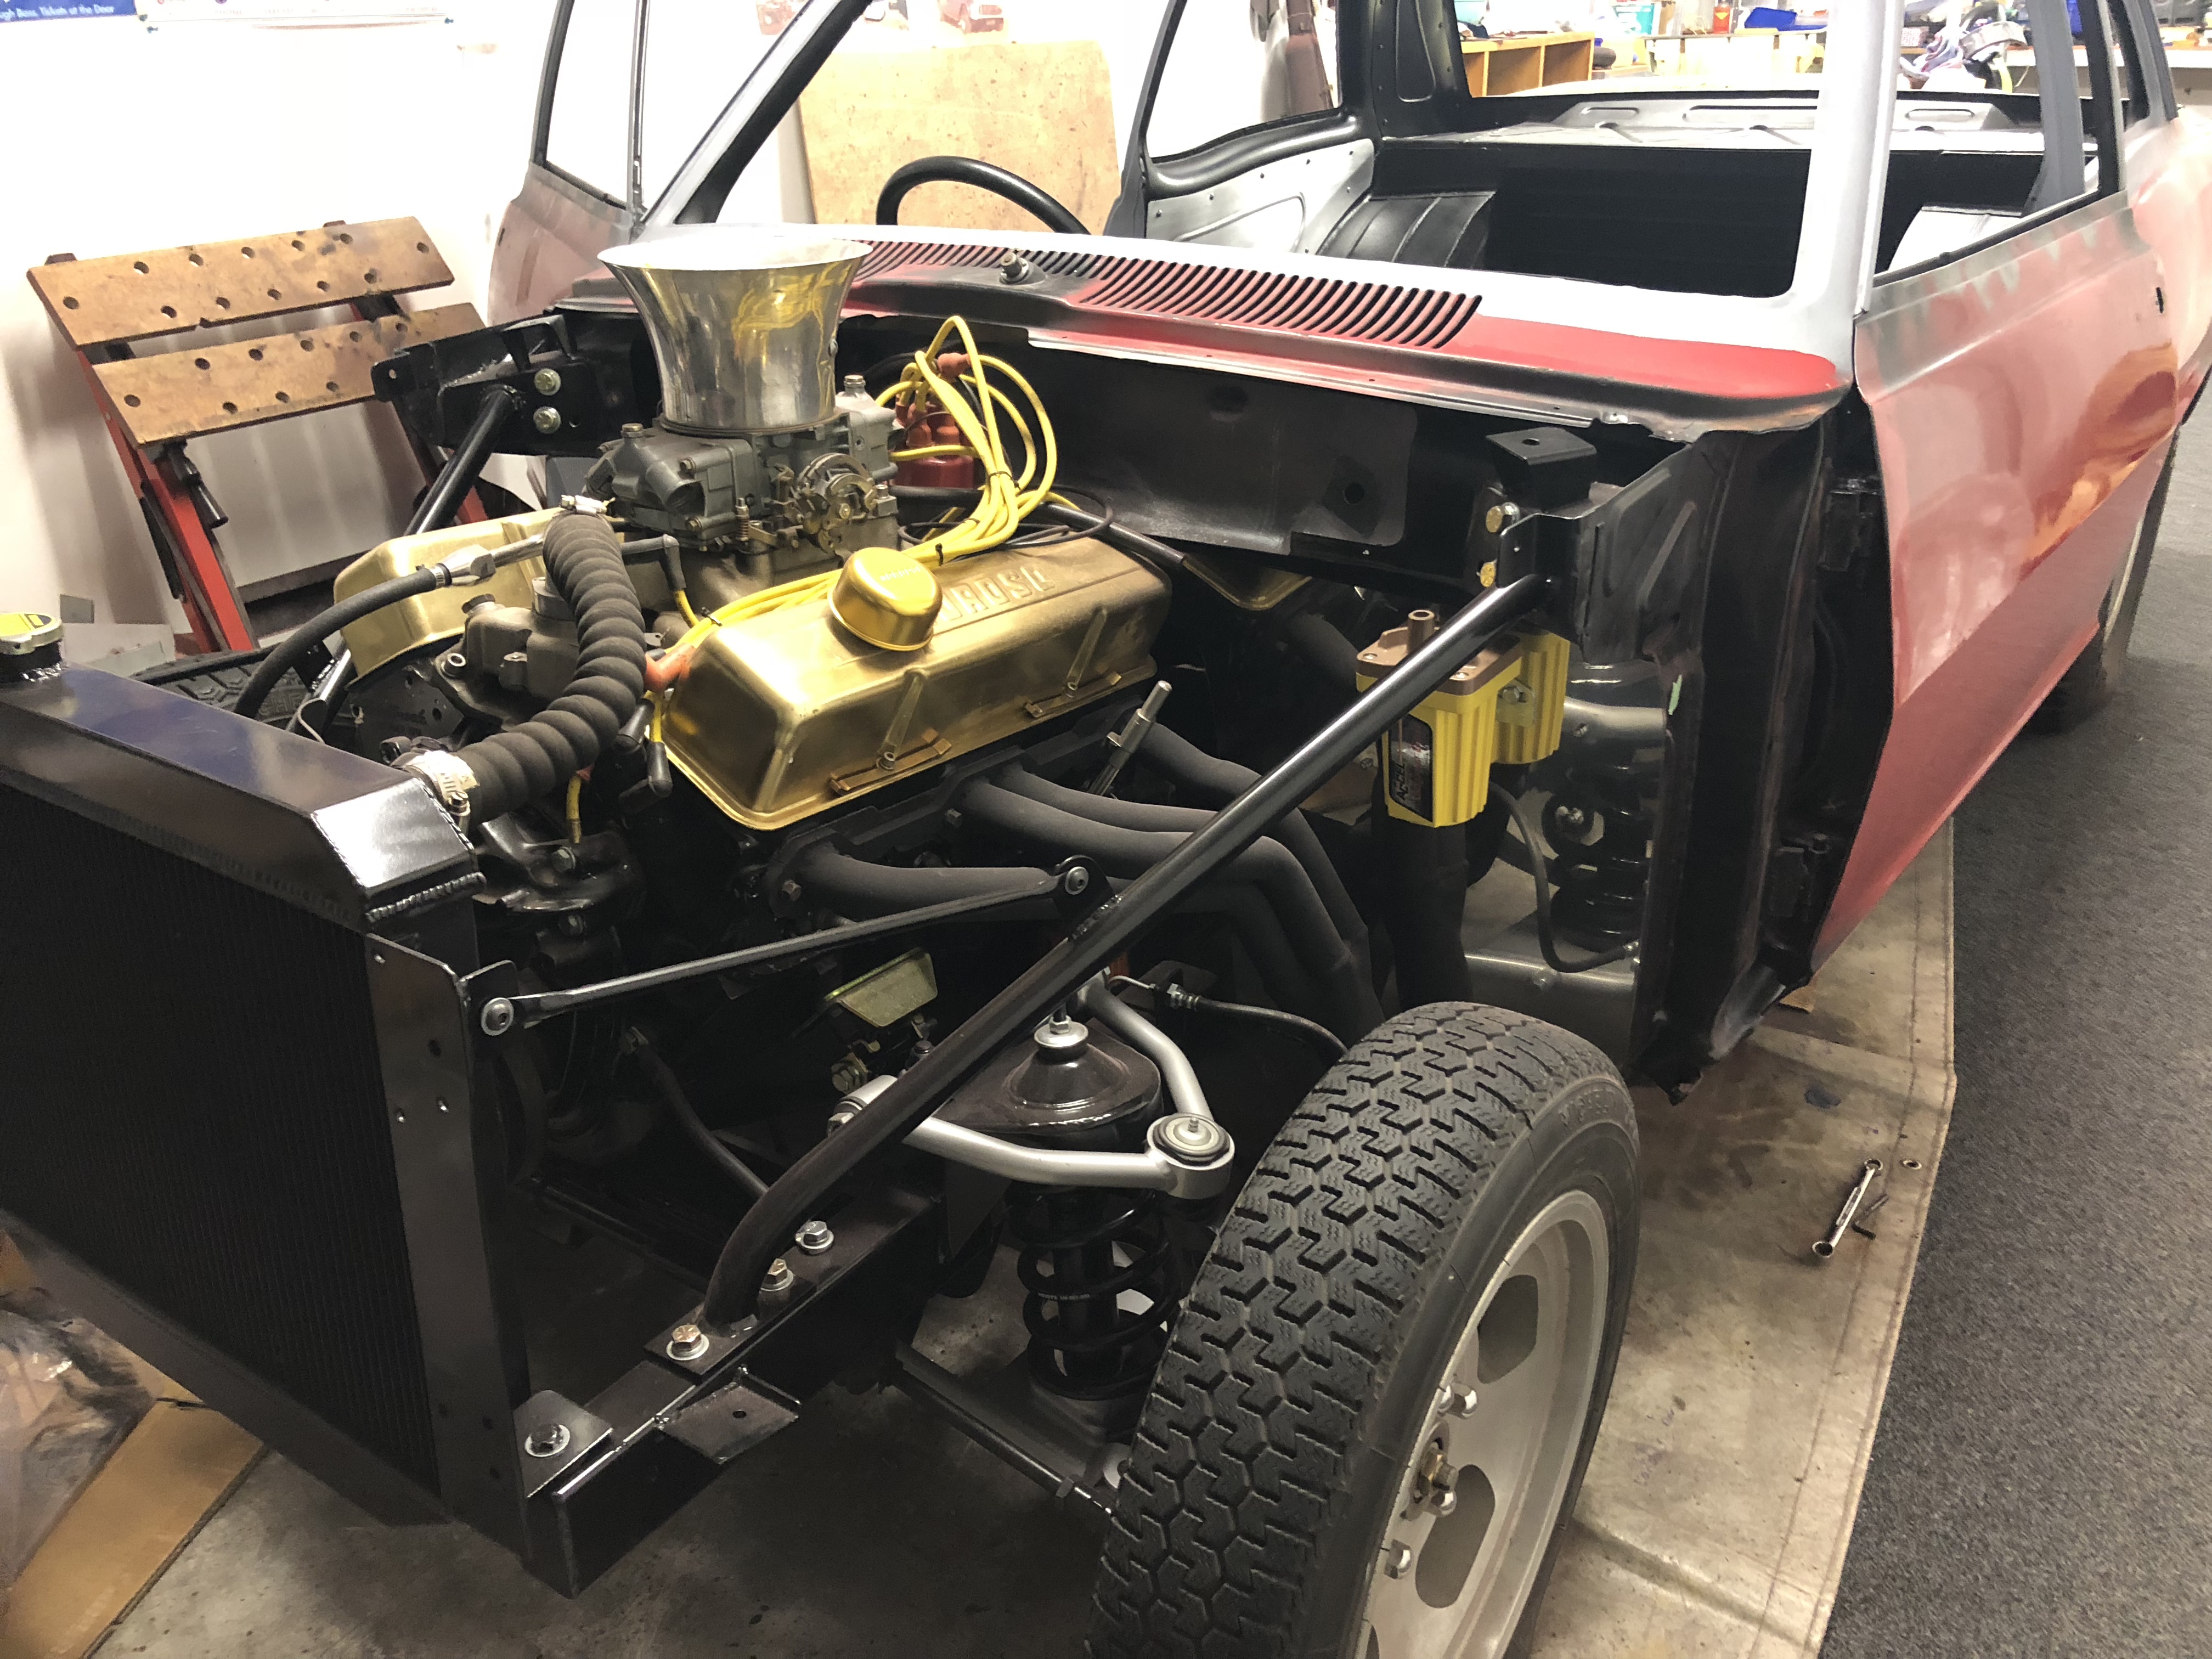
Big mission today to get old motor out and get the new motor/box/clutch/etc assembled. I was thinking it would likely be best/easiest to drop the motor out the bottom, like I've done with MR2 in the past. However once the axles are out it's pretty easy to turn the motor 90 deg and pull it straight out the front. Ended up spending about an hour and a half playing Dentist, when the new motor and new box both had the same alignment dowel stuck in them. Took a lot of heat and CRC and filing some flats into it before the bloody thing eventually came loose. Once that was sorted I tried aligning the box onto the motor but it was just too dark and too tired. So will get that sorted tomorrow after work. I CBF with the power steering so I've been keeping an eye out for a manual rack Echo at Pick a Part etc, but havent seen one yet. Then one just popped up on Trademe so bought it. hopefully it isnt missing a UJ or something specific to the manual rack (probably is, and I'm stupid for buying this) "
4 points
-
That rust killer from SCA is awesome.
3 points
-
Also the sweet sweet number plate HUNTER HE So where all things start... seeing what doesnt work and what parts I have Bloke seems to think it was something to do with the dizzy and points so I have like 4 new ones to try out from his stockpile Also about 6-7 stromburg carbys aswell as being able to install two so who knows we will see how things pan out My partner doesn't want to keep the engine bay art either... she thinks her parents might not approve
3 points
-
Aaannd bought a rough XR100 because reasons. Has had a hard life. Will attempt to tidy up without exceeding the limits of financial sensibility. And probably just use it for very light farm duties or as a loaner to beginners. IMG_20210424_115304 by John Bell, on Flickr Got vaguely correct tank graphics from.... AliExpress! Looks ok but are very thin, and have bubbled something chronic in days prior. Oh well. $$ IMG_20210425_170715 by John Bell, on Flickr Waiting on parts currently.3 points
-
Guess I’ll be needing this.
3 points
-
They say the two happiest days of Birtish car ownership are the day you get the car and the day it leaves your life. Well the other day it left my life (at least for now). My dad is taking it on a long road trip. He is taking it to Auckland, via the bottom of the South Island. They're staying at Lake Hawea tonight. I think their trip will be complete by around about the 15th. Hitting the road: Somewhere in Mt Somers I believe: Lindis pass (actually surprised it still ran up there): He insisted on taking the roof rack with it. I bet it uses 25% more fuel now. When it gets up to Auckland my brother will paint it and we will try to track down the few remaining bits that it needs to be complete and then will stick it on the market. I'll keep this updated as the photos from the trip come through. Feel free to add any spotted photos if you see him on the road.
3 points
-
3 points
-
Getting there now.
3 points
-
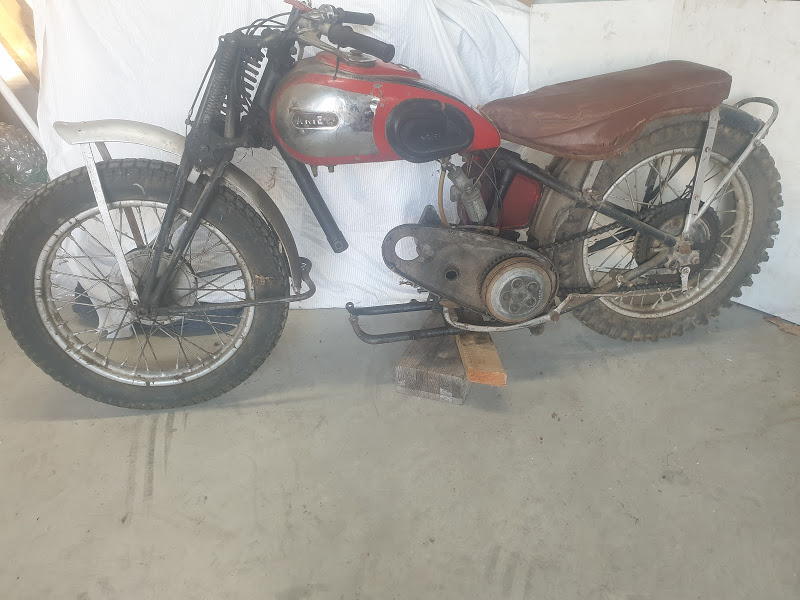
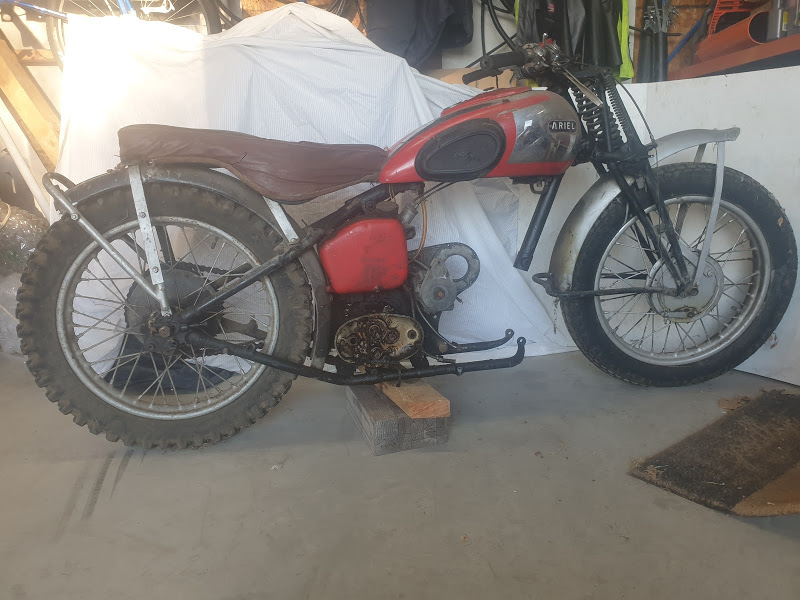
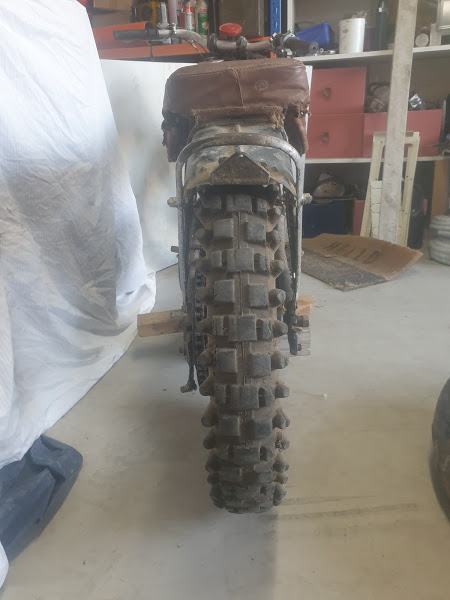
Thought I would put up a build of my Ariel, have been lurking on here for a while and have really enjoyed reading the builds posted, both cars and bikes. I've always been interested in motor bikes and had a few in my earlier years, mostly Yamahas, and had always wanted an older bike. Many moons ago where I worked in Ch-Ch there were quite a few guys in the VCC. A couple of them went to Wellington and bought up a heap of bikes from an estate (Brook or Brock Motorcycles?) One guy got a bunch of AJS/Matchless stuff, and the other guy a bunch of Ariels. I had a look through the Ariels and chose a bit of stuff that would be the grounding of a 1937 Ariel Red Hunter. Engine was 1937 and not too bad, frame is about 1946 from memory. Pretty much enough for a complete bike plus extras, but everything needing work. Back then I got a few bits done, girders straightened, oil pump over hauled and most importantly got the engine done. Had it re-bored to suit a wiseco piston from a 350 Chev and new chev valves to suit. Didn't get much more done due to moving towns, young family, seperating from wife etc. etc. Usual shit. So recently life has settled down a bit and I have come into possession of another Ariel. This is a pretty much complete, bit rough, ex farm/hoons bike that has been hidden in the back of a shed for at least 40 years. It's a 1939 500cc Red Hunter. Frame and engine numbers show it as a 1939. It had been used on a farm for a bit here in Ashburton and thrashed, blown up, piston shattered! Then sold, engine removed and stripped, stashed in the back of a shed until a few weeks ago when I got it. Most parts from 1937 & 1939 are all the same. Will post a couple of pictures of the 1939 bike as I got it, 1937 is in bits and all over the place in my workshop.
2 points
-
Thanks, I had a look on some EPC sites but couldnt find a diagram like that. I'll call the wrecker and see if they've got the rest of the car there still. What's the bet that sensing my desperation this part now costs $600 haha.2 points
-
If modern cars are anything like my old crap, the p/s steering column may be a different length to allow for all the hydralic bits2 points
-
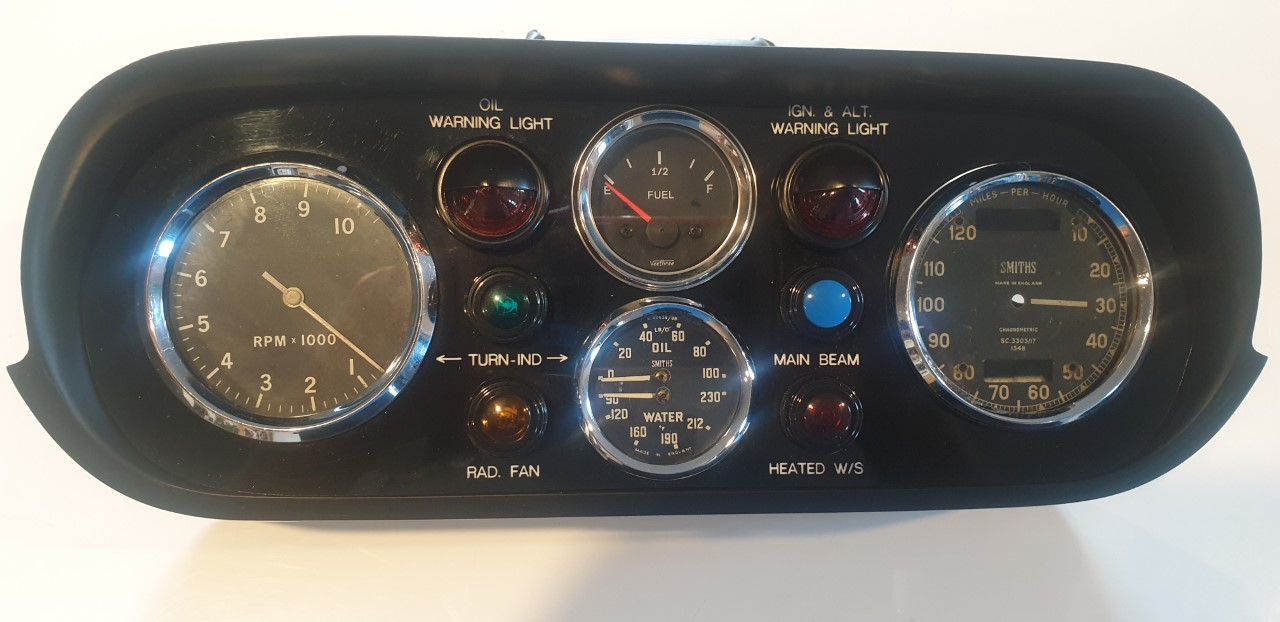
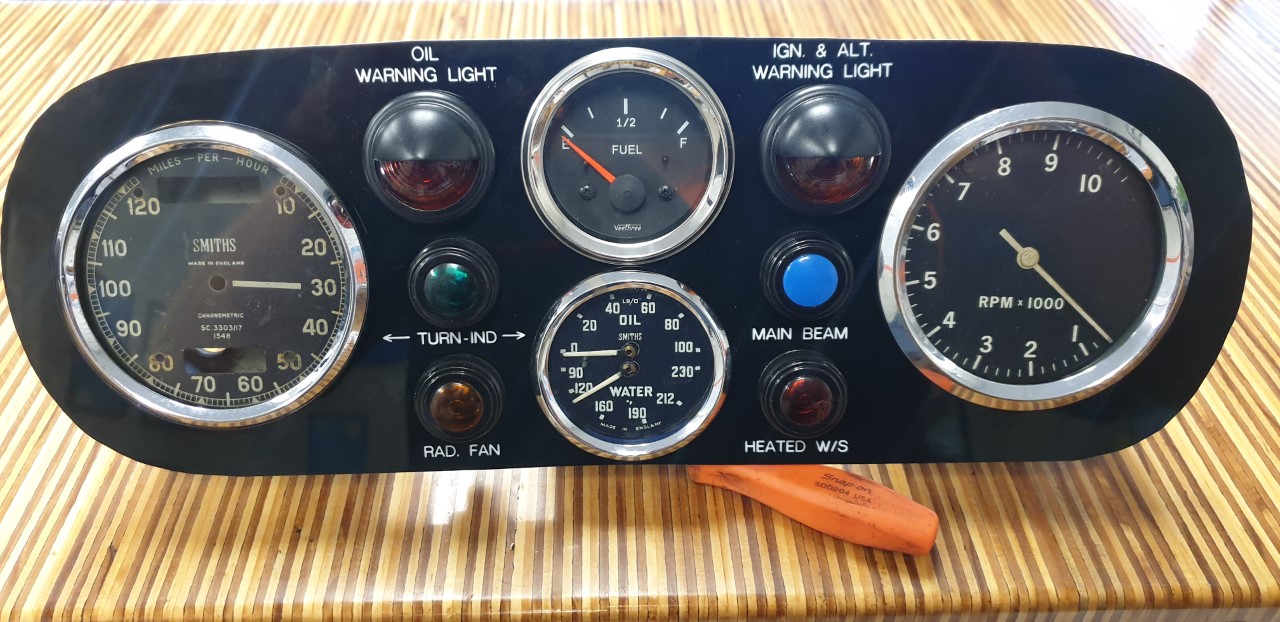
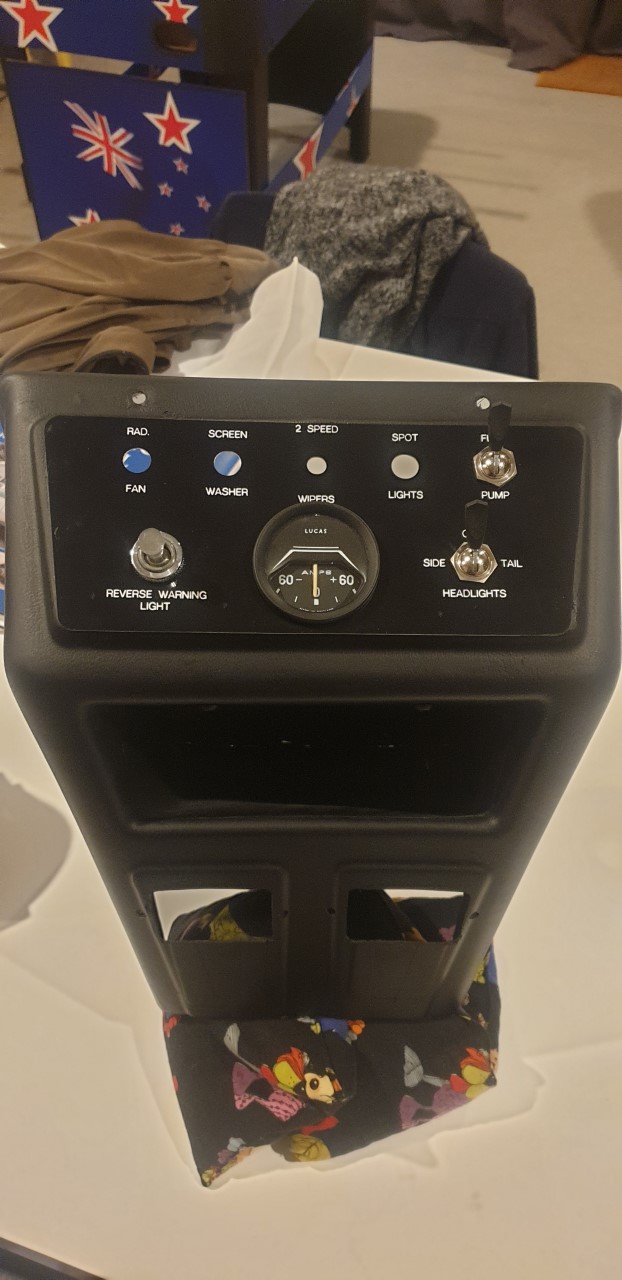
I found this pic from a while ago when i got the fibreglass dash parts and offered them up to see what it was going to look like... Lots of hours have gone into them since that pic was taken...
2 points
-
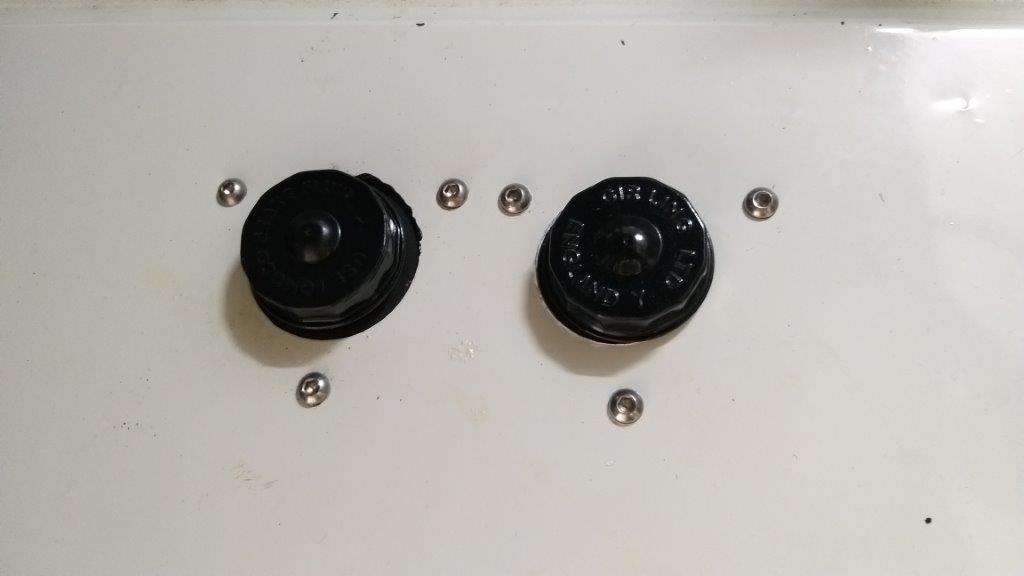
I painted it black and offered up all the gauges and lamps to make sure the layout was correct and was going to work in the dash surround. Very happy with the result , then i just had to finalise the wording i wanted and get it cut out in laminate. Happy days!
2 points
-
The first step was to cut out the centre as i only need the outer shell.
2 points
-
Thanks mate, I’ve been getting heat from my mates about buying safer first cars, but surely you can’t beat something special like this for a first car.2 points
-
So bought a very rough CRF50 near the start of 2020. As is tradition, threw a bunch of AliExpress parts at it, and badly painted rusty bits. It probably wasn't safe sitting around here as I was riding it round the lawn at every opportunity. Have lent it to my nephews until my boy is big enough or they get sick of it. IMG_20200213_183639 by John Bell, on Flickr IMG_20200426_151544 by John Bell, on Flickr2 points
-
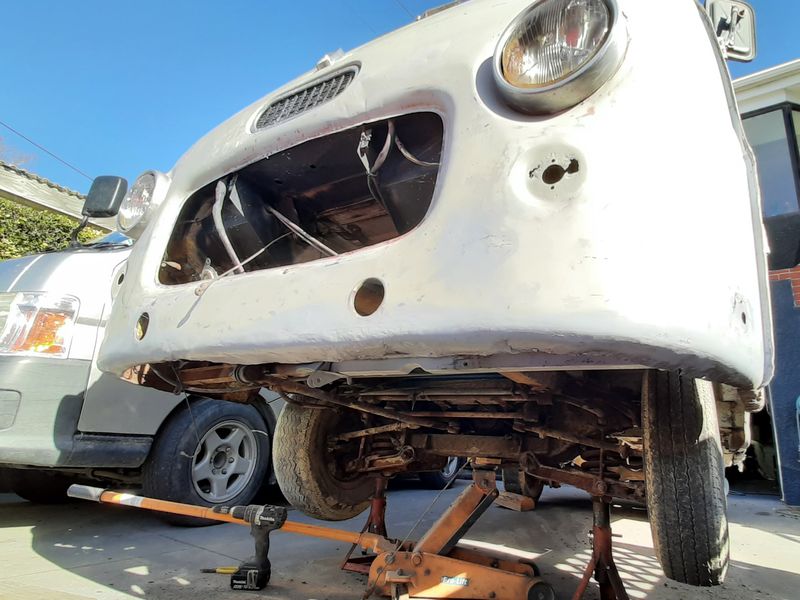
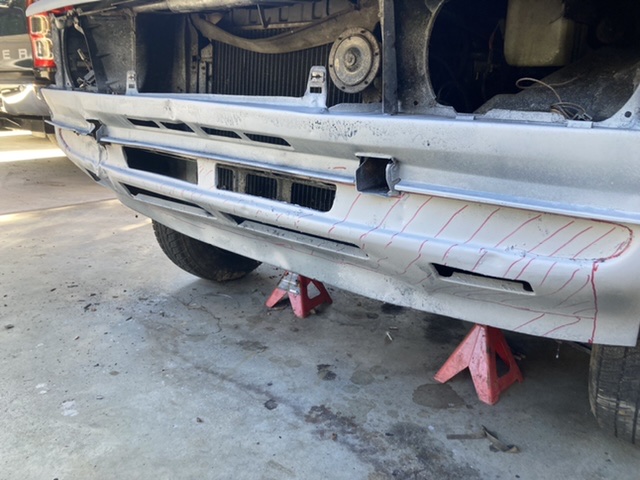
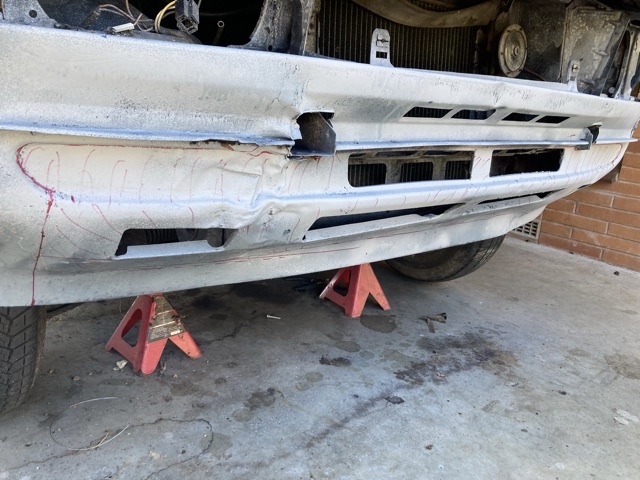
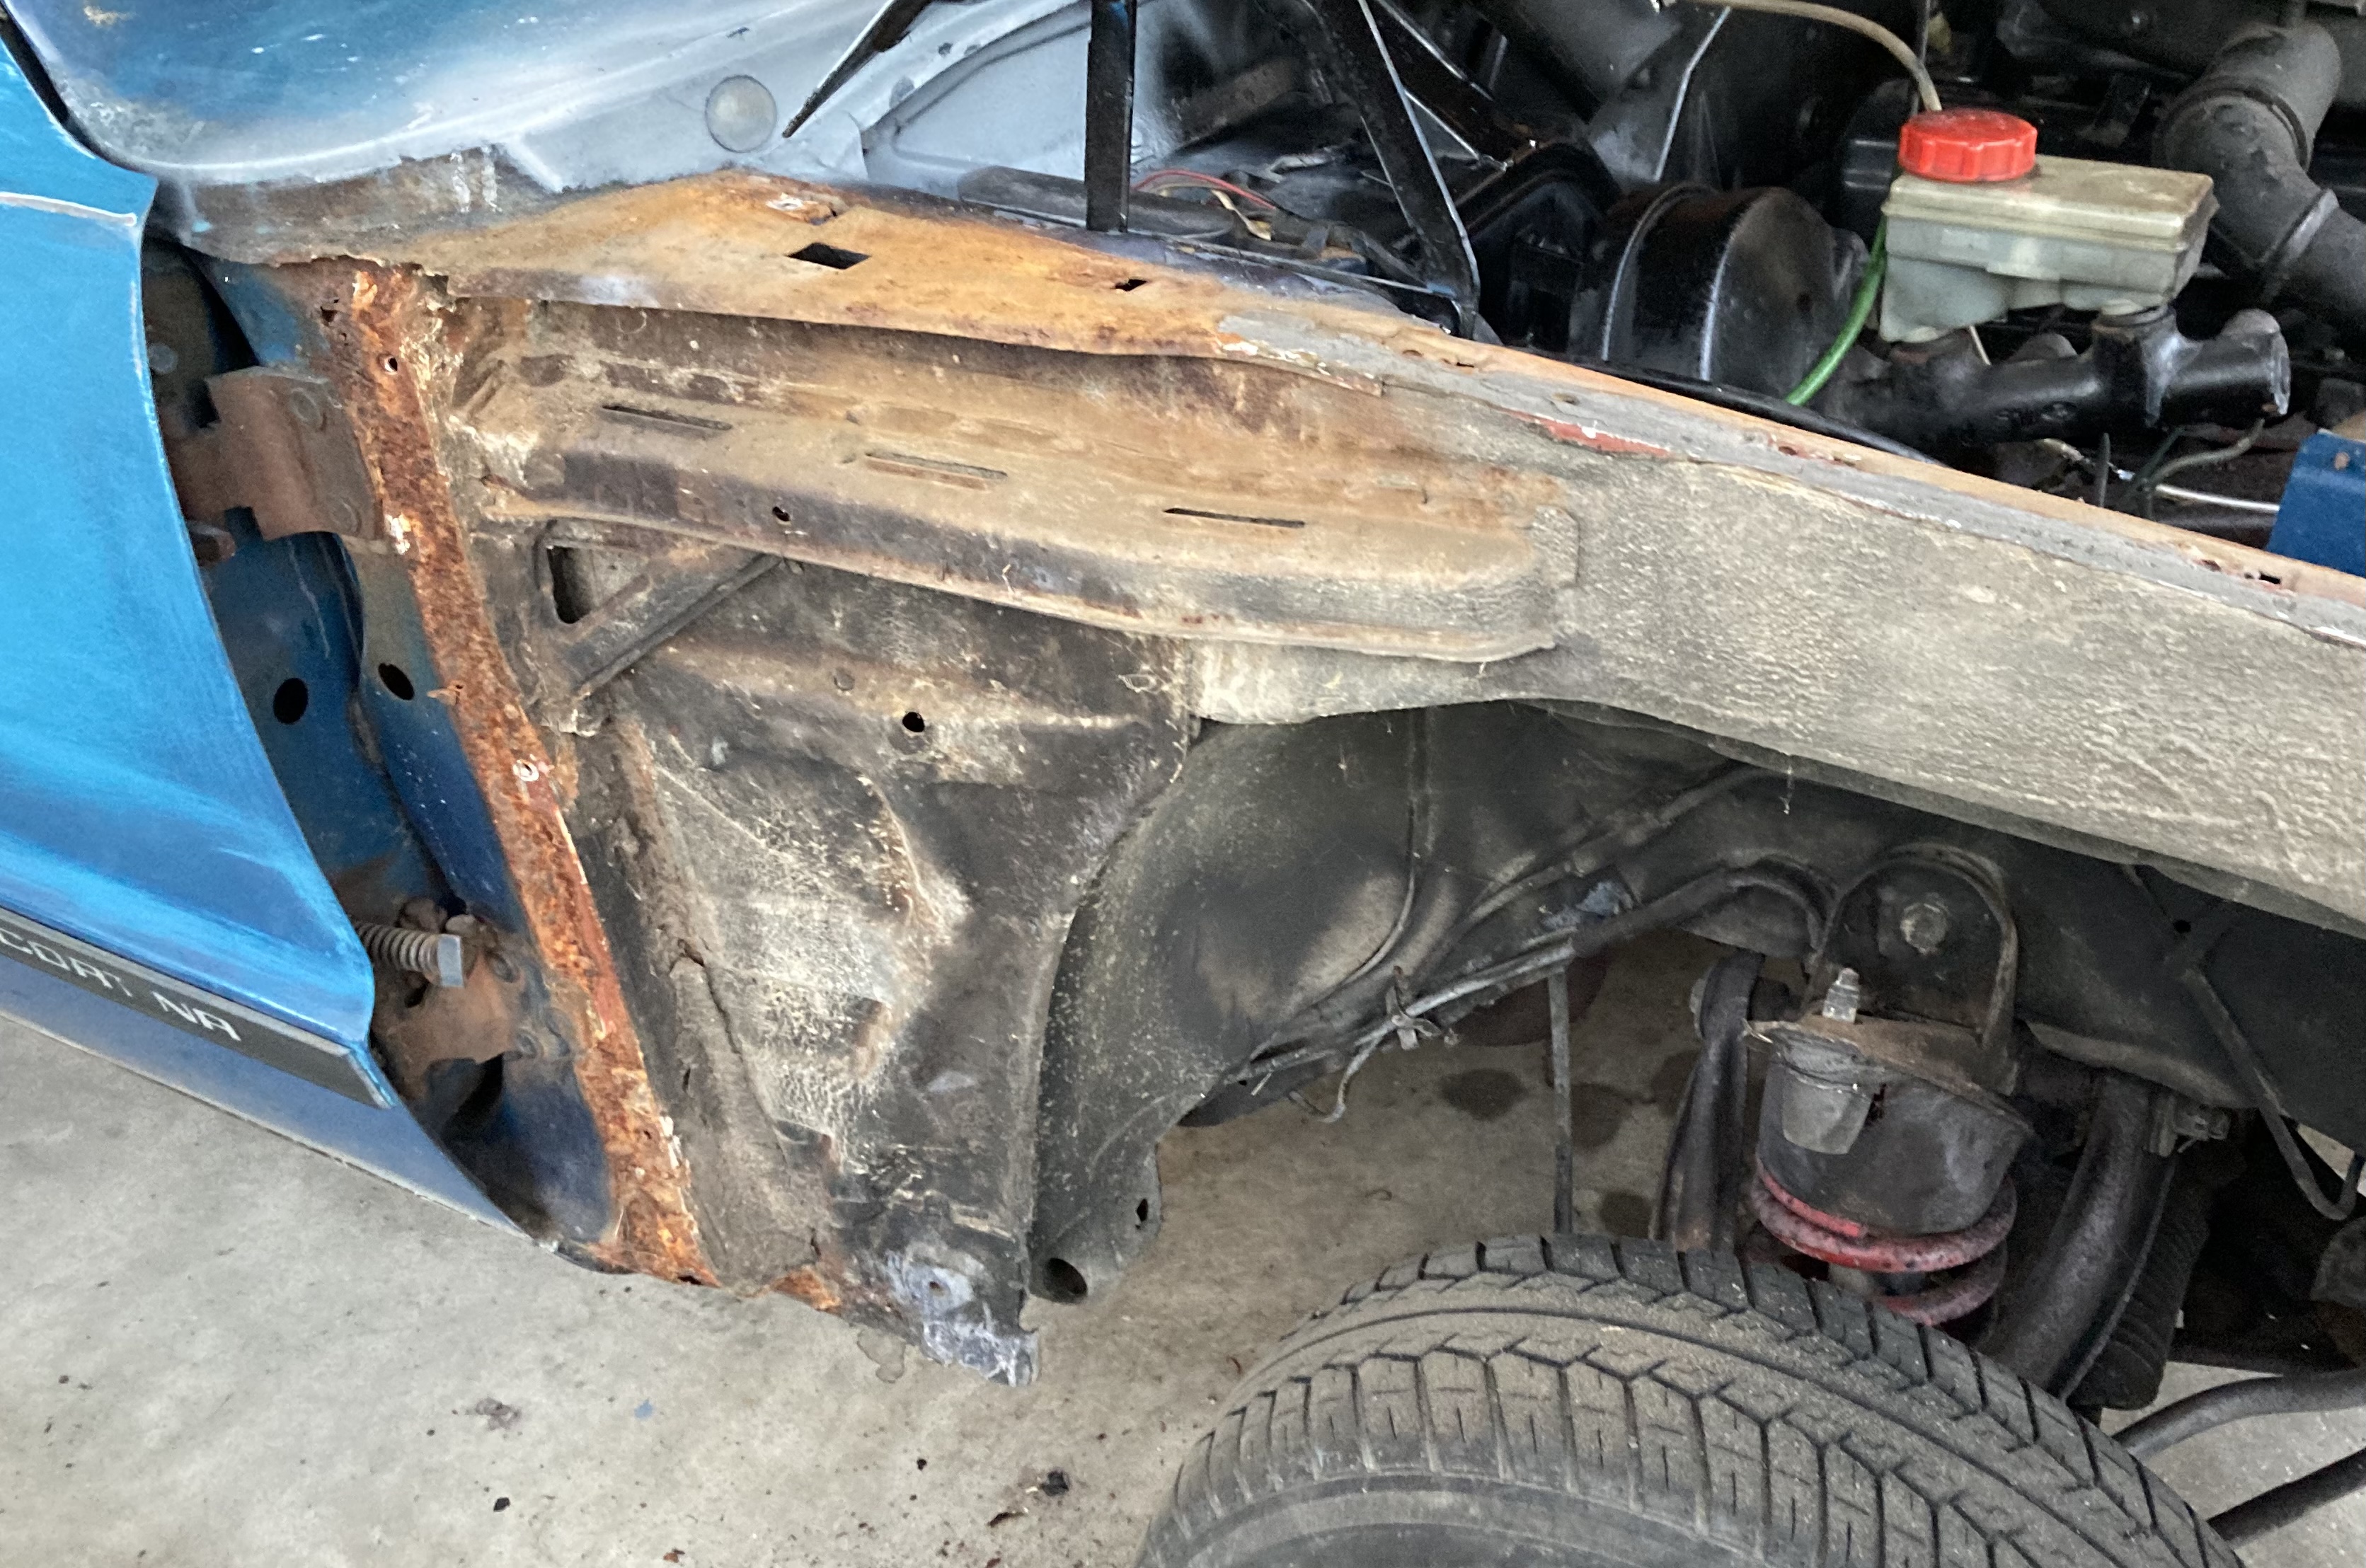
Front Valance is a mess too. Buckled and rusted. Bonnet is straight as are all the lines on the body, but for the valance.
2 points
-
2 points
-
2 points
-
So much hate in here, I can't even tune a carb, let alone tune an engine with EFI that wasn't setup for it. Go work on your cars, the lot of ya.2 points
-
I'd fill the sump with CRC 556 if I was you.2 points
-
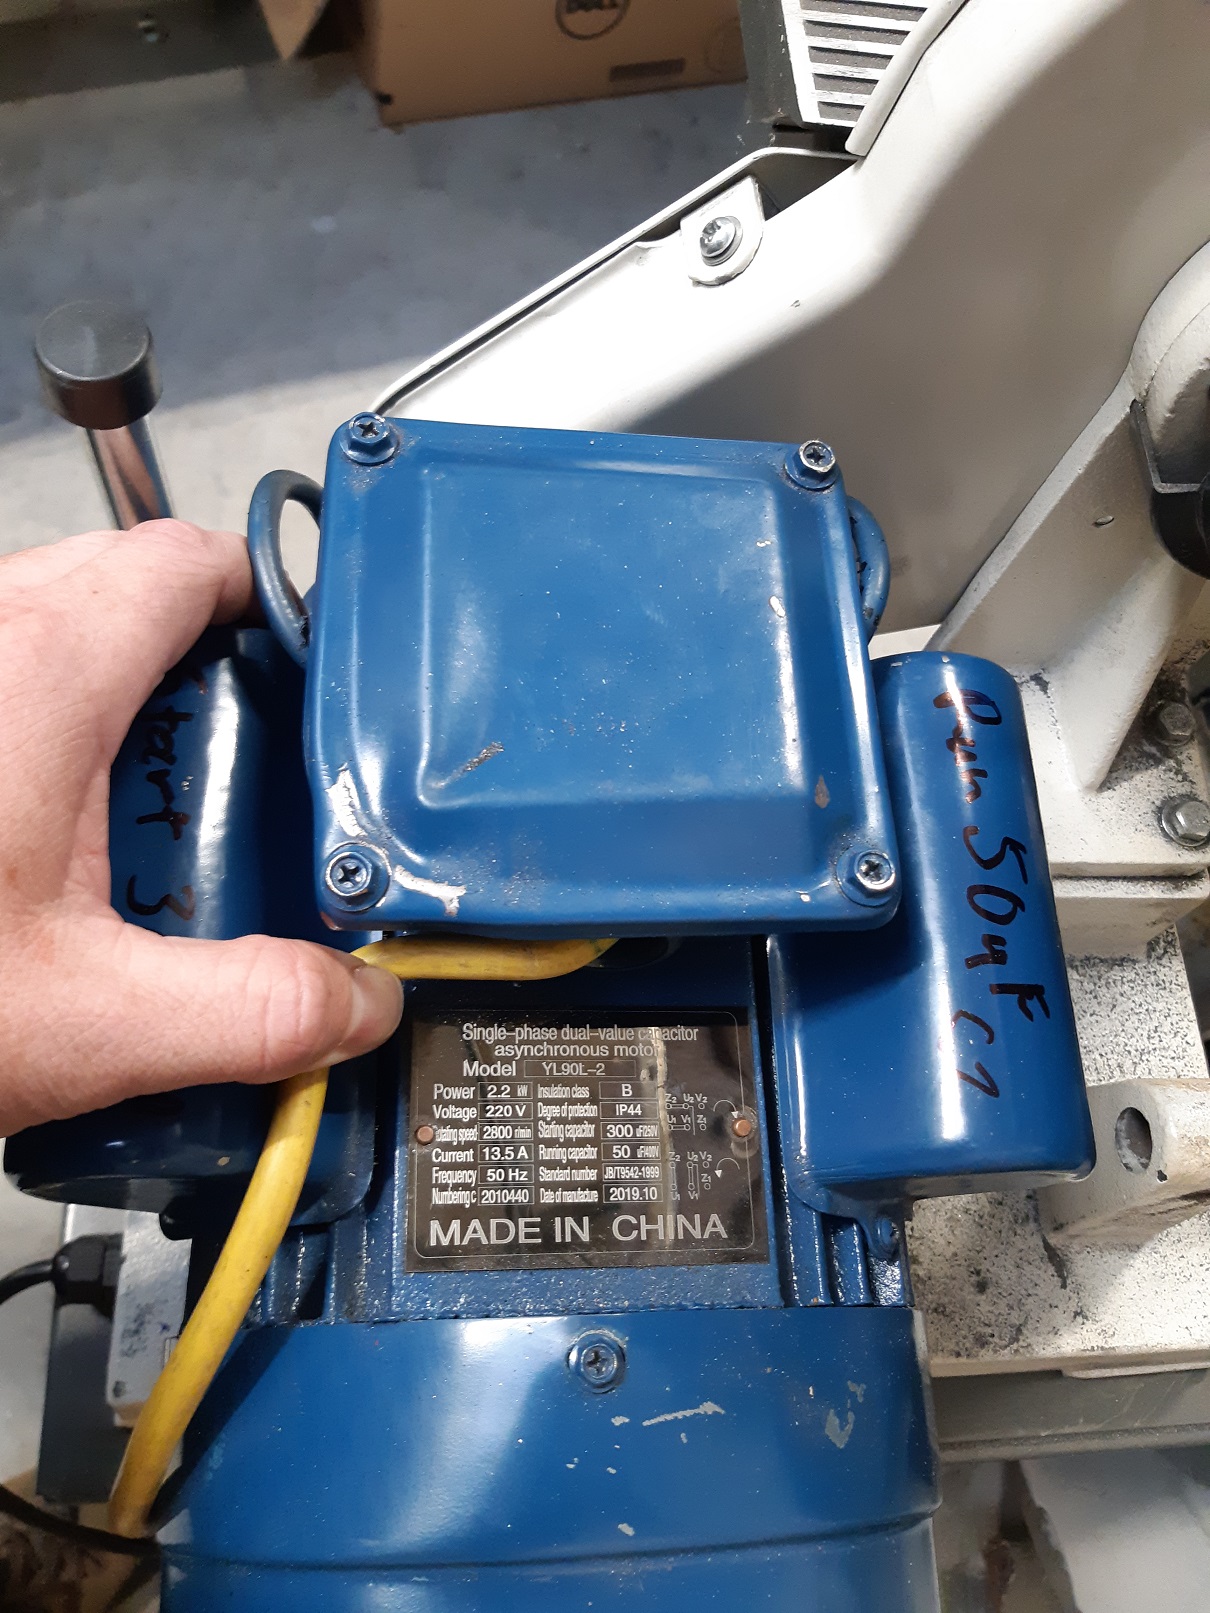
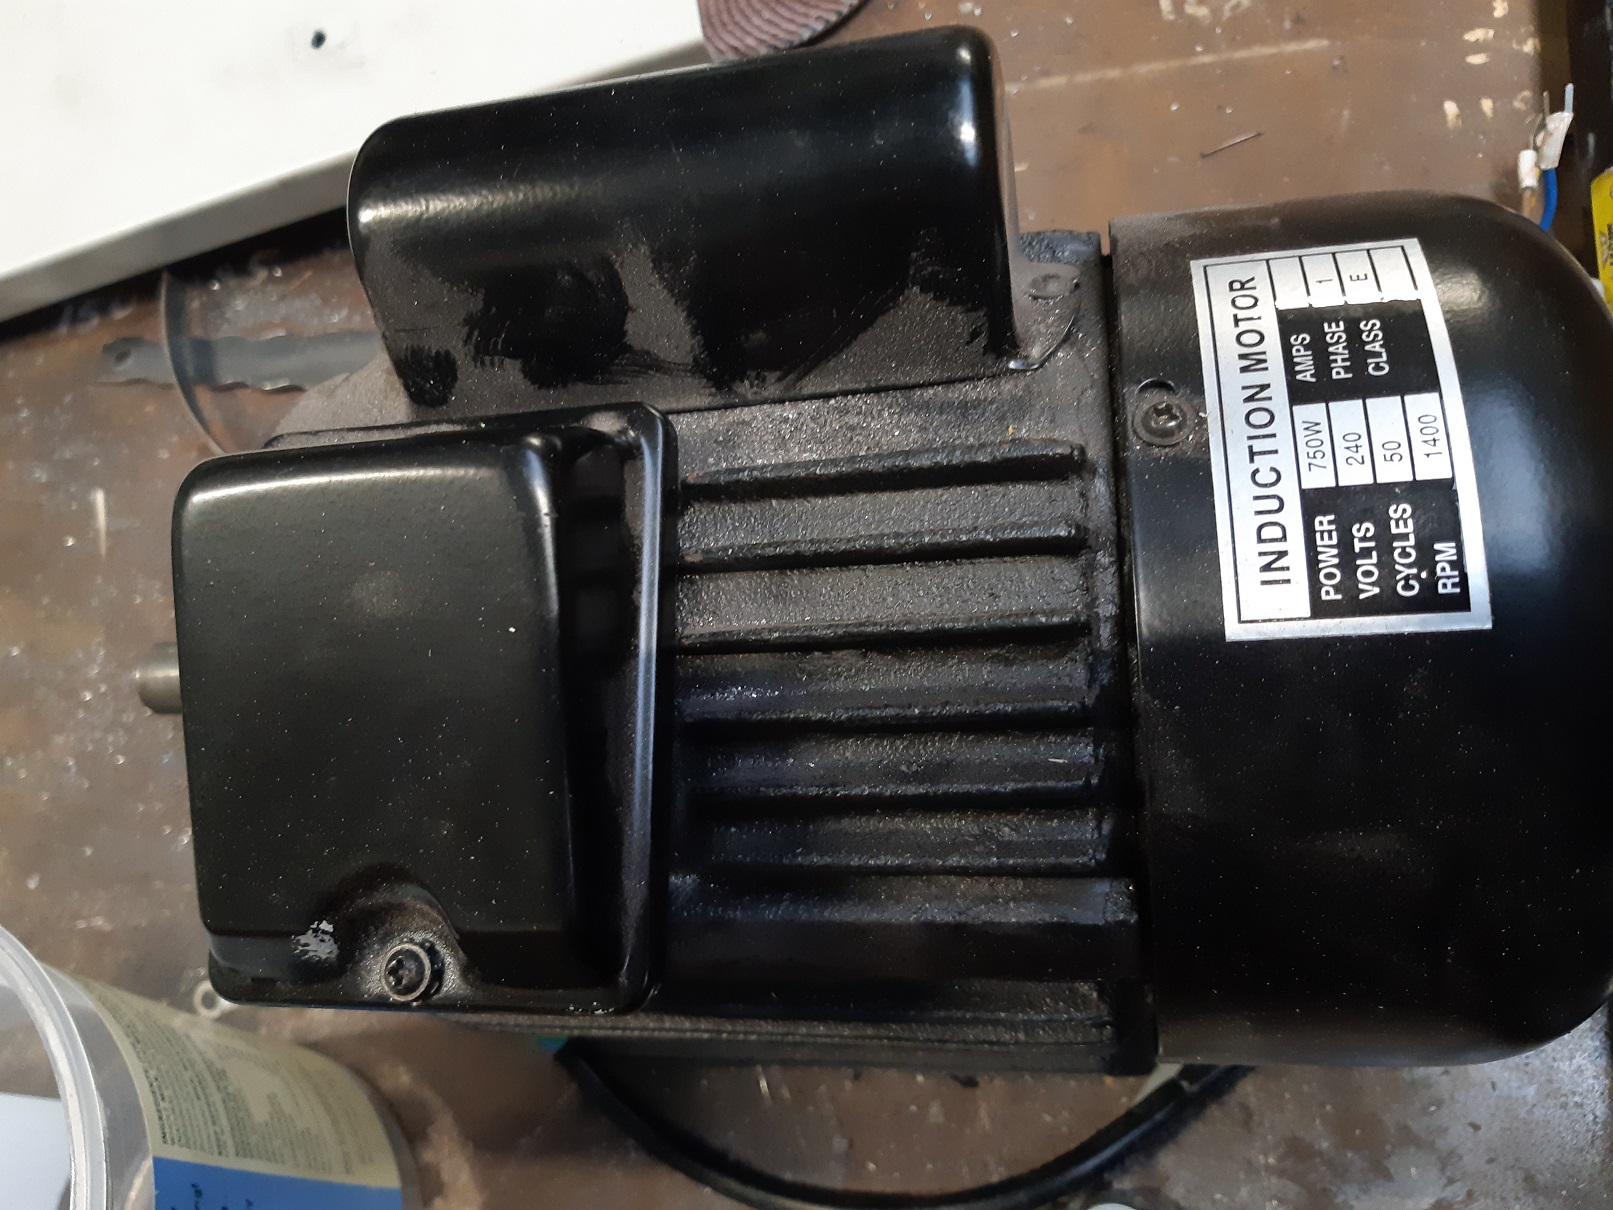
I bought a ToolShed linisher/belt grinder/sander thingo a while back. It had mediocre performance and it was easy to stall the belt. It came with a 1HP 1400rpm motor. Boooo! There! I've fixed it! YAAAAAY! Three times the power and double the speed should do it. The belt guard is off here. It's a bit shit and rattles and vibrates. It's almost as if they forgot to add fasteners to that lower bracket. I'm gonna sort that out. Should be able to flatten my exhaust manifold flange now.
2 points
-
Well its been loooong over due to do up another car so heres the discussion for my build which I'll drop the link too below Enjoy1 point
-
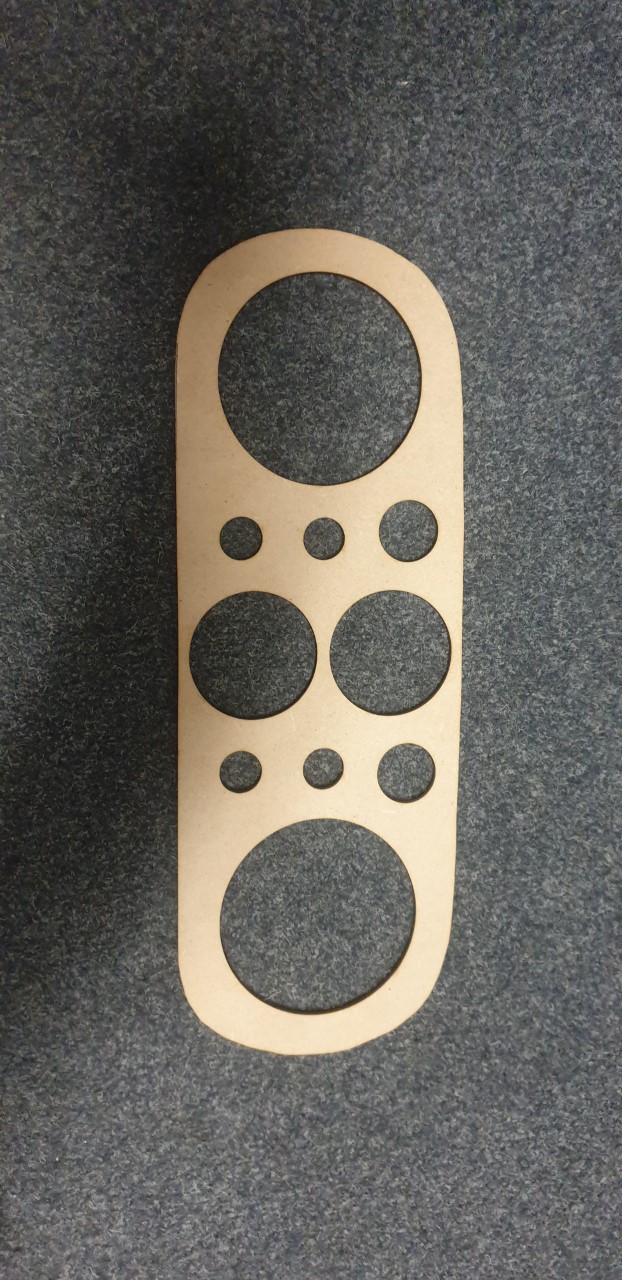
Then i drew up how the dash layout was going to look and had a mate laser cut it out of some 3mm MDF as a trial run before cutting it out of the proper laminate.
1 point
-
Theres a form we fill out that they take to vtnz/vinz Usually check the ID of the vehicle first and if theres any obvious issues tell the owner to go sort that out before the cert goes any further I've only ever had one dodgy one come back with the correct paperwork. The rest have dissapeared or NZTA has got involved I spoke to a cop about it once, he said if its had all the original identifiers removed, it is very unlikely that they would ever be able to return it to its rightful owner1 point
-
well, at least my cars have enough metal still in them to get sent to a scrap man eh @RUNAMUCK1 point
-
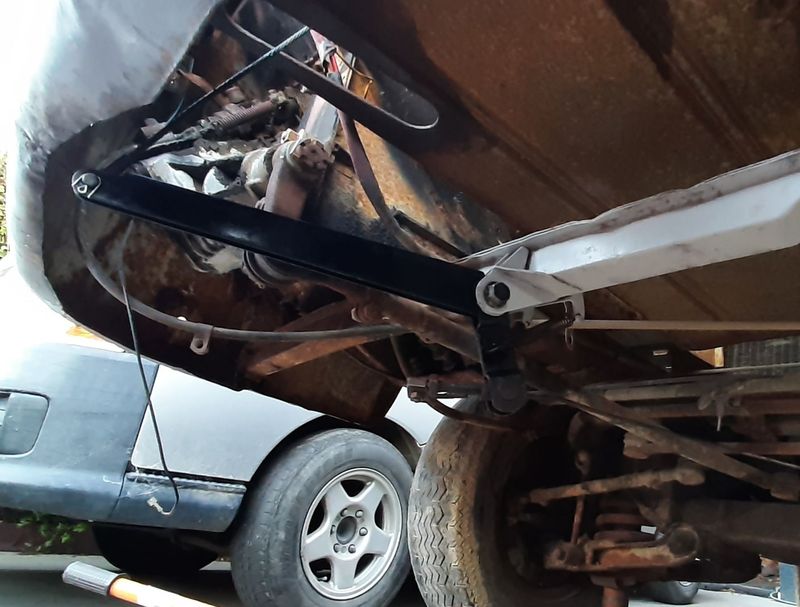
Progress has been slow of late. I've been mocking up the brake hard lines using old lines that I've harvested from my fleet of wrecks. I'm using them just to get the correct shapes and lengths as well as identifying the correct end fittings since I've got a mixture of brake components from both the Thames and some of my donor vans. It's fiddly work, but is worth investing the time to get them right. One of the Thames parts that I will be using is the brake light pressure switch and T piece. It was originally plumbed in to both the front and rear brake lines, but now that I am upgrading to a dual circuit setup I'm going to plumb it into the front circuit only and will blank off the remaining outlets. In other news I've finally installed the second fluid reservoir. I just need to complete the pipes feeding the master cylinder. Once I've got the pipes all mocked up I'll take them along to my local brake and clutch place to have new ones fabricated. Thanks for reading.
1 point
-
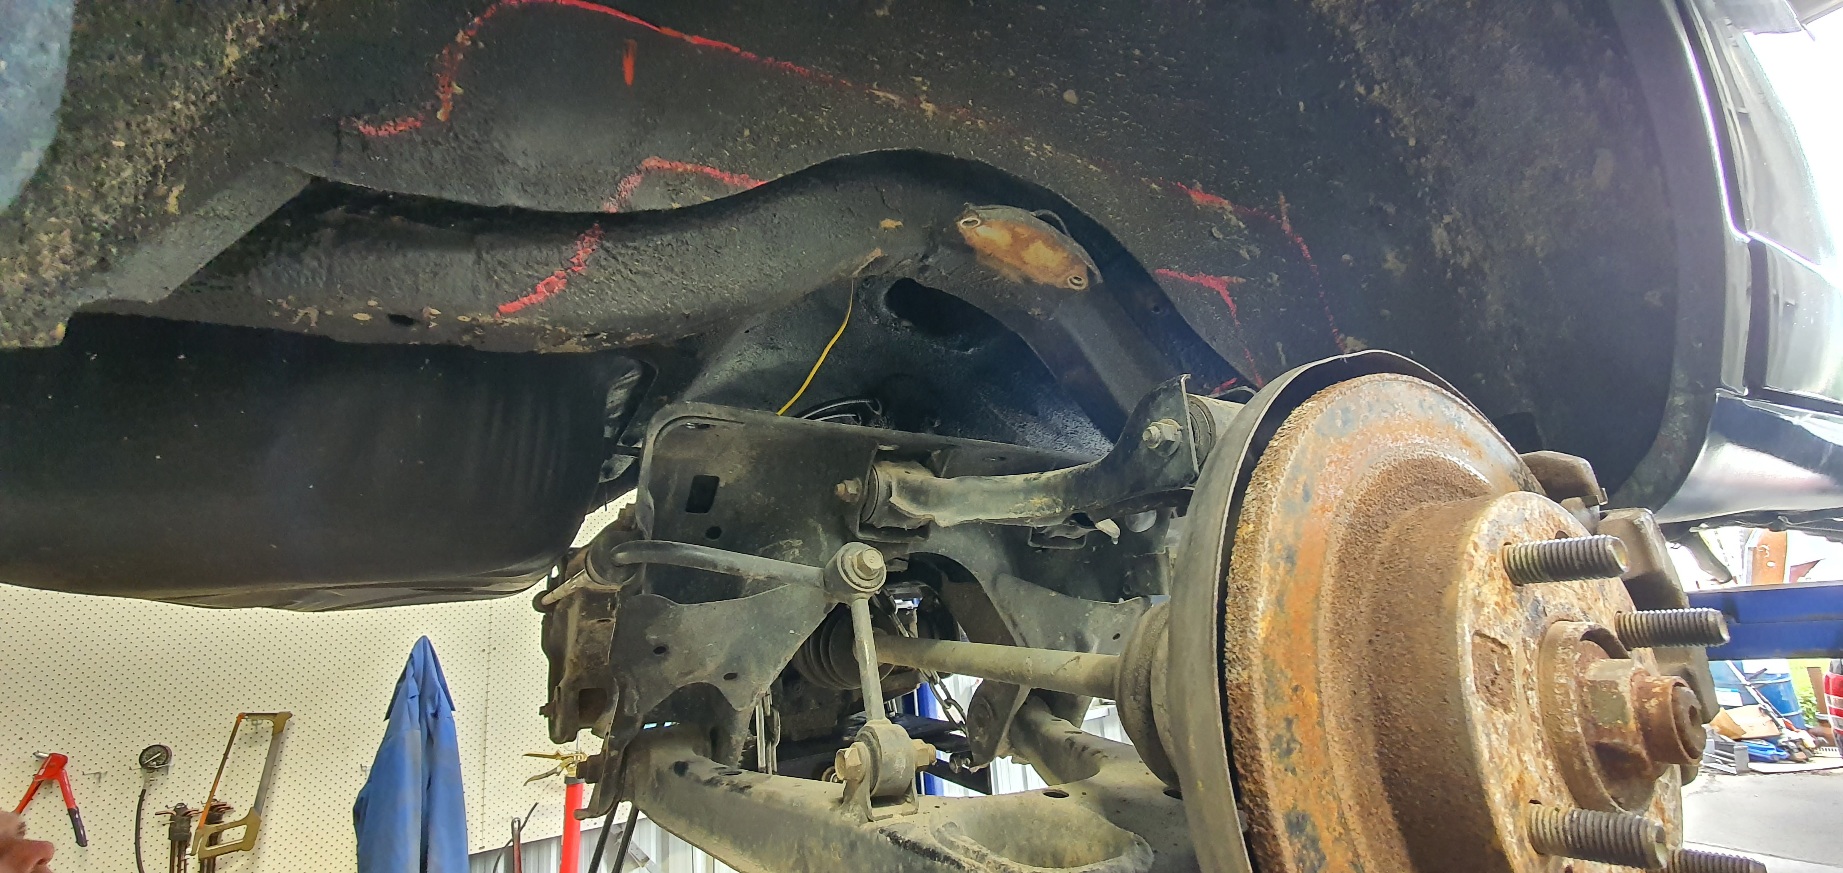
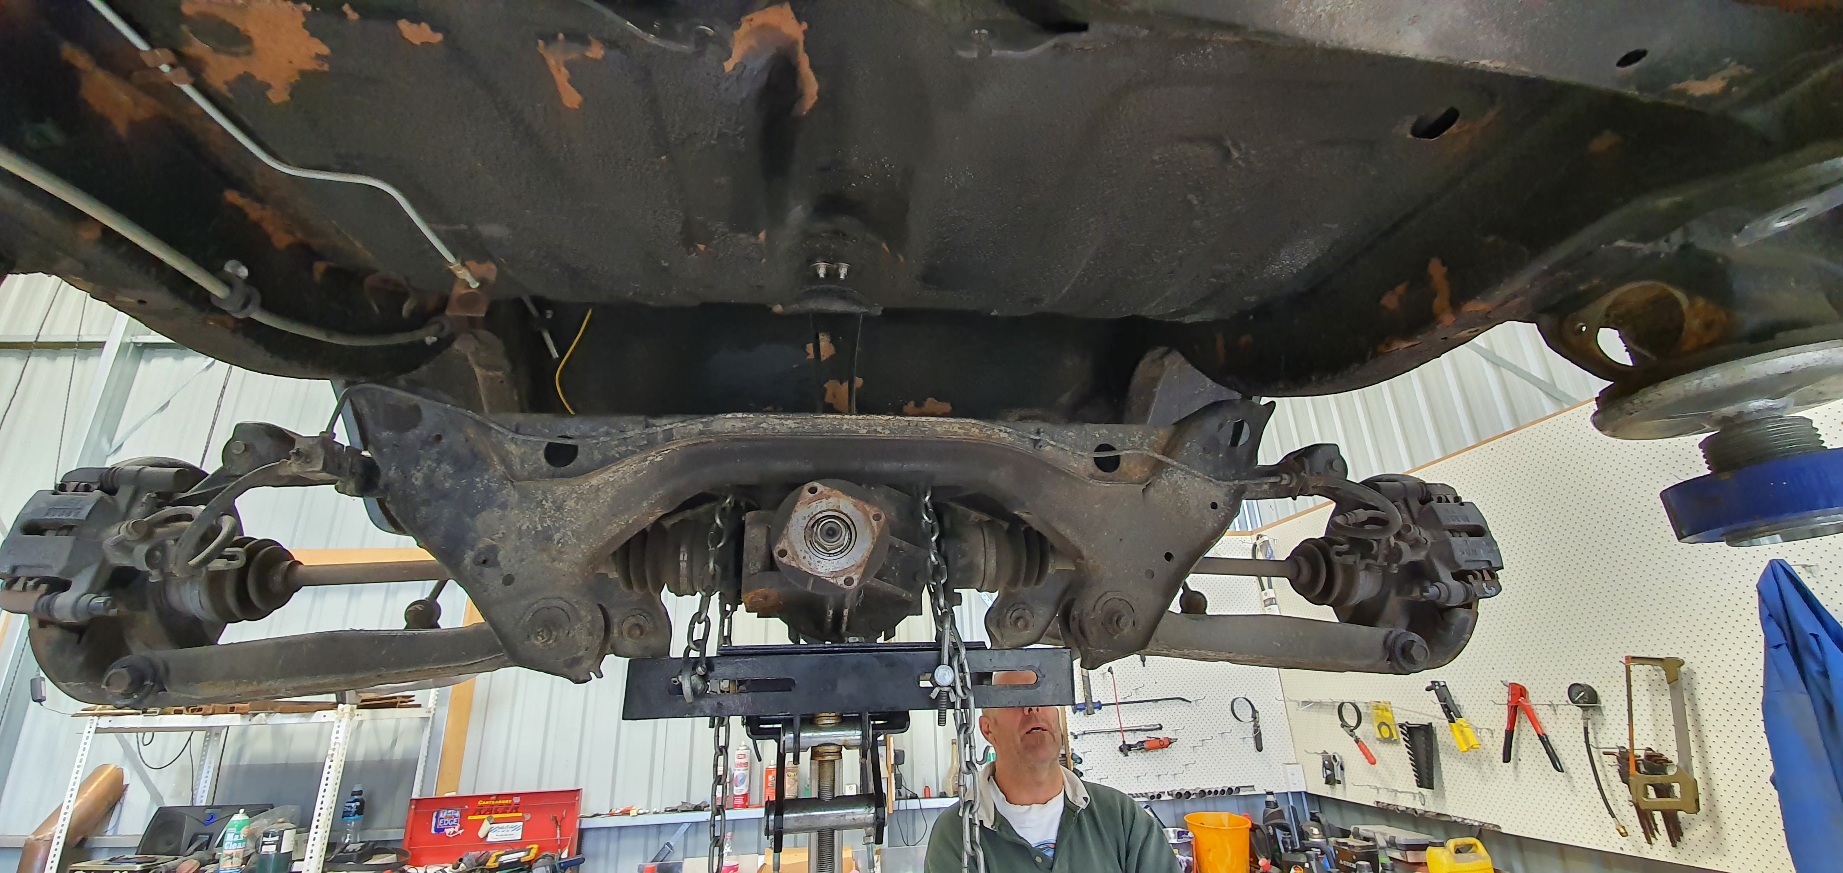
I've had a tiny amount of play in my rear wheel bearings so decided to rebuild my whole rear-end New CVs, bearings, aftermarket stub axles & companion flanges to take a 108mm CV. Old vs new stub axles. They have a larger splined diameter and are beefier at the wheel flange. This now shifts the weakest point in the driveline to my r180 diff, but it should be good enough for my engine. I also replaced all diff seals & o-rings so hopefully it stops leaving little puddles on the floor now. I couldn't get a micrometer inside the hubs to confirm, but I've assumed the play was from the bearing spacers getting overtightened and mushrooming slightly. So I cut some 0.05mm shims and torqued the hubs up and things feel right now. The left hub required two shims. Everything seems to measure up correctly and there's no play anymore. Rad! However. At this point I realised I have a problem. Since my new companion flange accepts a 108mm CV directly, I no longer need to run the CV adapter plate I used to use. This means my axles are now 25mm too short. FML. Cars aye!1 point
-
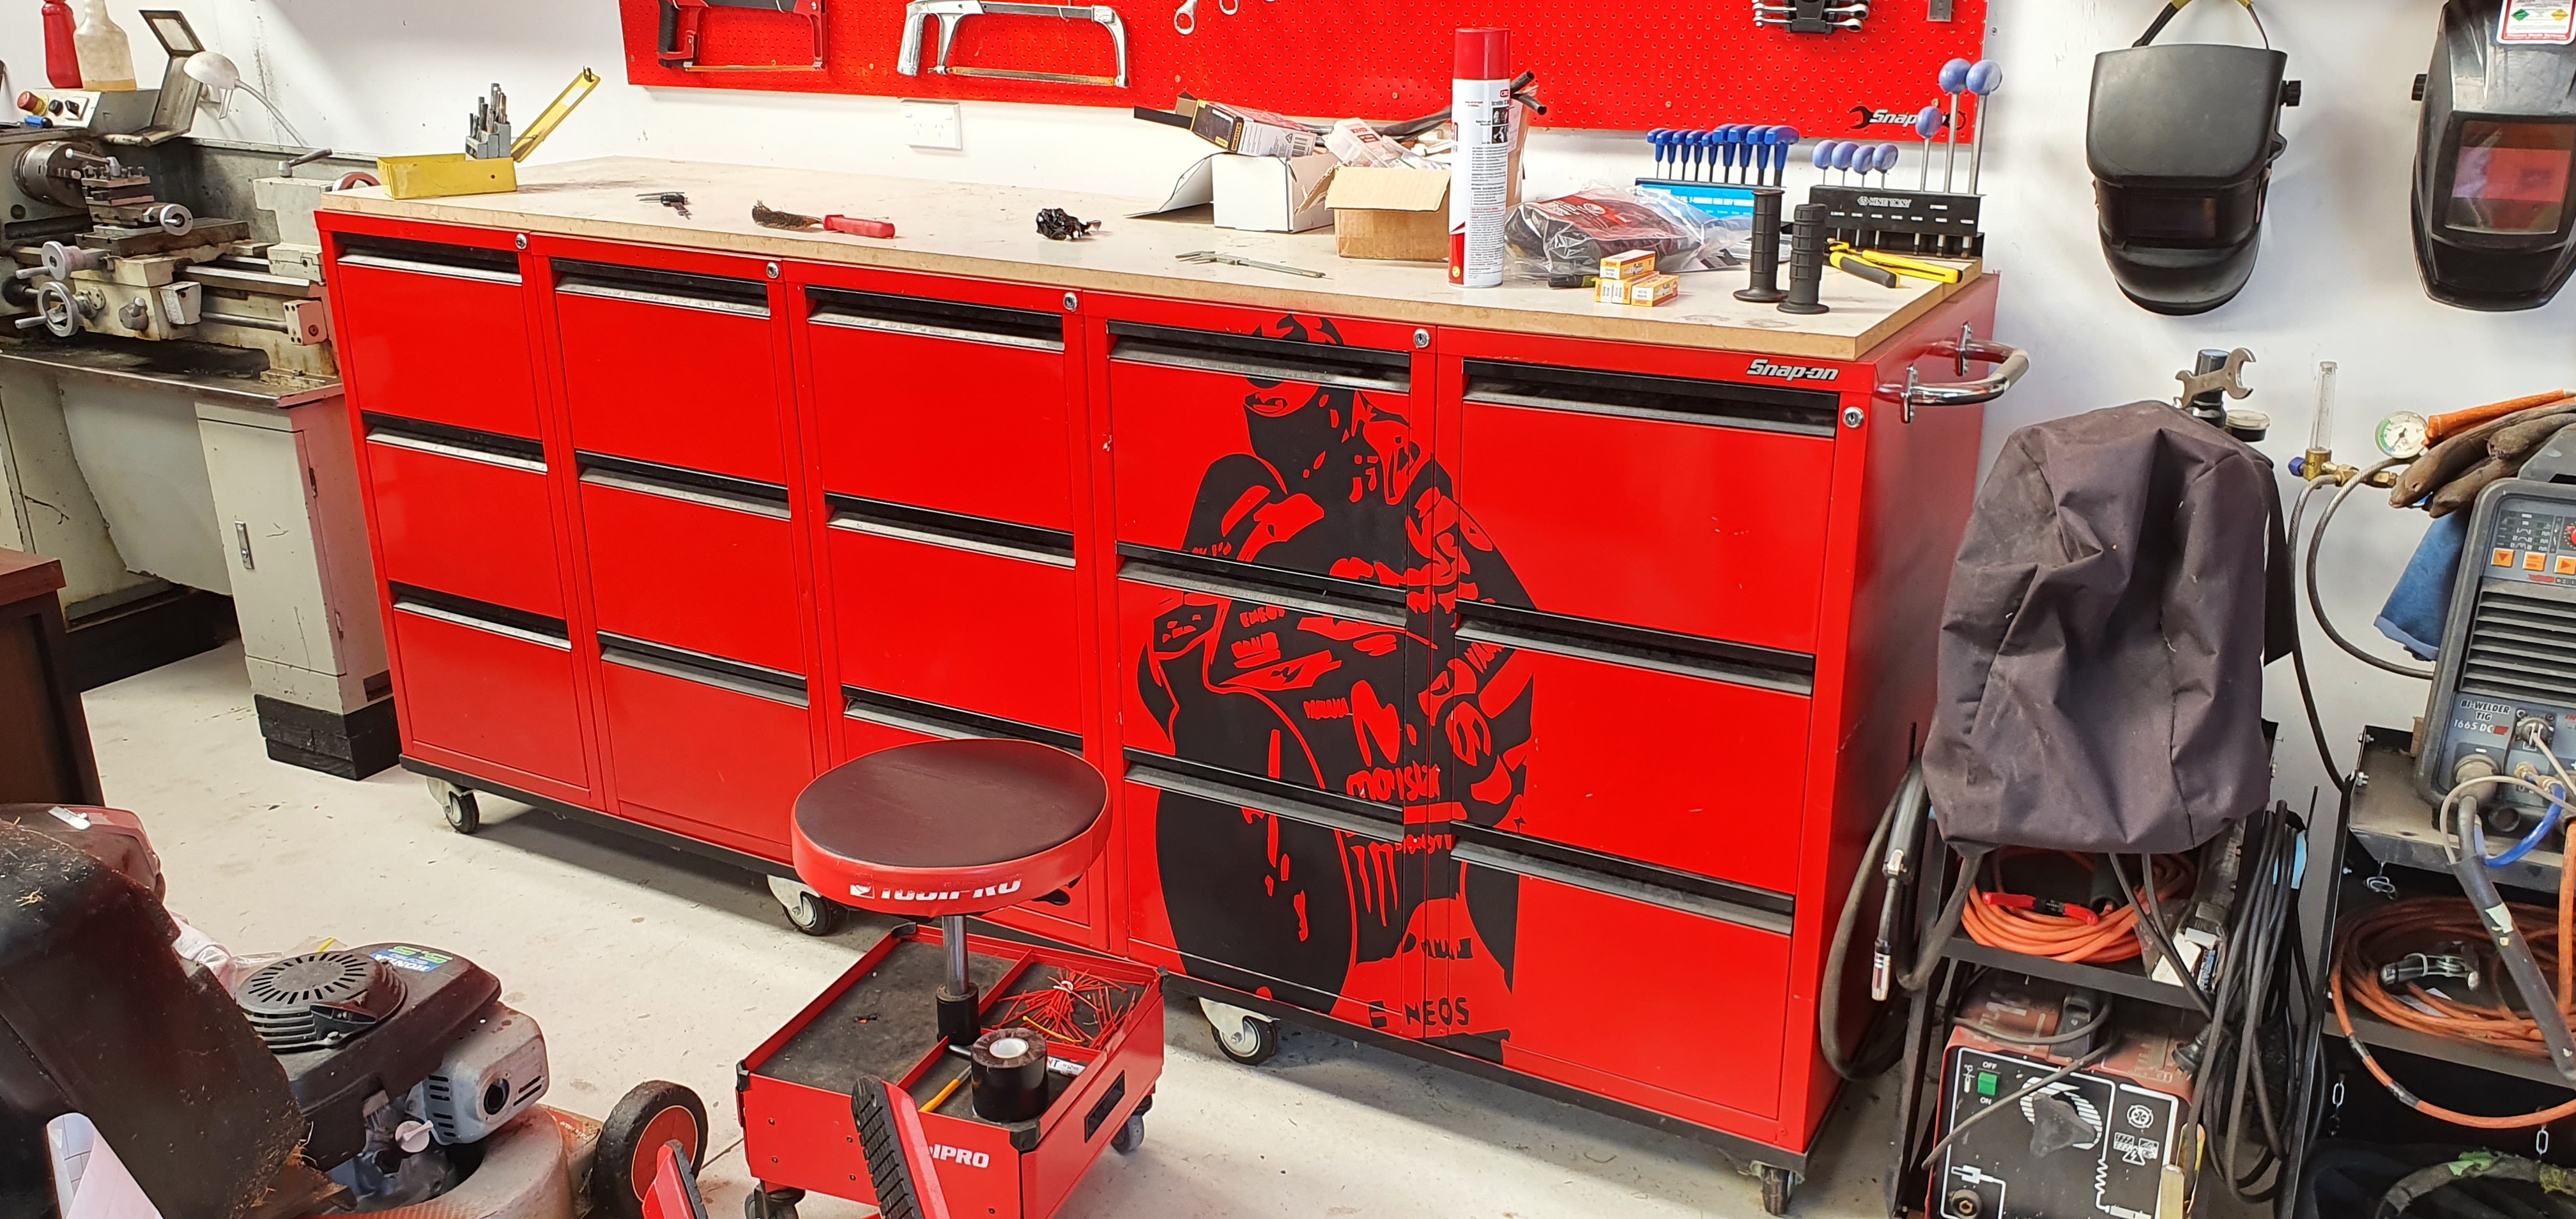
Toolbox art? Well if putting stickers on shit constitutes "art"? Was quite the mission to do and if I did it again I'd probably position it slightly differently...but meh, it works and looks basically like what I had in mind.
1 point
-
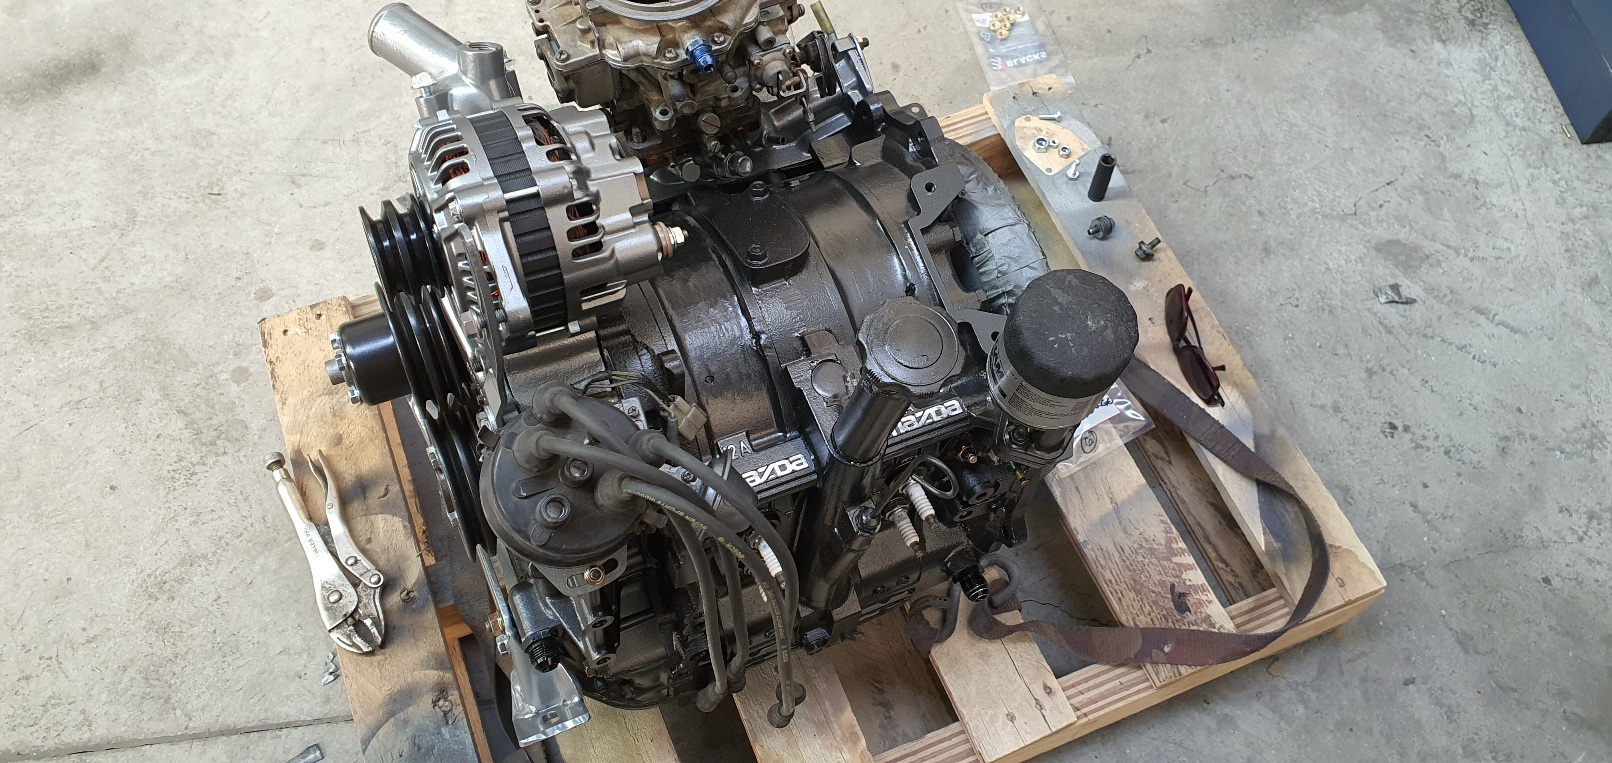
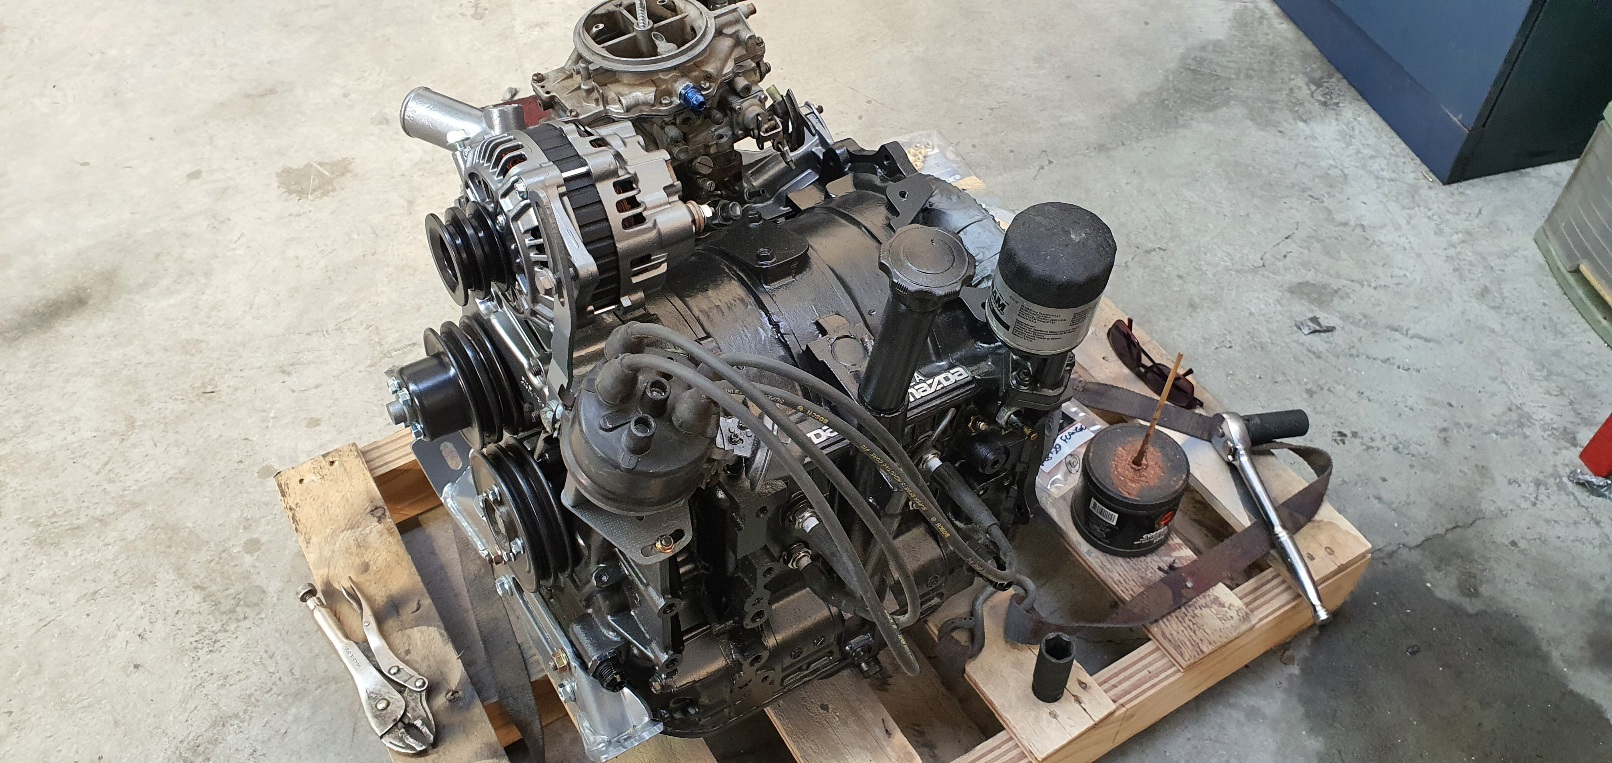
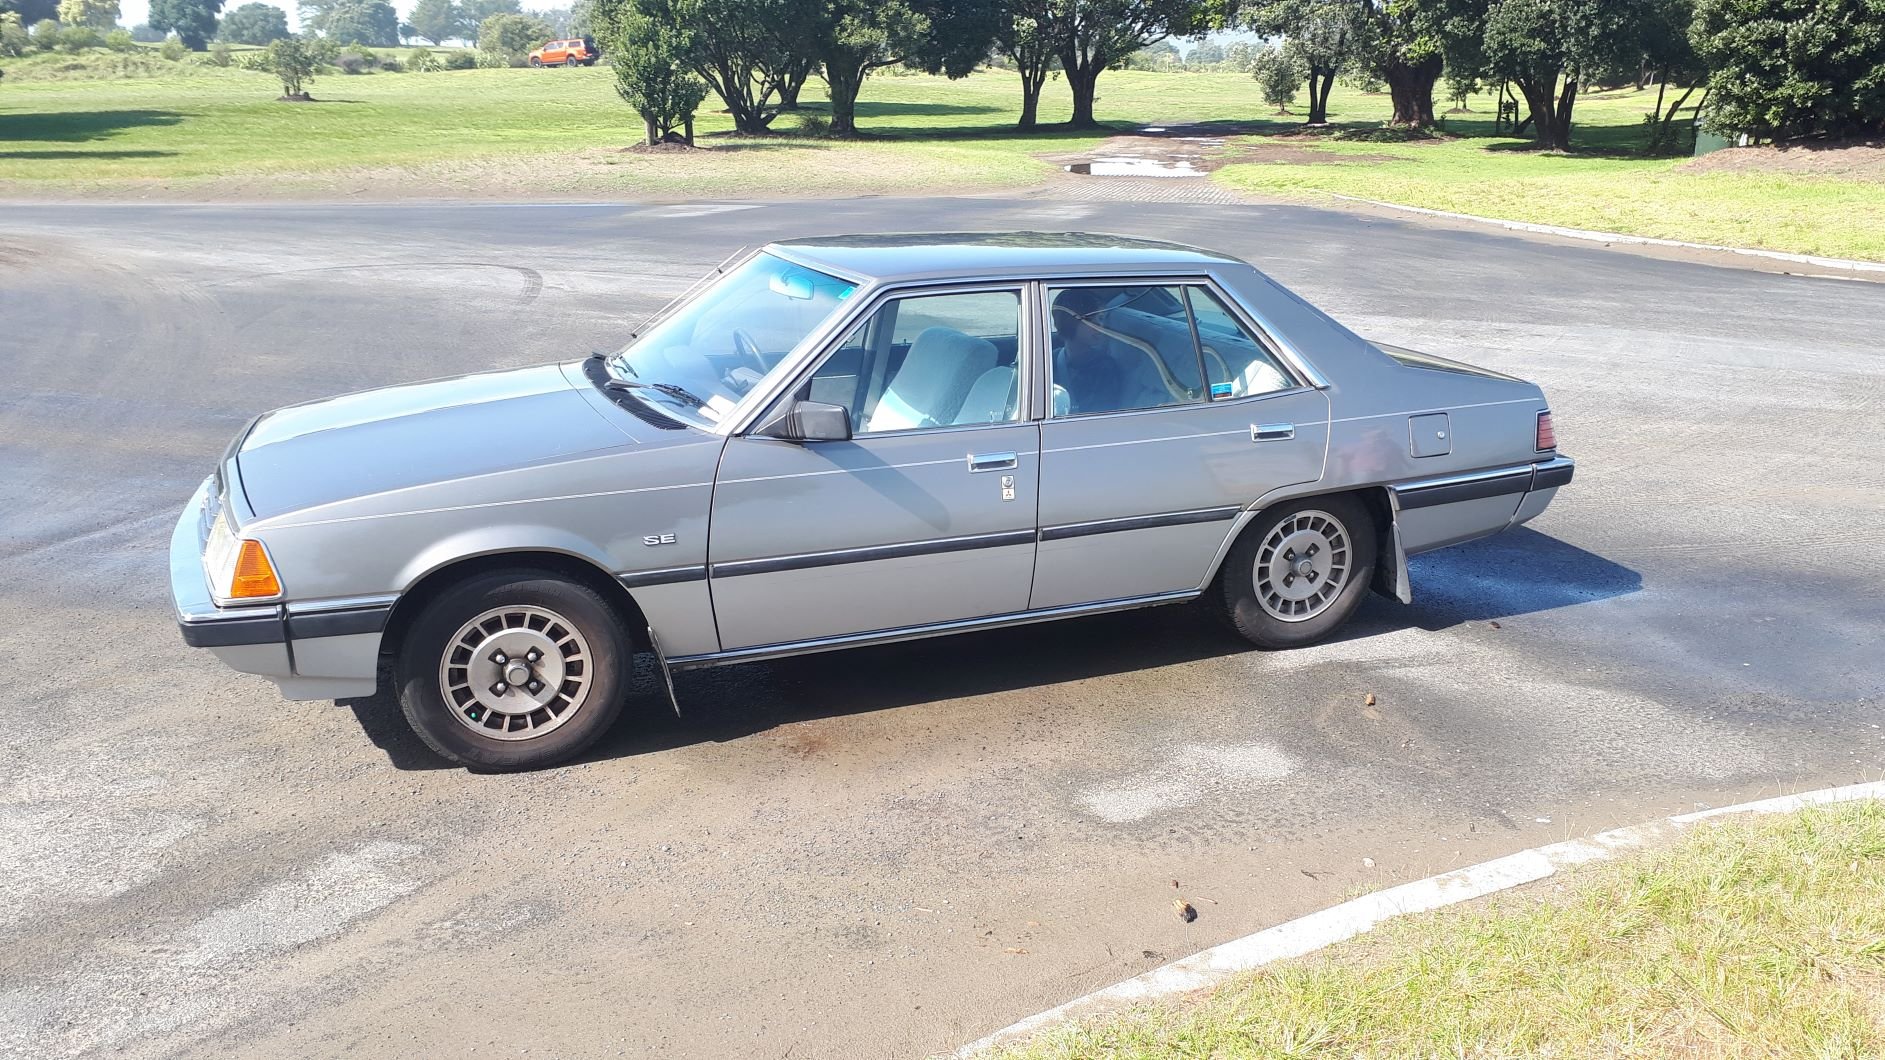
The Sigma has been sitting around a bit. I drive it every so often but it's kind of underpowered compared with my Aussie 6 cylinder stuff and I really wish it wasn't. I have been toying with the idea of repowering it but I thought I might try to liven up the stock engine first. A buddy of mine dropped this off over the weekend. I really have no idea what I am doing but that has never stopped me in the past. What could possibly go wrong?
1 point
-
Weld a morris crank handle on for a familiar way of doing it?1 point
-
This thread is going to get real busy if people start listing all of the motors that are better than a 2NZFE1 point
-
looks like you need a few thousand more rpm judging by that graph1 point
-
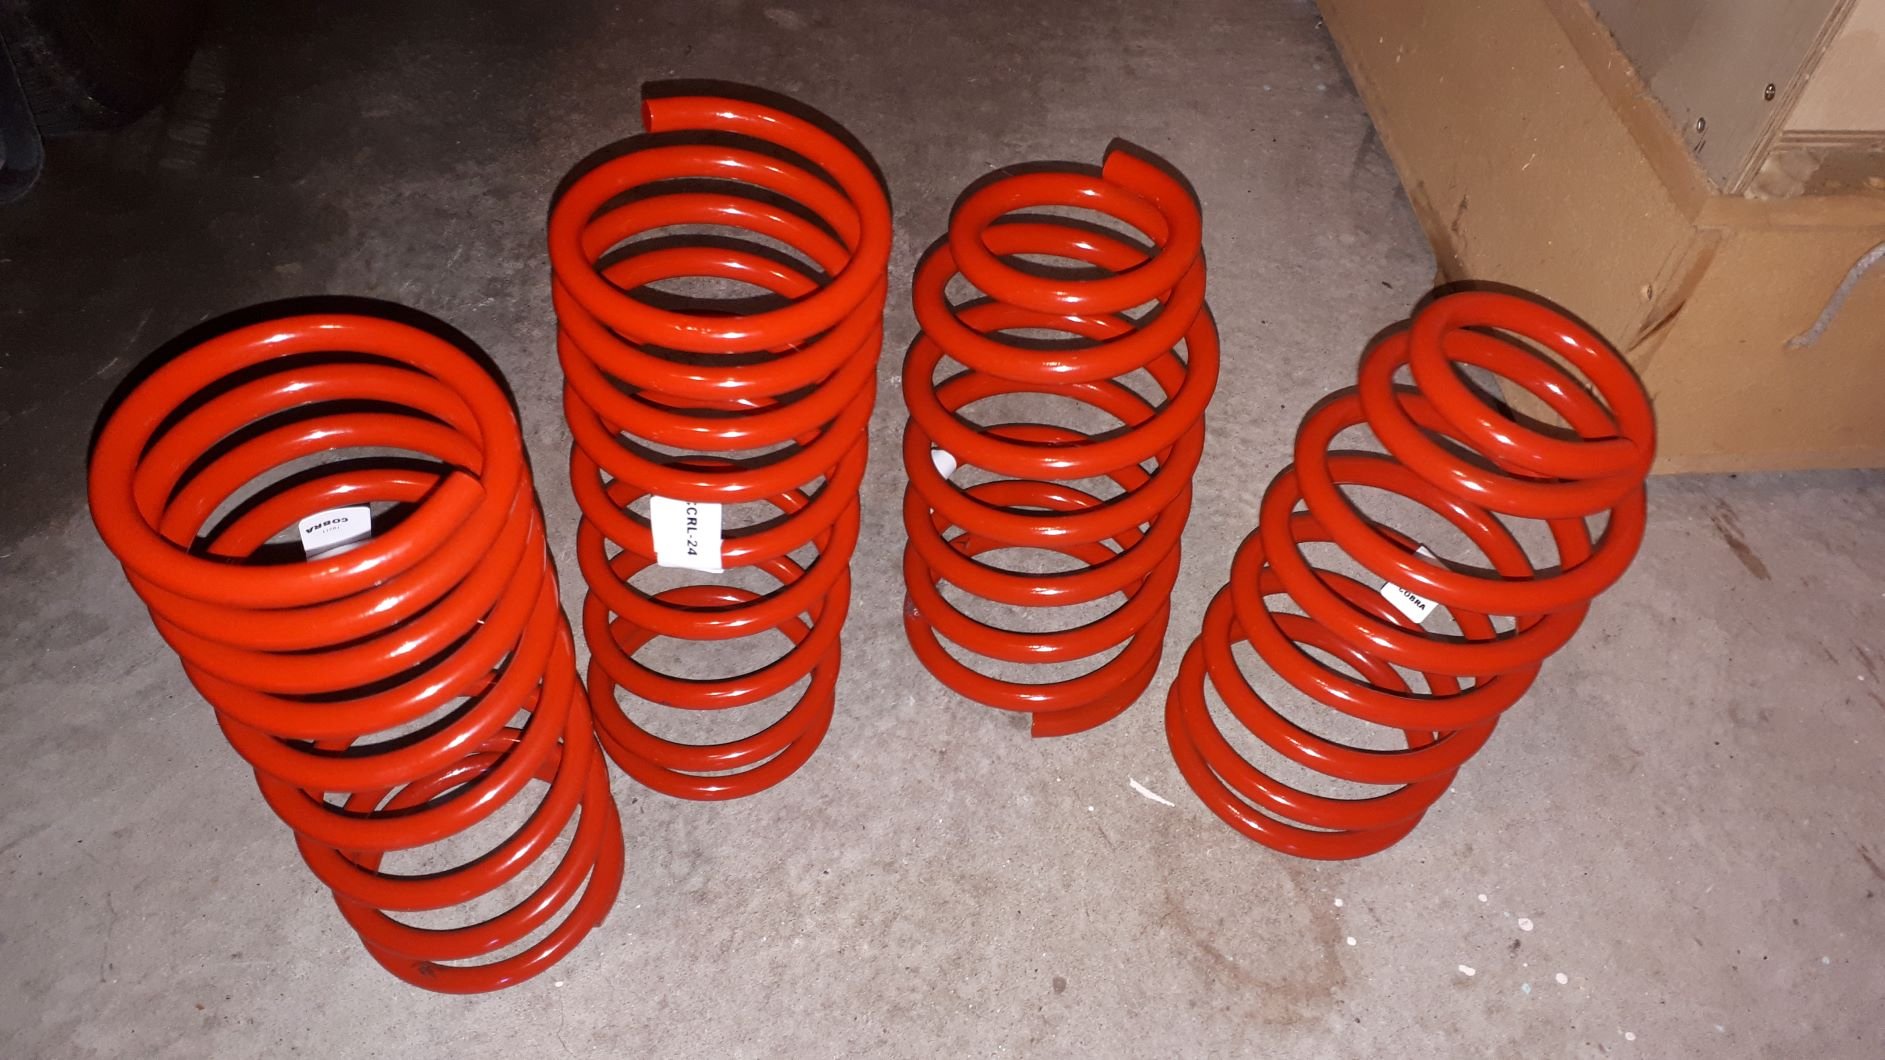
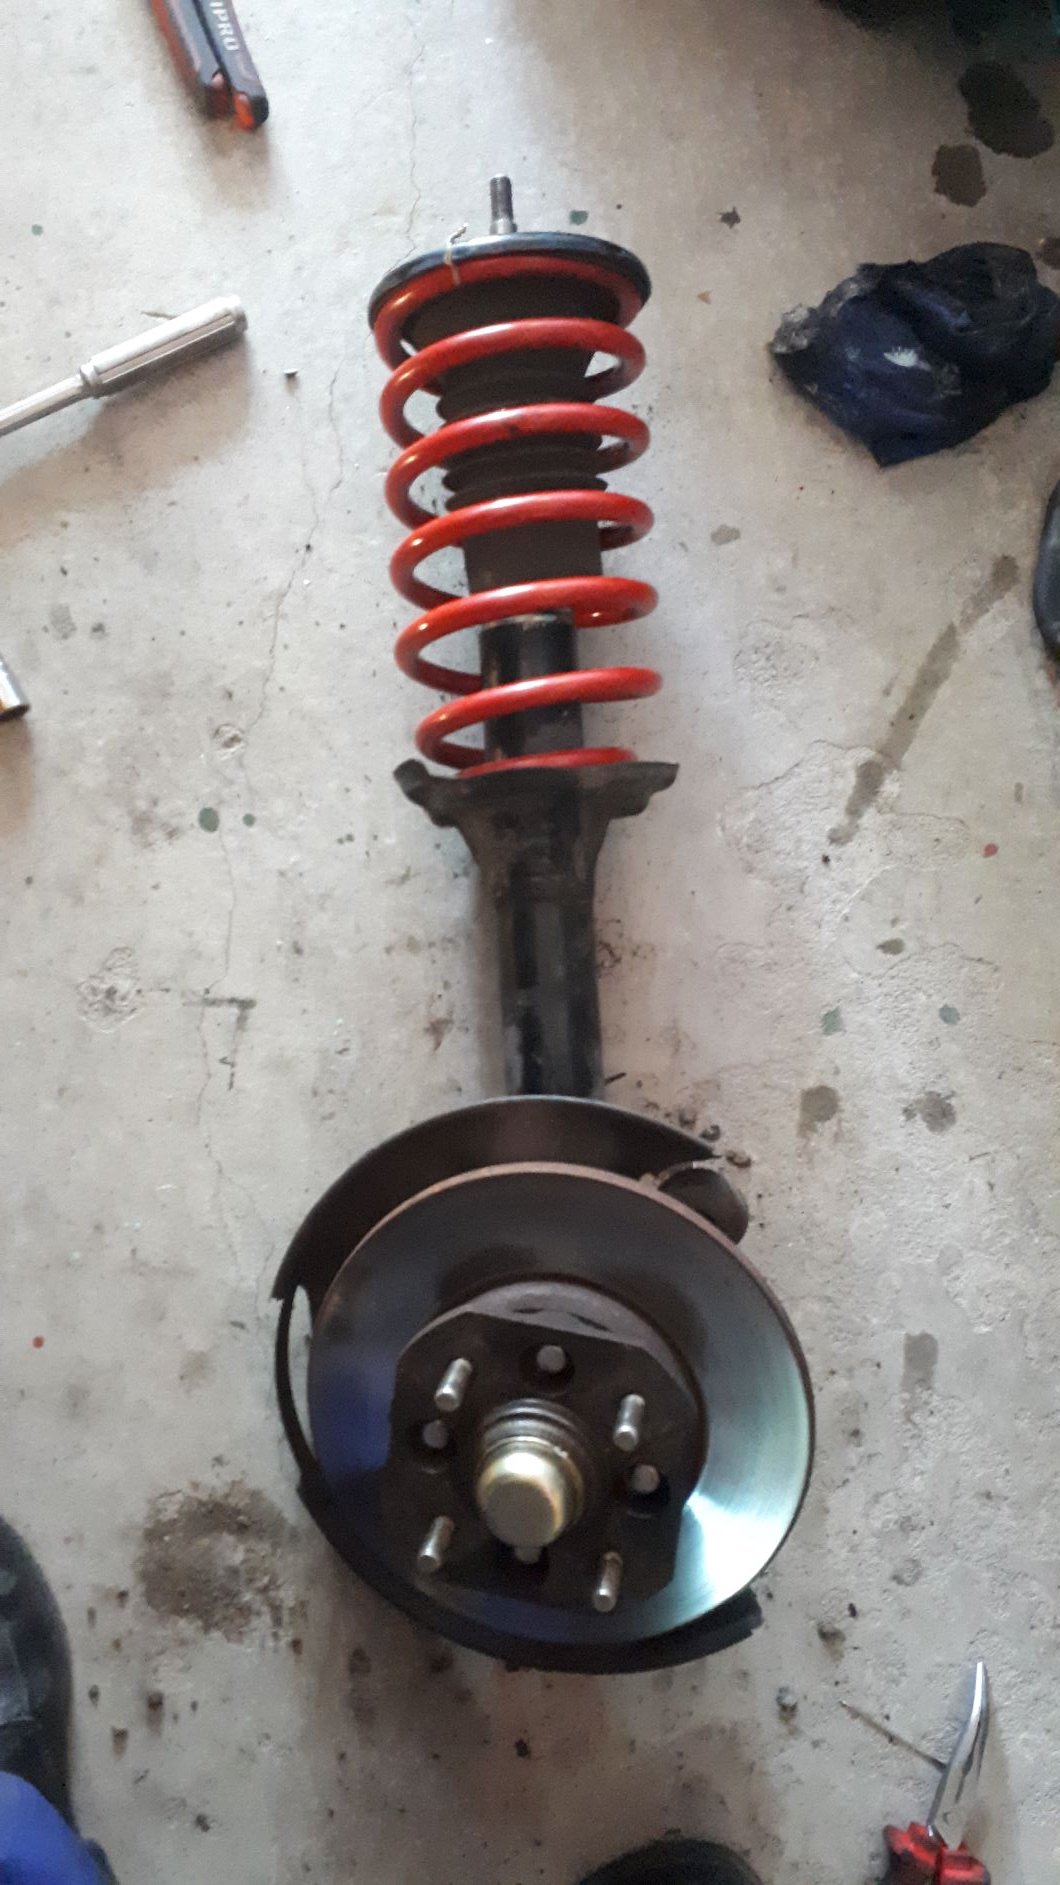
In the 1980's car manufacturers seemed to think it was a good idea to supply their customers with unnecessary and unsightly additional ride height. Last weeks project was to correct this with new springs and shocks all round. The car didn't drive particularly well so I did a back yard wheel alignment with string and a tape measure. I found that the front wheels were actually toed out so I also corrected that problem and it drives heaps better now. I will get it in for a proper wheel alignment sometime soon.
1 point


.thumb.jpeg.910c6632f6e66e8cba89476e83b41634.jpeg)


.jpg.b1d574b58ea1fc660d4ad2eeff6c2529.jpg)
.jpg.46acd8f1c0ab30373676b9a8fa30e0f8.jpg)
.jpg.9522e115b6ce42a0f1fa54ee8be88c1b.jpg)
.jpg.60725e6f3e2ef8e76802543785b76c6f.jpg)
.jpg.b356316fc88b188730b9a0eed71e2dc6.jpg)


This leaderboard is set to Auckland/GMT+12:00