
Leaderboard


Popular Content
Showing content with the highest reputation on 04/30/21 in all areas
-
Getting there now.
 16 points
 -
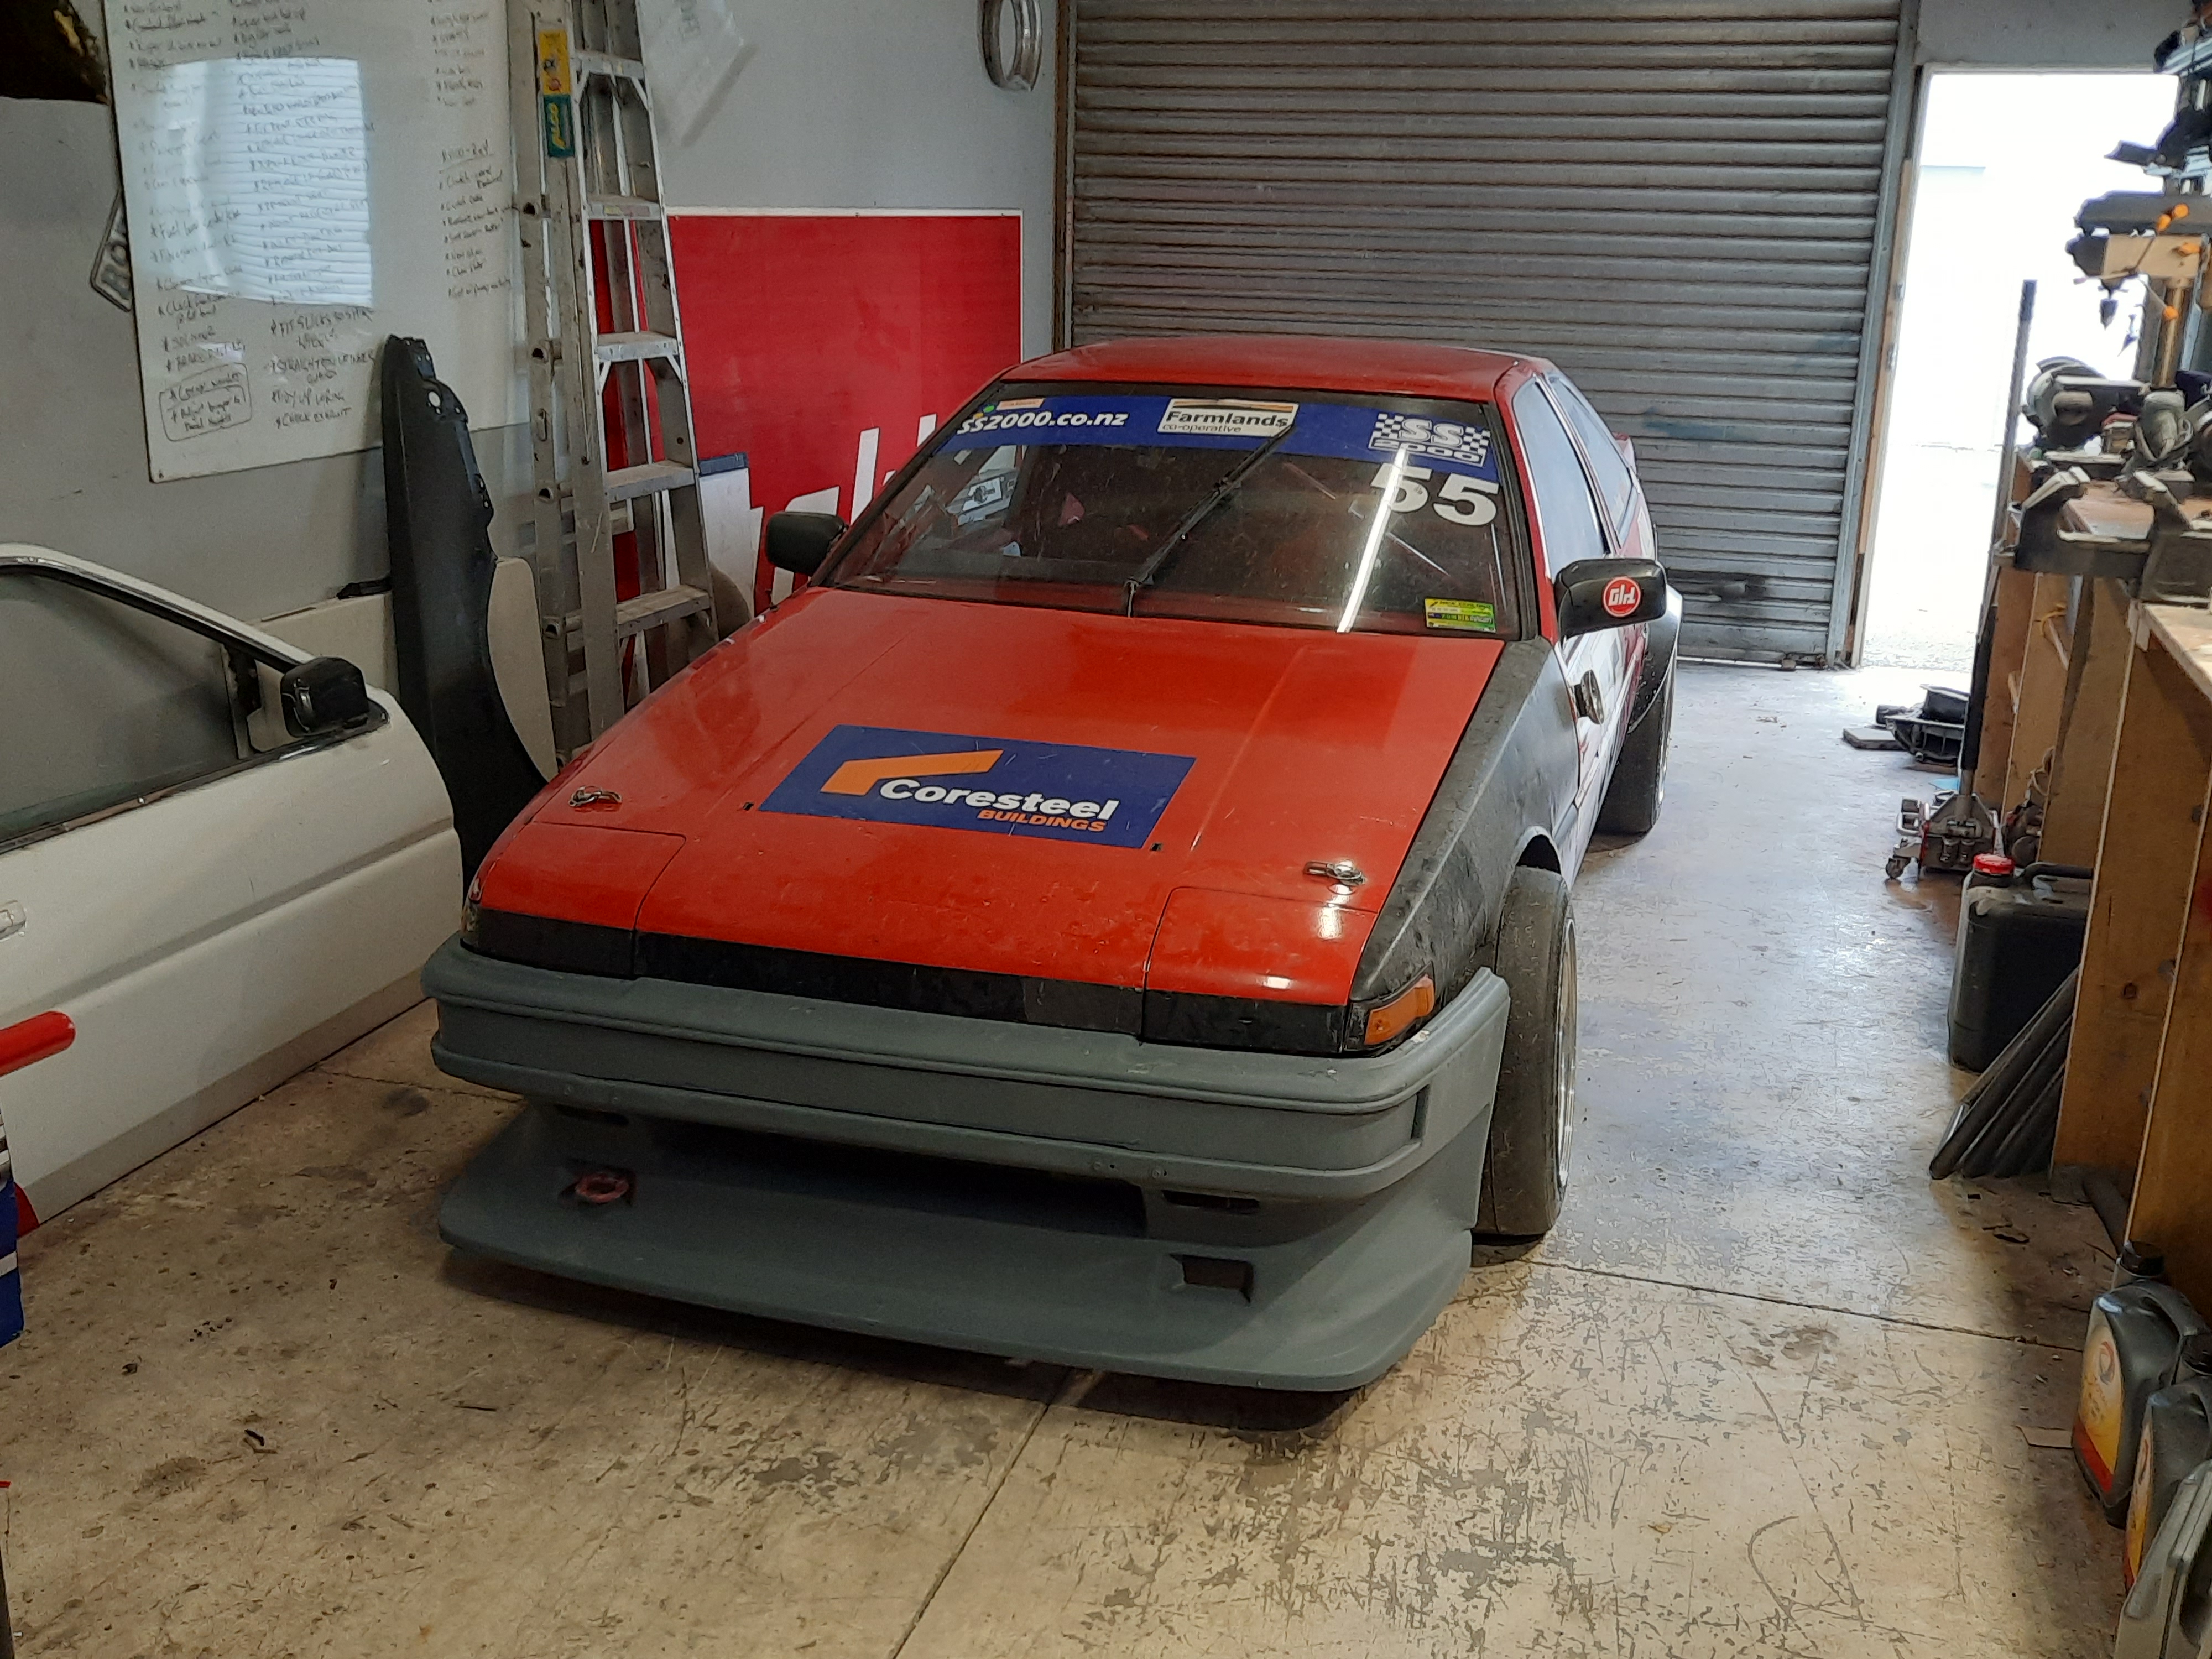
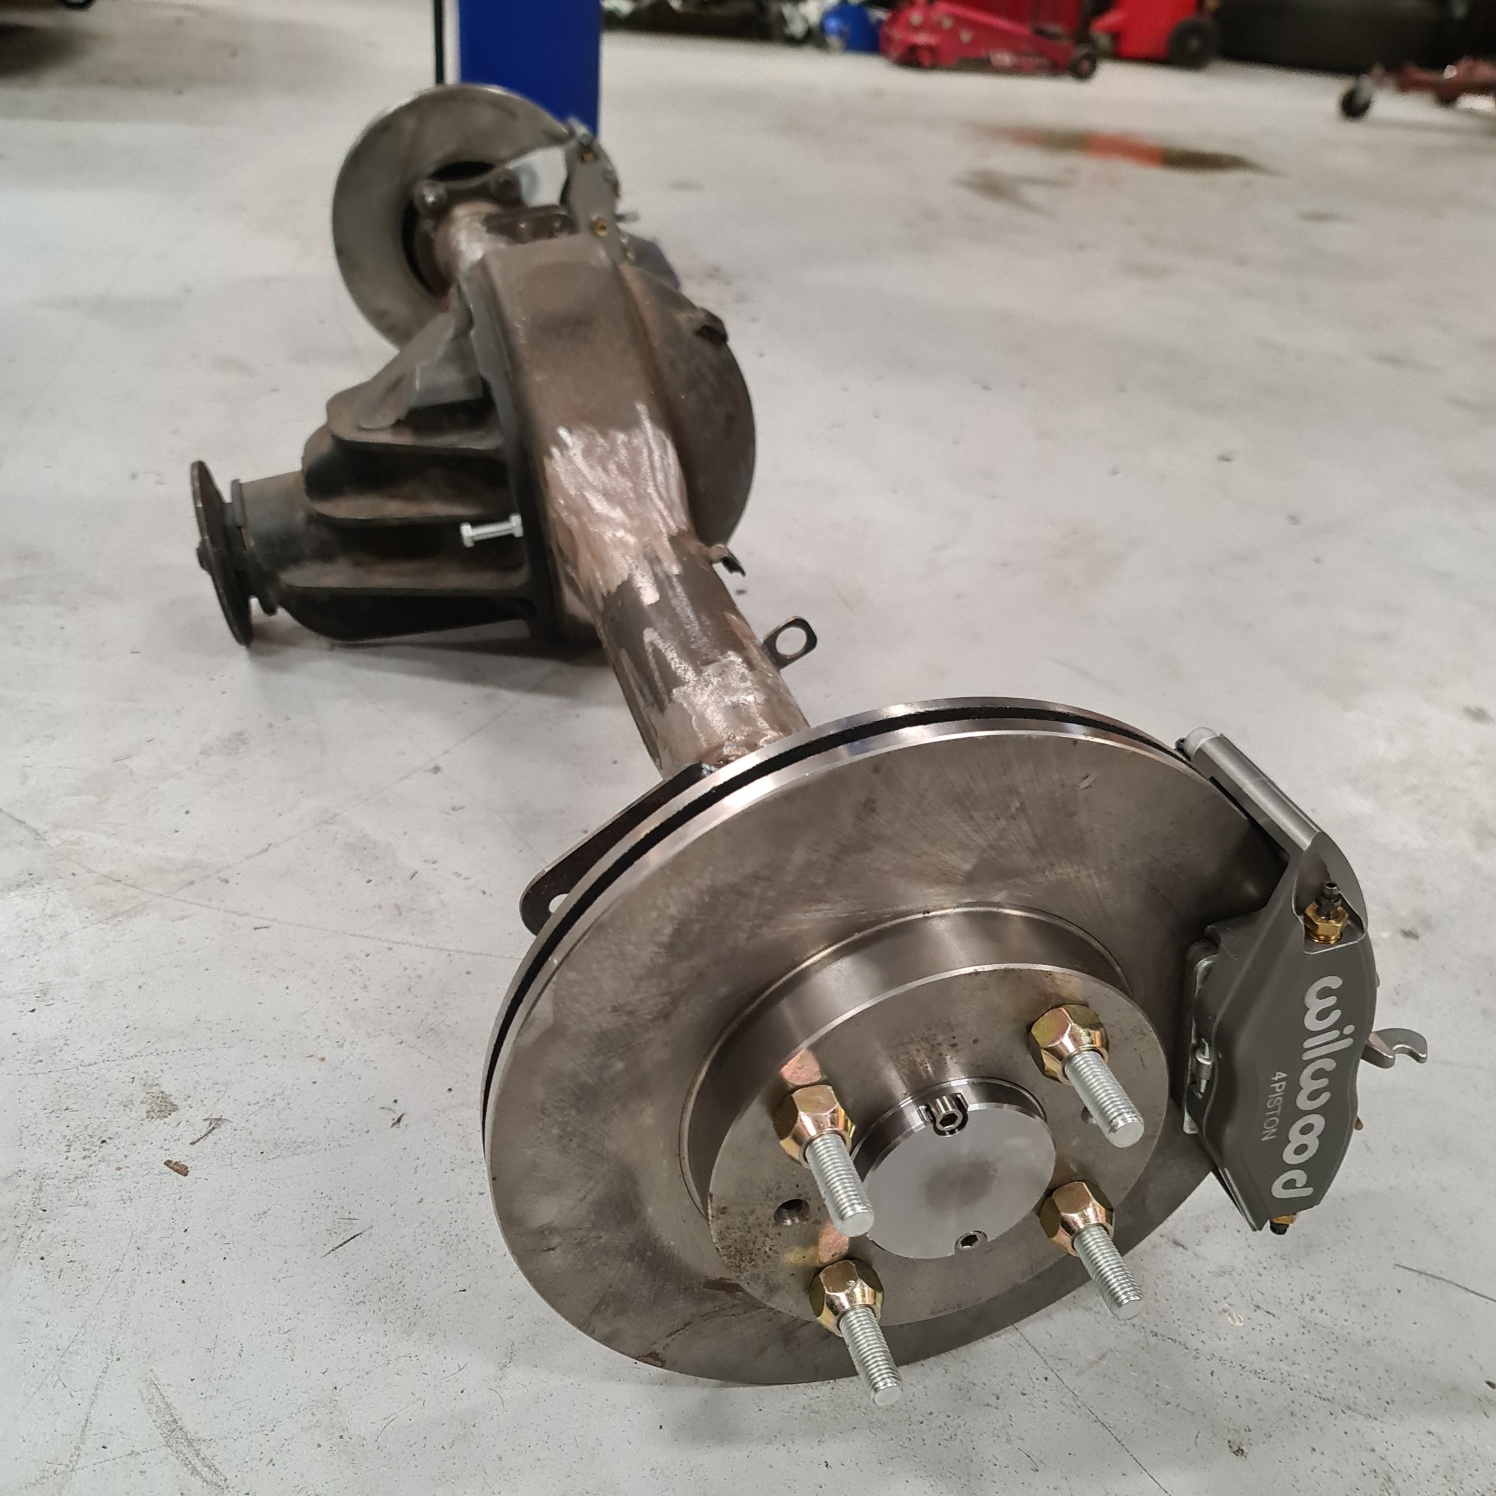
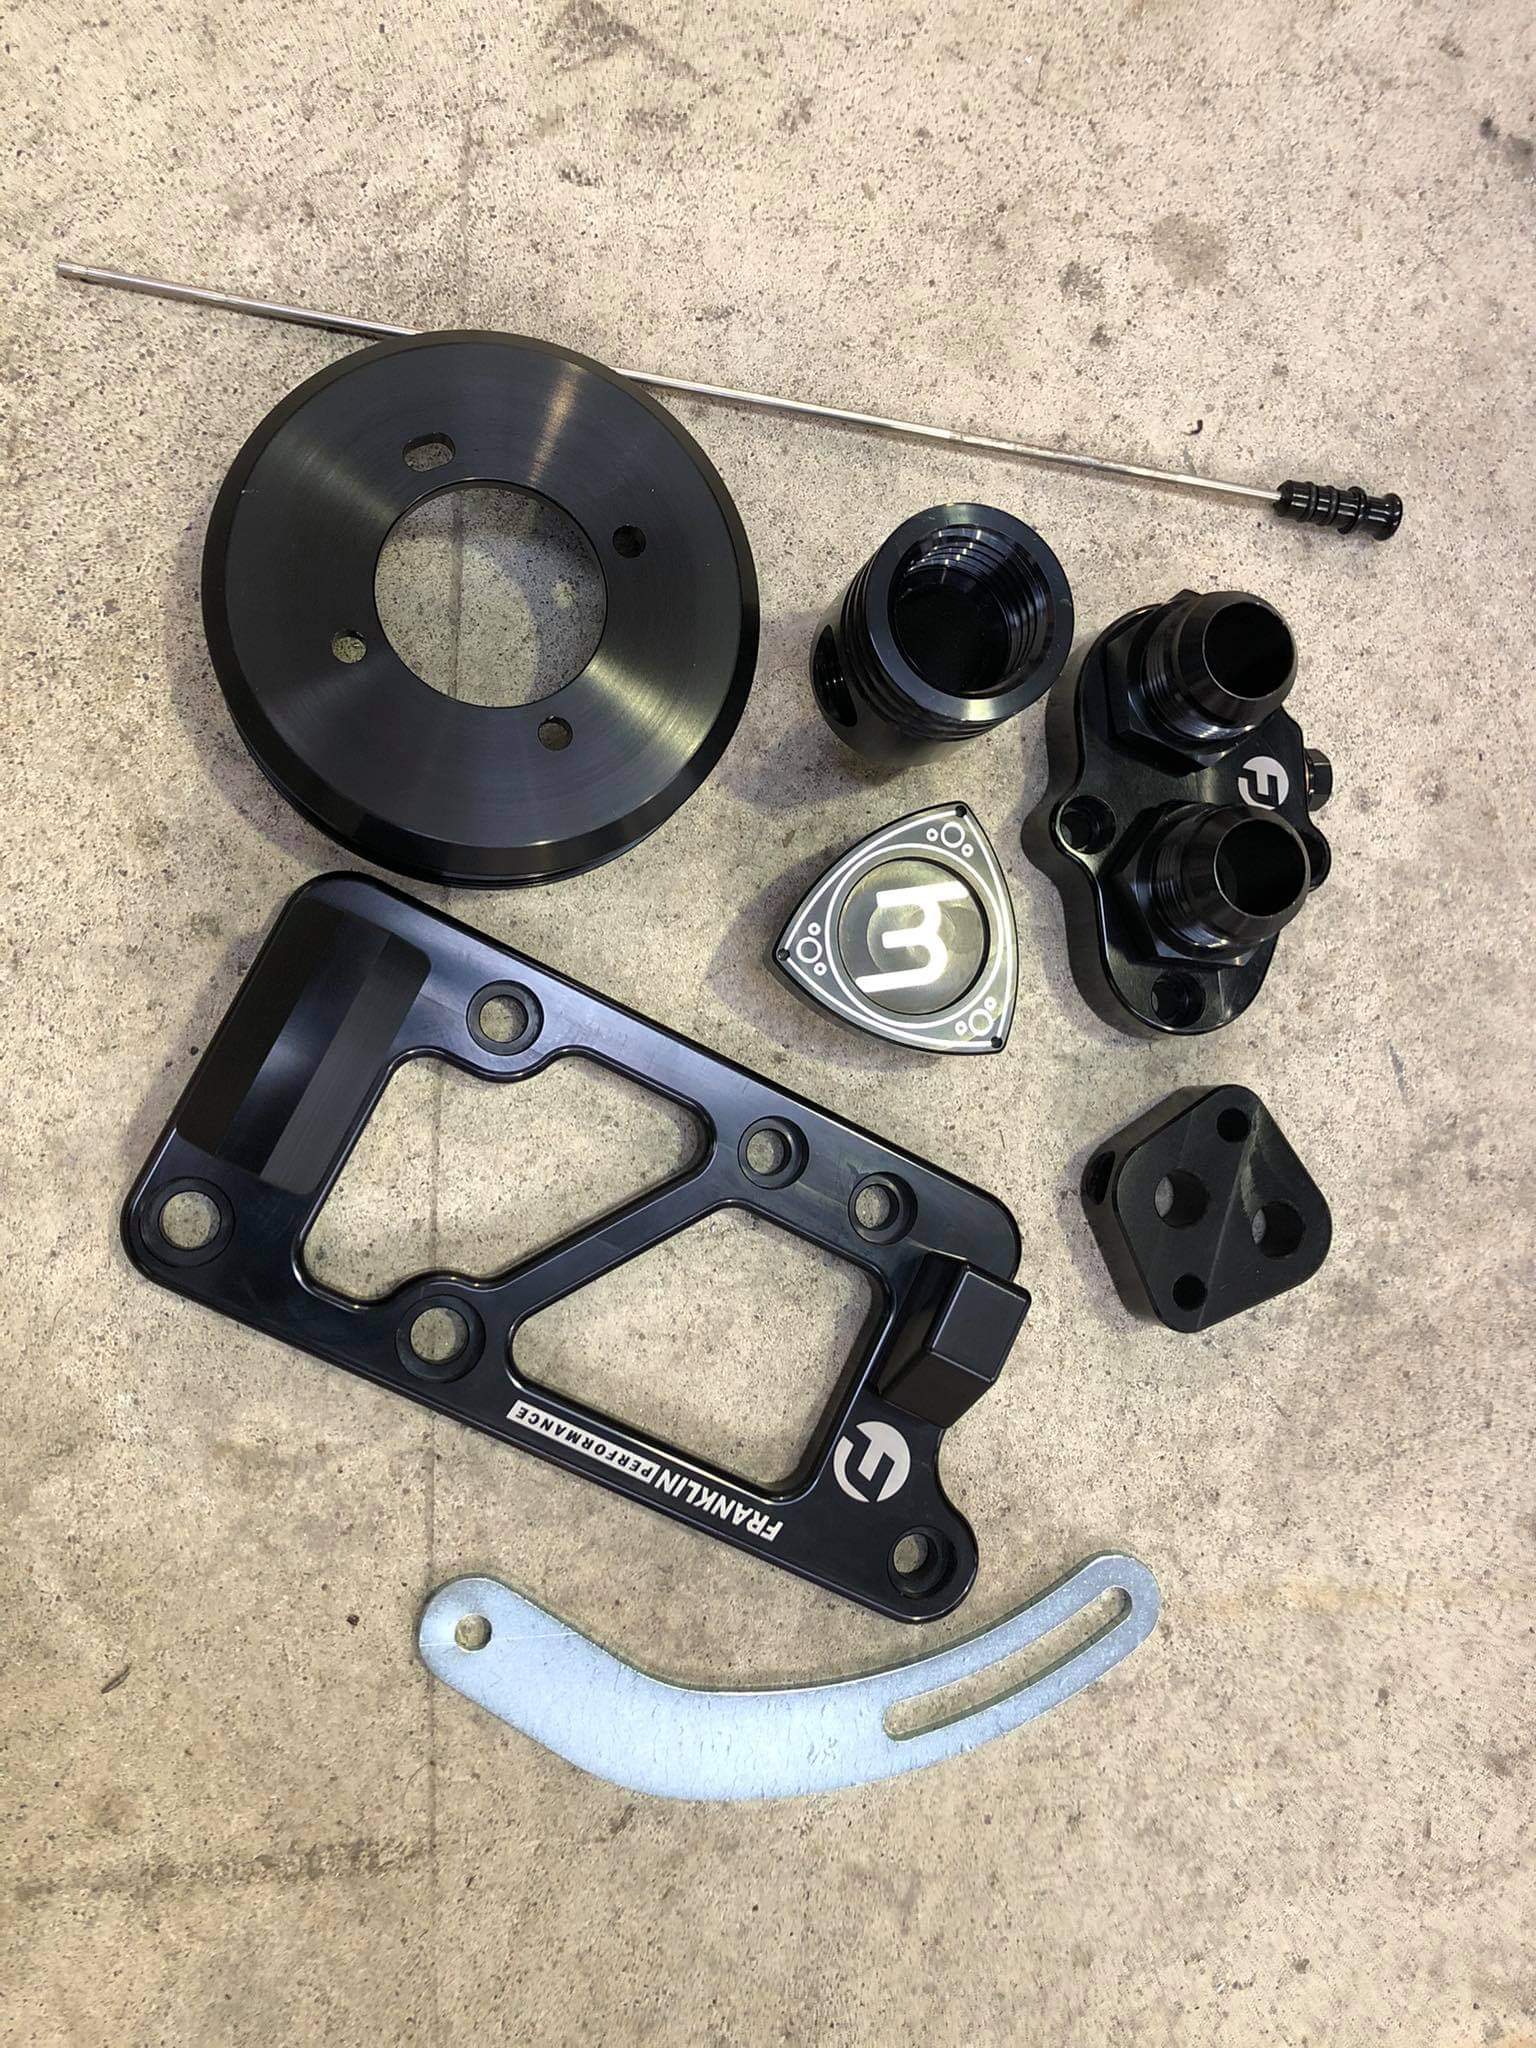
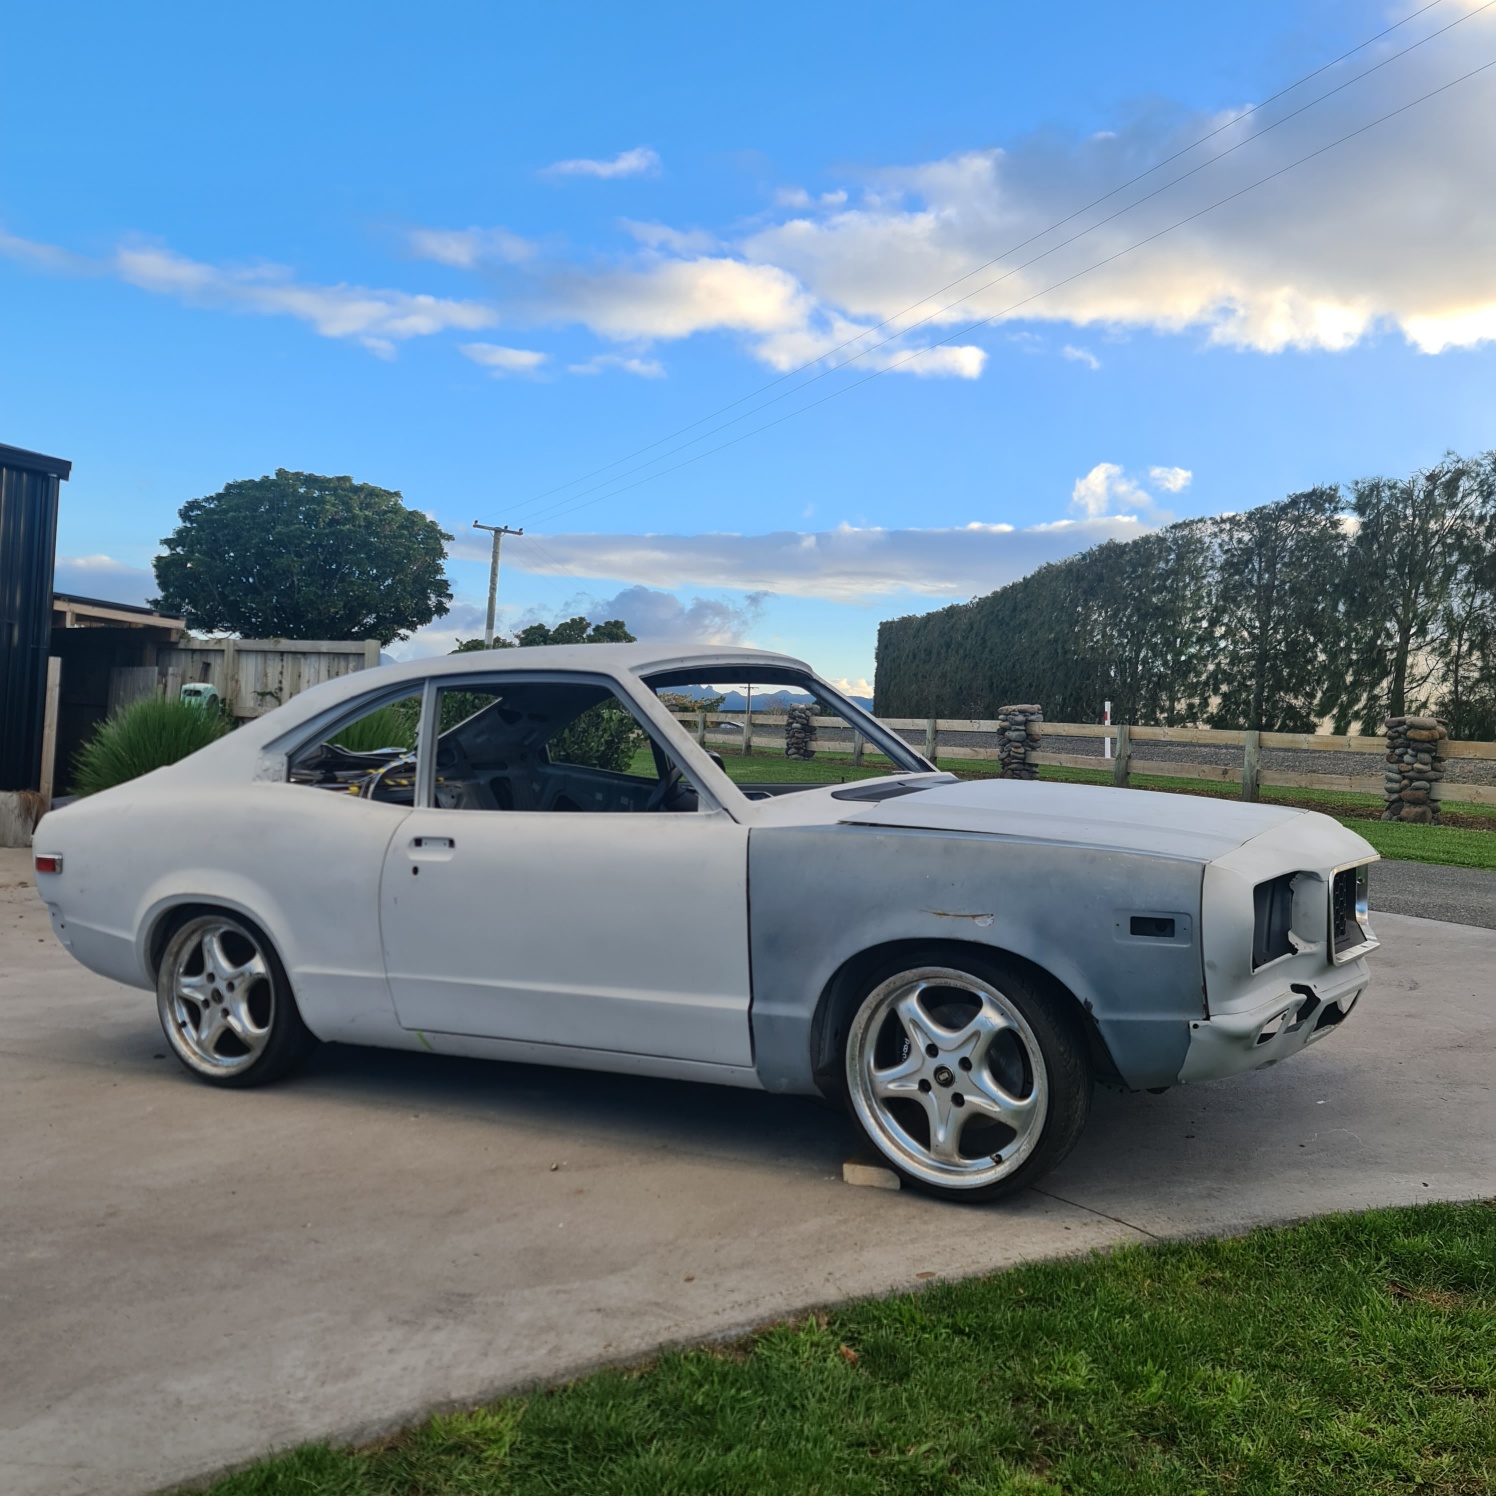
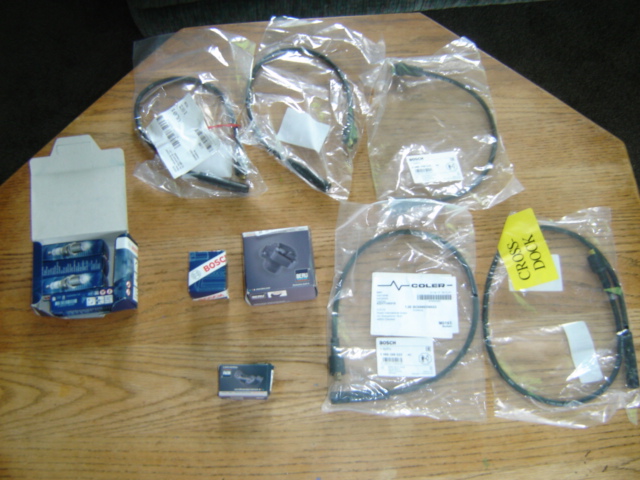
Bit more progress. Mate Gav just finished up the brake brackets for the rear calipers on the diff this week so i got that in, First issue was U bolts for RX3 diff are much smaller so had to get a set of B2000 ubolts and blocks. Chucked those in and got it fitted up last night Have ordered a heap of bits for the wiring, sensors (water temp, oil temp/pressure, fuel pressure) as well as a new alternator, starter and electric water pump which are all getting stripped to go to Toby for polishing. I also picked up a few goodies from Franklin Performance for the motor so they are ready to go on once assembled. Also test fitted a set of 17x7.5 ROH Z's for some nostalgia! Got plenty of space to run a 8.5" at least on the rear so will keep a eye out for a set of those.
7 points
-
In the meantime, I yolo'd other parts of the tank. As a reminder here's what I was dealing with. The pickup was so rusted that I almost threw it out. Even after finding out that they're basically unobtainable I still wanted to, but was convinced it was salvagable. Fine. The other stuff is OK but dirty and with splotchy surface rust - some bracketry holding the fuel pump on the tank, and the filler neck. So I decided to treat with a vinegar bath. I don't have many pics of the process, but it went like this: 1. put into vinegar 2. rotate every so often 3. hmm and humm about what to do, occasionally scrubbing rust and dirt 4. leave it in there because it can't rust in vinegar!* (* don't do this...) I decided I'd get it electroplated down the line and so topped it up with water and left it, figuring that it was better than open air. This was a mistake. The ascetic acid doesn't just like rust! It slowly ate at the surface of the metals and left pitting etc. I probably should have just left it all until immediately prior to electroplatey time. But whatever. After a quick wipe down it came out fine and the pitting is minor. The pickup tubes received extra wire brushing and a little sanding. So moving on. I had my first play with soda blasting! Super messy but it did a reasonable job. If it weren't for the pitting it'd probably be super smooth on all the non-pickup parts but MOVING ON. The soda killed all the weeds growing between the paving slabs so win-win. I wire wheeled the remaining black paint from one of the brackets then off to the electroplaters, a lovely pair of chaps in Petone, they praised my cleaning skills saying they usually get filthy trash in. I've never had this done before so the results are astonishing to me. SO FUCKING SHINY! Inside and out! The plating even seems to have filled in some of the pitting, or at least they psychologically look better - and the pitted parts still look nice and shiny. And the price was very reasonable. I'm probably going to be hunting for more stuff to make shiny now.6 points
-
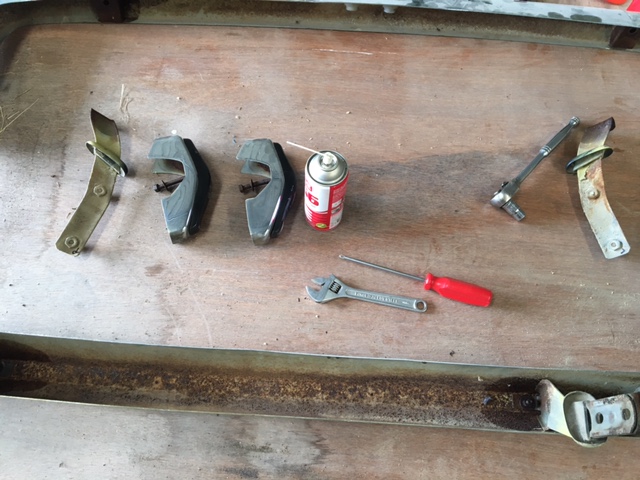
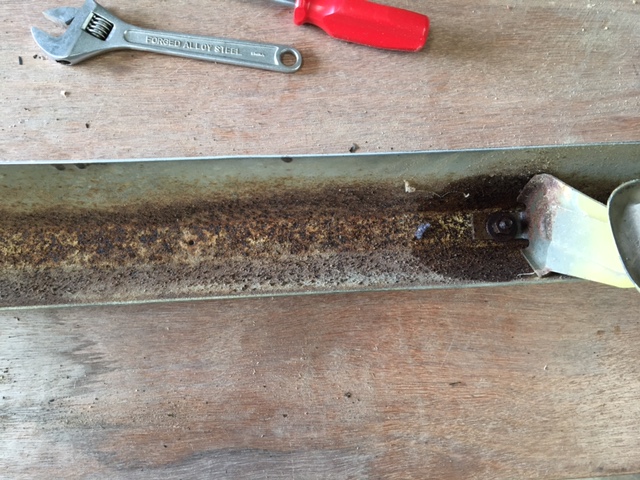
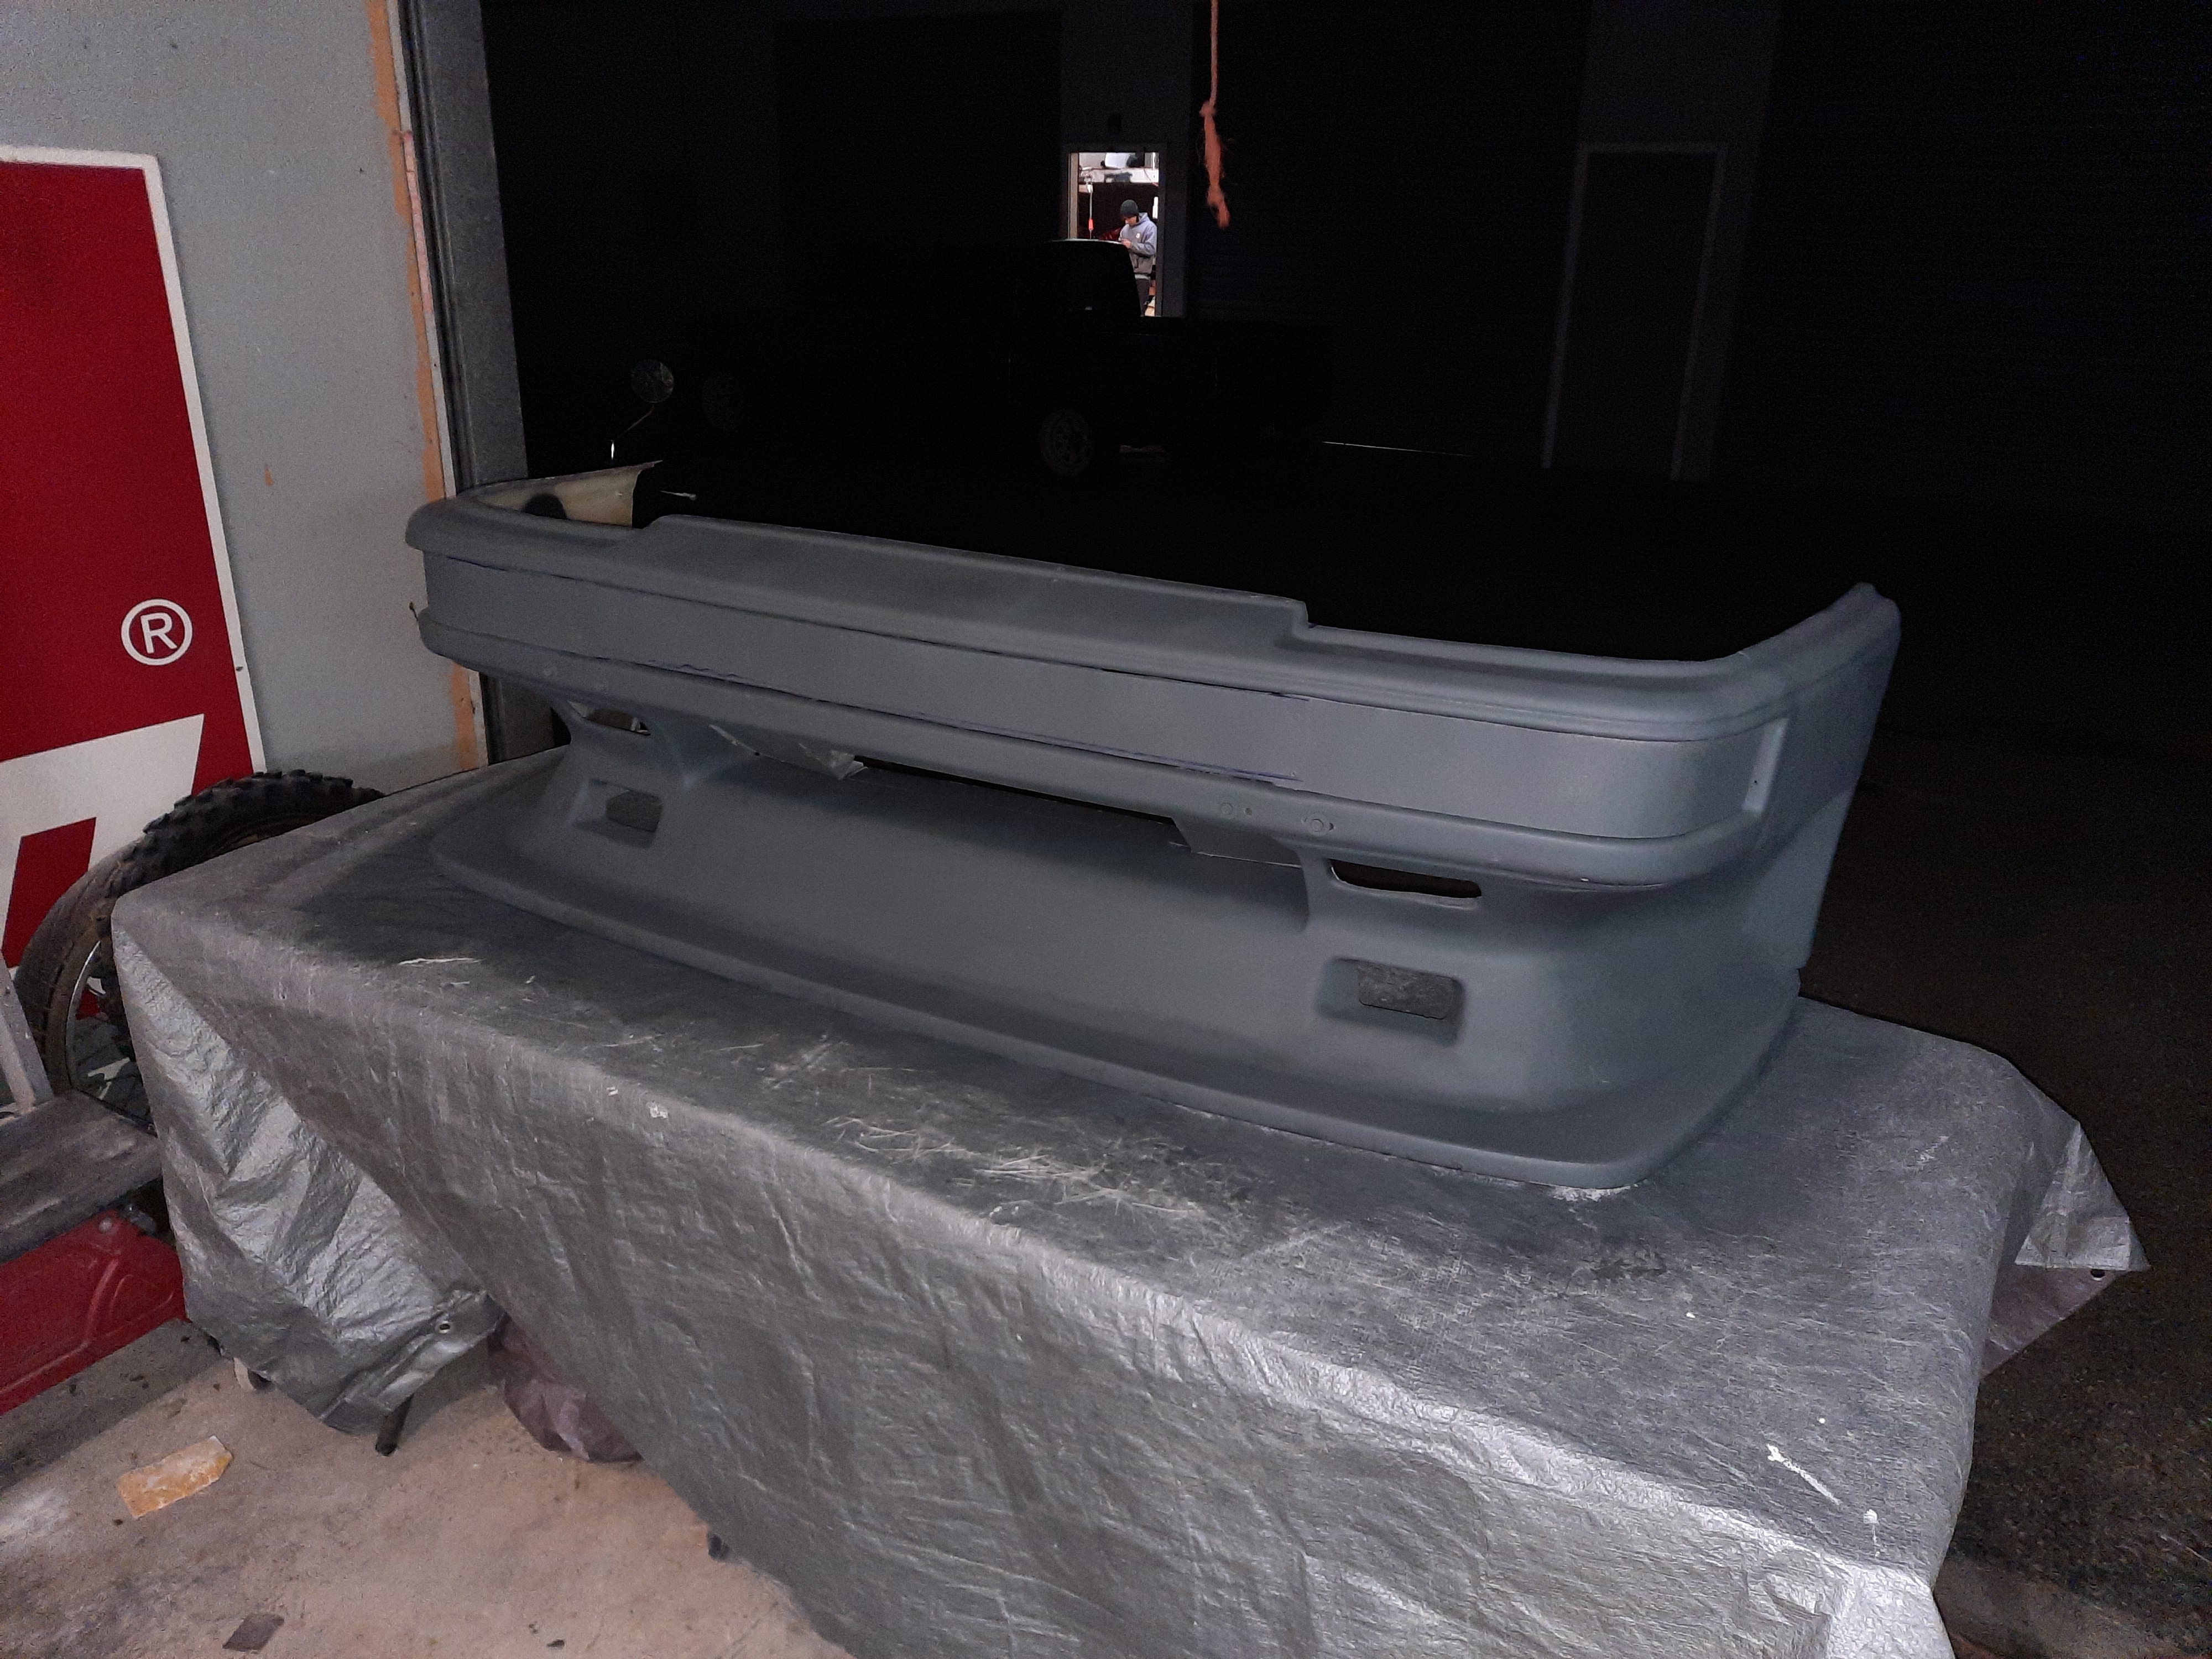
If the return of the Fiat is imminent, I should get onto the sundry jobs I need to do before reassembly. The bumpers are one such job. They have a lot of surface rust on the inside (ok, deep surface rust). I removed the brackets and overriders after some soaking time in crc. One bolt is still fighting me. With all the obstructions removed I can wire brush the worst of the rust. I can’t see myself being able to get it right back to clean metal. Suggestions for a good rust killer and sealing coat are welcome. Grot! Once the insides are cleaned up, I can tackle the shiny side. The chrome isn’t perfect, but serviceable. There are marks where the overriders were but I’m hoping a polish will mostly hide them. I want to leave the overriders off permanently because I much prefer the look. Share bumper rejuvenation tips with me in the discussion thread
5 points
-
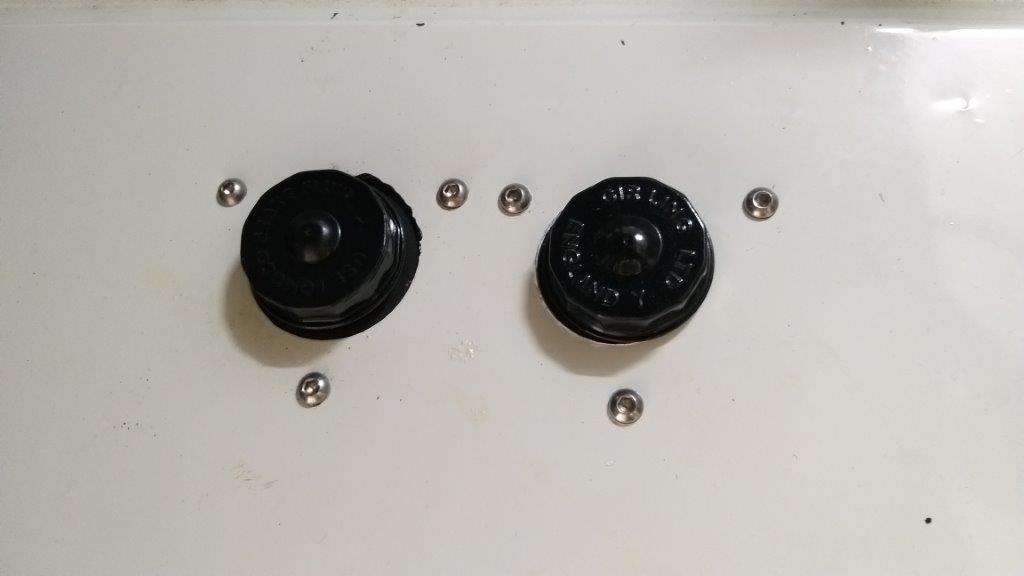
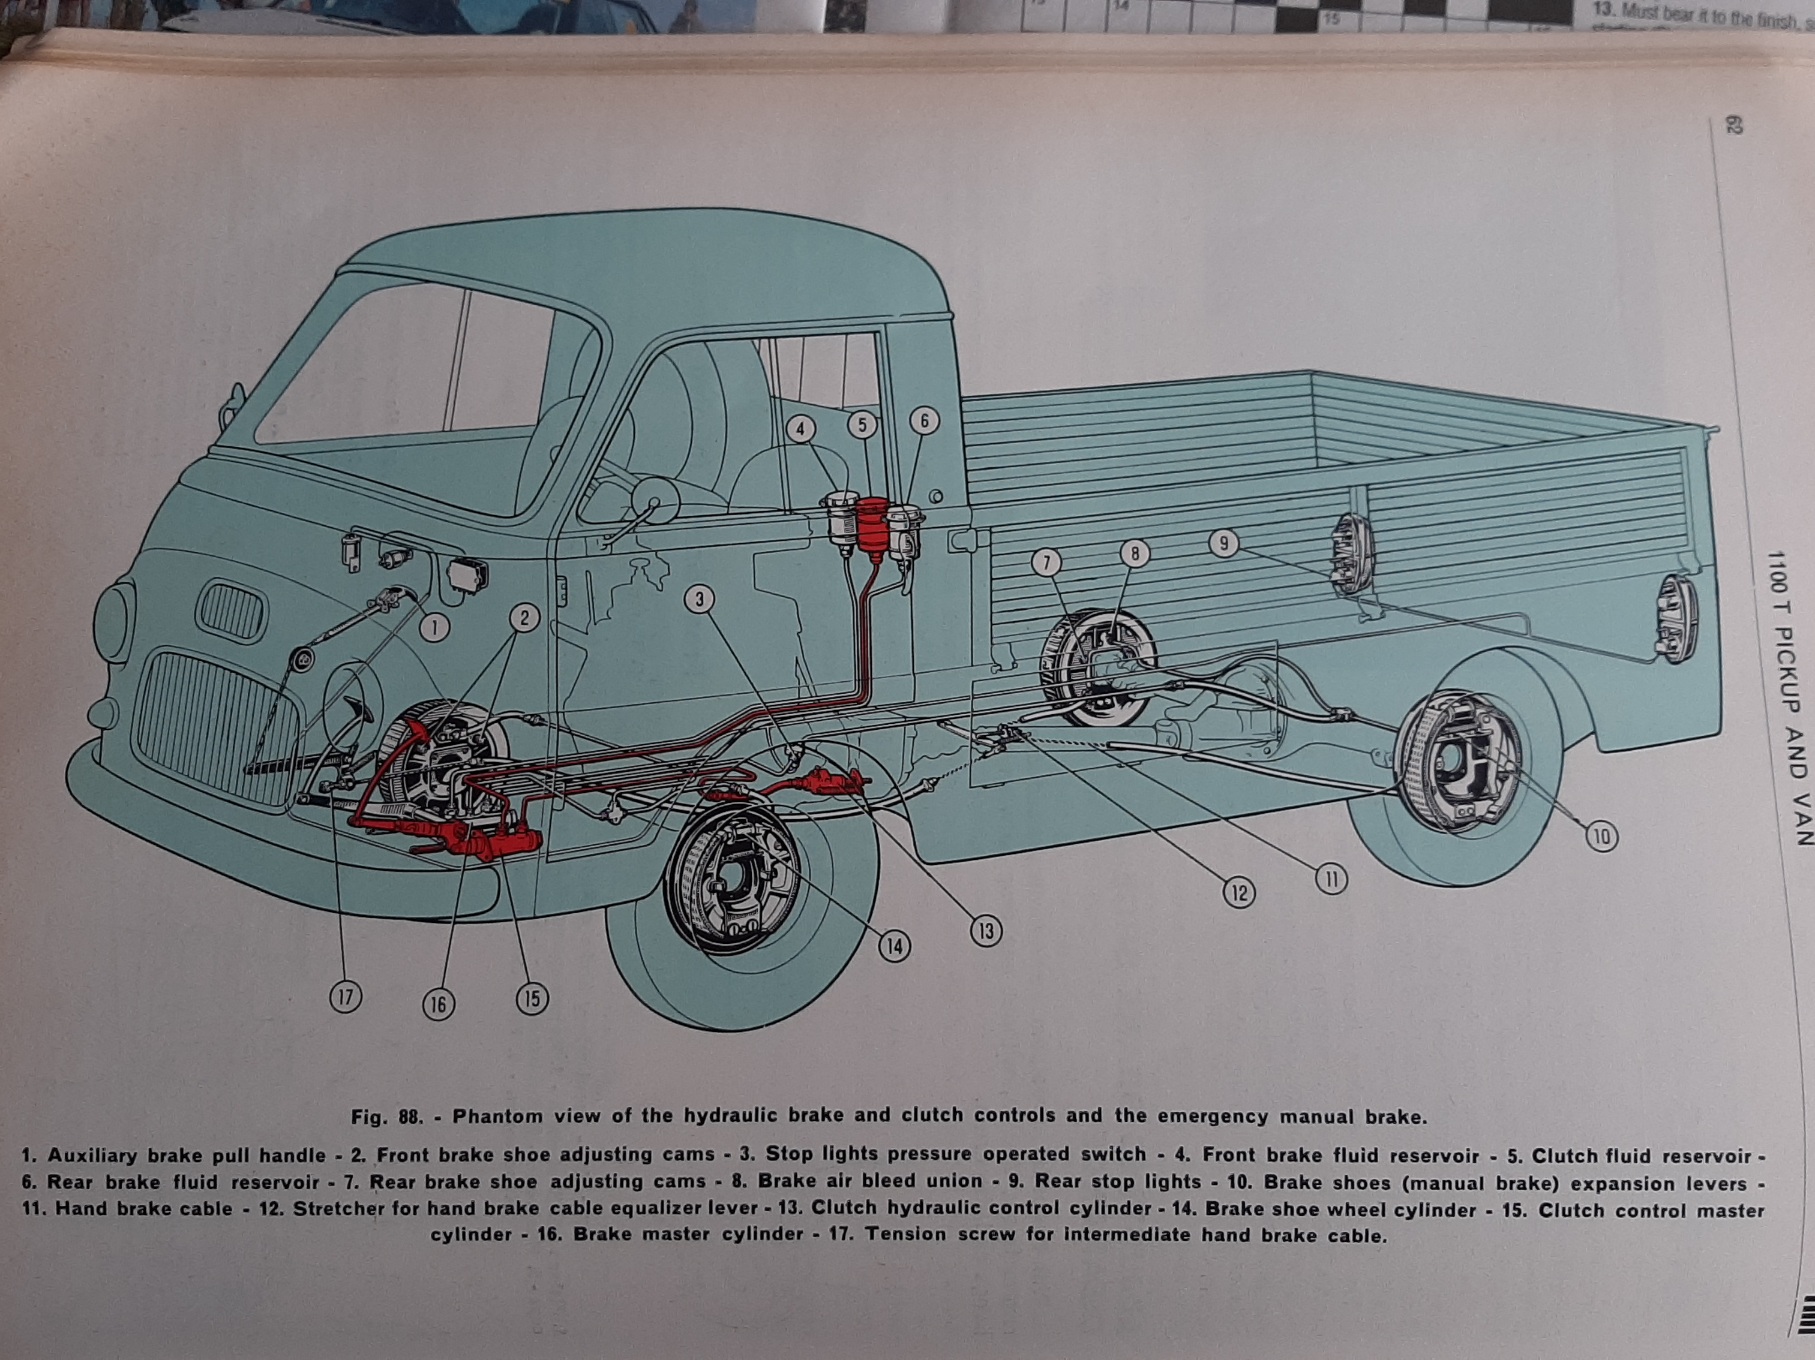
Progress has been slow of late. I've been mocking up the brake hard lines using old lines that I've harvested from my fleet of wrecks. I'm using them just to get the correct shapes and lengths as well as identifying the correct end fittings since I've got a mixture of brake components from both the Thames and some of my donor vans. It's fiddly work, but is worth investing the time to get them right. One of the Thames parts that I will be using is the brake light pressure switch and T piece. It was originally plumbed in to both the front and rear brake lines, but now that I am upgrading to a dual circuit setup I'm going to plumb it into the front circuit only and will blank off the remaining outlets. In other news I've finally installed the second fluid reservoir. I just need to complete the pipes feeding the master cylinder. Once I've got the pipes all mocked up I'll take them along to my local brake and clutch place to have new ones fabricated. Thanks for reading.
4 points
-
3 points
-
Mum is going to bid on that for me at some point, can't log on from here. Pining for some ringading in my life and hoping it sells for what little I can afford since the listing is hidden under parts and accessories.3 points
-
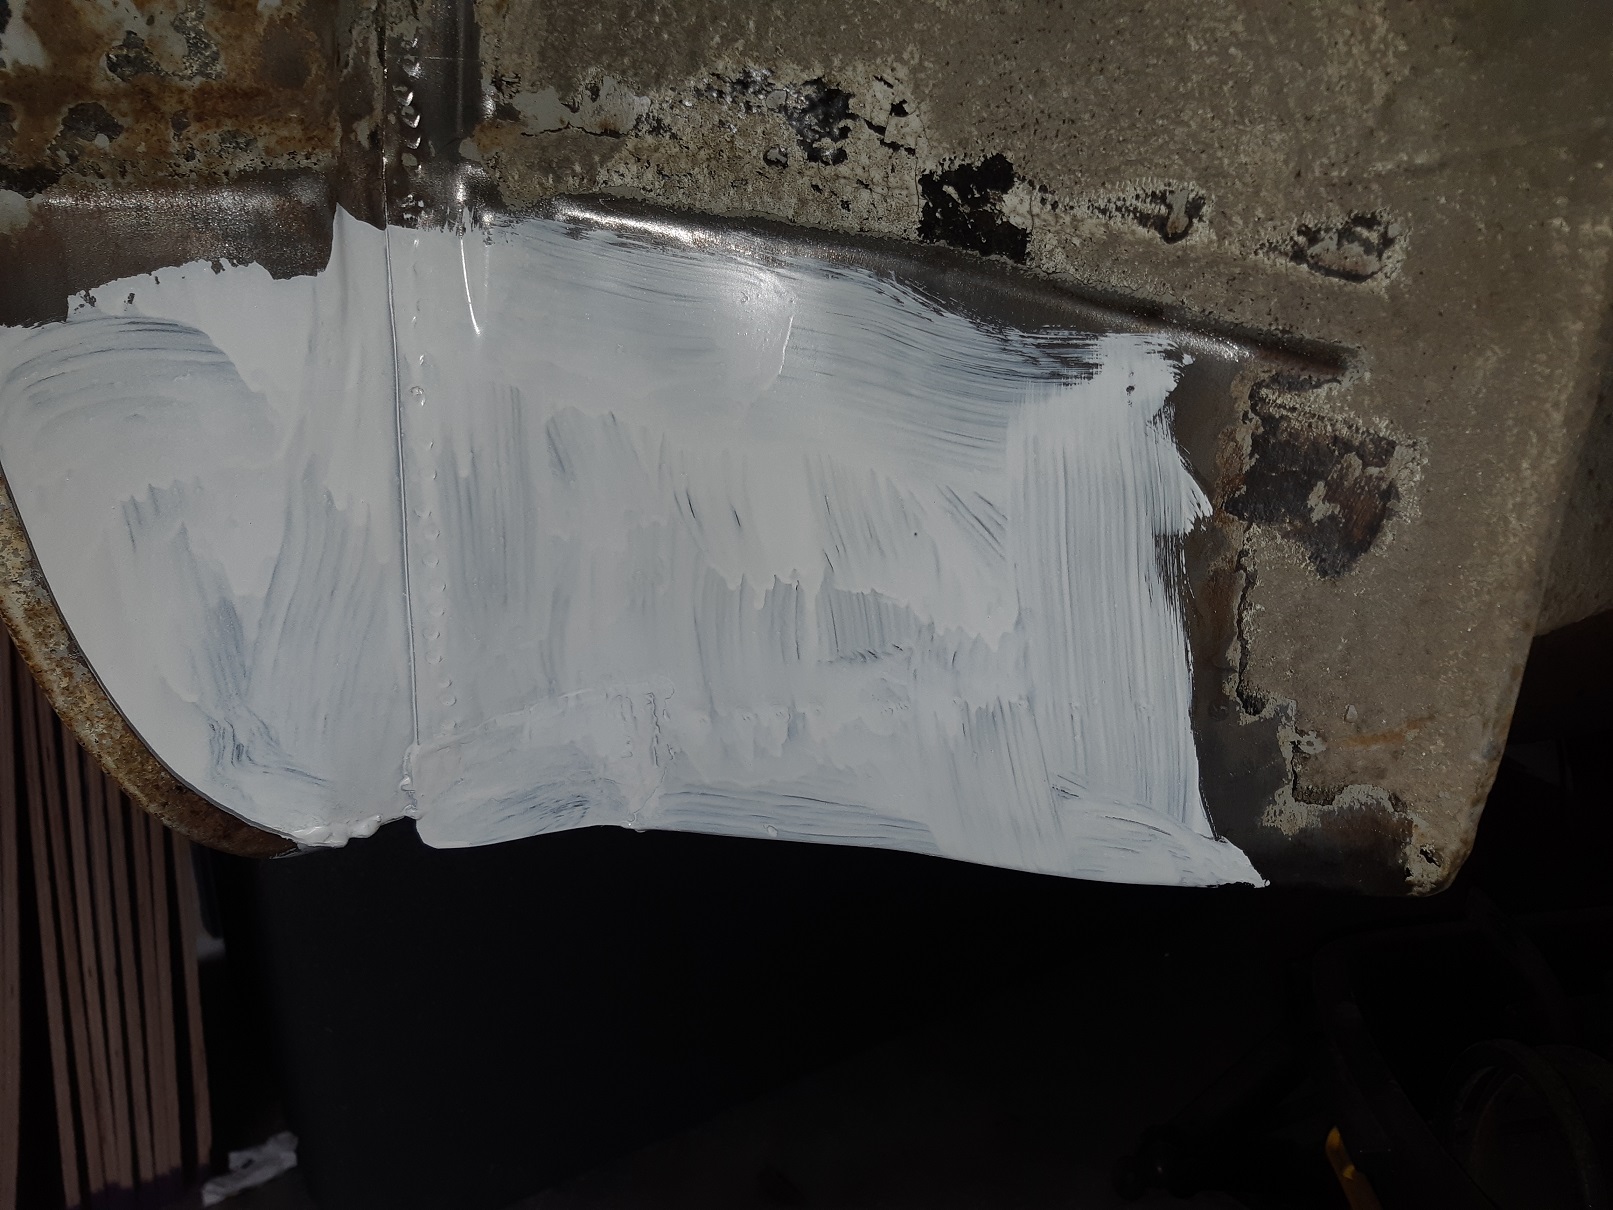
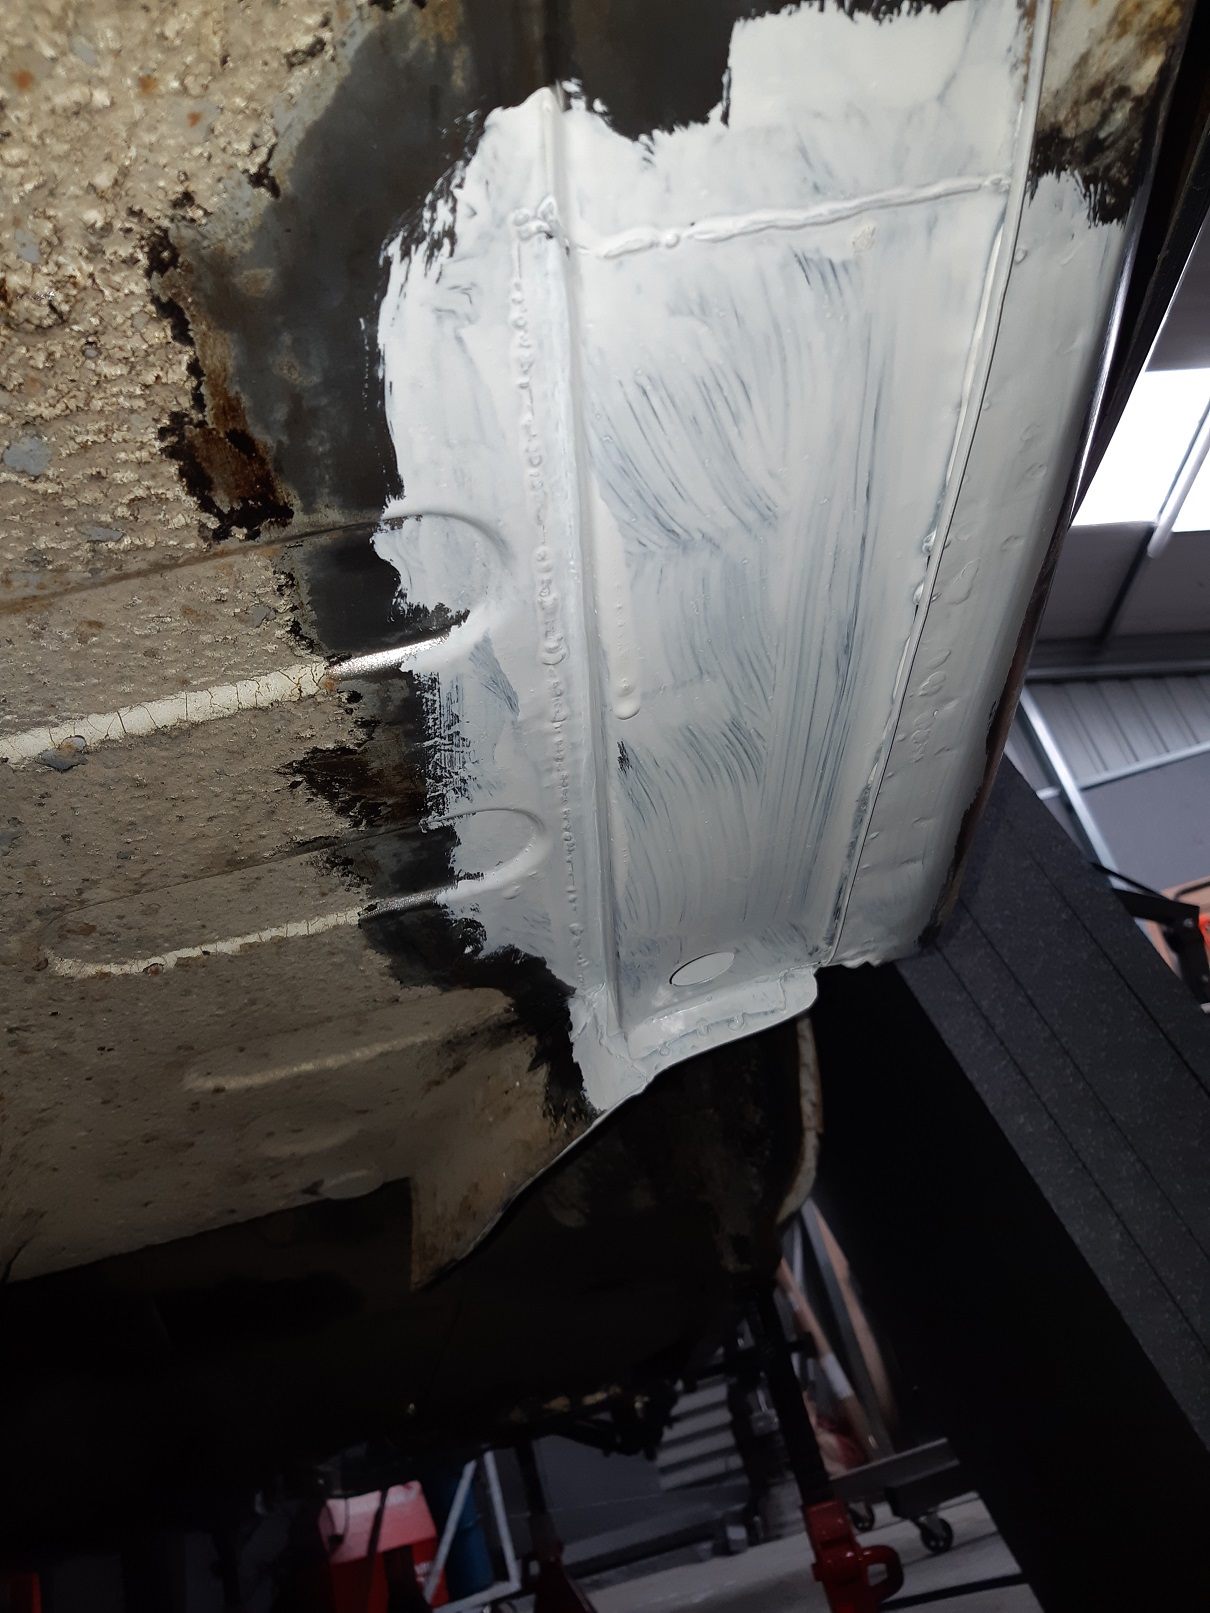
I did say things would slow down First target in my sights has been to fix up the tank and its bits and bobs, and get the rear side of the fuel system 100% sorted. The tank has surface rust inside, and a fair bit of deposited rust from the pickup tubing and gauge level rusting away. Most people I talked to told me not to worry about it, just clean it out and be done with it, but... that just doesn't sit well with me. Rust must perish! My tool for the job is a POR-15 tank sealing kit. There's a bunch of guides online but they all seem to differ somewhat or have missing bits of info so I figured I'd detail my journey. The first thing to decide was what order to do things in because I needed to strip the paint on the surface as well as there are some bad and rusty spots. I decided I'd rather not get chemicals or rusty dust or anything inside a freshly sealed tank so I opted to strip + quickly prime the surface before I started on the inside. There's a lot of paint stripper to choose from and it seems like they all really do have a large range of reviews from "perfect" to "did literally nothing". So I spent way too much time looking around and settled on TERGO paint stripper. I chose correctly, this stuff is fierce. I was worried it wouldn't touch the rust converter I had on it but the stripper just totally nailed anything it touched, including the brush itself. Lots of PPE for this! Next I used a strip wheel to clean up what the stripper didn't quite get. I learned I should have started with the wheel and then gotten the fiddly bits with the stripper afterwards. I also used some wire brushes to get as much of the rust off as I could from the fiddly places. This pic is halfway through the top before the rustening. Then it's paint time, I'm no expert here but I figured the more layers the better. I've got some self etching primer and the plan is to tidy up and go over it again later with some (also self etching) black paint. It's going to get banged around a fair bit and so I'll need to repaint it but I feel like this is the better order to do things in, I can easily clean up and repaint the surface but the POR-15 kit is expensive and time consuming. This is a logical break for a new post, but.. how big can these things get? POR-15 TIME So there's three steps here, clean/degrease, metal prep/rust removal, then seal. The $150 kit comes with stuff for all of this. I didn't need to spend all that honestly, but as a beginner I really am trying to minimise the amount of faffage I need to undertake. Past Tom was smart enough to write all this shit down as I did it because I knew I'd forget intricacies: Degrease! I plugged up the tubes using a technique I read about online, with pipe+bolt - this should help prevent the sealant from creating a plug later on. I used duct tape for the larger openings which worked well, however I noticed a small leak at one point in my initial taping and when I re-did it it was WAY worse. I noticed that the tape wouldn't stick very well despite drying it down with paper towels or using degreaser or even a little sandpaper (needed to sand it anyway). I ended up solving it by using a heat gun to dry the rim thoroughly, the tape stuck very nicely after that, so pro (lol) tip. I then poured the degreaser and warm water in, along with some bolts, and began my daily workout: shaking the absolute shit out of a large unwieldy fuel tank with few opportunities for grip. I would rotate to each side and different angles and slosh enough to hear the bolts fly around in there, taking breaks as needed (lots of breaks). I kept this up for probably 30-40min. Then I used the pet cock to drain the tank and added about the same amount of cold water back into the drain hole, sloshed each side to rinse and drained. I did this about 8 times with each time coming out a bit less brown, but I noticed that the water still had a sort of cloudy colour to it so as the instructions suggested I repeated all of the above with the second bottle of degreaser they sent me. Here's the stuff from the first drain. After that I did my absolute best to drain the shit out of it. At one point I took all the tape off and stuck a hose in each opening spraying on various angles with the tank in various angles until there weren't any bubbles forming inside the tank and the water was mostly clear. I used a magnet on a stick to get the bolts out because my hand is way too big to fit inside. This whole process took a fairly long time and is a serious workout, something the motorcycle tank guides won't tell you! The instructions said it didn't have to be bone dry for the next stage but I used my heat gun to get it some of the way. Sticking it into the tank did really well, heated the whole tank and even the exterior dried within 10 min. However lots of fumes so moved it outside really quick. Looking at the structure of the tank with all the pipes and baffles in the centre of the tank, it's clear that this mostly only cleaned the walls of the tank, but hopefully that's good enough because I don't think I could get it any cleaner with what they gave me. Oh hey look a logical breakpoint. Metal prep! Next I put the petcock back in, poured the bottle of metal prep in and re-taped it up, swished it around all the sides and paid special attention to rapidly rotating and shaking it to try and get enough of the interior structure coated as I could. Then I left it and rotated it every 30-60 min making sure to get all sides. The duct tape held up OK but dribbles started when left upside down for too long. Then I poked a heat gun in it and left it in various positions for an hour~ which was really effective at getting it bone dry. It was getting a bit late in the day and the sealant says it can bond with flash rust so I left it. Checked it out the next day and... was unimpressed. I could still see and feel rust coming off like sand. It did a little work, but here's a couple pics to show just how little work it did. Before: After: I did some googling and found a guy who'd done it a few times. He said the metal prep is fine for small amounts of rust but if you have more than just surface stuff you should use proper rust treatment first. I'd already been faffing for so long with this thing and was ready to be done with it, I very nearly just rolled the dice and proceeded with sealing it as-is but after a deep sigh my risk-averse brain caught up and actuated my legs over to mitre10 to pick up 5L of rust remover. So I sealed everything up, poured all 5L in and intended to leave it overnight on each side... and the duct tape started failing after 30 or so minutes. Blah. I tried many things including making a custom lid out of a takeaway container but everything eventually leaks. If only I had an L&P bottle. Mate to the rescue! He had made some C H O N K covers for another of his mates and cut them down to size further for me. Talk about overkill but it works so well! Along with some old gasket maker these sealed it up extremely well, in fact when opening them back up they'd let off a fair bit of pressure from gas build up inside. A++ Look ma no leaks! I also figured out a better way to seal the filler hole. So I left it on various sides rotating and sloshing once per day to a different side, for a week. Then I opened her up and.... not bad. Parts that were sandy rust are now absolutely smooth to the touch. A pipe with a bunch of growth on it is now clean. Vaguely surface rusty parts are now looking much more uniform. There's still some somewhat-sandy rust on a part of the top but... I'm happy enough to proceed. Short of cutting it open or getting some chains to try and go around the heavy baffling inside this thing, I can't get it any better. Obviously I can't re-use the metal prep but the rust remover and the copious amounts of water used to flush shouldn't have changed the quality of the surface any, I hope, so here's a different dice roll! Now I should make another post for the next part of the story. ... THE SEALENING Final stage! I opened the can and stirred for 10 mins, it REALLY doesn't want to become a uniform colour but my online research says that's normal. Then I sealed the tank back up, poured the sealant in, turned up my TV and sat on my deck for an hour just slowly rotating this thing. Occasionally I gave it a shock-turn to try and splash or dribble onto the baffle structures as much as I could. The low point in my tank is unfortunately around the petcock hole :\. With water I can just vacuum it out. Can't do that with sealant, and I don't want to stick a rag on a stick in there or anything. Someone online had gone overboard and rotated his tank for 2+ hours and that had the side effect of having the sealant essentially distribute and harden up during that final hour meaning he had no leftovers, so I was trying to go for a happy middle ground where there shouldn't be too much pooling. After an hour I opened it up and was beholden to all that was good. I was expecting the sides to be coated and then incomplete splotches on the baffles and the pickup cup etc but EVERYTHING IS 100% COATED and I am SO HAPPY. I removed the petcock and drained the best I could. It turns out quite a bit of sealant is still in there after an hour :\ so backup plan after removing everything else off the tank is to rotate onto its sides over the next couple hours, to try and get it to distribute a little more in there as it solidifies. I feel like a massive blob of it around the petcock is probably not ideal. Final thing was to use some turps to clean up the petcock hole threads and area, the petcock itself, prop it up and leave it to cure. And then abandon the garage with all the doors open because even with PPE I don't trust those fumes, The next day I am greeted with this lovely sight. I am extremely happy with how it turned out. The pictures show some semi-rusty bits, they're totally grey IRL so I don't know what that's about. It hardened to a plastic-like substance that I can't scratch with my fingernails. Finishing up Finally I tidied up and re-primed problematic parts of the exterior (I flower-pressed some grass into the bottom with the heat gun), re-masked things up and added a few layers of CRC black. I was going to clear coat it as well but the feedback on that was "why?" and I'd already spent enough time on it so .. ok. One giant post, and one giant tick box. I shouldn't have to do anything on this tank again. Yay! Now it's stored safely wrapped in plastic under a bench for the rest of the car to catch up!3 points
-
So I bought a Brewzilla all-grain brewing device recently, and while I was waiting for it to arrive I started gearing up my mini-brewery. I grabbed a rusty old fridge at the dump for $20 cos I liked the styling. I was only intending to use it as an insulated box with a small heating element, but when I wired it up it ran beautifully, so I have heating and cooling available... The interior door was buggered. I thought of replacing it with a flat sheet of plastic but the shelves would be useful for bottle conditioning, so looked at patching it up to re-use... Just laid fibreglass tape around the edge and filled with epoxy... And it cleaned up well with a bit of a sand... And the seal was in surprisingly good nick, bit of a scrub in some bleach and it cleaned up ok... Came together well... Then gave the door a sand and bombed it with some Rust-Oleum paint and clear coat... It was a Prestcold brand. Think the new name is an improvement... And made up a new label for under the handle... And it looks sweet after some detailing... I've ordered a 45W heating element, but as it hasn't arrived I chucked a $10 reptile heating lamp (50w) in to get things running... And fitted a s/s plate above it to dissipate the heat a bit, avoiding a hot spot directly above the lamp... And my PIR controller also hasn't arrived, so I hooked up an Inkbird controller, fitted a couple of glands and some interior grommets for the heating and temp sensor cables... Came out so good I bought another one ($25). As a fermenting fridge plus a conditioning fridge will make things quicker/ easier... such a fridge Barry...2 points
-
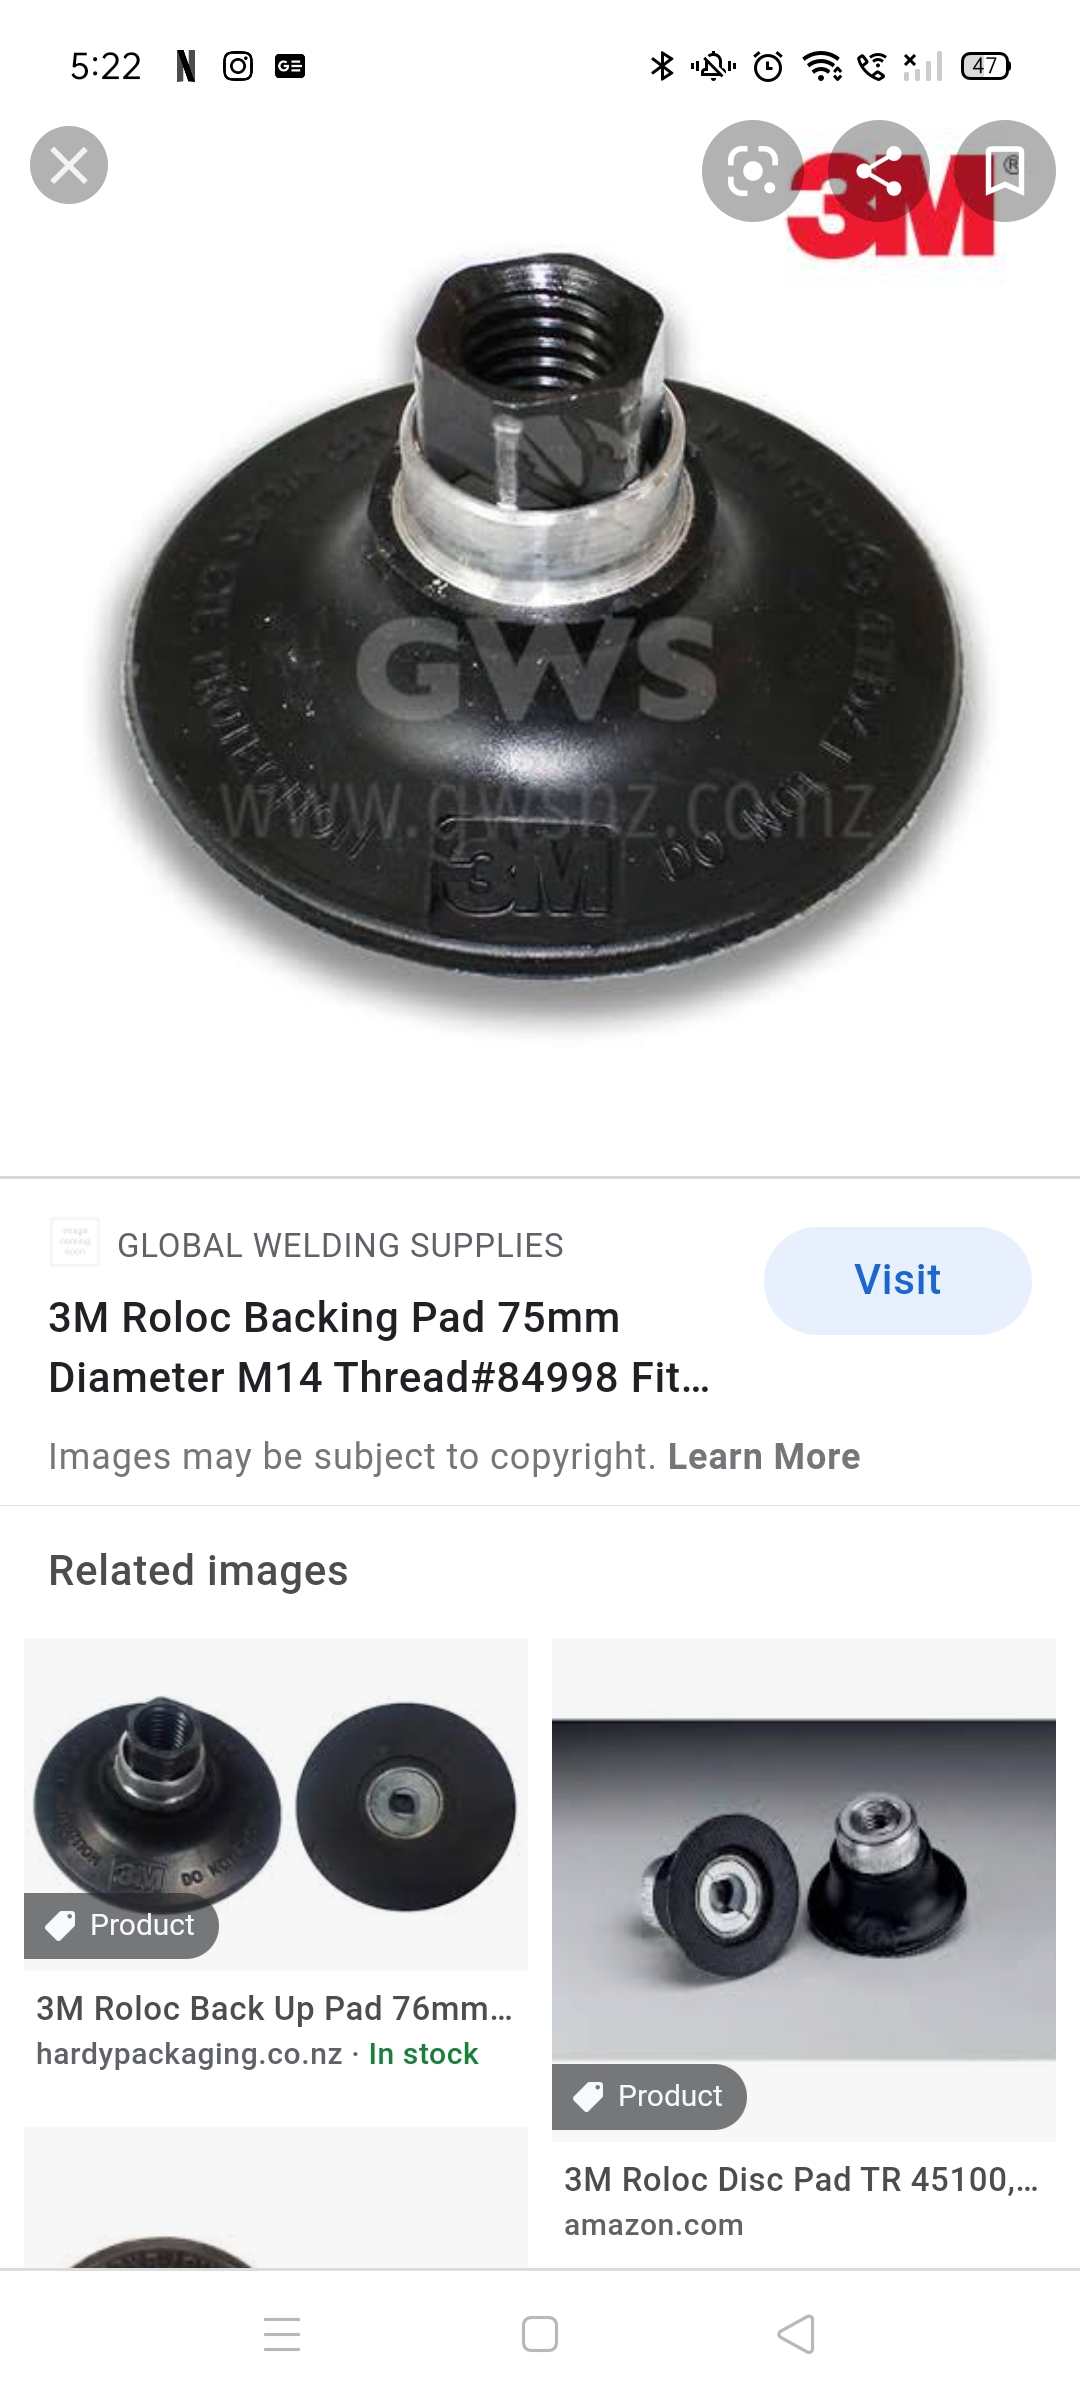
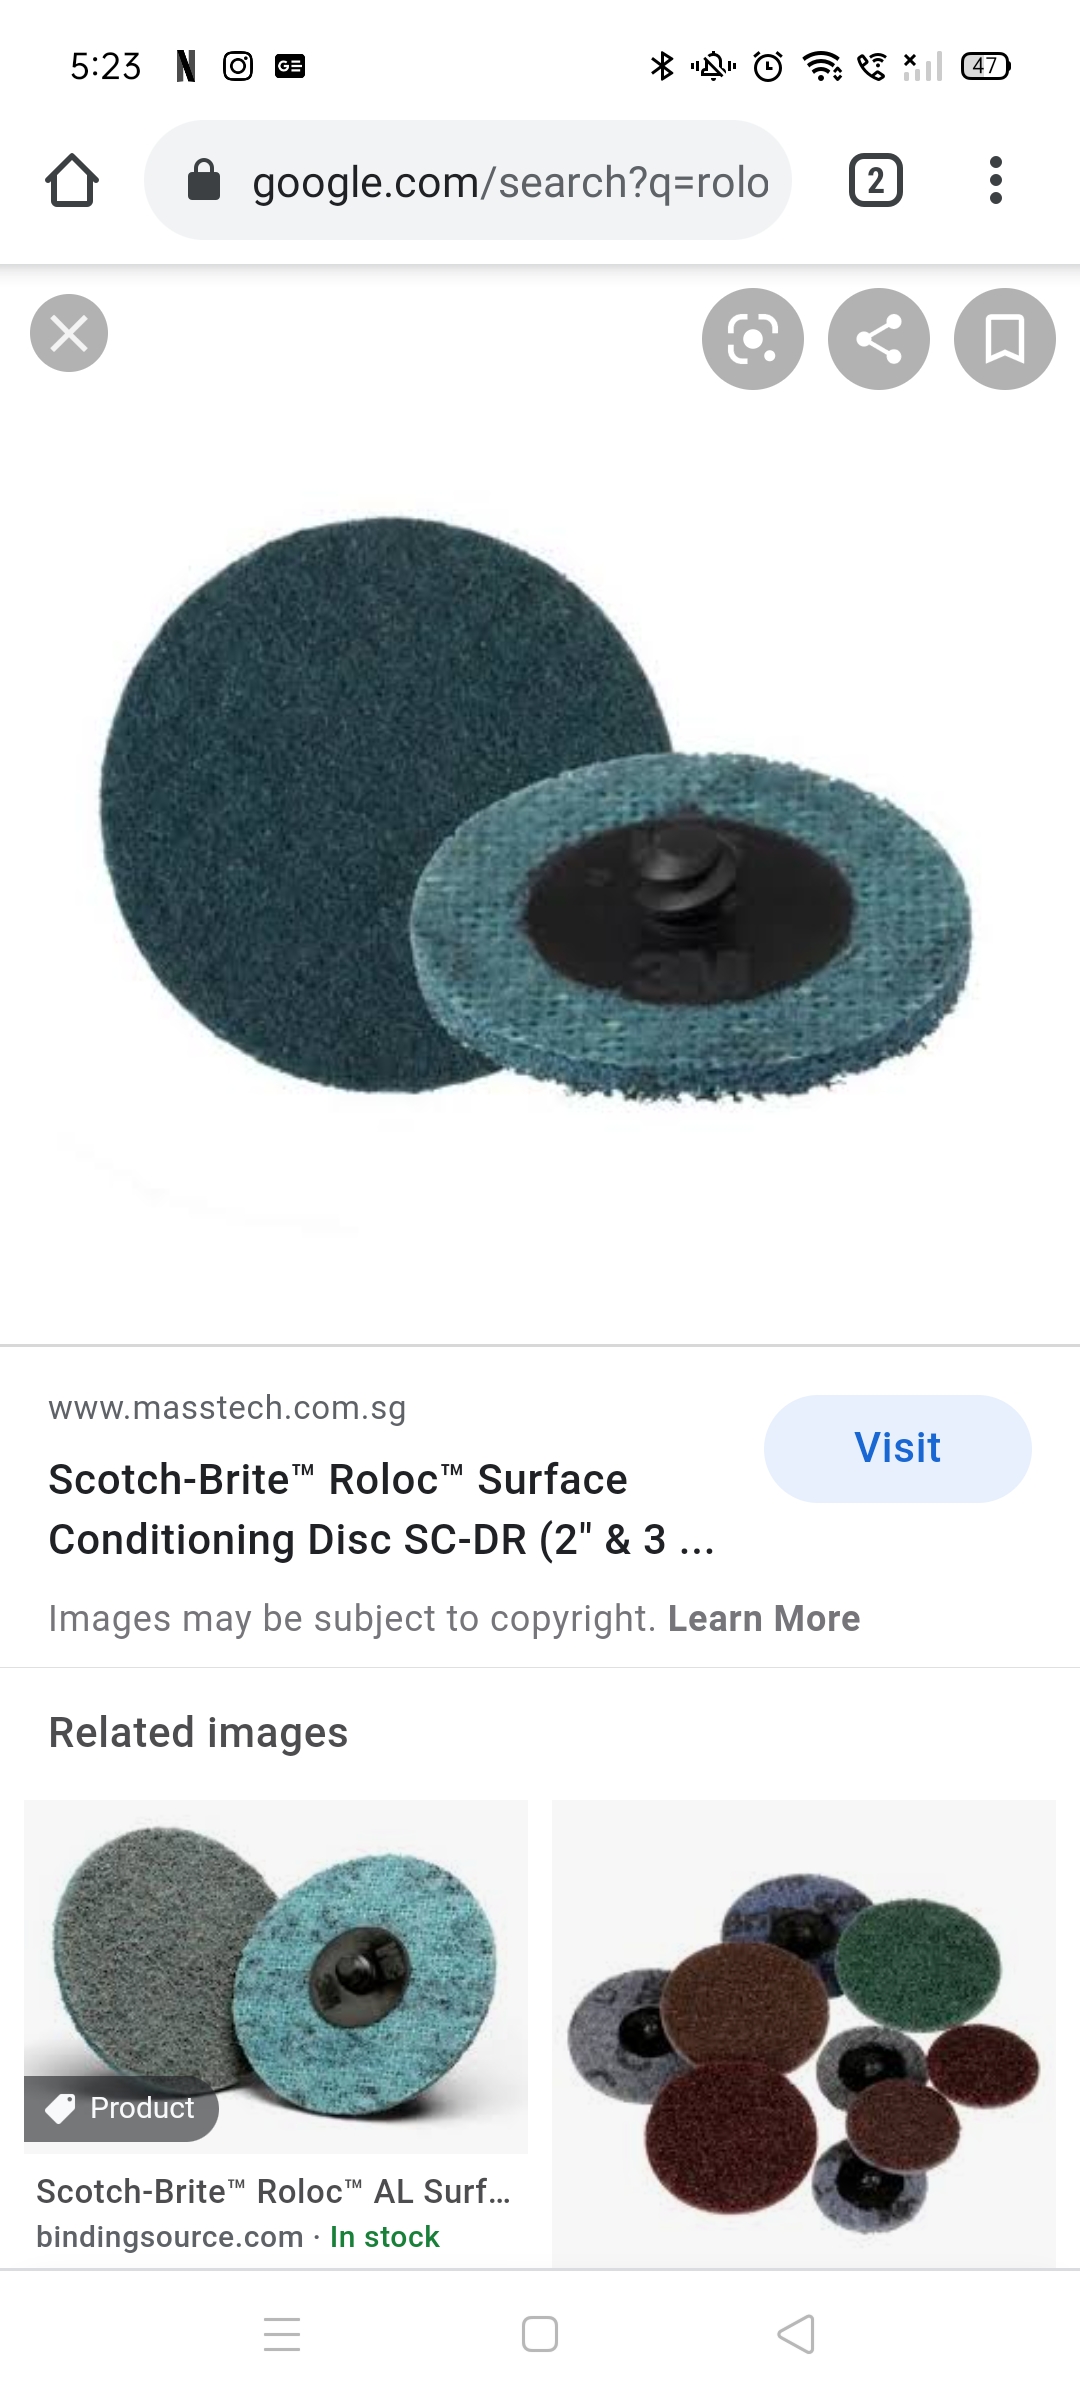
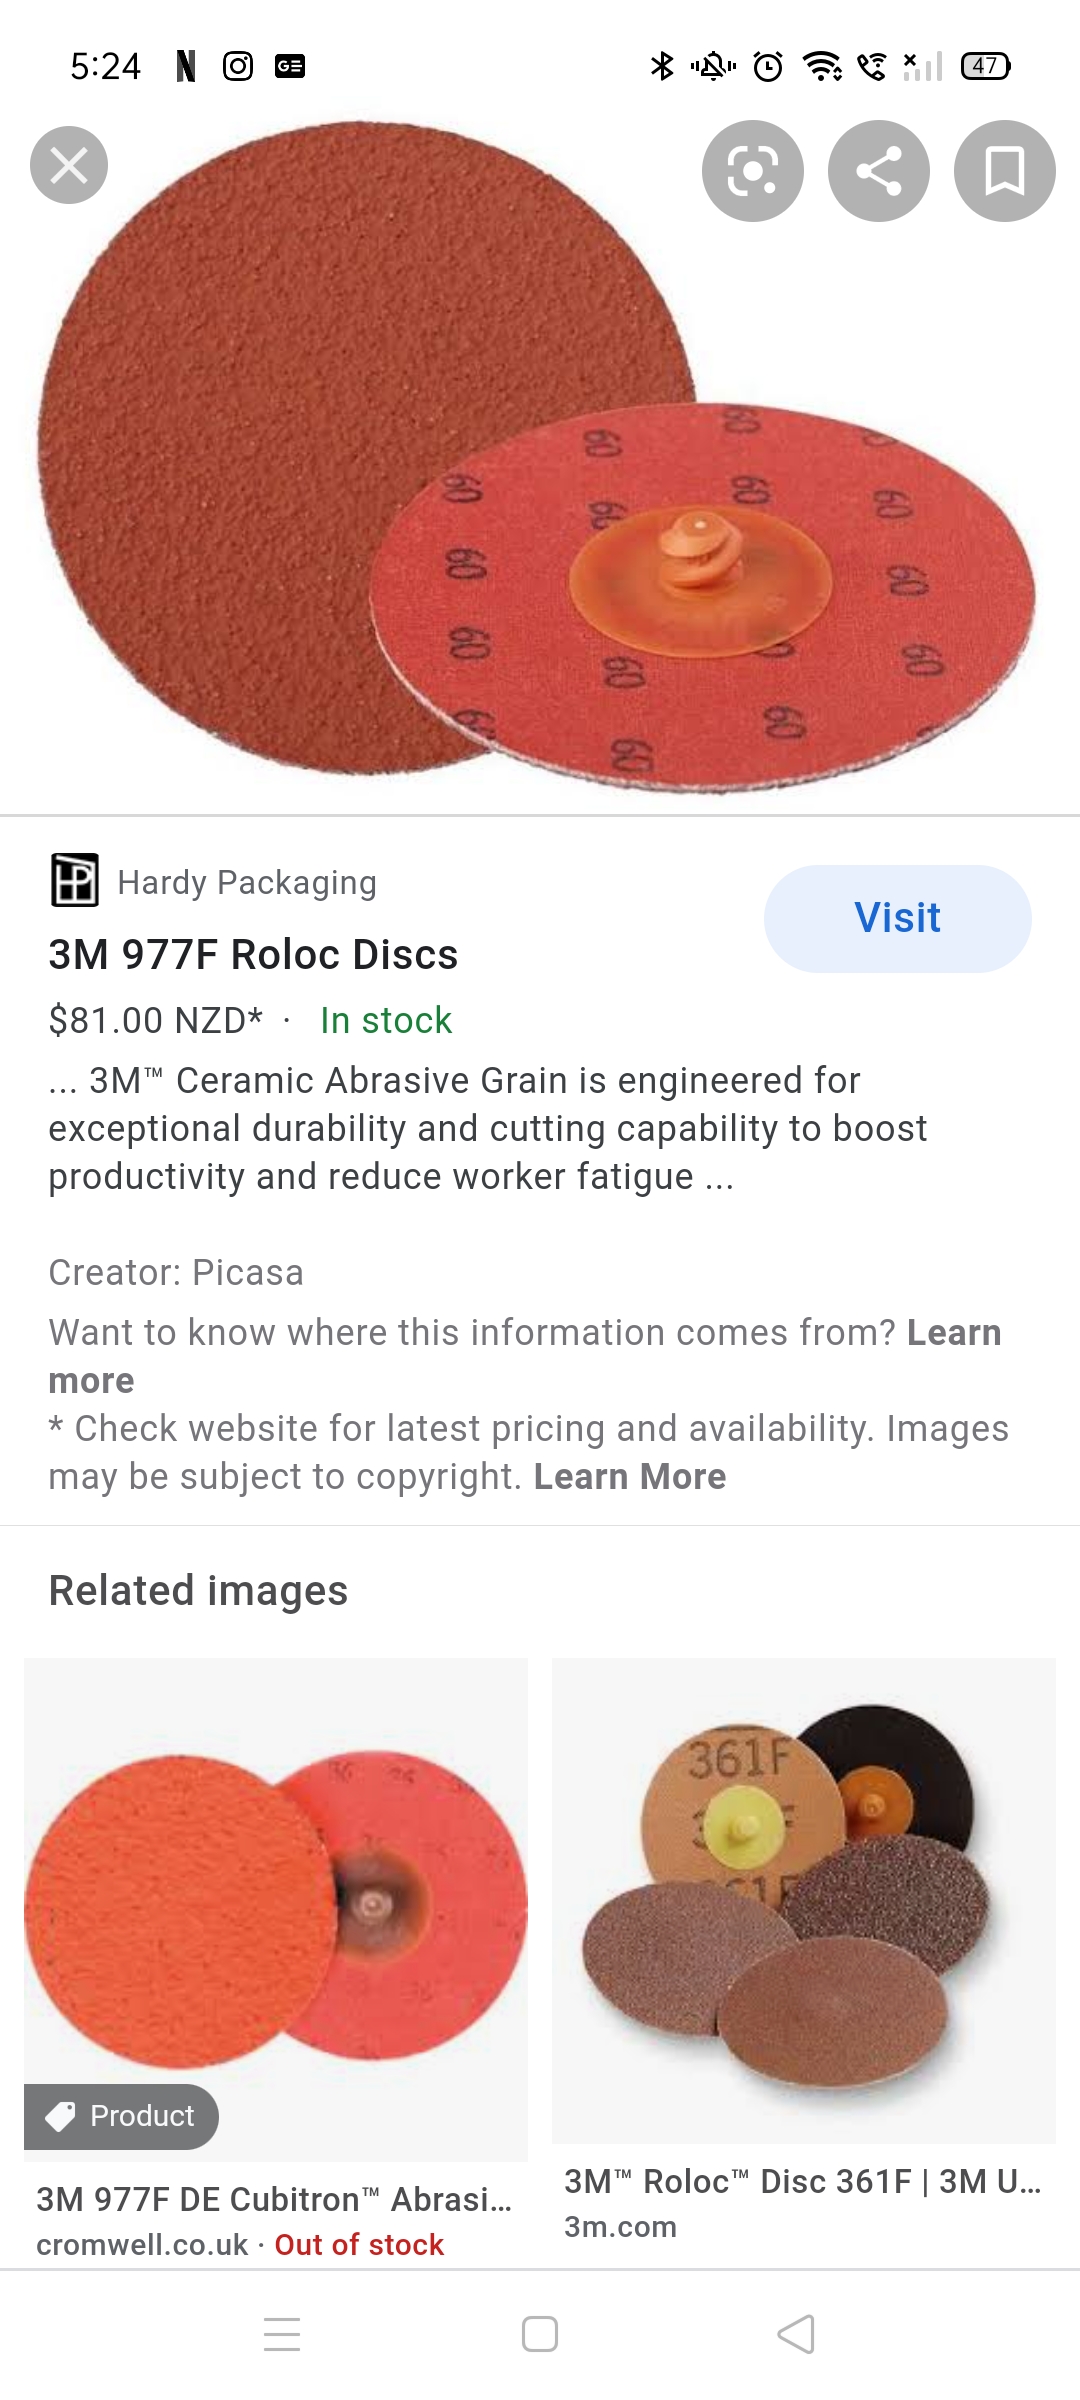
Yeah so you buy a backing pad to fit either your standard grinder (has a nut on the back) OR a die grinder (has a little shaft on the back) Grinder one looks like this. Then you buy either sanding discs like this Or softer abrasive discs like this. The benefit is that there is no center boss to get in the way so the pad can be put flat on the surface. Very good and much better than flap discs for keeping anything flat.
2 points
-
bee/wasp up the shorts2 points
-
Amayama are buying/onselling off OEM's direct in their home countries. They are stuck with database updates from OEM's (who don't give a shit about old parts), I buy lots of Honda shit for the daily from them and the stock listings are mint always get what you want at 1/4 local prices. OId mate rockauto controls the stock so they should have a tip top database.2 points
-
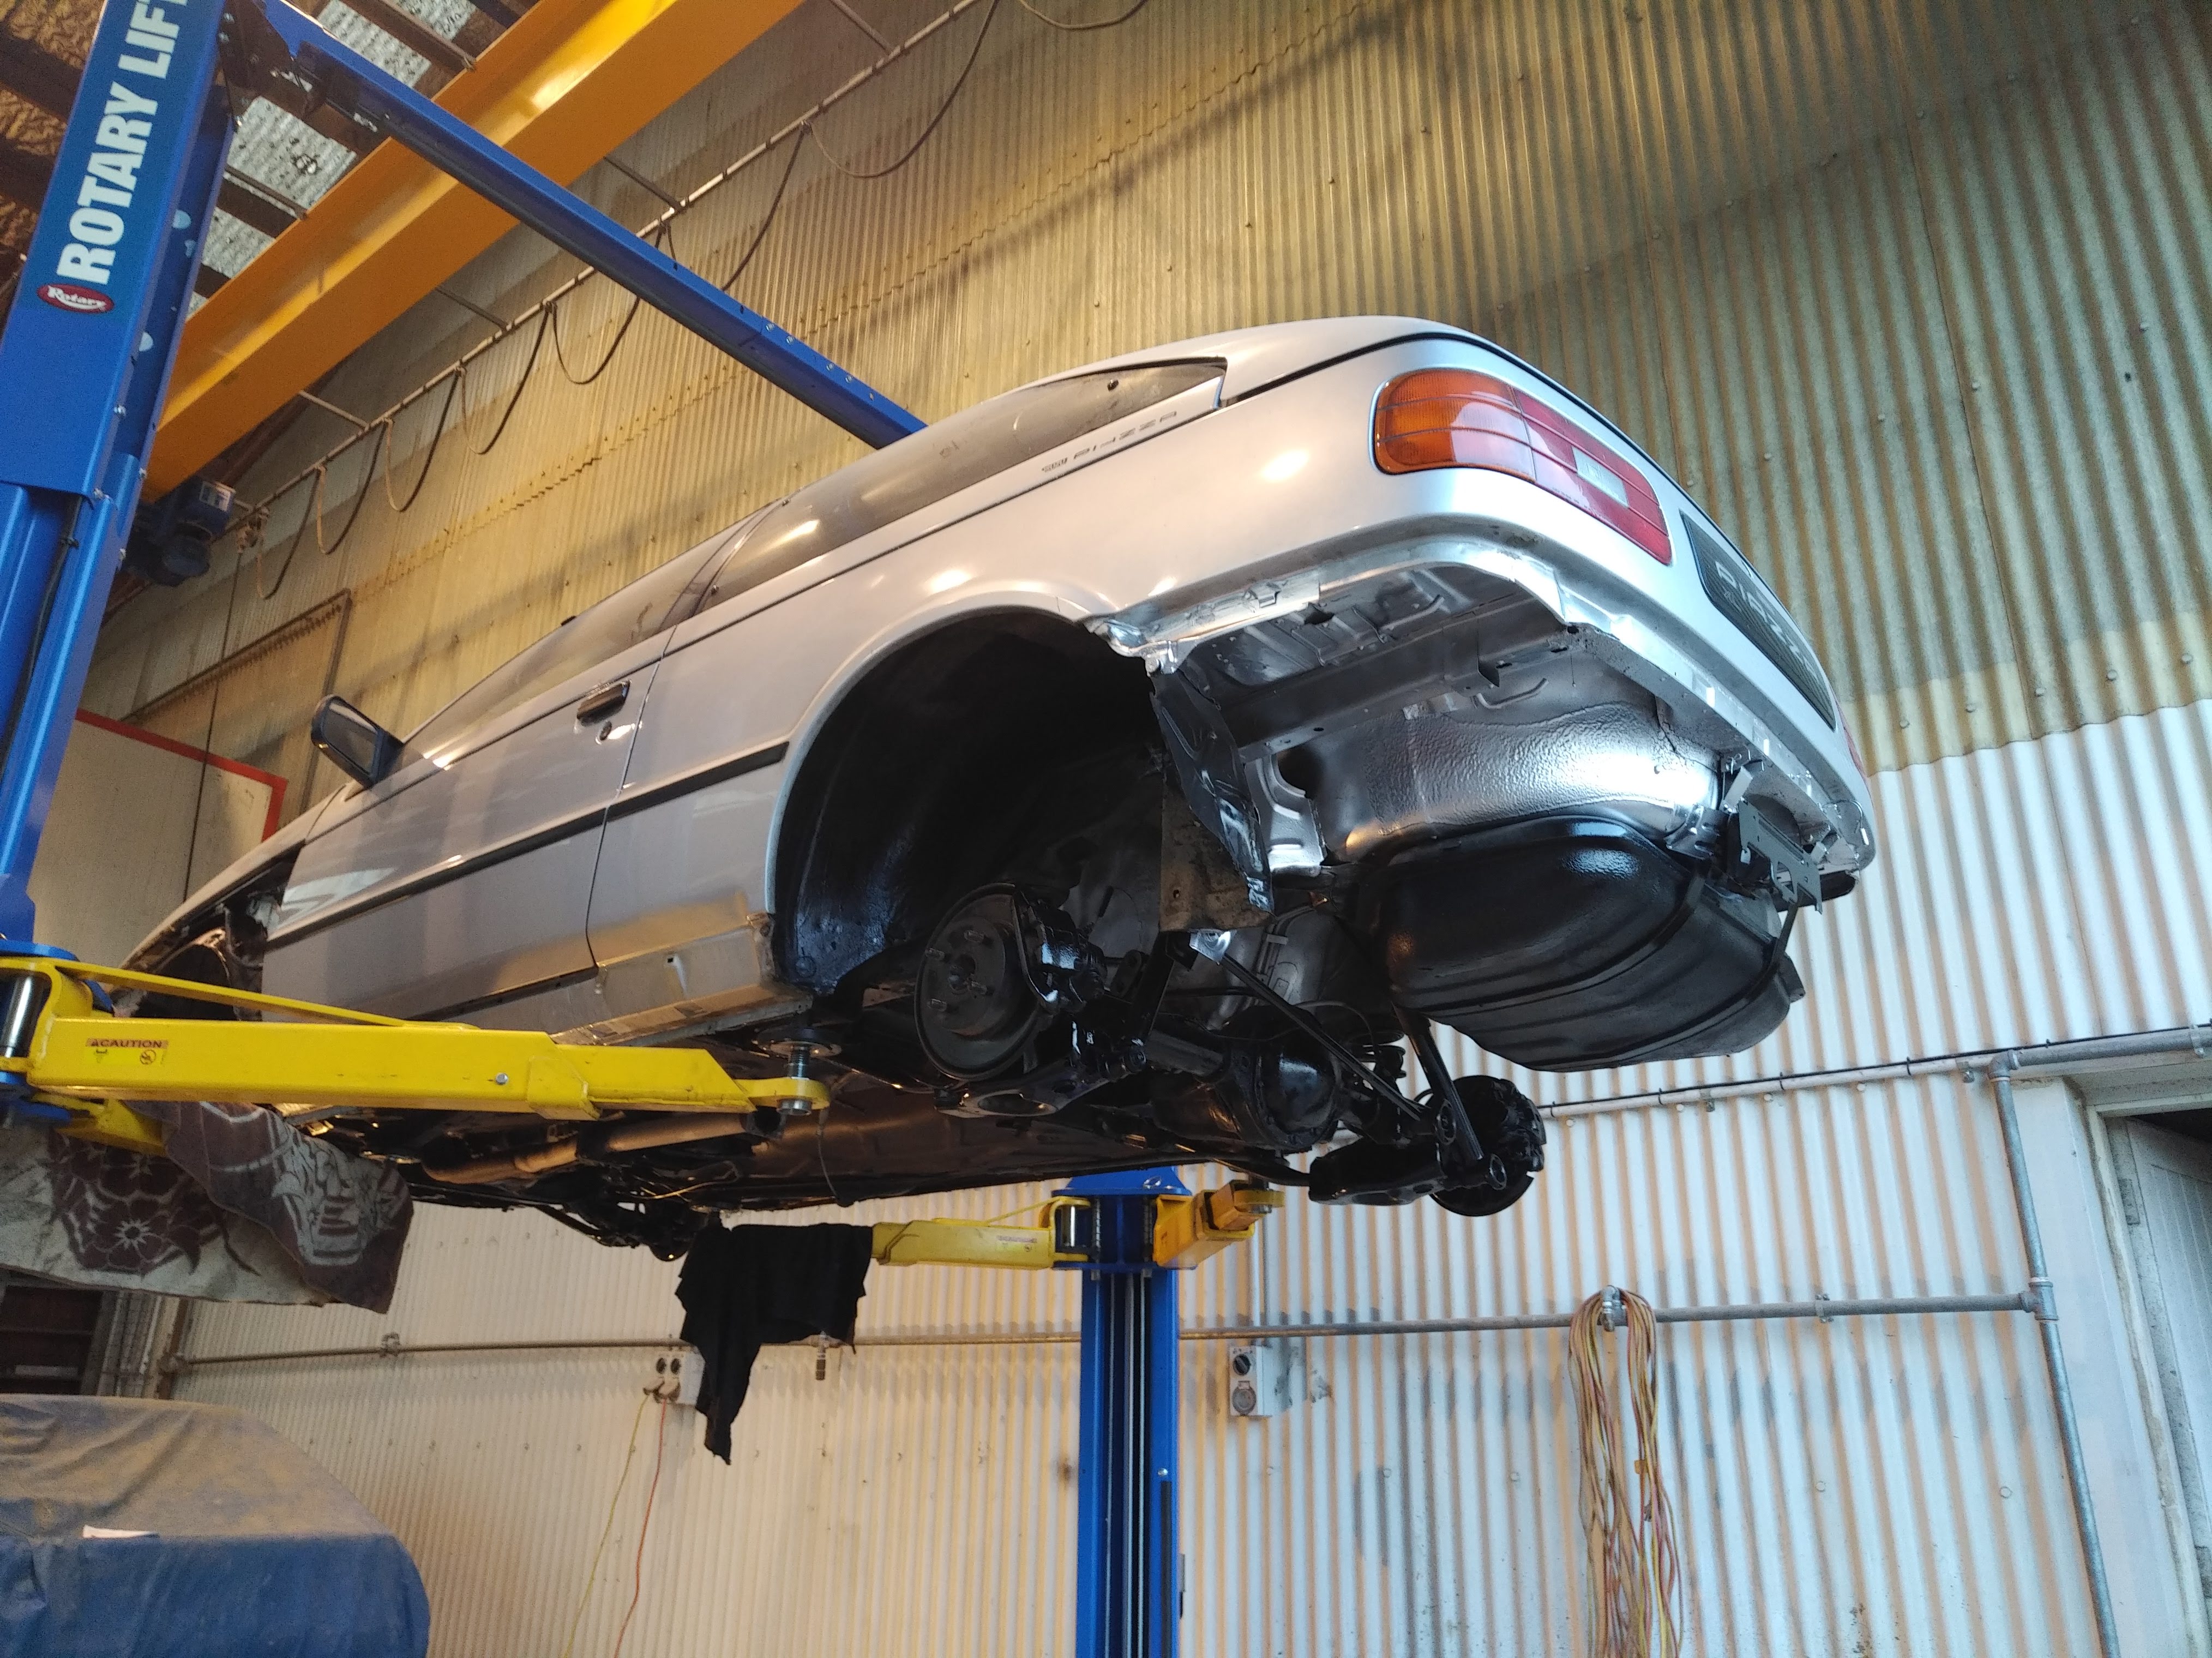
Gave the underside a bit of a Dulux overhaul, everything was getting a little brown down there..
2 points
-
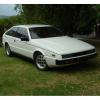
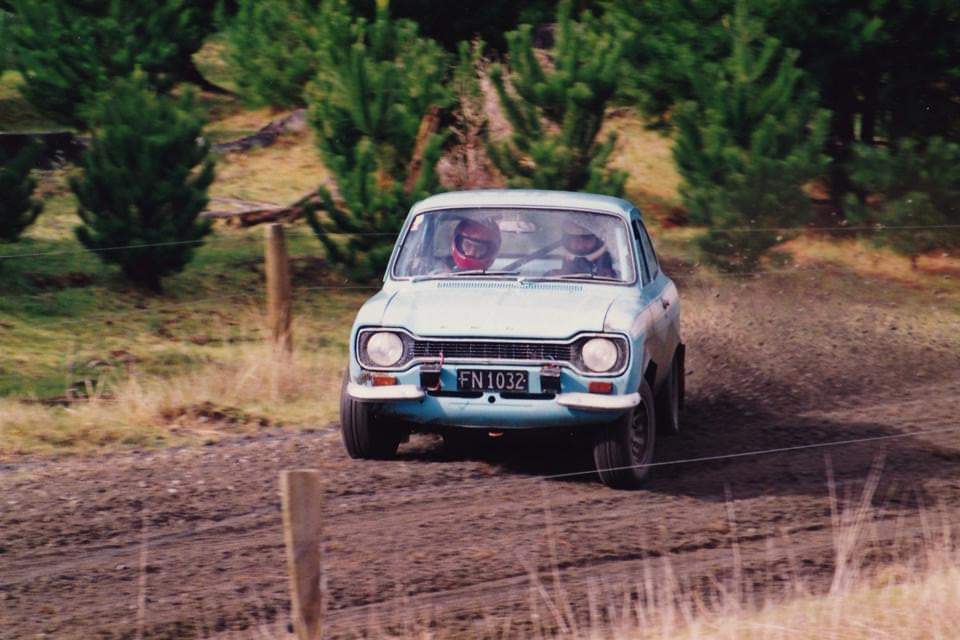
Just found and old pic of my original car on it's last event.
2 points
-
Note the new sill mount jacking point in the pic too..2 points
-
Working out where i needed to make some clearance to get the most travel in the rear. After cutting out the original diff tunnel the axle tubes now sit on the chassis rails and the tops of the tyres are just touching the tops of the wheel tubs. Here's a pic of what the maximum bump travel would look like. This is the most i can do without raising the chassis rails and wheel tubs which would involve changing the rear of the rollcage as well..... Too much work !
2 points
-
Gave it a bit of bog and a sand, then hit it with some primer to see the over all shape. So far I'm really happy with it. Still a bunch more sanding required, but I think it's going to look pretty good.
2 points
-
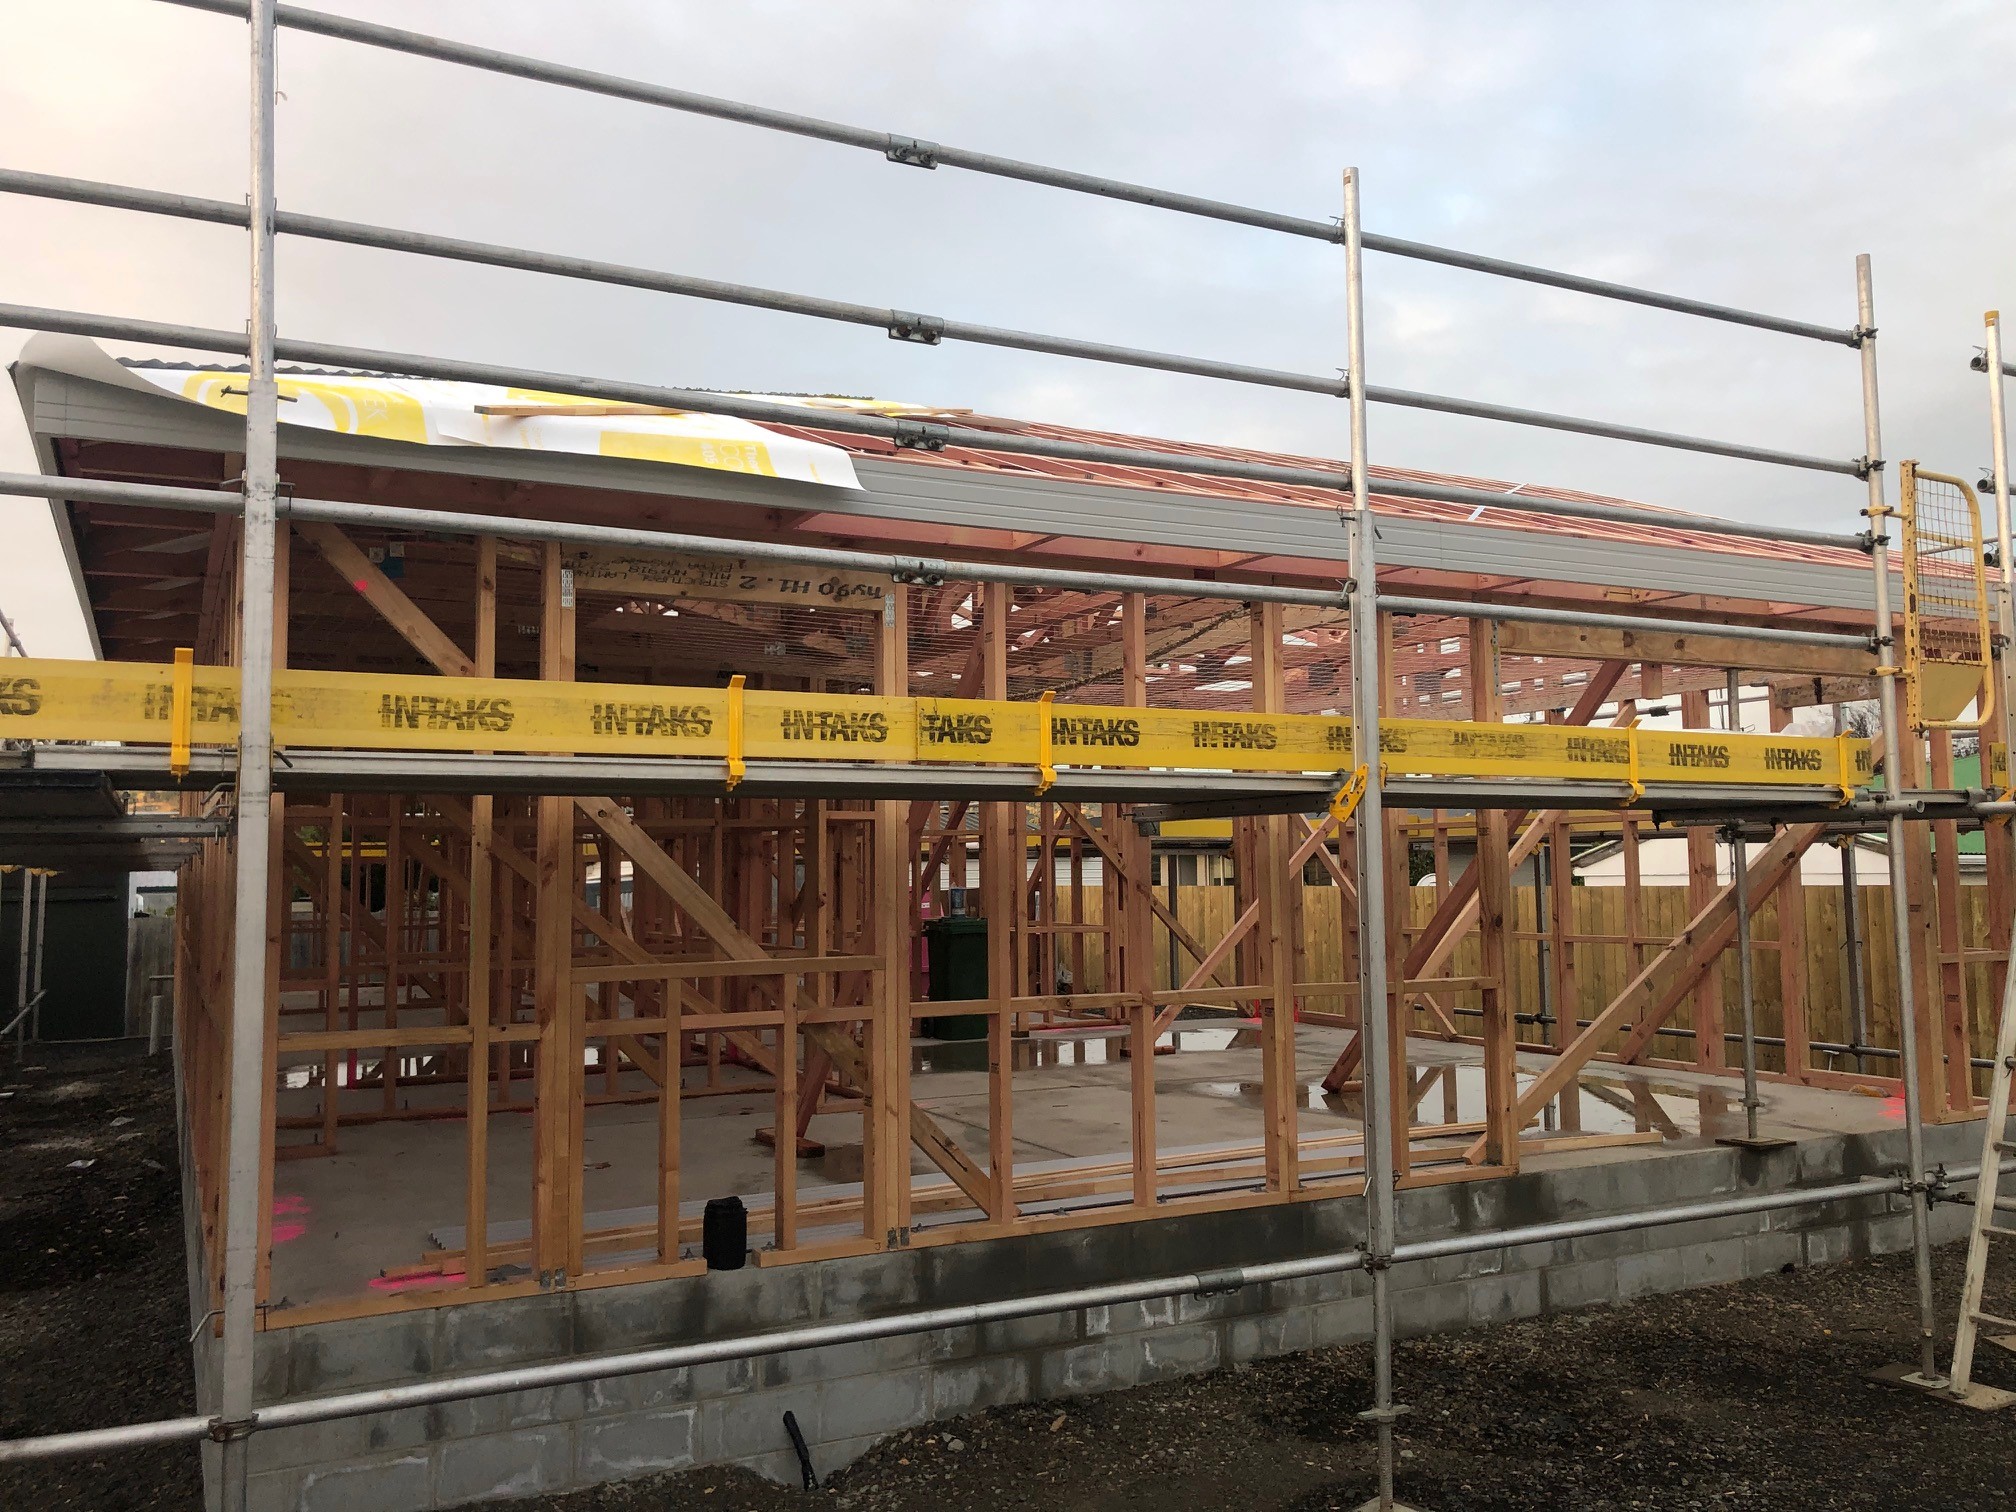
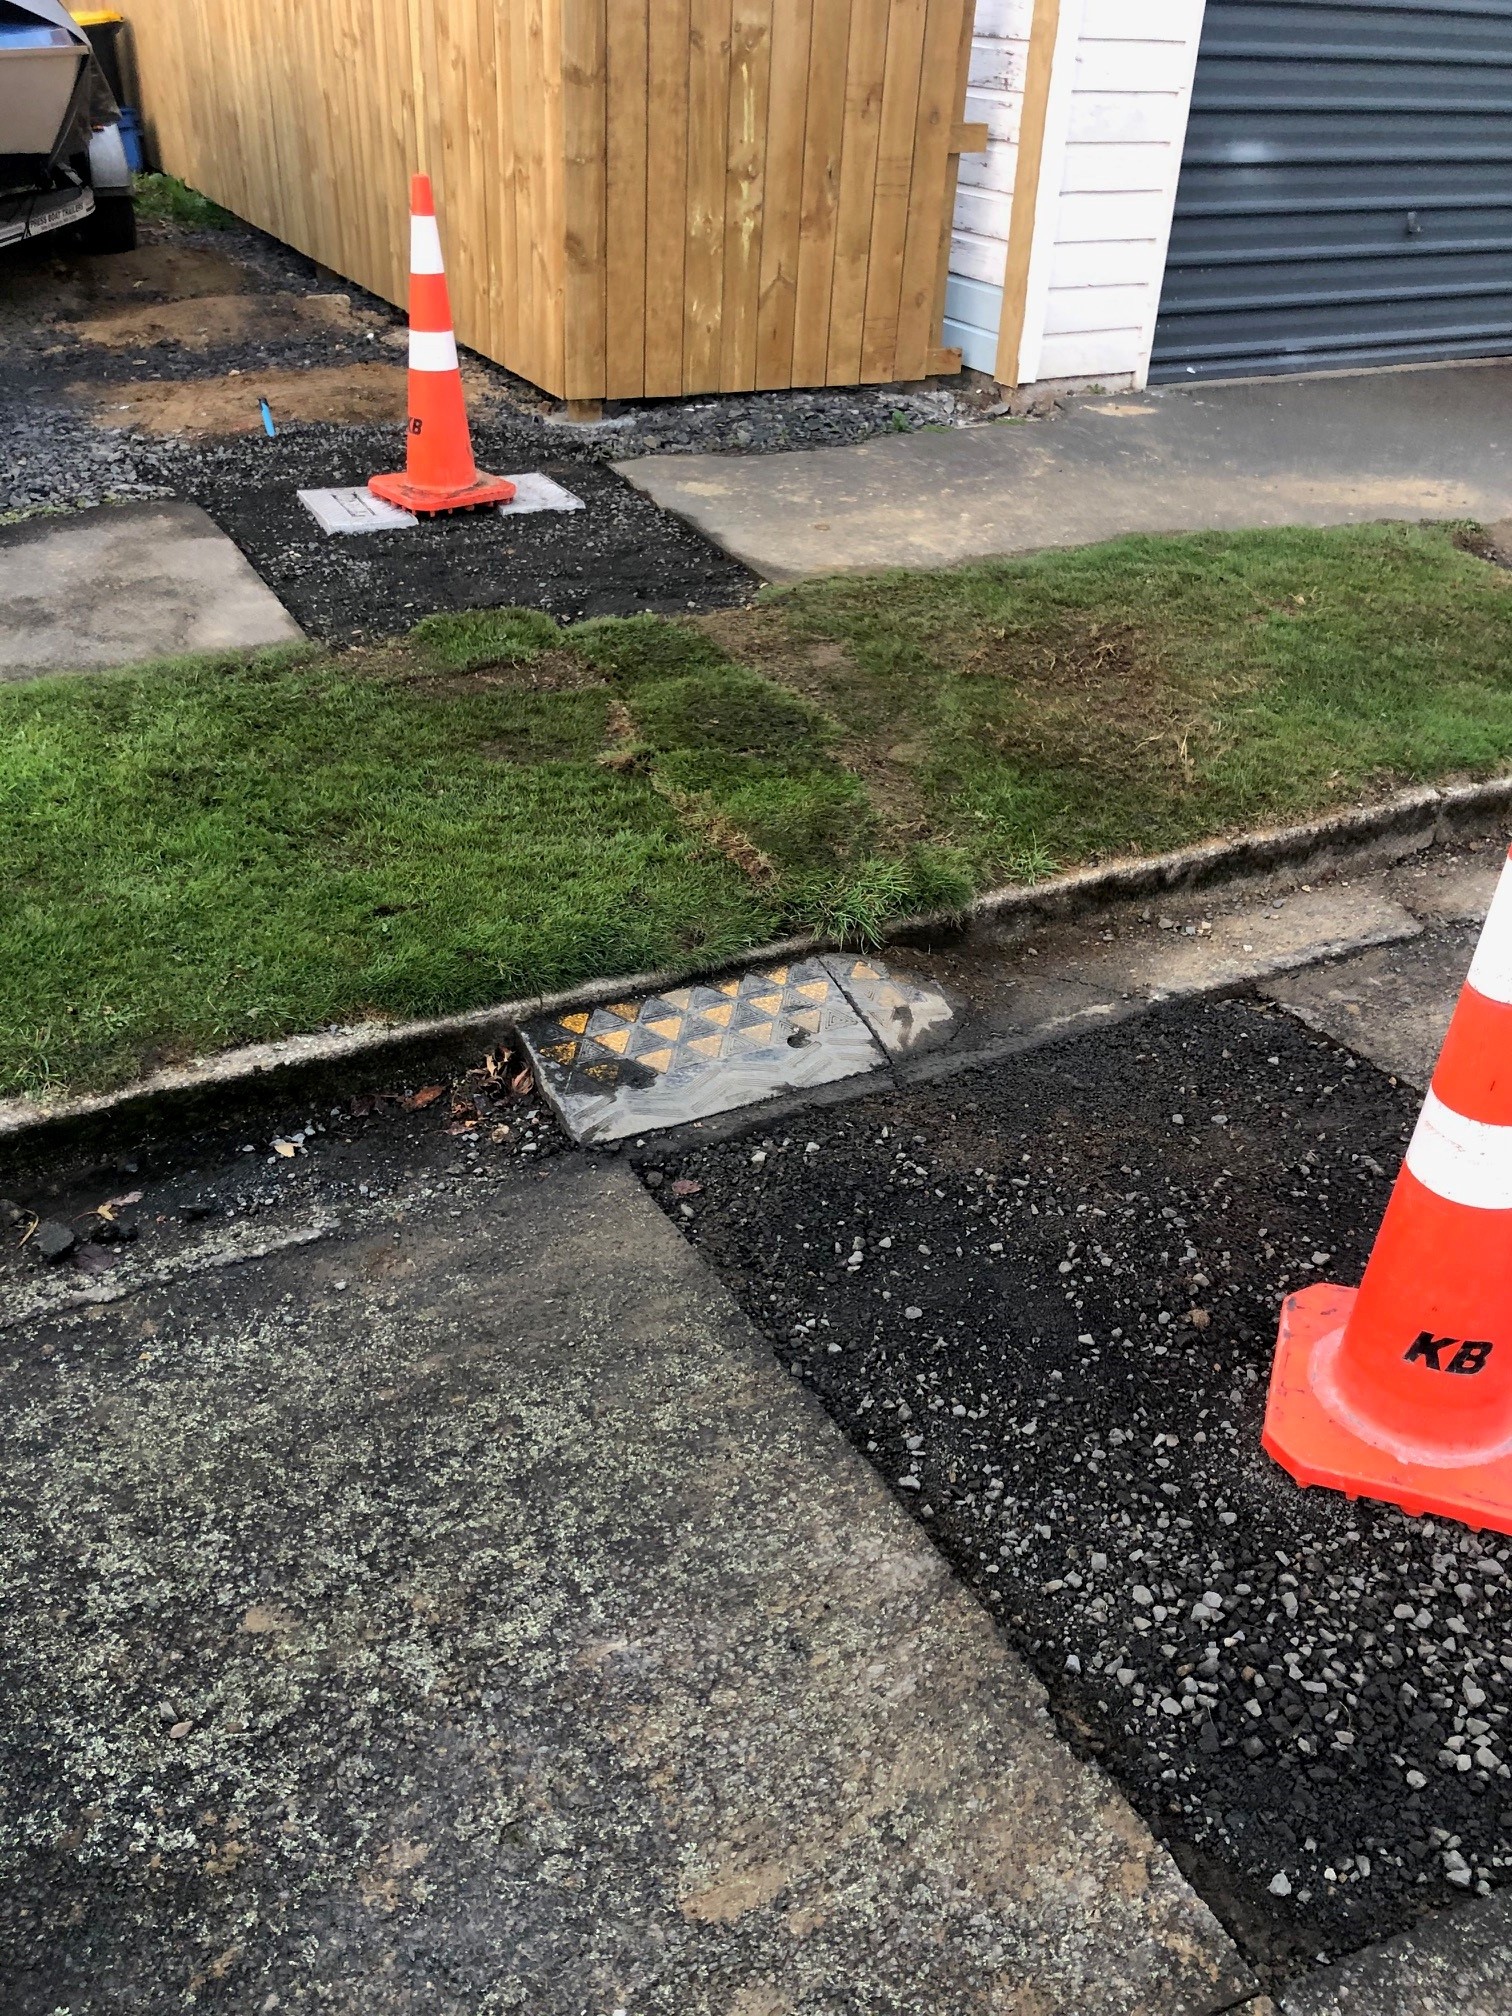
Builders weren't going to wait on the roofer so got the sheet delivered and started on it themselves. My spare shed is brimming with building materials so with the roof on they can plow on with the rest now that the weather has turned here is the south. 3 waters contractor was round to put in the new water connections, cant recall what the cost was for this (was in the total contract) but shouldnt be too much with such a short run. New power connections due in a few weeks also. Had a brief chat with my lawyer this morning, just to sign an easement to the council over their sewer main, and a private one for the sewer connections into the new lots. Title should be easy (and apparently not too much of a wait at the moment). We are also having thoughts on just selling up the whole lot and just buying or building somewhere else, I have the pricing to do the relocate (60k+) but the hassle/financing factor plus the residual value of the bare sections, added to the fact availability of lifestyle blocks is getting harder means we are weighing up our options. Watch this space, happy to receive questions also, I've had a few PMs along the way.
2 points
-
Get back on the main page. Got a set or soft lines for the rear brakes made up today and some seals for the calipers got them back on an bled up njce and easy Got a new brass frost plug in the block. Was a prick to get in Got it all dialed in and took it outside to wash the dust off it. Took it for a run up the motorway to test out all the work ive done to it Which turned into this haha Transmission is working ok in 2nd 3rd and overdrive. But pulling away in 1st gear in drive it slips pretty hard. But if i select low it is ok.....dunno. old autos beinh old autos. Might put a few more kms on it and see if it improves.. Cruises at 100k pretty good for a little 2 litre v6
2 points
-
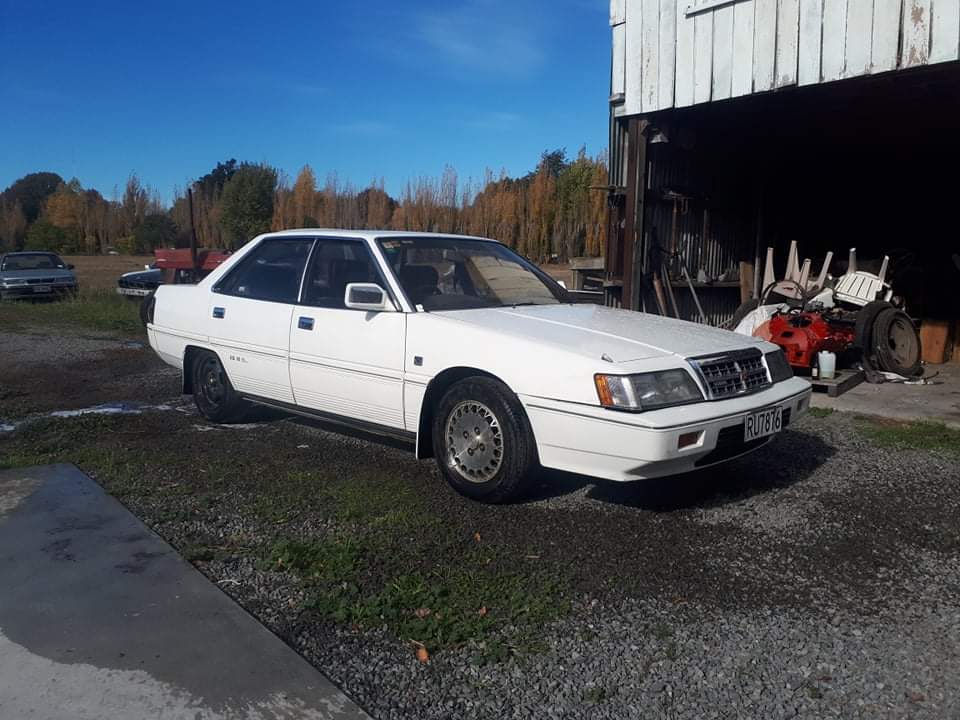
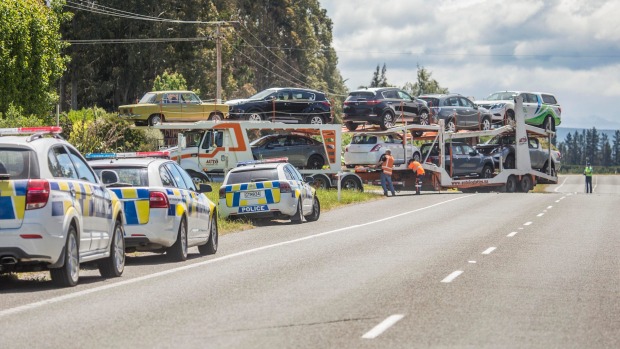
Good evening Old Schoolers, I think it about time I posted this old thing on here. Firstly, some history. Last year I bid on this car on Trade Me. It was being disposed of by Turners along with a whole bunch of other stuff from a private car museum in Blenheim, some of you probably remember it. I have been pining for another Fiat 125 for many years now as my first car was a Teal green 1973 125 with high back seats. I copped a lot of flack from my high school peers at the time for driving a "Lada" Philistines... Anyhow, I did not win the auction, a Fiat collector from Hawkes Bay kept outgunning me and the Finance Minister was not happy for me to gun back. Wallowing in self pity for months after, I got a random phone call from said collector wondering if I was still keen on the car, as he already had several minter 125s and had just bought an Alfa he has been chasing for 20 years. A deal was done and he also offered to store it for me until I could arrange to get it back to to South Island because we were in the middle of moving South from Taranaki. I am very grateful to him for giving me first refusal and for being very helpful. Whilst being transported to my new home, about 25km short of the destination, this happened. The truck was involved in a fatal accident in Amberley. A local and well known businesswoman driving her Old School Civic crossed the centreline into the path of the truck and was unfortunately killed. I could scarcely believe it when the dispatcher told me. Discussion
1 point
-
Just a FYI, I remember someone asking/looking for a place to widen wheels in the wellington area a while ago? Got in touch with Howatt Engineering, they said they do it. Quoted me $80+gst per rim (I asked how much for a 13" rim, 4.5" widened out to 7") so $368 (which is about on par with elite IIRC) Might look at getting the original avenger rims widened if I happen to find some coin hiding around....1 point
-
That'll do wonders for stopping your skirt blowing up at high speed.1 point
-
Could always do a @kyteler and keep it as artwork. Wouldn't take up much space.1 point
-
Good fun, but do your homework about what it'll take to re-register. They'll be looking inside the chassis for rust, etc. I got quoted silly monies to fix up a 550cc to required spec.1 point
-
We have leg sheild yuuuuus
1 point
-
You got me there.1 point
-
Correct ! L16 goodness, The new engine will still have a Datsun connection , i'm using an L18 fully counter-weighted steel crank which is getting massaged to fit the AX crossflow block. Should be a nice strong bottom end.1 point
-
Sweet project car to start off with. Its also nice to see a couple who don't know much about cars to give it a go and learn along the way. this is also the best way to learn but can also be frustrating and disappointing when you don't know how to fix an issue or break something from a rookie move. Also with the fuel tank situation I've seen very mixed results with the por15 kit. where a friend did his and the sealer did not stick and went through the fuel system. tank was a throw away and rockauto to the rescue for a new one. i also guess that the budget on this vehicle is limited just by going on the posts. as have seen people often get there fuel tanks reco'd but can be spendy. but often radiator shops can do this service. which i suspect the tank gets electroplated also now that you found media blasting. often getting a small blasting booth is handy for car resto stuff and would be a good investment. also yeah get proper efi rated fuel pressure hose. because being efi the system runs at a higher pressure. where a car with a carb might only run at 5-15 psi. and any hose clamp is better than none. keep up the good work And if you get stuck on something there's plenty of people on the forum who can help or take a look through the tech talk part of the forum.1 point
-
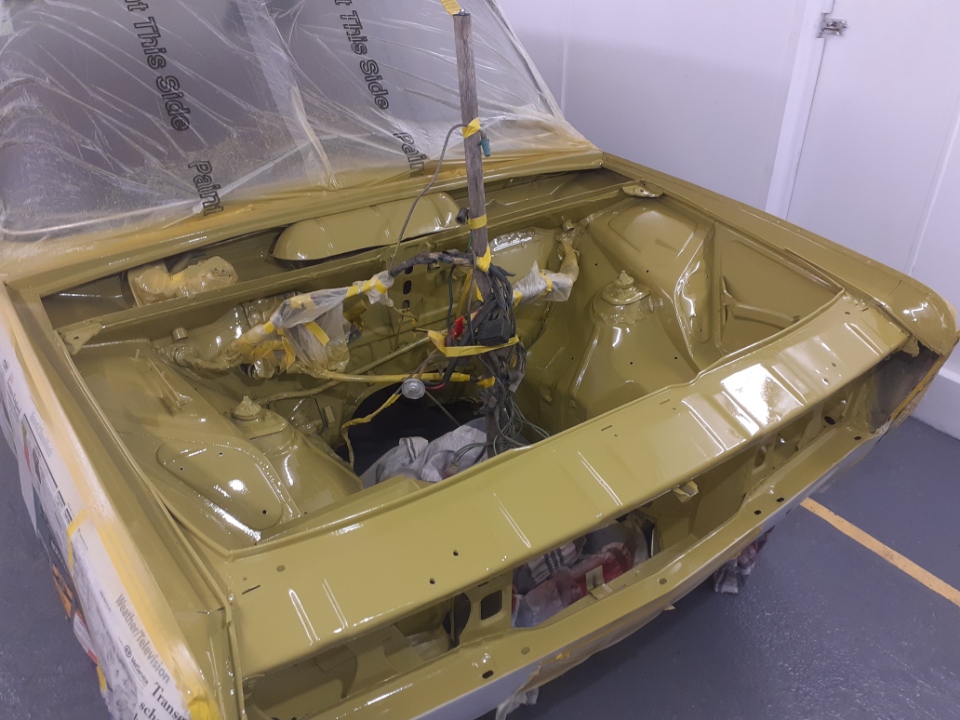
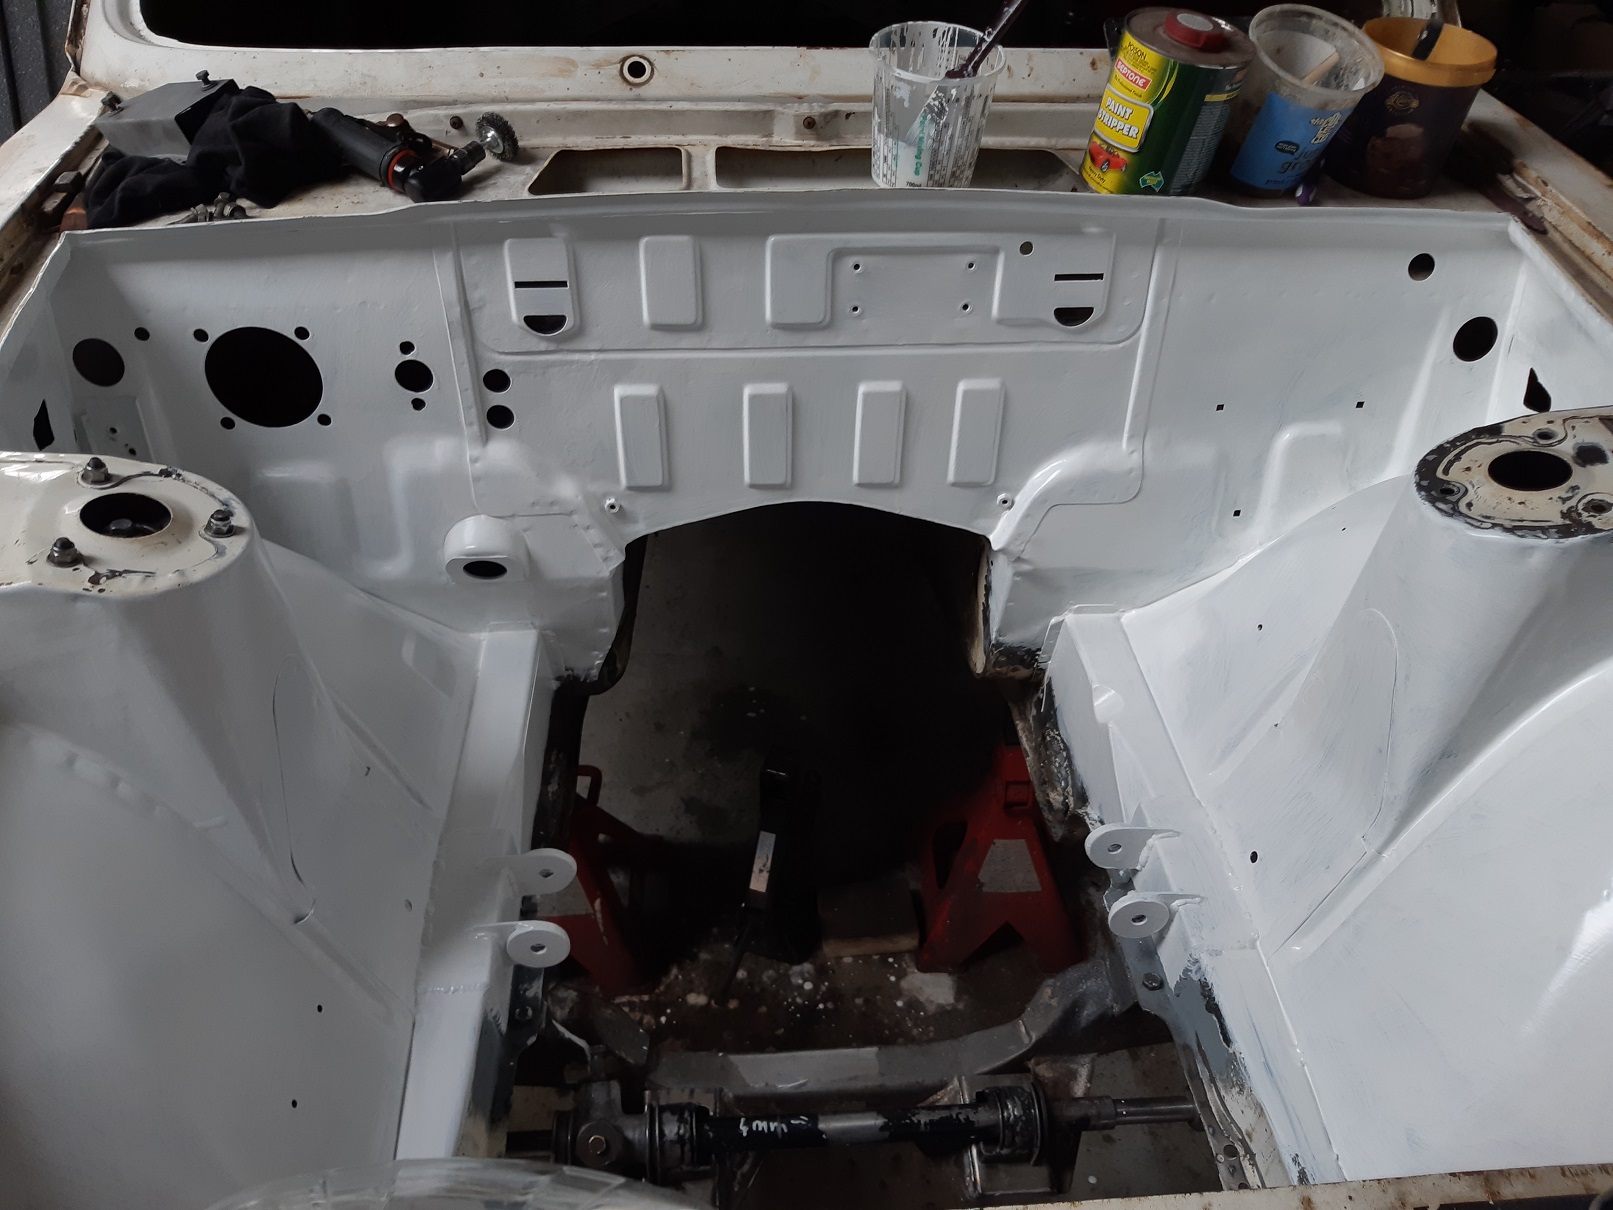
In the oven, baking the engine bay paint!
1 point
-
i think im just going to buy a rear seat wiring harness from my local Toyota dealer just to get the matching plug. remove my seat test the circuit and make a dummy harness. i will let you know how i go.1 point
-
You realise no one is ever going to plate and tag a Wolseley right? Yeah that's why they didn't look too hard. They only do it to desirable cars.1 point
-
Have had a few really dodgy ones over the years, a "mitsubishi lancer 1500cc" that had "been converted to a makkinen evo replica" And a "V6 commodore with a LS swap" that had really low kms and lots of weird rust almost like it had been hidden in a damp shed for 10 years and you could see where the SS stickers on the doors were and the engine number had been attacked with a chisel and the date tag on the belts didnt match the year on the rego and the vin tag under the glass had heaps of weird scratches on it Or the VE commodore that had a different vin on the bit under the carpet on the floor to under the glass and in the engine bay because whoever the crackhead that stole it didnt realise there was a chassis number in the floor1 point
-
A certifier has to send it to a TSDA to sort out any discrepancies in the ID of the vehicle. With old stuff it can be tricky because a lot dont have a stamped in number so swapping tags is very hard to pick up unless there is a difference in the body, ie if someone put VK commodore plates on a VH you'd notice because the body is different. Ive had quite a few cars that have never come back after being asked to sort out ID issues but most of them have been cars where it's been obvious, ie the stamped in number in the firewall had been cut out and another one welded in The last old car I had with chassis number problems, was one that the owner had lost the tag when it got painted, i failed it, next time i saw it hed "found the number under some bog" but had obviously got a punch set and diy'd the number into the front panel, he painted the front so it looked semi legit but forgot about the back side and the primer and paint had cracked where hed punched the numbers in It went to a TSDA to get a new vin, a bit of paperwork and a month or so of waiting and it got a new vin number on a proper tag1 point
-
I had some areas of bare metal where I had made repairs or modifications. They kept getting minor surface rust, so I thought I should really get around to painting them with epoxy. The prep around the firewall was awful. All the seam sealer was bituminous tar stuff. So there was many hours of heat gun and scraping and rags soaked in kerosene and manual wire brushes to remove it. Then I needed to remove the paint because there were areas with surface rust and others where rust was creeping under the paint. So that was more many hours of knotted wire brush on the grinder. And the 3M abrasive pad thing on the grinder. And chemical paint stripper on the larger flattish areas and more scraping. Then there are lots of narrow spaces and gaps and corners I can't get into with the grinder. I found some reasonably priced little wire brushes at mytools.co.nz that were rated to use in a die grinder at 20000rpm without exploding. I also used small abrasive pads in the die grinder. Then I dusted it off with the air gun and wiped it all down with a cloth soaked in prepsol. And dried it off with the heat gun. And brush painted it with protec 408 epoxy primer. The engine bay has had two coats, the repair in the boot has only had one. I have some modern seam sealer to use. Hopefully it hasn't all gone hard... I think I might have bought it a couple of years ago.
1 point
-
Right o, the latest round of fuckery. As discussed, I decided that a second rad was going in, regardless of you fuckers who said not to worry. Basically the thing bouncing off the electric fan just by hitting 100kmh for 2 mins or after a hard pull was not giving me the lovelies. After a measure up I scoured the internet radiator catalogs for a suitable donor. Unsurprisingly a Hiace van rad was pretty much bang on if maybe a little tall. I ordered one from my rad man and when it arrived presented it up. A minor forward tilt had it sitting in a good place. The top inlet pipe was a stupid angled thing so I took it back to rad man to change it for a straight inlet. I made some bottom mounts that hooked in to existing chassis holes, then fudged up a top mount. I had to grind off some unnecessary brackets and such but that was no drama. Then I spent quite a while rejigging the stainless pipework to point in the general direction of the rad pipes. I dragged the old fan and viscous clutch setup out of the container, however the 450mm safari fan was going to be pretty tight in there and probably going to hit the engine cover. Some google-fu resulted in the purchase of a TD27 fan, as it had the same mounting but only 420mm diameter, perfect. I then somehow spent nearly a week of evenings fucking around creating a shroud that would miss everything but still do ducty good things.. I have no idea what it took so long, but it did get remade 3 or 4 times. It's a bit dodgy, ie made out of some old flashings that were the only really thin steel I had lying around, but it appears to duct adequately. So today I finally filled and bled the cooling system and took it for a spin, and holy shit what a huge difference! It basically gets to 1/3 of the way up the gauge and stays there absolutely rock solid. This is where it sat when doodling around town previously. I did a long run at 100kmh, then went up a steep hill that had always made the big fan come on and it didn't move the gauge at all. Super happy with that.... It also appears the thermostat now has a temperature range it can work with, as the wee fan and aux pump cycle on and off which tells me the thermostat is choosing to open and close rather than stay open all the time in an attempt not to blow the engine up. So all in all that was a worthwhile exercise.1 point
-
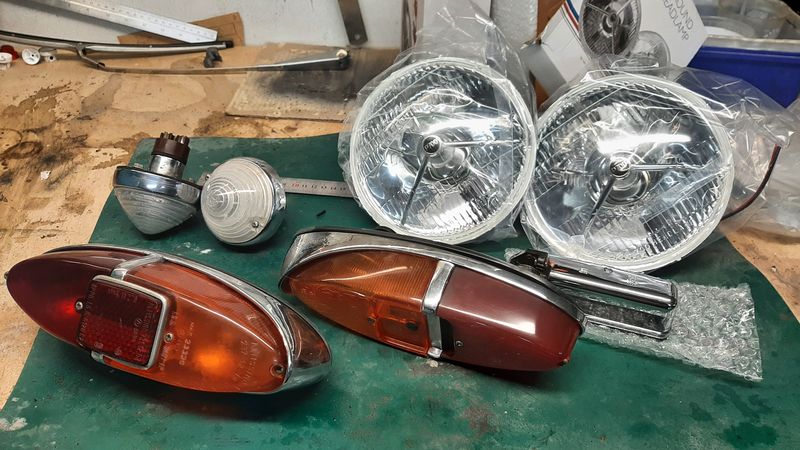
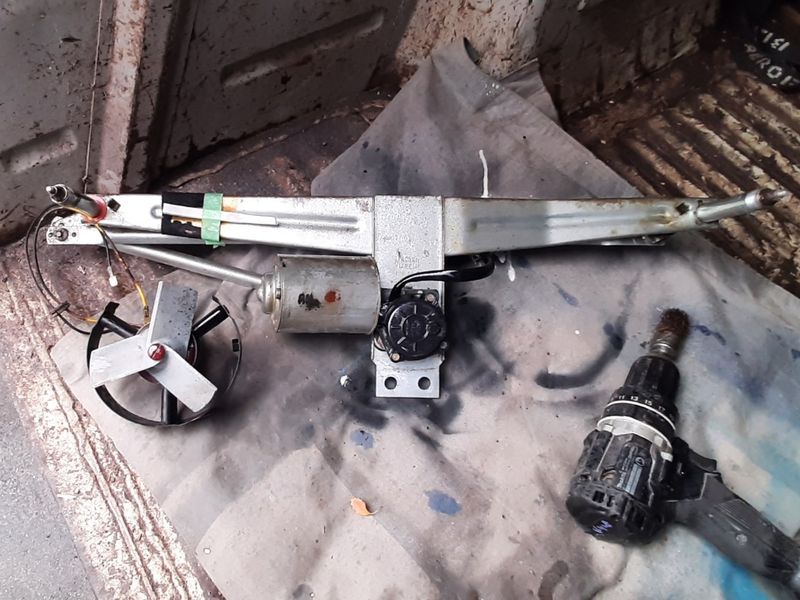
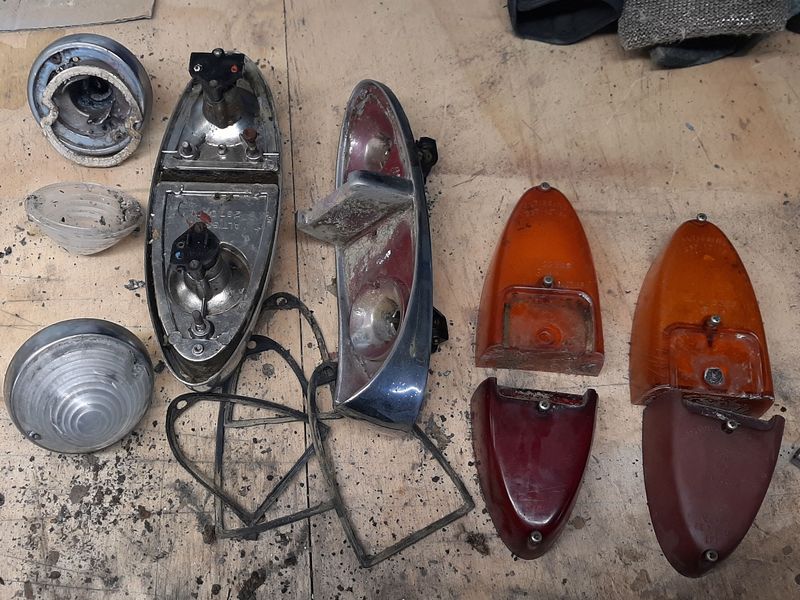
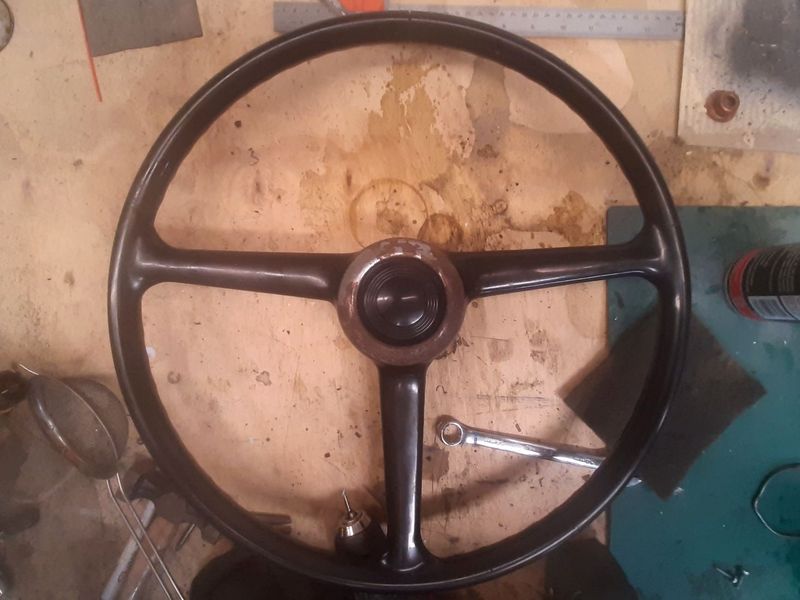
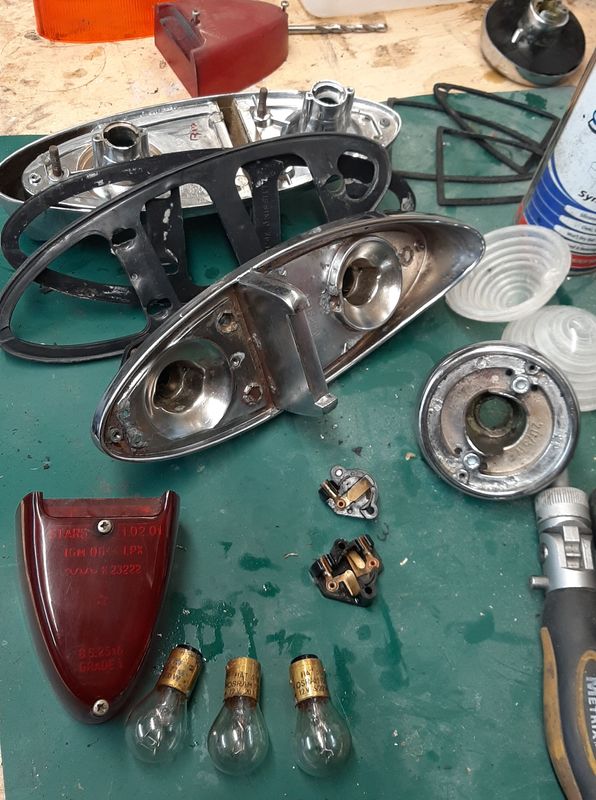
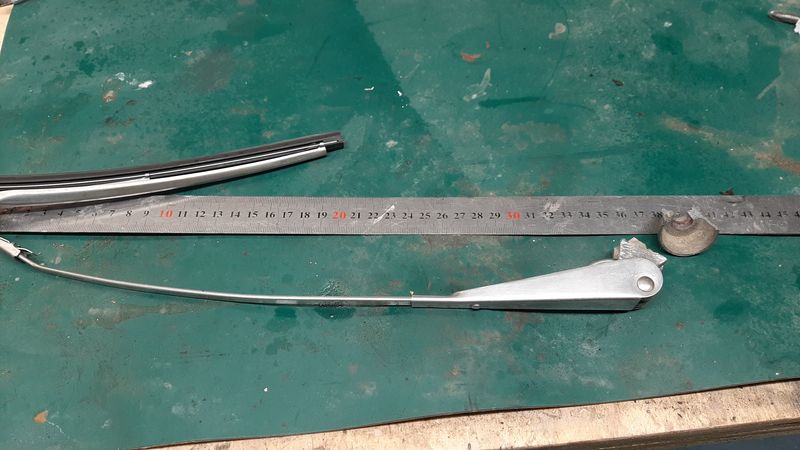
Also removed and tidied/greased and checked the operation of the ventilation fan and wiper mechanism. Putting the wipers back on this happened the pot metal just split as i was tightening the nut. They are the same style as my 2300 (and so also several other Fiats of the era) so should be fairly easy to find. Tidied up the horn button to match the dash And cleaned up all the existing lights Some modifications needed to replace M4 and M5 fine threaded steel machine screws embedded on cast aluminium on end end and wheel well muck on the other that either snapped off or got the dremel. Components are all quality material and servicable and have some up well - 2 of the Original FIAT branded bulbs went back in Some headlights came in as well, along with some generic mounting rings so i will see if i can get them to stay in. Lamps all tested and ready to install.
1 point
-
car went to the paint shop to get the runs out of it and get the final cut and polish. i went and picked it up last night and it looks amazing. anywho, today i wanted to fix the exhaust where the flex joint had worn through because its the lowest point and its had a fucking over judder bars and whatnot and subsequently has a hole it in. step 1 - jack up your car. this is where things went wrong. 2021-04-25_02-55-42 by sheepers, on Flickr car slid off the jack on the way up. given what could have happened i got off extremely lightly. it bent the radiator support up and bent the bottom of the radiator real bad. it also bent the bottom of the front bumper. however, the radiator isn't leaking and the crank pulley is unscathed which is a fucking miracle given what happened. i was able to bash the rad support back down and i got most of the bend out of the bumper so it looks fairly normal again. fuck it could have been WAY worse.................. so yea, after dealing with that i moved on to fixing the zorst. cut out the fucked bit, made a new bit, tacked it in place, remove zorst from car and fully weld, add 4mm thick bash plate and put zorst back in car. 2021-04-25_02-55-49 by sheepers, on Flickr 2021-04-25_02-55-55 by sheepers, on Flickr 2021-04-25_02-56-02 by sheepers, on Flickr 2021-04-25_02-56-09 by sheepers, on Flickr 2021-04-25_02-56-21 by sheepers, on Flickr then it was time to wax the newly polished paint. that went well. it looks pretty ace tbh and yea, i cant take a photo that justifies how good it looks. but it looks good. take my word for it. 2021-04-25_05-34-27 by sheepers, on Flickr 2021-04-25_06-18-48 by sheepers, on Flickr 2021-04-25_06-19-23 by sheepers, on Flickr 2021-04-25_06-32-09 by sheepers, on Flickr1 point
-
Also did some building, turned this... into this... Has different levels to help with sparging, siphoning etc. Bit of a gamble design-wise before I've actually done anything, but should work out ok. Cleared out a corner of the garage to put it in... And put down a brew last week. Simple all-grain APA, with NZ hops... And malt pipe lifted for sparging... Into the fermenting bucket. Hygiene is everything so fastidious cleaning and sterilisation as you go... Original gravity came out around 1.058, pretty good sugar levels... And into the brew fridge. No airlock fitted here yet, was just lifted into place after pitching yeast once it had cooled to 21 deg C, almost exactly 20 litres of wort... And ticking away doing its thing. My lovely little yeast cells are making things bubble away... So will hold at 20 degs for 10-14 days. Will take gravity readings later on then siphon into bottling bucket, add conditioning sugar and bottle. Then another couple of weeks... Took about 6hrs as it was my first time and I had initial equipment cleaning to do etc, I'll get better as I have learned how the temps go now and I'll be able to multitask once things are under way. Been interesting...1 point
-
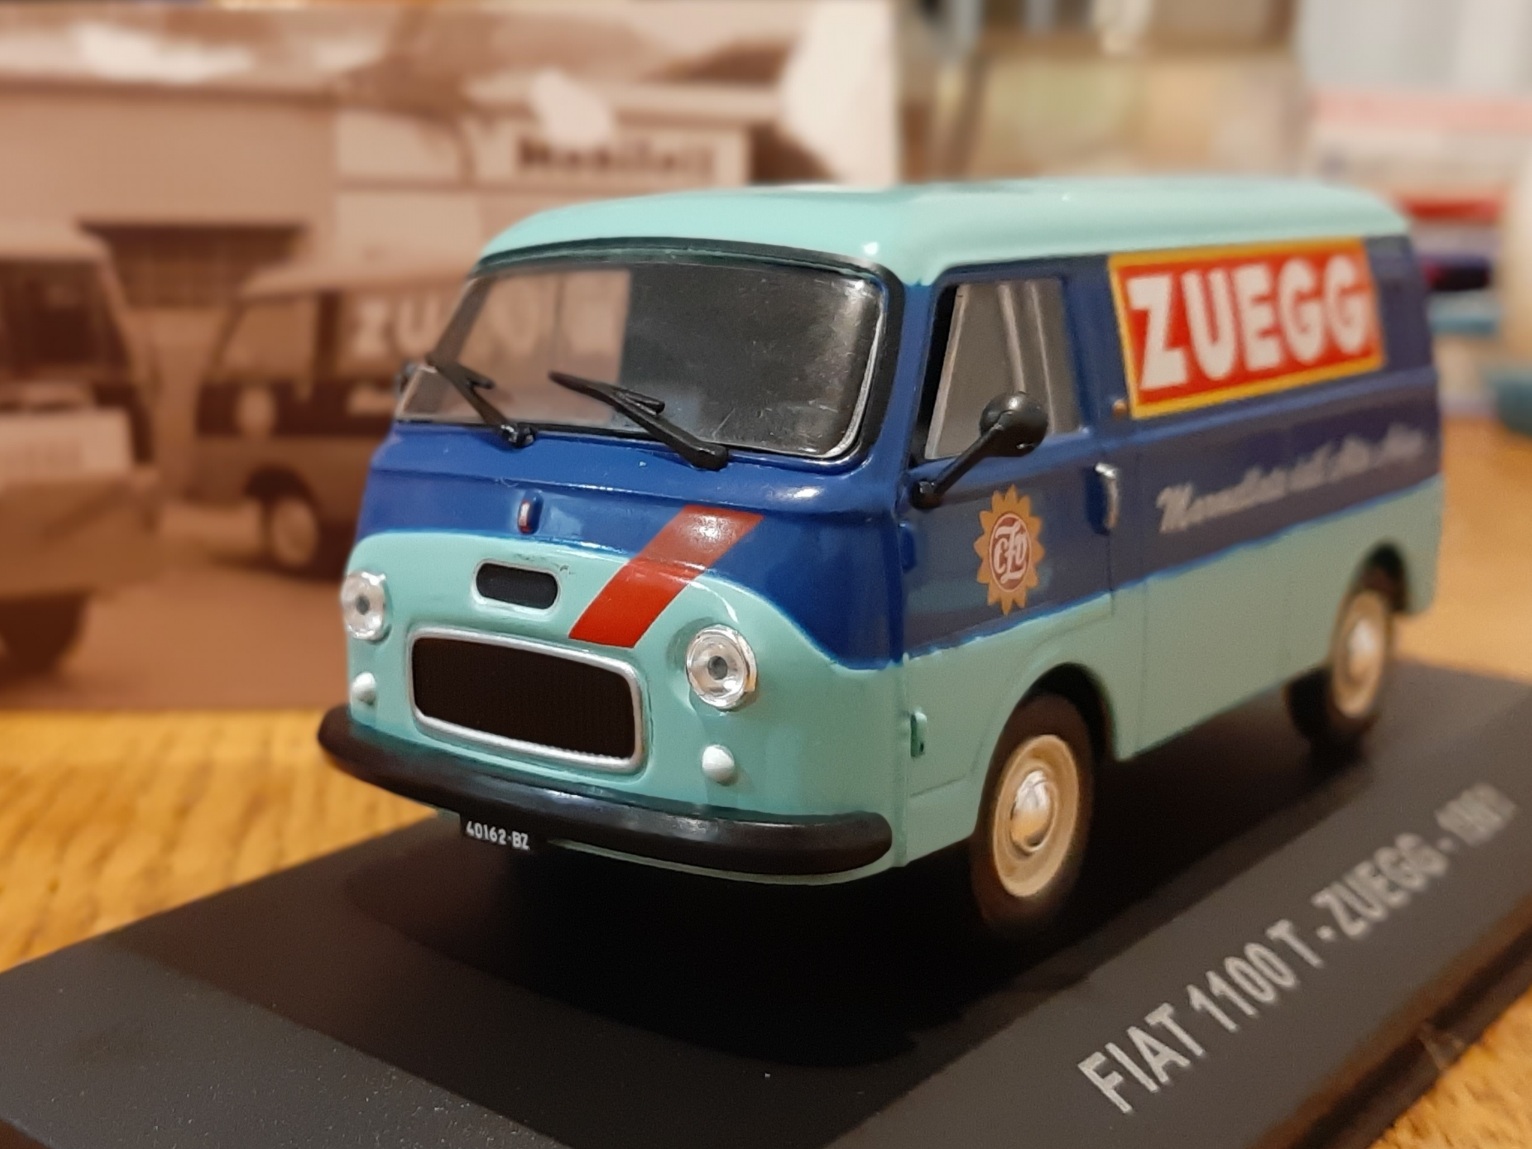
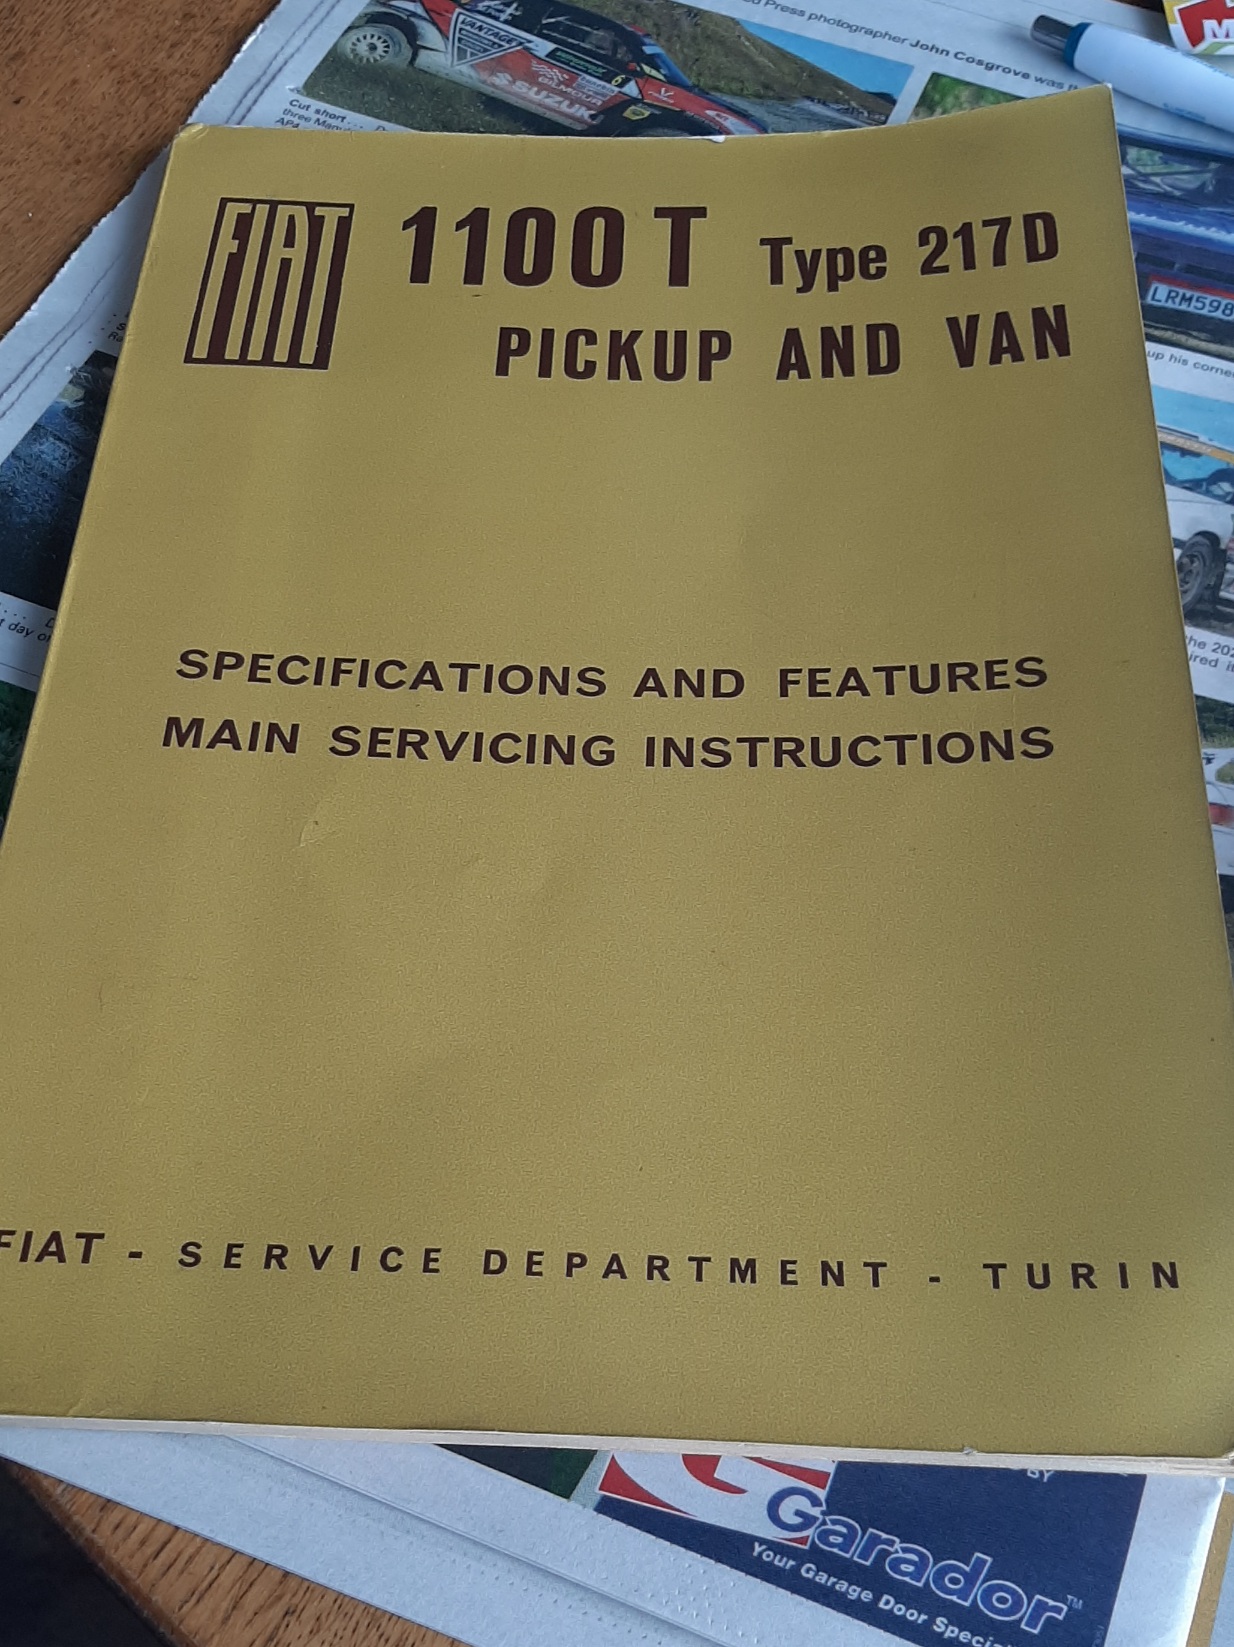
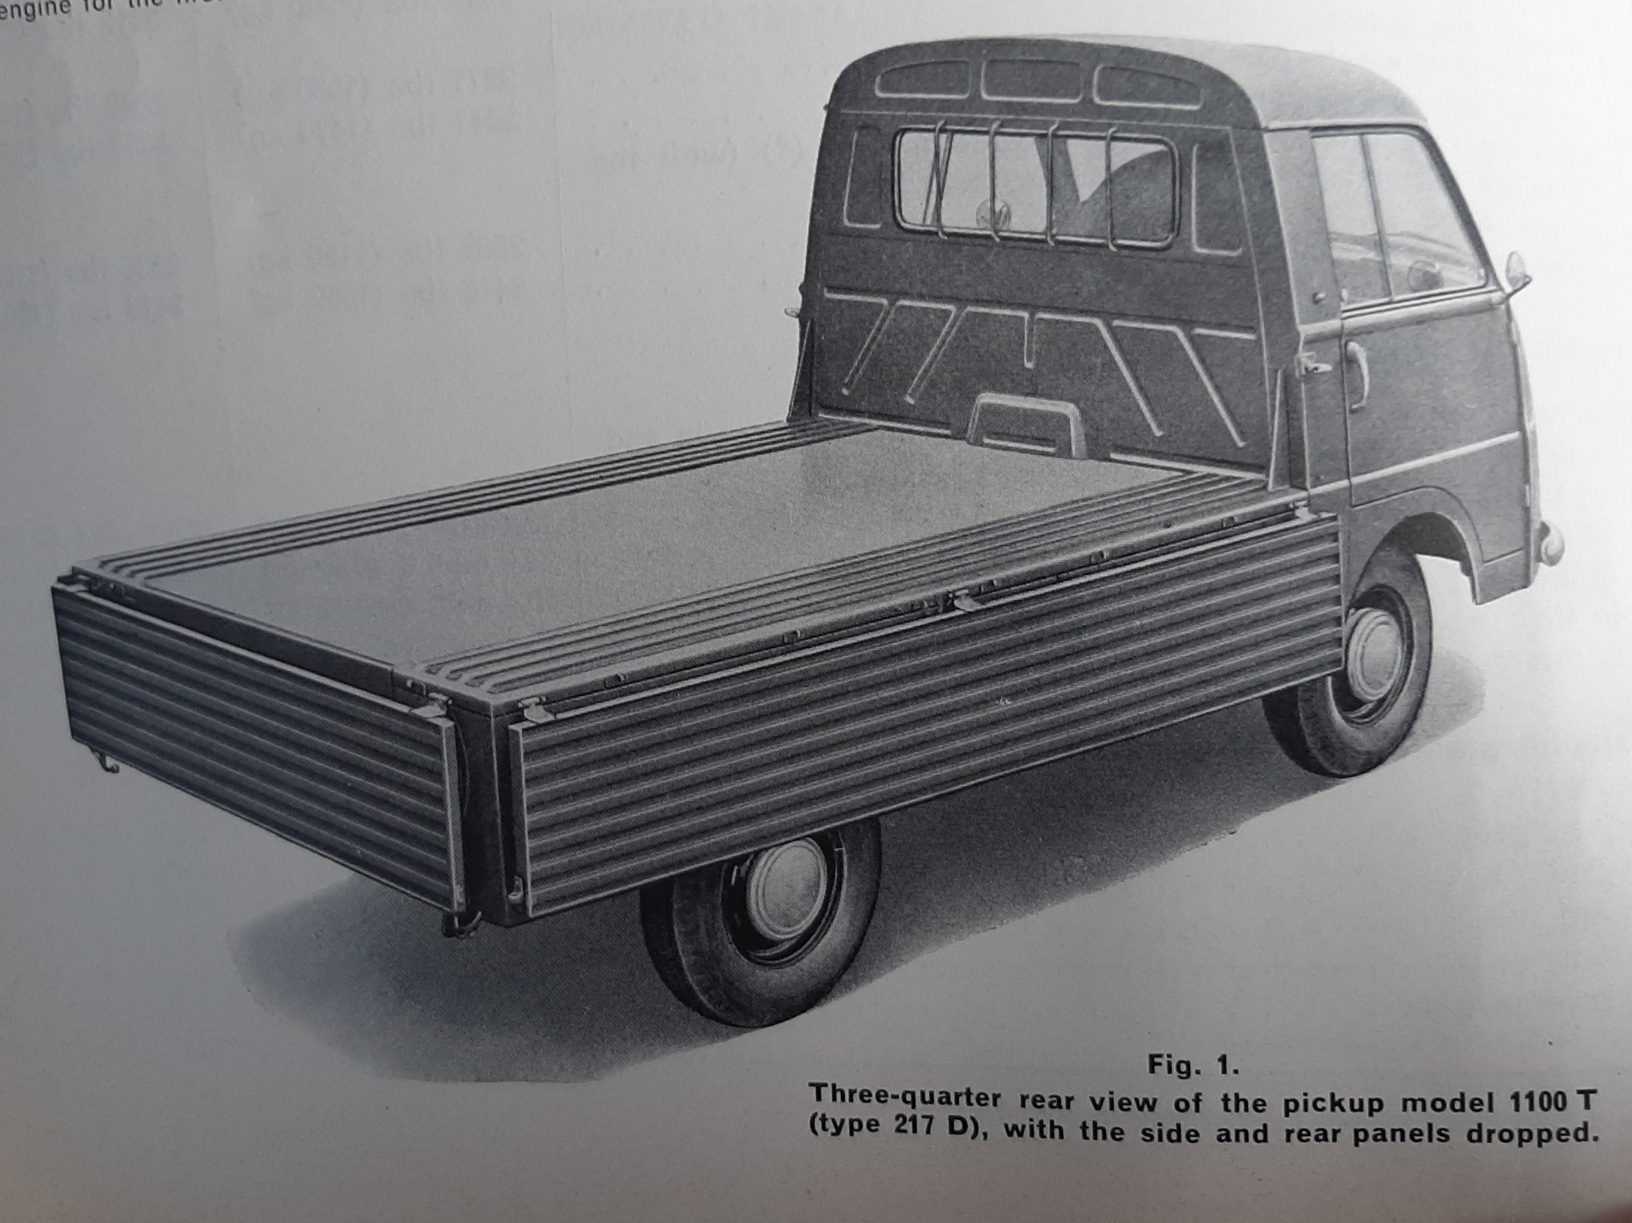
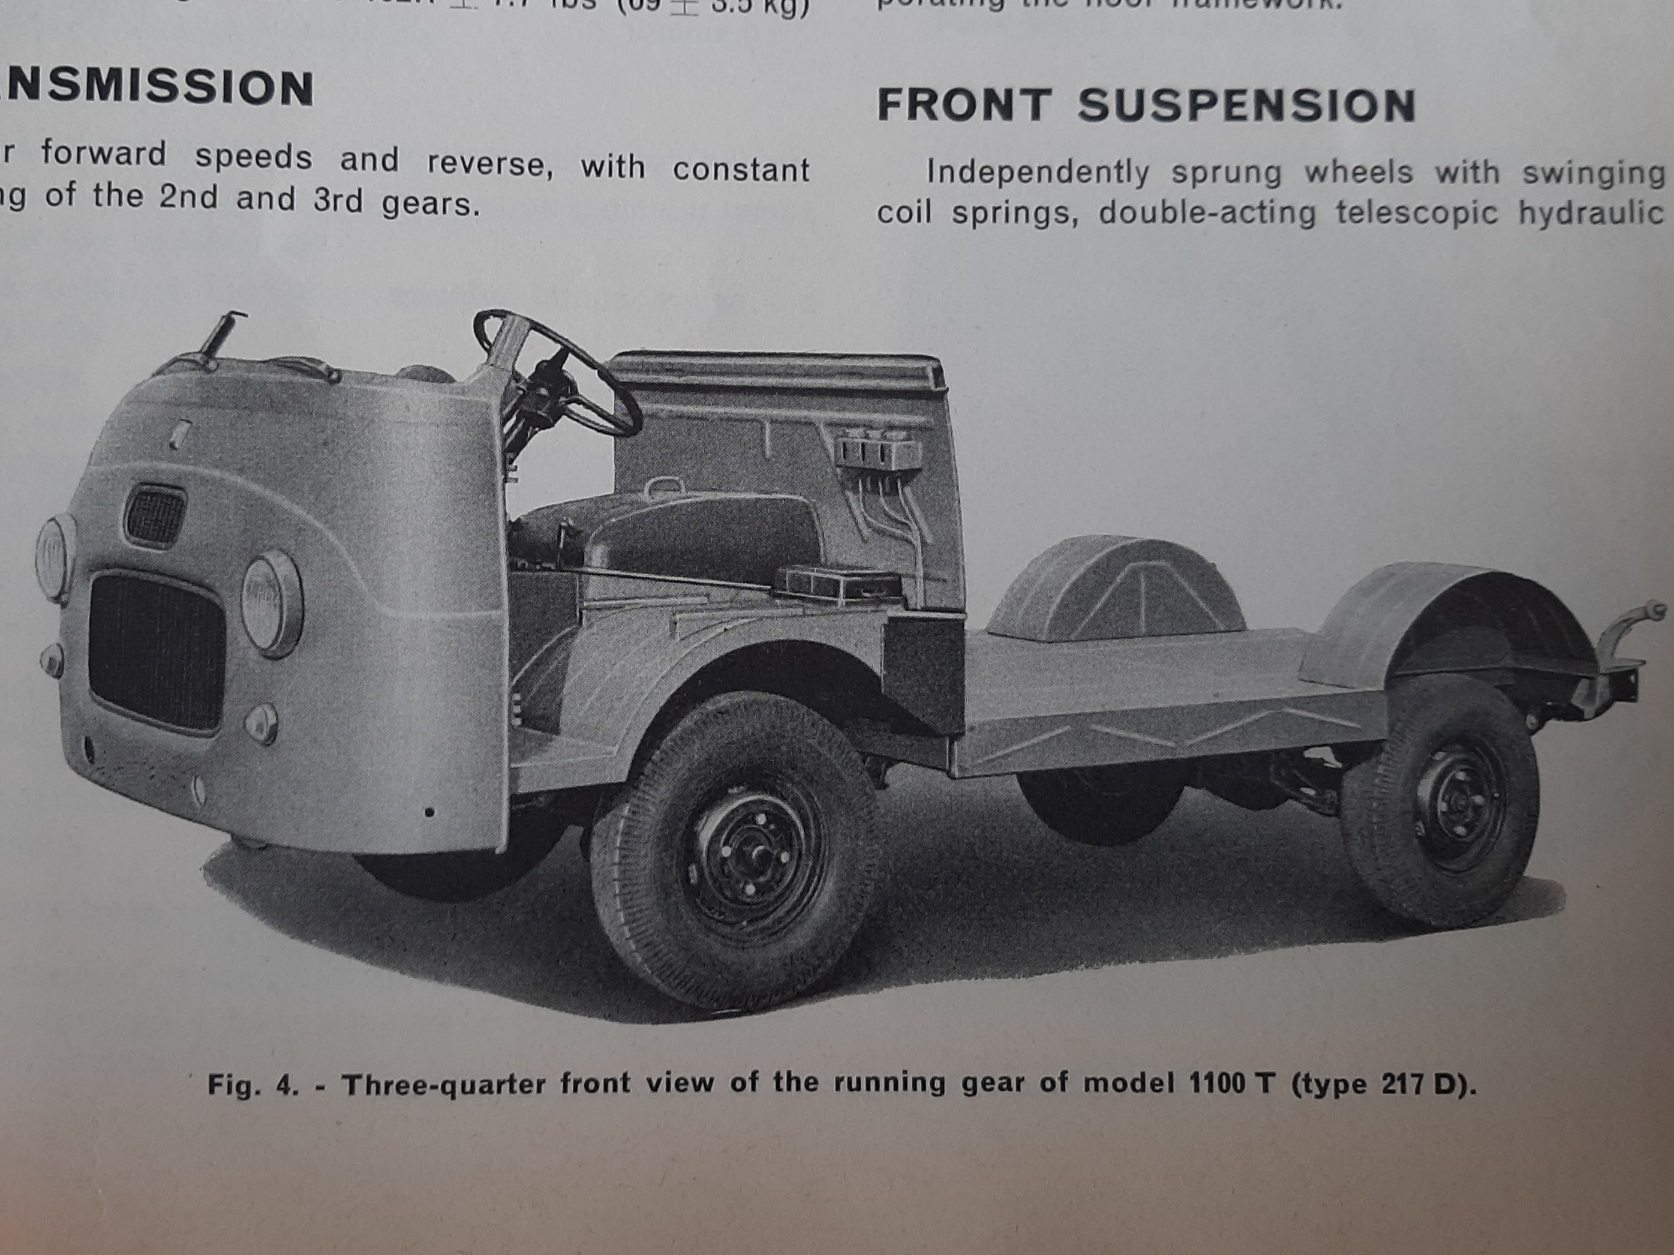
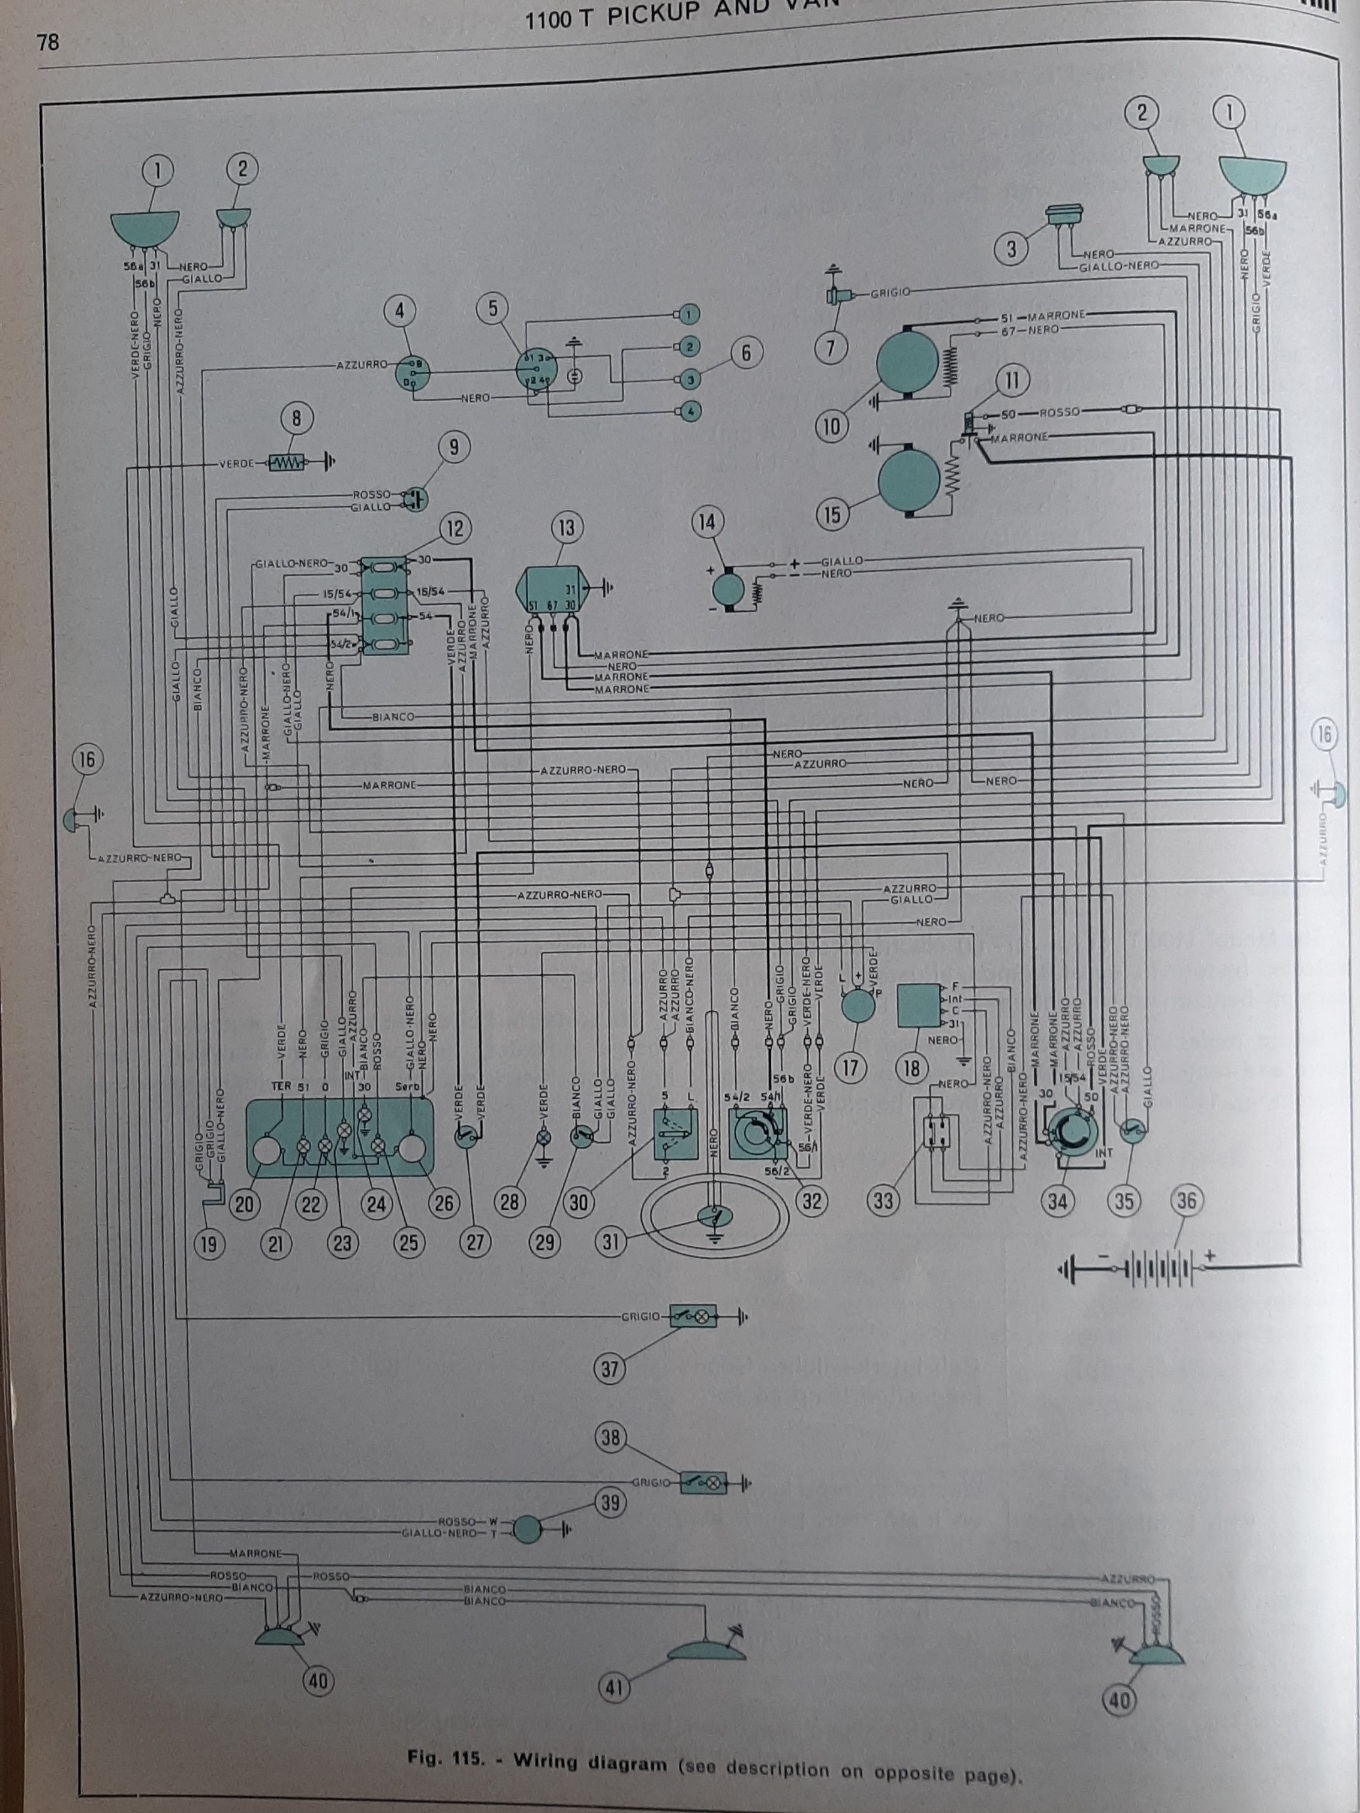
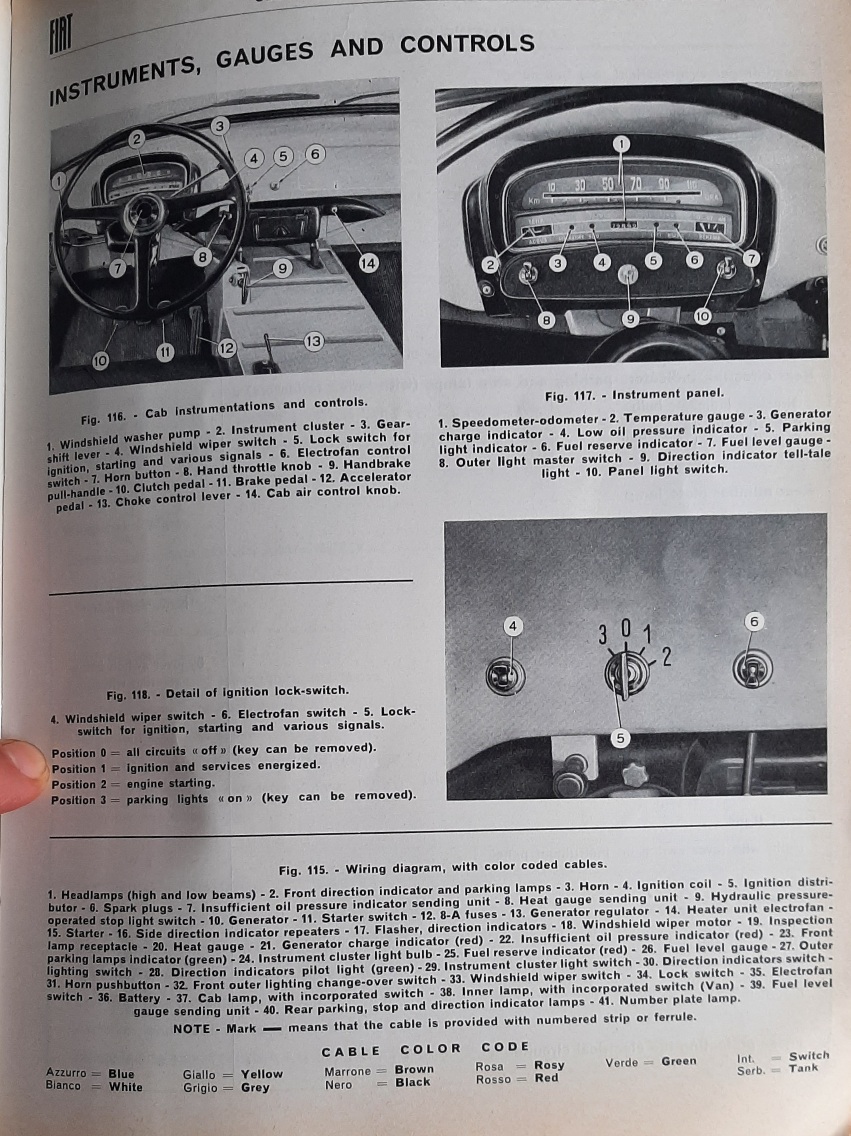
Trinkets are starting to arrive. This will be painted to suit, once i decide on the full size version A factory service manual. These 'yellow books' are great, beautiful hand drawn 'photos', pics of the special tools in use and all sorts of specs and info. Such power! (The 116.000 is the 1300, the 1500 is closer to 52hp with slightly more torque). Such utility! What i really wanted was this page. Fiat 1100T wiring diagram. Not too many systems, with only 4 fuses, but classically FIAT in its implementation And this. Dash contols, none of the switches are labelled from the factory anyway, and there has been some hackery, like a foot switch for hi/lo beam retrofitted to the steering column, aftermarket switches replacing the factory ones and vampire taps galore, as well as some rodent damage.
1 point
-
Swapped this in today for a new (full) one. Cost $425 incl. Eziswap Gas. G size. Argonshield. For those that were wondering what it cost to refill the large size. I'm usually in and out of that shop when I change a bottle but today I found myself in the new welders section looking at all the new stuff. Gawd! Need to stay outta this thread.
1 point
-
1 point
-
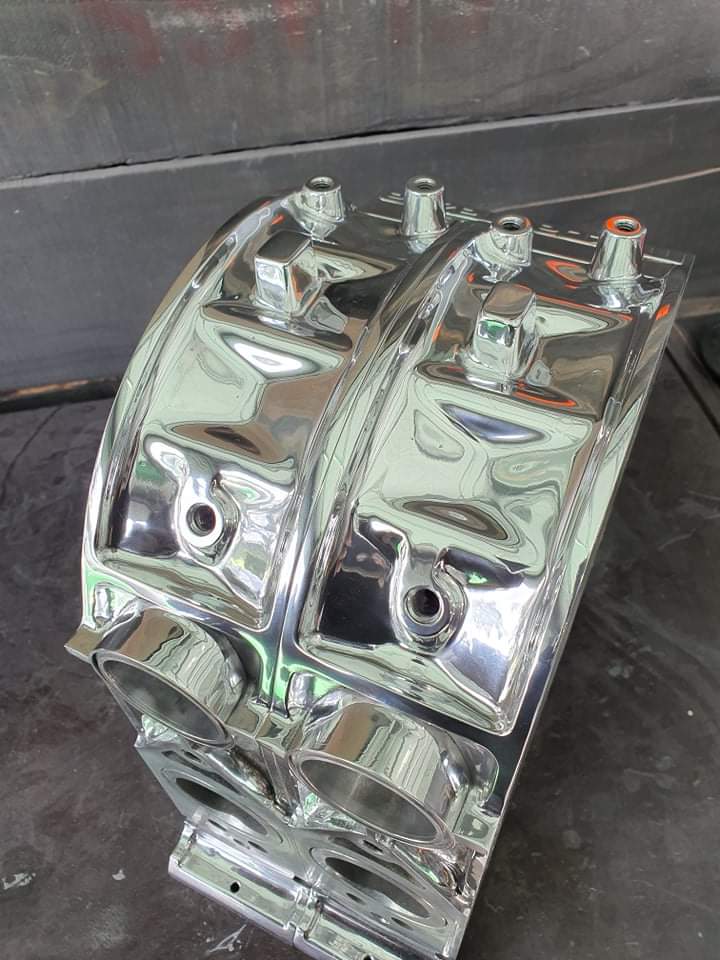
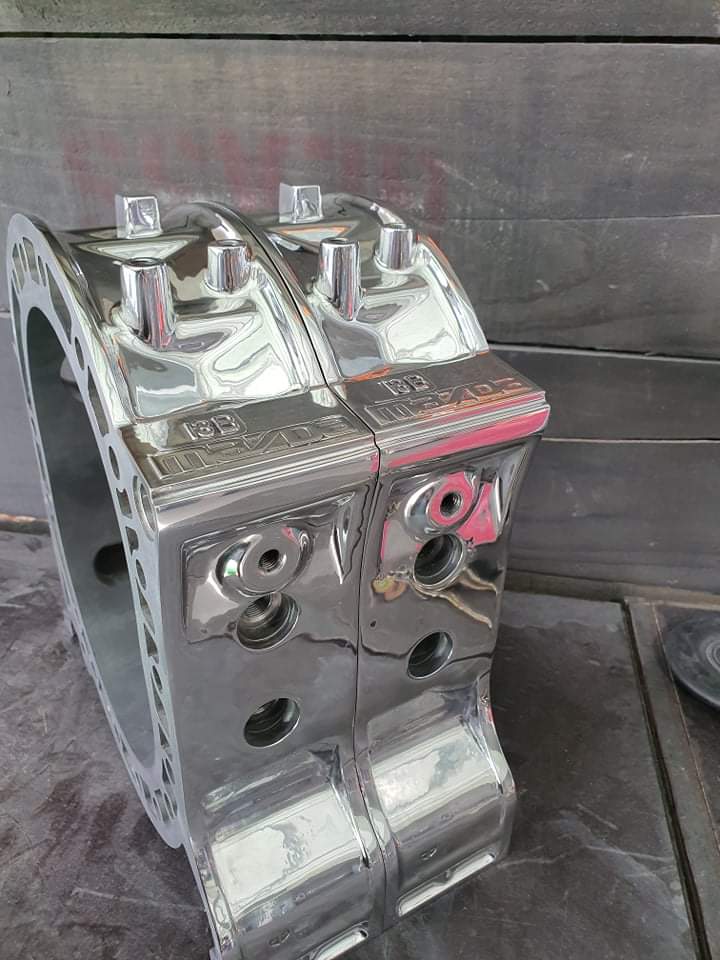
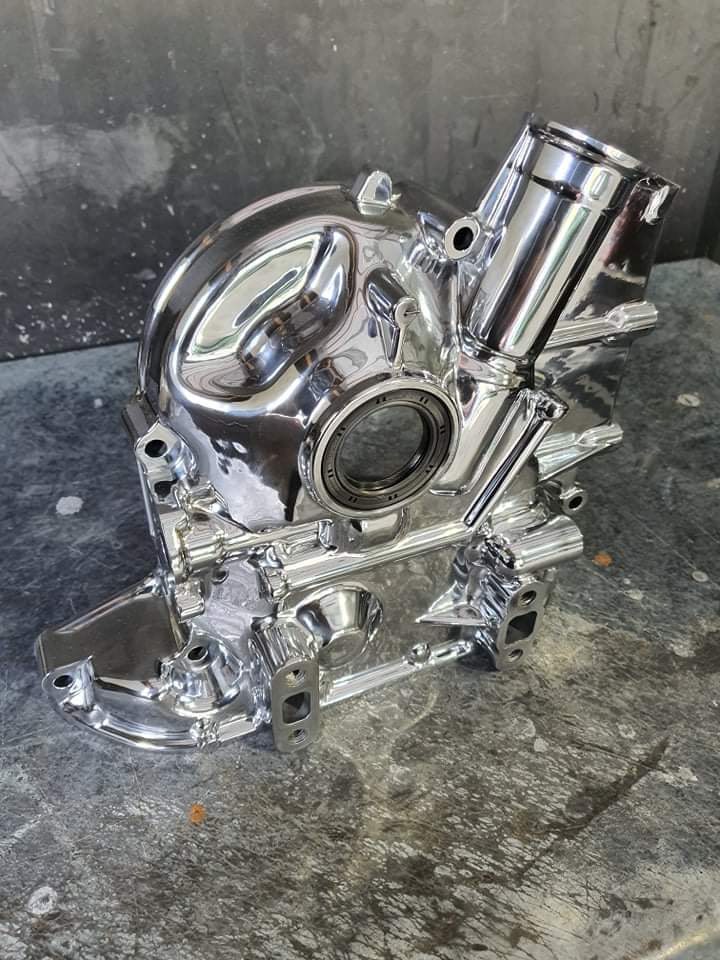
Things are progressing slowly in the background, Have had my new PP'd housings and front cover over at Toby to get the maddog polish, Shit they came up so good. Plates are getting the casting marks smoothed on them currently and then painted ready for the engine to be assembled. Iv been trying to work out how the jigsaw of the dash/heater/glovebox etc etc all goes back together from a box of a million screws and bolts and a whole lot of parts. Taking its time but getting there. want to make sure anything missing or broken is acquired before final assembly.
1 point
-
And the back1 point
-
Another typically fun few updates to catch up on. Just read them and Hannah was reading it too and we both giggled with delight when your car started and your girlface started giggling. Its such a cool thing when an engine starts for the first time and this can only be bloody amazing considering you're both new fresh barrys to the world of shitty old car tinkering. Congrats from us! Keep the great updates coming!1 point
-
Success! (ish) Flat50acres is now merely a flatspot. The rest must be down to fuelling. Put the timing light on it, idle set at 10 BTDC. Drives well, idle is a bit crap. I've spotted a rebuild kit for low $ on Ebay for the Solex carb.1 point
-
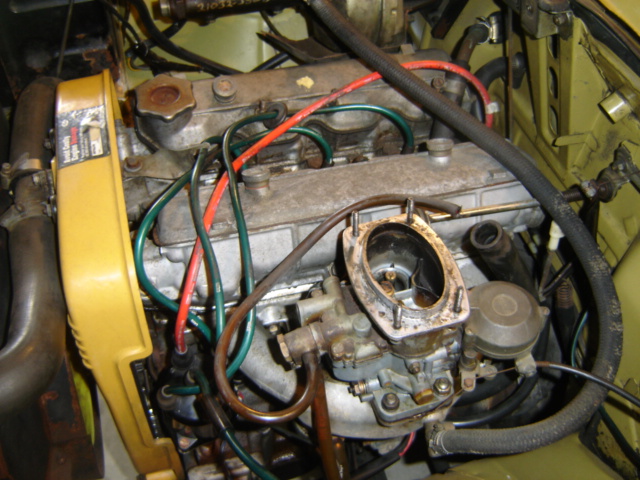
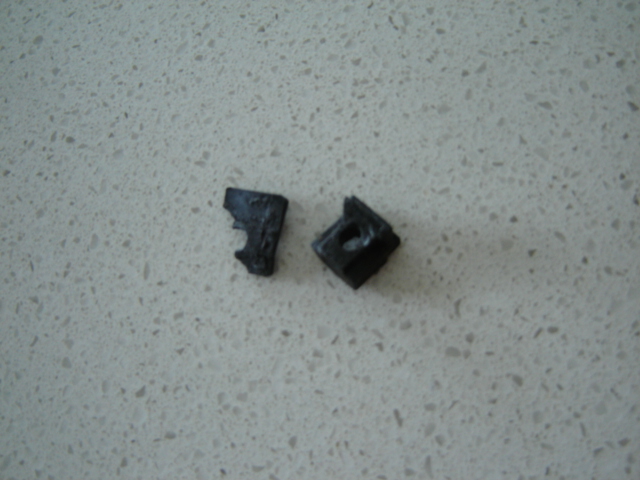
Test drive yesterday revealed not so much a flat spot in acceleration, but more of a yawning abyss the car would fall into when throttle is applied too rapidly. I have mild whiplash as a result. Today's mission is to put all this In here Mum is in town and the kids have found a Rammstein CD and are headbanging to Du Hast in the dining room. Hilarious. Dad escapes to garage. Anyhoo, those green HT leads are original 1973 Cavis items. I got another box from Germany with rotor, condensor, points, and leads. Essentially shipped for free with the wheel bearings and brake stuff I was getting anyway. All parts were very cheap. Unfortunately I broke this while undoing, it's the insulator block in the side of the dizzy housing that keeps the points, LT, and condensor leads electrically seperate from the housing. Ideas where I can obtain another? I can still use the inside bit. New high impedance insulator manufactured from Marmite lid for the outside..complete with special offset hole. Feeling quite chuffed at achieving some Barrying. Test drive on the cards for this arvo. When I got it, the accelerator pump on the carb wasn't working so I suspected this at first for causing said abyss. It seems to be working now however, so hopefully replacement ignition components will fix it.
1 point
-
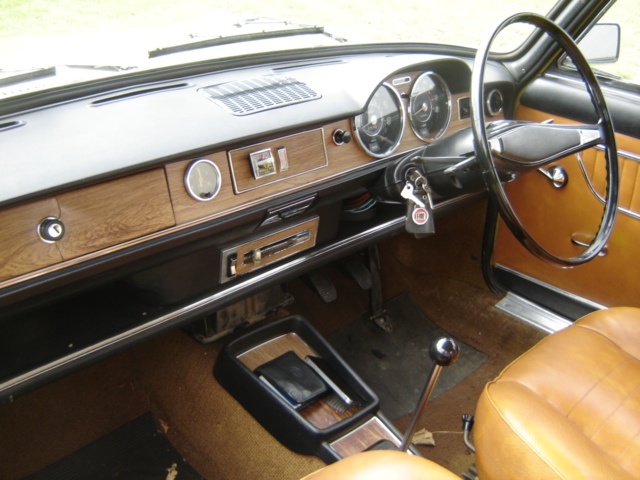
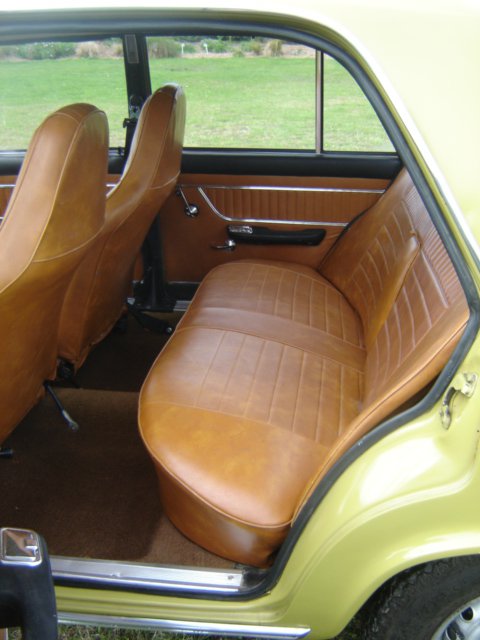
Interieur So, the heater fan doesn't go, and the lower heater flap is a bit broken. Needs seatbelts in the back and needs a stealth stereo. A nicer steering wheel wouldn't go astray either, the rim on the original one has a crack in it.
1 point
-
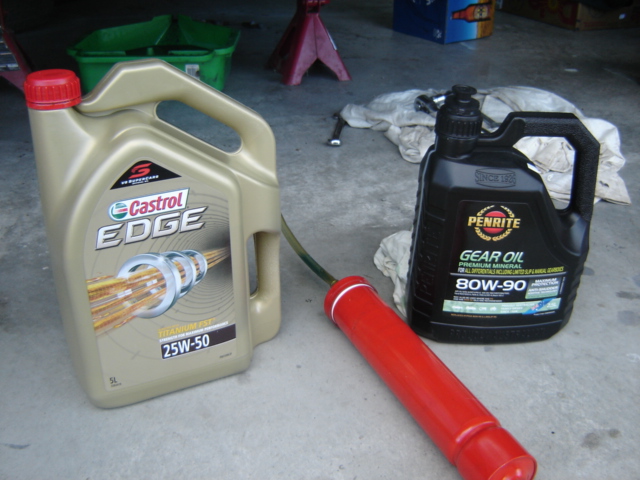
So, as well as not having been driven in nearly 10 years, it also hasn't been serviced. I drained a couple of litres of creosote out of the sump and treated her to fresh 20w50 and a filter. After this, I replaced the air filter which was so soggy you could almost knead the rubber like play doh. There is quite a lot of blowby being pushed into the filter housing and I think this has led to the deterioration of the rubber. This morning I changed the gearbox and diff oil. The gearbox oil was dark but at least it doesn't smell of gear oil. The EP additives in most gear oils are liquid death for these boxes and your average joe mechanic has no idea. The Castrol is what I used in the gearbox. The suction gun is great for jobs like this but it's very hard work sucking up 25w50 through a straw. Also, I sometimes think I am the only person in NZ who owns a 12mm hex driver. The sump, gearbox, and diff plugs have all been massacred with vice grips. My old 125 was the same and the few modern(ish) Fiats I have done work on were also the same!!
1 point
-
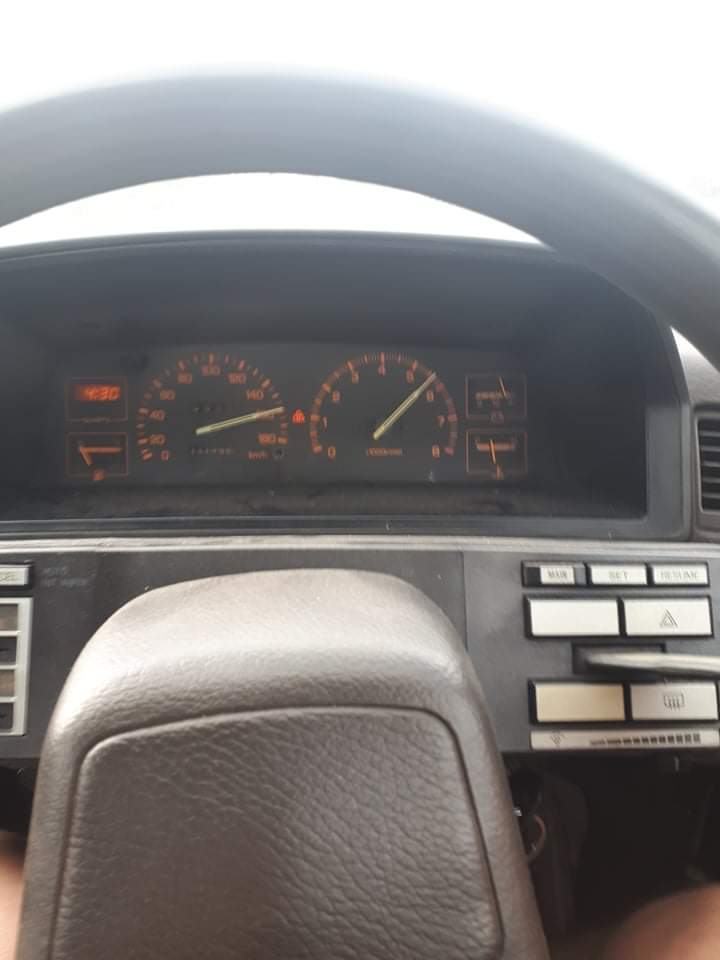
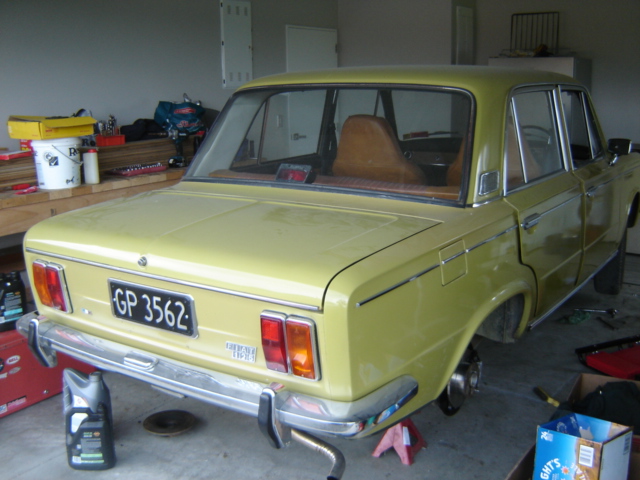
So, the car arrived safely (eventually) and got parked in the garage of our rental. So far I have not driven it far (about 3 miles in fact) Which revealed the brakes were a bit seized. This is hardly surprising as it hasn't had a reg or wof or been driven much at all in nearly 10 years. This inactivity is also why it's in such good nick. Unfortunately I have lost all the photos I took when I first got it. Here is a gratuitous bum shot. The other thing I like is that this car was probably registered in the same month as my first 125 because the number plate is only a few digits different. The interior is also identical. This baby has only done half the miles however, a gen-u-wine 72000 miles. All the more remarkable that this is 23 years after I owned the other one!
1 point


.thumb.jpeg.e0a4bff61111e0c8c7396950fcc94da1.jpeg)


.jpg.17ebde8f49fd174880921c24419dc04a.jpg)


This leaderboard is set to Auckland/GMT+12:00