
Leaderboard


Popular Content
Showing content with the highest reputation on 04/28/21 in all areas
-
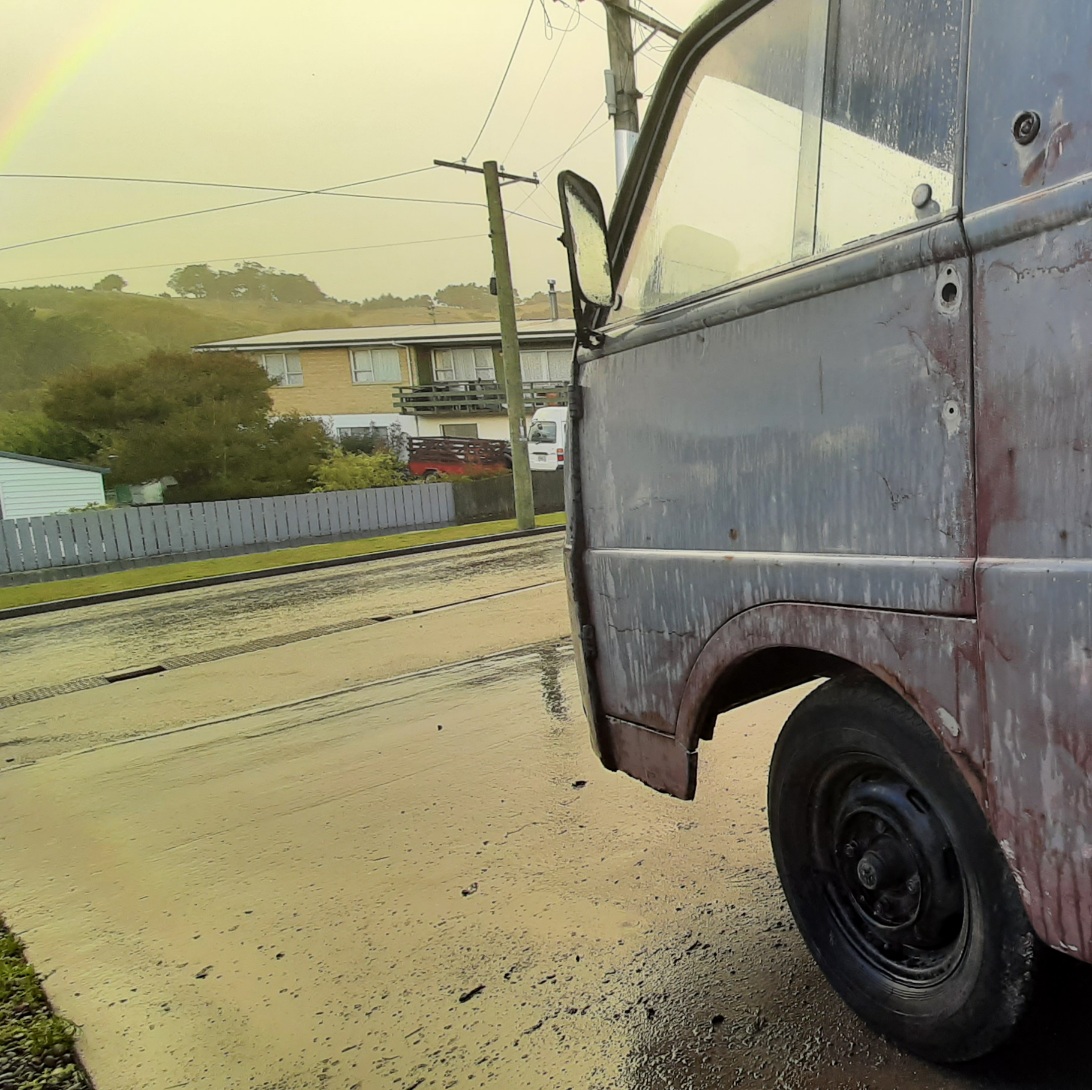
Here is a pic of one of it's last events before i parked it up .
 15 points
 -
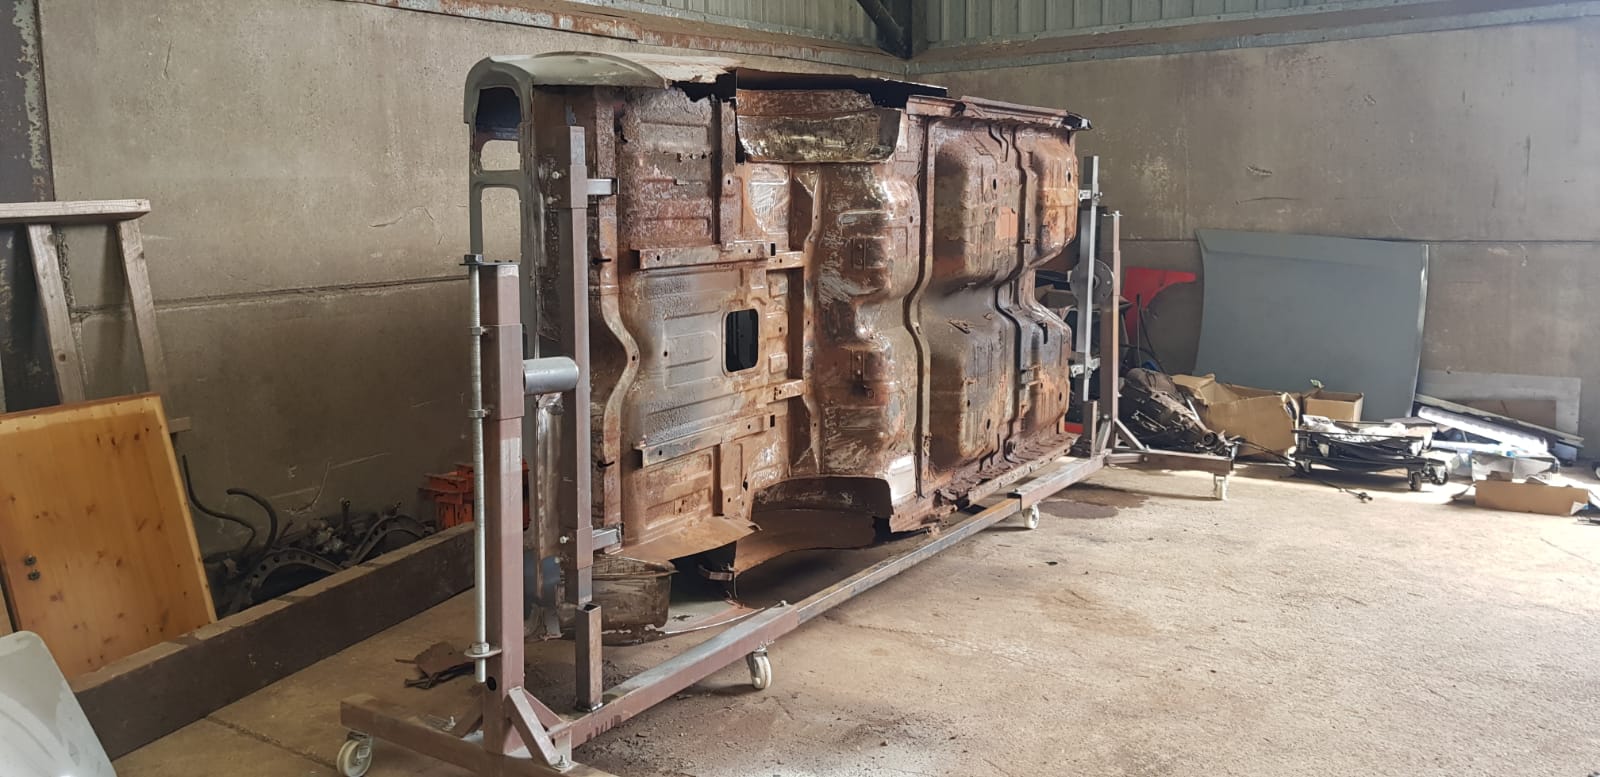
Car stripped and mounted on spit to start the paint stripping and mods.
9 points
-
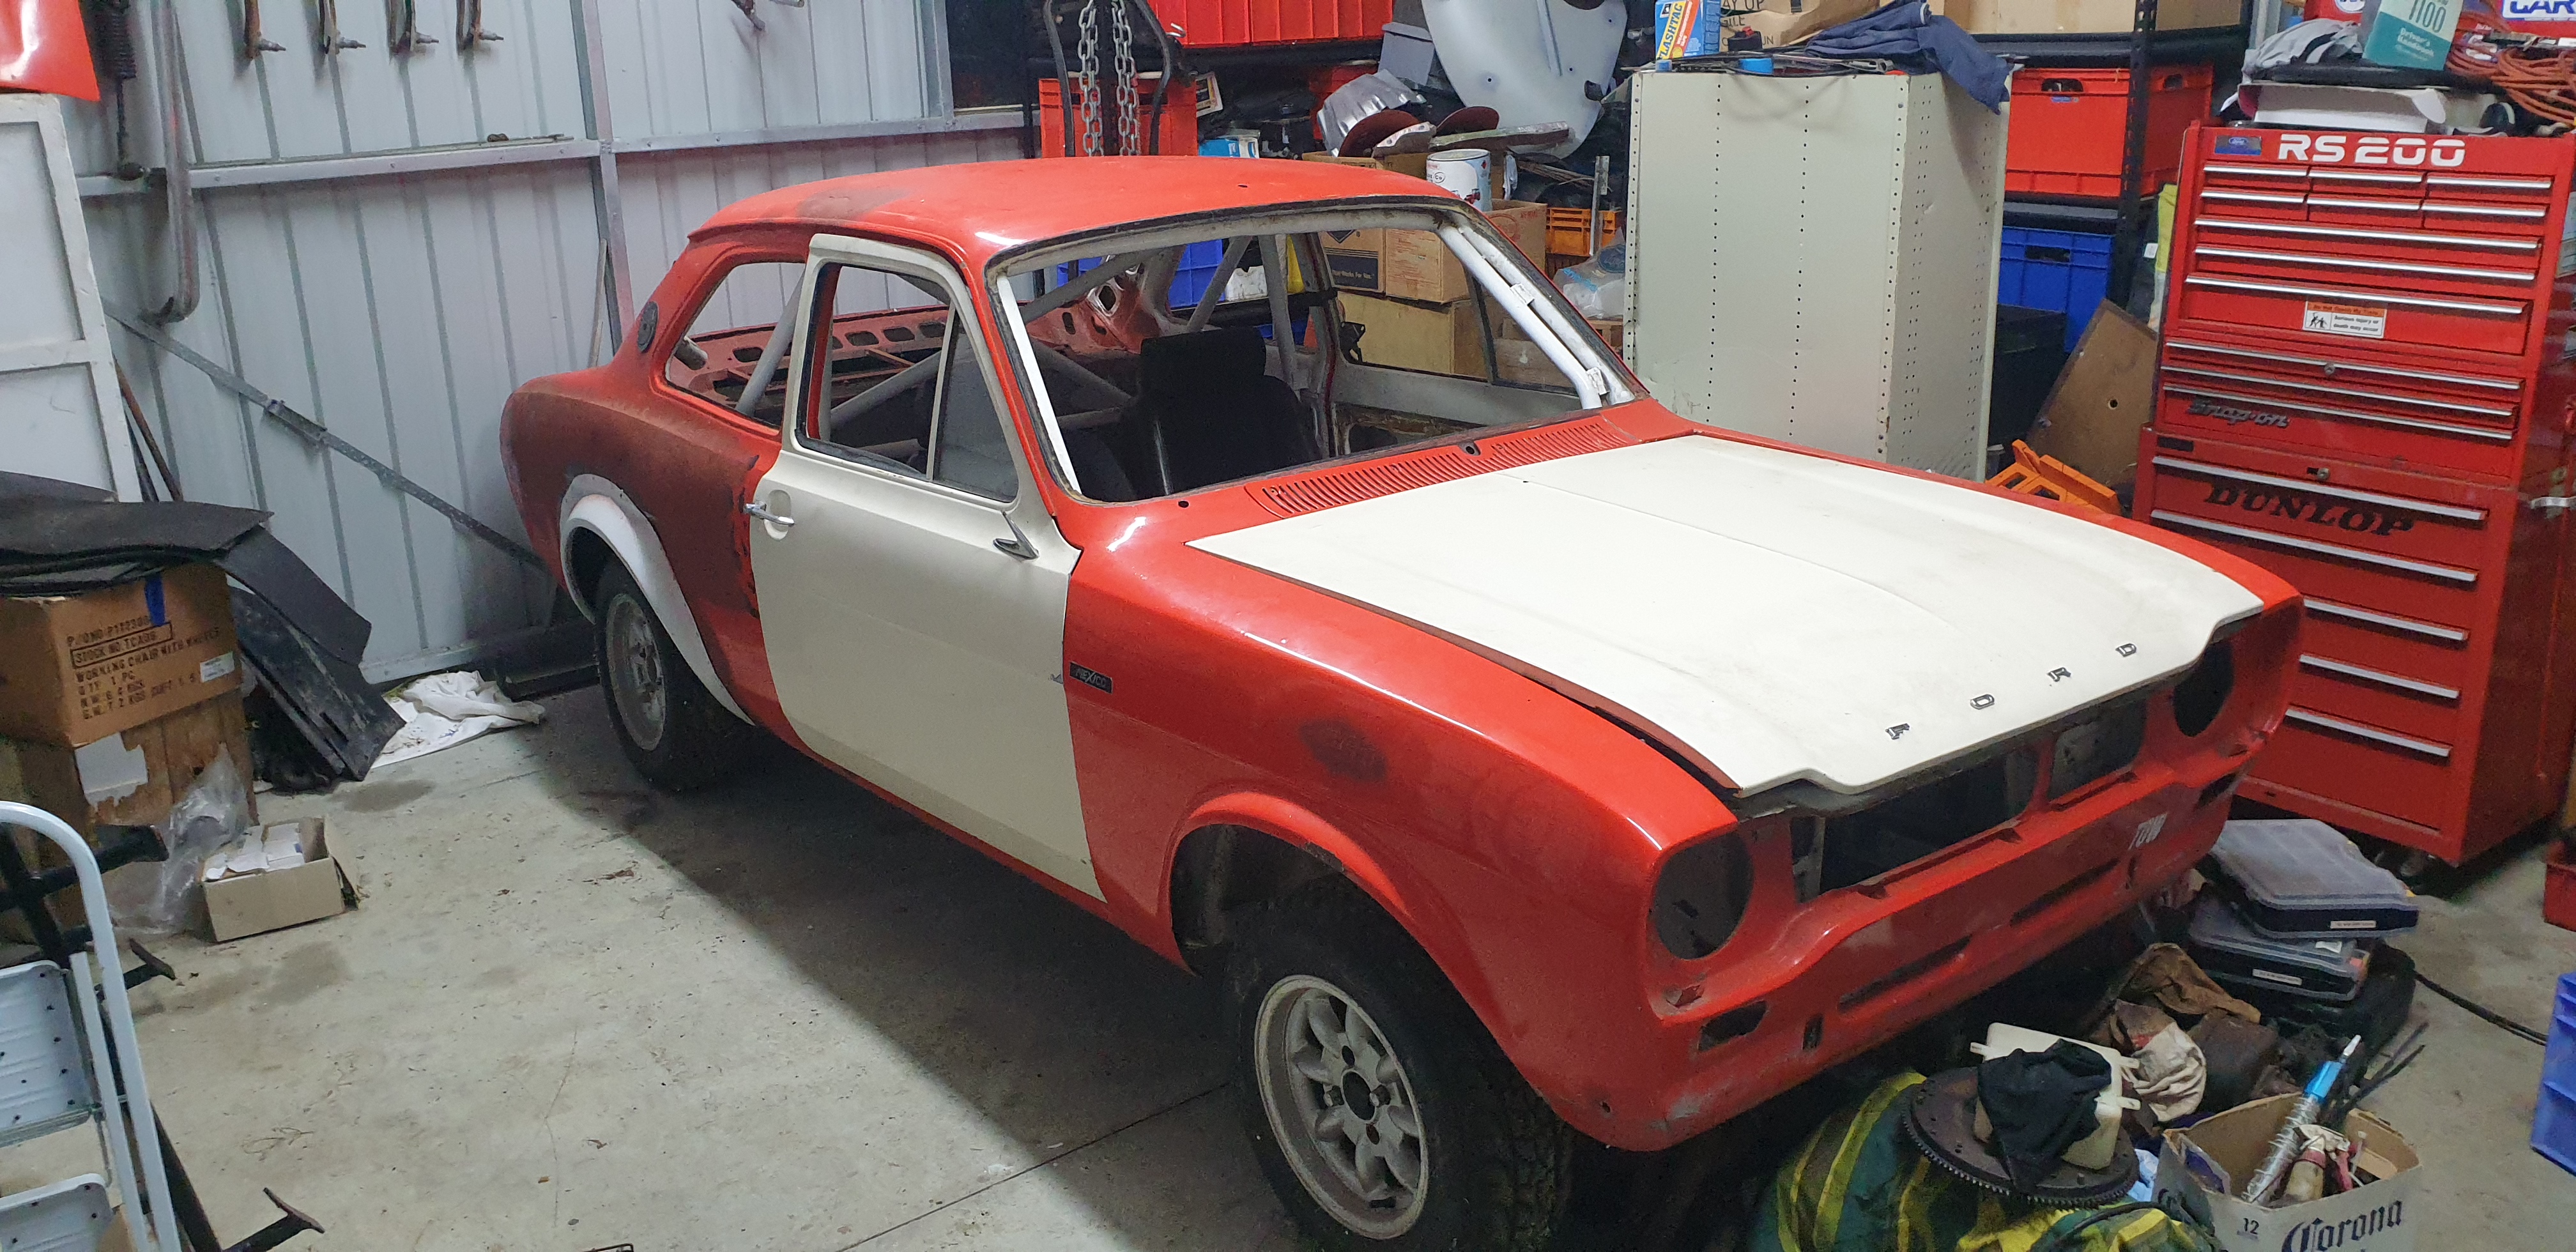
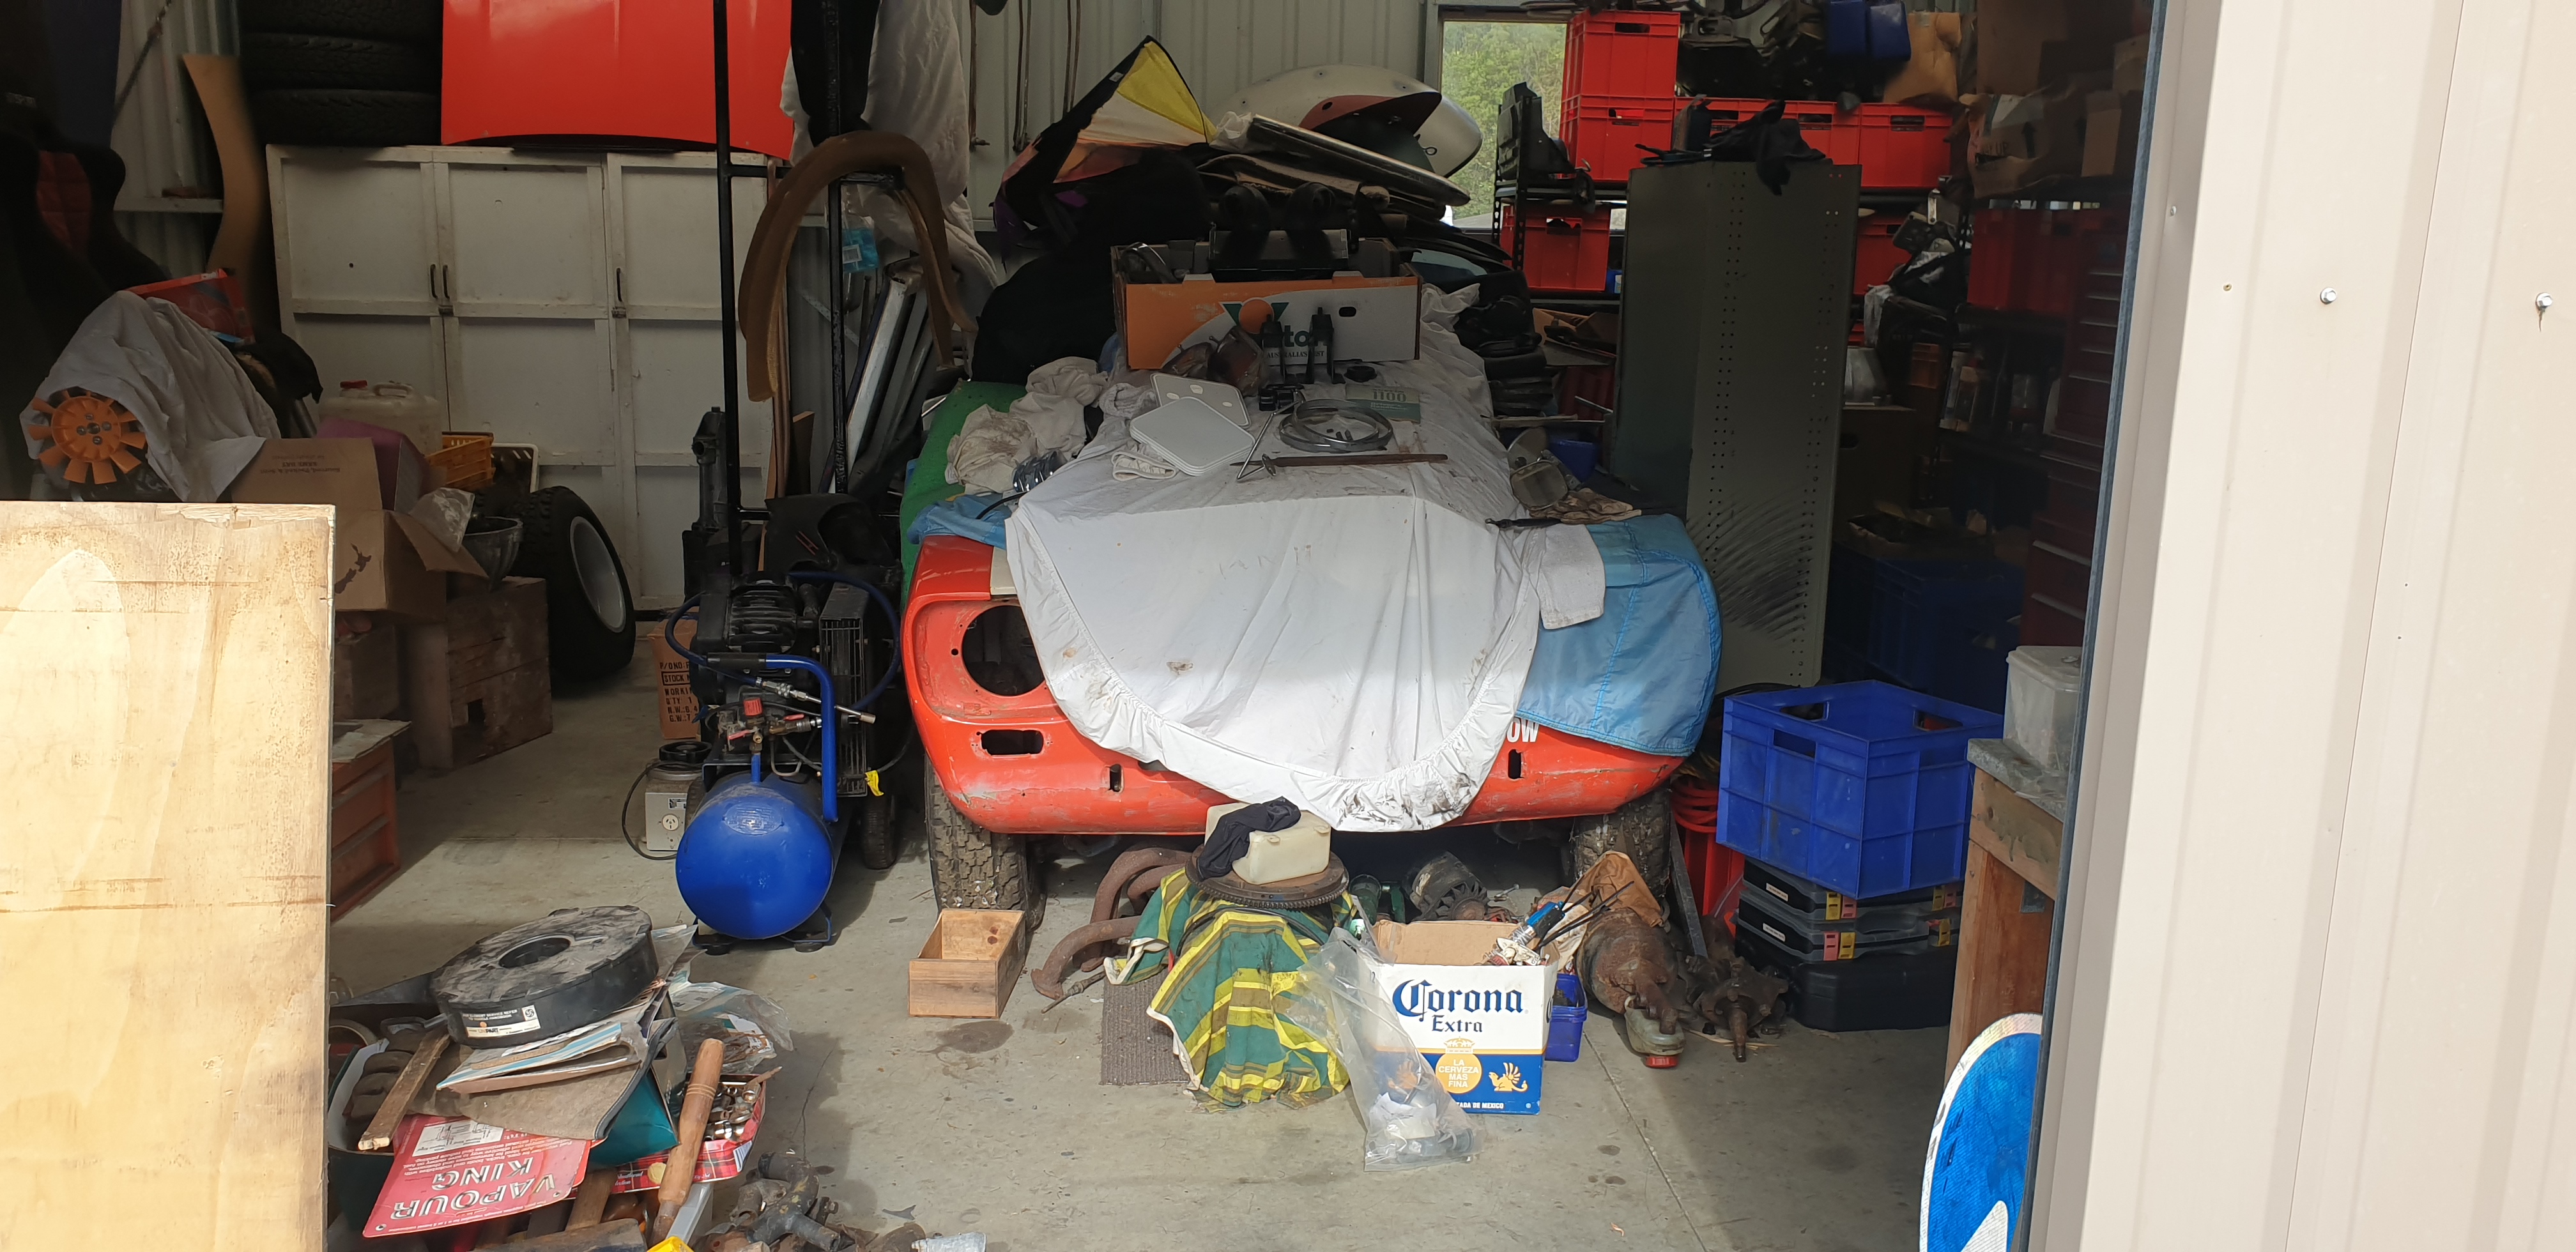
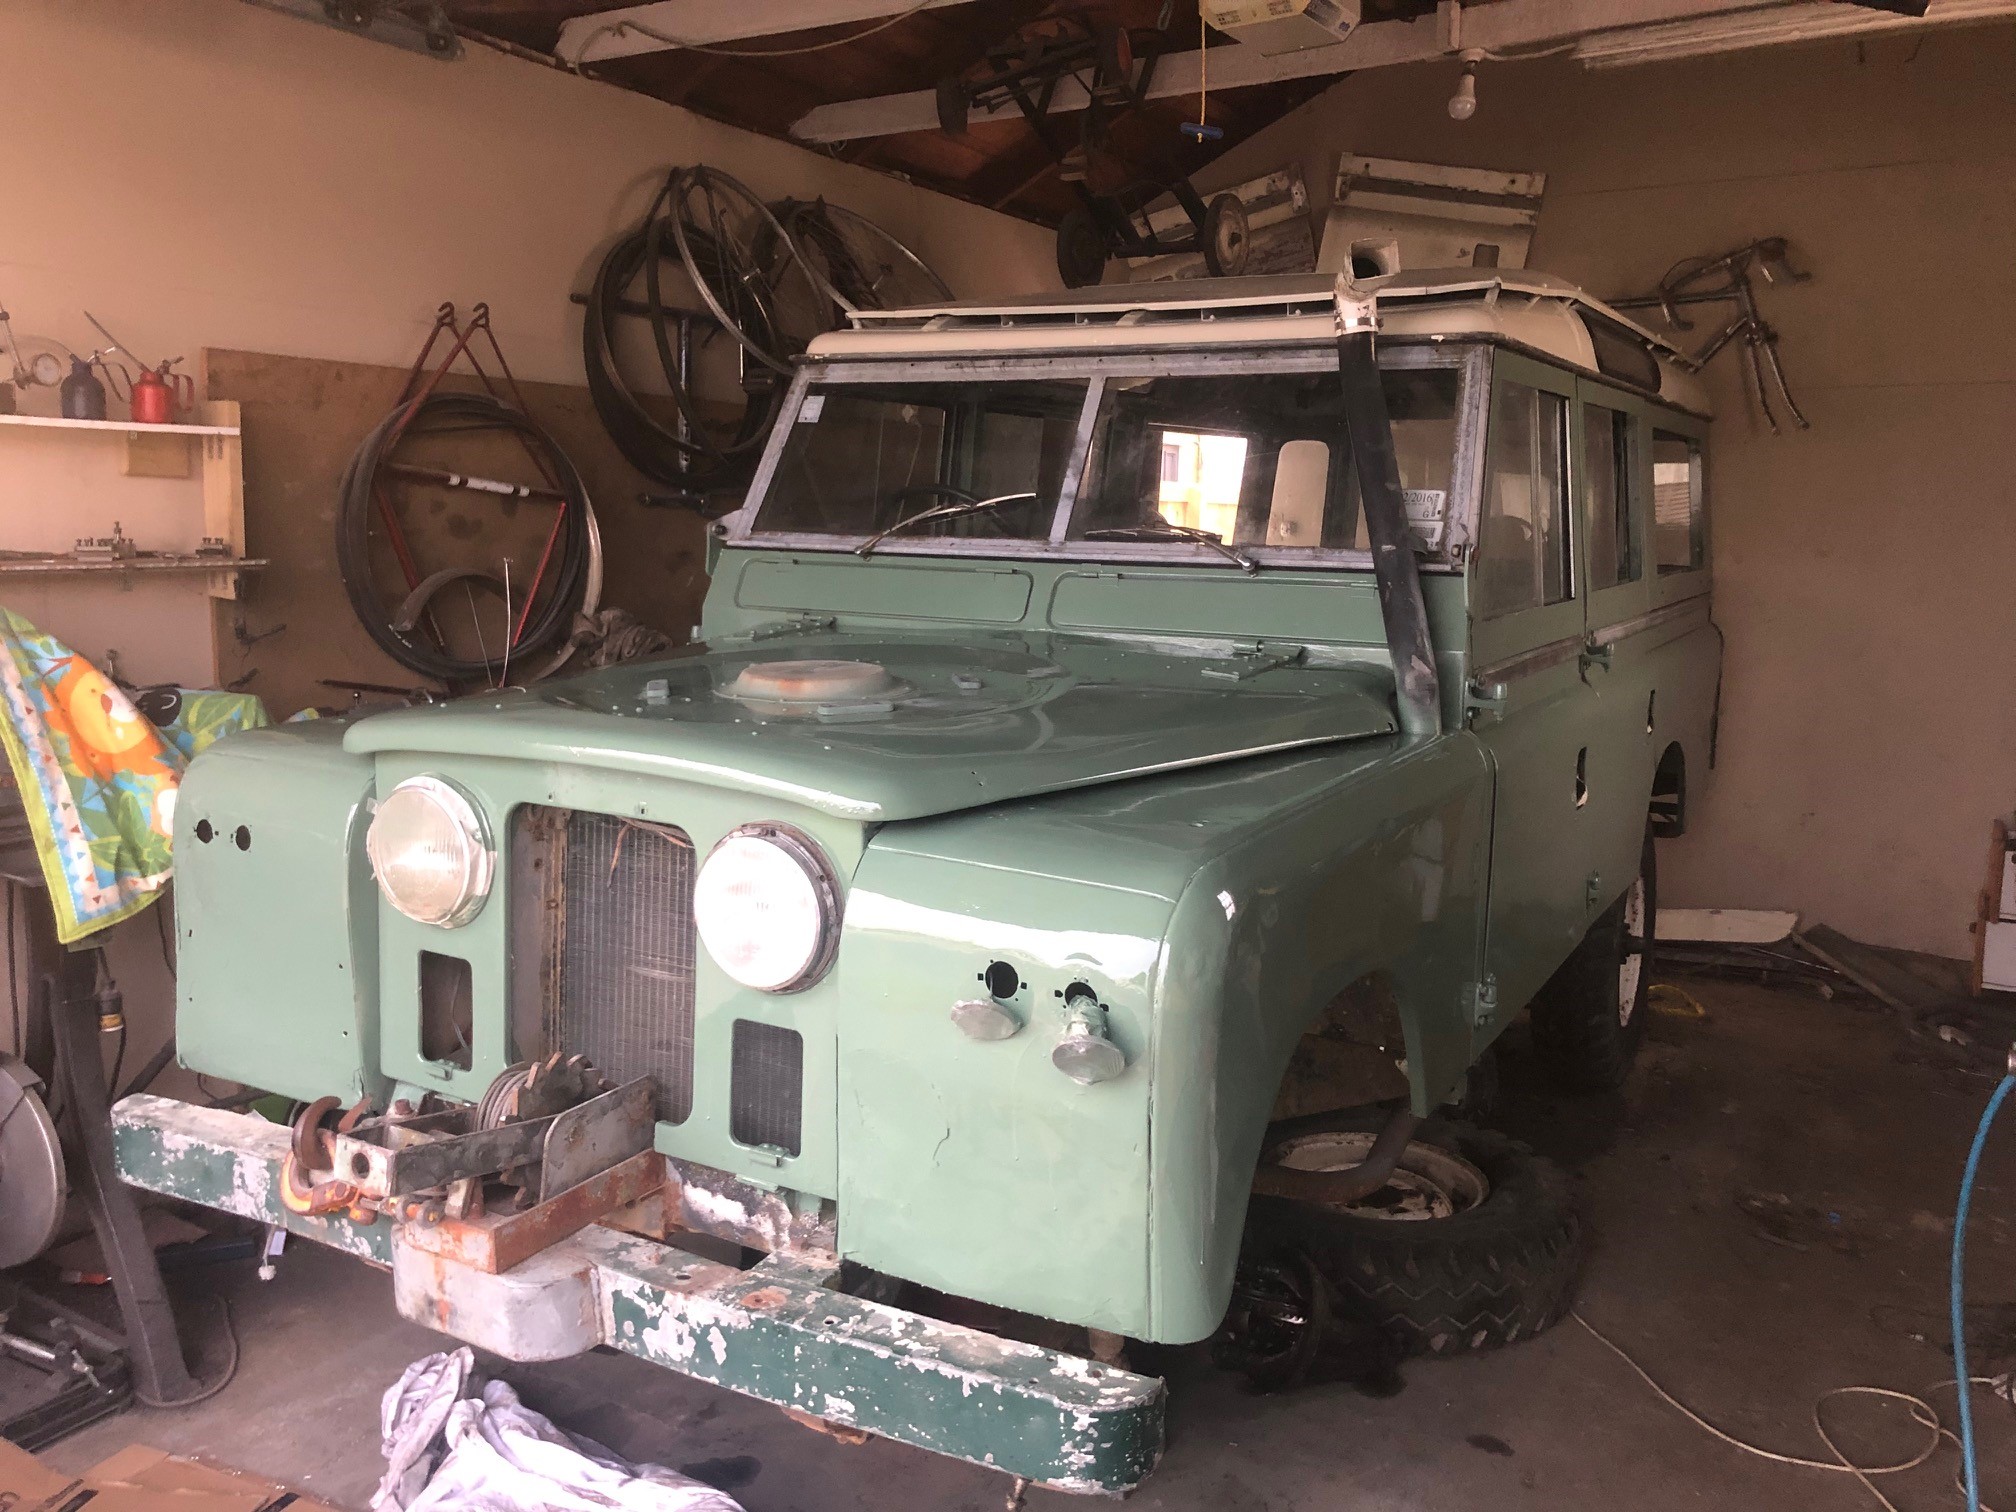
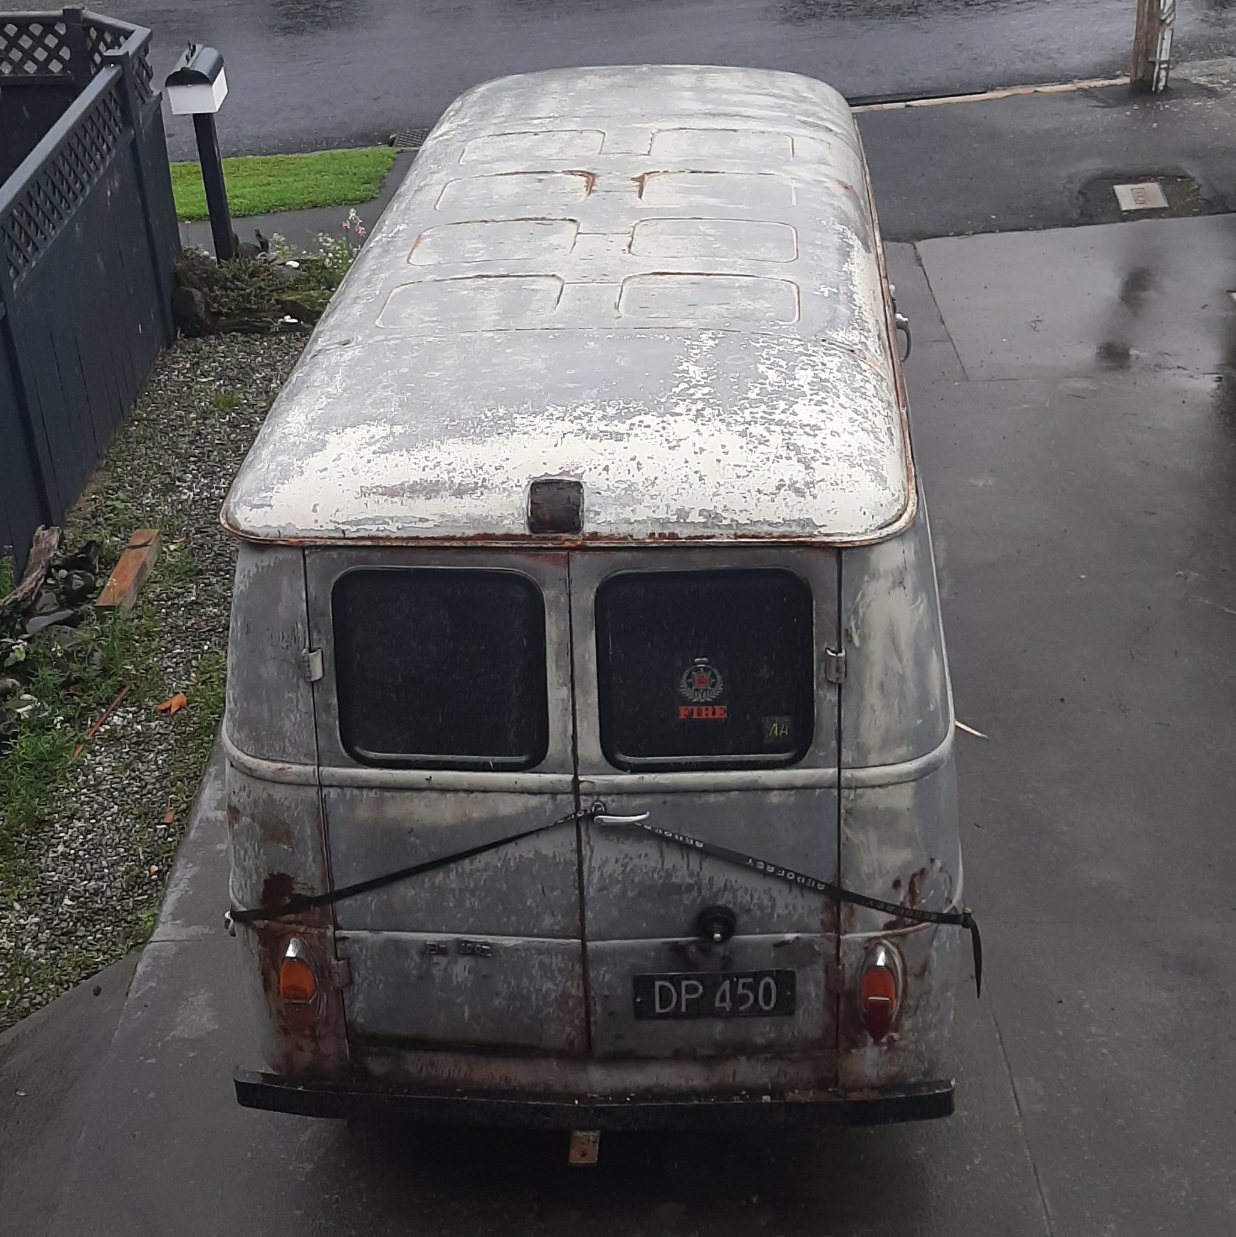
Car uncovered and looking a bit sorry for itself.
7 points
-
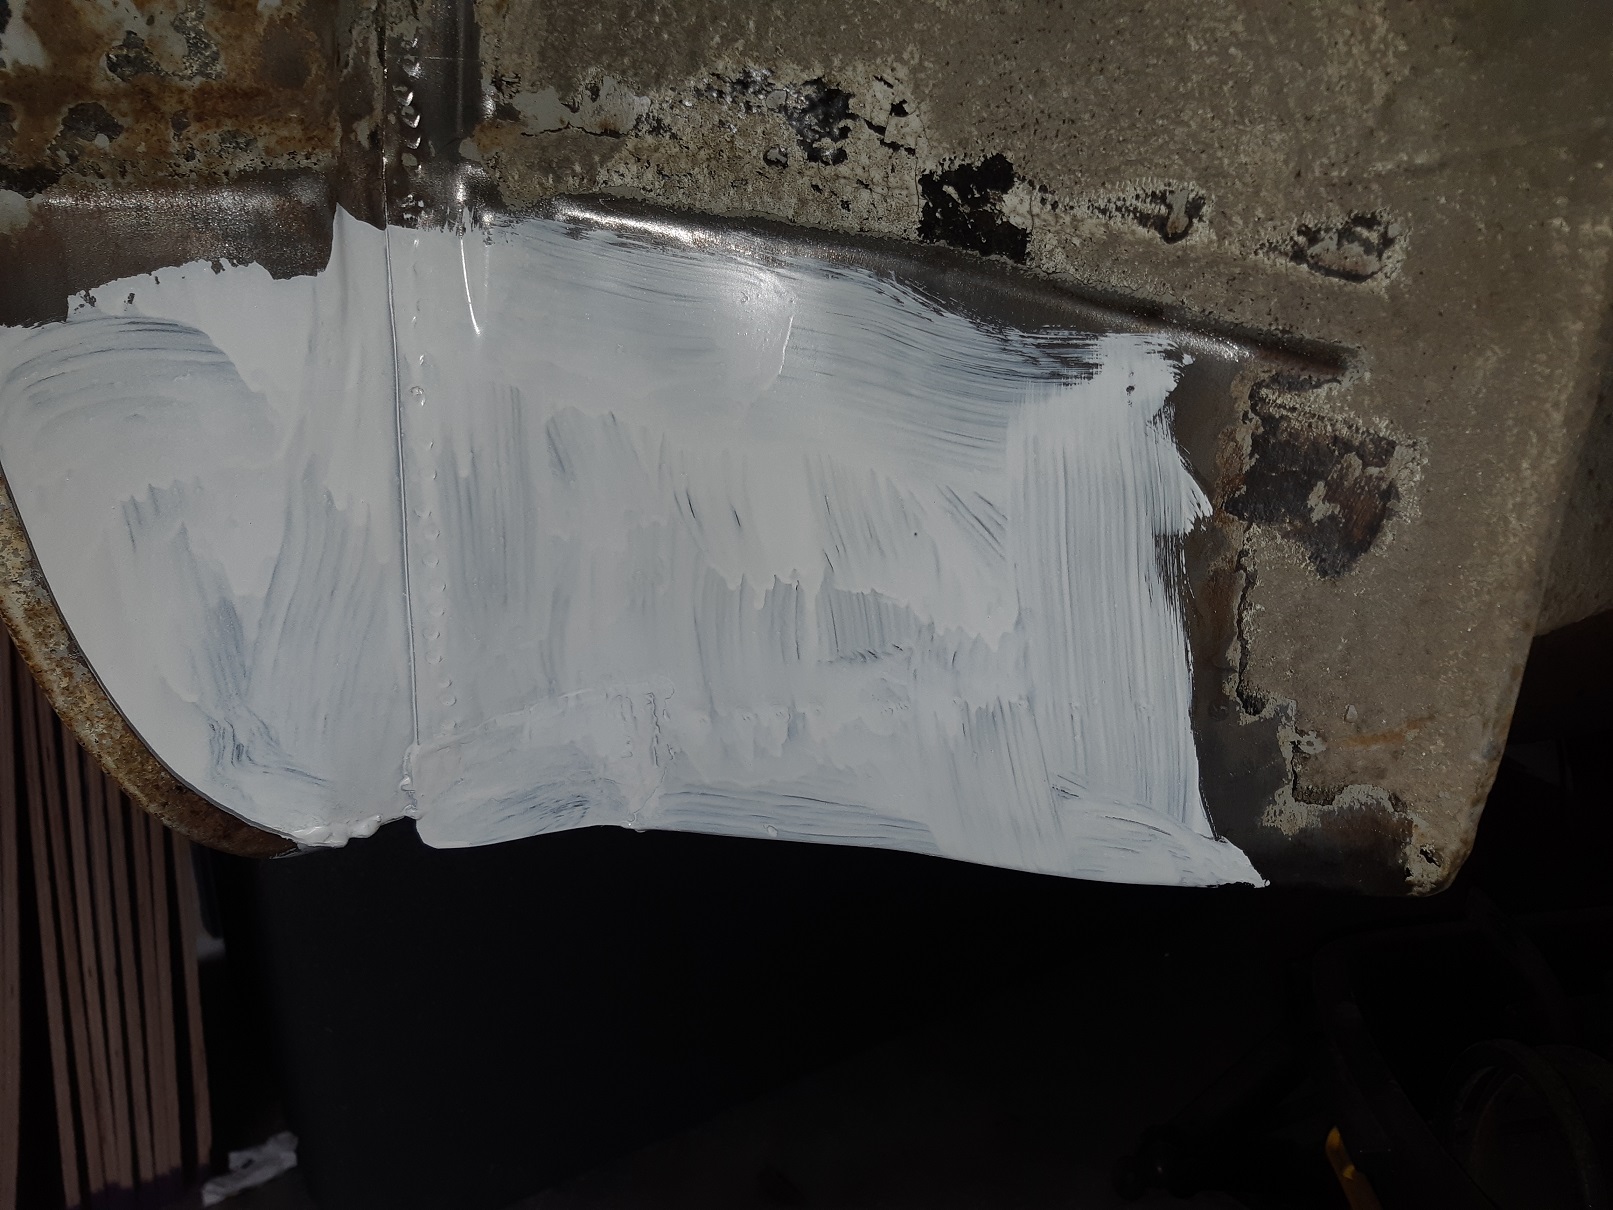
Finally rust treated and etch primed.
6 points
-
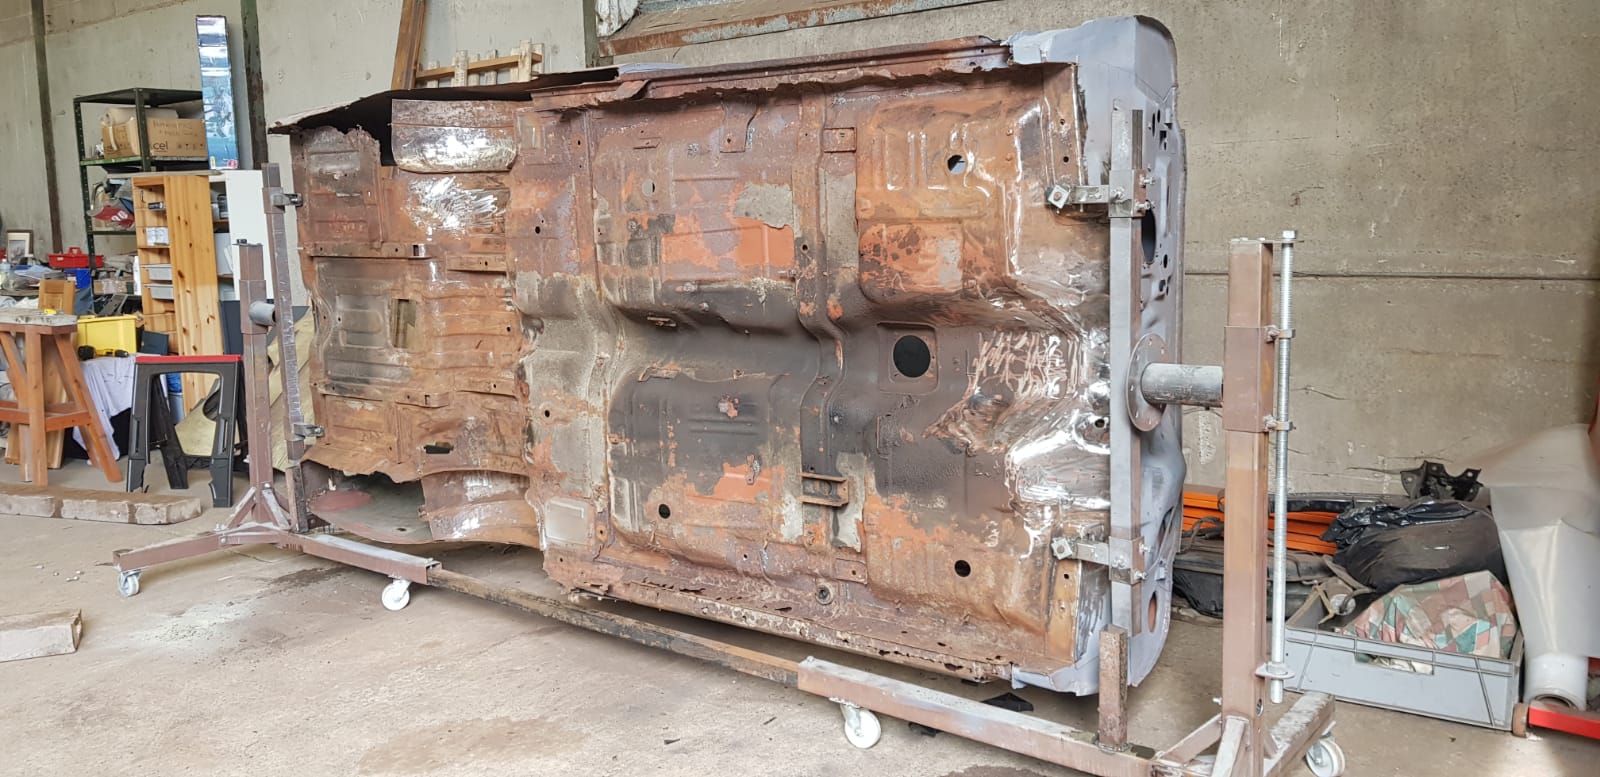
Several hours and tins of paint stripper later !
6 points
-
Hi all . Back in 1992 i built myself a Mk1 Escort rally car, i used this car for a couple of years before barrel rolling it in Woodhill forest at a rallysprint. After sourcing another shell i reshelled the car and did events in it till '99 when i parked it in container while i went on my OE. Fast forward 20 or so years... So after a gentle nudge from my partner that went along the lines of " You should do another rally before you're 50.." So i started to unearth my Escort ( it has been out of the container for about 10 years ). I will try to up load some progress shots as we go. Cheers for following!
5 points
-
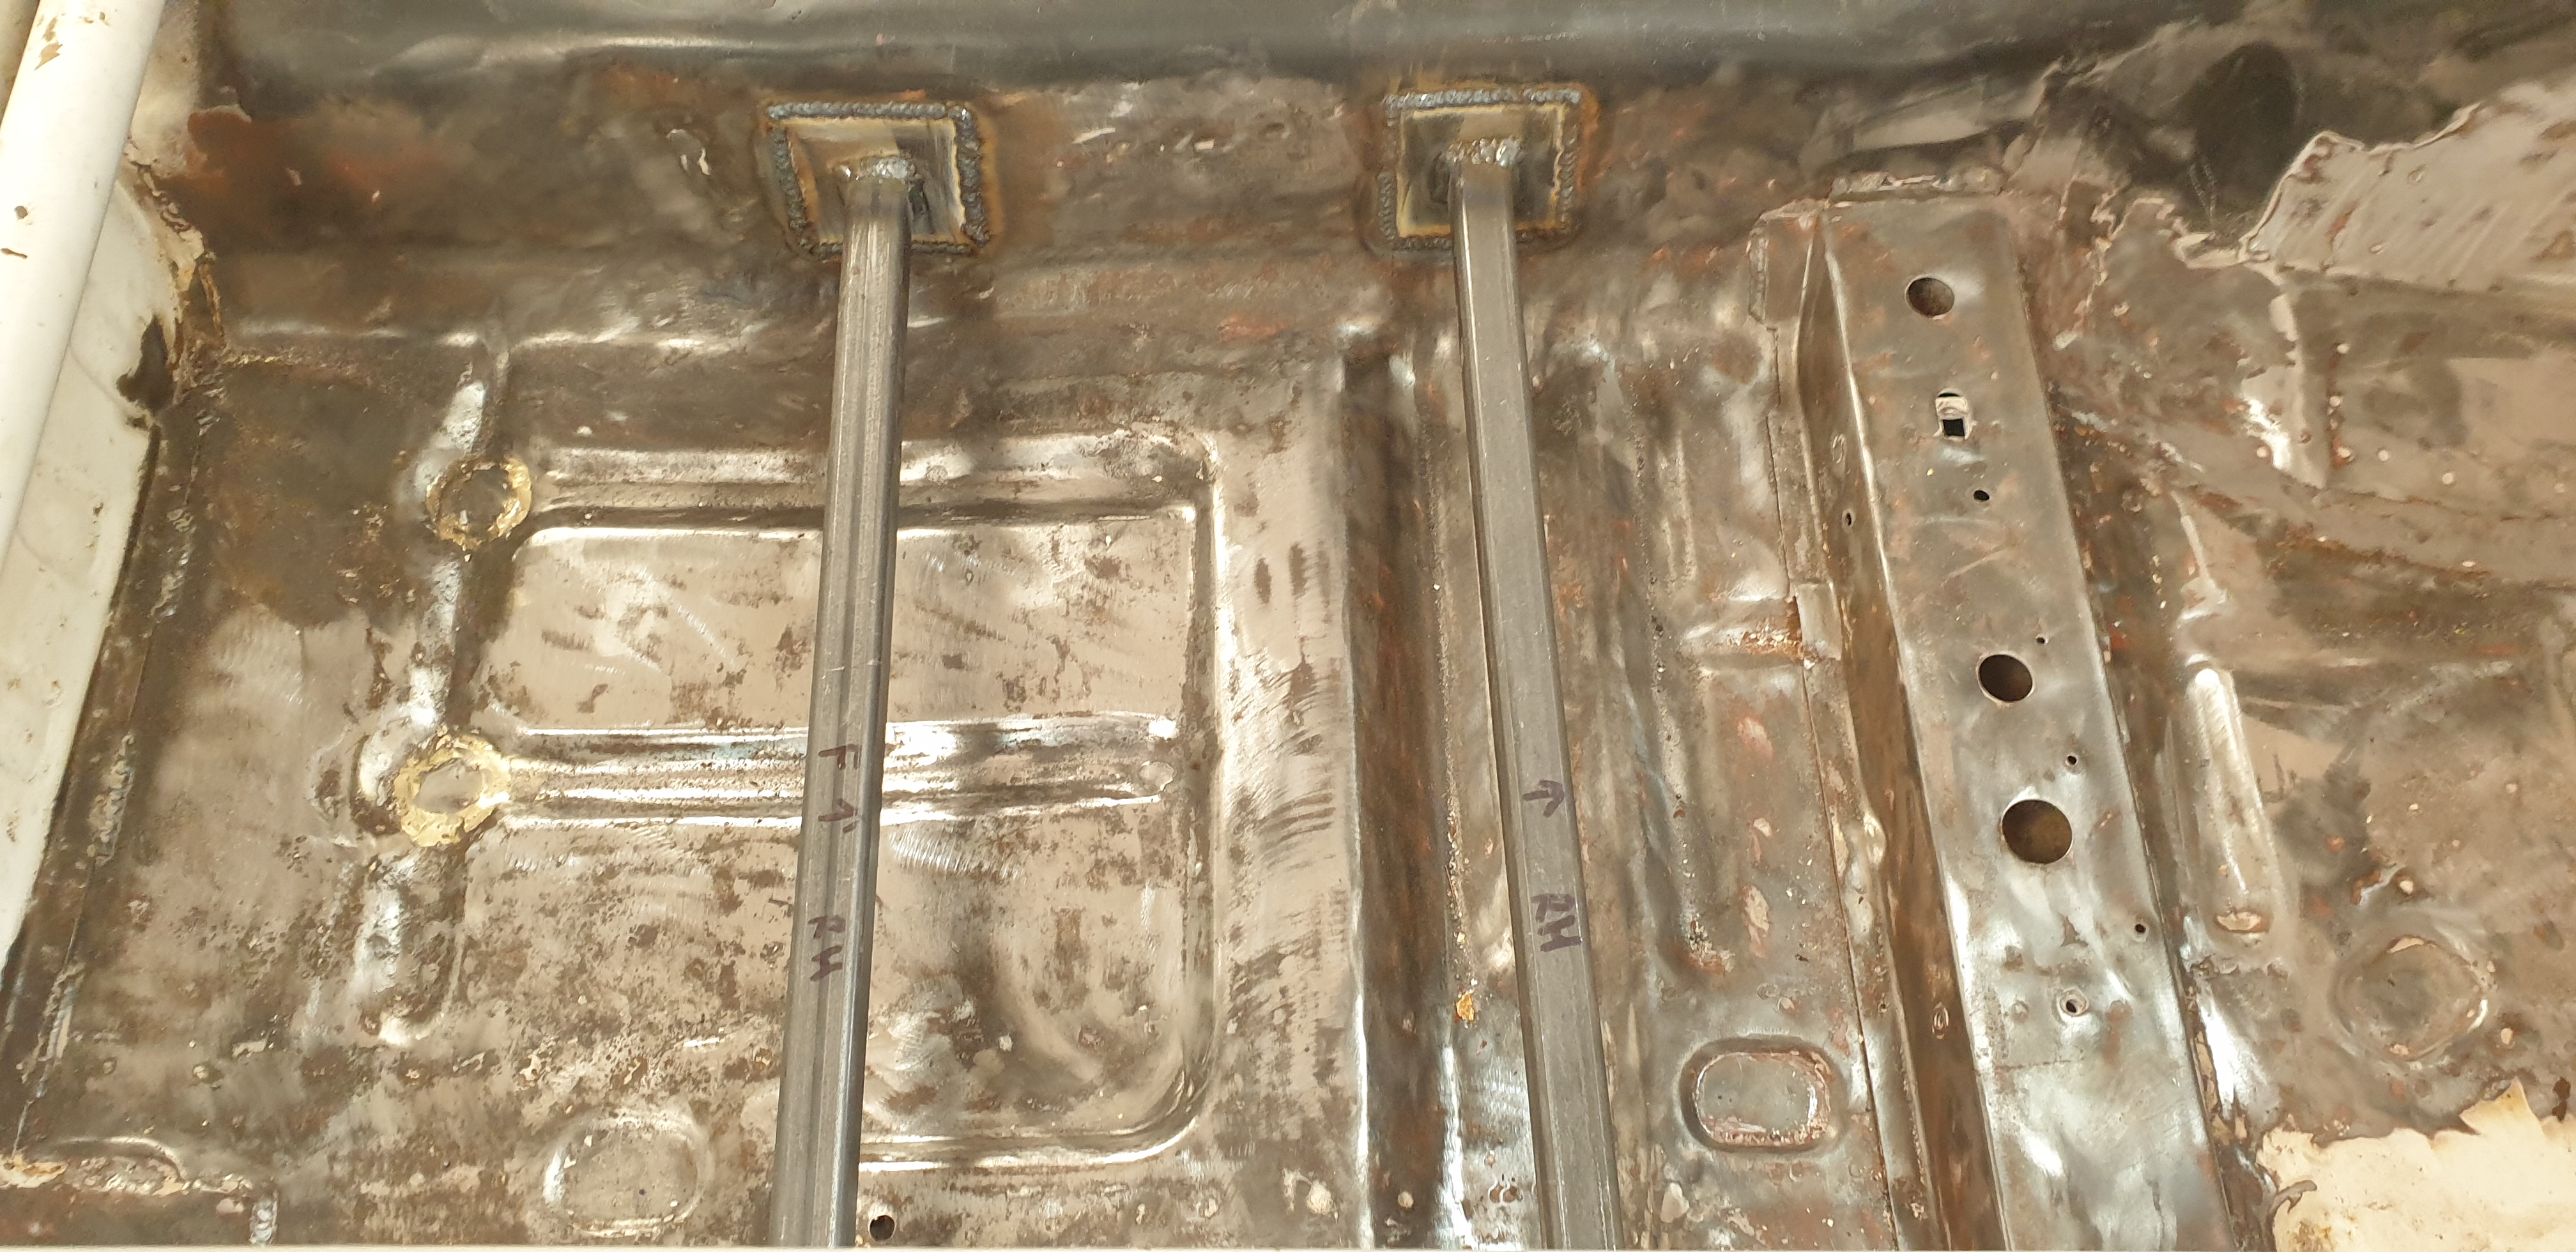
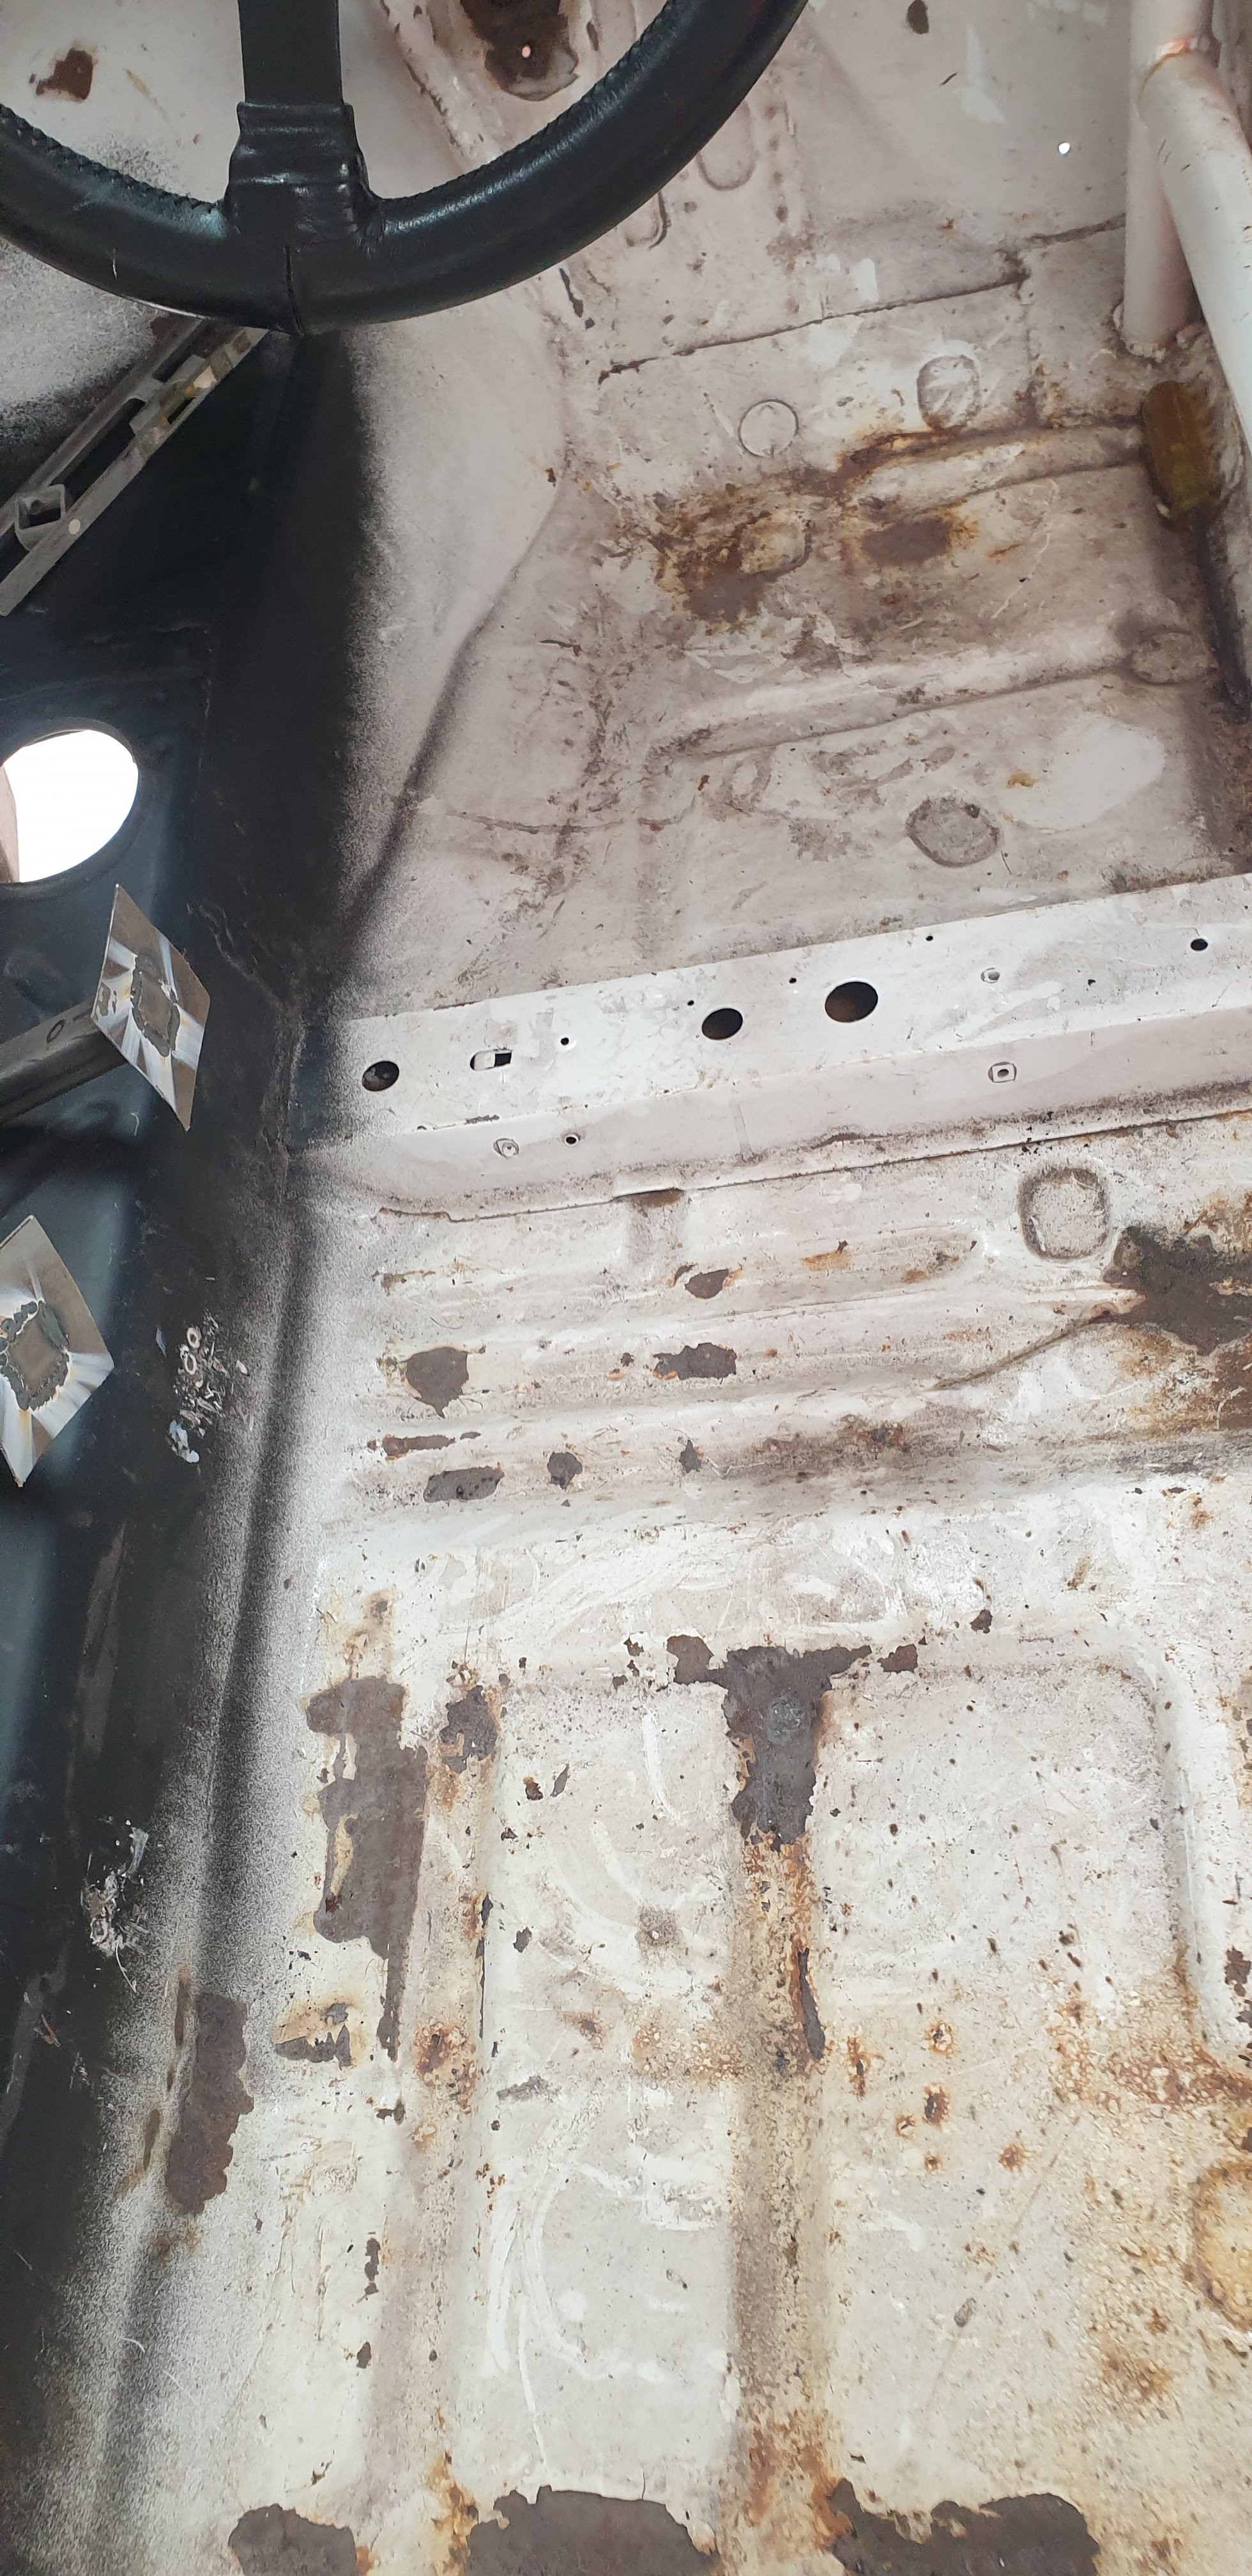
More progress of floor bare metaled and seat rails welded in.
4 points
-
can they be trusted to find it when the time comes?4 points
-
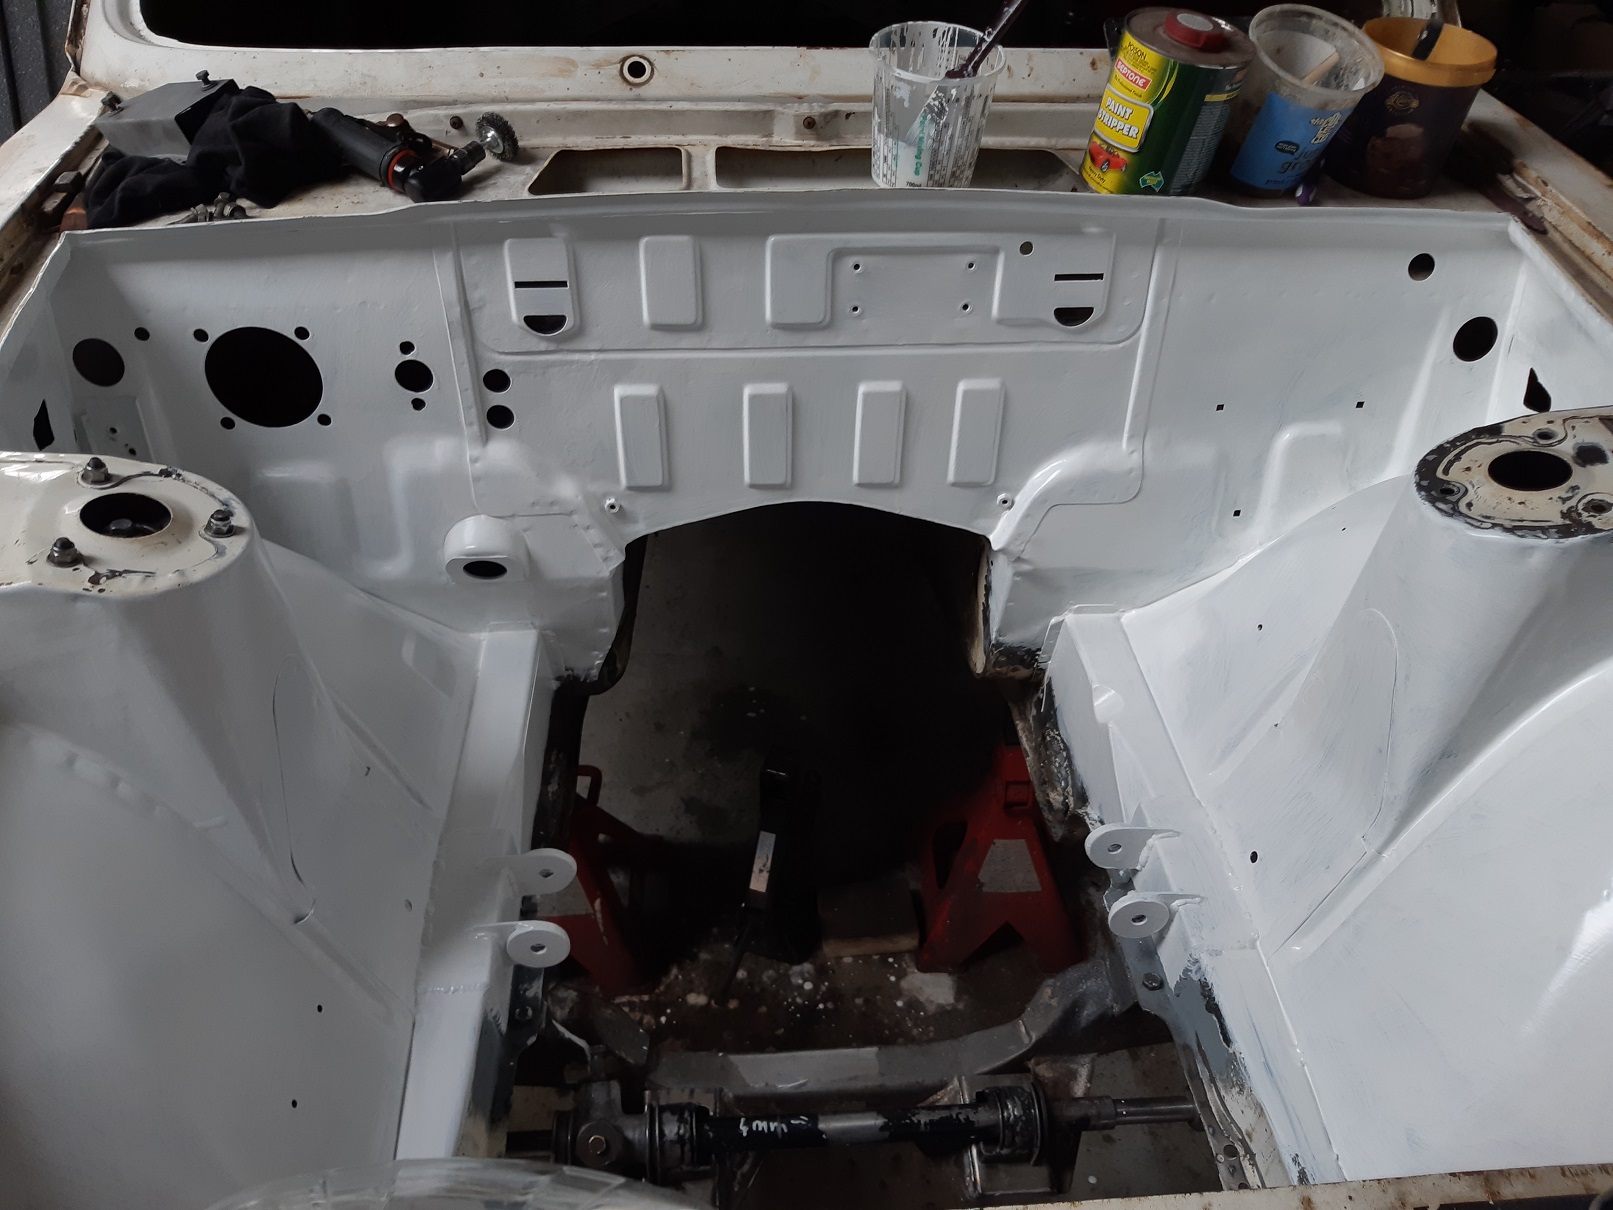
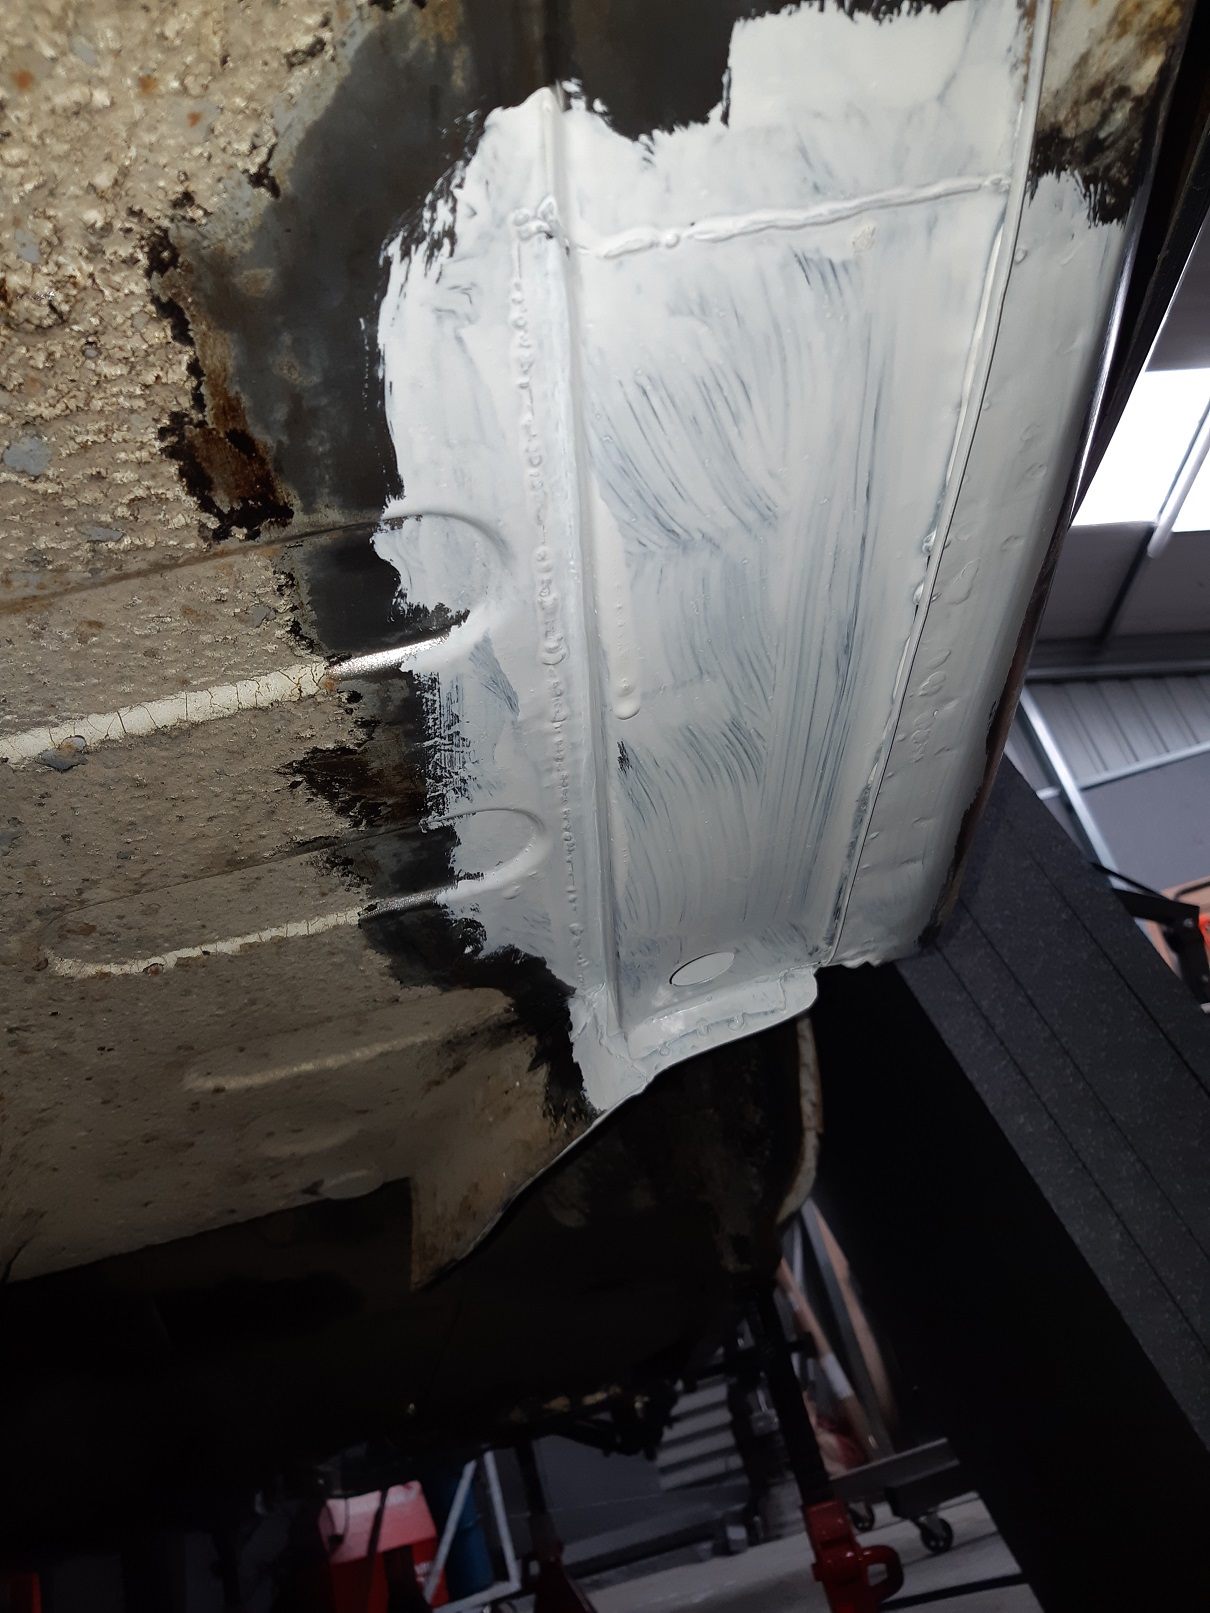
I had some areas of bare metal where I had made repairs or modifications. They kept getting minor surface rust, so I thought I should really get around to painting them with epoxy. The prep around the firewall was awful. All the seam sealer was bituminous tar stuff. So there was many hours of heat gun and scraping and rags soaked in kerosene and manual wire brushes to remove it. Then I needed to remove the paint because there were areas with surface rust and others where rust was creeping under the paint. So that was more many hours of knotted wire brush on the grinder. And the 3M abrasive pad thing on the grinder. And chemical paint stripper on the larger flattish areas and more scraping. Then there are lots of narrow spaces and gaps and corners I can't get into with the grinder. I found some reasonably priced little wire brushes at mytools.co.nz that were rated to use in a die grinder at 20000rpm without exploding. I also used small abrasive pads in the die grinder. Then I dusted it off with the air gun and wiped it all down with a cloth soaked in prepsol. And dried it off with the heat gun. And brush painted it with protec 408 epoxy primer. The engine bay has had two coats, the repair in the boot has only had one. I have some modern seam sealer to use. Hopefully it hasn't all gone hard... I think I might have bought it a couple of years ago.
4 points
-
May as well go non grease all the way through. Almost everything runs non greasy, and it's not like you're stressing them. Coz, Marina... Up to you. I've done 400,000km and 35 years on non greasy joints and only one is fucked.3 points
-
You realise no one is ever going to plate and tag a Wolseley right? Yeah that's why they didn't look too hard. They only do it to desirable cars.3 points
-
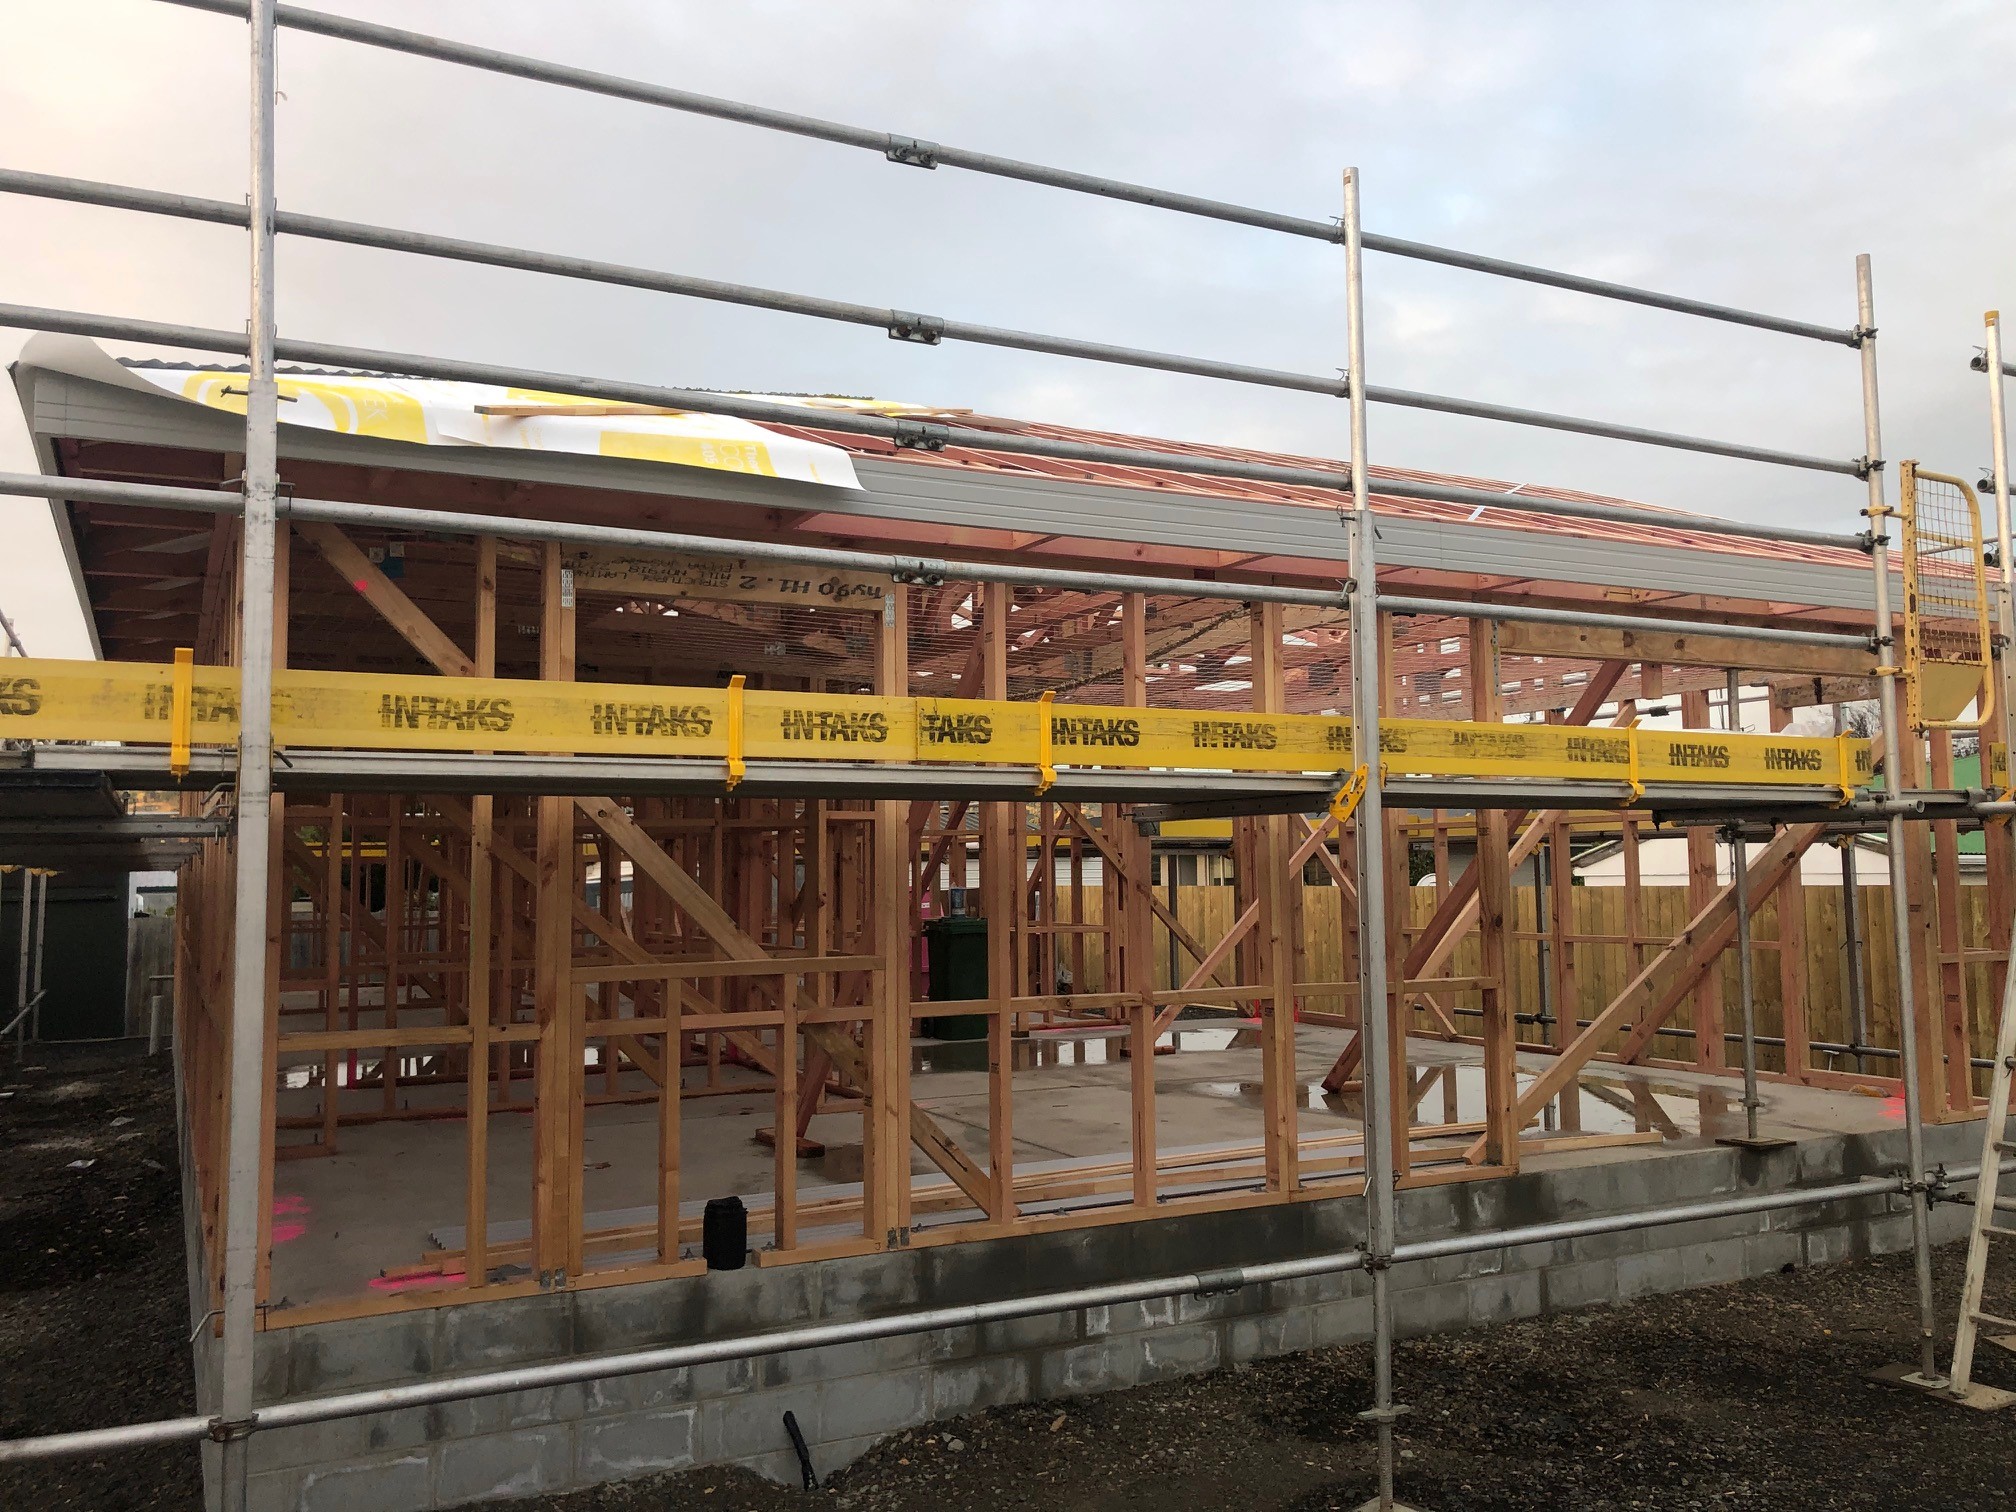
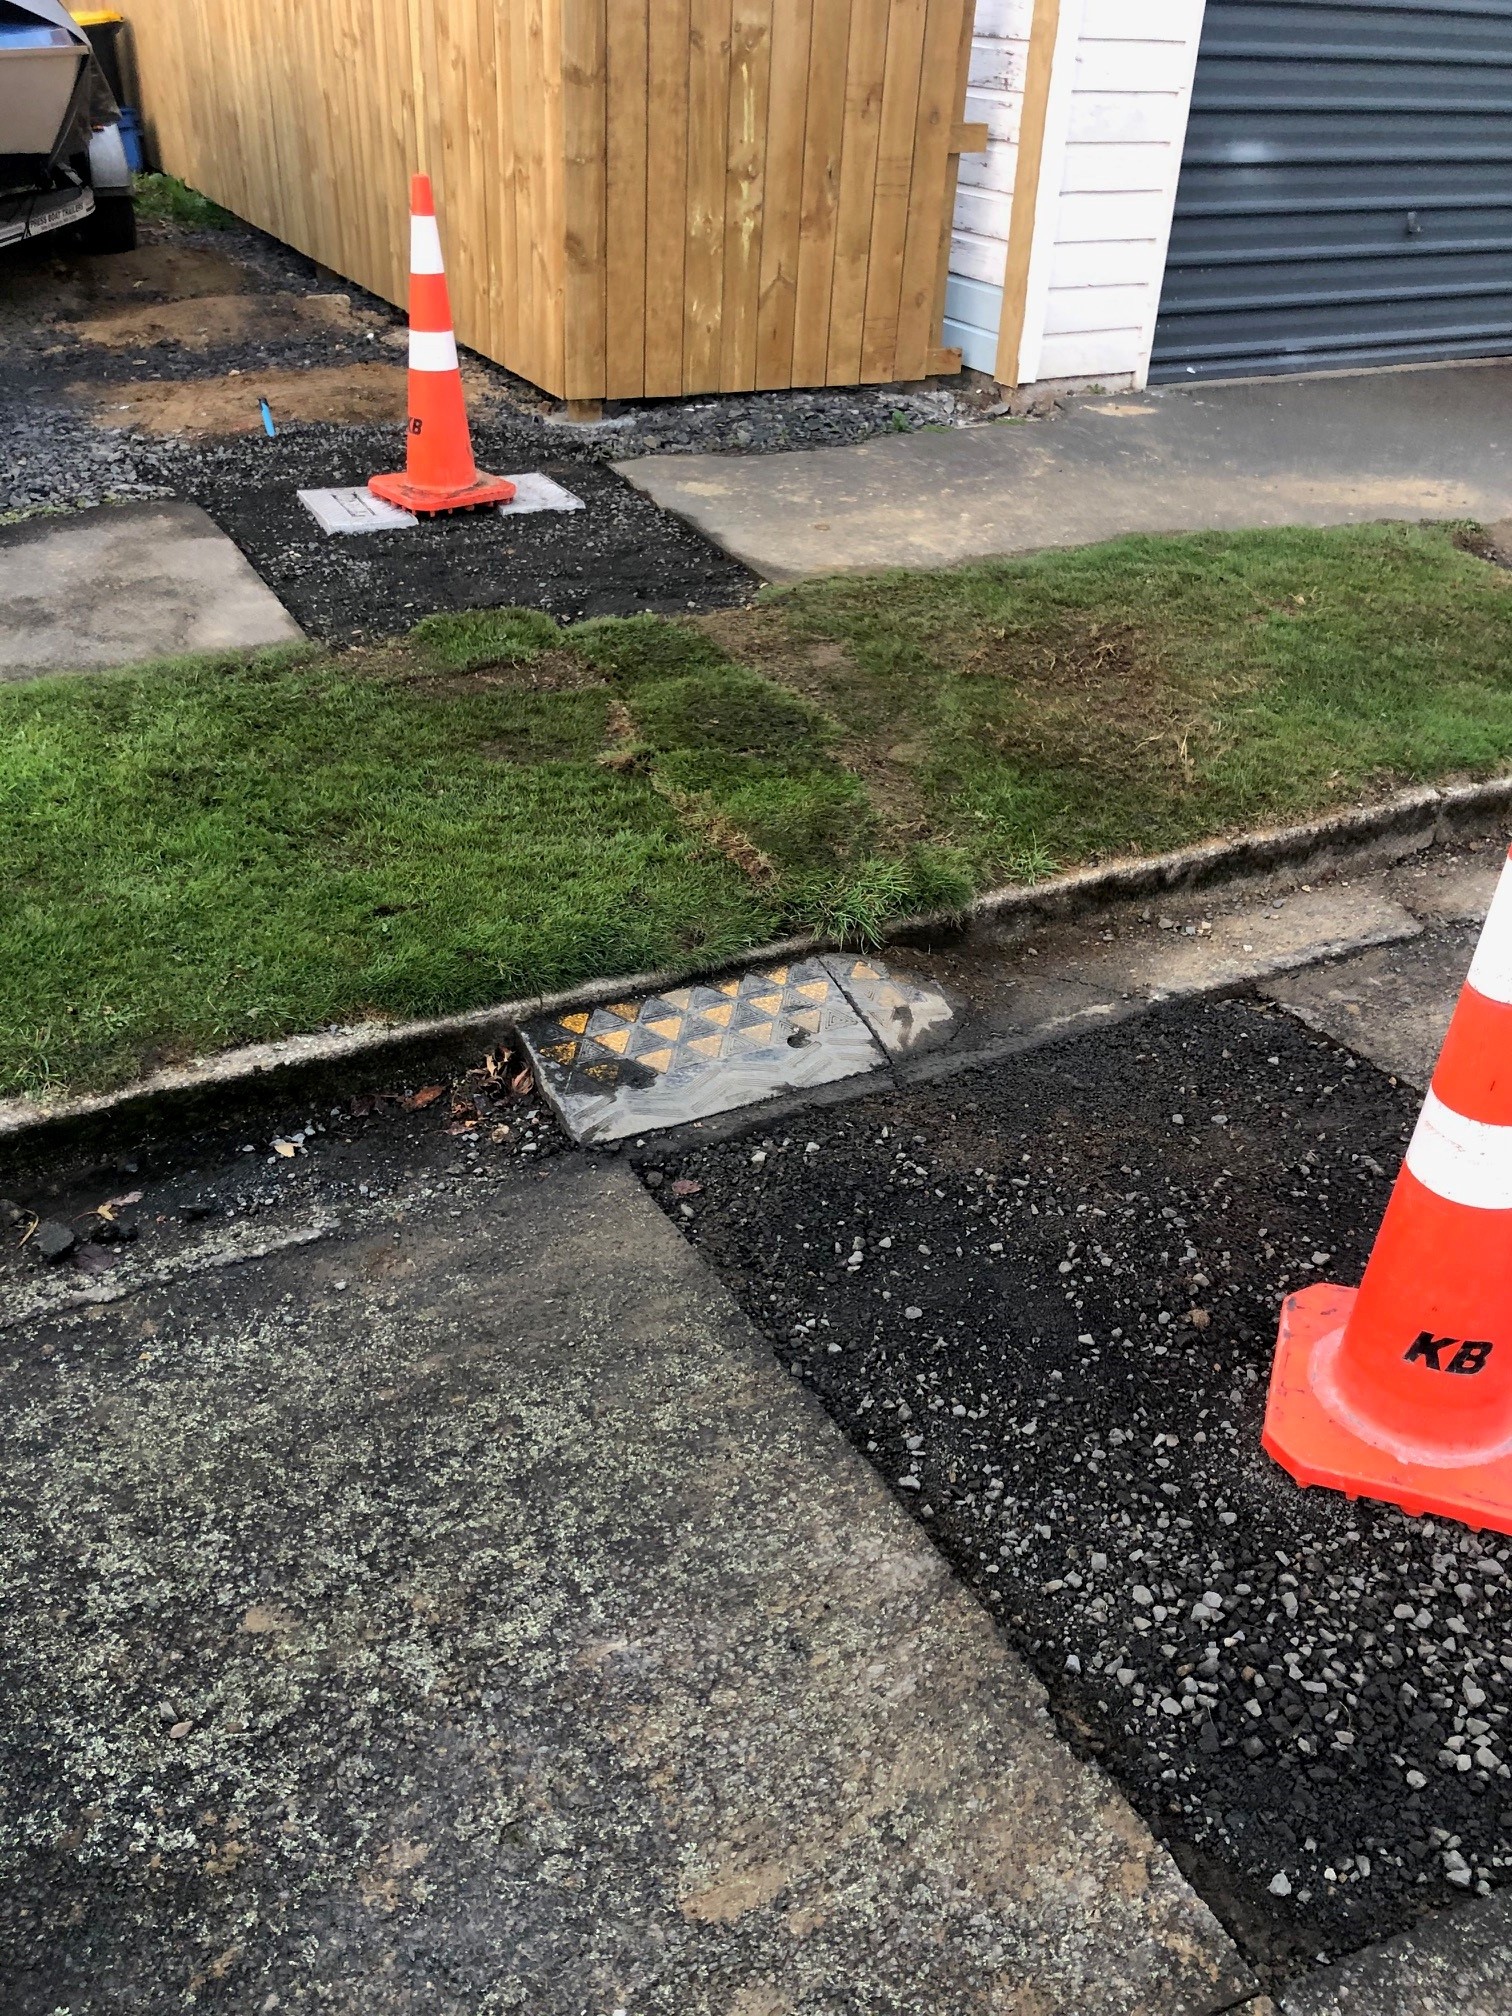
Builders weren't going to wait on the roofer so got the sheet delivered and started on it themselves. My spare shed is brimming with building materials so with the roof on they can plow on with the rest now that the weather has turned here is the south. 3 waters contractor was round to put in the new water connections, cant recall what the cost was for this (was in the total contract) but shouldnt be too much with such a short run. New power connections due in a few weeks also. Had a brief chat with my lawyer this morning, just to sign an easement to the council over their sewer main, and a private one for the sewer connections into the new lots. Title should be easy (and apparently not too much of a wait at the moment). We are also having thoughts on just selling up the whole lot and just buying or building somewhere else, I have the pricing to do the relocate (60k+) but the hassle/financing factor plus the residual value of the bare sections, added to the fact availability of lifestyle blocks is getting harder means we are weighing up our options. Watch this space, happy to receive questions also, I've had a few PMs along the way.
3 points
-
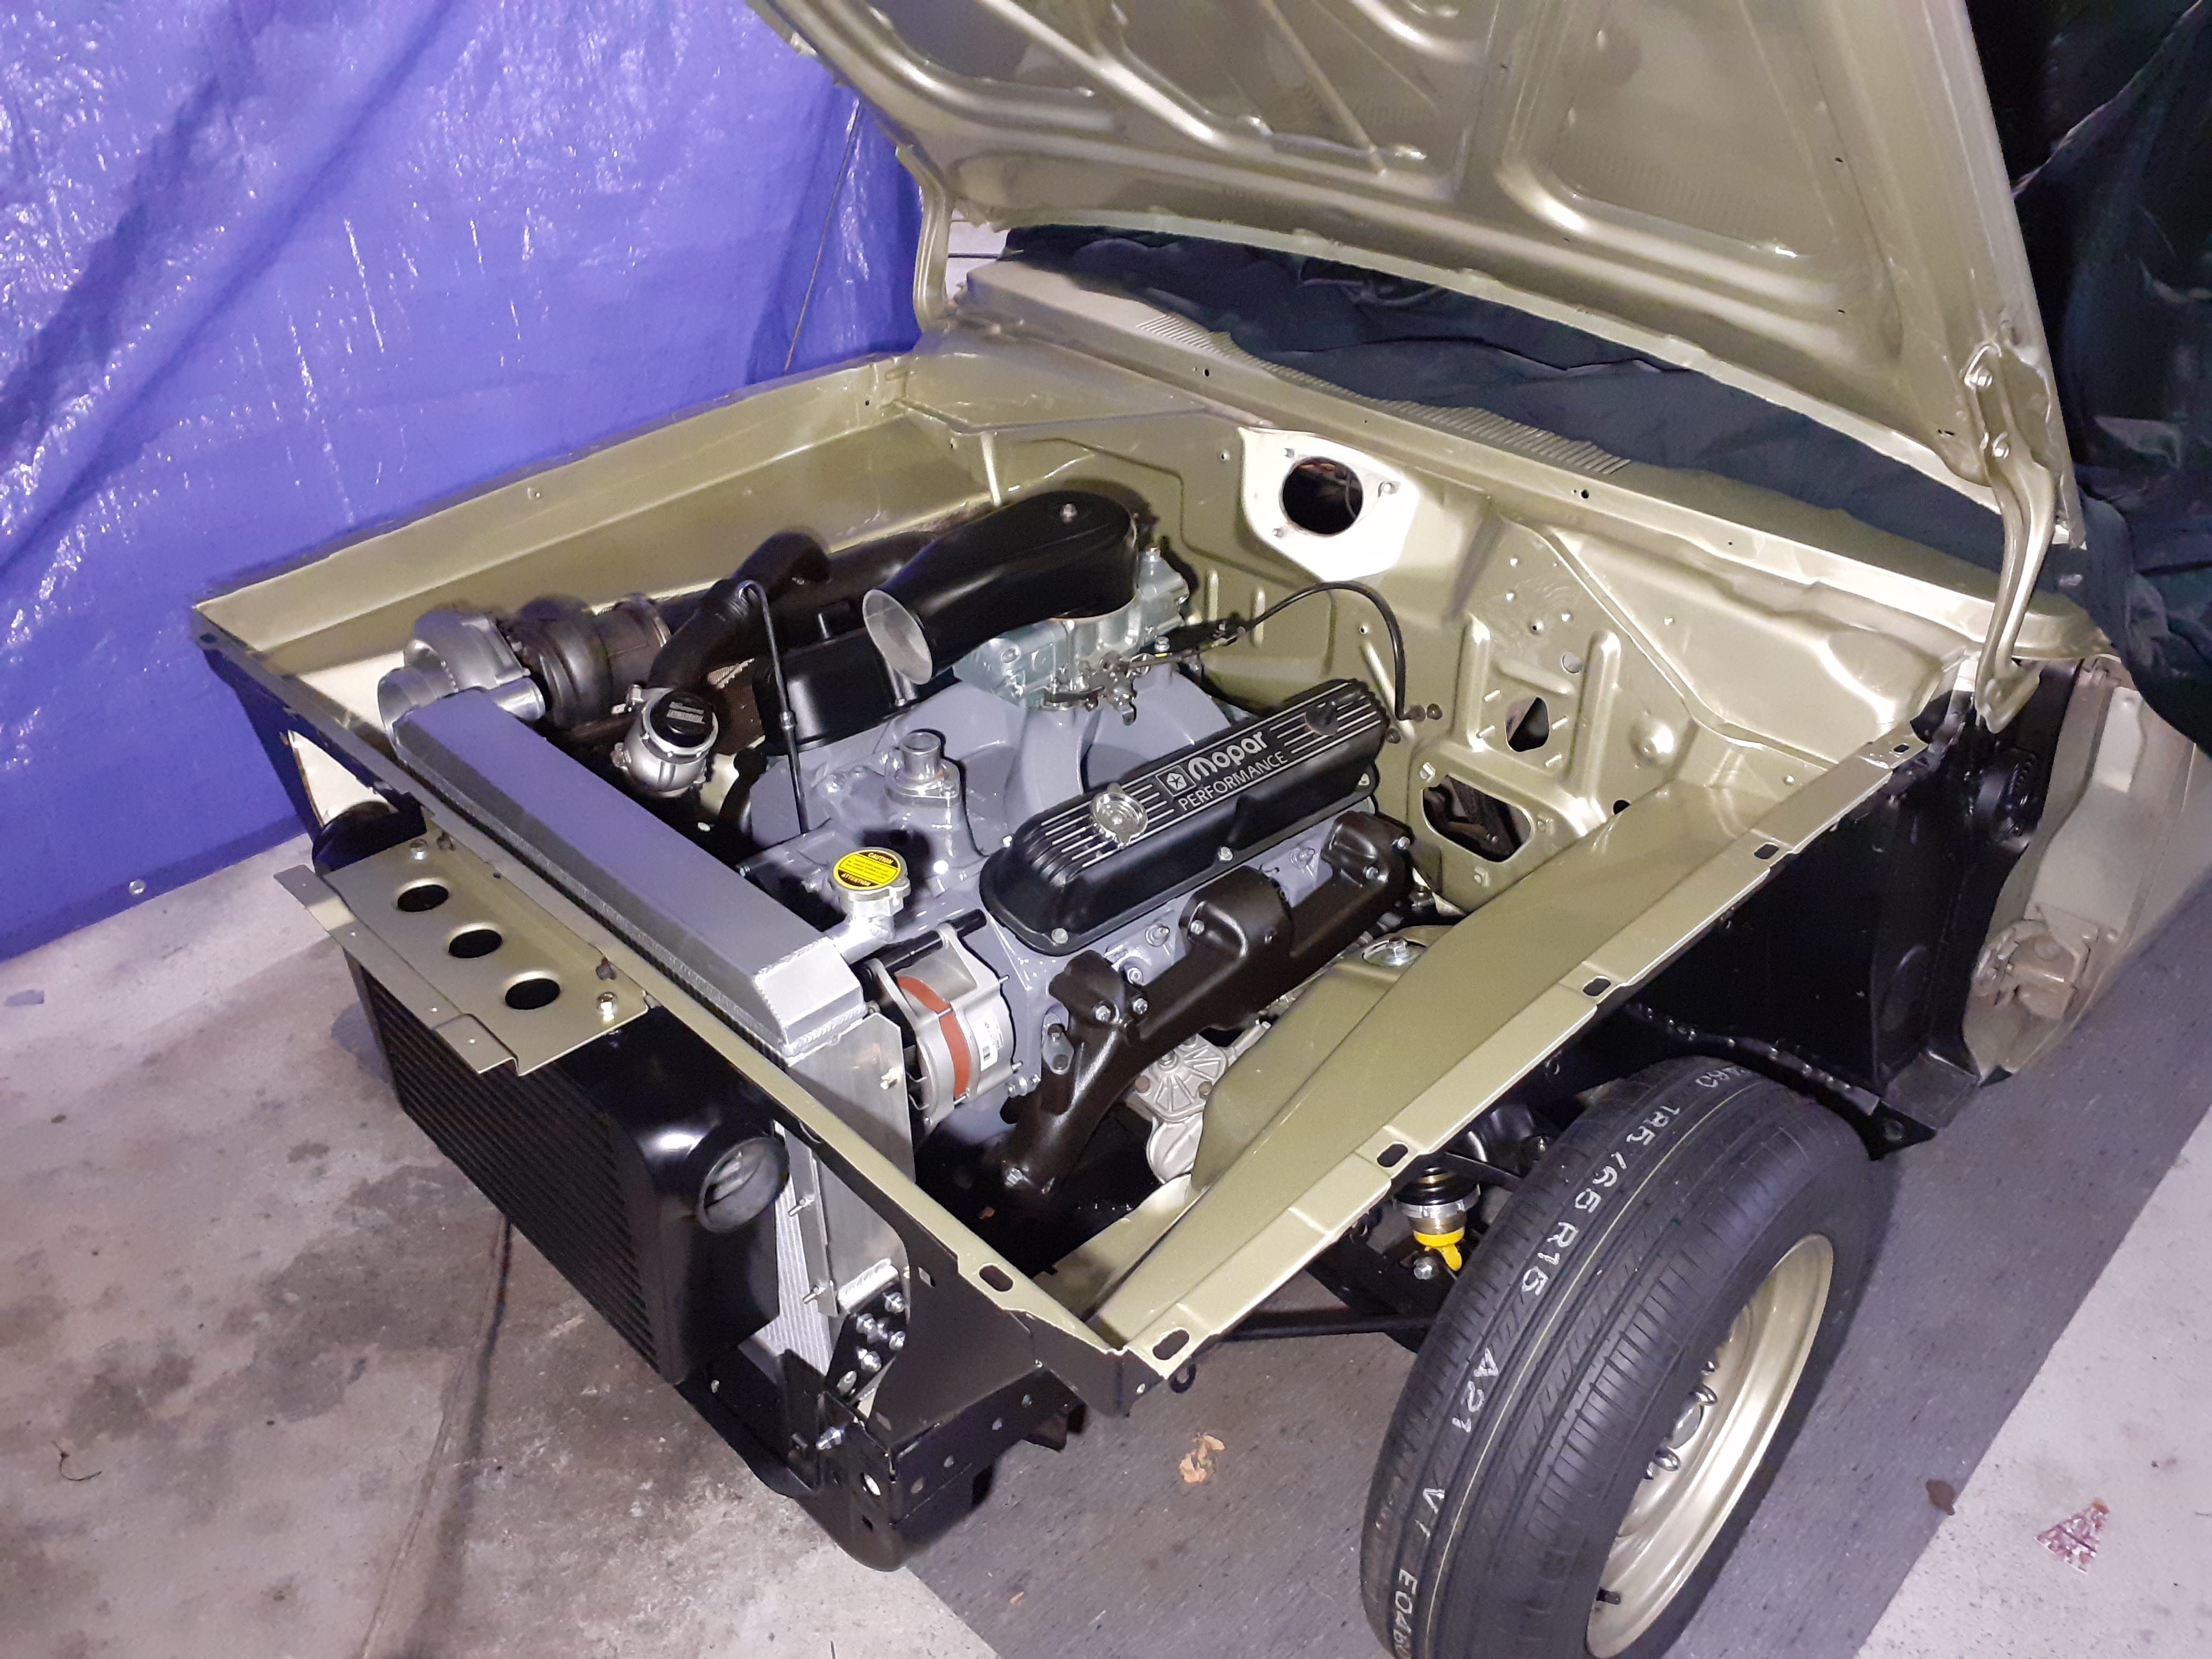
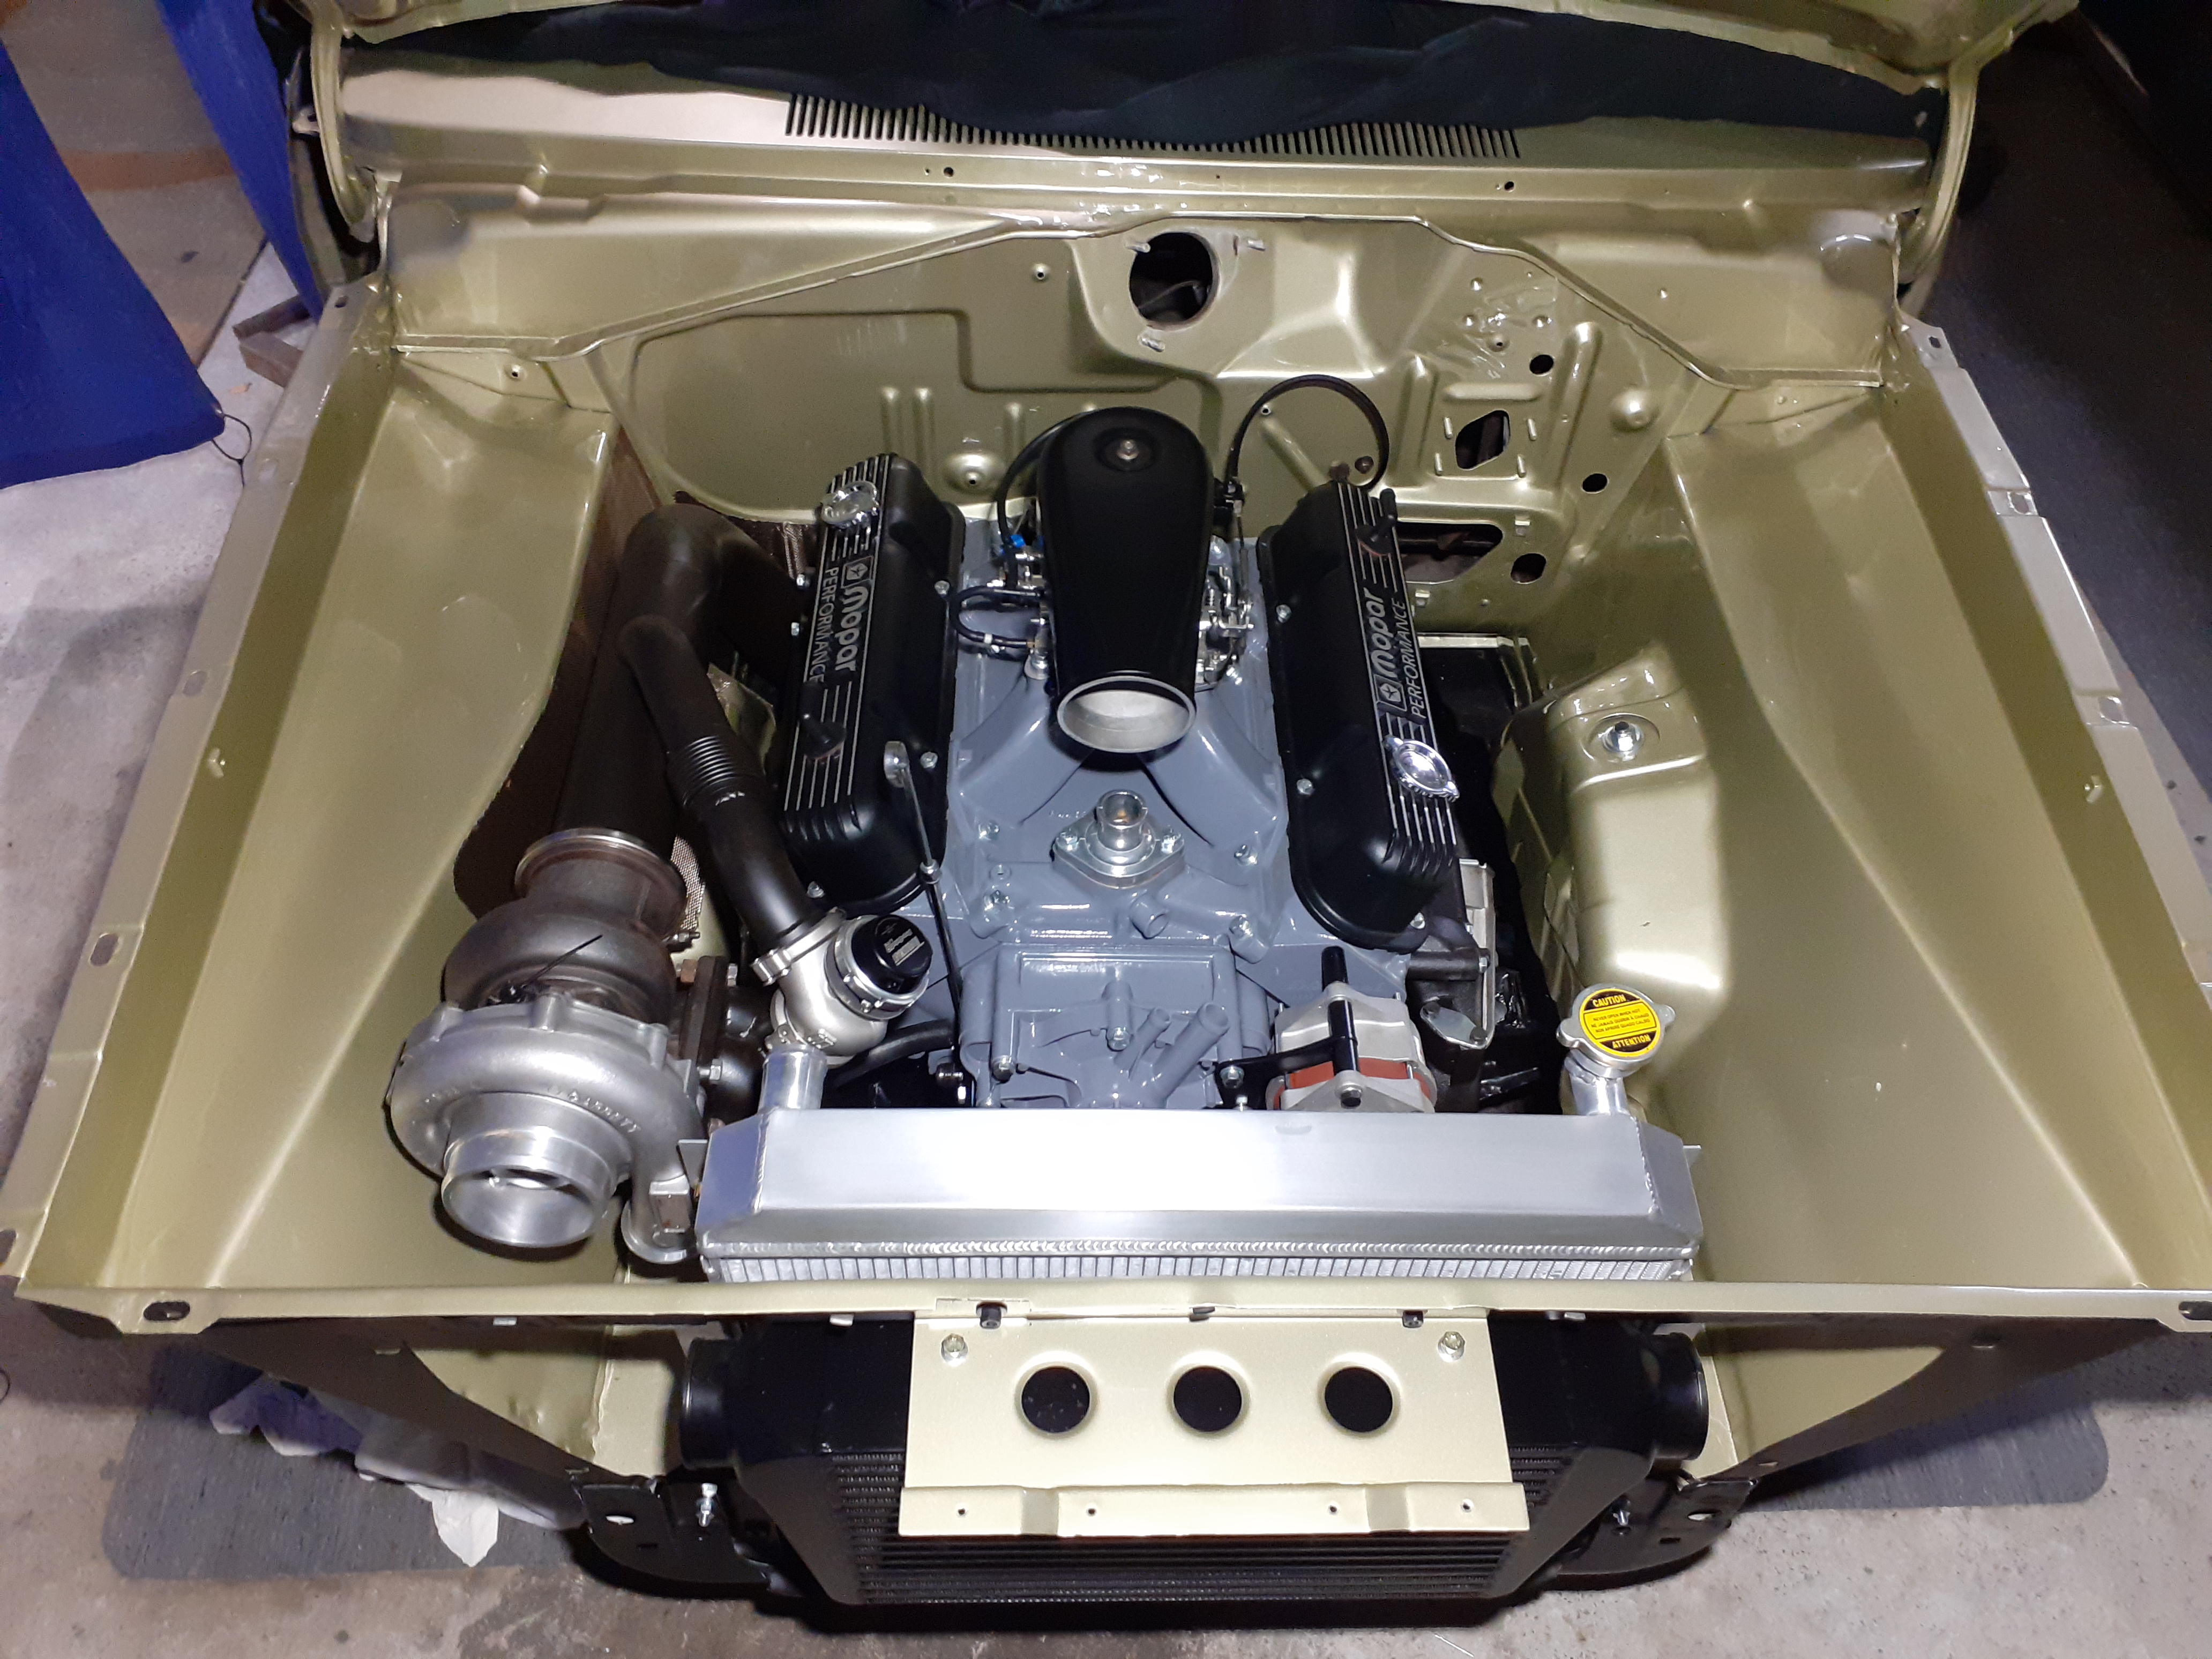
Brief spec on the car before the rebuild was 1600cc Xflow, Kent 244 cam, big valve head with double springs and steel rocker posts and solid spacers. Datsun pistons and twin 45mm Webers. 4 speed Straight cut , close ratio Tran-x gear kit. English axle with a steel plate type LSD 4.9:1 Ratio. Two link rear end. 4 wheel vented discs and bilstein shocks all round. Quick rack and a world cup cross member. All pretty normal for a rally car of that era. Plans for the rebuild are making it look more like a period works escort of the 70's, ie. Satin black interior with correct works twin cowl dash and centre console, correct smiths gauges etc etc. Improving the rear suspension travel by adding mini tubs and a diff tunnel. Adding a panhard rod, proper seat rails and sill mounted jacking points. I will still use the Tran-x 4 speed and same rear axle, i may have to change to a 5:1 diff ratio tho with the new engine.3 points
-
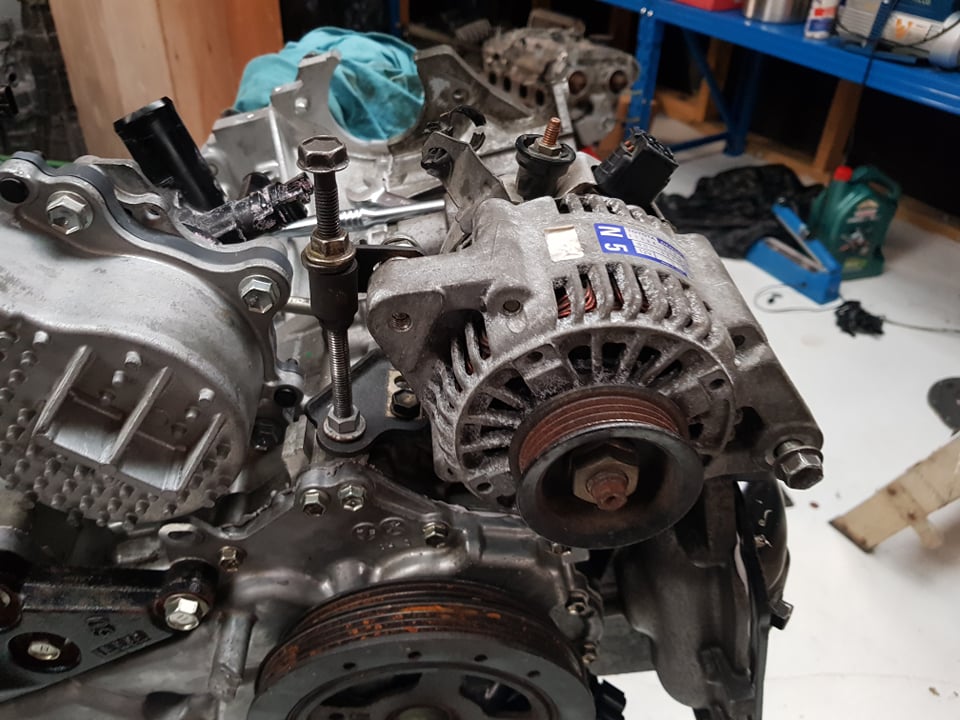
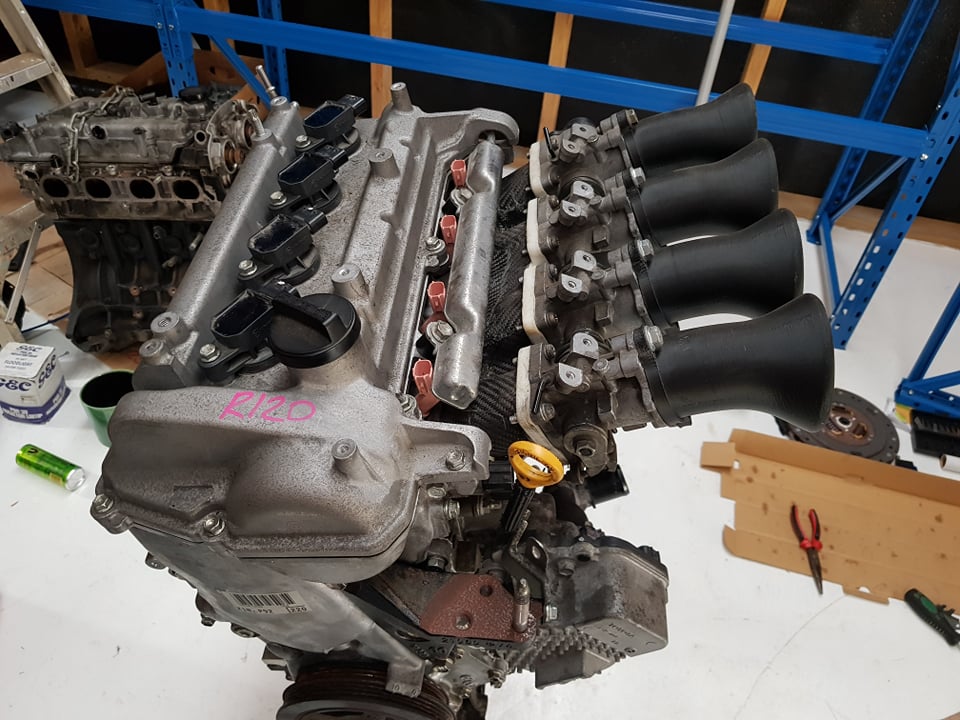
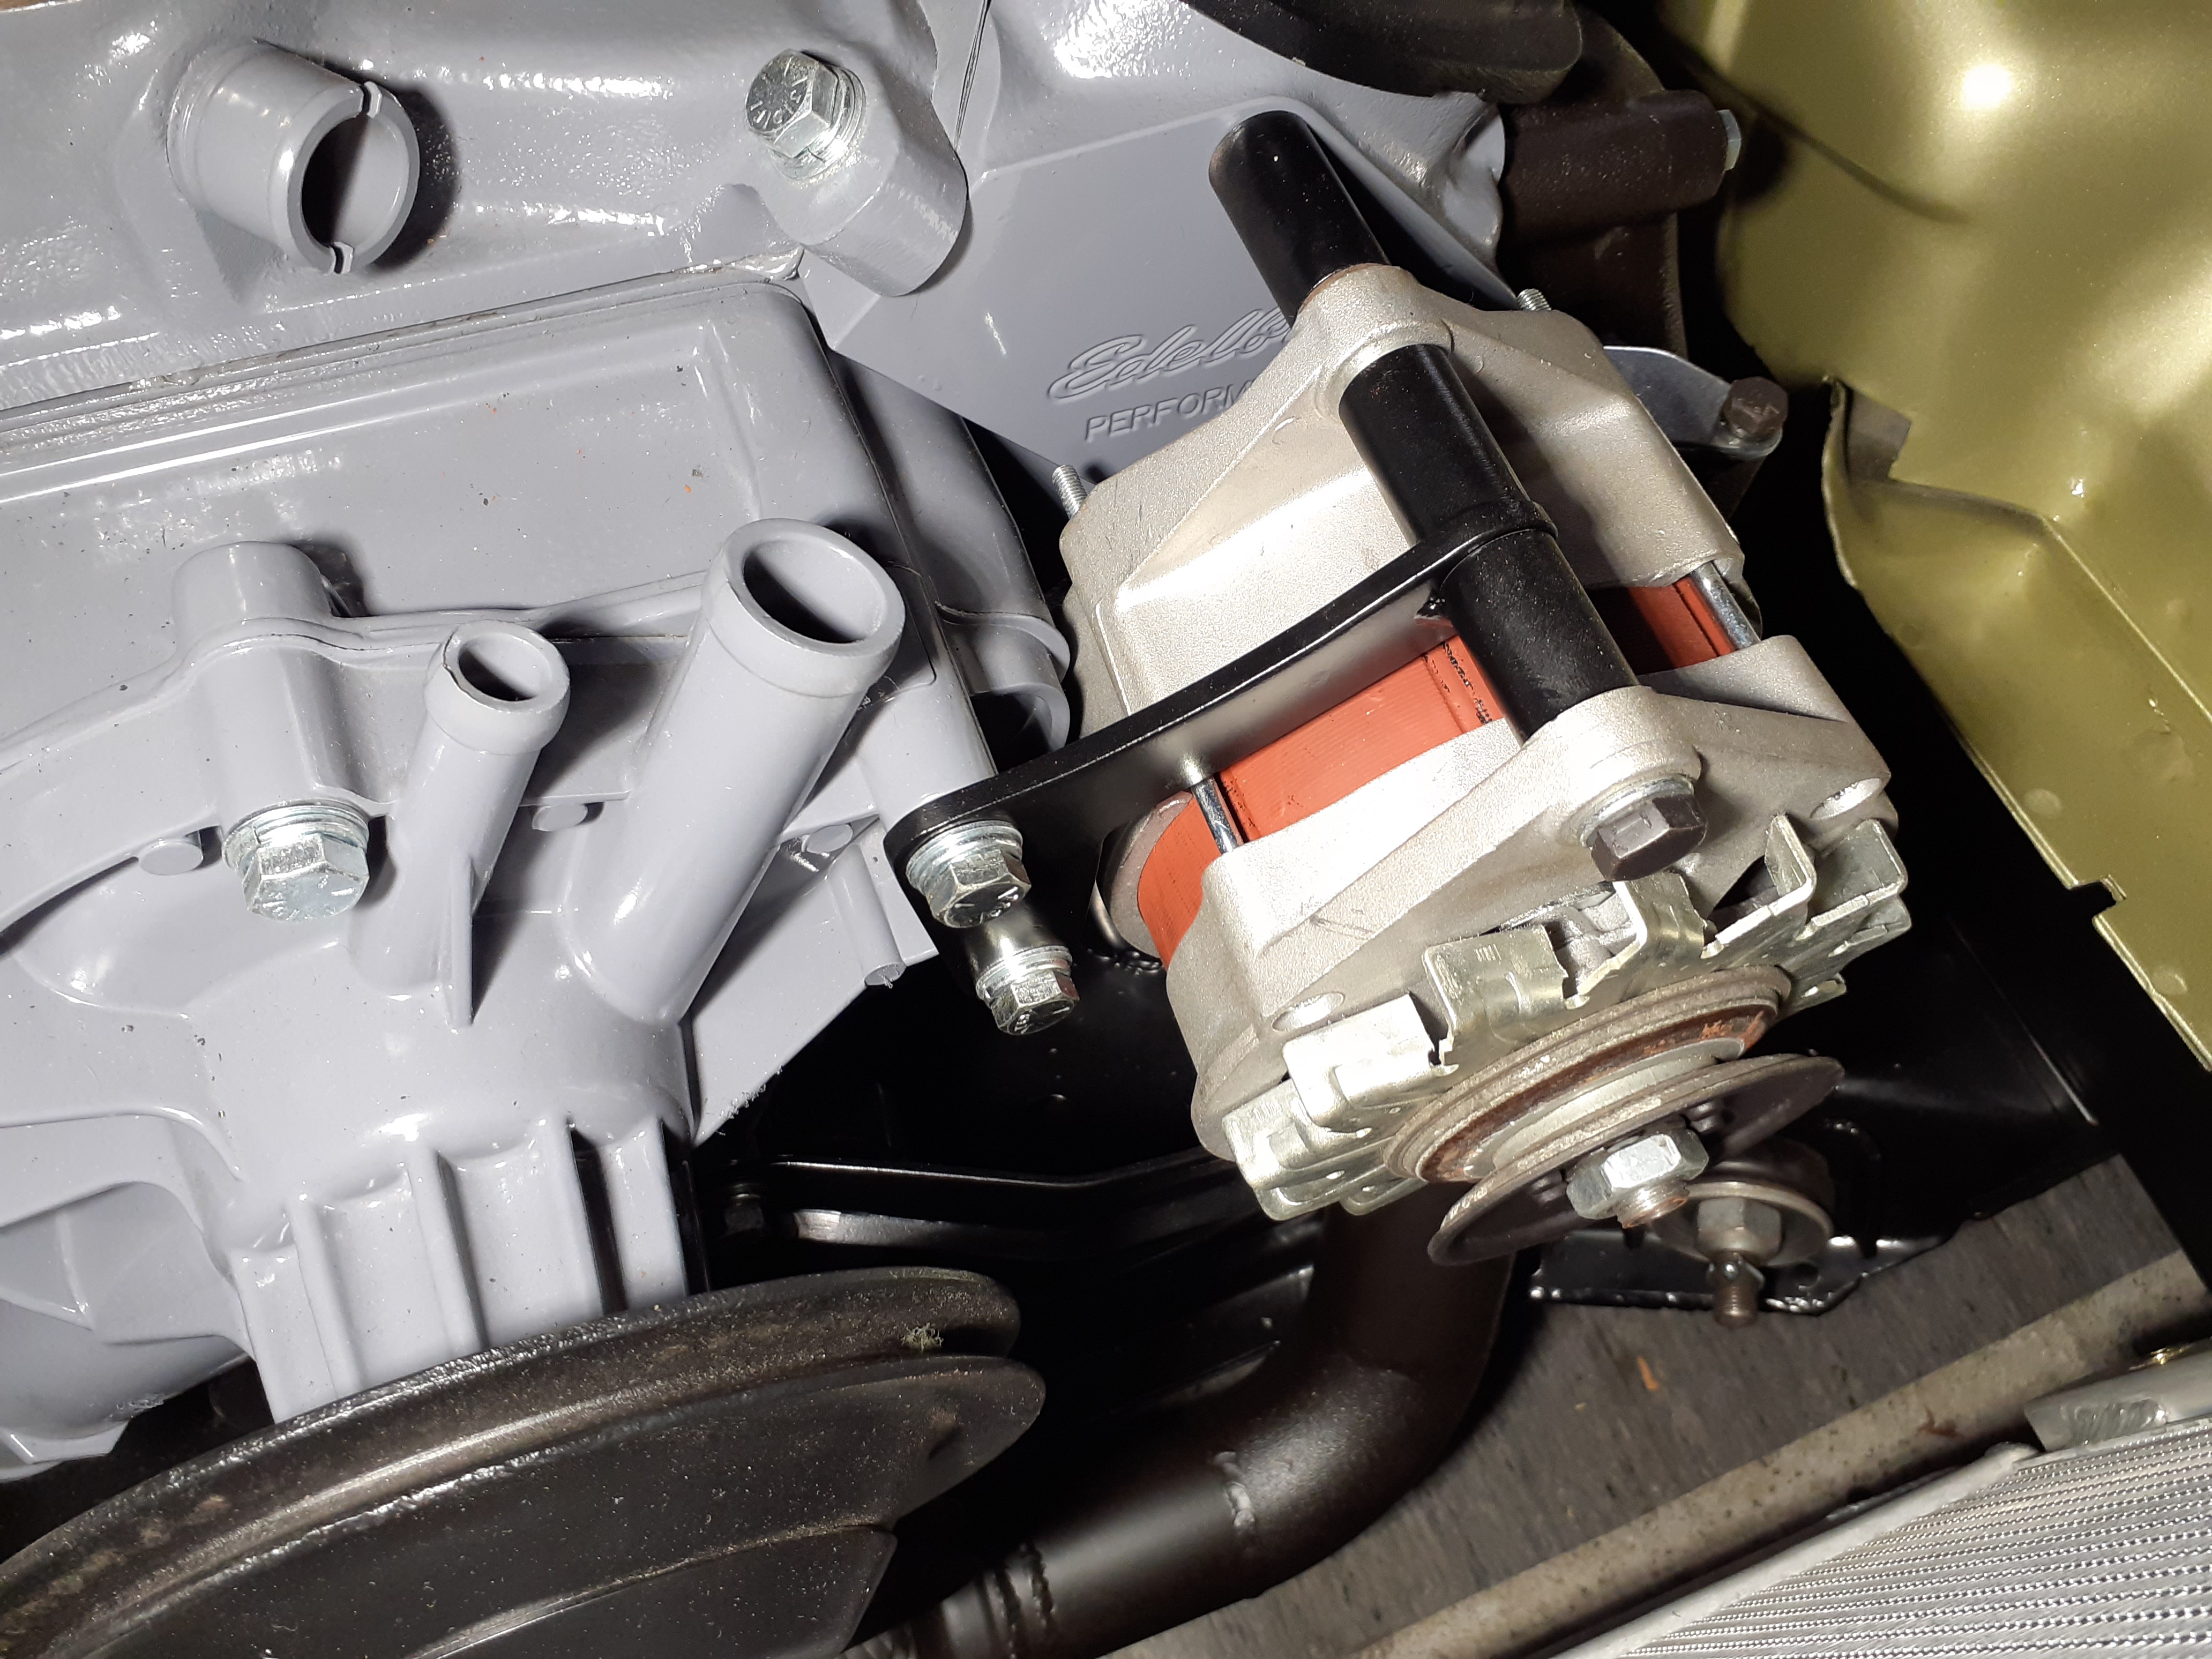
I've pulled the throttles off the car to mock up on here. Then reverted Echo to standard manifold which is a bit more WOF friendly, even if it's technically legal with throttles on currently. Also thanks to the excellent dude Matt Gill I've got some 2ZZ injectors on the way. So that's most of the puzzle pieces solved! The main task left to figure out has been the alternator bracket, which has resulted in some head scratching and a few different attempts at finding somewhere for it to sit. Settled on this, which is very low down bolting onto bottom of the sump. Ideally I didnt want to have the mounting points that far down the engine, but I think it'll be alright. Then the worlds shittiest assortment of accessories as a tensioner. I might improve on this, but if it works probably not haha. I dont have the skills or materials or tools to make a proper version of the bracket from aluminium, so I was hoping in someone in Waikato might be able to help? Here's some more specific details if anyone can.
3 points
-
Got a jig set up & the car mounted, ready to bare metal underneath & make a start on the sills etc.
3 points
-
car went to the paint shop to get the runs out of it and get the final cut and polish. i went and picked it up last night and it looks amazing. anywho, today i wanted to fix the exhaust where the flex joint had worn through because its the lowest point and its had a fucking over judder bars and whatnot and subsequently has a hole it in. step 1 - jack up your car. this is where things went wrong. 2021-04-25_02-55-42 by sheepers, on Flickr car slid off the jack on the way up. given what could have happened i got off extremely lightly. it bent the radiator support up and bent the bottom of the radiator real bad. it also bent the bottom of the front bumper. however, the radiator isn't leaking and the crank pulley is unscathed which is a fucking miracle given what happened. i was able to bash the rad support back down and i got most of the bend out of the bumper so it looks fairly normal again. fuck it could have been WAY worse.................. so yea, after dealing with that i moved on to fixing the zorst. cut out the fucked bit, made a new bit, tacked it in place, remove zorst from car and fully weld, add 4mm thick bash plate and put zorst back in car. 2021-04-25_02-55-49 by sheepers, on Flickr 2021-04-25_02-55-55 by sheepers, on Flickr 2021-04-25_02-56-02 by sheepers, on Flickr 2021-04-25_02-56-09 by sheepers, on Flickr 2021-04-25_02-56-21 by sheepers, on Flickr then it was time to wax the newly polished paint. that went well. it looks pretty ace tbh and yea, i cant take a photo that justifies how good it looks. but it looks good. take my word for it. 2021-04-25_05-34-27 by sheepers, on Flickr 2021-04-25_06-18-48 by sheepers, on Flickr 2021-04-25_06-19-23 by sheepers, on Flickr 2021-04-25_06-32-09 by sheepers, on Flickr3 points
-
yeah but wombling in the shed factor comes into it2 points
-
Relevant VIRM page for anyone interested https://vehicleinspection.nzta.govt.nz/virms/in-service-wof-and-cof/general/vehicle-identification/vin-and-chassis-number2 points
-
27 years of paint coming off... slowly but surely
2 points
-
Good tips, I wonder if silicon spray in the oil will help reduce frictional losses at high rpm2 points
-
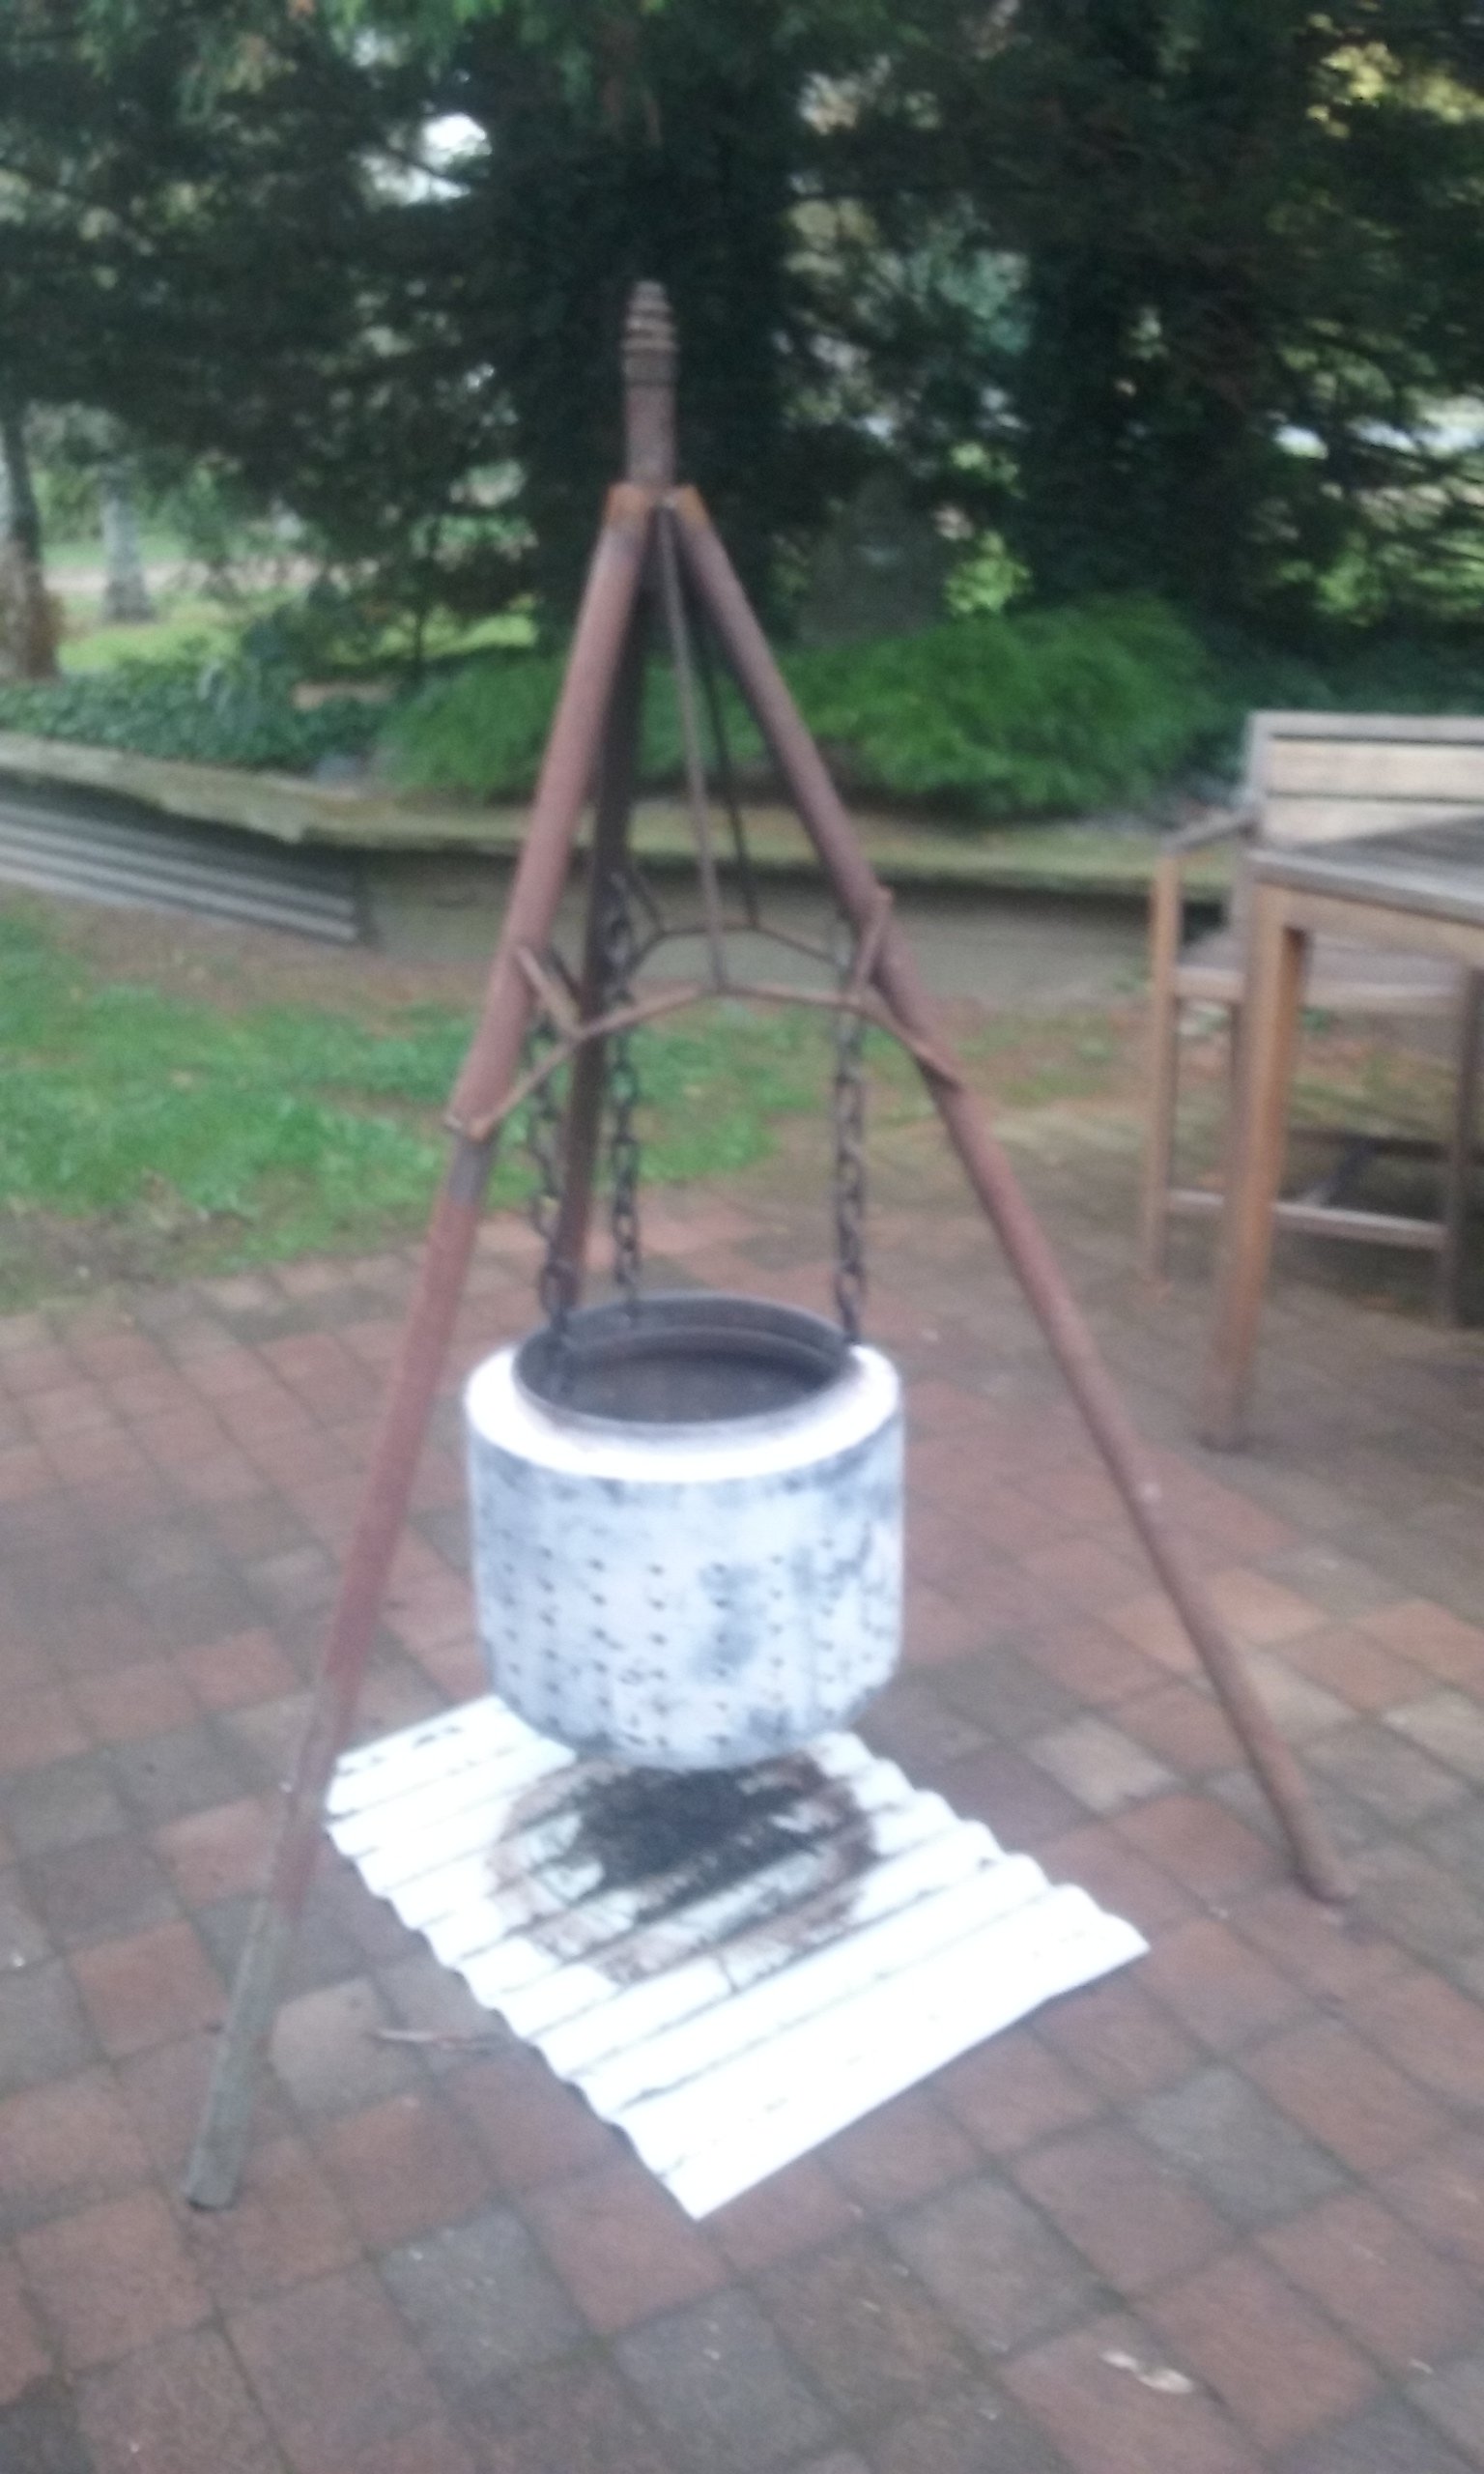
Was a bit hung over on Anzac day appreciation day, So I made a fire thingy out of some junk I had lying around
2 points
-
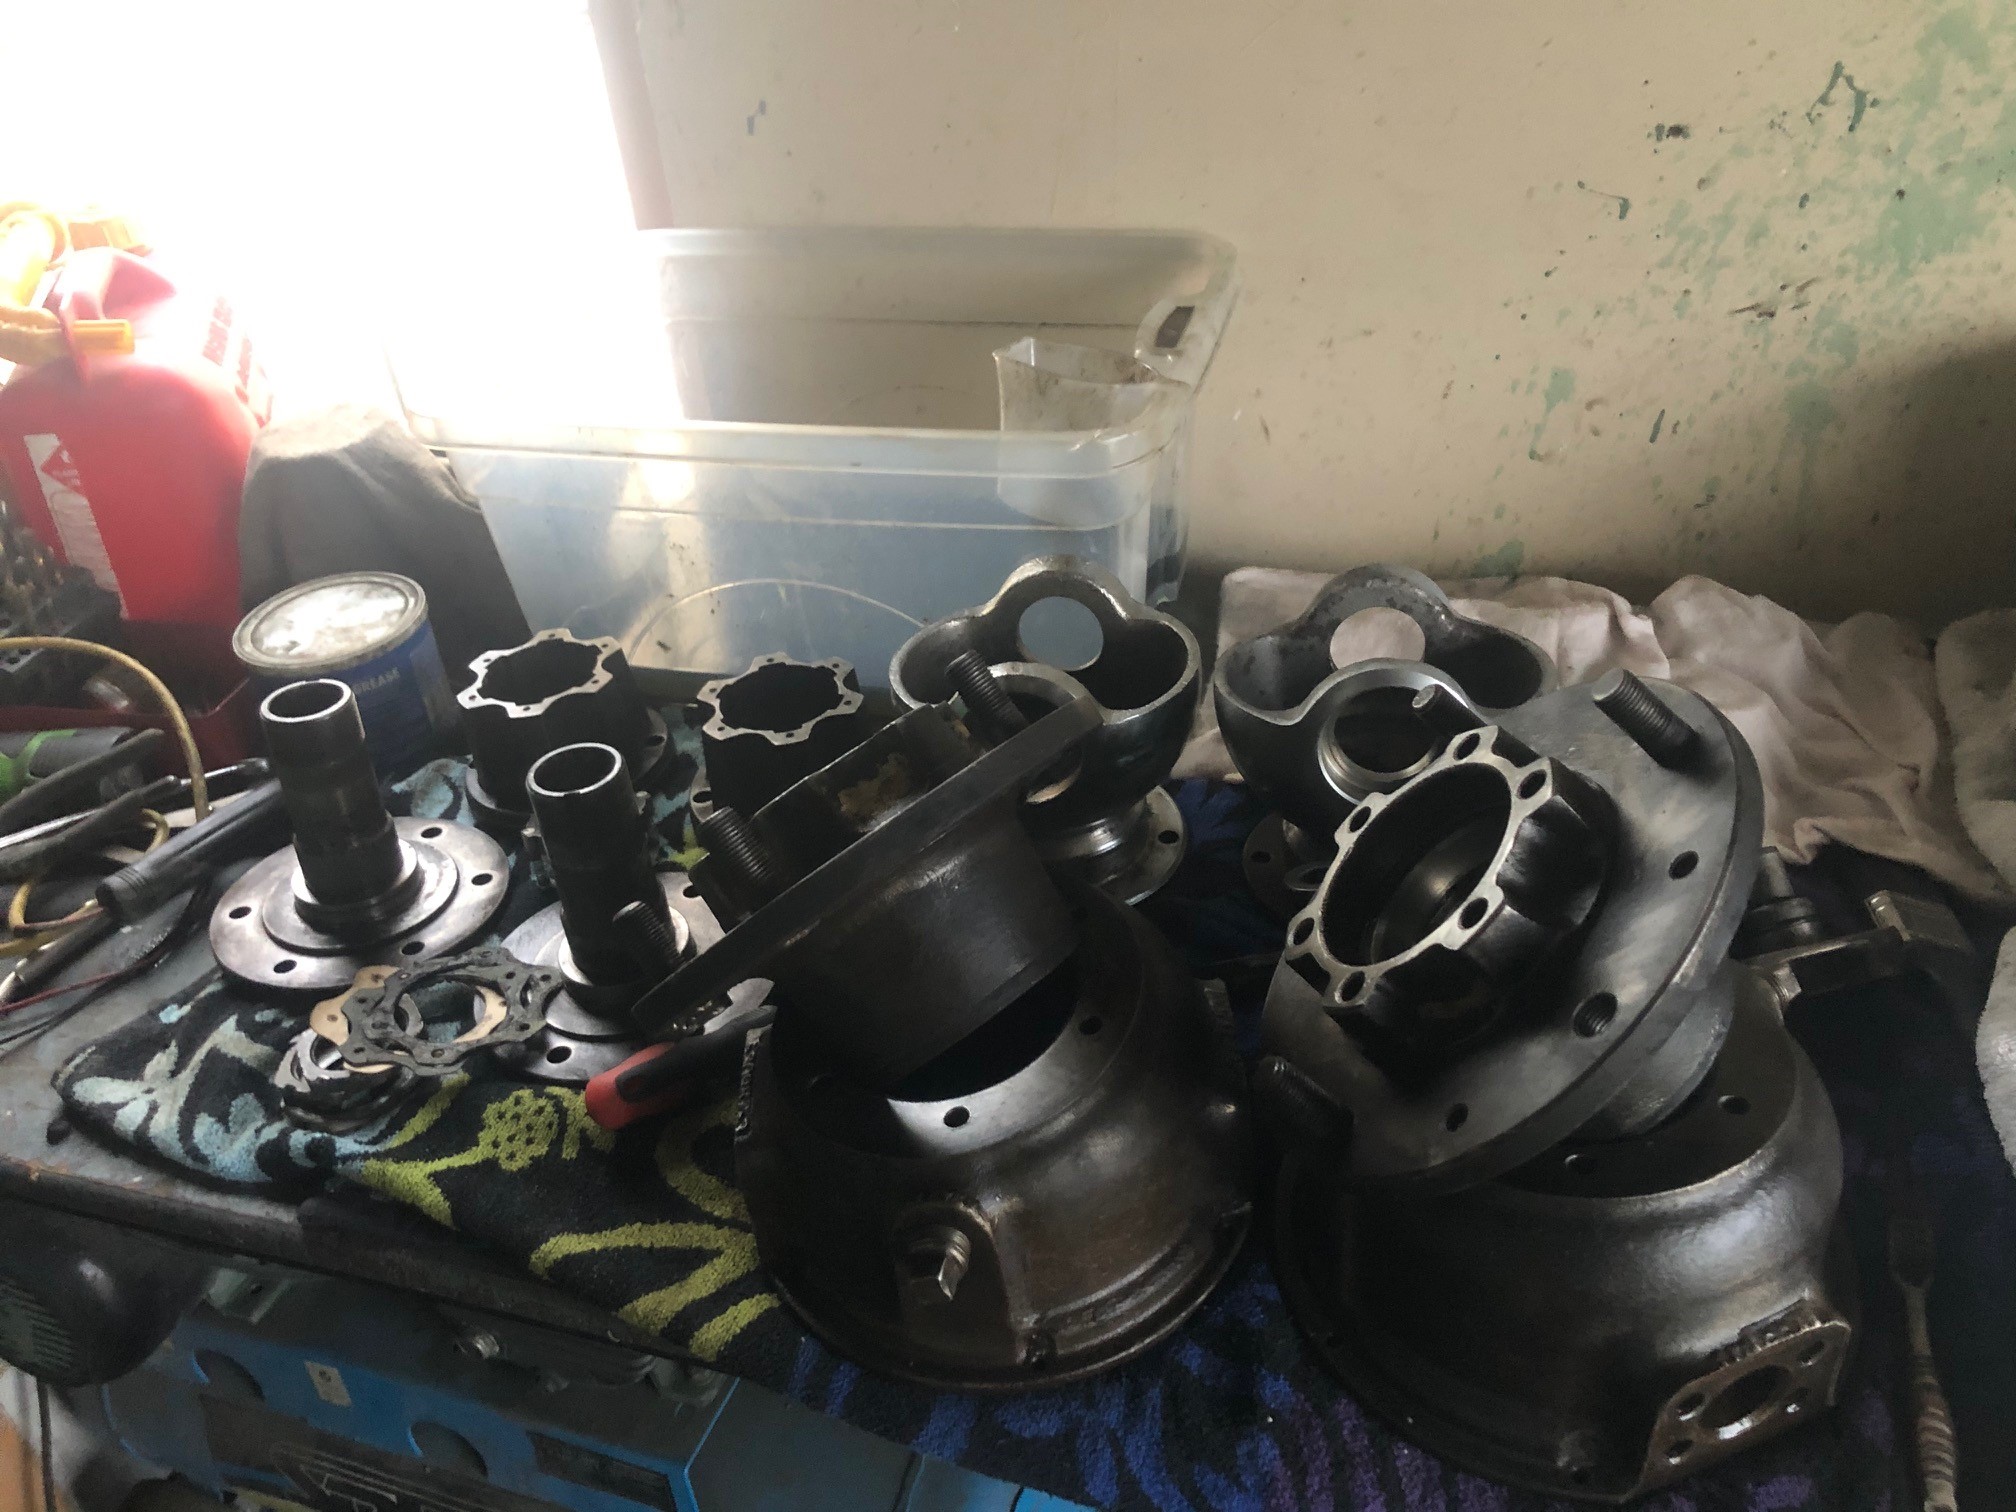
I've had a tiny amount of play in my rear wheel bearings so decided to rebuild my whole rear-end New CVs, bearings, aftermarket stub axles & companion flanges to take a 108mm CV. Old vs new stub axles. They have a larger splined diameter and are beefier at the wheel flange. This now shifts the weakest point in the driveline to my r180 diff, but it should be good enough for my engine. I also replaced all diff seals & o-rings so hopefully it stops leaving little puddles on the floor now. I couldn't get a micrometer inside the hubs to confirm, but I've assumed the play was from the bearing spacers getting overtightened and mushrooming slightly. So I cut some 0.05mm shims and torqued the hubs up and things feel right now. The left hub required two shims. Everything seems to measure up correctly and there's no play anymore. Rad! However. At this point I realised I have a problem. Since my new companion flange accepts a 108mm CV directly, I no longer need to run the CV adapter plate I used to use. This means my axles are now 25mm too short. FML. Cars aye!2 points
-
Some updates. Waikumete upholsteres made a carpet for me. 2 pieces, like original, and we found a loop pile in maroon! Which was brilliant, as I really wanted a loop pile for that more premium appearance. 20210321_161234 by Richard Opie, on Flickr 20210321_165710 by Richard Opie, on Flickr I think it turned out pretty well! Did the boot also, but I haven't got a pic of that for some reason. 20210408_210246 by Richard Opie, on Flickr Engine and gearbox came out again. This is minutes before it all lifted out. Very easy. 20210417_114901 by Richard Opie, on Flickr Pulled apart the gearbox with great guidance from Earle McFarlane. 20210417_121227 by Richard Opie, on Flickr Measured all the clearances, then pulled it apart. Selector hubs are a bit pwnt, there is excessive wear in the shift forks, bearings seem all right but they're all being replaced anyway with all those parts in the post above. So now the mainshaft has been assembled (in my absence) and we are just waiting on the forks to come in from Japanland so we can reassemble. 20210330_125040 by Richard Opie, on Flickr Since the motor was coming out anyway I thought it'd be a good time to get the top end sorted, as it's only ever been a stock head and cams, despite the bottom end being built/hi comp. This is a spare smallport head that I spent a while scrubbing in the shed to get clean. 20210330_125016 by Richard Opie, on Flickr I then thought I'd try cold jet/dry ice blasting as a bit of a test case on the cam boxes to remove the baked on sludge and scum. This is the result. Pretty awesome! I'm going to be using this process to clean some of the undercarriage parts in situ on the Honda. 20210331_084622 by Richard Opie, on Flickr I stripped the head myself, once I learned how to remove the collets from the retainers it was all pretty simple. Here's the head, with all the bits catalogued and in containers, with the Kelford 193B cams and Supertech retainers/springs I bought ages ago for it. It's in with Alan Harris at Harris Performance Engineering (previous Lynn Rogers) for porting, some tickles on the combustion chamber and a port match of the ITB manifold. I then got to thinking about what audio this car is going to have, even if you can't hear anything inside it really. Initially, I was going to run a modern Bluetooth head unit in the glovebox, and got as far as buying this pretty rad Sony unit that has 50wrms per channel - from a head deck!!! Enough to power anything, speaker wise. But then Ed sent me a link to a Yahoo auction that changed things. 20210422_172330-01 by Richard Opie, on Flickr 20210422_172308-01 by Richard Opie, on Flickr This is an AD-189T fitting kit/adapter produced by Pioneer in the early 80s. It fits a 'B' type head unit, which is conveniently what the 'component' systems of the early/mid 1980s are. Before the standard DIN size we all know and love today. It replaces an entire middle panel on the dash, replicating the OEM fit where normally there would be a spindle mount head unit (as is the case on my factory dash). I had never, ever seen even a picture of one of these kits before, let alone a NOS one on Yahoo. So I bid on it, because who doesn't love period accessories. And I won it. So then I thought I'd probably better find a head unit to fit. 20210422_172407-01 by Richard Opie, on Flickr I ended up with this Pioneer KP-717G tape deck. Note - it's a tape deck only, there is no AM/FM radio or anything with this, as was the style of the component systems of the time. This one was listed with a clean bill of health, and some remedial work done to ensure it was operational. The auction was backed up with a video to prove it. It's one of the higher end units in this range, with Dolby NR, adjustable tone controls, all the fruit. It doesn't have an amp on board - luckily Ed has one of the Pioneer GM-4 amps for this to plug into, that will find it's way into my car. 20210422_172454-01 by Richard Opie, on Flickr This is how it should look when installed in the car, using the AD-189T kit. Fuckin. Awesome. I reckon. 20210422_172612-01 by Richard Opie, on Flickr 20210422_172638-01 by Richard Opie, on Flickr And this is essentially what the initial system I run will be. Later on I may add some fronts - I have some NOS Pioneer TS167 coaxials, and also dual cones whose code escapes me right now. These TS-X9 are incredible though - I had them wired up to my amp in the house and they produce enough bass you can actually feel it through the floor. How they achieve it, I do not know. Sure it's not sub levels, but it's a beautifully balanced sound that I hope will be loud enough to listen to while pootling along at slow speeds or stuck in traffic. Thank you for coming to my TED talk. Hopefully, next updates will include a rowdy cylinder head, a slick shifting T50 and some Phil Collins tapes in the KP-717G.2 points
-
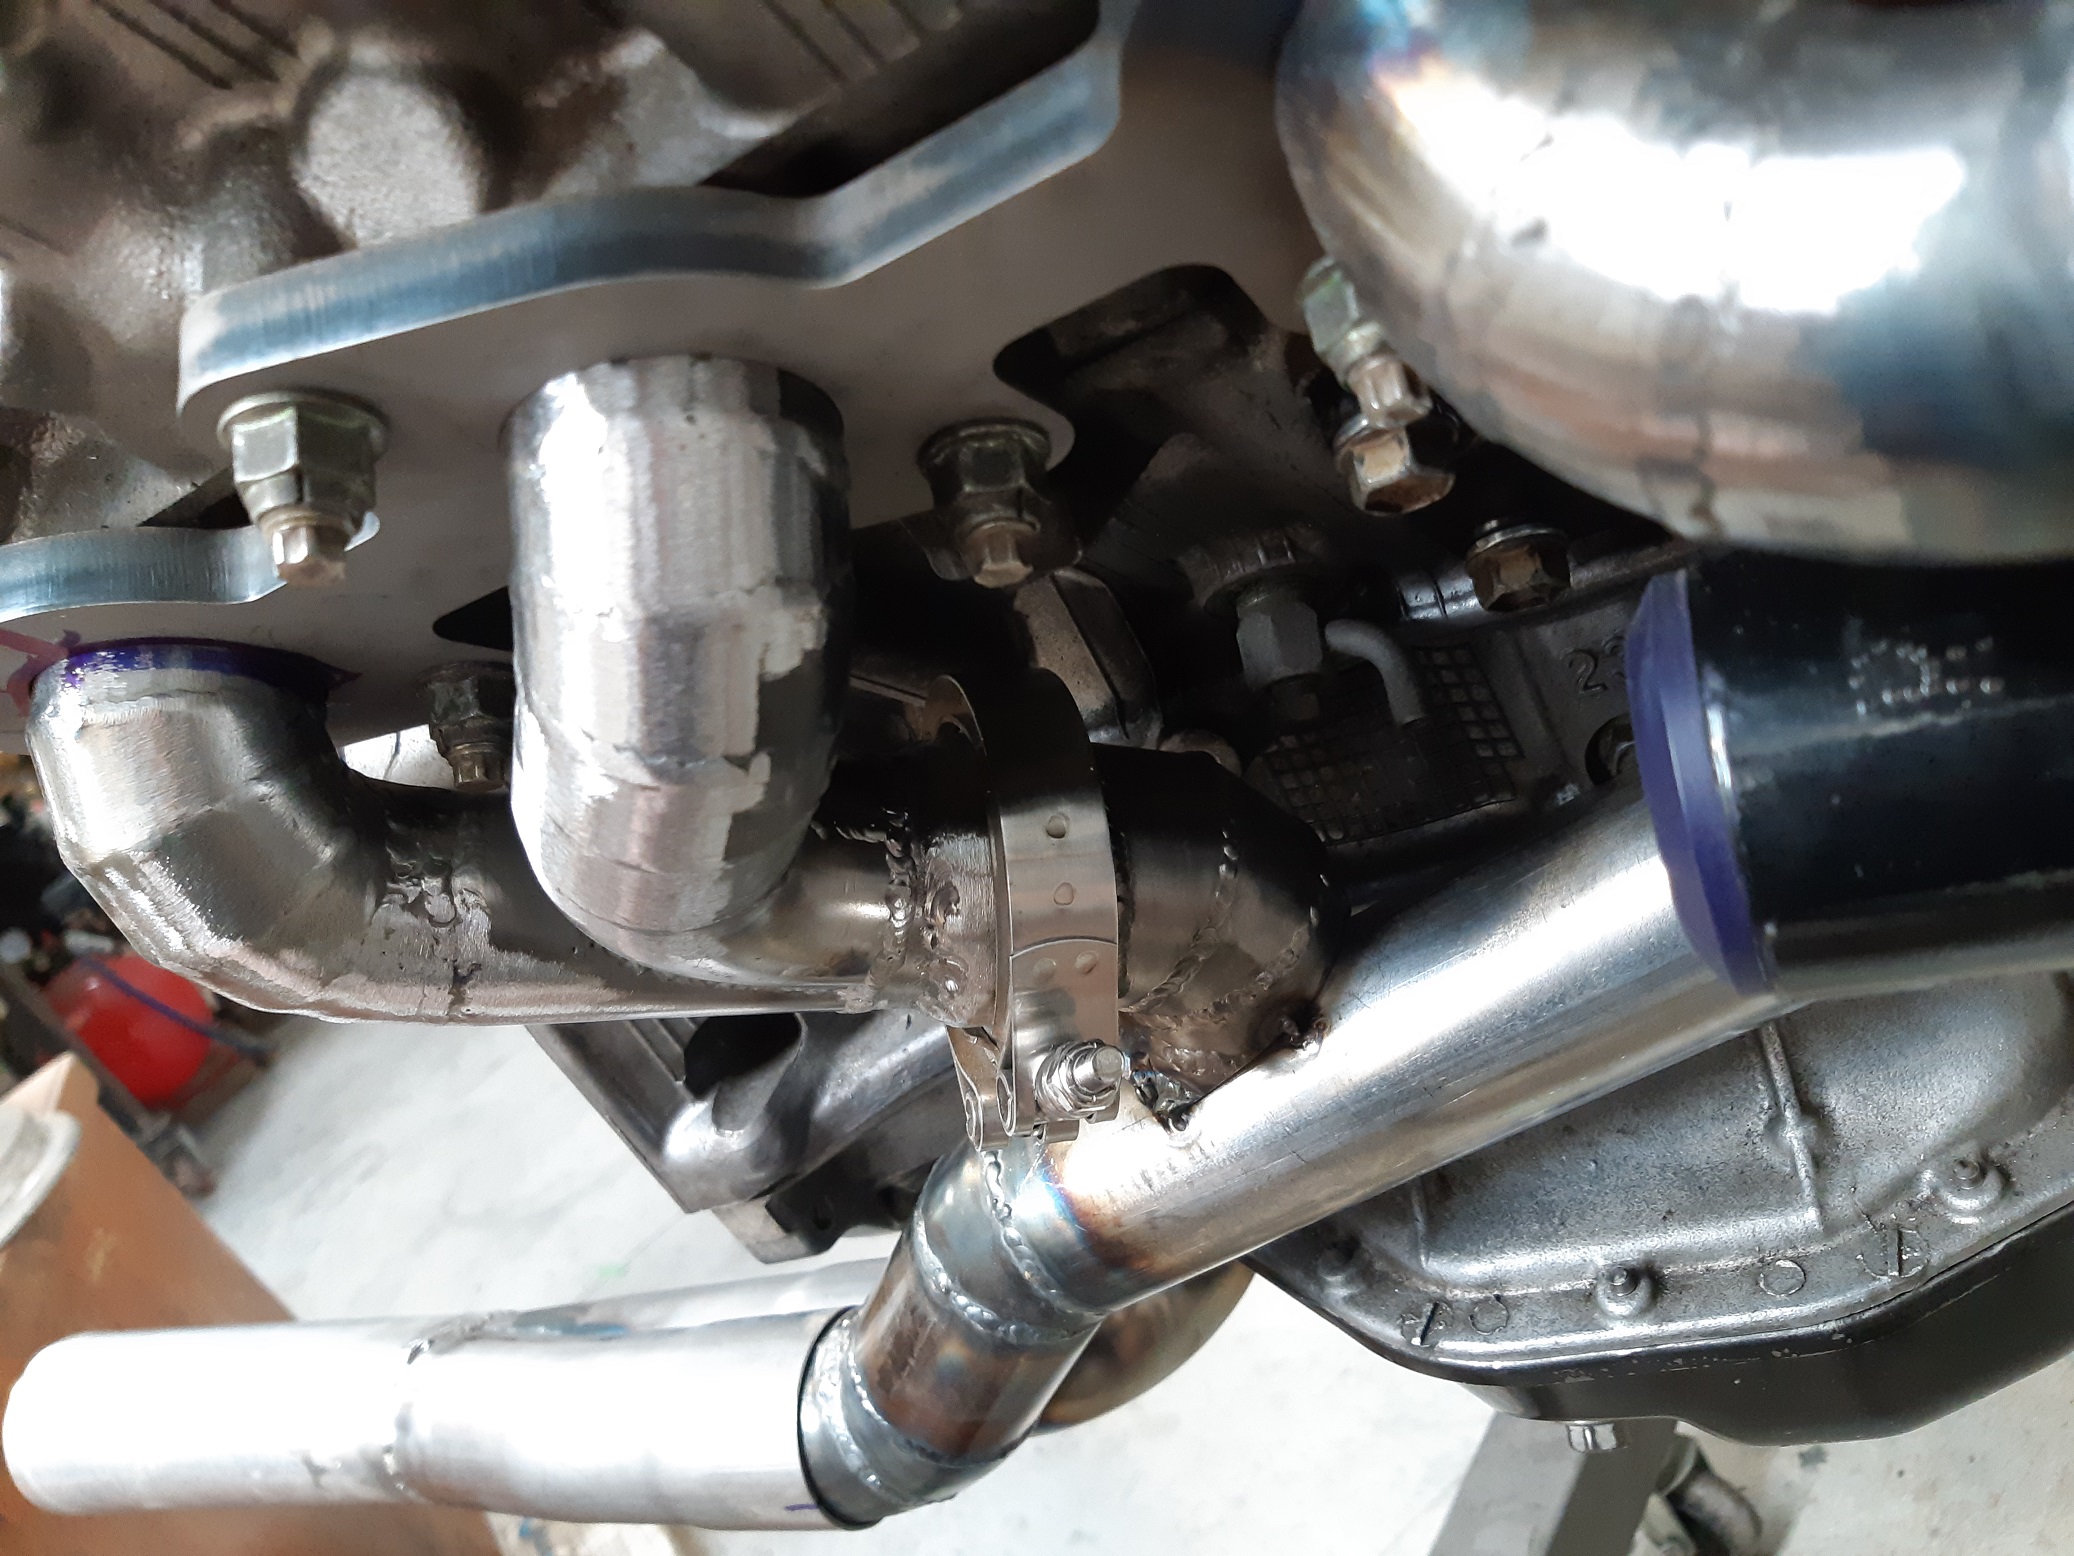
Leak test identified that the rear v-band on the drivers side was not sealing. I tried cutting and realigning with no luck. I changed the design to use only one v-band. Hopefully it's all good now.
2 points
-
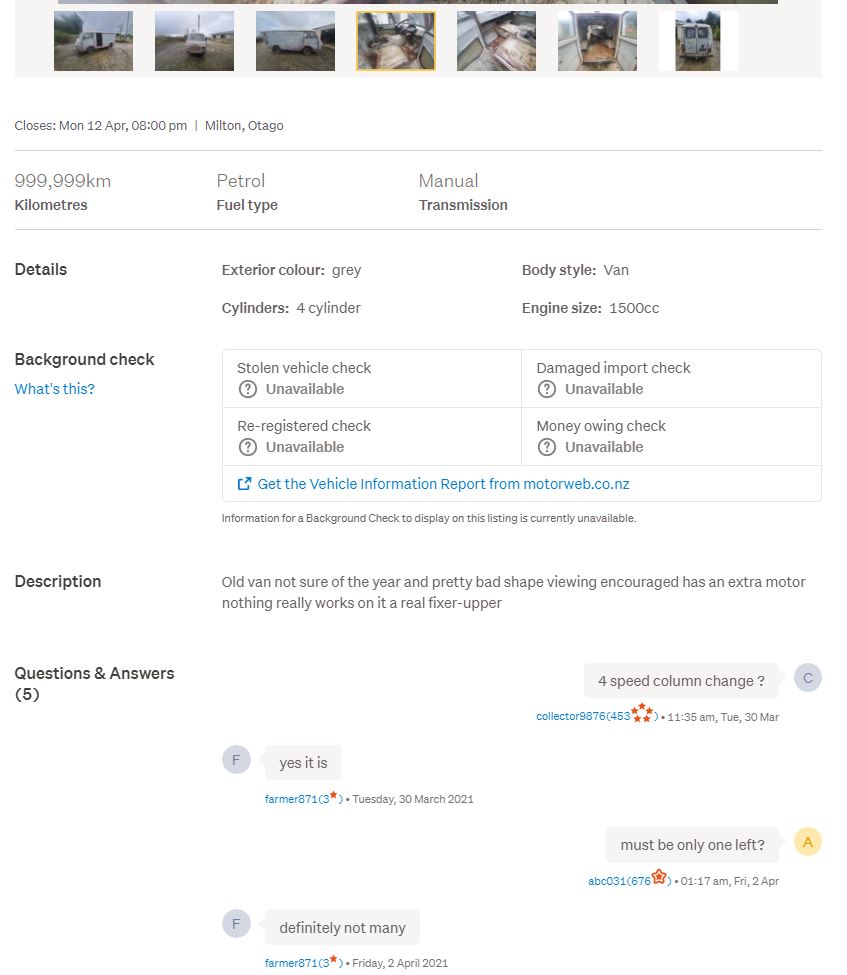
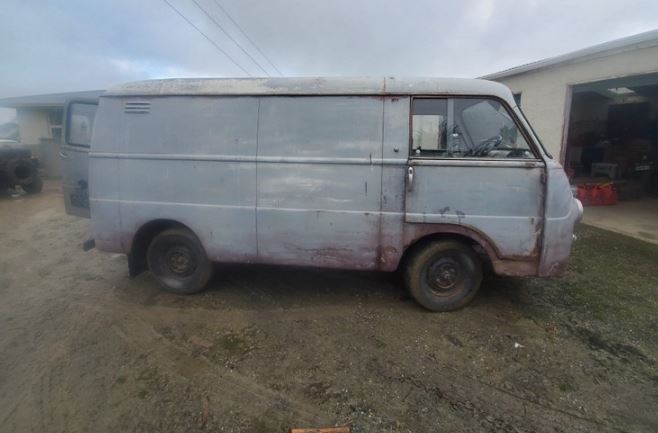
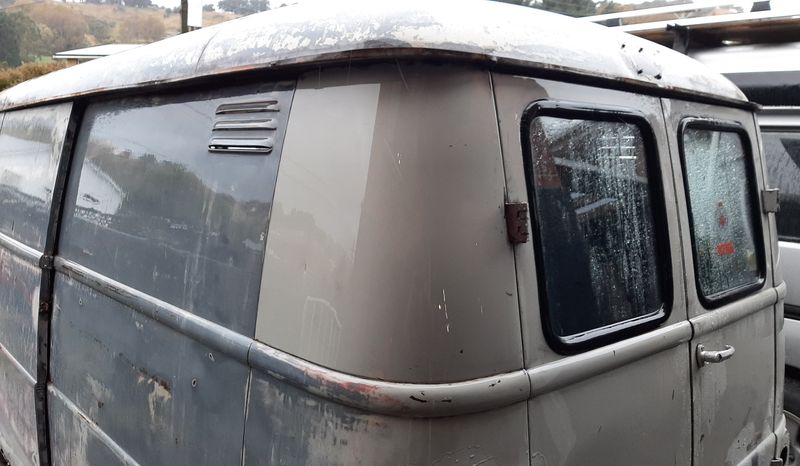
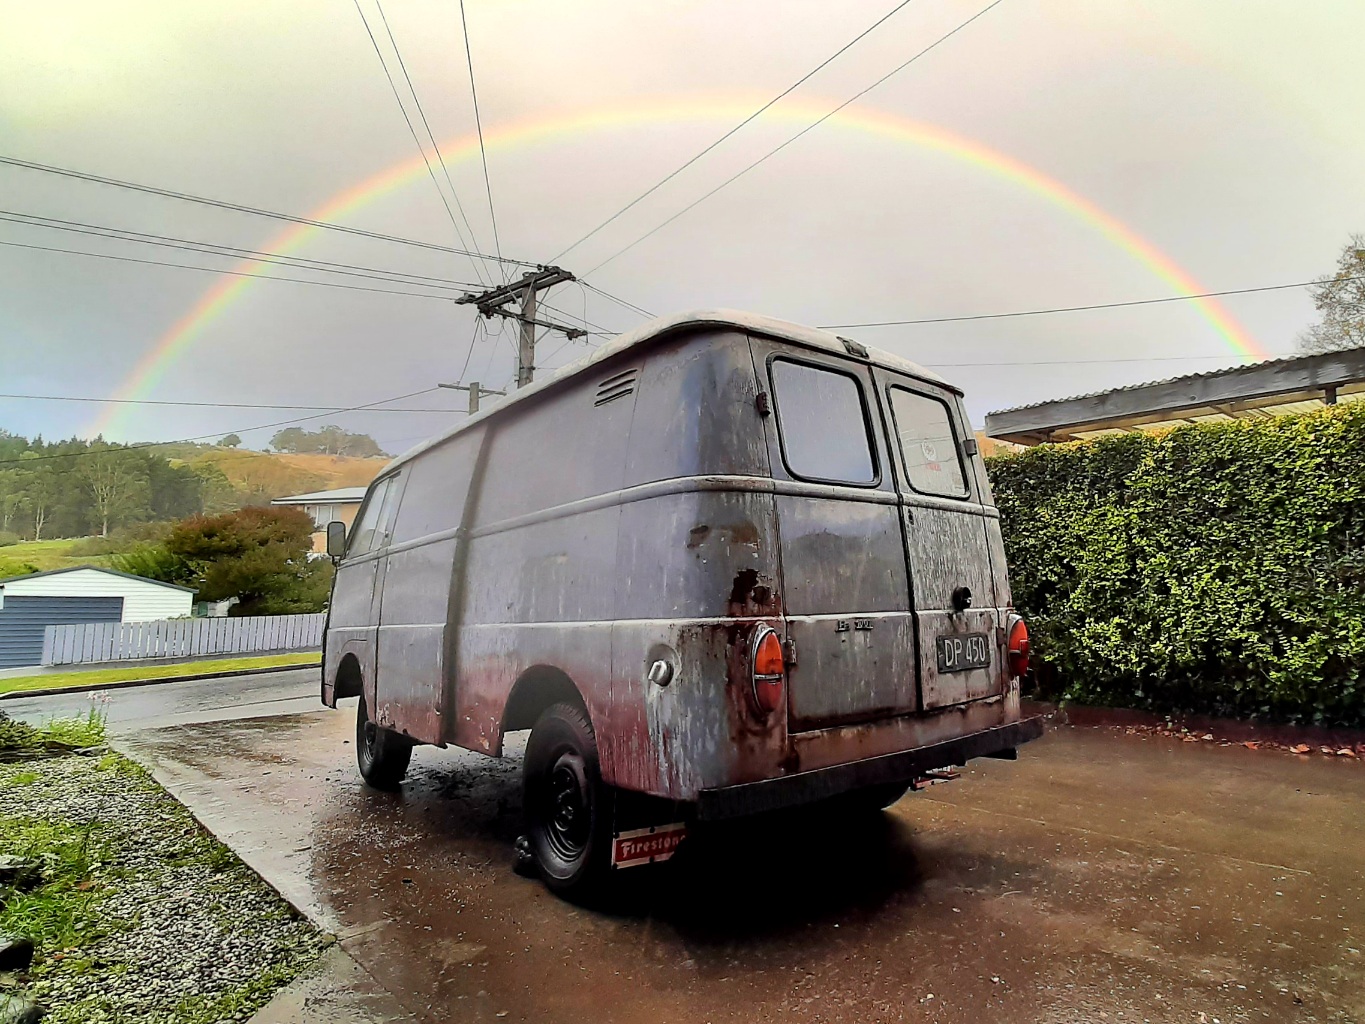
Just won a trademe auction for this. Not collected yet, so not fully mine or in my possession, but i'm quietly fizzing. Its been sold and resold on trademe and on Facebook about 4 times in the last 5 years, I was the second highest bidder a couple of times, moving pretty steadily south, starting off in Ashburton, then Christchurch (a fellow Fiat botherer went and had a look and sent me lots of detailed pics and declared it was savable), then i think Timaru , and now, back of Milton. At least 5 people messaged me directly to share the link, and the key difference is this time Im only 40 minutes up the road, and this time i got it for about half of what i have bid on a couple of the previous auctions I like to think the sellers (honest!) description, and utterly depressing photos put a lot of punters off but i could also be assuming its the world that is mad, not me.. Anyway, looking forwards to collecting and then playing around with this. What i know: - A 1960-64 model based on the sliding windows and engine - they made the same shape from the mid-1950s but started off with the 1100cc from the Fiat 1100 its based on. I suspect many bits will be easy (but not necessarily cheap) to find once i figure out what other Fiats it shares parts with - the 1100 obviously (eventually evolving into the Premier Padmini Taxi from india) , but also the Fiat 600 particularly the Multipla shared some lights and switchgear and maybe column change/front control parts and other bits which itself formed the base of the 850/133 and many other variants made up until the 1980s in places like Spain, Serbia and Argentina under licence. - dead rego, no papers no nothin, but im hoping the black plates are an in and maybe some faint rego stickers. Suggestions and hints on getting the paperwork sorted so its at least in the system again welcomed! - has the 'big block' 1500cc pushrod engine (the engine that should be in my 125p ute, and is the 2300 in my wagon, less 2 cylinders (so have some bits and pieces already). There was also a 1300cc model and orginally they came out with an 1100 same as the car. There is one engine in the hole thats seized and one in the back that i assume is also seized. - Seats and Engine cover, front bumper are int eh back - it doesnt really have any interior from the factory, no rear bumper either, this one has a tow bar (lol) - 4 speed column change, 5.x something rear diff, 95kph top speed new but apparently very quick off the line and able to lug a surprising amount of stuff, just not quickly! - everything is 'there' except a sliding door handle, but almost everything looks like shit or is slightly busted - it appears to be relatively low milage and remarkably unrusty otherwise - the terrible paint (flaky grey and rusty brown primer over the original poorly sanded white?) makes it look much worse than it is, but definitely needs new front floors, and the bottom of all the doors is frilly, otherwise surprisingly good underneath and on top
1 point
-
So I bought a Brewzilla all-grain brewing device recently, and while I was waiting for it to arrive I started gearing up my mini-brewery. I grabbed a rusty old fridge at the dump for $20 cos I liked the styling. I was only intending to use it as an insulated box with a small heating element, but when I wired it up it ran beautifully, so I have heating and cooling available... The interior door was buggered. I thought of replacing it with a flat sheet of plastic but the shelves would be useful for bottle conditioning, so looked at patching it up to re-use... Just laid fibreglass tape around the edge and filled with epoxy... And it cleaned up well with a bit of a sand... And the seal was in surprisingly good nick, bit of a scrub in some bleach and it cleaned up ok... Came together well... Then gave the door a sand and bombed it with some Rust-Oleum paint and clear coat... It was a Prestcold brand. Think the new name is an improvement... And made up a new label for under the handle... And it looks sweet after some detailing... I've ordered a 45W heating element, but as it hasn't arrived I chucked a $10 reptile heating lamp (50w) in to get things running... And fitted a s/s plate above it to dissipate the heat a bit, avoiding a hot spot directly above the lamp... And my PIR controller also hasn't arrived, so I hooked up an Inkbird controller, fitted a couple of glands and some interior grommets for the heating and temp sensor cables... Came out so good I bought another one ($25). As a fermenting fridge plus a conditioning fridge will make things quicker/ easier... such a fridge Barry...1 point
-
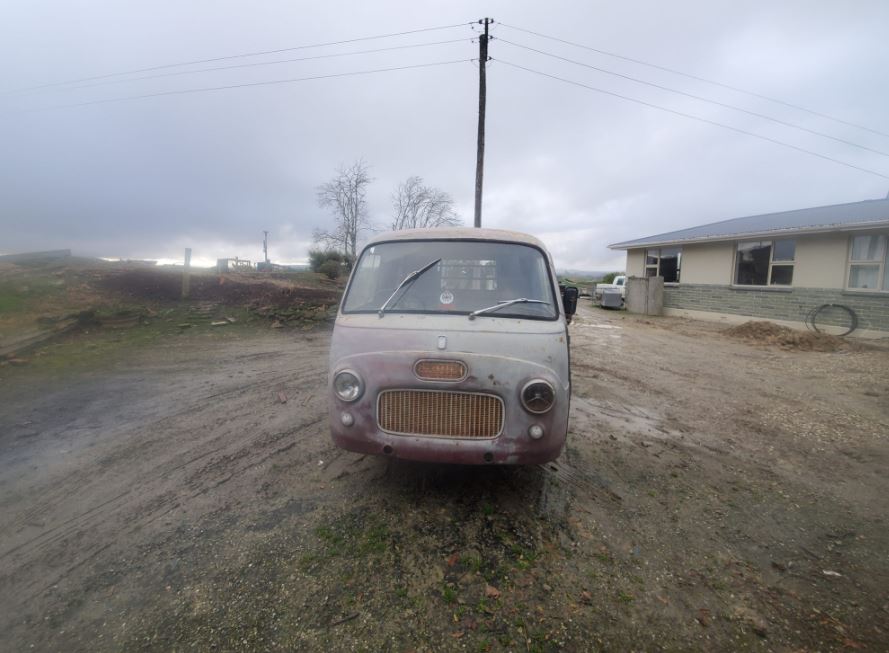
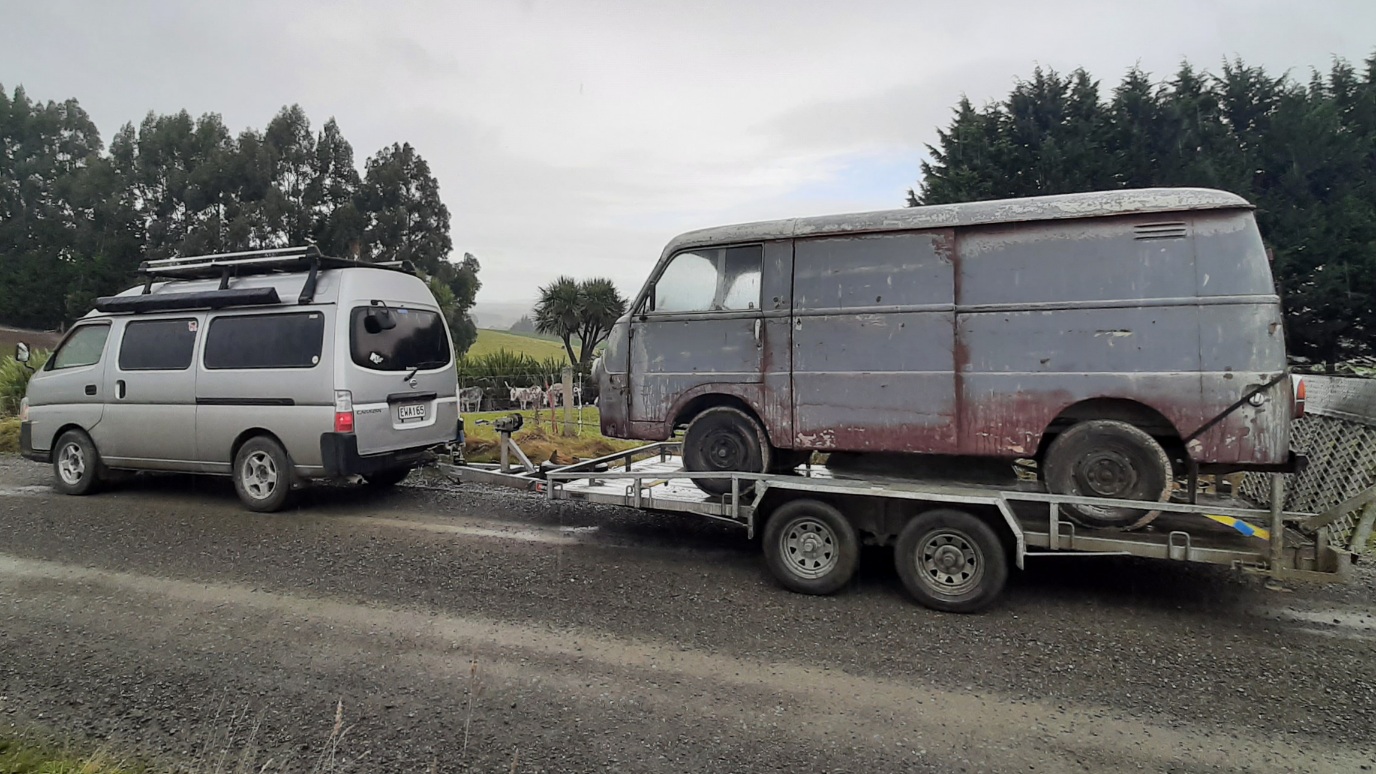
Here are some photos of the old girl when I first picked her up with the truck. Came with plenty of spare parts which I probably won't use as i'll likely be be throwing some later model japanese gear in there.1 point
-
Cost/Availability is the thing, its cheaper and easier to get ones with grease fittings from the States, but they dont list sealed ones.1 point
-
If the nipple wont interfere with the movement of the shaft, i had could only get joints with fittings for my commer and one of them would have jammed up the works. so if they dont bind and you have access go for it1 point
-
My Marina drive shaft has three universal joints. Two are sealed with no grease fitting, one has a grease fitting (they're all like this stock). Im replacing all three, is there any reason I shouldnt use the same part for all three and have them all greaseable? They appear the same otherwise.1 point
-
The tag on my Wolseley is held on with screws. It was never a problem at wof time. Guess they didn't look very hard.1 point
-
Just get good at masking and save the hassle I masked mine up and it came up fine, just spent my time making sure the tape was perfect, and also thin stuff.1 point
-
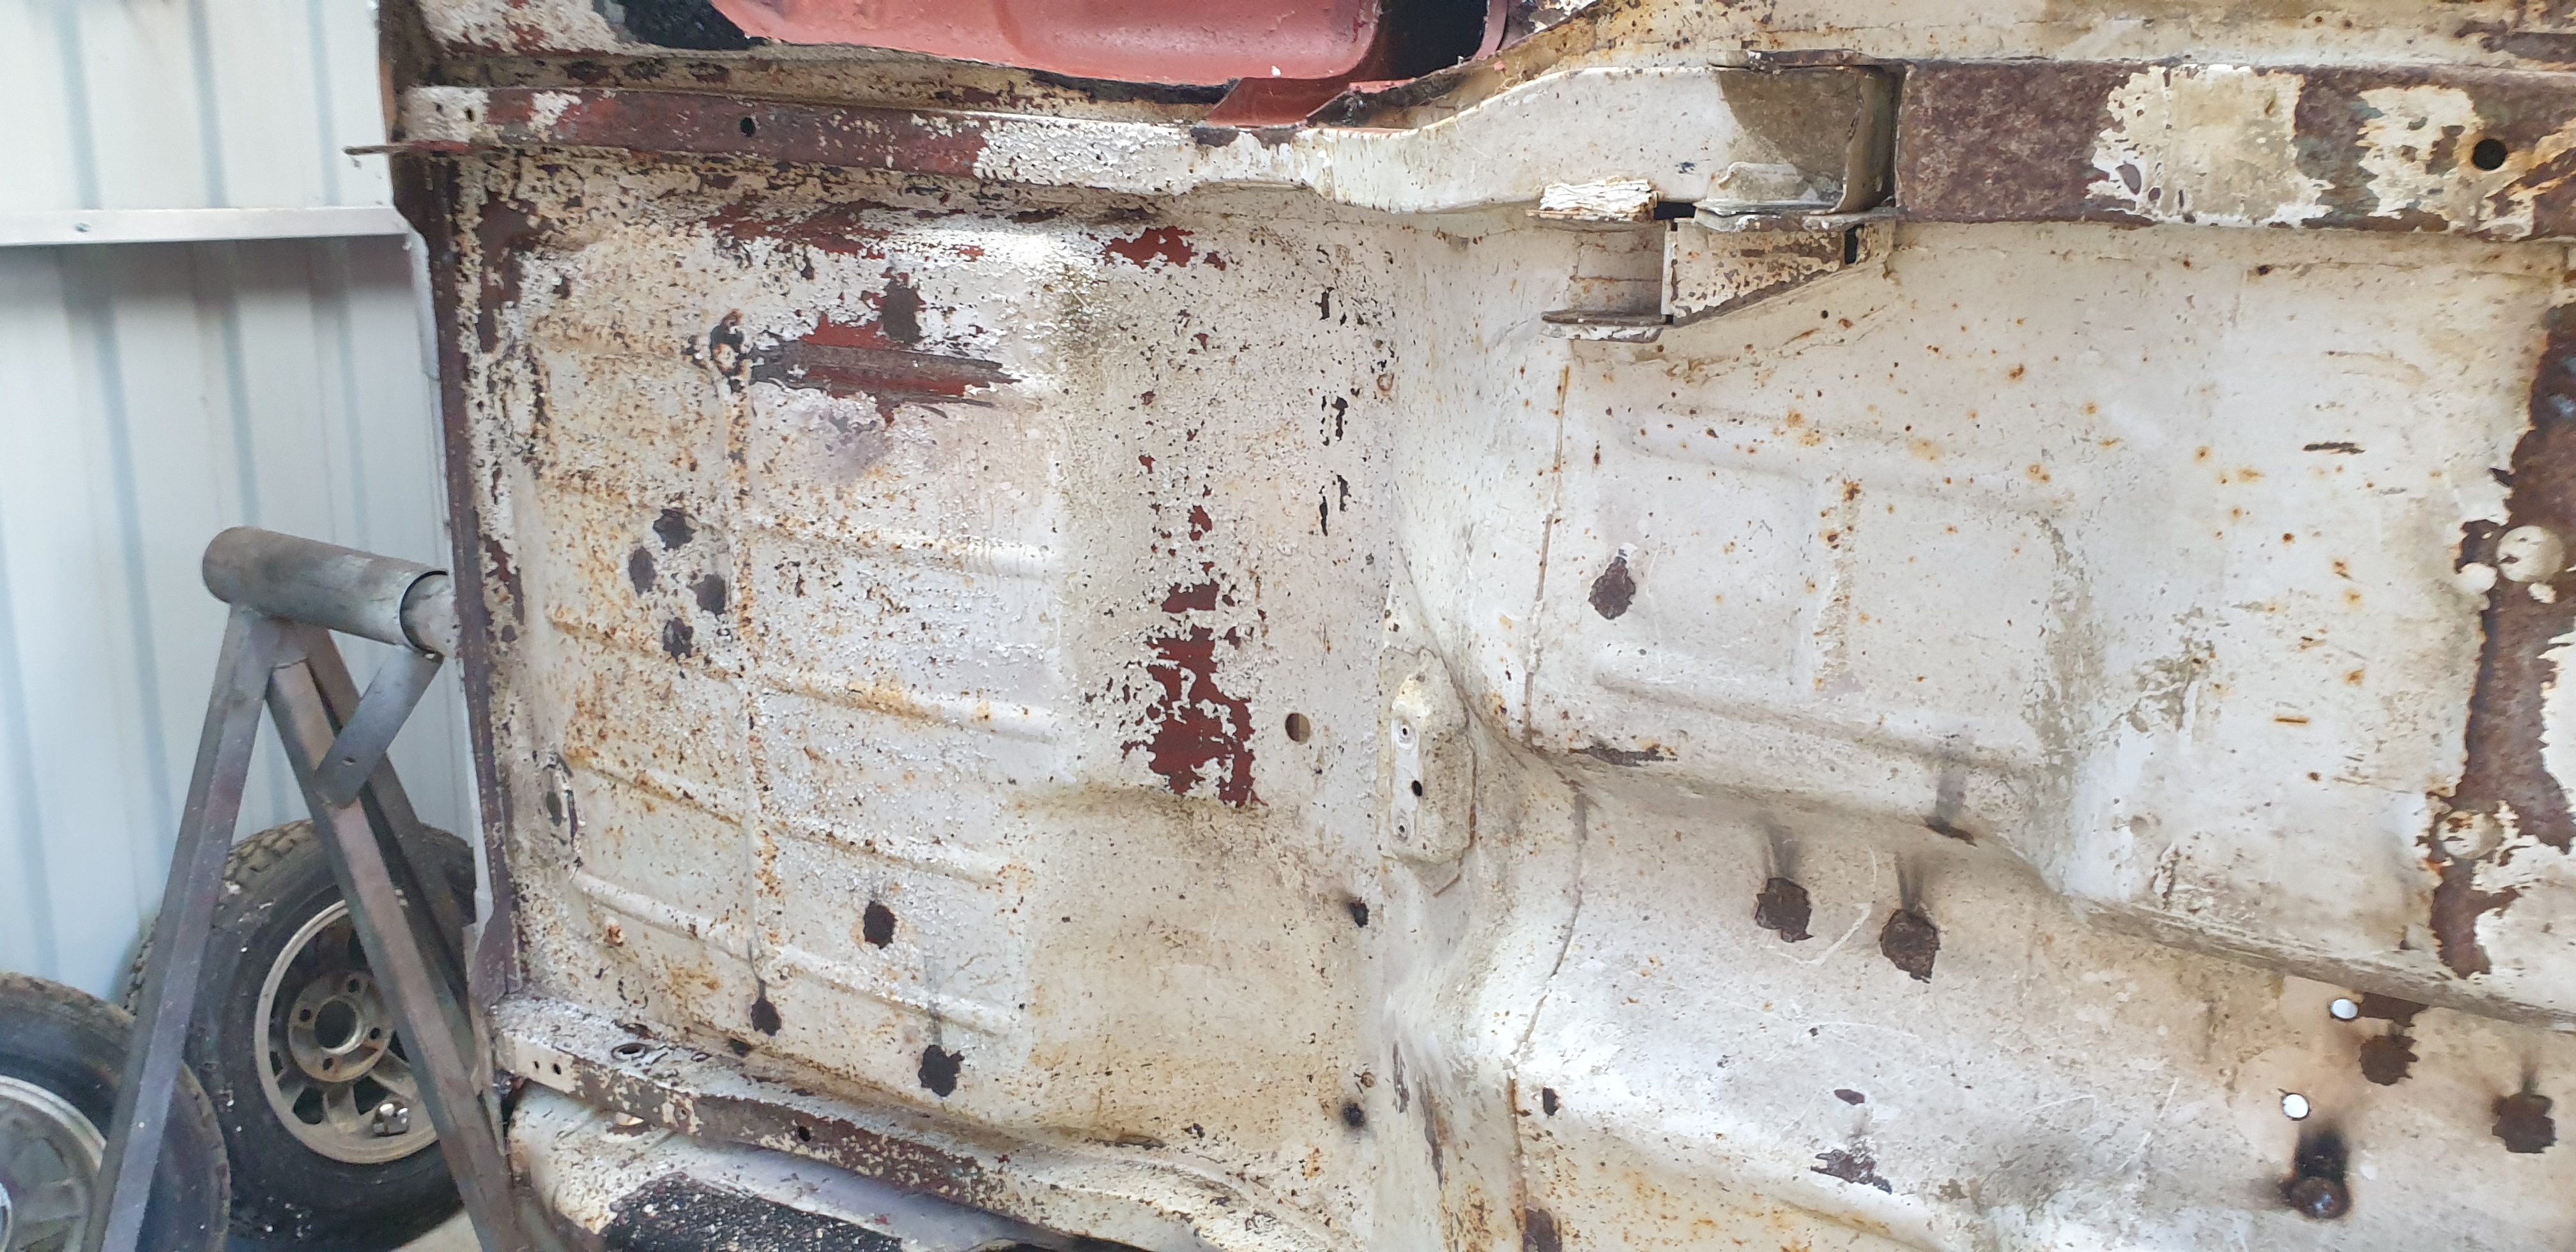
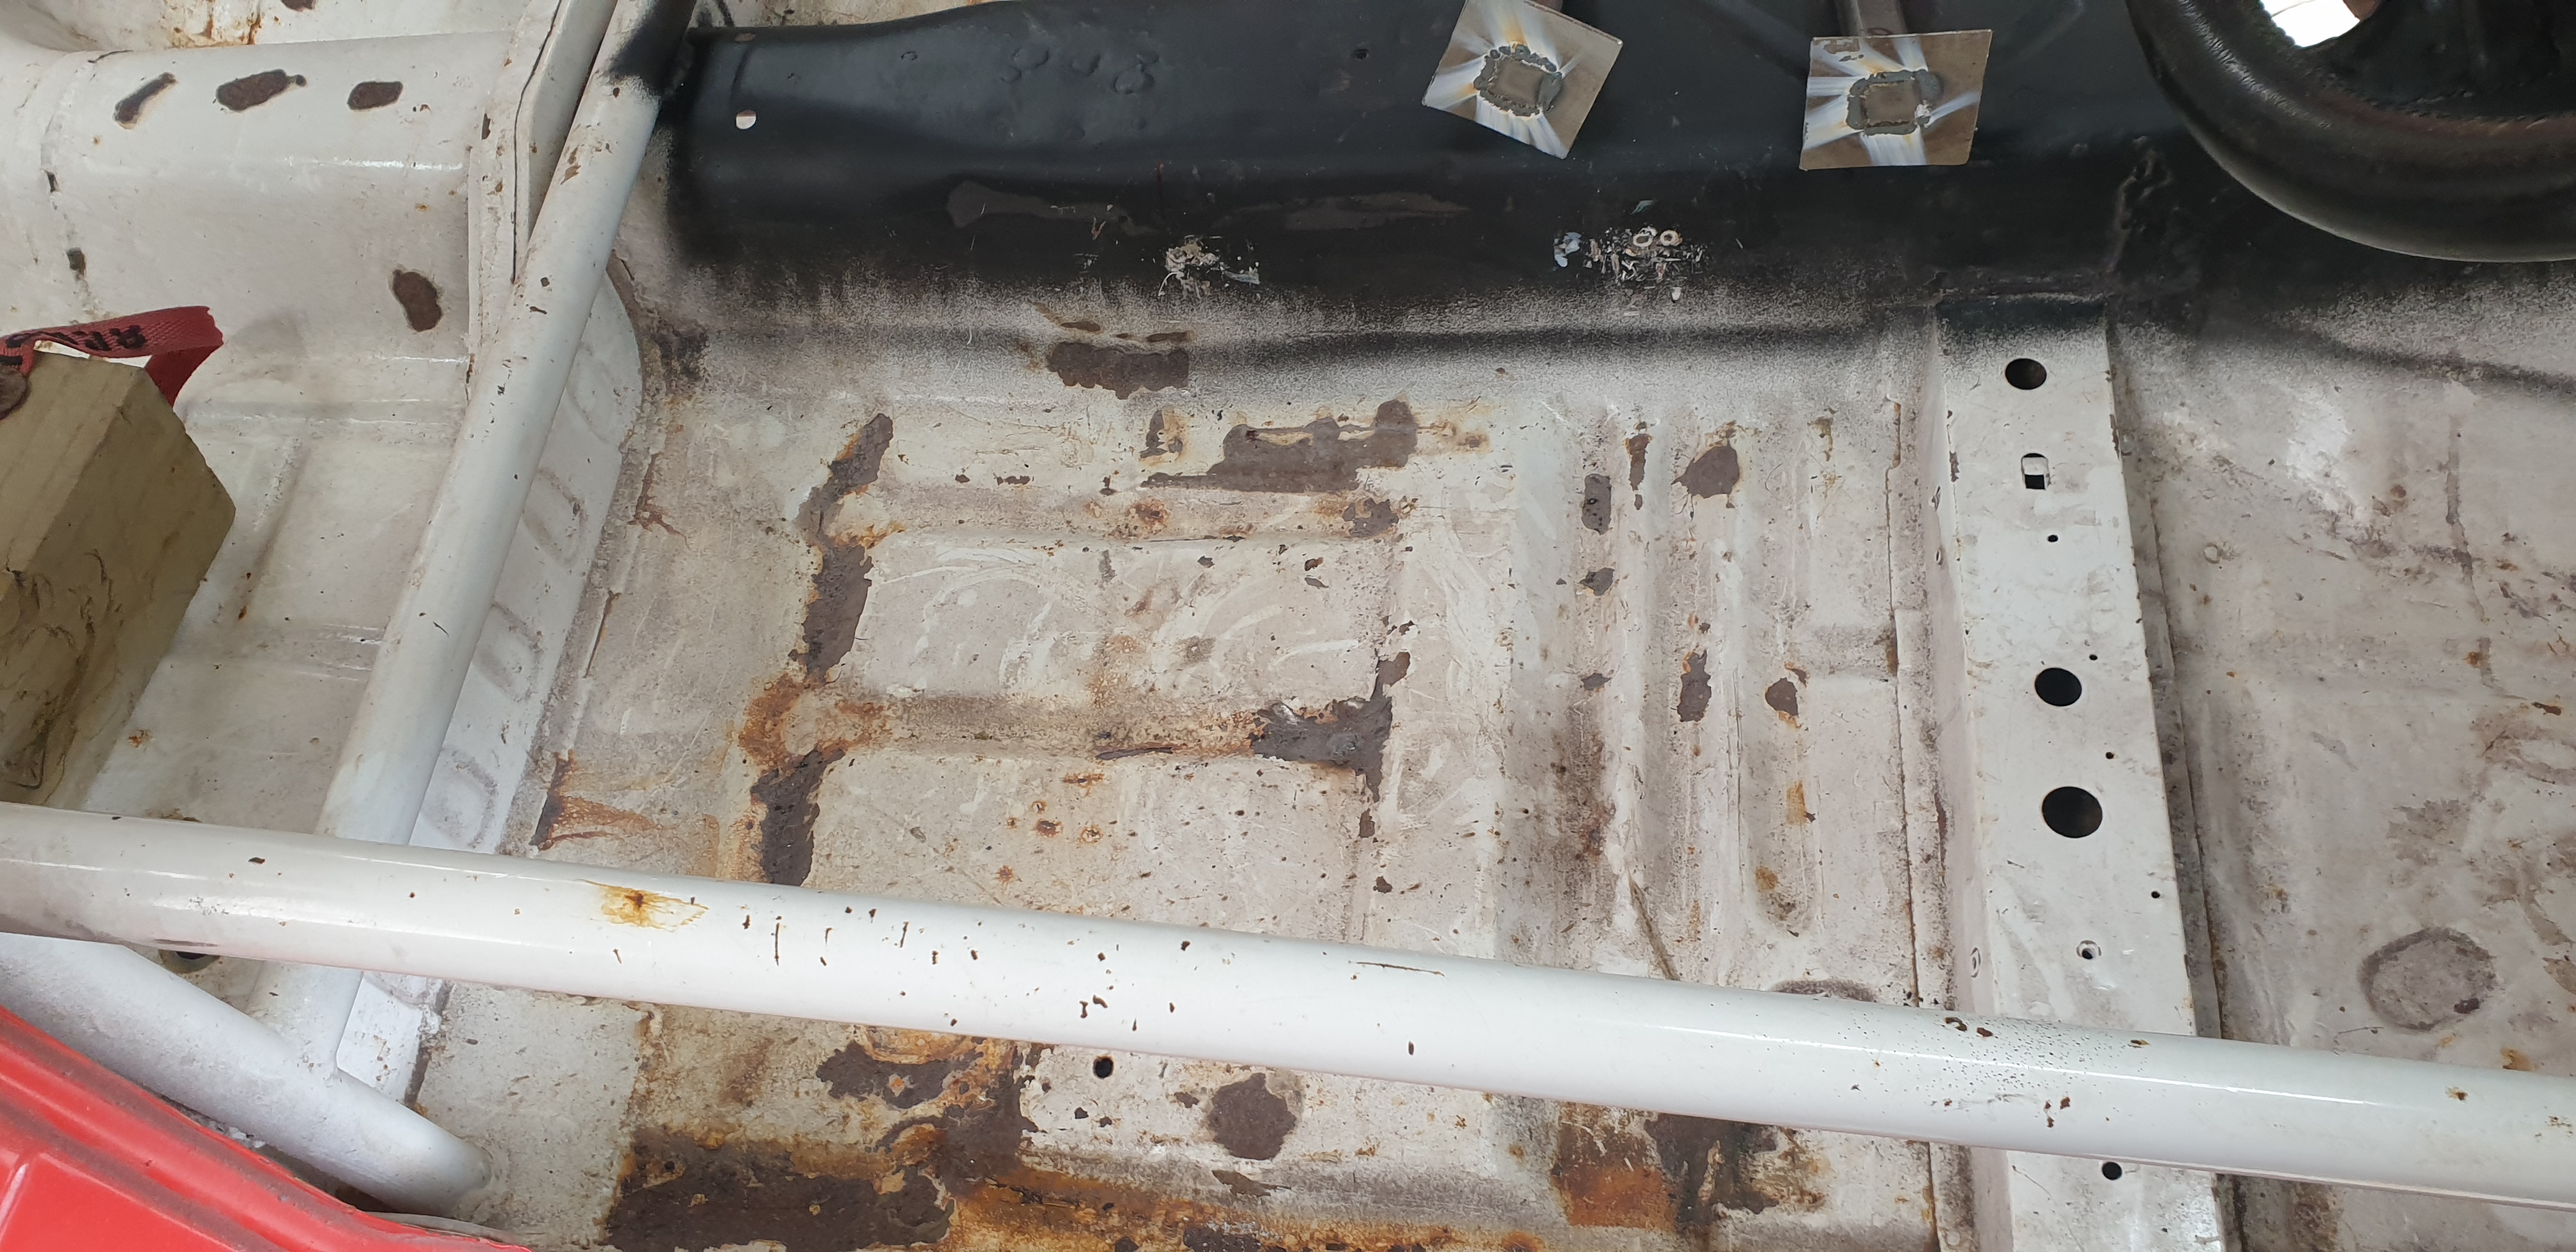
Here are some before pics of the inside floor before stripping and fabricating of the new seat rails and sill jacking points.
1 point
-
Eh, I just came in to ask the same thing. I'm also in the market for a decent spool gun, for ali via mig. Halp. Def go for a spool gun Mr Sentra, the ali liners for a std mig lead/hand piece always suck ass.1 point
-
Managed to source a spring and get it fitted with help from a friend was a job and a half1 point
-
Silicon spray keeps them and the belts looking like new1 point
-
And give them a good coating of oil to prevent any future rust1 point
-
Another +1 for enjoying keeping up with your Fiat talents, passed through dunners on the weekend and was hoping to spot them from the main drag! Keep up the A+ restos!1 point
-
Got dust seals, spring insulators and two new brake hose clips from amayama, rockauto order also came in and was much faster than amayama. Also got some nylock nuts for strut mounts and front sway end links, $25 for 6x m14x1.5 and 4 m10x1.25 from theboltholder.co.nz Also decided one caliper rebuild was lazy so ordered parts for other side, nek minnit decided to rebuild the fronts too. Got pads and rebuild kits for remaining 3 calipers for $100 from Rockauto. also got new tools, caliper wind back kit, cylinder hone and a grease gun. The ball joints came with nipples that caused clearance issues with the rest of the hub so I got m6x1.00 bolts from mitre10 and grinded them down to 10mm thread which is similar to what the grease nipple has / also shaved a few mm from the heads just to get clearance 100%. The alternative was letting grease escape through the hole and allowing dirt gunk etc in through said hole. I did alot of research on what grease.. I chose Castrol LMM for the ball joints as according to the product data sheet it's good for high loads/shock and Ultratak 2 for the brakes as it's a lithium complex silicone based grease and has a high drop point = high temp/good for corrosive environments. Also went over the brake rotors with a wire wheel then masked, rust treated with brunox and given a few coats of high temp black. Interesting to note that the fronts are similar size to the rear, they are quite small! Currently my front suspension is all back together except for the sway bar, took a while but I cleaned up threads of old green threadlocker (I only have red loctite, should I invest in medium strength stuff?) Rust and gunk etc, applied copper grease, torqued to spec.1 point
-
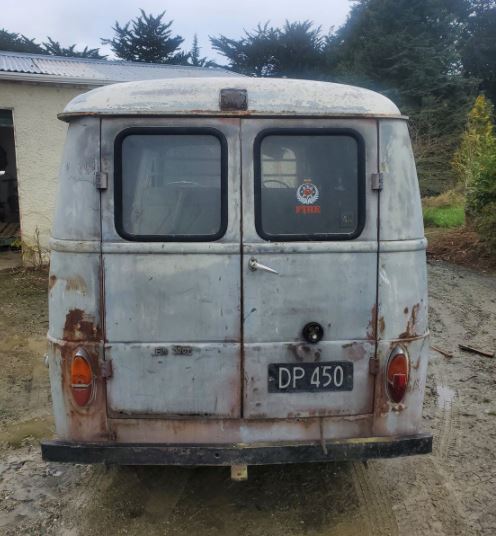
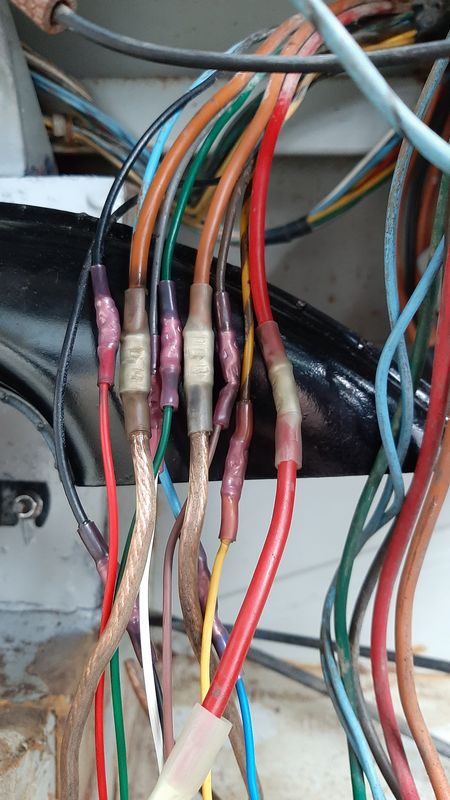
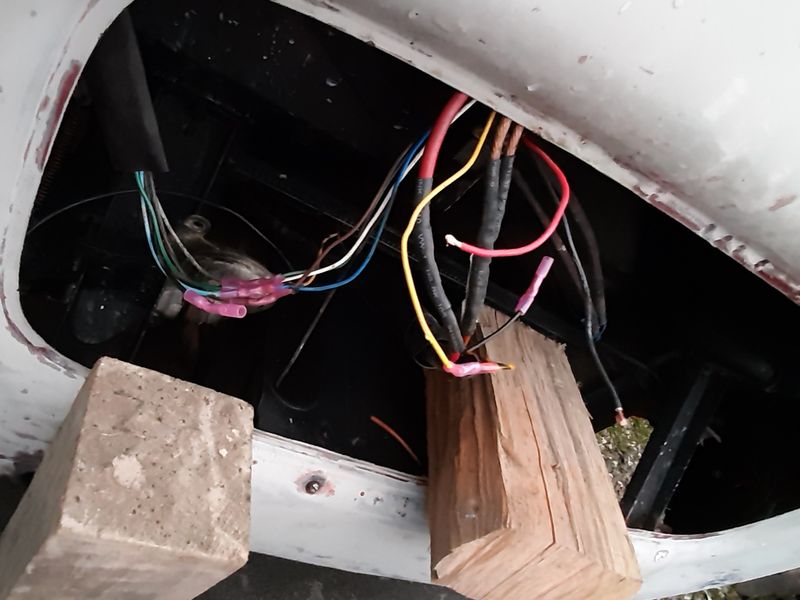
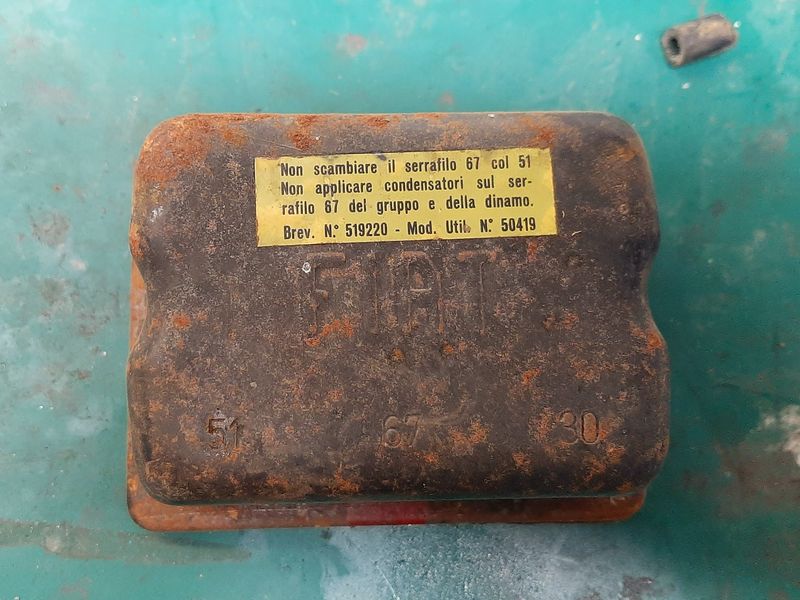
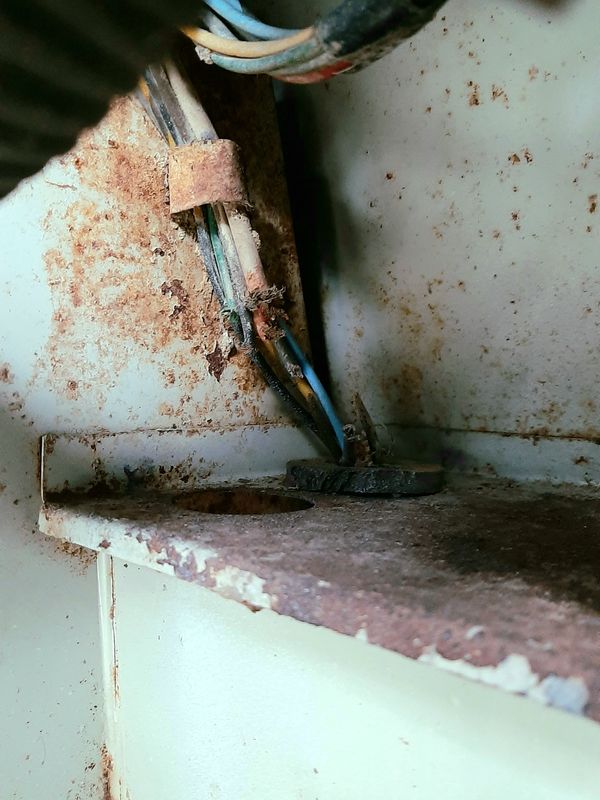
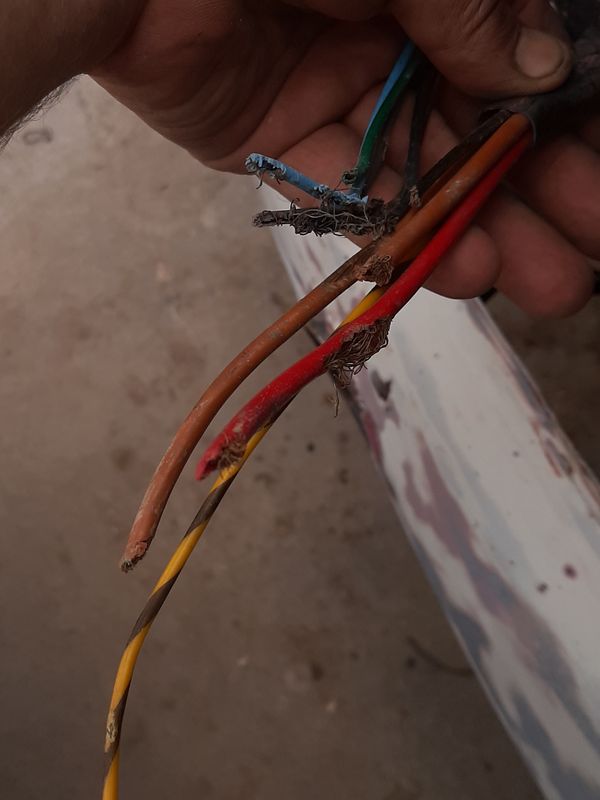
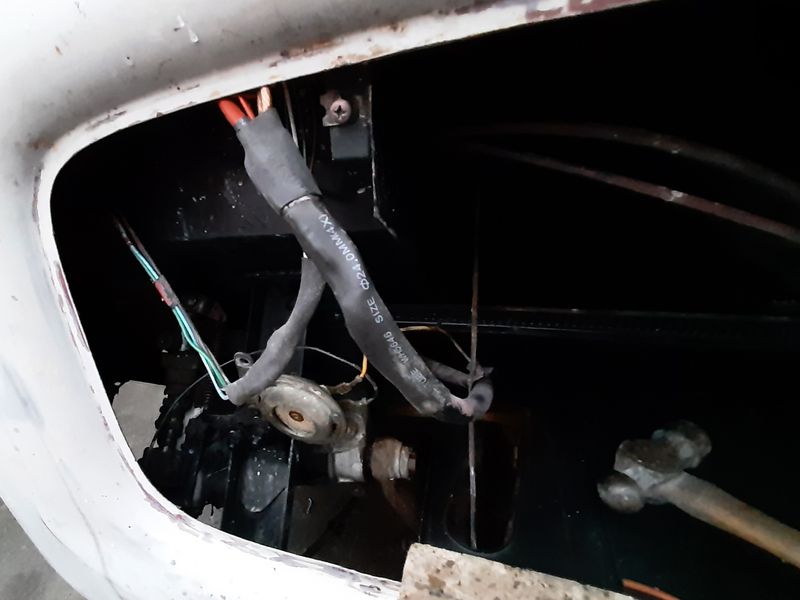
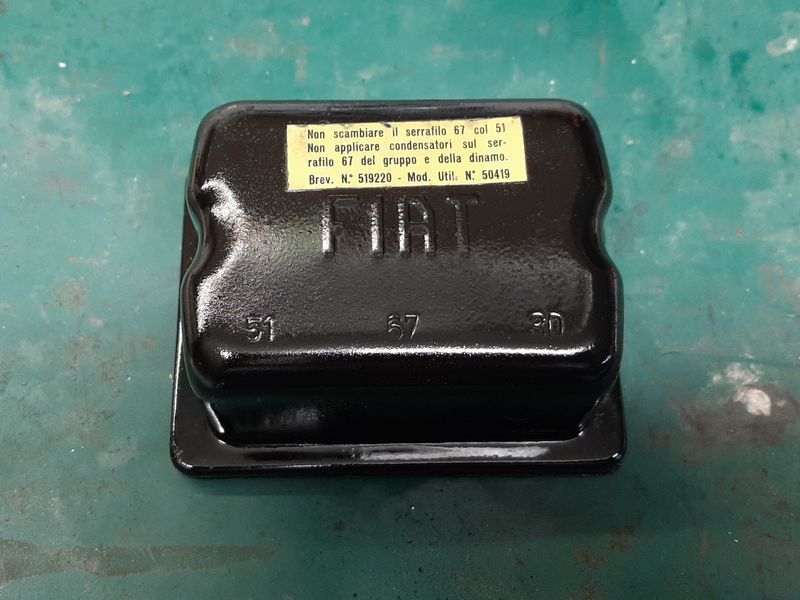
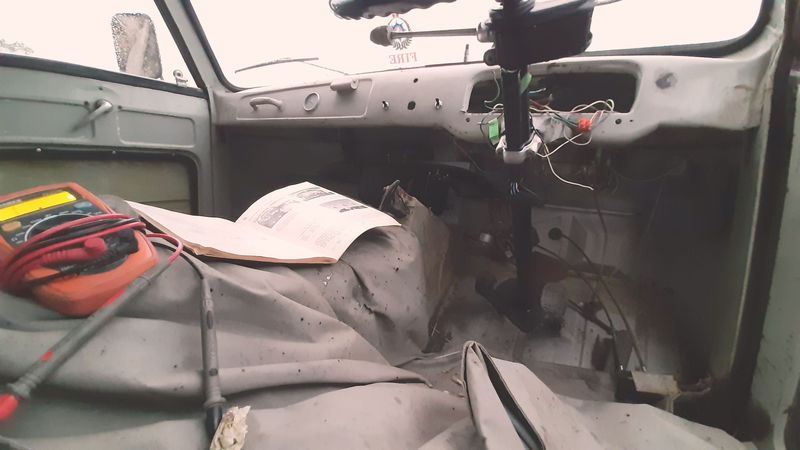
Before i put any electrical things back in i gotta take care of some shit. Fucking rats man. This is the main engine loom (alternator and starter control plus main power feed) as well as the drivers front lights loom. Only wire not chewed to the point of separation was the horn power supply. Interesting horn wiring sidesharn, the other horn wire (from the button, that earths out the circuit) actually travels the length of the hollow! steering column and exits the bottom of the steering box!?! Because of where the break was,right in a really tight shitty spot, under the dash, I extended the loom from the dash side first. Love these shrinky connectors and my box of wires came up with almost a match for most of the wires. For future reference the black to red wire is the alternator signal for the voltage controller. Then poked that though the hole after a quick derust on the shelf while it was all ot the way. Then finish off underneath with lots of heat shrink. The wooden block for really getting those small crimps crimped up good with a blunt cold chisel, my crimpers dont quite go small enough on the small ones And some cable ties then more heats for good measure. If you cant fix it with a hammer you got yourself a software problem... Voltage regulator lives under the dash too. "Do not mistake the clamp 67 with the 51 Do not apply capacitors on the wire clamp 67 of the unit and of the dynamo" Cleaned out the cobwebs and gave the 'points' a quick file while the paint dried after a quick sandblast. Important electrical safety messages maintained. I forsee a bit of this before i finally wire everything back in. My back got pretty sore from even thinking about doing that, so I did some more sanding, shes coming around. Got a good light for finally seeing the chassis number properly. I also wanted to be able to get a good photo of it before cleaning up the area. FIAT 217D * 107627 * Tipo 217D = Type 217, revision D, that makes it a 'late' 1962 to 1968 model, and this was the 107627th, Tipo 217
1 point
-
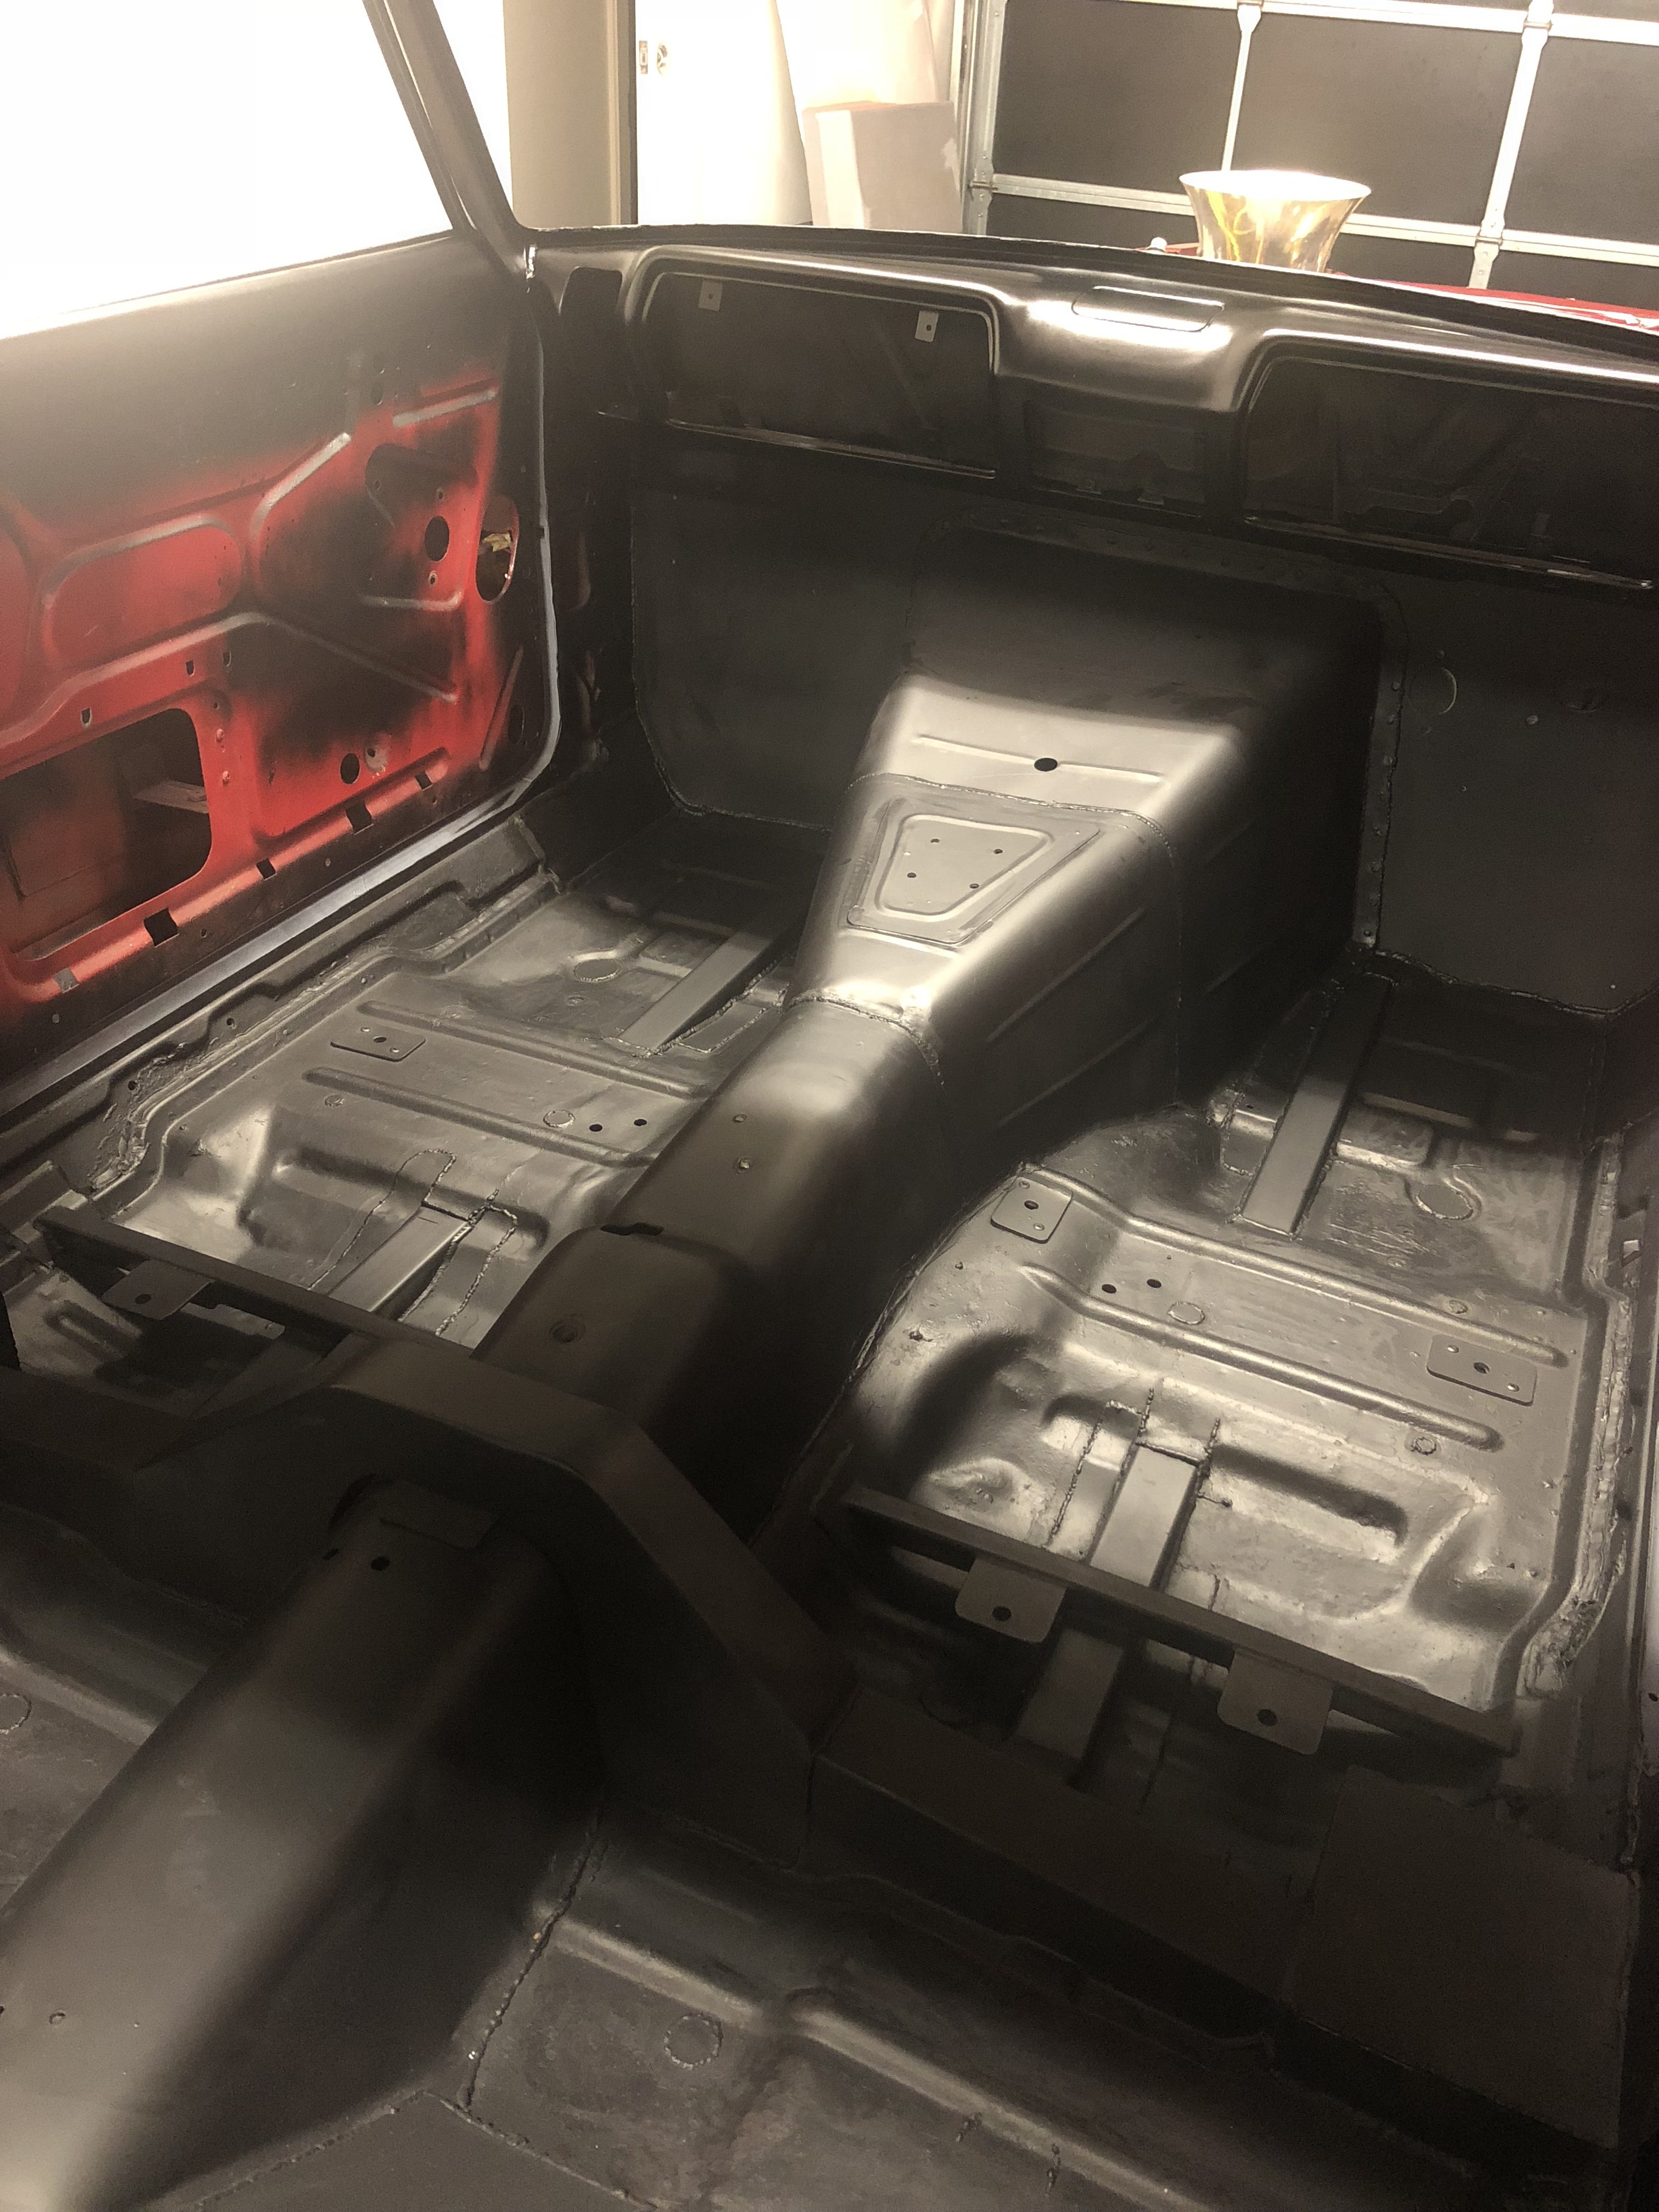
Finally rid of that shit red colour on the floor. two coats of stone chip to go and 2k clear and she’s done.
1 point
-
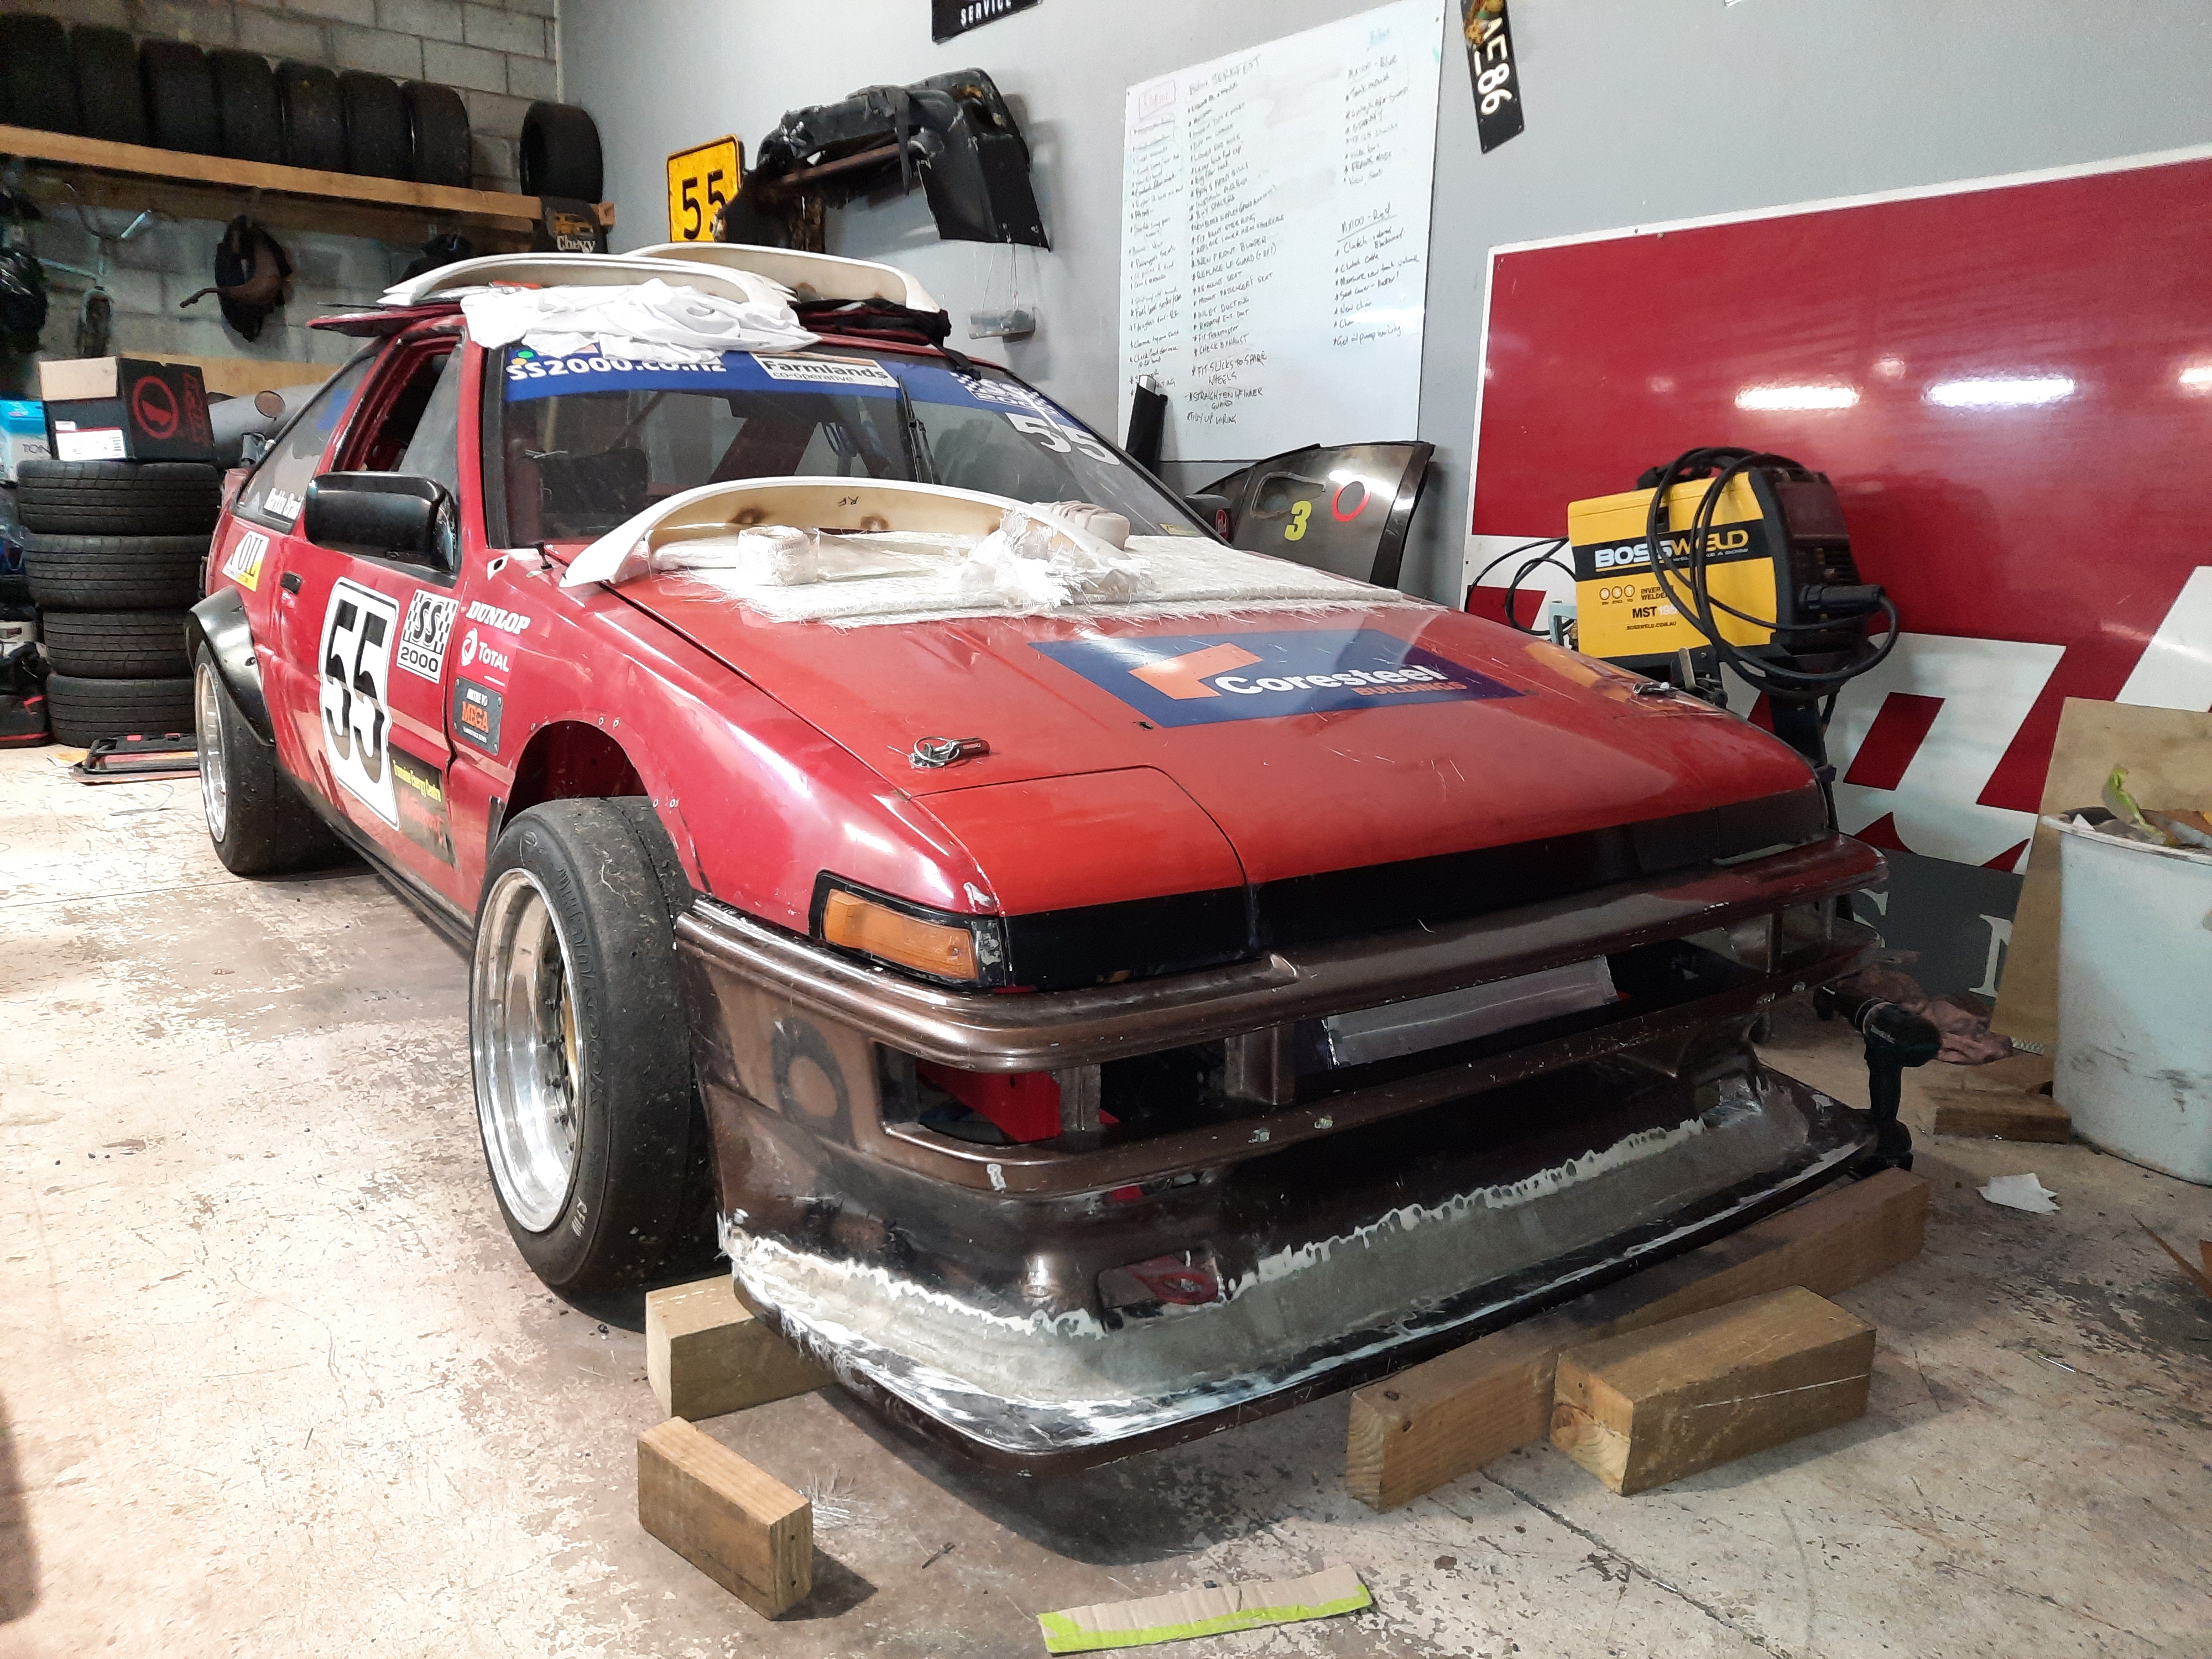
I've been busy doing a bit of fibreglass work. The front is coming back together now. Sanding and bogging is up next, then it'll be ready for paint. My replacement guards arrived too. Thanks to @TimShadboltfan27 for being a GC and collecting them for me! It'll need a wheel alignment (possibly a new tie rod end or rack end if they're bent) and then it's basically ready to hit the track again.
1 point
-
Also did some building, turned this... into this... Has different levels to help with sparging, siphoning etc. Bit of a gamble design-wise before I've actually done anything, but should work out ok. Cleared out a corner of the garage to put it in... And put down a brew last week. Simple all-grain APA, with NZ hops... And malt pipe lifted for sparging... Into the fermenting bucket. Hygiene is everything so fastidious cleaning and sterilisation as you go... Original gravity came out around 1.058, pretty good sugar levels... And into the brew fridge. No airlock fitted here yet, was just lifted into place after pitching yeast once it had cooled to 21 deg C, almost exactly 20 litres of wort... And ticking away doing its thing. My lovely little yeast cells are making things bubble away... So will hold at 20 degs for 10-14 days. Will take gravity readings later on then siphon into bottling bucket, add conditioning sugar and bottle. Then another couple of weeks... Took about 6hrs as it was my first time and I had initial equipment cleaning to do etc, I'll get better as I have learned how the temps go now and I'll be able to multitask once things are under way. Been interesting...1 point
-
Ideally we’ll be blasting the underside and enginebay next week! stripped the heater A/C and junk out because it will never be more accessible/ save some weight baring down on my stupid little wheels and I can clean the mouse shit off. Some time in the past the furry sound deadener has got moist and that’s why there’s crusty bits on the firewall. I had to remove it or it would catch fire anyway. Back out with the face mask and wire wheeled this big kahuna after whipping off the fuzzy shit. Quick black-zinc to seal and savour. That shite I mentioned a few weeks back that I was blowing out of the plenum, there was more in the ducts. Glad that didn’t fire out first time I used the heater! LOL at the gasket never being square since assembly. Classic industries hadn’t provided an invoice or MAF declaration, just an address.. so the crate was just chilling at the depot in California. Took the mrs a couple of weeks to get that squared away.1 point
-
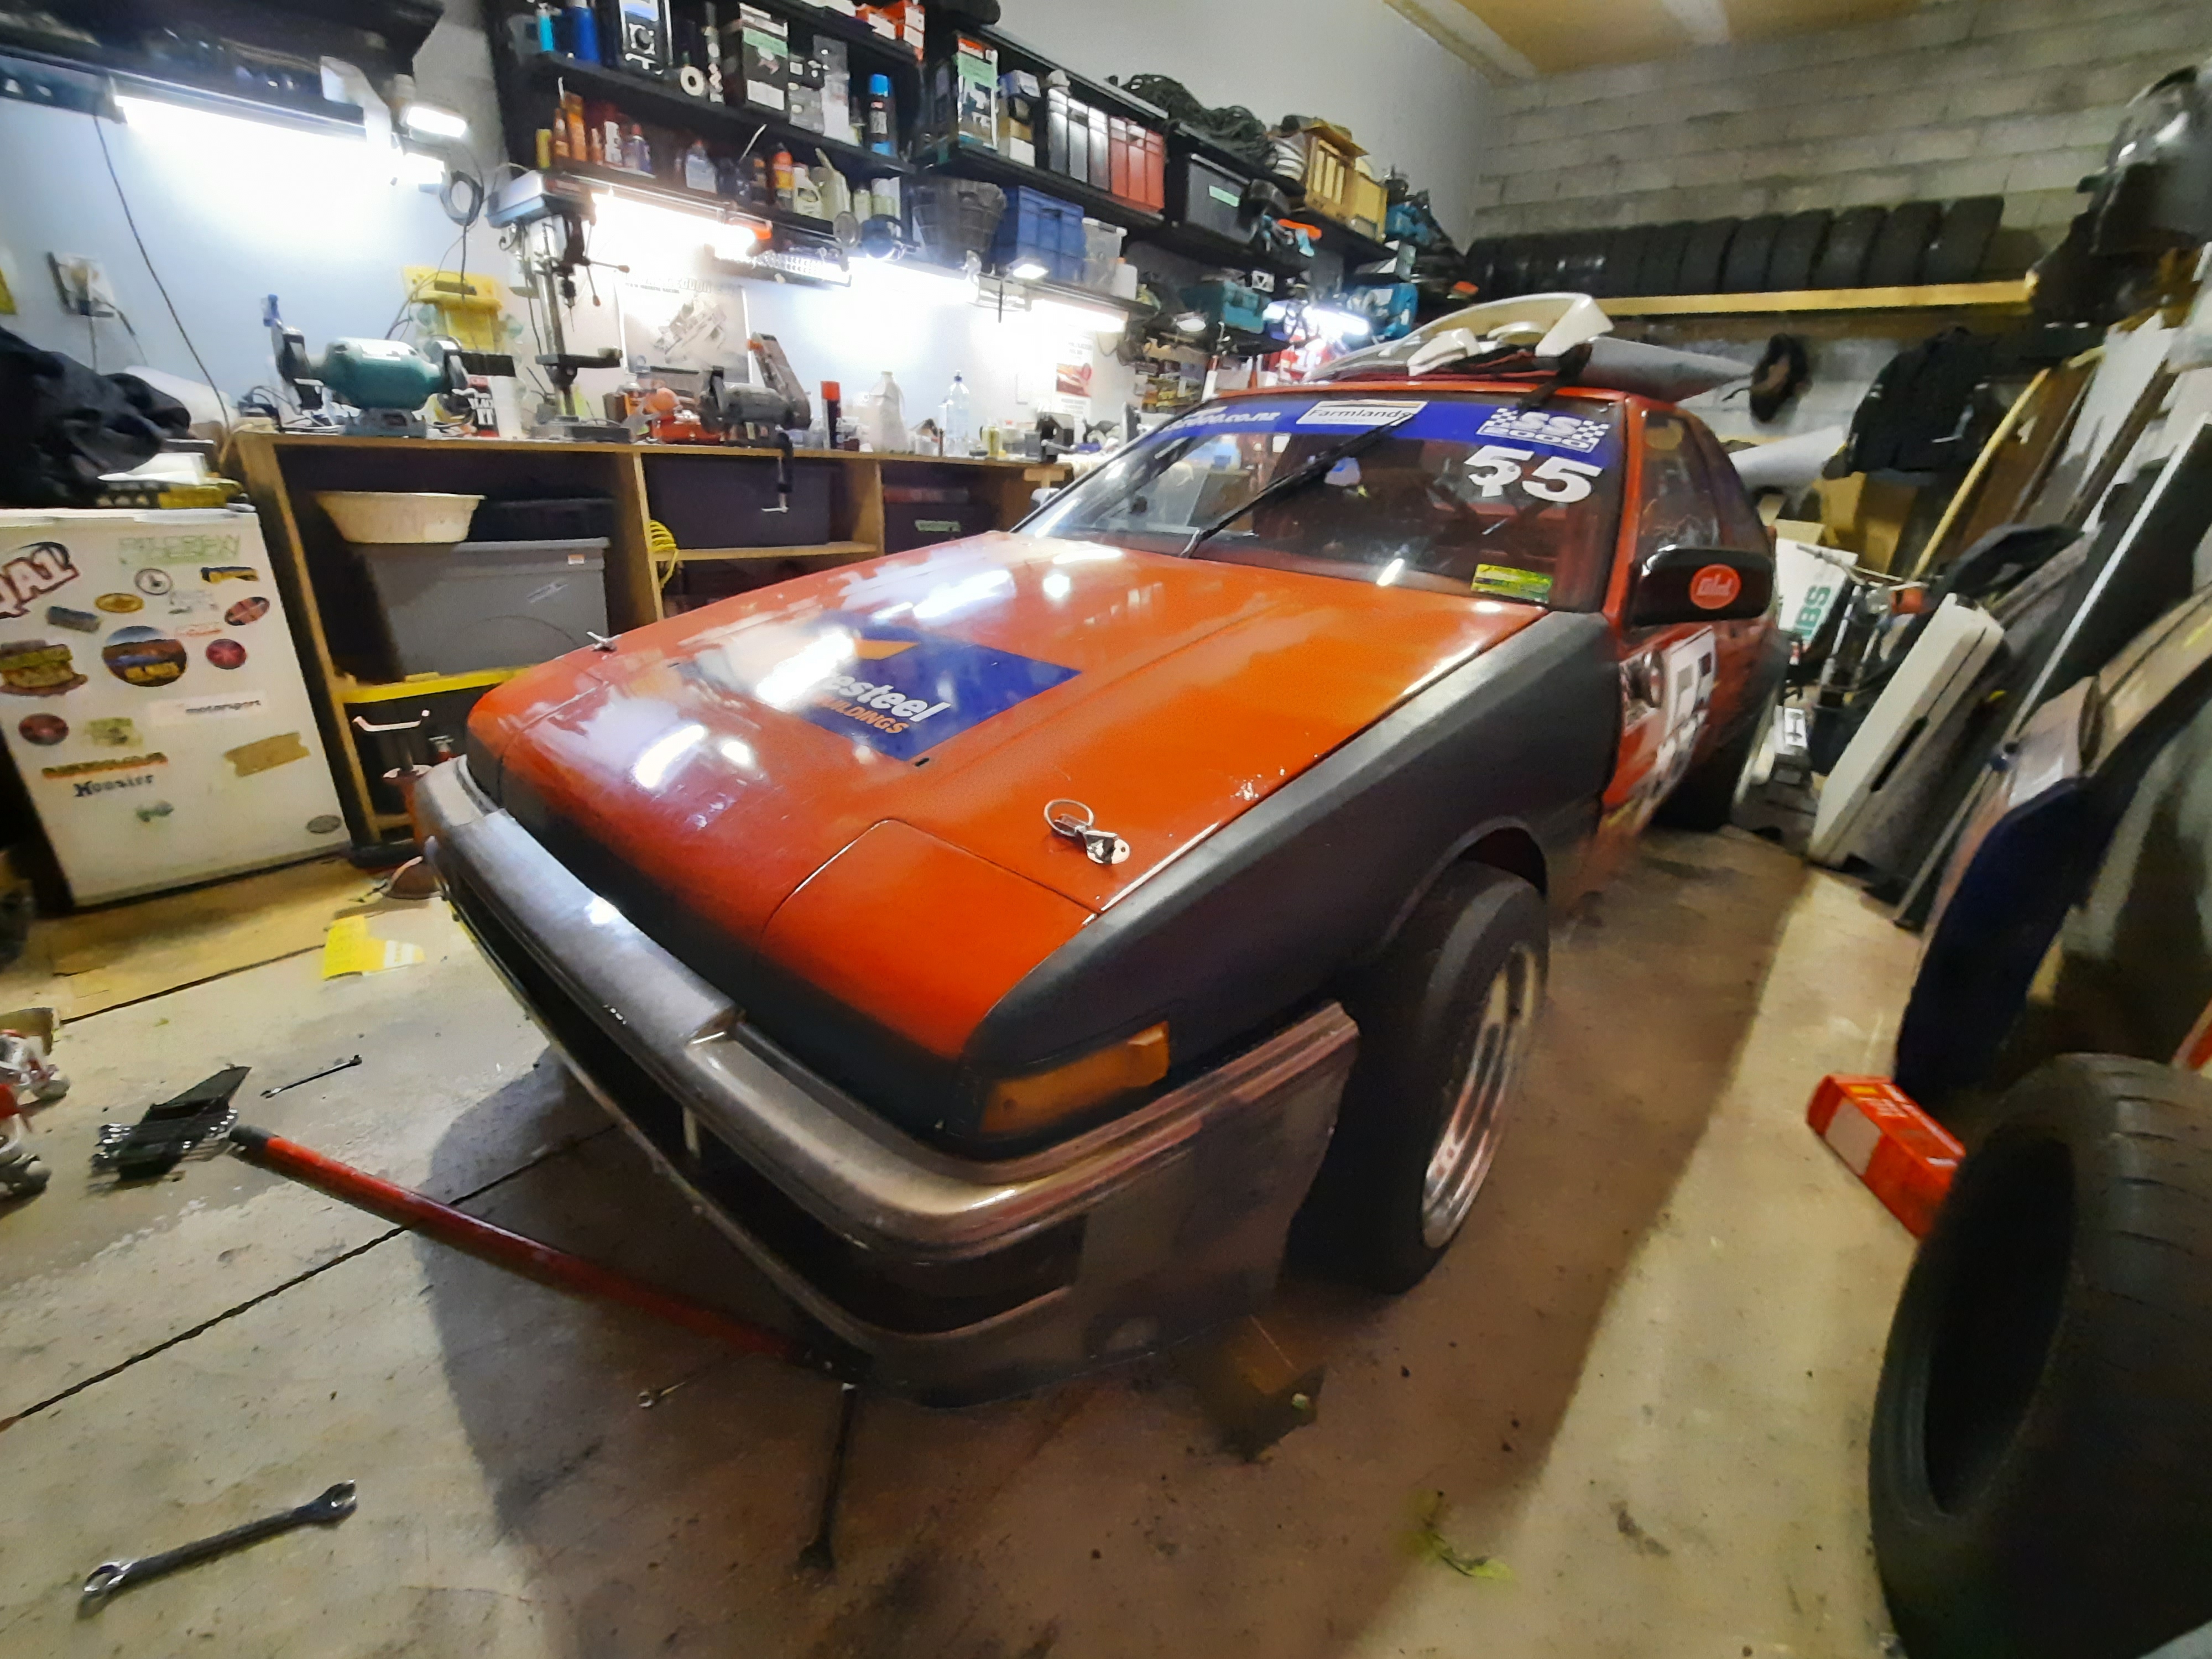
Being that I dont have too much time to keep my shed I went ahead and sprayed the front. I bashed out the main dents where there the best I could but realistically the whole front end needs alot of panel work at some point in the future - probably worthwhile to get a whole new clip. Ive got new bits on the way to rebuild the front axle so that's the next job on the list....
1 point
-
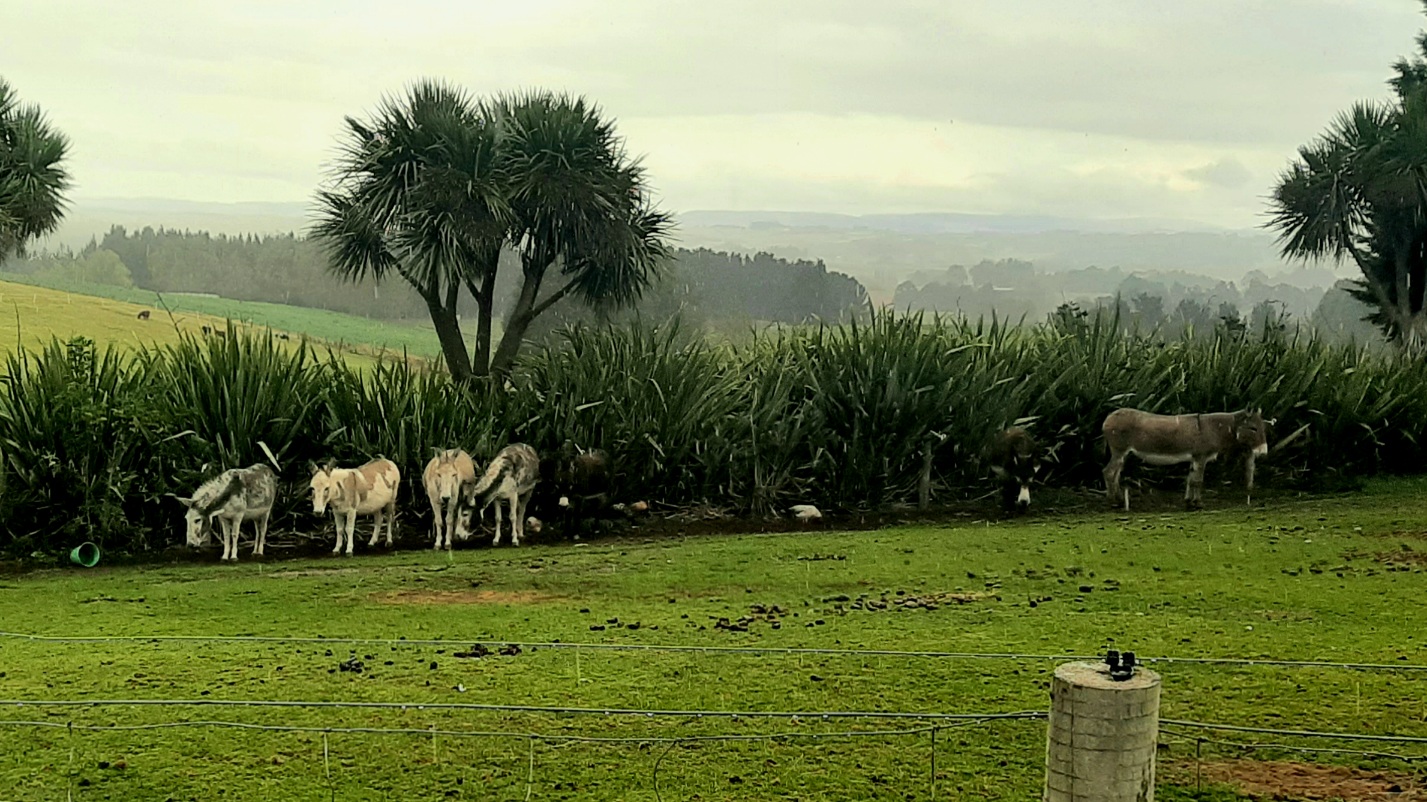
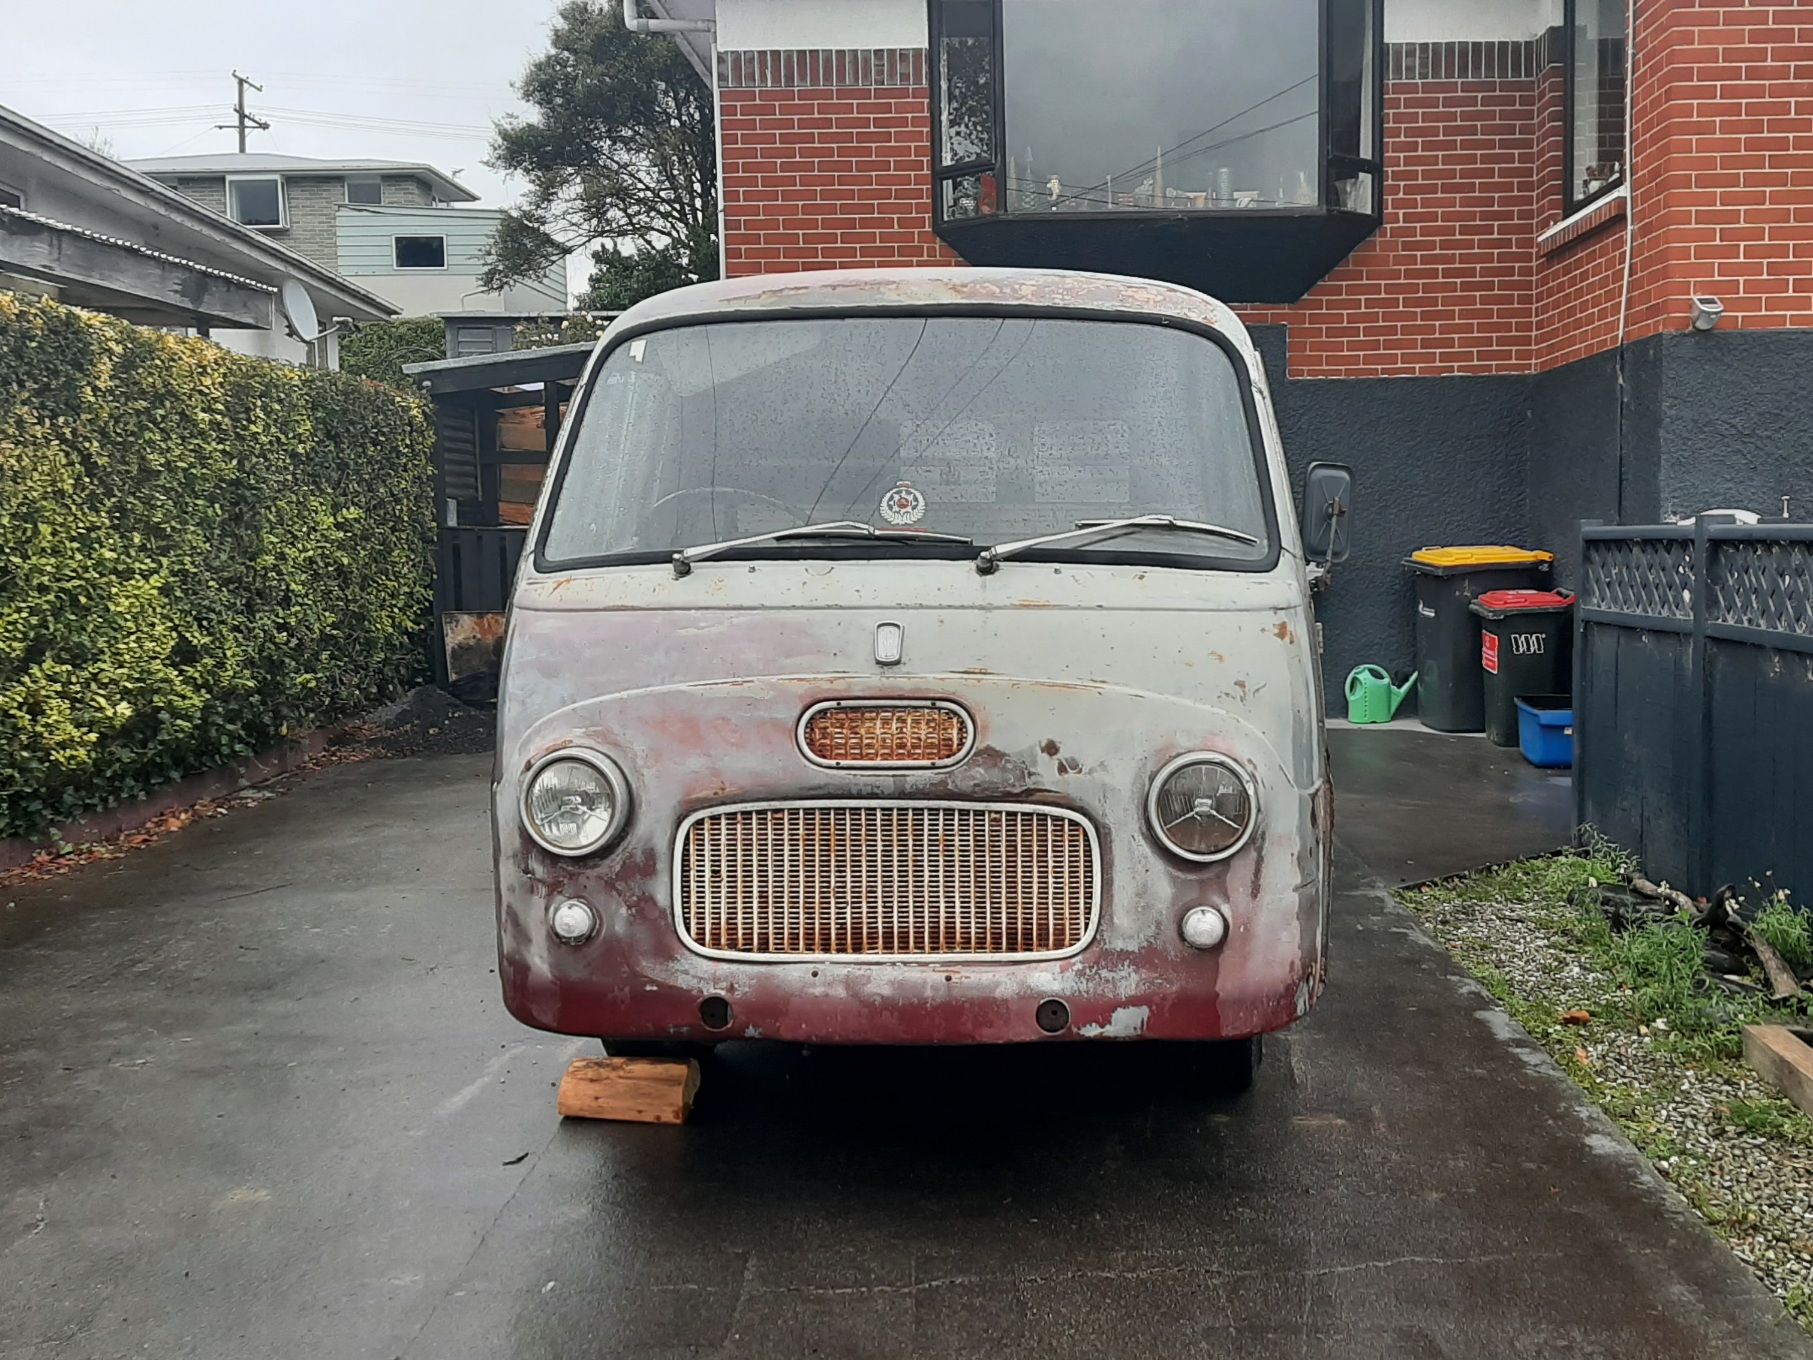
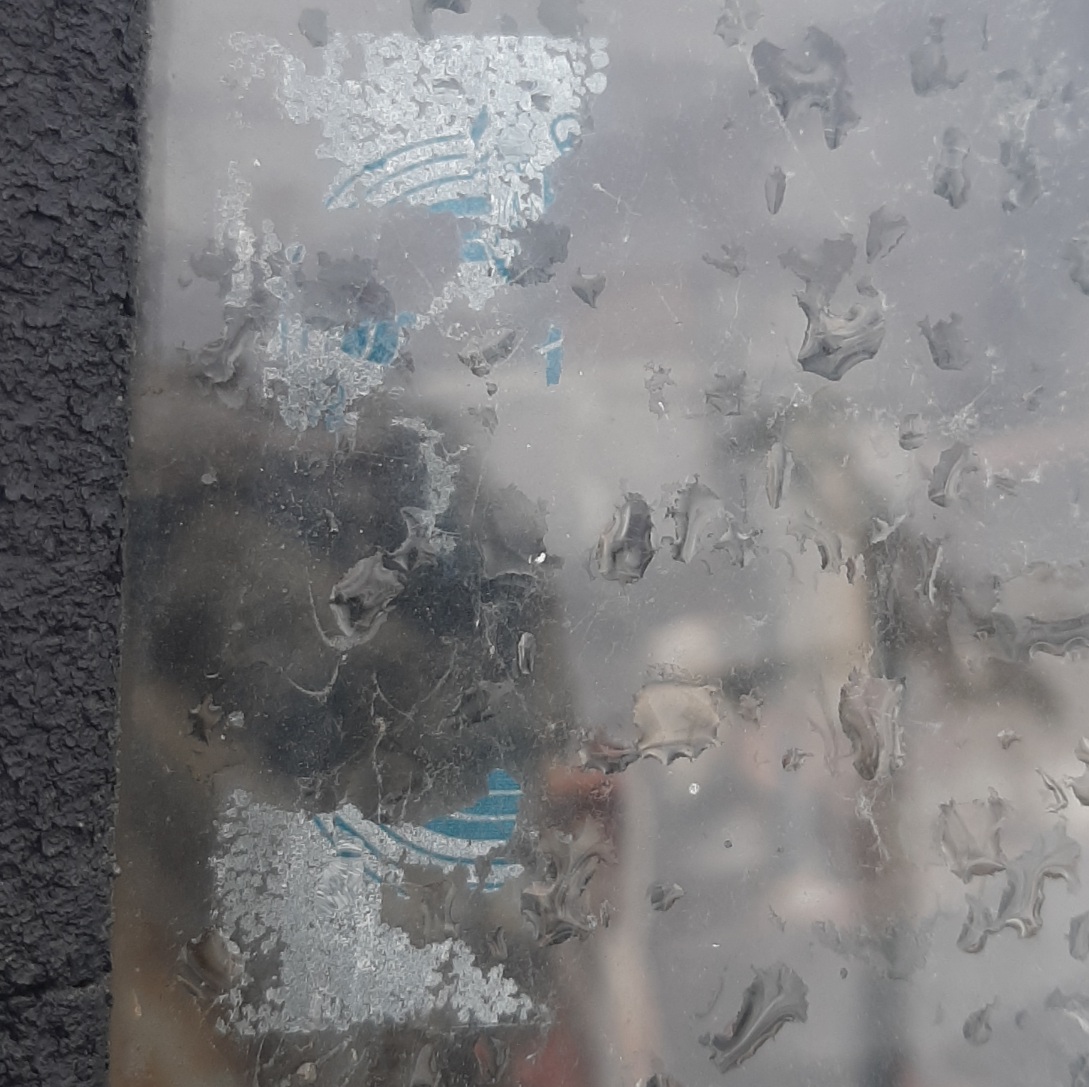
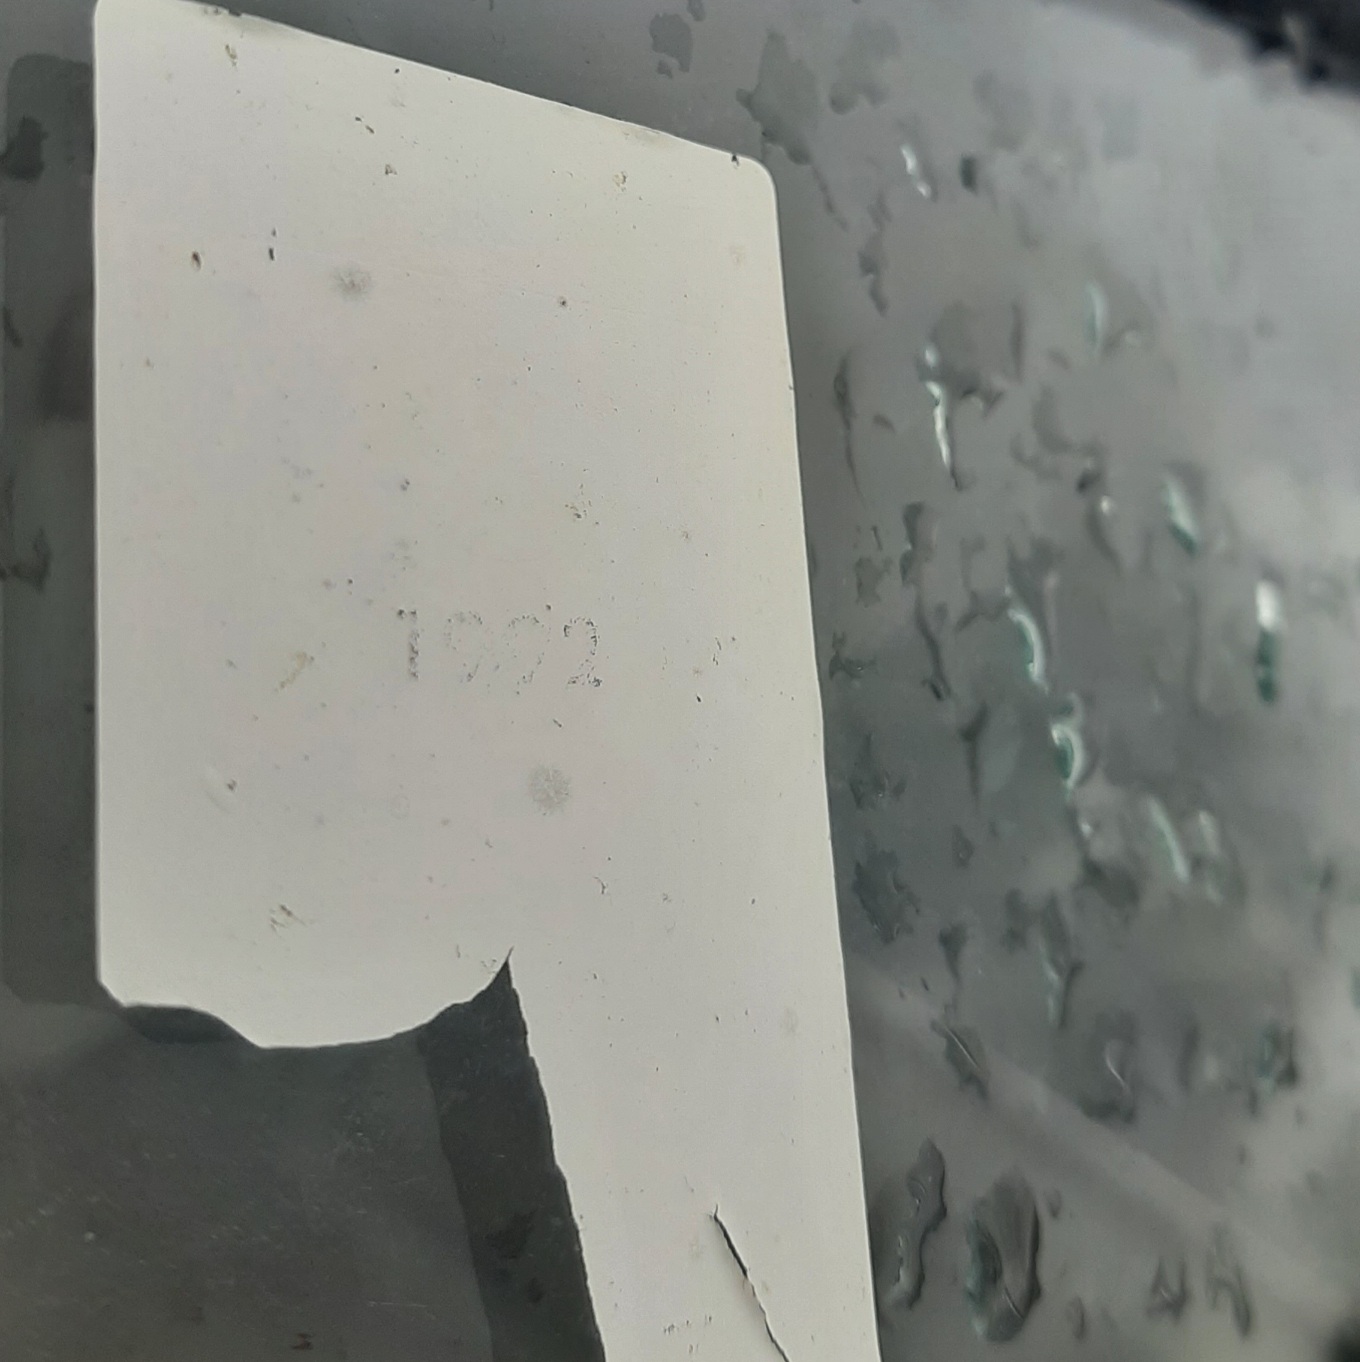
Took the day off work today to pick this up. Donkeys! Then home. Gave it a rinse inside and out with the waterblaster, and started digging in to see what I got/whats missing. It is mostly complete, box of spares has old brake bits, which might be ominous. It has a 4x148 or so stud pattern, which ive never seen before. The body is pretty good, just the bottom of all the doors and front floors are crispy. All the switches are bung. Windows are stuck. Found the chassis number, data plate and an faint image of an old wof sticker and an old style reg sticker with 1992 faintly on it. Pretty sure it was repainted maroon over grey primer and roof left cream, and the maroon has fallen mostly off. I think the grey primer might wet sand off. I also think it was a painters van for a while based on the range of colours and depth of house paint splatters in the back. None of the doors close or work properly so i started by adjusting the catches then taking the door handles off to clean and lube them up. Fixing the rust will help the door stiffness too.
1 point
-
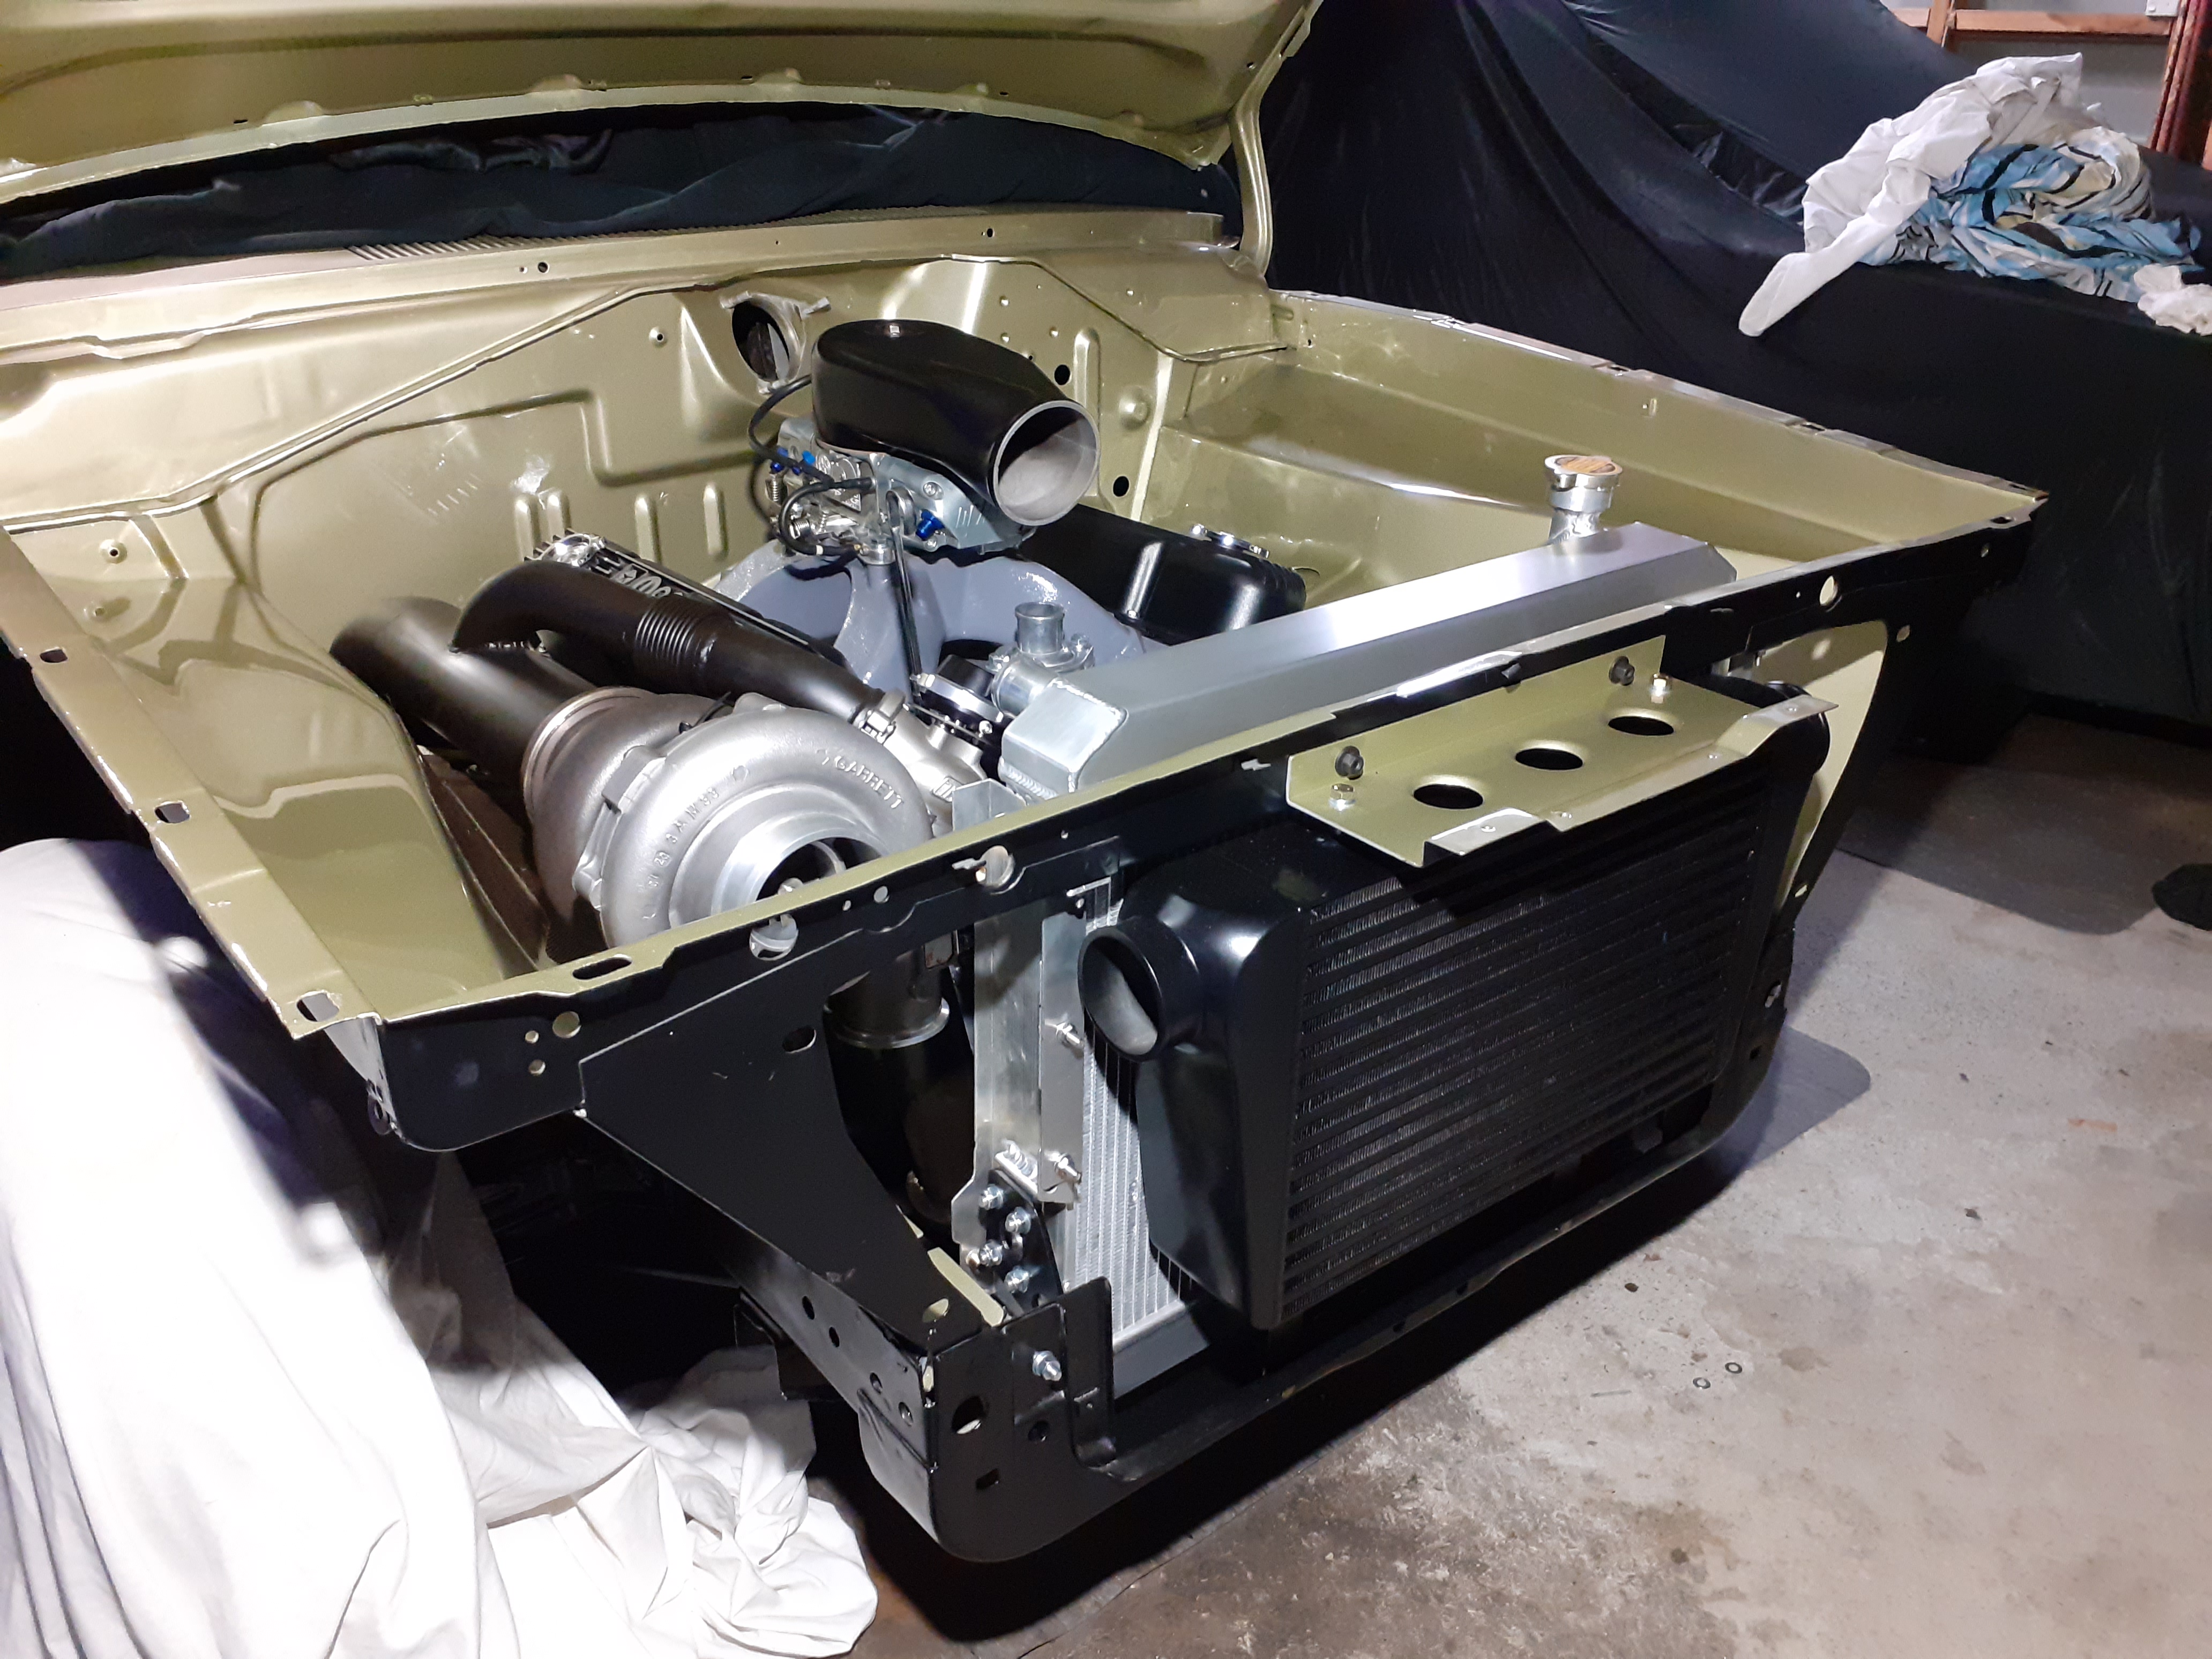
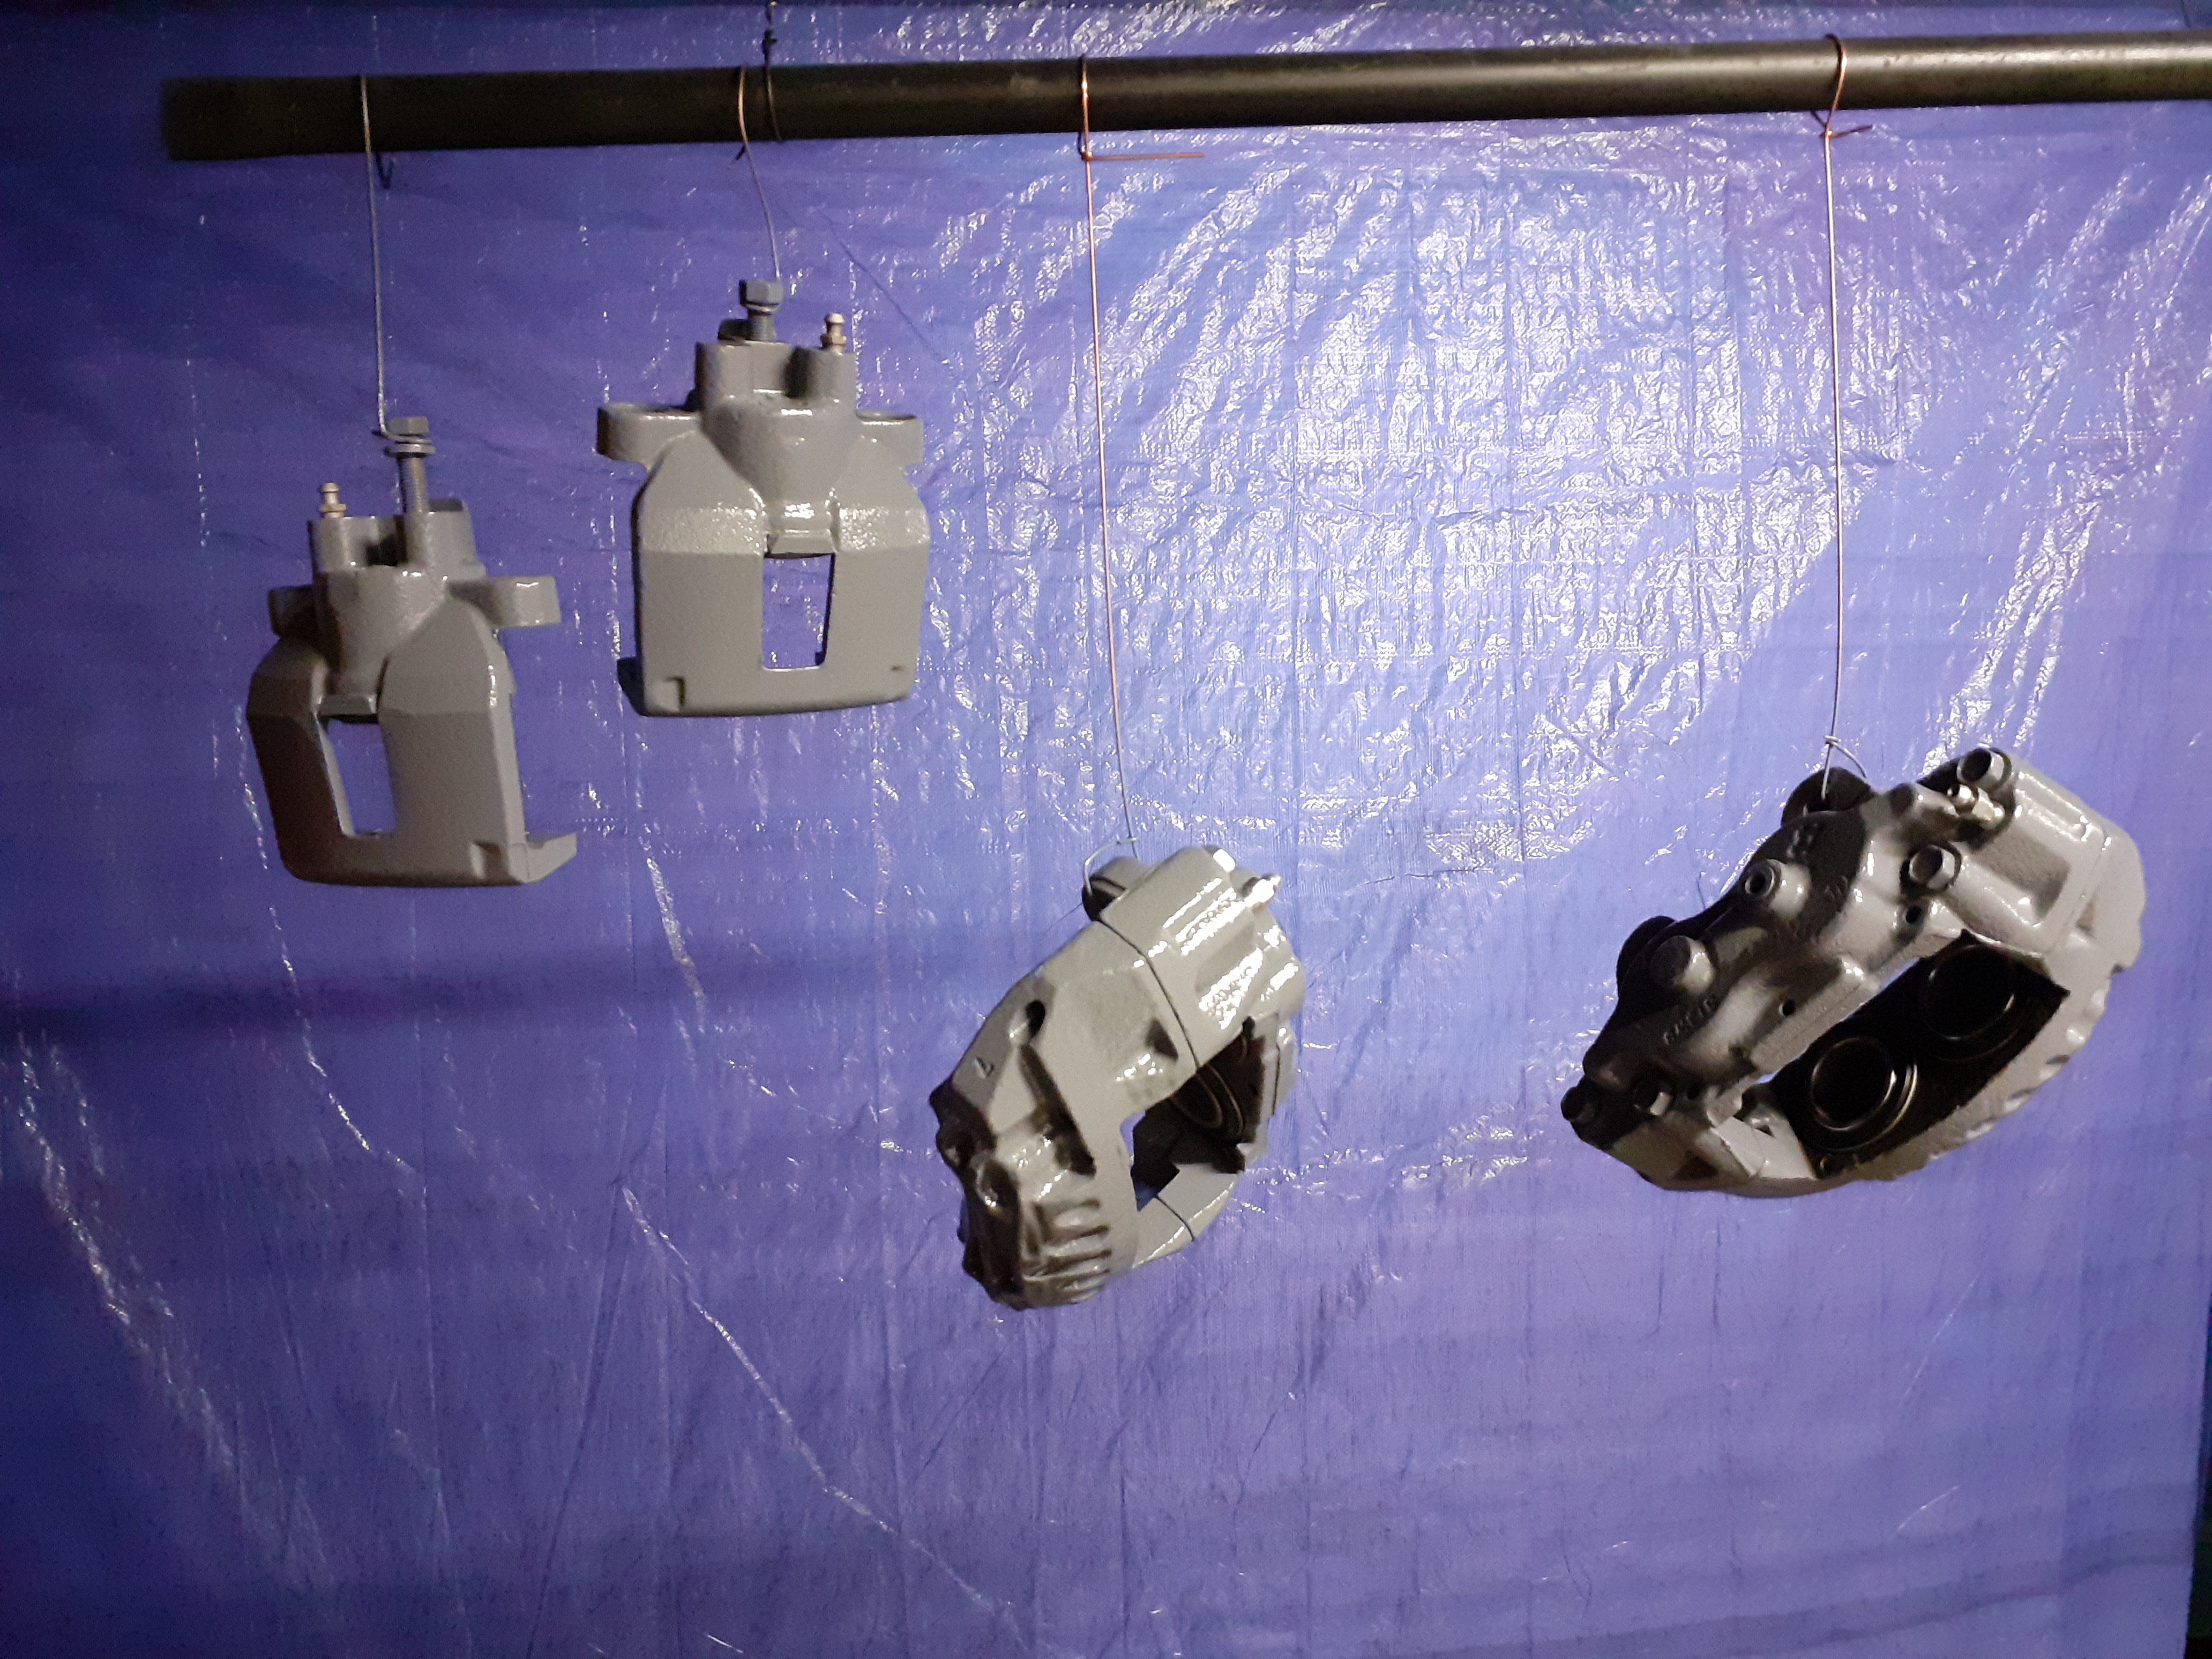
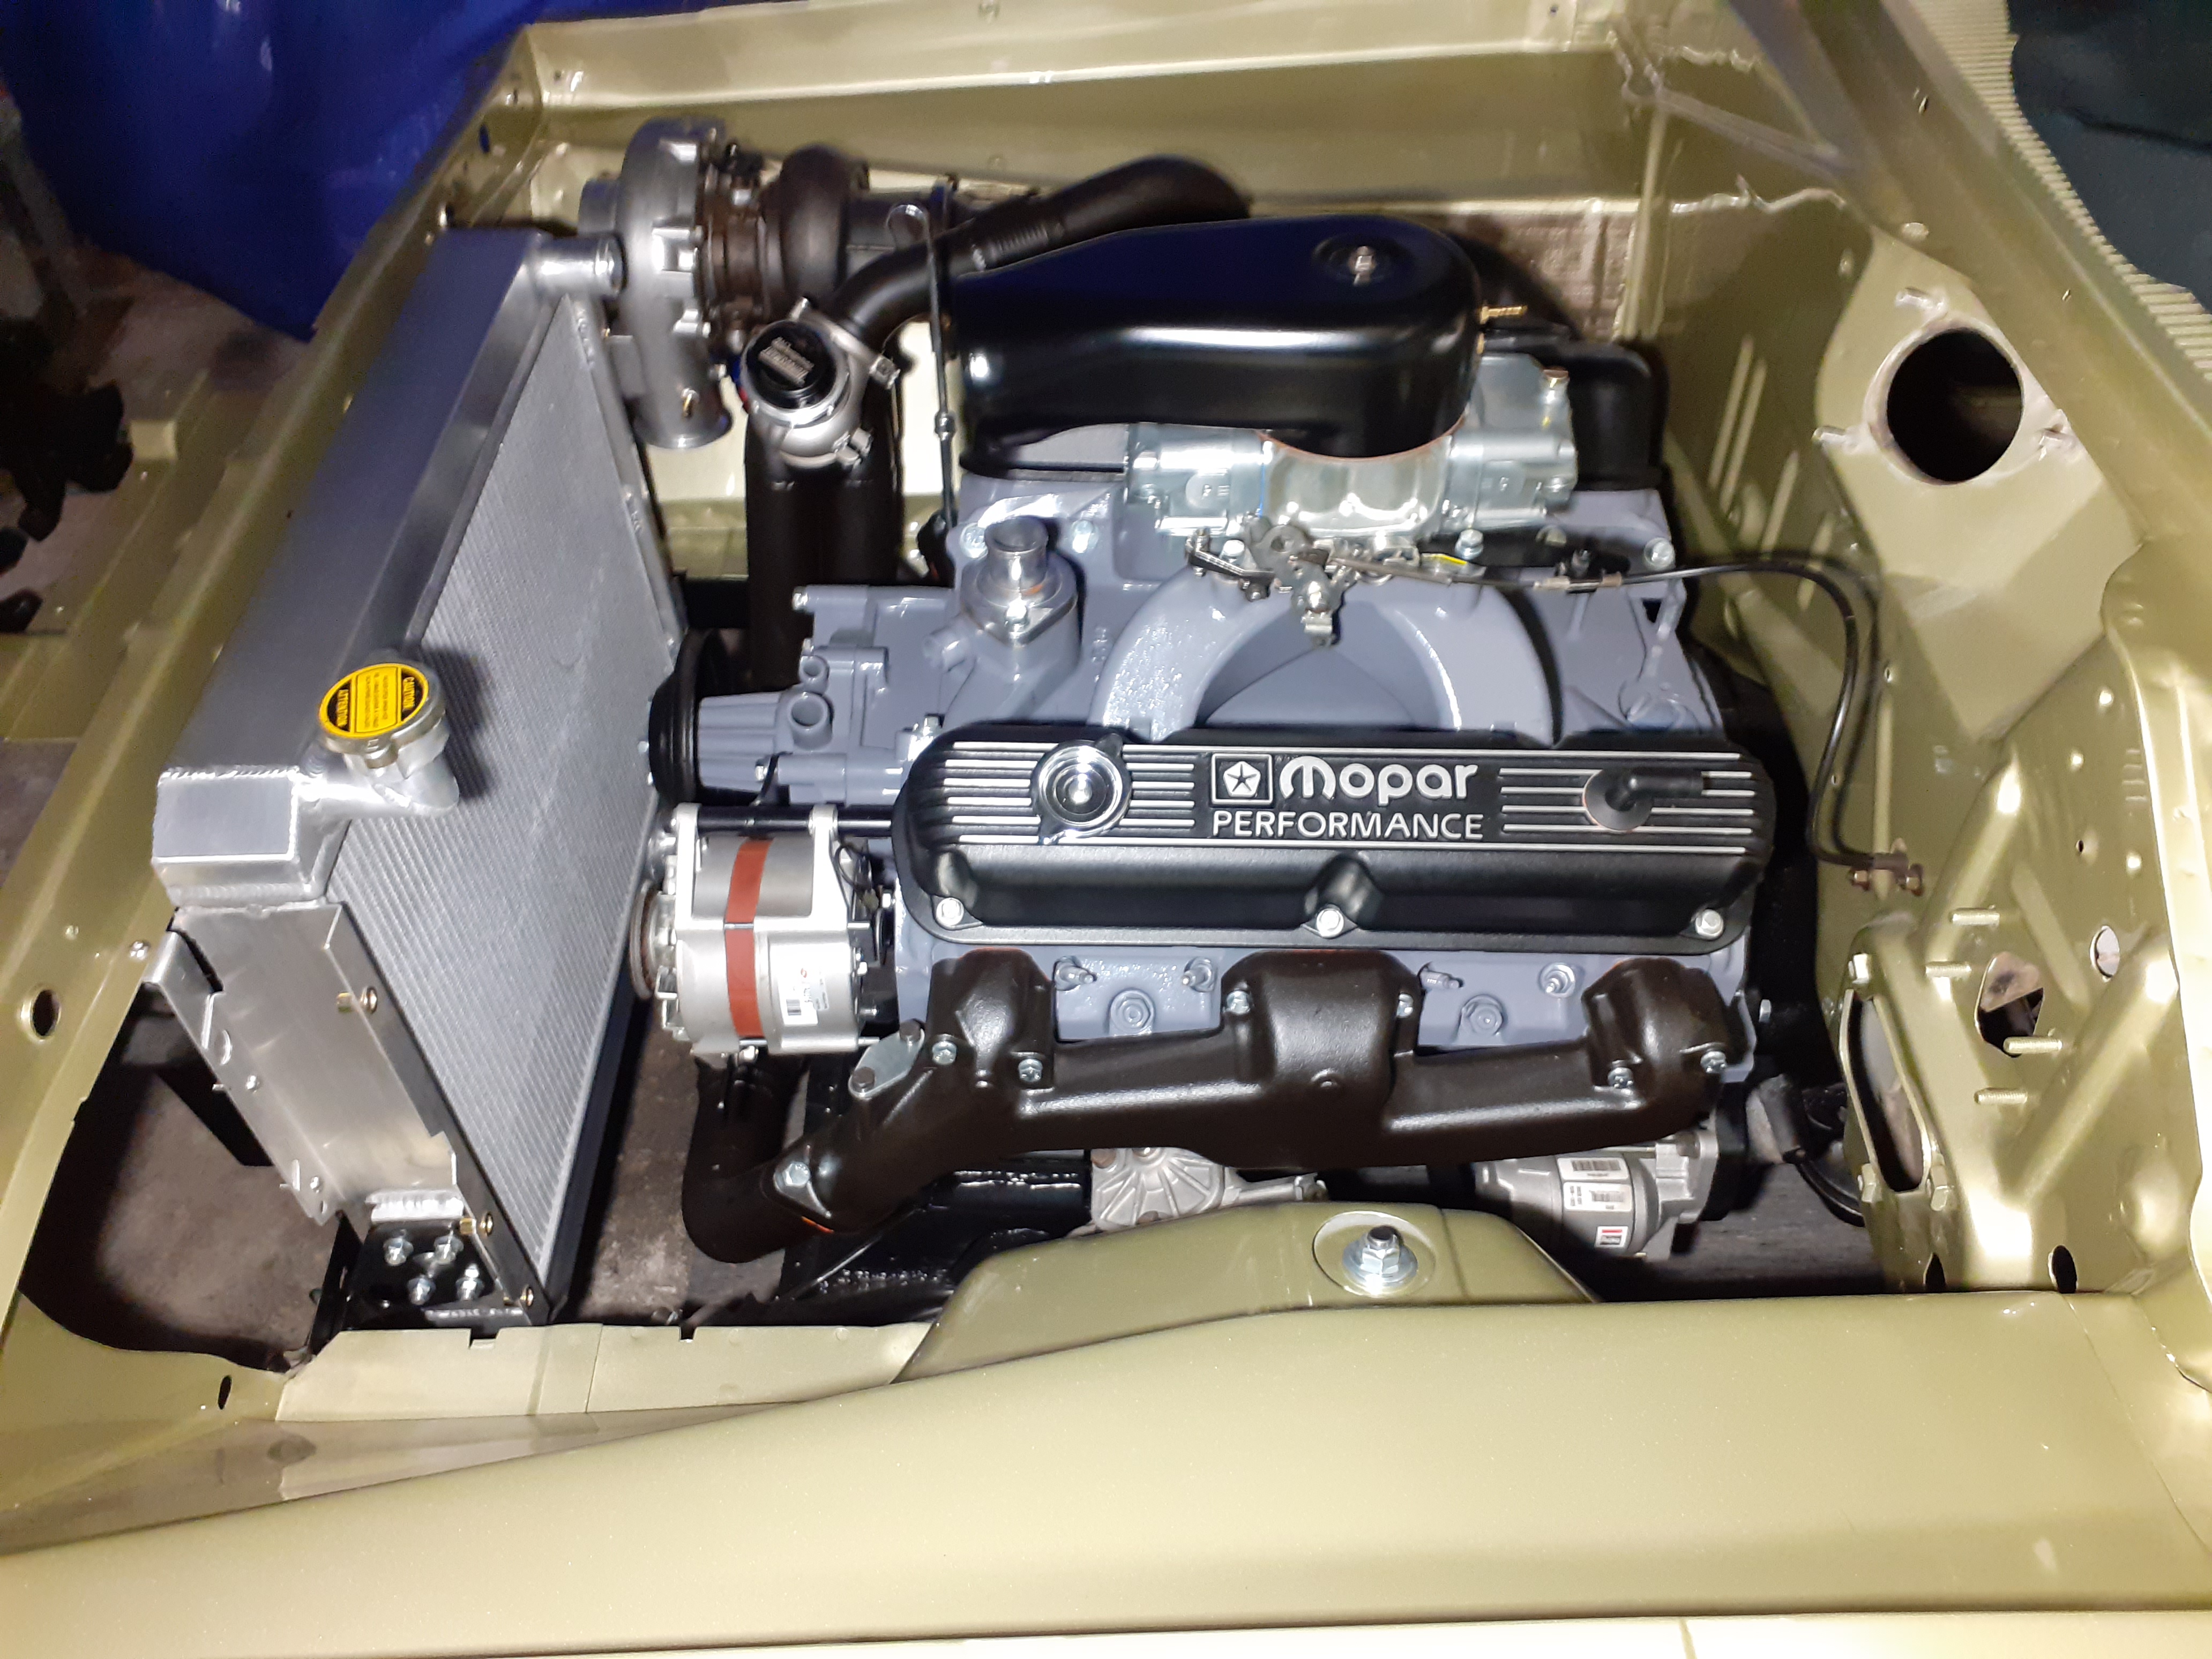
It's at the stage now where it looks like I've done fuck all Which is sort of true. Have been too busy to get a lot of time on it But have been chipping away at small jobs Carb rebuilt Alternator mounts made Throttle cable done Mod and painted the carb hat Calipers cleaned up and painted Radiator finished Hose shapes mocked up just have to find something that sort of fits Turbo oil drain 90% sorted just need a fitting for the block end Takes ages when everything needs blasting and painting and then it seems best to leave it for a week to harden properly
1 point
-
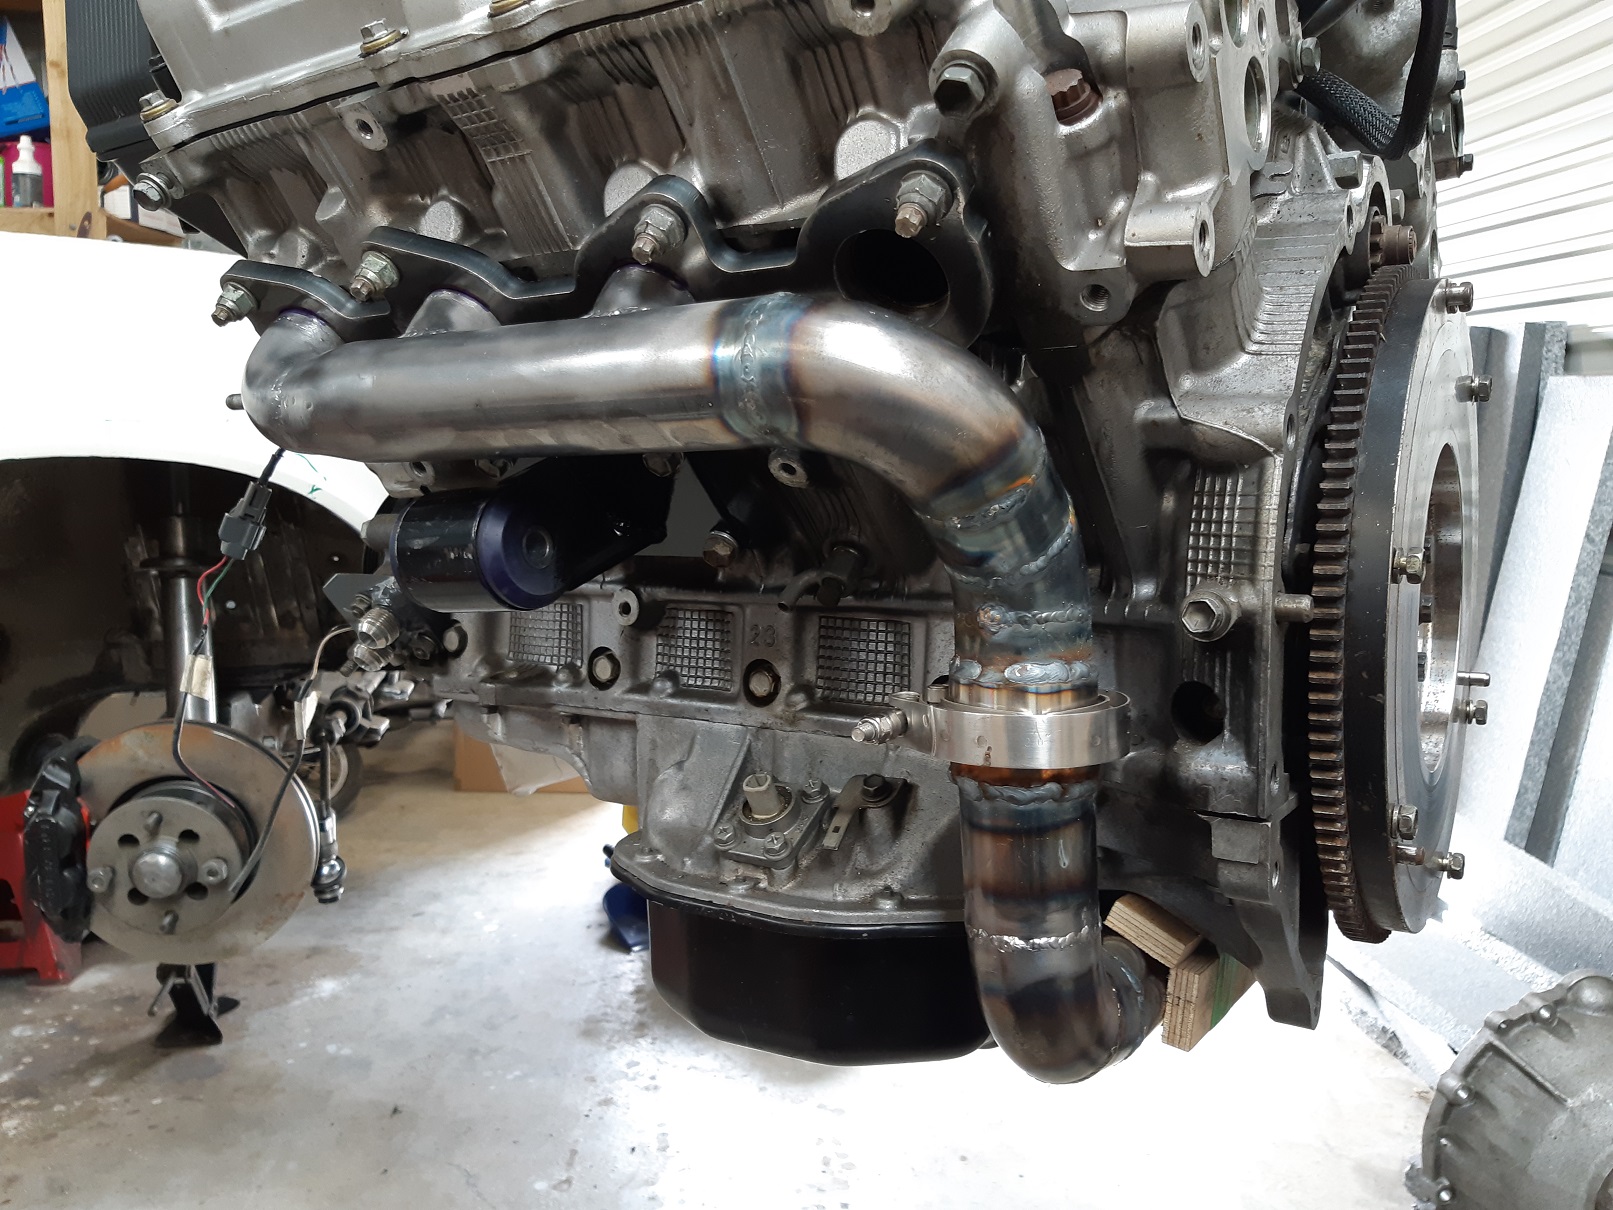
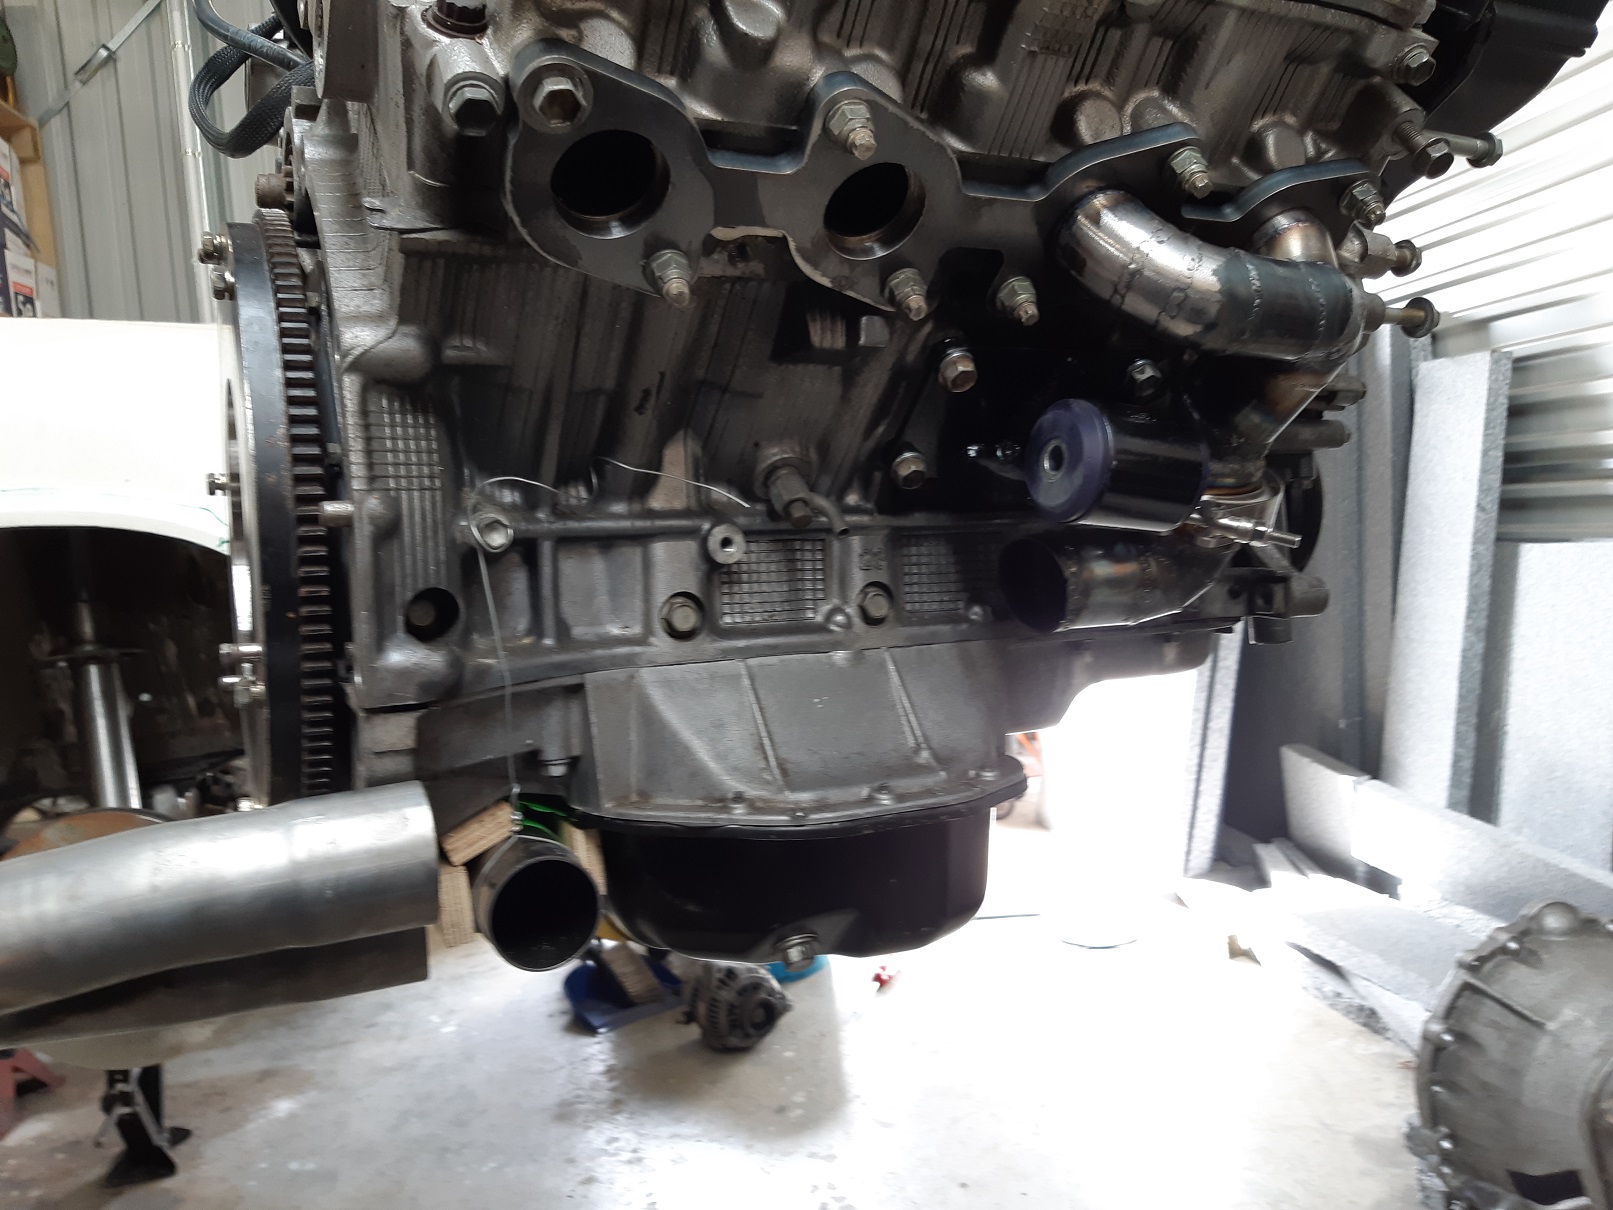
Managed to fit it all in. I had to put the v-band flanges in the lathe to make it shorter. Need to scribe around it, then cut those spot welds and whittle out a hole
1 point
-
Yep, it needed a kink put in it. Even like this it just misses the corner of the chassis rail by 5mm. Not sure if I will need to relieve the chassis rail by taking the corner off it. I'll see if I can get the engine to rock enough to hit next time it's in. Hopefully it doesn't, the urethane engine mounts are pretty stiff. I've still got to fill in the blanks on this side.
1 point


.jpg.1e328f149fdc01e2337acb0ff4b7c054.jpg)


.thumb.jpeg.384ff72c8d2b0ee0d34a7bdedb55bdcf.jpeg)


This leaderboard is set to Auckland/GMT+12:00