
Leaderboard


Popular Content
Showing content with the highest reputation on 04/23/21 in all areas
-
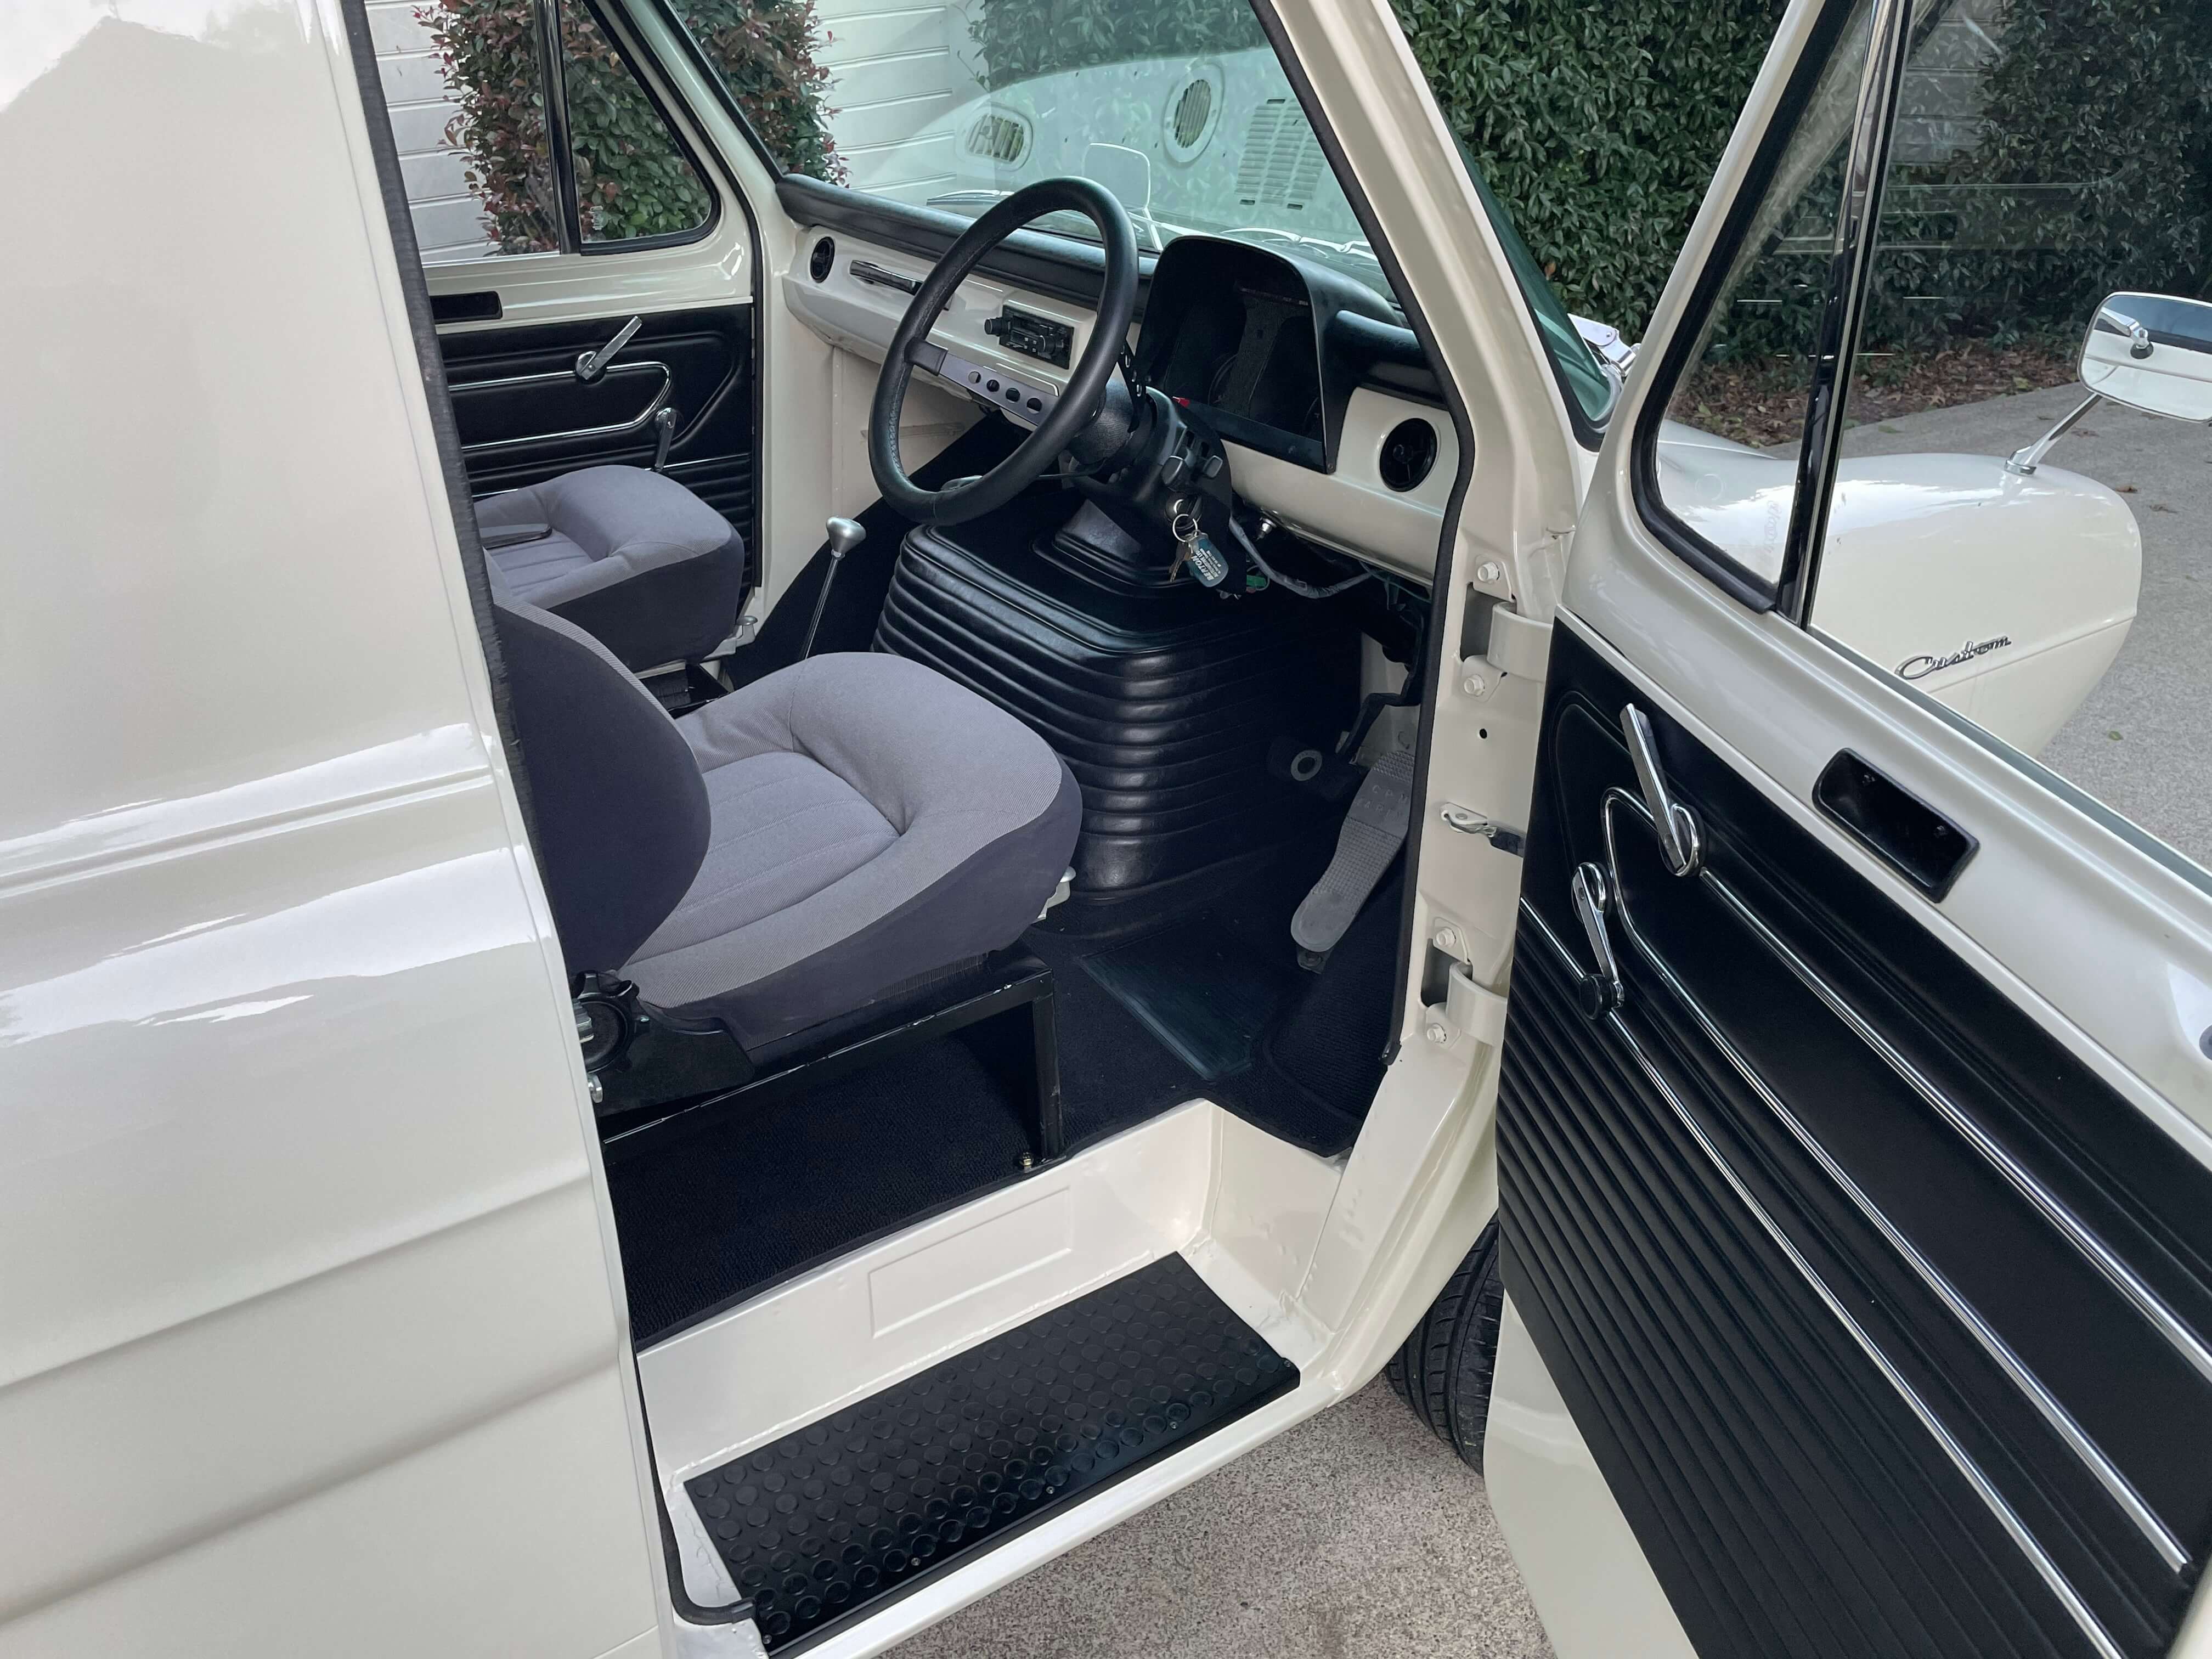
Some updates. Waikumete upholsteres made a carpet for me. 2 pieces, like original, and we found a loop pile in maroon! Which was brilliant, as I really wanted a loop pile for that more premium appearance. 20210321_161234 by Richard Opie, on Flickr 20210321_165710 by Richard Opie, on Flickr I think it turned out pretty well! Did the boot also, but I haven't got a pic of that for some reason. 20210408_210246 by Richard Opie, on Flickr Engine and gearbox came out again. This is minutes before it all lifted out. Very easy. 20210417_114901 by Richard Opie, on Flickr Pulled apart the gearbox with great guidance from Earle McFarlane. 20210417_121227 by Richard Opie, on Flickr Measured all the clearances, then pulled it apart. Selector hubs are a bit pwnt, there is excessive wear in the shift forks, bearings seem all right but they're all being replaced anyway with all those parts in the post above. So now the mainshaft has been assembled (in my absence) and we are just waiting on the forks to come in from Japanland so we can reassemble. 20210330_125040 by Richard Opie, on Flickr Since the motor was coming out anyway I thought it'd be a good time to get the top end sorted, as it's only ever been a stock head and cams, despite the bottom end being built/hi comp. This is a spare smallport head that I spent a while scrubbing in the shed to get clean. 20210330_125016 by Richard Opie, on Flickr I then thought I'd try cold jet/dry ice blasting as a bit of a test case on the cam boxes to remove the baked on sludge and scum. This is the result. Pretty awesome! I'm going to be using this process to clean some of the undercarriage parts in situ on the Honda. 20210331_084622 by Richard Opie, on Flickr I stripped the head myself, once I learned how to remove the collets from the retainers it was all pretty simple. Here's the head, with all the bits catalogued and in containers, with the Kelford 193B cams and Supertech retainers/springs I bought ages ago for it. It's in with Alan Harris at Harris Performance Engineering (previous Lynn Rogers) for porting, some tickles on the combustion chamber and a port match of the ITB manifold. I then got to thinking about what audio this car is going to have, even if you can't hear anything inside it really. Initially, I was going to run a modern Bluetooth head unit in the glovebox, and got as far as buying this pretty rad Sony unit that has 50wrms per channel - from a head deck!!! Enough to power anything, speaker wise. But then Ed sent me a link to a Yahoo auction that changed things. 20210422_172330-01 by Richard Opie, on Flickr 20210422_172308-01 by Richard Opie, on Flickr This is an AD-189T fitting kit/adapter produced by Pioneer in the early 80s. It fits a 'B' type head unit, which is conveniently what the 'component' systems of the early/mid 1980s are. Before the standard DIN size we all know and love today. It replaces an entire middle panel on the dash, replicating the OEM fit where normally there would be a spindle mount head unit (as is the case on my factory dash). I had never, ever seen even a picture of one of these kits before, let alone a NOS one on Yahoo. So I bid on it, because who doesn't love period accessories. And I won it. So then I thought I'd probably better find a head unit to fit. 20210422_172407-01 by Richard Opie, on Flickr I ended up with this Pioneer KP-717G tape deck. Note - it's a tape deck only, there is no AM/FM radio or anything with this, as was the style of the component systems of the time. This one was listed with a clean bill of health, and some remedial work done to ensure it was operational. The auction was backed up with a video to prove it. It's one of the higher end units in this range, with Dolby NR, adjustable tone controls, all the fruit. It doesn't have an amp on board - luckily Ed has one of the Pioneer GM-4 amps for this to plug into, that will find it's way into my car. 20210422_172454-01 by Richard Opie, on Flickr This is how it should look when installed in the car, using the AD-189T kit. Fuckin. Awesome. I reckon. 20210422_172612-01 by Richard Opie, on Flickr 20210422_172638-01 by Richard Opie, on Flickr And this is essentially what the initial system I run will be. Later on I may add some fronts - I have some NOS Pioneer TS167 coaxials, and also dual cones whose code escapes me right now. These TS-X9 are incredible though - I had them wired up to my amp in the house and they produce enough bass you can actually feel it through the floor. How they achieve it, I do not know. Sure it's not sub levels, but it's a beautifully balanced sound that I hope will be loud enough to listen to while pootling along at slow speeds or stuck in traffic. Thank you for coming to my TED talk. Hopefully, next updates will include a rowdy cylinder head, a slick shifting T50 and some Phil Collins tapes in the KP-717G.21 points
-
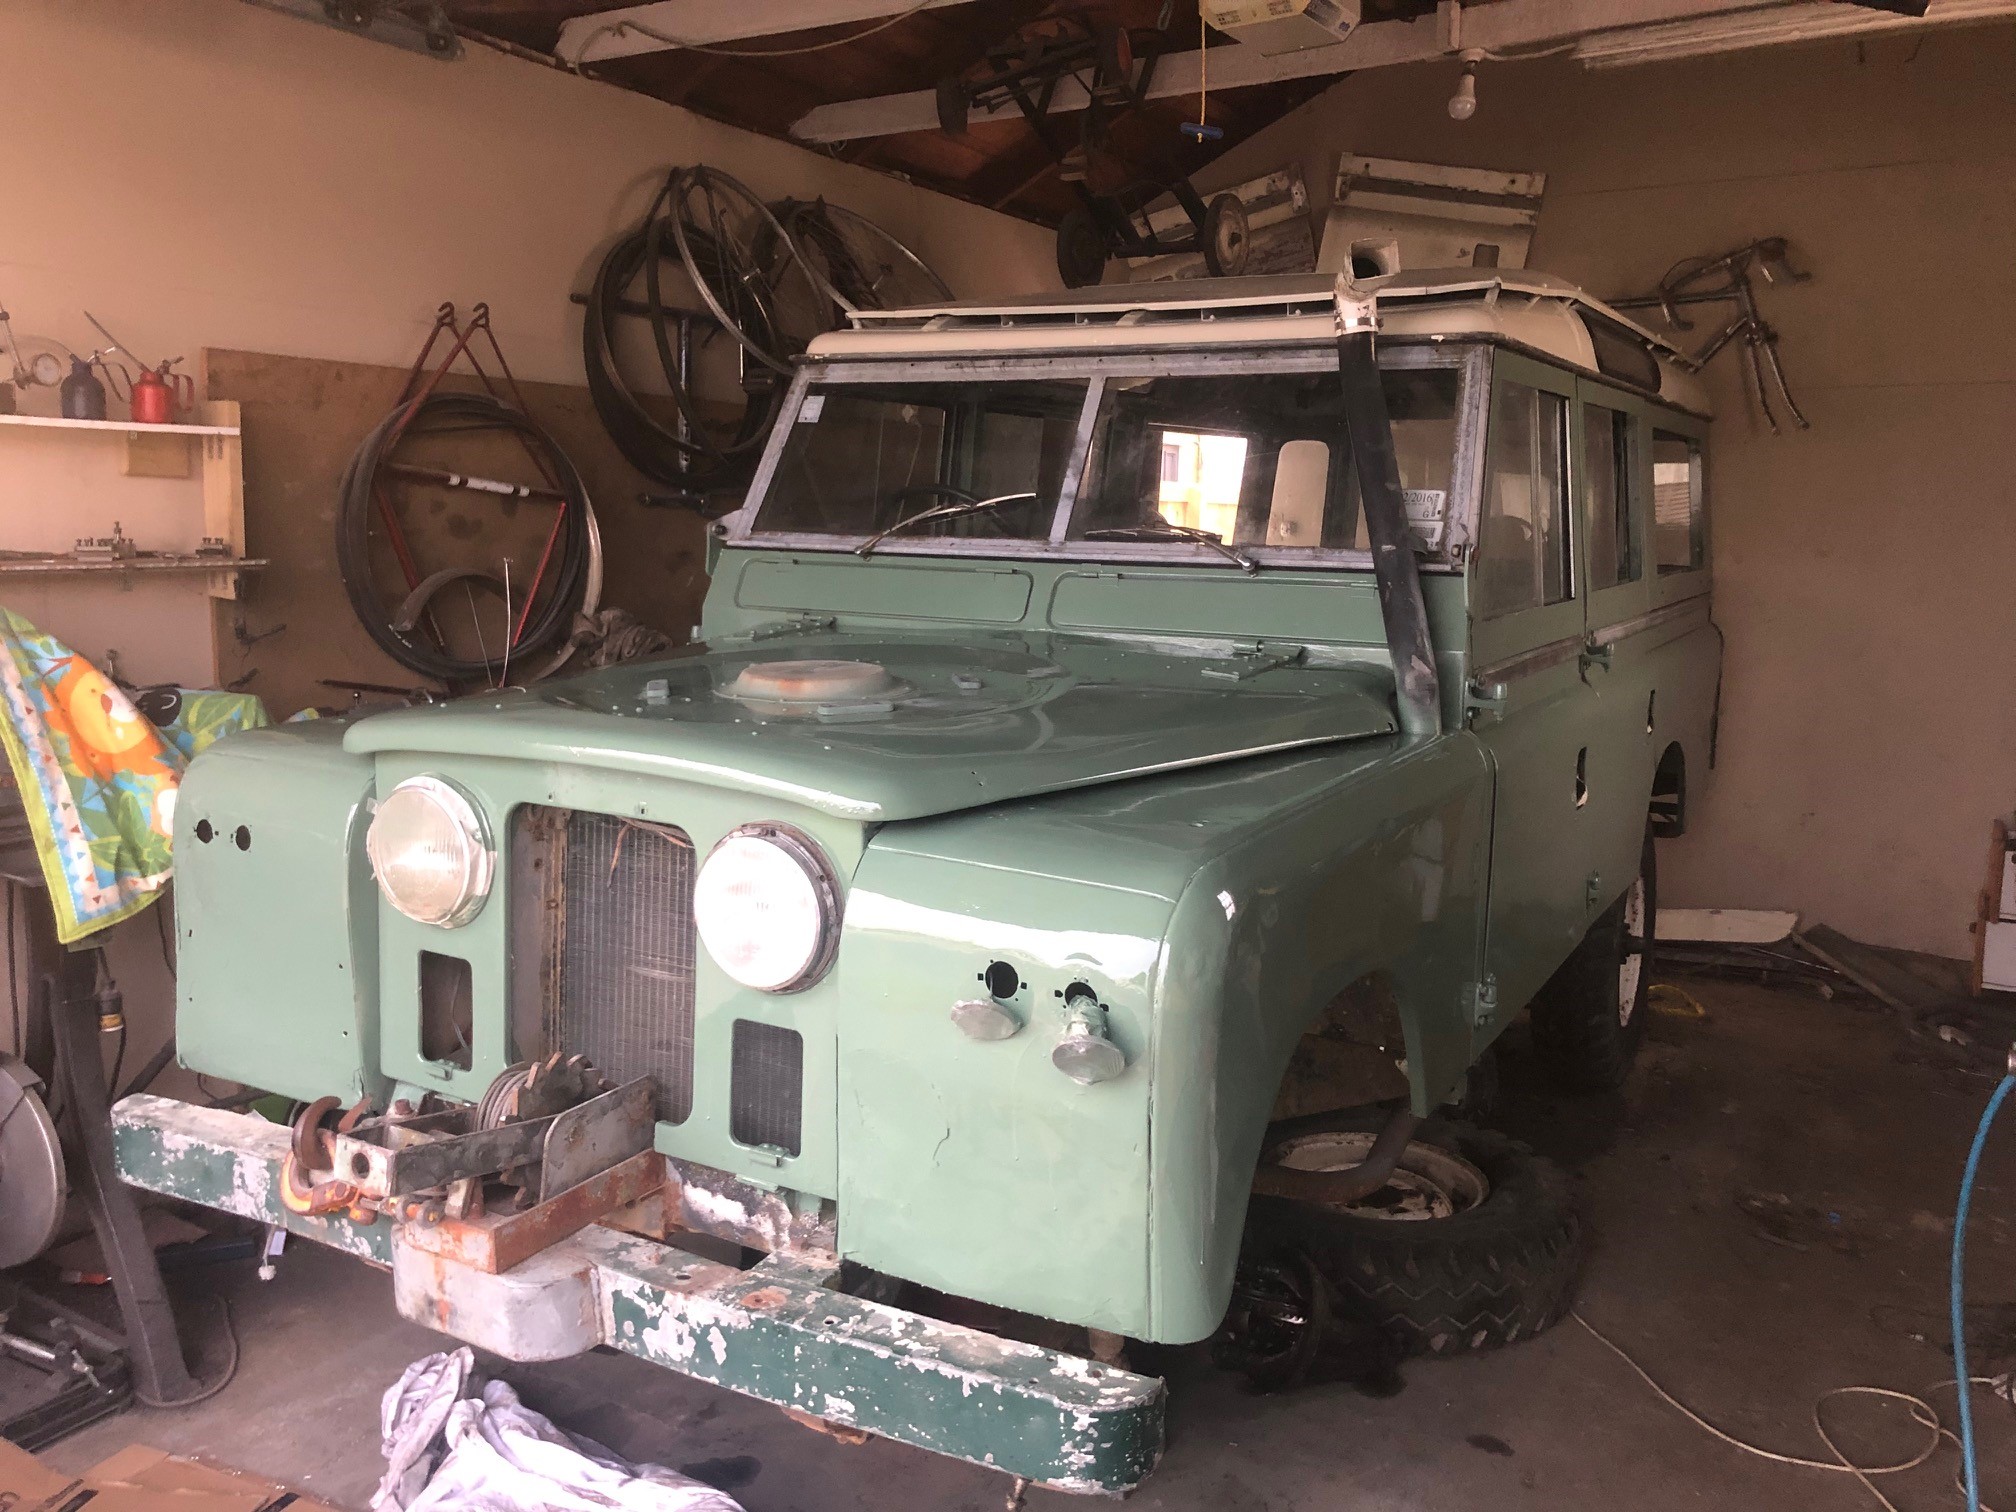
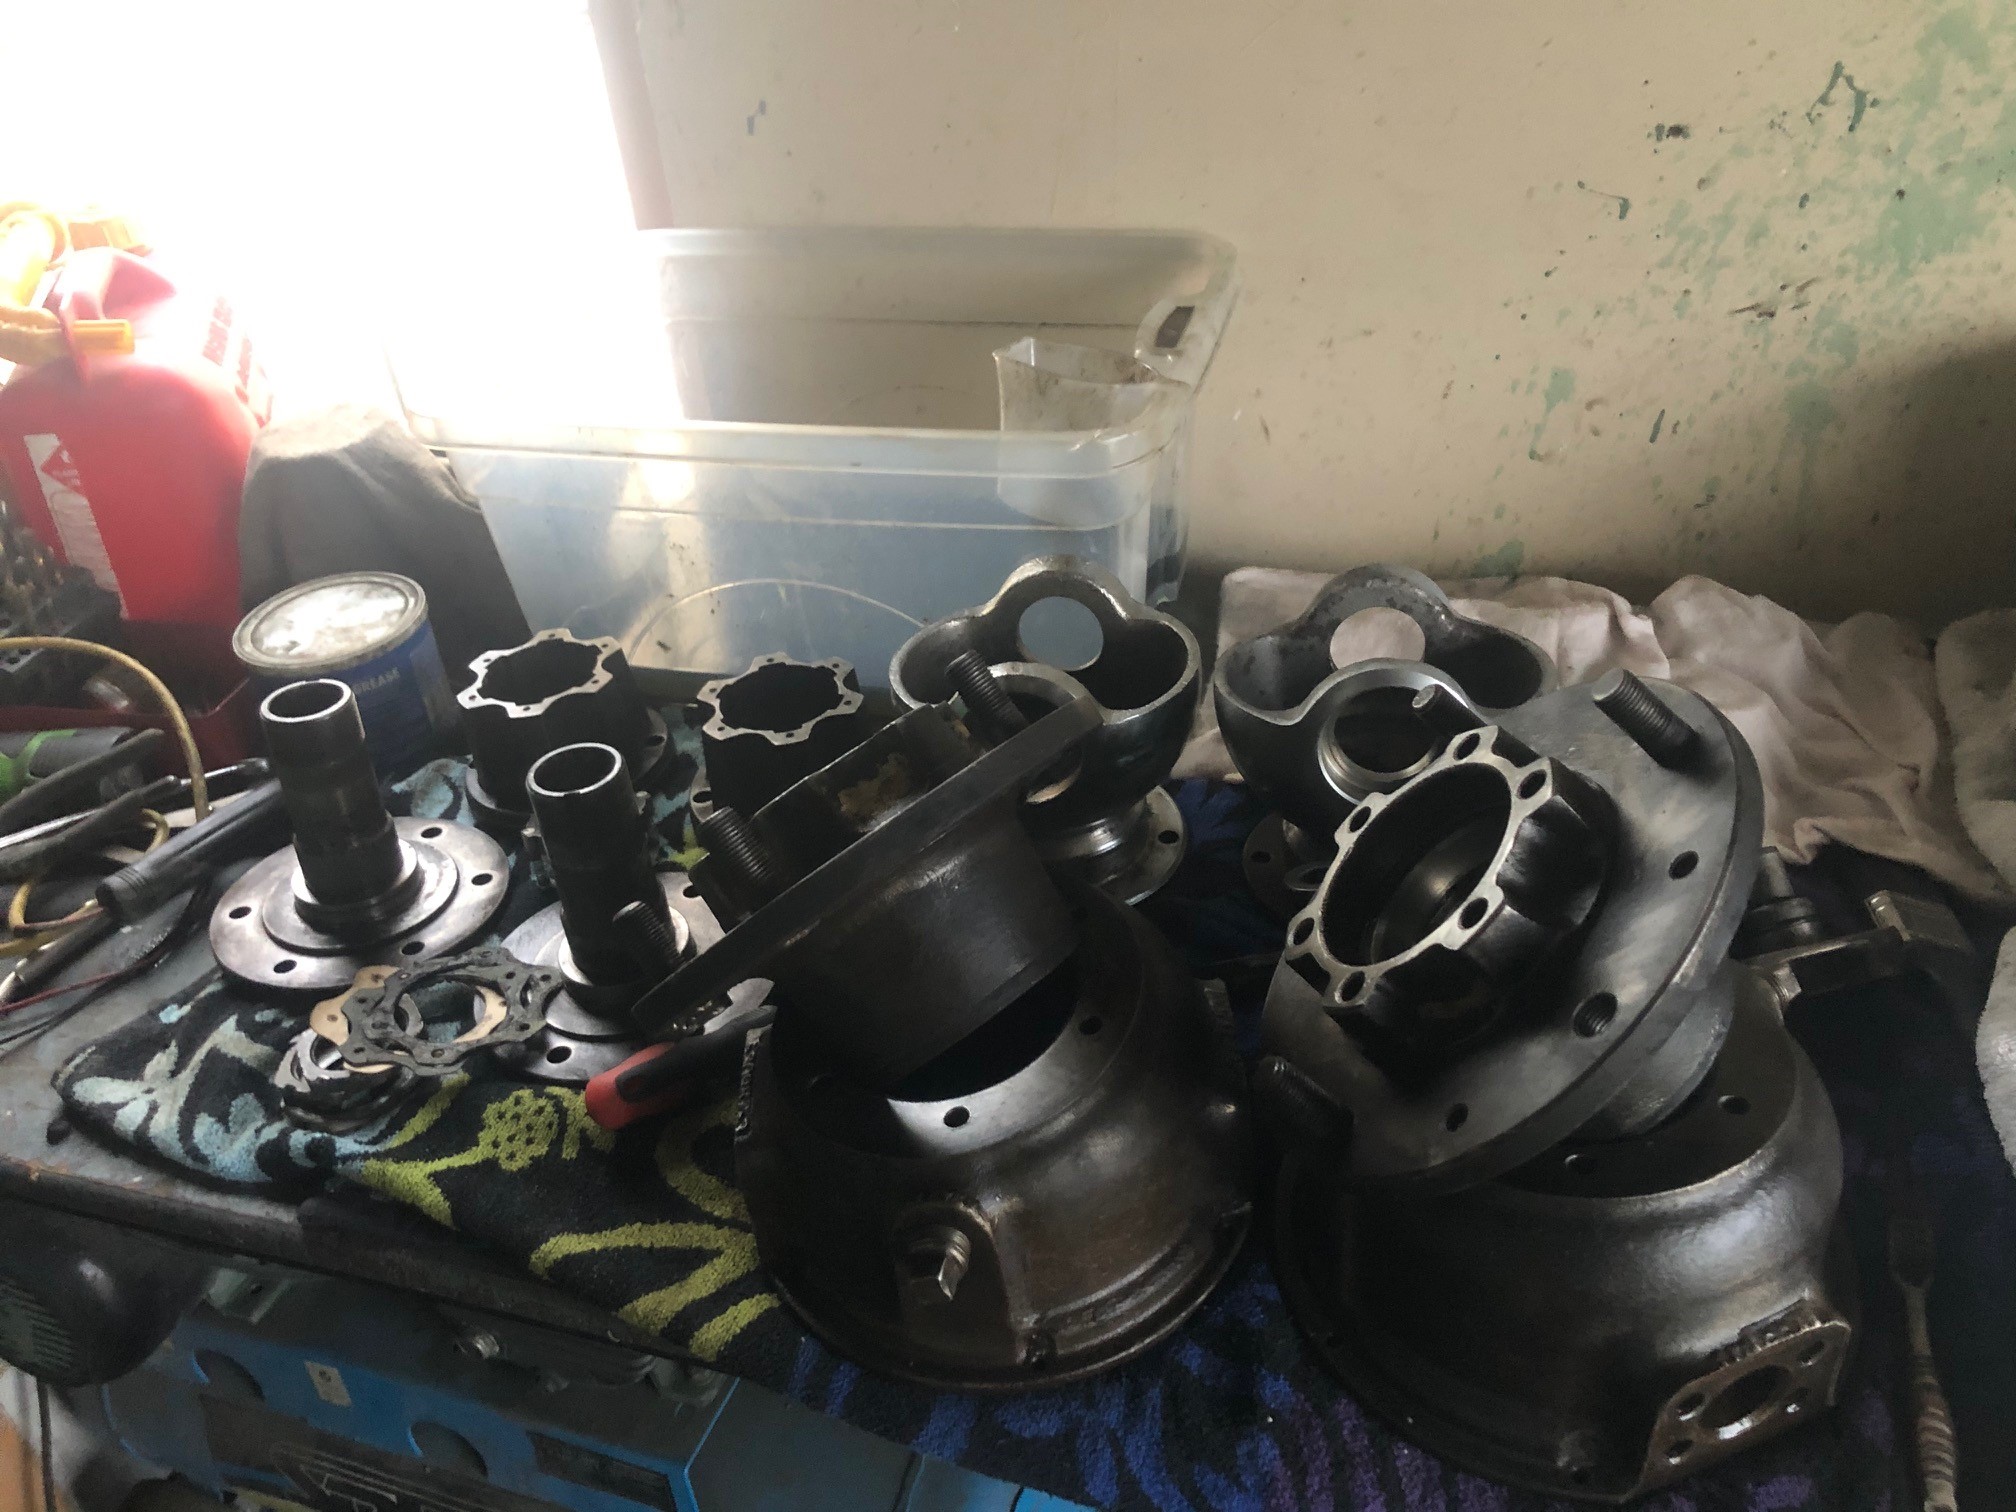
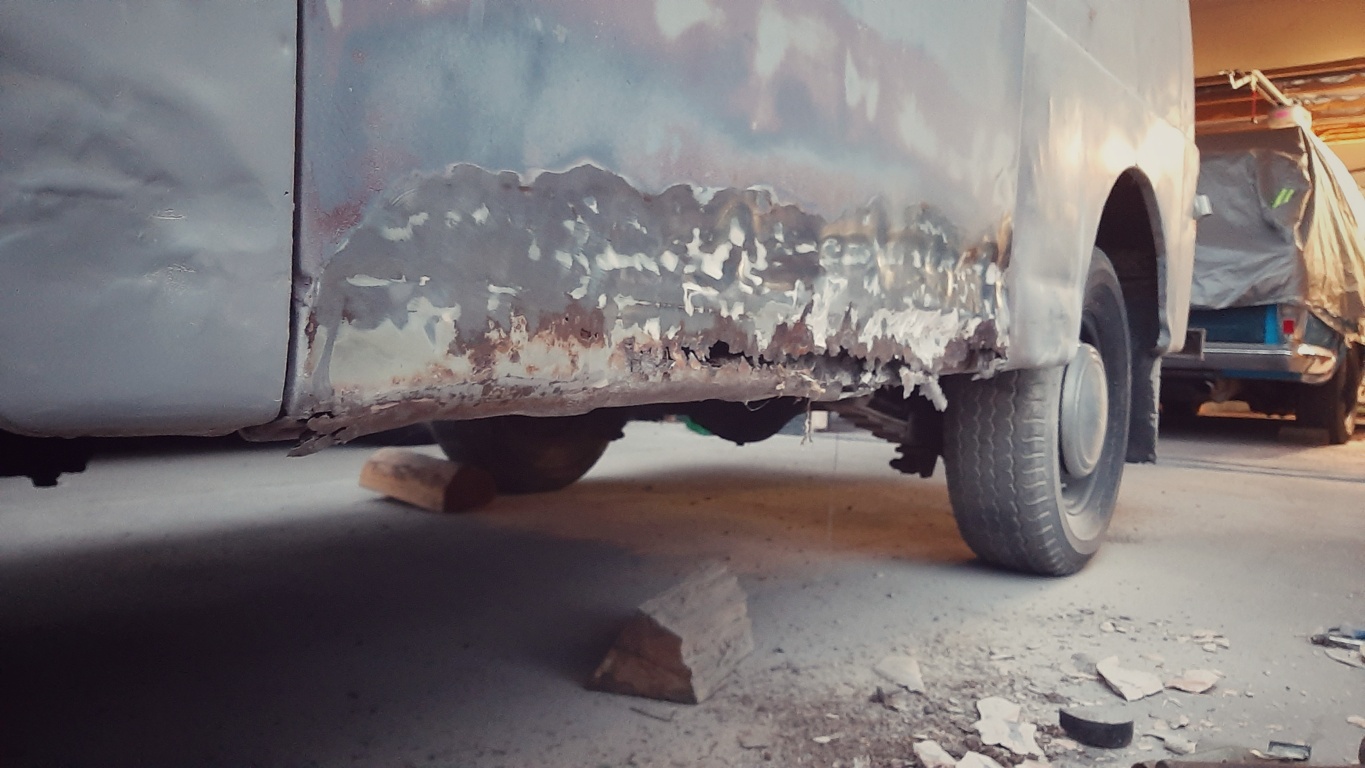
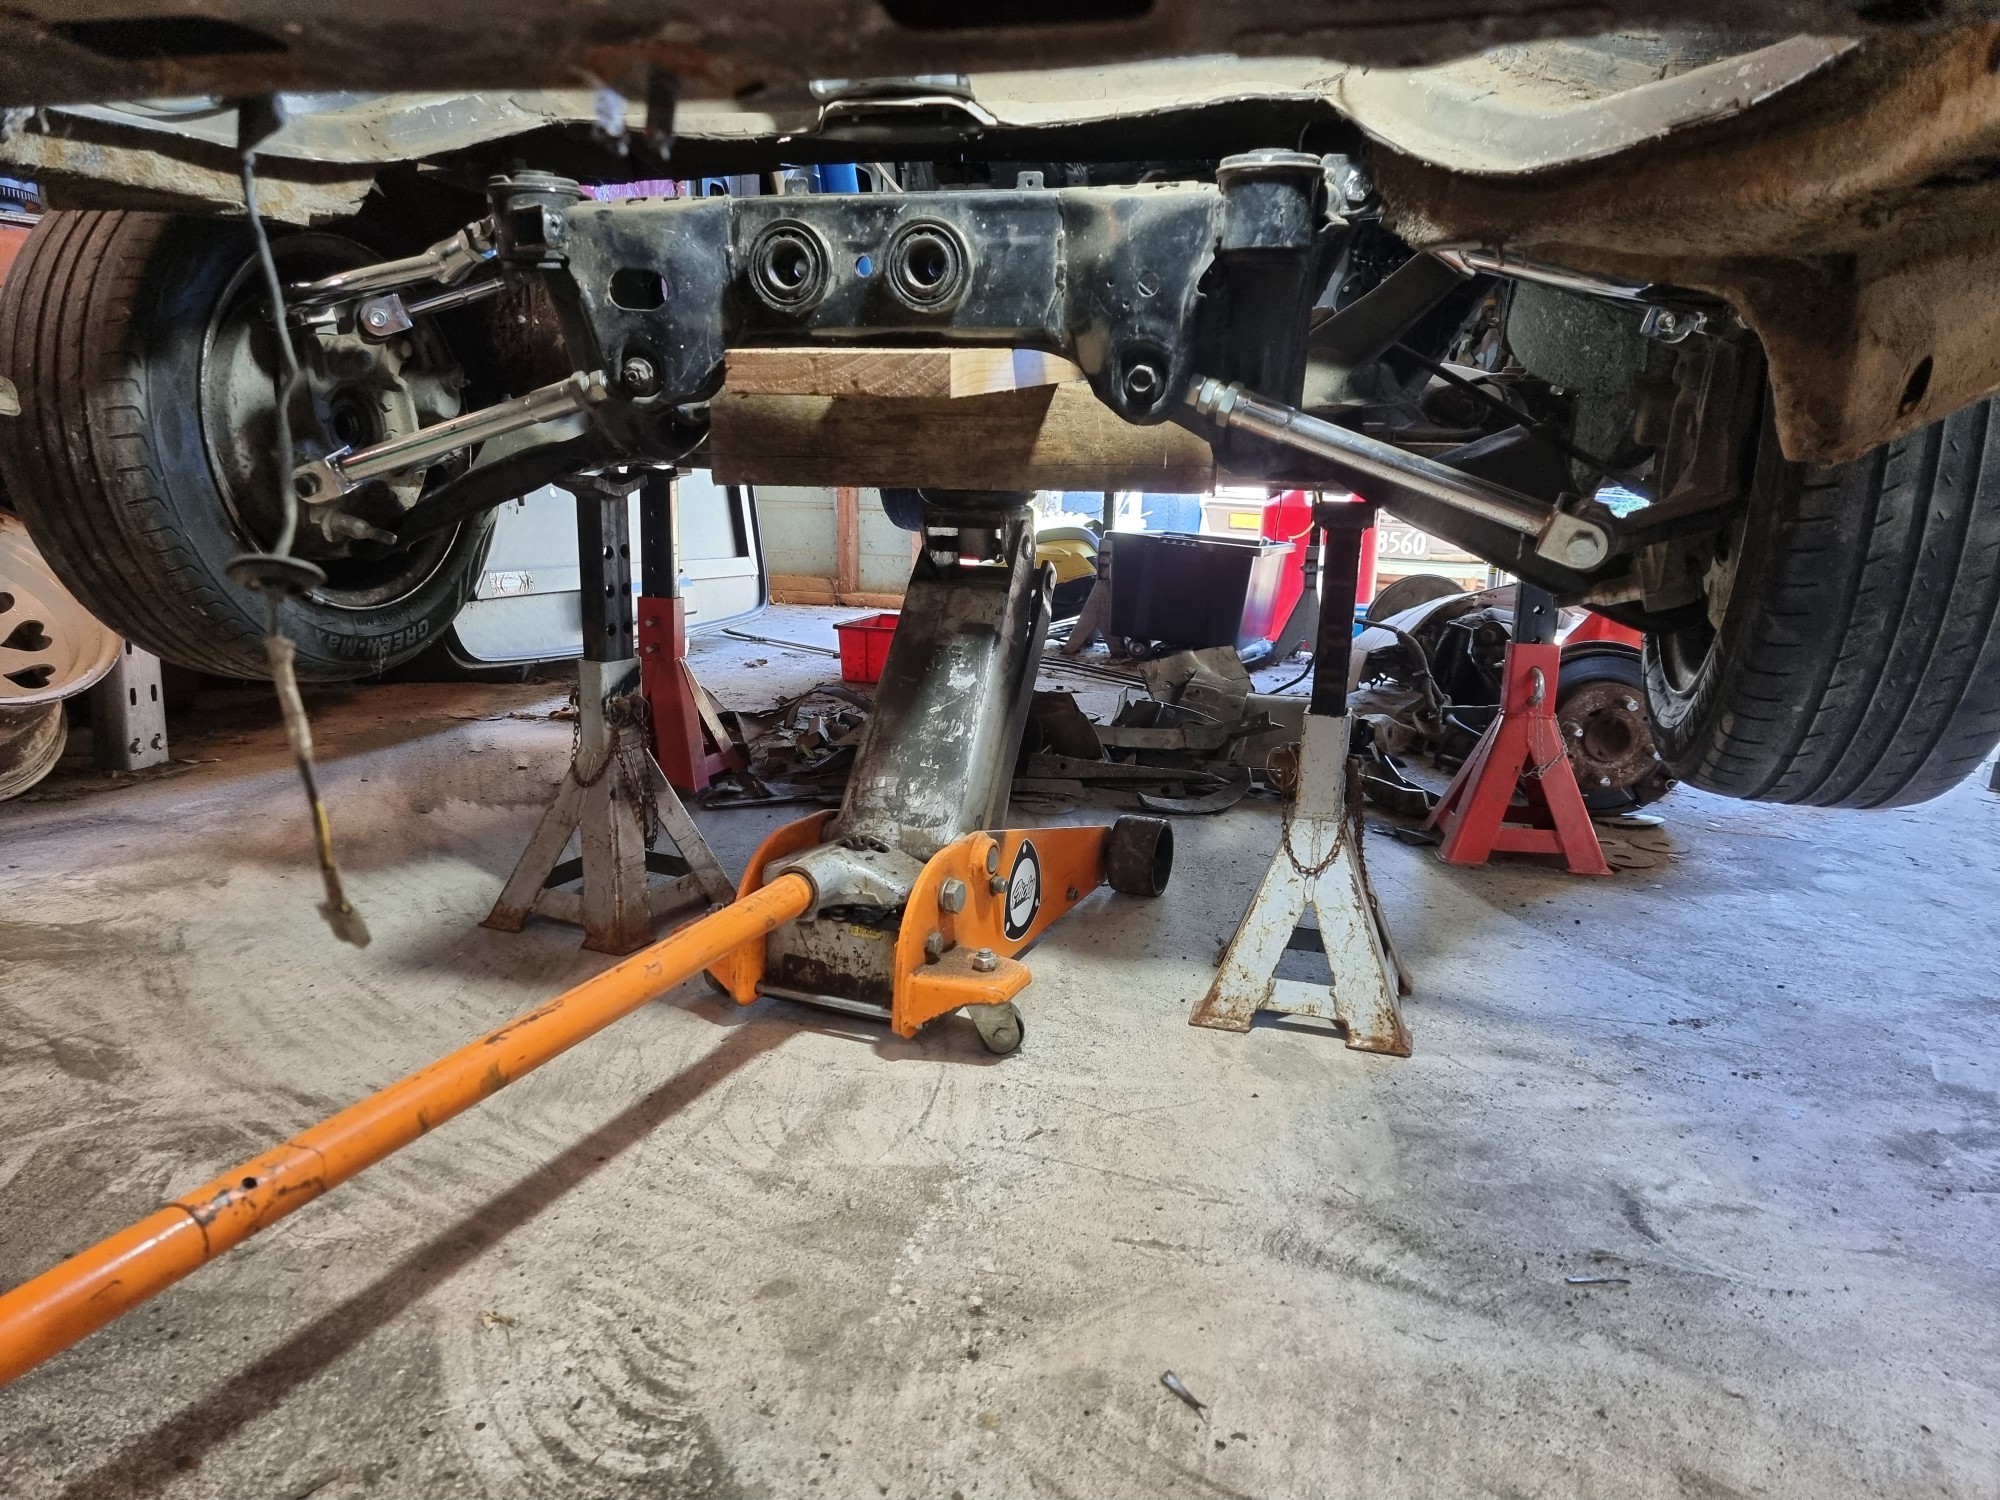
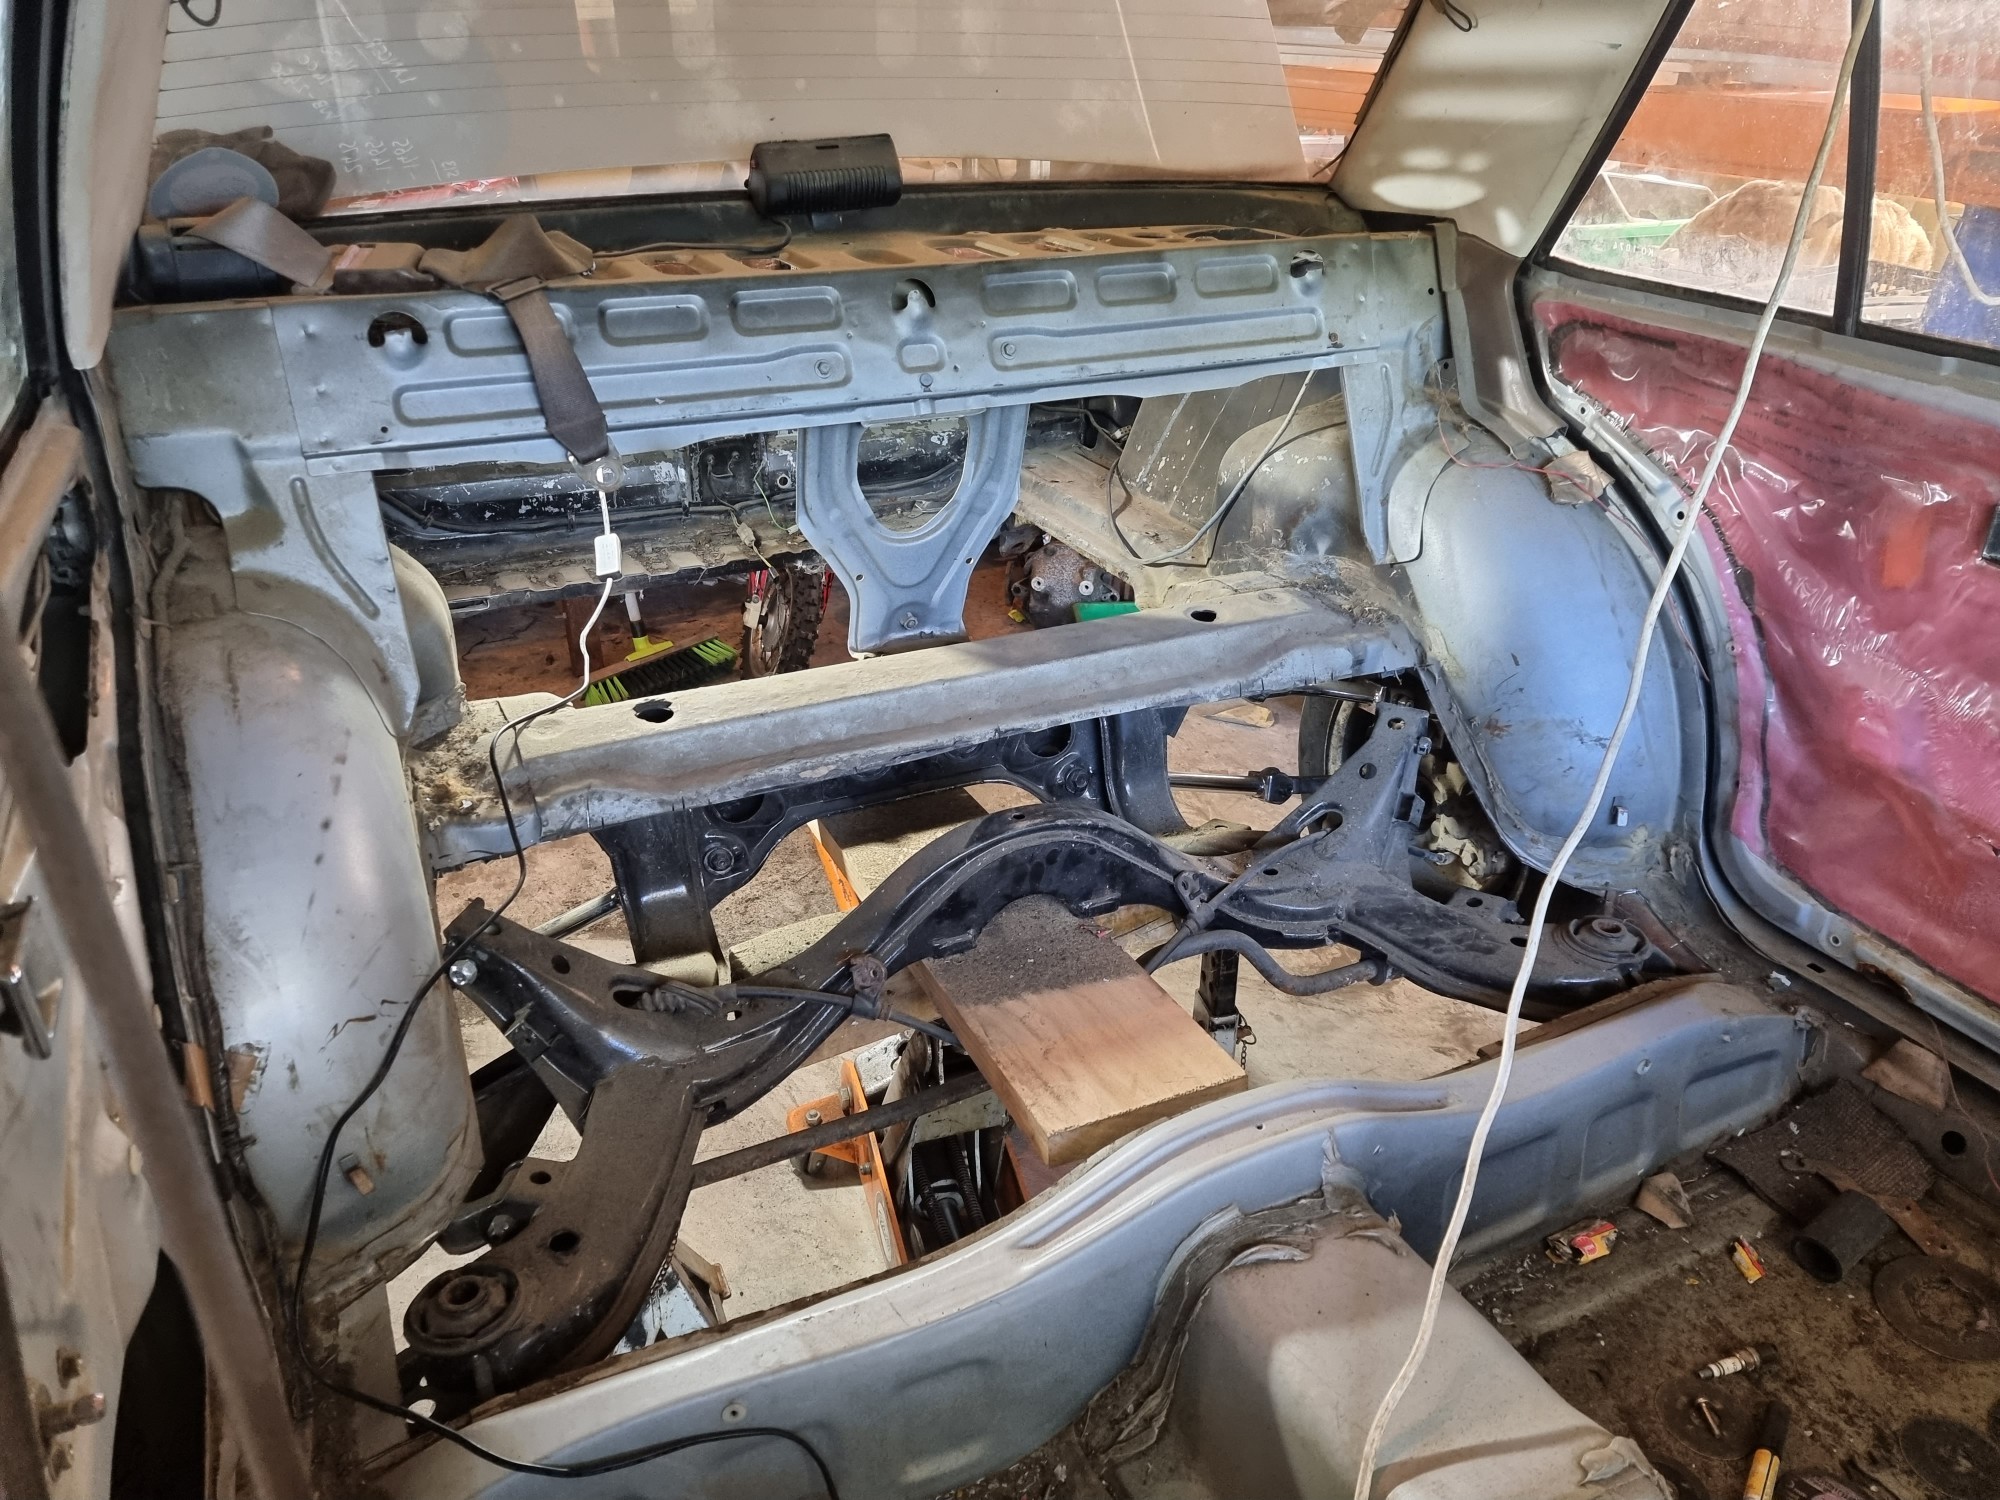
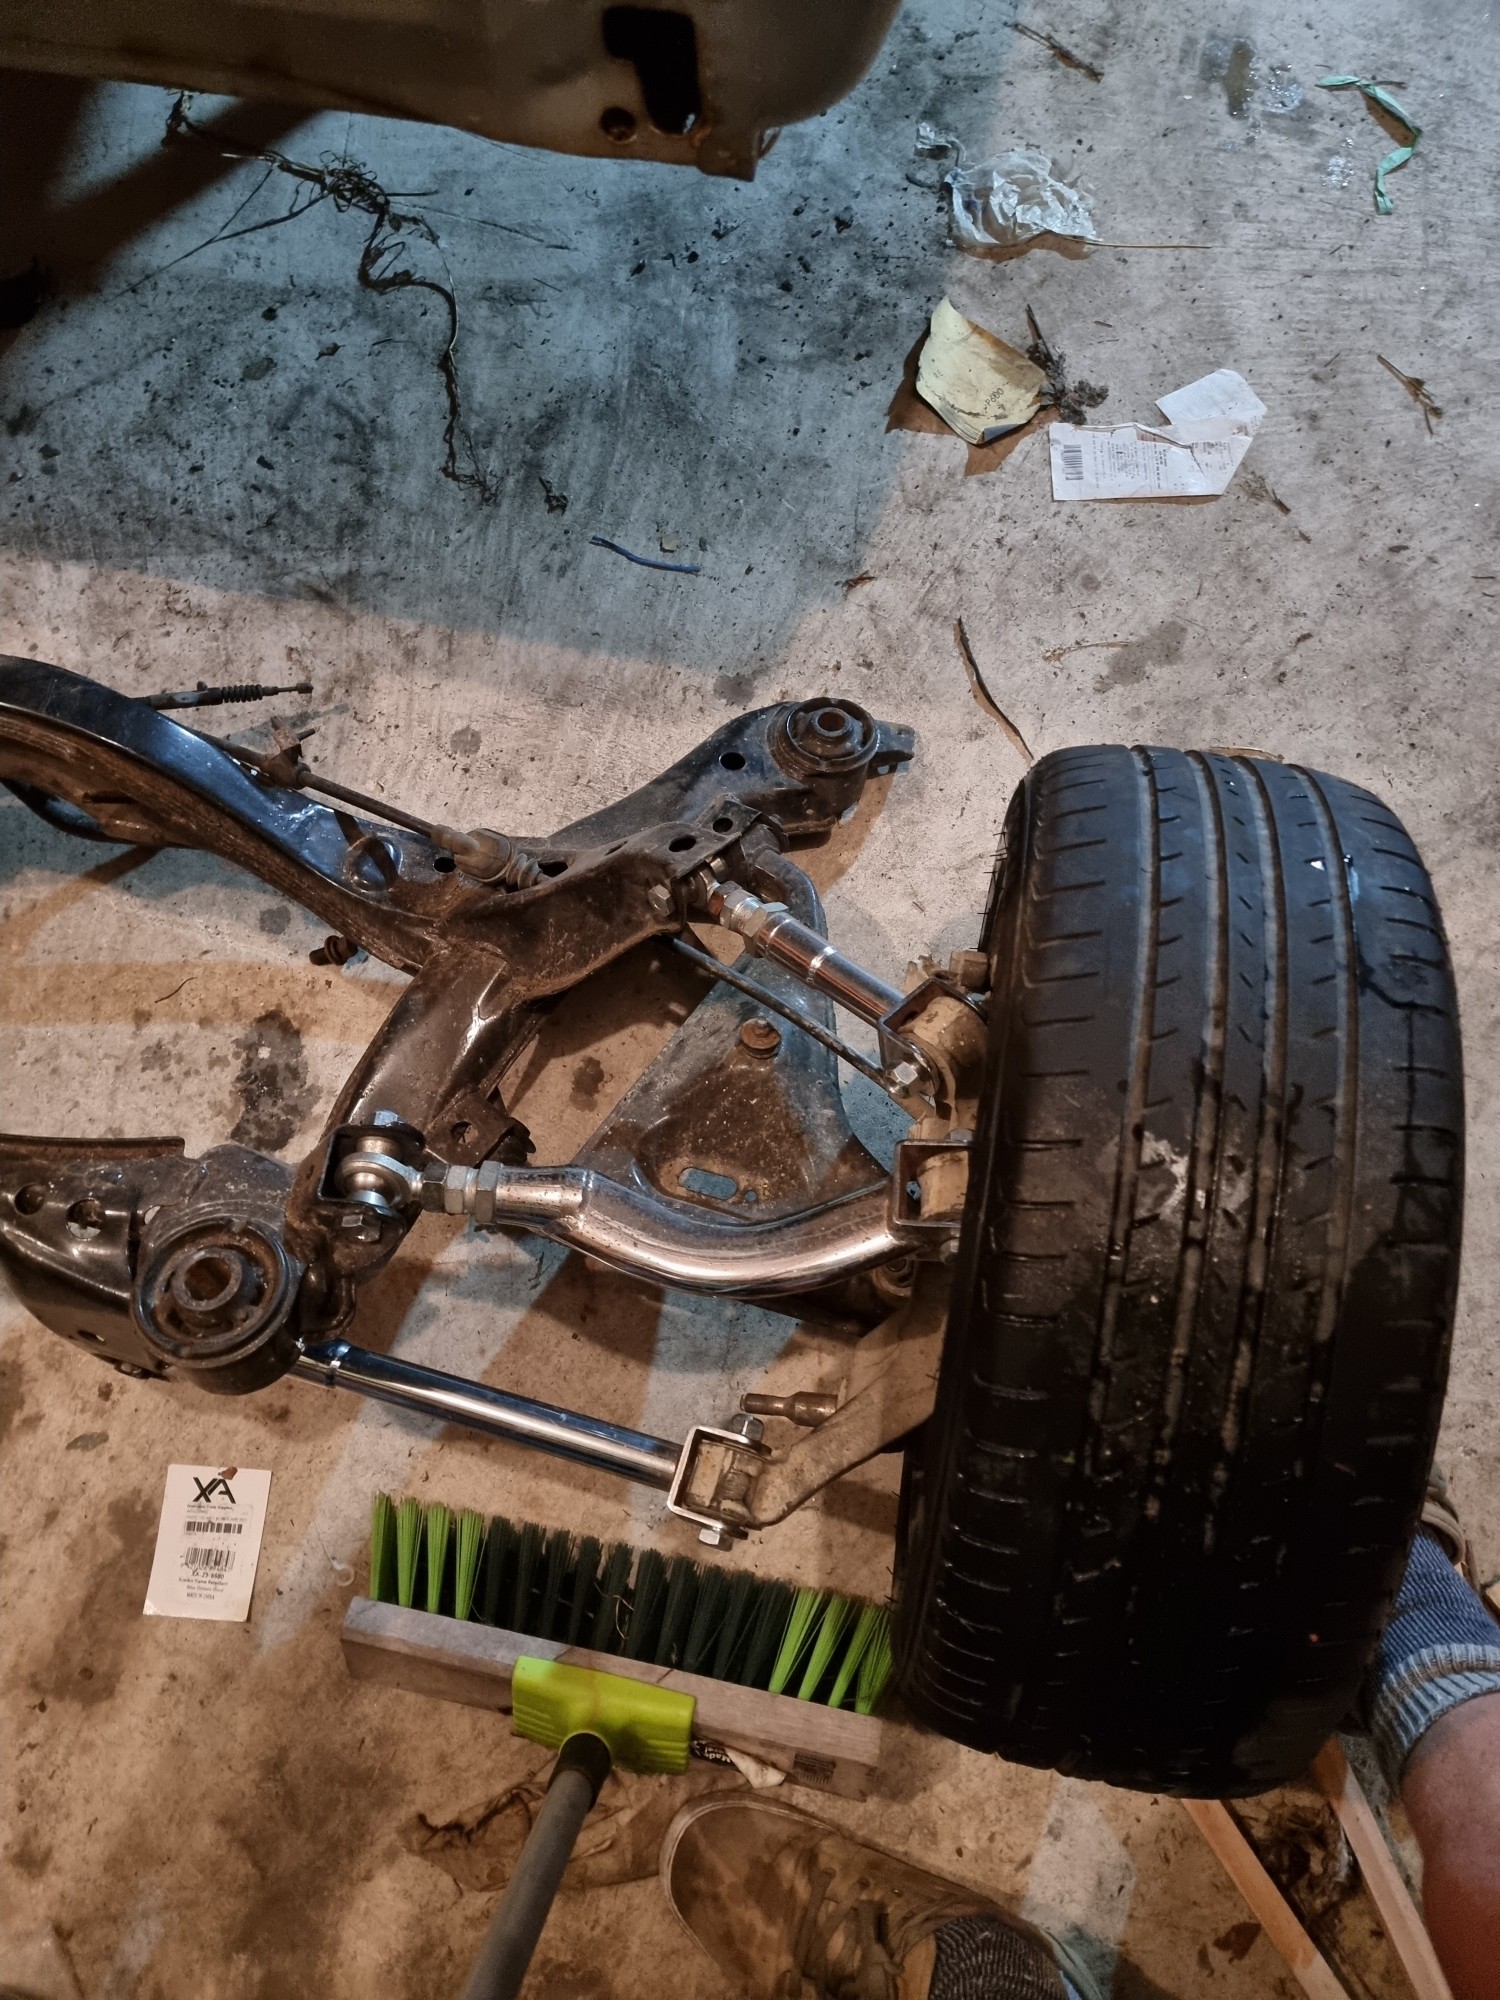
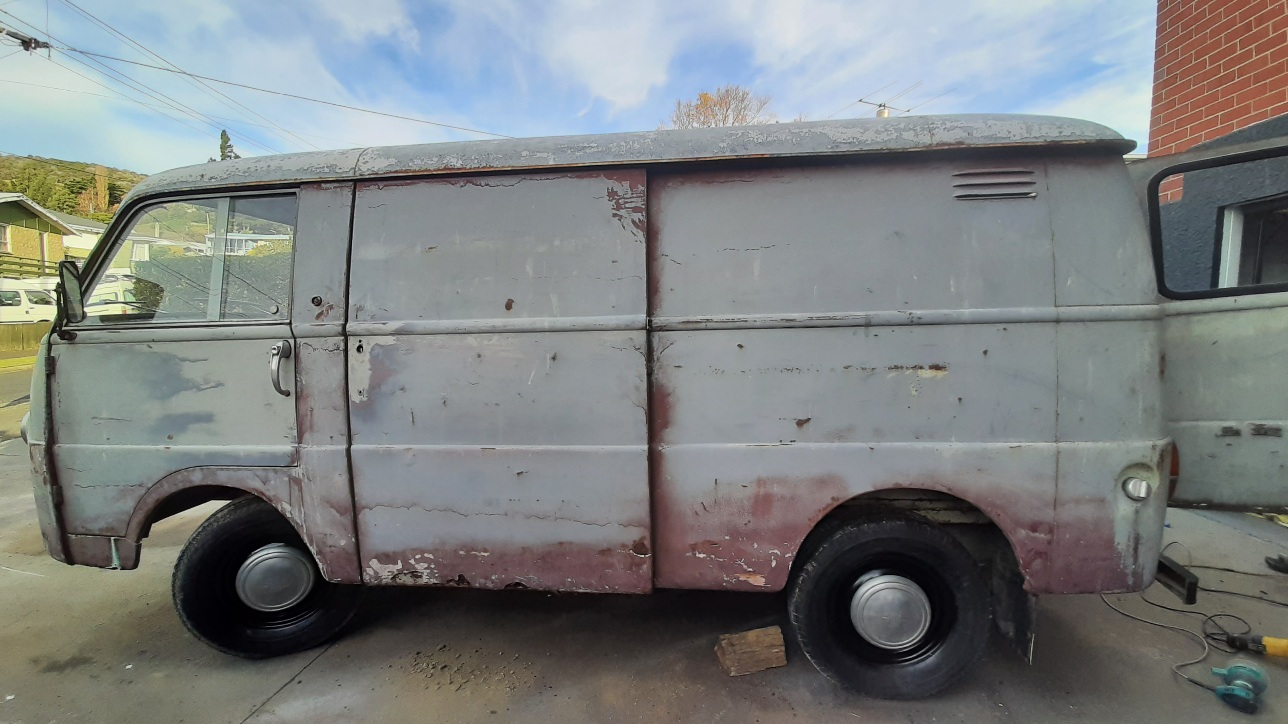
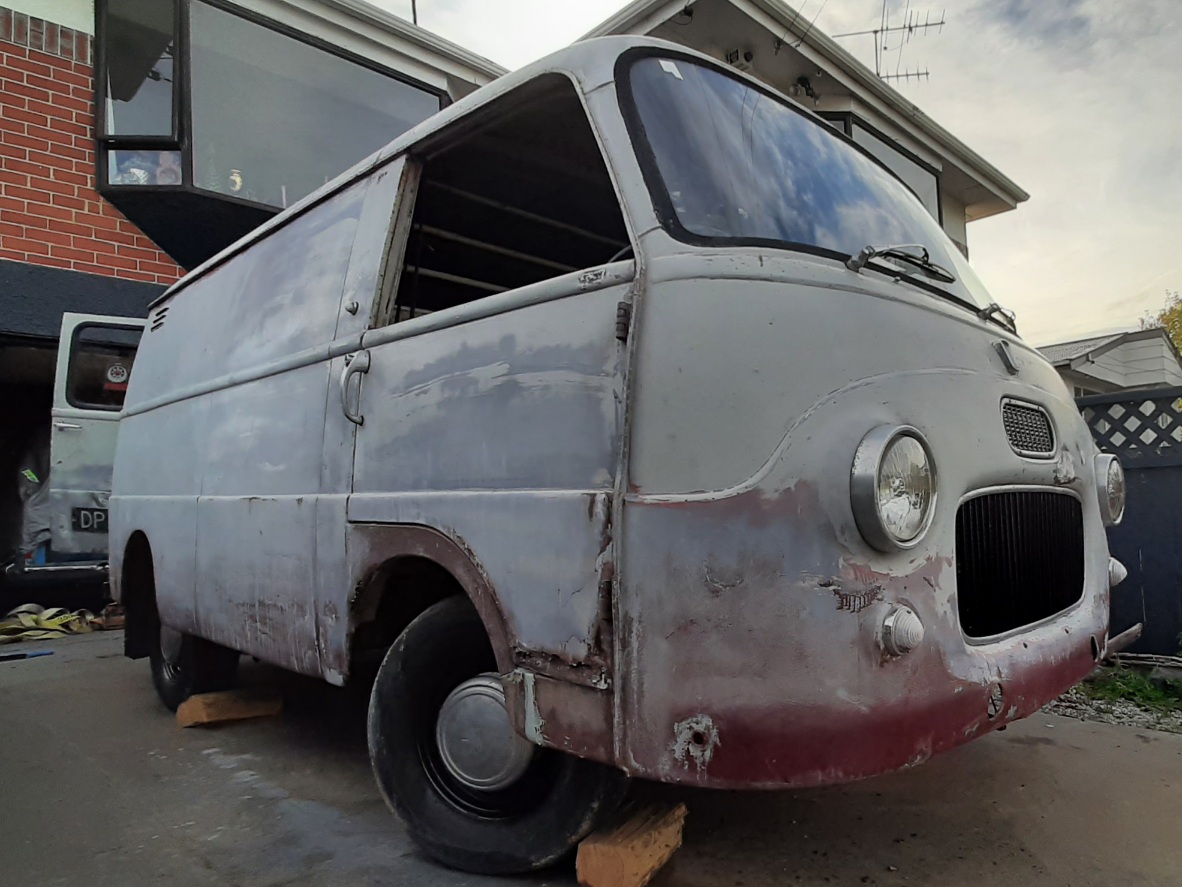
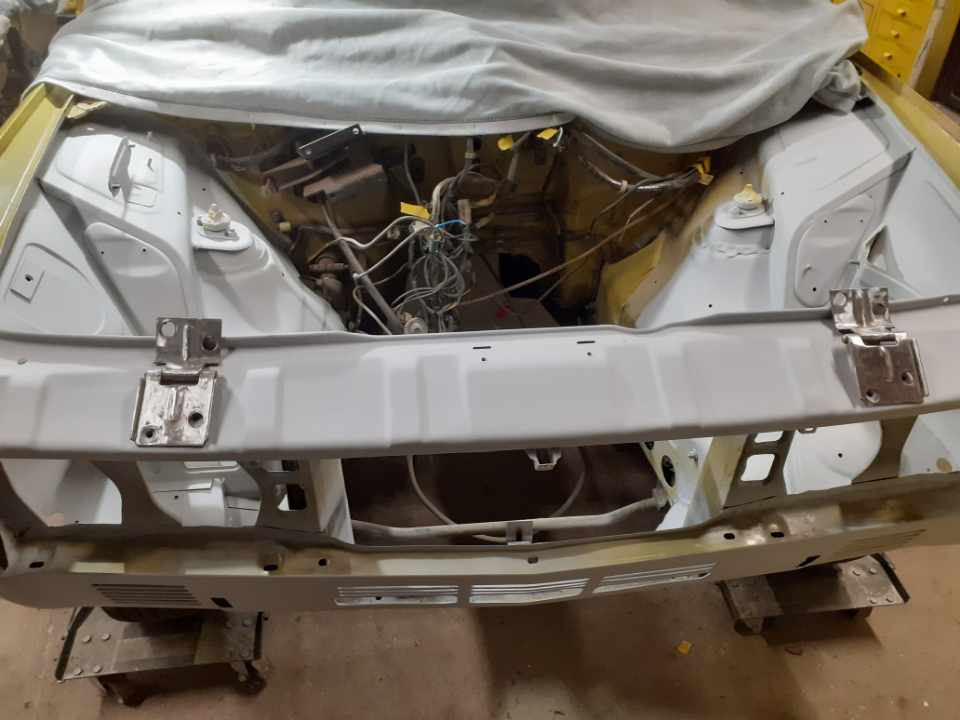
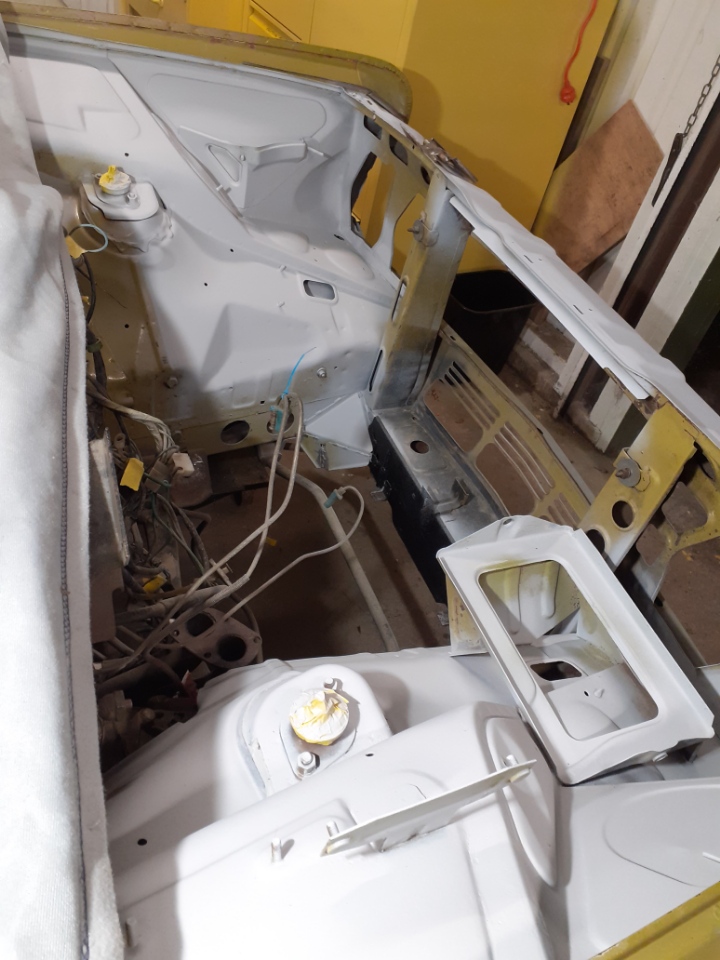
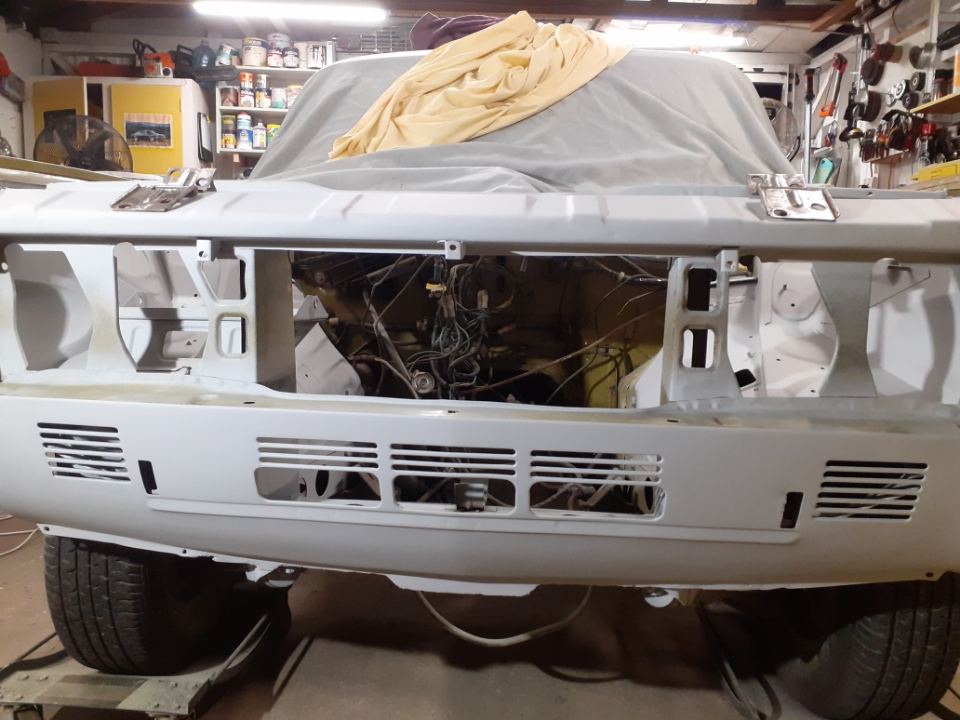
Being that I dont have too much time to keep my shed I went ahead and sprayed the front. I bashed out the main dents where there the best I could but realistically the whole front end needs alot of panel work at some point in the future - probably worthwhile to get a whole new clip. Ive got new bits on the way to rebuild the front axle so that's the next job on the list....
 12 points
 -
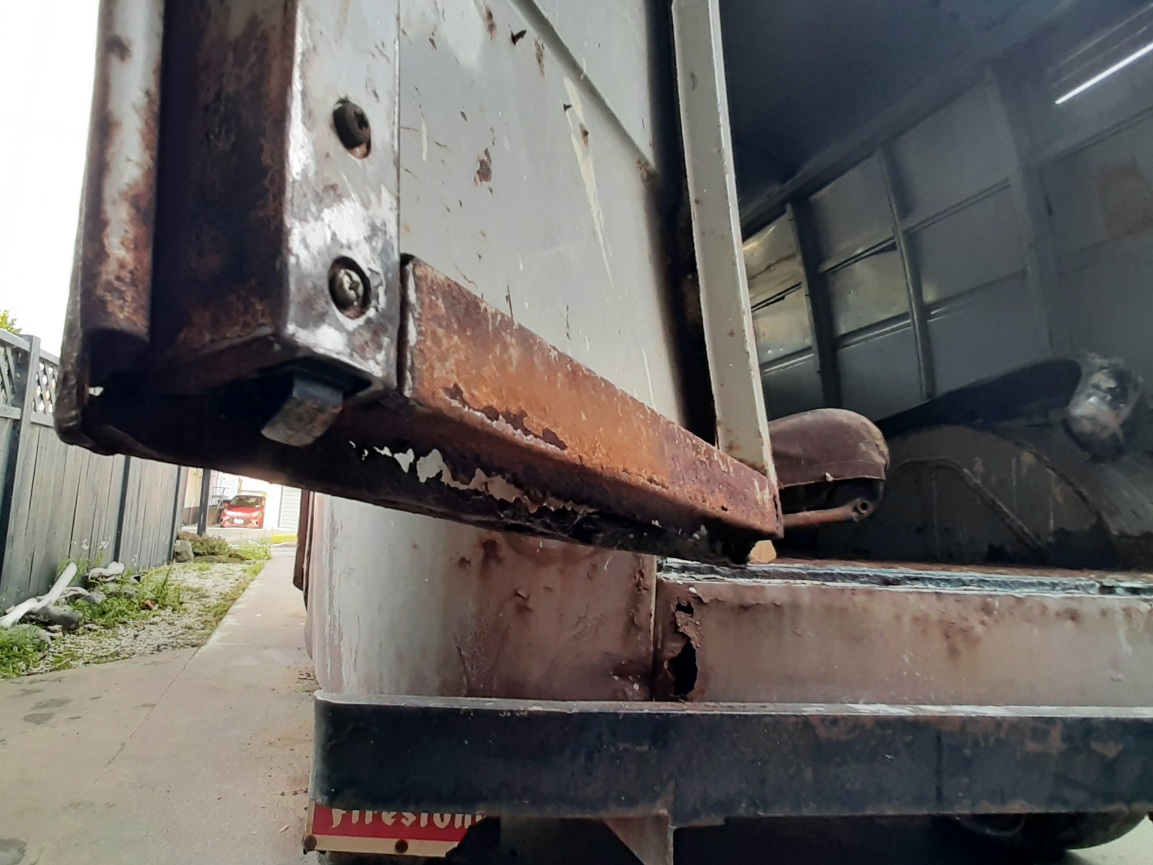
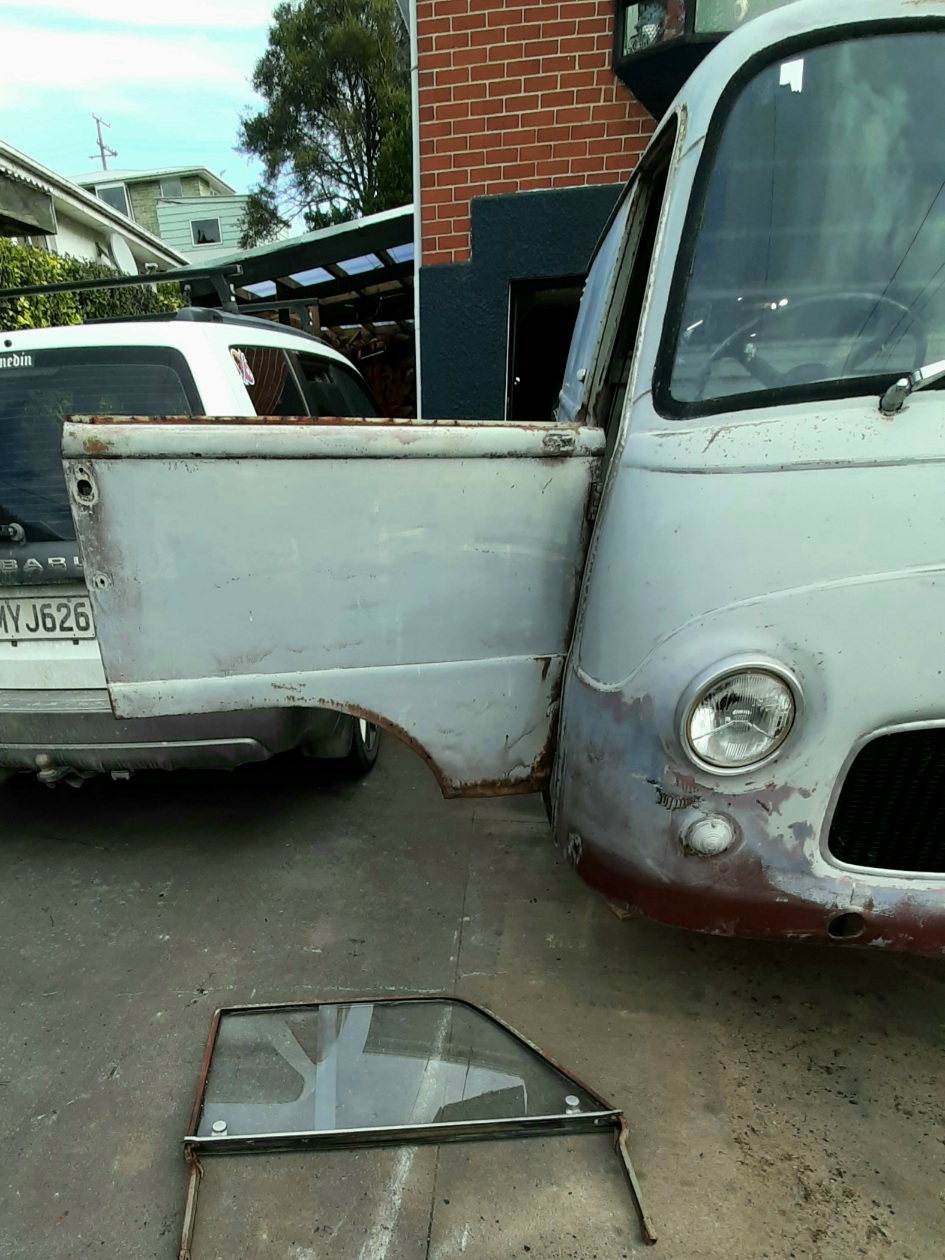
Been doing some excavation, attacking the bog patches with a stripping wheel to free what lurks behind them. First the ugly forehead lump above the windscreen. Looks like it was driven into something, and very roughly but also hardly tapped out. Pretty easy access from the back too so some tappy tap should tidy up a lot. Stoked there are no rusty holes tho! Then the area between the wheels on the passenger side. Jeepers! Front of the sliding door looks good under the protective 10mm layer of wob Back half not so much, and reveals the deep dingle down the side. The panels either side of the sliding door are pretty beat up but not rusty. Again pretty good access from behind so not sure why they used heaps of time layering on so, so much bog, rather than spend a few minutes with a hammer and dolly.
10 points
-
Create a frame to maintain alignment and add tail fins to ensure correct orientation. Then drop from hot air balloon7 points
-
iT b0lTs oN sO iTs gOOd It A kIT I bRoUgT fRoM aMuurica
6 points
-
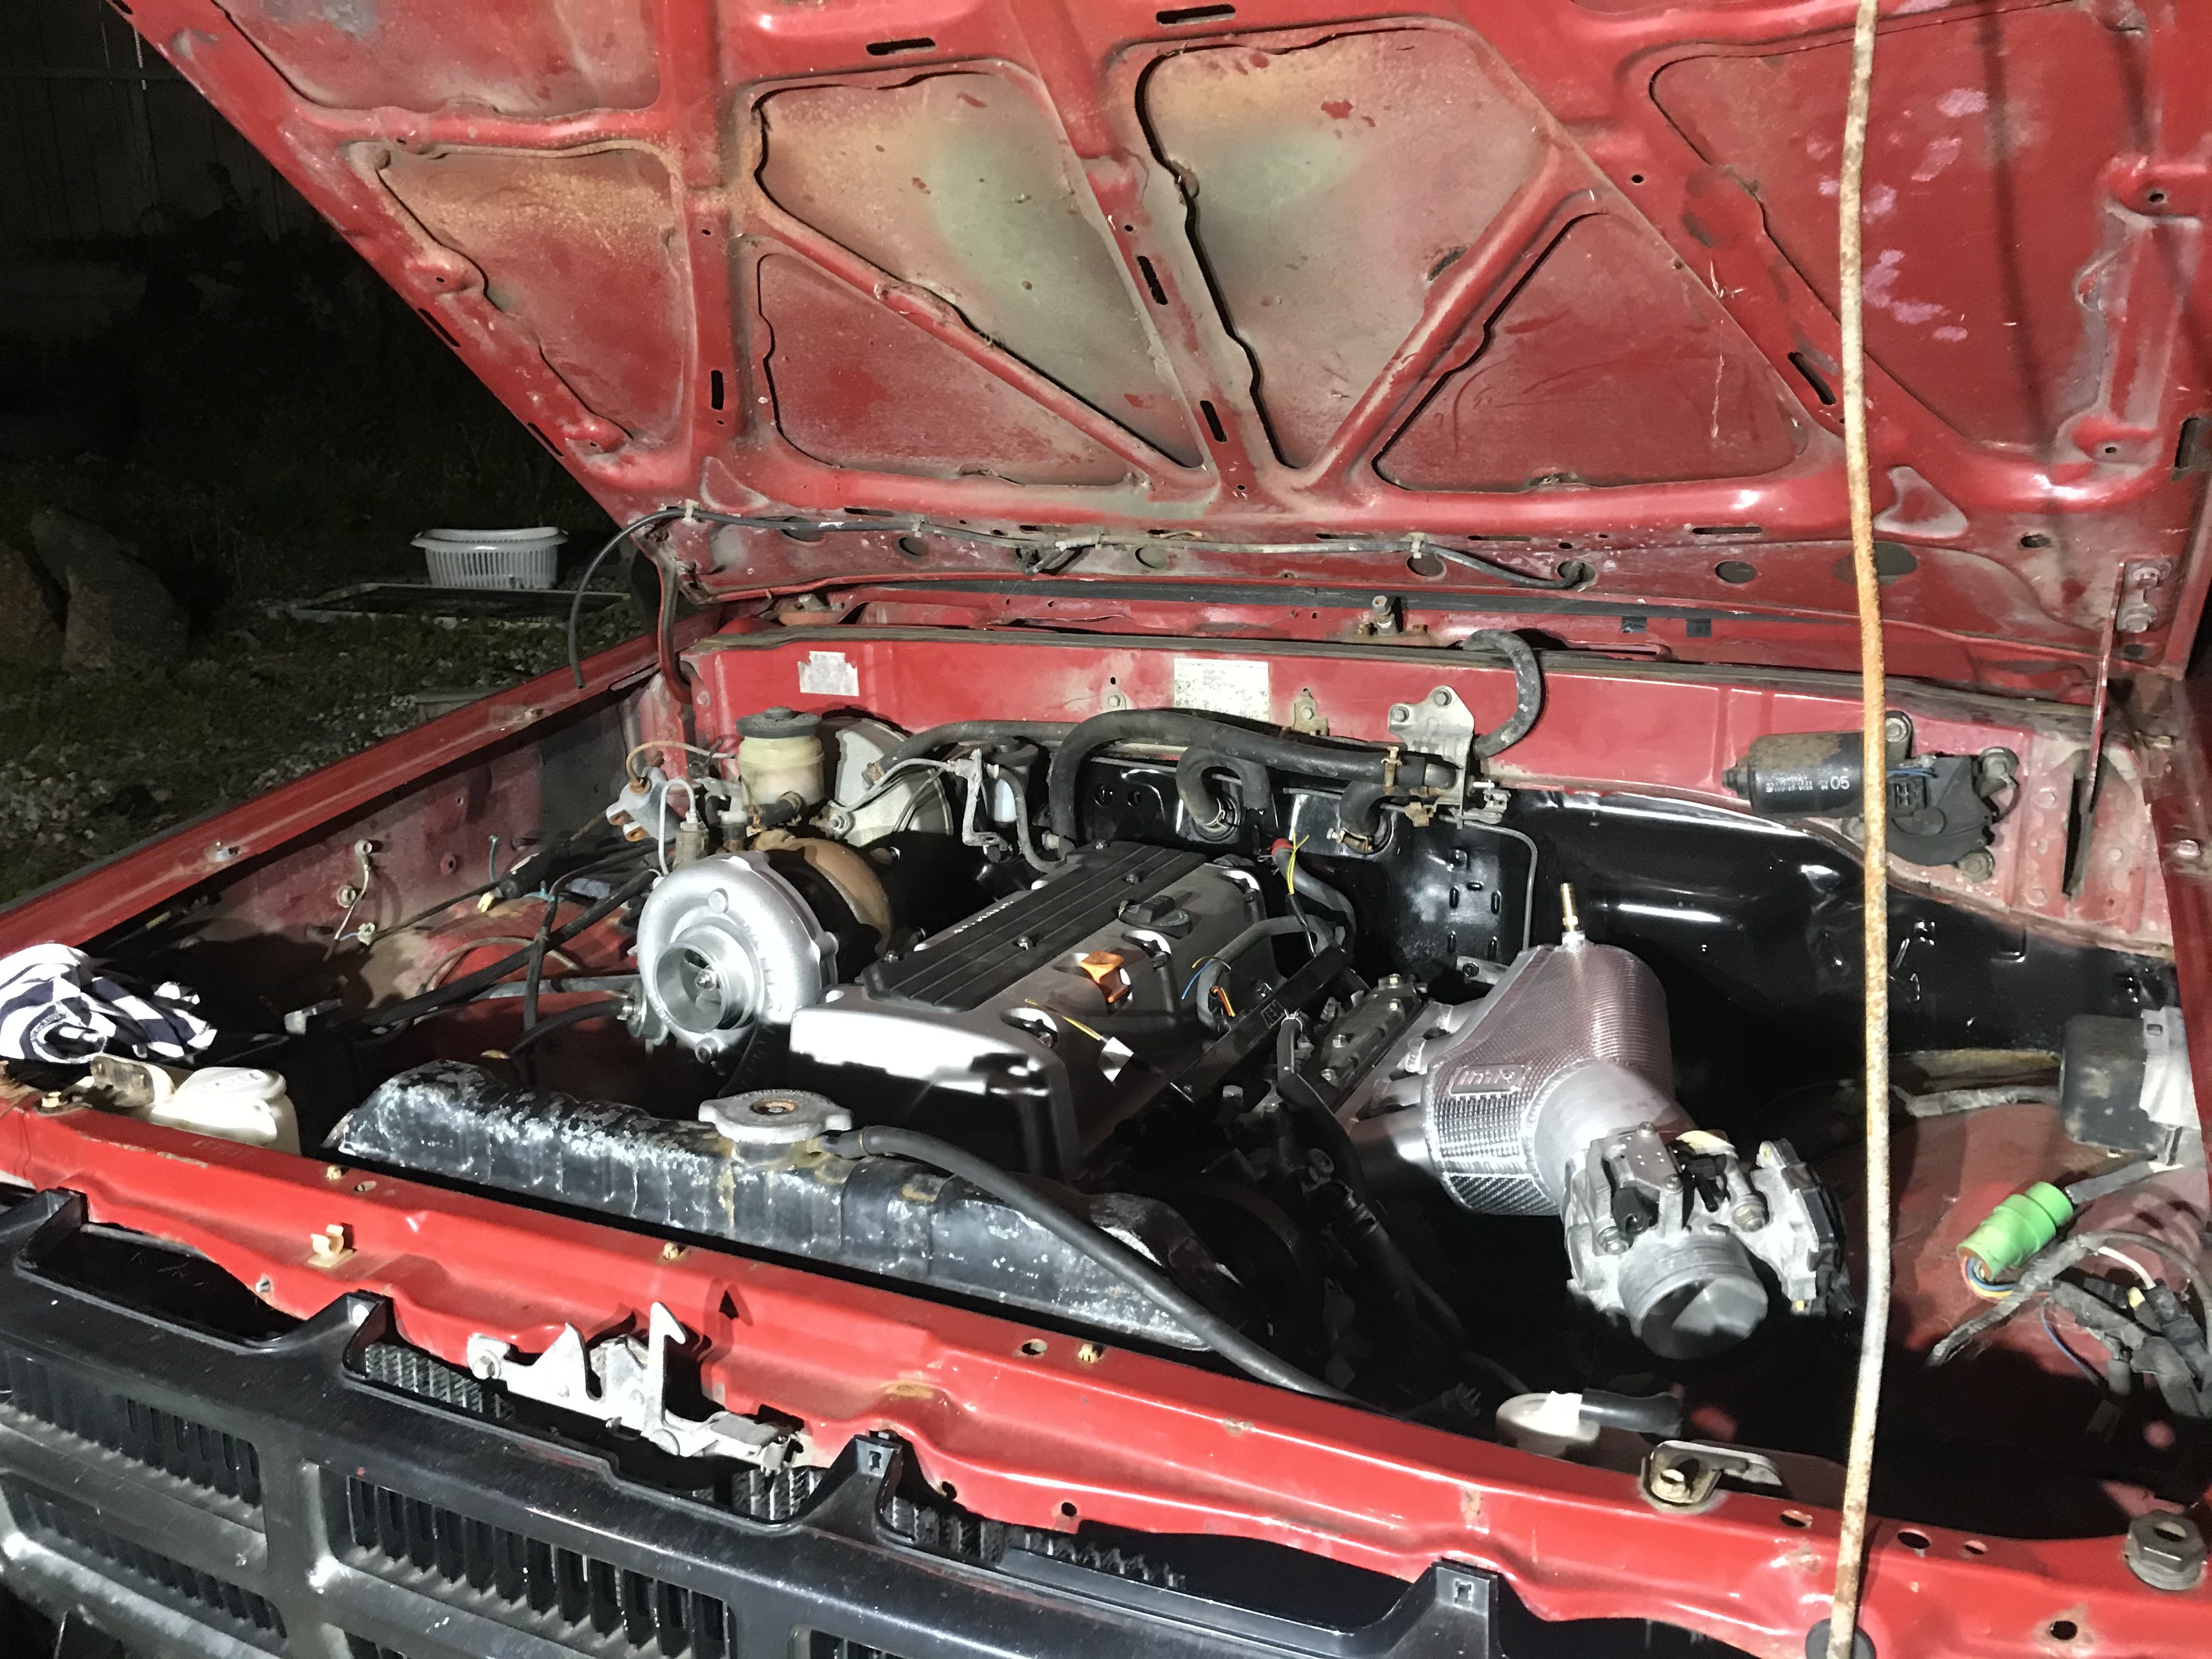
Now that I can work on this again, I thought I'd start with the engine, considering it was already out. I'm planning to stick with the L20ET that came with the car, From my understand it has some good old mystery cam in it, and a flogged turbo. I picked up a new wastegate for the steel wheel 25det turbo i picked up awhile back. But here's a photo of before i started to clean up the engine, and below was afterwards. I'm planning to go with a Speeduino engine management system, So I'll be able to get rid of that massive AFM box in front of the turbo. I'm still waiting on getting a new fuel rail as the OEM one is a mess. Looks like the 25det manifold may need some slight adjusting aswell as it looks like it'll hit the transmission. I've also got an SR20 throttle body i haven't put on yet as well. I'm pretty happy with how the engine is looking now. It's far from done though. I need to replace a handful more gaskets, Paint the valve cover, Get the new fuel rail and injectors, and some more manifold studs for the turbo, attach the throttle body and finish running the lines for the turbo.6 points
-
Put axle in freezer to shrink it? Bearing in oven to warm?5 points
-
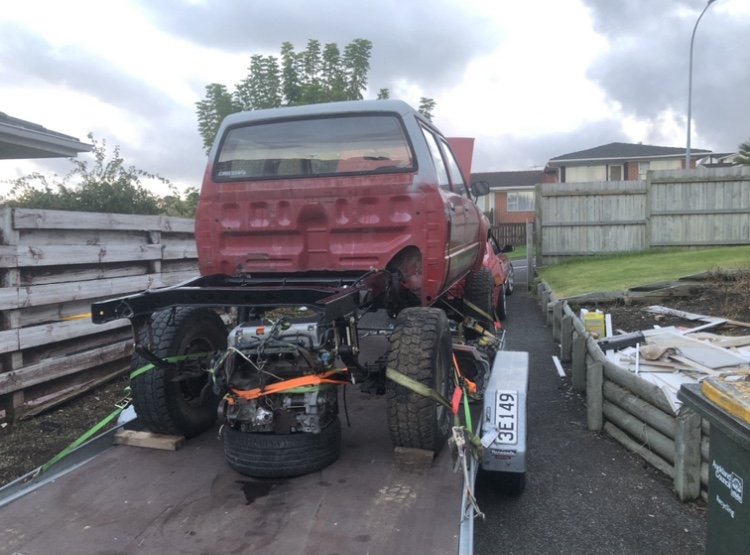
Well it's been awhile since I've posted an update in here. I've finally moved house and had time to move the R30 over to the new place. She wasn't looking the best as I'd started stripping it down again. Put some wheels on her, took out all the loose shit and flat towed her home. The grind continues.5 points
-
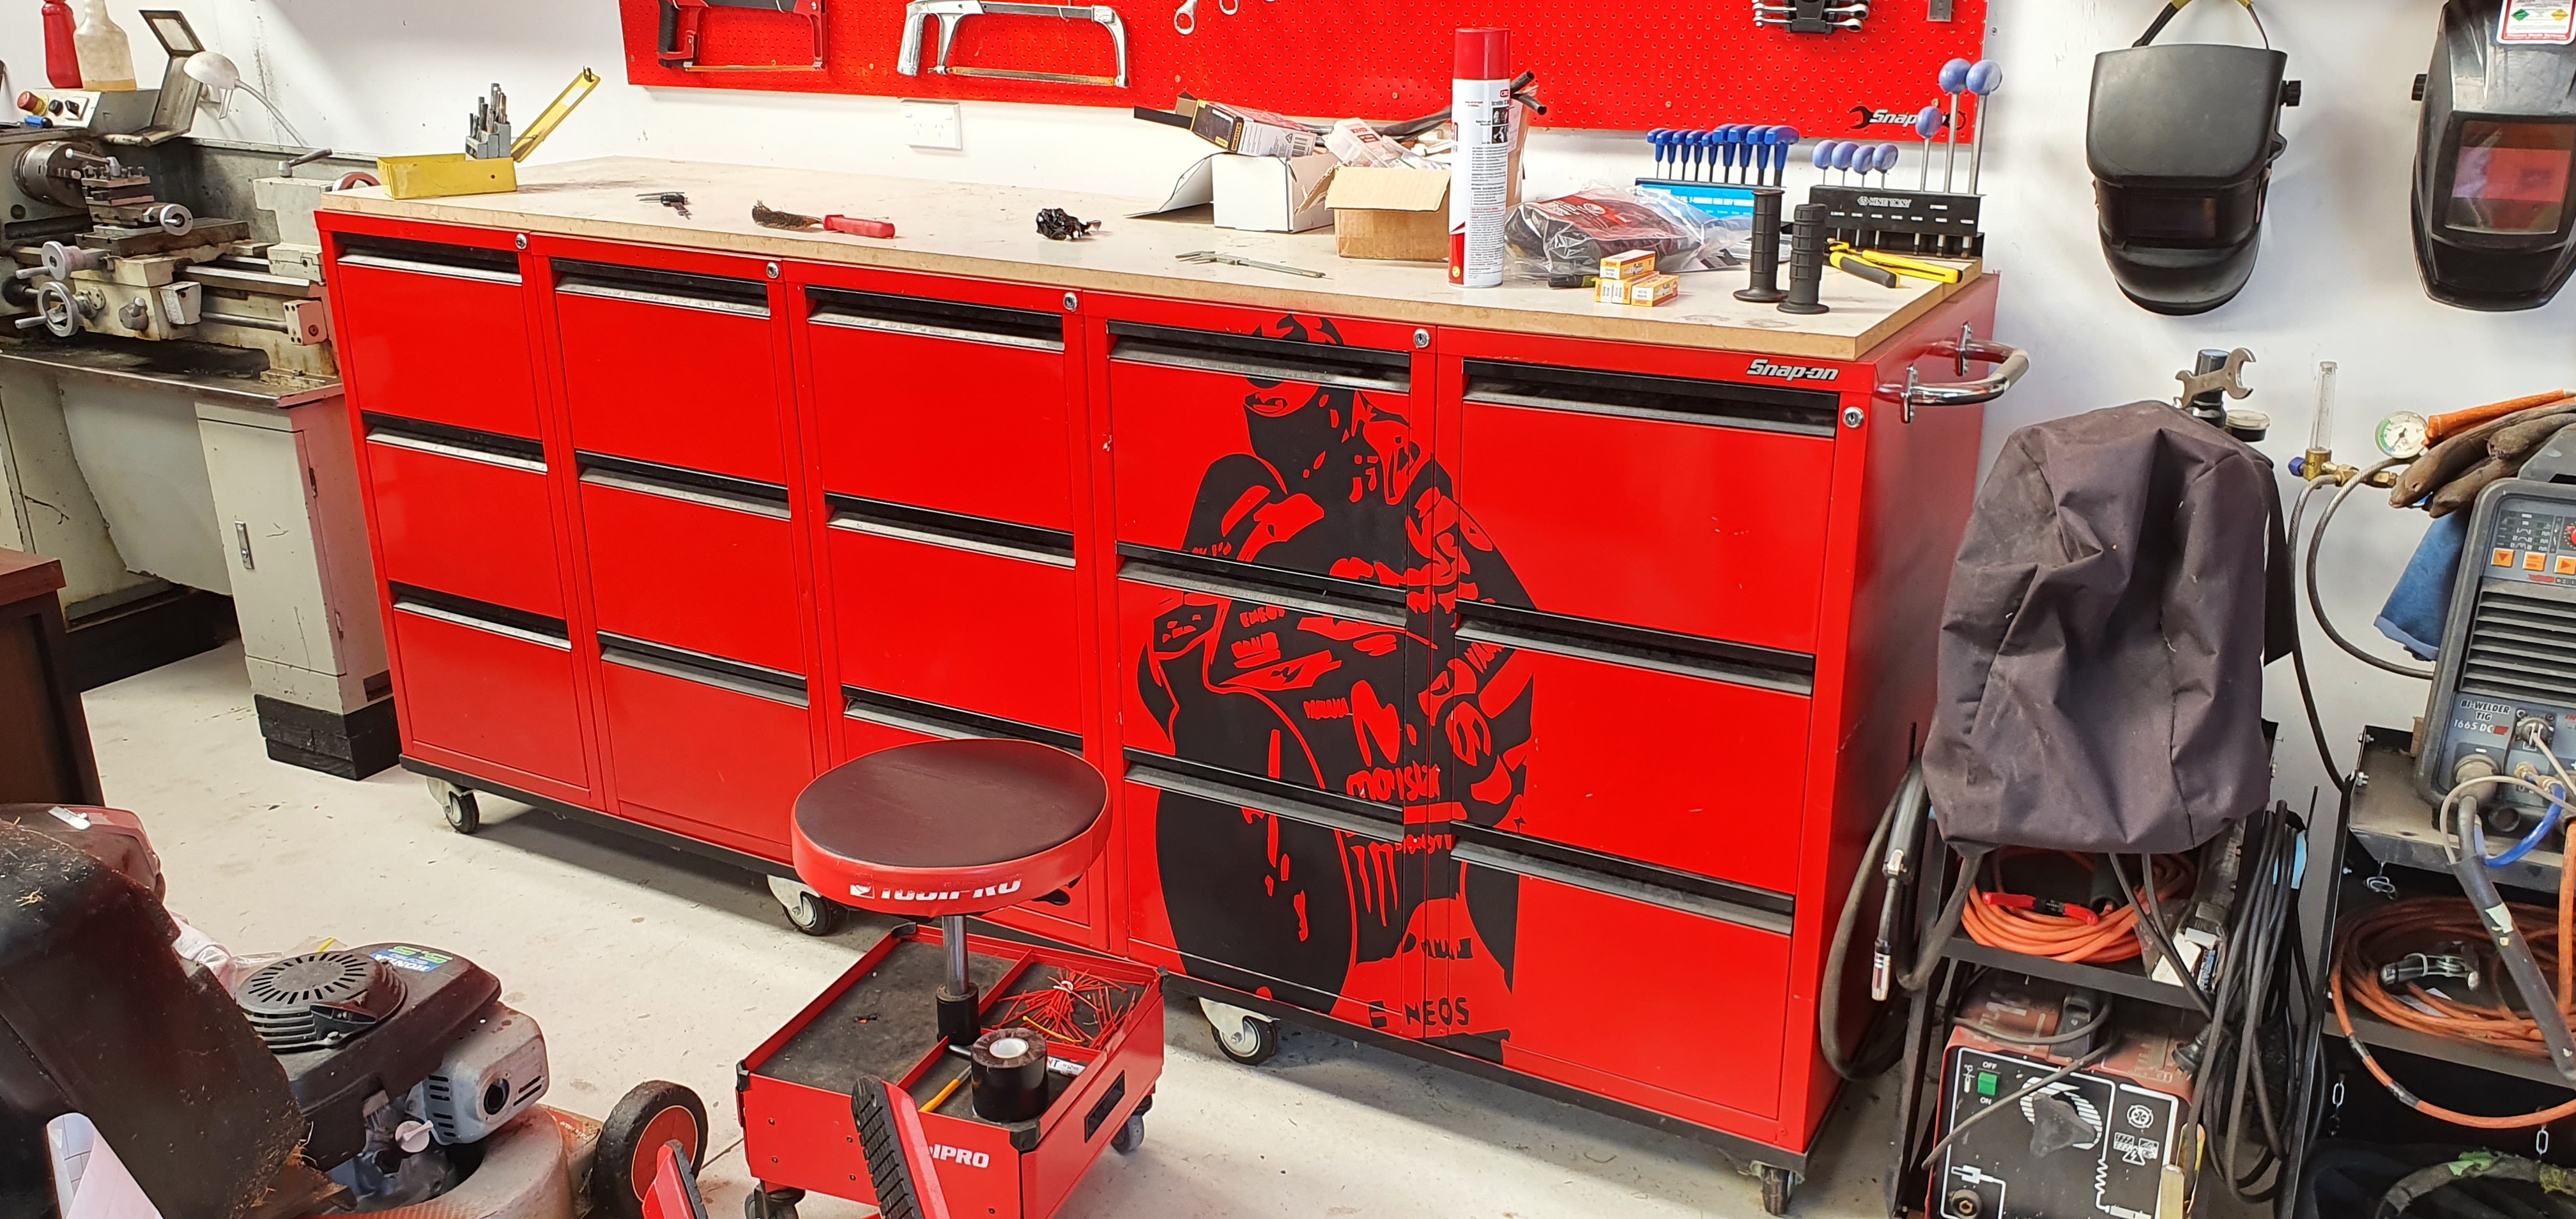
Toolbox art? Well if putting stickers on shit constitutes "art"? Was quite the mission to do and if I did it again I'd probably position it slightly differently...but meh, it works and looks basically like what I had in mind.
5 points
-
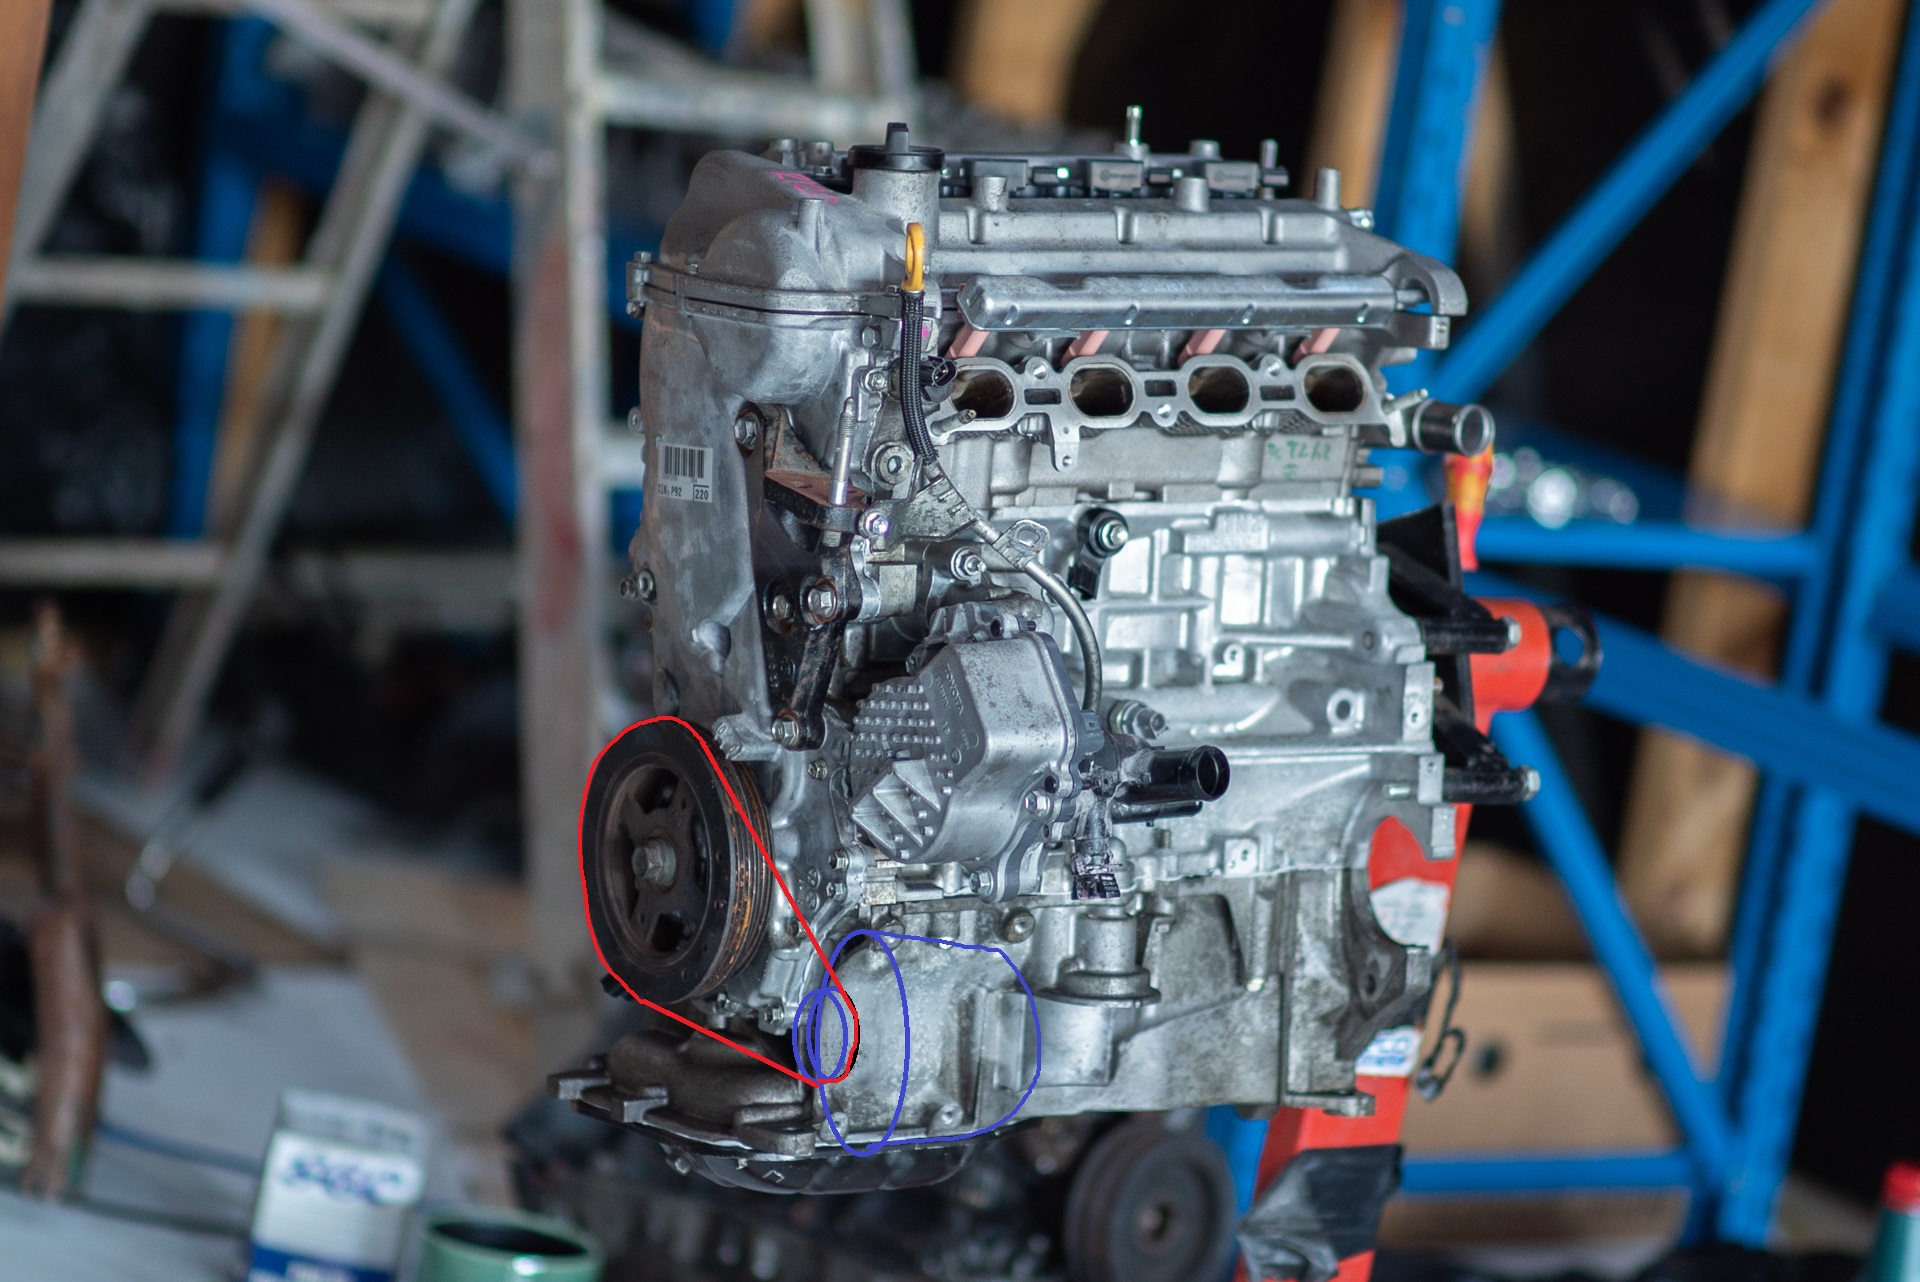
Progress. The head is back on properly, cam clearances all within spec after 2-3 goes of juggling the existing shims around. I pick-a-parted a front pulley, so now I can start on an alternator bracket. Funnily enough the light weight alternator kit for my 3S motor, that saves 4KG. Uses a 1NZ alternator. So there's some irony in stealing the brackets from that, in order to mount a 1NZ alternator to a 1NZ. I'll just need an intermediate plate to bolt to the side of the block and stick these on, hopefully. Not the most light weight solution but I'm more about just getting this going for now. Looks like underneath the waterpump will be the place for it, and no AC anymore. Keep the top side looking tidy - Afterall, this is a show car. One of the now superfluous water outlets was a hose barb that sat with a tapered thread into the back side of the block. Which I replaced with a drain block off bolt I pinched from a dead 3S motor. Easy fix. Also note how the dipstick on this motor nicely bends out of the way, rather than being between number 1 and 2 throttles. Excellent. The power steering pump is apparently difficult to mount on the rear side of the engine, but I'm thinking something looks doable. The amount of gasket goo required to put on both layers of the sump as well as the timing cover is insane. If this doesnt leak, I'll be suprised!
5 points
-
Just like steering bits, only weld them. Never bolt them.4 points
-
I've spent the last few weeks trying to strip the shell down as much as possible to find any hidden rust and to have the car sent off to the panel beaters. It will be good having all the rust cut out and being painted professionally, Even though i would have liked to do it myself. For the most part, It's just a rolling shell now. There is still the glass in, although I have to get the windscreen removed as it's damaged now unfortunately. There is a massive crack on the passenger side of the window. I picked up these Recaro fishnet seats awhile back and have been considering getting them re-upholstered with the rest of the interior. Still on the fence about it. I'll do an update on the interior at a later date as currently it's all inside the car in boxes.4 points
-
I figured i'd just throw this in for comparison, This is a picture of the new turbo. This is a picture of the old turbo, next to the new one.4 points
-
It's been a minute..... Here's some progress I guess ? Ditched the borg Warner diff idea when I had a mind explosion. Now has a s14 rear end I'm trying to modify into it. The surgery started with small cuts and ended up at this current state... definitely in the deep end over my head but all decisions have happened slowly with plenty of good advice from mates that are experienced in this field of torture. S14 subframe was purchased for one 18 box of 7p Cody's, no covid or rfb tax to be seen Obviously next step is to make a new rear chassis to accept Nissan plague into the lancer. This is a huge step and learning curve for me so may be awhile before another update Also a sweet handbrake I scored cheap And a sweet meme that suits this car
4 points
-
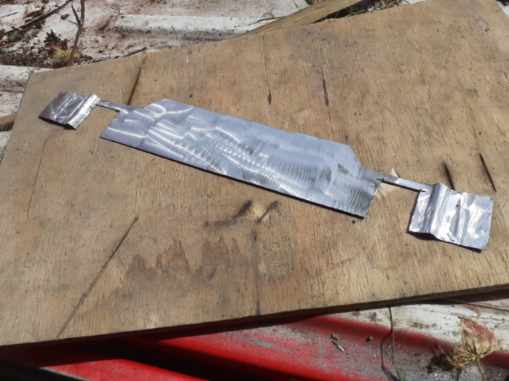
A mates farm had pylons replaced with bigger pylons. They got to keep the steel. Ive always tried to think of things that you could make out of it. Today I found a use: Sweeeeet!!!
3 points
-
Never mind, I used my neighbours press. Thanks guys.3 points
-
I managed to get in touch with one of the previous owners and they sent me some pictures of how this car used to look. Looks like this car has had a hard life before it ended up in my hands.3 points
-
People have put the electric assist motors into KP starlets. Legend has it that the same steering column joints/splines have been in use for over 40 years3 points
-
Still been cracking on with this, 70% finished with our tiny home build so that's taken priority over this unfortunately.. Still been trying to get this running. Installed exhaust with lambda o2 sensor in it. No photo though. Fucked off the extra 2 injector loom and plugs and terminated the end. I used my soldering iron to engrave the plugs so I no which is which. Loom all finished now. Mounted ecu and relays on bottom side of glovebox hidden and out of the way. Used 2 bolts thru from glovebox into perspex so can remove easily enough if need be. I can access all the fuses so hopefully shouldn't need too. Fired up ECU and went thru all the pre start up checks. Everything works, and is what it should be, coil 1, injector 1 etc. no error codes not bad! Green LED is my AEM methanol light, if an error code pops up it'll flash depending on the fault code/low reservoir. I've set it up in the ecu that if it throws an error/low reservoir it'll engage the supercharger clutch and switch fuel tables that ill get setup at tuning stage, pretty handy failsafe. The led illuminates brighter when it starts spraying. As I got further into setting up the ecu it didn't come with its problems.. Firstly the bmw e series tps had failed/was already broken before installing was a pickapart special. After testing with multimeter it was apparent it was stuffed. Back to pick a part for another, with my newly acquired testing skills I tested another before buying. After installing i was able to sync it to ecu so win! Then when trying to sync my trigger 1 with ecu, nzefi coil on cylinder 1 randomly blew the coil fuse at the relay and then when changing the fuse it would instantly heat up real quick and almost be untouchable within 10 seconds. All the other 3 worked. I had already checked for spark etc in ecu before I got to this stage. Re checked wiring and all is correct. Anyway nzefi were good about it and Chris sent out another but warned in past its been due to incorrect wiring. Got it all hooked back up and I was stilling struggling to sync trigger 1 with ecu. Turned out the crank sensor my mate gave me was a magnetic pickup and not a GS sensor for ferrous metal.. picked up another cherry GS100502 but am yet to change it over. Should do the trick though. My gauge pod turned out so I started installing, the 2 gauges are oil pressure and boost gauge. The oil pickup i will run to ecu and set up a failsafe then ecu to run the gauge. As previously mentioned i decided to mount it on steering column behind steering wheel. Pretty happy with how it turned out. Couple more pics of engine bay cuz why fuckn not Thanks for looking Almost there now3 points
-
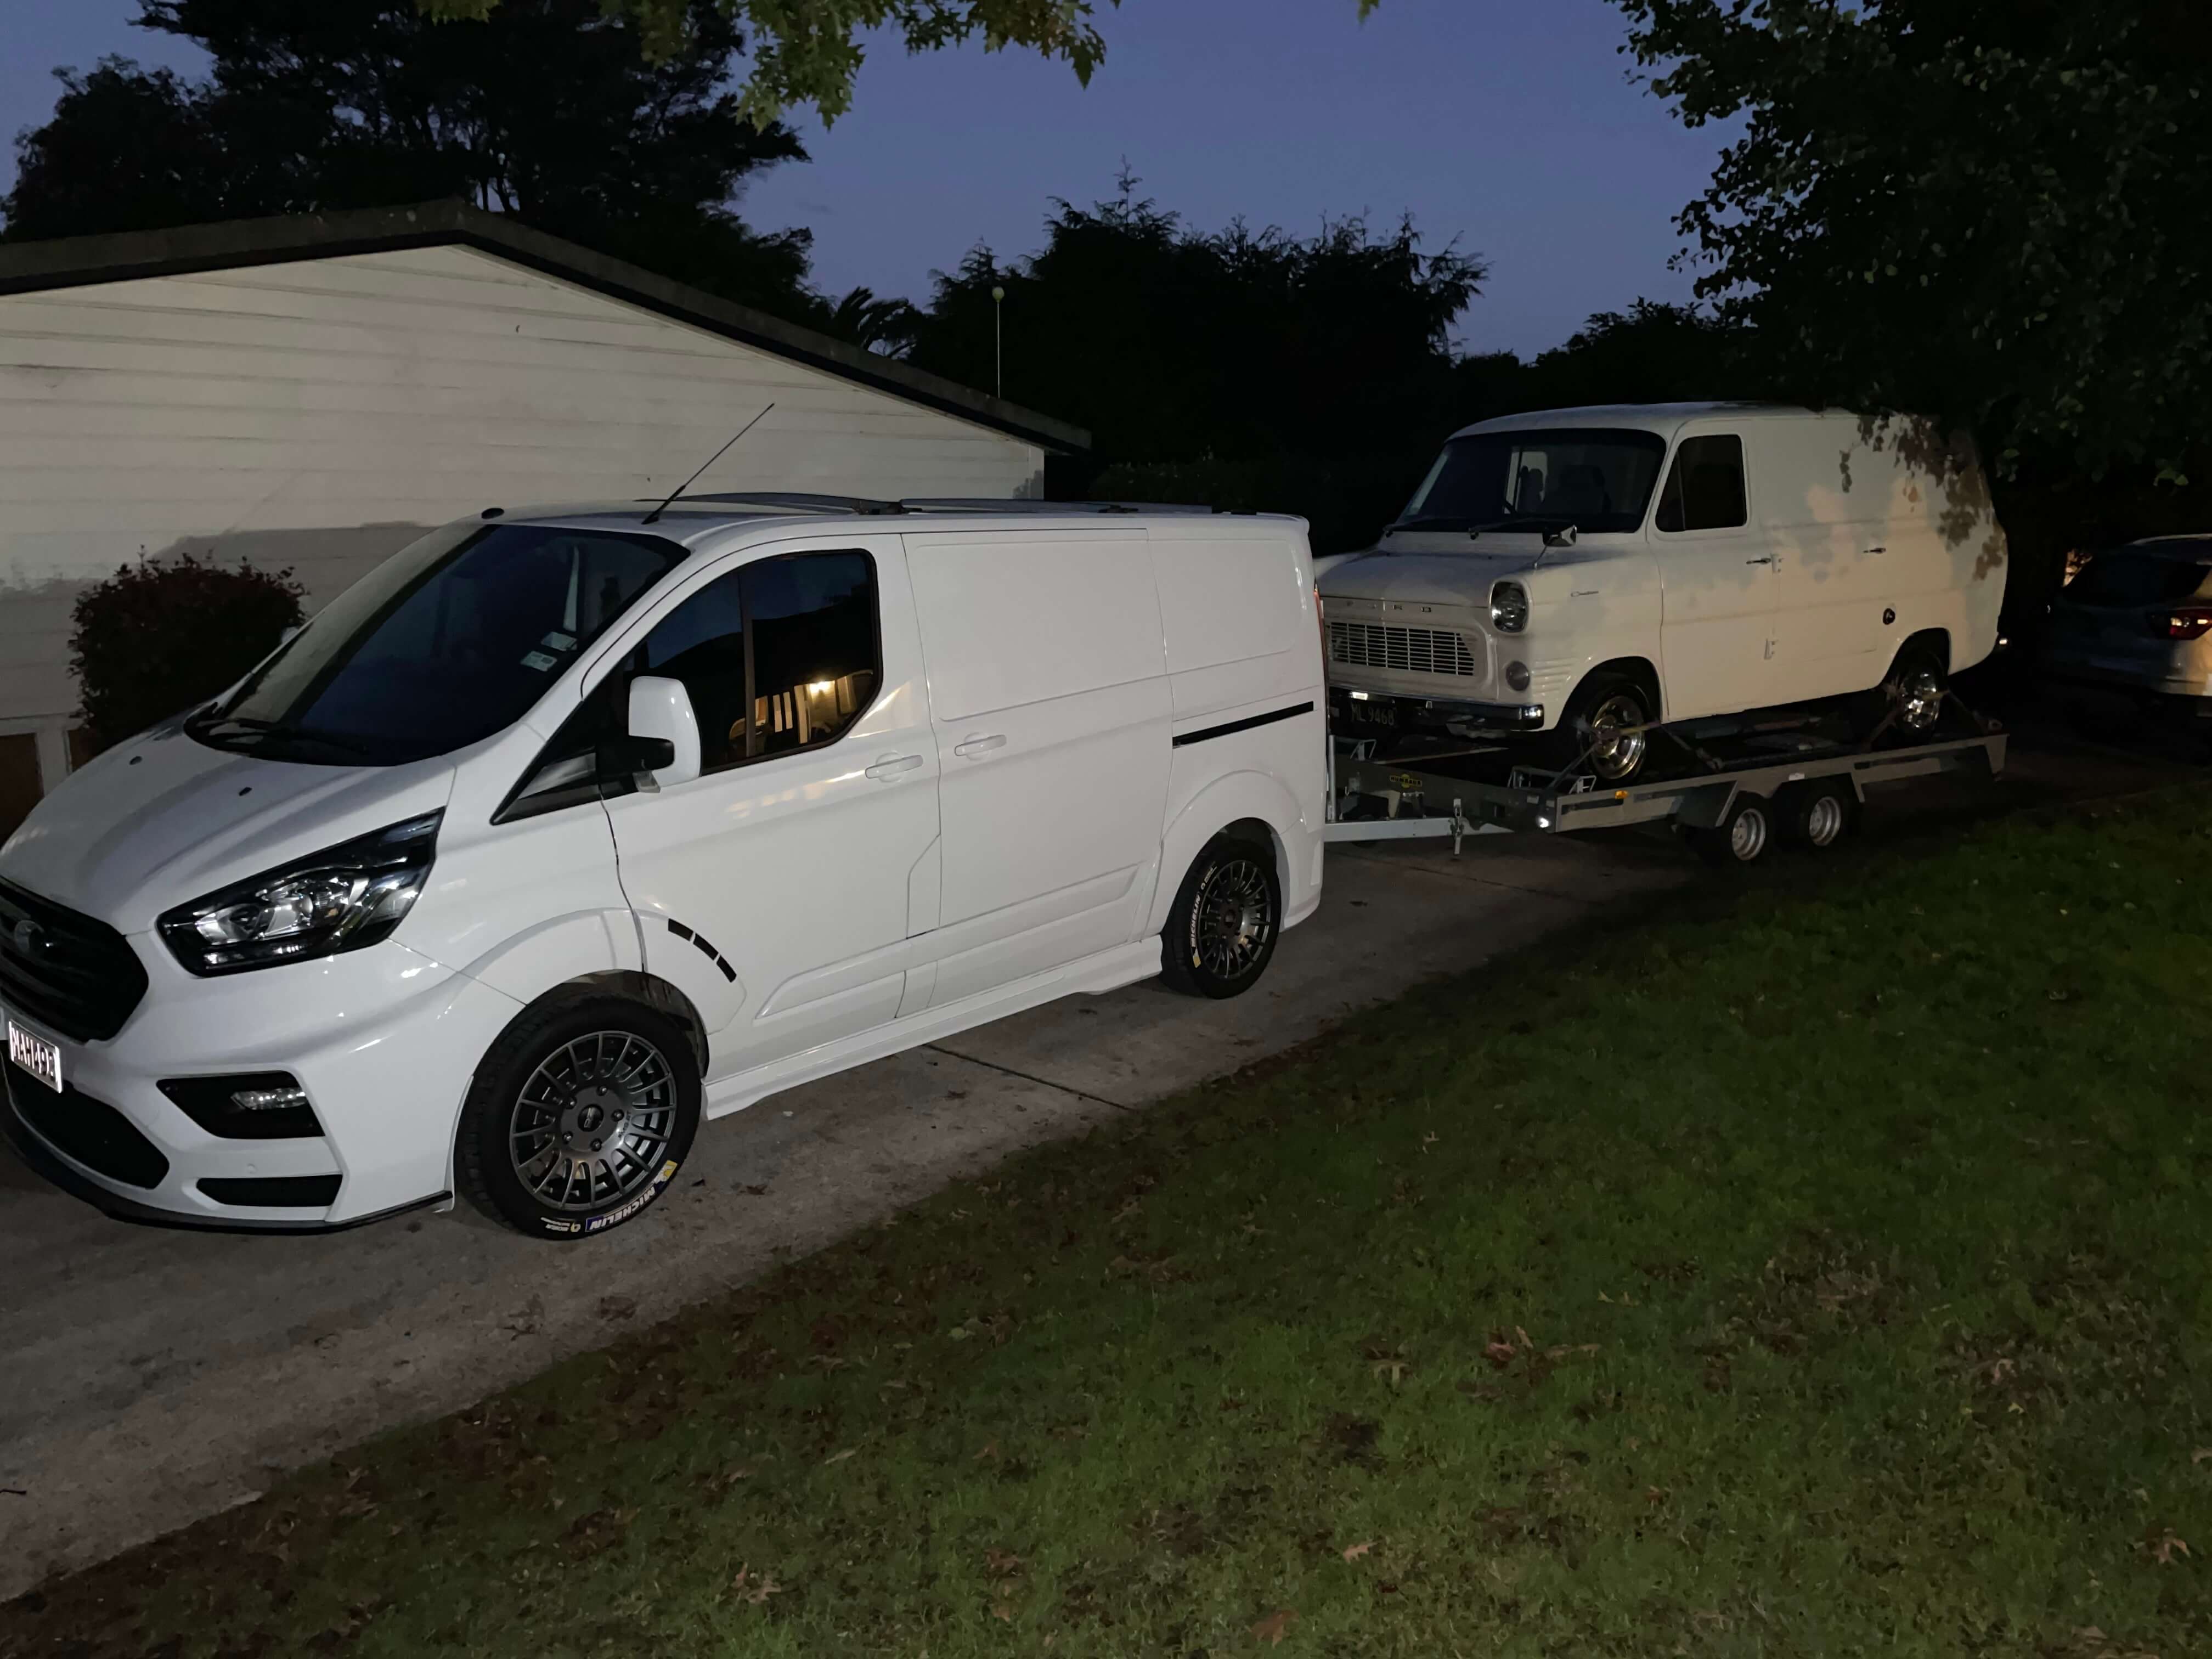
Apart again, loaded up, ready for fab hopefully next time it’ll be the 4wd towing the drift hack and not the other way around
2 points
-
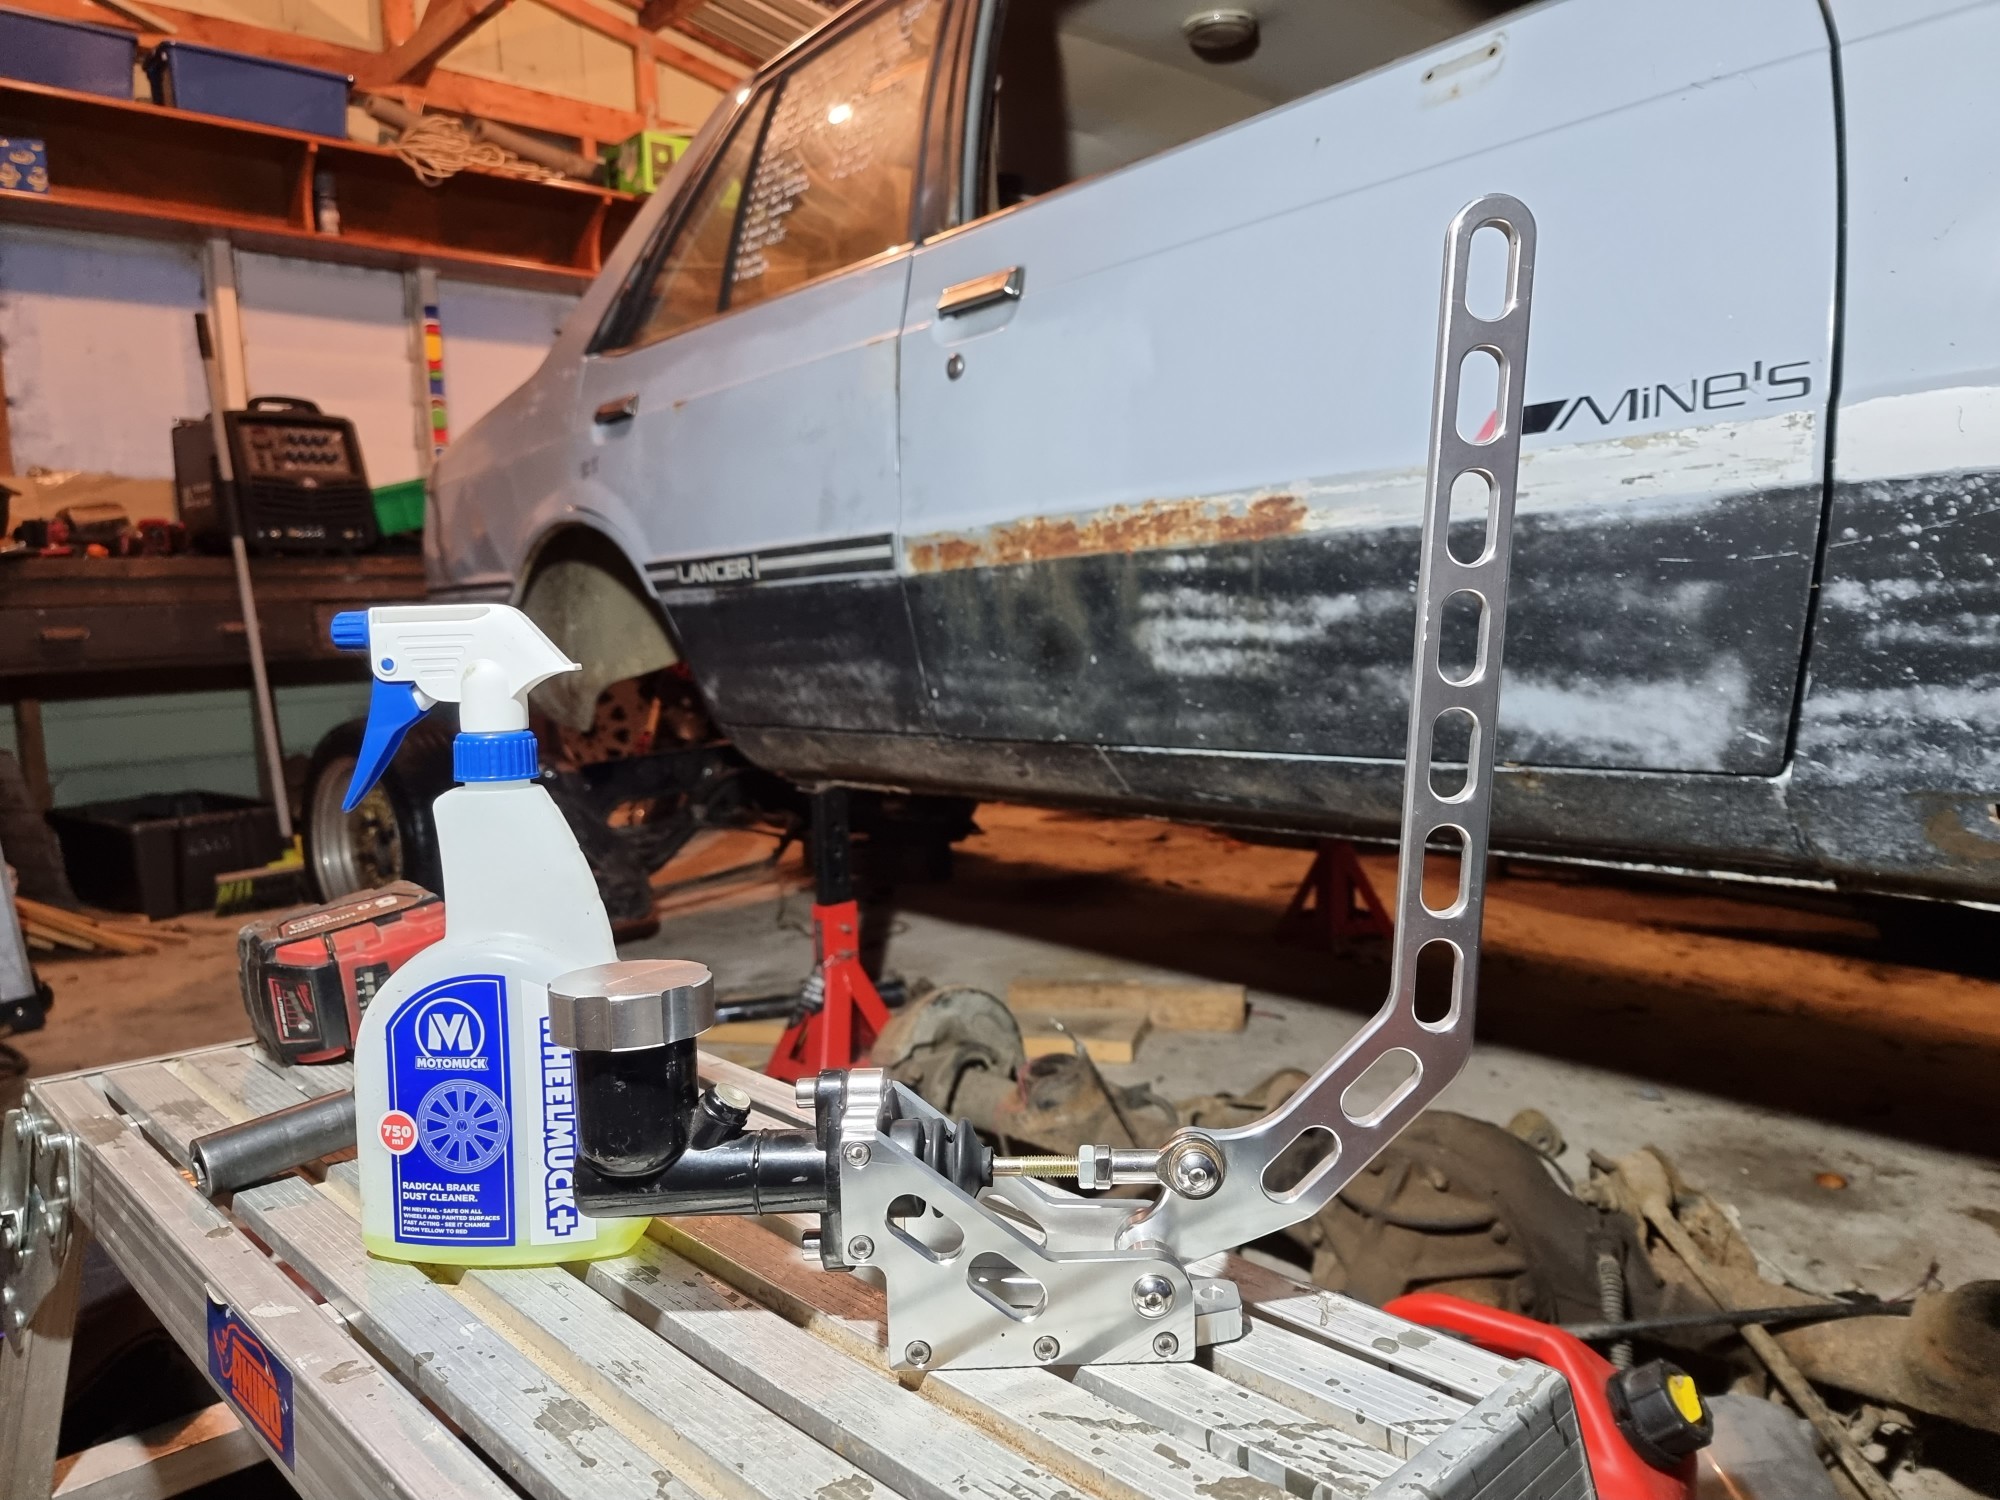
To be fair who doesn’t like a nice set of bolt on’s2 points
-
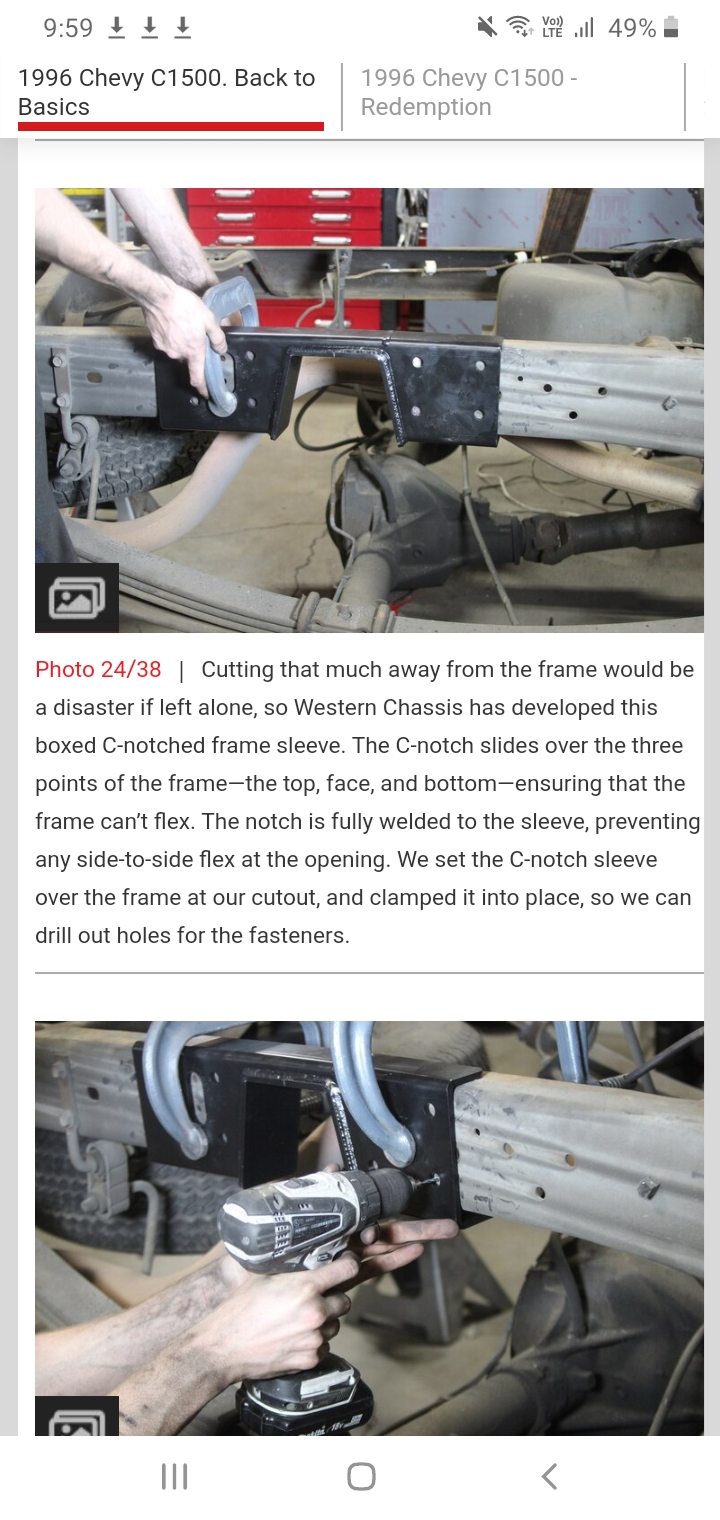
Most of the time that sort of thing has to be welded. You might be able to get an exemption from lvvta if you followed the right process but it might be more hassle than its worth. You would probably need to modify parts of it anyway for it to comply so may as well just weld it in Like tortron said its probably to do with the skill level of the installer in its home market, like many other things, the fact that something bolts in/on in america is a big selling point2 points
-
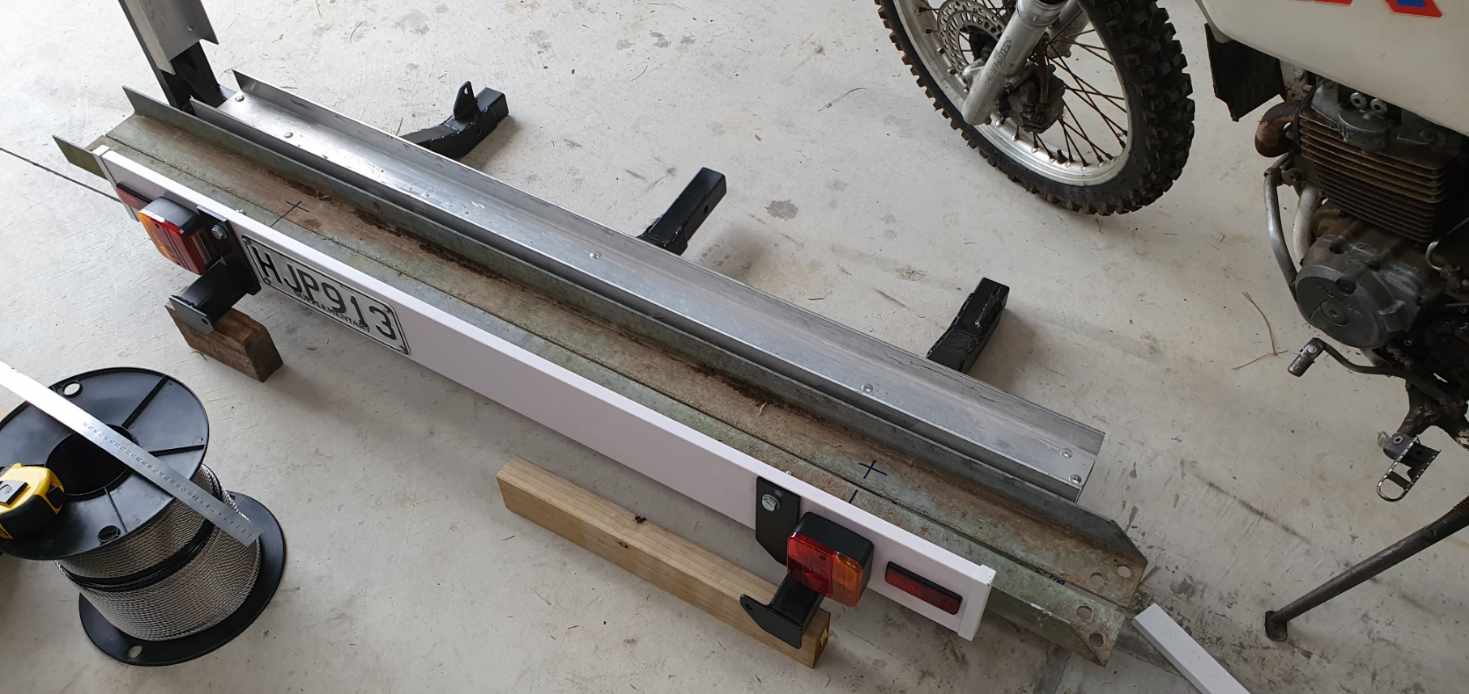
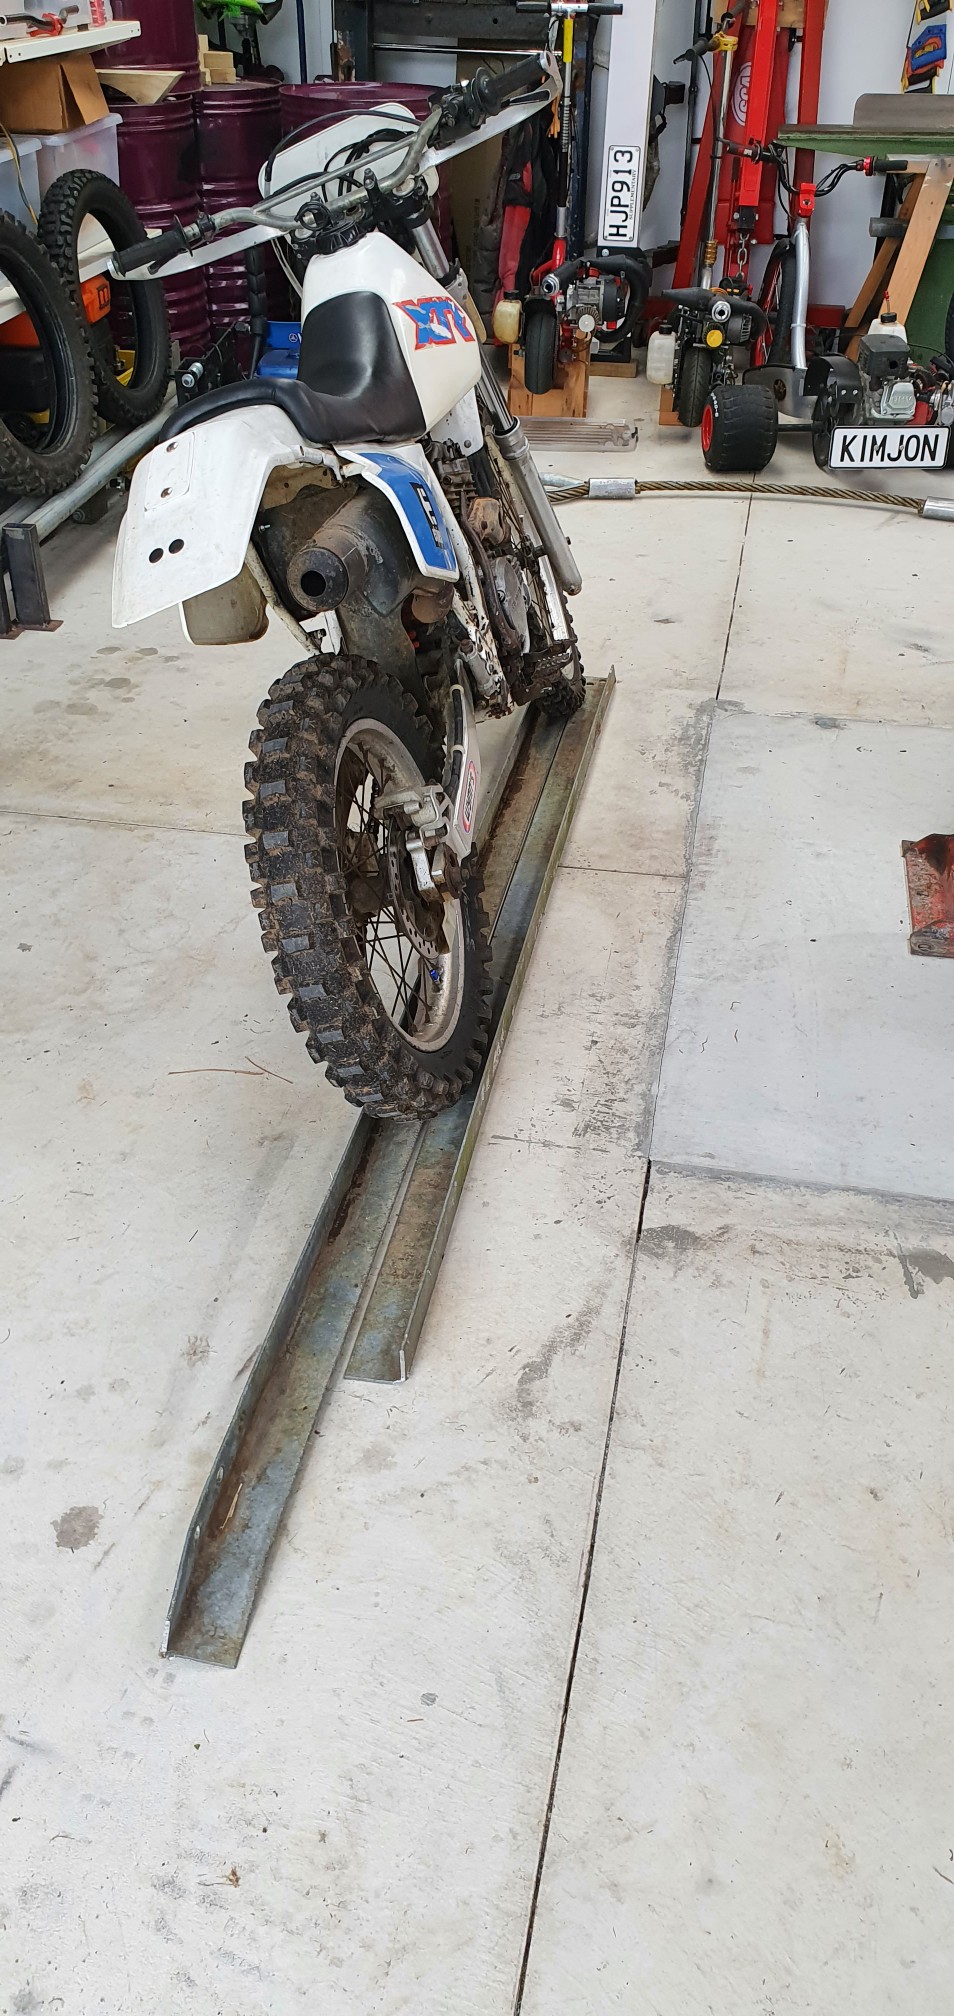
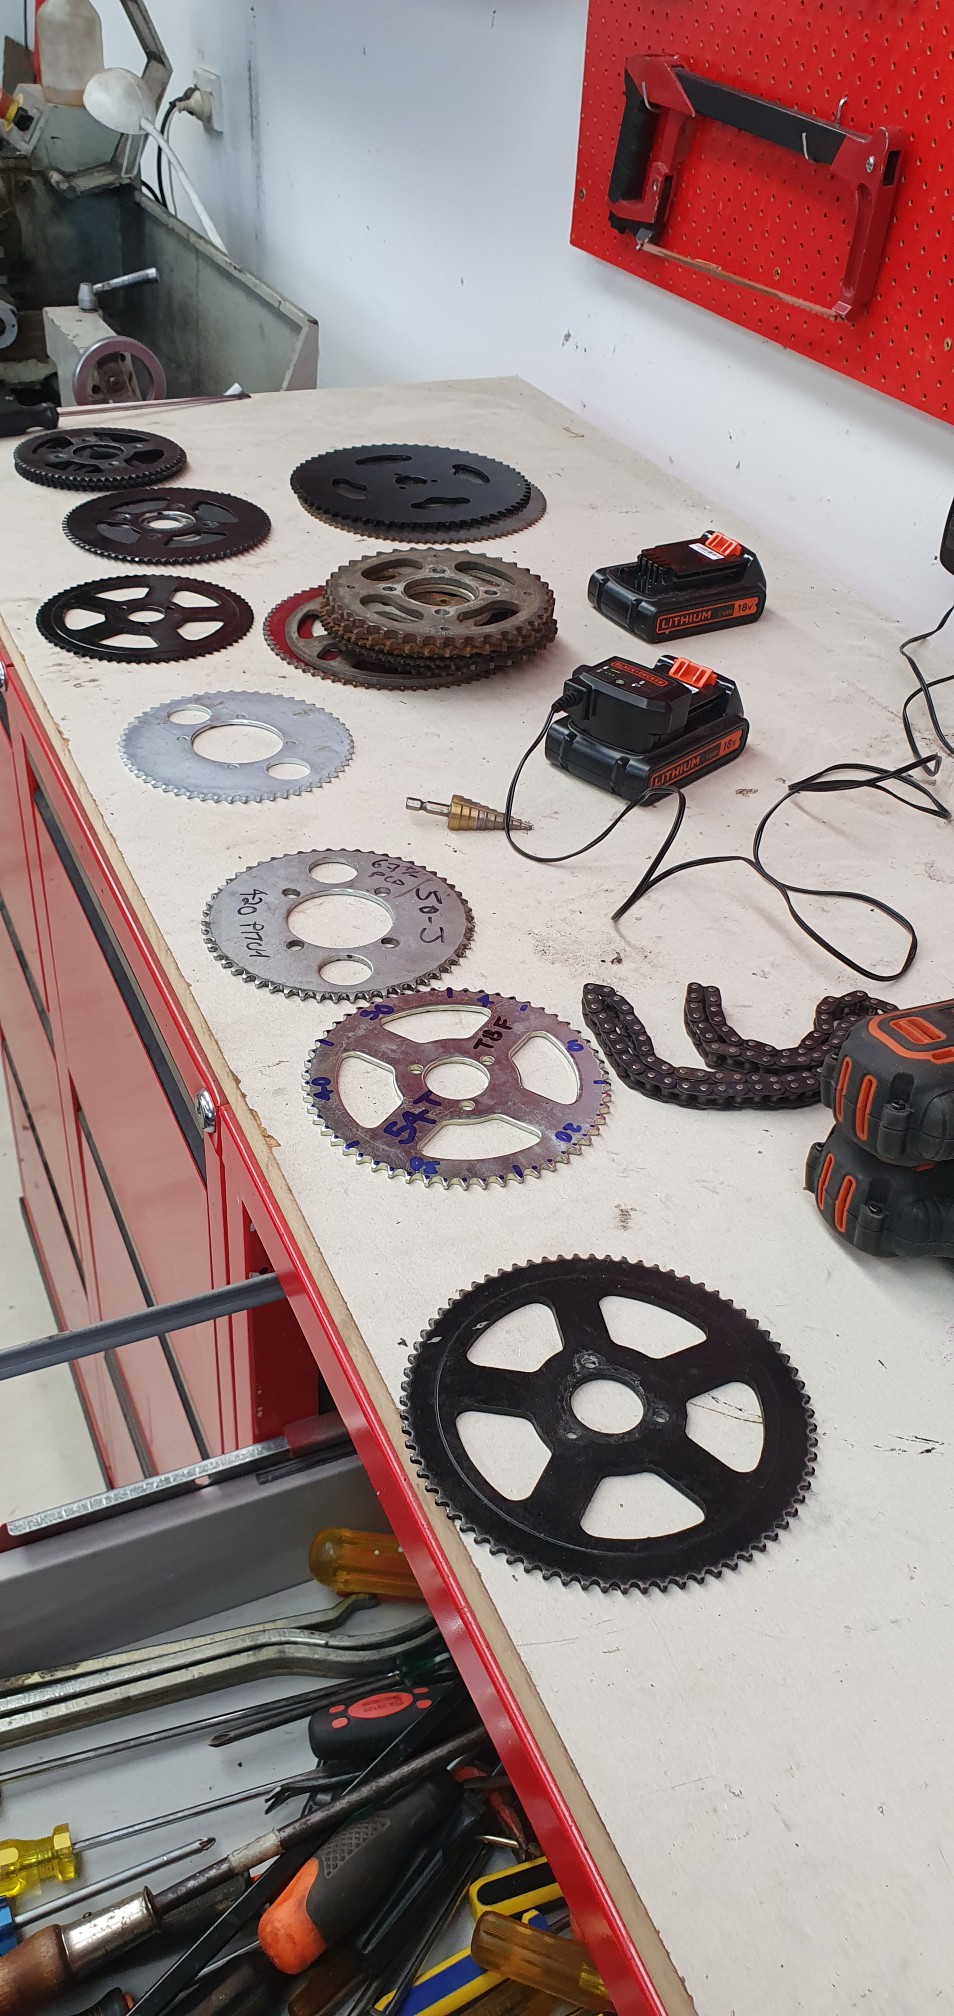
The boy keeps smoking the clutch. These bikes aren't really suited to hills like we have, that plus he's only just learning techniques like throttle control, not stopping halfway up a hill, conserving momentum etc...so I'm going as extreme as I can on the gear ratio. You think there'd be one that works in this pile...but nope Pretty much the same as whats on the bike. So I've ordered some shit off trademe: •11 tooth front sprocket (currently 14T on there now). •68 tooth rear sprocket (currently 54T on there now) • some T8f chain and joiners. That should improve things a lot, as 54/14 = 3.9:1 ratio 68/11 = 6.1:1 ratio So my new setup should be 2/3rds the torque, a third less strain on the clutch, but 2/3rds the current speed. Im not worried about the loss of speed as he's not skilled enough to use it all anyway. Later I can adjust it back in stages if required. Or by then he may need a bigger bike at the rate he's growing?
2 points
-
pretty easy boss For a full rebuild, this series was so damn good have a watch through of any parts you are concerned about2 points
-
The next shape along (ncp91) has a non ps rack because electrically assisted steering column. Theres no electric PS from this generation (apart from Prius). But I think it runs the pump from the higher voltage battery not 12v. Hmmm but maybe its worth checking. There are poverty spec echos with non PS racks but ive never come across one before.2 points
-
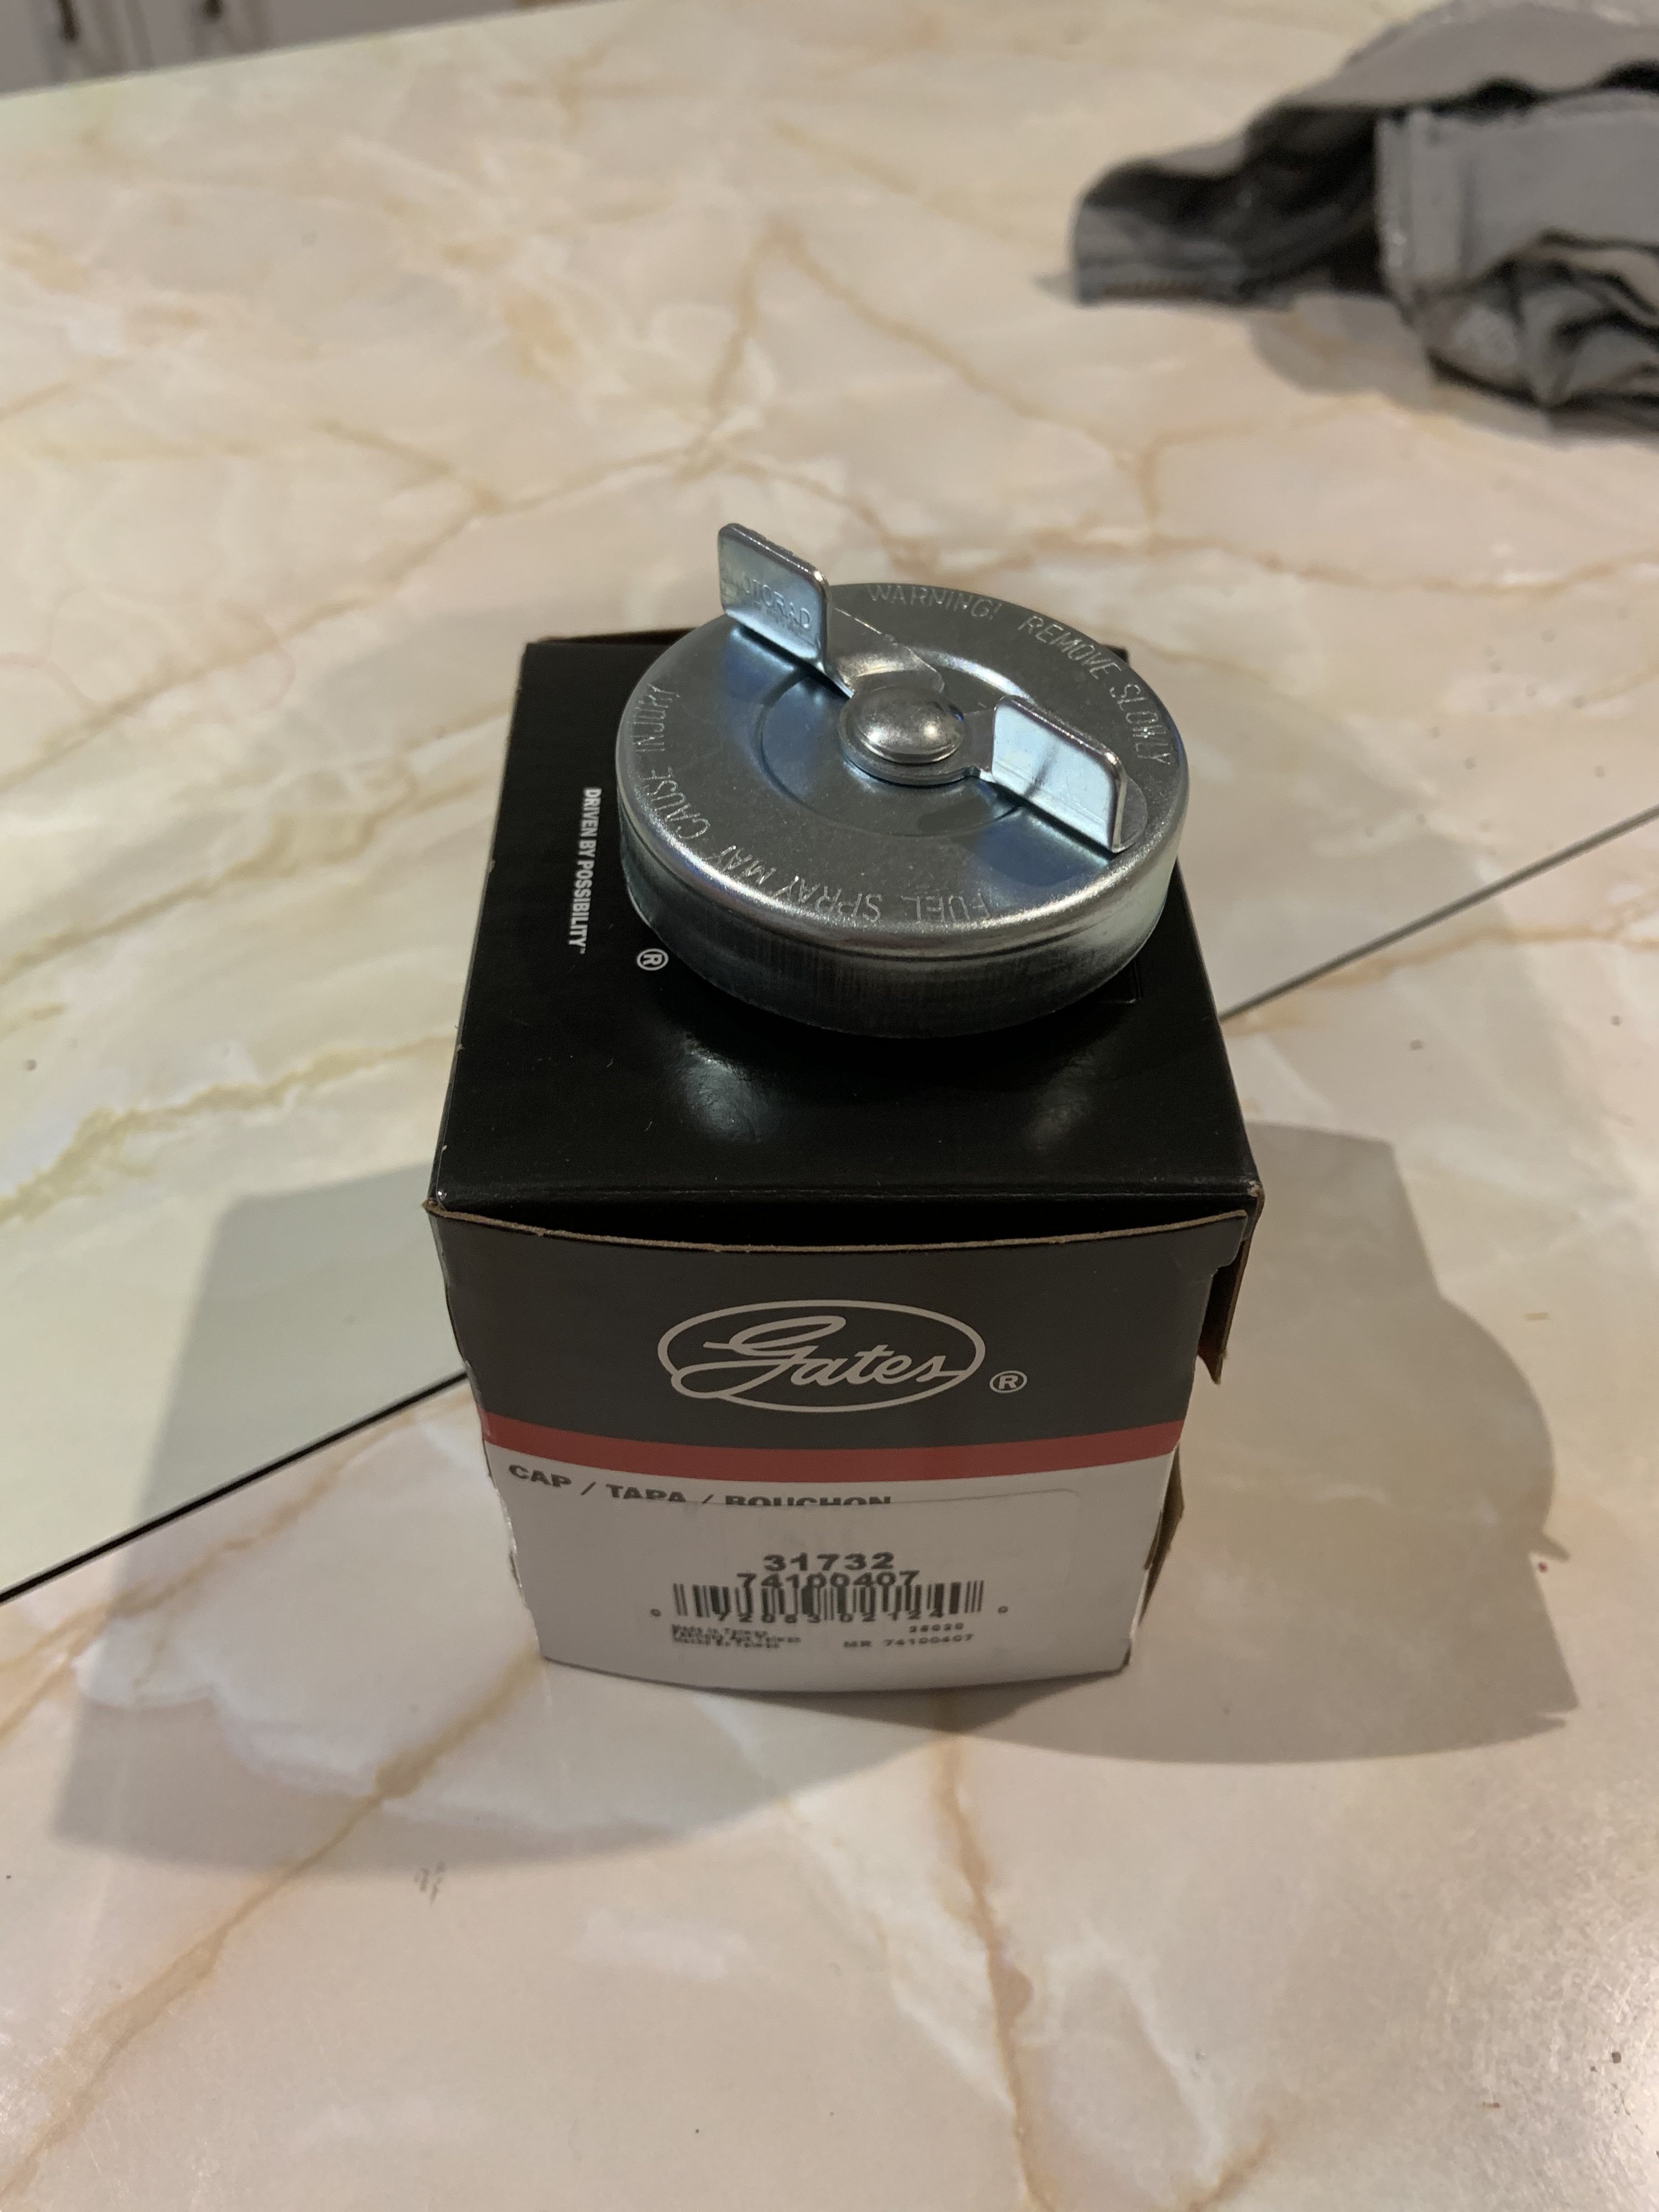
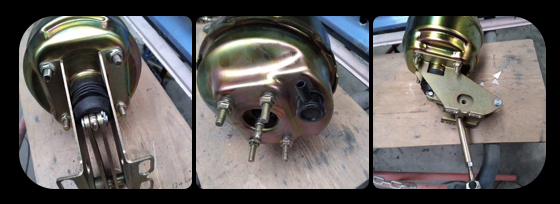
Minty! Didn’t like how the generic Tridon ones went so rock auto came through again, for less coin! I sent the old booster to a shop to assess its state and they came back at $700 in parts alone x USA in a month. It is a bit of an oddball, but no thanks. I figured it was fucked cause it had been full of brake fluid but a customer I didn’t know had the tech came in and saw it, said he can clean it up and reassemble it and that if the diaphragms we’re going to react badly to fluid contamination then it would happen pretty quickly, that mine was salvageable. I mean it’s junk totally disassembled in a box so may as well sling it back together! He’ll sleeve the master too. Just prior to this, I brought new booster off a chap on Facebook for cheap, he didn’t end up using it. It’s not ideal but was going to make it work.. it’s a couple inches smaller than my original unit but I figured all it does is assist. I could deal with a slightly heavier pedal. me preference is original..
2 points
-
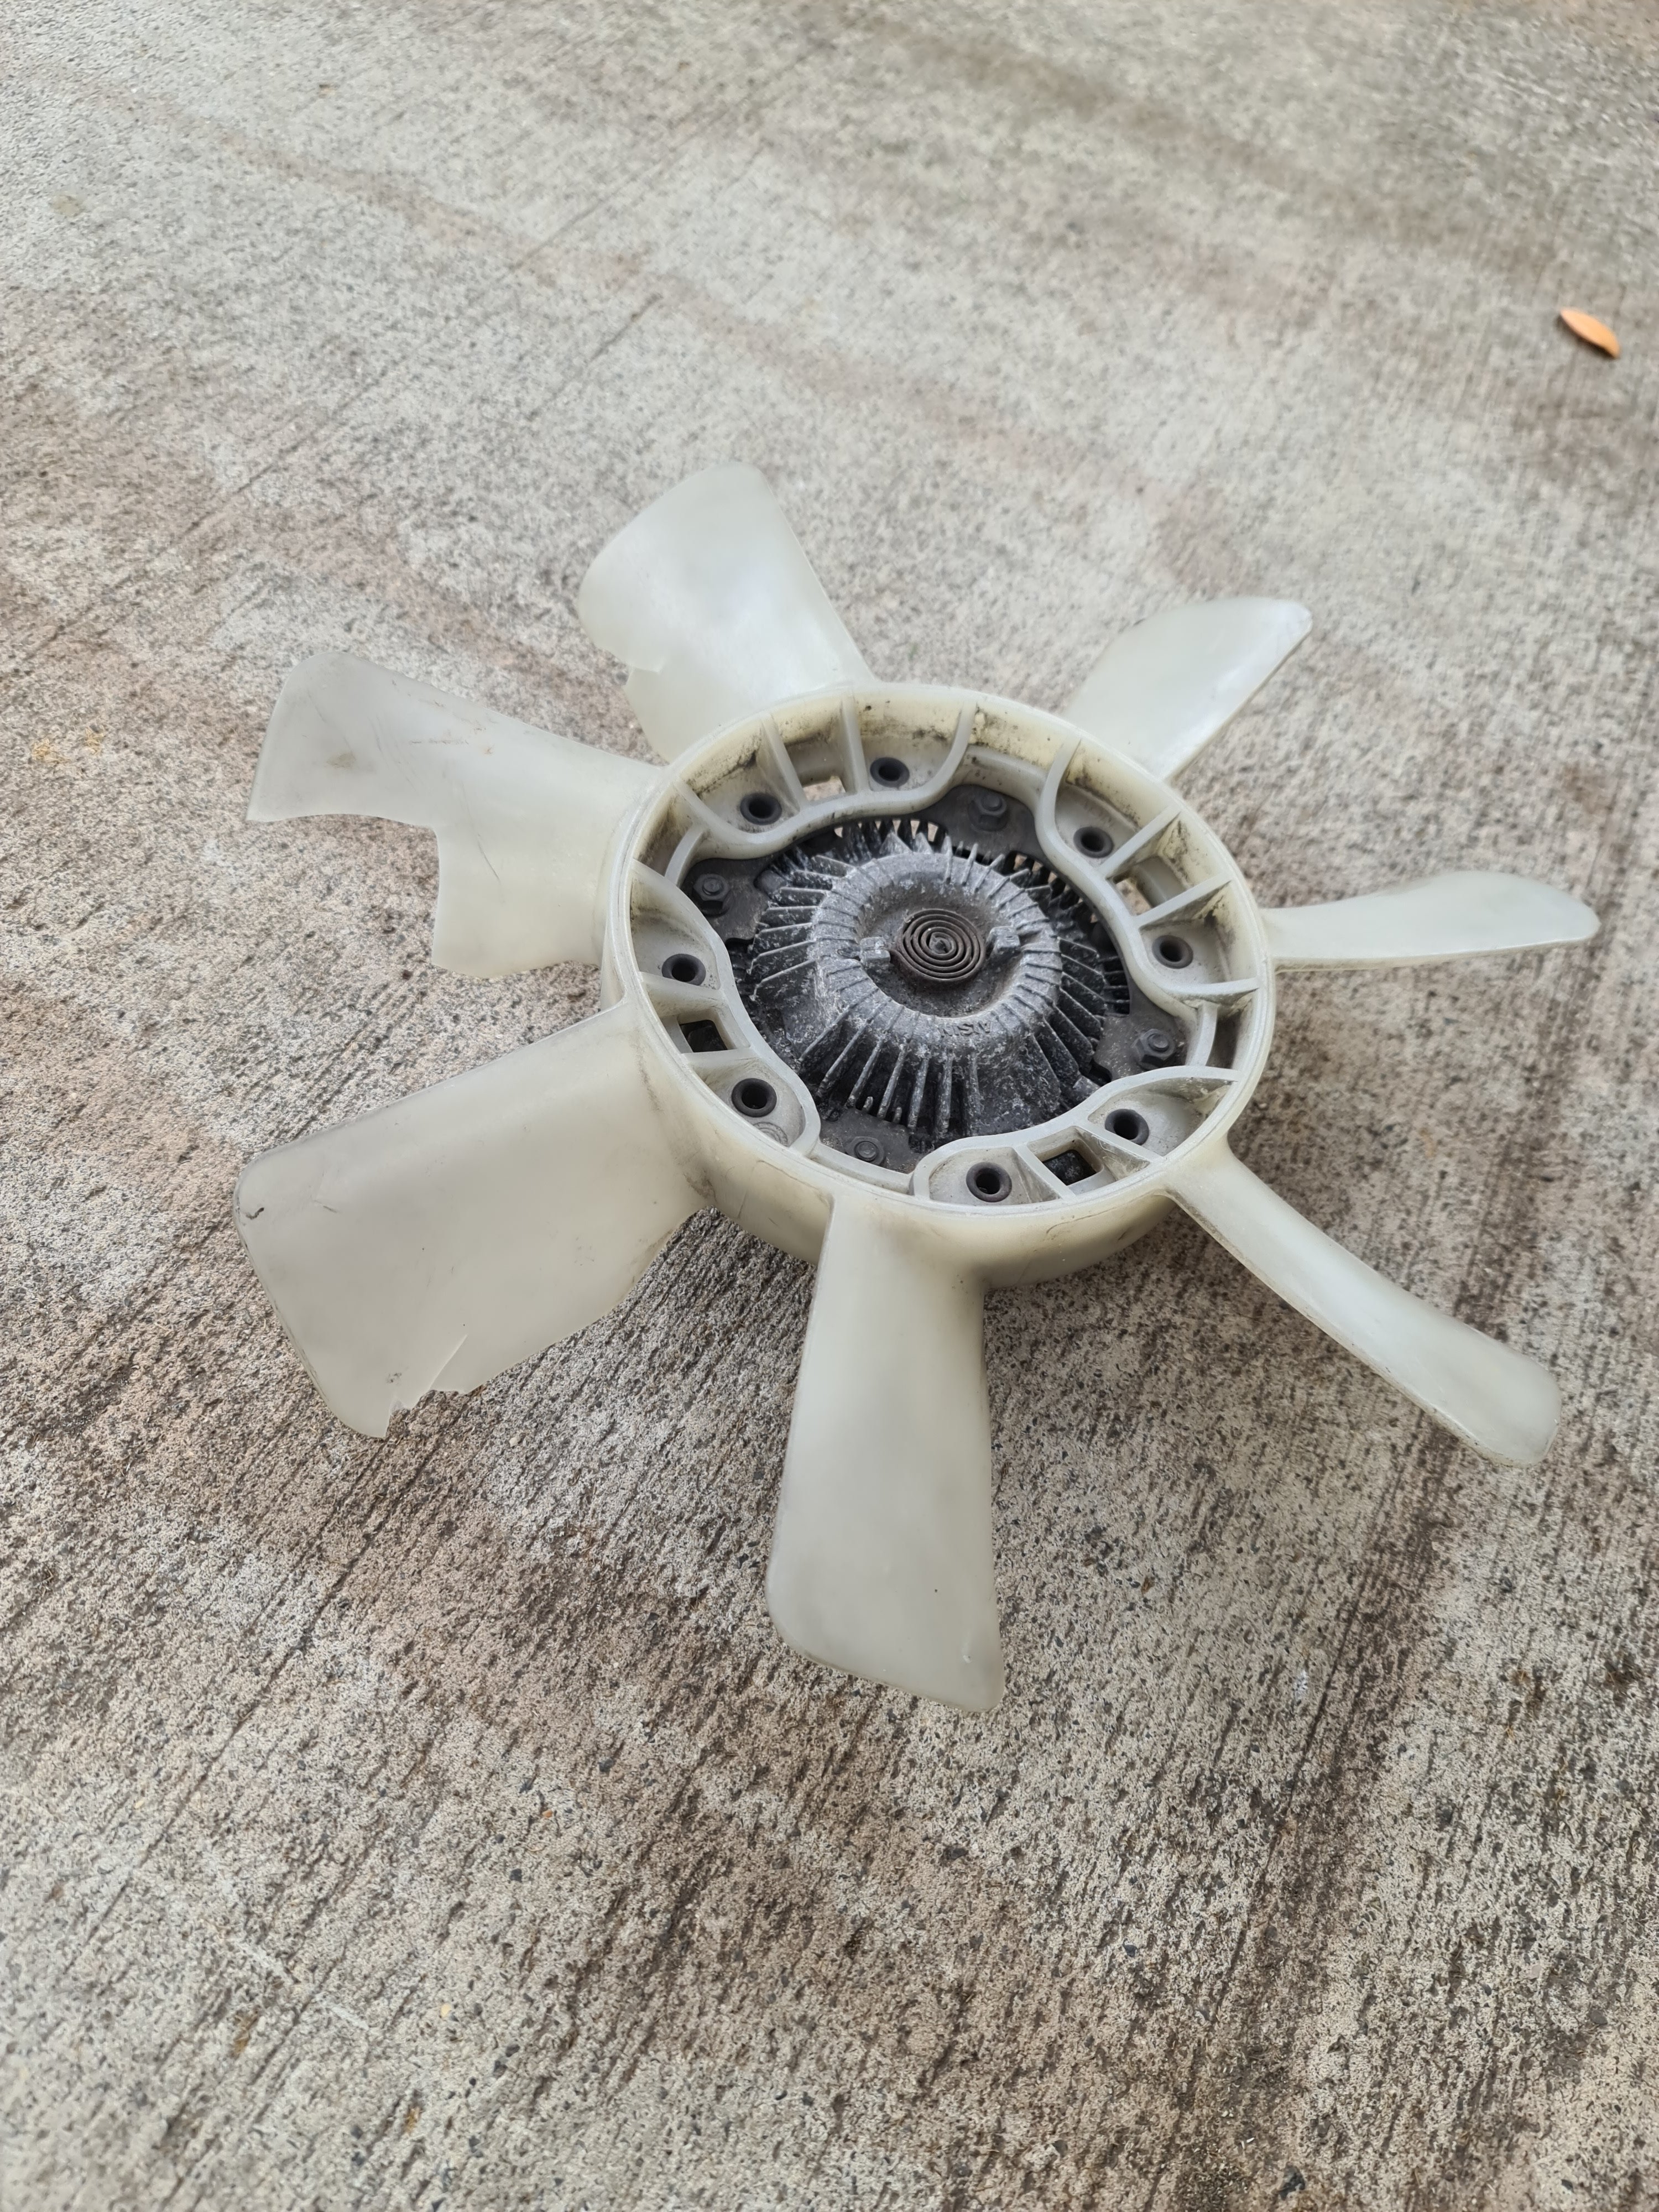
We have start up Not without a couple of issues. First of all was fuel leak which was a banjo for cold start injector I hadn't tightened properly. I also left the supercharger/aircon idler pulley nut loose after tensioning belt and it came loose and met with the fan (lucky I have more in the garage which I nearly binned) Somehow alternator belt has massive slack after I definitely tightened it, have done it back up and locked everything off and seems ok. Need to install the braces from blower to block before first driver especially as one of these has a bracket to hold the dipstick (they really have included everything in this kit its scary) Have noticed the idle is way lower and pretty poor but just remembered last night that I had tps out to get intake blasted so it's likely I've put it back close but not close enough. Fix all these bits and rig up an intake pipe and off we go. I'd like to find someone in Auckland with the portable afr setup that I can confirm everything is safe with a few pulls (maybe dyno also for curiosity) Also not sure if I should be adjusting timing to allow for boost?
2 points
-
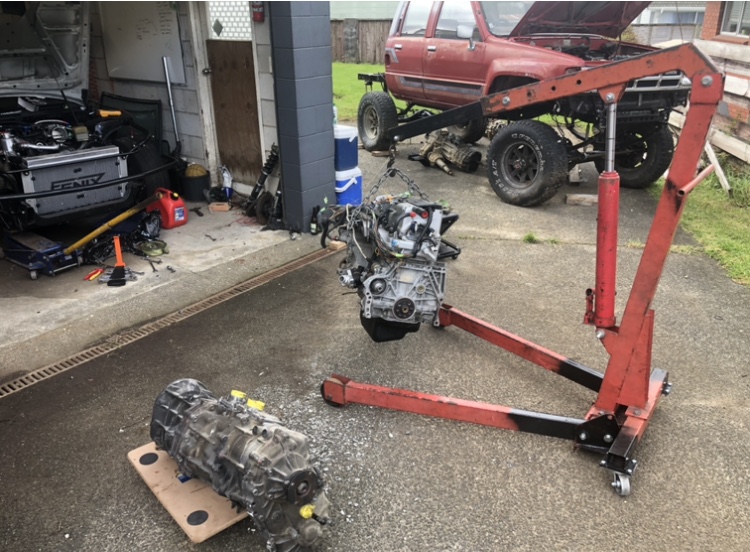
Well it didnt 100% work. But it could definitely be fixed with a welder! It didnt fill fast enough and there wasnt enough pressure. So they had to frantically fill from one of the riser holes to try save it. In doing that there is a big section of cold lap and a big hole! So the changes would be to have 2 filling sprues in the middle of the casting. Then increase the head pressure a little bit. The bowl I had in the sprue was way too big and reduced the head pressure. For the most part it looks pretty good. All the finer details are there. No cores collapsed or shifted, no shrinking of any areas so I dont need to worry about chill blocks. El Camino for scale. Going to have to figure out an easier way to do this in the shed. Was way too much work!2 points
-
Finished and loaded up. Probably the most expensive and elaborate way to lower an El Camino! Looks like we'll see how good these bump stops are!2 points
-
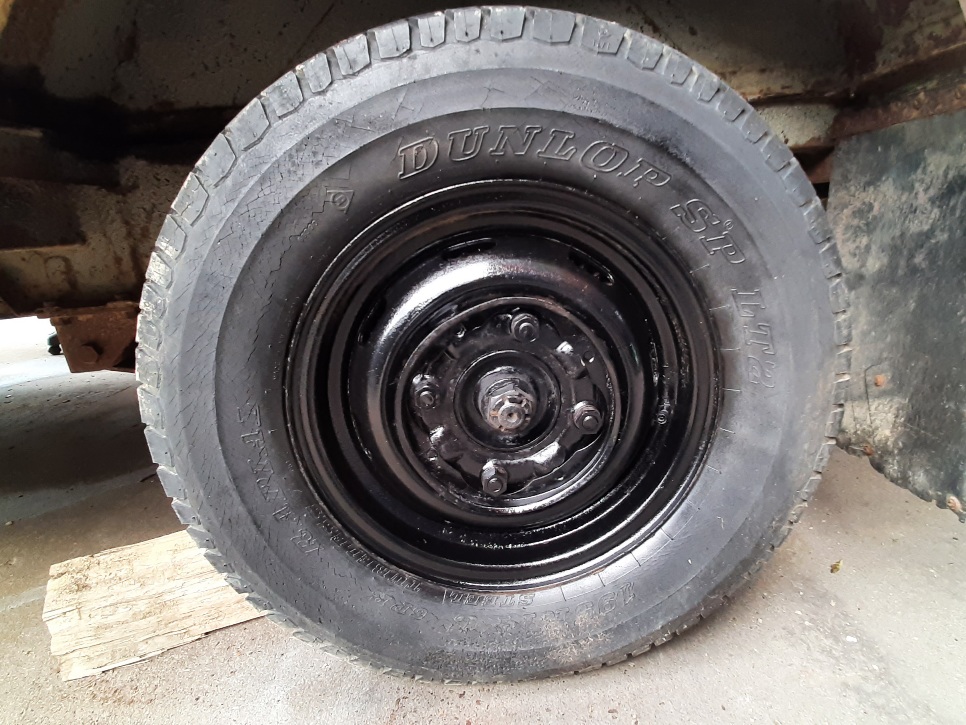
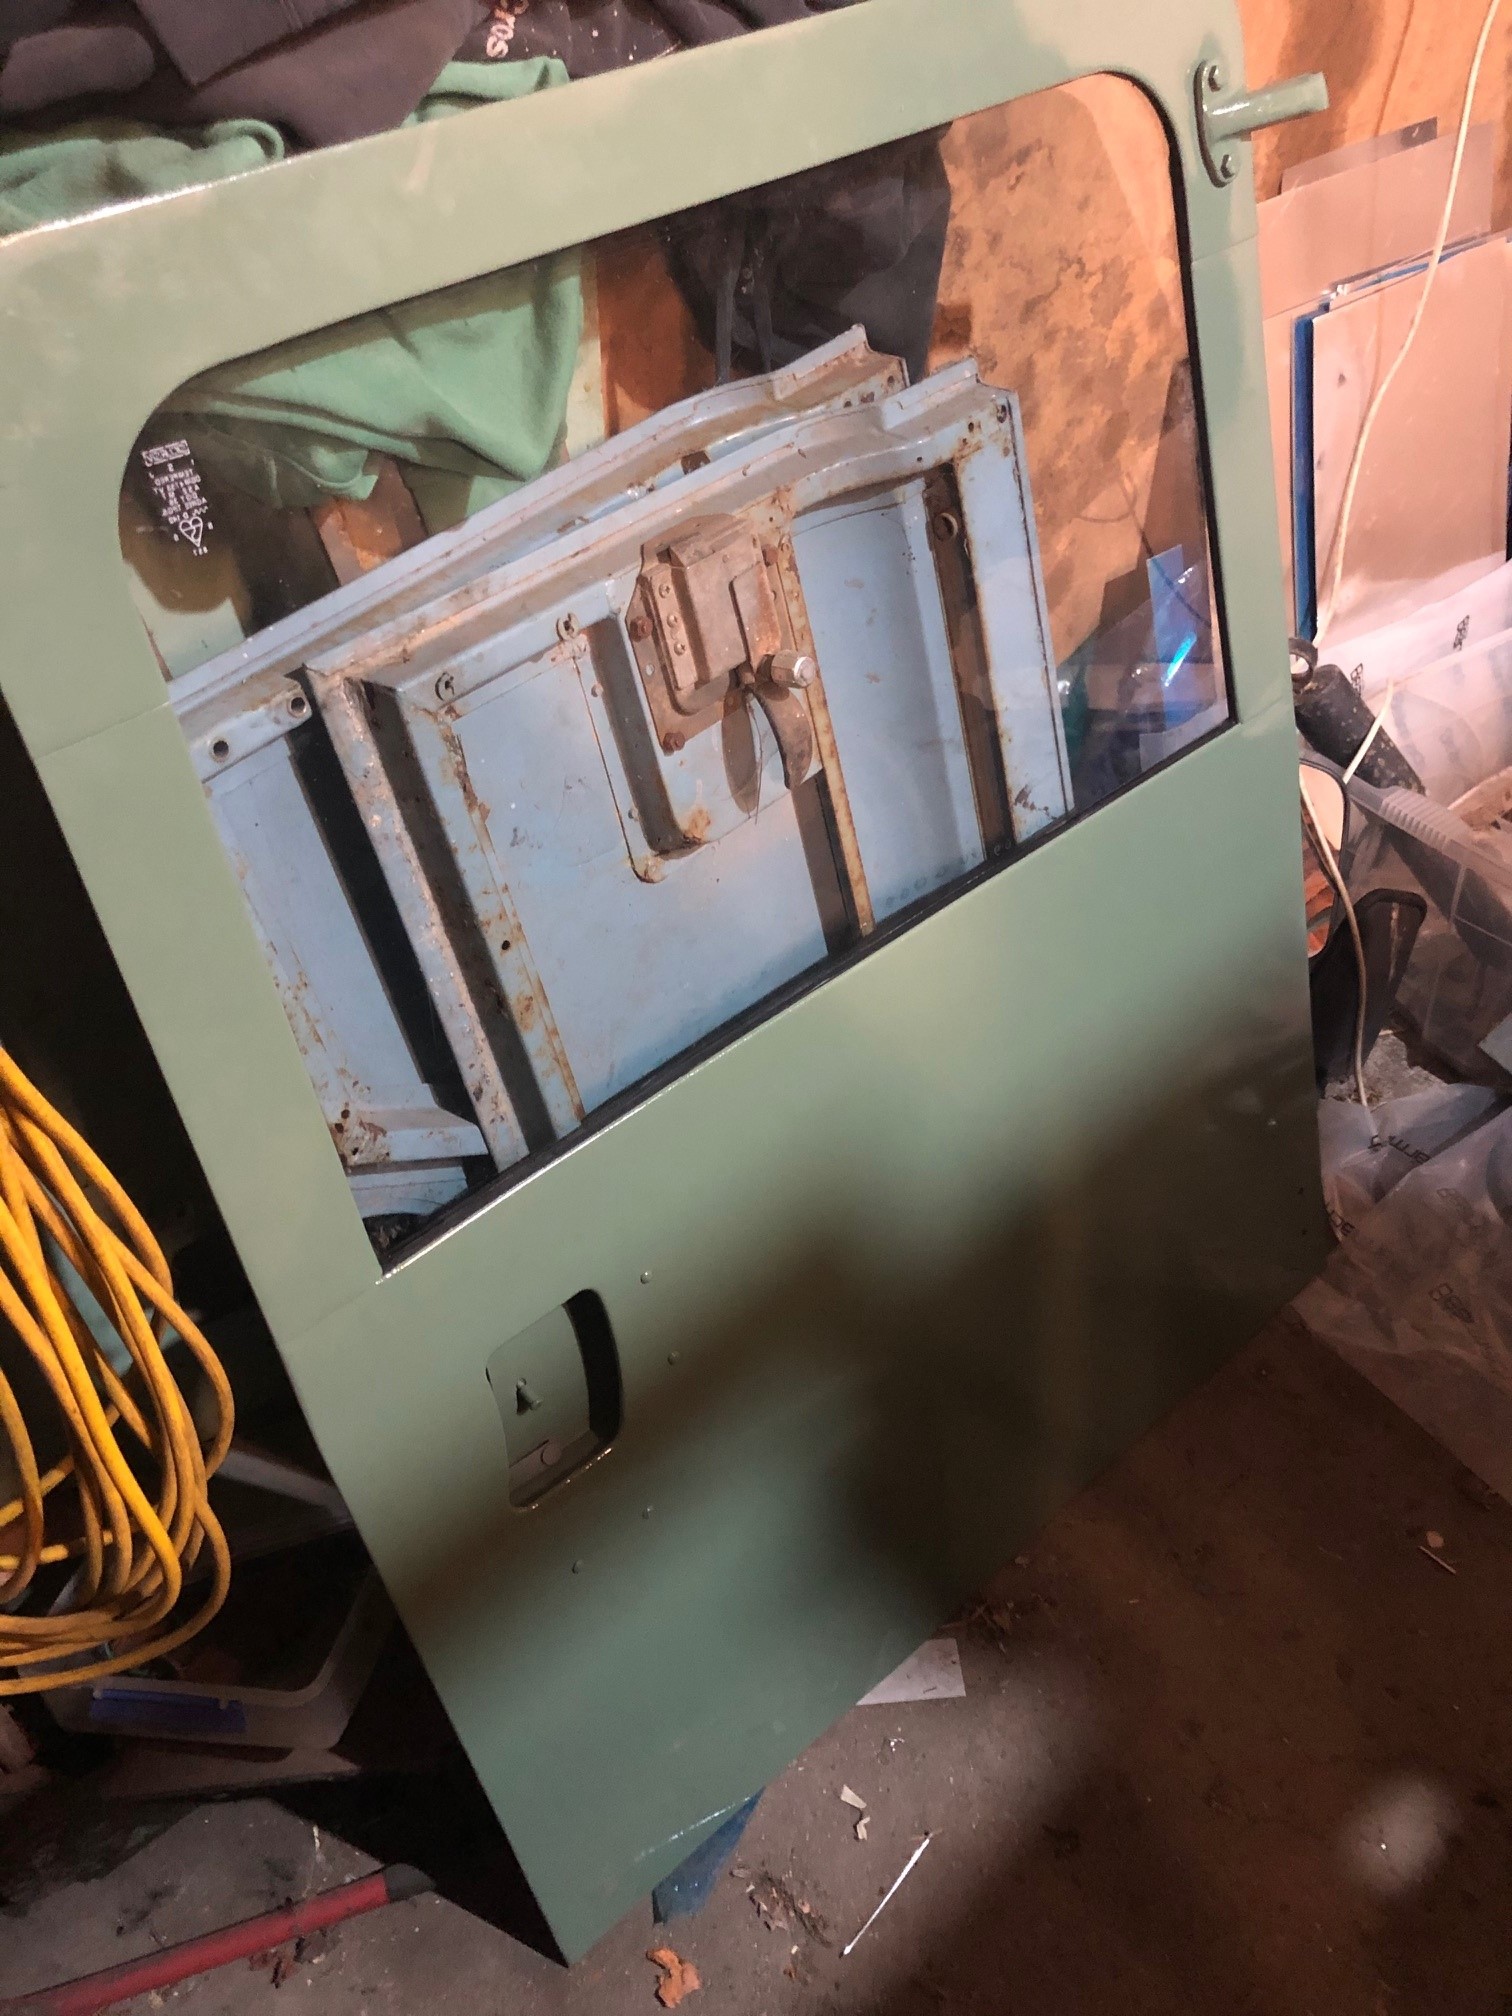
Sprayed some black rust remover and metal restorer on the rims. Massive stud pattern. Ill take the drums off to look at the brakes another day. Im sure they are juuust fiiine. Cop mode. Put the rear doors back together and straightened a few things out and did a bit more sanding. They are still busted but now they open and close nicely. Pulled the front door apart to get the inner latch out. Safari! Some percussive maintenance needed where the limit strap had bent in the door flange and the door now opens and closes lovely.
2 points
-
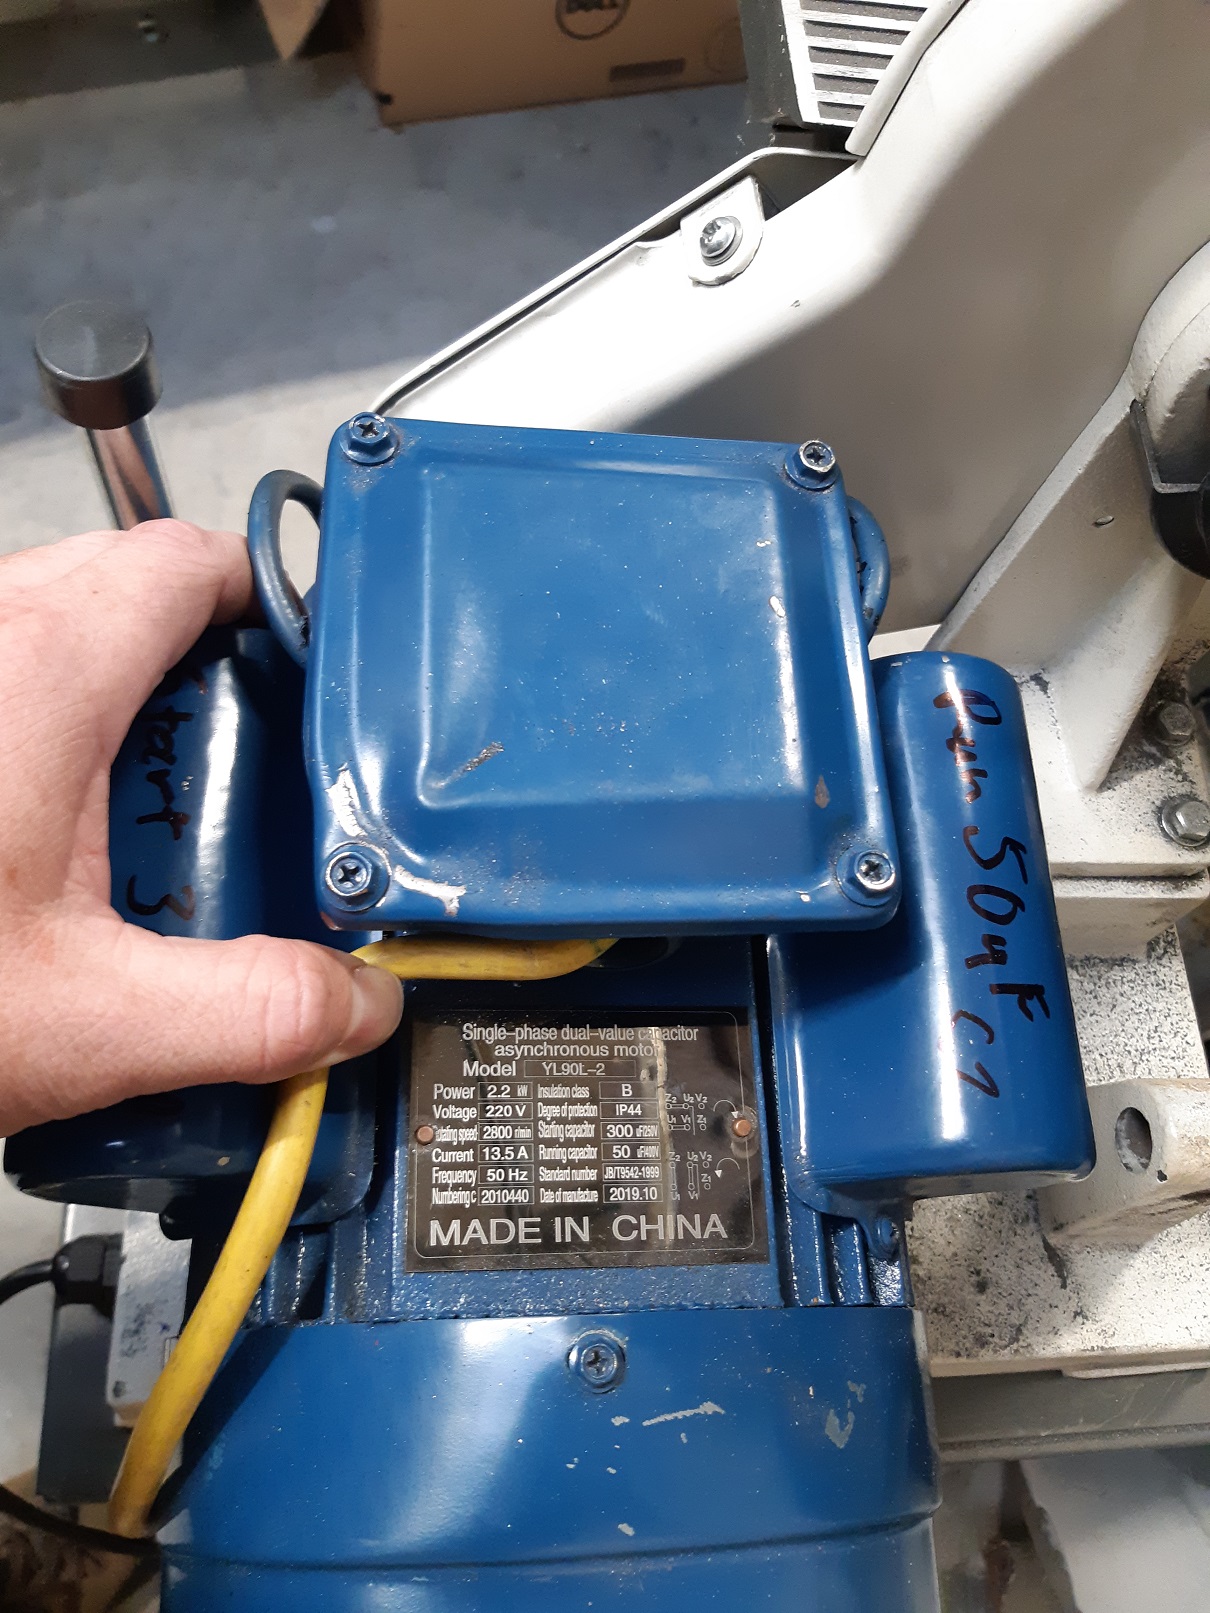
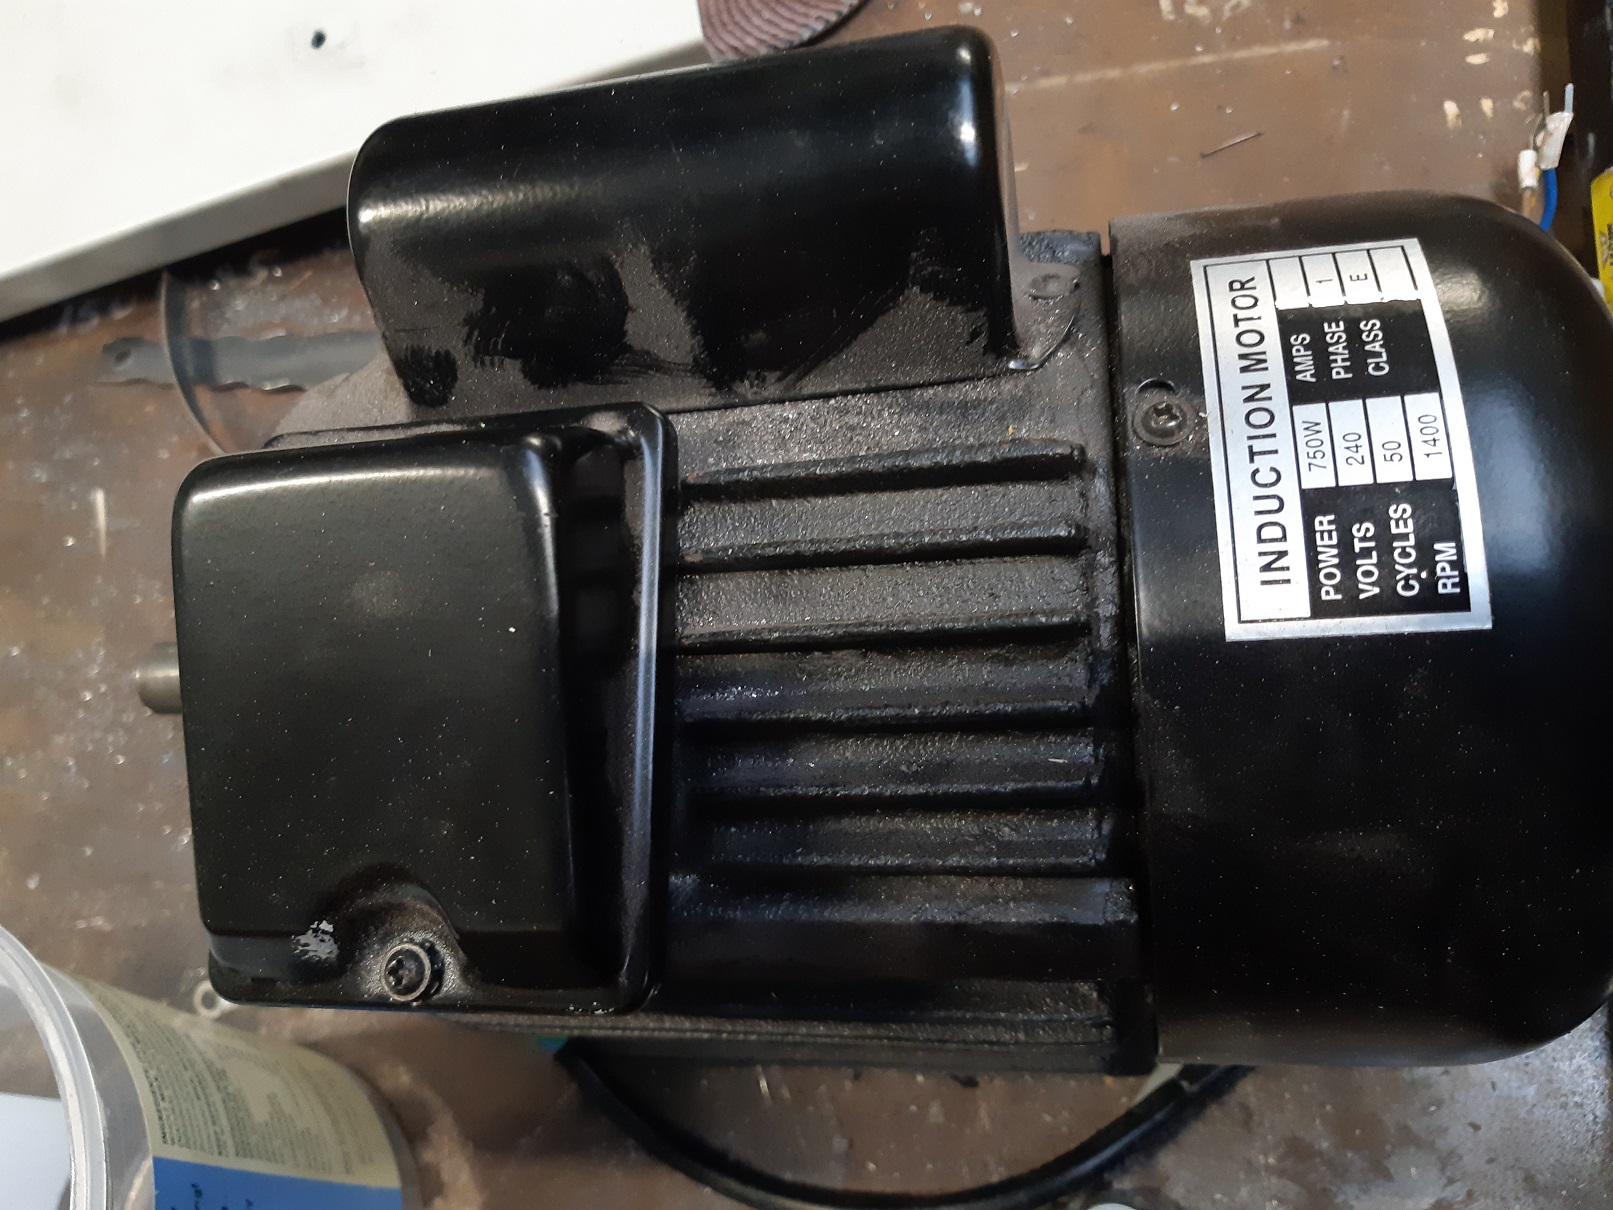
I bought a ToolShed linisher/belt grinder/sander thingo a while back. It had mediocre performance and it was easy to stall the belt. It came with a 1HP 1400rpm motor. Boooo! There! I've fixed it! YAAAAAY! Three times the power and double the speed should do it. The belt guard is off here. It's a bit shit and rattles and vibrates. It's almost as if they forgot to add fasteners to that lower bracket. I'm gonna sort that out. Should be able to flatten my exhaust manifold flange now.
2 points
-
Cleaned all the crap out of the back and did a short video of a walk around. going to try and con the guys at the workshop to let me waterblast the back out when i grab my tools.1 point
-
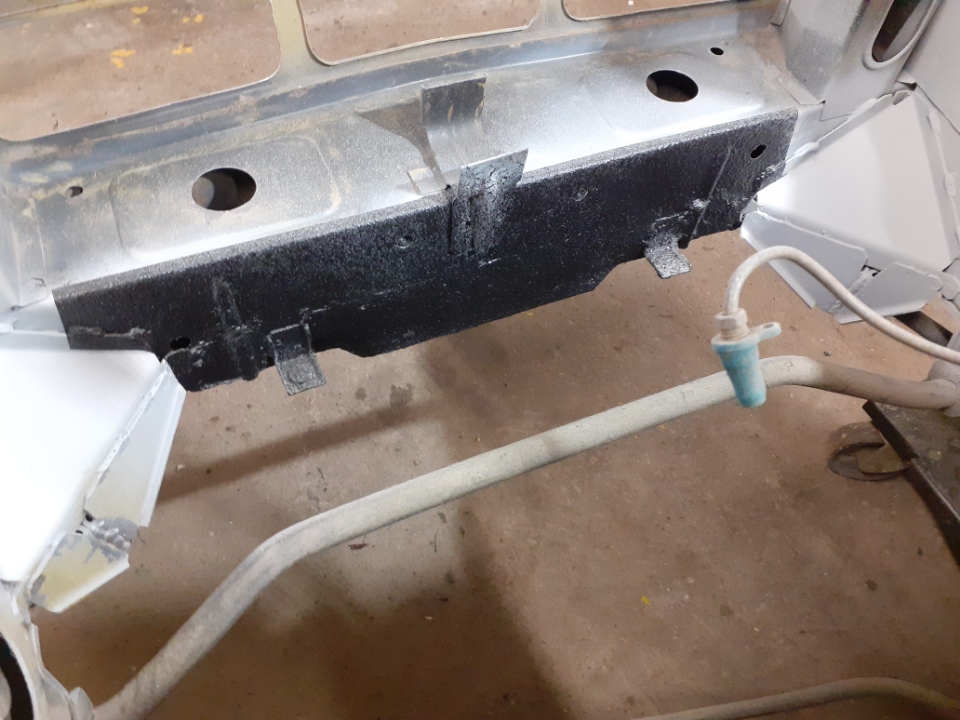
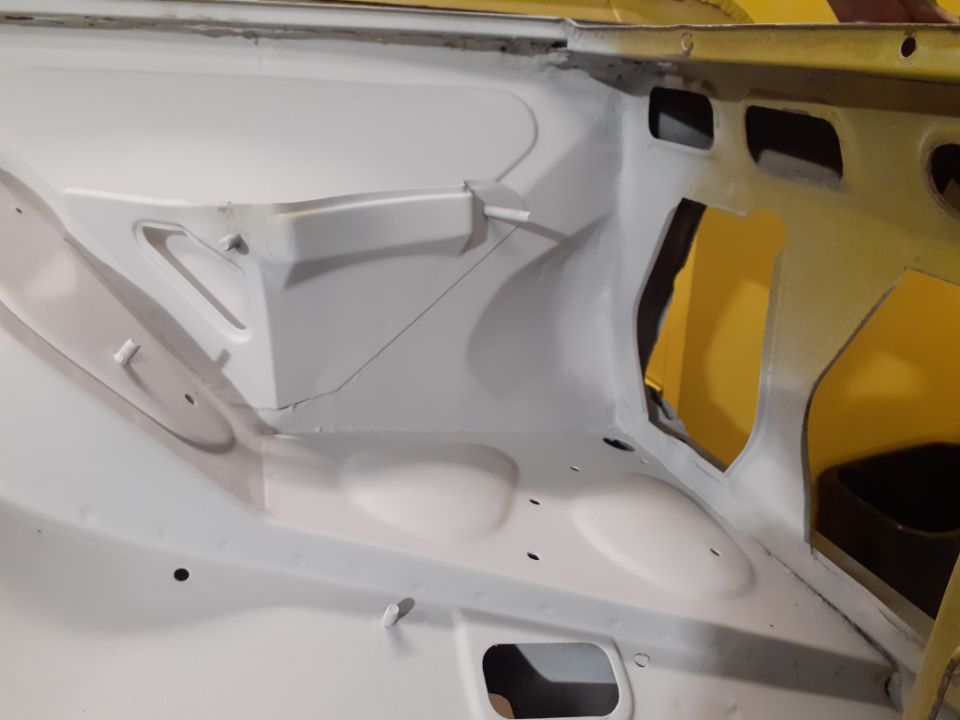
Another month passed and I get a text to say the fuel flap has been sent to the big smoke for a paint match, and hopefully painting can start next week! Clean slam panel Radiator support panel repaired Behind the left headlight done. New smile
1 point
-
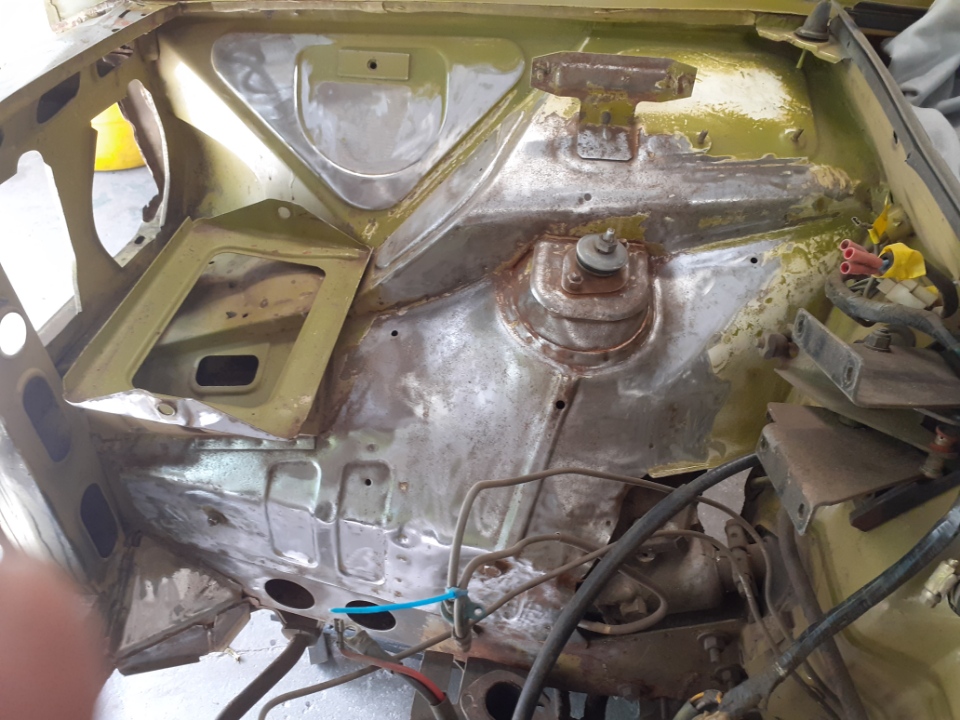
My panel beater is slowly chipping away. The first update came at the 3 month mark, just when I was beginning to think it must have fallen into the Inangahua River. Dent roughed out Also, dirtiest job first-blasting the engine bay. Glad I opted to have this done, as the corrosion under the paint was getting a good foothold. He also fabbed up a new repair section for the chin panel.
1 point
-
Didn't get to the brakes today, got busy with the "rear end". Anyway, made this as I found my hose stash. Tube is a tight fit and given it shouldn't really be under any pressure due to open end i'm hoping it doesn't leak. Will bleed it in car and just rag underneath it.
1 point
-
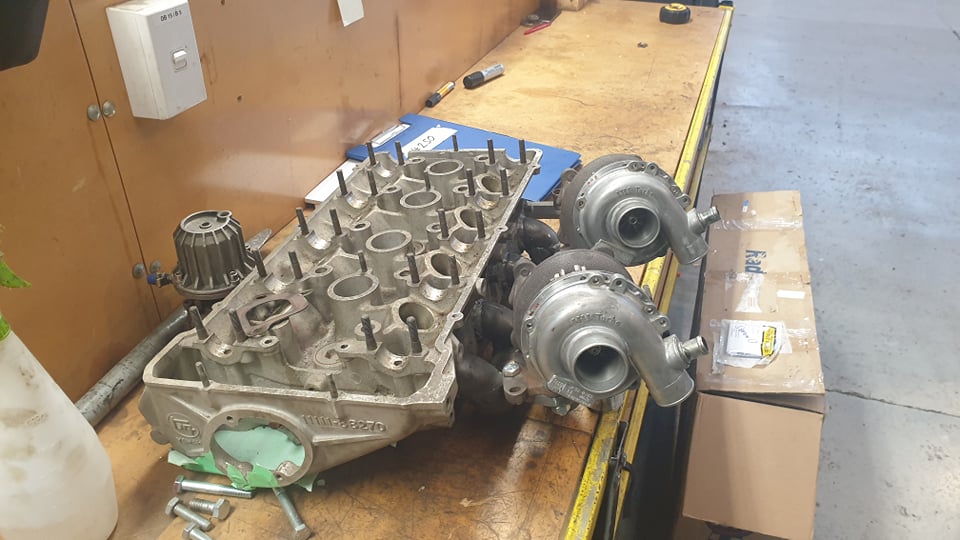
its been a while. given that i bought the supercharged crown, i was starting to think that perhaps id like to have a turbo car in the garage, so i listed the supercharger kit for sale and it turns out matteybean on here bought it and has fitted it to hit RT104 and done a real nice job of finishing it off. real glad i get to see it finished off. now turbo 18rgs are pretty common and never wanting to do the smart or easy thing decided i really like the look of aftermarket twin high mount turbo rb26 engines. so decided this is the style id go for. twin IHI VF32s the secondary turbo from the 2000cc twin turbo legacy, in theory should be suitable. and are dirt cheap and look pretty nice to boot. spent a few days piecing together a manifold which took a fair bit of thinking to fit everything in, i still need to add the wastage but will need to test fit into the engine bay to see where i can put it. (the front turbo does sit straight but is not bolted down tight)
1 point
-
got my fairings back from the painter on the weekend. he did a pretty lush job I think. Im glad I put a lot of effort into the prep. Bit of a mockup on the bike Really happy with how the custom tail piece worked out with the XR250 tail light. The tool bag is a cool touch I think and the colour is pretty close. I used the original real mudguard piece mostly to have somewhere to mount the number plate. Would have looked cool without it but will also serve some purpose of stopping too much shit getting flicked around. It is also a small memento of its previous life as it has some of the stickers on it from the South America trip the bike went on.1 point
-
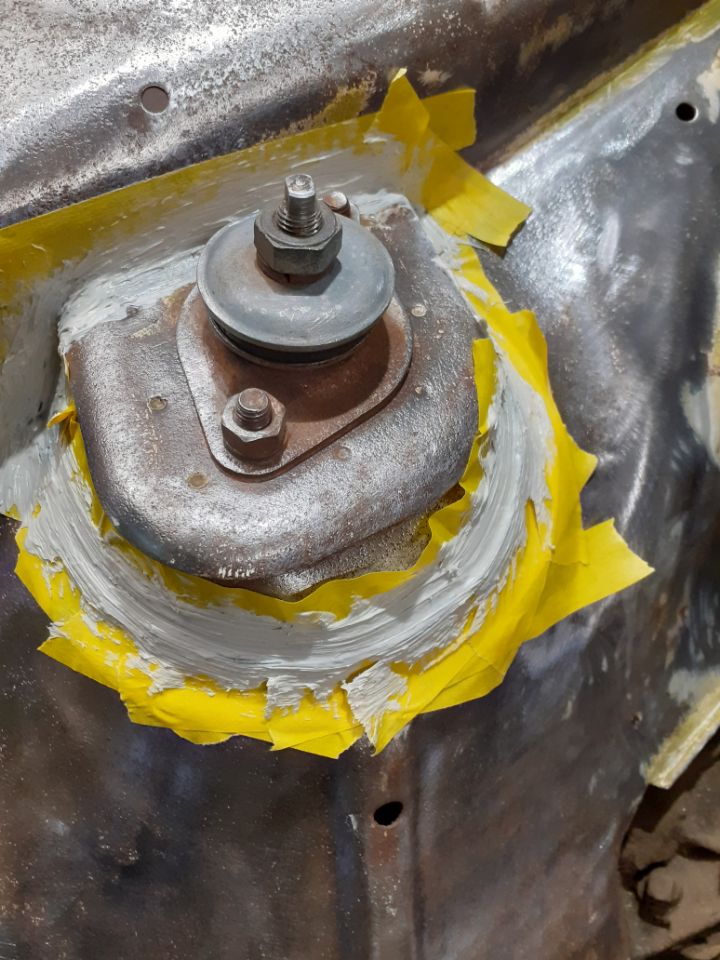
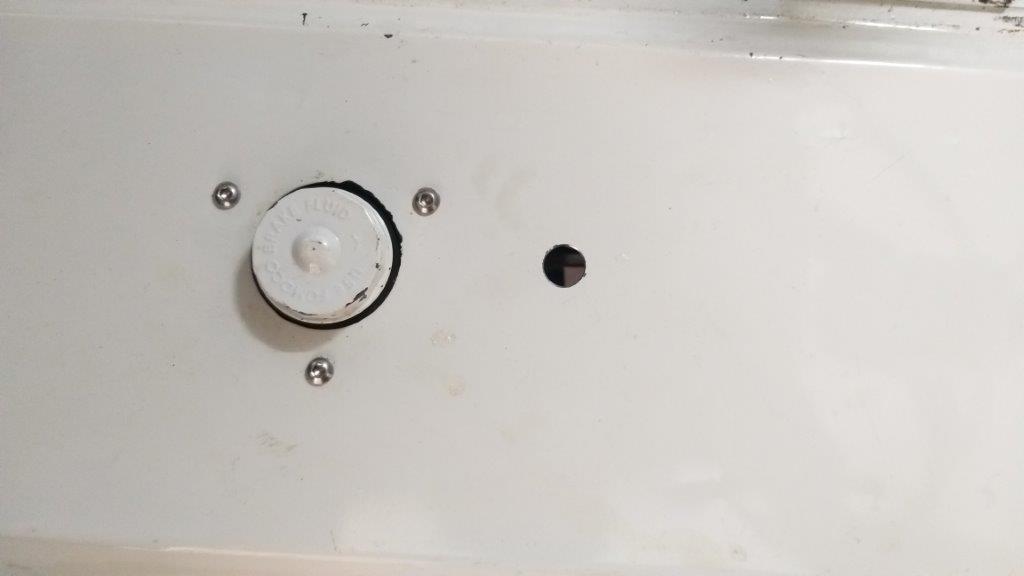
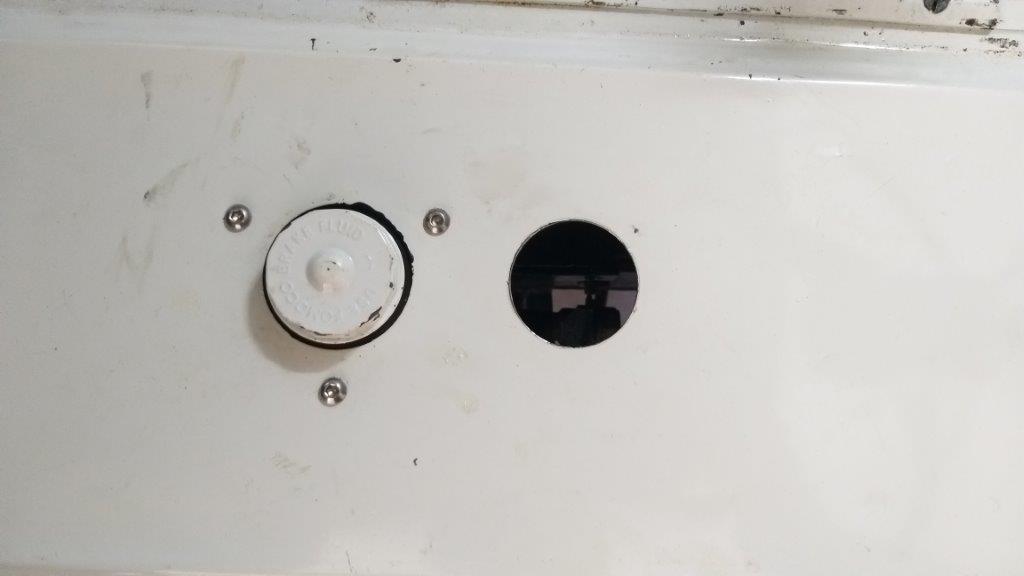
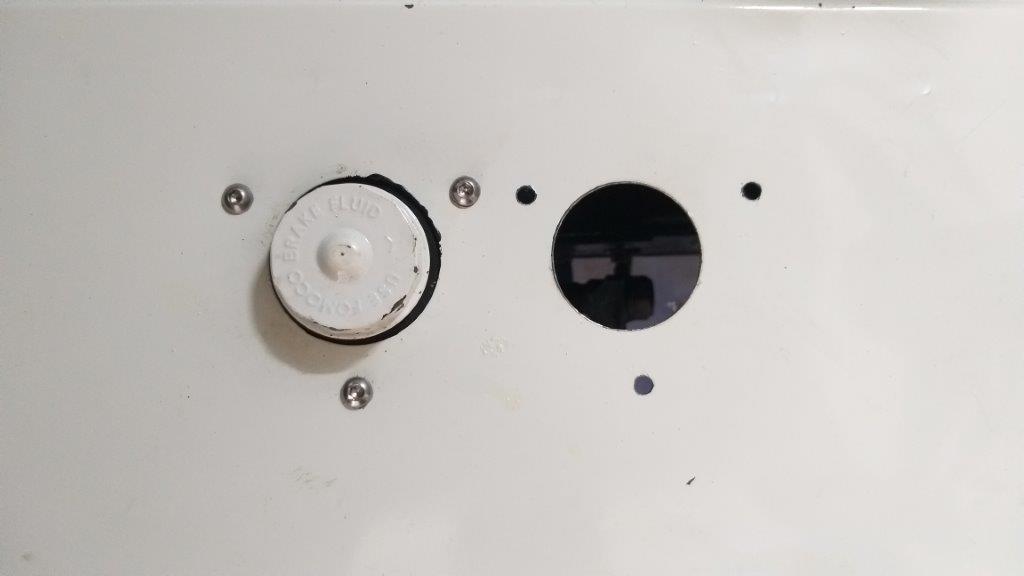
Today I took the bull by the balls and poked a ruddy great hole in the sheet metal under the drivers seat for the additional brake fluid reservoir. Started with a 15 mm pilot hole which is the size of the bolt on my 50 mm chassis punch. The chassis punch made short work of the cab floor and I then poked the 3 smaller mounting holes for the bracket. I cleaned and painted the second hand mounting bracket that I got in from the UK and gave the new reservoir a few coats of satin black to match the existing one. I've ordered 2 meters of 3/8 EPDM fluid reservoir tube which should be more than enough to plumb the dual reservoirs to the brake master cylinder.
1 point
-
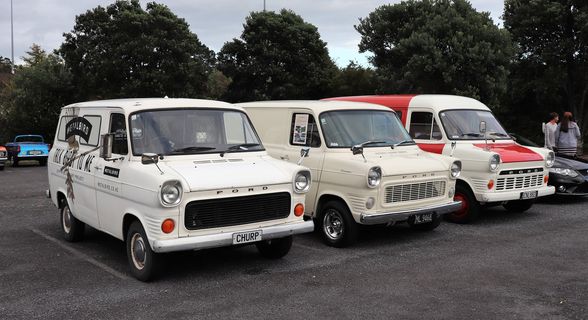
a few more pics......... Browndog's 1972 V8 Transit - Page 3 - Project Discussion - oldschool.co.nz
1 point
-
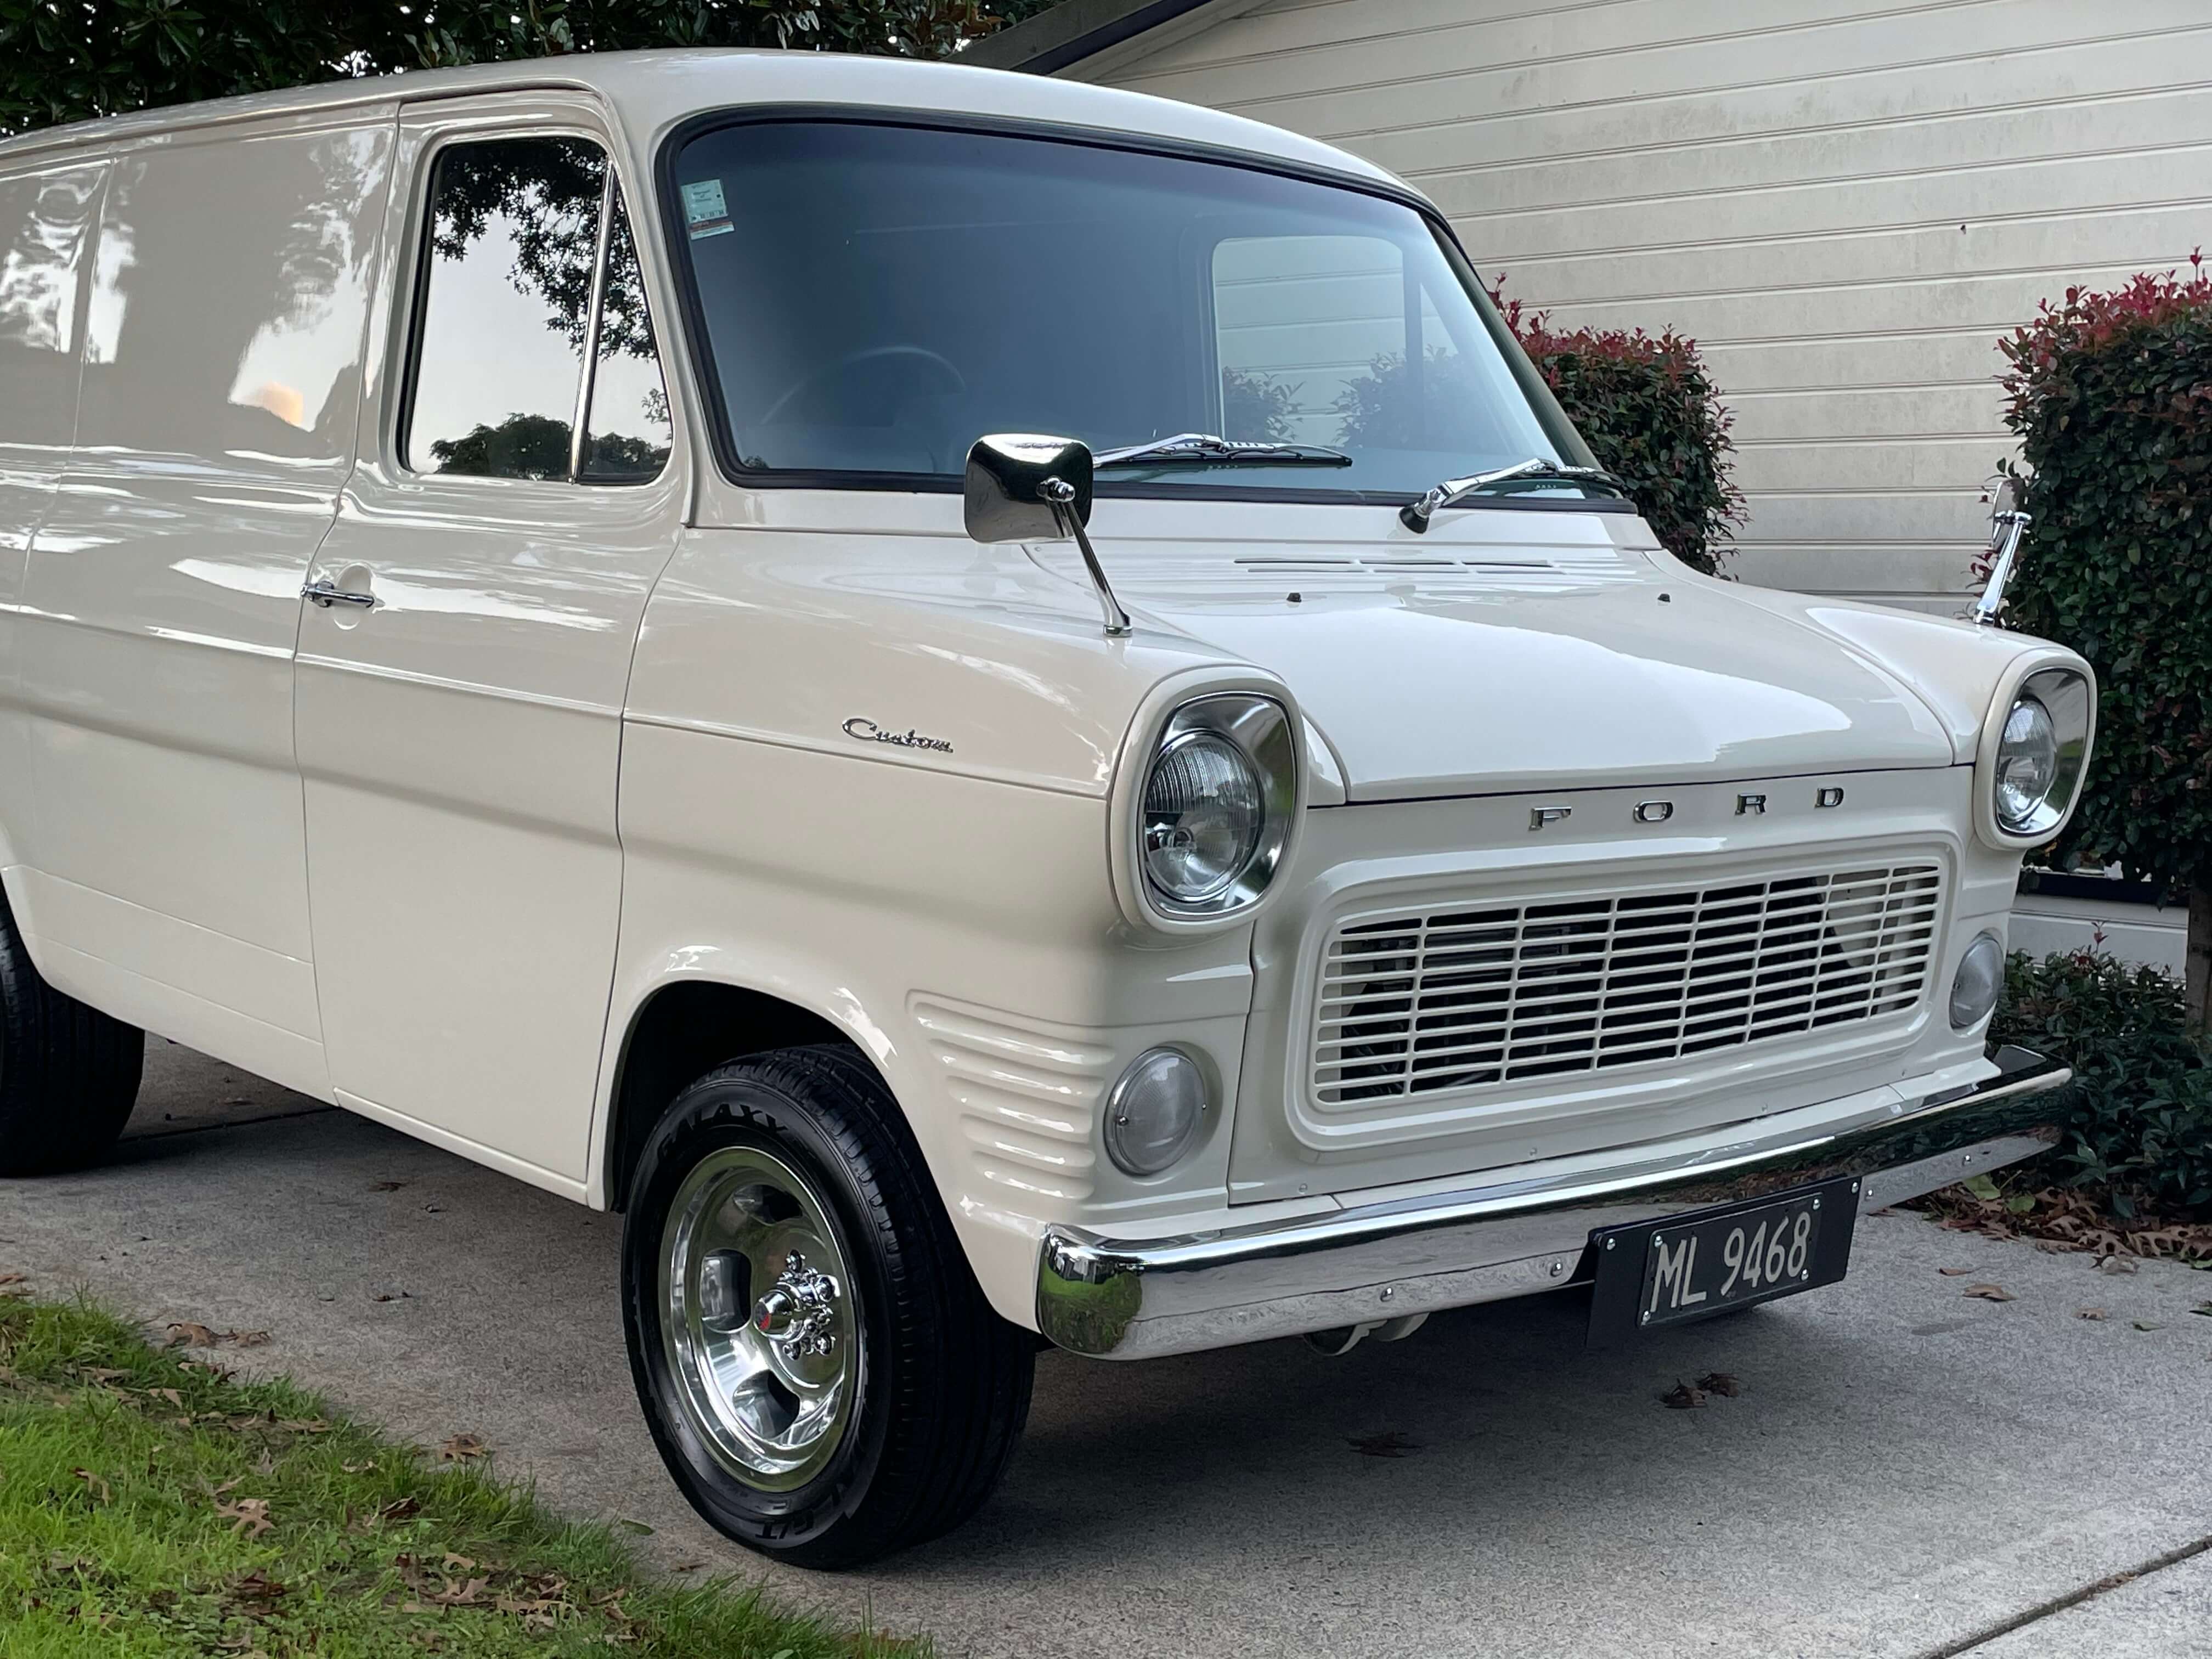
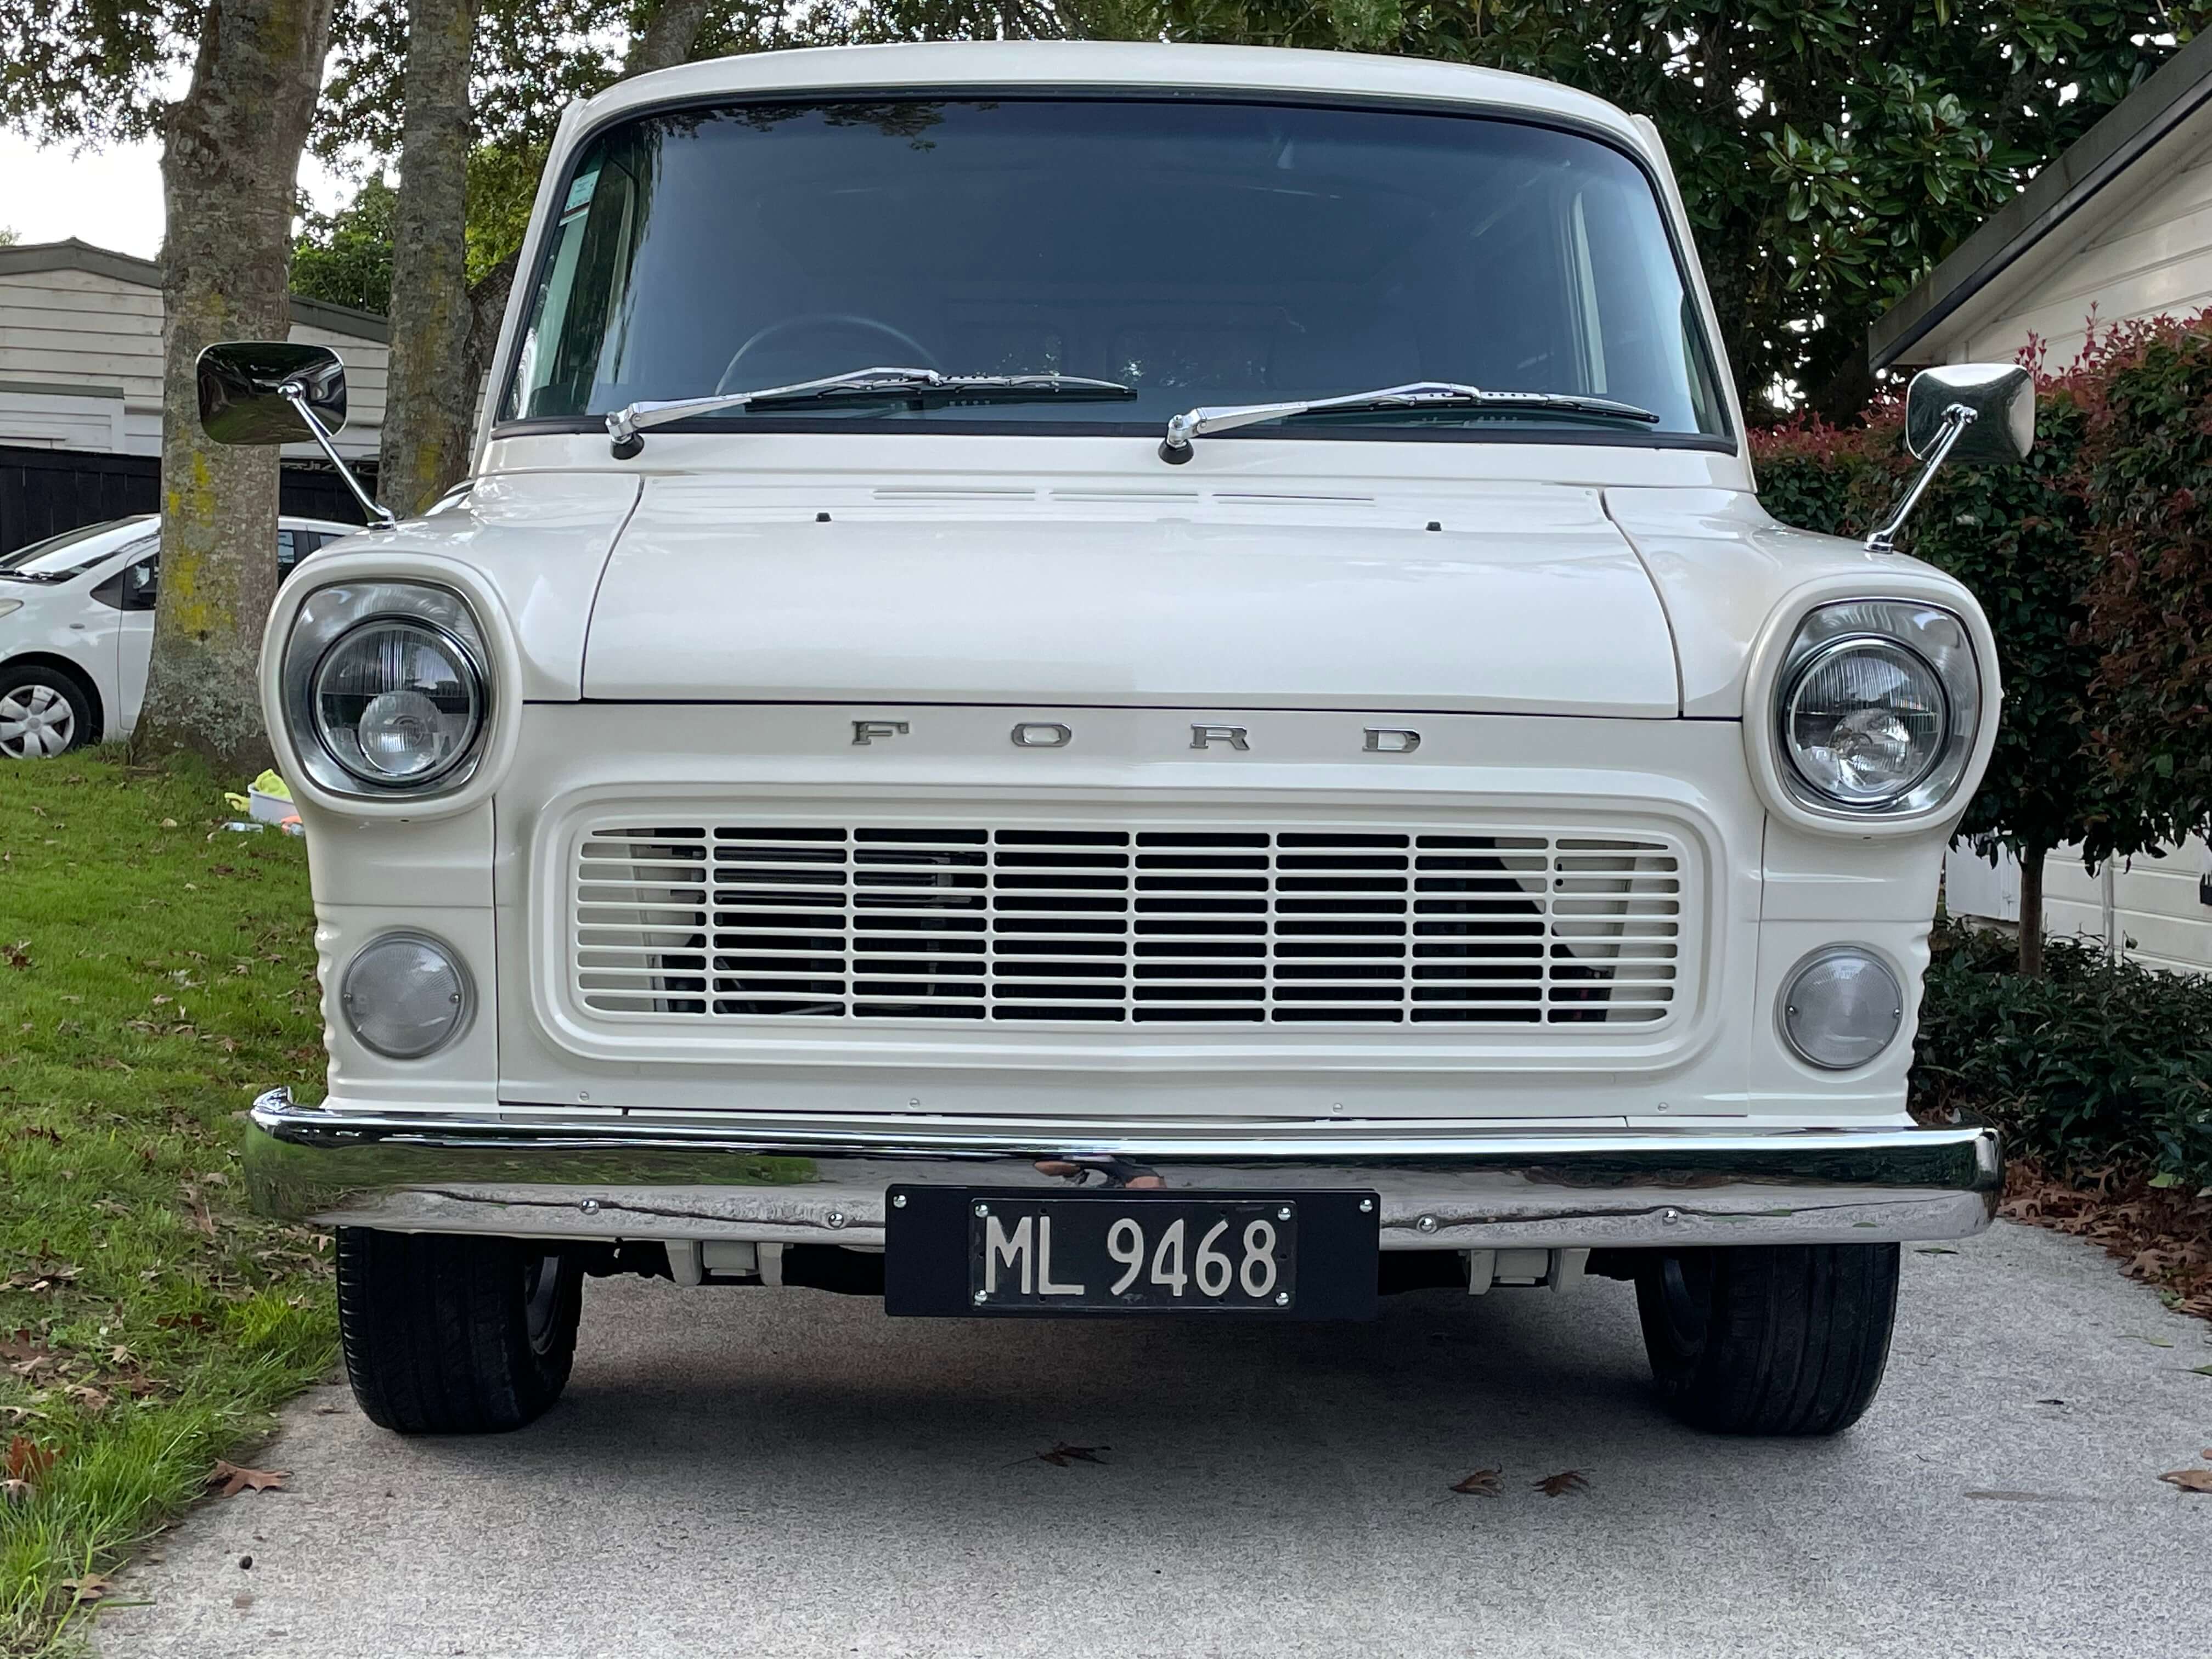
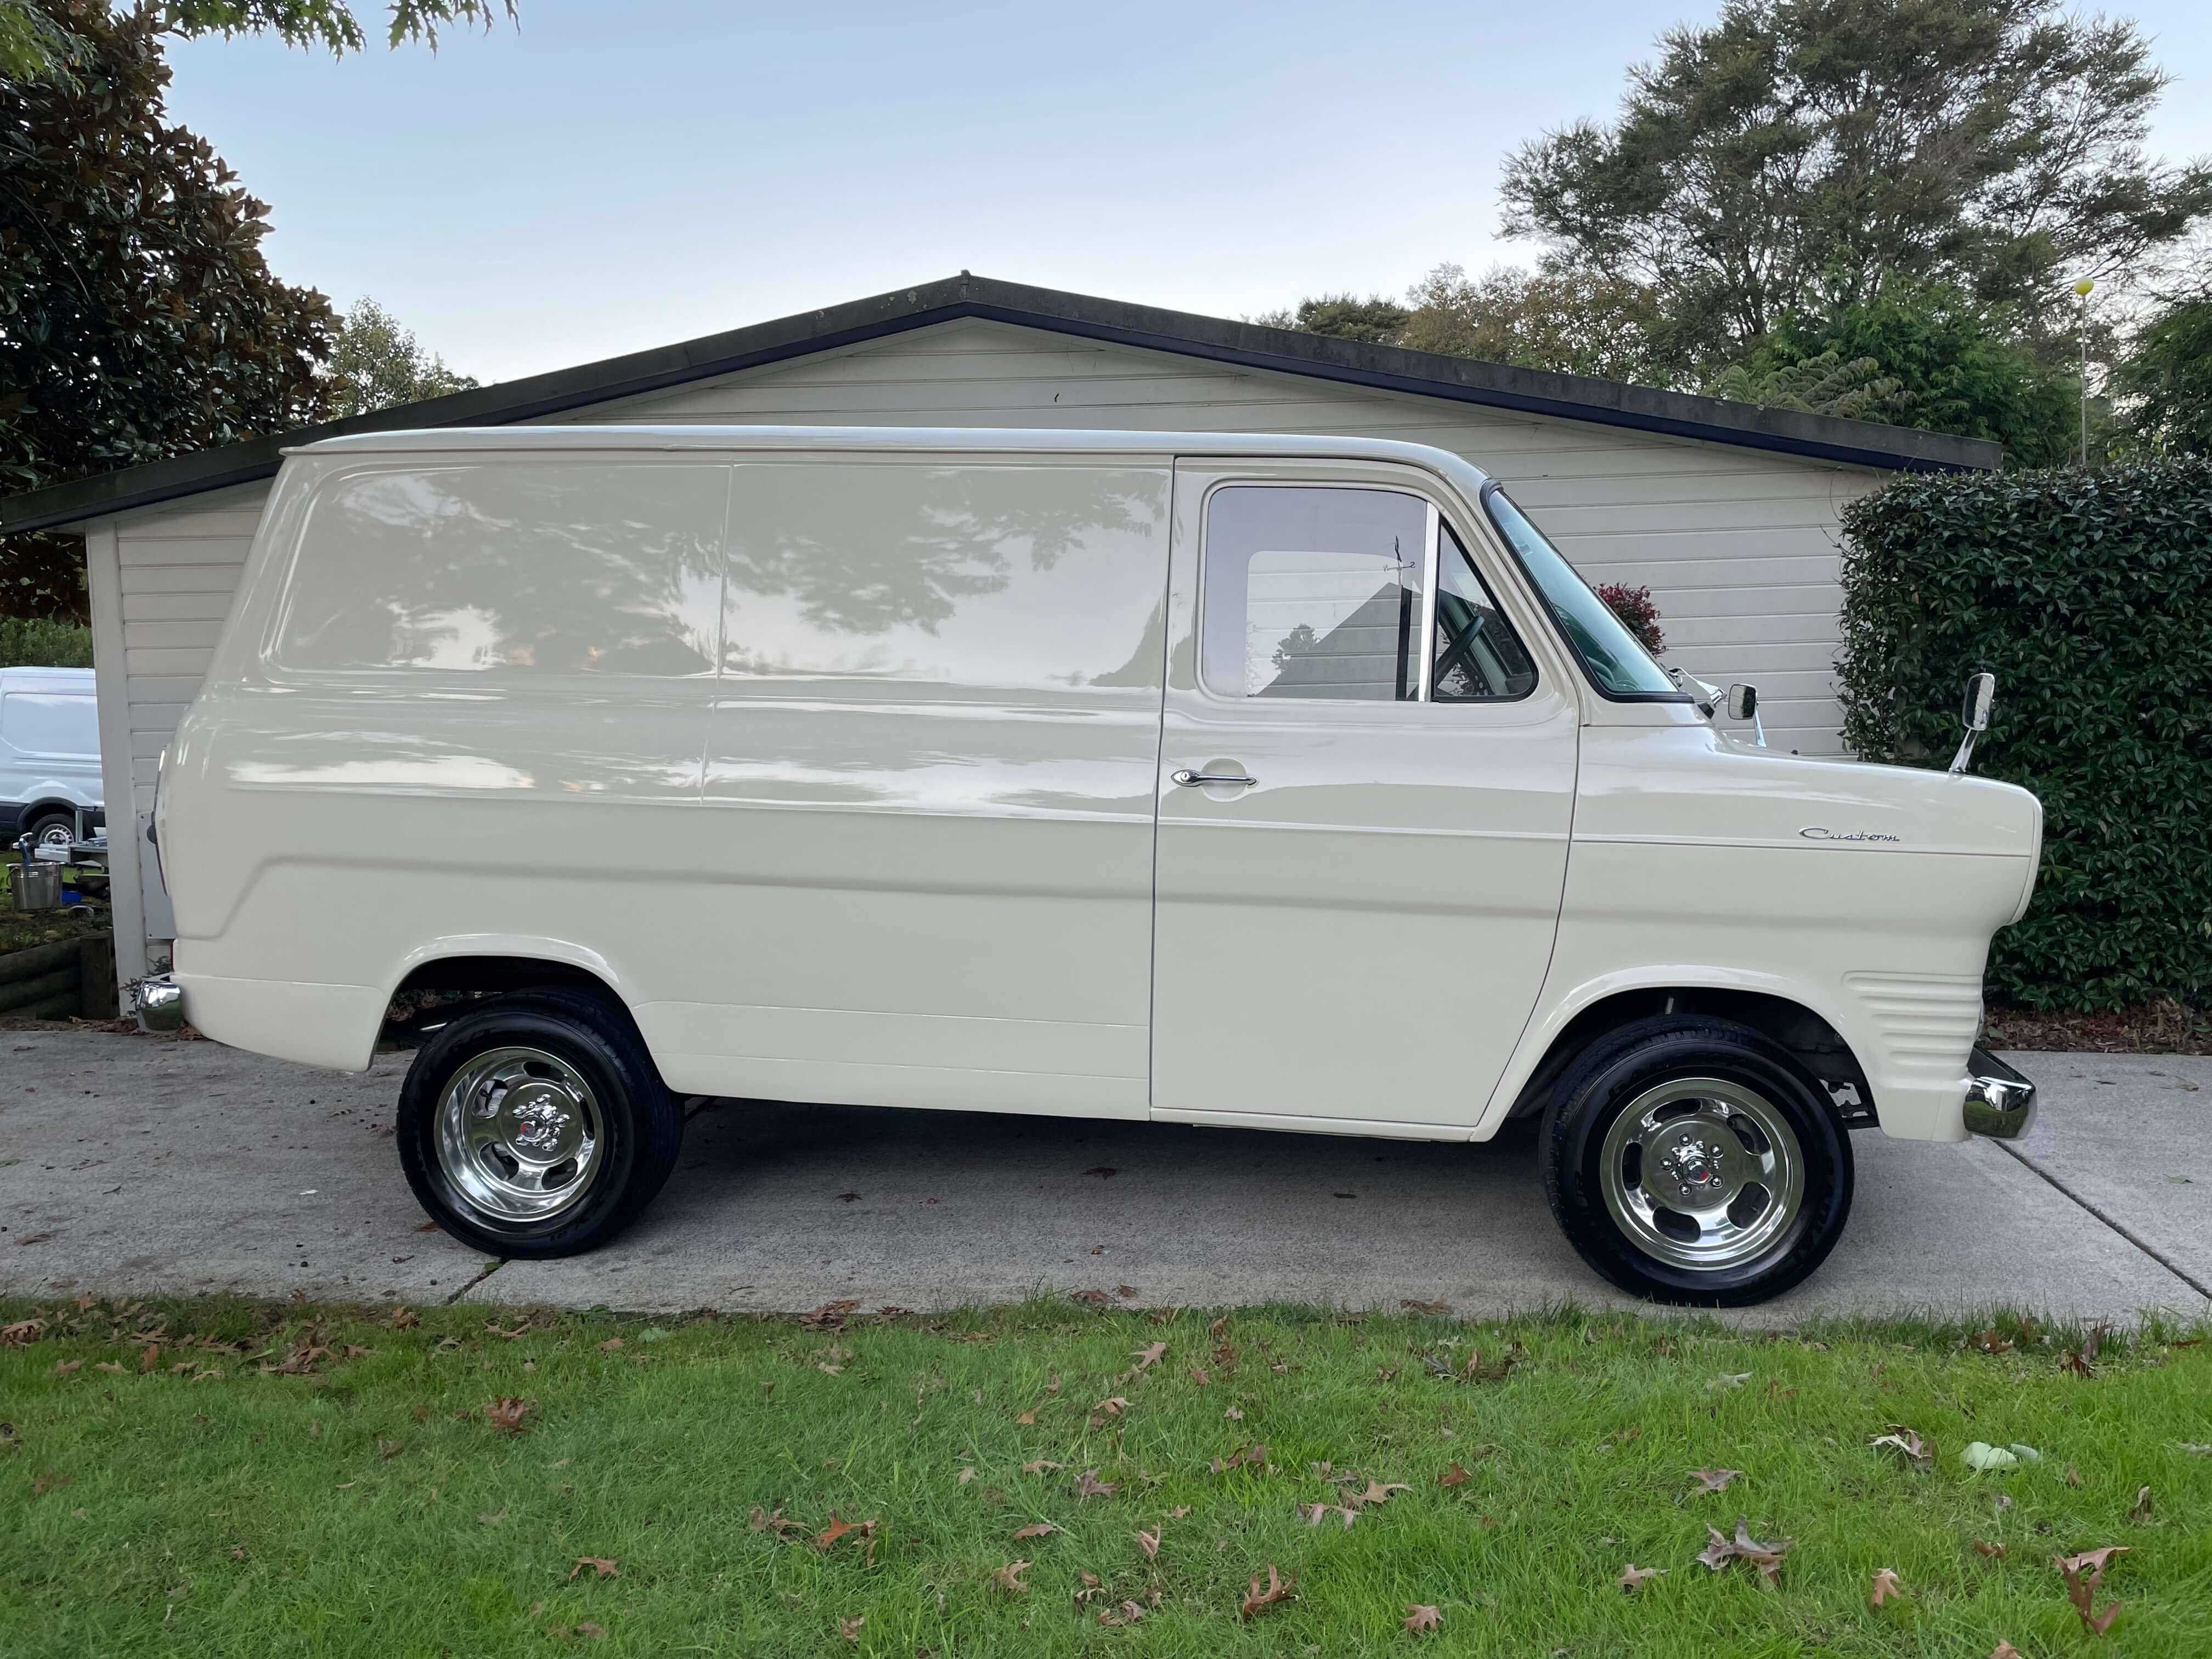
completed last week, and took it to the Auckland All Ford Day on Sunday Browndog's 1972 V8 Transit - Page 3 - Project Discussion - oldschool.co.nz
1 point
-
Hi. lets go back a few steps. I had just received my beam from Sean at kune re. I put a few layers of brunox on it and painted it black. and stashed it away. the next stage was to fill some holes and touch up some rusty peaces and i was waiting on a mate for a hand with this part but i ended up getting a bit impatient and smashing them out with the mig welder and cleaning them up with a grinder cause im clearly not a welder and while i was at it i went over a bunch of my old welding peaces and ground them up and cleaned them up. a few late nights and got the job done. next up i wanted to cover the underneath with brunox and get a few layers in to convert the small amount of surface rust it had and set a good base. with that done i went around and chucked a bunch of seem sealer on crap to clean it up and make sure aint no water getting passed my dodgy welding techniques. once that was done i dusted the under body with some underseal. end result was pretty much brand new. next job was to get the beam in the bus, i needed to put the steering arm and the torsion arms on. this also meant i needed to shorten my leaves to now match the narrowed beam. to have them narrowed i visited a mate who helped me cut them and he welded the ends together to make the leaves go into the ends easy. here we cut. here we weld then i kinda rounded the edges to help it find its own way into the hole and re drilled my locating hole for my arms to bolt into. next up the torsion and steering arm on the beam next job to put the beam in, and jesus i am lucky to have a hoist. me and @flyingbrick lowered the kombi down over the beam and bit by bit we went up and down with a peace of wood between the beam and the ground as the fitment was so bang on with my underseal on it she was binding up going in, definitely should have used lube. but we got there in the end beam in, the brakes went on the front, new rotors new bearings, new calipers, the only 2nd hand part here is the drop spindle and the retaining nut which was robbed of a bus rotting away. this wasnt an easy job. i ended up using a strop and tightening the bottom arm and kinda fitting the drop spindle in the middle now with that all done i installed my gear linkage. i replaced the bush at the front while it was out before i went and installed this next up was the rear. for some reason i was doing this all to fast and didnt really get many photos of assembly. but the new stepped spring plates are a breeze. actually after that i had to put the rear arms in, which i had replaced the bushes in quite some time ago and they were ready to go. so also installed them after the spring plates. next was the rear hub, i actually drilled my old one out to fit different bolts in for the horse shoes i tried to fit just before covid last year. so i got some second hand ones and headed to evans place to use his sand blaster and clean them up. before: note the long noes pliers as circlip pliers during after and new bearings fot the rear hub section. now with this all done i can put the axel in and put the rear brakes on and continue doing small jobs. next up was new brakes lines, hard and soft ones all the way through the bus. also my last slave cylinder was just left sitting out, kinda rusted and also never really worked correctly when installed on the bus. so got a new one of those but the cups where a different size than the last one, so got some small adapters to make it work also i had replaces both hand brake cables, accelerator cable, clutch cable and complete full axels and cv's some where along the line. This where i ended up in the last post. made it on the ground and drove it for the 1st time in over a year. Great success. one Greg for scale i just checked dates on this and i started grinding the under body and doing rust on the 12th of feb and she was on the ground out side on the 23rd of feb at 830pm.1 point
-
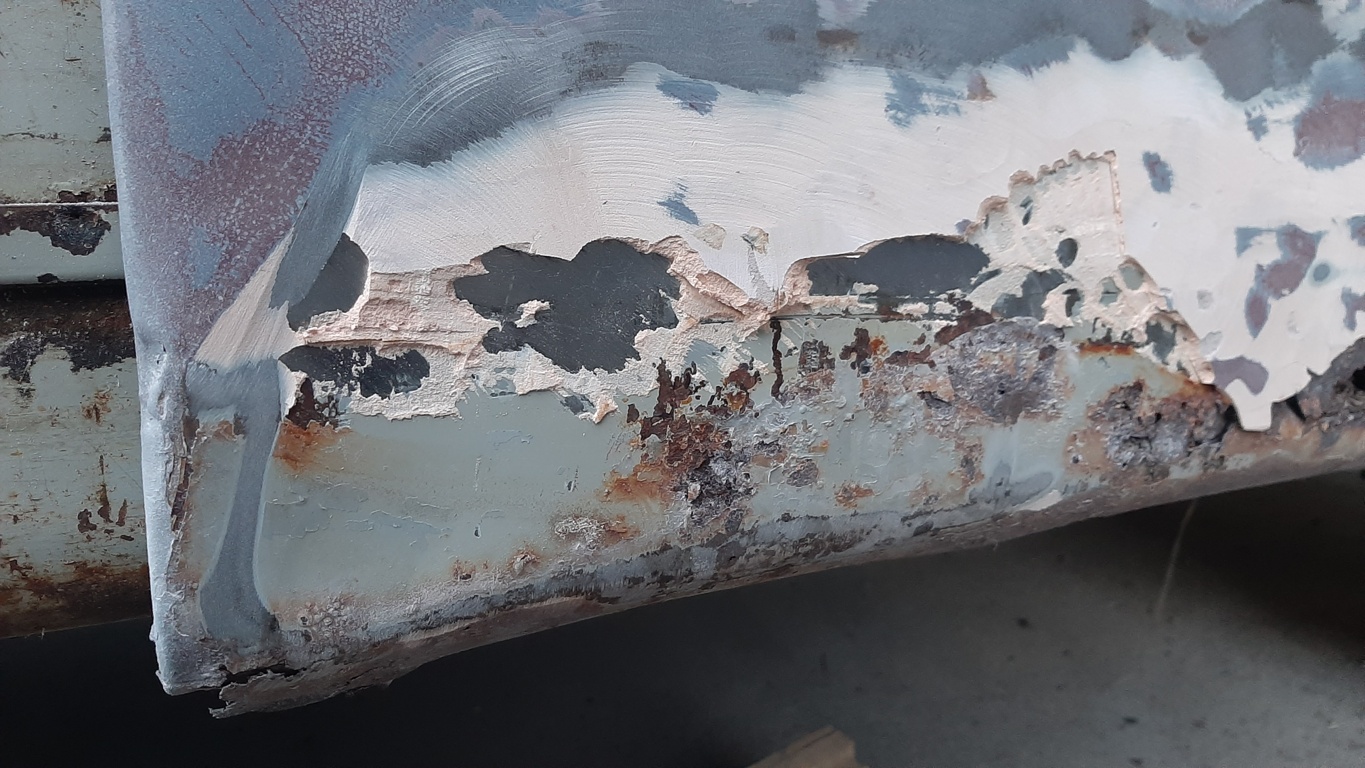
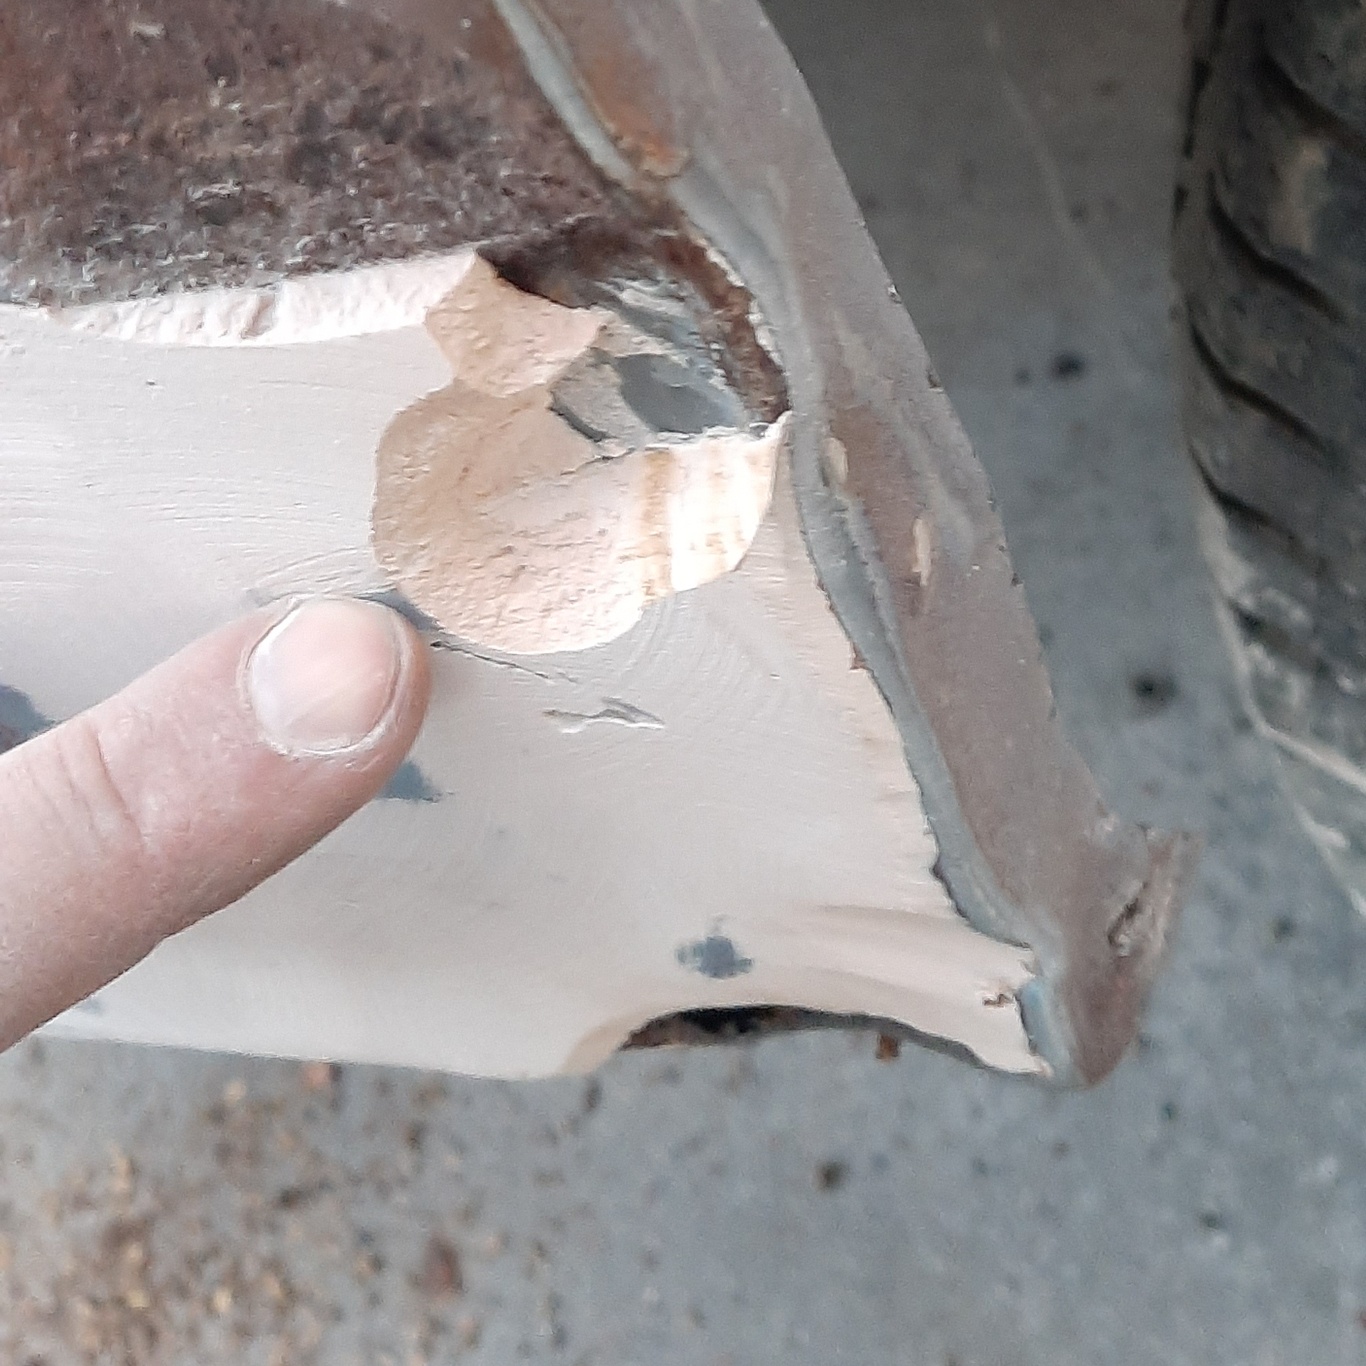
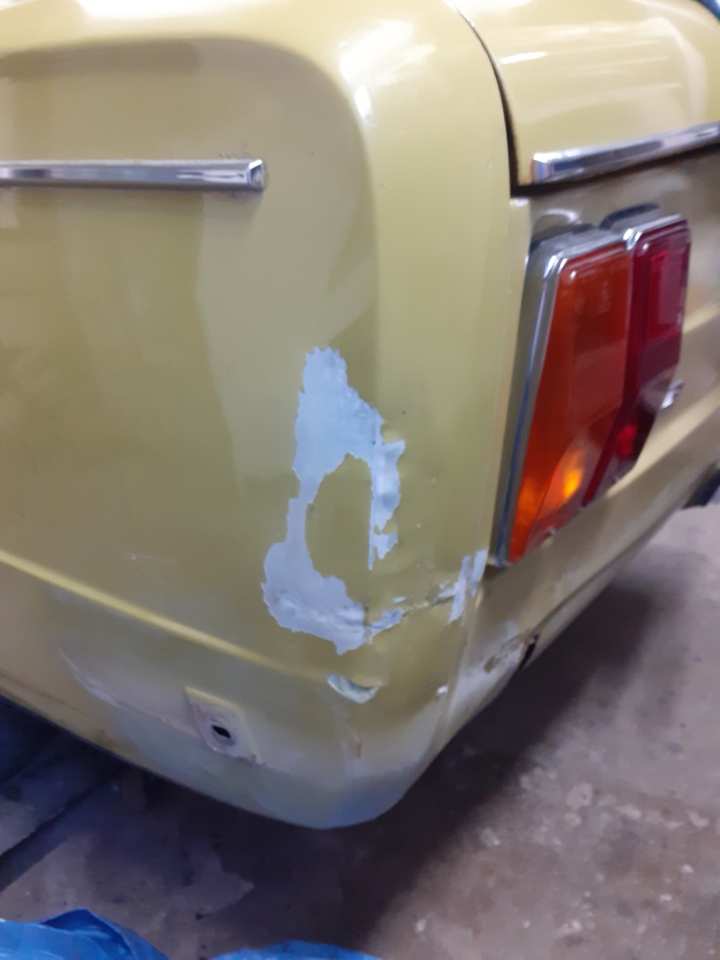
So, I've been digging with the stripping wheel on the grinder. I poked this scab a while back... And yesterday I went full bore at it. The previous owner was definitely a sculptor. There are places where the bog is 1-2CM thick. Its messy AF, so will leave the rest of the stripping until I can get the car outside and make the rest of the dust natures problem The strange thing is, the bog doesn't need to be this thick. I got a profile gauge today and using the good LH side as a sample, I compared it to the stripped RH side. Its not perfect, but its a lot closer to useable than I expected. There is no way it needed that much bog. Once I have the rest of the bog off I'm going to etch prime the panel (takes the shine away, which is making it hard to see the shape) and then try my hand at shaping it with a hammer and dolly. Not sure how much better I can make the swage line, as its almost gone in places, but we'll see. Worst case, I keep an eye out for a replacement panel cut.1 point
-
I refurbished the rear drum brake setup today. I almost left it as is, but I'm glad I didn't as it definitely needed stripping down. I removed the drums a while back and had a quick visual inspection, and whilst one side looked like it had been under the ocean, there was no brake fluid or axle grease where it shouldn't be. I started on the LH side, which didn't look like it had been under the sea, but instead had been full of bugs and spiders. The whole drum was packed with cobwebs and took a lot of cleaning and vacuuming to not be grossed out. The shoes look really good, almost new I'd say, and everything was very dry. Someone had been in here before though as this big, annoying to install, spring should be behind the shoes, not in front of them. Removing the shoes is a case of removing the little retaining spring pins, removing the big spring and then the pair of shoes can be withdrawn from the backing plate. With the shoes out the cylinder can be removed by undoing the pipe(s), removing the boot, sliding the U shaped clip downwards and the spring clip upwards. The cylinder should be free to remove. This one looked OK. The boot was torn, and the piston had some crud built up on it, but the bore was clean. The piston seal looked so good I probably could have reused it, but since I ordered a replacement seal kit anyway, I replaced it. The seal kit for this car is from a Spitfire and has 3/4" (19.05mm) bore. With the build up carefully scraped off and polished with some fine sandpaper, the new piston seal goes on. Now, before installing the piston in the cylinder again, install the boot first. This is a real prick of a job as it needs to stretch over the top, and it's a very tight fit. And carefully install back into the cylinder. I chose to lube the cylinder walls and piston/seal with brake fluid for assembly. Reinstall the clip and you're done. There isn't a heck of a lot to a wheel cylinder on these. I cleaned up and greased the self-adjuster. This just rests in the bottom of the cylinder but must turn freely. Now clean the backing plate up, especially at the points where the cylinder and shoes contact it (the six raised bumps on the top and bottom, as well as the anchor where the end of the shoes rest and behind the wheel cylinder). I used a wire brush and brake clean. Once clean, use thin smears of copper or brake grease on those contact points. Once the cylinder and hand brake lever is installed, reinstall the shoes. I found this easiest with the double spring in one end (shoe end), rest the top shoe on the hub, whilst inserting the lower shoe into the self-adjuster and then the shoe anchor. Now the top shoe can be installed. Take care not to lose the little metal H piece that sits above the handbrake lever where it goes through the shoe. Don't forget to install the retaining pins and the big spring. As mentioned, this should be behind the shoes, and I found levering it in place with a long flat blade screwdriver easiest. It takes a few tries. Done. Rebuilt cylinder So cocky, on went the drum Now to move onto the other side. This one was very crusty. Obviously water had gotten into the drum somehow, and couldn't get out until it dried over time. This drum had plugs in the adjuster holes, whilst the other side didn't. Explains why the bugs liked that side, and the water got stuck in this side. The cylinder on this side was looking particularly average. Removing the shoes shows how crusty it was The adjuster was completely seized. No chance of self-adjustment here. Just as an aside, the self-adjustment works by means of pulling on the hand brake. Pulling the hand brake pulls up on the top shoe, creating the friction to stop the car, but the movement of that lever also moves the metal tang in the photo below from left to right. As it heads on over to the right it catches the teeth of the adjuster, which winds the threaded inner section that the lower shoe rests on up and down. The whole cylinder is free to move up and down in its mount, which evens out the braking between the two shoes. Simple. Removing the cylinder on this side was a little more of a pain as it has the inlet and the link pipe, instead of just the inlet and a bleeder like the other side. Both freed off with some careful force, and out came the cylinder. The adjuster came off the end after a couple of careful taps with a hammer. It was packed with furry corrosion behind it. As was the space under the boot on the top. This concerned me a bit as it didn't bode well for the condition of the bore. The piston is completely compressed and didn't move by hand It did move with some gentle persuasion with a long screwdriver though I had to get a bit more angry to get it out further. A long spanner was used as the lever for this And out it popped The bore looks worse than it is. The cylinder is aluminium, so it's not really rust, just a build up of gunk stuck to the bore. I suspect the piston is stainless as other than more gunk on it, it was immaculate. The seal on the other hand was rubbish as there is a big tear/cut in it. Mmm, more crusty fur I tidied the bore up with some careful scraping, and then some very fine sandpaper. There is some staining on the walls, but there are no marks you can feel. The walls are very smooth. The rest of the cylinder got scraped and wire brushed before a good clean out and the new seal kit fitted. Before refitting, the back plate was de-crusted with a wire brush and then brake clean. The cylinder was refitted. The locking method for these is a bit of a pain, but simple enough. The spring clip goes down from the top first, with the dimples pointing outwards (away from the cylinder). The locking U shaped clip then slides up over top of the spring clip, and locks into the dimples. I used a flat blade screwdriver to press down on the top of the spring clip, and pliers to tap up on the U clip. And the wheel cylinder is in. The shoes got a quick scuff with some rough sandpaper to clean the surface up a bit, and then they were fitted. They look fine but had some rust marks where they had been in contact with the drum. And the completed assembly The friction surface on the drum was quite rusty too, so that got a wire brush before fitting. It's good enough that any other rust should be scraped off once the car is on the road and the brakes operate. Drum fitted Unfortunately I can't test them as the master cylinder is off being re-sleeved, and the front brakes also need to go back on, but hopefully it won't be long.1 point
-
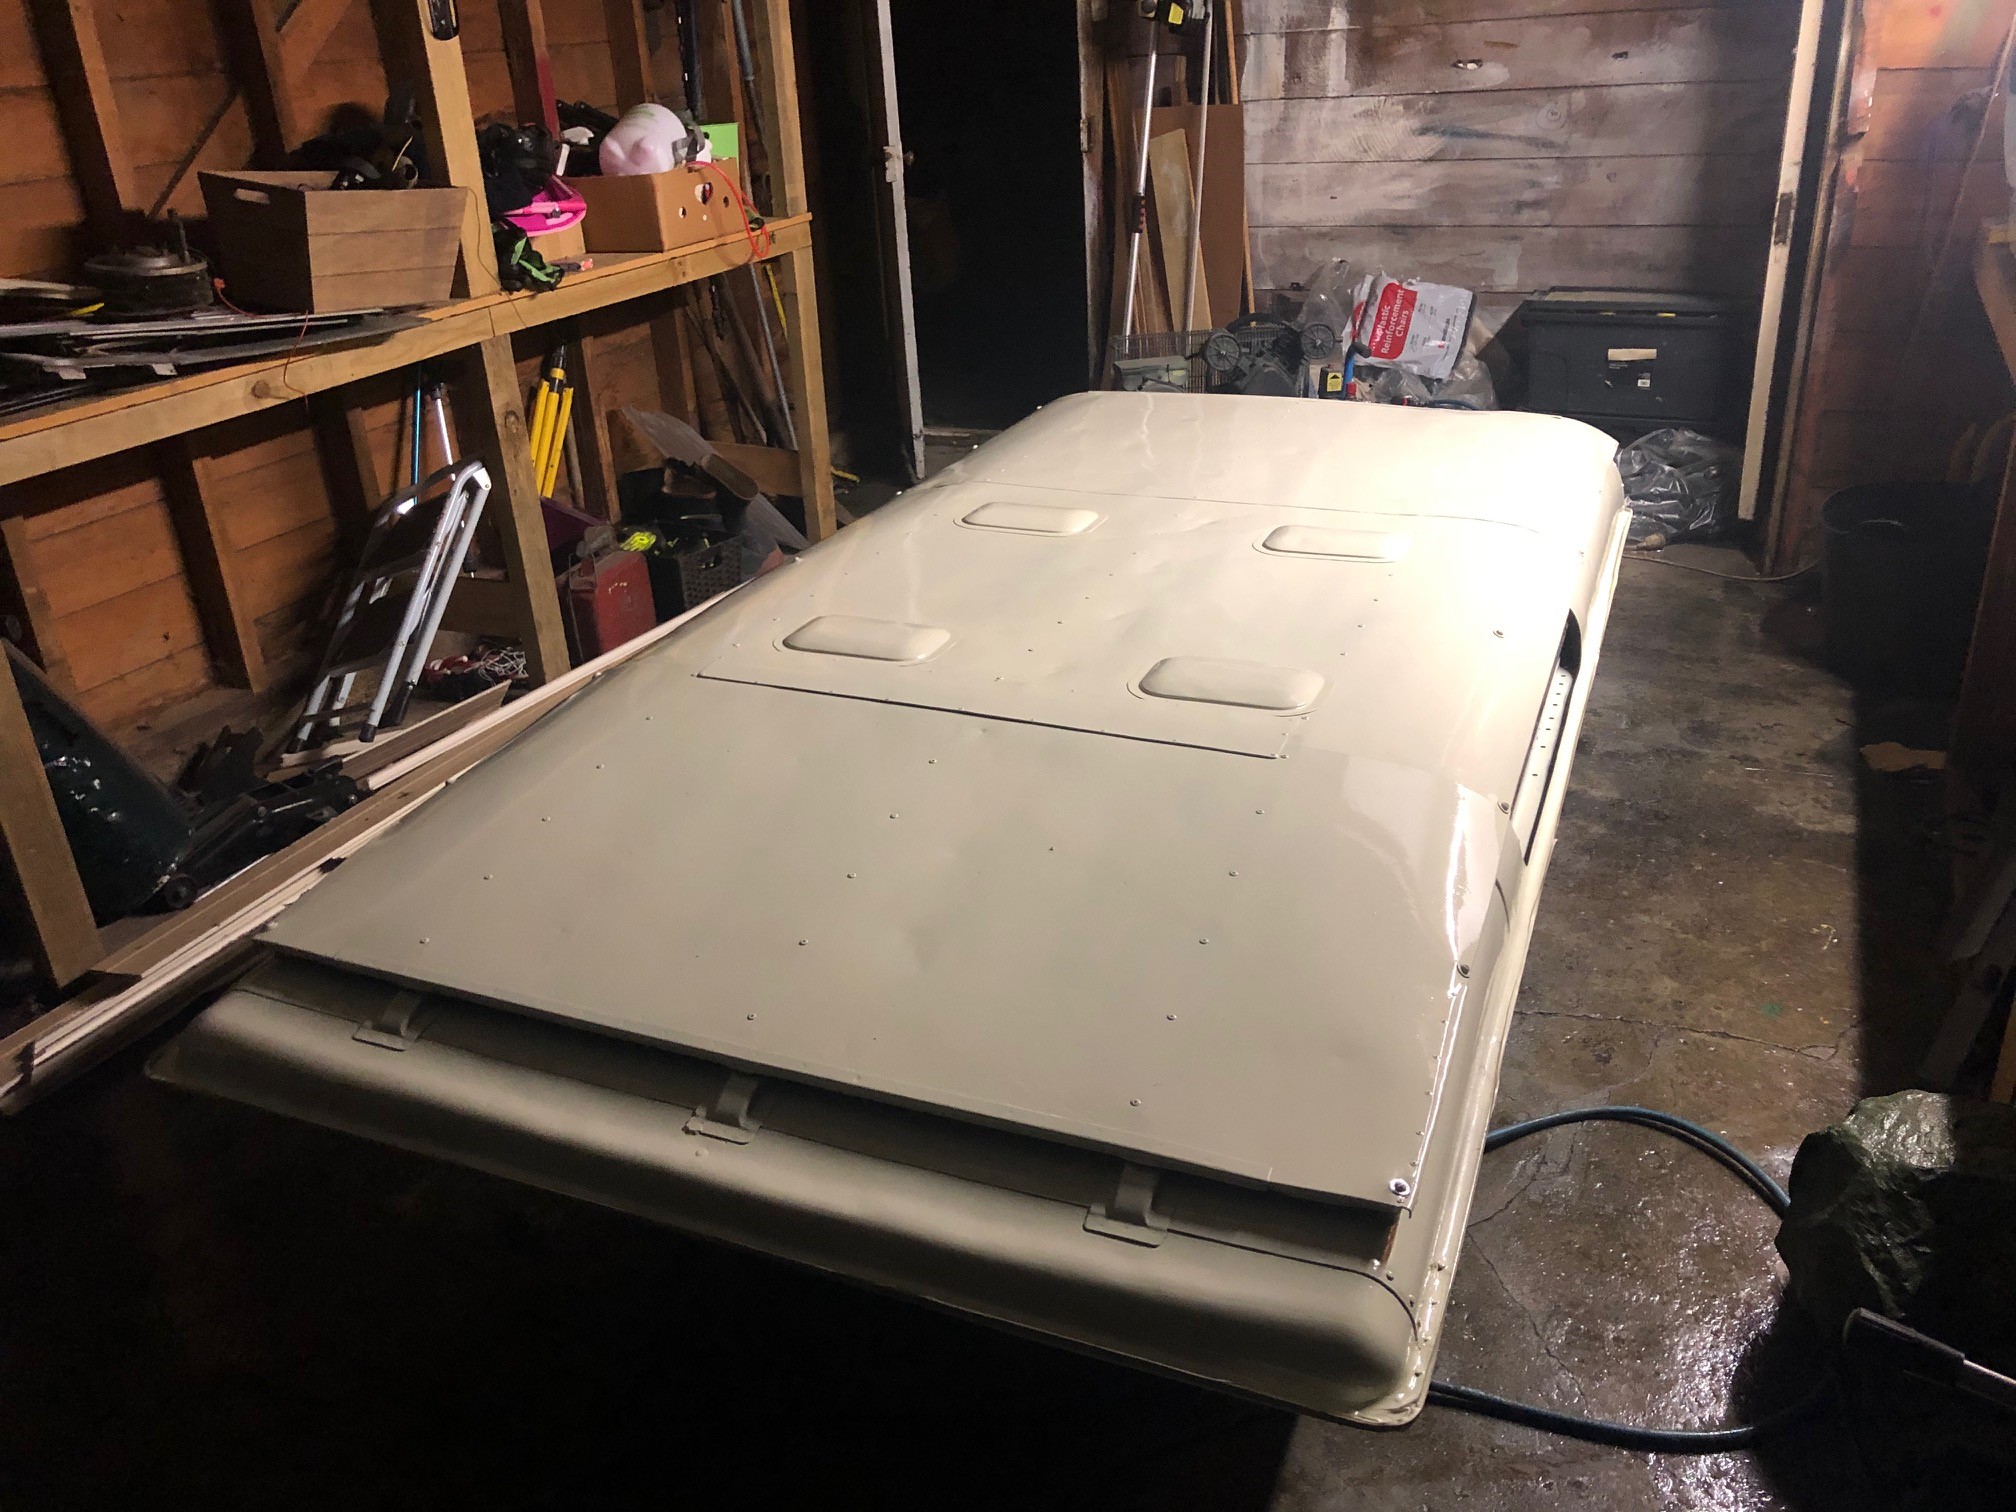
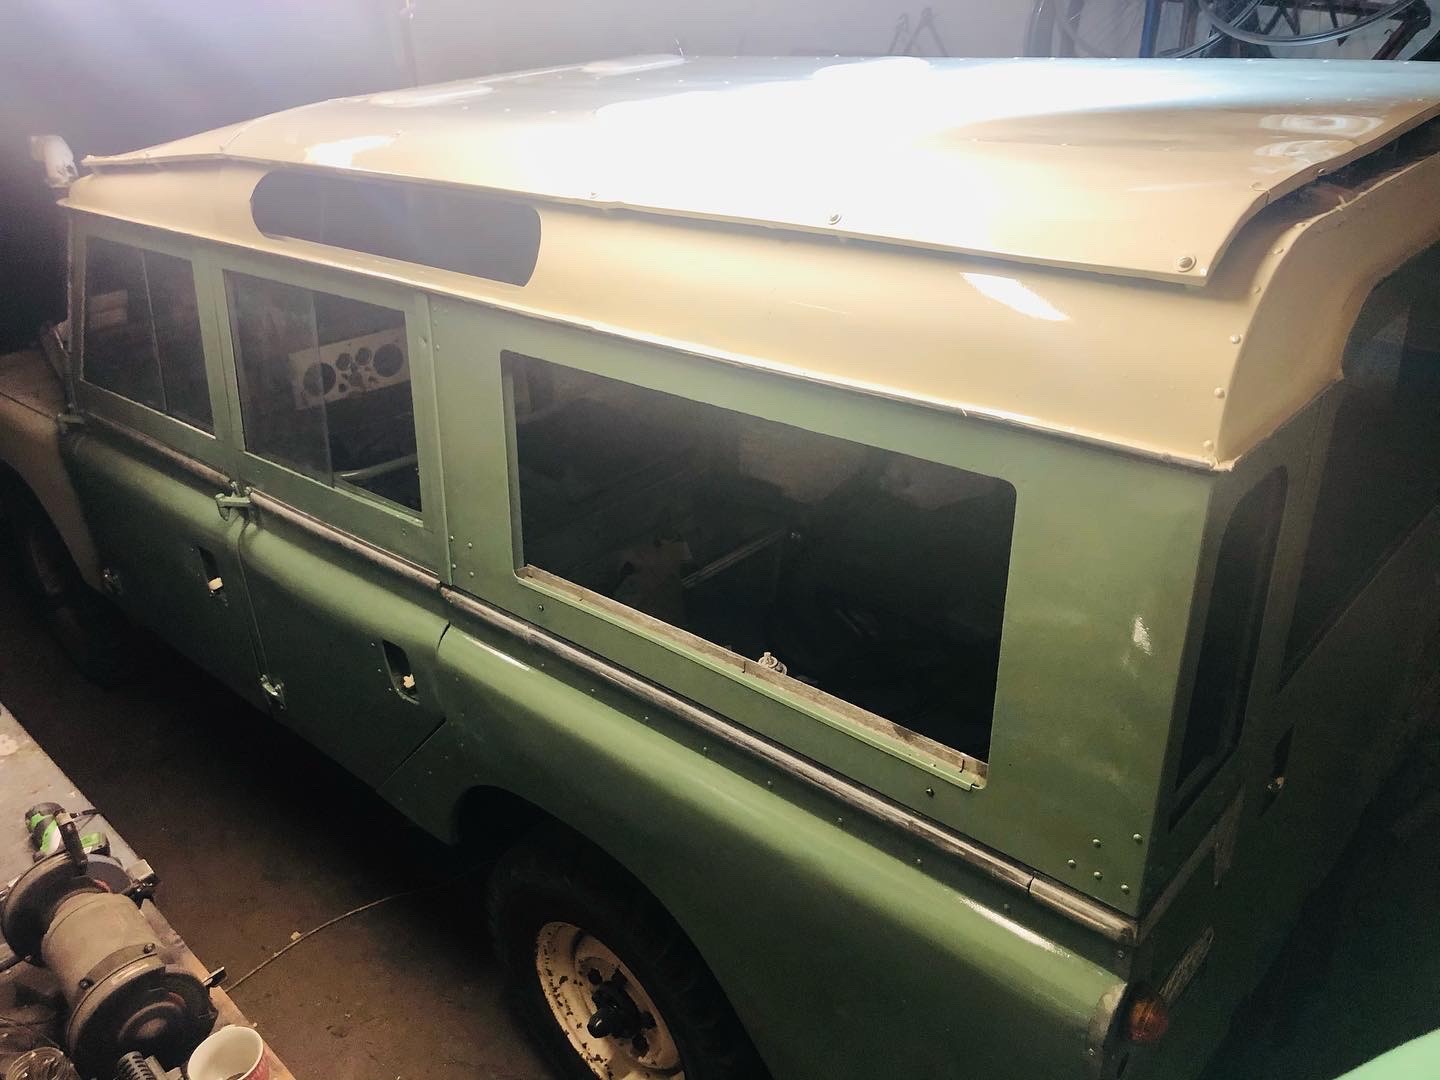
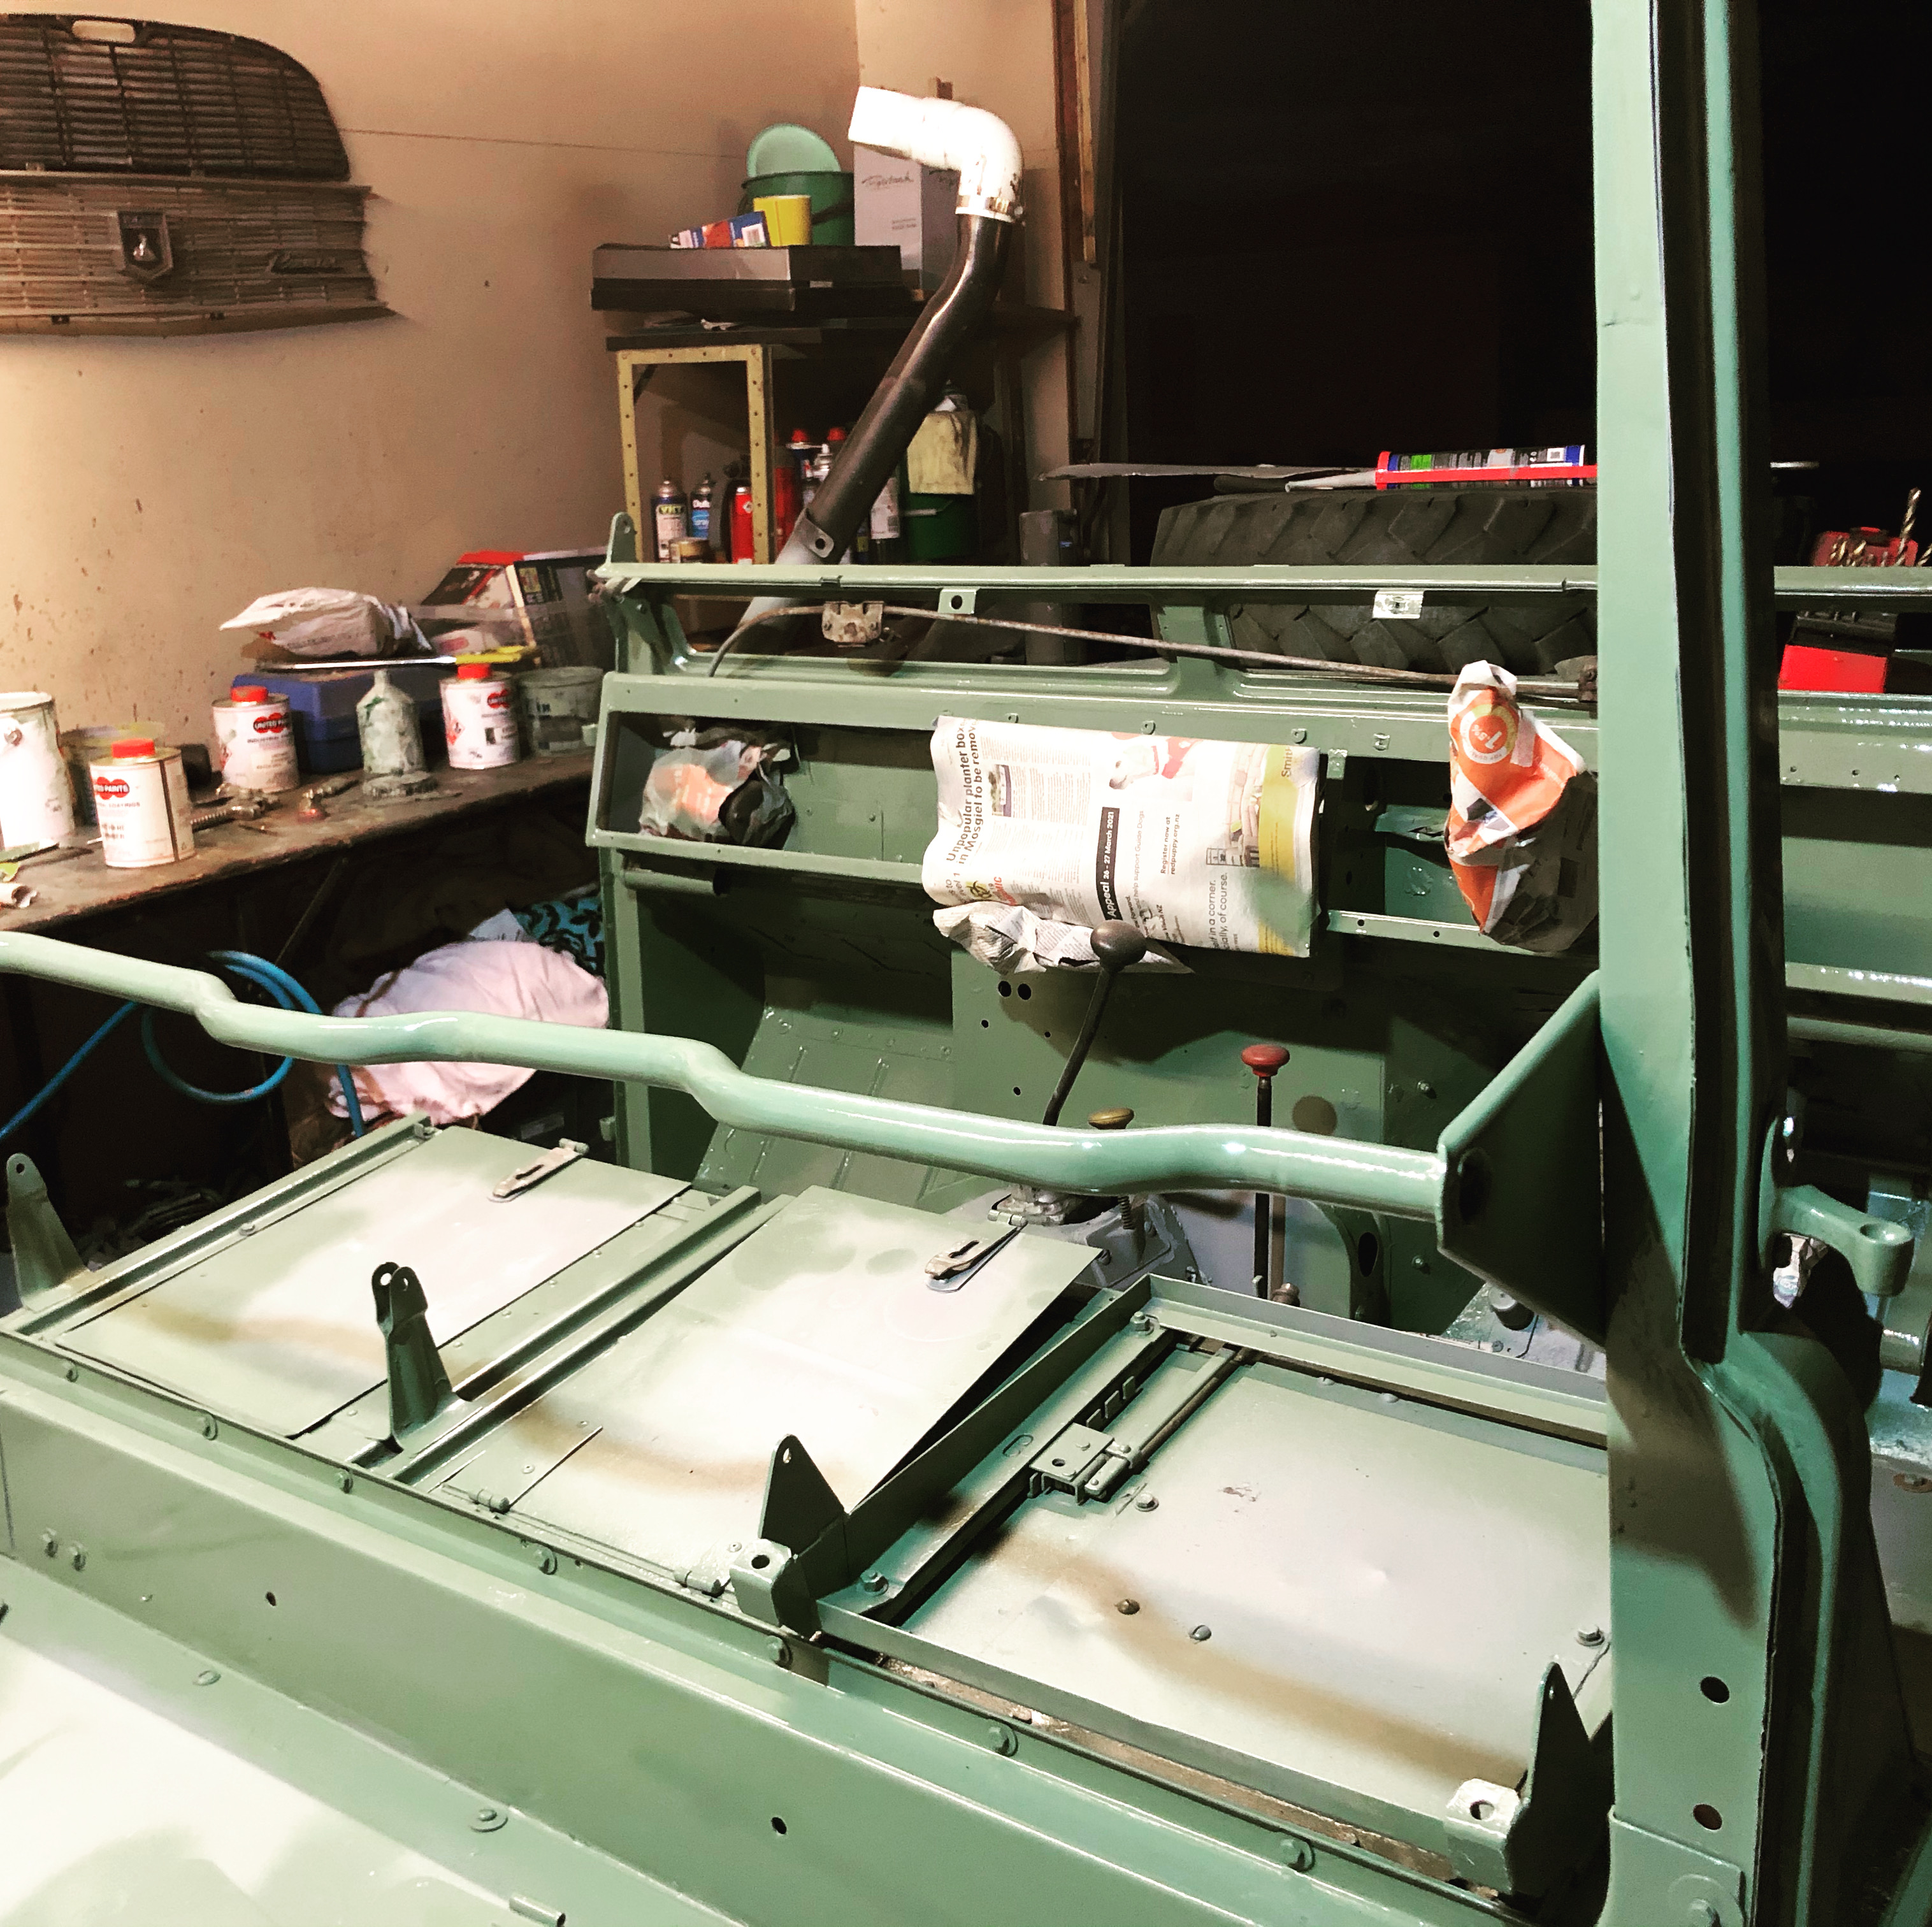
Not my best painting in the world, nor the best photos in the light but I got the roof done and back onto where it is suppose to be. Looking alot more like a truck now...
1 point
-
SOme more things have been done, including all-new loop pile carpet and a nice alloy sealed battery box in the boot but that's not even important. What is important, is the gearbox, which sucks. Downshifting is impossible without a big ol' rev match and double clutch to get it from 4th to 3rd, then from 3rd to 2nd. As the car makes a little bit of a racket, it's quite obnoxious. So I sat down with Earle McFarlane (he's had many many experience with T50s and rebuilding them) and ordered a whole load of parts from Japan. They came in this box. This struck me as odd. Amayama orders are sent to an NZ warehouse then dispatched from there, so I'm guessing this happened locally. 20210325_180028 by Richard Opie, on Flickr And this is what's in it. 20210325_175701 by Richard Opie, on Flickr We have; Synchros for all gears New selector hub sleeves Gasket/seal set Selector hub shift keys Clippy springy things for above Bearings a go-go (all bearings I could possibly get, we need to get the 2 countershaft bearings locally) Some good low km selector hub centers are en route from South Island. Next, I will rebuild the gearbox - well, Earle will rebuild it and instruct me to do some of the easy bits. Then I can finally aim for some twisties and give it a good drive, assuming it all plays the game. Looking forward to pissing around with brake bias, making all that stuff work etc.1 point
-
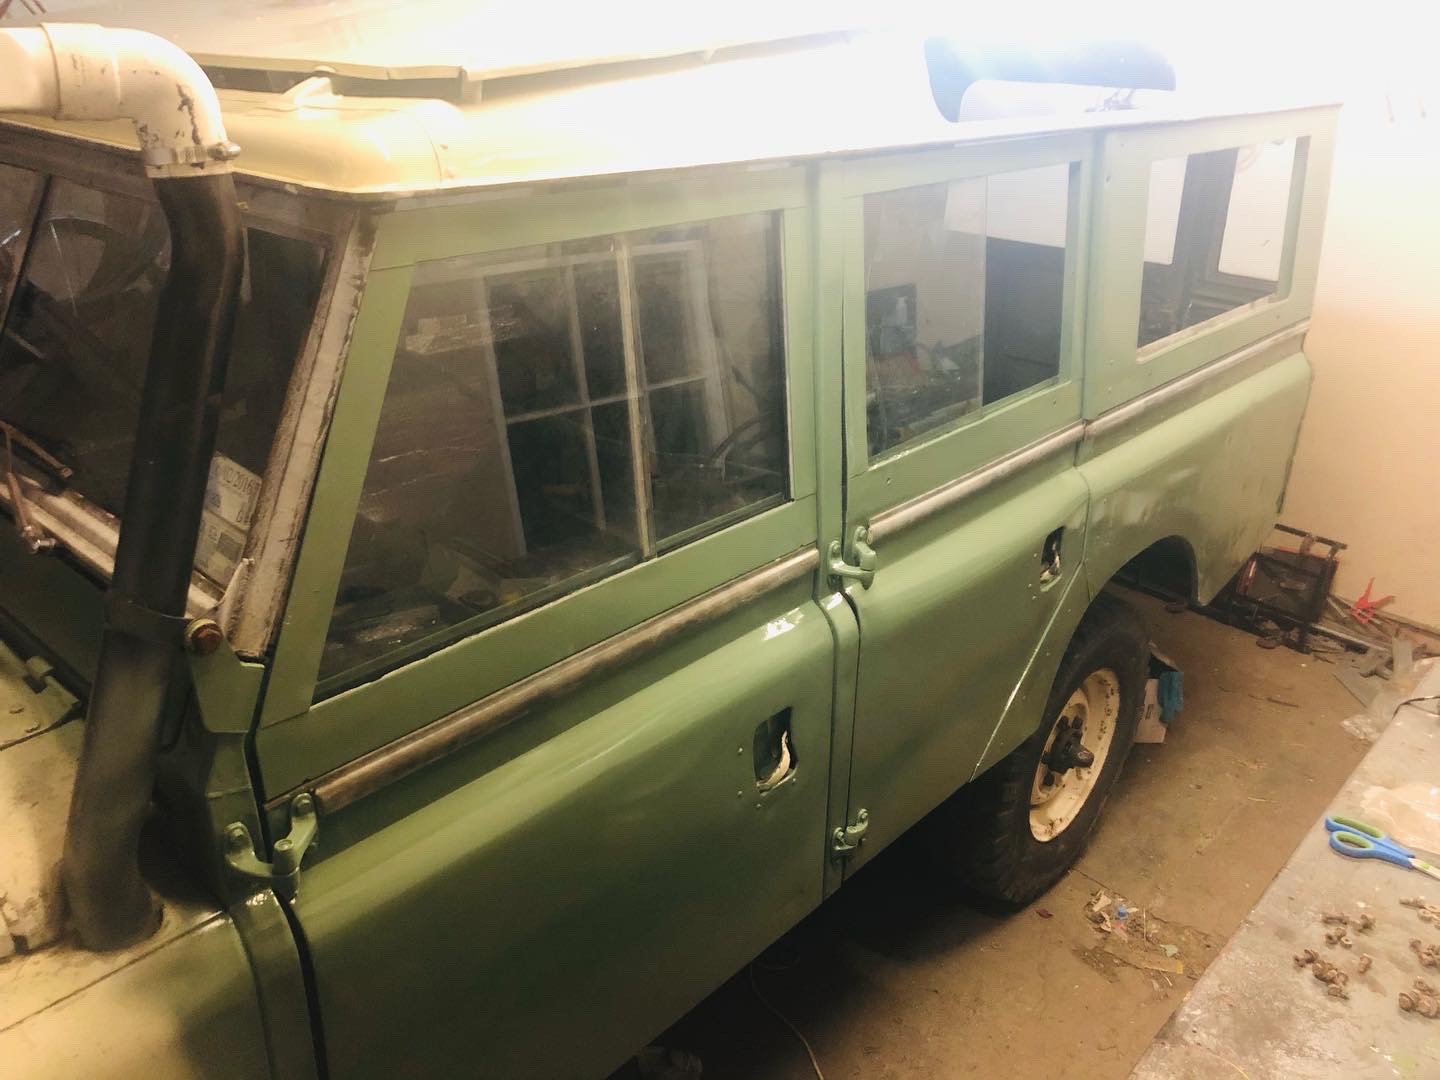
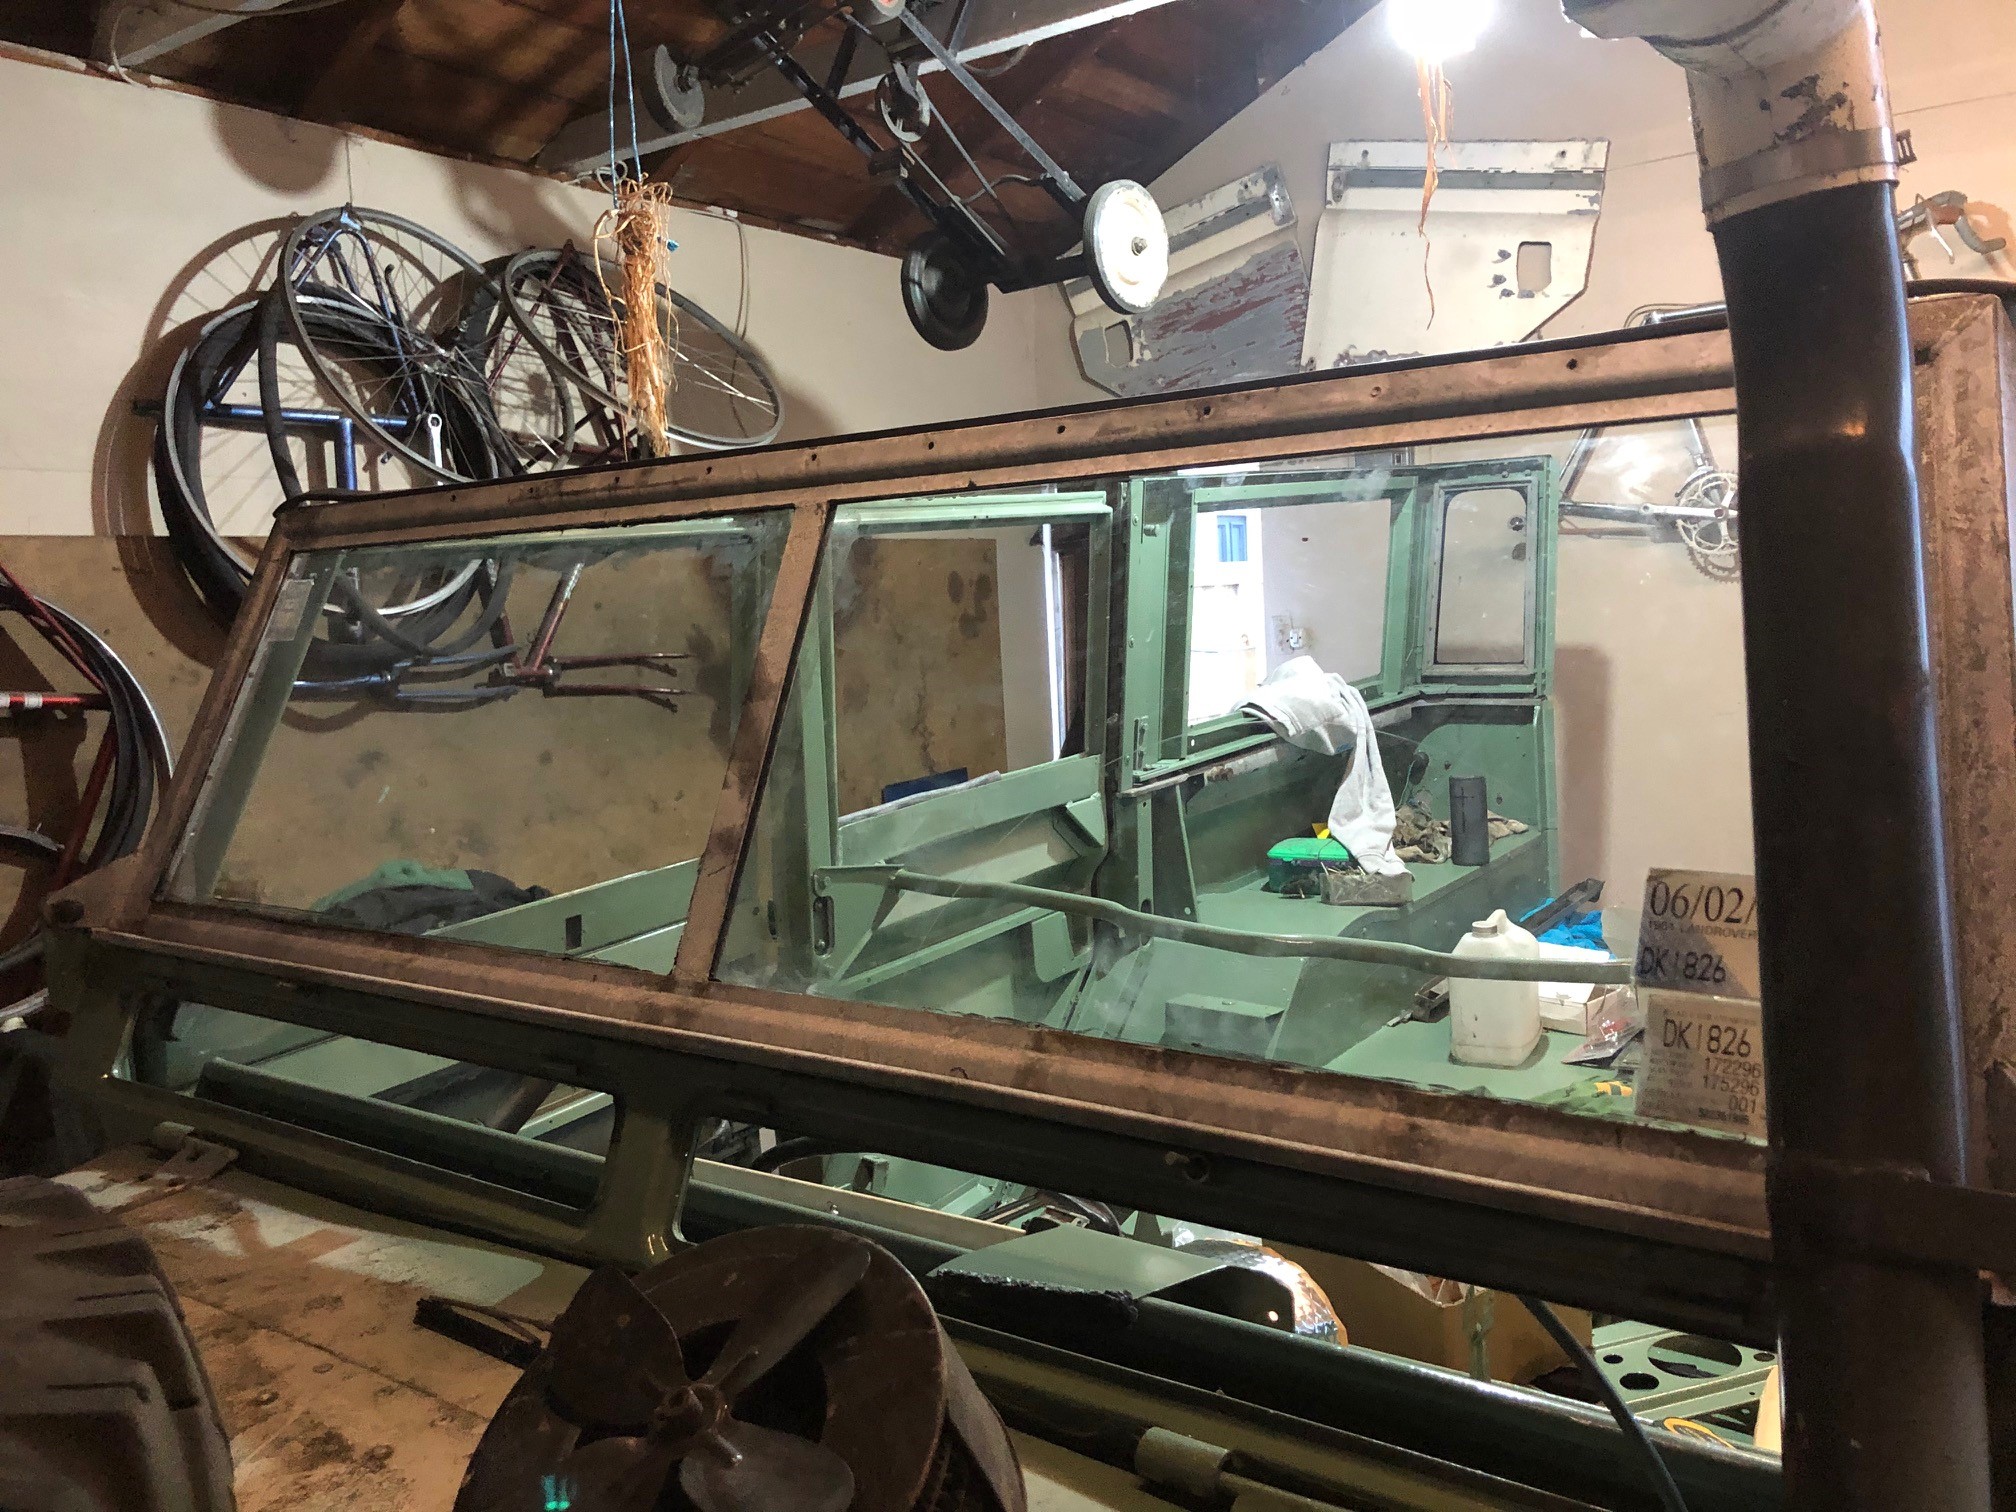
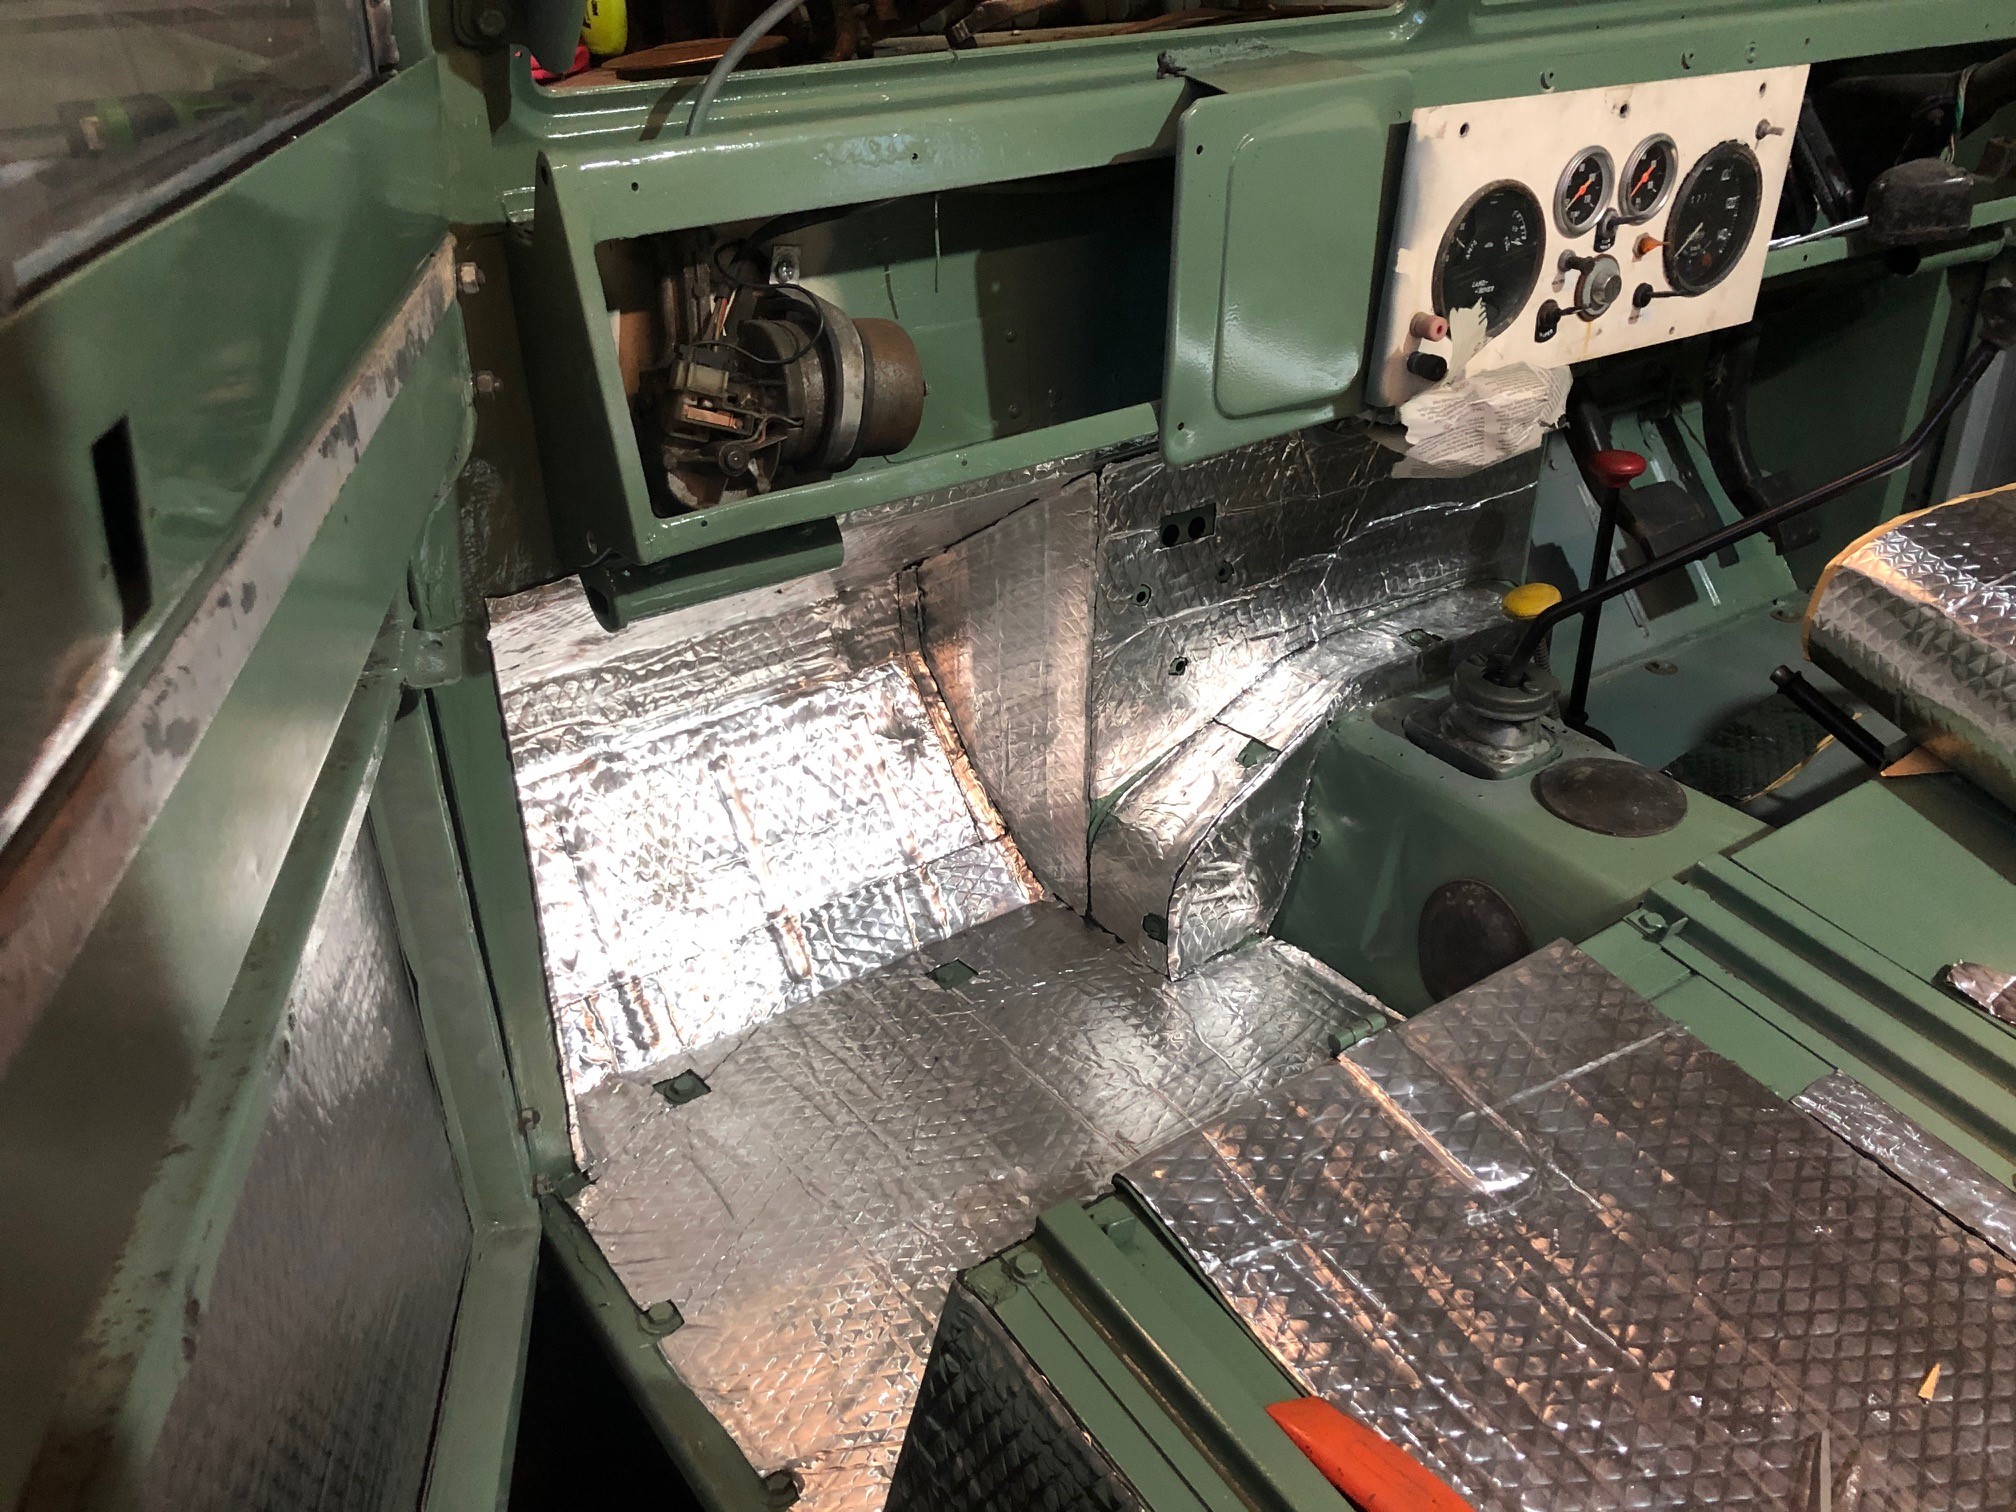
Not terribly interesting but making some progress.. A tube worth of sikaflex to seal up the roof join. Also replacing the rubber donuts for where the safari roof bolts on, hope to get this all in colour soon so I can mount it. Windscreen back in with new seals Going old school glazing with the butyl tape (which I actually like working with) Bought a roll of sound deadening off TM (cheapest option I found) and working through layering all the internal panels. The roll is better than the flat pack as have less wastage.
1 point
-
Little bit stuck cause getting motor mounts done and plumbing brake and fuel lines is all good and well. However they all run down the inner drivers side chassis rail. unfortunity this leaves bugger all room for exhaust manifold and turbo down pipe incl clearance to meet ver requirements. i have a feeling there’s gonna be a significant amount of time and money spent here. good news though, if I get fuel running to it and finish the ecu wiring there’s no reason I can’t get it started now I’ve got a manifold made
1 point
-
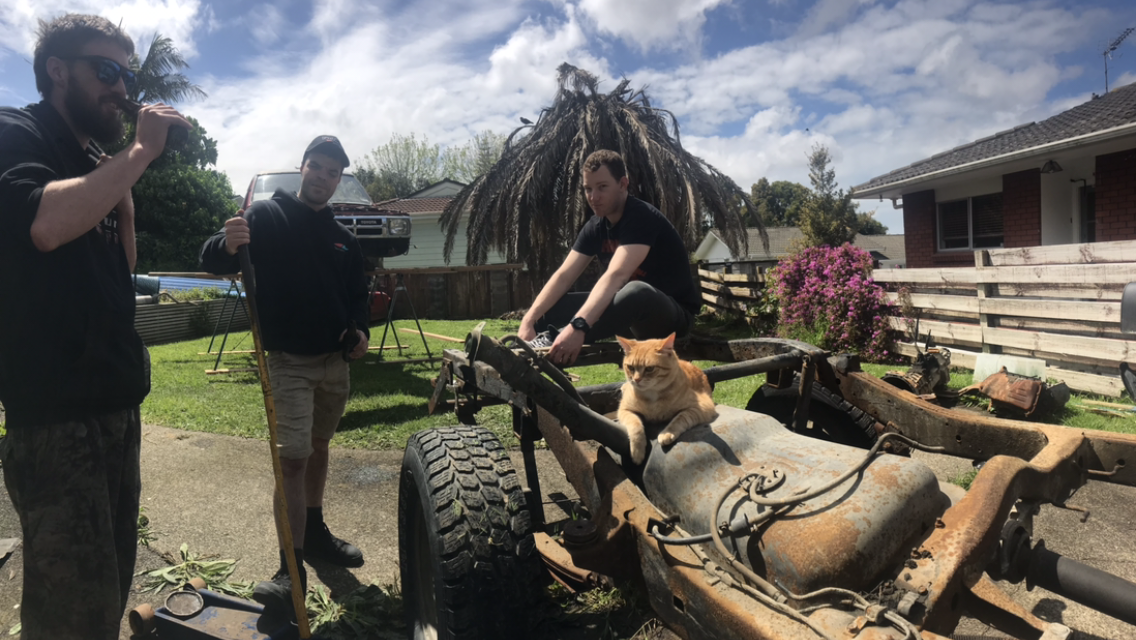
Excuse the palm ive been slowly killing. Bastard got in the waste pipe Put lunch and beers on and got the cab off. Debating weather to acid dip or sand blast still. ill give it a water blast and get all the lines and shit off it 8CDBB3D6-F2DE-4E90-B4A9-2034D84EF311.png
1 point


This leaderboard is set to Auckland/GMT+12:00