
Leaderboard


Popular Content
Showing content with the highest reputation on 03/14/21 in all areas
-
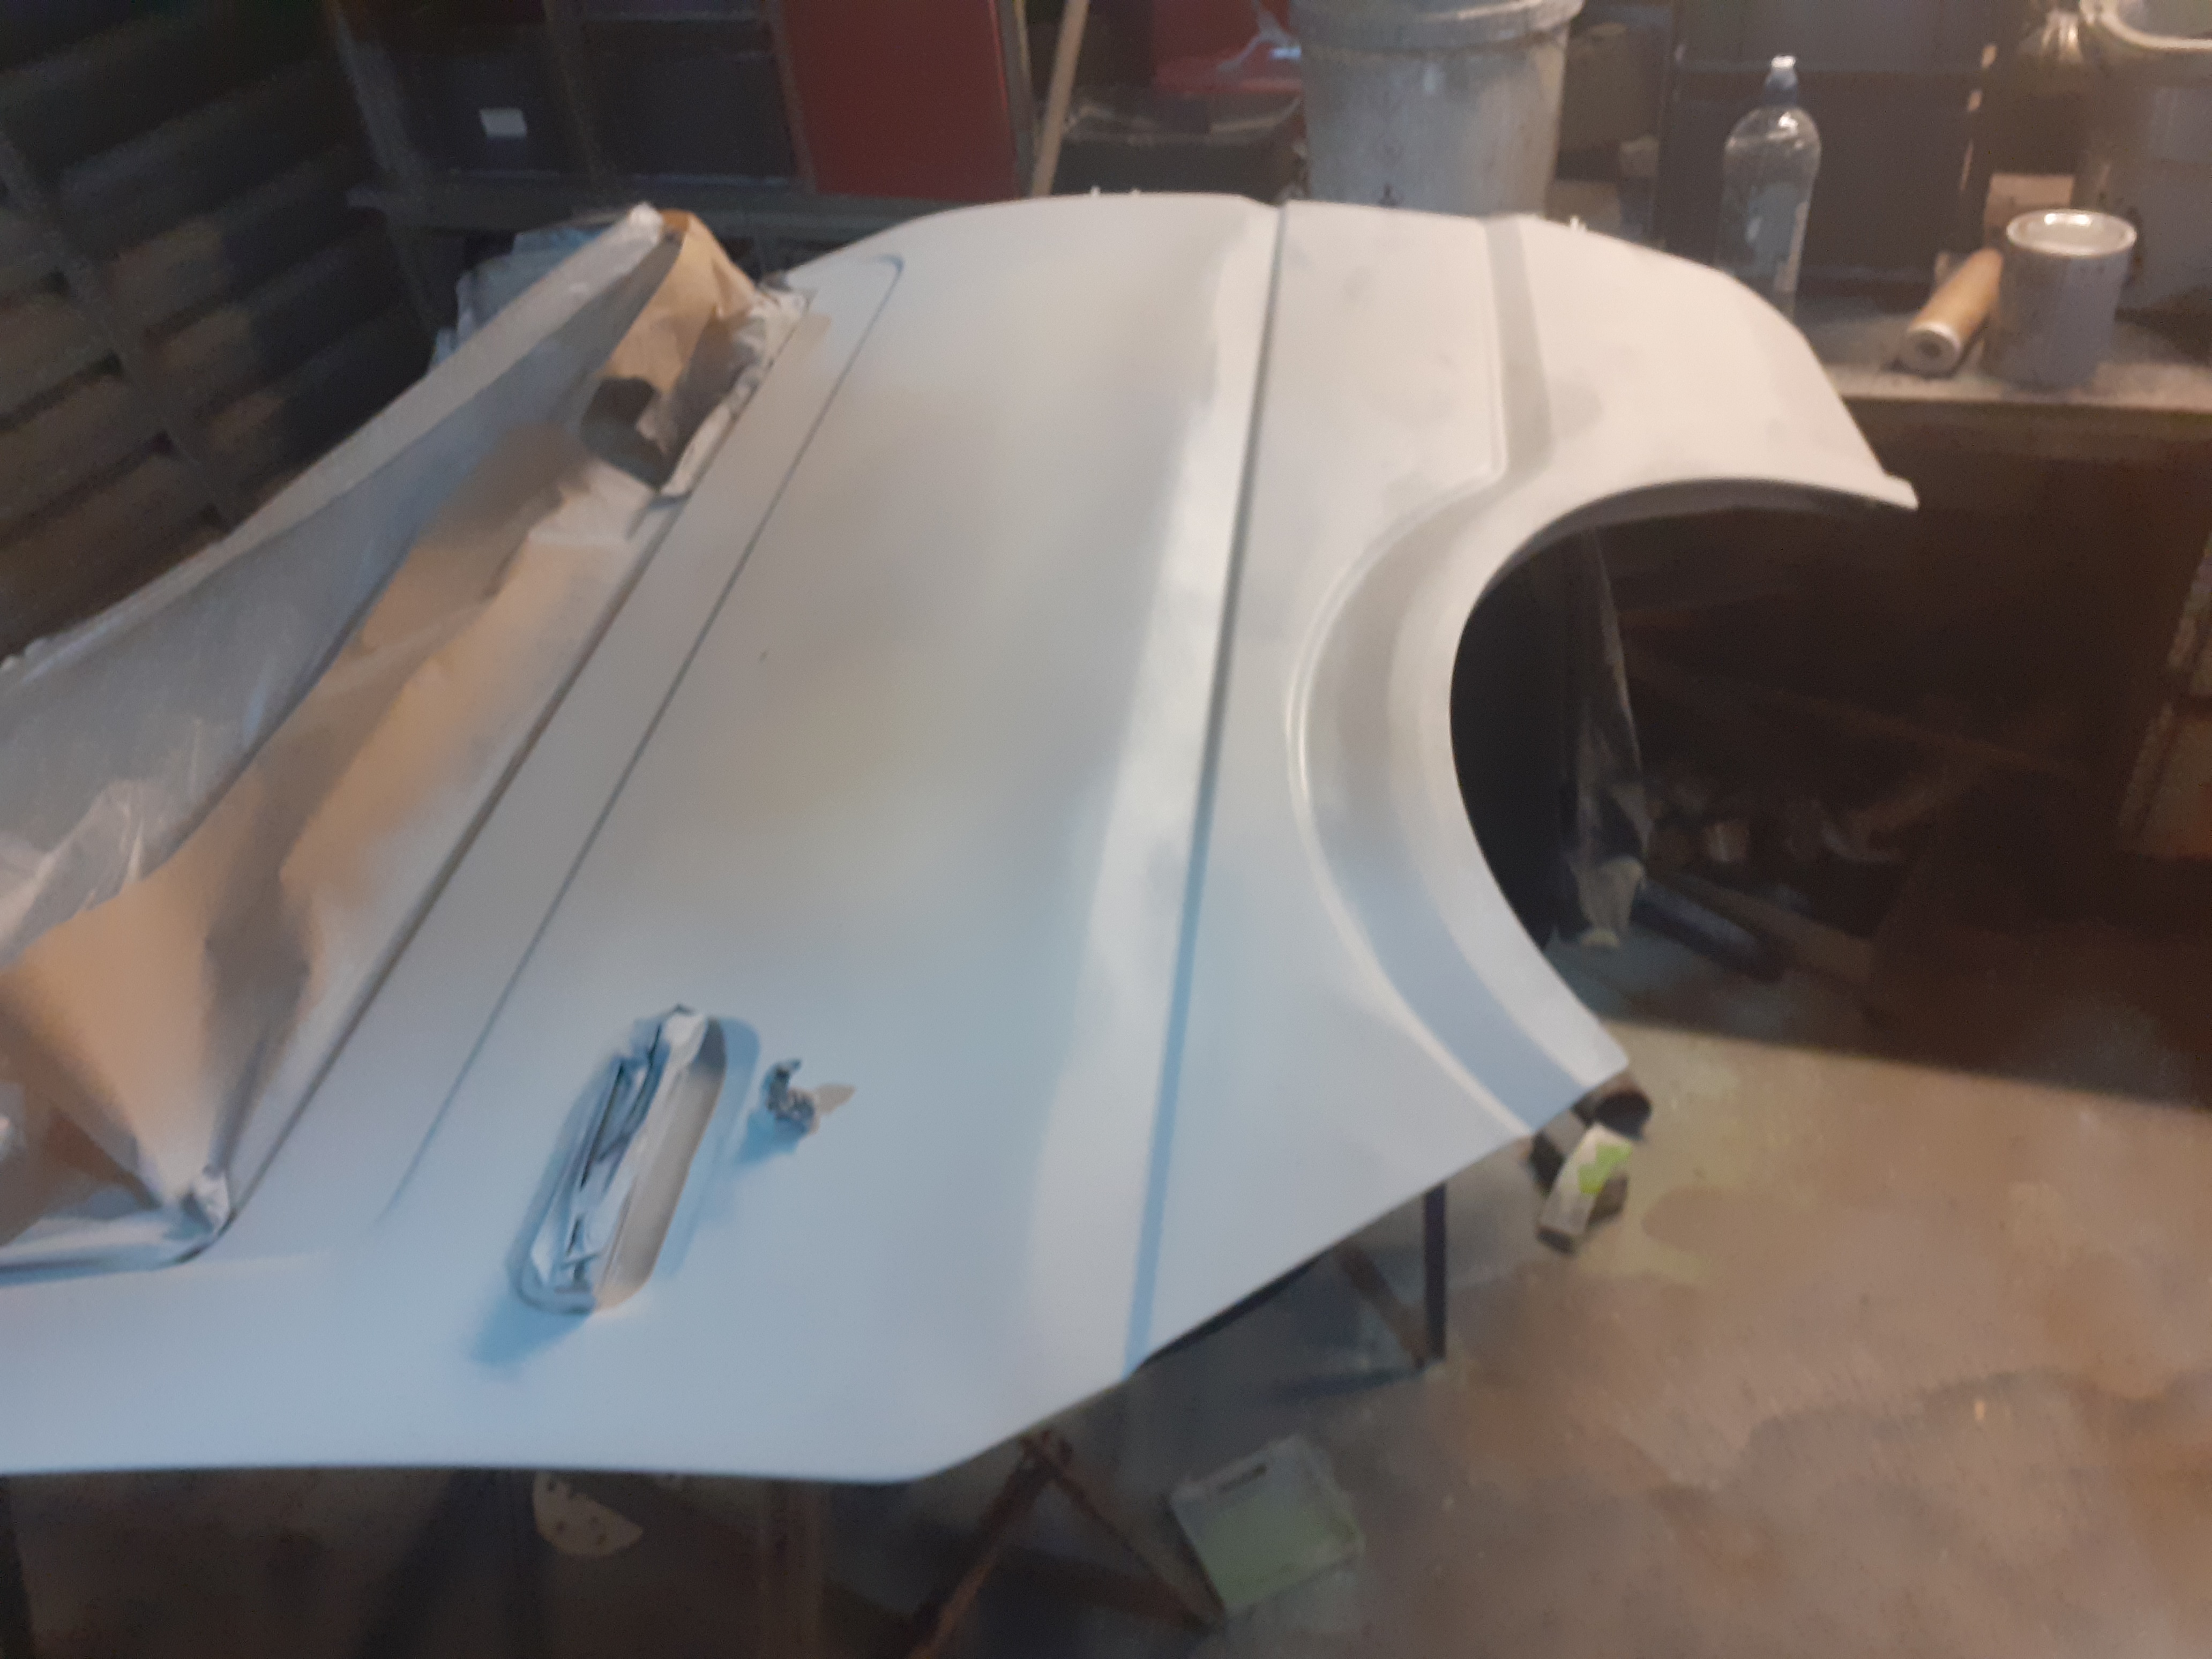
what a bloody roller coaster the windscreen instillation turned into. got everything ready and Nick the sparky came and gave me a hand and we put the back screen in. then we went to put the front one in and it was way to wide at the top to fit any where near right so out it came. remember this is the same screen that came out of the car so what the fuck? closer inspection reveled some insights as to why the screen was a bit weird when i took it out. i never thought much of it at the time but the screen was sitting down in the bottom channel with what would amount to a gap (if it wasn't full of windscreen sealant) at the top. now i know why. so, sand the edge of the glass with a DA sander and 80 grit to remove the 3mm a side that needed to not be there in order for it to fit. 2021-03-13_02-57-38 by sheepers, on Flickr 2021-03-13_02-57-47 by sheepers, on Flickr that took a total of 4 hours to remove the extra width from the screen. but, now it should fit. so i trial fitted it and all was well. except, remember the rear screen and how it was all good, done and dusted? yea well i used the wrong mastic and the rear screen had to come out and i had to clean the shit off everything and clean the glass and get it all ready to do again, except this time with the right sealant. so, take two. was all ready to re-install both screens with the right sealant and with the front screen fitting right, i just had to chamfer the edge of the glass where i had sanded it because it was a bit sharp and i didnt want to leave anything that could chip and start a crack. so i sanded the edges, just like i had been doing for 4 hours and the front windscreen exploded. 2021-03-14_02-17-22 by sheepers, on Flickr 2021-03-14_02-17-27 by sheepers, on Flickr fuck i was pretty unhappy with life at that point. so cool, id broken both screens out of the car. good one. i cried into my beer for a while then i thought id just ask my mate if the parts sedan i had still existed. i had told him i was done with it and he could squash it about 7 months ago. lucky for me hes a lazy bastard and he hadn't got around to getting rid of it. so i went up to Kemeu this morning and got the front screen out of the sedan and now i have a front screen. its the same (read wrong and still doesn't fit) brand as the one i had but this time i sacrificed the pins that hold the trim clips and just mashed it in. so now both screens are in the car. the back one is super mint mainly because its a genuine toyota one and the front one is as good as its going to get. cool, that will do. 2021-03-14_02-17-39 by sheepers, on Flickr 2021-03-14_02-17-47 by sheepers, on Flickr23 points
-
I think I have a solution for the next one. Something slightly more suitable / with less care factor than a fancy big road bike!
 15 points
 -
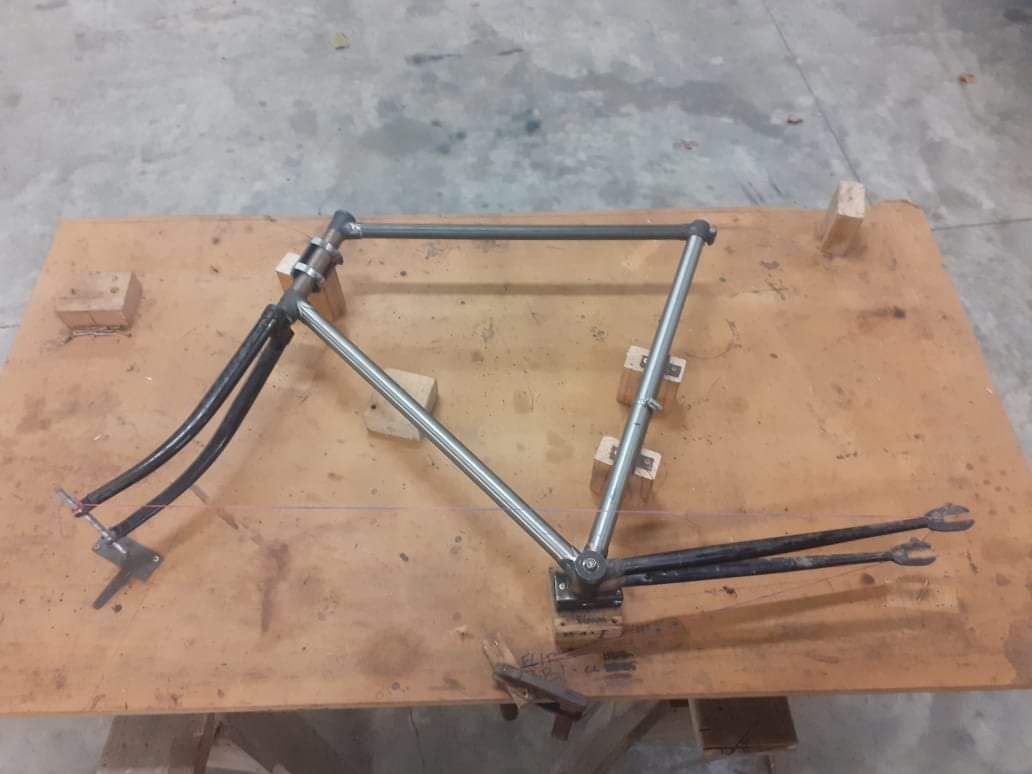
Still battling with the top arm ball joint. Thought I’d weld a scrap bracket on and give it a belt. it tore. sandblasted them and gave a coat of brunox in the mean time. then if by some divine intervention the mrs dragged me out of bed early for a swap meet. Chris was there flogging some of his pop’s gear (Chrysler man) and amongst it was the fucking ball joint socket! Donated to the cause along with some new valiant + Desoto ball joints, a valve stem seal set and a cool vintage car jug to carry it home in. Thanks! Can confirm the bushes are the same as those listed for Valiants too Now awaiting my tin of hammerite black to arrive so i can slap some nice hard-wearing paint on! also pulled the trans, D-shaft and exhausts out. Started into the brake booster and master but came to a screeching halt.. the last of 4 nuts up behind the dash can be seen but not touched. I got a socket on but couldn’t reach with ratchet. I got a spanner on but couldn’t turn it. Also super close to the bracket so nothing sits square on the nut...... Chunder. I’d get it if the column was pulled but I don’t really want to. Same with the dash but I don’t really want to. time will tell, hahaha I've paid 3k towards the repair panels and shipping, hope to catch the container leaving on 30th14 points
-
https://debossgarage.com/ics2021/entry/1615686997-2020-dynafari-scratch-built12 points
-
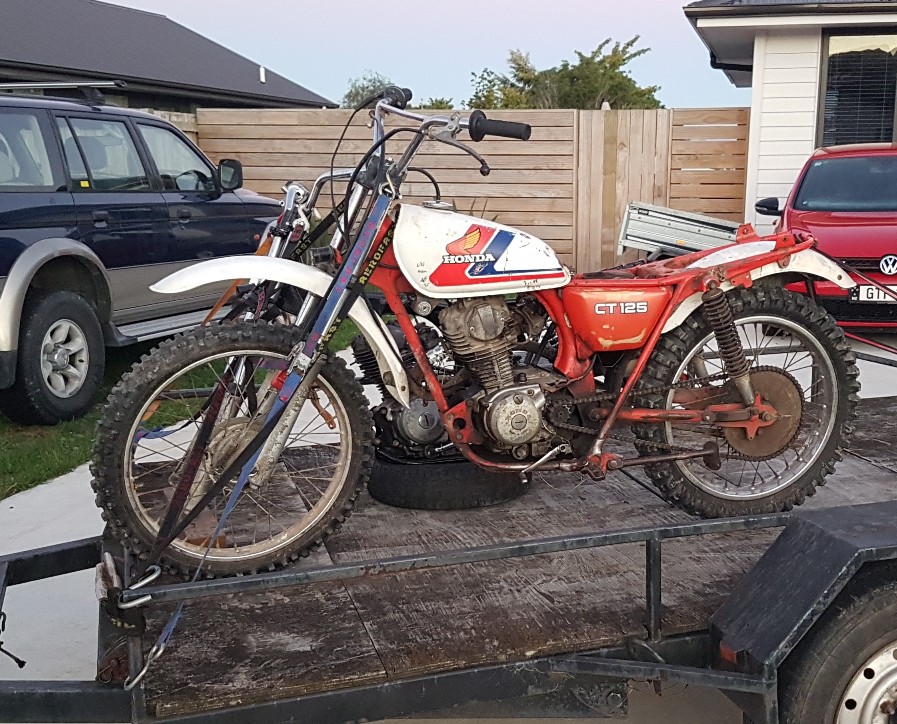
Wow I have had this car for a long time. To stubborn to sell it so better do something with it. Mitsis are re-united again. I was a bit of an effort to get the car in the garage. Four of us were unable to push it so I had to shunt it in with the daily. Plans for it are still pretty similar to the original ones. I have a twin cam head off a vr4 that will go on the engine. Engine will be coming out in a week or so and will be pulling down and measuring bits. If the crank is stuffed i have a couple of spares so no dramas there. Basically i will be focusing on allot of the smaller jobs for now and getting it all cleaned and set up for when i can bring myself to part with some cash to build an engine. Hopefully the next update will be sooner than 14 years away. lol At least i have had 14 years to learn allot more and have a much better idea of what i am doing.12 points
-
That pump is in, it runs and no longer pisses black smoke so thats a win. The rattle is still there so that means its the engine, so thats a fail. That means the NA pump is probably better condition than I thought, so I can sell it as a runner, so thats a win. It took twice as long as I thought it would as I had it 100% back together ready to run up, and as I went up to lunch I had a thought to check if the stop solenoid was 12v or 24v. Guess what? 12v. Shit. So out it all came so i could swap it for a 24v one as I couldnt get to it with it sitting in there. Stink. It isnt quite as lively off the mark as before, probably due to the actually appropriate fuel levels. I will run it for a bit and see if the various wicks will need turning up... The engine rattle solution is probably a proper rebuild of the spare short block that I have, assuming all is well with it the boys at Mean Machine reckoned about 3k to make it proper with new pistons etc. The head and fuel pump are sorted so those can get bolted on probably. I parked it out in the sun and took some competition winning pics, yay. Then I wiped the copious smeg off my phone lens and did it again..10 points
-
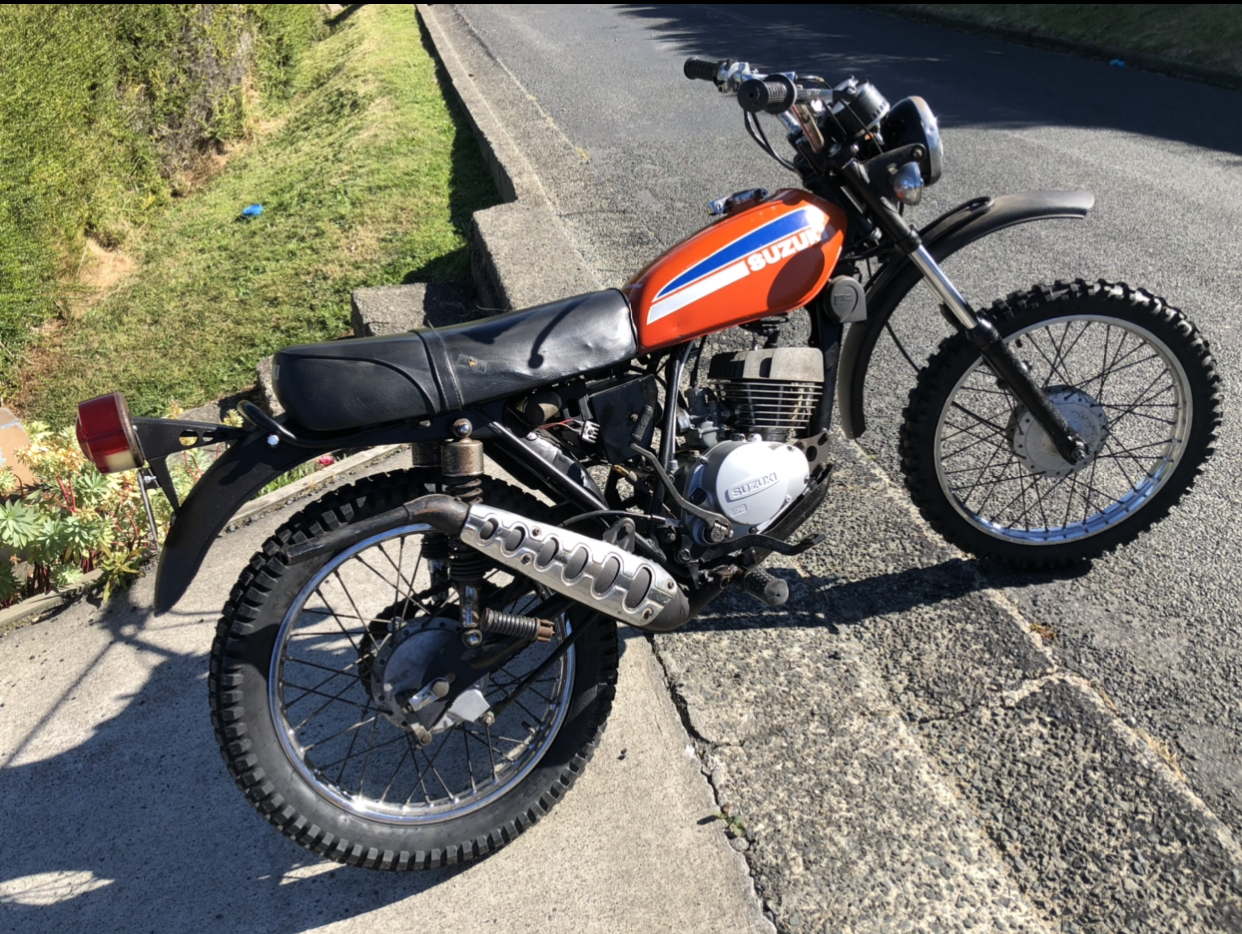
got these high pipes made up today, turned out super sweet looking, only downside is they are wayyy too loud so i'm going to have a go at making some baffles/mufflers. once i get them quiet enough that i'm happy with it ill make up some heatshields for them and a-couple of hangers too. (please ignore the terrible car in background its not mine)8 points
-
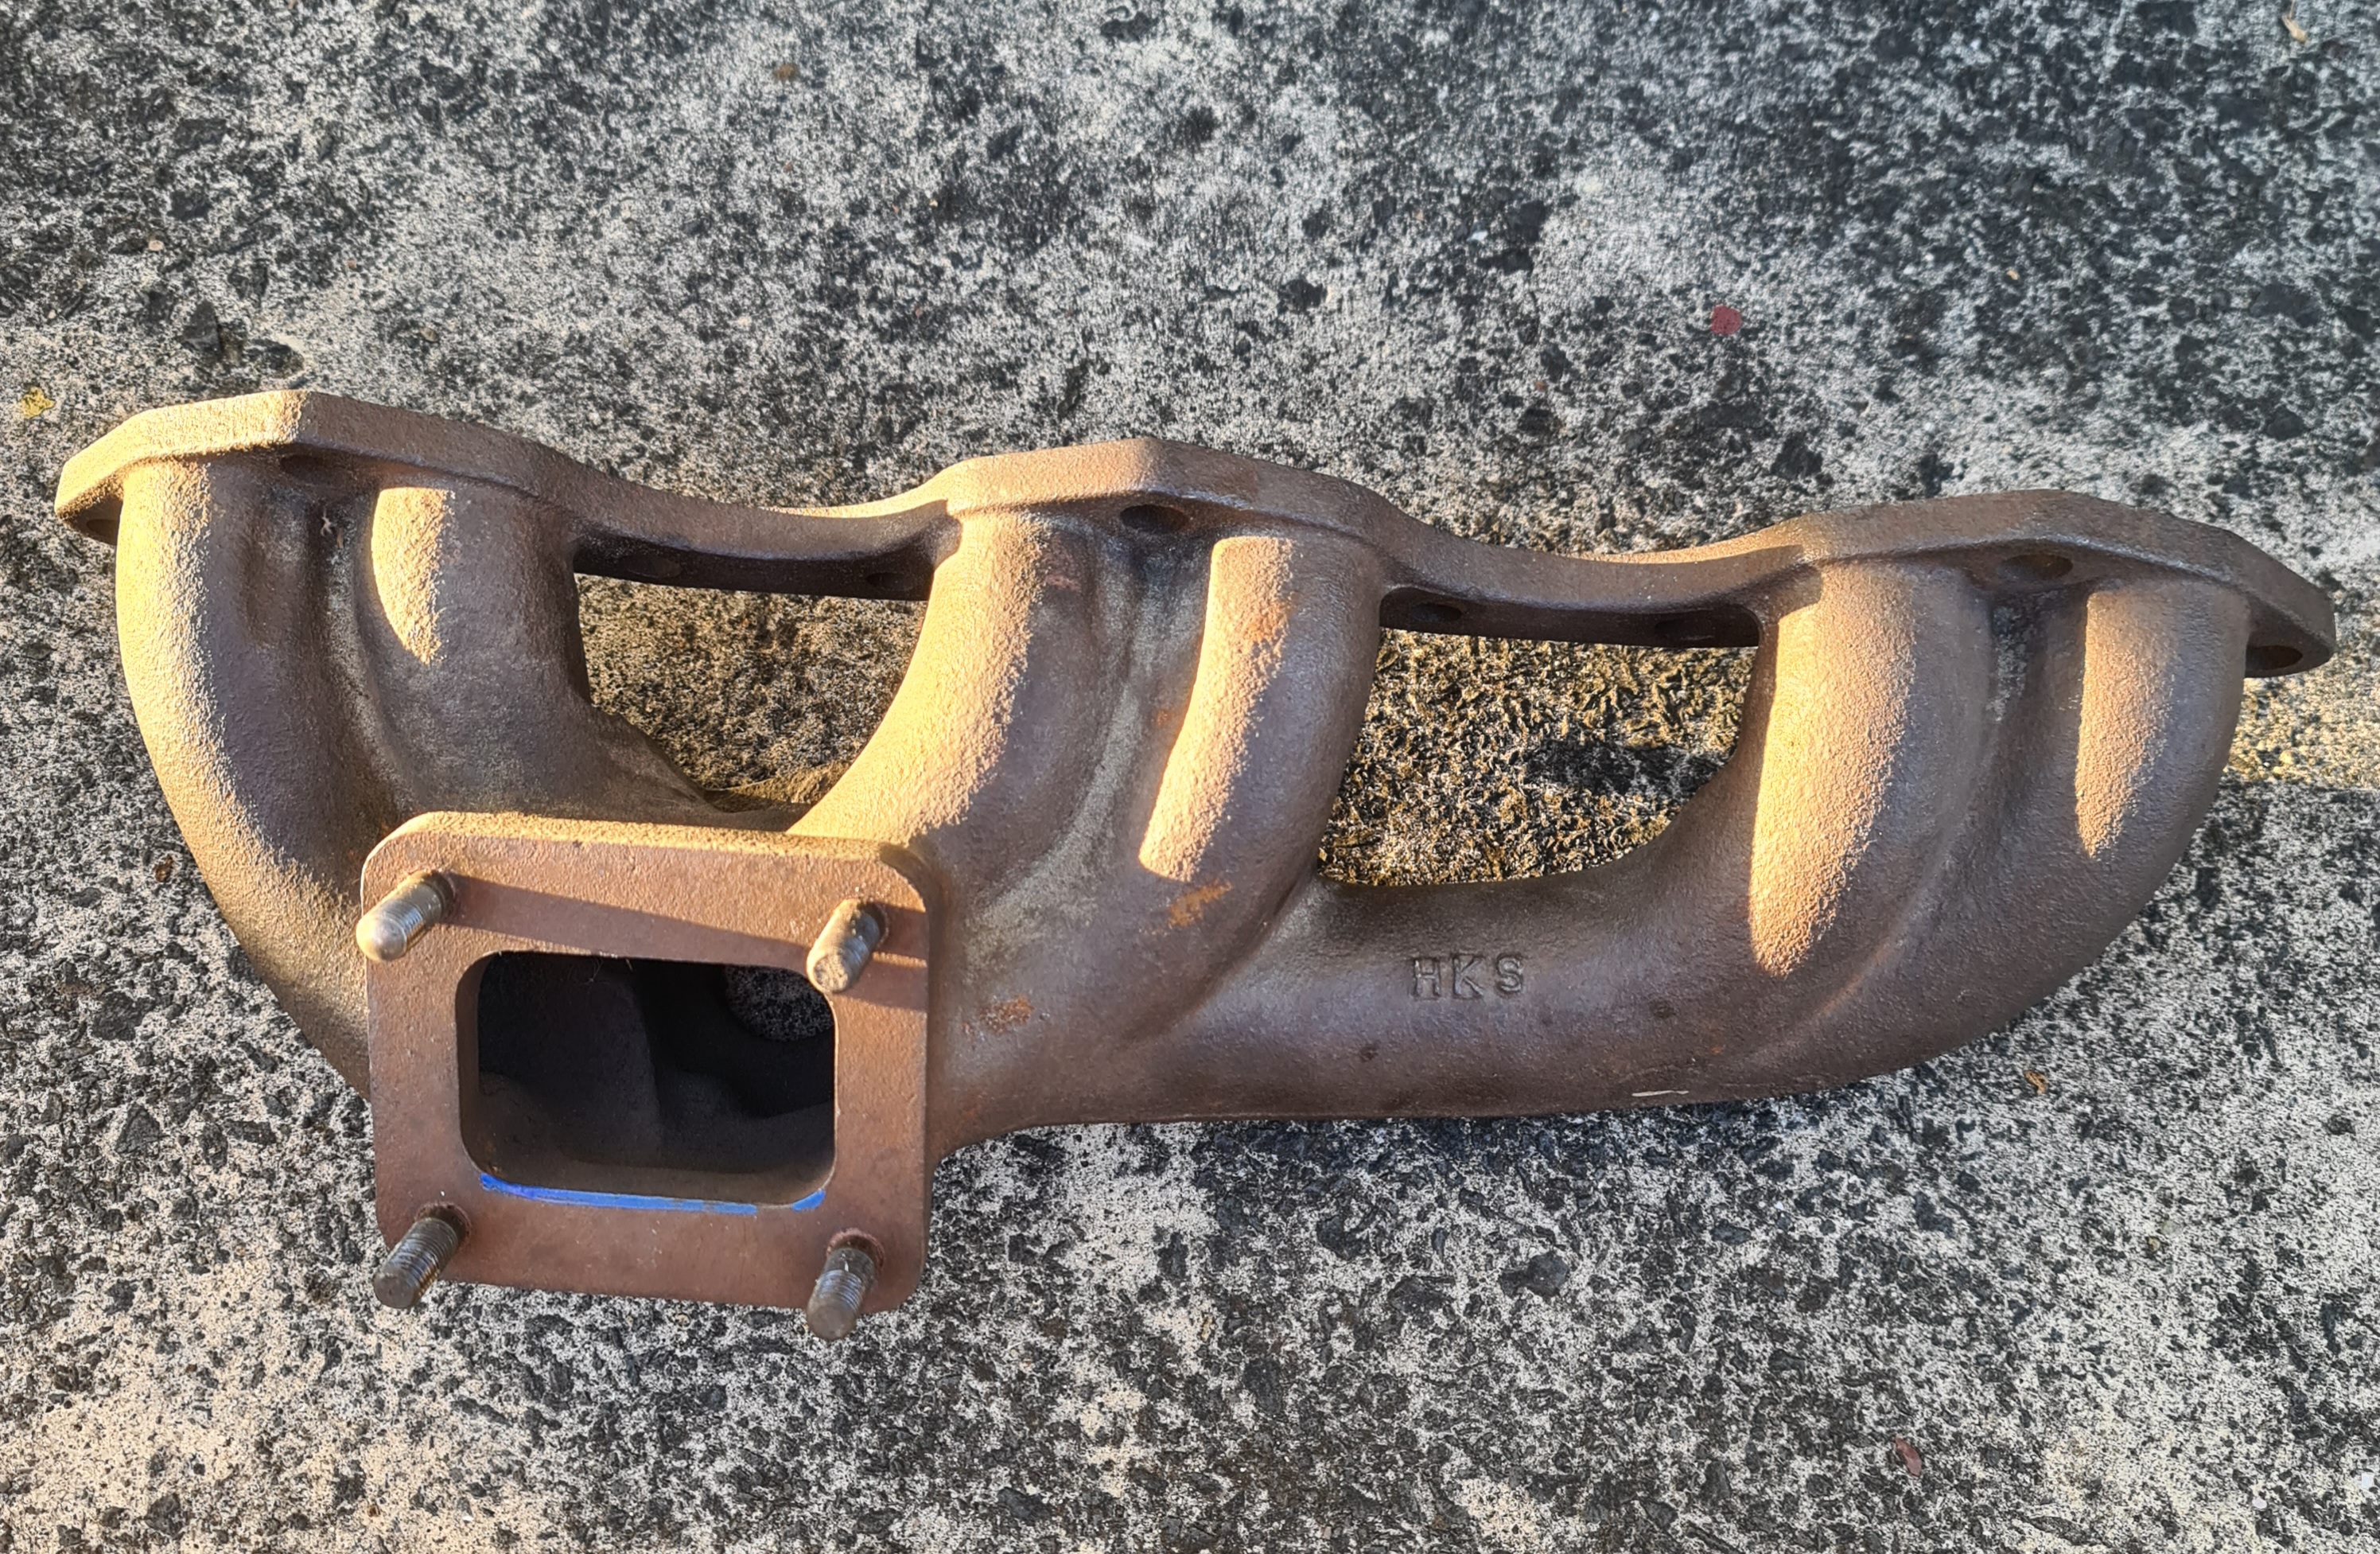
Full Hks Barry mode
7 points
-
Yeah I reckon it deserves a spot for sure One of the best things about it IMO is you couldnt find a vehicle to do all the things you wanted So you just made one yourself, with some clever recycling and fabrication It's only some fancy paint, hi tech light bars and some 22" wheels away from being a SEMA winner anyway?7 points
-
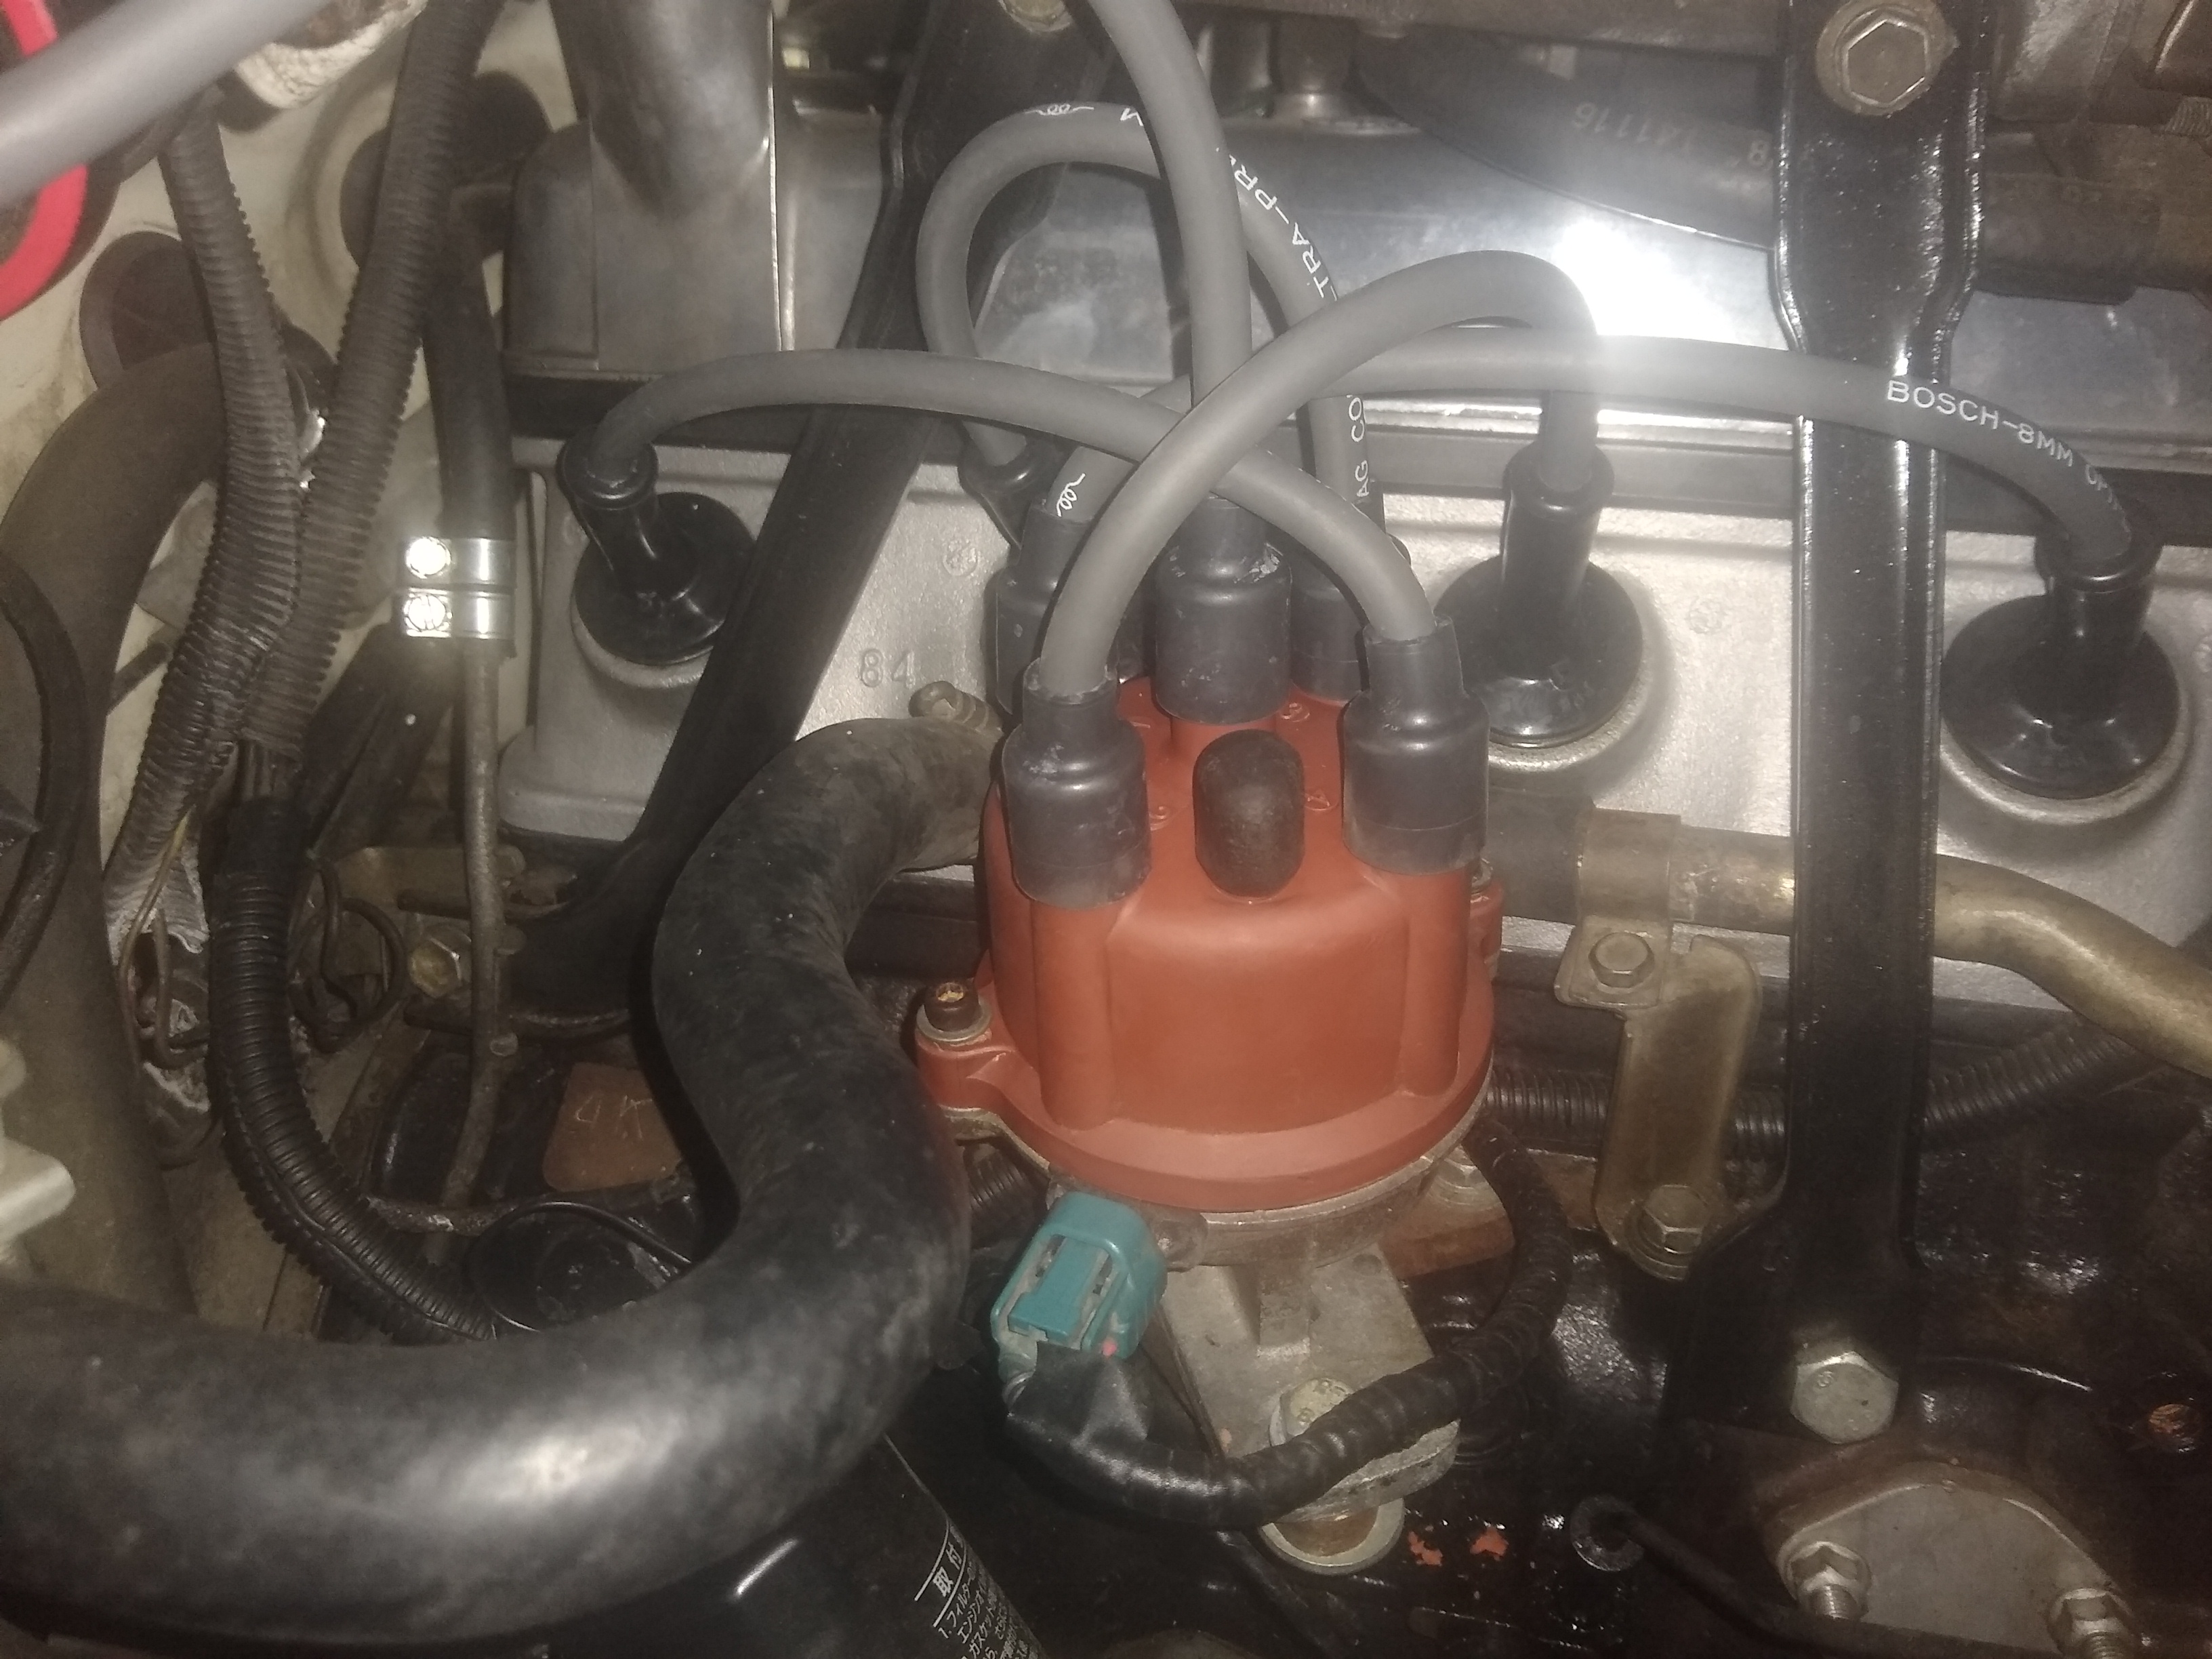
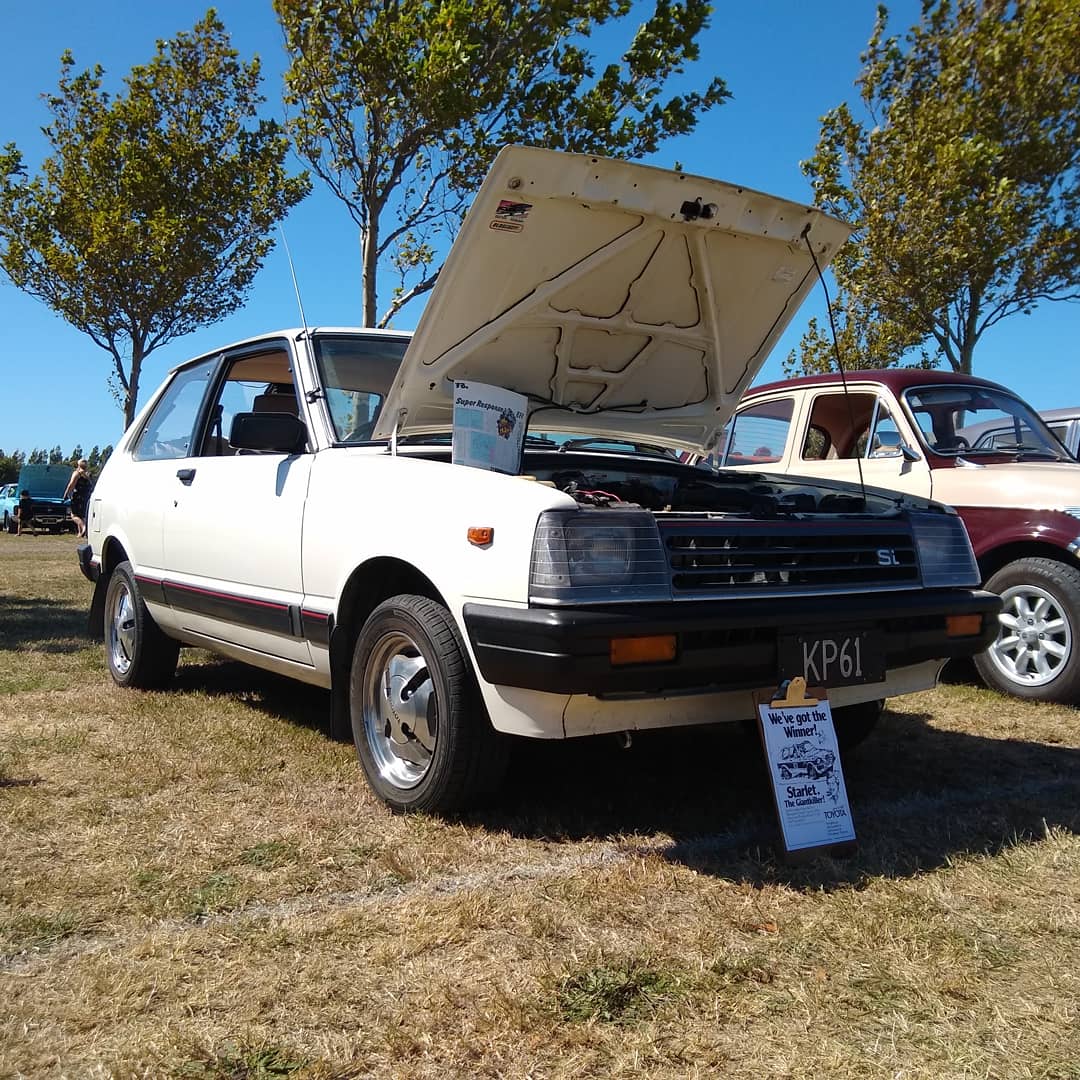
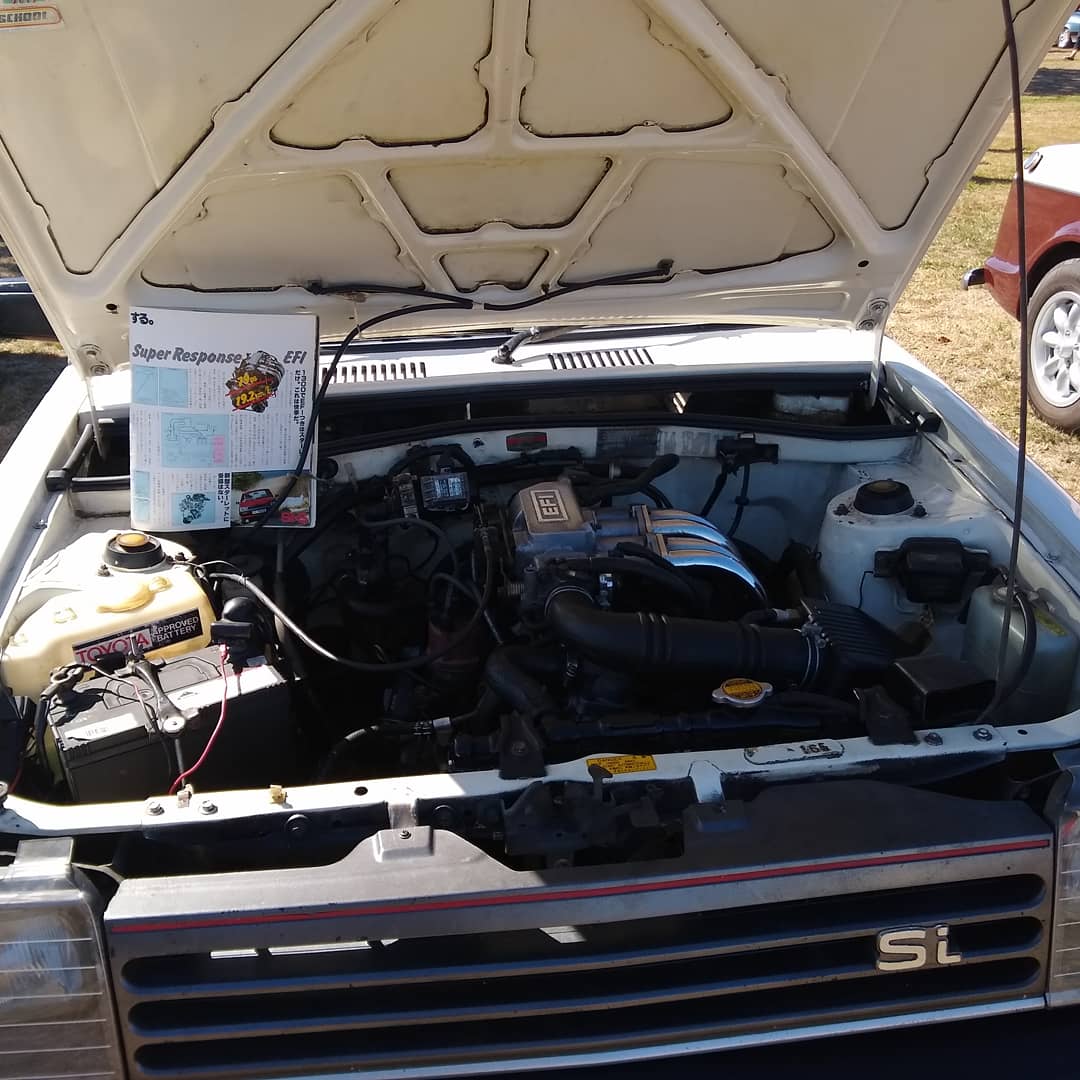
Not too much news here, dragged the car out to Twin Rivers car show today. It seems that in the last year or so there has been a sudden spike in interest in old Toyotas. Had quite a lot of people stop and look at it. Noone could really identify that the EFI system was custom so it looks like I have succeeded in making a subtle system. One old guy was staring at it and said "It doesn't look like the KP60s I worked on in the 80's but I can't really tell what is different". There were no other Starlets at the show, which was quite a surprise. There were heaps of AE82 GT liftbacks though, I swear none of the 183 of them have died yet. I also got some NOS Bosch ignition leads from RockAuto the other day because they were stupidly cheap: Have to take it for a WoF in a week, should hopefully go through without too much of a problem. Might do an oil change next weekend. Also took it on a late summer high country camping mission a few weeks ago.
6 points
-
Fuck that. I'll find out what it is one day when it sends a rod through the case after I try to pass a nissan tiida (insert any other typically slowly driven modern car) on a slight downhill using gravity to aid punching the Bedford beyond its normal safe working speed.6 points
-
Here's the Newspaper ad from the clipboard:
5 points
-
Here's a compilation of my snaps from last weekend - enjoy!5 points
-
4 points
-
Ah yes Tori Nats 20223 points
-
I might go ahead and adapt my scooter into a different motorcycle more capable of such adventures3 points
-
Just tighten that front axle and its good to go3 points
-
Took the gn out today in honour of what it had accomplished. had a few sharns with people about last weekend. still fizzing.. keen to do some banks pensulia dirt roads with you lot.3 points
-
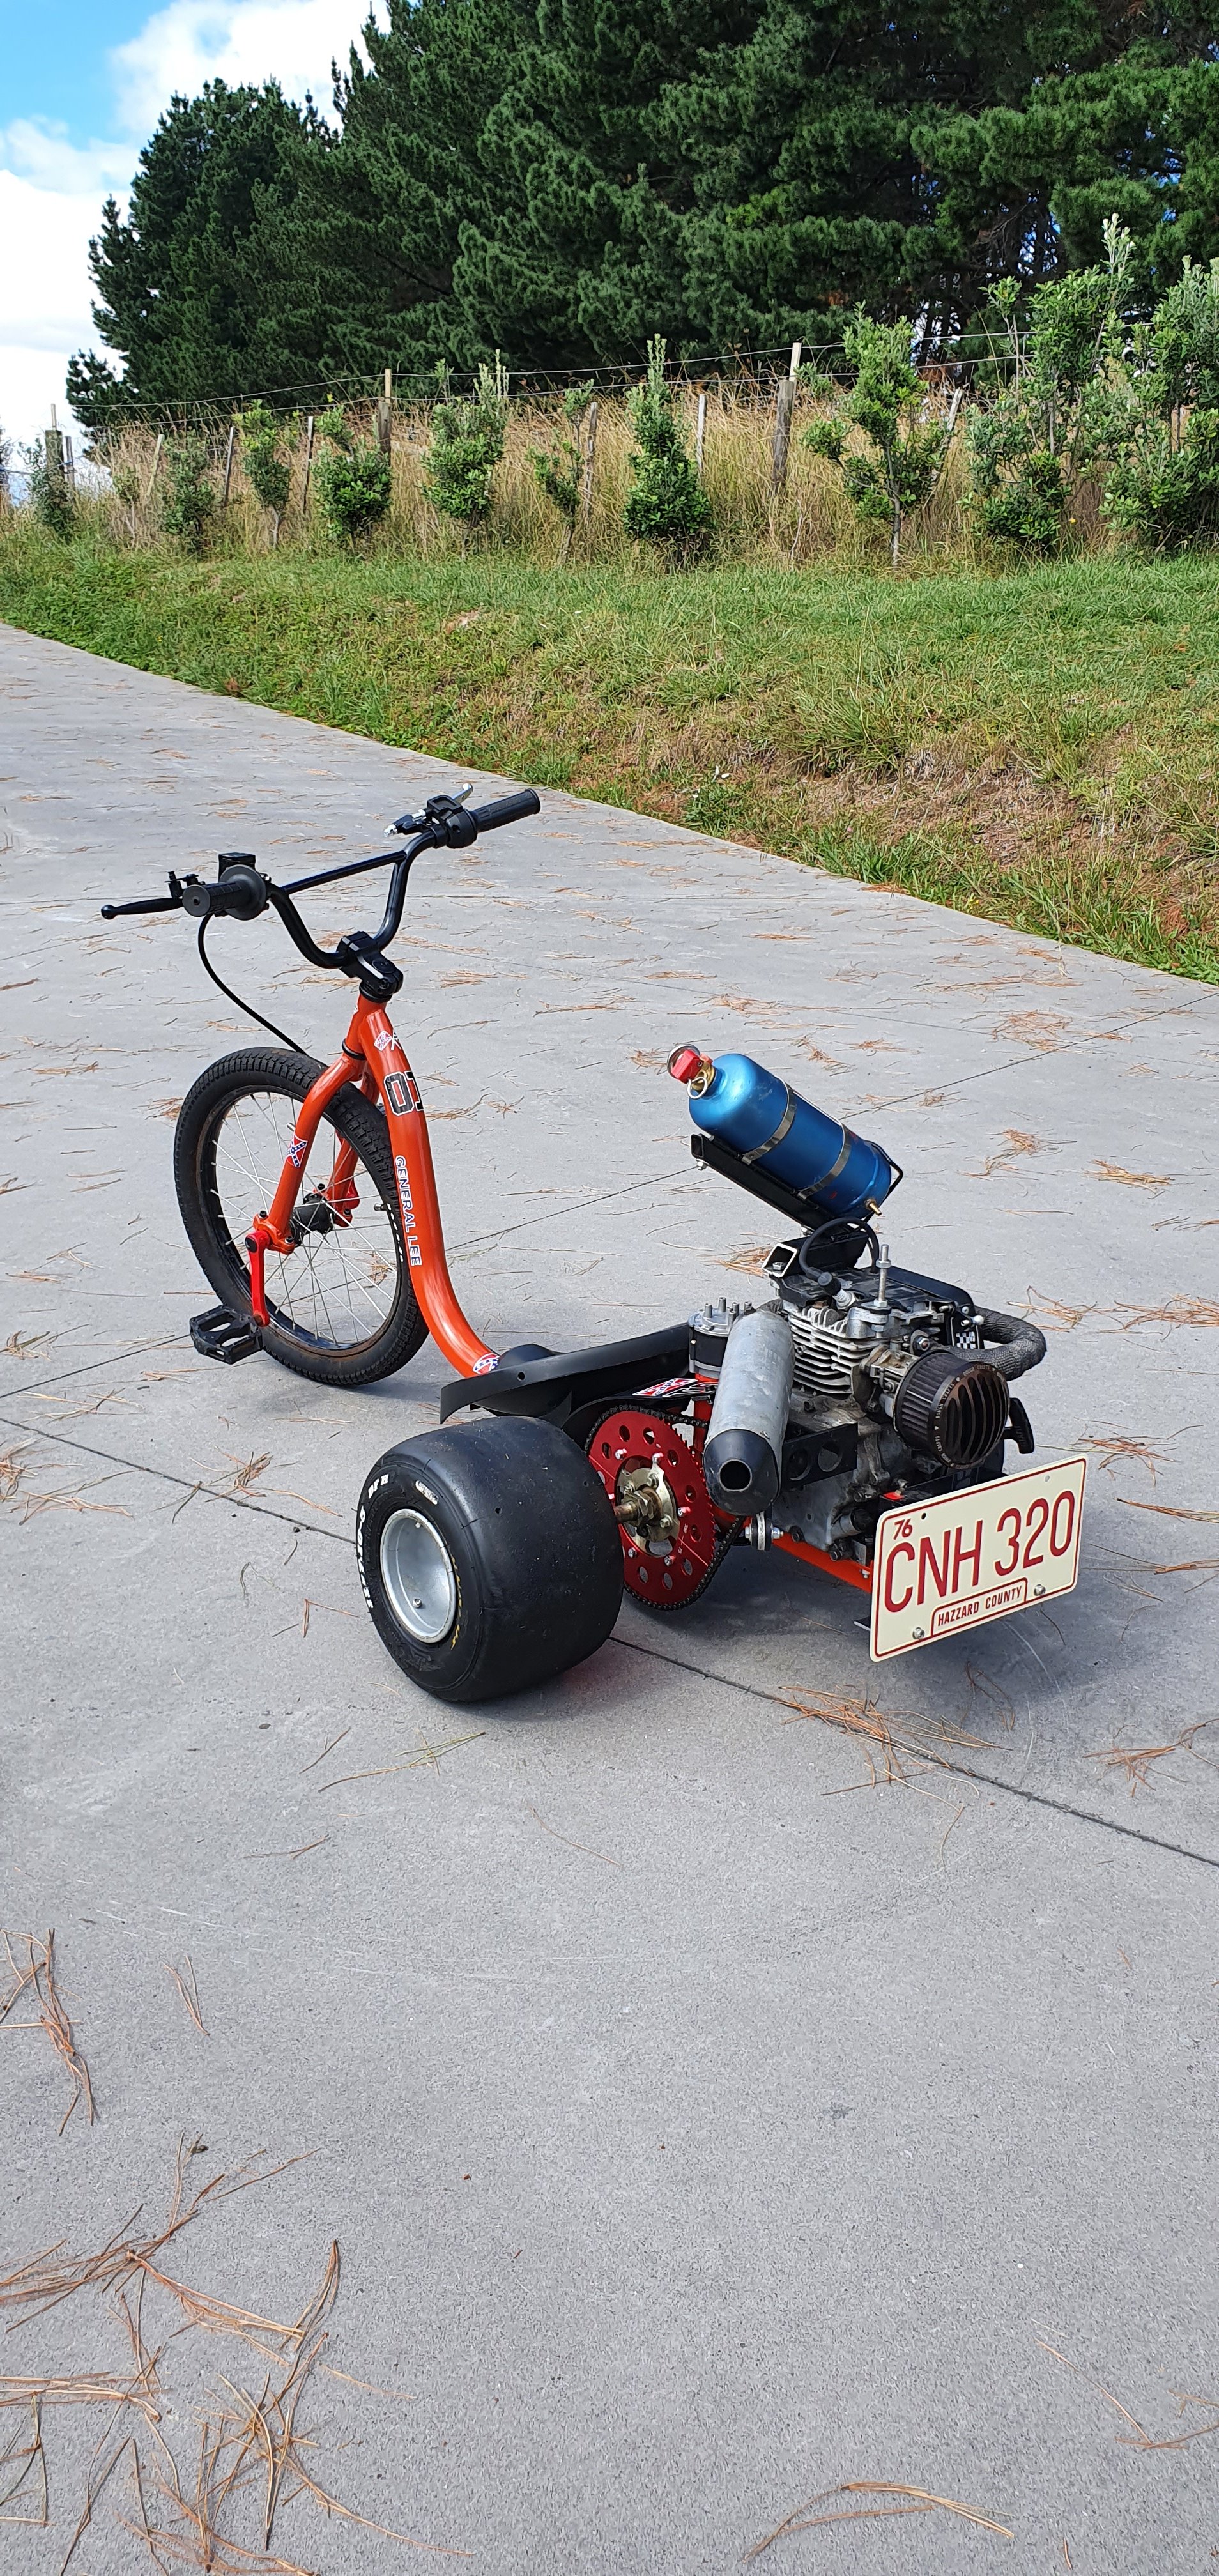
National GN rally? none of this moped melee carry on Rules; 1: spend no more than $500 on ya bike, 2: send it2 points
-
Yeah that was from Aarons bike and got wrung out and reused on Marks bike Mine also split so Im now going ahead with adapting a factory CT90 airbox up to my Mikuni carb for trouble free river crossings2 points
-
Come down for a Peninsula ride @Chunky_t. I reckon I could organise a 2 day overnighter in Akaroa exploring all the great gravel roads of Banks Peninsula2 points
-
tbh this ride made me want an actual dual sport bike for more epic bike adventures. giz DRZ4002 points
-
Yeah Banks Peninsula has some great gravel roads
2 points
-
Yeah buddy!!!
2 points
-
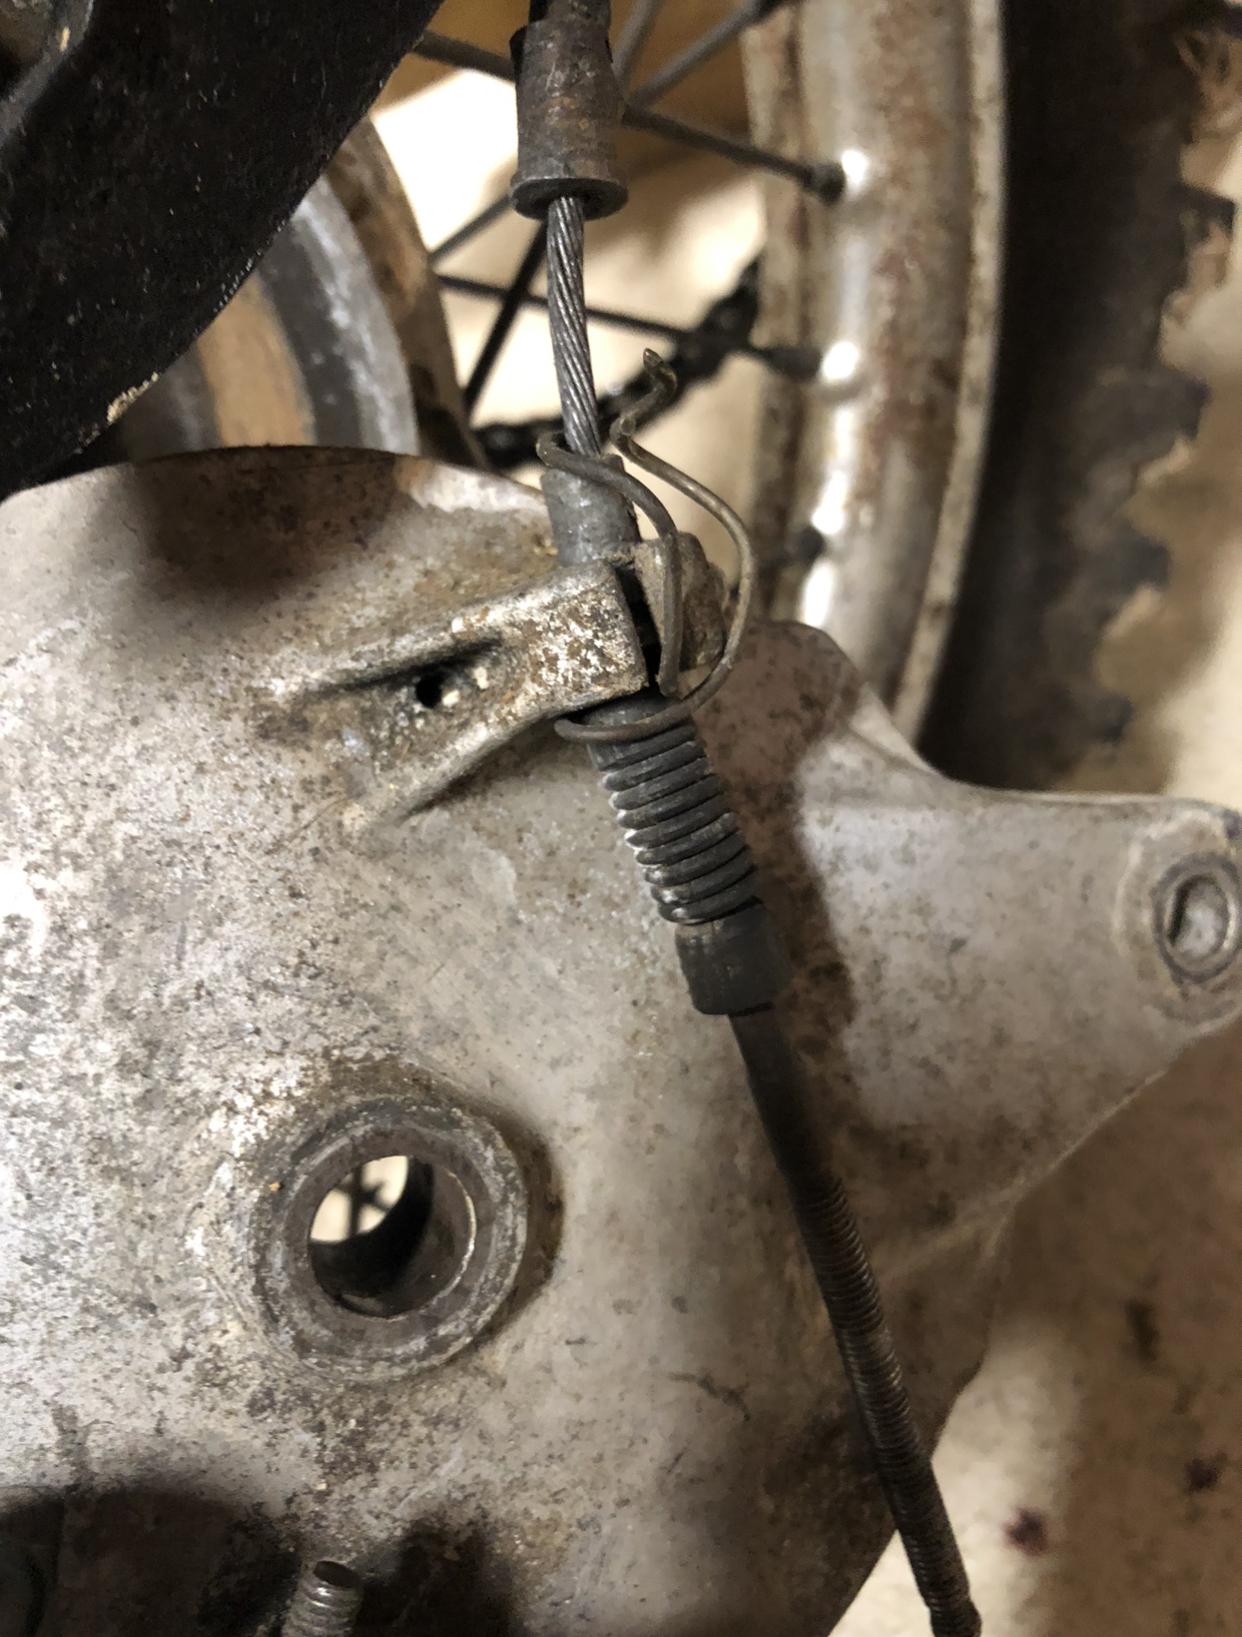
There was some real farm spec shenanigans going on with the rear brake cable. looking at the front forks I could prob squeeze a 3.50 chonky golden boy in there.
2 points
-
Shit that is some vinyl wrap, a trip to repco and finding one of the dozen or so tuff rangers on literally any street in NZ to put up on blocks. I will see what I can do... cheers all.2 points
-
You get to choose your categories to compete in, definitely a worthy candidate in my mind.2 points
-
https://debossgarage.com/ics2021 I think you should enter this monsoir pawg.2 points
-
Shifted the car so could work on driver's side, same deal, spent ages scraping all the old tape and mastic off... And found this in rear door, no idea what it is, prob been there for decades... Pulled grubby gubbins out of both doors, and cleaned up lots of grime with solvent and a bath in the ultrasonic cleaner... But the latch mech was very worn on the drivers door... Looked at welding up and cutting out new slot, but a little research found these... So ordered. Have also received my non-setting mastic/butyl and my shiny new handles... Plus the rubber boots, so I cut holes with a chassis punch, so neat. Door side positioned at the dimple mark I'd pre-drilled earlier... And there was a dimple on the side that lined up with a hole behind the kick panel, so cut that as well... But when I test fitted it, it was a bit stretched for my liking, so cut another hole in the door 50mm lower... And it's much better, seems to hold it's shape opening and closing ok. Shame I have a hole to fill but will just chuck a solid rubber grommet in it and install things properly on the other side... Have to figure out how to do the rear doors next...2 points
-
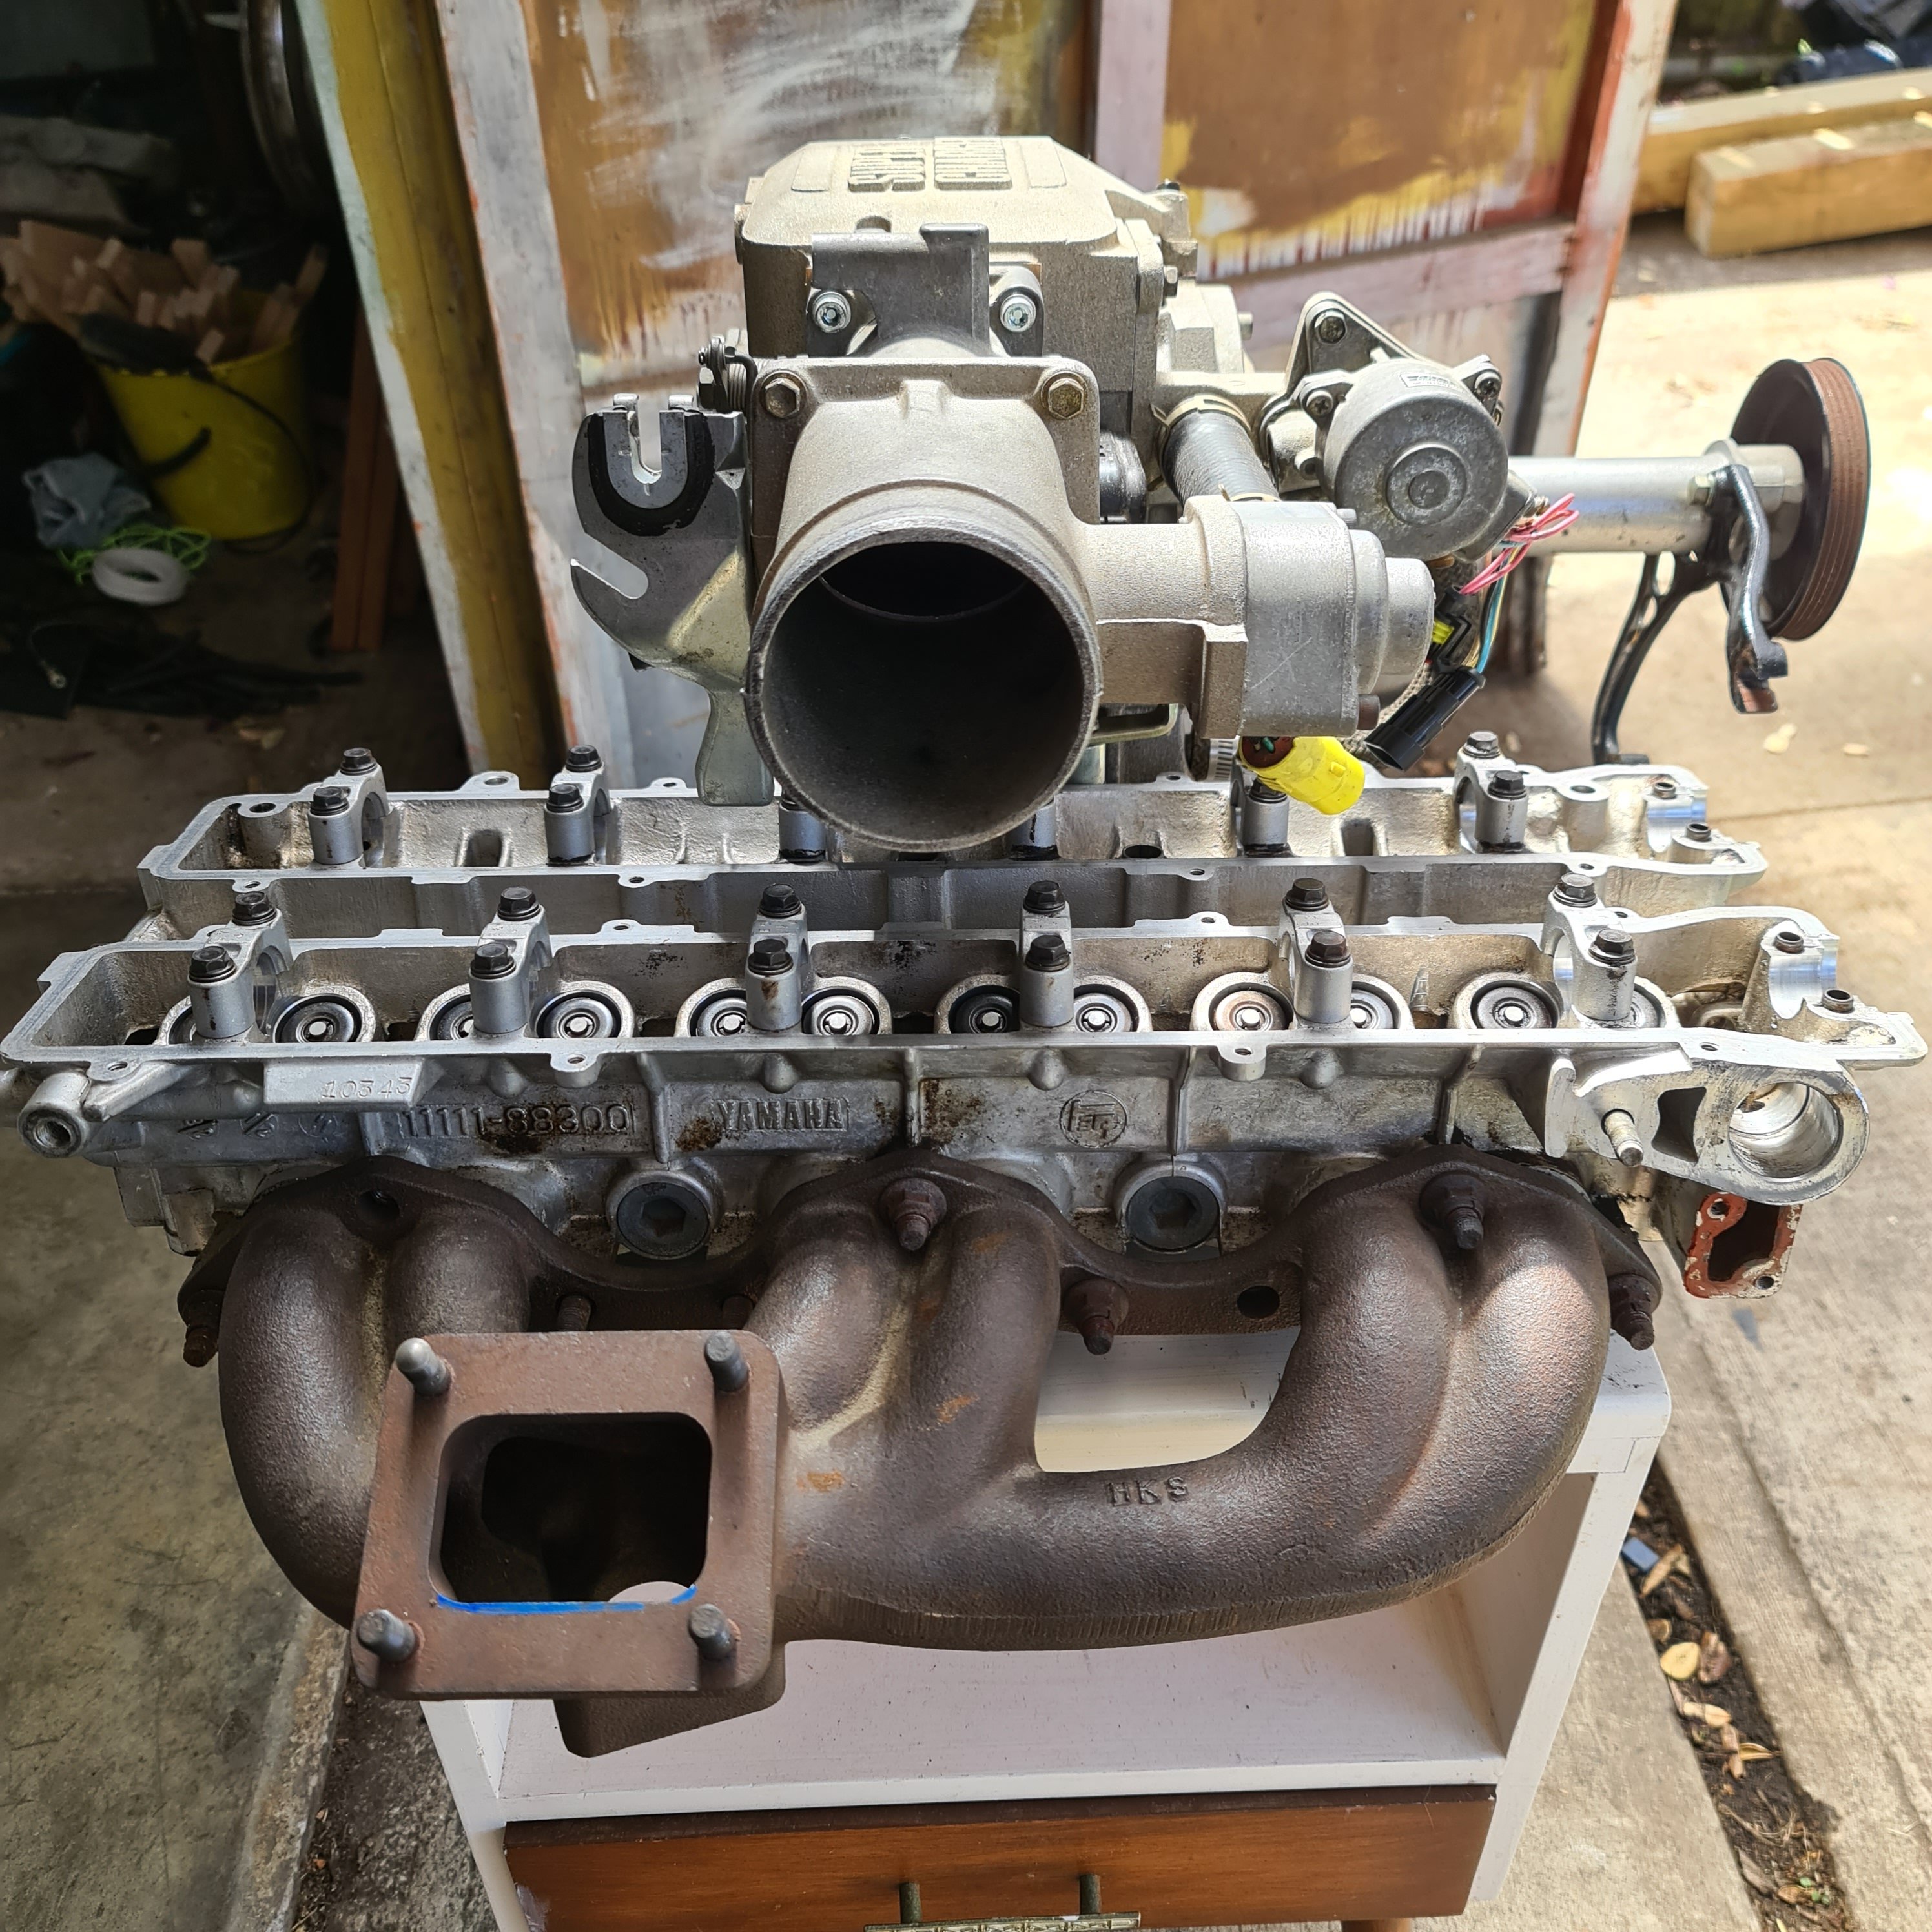
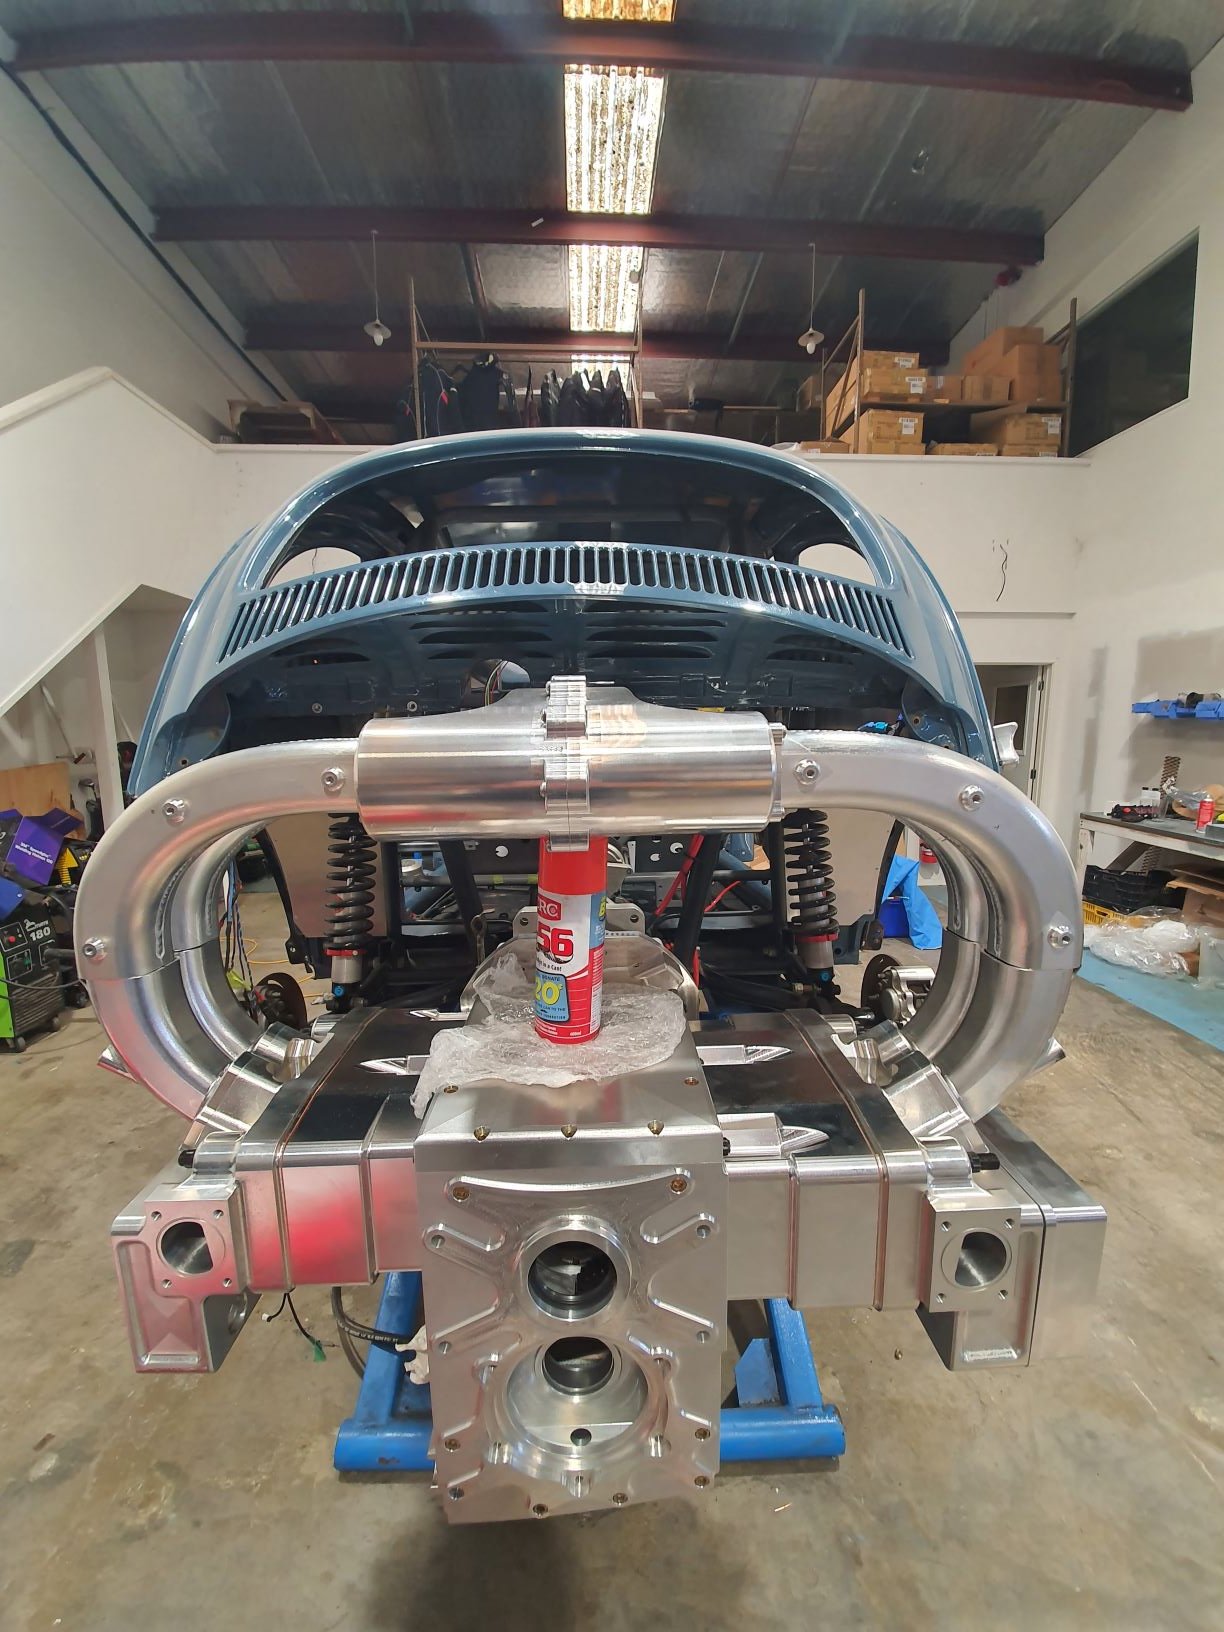
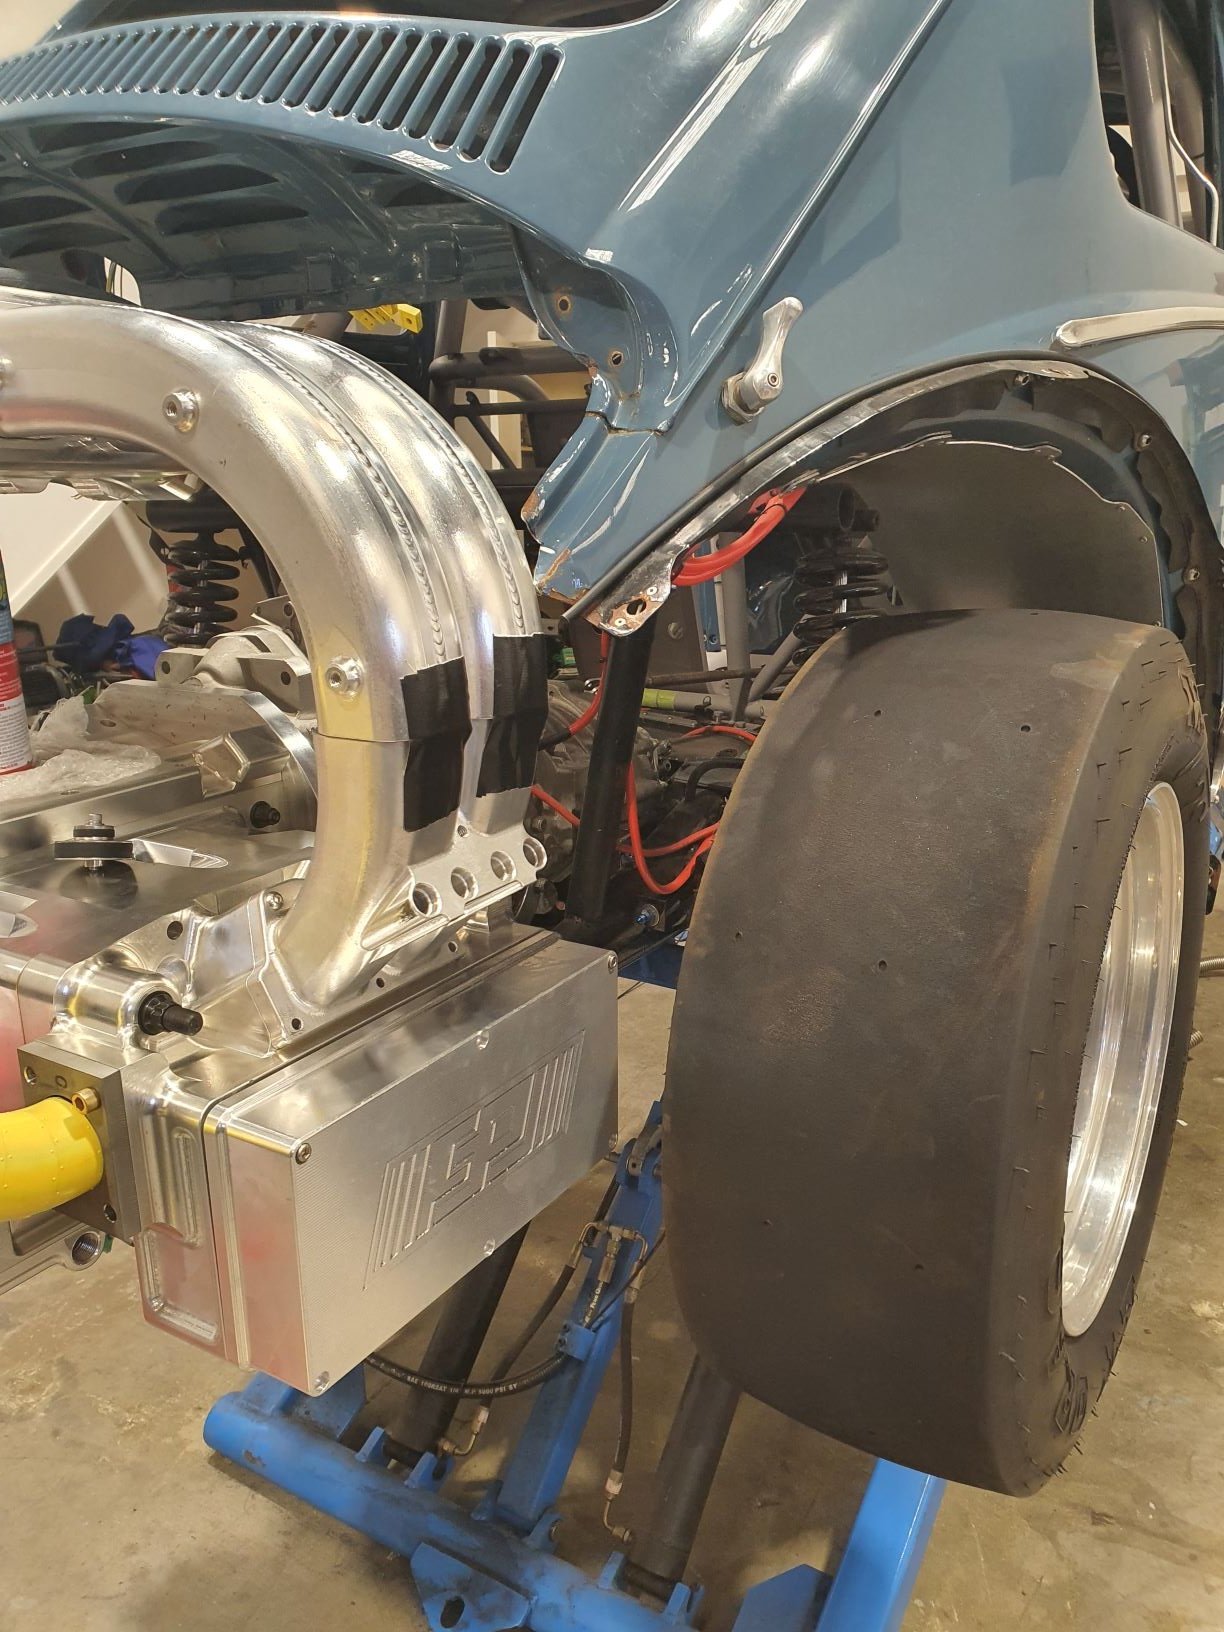
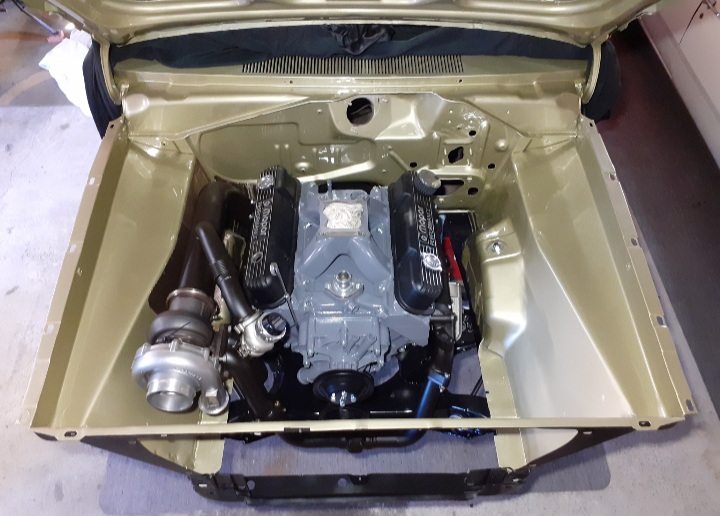
Most of the engine is here, so time for some cutting and tucking. Waiting on piston pins and some hardware. Also going to a fueltech ecu, so I have a link fury and 2 race tech dashes up for grabs if anyone is looking for one. Will try and update this a bit more regularly as I make progress. This is just mocking up, fitting everything in and then will do the engine build once that is all sorted.
2 points
-
The time has finally come to start work on the starion. the escort is pretty much done and the lancer is waiting on some funds for a link so the starion has made it's way into the garage. Plans: Rebuild engine with bigger turbo and multipoint Make a custom front to go with the kit Fit coilover suspension Panel and Paint, don't know what colour yet Put nice exhaust on it and ehjoy driving it. It has only done 37000 miles so the interior is in good condition. gearbox feels to be good aswell and hoping the factory LSD is also in excellent condition. Side by side starion projects Pulled the head off. Now have to pull the block out. engine has a loud knocking. Think its big end. Some shots from different angles1 point
-
125's only also I might add. also GN paddock speedway would be great too1 point
-
I remember picking up an air cleaner floating on one of the rainbow water crossings. And on the road. a few times.1 point
-
I could be keen - probably need to give my scoot a birthday first1 point
-
Rollercoaster of emotions on the glass install! Installing glass sucks btw.1 point
-
Yep well worthy of an entry - skid factory will love it cos safari and surely there is some worthy bracketry - tis a very cool well executed clean looking conversion1 point
-
Adding to the catalogue in my garage I've found this pretty epic twin charge build in an old carboy magazine
1 point
-
How the hell did they get the silver / black top names if the silver or black top is meaningless? Sounds like the whole designation is meaningless tbh, and it's nothing more than a construct of Barry's who like to sound like they know what they're talking about1 point
-
And anyway cunts, can't you see that my barry on this is so thin it's two dimensional? Maybe all the jap import ones were different, all the reading I have done is on oz based forums. I have only looked inside two engines.... All I was trying to do was enjoy some nice internet based knowledge superiority and you fuckers have ruined it. I shall drink beer now in protest. And by the way that new pump is now 60% installed thanks to this evenings efforts...1 point
-
https://www.facebook.com/events/266420478467131/?sfnsn=mo This month's meet is up.1 point
-
Thanks @63Ragtop. Glad you like the project. I got more reassembled and jigged up tonight.
1 point
-
Woohoo! it has a pinhole or two but immaculate compared!1 point
-
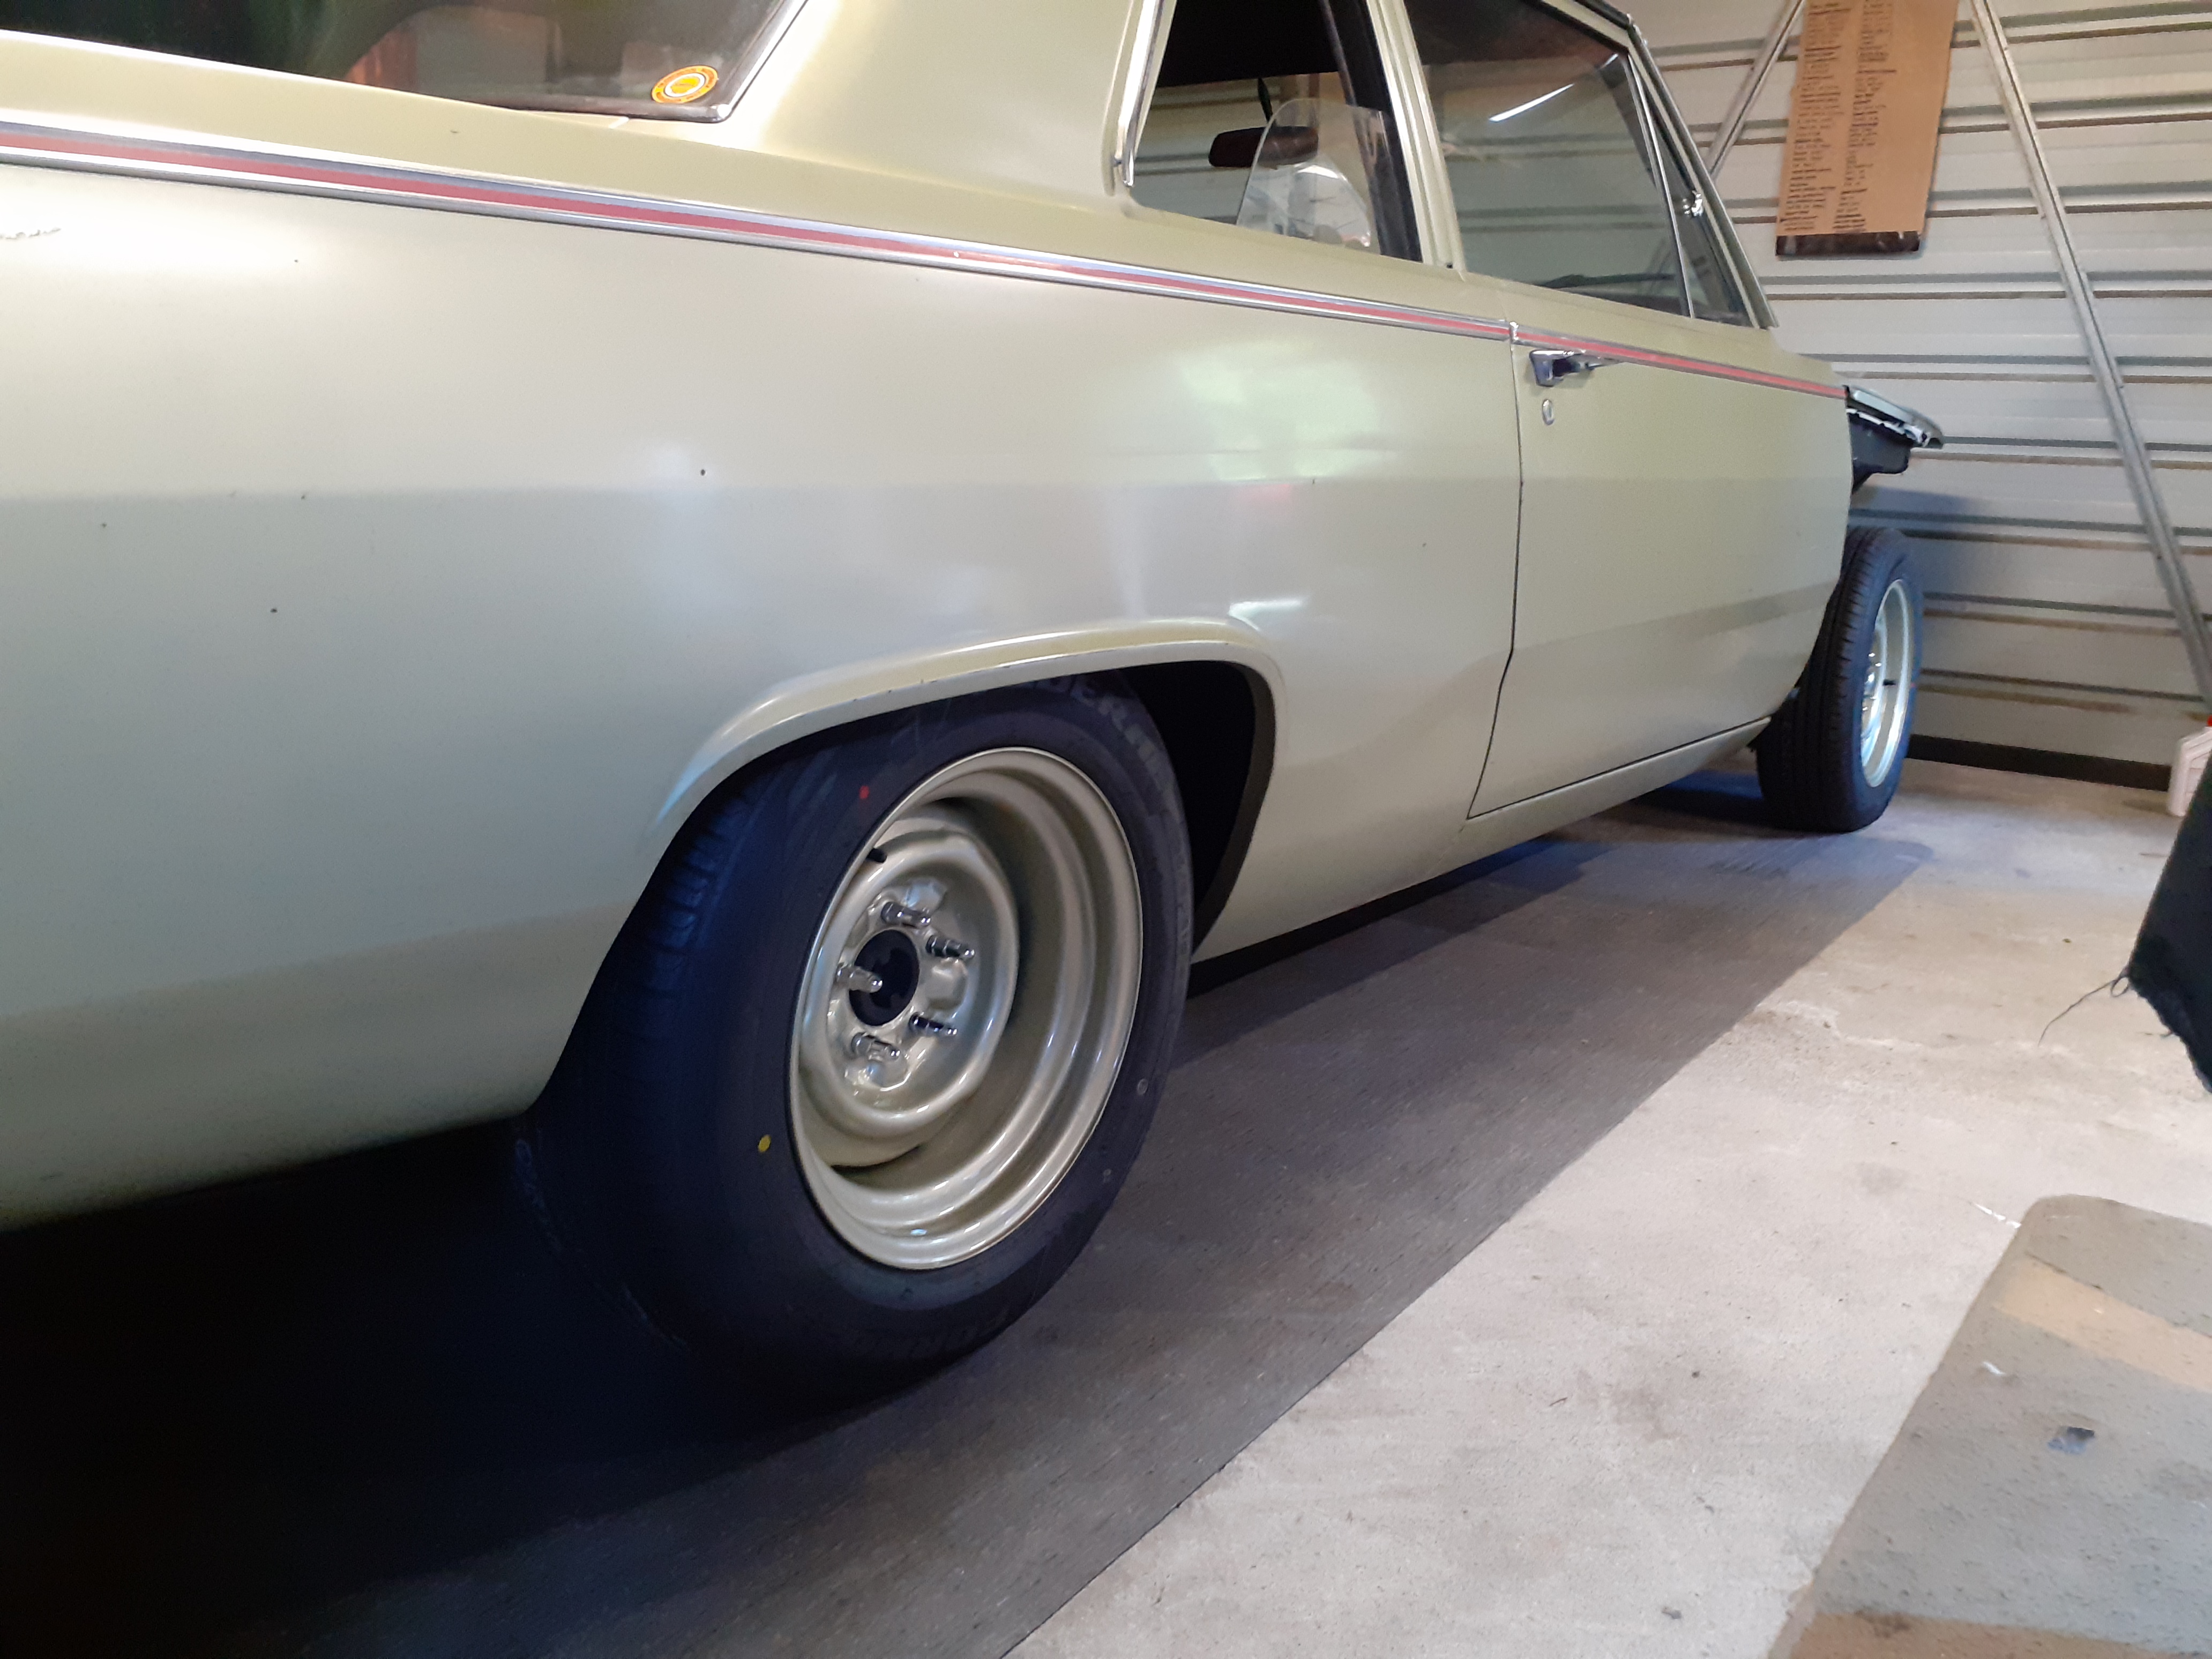
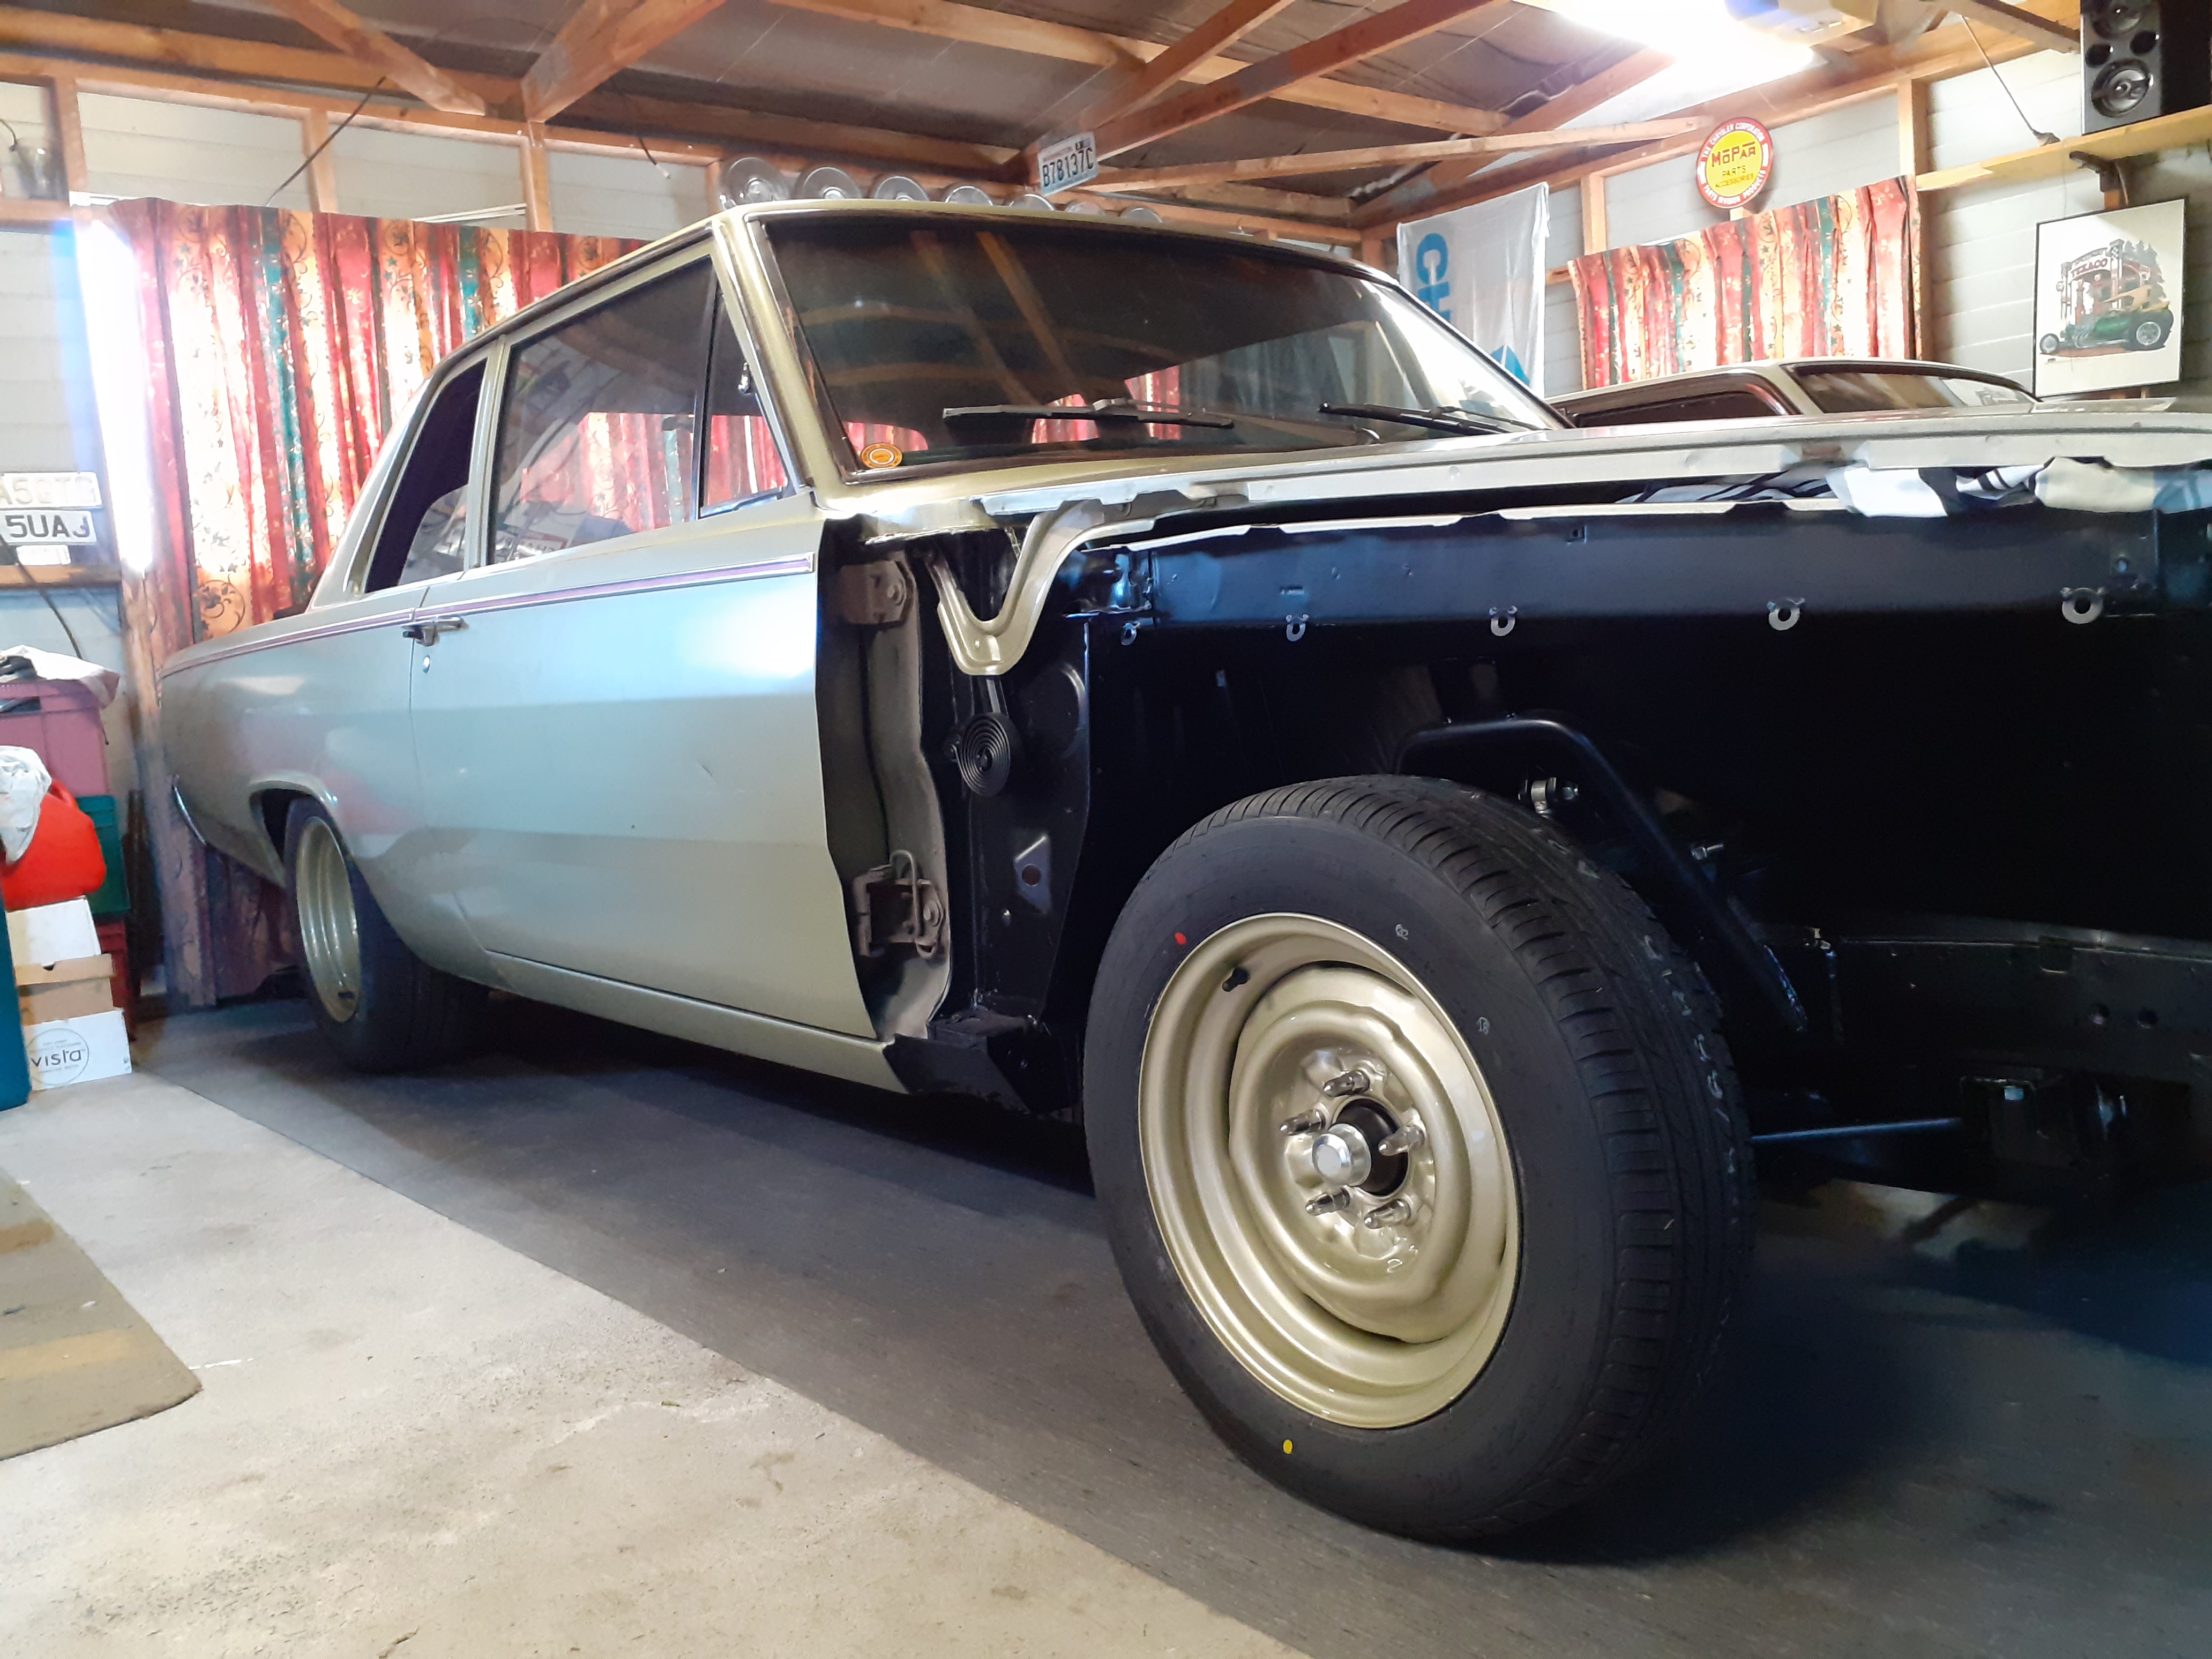
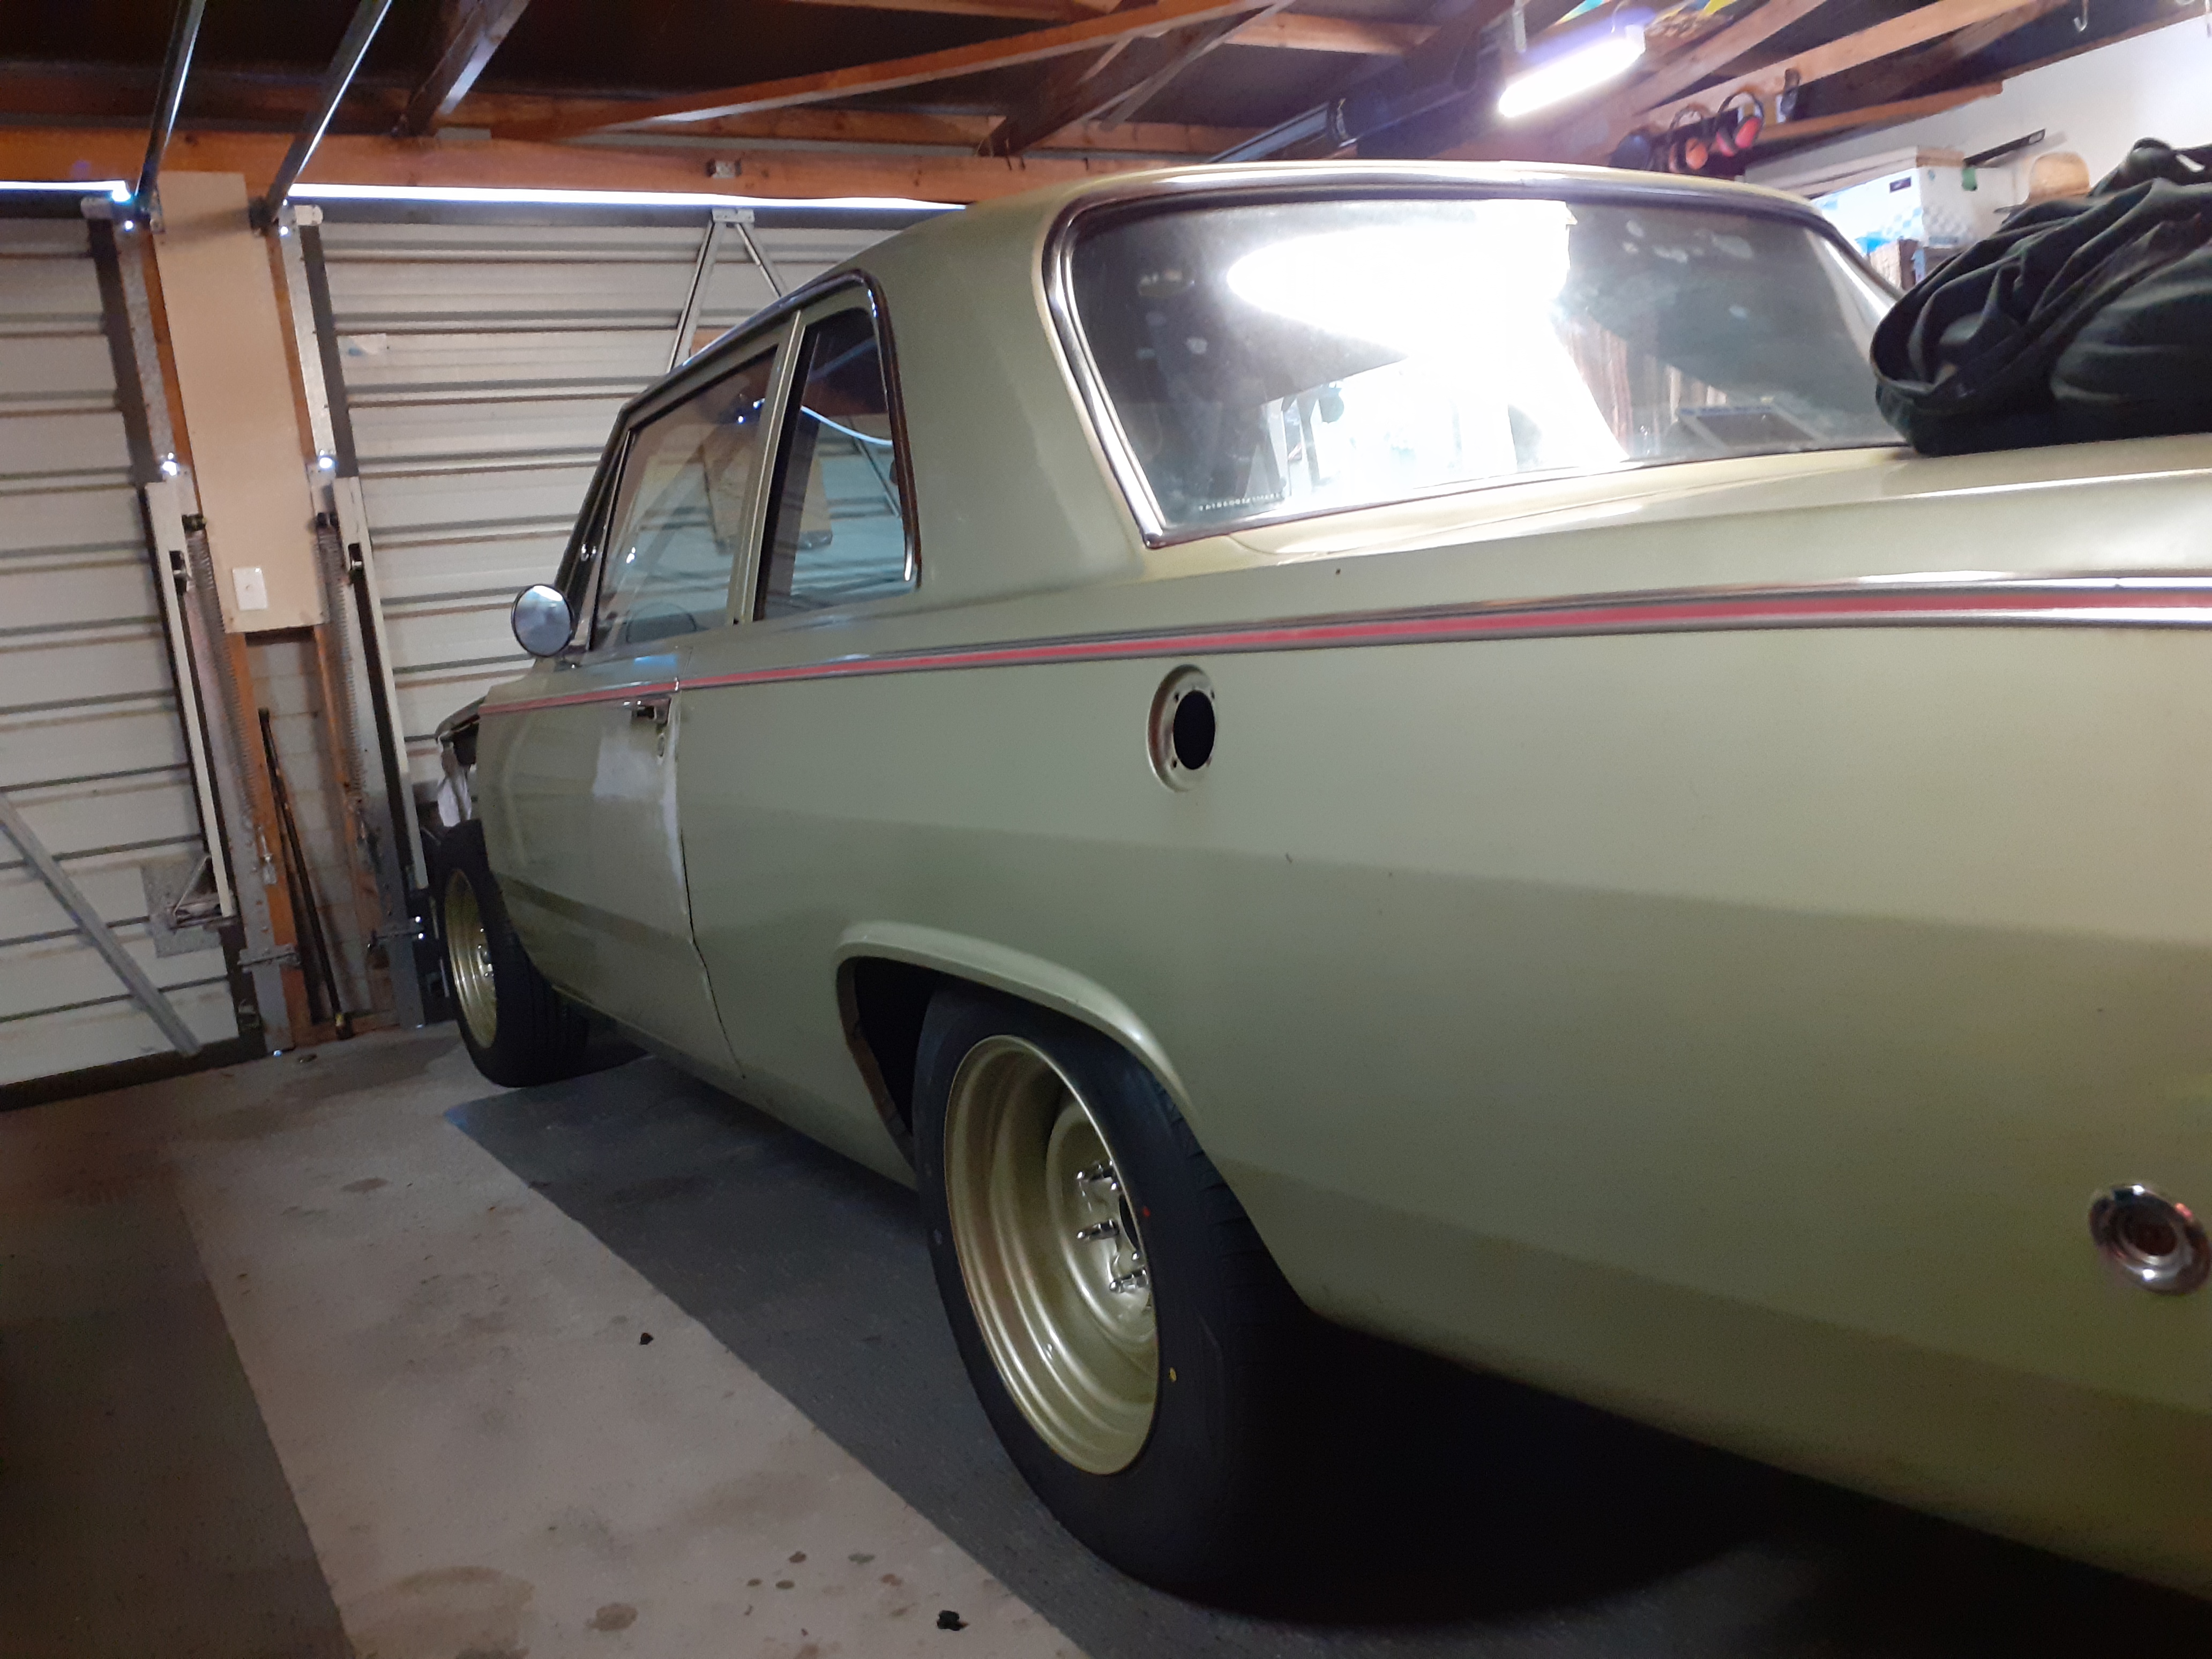
Tyres. I've been looking at different sizes on 6 and 8 inch rims since I got the wheels trying to get a combo that looks right 225 60 15 on 15x8 rear 185 65 15 on 15x6 front I like the outcome, looks exactly how I wanted. As per other pics, the colour is hard to photograph. It looks more green irl and the match between wheel and body looks better for some reason?
1 point
-
Been using the car a bit and one of the few modern things I miss is central locking. I'd bought a kit years ago but never put it in as it was a bit cheap looking, so shouted myself a new high-torque kit from Bluewire (Aus) that is supposed to be great for classic cars... And pulled a rear door card off, looks like back in the day I'd used masking/insul tape and almost gladwrap-spec plastic sheet as a moisture/dust barrier... So thought I'd do it properly, scraping off all the old mastic and cleaning things up first... And pulled the door mechanism out. Also wanted to free things up a bit as kids struggle to operate the doors, pretty much just 50 yr old car life... Plus the latch mech had been painted at some stage, which bothered me... Gummed up... Chucked the bits in my Ultrasonic cleaner, so good for things like this, came out mint... And door all cleaned up and mech temporarily put back in, operates much better now, solid clunk and noticeably easier to operate. Will grab some lithium grease and lube things properly before final install, should probably clean and lube the window mech as well. The central locking motor will have to push-pull the horizontal rod covered in fibreglass tape, looks do-able by mounting it left of the central vertical section of door... And latch looks better cleaned of paint, prob need new rubbers as well. You can see the new polythene sheet I will use on the back seat, all of $4.98/m from the Mitre 10 garden centre... And the lever arm contact part of the internal handle is quite worn (seen here from inside of door). Operates ok, but it's around AU$26 for a new one so have ordered some. Prob should have ordered new chrome knobs and rubbers at same time but can do that later. Have also ordered some butyl sealant that stays plastic, not sure what tape to use on edges, will look into it. Next update after fitting motor unit and testing...1 point
-
Today I got a new mind reading tag thing so the government knows what I had for dinner on Wednesday
1 point
-
Still tidying things up, sadly my old sanyo tape deck had failed, couldn't change stations and wouldn't play tapes. That saddened me cos I have boxes of old tapes I was gonna punish the kids with... So pulled it out, was impressed with the stainless mounting plate I'd made yrs ago, all perfectly square, scribed lines, chassis punched holes... And putting in a cheap Ali stereo, taking the opportunity to tidy up some old wiring... There were also no front speakers under the speaker covers. Obviously nobody had taken any care in cutting holes in the kick panels... Chucked in some JVCs that fitted the space available on mdf spacers... And put the old covers back on for old school feel. You can get repro kick panels but not overly fussed on these details... And new sounds in and working... Quite nice having a stereo that works, also has bluetooth, usb port, aux and memory card input. All for around $26 delivered, unreal really... I've toyed with the idea of installing a retro-looking push button radio but they're spendy, esp with bluetooth, and lots of them have usb ports at the rear which would suck. Pretty happy with the cheap retro-look job, and sound is great for what I spent... Will do for a while anyway.1 point
-
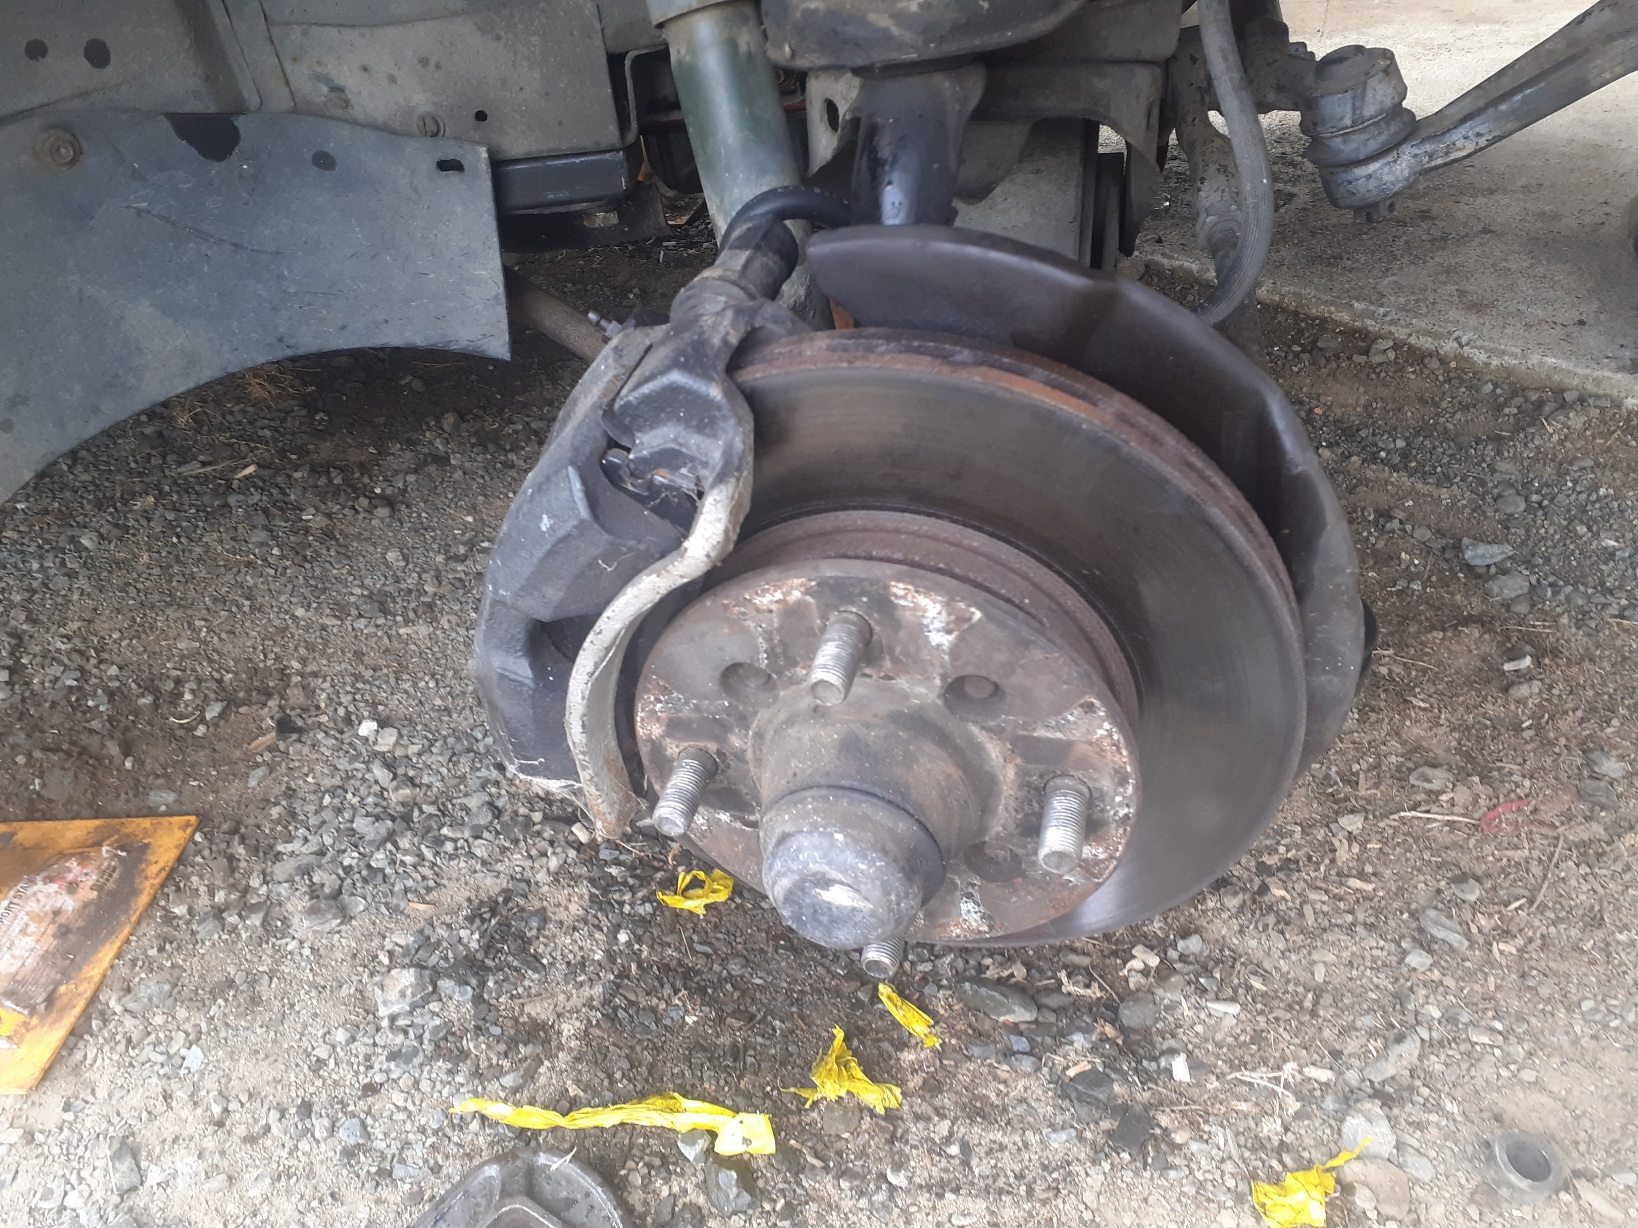
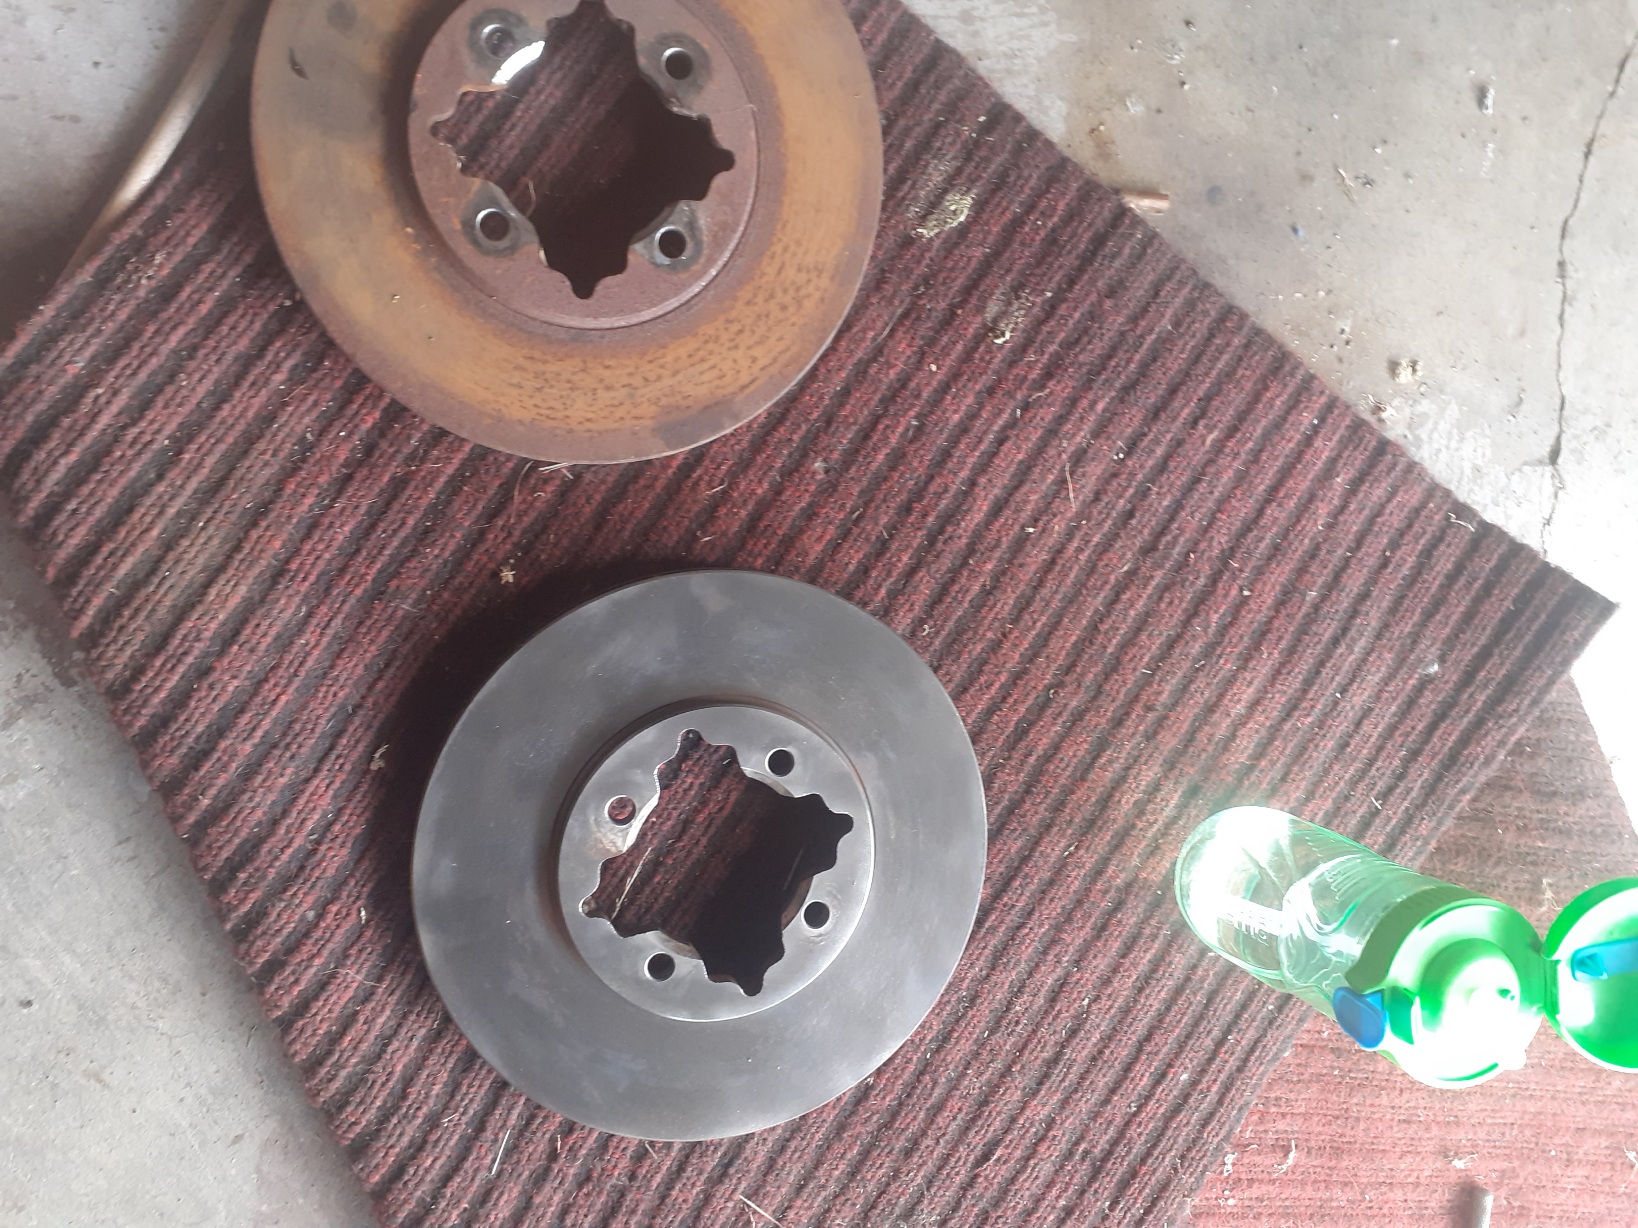
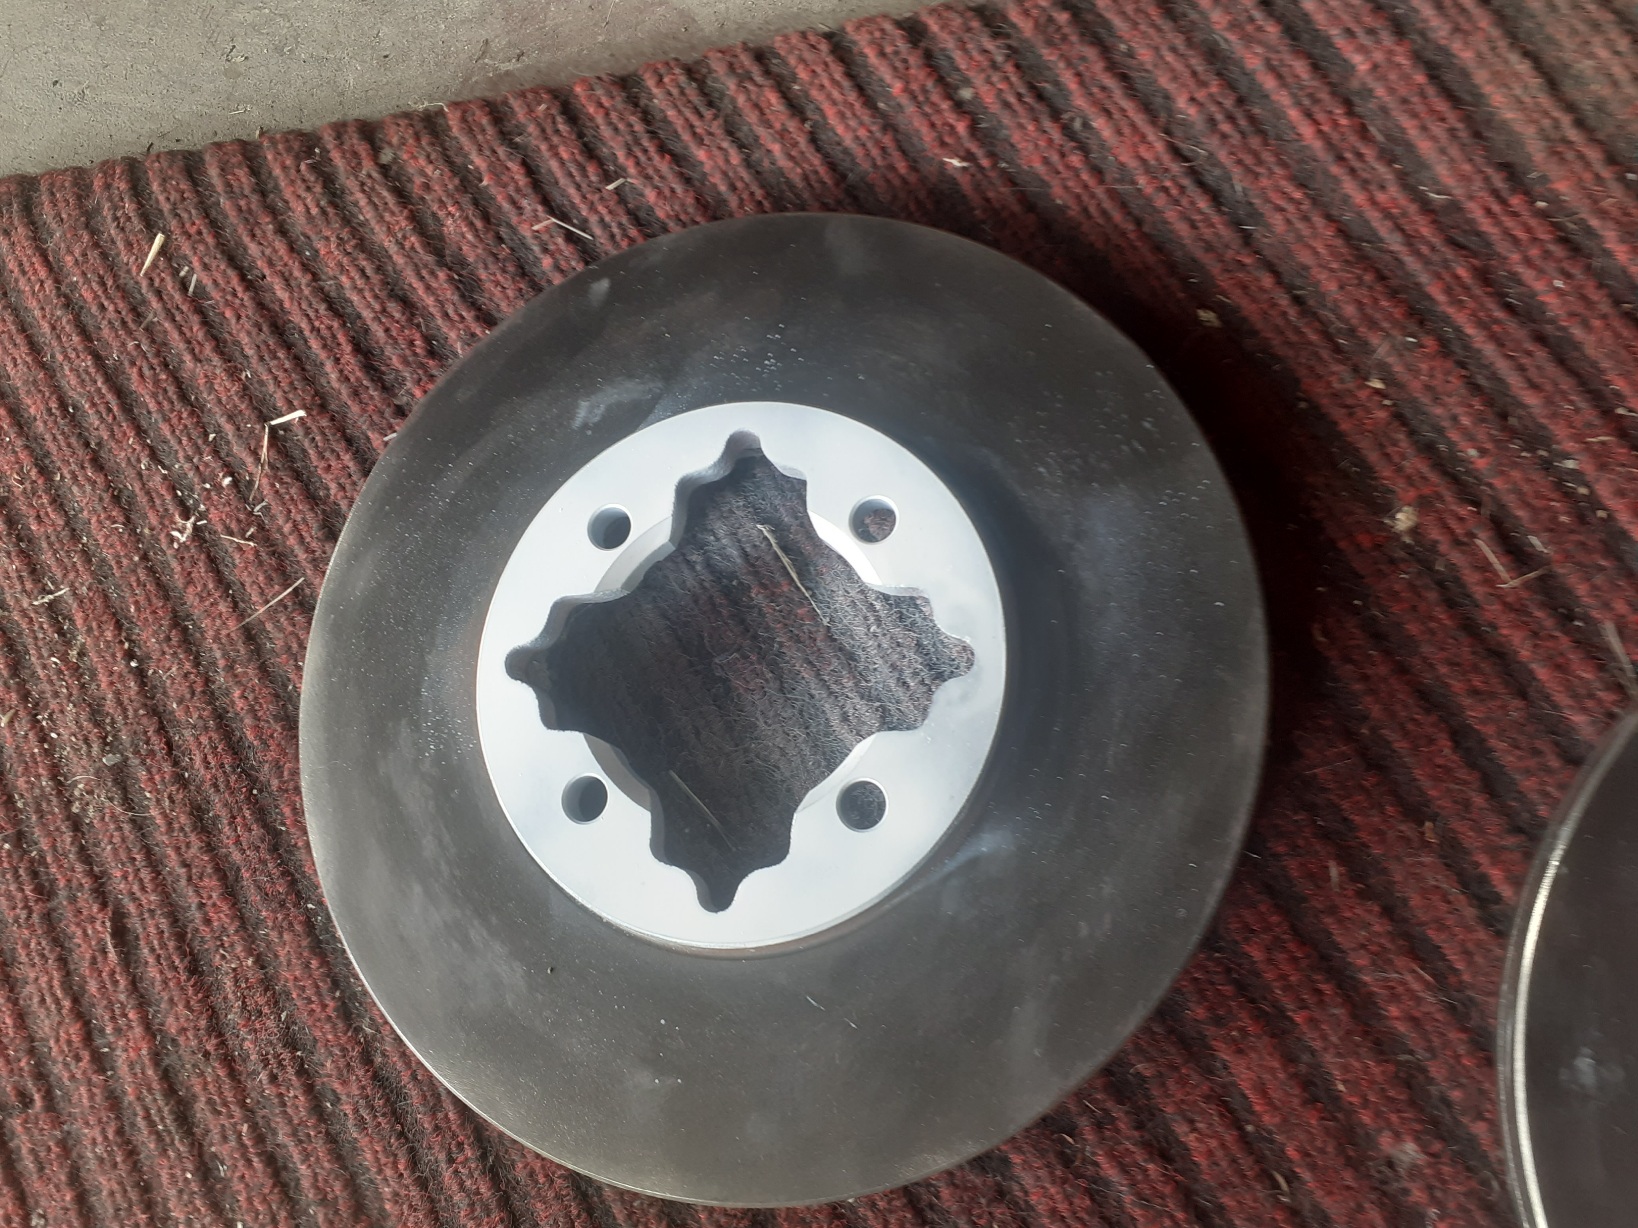
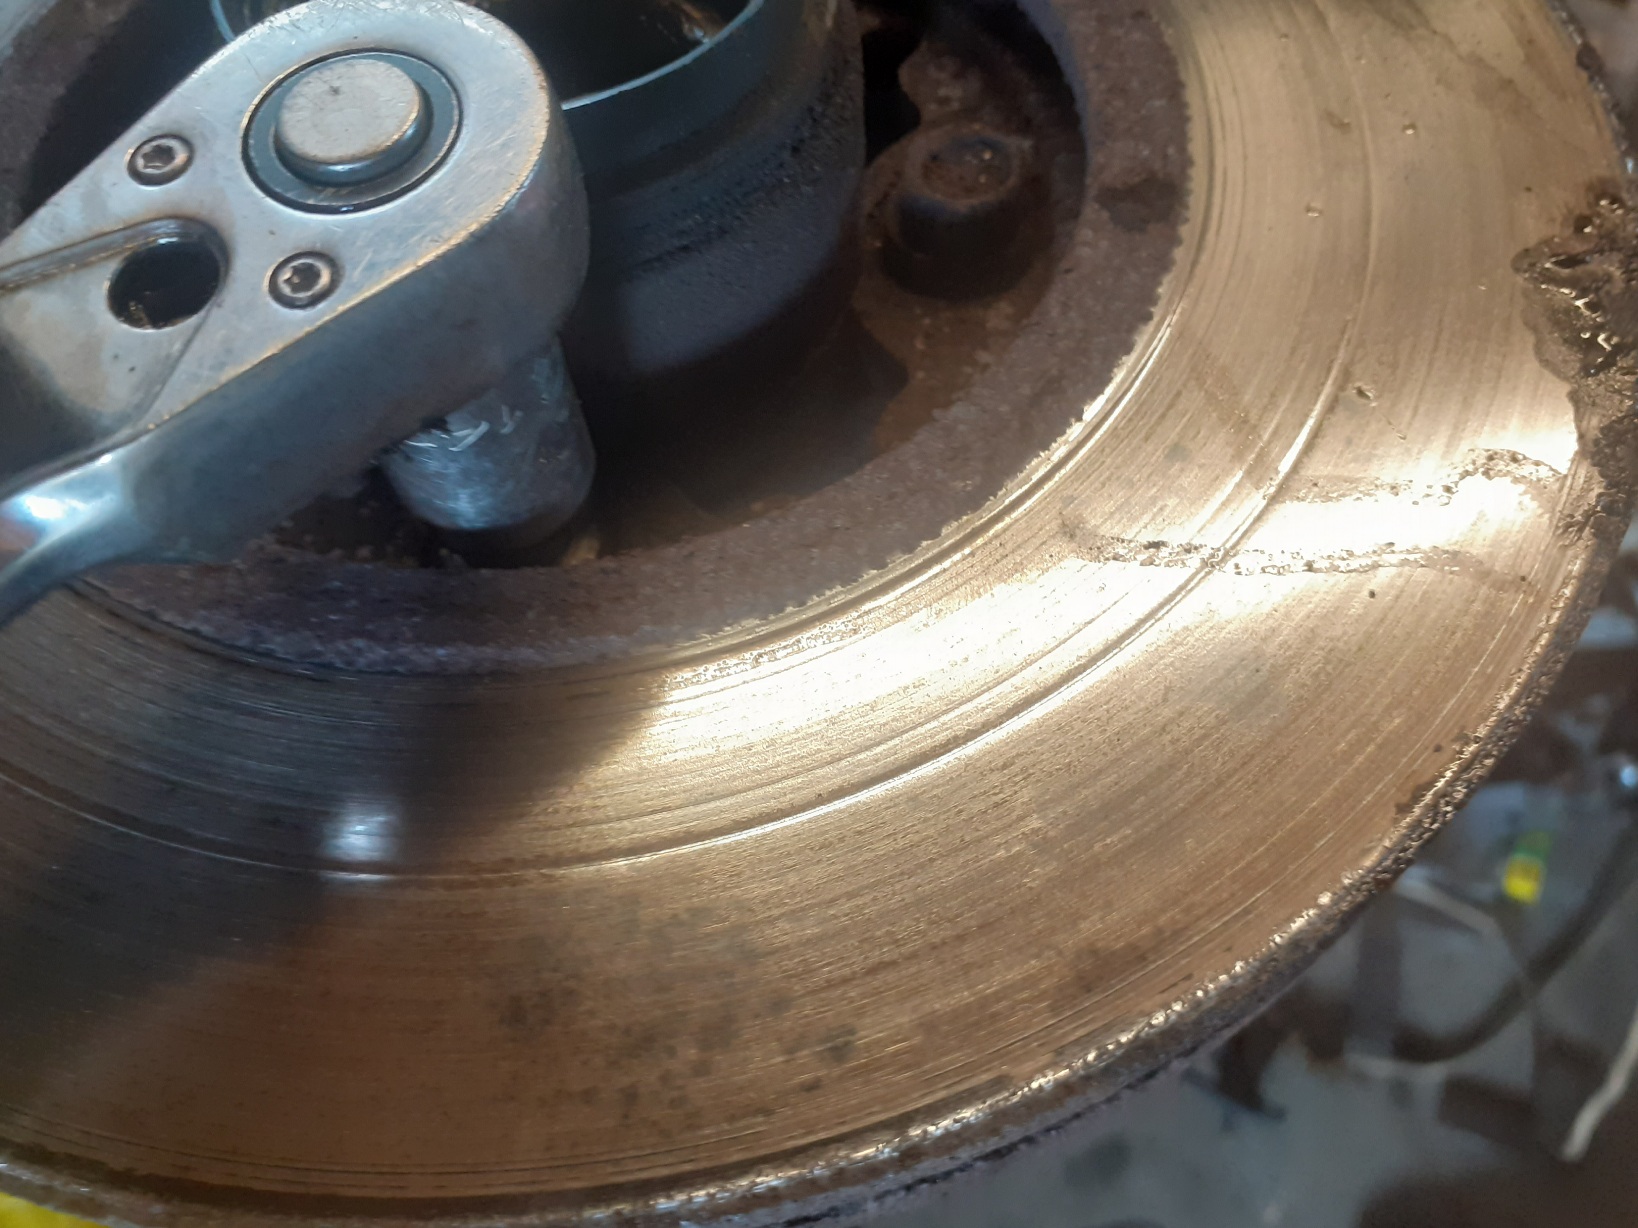
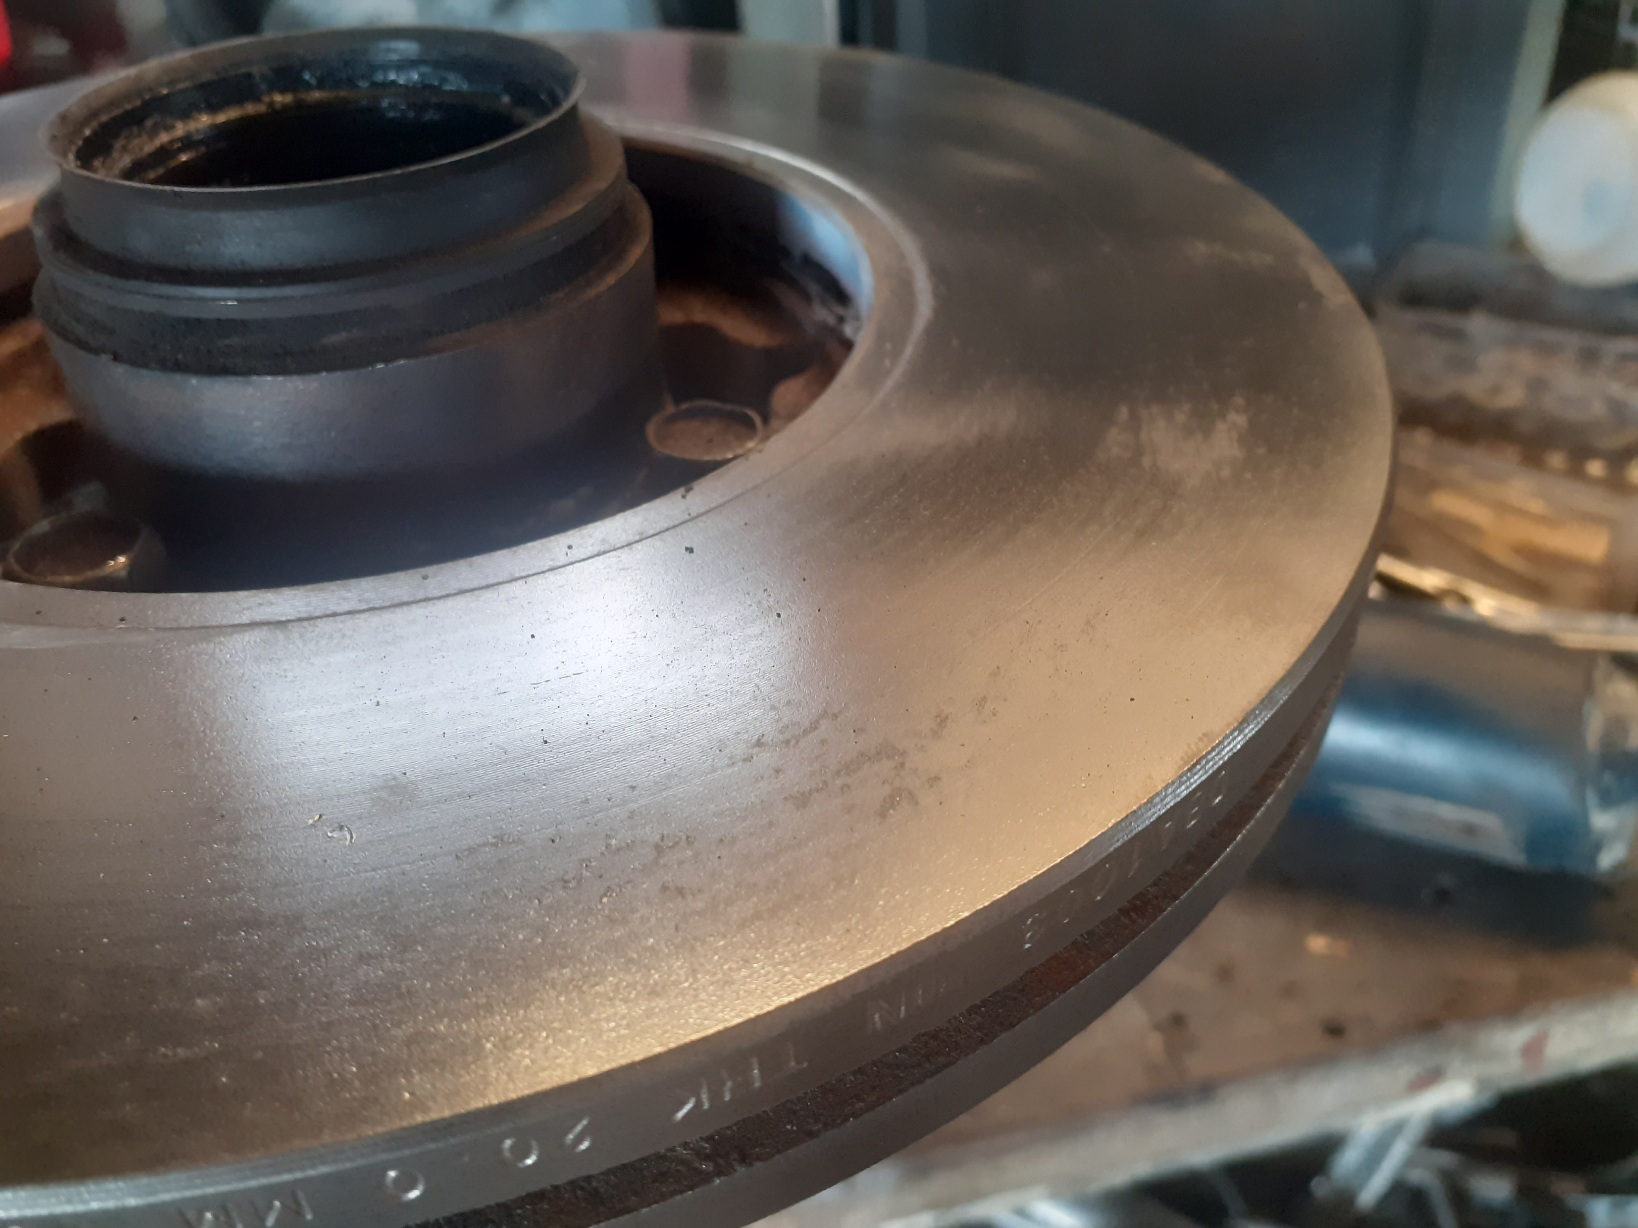
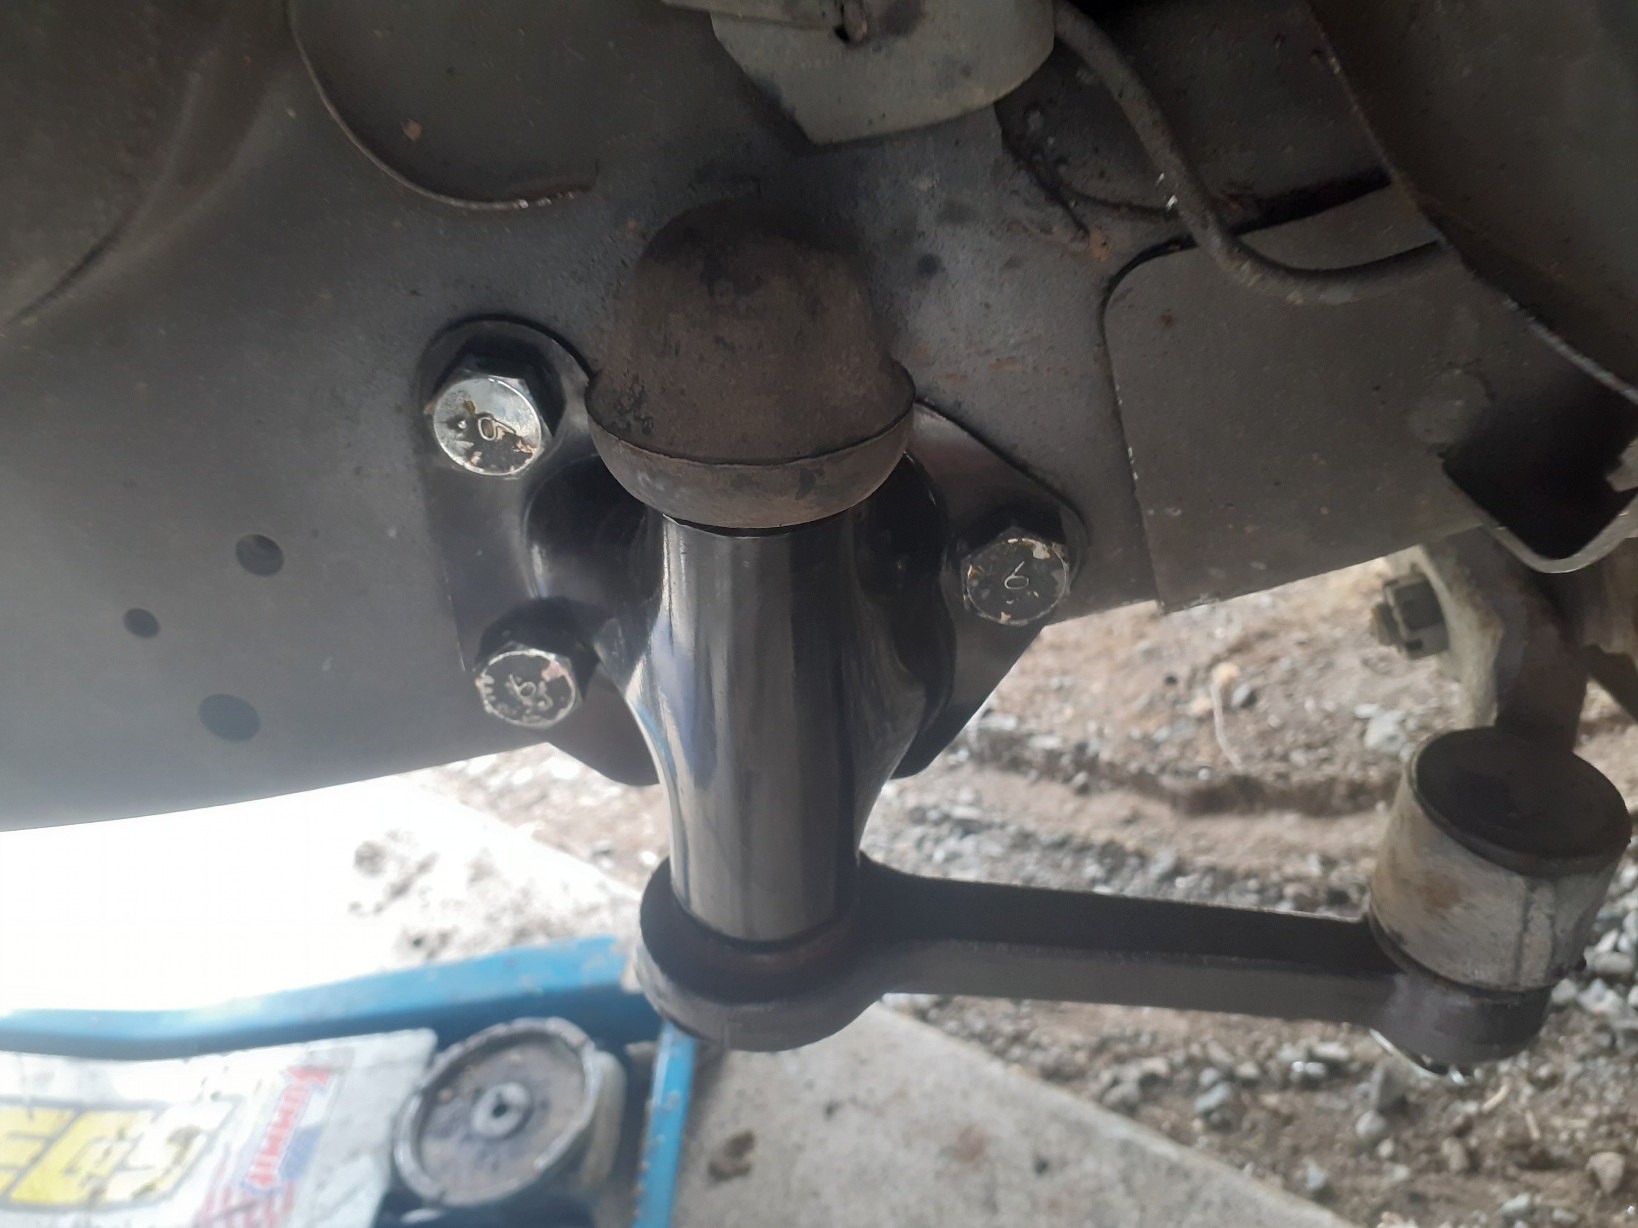
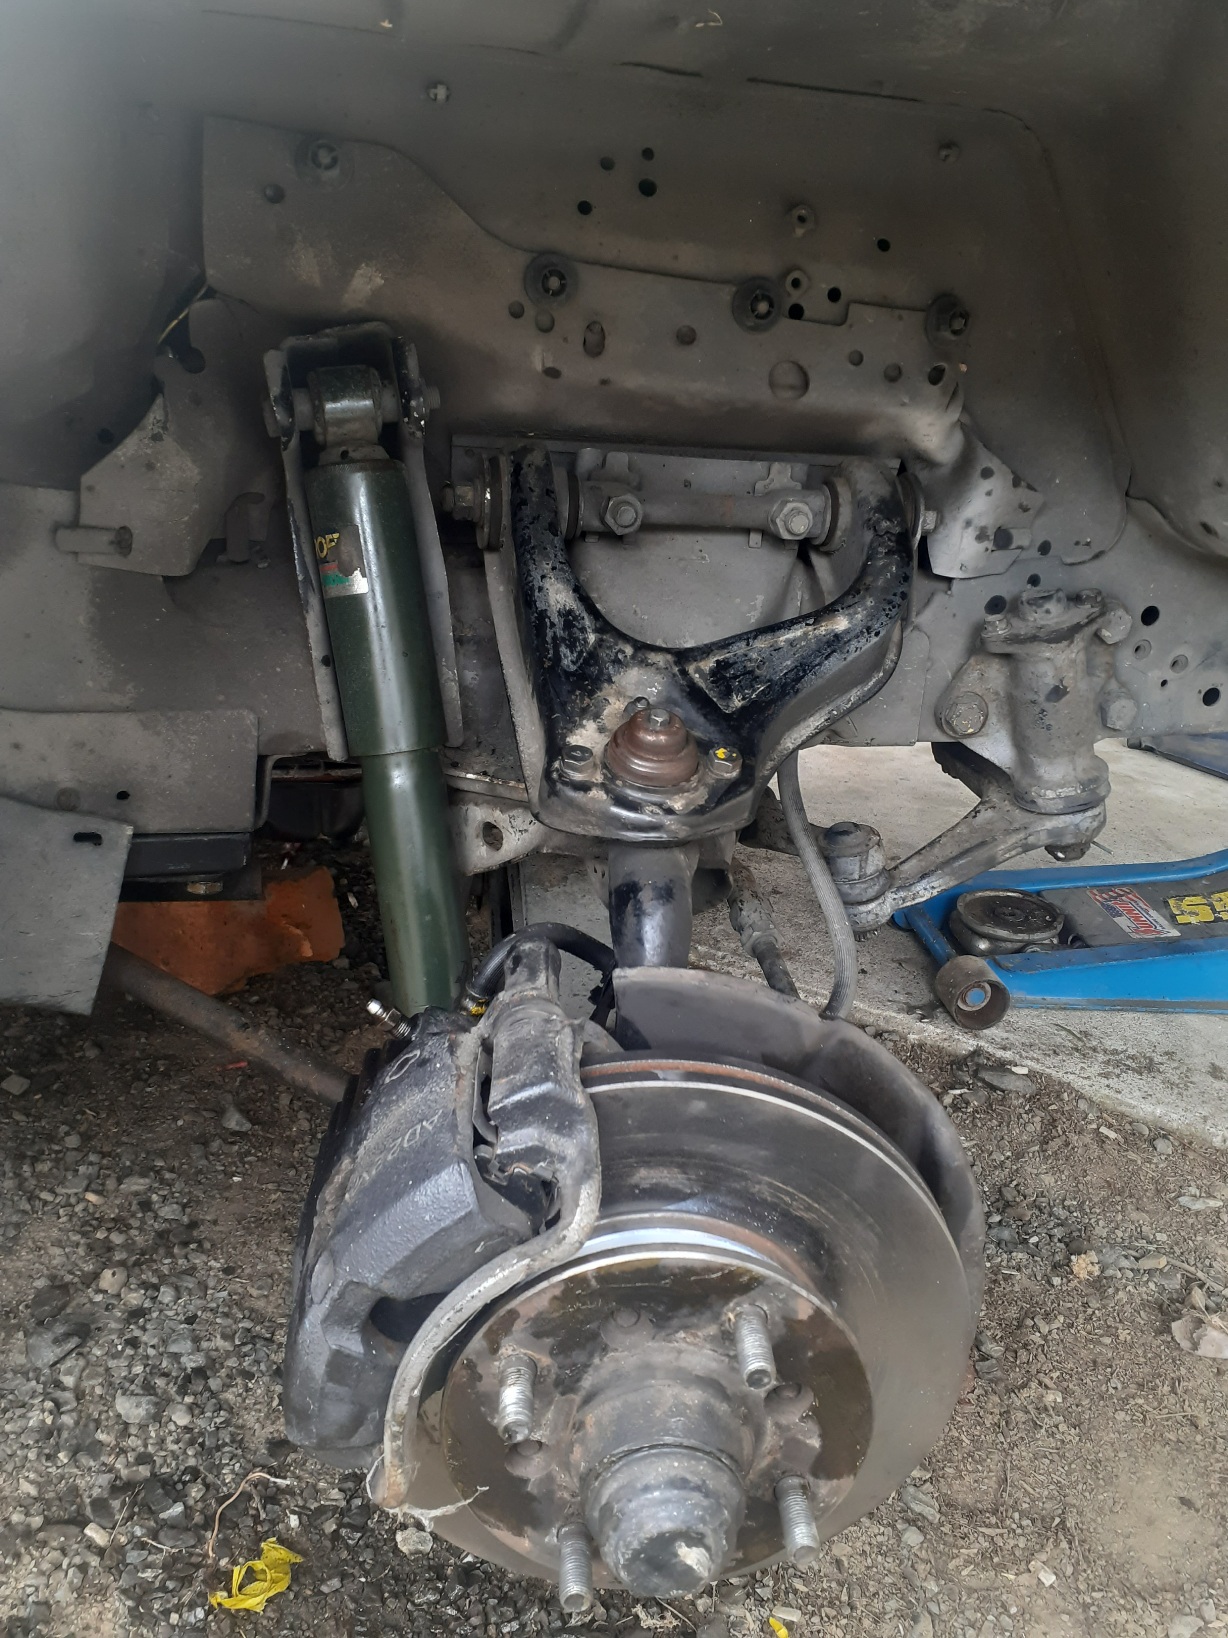
The new van came with a new steering arm bush/pivot/thing, so I put it in, while I was there I thought to check the brakes, they weren't too bad but maybe a bit spongy. Turns out the caliper on drivers side leaked brake fluid out when I push the piston in... , so I swapped all the parts from the old van.. which I'd already gone through for the previous cert process, and the discs are new (came with the old van) and new pads. Cleaned up the surface rust, bit of high heat paint, some other cleaning 'while I was in there' layers of grease removed...., also did a general check of ball joints, loose nuts (which there were ) and tightened everything. And it now stops much better. I have been driving it a bit, seems to be no major issues so far, next thing will probably be driveshaft hoop.
1 point
-
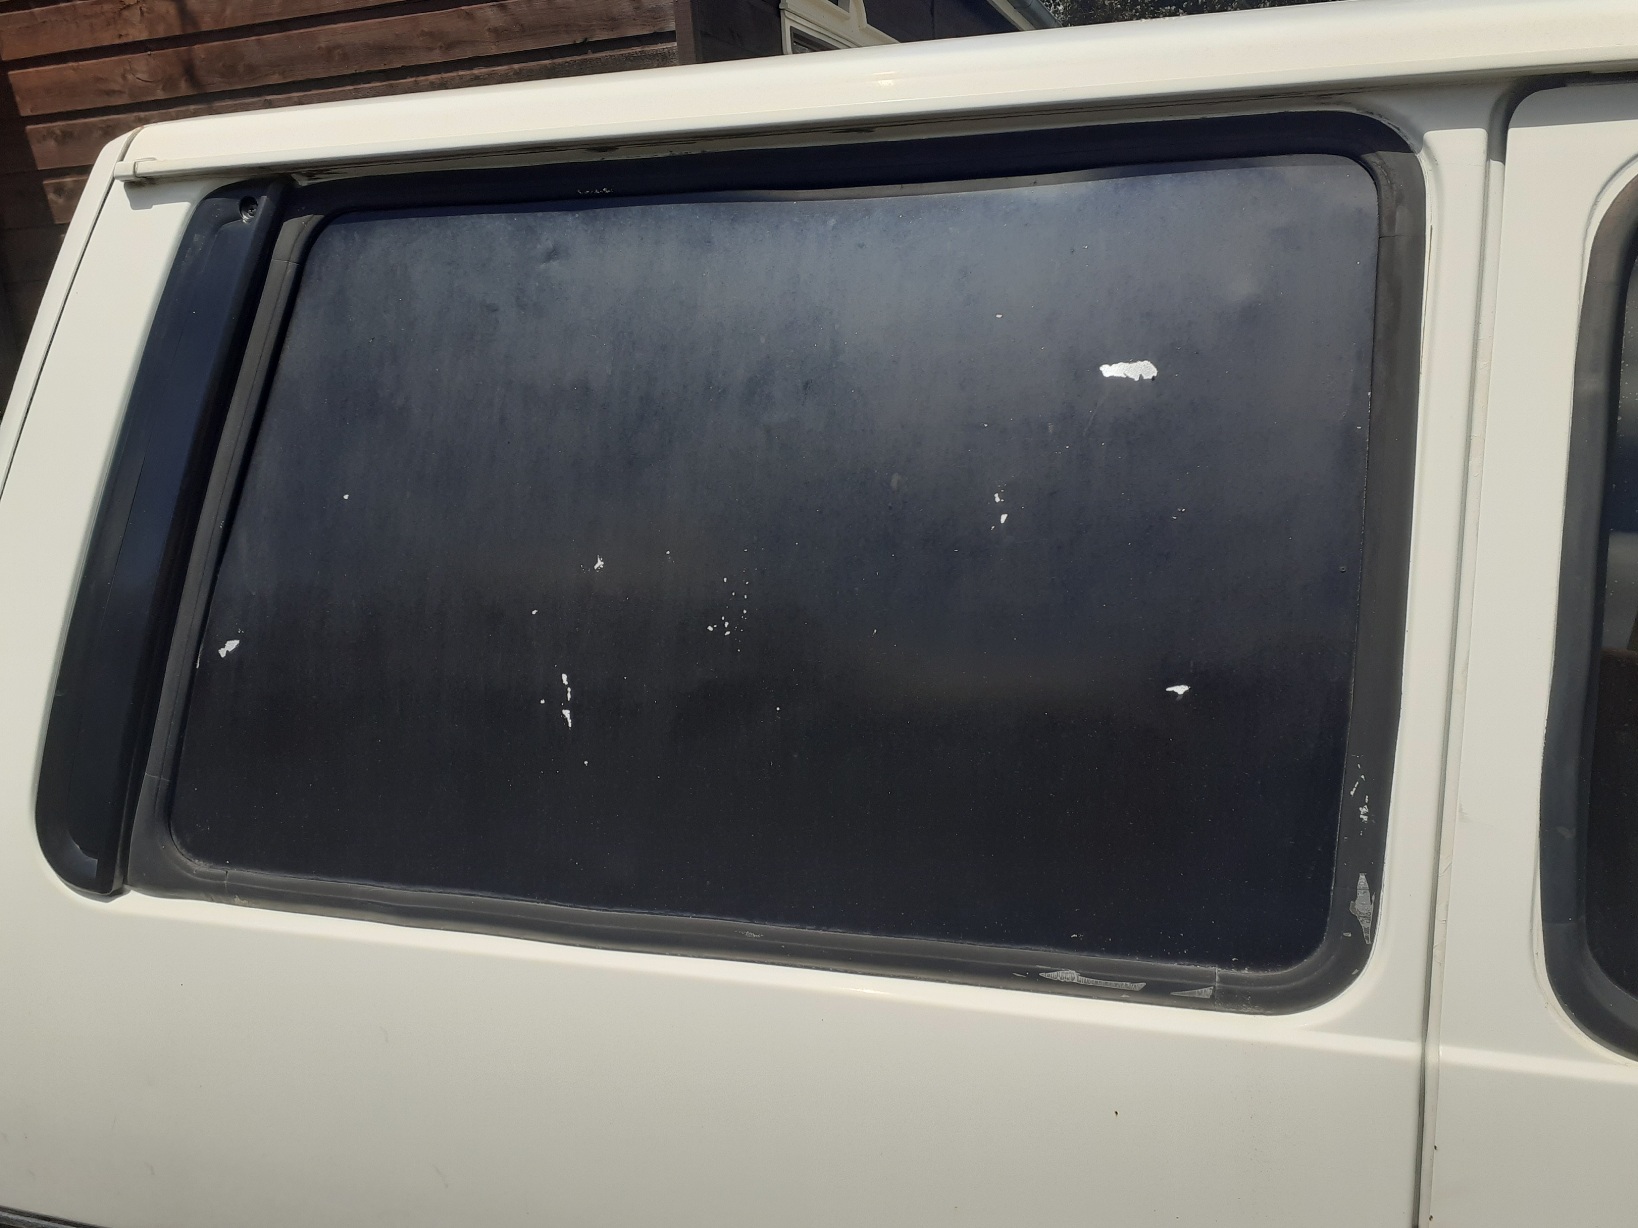
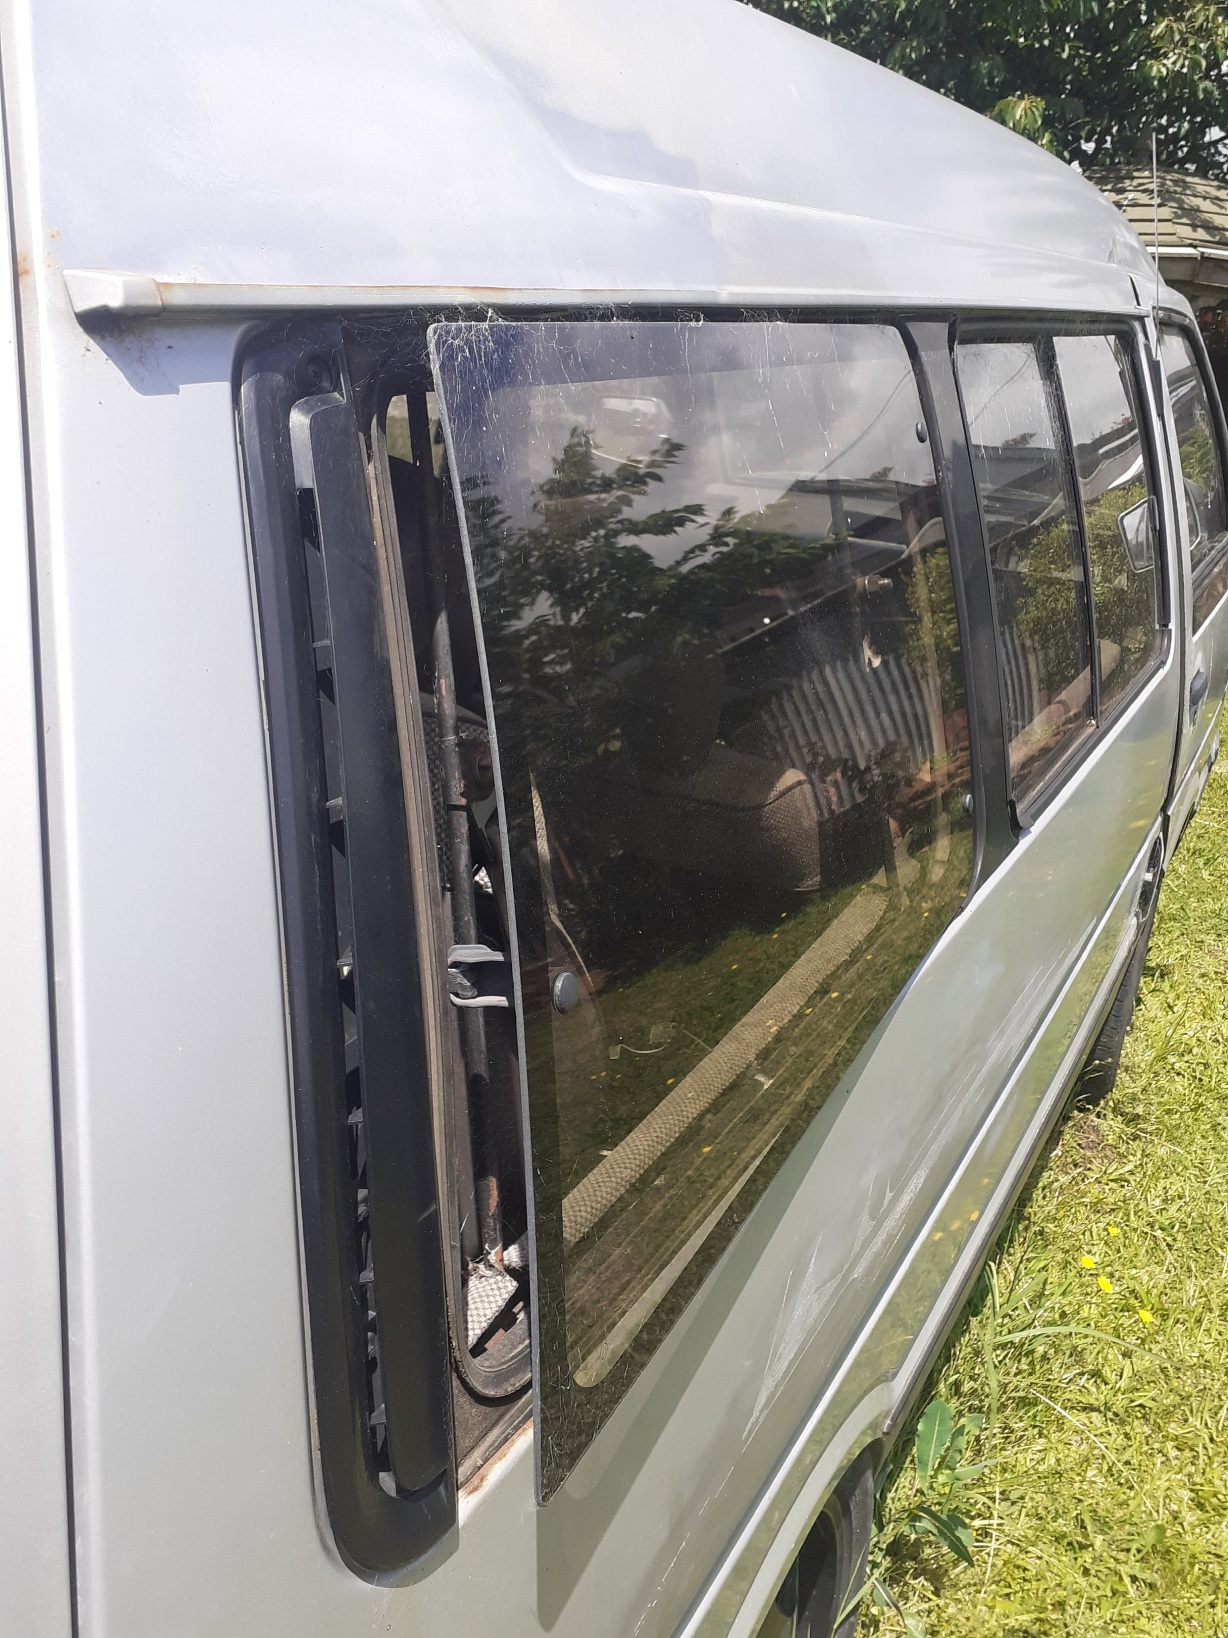
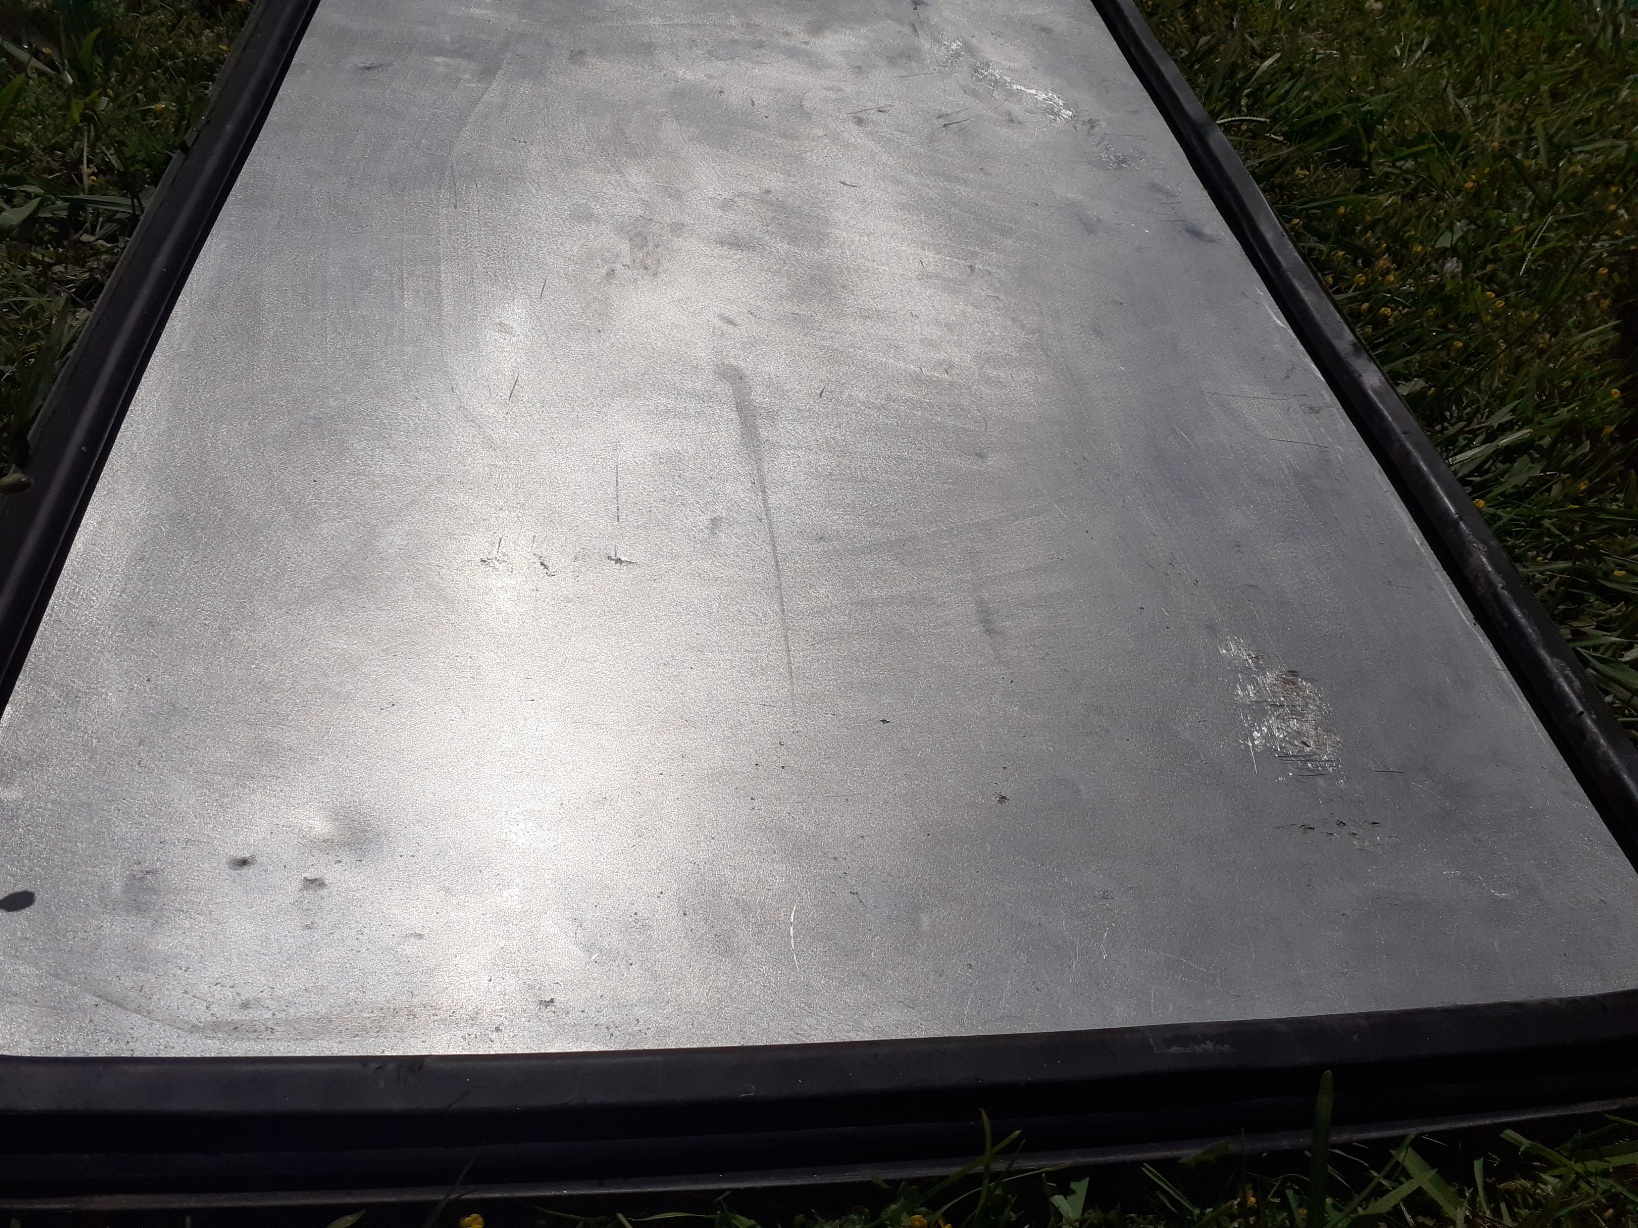
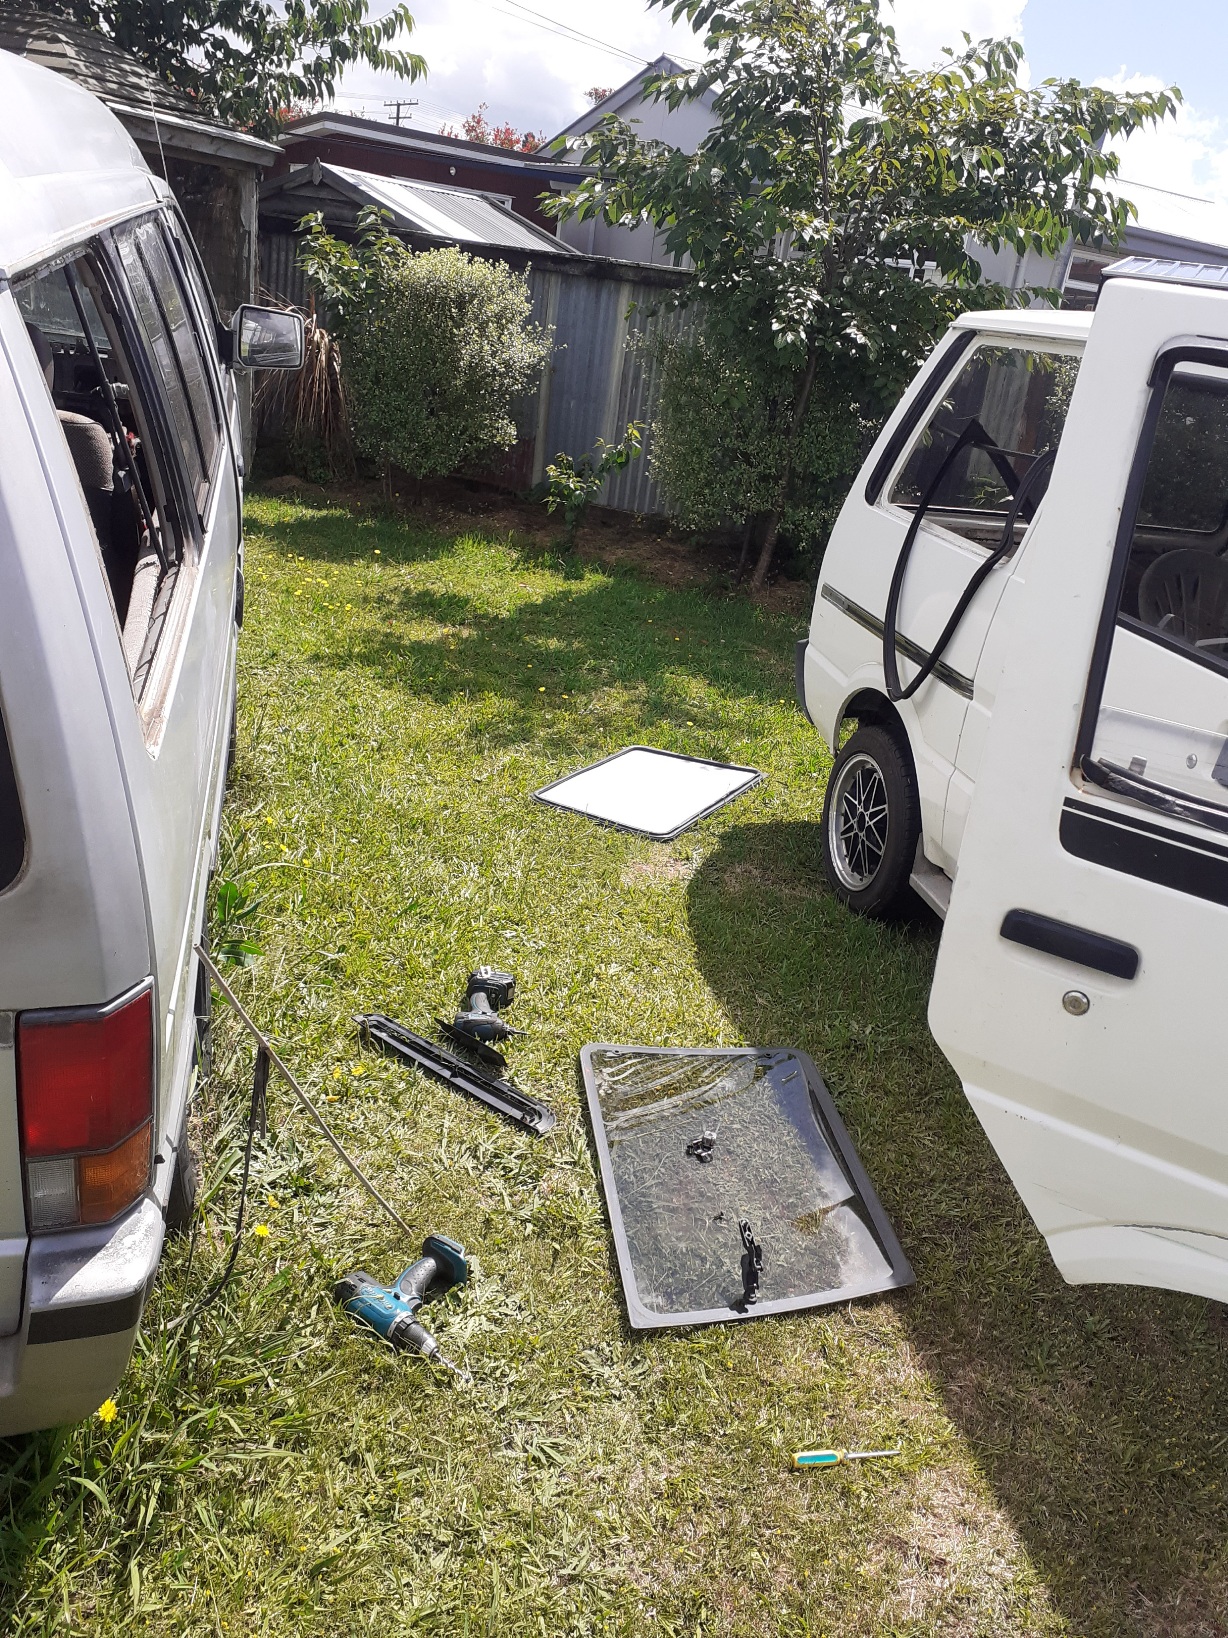
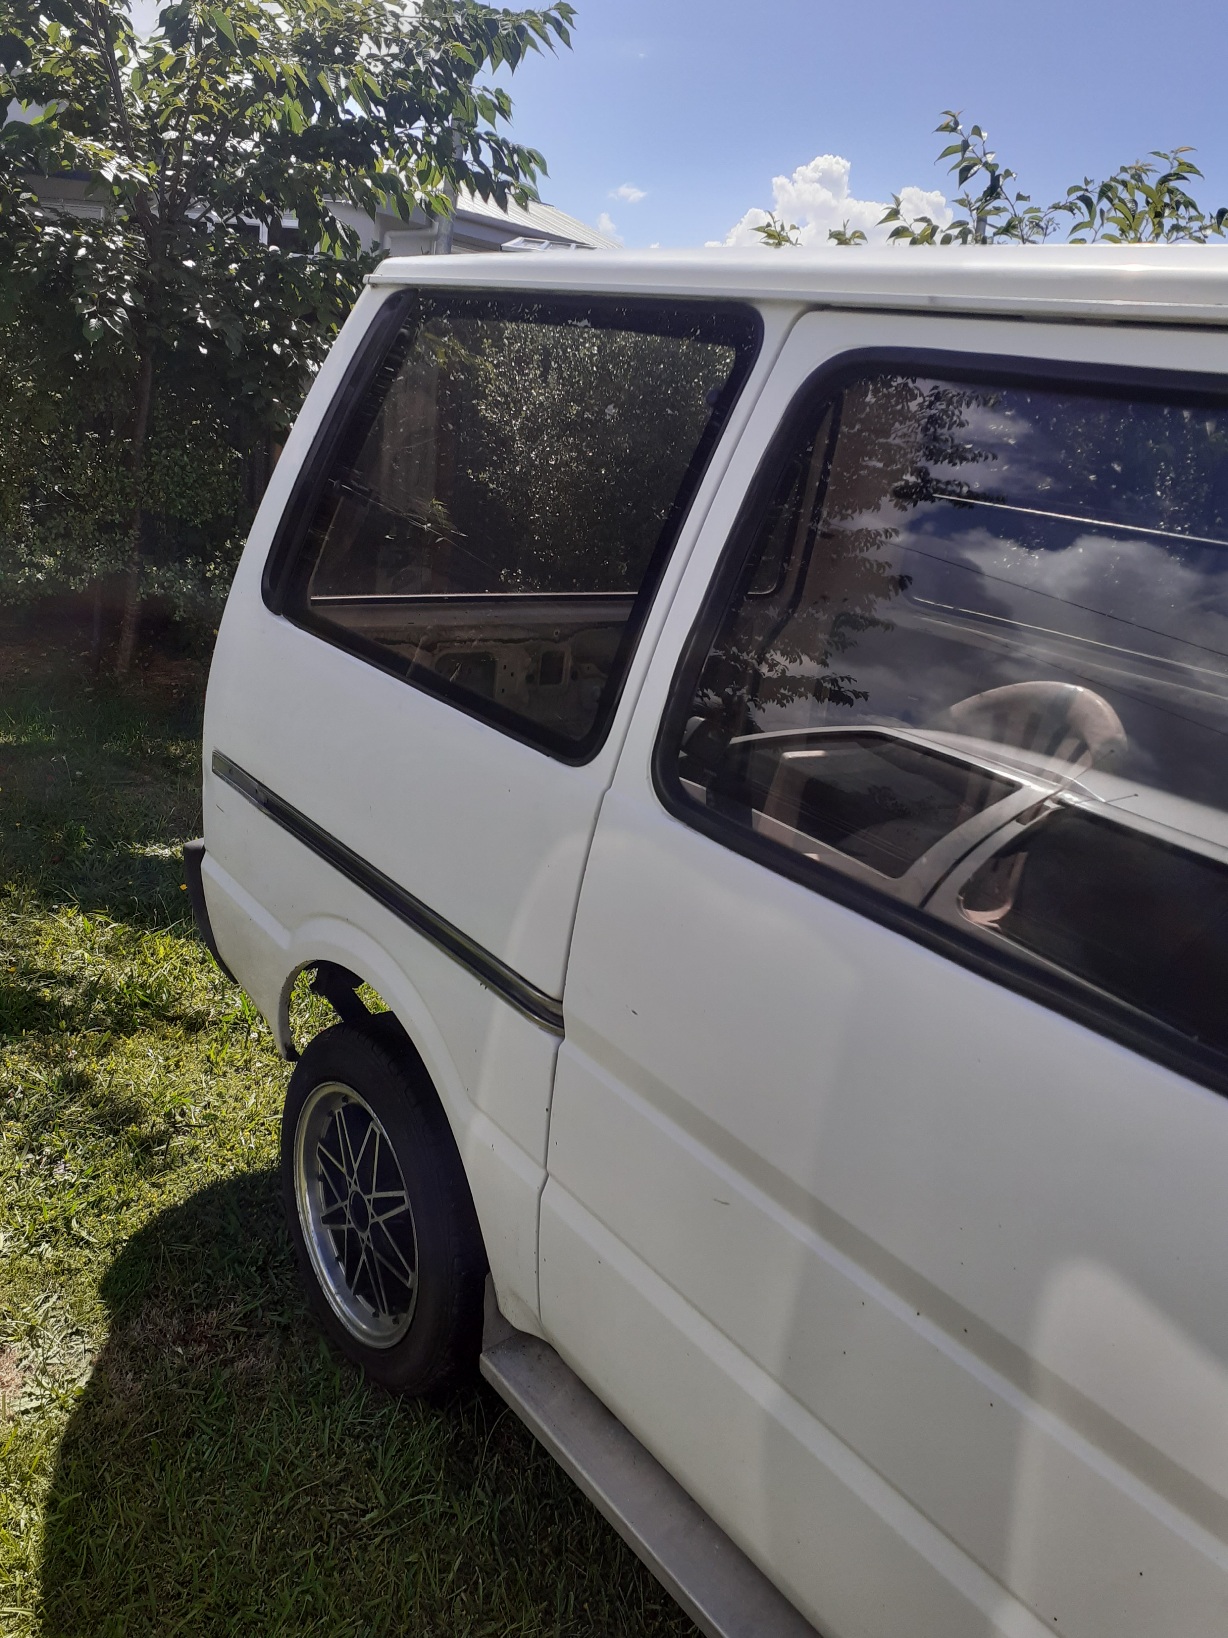
The old van keeps giving,.. the thin piece of aluminium disguised as a window on the rhs rear... not very secure So now it's got an opening rear window A donor car is soo good, 2 of everything and mix/match parts everywhere
1 point
-
Bolted more stuff back on
1 point
-
JB Weld is a miracle, when it hardened to a putty consistency I flattened it out, pushing it under the lip, and looked good (put it on dash of other car in the sun to speed up curing)... And cranked up good with no fuel spills, ran it 10 minutes to cycle coolant and cure header paint... And a quick hoon with no bonnet... No probs apart from some hoses needing tightening, plus the upper arm is pretty close to the tyres, hopefully an alignment will improve this... And bonnet on and time to wash off 3 years of storage dust and grime... to Mr Sparkle... And down the bottly for a celebratory ale... Another check and nothing amiss, still need to fit air cleaner and fan shroud, plus top up trans fluid... And deserved I reckon...1 point


.jpg.c73c65e0f682f001c3ba774da4a3bf16.jpg)


This leaderboard is set to Auckland/GMT+12:00