
Leaderboard


Popular Content
Showing content with the highest reputation on 01/03/21 in all areas
-
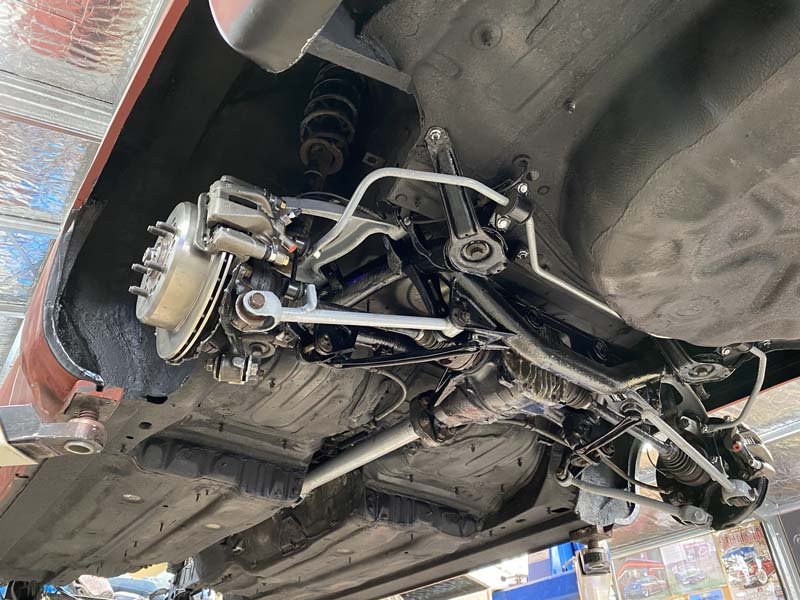
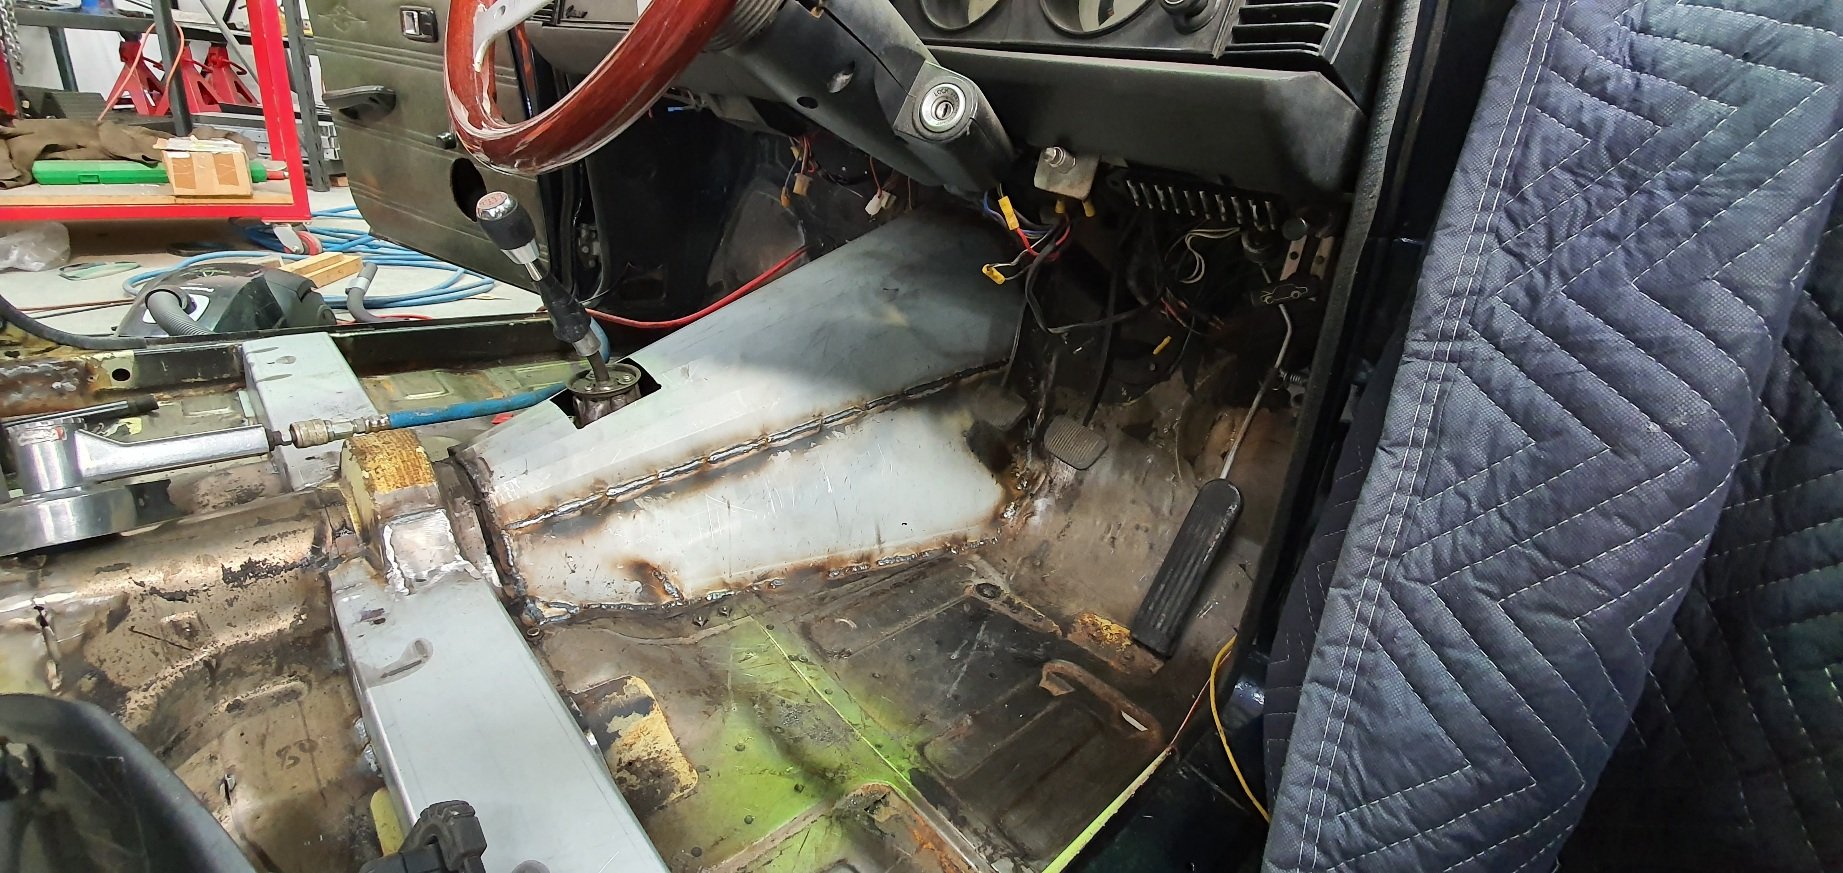
Made some more progress today, gave it an eyed up wheel alignment, fitted up the new booster and master cylinder, repinned all the door hinges, refitted the cert plate and cut off the old exhaust ends. Also pulled out the pedal box to give that a small birthday while it was easy to get to it. Back on its own 4 wheels for the first time in 9 months.20 points
-
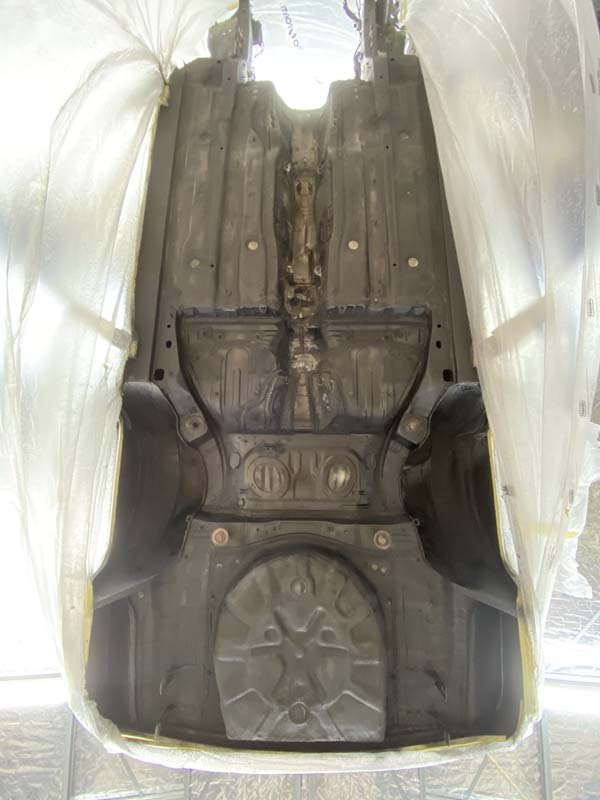
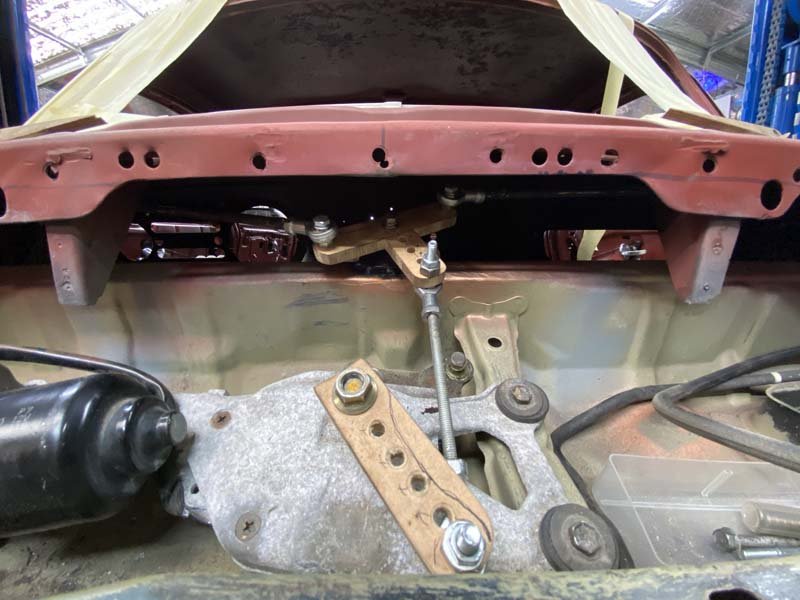
Seam sealed beneath and in the trunk. Undersealed over the seam sealer beneath. And while waiting for that to dry etc. I made a start on mounting the 50s chevy pickup wipers. Work well and much easier to purchase than the sedan's cable driven factory units. Then made a start on connecting them to the cut down lexus wiper motor. Is working Well. Even has an extra motor to park the wipers. Which should bring them to a rest on the windscreen rubbers very nicely. Will continue once Ulrich is back open again. So I can replace the wood. Today I reassembled the rear subframe and reinstalled.
 11 points
 -
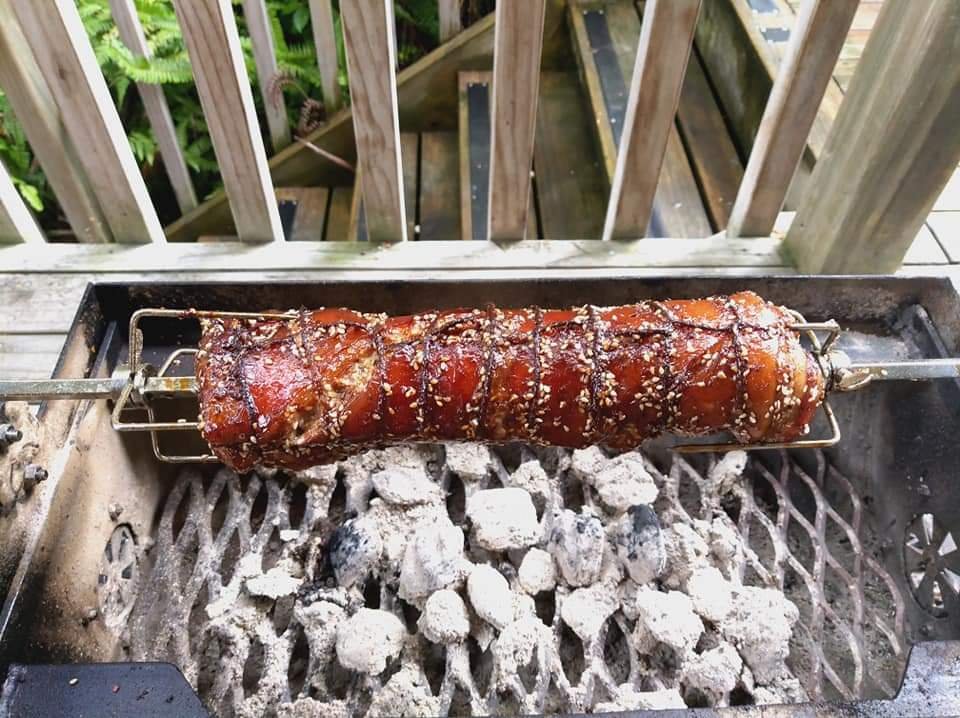
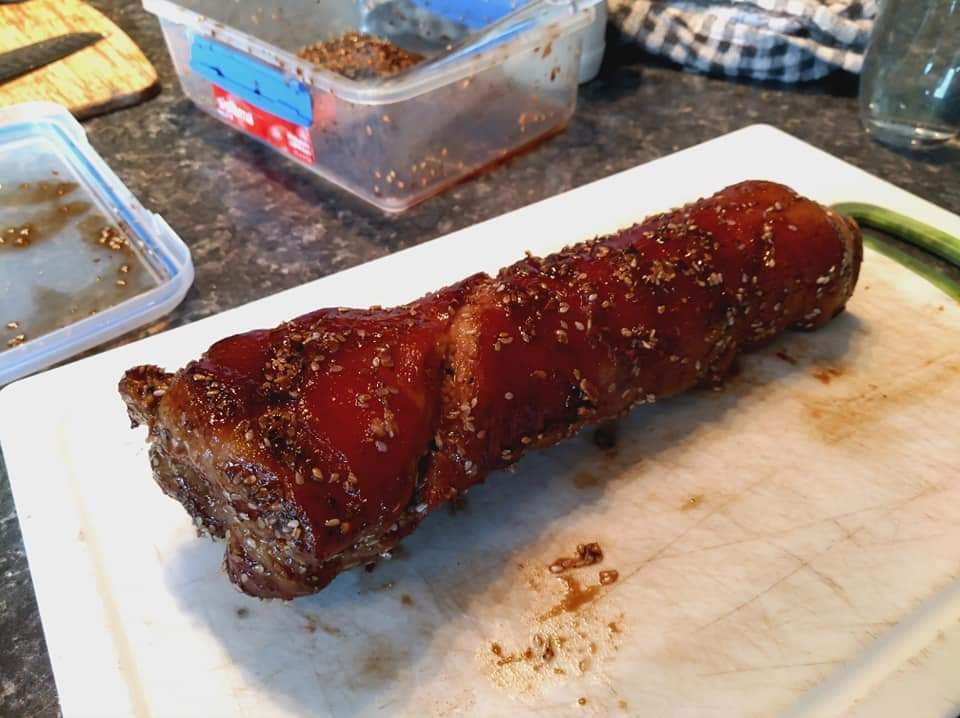
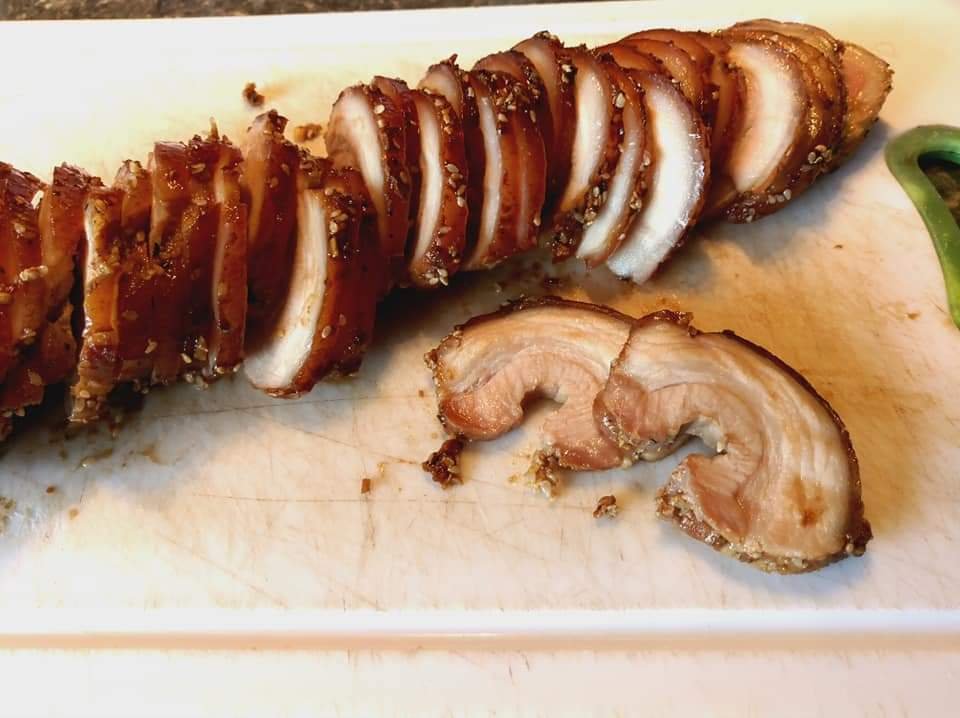
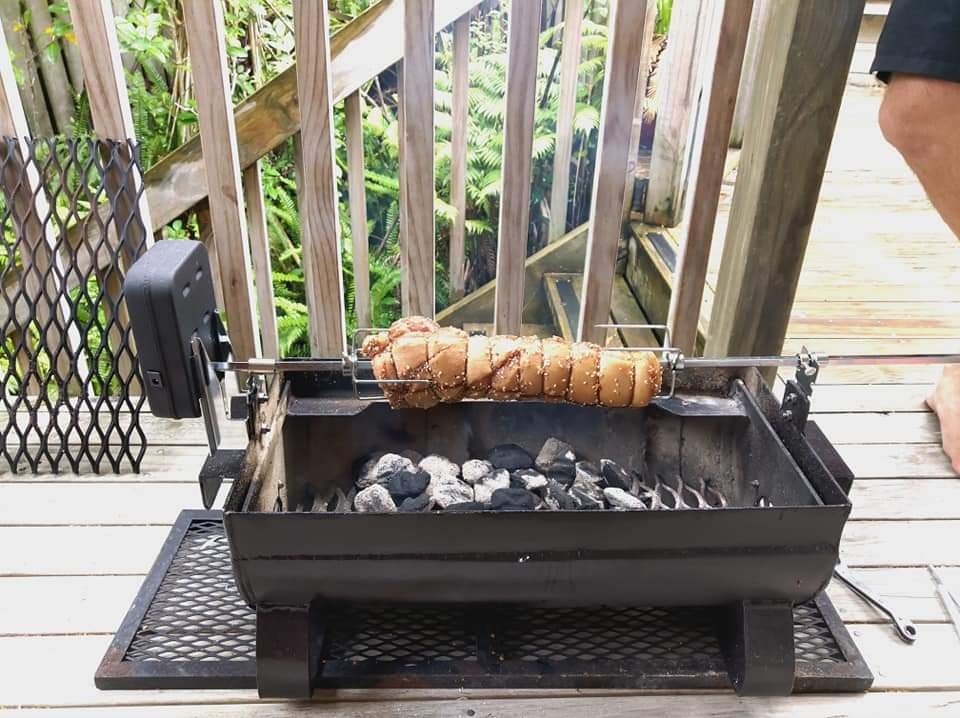
After 2 hours on the rotisserie and the internal temp to just over 60 I took it off, wrapped it and let it rest for about 20mins. Removed the string and cut it up and damn, not too bad. Juicy and tasty as, sticky on the outside. Made a quick sandwich for a snack and will be using it in noodles tonight. Probably freeze some of it for future ramen.
10 points
-
Got the sump inner core pattern assembled and painted. Should be a lot easier to sand than the outer pattern! This gives a visual on what its making. The main inner core. A couple of smaller cores attach to it.9 points
-
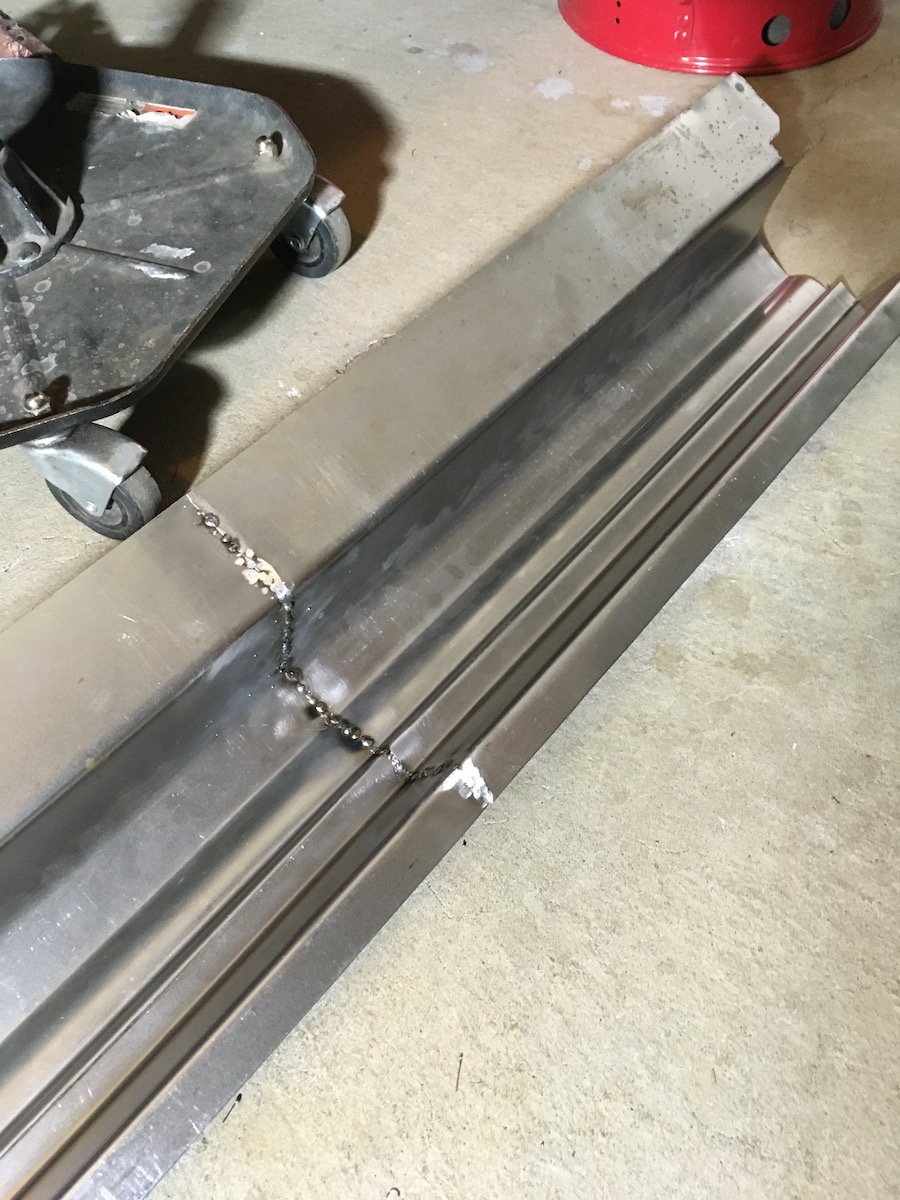
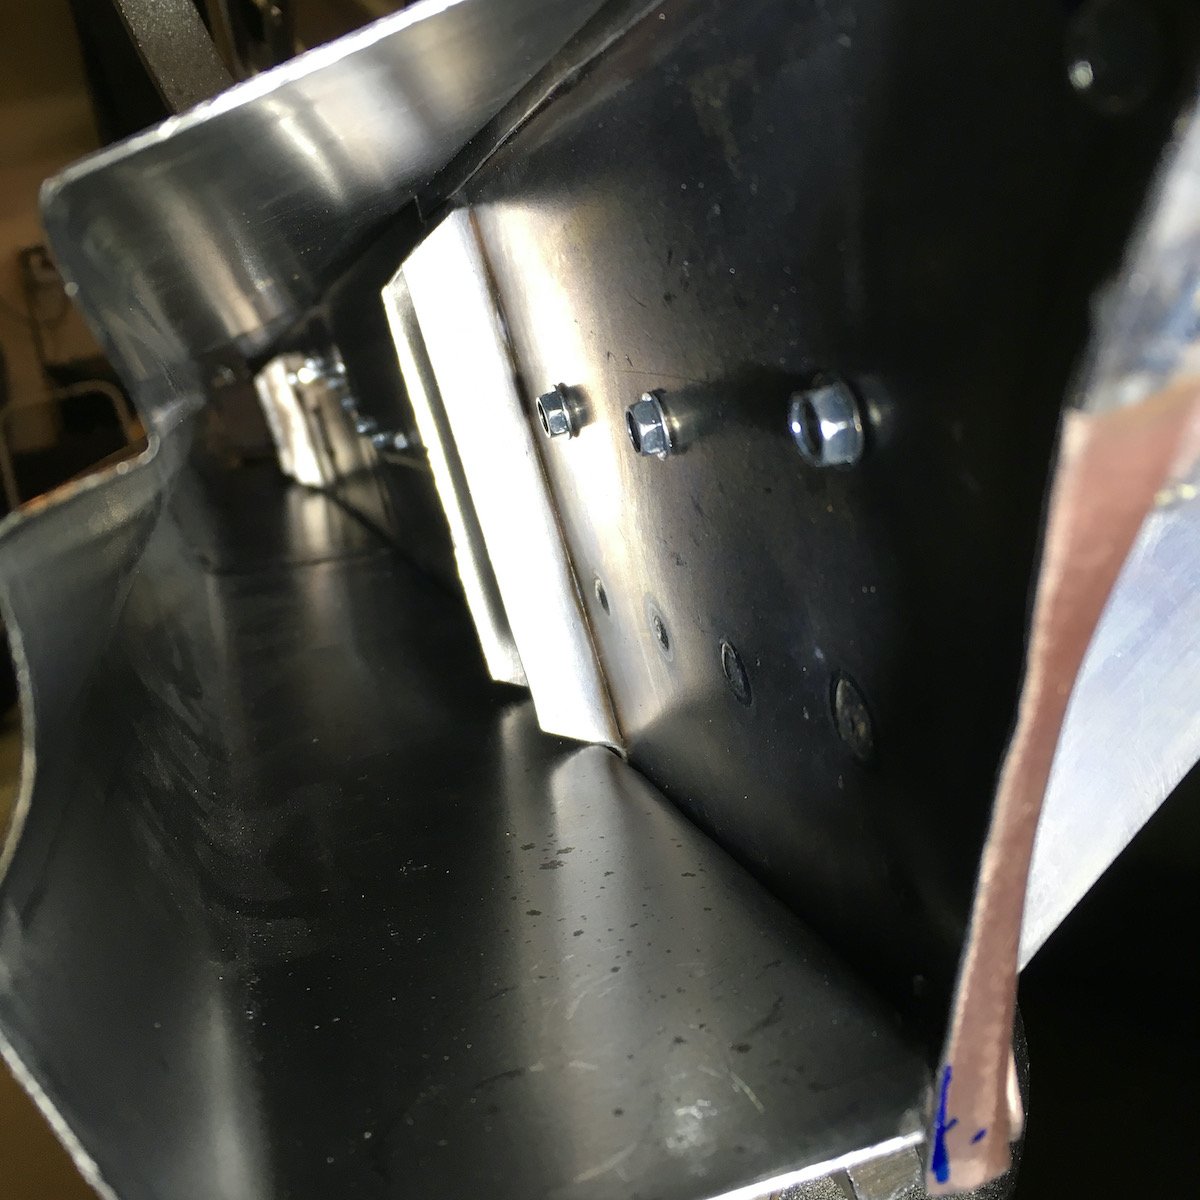
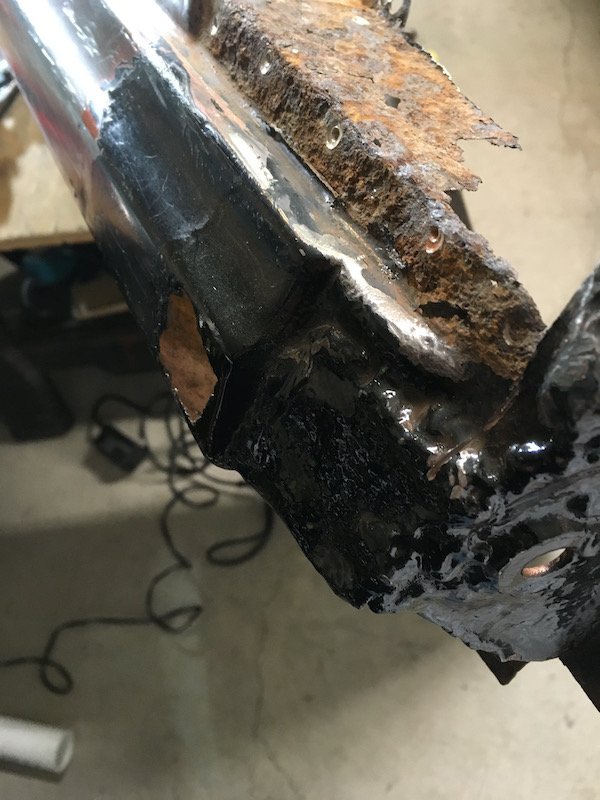
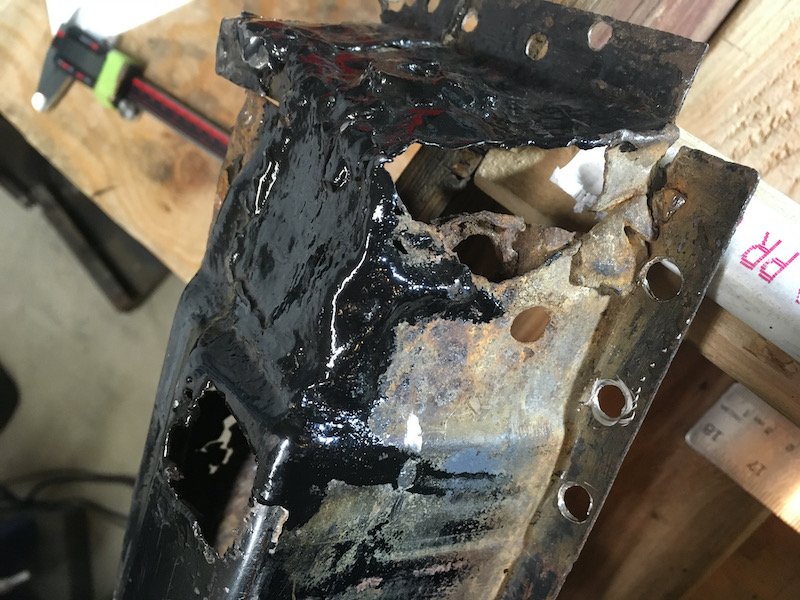
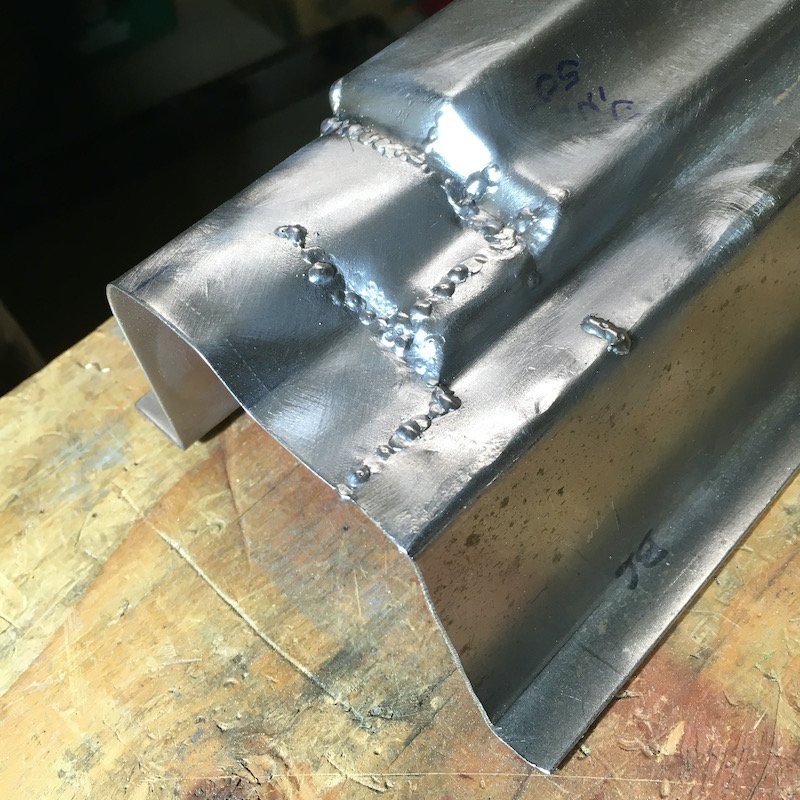
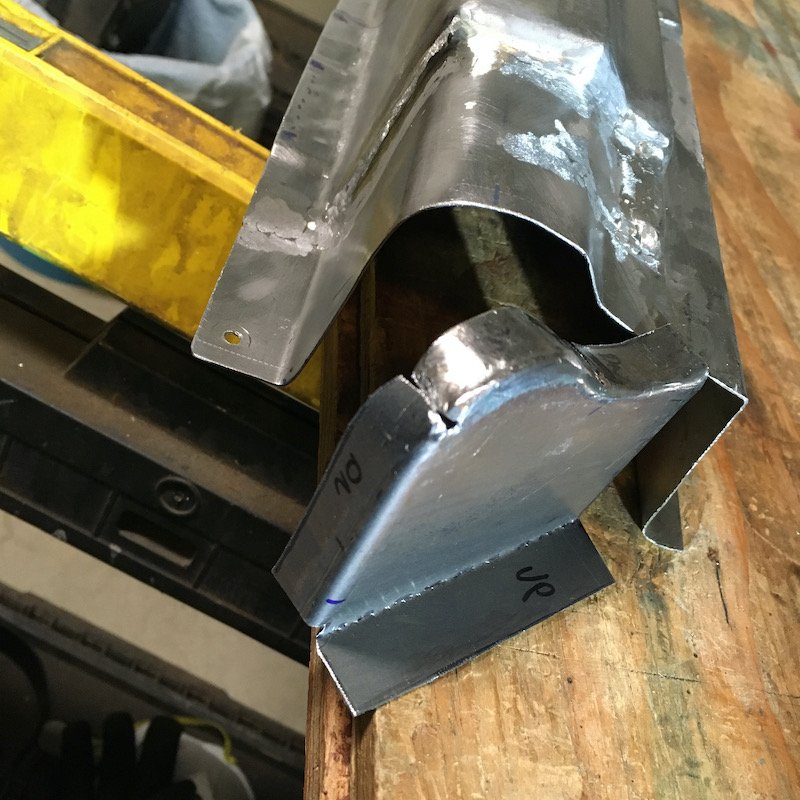
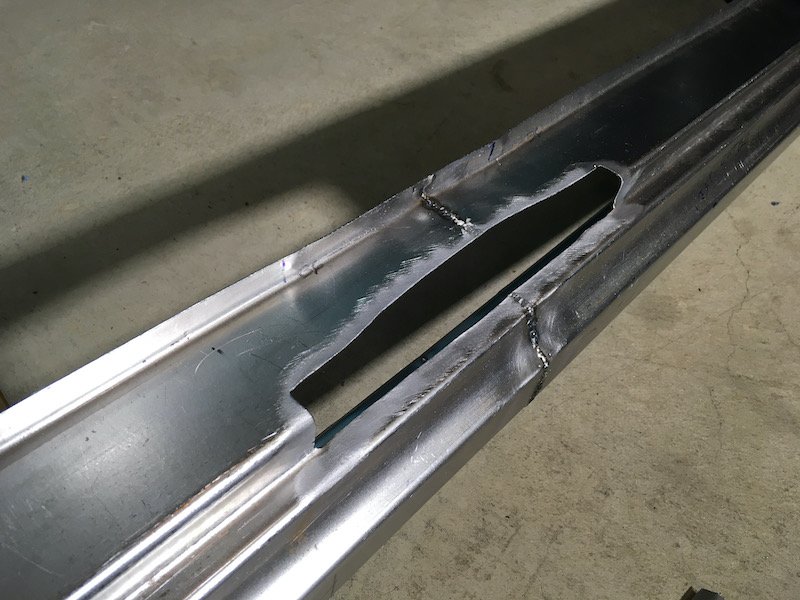
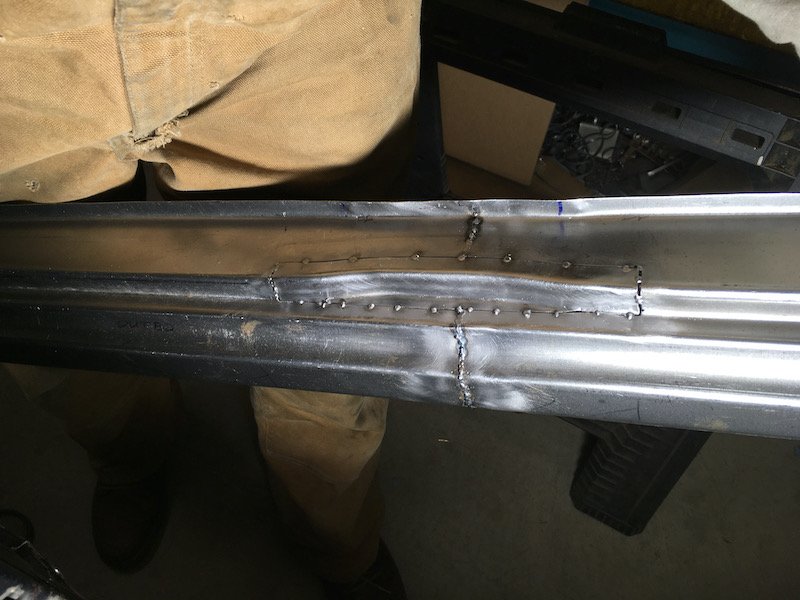
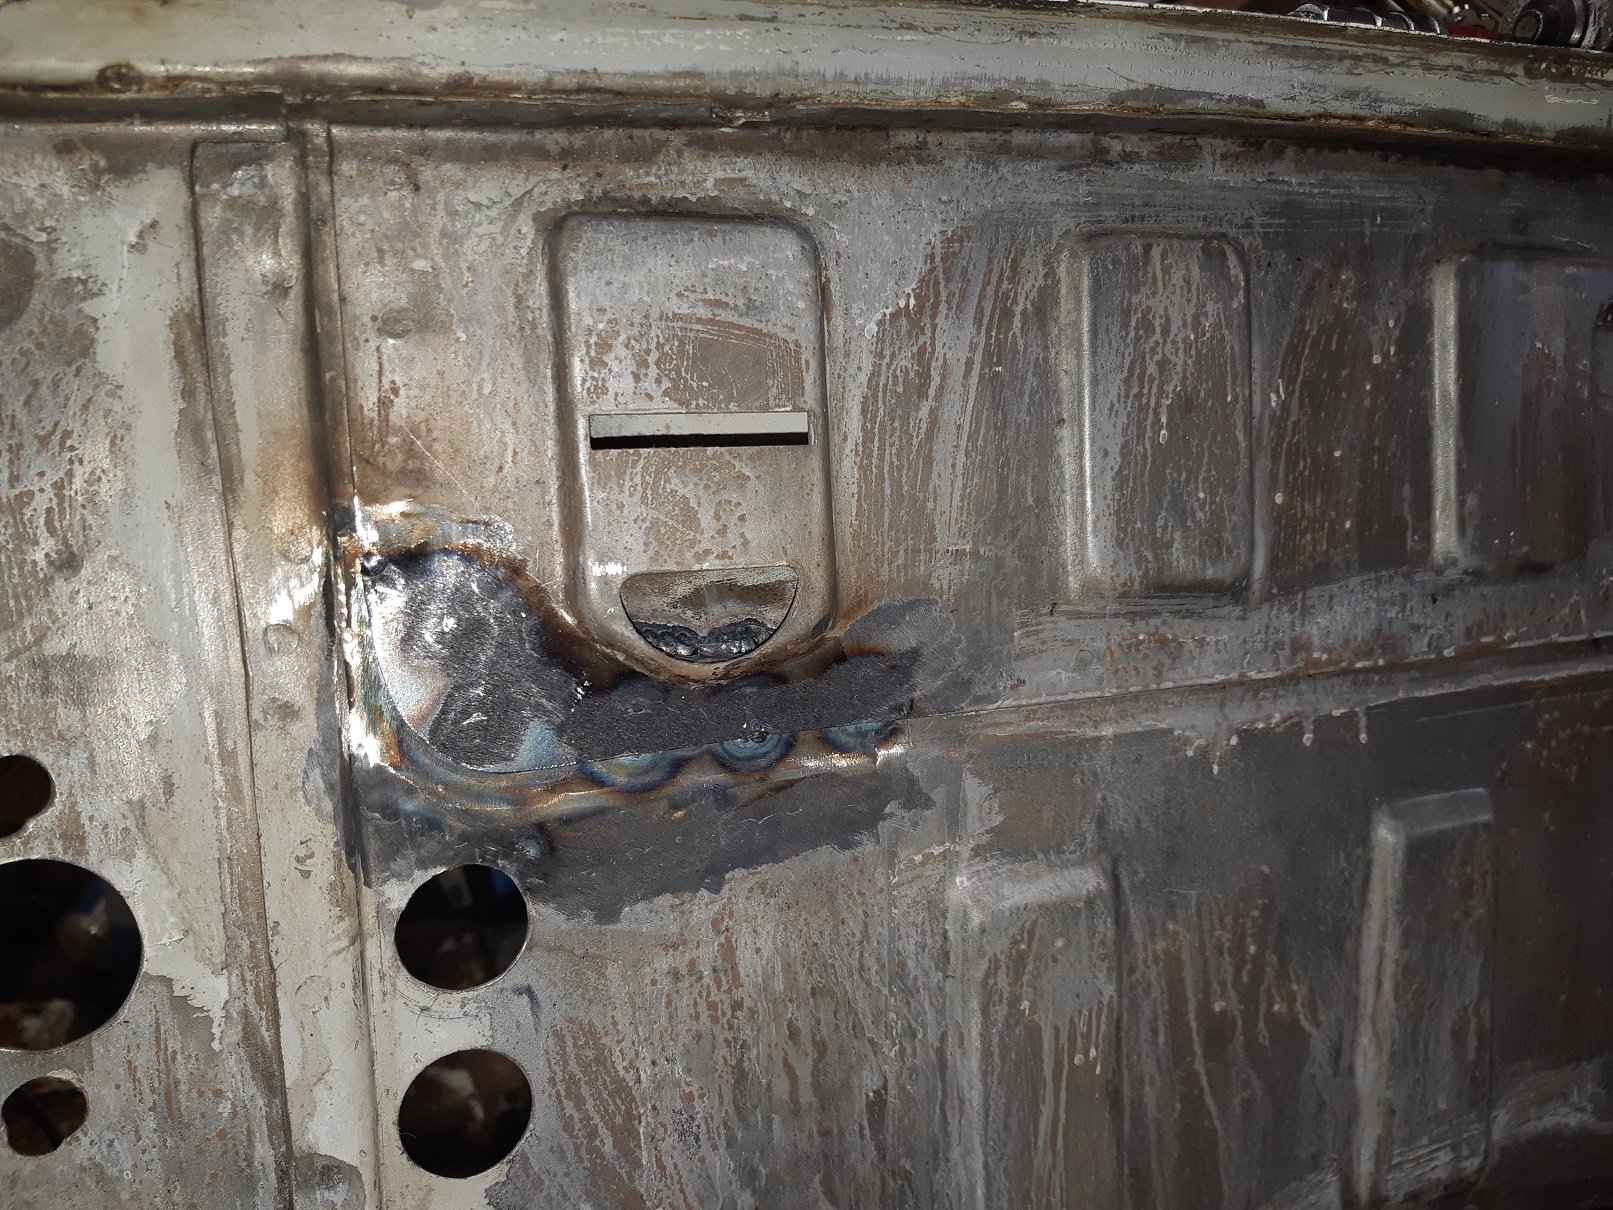
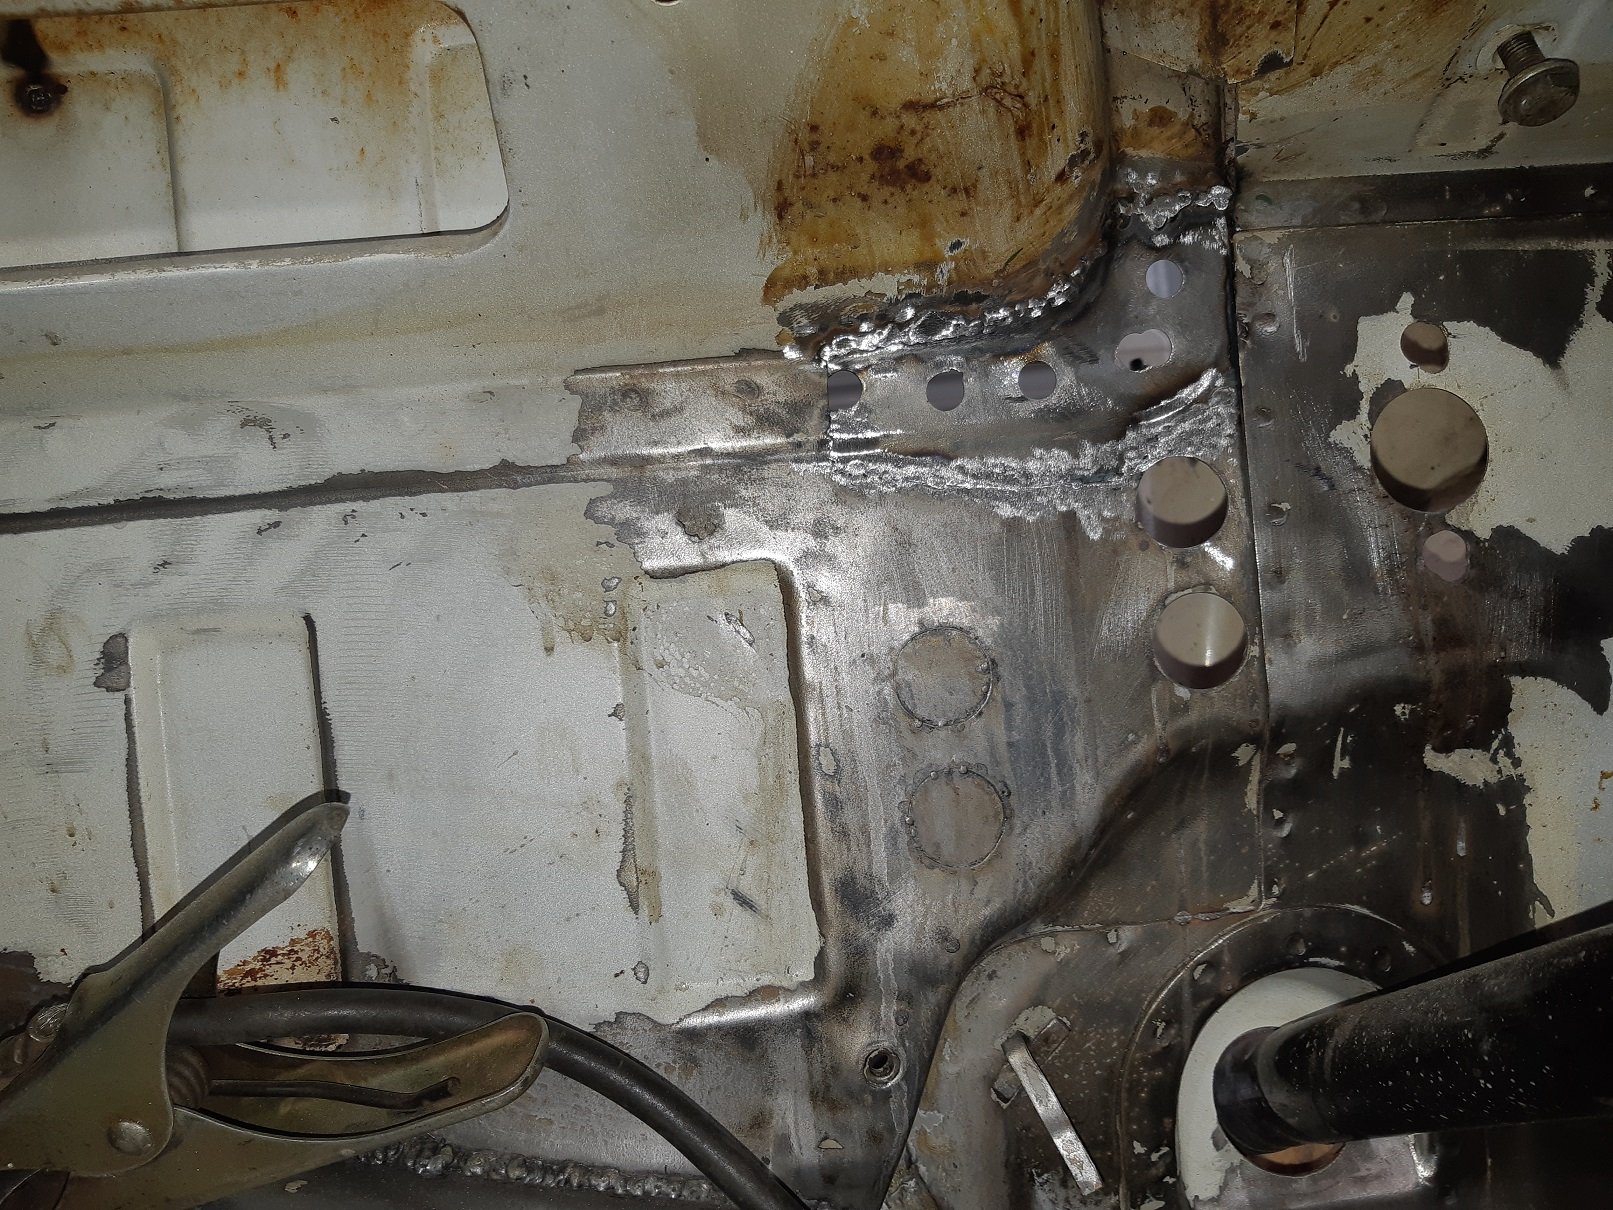
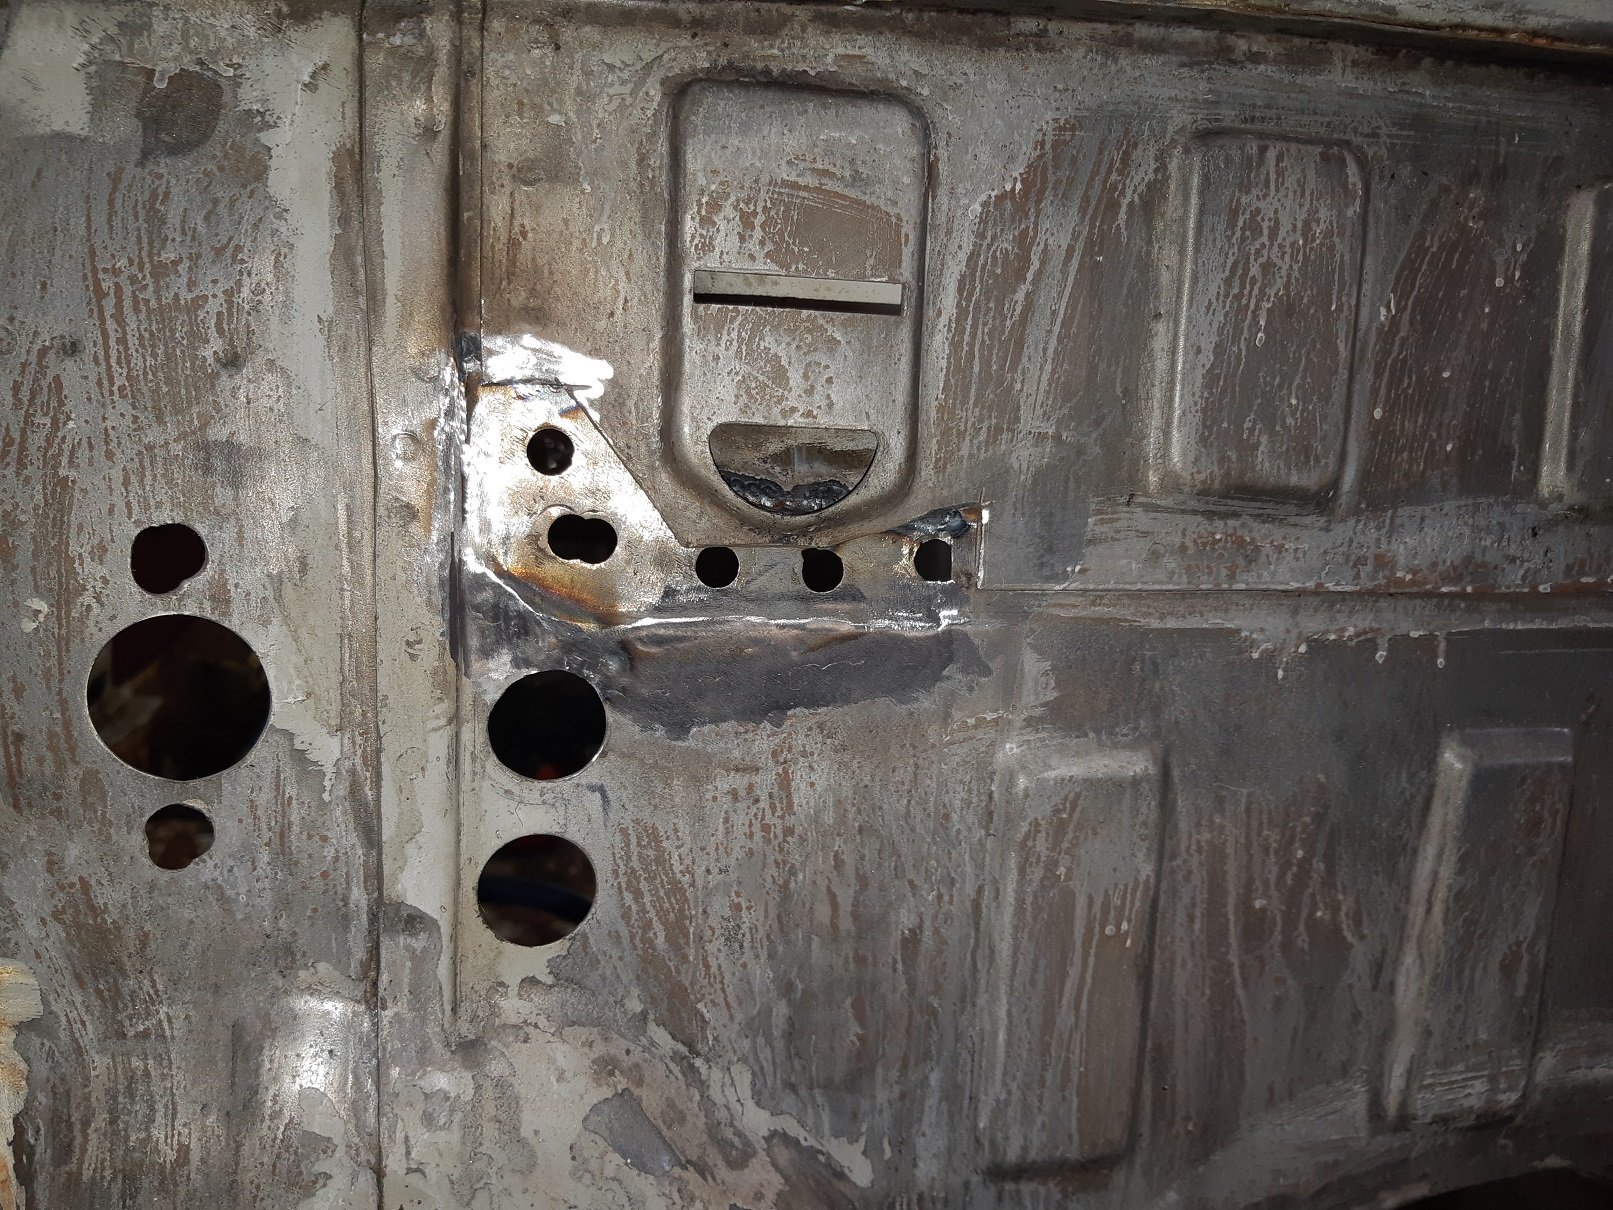
Building the 1961 Datsun 310 Bluebird - RHS Outer Sill Weld Together and Details. Time for an update reporting progress on the RHS build. Outer sill segments are welded together, including most details; end stub, end stub cap and inward joggle at B-post base. Lower A-post below the belt line and down to the sill (about 2 feet w/hinge mount points) is fabricated, tack welded together and temporarily fitted (mock up installed with Teks). The Inner body skin behind the A-post is repaired with another patch. The RHS front door hinges are rebuilt. Both RHS doors were dragged out of the backyard shed, temporarily installed and checked for fitment with the other repairs and all is well. The lower half B-post repairs are underway and nearly complete. Posting the outer sill progress/pics. Other stuff noted above to follow later. The three RHS outer sill segments welded together. Fully welded on both sides since outer is to be sanded flush. Trimmed and fit checked. Kept the weld heat under control by alternating tacks between the different joints and sides and it all came out exceptionally straight. It could have easily warped and created a nightmare. I don't recommend this approach but with a cheap 18 inch metal folder it was the only way to make it. Looks good enough now to proceed with the forward end stub. Next, making the RHS outer sill forward end stub. What follows is the detail required to allow the sill to have clearance with and tuck under the inner front fender support structure. I had no reliable original stub to copy from and just made my best guess to reverse engineer this new stub from the mutilated mess of the original as shown in the pics below. I got lucky and it does test fit snugly with the inner fender structure with just a millimeter or two of clearance. Then, after dressing the stub welds, I made a forward end cap to fit it based on best guesstimate. Stuck it together using a resistance spot welder from Harbor Freight. First time use where I may have been holding the dwell a bit too long. It's permanently stuck on at any rate. In preparing for future repairs and fitment work on the B-post, I made a cutout about mid-length down the outer sill to fit the base, same as on the original. Then filled it in with a custom small inward joggle piece that, though small, took several hours to build. Tacked it in and left it that way for now until the B-post is complete and fit is assured. Made several other minor joggles along the pinch weld flanges to accommodate overlap of bracket flanges and such. Not worthy of pics. That's it for this post on the RHS outer sill. As mentioned in the beginning of the post, hopefully more to follow soon. Discussion: https://oldschool.co.nz/index.php?/topic/60267-marts-pl310-61-datsun-bluebird-sedan/ Build: https://oldschool.co.nz/index.php?/topic/60264-marts-pl310-61-datsun-bluebird-sedan/
7 points
-
So we did a few things in between family obligations. We replaced the oil and oil filter - well partner did, I remain an oil change virgin. Not too much mess, at least nothing a rag and some dirt won't clean up! We found top dead sexy and got the distributor installed - 50% chance it's right, gotta figure out if it's on the compression stroke but #1 cylinder is too hard to reach rn - we'll find a cork or something. We also dropped the dizzy nut and it entered a portal to another dimension. So now a windscreen wiper needs a new nut. We followed this guide and so have the timing 10 units before TDC. Pulled all the spark plugs to check them out, visual inspection seems good even if they're two different brands for some reason. Metal isn't bent, can't measure gap but it seems okay, no crazy build up of stuff, threads are dry (ignoring penetrating lube), except... ... #3 is cross threaded >.< It took most of my strength w/ a breaker bar to get out and required the use of the bar for almost the entire journey out. It's definitely the socket that is the main problem as other spark plugs struggled to go back in too. The socket itself looks like it has some crap in it - I got a pokey magnet in there and drew out a fairly substantial amount of shavings and dust from the threads, but... eek. Down the line we'll try a back tap and see if we can avoid removing the head. We're still lacking the dizzy cap (on its way) but we hooked all the bits back up and the battery and tried to turn it over just to see if that was all good - but nothing, just a click. Full charge on the battery with plenty of CC's tasting like these. The click doesn't seem to come from the starter but rather inside the car on the passenger side which is confusing, but the day was long so we called it there. To do: figure out exactly what's making the noise, also remove starter and see what it looks like / poke it with some electricity. ---- Bonus older gif: pop pop up and down headlights! The left hand horn likes to sound when the lights pop up. I'm guessing there's a short somewhere. The left light also is sliiightly slower to come up giving it a lazy eye effect. Features?7 points
-
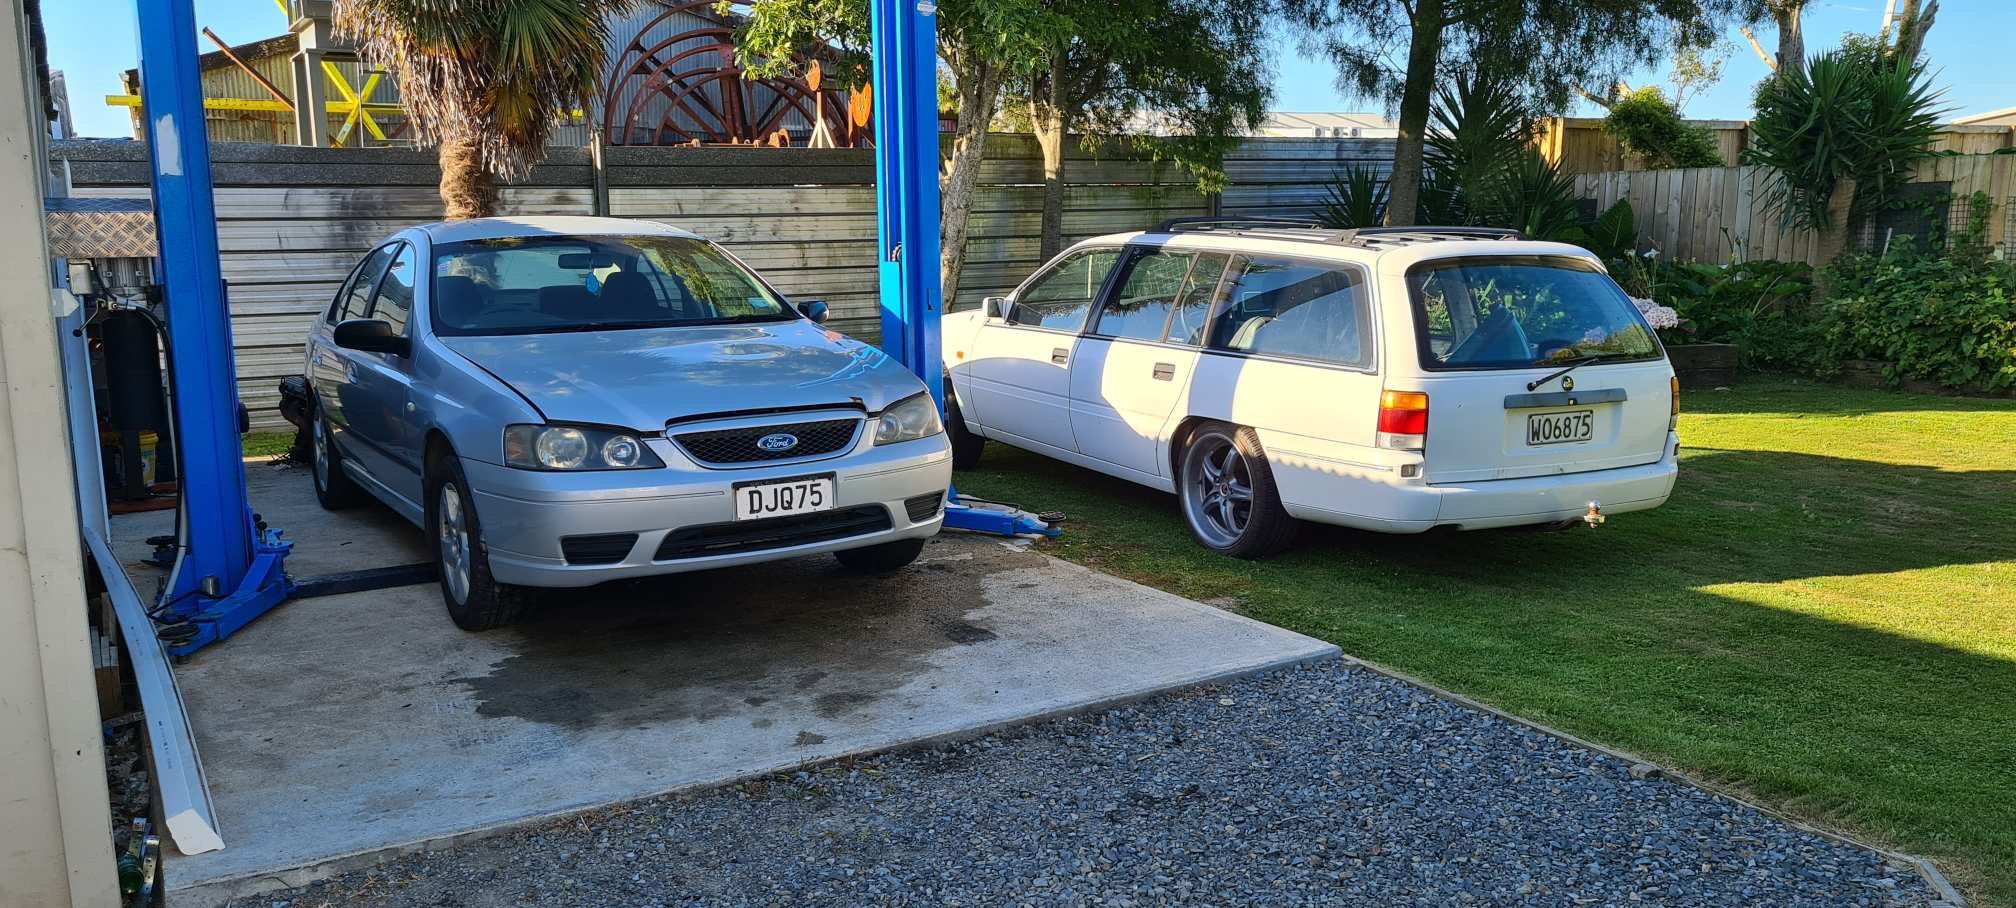
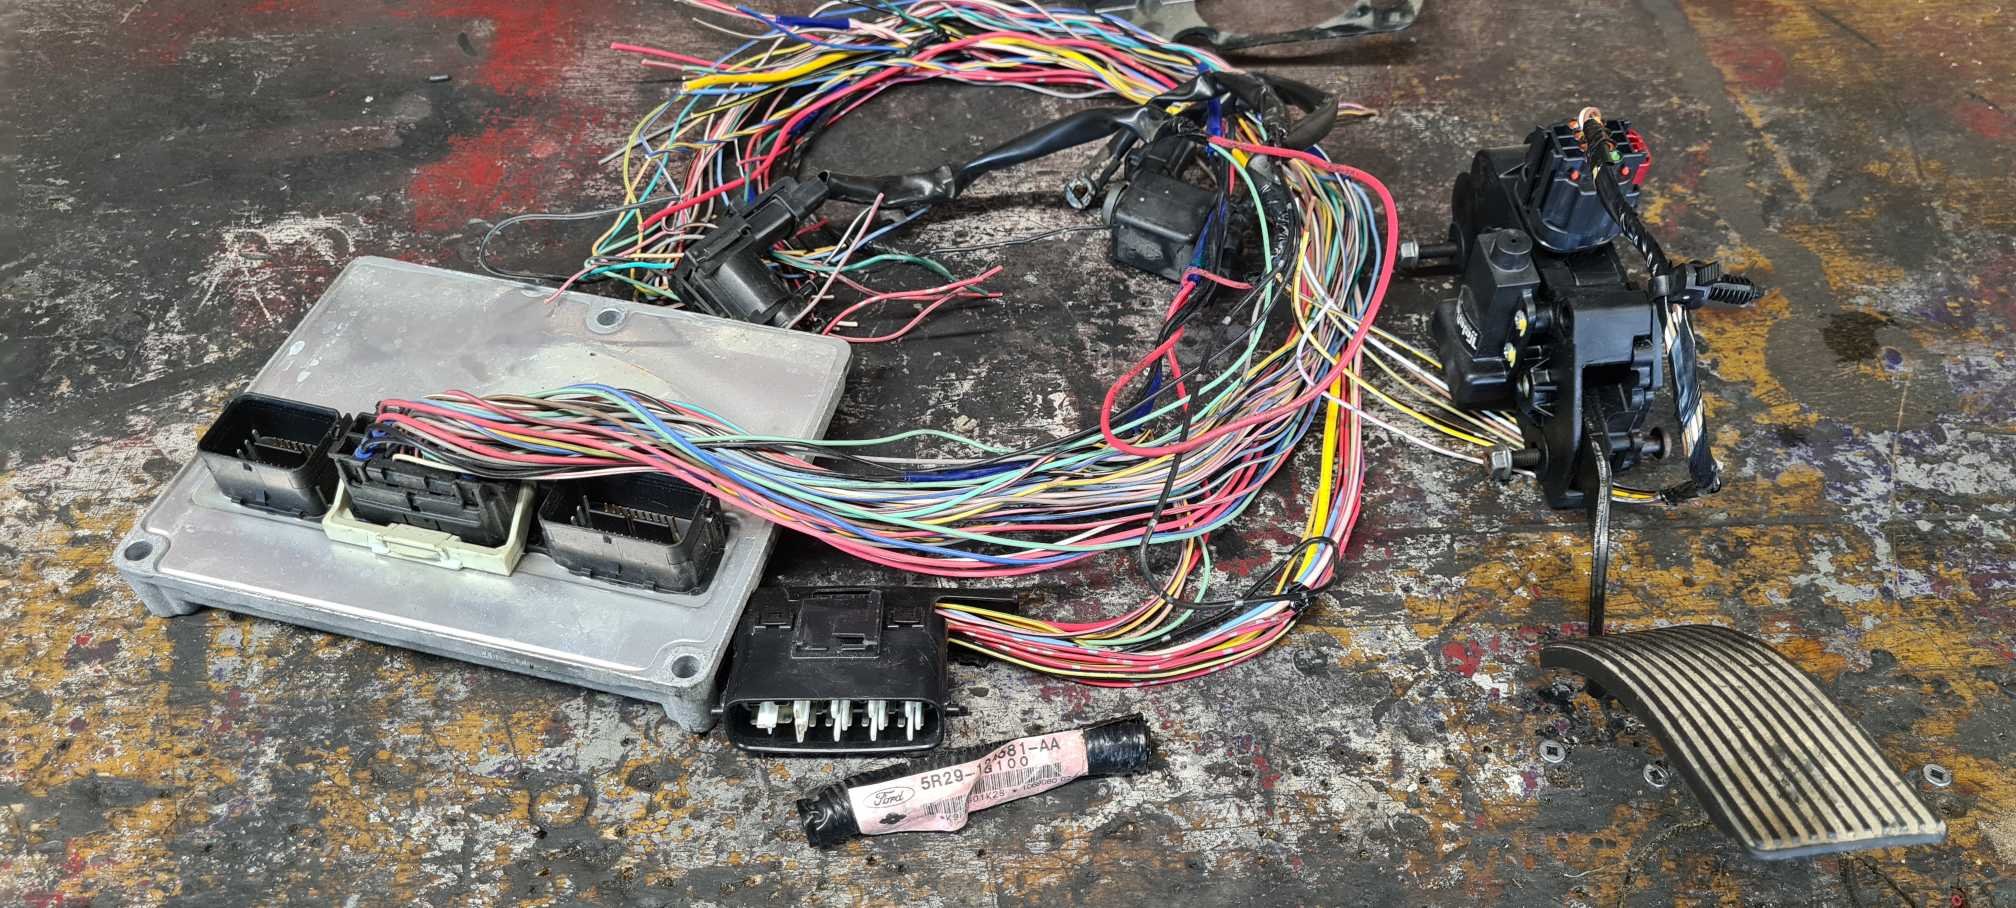
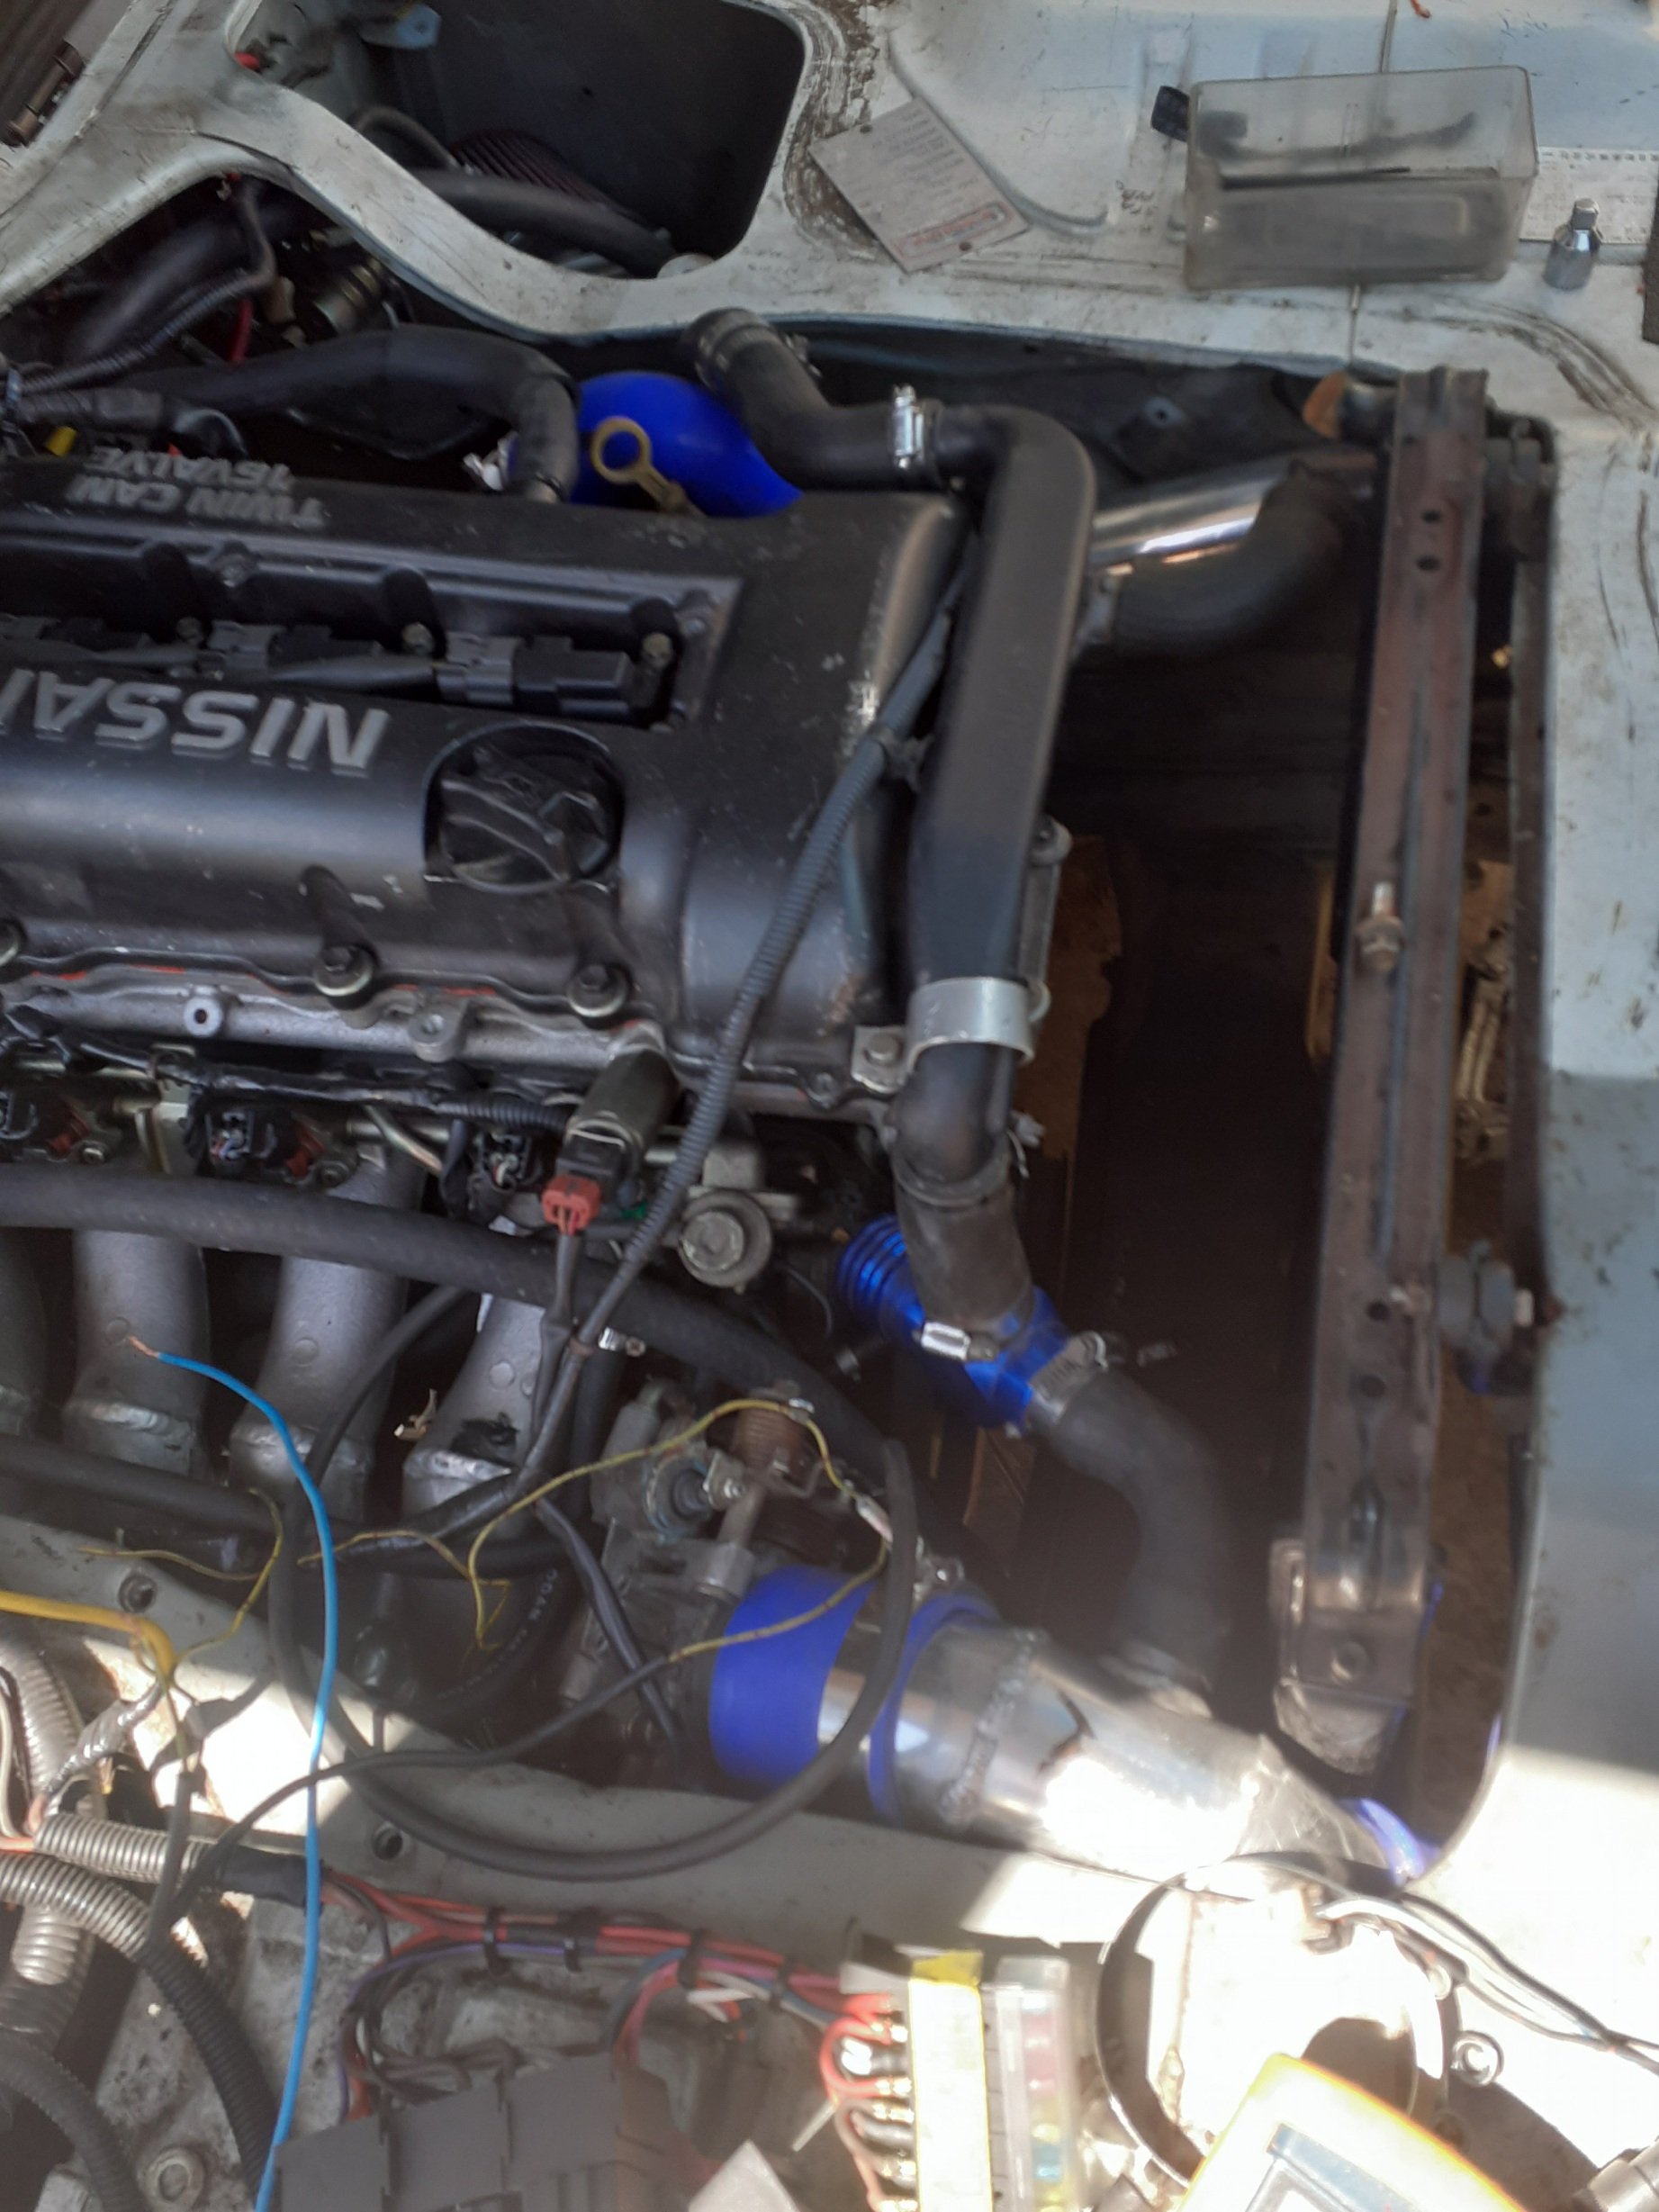
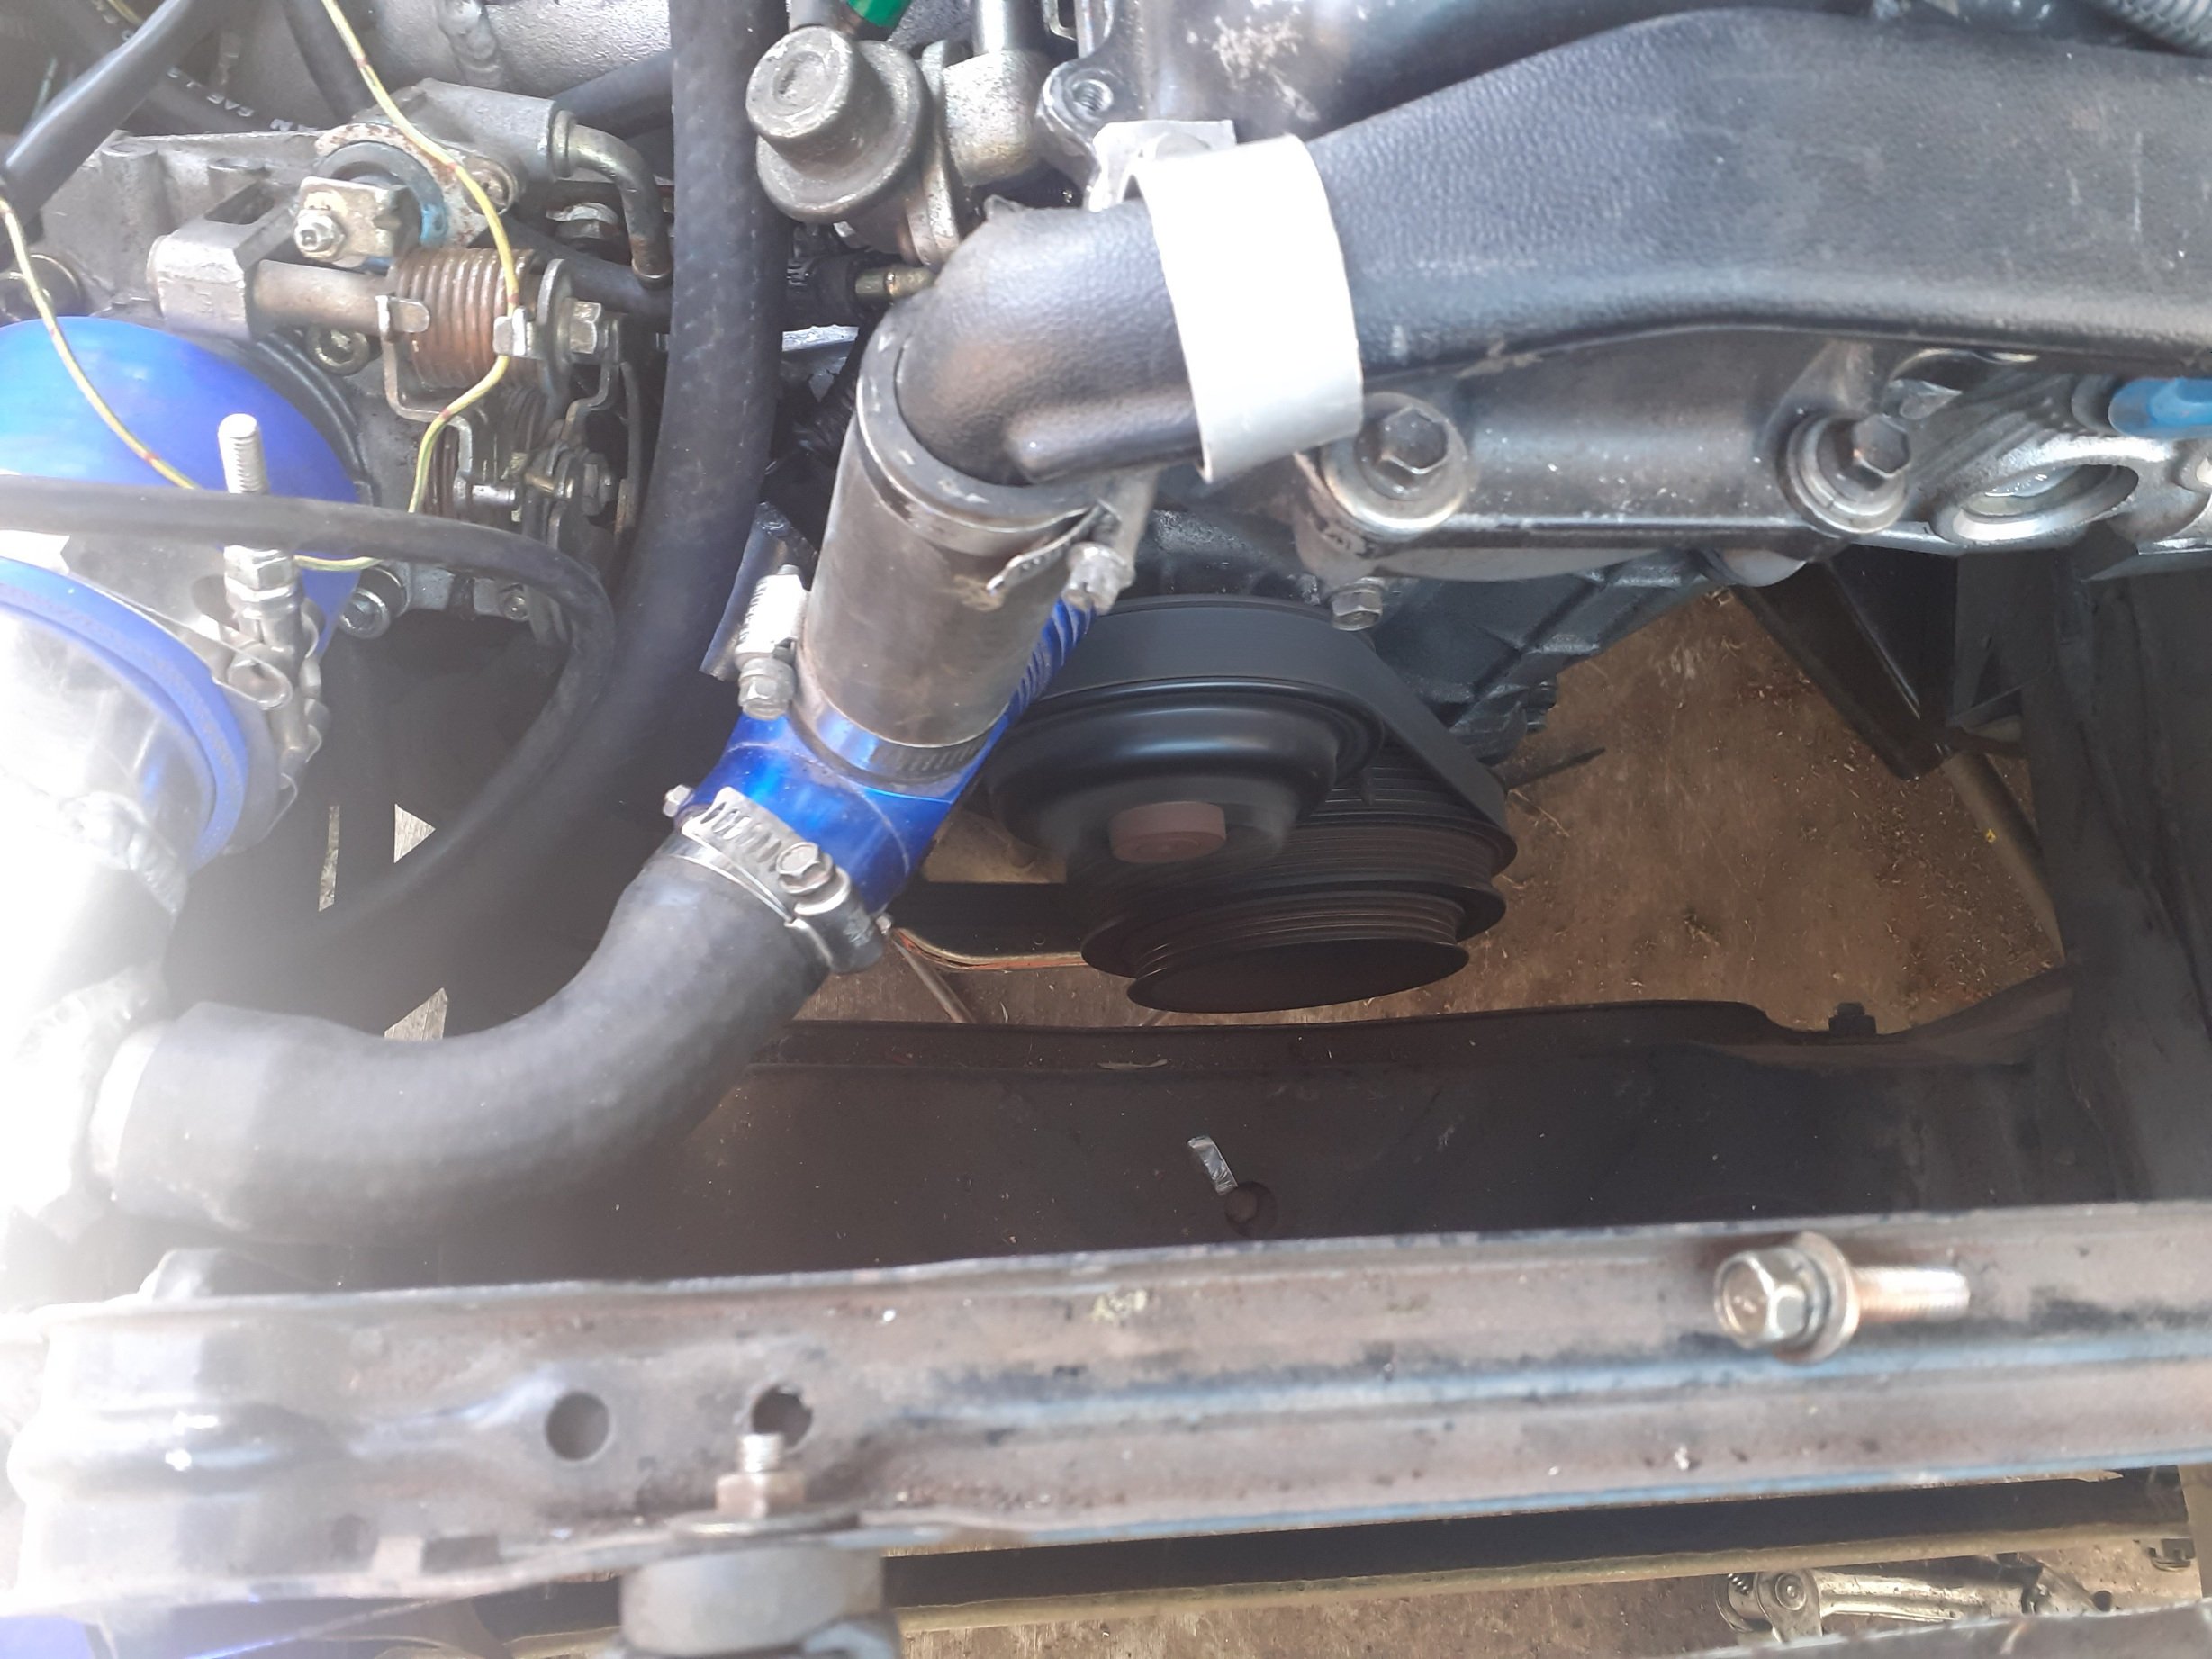
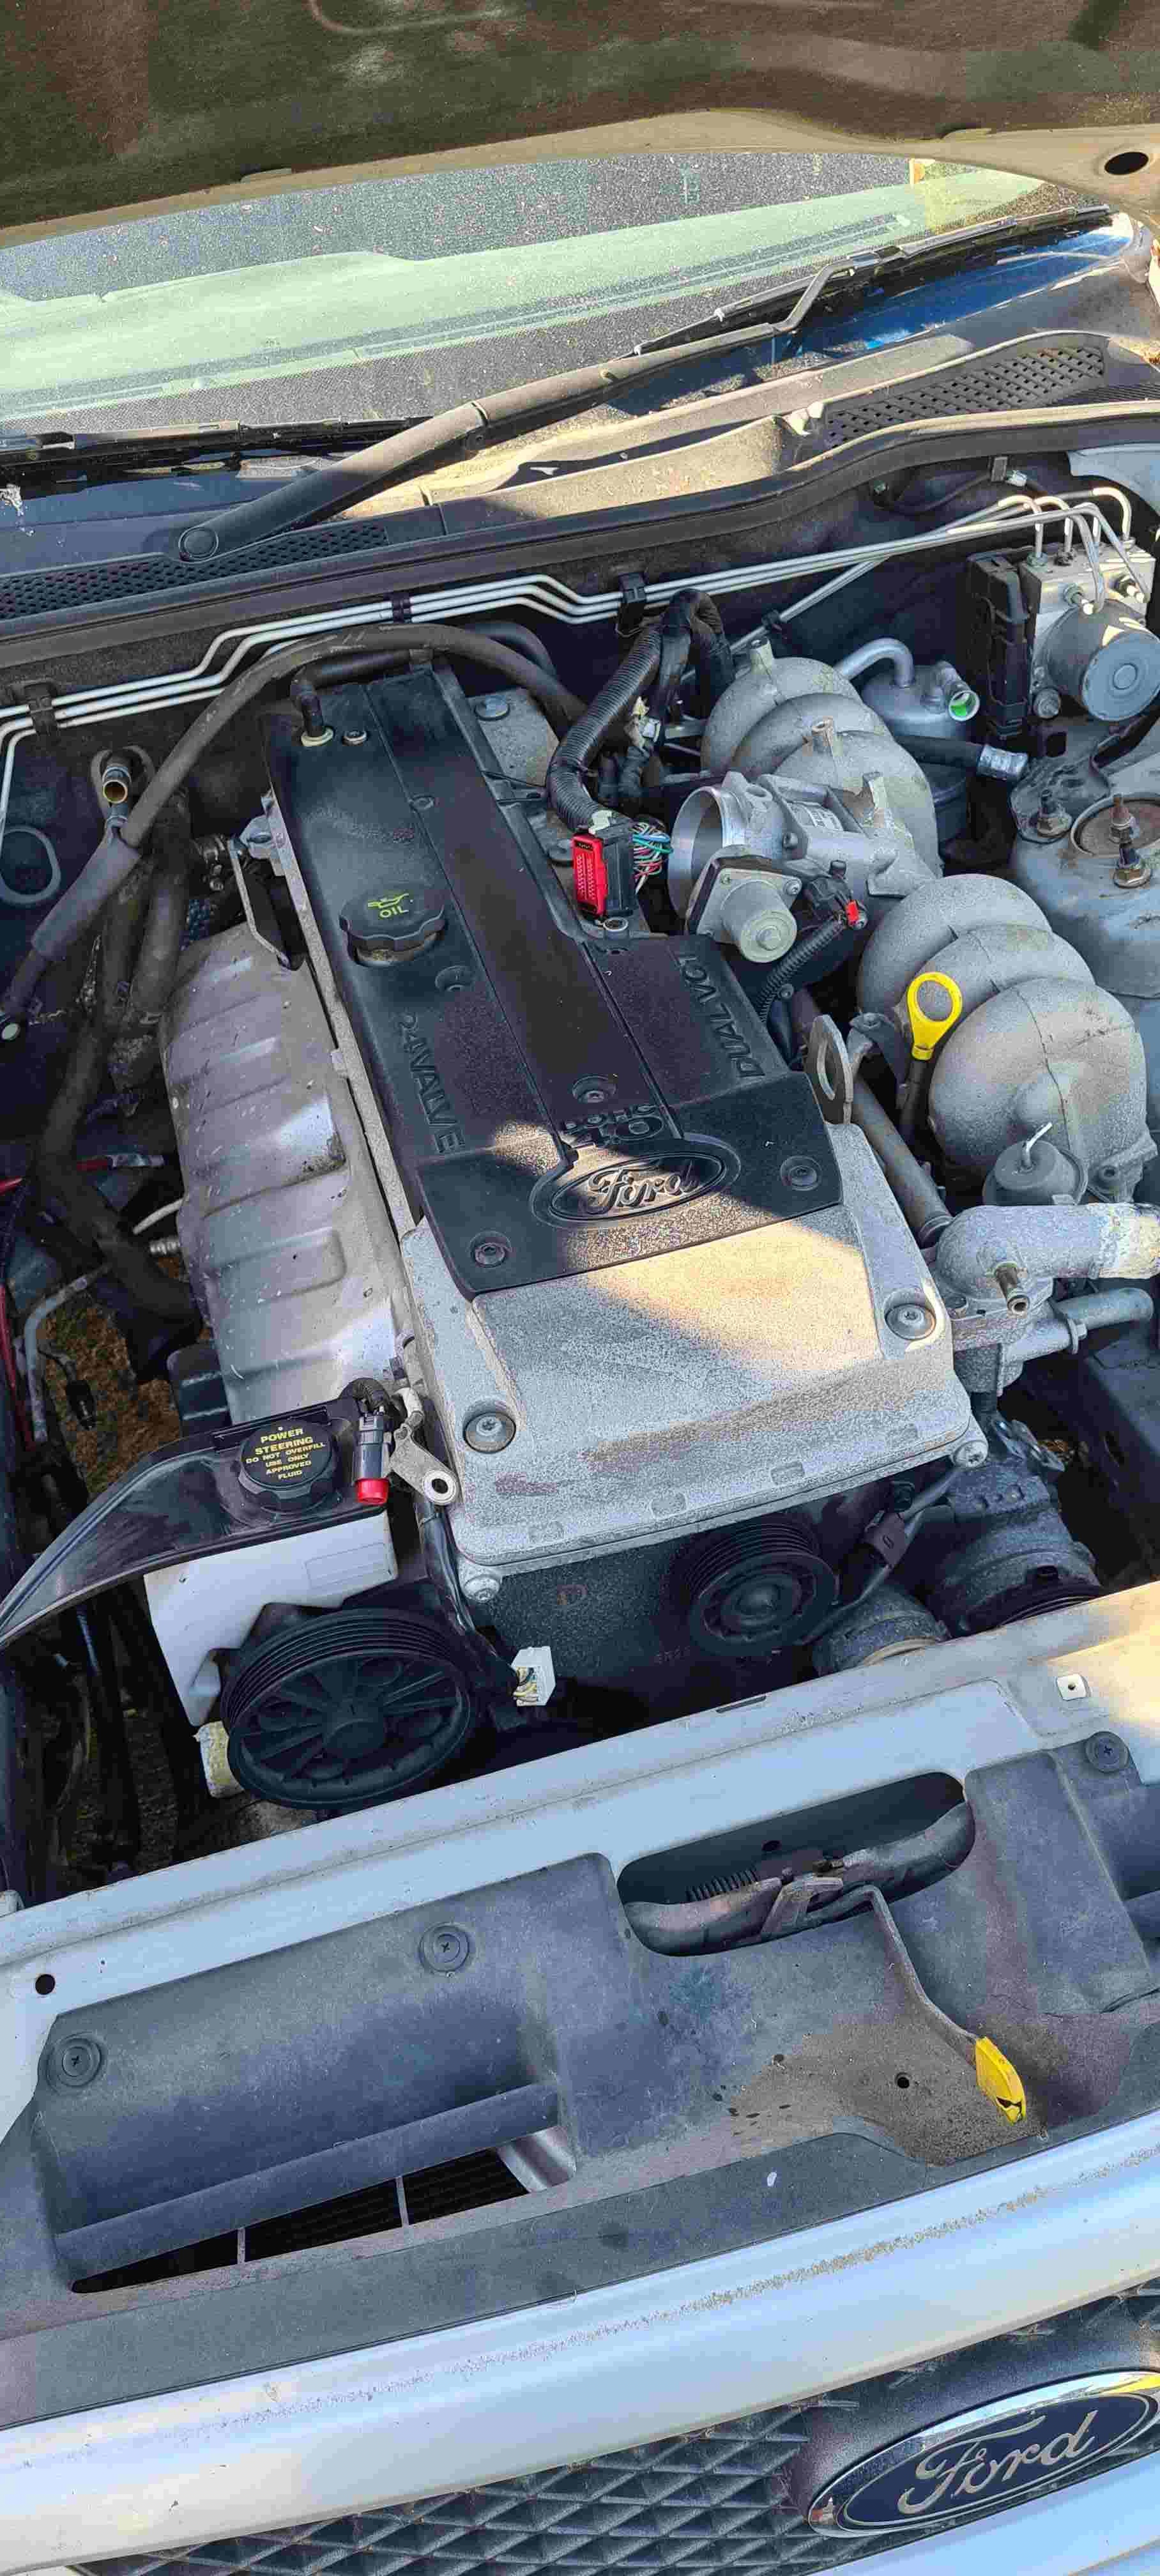
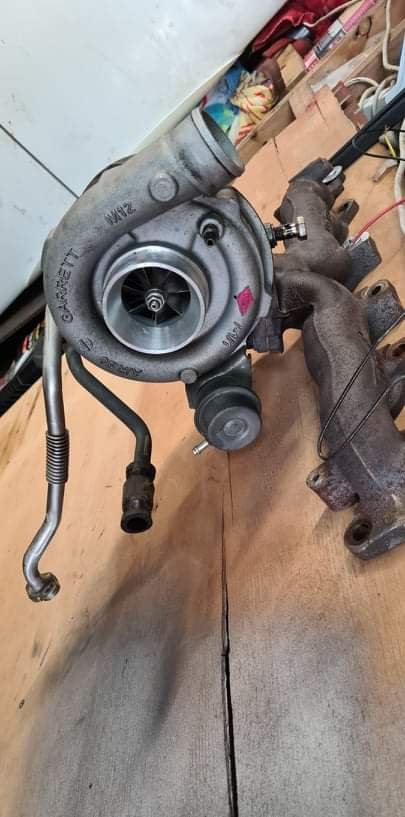
Pulled the engine out of the falcon and got all the turbo goodies bolted up, been setting up the ECU to take the Fg throttle and injectors and converting the tune file with HP tuners while on nightshift, should have the engine wiring finished off in the next day or 2. Getting rid of the falcon body soon so will get the wagon back on the hoist and look at getting the engine in and mounted
6 points
-
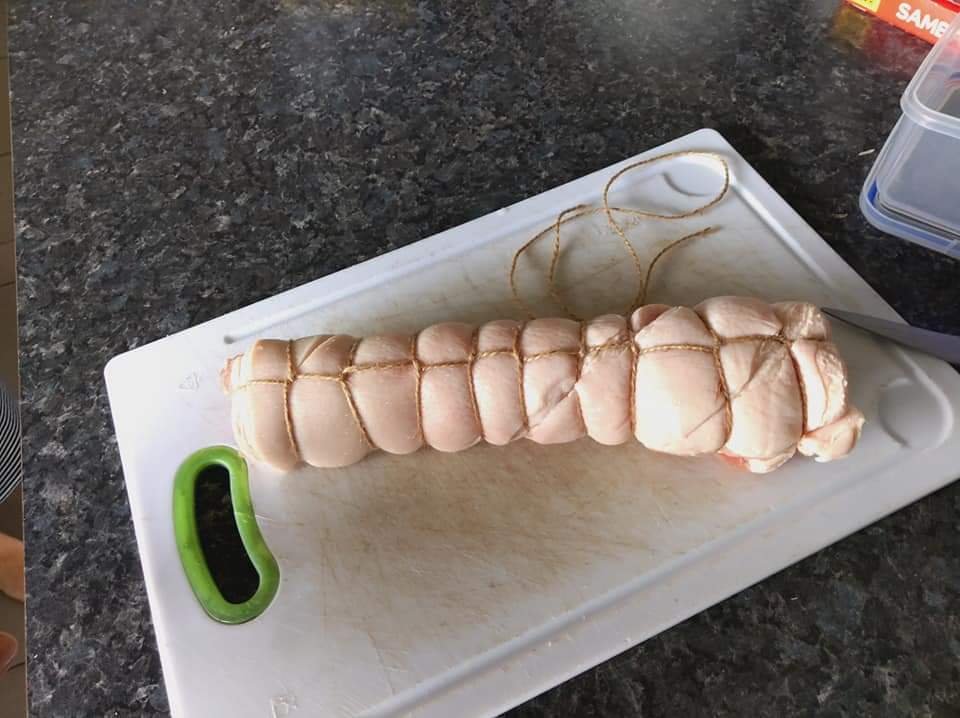
We've got some mates coming around tonight so decided that we'll make some Soba noodles, and thought about doing some chashu pork on the rotisserie to break it in. Picked up about a kg worth of pork belly, had a crack at rolling and tying it up (one end had more meat than the other and I didn't want to trim it). I salted the meat and let it sit for about an hour. After I made a Japanese style marinade using soy (light and dark), mirin , sake, rice wine vinegar, sesame seeds, garlic and ginger. Let it marinade in that for about an hour and a half then setup the bbq. It's been on for about 45minutes since that last pic and tbh it probably doesn't need too much more. Will keep you guys posted shortly.
5 points
-
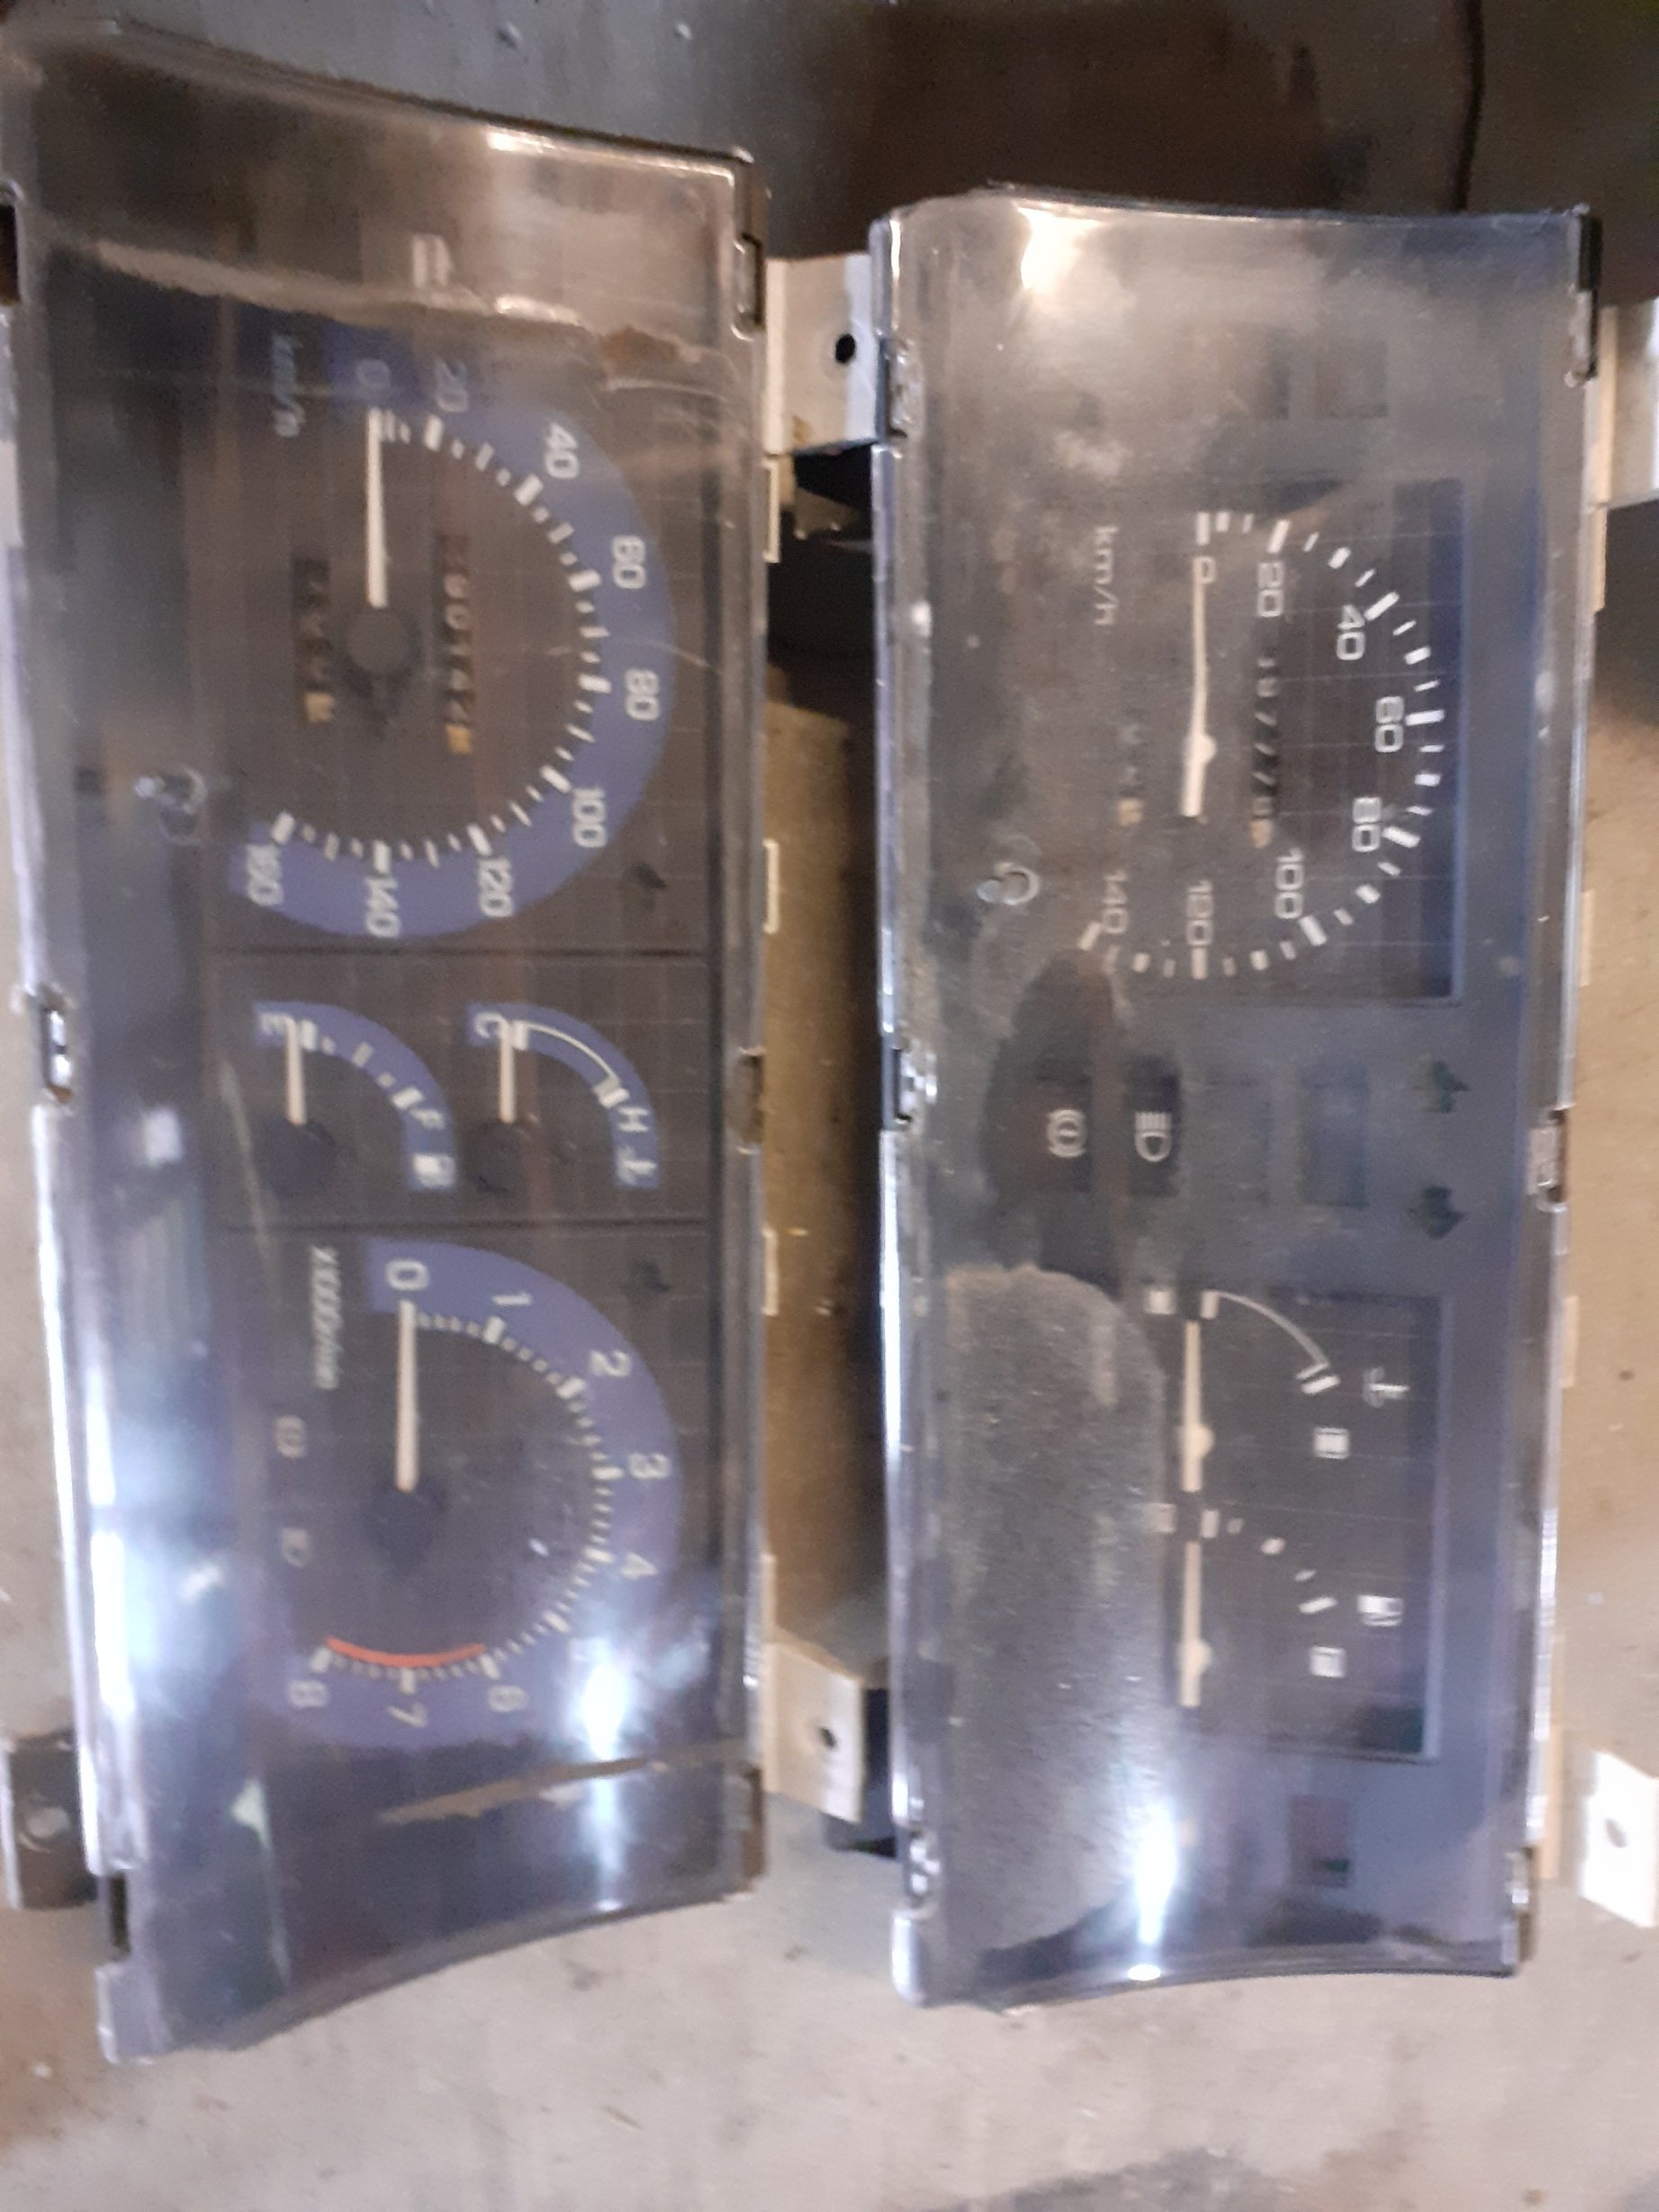
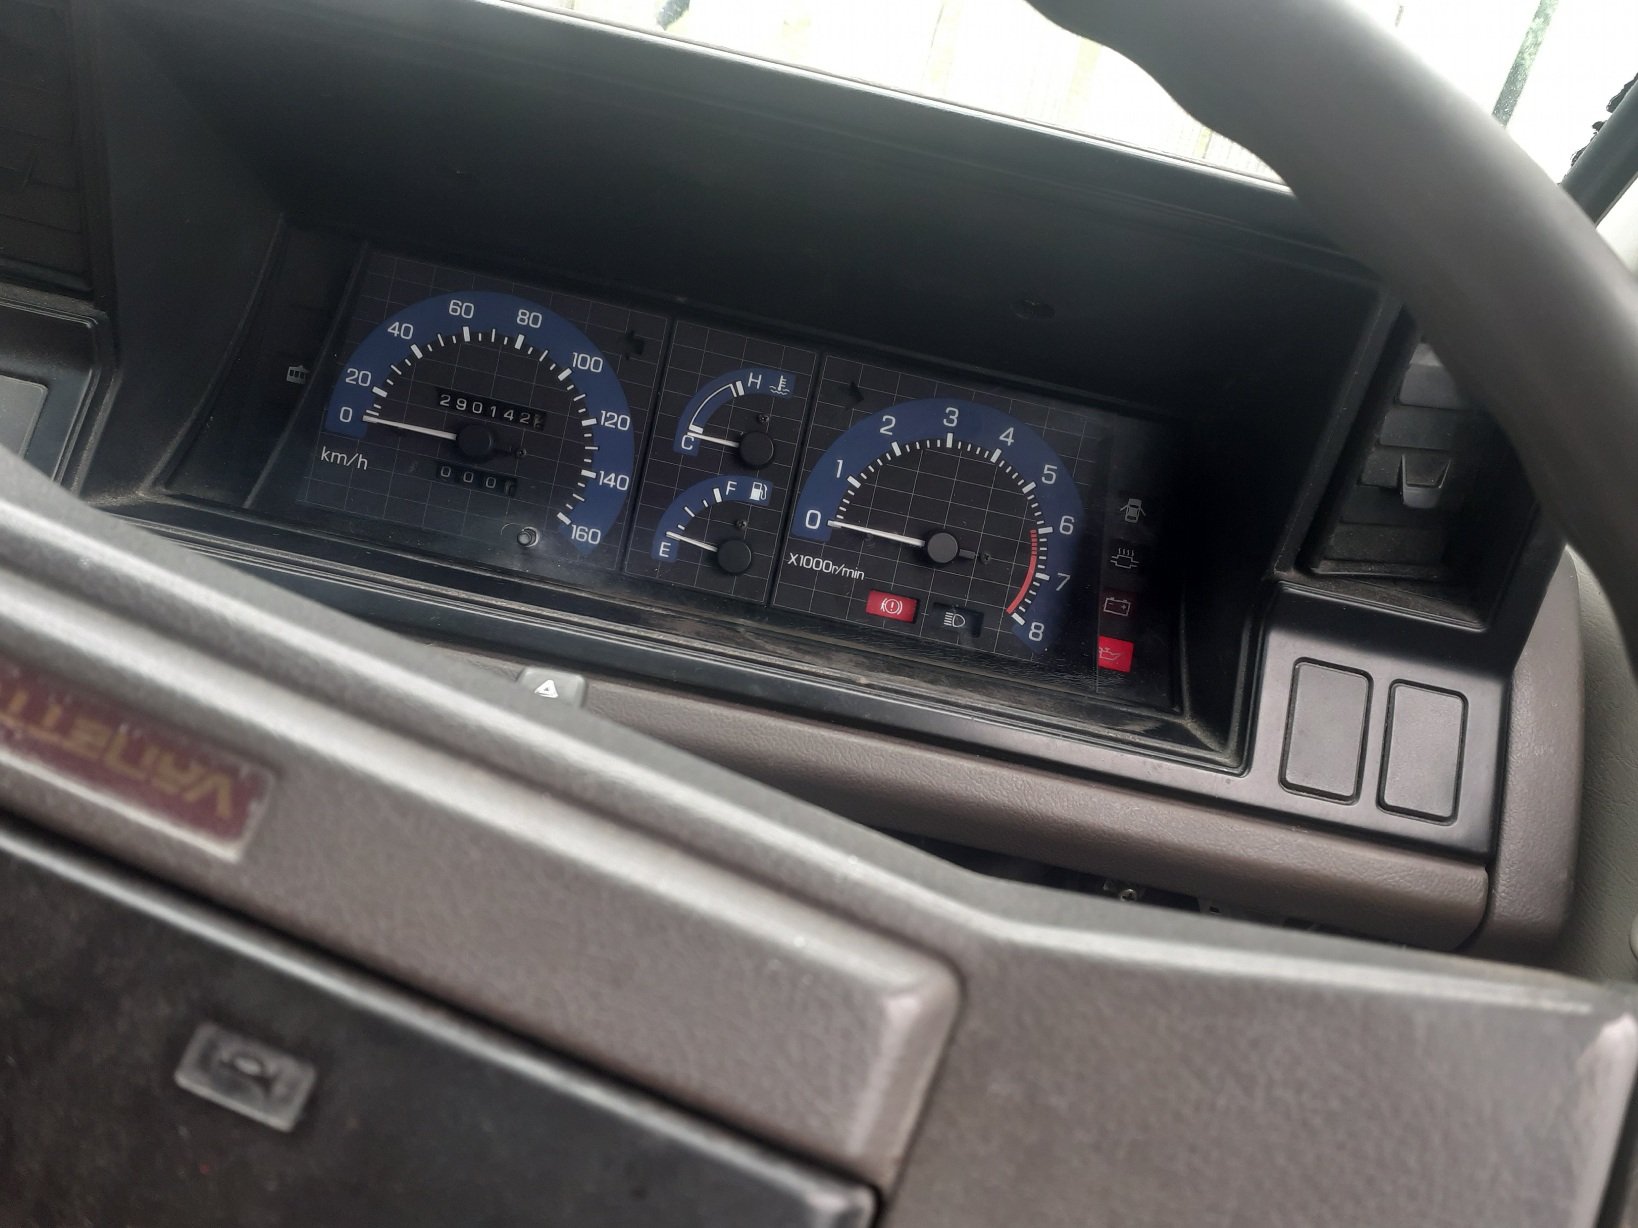
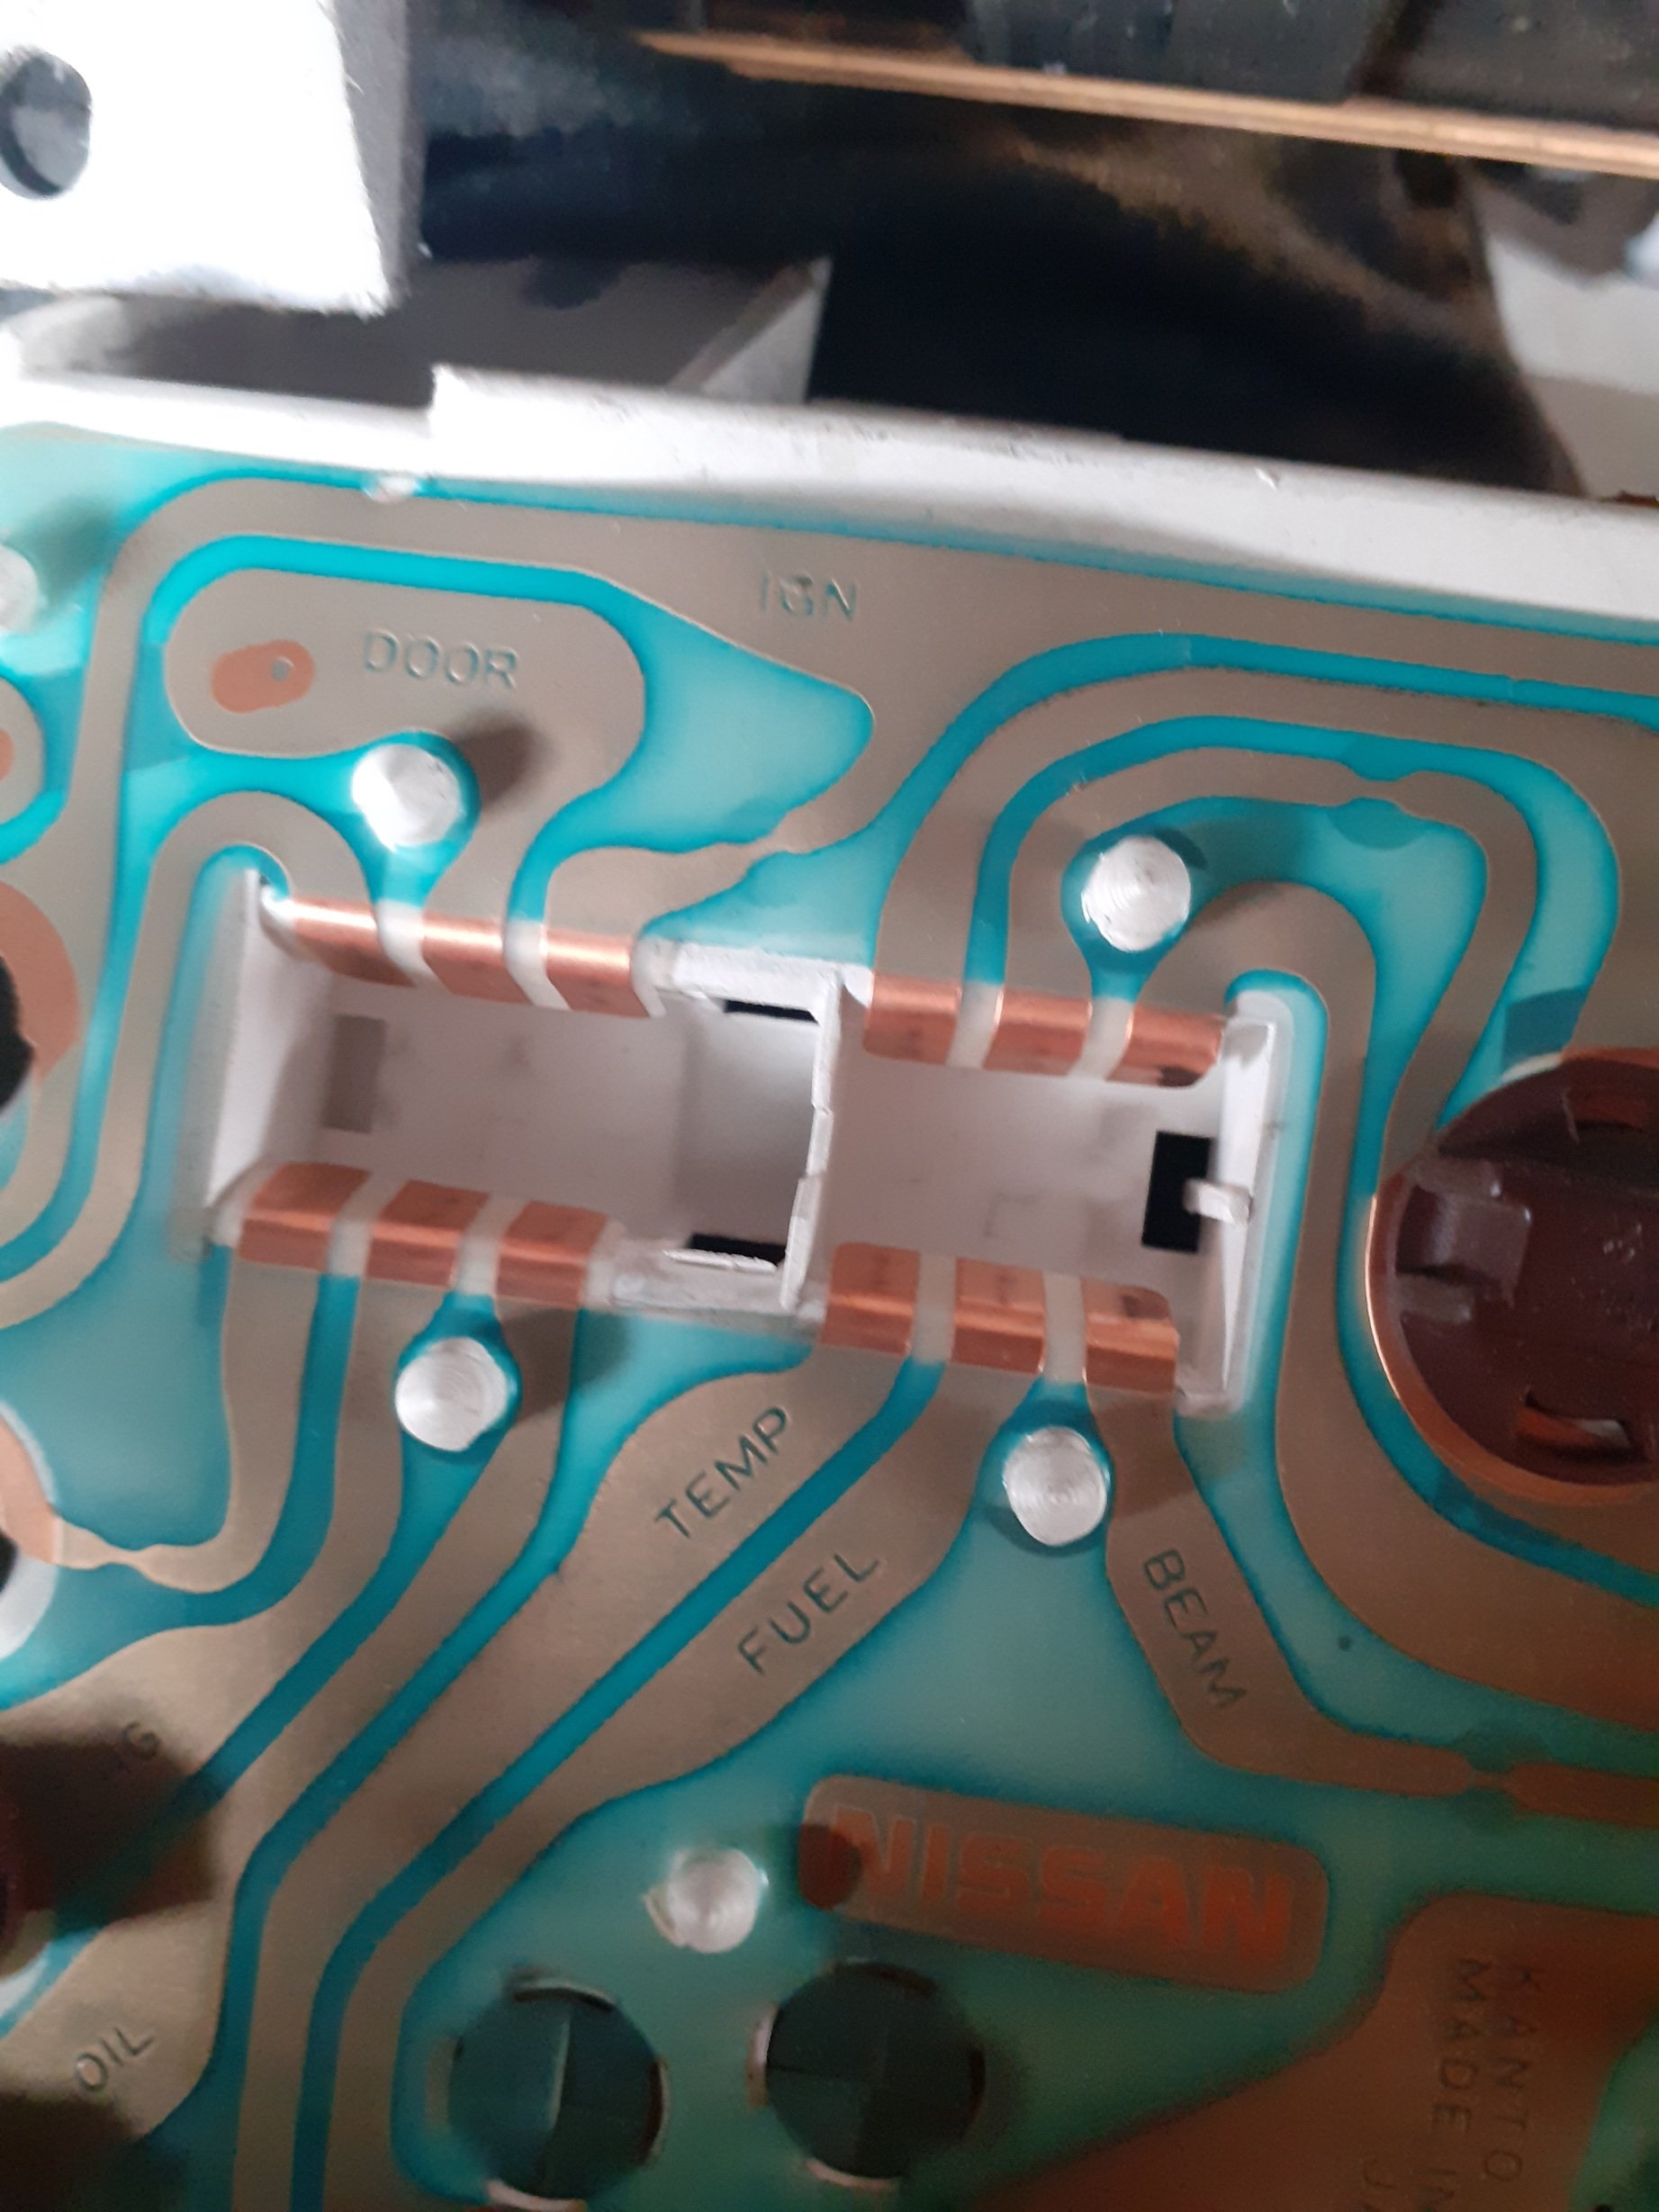
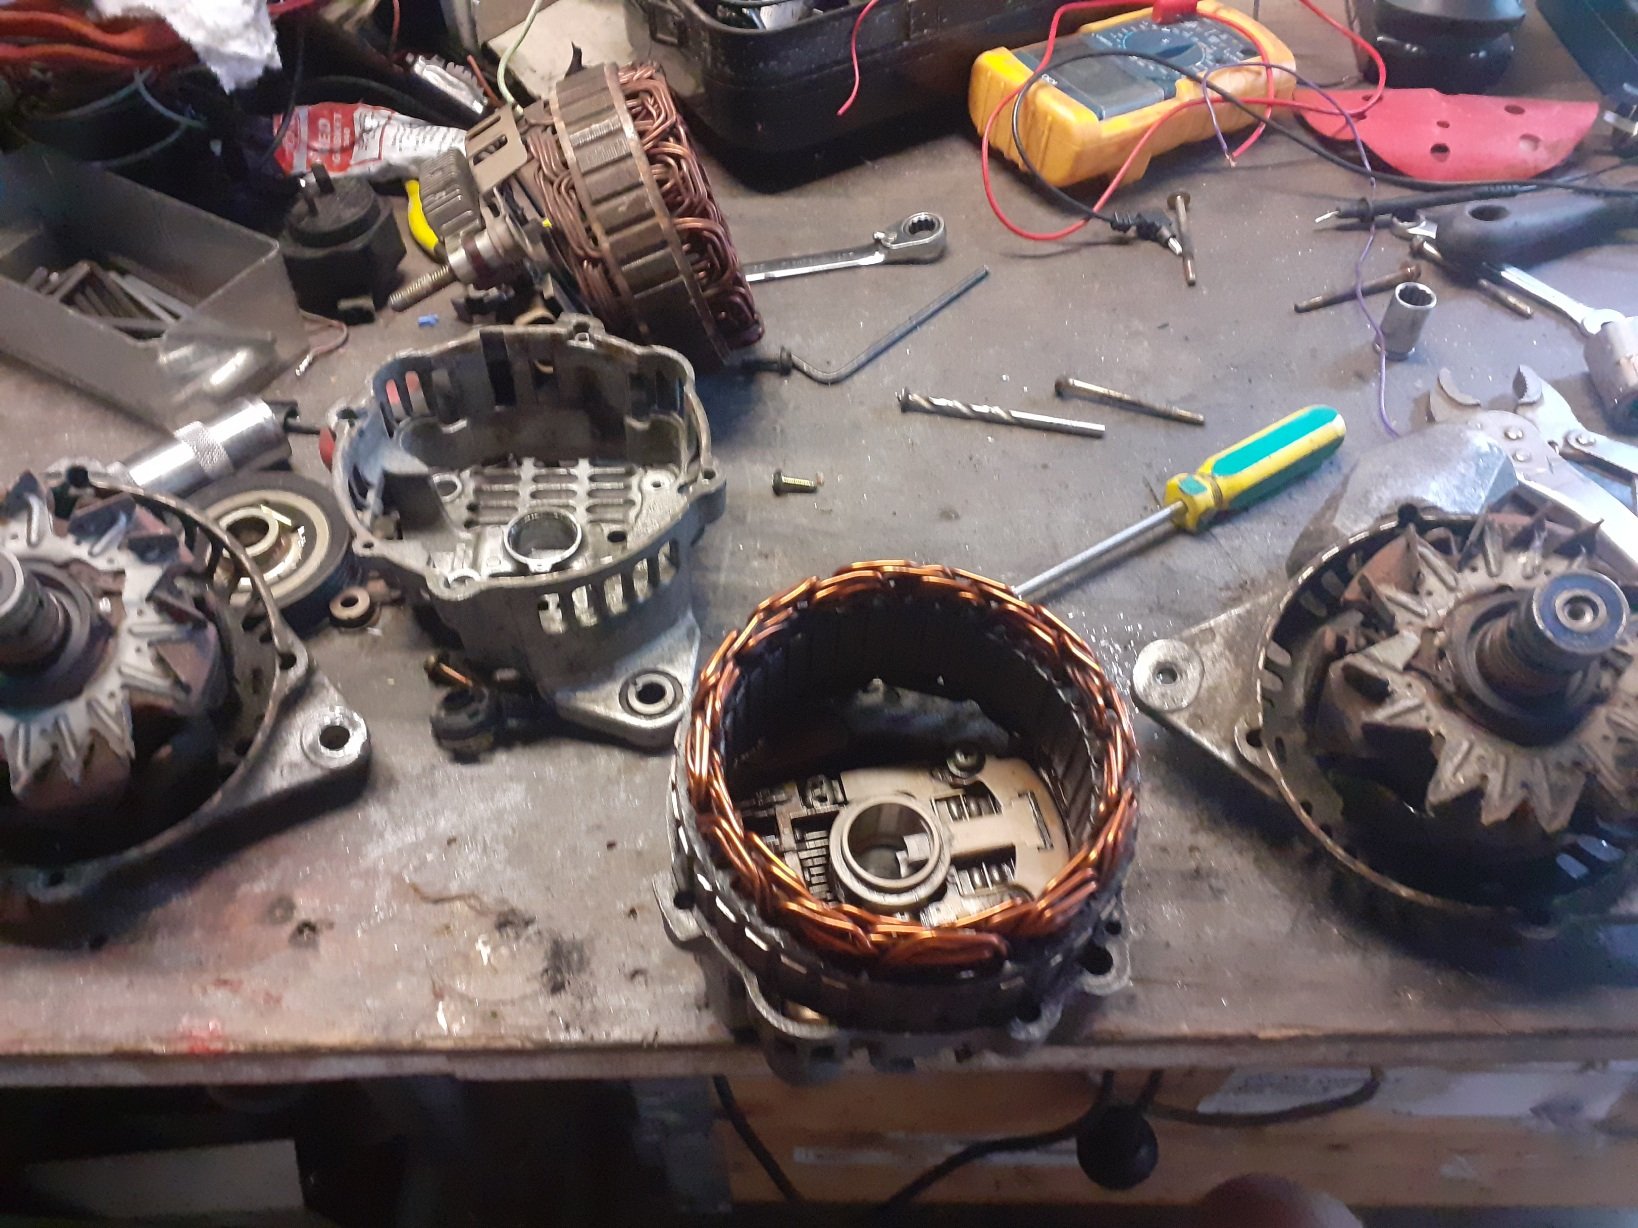
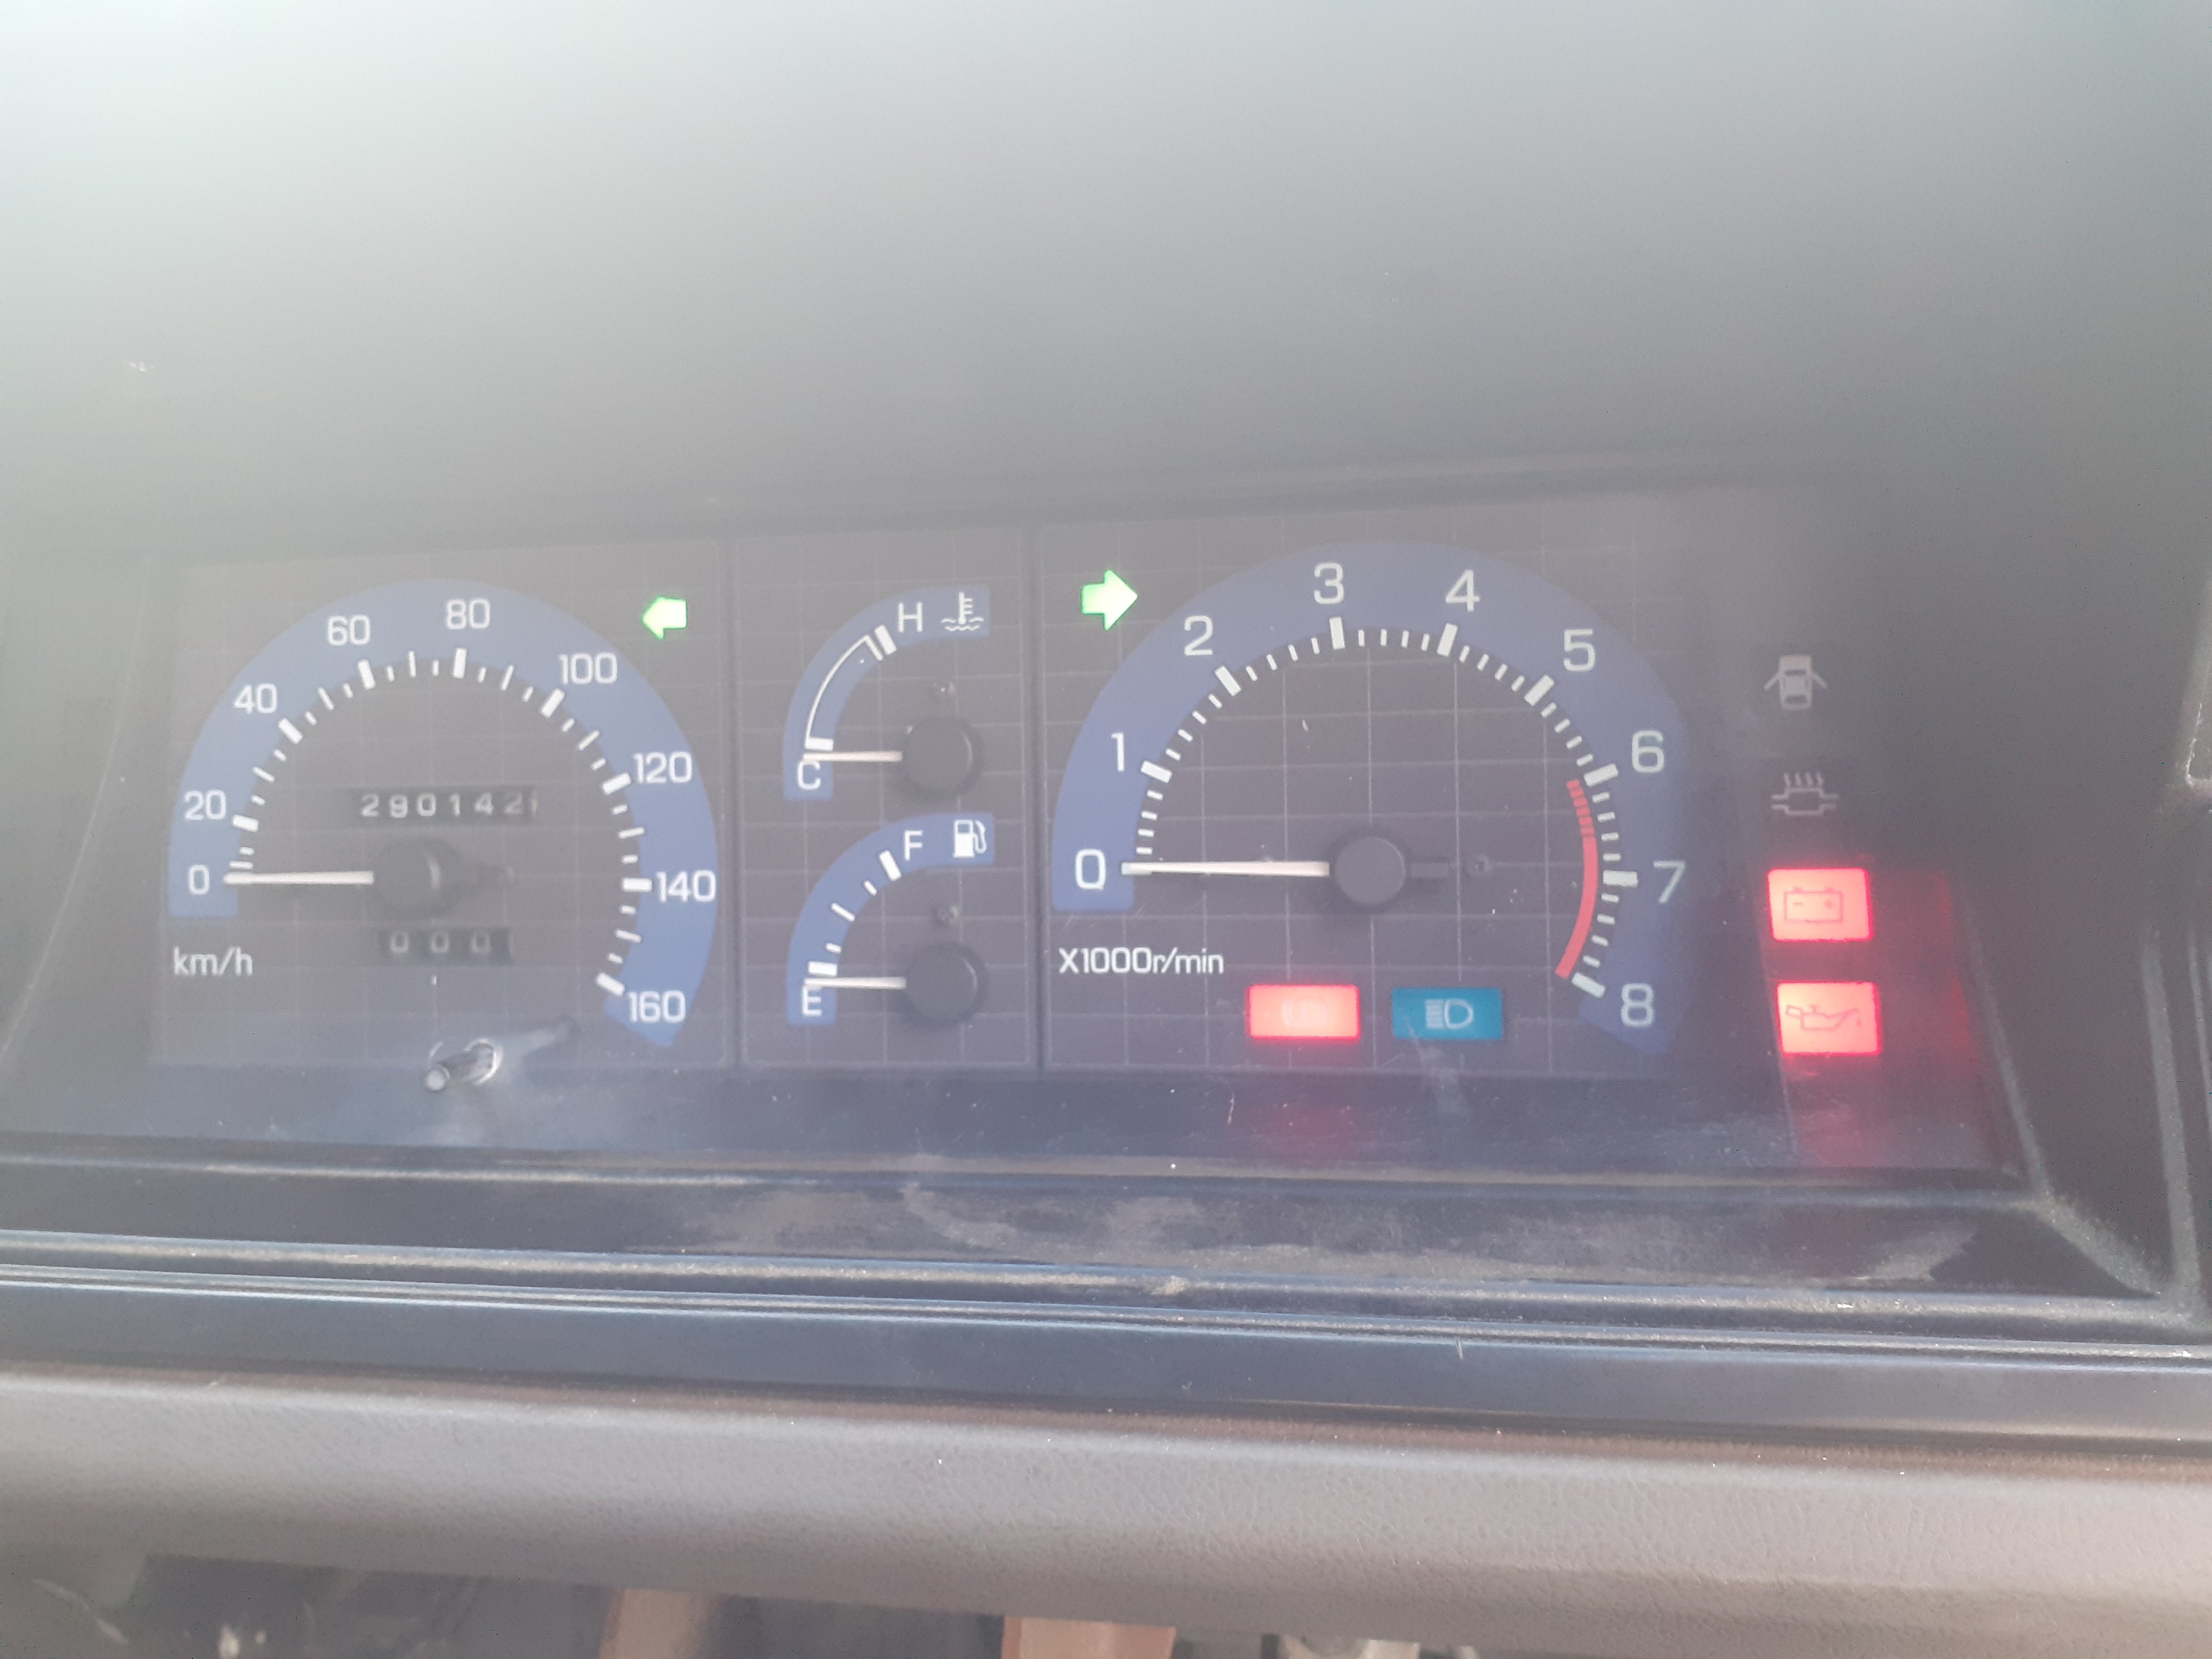
Changed out the cluster to the one from the old van so I've gained a tach, 100,000 less kms and 20 km/h more top speed ..haha, mucked around with the wiring, I'm not so good at it but I guess simple 80s wirings not too bad... looks better nice labelling still managed to get a wire wrong though :/ blew up my alternator somewhere along the way, so I got a spare nissan skyline one and swapped the center out to the silvia housing (housings are different)
4 points
-
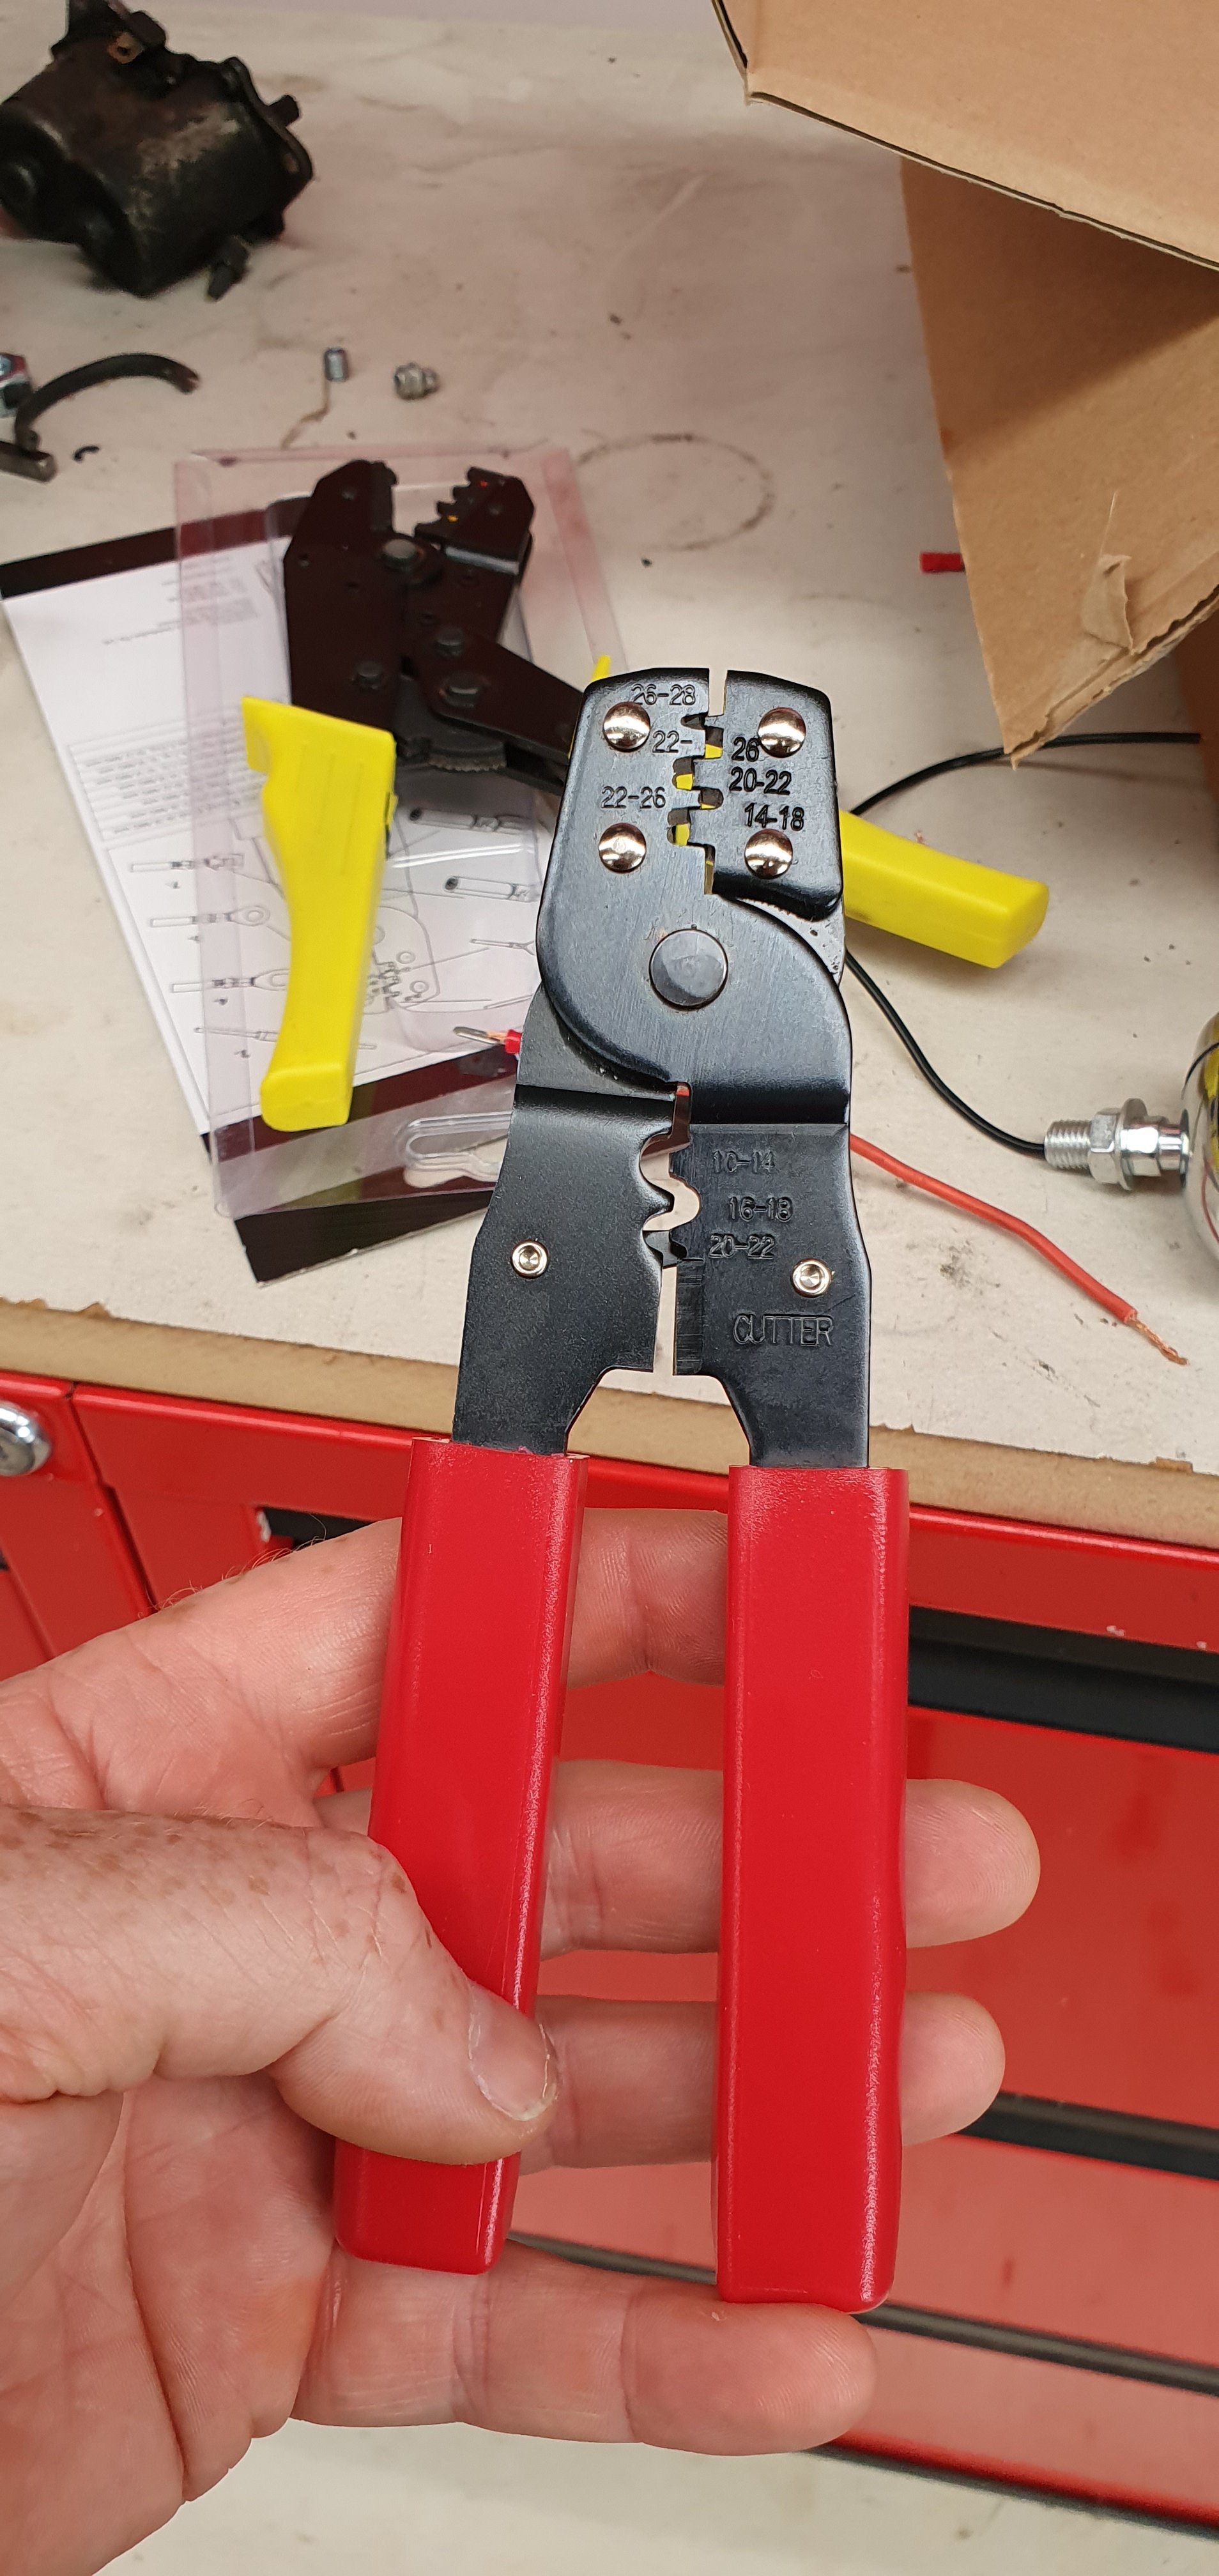
Brought these from jaycar. They work amazing!! Only $20, super happy with them. Im sure there's much better ones, but even on insulated connections they make an unbelievable tight grip. Wish I'd had these years ago. I have 4 other sets of crimping tools...they're all just rubbish compared to this.
4 points
-
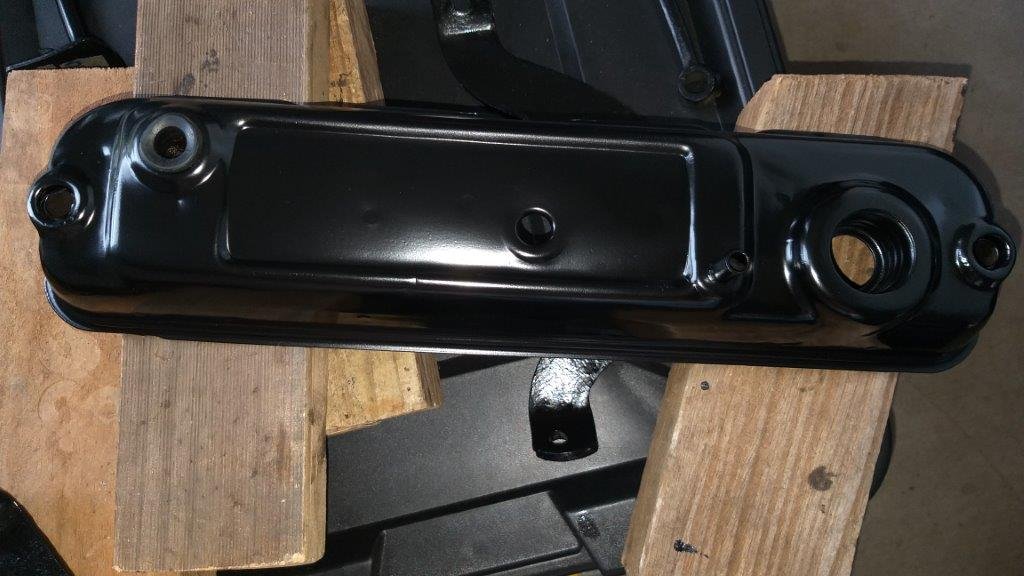
Today I made a start on tidying up some of the loose engine parts. De-greased the tappet cover and sump and then took to them with a wire wheel. Chucked a few coats of satin black engine enamel on the tappet cover and it came up mint. The indentations on the sump need a bit more work before its ready for paint so I'll carry on with that tomorrow.
4 points
-
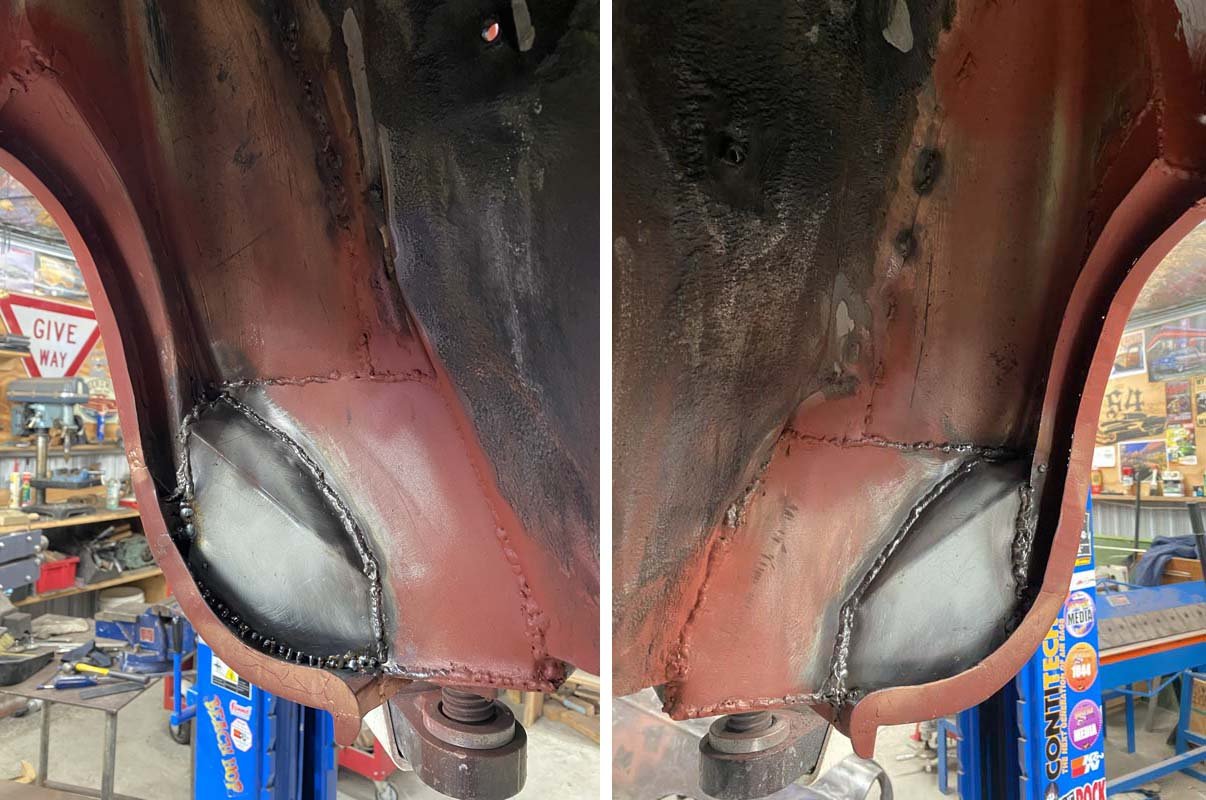
Cut out the rust. Stole a bit from the other car. Then spent what must have been HOURS getting it to fit properly. I did minimal linishing at the back because it's hidden behind the dash. Then I cut out a new bit for the front and spent another age getting it to fit.
4 points
-
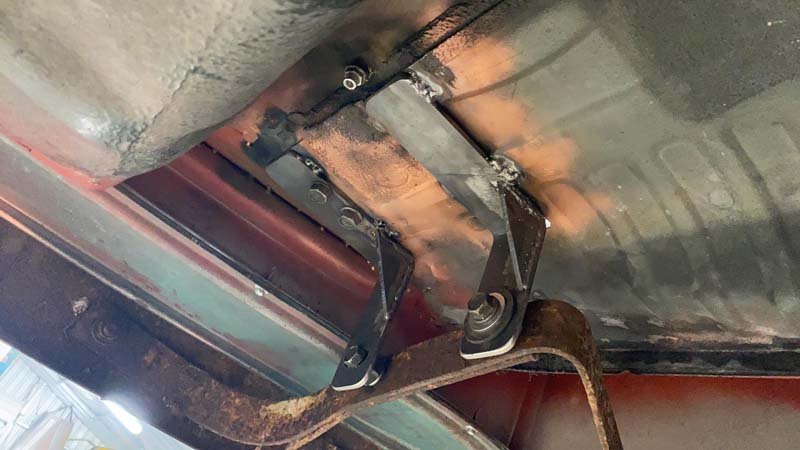
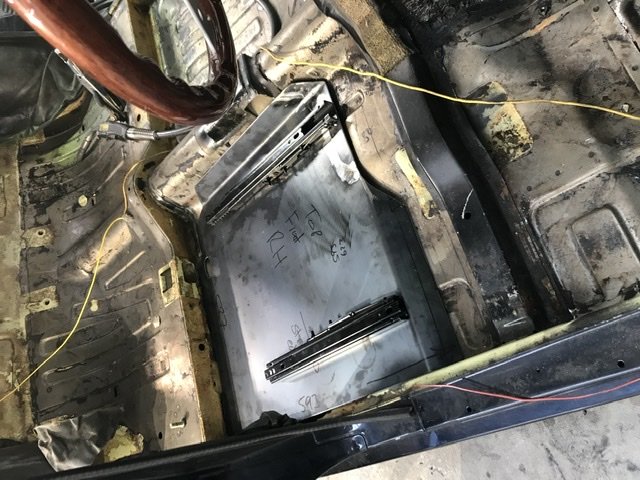
Fuck I hope I don't ever need to remove this.
4 points
-
Altenator works now, I've now got all the dash functions I need, should get some 100amp fuses for battery though as the loom never had them ?? Would explain the altenator
3 points
-
Waiting on a couple of seals and a number plate light, but this is about ready to get inspected3 points
-
I mounted that expansion tank somewhere convenient. Went for a drive and all seems to be behaving. I also made some racks to carry long things, did the rear a few days ago and sorted the front out today. I'll get those zinc arc sprayed I imagine; Might make the rear clamp on rather than ratcheted, you have to properly crank it up to prevent it from rocking a little....3 points
-
So yeah, after googling what wear rings are supposed to look like, and frowning at the pump from the donor banana ski, yesterday I removed the pump from GreenWaste and had a look. Two pumps on the floor, pretty much identical. IMG_20201231_102856_1 by John Bell, on Flickr I believe this is what a bad condition wear ring looks like, from the donor ski. Cracks and grooves, not toight. IMG_20201231_113413 by John Bell, on Flickr And this is what the Greenboat had in it, note the missing material around most of the diameter. Lots of clearance. IMG_20201231_113456 by John Bell, on Flickr So I figured bad was better than worse than bad, so gooped it up and bolted it back on. IMG_20201231_121347 by John Bell, on Flickr Sploot. IMG_20201231_133309_1 by John Bell, on Flickr Launched it into the harbour this morning and pootled about with VG and Keltik, it still doesn't feel 100%, but its pretty usable now and hooks up and pisses off quick enough for me. I will likely order some bits and pieces to tidy up the original pump and probably swap it back in the winter perhaps. IMG_20210101_104035_1 by John Bell, on Flickr I'm waiting for a China GPS speedo, and need to fit a hour meter/tacho, fit some latches to the hood, attach the paddles in a better way, and I think that'll do for now. What a novelty having a working toy3 points
-
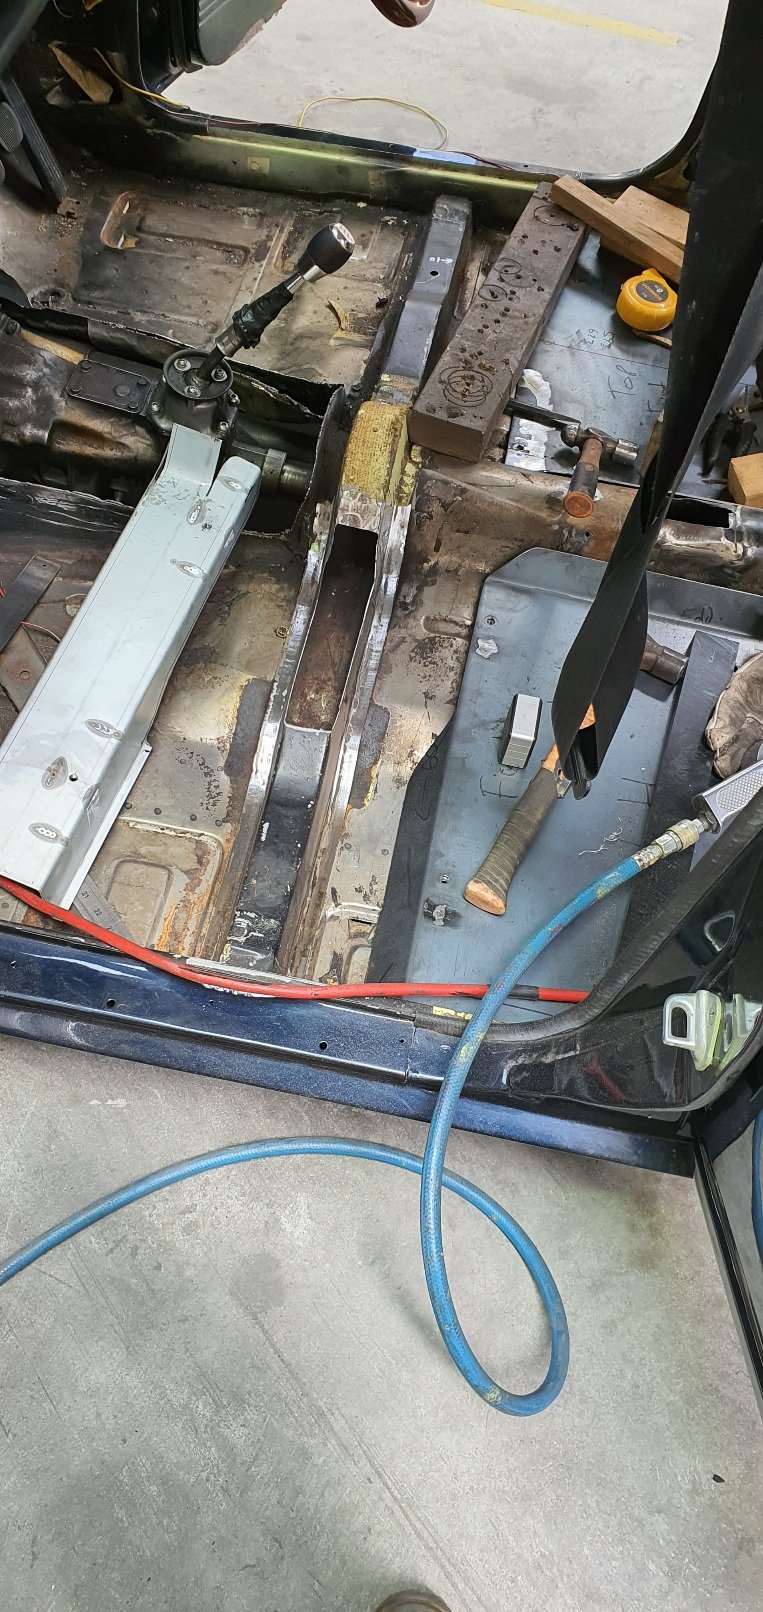
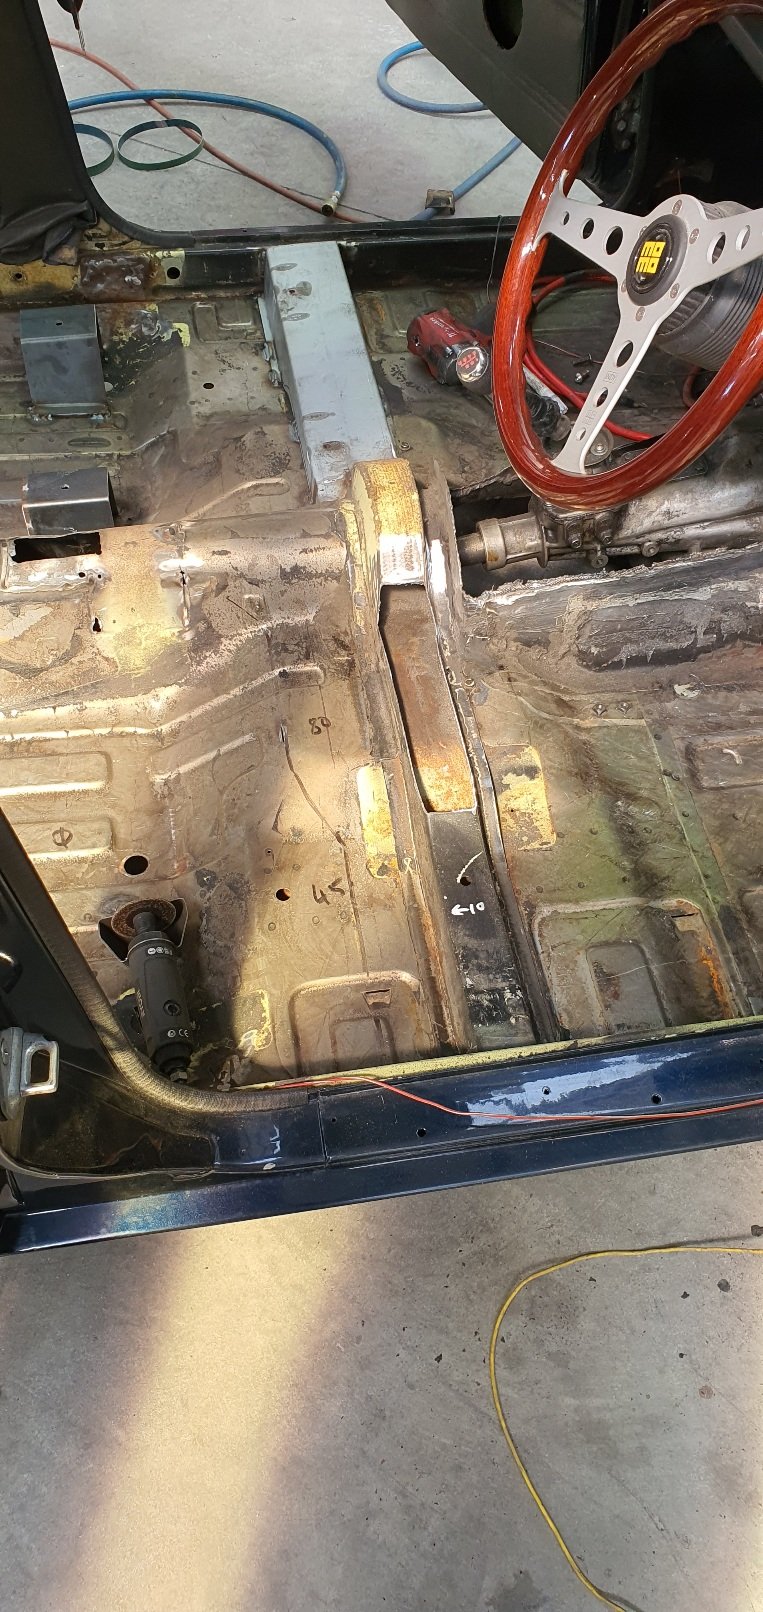
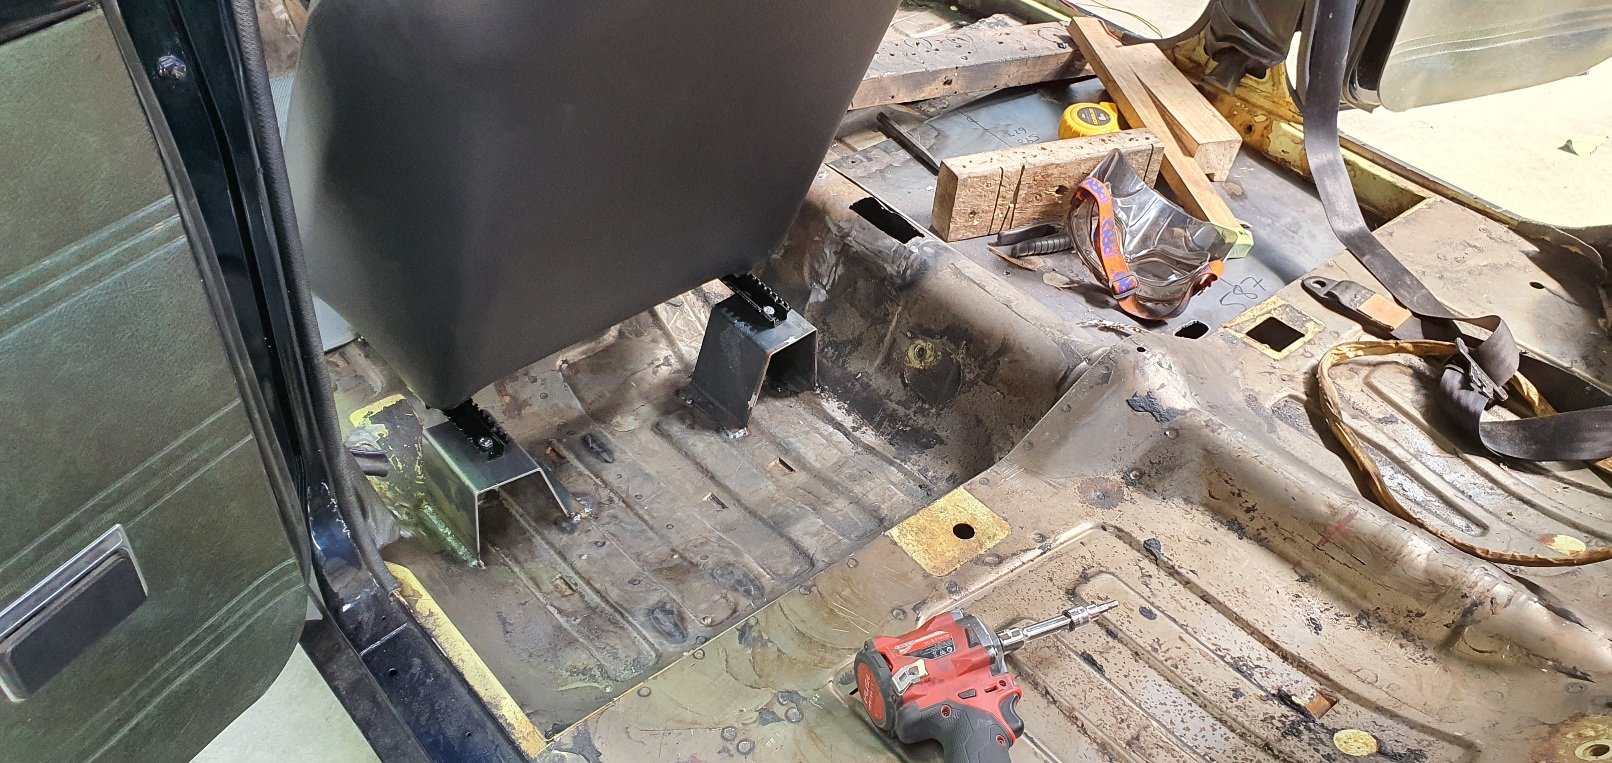
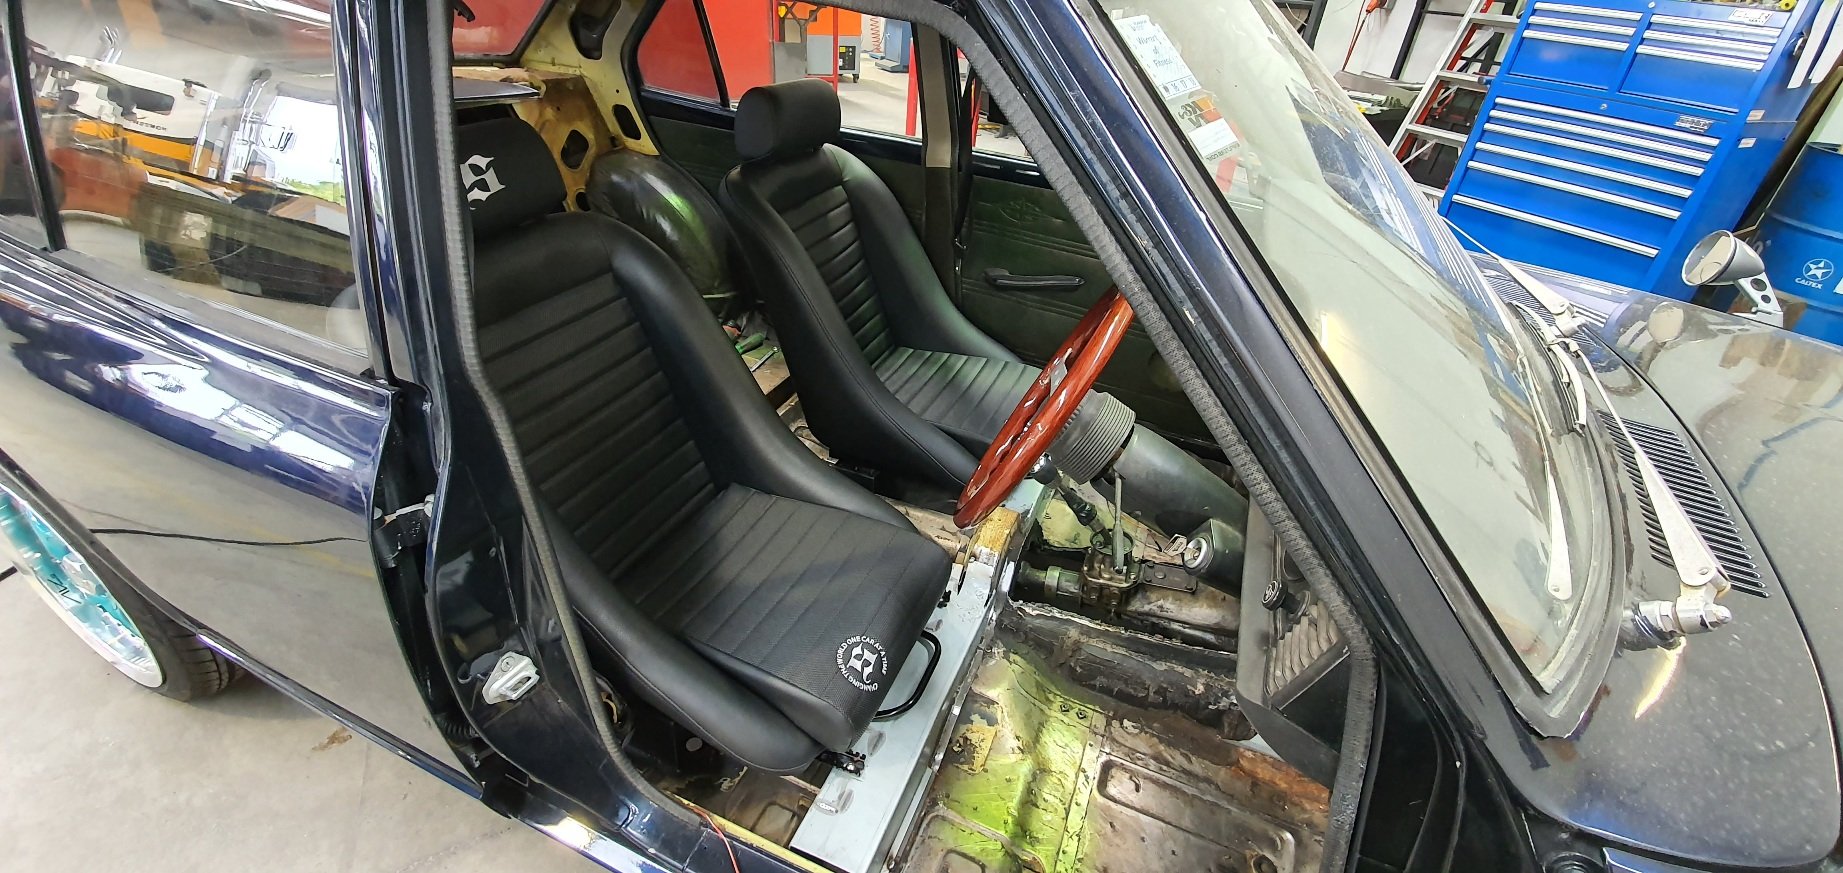
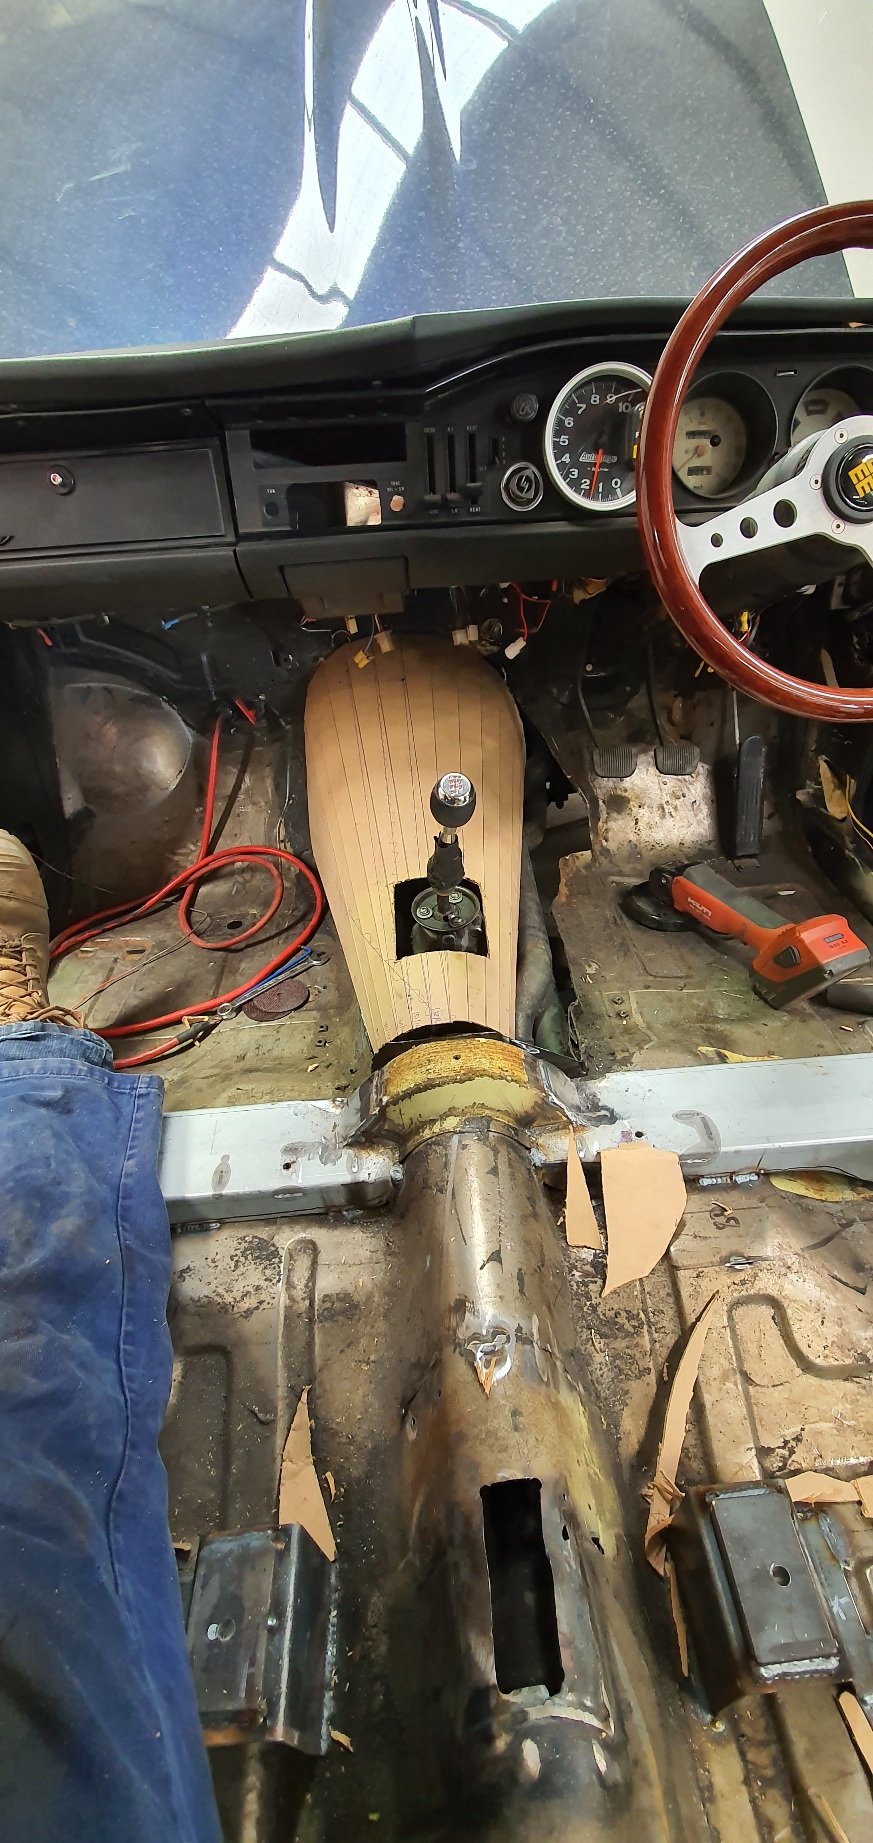
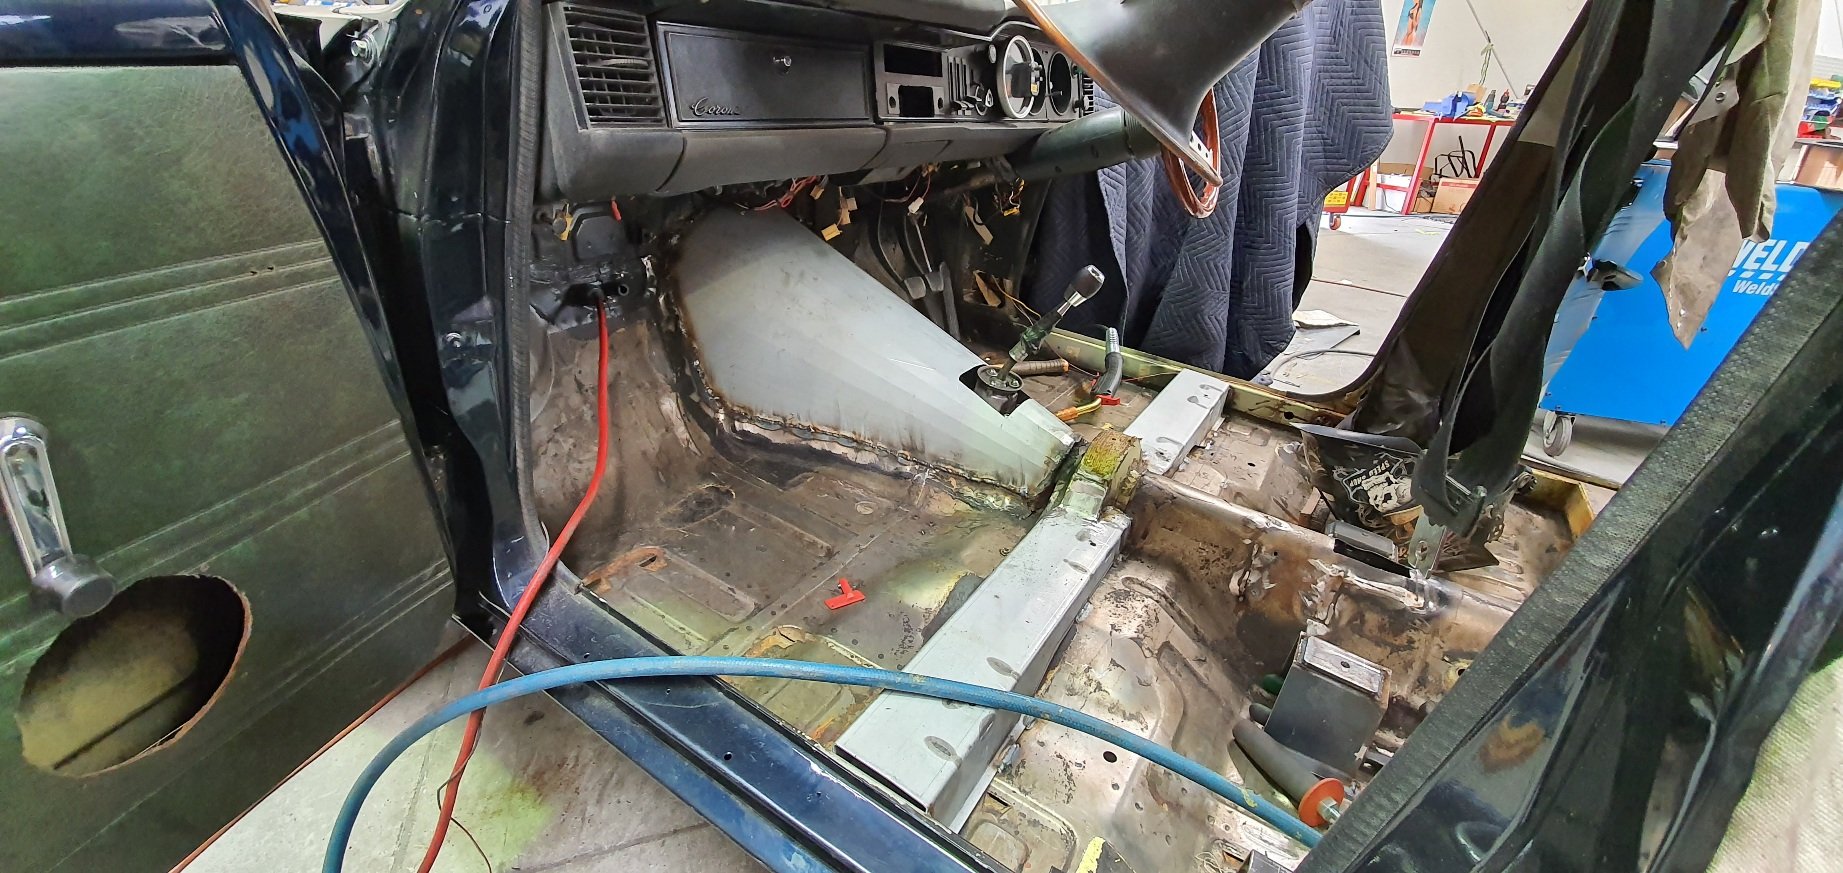
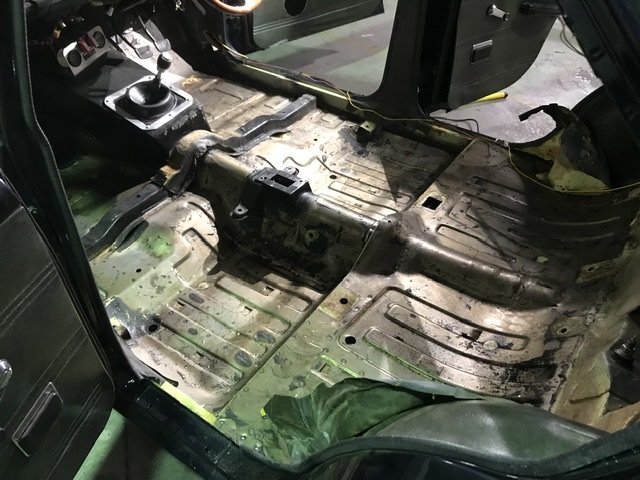
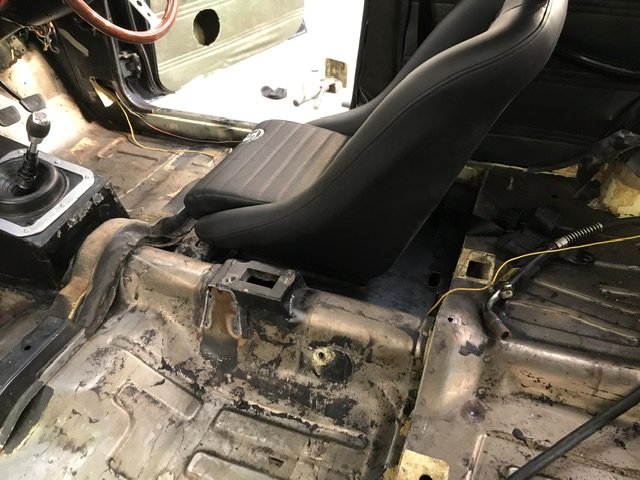
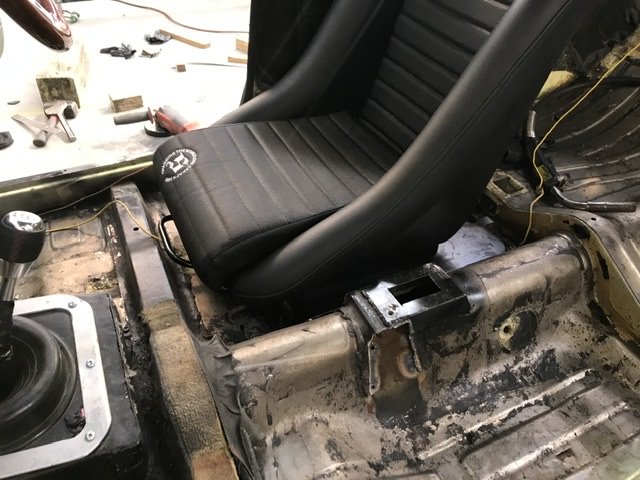
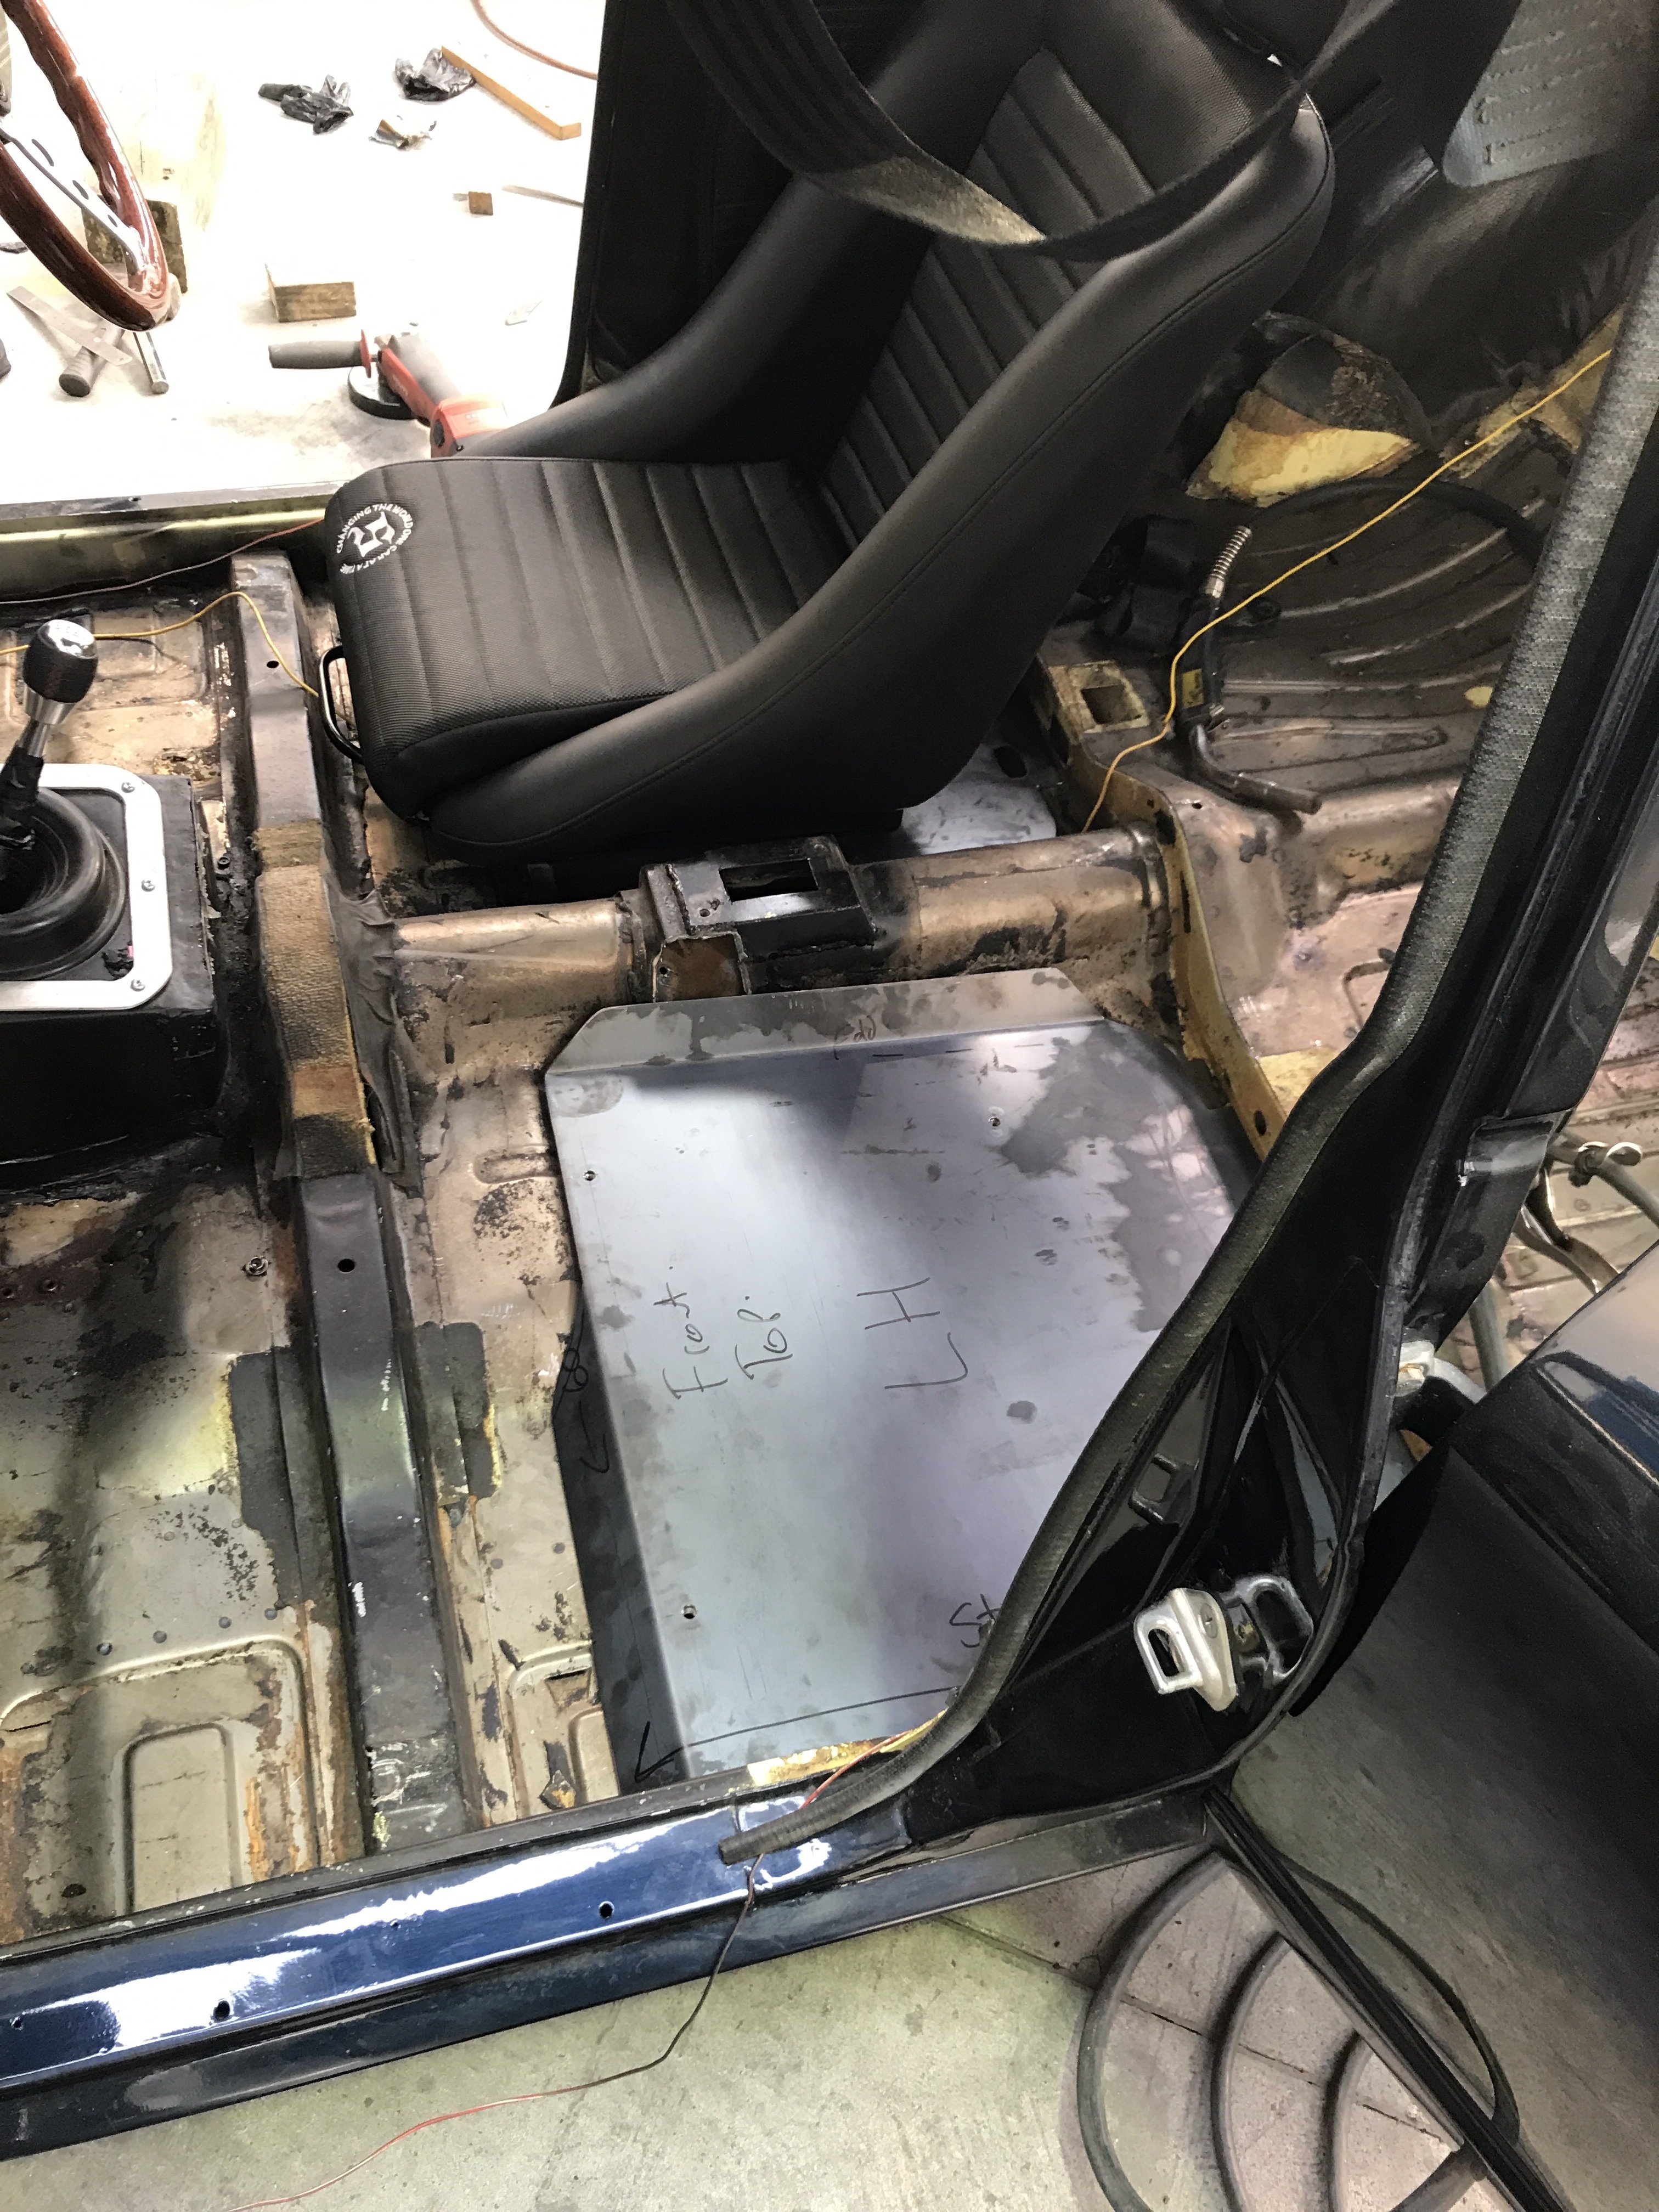
Well after staring at this in the workshop for the last 3 months while we've been massively busy at work and I've been caught up on the weekends entertaining my son I finally managed to get a couple of days to spend on this so I managed to mount my seats and get my tunnel fab'd up. I had to change my plan for the seats as my original design ended up too low and too far back surprisingly. Also the cert man wasn't happy with me removing the stiffer running the width of the car. So, I went back to the drawing board and came with this Then I made up a cardboard gearbox tunnel. And decided I better turn it into steel Happy to have those big jobs ticked off. I do still have to pull the engine and box to weld underneath but the hard work is done for the tunnel fabrication which is great
3 points
-
today went better. i got the little bit of surface rust of the inside of the scuttle panel and chucked some brunnox on it. poured some brunnox inside the fuel filler flap and then chucked some primer on things. yesterday i primed the car again so only the drivers side needs another coat, the rest of the car is ready for wet sanding. yay, wet sanding. 2020-12-30_02-33-07 by sheepers, on Flickr 2020-12-30_02-32-59 by sheepers, on Flickr 2020-12-30_02-32-45 by sheepers, on Flickr 2020-12-30_02-32-52 by sheepers, on Flickr before priming, 2020-12-30_02-33-43 by sheepers, on Flickr 2020-12-30_02-33-36 by sheepers, on Flickr after priming, 2020-12-30_02-33-29 by sheepers, on Flickr 2020-12-30_02-33-22 by sheepers, on Flickr3 points
-
Since I can only safely mix 30kg of sand at once Ive made some partitions over the pattern for 30kg sections. Will do some sequence of removing walls and work along the pattern. Probably key the sand together as I go so hopefully it doesnt shift around. The base is an overly complicated 30mm spacer that the inner cores align to. Could have done it out of wood but when you have a big printer why not! Once Ive figured out if the pattern works I will be able to fill it at the foundry in one go without partitions.3 points
-
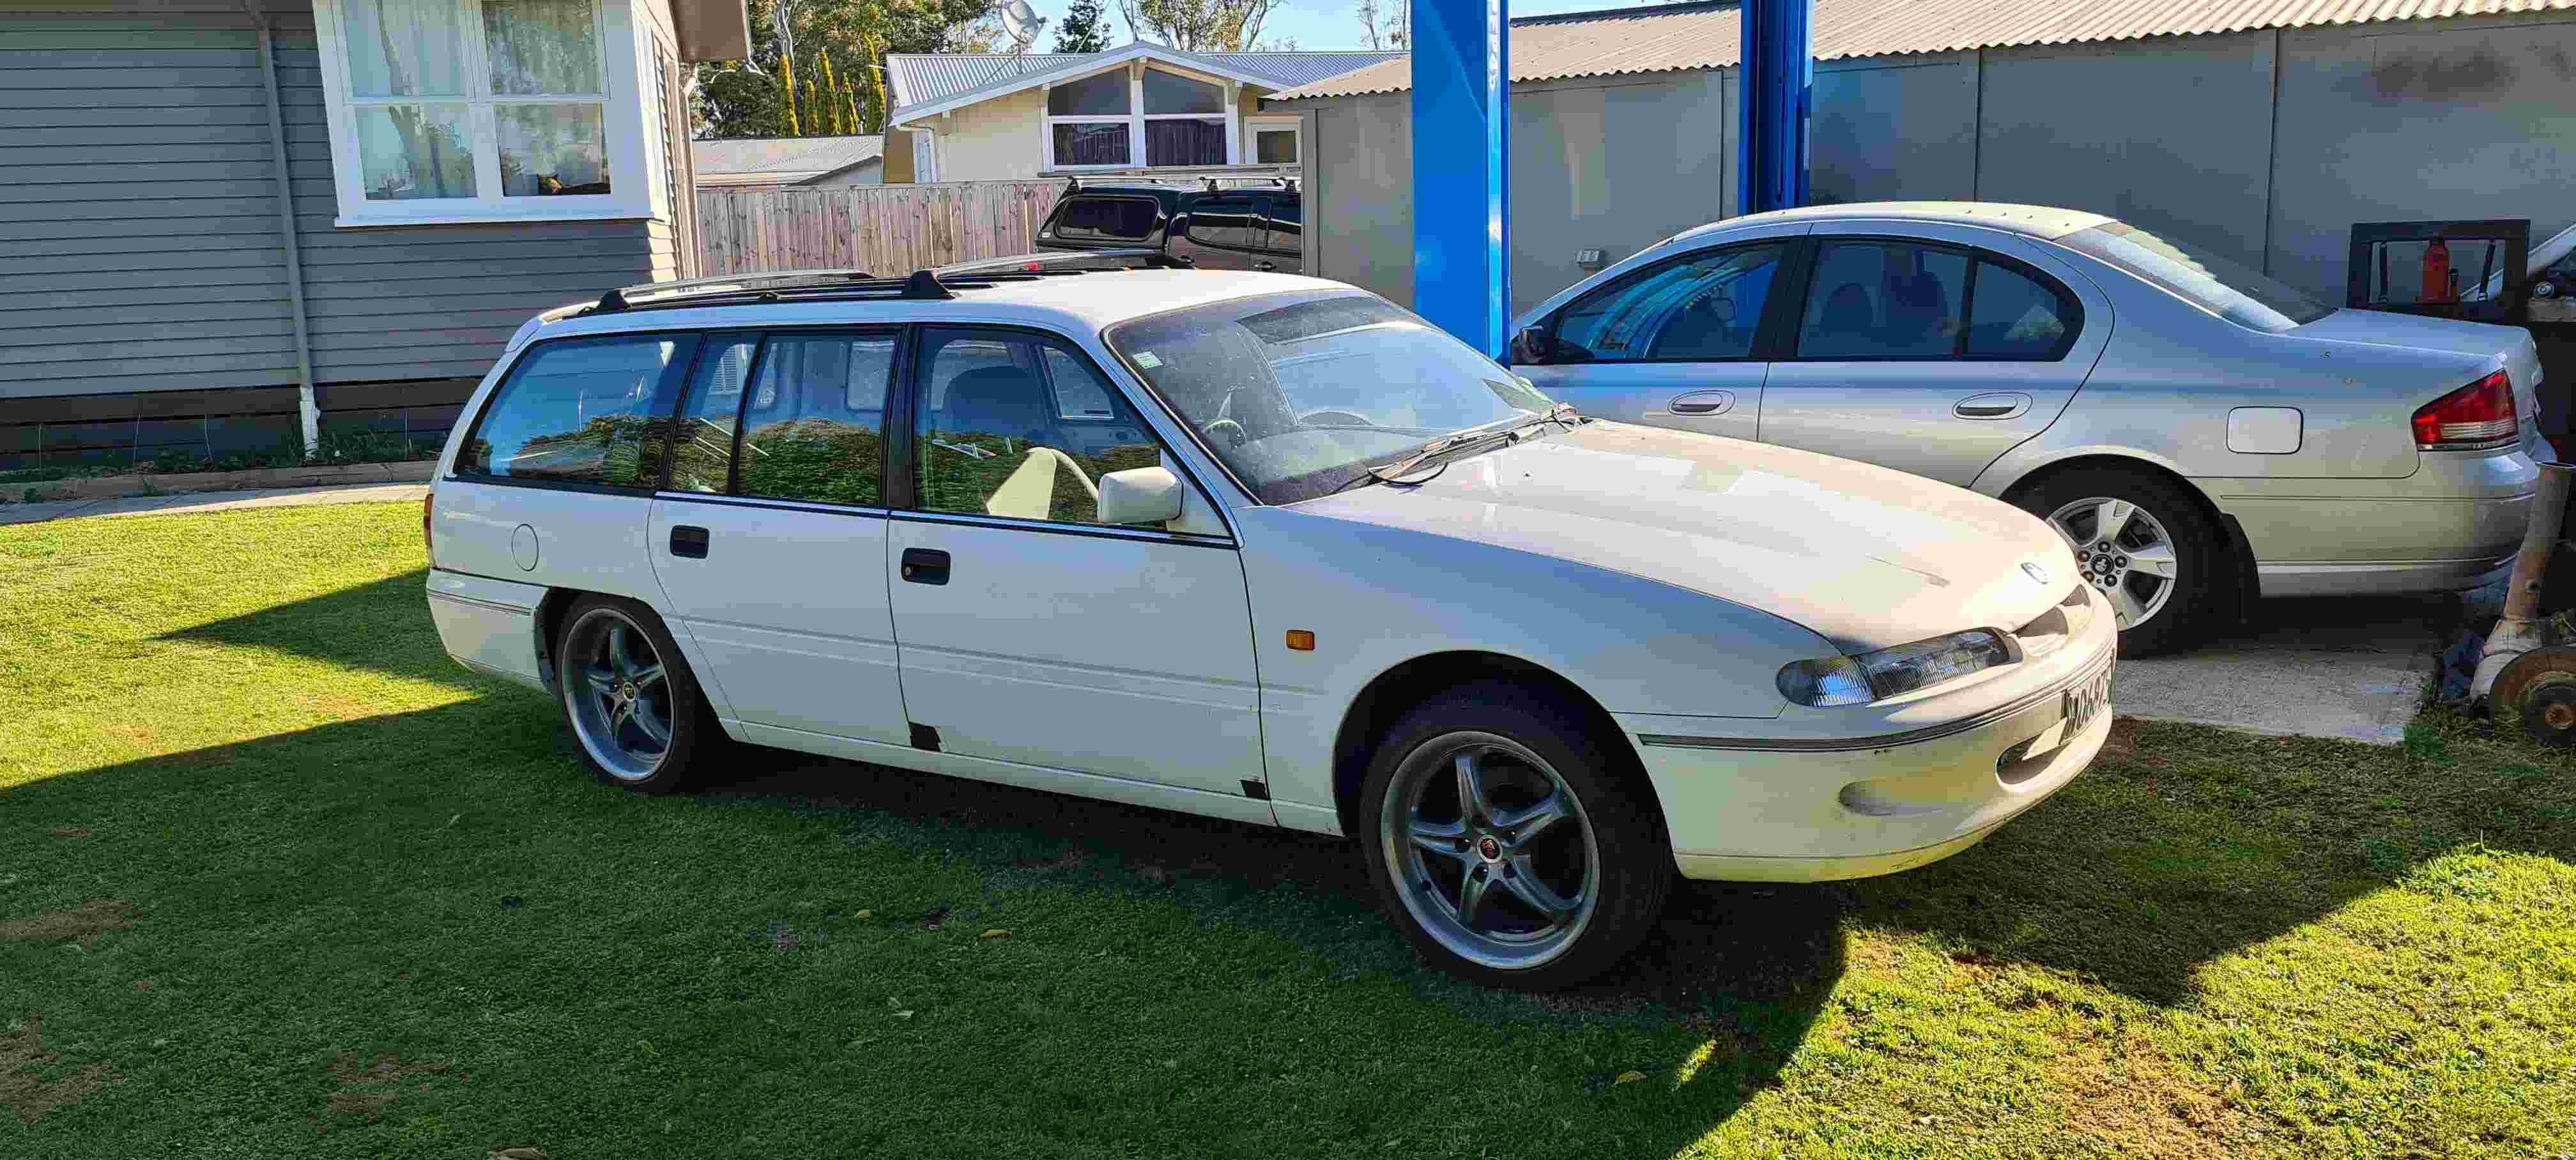
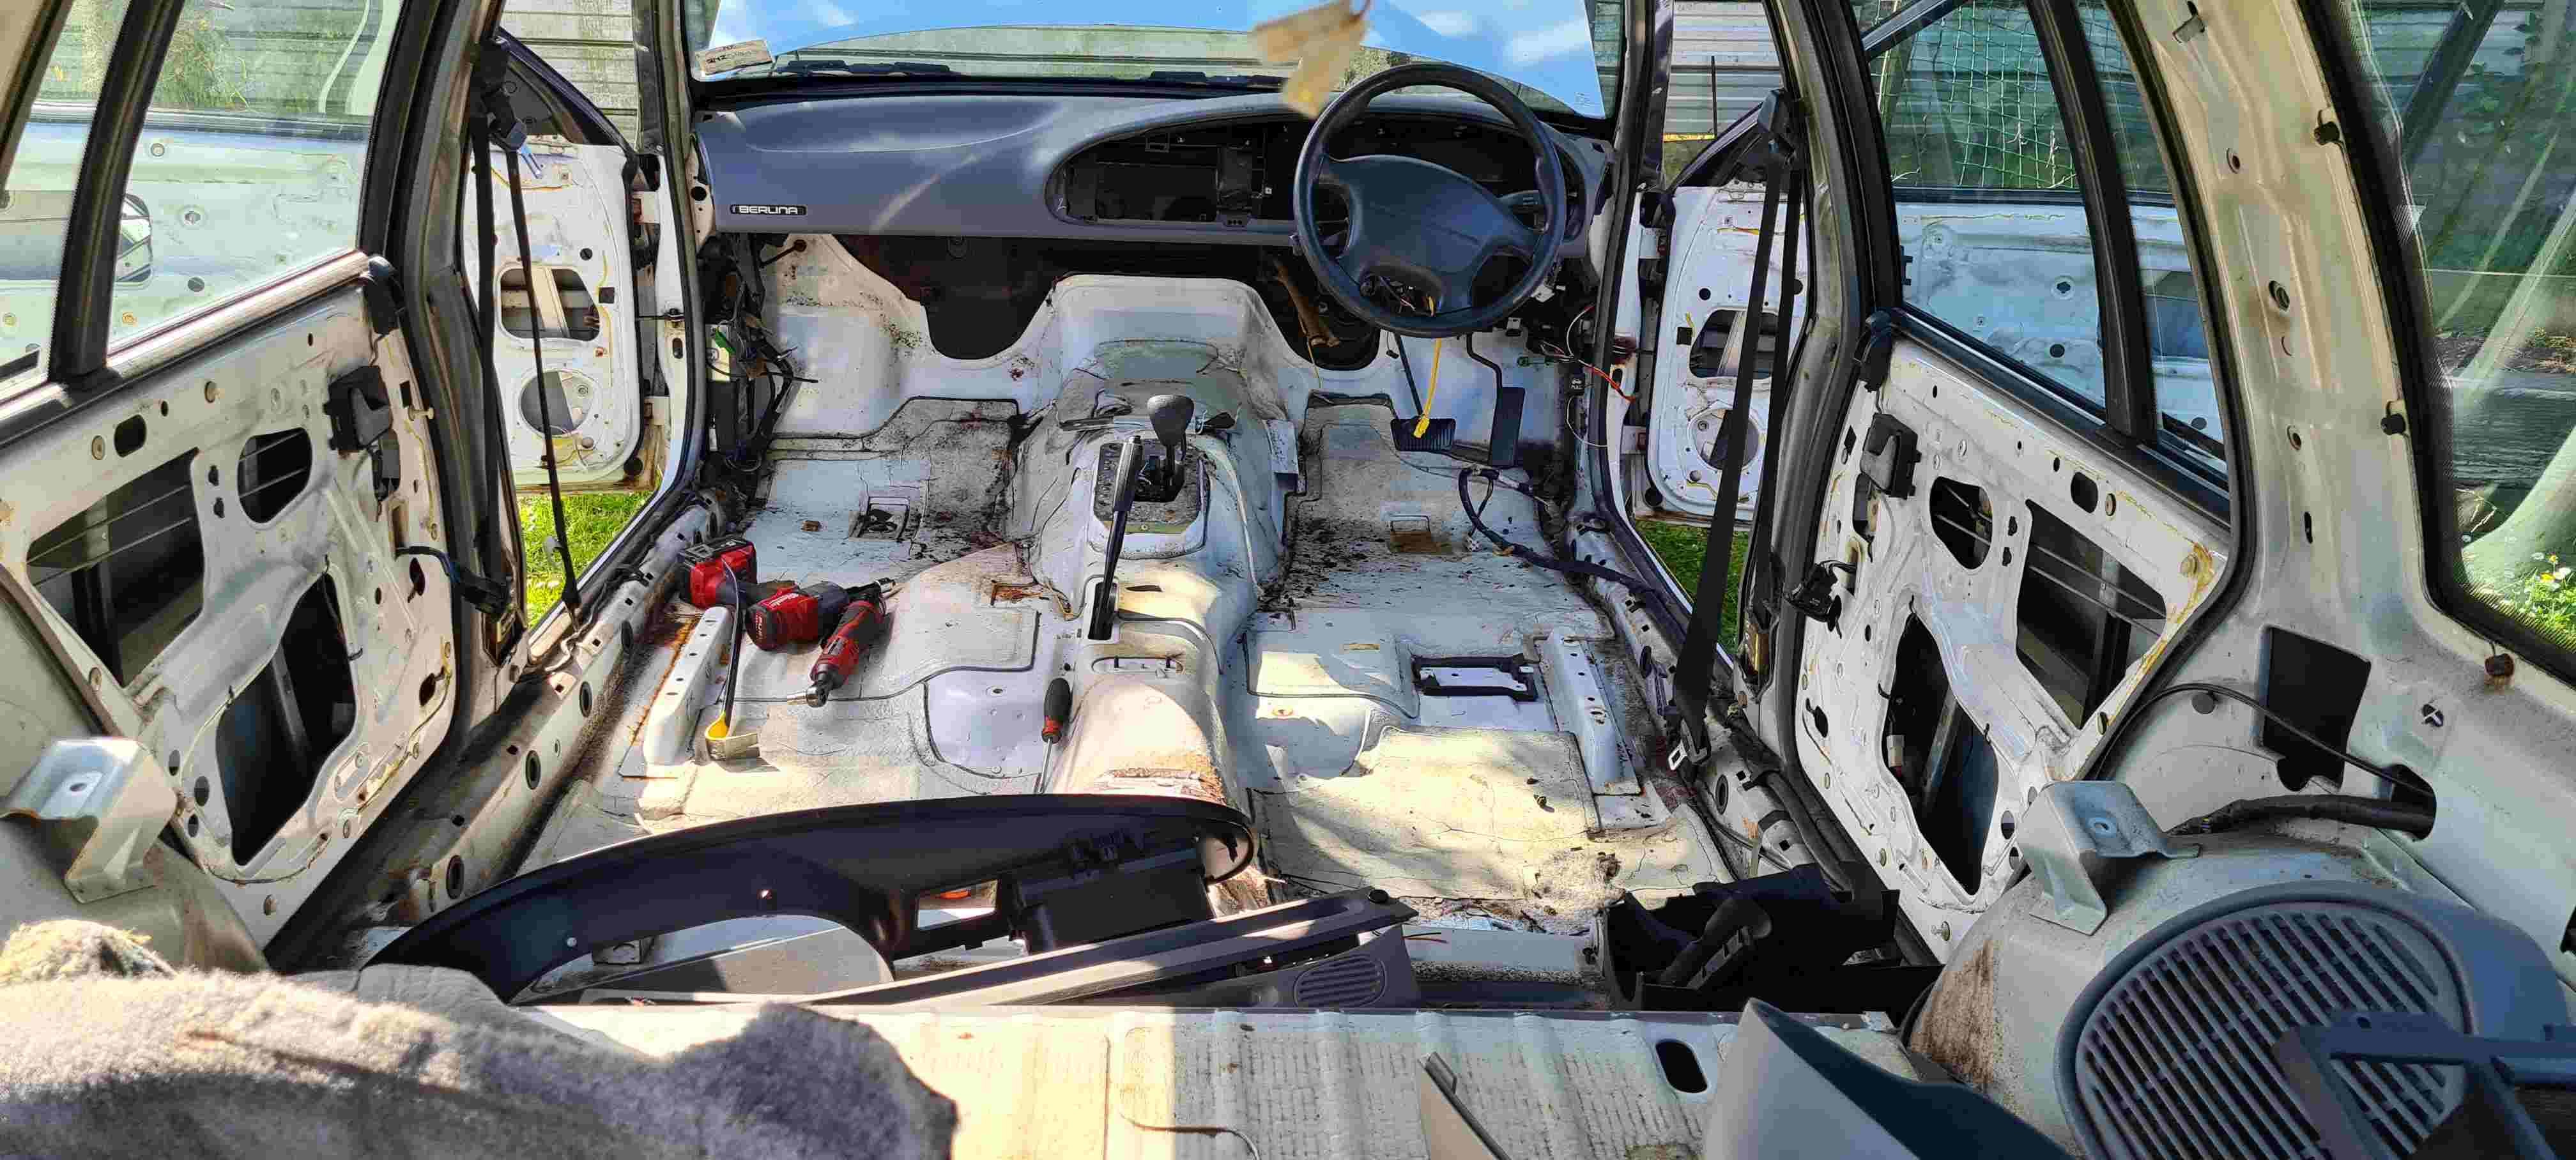
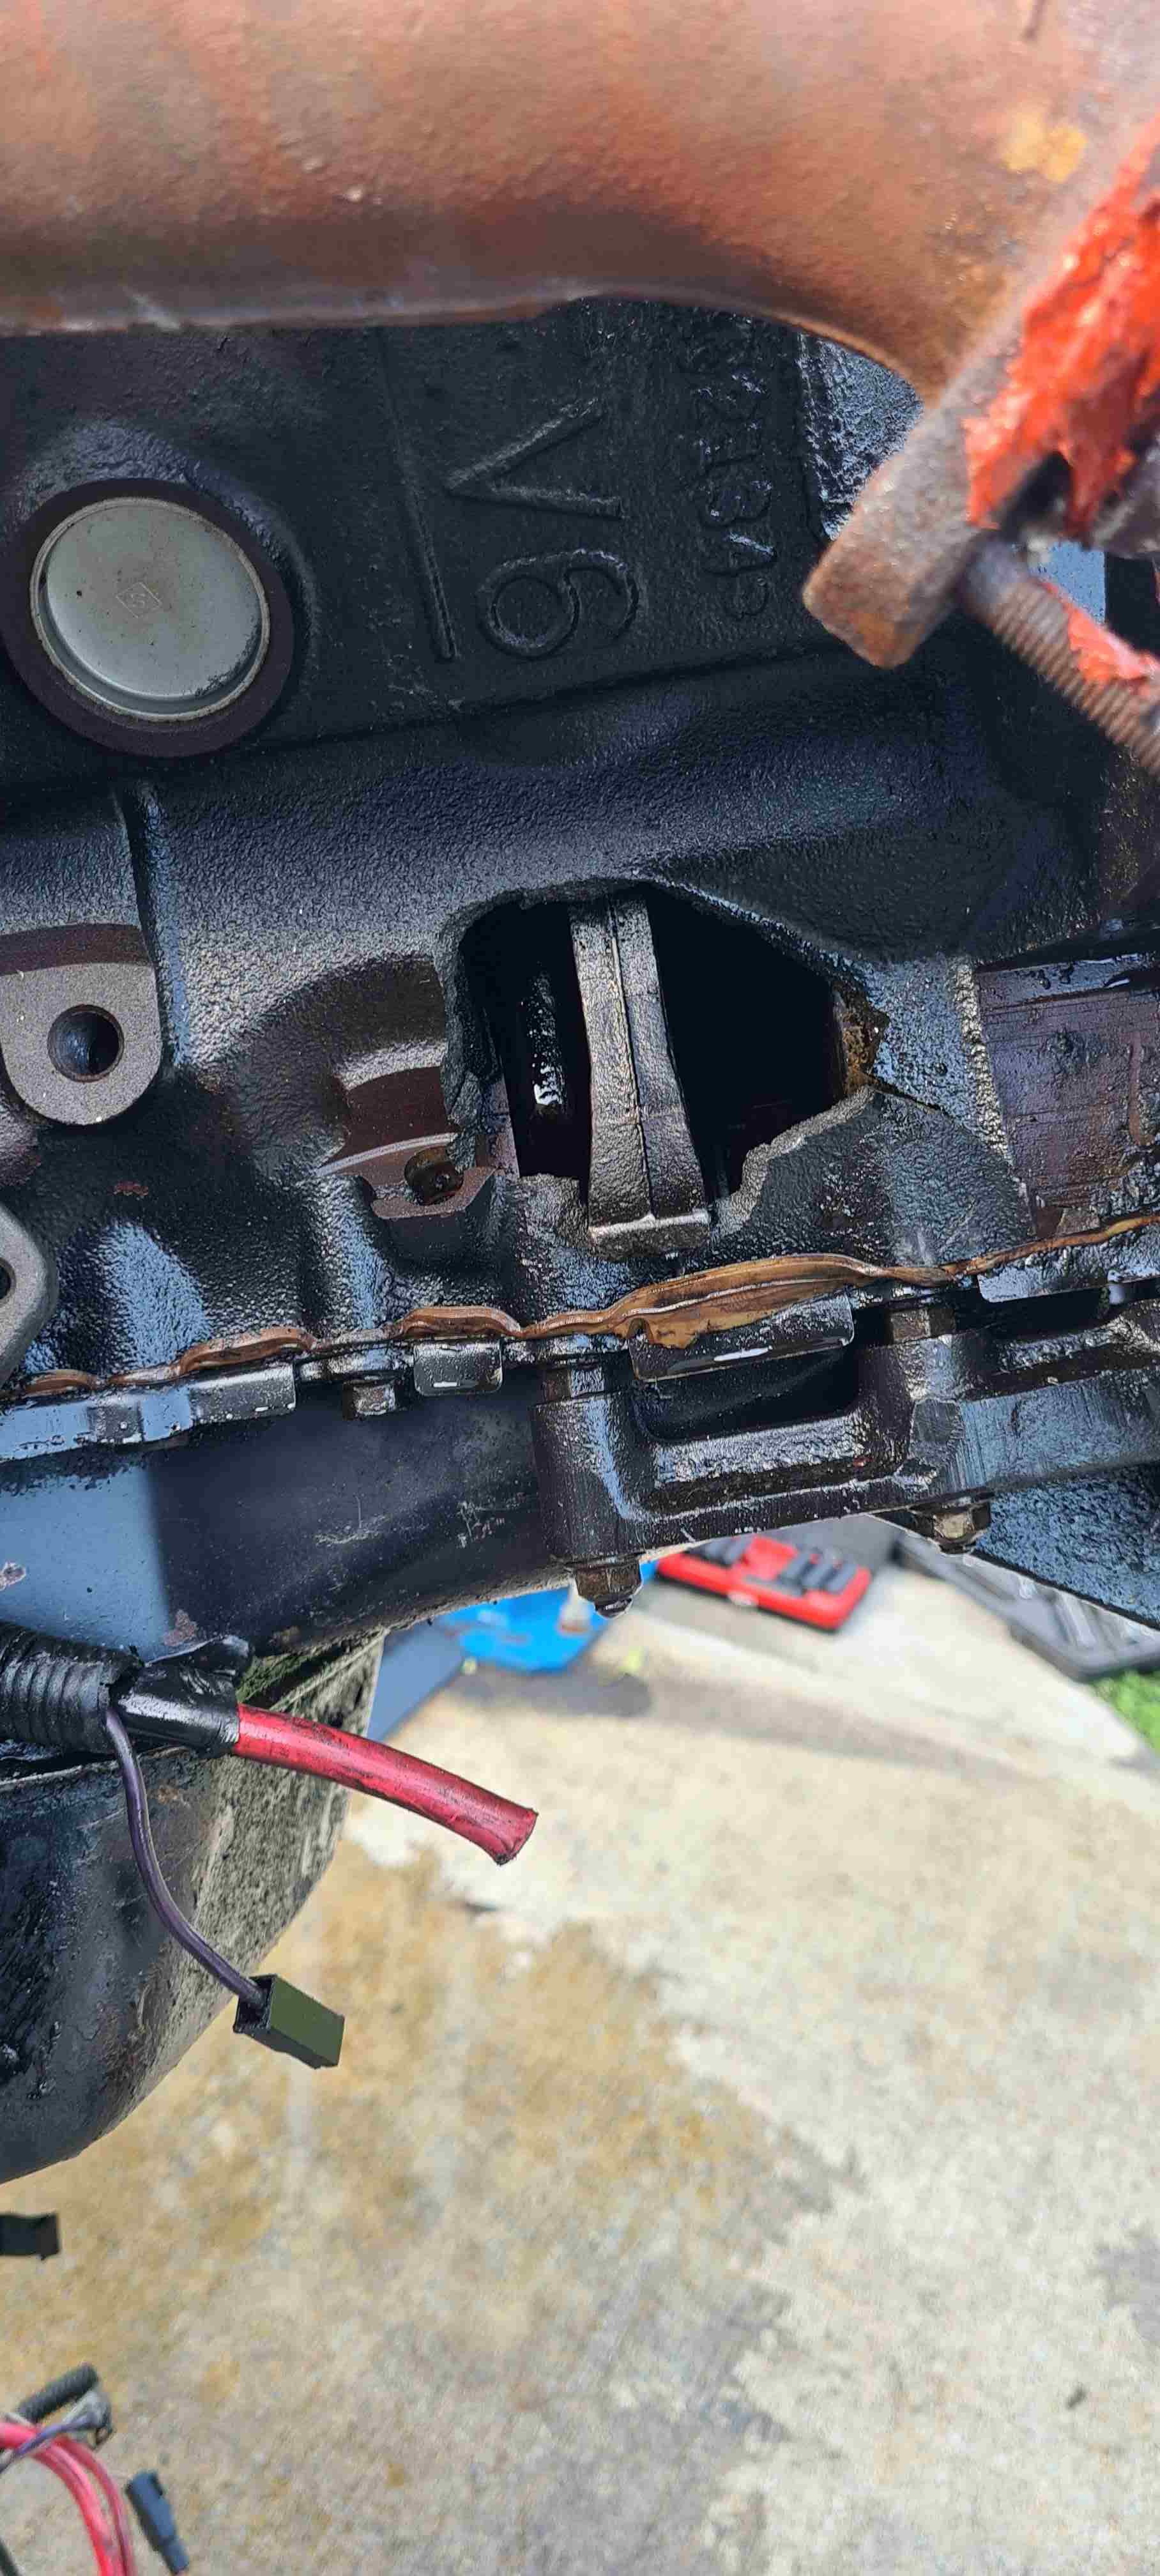
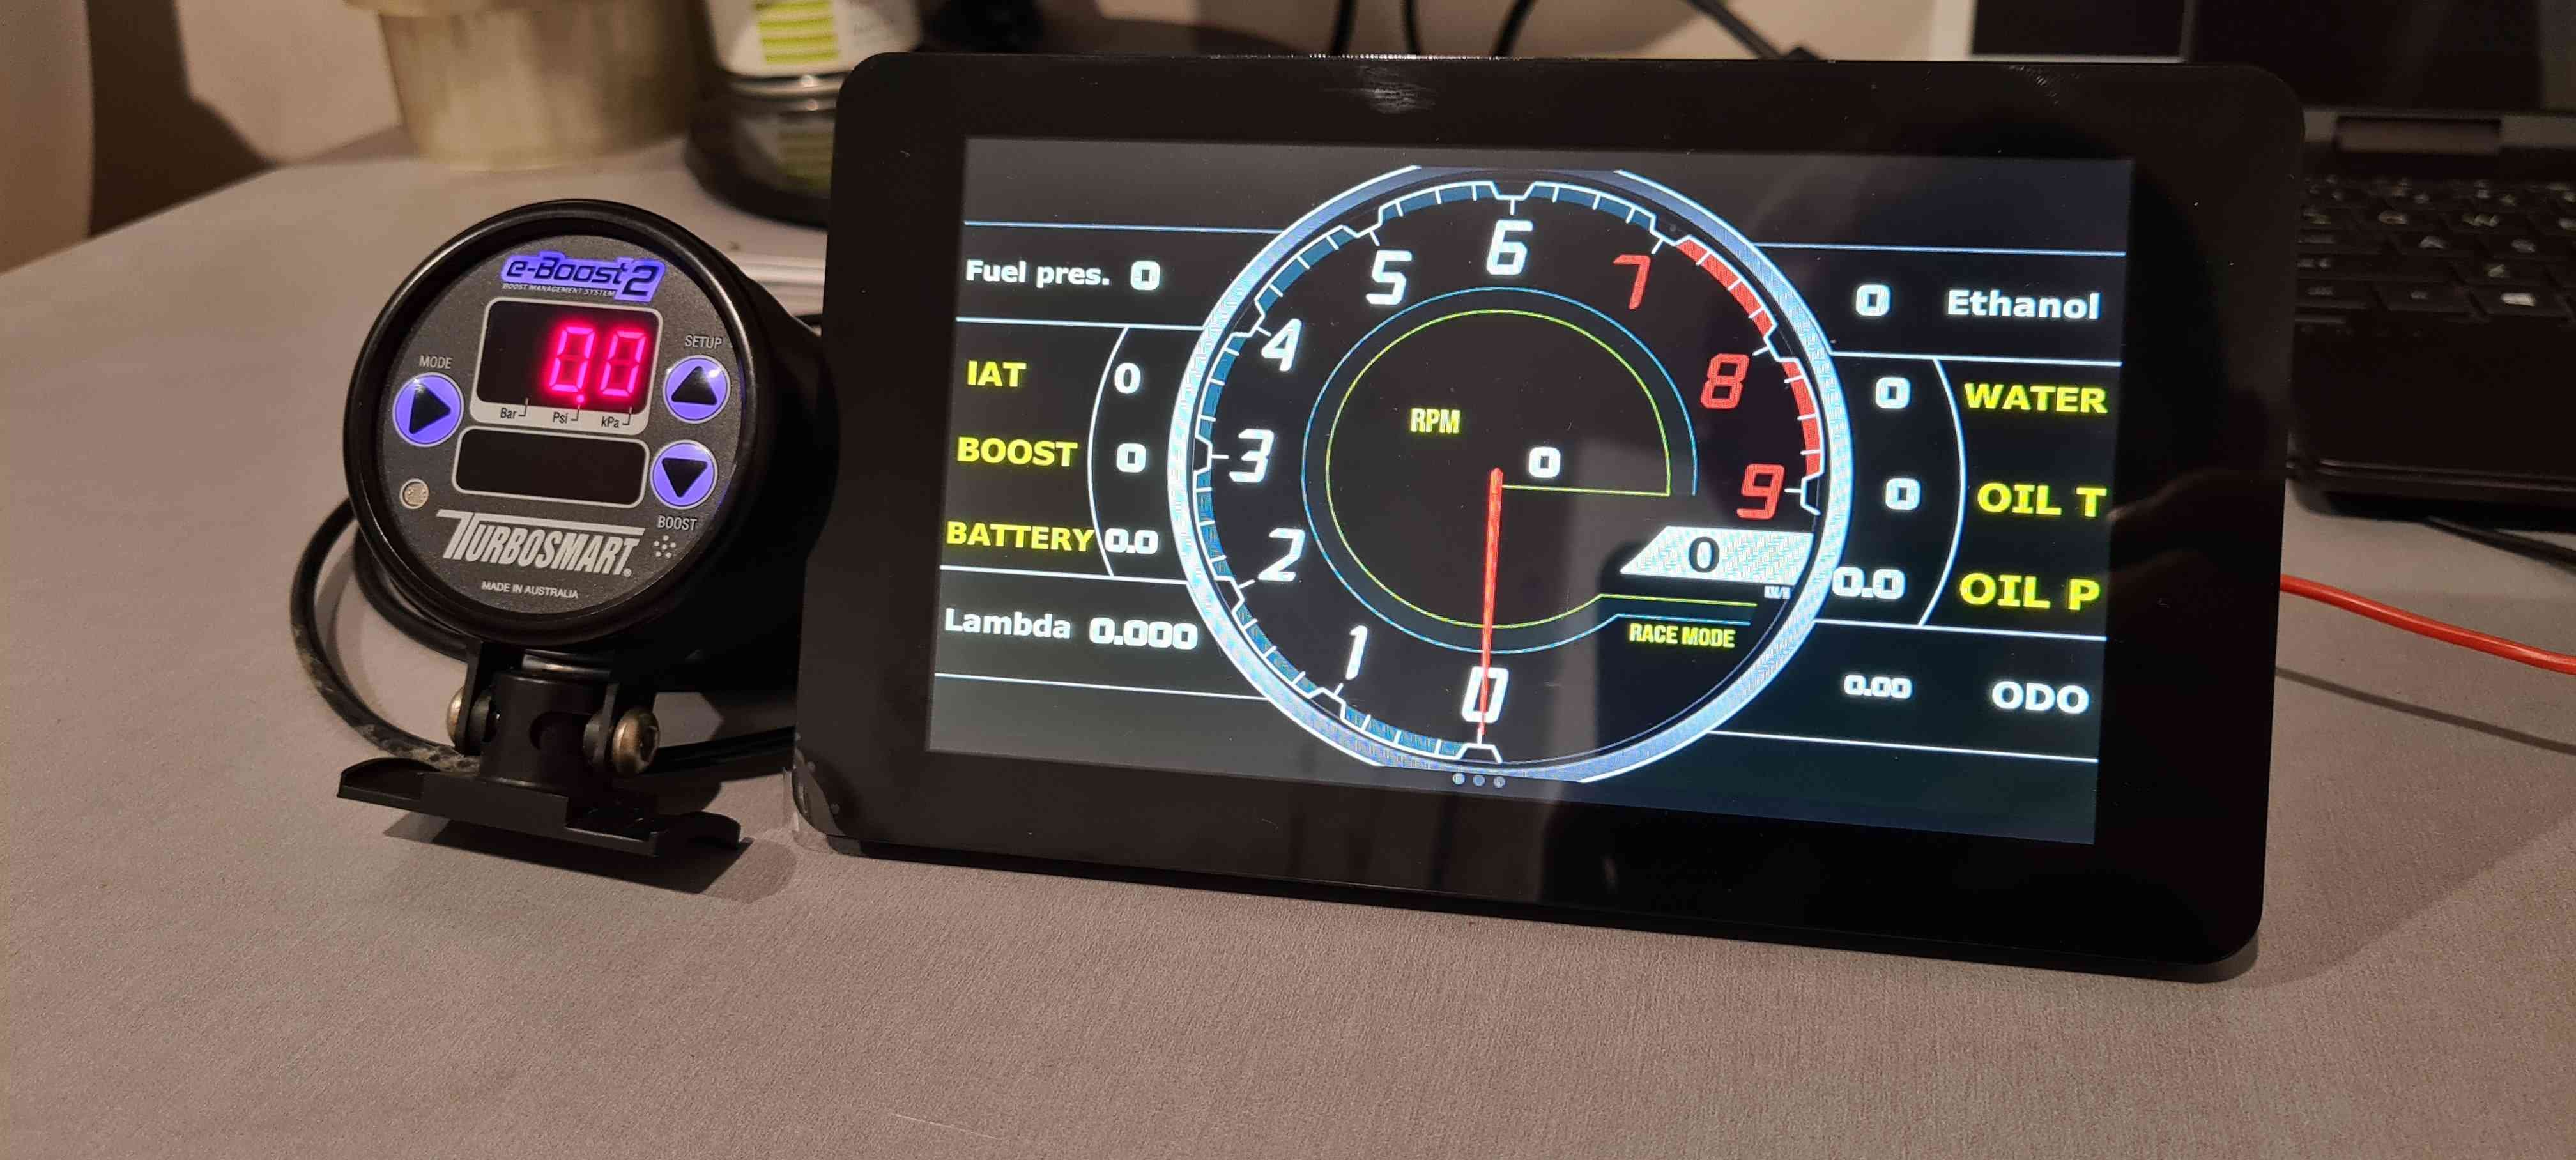
Time to chuck up a post about my latest project since iv just started pulling apart the donor car, starting with 1 VR commodore wagon the old 3.8s rod came knocking and put a window in the block. Iv stripped the interior of that, to make way for a 6 point sfi cage and rear tubs to the rails to accommodate wider rubber and a parallel 4 link 9", to be commenced early/mid 2021, Now the fun part the bf falcon some of you may know from such shenanigans as palmy/fielding 2020 swapmeet is giving up its engine for the repower to be backed up by a th400, now let's see what the stocker na can do with an FG xr6 gt3576 strapped to the side of it. Already got some goodies a powertune digi dash to run off the factory ford pcm and eventually the link g4 when it goes full send, also picked up an e boost2 to keep the boost pixies under control. Plan is to make it fully street legal and be able to swap wheels and tyres and go full send on the drag strip/power cruise and chrome.
2 points
-
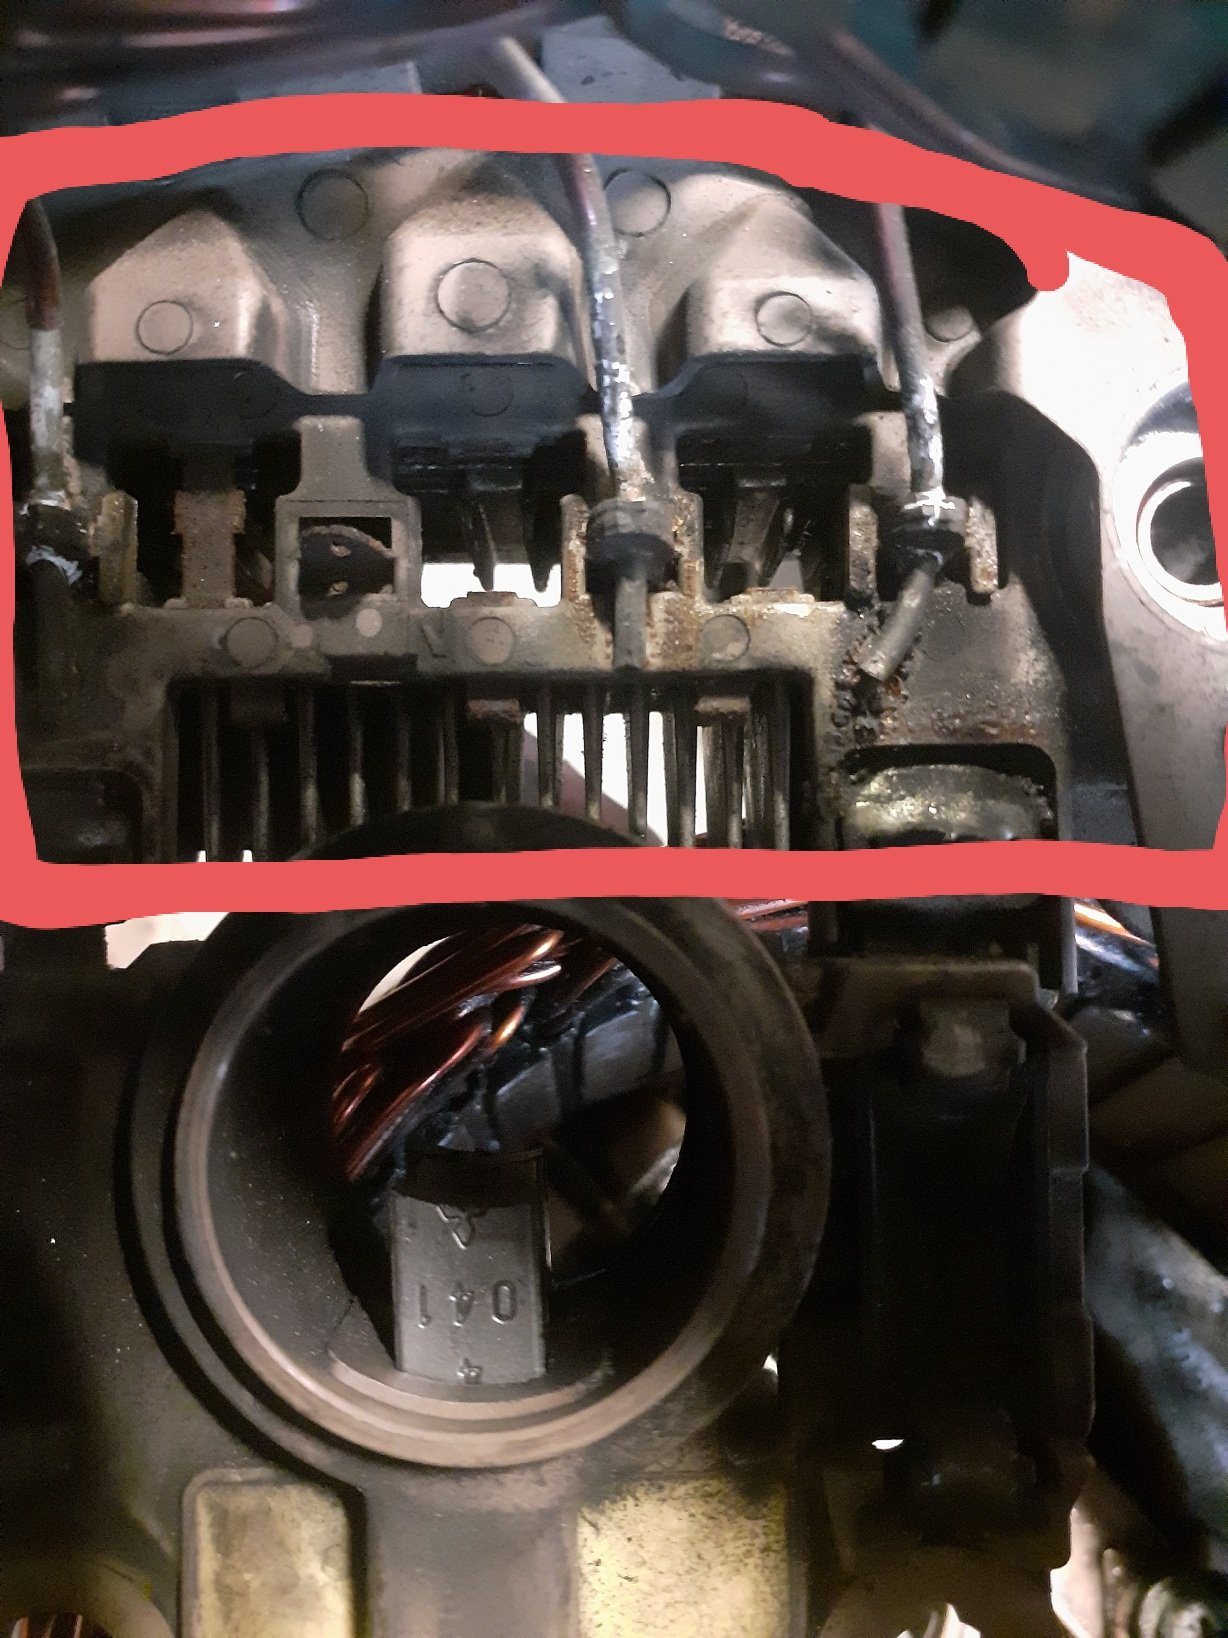
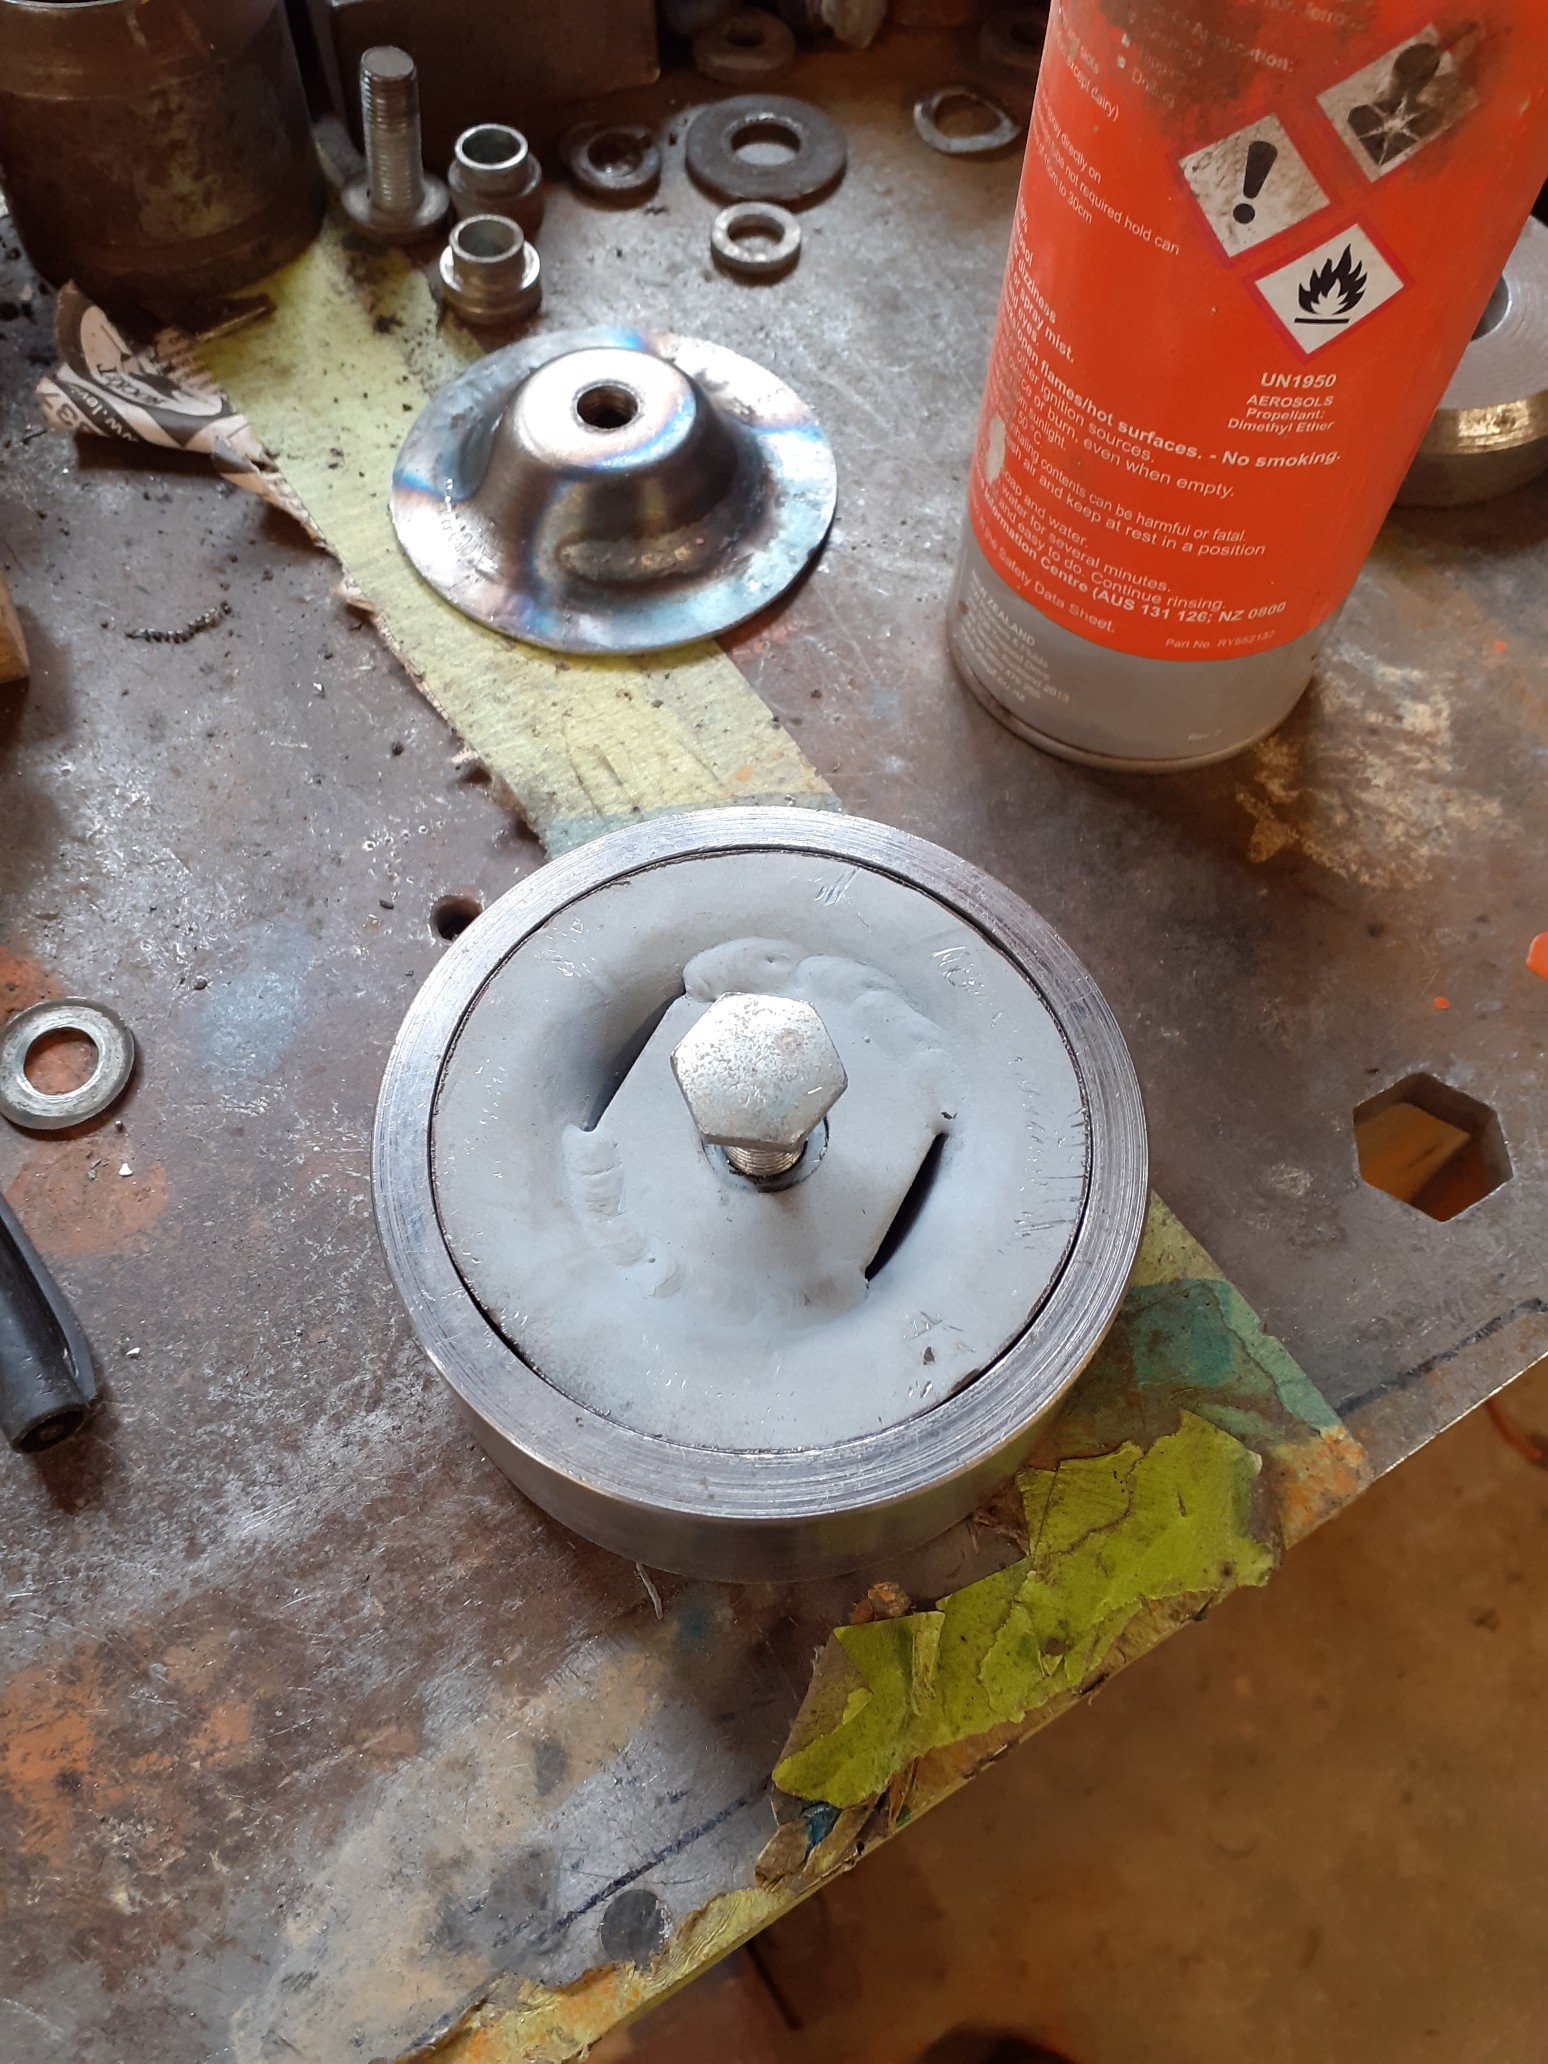
Get us one of these please love - this ones fucked. Previous owner has indeed filled the seal lubrication hole with silicone. Everything has also been reassembled less the electrical insulation stuff so the front bearing was pretty loose in the outer housing - had not been loctited into place as they recommend. Might need to get someone talented on a lathe to spin up a new spacer. This ones got a pretty decent groove in it from the oil seal and the front edge is also chooched so i cant just turn it round. I really hope its not part of the shaft! I guess I'll find out soon enough once I get a suitable sized puller to go in there.2 points
-
^ I remember how amazing yet horrible that was. said dumb shit, complete with youtube clickbait. if tldw. it almost gained 1kw. so success ? just need one of these2 points
-
GPS plotted a path of some of our journey yesterday. Stupid tide running away from us though, there only seems to be a couple hour window where you have useable water depth. boat journey 2-1-21 by John Bell, on Flickr2 points
-
Yip, thats how I was feeling as I figured out that a lot the wires are spliced and share common power/earths etc. But by testing the resistance (ohms) through each circuit using a multimeter, i got there in the end. Pretty common shit I guess...but for an electrically retarded person like myself, self teaching as I go along, its a lot of condensed learning to fit into my already closed mind. That said, I'm there now. Each wire labeled and each corresponding circuit tested and working via its switch. so I'm now ready to buy expensive tools to strip and crimp the wires and then try installing OEM style connectors, yet another thing I've never done...but will soon have to figure out quick smart If I want it to work.
2 points
-
I always knew this topic would end up at the holy grail, the su carb2 points
-
Next video will have dumb shit
2 points
-
Its alive! Idles, revs and has oil pressure (the light turns off) and fuel level sender , as you can see not much else but a good sign I haven't shorted stuff out or done something wrong, now it's just tidy tidy everything, happy new years!
2 points
-
Got the body in primer about 6 weeks ago It then took me all that time to get it up to a reasonable state so that it could then be painted. So then a couple days a go we loaded it up on the trailer (only just fit!) and dragged it into the spray booth at work. Sprayed the base and clearcoat on, it turned out pretty good! A few runs around in places, but nothing that can't be fixed. Pretty stocked really! Could of easily gone wrong haha. Gonna leave it in the booth for a few more days to harden, then take it home and get some underseal on the underside. In the meantime get the rest of the panels ready for some paint too.2 points
-
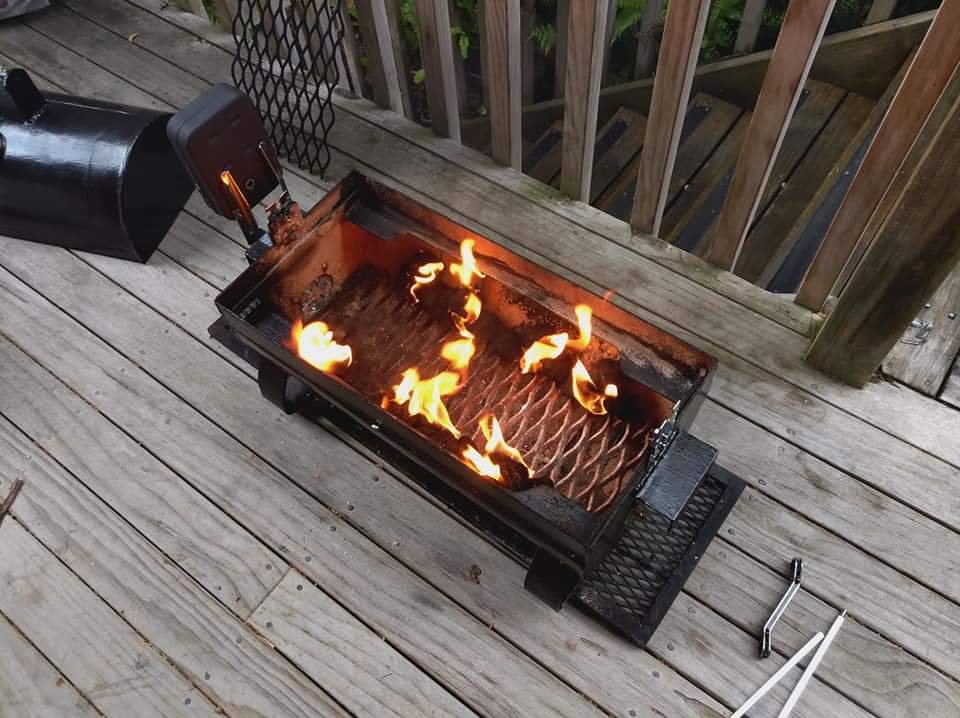
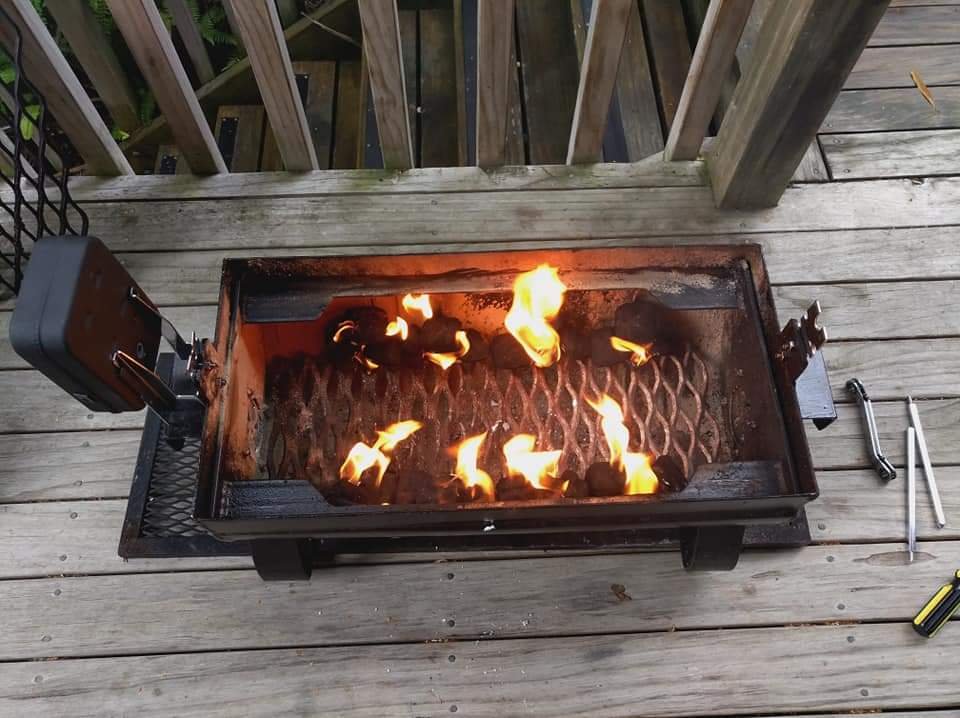
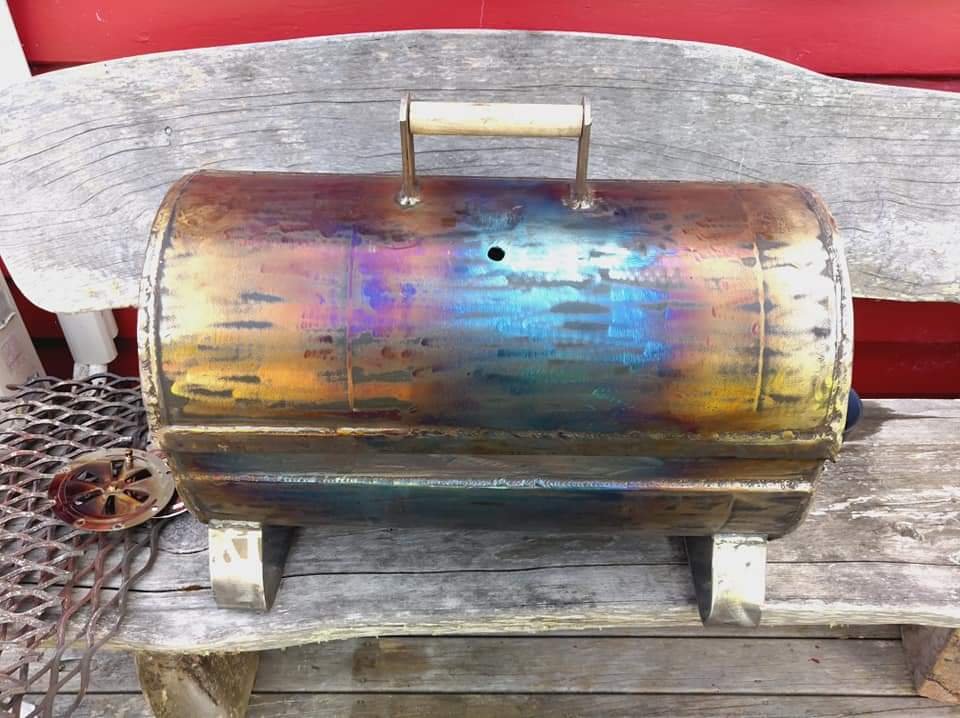
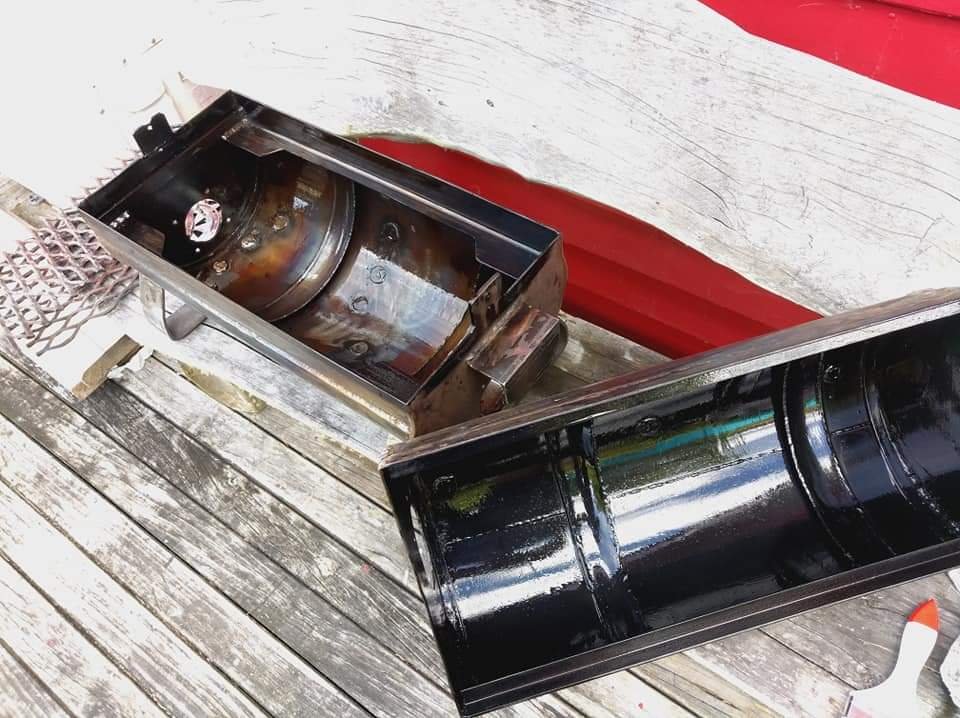
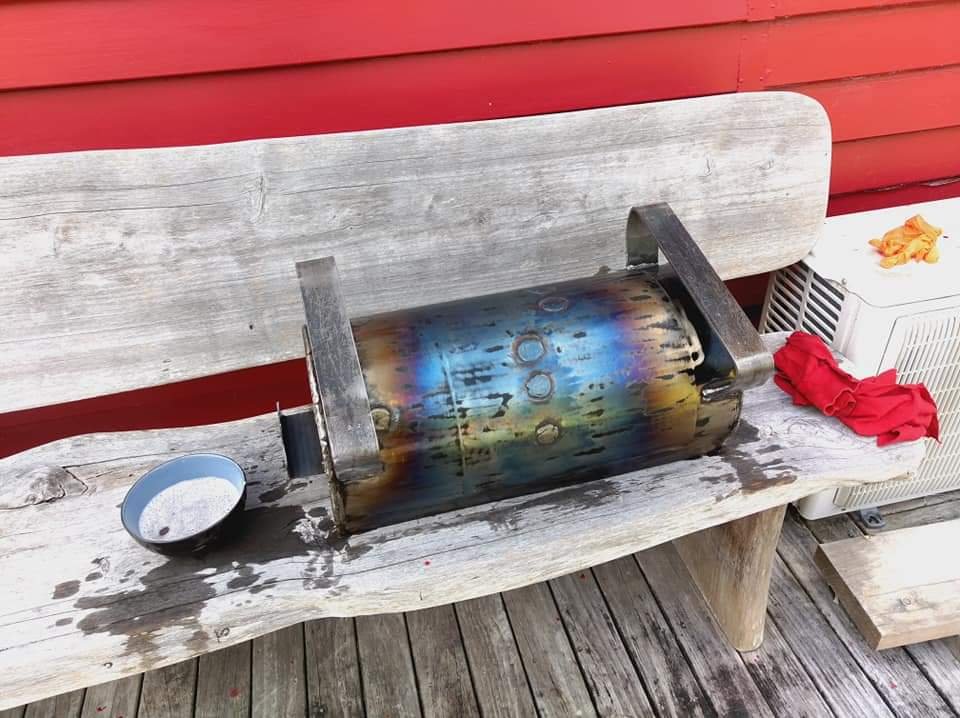
Burn off the other night went well. Got it to 500f and it held there for atleast 3 hours without adding any extra fuel. Left it going when I went to bed. Had a look in the morning and it looked like this... Emptied out the ash and gave it a good clean to prep it for seasoning and paint. Just used olive oil on the inside as that's all I had and Mangawhai shops are shit to go to this time of the year cause of all the jafas and northern bass homies.
2 points
-
So yeah, as seen above, took it back to the water yesterday and it does run a lot better when its not breathing its own fart cloud. Picture of failed engine mount and V band that needed toightening. IMG_20201228_170634 by John Bell, on Flickr I'm not completely happy with its performance though now its making full more power, it doesn't 'bite' the water like I would expect, if you feed it more power than it can shift water, it nangs out and feels slower than if you were to nurse it up to speed. You can see/hear this in one of the vids. It handles a quite loosely, but I don't have much reference to compare it to, aside from the donor ski which carved corners like a water-skiing cut cat, comparatively. If you do manoeuvres that are too aggressive or any spins it comes off the plane pretty easily and doesn't pop out of the water like the motor seems capable. So next step is to look at the spare jetunit, if its any better pop it on for testing, and I feel I'll probably wind up giving one of the pumps a birthday. Cute IMG_20201228_182945 by John Bell, on Flickr2 points
-
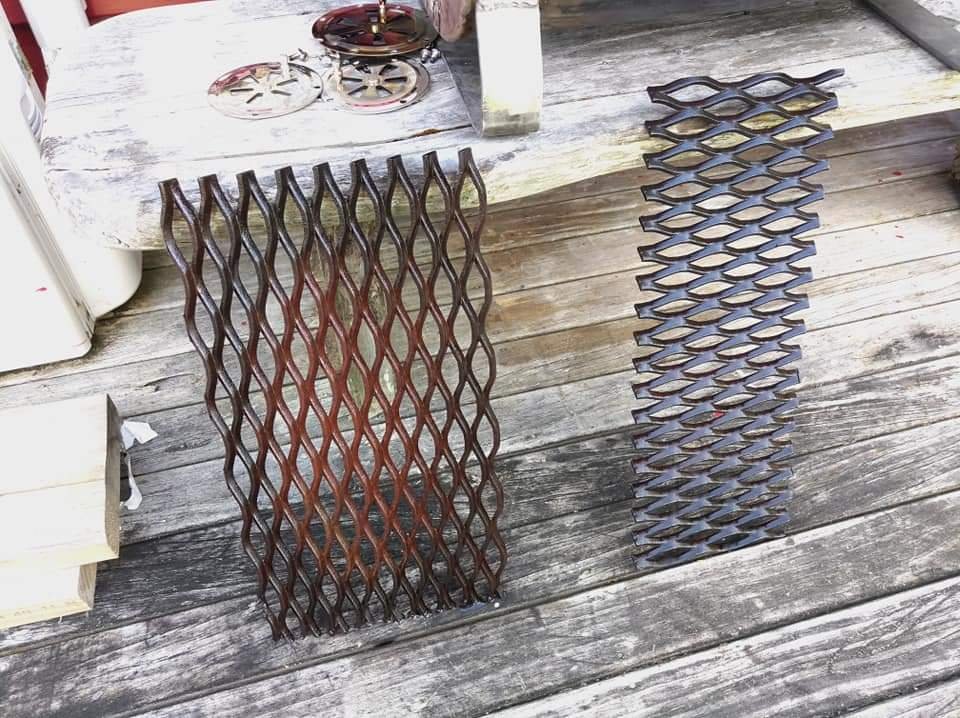
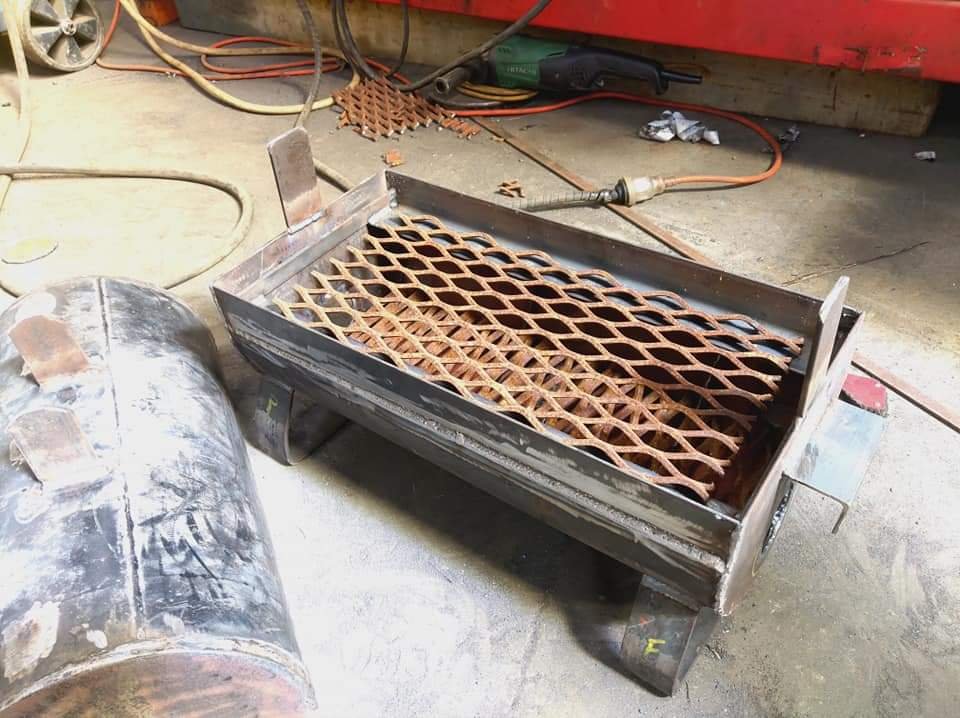
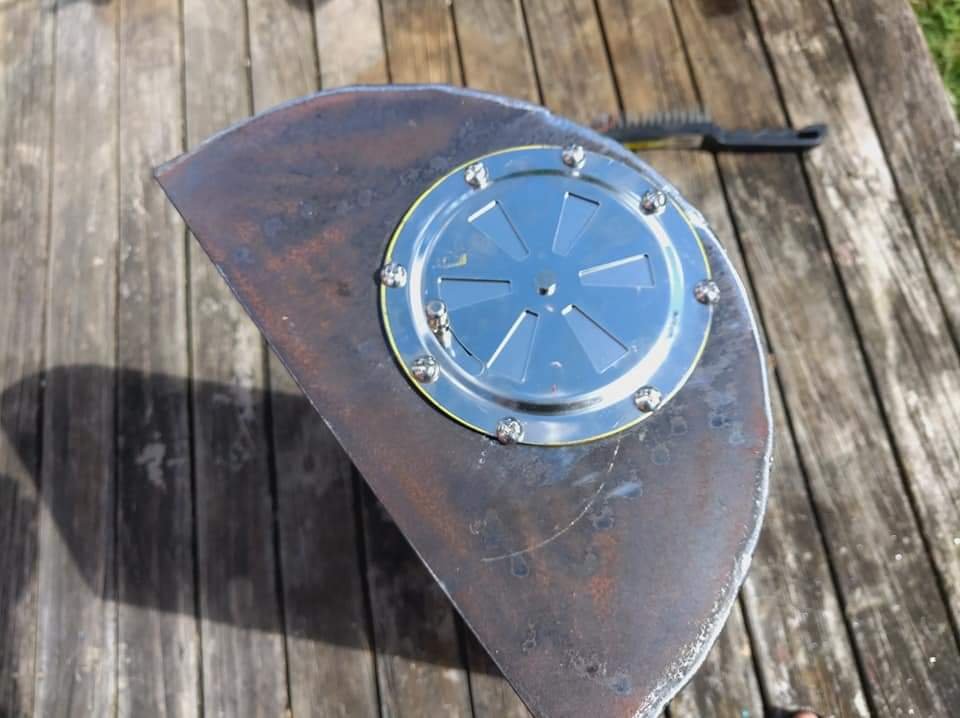
Cut up some thicccc expanded mesh(this shit is about 10x6mm thick and expensive as shit. We use it for guarding heavy machinery, luckily we had some left over for the coal rack and also for the grille. And here's the upper vent mocked up. These are called butterfly vents and are used for marine purposes. Took me bloody ages to find something like this
2 points
-
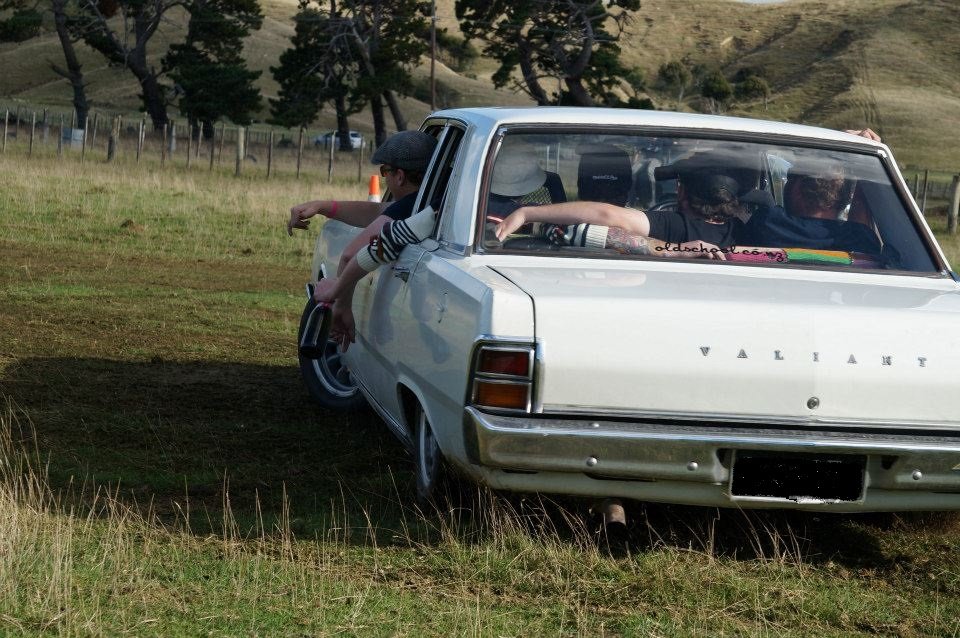
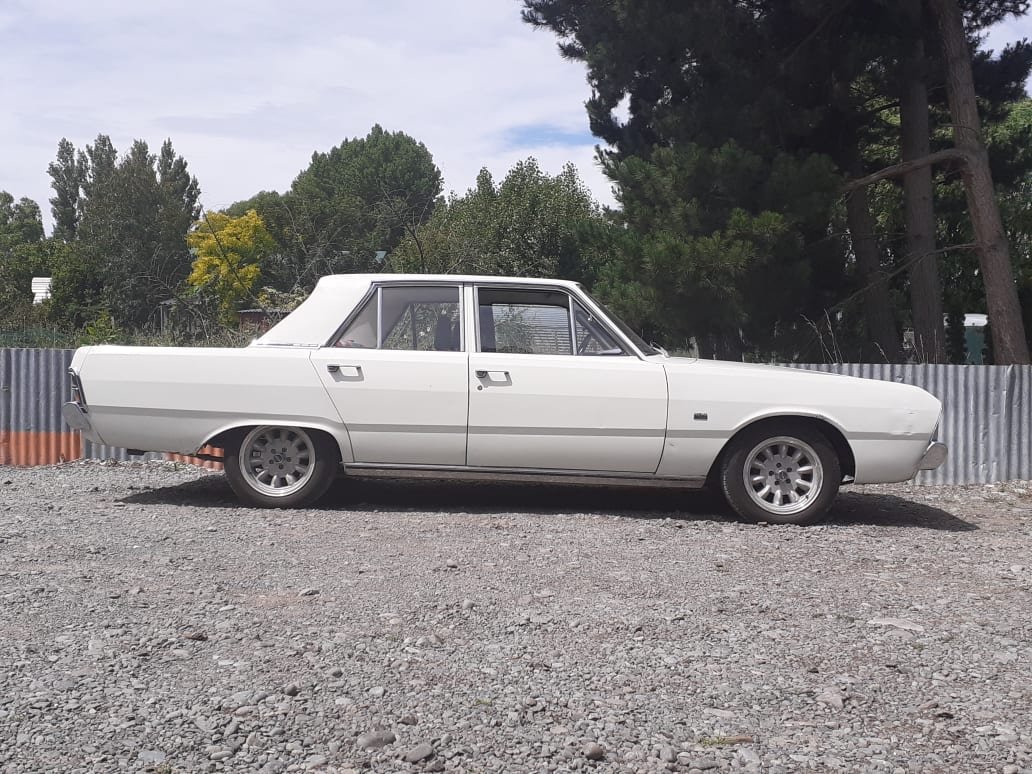
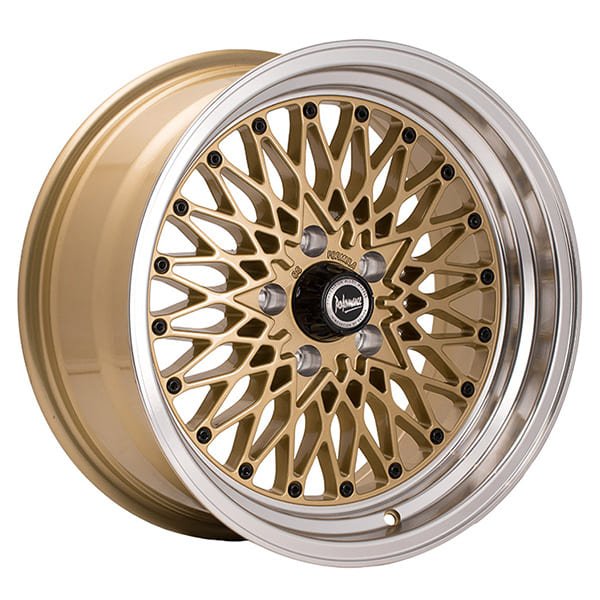
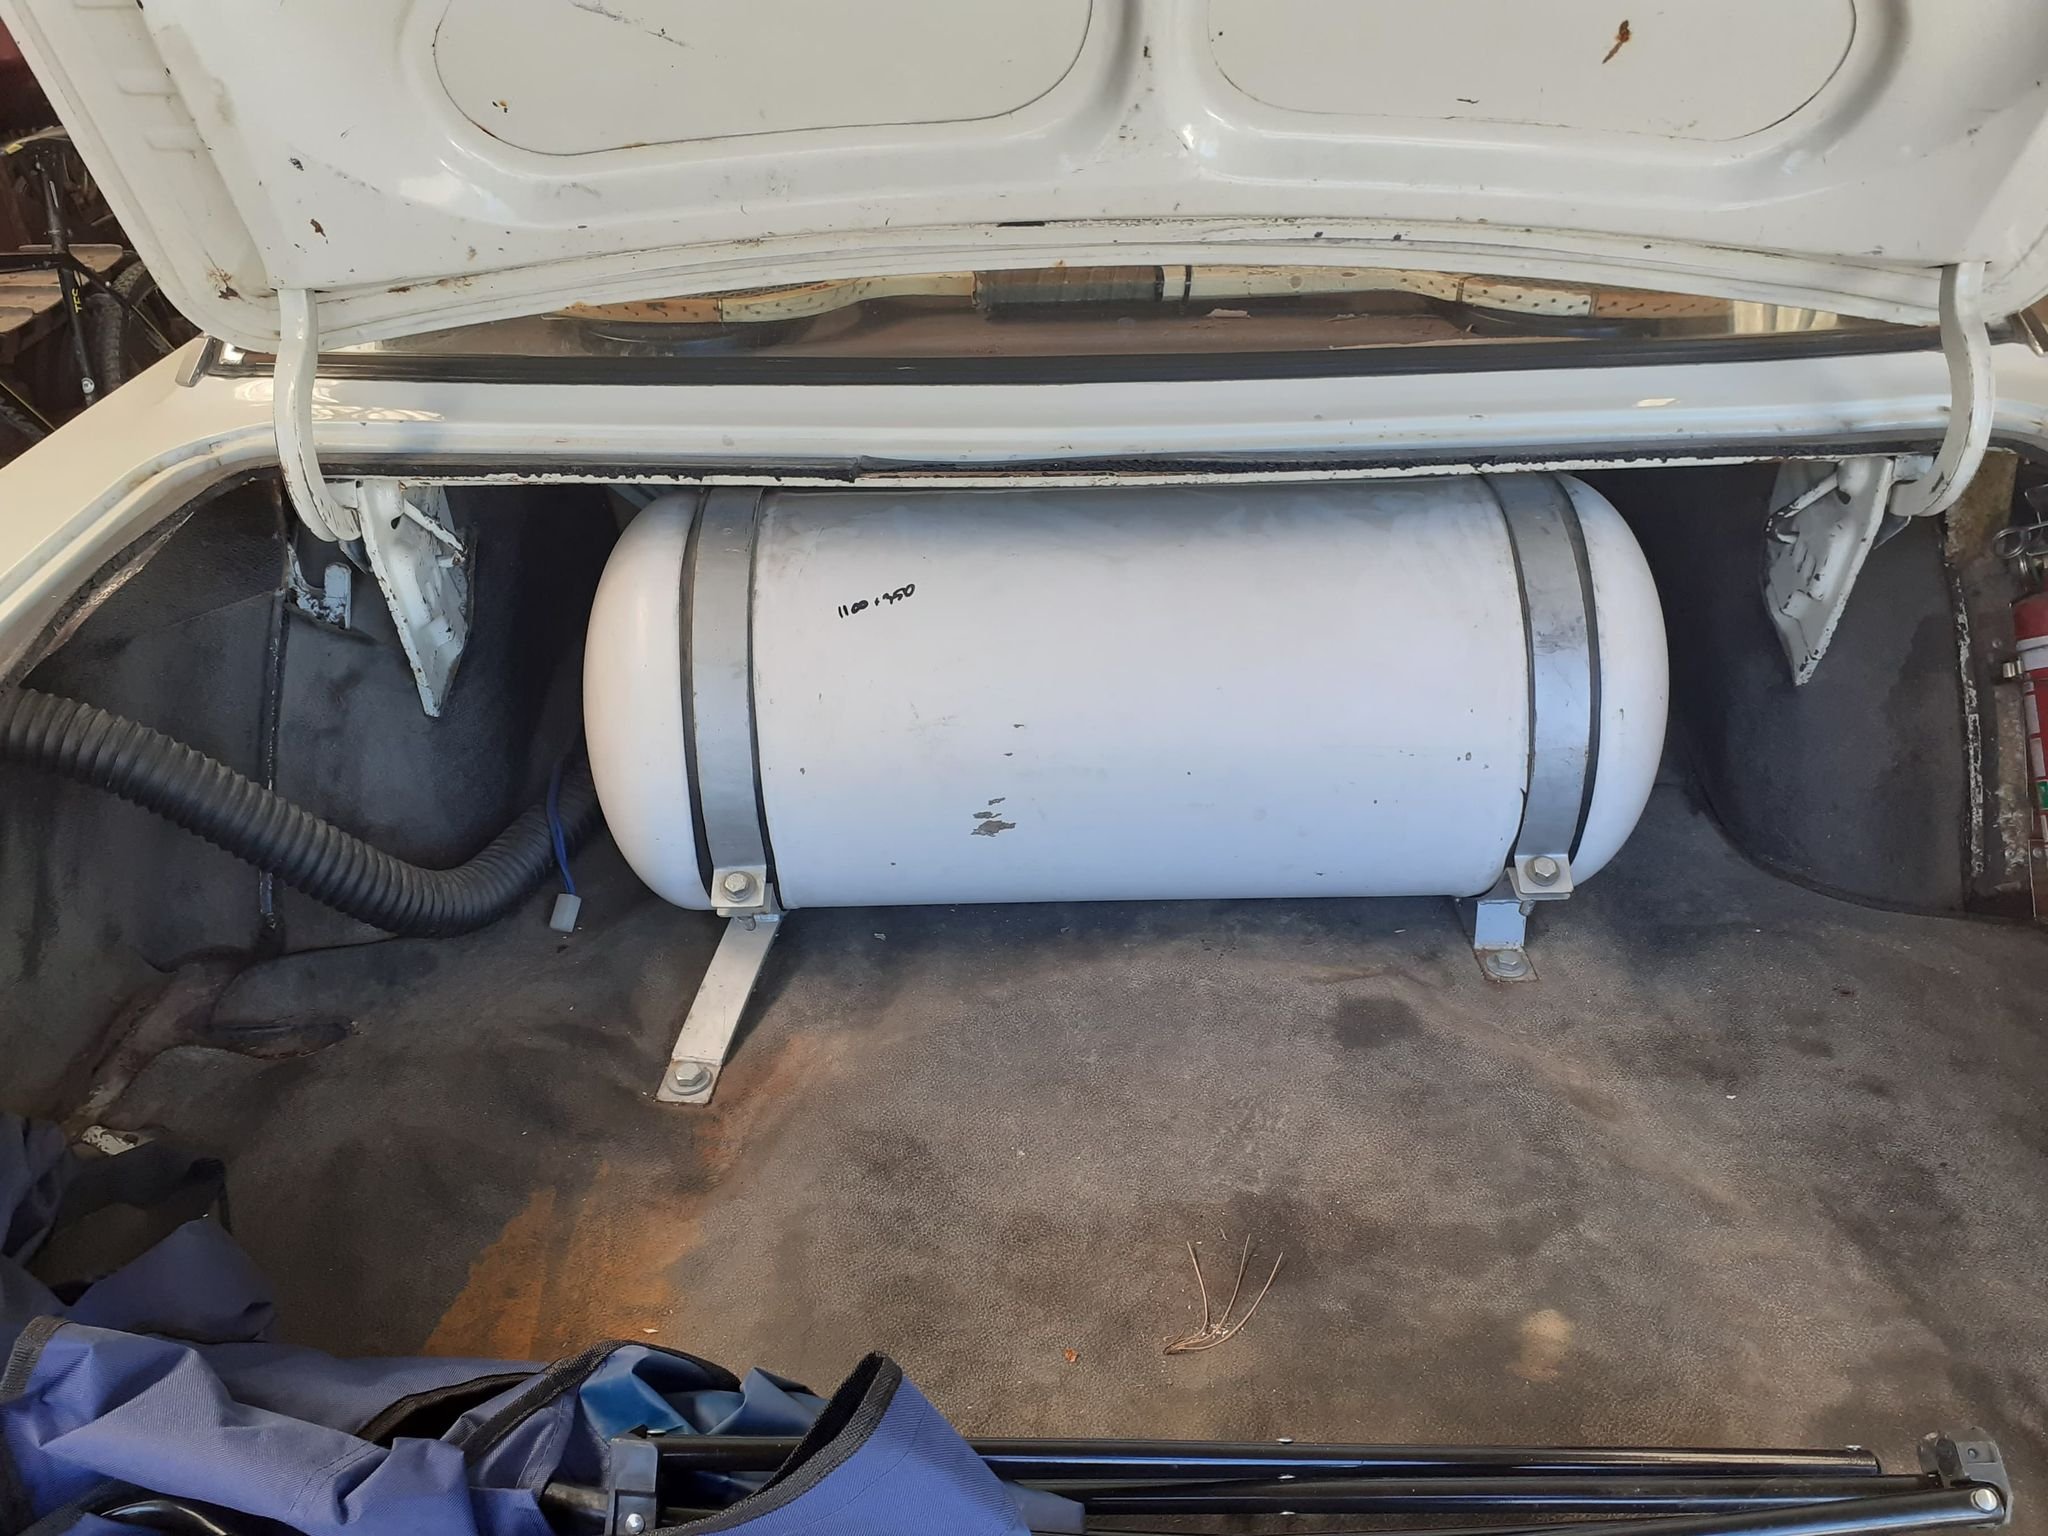
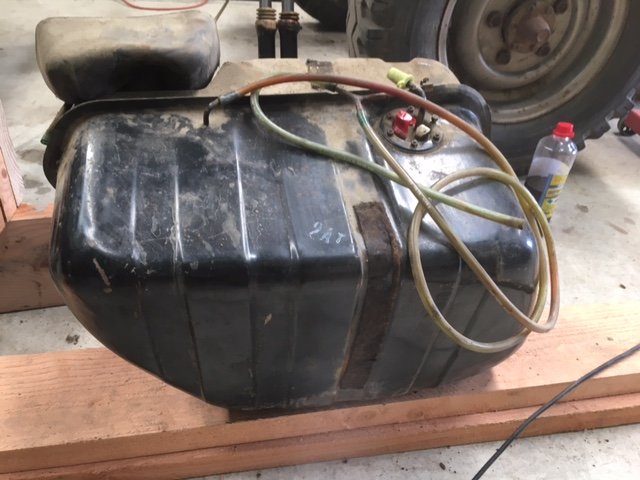
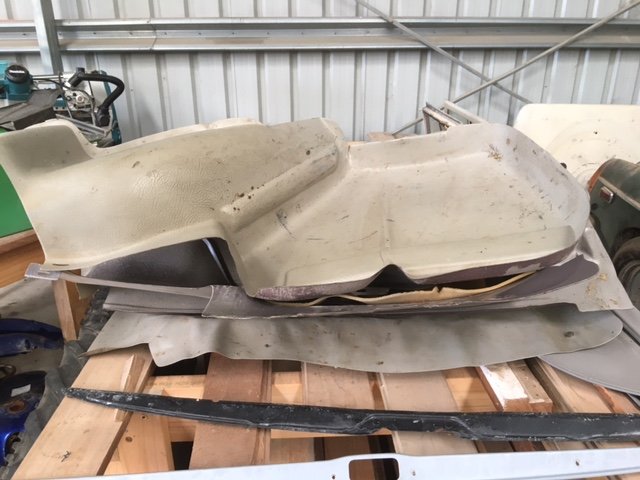
Bushes replaced and the Valiant drives nicely again. One of my boys finished year 8 schooling, they have a formal and parents etc are invited to drop their kids off at in front of the school hall pre formal. The valiant beached quite loudly as I was turning onto the field which my son thought was fantastic. Good boy! He was very keen on some school field paddock work. I exercised the utmost restraint and no circles were done. Here's a pic of some previous grass silliness. I put the Superlites on for the school run. Then decided I didn't like them and took them off the next day. I'd quite like a set of these modernized Cheviot Quattro's but the budget won't stretch that far at the moment. anyway that's enough sharnes. I have done some productive stuff too. I got my big fuel tank re tested, blasted and painted. It's slightly larger in diameter and considerably longer than the old one. My calculations suggest it will hold about 20 Liters more fuel than previous which equates to about %30 more. Luckily I managed to fit it into the old tank straps which was a bonus and saved much fucking about. Old. New. I Need to sort out some new ducting as the tank has is designed for 60mm as opposed to 2 inch as before and I'll be ready to run. This tank has a little magnetic gauge sender unit that is miles different resistances to what the factory sender had. It looks fairly simple and I'd like to see about getting it changed so I can use my factory gauge. Has any one in ChCh delt with E Parrot and Sons since it has changed hands? Are Robinson instruments still around? Suggestions please.
2 points
-
And some photos to stick on the fridge2 points
-
I'm pleased to announce this boat has successfully completed stringent reliability and performance trials including but not limited to... Shallow water performance Low speed maneuverability Higher speed spins and dicking around2 points
-
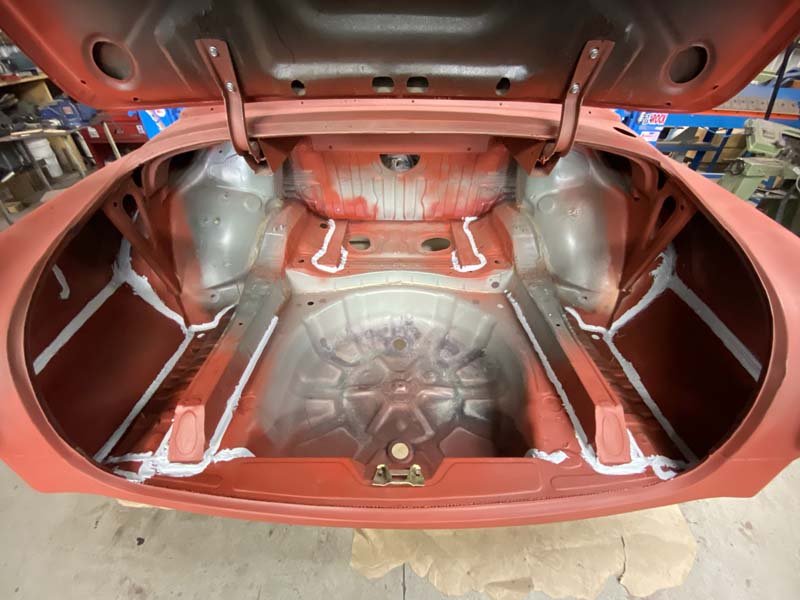
Finished up the bumper mounting brackets. 5x large plug welds down through the floor skins into them. Outer edge also has a strap on each side, which it is also plug welded through. Also filled the last of the holes in the sills. Have now painted a chassis black primer underneath, anywhere underseal did not exist. Seam sealer tomorrow. Then spray on underseal.
2 points
-
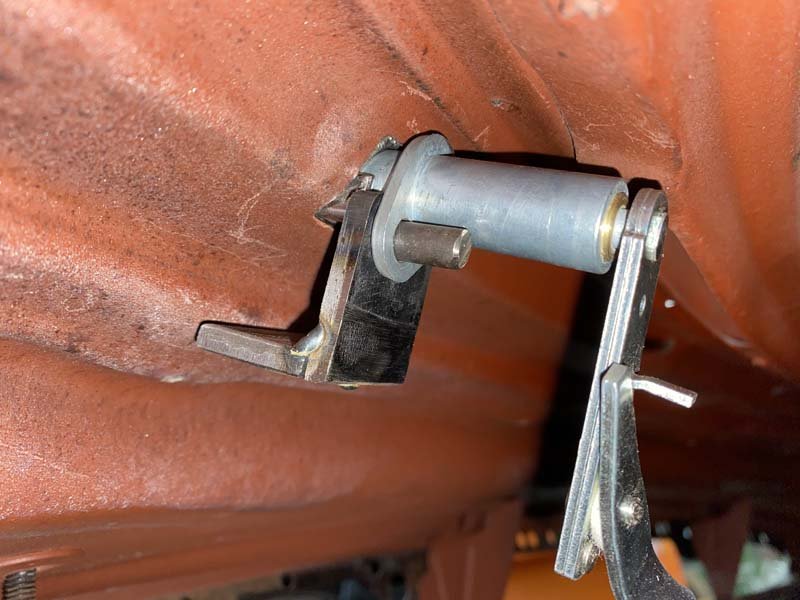
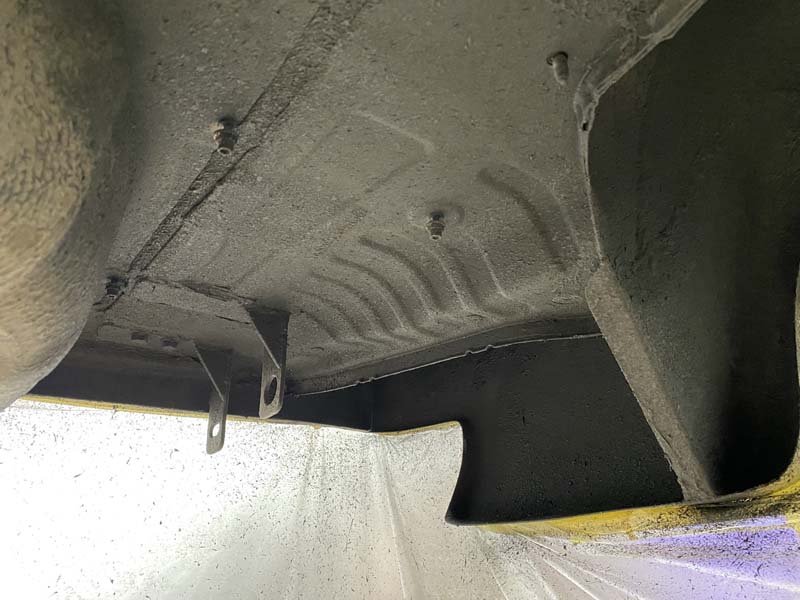
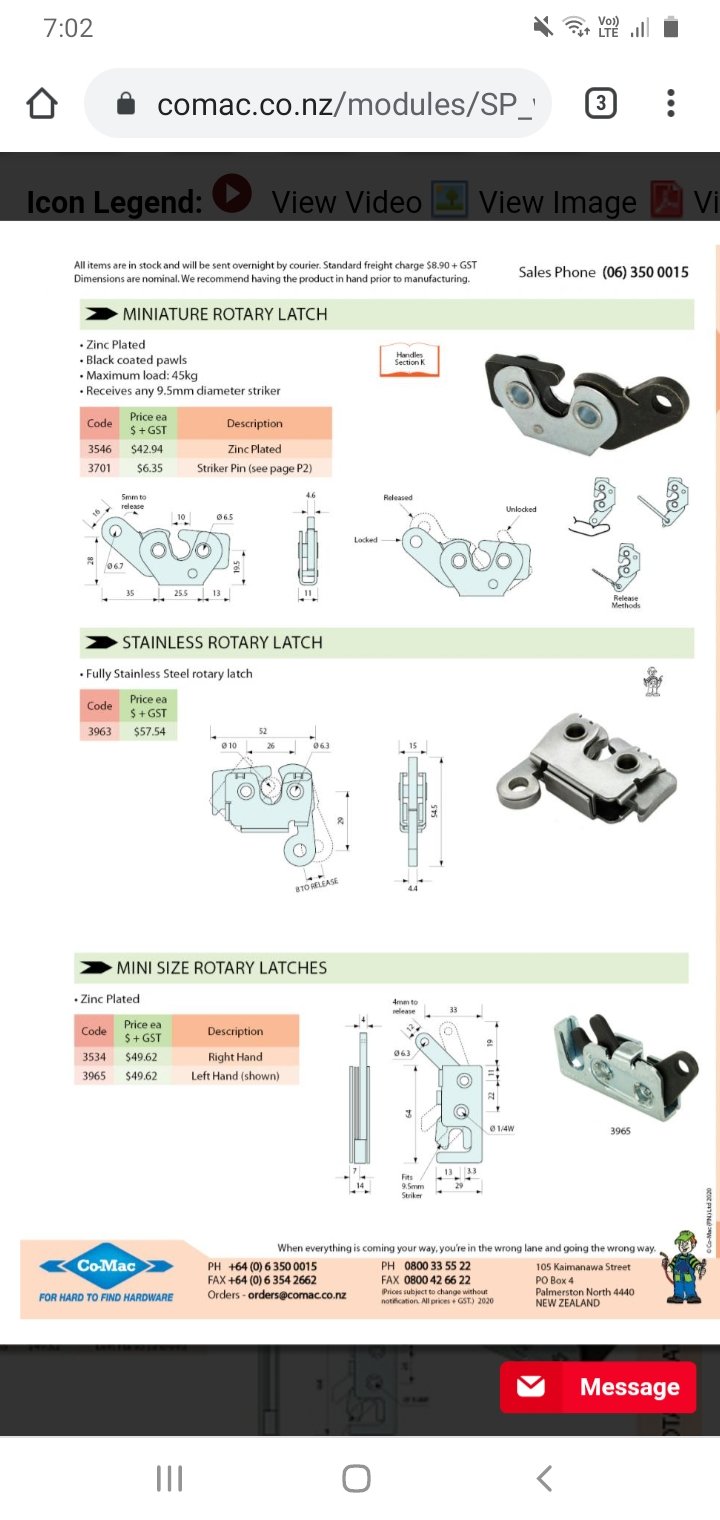
Have all the interior door handles back on. Modified the rods and clips from the Lexus doors. To join the Chevy Handle mechanisms to the Dakota Digital Bear Claw Latches. I had to modify/weld the lever on the Dakota Digital bear claw, so it would pull forward/Back, instead of Up/down. And had to cut the existing holes in the door a little bigger. They work beautiful and reliably so far. Latch smoothly. And have a good amount of movement in the handle, before they release the doors. Next up was the brackets for the rear bumper. Folded up a couple of 50x5mm steel brackets to bolt onto existing m12 holes. Couple more to make for the front of the bumper irons. Then all will be spot welded through the double skin beam in the floor, that the factory tow bar and hooks is mounted to.
2 points
-
image-20170130_123129 by John Bell, on Flickr So the old man spotted this plastic bath toy at his local WOF spot a few years ago. They (not a marine workshop, a backwater automotive garage) were unable to make it run. The old man pestered them every six months for a while till they sold it to him on behalf of the owner for a reasonable price (for a lump of plastic). He then squirrelled it away in a barn until we built a shed at our place, we then squirrelled it away in my shed. I decided to take ownership of this project, and proceeded to do nothing with it, as is customary. I am far from knowledgeable about boats (or anything), but can run google and the telephone pretty well. It appears to be a Tuff Jet, they were built by a Whakatane based business for a while (now based down south). I believe this one to be a pretty early iteration, likely late nineties, early 2000's. Roto-moulded polyethylene 2.8m 2 seater jetboat. (Yet to put a tape measure over it, but later models are stretched an extra 400mm or so). Just over 300kg (I'd like to weigh it to confirm though), this one is fitted with a 2cylinder 787 Rotax as found in Seadoos of the late ninties. Quoted 110 Canadian HP. Some forum post on the internet says that the plastic hull has a UV warranty of 25 years, so hopefully the fact its been unused in sheds for the last 10 means I have more than 5 years of life in it. I poked around a bit and learnt that Seadoo used a highly advanced (for its time) all in one CDI that included an immobilizer using a security coded lanyard. Cool. My money was on that being quite shit, based on its resistance to do the sparks or allow the cranking. I was reluctant to bring it to a dealer to have its lanyard replaced / diagnosed until I knew the motor was better than it looks. Shorting the starter solenoid said it was quite fucked, and would not rotate, I freed it up, and a compression test confirmed, it was indeed as shit as it looked. IMG_20180926_183501 by John Bell, on Flickr SOMEBODIES BEEN IN HERE IMG_20180926_183510 by John Bell, on Flickr At this point it nothing happened for a few years while we brainstormed compact alternative powerplants that we were capable of making work. This would be a perfect opportunity to fit something modern, more efficient, and in known good condition. Naturally at this point I purchased the cheapest donor Jet-ski with the same engine I could find after trawling trademe and facebook marketplace relentlessly. I'll learn this lession twice. IMG_20200701_143340 by John Bell, on Flickr Amusingly the banana is supposed to make about 40hp more than a Jimny, and weigh about 1/3. IMG_20200701_165559 by John Bell, on Flickr WOAH IMG_20200701_165553 by John Bell, on Flickr RADICAL IMG_20200701_165544 by John Bell, on Flickr I feel (more) like a scumbag instantly. Popped it in the harbour one night after work, to try and assess it's health. 109576785_1549285395257880_4072391247589855252_n by John Bell, on Flickr 110336327_323032162200748_7293717375980309486_n by John Bell, on Flickr As you'd expect it had a dead battery, jumpstarting a thing that is always in gear is a bit awkward. My only experience of Jet-skis being a JS300 childs Jet-ski I was very impressed and thought it to be very good initially. Potato footage. It wasn't running 100% but appeared to go hard, until it stopped abruptly at wide open throttle in what suspiciously seemed like a heat seize, followed by a flat battery, followed by having to push it back about half a K across some oyster beds. NOICE. Speedo reckoned it was good for about 80km/h water speed though. I got a battery and did a compression test on the Banana yesterday, got an even ~130psi across both pistons, which doesn't seem massive, but its even, and it still runs and nangs the limiter so I think I'm gonna send it. So the Green Croc is covered in dust and reeks like 10 year old stale fuel, but now that @keltik and @Vintage Grumble have both purchased jetboats, its time I go and break down on a body of water with company, at some stage before summer I would like to swap powerplant, tidy up the plumbing and wiring, check carbs and fuel/oil system, and go get stranded somewhere. IMG_20201110_144127_1 by John Bell, on Flickr IMG_20201110_144119 by John Bell, on Flickr1 point
-
Set your second fan up to another cone on the exhaust tbh1 point
-
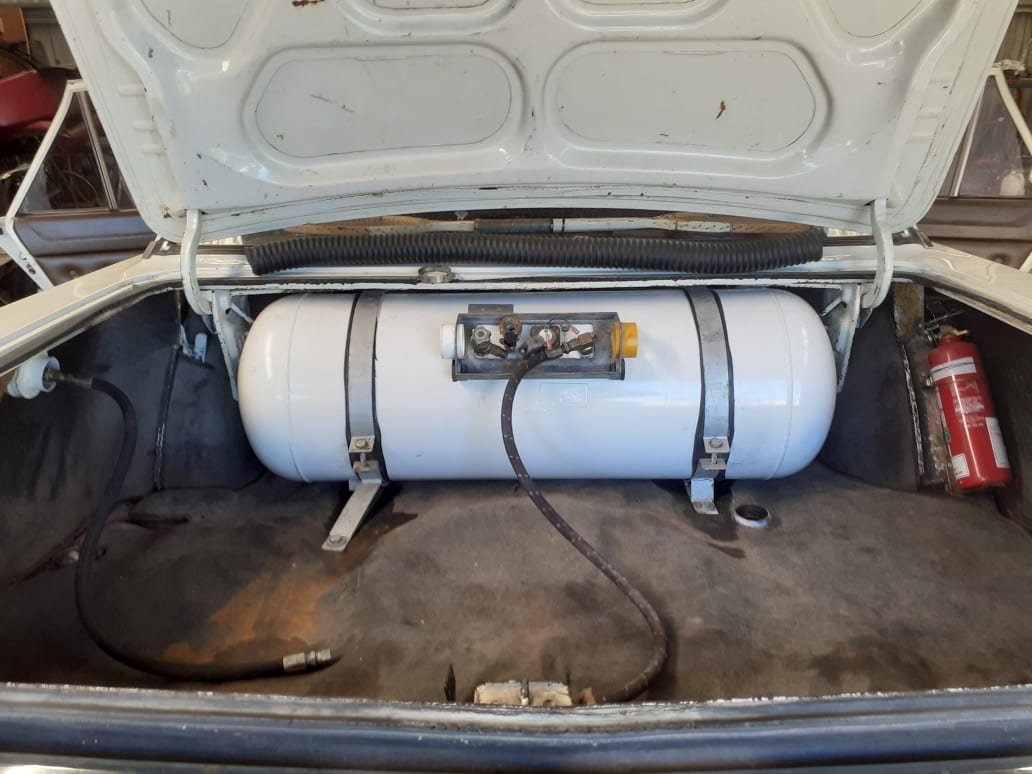
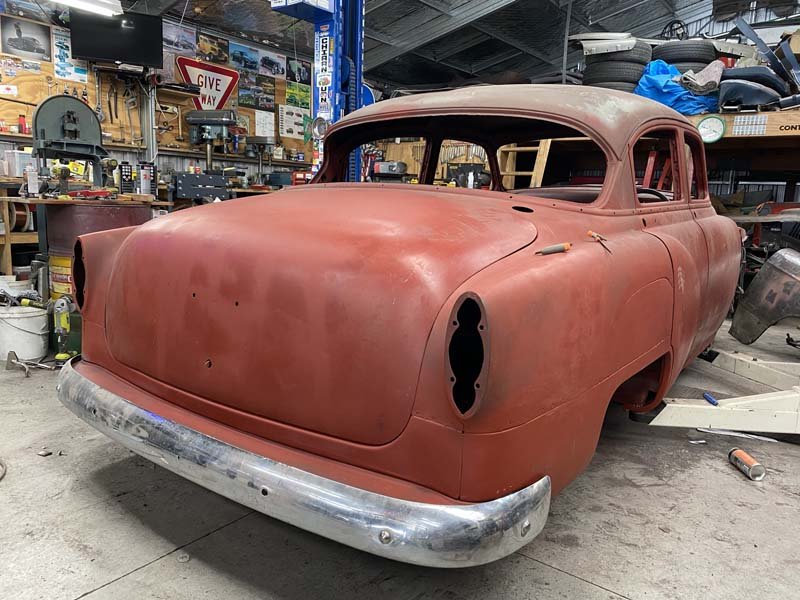
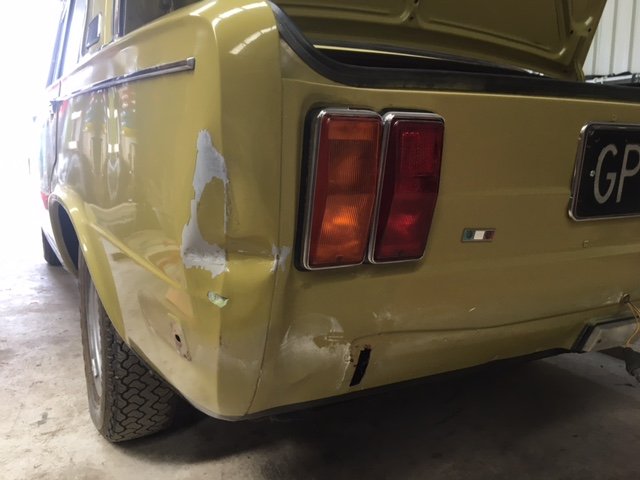
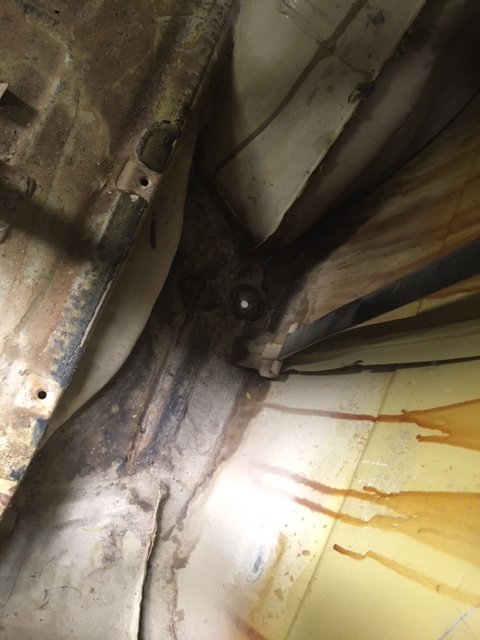
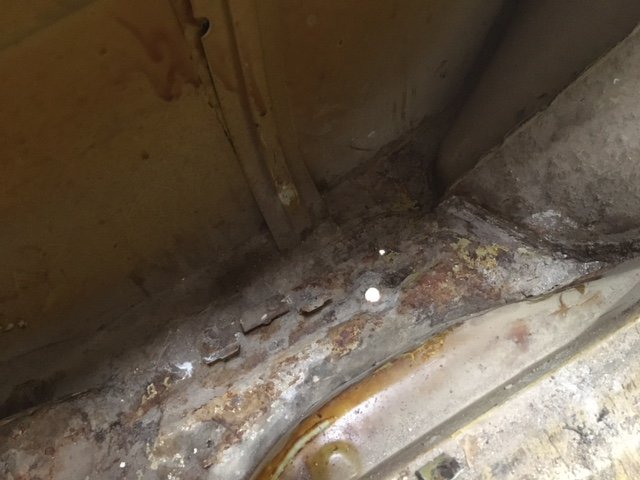
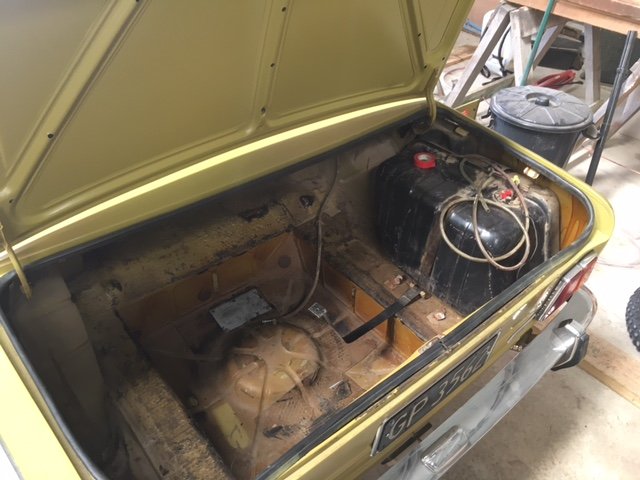
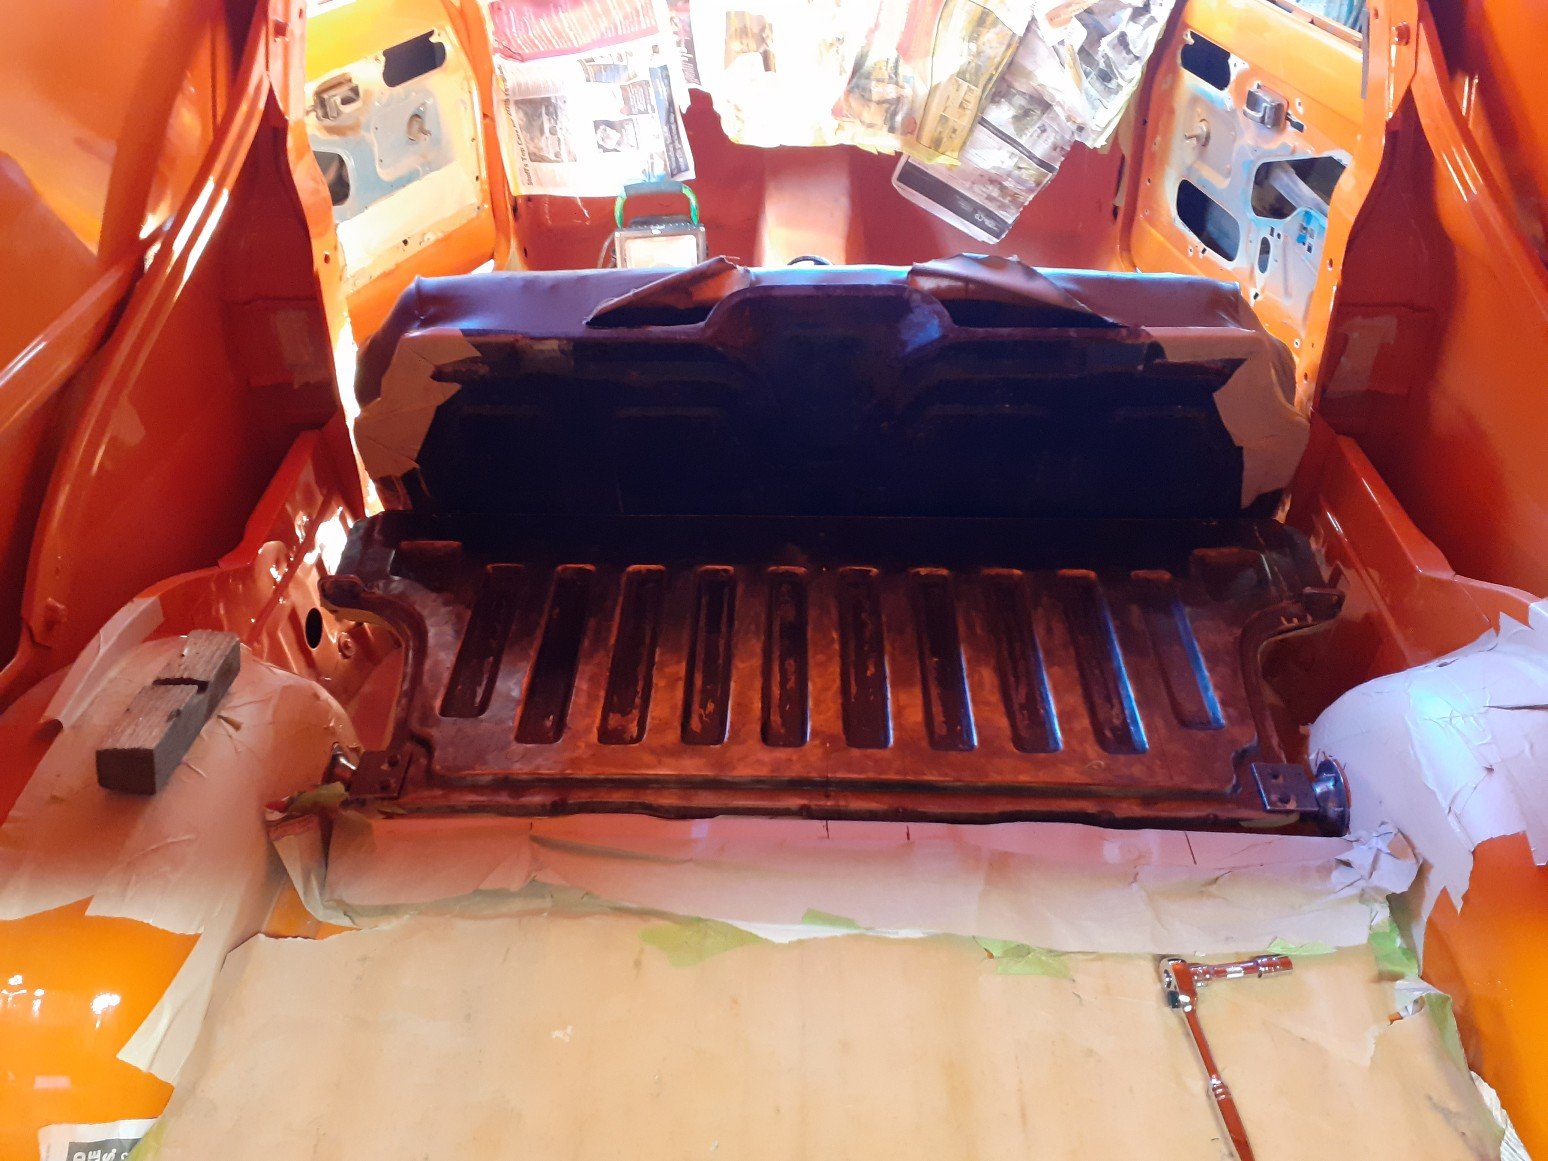
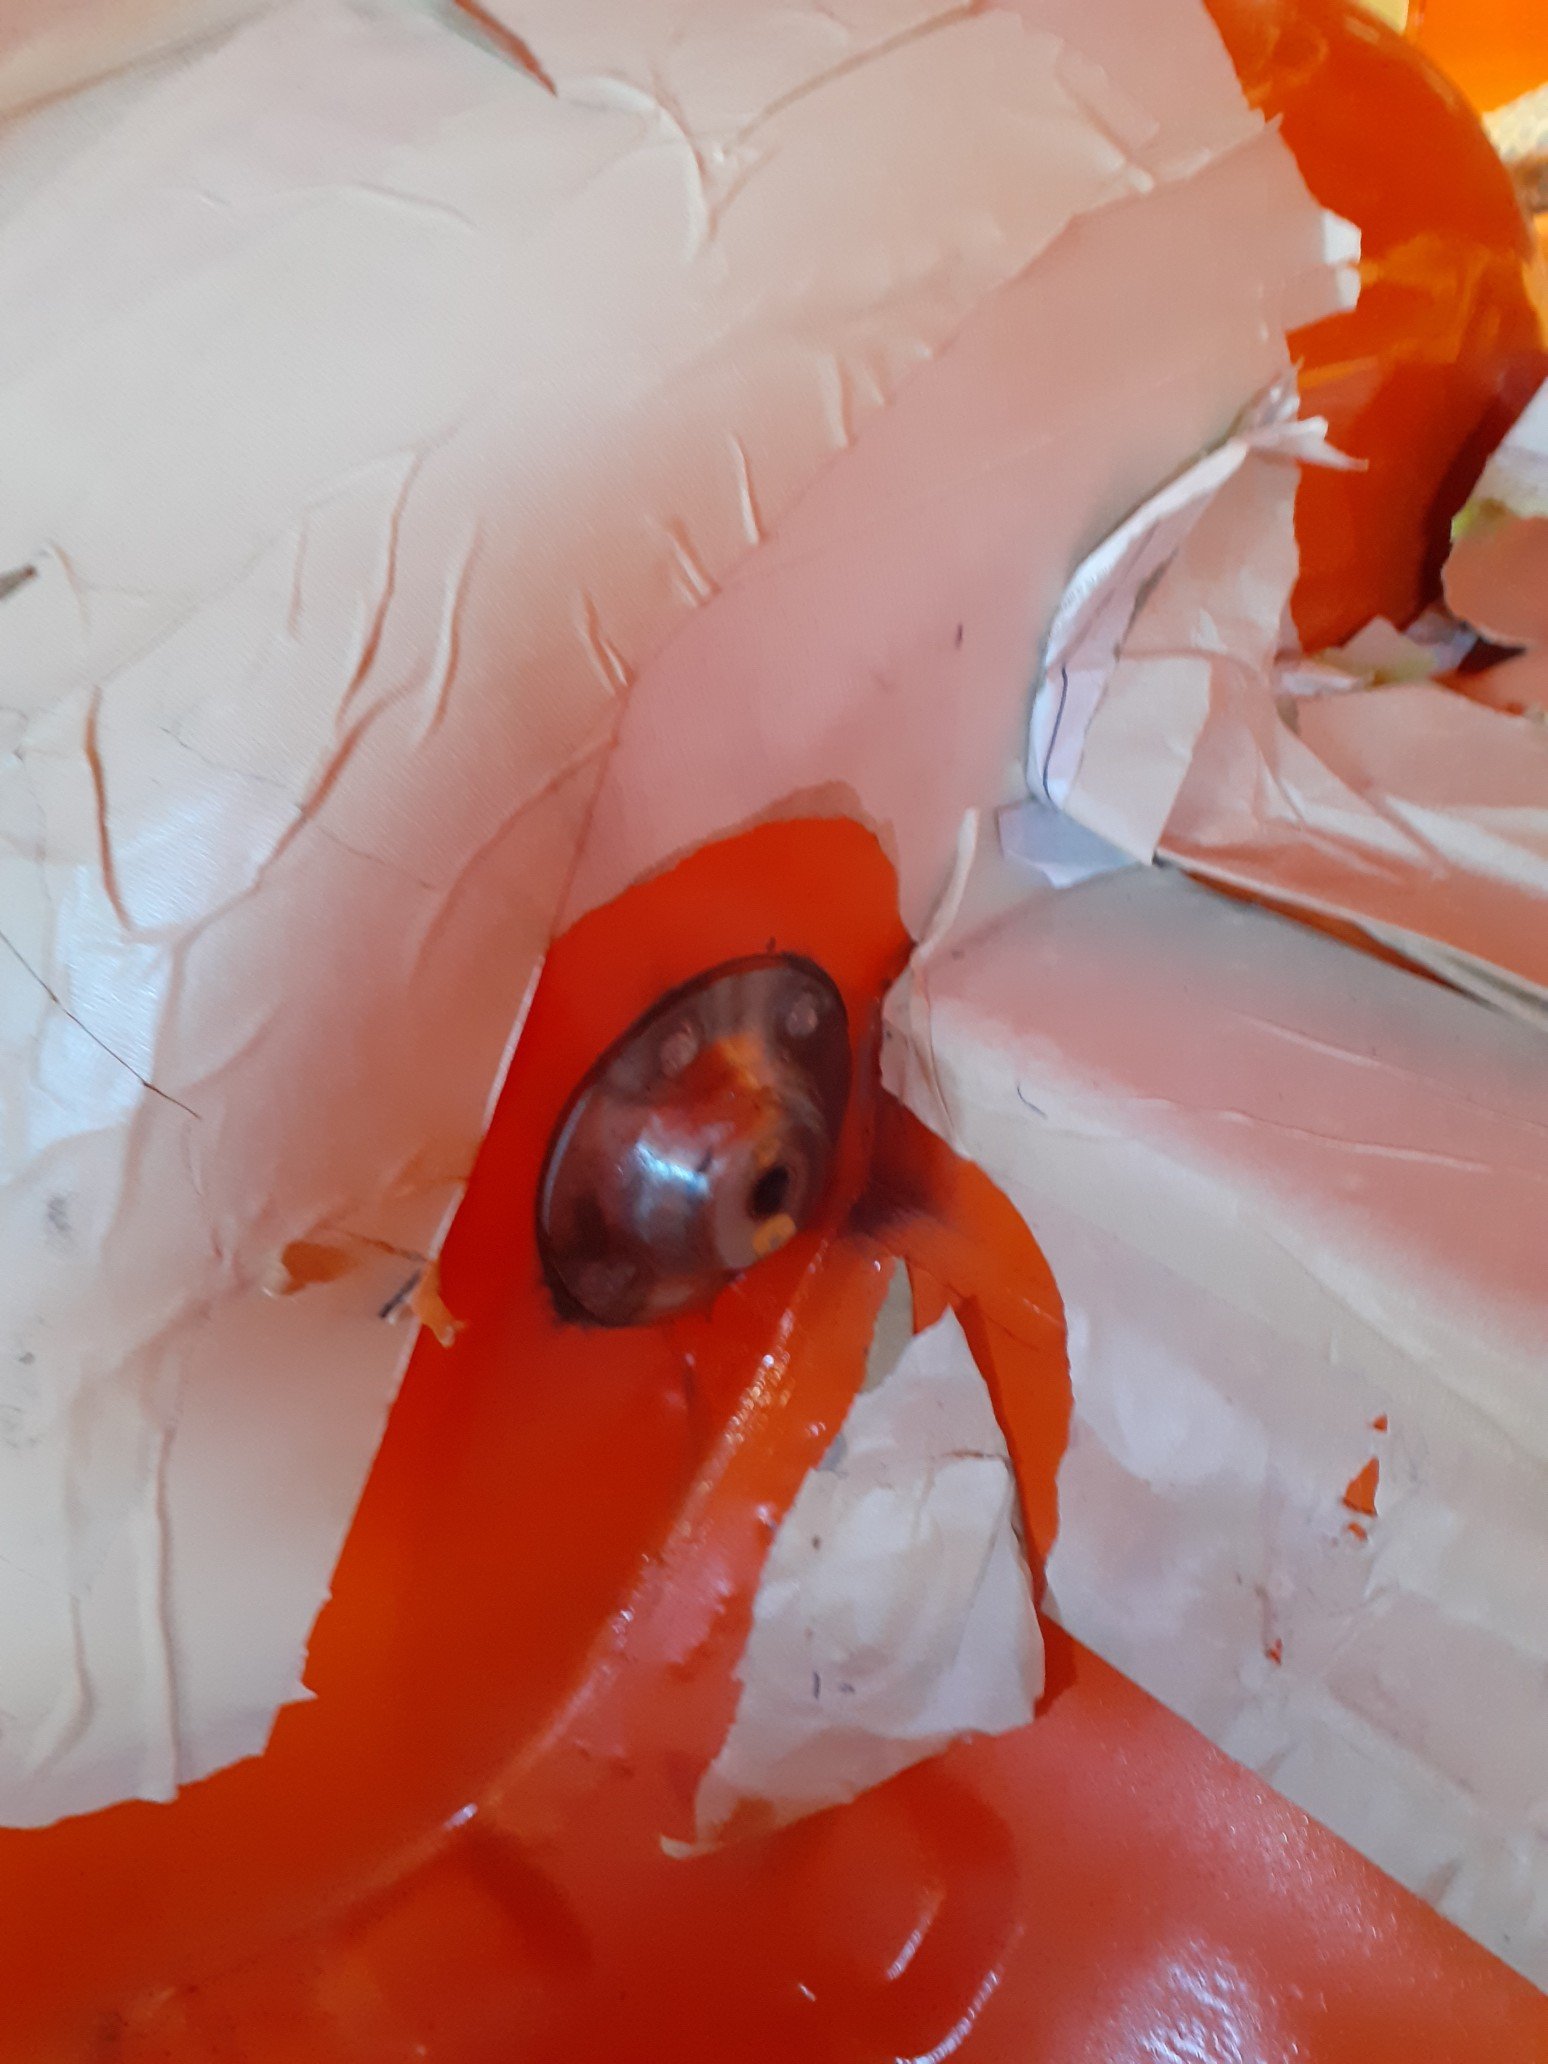
Happy new year. 2021 shall be the year of the Fiat. A strategy has been mapped out with the ministry of finance to get this thing back on the road. I have lined up a semi retired panel beater who happens to actually like cars to fix this thing for me. No, I do not feel like a failure... In preparation I needed to remove the rear bumper which necessitates removal of the boot lining and fuel tank. The boot lining is not too bad except for the left side panel which is wedged in quite tight. I can see why it’s cracked, somebody has had it out before me to graft in a high stop light, daisy chained from the left brake light. If I ever feel inclined, the cracks should be an easy enough fix with some fibreglass. Inside the boot isn’t bad. I vacuumed out all the crud and there is just a small rust hole in the left side, bottom of the rear guard. Wheel well is all good. There is a lot of cavity wax inside it, which I’m not sure is factory, but certainly beneficial. Tank out is easy, then the bumper is even easier, and there we have it, bare bum. Bonus, tank looks pretty mint too, although starting to smell a bit stale with the bulk of the remaining petrol in there being upwards of 5 years old.. Bring it on! Can’t wait.
1 point
-
Robertson Instruments are in Onehunga, AKL, as I called in there a couple of weeks ago.1 point
-
Rounded the cones by hand, had some round pipe as a guide. Found there final spot and temporarily drilled into place to try with the seat. Made some hinges out of 5mm angle line, which will later be trimmed up, driled for counter sunk screws and zinc plated. Primed everything and welded into place. I've maxed out the adjustments to have the seat level with the floor with folded flat. The floor section will be color matched the van, and the upright will be painted black to break it up. Plug welded in place. Will be primed and painted orange. This the last mounting point to be made. It holds the upright in place when in the seating position and should lock in it so in an event of an emergency stop, it shouldn't fold forward. Looks like a big gap but this is the normal and there is no room for adjustment when folded flat. Thinking some post which would encase a locking mechanism like the below would be the go. I like the idea of pulling the seat up and clicking it into place, and having a release lever when needing to fold it flat. Any other ways of doing this? Needs to lock it in place, and support the back rest.
1 point
-
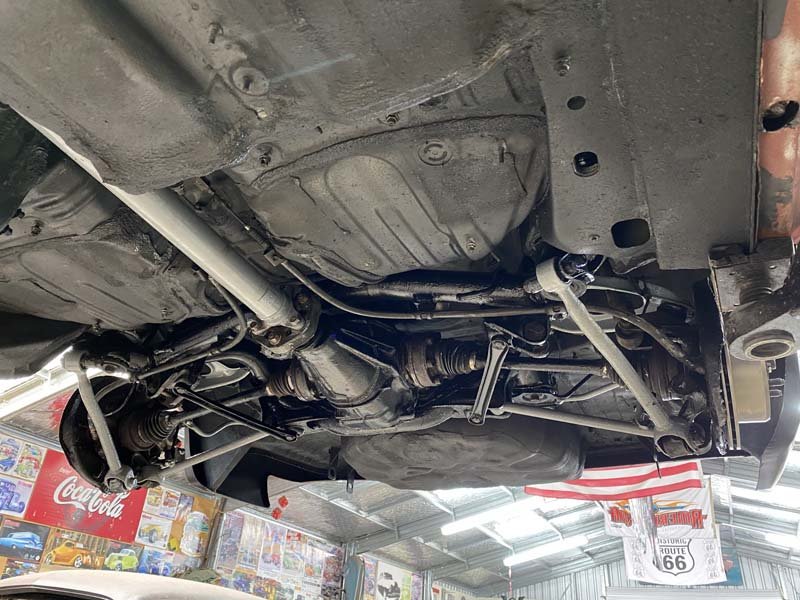
Took the kids to the caroline bay festival today. A solid 4 boring hours of flat out straight road. Well on the way there it was flat out, the way back was full of bloody caravans Done about 1100 or 1200 miles so far. Hasn't missed a beat. Just rolled over 105,000. Still got the sticker on the windscreen saying next service due @105 or june 2010. So hasn't done a lot of work the last 10 yrs Edit, soz upside down pic. Dunno why. Easier to turn ya phone around.1 point
-
1 point
-
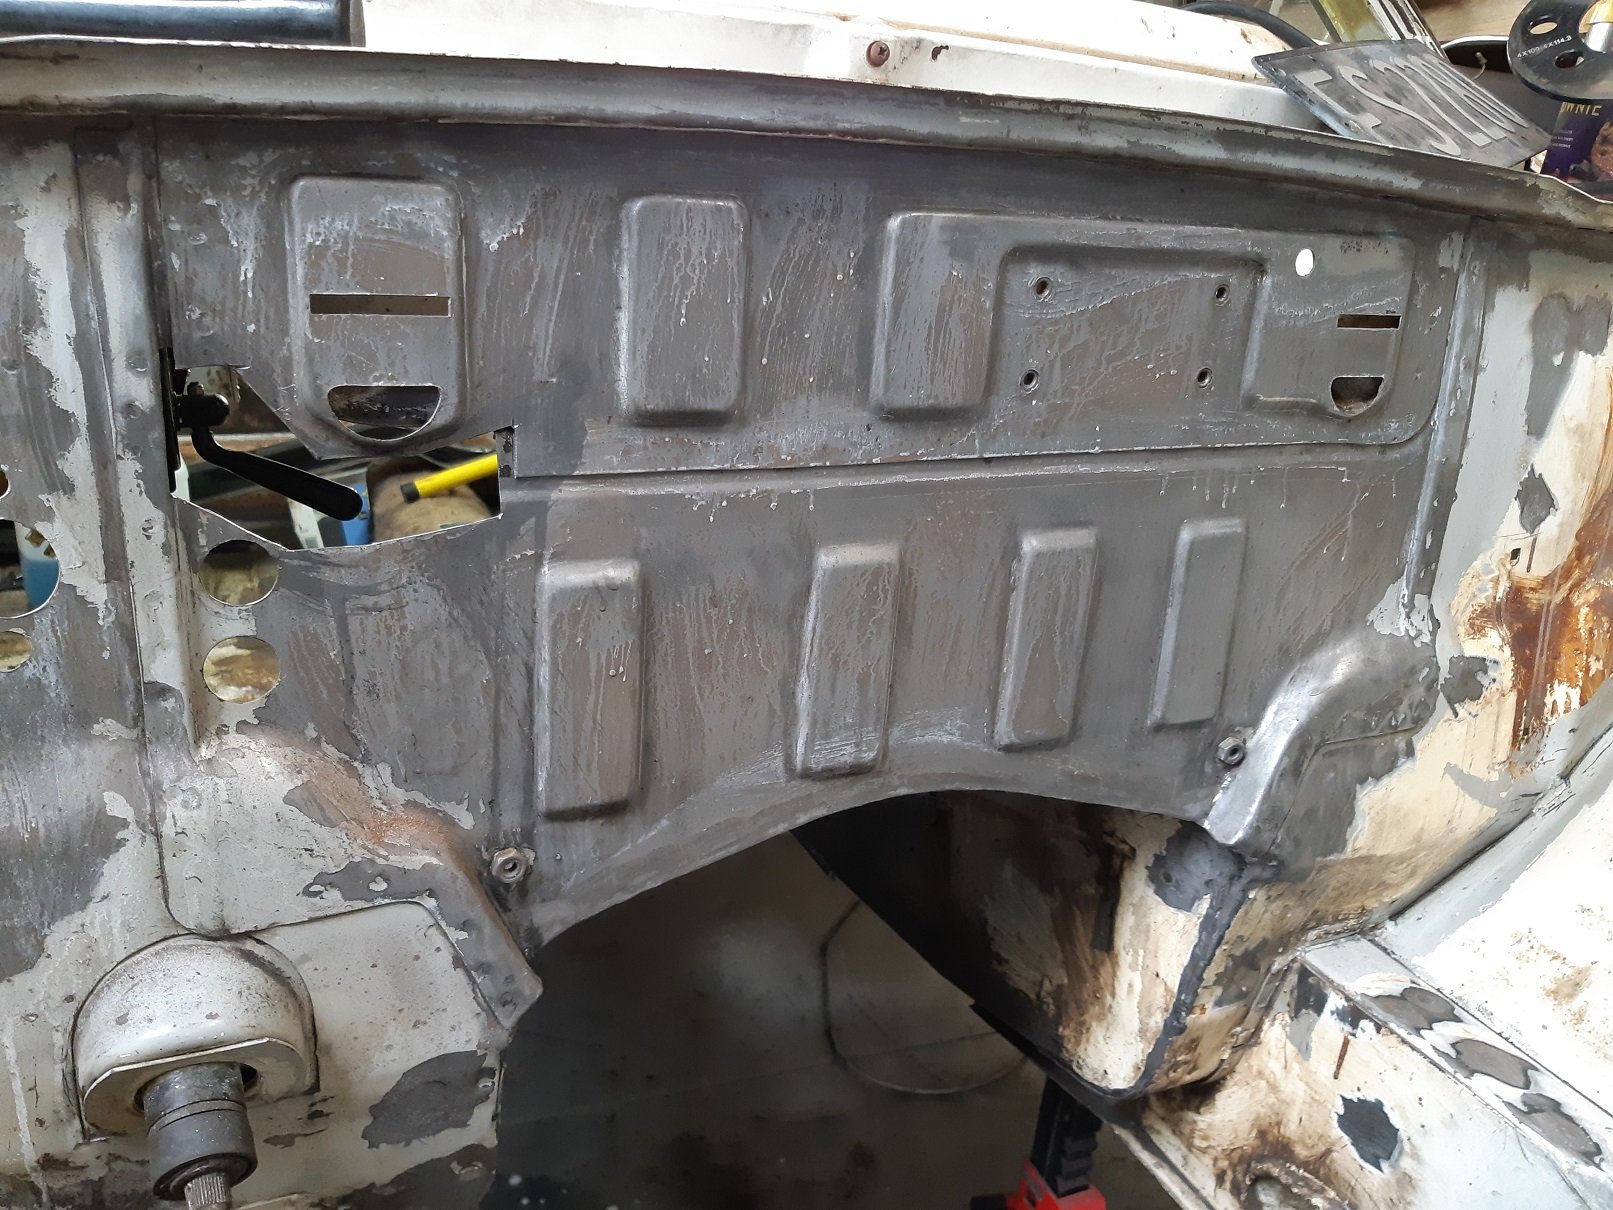
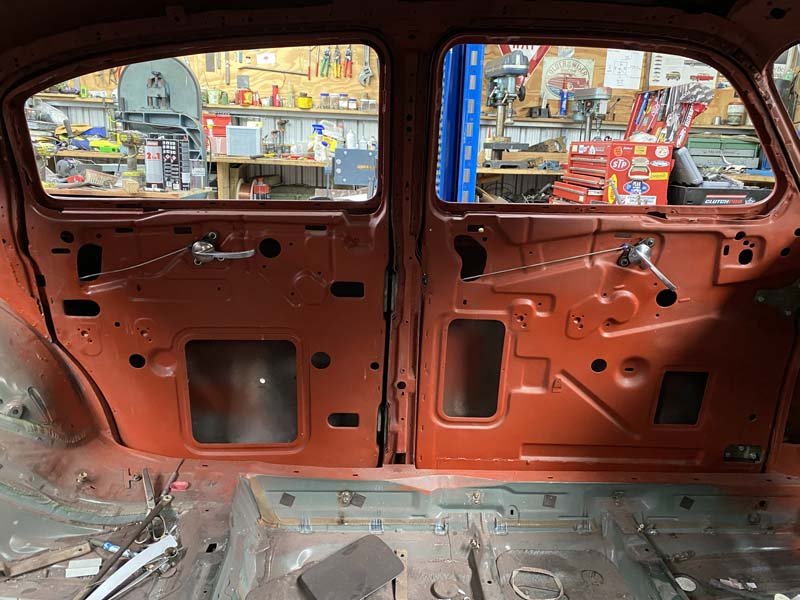
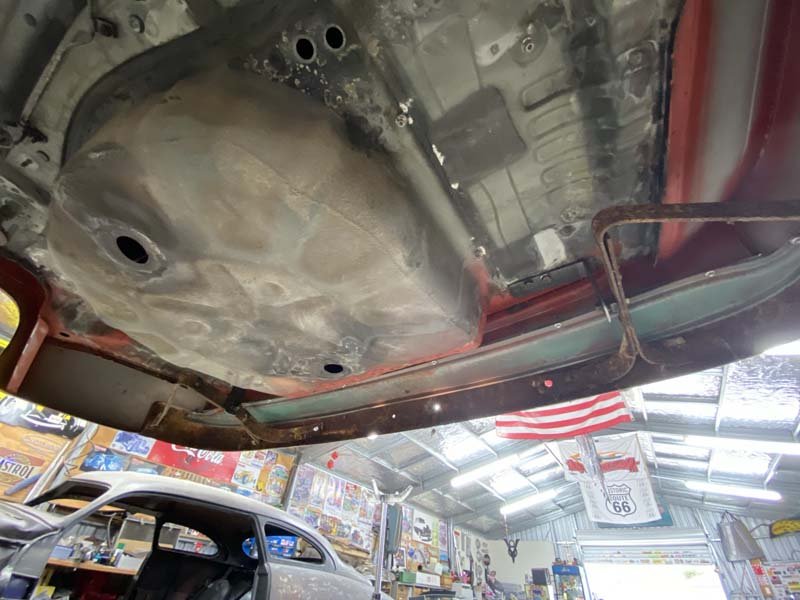
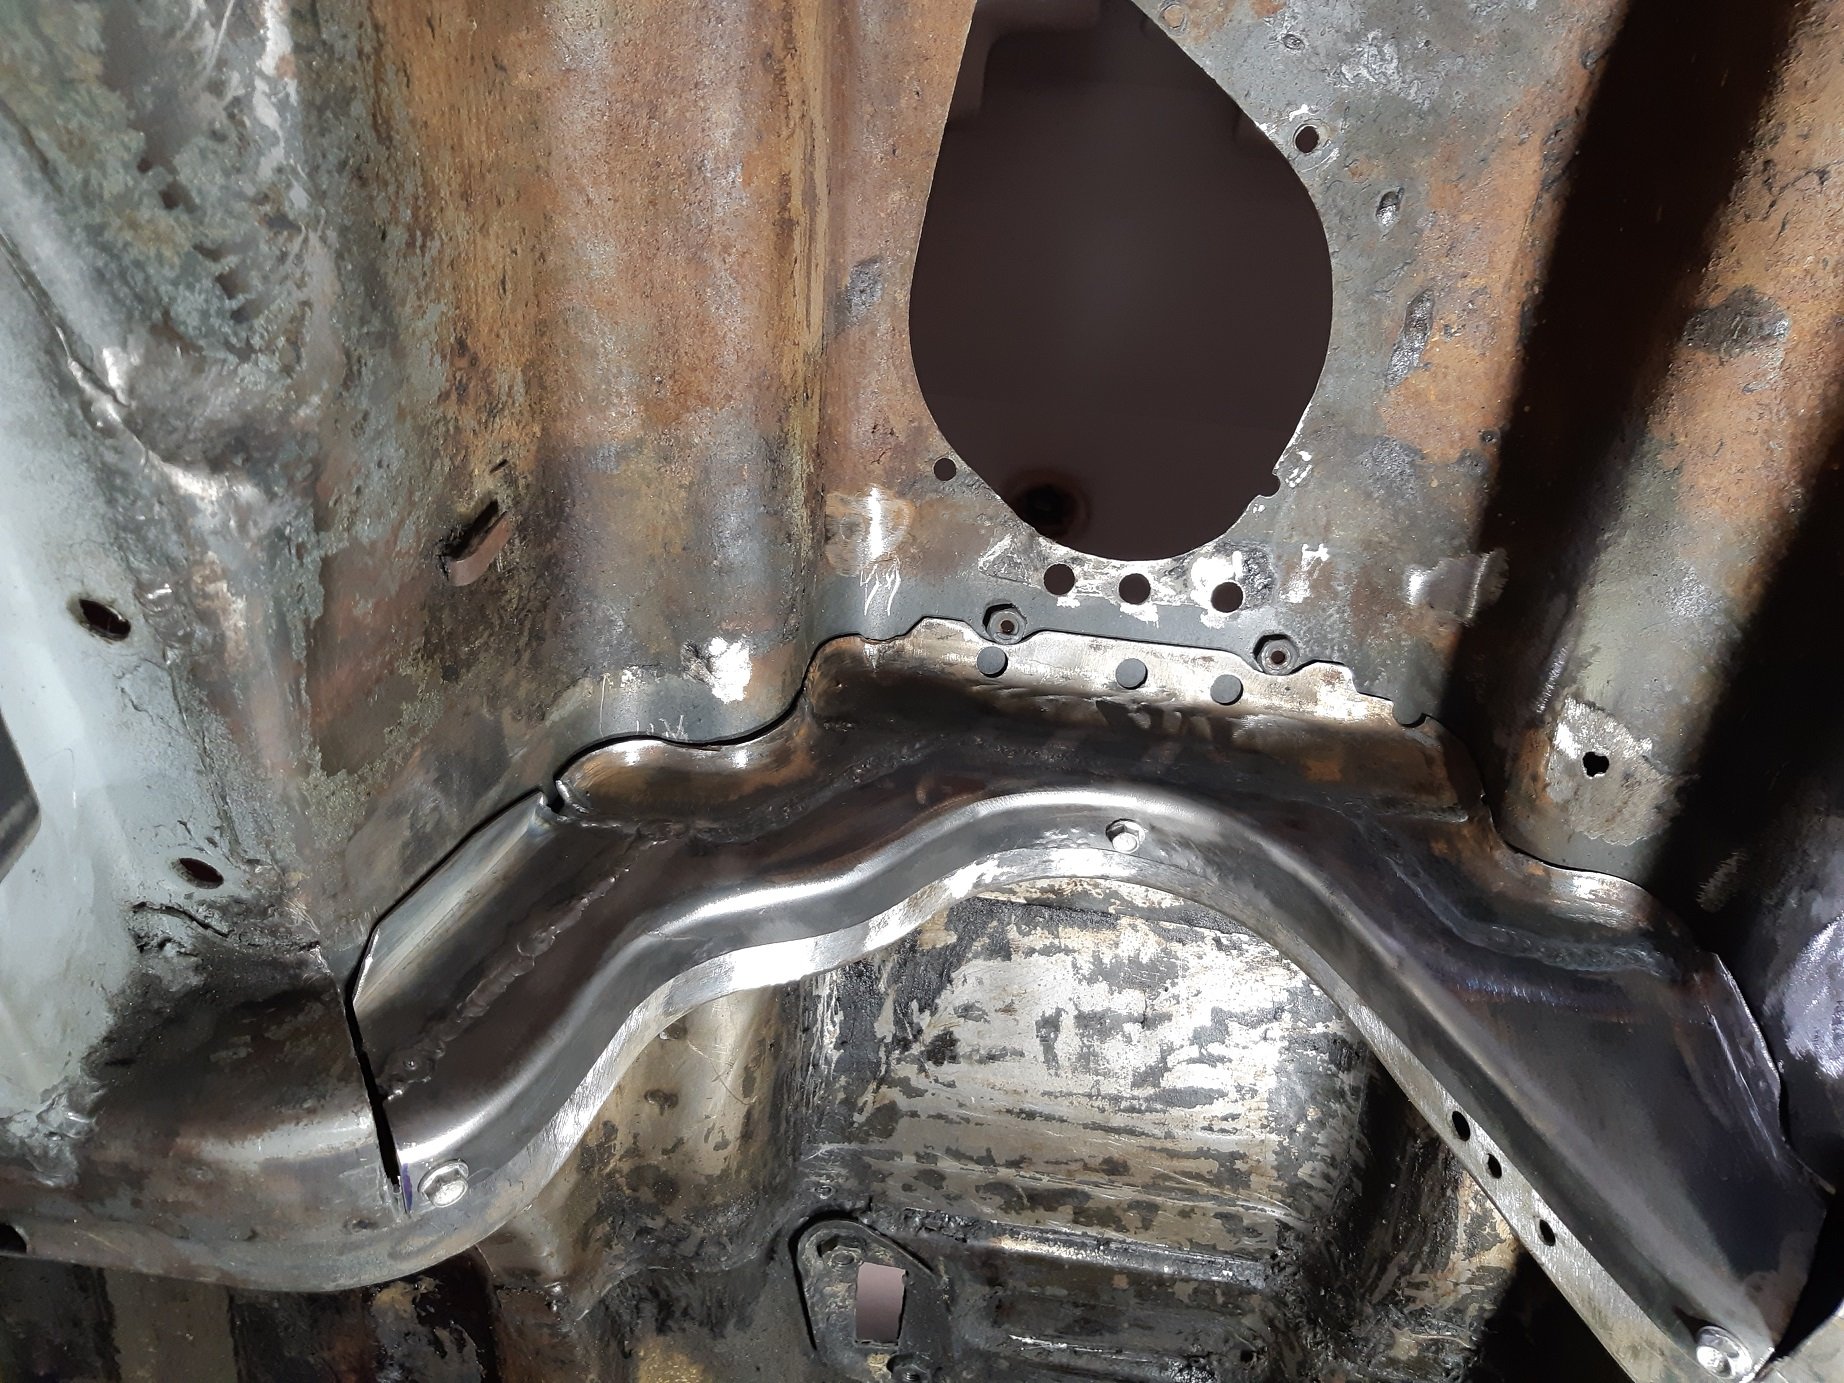
Since I had decided on the path the extractors needed to go to miss the steering, I decided to take the engine out and do the rest of the extractors on the engine stand. I have some stuff to do while it's out. Like fix the one rusty bit on the firewall. Clean up the rest of the tar seam sealer. Remove the big seam where the firewall joins the transmission tunnel, this will get me a bit more room around the back of the engine. I also cut out part of the cross member that makes it really hard to install the gearbox and temporarily tekscrewed in the modified section I made several posts back. Was a filthy job. I was getting showered with dirt and grinding dust. Fortunately it was cold, so I could wear overalls and a beanie and safety glasses and ear defenders without dying of heat exhaustion.
1 point
-
well, after a very long day in which the gun blocked multiple times and i poured 500 mils of paint all over the bench i finally got a sealer coat on the car. the drivers side isn't done yet, ill turn the car around and do that tomorrow. now the fun job of sanding can begin 2020-12-06_05-31-17 by sheepers, on Flickr1 point
-
@keltik insisted that I pull finger and offered to come give a hand to make some things happen. Today we removed the dead motor from the green one and gave the engine bay a quick wipe down, pulled the fuel tank and rinsed out most of the orange sludge, pulled the oil tank and gave it a slight rinse. Everything is pretty dank. IMG_20201115_120527 by John Bell, on Flickr IMG_20201115_125803 by John Bell, on Flickr We then turned to the donor Banana and set about removing the working motor, and wiring etc. IMG_20201115_140215_1 by John Bell, on Flickr While the donor boat has the same motor, its more mid/front mounted when compared to the Green boat. I've since worked out that there was a hull change between '96 and '97 Seadoo XP models. The problem we found is that the boat required a splined coupling on the end of the crank for the rear mounted engine, and the front mounted donor ski had a different rubber flexi coupling thing for the longboi driveshaft. Spent a bit of time headscratching and bending bars unscrewing coupling from the crank, thankfully it got them swapped over. IMG_20201115_172626_1 by John Bell, on Flickr IMG_20201115_140209_1 by John Bell, on Flickr The donor motor has an aftermarket tune pipe and cute filters, sadly the aftermarket pipe won't easily fit under the seat, and have reverted back to the factory short boi. IMG_20201115_163048_1 by John Bell, on Flickr Got it back into the spot. Going to try the jet unit that is in there for now, and see about swapping the other if something is rooted. Will need to sort out the water plumbing, fuel, oil, the wiring somewhat, and figure out how to shim the motor to get it aligned with the pump properly. Big boi no fit IMG_20201115_172512_1 by John Bell, on Flickr Very pleased with the progress, I would have likely given up for the day when finding those couplings were different.1 point
-
Got this started yesterday. Decided to start with the plates for the seats. So I can tack them in to stiffen things up when I take out the top hat stiffener. Much better seating position now for someone of 6’3” however the mrs might not be able to drive it anymore...
1 point
-
Fitting 3D printed patterns to get the CAD right.1 point


.jpeg.f51a899fbb62ee27267b4ca377d73c80.jpeg)
.jpeg.7db9077b86fe69e11960d3ceae544c3e.jpeg)


.thumb.jpeg.910c6632f6e66e8cba89476e83b41634.jpeg)


This leaderboard is set to Auckland/GMT+12:00