
Leaderboard


Popular Content
Showing content with the highest reputation on 12/13/20 in all areas
-
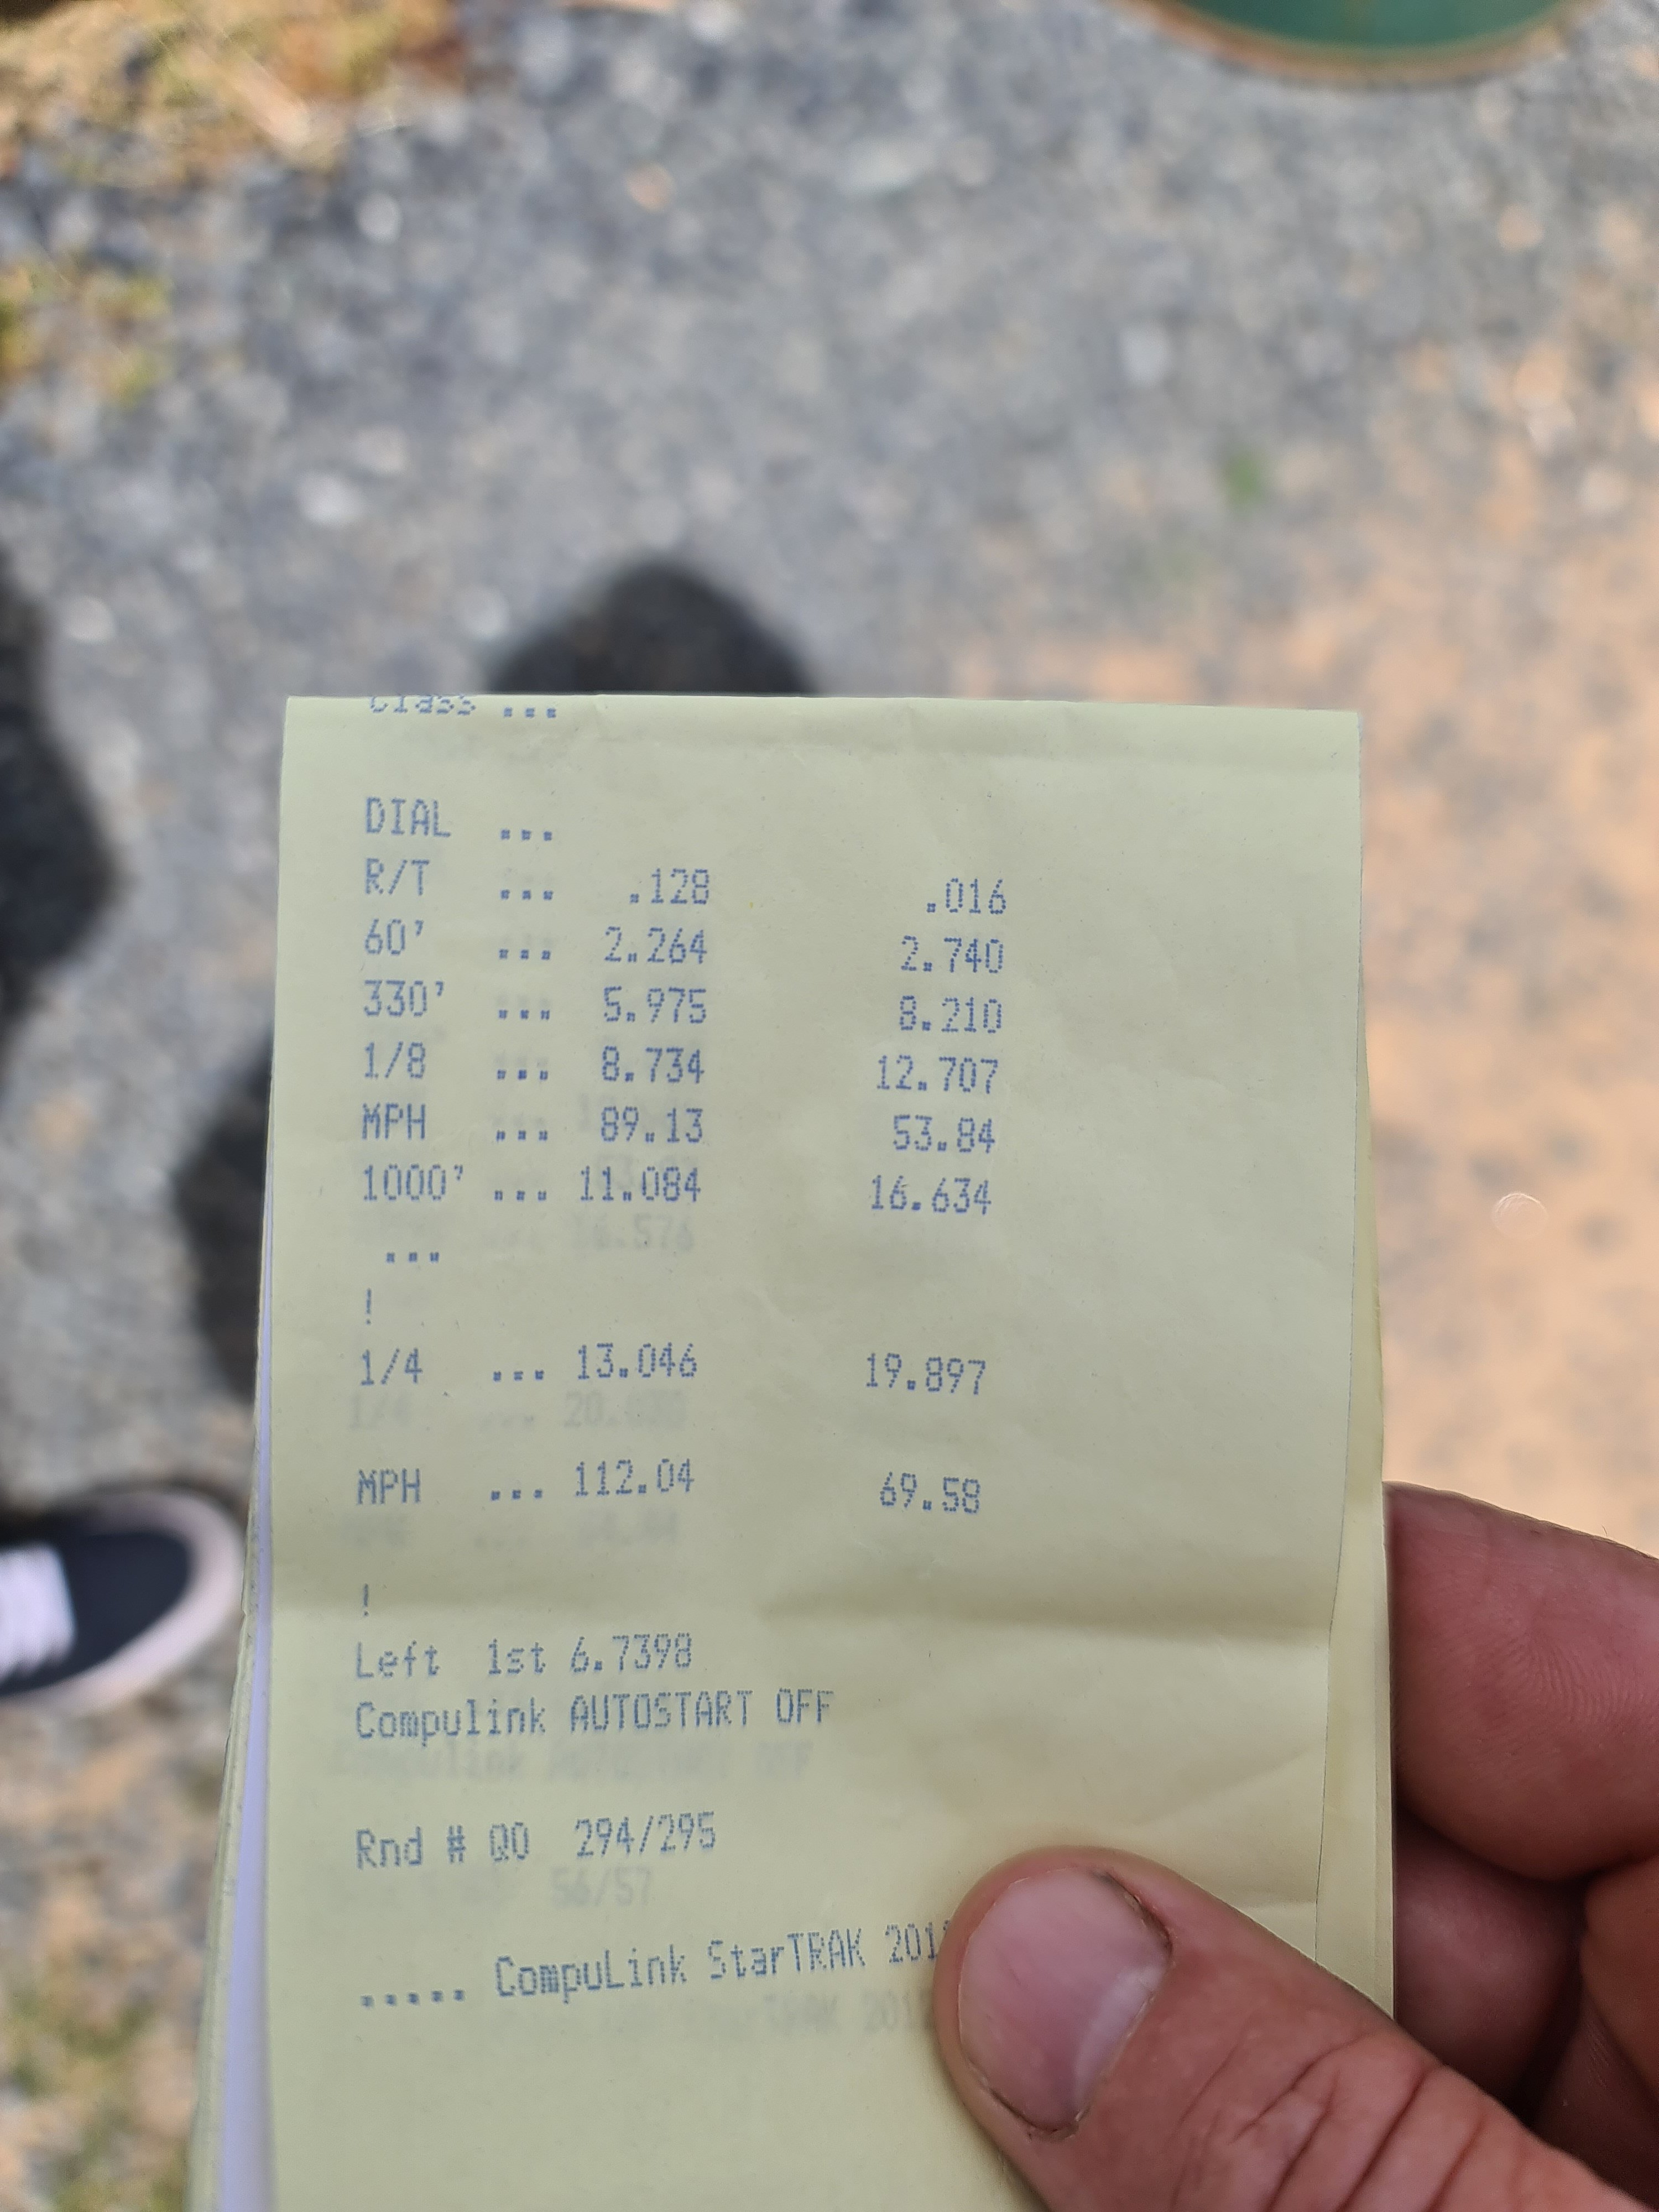
drag day went super well. had a great day. struggling for traction as normal but managed to put one good run together and ran a PB of 12.93@110mph. i cant tell you how stoked i am to make it into the 12s. 2020-12-13_07-05-28 by sheepers, on Flickr22 points
-
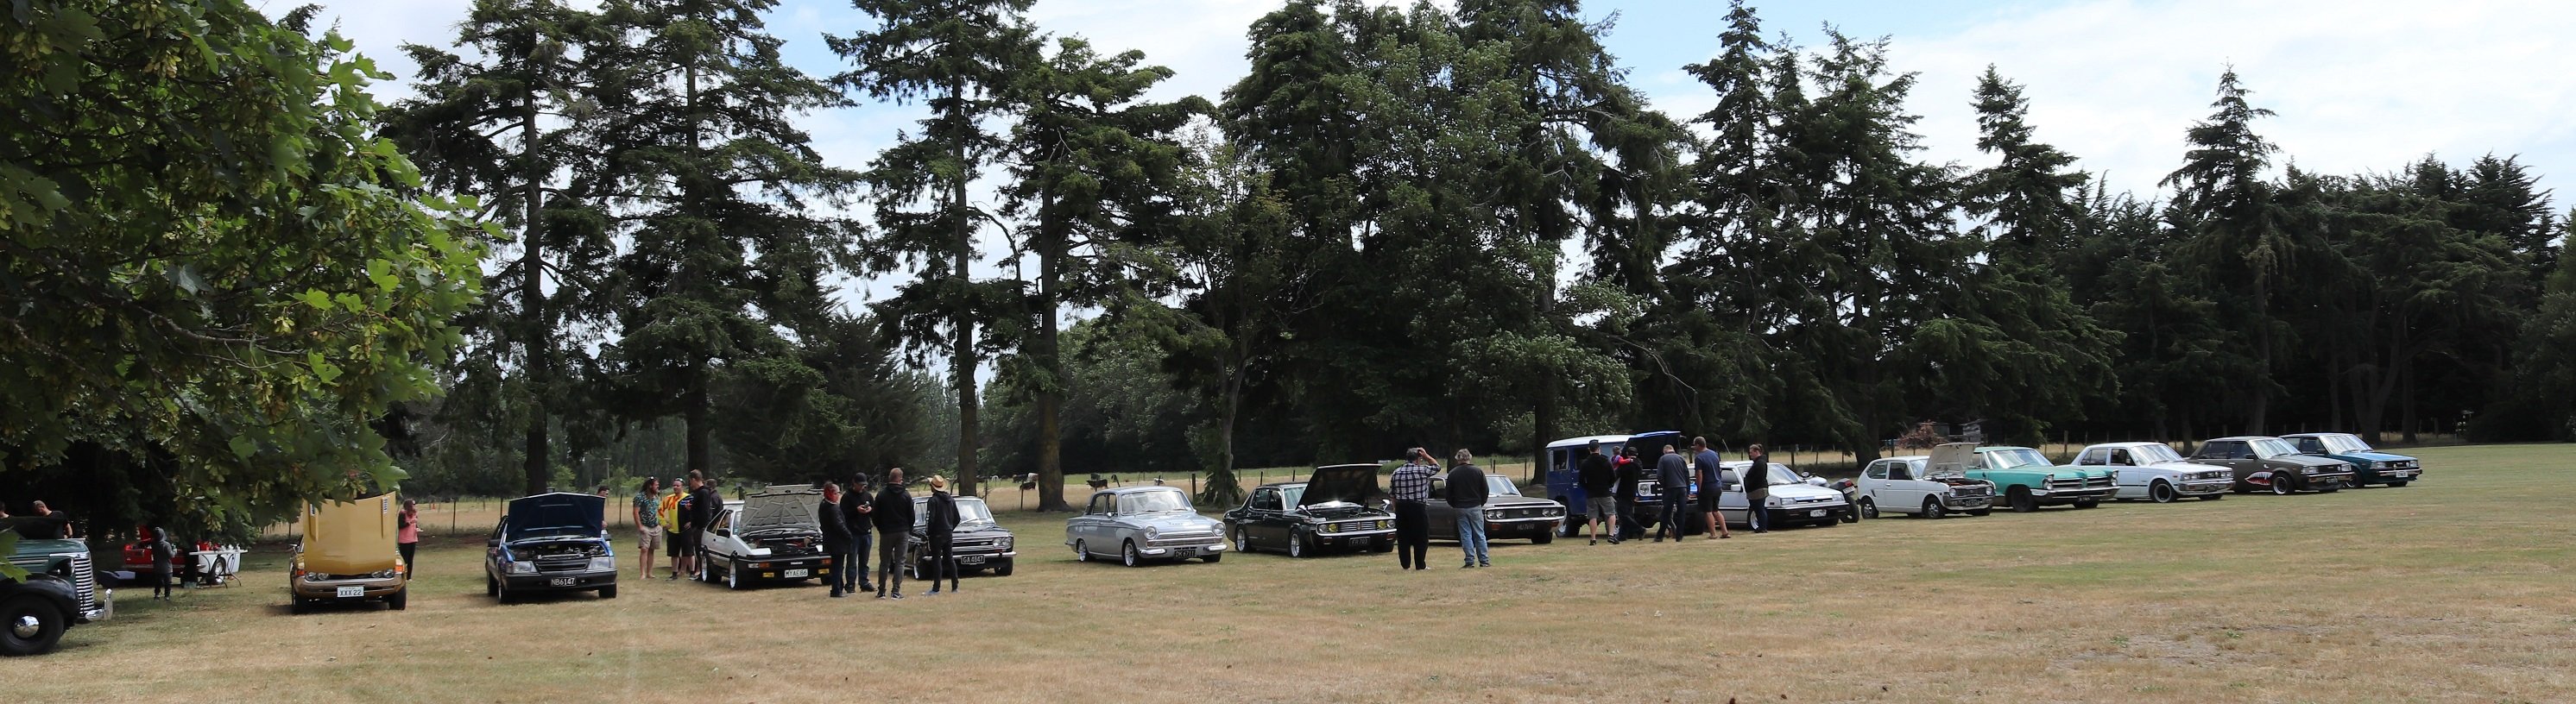
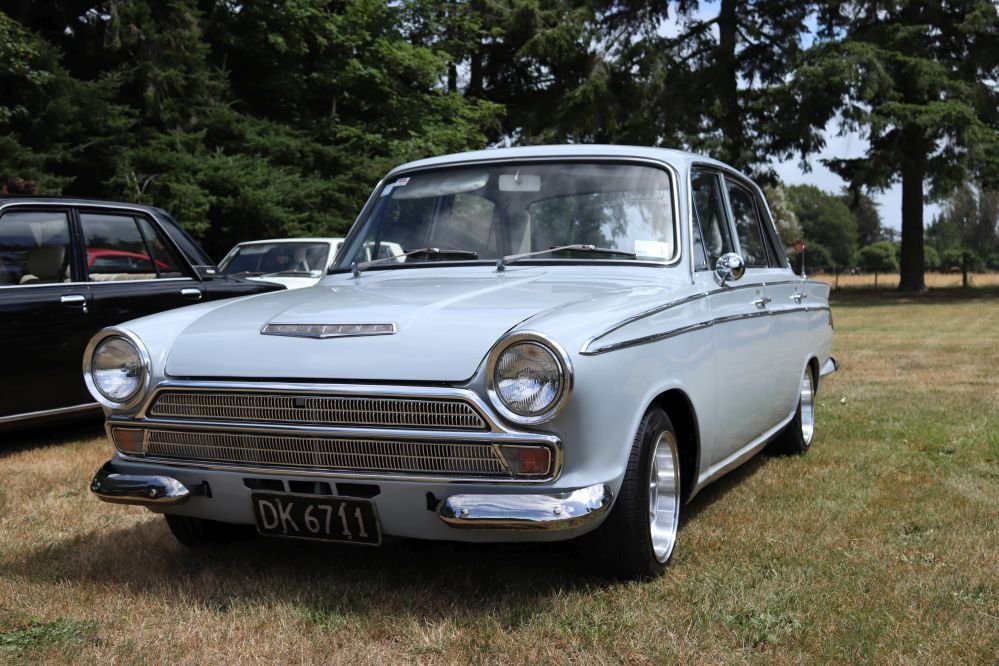
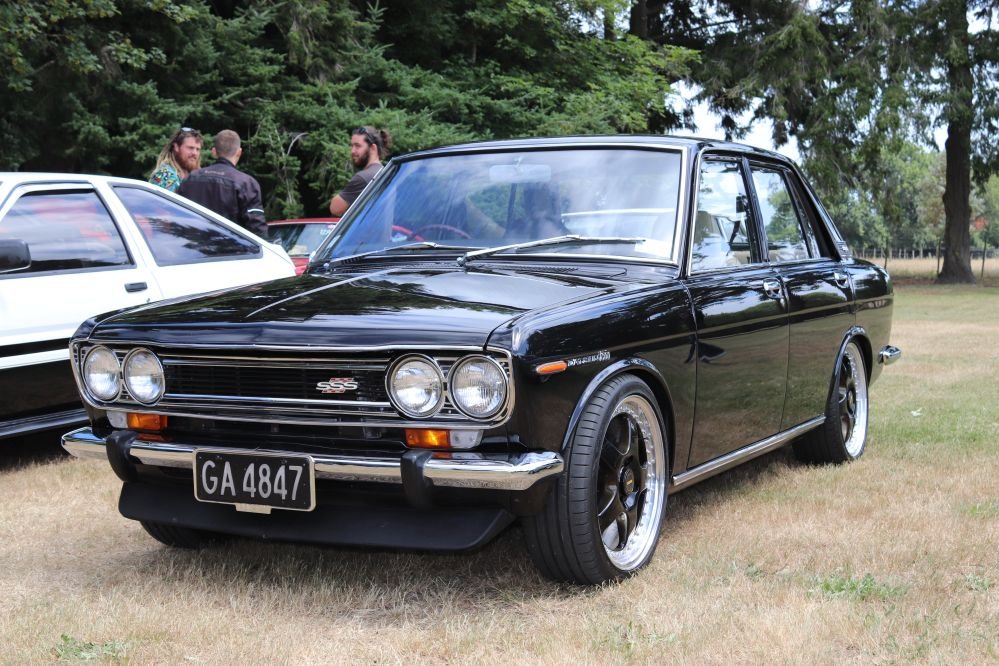
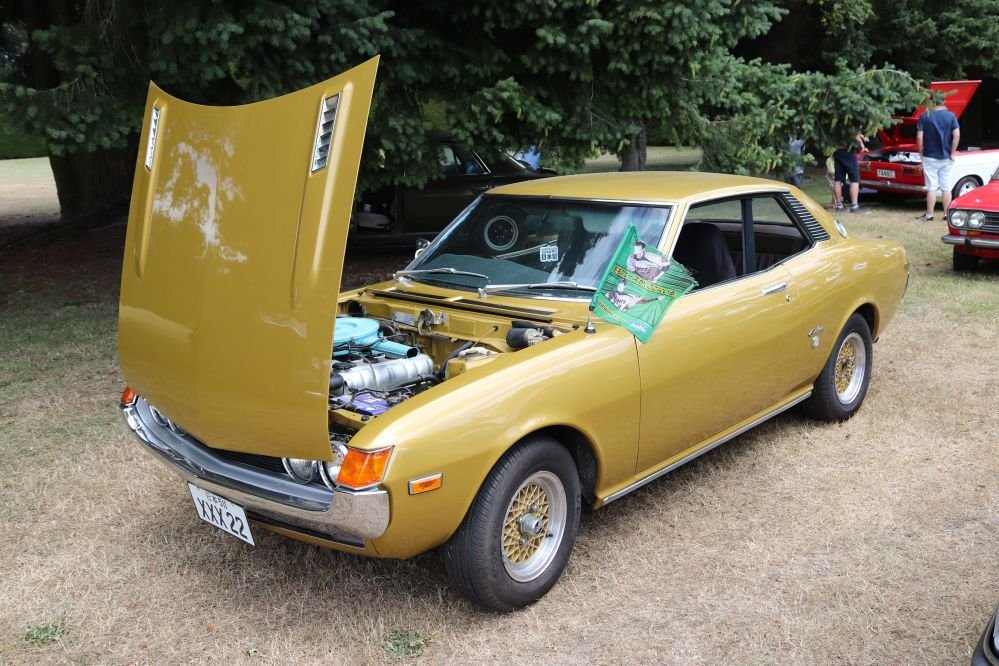
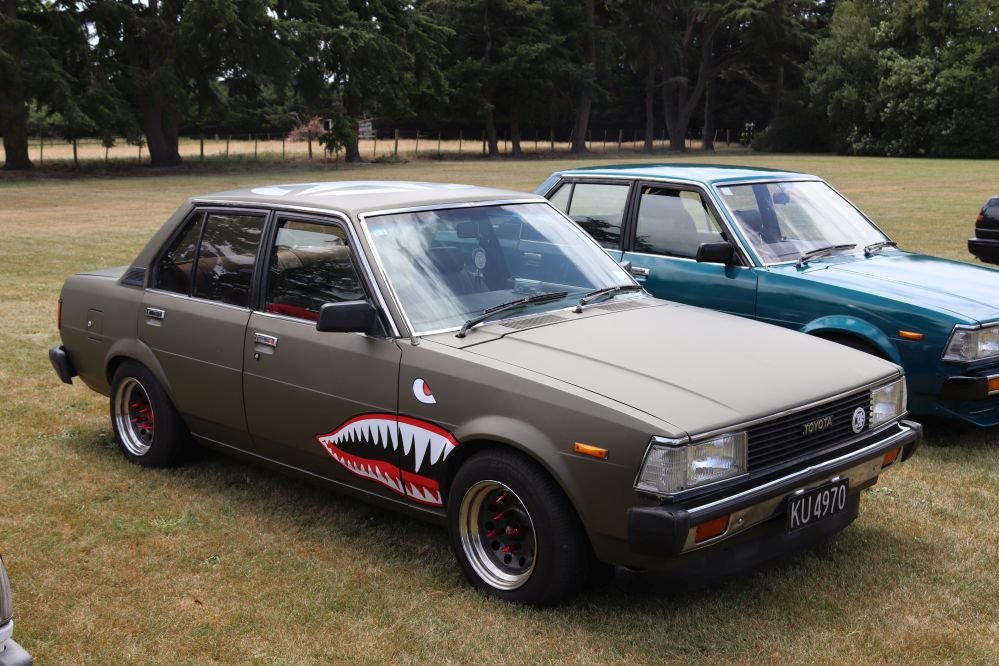
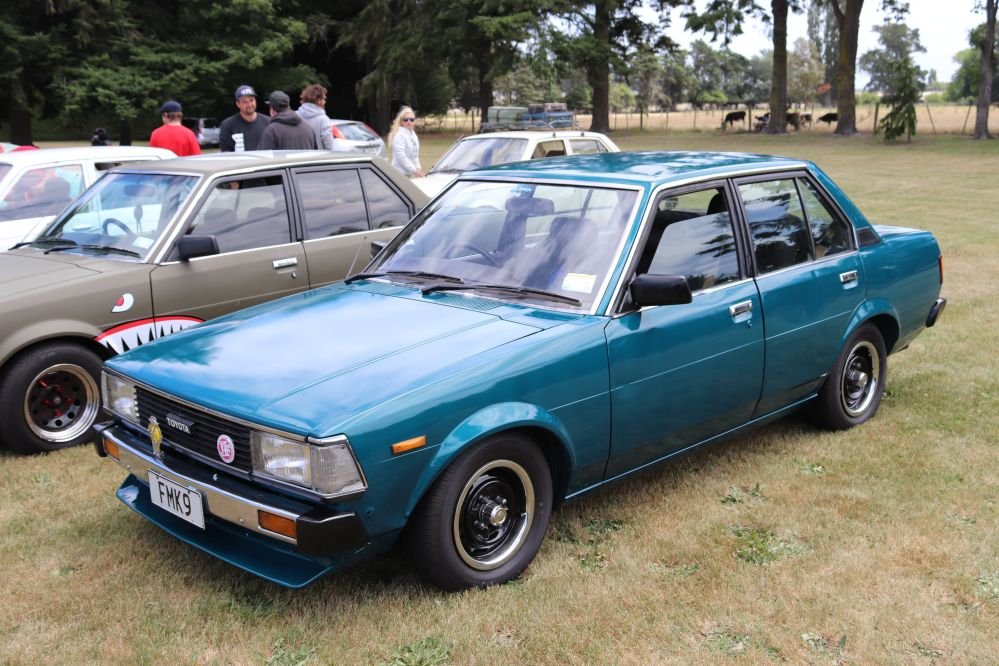
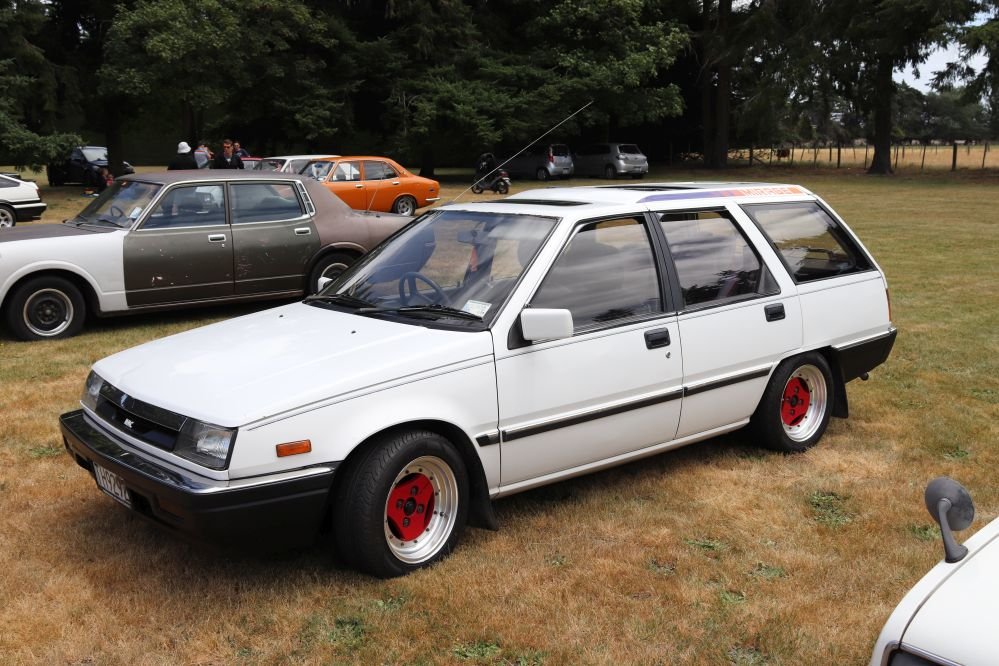
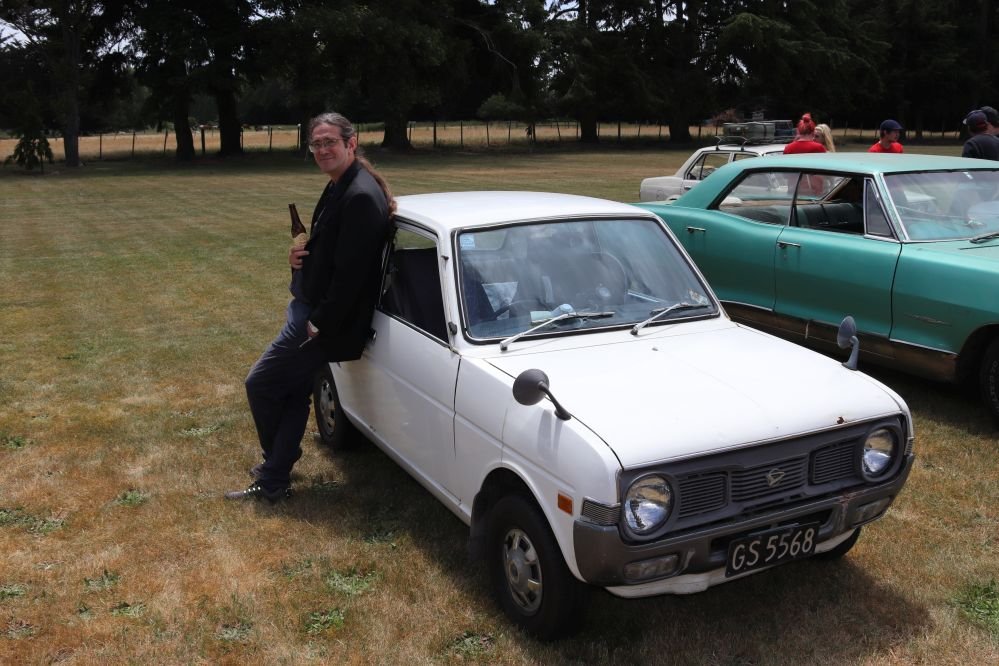
Good turnout, sun turned up the heat, bbq'd meats and sharns, job well done. A few pics, resizing them down is pretty killer. If you want an original size just let me know. The line up was taken early on so doesn't show the full turnout that was pretty impressive for a lazy Sunday.
 9 points
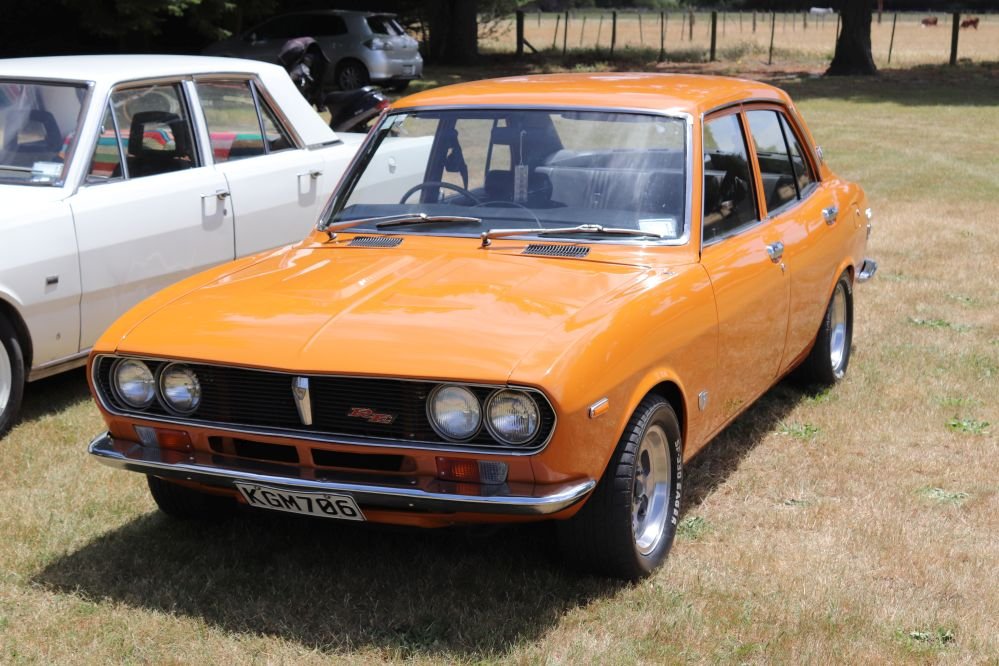
 -
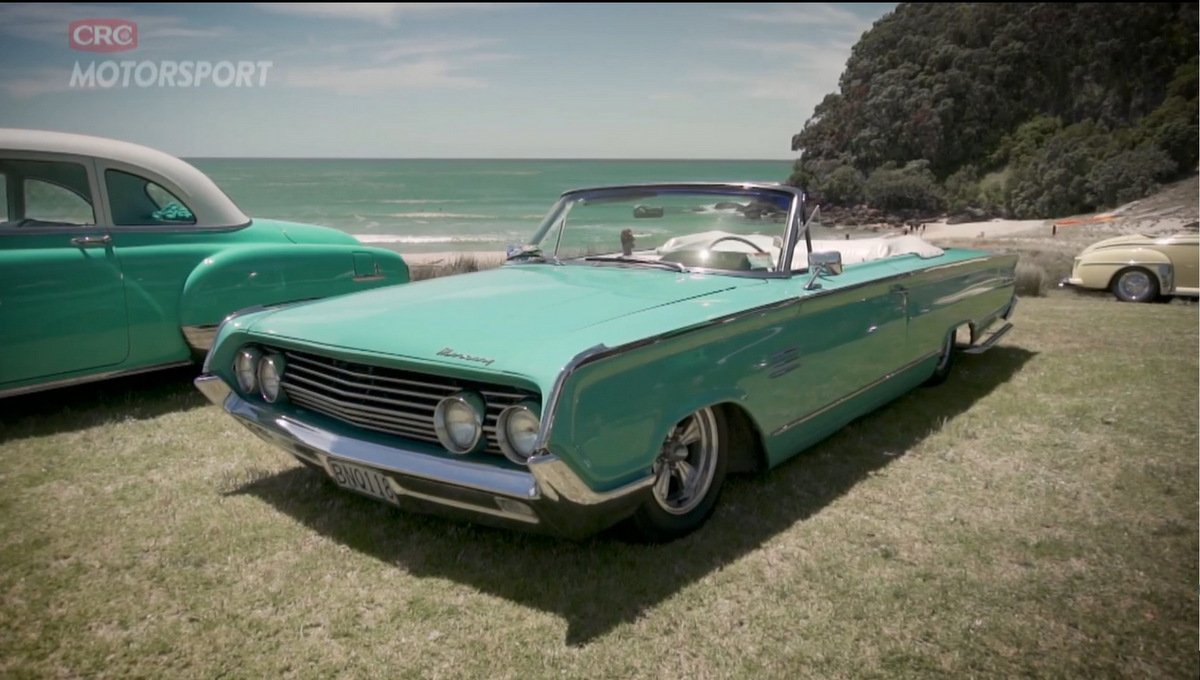
Beach Hop 2020 done and dusted, no issues. Even got a quick shot on the tele-v
8 points
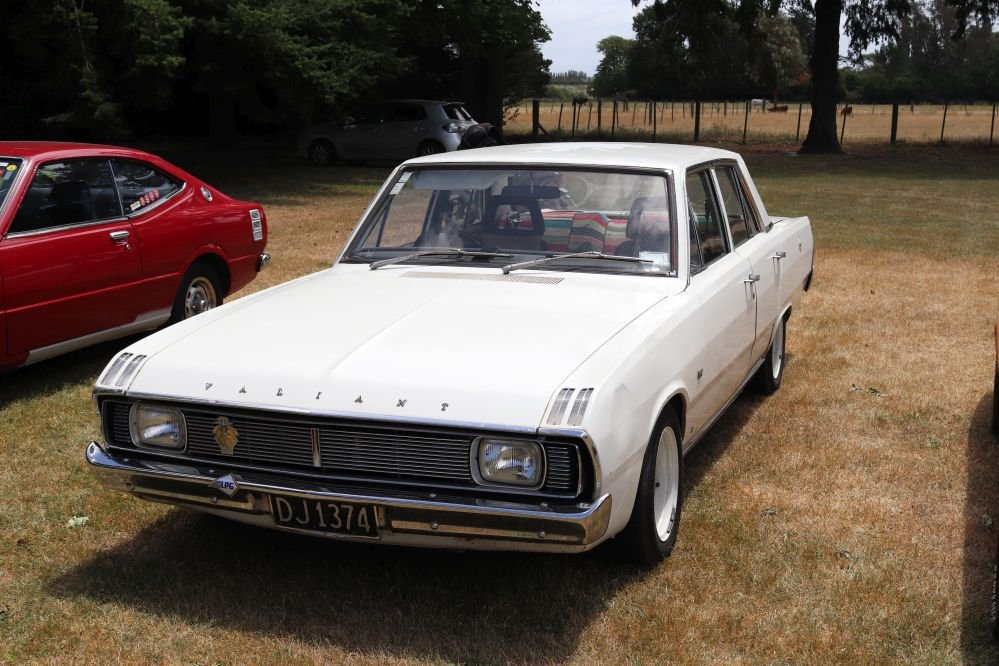
-
I had to leave early and a few had turned up after I took these, at least the weather turned it on
8 points
-
Took the door off again. Decided the passenger door lock can go in the bin with the mirror.
8 points
-
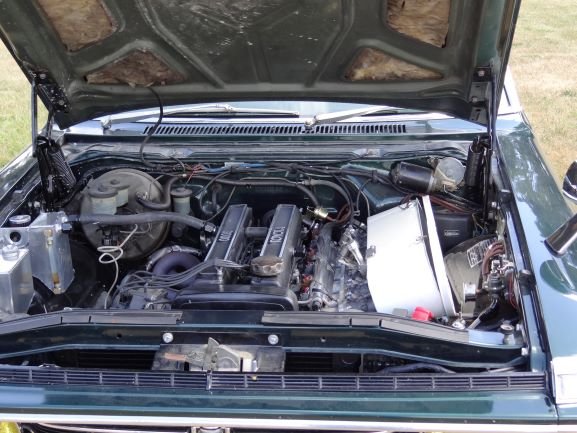
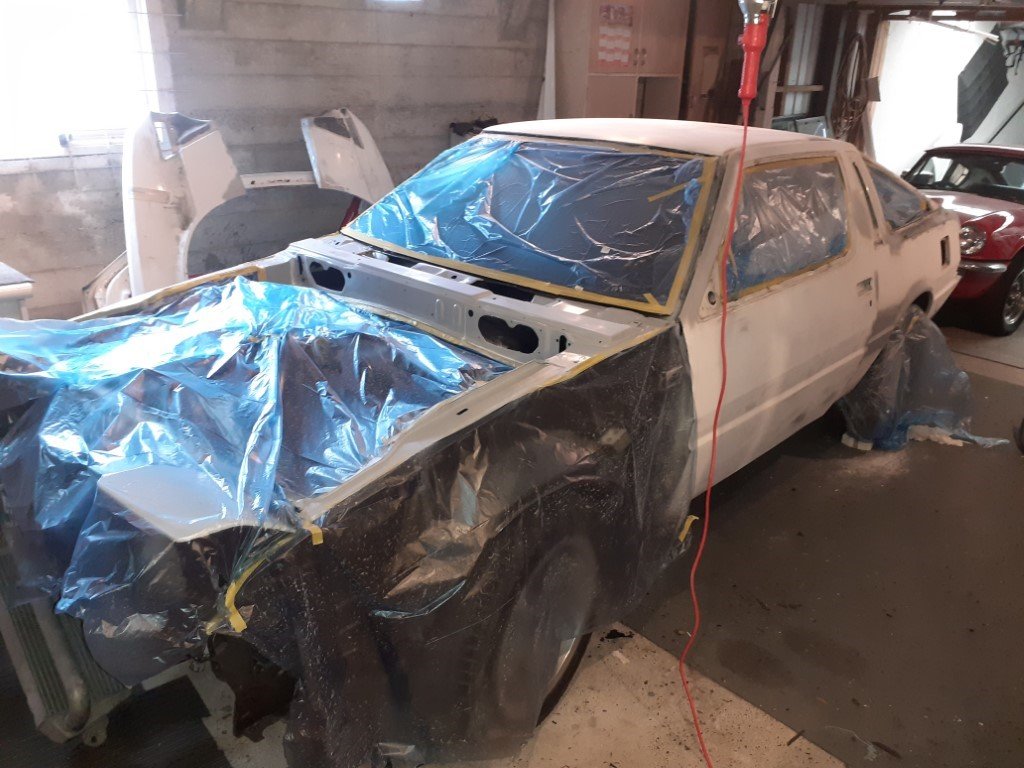
WOF acquired! we are legal! over the last month or so I've gone hard to get this thing legal to use over summer. Whilst I didn't make beach hop due to it being unreliable, I still managed a WOF and even attended drag day yesterday, although I didn't attempt a 2 second pass due to not having a coolant overflow tank properly setup as well as coolant leaks. but, regardless, it's going now and I've been idling around town trying to iron out problems as they come. the photos added are of how it sits now. the front end is super on the piss (panel wise) so my next step is to start straightening it all out and getting it to look a bit better. I've been fighting the engine as of recent, it idles on 5 cylinders (very noticeable in gear) but when driving its normal. Not sure what this is about, have changed carb, checked all vacuums, changed dizzy, new points etc etc but the problem won't go away. Hit the discussion if you're able to help in resolving this as it's quite frustrating! slowly but surely I'll get this sorted a little better than it is now and hopefully have it going all summer. cheers!8 points
-
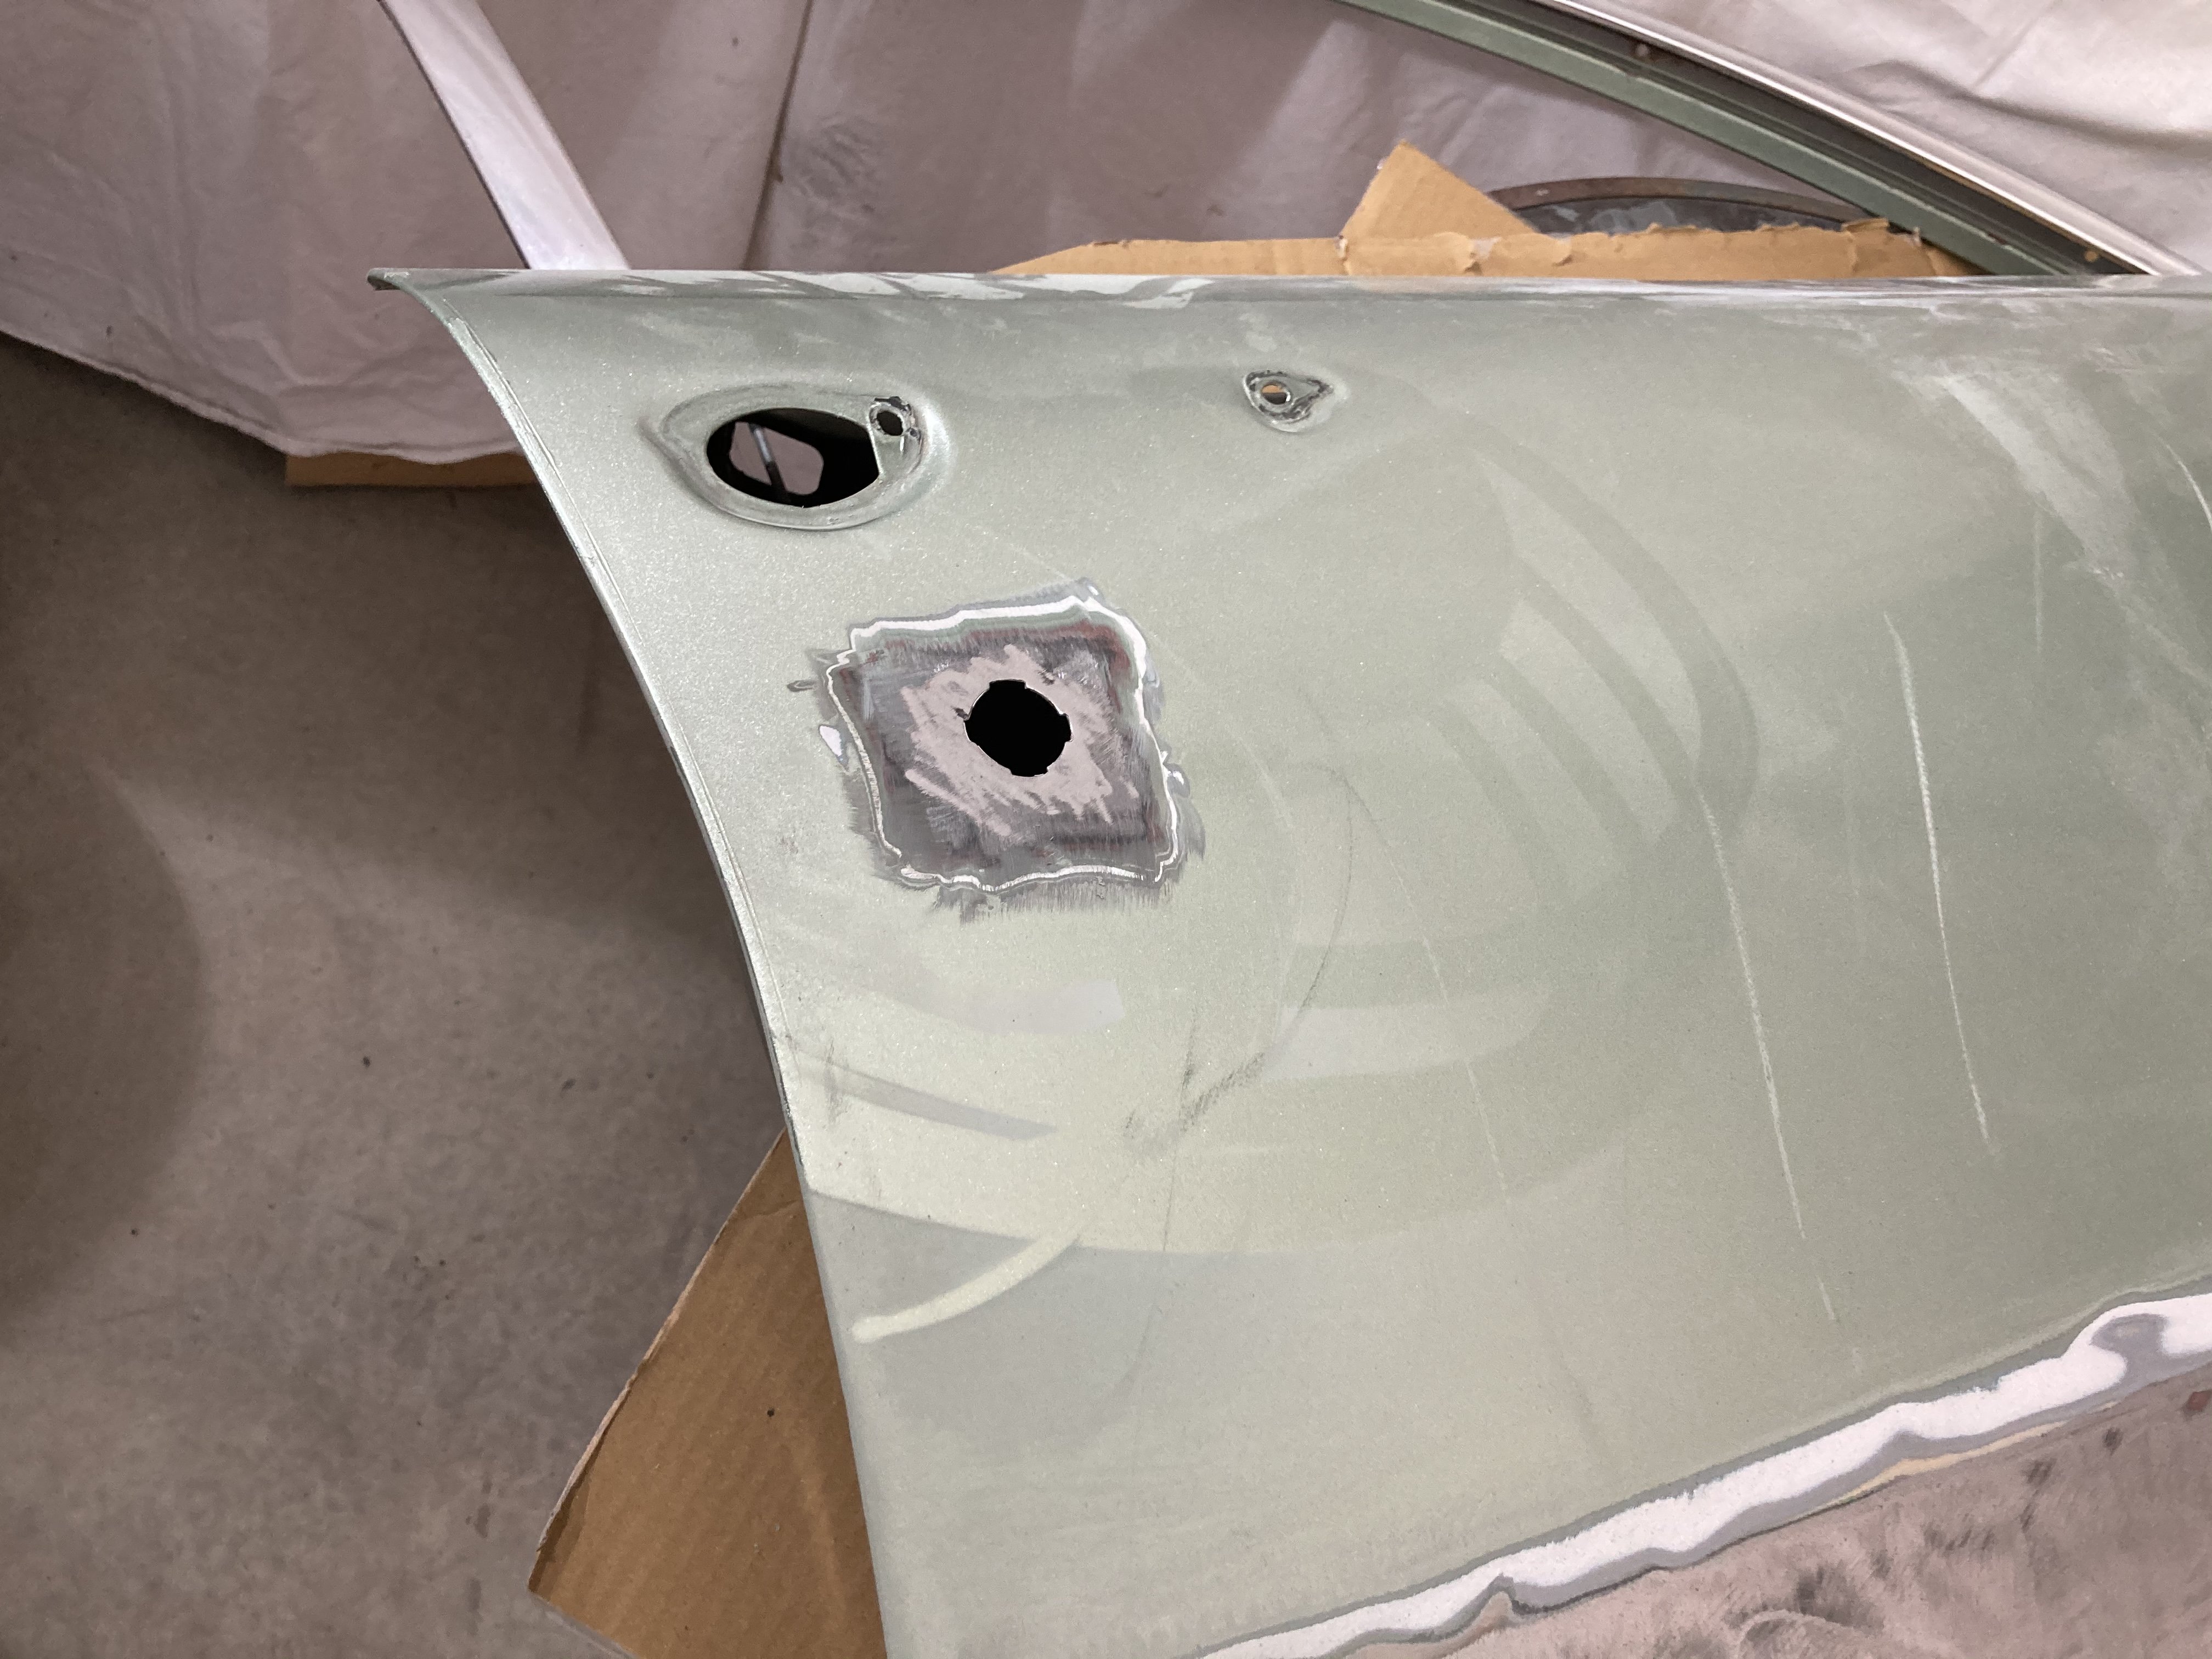
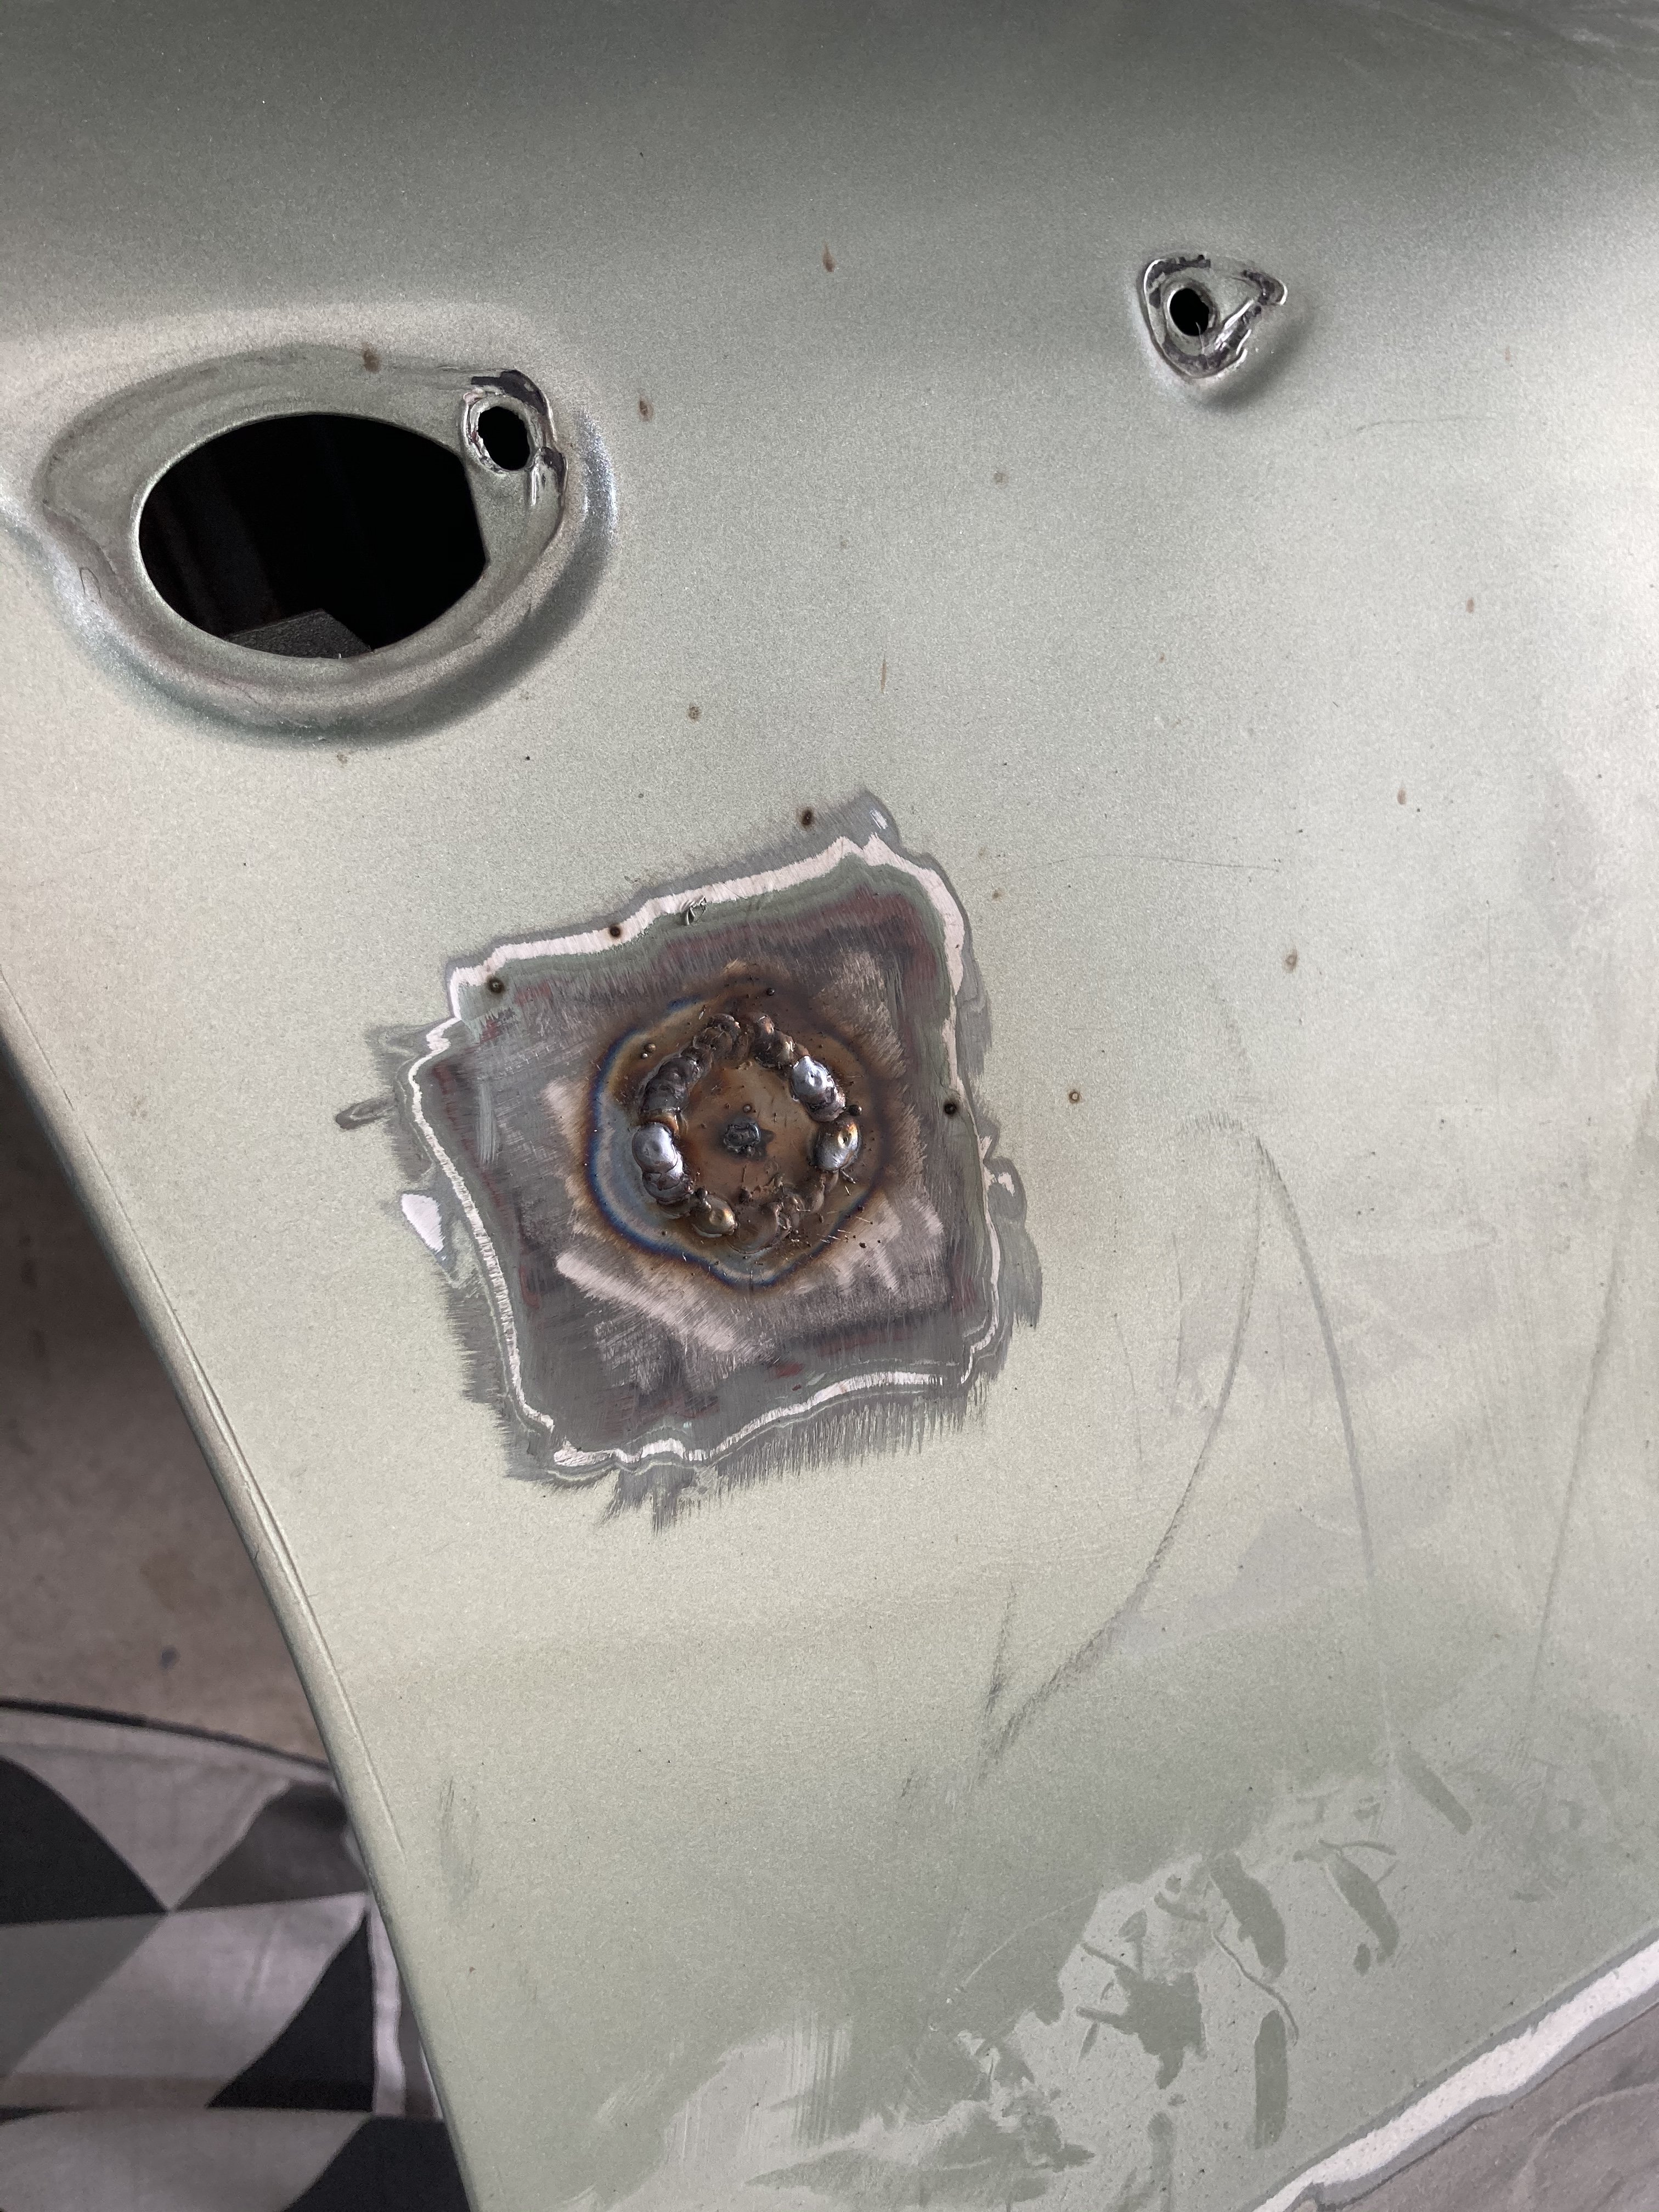
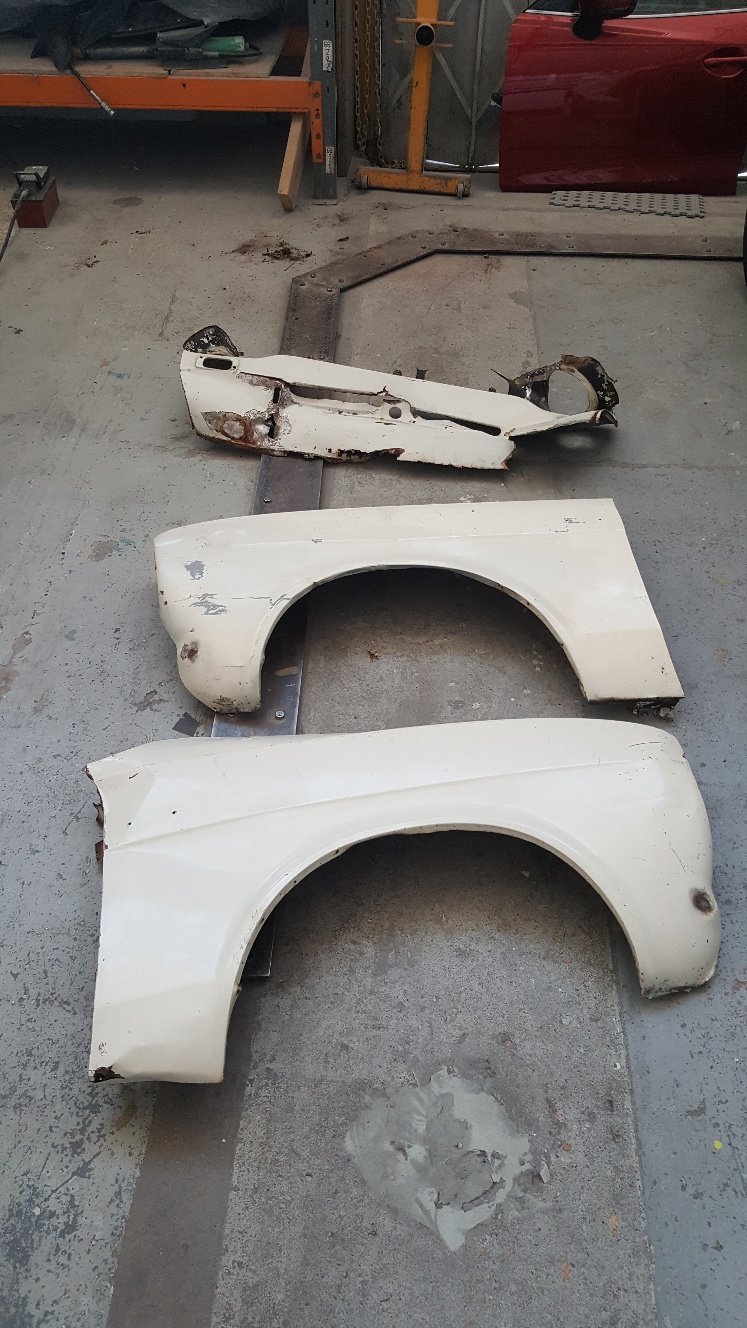
More progress. Front guards and front panel removed. I have bought old new stock Mexico Gaurds. And the front panel had rusted out where the number plate mounts. So new front headlight panel to be fitted. I will fit some new flitch panels. Rust sorted. Ready for the new panel.
7 points
-
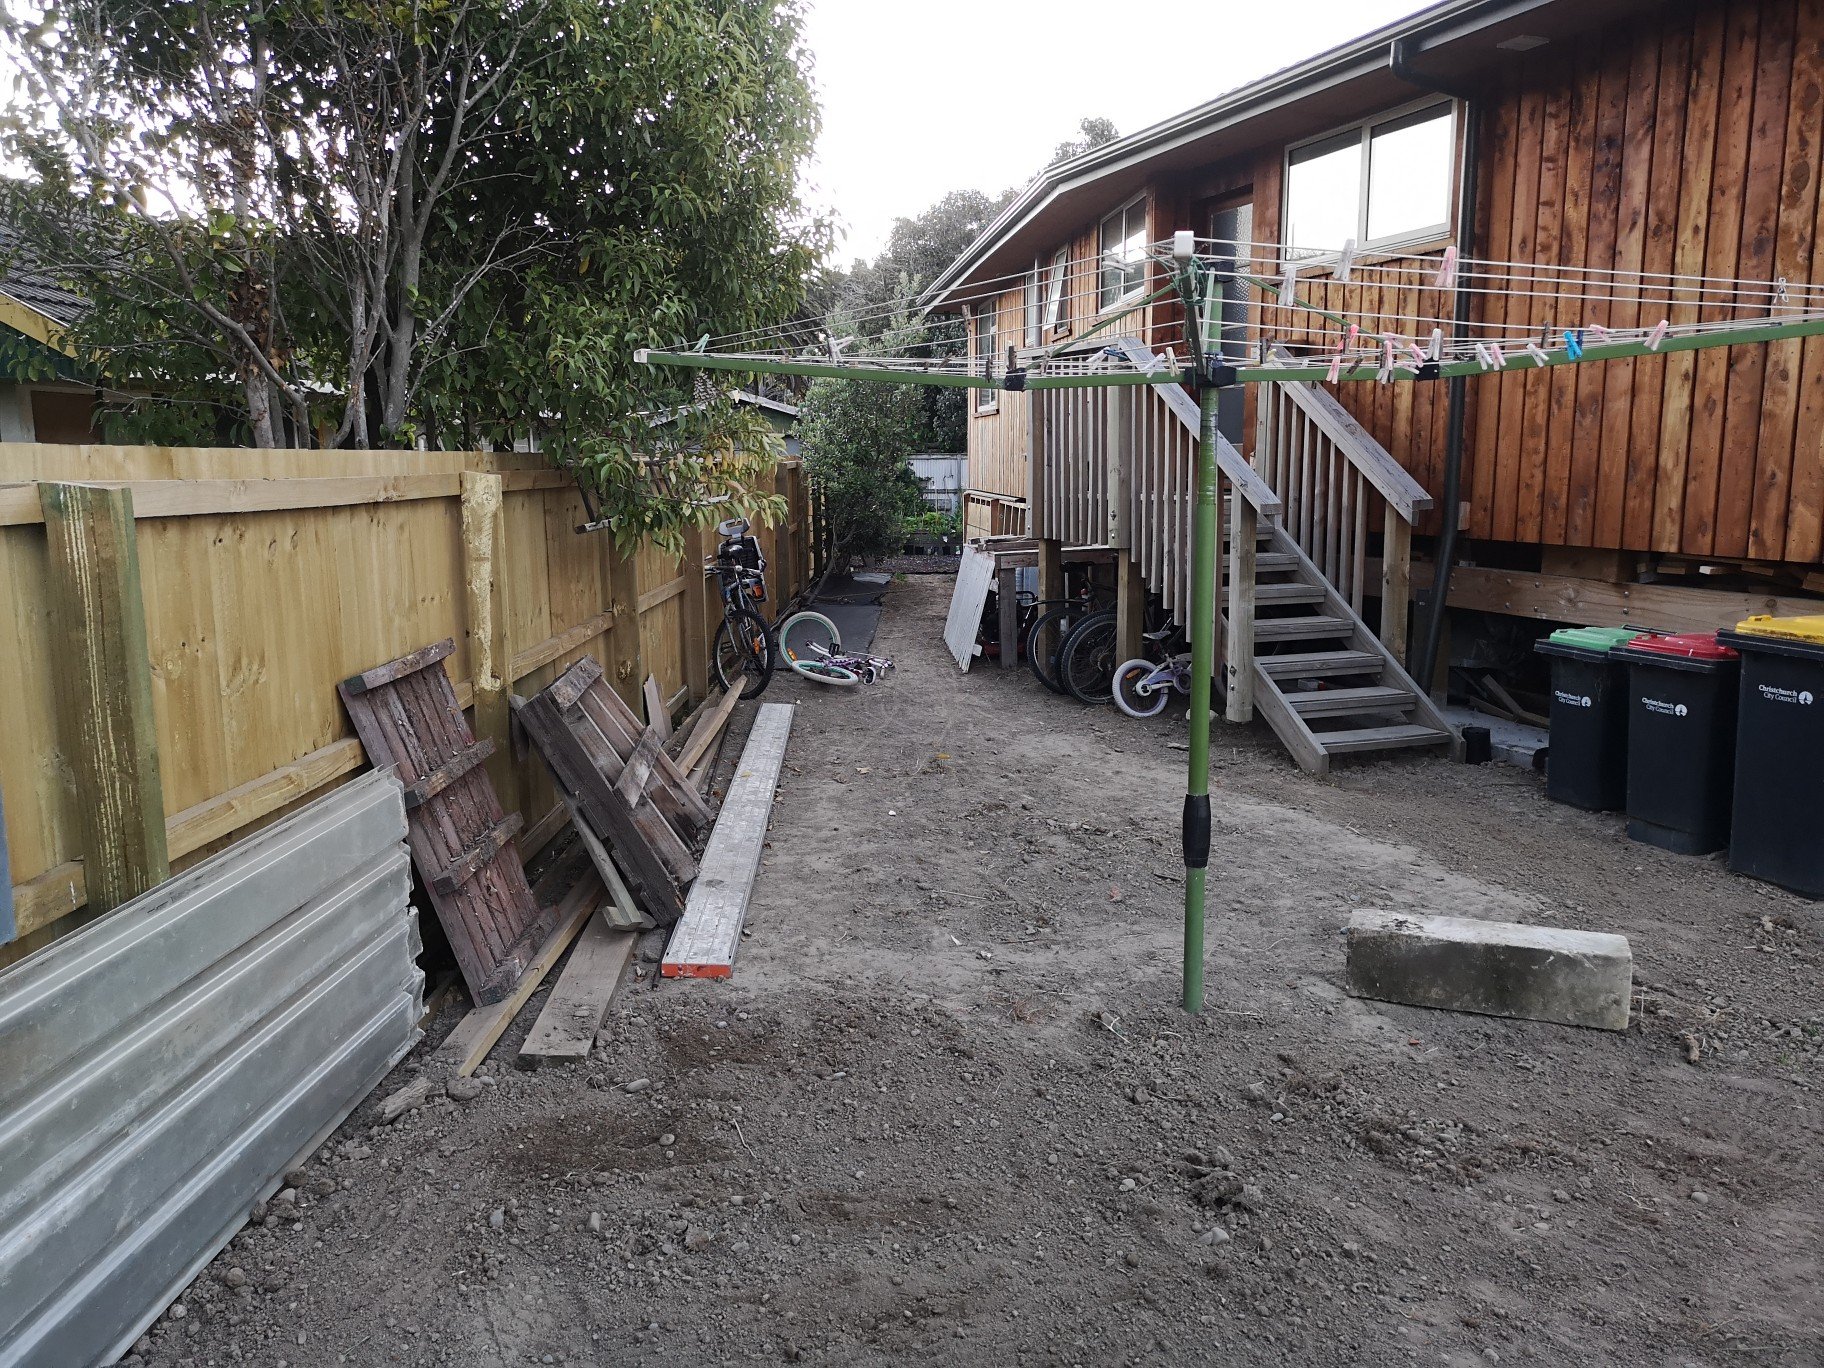
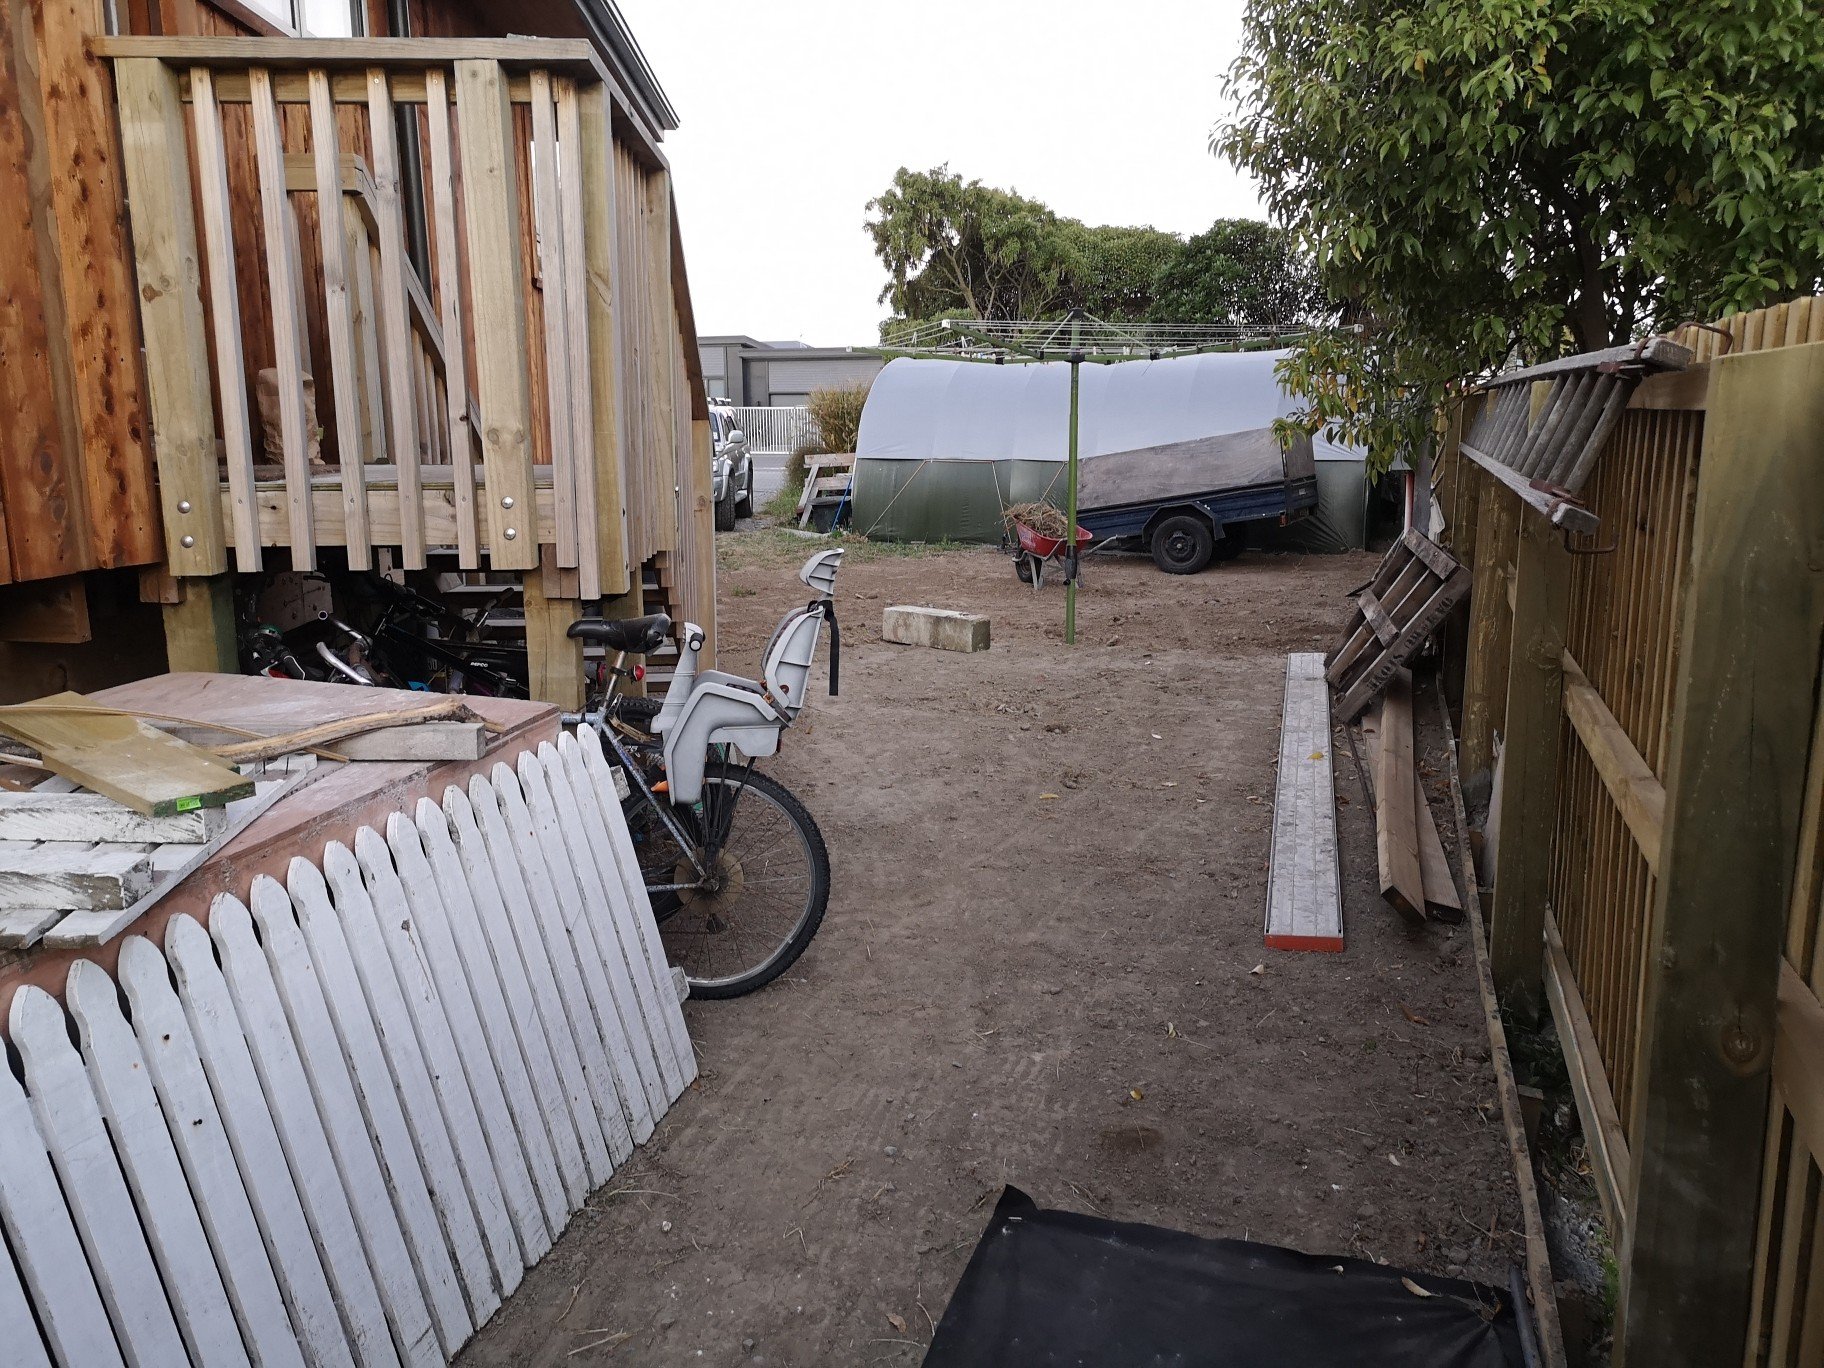
God.. I'm so time poor it's rediculous.. The back side of the house where the new fence is has always been about 150mm low, in part because the neighbours house sank in the quakes. The fencer said I could retain up to 200mm just using the posts so I got some 1500mm boxing and whacked it in 20mm lower than the house found with a couple of 600mm pegs every bay.. Cue 8m of free soil.. Gonna put a bunch of weed mat down and bark/plant it out. Can get pretty good limestone pavers for 25 bucks a ton (fucken cheap) from a quarry up by Waiau so thinking of paving from the back steps out to the clothes line and down the side of the house to the back yard. May even pave in front of the the front steps but not sure. Will use the same lime chip I used in the court yard as a path around the pavers (all come from the same quarry).. Also, since garages seem to be horrifically expensive, looking to put a 7x6m pole carport where the tunnel houses are and close it in with one side removable. This is amongst all the other shit I have to do in the next 6 months as we've put an offer in on a house in golden bay.
7 points
-
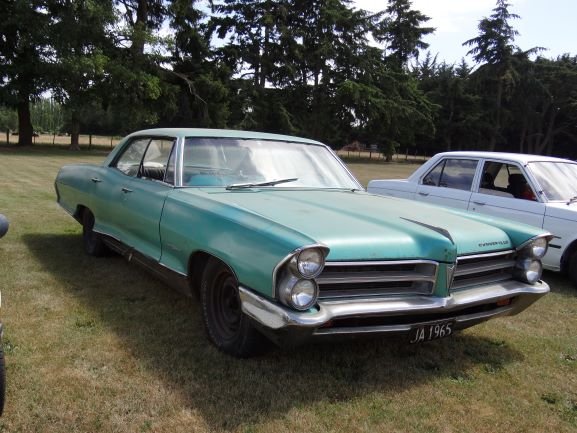
Maybe some more background as I've kind of started part way through. I saw this car pop up a couple times on Trade me and couldn't really get it out of my brain despite never being interested in this sort of thing before. We bought it went the price made sense a couple months after first seeing it. In my original post I put some asterisks after some words. This because we realised that the previous-previous owner probably told some porkies to the previous owner to sell it to him. They say they took the dizzy out as an anti-theft measure but it's the wrong dizzy, which calls into question all of their other claims (driven into a garage for storage 15 years ago for eg). And why cut the battery out? :\ Things we knew were wrong with it both of the boot latches are broken the distributor is (was) missing the battery has been removed via wire cutters fair amount of surface rust paint is horrific 14+ owners, and it's clear that the last few have not cared too much for it unrepaired front passenger corner collision (plus evidence of other historic repaired collision damage) interior trim is horrific or missing with only a few 'ok' bits only truly concerning rust was a piece at one of the rear latches and on the back of the bonnet The previous owner left a lot of fun stuff for us to find. Not pictured: all sorts of screws and bolts and trim bits that had fallen off deteriorated trim and found their way under the seats. Also 12 pence somehow. I considered the rust situation to be "ok" but after seeing a few restoration threads I have upgraded that to "pretty decent actually". No rust underneath, and the "usual" spots for starions seem to have escaped unscathed. There's surface rust in a lot of places but it's only eaten through or "bad" in a few minor spots. The rear driver's side floor doesn't look happy, but is surface only. Even the battery tray hasn't been eaten through Lots of dodgy looking bits actually cleaned up relatively ok with just a wire brush. It turns out that both latches have some rust that has managed to eat through - it's quite minor but will need some welding. I've dressed some bits with rust converter already. The only really bad spot we've found so far is the front crossmember which has a hole eaten straight through it. So we'll have to either find a new crossmember or get it repaired. I feel like we've dodged most of the rust bullets, but I do need to impress just how much surface rust is on this thing. There's also a ton of rando bog from historic repairs in places. So I'll likely get the whole thing media blasted down professionally just to make sure we're not leaving anything to get eaten away.6 points
-
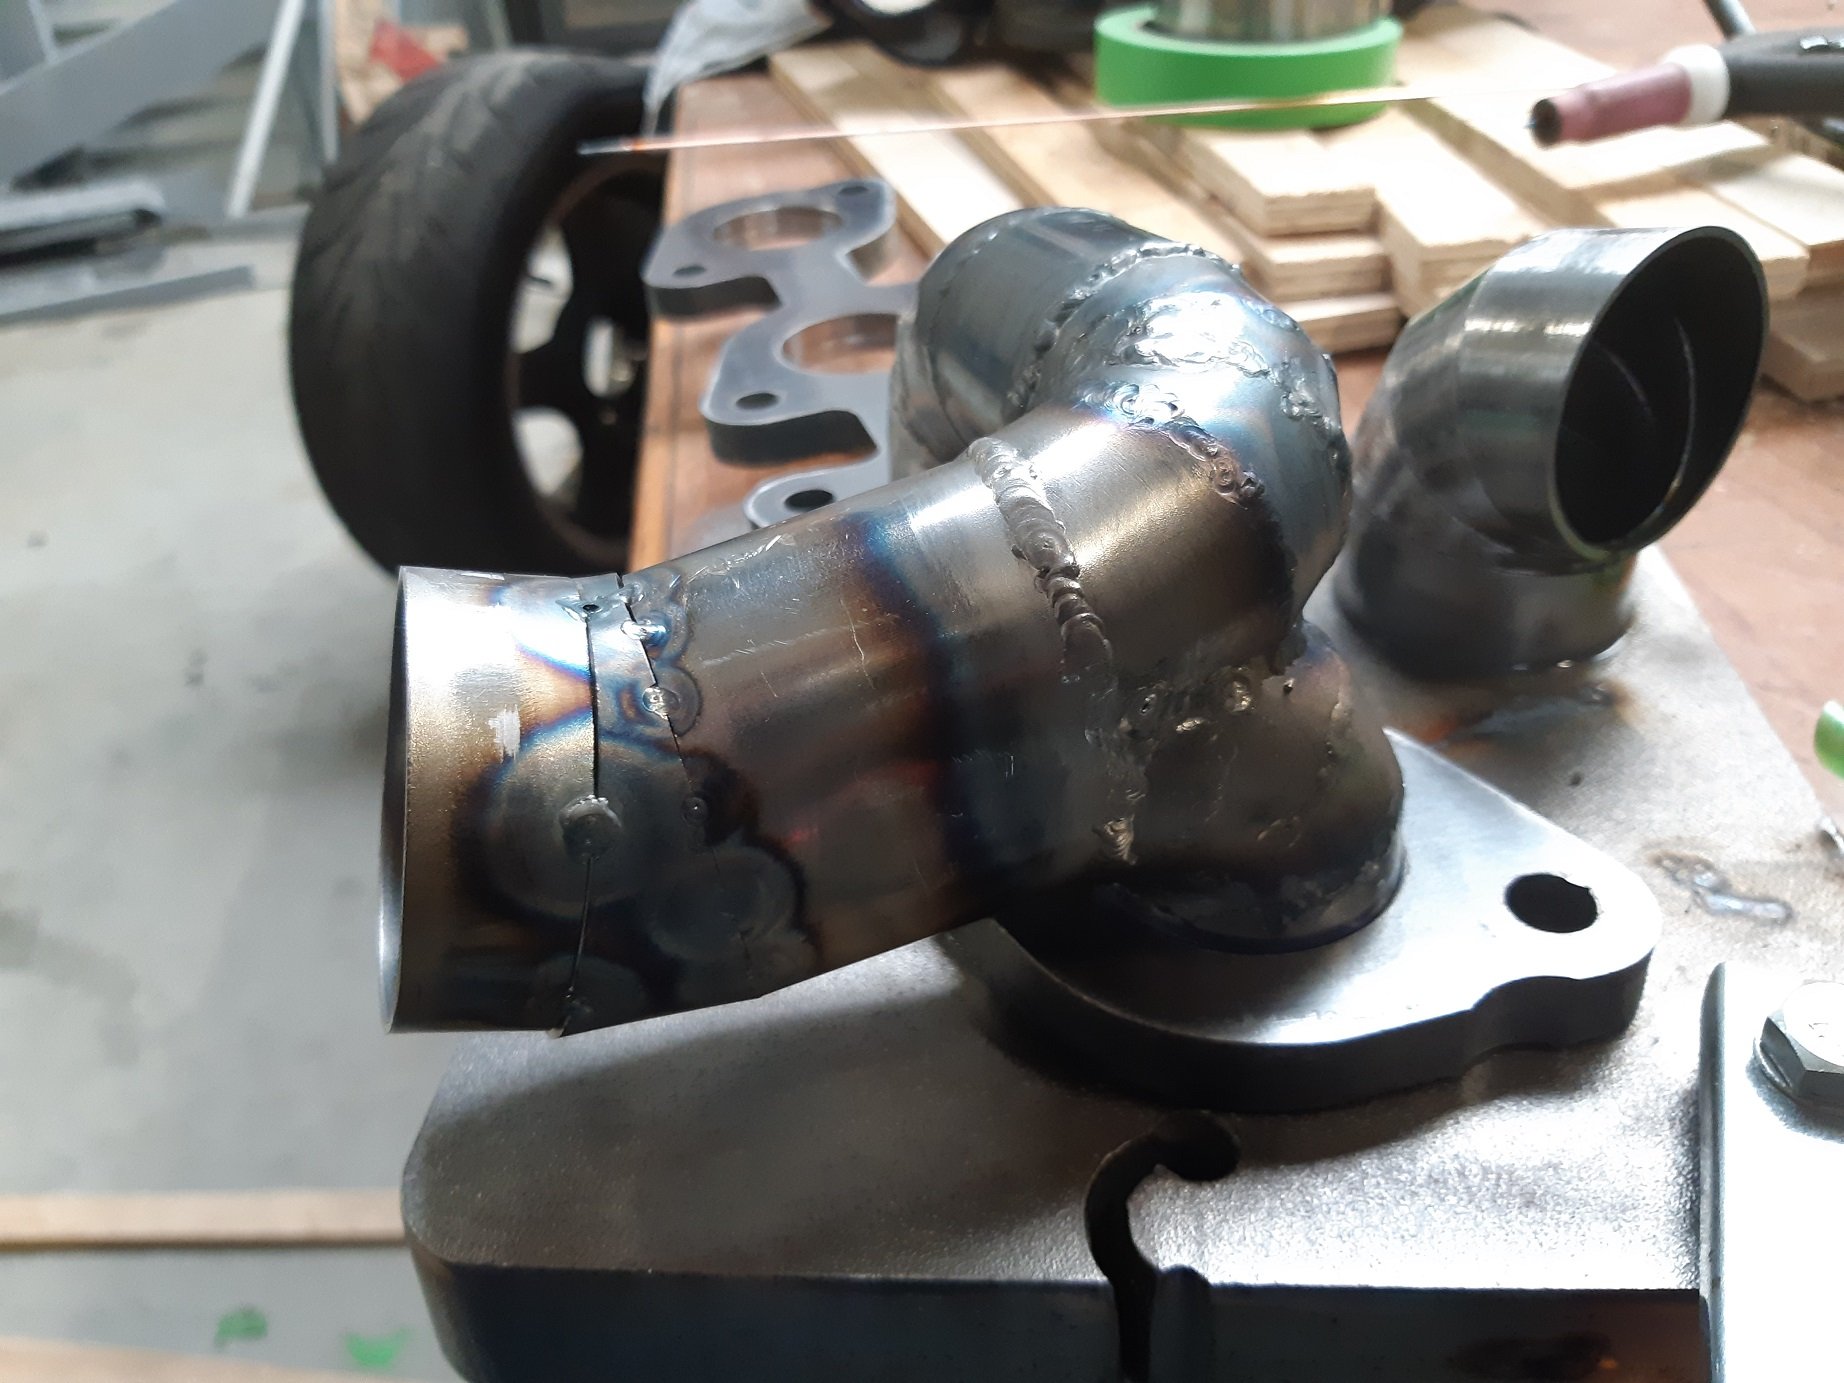
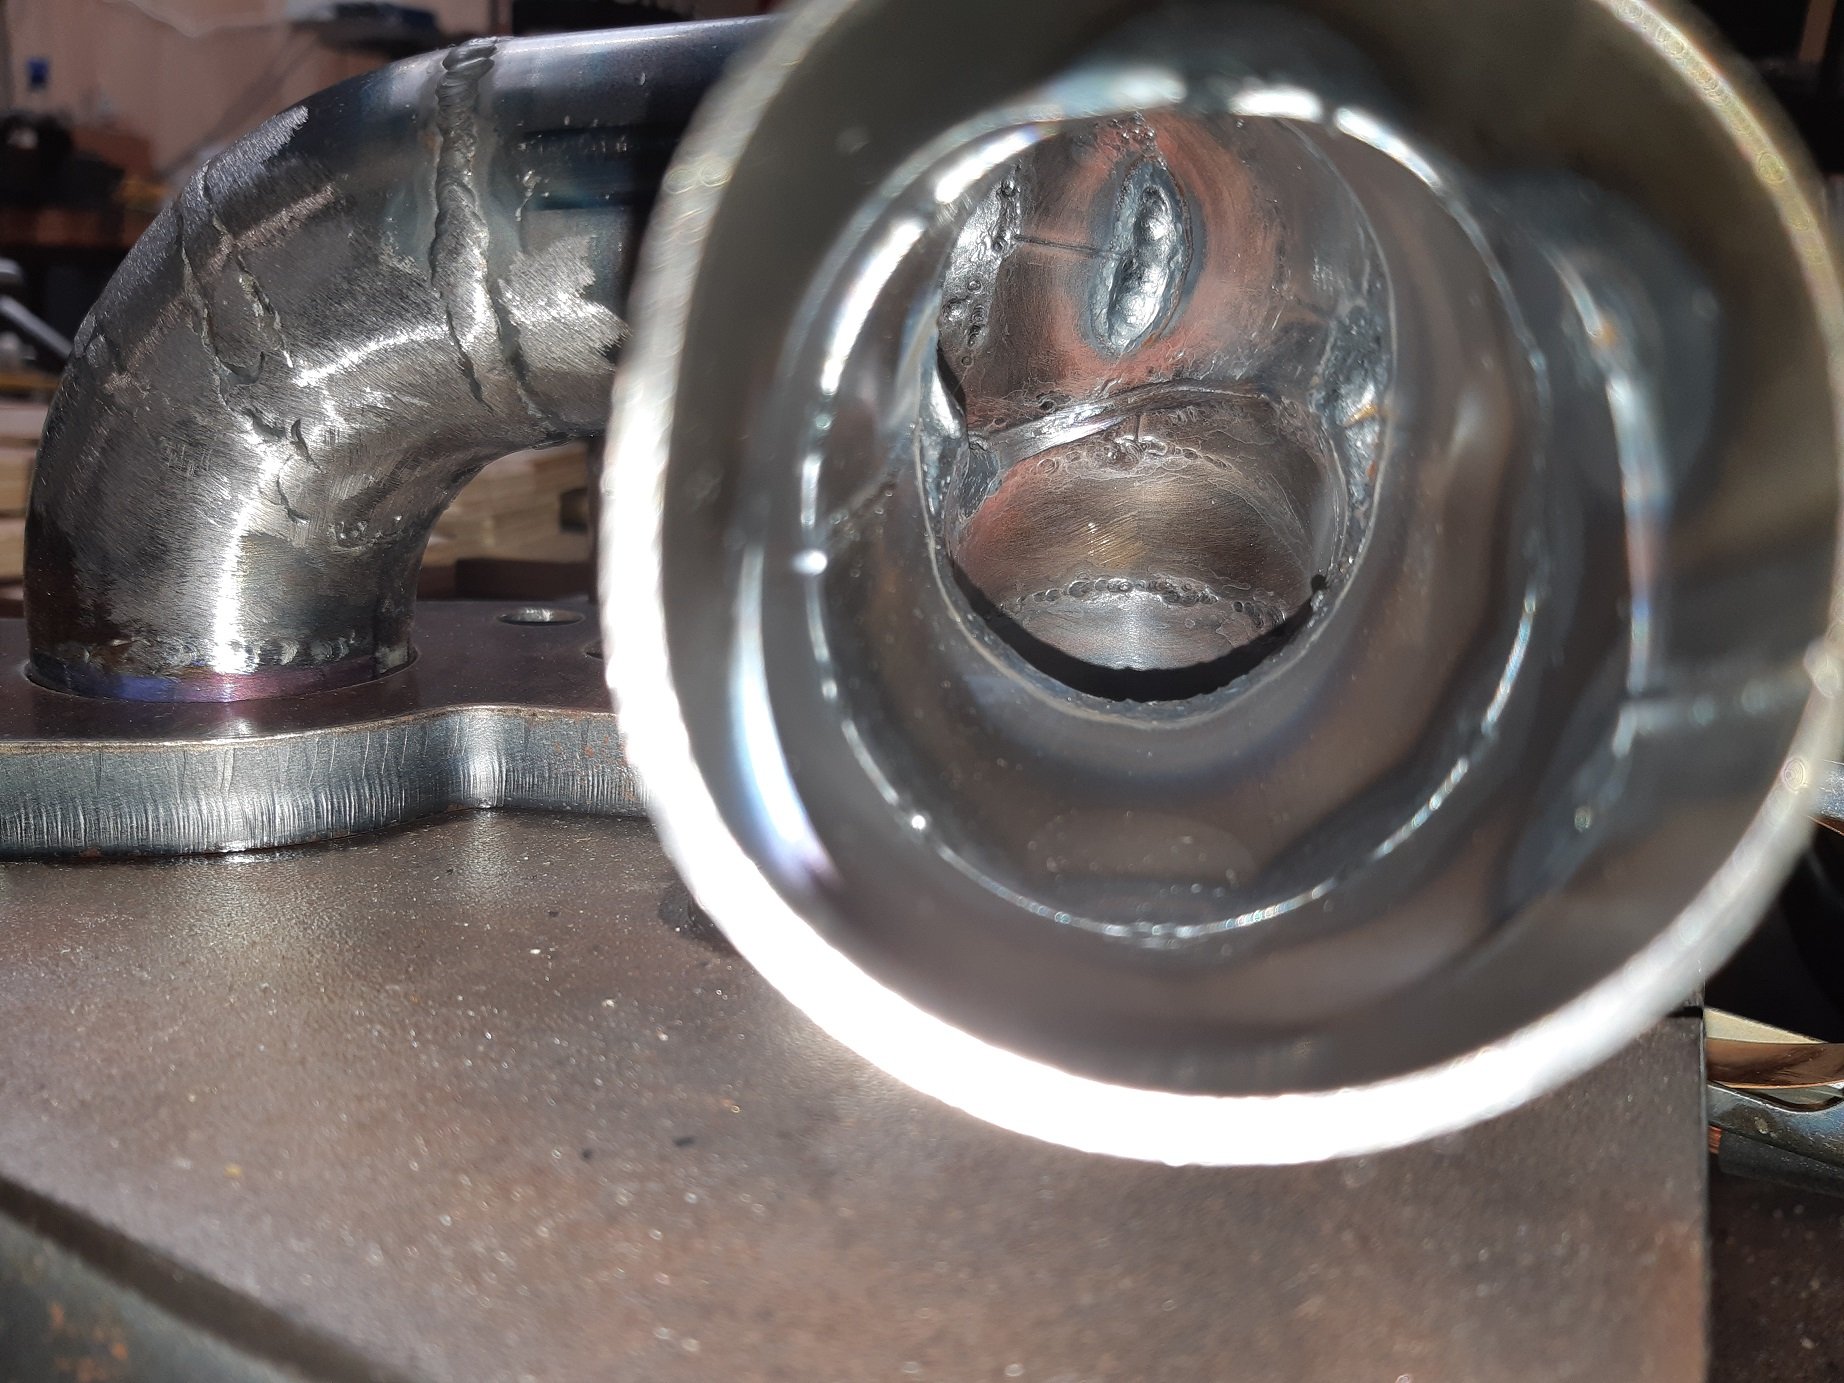
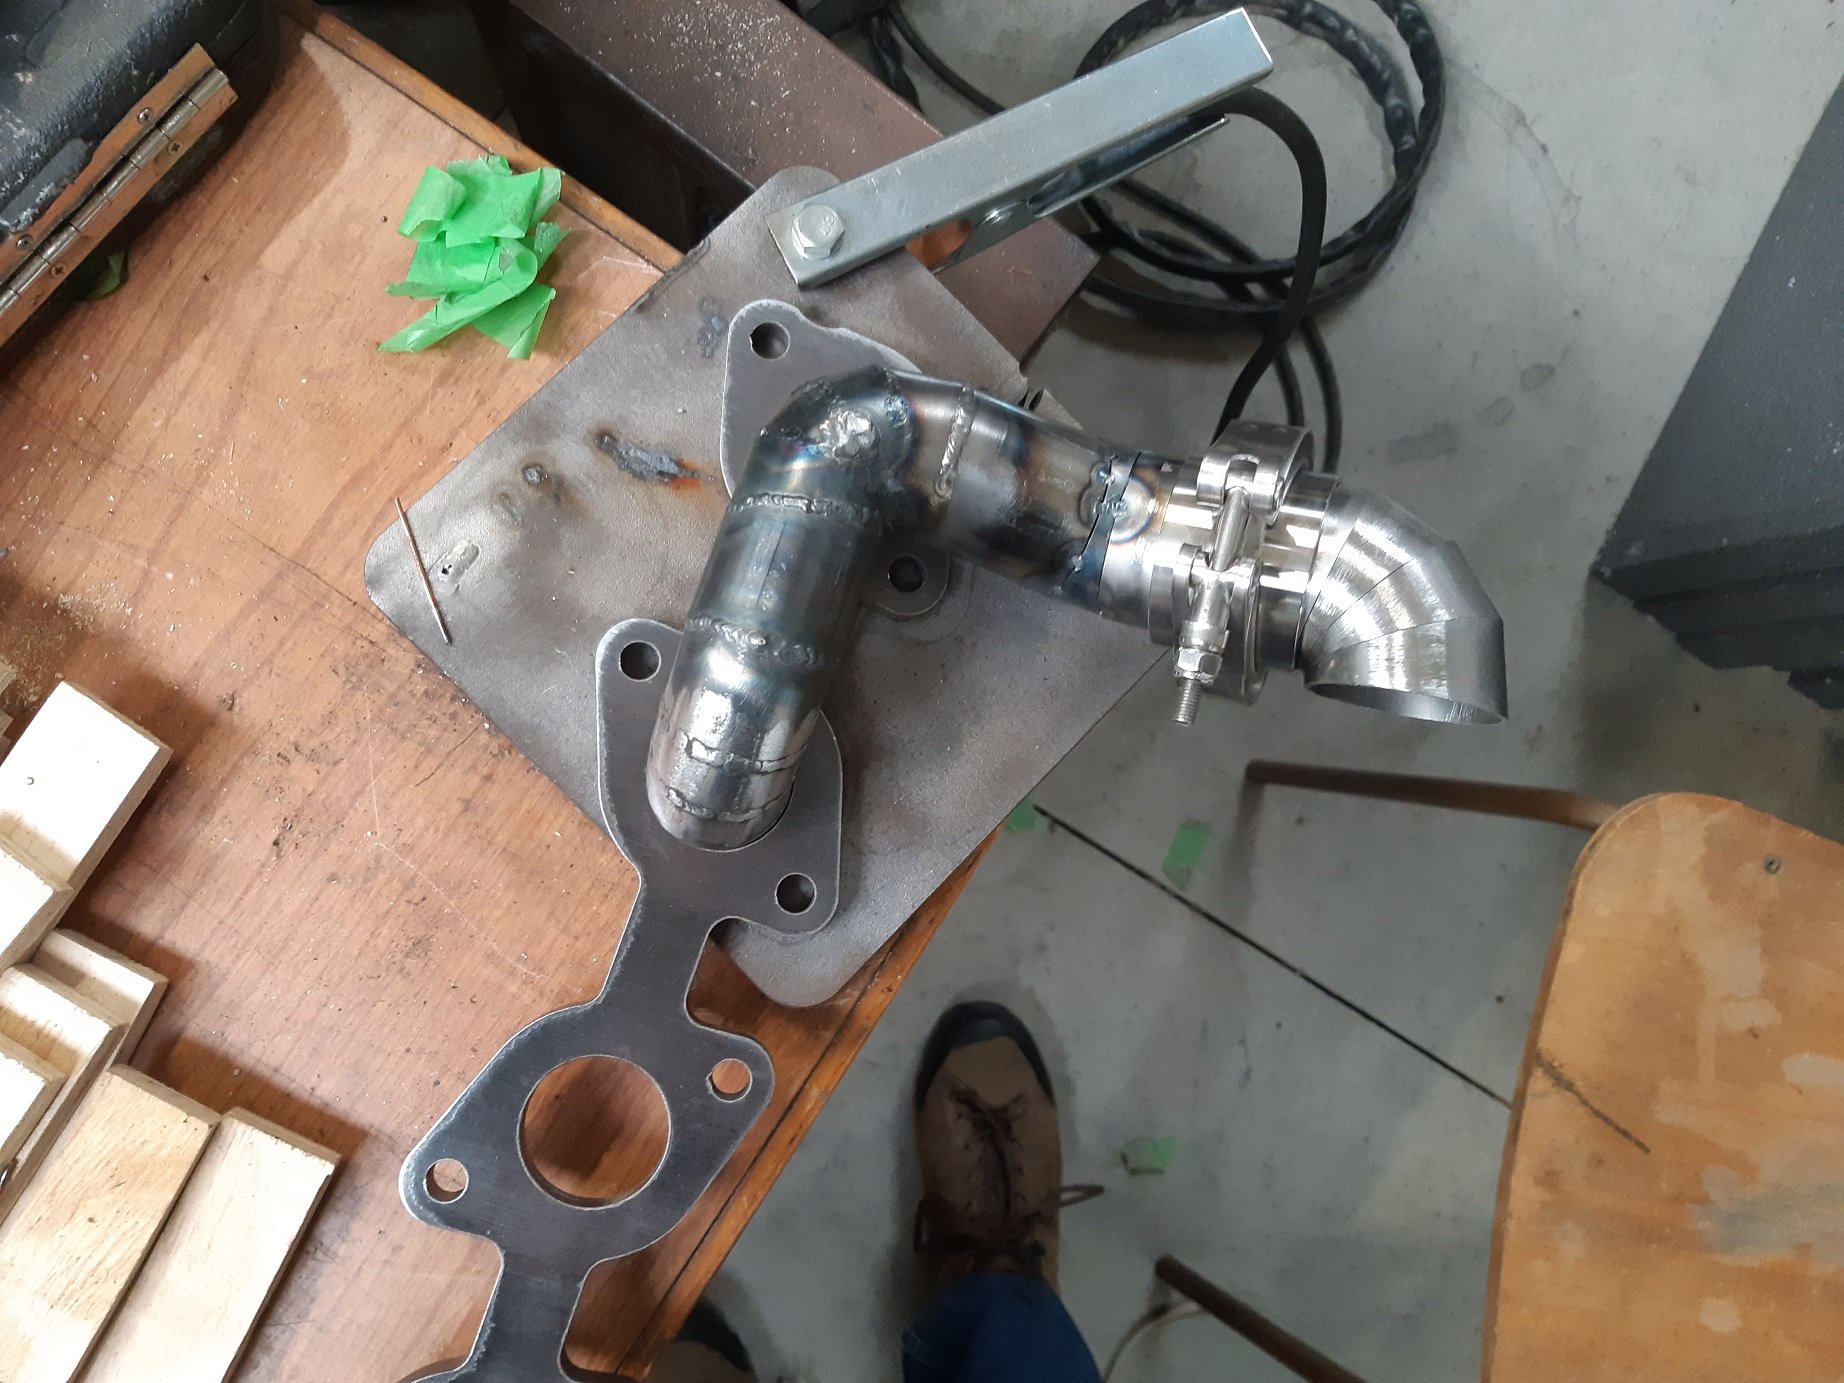
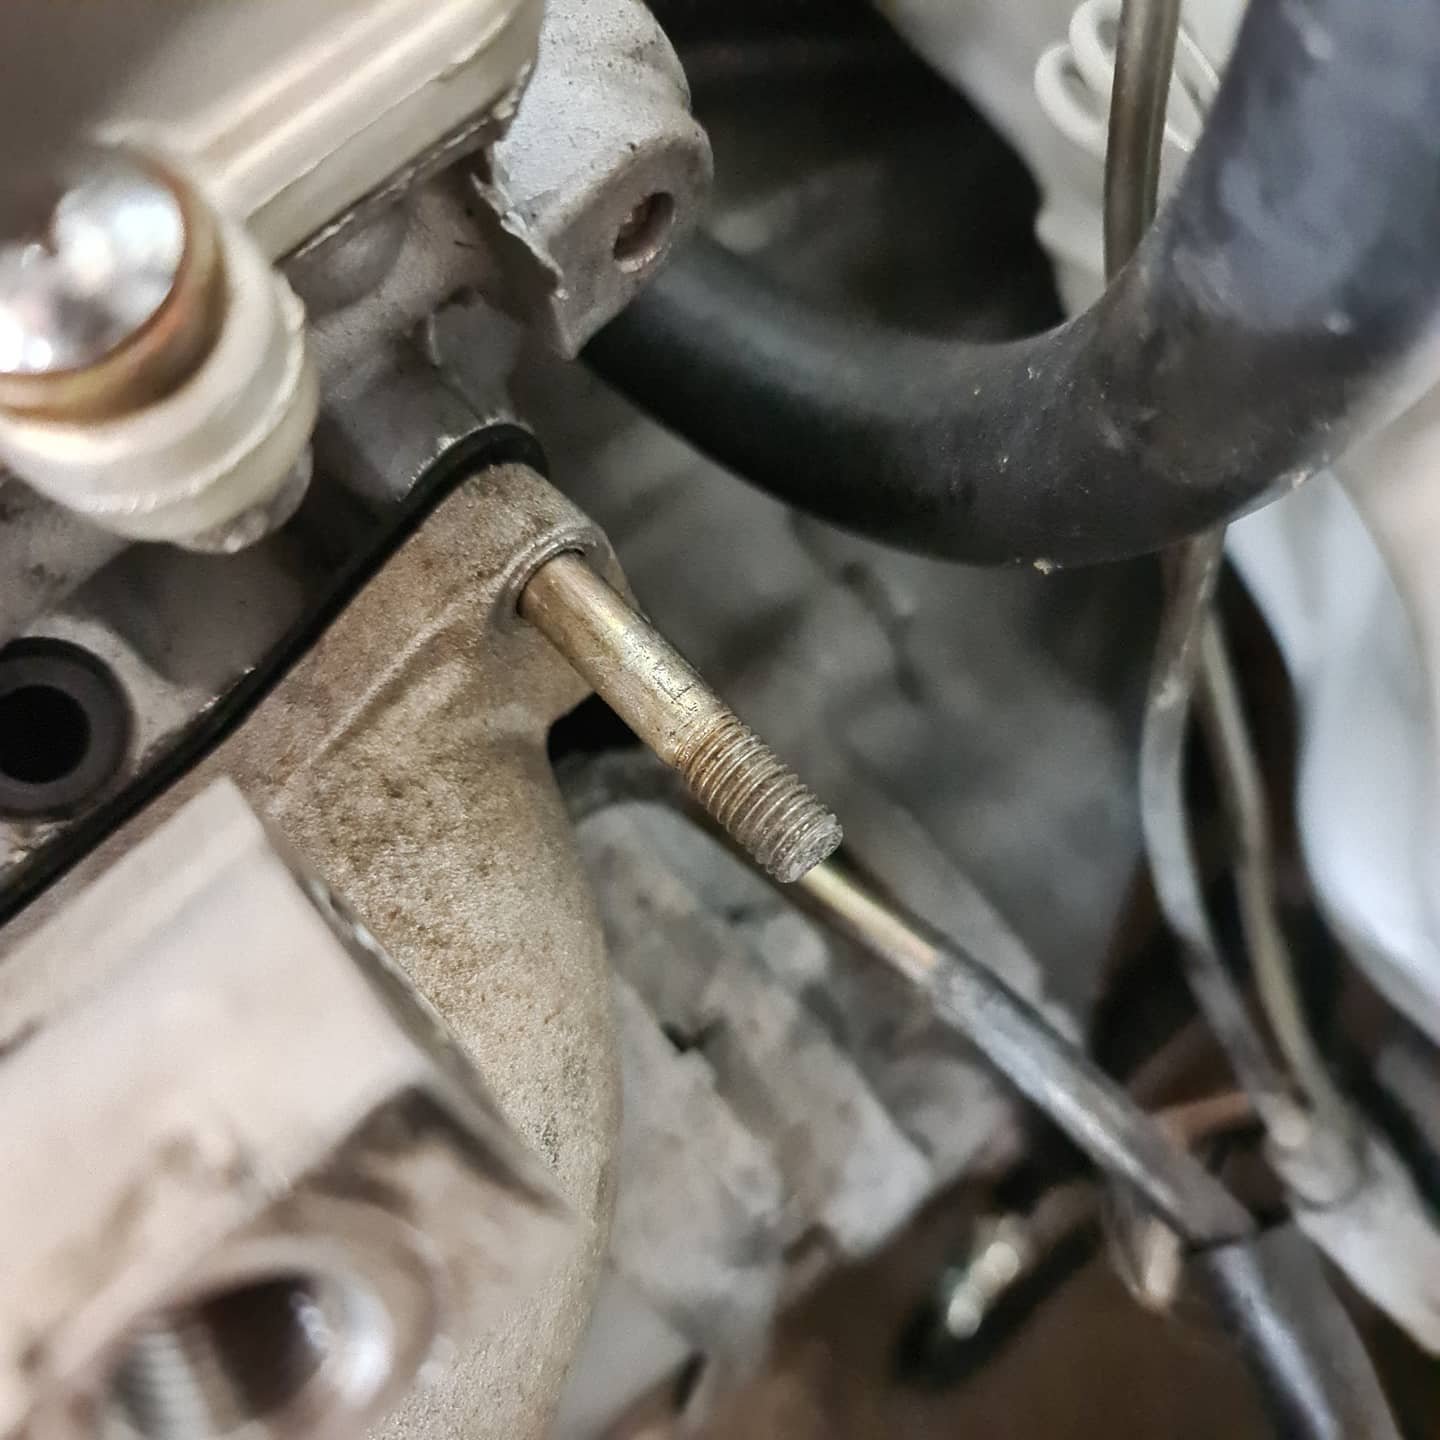
I've made a start on the convoluted snake nest that will be the exhaust manifold. The steering shaft and engine mounts are leaving me with fuck all options. I also have to avoid blocking any bolts that will make it impossible to install the exhaust. That rear stud needs to be replaced with a bolt, it only clears the universal joint by a few mm. The only direction the two rear ports can go is under the steering shaft. To do that I have to make pie-cut bends, the smallest donuts are too big. They will merge right away into a 2" pipe, then there will be a v-band clamp. The two front ports also merge into a 2" pipe then there is a v-band clamp. There will be a 2" pipe running under the engine mount that joins the two v-bands, then crosses over to the other bank in the gap between the sump and bellhousing. There will be another v-band just before the cross over pipe merges with the 2" pipe from the other bank. The two 2" pipes from each bank will merge into the final 2.5" pipe. Here's my start on the piping for the front two ports. The v-band won't be exactly there, it's just precariously balanced for the photo. My tig welding has improved a little since I started.
6 points
-
Moar testing this afternoon. Tried different float needle, didn't really change anything. We think the choke plunger may be jamming on, causing the "not wanting to start under 70% throttle, and then hardly running, and then after a fiddle starting sweet as" issue, and it was still doing the "running out of gas after a period of full nangs, but then OK again if you idle around for a bit" thing, which was a bugger, but I have a couple of plans on solving this. Float needles, spot the rooted(er) one, Mr Jones going for a nang, Weed make boat go slow, I also have a plan to enhance my boating pleasure, so cunning, you could put a tail on it, and call it a weasel. Regards, VG.5 points
-
Then tackled one of the rear shock boxes. Looked like grease at first but turned out to be stuck on real good, so I'm thinking maybe road tar. Anyway lots of wire brushing and liberal applications of petrol and I eventually got it clean enough to make out the manufacturer's name in the casting. Made by Armstrong interestingly enough. One down, one to go.
5 points
-
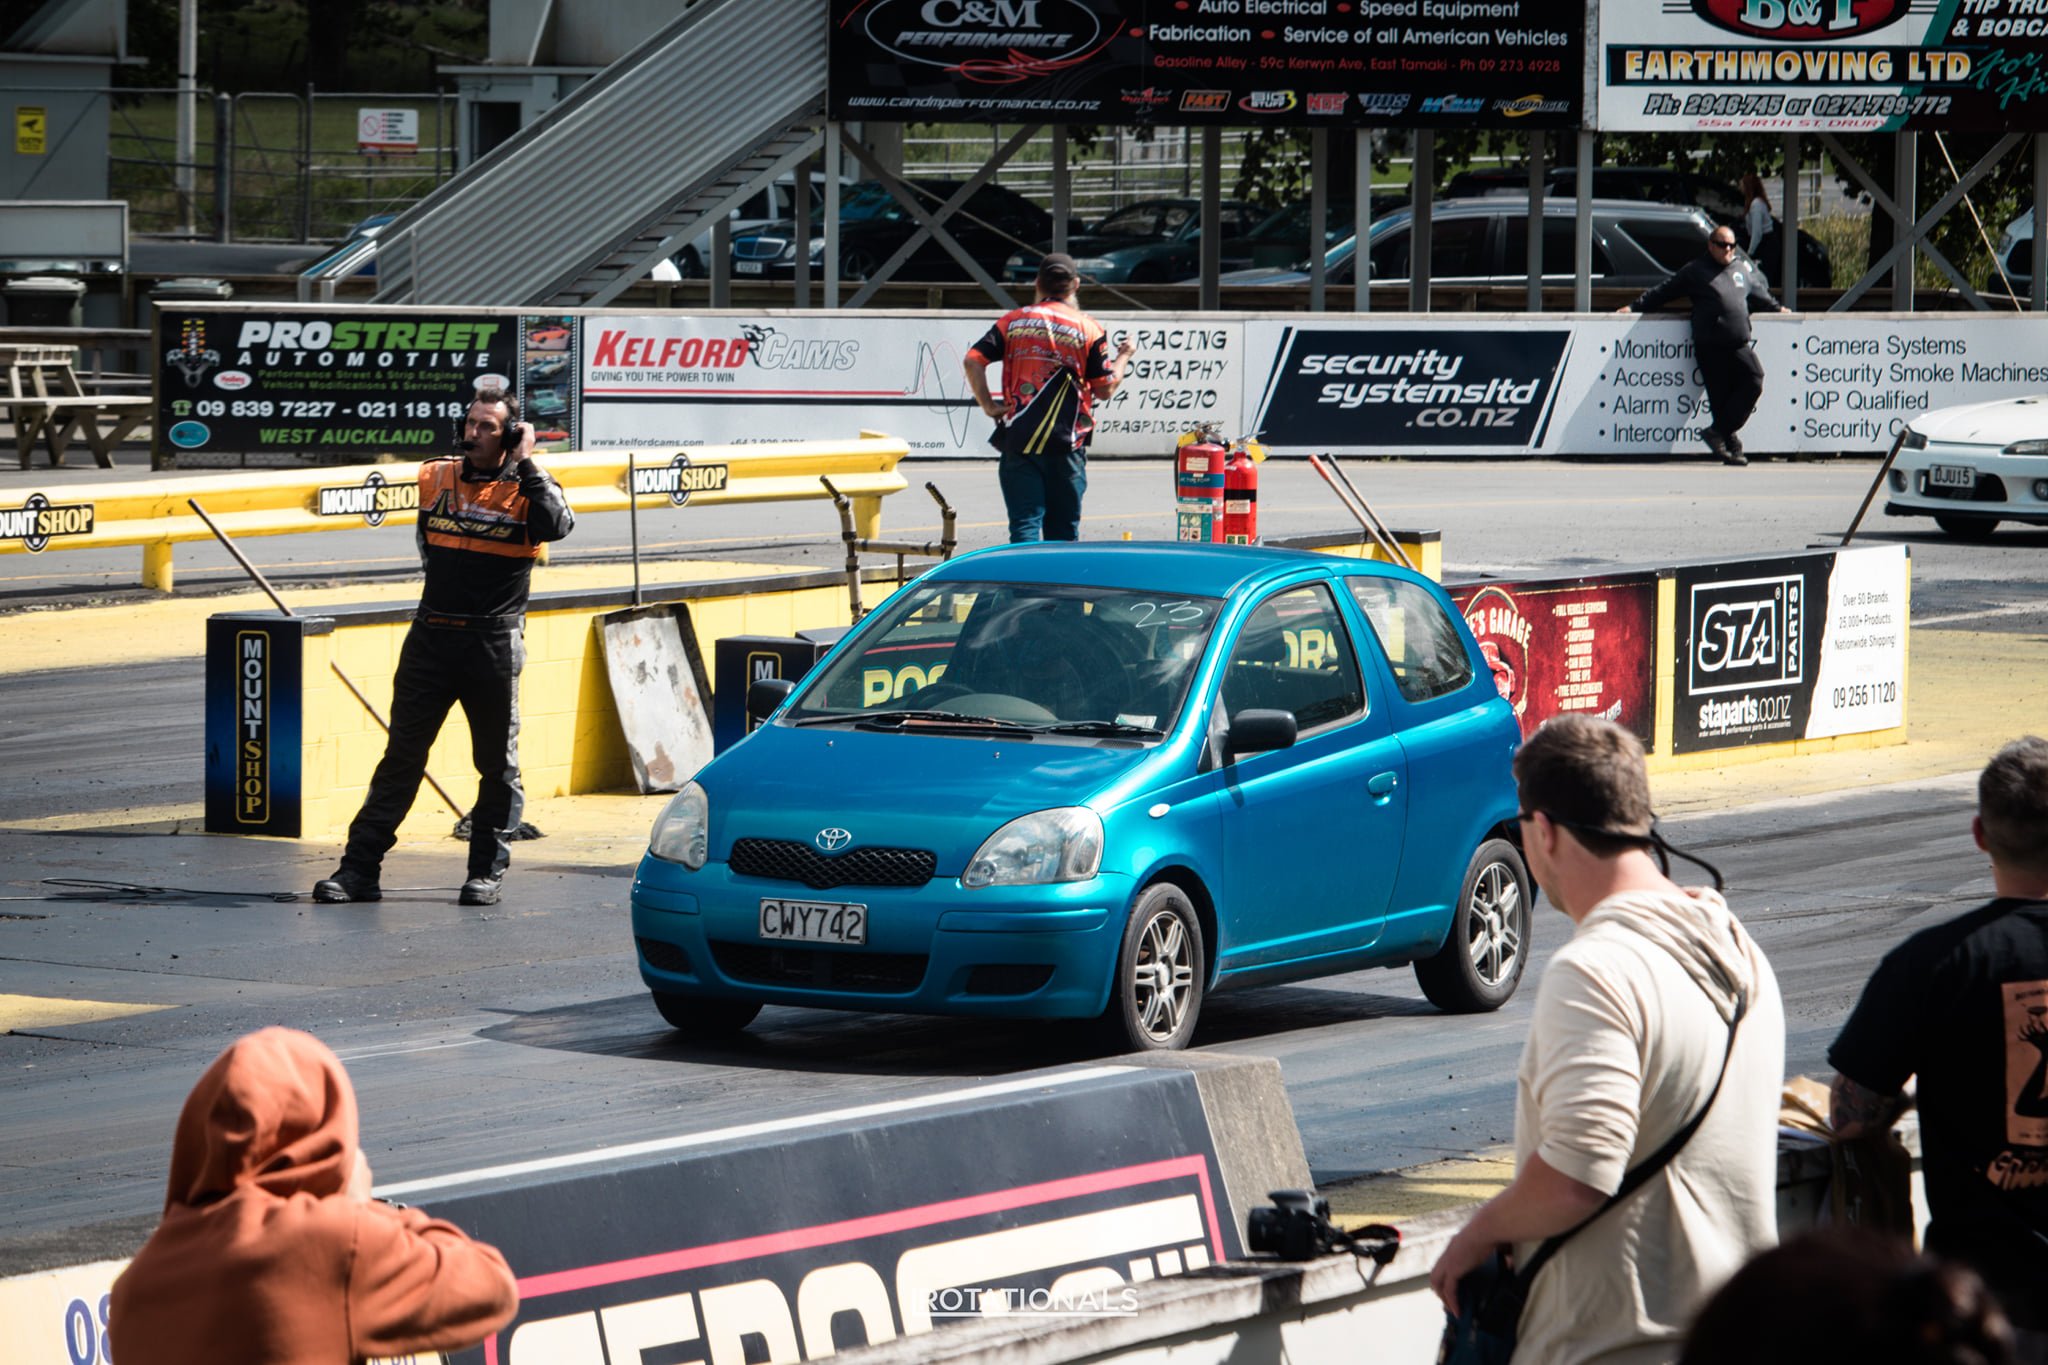
It held together and nothing broke - home safe Stoked with how things went, improved PB by 1.2 seconds to a 16.4 Only did 6 runs as it was clear I wasnt going to go groundbreakingly faster. But using the rule of thumb of " 0.1 off your 60ft is worth 0.2 off your 1/4 time" If I combined my best 60foot with best quarter I'd ideally end up somewhere under 16.3 which I think is pretty sweet for a 1300cc echo haha. But I was more worried about getting home okay this time so was minimal on burnouts off the line which might have helped. A++ would make drag day doort noises and excuses again. Hectic 1500 setup next time
5 points
-
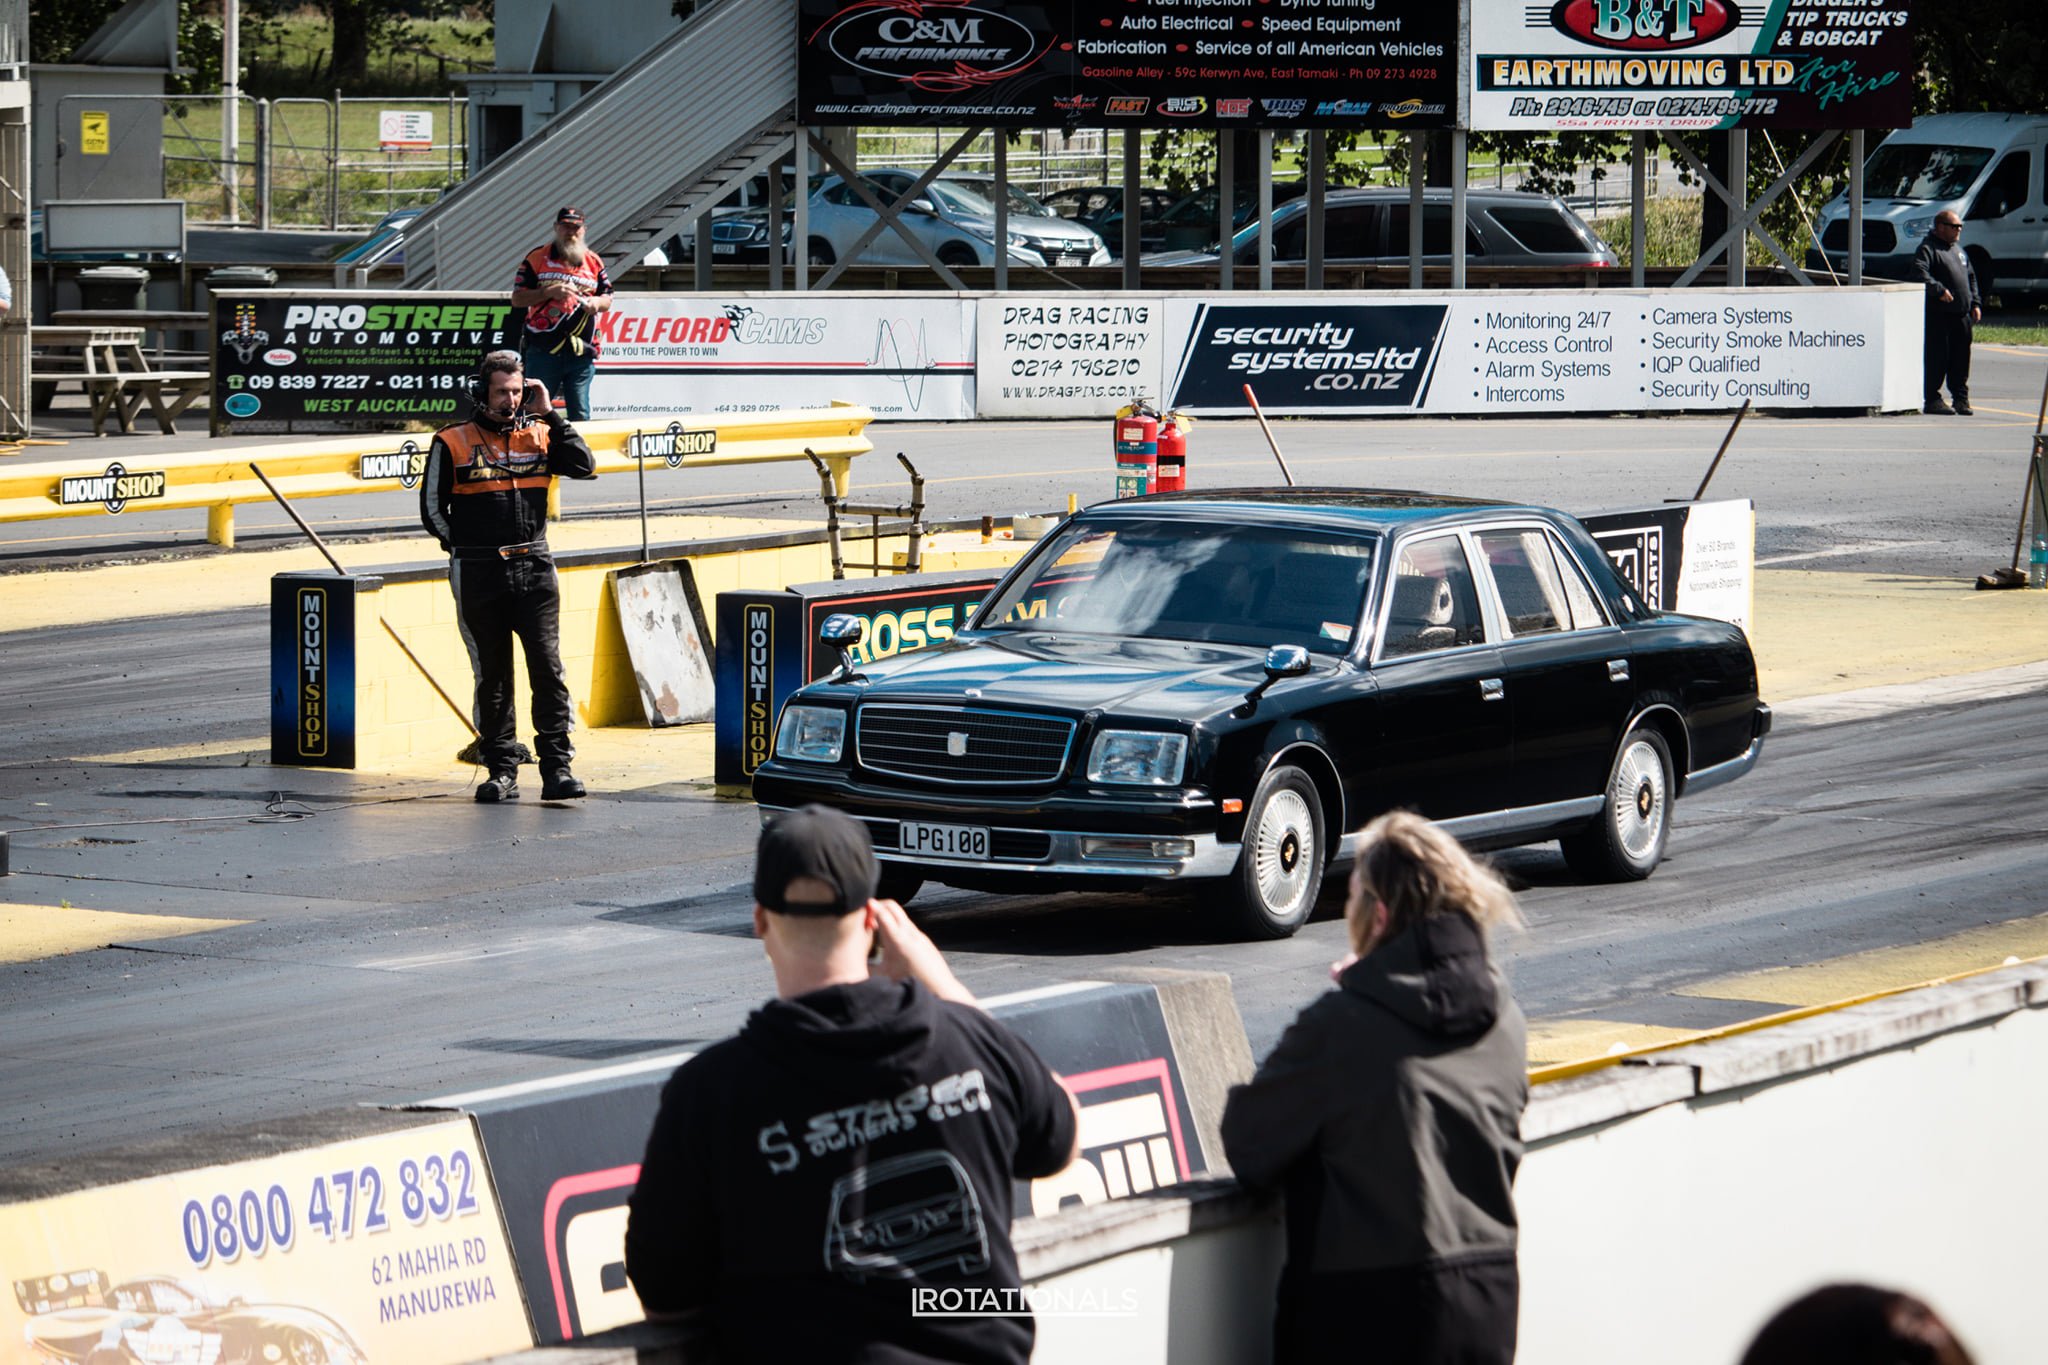
I'm hugely grateful that Dad comes along and participates in things, he was super chuffed to get the Century out there. It still blows me away that these things are in any way shape or form, affordable and accessable. However his PB is still definitely with the JZX90 which is a low 14. and the blue skittle The wind noise doesnt quite capture the racket coming out of it, but a vid's a vid:
4 points
-
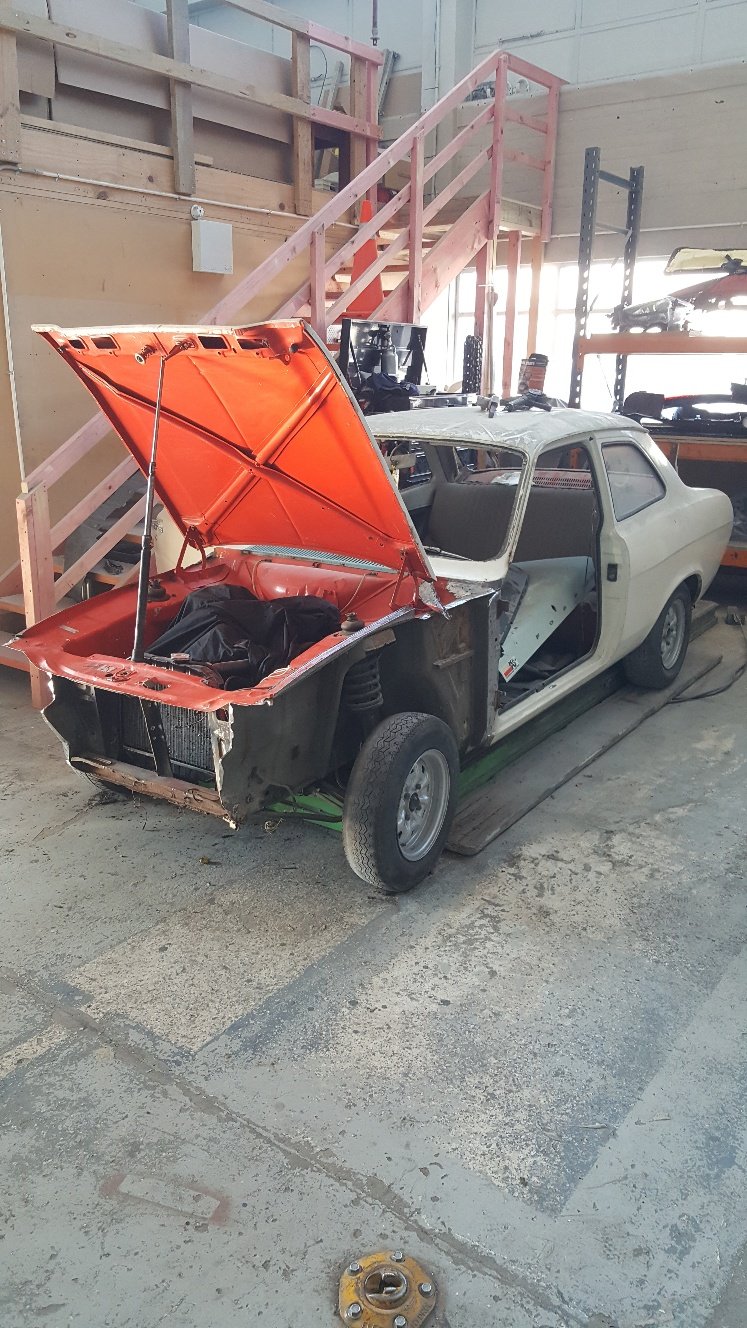
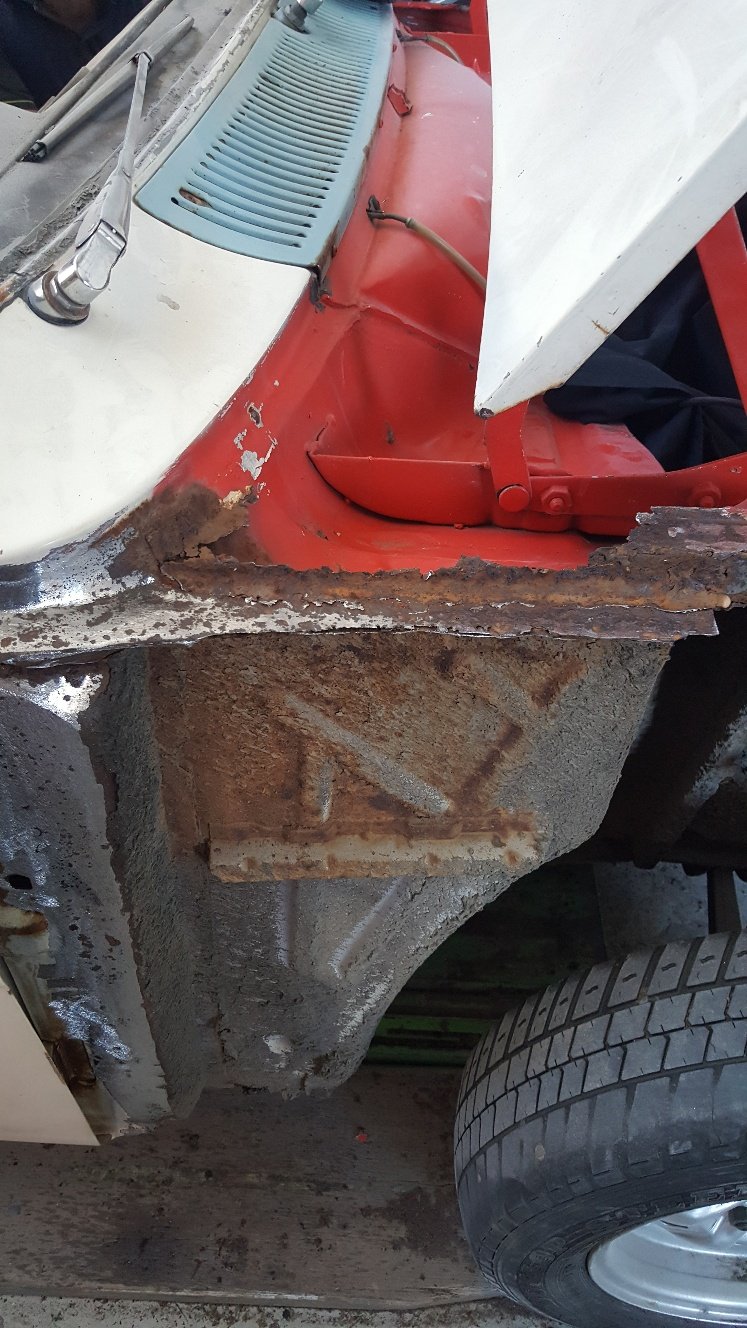
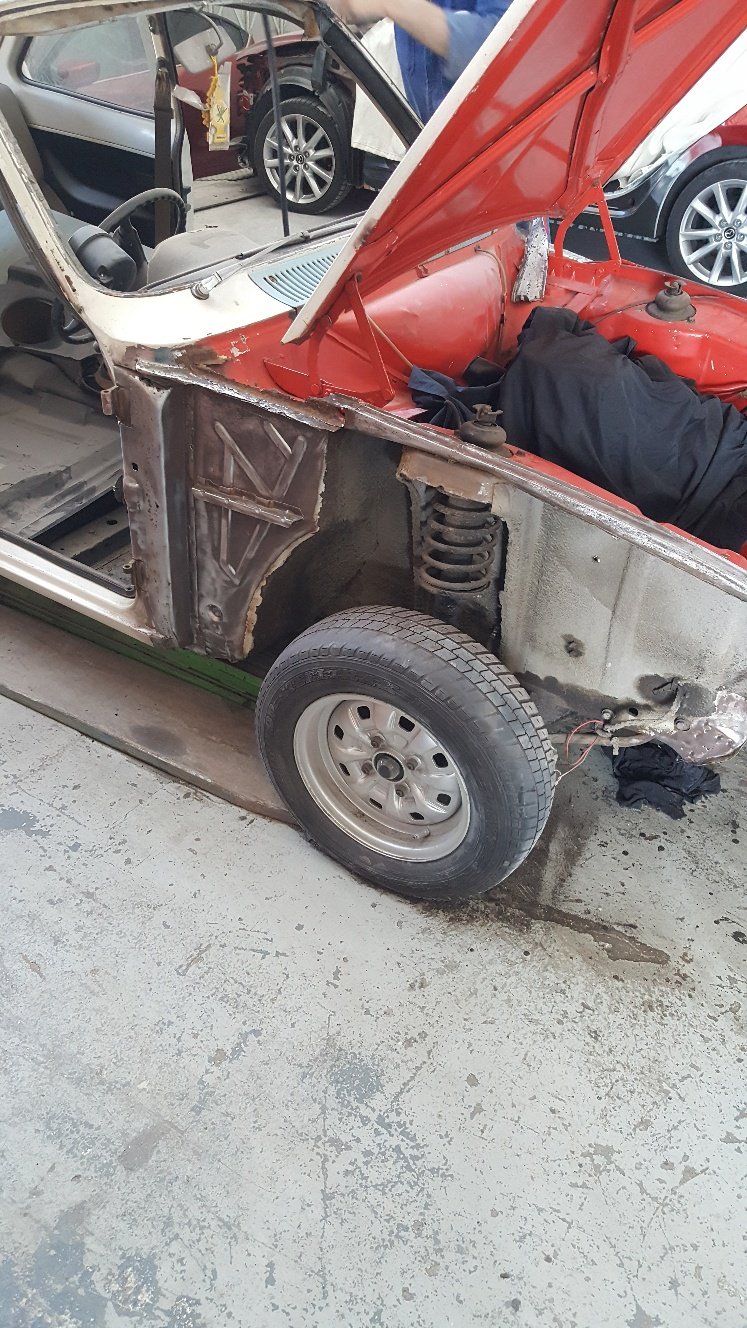
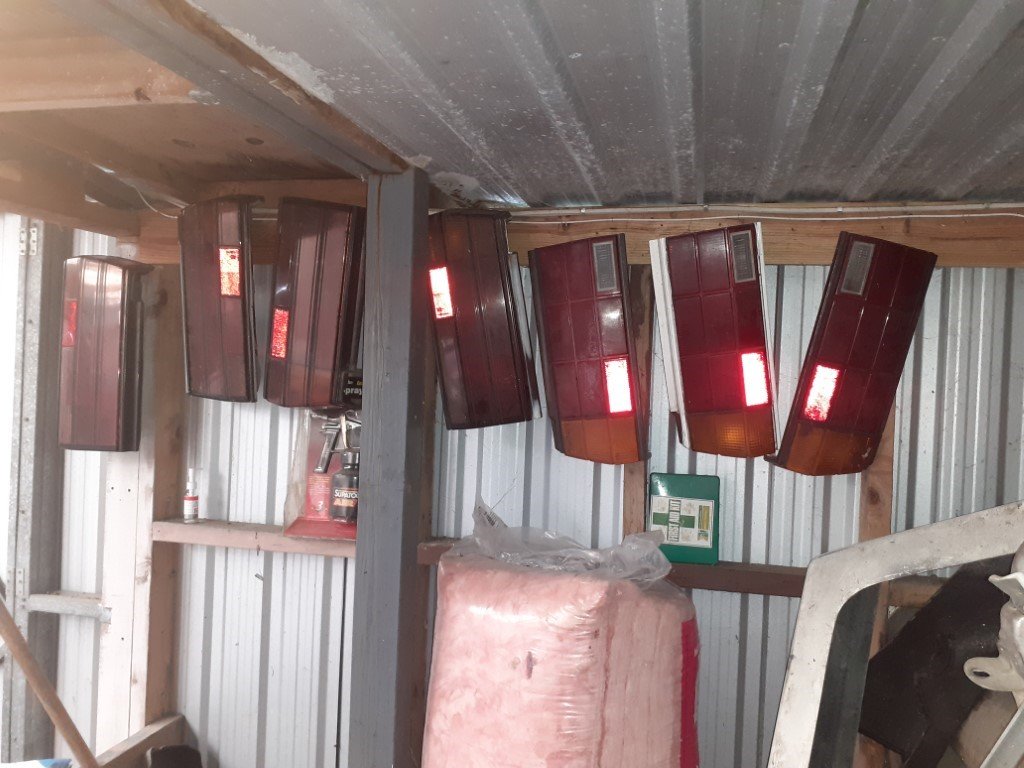
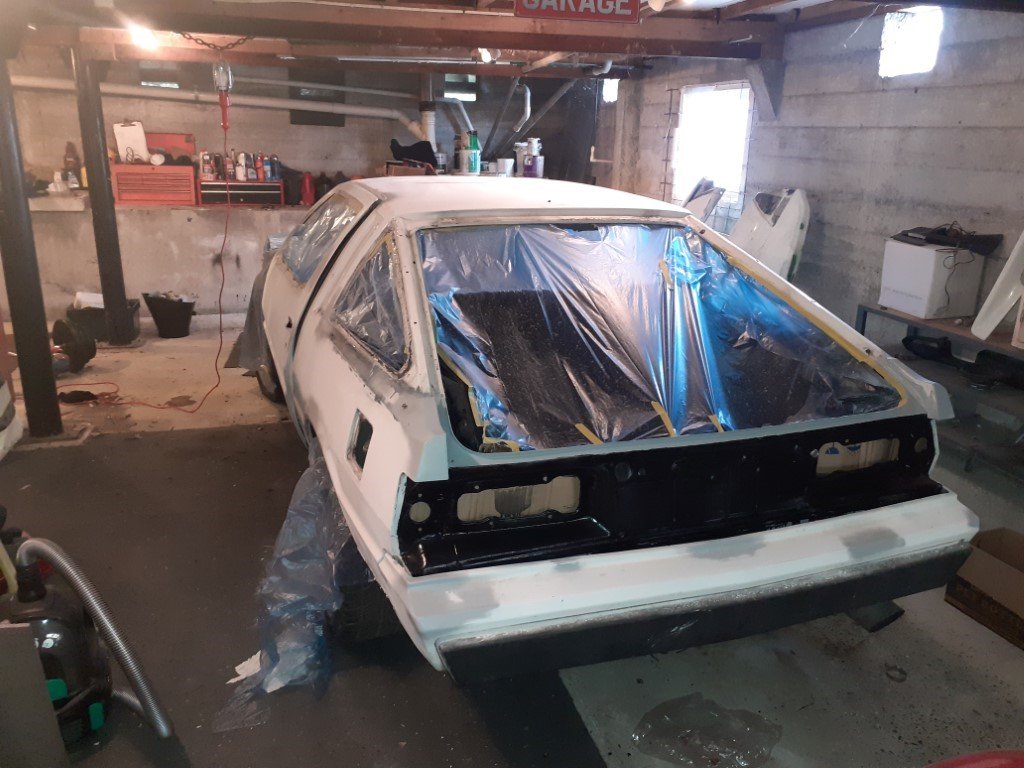
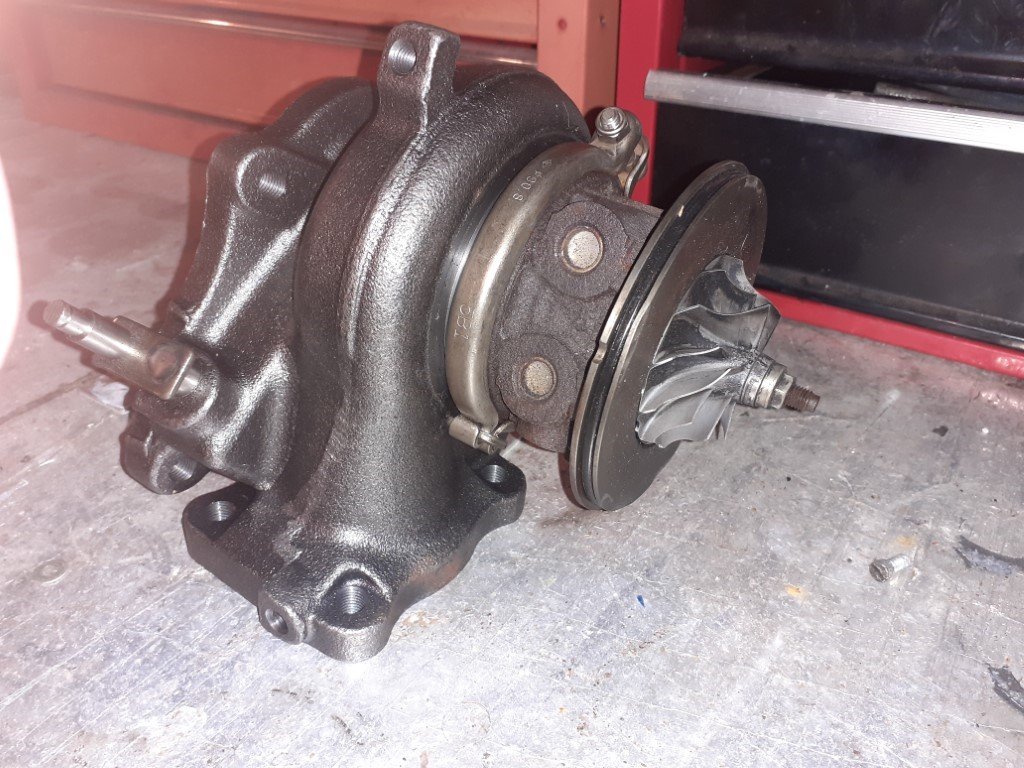
sort of an update, more to show that I'm still alive. Maybe not for long, having inhaled a few cubic meters of bog dust over the last couple of months. Caught up with the panelbeater as he had to weld up my other car to get it's WOF. I asked if he knew any good painters "sure I do, remember that Escort that was in my workshop? they just painted it, it came out absolutely awesome.... cost the guy about 12k if i recall" So yeah I'll be handling the paint job at home. So i've been bogging and sanding and bogging and sanding and bogging and sanding and bogging and sanding and bogging and sanding and bogging and sanding and boggind and sanging sag broggin snd srntibafhfsda;lkjdj,ngbdk;ljhfad;lkjs,k learned a lot of dumb and obvious lessons with bog (which I somehow hadn't clicked on to in my youth); 1. every little bit you put on, that you don't actually need, is going to have to come off again 2. just because you have some left over, doesn't mean there's still somewhere that needs that little more more added to it. 3. no the paint won't hide that I also chassis black'd all the sills, front quarters under the guards, and in around the rear light recesses. I haven't really looked at the bonnet, guards or donor RH door, just been concentrating on the shell. It's all there, it's all straight... just there sure are a lot of little nicks and scratches when you start hunting for every single one of them. my favourite pastime recently has been obsessing over this section just in front of the passenger rear wheel. There was a little patch of rust here which had cracked the paint, and the more i picked, the more came off, including over the ridge of the body line. So when I sanded it all back, the radius of the ridge was sharp in some places, and smoother in others. Then of course I started looking around all the other ridge lines on the car and could suddenly see where they'd been sanded back over the years for various repairs. So I spent a considerable amount of time shaping tiny ridges of bog to try and sharpen up the lines in a number of places. Meanwhile everything that's going under the bodykit got a shrug and a scuff. pick your battles. a while back I picked up a sweet tubular exhaust manifold to suit a sohc 4g63 (maybe off someone here?). but the turbine inlet port was too big for the teeny weeny starion turbo. likewise the stock downpipe is horrific and I wanted to replace it with something nicer, which would require porting the turbine housing of said teeny weeny turbo in order to make it worthwhile. So i said bugger it and bought a small 16g subie TD05H and lucky dip chinese pot metal ebay 8cm turbine housing that at least will match the manifold and downpipe. likewise the subie compressor housing isn't really suited for starion duty so that's another thing to go hunting for Then I cleaned up the garage a bit because I'm fucking sick of bogging and sanding and would rather do literally anything else. cleaned out a whole nest of tail lights which had been breeding up in the back of the garage, yuck The boss reckons we'll knock off for the year at the end of this week, so then I should have some time to get some actual progress made
4 points
-
Then I thought I would see if it still runs. Hasn’t been started since lock down. Connected the battery, primed the carb... Started first turn of the key. Let it run up to temp and gave it a rev for Trev.
4 points
-
Getting the engine started is a milestone I want my partner to be there for so putting it off until the holidays when we have the time. So in the mean time let's take a look at our fuel system. I read that fuel drains slowly so I didn't bother to raise the back of the car to fit jerry cans/buckets under, instead opting to just use a pan and ice cream container and swap them over. This went poorly... But at least I didn't roll a 1 so the garage and everything is intact and I just have to deal with the fact that I need to keep all the doors open for a while. Also poor: my preparation. I bought a 10L jerry can and for some brain fart reason decided that is all I'd need. I had a couple more litres than would fit in it so I threw it in an old container and let it evap outside until I could get another one. 15 year old fuel smells and looks pretty bad. My old container was dirty so I was hoping that the crud at the bottom was already there. Foreshadowing Fast forward to weekend: Partner is over! I want to see what is borked and what can be cleaned and re-used. She removed the wheel and dropped the fuel tank after a bunch of dirt/fuel to the face. What a trooper. I disassembled it and found probably the first truly effed functional pieces of the car. I'm actually shocked at how bad this has rusted. It's like the rust has generated its own cities and infrastructure on these tubes. This float mechanism is truly beyond hope. I was hoping to be able to clean the in-tank filter and re-use it, but it's $15 from amayama and it looks like I'll need to find some other bits too so shrug emoji. I gave the tank a quick zhuzh with a smol brush and left it outside to tackle another day. I can hear debris shift around when I tilt it. A brief shitty look inside is inconclusive - definitely some rusty bois floating around in there but not sure what the tank itself looks like. The exterior has some minor surface rust in places, hidden under the geological layers of dirt. It sucks that the holes are so small, definitely won't be able to get my arm in there to clean it properly, so we may have to wait for some solvents to arrive courtesy of partner's chemistry connections. As a side, the paint around the drain hole peeled off from the fuel. Seems like a design flaw... also the fact that the heat guard can't be removed so treating up in there is going to be "fun".3 points
-
Talking about fuel tanks, what kind of muppet does a bare metal restoration and leaves the old rubber fuel neck grommet in place ? Hard to believe It was done by a professional restoration company. If I had been the one who paid for the job I would have been spewing. I carefully cut around the paint and was able to remove the grommet with no further damage. The grommet is shared with an Anglia 100E saloon and the good news is that reproduction ones are readily available in the UK. Further good news is that they have a larger outer diameter, so with a bit of luck the new one should totally hide the old paint. Thanks for reading.
3 points
-
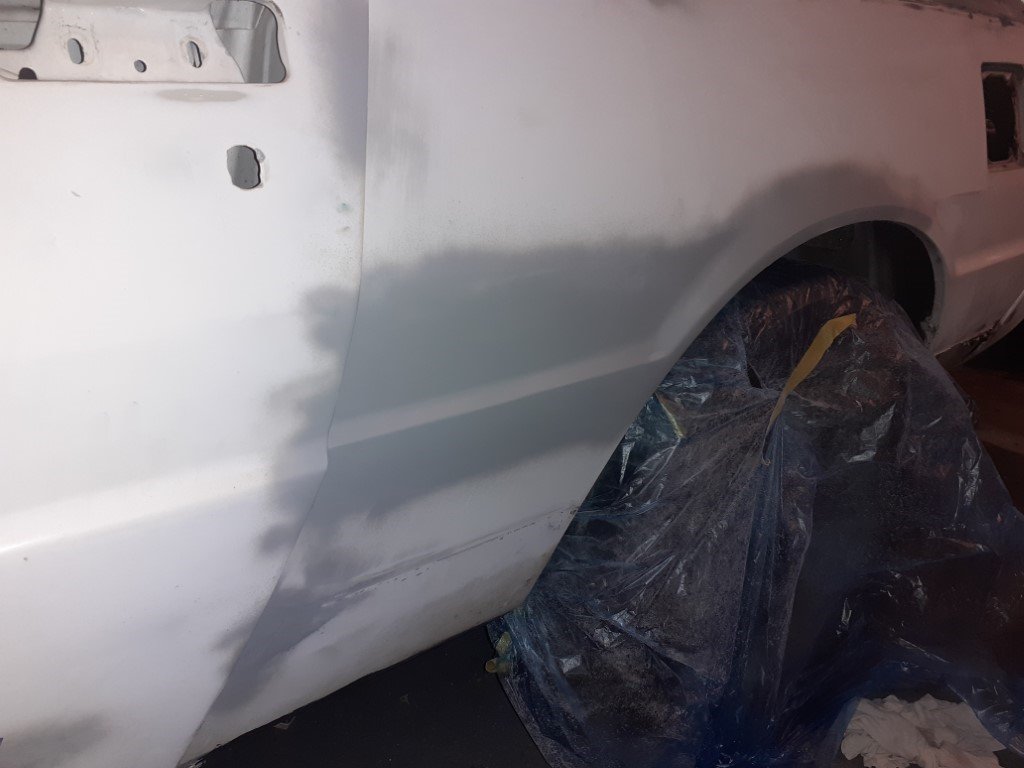
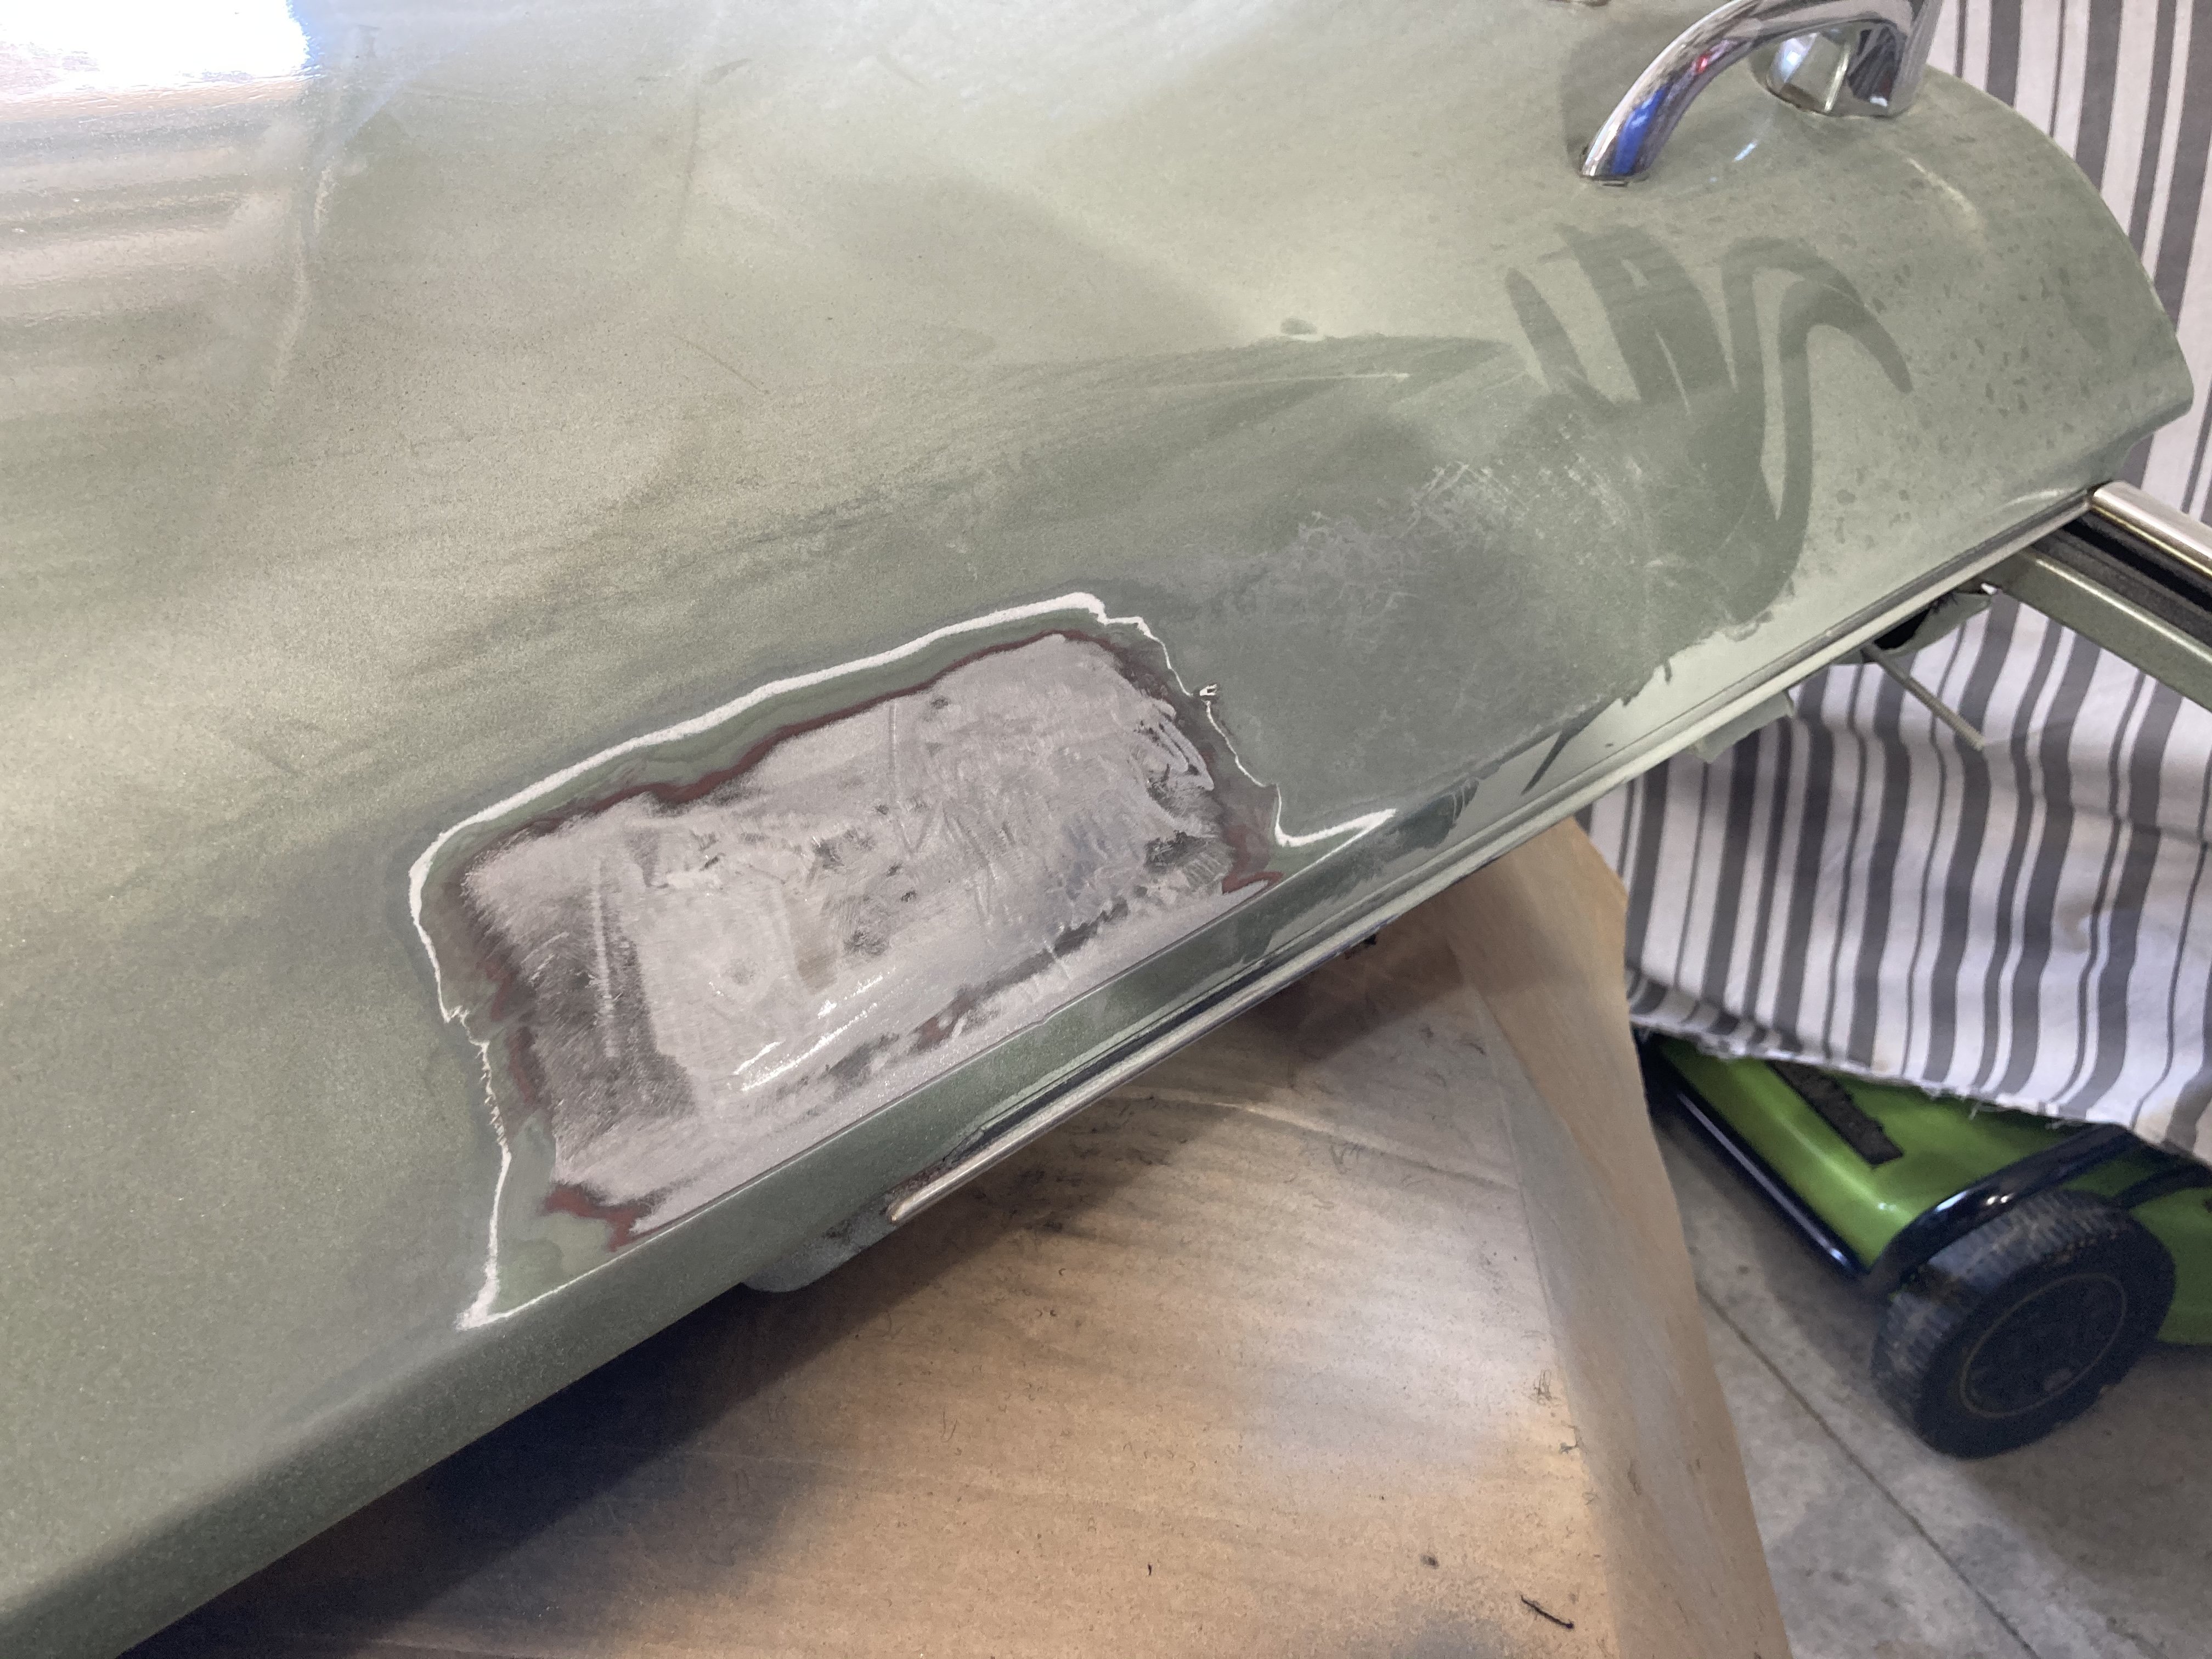
I put the door back on to check the body lines. Hit it with a hammer in a couple of spots but pretty happy with it considering the bog I took out.
3 points
-
forgot to mention, a supercharged 1UZ pulling hard at 7200RPM sounds pretty ace.3 points
-
Looks like the previous owners left you a fine trove of treasures under the seats I would recommend getting internal access to the upper firewall box section and have a real good look for rust around the base of the windscreen and the back side of the bonnet hinges... hope your machine had been garaged! All that gadgetry in your centre console I believe is the VELNAS computer which is pretty retro chic2 points
-
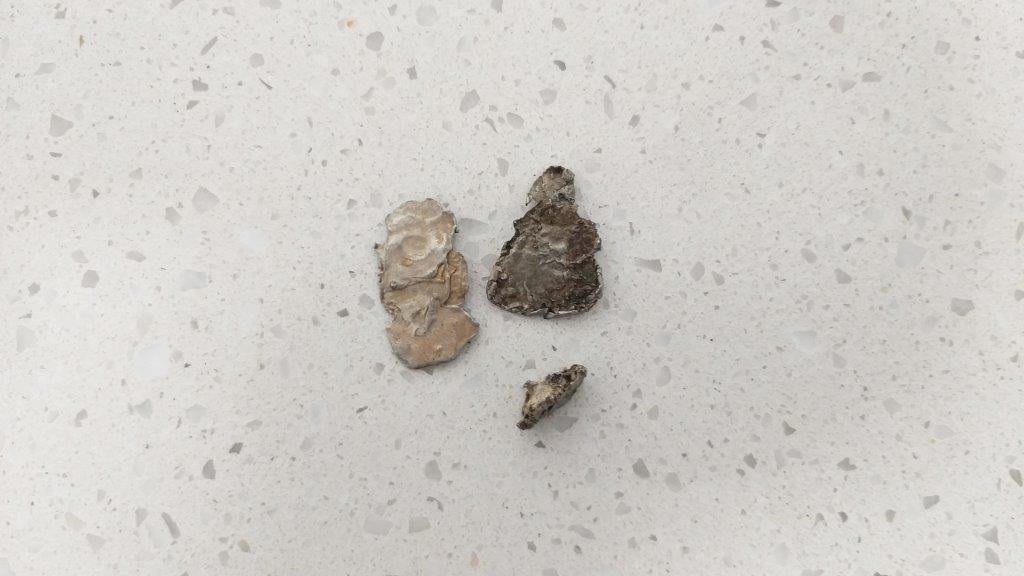
Grabbed the tank to give it a final once over before paint. Pulled the sender unit and the gasket is toast so I'll make up a new one before refitting. Tank still looks pretty clean inside, but I could hear something rolling around. Spent a bit of time jiggling the tank back and forth to work the bits through the gaps in the internal baffle plates and eventually managed to retrieve some decent chunks of old solder. All quiet now, so that must be the lot. I wonder how long those have been in there.
2 points
-
Very near the slowest time of day? Definitely blaming the 3.73 ratio diff. Heaps of fun, didn't break anything (certainly not any speed records) shaved a second off my first go and a really good reference point for when the supercharger kit eventually makes it on
2 points
-
To better diagnose my hot start issue, I figured it would be nice to plug into the ecu and see what it thinks is going on. First problem was where did the guy who built this thing put the diagnostic connector... Nowhere is the answer. So off to pick a part to liberate a complete engine loom from the VS commodore there. Then to figure out how everything should be wired in, a factory service manual sure would be handy. Removed the ECU from its waterproof enclosure. They did a pretty good job filling it with foam and bathroom sealant and even glad wrap. As anyone who's ever tried to waterproof anything knows....you can't. So off came the glad wrap and I popped out the EEPROM chip to shake the water out of it.2 points
-
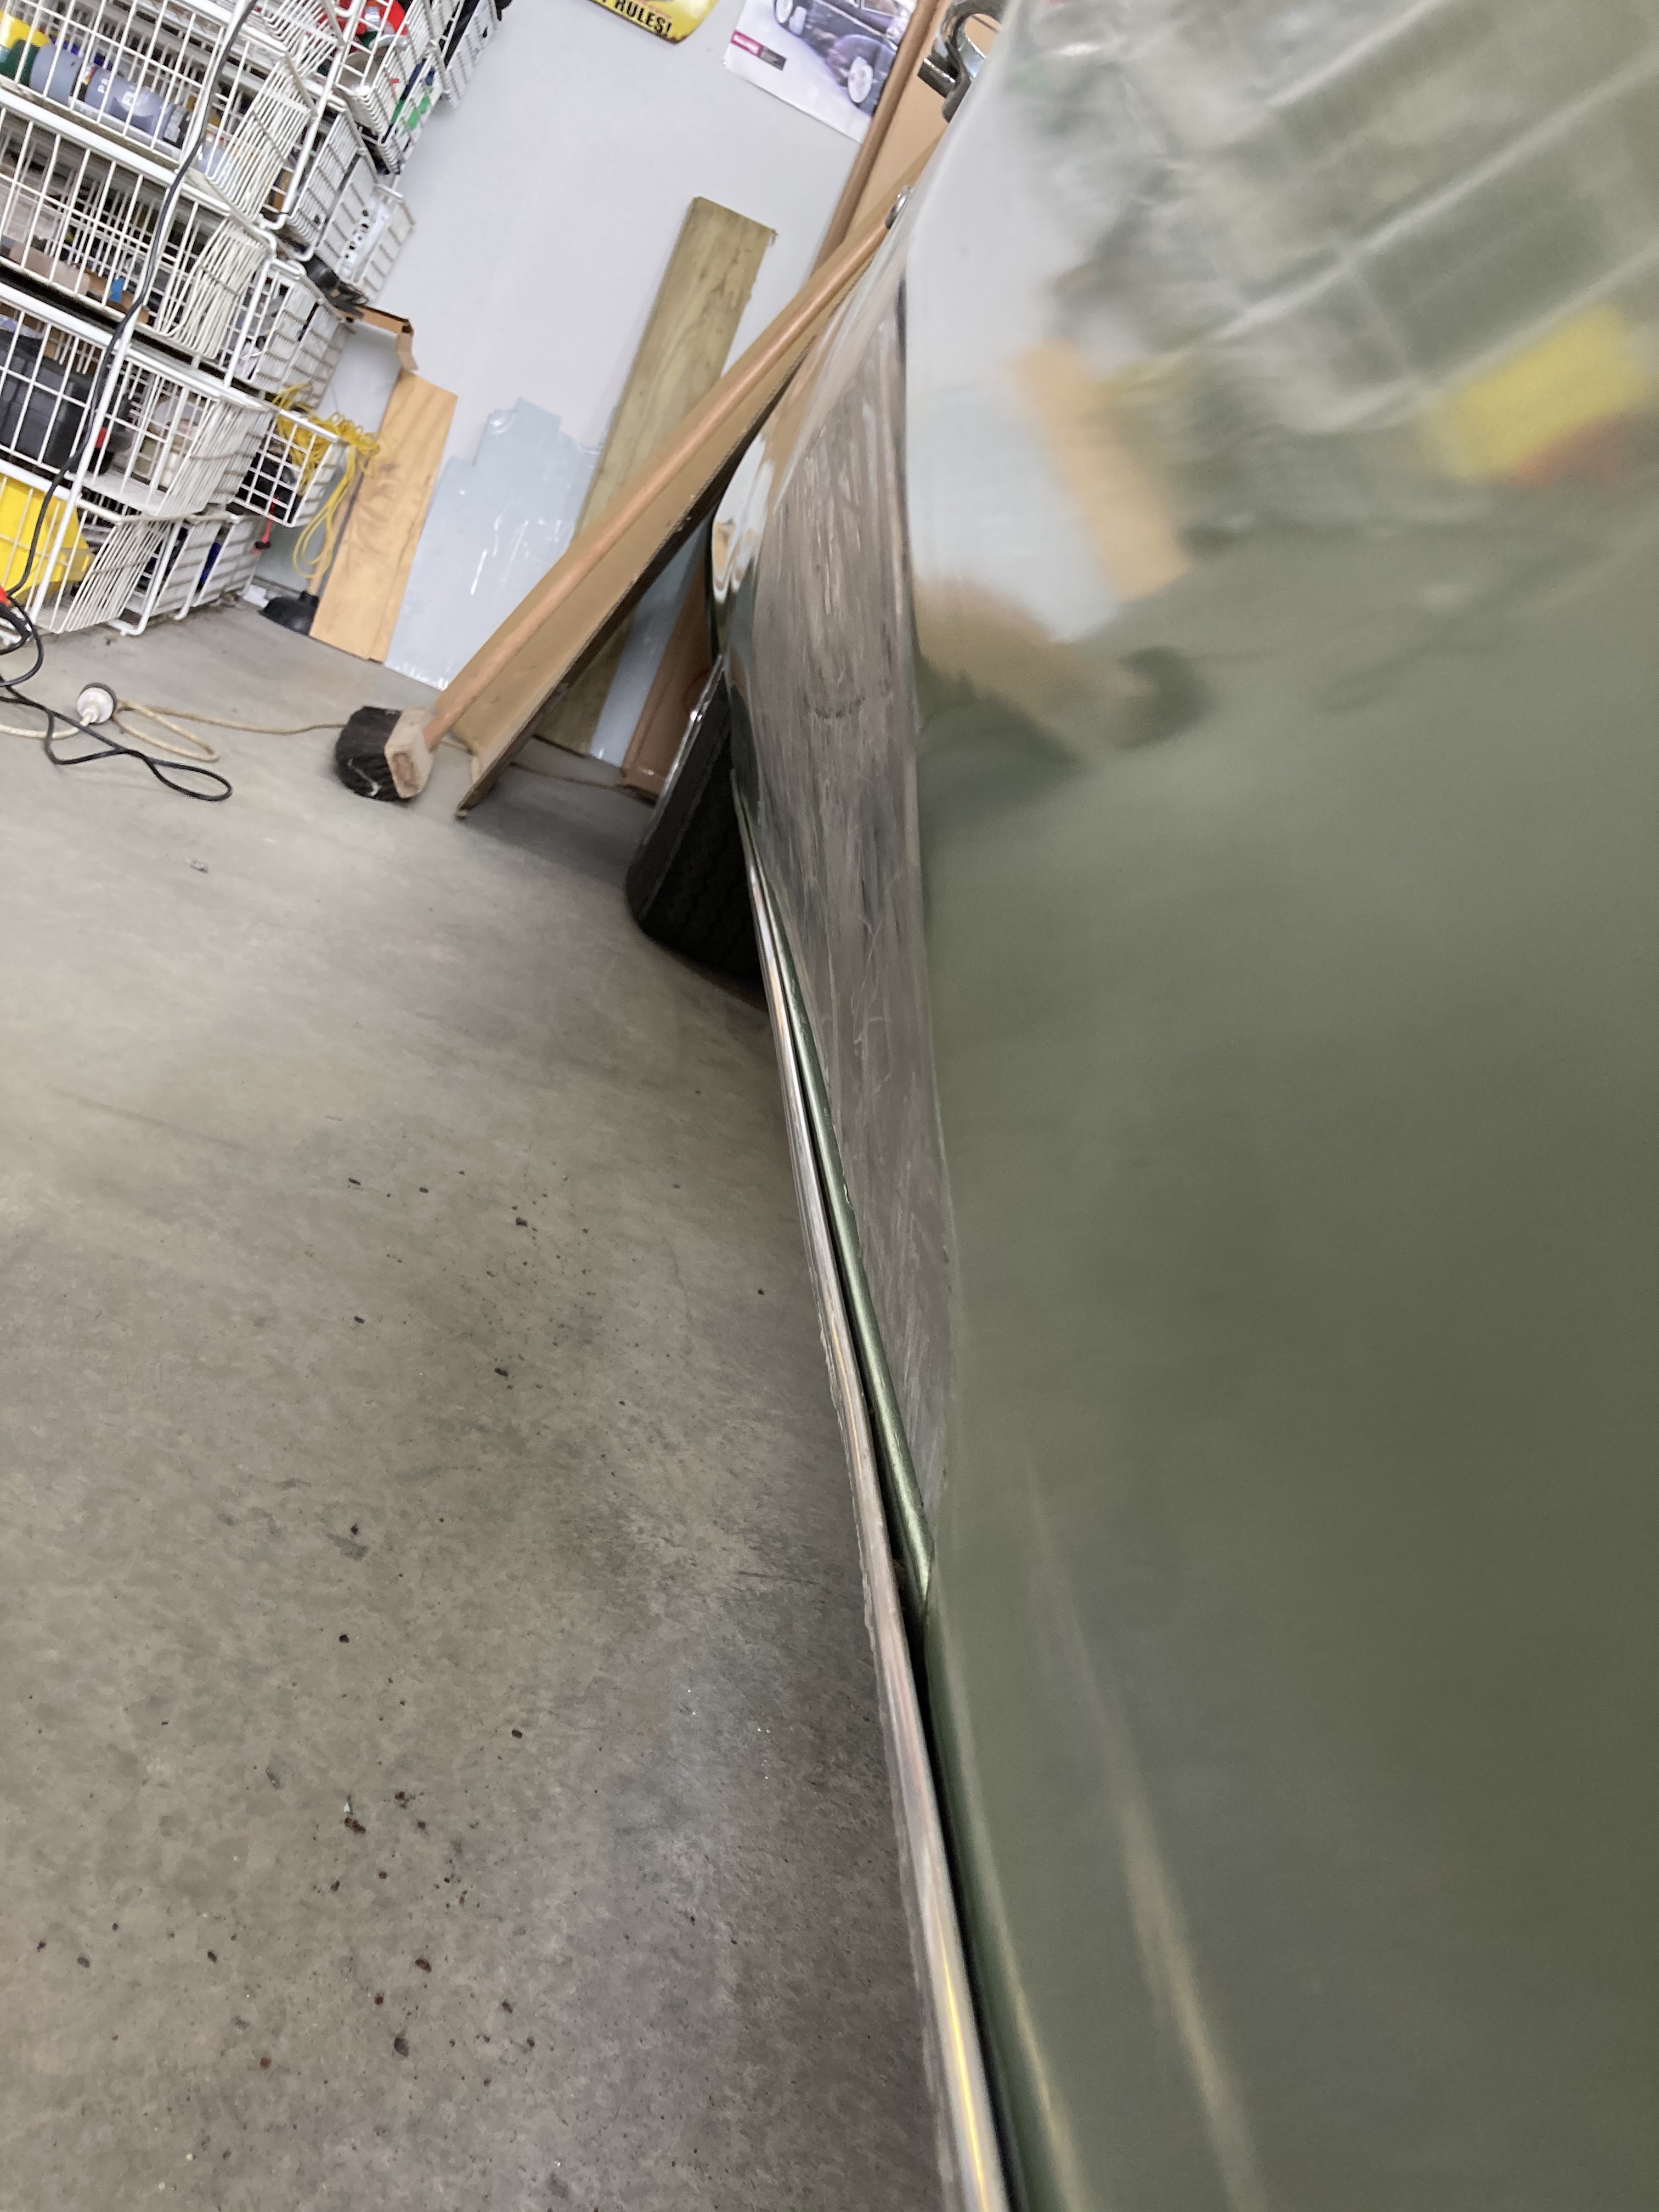
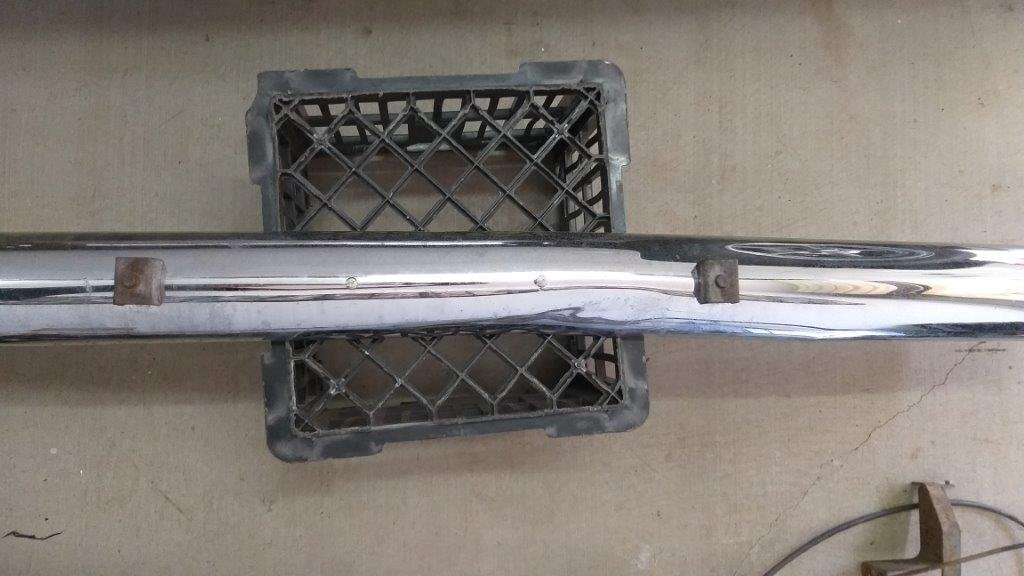
While I was on a roll I thought I'd give the front bumper the once over. There is a dent in the lower part which I'll have a go at knocking out. I'll need to be gentle to preserve the chrome. Luckily most of it is hidden by the rego plate, so no major drama if I can't get it straight. Talking about rego plates there are two manky looking brackets that I suspect either used to hold the older style long rego plate or maybe a set of spot lights . Anyway they stand out like balls on a greyhound so a plan was needed. Luckily I had two spare round headed chrome bumper bolts in my stash from when I built the Bedford and on closer inspection they are the right size, so the brackets are now a thing of the past. The inside of the bumper is quite rusty. Unfortunately the bracket holes and the long sweeping corners prevent me from being able to try the overnight vinegar soak trick, so I might just hit it with a flapper disk and then give it some silver paint. The outside chrome is in similar condition to the rear bumpers so will need a bit of elbow grease. Thanks for reading.
2 points
-
Got the leaf springs in and dropped the van back on its wheels yesterday, so that was good. This morning I gave the Thames a quick bath and pushed it back into the shed to start assembly. Spent a bit of time gathering all of the previously fabricated loose parts which need to be prepped for painting so I'll make a start on that tomorrow. In the time that was left I carried on doing a bit of work on the rear bumpers. When I bought the van they were sitting in a cardboard box so have never been fitted during my ownership. The outside chrome shows a bit of patina, but might come up with the old "coke and tin foil trick". The insides are a different story with quite a bit of rust build up. So yesterday I turned them over to create little "boats", filled them up with vinegar and left them overnight. Checked progress this morning and the vinegar had turned into a thick black crud. Scraped off the crud, gave them a wash and they are looking a bit better. Might just give the insides a bit of a sand and hit them with some silver paint to preserve them.
2 points
-
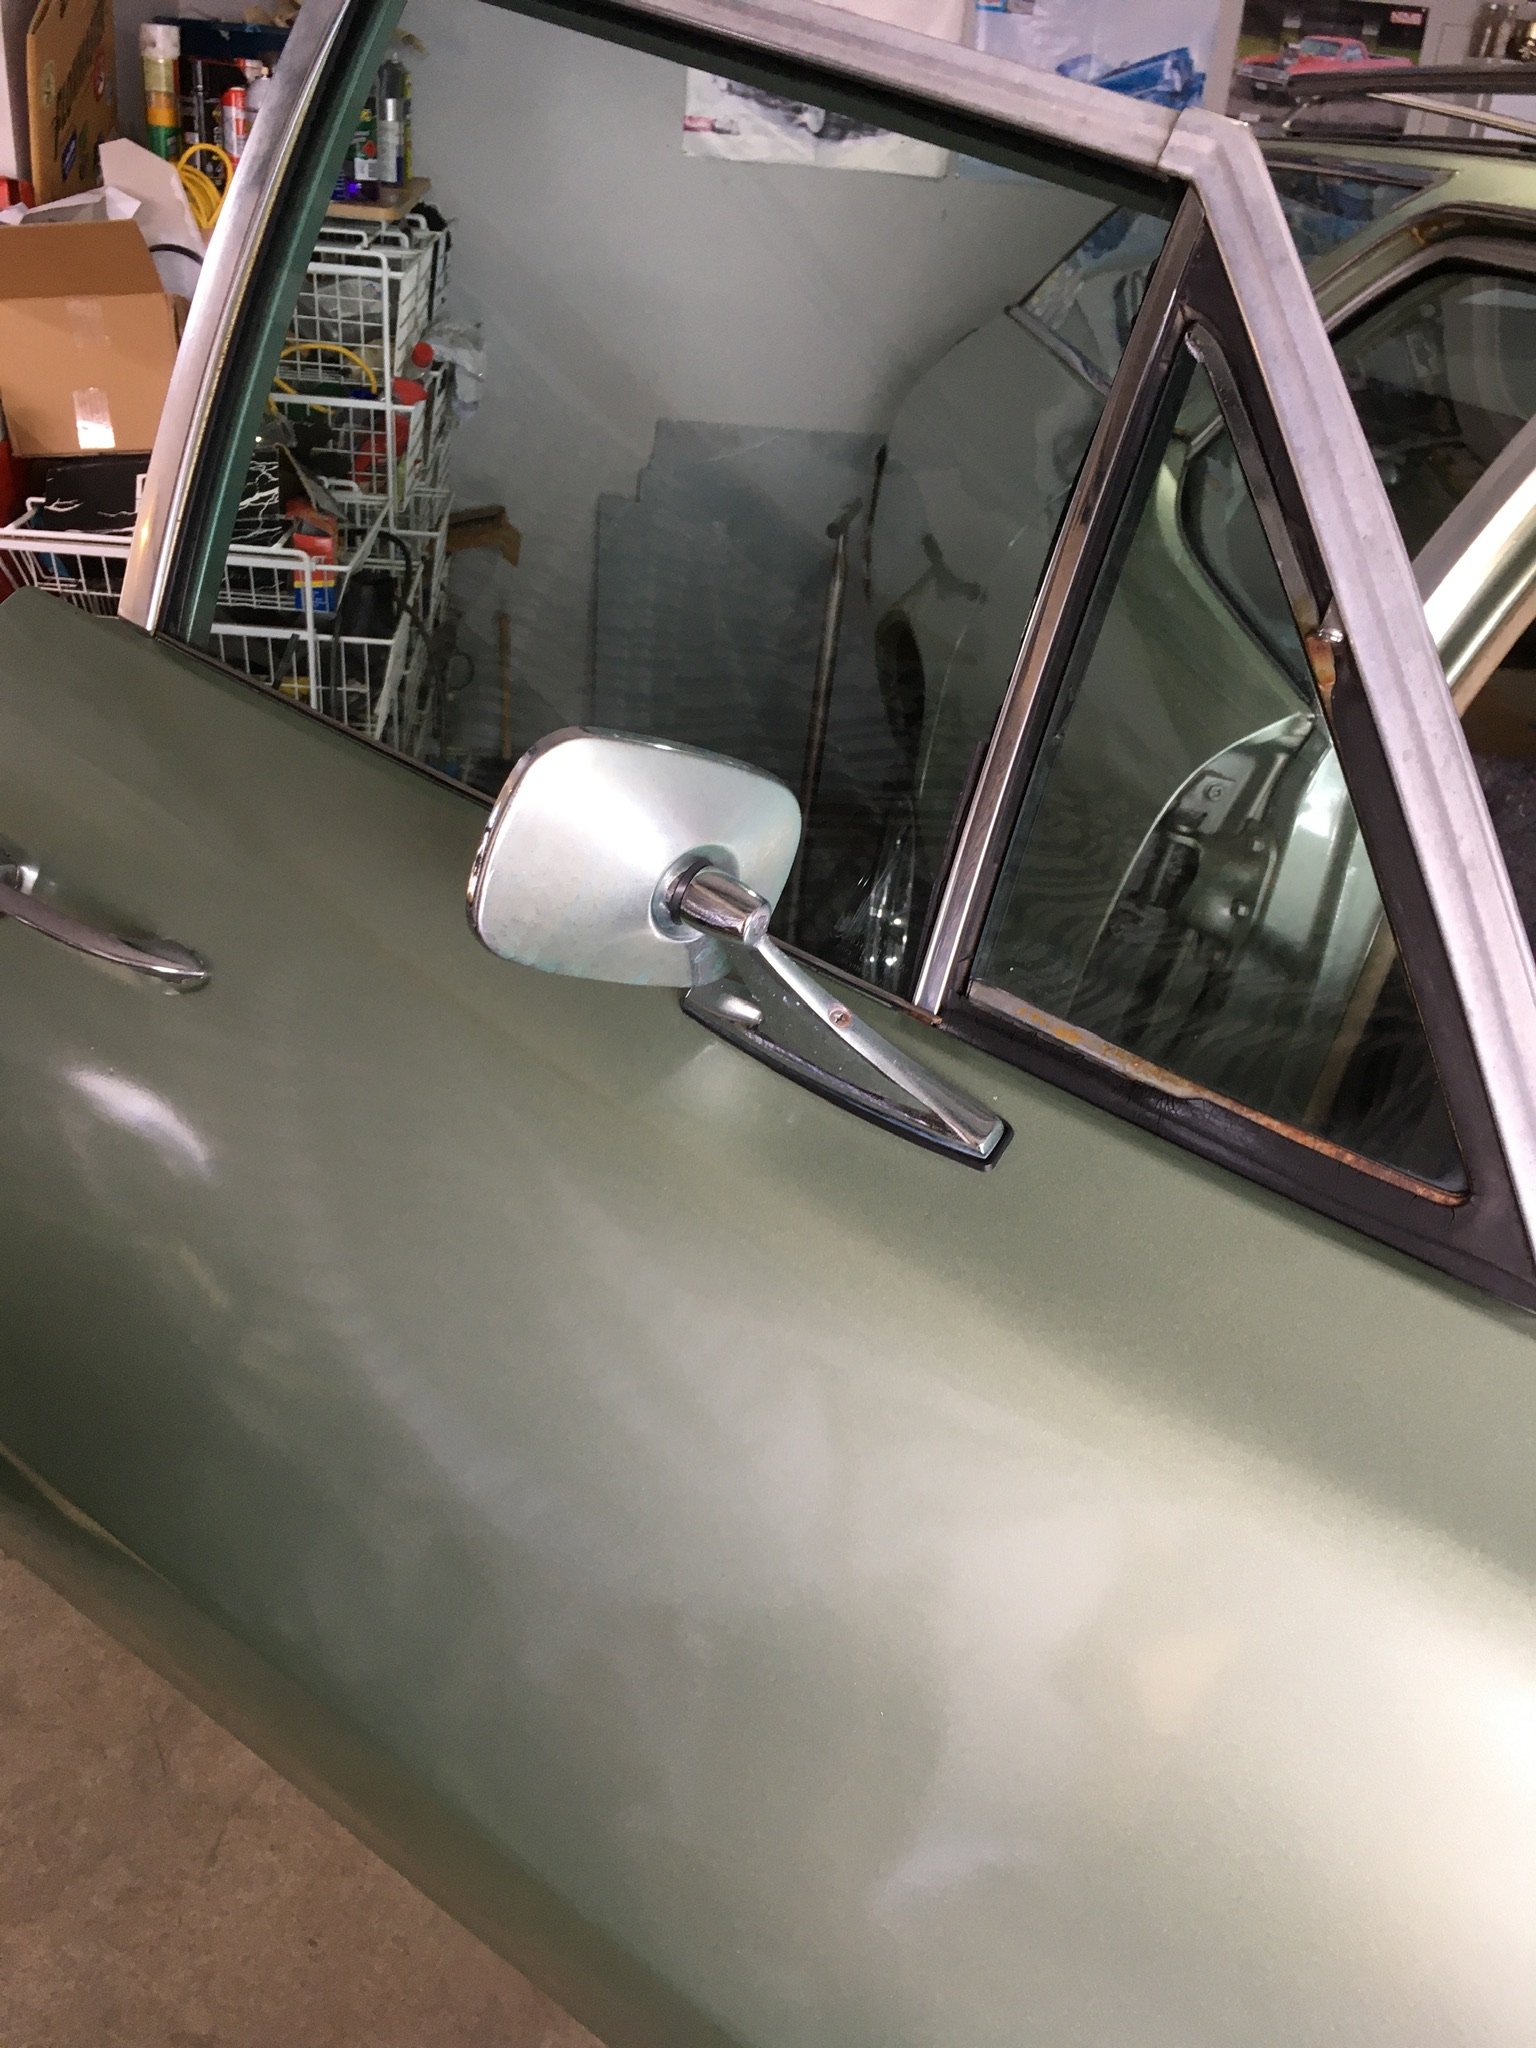
This mirror was useless and not original. Now it’s gone
2 points
-
So a bunch of us have been to this campground between Geraldine and Fairlie for the last couple years as a wee getaway around New years. Its a pretty sweet spot. Very secluded, and very basic camping. 2 long drops and non drinkable running water. But, it's one of the few campgrounds around where dogs are allowed, and we can still have campfires. There's a few sweet bushwalks around at the campgound, and other places to explore via car. But it's mainly just a couple days chilling out and spinning sharns more than doing stuff. Thought I'd throw the invite out there if any other OS boes wanted to come along and join in the festivities. Named MMC Wagnats purely because most of us will be bringing our mirage wagons haha, no affiliation to actual wagnats, and not trying to steal any thunder from the actual event. We'll be leaving chch early-mid morning on weds 30th December, then there for 2 nights and come back on Friday the 1st Jan. Interweb deets here. https://www.doc.govt.nz/parks-and-recreation/places-to-go/canterbury/places/pioneer-park-conservation-area/things-to-do/pioneer-park-campsite/ Couple pics stolen from the net. Couple pics from last years setup. Dam exploring around the area. Couple pics from the bushwalks at the campground.2 points
-
GOING DRAG RACING THIS WEEKEND
2 points
-
So, long time no update. I have been holding off as shit was so nearly there for fucking weeks but kept on dragging on... Early September it got shipped off to Wellington; Then early October it arrived back home with a very excited son of a truckie.. Then I got the list from the cert man and was pleased/kind of surprised how short it was; - Needs rear headrests - Extra size on the driveshaft hoop mounts - Front seatbelts needed to web clamp type not inertia - Change a vac hose for proper auto stuff - Wheel alignment That was it and apart from sourcing the seatbelts it was all done in that weekend with the help of some butty ramps I had made for this sort of thing; So if anyone needs a brand new set of vertical fit reels, hit me up. Then I waited for the cert man to approve all that and get the plate done - this was another couple of weeks... Then the compliance man was on holiday and couldn't do anything for another couple of weeks... Then I realised much to my disappointment that the head was probably cracked as it was using water and pressurising the system That will teach me to not get things checked by professionals and just trusting to the prime cause. So while I was waiting for the compliance man I dragged out the spare head out of the container and sent it to Mean Machine for crack testing. This came up sweet but the valves were dodgy and the surface was a bit banana. So I got it surfaced and the valves and seats recut, plus I got a spare set of injectors rebuilt as i didn't want to fuck up the newly sorted head. Getting it in and out was not too much of a drama with a bit of channel clamped to the forklift forks. I didn't really take any pics of all this as I was on a bit of a mission, just this one of the freshened head put back in place; New gaskets, head bolts, slightly thicker oil plus filters plus coolant and much money out of my account and the jobs a goodun. Then fast forward to today and we have this very very exciting situation early this morning... Resulting in this even more exciting situation this afternoon; Ah shit yes. Anyway there is still a bit to do, I am not happy with the radiator situation as it is pretty much relying on the fan even at road speed. I can fit a standard Safari rad in the same hole but with much bigger collection area, plus I have some cunning plans to duct more air toward it so at least on the open road it isnt cycling the fan. Still I'm pretty happy, it has been a long but satisfying road. Beer will be drunk tonight I imagine....2 points
-
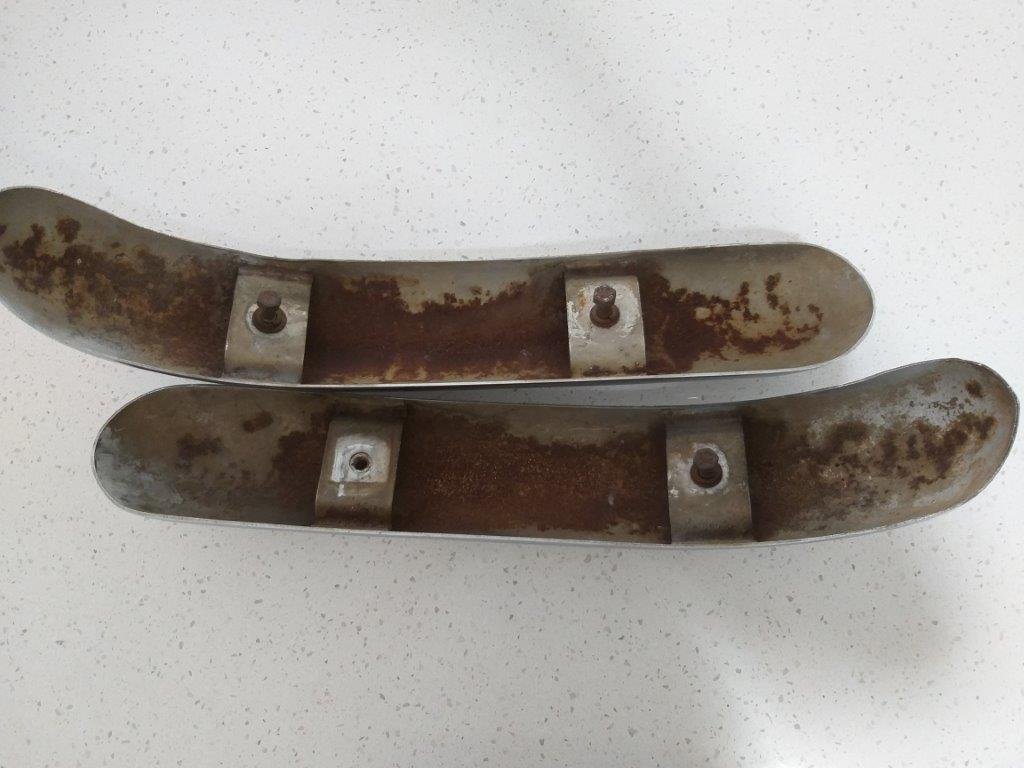
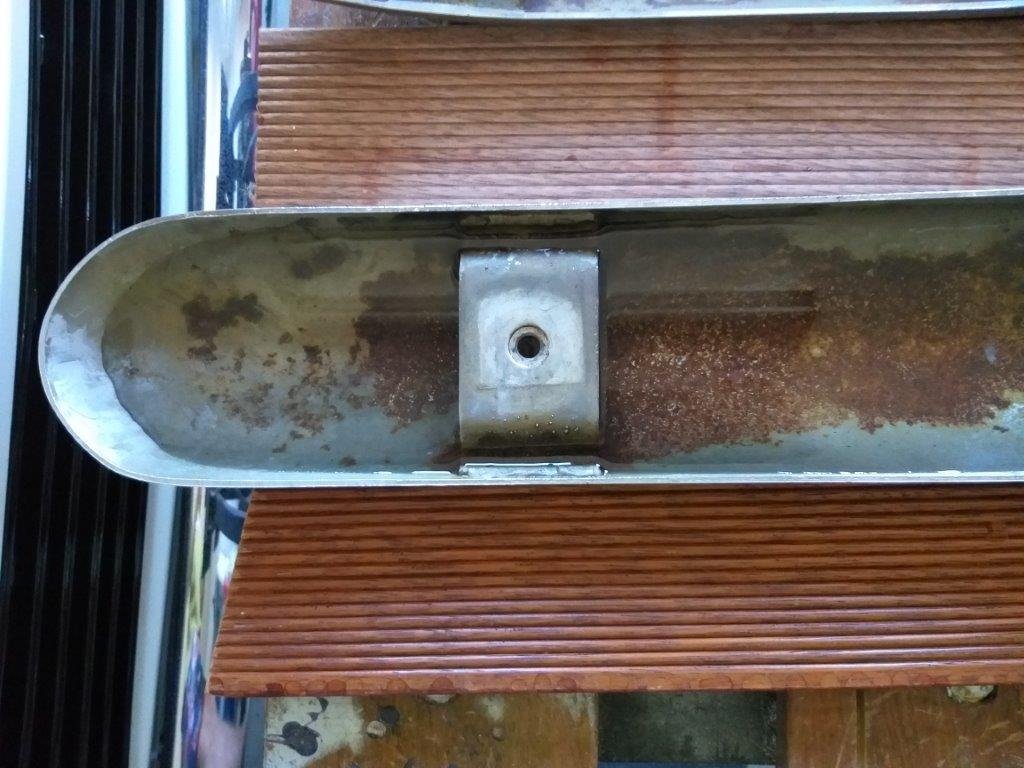
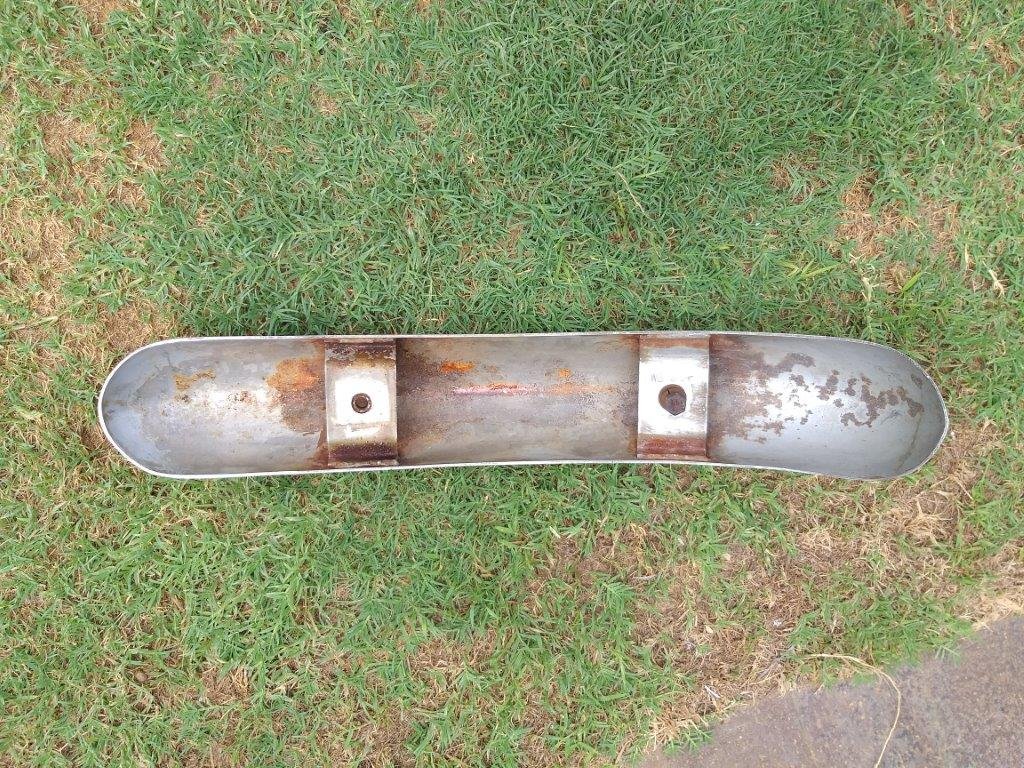
Last of the rust in this door.
2 points
-
Drag day was awesome as per usual.. couldnt stay as long as I had wanted but that's what happens when you bring your 1yo daughter with ya! Anyway that sparked some motivation and today I got stuck into the Corona. I pulled the spare diff and leaf springs from out under the house, they were dirty so I gave em a clean up.. as you do Taa daa When I pulled the leaf springs out I noticed something different.. ha the top leaf has been flipped prob be just about right as is no need to reset or I'll be in the same boat again So I cleaned the leaf springs too The ones I was running were reset twice and would be inverted under load. I did the same test with the other ones before cleaning em up and felt better/stiffer Crazy how the metal all twists like this All back In and leaf/diff mounts all buttoned back up. I'll grab a couple wheel cylinders tomorrow I believe the drivers side has developed a weep. Much betterer Dummy fitted the wheel to see how it fits. Thanks for looking1 point
-
that was the only pass i made with such a good launch and some actual traction through first and second. rest of the day was all 13.2, 13.4 with wheel spin at the first part of the track.1 point
-
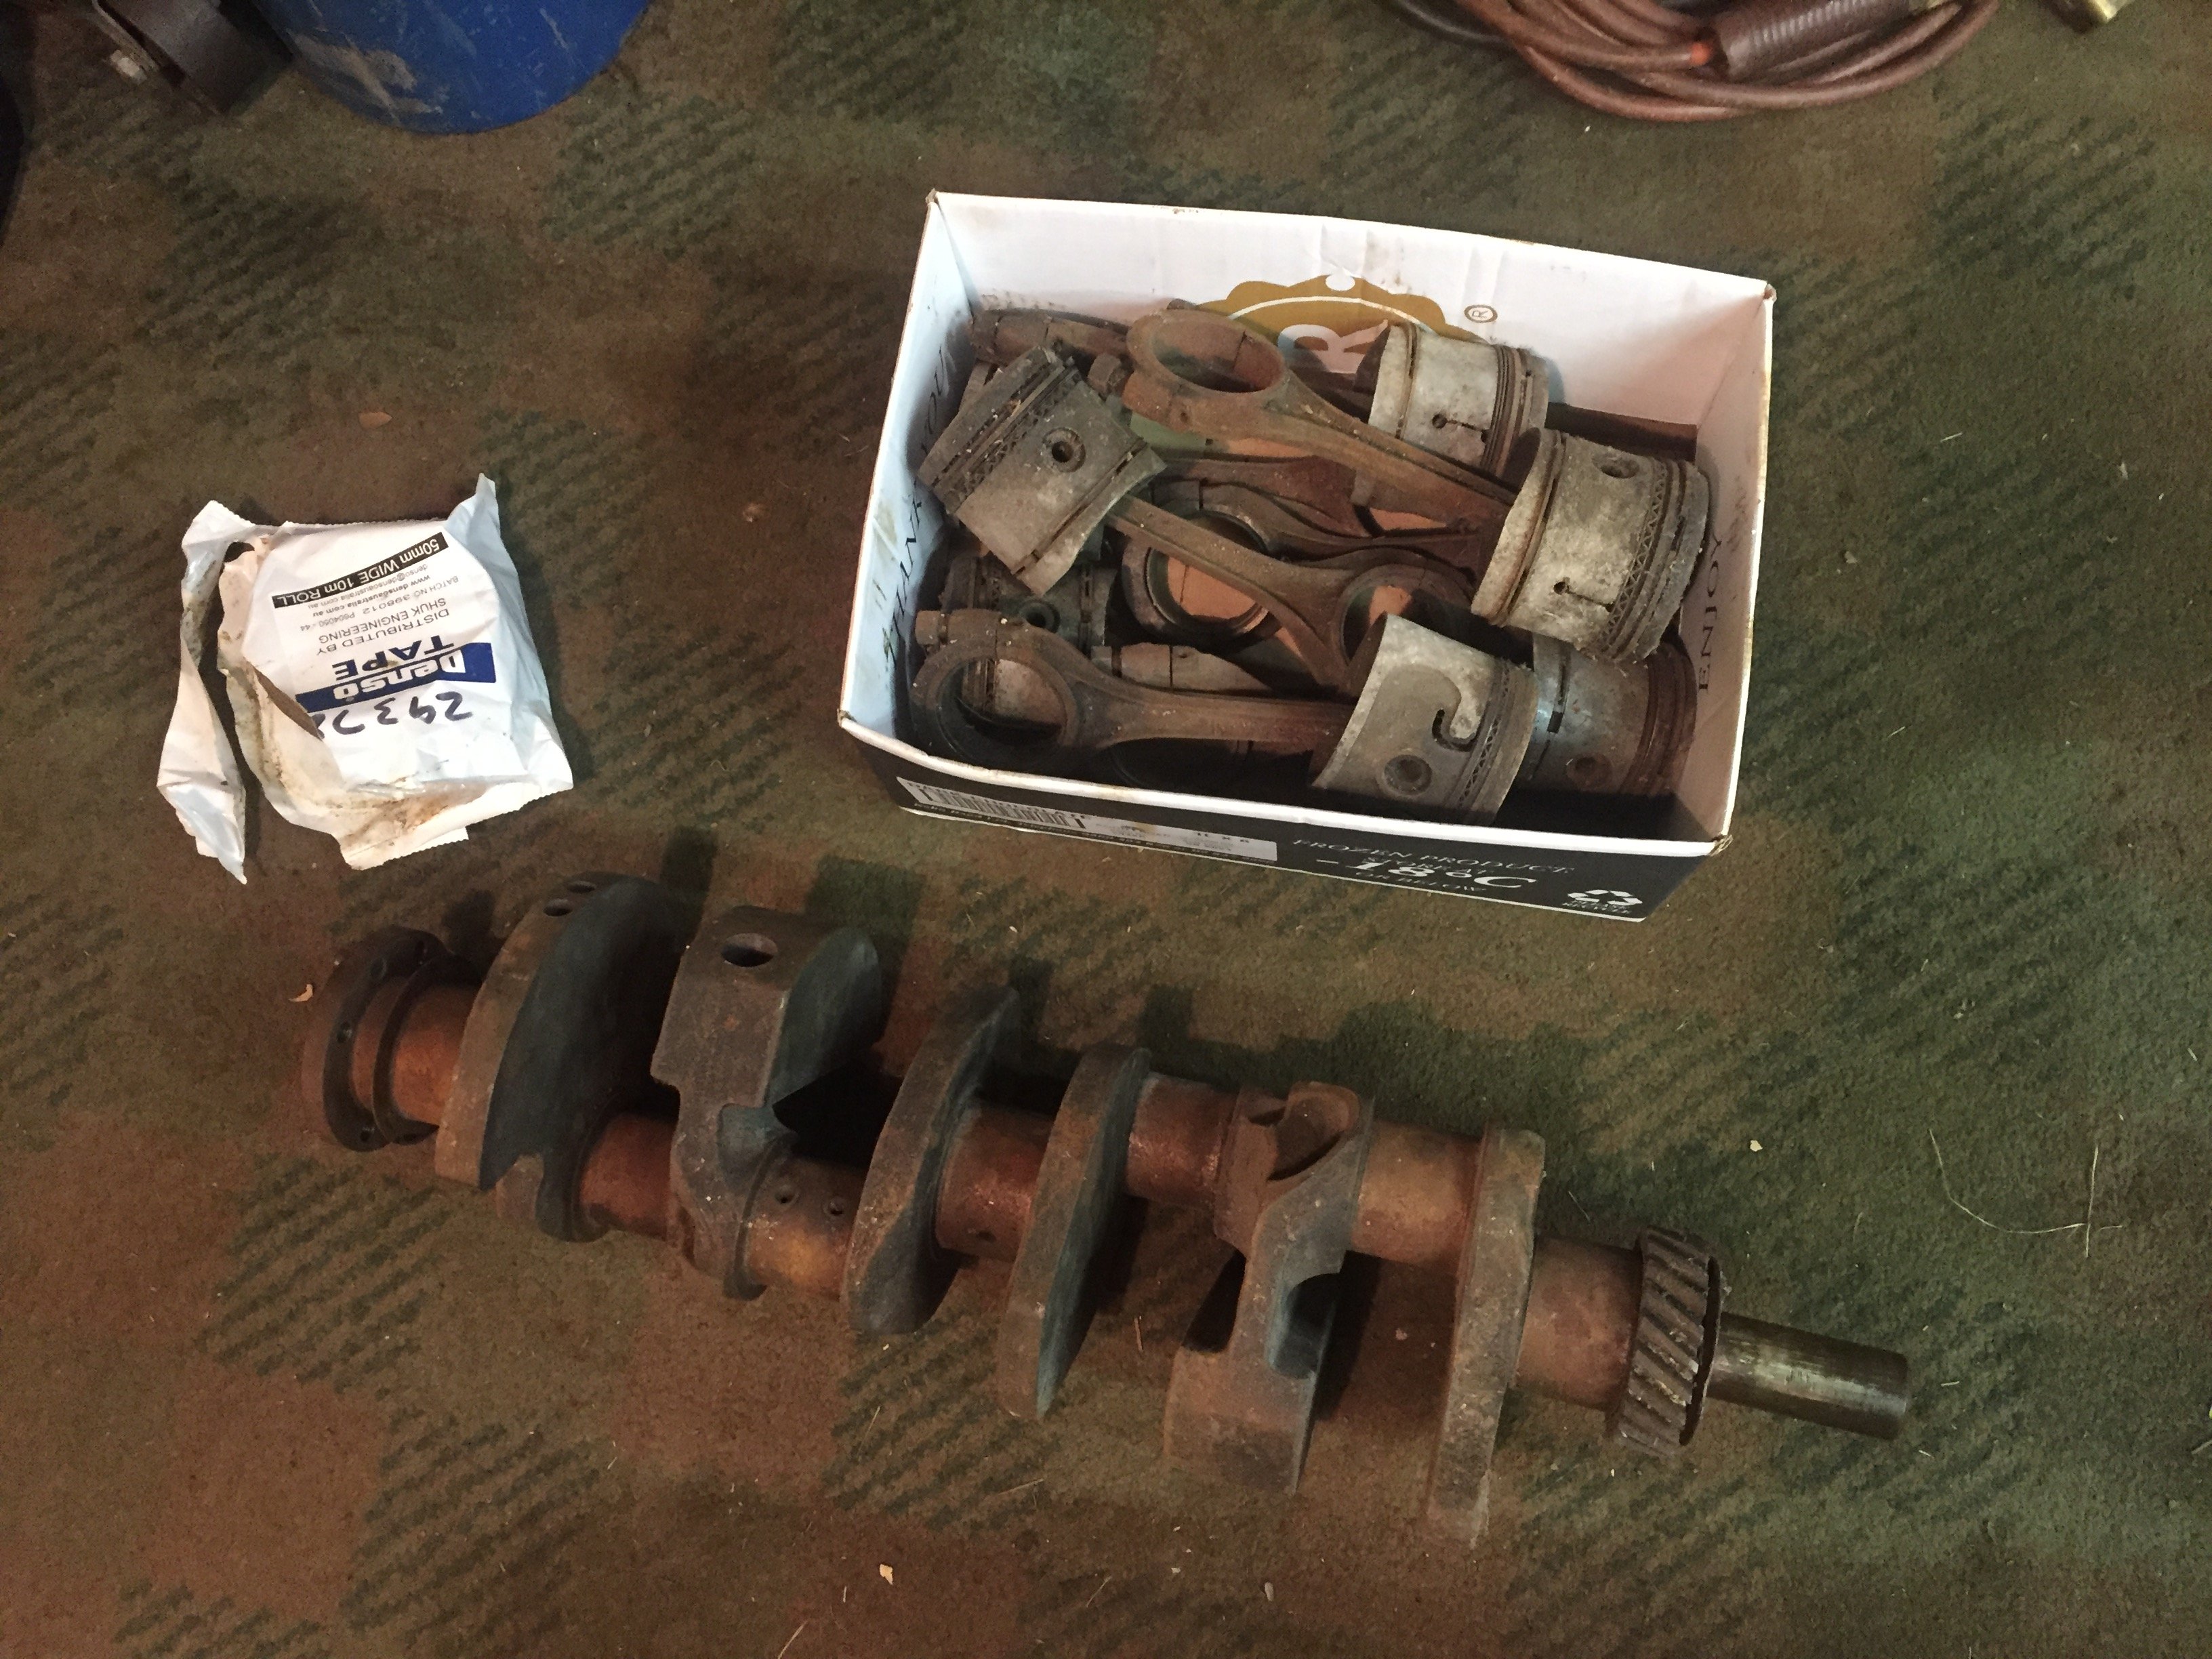
I need to make a quick decision now to change plans on my engine build, should I fit this crank witch uses modern style shell big end bearings and a positive rear main seal? I would have to change the rear seal plate in the block witch just sits in and is held in place by the sump and I will need to fit the later oil pump and buy a new seat of big end bearings. Or should I just run with the old full floating bearings?
1 point
-
Running the Big Block 3601 point
-
Great turnout! I got no pics but saw @Bling taking many pics with a big boi camera.1 point
-
This thing made so much dort, I was too busy wondering how the fuck it was so rowdy and I missed a shift. A+, would trade again1 point
-
Did the plastic trim with "solution finish" spendy as but great results It's some kind of mix of linseed oil, carbon dust and unicorn farts from what I can figure. Use like a drop per trim so goes a long way. Apparently lasts way longer then the usual stuff (turtle Wax fading in the sun the same day you use it for example) If it was my car I'd wetsand and polish, but ain't got time for that, it's getting loaded on a ship and sent to Africa apparently Had the air pressure to high for the clear id say, so a bit orange pealy/dry (my lazyness really, compressor is stashed behind a bunch of morries at the moment) Tho i think this clear (fast flow) prefers to go on thicker than the other one i use (ultra finish), which runs a bit easier. Will improve for next time The dust/strings of clear nibbing out werent as bad as i originally thought, i guess they melted in overnight? touched up a couple bits with 1500 and G3 compound.
1 point
-
you wouldn't want to talk to that guy. he is odd. I really should update the build thread on here at some point.1 point
-
@Firebrand to the rescue! He happened to have the right one (we think) floating around and used the opportunity to offload a bunch of other stuff he was hoarding, for which I am extremely grateful. And most importantly, it fits! Finally!!! This is just a test fit - I'll need to get it properly in. Next up is to sort out the spark plugs, re-dinosaur the oil system and de-dinosaur the fuel system, then we're pretty close to test firing this beastie.1 point
-
Fresh 035 white paint. Just been peeling the shitty old tape off side moldings before they go back on.
1 point
-
I'm definitely looking back at the 9752 "is my car oldschool?" forum posts and having a mild chortle1 point
-
Also I remember when I drove the Echo to Nats in Nelson and people thought it was new and awful But now... Its not new anymore1 point
-
Panel beating done last weekend and most of car in primer. So good to get rid of the trolley dents from daily use when I first purchased. Took it through vtnz pink sticker inspection as it sits above. Failed on wiper blades, headlight high beam angle too low and certification required for suspension. Paint booked in for next week and hopefully cert man can see me before end of year
1 point
-
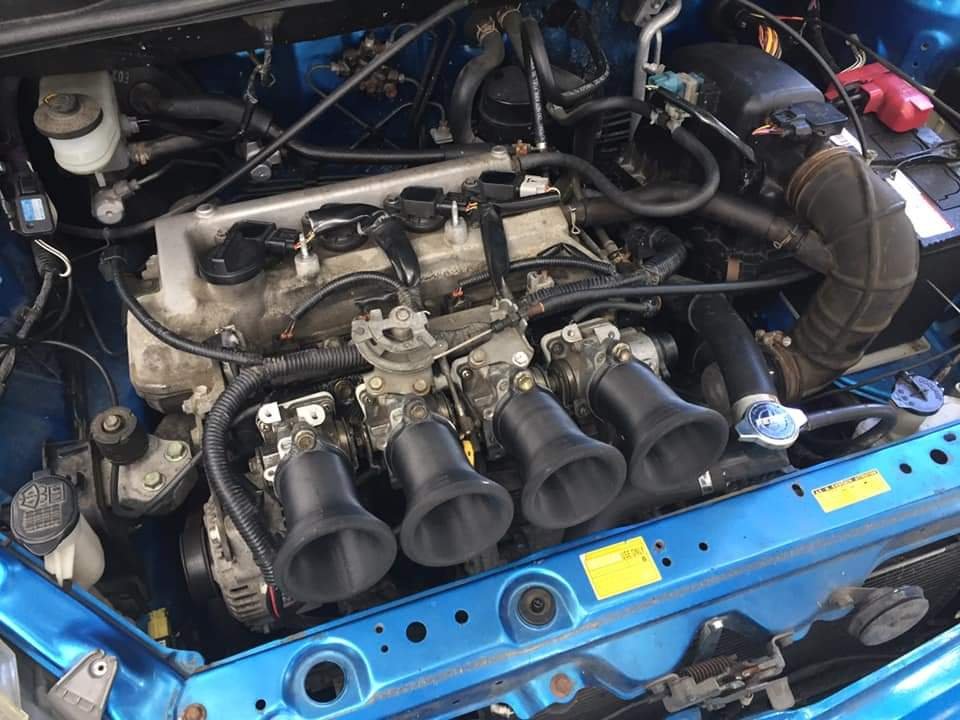
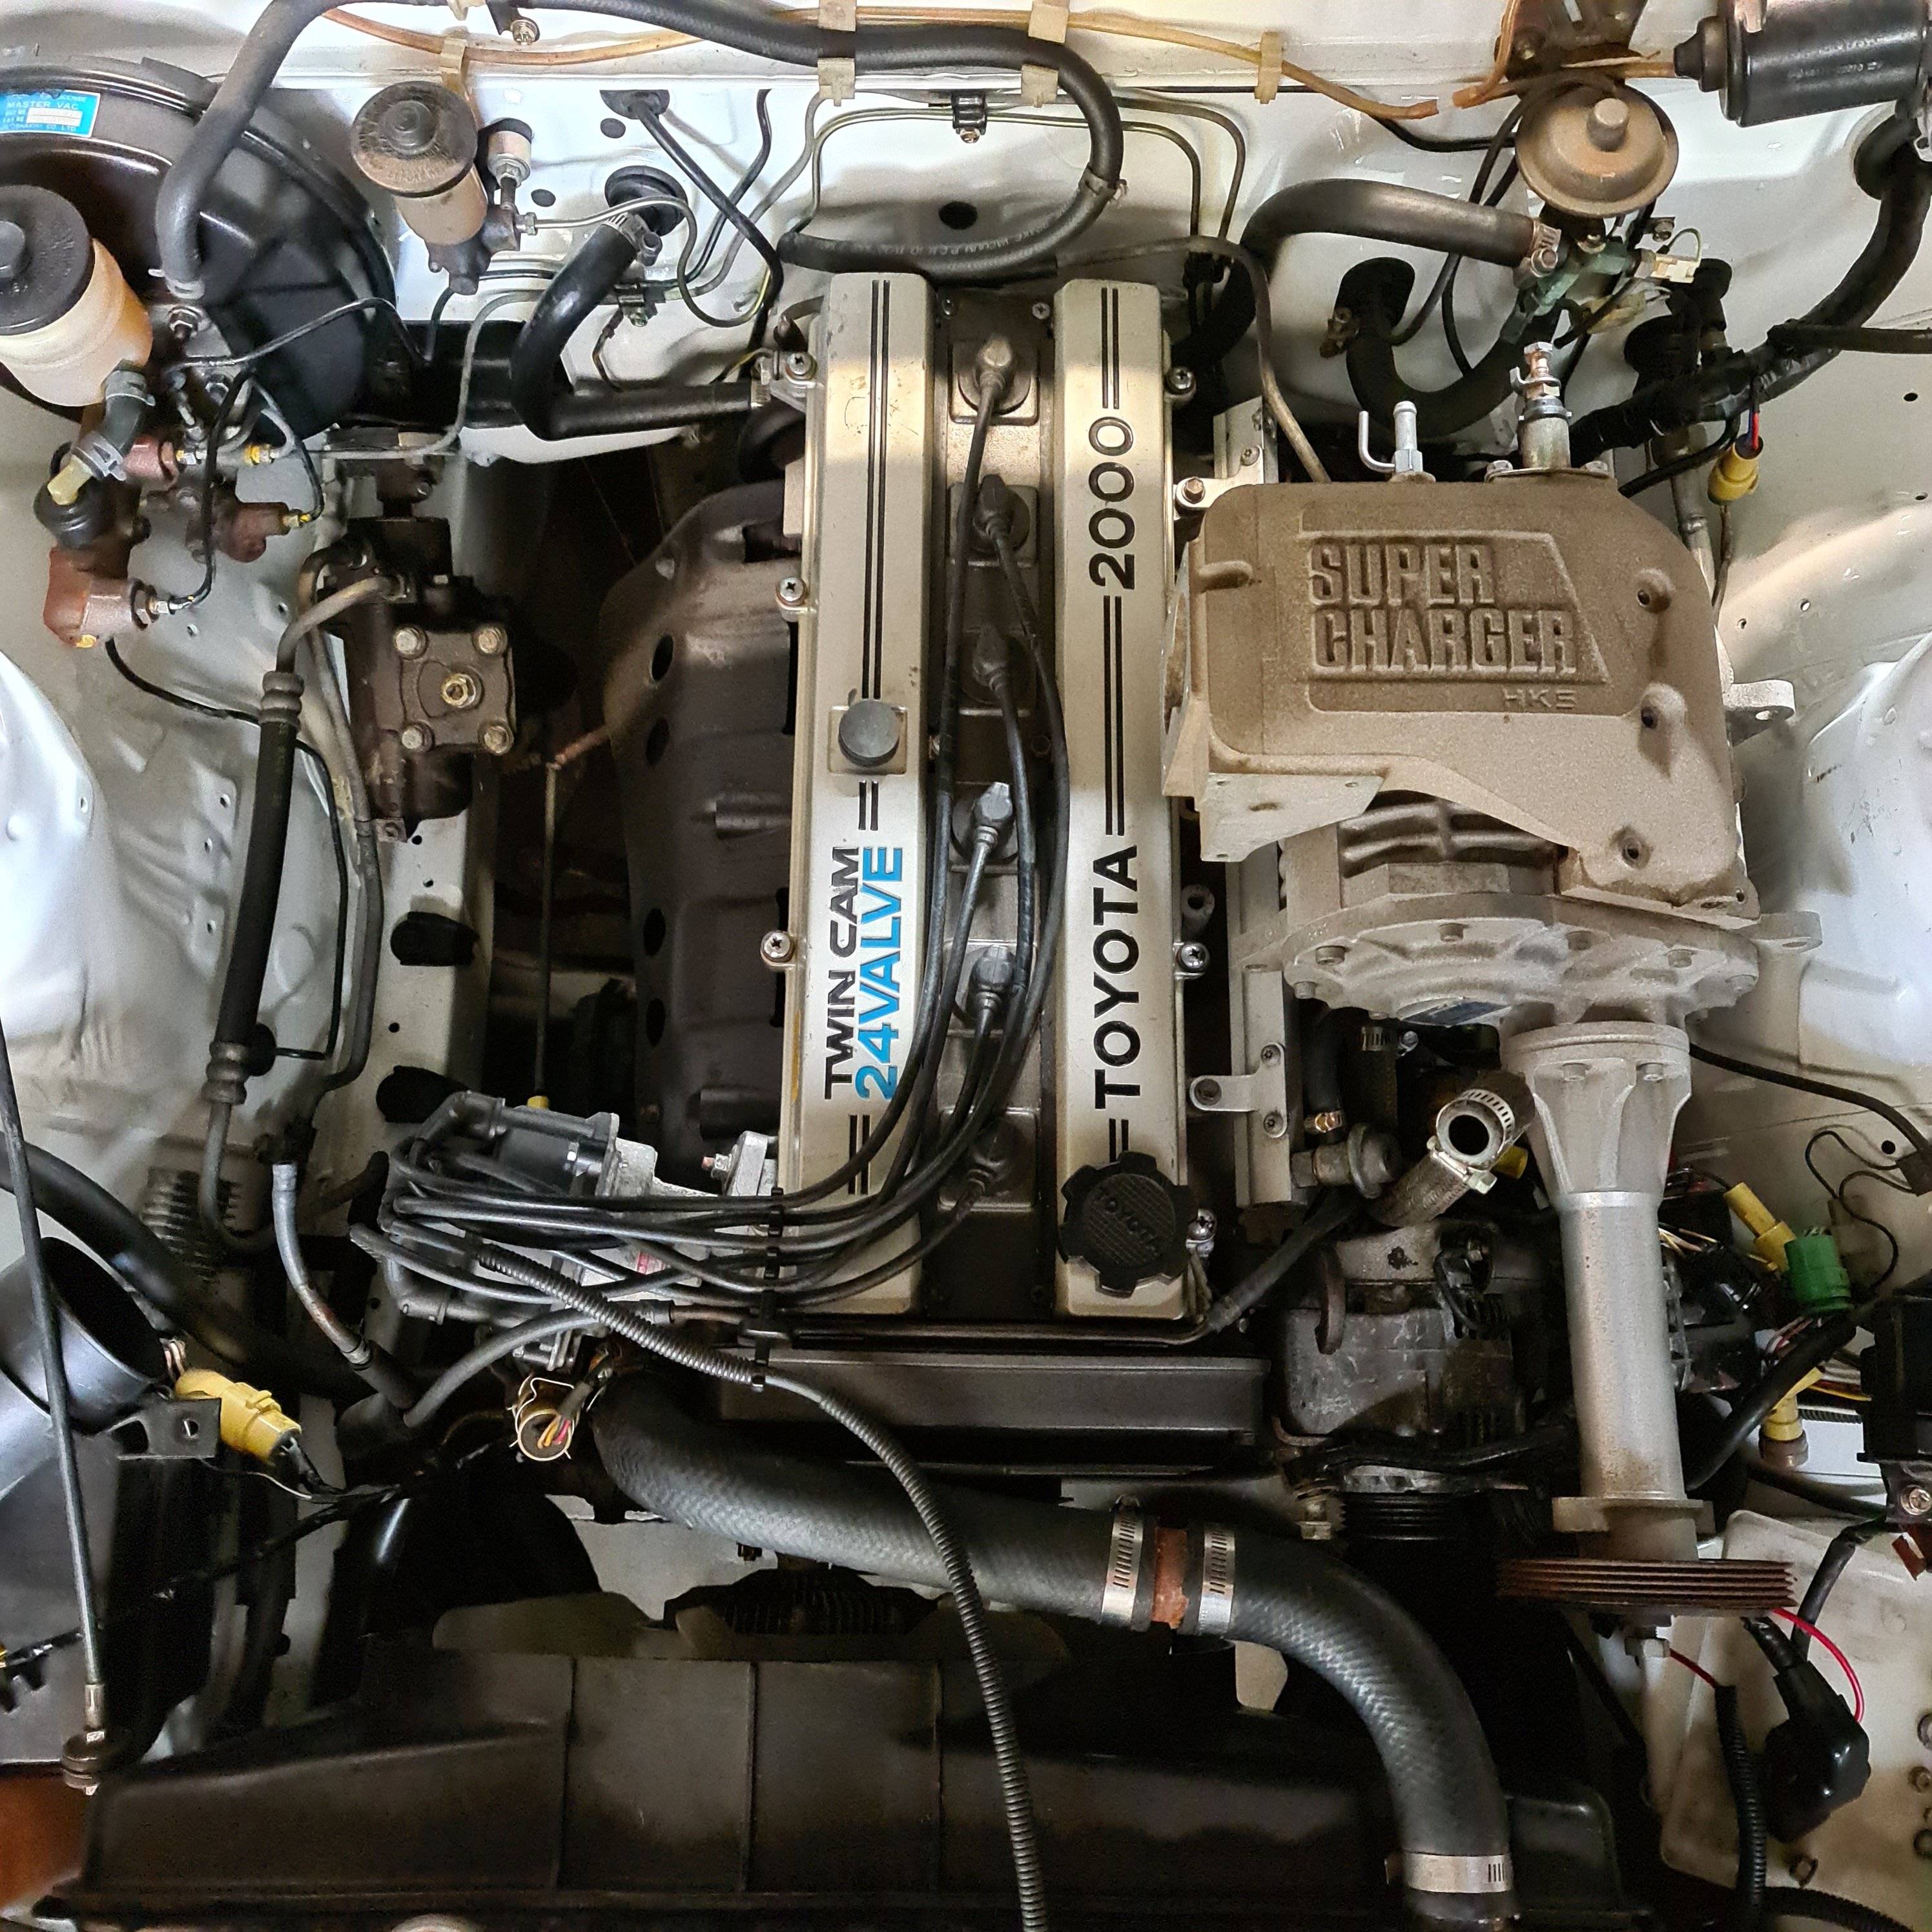
Supercharger kit arrived a couple weeks back so I started to pull apart a running car. Took a shit tonne of paint off the strut tower trying to side it all on in one go. Figured out its best to take supercharger off the intake manifold. Manifold fouls on fuel rail with the tvis butterfly plate left there so had to remove then try again. Now the intake head studs were fouling on manifold due to being to long so have removed them all successfully and awaiting new studs. Did mock up with some bolts for now Need to track down a 1st gen throttle body and iscv
1 point
-
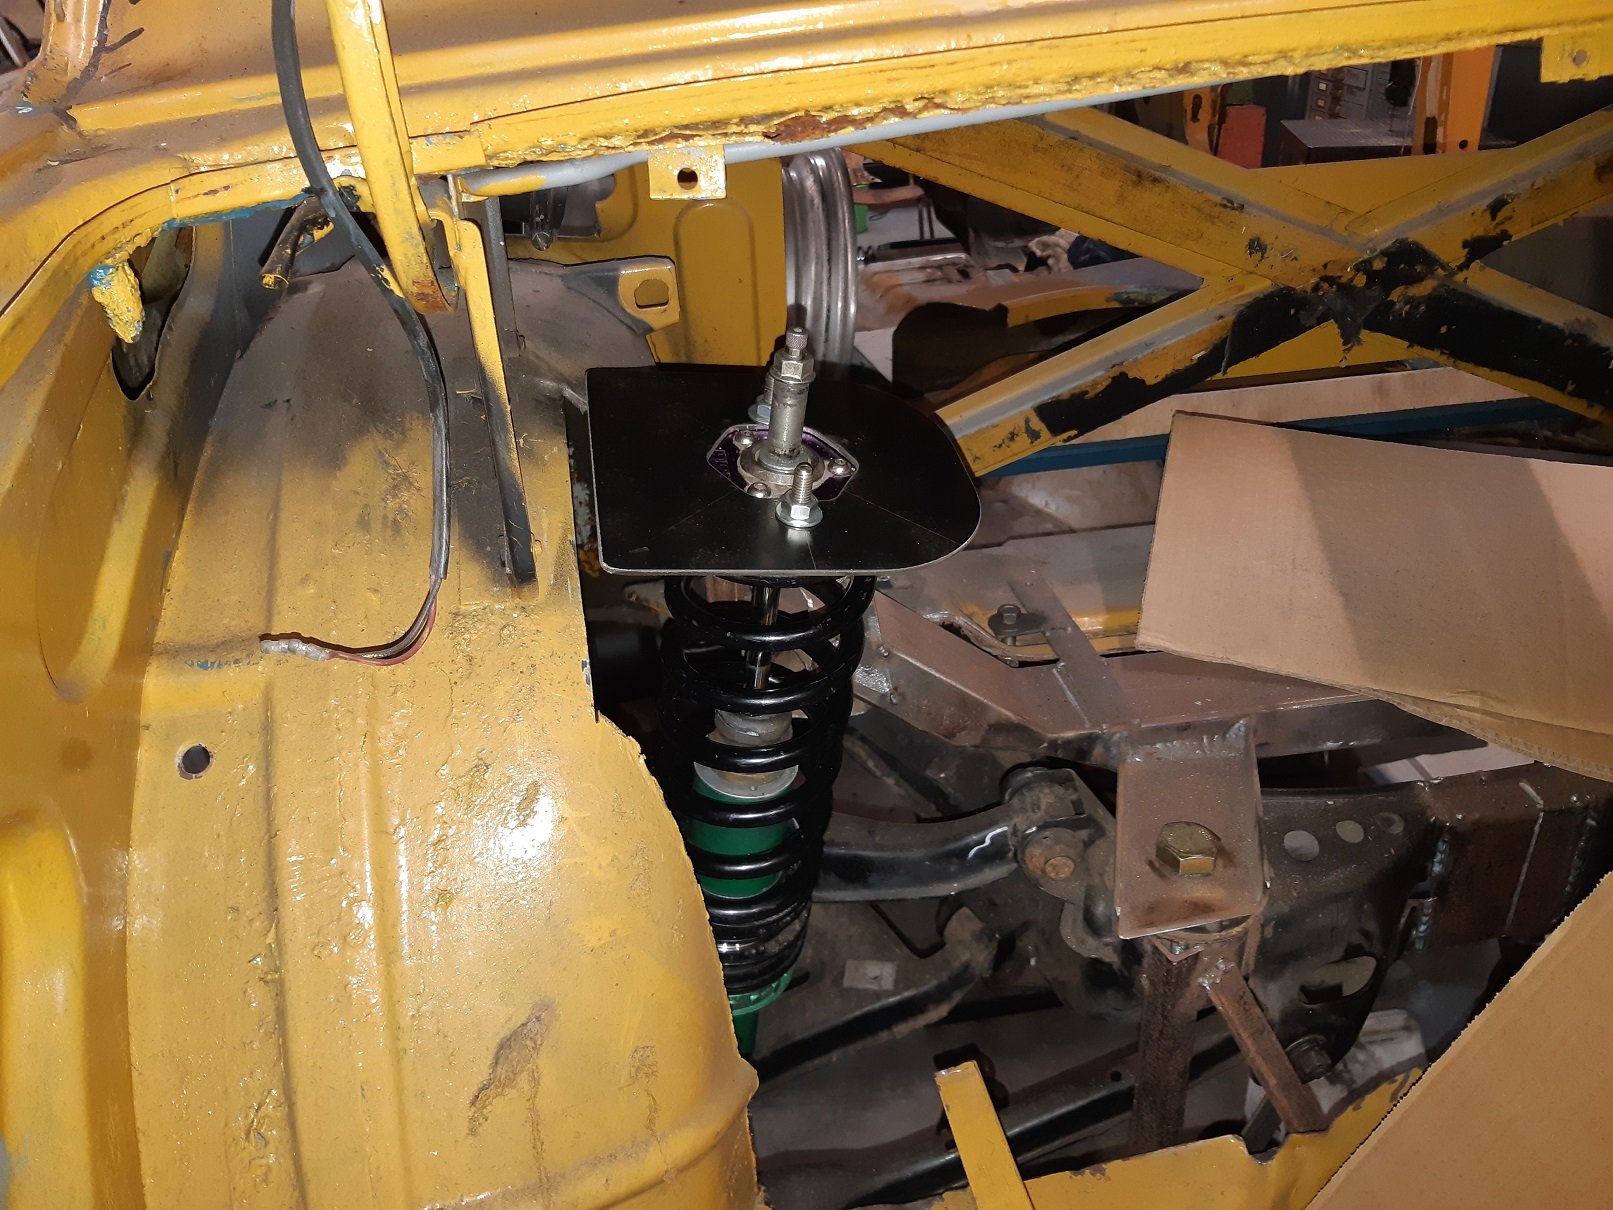
Made a top plate to mock up the coil over top mount. I somehow managed to mess up drilling the stud holes, so I guess this is just for testing. This is pretty much where it will sit. Ride height will be in the middle of the stroke.
1 point
-
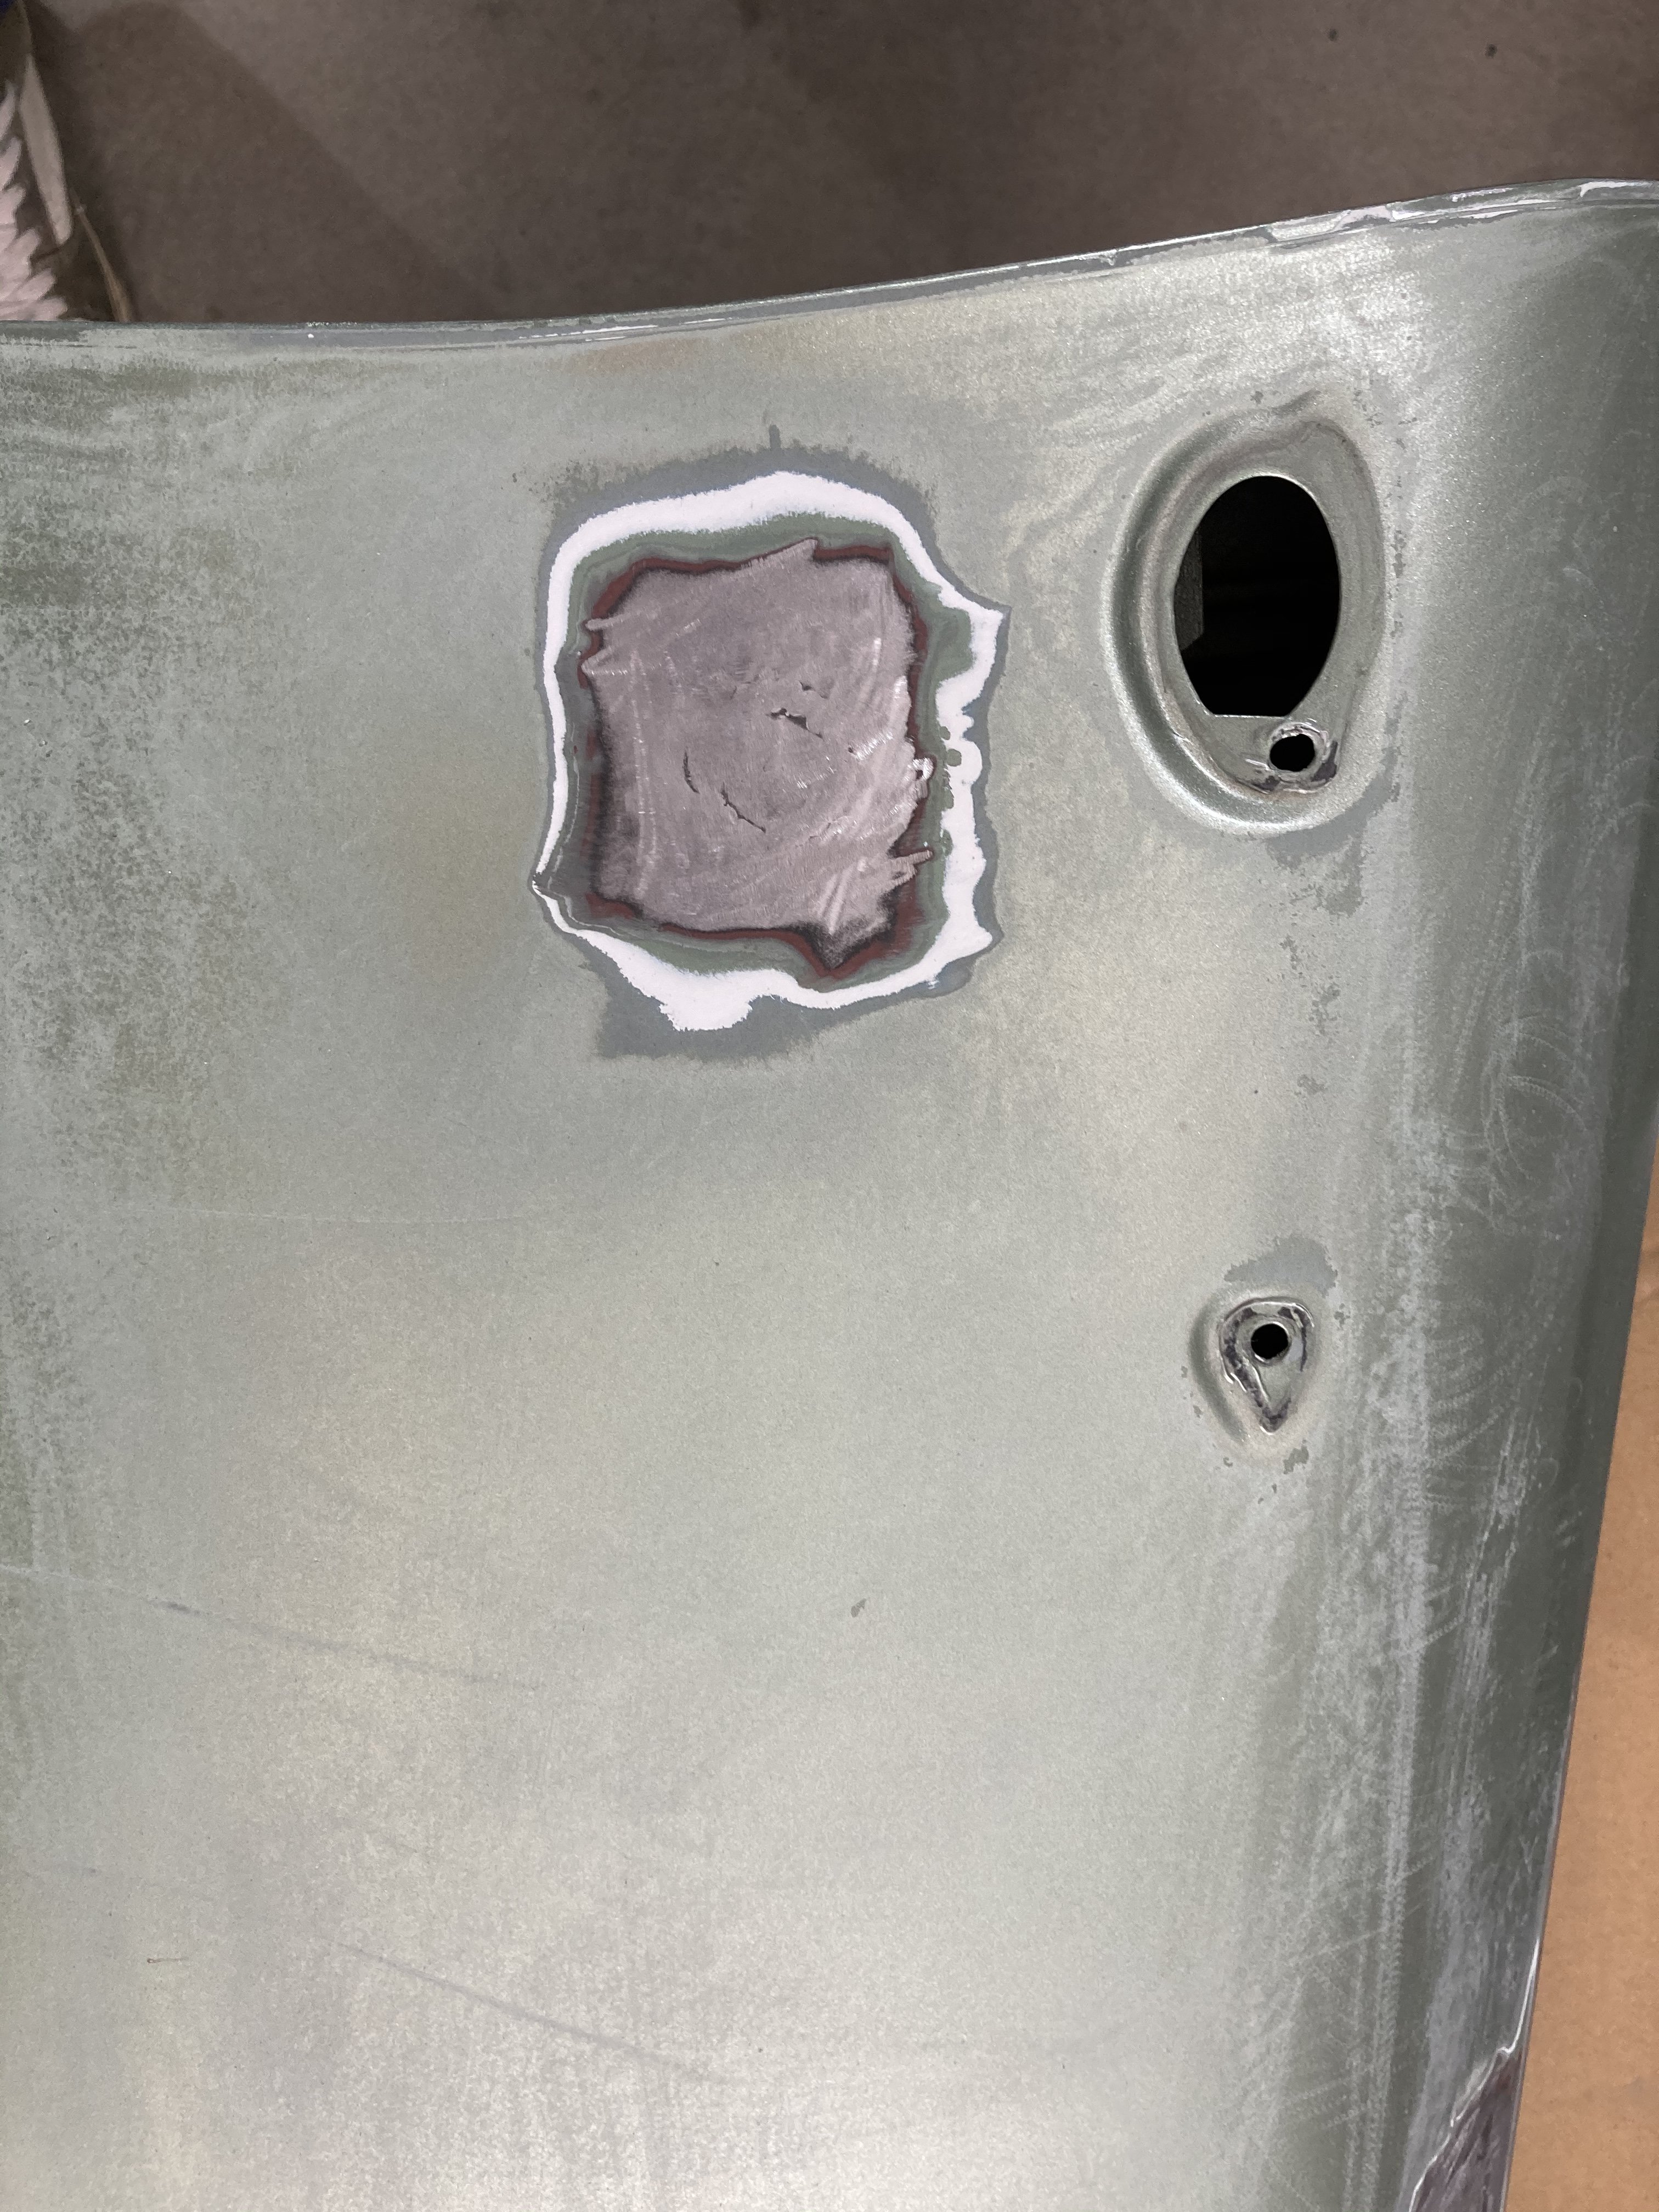
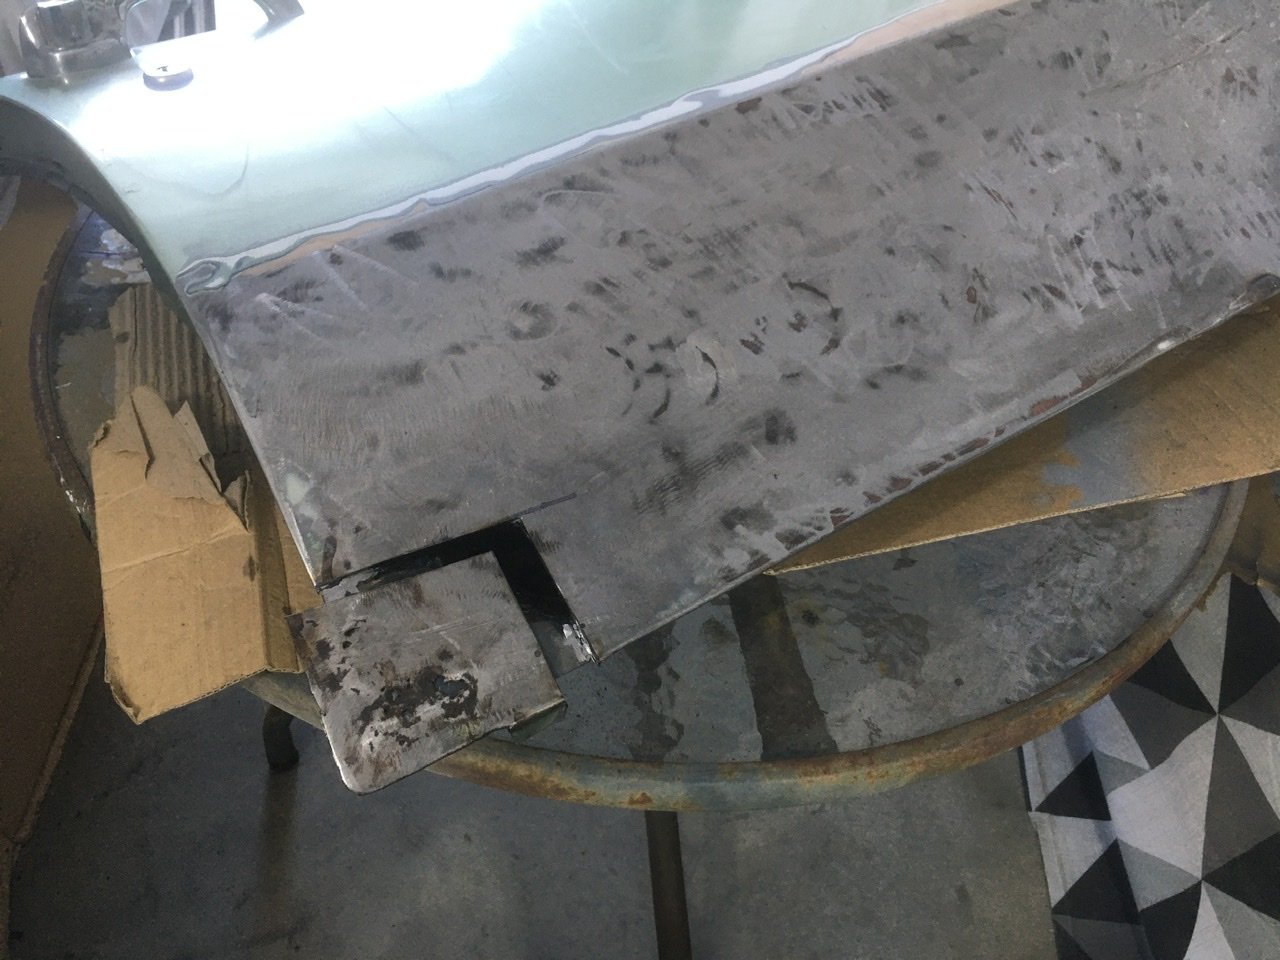
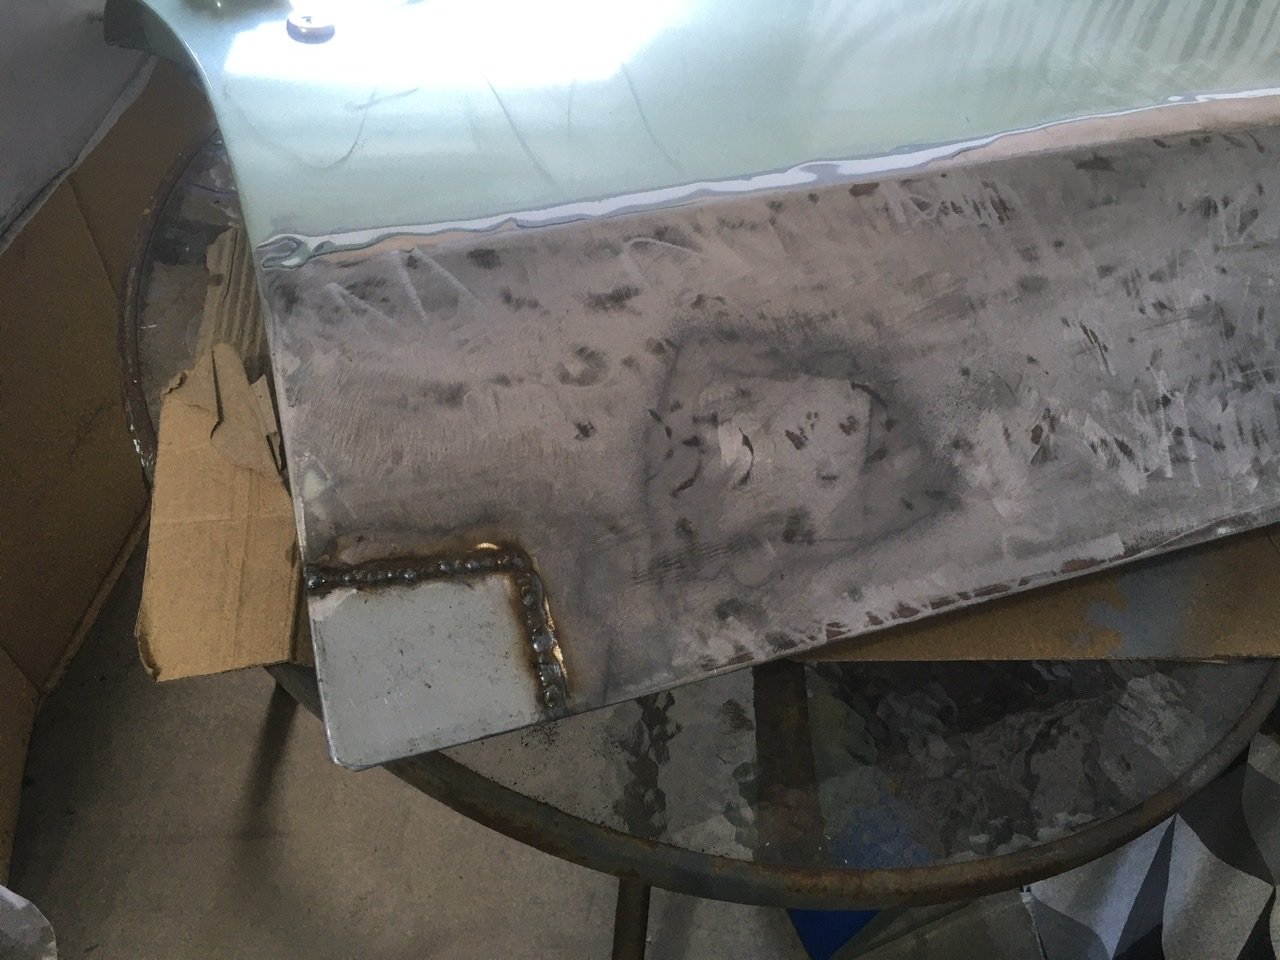
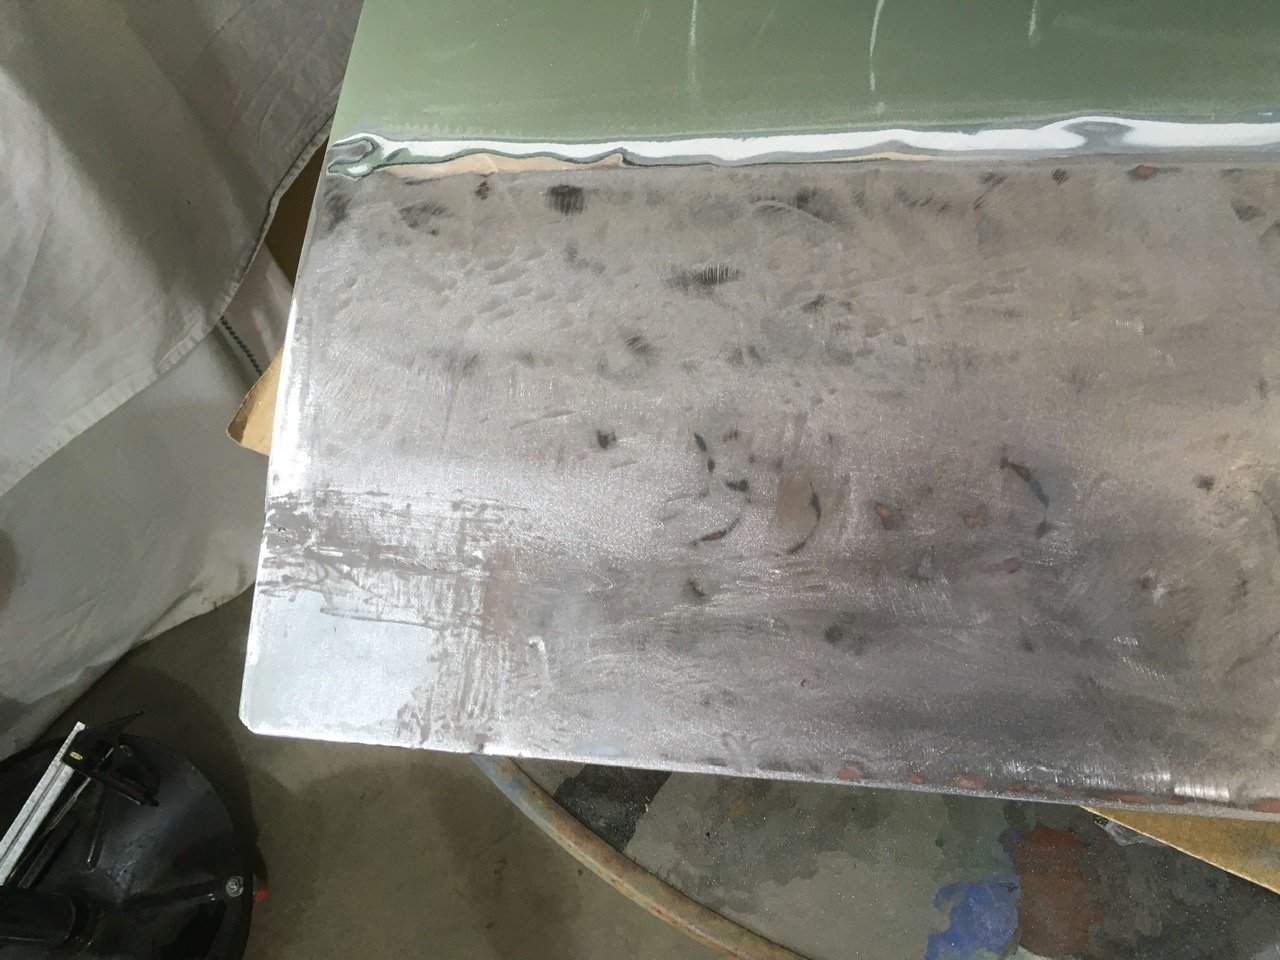
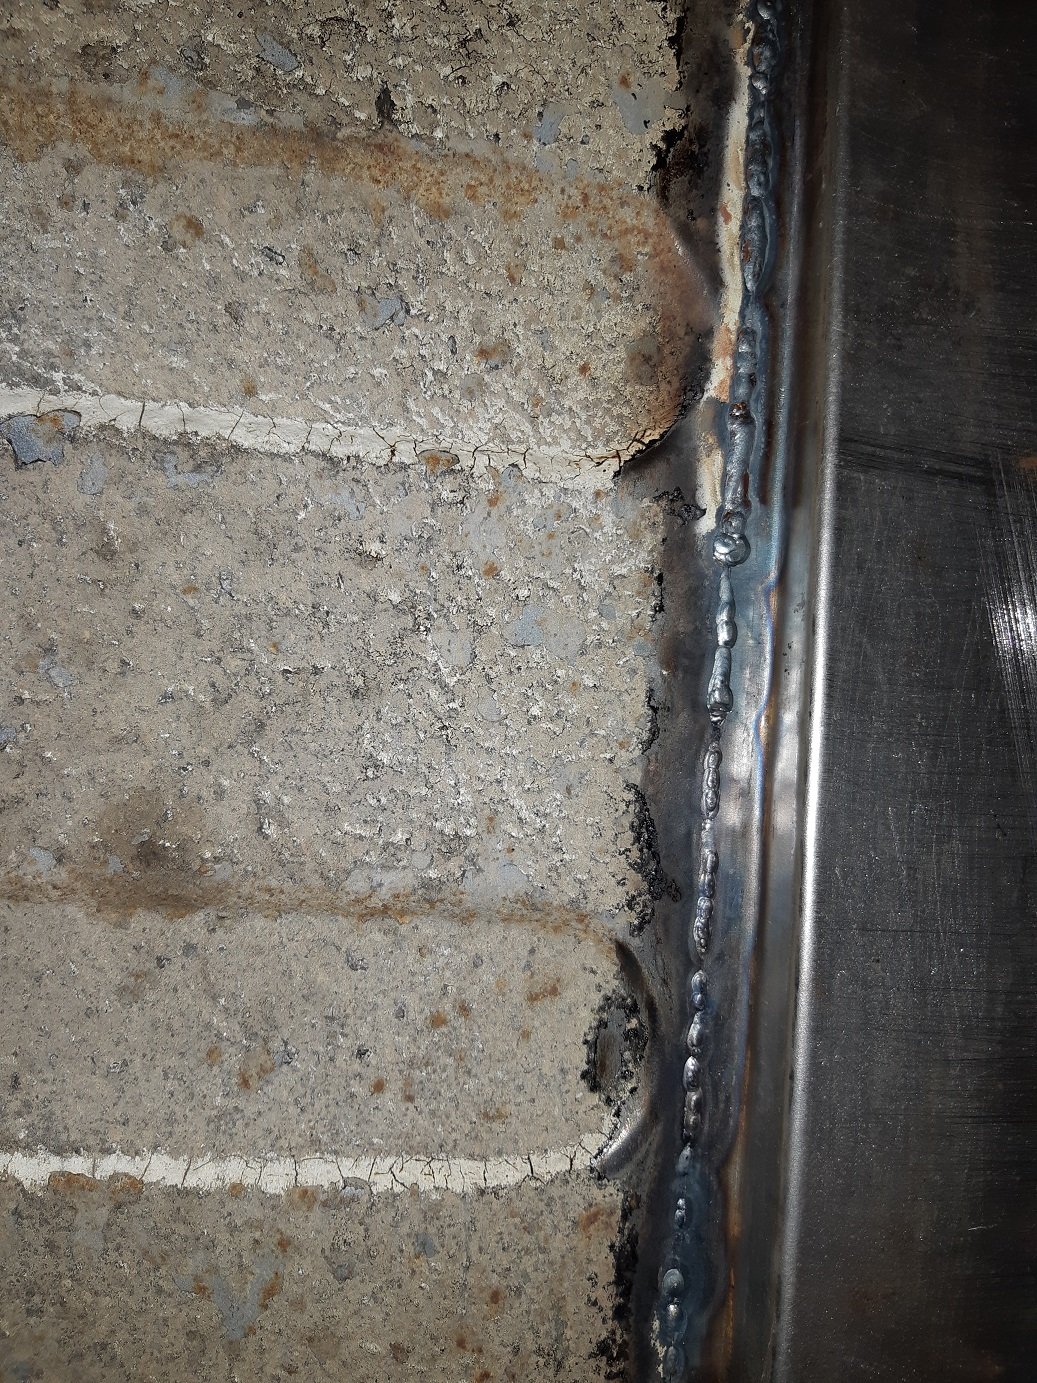
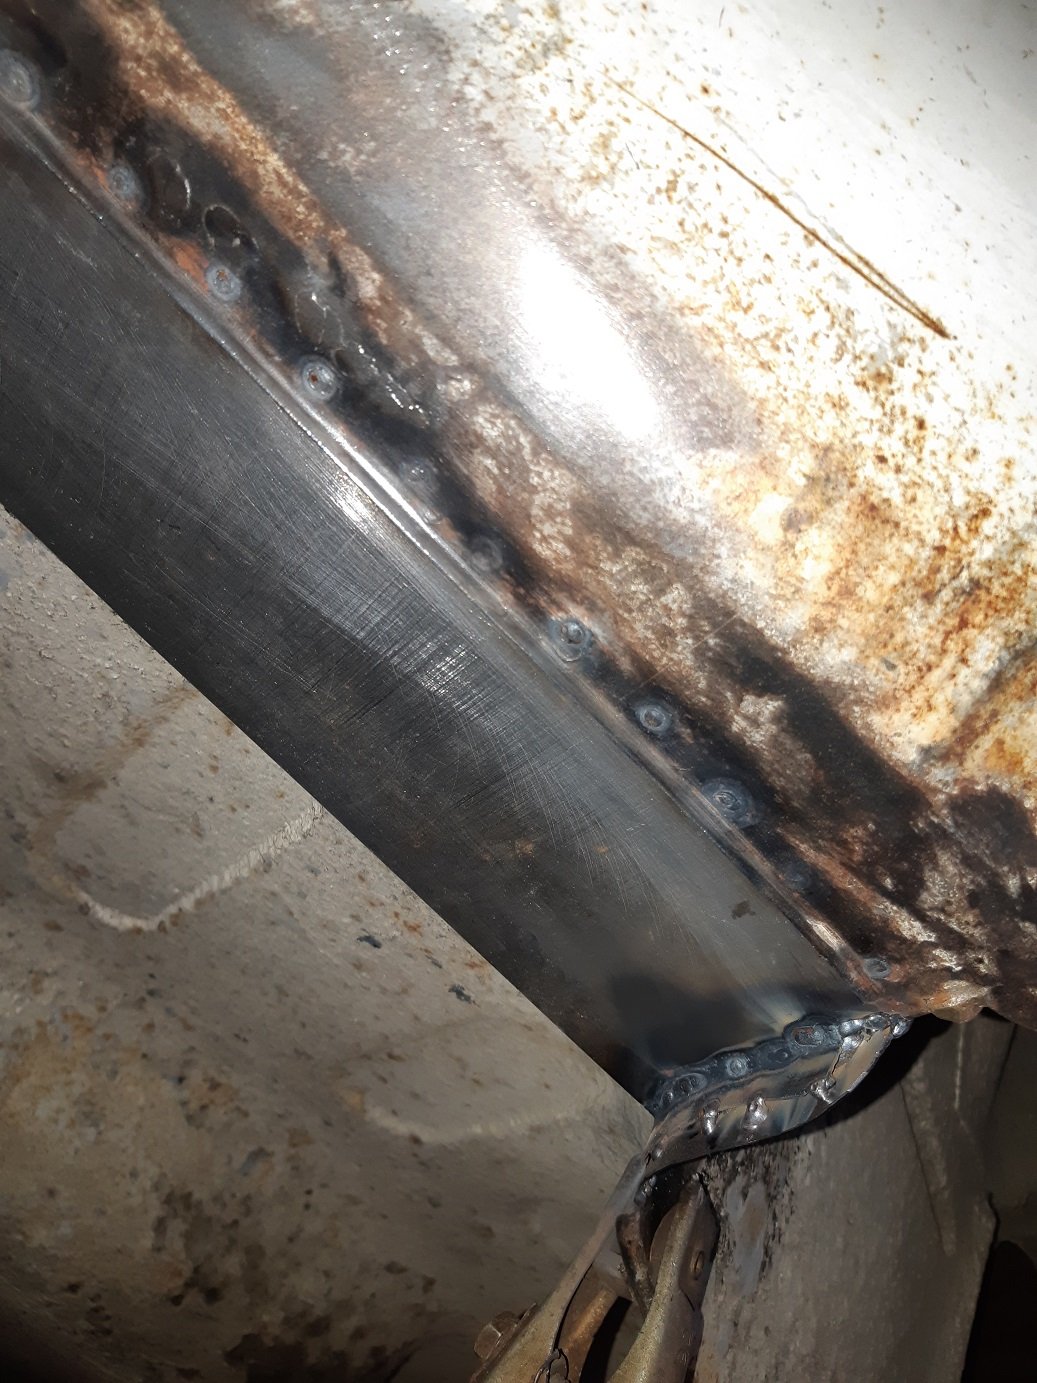
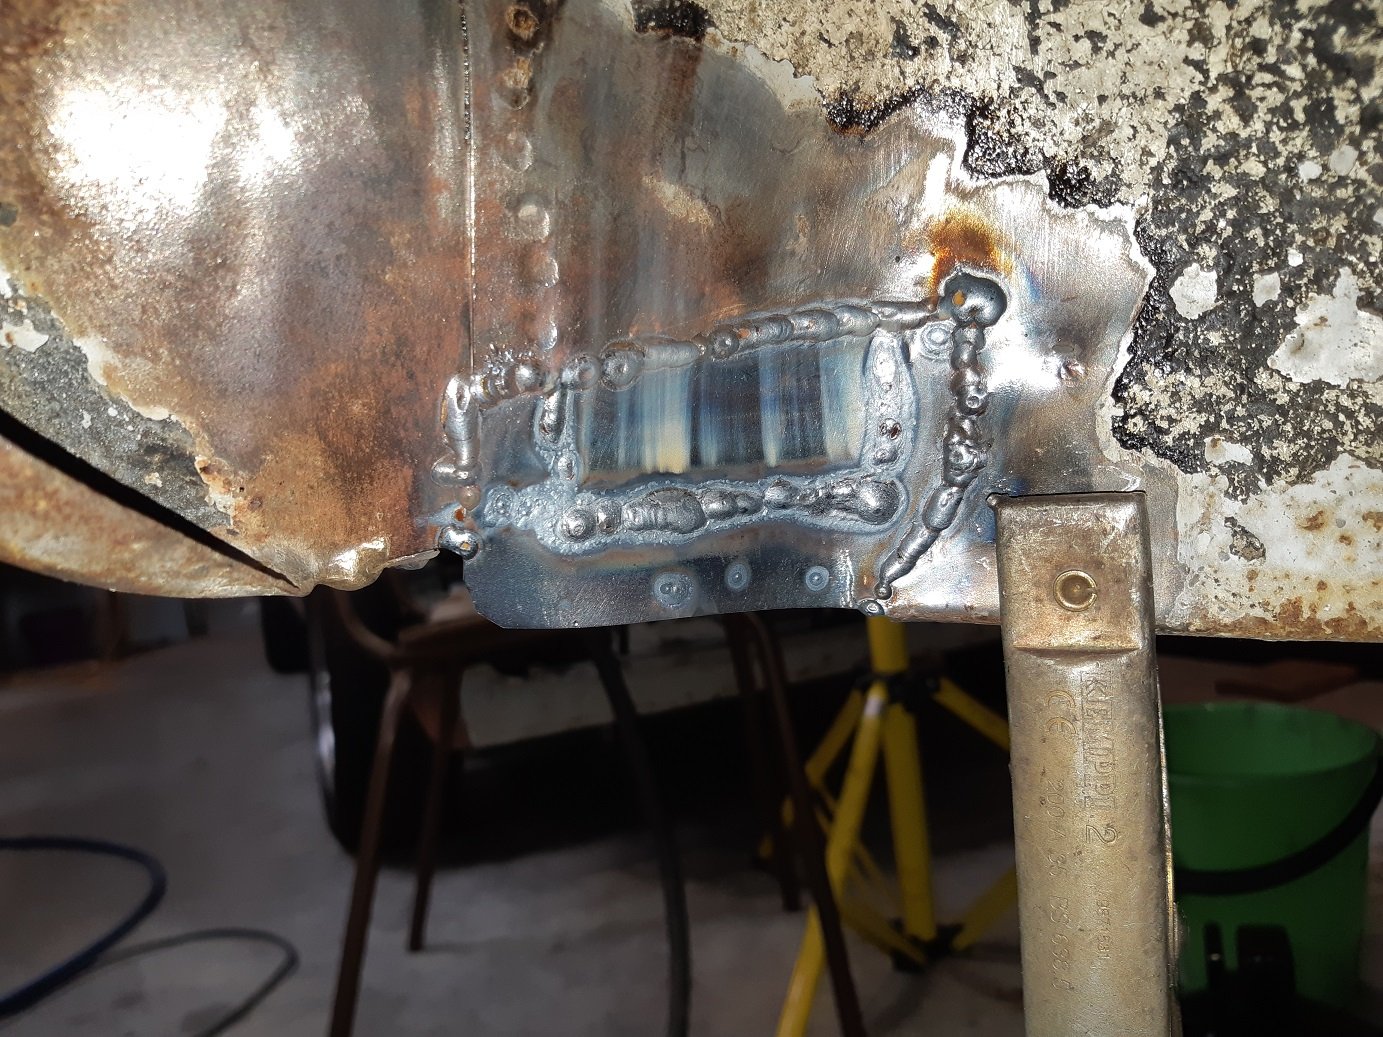
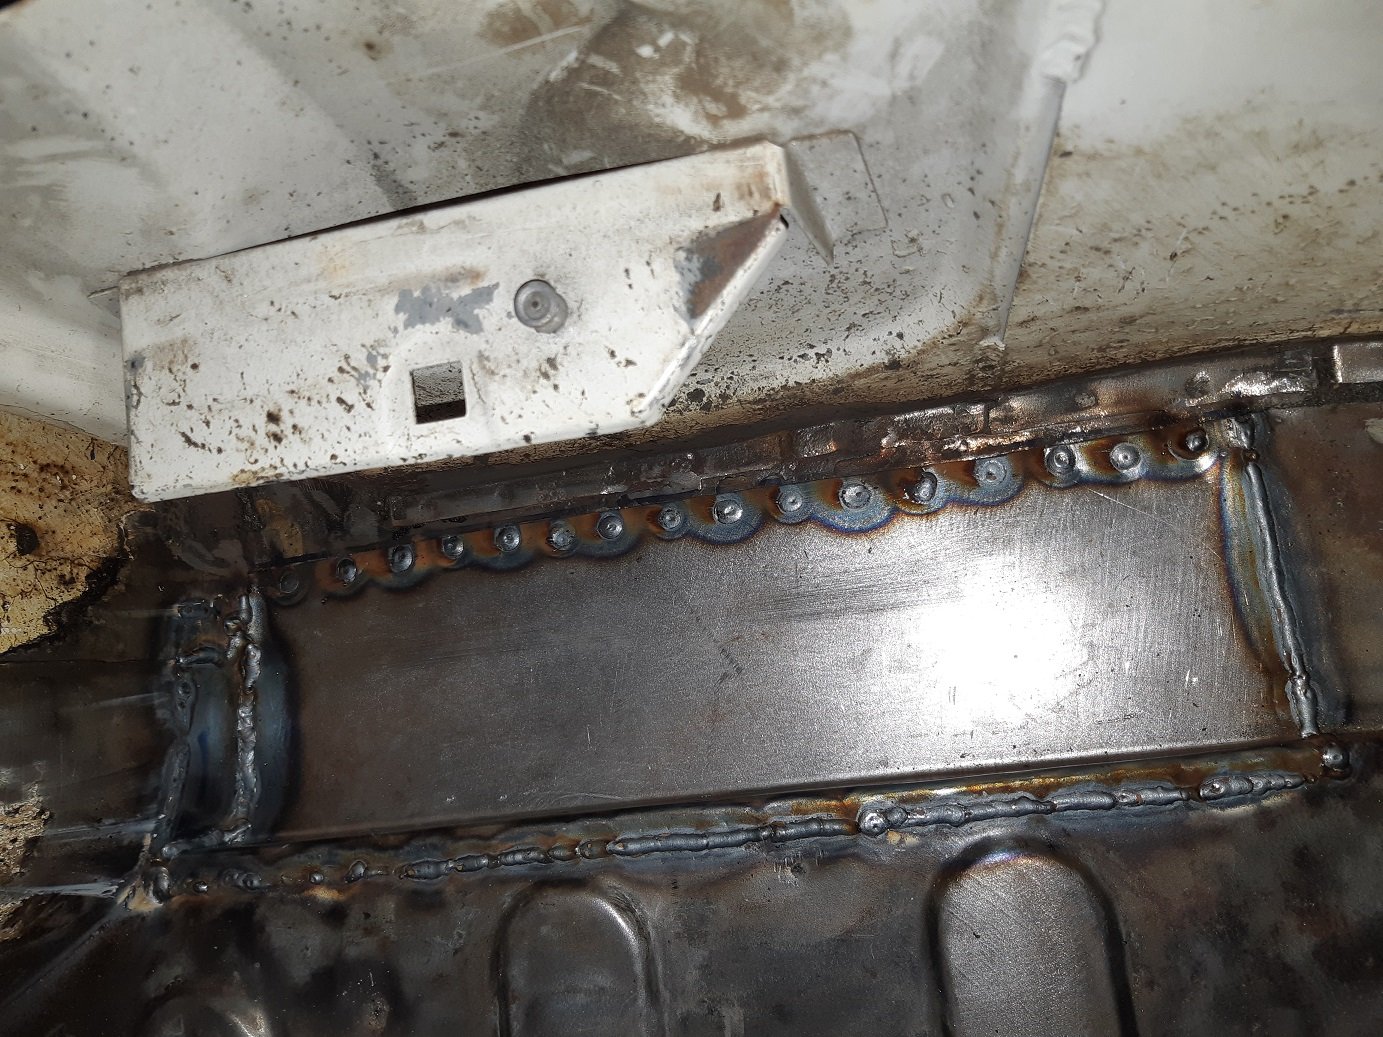
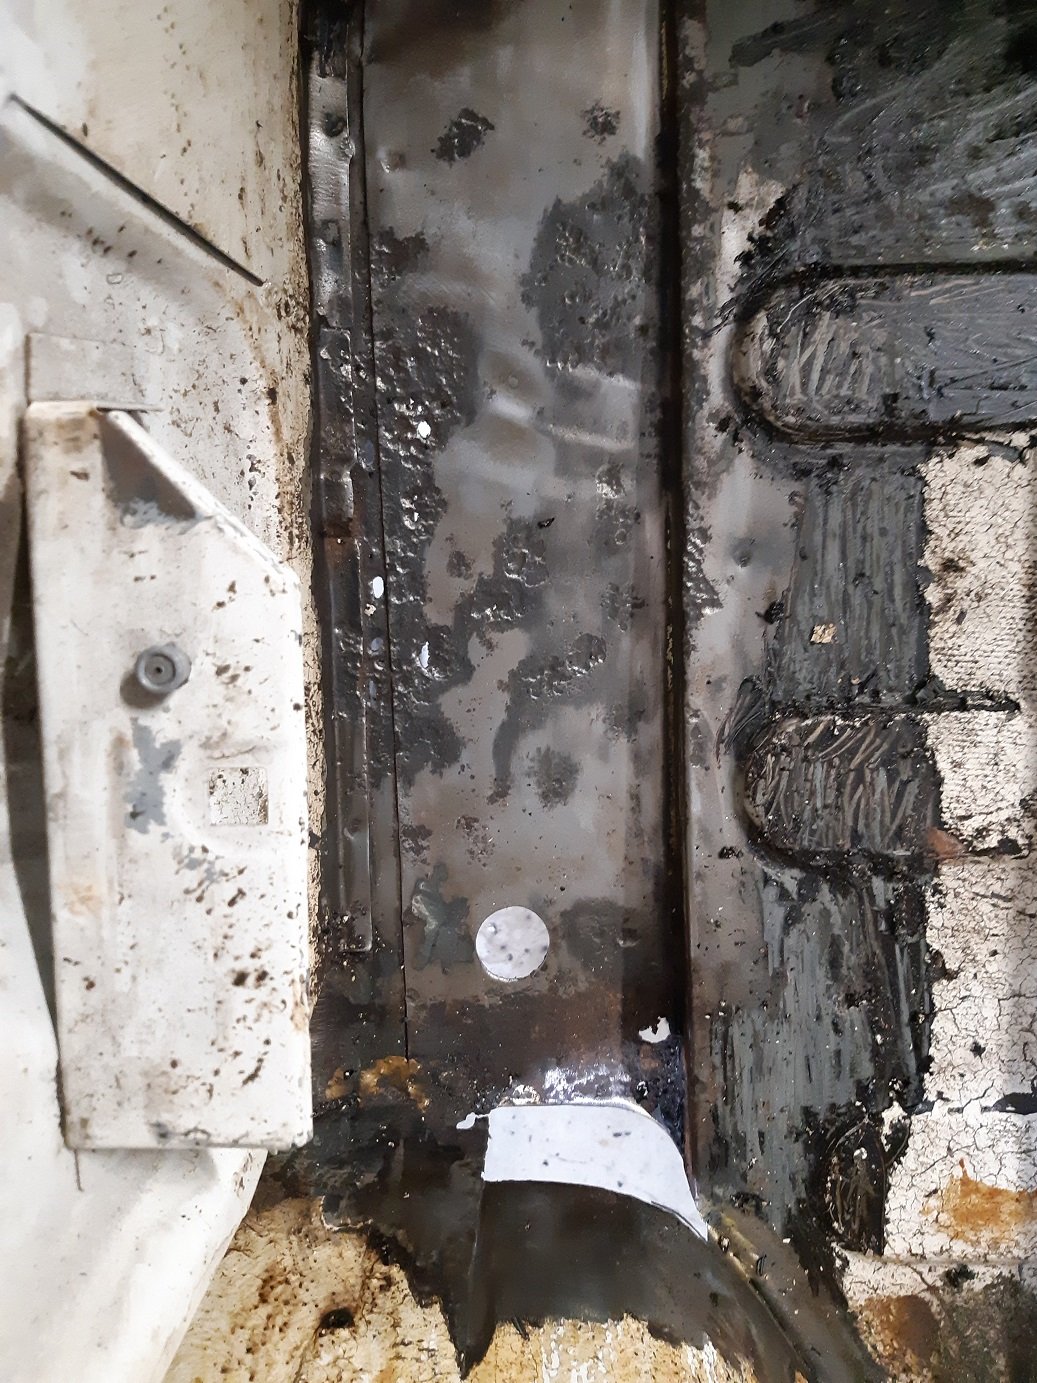
One of the two areas where there is rust. In the boot/rear quarter. Got decent penetration. I made use of a copper backing plate(a squashed copper pipe) for the long butt welds.
1 point
-
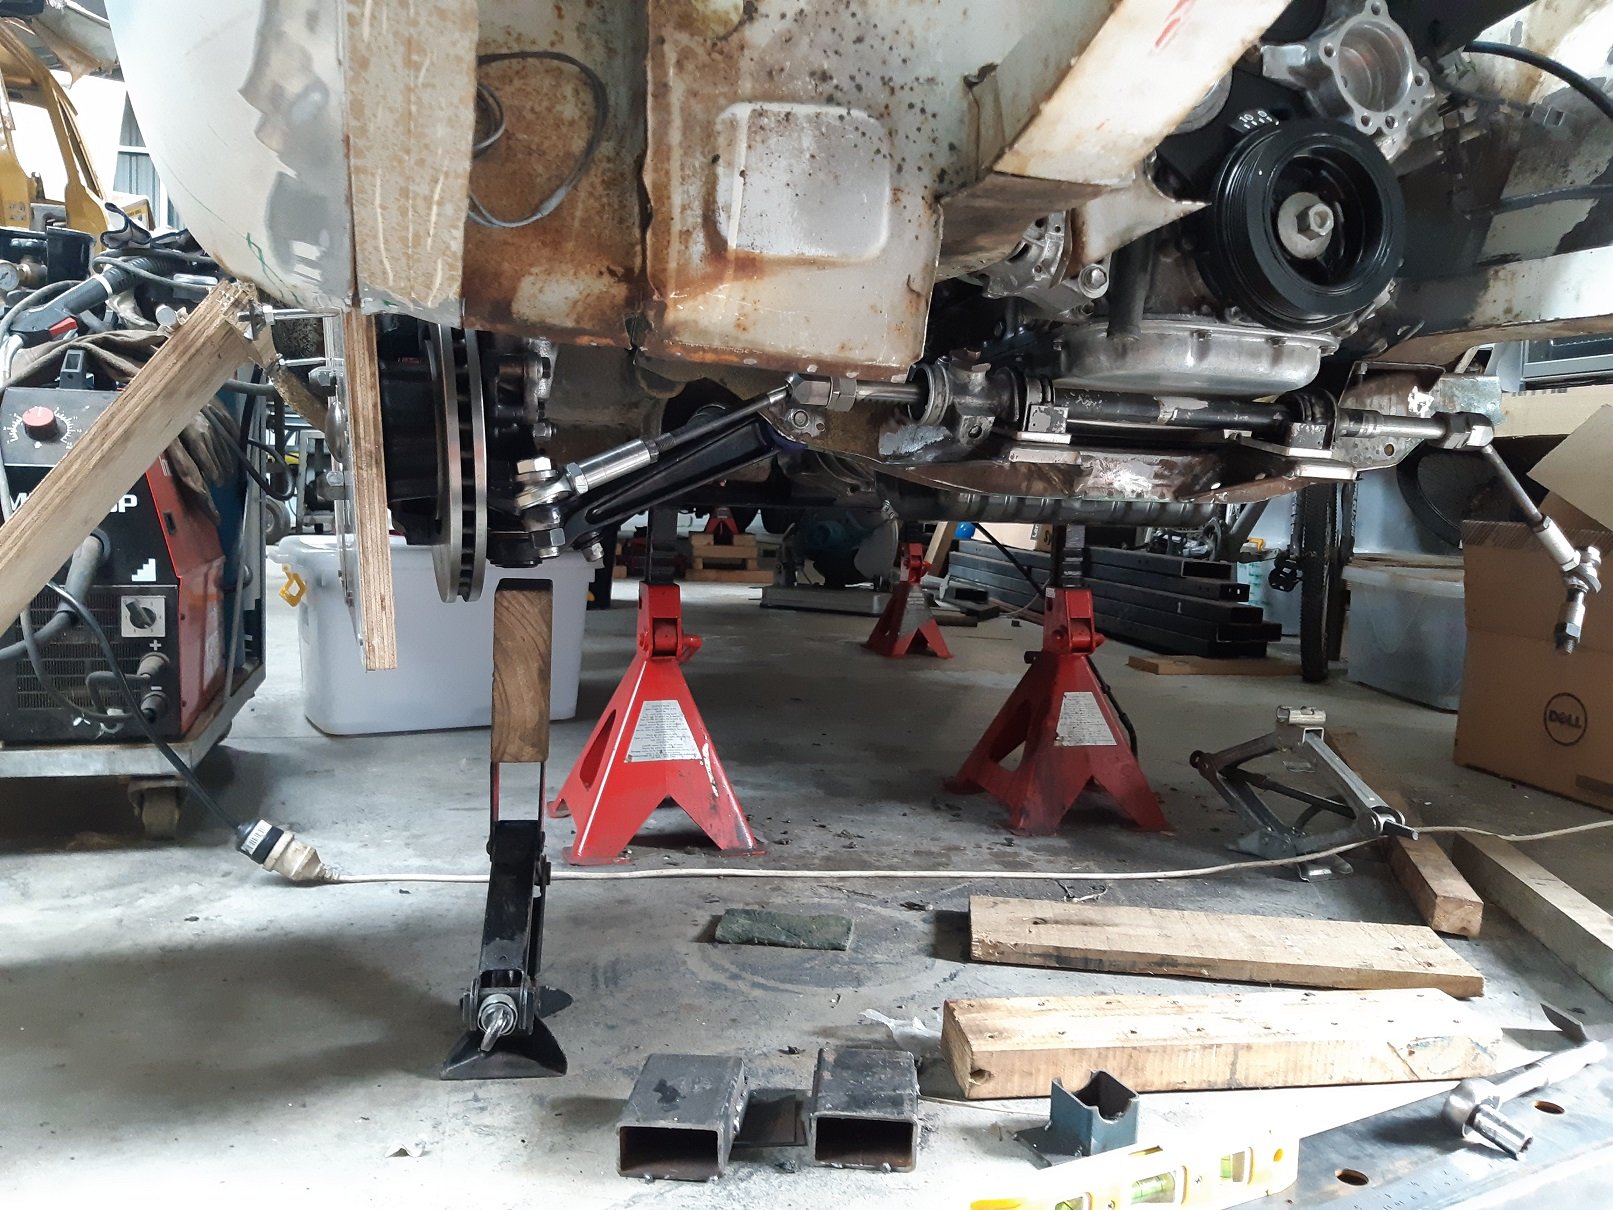
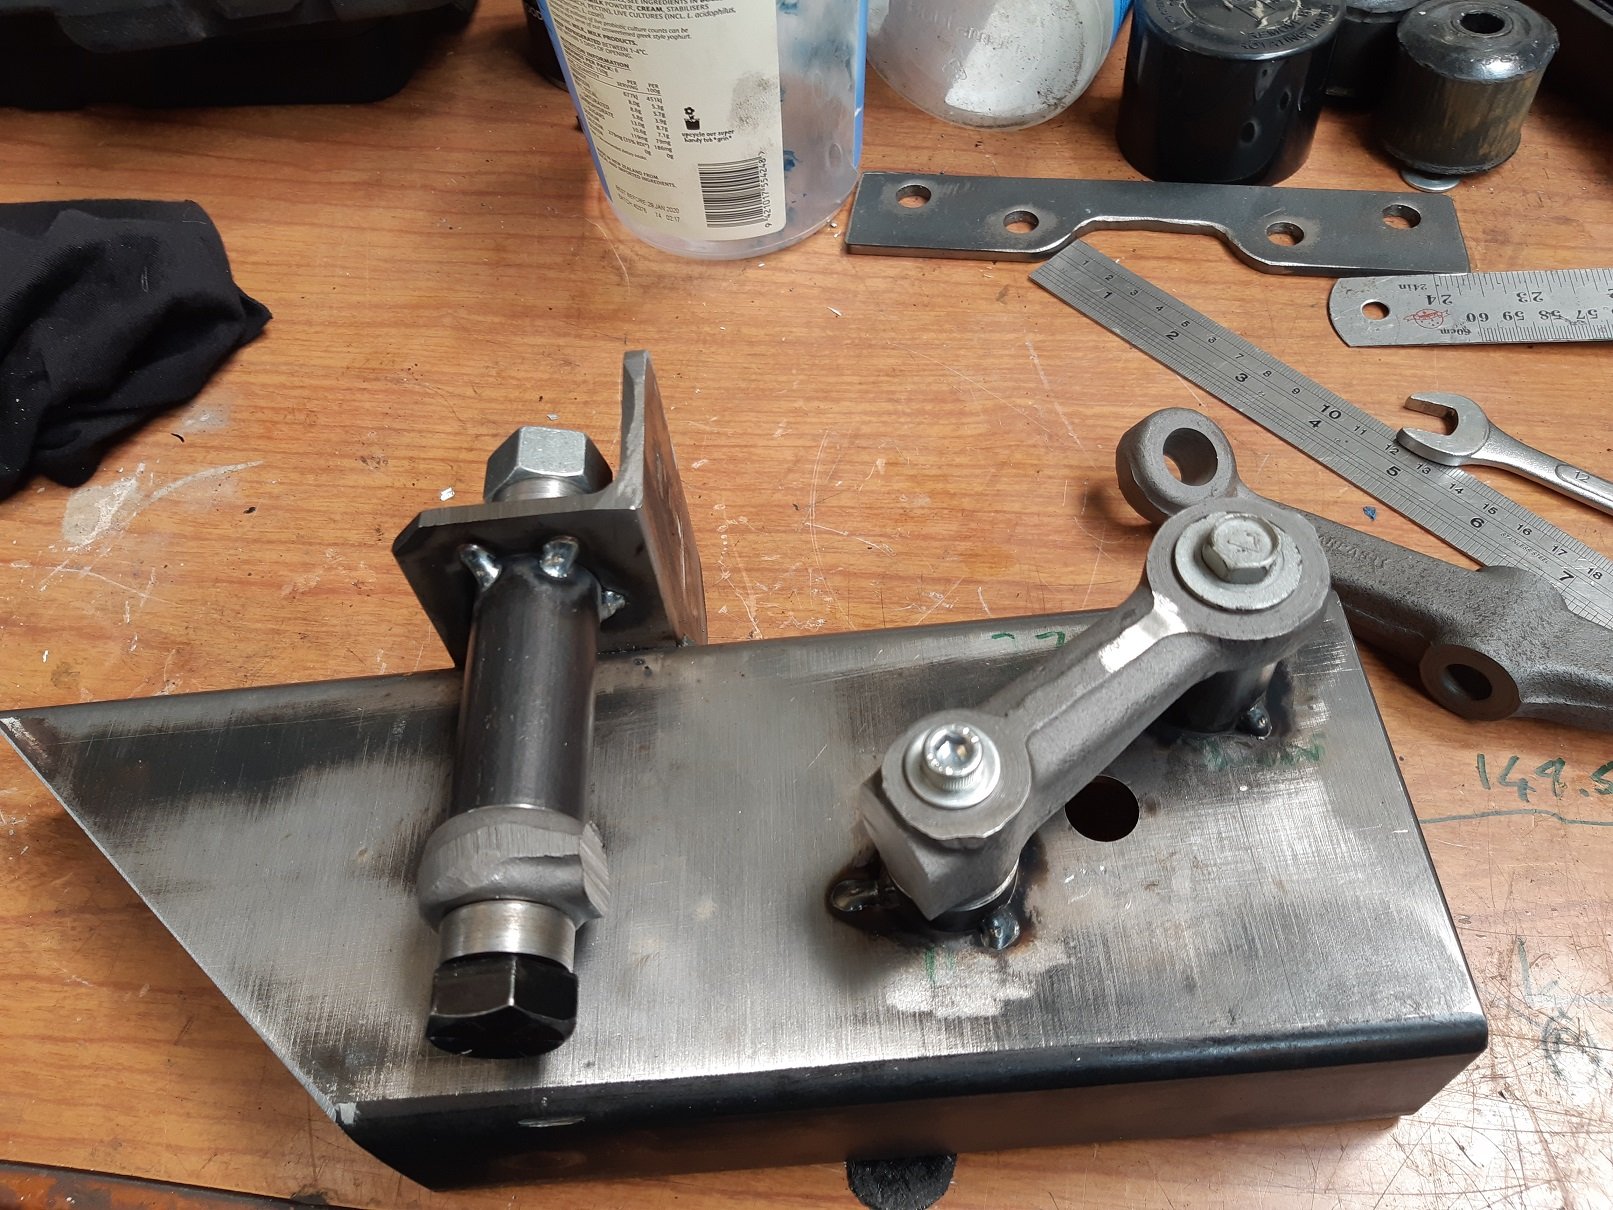
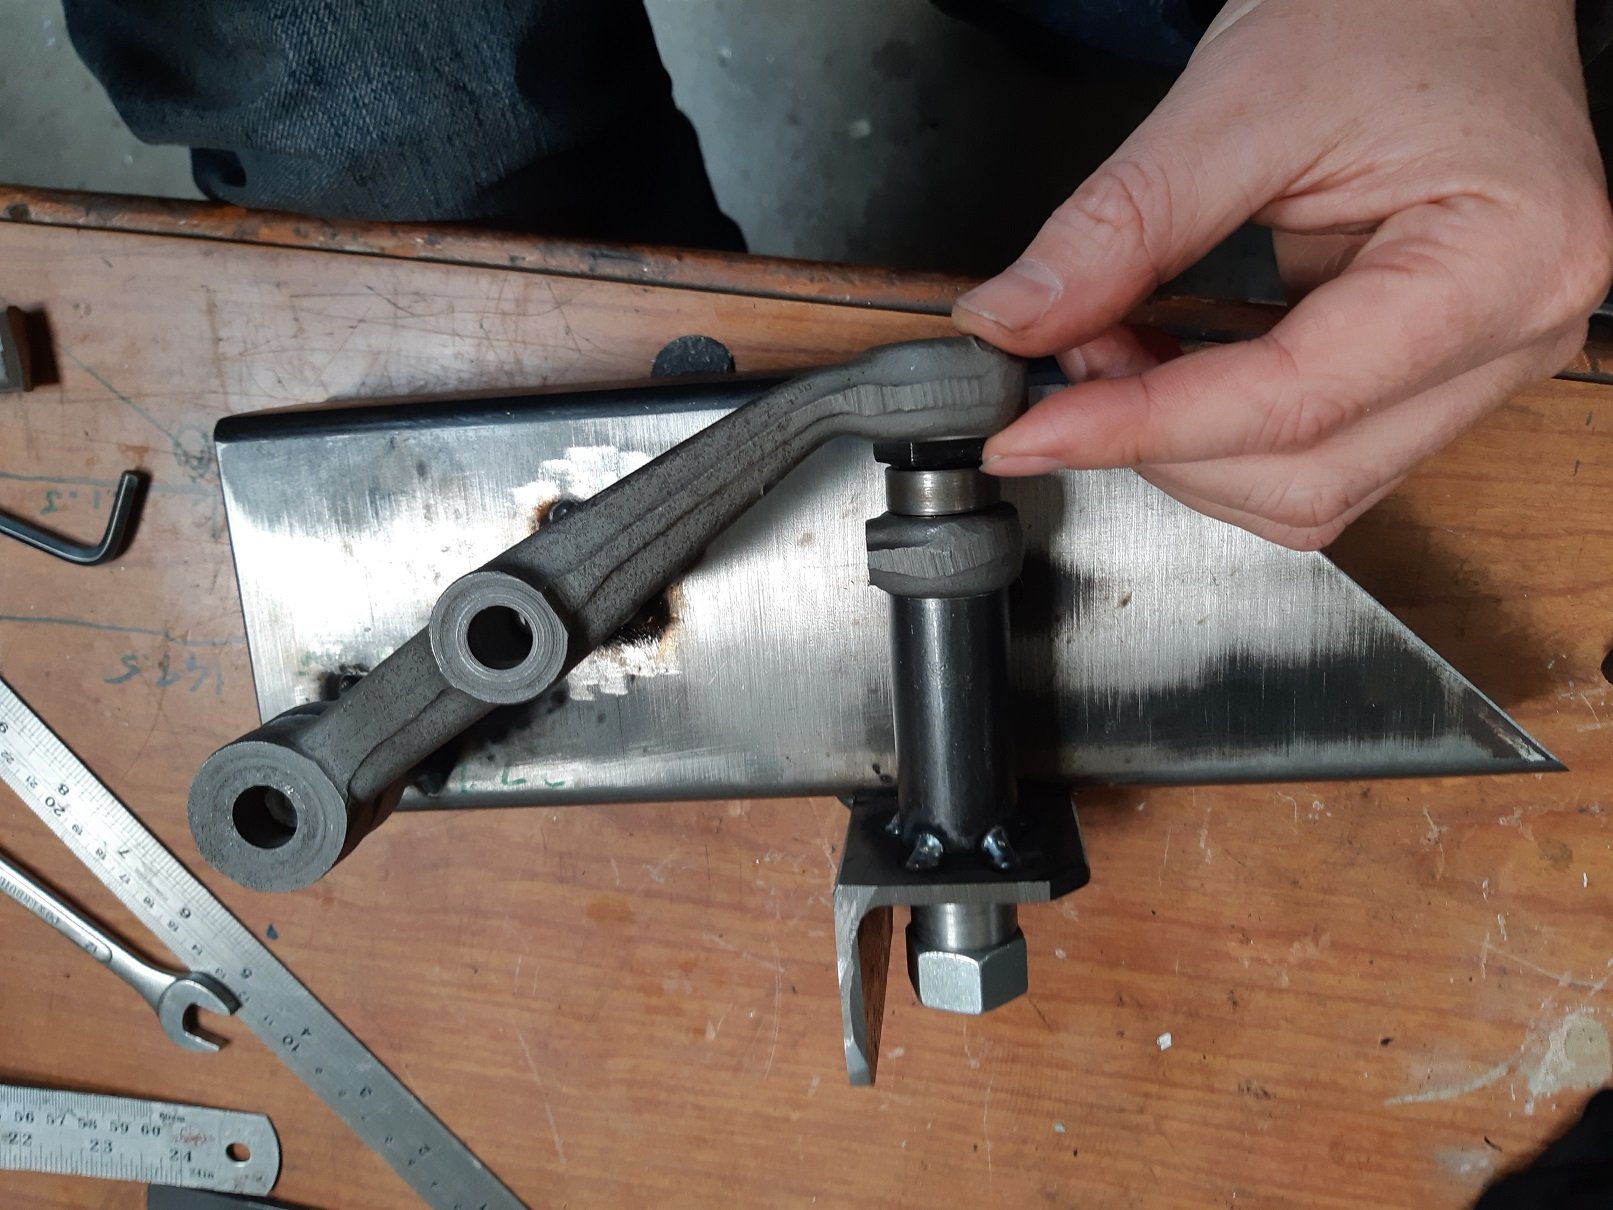
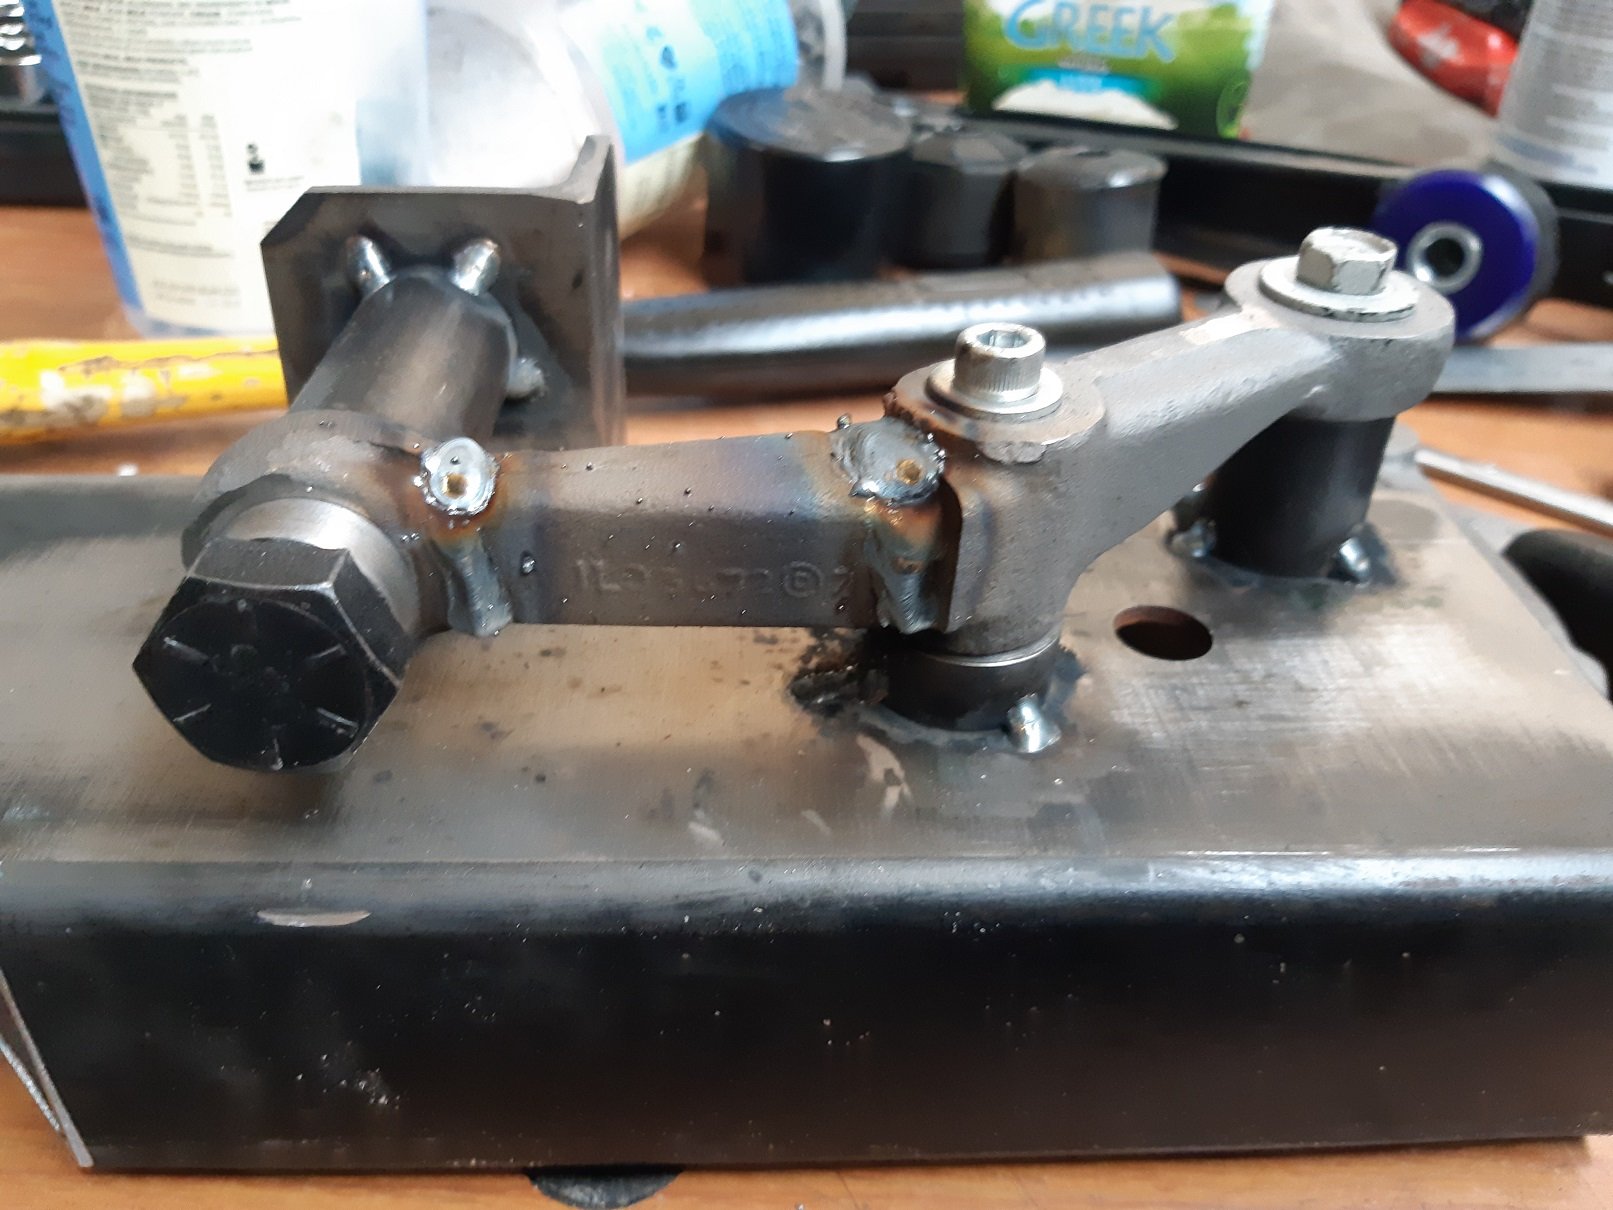
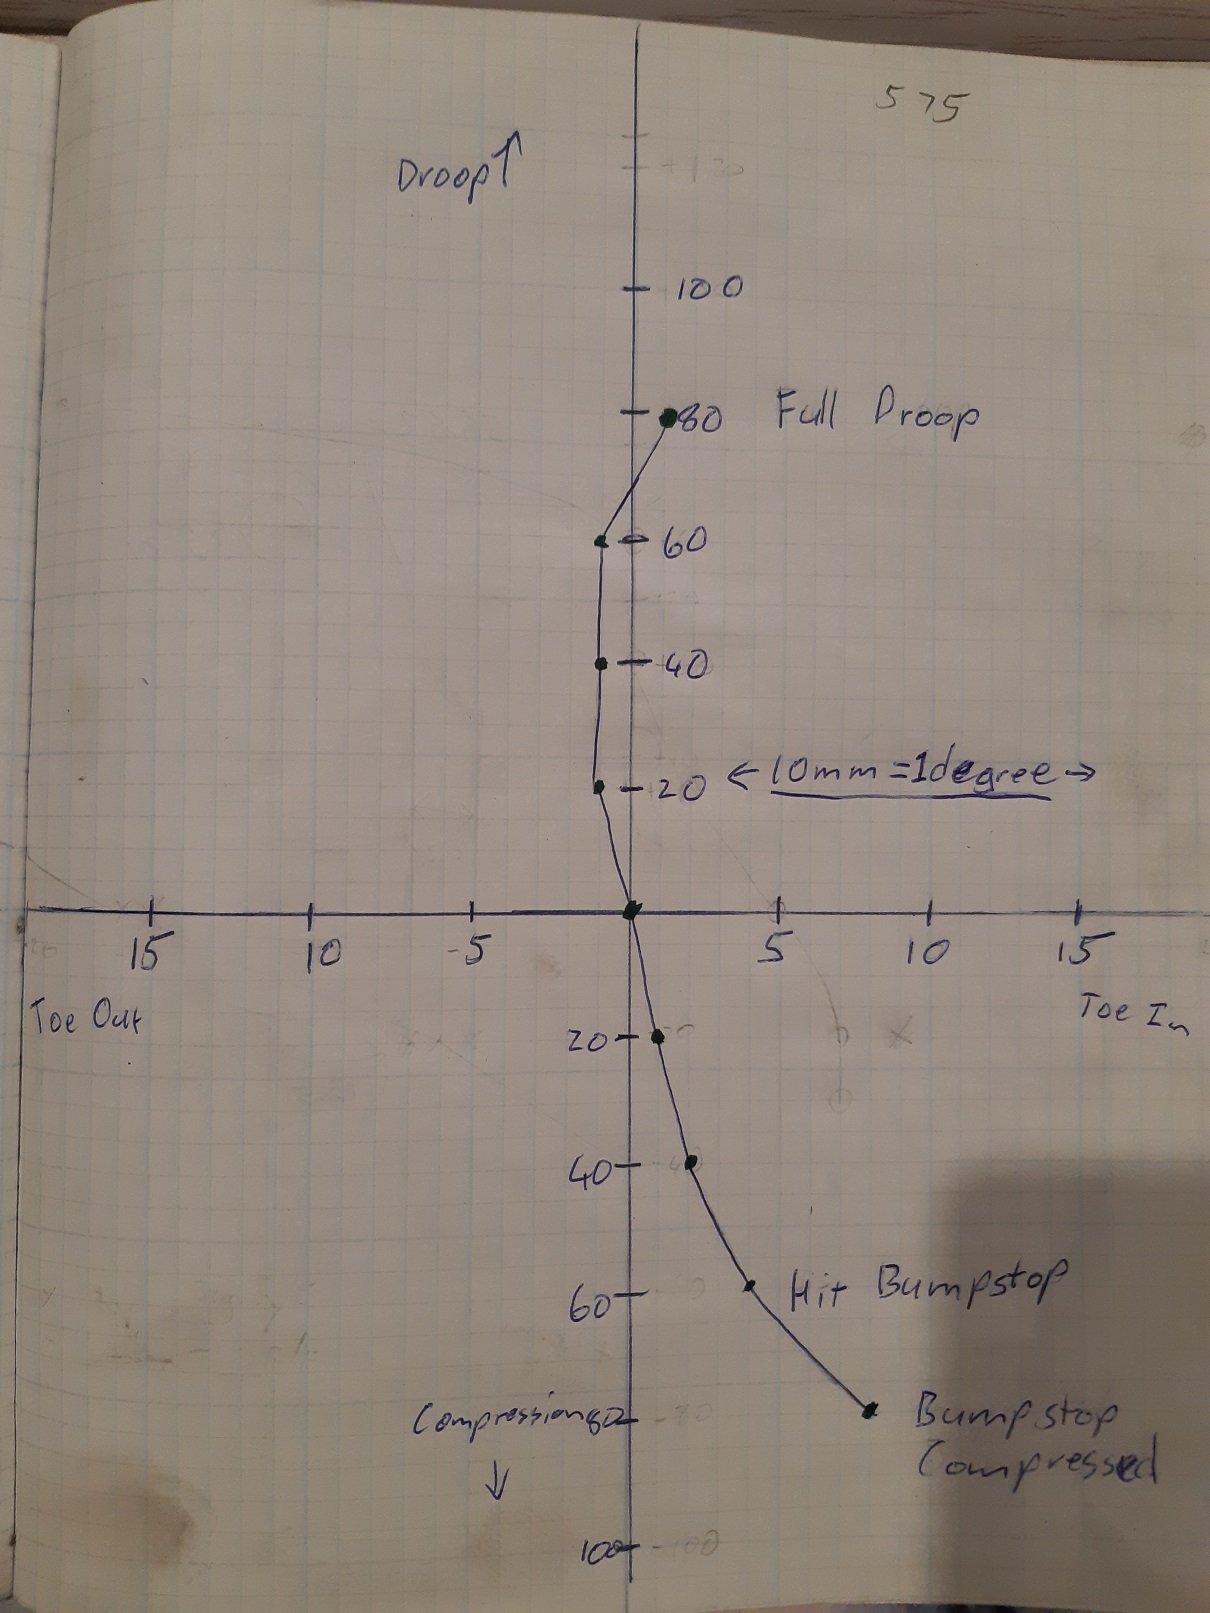
Using my bumpsteer measuring thingamadoodah and fucking around with spacing the tie rod end and rack mounts I found that the tie rod end and the steering arm needed to exist in the same space. So I sacrificed a spare one to modify so I can continue mocking up. I made a jig to hold the end in the right place for welding. Here is the one from the other side to see how far it's moved up. . And totally legit welding. safe as. This is just for mocking up. Once I get the height right for minimal bump steer, I'll mill the final ones out of a block of mild steel and have tapered holes so I can use the factory tie-rod end and not fuck around with rose joints, bolts and spacers. I've been using the LVVTA bumpsteer pdf thing. https://www.lvvta.org.nz/documents/infosheets/LVVTA_Info_04-2010_Bump-steer_Measurement_Background_Information.pdf My measuring thingamadoodah has the points 575mm apart, so each mm of toe is 0.1 degrees. With my hacked steering arm, the tie rod end is mounted below it. This is with a 3mm spacer, it's the best I've got it so far. If I remove the spacer and move the tie-rod end up, the line on the graph indicates the tie rod end is too high. If I have two 3mm spacers, the line says it's too low. I'll have to make some 1mm spacers to see if I can fine tune it further. To flatten out that curve I think the whole tie rod has to be longer, but then I'd need a shorter steering rack.
1 point
-
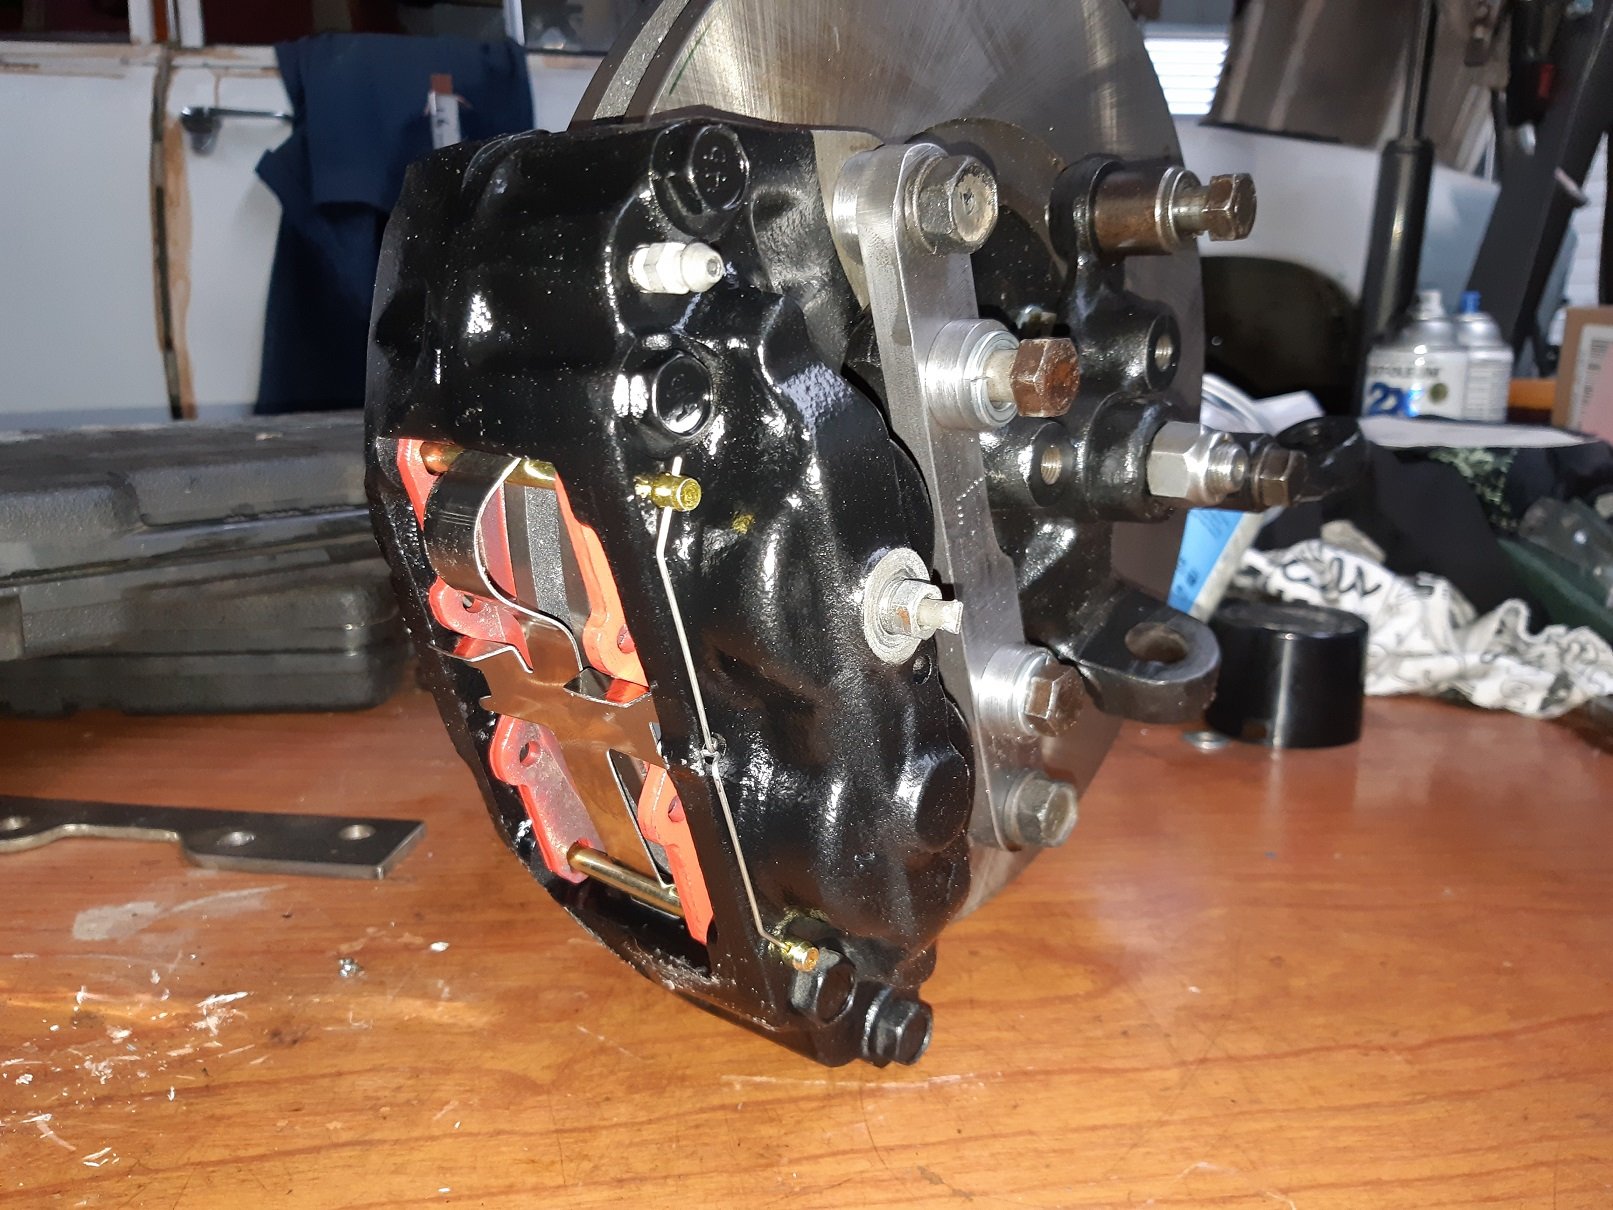
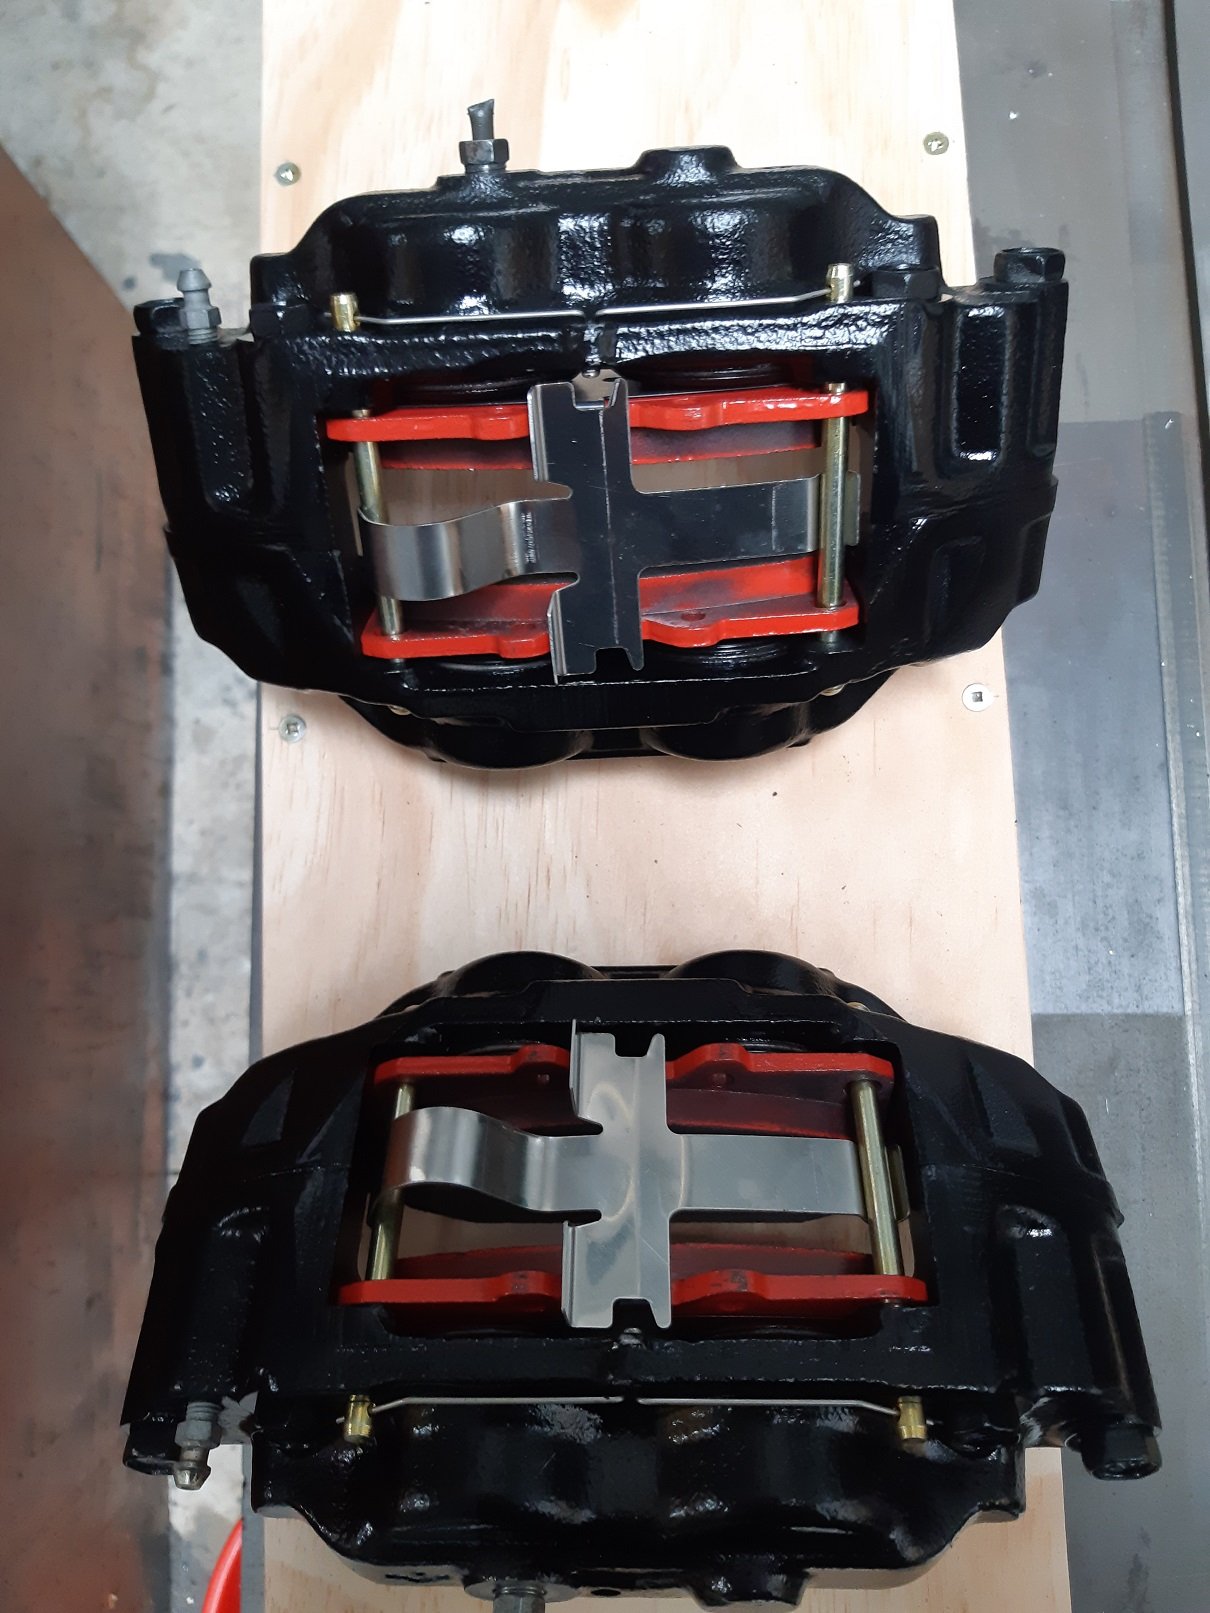
Calipers are rebuilt. I had to use the original retaining spring ring things that hold the seals on as the replacement ones were too short and made the seal bunch up between the ends. I made 3 sets of spacer before I got the thickness right so the disc is in the middle of the calipers. The spacers still have to be tig'ed on and the brackets painted.
1 point
-
I modified my dizzy to sort a similar issue but to do it again I would either buy a pre modified one from Burton or a tuneable 1 from 123ignition.com. The Bluetooth mapable ones look awesome. Mine makes 115hp at the wheels with similar spec to yours but Kent 234 cam and bike carb setup.1 point


.JPG.e540bd1596f6fdb63fb8080d4cc92ad2.JPG)
.JPG.2a04d3b782990aa55c3c402a6053889b.JPG)
.JPG.92f8cd0a725624eb922d949e07adba1a.JPG)
.JPG.c098e1cce08d286ae63a0f5879fbc57d.JPG)
.JPG.d9f5a61712342ba3342e07366885ab52.JPG)
.JPG.54ce56a09d13fd494a7aeaa279e7ed66.JPG)
.JPG.4e09d675a47c270dada7f41303b545e8.JPG)
.JPG.a10a86e177e685d26e26d7bc43f01afd.JPG)
.JPG.4fe1e474ad6a628f6b8a231c7487241d.JPG)
.JPG.f278bcc14c09a49c80620775126b055e.JPG)
.JPG.5227f860244c0e1b931e27b826d1c72a.JPG)


.thumb.jpeg.384ff72c8d2b0ee0d34a7bdedb55bdcf.jpeg)


This leaderboard is set to Auckland/GMT+12:00