
Leaderboard


Popular Content
Showing content with the highest reputation on 12/05/20 in all areas
-
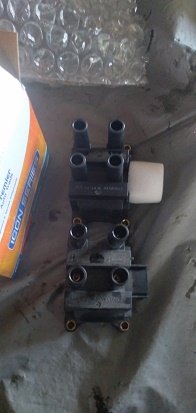
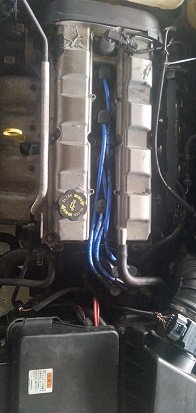
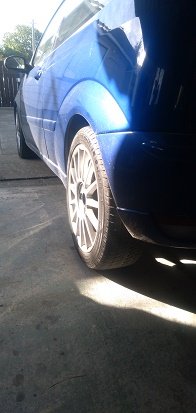
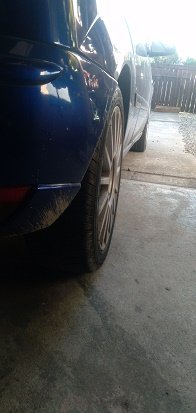
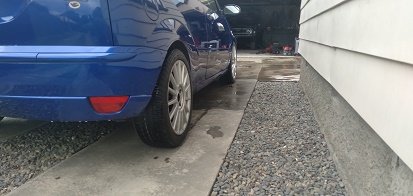
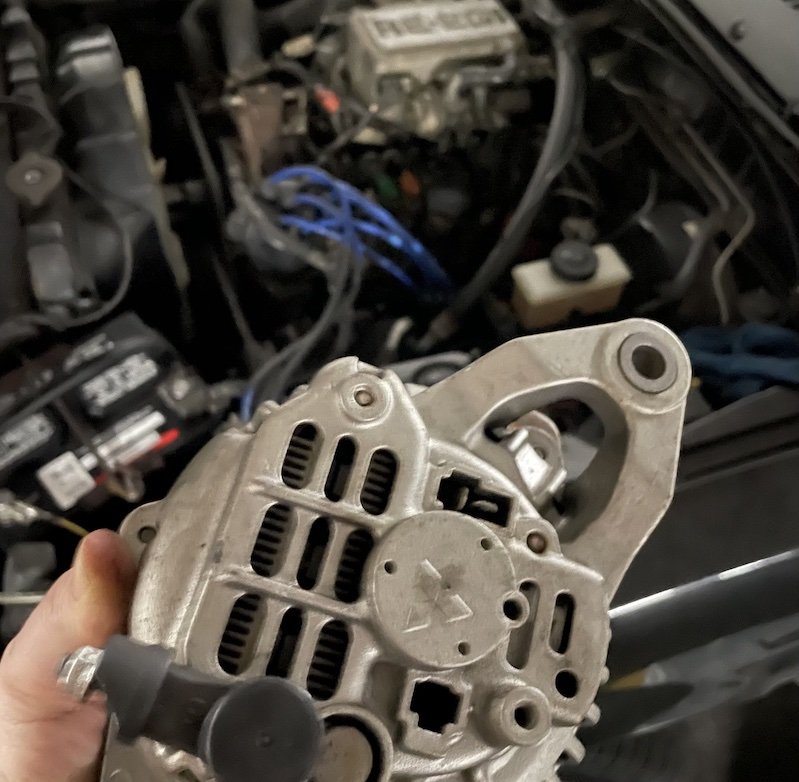
we in the vain of preempting all the problem parts ..i fitted a new coil pack and 8mm leads to go with the new plugs..(the old leads and coil pack hasnt failed YET so i put them in the spare parts box i have under the spare wheel for breakdowns lol) there is a thing that i actually hate and thats the rear wheel tuck ..they should have moved the axle out or gave it wider wheels...the front isnt to bad but i will do something with at somepoint .. as for the rear they have been racing and rallying these things for years so you can get parts and people have figured out interchangeable parts ..so i got a set of axles mounts from a ford puma sent out from the uk and its a bolt on and all the st170 parts bolt onto that and it moves the rear wheels out 20mm each side......much better
 7 points
 -
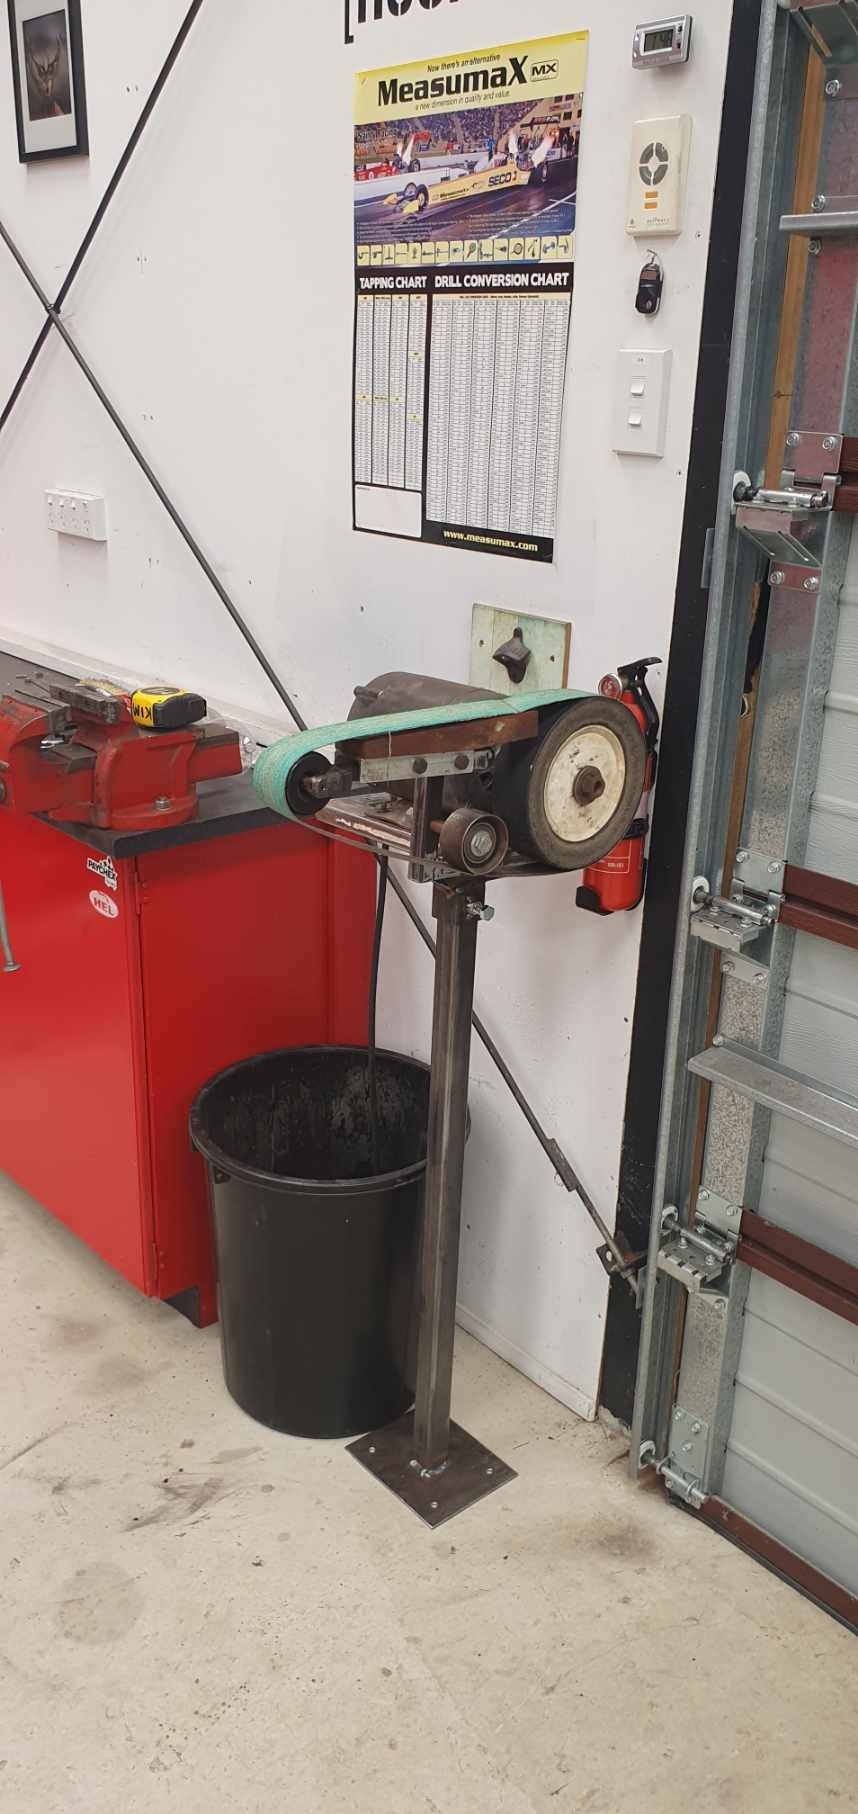
Finished and working great! Just need to bolt it down to the concrete so I can use it without fear of it toppling over.4 points
-
Well the last few days has been a bit emotional and busy. Did the last few tidy up jobs on the housetruck and added a few little features we had always intended to but never got around to (typical..) Main thing we added was a bit of decking on the roof. This serves a few purposes. The black butynol roofing gets fucking hot in summer, too hot to stand on. Not ideal for insulation or bare feet. It also gets a bit grubby = messy feet or shoes marking the floor or carpets. Plus the plywood roof is 12mm which is strong but still springy to walk on between the rafters. The decking is sat on runners above the rafters so now feels solid as. We got rid of the ugly old temporary pop out roof sheets of alloy that we'd put up after fixing the roofs and fitted new thicker shiny alloy with proper edgings. Also added gutters so now the rain wont run down the side of the popouts. So the last few days we emptied out all our stuff and moved it into the mezzanine or the cabin. Quite amazed at how much stuff we had collected and stashed away in the truck! Then a final clean up and moved the truck down into the yard. Ran it up hot and did an oil change. Took a few more pics of it. Here's one with Minky the Micra for scale... Then drove it to its new home. Luckily only 10 minutes away! We had to cut back loads of trees to get it down their driveway. The owners taking heaps of photos as we went. Finally parked it up... It wont stay in this spot for good. The young family that will be moving in are in isolation having just got back to NZ. In two weeks time I'll be popping round to run them through the ins and outs, packing it up for travel and setting it up etc. We'll go for a brief drive too so they can have a feel of what its like to drive. Then we'll set it up in its new home spot proper. But for now that's where it is. Hannah and I had a cup of tea and said bye bye to our reliable, comfortable, safe and cosy home of almost the last 9 years or so... Yes we are sad to see it go because its our home that we built. But also really excited because its another step in life. We can finish the mezzanine now, build a garage, do some other little projects but most exciting is we also get to build another housetruck! We left the truck went to the local cafe/bar and had a pint with local friends - where word throughout the village that we had sold the housetruck was already well out there. Suitably fizzed up on beer we walked home on a warm evening and discussed our next housetruck build... So that is this thread finished. Its been a great journey and I'm sure its entertained a fair few. I'm hoping its inspired many to try out this housing and lifestyle and also been a useful source of ideas, tips, designs and lessons for those who were already building or about to build a housetruck. I'll be back with another thread soon for what will be our 4th housetruck build (excluding a few vans along the way) As always we've learned loads of things and look forward to using the lessons learned and ideas gained for the next build We have both already been checking out the usual places for a suitable truck. Fun times! Alex4 points
-
New here, new to bikes, had a friend mentioned this ride to me and I'm keen. Would make a great maiden voyage for the ct1103 points
-
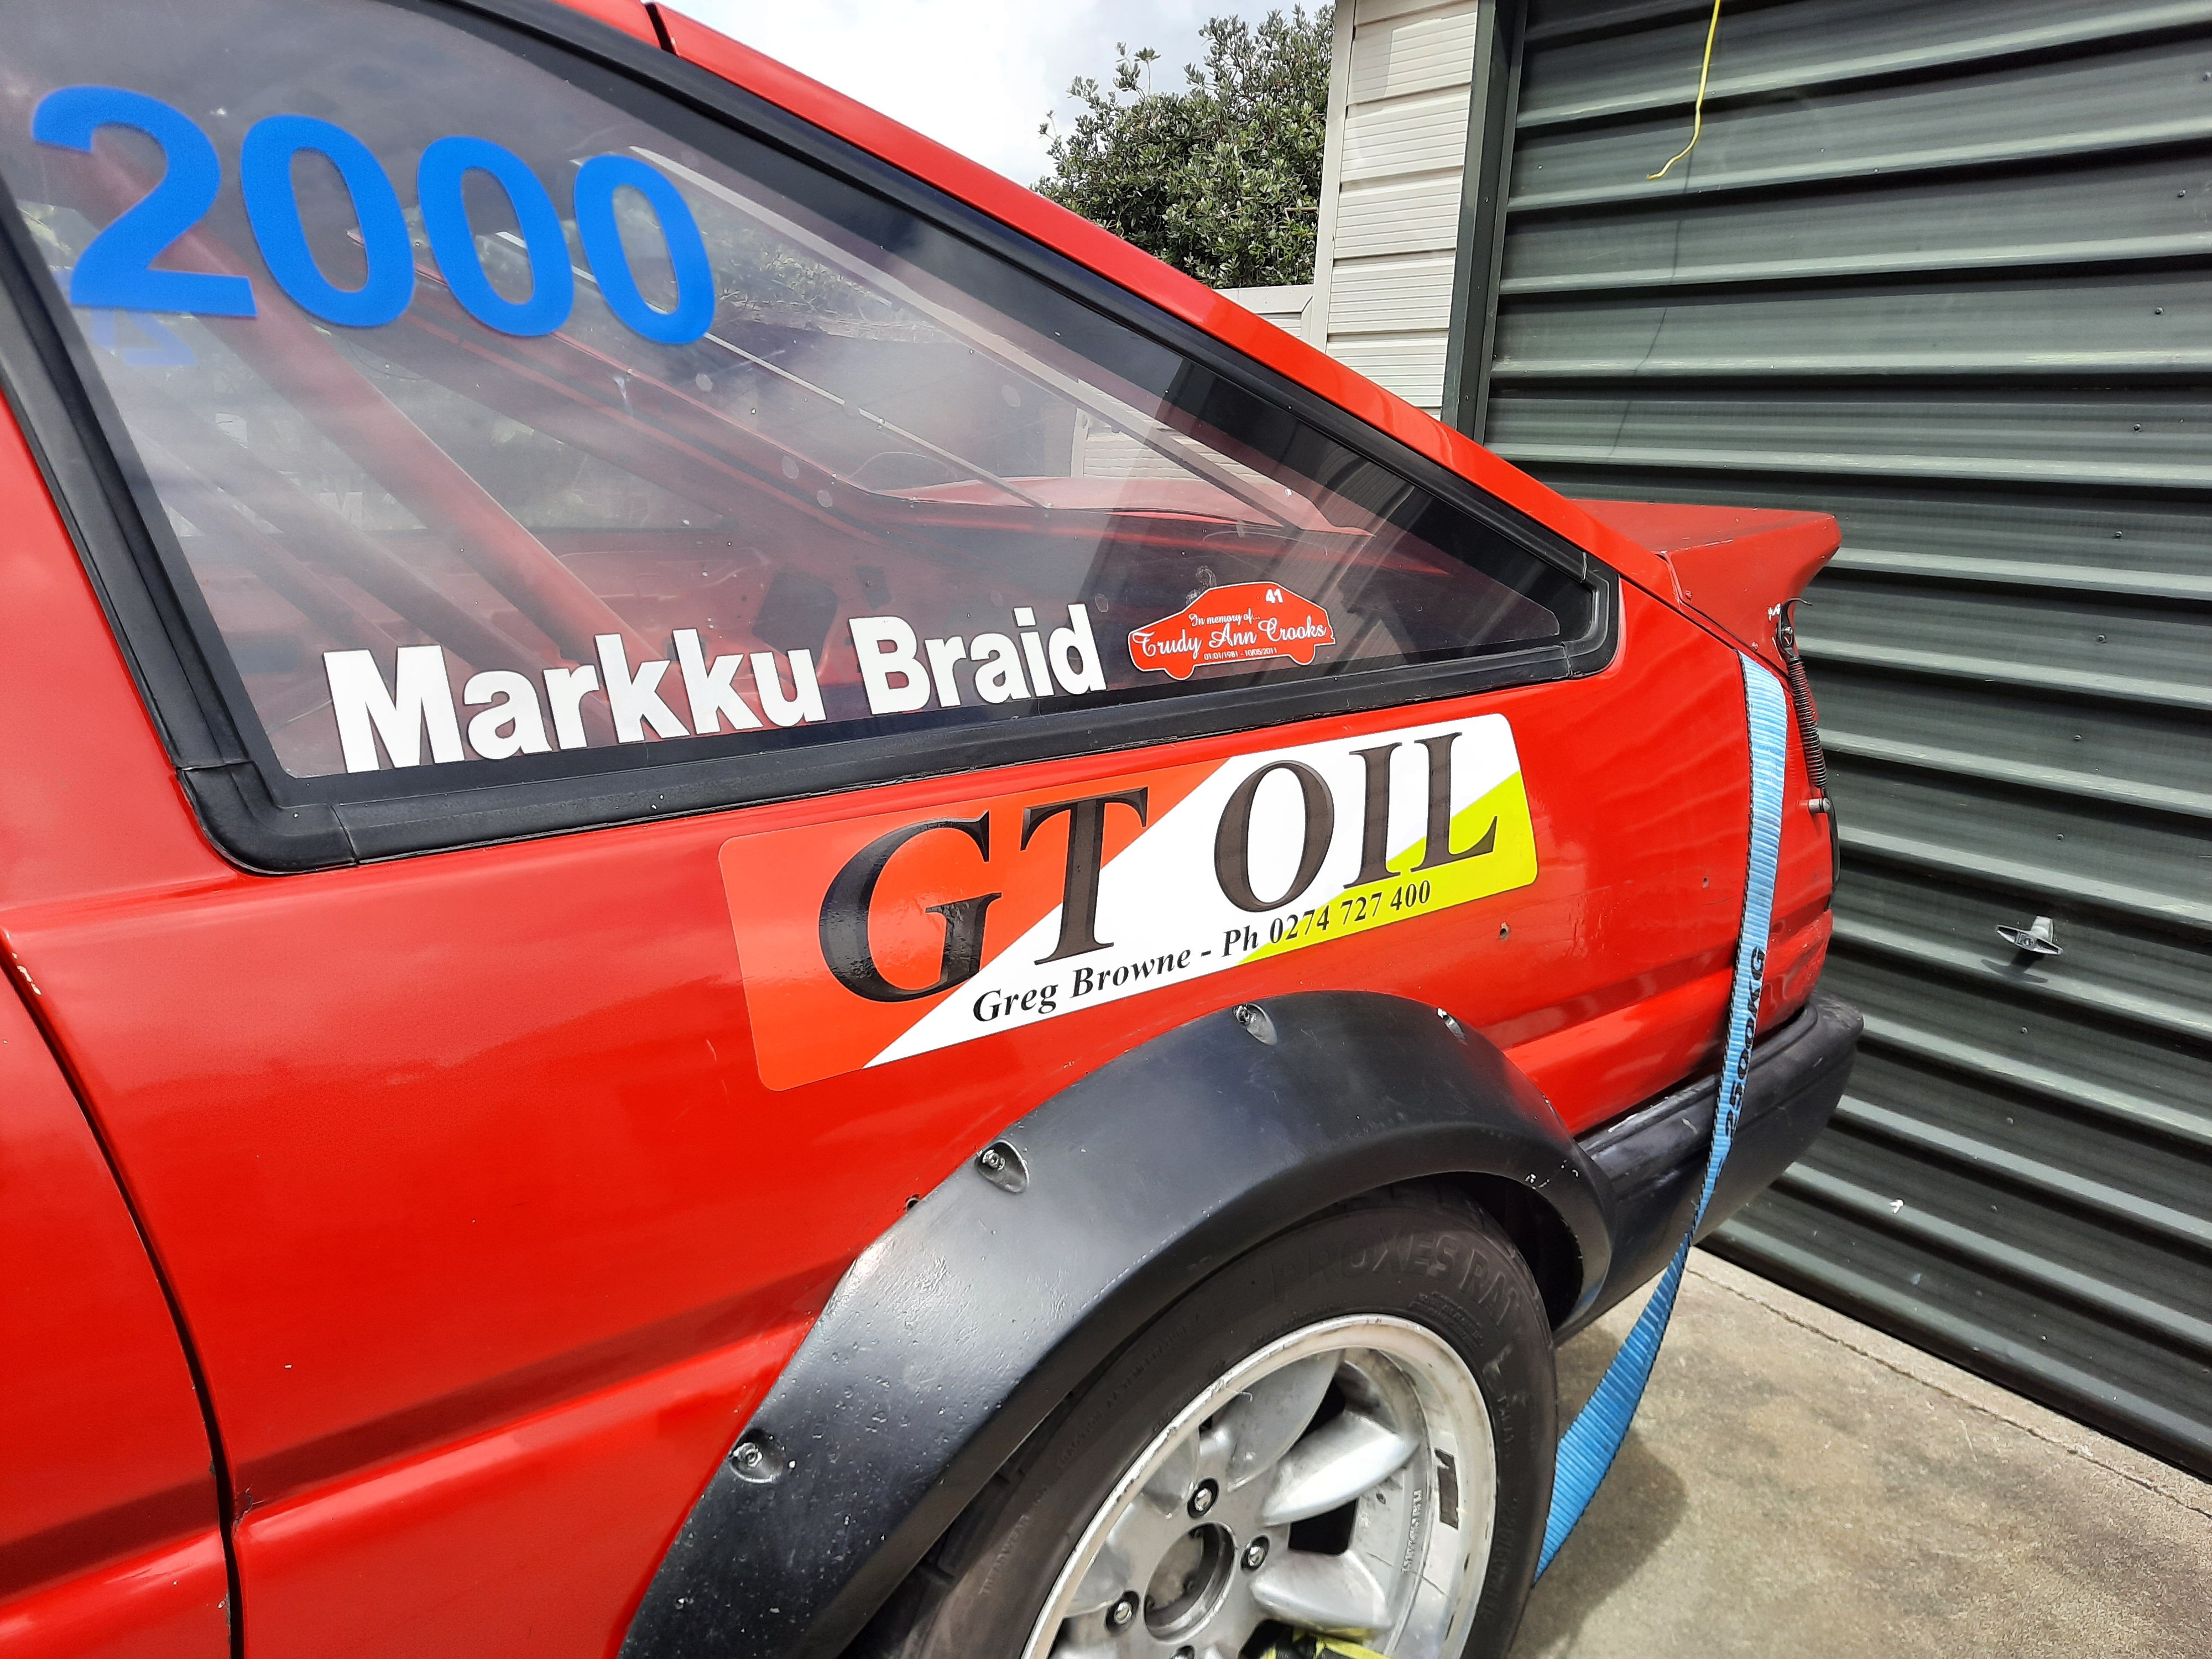
Threw a few stickers at it today. Coresteel Manawatu, Tremaine Energy Centre and GT Oil have all helped me out on this journey. I'm super thankful for their assistance.
3 points
-
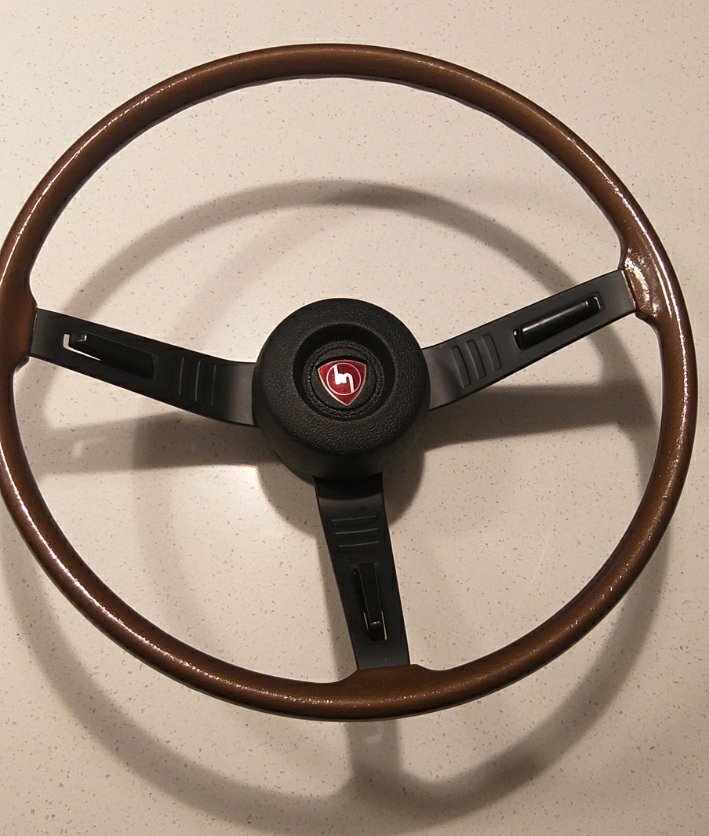
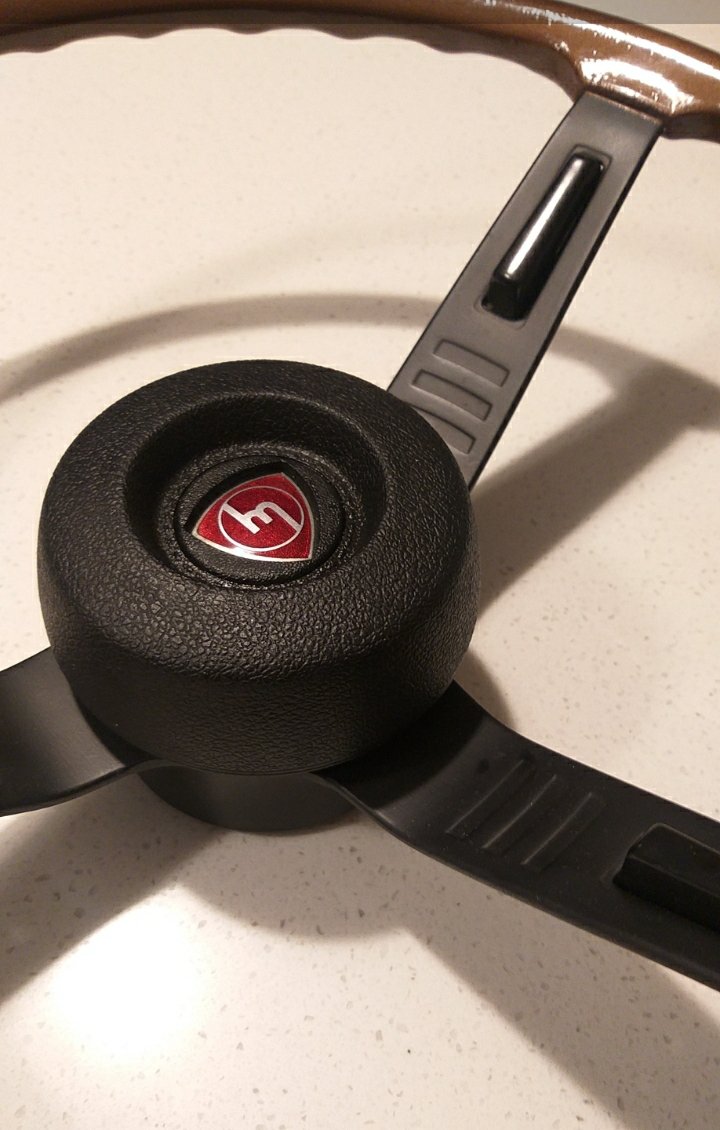
Tiny update, but one nevertheless Painted up my $250 rx2 steering wheel, it was sun faded and cracked, filled the cracks with resin. Colour not quite the same as original, but I dont care, beats paying $2k like others do, painted the gear knob to match, and got a repro shift pattern badge to suit.
2 points
-
This is much better, but it kind of reminds me of my grandad's home made belt driven table saw and home made belt driven wood lathe. Both in wooden frames. They both worked fine, but were fucking terrifying.2 points
-
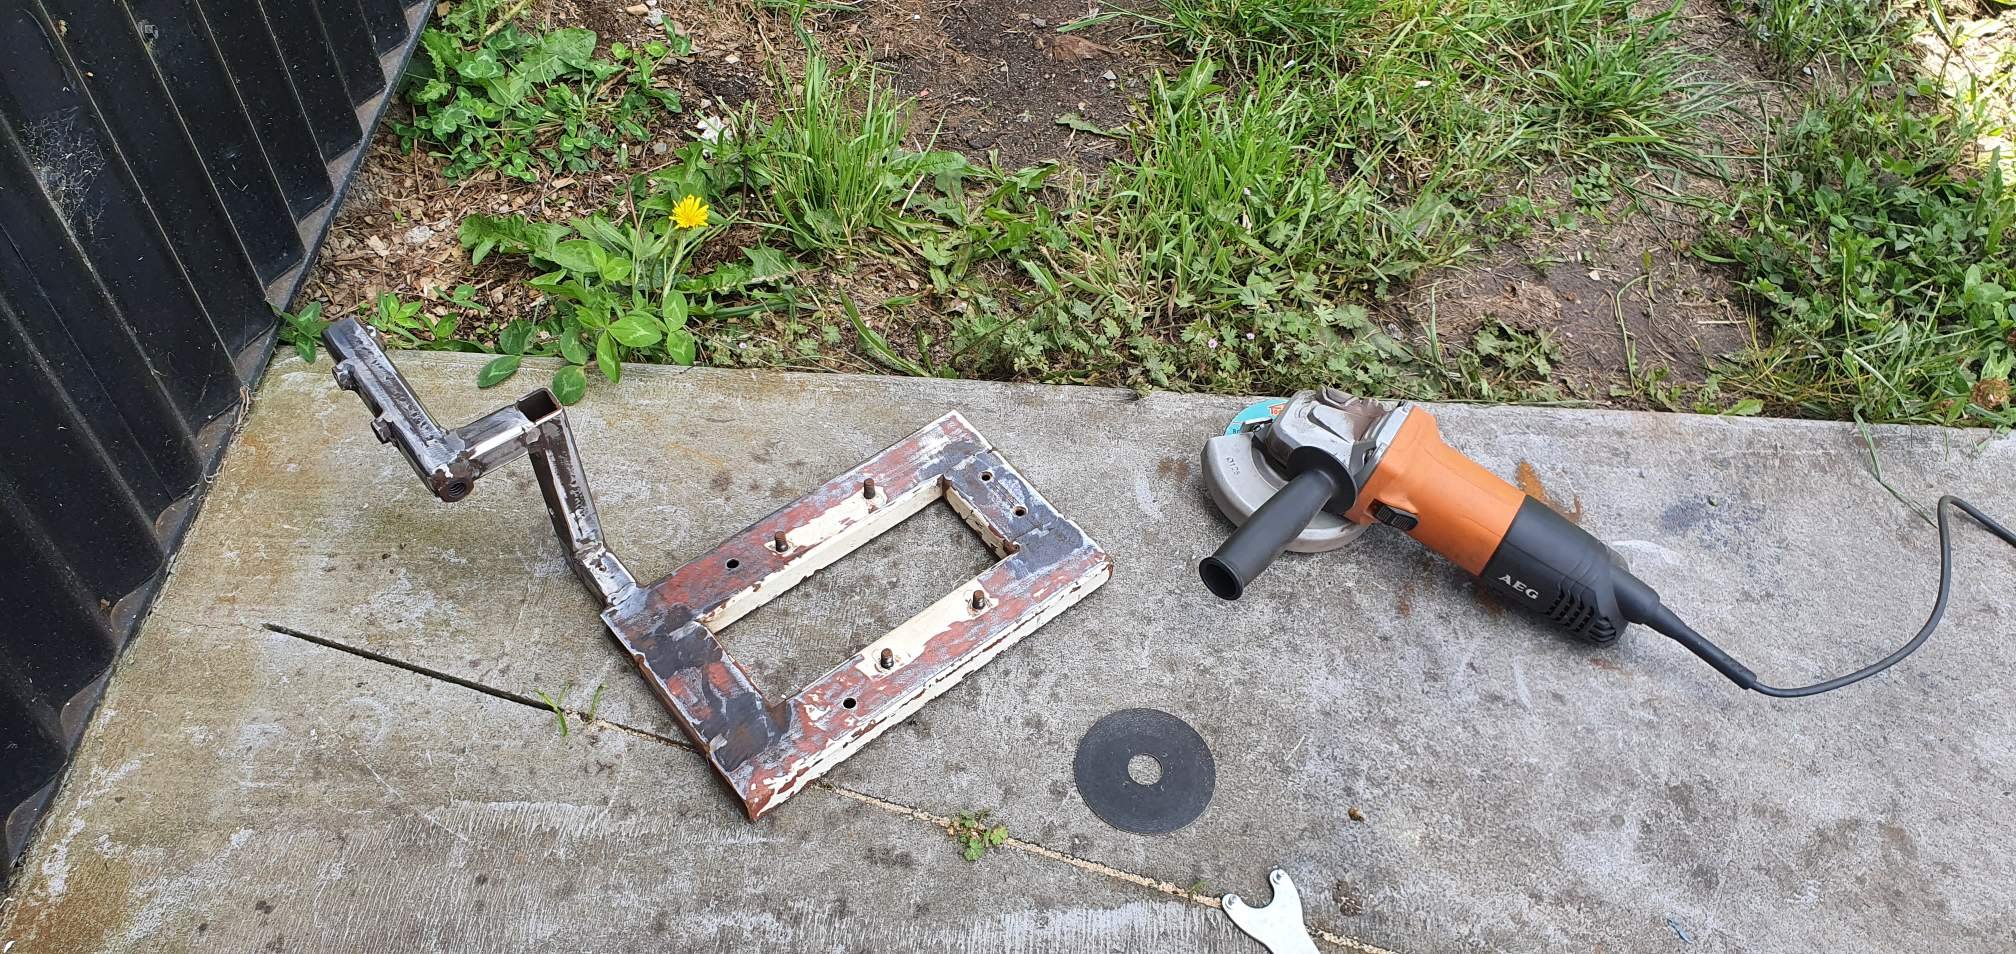
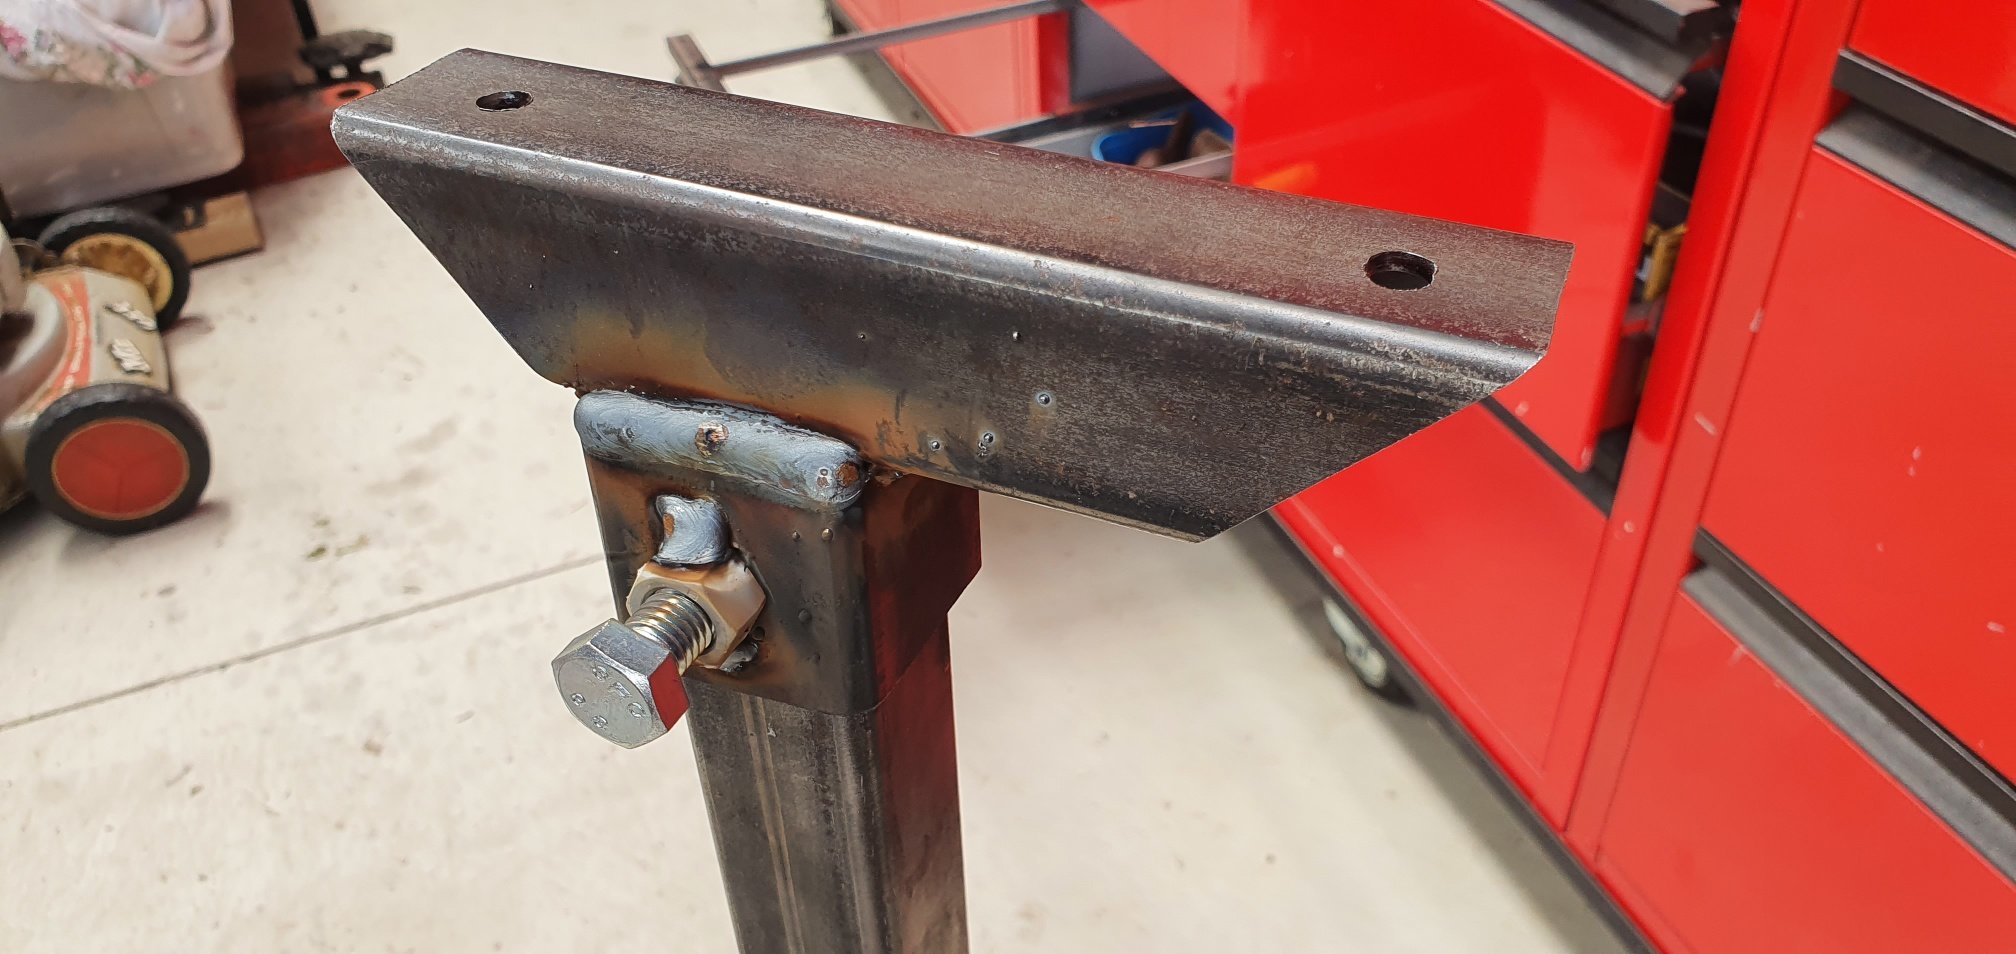
Not finished...but you get the idea. I've made it so the top can move around in 90° increments, so you can use it in whatever position you need. Left, right, big wheel or little wheel etc...Paint to come next.
2 points
-
you know youre probably right there, i was only going 16mm cause thats what the guy at saeco measured, but id better buy a battery for my verniers (or get some OG ones) and check for myself. id be much less surprised if it was 5/8ths be a bunch more options at 5/8ths too1 point
-
Isn't it a type of angular bearing? Its much like a oldschool wheel bearing in a pushbike. So if you machine up or find a thin shim to go between the end of the column tube and the bearing flange you'll squeeze the bearing that bit tighter to take up the slack.1 point
-
As per the description: I said it rode well. It did on tarmac. But Blake says it was crap on Gravel. NEVER TRUST THE MEDIA MATE. 6 gears was lush though.1 point
-
This guys a fucking legend in his field1 point
-
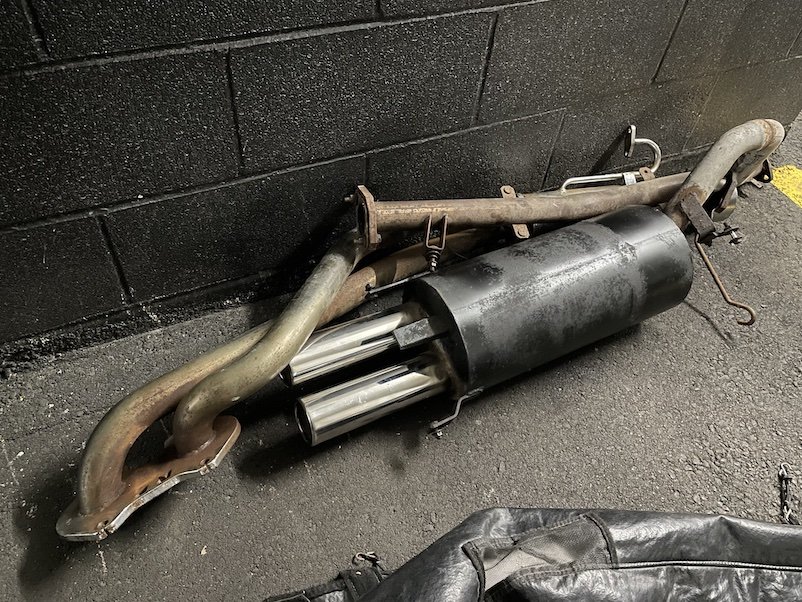
End result was good other than it drooping a bit during welding. Turns out although the muffler looks cool it sounds like a TRX350 ie shit, so will be getting a nice small stainless one from overseas long boi air filter sorted and started playing around with bag positioning, wanted to get them as far forward as possible bent up some 16mm tube in my little bender that i got specifically for making pannier racks Buzzed them up with my poo MIG then dropped at powdercoaters added a wee tool box that i picked up from an old bike shop selling off some shit. fits a kids pencil case full of tools perfectly. Took for a test ride, it ran rich as fuck, the clutch slipped like crazy and the tail light fell off. took a day off before the ride and pulled the clutch out and scuffed the new steels, adde some HD springs and put some preload on them with some 1.4mm washers. Rich running condition was from me not getting the carb angle quite right, so cut and had mitch re weld the inlet manifold to get it back to the factory angle, then riveted the tail light on and jobs good. I got 28km up and down my street of shakedown while trying to jet the thing right, never seen gravel before and all on a brand new engine. Sounds like time for a 600km gravel ride to me She actually worked a treat. no issues, took it easy on the revs on the first day to run it in, did a drunken oil change at 1am the next evening / morning then sent it for the remaining 2 days. engine went swell. Bike handled like a bucket of shit though, really heavy in the steering and very skittery on gravel, hard to lean over and just wanted to stand itself up all the time. im going to ditch the 400-18 on the rear and go to a 350-18, this should help some of the rubbing issues. going to ditch the 19" front rim and 350-19 front tyre, i think this just had too much rotational mass and was what made it hard to get over. will go to a 300-18 set up on the front, hopefully the mBike boys can get me one in. Fingers crossed I get those things sorted for the molesworth ride1 point
-
got bloody busy trying to get this thing finished in time so didnt do any updates, might as well fill ya'll in now. So i went to put the engine back together and noticed the little end of the rod and gudgeon were toast. Rather than do down the rabitt hole of getting a new rod i took the crank to my local machine shop and for a mere $50 they honed out the little end and the piston, then machined an oversized gudgeon pin and she was all hoki mai. That meant I could get stick into throwing it all together. When doing so I also noticed the gear shift spline was coozed, so ordered a new one through anaconda ex japan that was going to turn up 3 days before leaving for east cape, heeeeeaps of time. Aliexpress LED looks lightly out of place on a classic styled bike but jeeebus does she throw some lumens. Resident palmy GC matt cut me out some exhaust flanges so I could make a sweet full stainless pipe and get mitch to tig it all up. Threw the engine in just wihtout the right side cover and clutch as needed to wait for gear shift arm/spline to turn up for that. stocked with how the black come up Rolled her out for some sunbathing I tried a side number plate mount but it ust wasnt gunna work with panniers so ended up going off the rear guard This jigsaw puzzle took a while Alloy taped it so I could drop it around to mitch to buzz up1 point
-
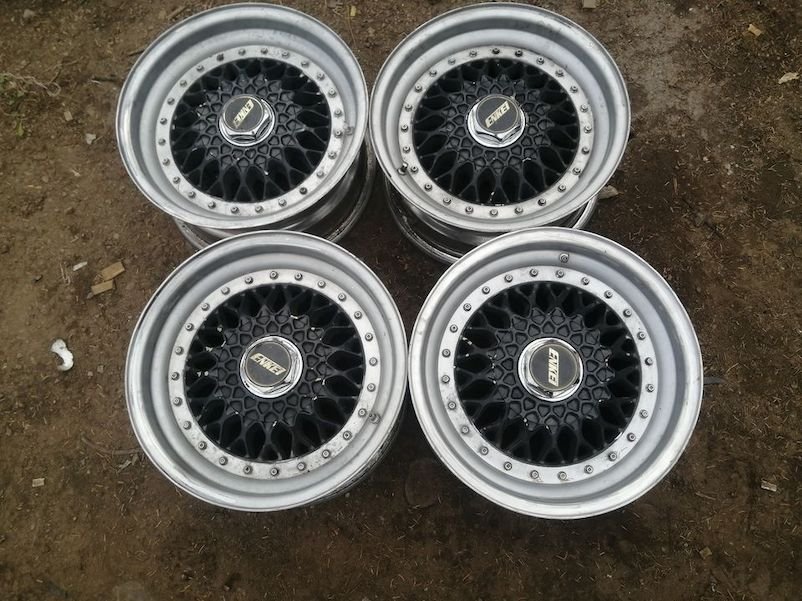
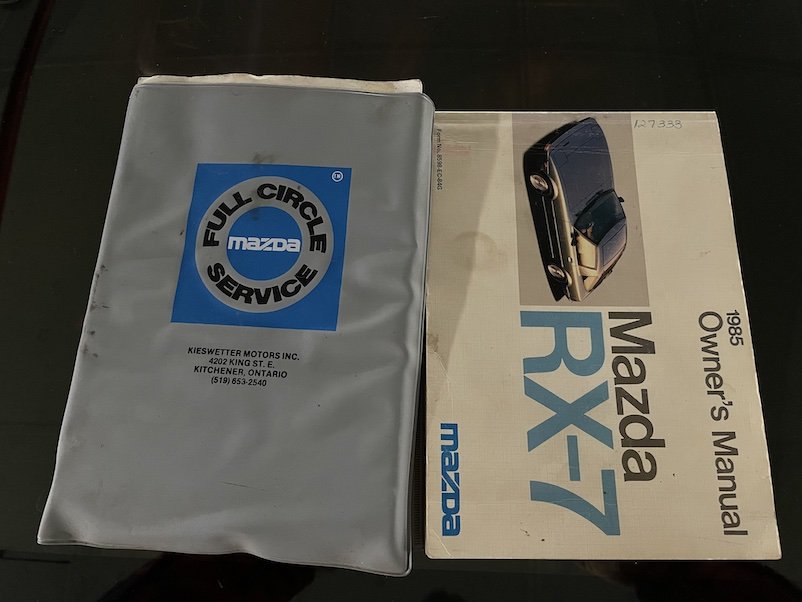
** Discussion https://oldschool.co.nz/index.php?/topic/74793-helium-elbows-magical-rx-7-fb/ ** As 3-4 months of winter snow is coming up in just a few weeks I'm going to take it off the road and do a bit of a refresh. It needs a bit of a tidy up body wise as there is some faded/crazed paint on the passenger guard and door, and some little bits of surface rust here and there to tend to. I've salvaged the Racing Beat Road Race header and Power Pulse pre-silencer and main muffler from the parts car And picked up some Enkei EK98 15x7 -3 wheels which could do with a bit of a tidy up. The lips have been painted silver and I want to take them back to polished metal. Not keen on the black centres either, looking to go a metallic silver or bronzey/gunmetal. Also found the original owner's manual
1 point
-
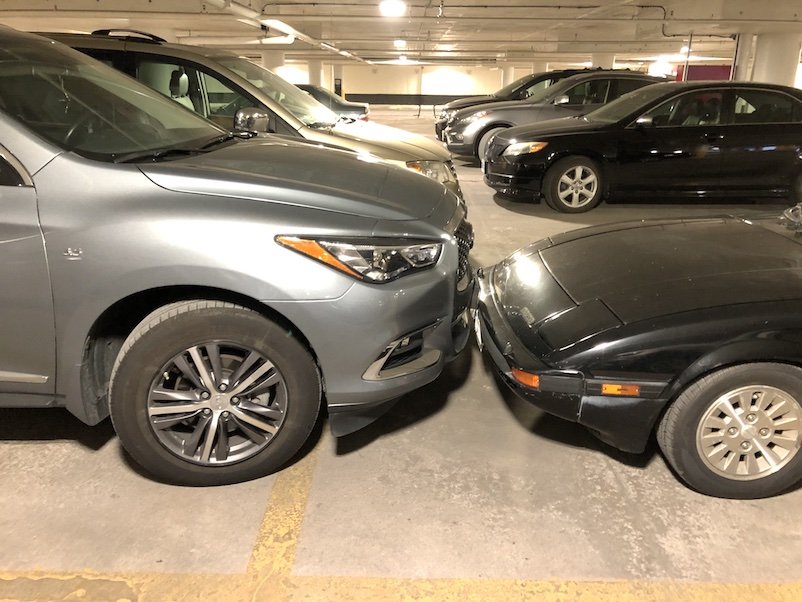
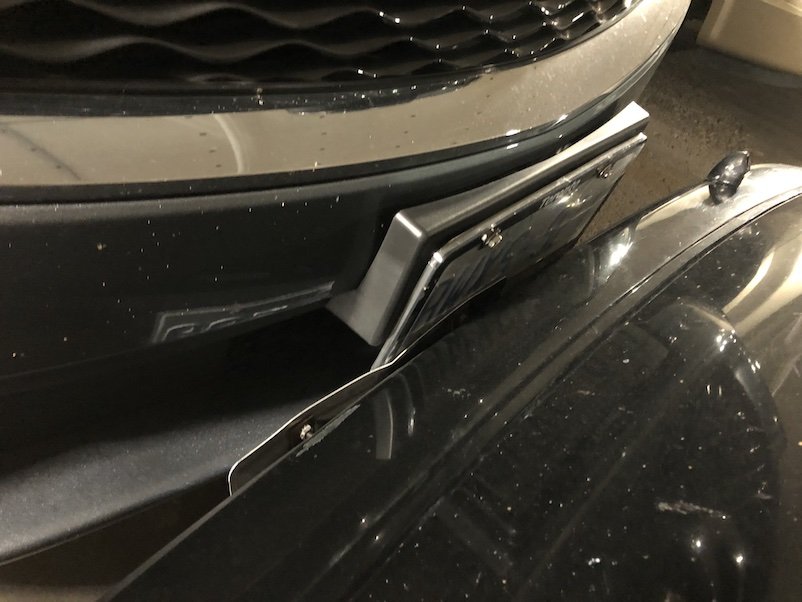
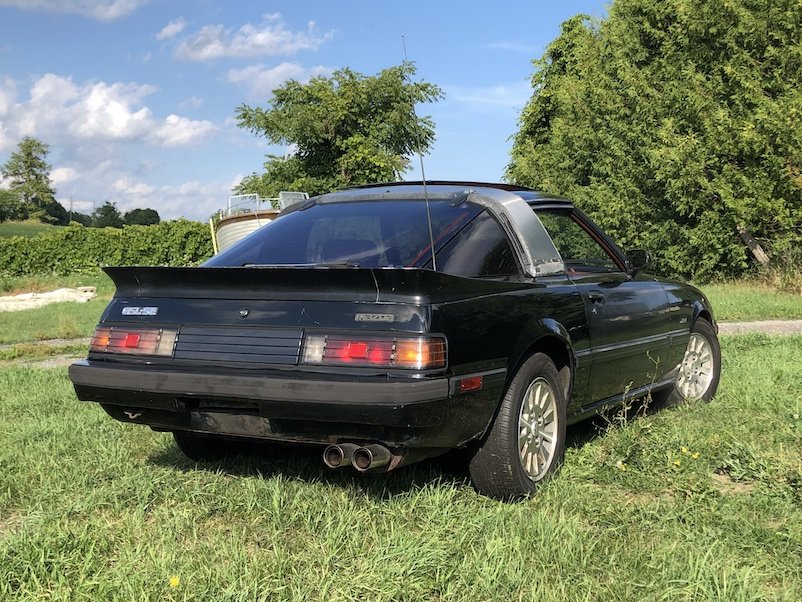
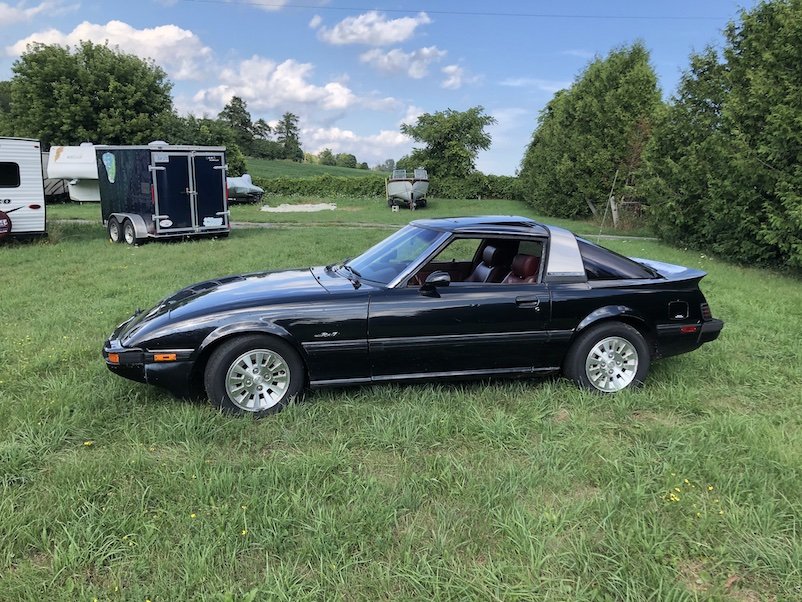
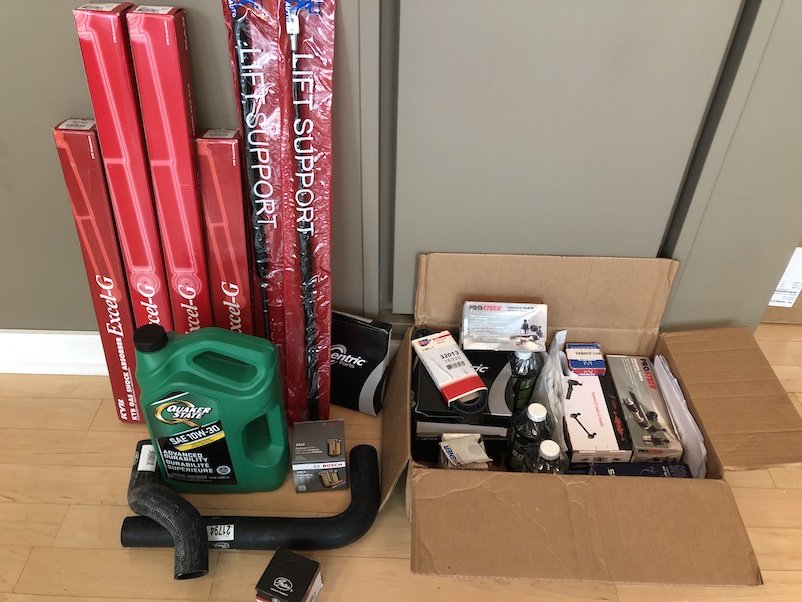
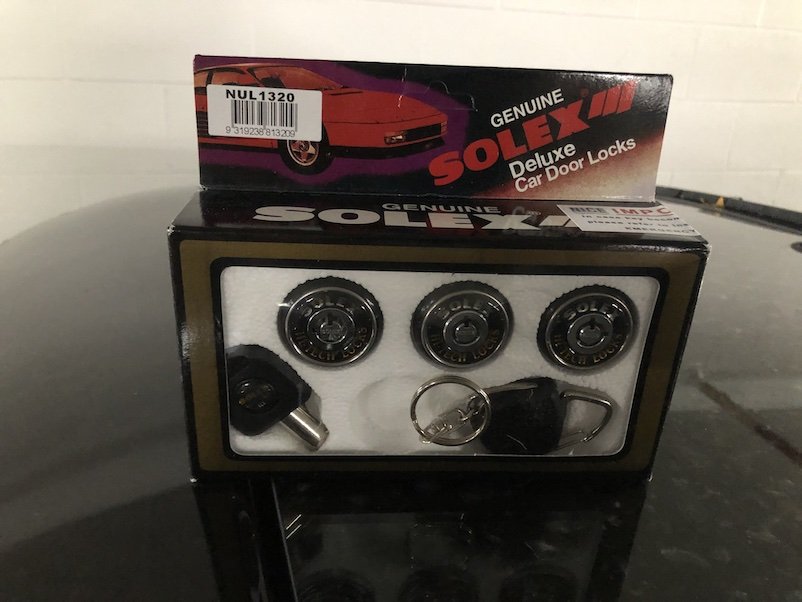
Just a small update - not long after getting it I put it through the Ontario equivalent of a WOF, the "Safety Check" which it passed not needing much. With new plates (old owner takes their plates off) and ridiculously expensive mandatory insurance it was back on the road. It's first legal trip was to the supermarket, where someone in their oversized Datsun prompted used my bumper (and 2 day old fresh plate) as a parking spot. I now have a dashcam & tyre valve stem remover kept in my glovebox for these times. Bought many a box of service items from RockAuto And some Solex locks from 'straya maaaate because the original lock barrels can be opened with almost any key and it has keyless entry anyway. Also had my first break down, can you spot the problem? ** Discussion https://oldschool.co.nz/index.php?/topic/74793-helium-elbows-magical-rx-7-fb/ **
1 point
-
Regarding pimp my disability... Could be a great interim/future 2 stroke upgrade...1 point
-
and yip, then i painted it. now got the back of the boot lid and the boot seal area to finish and i can start priming the outside. 2020-11-17_08-09-25 by sheepers, on Flickr 2020-11-17_08-09-18 by sheepers, on Flickr 2020-11-17_08-09-11 by sheepers, on Flickr1 point
-
Wow. It been six years since I last posted in this thread. I see it still has some missing photos I need to sort out at some point. Bloody photobucket. Anyway. Update time. This just happened... That's a new fresh legal stamp of approval stating that its safe to take our house out for some hoons. We just put it through a COF test because we have sold the housetruck recently to a nice local family. Wow. So much to take in. Suddenly things got very busy around our place! But I better back track to a while back with some various bits of work we did to improve the truck... In December 2018 we had a little leak from one of the skylights. Water was creeping through a spot, created initially by condensation on the skylight and had rotted the plywood roof around that area. It could possibly have been a local fix but we decided to take off the entire roof on that side, replace the ply, get rid of one skylight and make a new improved design with double glazing. A proper fix. It was hot and sunny,materials cheap and a satisfying thing to fix. Photos... Old design skylights looking a bit tatty... Rotten ply... rip it down starting with the butynol roofing... Open air bedroom... Lunchtime... new ply, new Butynol... New roof. New improved skylight yet to be built and fitted. Not got a photo of that but will get some. Was actually a pretty easy job- made better by sunshine, music and drugs. This dates the photo. Imp race car, Viva wagon. But check out that centre garden and compare it to the pics from when we first parked the truck up here 4 years previous to this pic... We also re-roofed both popouts because the drains that used to block with leaves when parked up in the Nelson campground had created some issues in the corners. New improved roofs and covered in alloy (for now- but it looks unfinished so we have some baby iron to fit before passing the truck over to its new owners) I didn't take too many photos- It was a job we just got stuck into. Here's what I did take. Luckily all the steel work was fine as. Some new wood, new ply and all good. Learned a lesson not to fuck about trying to make hidden drains! Keep it simple and easy to keep clean! Fast fowarding on to this year. We had chosen a while back to sell this housetruck and put the money towards building another. A few reasons why... 1: this truck layout didn't suit the aspect of our land. It never will. Stuff is in the wrong place. The bedroom at the front facing north for all day sun when we aint in there is silly. Turning it around doesn't help because that the sheltered doorway is in full blast of the main bad weather directions we get in our valley. 2: we are not using all of the truck to its full- the spare room is just filled with junk. The bike box is wasted not being used. The truck is too big in the wrong ways for us two. 3: I want to build another housetruck. This is probably the main reason really. But the next truck will be designed around our land and be removable (on legs) so we can use the truck when ever we want (cof and other costs considered). But yeah. I've got itchy housetruck building fingers. So much learned, so many little ideas. No pressure this time either because we have the cabin and the (being built right now) mezzanine floor to live in. Find the right truck and have fun. So a few people heard it was for sale, some came round and kicked its tyres and absorbed huge amounts of time but in the end it has gone to a young local family- who's parents had them growing up in a housetruck. Lovely people, staying local = happy sale. Its a great truck, they got a great deal and we are less stressed by keeping it local with friends. We decided we would put it through a cof even though there is a good chance it'll be parked up again for a few years. But it means everyone knows what the deal is and the condition. A few jobs in the last week after booking it in for its test. Clean some stuff, source and fit some seatbelts because its now registered as a motorhome and then test drive it... Just having a little look to see if its engine would fit the imp.... Such a lovely simple clean engine... Luckily I have been really strict on a regular routine of hopping in the cab every so often and pumping the brakes etc. Occasional starts on hot days when the air is dry and rock the truck on the clutch too. It all worked so nice. One rear brake was binding slightly - has been a bit tightly adjusted ever since I had fixed that leaky hub seal year ago. I backed that off and we took it down to the beach... Kevin joined us... We broke some rules... Hannah had a drive in the Abel Tasman carpark. She has not driven a truck since she owned her Bedford TK in Blighty. Happy Hannah wants to get her NZ truck license... I did some laps... We got home, gave it a really good clean, checked all the other bits and bobs. Today I drove it to Motueka VTNZ truck testing station where it was booked in... The fella was super nice, liked the truck. We went for lunch and came back to a freshly cof'd truck. It needed an orange bulb as one indicator cover is faded almost white in the harsh Nelson sun and he's advised I tighten the bearings on one side of the rear axle (the opposite side to that what I had worked on when doing the brakes way way back in 2012) We drove home happy but sad. Its been a great truck to us. Happy its going to a good home but still sad. Excited though...soon we can start hunting for another truck to buy!!! We had a beer to celebrate. Much work to do now- a few tidy up jobs on the truck and we have to finish the mezzanine to live in once the truck leaves our place at the ned of November! I'll have a few ideas to put forward for the next build. Some little designs that I would like to get others to view and discuss . Many minds etc etc. We will have the time to really make something sweet. I'm keen on another Hino - I would love a 4wd like our firetruck and have already been asking about via the various channels within Fenz (fire and emergency NZ - if you've not heard of that) plus there's a sweet classic truck down south I fancy. Hmmmmmmm.... Next housetruck build will be shorter in length, have a one sided full length pop out that extends at least 1.5 m, a bedroom over the cab but that raises up high for full standing height and slide back roof for star gazing. Open plan living area at the back with roll around walls for inside outside flow onto a verandah (when this truck is gone we will be landscaping the entire area its currently parked up on) Bloody excited really1 point
-
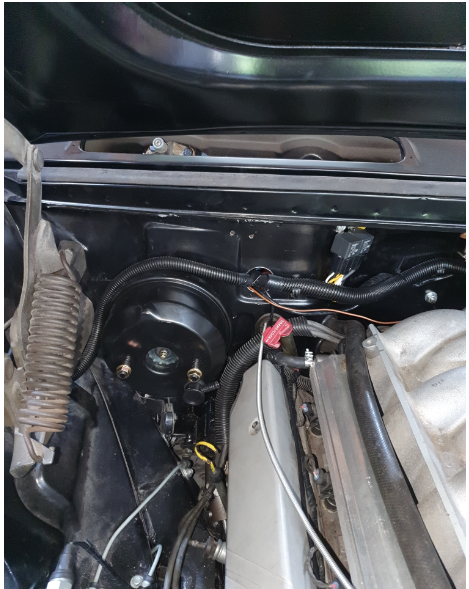
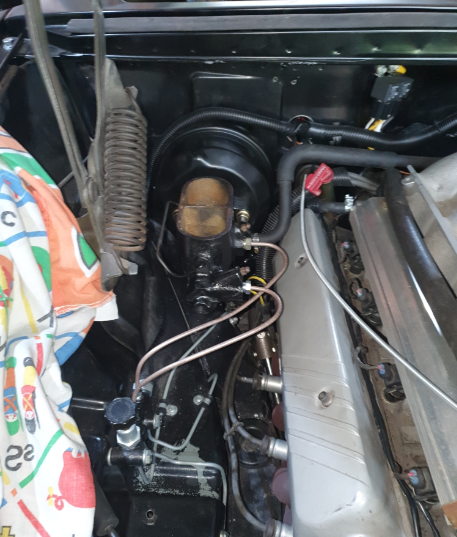
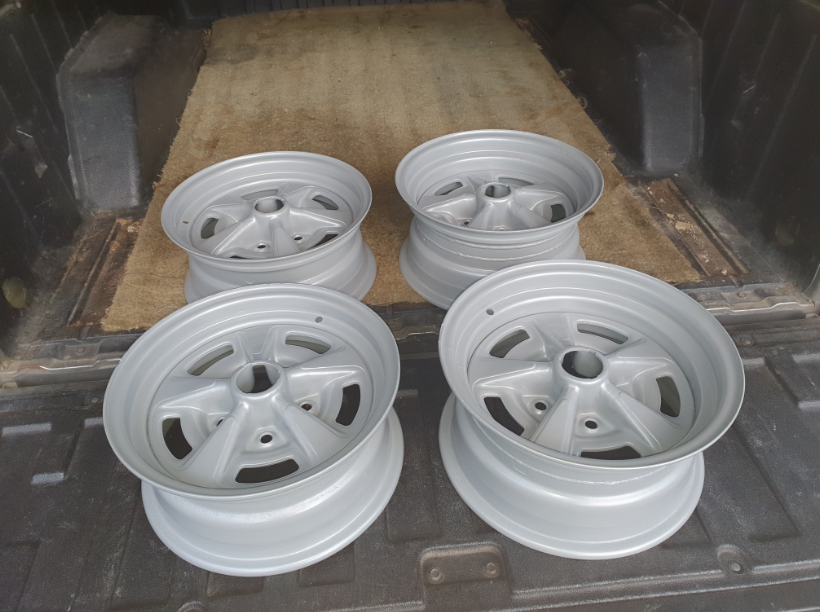
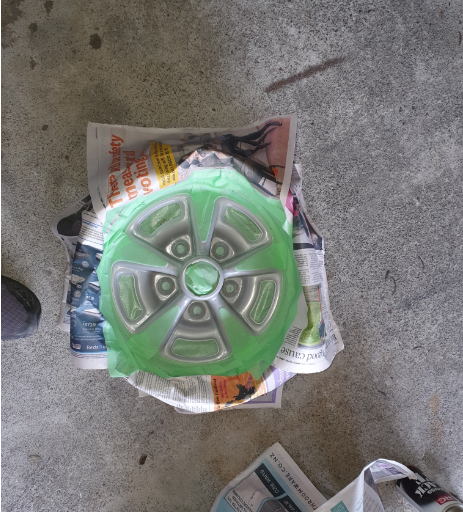
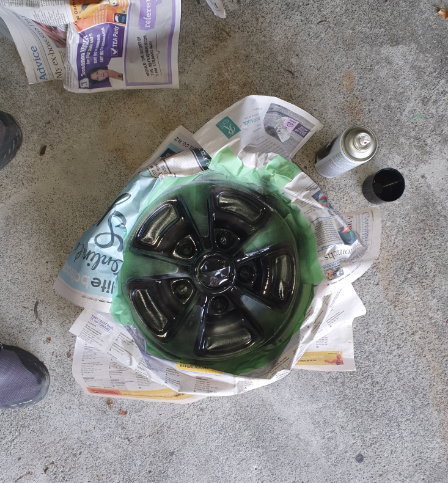
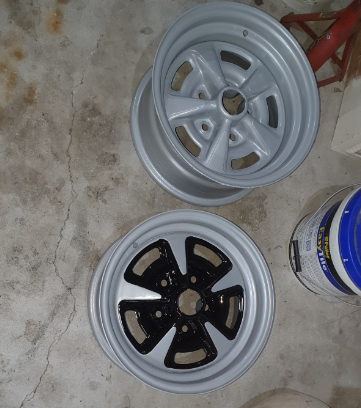
A long overdue up date. I stole the master cylinder off the firebird, which was stuffed from having sat for nearly 3 years. Off to Sterling Brake and Clutch for a rebuild, the 3rd time in 25 years. Here is the booster mounted. And then with the master cylinder and brake lines. The brake lines were made out of a copper alloy tube that the brake guys said is all good for cert and way easier than steel to work with. They were not wrong. The brakes work really well. First hard stop had my 16 year old son complaining that I was going to put him through the windscreen. Had a couple of lock the brake test on the road outside the local school one weekend. Got the serious evils from the lady across the road. I had 2 of my HQ rostyle wheels widened by the steel surgeon and then all 4 powder coated. Masking for the painting. This is pig of a job and took about an hour per wheel. I have done both the fronts and one of the back wheels. Paint Finished I'm pretty happy with the final result. I bought new chrome wheel nuts and cleaned up the centre caps. Only have 3 so if anyone has one floating around I will gladly swap for some cash.
1 point
-
The paint will still be on the outside, no matter which rim you place it on. That's how asymmetric tyres work. I'd probably lean towards tyre black or a sand with some fine sand paper. can't be any worse than scuffing a tyre on a curb which doesn't seem to affect them?1 point


This leaderboard is set to Auckland/GMT+12:00