
Leaderboard


Popular Content
Showing content with the highest reputation on 11/12/20 in all areas
-
Dads DakaRGV is pretty much ready to go now
 13 points
 -
Fitting up well. Inserts and removable pieces are looking good. Its going to take a bit of bog before paint and a lot of sanding afterwards.10 points
-
Almost 2 years ago a chassis dyno popped up for sale on TradeMe with a starting price of 15k - I was immediately interested (after looking for quite some time) - so I called the owner to get some information on it. It turned out to be an old Vane 4000 bed with a Telma cc130 retarder, which had been upgraded to modern DTec data acquisition and brake control. Sweet! After talking to the seller for a while I got the impression it was rather traction limited with its smooth, small diameter rollers. It also sounded like the DTec wasn't that great at steady state retarder control. I threw in an autobid of 17k (my entire savings) and lost.. But over the couple of weeks that the auction was held, I got to thinking that maybe I could make a dyno for similar money? Google led me on a path to some pretty cool DIY dyno builds.. I thought, if they can do it, why can't I? - The only difference is that I'm not an engineer at all, bar 3 years of light fabrication work and the skills I'd acquired working on cars as a hobby. So after losing the auction I rang around truck and bus wreckers with no luck finding an eddy current retarder. Damn! - After a few weeks of hunting I found a Telma AC83-00 on Ebay in the UK which was a couple of decades old, but still new in the box. The quotes were quite horrendous at first to get it to NZ but with a very helpful seller who also sold the retarder to me for much cheaper than his listed price, the deal was done. I was pretty stressed for a few months as I had just sent a big chunk of money to a random bloke in the UK with no tracking and no contact with the shipping company - but 3 months later it finally arrived. You know that feeling you get when you buy a cool new car? This was almost better than that. 390kg potential paper weight...
6 points
-
If all else fails6 points
-
Maybe that's what I do with the donor. Repower for dromeaggedon 2, on water5 points
-
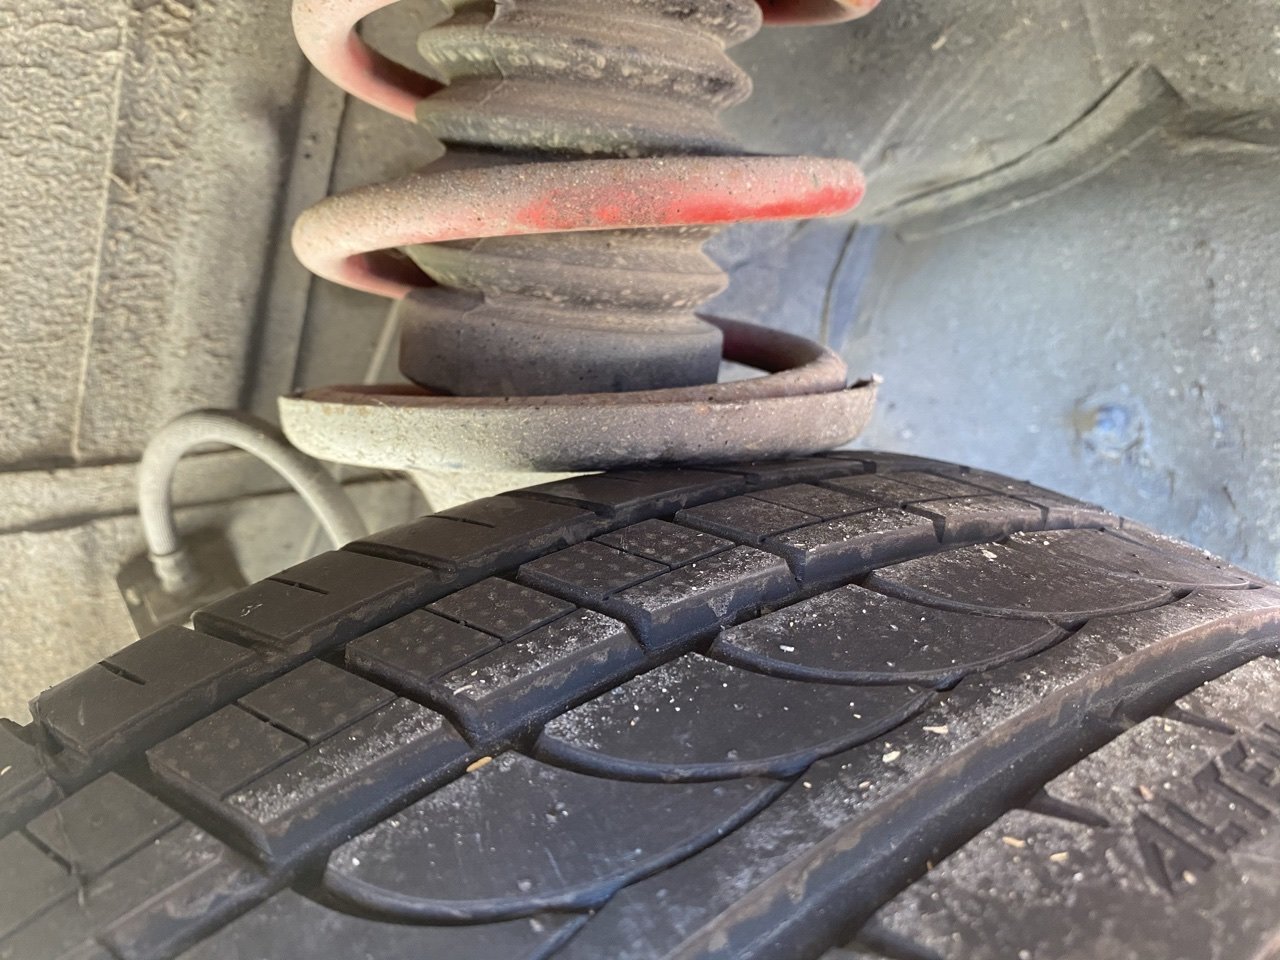
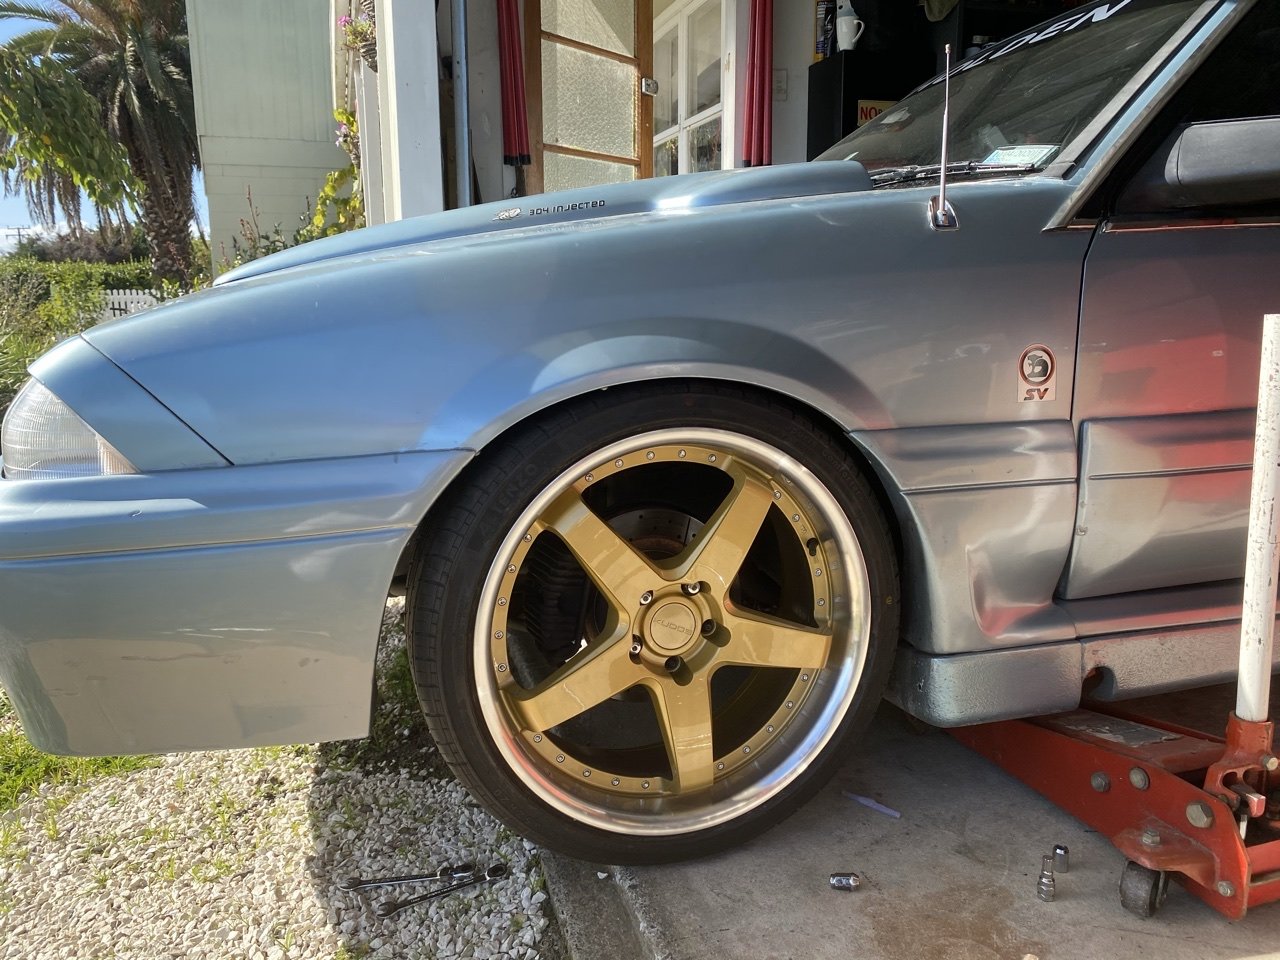
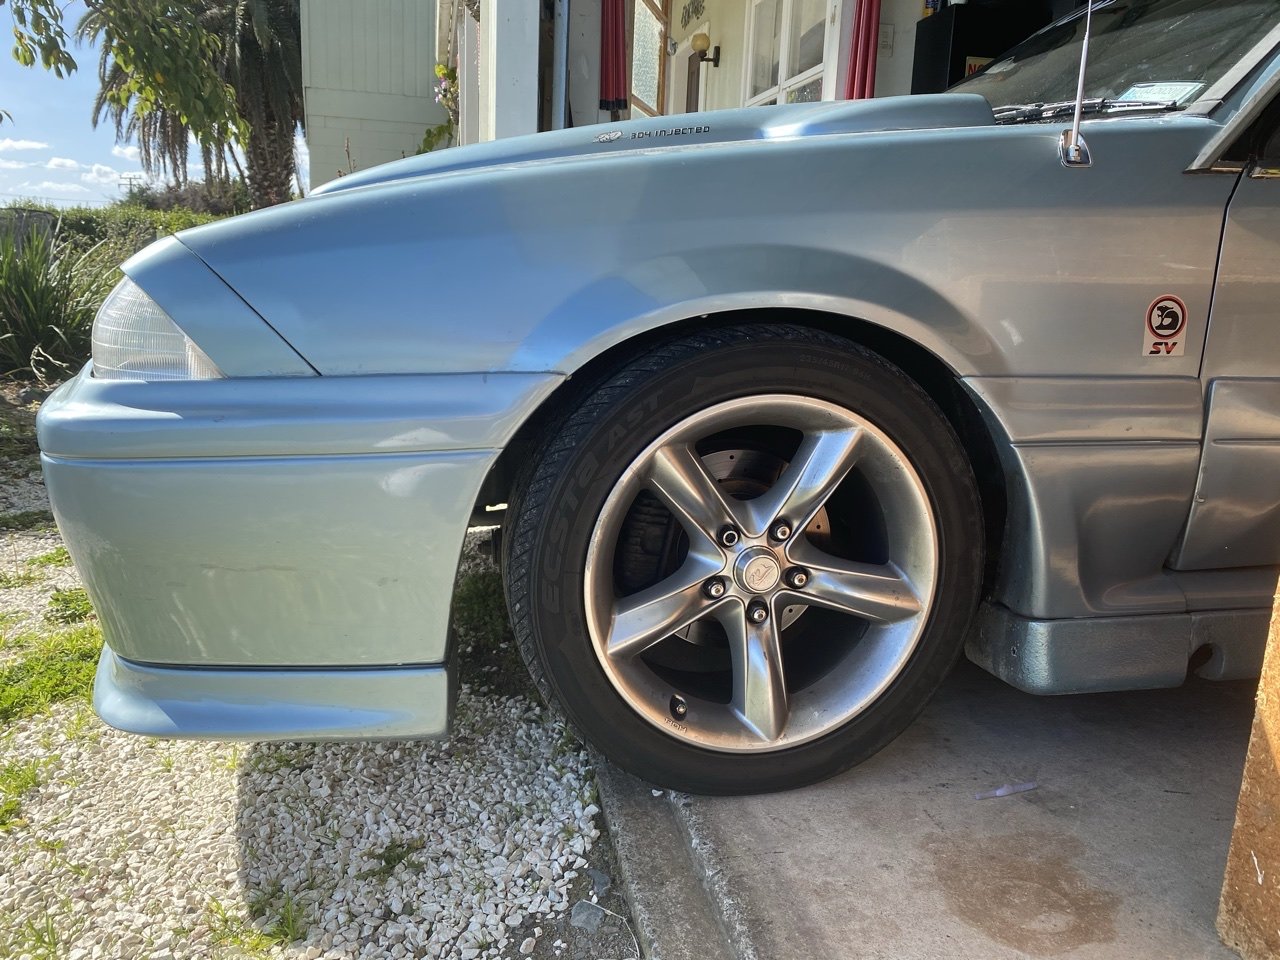
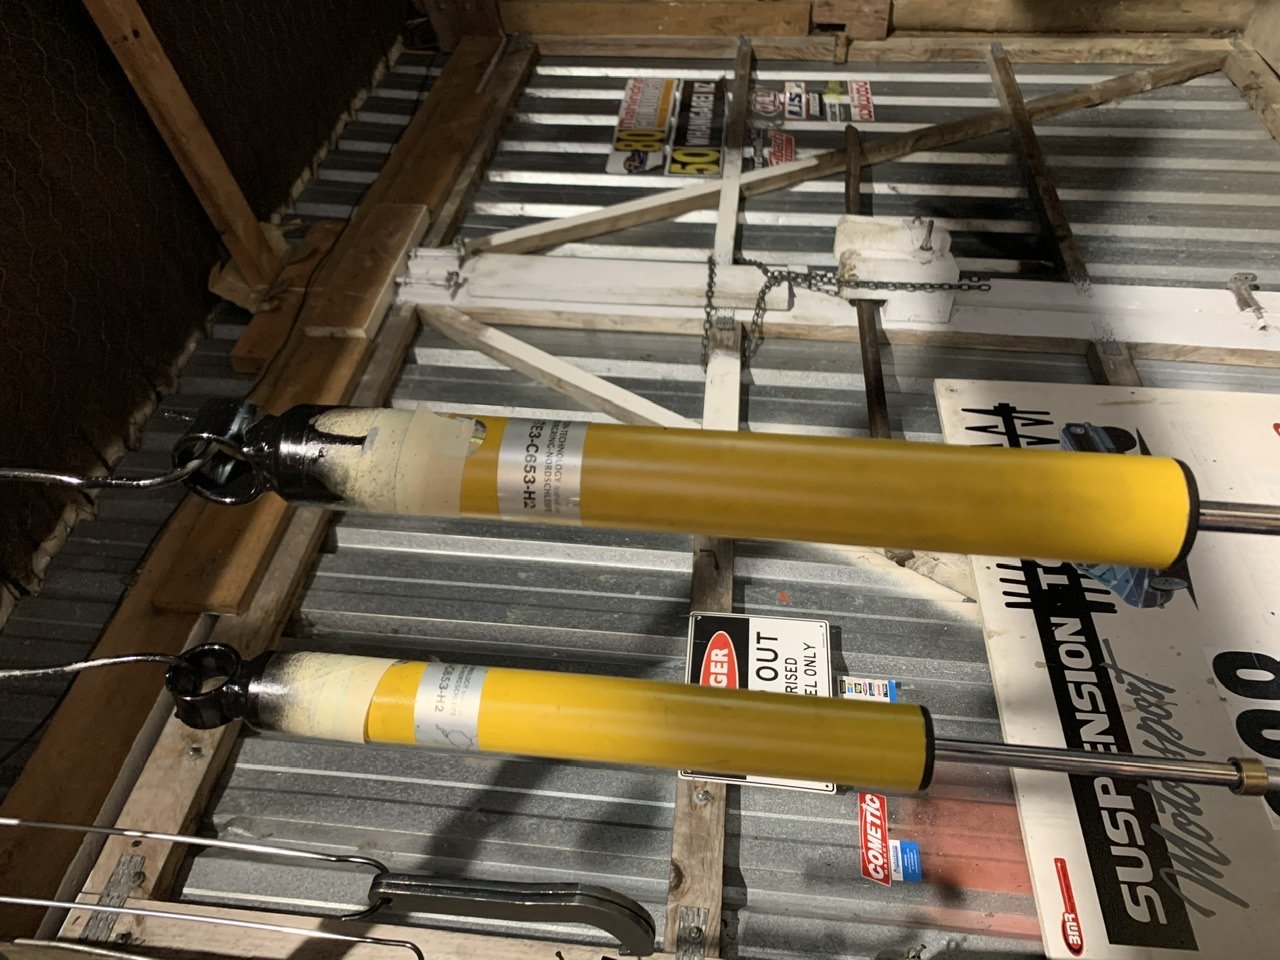
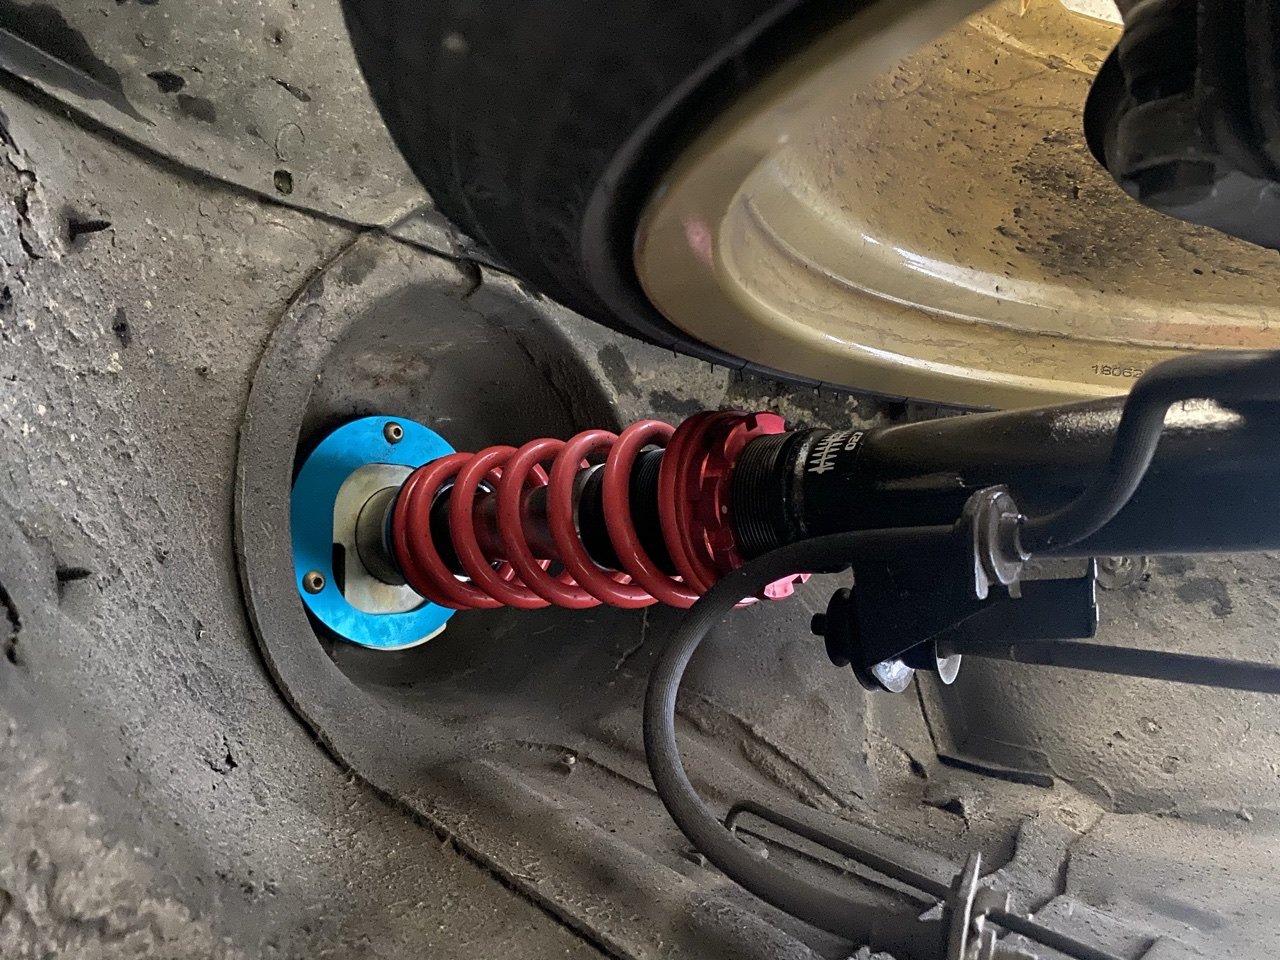
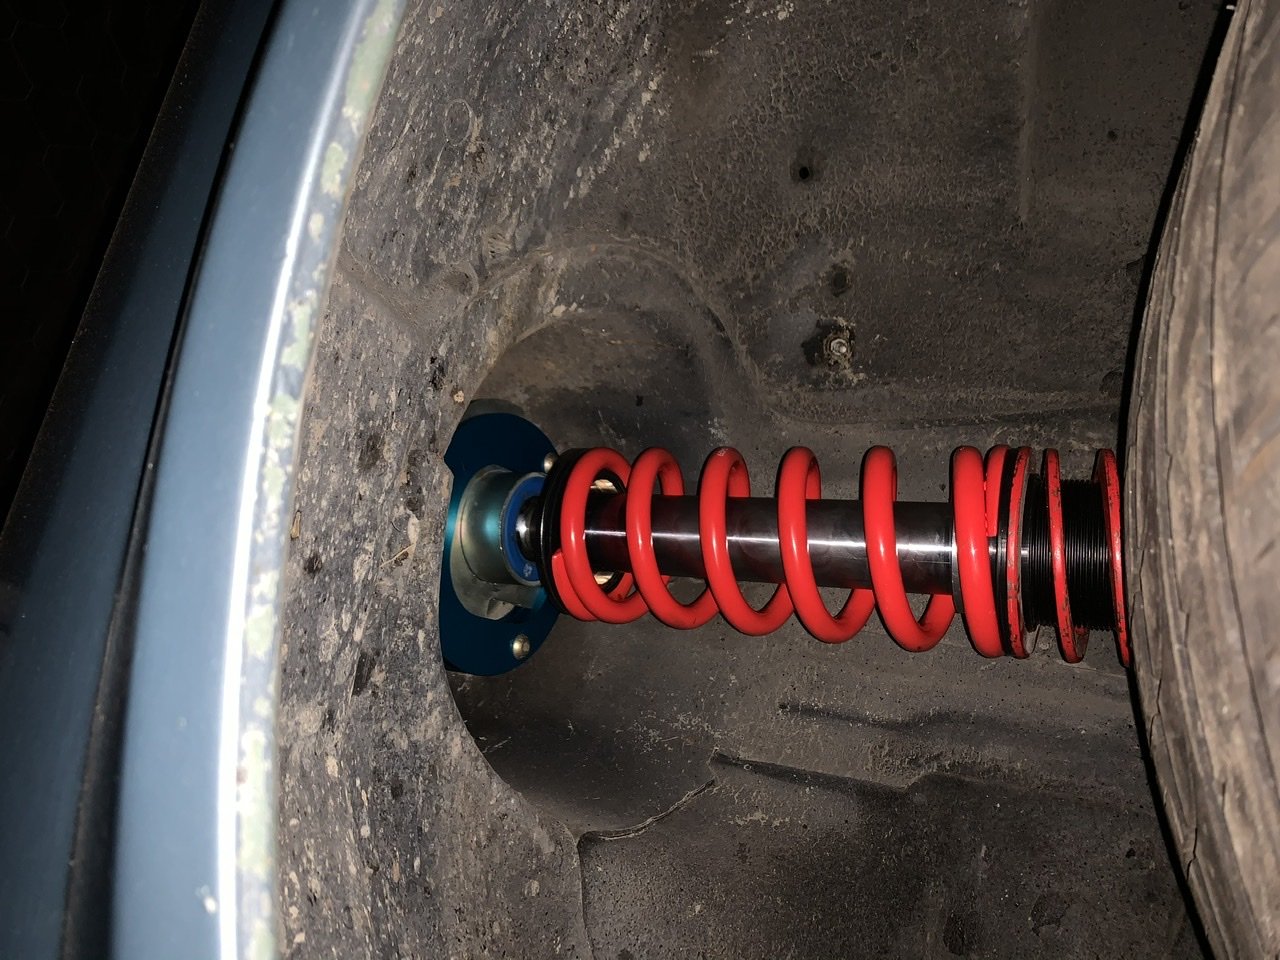
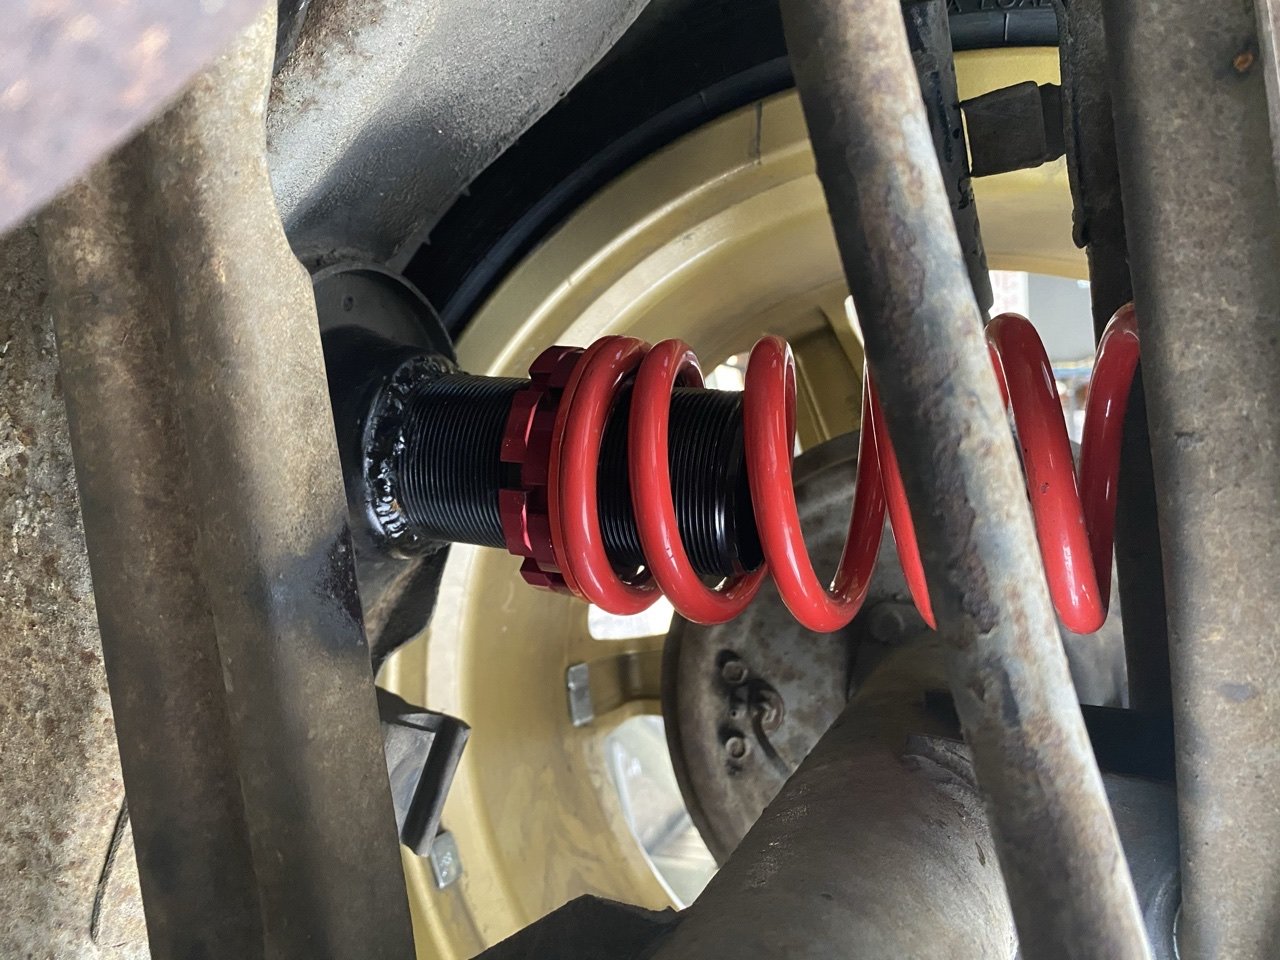
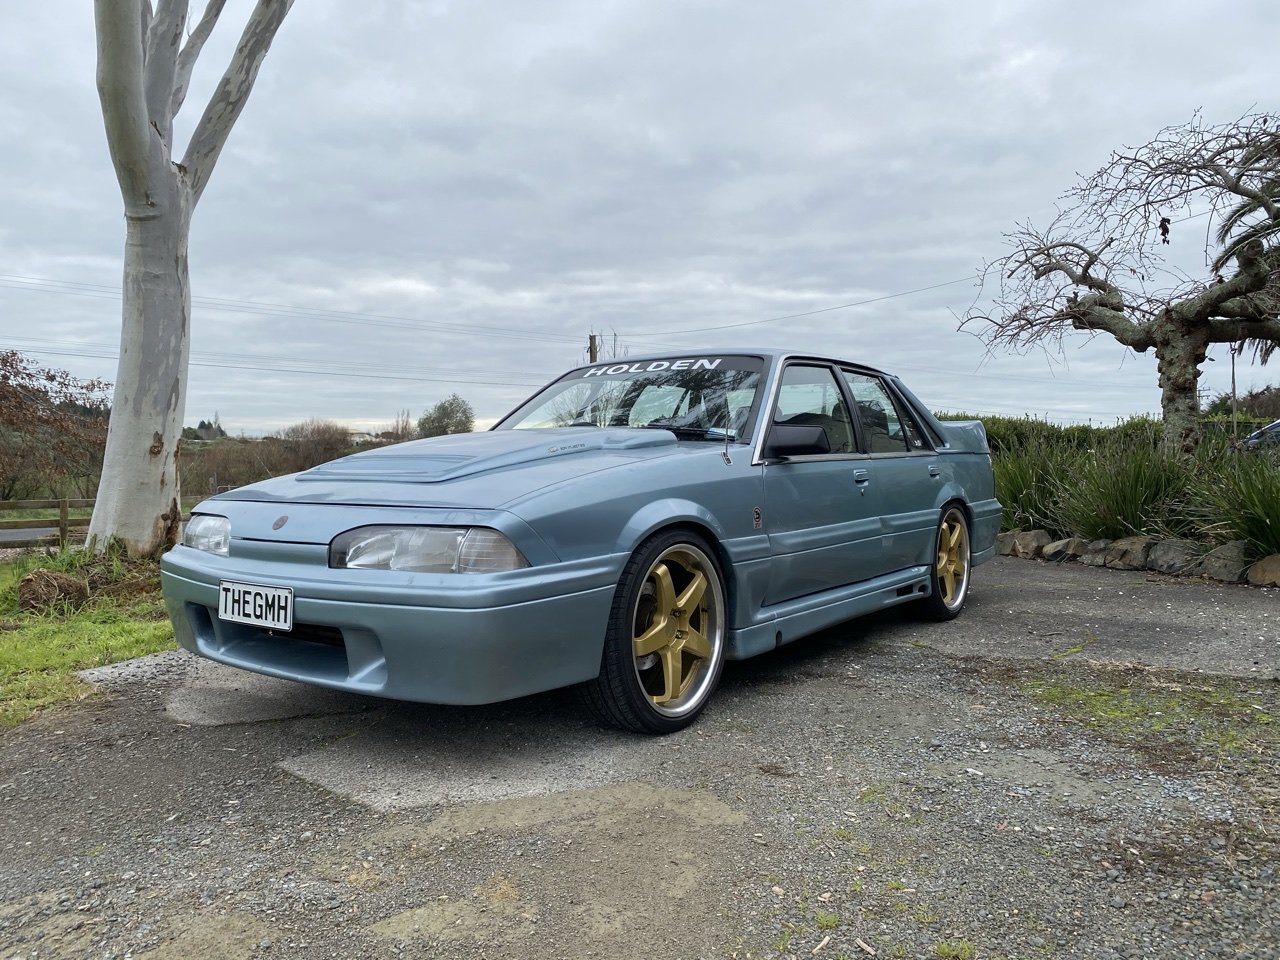
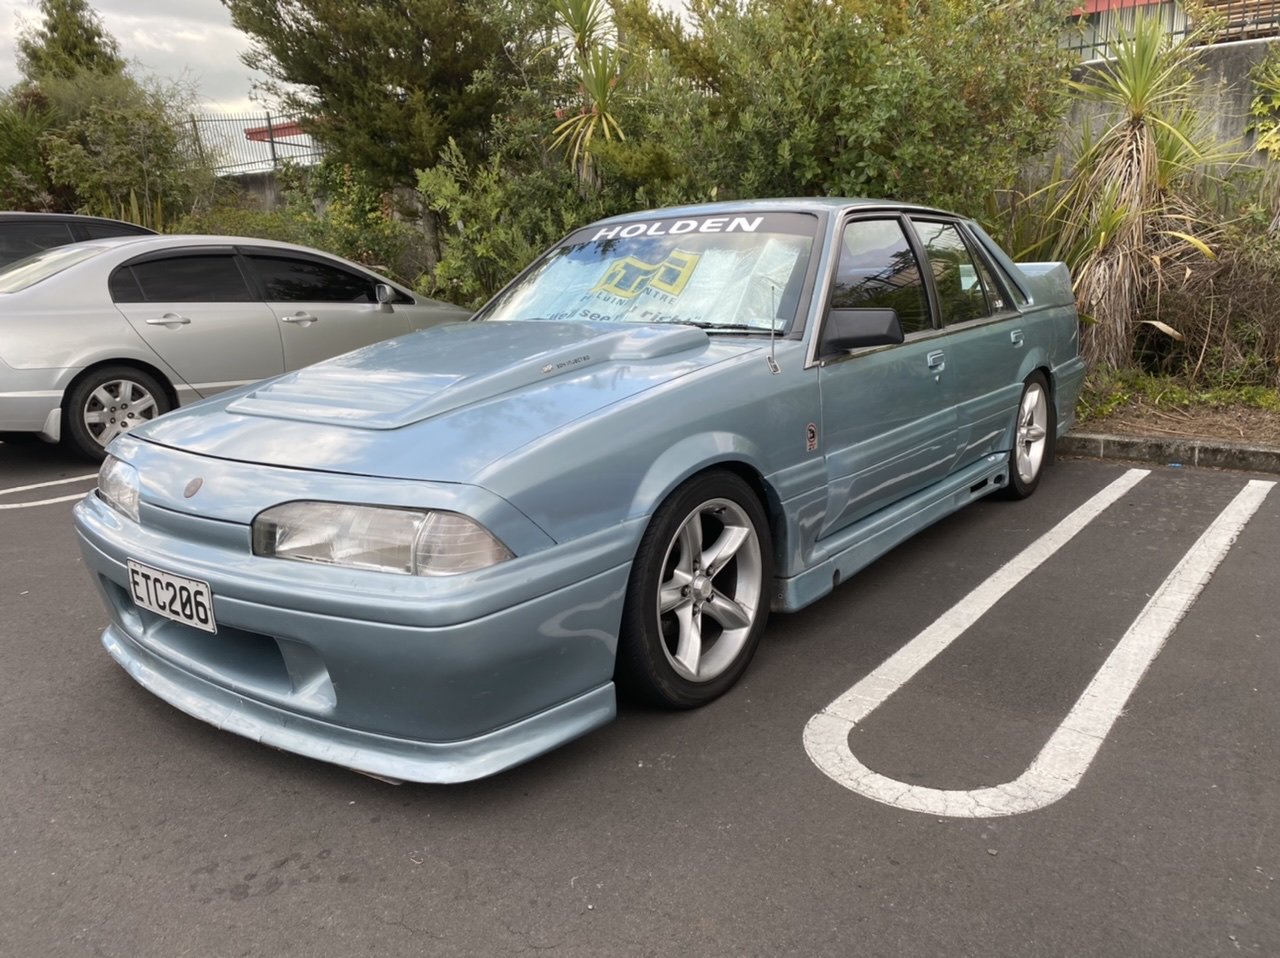
Long time no update, but rest assured stuff has been happening. One of the major issues I had was how low the car was.. couldn’t go over anything that remotely looked like a bump in the road for fear of leaving the lower skirt of the front bumper behind, and I do prefer having it on there than not so I set some things in motion. First up was the purchase of some 20” rims thinking that’d give me the slight (about 18mm) clearance I needed from the rims that were on the car originally. The rims came with a 40 or 45 series tyre which I preferred as I don’t go for the thin strips of rubber on most big rims, but unfortunately this didn’t clear the bottom of the spring perch Lower skirt taken off in this pic as I had an altercation with the olds' driveway angle This made me not overly happy as I was after an easy fix for my clearance issues.. so with this turn of events it started me on a journey into the realms of adjustable suspension. I was looking at different kits online and came across Chris at Suspension Tech. Went and had a chat and settled on fully adjustable setup with bilstein shocks. (Sorry for sideways photos) All in all I’m very happy with the result. The car sits better, and handles far better than it used to
5 points
-
image-20170130_123129 by John Bell, on Flickr So the old man spotted this plastic bath toy at his local WOF spot a few years ago. They (not a marine workshop, a backwater automotive garage) were unable to make it run. The old man pestered them every six months for a while till they sold it to him on behalf of the owner for a reasonable price (for a lump of plastic). He then squirrelled it away in a barn until we built a shed at our place, we then squirrelled it away in my shed. I decided to take ownership of this project, and proceeded to do nothing with it, as is customary. I am far from knowledgeable about boats (or anything), but can run google and the telephone pretty well. It appears to be a Tuff Jet, they were built by a Whakatane based business for a while (now based down south). I believe this one to be a pretty early iteration, likely late nineties, early 2000's. Roto-moulded polyethylene 2.8m 2 seater jetboat. (Yet to put a tape measure over it, but later models are stretched an extra 400mm or so). Just over 300kg (I'd like to weigh it to confirm though), this one is fitted with a 2cylinder 787 Rotax as found in Seadoos of the late ninties. Quoted 110 Canadian HP. Some forum post on the internet says that the plastic hull has a UV warranty of 25 years, so hopefully the fact its been unused in sheds for the last 10 means I have more than 5 years of life in it. I poked around a bit and learnt that Seadoo used a highly advanced (for its time) all in one CDI that included an immobilizer using a security coded lanyard. Cool. My money was on that being quite shit, based on its resistance to do the sparks or allow the cranking. I was reluctant to bring it to a dealer to have its lanyard replaced / diagnosed until I knew the motor was better than it looks. Shorting the starter solenoid said it was quite fucked, and would not rotate, I freed it up, and a compression test confirmed, it was indeed as shit as it looked. IMG_20180926_183501 by John Bell, on Flickr SOMEBODIES BEEN IN HERE IMG_20180926_183510 by John Bell, on Flickr At this point it nothing happened for a few years while we brainstormed compact alternative powerplants that we were capable of making work. This would be a perfect opportunity to fit something modern, more efficient, and in known good condition. Naturally at this point I purchased the cheapest donor Jet-ski with the same engine I could find after trawling trademe and facebook marketplace relentlessly. I'll learn this lession twice. IMG_20200701_143340 by John Bell, on Flickr Amusingly the banana is supposed to make about 40hp more than a Jimny, and weigh about 1/3. IMG_20200701_165559 by John Bell, on Flickr WOAH IMG_20200701_165553 by John Bell, on Flickr RADICAL IMG_20200701_165544 by John Bell, on Flickr I feel (more) like a scumbag instantly. Popped it in the harbour one night after work, to try and assess it's health. 109576785_1549285395257880_4072391247589855252_n by John Bell, on Flickr 110336327_323032162200748_7293717375980309486_n by John Bell, on Flickr As you'd expect it had a dead battery, jumpstarting a thing that is always in gear is a bit awkward. My only experience of Jet-skis being a JS300 childs Jet-ski I was very impressed and thought it to be very good initially. Potato footage. It wasn't running 100% but appeared to go hard, until it stopped abruptly at wide open throttle in what suspiciously seemed like a heat seize, followed by a flat battery, followed by having to push it back about half a K across some oyster beds. NOICE. Speedo reckoned it was good for about 80km/h water speed though. I got a battery and did a compression test on the Banana yesterday, got an even ~130psi across both pistons, which doesn't seem massive, but its even, and it still runs and nangs the limiter so I think I'm gonna send it. So the Green Croc is covered in dust and reeks like 10 year old stale fuel, but now that @keltik and @Vintage Grumble have both purchased jetboats, its time I go and break down on a body of water with company, at some stage before summer I would like to swap powerplant, tidy up the plumbing and wiring, check carbs and fuel/oil system, and go get stranded somewhere. IMG_20201110_144127_1 by John Bell, on Flickr IMG_20201110_144119 by John Bell, on Flickr4 points
-
This thread is going to get real busy if people start listing all of the motors that are better than a 2NZFE4 points
-
All these cute little boats popping up are making it very hard to resist looking on trademe/buy and sell... MUST.RESIST.MORE.PROJECTS4 points
-
Nah put hull over a ct for poor mans burgman landski3 points
-
With east cape a couple of weeks away Iv been busy finishing the forztard mini ADV for 3 days of ass punishing fun With thanks to @Shakotom and @datlow who donated me some wiring looms with cruddy china connectors I now have a full loom to run lights indicators brake lights key to switch on 12v and also ground out the cdi so you cant steal it and the flash digi dash and don’t forget a horn for tooting at locals along the way Plus a charging stator and scooter battery which does an average job of making volts because china voltage reg, it should be fine once I fit a LED headlight bulb but il pack a battery charger just incase Bunged up a dash mount out of ali and a speedo sensor out of bit of steel plate with more thanks to the fitters at work who drilled my front disks to mount the magnets for the sensor Golden boi sr241 front tyre fitted for that standing on the footpegs look Speedo instructions were quality chinglish but a helpful YouTube video explained how to wire it up and change the settings for reading the correct speed GPS confirmed speedo to be accurate after some programming and does 90kph on the limiter in top gear which is plenty for mostly gravel roads So far it owes me just shy of $1000 including bike purchase which is pretty good for how its turned out Ready to do some skids ,drink durries, smoke purple goannas and hoon dudes3 points
-
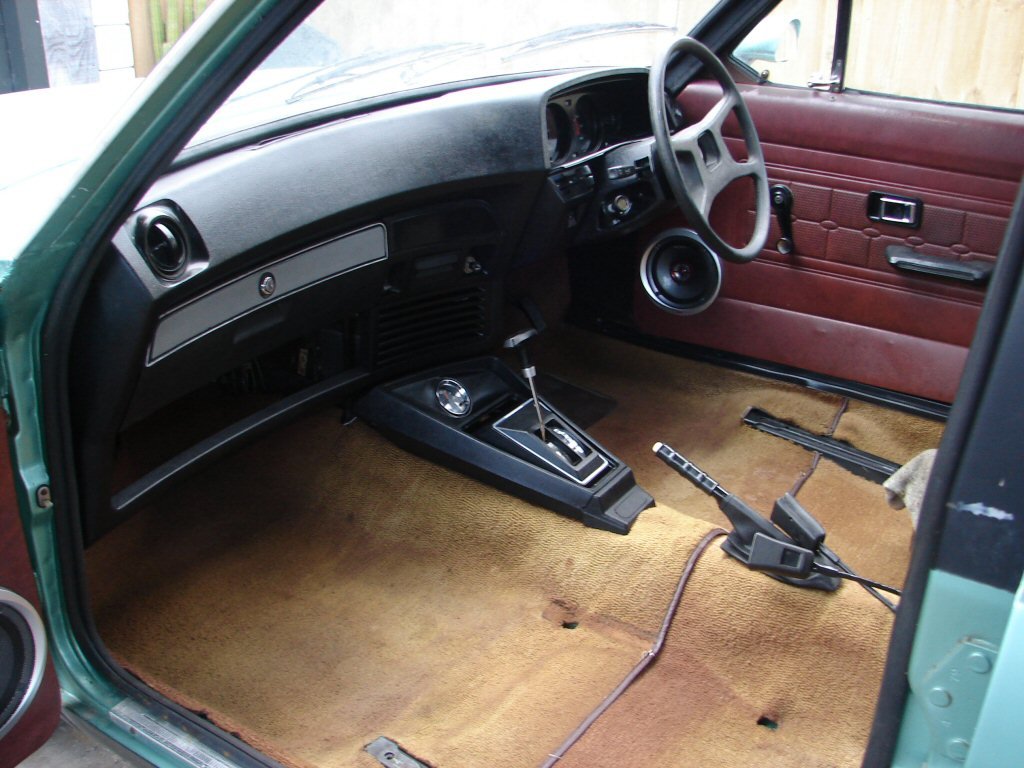
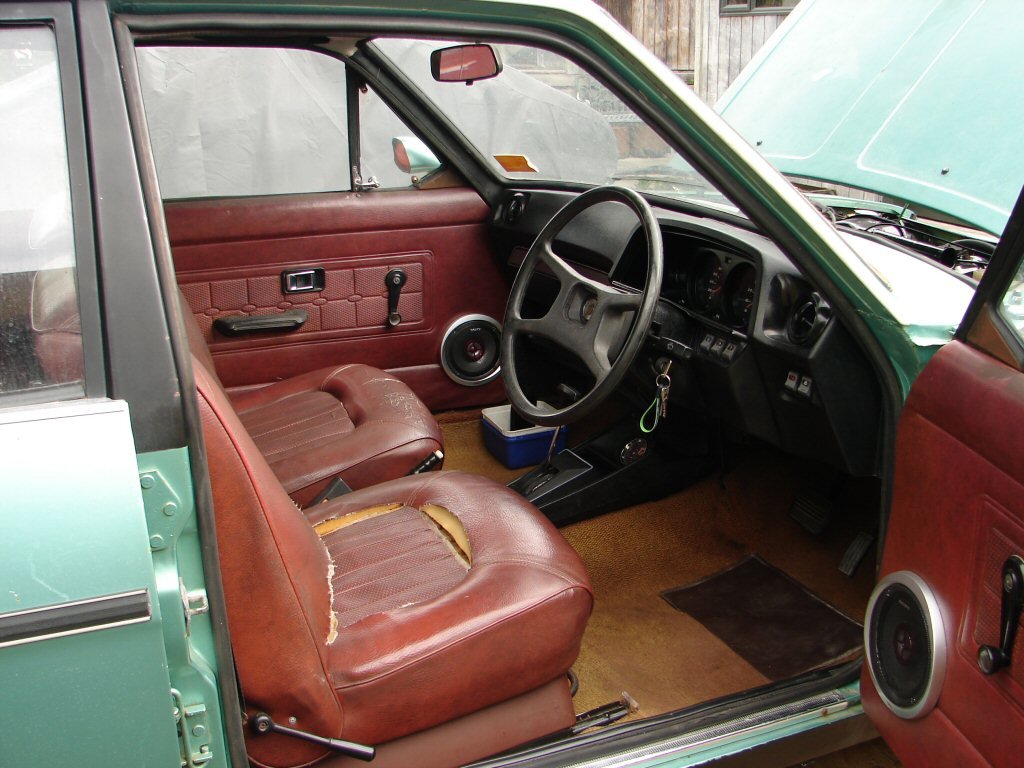
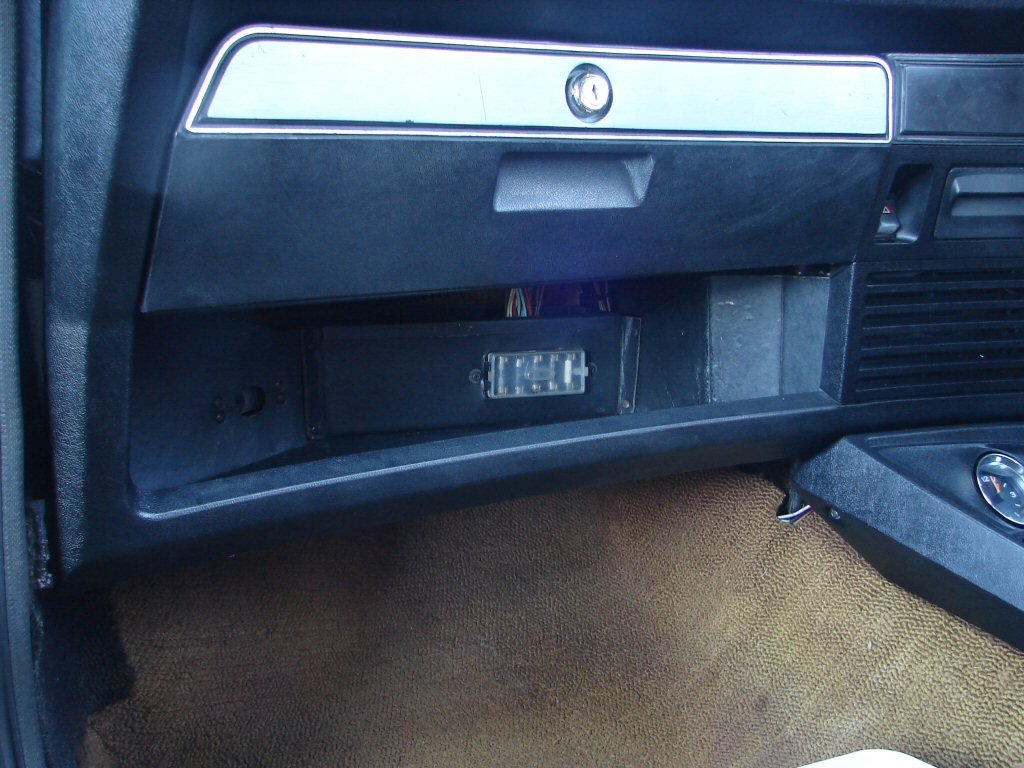
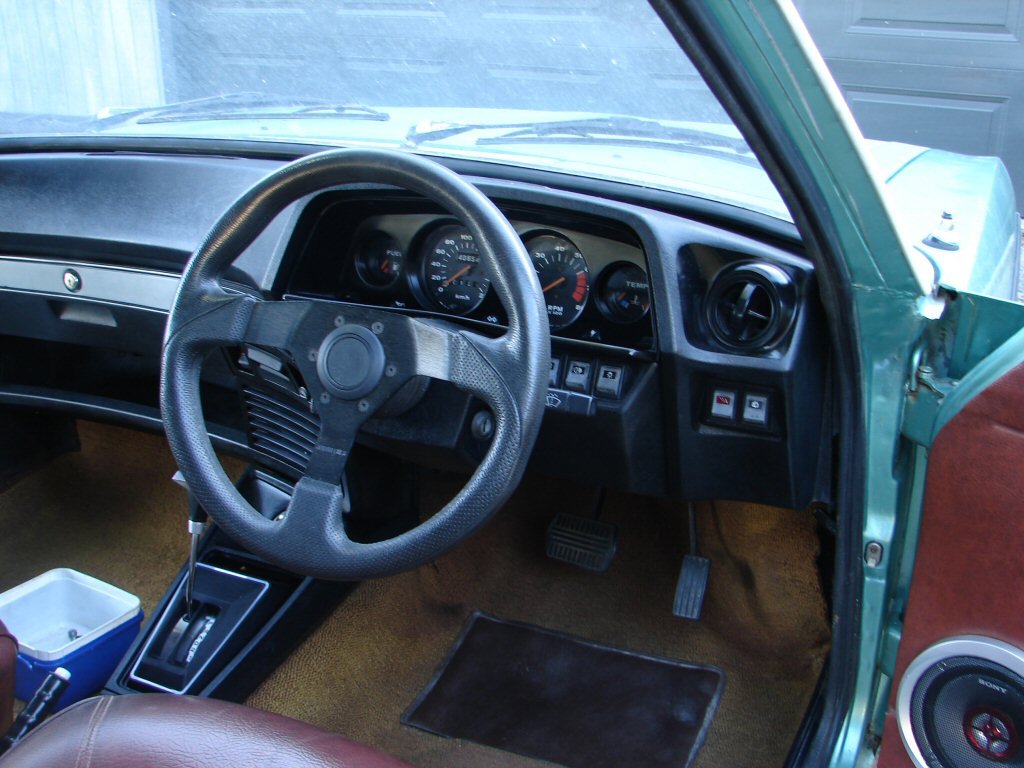
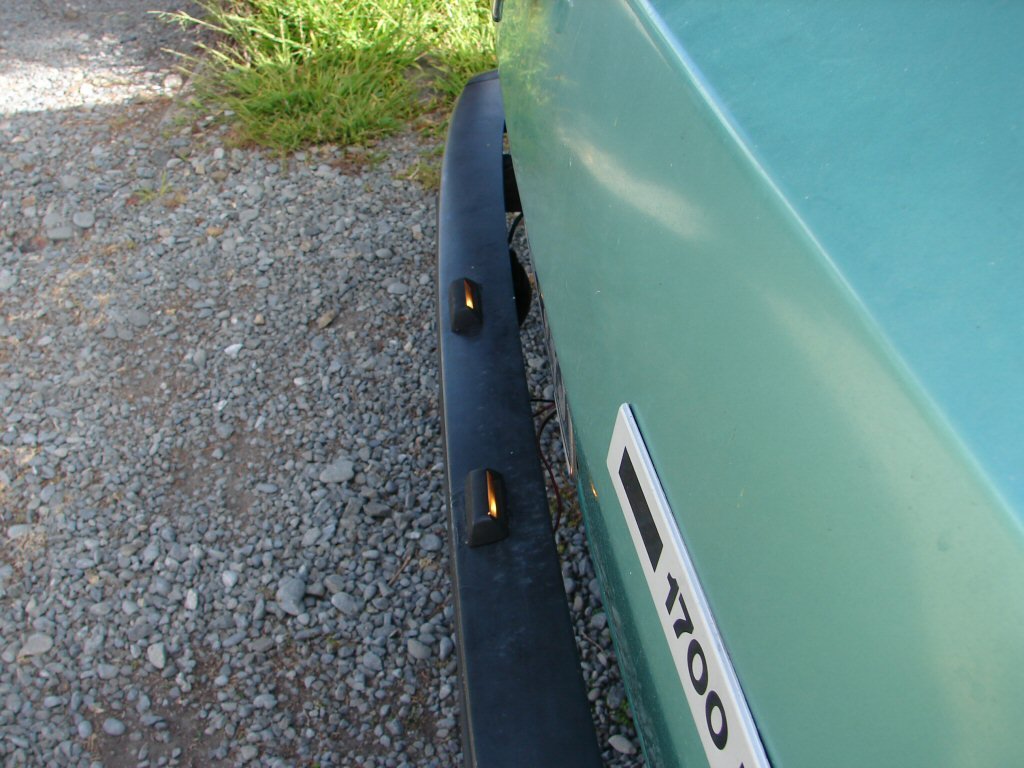
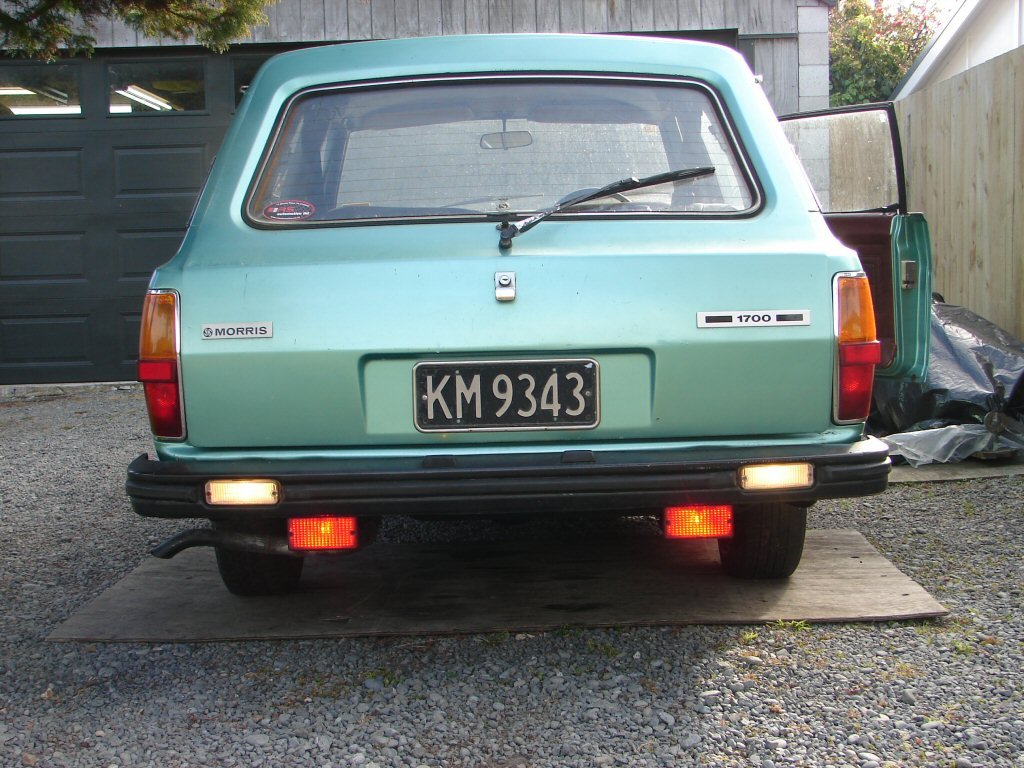
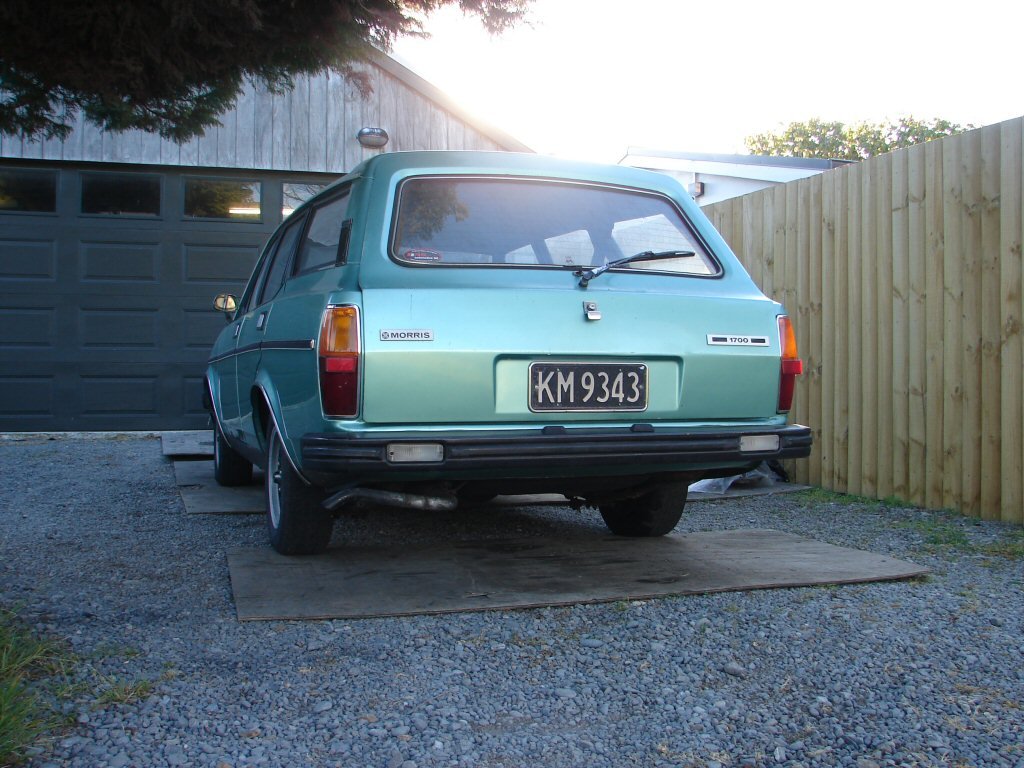
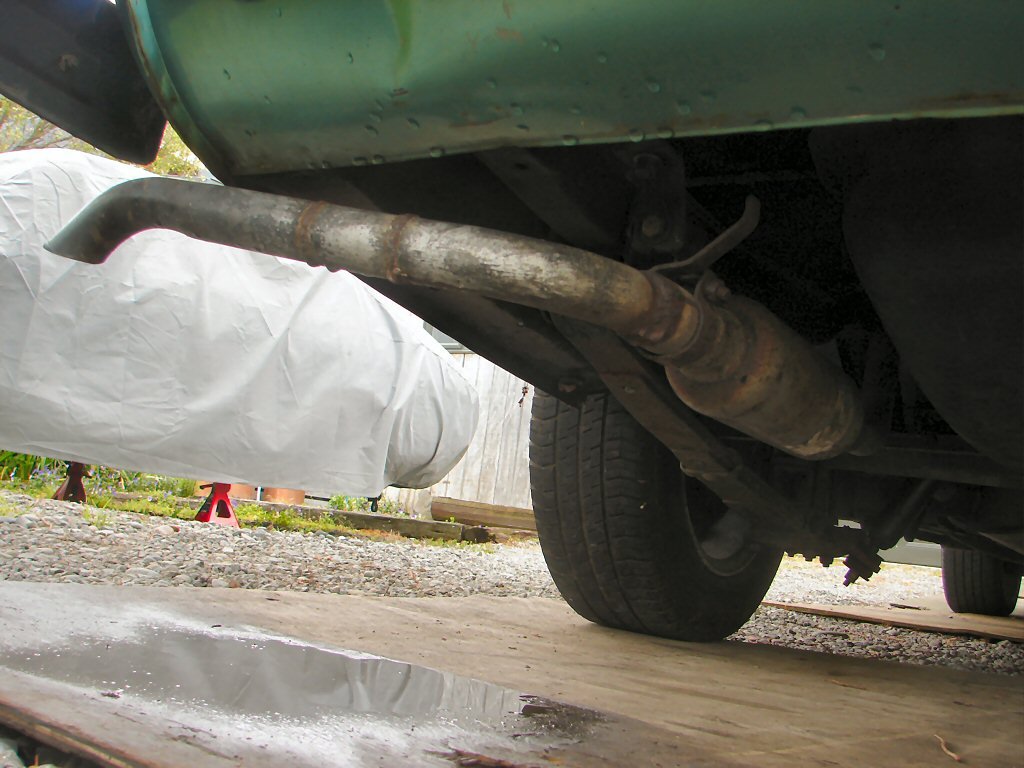
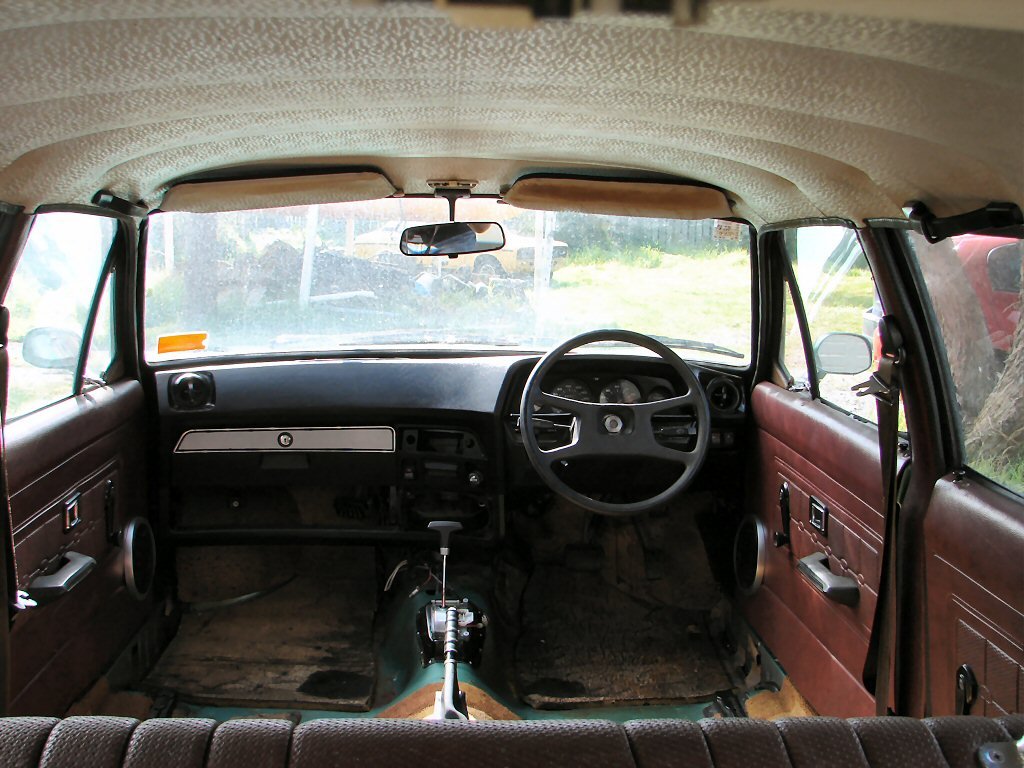
The front carpet finally got fitted - it was originally from a manual so had to be cut around the shifter which has a bigger footprint. Fortunately the console hides any bad judgement.. Yay. Got seats. Brilliant. Well, the seats themselves aint, but having some at all is. Tempted to get the vinyl repaired, being as they are the right colour and all. Really comfortable to sit on, so that's a win. Some covers would also do the job. Considering options. Next was the parcel tray. Bloody handy things they are too. Also contains the fusebox, in case you get bored at the drive-thru... And just because I could, I fitted a well - traveled sports wheel. Its cheaper than fitting a higher geared steering rack, but magically feels like it has the same effect. Manages to let you still see the necessary clocks as well. Life doesn't get better than this.. Next bit was to get all the various lighting doing its thing, as we are gearing up for a wof after all. Managed to finally get both numberplate lights working at the same time. Not sure for how long though. The rear bumper on these also holds the reversing lights, and a number of estates I have owned had fog lights fitted, although I never fired one in anger. Bit over the top really, but at least they all work now. Starting to look like a complete car now, and because I wanted to see them on it, I fitted an old set of hotwires that were factory fitment on the first Marina I ever owned. Be nice to get them cleaned up and some fresh tyres on, but a lot of stuff would be nice I guess. I thought better of having the fog lights. I have something else in mind... This thing will have to go. Besides making it inaudible, it reduces in diameter about 5 times in as many inches, so all the gases have to squabble just to get out. Hard to know what they were thinking. Back to the lighting. If its there it has to work, and as the plates have been on hold for 10 years I figure it will get a fair going over. One of the road lights had its plug chopped off, so that involved finding another and breaking out a soldering iron. Been putting that off for a while. Such a lot of dicking about for small gain. At least it got the front lit up properly for the first time. And as you have noticed, the stock wheels have finally made the cut. The new tyres mean these are the best wof candidates, so can stay on here until that happens. Sort of warranted another photo, so I actually washed the car for the first time. Lawdy - it actually looks rather tidy. The body coloured mirrors are gone too now. They looked pretty good on the car, and the style did not look out of place, but you simply could not see anything in them, which made it all a pointless exercise. These are the factory mirror style and still come up on Trademe from time to time. I have bought a pair that will hopefully look more like the coloured ones, but they say they could take 10 weeks from China. At least we are covered for being legal meantime. Cheers.
3 points
-
Starting on the sump. Its going to be a pretty big job!3 points
-
Did a range test with Kass. Filmed it. Made a video. Here's the video. Should be a bit more HD later in the day. Currently still processing.2 points
-
Velo boats have been a long time coming.... I reckon @sentra needs to get in on this tiny jet boat action.2 points
-
So when are you selling up and getting a Proton Saga? Would be interesting to see what has been done to that lead car, that original 4G15 would probably move like that!2 points
-
It's a gn thread so that part goes without saying2 points
-
Will be interesting to see how Boort finds this years trip. Will it be boring? Will he be first to camp and hit the blue tops way too hard? Will he be overcome by the power and speed and put himself through a fence? Tune in in a couple of weeks to find out!2 points
-
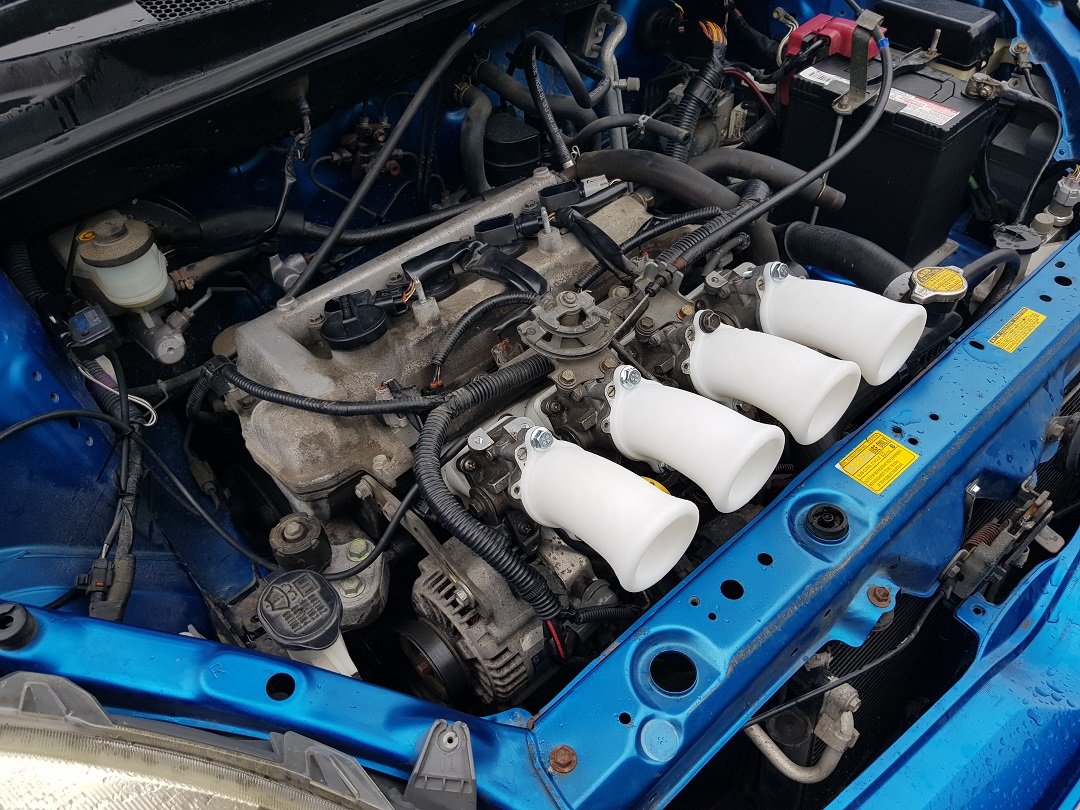
My bendy trumpets wouldnt work, because if I try fit them closer over towards the edge of the engine bay they hit the bonnet. Based on some of KPRs wizard magic testing though, I saw that the effective tuned length seems to be where the end of the trumpet starts to flare out from its normal diameter rather than the outer part of the bell shape. So I figure since I'm probably not taxing the throughput of a 48mm ID I'll try keep it more uniformly shaped with less of a bell on it so I can fit the longest possible effective length with straight-ish runners and still clearance to bonnet etc. Could have actually fitted a bit longer, but anyway, they ended up like so: Looking at the fuel map it looks like there was nothing in it at all, like + - 1% margin of error. Apart from it eating shit over 6000rpm and running rich. Probably thanks to shitty bell entrance. Again this is probably an instance where if the exhaust had less back pressure and I was able to make better use of the inlet and exhaust working together with cam overlap, you'd see more of a change wiith intake side stuff like this. The other ones look to still be the winner at the moment though.
2 points
-
Unbolt exhaust at the headers for drags? It's what a proper drag car would do And by proper drag car I mean a HQ with a tired 350/th350/2.75 geared single spinner 9 inch with a badly jetted 600 holley and one of those fake 3 hole scoops thru the bonnet and some rusty chrome rocker covers and an accel super coil and a moroso sticker and a jack daniels towel over the ripped rear seat top and a wildcat steering wheel with the center cap missing and a sticker on the back window that says only milk and juice comes in 2l2 points
-
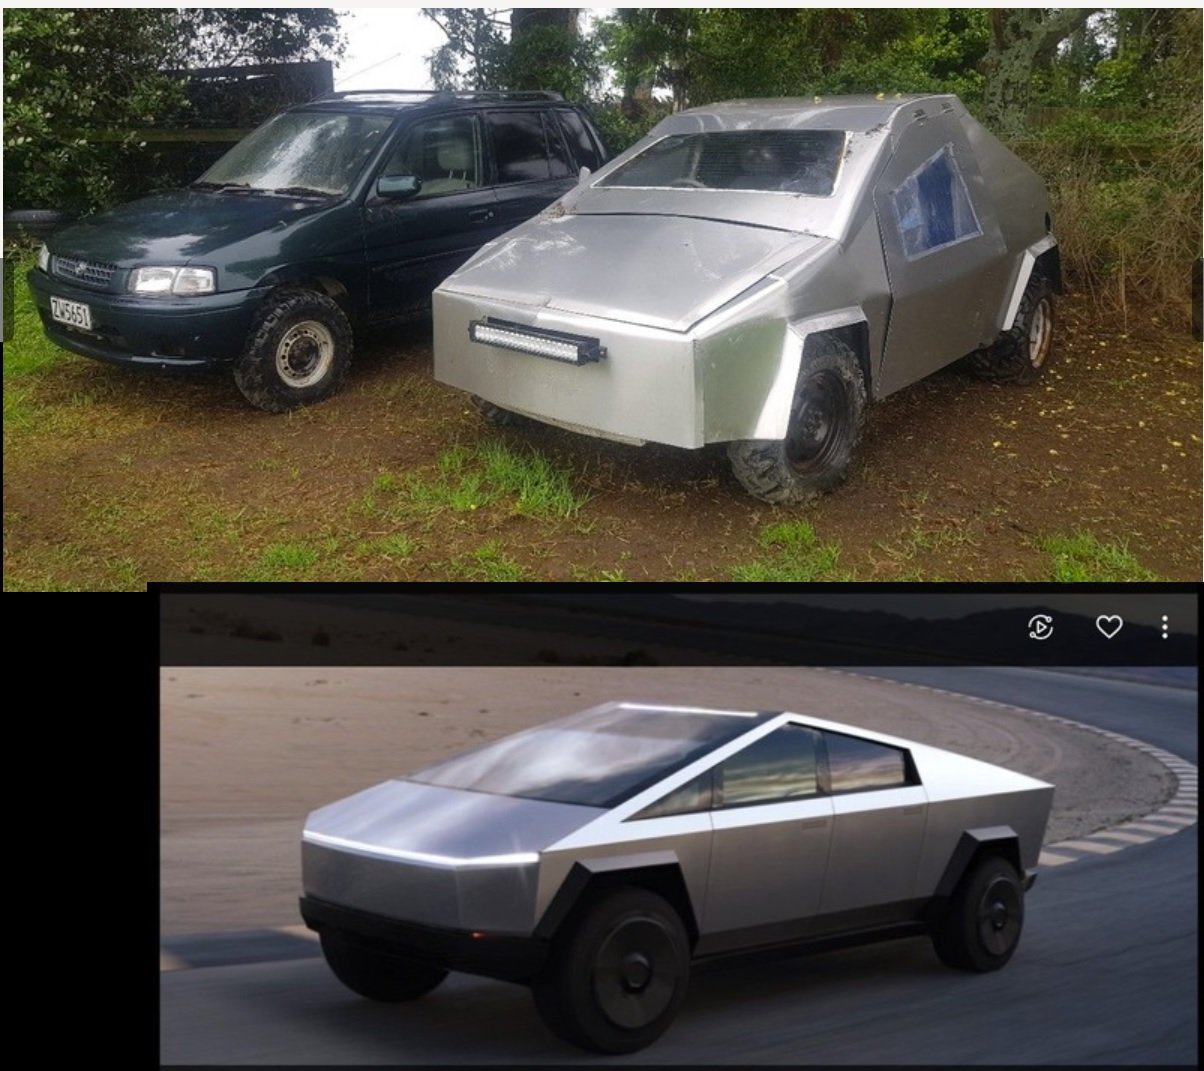
I dont understand what's going on in that auction? What's it got to do with a Vitz? All I see is pictures of a cyber truck
2 points
-
Finished up what I think was all the fabrication and welding on the body. So gave the inside a good clean, sand and then sprayed some epoxy primer down. Came out really nice and smooth! Scuffed back the bits that need to be nice as they aren't being covered up once the interior is back in; wheel wells, strut brace and the b to c pillars. Also went around all the seams and applied some seam sealer, matched to the factory look. Then it was ready to spray the base coat and clear on. Really happy with how it turned out, got all the visible bits nice and glossy! Got some basecoat matched to the brown colour of the dash and spayed some on the dash top piece. Sprayed some flattened 2k clear on top. Got the outside, underneath and engine bay mostly sanded back, hopefully done by next weekend so it can be epoxy primed. Not really too sure on what order to do things from now though. Would like to try and avoid having to mask it up multiple times and having to sand the whole thing in-between each process.2 points
-
Did bit of a time laps video of the camtree casting. Not great but its a start.2 points
-
Here is my new borderline oldschool mode of transportation. Admin please feel free to move it if it doesn’t fit the “oldschool” criteria (maybe too much plastic perhaps). But anyway, previous to this (after my 74 Camaro) I had picked up a 47 Chev coupe, but struggled to get into it so did a deal with a guy and swapped it for this (much to my partner’s disgust). I always enjoy having a car that’s actually on the road that I can enjoy and tinker away with. I’ll probably end up getting another project, but in the meantime this thing is kinda fun. I have plans to personalise it a bit more to my needs.. some I’ve done, and some I’ll get round to it when funds allow, but in the mean time this is her:
1 point
-
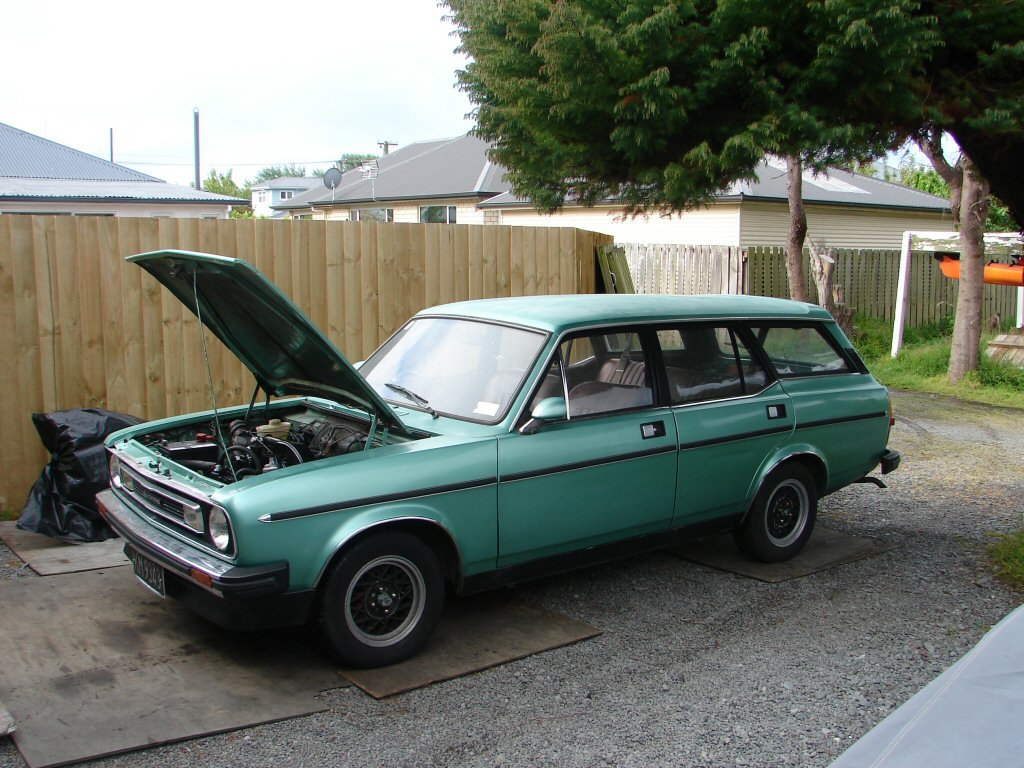
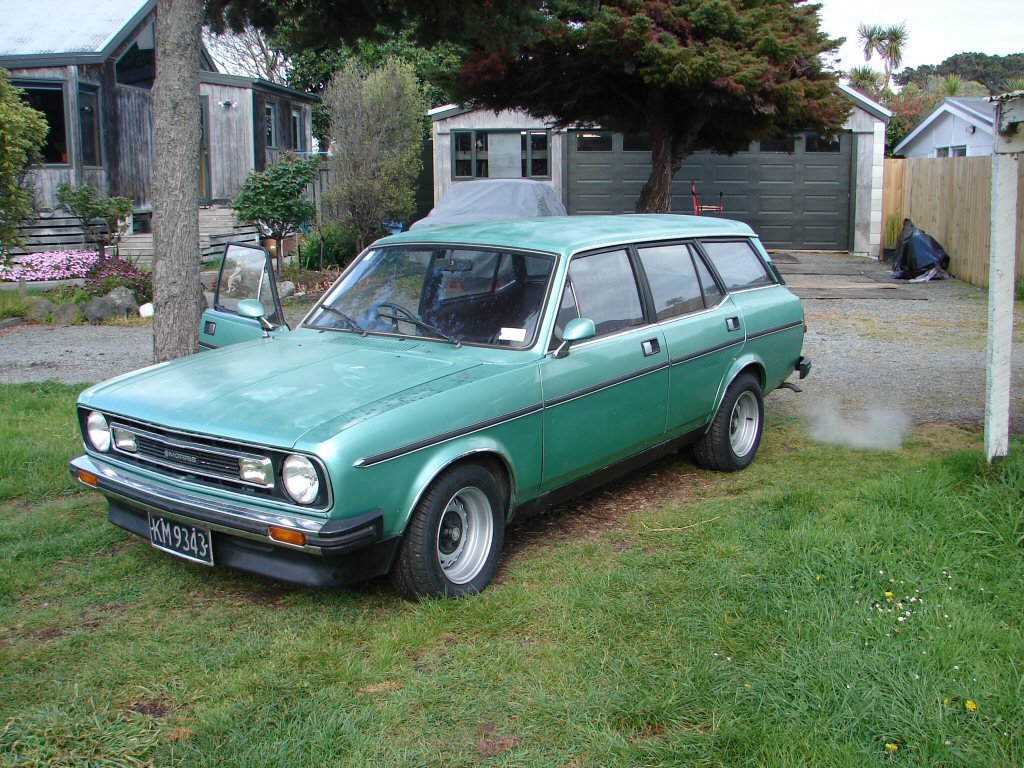
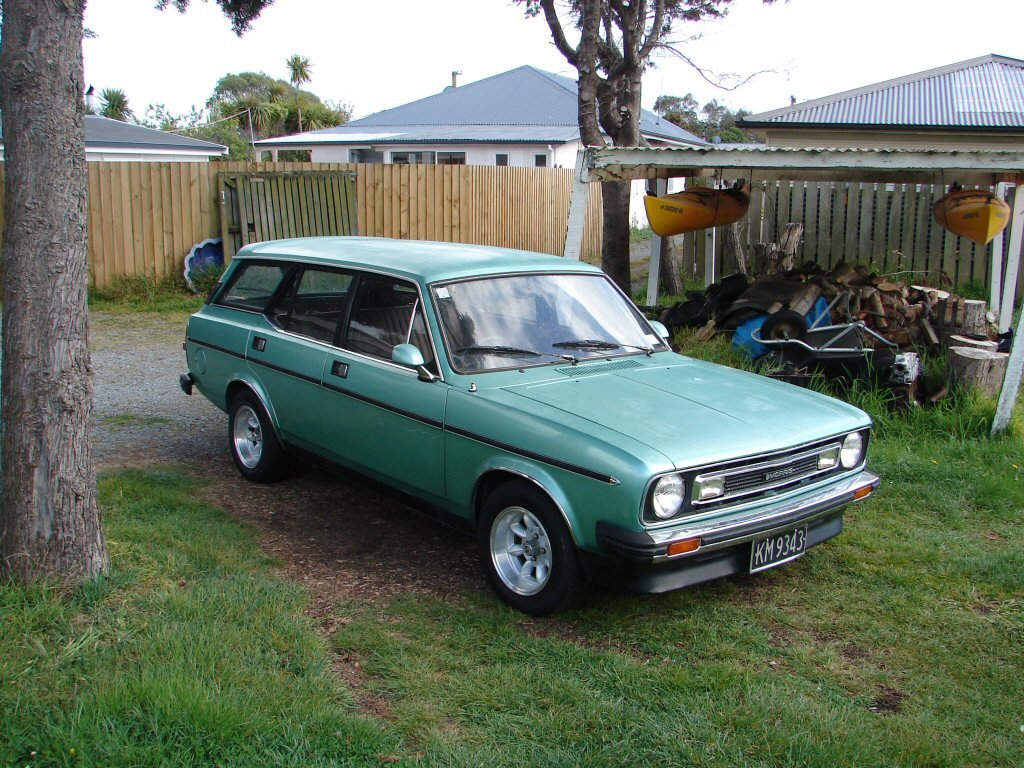
Hey all. I have owned more than 20 of the most hated cars on the planet. That has a great deal to do with why I did so. I am not a follower, so I go my own way. I don't care what you drive, and I don't feel the need to leave things standard - as many of you don't - but I figure that if I turn the lowliest cars into something that other people now see value in, then I have done a good thing. In todays world I think that the most ecologically friendly thing you can do is to keep using something old. And I make a living by repairing old things for other people. So that is my mode. I swapped my first Morris Marina for a used washing machine. It turned out to be a great car, although it was rusty as hell and would never come back from that. So I bought another body and transferred the good stuff into that. That's where it began. I guess this might be Marina #23 for me, but I am no longer concerned about numbers. I got contacted via a UK Marina website that a New Zealand Marina owner was looking for help with his project. I was unable to supply him with a correct O series engine for his estate, and the B series engine his car came with was in trouble. Over a period of time we communicated until he decided the project was beyond him and decided to part with it. He offered it to me for free as he really wanted it to be saved. Having seen photos of the body I agreed - it really needed to be saved. To retrieve it from where he lived was going to cost me at least NZ$1000, so I did not see that I could justify it, even though I did have an engine and transmission that would revive it. Sheesh.! As it happened, I was in charge of a local ex-competition rally coupe that belonged to a friend, and which a buyer had been found for, and as he also lived in the NZ North Island as did this estate, I asked if he would be willing to pay for a one way ferry trip if I trailered his car north in order to drag mine south. He agreed, so the game was on. Despite the continuing road issues which cause traffic stoppages, we made the pilgrimage north with the rally coupe. That actually worked, albeit a day later than intended as the ferry company cancelled my sailings on the Saturday, but I was able to get the same sailings on the Sunday and extend the trailer rental by a day. I met a really cool Dude at the place I dropped the Coupe off, and such events make you realise that it is all a part of some greater plan. Love it when that happens. From there I found my way to the place where the estate lived, and was chuffed to finally meet the owner who I had spoken to at great length by email. I had decided that I would have to give him a few hundred dollars for the car even though he had offered it for free, as it had cost him money and was a viable project. When he showed me all the stuff he had bought for its repair, and which he was now giving me, I felt like a total tightarse, but he seemed to be pretty happy that I was giving him anything at all. One of the reasons I love working with these old cars. The people are just the best. I have made a promise that he gets first dibs if I decide to sell it after I have completed it. We loaded the estate up and I dragged it back to the ferry. 7 hours of ferry crossings in one day can seriously damage your humour. Never mind. We have a challenge here. Stayed with friends at the southern end of the voyage, as I arrived close to midnight. Here's how things looked in the morning.. Next day we dragged this back to Christchurch which was about 300 miles by the route we took. I was concerned about the auto in the Volvo being under stress so was trying to adopt an easier route, but it turned out to be more difficult than the northbound coastal one. But we survived. Work on the estate began the next day.1 point
-
Changed the look of my bike again, she's changed more than the weather.1 point
-
Ooh ooh how about one of these in there for next drag day.
1 point
-
I'm fabricating my own roller. I'm a bit further ahead than my first post so I will update in the coming weeks with more deets. I'm going to use the YourDyno controller and they have just bought out their own eddy power supply as well - it's constantly under development but appears to be quite decent. I would have gone with Sport Devices but they were way over my budget. PS I do watch your youtube stuff (love all the content btw!) - I assume your Vane is a modified one by torque performance? Knurled rollers do make a huge difference apparently.1 point
-
Holy dang thats tough.1 point
-
@rumrum you still in? theres a trident cape meeting happening tonight @V8Pete & all others1 point
-
I think Dave decided home made long tail boats were going to be the next big thing, so we aren't far off.1 point
-
Big (not huge) cam in my 4k doubled idle fuel consumption.1 point
-
well the stock car guys do just weld a 2 barrell holley to the top to pour fuel in and just power up the coil on fixed timing with a three speed hq box, if ya get stuck with it Im in hamilton and can have a look at it, been messing with holden wiring for years now1 point
-
Ahh for the days of a timing light and screw driver.1 point
-
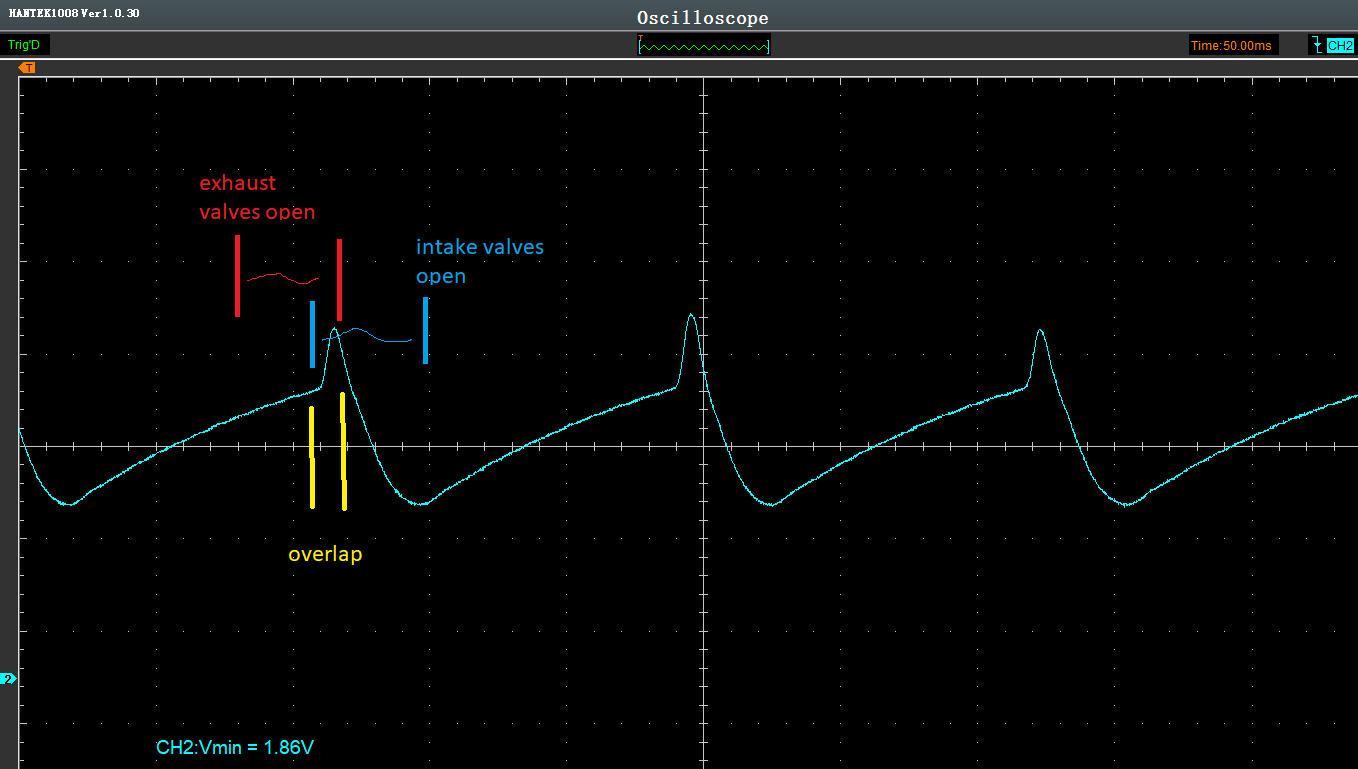
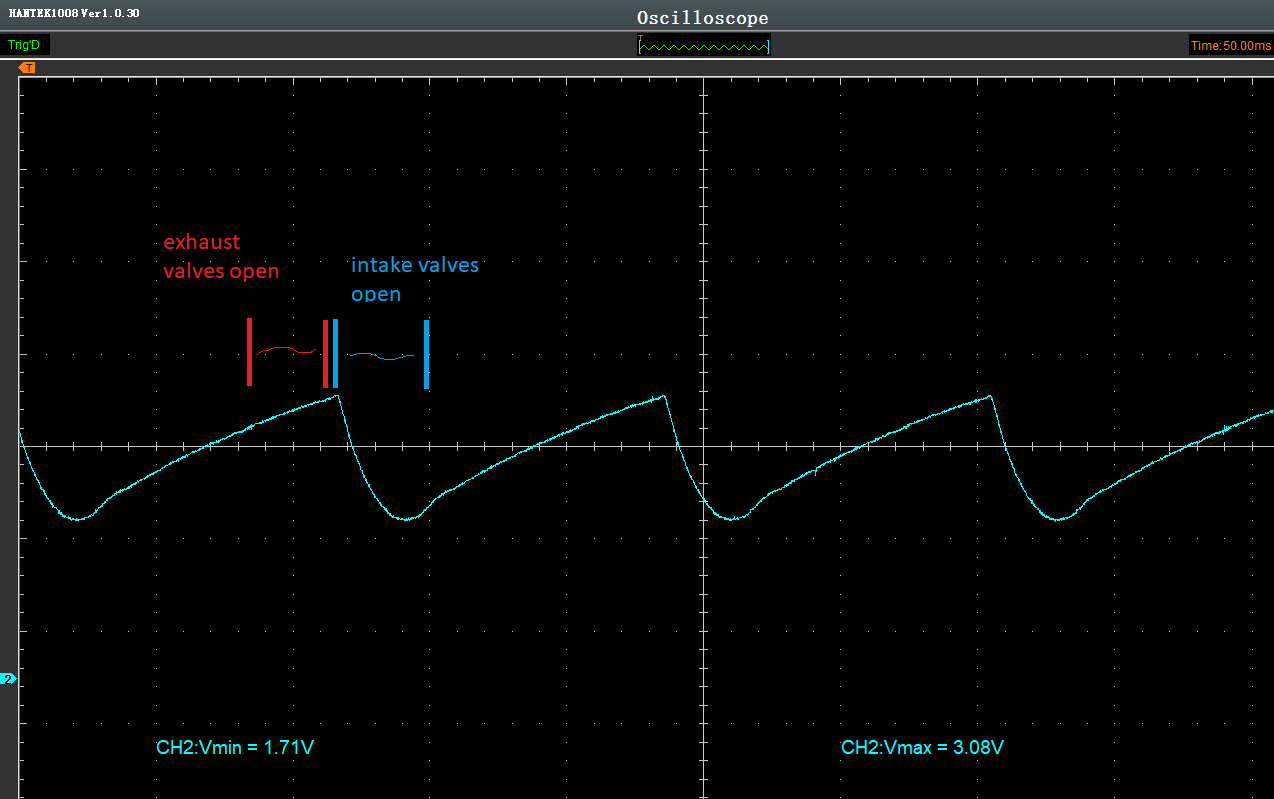
So I hooked up a MAP sensor to a single runner, and as expected it's useless because the voltage fluctuates like crazy. But then its interesting to view with an oscilliscope instead. This is the MAP signal when the car is idling normally. Peak to peak is 720 degrees of engine rotation So when the intake valves are open and the piston goes down you can see pressure starts dropping as you'd expect. Look what happens when you add 40 deg intake cam advance though. Now there's a period of time where the inlet cam and the exhaust cam are both holding their sets of valves open. So the intake side intake low pressure and the exhaust side high pressure means exhaust gas scoots right back over the piston and rushes to fill in the intake. So pressure goes up. Then the exhaust valves shut, piston goes down and then the pressure starts to drop like normal. Which is why you get that fully sick 3/4 race cam idle on your 4k that goes hard for what it is. I wonder if it's actually better economy having this happen so you're heating the air fuel mix. Hah. I'll hook up some more sensors to it to give some context and see if there's anything interesting happening at full throttle.
1 point
-
Ahh the ol' shitty running Ecotec. You'll likely find your timing chain is far longer than recommended.1 point
-
I have a full album of Clints nutsack from multiple angles and reflecting from shiny surfaces.1 point
-
Ahhh not sure yet. Definitely bang the headers in but not sure if I'll be able to do the full rest of it before drag day. It'll probably not acheive much without the rest to go with it though. I finally got consent for my shed so hoping it'll be up by christmas or not too long after. So some busy weekends ahead! And otherwise a bit tight on cash till end of the year at least. Once I've got shed up there's no reason not to hoard more stuff for a C56 & big block swap instead of doing other stupid stuff like getting Carina going.1 point
-
Pretty sure they've lusted after a vitz for so long that they put the interior from one into their cybertruck1 point
-
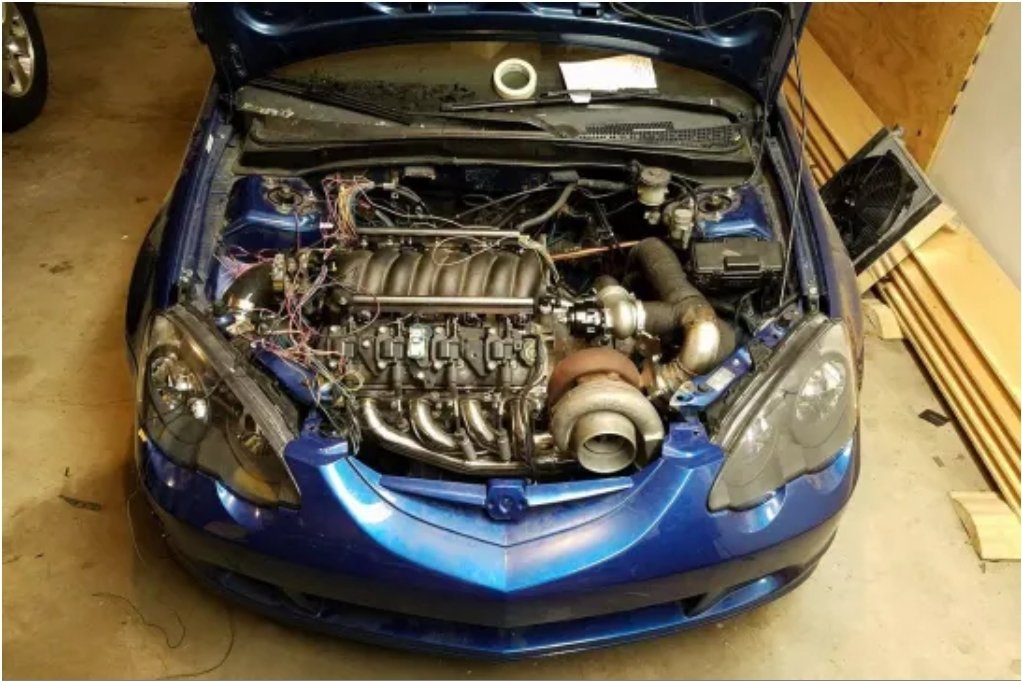
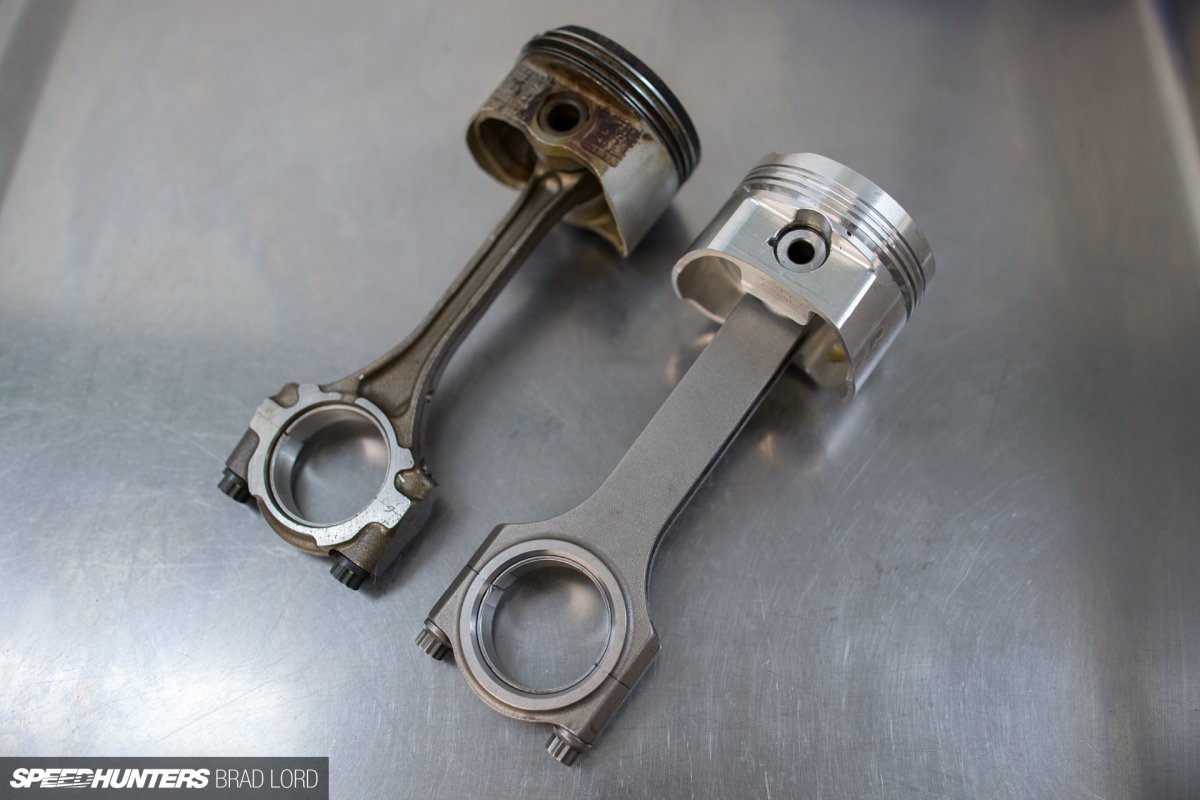
It's the same block, same rods, same head as the non hybrid version. Likely even softer valve springs but I'd need to change those in any case as the current 7200ish valve bounce limit is ruining my day. But it has different pistons (high comp) and different cams (270 deg duration intake) to make it atkinson cycle. Here's a pic of the factory pencil rods vs some considerably beefier looking aftermarket ones The upside though is that it's got a fairly decent rod/stroke ratio. Which is probably why it can get away with such shit looking rods in the first place. I've found a few more examples of people using prius pistons in normal 1NZ engines though. This dude had 140hp at the wheels and 8k rpm on standard rods. In a toyota Vios though which is a big chunka compared to an Echo. Looks like it goes alright though
1 point
-
Richie came over and gave me a hand to prep some bits and then, i painted a thing. 2020-11-07_03-58-20 by sheepers, on Flickr 2020-11-07_03-58-14 by sheepers, on Flickr1 point
-
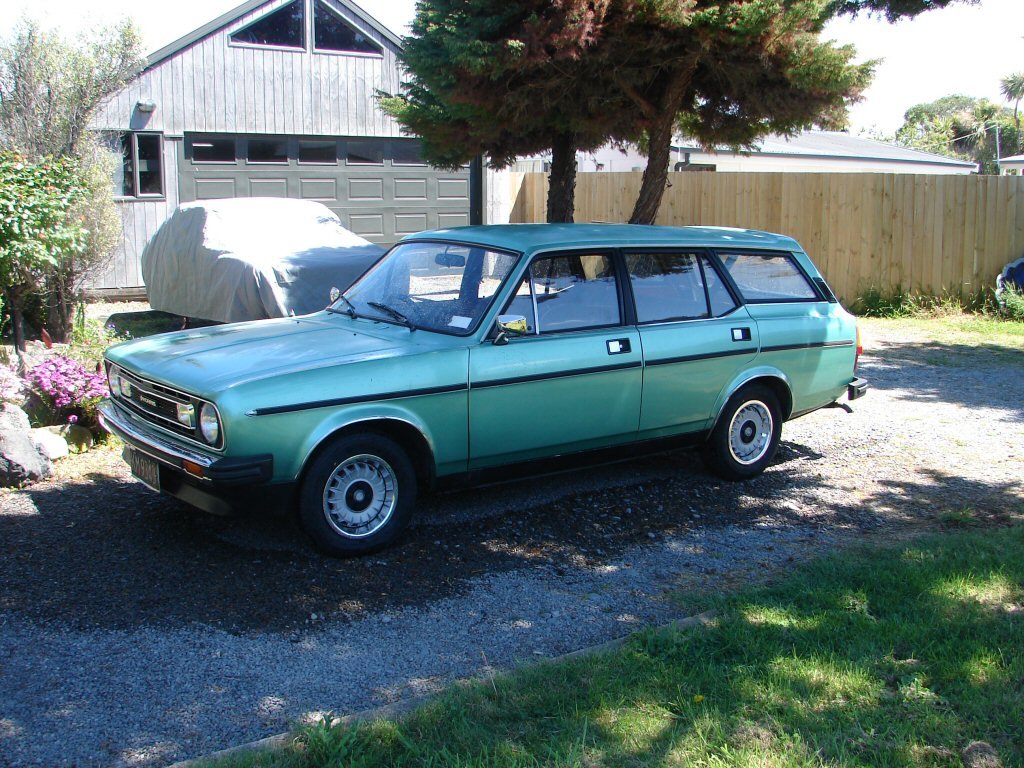
Well that was a happy thing. After a bit of carb tuning it was much happier at idle, but I also had to retard the timing slightly. It was spot-on by strobe, but as the engine is running 11/1 the fuel is not up to it and needs to be slightly less advanced. Despite the driving position being a bit plush I was keen to make sure everything worked as intended. This is the steel side... .. and this is the alloy side.. Beginning to look like something now.
1 point
-
But yes, the intake clears everything now including the engine covers so all the seats should be factory:)
1 point
-
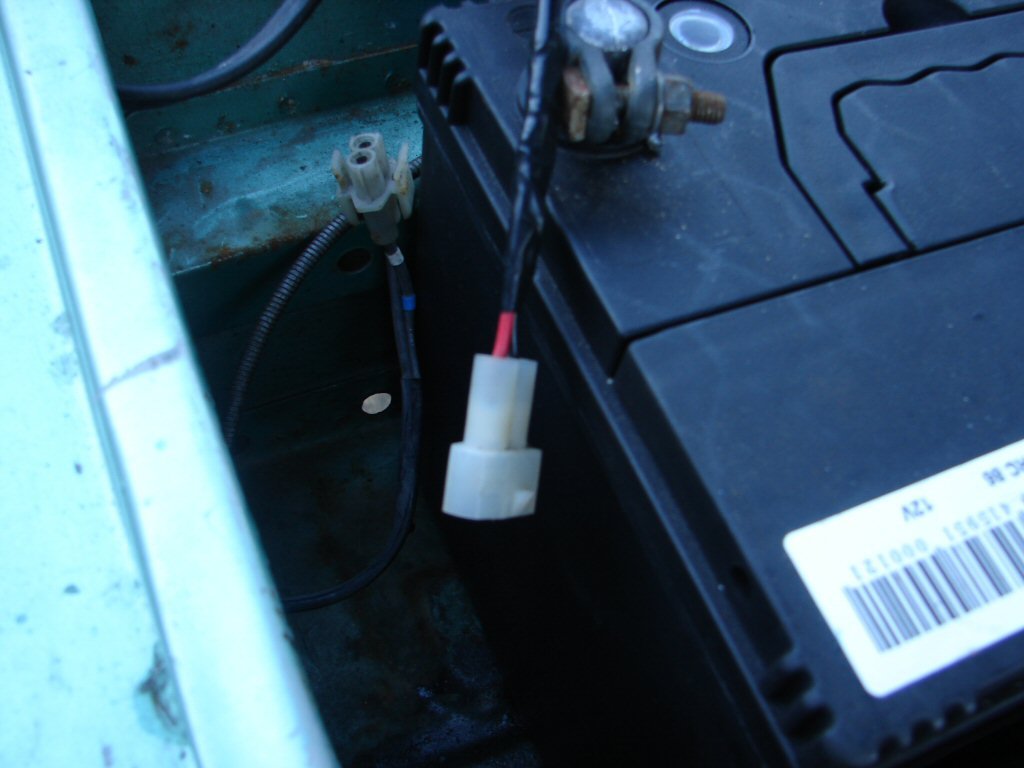
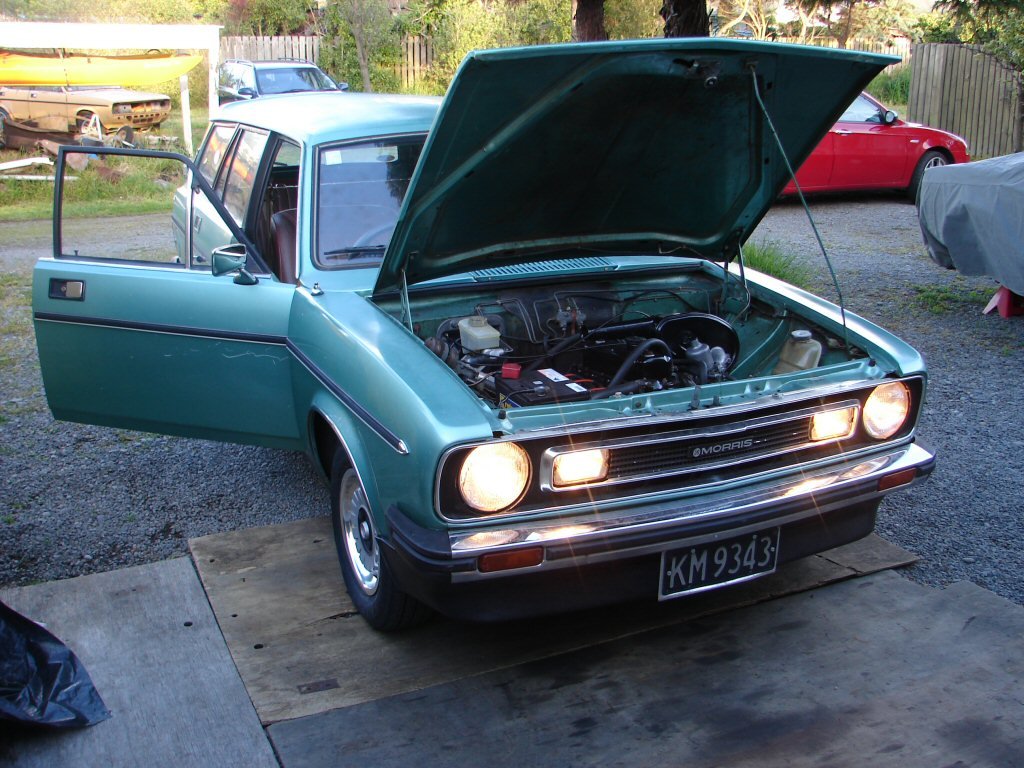
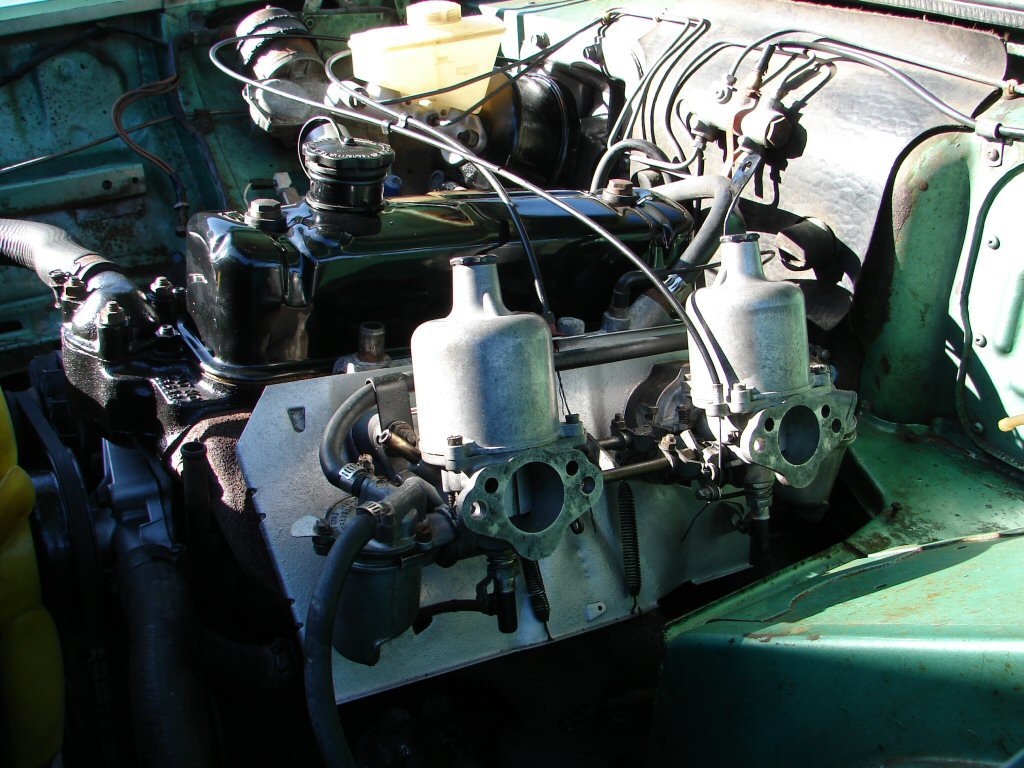
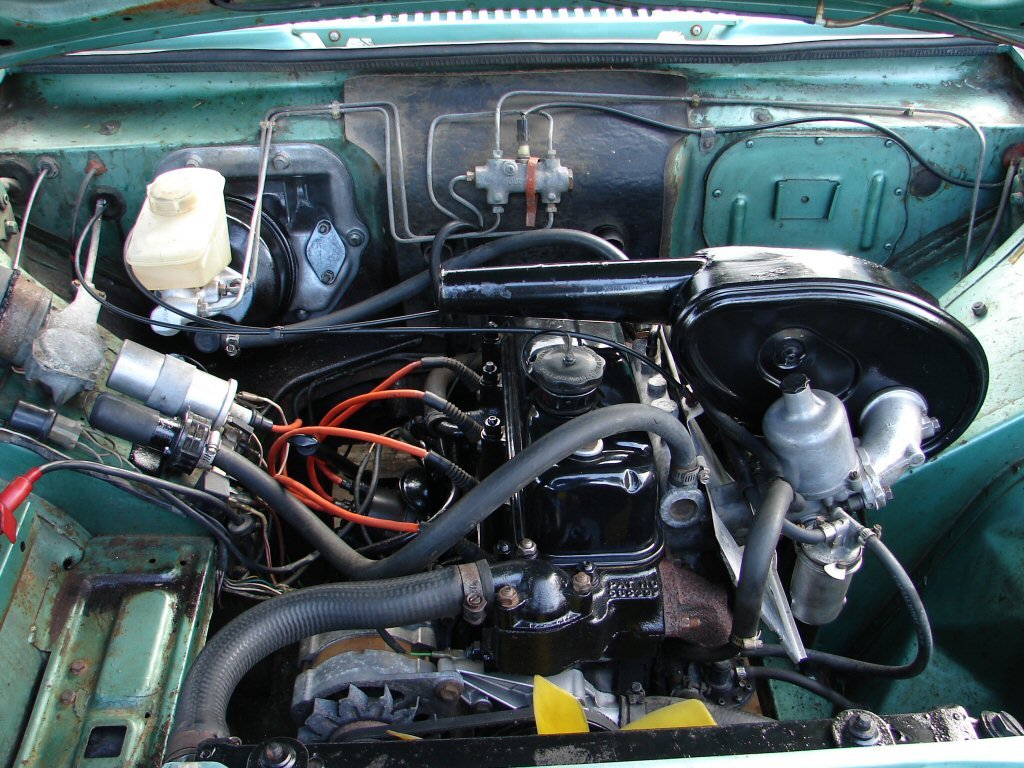
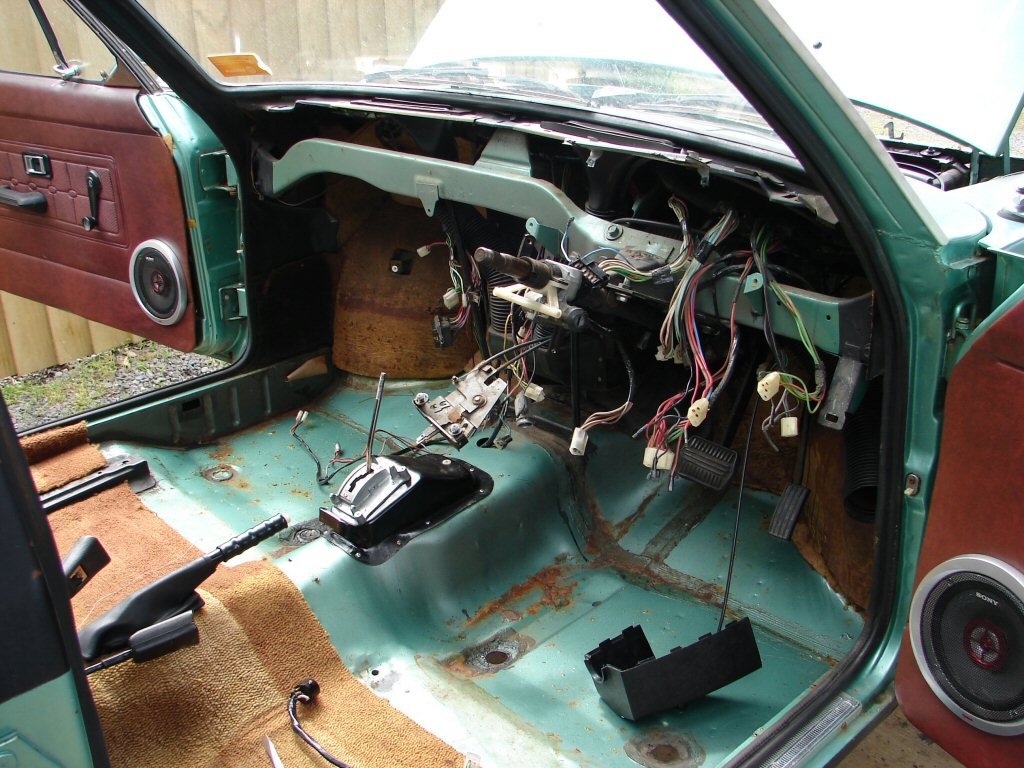
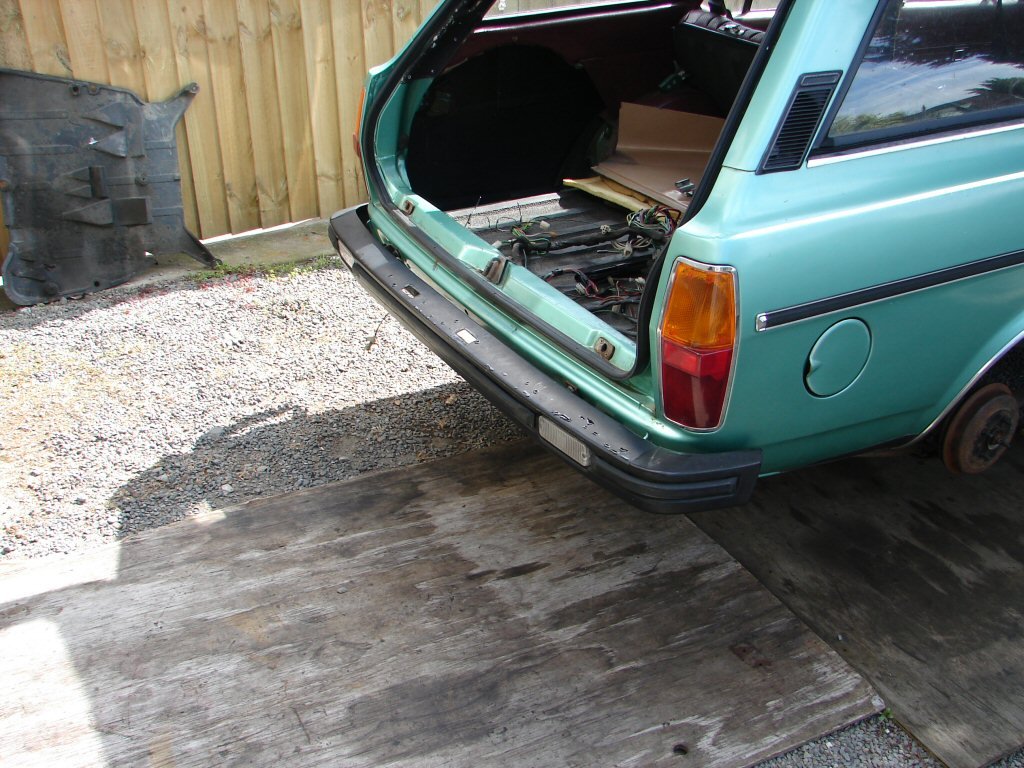
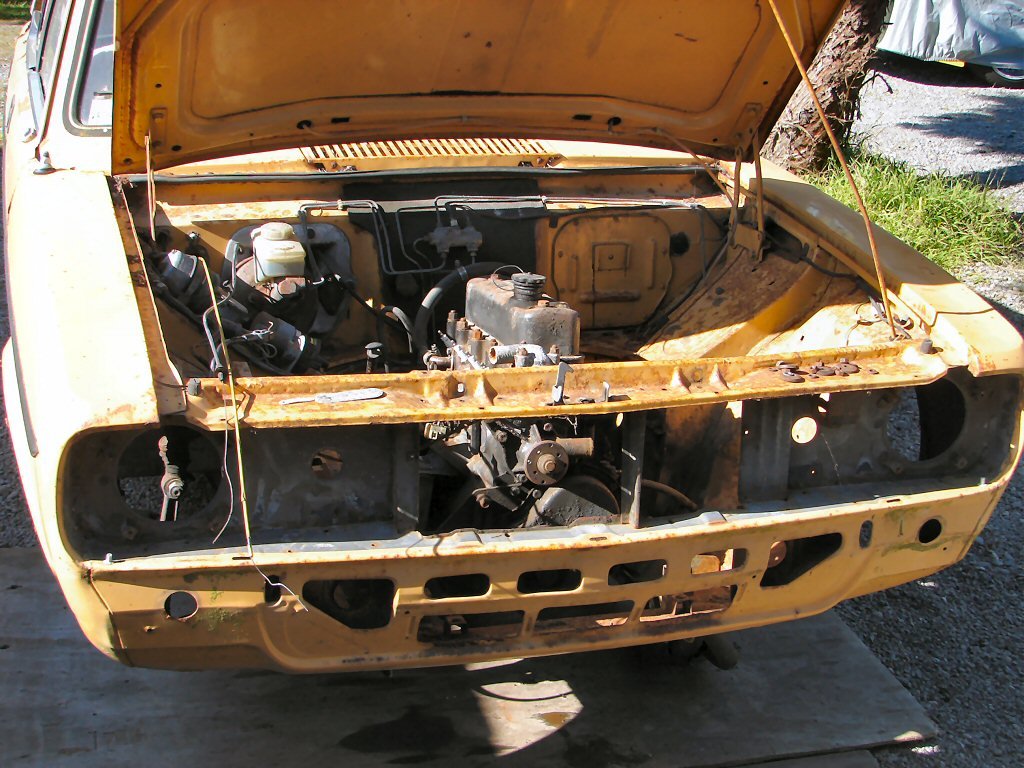
I had cleaned up the carbs and manifold bits that came with this engine, so they all got fitted looking a tad fresher... Don't be ridiculous.... I also found a powder coated rocker cover that I knew I had stashed somewhere. Somebody went to great trouble to have it powder coated with the existing dent still in it...? Next obvious step was to refit the aircleaner, indigenous to Marina models that got all the otherwise MGB stuff, but which rather wisely drew their air from the cold side of the engine... The next step involved adding some functionality which this car was never equipped for. The twin carb 1800 engines had a propensity for 'running-on', due to various things, but because of this and the forthcoming US emission limits, a modification was done to ensure that fresh air was drawn into the inlet manifold at the instant the engine was turned off, to thus purge unburnt fuel, and also make the engine stop at a time it was supposed to do so. This was achieved in a way that was both elegant and clumsy. A relay was fitted which received power when the ignition was turned off. However, the relay was not earthed unless oil pressure was still present, achieved by extra contacts on the oil pressure light switch. The relay operated a solenoid valve which allowed air to be delivered to the inlet manifold, thus delivering the cure for life, the universe, and everything. To demonstrate I shall insert here the final video of this engine running in its previous body prior to the transplant. The water pump was entirely karked and made a hideous noise, but the engine was otherwise responsive and healthy as I knew it to be. Pay attention to how it stops. Old yella With a manual transmission you can drop the clutch and force a stall when the engine runs on, but with an auto that is not an option. The cure worked very well indeed. This same technology would need to be installed in this car. Besides some plumbing this would require a different ignition switch, extra wires in the wiring loom to the engine bay, and the relay and solenoid themselves, plus the weirdy oil pressure light switch. All of which it got. As can be seen here if you know what you are looking at. Both items are on the left inner guard above a starter relay that I install as a matter of course, but the large diameter hose through which air is delivered to the inlet manifold is obvious. So that should take care of the niceties. I had now to add wiring behind the dashboard, which is a mega-bitch from an access point of view, and I had already discovered that the dashboard was broken, missing a mounting on the left side which allowed the parcel tray to collapse, so as I had several (5) complete dashboards on hand, I decided to rip this one out and replace it. This would make access to the wiring a cinch, but would also involve a great deal of work. Sigh... Well, it certainly did. But there are always advantages in providing a clean palette as a base working platform. I was able to swap the necessary ignition switch wiring for the solenoid by using another already equipped connector, plus I was able to address all the shortcomings of the old dashboard before fitting the new one. This then began to happen... As I was in an electrical mode, I decided it was time to fit a rear bumper, which contains various necessary lights. The car did not have one fitted when I got it, but the previous owner had obtained one and included it. The correct bumper would have been chrome, whereas this one was black chrome. I thought I had a chrome example I could fit, but found an interesting thing - the Estate bumper was wider than those from a sedan. Bother. I figured I would fit the black one for the time being, as there was some urgency to make this car road legal. Having made progress here, there was only one logical next step. Would it go..? First start
1 point
-
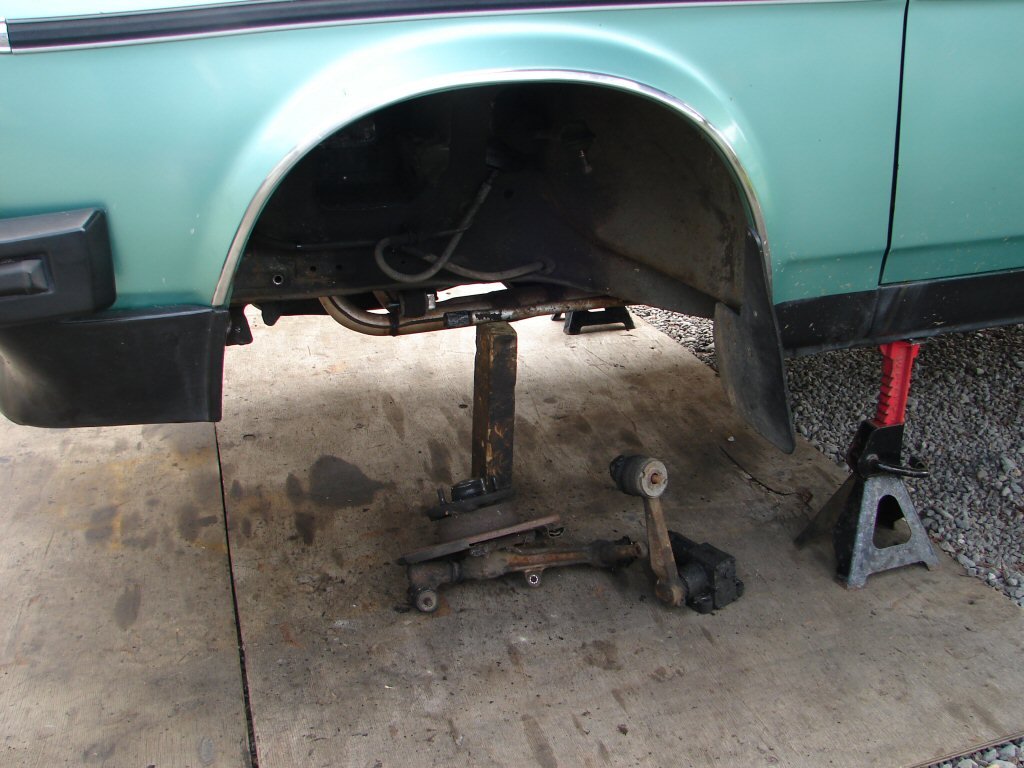
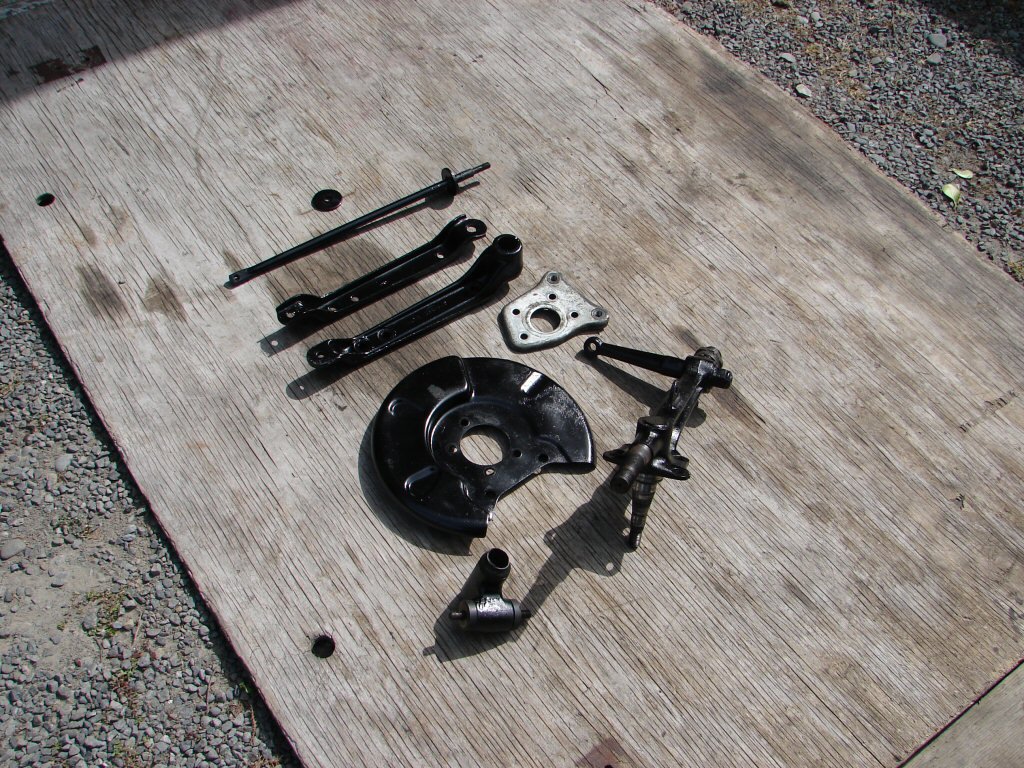
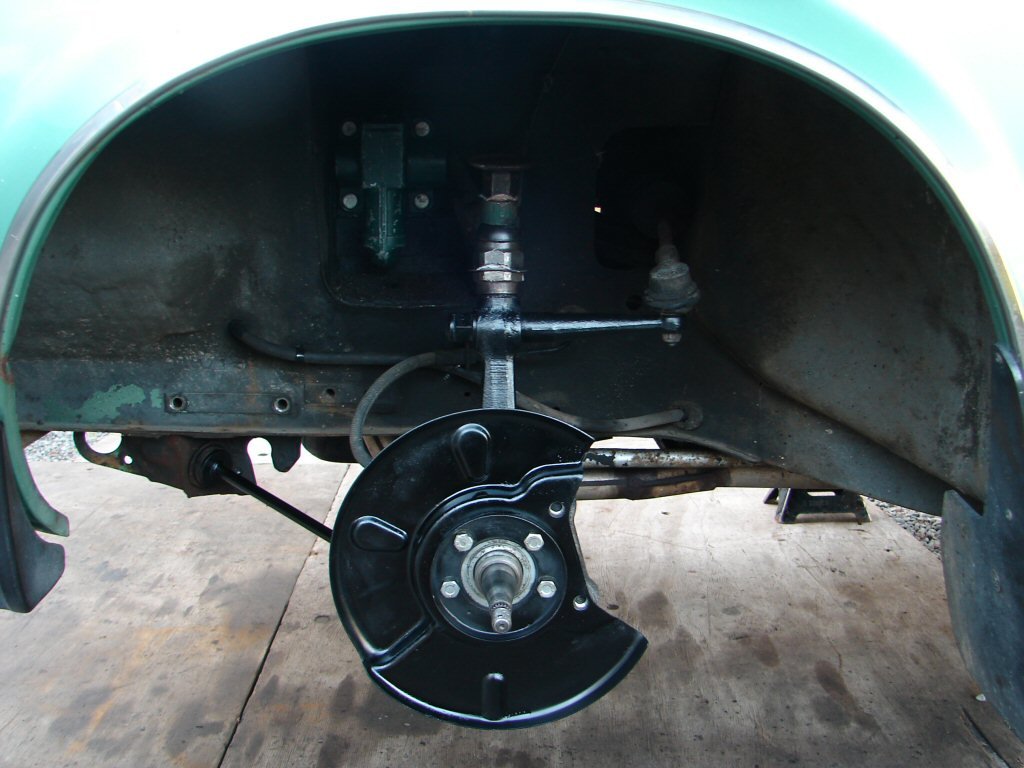
Inspecting the front suspension revealed some early stuff fitted here as well. Seems this car was built with parts from several. Perhaps the donor car also supplied the twin-carb 1800 engine as this would have originally had the 1700 O series. The early suspension had rubber bushes in the shock absorber arms, which form the top arms of the suspension, so that allows a bit of vagueness in the steering. There was also a camber change at some point, but as I could not detect any difference in the dimensions of this setup otherwise, I decided to reuse the uprights but convert them to later spec by fitting the later top swivel joints which have a tapered pin that fits to the shock absorber arm, so I would also need to fit a different pair of shocks. First step to rip it all out then.. Doesn't take long, although some parts were rusted together so I just left them that way. What does take the time is cleaning all the crappy bits and painting them. There is a trunnion at the lower end of the upright which need regular greasing, but they are prone to letting all the grease go to the loosest bit and starving the other, so when you are assembling them is the ideal time to get grease everywhere. The trunnions screw onto a huge thread on the upright, so the steering turns the two parts up and down the thread, albeit only about 1/4 turn. This is why the grease is important. The swivels were removed from some spare uprights and bunged onto these, and a pair of shocks found that were nice and clean, which makes me suspicious, but they would do for now. The brake calipers were problematic, but I got one working properly and found another to replace the one that wouldn't. That allowed me to bleed them all up and get the car back on its wheels so I could turn it around when needed. I had fitted some 2" lowering blocks when the replacement rear end went in, so I dropped the front a similar amount. This is as simple as fitting the lower arms onto the torsion bar in a different position on the spline. The torsion bar is the silver thing just above the exhaust. Crude but effective. Another couple of things completed then. If you don't go through absolutely everything you miss the bit that is going to give you trouble...
1 point
-
All the old underseal is all scrapped off ( what a shitta of a job) Can start to get it back to bare metal.
1 point
-
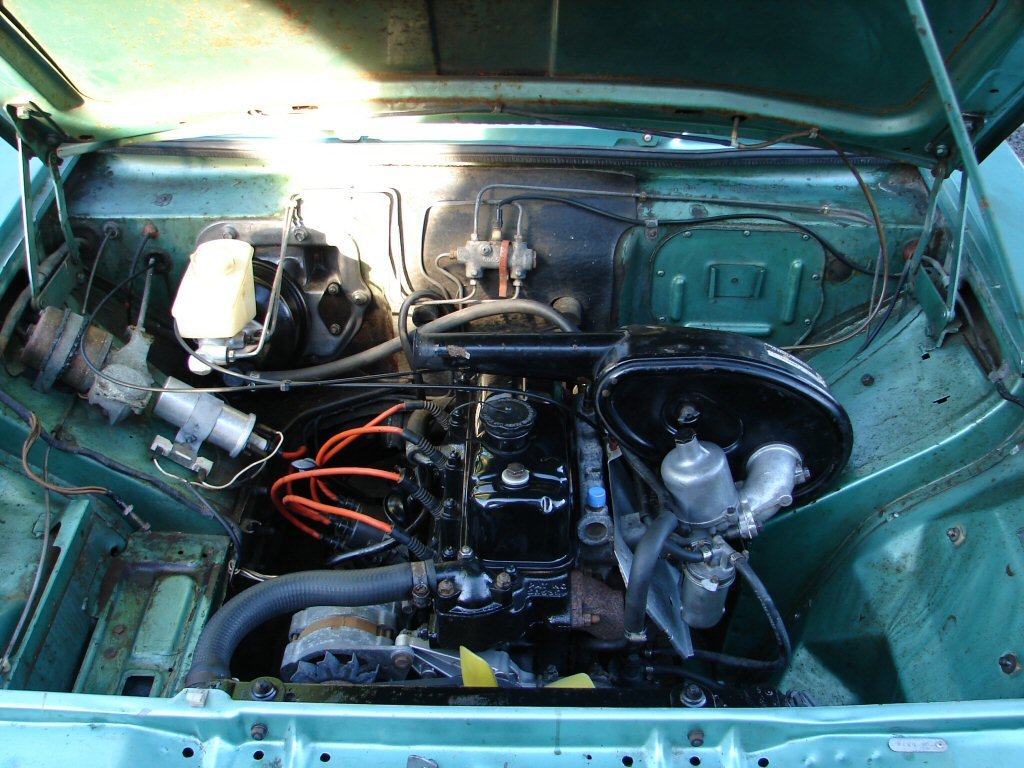
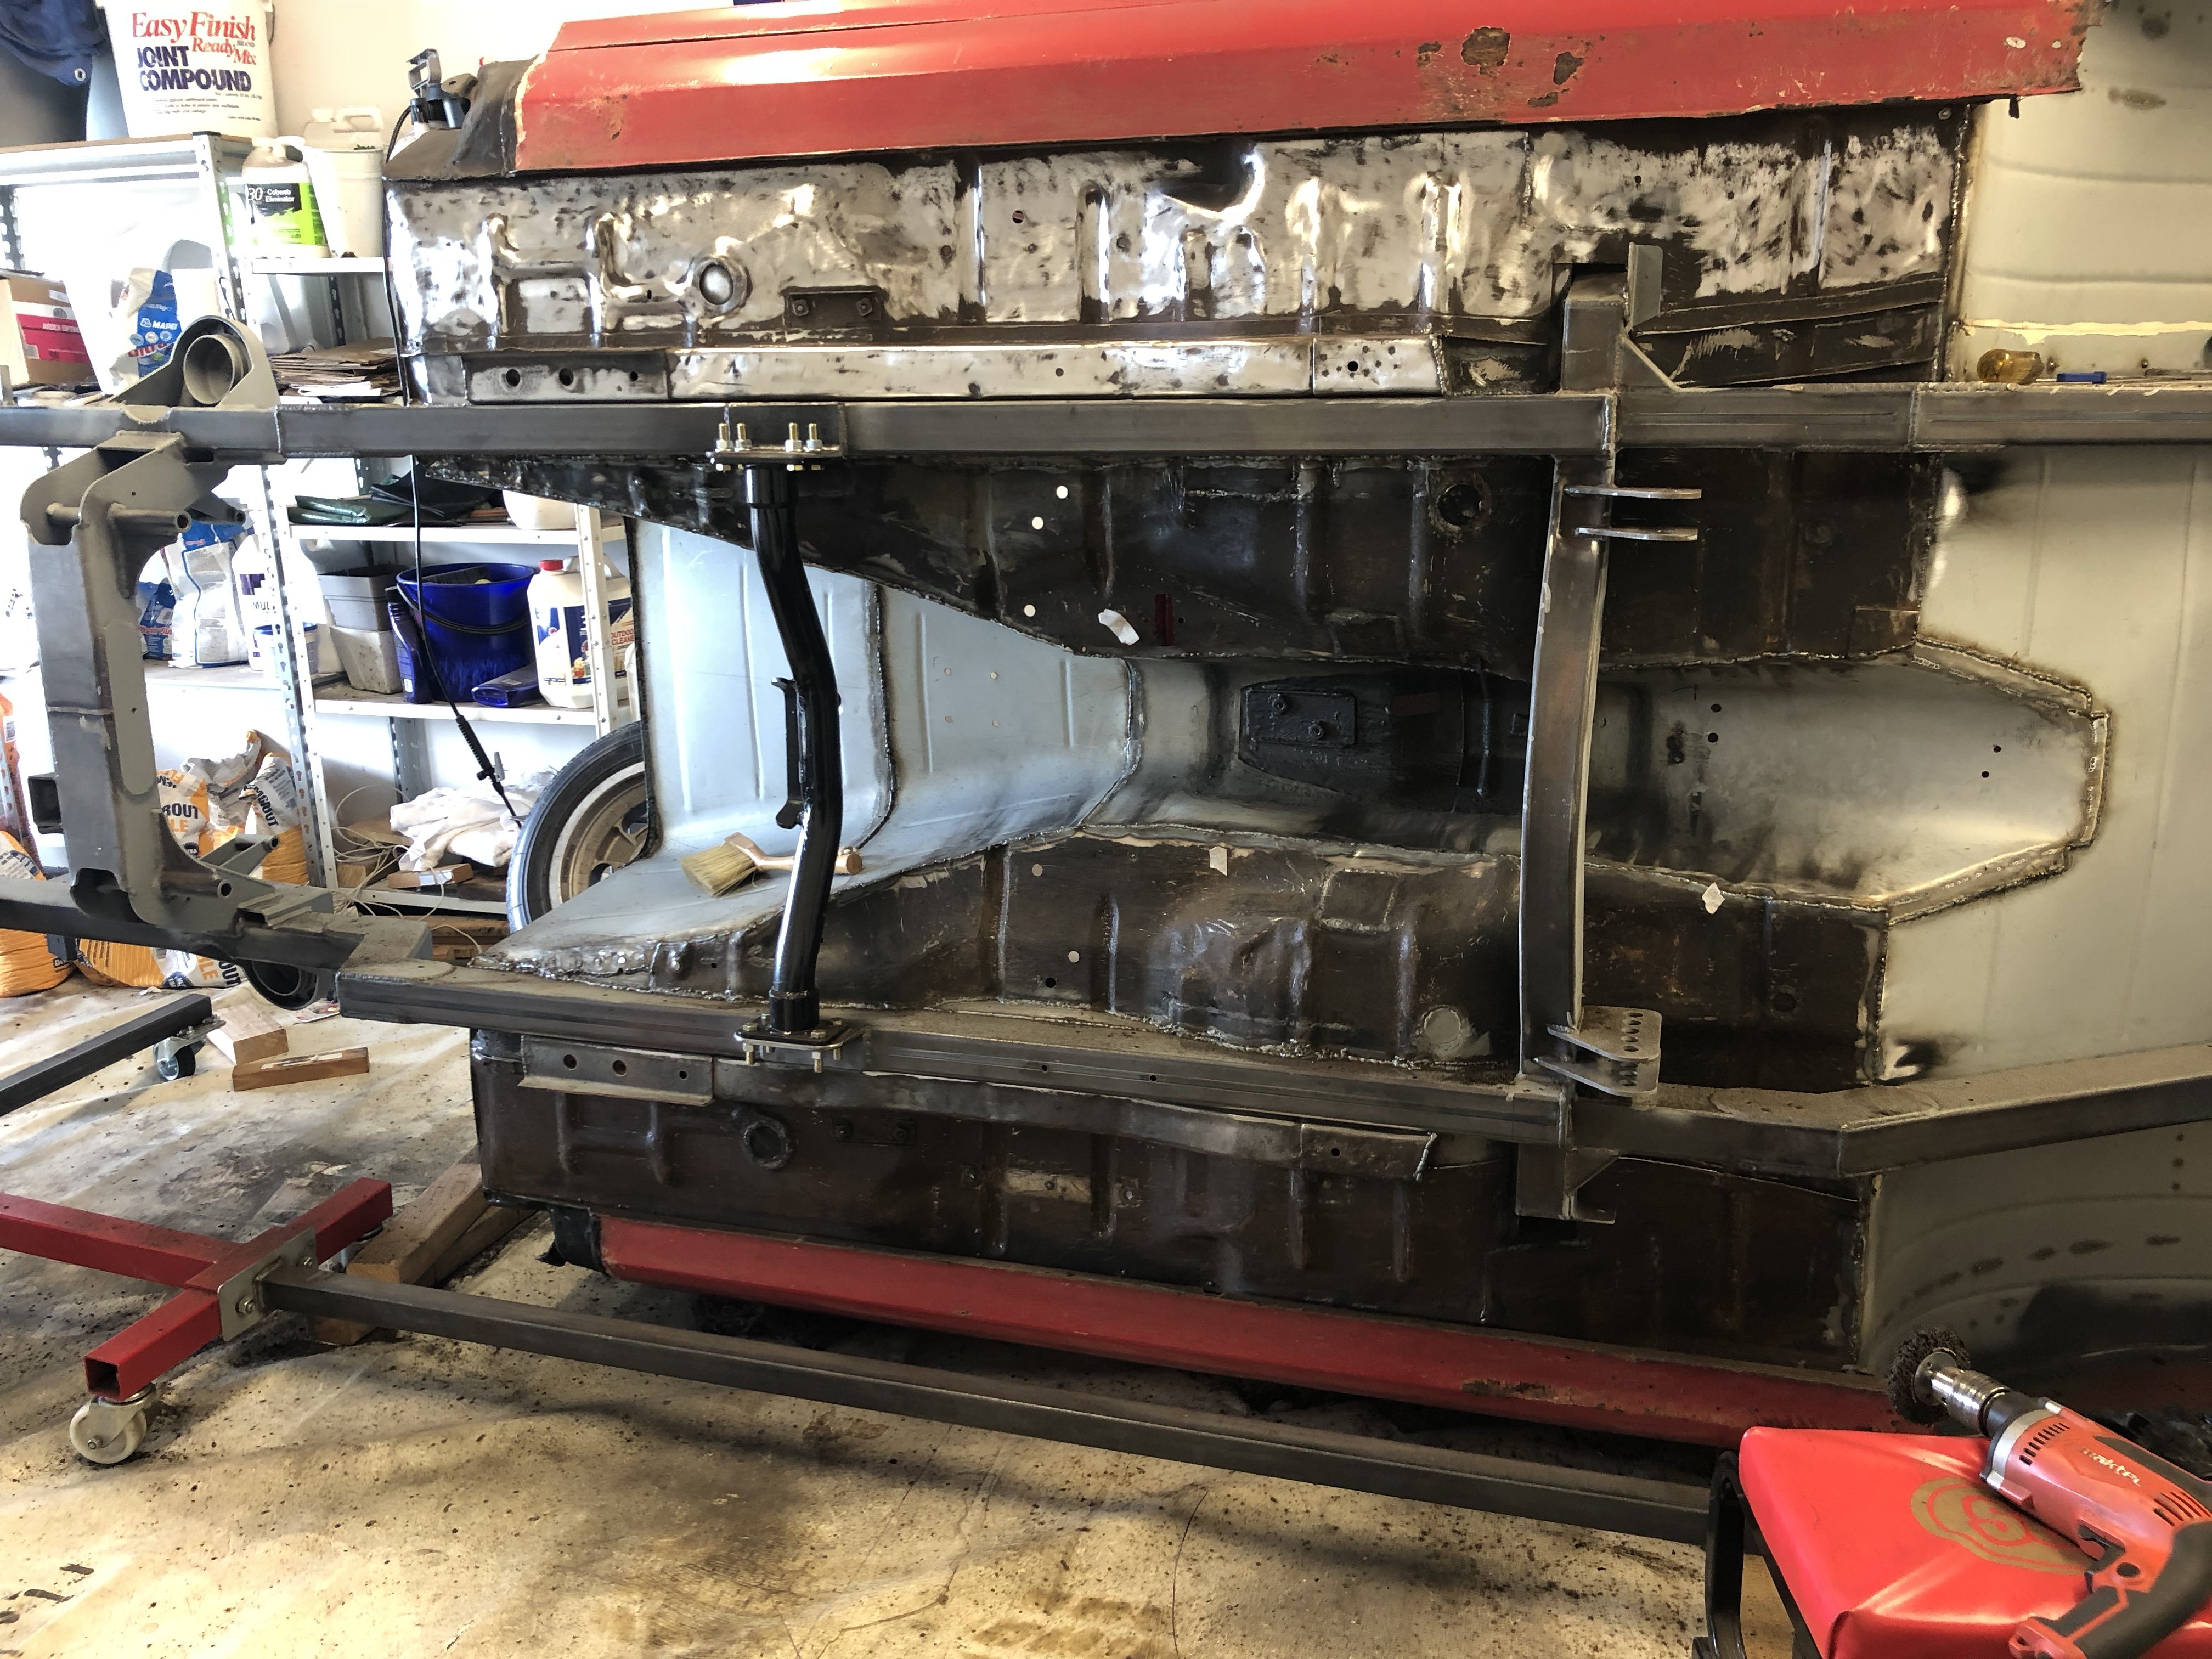
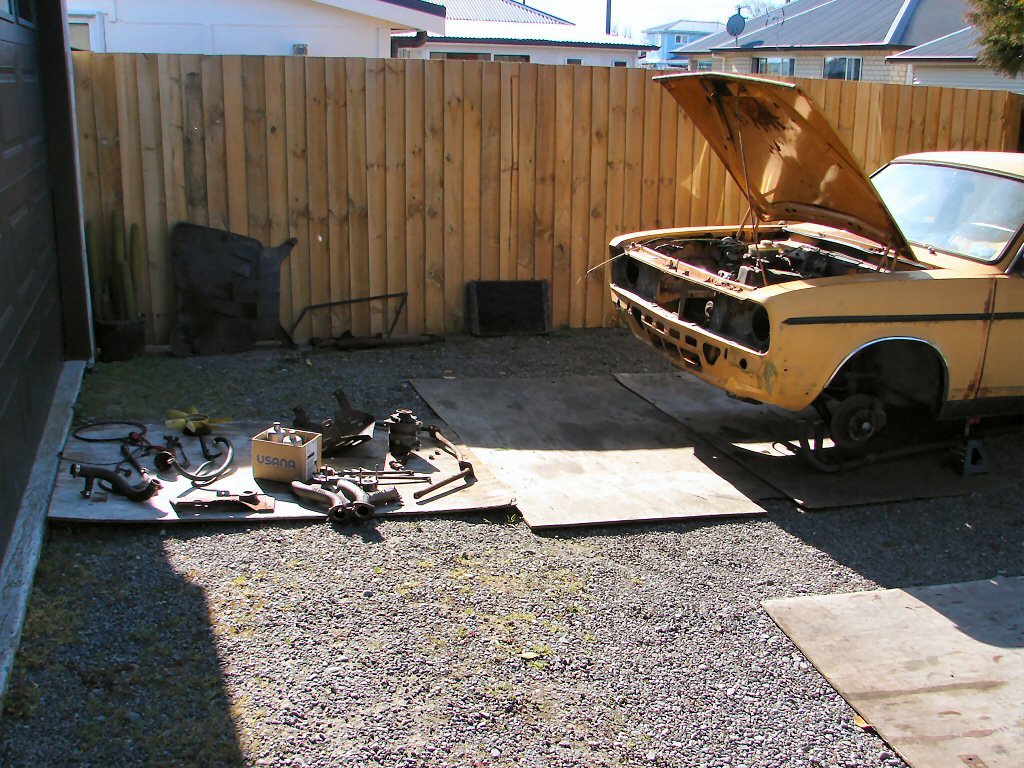
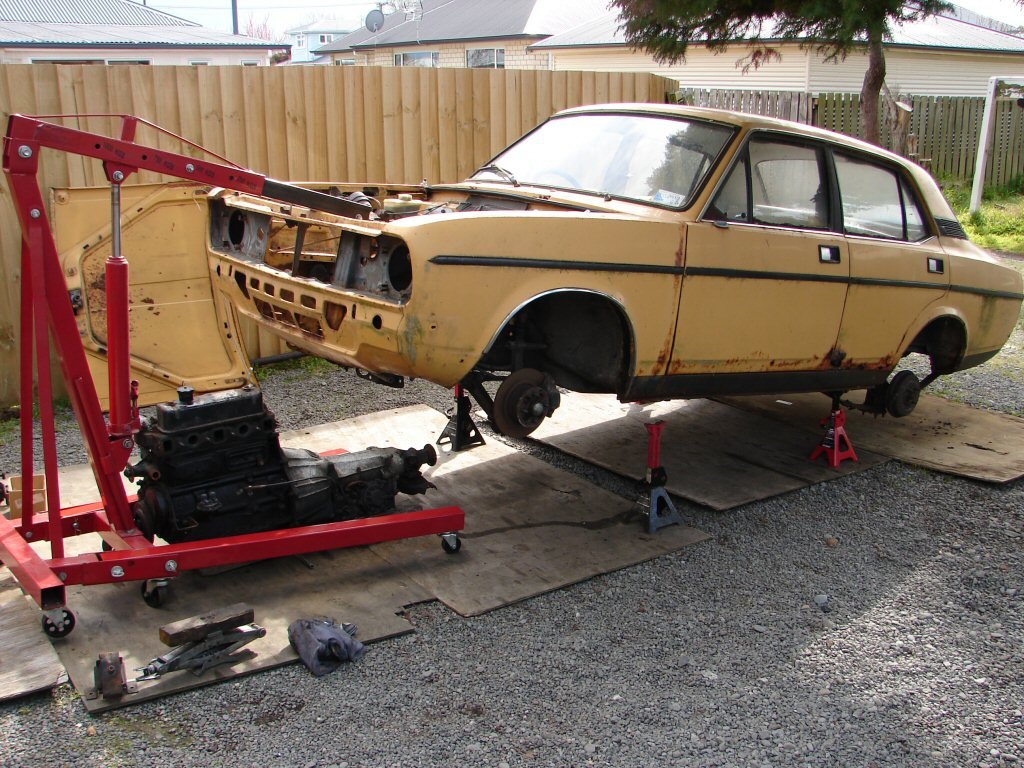
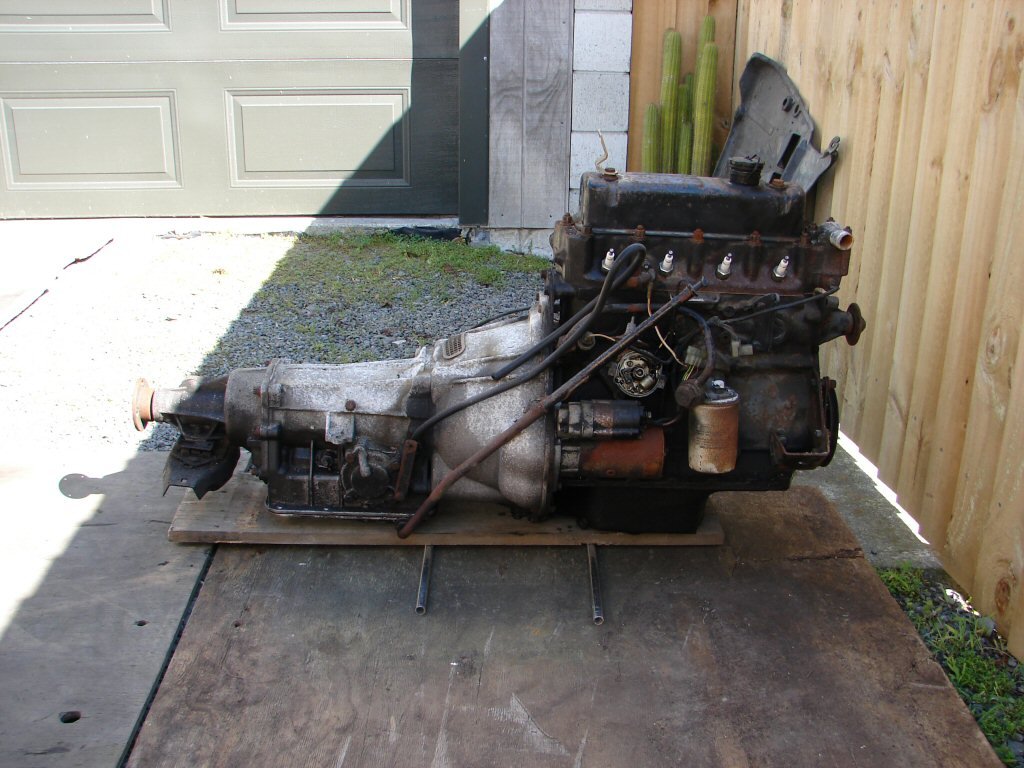
It takes a whole lot longer to remove all the ancillary bits of an engine than it does to remove the dang engine. I try to keep things in groups, so I will be able to find all the manifold nuts/bolts when I next need this manifold again, for example. Sometimes it works. Got this thing looking good. Took a few years on the lawn... The Marina has no crossmembers other than the rear gearbox mount - which can be removed with the gearbox. So the easiest approach is to drop the entire engine/gearbox as a unit on the deck, then lift the body and drag it out the front. My engine hoist has just enough room between the leg extensions to allow dropping the body back down to remove the hoist and mess with the rest. I drop the engine assy on a piece of wood with a couple of small rollers under it, so moving it is quite easy. That gets us to the point where this engine can be spruced up for another life in yet another body. Has outlived 3 so far... Once this lot is ready to move into the estate I will drop its engine out in the same way.
1 point
-
Chassis mandrel finished! Exciting stuff. Brunton Engineering in Palmy did an awesome job. If you need fab work Id definitely recommend.1 point
-
1 point
-
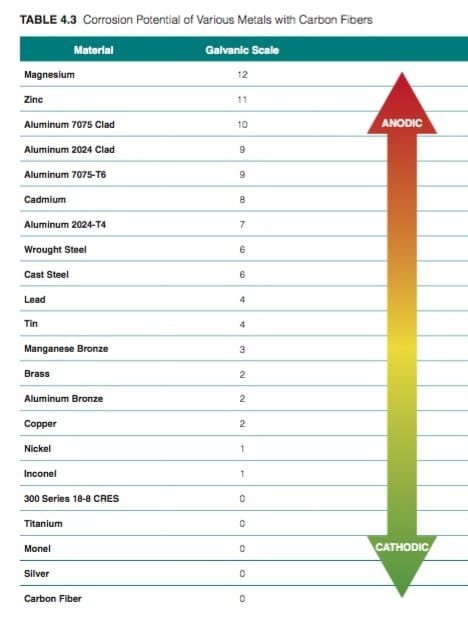
1, I had the hood laying on the lawn out of the way, he wasnt watching where he was going. 2, nope, he was nearly twice my weight LOL 3, yup, he has to bend over to get through doors. And yes, from my experience a glass part has to be considerably thicker. My suggestion is to get some glass and some cf and start playing around. You need to fool around for a bit before committing to a big part anyway. Ali express cf is great.1 point


.thumb.jpeg.384ff72c8d2b0ee0d34a7bdedb55bdcf.jpeg)


This leaderboard is set to Auckland/GMT+12:00