
Leaderboard


Popular Content
Showing content with the highest reputation on 09/22/20 in all areas
-
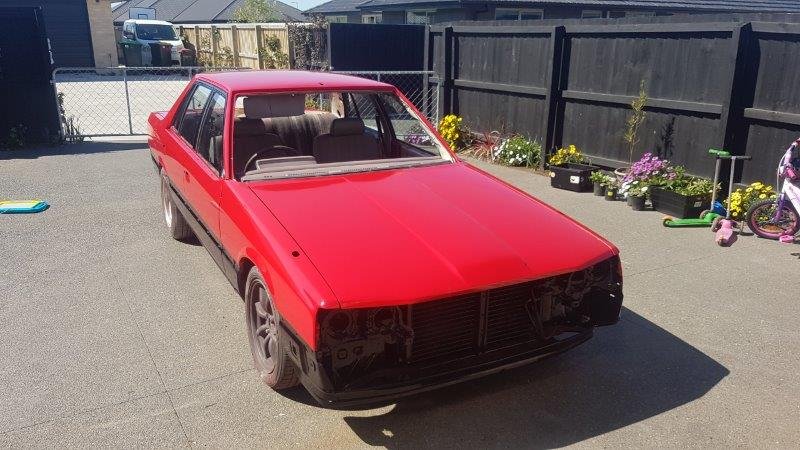
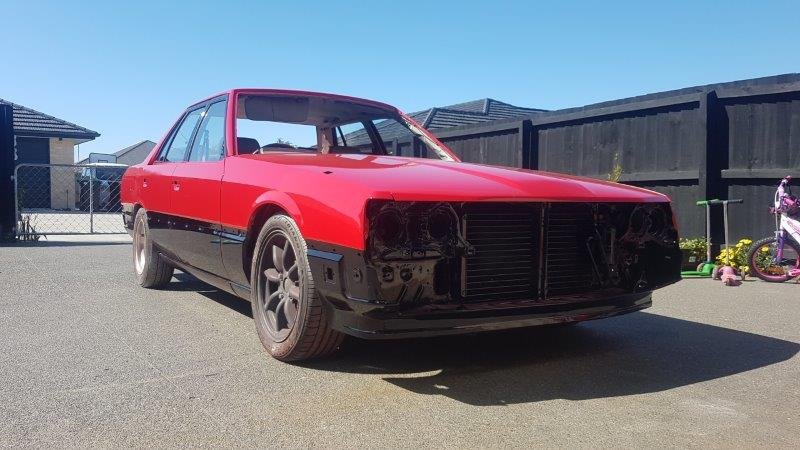
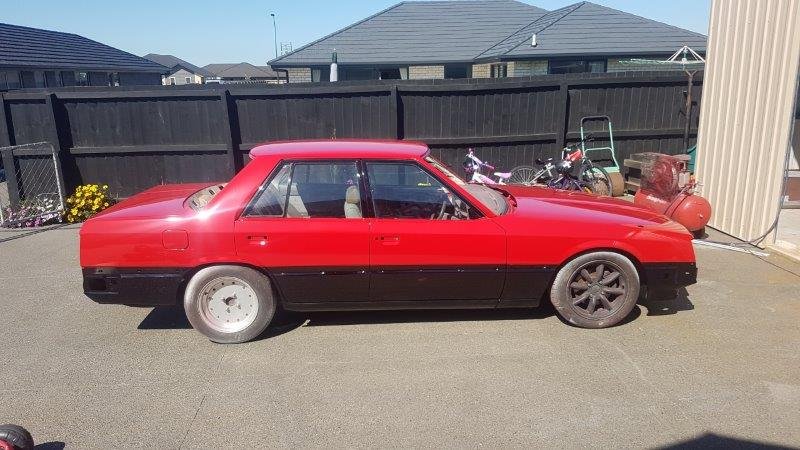
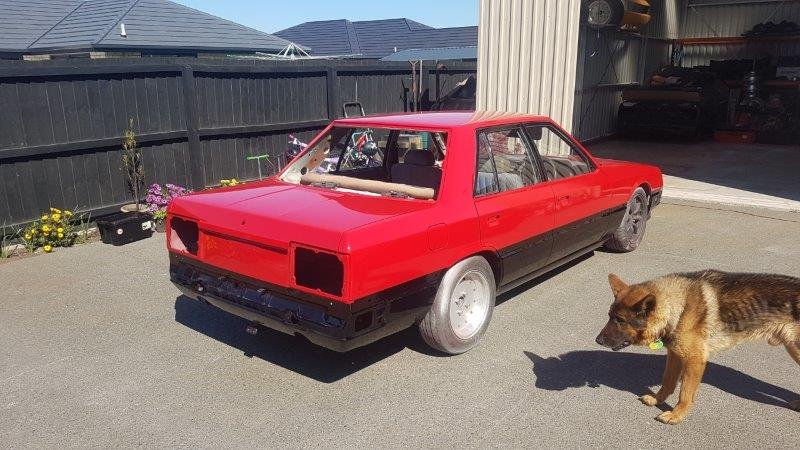
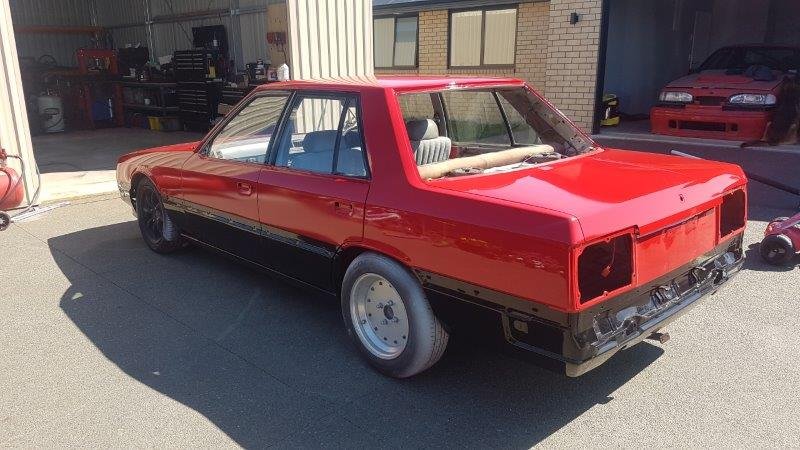
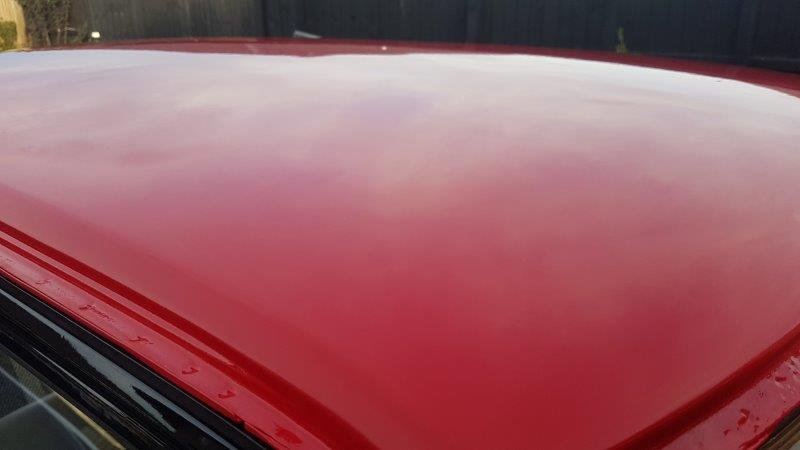
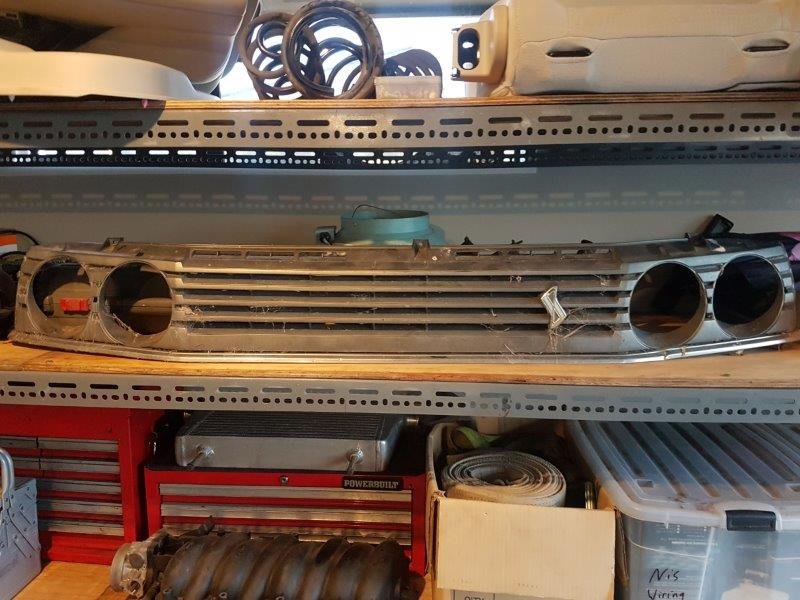
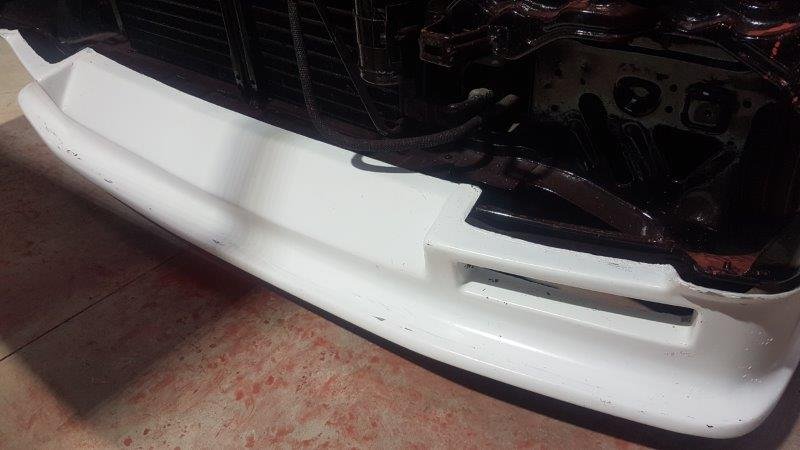
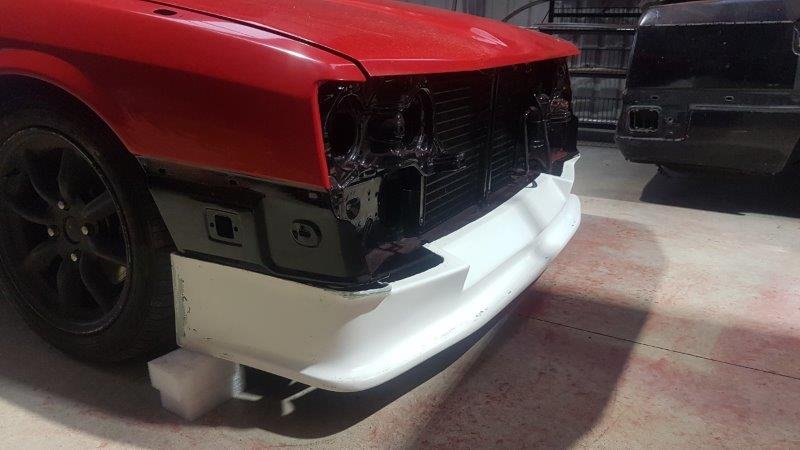
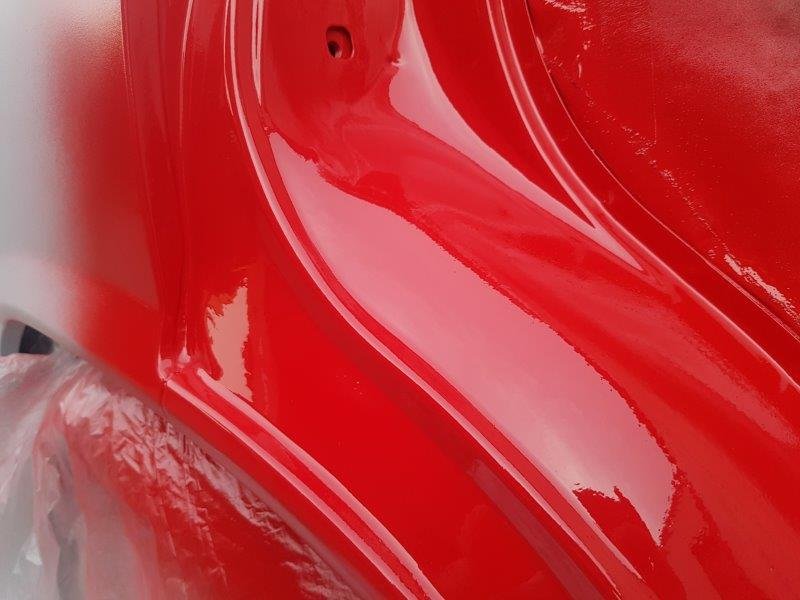
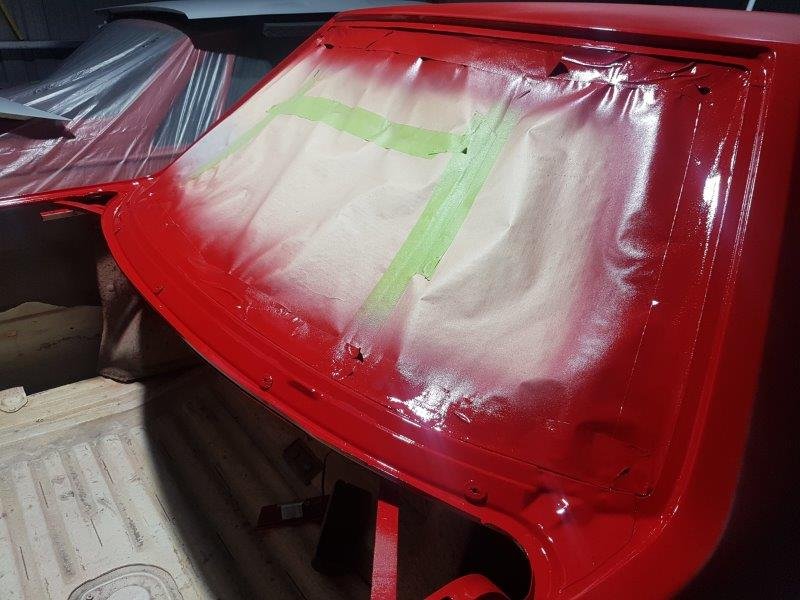
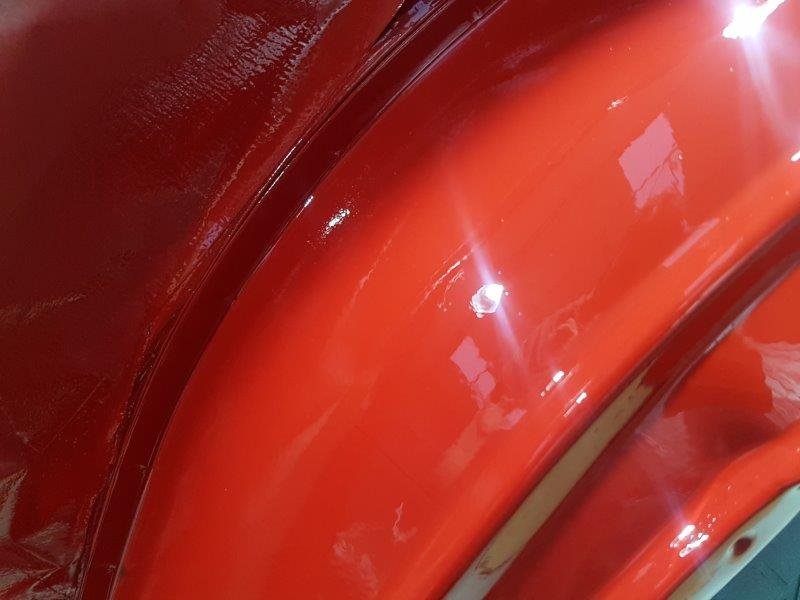
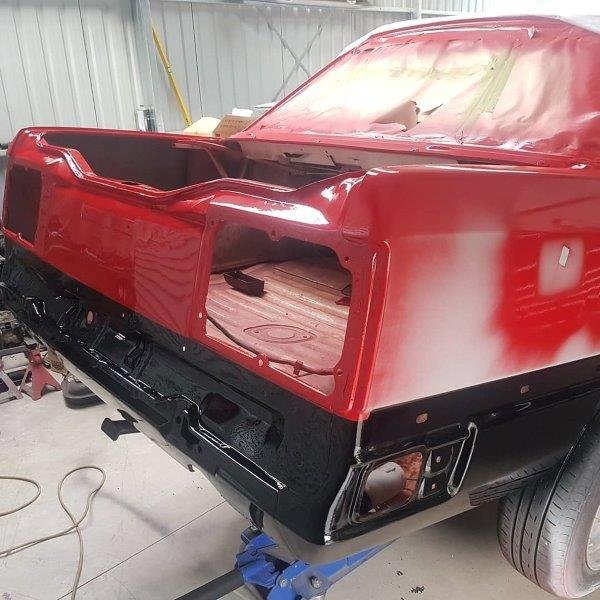
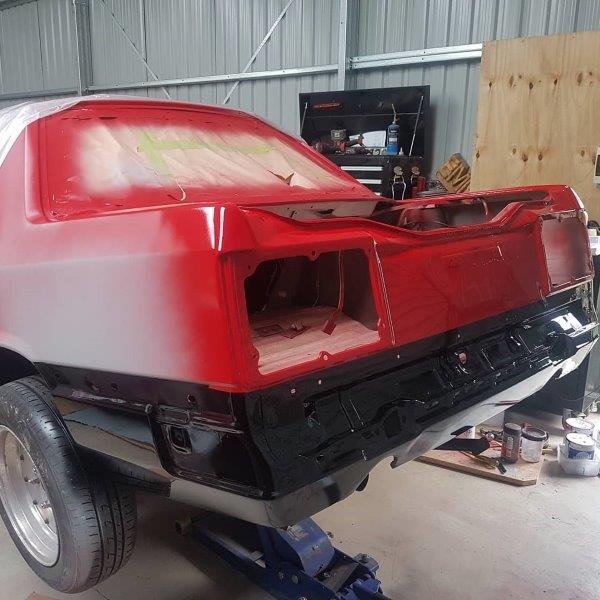
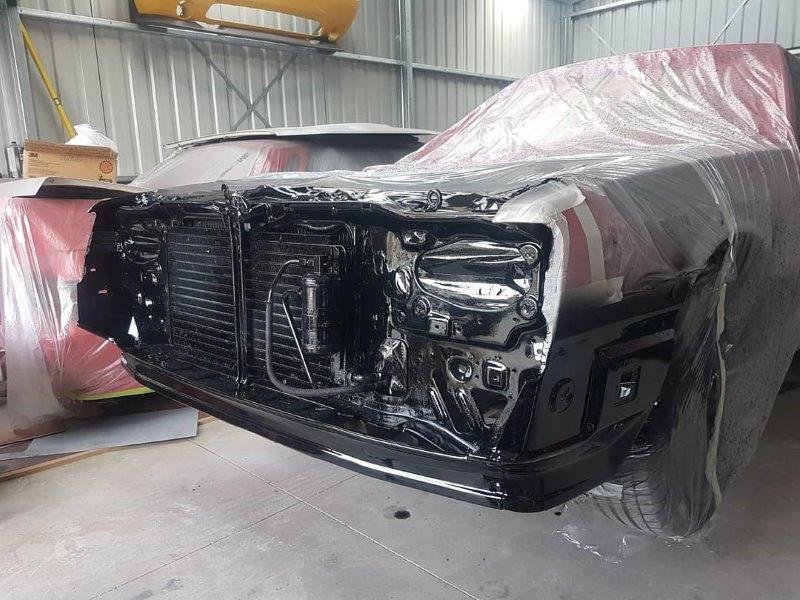
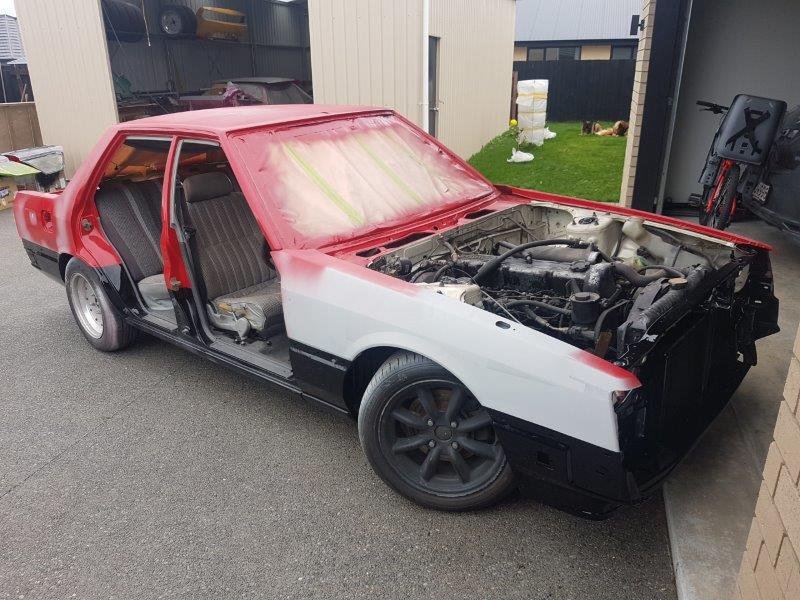
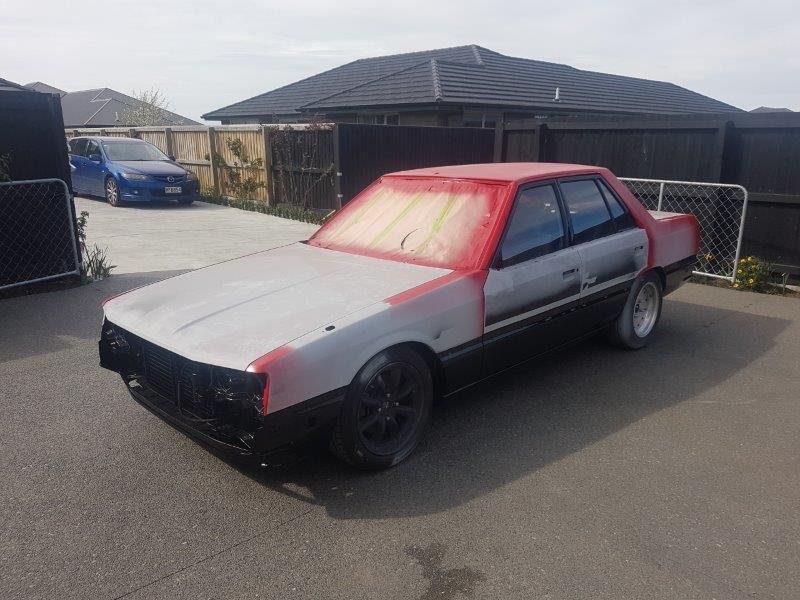
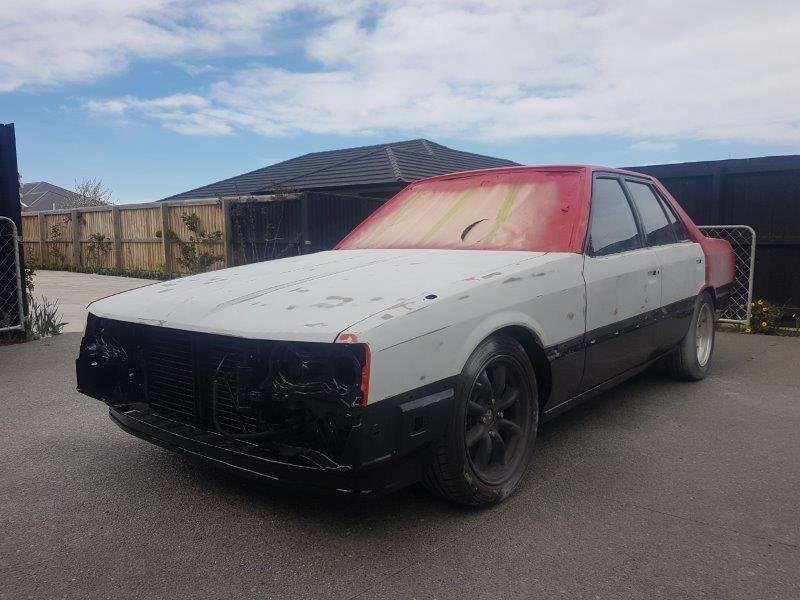
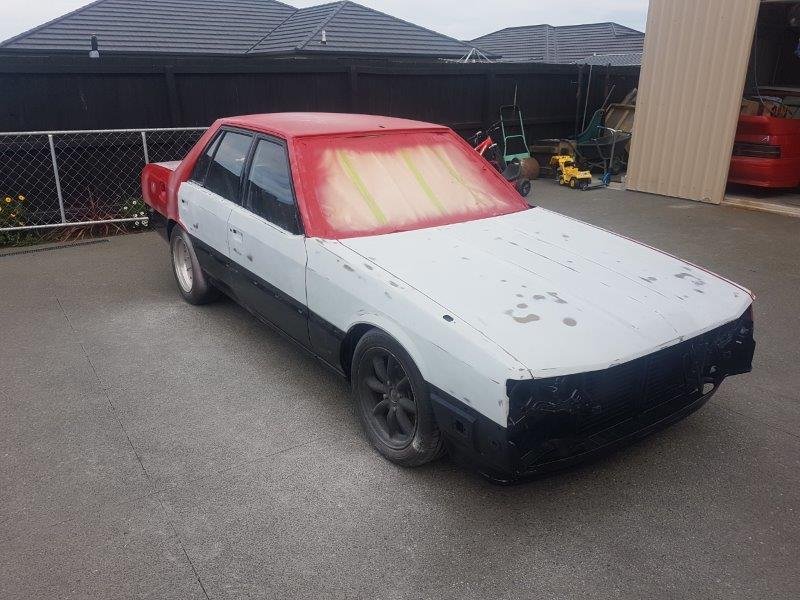
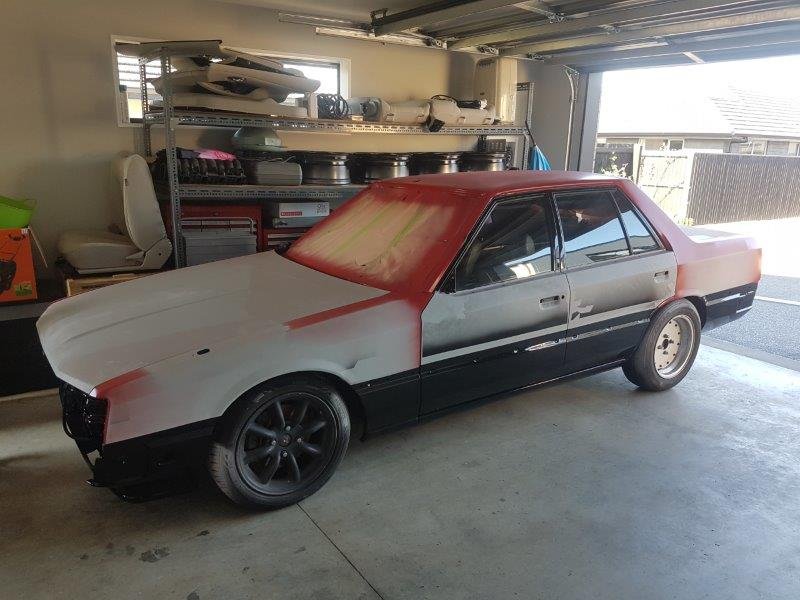
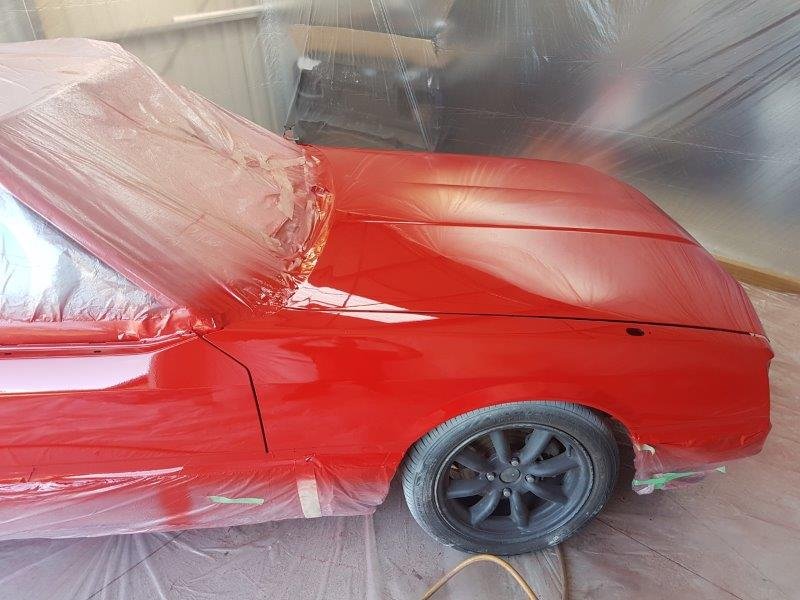
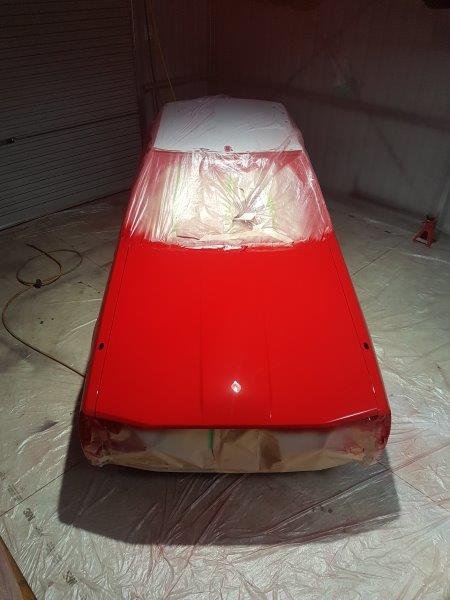
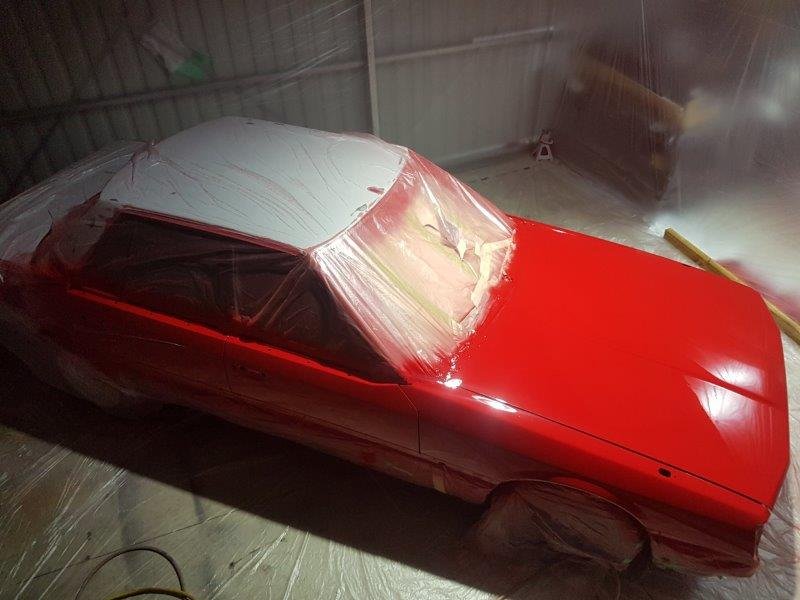
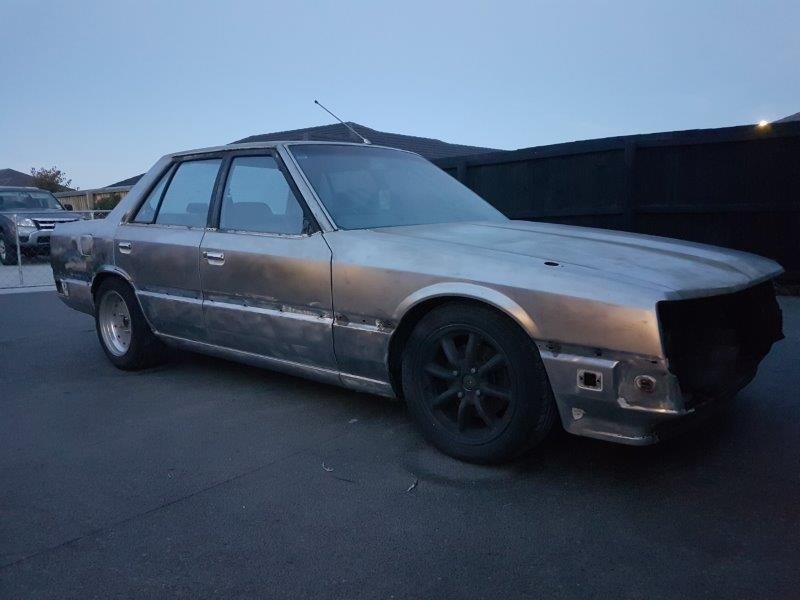
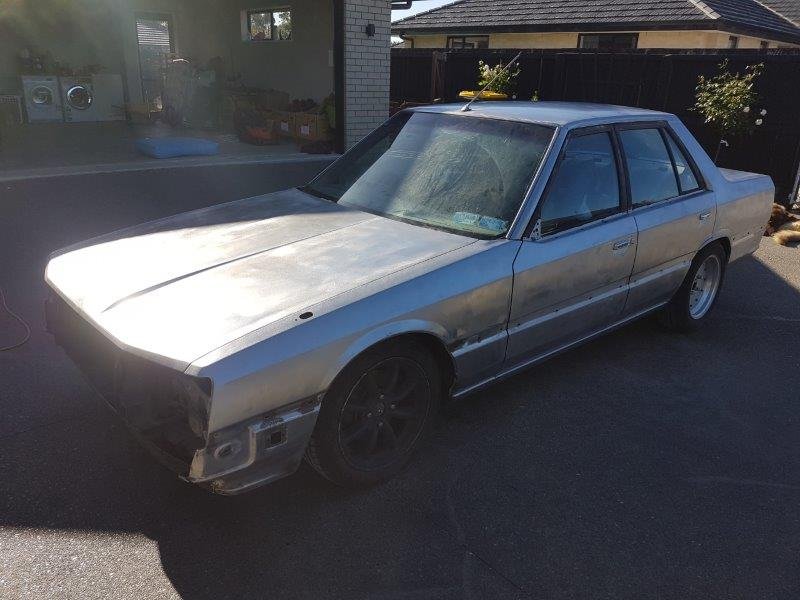
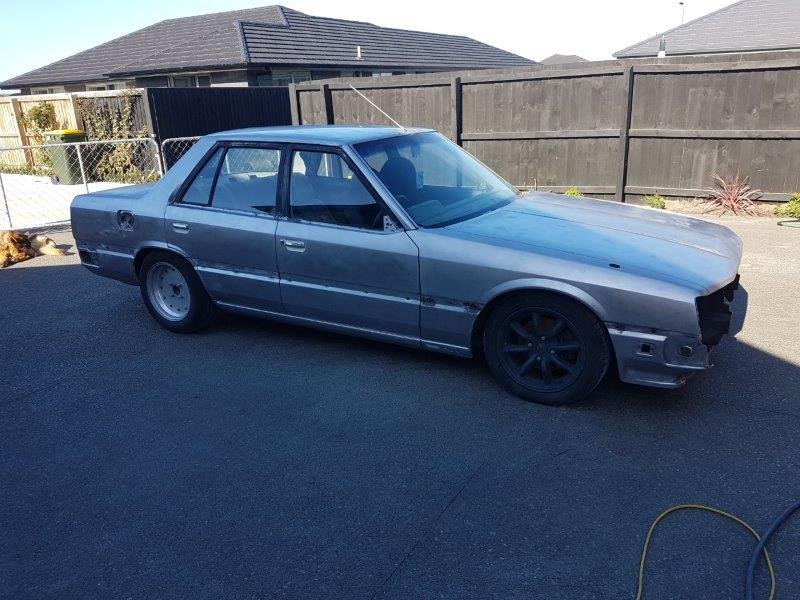
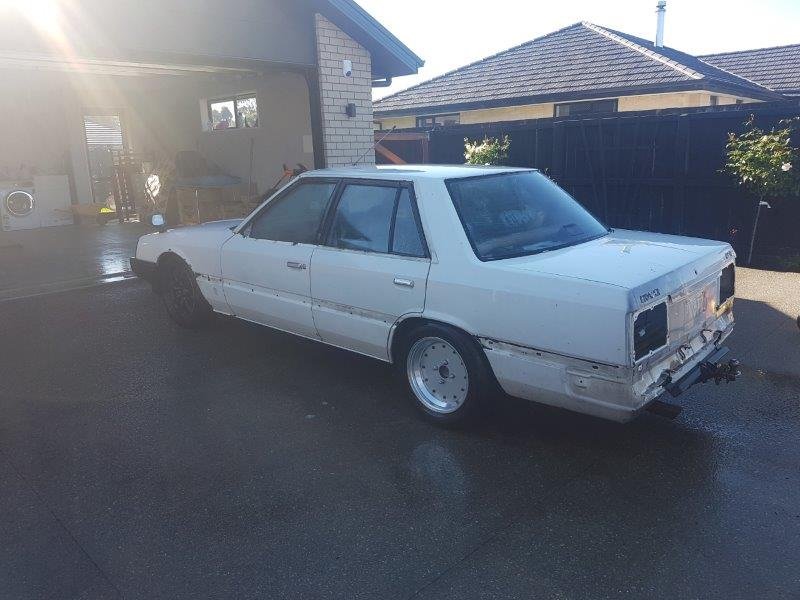
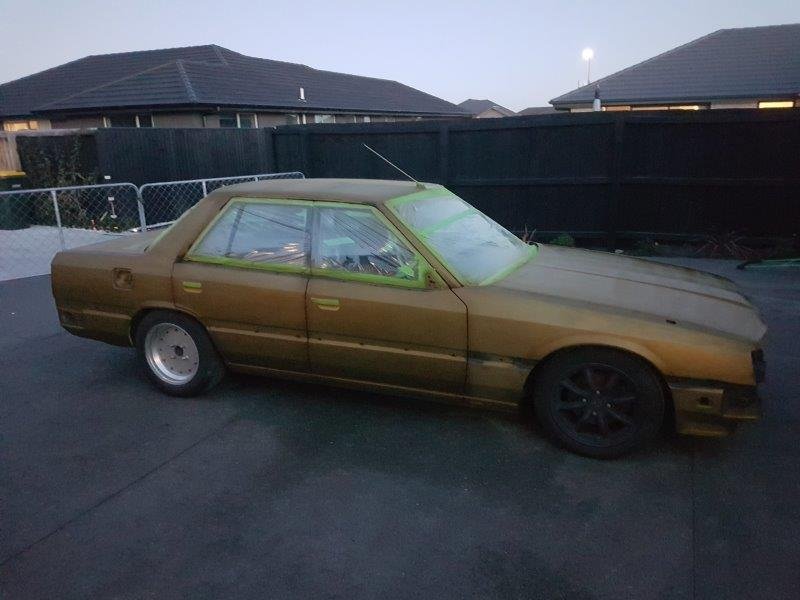
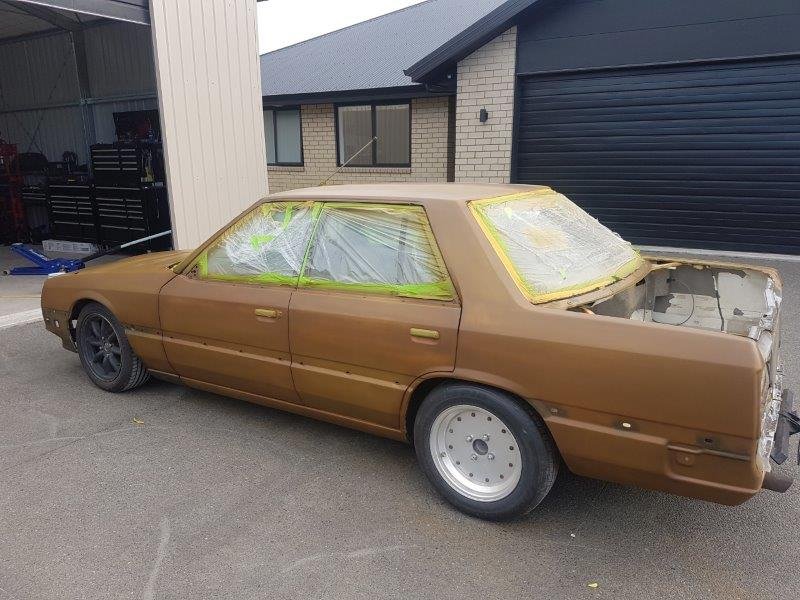
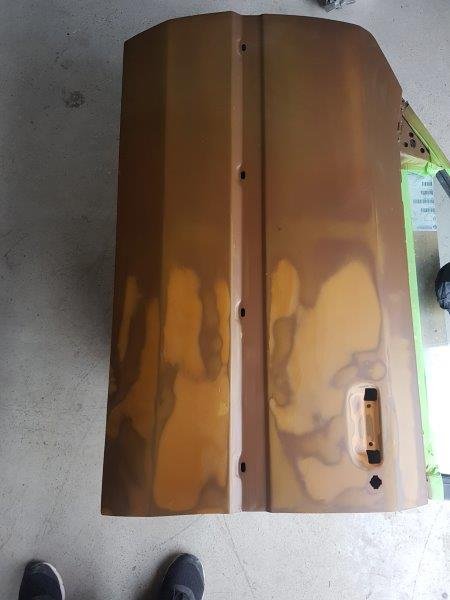
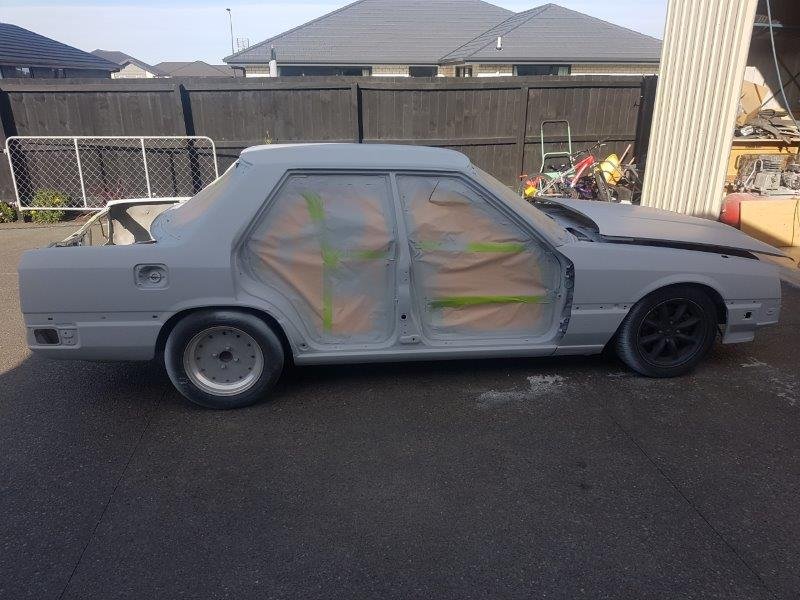
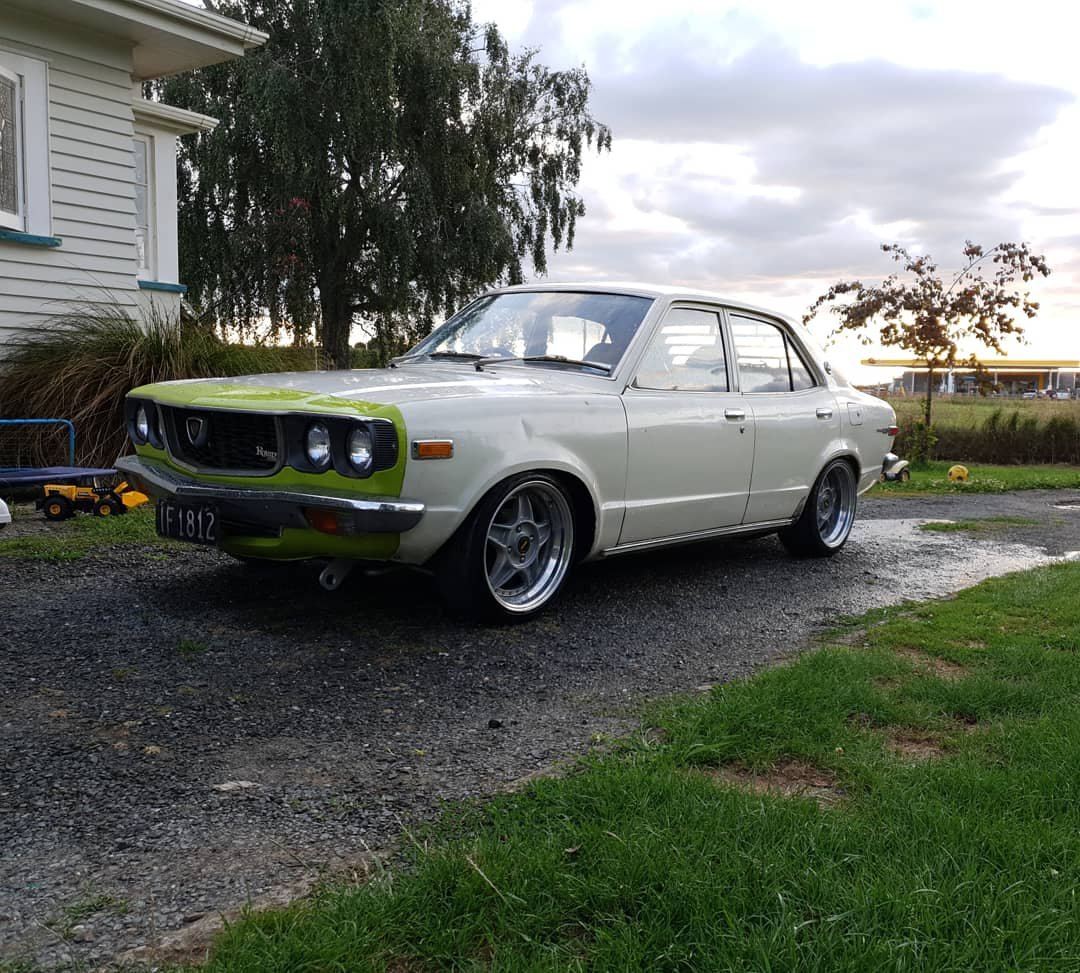
Now the caveat here is that I'm a mechanic, not a body work or paint guy but I think I done gone did alright if I do say so myself Flat sanding and buffing the car didn't quite go so smoothly, I managed to buff through a few spots with the woolen pad(my old man later informs me that he shouldv'e given me the foam (pleb) version instead And from this point is where it all went a little pear shaped (and I stopped taking photos) Because I'd run out of red I needed Dad to get me some more for the touch ups, now I sent him a photo of the label on the paint he had originally got me. He brought out a 250ml tin, took the lid off and checked it against the car "yep thats it" (he was originally an autopainter by trade, so I made the mistake of believing he could still see colour) I prepped all the touch up spots and gave them a lick of colour. Now somehow I managed to pull off spraying all the touch ups perfectly, no runs, no dusting, good coverage, excellent! buuuut after the paint dried I had a some very orangey red spots on an otherwise red car..... Out came the D/A and off came the paint. Now on my second attempt with the correct Red I think the rag I was using to wipe down the car must have had some sort of contamination because nearly all the repairs fish eyed in spots. I've sanded and buffed most of them good now but my motivation at the time was quickly waning. I ended up repainting the entire boot lid twice because the first attempt fish eyed badly and that is pretty much where motivation cease. The bootlid still needs to be rebuffed when I find some CBFs. In binning the Ironmask front from this car I decided to try out the Wagon quad light set up. I had to trim the chrome off the bottom for it to work with the kouki bumper I have since painted the front bar, grill and all the side trims in black as well, I need to find a better facelift rear bar as mines pretty out of shape (anyone?) Oh and @Brdflu lent me his front lip, of which I repaired and made a mould This Is also now black. Anywho, thats enough spamming from me, hopefully I summon some motivation and get back into it, otherwise I'll see you all in 2 years Discussion, advice and suggestions welcomed: https://oldschool.co.nz/index.php?/topic/57362-beaubots-1982-er30-skyline-sedan/
 16 points
 -
Since last update i've just been driving it and enjoying it. well, as much as you can enjoy and automatic 4M but whatever.... its fast approaching time to paint this car. and with that in mind its time for some new wheels. rear wheels that have a neg 15 offset so they wont fit on the back. only one thing for it, narrow the diff. ive had this disk brake diff lying around for ages and its time to use it. to do so i need to remove about 15-17mm per side. this small amount means i dont have to do anything to the axels save trim about 10mm off the end. ansd as far as the housing goes, all i need to do is move the spring perches. everything else can move in with the ends. the lower control arms will just need to have a bit of flex in the bushes and ill make a shorter panhard rod for it and everything is gravey. pictures of things, checking i could push the axels 15mm further into the spiders. 2020-09-22_08-44-55 by sheepers, on Flickr 2020-09-22_08-45-05 by sheepers, on Flickr 15mm cutting guide, 2020-09-22_08-45-17 by sheepers, on Flickr 2020-09-22_08-45-24 by sheepers, on Flickr 2020-09-22_08-45-32 by sheepers, on Flickr 2020-09-22_08-45-40 by sheepers, on Flickr9 points
-
So whats my plan for this? Well. Plan at this stage is as follows: -13B PP Injected -Link ecu or the likes with built in dash (no need for aftermarket gauges this way) -Front Coilovers with S4/5 Front brakes and convert to 4x114.3 or 5x114.3 - Narrowed B2000 LSD (Has been narrowed 40mm from RX3 stock width) is currently 5x114.3 with RX8 rear calipers and rotors but may change to 4x114.3 to allow better wheel choice in 15s/16s -Reset leaves and blocks in rear - S5 RX7 gearbox -Custom exhaust, driveshaft, driveshaft hoops, gearbox xmember to suit drivetrain - Nice tidied up painted/polished/shaved/deloomed niced up engine bay Wheels TBC, got a few ideas but need to keep working through that Colour TBC. Again got a few ideas but haven't committed to anything Spent half a day going through all the boxes of bits on the weekend an working out what iv got and what i need or want to replace, Majority of stuff is there which is a good start.9 points
-
Next up I started on the shuts(read had no idea so I started on the bits you can hide) I know red over black, how R30 Stereotypical Some errors were made Turtle helped Discussion: https://oldschool.co.nz/index.php?/topic/57362-beaubots-1982-er30-skyline-sedan/
8 points
-
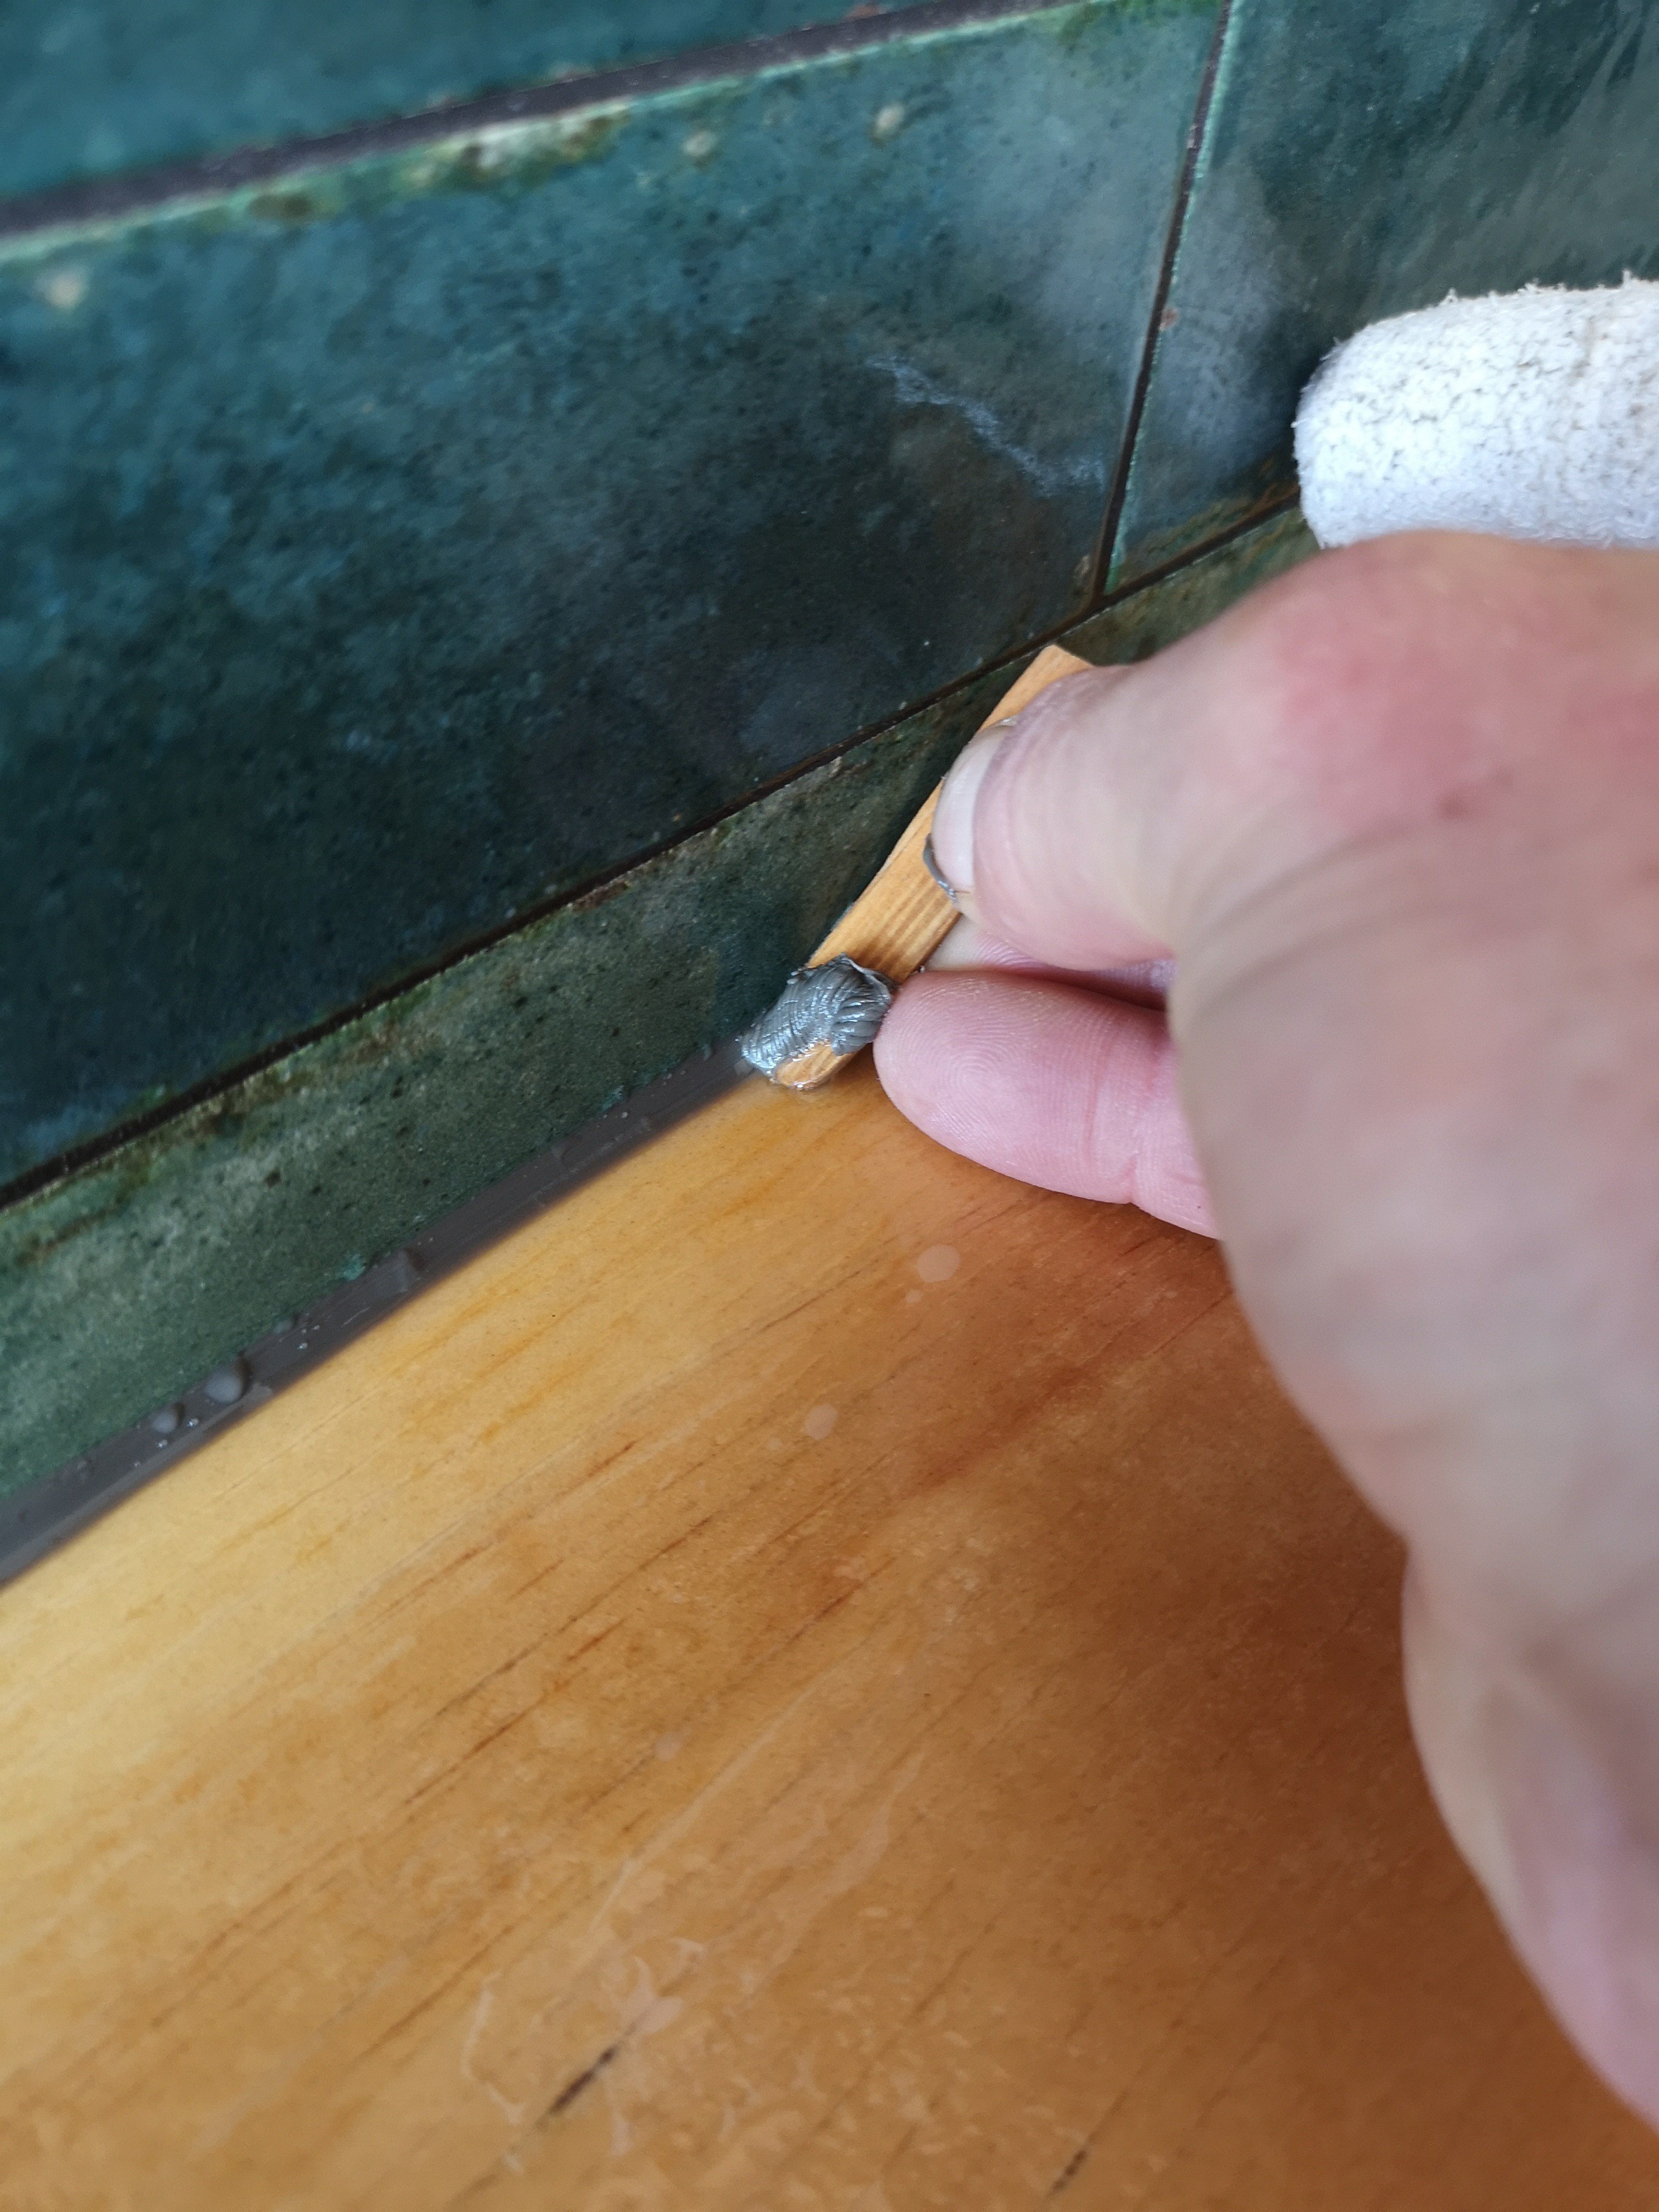
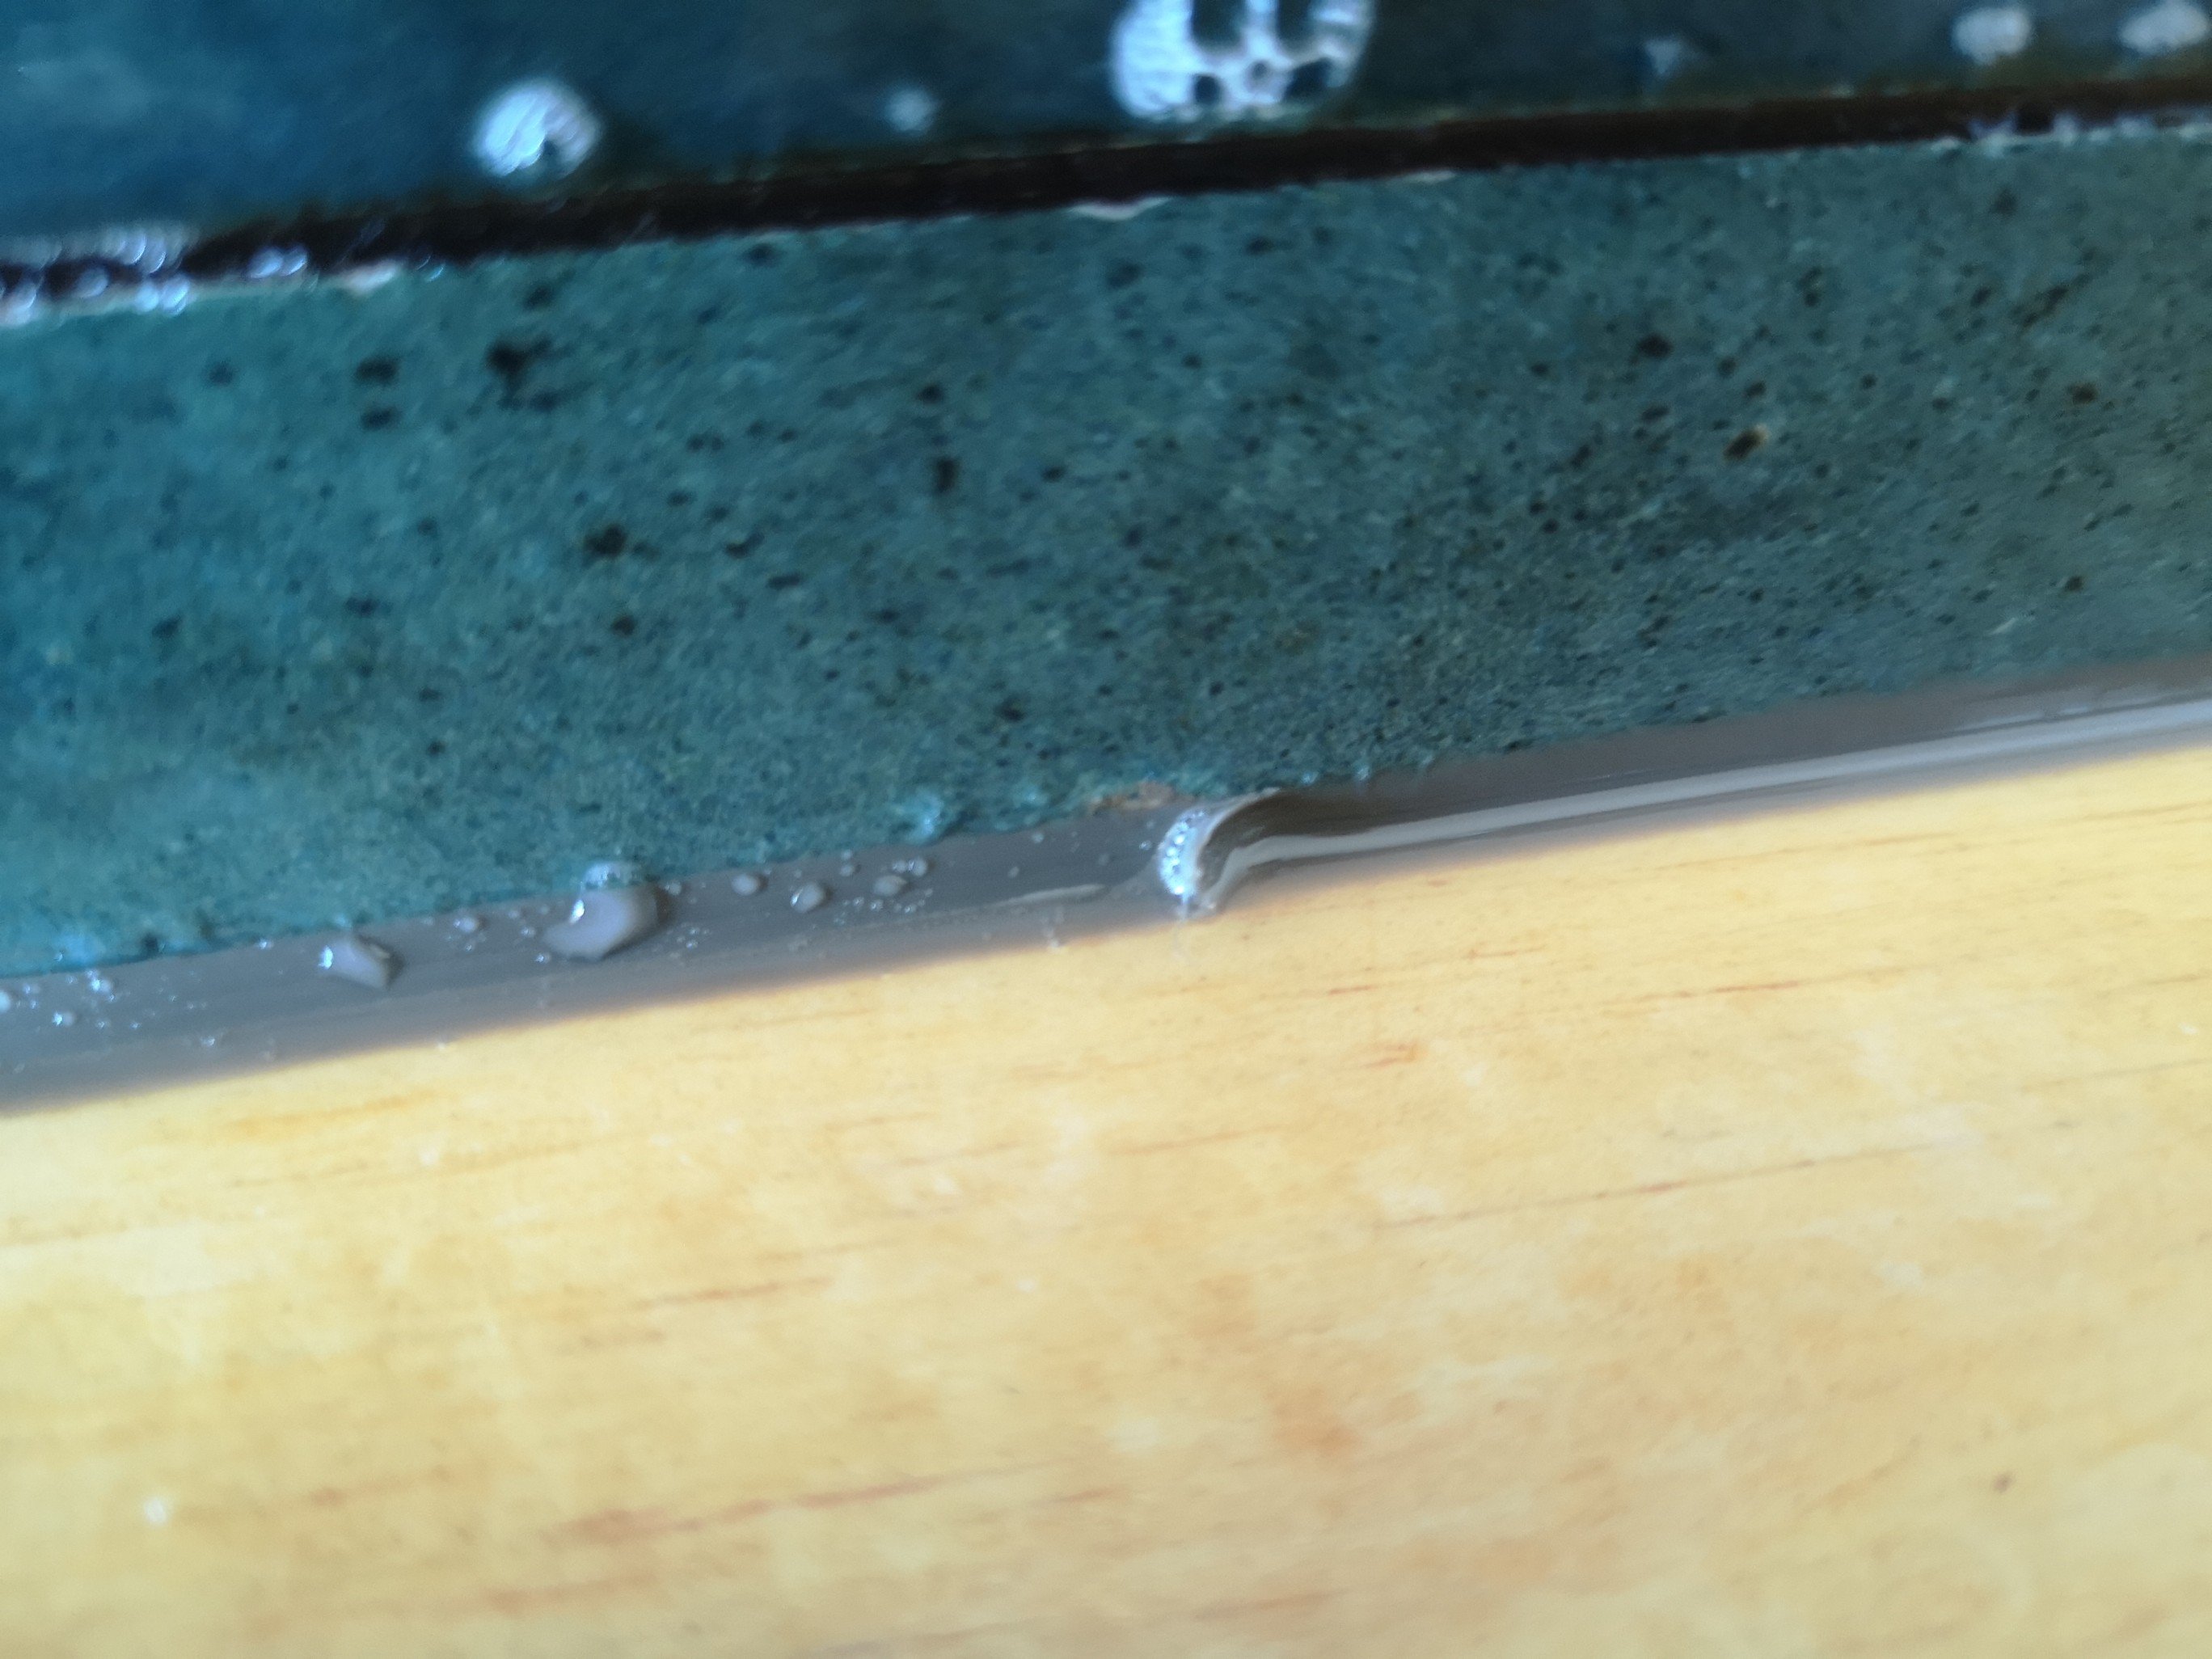
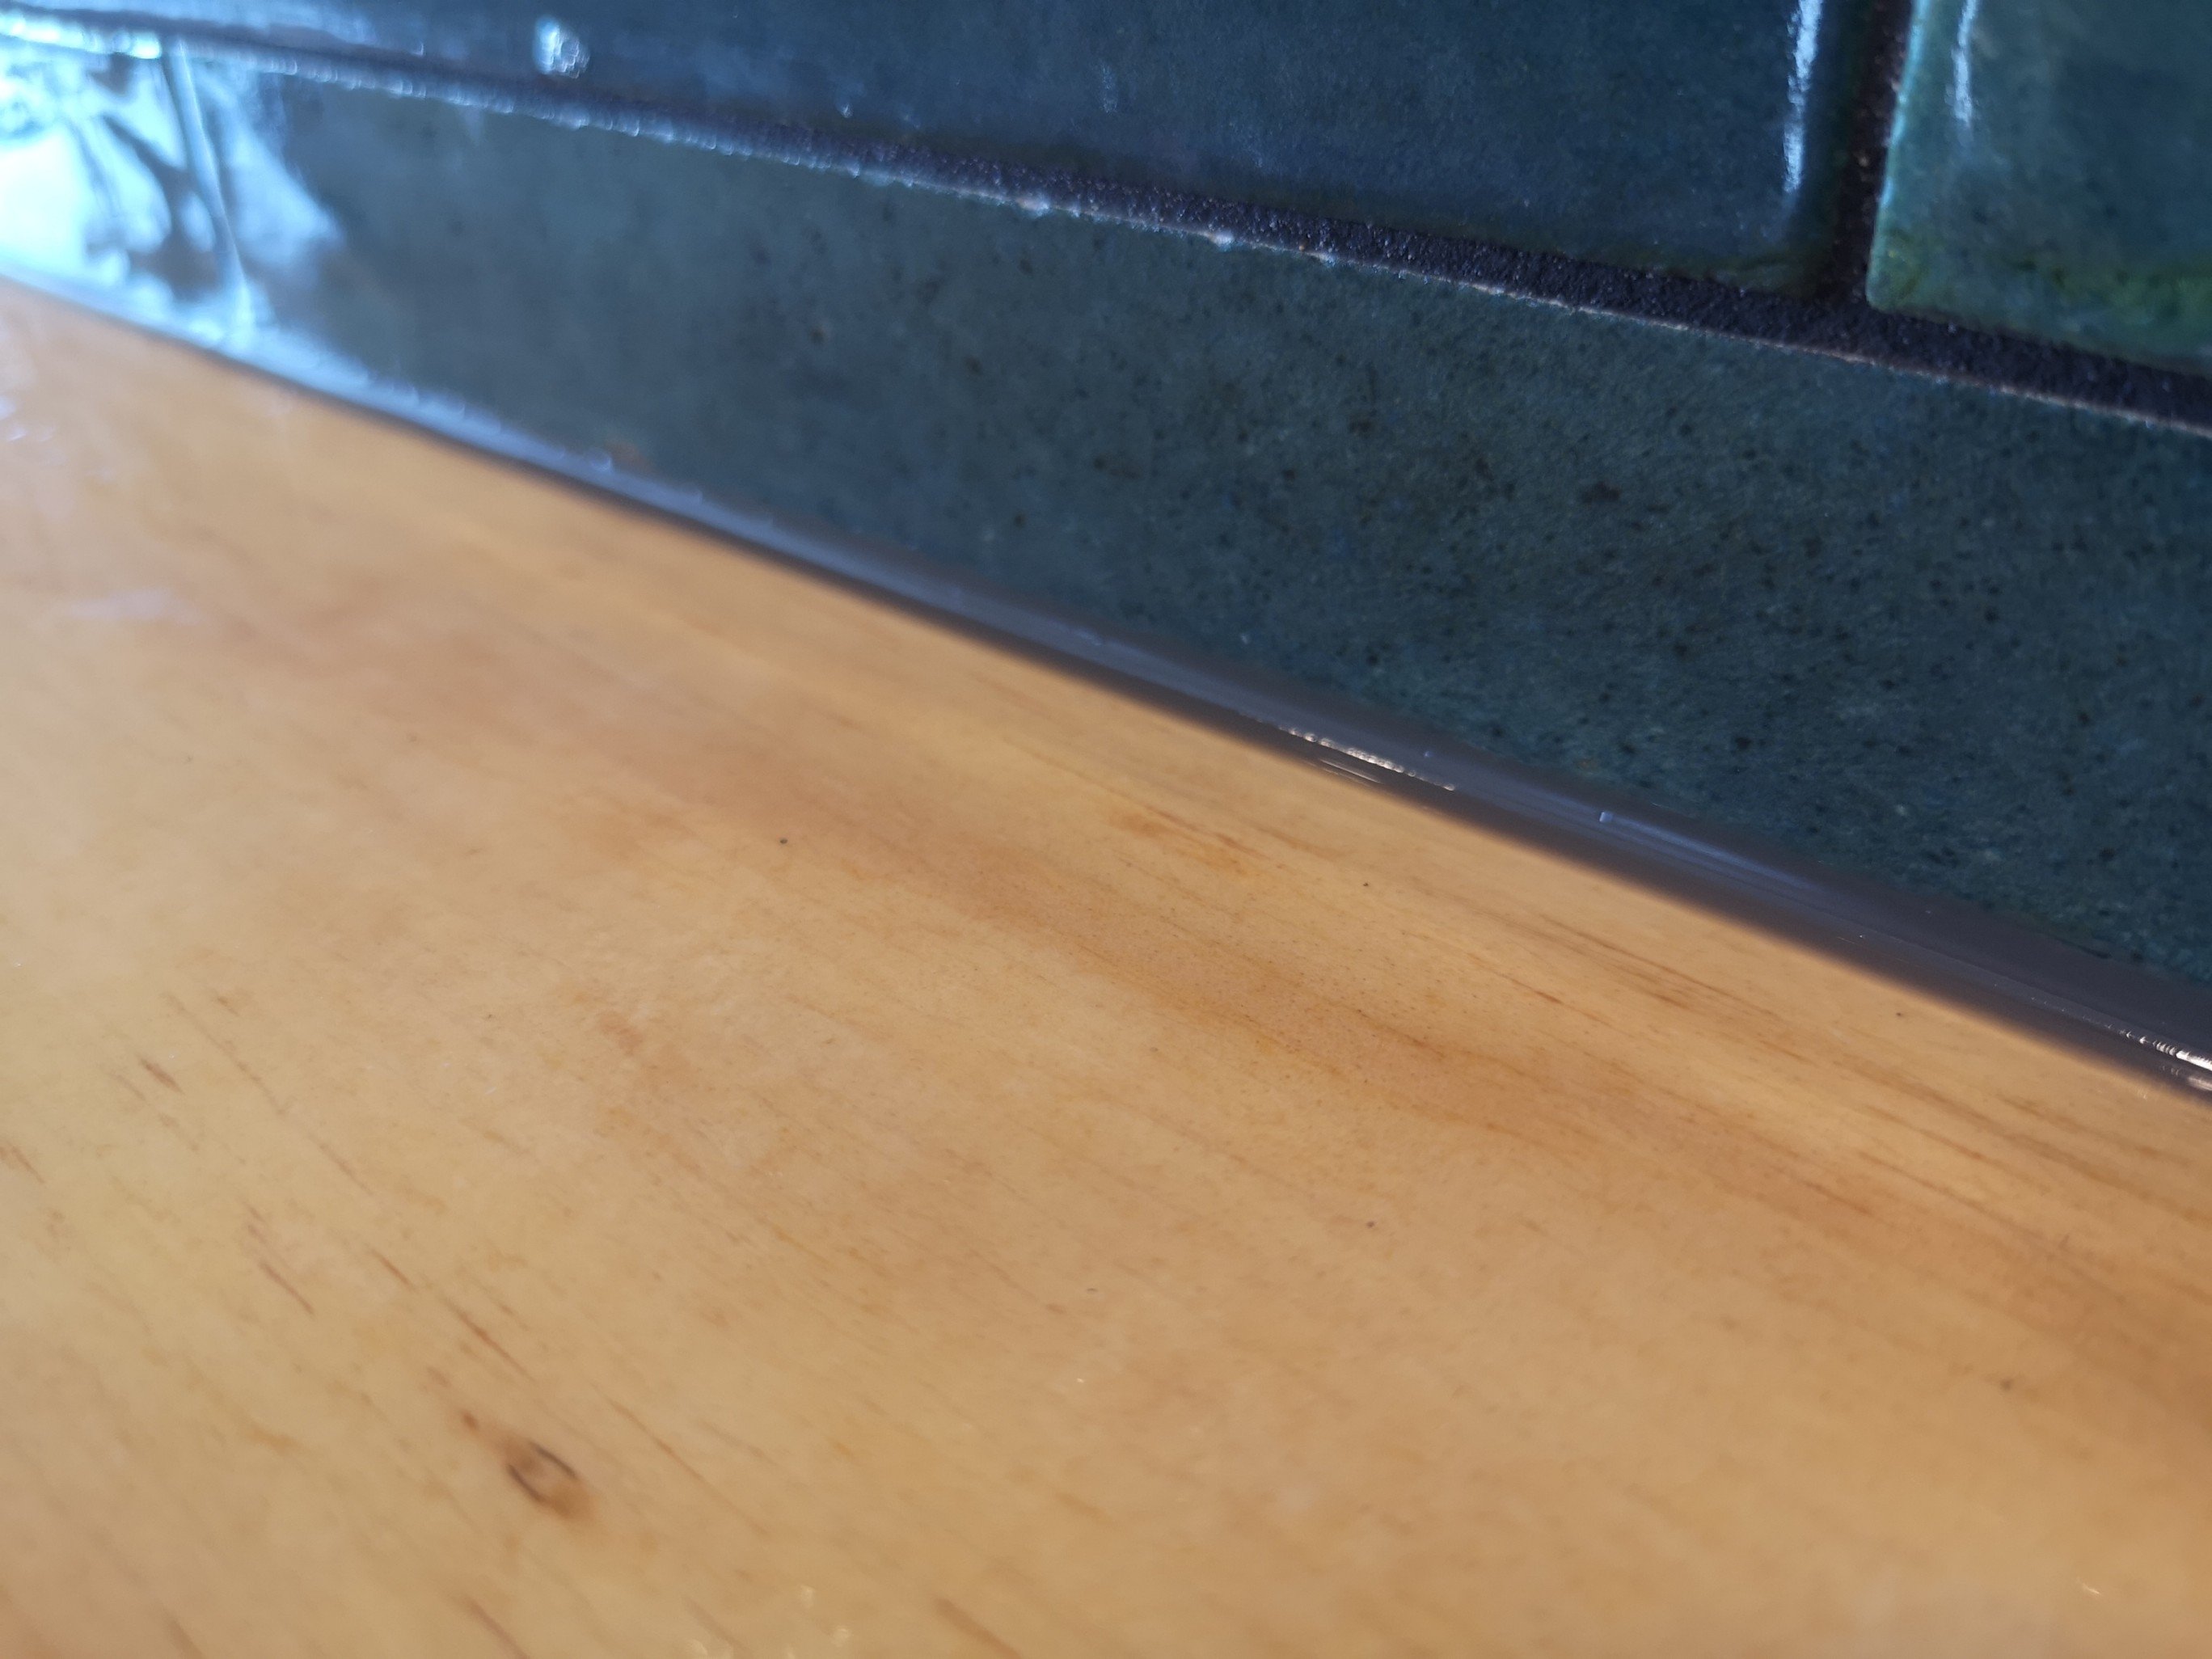
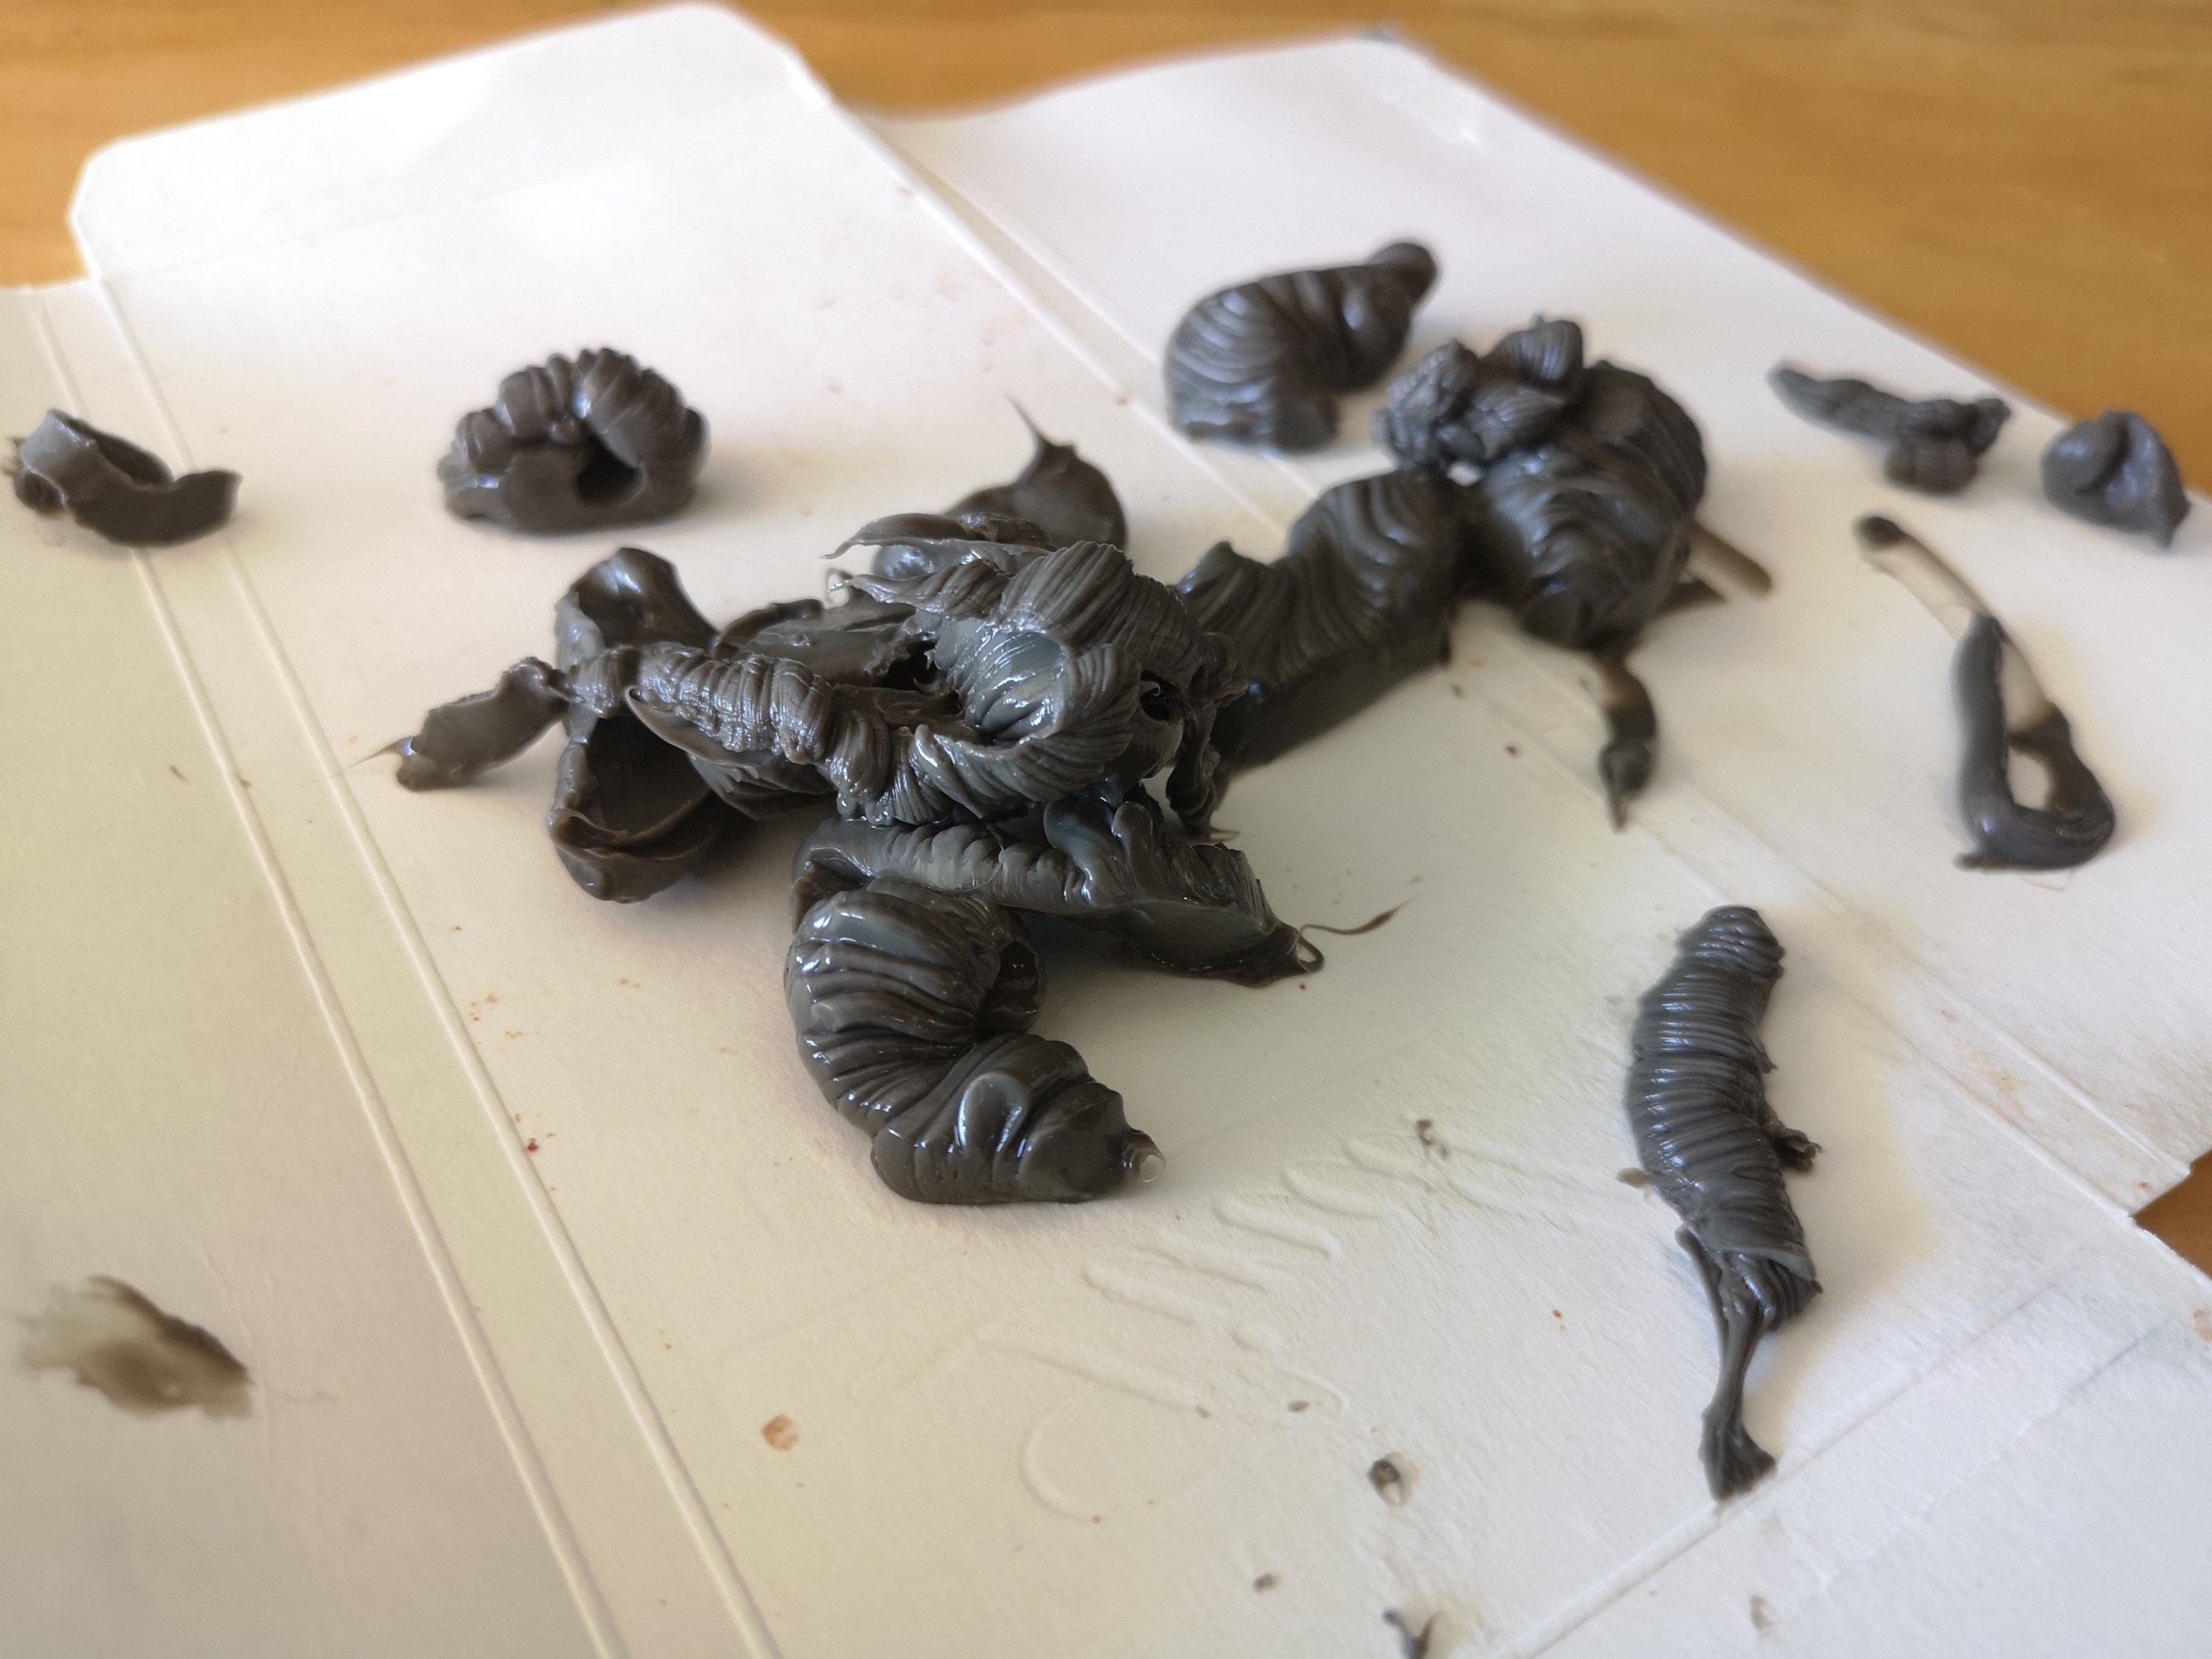
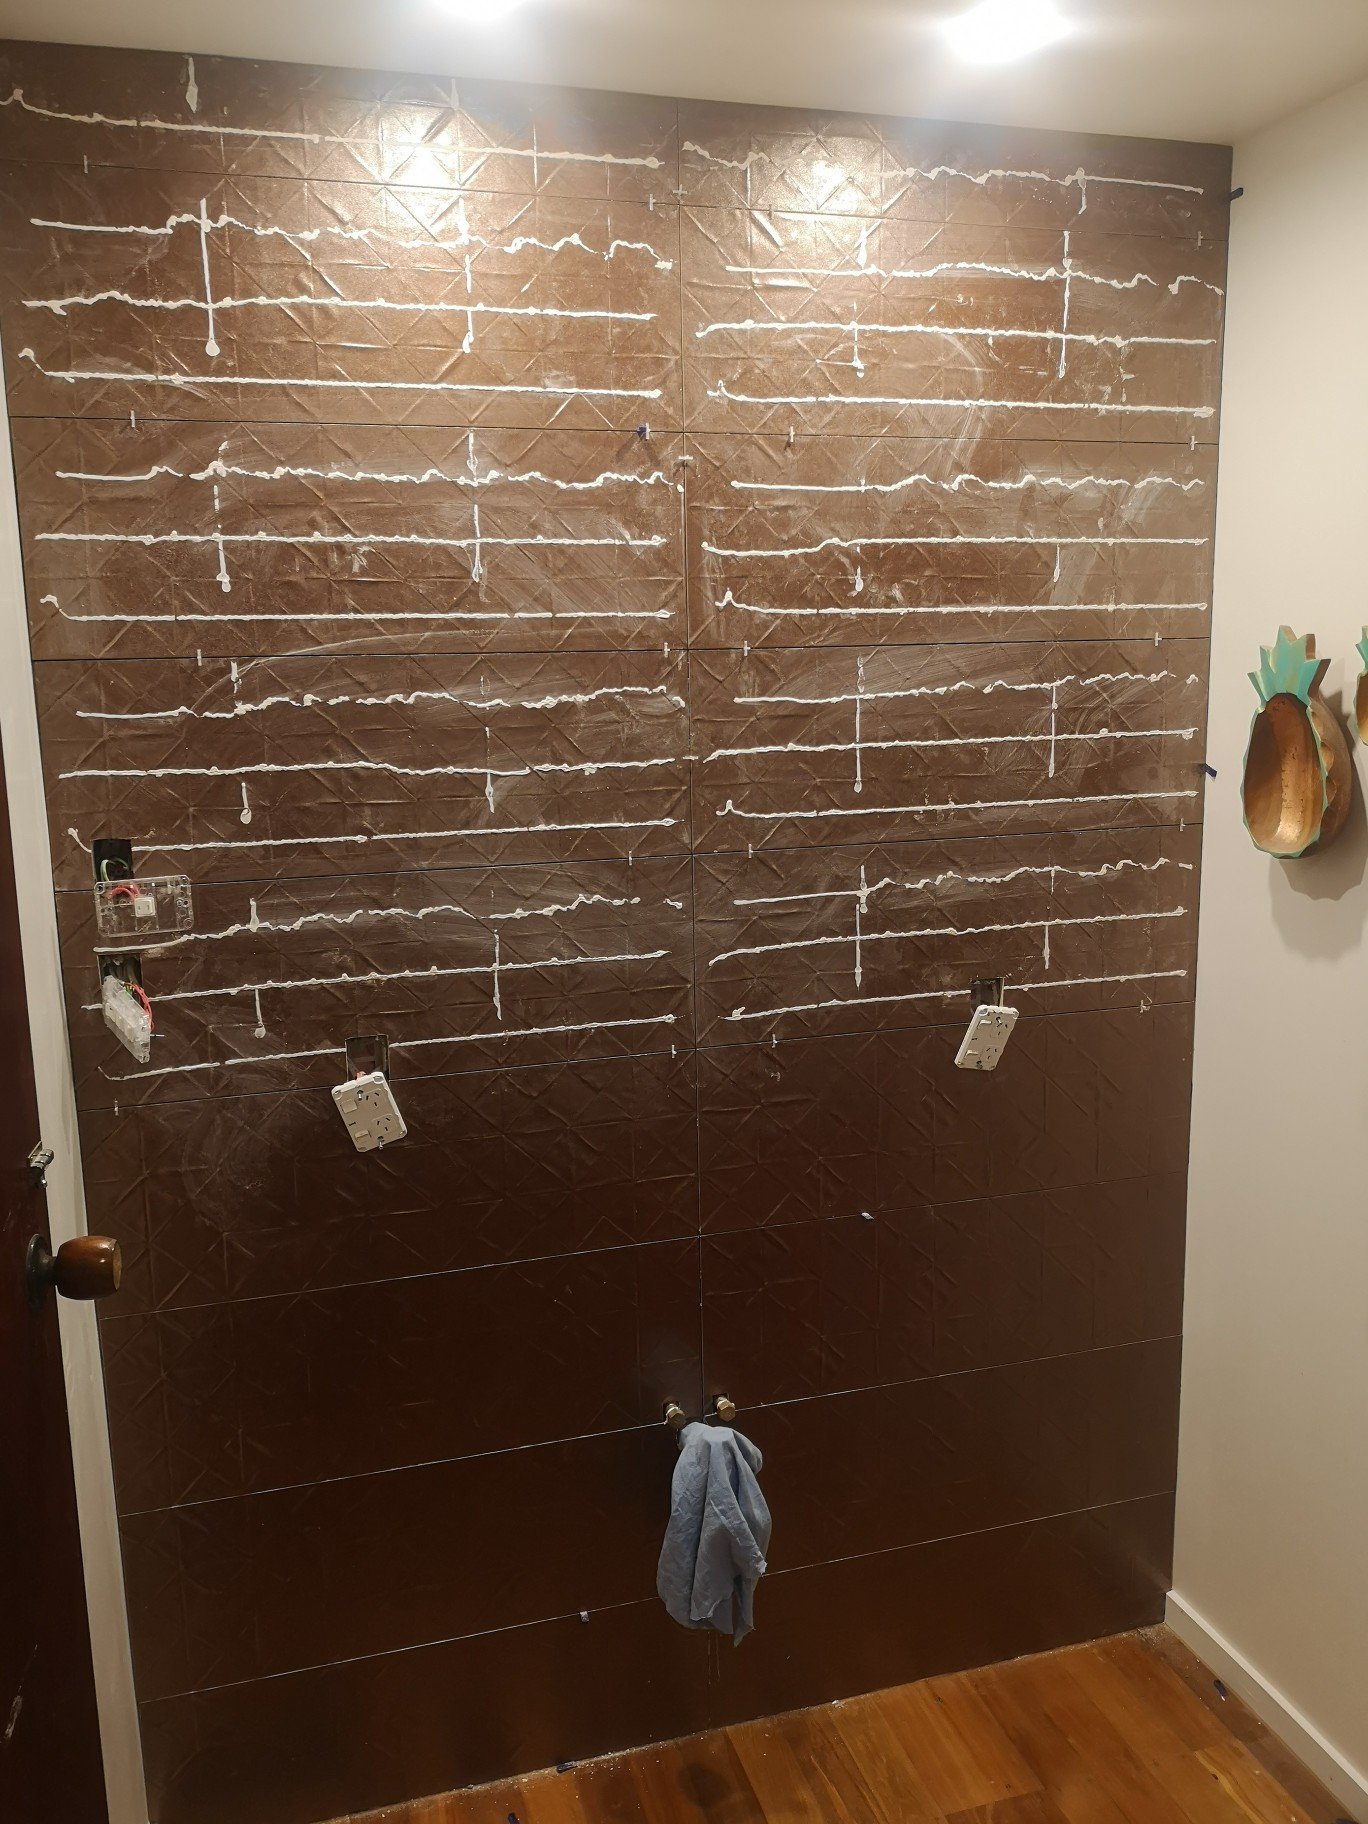
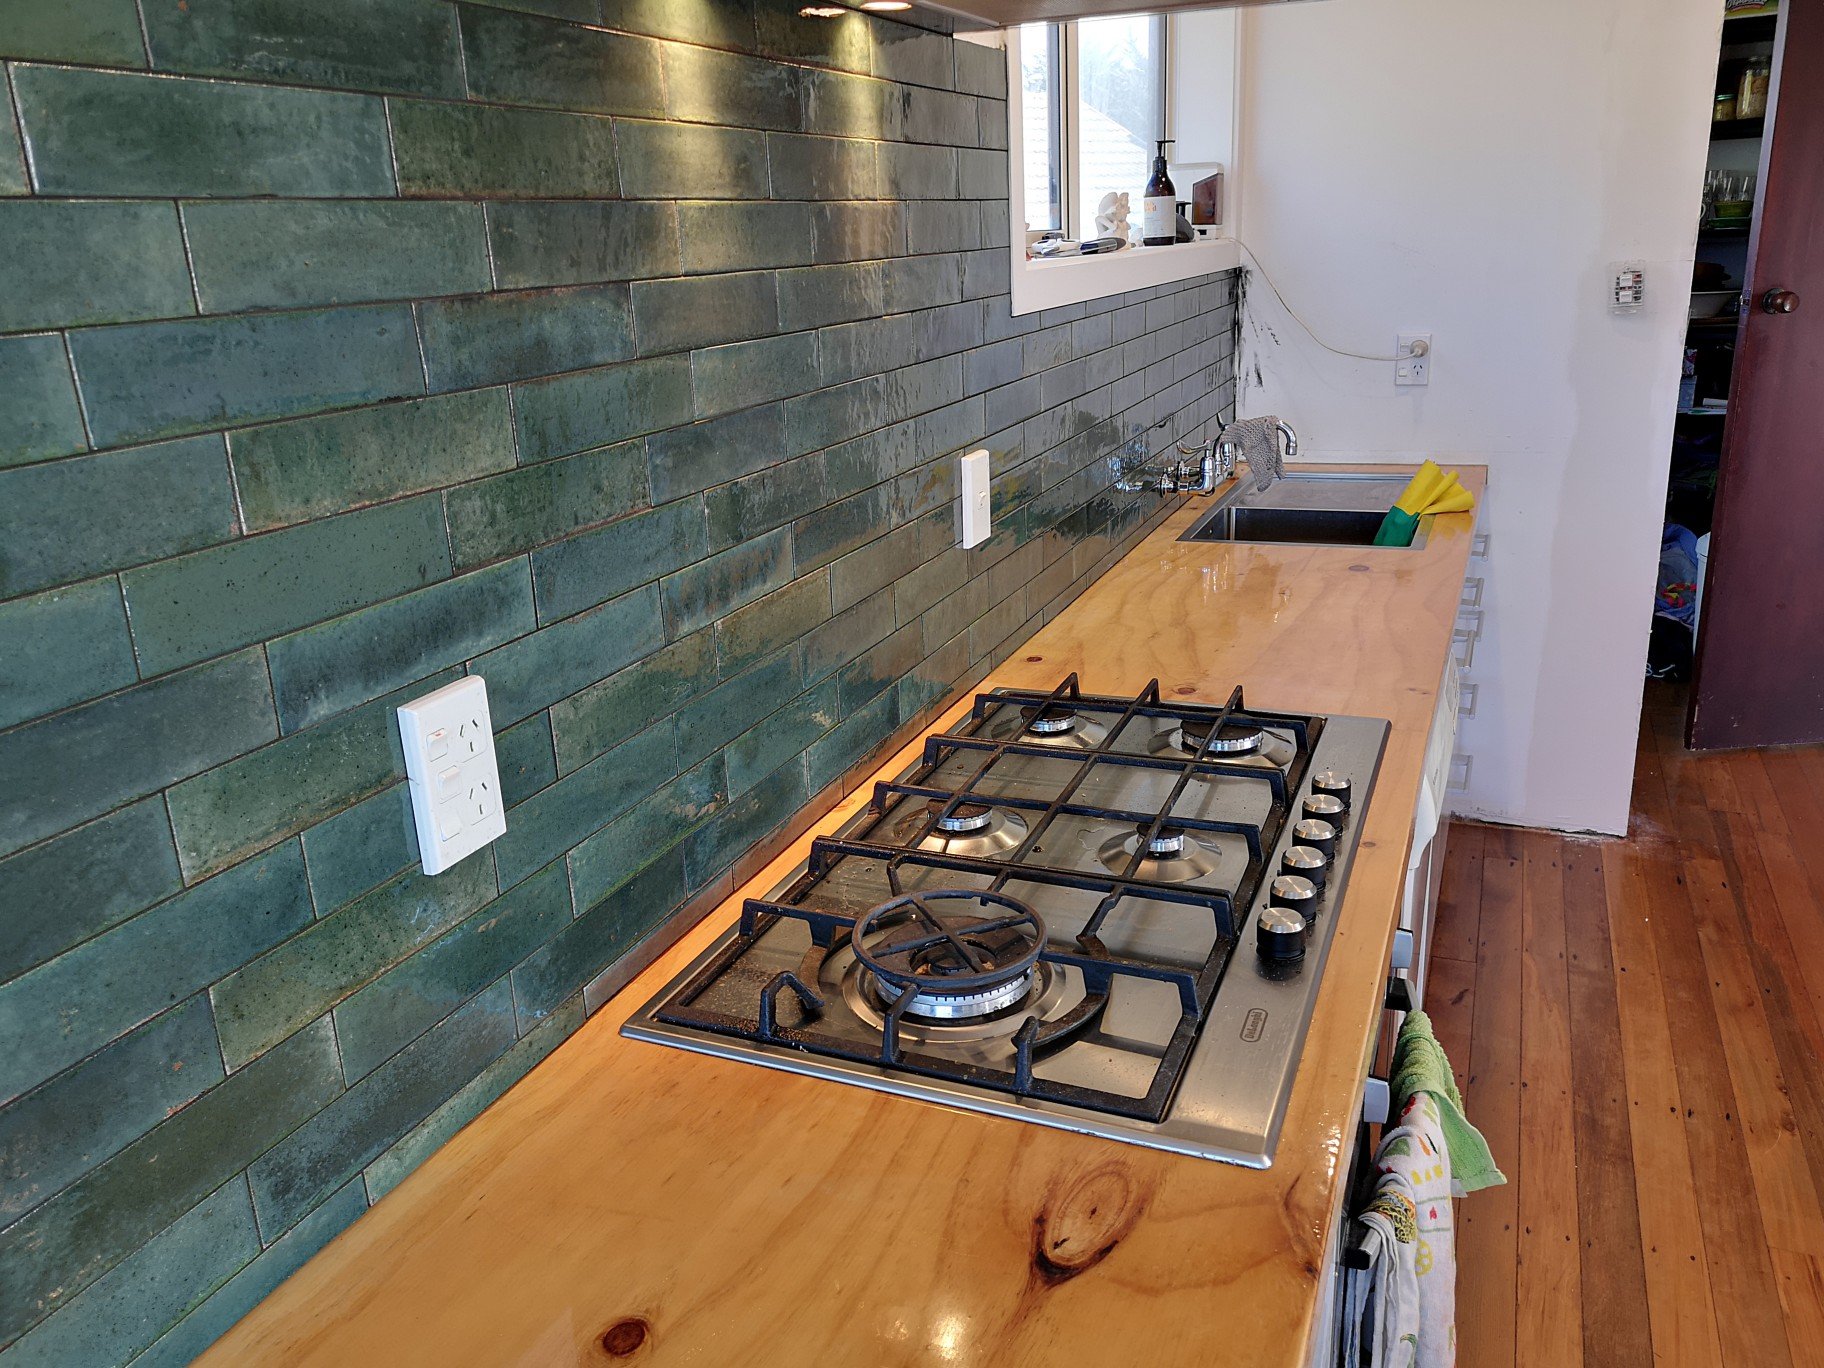
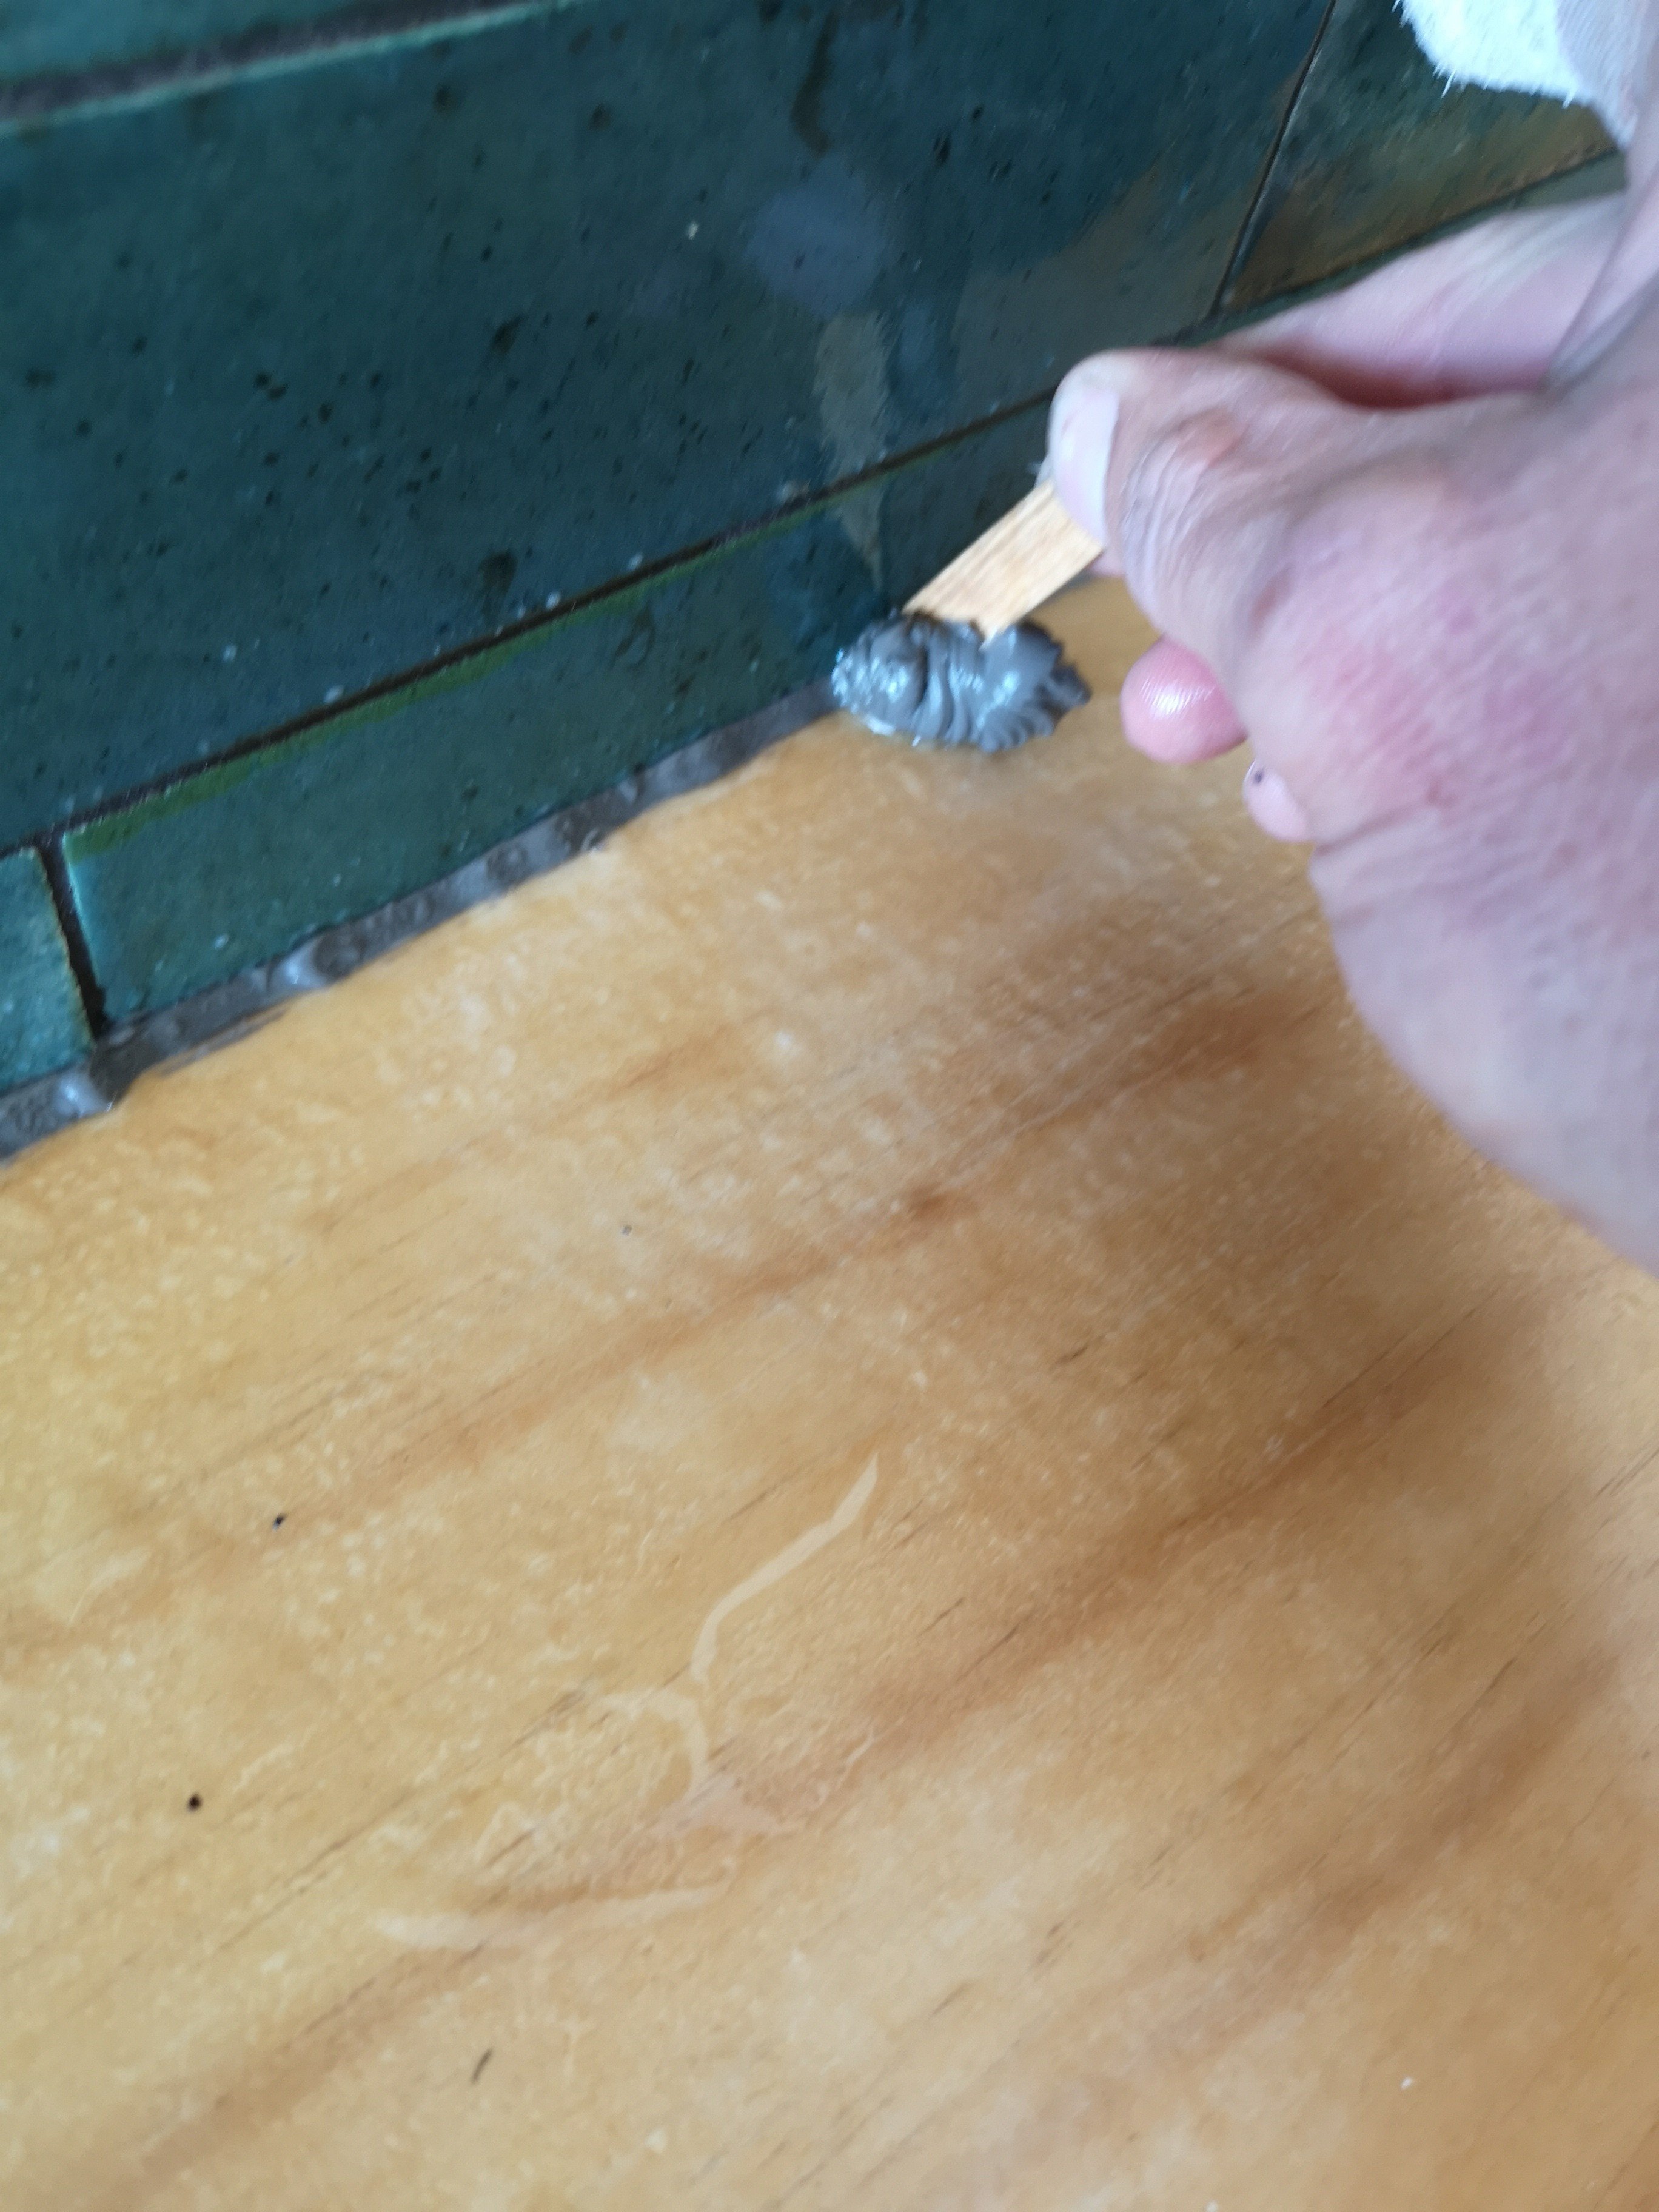
This is obviously how it would look sans silicone. I try to keep the popsicle stick on the same plane as the tiles that way it leaves a minimal bump in the silicone line when you run from one tile to the next. Then once I've done my first pass (respraying soapy water with every pass) I go over again with a tighter angle on the pop stick, smaller line is better. Looks like this... You only get one chance with this otherwise you make a mess cleaning it out now with meths or wait till it dries and cut it out. Saturate your finger with the soapy water and another spray on the bead and lightly run your finger along the entire length to smooth out any ridges and it should come out looking like this. 10% of the time it doesn't go as I planned or I fuck something up but you get about 5-8mins to play with it then it skins up. Sometimes you can still smooth it even though it's skinned. You end up with a pile of silicone grubs, bit of wastage but meh. That makes this bit done.
7 points
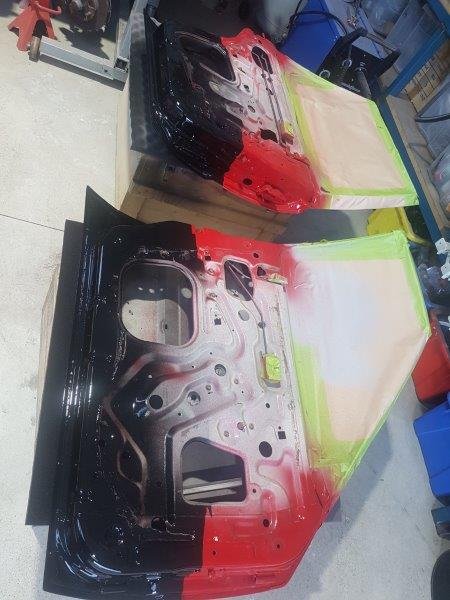
-
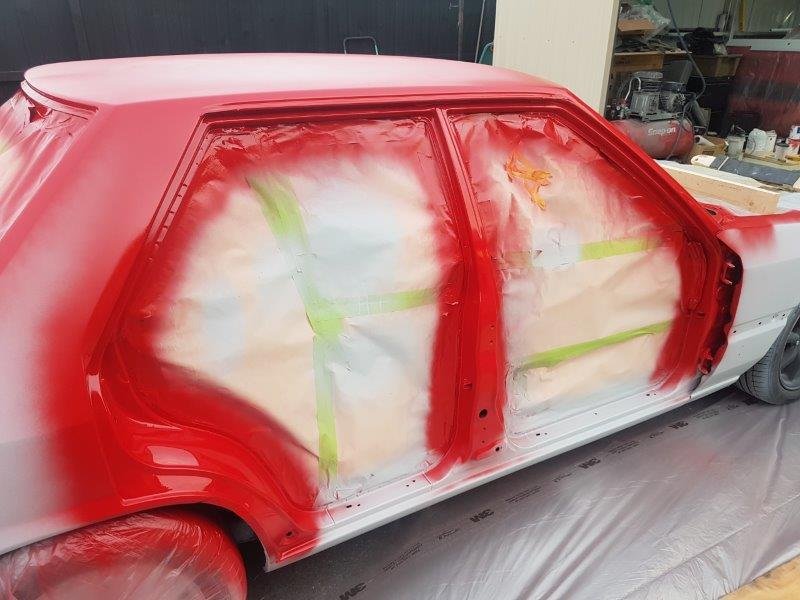
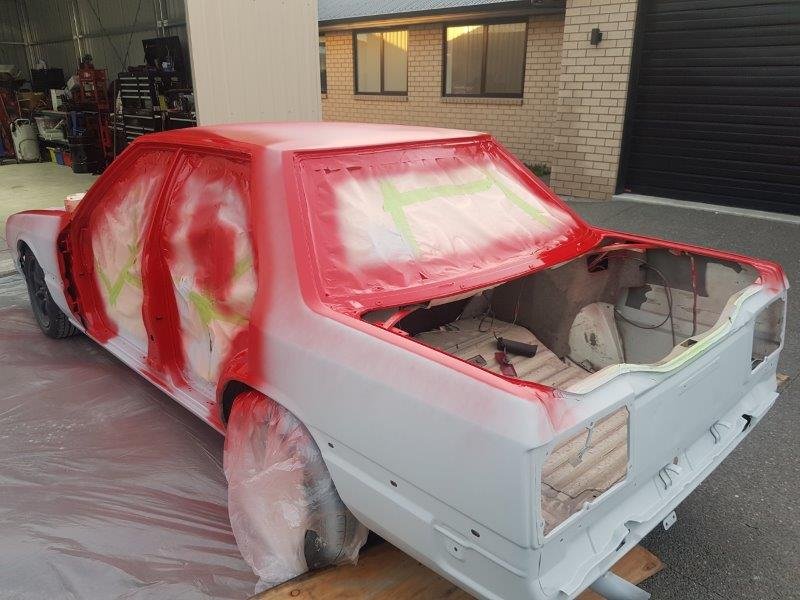
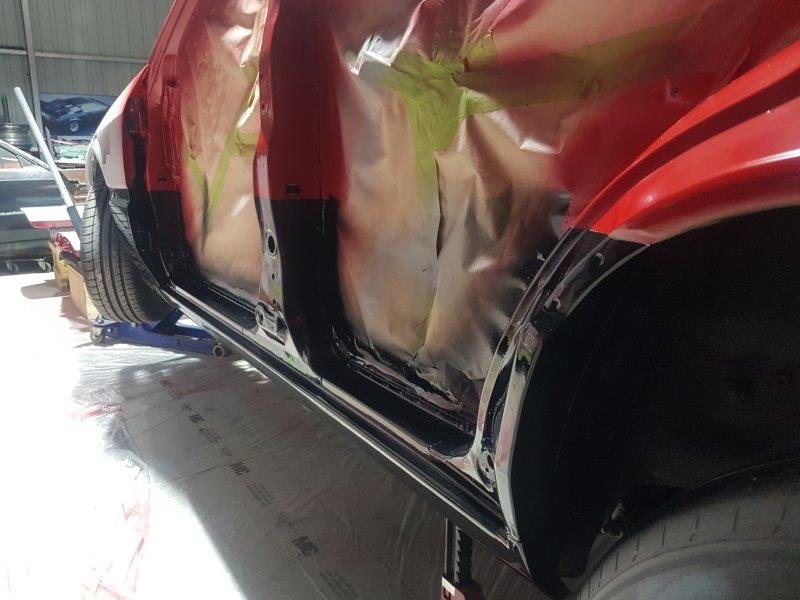
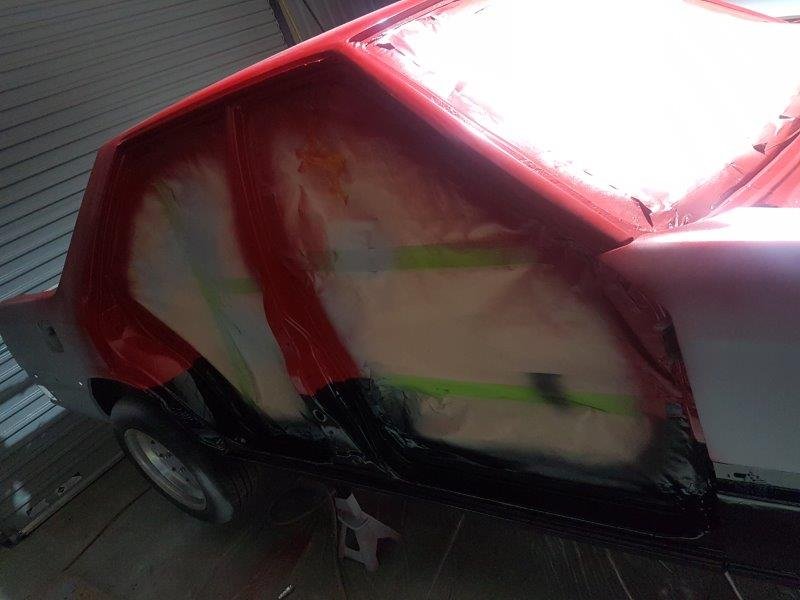
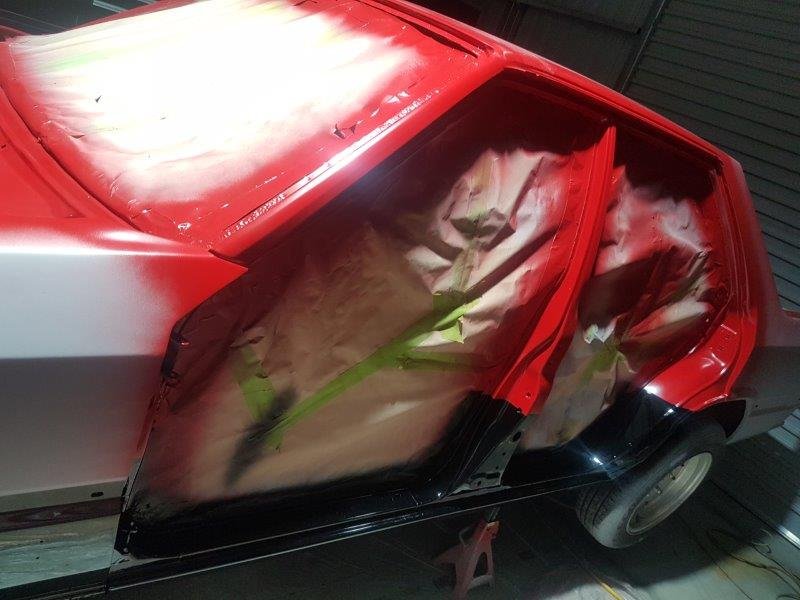
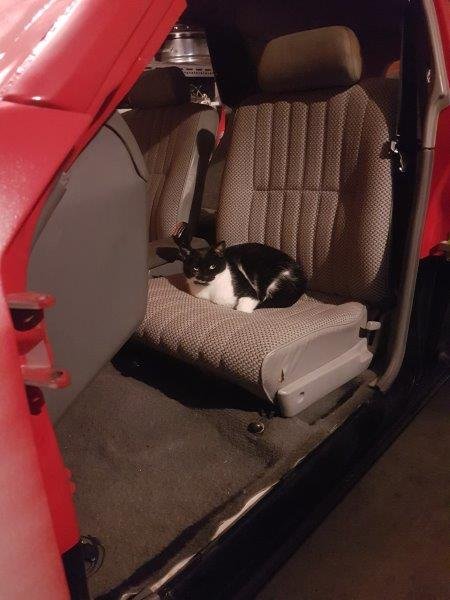
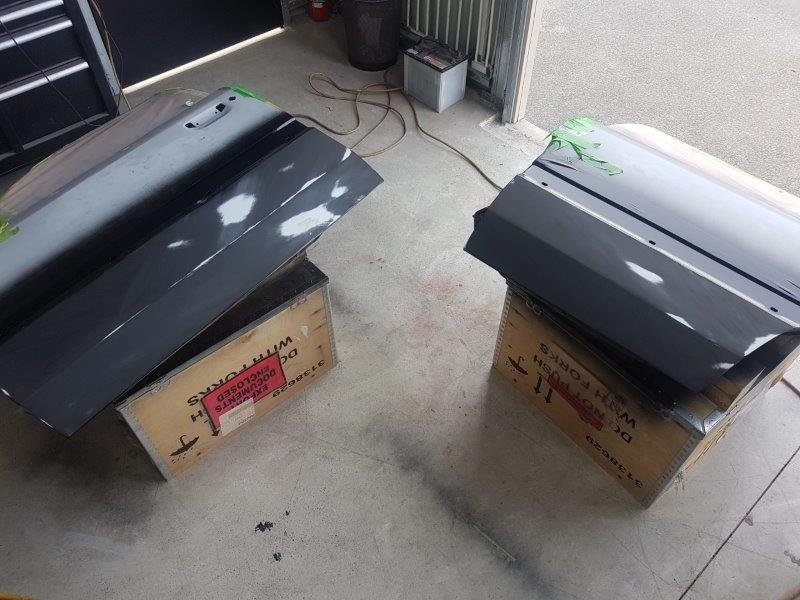
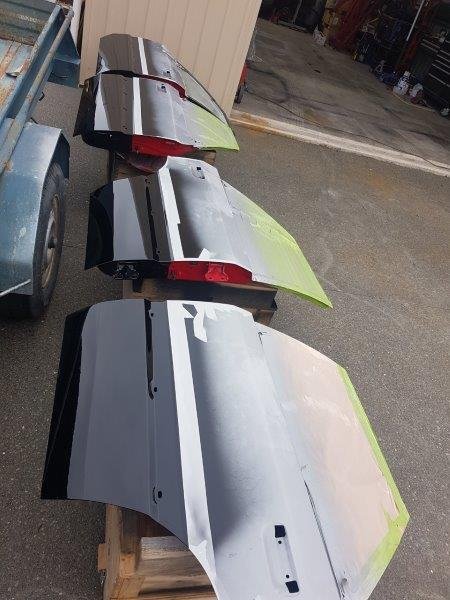
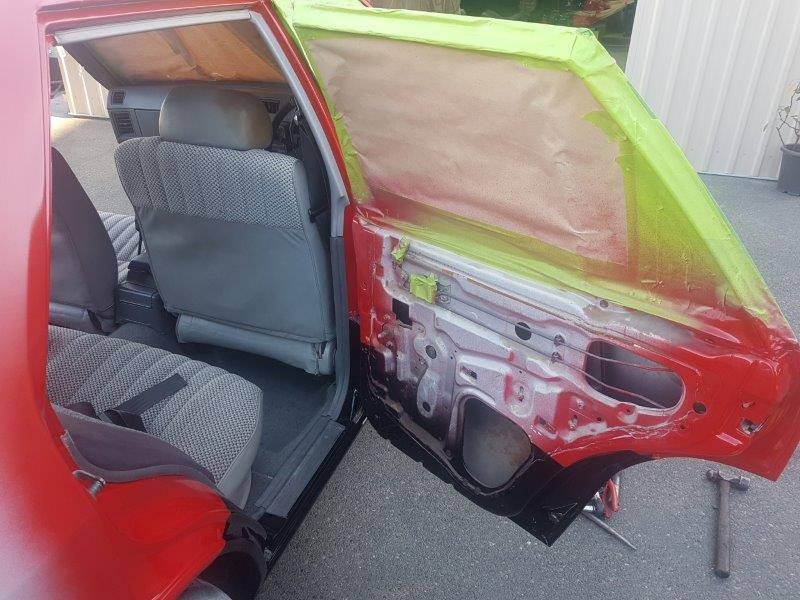
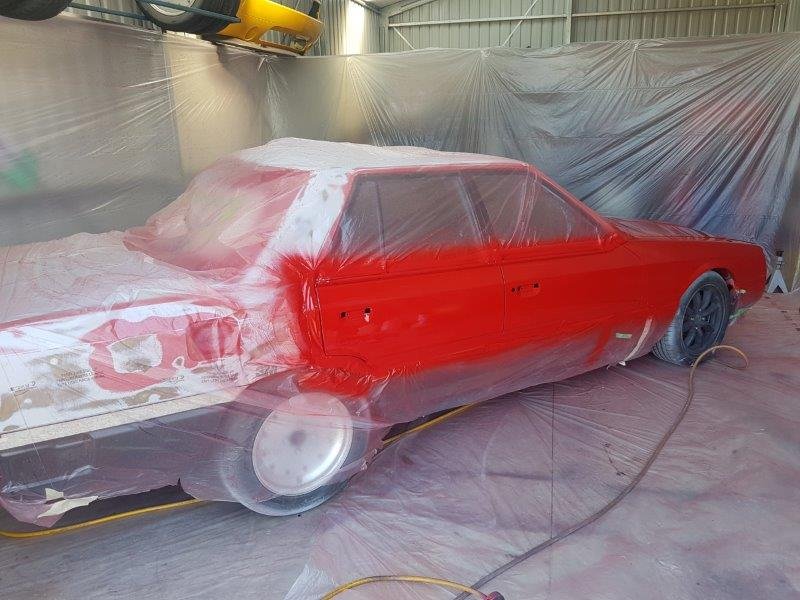
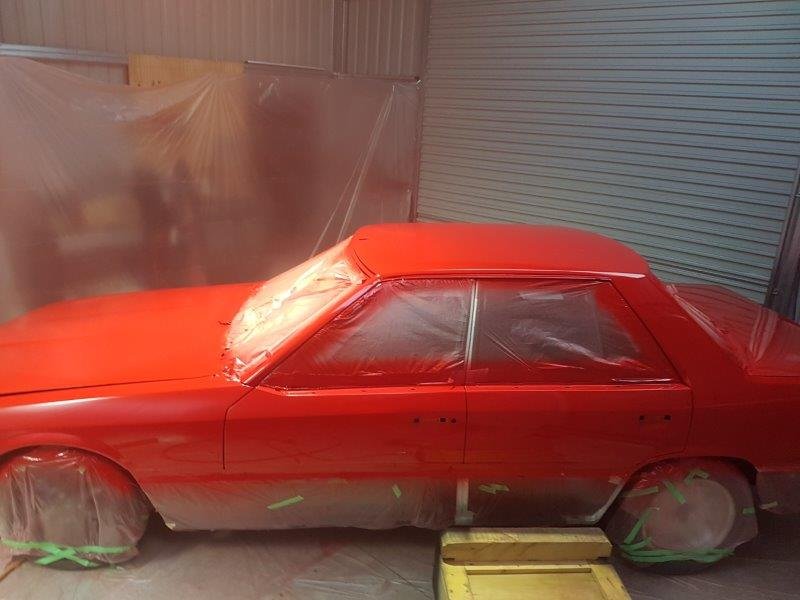
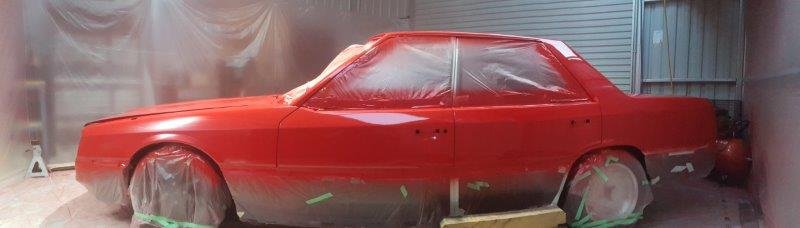
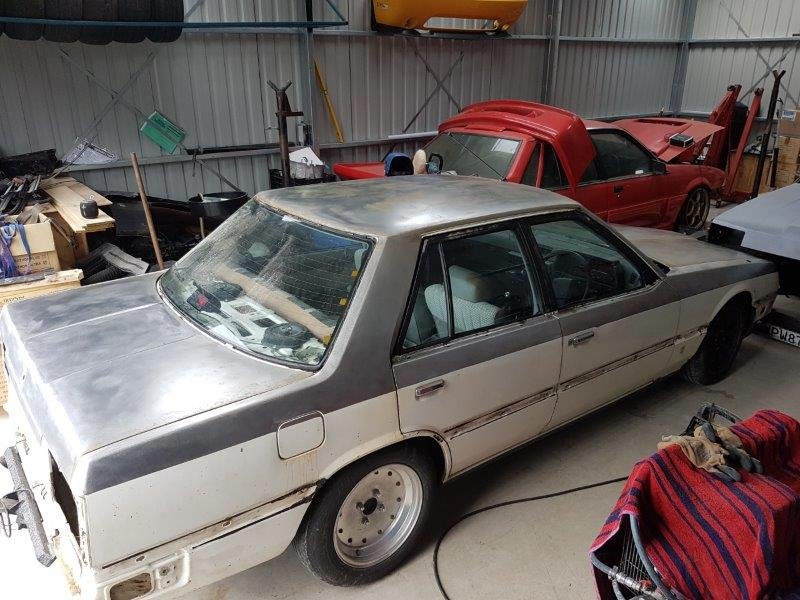
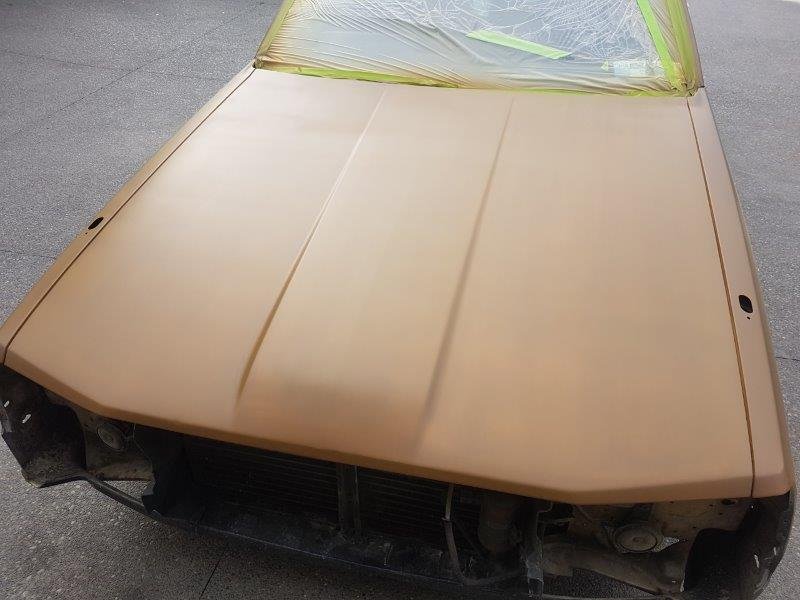
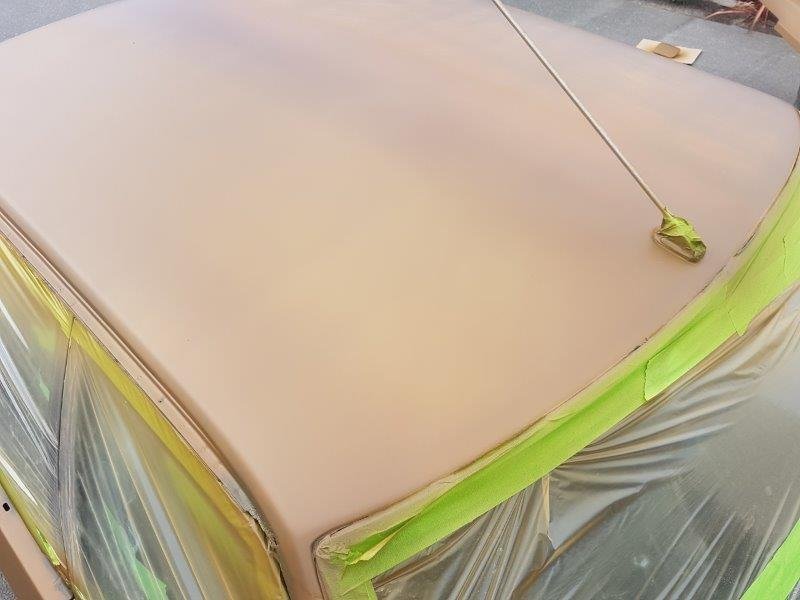
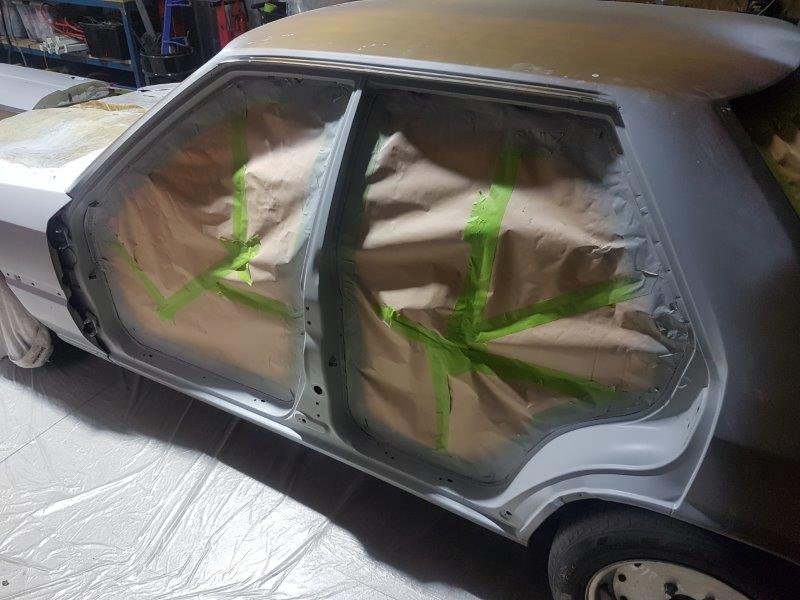
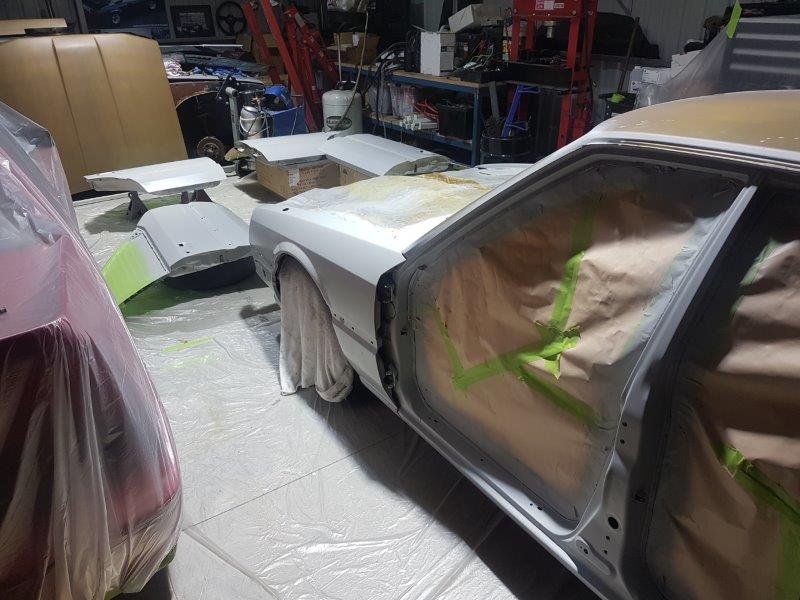
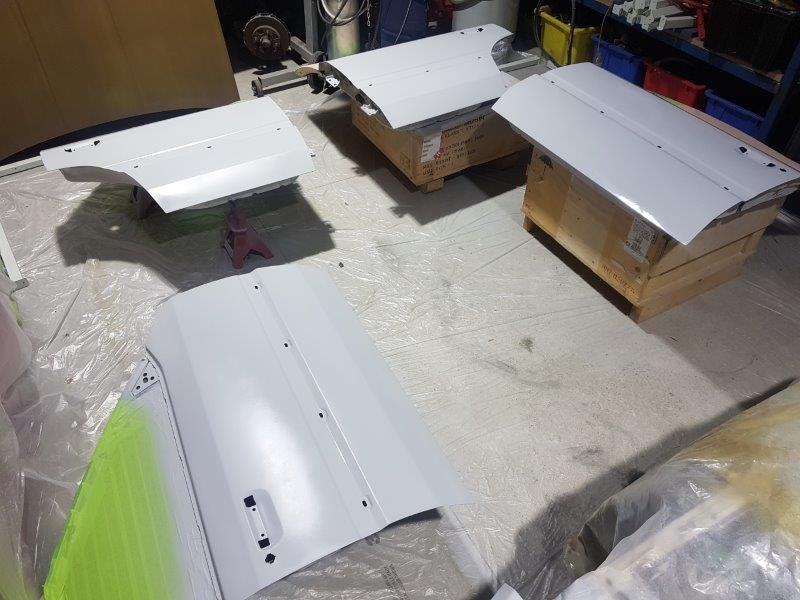
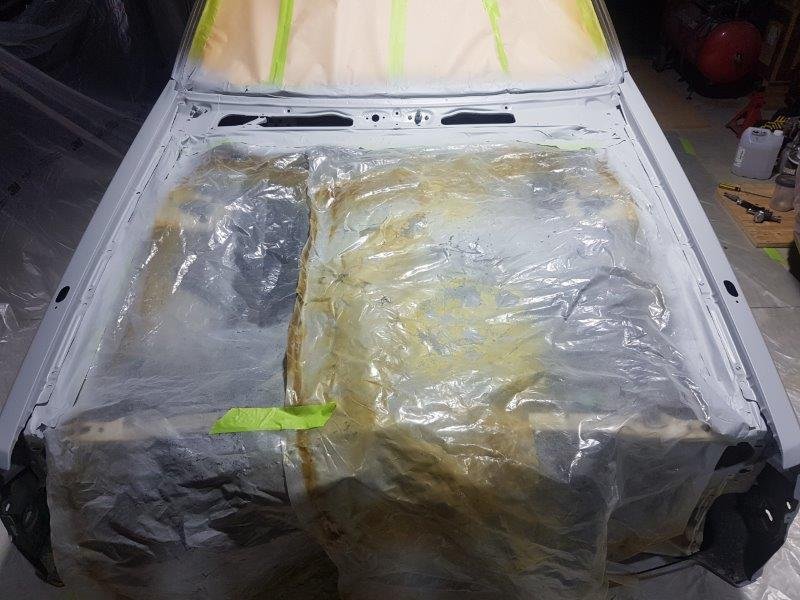
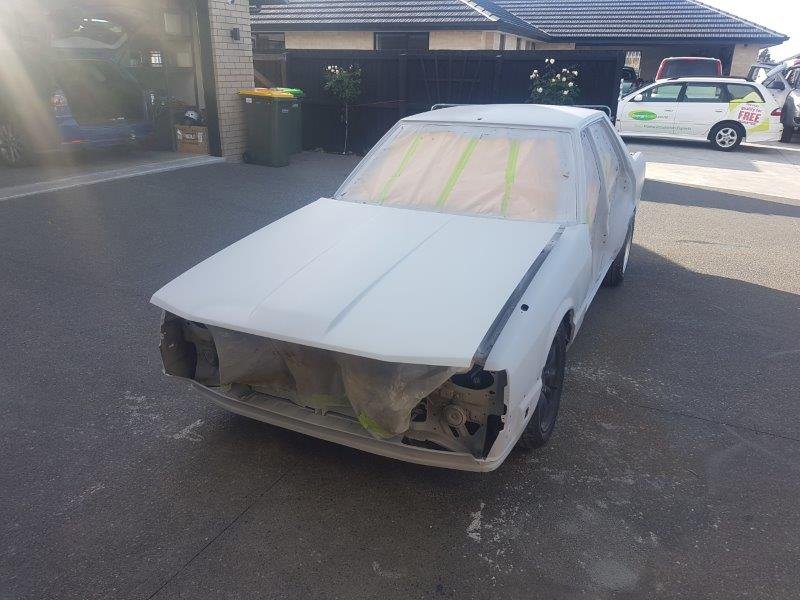
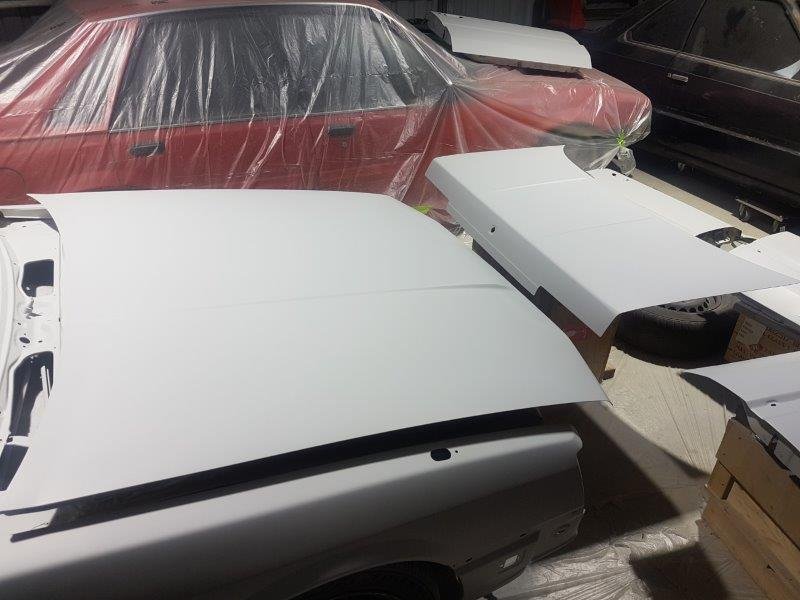
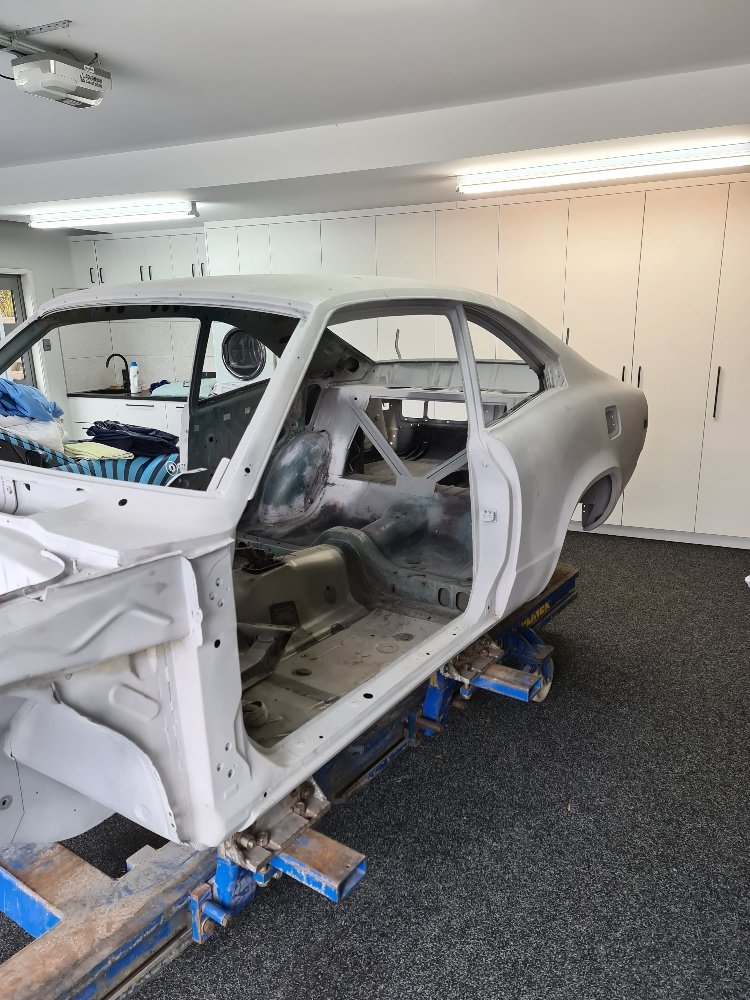
Doors were up next, started with the shuts, gave the lower halves a lick of black along with the window frames. Chuck all the panels back on for a looksee, and a quick sand Next up, I moved everything in the shed and knocked up a makeshift booth using some steel cables and plastic drop sheets and had a crack at the doors and nose cone I didn't mix up quite enough paint to get two full coats on everything, so I had a few dusty spots on the RH doors. On another note nothing attracts bugs like fresh car paint, landed right in the middle of the RHF guard, whats a little more sanding. So for my next trick I went all in, mixed the remainder of the paint and took the gun to the whole car. Discussion, advice and suggestions welcomed: https://oldschool.co.nz/index.php?/topic/57362-beaubots-1982-er30-skyline-sedan/
6 points
-
Man I am fizzing over this thing. I surfaced the table over the weekend so I had a decent base to work with. There was some dumbfuckery with the length of the cut surface as it was 40mm or so too short. It turned out my calibration was just wrong, what a dick. After I sorted that I then I realised that the odd misalignment at one of the corners of the bed was not a poorly cut bit of laminex, it was the belts moving at different rates due to different stretch. I sorted that tonight and then started cutting the vac table. I'm breaking it out into small operations so I can learn some shit about feeds. This is the vac inlet pockets; Come up good, those screw holes were routed too... I also set up spindle cooling as I didn't want to toast it, I bought some tube from mitre 10 and went redneck on it; This will get tidied up and made to run automatically a bit later.6 points
-
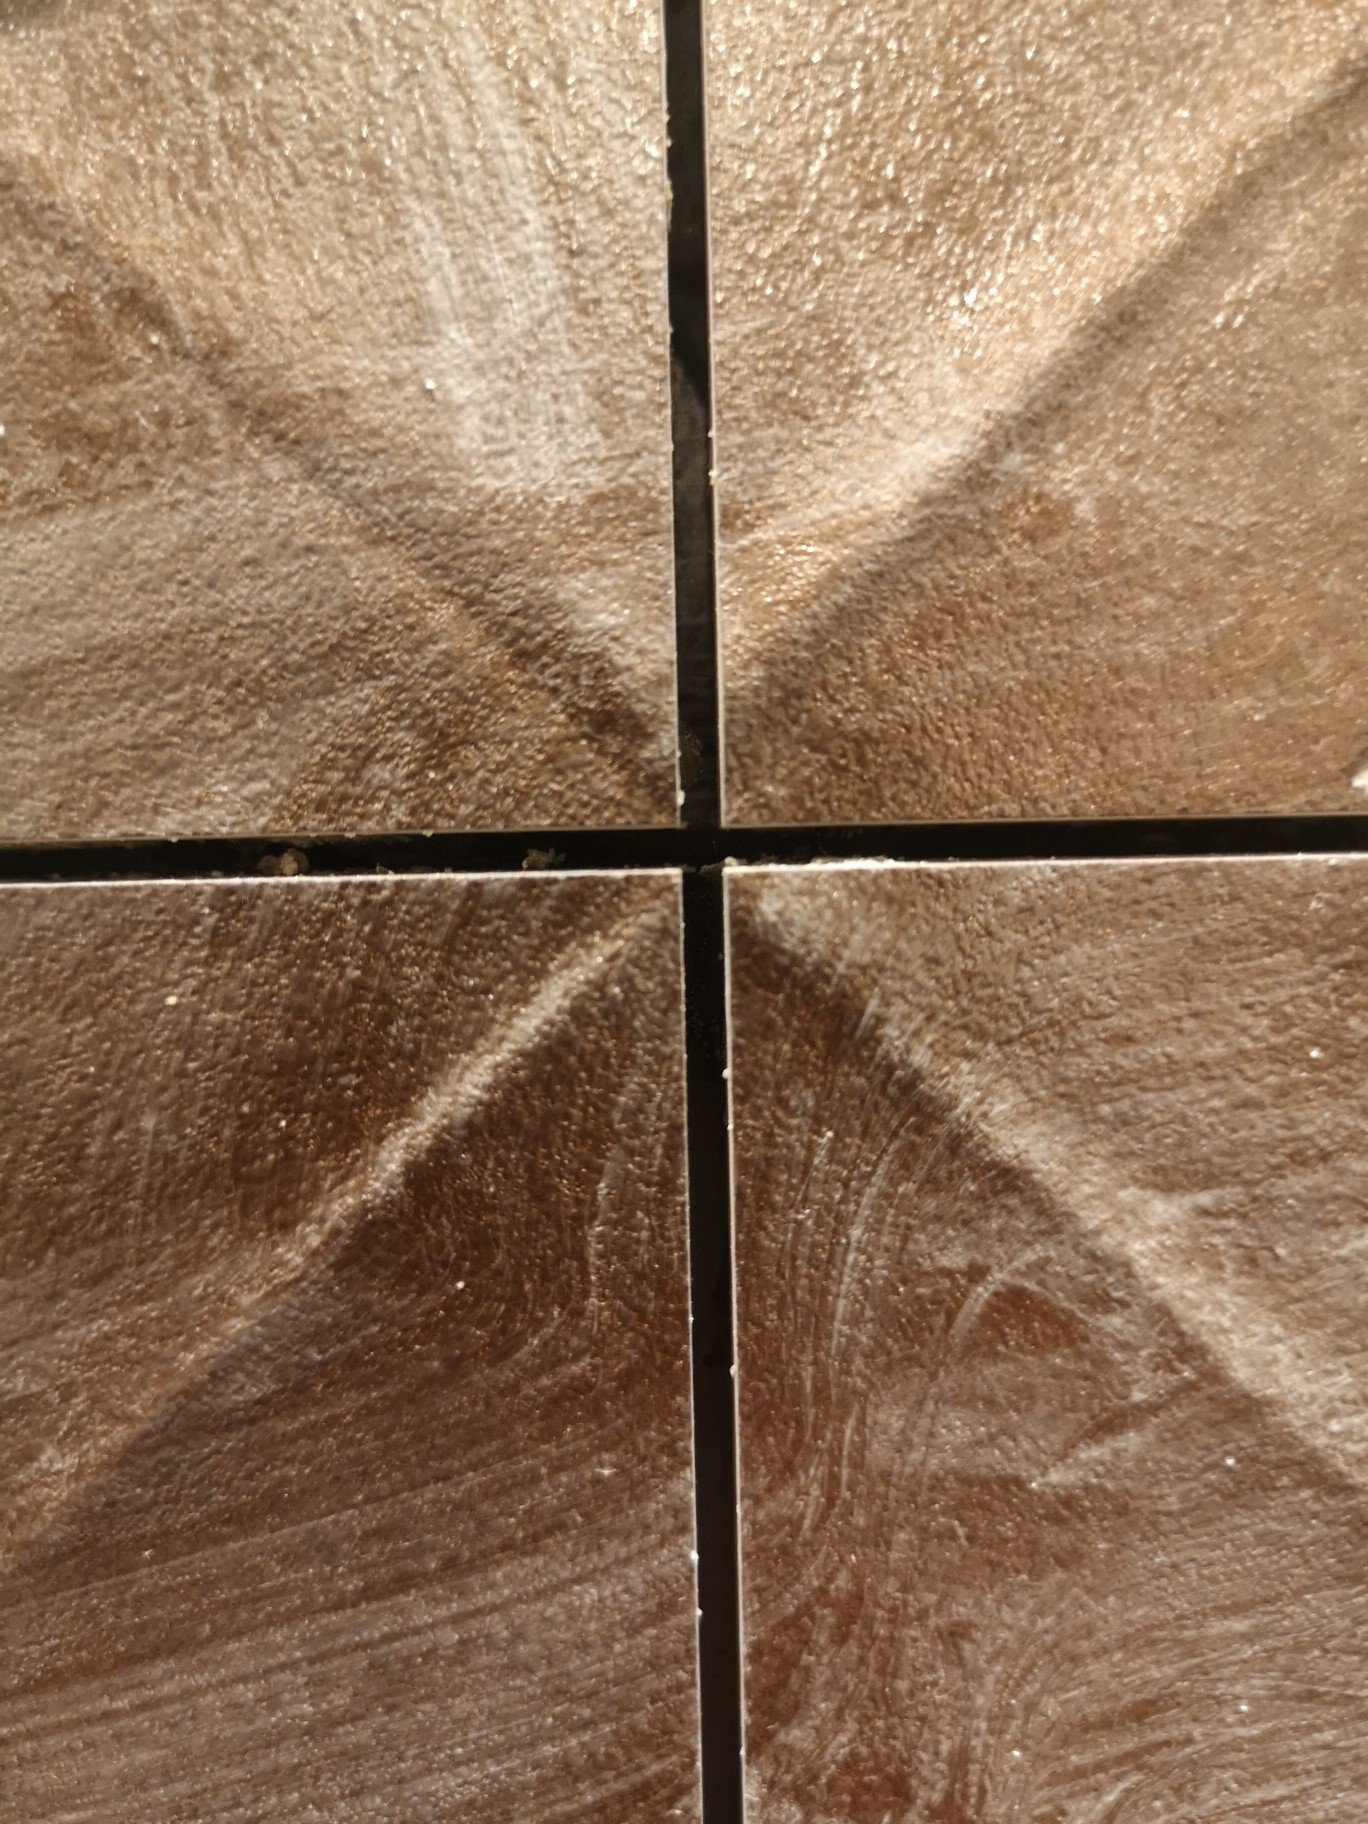
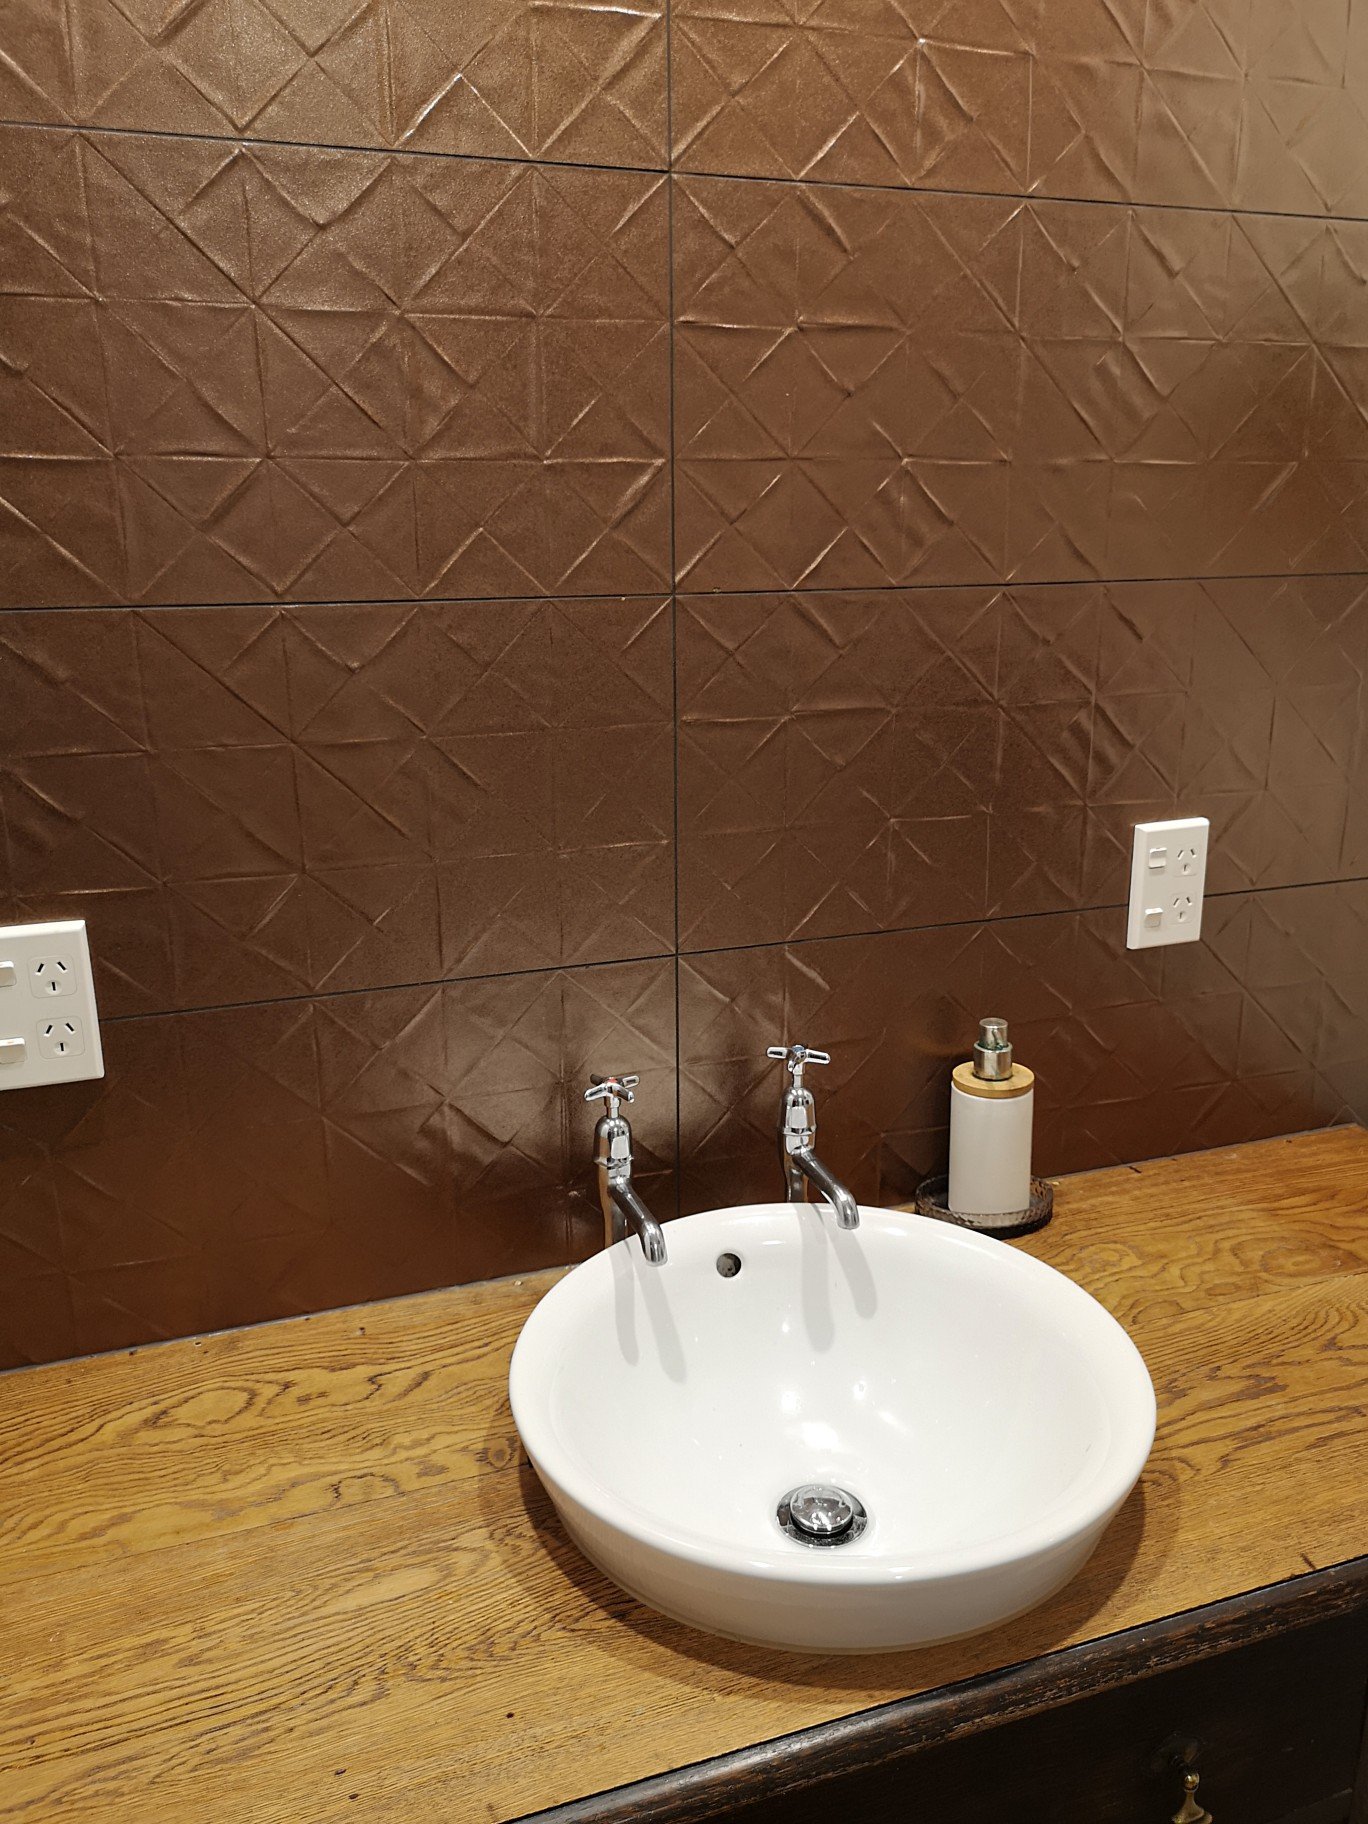
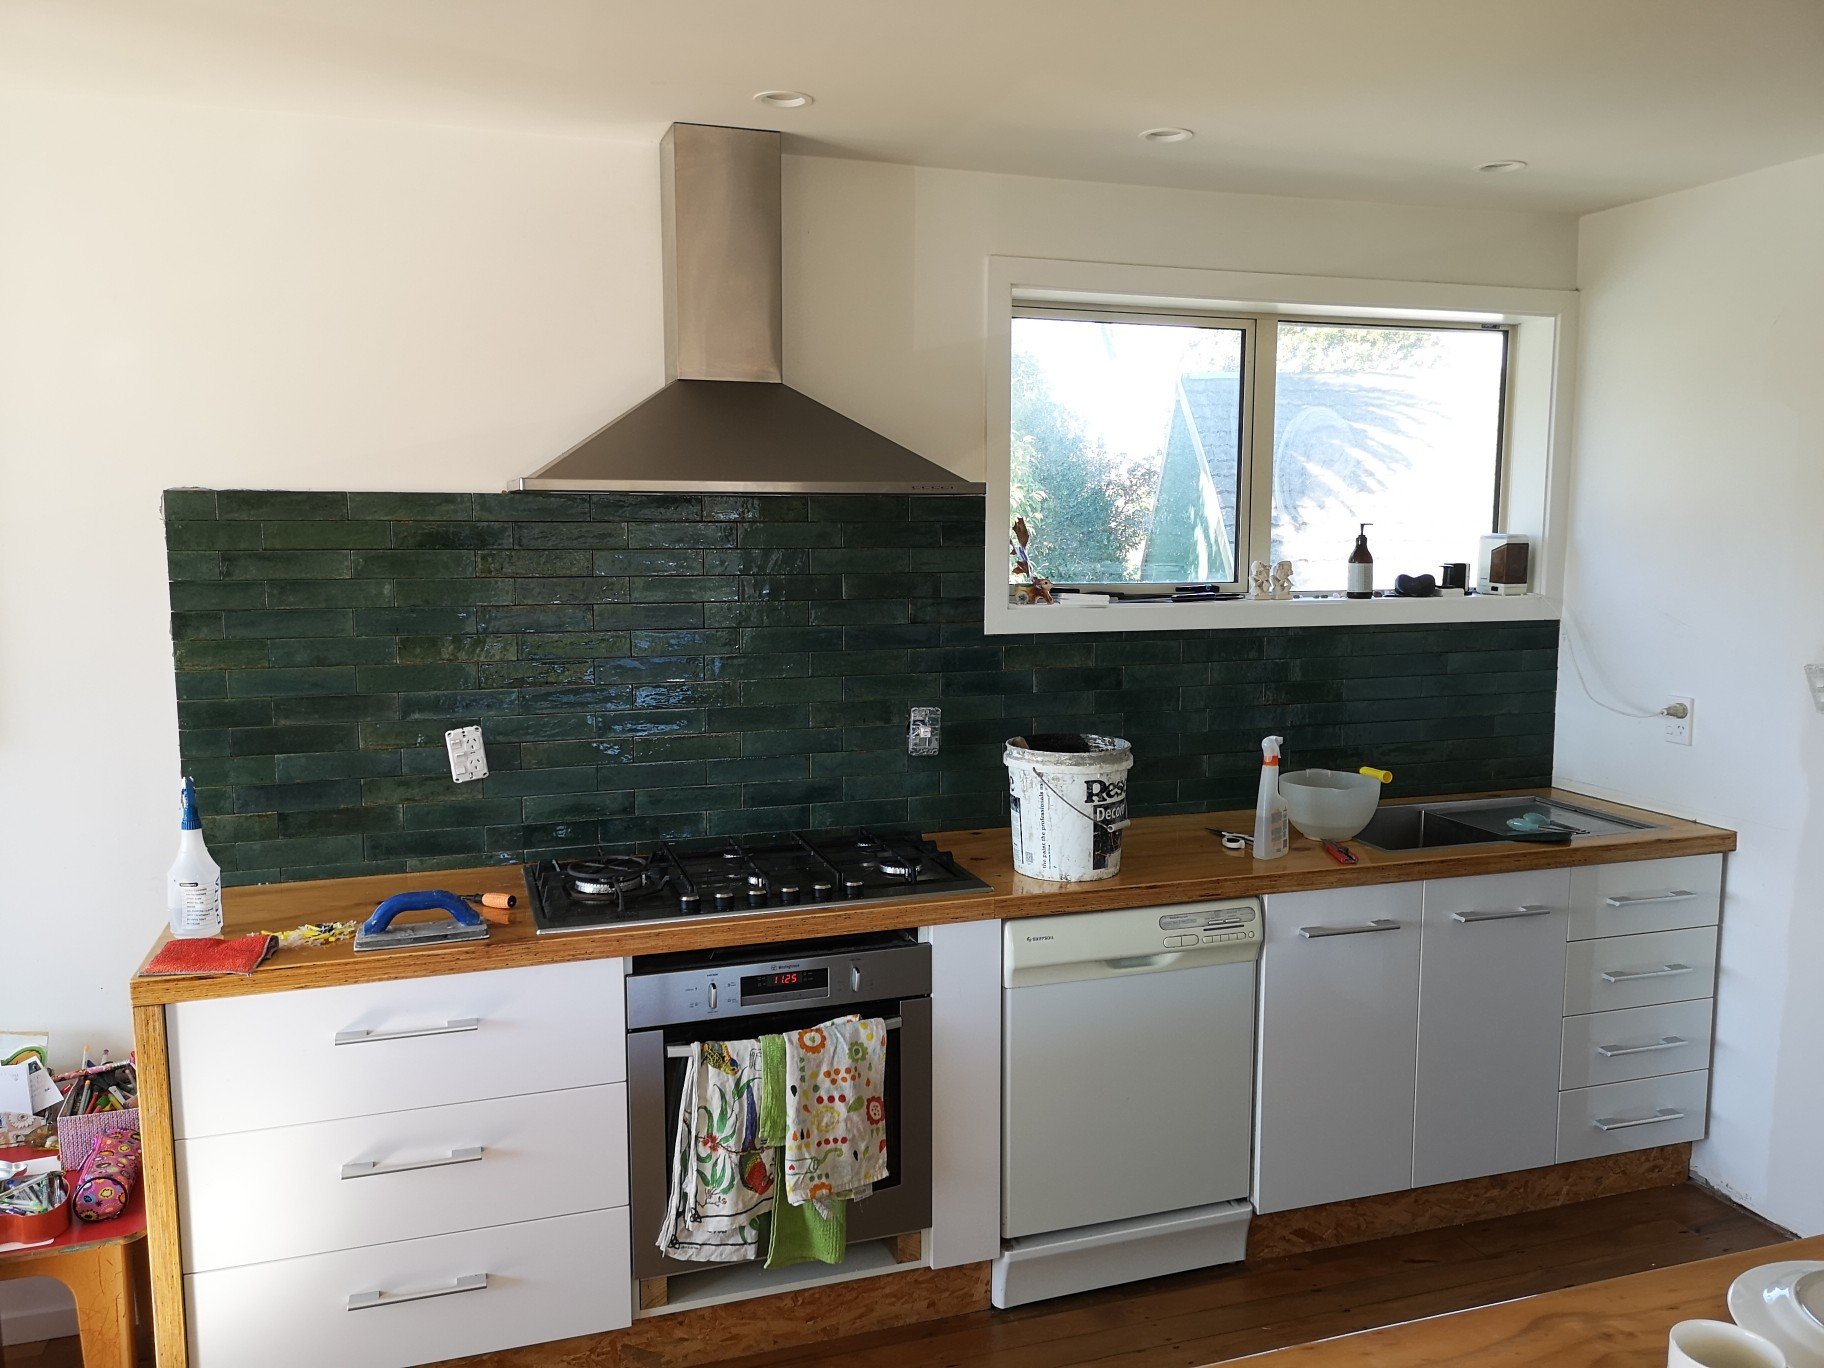
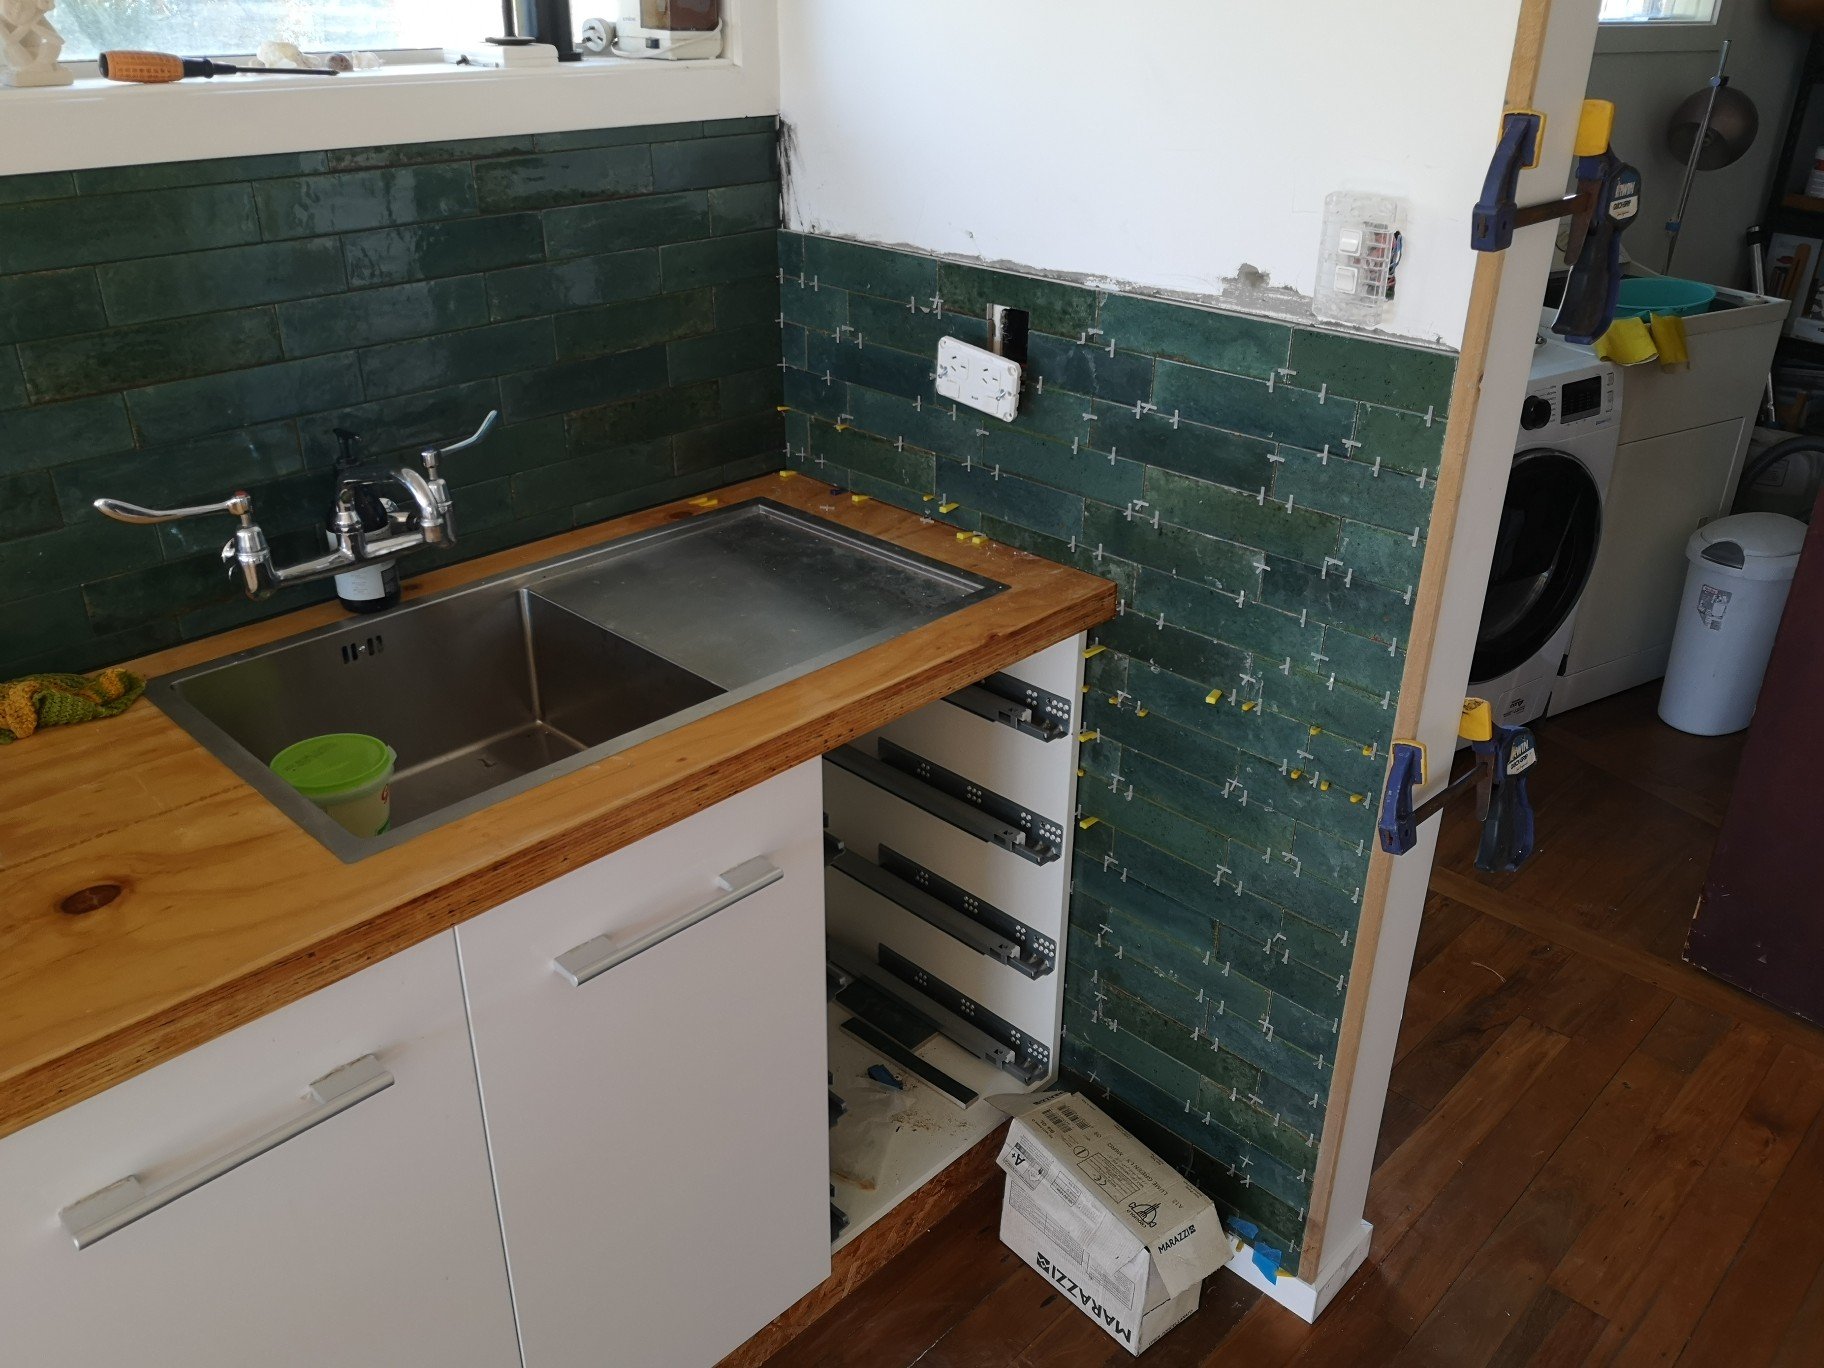
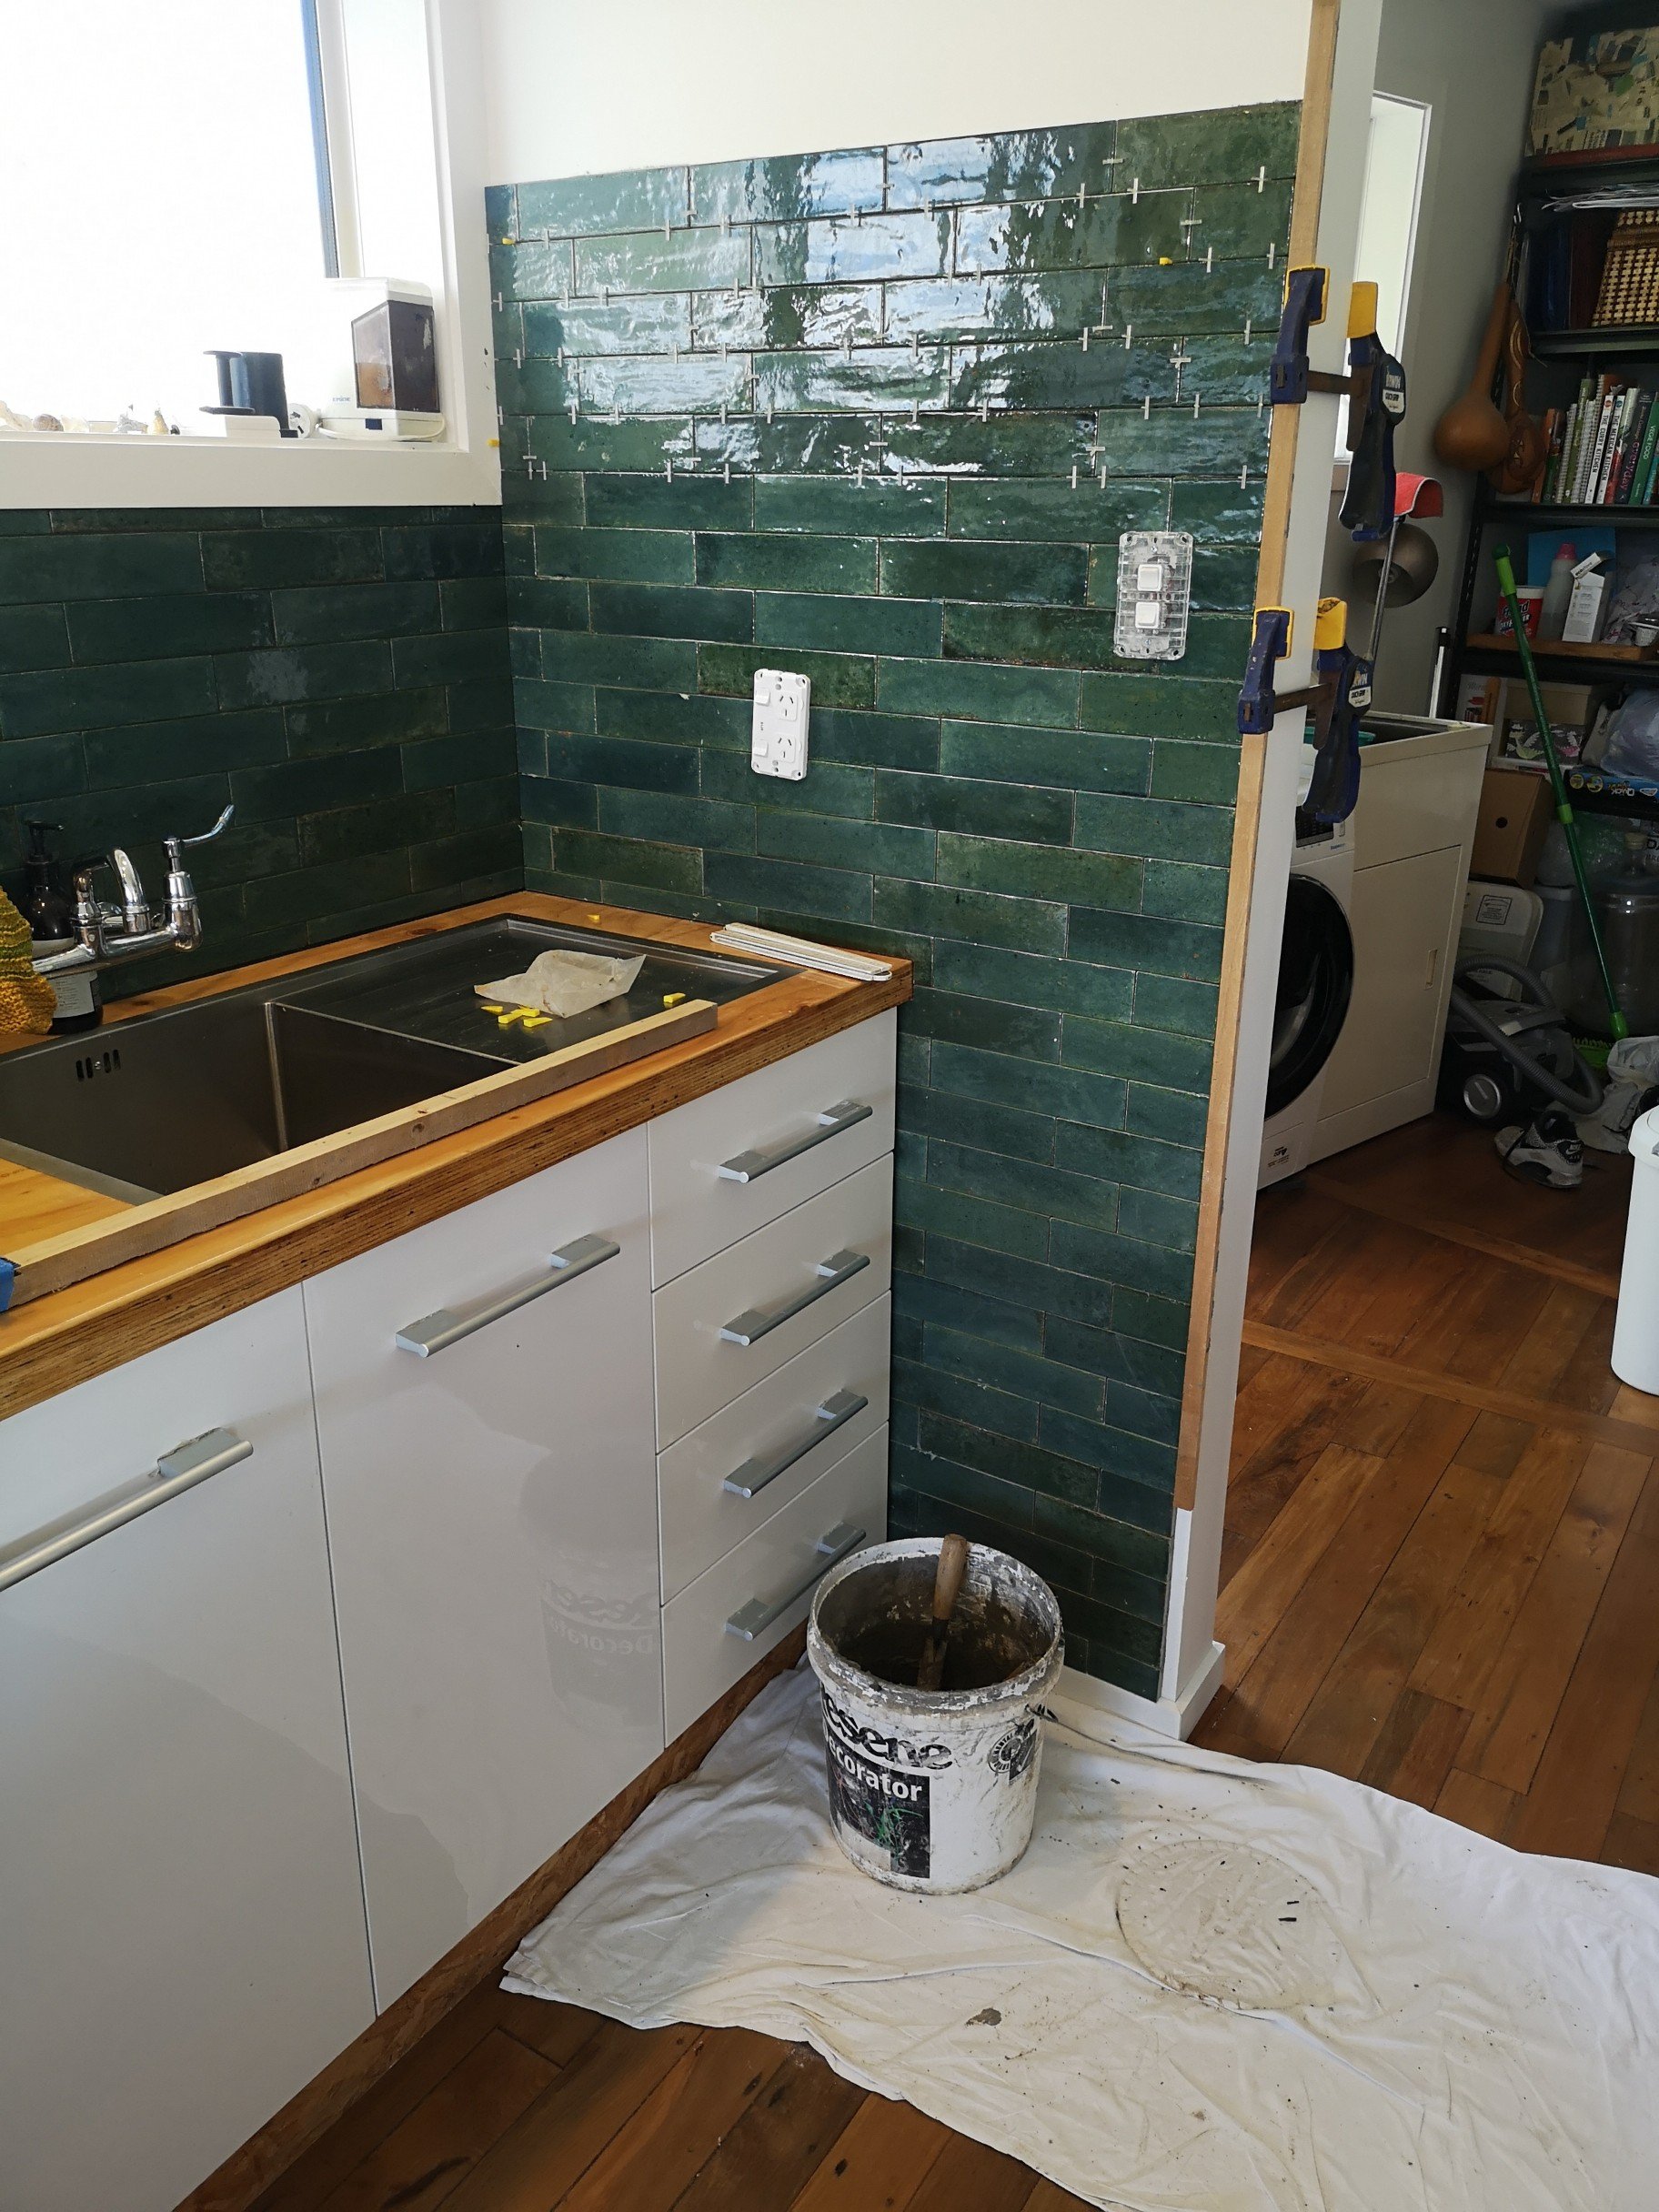
Finished the tiling a couple of days after the above.. Got the joints pretty spot on. Discovered these tiles are quite soft, had to wedge a couple up to keep the line level and they chipped the edge of the tile when I pulled them out. Shit plastic wedges, behind the mirror anyway. If you need to wedge non ceramic tiles use wet timber wedges as they don't chip the tiles and have the added bonus of shrinking when they dry. 1st grout pass Sponge pass Didn't take any pics of the vanity install but it's literally a 10mm bead of silicone along the back edge and jammed into the tiles then tooled off. Plumbing was a total cunt which involved 3 trips to miter10's shit plumbing selection on a Sunday. Had one of those dux adjustable u-bends but with the additional tile thickness was too short length ways to meet the sink drain. Ended up getting removable bowl trap and 90 bend compression fitting. Then had to go back to get a 40mm extention. This all started as I couldn't be fucked cutting and glueing fittings.. Did that anyway in the end. Will get different colour socket plates to match the tiles. Grouting kitchen tiles,
5 points
-
Accumulating more stuff, and selling other stuff. Shiny video from Sao Paulo... running a bit behind time, but car life.4 points
-
I jumped in on some free powdercoating and had the Silvia and falcon (rear) covers done after I sandblasted them. came out great! Decided to chuck them together for a pine and realised they dont clear the calipers (need to trim back the curved edges but not a lot) and since it’s got larger discs, they sit hard up against them too! c.l.e.v.e.r. B.o.y Live and learn didn’t realise the discs were murdered out, it’s cool but was expecting nice clean raw look lol.4 points
-
Forgot a shifter linkage bracket bolted up to the trans pan. The original had an L shaped spacer plate on the thin steel pan... I won't need that with the thicker alloy flange, but the bracket fouled the welds on the alloy pan, so I filed some off it... And fits ok... It looked heaps thicker and I was worried it would throw the alignment out, but was only 3mm more than the original so should be fine... And realised I'd left the engine plate and flywheel off, so lifted it off the stand, was happy to do this as I'd forgotten to grease the tube and it was a bastard to rotate... And scrubbed the surface rust off the plate... And it cleaned up nice... So flywheel and plate back on, pretty much ready to mate up to trans when things are torqued up...4 points
-
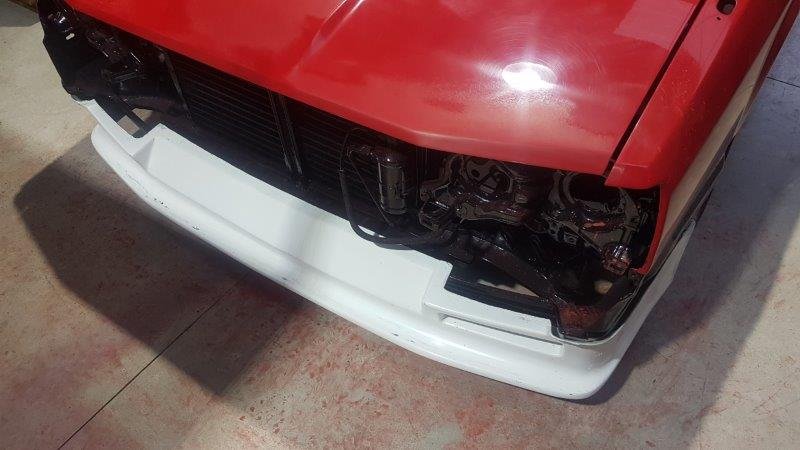
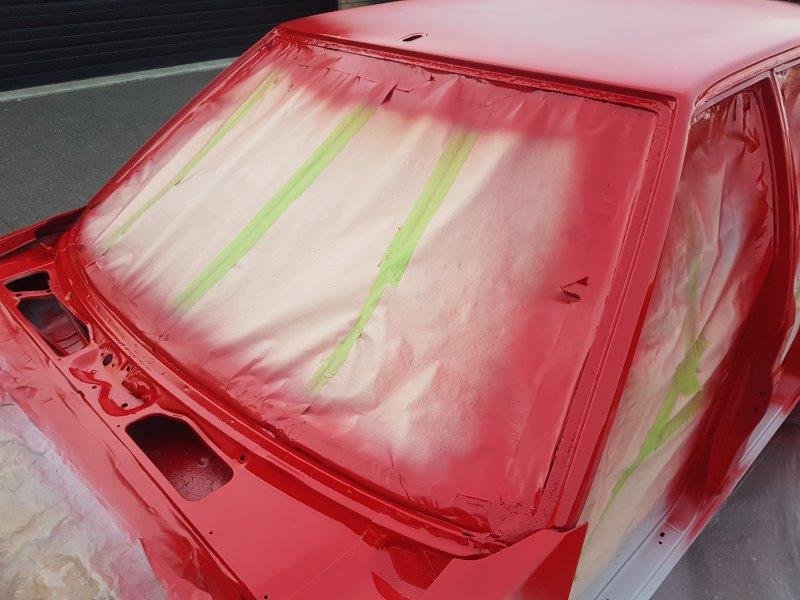
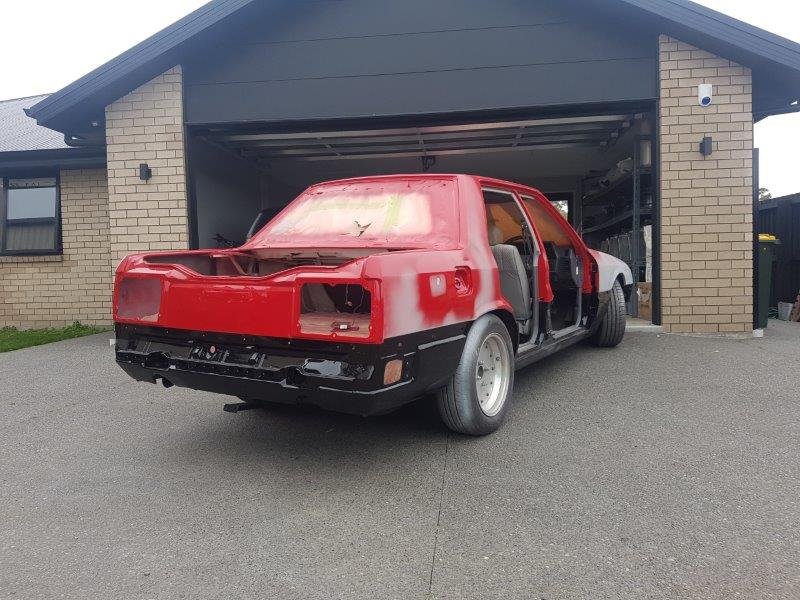
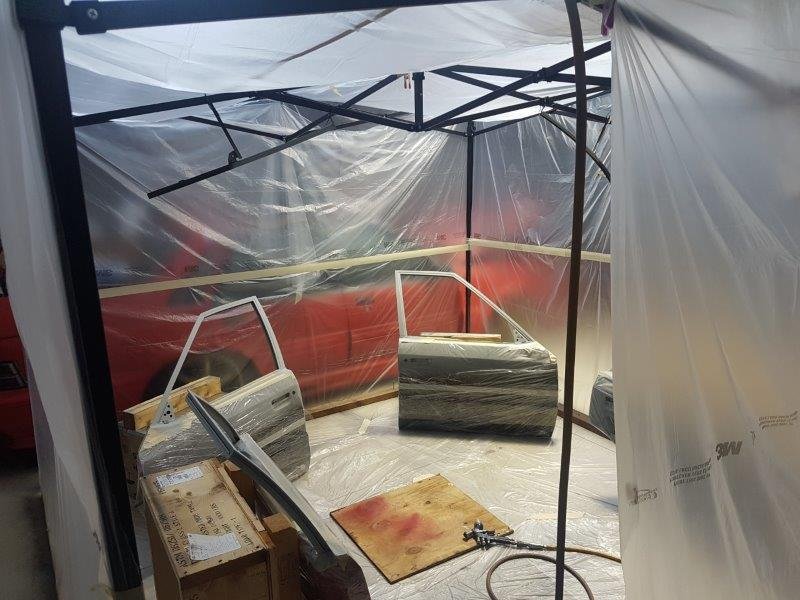
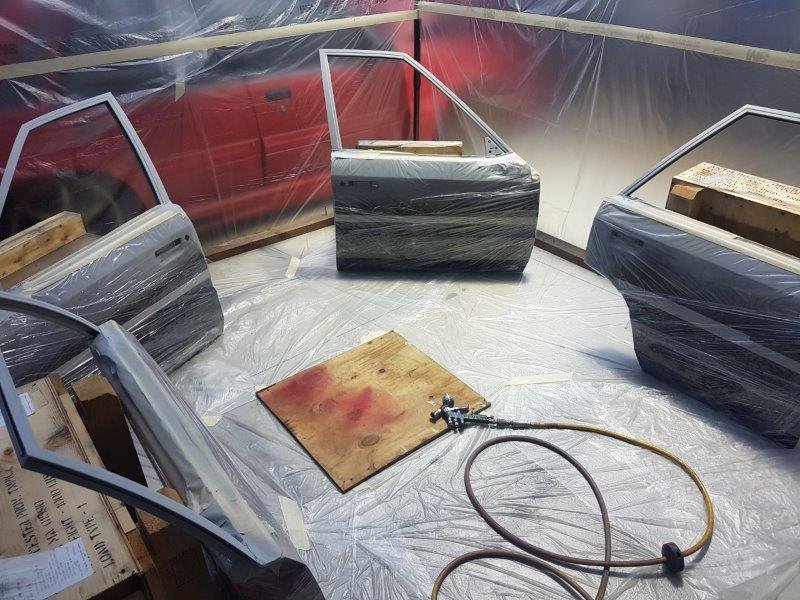
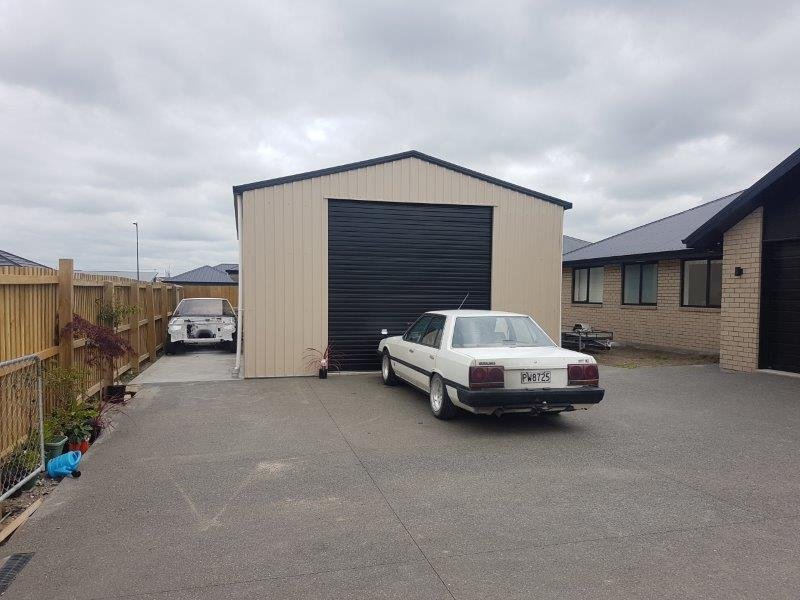
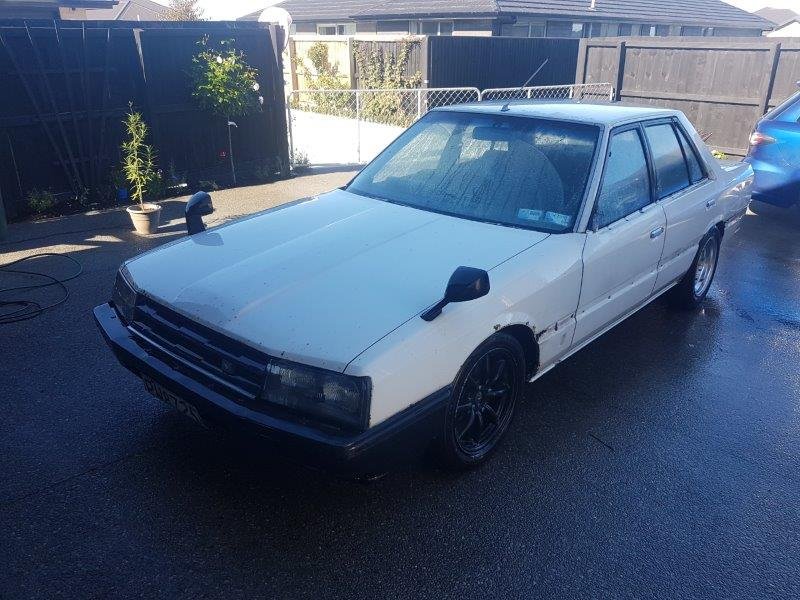
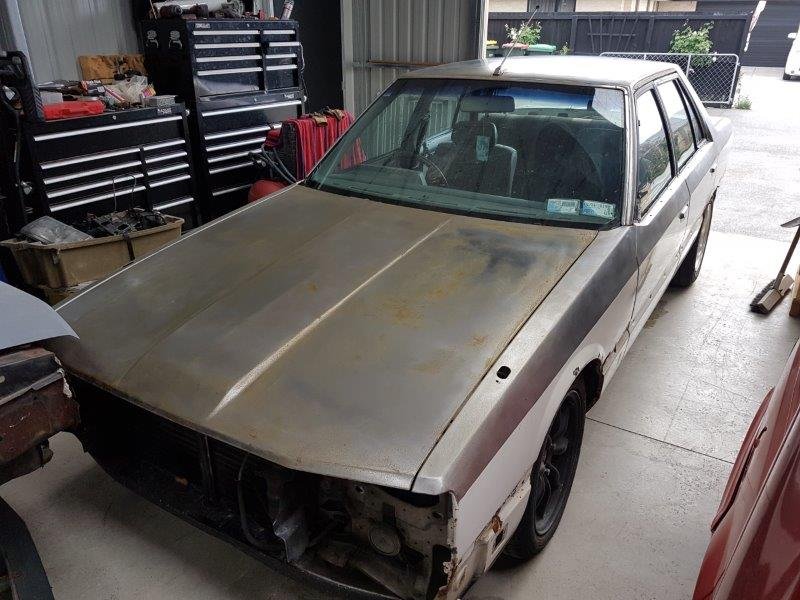
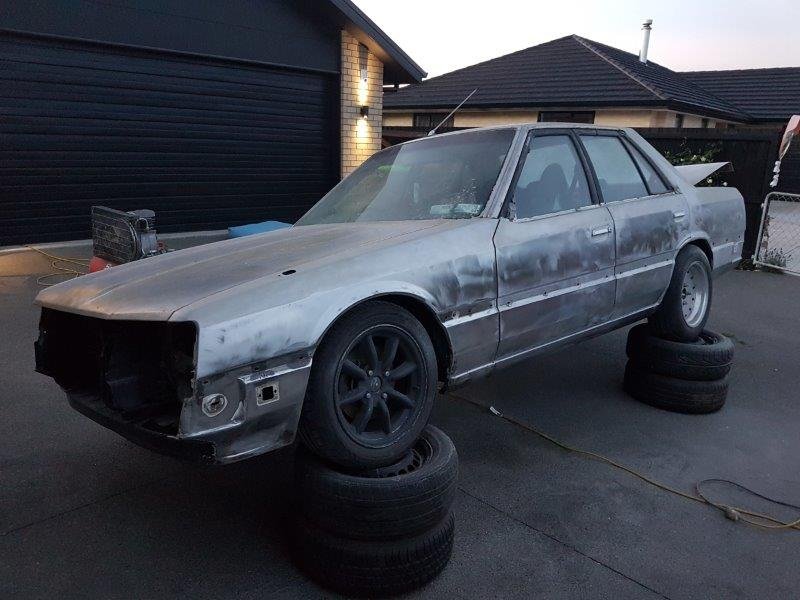
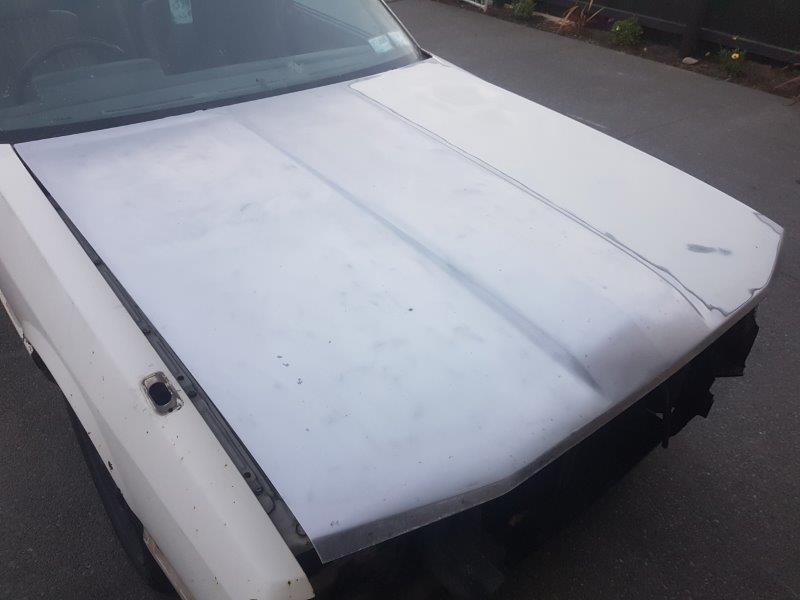
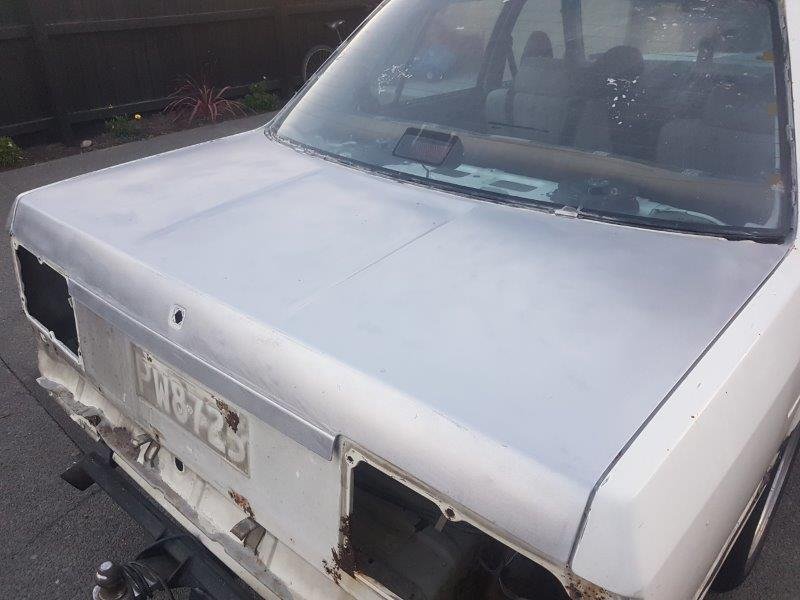
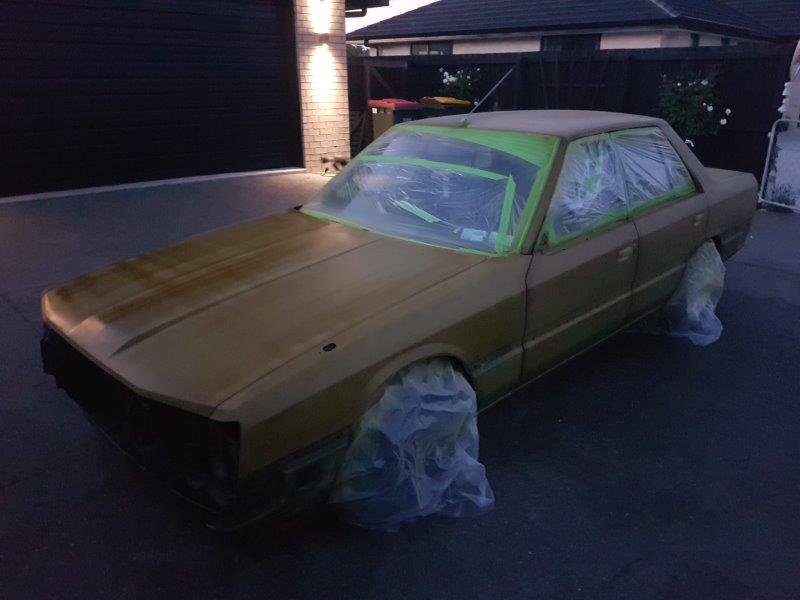
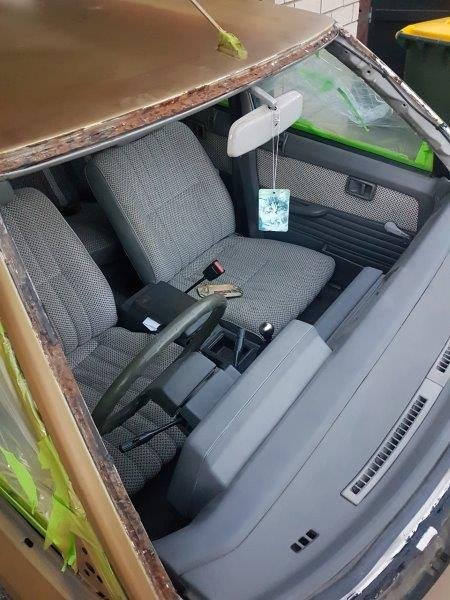
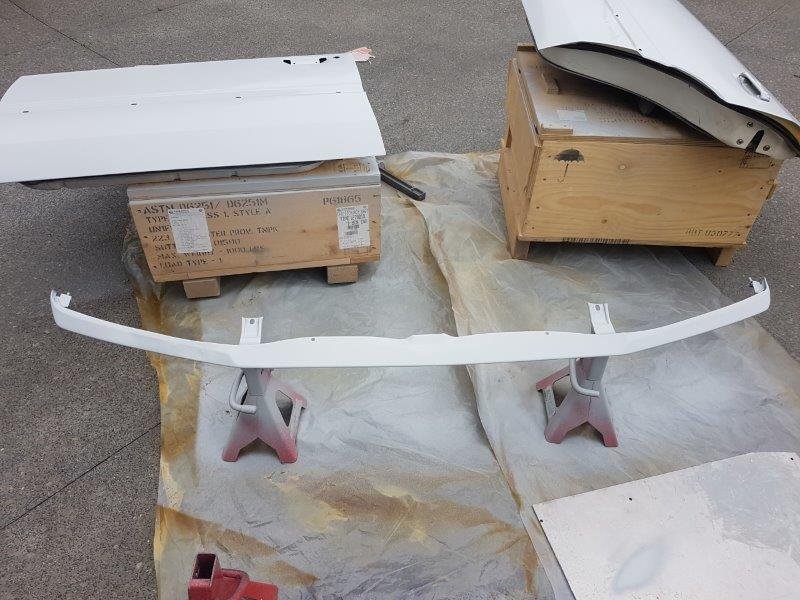
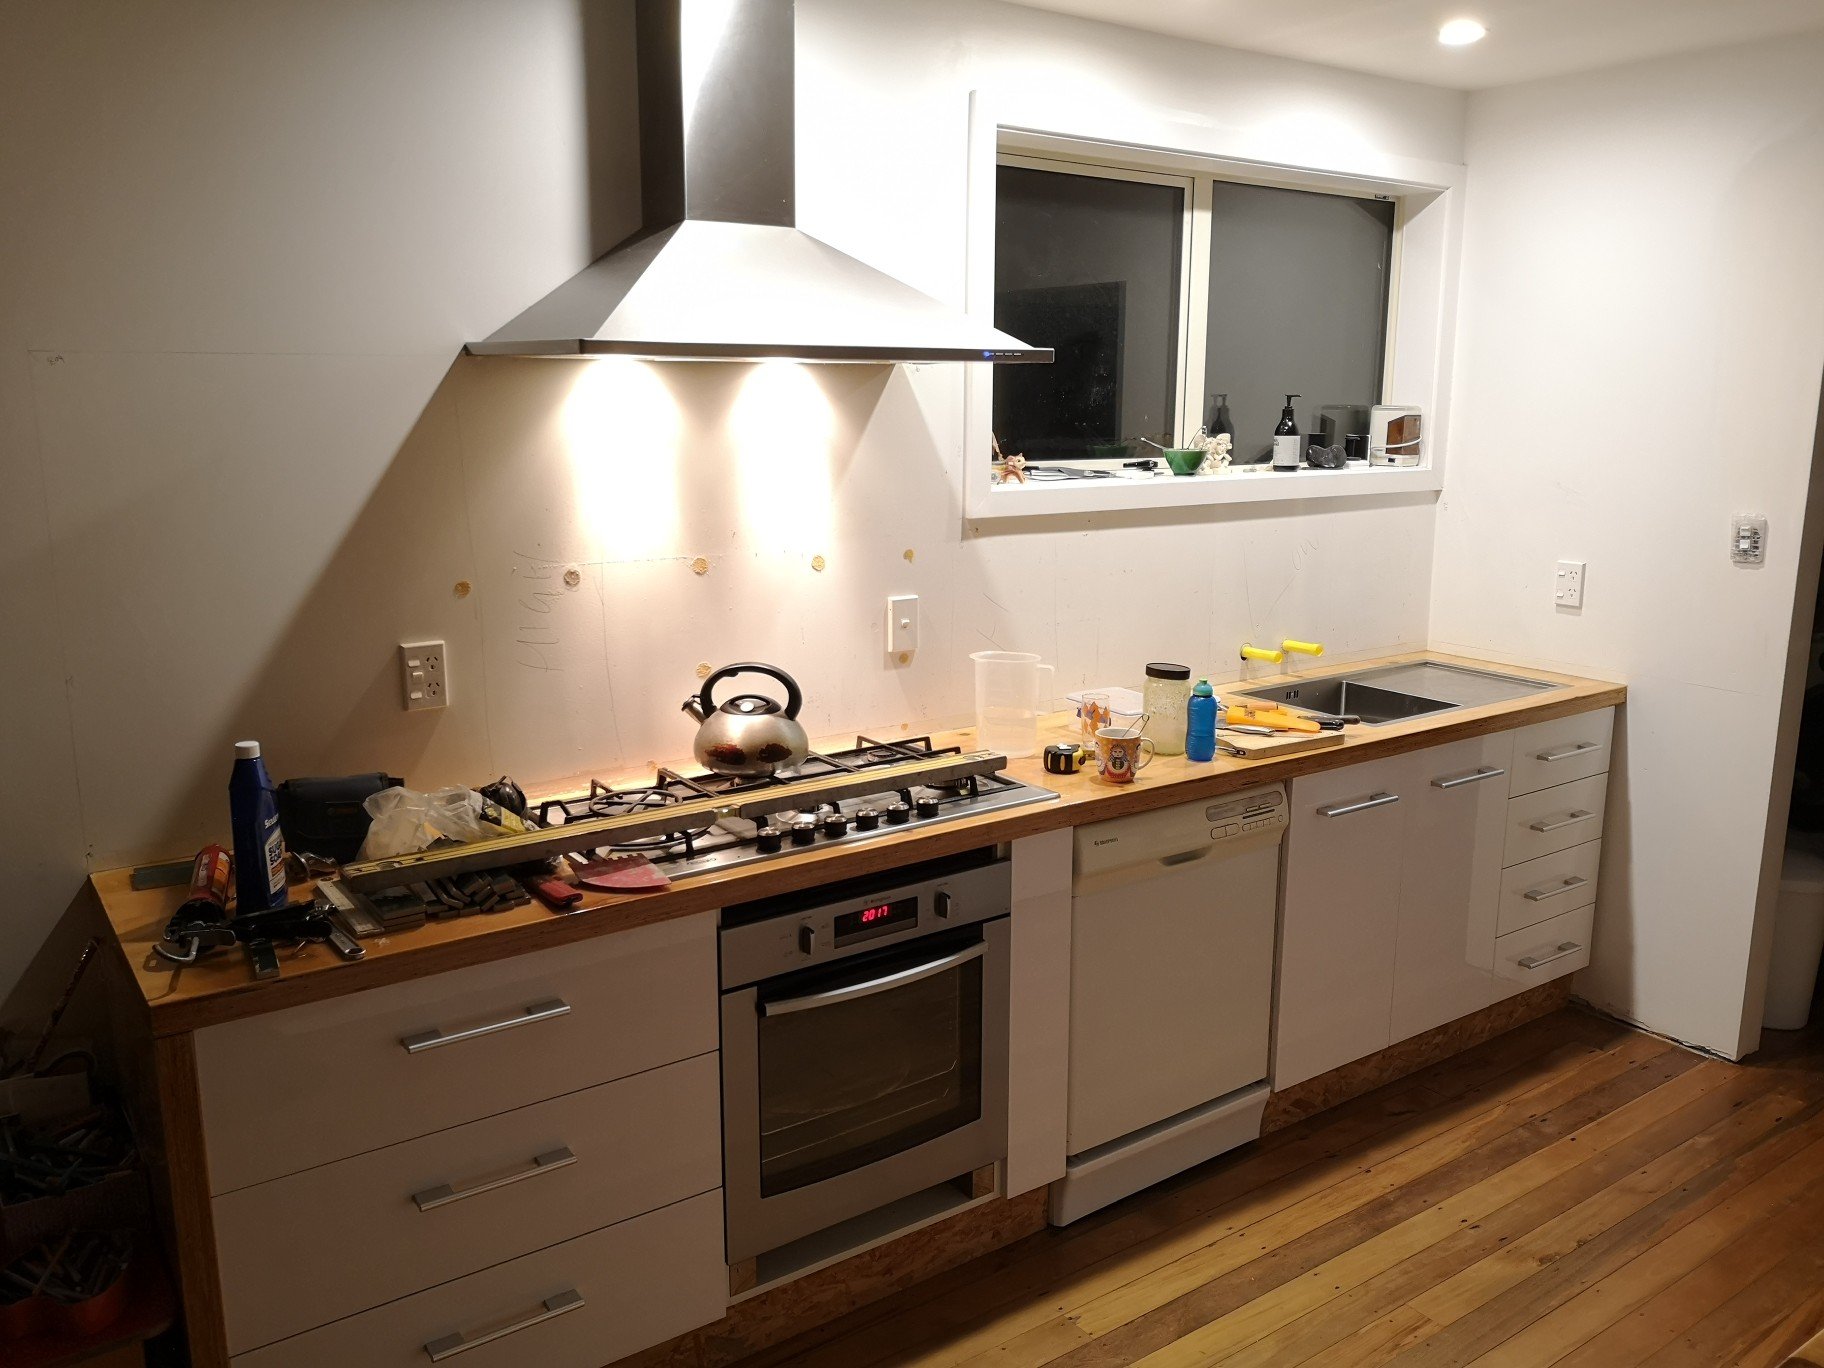
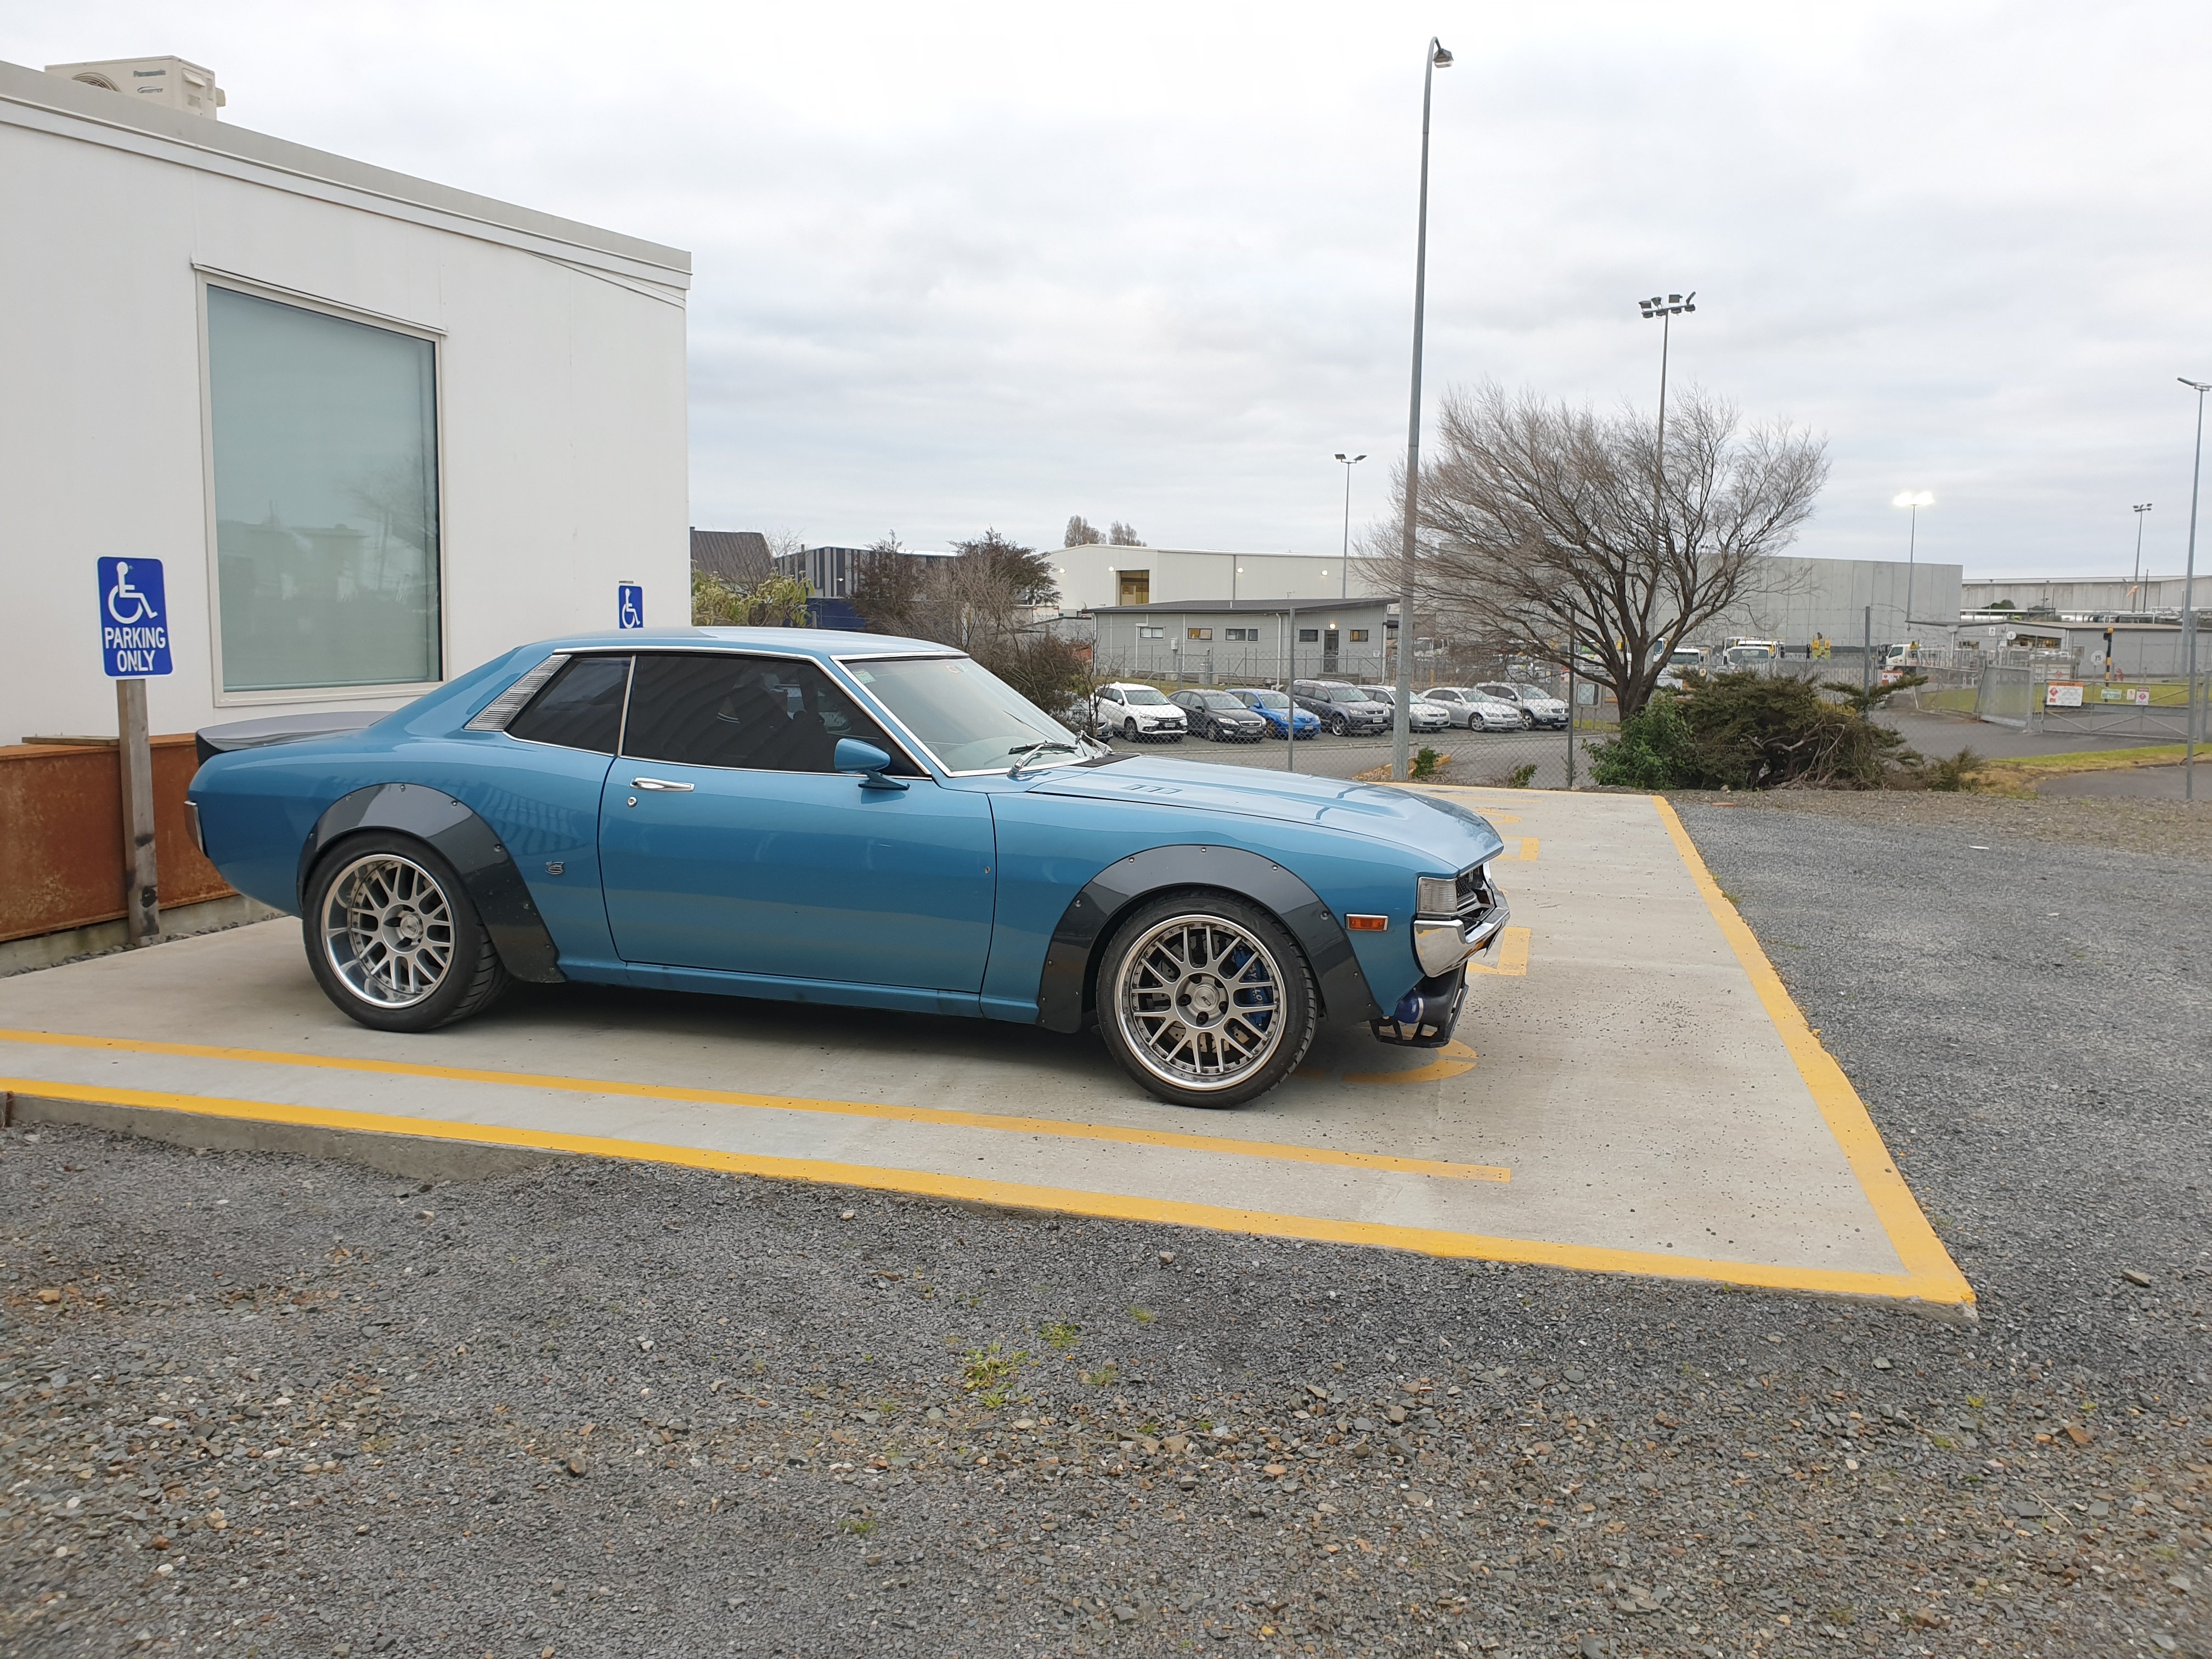
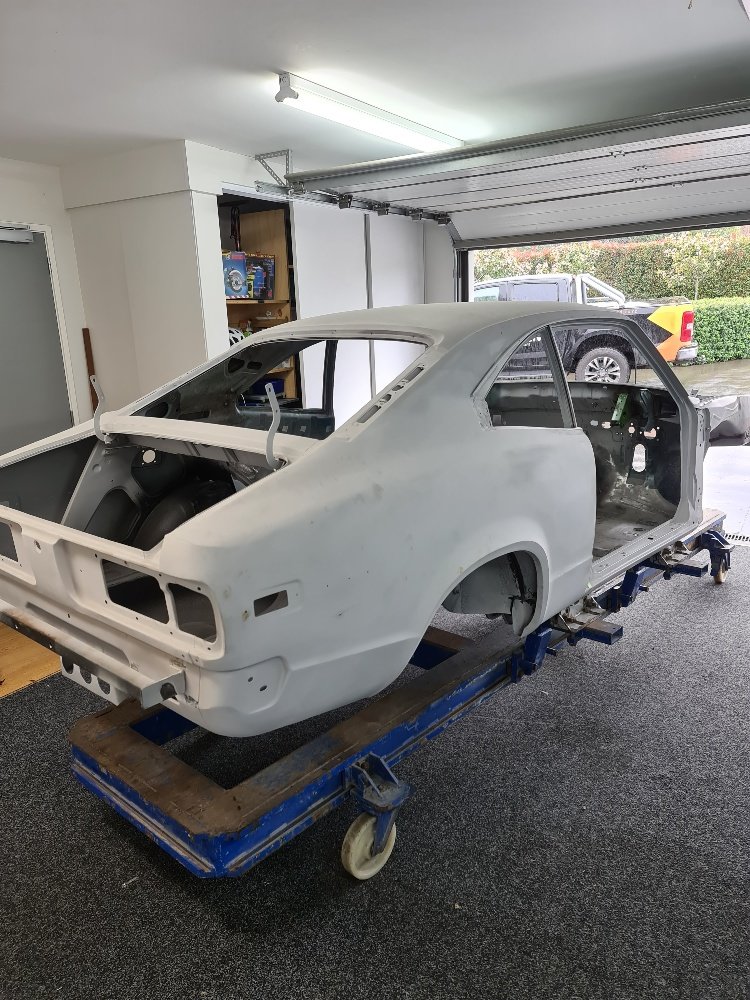
After more than 2 years, I'm here to update my thread. The Ironmask bonnet arrived from Japan and I had some small dents tidied up by a panel beater mate. But I have decided to save the Ironmask front for another future project. Id run the car as a daily till mid 2019 when I decided it was time for a birthday, the paint was getting pretty shabby. Also new(Sep 2018, yes Its been a while) house and garage who dis So I decided I'd like to have a go at painting a car, I always liked watching my drift cars getting painted so I figured fuck it lets have a crack. I decided to go to bare metal on the exterior And then gave it a couple coats of etch primer to prevent surface corrosion I ended up pulling the screens and inevitably found a bit of rust, the front screen had been refitted by someone with clear RTV and it didn't exactly keep the moisture out. A bit of a wire wheel, rust converter and some welding and it was sorted. There had been a skim of bog on both the left doors, so I sanded it out and re applied it where necessary, pretty good given how old the car is. Started with Priming the shuts and loose panels Followed by the body Discussion: https://oldschool.co.nz/index.php?/topic/57362-beaubots-1982-er30-skyline-sedan/
3 points
-
I needed accurate aerials for a thing. A mate laser cut blank PCB, and I peeled up the intervening strips with tweezers, and a heat gun to soften the adhesive. #RF (I needed them fast, PCB house turn-around was too slow).3 points
-
Glued on (yes, with silicone again. Makes good glue) the last of the trims Tape does a good job of holding most things wood orientated. This is a classic example of my wobbly walls, just on bench height it was about 7mm, here it's about 3 but as I'm 6'5 it's pretty much only me that can see it. It's good having my miter saw calibrated right after 13 years of ownership. And that makes that bit done. Still have to do some shelving around the fridge and the laundry. Need to change it up tho otherwise the cbf factor skyrockets.
3 points
-
Had a sunroof removed a while back. Paid good $ for a craftsman panel beater. Once the insert was tigged in it went to paint. The painter only used high build primer, no filler at all. Then a metal flake paint so it had to be spot on. Makes me lol watching the yankee hot rod shows. Fabrication is finished now it's time for body work, out comes a big drum of bog. Lol.
3 points
-
Alright mumma never raised no quitter after alot of perseverance and some fresh eyes weve got it going! Thanks to everyone who offered ideas. So I had the ignition side of the wiring all re done with new relay. The dizzy cap was giving shit spark to #1 Bought a new dizzy cap and rotor Took all plugs out cleaned up still no go. Turns out a rogue plug wasnt giving consistent spark so replaced all plugs and checked resistence in the leads which all were fine. It would start up fine but when getting warm it would start to run like a bag of dicks.. over fueling and smoking like no bodies business.. Started looking at carb videos thinking I would be replacing the jets/adjusting floats I noticed in the videos their choke was fully open at 180 degrees and mine wasnt... no where close Heres a pic of when the engine is warm and the electric choke fully open.. Pretty sure suppose to be more like this anyway after rotating the cap when engine was warm to keep it fully open it ran great! Few trips up and down the street no hesitation or bogging down and buggar all smoke!! Drove up and down the road half a dozen times noticed temp guage rising so put it back in shed to give it a once over - boiled thermostat it didnt open so I'll grab another tomorrow. Sump still leaks so I'll need to remove motor to goo up sump gasket proper. Then wof3 points
-
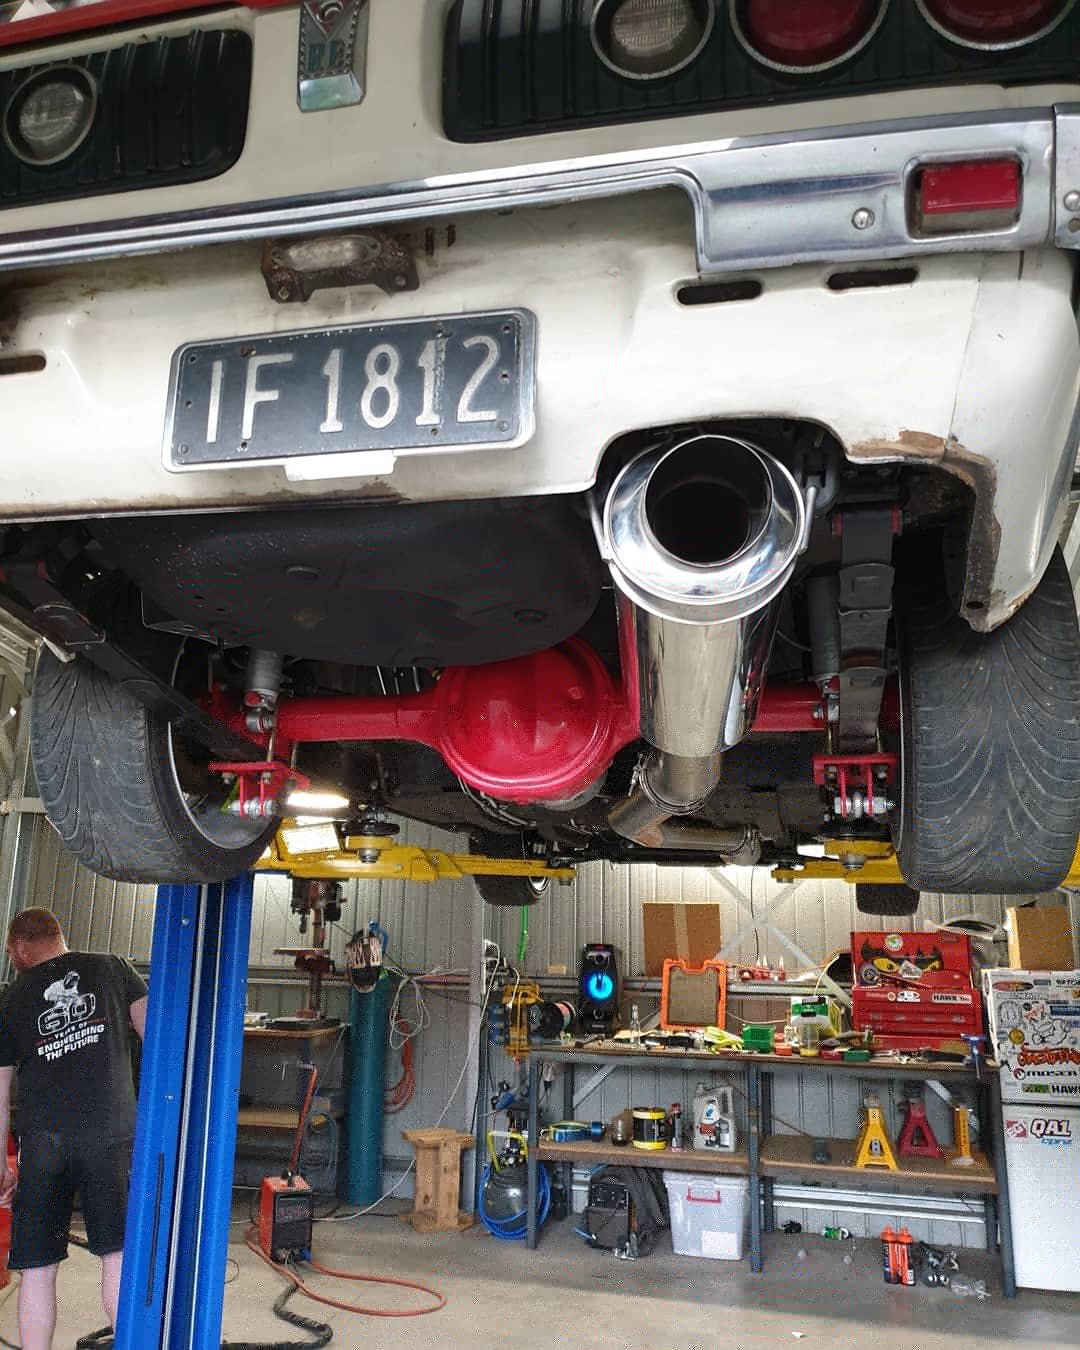
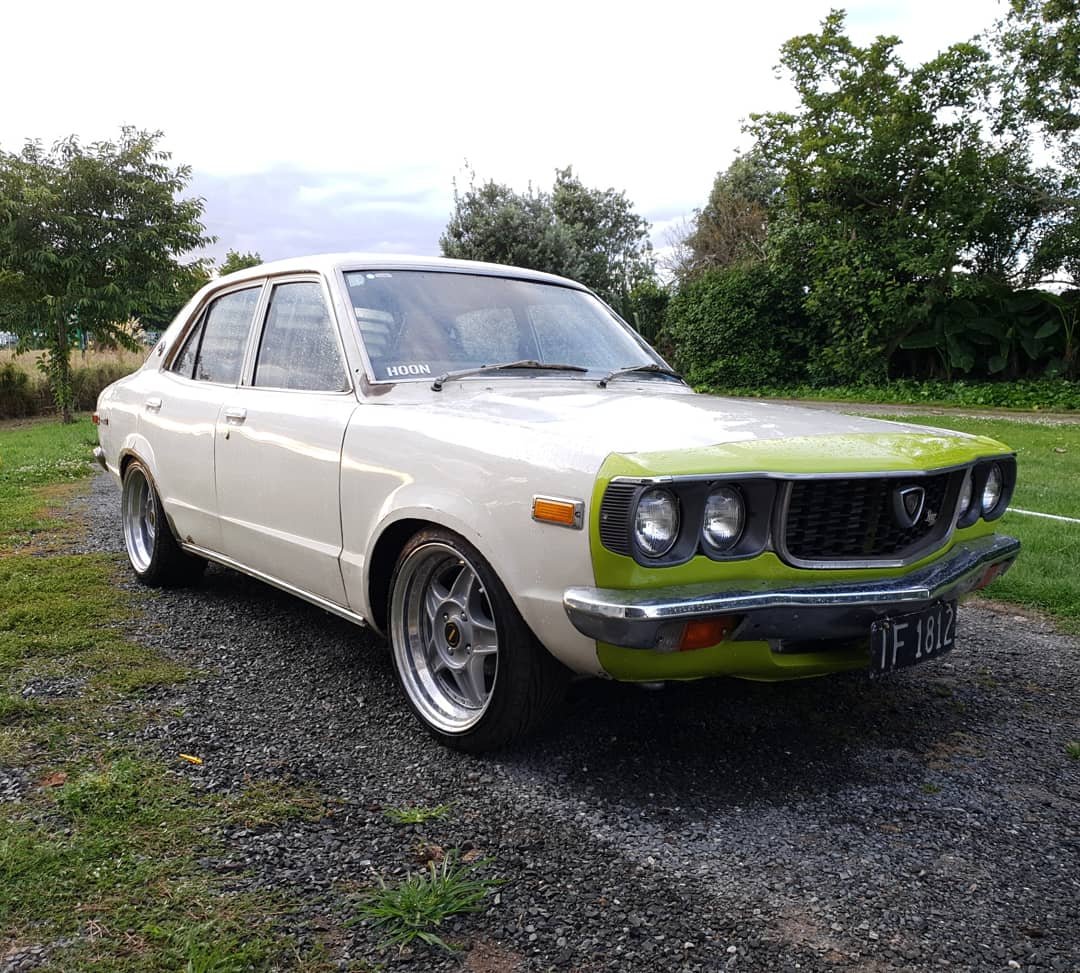
So sheepers popped around, we did a bit of a bolt check, clipped all the fuel and brake lines up and then the above happened. How cool. The tune is only very beginning stages so I couldn't give it any real beans under load yet, but ambling around on part throttle was super great. The brakes feel awesome, as does the suspension. Things to look at include (and this is for my reference): - fix/adjust clutch so shifting is hopefully easier - move exhaust to drivers side so muffler is away from rear passenger side wheel - resolve tacho and speedo not working - roll rear guards cos she rubs a bit - driveshaft loop - secure and install battery box - seat mounts (for lush lush lush new interior) - diff is noisy, change out worn CW & P for a good spare set I have - get it aligned properly That's really about it for the moment. Not bad all things considered, the only stock mechanical component on the car is the steering column and rack!3 points
-
Son has be harassing me for a green stone necklace so I made this in about 15 mins with a tile cutter disk
3 points
-
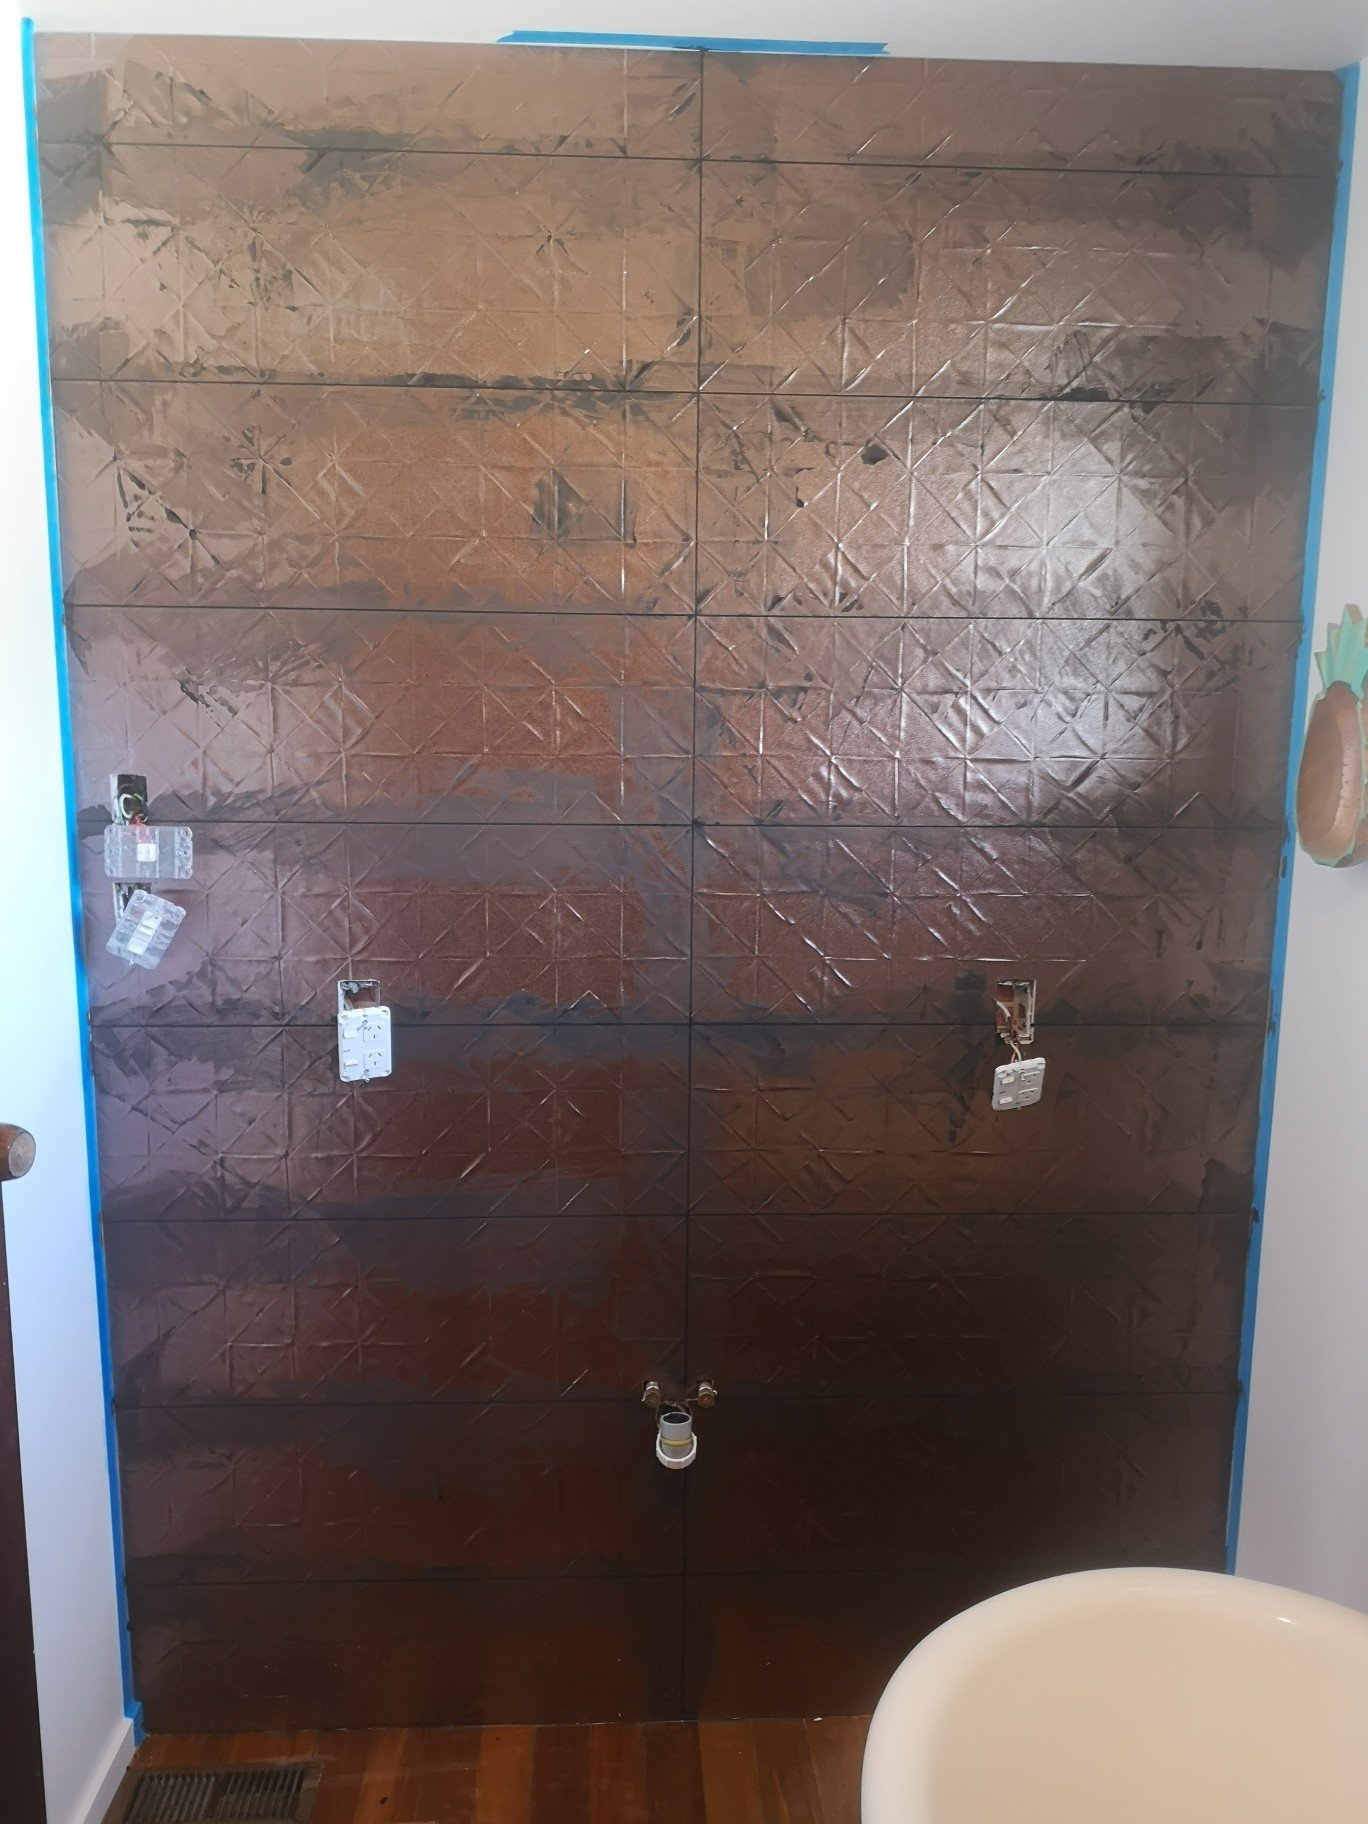
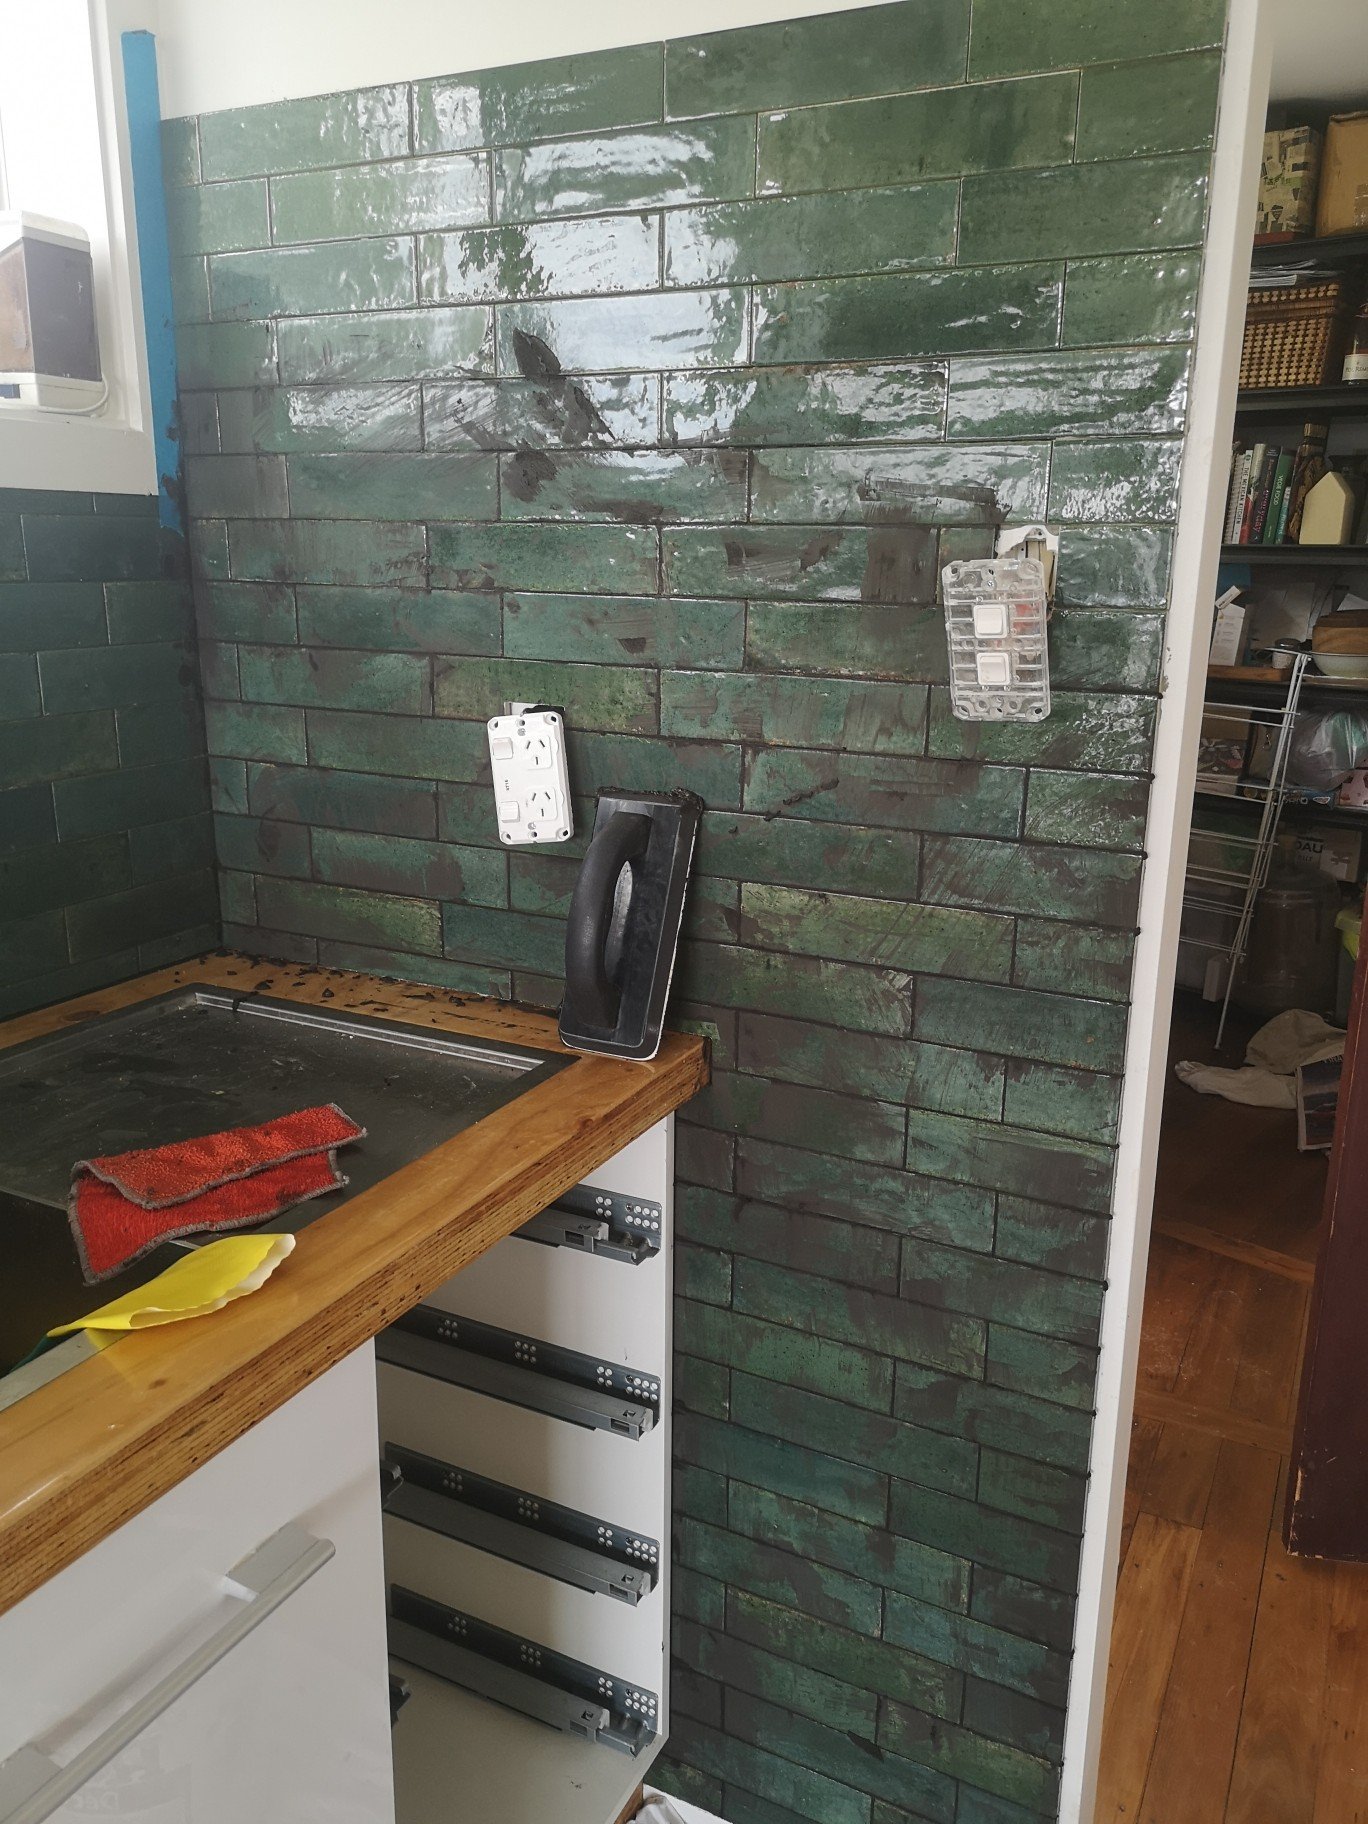
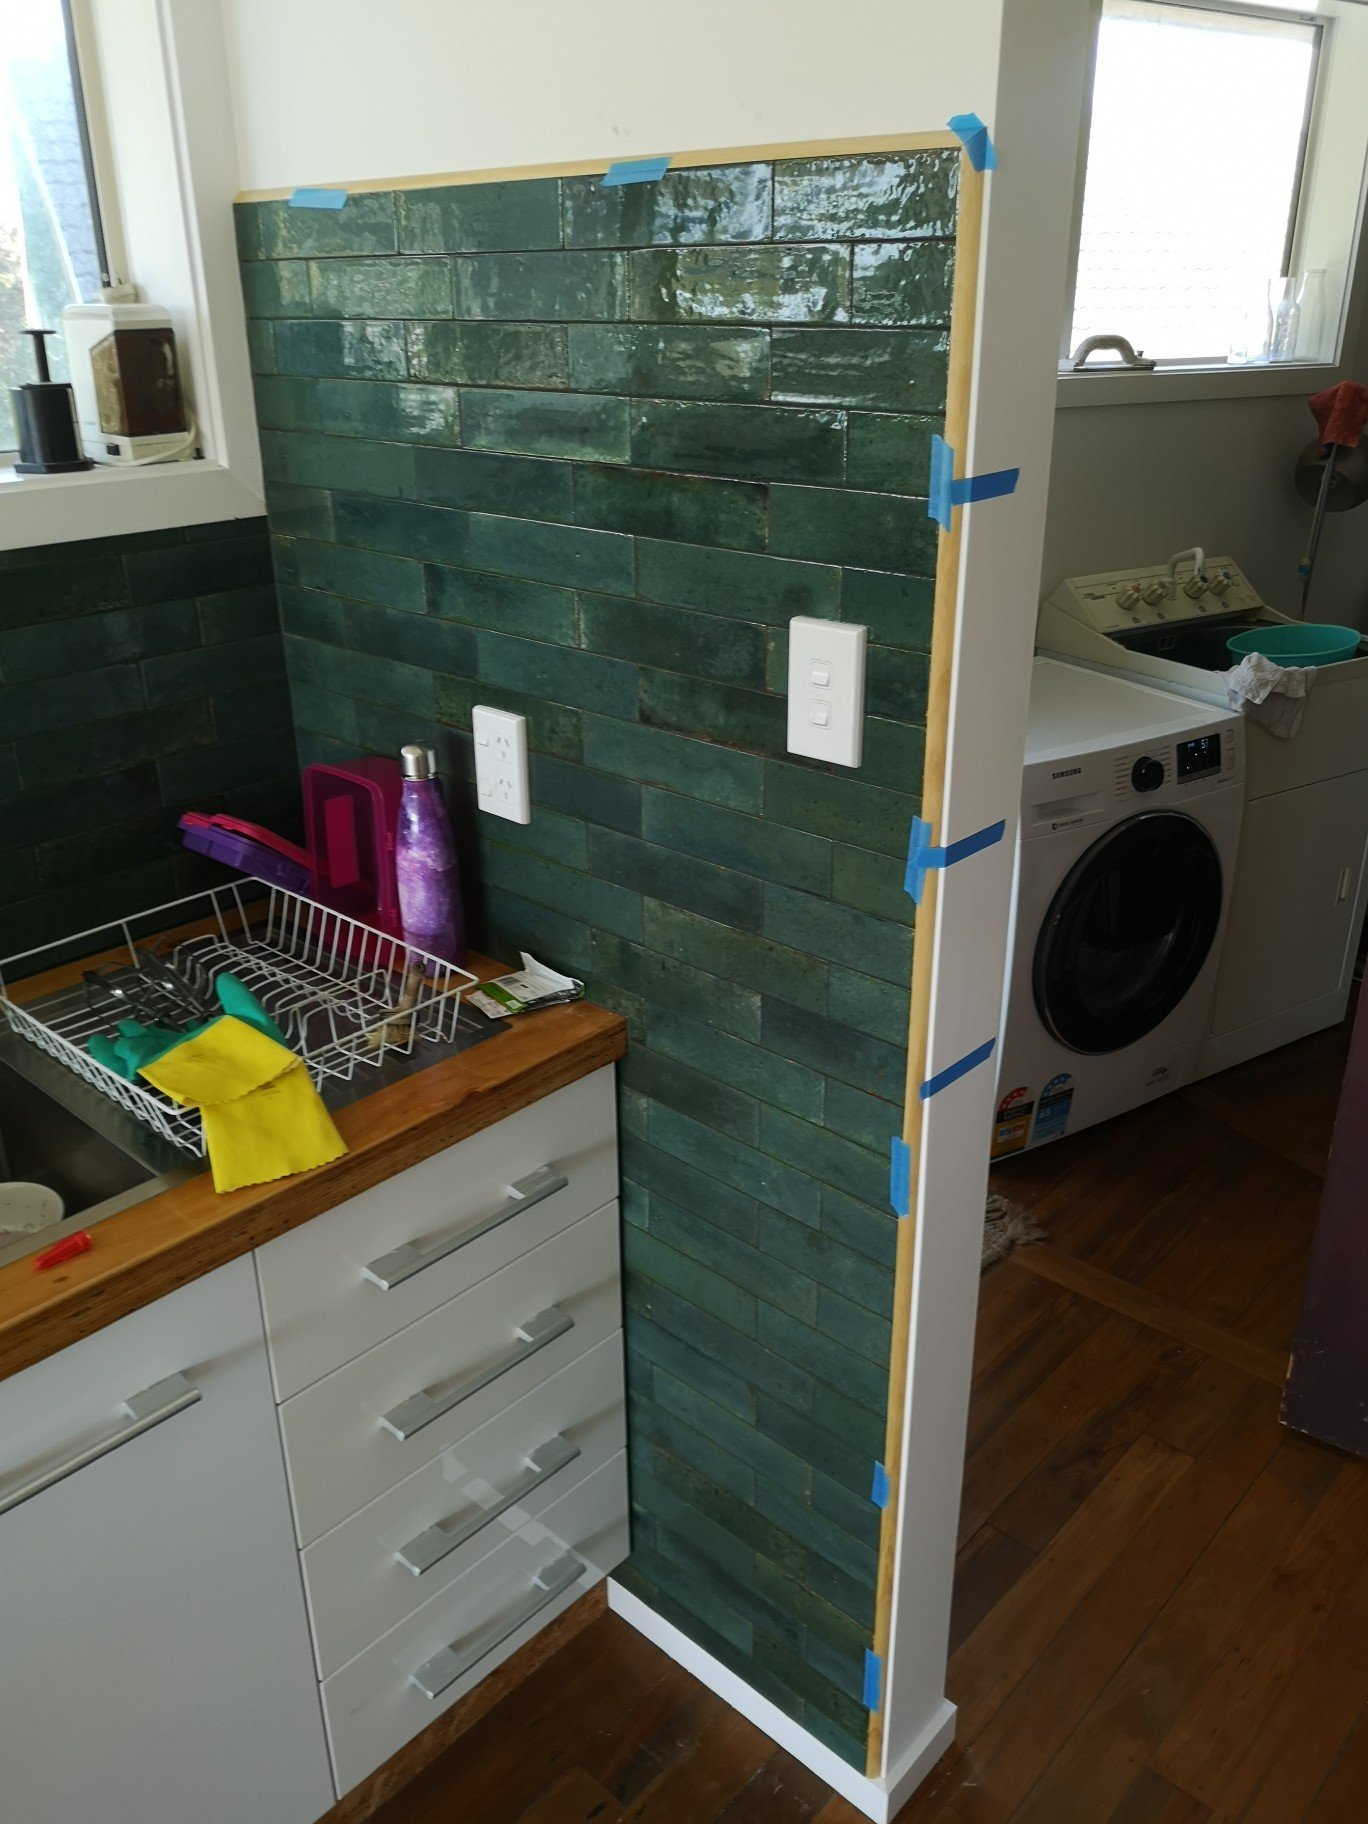
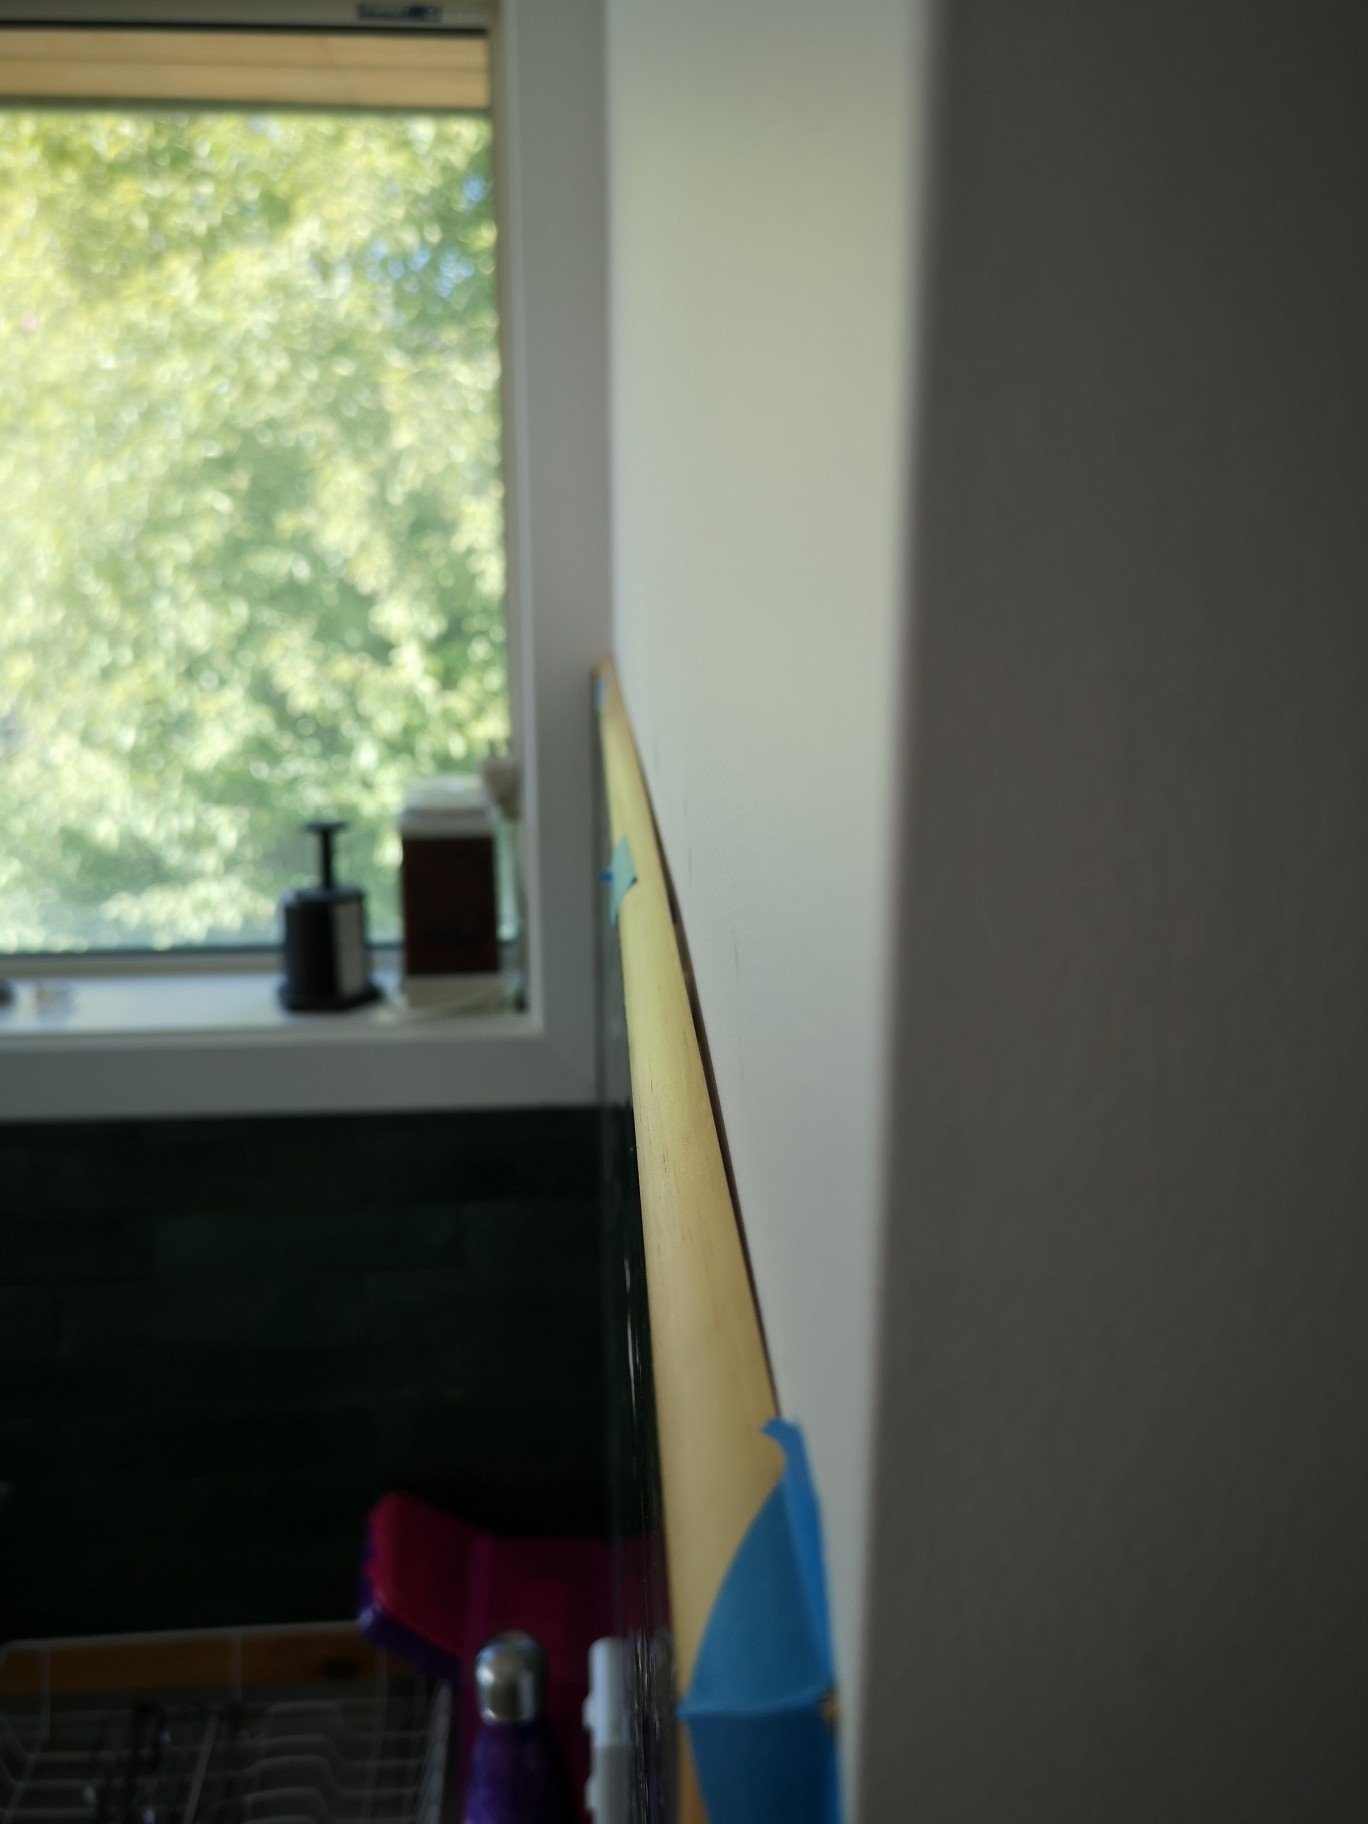
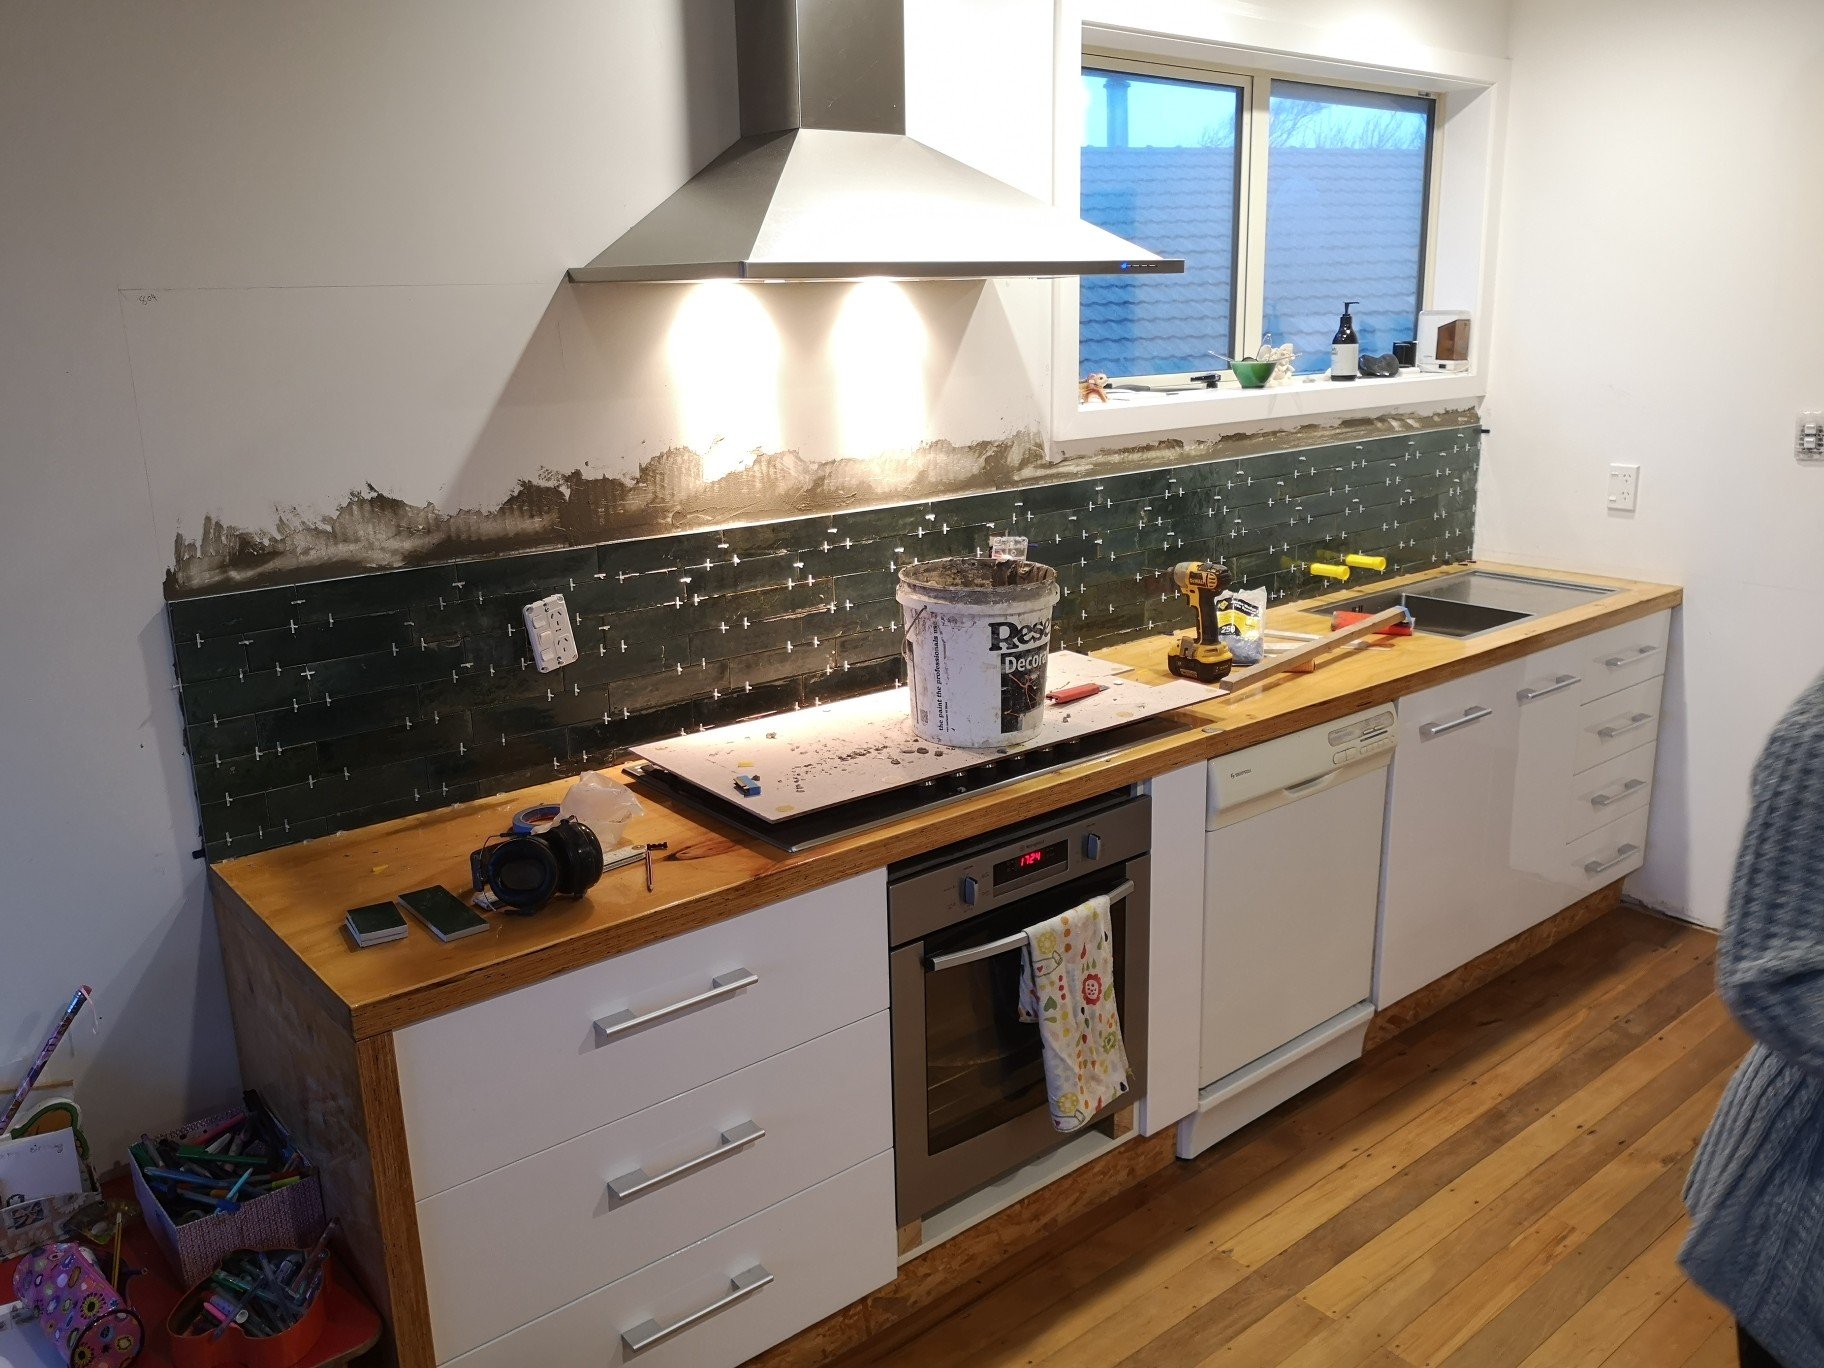
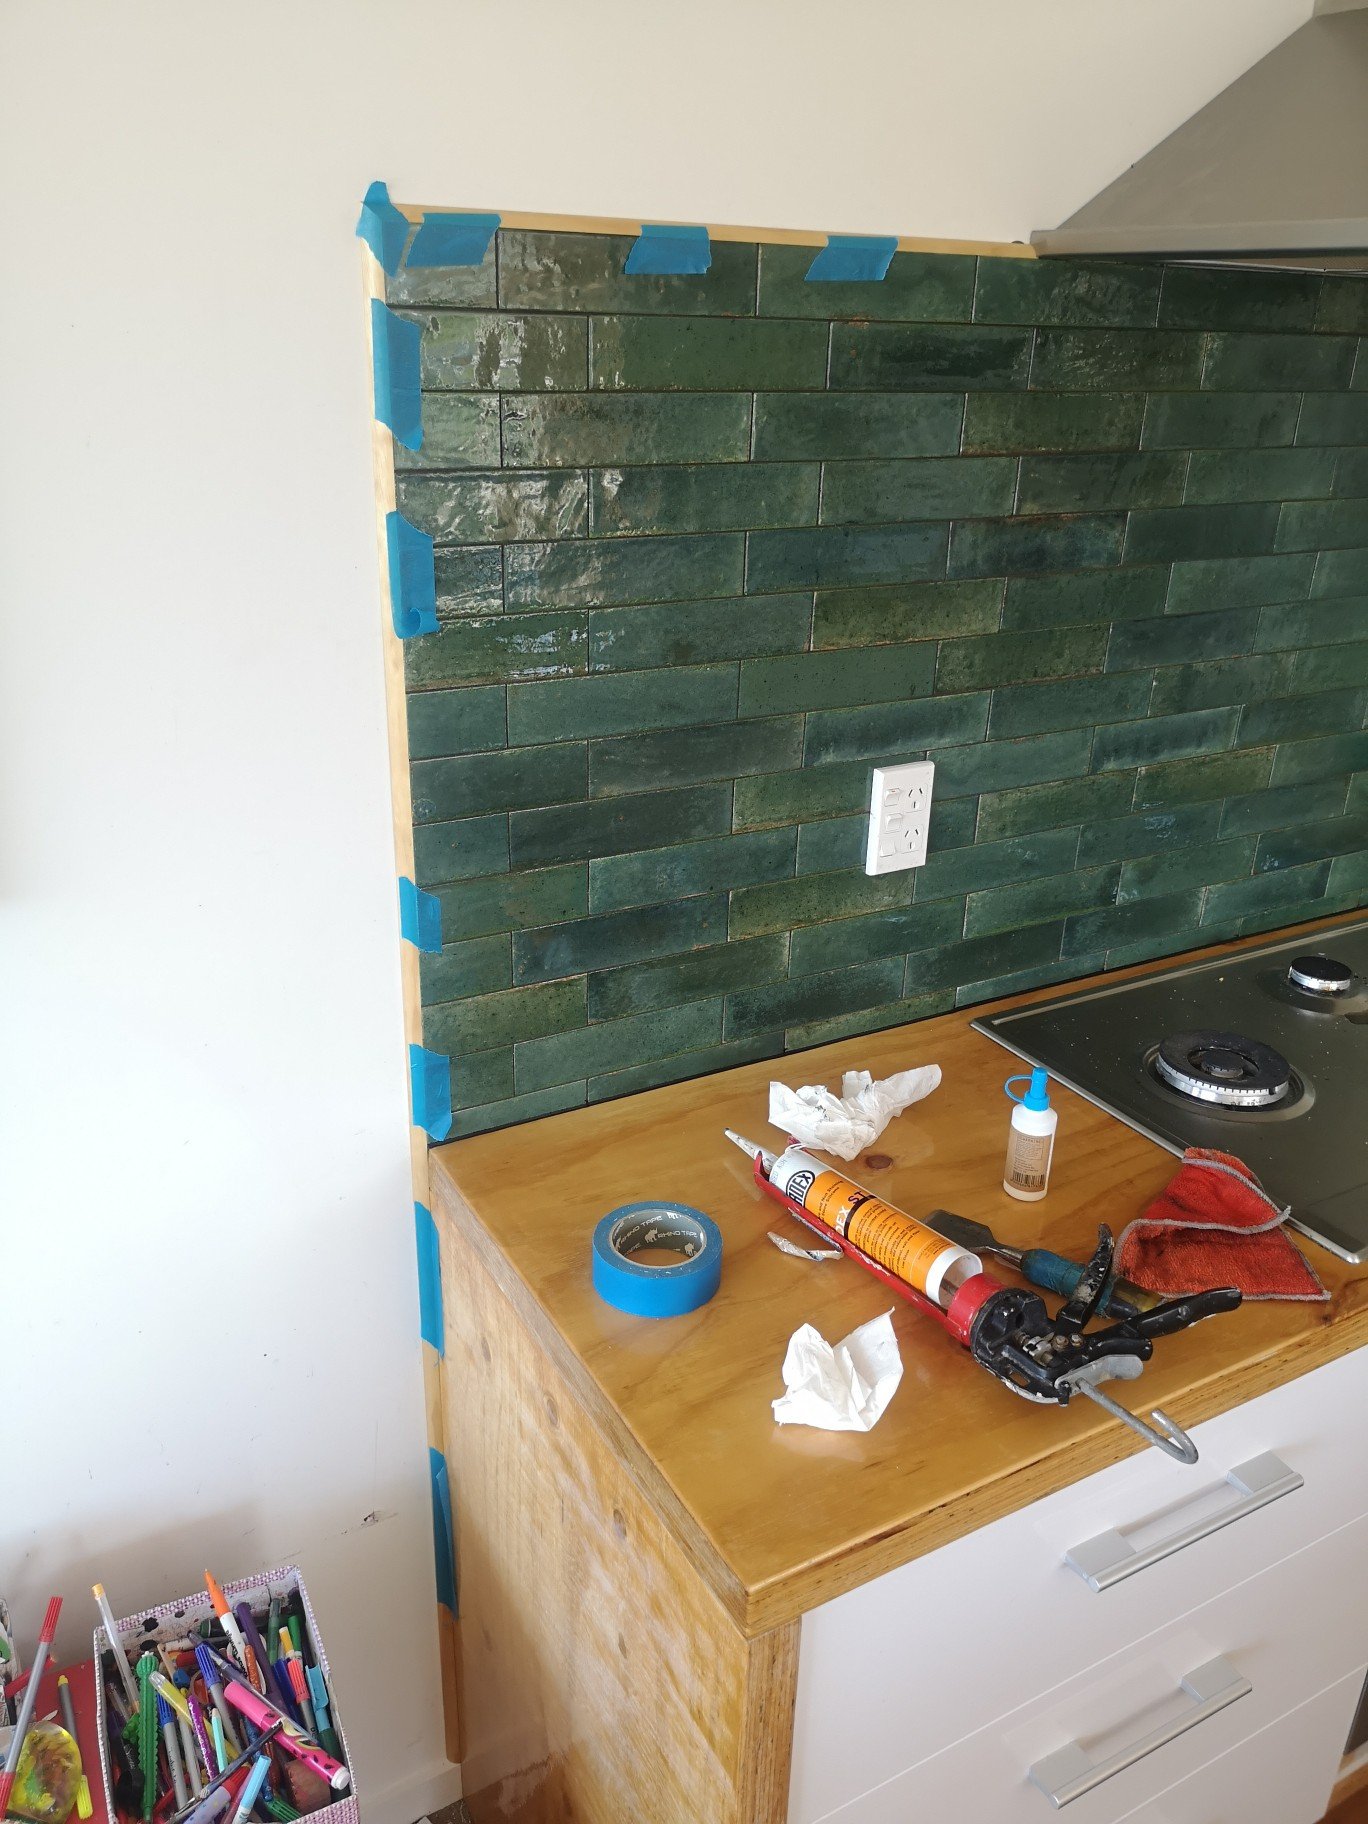
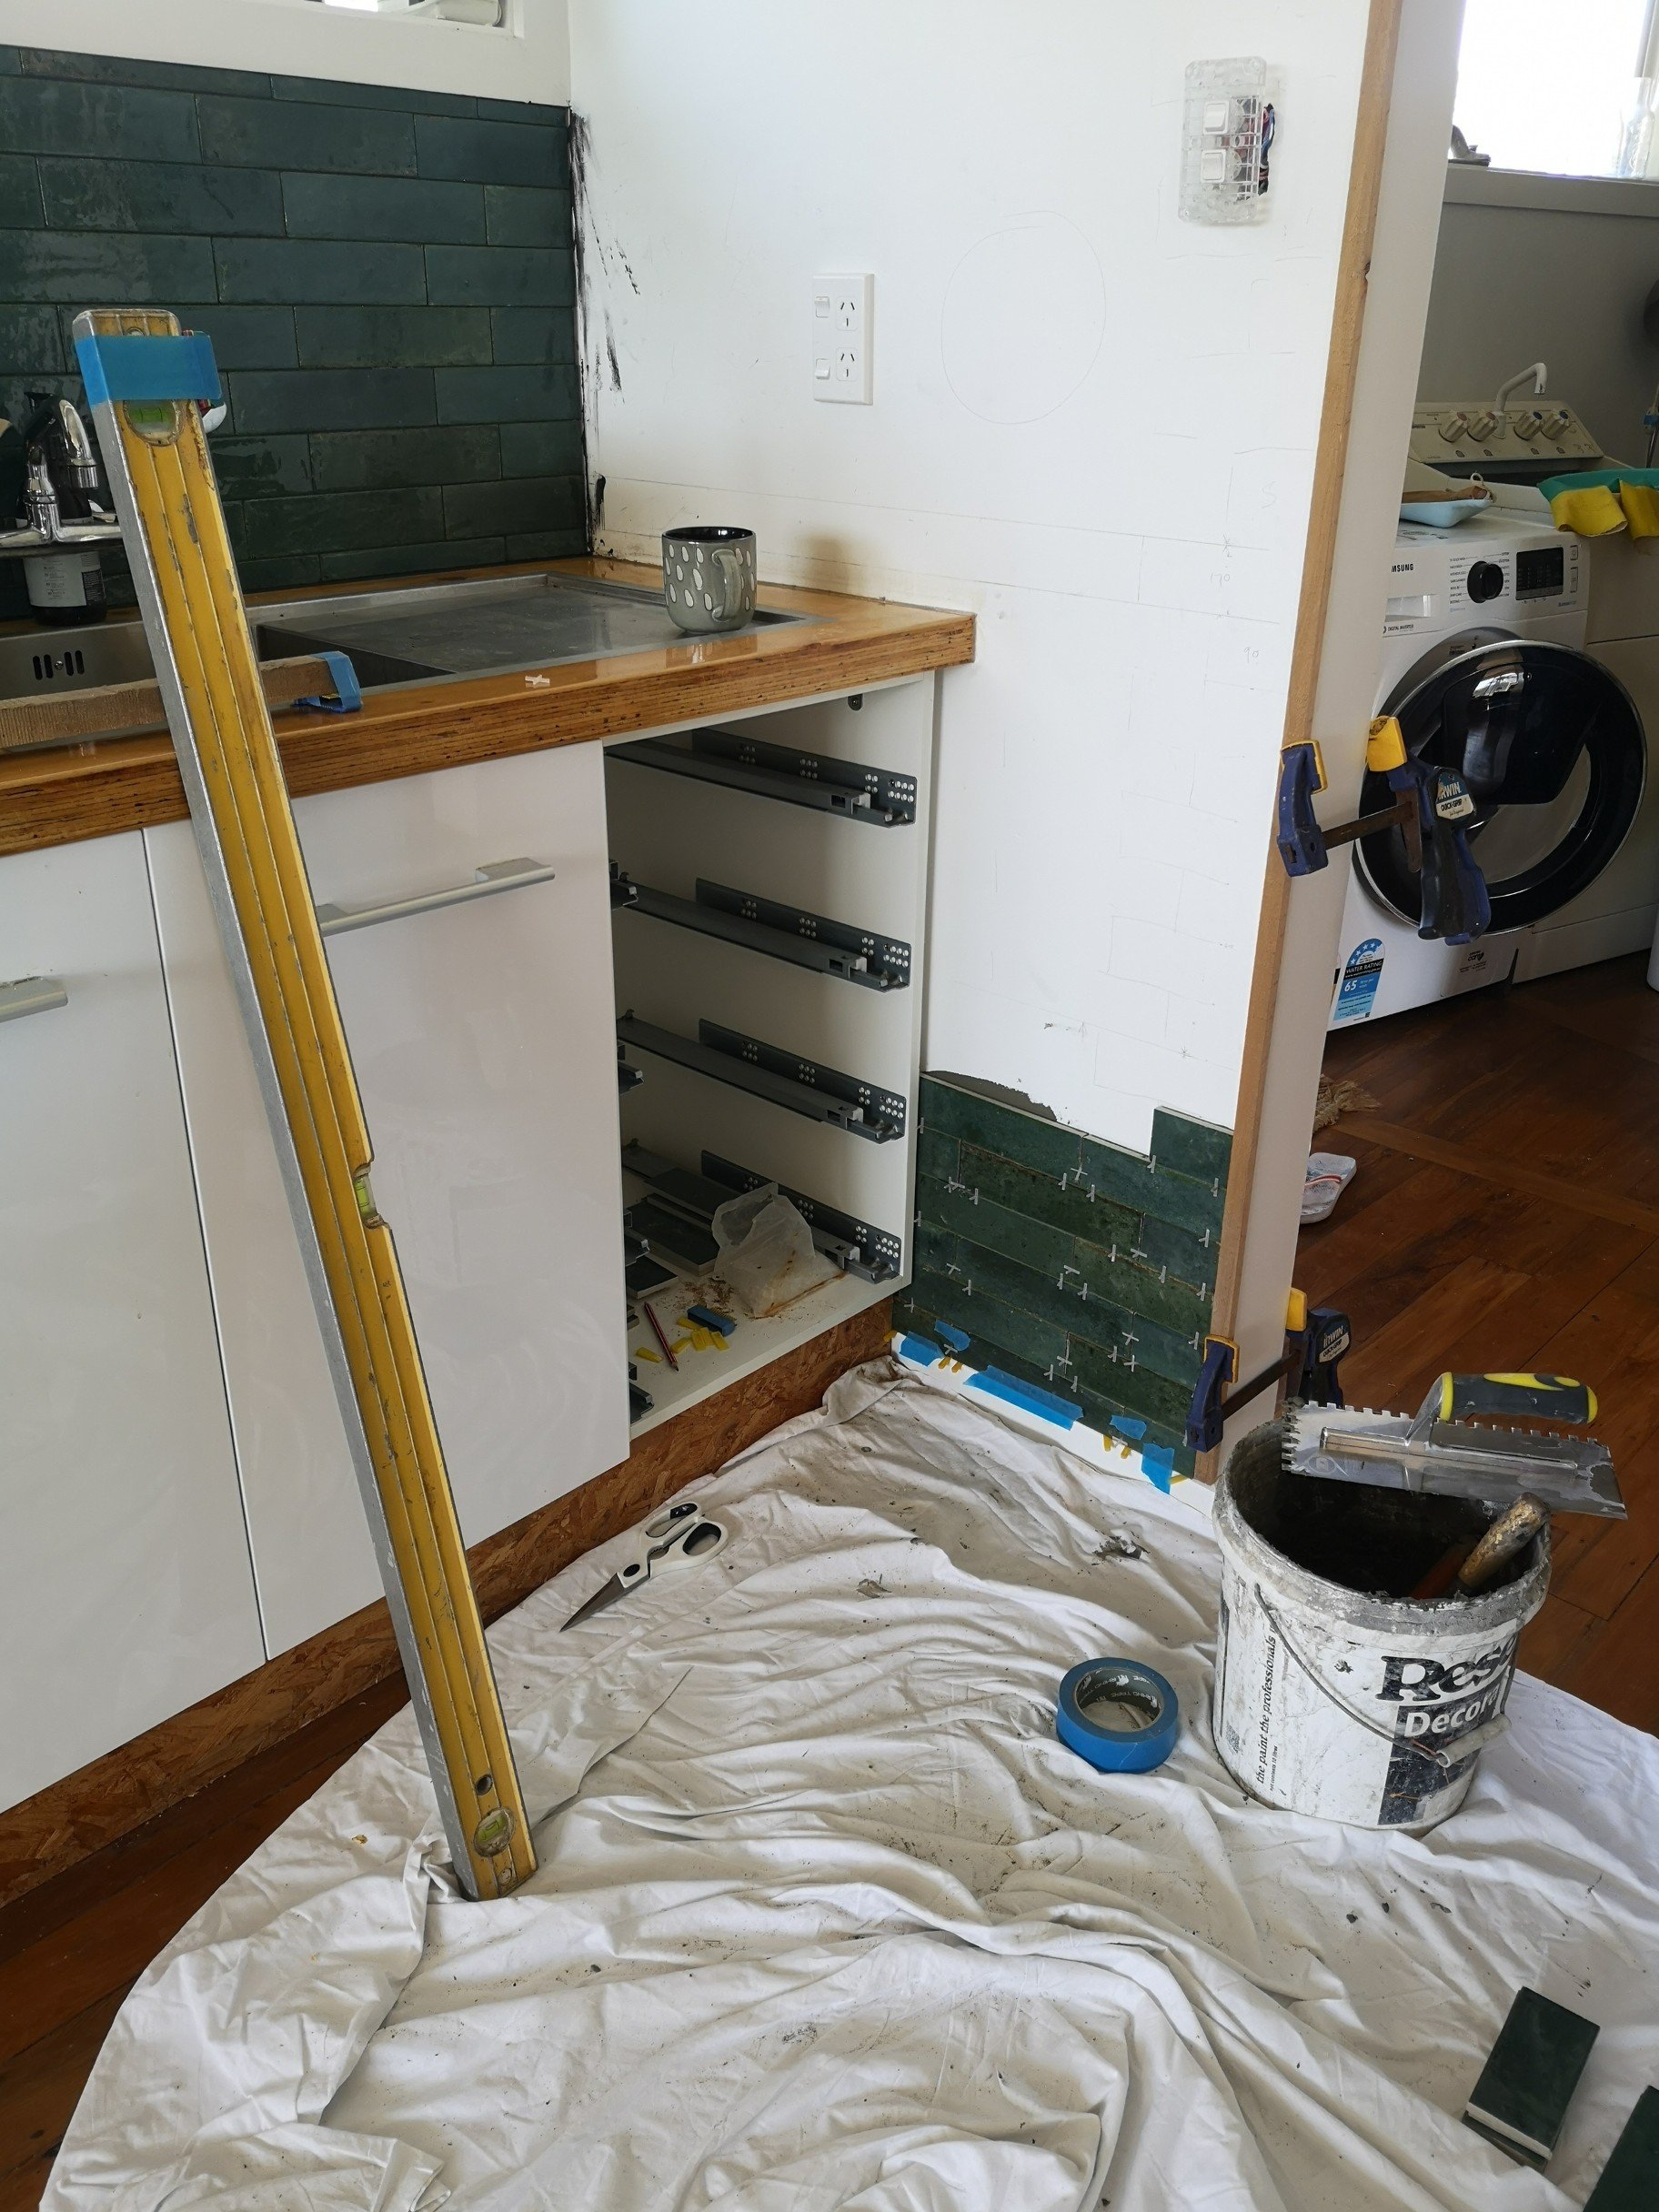
Finally finishing plastering was spurred on by the fact I had some tiling to do.. Decided on a handmade Italian subway style green tile.. Not a huge fan of tiling either, mainly due to tiling over an abundance wobbly floors and walls. That sort makes tiling extremely painful, my house was no fucken different.. After doing some measurements I found that I was going to have to start with a half tile cut at the bottom to meet the extractor with a full tile at the top. I could've moved the range hood to make it work but I really couldn't be fucked and the tiles are dark enough that you wouldn't really notice a half tile under the window either.. As you can see my original mixer adaptors were pretty munted looking, went to miter10 to see what they had on the shelves and what do you know.. Free. Look a better now.
3 points
-
Cool its going to work. Bees dick clearances but a gap is a gap chain appears to fall in right spot. Exhaust will not sadly.
2 points
-
Here are some colour charts and codes for early model Mazdas. They relate to export colours, as there are JDM colours as well, not used on exported models. If you have other charts for models not listed, then feel free to add. Thread for colour reference and paint codes for those considering using original colours.2 points
-
Right that on the floor needs to go right where my lovely swoopy exhaust is..... might just experiment with new pipes at same time. CVT Time excitement! off the line punch and top end, up till now ive only been able to have one or the other. And the compromise of the exploding pocket bike wheels or a slipping clutch on take off for top end. Was on special finally from Motiveparts (nz company) so i decided to finally do it. The long suffering clutch was only ever rated to 8hp this one is 13hp the guy i bought from assures me it'll take my power easy because its light and gearing is pretty decent.
2 points
-
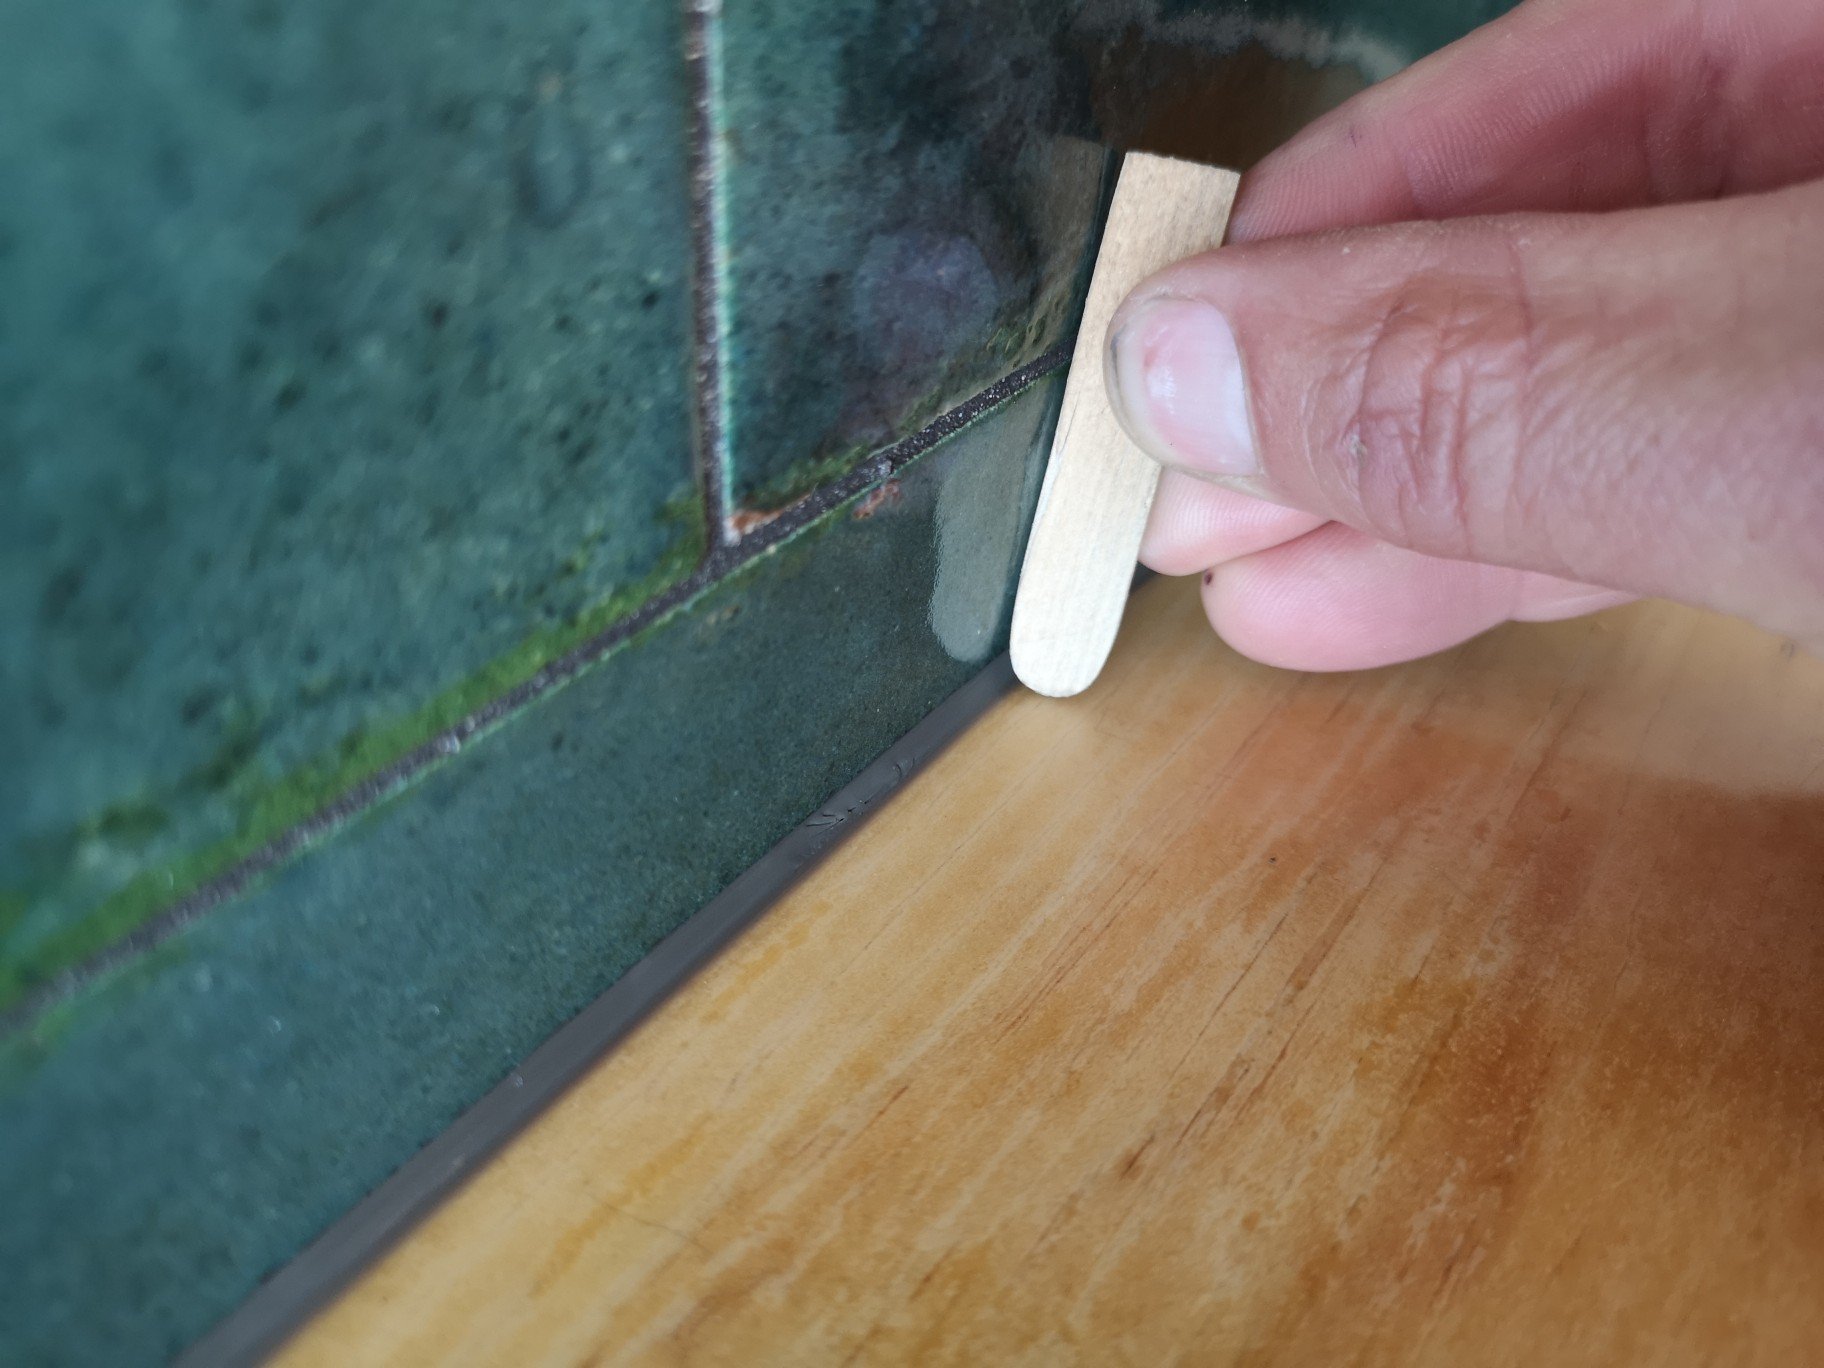
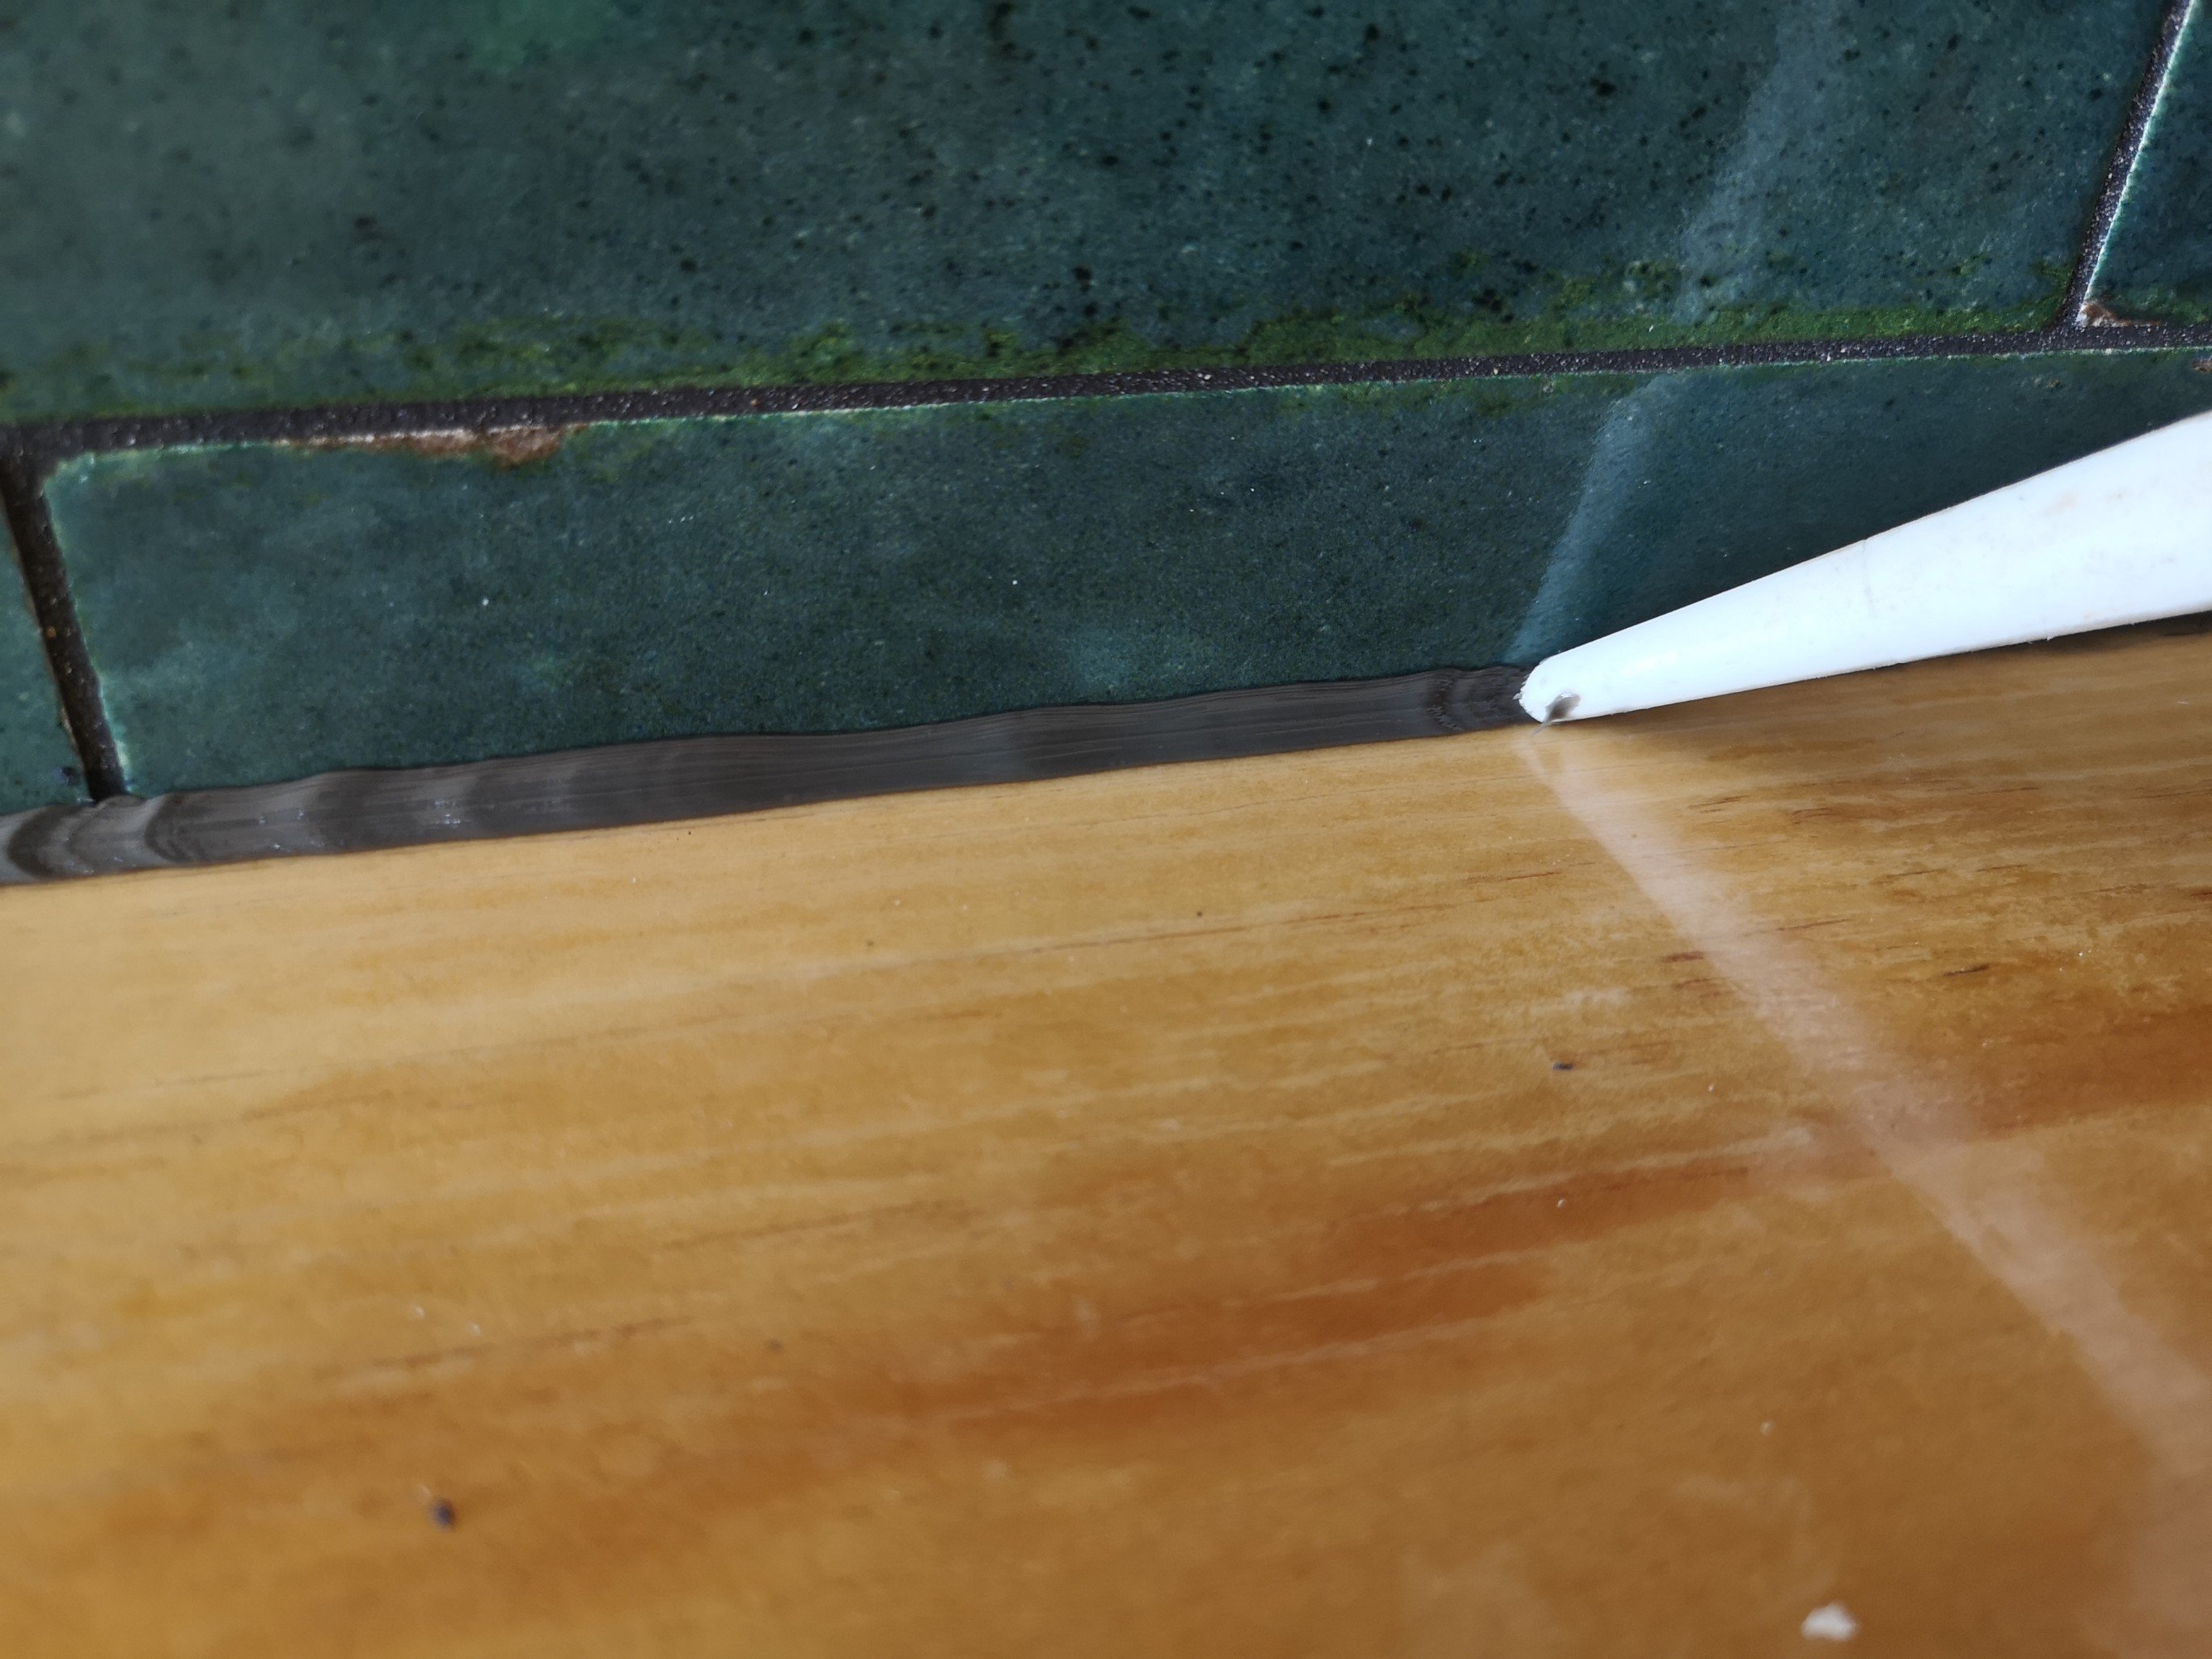
Actually, this makes it done. Went with a black silicone to try and match the grout but it made the line to obvious being that it's twice the size of the tile gap So I cut it back out and went with a dark grey (anthracite) what follows is how I silicone tiles and /or most other things that need a silicone join. First I cut the nozzle so it's large enough to get a bead slightly bigger than the joint in trying to seal. Make sure that I overfill it so when I put water /soap on it everything I want to seal has clean contact with the silicone as once the water goes on it won't stick to anything. Then using a popsical stick (coz they're round, wood and a good excuse to get a popsical) that's been soaked in the soapy water, I run it along the bead far enough that I don't end up with an unmanageable blob of silicone on the stick (normally about 200mm) Circulars are a good for wiping excess silicone of onto.. In this case a lint chocolate bar wrapper.
2 points
-
From what I've used: 3M gold? = expensive, okay ish, not really my favourite to use as it's super runny. Nice to sand though and you generally won't need spot putty to fill holes etc. Used at fancy pants work Evercoat blue tin = good stuff, bit light, nice to sand, not as runny as 3m, what we used in course. Roberlo maxi fill = heavier filler, bit different to get used to as doesn't sand as nice and may need to go over with spot putty if high build primer doesn't fill holes etc, bit harder to feather edge, but an experienced panelbeater I knew loved it for bigger repairs and it was cos it didn't shrink much and was nice to use with the larger spreaders. Repco = I used it on my sills of my subaru that were smashed in. Sucked, always had giant holes. Good thing I used Underseal which filled it easily. Ain't fell off yet and I used amounts that would probably get me fired if I did it in industry lol Septone metal fibreglass reinforced = okay ish, hard to work like with most of this type of bog, but if you do it right can run magnets etc over the finished product and will be harder to detect bog due to metal filaments in it I'm in my 2nd year of being in the panel/paint industry so my opinion may not count for much2 points
-
Sunday had a few hours free for shed time and beers so pulled out front springs and tried to fit some XF falcon front springs but couldn’t get them to fit as they spring diameter is 10mm larger The reason for that is the front is about 20mm to low on cut standard springs and rear is 40mm to high needs compressing and I’d had these XF springs sitting for years so tried to use them up front Have now decided to get shit done properly and have ordered through BNT pukekohe low springs for front and standard Springs rear once I get the wheels I want I can install new springs and compress down to required height and new bushes etc.The shocks I have are shortened KYBs so can re use those chucked on wheels of my old hiace for a laugh started it up still running rough.drove onto driveway then turned it off then under bonnet tinkering away go to jump back in drivers seat and hello the alarm locked the car so now it’s sitting in my driveway with the only key in ignition pretty pissed off at myself because I’d been cautious of that all afternoon till then ffs so yeah may as well give it a wash because I’m locked out of the bloody thing
2 points
-
Kind of did a build thread here... But long story short: Made this, which holds these: The end.
2 points
-
All back together now. Had a turbo shit off a time getting the heater hoses back on because some idiot stuffed a huge motor right in the way. New clutch (remember that, the reason we pulled it apart in the first place) is really good, it's a tiny bit grabby at take off but it's not really bedded in at all so I don't know if this will get better or worse. Also i have connected the boost control pipes around the wrong way so it's free boosting up to about 30psi. Easy fix that. I drove it to work.
2 points
-
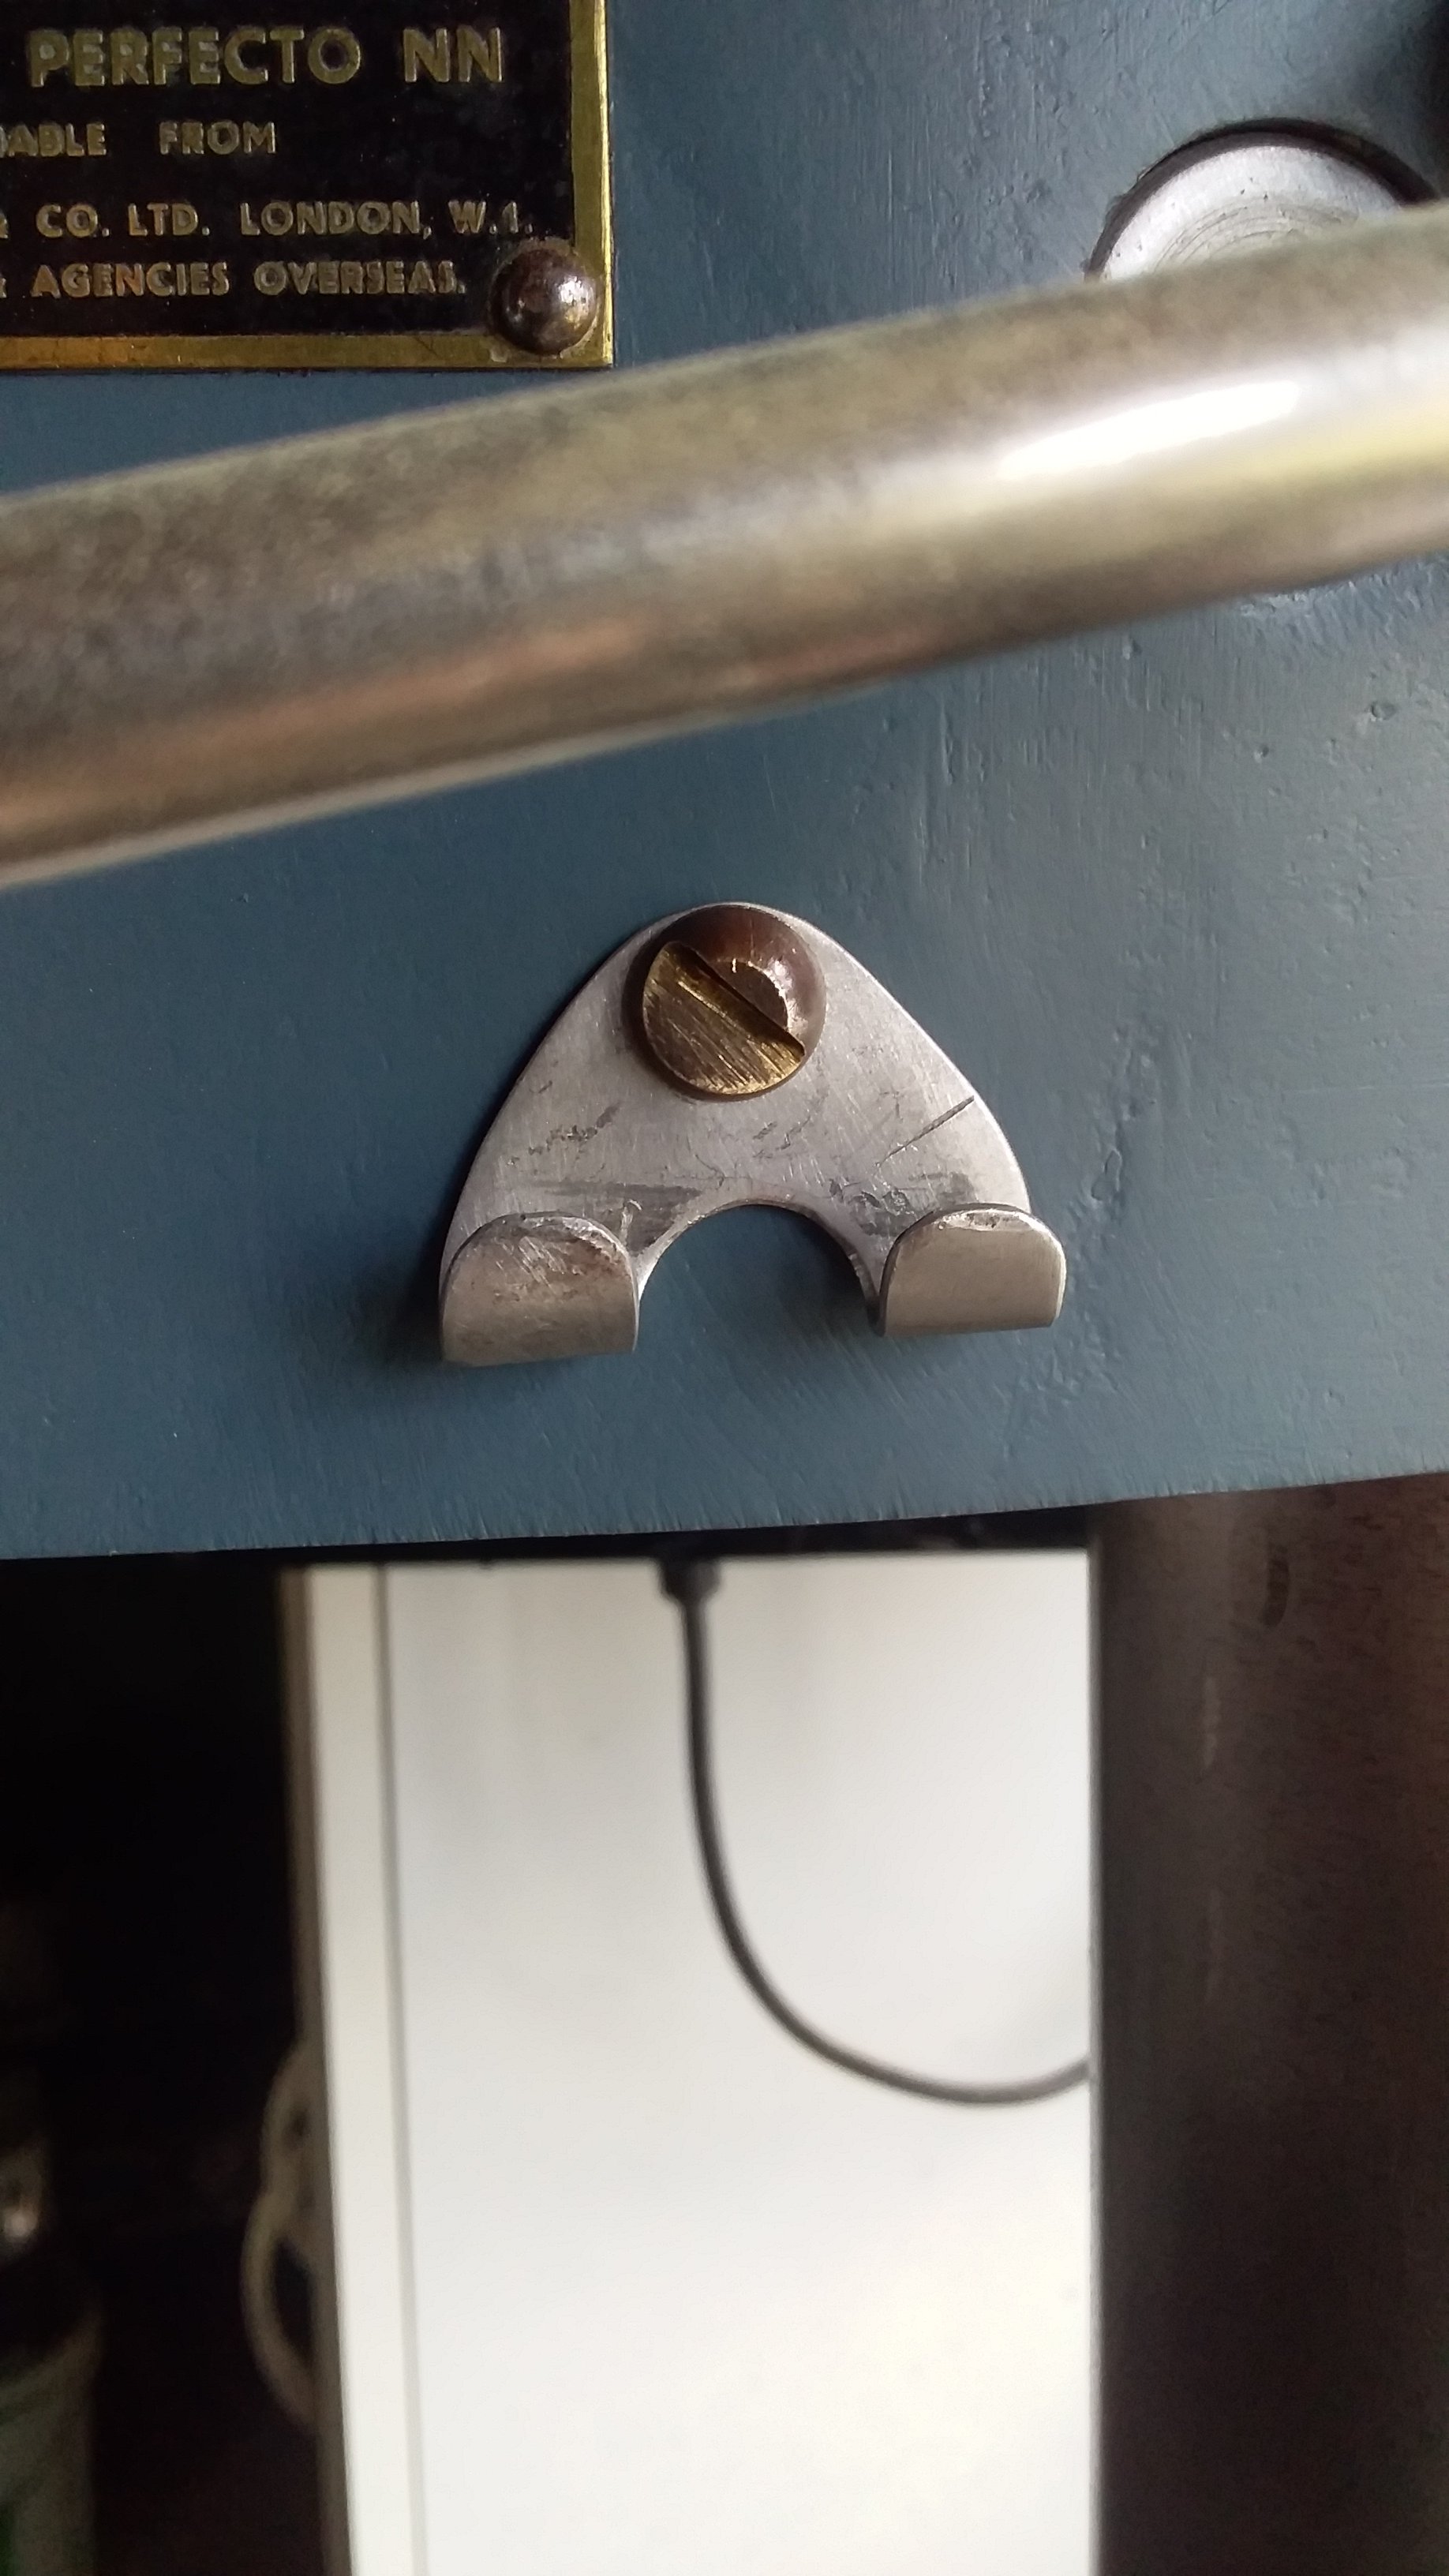
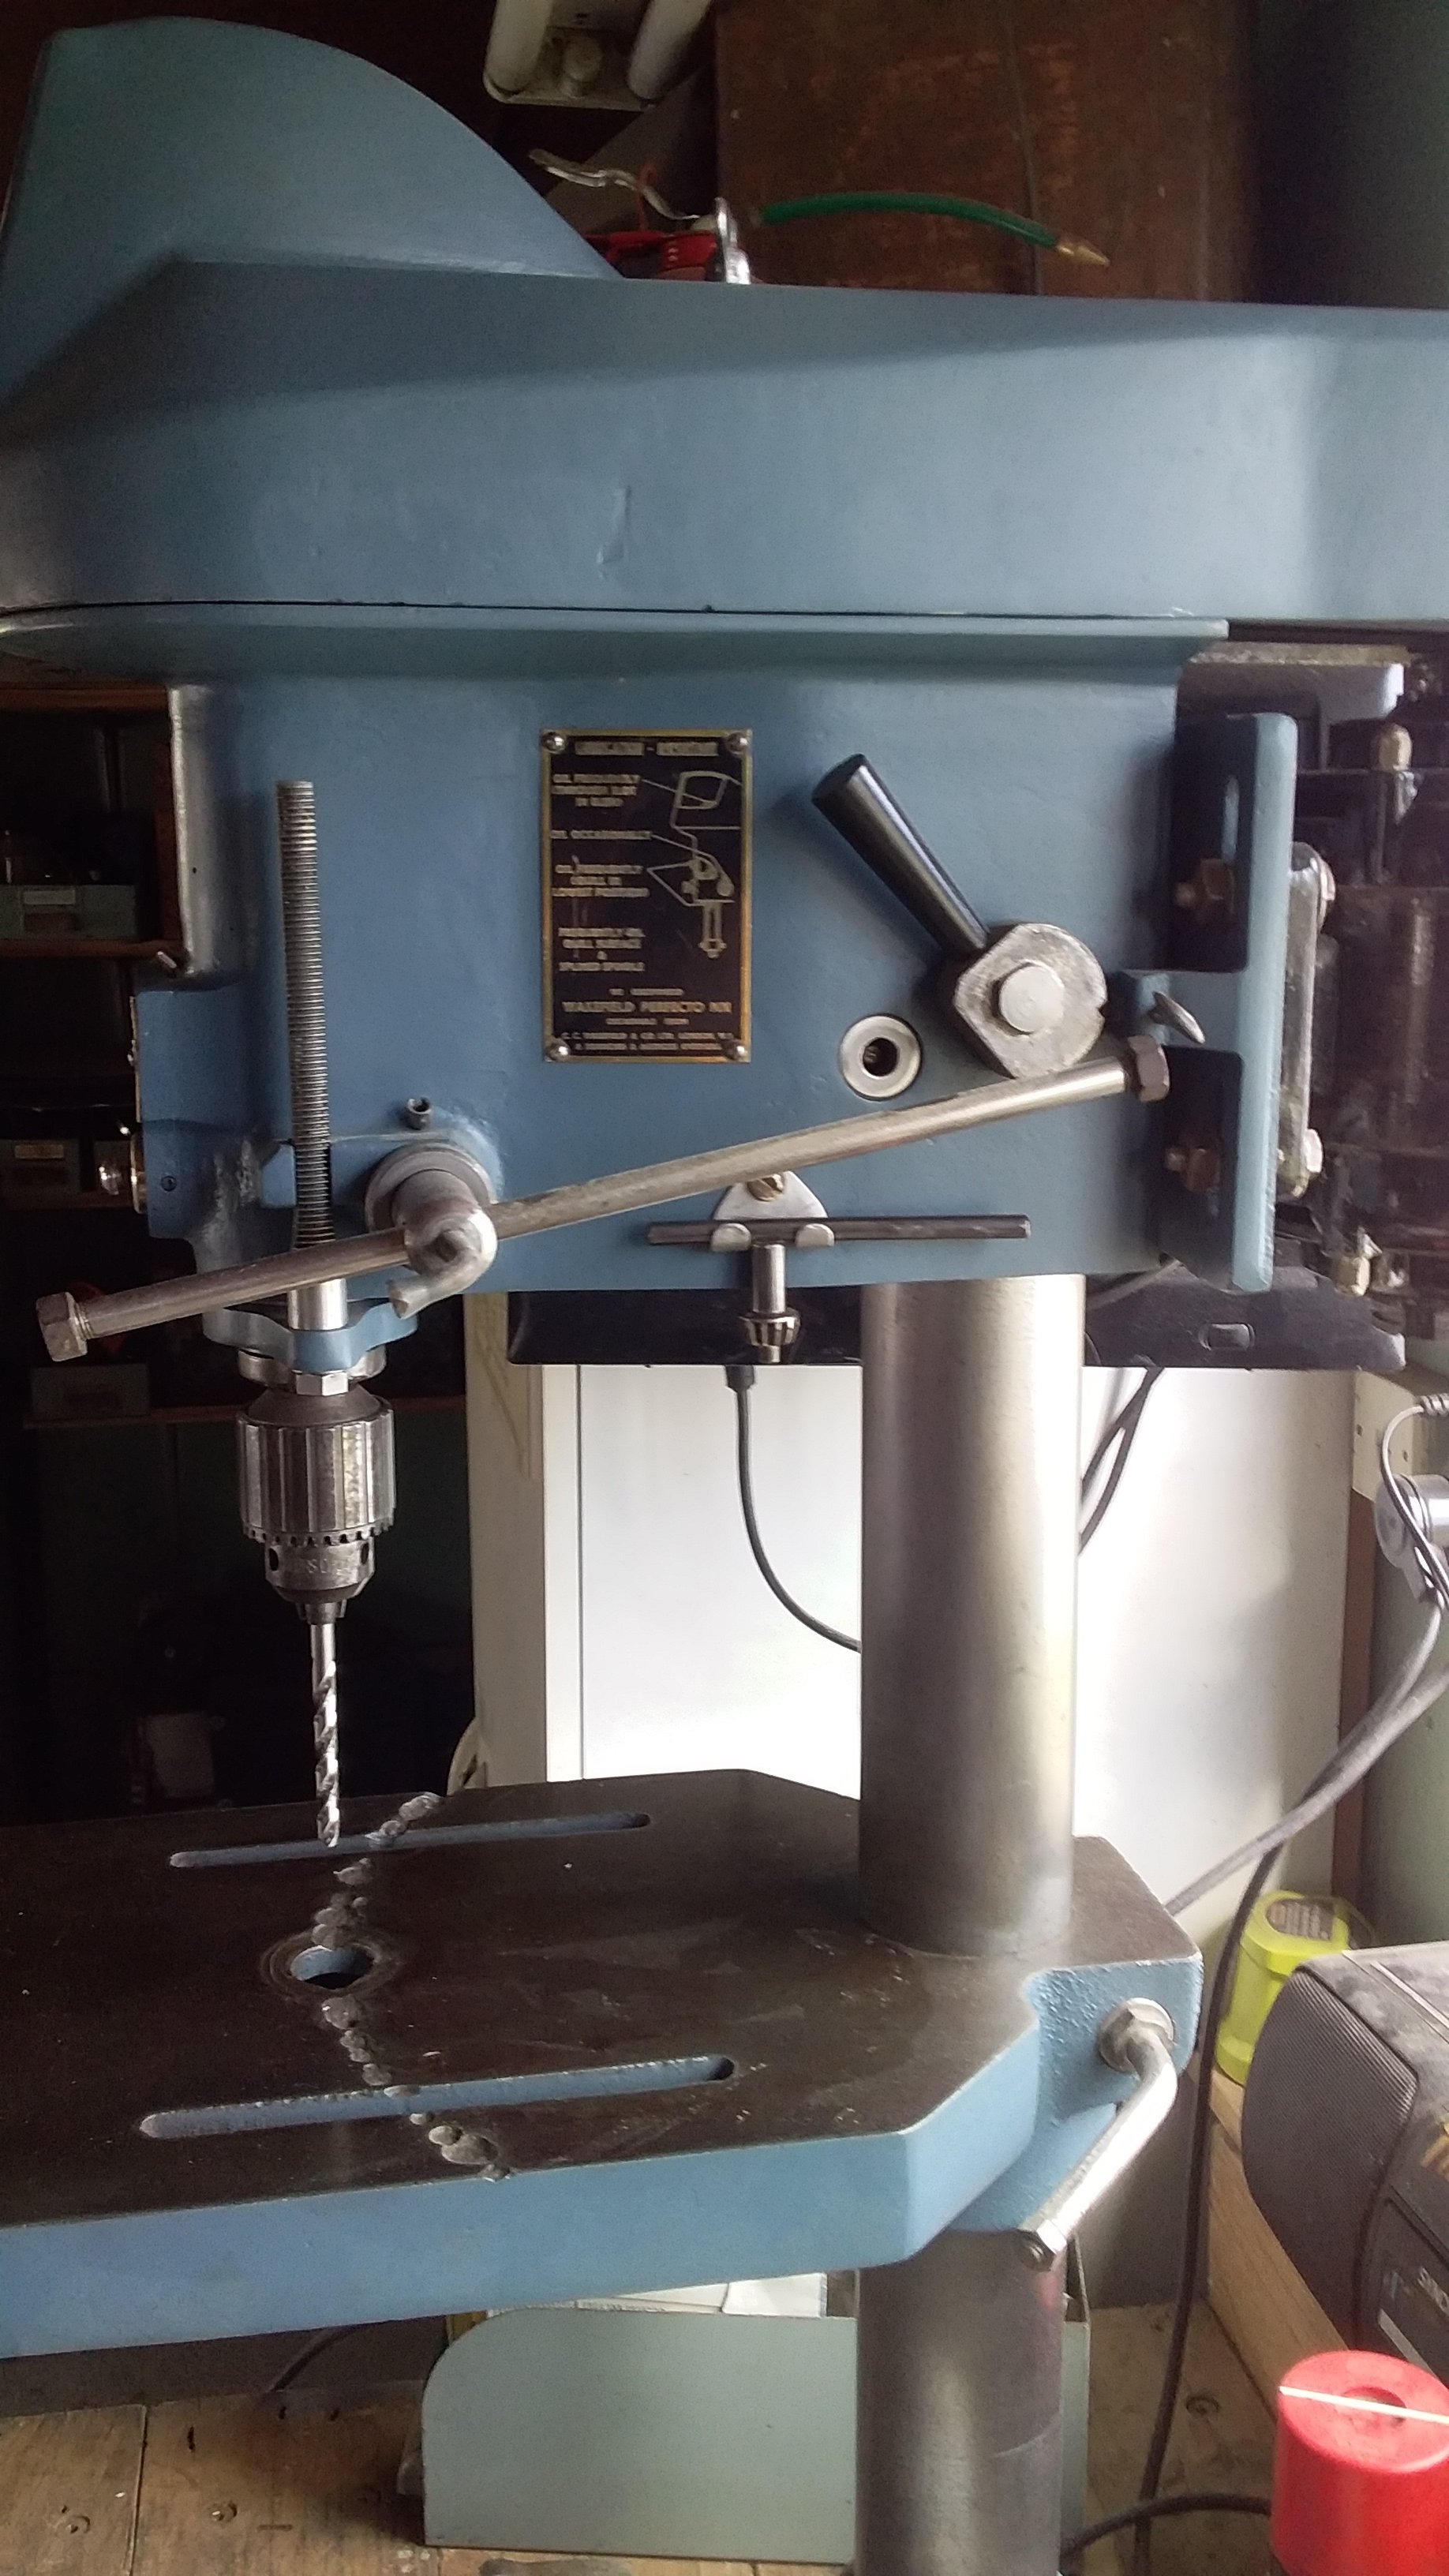
Cut up my first failed version of the switch plate today and turned it into a chuck key holder. Ye olde drill press had this weird half brass screw already, so I made use of it.
2 points
-
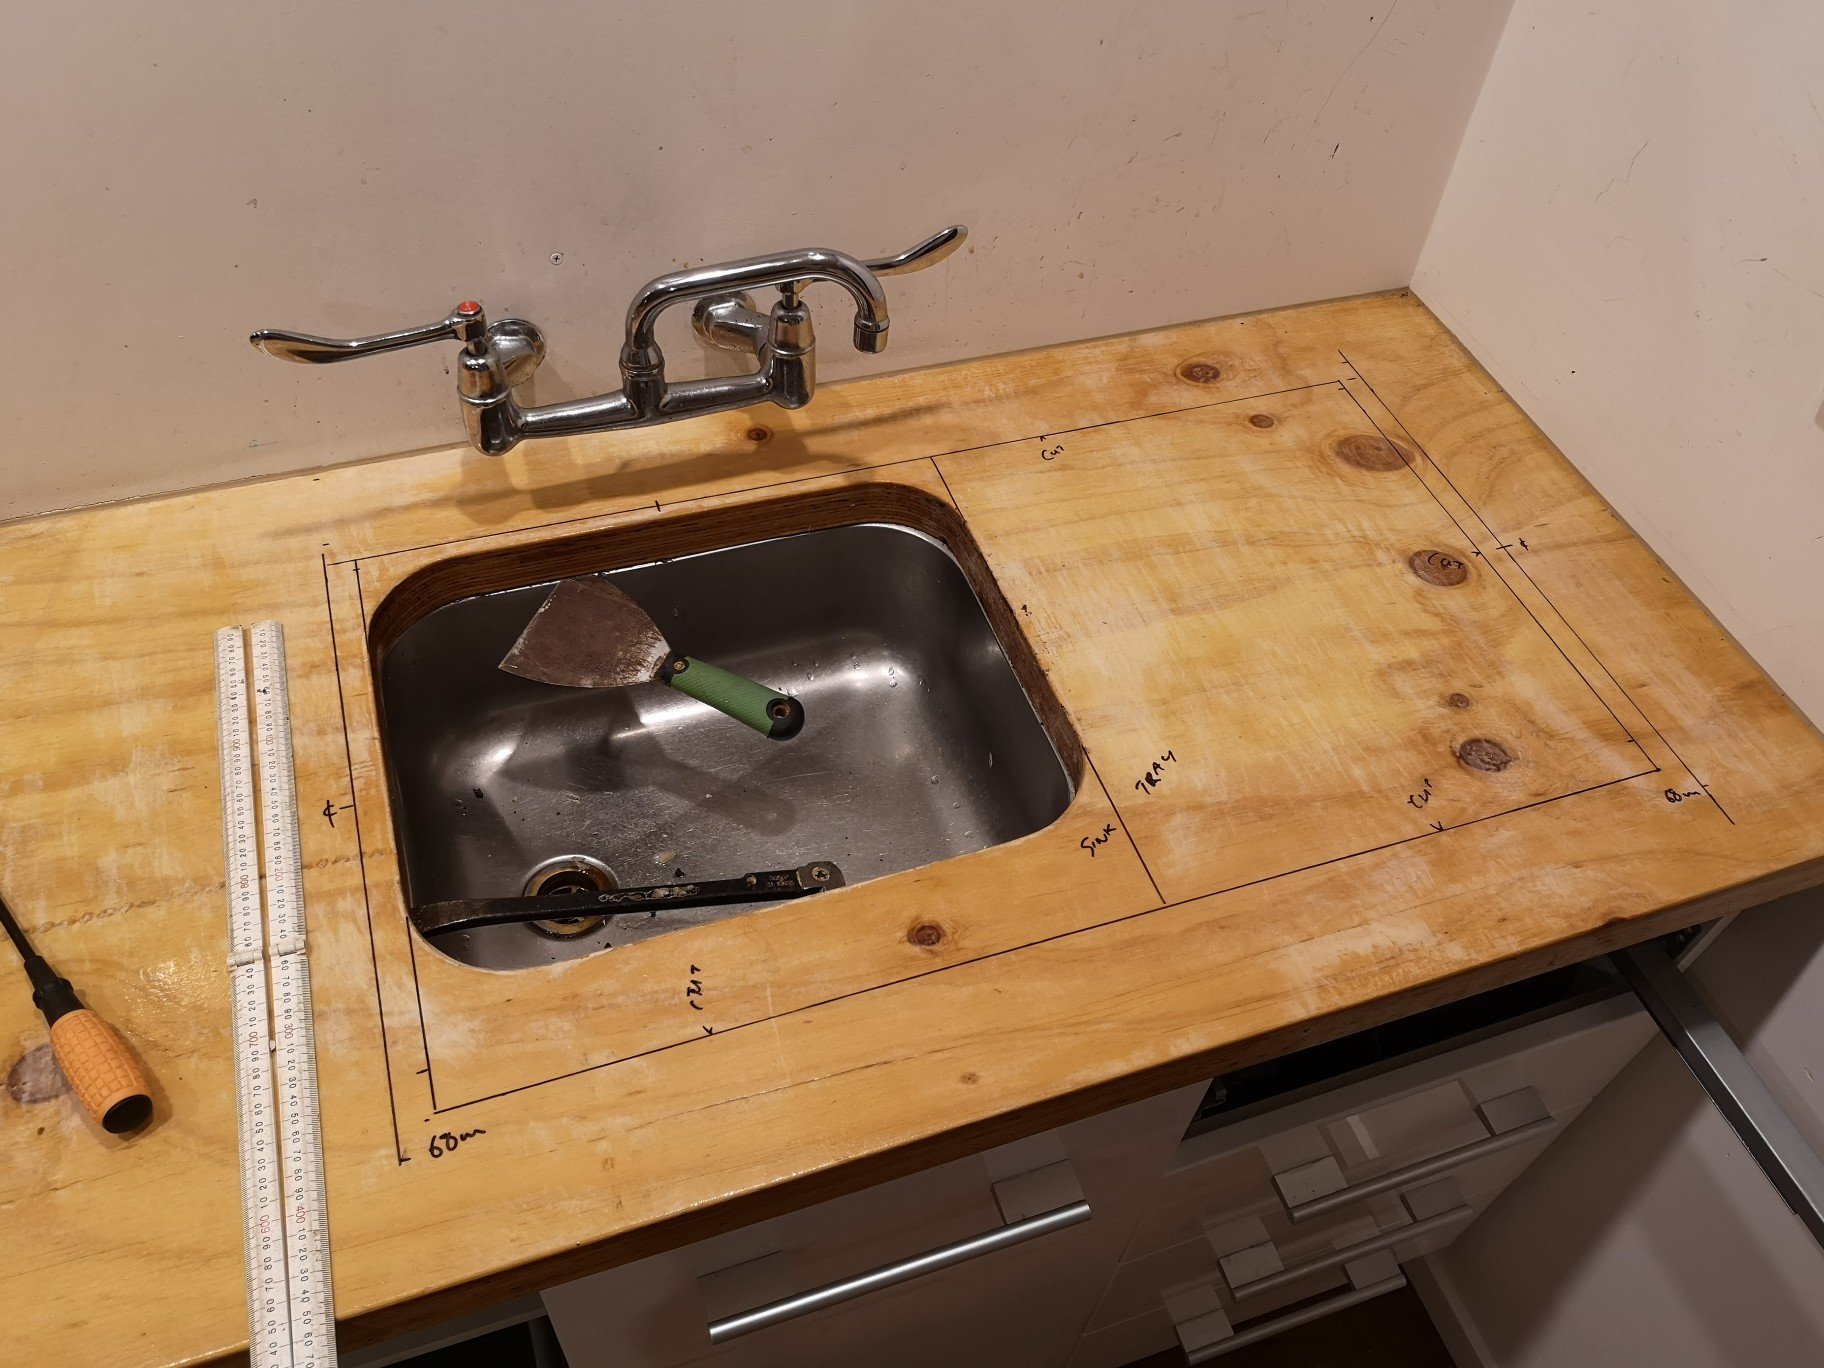
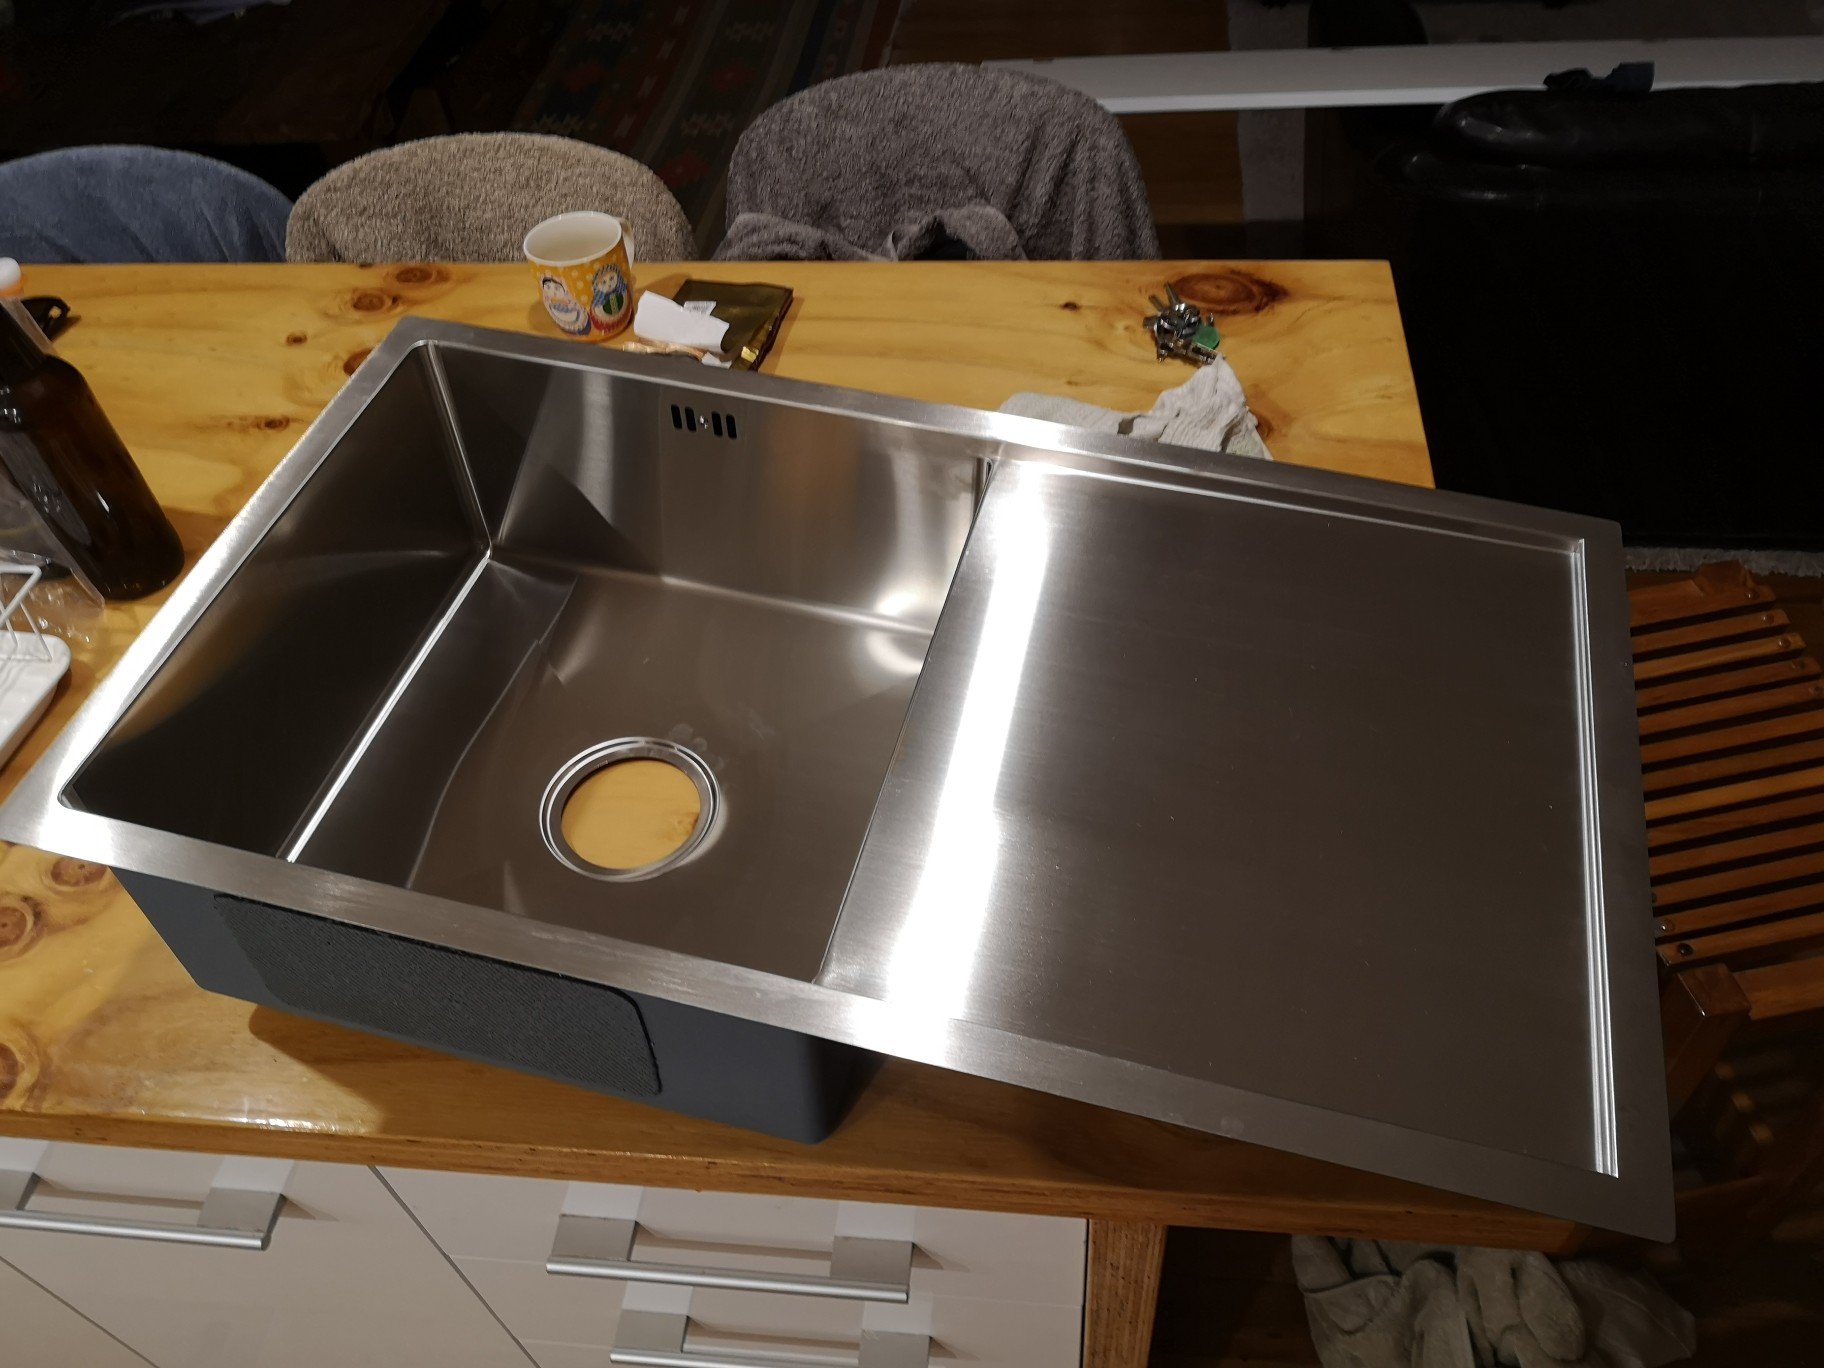
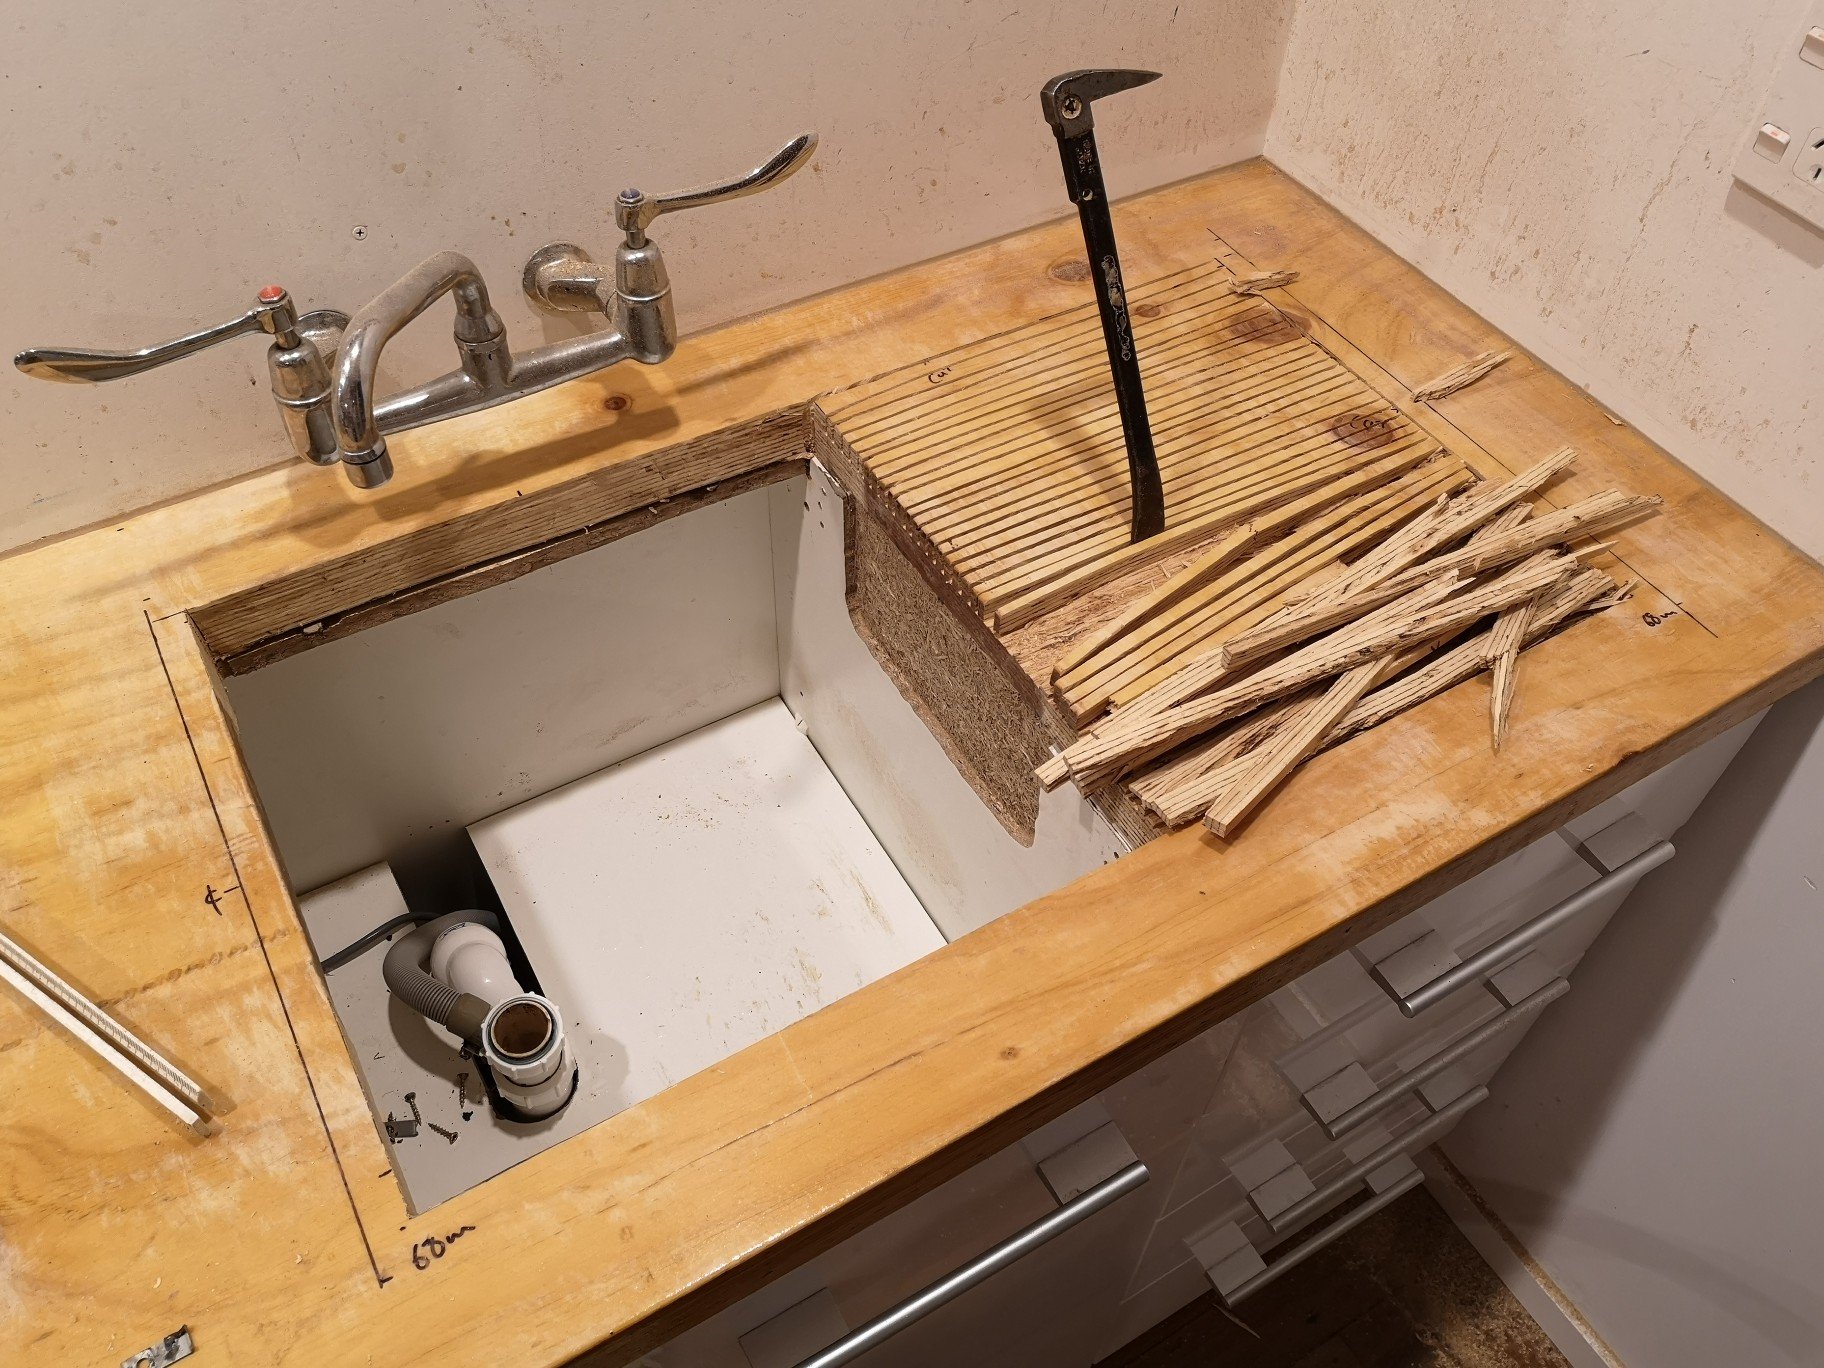
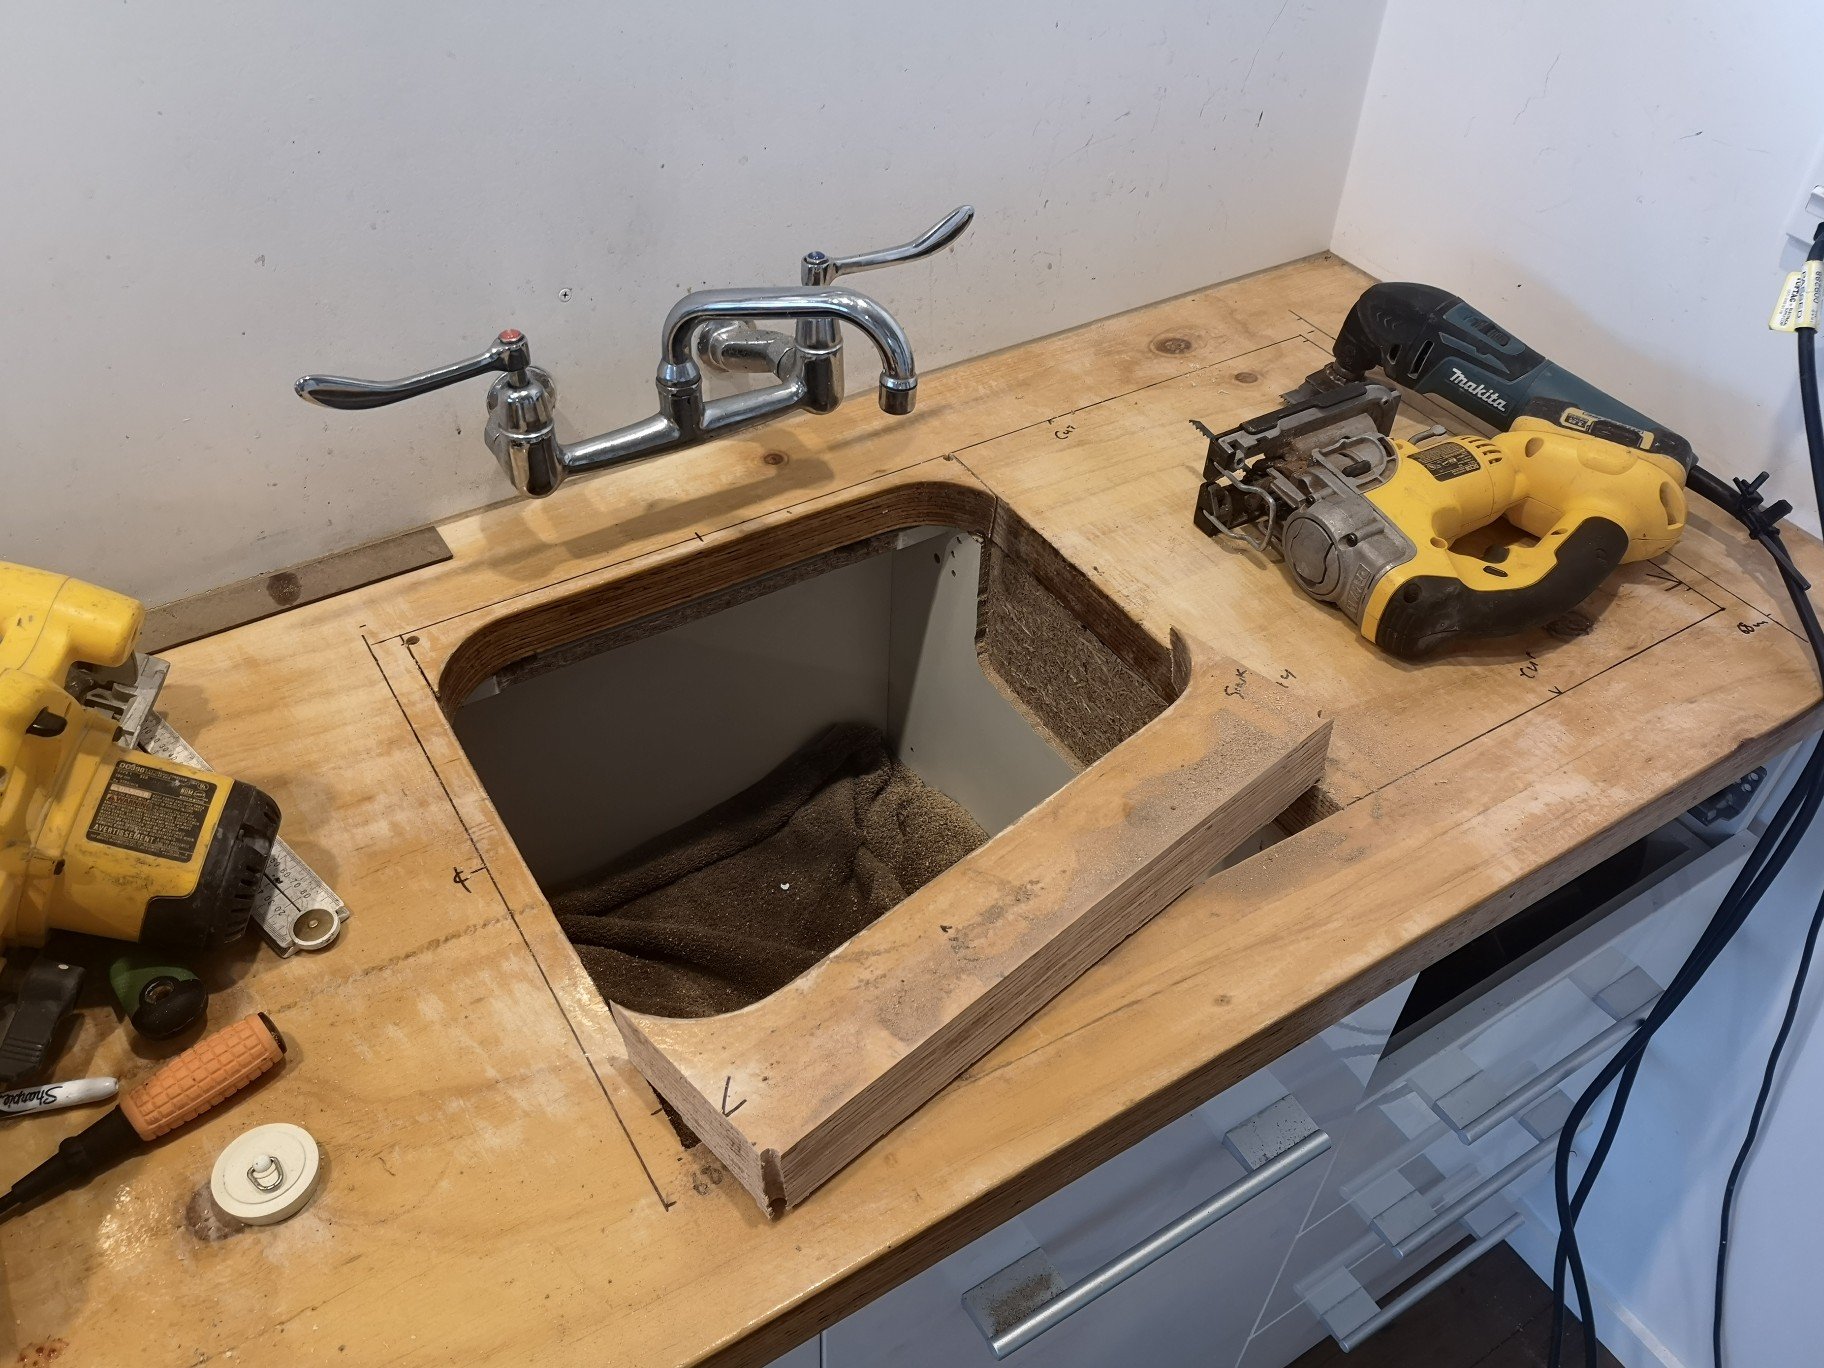
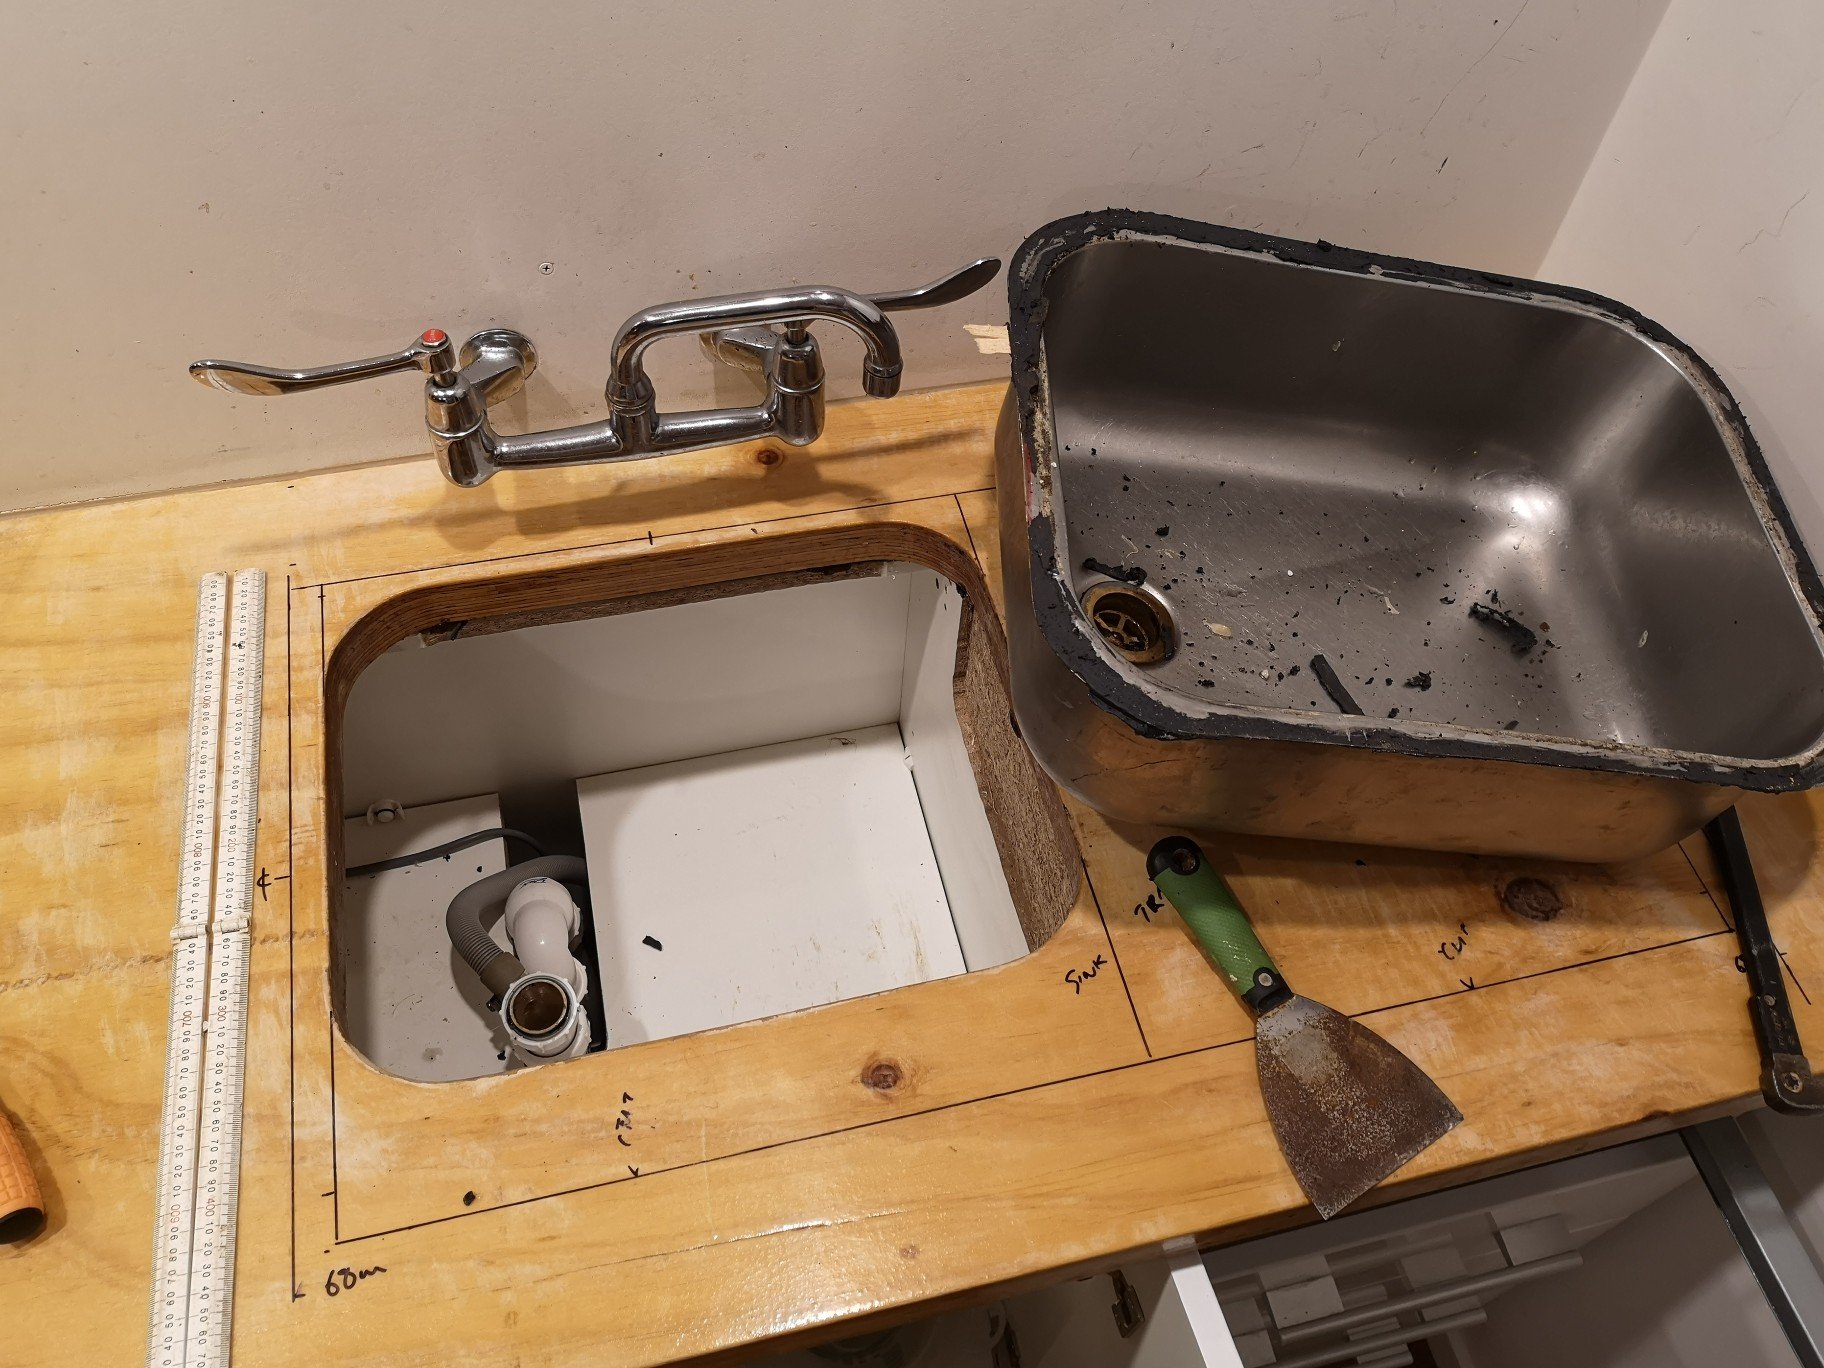
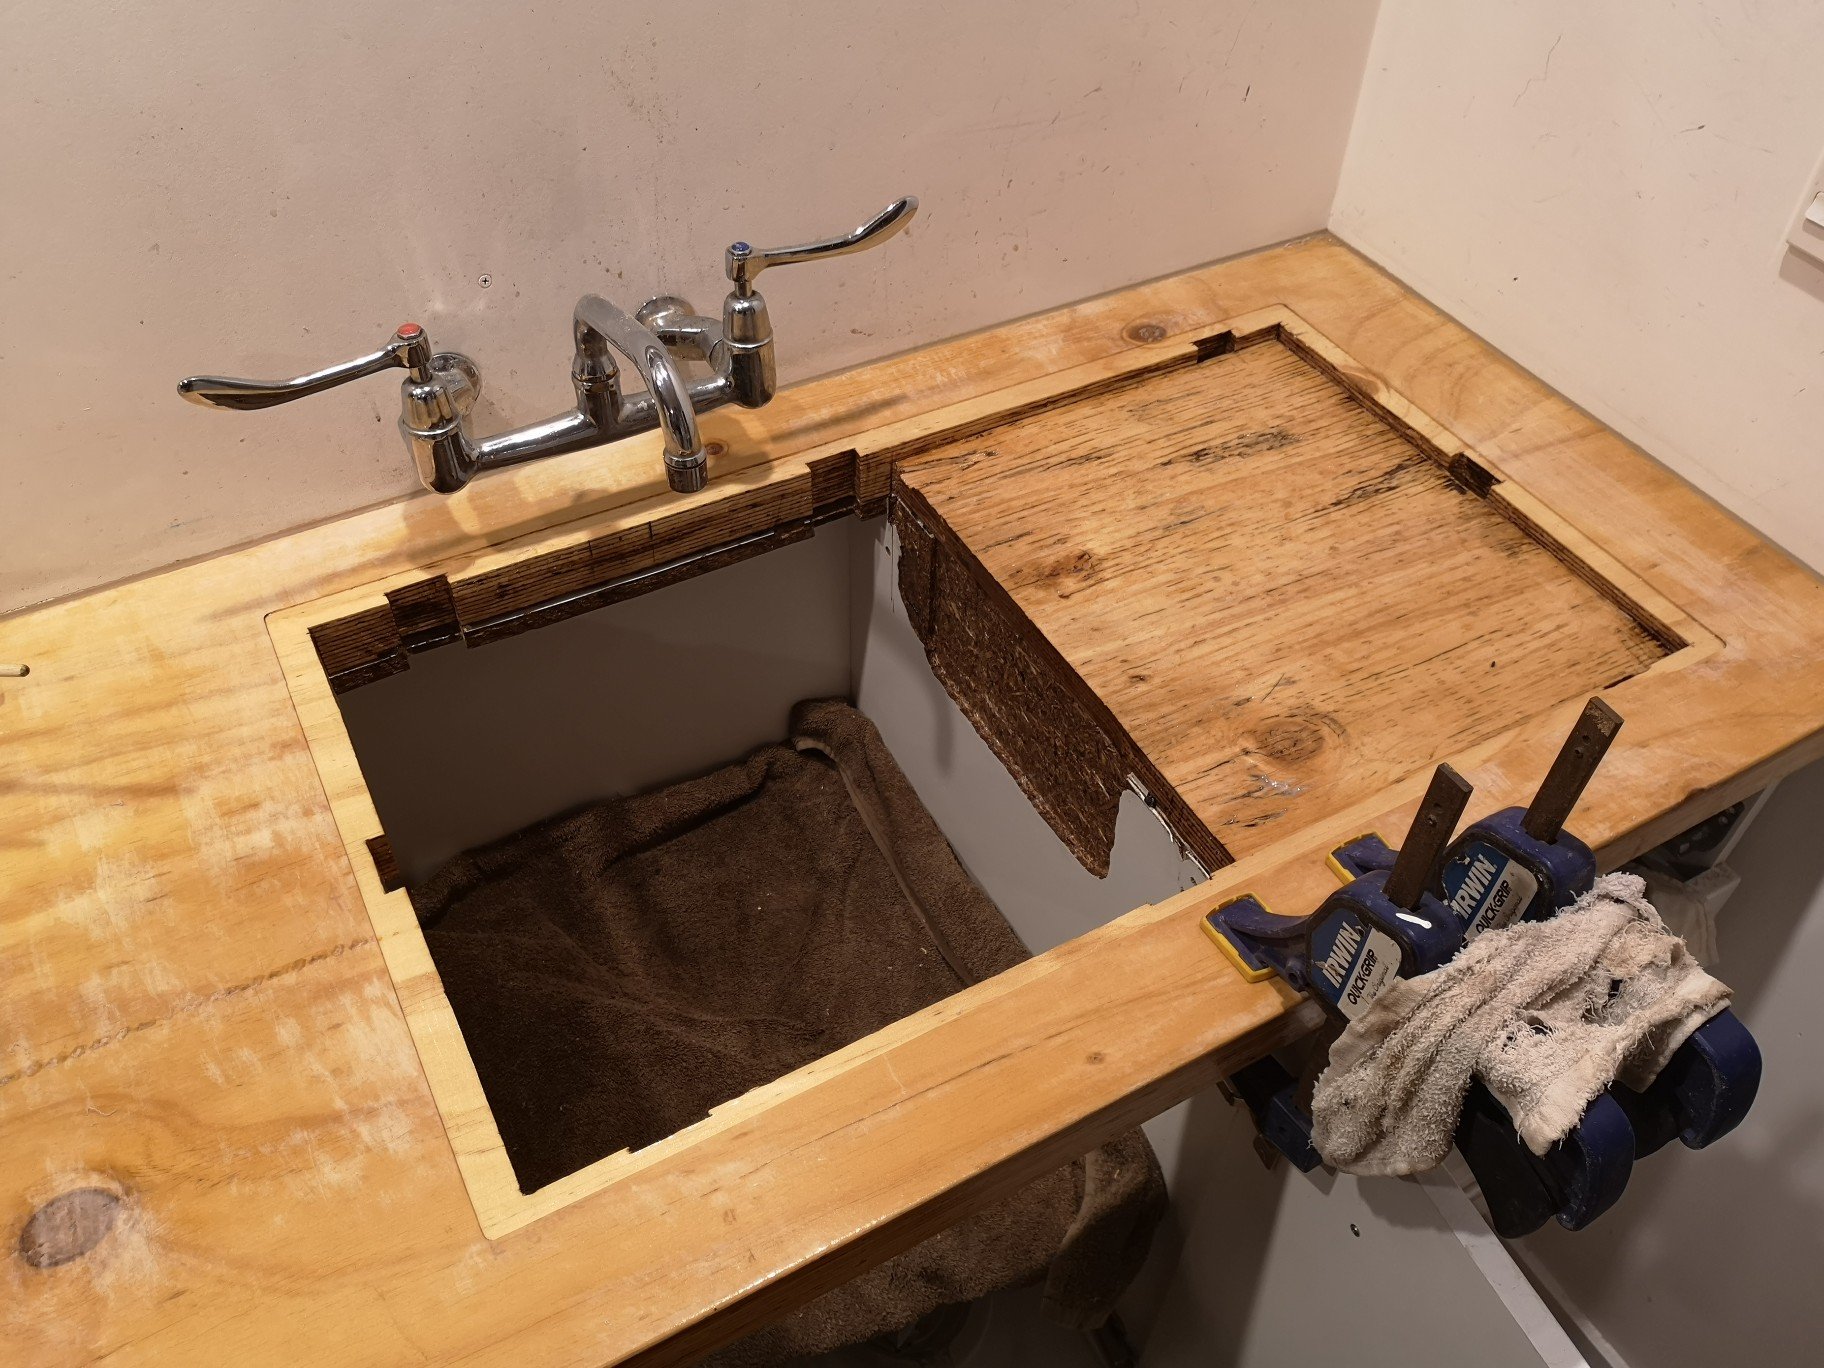
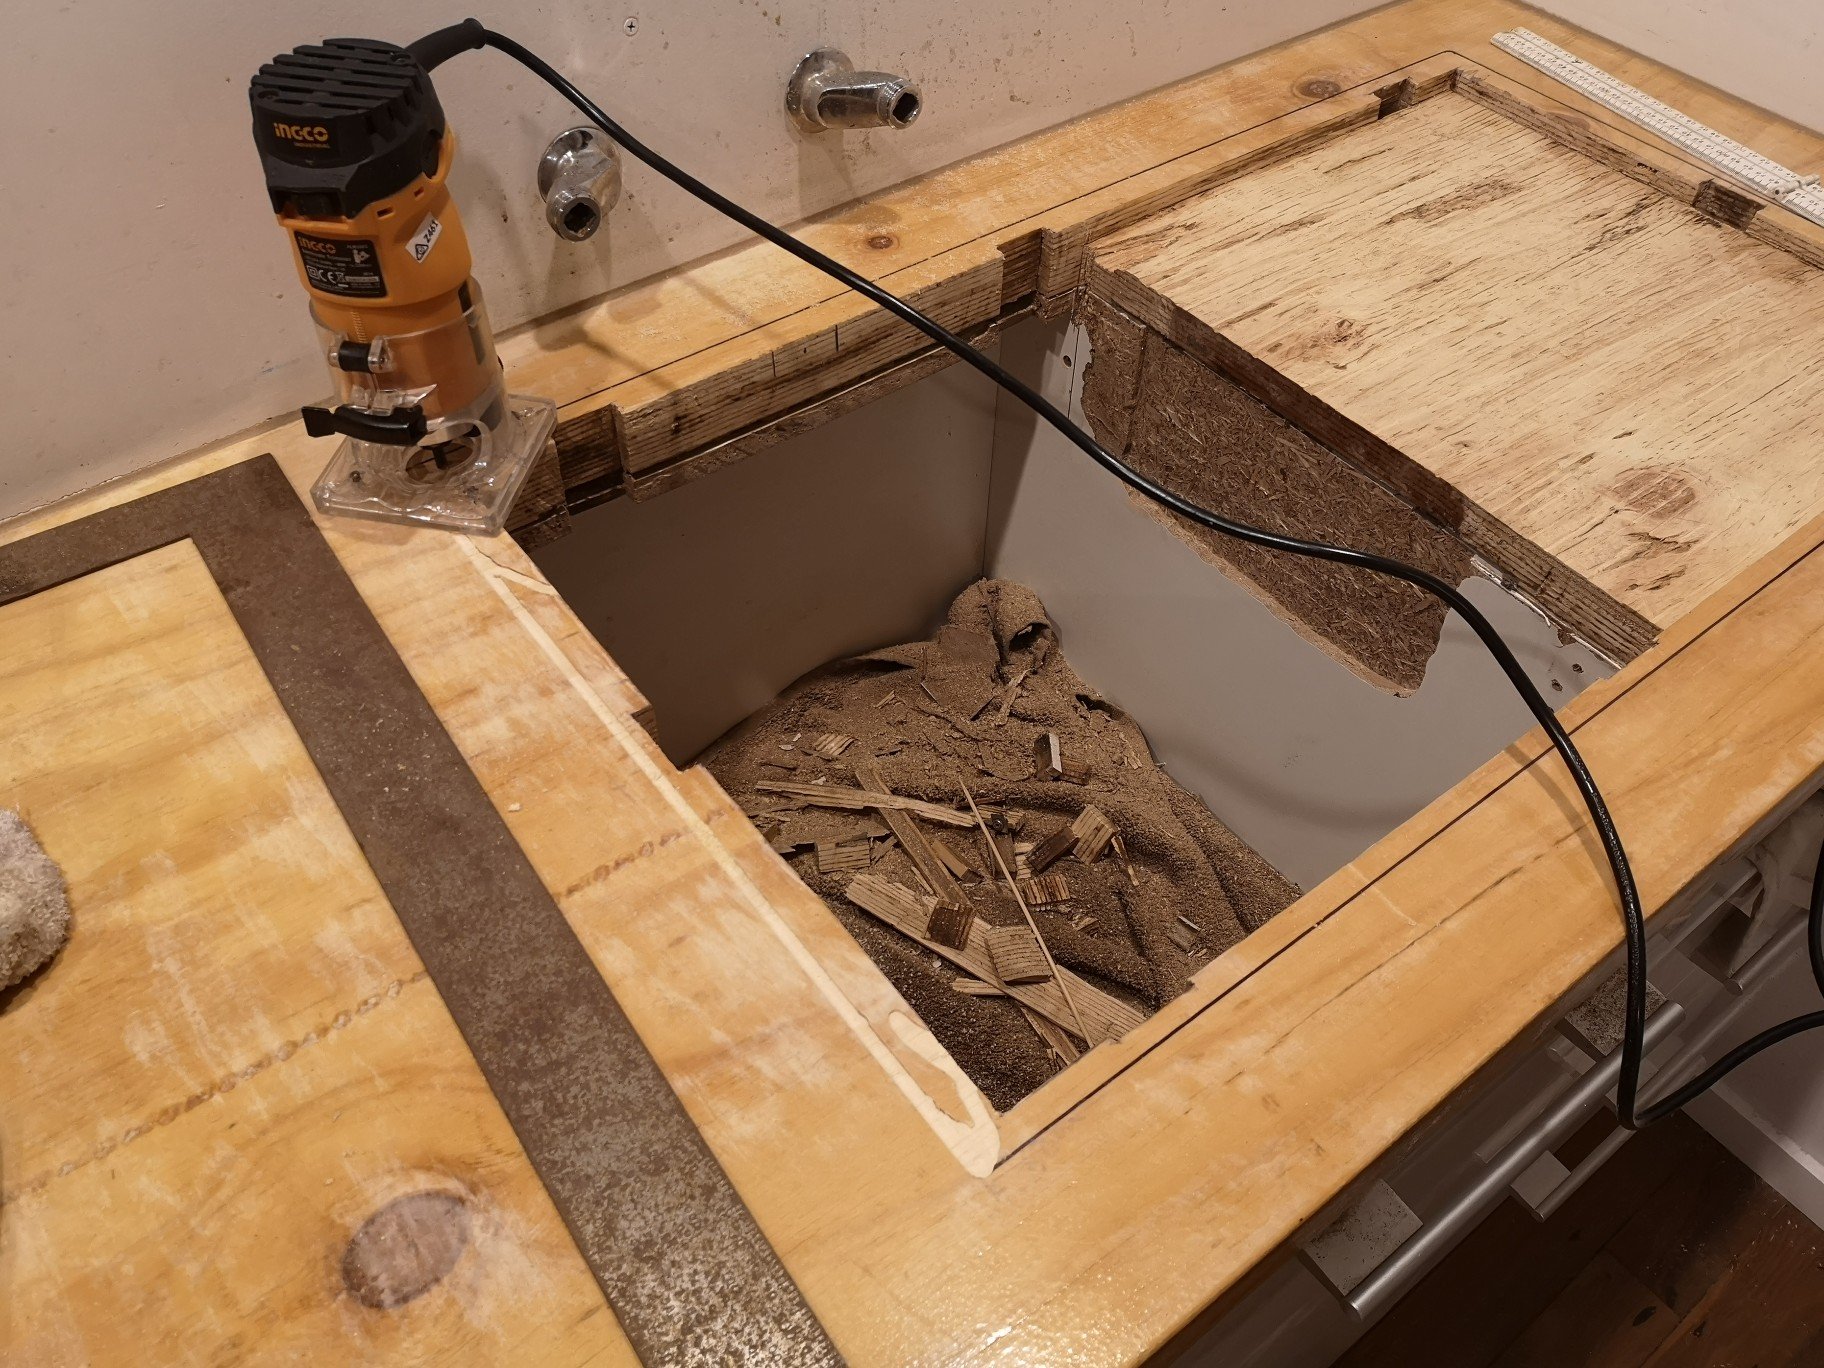
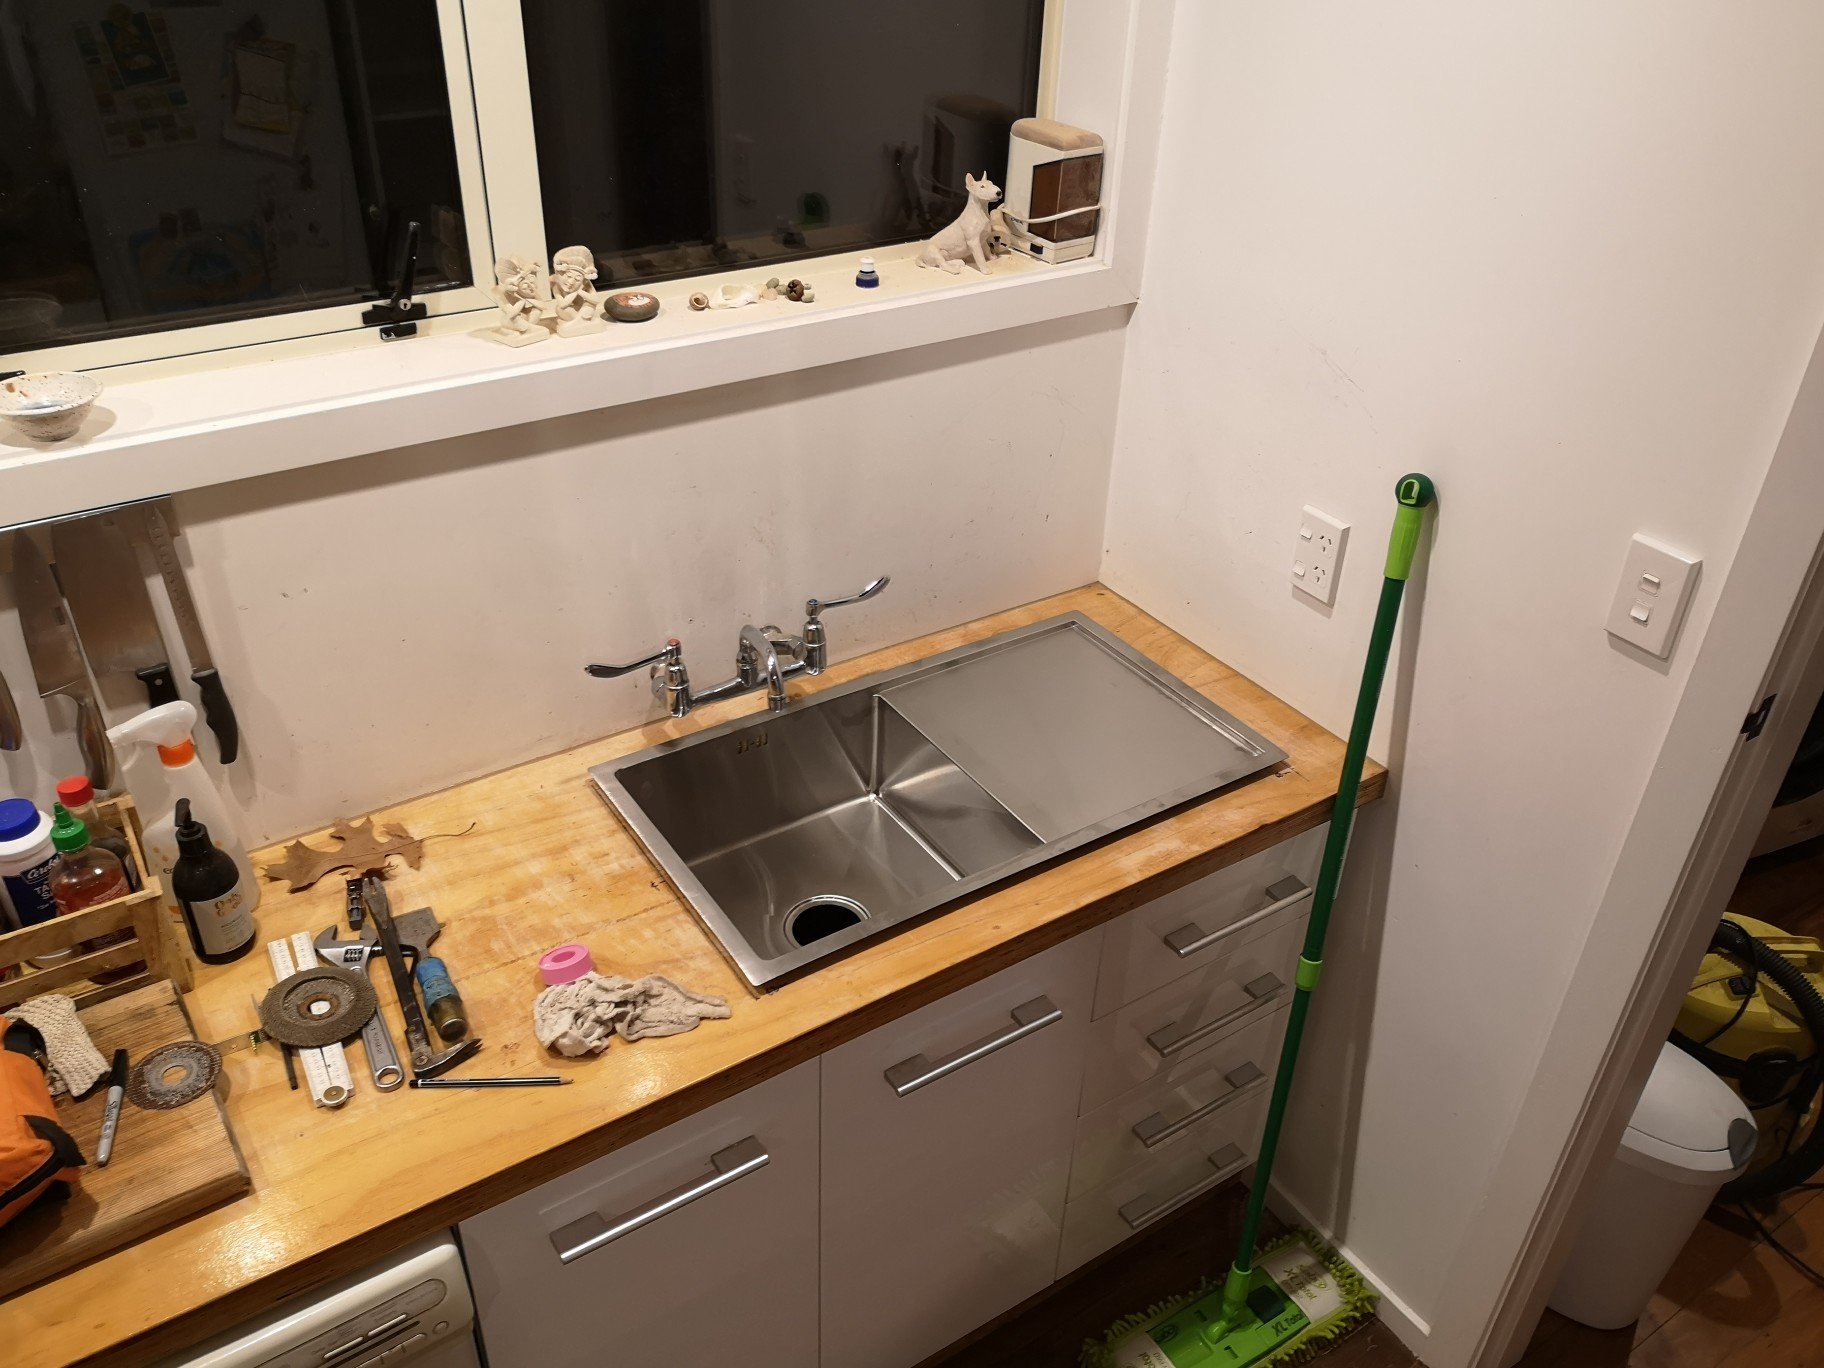
In other news.. Started the interior finishing touches just after lockdown 1.0... Just after nys I bought the rest of the cabinetry to go in the laundry/skullery which included a new sink for the kitchen. I was sick of the old one as it was way too small and asymmetrical. Mmmm, shiney Bit of a measure up, was gonna try and bring it evenly spaced between the front of the bench and the wall but the door hinges had the final say. Out with the old, And time to make a massive mess, luckily the fam was away. Trial fit and edge confirmation. Semi free hand routing, consists of me holding the square with one hand and routing with the other. Has a couple of layers of epoxy on all the rebates just incase of water.
2 points
-
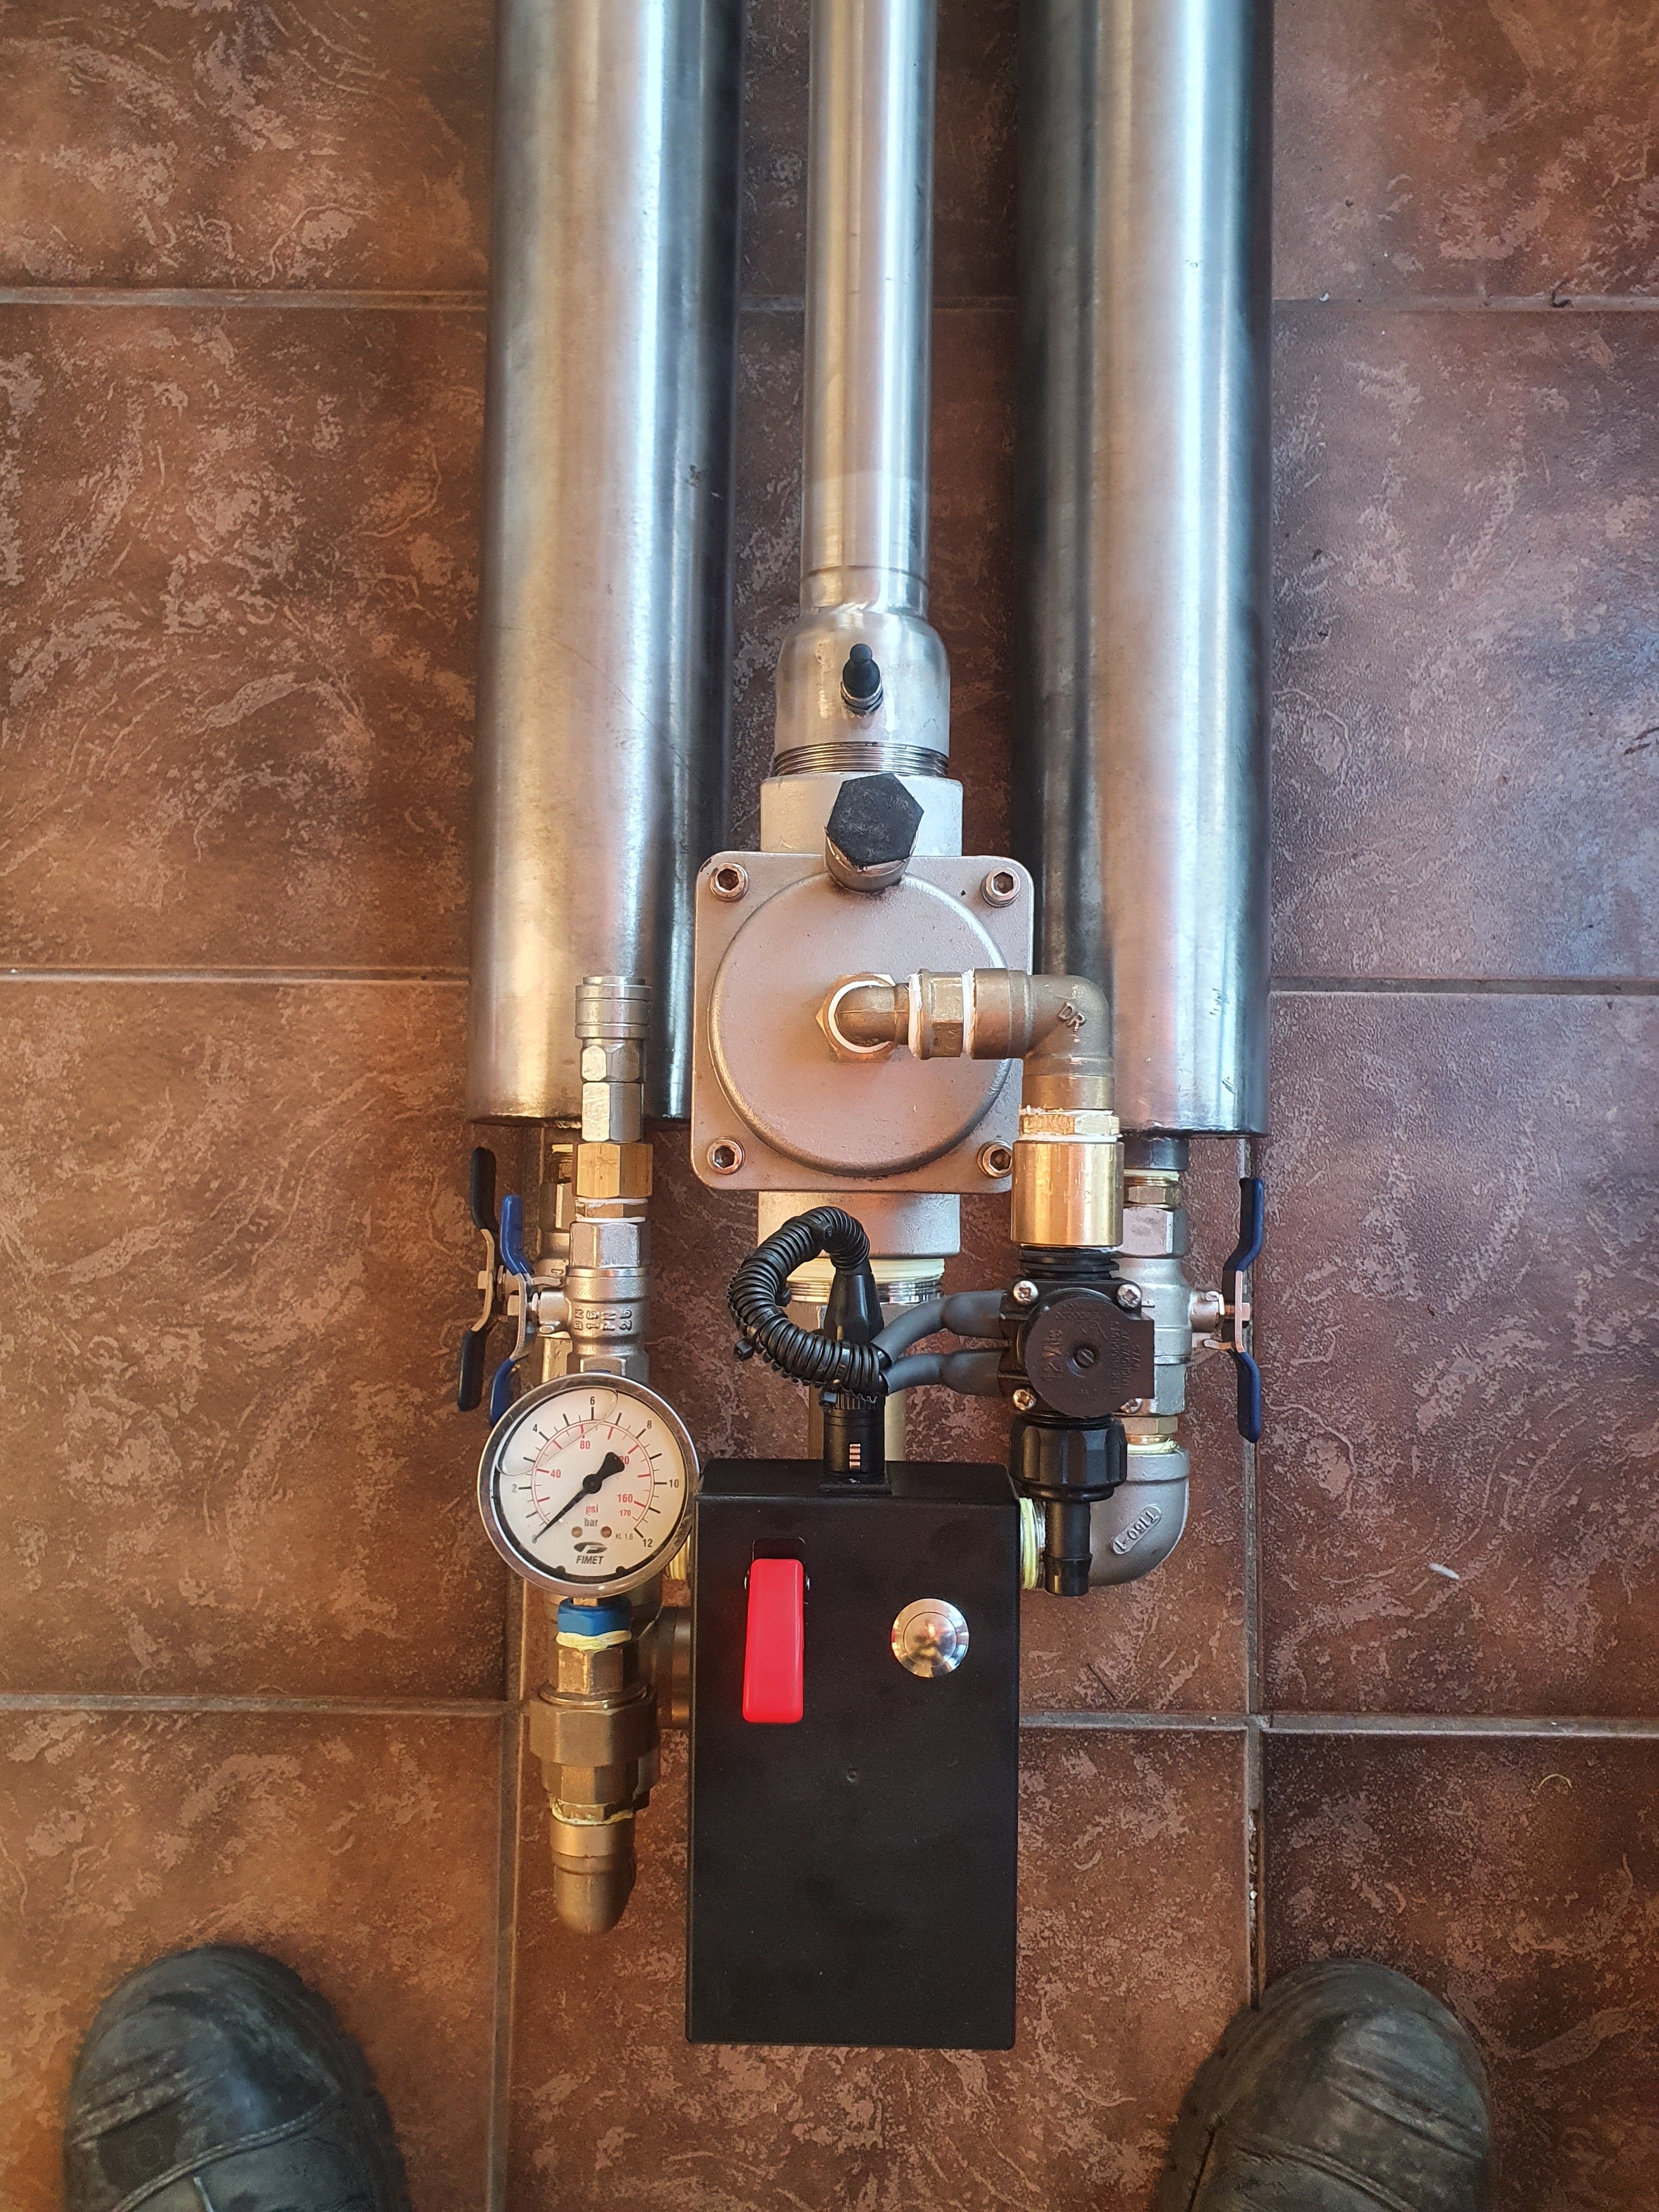
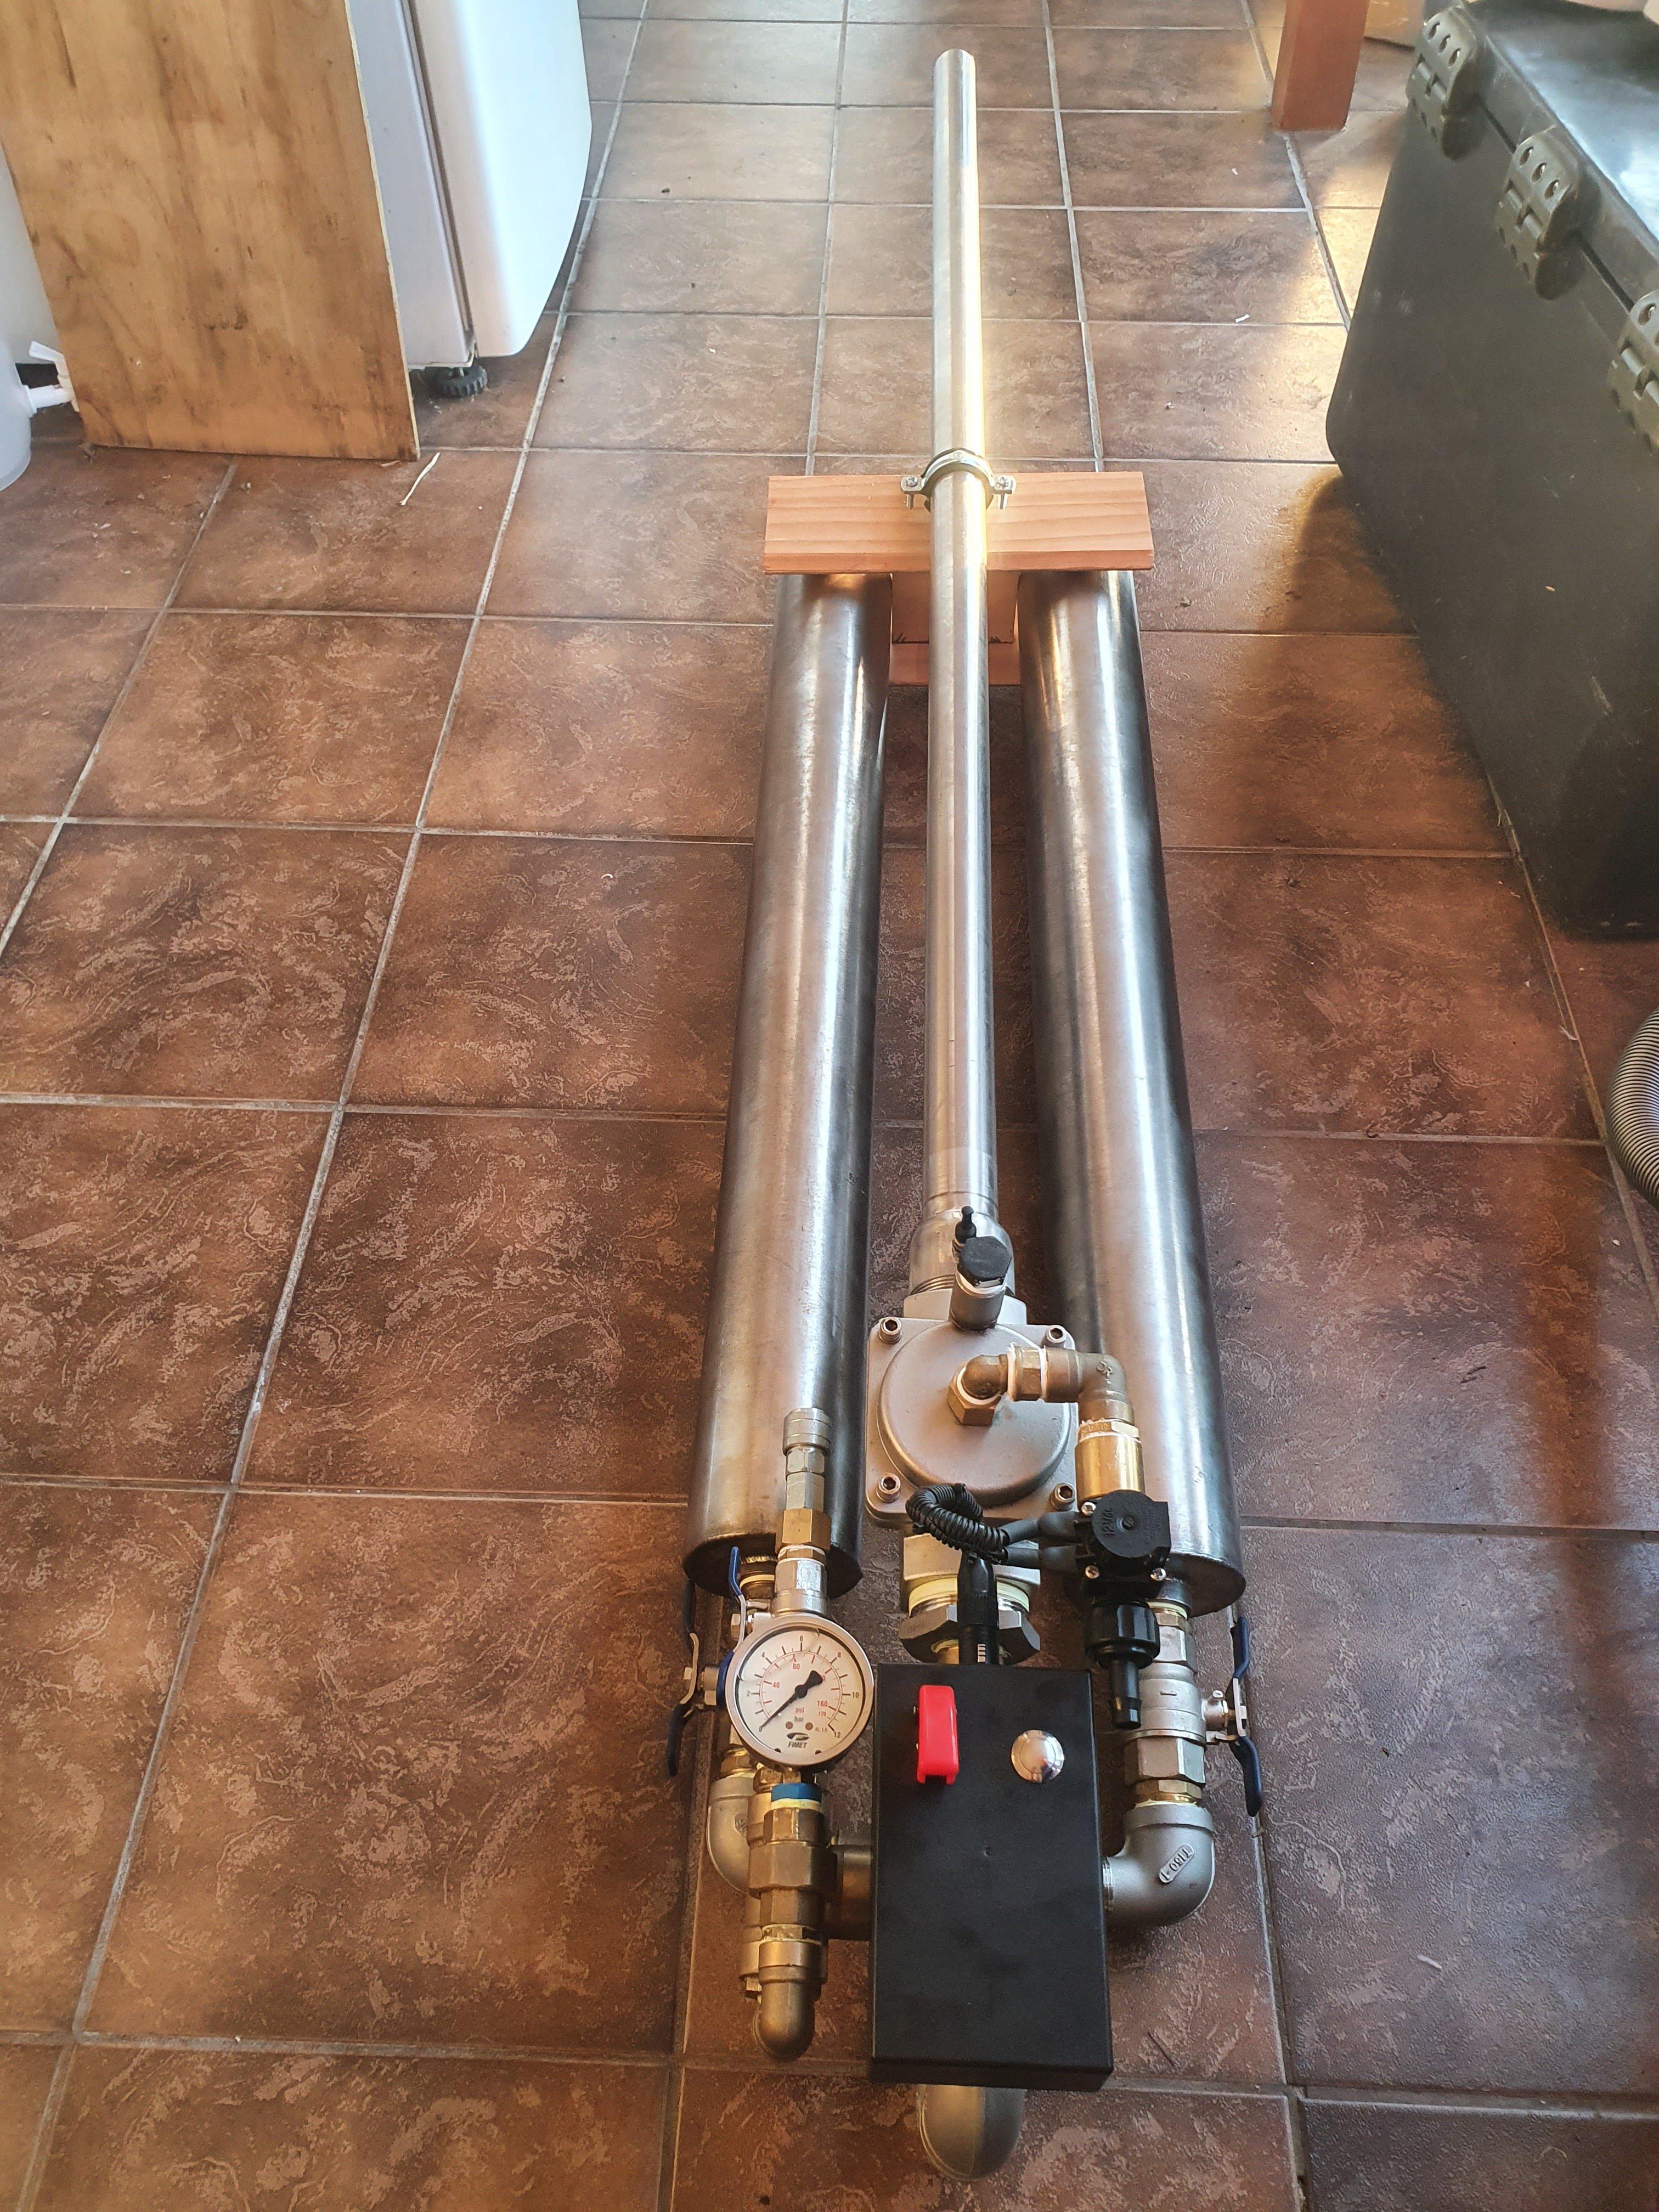
Made an upgraded bait launcher / spud gun. Should work well Twin 100mm stainless tanks, each able to be isolated separately. 50mm stainless irrigation valve, modified to be released via push button trigger. Its a tad overkill haha.
2 points
-
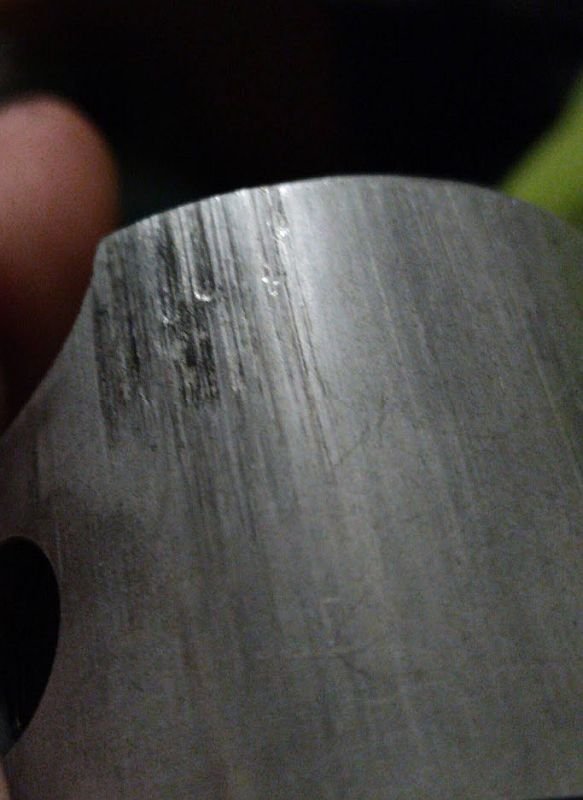
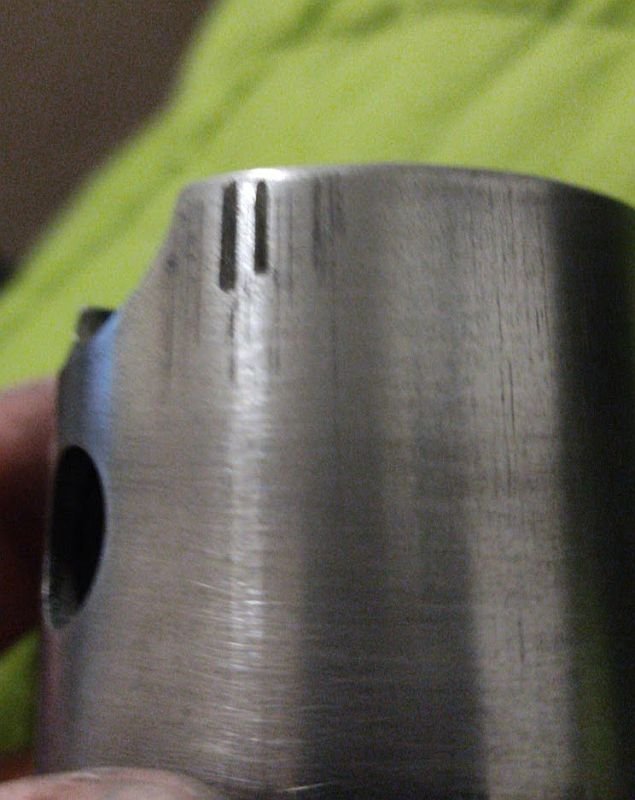
Pretty sure this was grabbing a bit, the bigger marks etc were there already but it wasn't rough when I fitted it Little bit of rubbing with 400, 800 then1000 paper later and it's more than good enough for me Shit pics, work phone is a bit of a potato and they were taken in messenger. Also it looks like the piston was hitting the plug lightly I'll be rather embarrassed if that was the noise ha! Had a set of jets on hand left over from my old parts business, so that's a plus I guess Always amused me how economy options saved costs by having smaller heads on them just to save a little bit of brass! While it was apart I realized that the carb has all the 4 stroke bits in it, needle, slide, atomizer, atomizer bushing etc, works out much easier to just buy a new 2t spec'd carb than all the individual bits, so once I get the credit card balance a little healthier I'll order one, they are pretty much impossible to get a spot on tune from with the 4t bits in. Bit of info for anyone interested 4T atomizer and bushing: 2T spec ones: Swapped the projected tip NGK out for a standard tip Denso IRIDIUM POWER I had kicking about And added a nice new Uni filter, which only looks majorly over size and out of place hahaha
1 point
-
Rollercoaster weekend mate hah. I cant get the boot open at all. But yeah it looks like boot, rear panel and drivers side light at this point. The bumper has moved but hopefully its just the mount has bent. No idea if the boot floor is damaged. Yeah hes been in touch, were all insured so hopefully itll all get fixed easy enough.1 point
-
1 point
-
Fuck yes1 point
-
Got it on the dyno made 305kw @14psi . https://youtu.be/zg2lvkEhofM1 point
-
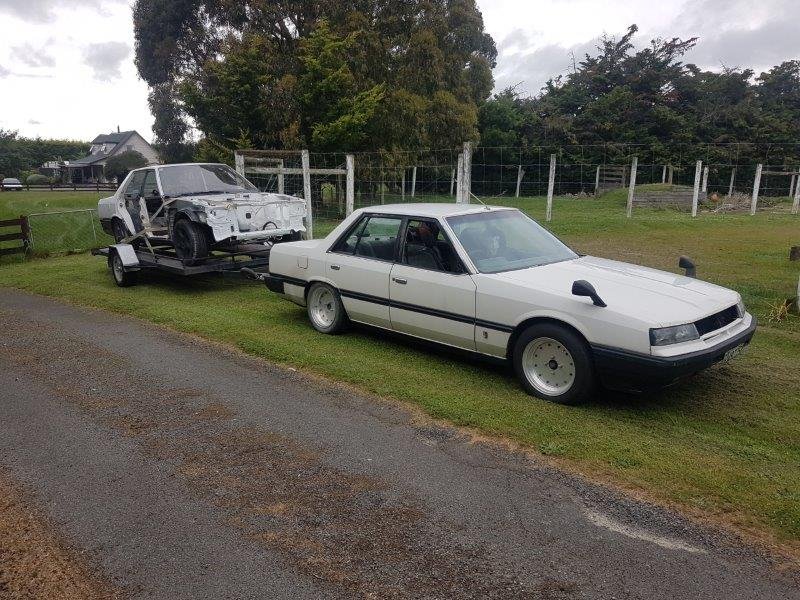
So when i first looked at the car right before Auckland Lockdown V2 it was a bare shell on a chassis dolly, The previous owner spent a bit of time during lockdown and put the panels back on, factory suspension and steering and diff in and got it mobile again for me. He packed the car with as much as he could then when I picked it up the ute tray and back seat was chocka with bits as well for the trip home!
1 point
-
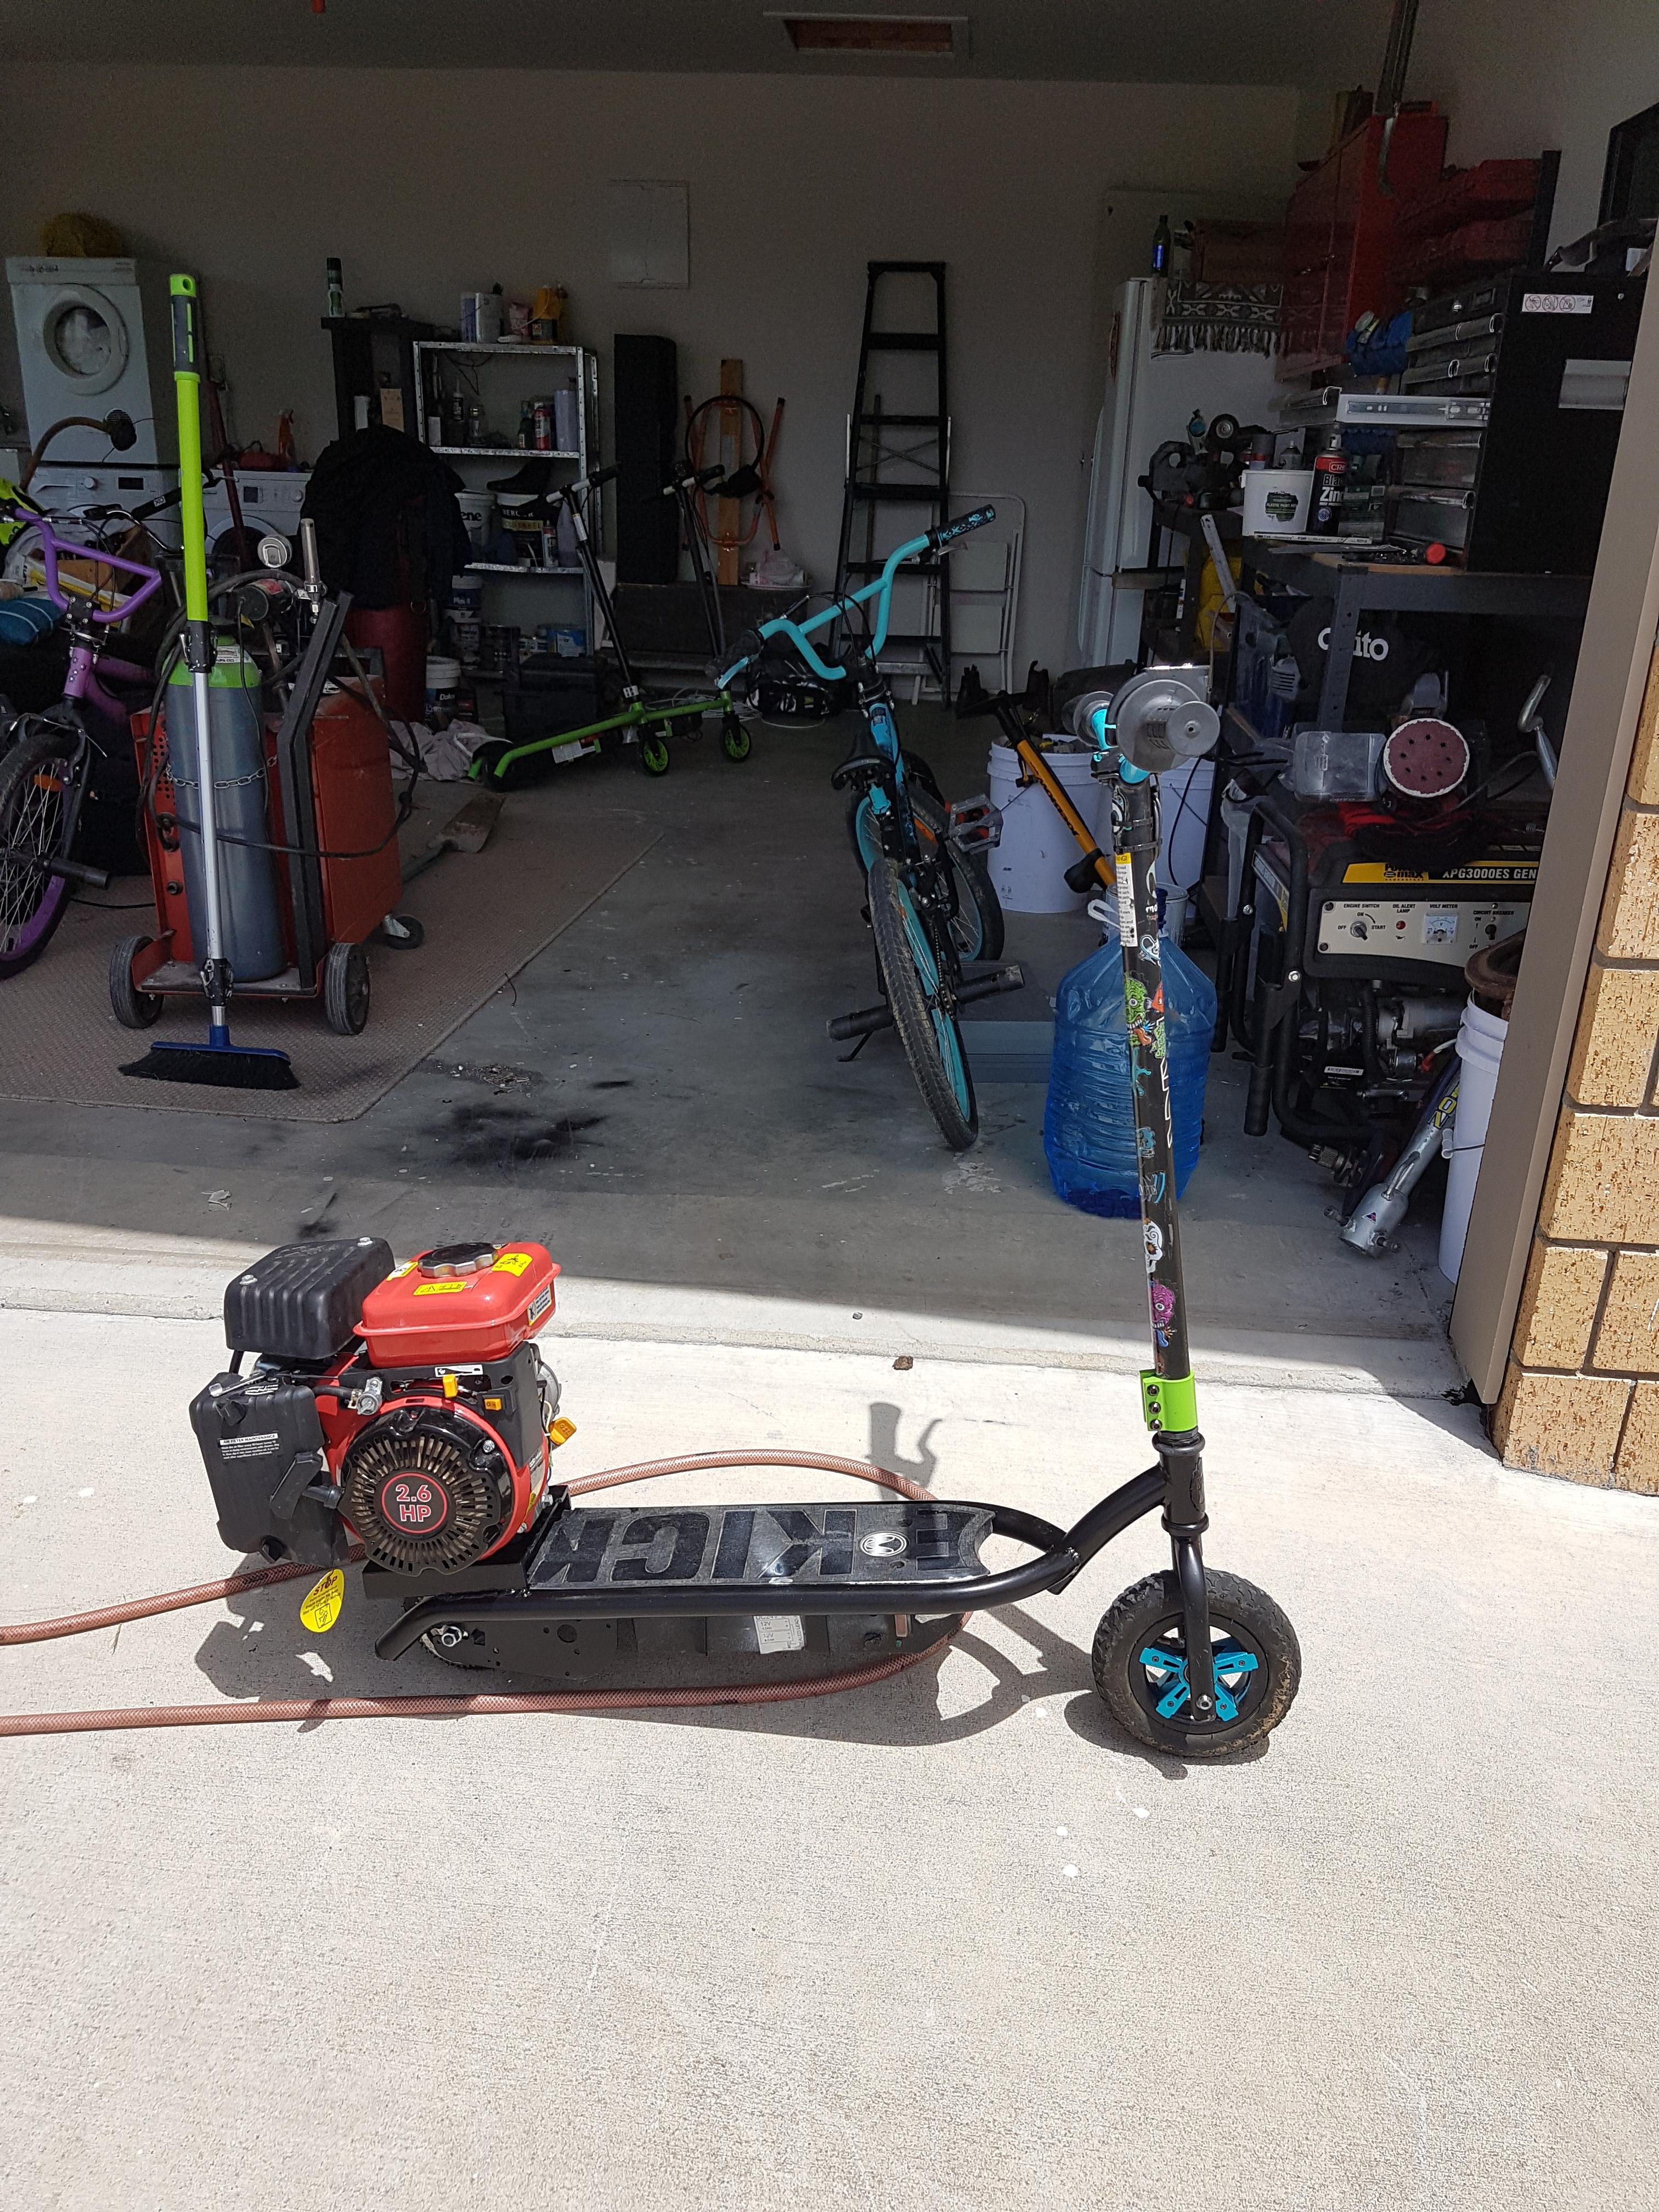
Found this vid of it first time it worked long enough for kids to ride it. Might actually rebuild it as i still have the exact same scooter unmolested in roof stored away. It then evolved to this
1 point
-
Sparked this up today after pissing around with chain alignment and tension it had this weird harmonic going on when you got to about 40 ks thats gone now. it could do with a roller on the chain that runs to the jackshaft but seeing as I'll be going CVT fuck it I'll just keep it on tight side. Anyway tune is good on 50% ethanol mix with taller gearing the SU is way happier plugs are nice and clean. Went for a 10k ride along a closed stretch of road and used lots of petrol this things effortless though just cruises along and doesn't fuck around for a second when you give it berries! Top speed? Dont know didn't get there just enjoying it not breaking shit and getting pelted by bees and sand flys. Hard to believe it started as this thing now. Very little remains maybe the throttle cable and some tube, and the battery box, the rest was chopped out and replaced with heavier tube at some point i didn't photograph.
1 point
-
A bit of a win today. I have been looking for bits of MDF at least 3m x 1.4m so I can have a bed with no joins in it, this was proving difficult and/or stupidly expensive. Then I remembered a place next to where I got some electroplating done that had stacks of random MDF sheets lying around. I rocked up yesterday and told the the man what I was doing and what I wanted, he was super interested and said he would sort it out. I got a call today saying the sheet was ready, so I swung by to pick it up. He had cut 2 sheets of 18mm to the exact dimensions I wanted and sold them to me for only $50, what a GC. I just slammed one on now, looks sweet. I have also been setting up some cable routing and the prox switches, just the Z axis to go;1 point
-
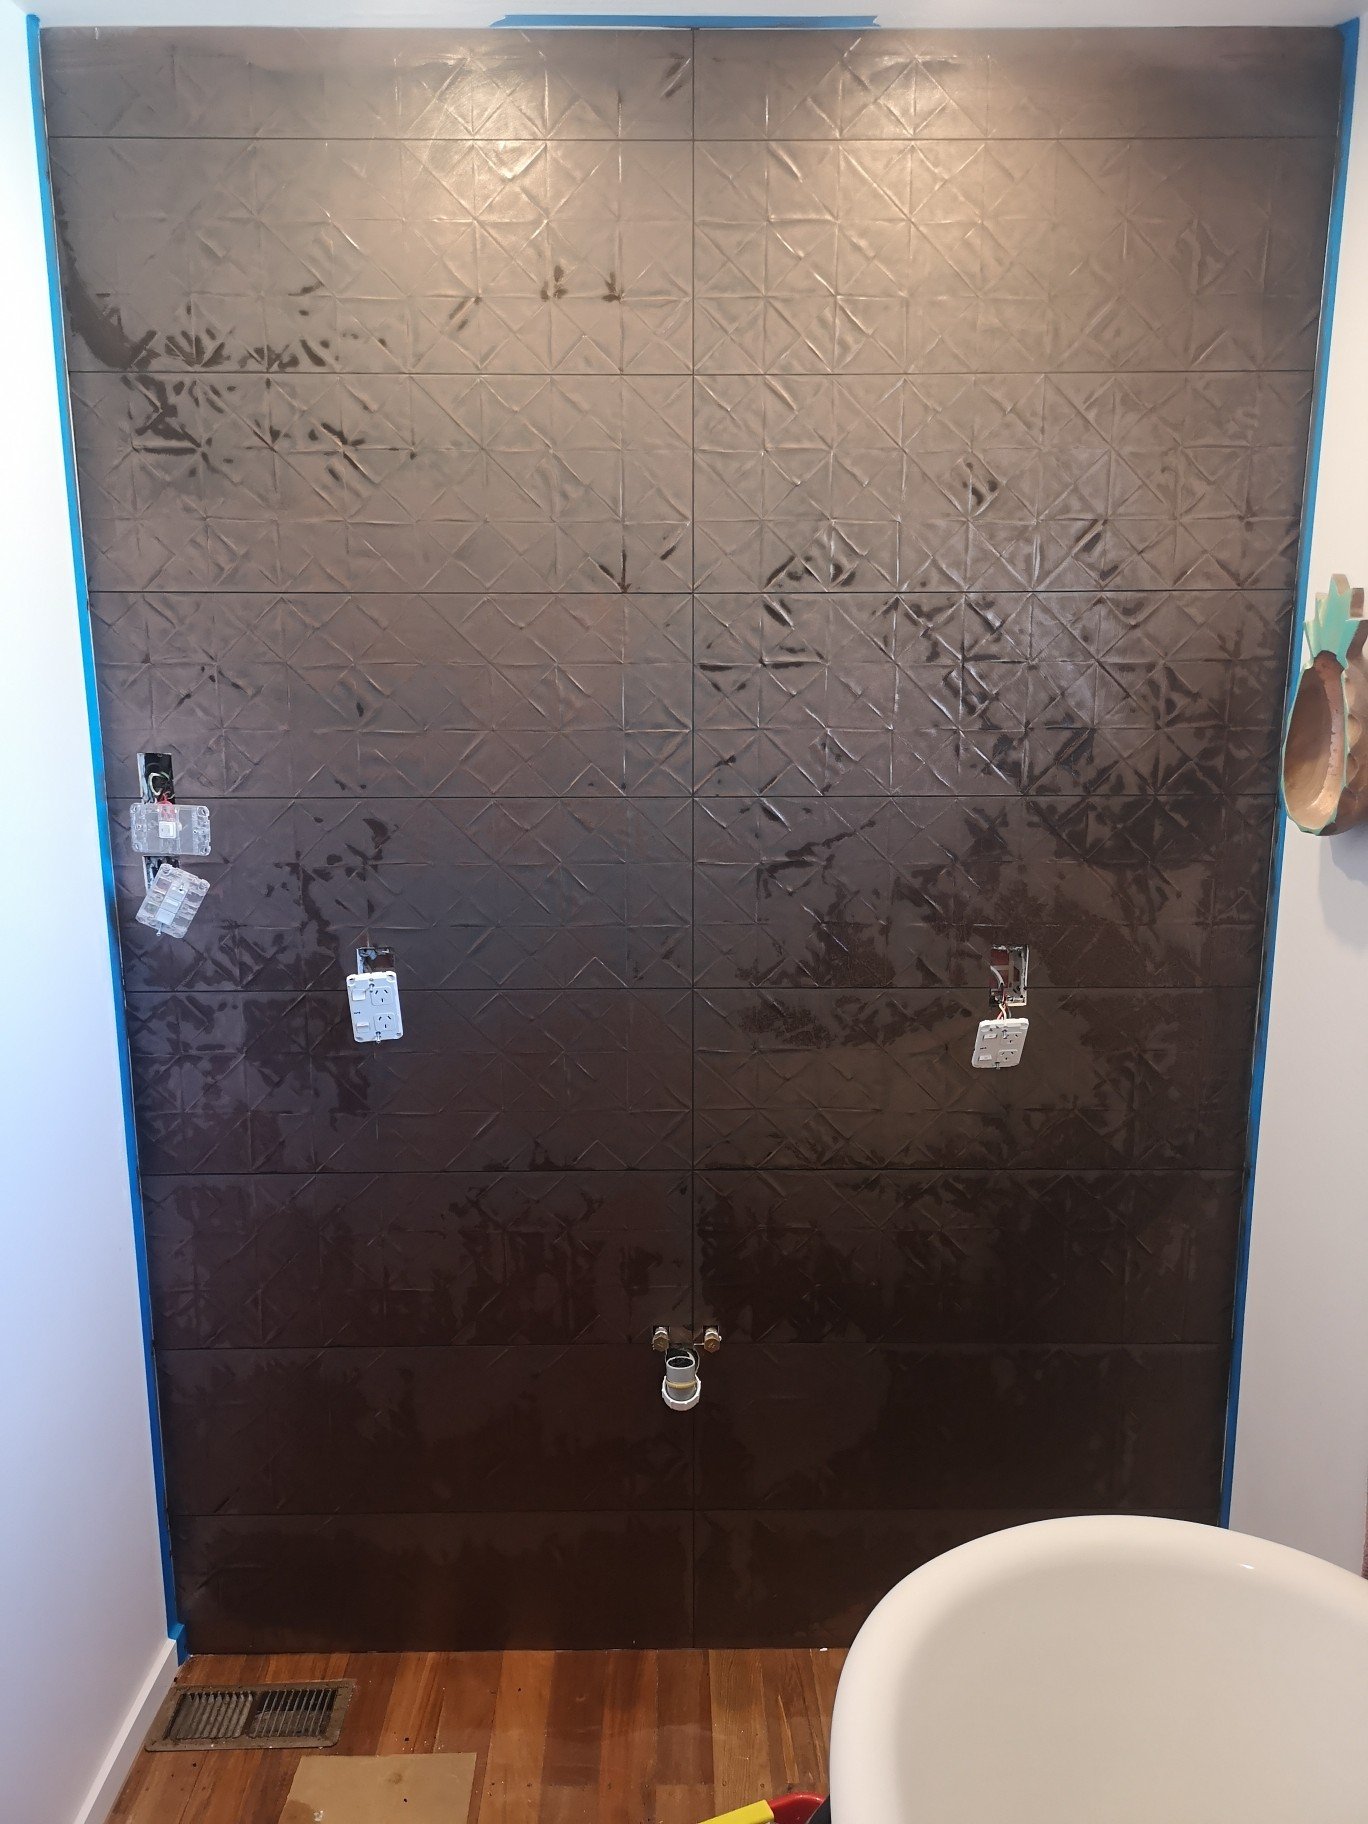
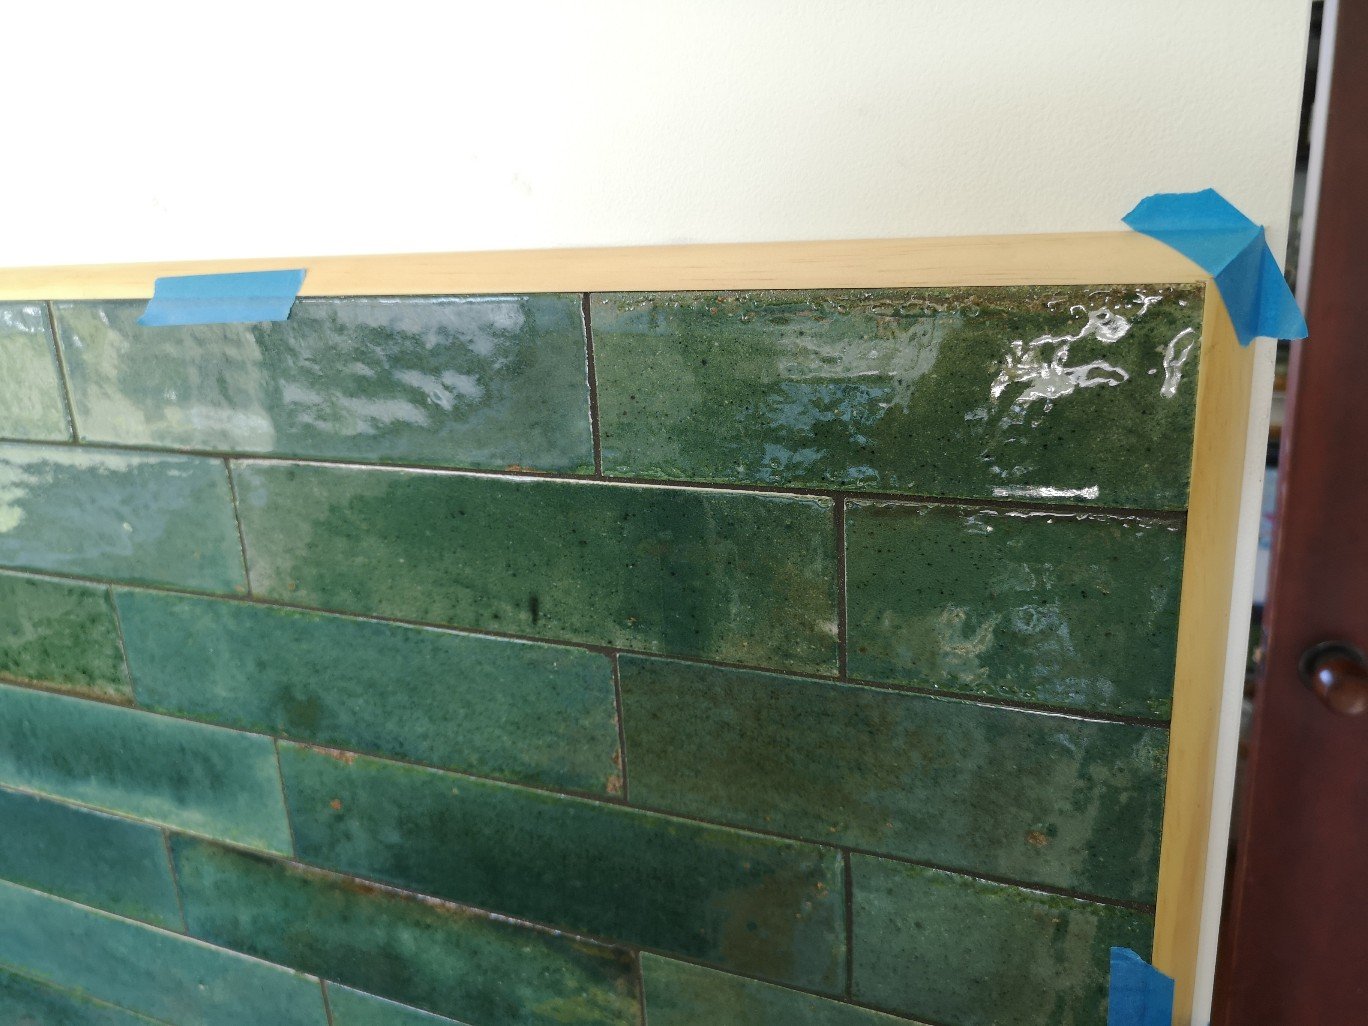
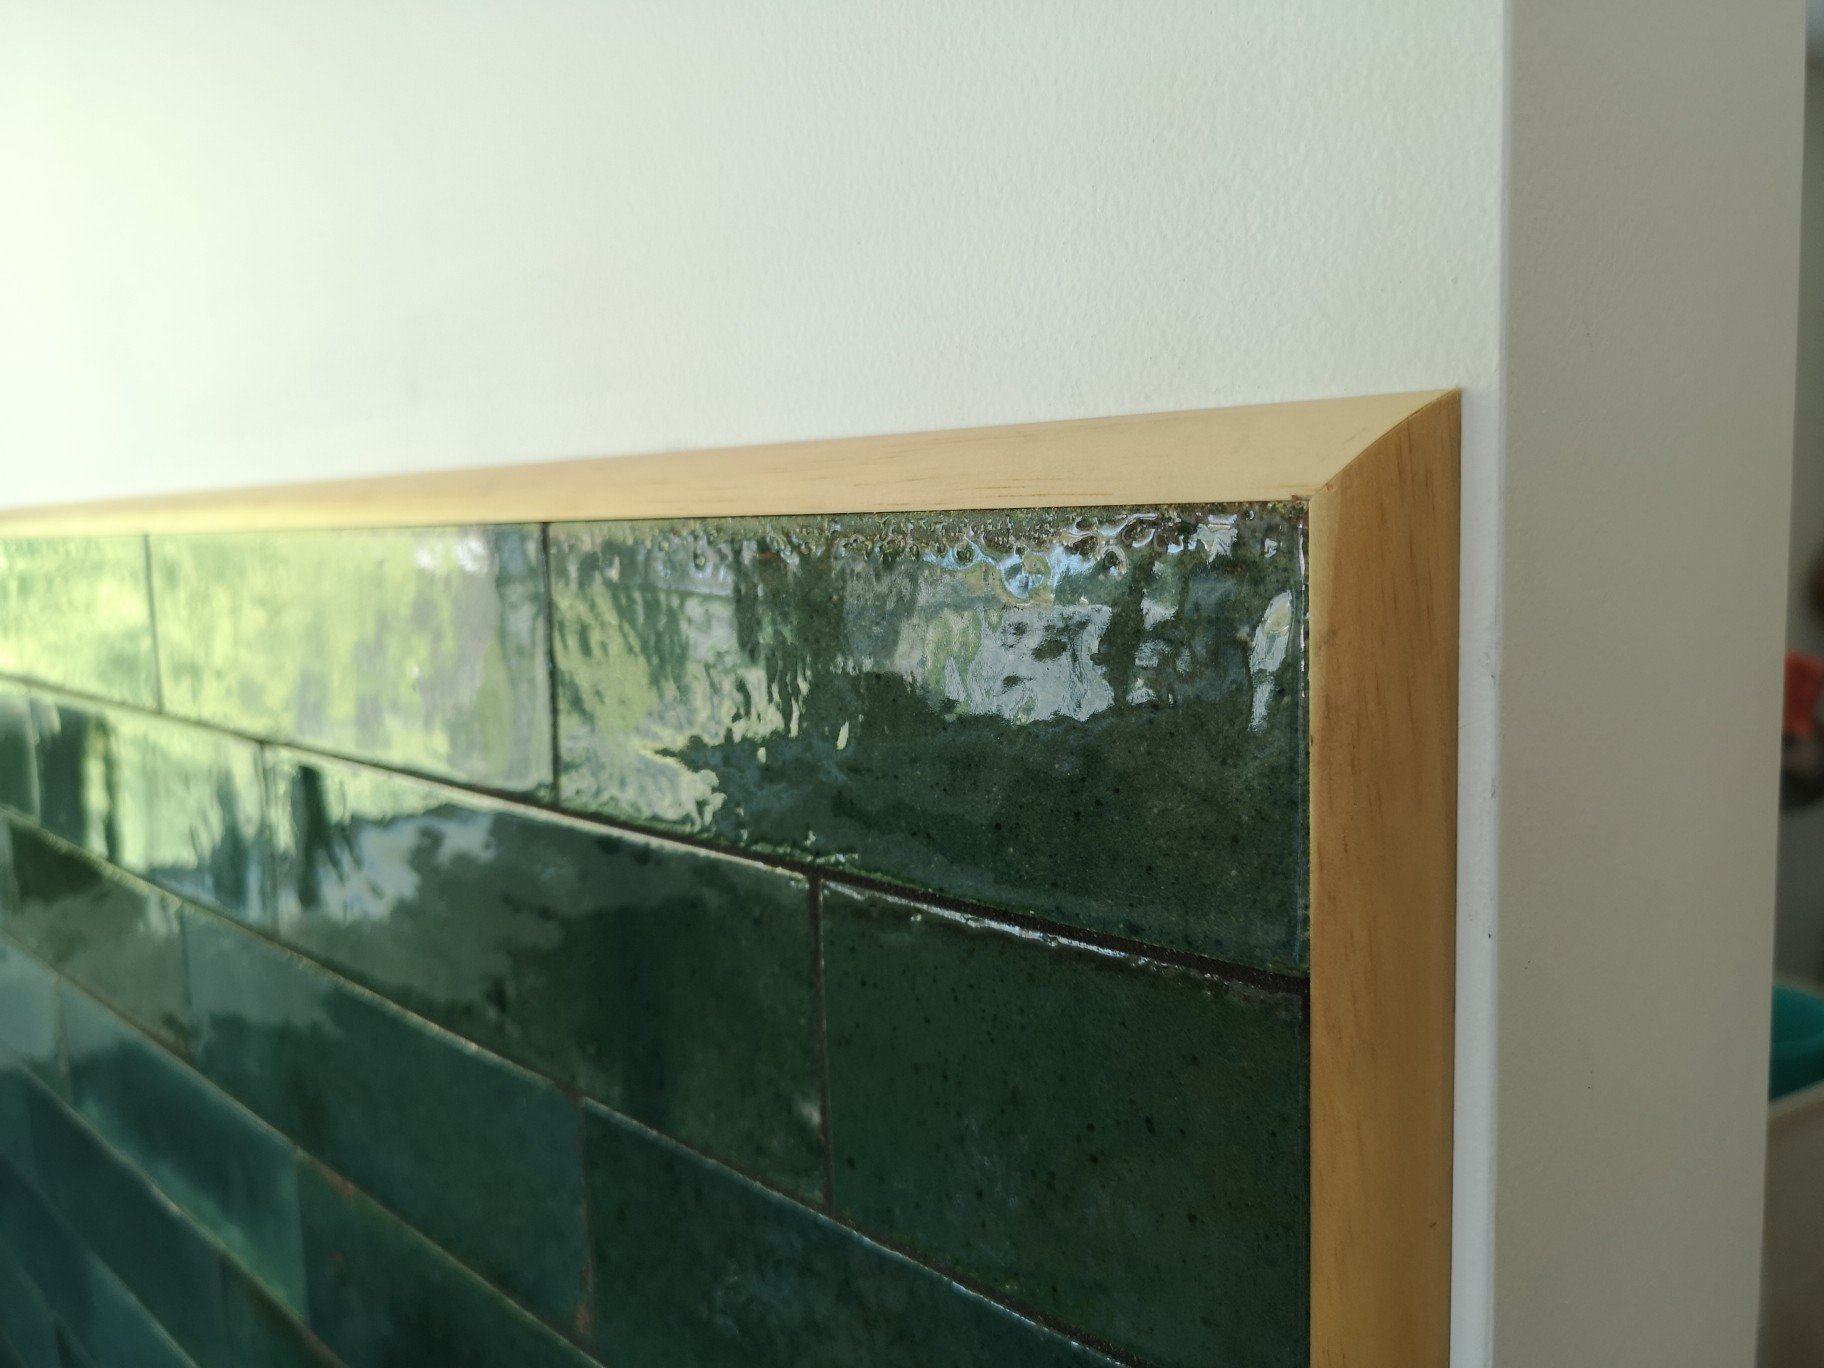
The other problem with a half tile under the window was that when I returned back to the laundry doorway I couldn't just finish at the height of the window architrave as that would mean a half tile to finish on which isn't ideal but putting a full tile there means a step in the line of the architrave, again, also not ideal. I was 2 tiles short of being able to finish on the line of the range hood but luckily the tile warehouse supplied us three tiles for nothing.. Win. Put the new skirtings on, Worked out where I needed to start to meet the course of the initial tiles, meant starting on another cut (roll eyes) got it right tho and didn't have to do any last minute adjustments to the course. I'm also not a huge fan of generic tile edges so I decided to use a 12mm quad instead. Oiled with the same stuff as the floor. Still have to grout and install the edging on the return tiles.. Came up pretty good tho.
1 point
-
The timber with green is a winning combo1 point
-
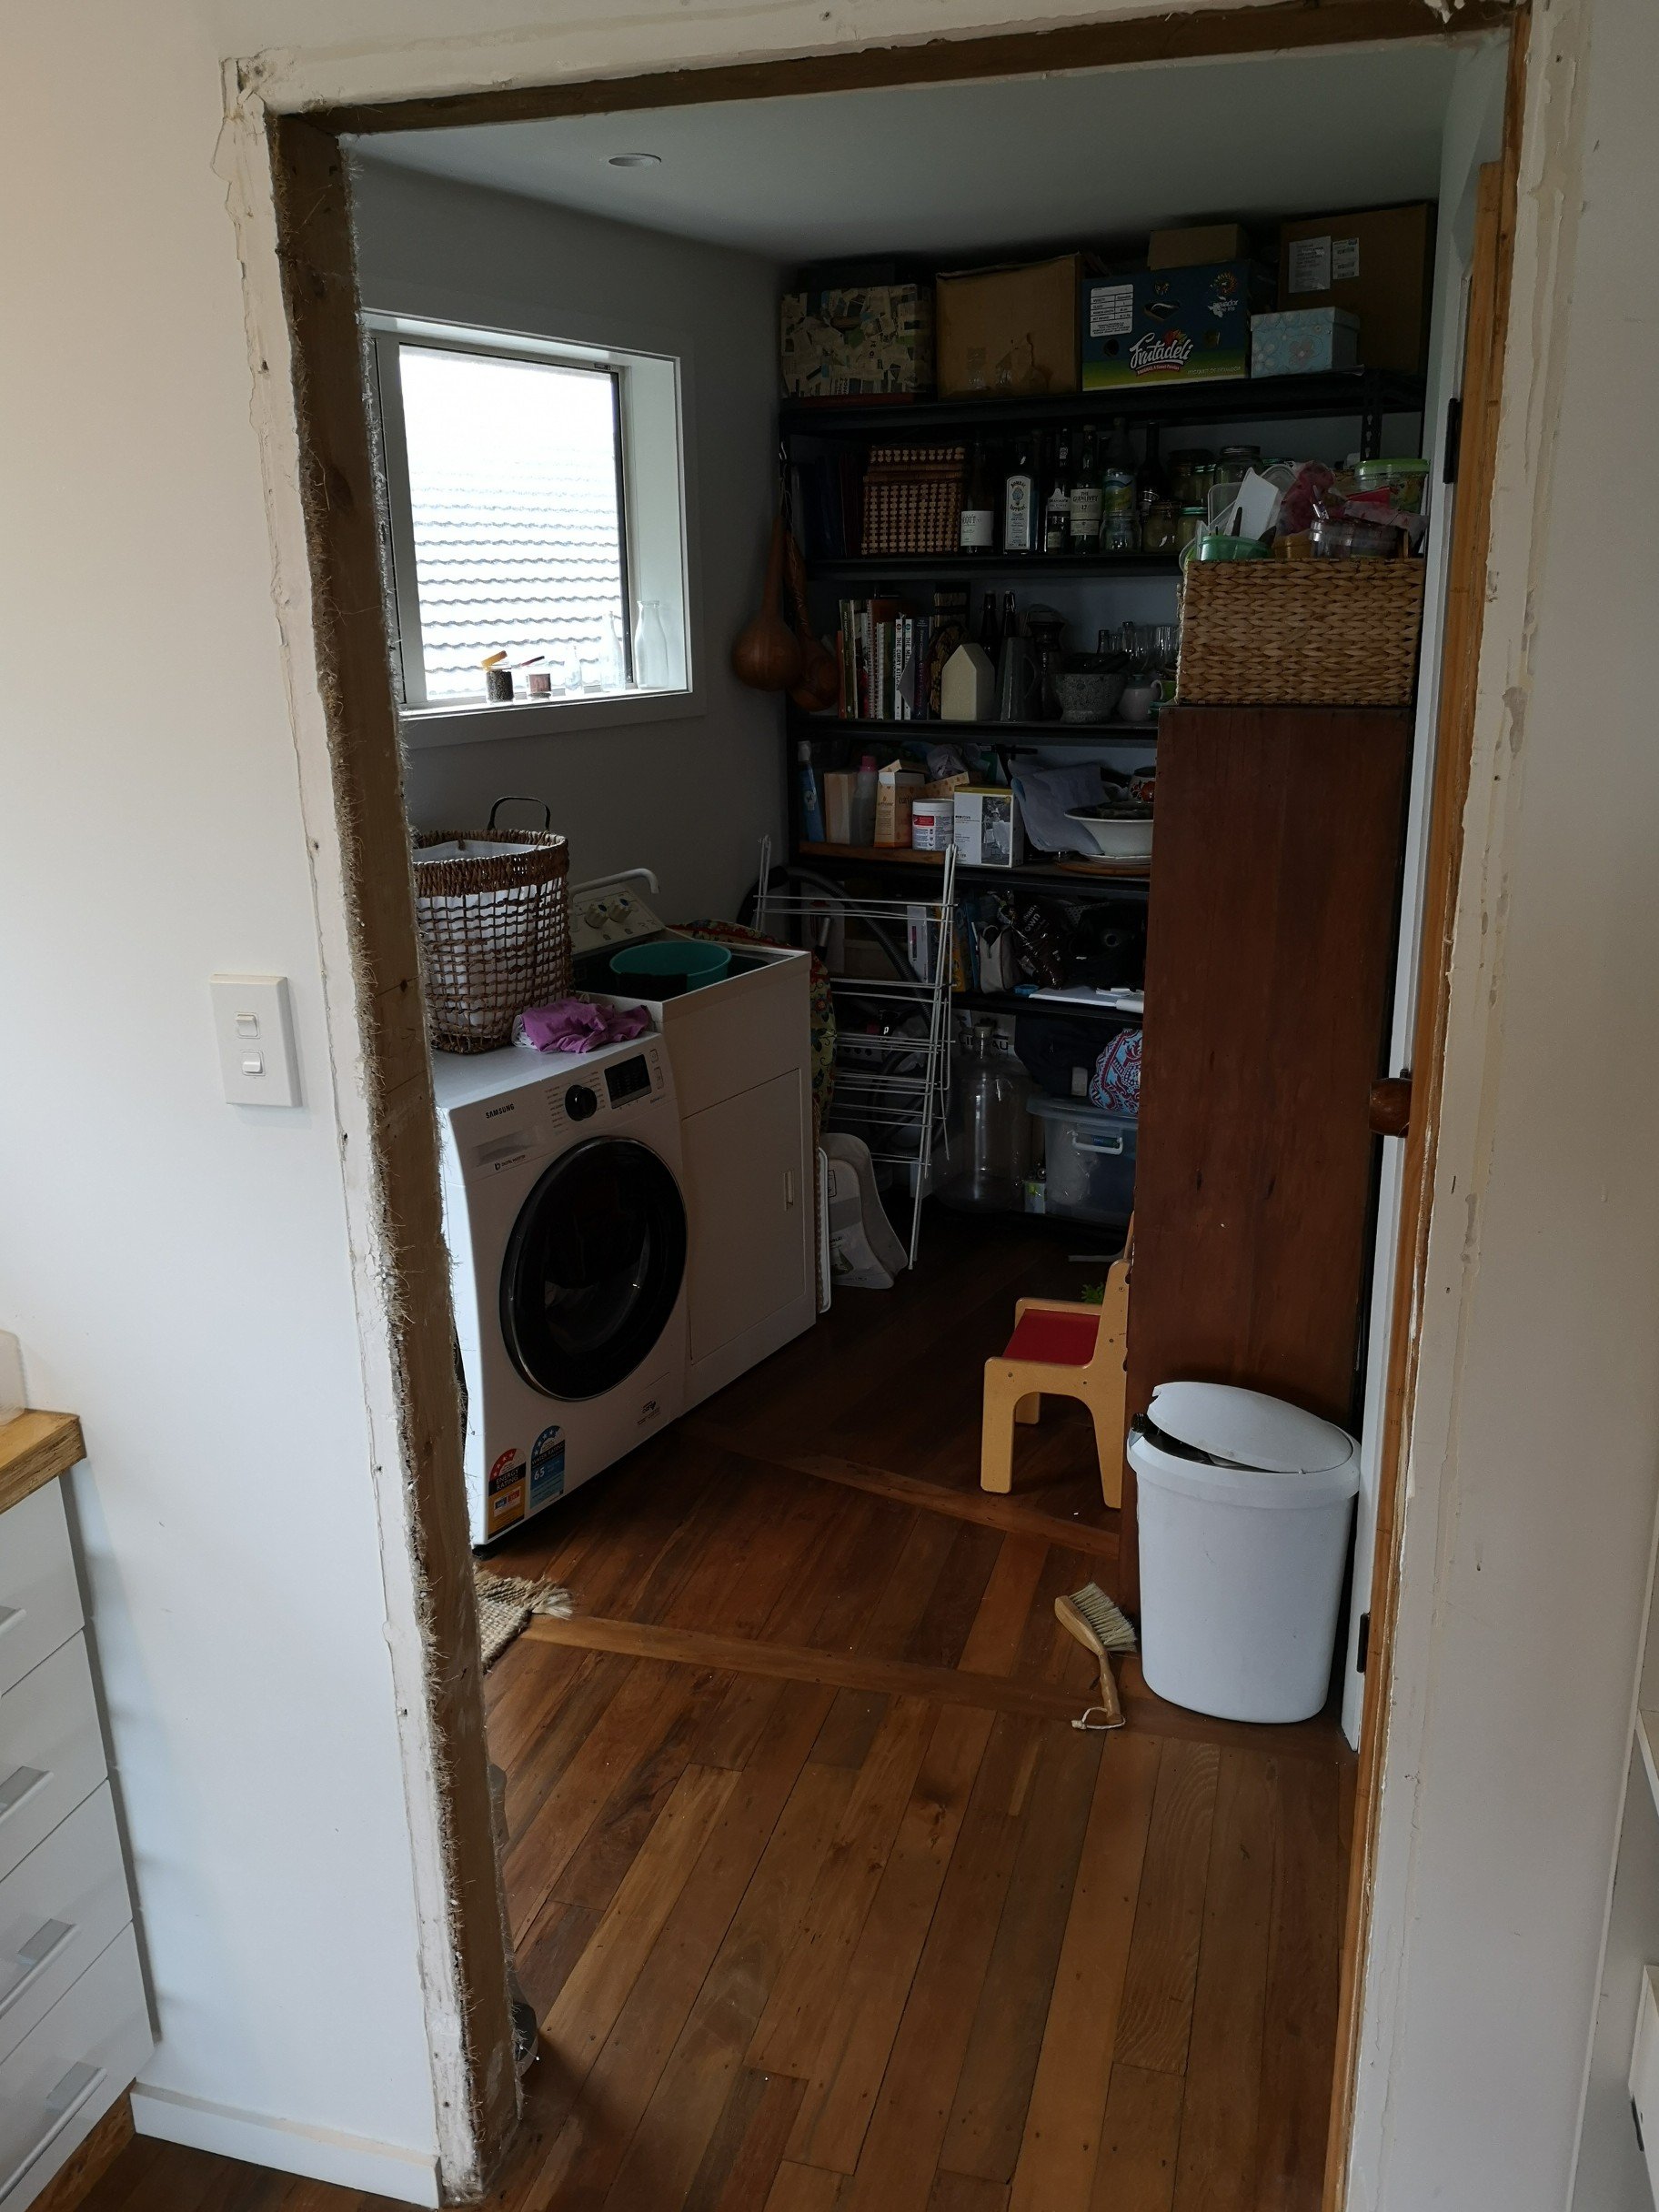
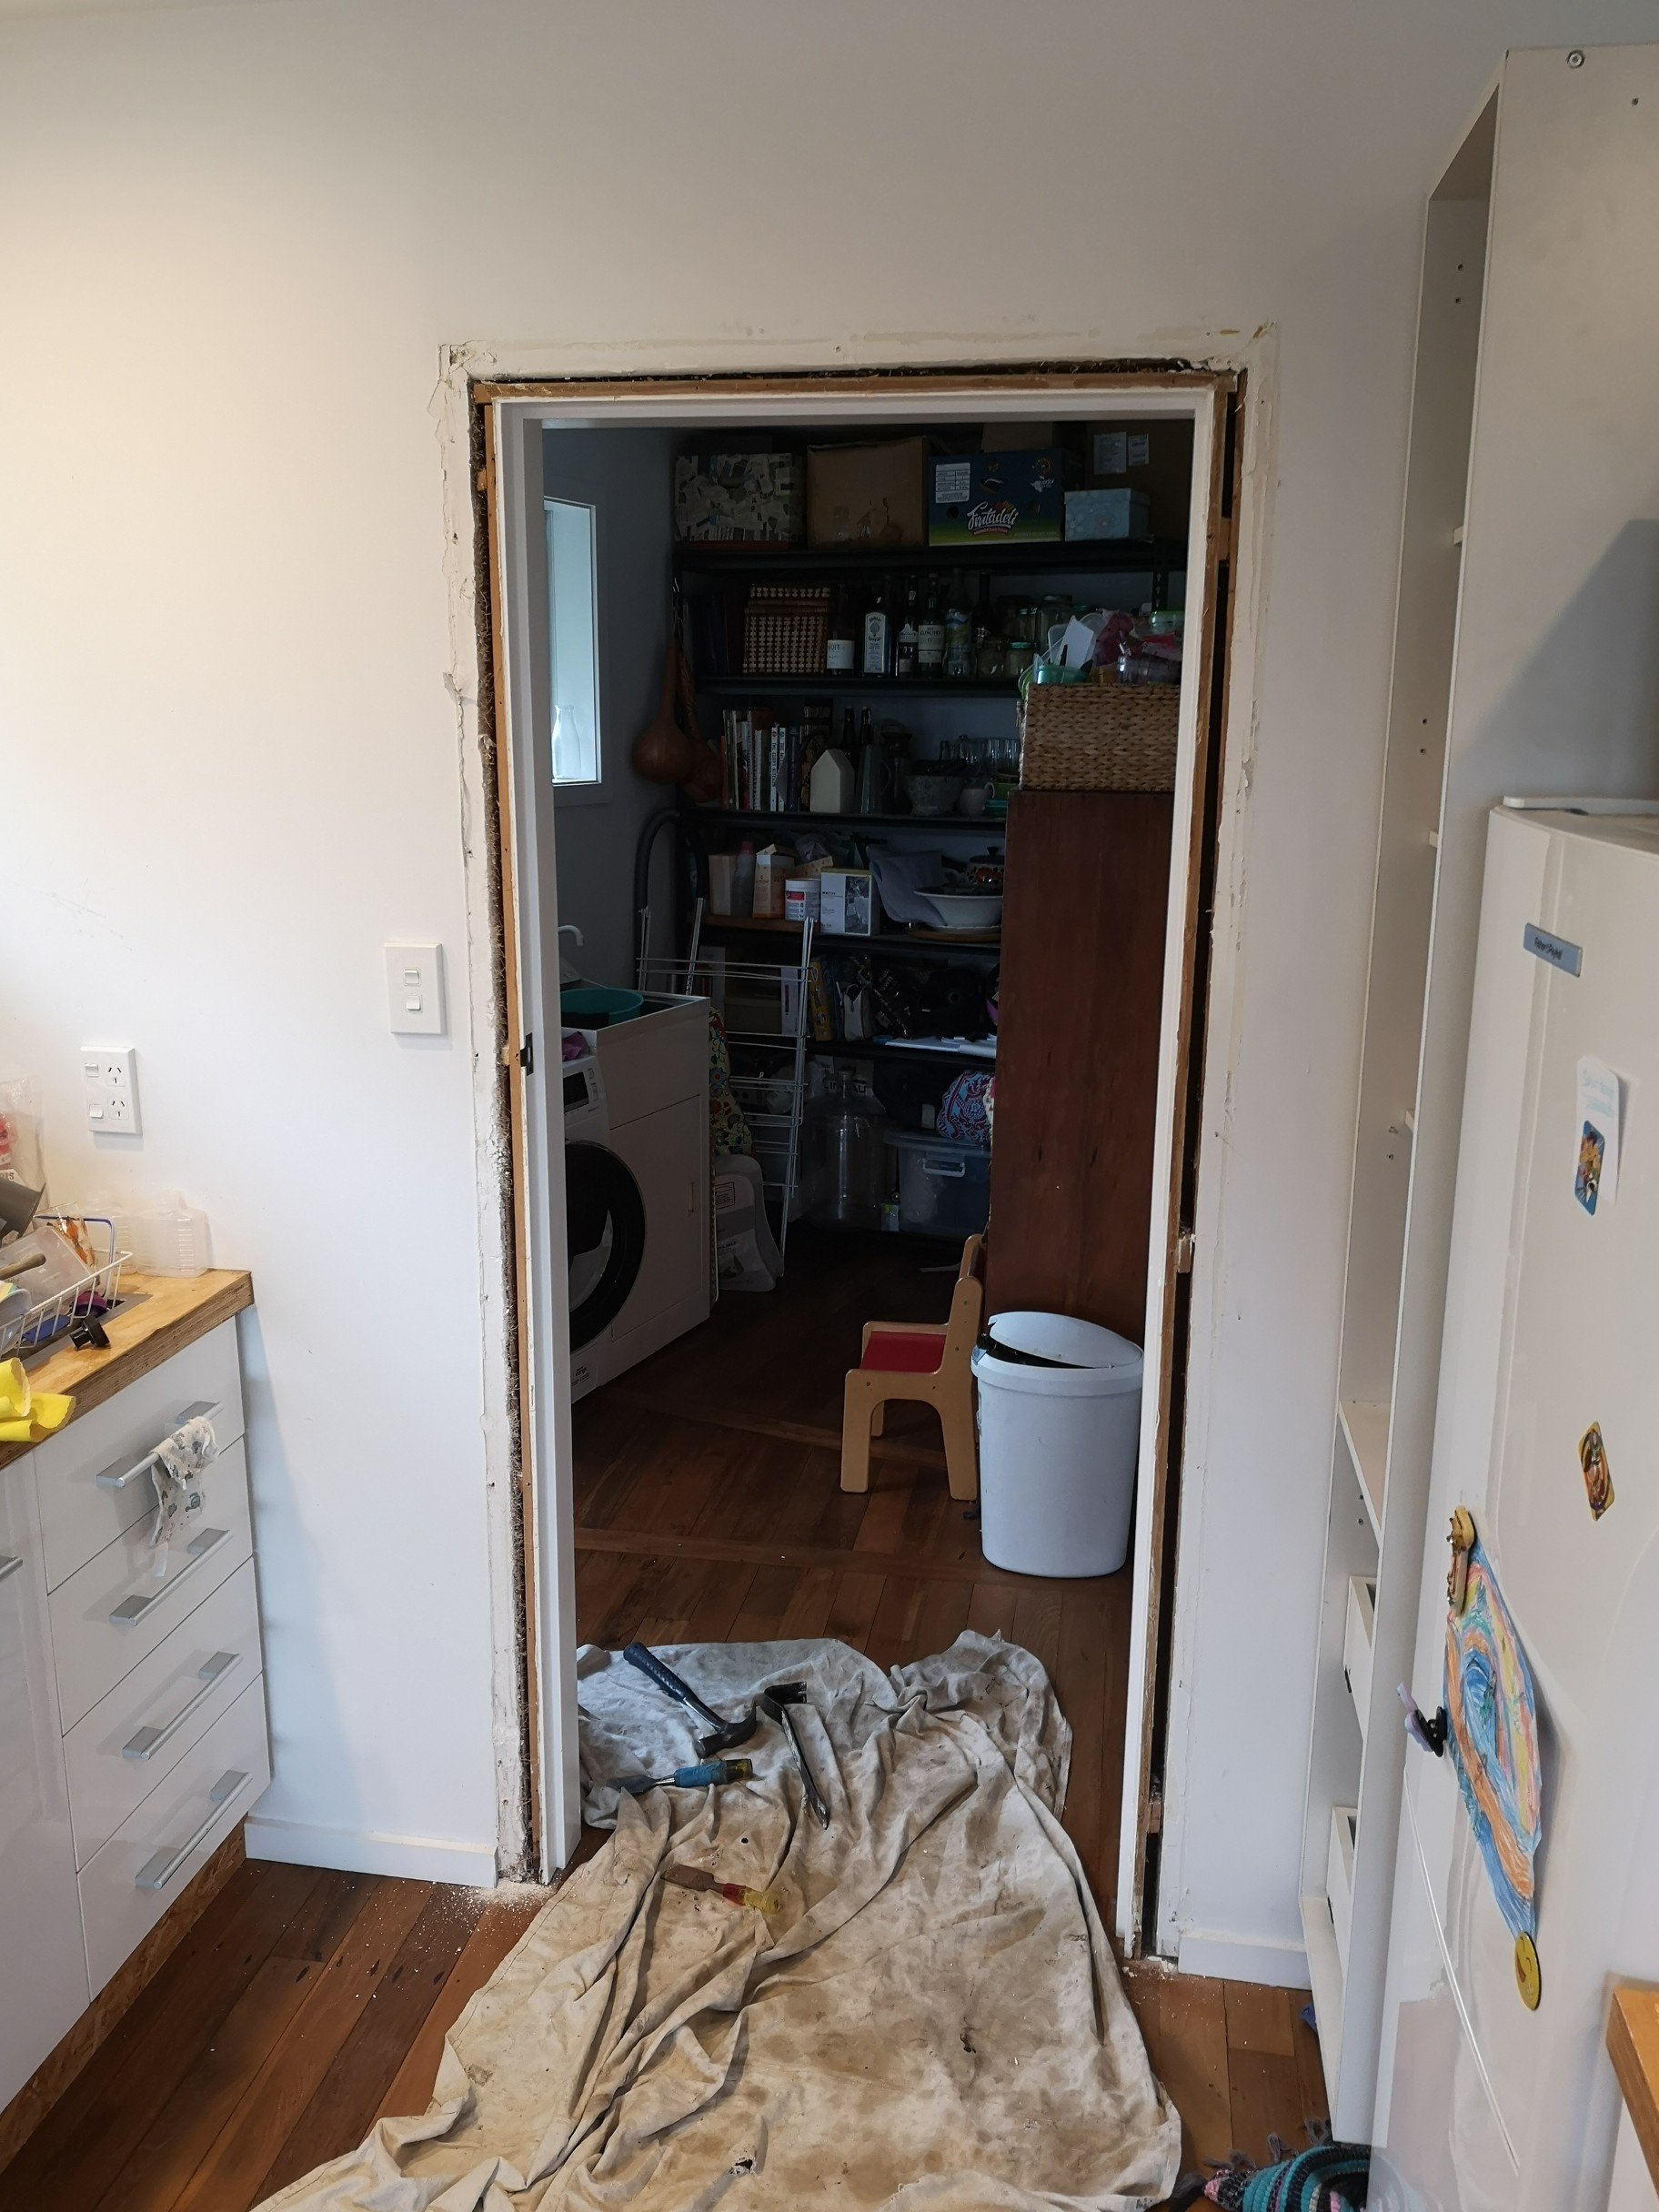
One of the jobs to do during lockdown was remove the door jamb and architrave from between the kitchen and laundry as we weren't putting a door back there. In hindsight we should have put a cavity slider in there when we had the chance but meh.. I really don't like plastering, specially small jobs. Coat of oil on the revealed flooring. Time for plaster.
1 point
-
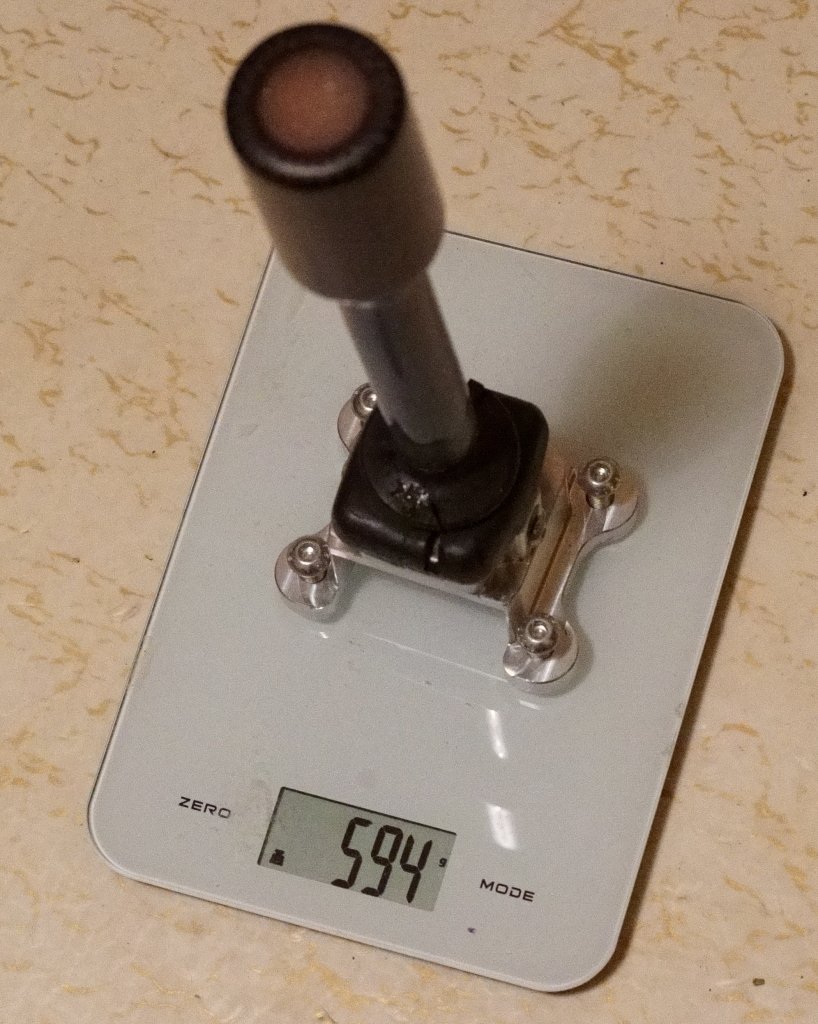
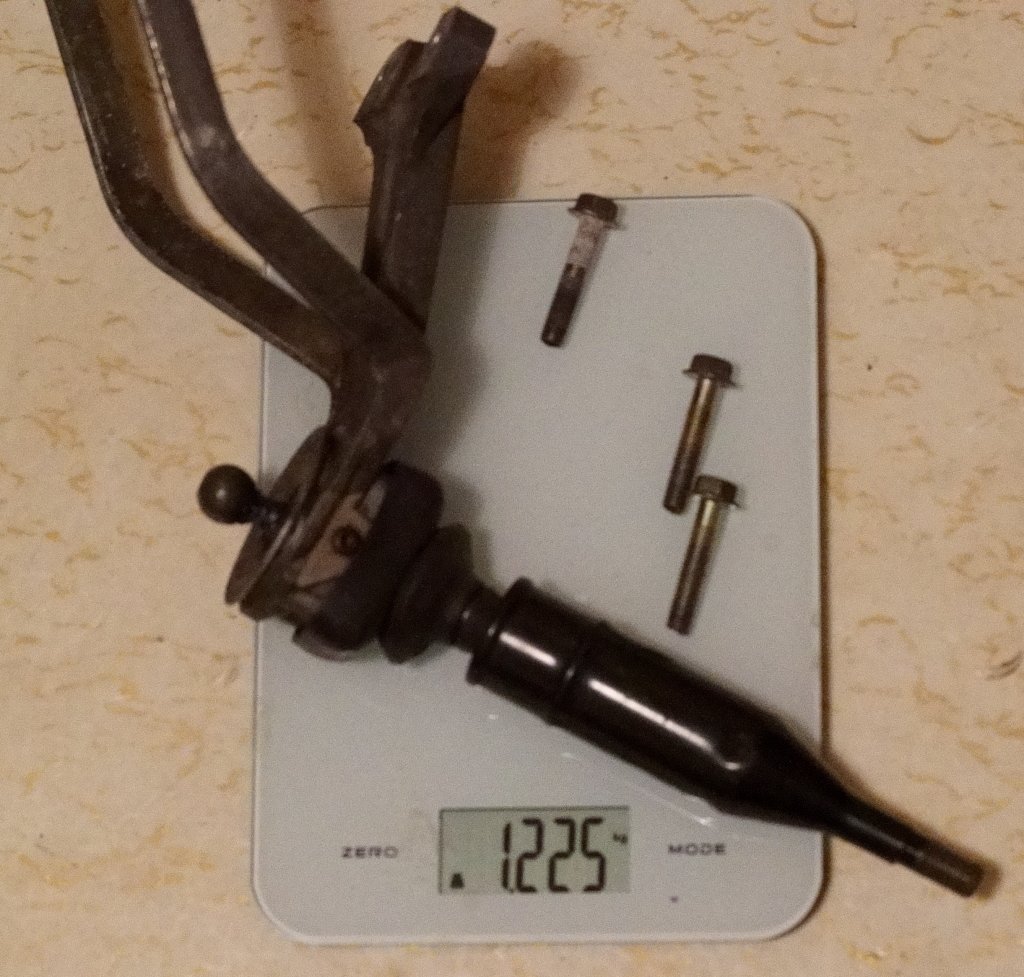
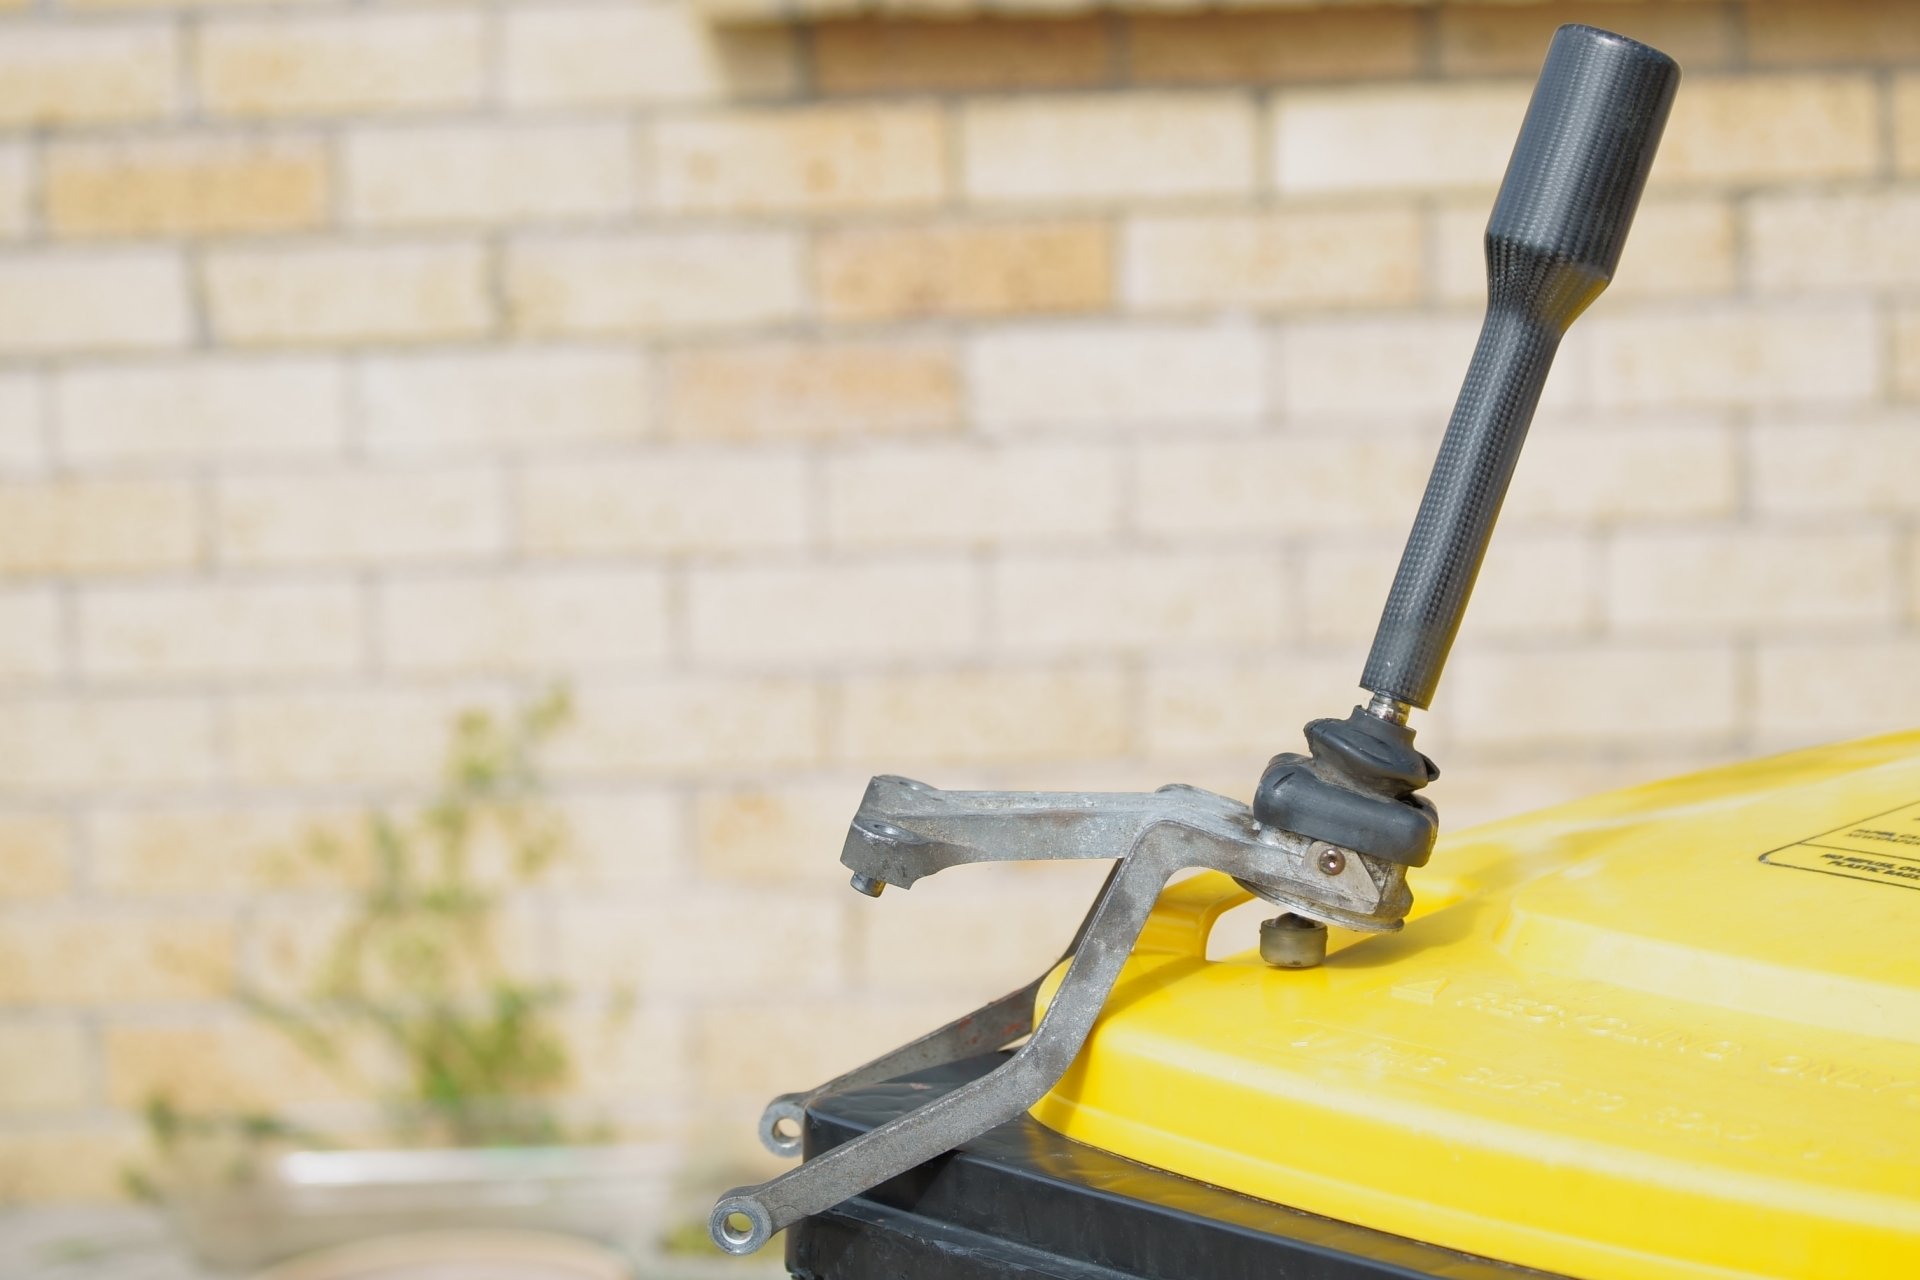
Some minor progress on making things a bit lighter and a bit fancier. Made a new shifter with a 3d printed dissolvable inner and some carbon sleeve. Turns out nice this way because there are no seam lines like you get with flat sheets. I was grizzling about how that bottom bracket seems heavier than it needs to be too, but then I remembered I've got the SQ Engineering relocation kit thing so that gets replaced too. And then to the most important part of anything I'm involved with, max effort for negligable differences and pointless graphs: I couldnt find the old gearknob but I think I remember Nic saying it was about 60 grams. and missing one of the bolts which are 20 grams so around 1400 all up. "That's fine dave, thanks, I can see difference from the pics" No, no, I insist Also bought a brand new OEM Silvia 6th gear kit finally. Looking forward to those sweet sweet sub 3000rpm cruising speeds... What fuel economy dreams are made of. Still no progress on getting a new shed built before I can do any major stuff needed, so probably a few other random additions like this in the meantime.
1 point
-
Yeah never buy any body work gear from the auto chain stores, they just sell you crap and don't give a fuck. Go see you local auto paint shop get something like evercoat (lite-weight or rage) its the shit. With the good stuff you should get basically zero shrinking, sands like a dream and no pin holes.1 point
-
1 point
-
2k white will be cheaper than spray cans1 point
-
A good quality rattle can job will last years. Did one of my front guards in 2016 and it still looks perfect apart from a couple of stone chips1 point
-
Turns out all the links have shit themselves for some reason, nevermind. Anyway, all this bullshit has me pretty up and down and generally a bit upset in between the occasional moment of optimism. I haven't seen the car since a week or so before lock down, and even though I might not have done anything on it anyway under normal circumstances I thought I'd go through my phone a bit and see what I had, just as means of trying to cheer myself up. I haven't updated much here, but this is the engine bay, it has the loom in it in this photo with much thanks to Stu, Nick the Spraky and Sheeper. 20200307_203640 by Richard Opie, on Flickr I'm a bit hopeful I might be able to spark it up not long after we're allowed out again, it'd make me pretty happy to do so. KP61 Phone-11 by Richard Opie, on Flickr The brakes also work on it, the handbrake works, the body loom works (headlights etc), Lewis has the new front seats to trim and soon I'll ship the back one down. It has some cert compliant wheels and tyres on it now, and Clint even came and gave it a wee pre-check over just to ensure I haven't made any totally glaring oversights. So overall, notbad.1 point
-
1 point


.jpg.3c4e1b50c7c5424d7266f66ce10aa1d3.jpg)


This leaderboard is set to Auckland/GMT+12:00