
Leaderboard


Popular Content
Showing content with the highest reputation on 09/21/20 in all areas
-
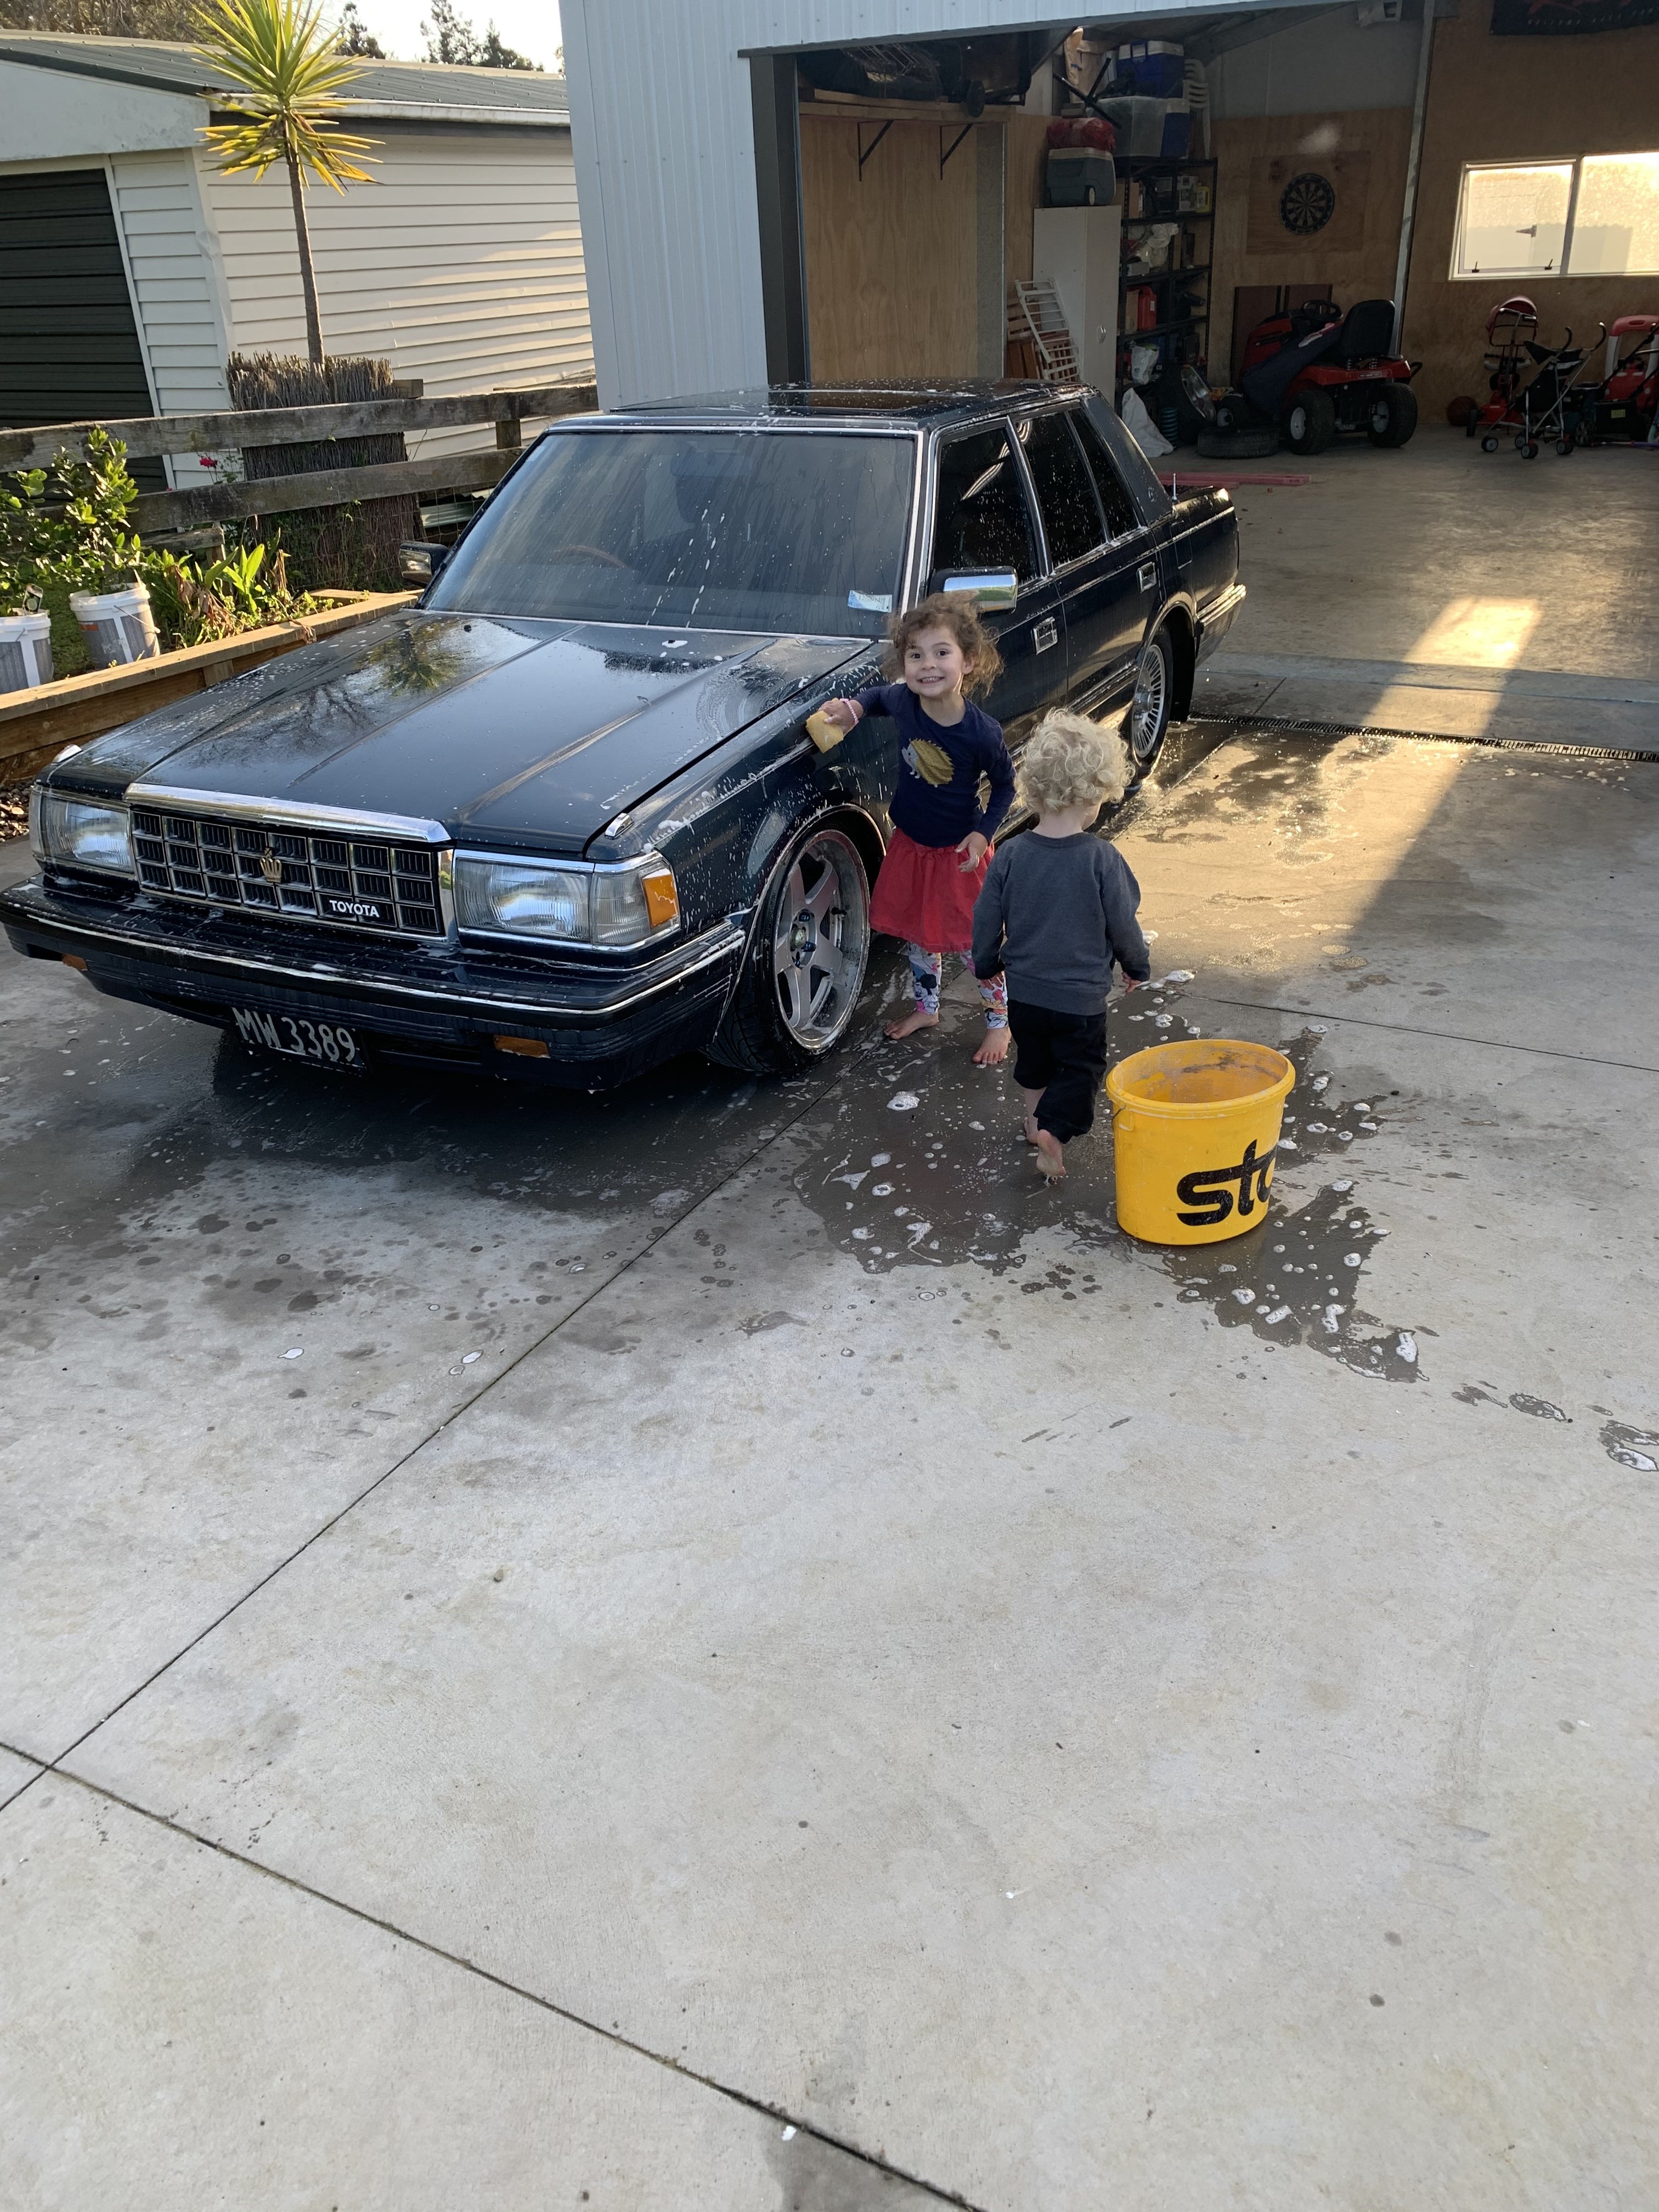
Alright mumma never raised no quitter after alot of perseverance and some fresh eyes weve got it going! Thanks to everyone who offered ideas. So I had the ignition side of the wiring all re done with new relay. The dizzy cap was giving shit spark to #1 Bought a new dizzy cap and rotor Took all plugs out cleaned up still no go. Turns out a rogue plug wasnt giving consistent spark so replaced all plugs and checked resistence in the leads which all were fine. It would start up fine but when getting warm it would start to run like a bag of dicks.. over fueling and smoking like no bodies business.. Started looking at carb videos thinking I would be replacing the jets/adjusting floats I noticed in the videos their choke was fully open at 180 degrees and mine wasnt... no where close Heres a pic of when the engine is warm and the electric choke fully open.. Pretty sure suppose to be more like this anyway after rotating the cap when engine was warm to keep it fully open it ran great! Few trips up and down the street no hesitation or bogging down and buggar all smoke!! Drove up and down the road half a dozen times noticed temp guage rising so put it back in shed to give it a once over - boiled thermostat it didnt open so I'll grab another tomorrow. Sump still leaks so I'll need to remove motor to goo up sump gasket proper. Then wof7 points
-
Forgot a shifter linkage bracket bolted up to the trans pan. The original had an L shaped spacer plate on the thin steel pan... I won't need that with the thicker alloy flange, but the bracket fouled the welds on the alloy pan, so I filed some off it... And fits ok... It looked heaps thicker and I was worried it would throw the alignment out, but was only 3mm more than the original so should be fine... And realised I'd left the engine plate and flywheel off, so lifted it off the stand, was happy to do this as I'd forgotten to grease the tube and it was a bastard to rotate... And scrubbed the surface rust off the plate... And it cleaned up nice... So flywheel and plate back on, pretty much ready to mate up to trans when things are torqued up...6 points
-
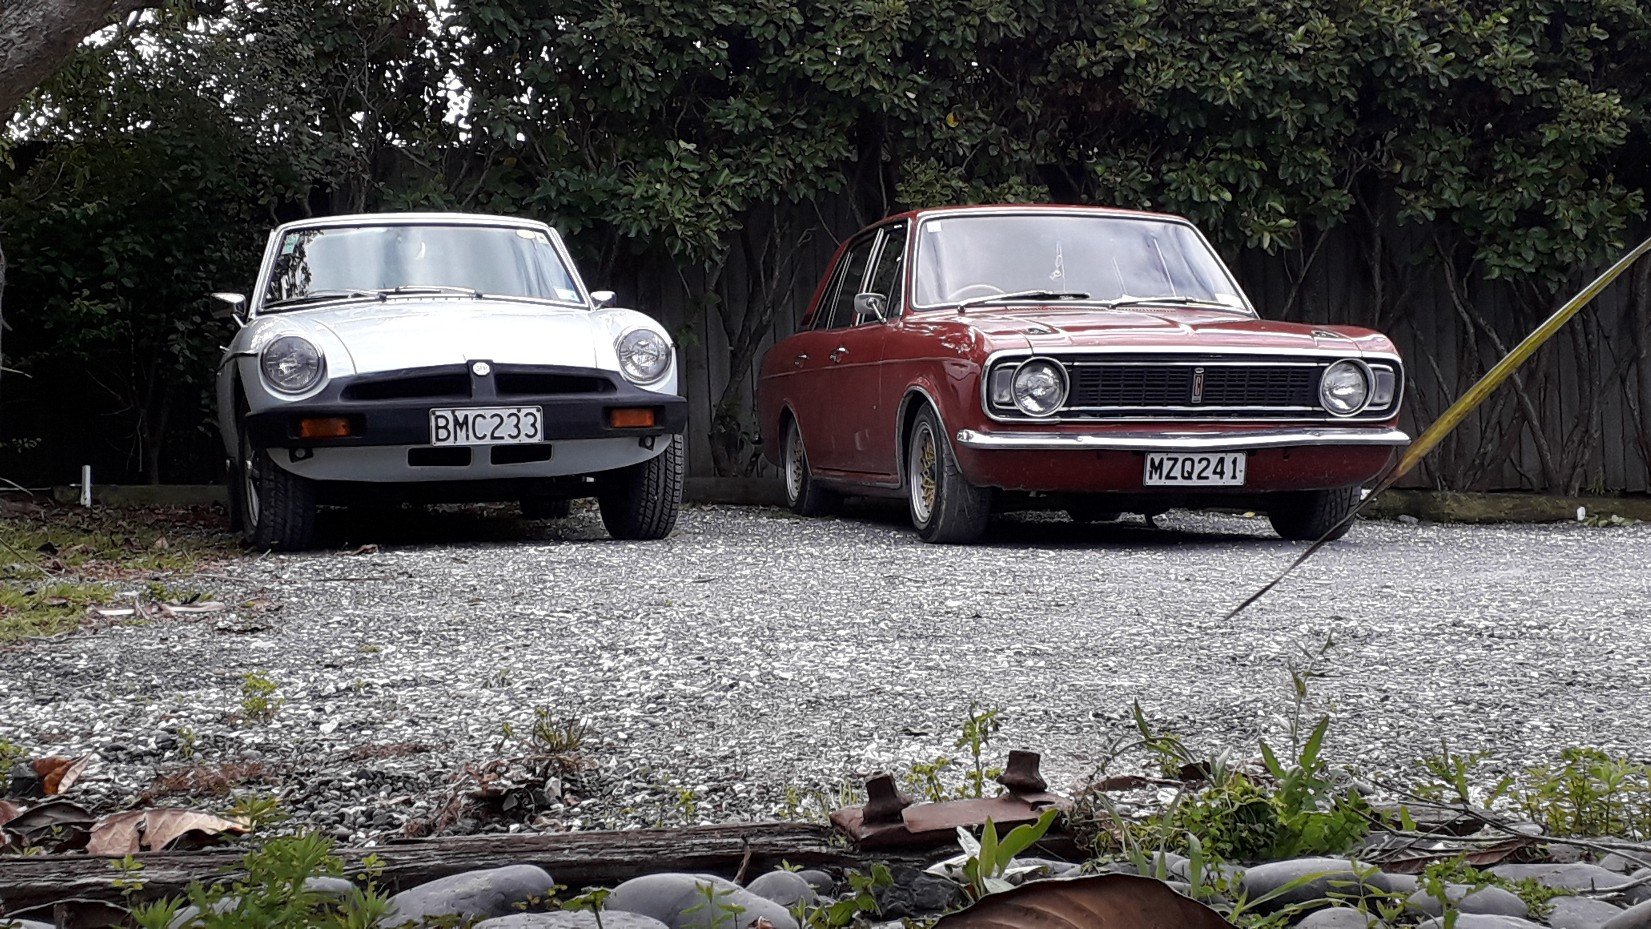
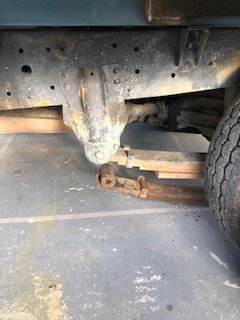
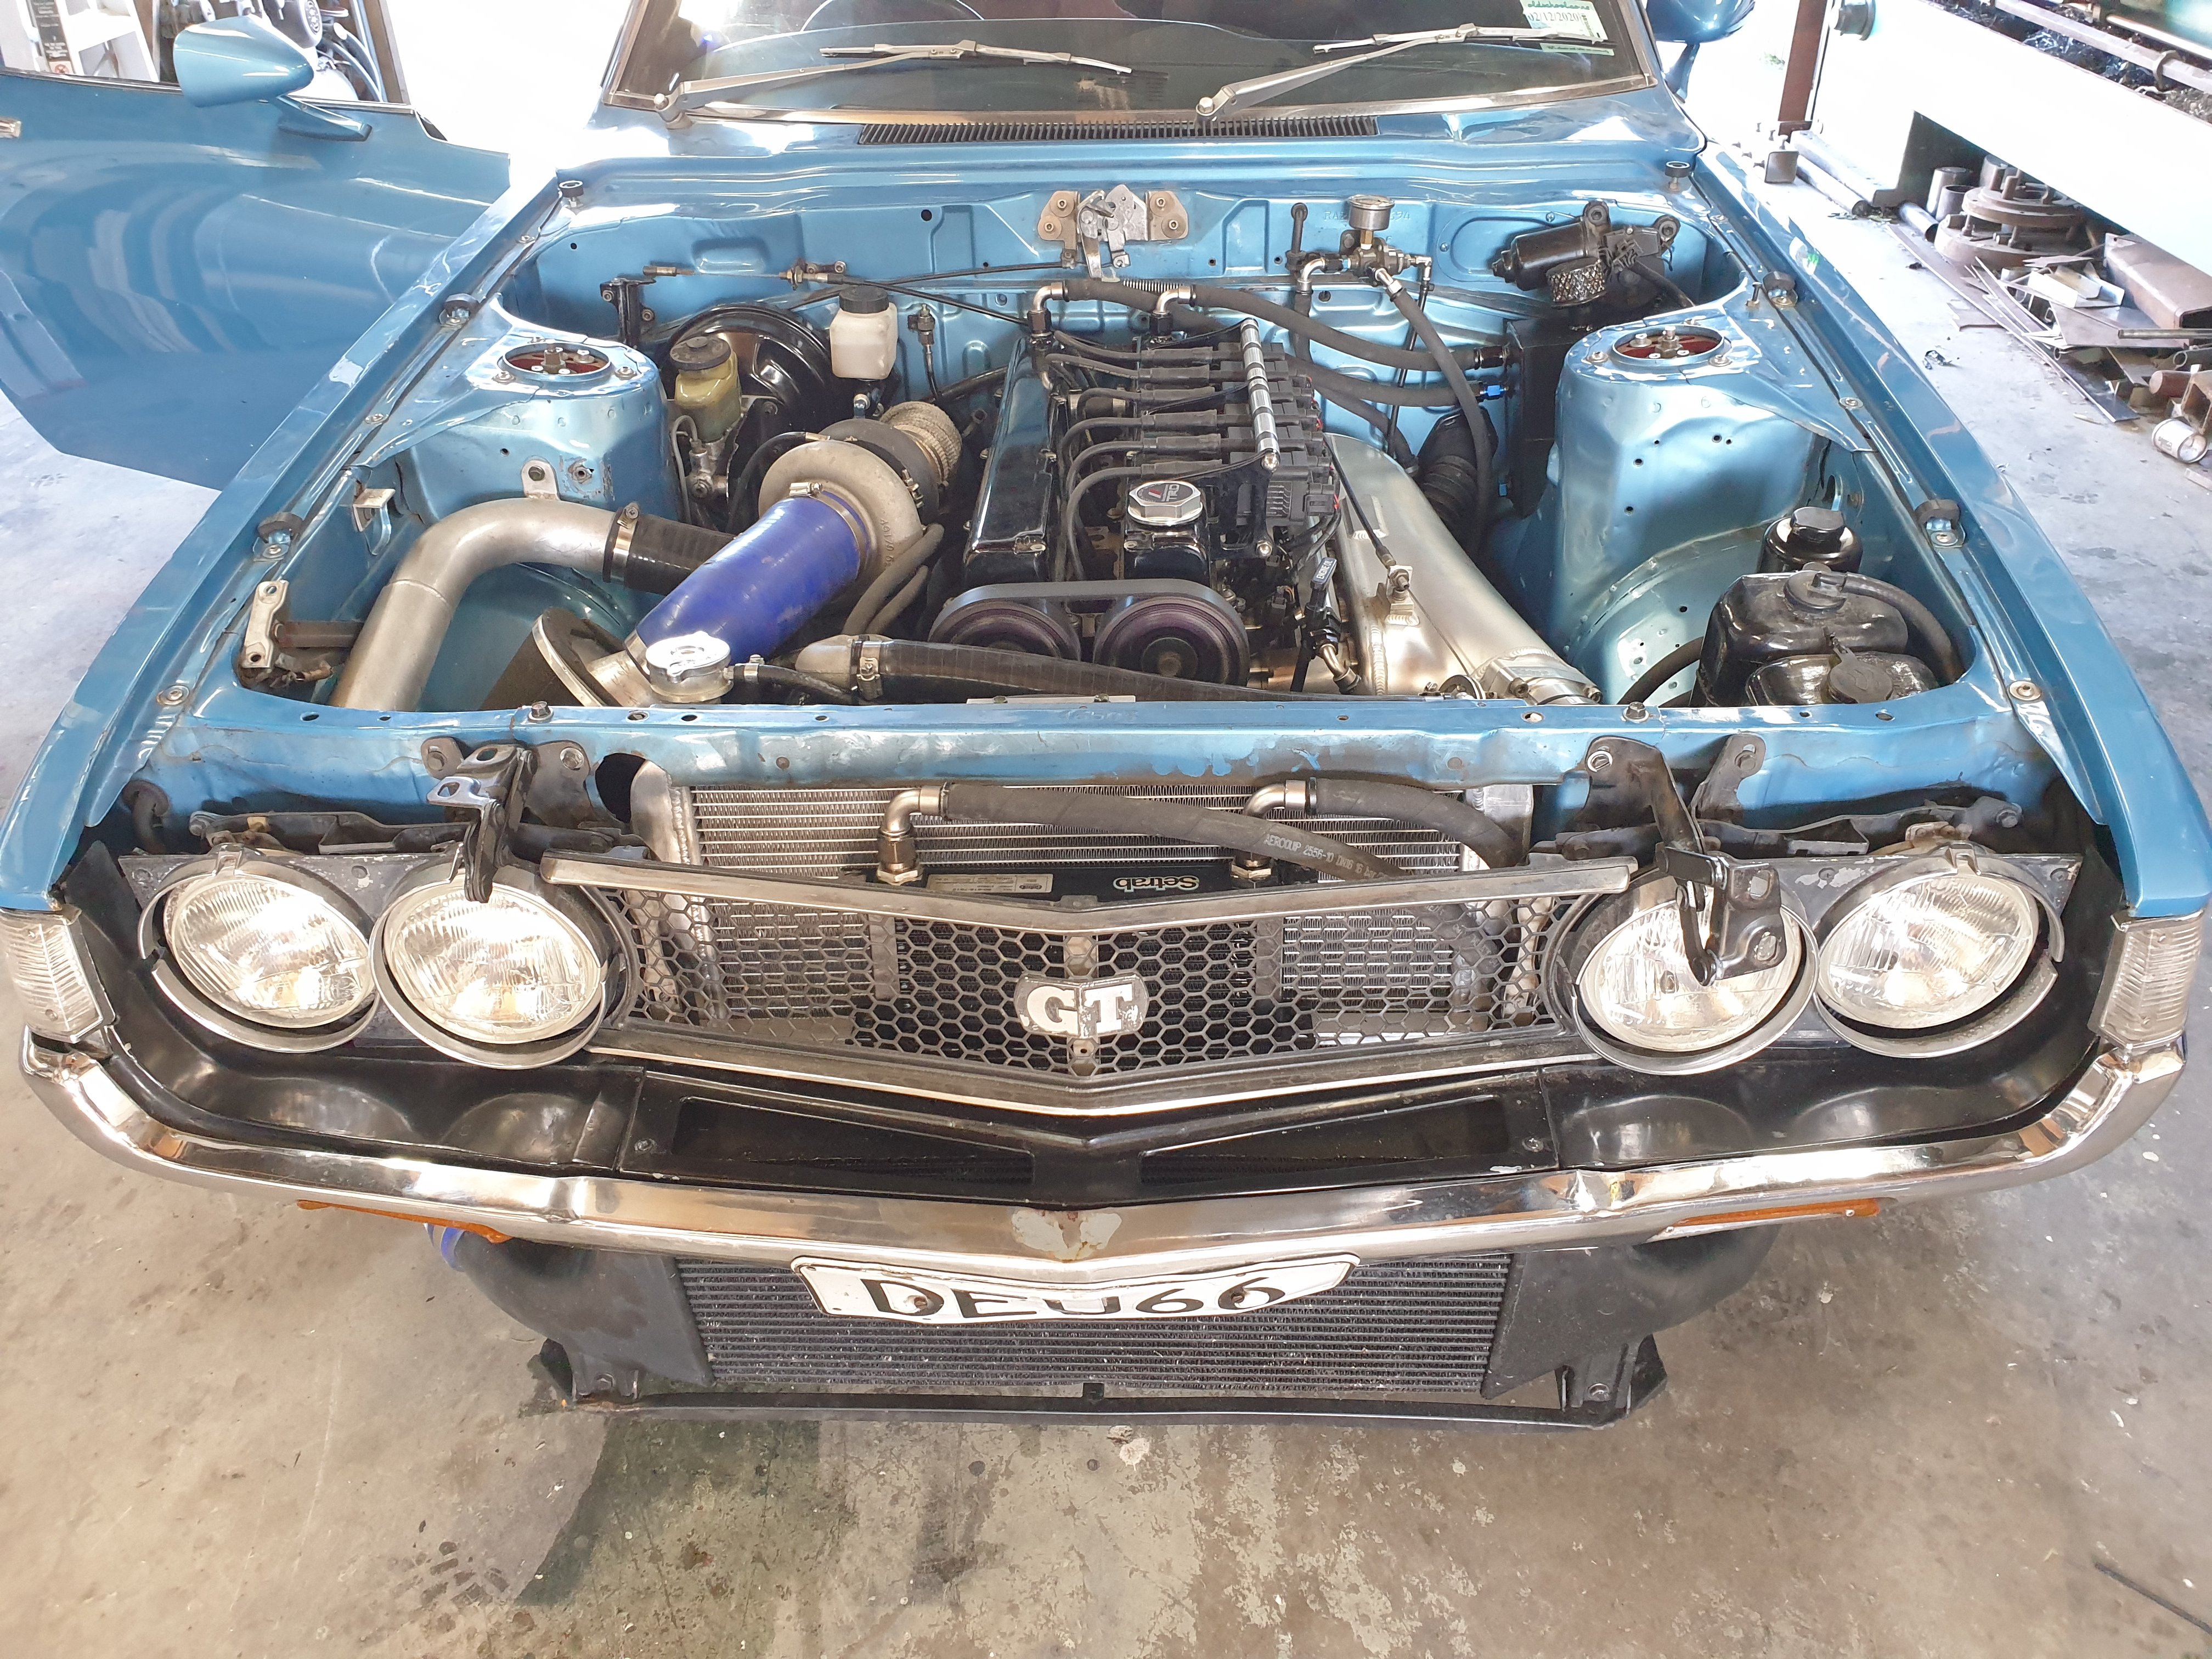
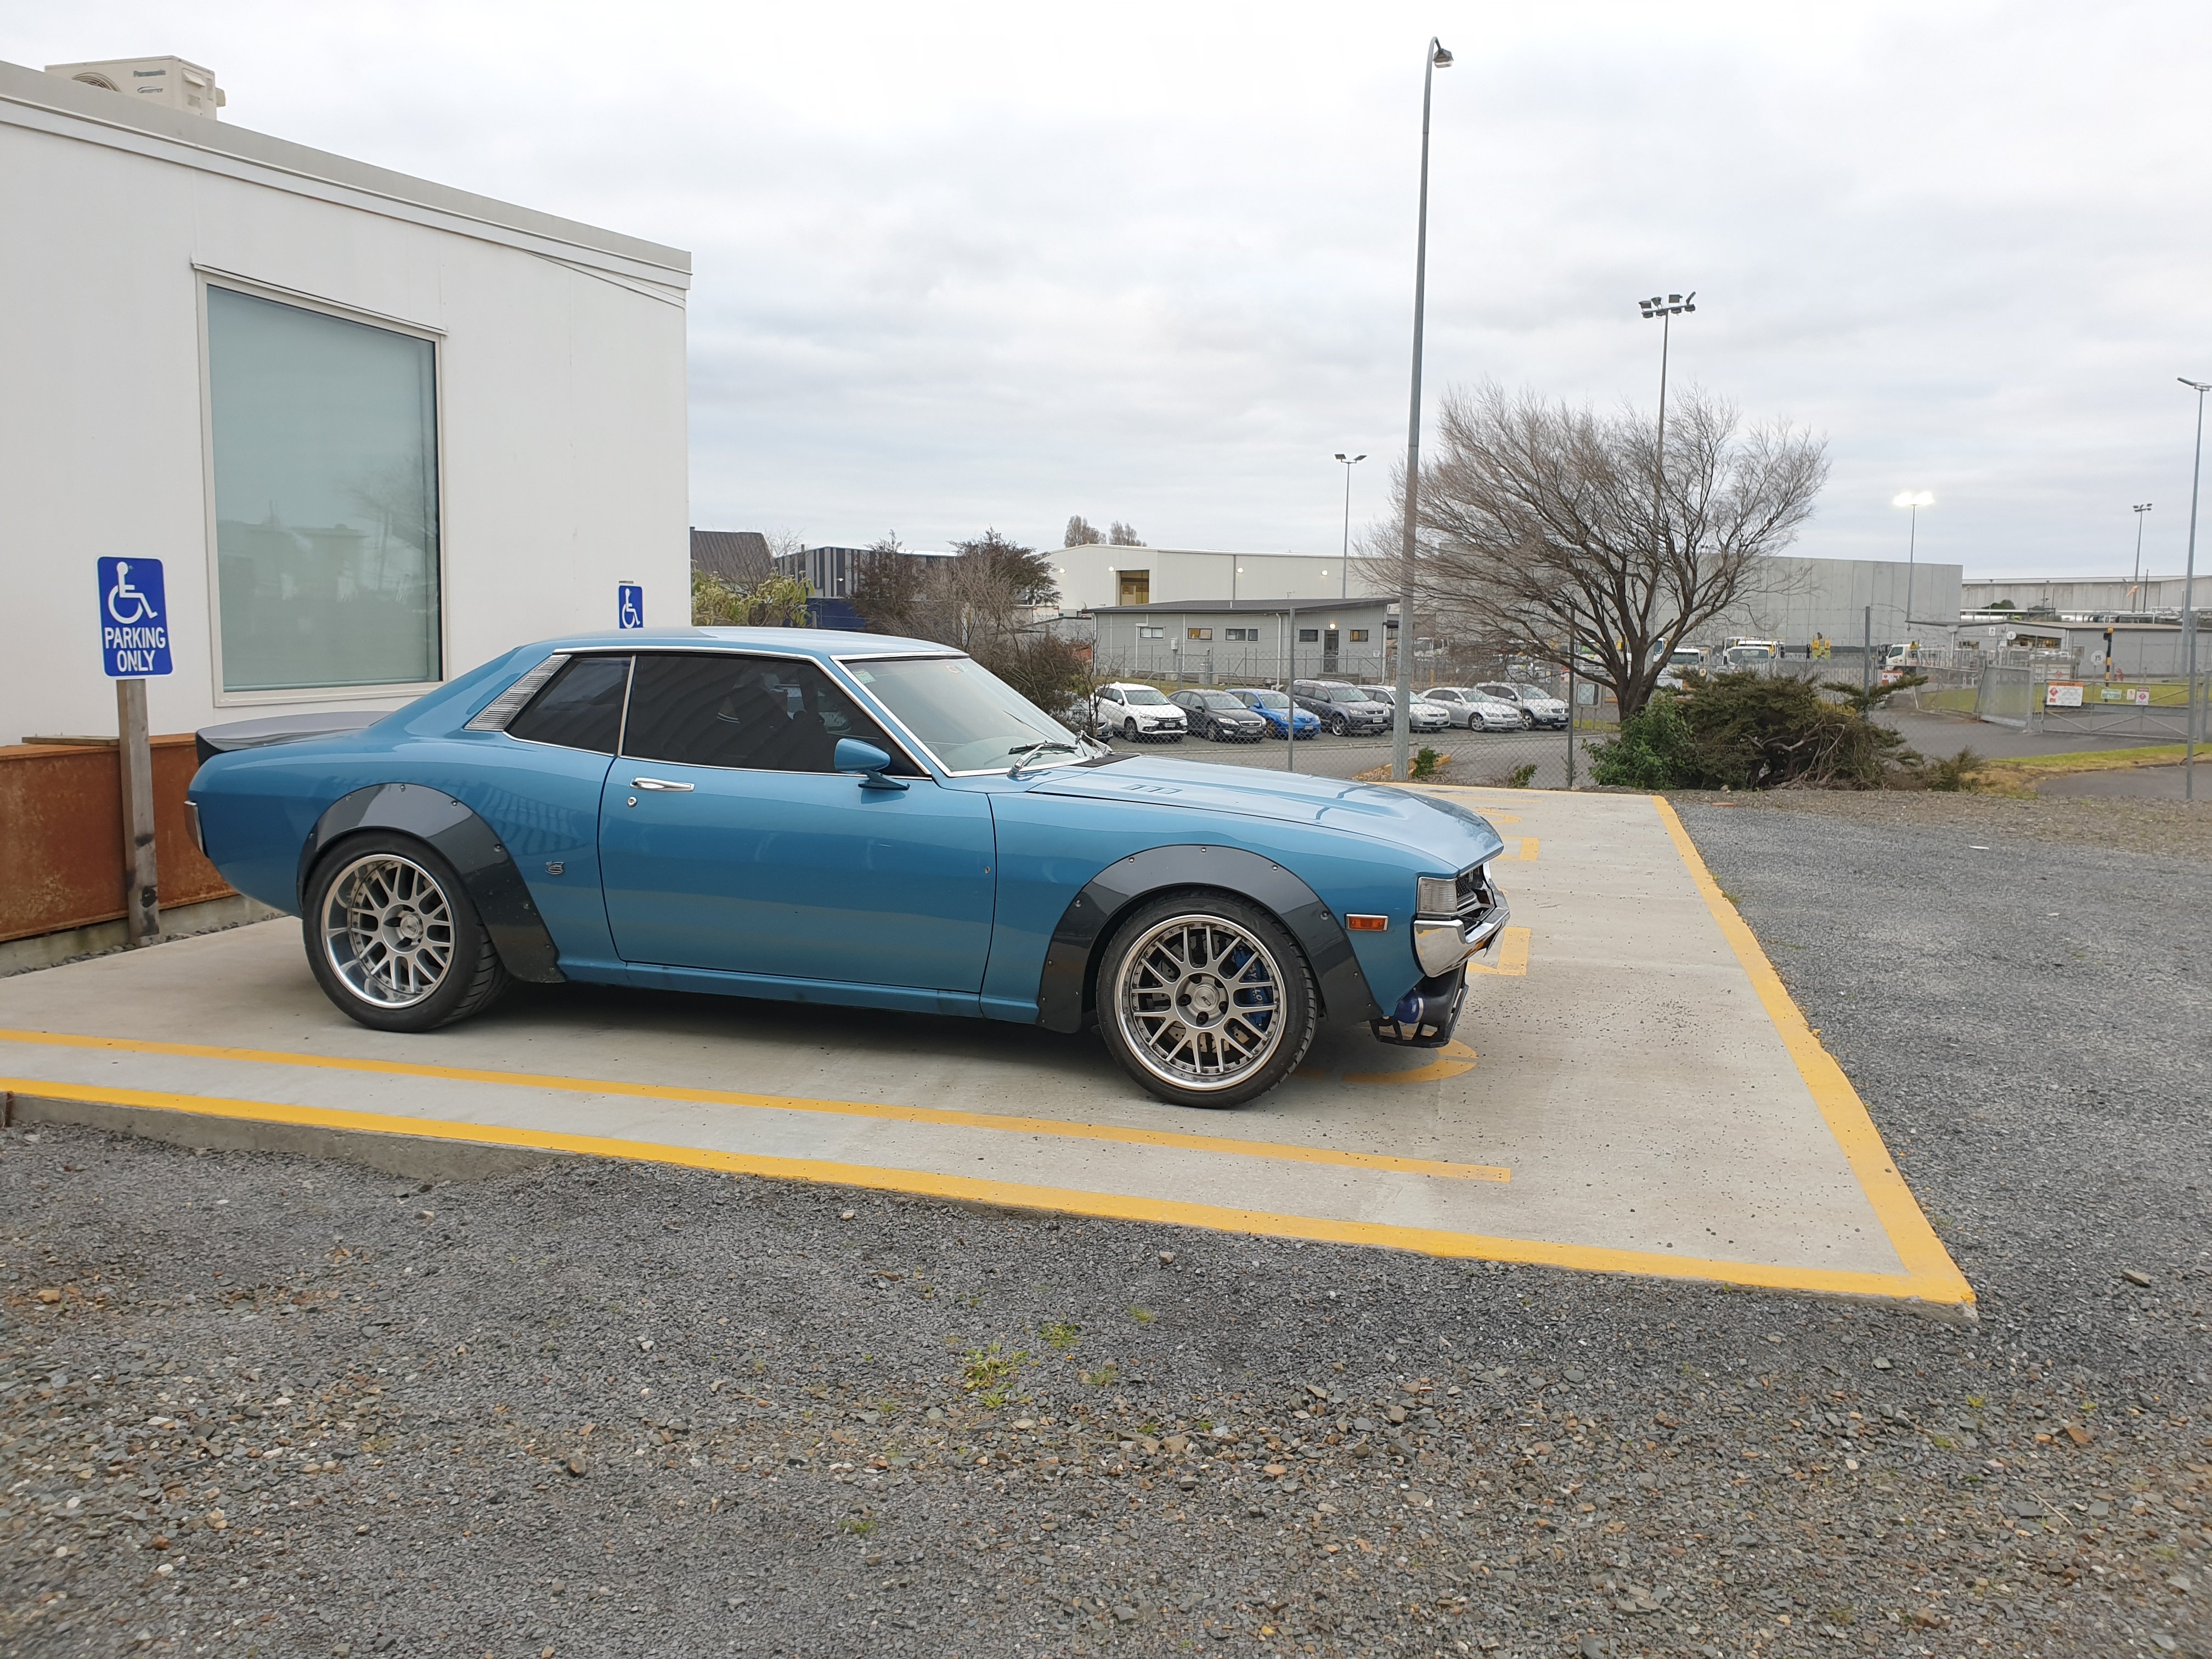
So sheepers popped around, we did a bit of a bolt check, clipped all the fuel and brake lines up and then the above happened. How cool. The tune is only very beginning stages so I couldn't give it any real beans under load yet, but ambling around on part throttle was super great. The brakes feel awesome, as does the suspension. Things to look at include (and this is for my reference): - fix/adjust clutch so shifting is hopefully easier - move exhaust to drivers side so muffler is away from rear passenger side wheel - resolve tacho and speedo not working - roll rear guards cos she rubs a bit - driveshaft loop - secure and install battery box - seat mounts (for lush lush lush new interior) - diff is noisy, change out worn CW & P for a good spare set I have - get it aligned properly That's really about it for the moment. Not bad all things considered, the only stock mechanical component on the car is the steering column and rack!6 points
-
From my economic point of view, whatever name brand is on 50% special at repco/supercheap at the time is what goes in.4 points
-
Rollercoaster weekend mate hah. I cant get the boot open at all. But yeah it looks like boot, rear panel and drivers side light at this point. The bumper has moved but hopefully its just the mount has bent. No idea if the boot floor is damaged. Yeah hes been in touch, were all insured so hopefully itll all get fixed easy enough.3 points
-
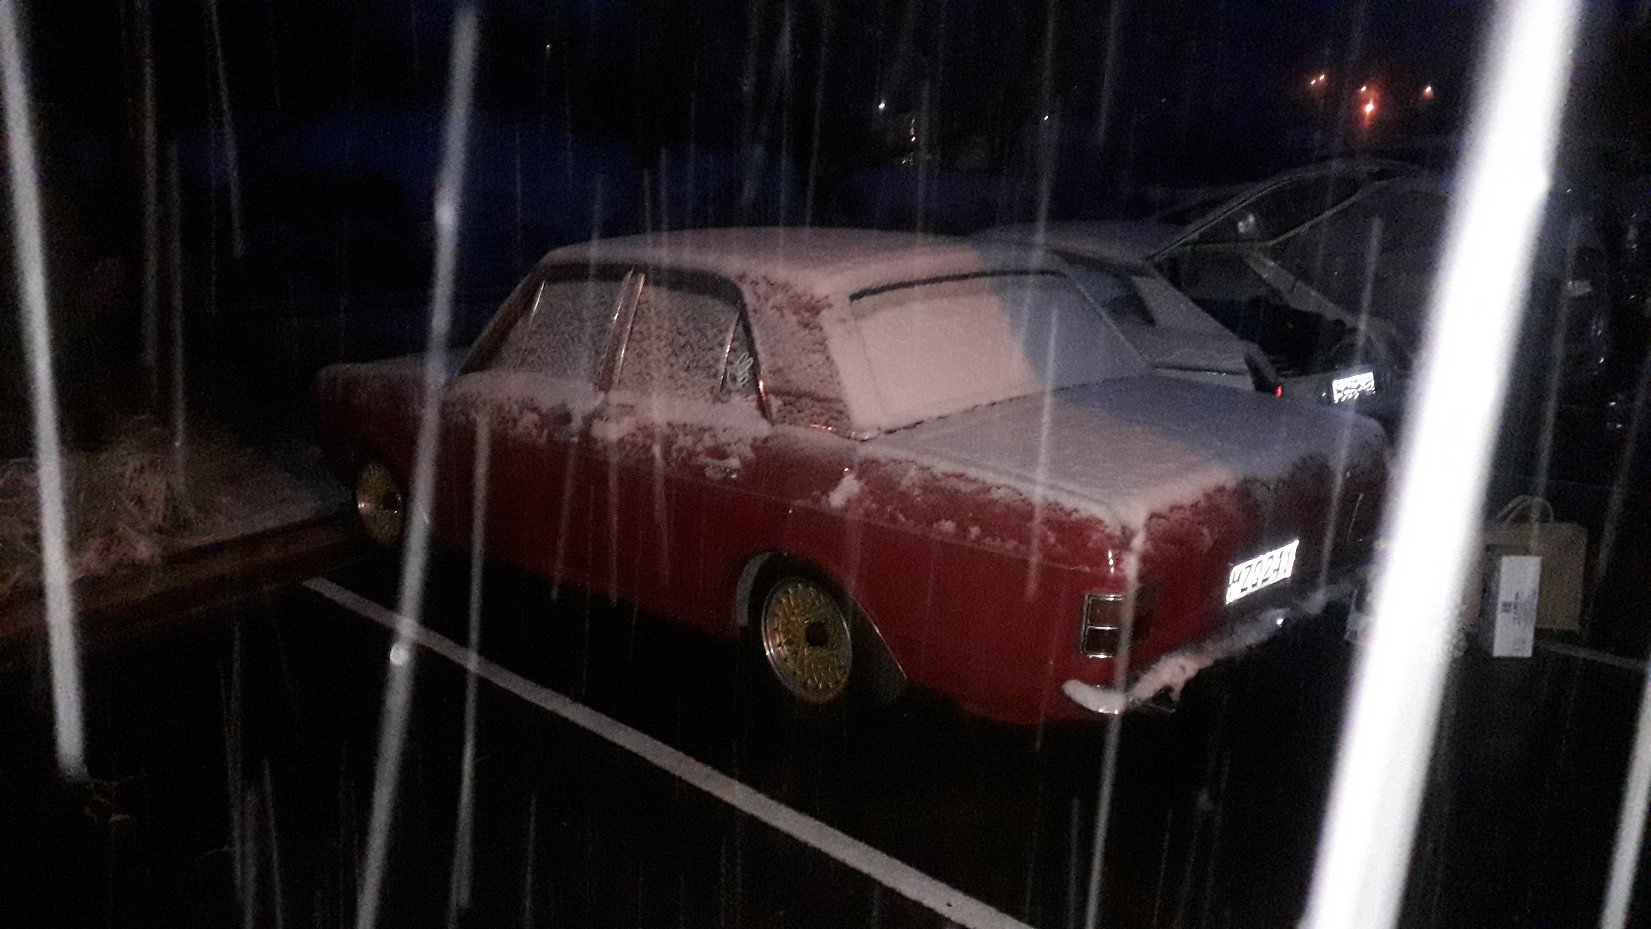
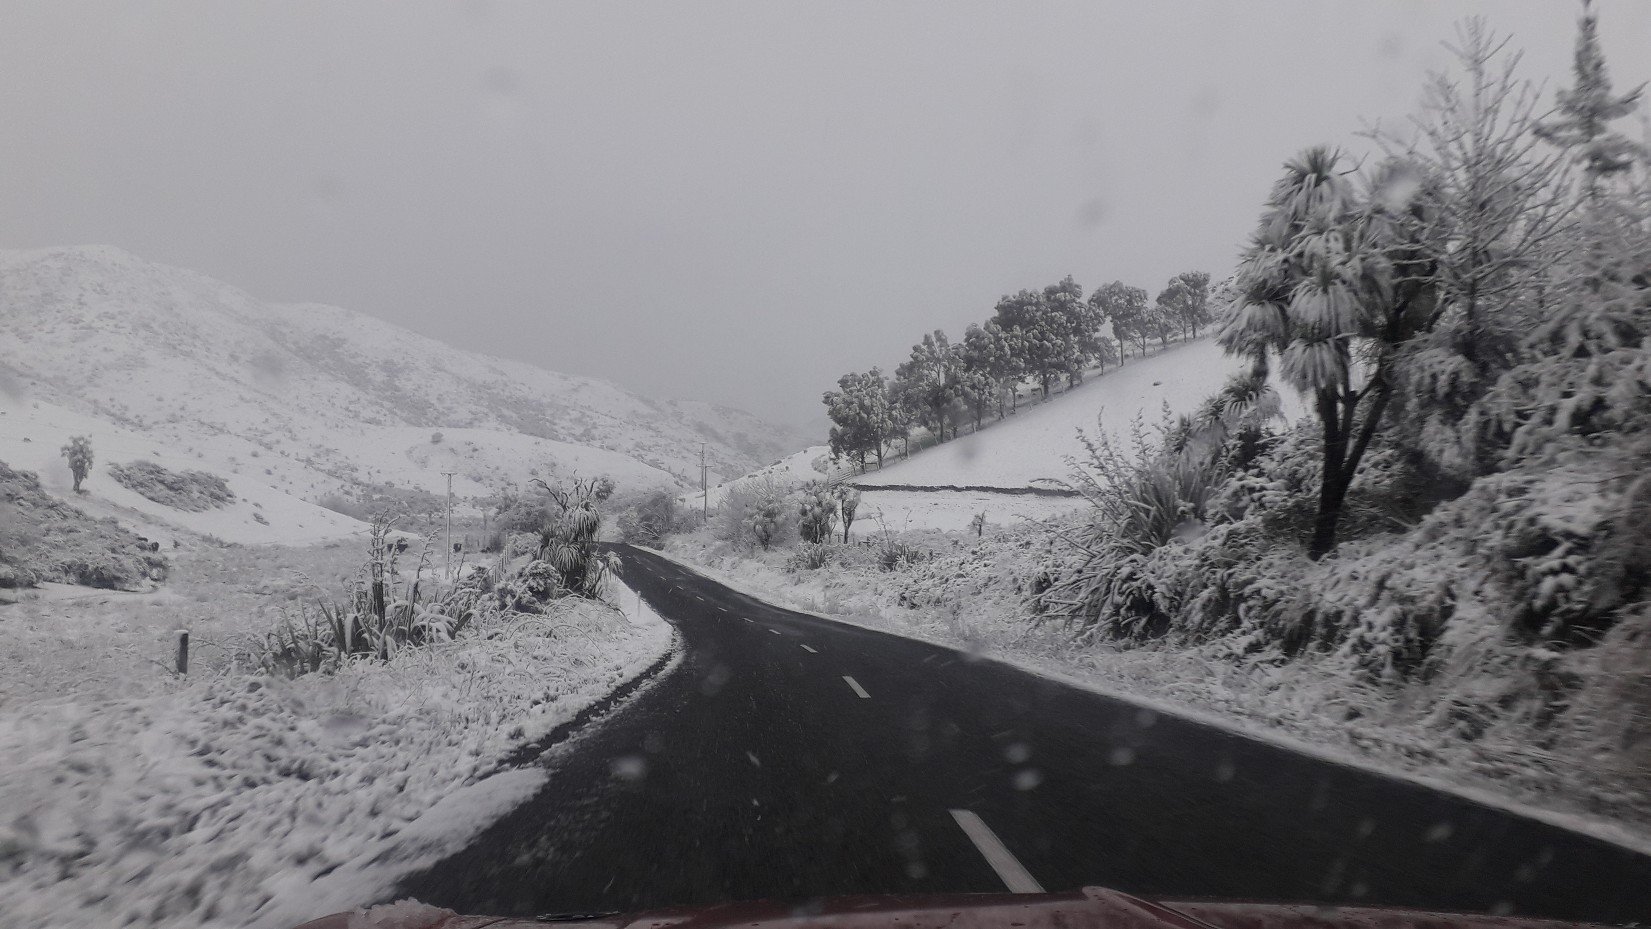
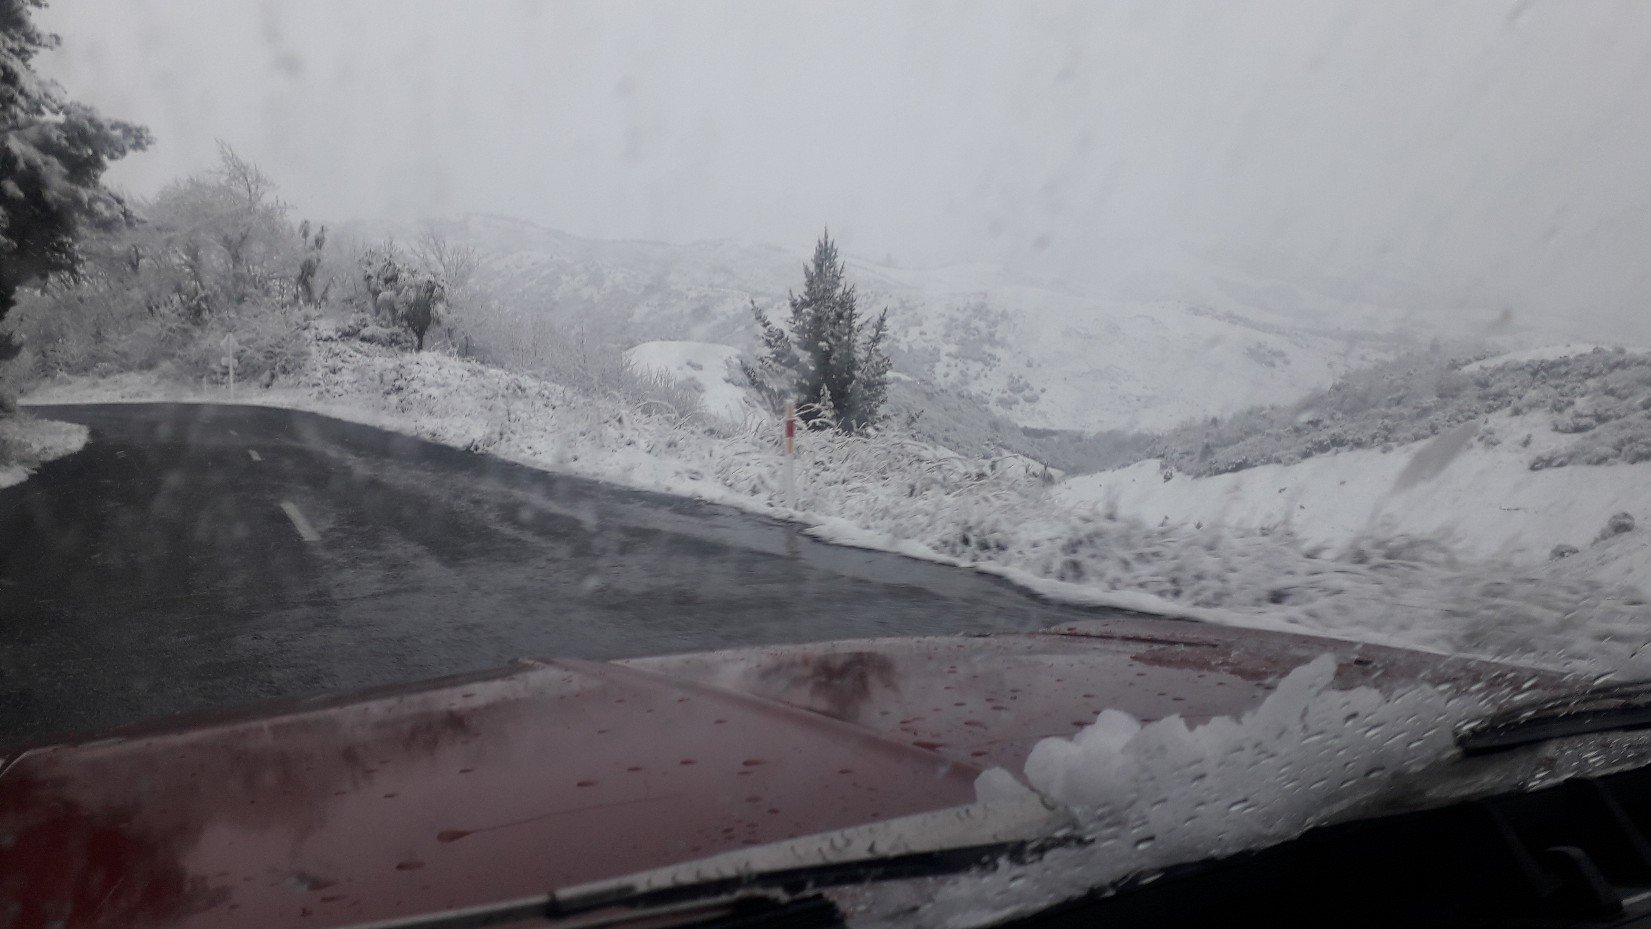
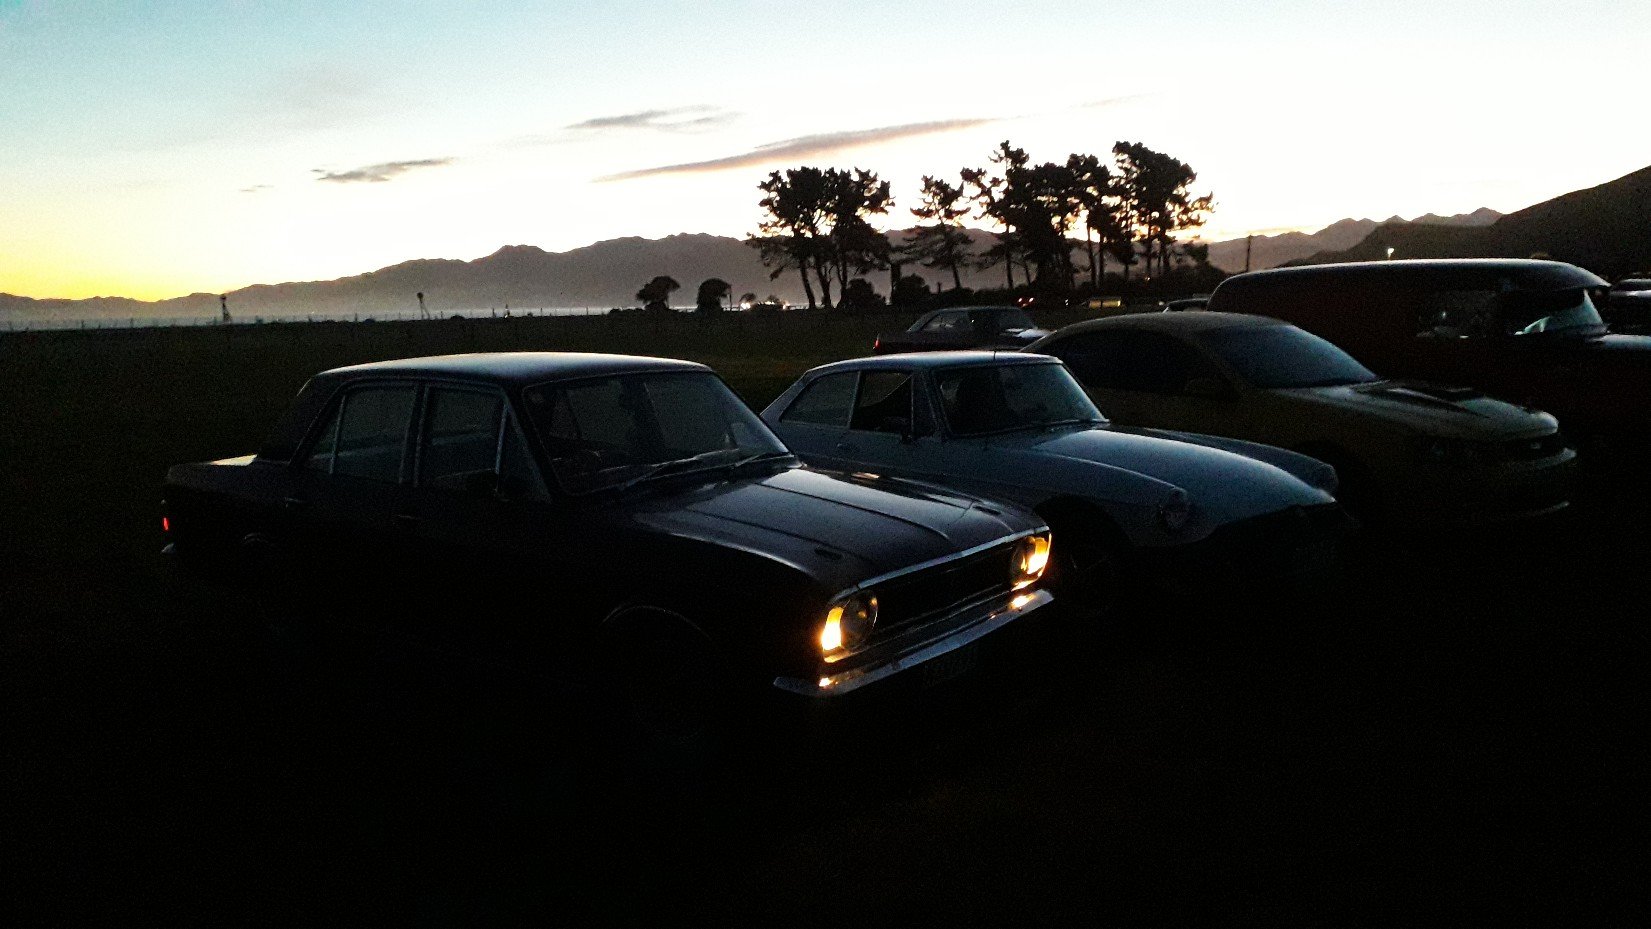
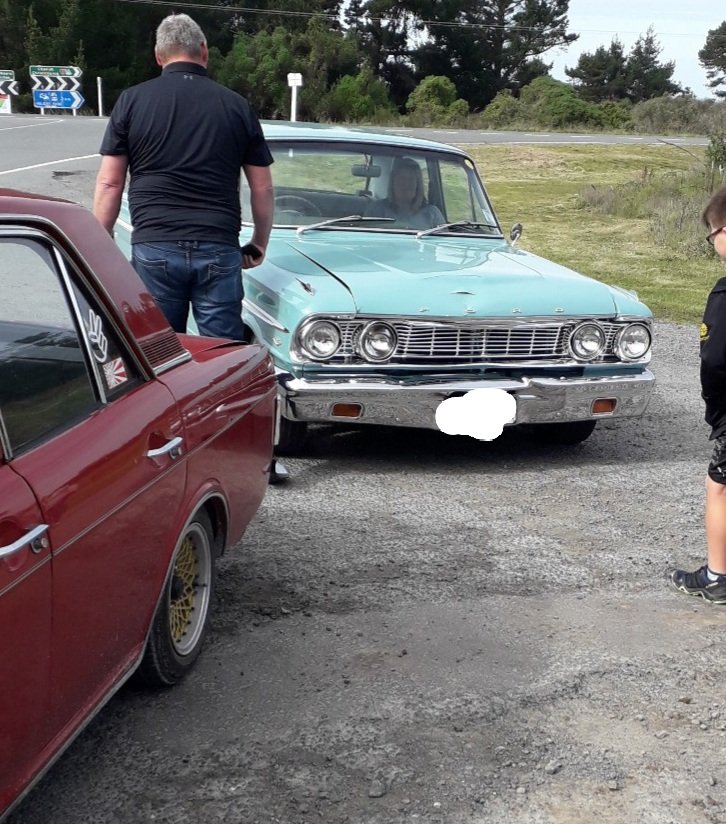
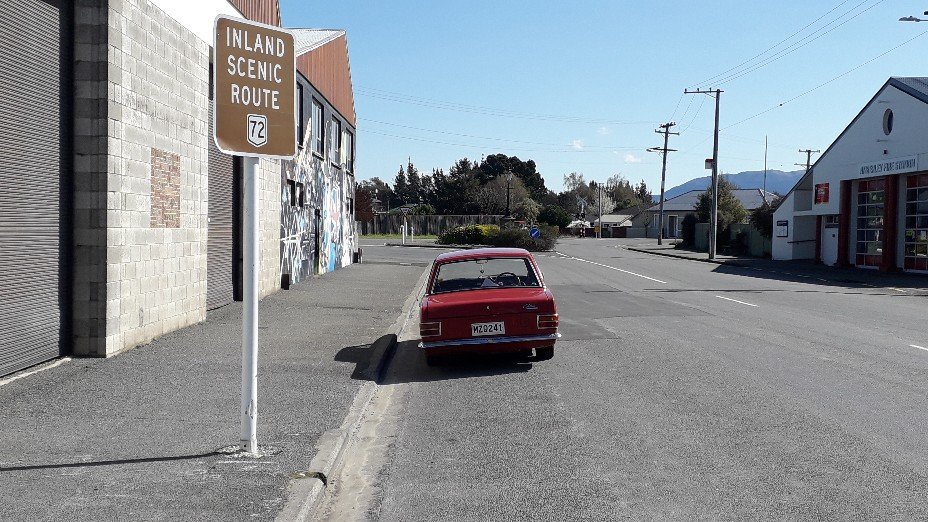
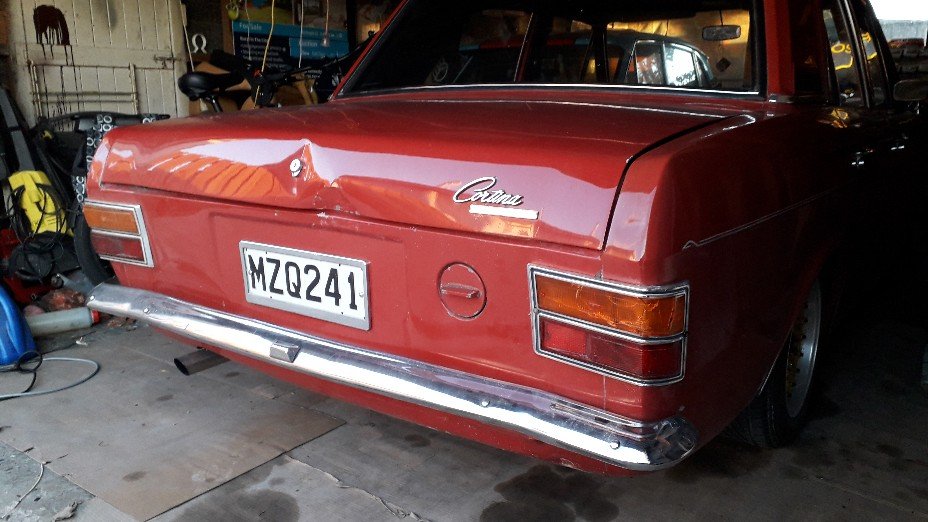
Faaar out what a weekend. We travelled to Hanmer on Thursday and woke up friday morning to snow. lol. That was good fun though tbh, there werent any scary moments. Kaikoura bound, feeling very underprepared. The Clutch master died on the way over. got lucky with the roadworks and managed to bang gears/ revmatch enough to get all the way into town without stopping once since leaving hanmer. i pulled straight into the caltex and spoke to the mechanic there. he rang round for me and tried to locate a rebuild kit but there wasnt anything anywhere he could find. i decided to try a brake master from a trailer, only as i saw one on the shelf at safe r brakes yrs ago and thought, hmm, that looks similar. turns out theyre identical. fuck yeah. shop across the rd had 2 in stock. the snow hadnt reached KK but the rain had, so i had 40 mins of getting wet and lying on the floor on a sketchy as fuck jack reching in through the wheel well to bleed it. but it worked. the sun came out after i'd finished because of course it did so we cruised the strip a bit until we could check in. Night time at south bay. then the sat cruise. I got hit, fairlane couldnt stop, smacked into a mini which then shunted me. the mini was badly damaged unfortunately. i feel really bad for the guy. i was pretty pissed off but did some stuff still, but mostly waited until the afternoon and parked my arse on the espalande with a box and watched the cars cruise. on the way home... The damage. FU! its been a pretty intense few days tbh.
 3 points
 -
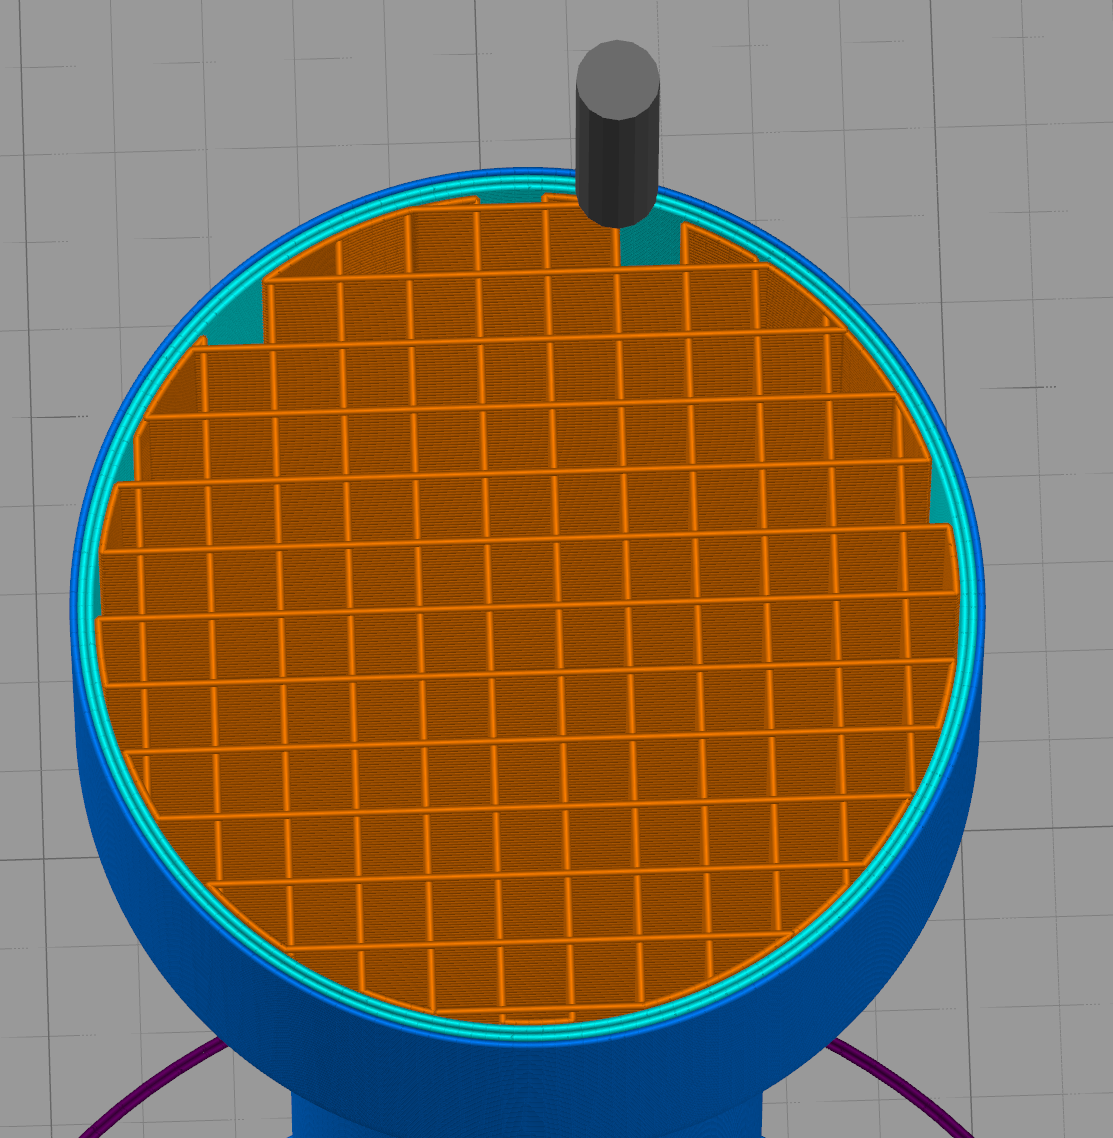
Man I am fizzing over this thing. I surfaced the table over the weekend so I had a decent base to work with. There was some dumbfuckery with the length of the cut surface as it was 40mm or so too short. It turned out my calibration was just wrong, what a dick. After I sorted that I then I realised that the odd misalignment at one of the corners of the bed was not a poorly cut bit of laminex, it was the belts moving at different rates due to different stretch. I sorted that tonight and then started cutting the vac table. I'm breaking it out into small operations so I can learn some shit about feeds. This is the vac inlet pockets; Come up good, those screw holes were routed too... I also set up spindle cooling as I didn't want to toast it, I bought some tube from mitre 10 and went redneck on it; This will get tidied up and made to run automatically a bit later.2 points
-
This stuff is the automotive equivalent to alison holst sausage rolls, keep making the packaging forever
2 points
-
2 points
-
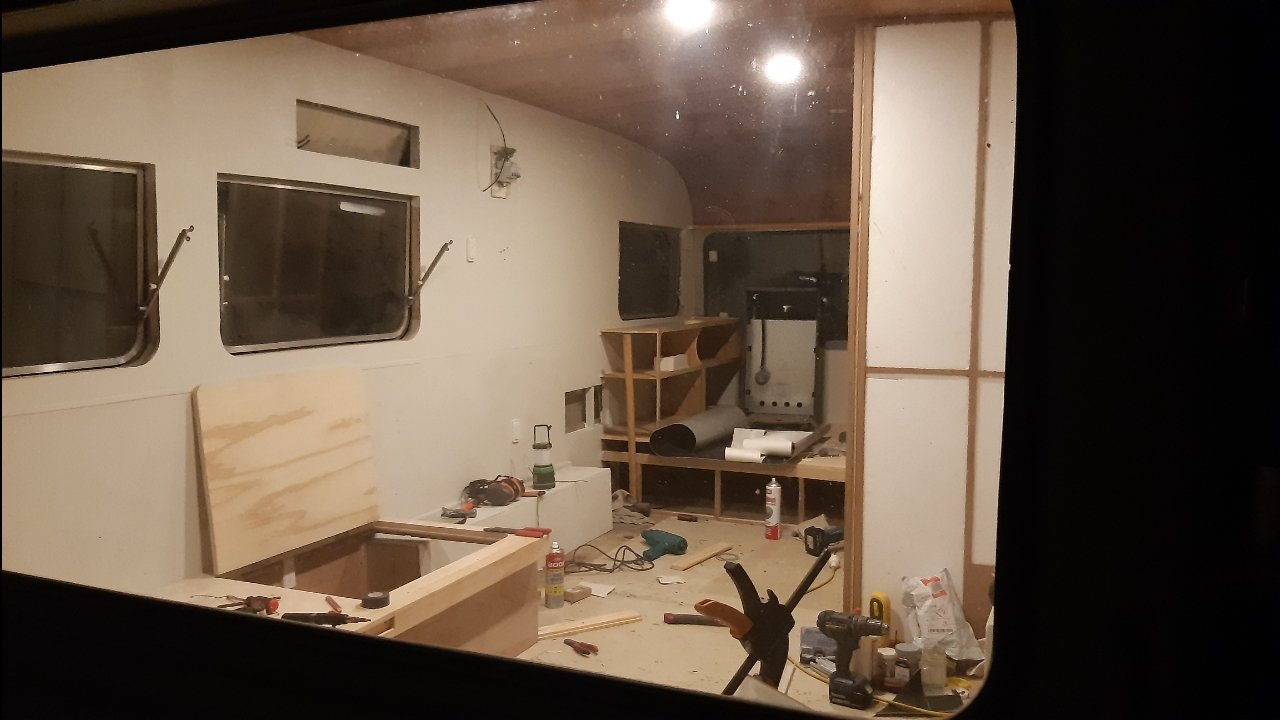
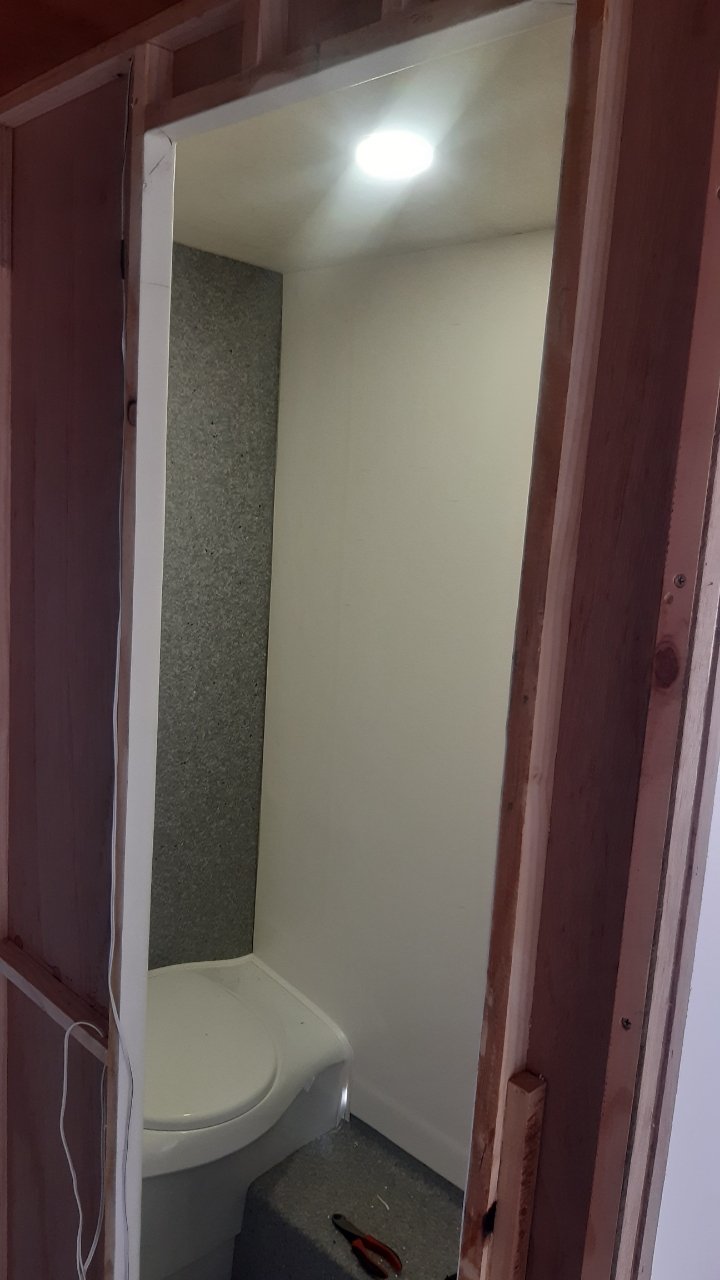
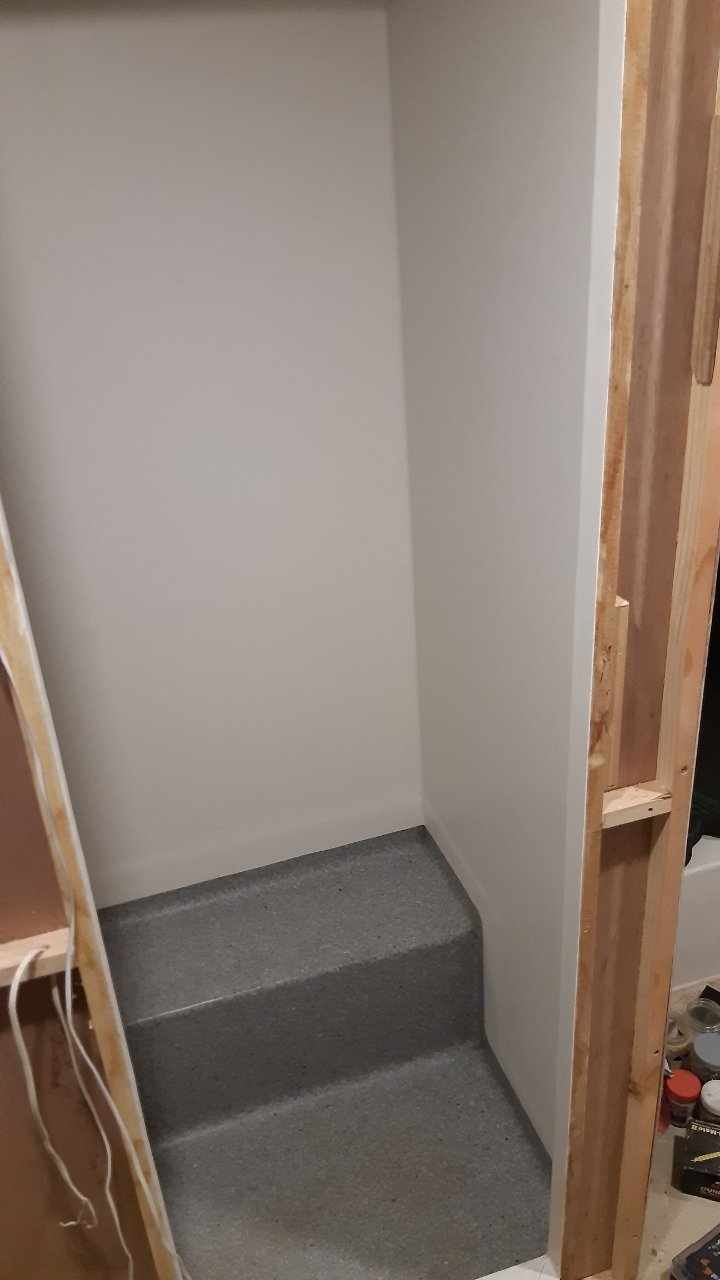
Painted and put the lights in the roof Vinyl in the bathroom, toilet and light in
2 points
-
Kind of did a build thread here... But long story short: Made this, which holds these: The end.
2 points
-
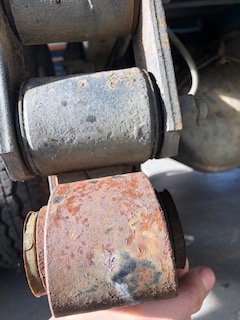
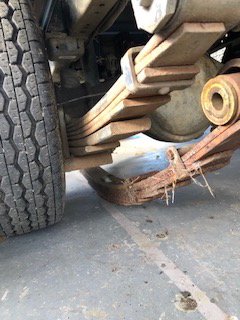
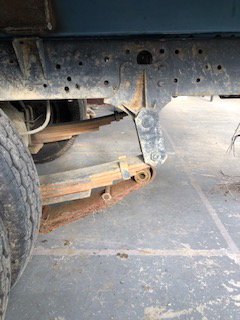
Sunday had a few hours free for shed time and beers so pulled out front springs and tried to fit some XF falcon front springs but couldn’t get them to fit as they spring diameter is 10mm larger The reason for that is the front is about 20mm to low on cut standard springs and rear is 40mm to high needs compressing and I’d had these XF springs sitting for years so tried to use them up front Have now decided to get shit done properly and have ordered through BNT pukekohe low springs for front and standard Springs rear once I get the wheels I want I can install new springs and compress down to required height and new bushes etc.The shocks I have are shortened KYBs so can re use those chucked on wheels of my old hiace for a laugh started it up still running rough.drove onto driveway then turned it off then under bonnet tinkering away go to jump back in drivers seat and hello the alarm locked the car so now it’s sitting in my driveway with the only key in ignition pretty pissed off at myself because I’d been cautious of that all afternoon till then ffs so yeah may as well give it a wash because I’m locked out of the bloody thing
1 point
-
I jumped in on some free powdercoating and had the Silvia and falcon (rear) covers done after I sandblasted them. came out great! Decided to chuck them together for a pine and realised they dont clear the calipers (need to trim back the curved edges but not a lot) and since it’s got larger discs, they sit hard up against them too! c.l.e.v.e.r. B.o.y Live and learn didn’t realise the discs were murdered out, it’s cool but was expecting nice clean raw look lol.1 point
-
heres some 2" cobra land cruiser 70 series lift springs next to my 95 2wd dyna, they look like they would fit but you would need to use the bottom two fat dyna leafs. another hori way would be to mount some coil springs in between your diff and bumpstops ftw. cruiser shackle extenders would be simple to fit too. sorry for non airbag chat. also keen for an island mish one day
1 point
-
@Unclejake I used to own a London ambulance that had airbags and leaves on the rear, and the ride was lush.1 point
-
Hey very basic question but im new to diesel life, whats a good oil to roll in the older 2l Hilux? Averaging a oil change every 3 months as am covering a few Ks commuting so happy to buy good shit if its doing a good job.1 point
-
https://panelstore.co.nz/collections/all-paint/products/evercoat-lite-weight-body-filler-3l https://panelstore.co.nz/collections/all-paint/Body-Filler or pick a 3m one1 point
-
Was whatever the old panelshop used to get after they decided the 3M they used to use was too expensive, I can't recall specifics I just remember it not being quite as nice to work with as the 3M shit so when I got a bucket for home I got the 3M shit.1 point
-
Tonner went in last week, hard-line is all done now, master cylinder was perma fucked from sitting/neglect so they are working out the cheapest solution to sort that.1 point
-
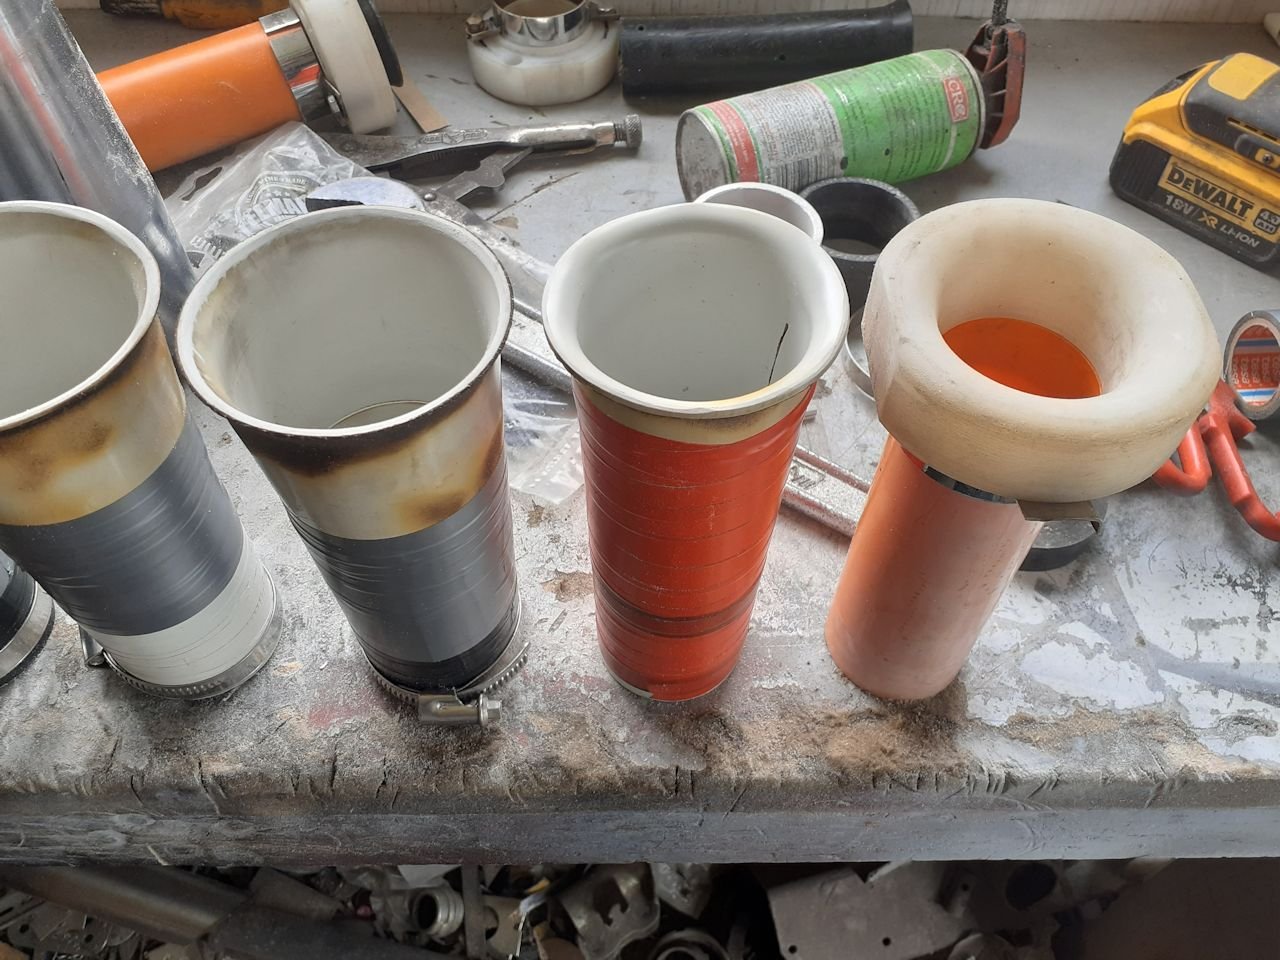
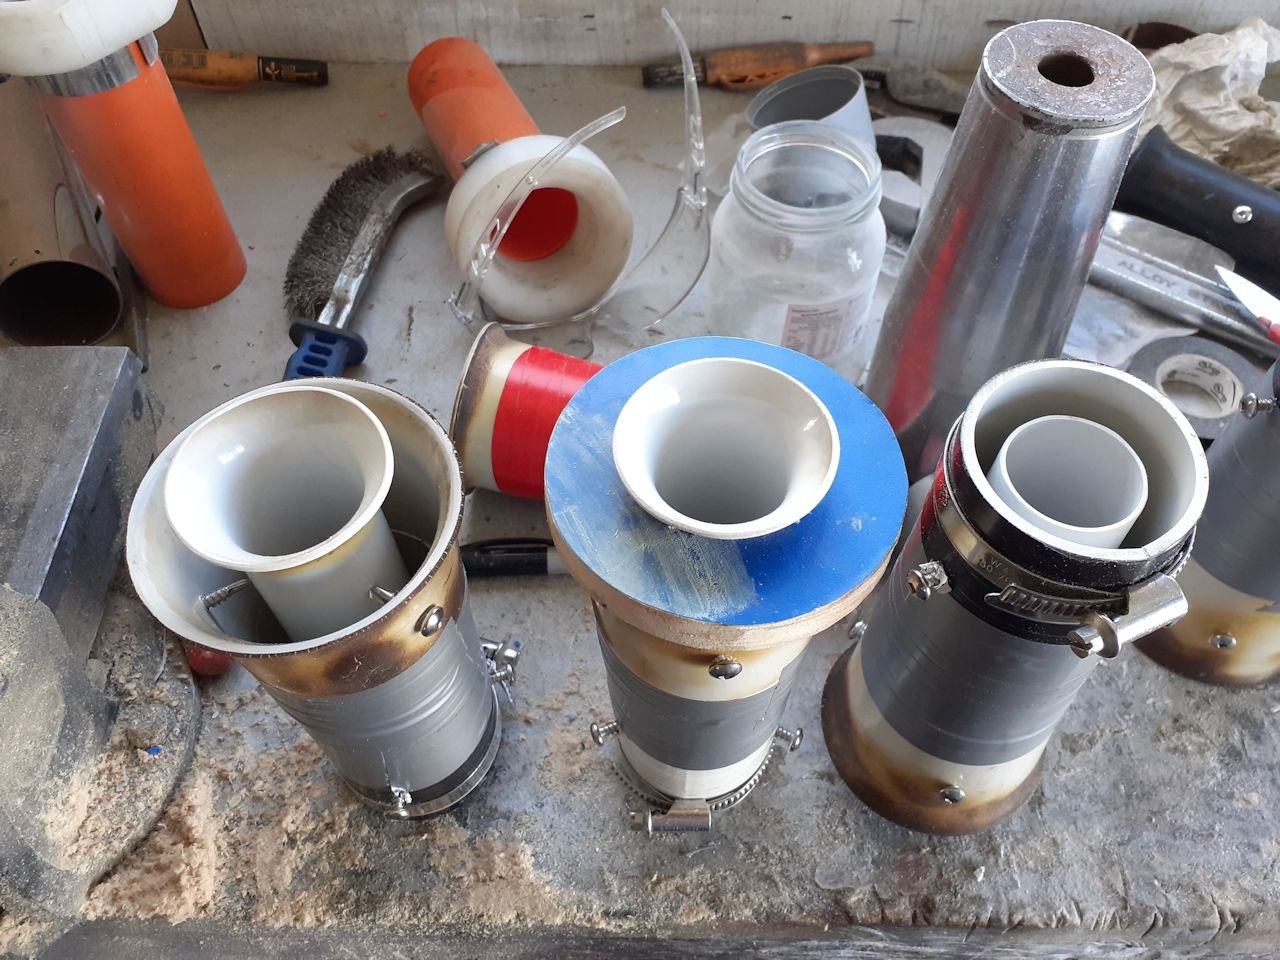
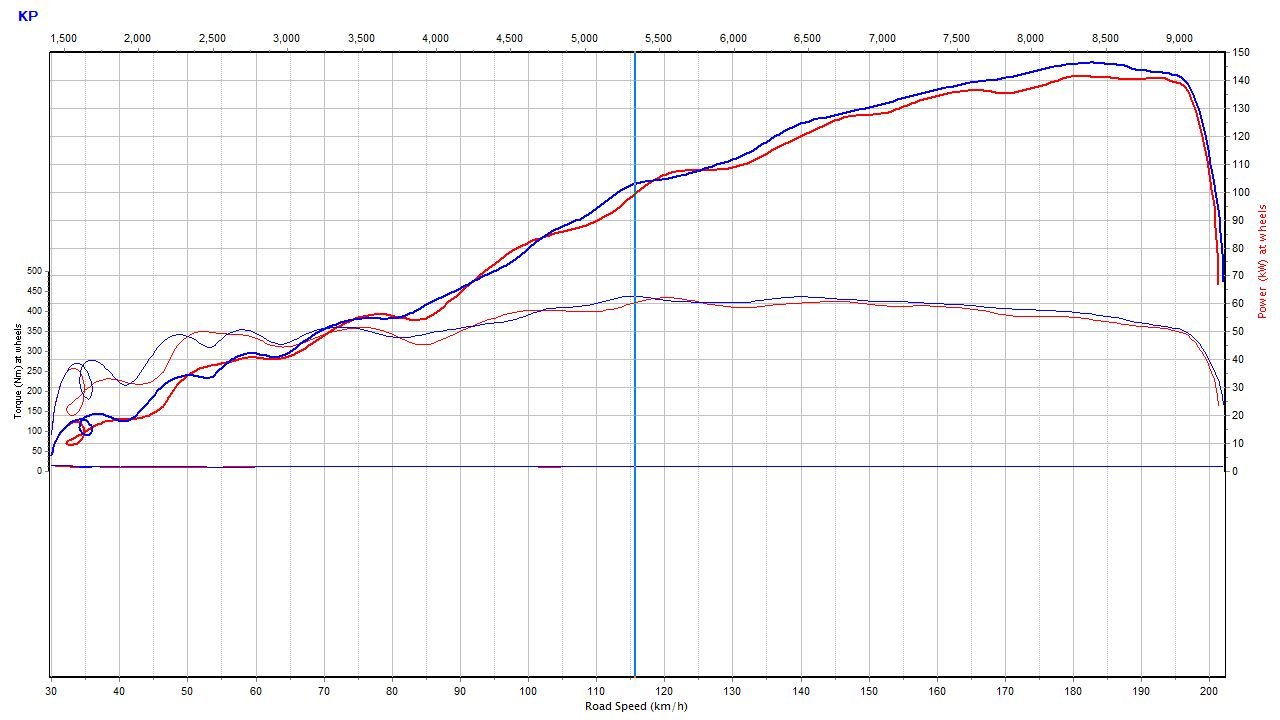
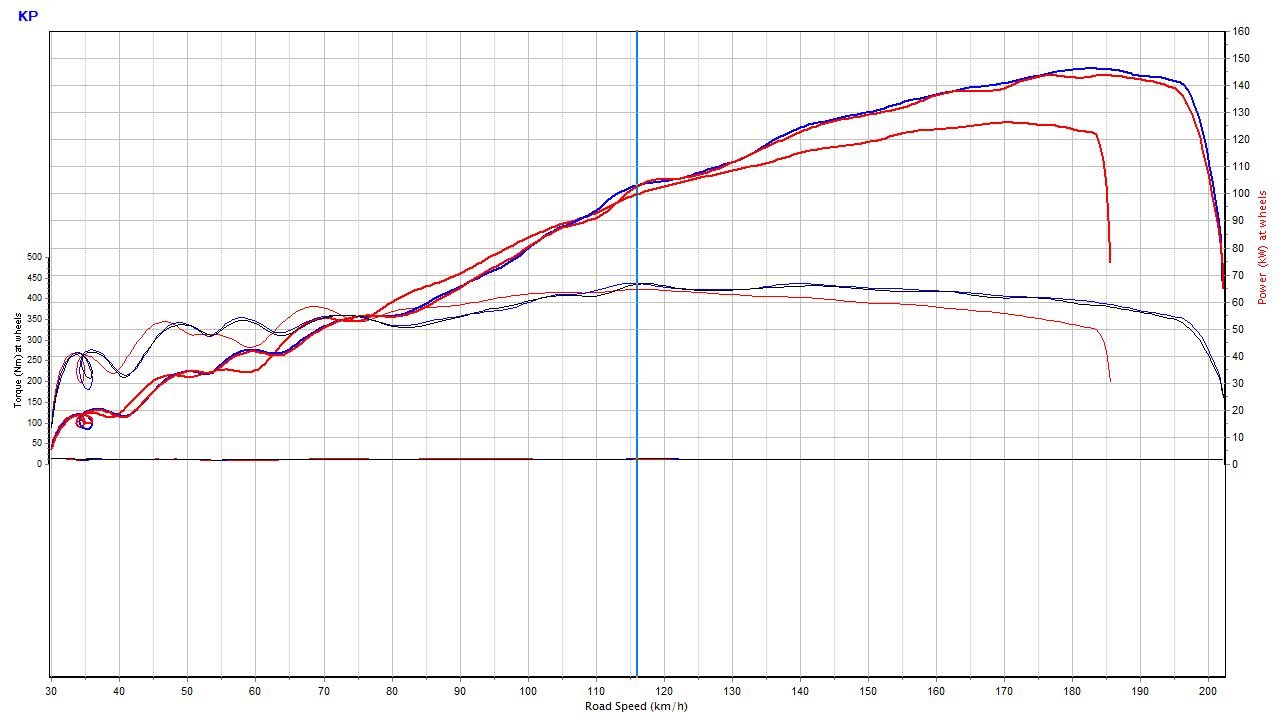
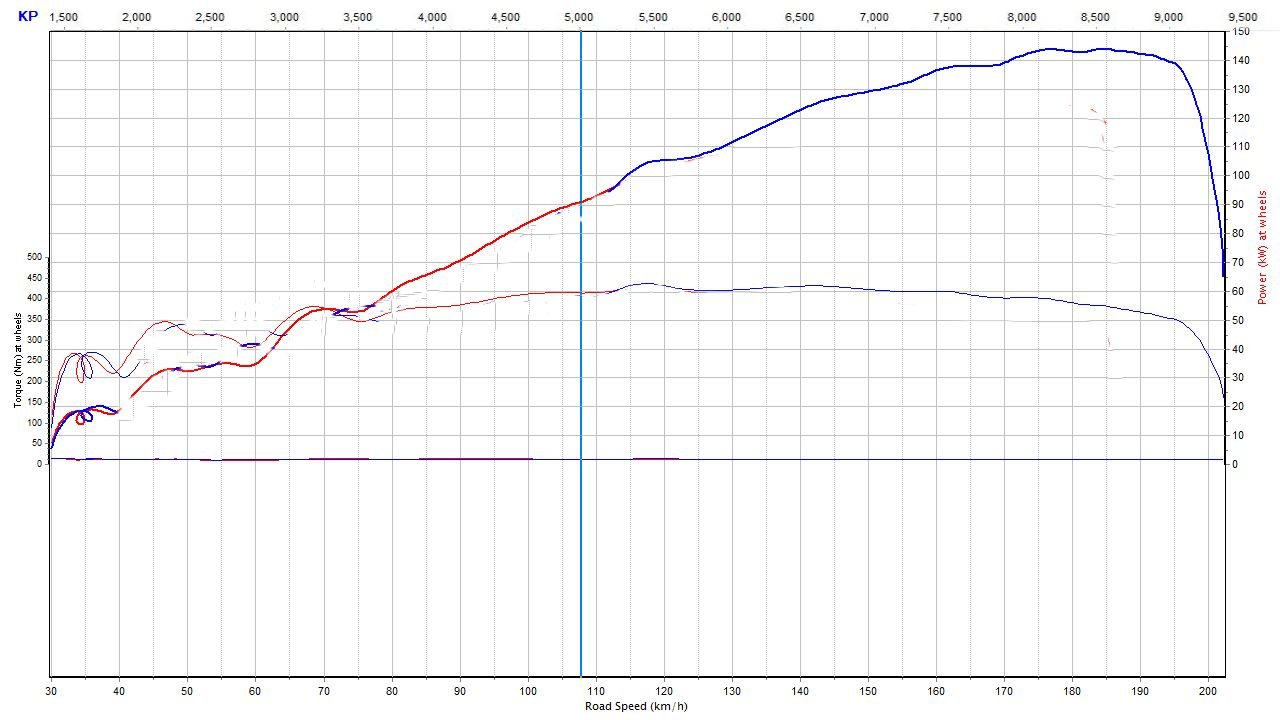
so, red line - Silver tape - 52-70 Blue line red tape - 51-62 = best overall to date some power loss, too big blue line - same as above jam the 35mm pipe down the middle as per left in below pic gain most of power back - red line block outer runner with blue plate - other red line with gain down low and loss up top Looking pretty good, Haven't decided if its worth the effort to combine the 2 with a variable setup. but pretty close to matching the best trumpet with the double. it would make a pretty nice power/torque curve combing the 2 positions together :
1 point
-
Fuck yes1 point
-
Yeah its pretty big. Banana for scale. Also mm for scale. Its about 1020mm long. About 700mm tall1 point
-
And today the bulkhead connector has arrived. So stoked to have this piece of gear.1 point
-
Another 2 done. Worked well. I think 4 paper weights is enough for now. Time to move on to something big! For reference of where it goes. Houses cam gearing.1 point
-
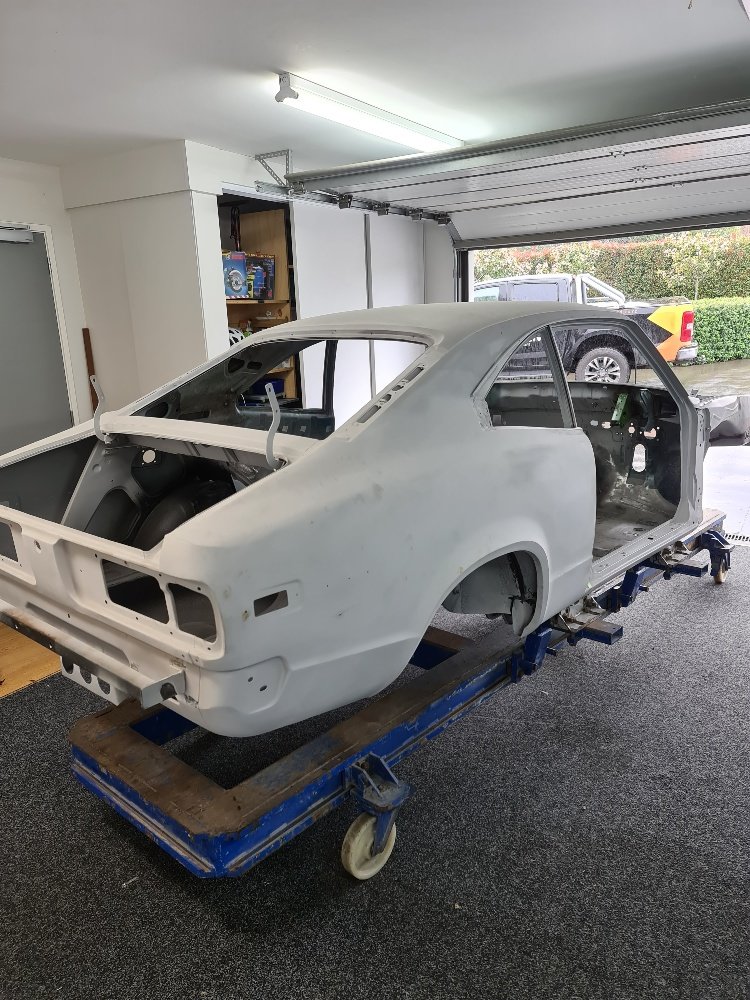
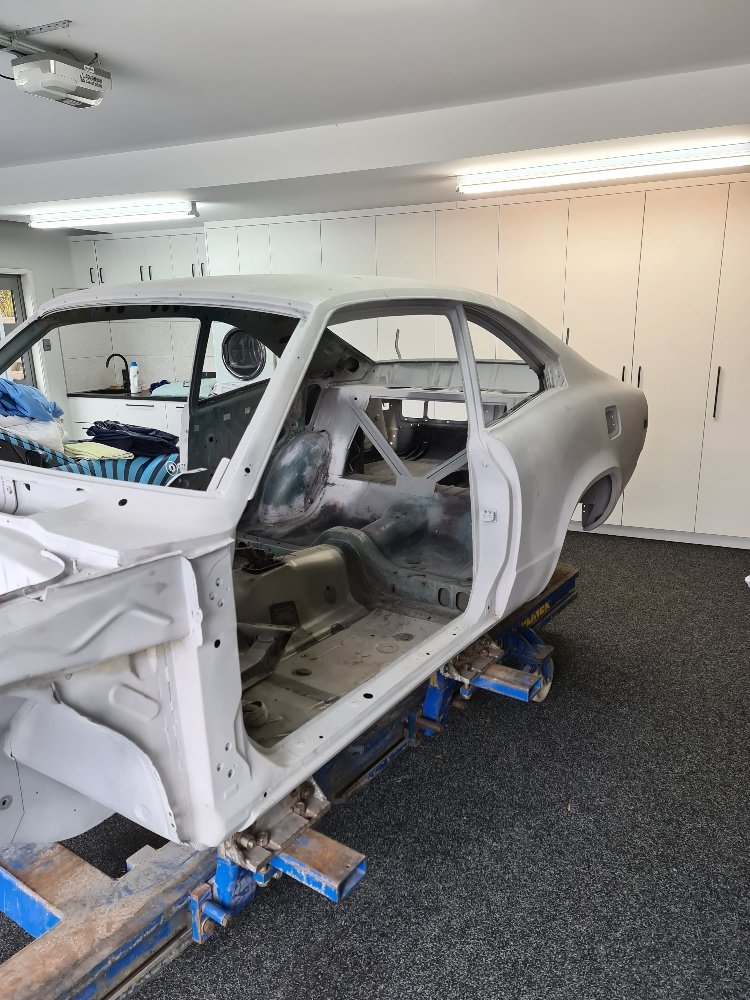
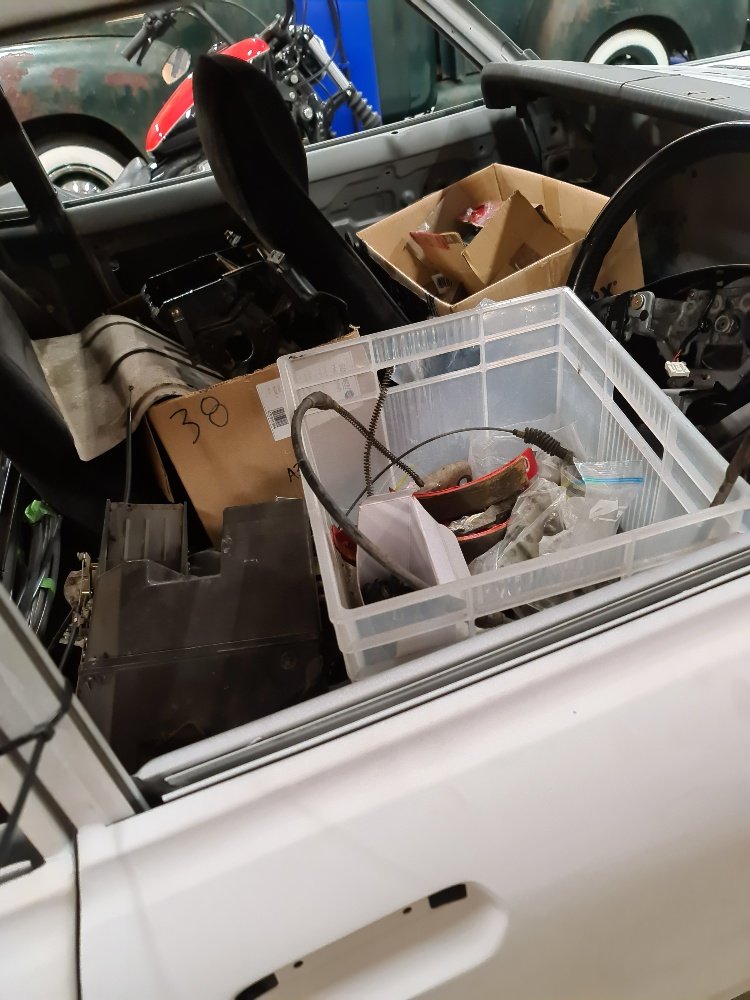
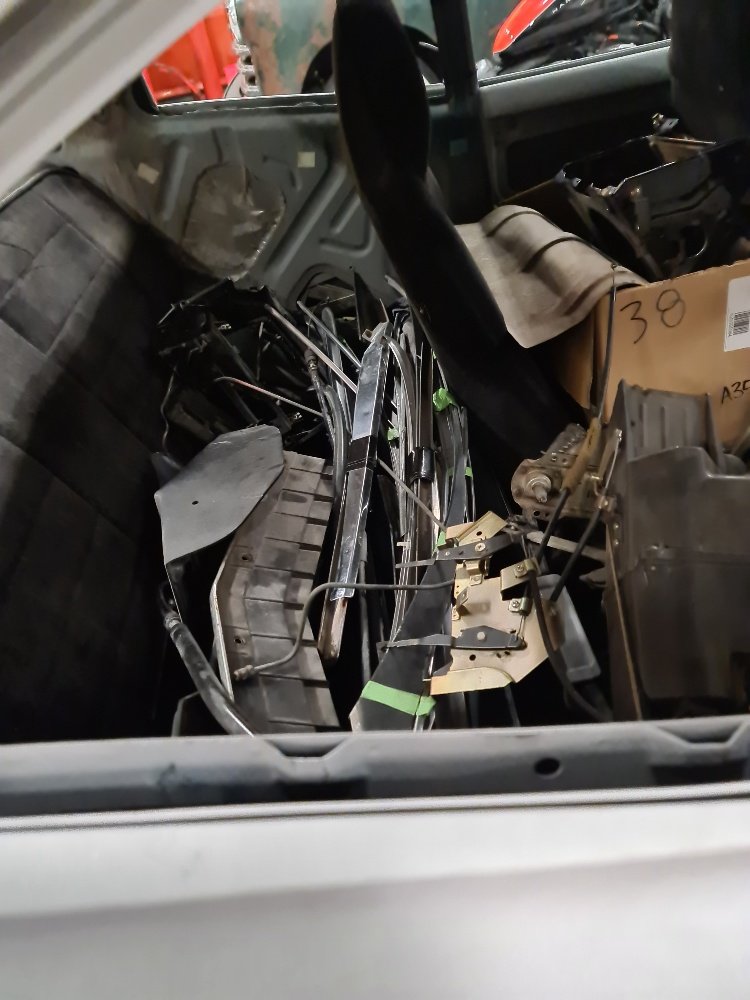
So when i first looked at the car right before Auckland Lockdown V2 it was a bare shell on a chassis dolly, The previous owner spent a bit of time during lockdown and put the panels back on, factory suspension and steering and diff in and got it mobile again for me. He packed the car with as much as he could then when I picked it up the ute tray and back seat was chocka with bits as well for the trip home!
1 point
-
All back together now. Had a turbo shit off a time getting the heater hoses back on because some idiot stuffed a huge motor right in the way. New clutch (remember that, the reason we pulled it apart in the first place) is really good, it's a tiny bit grabby at take off but it's not really bedded in at all so I don't know if this will get better or worse. Also i have connected the boost control pipes around the wrong way so it's free boosting up to about 30psi. Easy fix that. I drove it to work.
1 point
-
I think i caught that just in time. and the wheel doesn't really show in the picture but thats a before / after. they look tidier in person though.
1 point
-
Needs to slight left a little, but I need to remove the reverse switch. It's not needed on the hunter anyway, no reverse lights
1 point
-
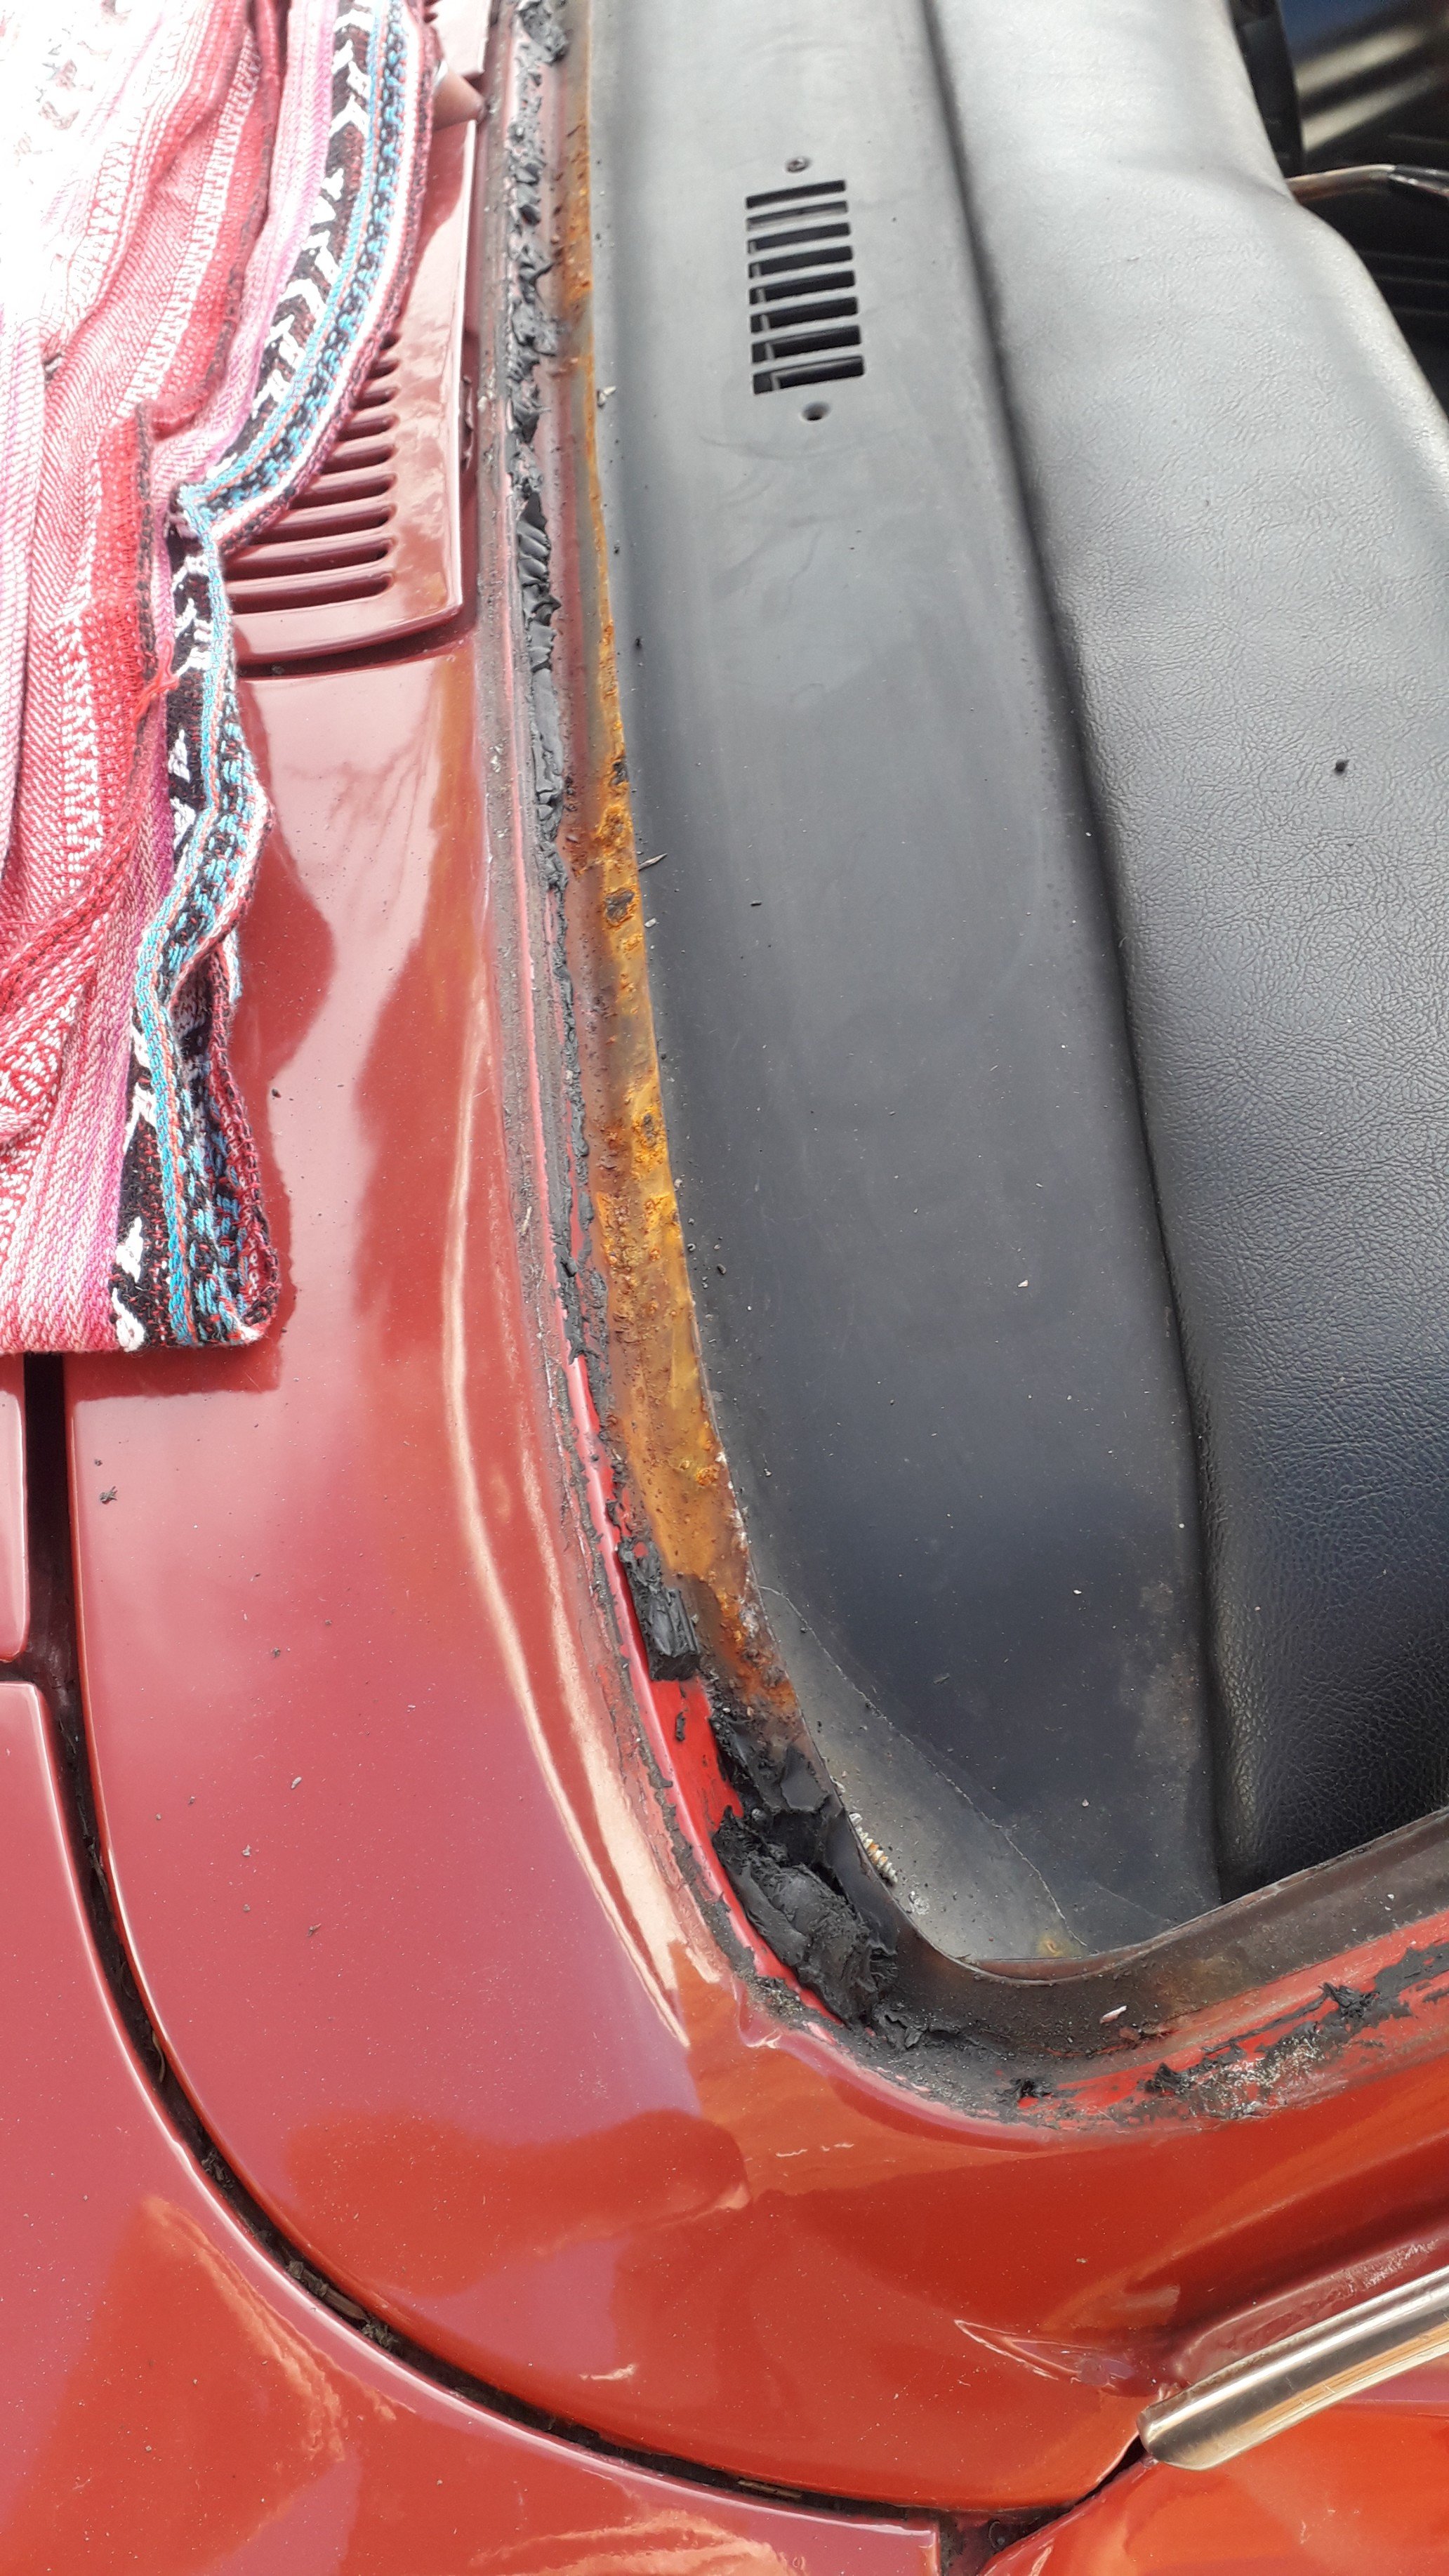
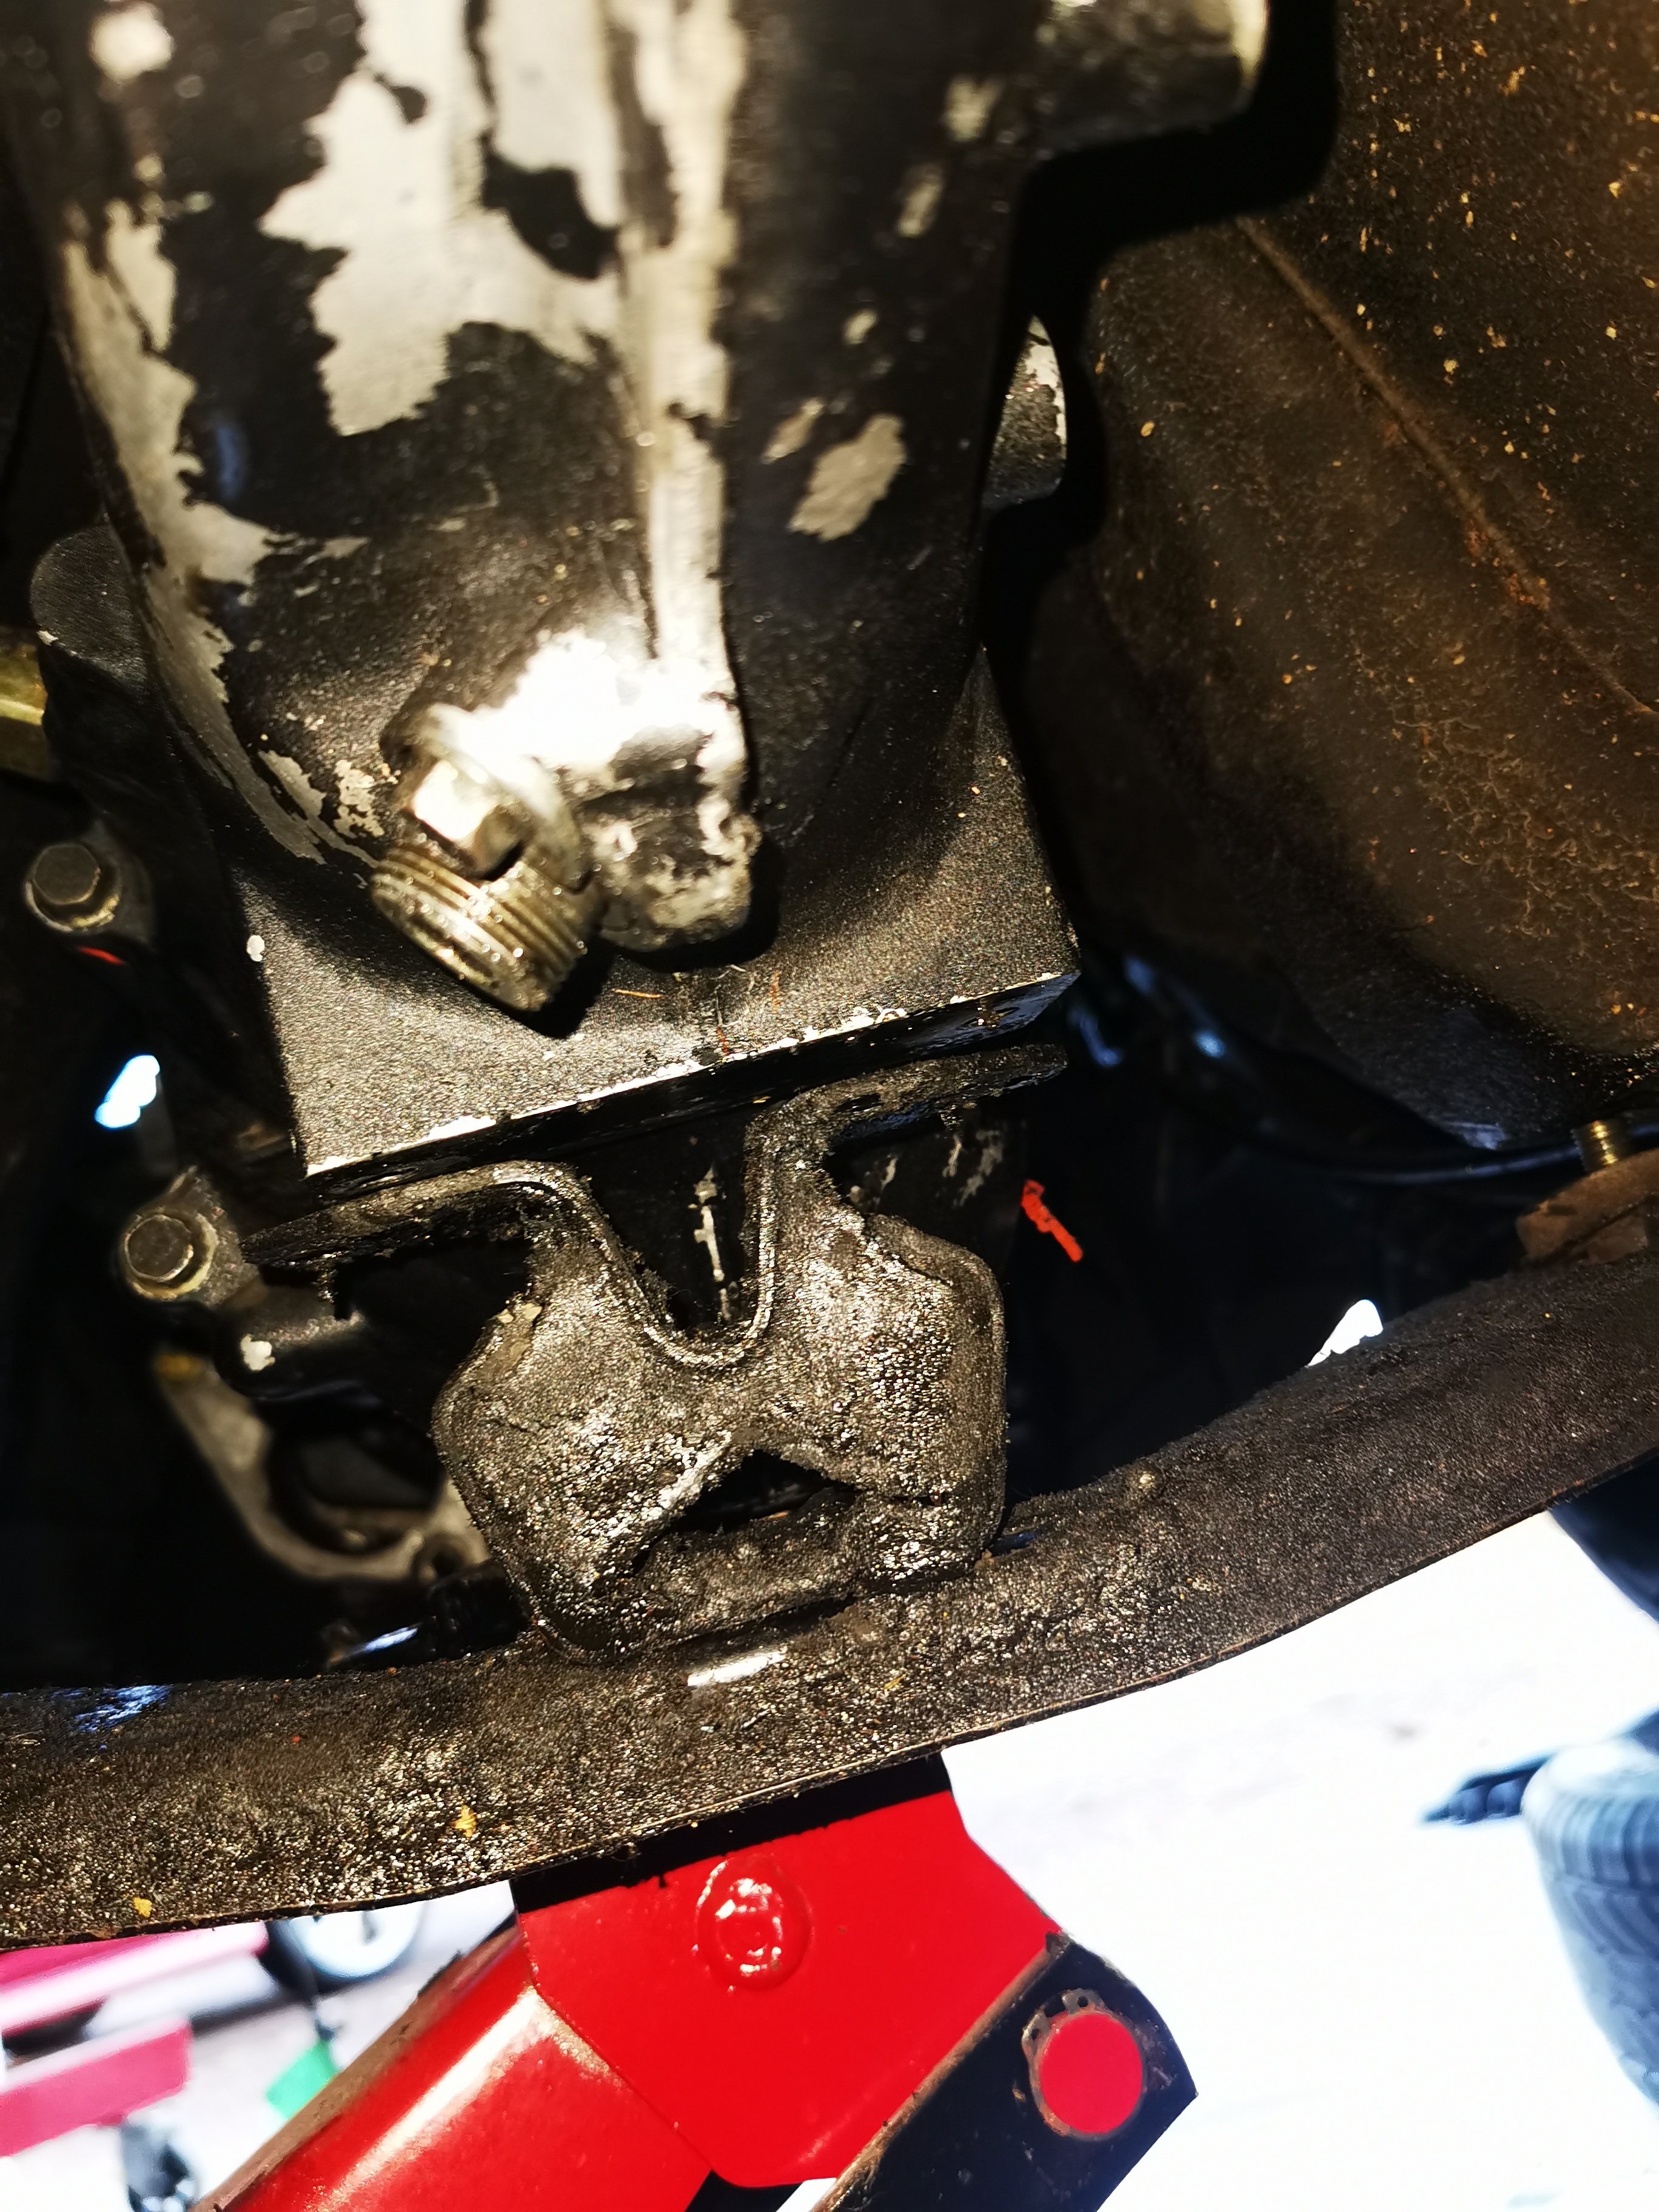
Loving it in the new garage, gets beaut sun in the morning, so encouraging to get into things... Put the cover back on the diff, still got pinion seal to install... And wheeled trans out in the sun, dropped the pan and uh-oh. Sort of expected some debris, but not a loose bolt...? Pretty sure it came from here after googling images of C4's... So carried on replacing filter, forgot about the spring and plunger under it but caught them ok... and cleaned things up and replaced that bolt... Shiny new bits to fix the leaky pan, sweet... And cos the alloy pan is deeper you need a deep pan filter. Nice thick reusable gasket... I did measure things, but looks right... Was about here a duck turned up to help... And done... Fitted a new mount as well... So trans should be good to go, there was a bit of gunk and a few metal shavings that bothered me, but as it costs a couple of grand to get a trans refurbished I'll just hope a new filter and fresh fluid will be ok. Never had any issues (apart from blowing a torque converter during a burnout) and interweb consensus is bits in the pan are normal, so we'll see...1 point
-
Its working decently now. My first bit I tried wasnt dissolving but I found the problem was that when I vac bagged the part it sucked all of the epoxy to cover all of the exposed surfaces of the HIPS as well. Woops. The good news is that once it reaches the infill section of the print it just eats it up super quick because the ratio of surface area is massive The outer layers turn to a mushy goo though that takes longer but sloshing it around to clear it off seems to work. I think I'll next try just a single outer layer or maybe just two. It doesnt really need any strength for covering with sleeve as its not being vac bagged or anything. I think vac bagging probably wouldnt work well for this process anyway as it would try suck epoxy into the infill areas. Or the vacuum would crush the infill and you'd need thicker walls that would be uneconomical to try dissolve. In any case - it's a good trickto have available for when the conditions allow it.
1 point
-
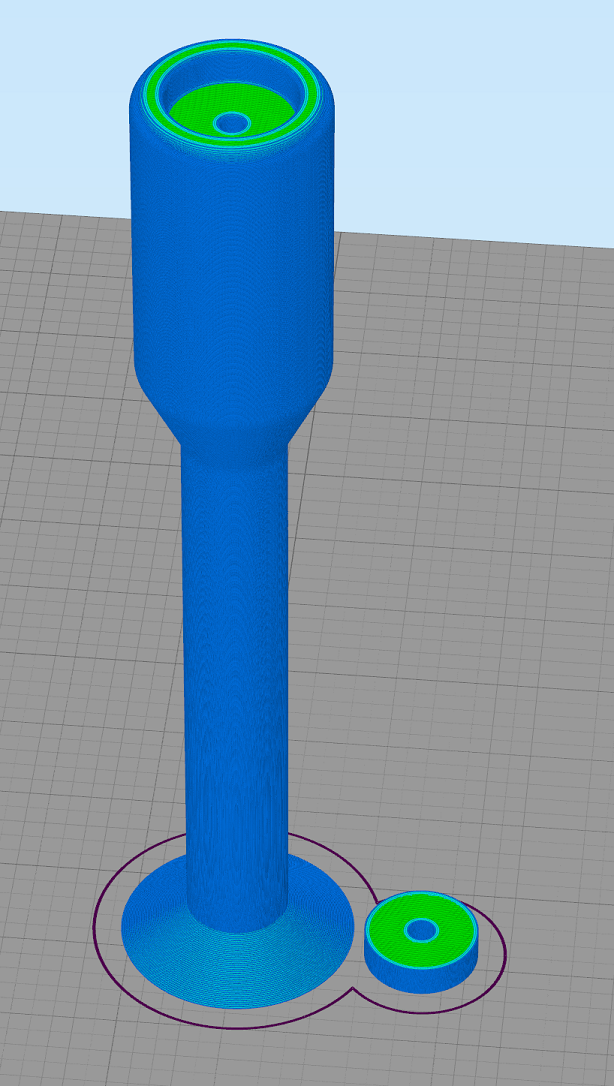
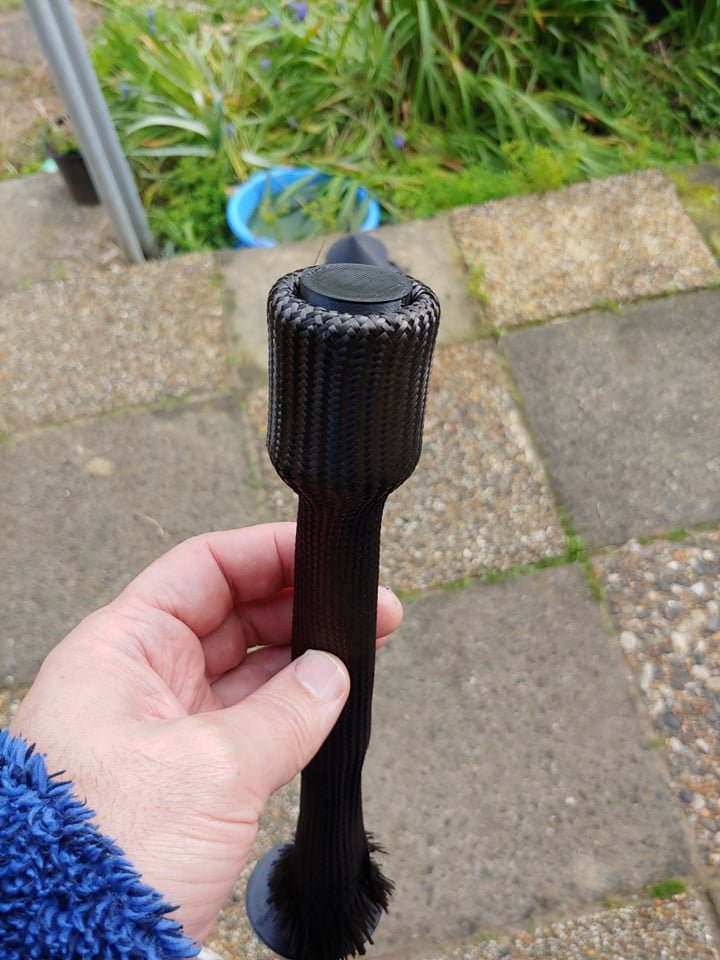
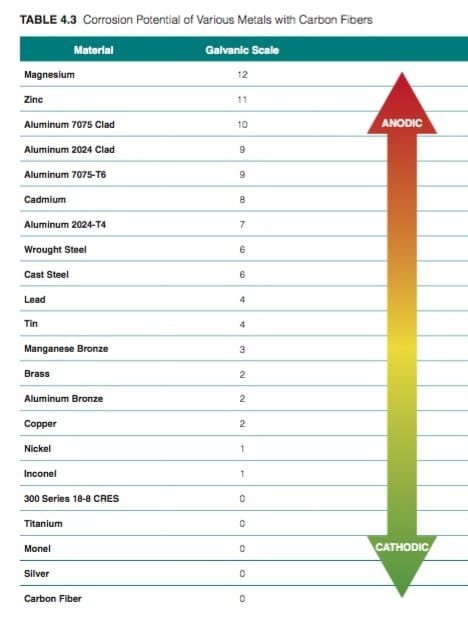
I finally managed to get the HIPS material working on the 3d printer (it's dissolvable in a particular chemical) One of my long term dreams for ages has been to have a good dissolvable core so I can lay up CF on it nicely and end up with a good light weight complex shape. However I've never had access to the chemical either so I wasnt sure if it was feasible to get or if it would damage the epoxy or carbon. Turns out you can buy D-Lemonine from the chemical supplier in Hamilton and it wasnt too expensive. So bought 2 litres to test - it also turns out that epoxy and CF are completely impervious to it. Awesome! For printing a part I decided to start with something easy as I'm always over reaching a bit trying something complicated then falling short. So after a few test prints to get the proportions feel right I managed to get a decent-ish gear stick shape. The idea is to use sleeve over it, and then the messy bit at the end will tuck under that little cap which screws in place but then dissolves later. So then I could put a little shifter icon thing or a logo or something set down into it, then fill it with clear epoxy to give some depth to it. Loose layup with the sleeve to see if cap fits ok: The sleeve couldnt quite go small enough to the diameter I wanted at the bottom so I had to widen it a bit. Yeah I'm wearing a dressing gown, what of it? Revised the print and just wet layup and turned out pretty sweet. It's had enough time for the epoxy to cure so now it's sitting in the bath of D-lemonine slowly turning its innards into goop. I waxed the HIPS to try block its porosity so the epoxy doenst leech into it and stop the chemical process from happening. Think I've probably got another 12-24 hours before it'll all be dissolved but looking forward to seeing how it turns out.
1 point
-
Sorted out a lot of bits I need for the next stages, good to find most of them and get things sorted. Crawled under the back end for a look at the leaky diff... I know the brake lines need replaced, that'll happen as soon as the wheel alignment is done. Also dragged the trans into the garage and inspected it, noticed the rear mount was perished so ordered another one, pretty common item, carried in SCA and Repco... And pulled the diff cover off for a cleanup. Needs cleaned, painted and dents taken out of rim... After wire brushing the cover, bolts and drain plug, I just brush painted everything with durepox, came out ok really with a thick mix, will trade again, easier than setting up the spray gun... So I'll put that together and fit new front seal when things are dry...1 point
-
1 point
-
I've got a little old wheezy air compressor, about 1/4 hp. If I put an 8 mm hose onto the inlet side it acts as a pretty effective vacuum pump. Used it to suck oil out of my mower and whatnot before.1 point
-
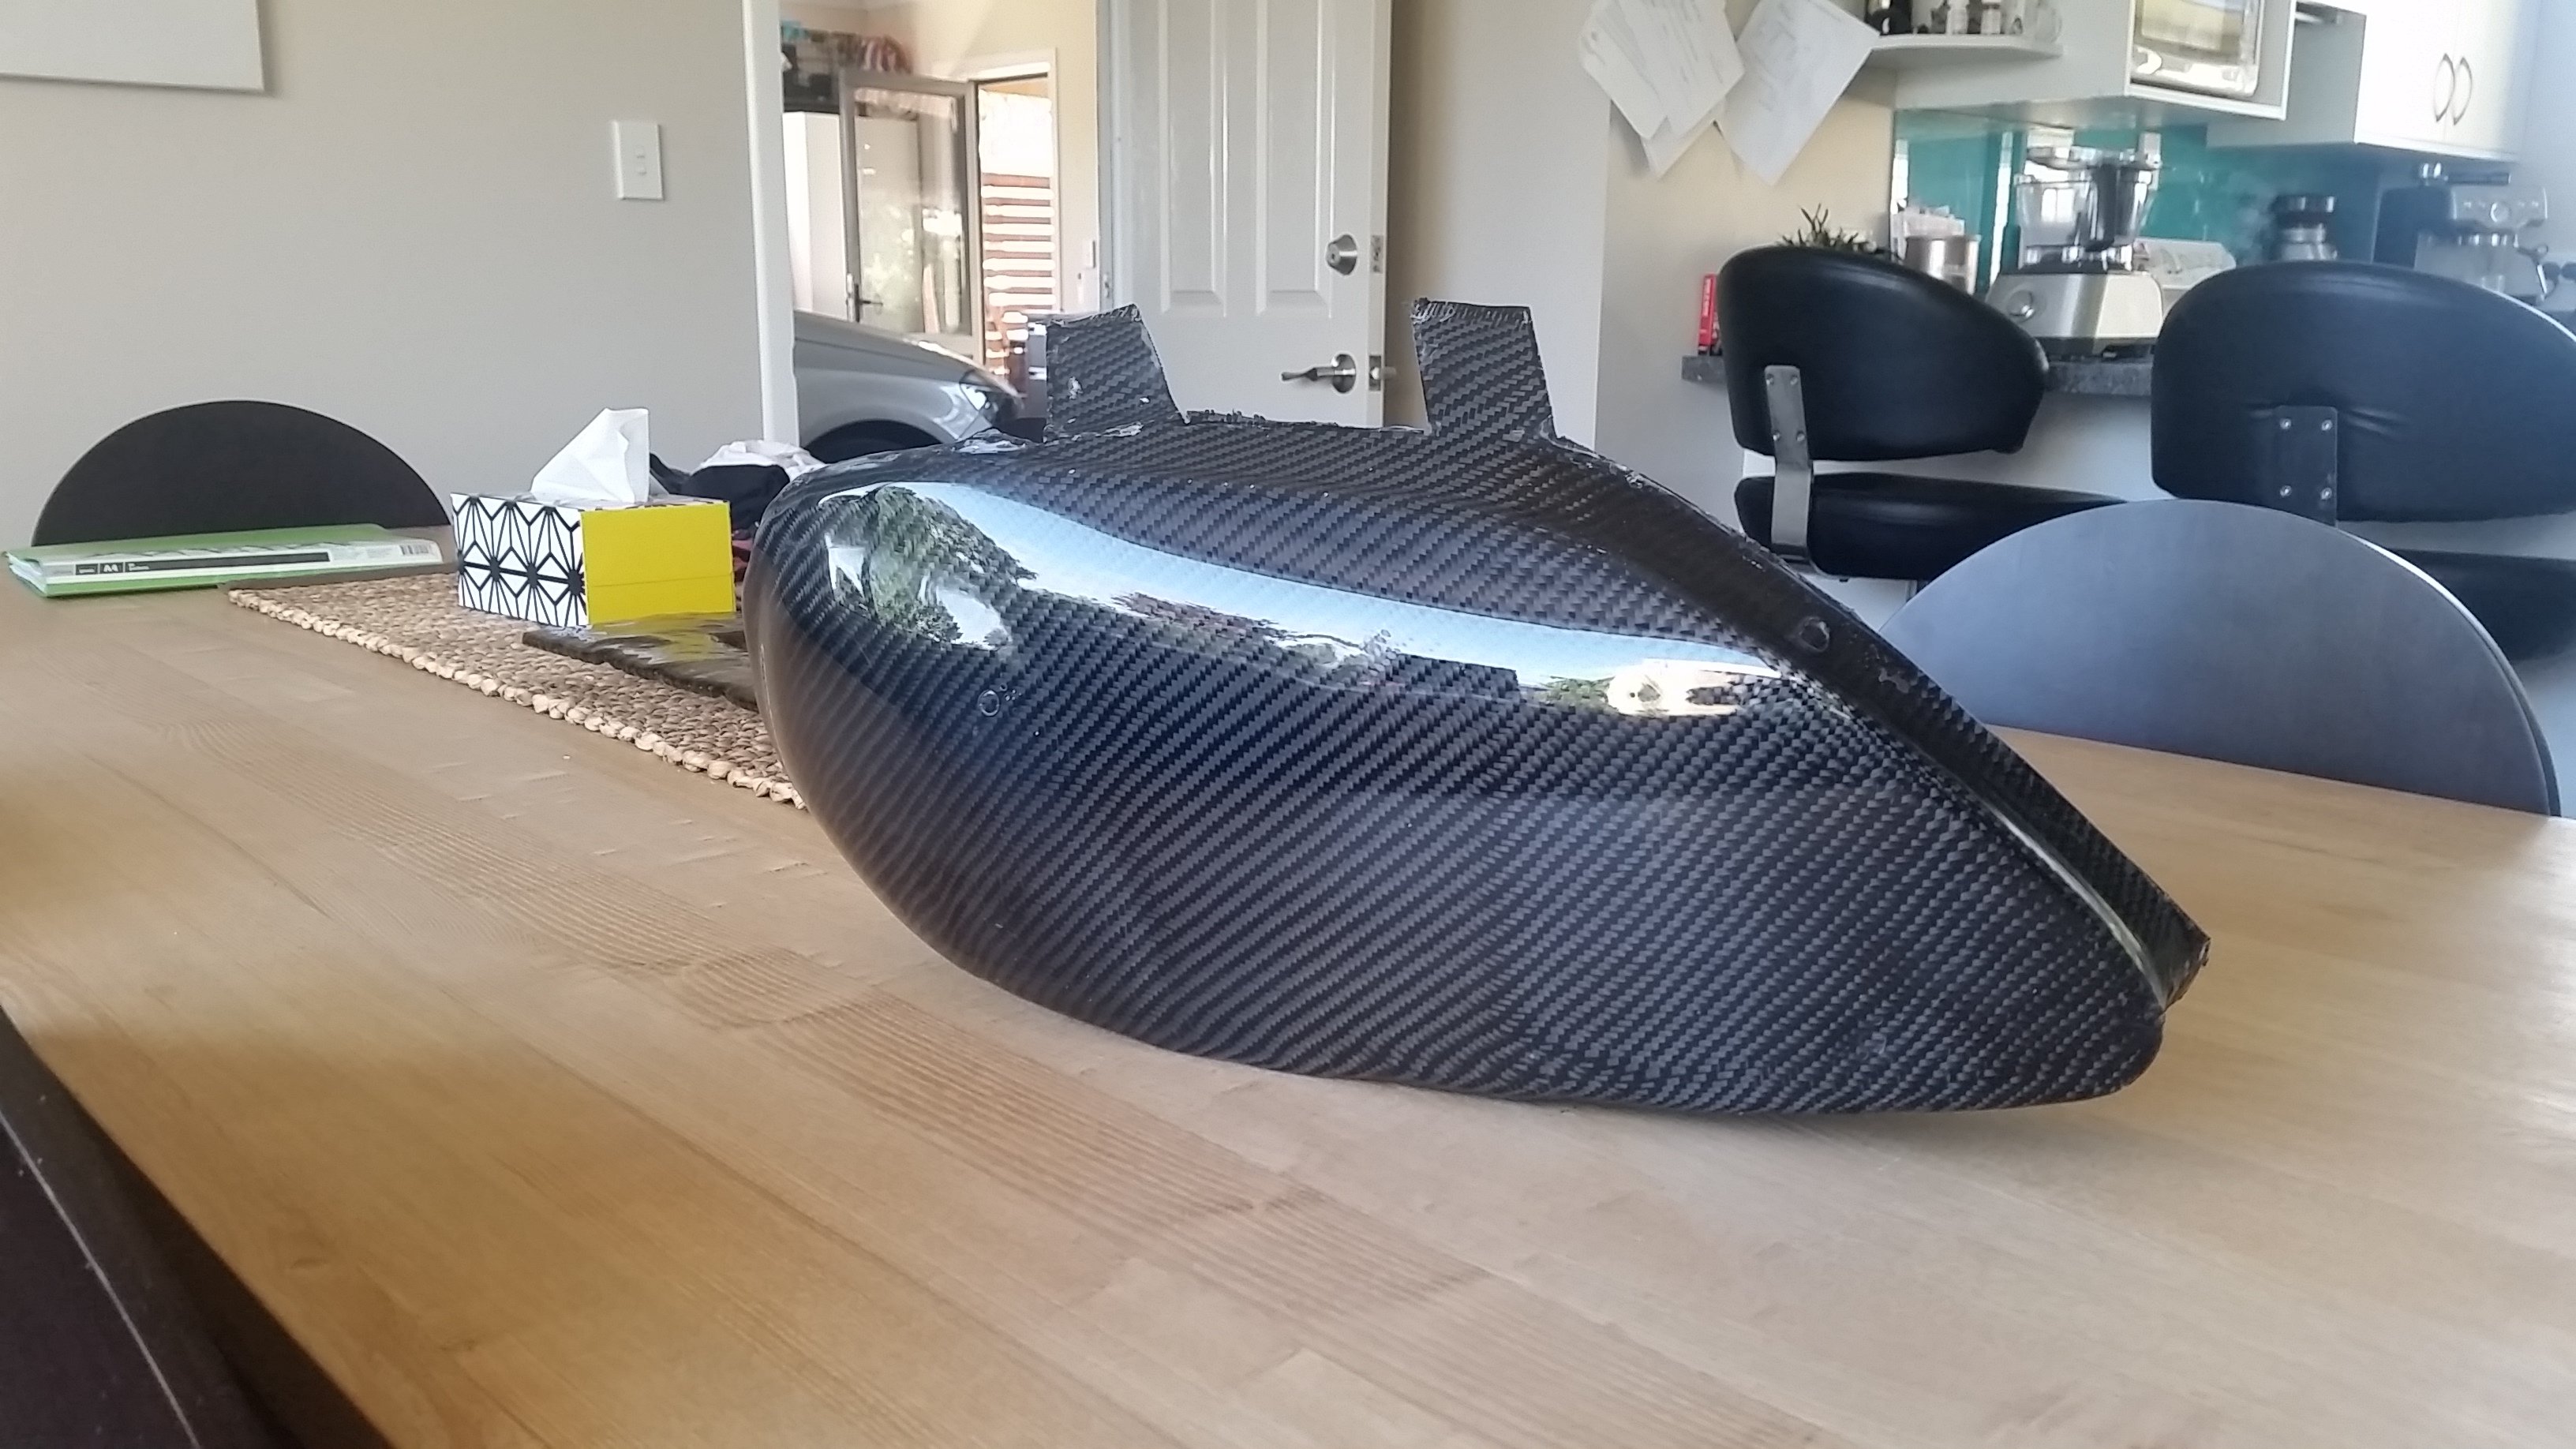
Looks like the civic needs it’s own project thread in other projects? Loving the carbon work!1 point
-
The same epoxy you made the panel from would be a good start, make sure you key up the panel in the area you're trying to bond and even more sure that all the release wax has been cleaned off1 point
-
Keep doing what you're doing, looks great! I mean, your first thing you've done and it looks marvelous. Can only get better from here as you go!1 point
-
Not sure if I should get some epoxy or try to rangi up a vacuum system or just carry on as I am.. Did some reading about prepreg but seems like the cost skyrockets / is not really novice spec.
1 point
-
That's a nice touch - Using actual Rover factory fabrication techniques.1 point
-
Yes, but it's still half the weight of a standard glovebox lid Titanium fasteners are cool buuuttttt one of my other "Things" about my car is I want to be as servicable as possible, and part of that is reducing toolset needed to work on it. I've got no cap screws for this reason (except where unavoidable) So I can do pretty much everything with 10,12,14,17,19,21mm sockets or spanners apart from a few necessary exceptions like headbolts and so on. (Which if I'm needing to do something with headbolts, I'm in deep trouble already!)1 point


This leaderboard is set to Auckland/GMT+12:00