
Leaderboard


Popular Content
Showing content with the highest reputation on 09/17/20 in Posts
-
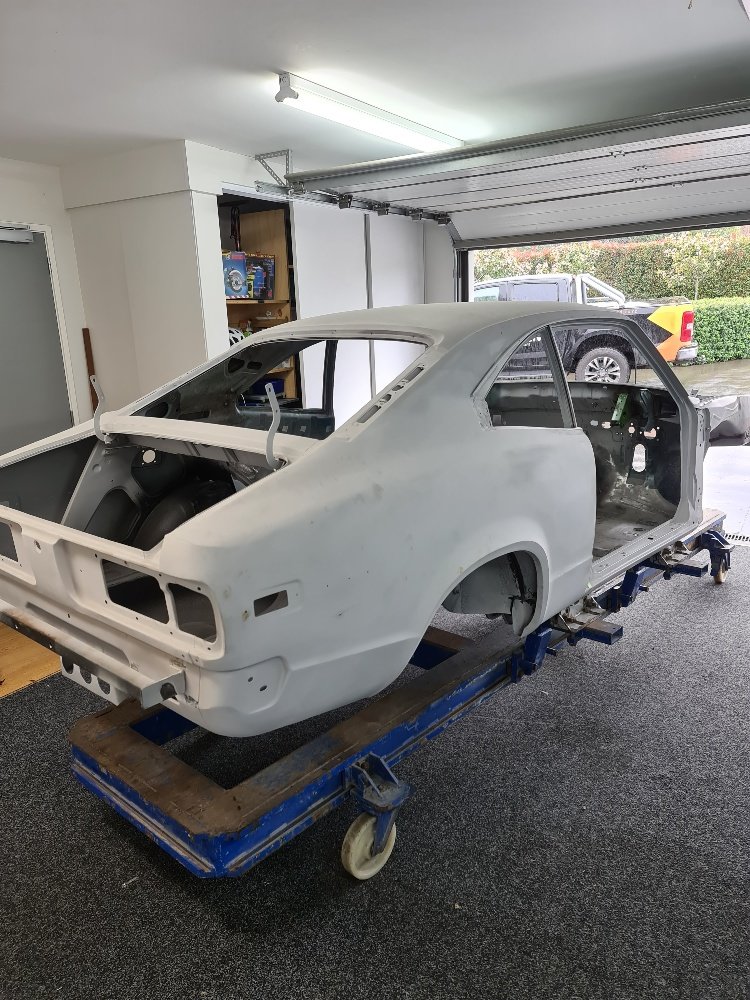
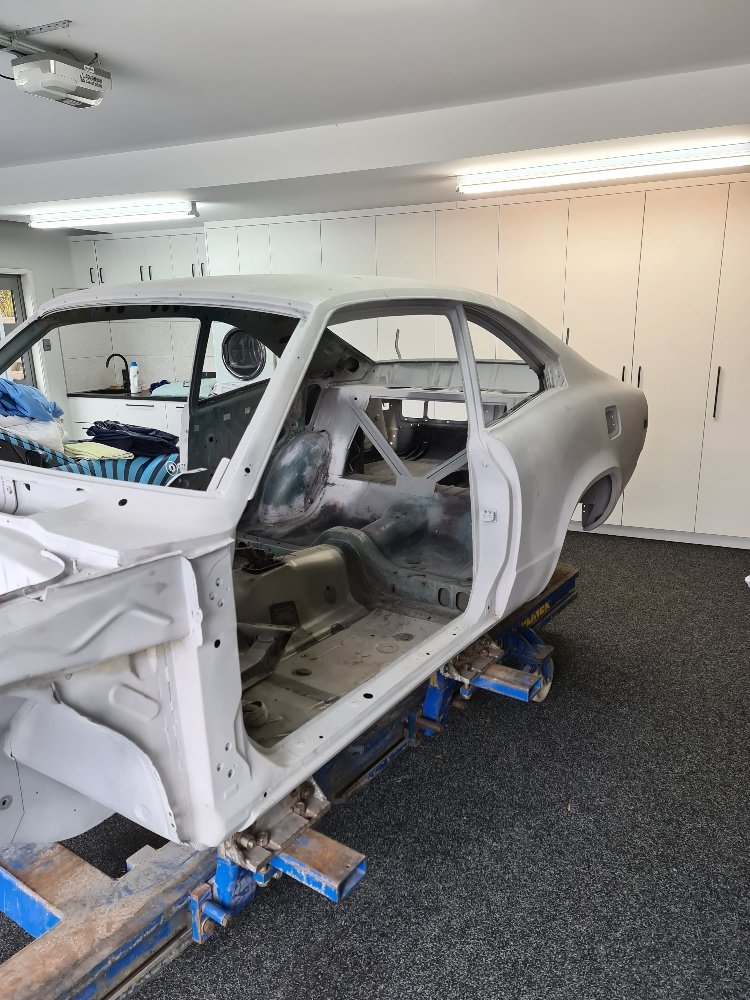
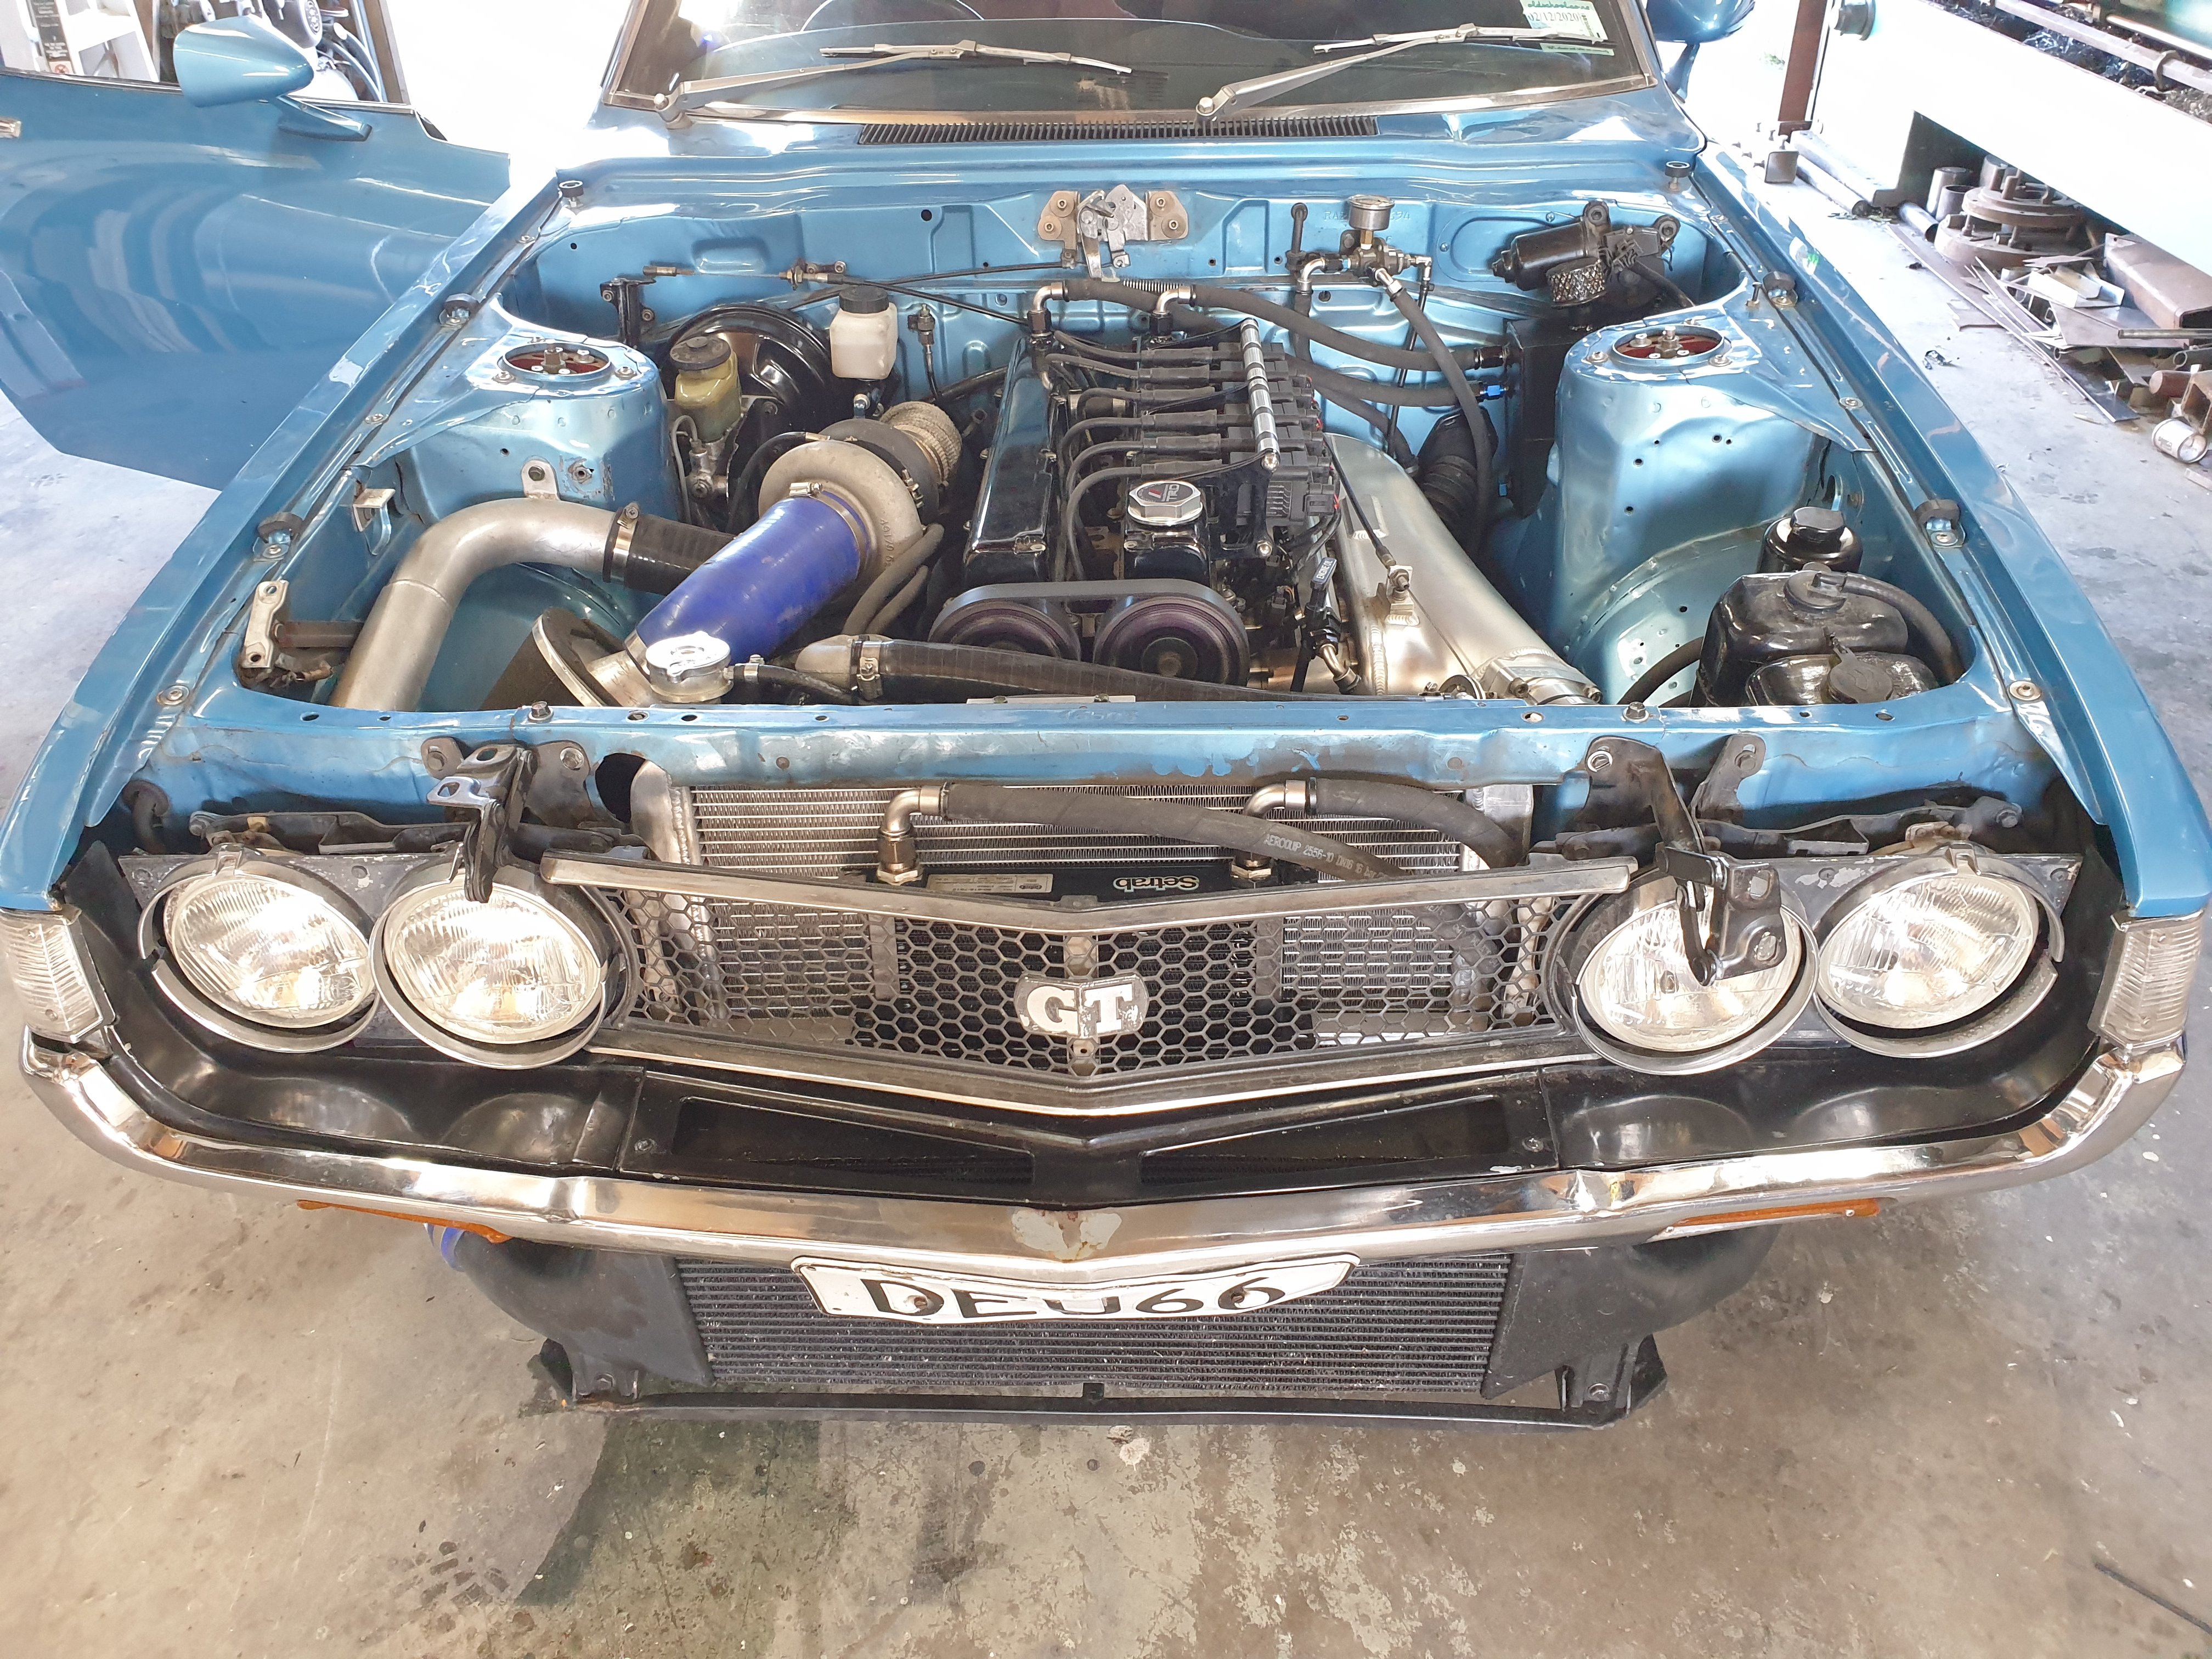
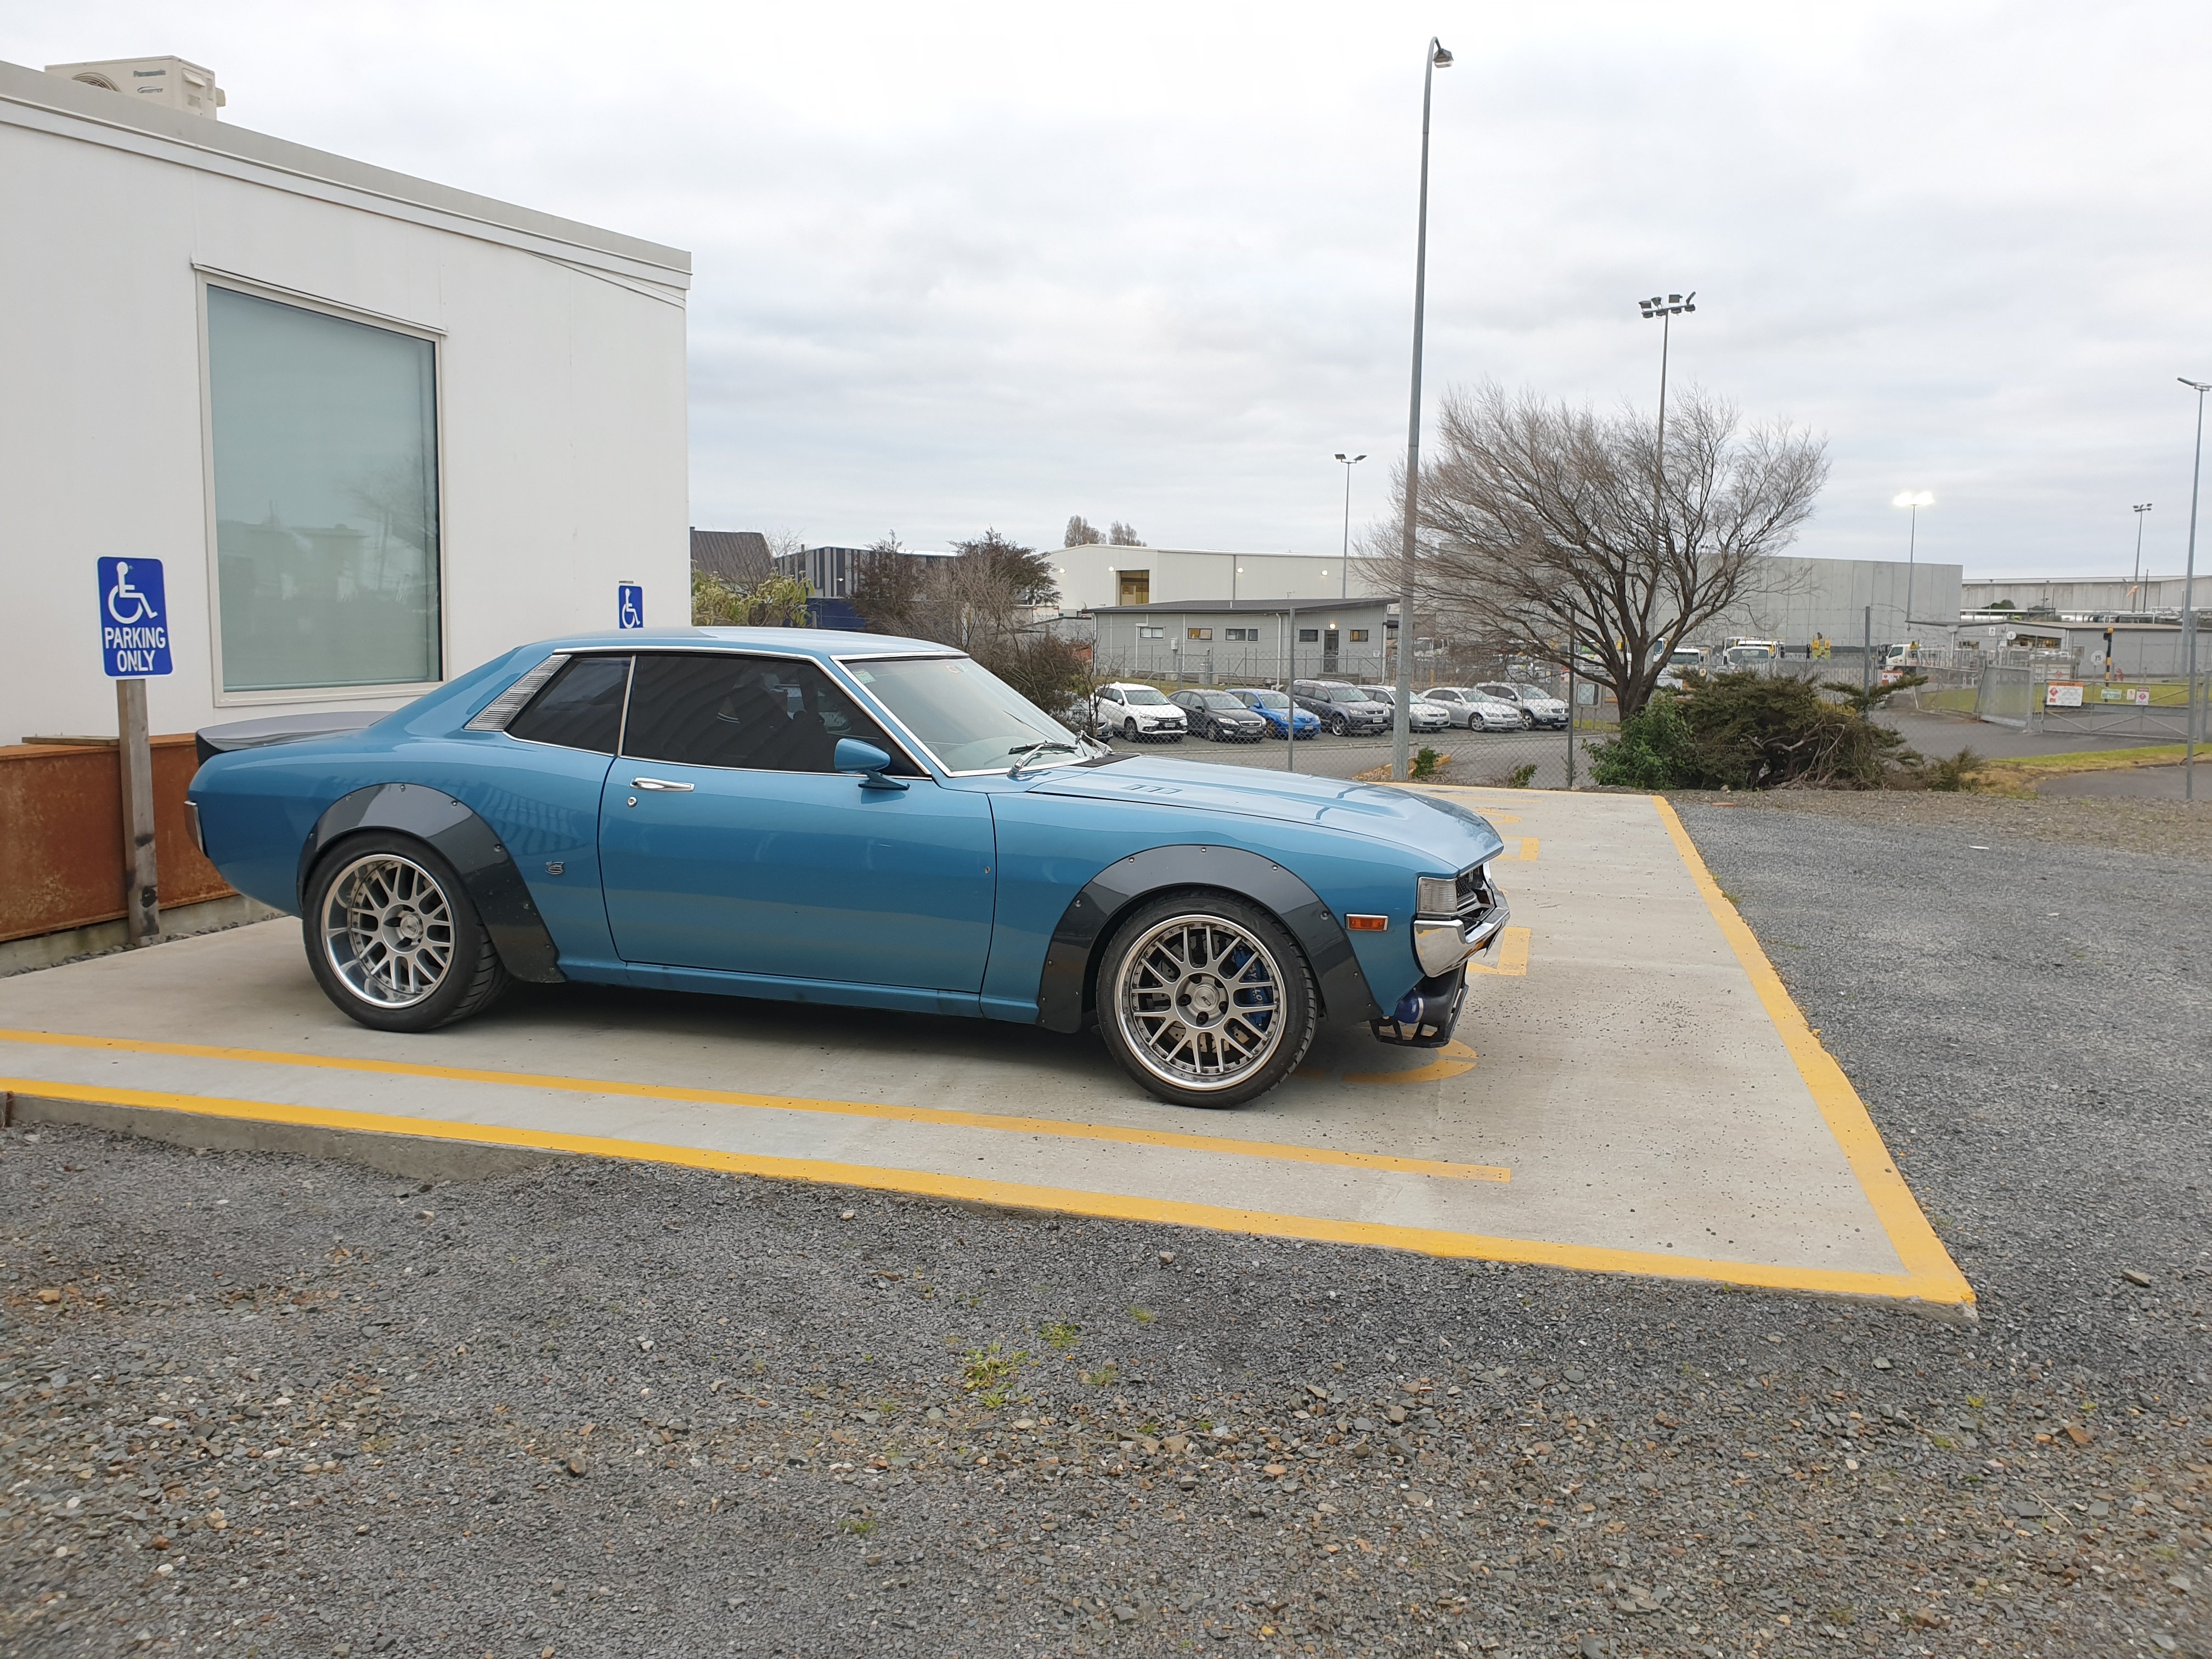
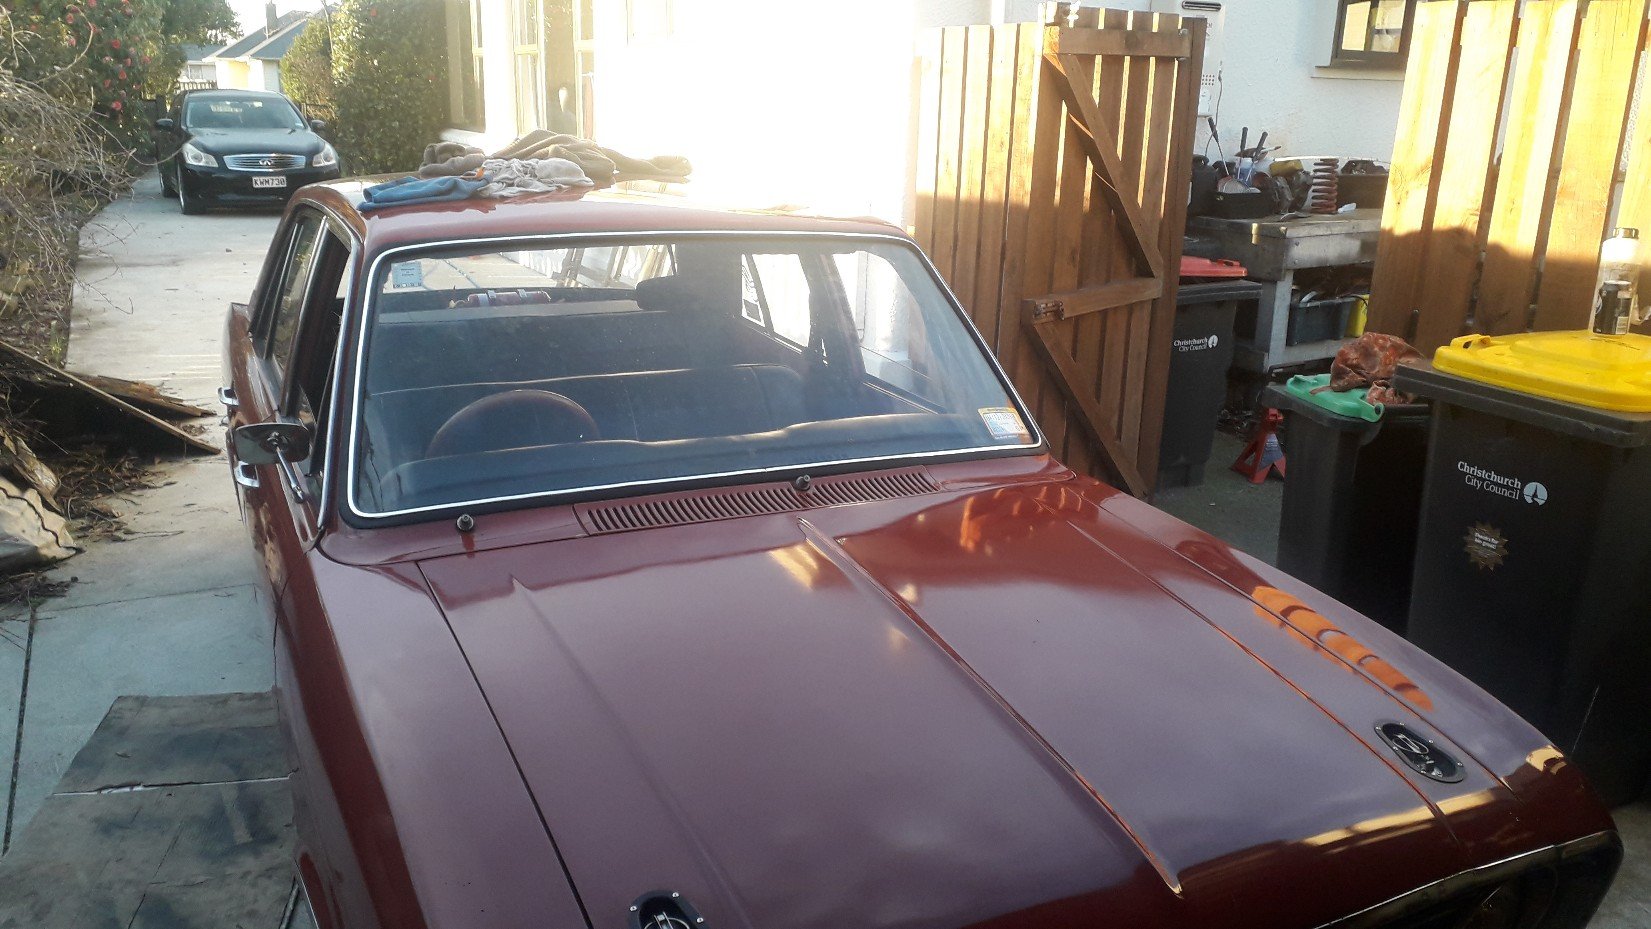
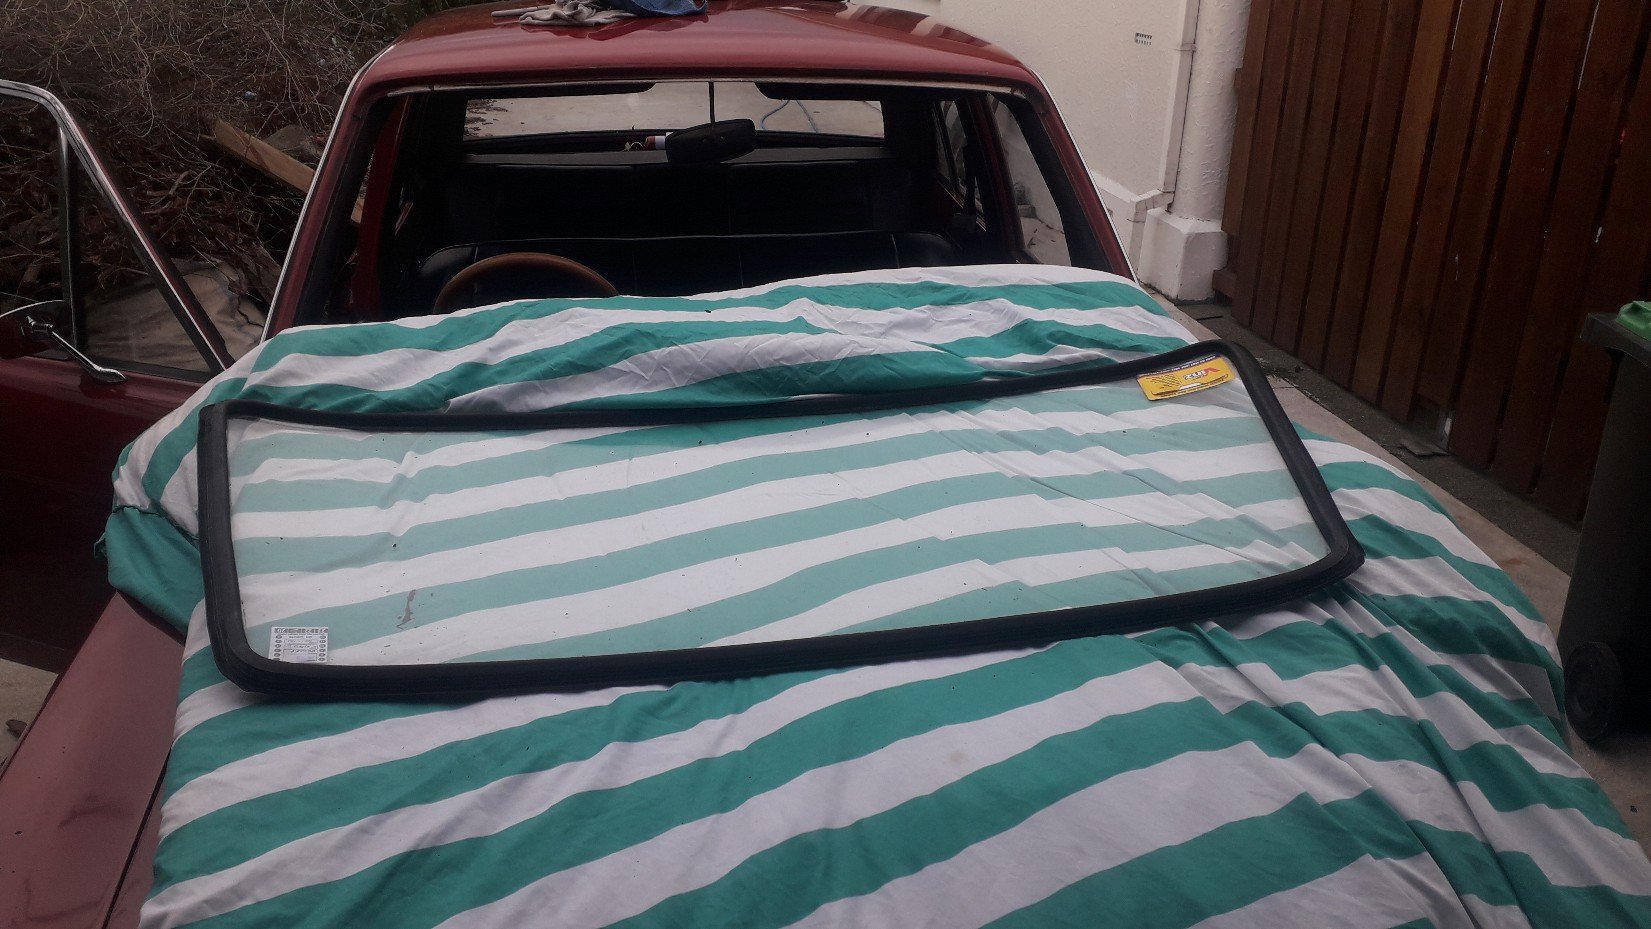
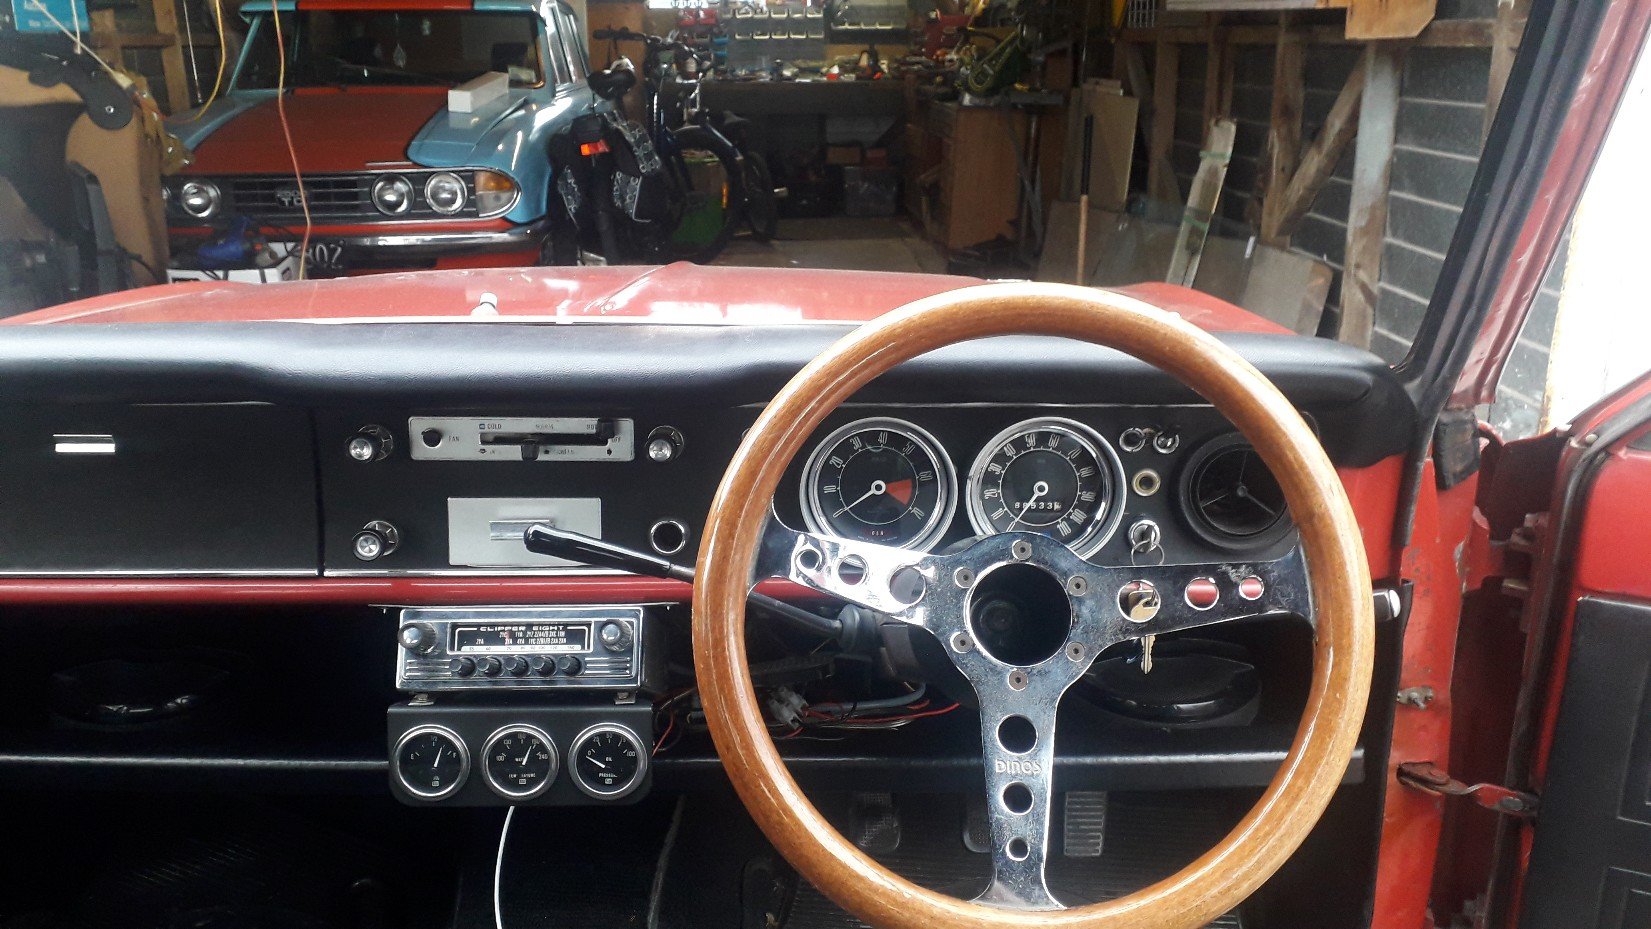
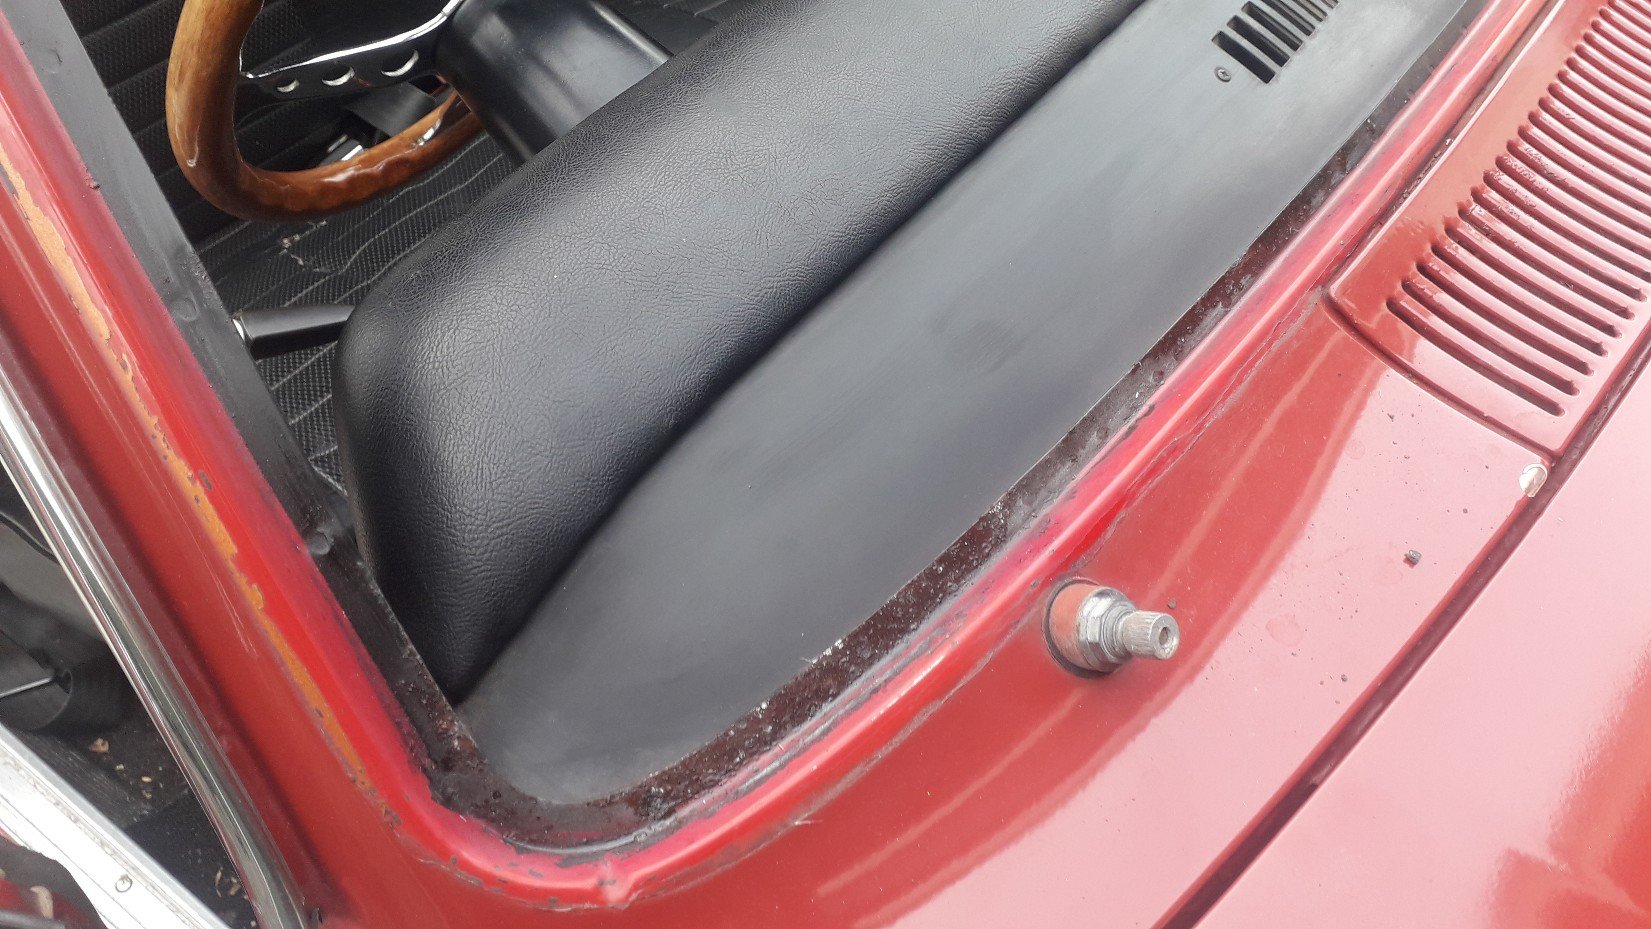
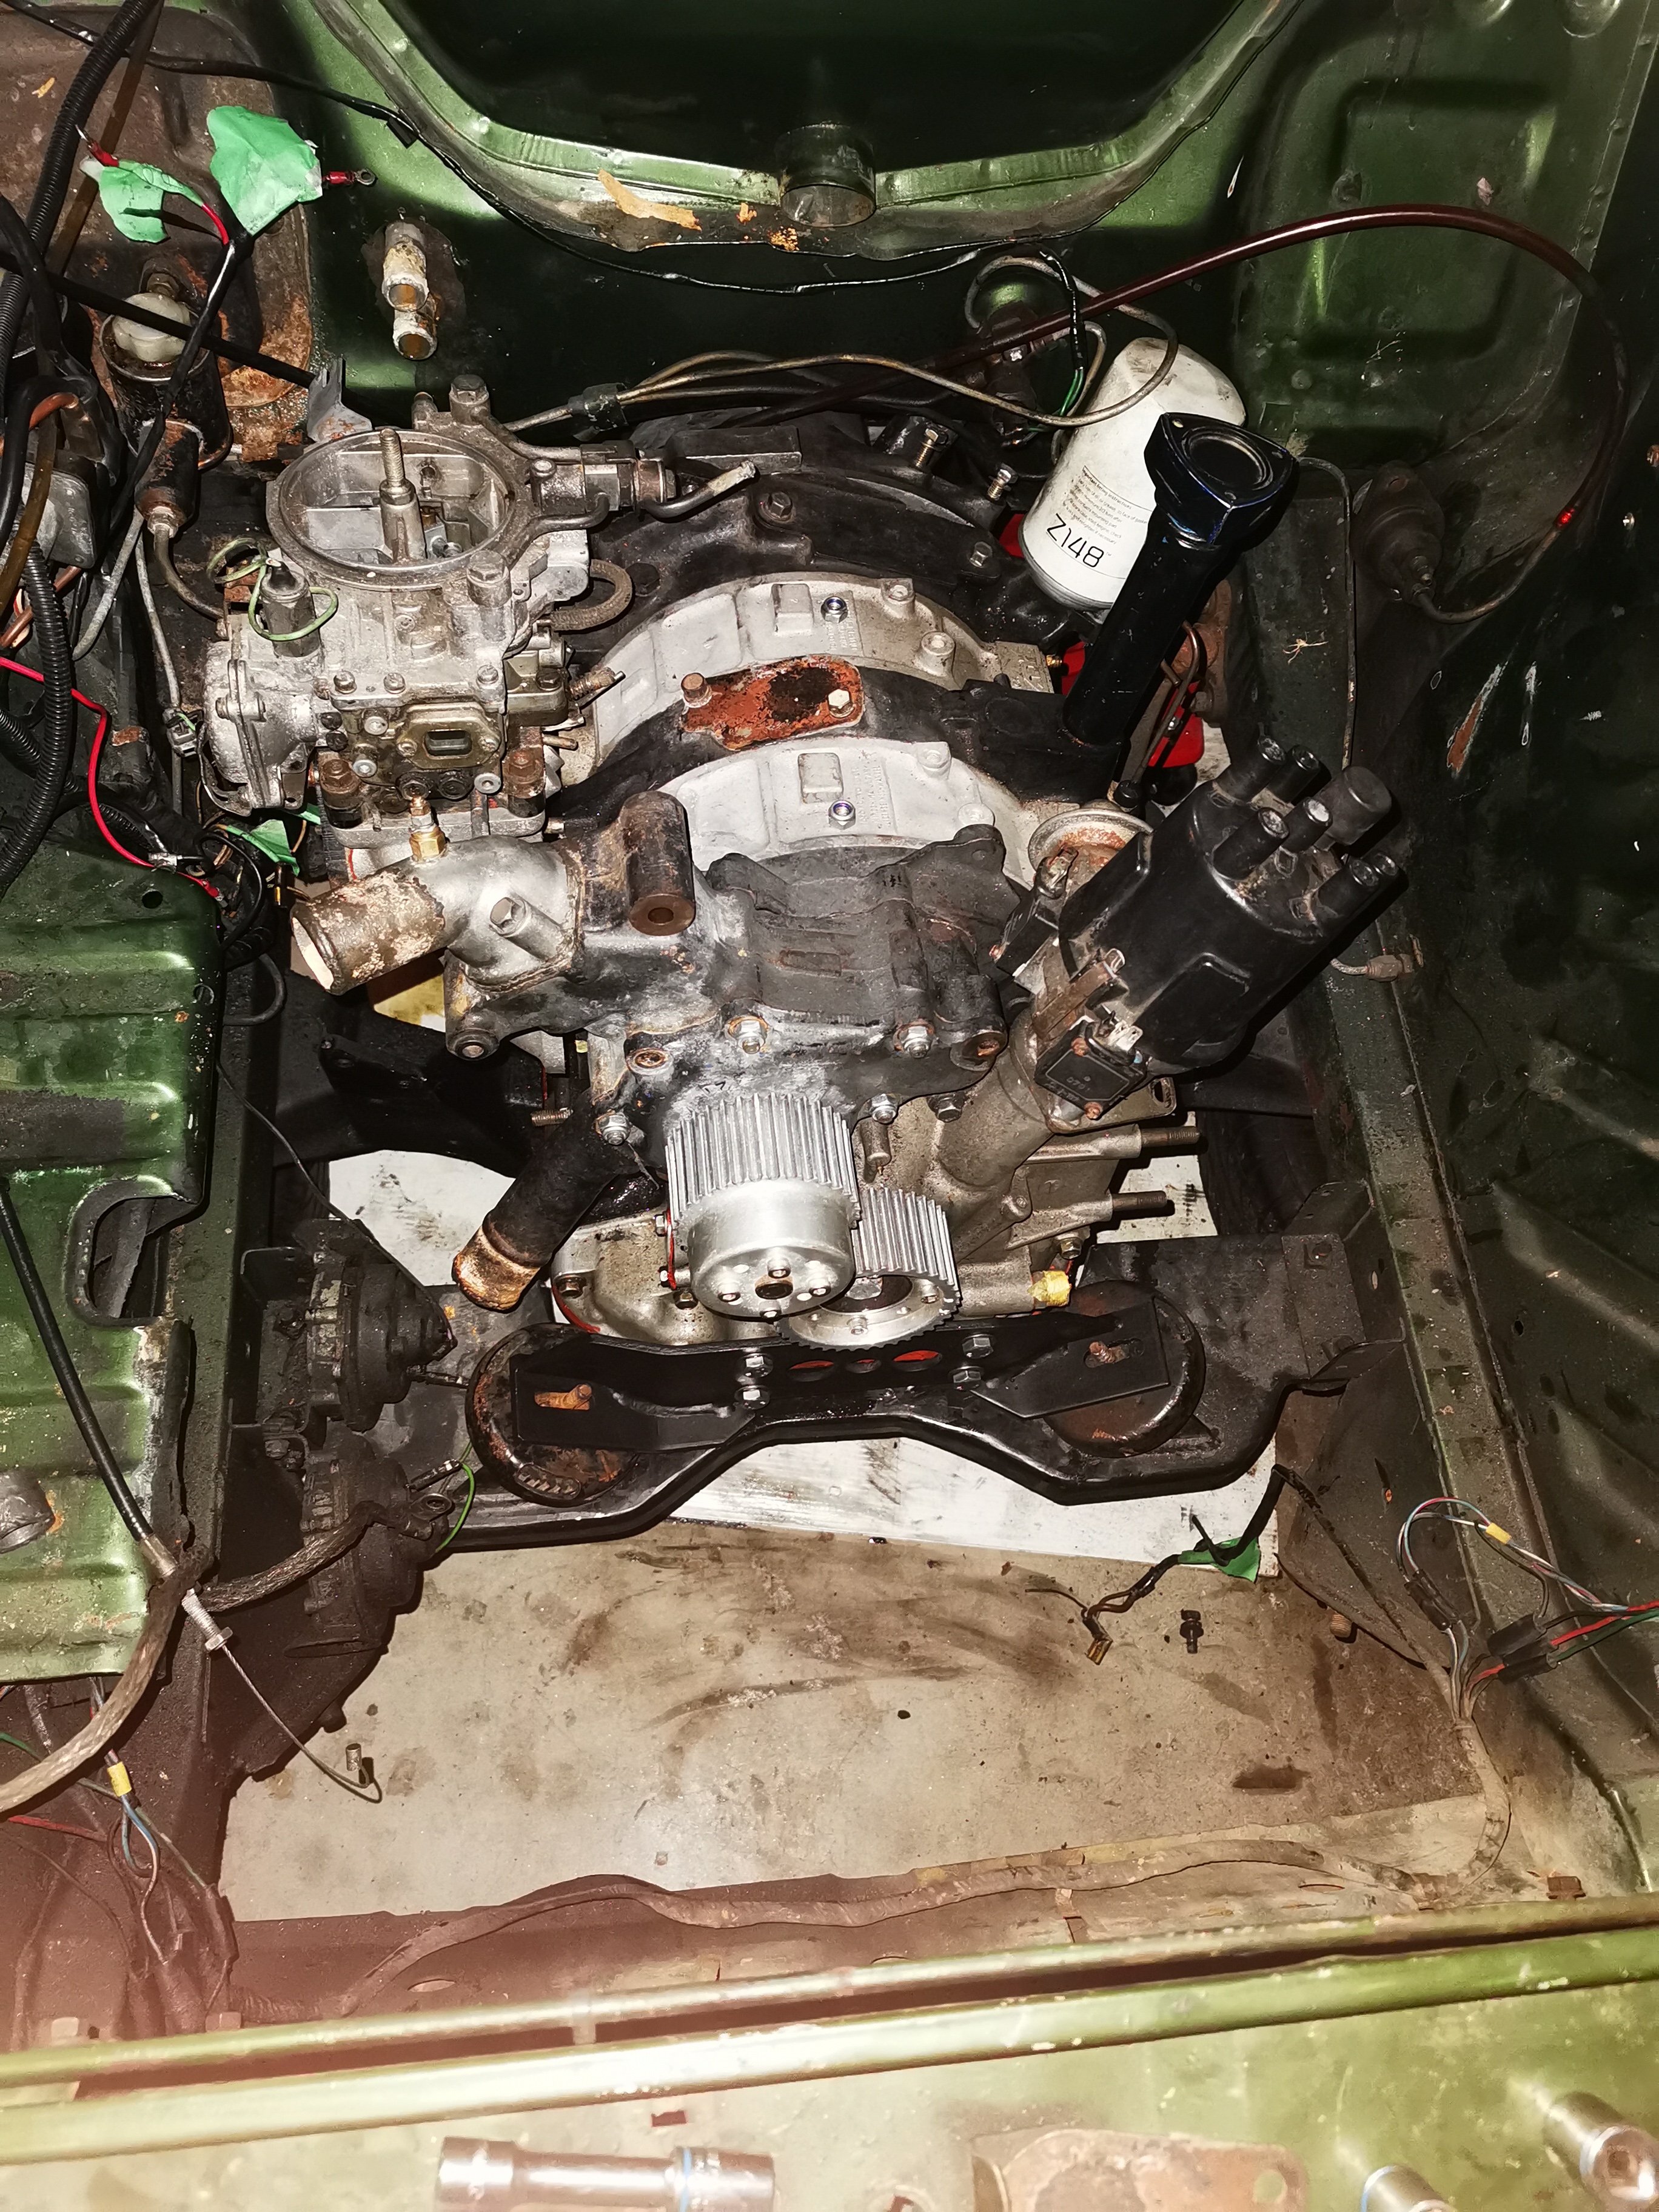
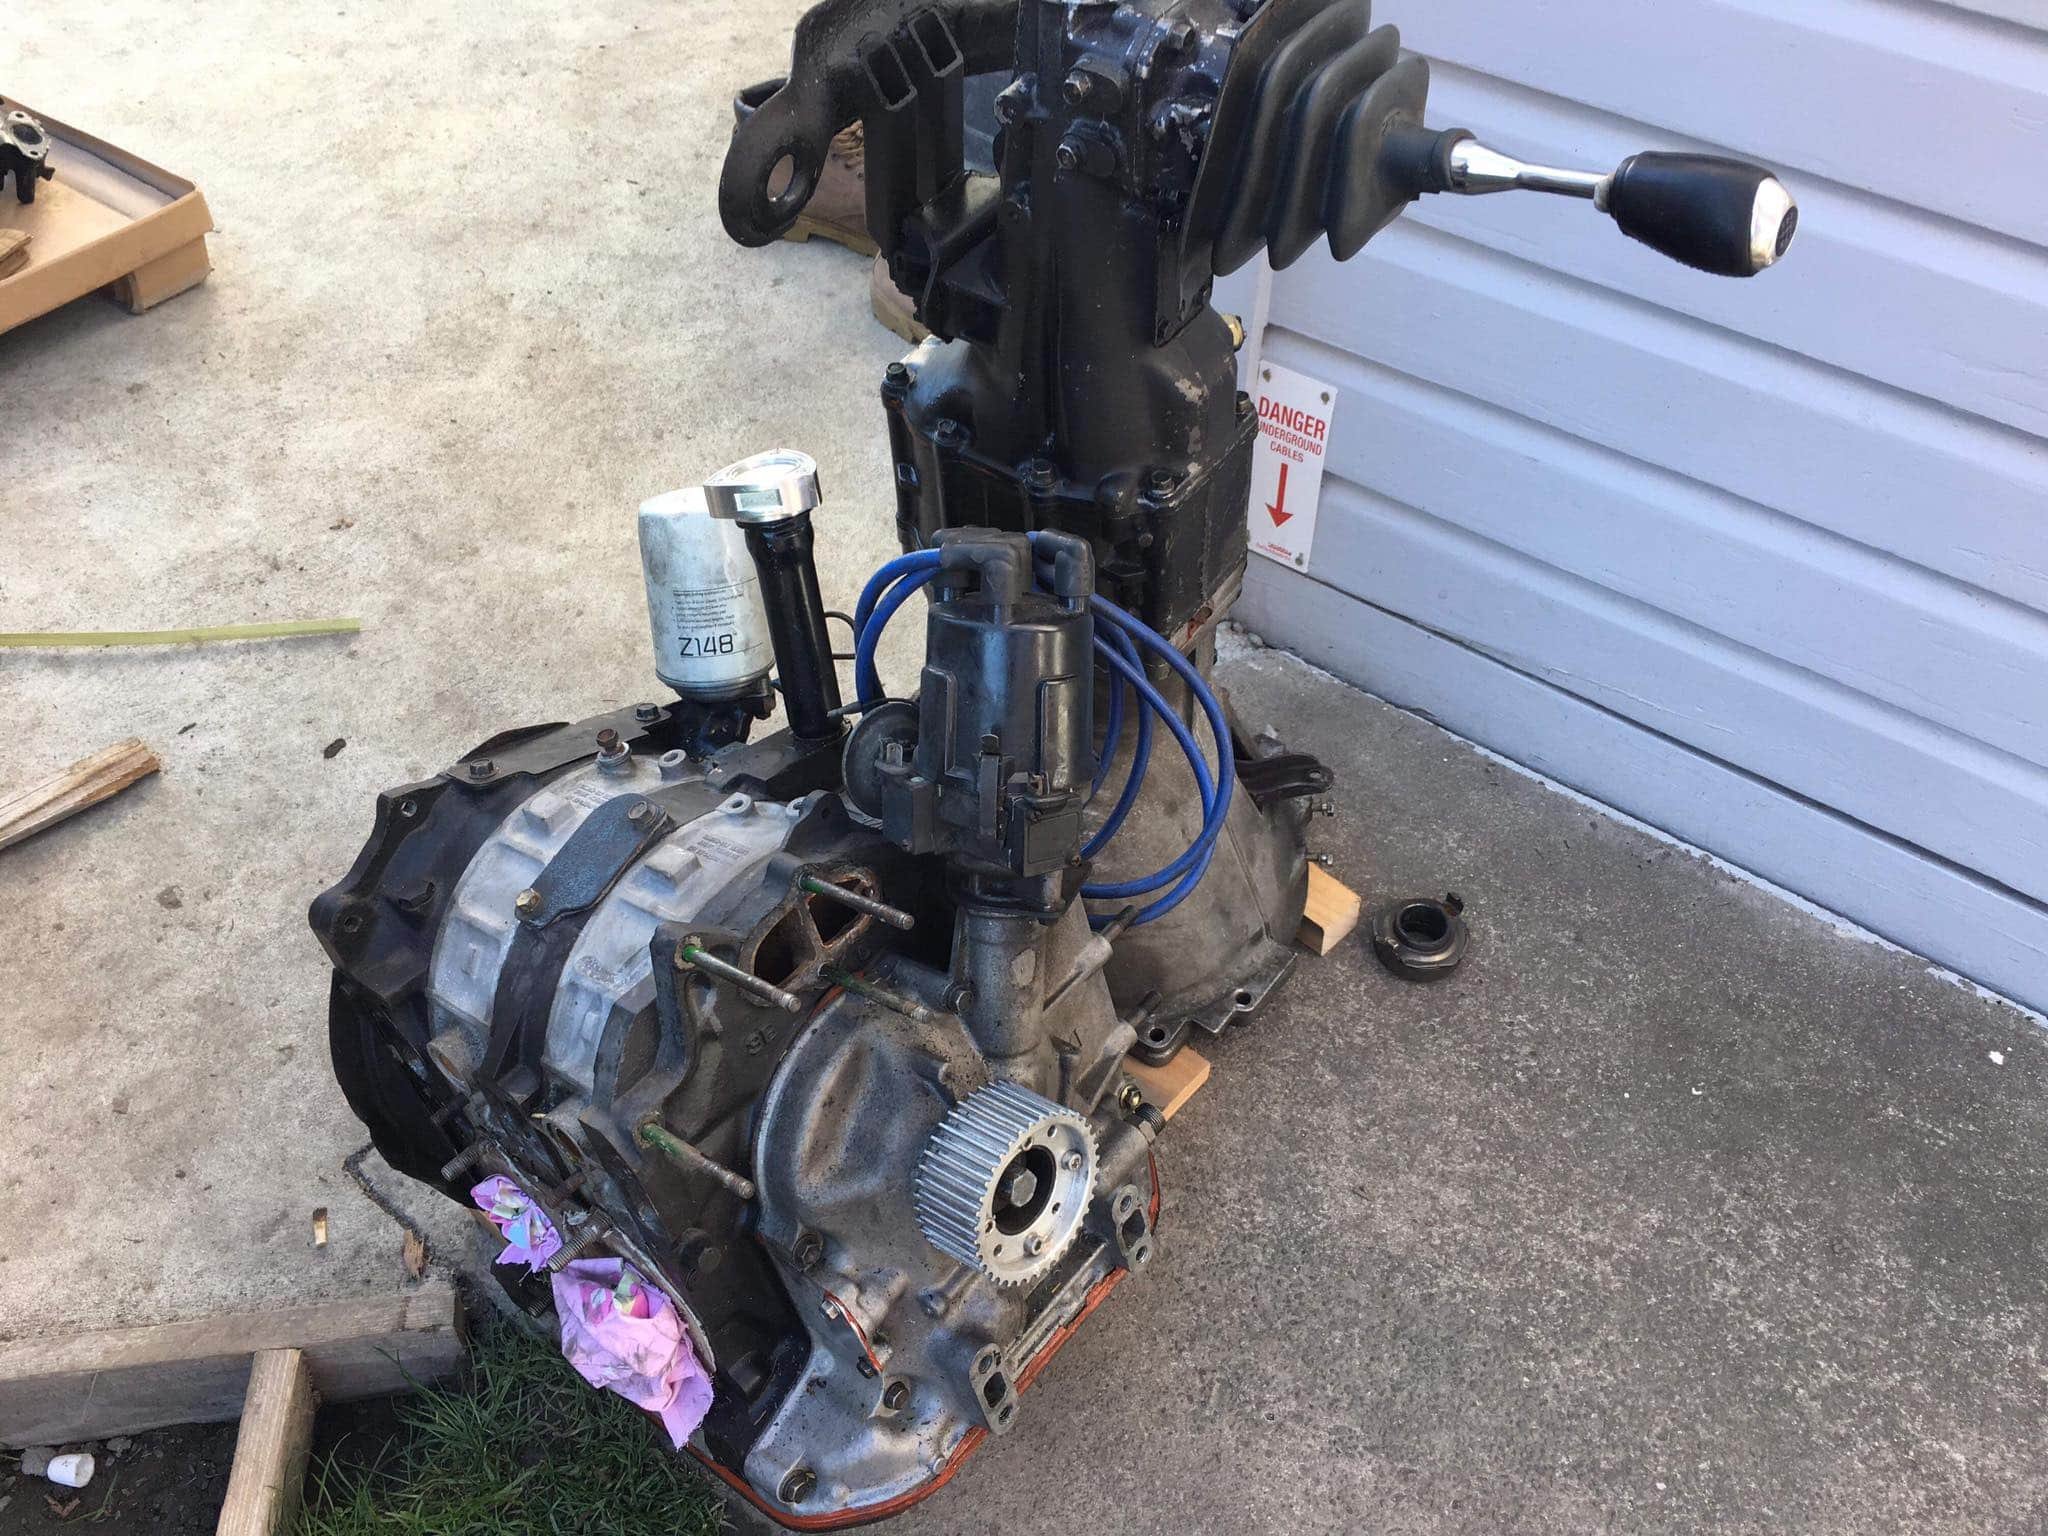
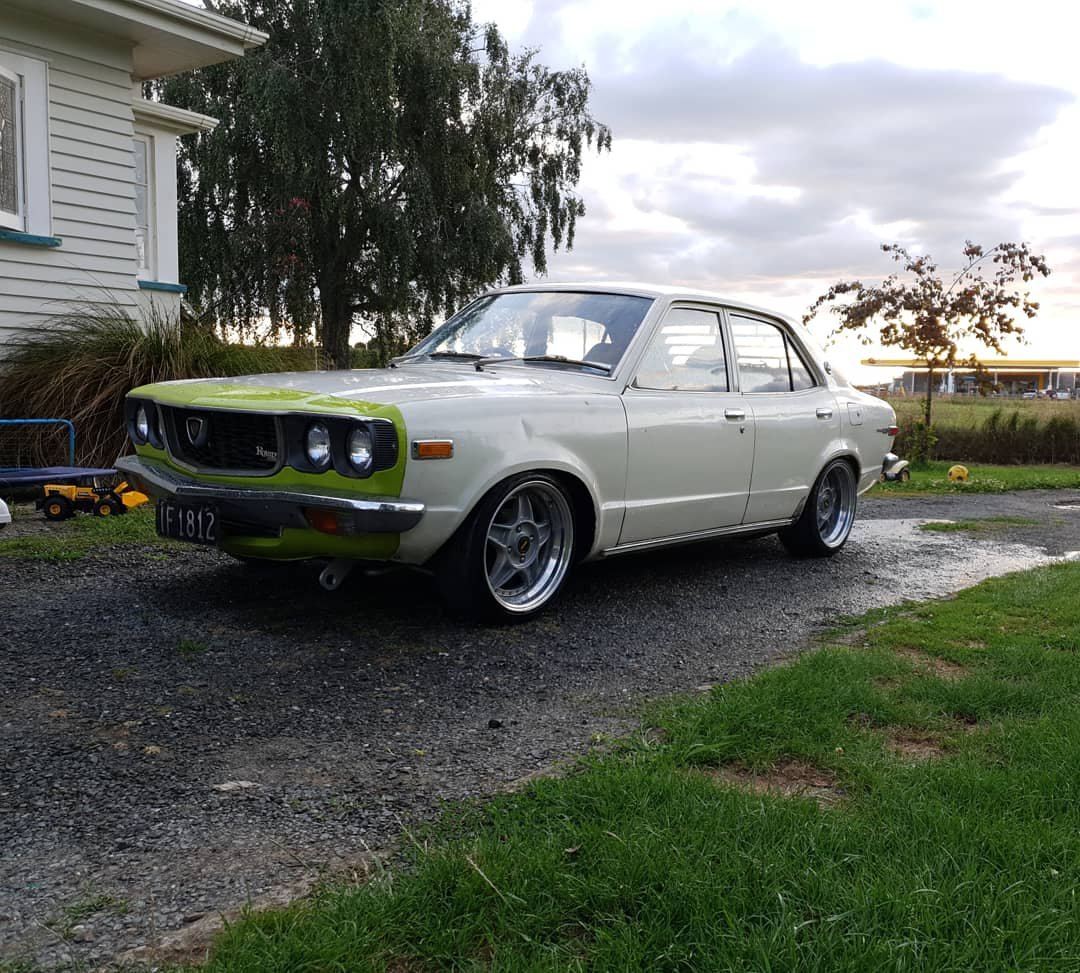
Been a long time no update but anyway thanks to Stu and Sheepers and Nick the Sparky this is where we are at. Weird. Went pretty smoothly, it's spooging a bit of oil out the breathers on the top but I guess once it's run in that'll settle down or it'll just keep doing it cos 4AG life. I have 5 forward gears, a clutch that works and some brakes so with a few hours checking things and tidying up small jobs there's nothing stopping me from going for a wee drive. Oh the thermostat doesn't seem to be opening but that's not really a big deal to sort out hopefully, it might just be old and stuck, or new and stuck, as the case is.38 points
-
Another 2 done. Worked well. I think 4 paper weights is enough for now. Time to move on to something big! For reference of where it goes. Houses cam gearing.15 points
-
So yeah I don't really update this at all, not much has happened since my last post in 2017. Had to use Google to find this build thread because OS search sucks. For the first time in over 5 years this is now living in the same house where I live. Amazing. I might even use it over summer. It doesn't fit down my driveway though so I'll have to make a small ramp to avoid it getting bellied. Was a three plank job to get it down today when it arrived. I might do some stuff to it as well. Check back in 2023.
 8 points
 -
So update time again so this doesnt go stale. Wiring mockup done. Took exception to the placement of the IAT sensor so have fixed that. Location couldnt be any better than this. Power distribution has also arrived so now the biggest hurdle is having time to put into this. Bulkhead connector should arrive tomorrow so I can start to get the engine harness finished. Really looking forward to see it done.3 points
-
I finally got the spindle running, as expected it was me being a dumbass about the VFD setup parameters. Although for some reason it is only getting speed control from the potentiometer on the VFD. I am ok with this though as it will allow me to experiment with speeds and feeds. I also trammed the spindle to cut straight and flat, good enough to be able to face the table anyways. I also did a hard out calibration of the X and Y axis so it would cut accurately. I also made up a longer control cable for the big servo, that was stressful. This means everything is nicely tucked away in the cable trays now. Next is to buy a cutter and face that table... Then I'll design a vac table and make it. After that it's all cash money.2 points
-
I would like to attend next month if it lines up with the dates im in Wellington2 points
-
Amazingly my car is fully legal! Well it was when parked, at least. Wonder if it still runs?2 points
-
You should, but I hardly ever do. Just gotta pump it faster to get the juice going2 points
-
you should bench bleed any master cylinder before fitment anyway.2 points
-
Think I'll bring the wagon out of hibernation....no one tell the po pop though2 points
-
I'm not gonna lie, it's pretty cool.2 points
-
You must be super duper stoked to have that running. I know I'm super duper stoked that you have it running2 points
-
Vid isnt the greatest and my dad didn't learn to hold it landscape but here is a quick blat up the Taieri river. You can only go ~6km up the gorge and it quickly goes from placid to some heavy lifts to completely un boatable - didn't go as far to show those parts.2 points
-
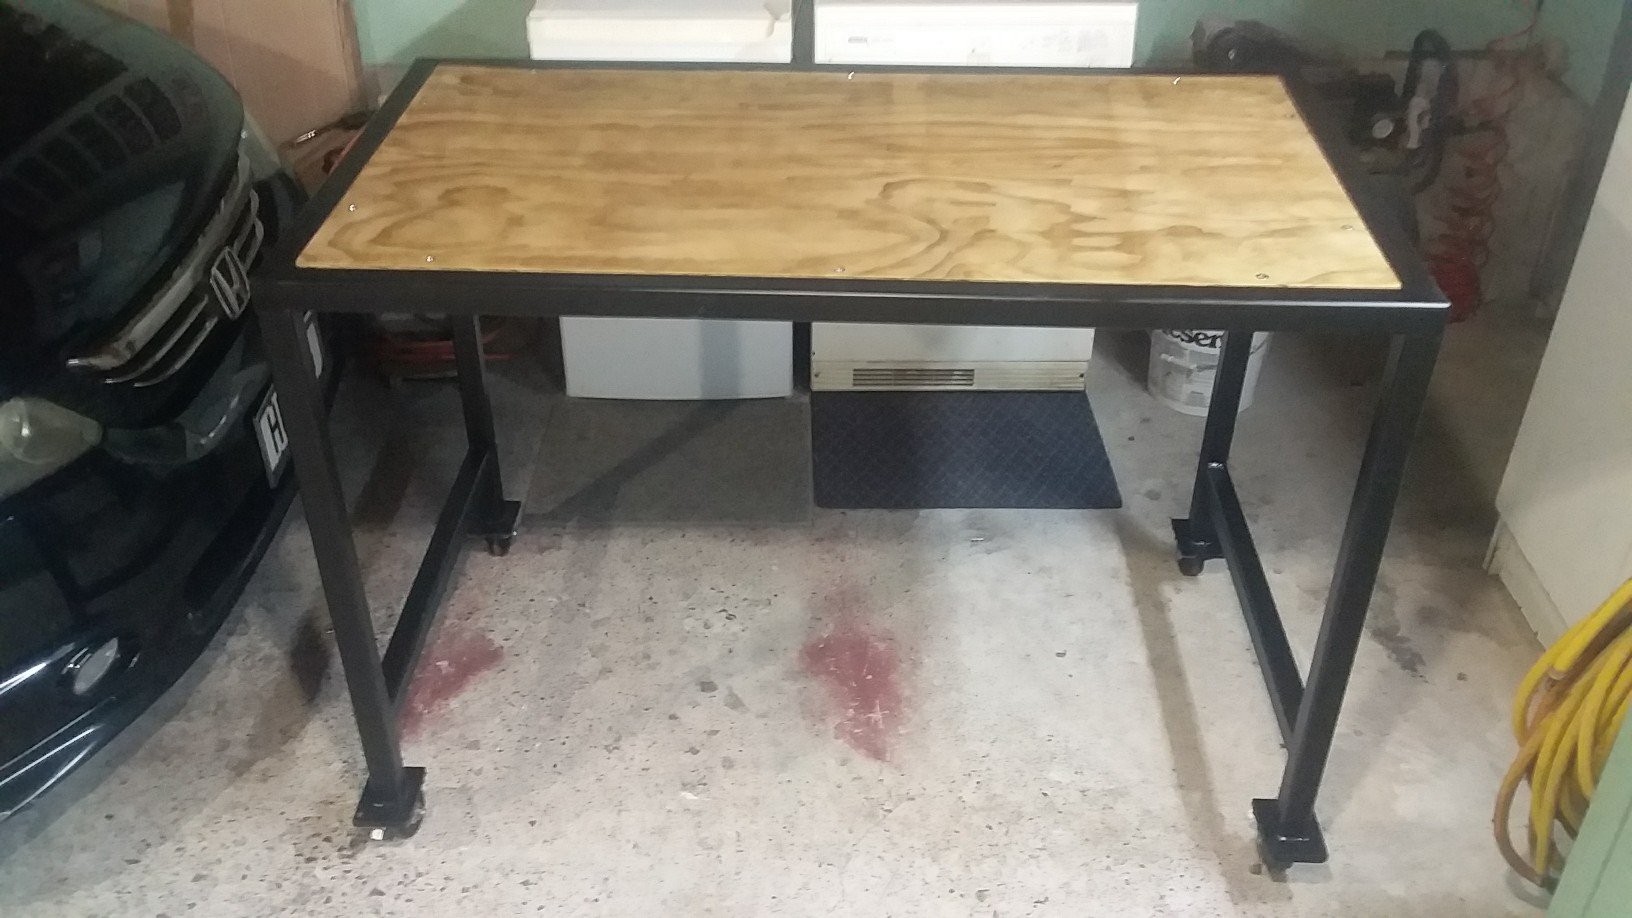
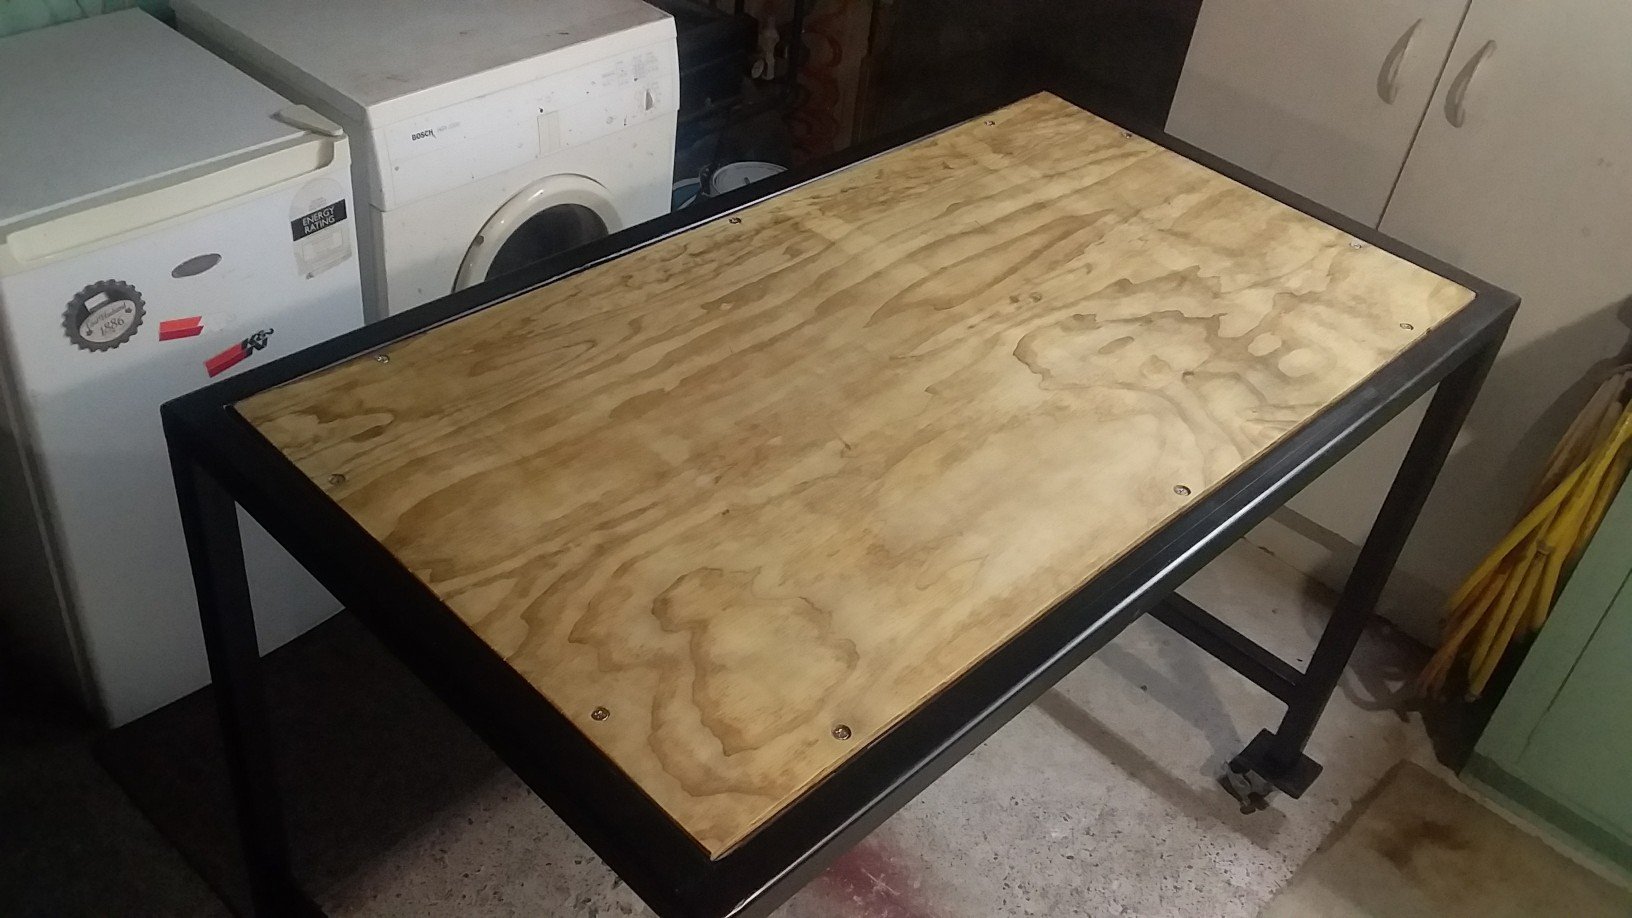
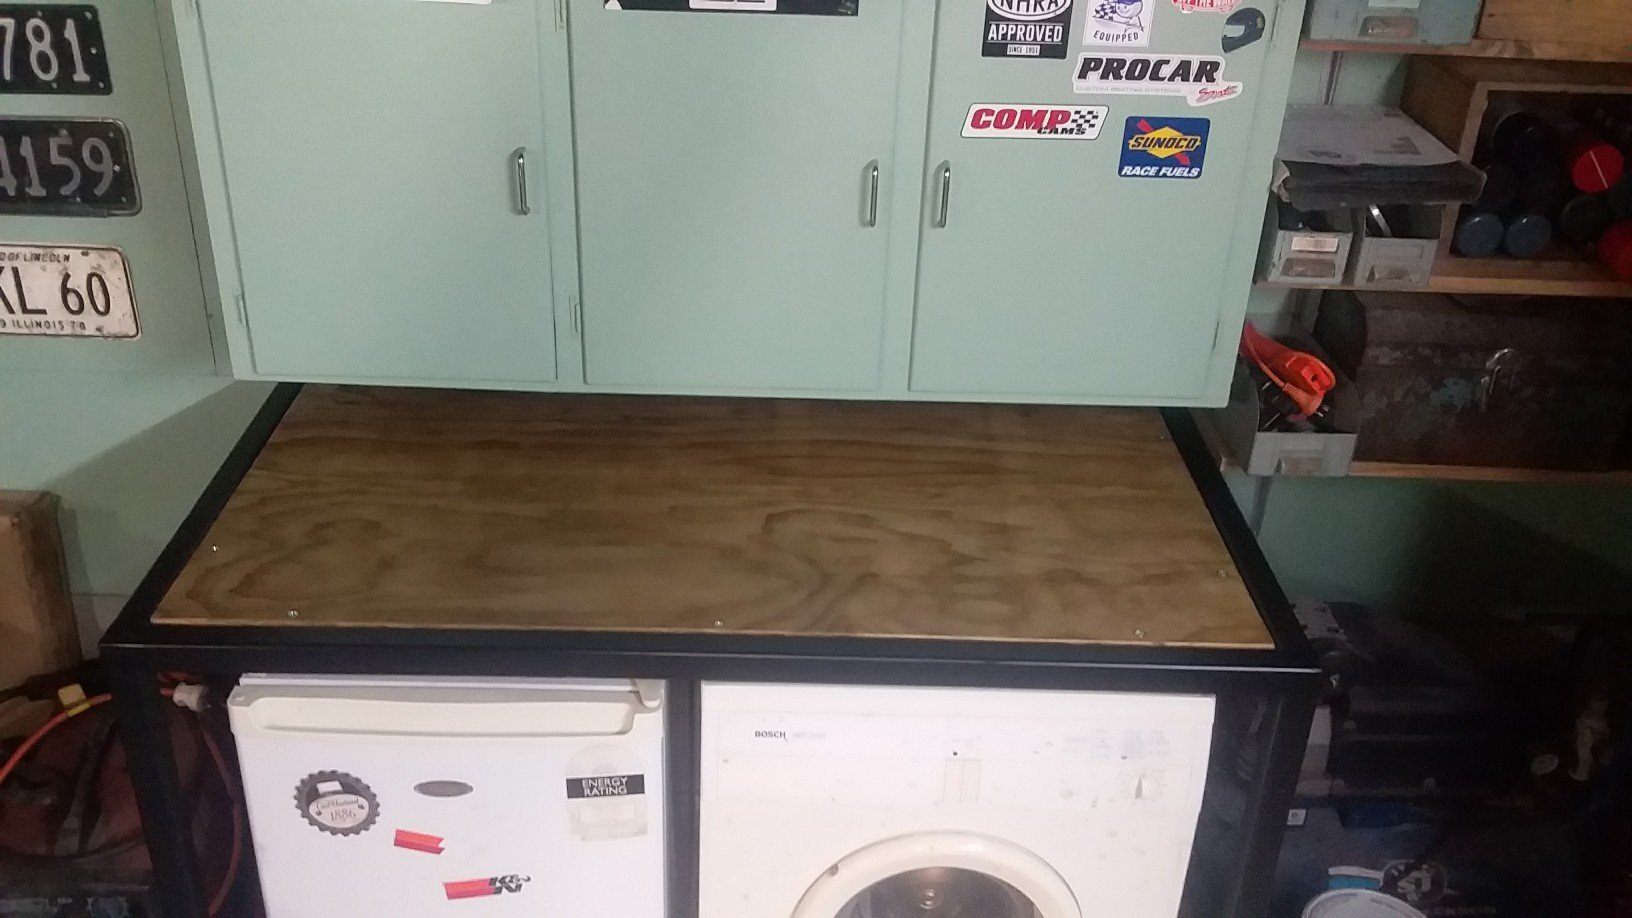
Finished this bench to sit over the ugly whiteware and provide some extra bench space. I started it last lockdown, so I'm glad to finish it! Except for the screws to hold the ply on its all recycled materials. Sanded the old ply down and coated in boiled linseed oil. Silky smooth. And black zinc it for the frame. Turned out better than I expected, the plan was to mount a bench grinder to it but the wife thinks it's nice enough to be extra outdoor furniture!
2 points
-
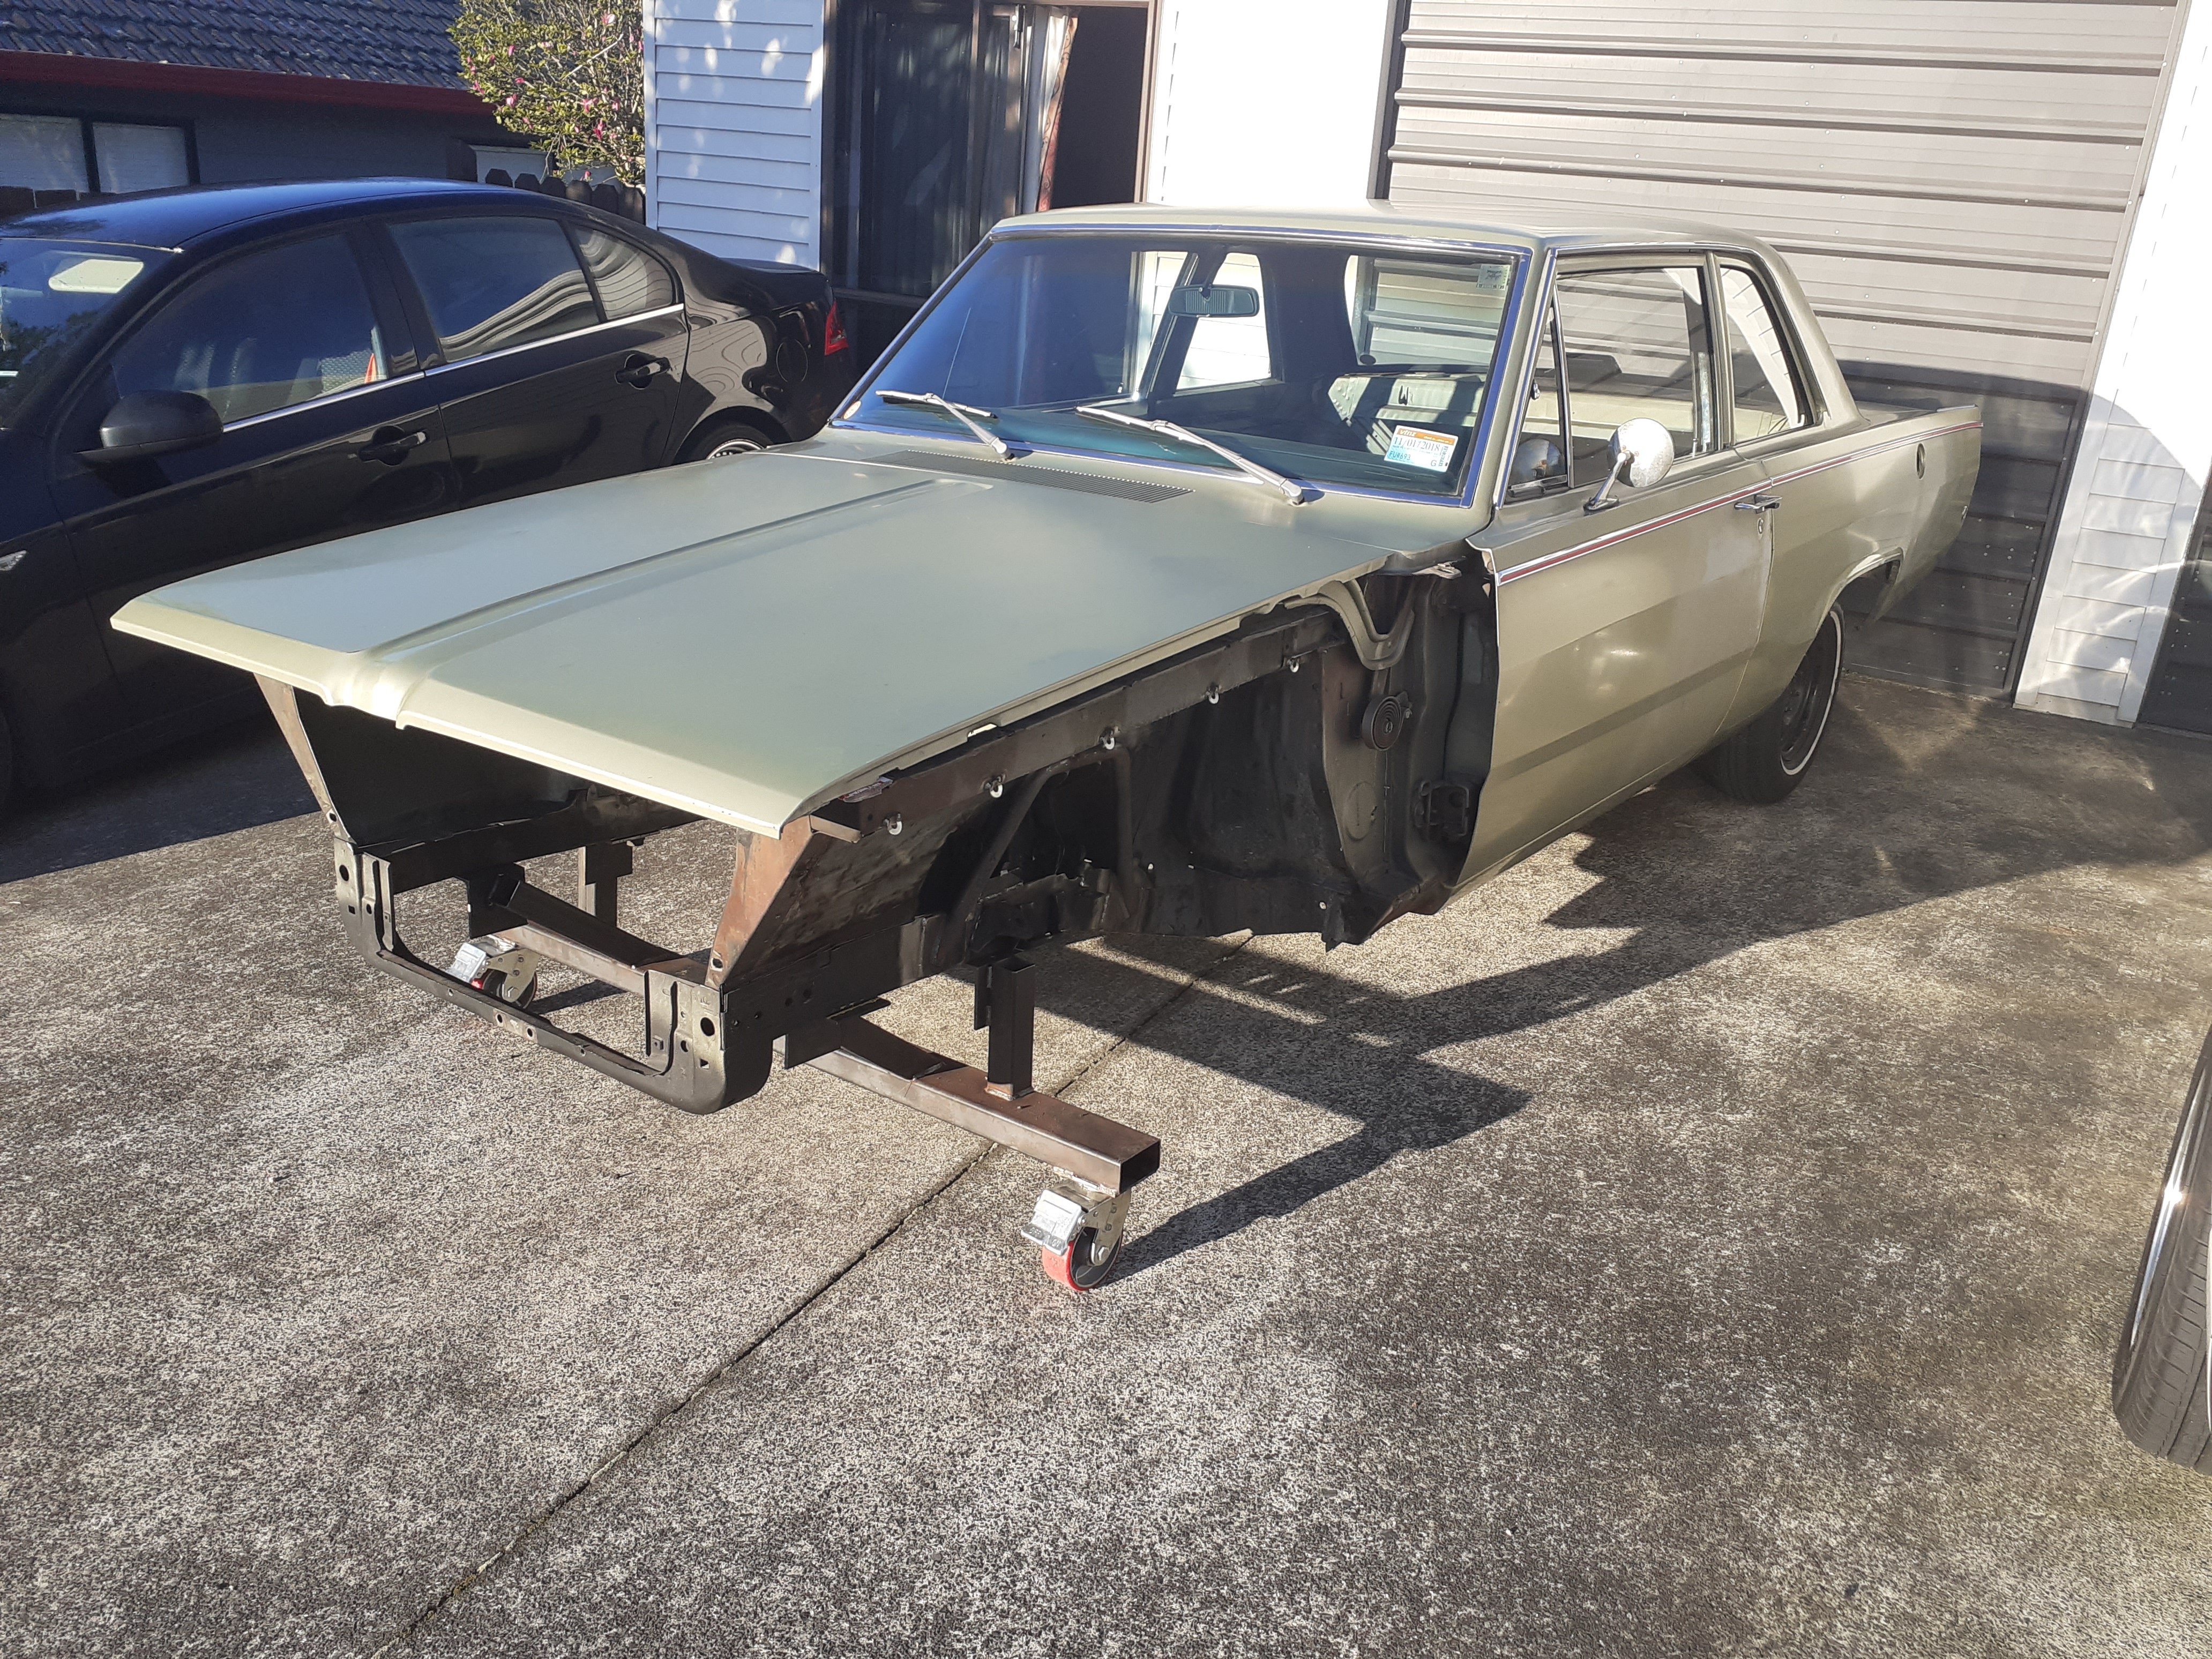
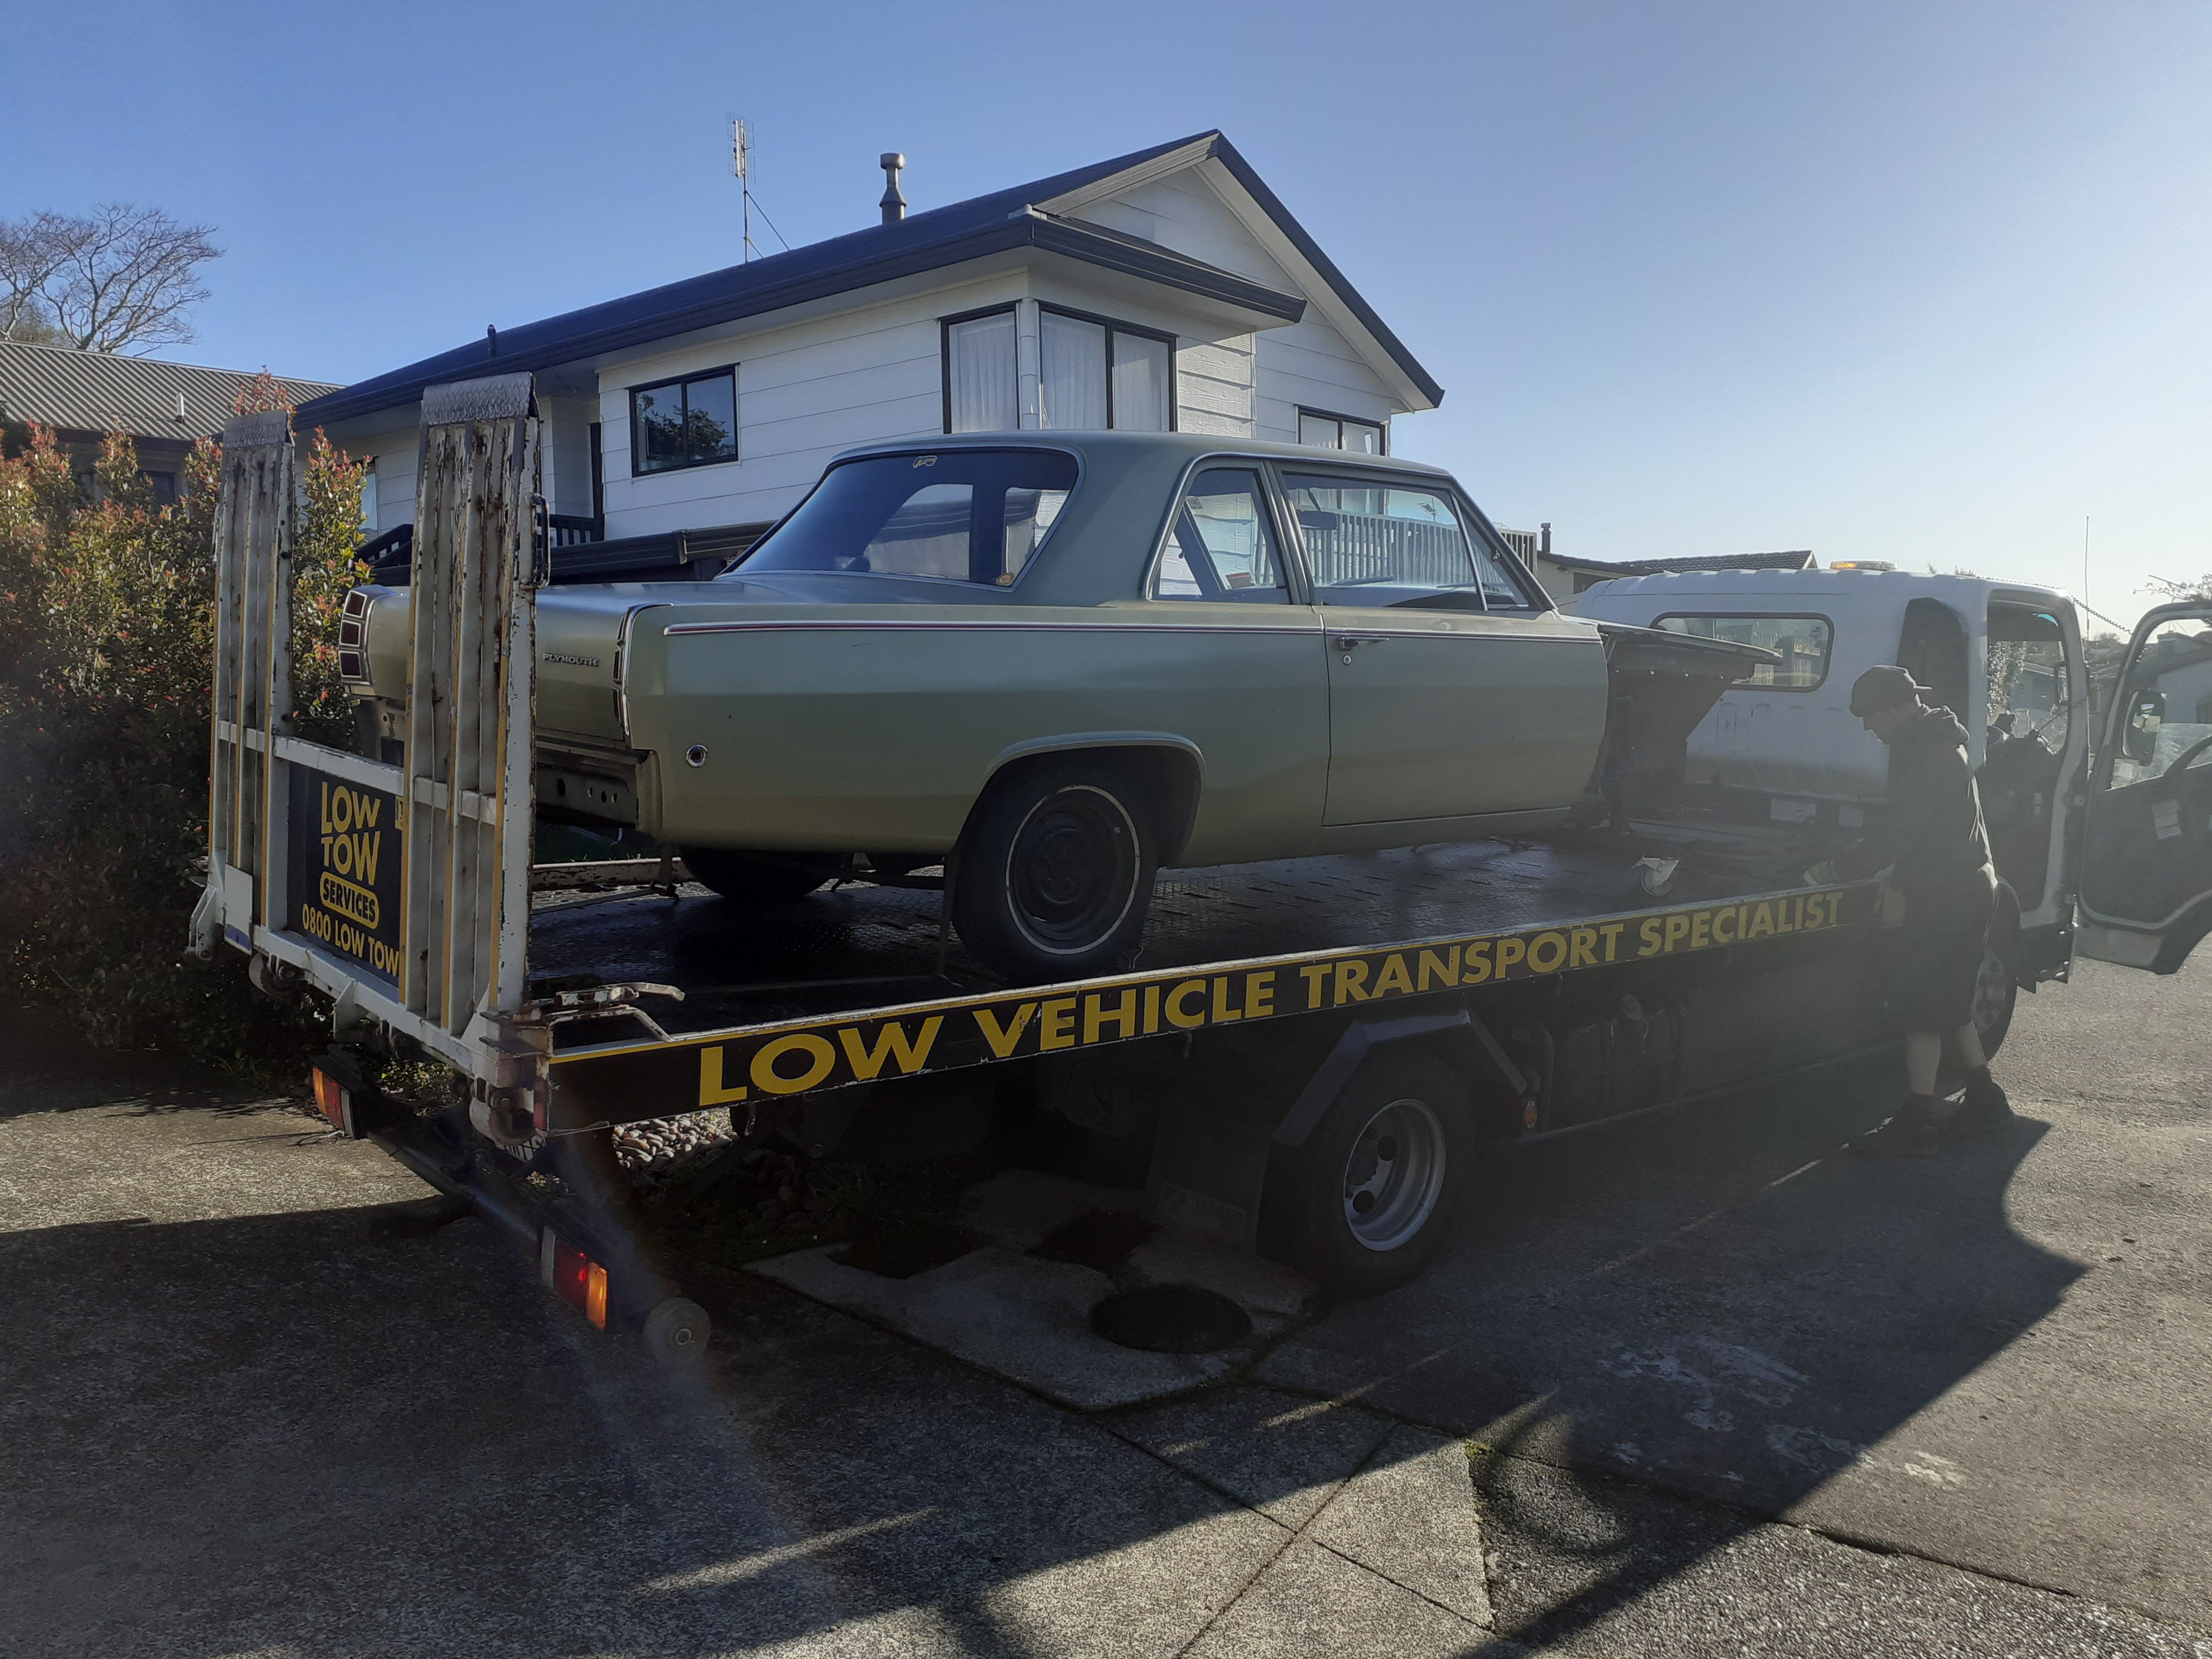
So when i first looked at the car right before Auckland Lockdown V2 it was a bare shell on a chassis dolly, The previous owner spent a bit of time during lockdown and put the panels back on, factory suspension and steering and diff in and got it mobile again for me. He packed the car with as much as he could then when I picked it up the ute tray and back seat was chocka with bits as well for the trip home!
2 points
-
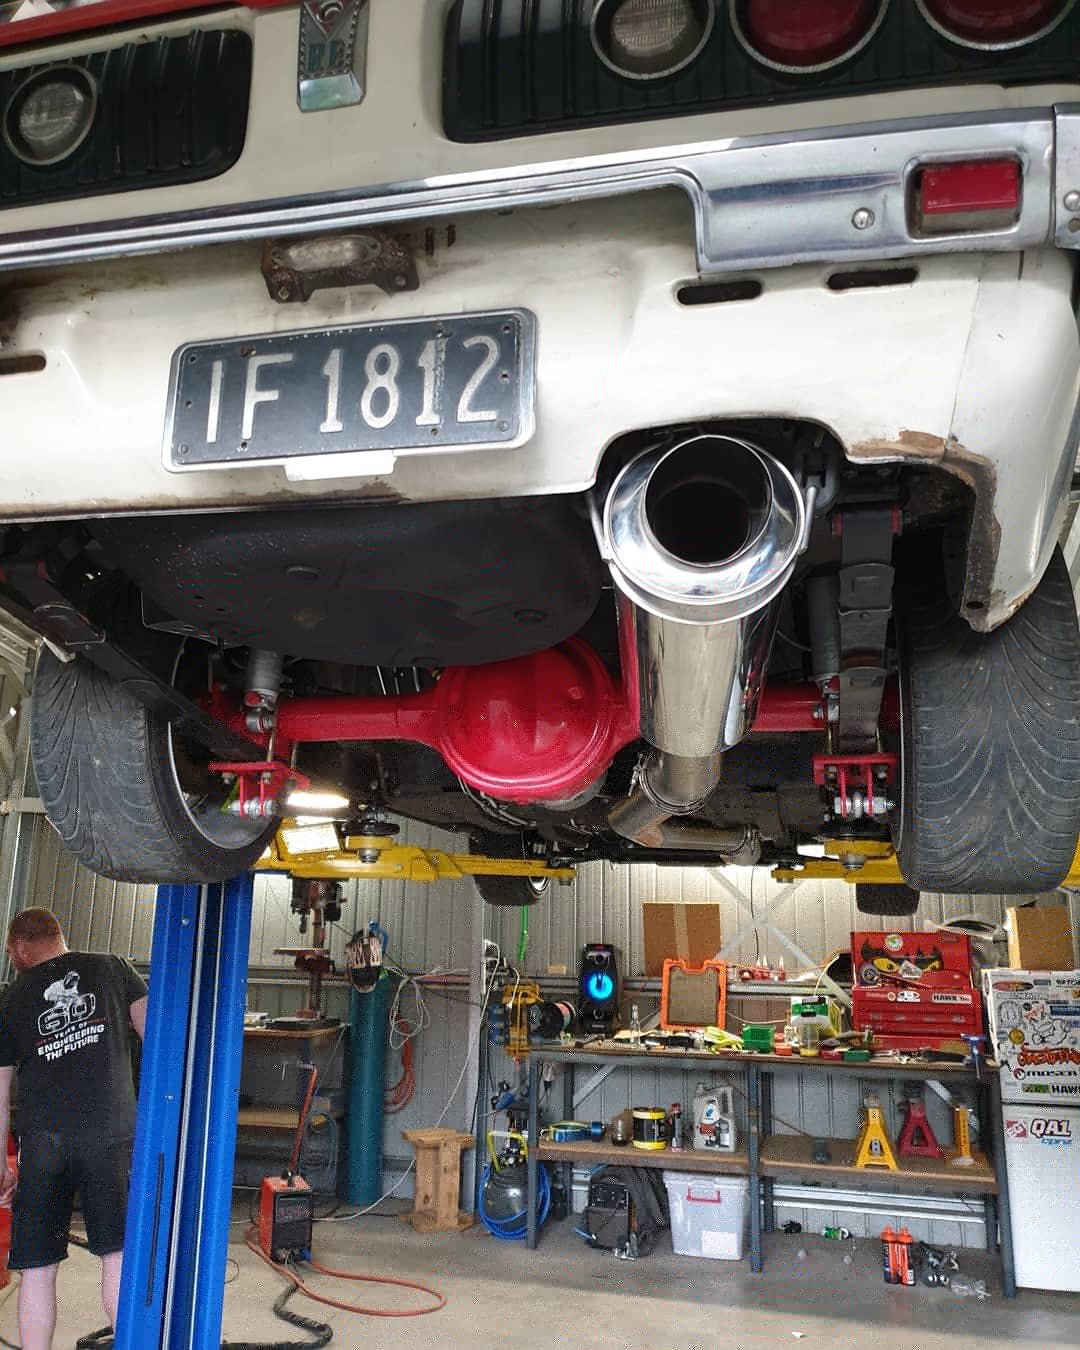
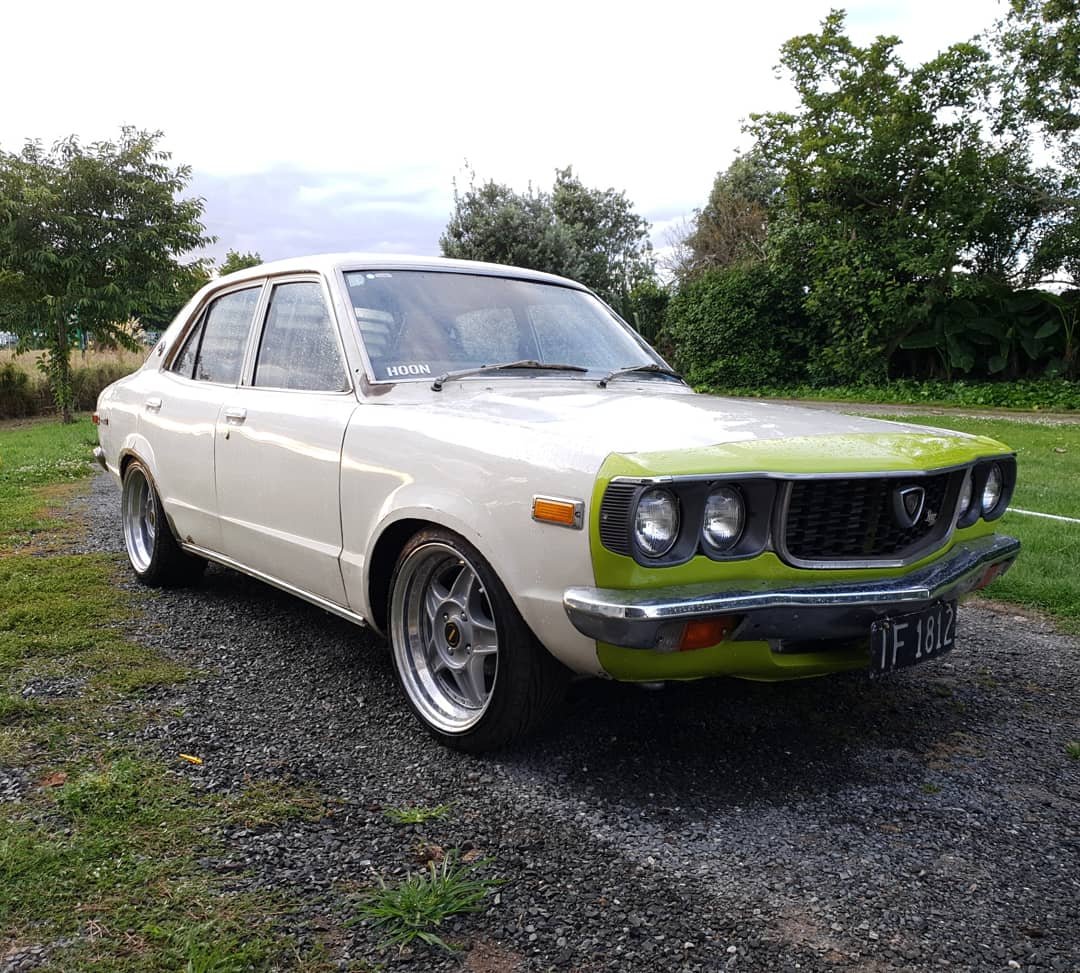
All back together now. Had a turbo shit off a time getting the heater hoses back on because some idiot stuffed a huge motor right in the way. New clutch (remember that, the reason we pulled it apart in the first place) is really good, it's a tiny bit grabby at take off but it's not really bedded in at all so I don't know if this will get better or worse. Also i have connected the boost control pipes around the wrong way so it's free boosting up to about 30psi. Easy fix that. I drove it to work.
2 points
-
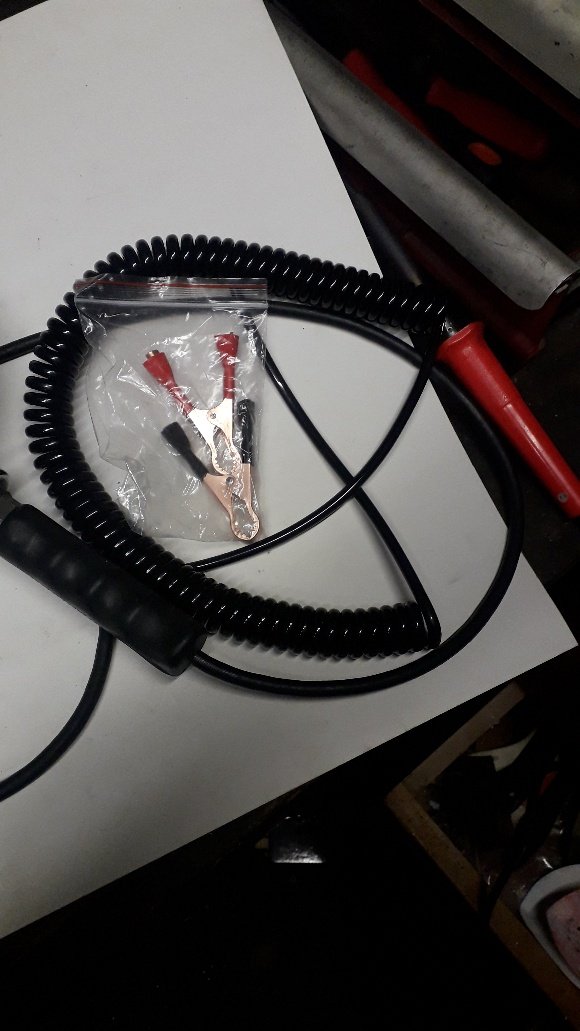
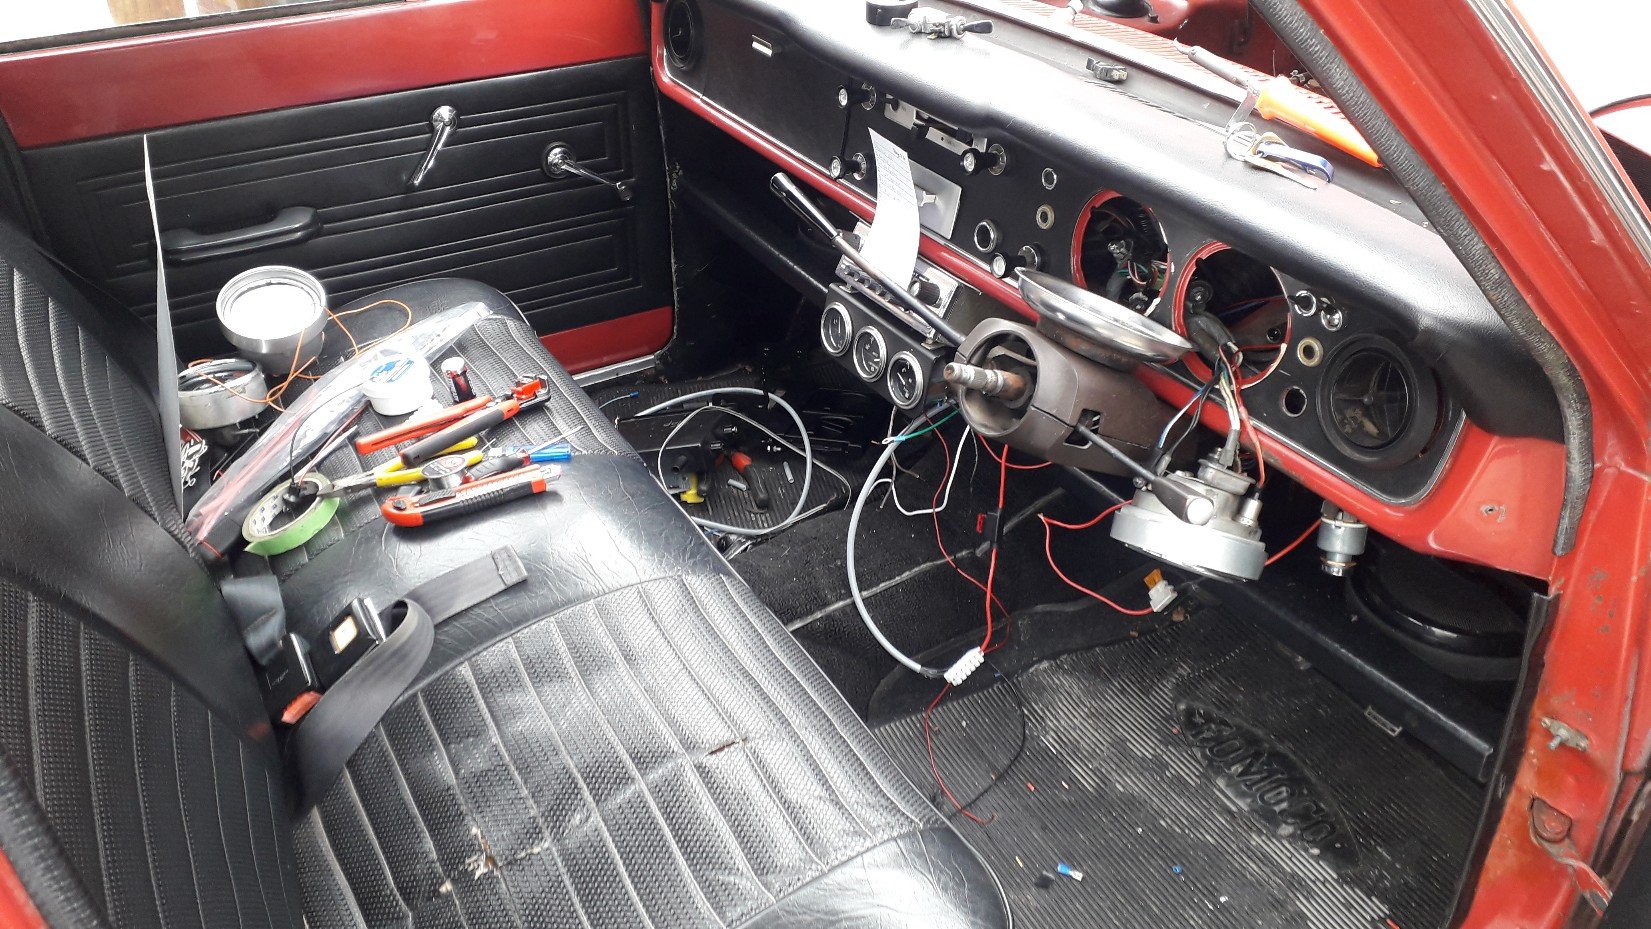
Turns out all the links have shit themselves for some reason, nevermind. Anyway, all this bullshit has me pretty up and down and generally a bit upset in between the occasional moment of optimism. I haven't seen the car since a week or so before lock down, and even though I might not have done anything on it anyway under normal circumstances I thought I'd go through my phone a bit and see what I had, just as means of trying to cheer myself up. I haven't updated much here, but this is the engine bay, it has the loom in it in this photo with much thanks to Stu, Nick the Spraky and Sheeper. 20200307_203640 by Richard Opie, on Flickr I'm a bit hopeful I might be able to spark it up not long after we're allowed out again, it'd make me pretty happy to do so. KP61 Phone-11 by Richard Opie, on Flickr The brakes also work on it, the handbrake works, the body loom works (headlights etc), Lewis has the new front seats to trim and soon I'll ship the back one down. It has some cert compliant wheels and tyres on it now, and Clint even came and gave it a wee pre-check over just to ensure I haven't made any totally glaring oversights. So overall, notbad.2 points
-
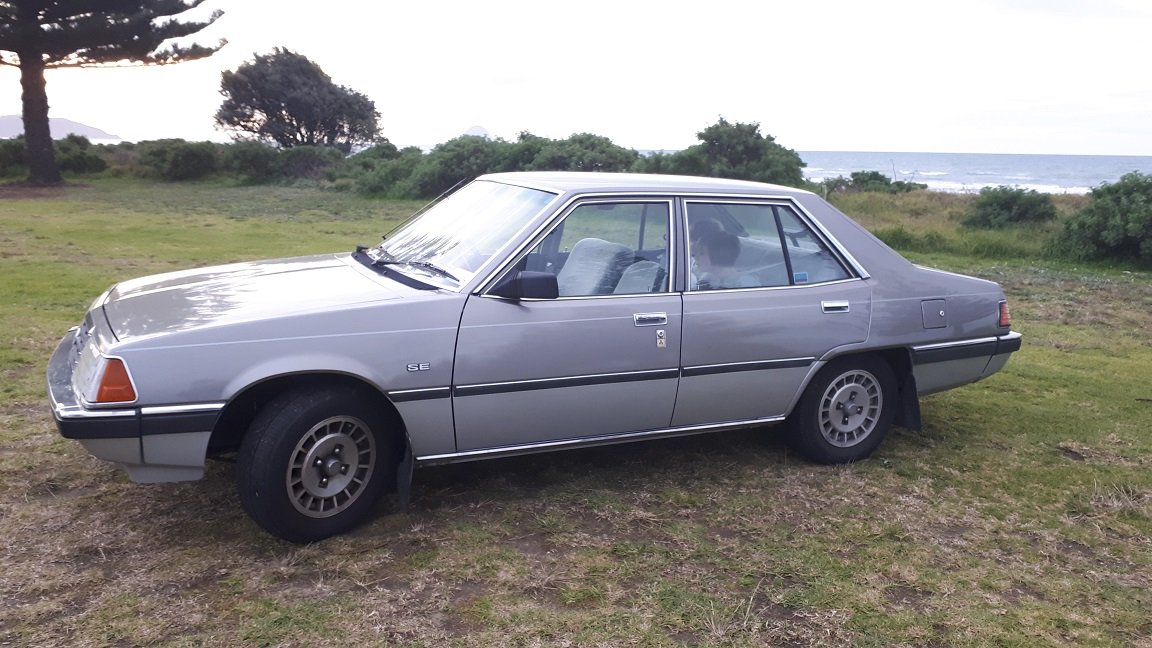
Well I haven't been very good at keeping you all up to date with what's going on in my shed lately so I thought I should try a little harder and share this with you. A few weeks ago I spotted this 1982 Sigma SE on the side of the road in Ohope and decided that it had to be mine. It ran like crap, but it is very tidy and most importantly is rust free. I have been busy working on getting it running properly. The car was on LPG for many years and the factory carb was pretty much useless. I have fixed this problem by installing a 32/36 Weber and she runs sweet now. Photos and details to follow. Discuss the project and/or mock me for my ridiculous life choices here
1 point
-
one time it bit me in the ass and the master was a cunt to remove, so i always do now1 point
-
highlight of day seeing startup vid on the gram, well done ol chap1 point
-
See y'all tonight!1 point
-
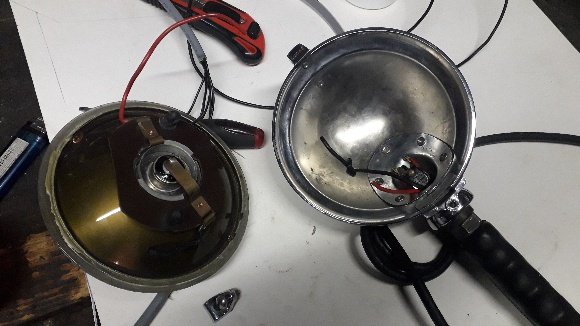
One classic lucas workshop light bought at a swap meet for $20. Blown to hell, I think someone put 240v in it or something, everything was melted. Some ali express goodness and a very expensive bulb. Seriously. The bulb was more than the lamp lol. Done. And it works.
1 point
-
Got it on the dyno made 305kw @14psi . https://youtu.be/zg2lvkEhofM1 point
-
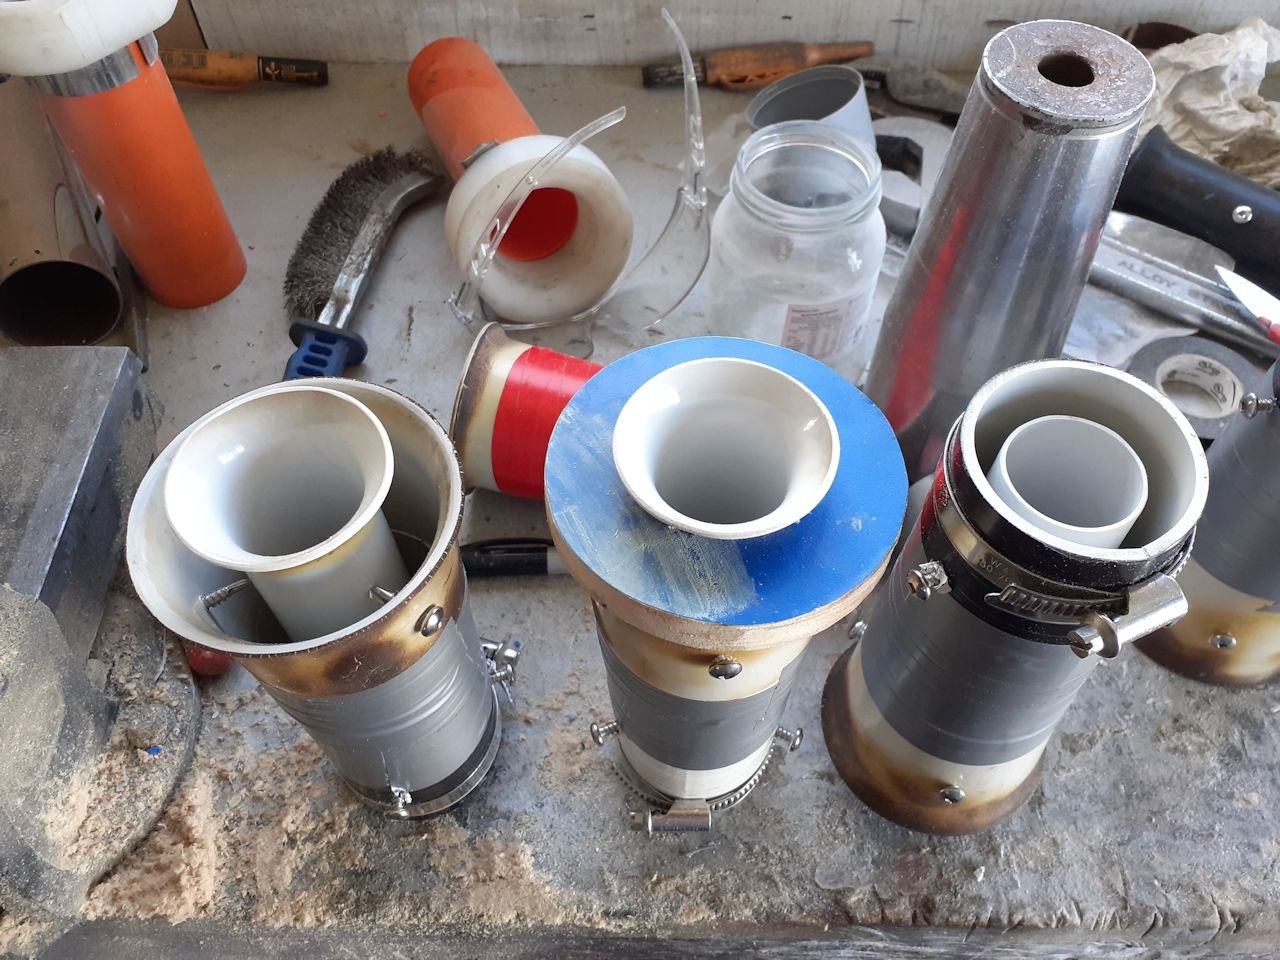
These are up next for some testing. maybe this weekend.
1 point
-
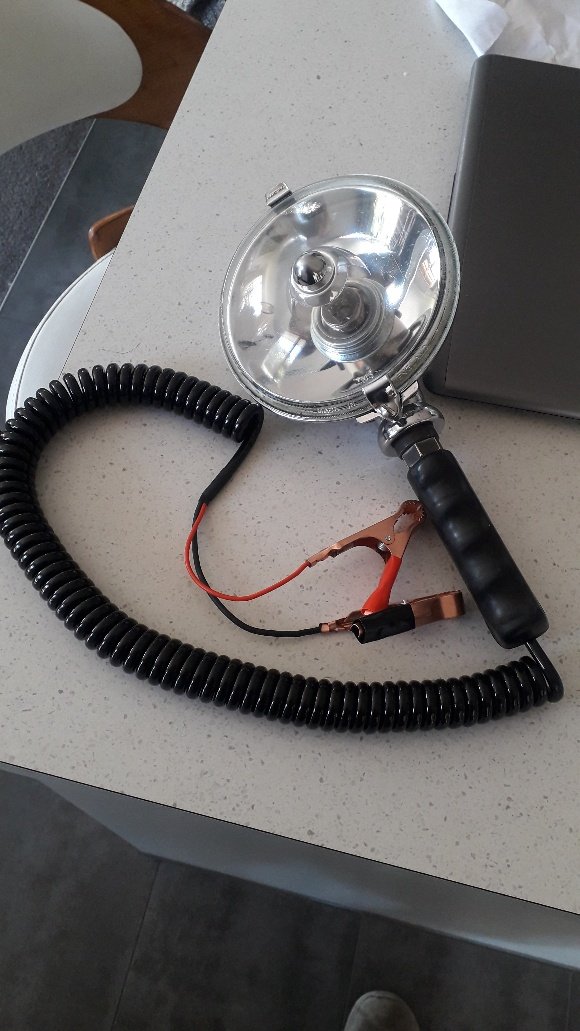
I made this 2x18w for the top of my driveway, it’s fabricated from steel and arc welded, and has an acrylic bowl, all the insides are made by me to, made a post for it to witch is made from heavy DOM tube
1 point
-
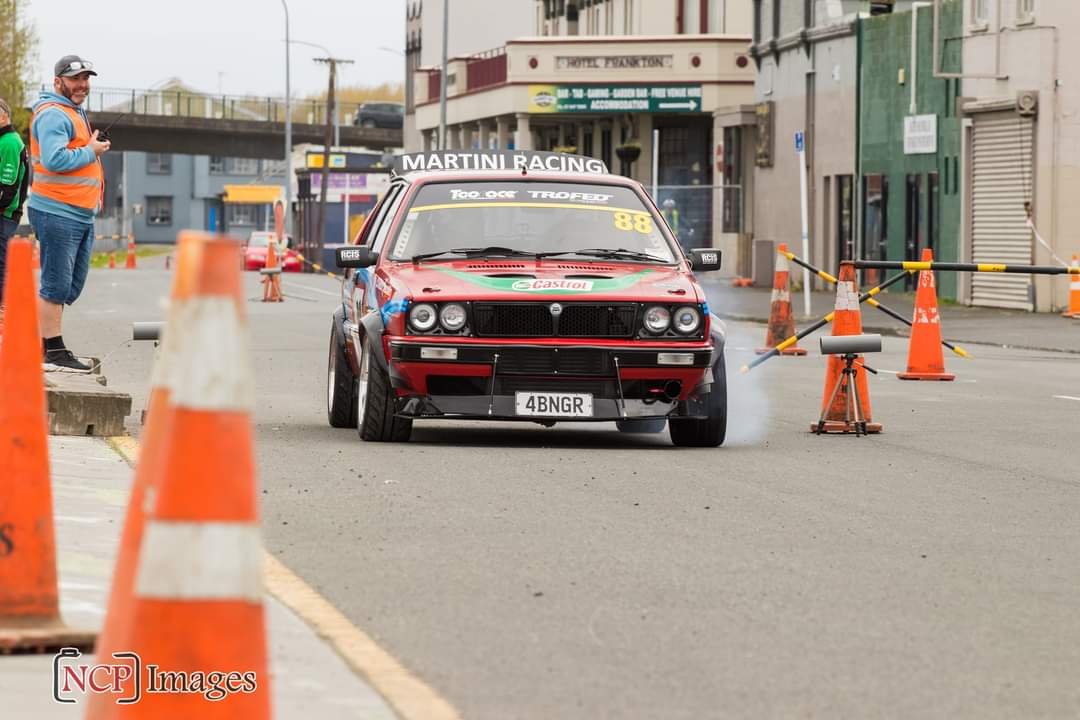
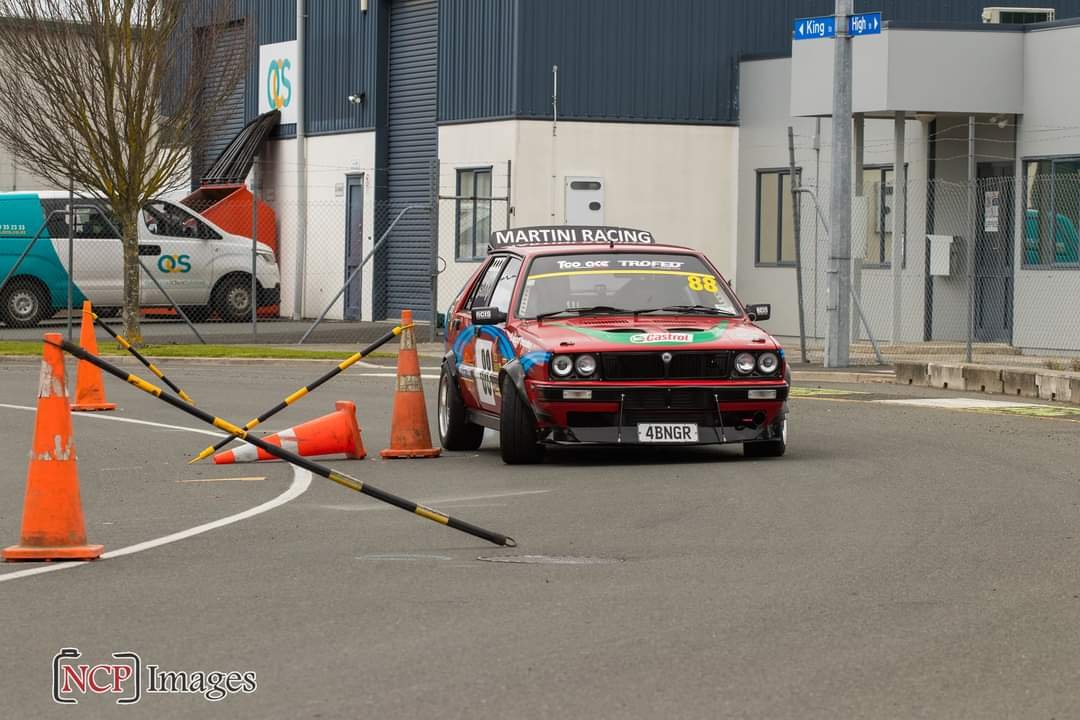
Got her out on Sunday for a quick Autocross. Absolutely hopeless to be fair, cones very tight together meant having to drive it off boost as on boost it would pull away from the cones and sledge, and then when the course opened, it was 1st/2nd/3rd gear wheelspin and then hard on brakes to get around the next cone. A hell of a lot of fun though. Since the last post, the low volume cert was completed, authority card complete, motorsport license renewed, WOF & Reg updated, so fully road legal now. Also i now have sitting at home a Quaife limited slip diff, and Winmax race pads front and rear to go in.
1 point
-
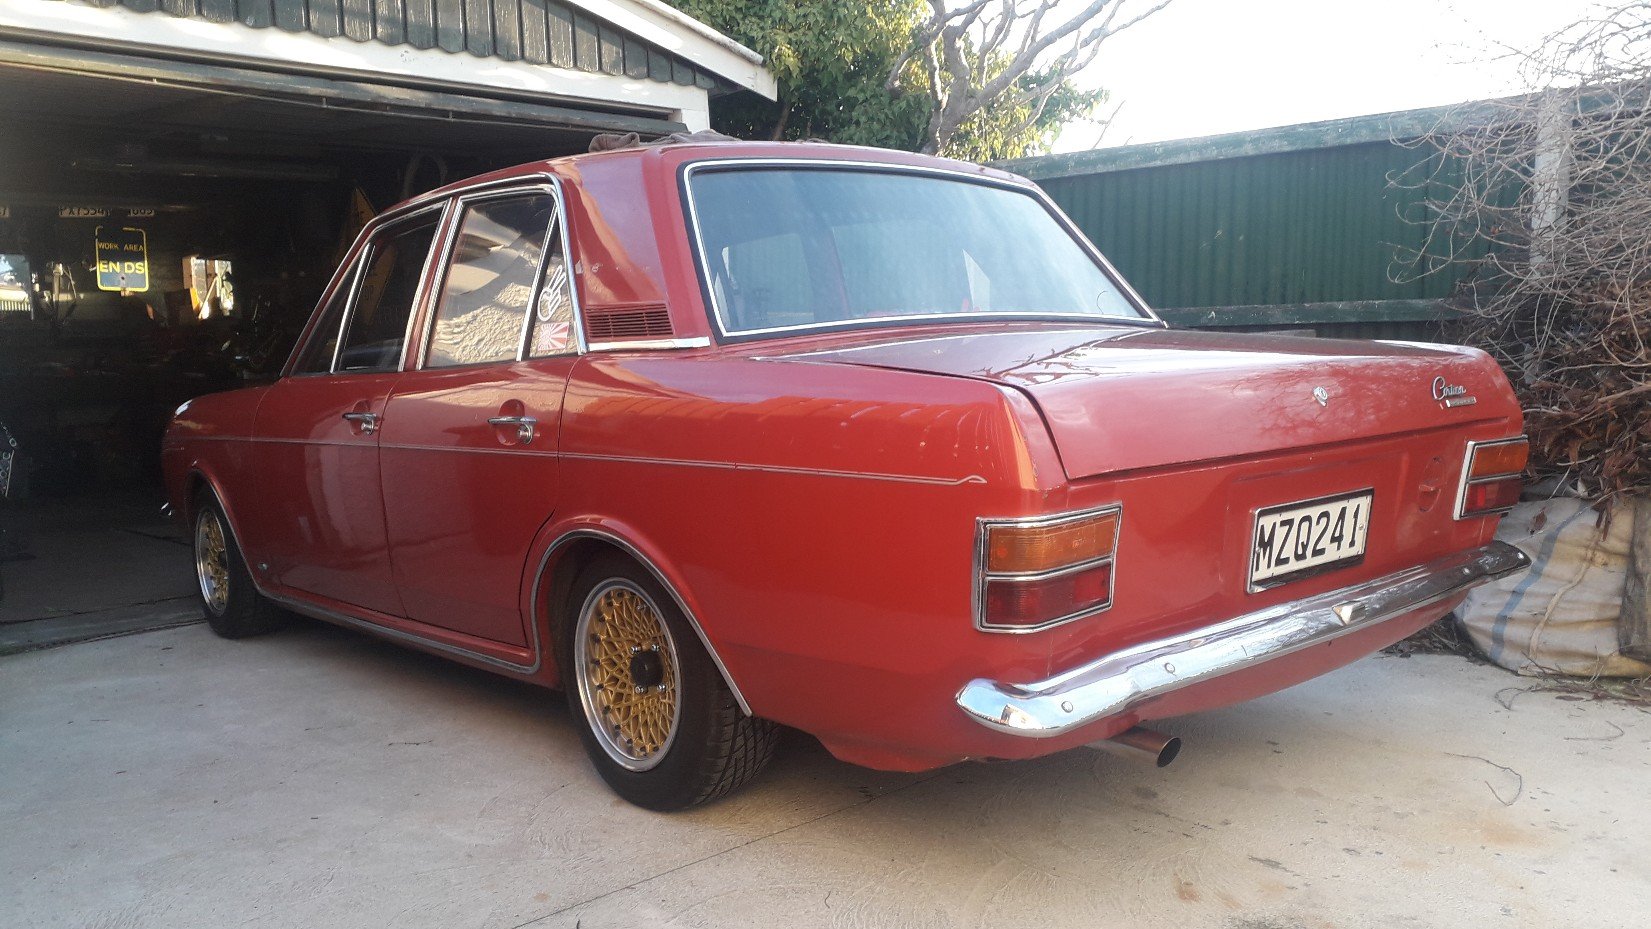
More painting.... pretty much decided not to bother with any filler. It can rock its history with pride
1 point
-
Meet this week people, get amongst it!1 point
-
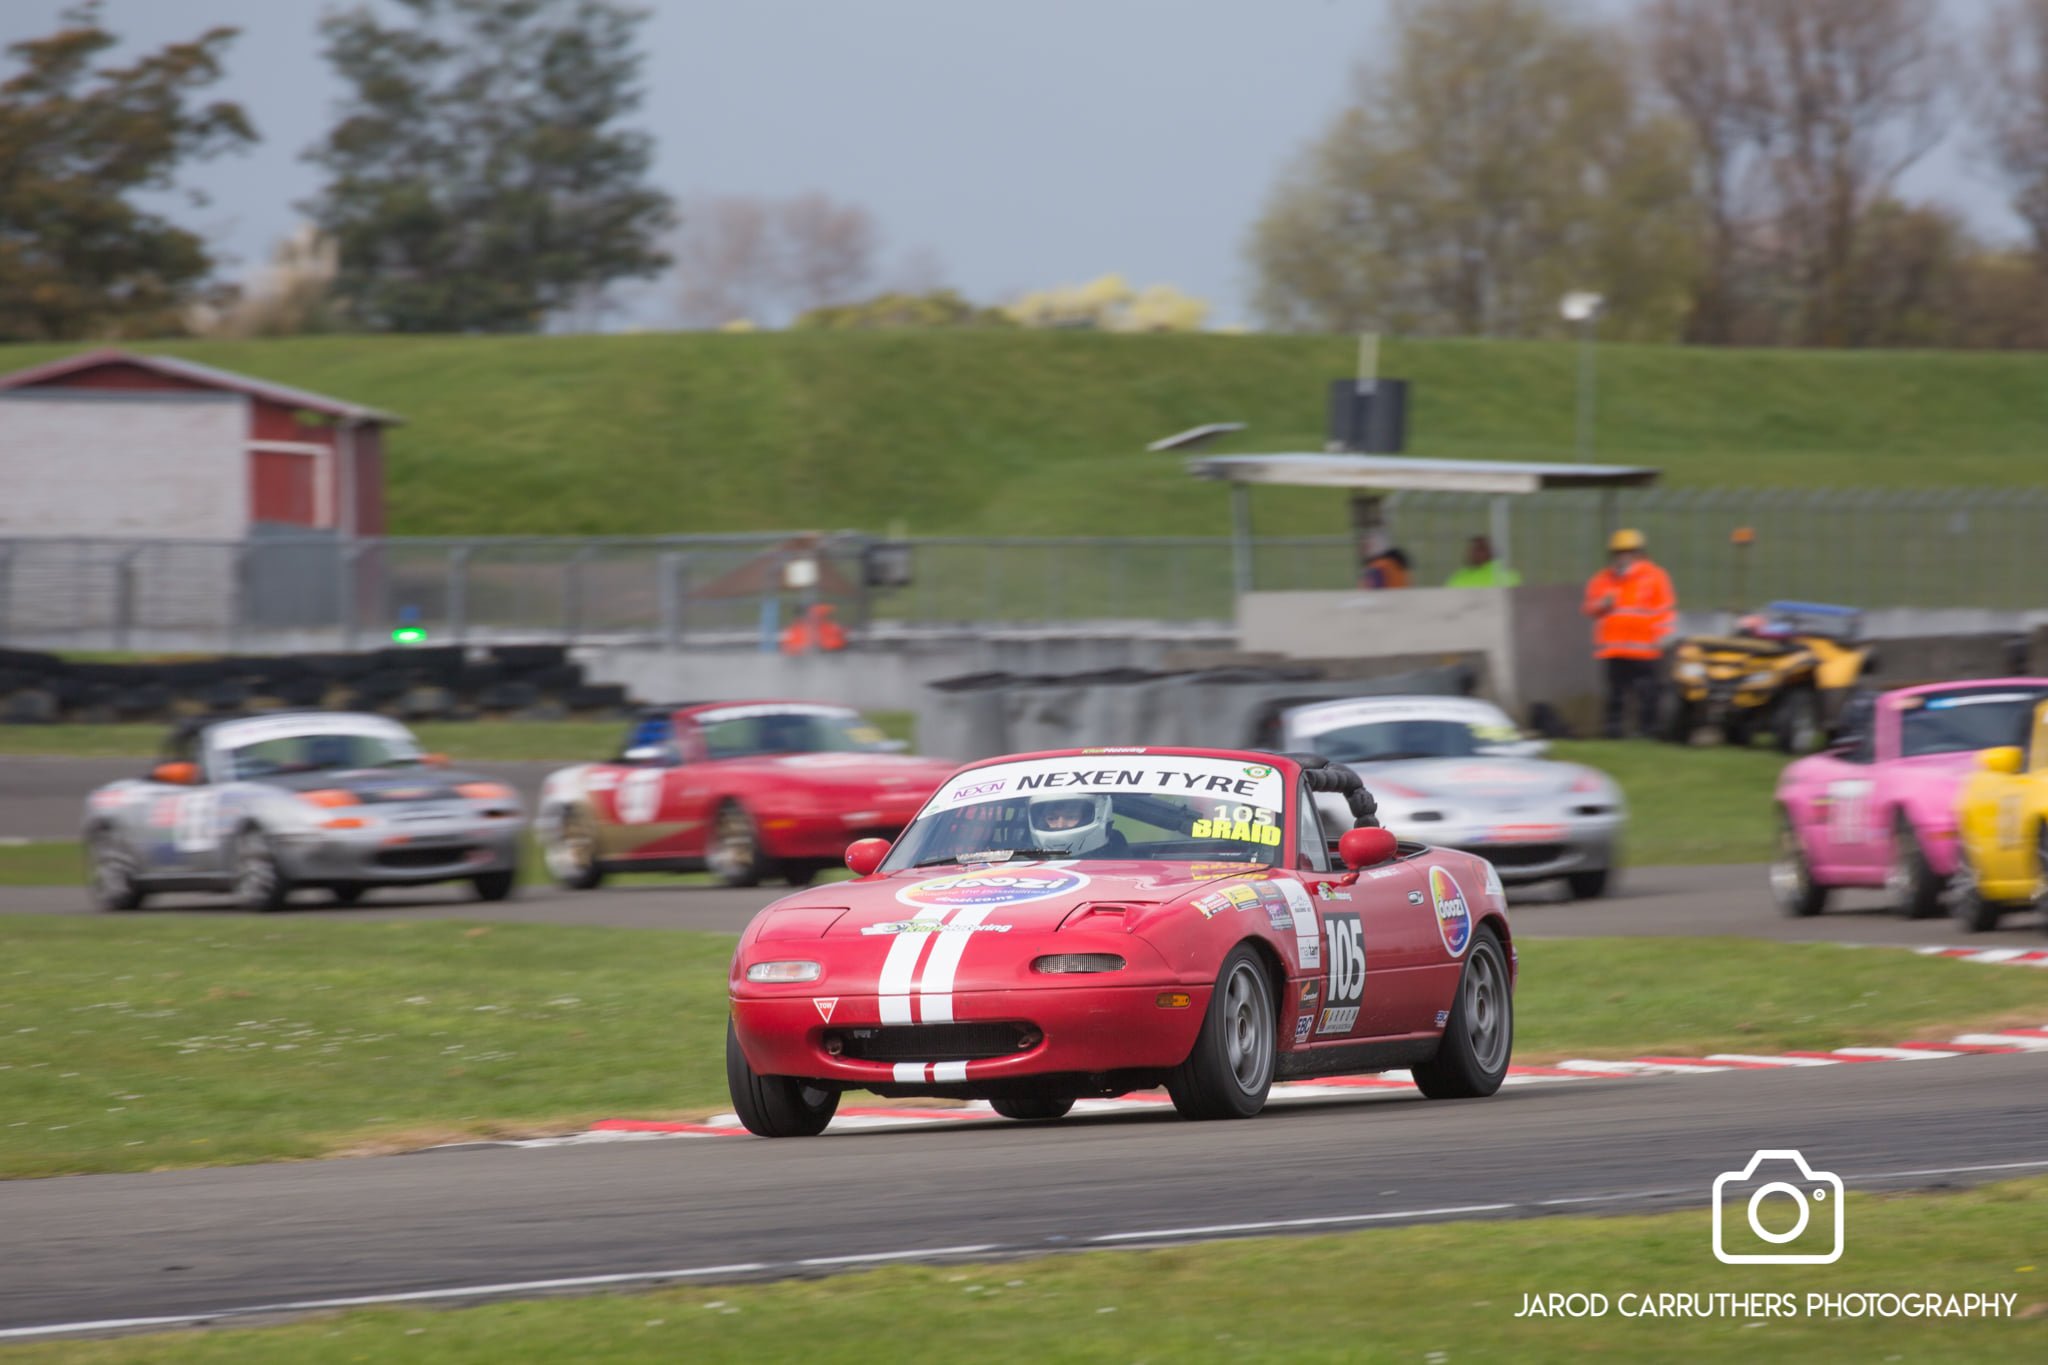
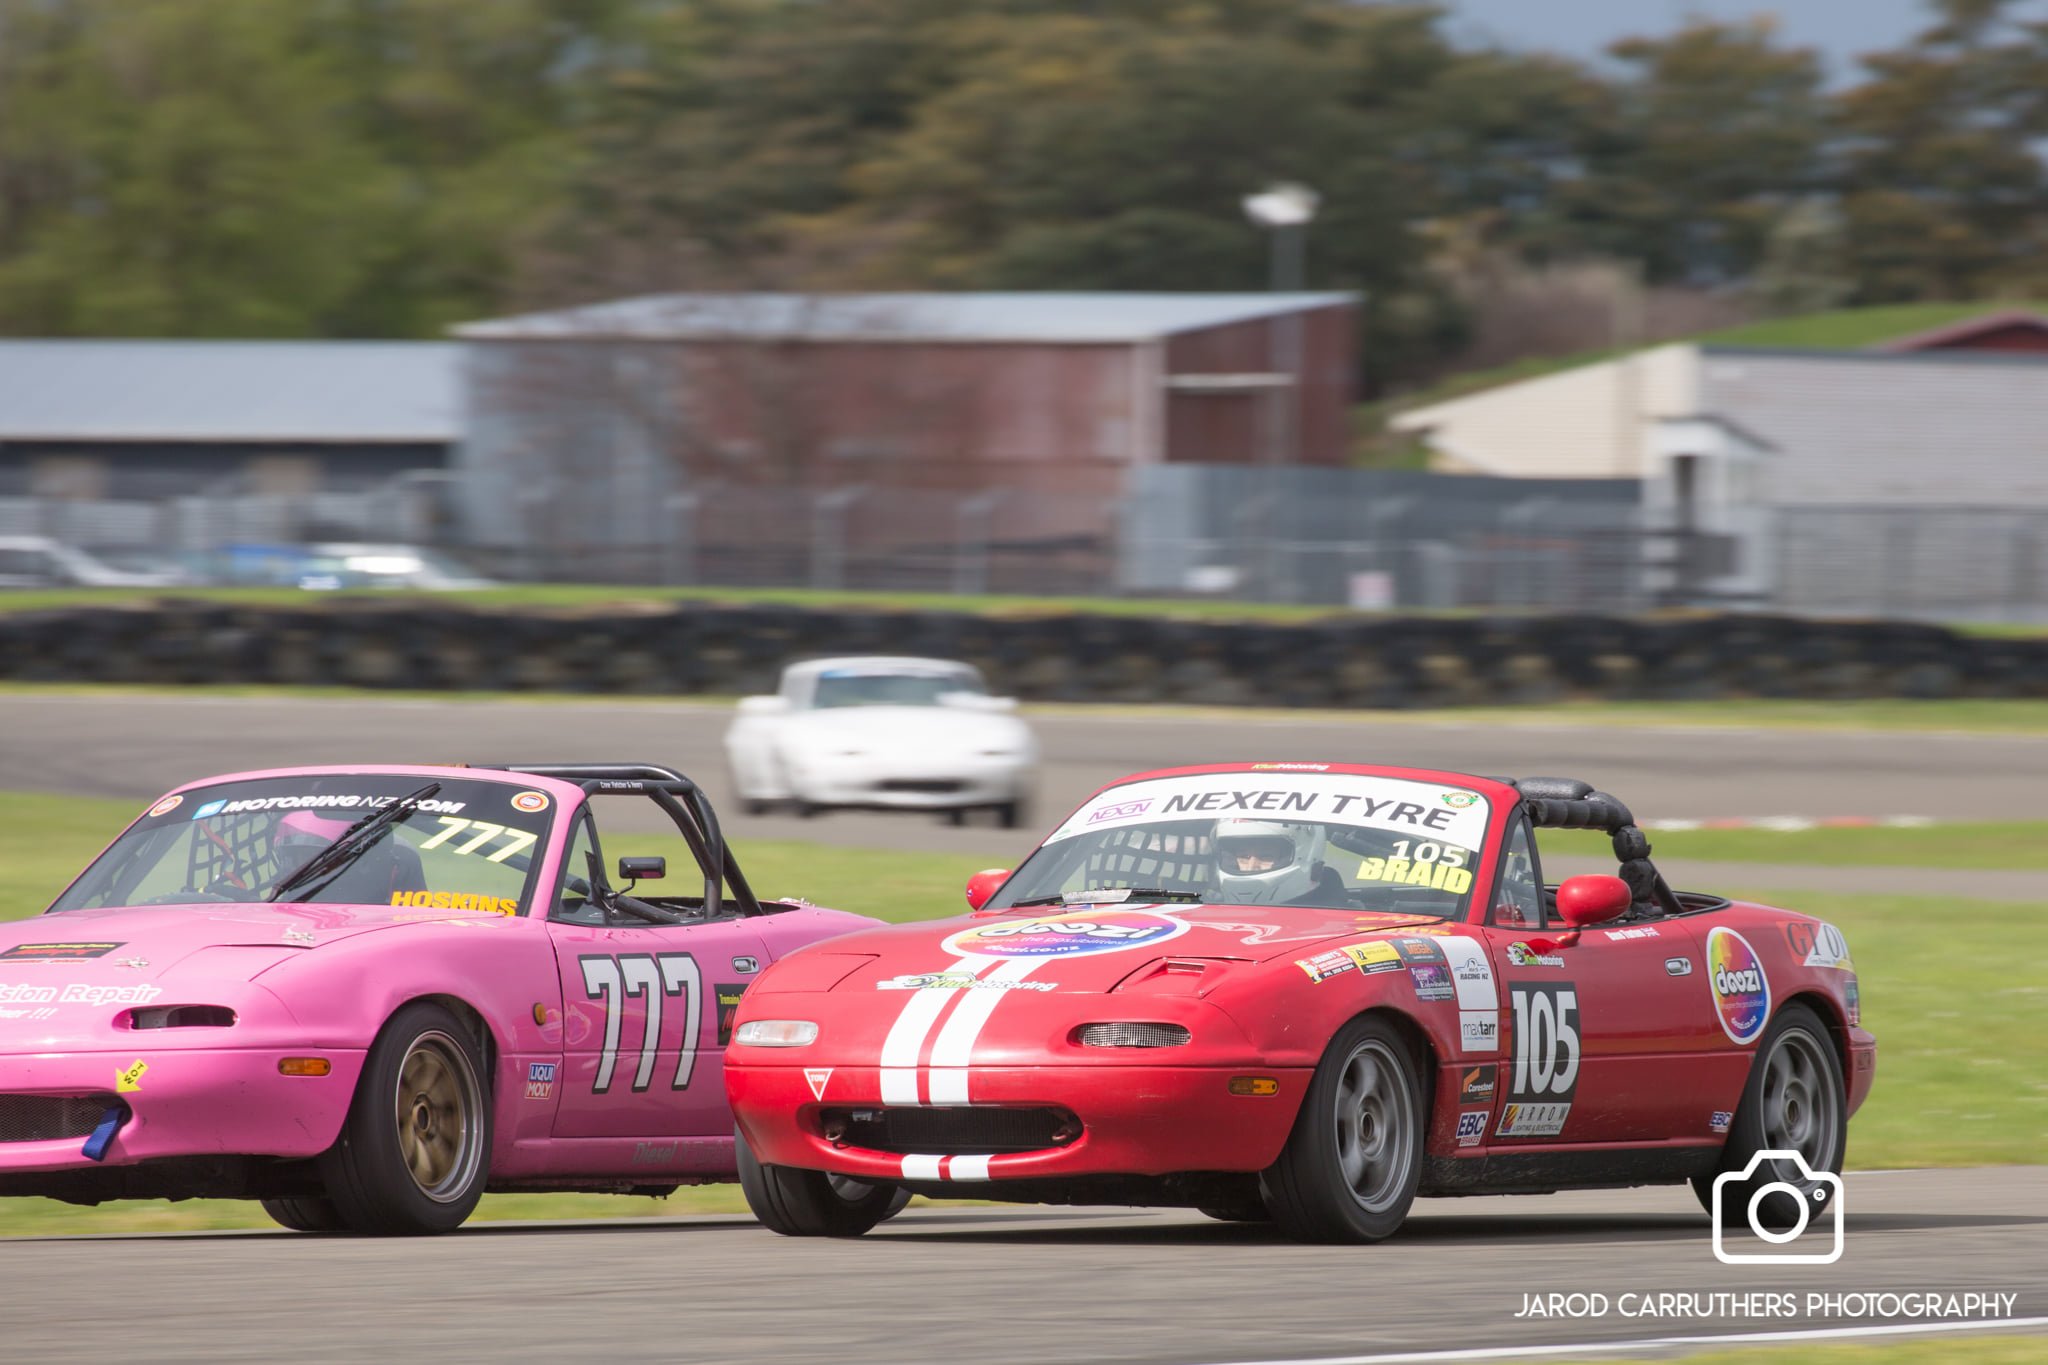
Jumped back in this car over the weekend after a year out of the saddle. We fitted a set of the new class tyres, Hankook Ventus RS4. These are more of a road tyre than the Toyo R888R tyres that we previously ran on. They're around half the cost of a set of Toyos and I wasn't sure what to expect from them. This weekend had the meeting split over two days, with 4 classes on Saturday and 4 classes on Sunday and a 30 minute test session for each class in the morning. I entered the SF Cup on Saturday (open clubmans type racing) and the MX5 cup on Sunday. Straight out of the box, the tyres were proving to be quick. I set a lap time of a 1.24.6 in testing, which is right in line with the times we were doing on the old tyres. I didn't get any photos or video from Saturday as I was busy getting back into the groove of racing. Had loads of good battles with a bunch of drivers I wouldn't normally be on track with. It's fun racing against all types of cars! Turns out MX5s, VT SS Commodores and BA XR8 Falcons are all similar pace, but they develop their speed in very different ways. My fastest lap for the day was a 1.24.2 in the first race and Jerry did a 1.24.1 in his pink #777 - the quickest I've been on Toyos is 1.24.0, so these Hankooks have potential! Sunday was another intense day of racing with variable weather to add to the excitement. We were greeted by showers and a greasy track. A good chance to test the new tyres in the rain! They were much more predictable in the rain than the old tyres and I was able to hold the car VERY sideways without spinning out. Good news from a drivers and spectators perspective. I qualified on pole in the greasy conditions, but didn't quite have the pace in the first race, dropping back to third. My camera battery was flat, so I didn't get any footage. The second race was reverse grid, so I was starting third to last in position 12. After a hectic couple of laps in traffic, I managed to pop out in the lead and hold that to the end. This was the first win I've had for a couple of years and the chocolate fish tasted sweet! Onboard footage from Race 2: Race 3 was a staggered start race with the slower cars to the front. Jerry Hoskins in the pink car 777 was right with me through the whole race. We traded positions a few times and then attempted to make our way through the traffic. We didn't quite make it to the front, but I managed to get up to 6th which gave me an overall round win for the weekend. Onboard footage from race 3: It felt good to be back in the car and was great to get a win! I'm moving back to Palmerston North very soon, so will be doing as much motorsport as I can.
1 point
-
Finished up 2 more. Added chill blocks to the bigger top bosses and also a bigger flat one to the middle (instead of the tapered one). Still have the same risers.1 point
-
The horn button and the steering wheel are still in their box. But instead I did some other stuff, we'll call this "Gen 2.0" of the project/not really a project. Last weekend, I fitted up the option OEM skirts and rear caps, made sure it all fit OK (which it did, because it's OEM) and trekked to Hamilton to get my mate Brendan to paint it all up. This stuff is all pretty rare - the skirts came up cheap locally so I pounced on them, but the caps I ended up having to spirit across from the USA. I've had it all for about 6 months I guess. The skirts needed some cracks repaired - luckily this was easy, as they're made from ABS. I foolishly forgot to take any photos during the paint and final fitting process. A cool trick for those at home, is to use side skirt trim for a Toyota bB to act as the NLA Honda weatherstripping that seals the edges of the kit against the side of the car. But anyway. I also scored a cheap set of Advan RG in 16x7.5" flavour just this weekend. They aren't mint, but present really well. They have a bit of light kerbing on 3 of the wheels, some stone chips as expected through age, and plenty of marks and chips on the inner barrels. I spent HOURS removing baked on brake scum, tar spots, and cutting the paint to remove light scuffs and they turned out pretty awesome I reckon. A bit of a bucket list wheel for me, I had some 17-inch versions on my old Torneo Euro R if anyone remembers that... Anyway, pics of wheels and kit on car. They tyres are a bit too tall, these are a 205/50/16 where the 205/45/16 on the stock 16's fits (and looks) much nicer. Just lame-o phone photos for the moment, I'm intending to get out with the camera (and the car on 17's) soon for some nice pics of how it all looks with it's flash new aero. DC2R Phone (41)-Edit by Richard Opie, on Flickr DC2R Phone (44)-Edit by Richard Opie, on Flickr DC2R Phone (42)-Edit by Richard Opie, on Flickr Bloody good though, eh.1 point
-
plenty of 'wiring' happening today. in my defence i fused everything. and it all works. i'm really happy with the result though. finally got the tach in and working. it reads comically high but meh, thats a problem for another day. i love it, they're different cars with the tachs. rust converter doing the magic got the missus tp help me string the screen in, its the 3rd one we've done, she's getting quite good at it lol. i hope i used enough sealant. done, with the chrome.
1 point
-
Needs to slight left a little, but I need to remove the reverse switch. It's not needed on the hunter anyway, no reverse lights
1 point
-
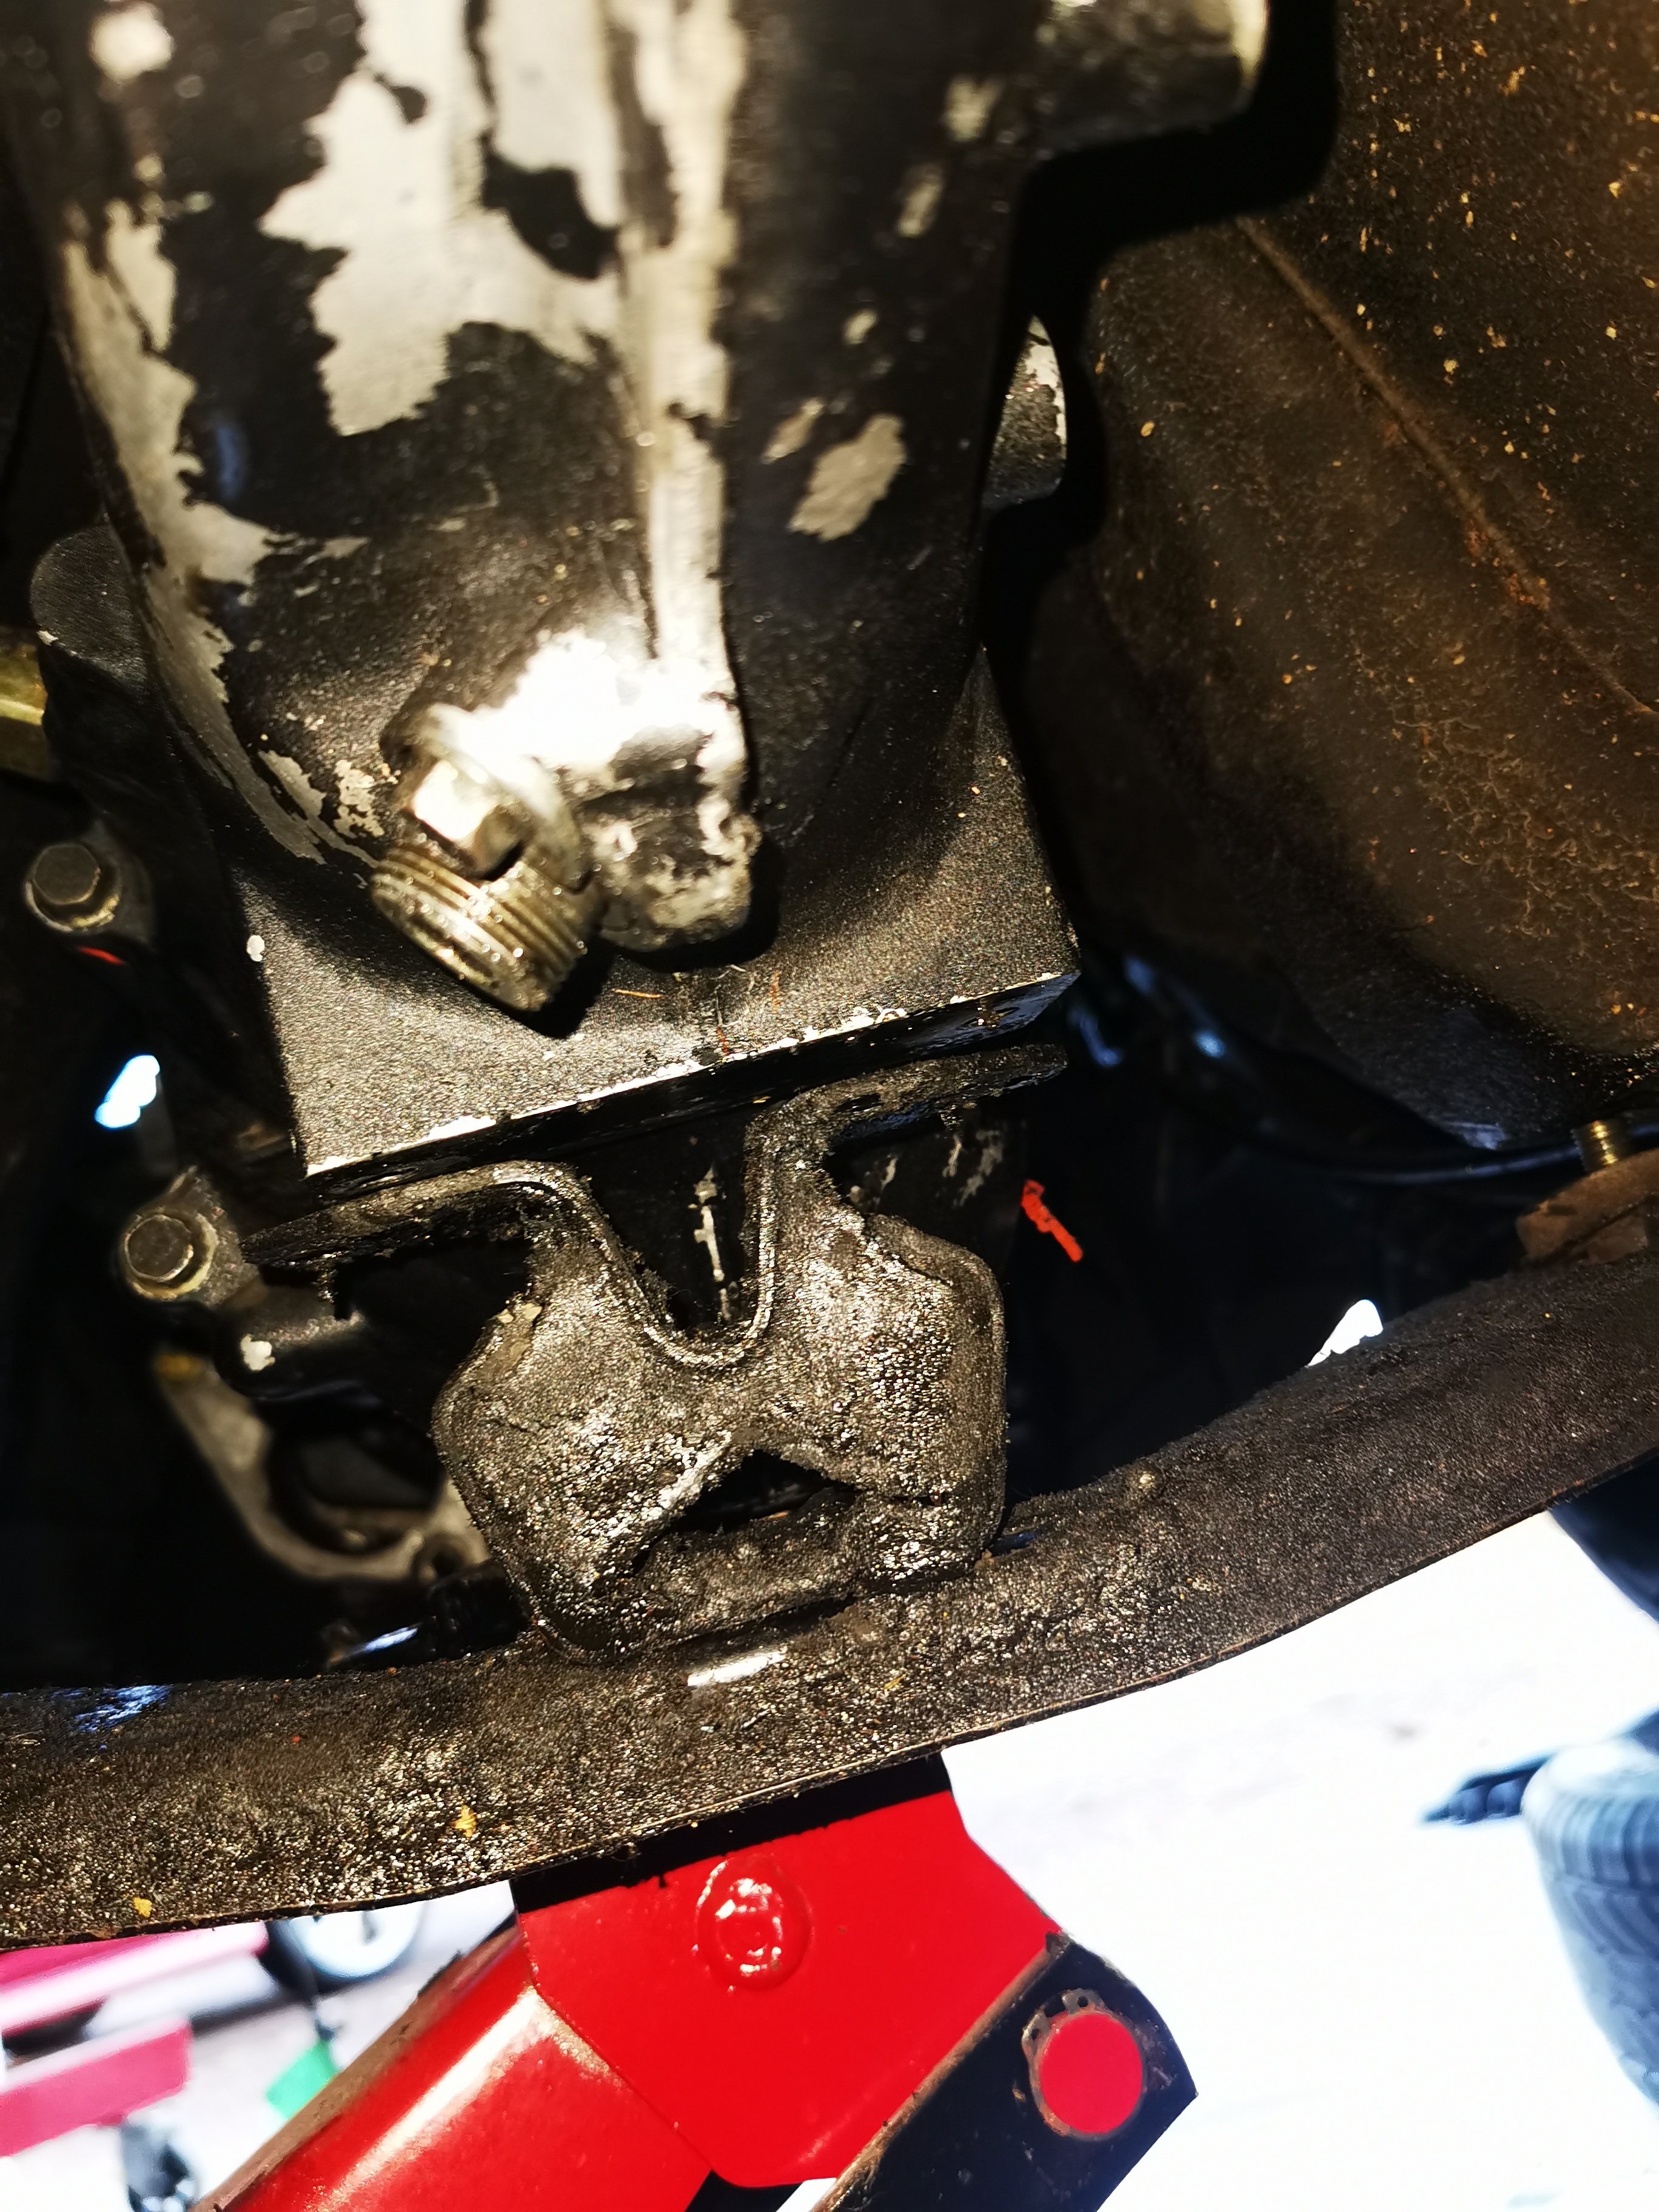
Engine and box is mounted. Does need to come back out so I can chop off the factory mounts, thump in some clearance for the fork and slave 10mm if that. And remove the reverse switch. And believe it or not, the hunter gearbox mount bolts directly to the rx7 box. No mods at all on the gearbox crossmember or mount. Dafuq..??? Rx7 radiator practically bolts directly to the hunter bolt holes too. Just need to cut 100mm of the shifter hole out and spin it round.. Too easy. I would like to space the crossmember down 10mm to see if it gives enough clearance for the slave, and a slightly better yoke angle.
1 point
-
Matt from tin tricks did some more work for me on the inner guards and firewall so it looks much better . Today it got dropped off at autoblast for underneath and the engine bay to get blasted, primed and underneath painted with 2k epoxy
1 point
-
The hunter box is longer than the rx7 box. Shifter and box mounts are in very similar positions. Hunter box is taller due to the shifter rail.. Looking good for throwing in the hole
1 point
-
Well because I have a couple of updates worth of advance progress to use up before I have to actually start tinkering again here is another 'update'.. So I had sussed out my oil pump drive. Cool. Lets ignore the tensioners for now...mainly because I have not actually fitted the ones I have - this will be one of the next jobs once Hannah and I finish the workshop mezzanine main structure mentioned in the last post. I know they should work but I wanted to skip ahead to other more fun bits. Sort of like eating your meat before finishing the vege. I needed to join these to assemblies together, neatly and most importantly - completely accurately. I had completed some rather fine looking sketches in pencil of how I might fabricate something, along with measurements compiled by the time honoured tradition of starting at set datum points and then using a selection of various rulers, verniers, bits of string, bluetack, tape measures and a bit of eyeballing to suss out the positions of a new flywheel, seal housing, clutch height, starter pinion position at rest and at full extension. It was all going to be made up along the way but I still needed some datums to work to and from. The main thing I knew the position of and that I could not change was the end of the crank and my added on adaptor with its seal landing. I also had a nice flat, square face on the back of the engine - the flange to which the old clutch and gear housing bolted to. I needed to start with that and work out towards the Subaru gearbox. The Subaru gearbox does not really have a full length bellhousing as such. It normally bolts onto another section of housing that is bolted to the Subaru engine. This was fine because I was going to make my own housing extension that suits both the Honda engine flange and the Subaru box, with a depth to suit a custom flywheel and the clutch. But the flywheel offset was not a known thing yet because I had not yet secured a clutch to use. That's another story and I'll cover that with the flywheel. I'll mention now though that I almost made a complete balls up in clutch pressure plate selection. An easy mistake because its not normally something one would ever need to think about when looking at clutches. See if anyone can guess it? Go on - have a go.... Anyway- back to my flange plate assembly. So the most important thing to keep bang on is that the input shaft is concentric with the crankshaft and this is how I did it. I started with a plate of 6mm thick aluminium, cut larger than the back of the engine and front of the box. I made a pretty damn big hole in it with a large holesaw. It had to be much bigger than the rear main seal I had bought to suit my crank adaptor... Then I machined down a big lump of alloy bar to fit into the hole perfectly. I machined it with a large flange so it could be bolted to the plate. Pushed into the plate and then drilled the flange and tapped the holes. The flange was dot punched while on so its always bolted back up to the same holes after removal. I fitted the flange back into the lathe, drilled and bored it out to fit the gearbox input shaft snug... Now I was able to slide the whole lot onto the box. Luckily these boxes have a decent bearing supporting the input shaft so there is no up and down movement (unlike the Imp box which has a two piece input shaft and wobbles all over the place) I machined a couple of centre punches that tightly slid into the gearbox bellhousing bolt holes, enabling my to accurately mark the bolt holes onto the plate... Now I had a plate that lined and bolted up perfectly concentric to the gearbox input shaft. Now to mark and drill another set of holes on the back of this plate to suit the engines flange. I removed the flange and bored it out to slide onto the crank adaptor seal land snugly. With the flange bolted back onto the plate I was able to slide the lot onto the engine, concentric, and repeat the marking process with yet another set of centre punches machined to suit. Then drill the holes to suit... I did have to add a little extension to reach out to one pesky bolt hole that refused to stay within my square... Now I had a plate that was bolted to the engine, bang on concentric, which had another set of holes to suit the bellhousing. I would connect the bellhousing to this plate with machined bars, of a depth that I was yet to finalise. I knew roughly what they would be, around 40mm, but could not confirm this until I had made my flywheel and the clutch to suit it had arrived. That'll be in the next update. In other news- I have been a little undecided about which ECU route to go down. I was planning to build either a Speeduino or go with Megasquirt again. I had started buying the bits for a Speeduino ages ago (I already had a board I had bought from @kws and from aliexpress I bought the main arduino cpu the runs it, an ATmega 2560, plus scored some other bits from @NickJ) but I still wasn't convinced about Speeduino for this application, as tempting as the possible sub $200 price might be. My Main reason against it was because I really would like to run this engine with full sequential injection. However the Megasquirt that offered this on more than 4 cylinders, along with a couple of other non big brand name options were just too expensive for what I want to throw at the project. But then last week I ended up buying a megasquirt 3 with an expansion card at a price I couldn't turn down. I'm stoked about this because I know Megasquirt well and I like the support plus I like using Tunerstudio (which is also used for Speeduino but with a couple of features left out) . I'll leave the Speeduino for something else in the future (the quad bike! ) Oh and after having ordered these uprated valve stem seals from Norway of all places in July they finally arrived yesterday. 2 months! Ha. My new headgaskets and cambelts have also arrived so I've pretty much got the bits I need to through it back together when the time comes.1 point
-
Yes! highschool friend had one of these always felt like having a petrol fight riding 5 up with the boys and the roofs off.1 point
-
Mine and Joe's together briefly during our South Island roadtrip in his.
1 point
-
Well I've sold all of the hunter engine parts that I have. Carbs, head etc.. Got the engine disconnected ready to pull out for collection next weekend. Have a breast plate on its way which should work with the crossmember. Got a 12a carb but needs a strip and clean. Found an electronic dizzy too with modules, these seem to be very hard to find these days.. Only need a driveshaft yoke, colling fan, fuel pump and hosing etc and an alternator with bracket. Then start piecing this together.
1 point
-
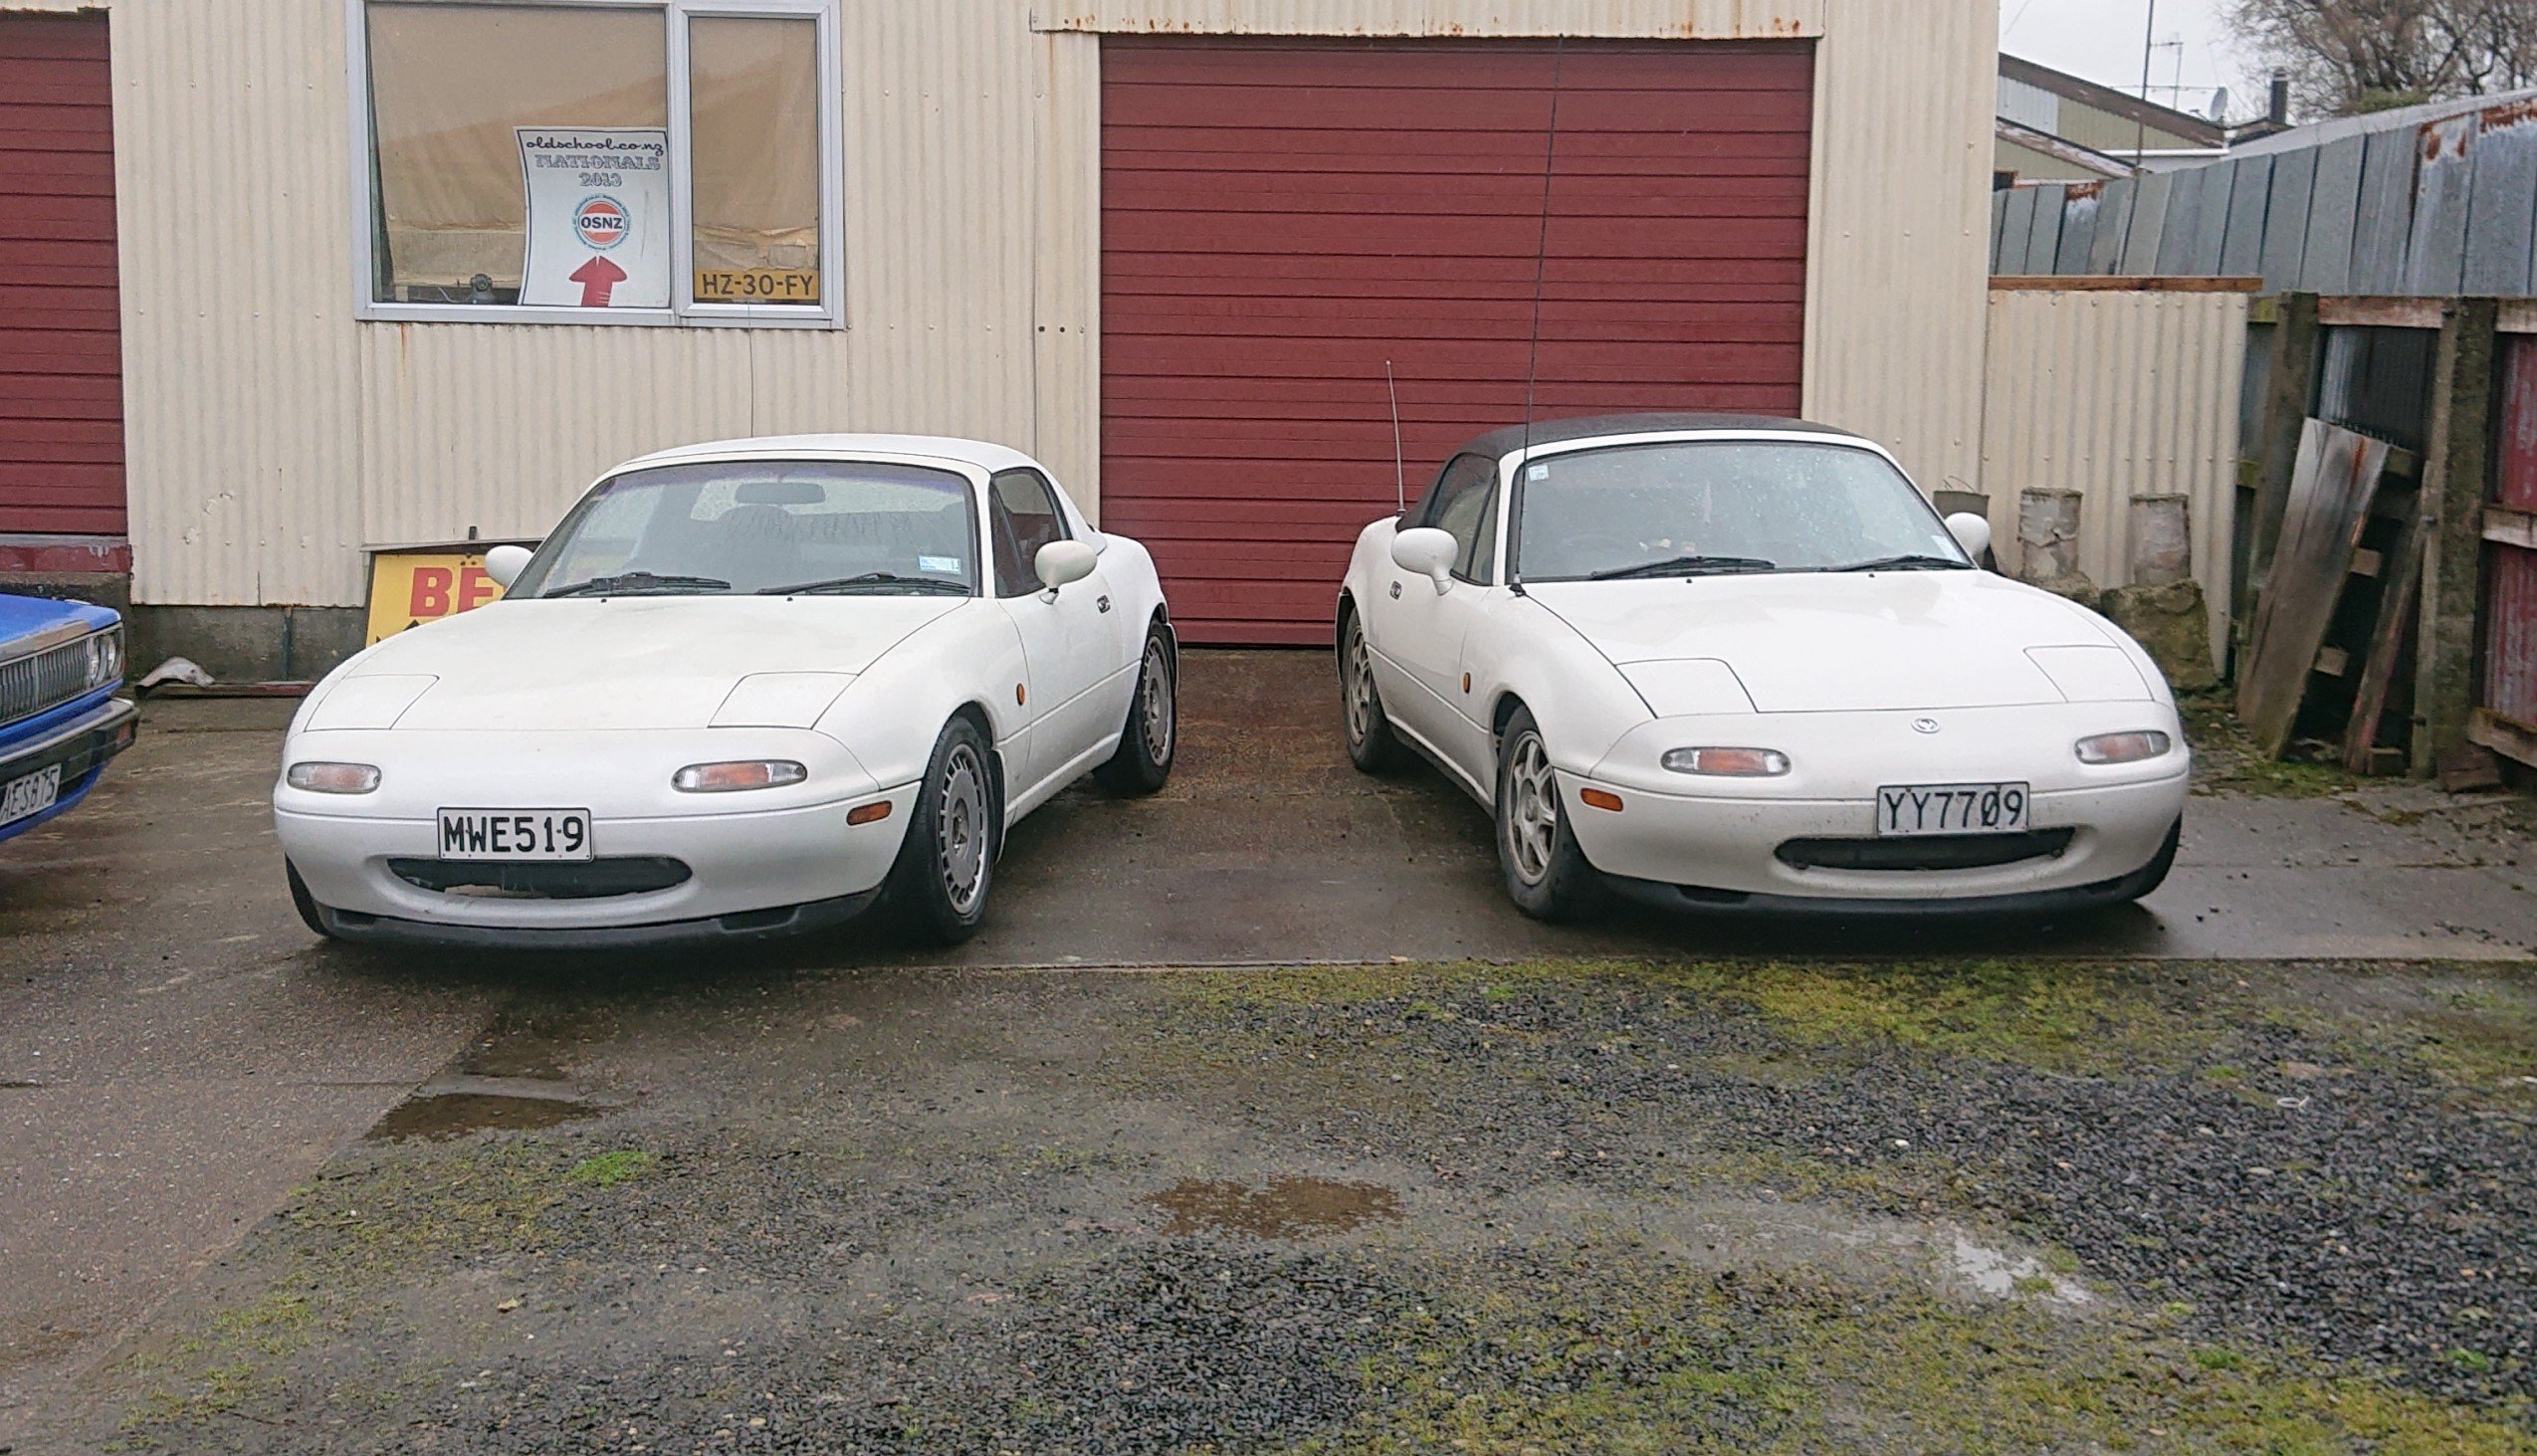
I got the replacement clutch in and working but there's still something a little awry there that will have to wait until I get back from a couple of weeks holiday. I also discovered that I have a fairly common wobbly crank pulley issue so I should look into that before I get too carried away thrashing it. That said, I did enjoy taking it for a wee hoon after I got the clutch working and the hardtop on. More to come in the future but this is where we are at the minute: Once that was sorted I took it for a hoon to see my other white coupe...1 point
-
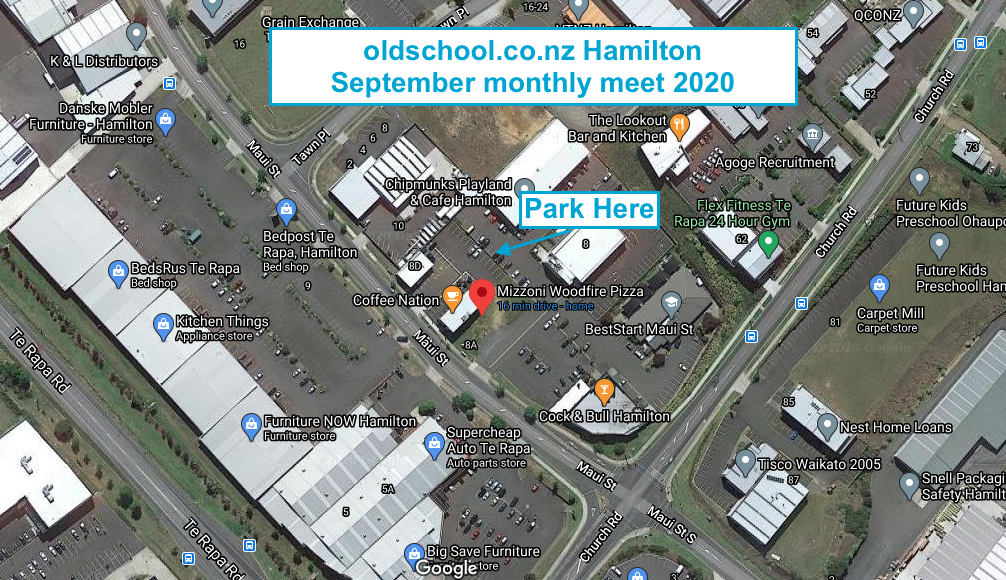
The September meet will be a little different. Thanks to @Beaver and @macabre for the future of our monthly meets. Copy/paste of the first post:
1 point
-
Had a productive weekend Got the headlights working with dip switch got horn up and running and removed the ridiculous speaker boxes on the doors . There was some left over vinyl so i hole sawed and patched over Not perfect but 100x better than previously Treated myself to some hydraulic wheel dollies so handy for small garages Cars running like a bag of dicks not sure why..1 point
-
The original motor requires a rebuild. Also needs an extra gear and better brakes. These need certing anyway, so why not up the power and smiles per hour1 point
-
Sort of sad it's losing it's heart. Offset by the thought of a rotary Hunter...1 point
-
1 point
-
This is nearly working. Lots has been done since ^^1 point
-
Haven't been on here in ages. Plenty has changed. Ended up building a forged engine, new turbo, link ECU, going to 15X8's with flares, 225 rubber, etc etc. Current tune is 240hp @ the hubs on 17psi boost, intending to do some cam timing adjustments and retune in the new year with a much higher redline and a bit more boost. A quick shakedown at Taupo first time out qualified mid pack with so many areas to. Improve, and was only running at about 70% race pace.
1 point
-
OK so the motor is pretty much ready to drop in. 2019-03-12_04-30-05 by Richard Opie, on Flickr I've been tidying things up, thanks to blasting and VHT Epoxy black. Fuck I love VHT Epoxy black. 20190102_164709 by Richard Opie, on Flickr 20190120_184608 by Richard Opie, on Flickr 20190120_184624 by Richard Opie, on Flickr 20190120_184637 by Richard Opie, on Flickr 20190120_184653 by Richard Opie, on Flickr 20190120_184724(0) by Richard Opie, on Flickr 20190127_124320 by Richard Opie, on Flickr Even the wiper linkages got a refresh! 20190216_154907 by Richard Opie, on Flickr Sump and crossmember also got the treatment. 20190219_185312 by Richard Opie, on Flickr Back on with a bit of Toyota Grey Sealant and carefully torqued up oil pan bolts. As an aside, when I took this off to have a nosy in the engine also, it turned out the oil pump bolts were only finger tight. Whew. 20190105_160736 by Richard Opie, on Flickr Nick the Sparky helped me rebuild the alternator and starter. 20190126_133528 by Richard Opie, on Flickr @Stu popped in and finished up the wee loom for the front of engine bits, so the cam/crank sensors etc are all sorted out. Here's kpr's lush crank angle sensor installed, in blurryish technicolor. Project KP61 2019 (6) by Richard Opie, on Flickr Project KP61 2019 (10) by Richard Opie, on Flickr Project KP61 2019 (90) by Richard Opie, on Flickr I've chucked all the brand new plastics/seals on the front (Toyota still carry a lot of things) and stuck the new 4AGE sticker on the front. Important. Project KP61 2019 (84) by Richard Opie, on Flickr Project KP61 2019 (75) by Richard Opie, on Flickr Project KP61 2019 (21) by Richard Opie, on Flickr This weekend the idea is to drop it back in the hole and then at some point wire it all up. Yay? YAY!1 point


This leaderboard is set to Auckland/GMT+12:00