
Leaderboard


Popular Content
Showing content with the highest reputation on 08/09/20 in all areas
-
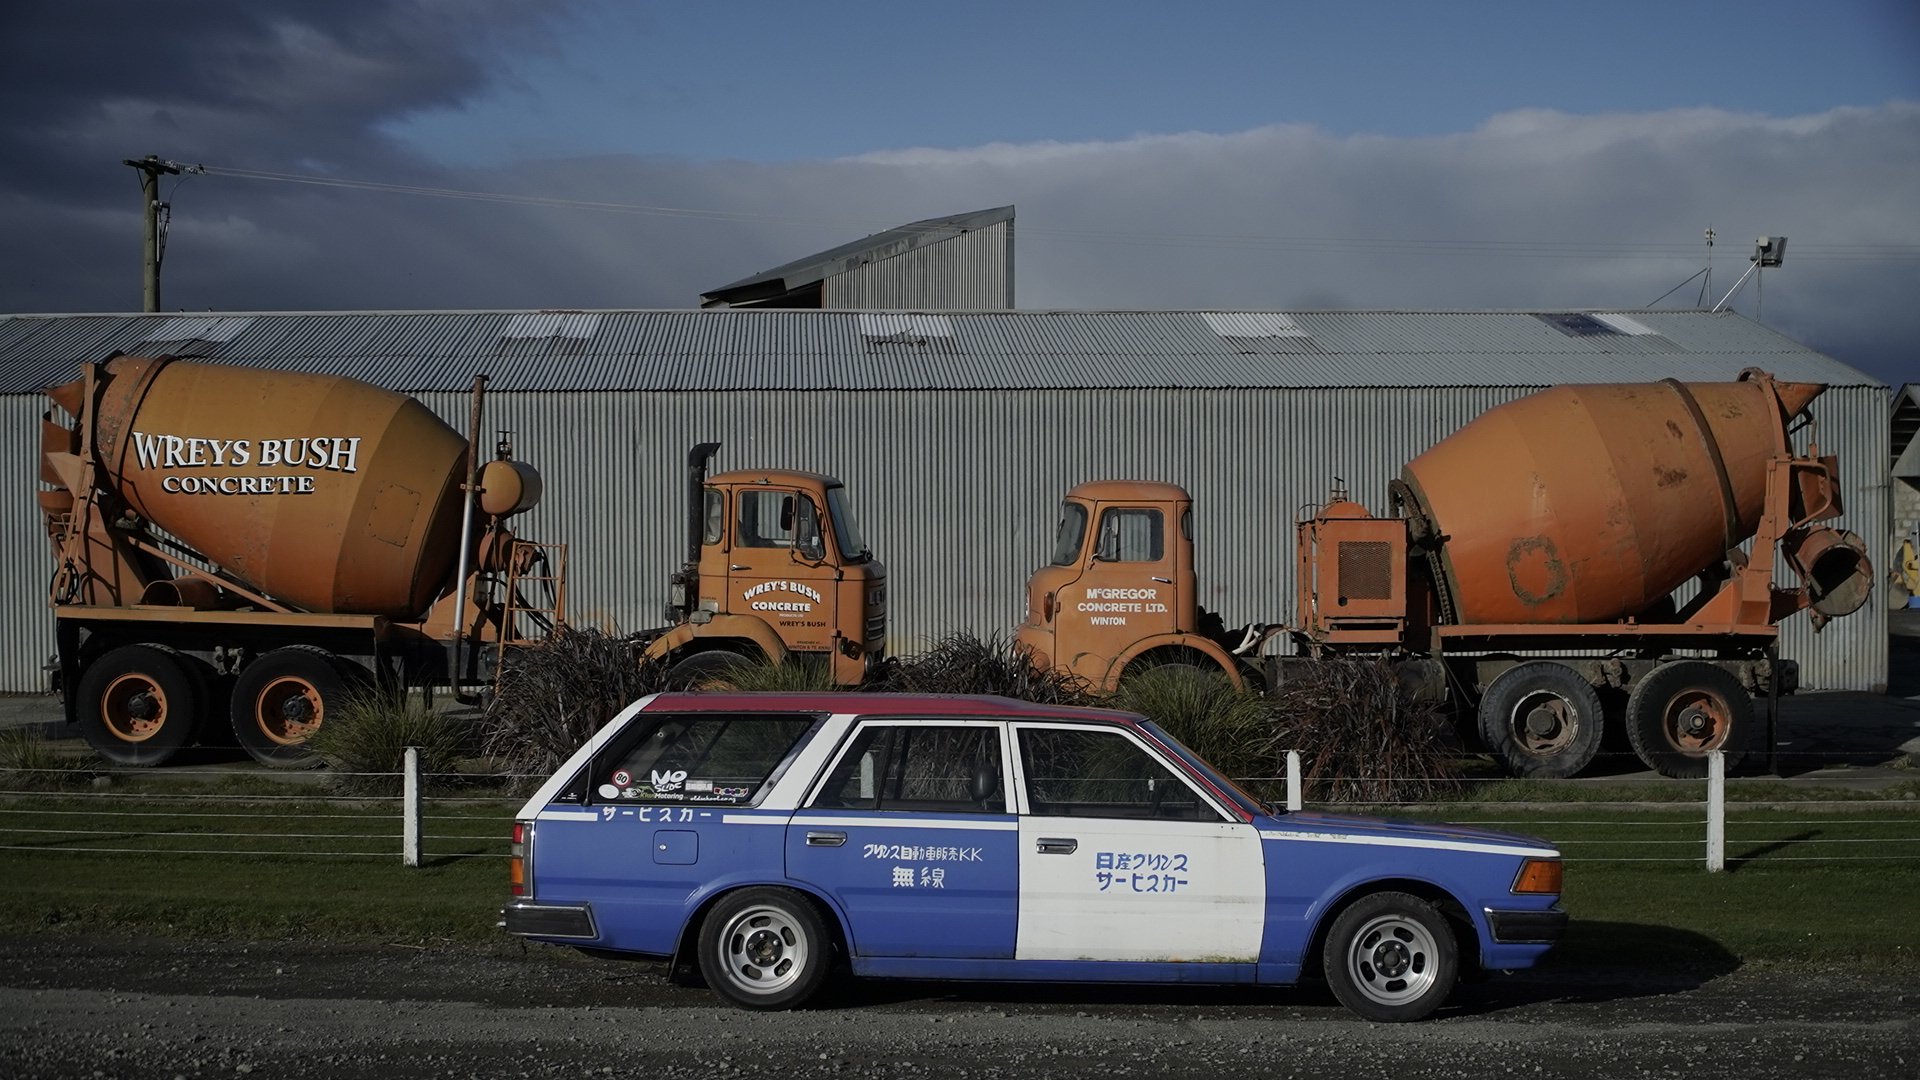
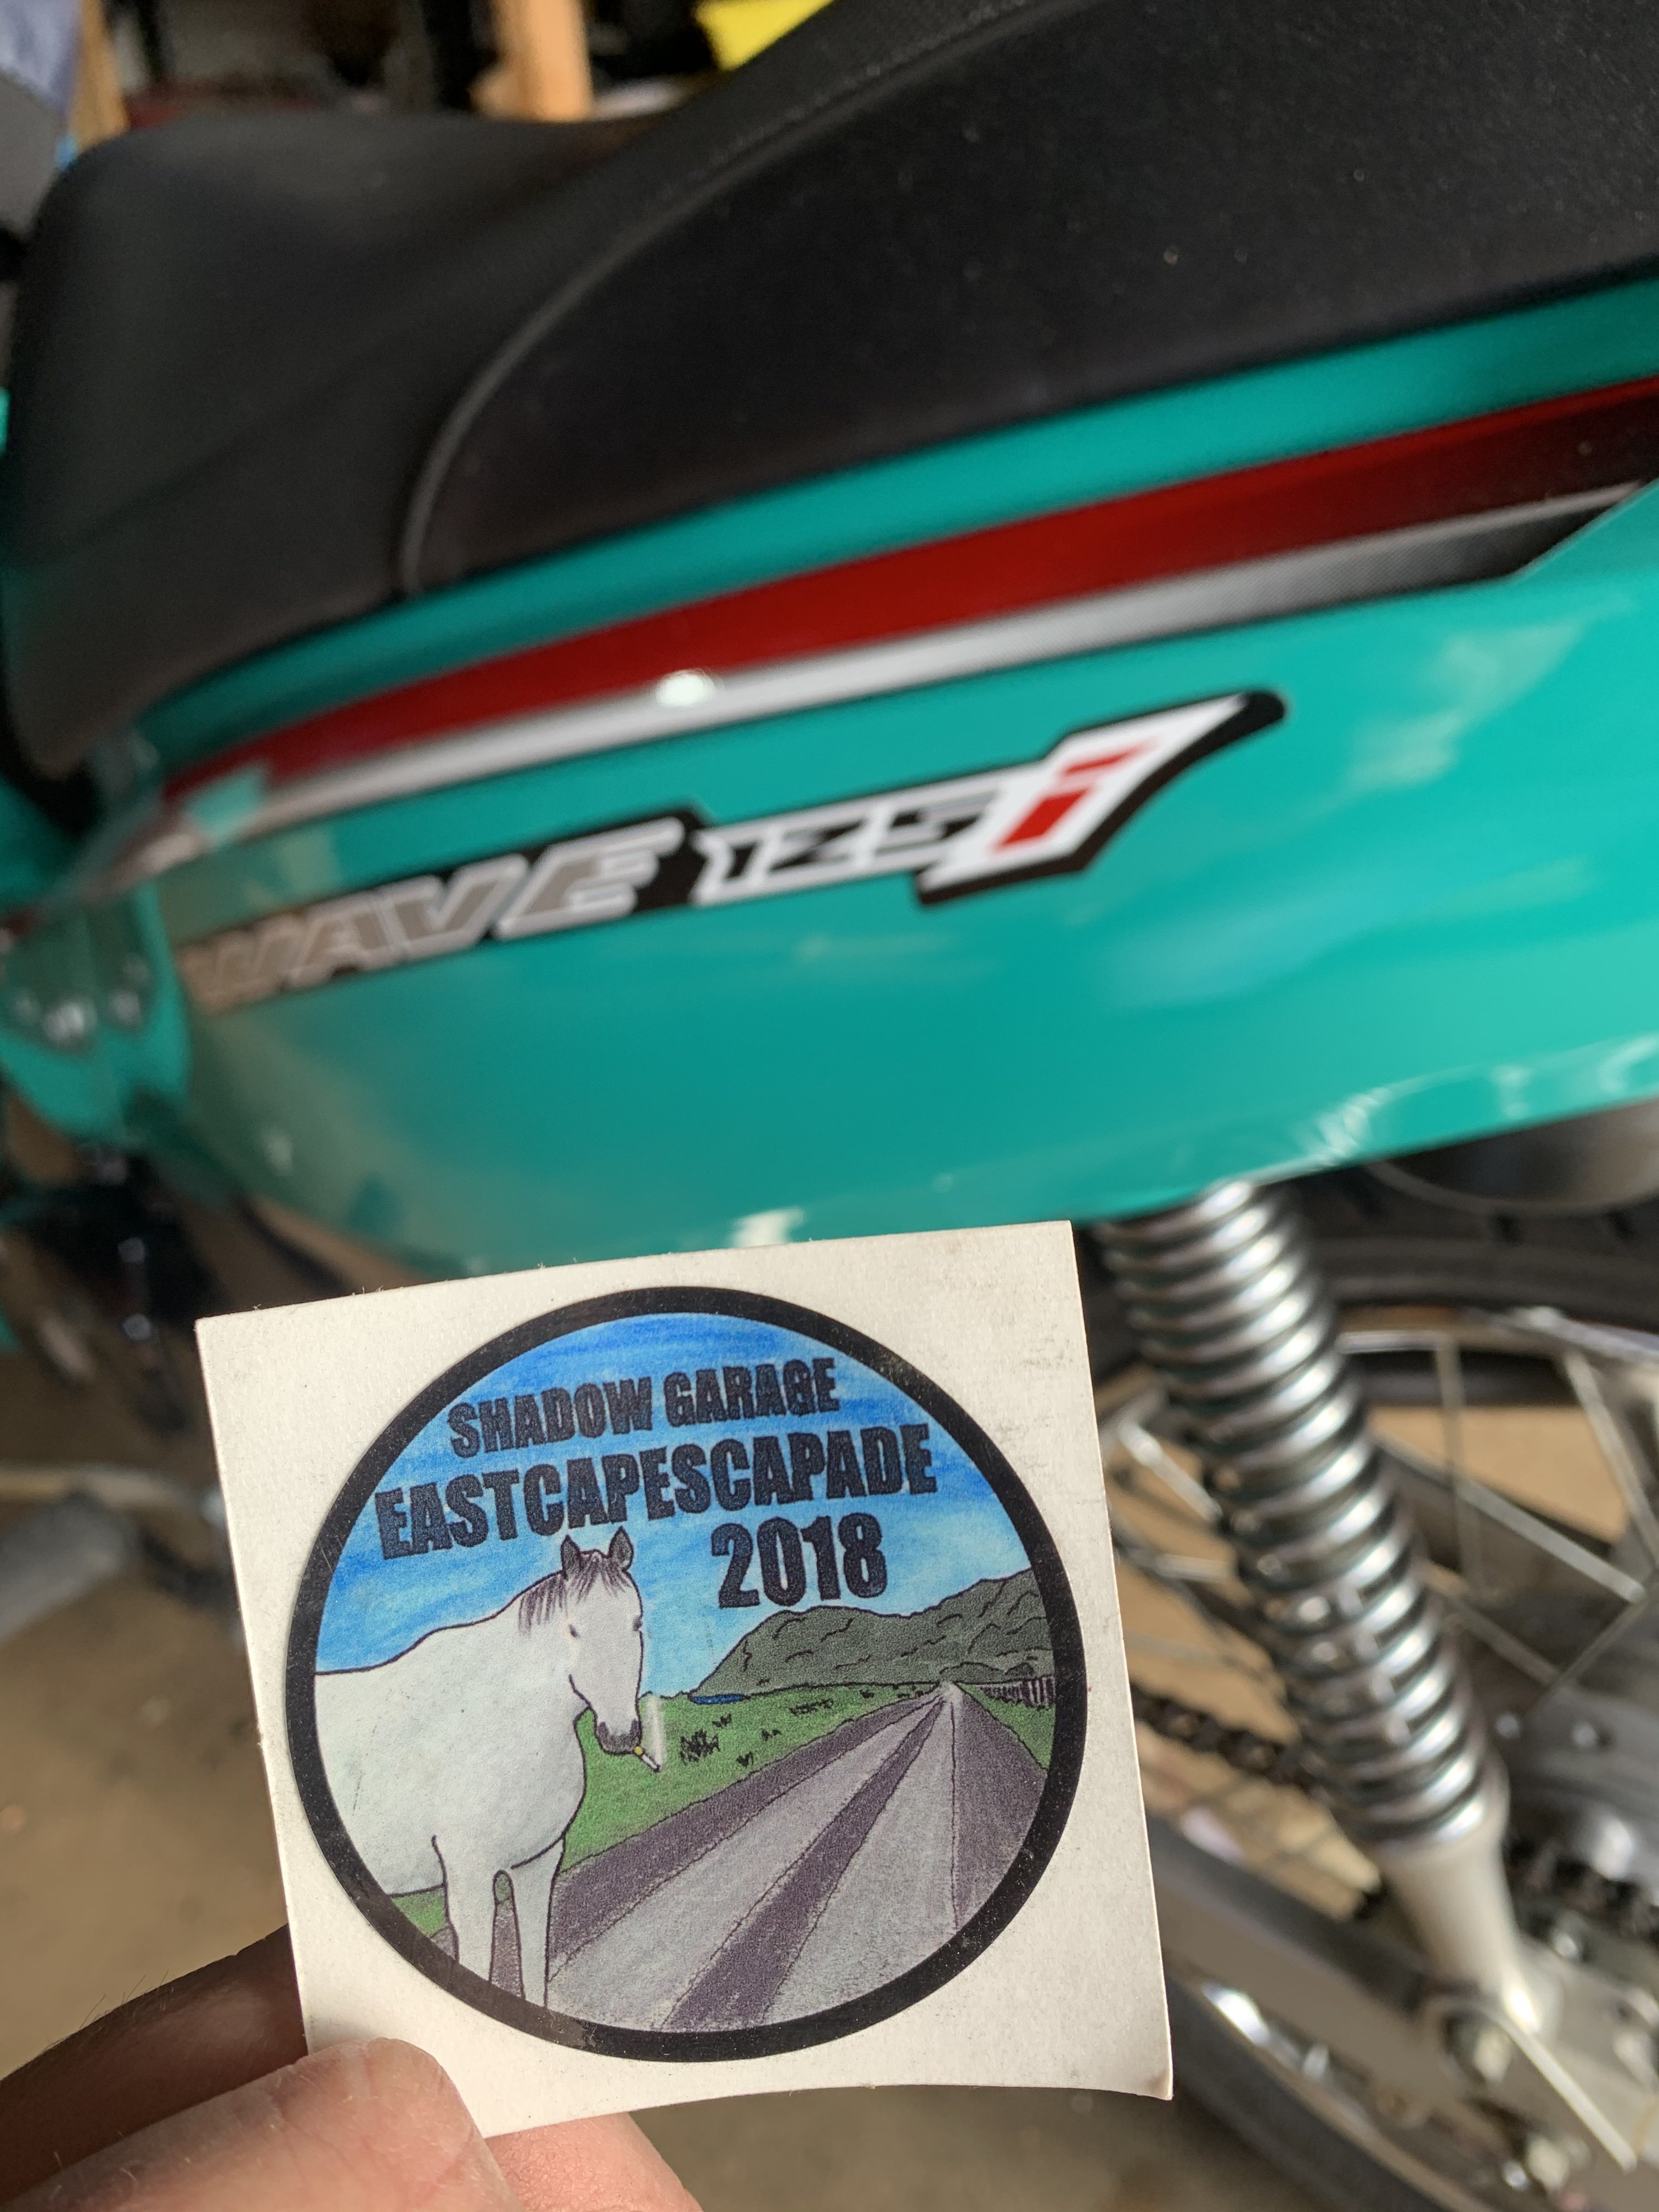
Took the Imp for a hoon on Saturday. Went to visit a mechanic who works from home up a valley not far from us because he has fields of cars and I had spotted some Subaru Leones. Sadly he doesn't have an front wheel drive models because I wanted to nab any gear boxes that I can just as spares in case my decides to detonate. Top bloke though- he knows his scooby stuff having been a mechanic for Subaru NZ. He's given me a contact to try for boxes. So since it was a very lourverly sunny spring day indeed we thought we'd continue our drive further up the valley and check out a load of nice roads we normally cycle on. It was so much fun. I didn't drive super quick. Just enjoyed the nice handling and it feels quick anyway when you sit so low. I took this pic along the way. (some fellow oldschoolers might know the area because it was part of a circuit I lead folks on for a friday cruise on the weekend of the oldschool nats, Marahau 2014. We went to Mapua for lunch and hung out with all the posh people there. Then home via the supermarket to end a nice day out in the Imp. The day before I had picked up some carpet that local lady who makes funky cushions had sorted me out with for cheaps. Proper auto carpet, same as what I had used in my Viva... The workshop is finally a fair bit emptier having smashed out a few other jobs and got them picked up/delivered. One job we just did was build some hefty steel art deco styled gates and a large set of doors for under an outdoor cooking area for a customer in Nelson. We reckon the gates look really neat so I have to share ... Now going back in time to where I had finished off in the last post. The oil pump was now mounted and I had a oil filter mount in place. I had forgotten to take a photo of the inlet/outlet off the mount but picture two tubes coming out of its base and going through the wall of the engine block. I now had to link those two pipes with things. One had to make it way to the oil pump and the other had to work its way to the back of the engine (as positioned in the Imp) and link up to the main oil gallery into the block. I had to have a good think about this. Whatever I do to make it work has to be easy to assemble, through the bottom of the engine with the sump cover removed. Once the engines two clamshells are placed together I don't want to ever separate them again for two main reasons... 1 : Because that involves removing the heads so new gaskets required and that costs money and I dont like spending money. 2 : It also involves a tricky little system to fit three pistons into the bores, from the bottom of the bores, using removable piston ring compressors through a gap of about an inch inside. You'll see more on that later. I am NOT looking forward to that bit. Originally the Honda oil feed system used pipes and sealed everything with O rings. It works well and makes sense. I could work with that. I did entertain using lots of AN fittings and hose etc. However there was a few reasons why not. They are a bit pricey. They were not easily available locally, especially during lockdown. It is not at all easy to swing spanners inside this engine block. Did I mention they are pricey ? Ultimately if money was not really an issue for me I would dry sump the engine and run a external pump. But ugly, expensive, external oil tank in the way somewhere, driving the pump off a currently non existent belt drive pulley (not even got to that point yet for an alternator but I have an idea) So keep it simple with stuff I have to hand! With that I rummaged through the pile of alloy stock I had and found a few bits that would work... But O rings were going to be a bit trickier. The size used by Honda didn't match anything I had nor anything I could find on my suppliers website. They were odd. I looked through a Honda parts diagram online and found the Honda part number along with the exact size of the O rings. Nice of Honda to do that! Looked up sizes online and it turns out that they are a JIS standard Oring. I never knew of such things. Actually very common among many Japanese cars. Even better - when I searched through my suppliers website they actually had them! But wait - there's more!!! They were cheaper than all the other O rings close in size. Yay! But the shop was shut to public and I couldn't visit it anyway. Boo! Thanks Covid However- the shop was open for supplying engineering places that were considered essential services. It happened that one of the employees lived not far from me. He delivered some and left them in my mail box. Yay! So now I could start what Hannah refers to as the London underground of oil tubes. I worked my way from the oil filter and made various blocks with holes and tubes with grooves. All very carefully measured to fit just right and tight but constructed in a way that it could be taken apart from the sump opening. I was lucky that I happened to have a large drill bit that was spot on for the final pass on the bores to suit the pipes and O rings for exactly the same amount of 'squish' that the Honda factory pipes and fittings have. I made sure that all the bores were as big if not bigger than the Honda setup so not to increase restriction on the oil paths. You'll see later that I will be over driving the pump in speed by a notch but that's another story. I must add that the job of planning, measuring and machining up all these little bits was a super fun way of spending time during lockdown (in between going for heaps of bike rides on super quiet roads!) Here's some pics of my subway tube network. These are the two blocks that seal onto the in and out pipes for the oil filter... The closest hole will feed a pipe heading back to link to the oil gallery. The further most block has a hole that takes a connecting pipe from the pump. Here's a view from the side... Lets zoom out a bit so you can see where they are in relation to the pump... You can also see how the pump is bolted to an adaptor plate which is bolted to the inside of the block. My connecting pipe that goes between pump station and filter station is in two parts so it can be fitted easily from below... Together its like this (lighter for scale... because all the cool kids measure the dish of their hand machined oil pump pipes with lighters like this)... Then fitted in place... Connections man! So I had the pump to filter sorted. The filter to main gallery looks like this... That pipe sticks out through a hole that was originally for the shifter mechanism ( I think. But whatever... thanks Honda for your convenient hole) You can see the oil gallery below. I will make a bolt on block with oil ways to connect them. I will also design it so I have the potential to take off from there and add an oil cooler. I would rather run the engine without one. It never had one as a bike but the engine did have more air flow over the engine though. But my engine will have a well finned sump cover to pull off heat plus be free to radiate heat better than on the bike. I shall run it and see. Its not a race car so I suspect that with really good synthetic oil I'll be fine. Its a pretty understressed engine anyway. Maybe I can add an oil temp sender to my filter block and run that through the ECU so I can have it show up on Tunerstudio for evaluation? Hmmmm - I like little things like that. But either way- keeping it as an option is good. I have yet to make the cover plate (some alloy plate is under my bench for it) that will go over that end. All simple stuff that. Once that's in place I can make a union block to suit the pipes. That cover plate will also have the oil filler and possibly a centre engine mount to suit a cross member but I have not yet decided on that. Moving around to the flywheel end of the engine you can see where the oil pump drive shaft hangs out, waving about like an unsupported shaft with no attachments... That shaft needs some motorvation and that is going to be part of the next exciting instalment. It involves Shimano....13 points
-
So that was last weekend but then this week a hardtop had popped up on TM locally for too much. I managed to get it slightly cheaper but still, not that cheap... I think I'll still try and get some out of Japan to sell at some point given how much they go for nowadays. Crazy. I took the old Gloria out to collect it. The guy selling it had an FD3S as well which he showed me, it was fucking slick. Super tidy. It turned out that he was originally from Auckland but was now living in Nightcaps of all places. Hilarious. Anyway we got to yarning about the 90's/00's Auckland car scene and it was a good wee chat before I bumbled off. Then when I got home (in between rain showers again) I started to fit it up. Mine has apparently never had an hardtop before as the plastic trim pieces were all in one piece and covered up the mounting fixtures. This one came with all the parts so I used those and my eyechrometer to mark and holesaw then grind clearance into the plastic to fit up the catches. THe end result was as follows: Obviously black looks fucking stupid so I will be painting it white when I get a chance and removing the soft-top from underneath when I refit it once painted. That's all for now.
 11 points
 -
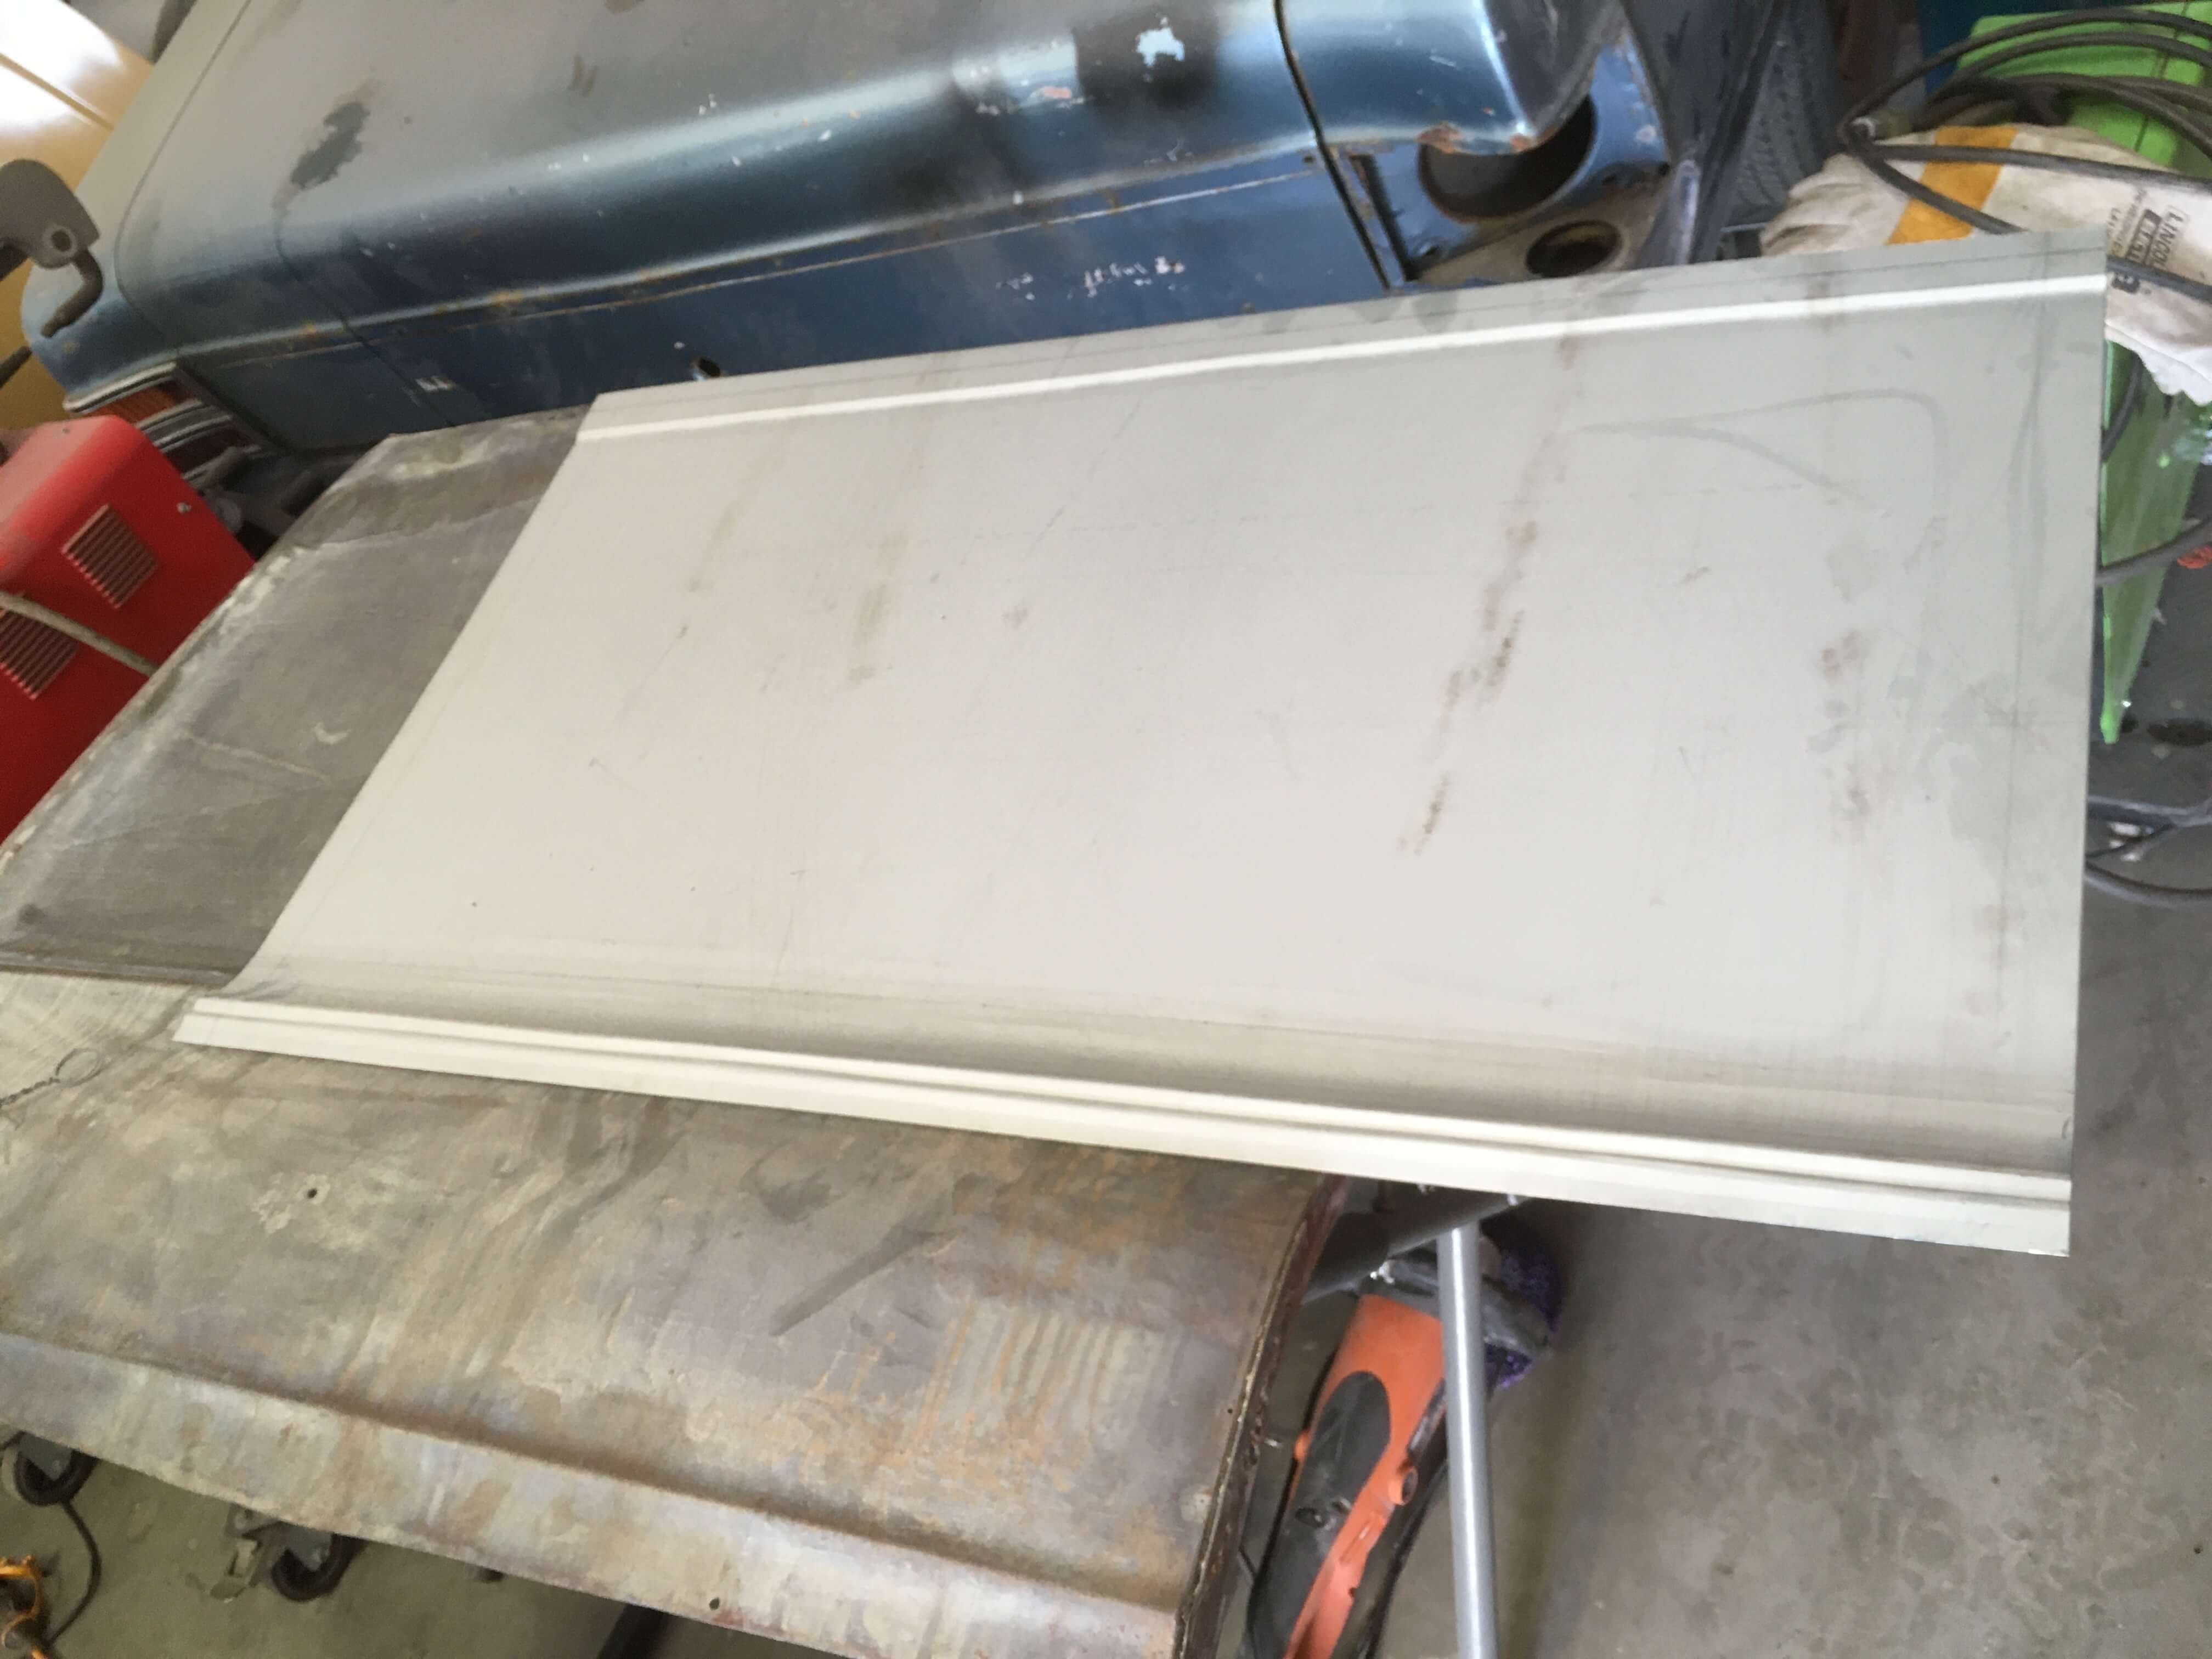
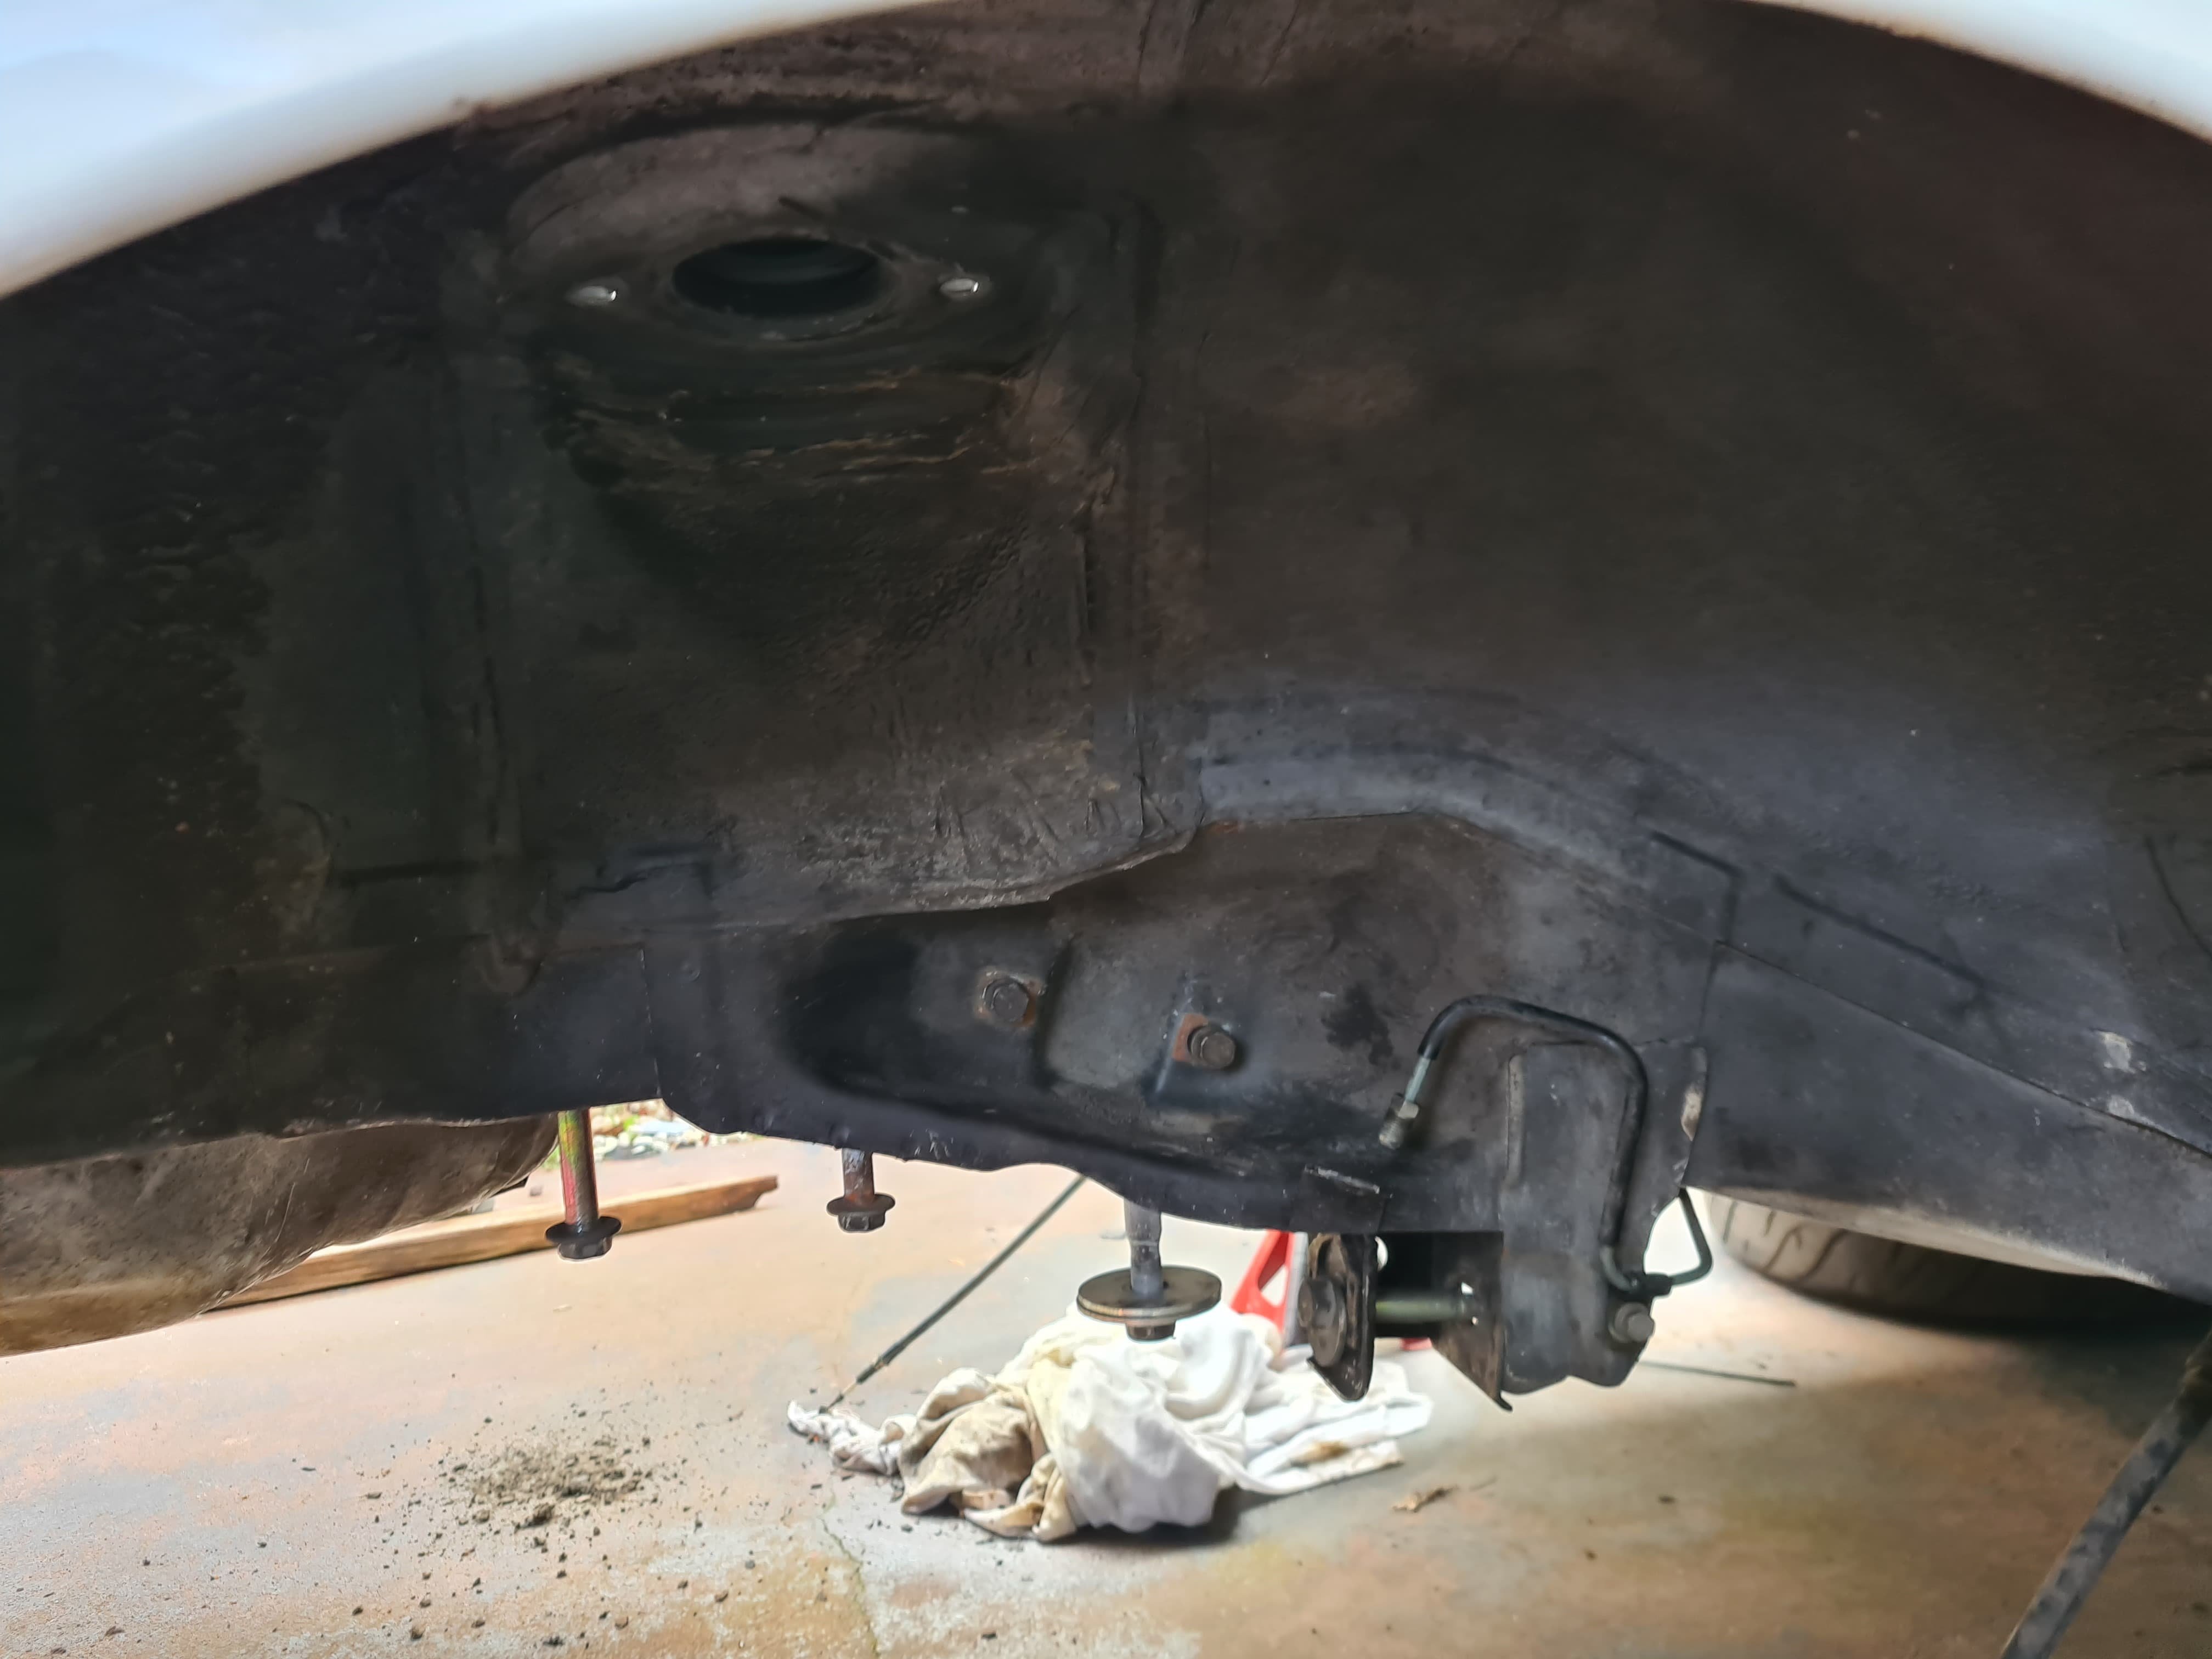
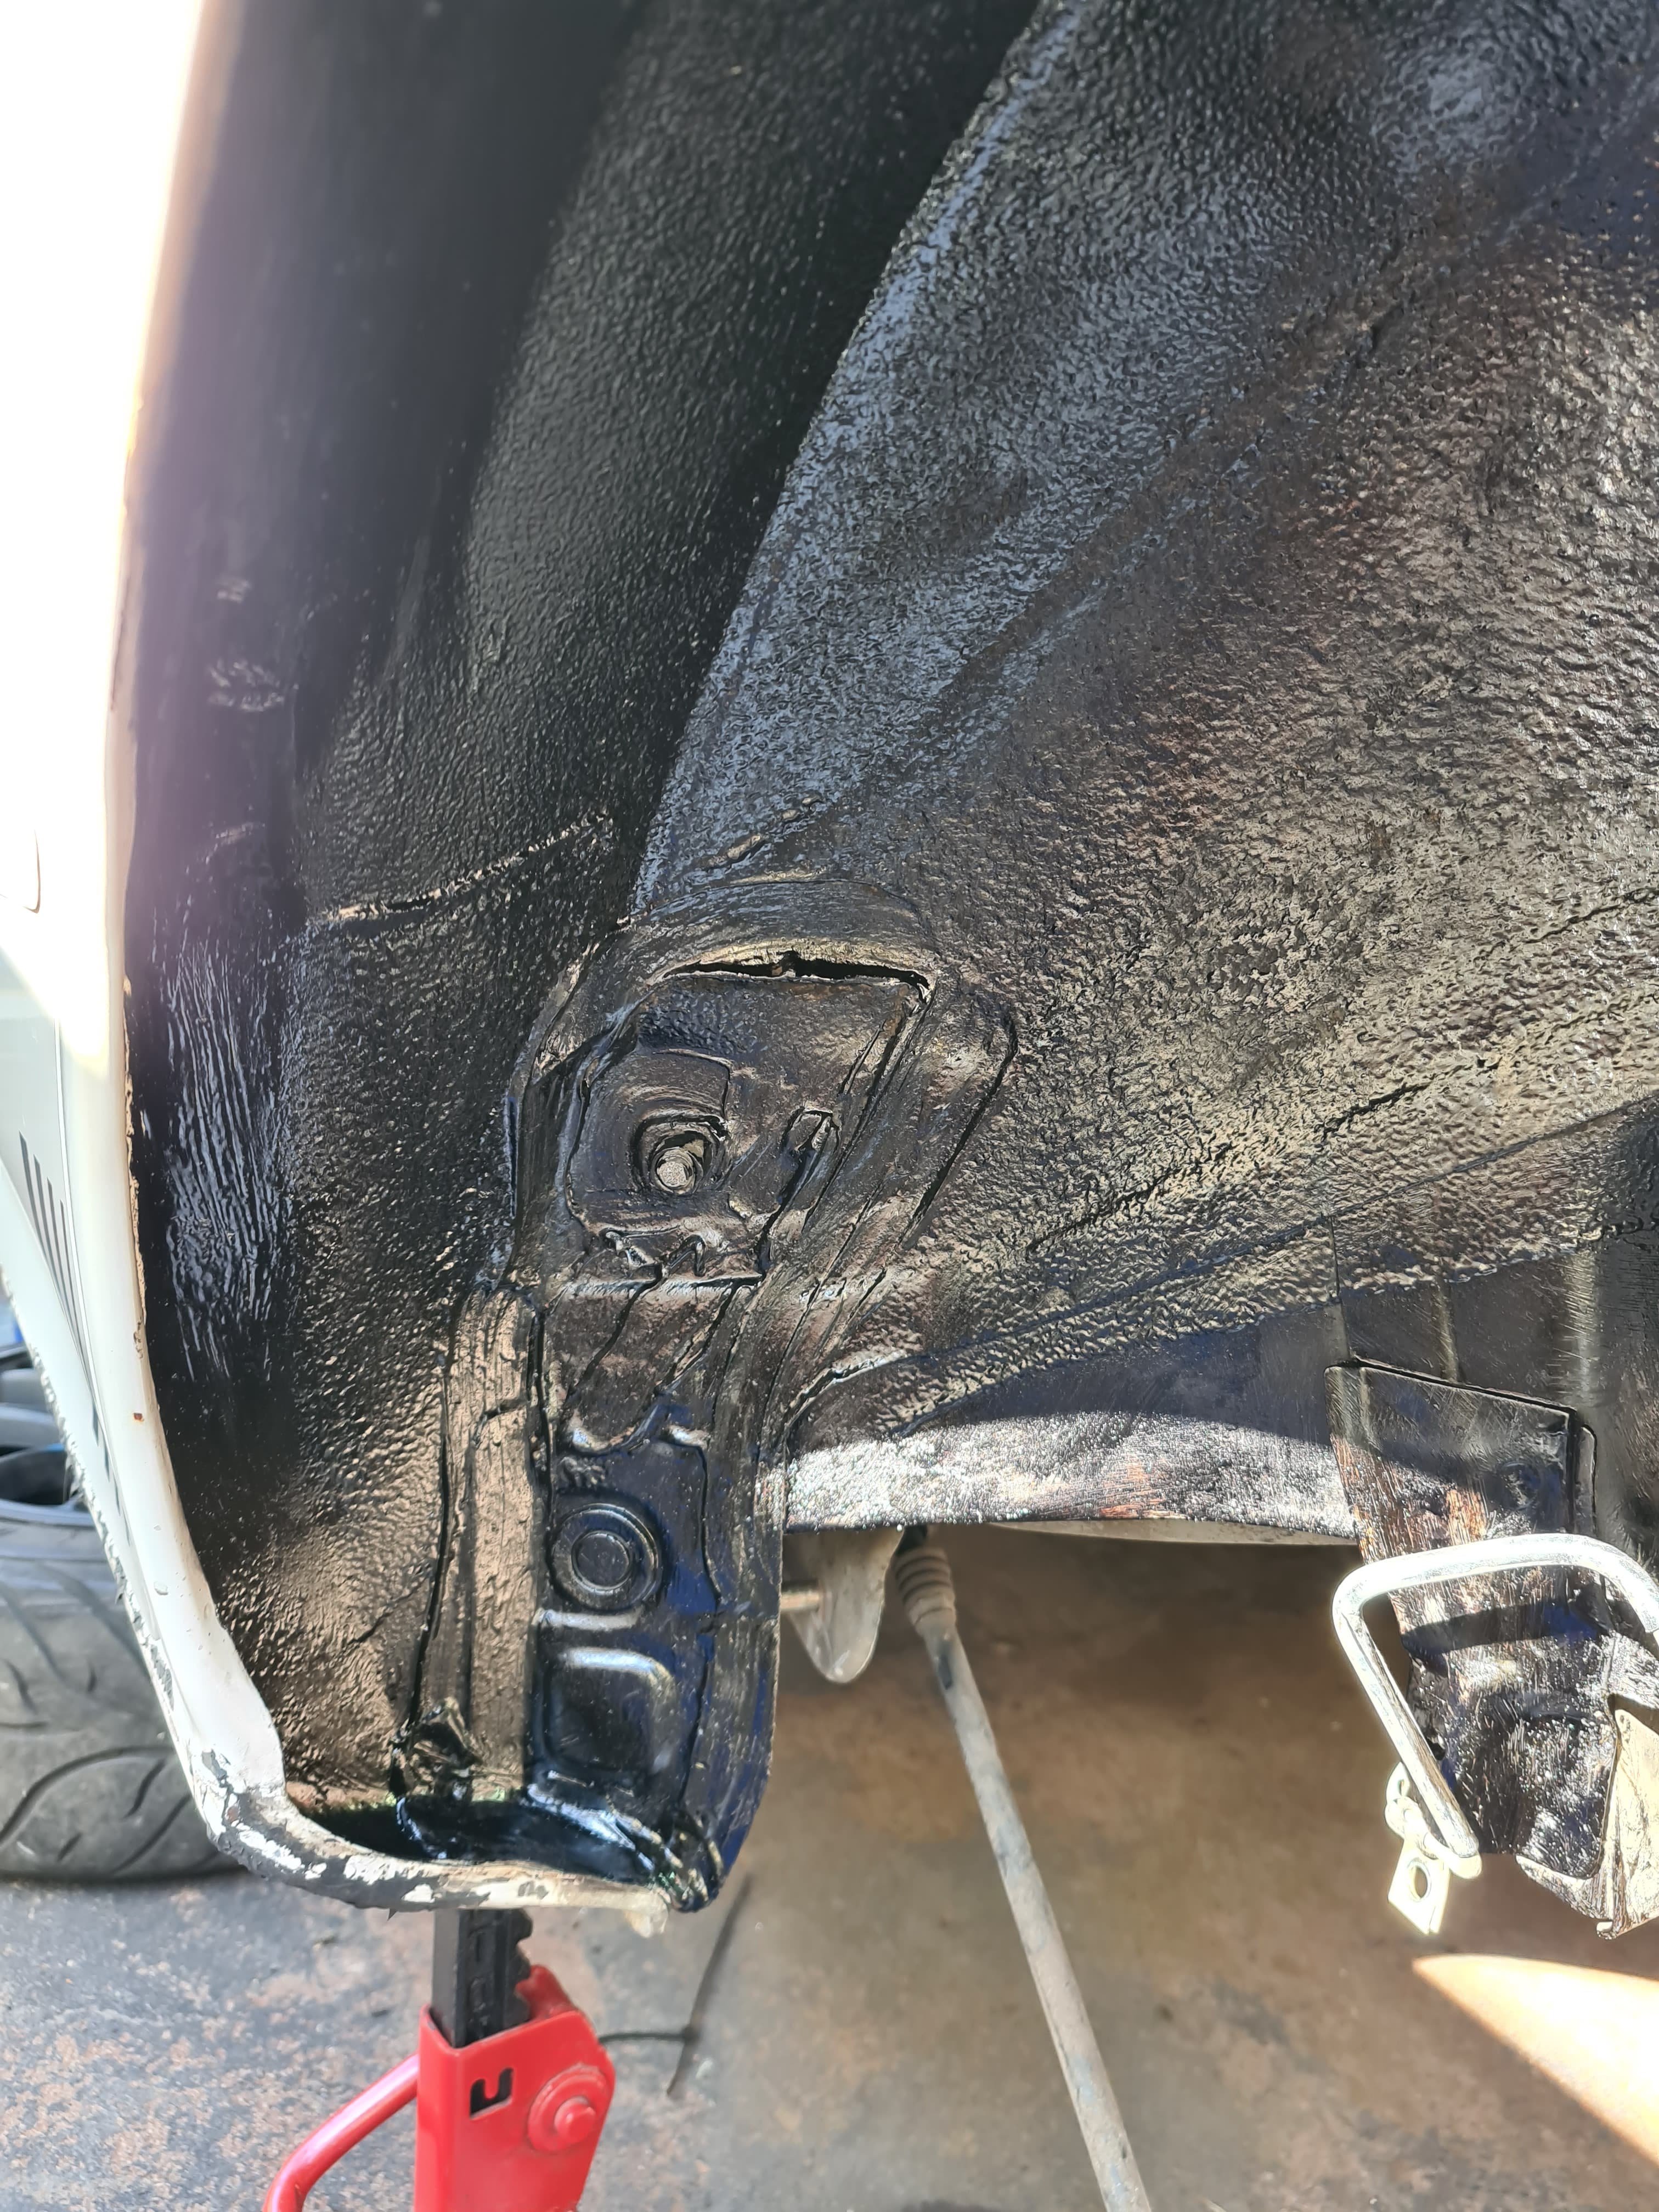
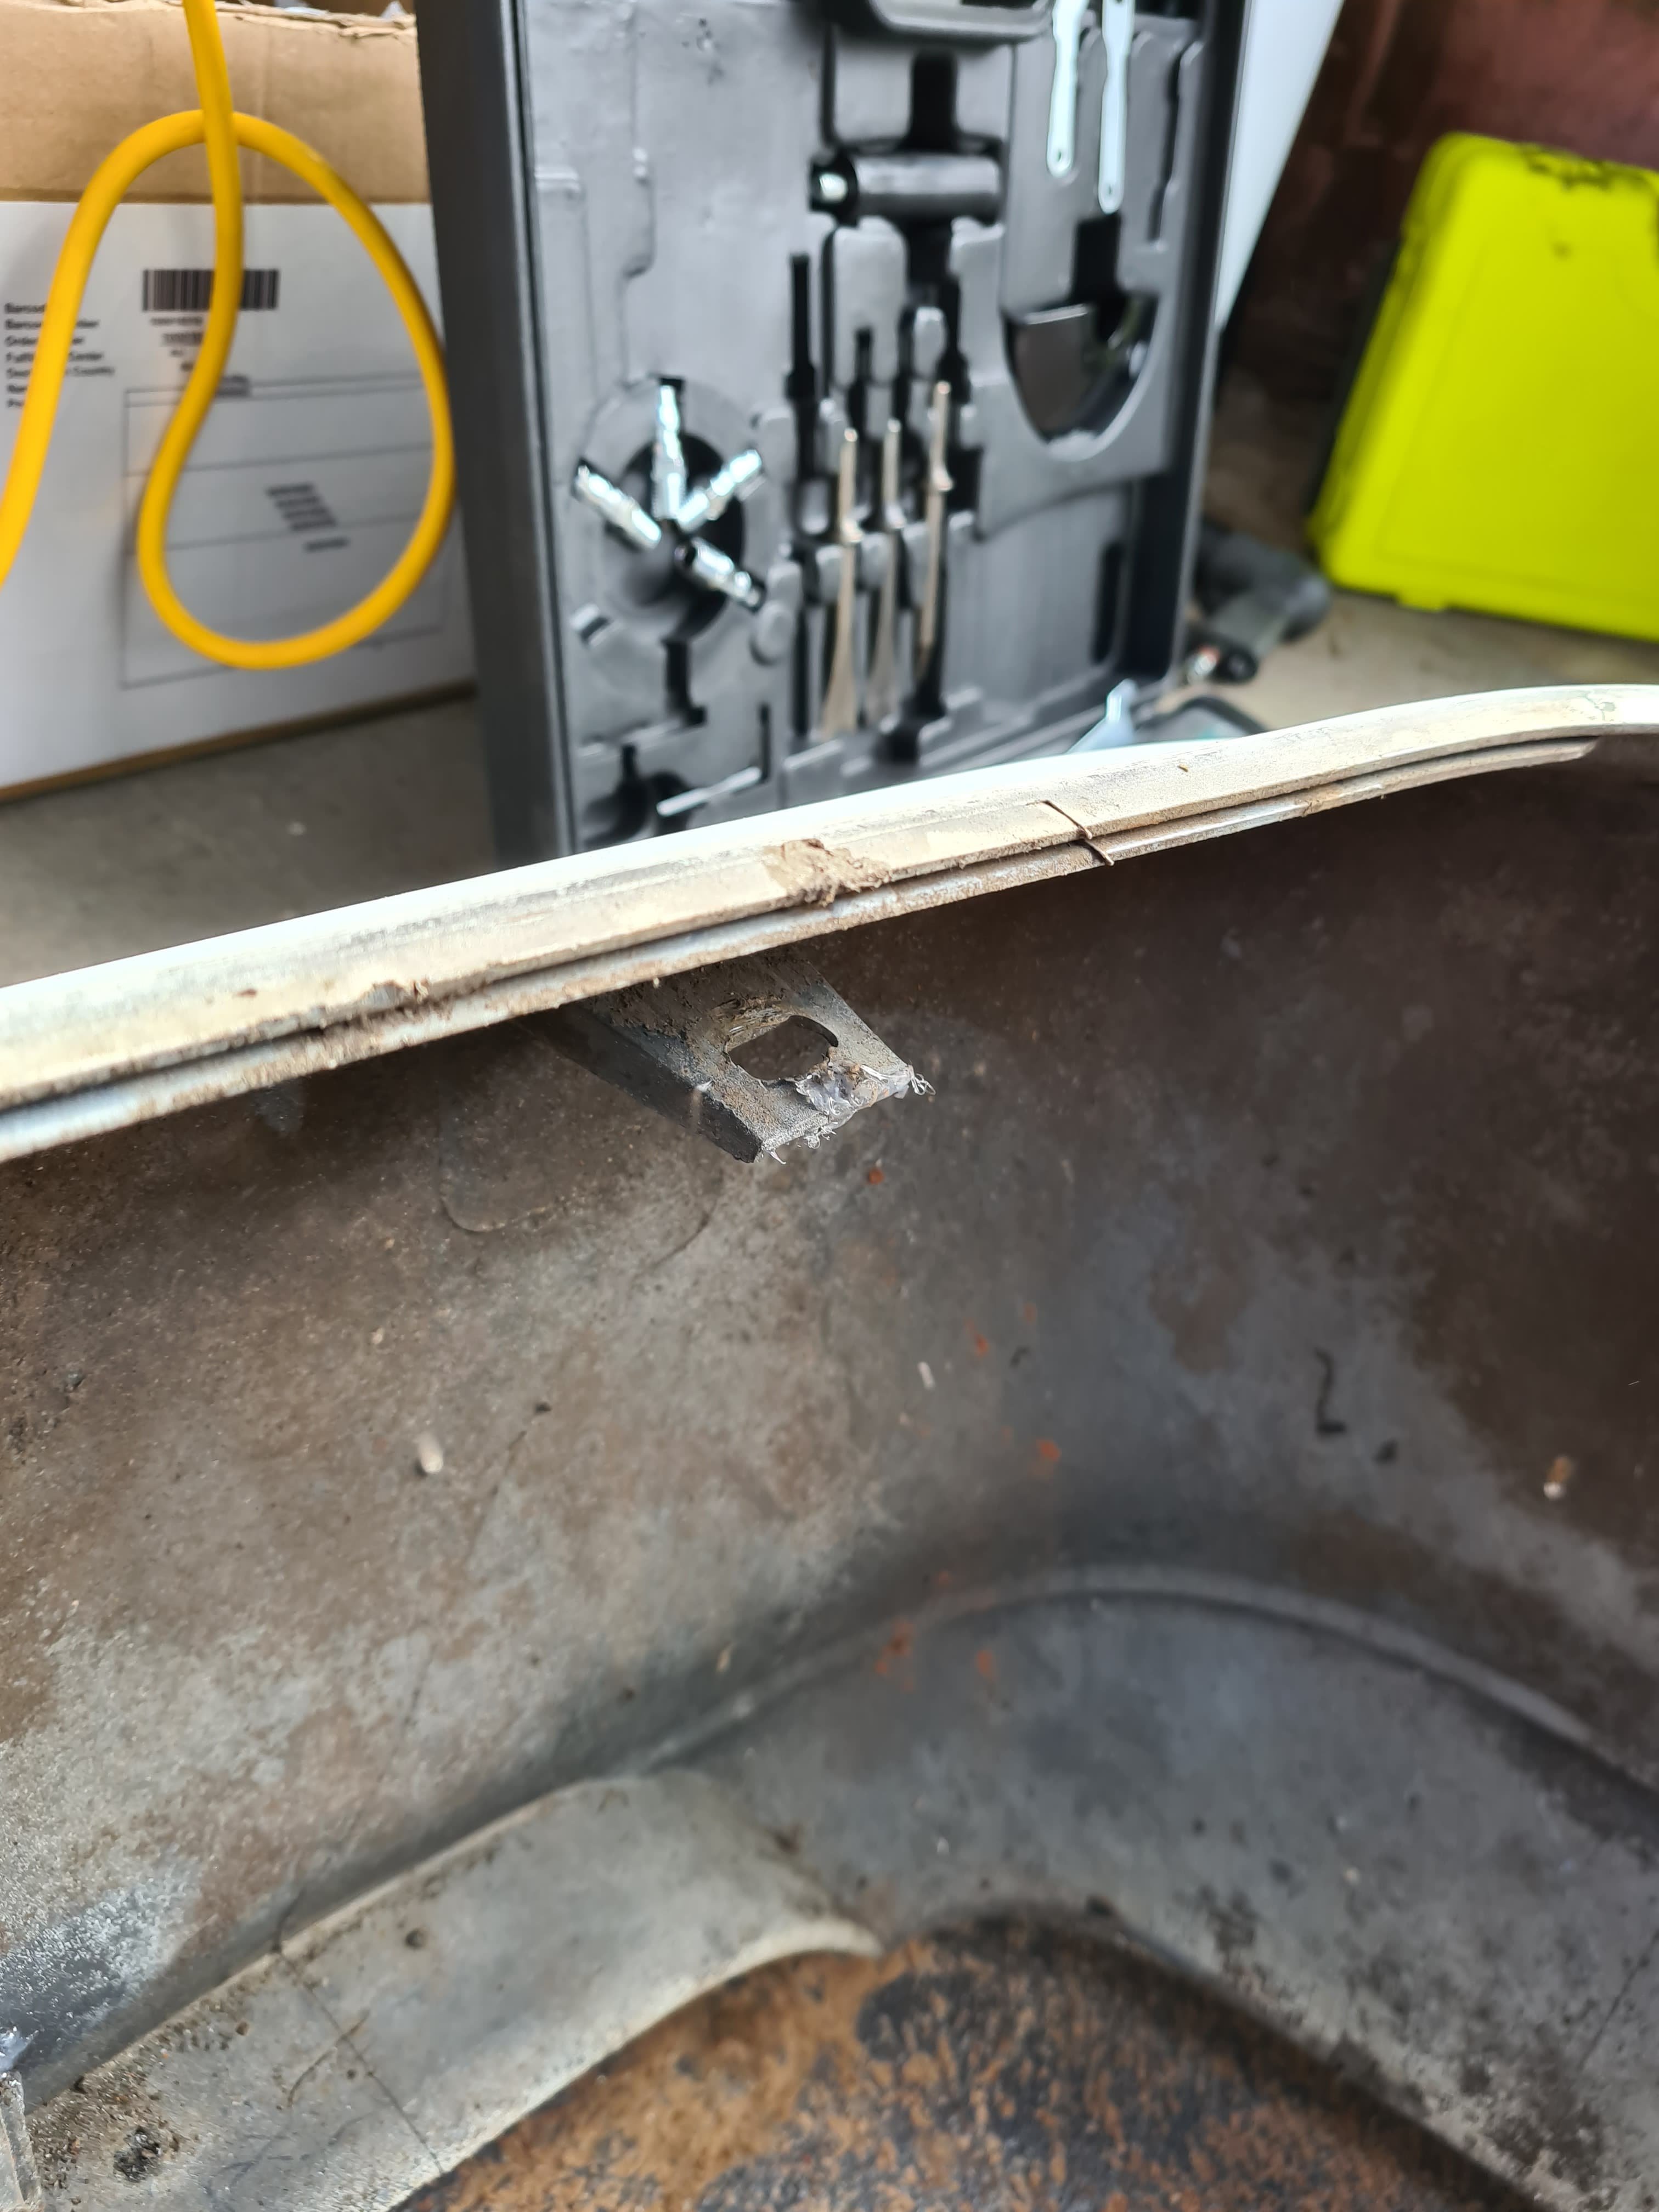
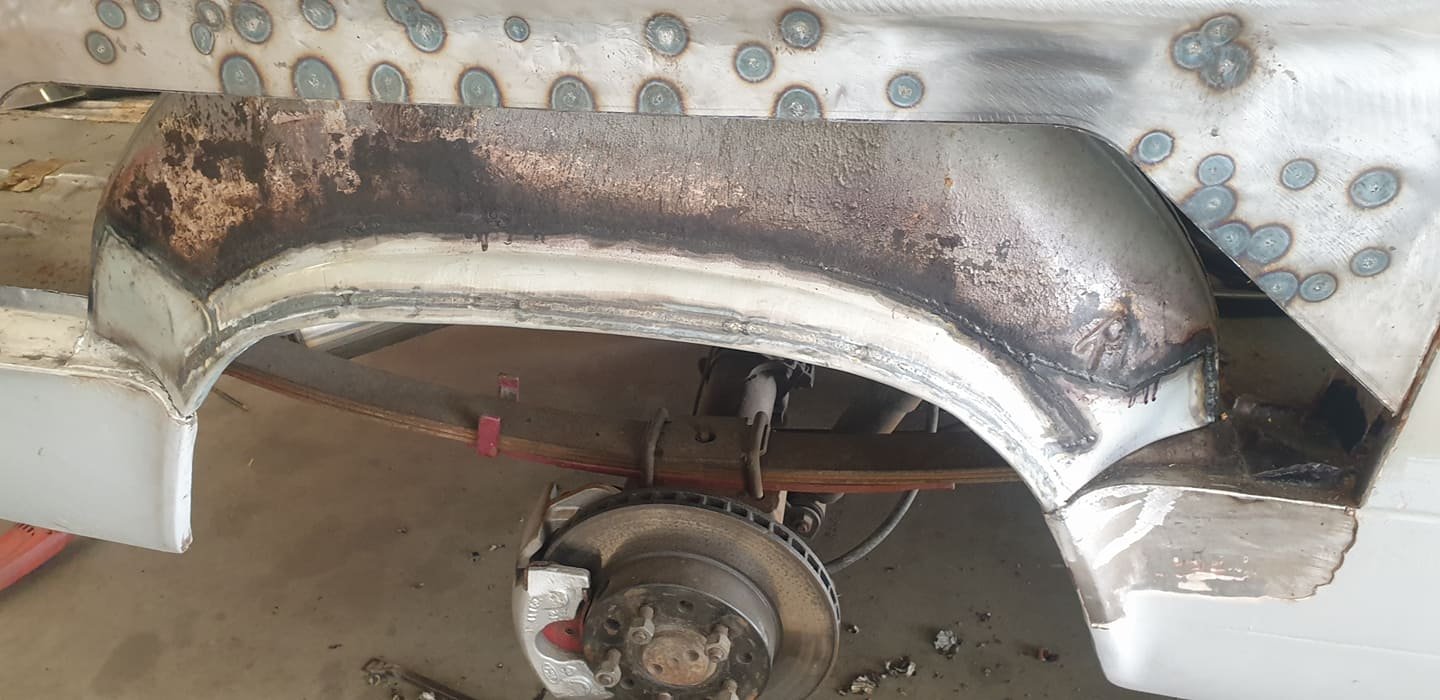
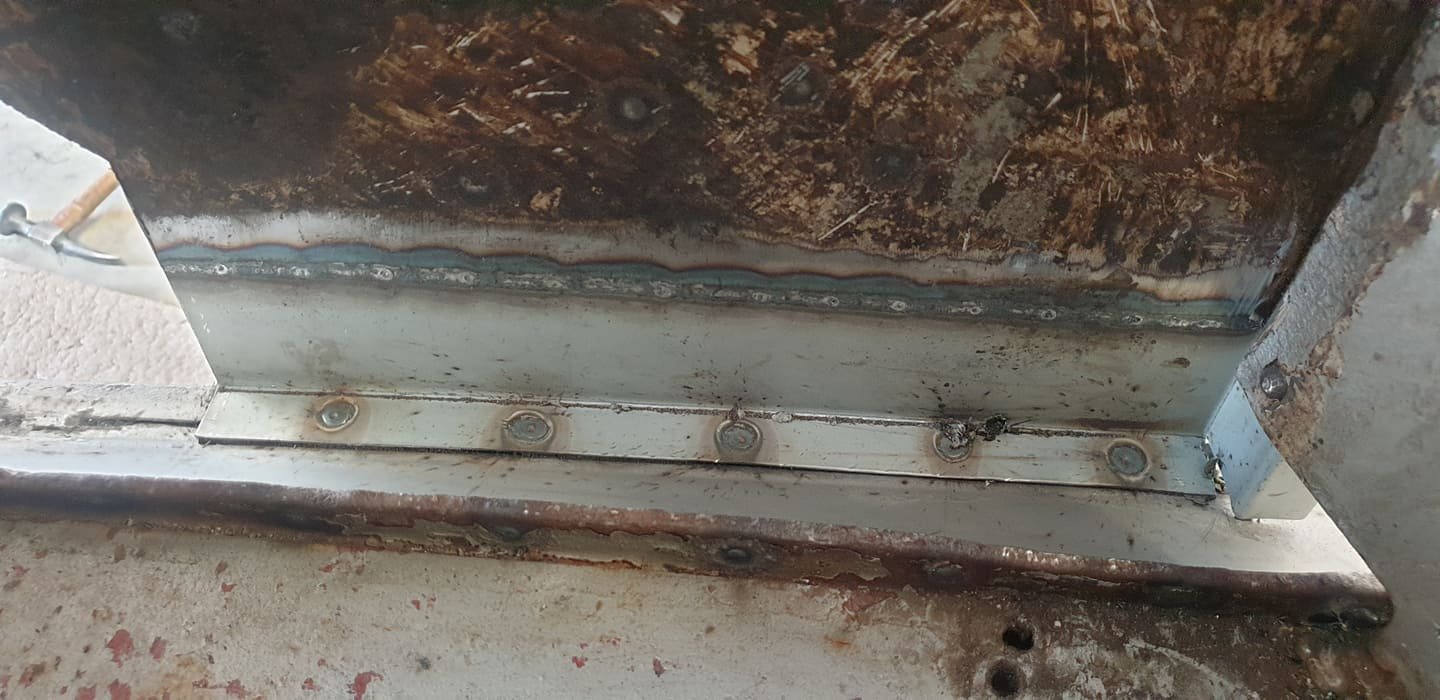
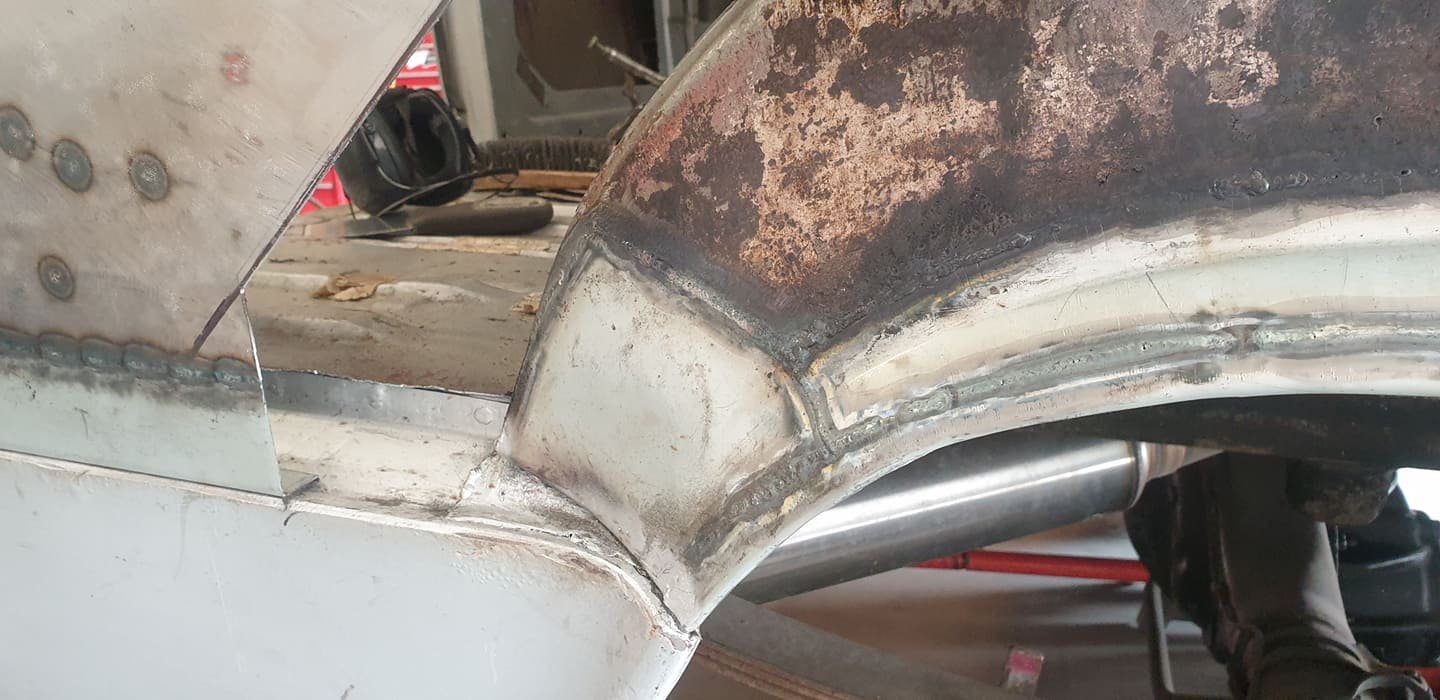
So when I finished the last post I said to myself that the next one should be less wordy and just let the pictures do the talking. Now bear those good intentions in mind as you read the following. I did say that I might need to go to Palmside for the repair panel for this one, which means I am all the more proud of what I was able to pull off. Considering I only have the bench and a couple of hammers and dollies to work with, it came out pretty close. When you see the photos side by side it looks like the rear sloping section is slightly further forward than the original, especially compared to the shackle bolt access hole, but I'm planning to run an early Mondeo space saver or something so I'm not too worried. My cheviots wouldn't fit in there originally anyway so no biggie. Looks pretty good in the hole too. I left the front edge unfinished for now until I figure out what I want to do with the wheel tub and how to connect the two together. You might have noticed I also reused the original strap bracket thing too so, um, neat? So with the inside panel sorted I started on the outside. I started by stripping the paint back, along with the bog. So much bog. Ain't she purty? After setting to with the bench, hammers, and dollies again, I got this whipped up. It looked pretty good and I was preparing to tack it in but as I cleaned up the inside of the rear little corner piece I was finding more and more pitting so I figured I might as well do the whole job proper. Believe it or not, this was roughly formed with a rubber mallet on the grass on the back lawn before I did the final fettling the normal way. If it works it ain't stupid right? And so next began what I can honestly say is my most successful panel welding so far. All told it was about two hours to get to this point, welding 10-15mm each time and hammering on each weld to keep the warping to a minimum. I left the front little bit untouched for now because I'm planning on replacing the wheel arch at some point so I'll finish it off when I get that finalised. Some more panel beating and a quick coat of primer later, I got this: Lighting it from a very oblique angle exaggerates the imperfections but it gives a good idea of what I'm dealing with. I've since spent more time sorting that out as best I can and made some good progress. I don't think I'll be able to get it mirror straight with my abilities but it's pretty close now and a couple of coats of high build primer should get it there. It's a damn sight better than it was in any case. The last panel I wanted to play with in this area was the lower part of the door surround/quarter panel attachment point. This bit. As you can see it's pretty lacy and I wanted to change how the panel fitting worked so I make a replacement up that was slightly different. It's the top one here obviously; the bottom being the now installed quarter patch. You can see the flange where it used to sandwich between the quarter and valence has been folded over and an extra flange added to sit flush with it. From the inside: This is going to let me plug weld the valence directly to that flange and remove the protruding section that they all have from factory. It obviously worked fine for Ford and made it very easy to manufacture but I don't like how it looks and it's always been my plan to remove it. I realise it'll be hidden behind the bumper in the end and no one will ever notice but that's no reason not to waste a few hours on it for me. The finishing touch for this area was to add in the dimple for the bung that covers the shackle bolt access hole in the inner wheel well panel. I could have just left the panel straight, but then anyone who saw it might begin to suspect that the car wasn't a completely standard, unmolested example of a 77 Escort Estate. Obviously that's not something I'm willing to risk. All you need is a lovely wee die like this and you too can keep all the anoraks fooled. I'll take the hole out to final diameter at some point. Don't rush me. I just spent something like three hours hack sawing through this so I'm a bit tired actually. Over the course of making up these panels I did a few plug welds with the TIG. I was quickly convinced I should get myself a MIG before doing many more. So until then, the panels are going to sit nicely in the corner, ready to go when called upon. In the meantime, I've opened another can of worms. The driver's side quarter has similar rust problems, though not as severe. I figured I might as well crack into it while the techniques are still fresh in my mind and I can't progress on the other side. I started by stripping the paint again. And the bog. Even more this time. I'm reminded again how thankful I am to whomever bodged the shit out of this car didn't just scrap it. Cause judging by their skill level, they really should have saved themselves the effort. And then where would I be? This patch it going to need some considerable beating around so I'm definitely going to need access to the inside of the panel. Which means this has to come out. And this. . It's a weird, almost double skin design, but not really, with a decently voluminous inaccessible cavity between the quarter panel and this inner one. With no drain holes either. Of course. So any dirt or water or bolts or bread ties or bookmarks or whatever that falls down there is gonna stay there. Until it rusts itself a nice access hole anyway. But it comes out easy enough in the end. I love spot weld drills. I have some plans for this area. It'll mostly be back to standard with new steel and better drainage, but I also have an idea for the back-most section that I'll reveal later on, assuming it works. Soviet space program style. In the meantime I'll get myself a welder sorted out and keep chasing my wheel arch lead. I'm not sure I stuck to the plan with being less wordy but hopefully it's been entertaining nonetheless. Thanks for reading.8 points
-
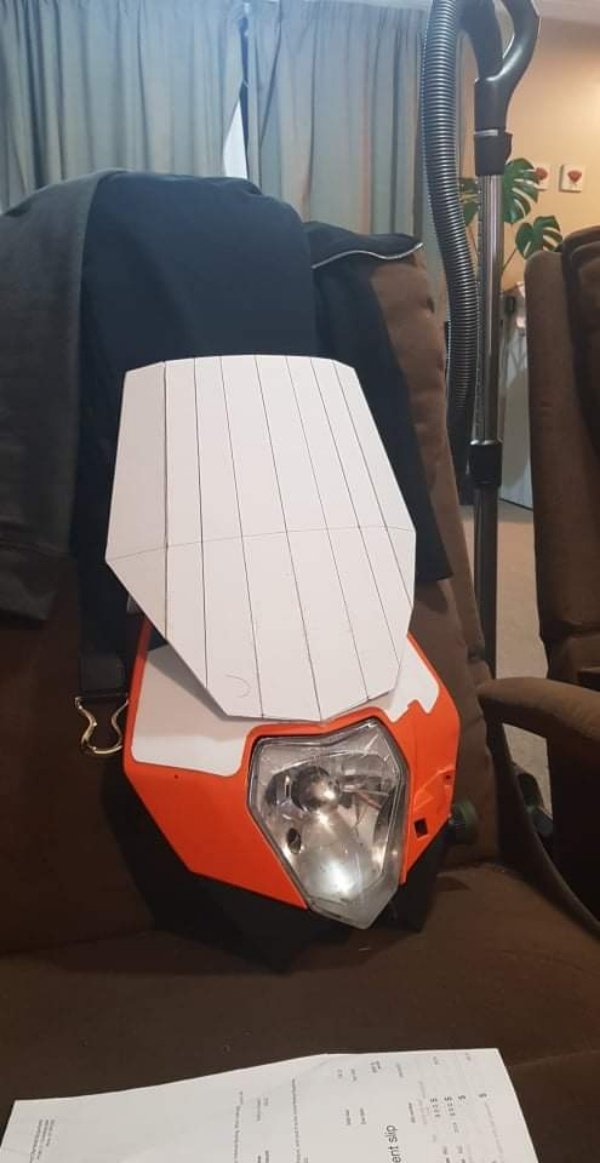
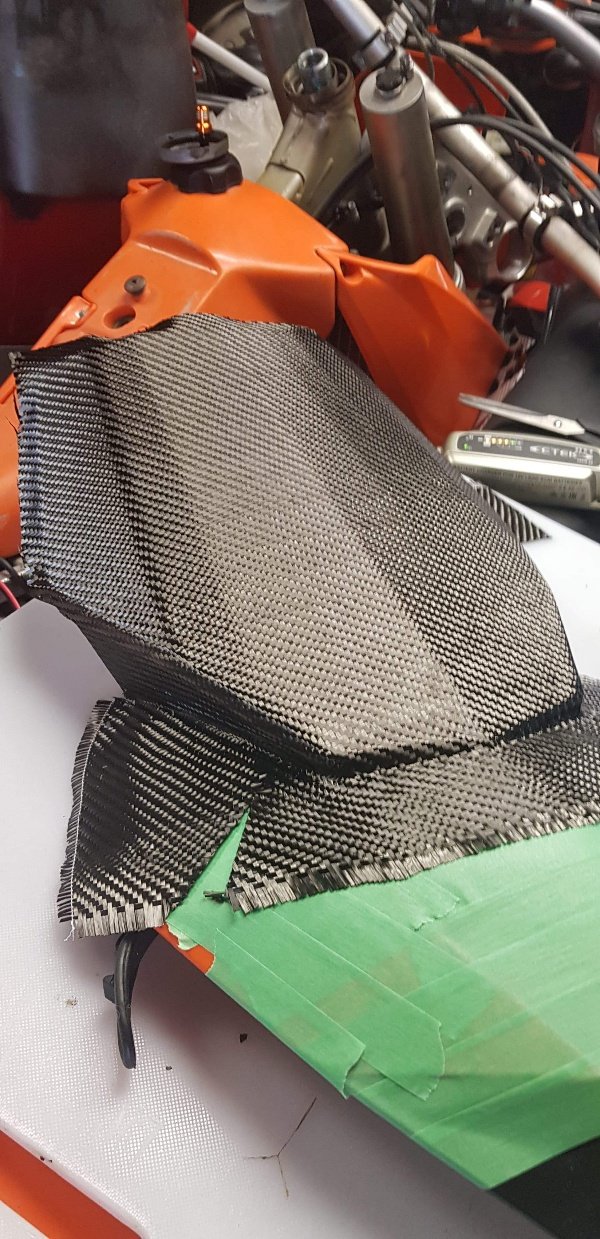
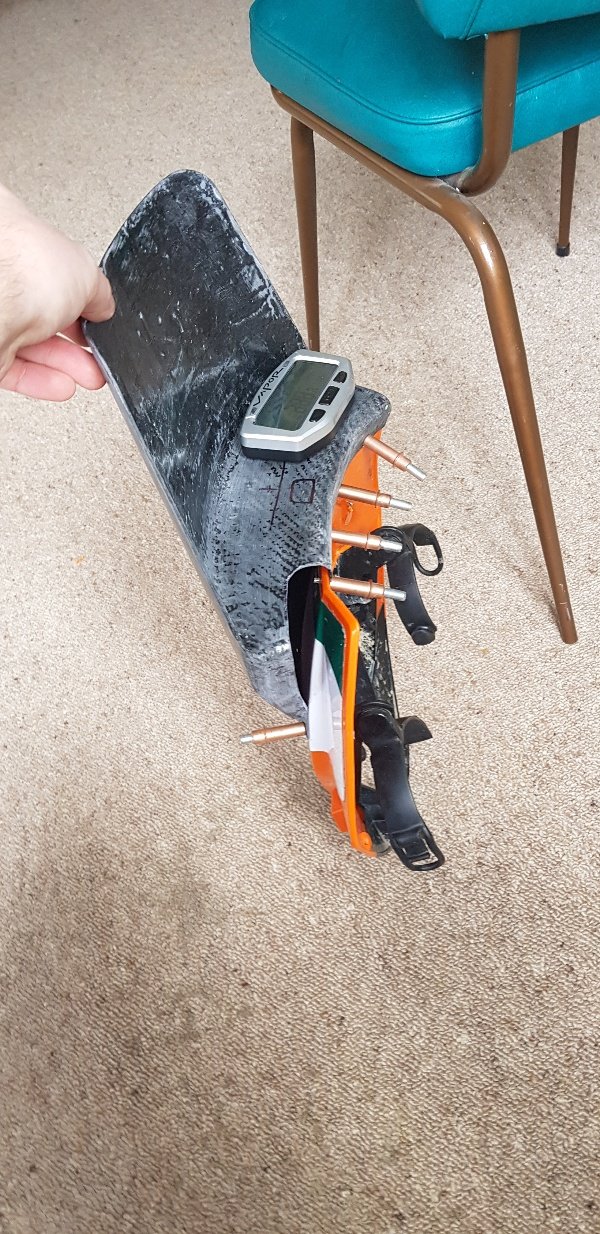
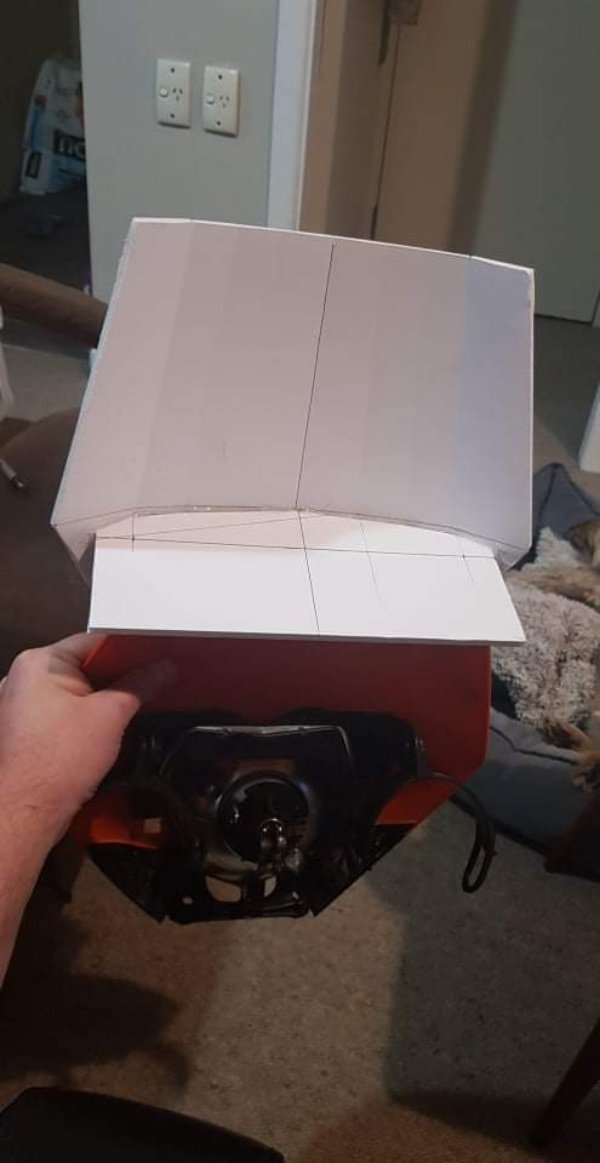
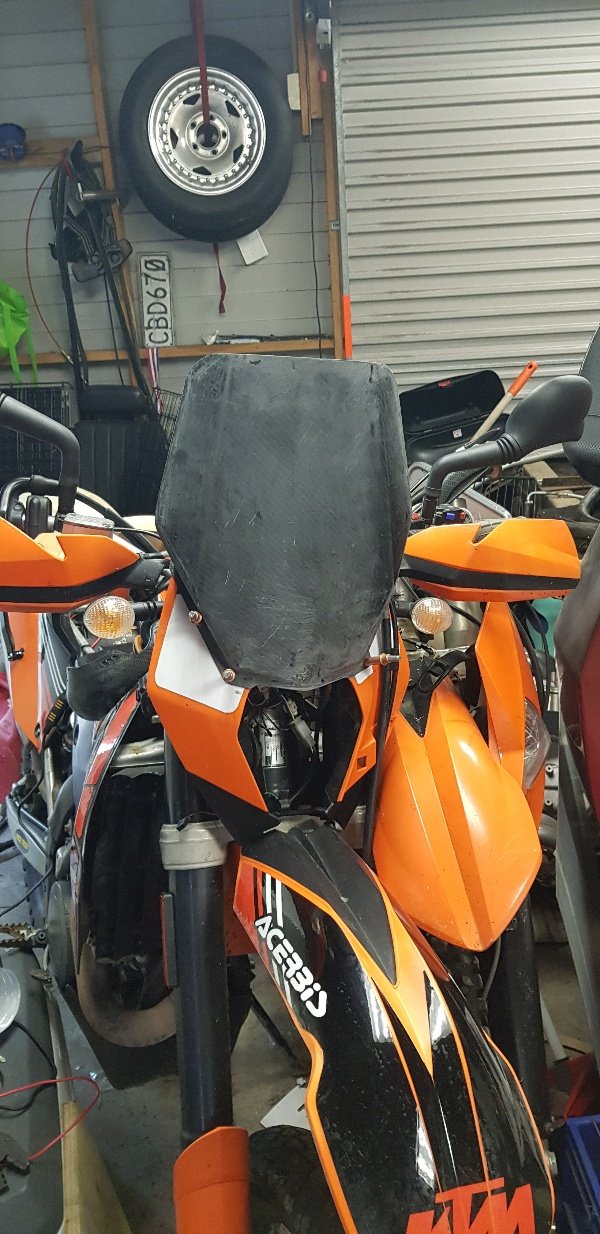
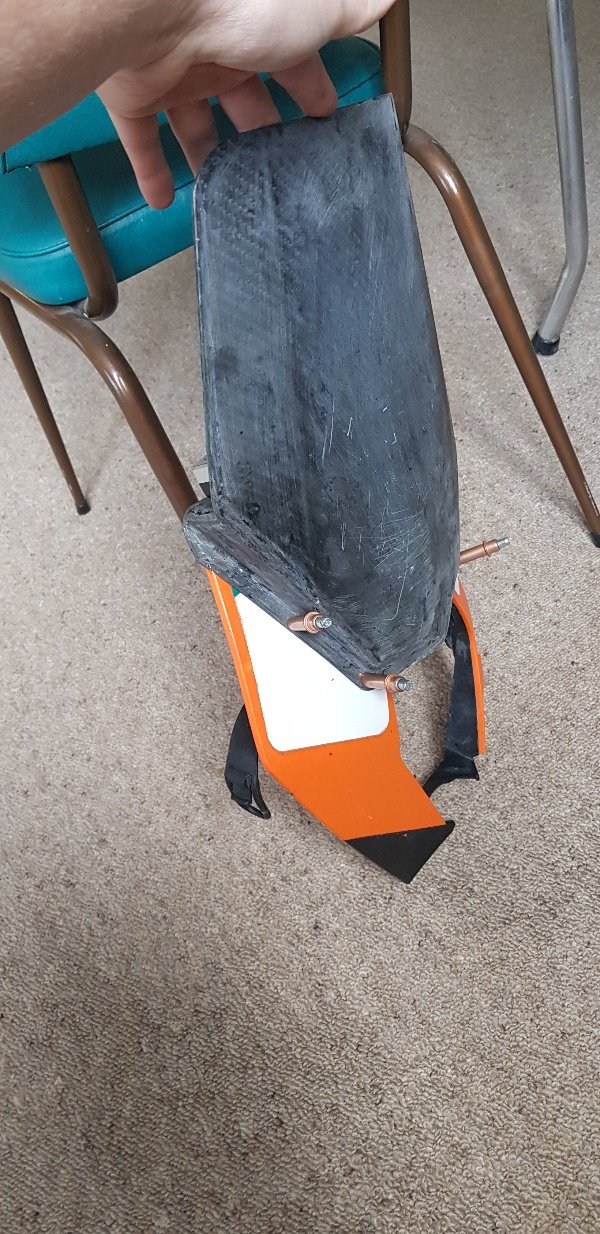
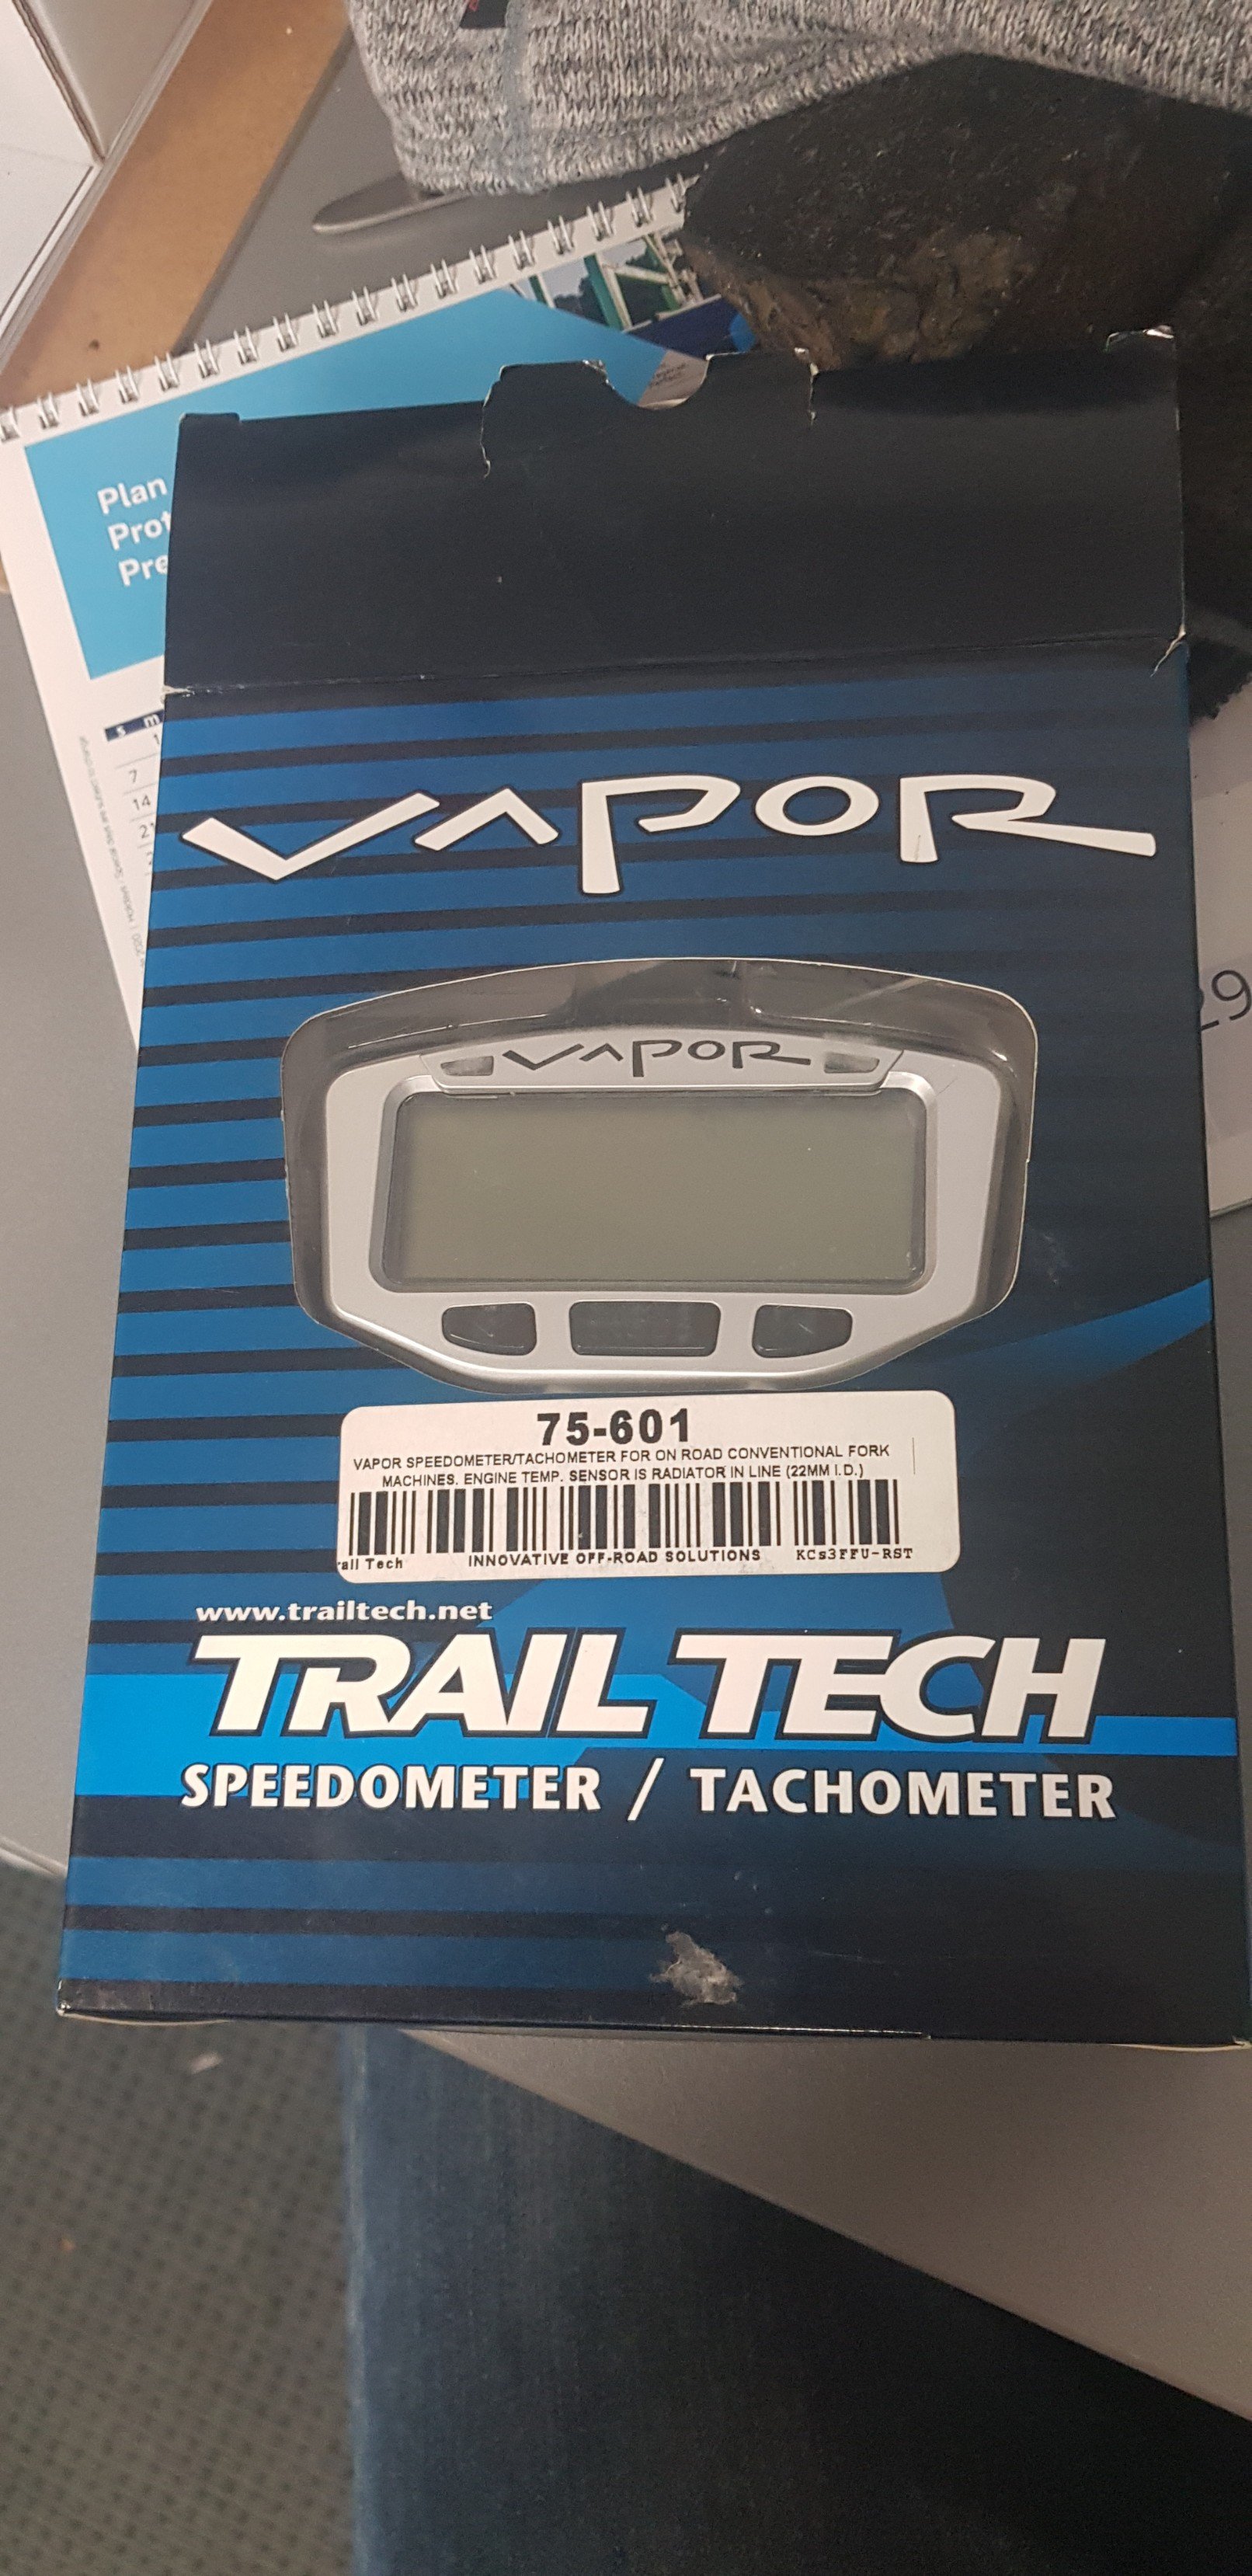
Been working on this, cf wind deflector and dashboard to take a phone (for gps) and the vapor. Ready now for a few coats of clear.
8 points
-
So a week ago I did actually manage to find some time to get stuck into the replacing of parts on this thing. First thing I did was in between rain showers, change the brake discs and pads. This was a bit different than I was used to with the rears but actually super easy once I looked up why the fuck the piston wasn't retracting.. (there's a bolt at the back of the caliper with a hex head screw in it that needs rotated to pull the piston back) Fronts were typical push back spec, nothing too exciting.7 points
-
Yesterday, I put the intake. There were no tears, copious swearing and ALMOST one snapped bolt. But not quite. 2000 Honda Integra Type RX-955-Edit by Richard Opie, on Flickr The garage is only wee, so this is a door-up jobby. Yay for a break in the weather. 2000 Honda Integra Type RX-957-Edit by Richard Opie, on Flickr Car goes up, bumper comes off. More stuff needed to come off, too. How easy is it taking off a modern car bumper. This appears to be attached with 2 self tapping screws, 3 push-in clip things and a 10mm bolt. And maybe a hearty splurge of hopes and dreams. 2000 Honda Integra Type RX-962-Edit by Richard Opie, on Flickr The old intake arrangement consisted of this piece of convoluted hose feeding the original airbox. In the interests of total originality, I still have the big resonator that sits up in the guard and all the pieces required to reinstate to OEM will be kept. 2000 Honda Integra Type RX-963-Edit by Richard Opie, on Flickr The airbox has to come out. Along with the radiator overflow bottle and it's bracket. And the support bracket for the airbox. And you also need to undo a stay that connects the clutch flexible hose to the hard line. This becomes evident later in the swear-fest, after Richy says "surely I don't actually need to remove that part." 2000 Honda Integra Type RX-976-Edit by Richard Opie, on Flickr Next, we attach this wee stainless bracket to the bellmouth part of the kit. 2000 Honda Integra Type RX-981-Edit by Richard Opie, on Flickr Then, you slide the bellmouth into the OEM intake arm. You'll see there's a wee spring on the end that goes around the circumference of the arm. This keeps enough tension on the joint to prevent slippage, in lieu of some ghastly looking hose clamp. 2000 Honda Integra Type RX-985-Edit by Richard Opie, on Flickr THEN, oh boy, what a humdinger of a step... the wee bracket bolts onto the mounting tab vacated by one of the three bolts that secured the original airbox. MAGIC. But yeah nah, it located perfectly. 2000 Honda Integra Type RX-991-Edit by Richard Opie, on Flickr The filter - a K&N item made specifically for the kit - then slips onto the bellmouth. It's a pretty tight fit, so it stays put. For now at least. Until the next step. When it seems to be a real sausage in a hallway situation right when you don't want it to be. 2000 Honda Integra Type RX-994-Edit by Richard Opie, on Flickr Unfortunately, I had to use all 7 of my hands to complete this step, so couldn't document the in-progress part. That's a big V-band clamp at the wide end of the airbox. After you have successfully managed to spend most of your life maneuvering the airbox into general position - I took the headlight out also to help - you then have to deal with clamping the bellmouth, filter, and airbox together with this big clamp. Now, the filter loses any conviction whatsoever to retain its interference fit to the bellmouth flange at this stage. This results in MUCH fumbling, and I'm pretty sure one of the instructions in the manual was "say FUCK a lot," but I don't read Japanese so I'm unable to confirm. So yeah, it's quite a challenge to ensure the clamp, er, clamps all three of the components. Often times you'd be like "YUS GREAT SUCCESS" only to realise the bottom (which is totally inaccessible) wasn't properly clamping. 2000 Honda Integra Type RX-995-Edit by Richard Opie, on Flickr Anyway, after saying 'fuck' about 589 times, it paid off and I got it all clamped up. I also added the trumpet to the bottom (fixed in place with aluminised tape) and fixed the bottom snorkel part with the supplied bracket. No pics, cos it was dark and I was mainly fumbling about trying to finish it off. 2000 Honda Integra Type RX-1018-Edit by Richard Opie, on Flickr The next day, the all important task of fitting the sticker was on the agenda. I struggle to attach a WOF sticker without it being 78% air bubble, so trying to place this no doubt expensive adhesive thing was slightly stressful. But we got there. 2000 Honda Integra Type RX-1009-Edit by Richard Opie, on Flickr Final step! Stand back and admire the view. Took it for a test doort round to sheepers place, seems to have fattened up the midrange noticeably in conjunction with the headers. And there's heaps of noise, so this unequivocally means it is faster. Thanks for looking.6 points
-
Dad's been round and after inspection said to run new cog as original is stuffed... Turn cog upside down and fit onto shaft. Now matches with original jackshaft position Bore new hole... Fit roll pin. Ready to go.... In position. It is known that on some of these you need to have dizzy in place before manifold is on. Its not a stockcar motor which have a tenancy to snap the rotor tag off so this is of no concern.... NO more computer saying 6000rpm is too much. No more injection saying Nope. My old EL 4.0l in stockcar used to run 8000rpm all raceday. Did that for 3 years until catastrophic failure
6 points
-
Nah nah nah, paint the windscreen frame black to match for a seedyal special5 points
-
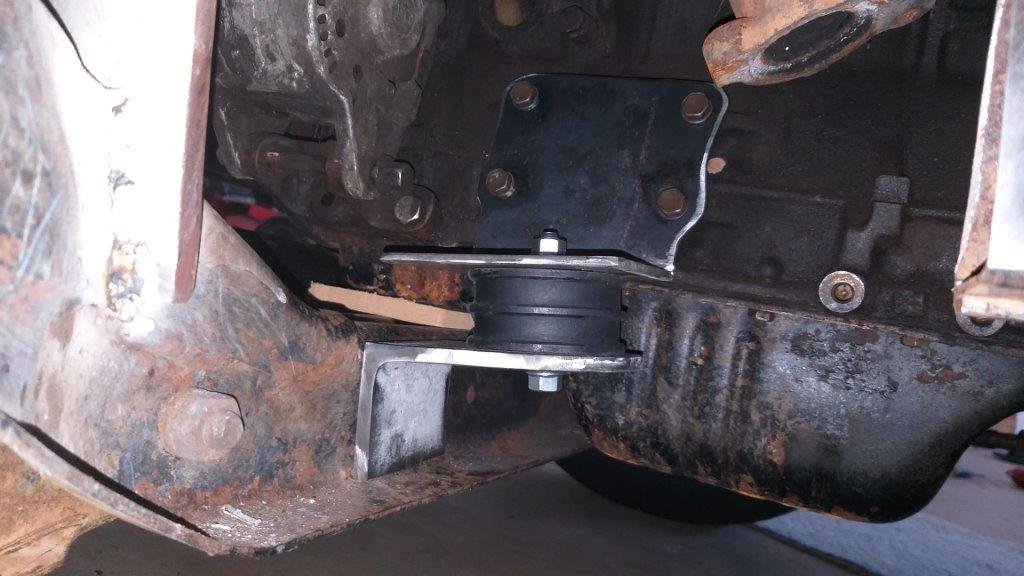
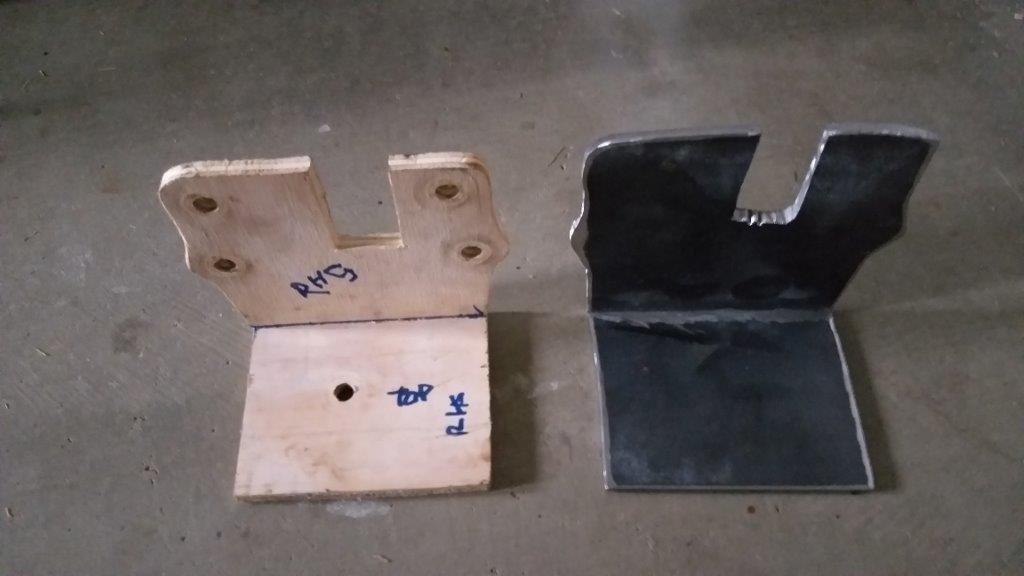
Managed to get the left hand side upper engine mount carved today. Then drilled all of the mounting holes and bolted everything together. Next step is to carve some gussets out of 8 mm plate for the upper mounts and I can then glue everything together. Until the welding is done the engine weight is still supported by a wooden spacer between the front beam and the 4Y sump so the rubber mounts should compress a bit once I remove the spacer. For those wondering the bit poking through the center of the one vertical plate is the dip stick tube. Thanks for reading.
5 points
-
5 points
-
5 points
-
First drive complete! Injector seals started leaking. New seals in tonight and away it goes. Next up solve a water leak, get the speedo working and a service and should be dream motoring.
5 points
-
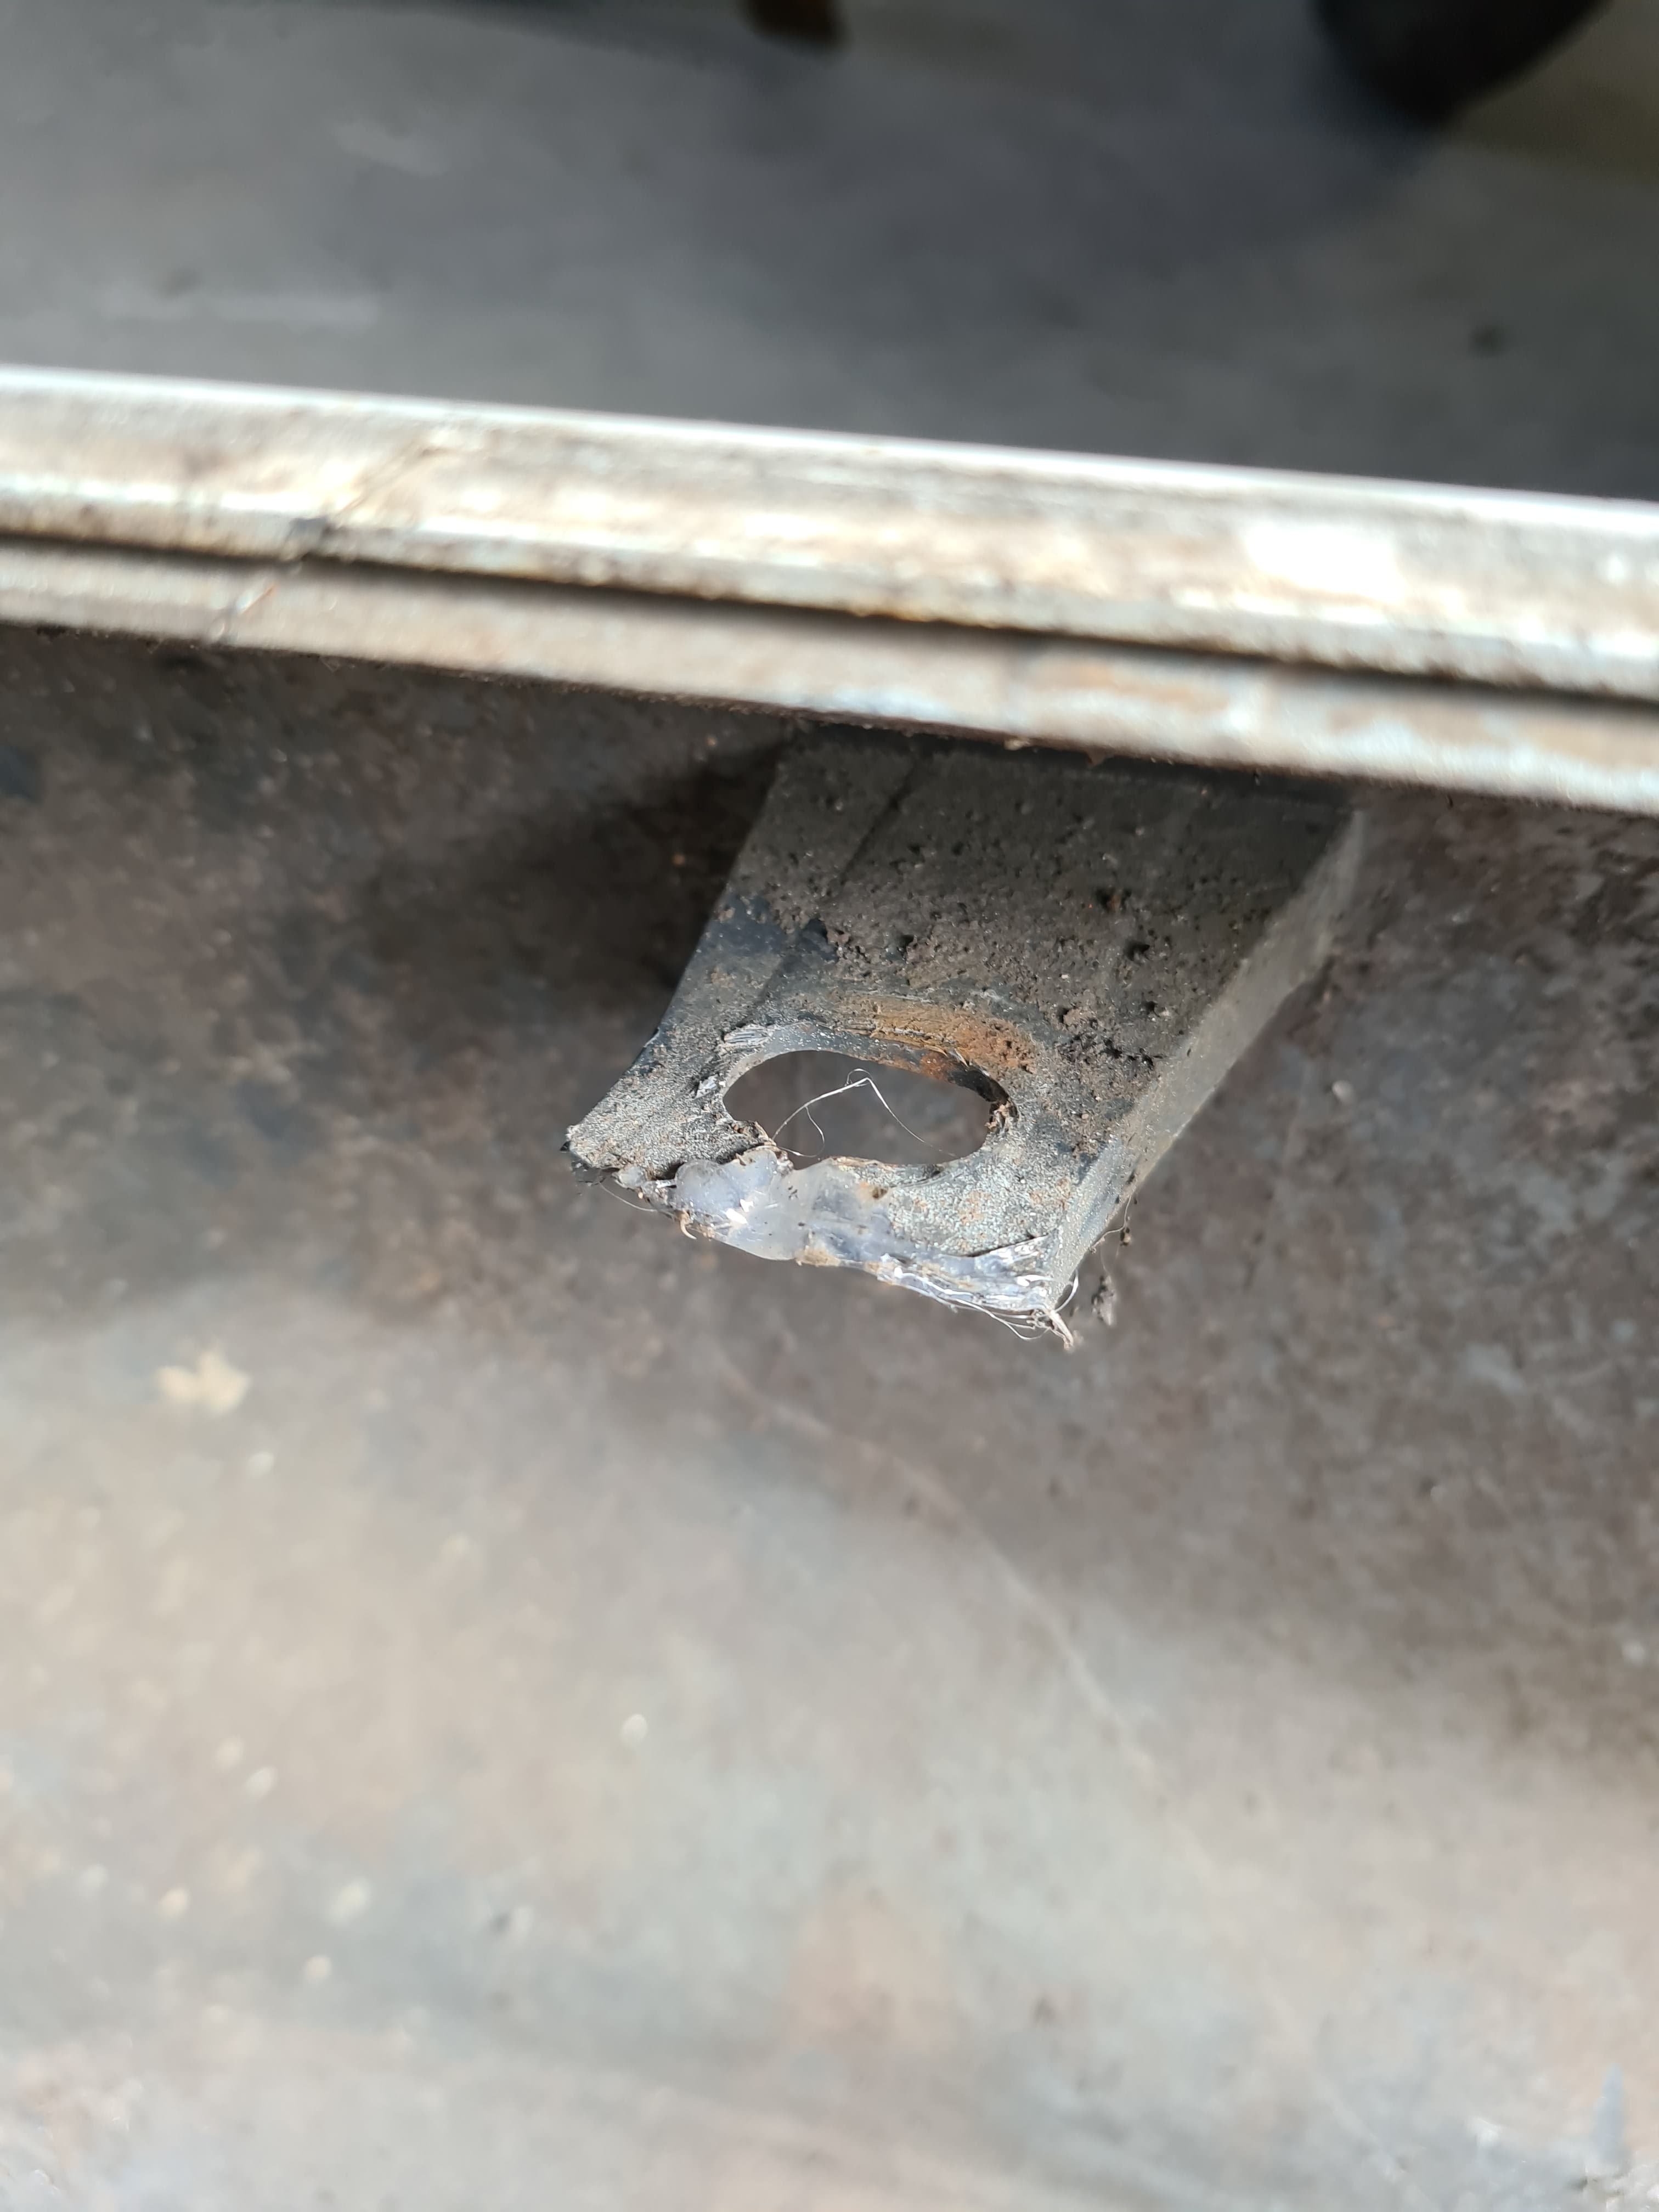
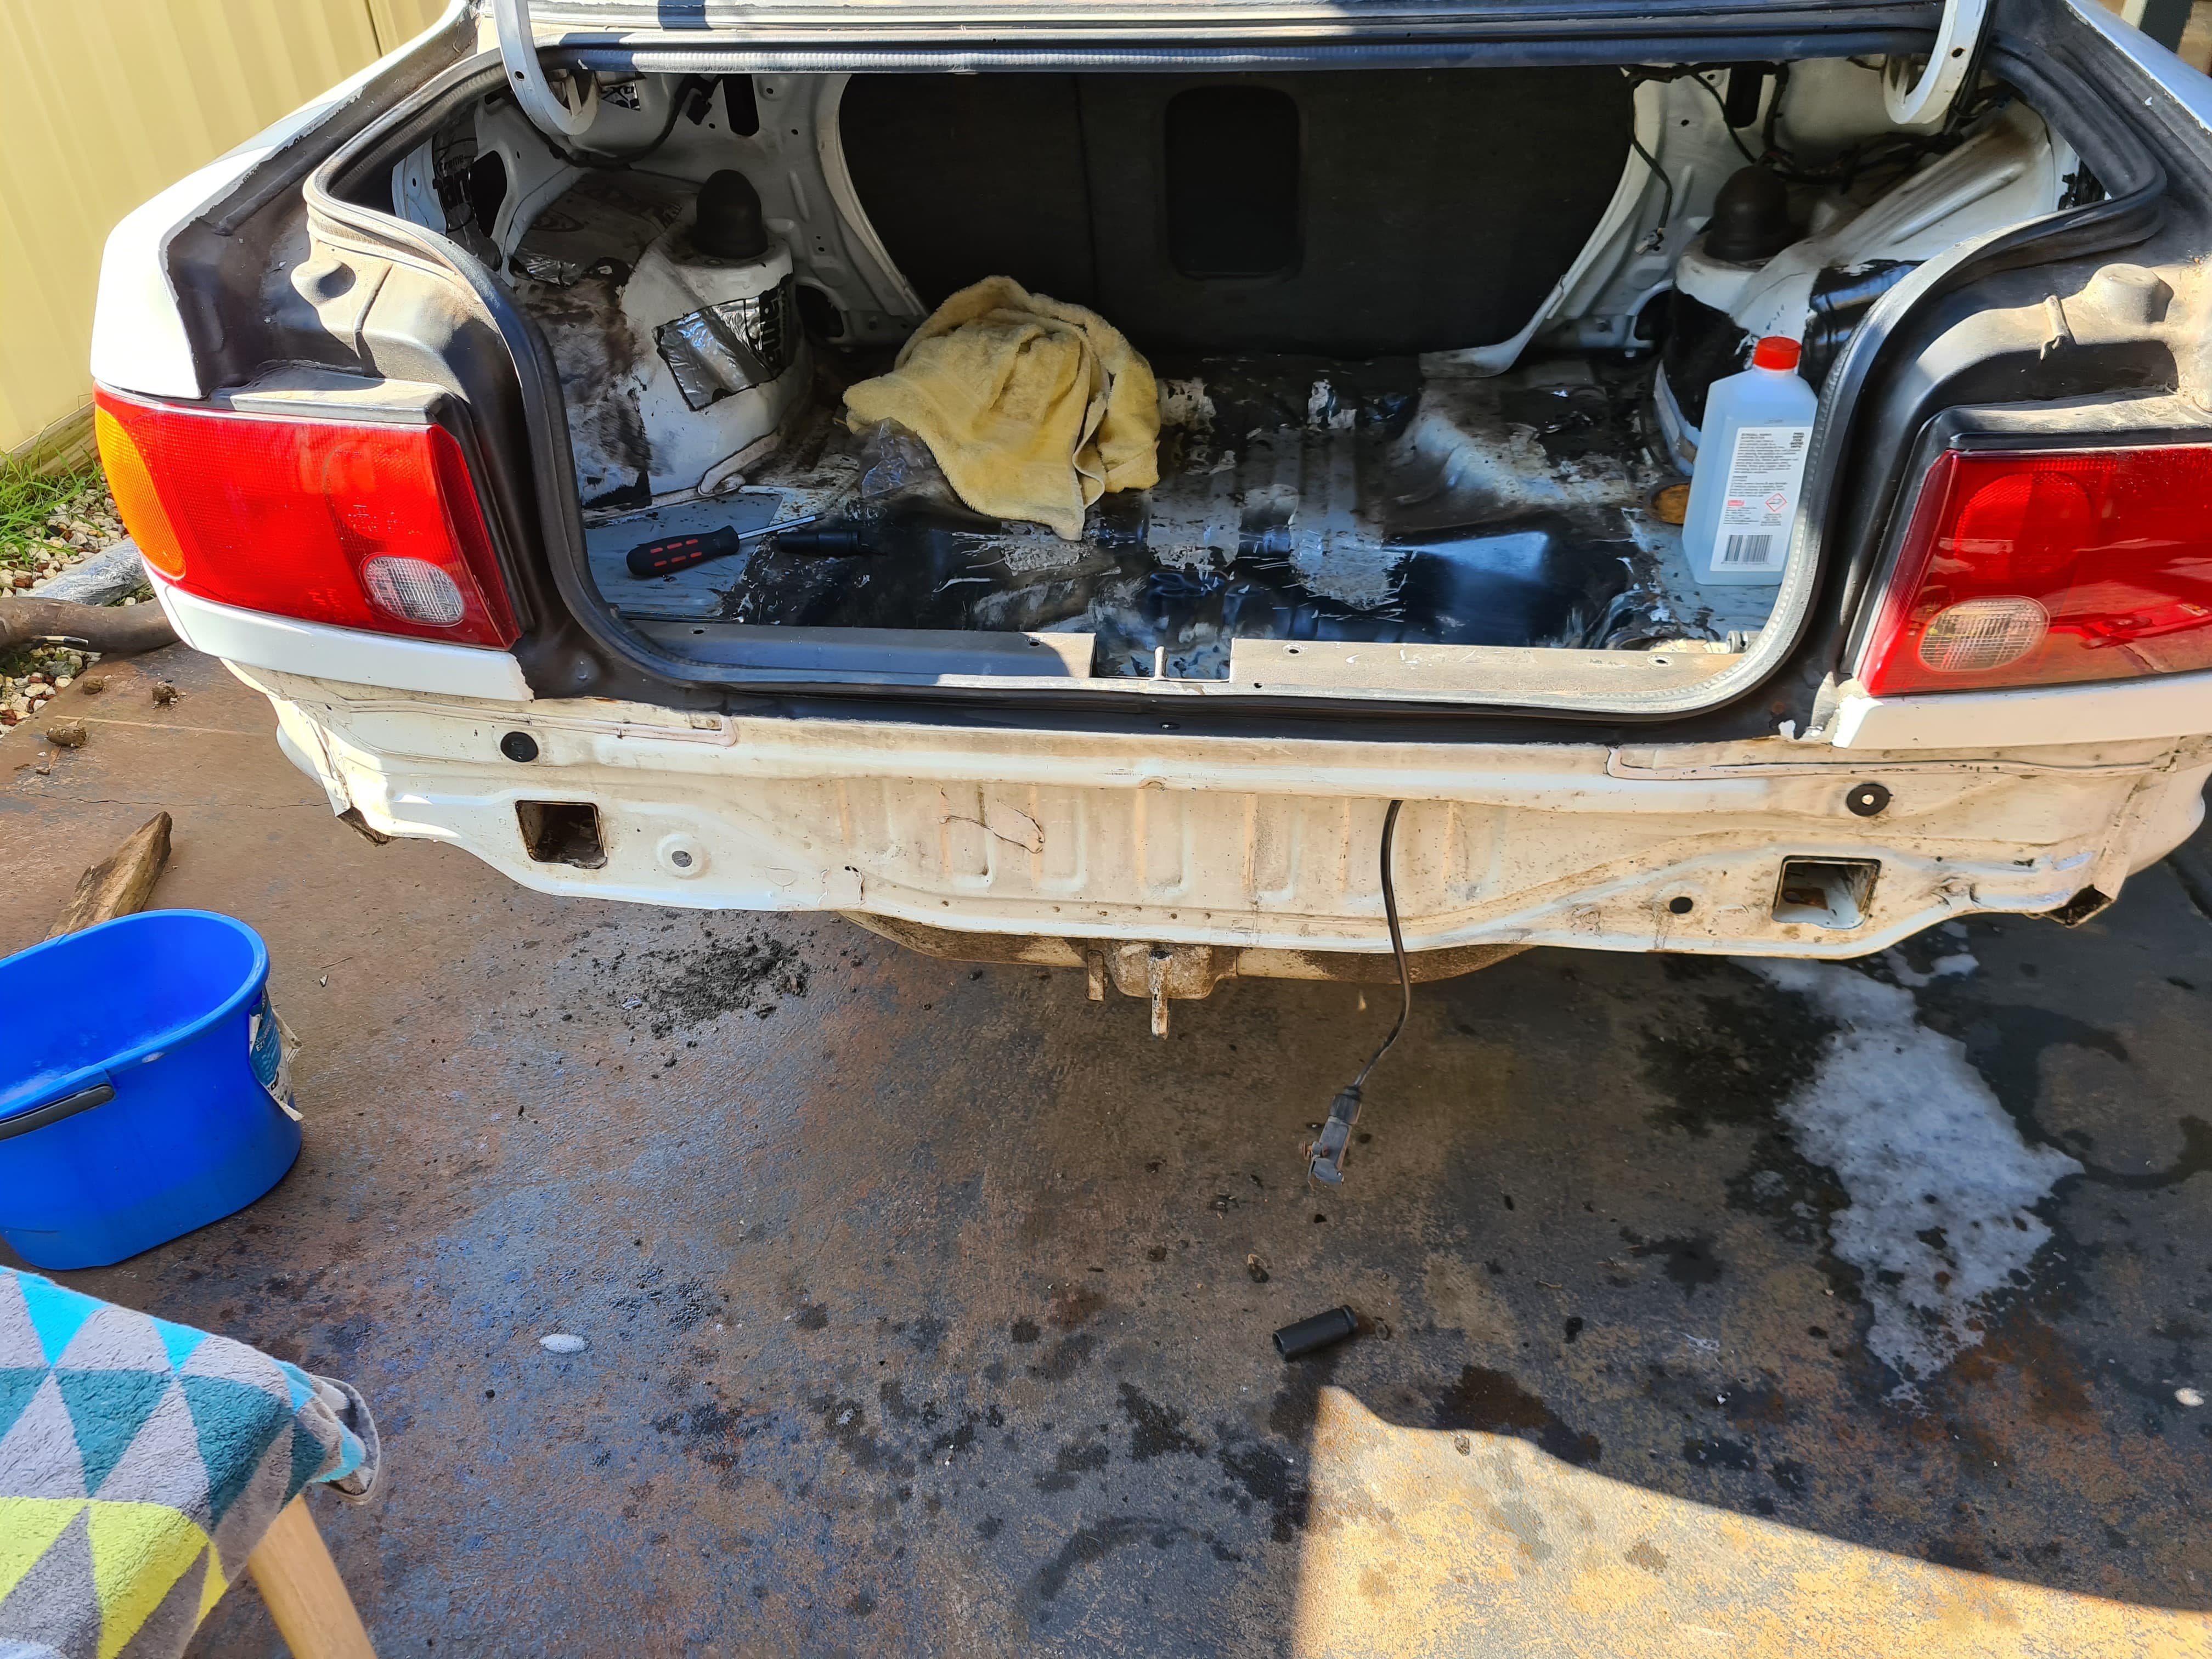
No relevant pictures. But I fixed the rust in the floor the other weekend. It's a fair bit quieter to drive with no holes in the floor. Have used it to move firewood around and dump some green waste for my nan4 points
-
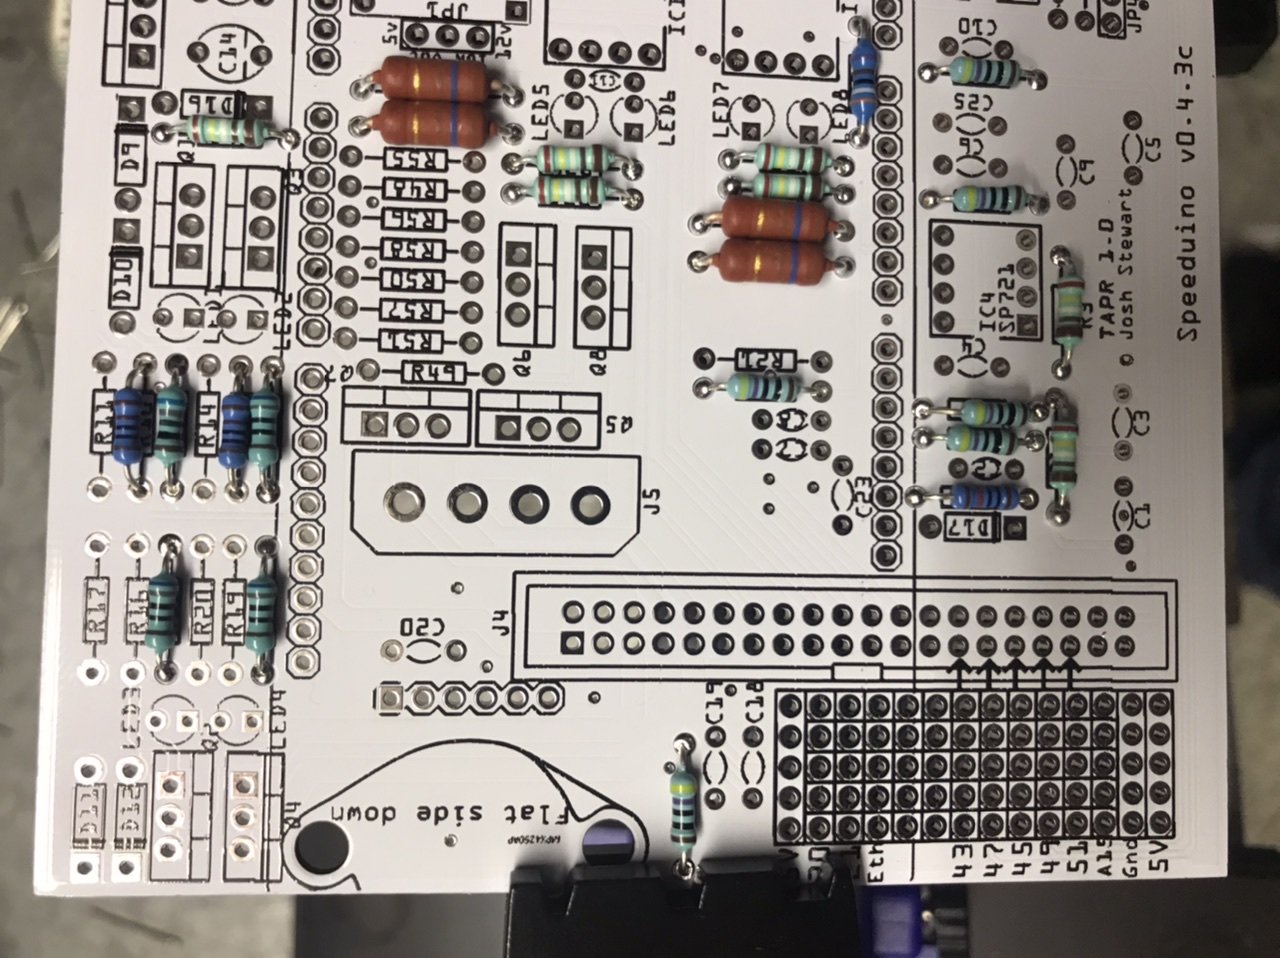
Speeduino kit arrived from the UK, bought a PCB holder thing from Jaycar. Still waiting on the mx5 adapter board but made a start on soldering.
4 points
-
More progress pics https://oldschool.co.nz/index.php?/topic/45289-browndogs-1972-v8-transit/page/4/
4 points
-
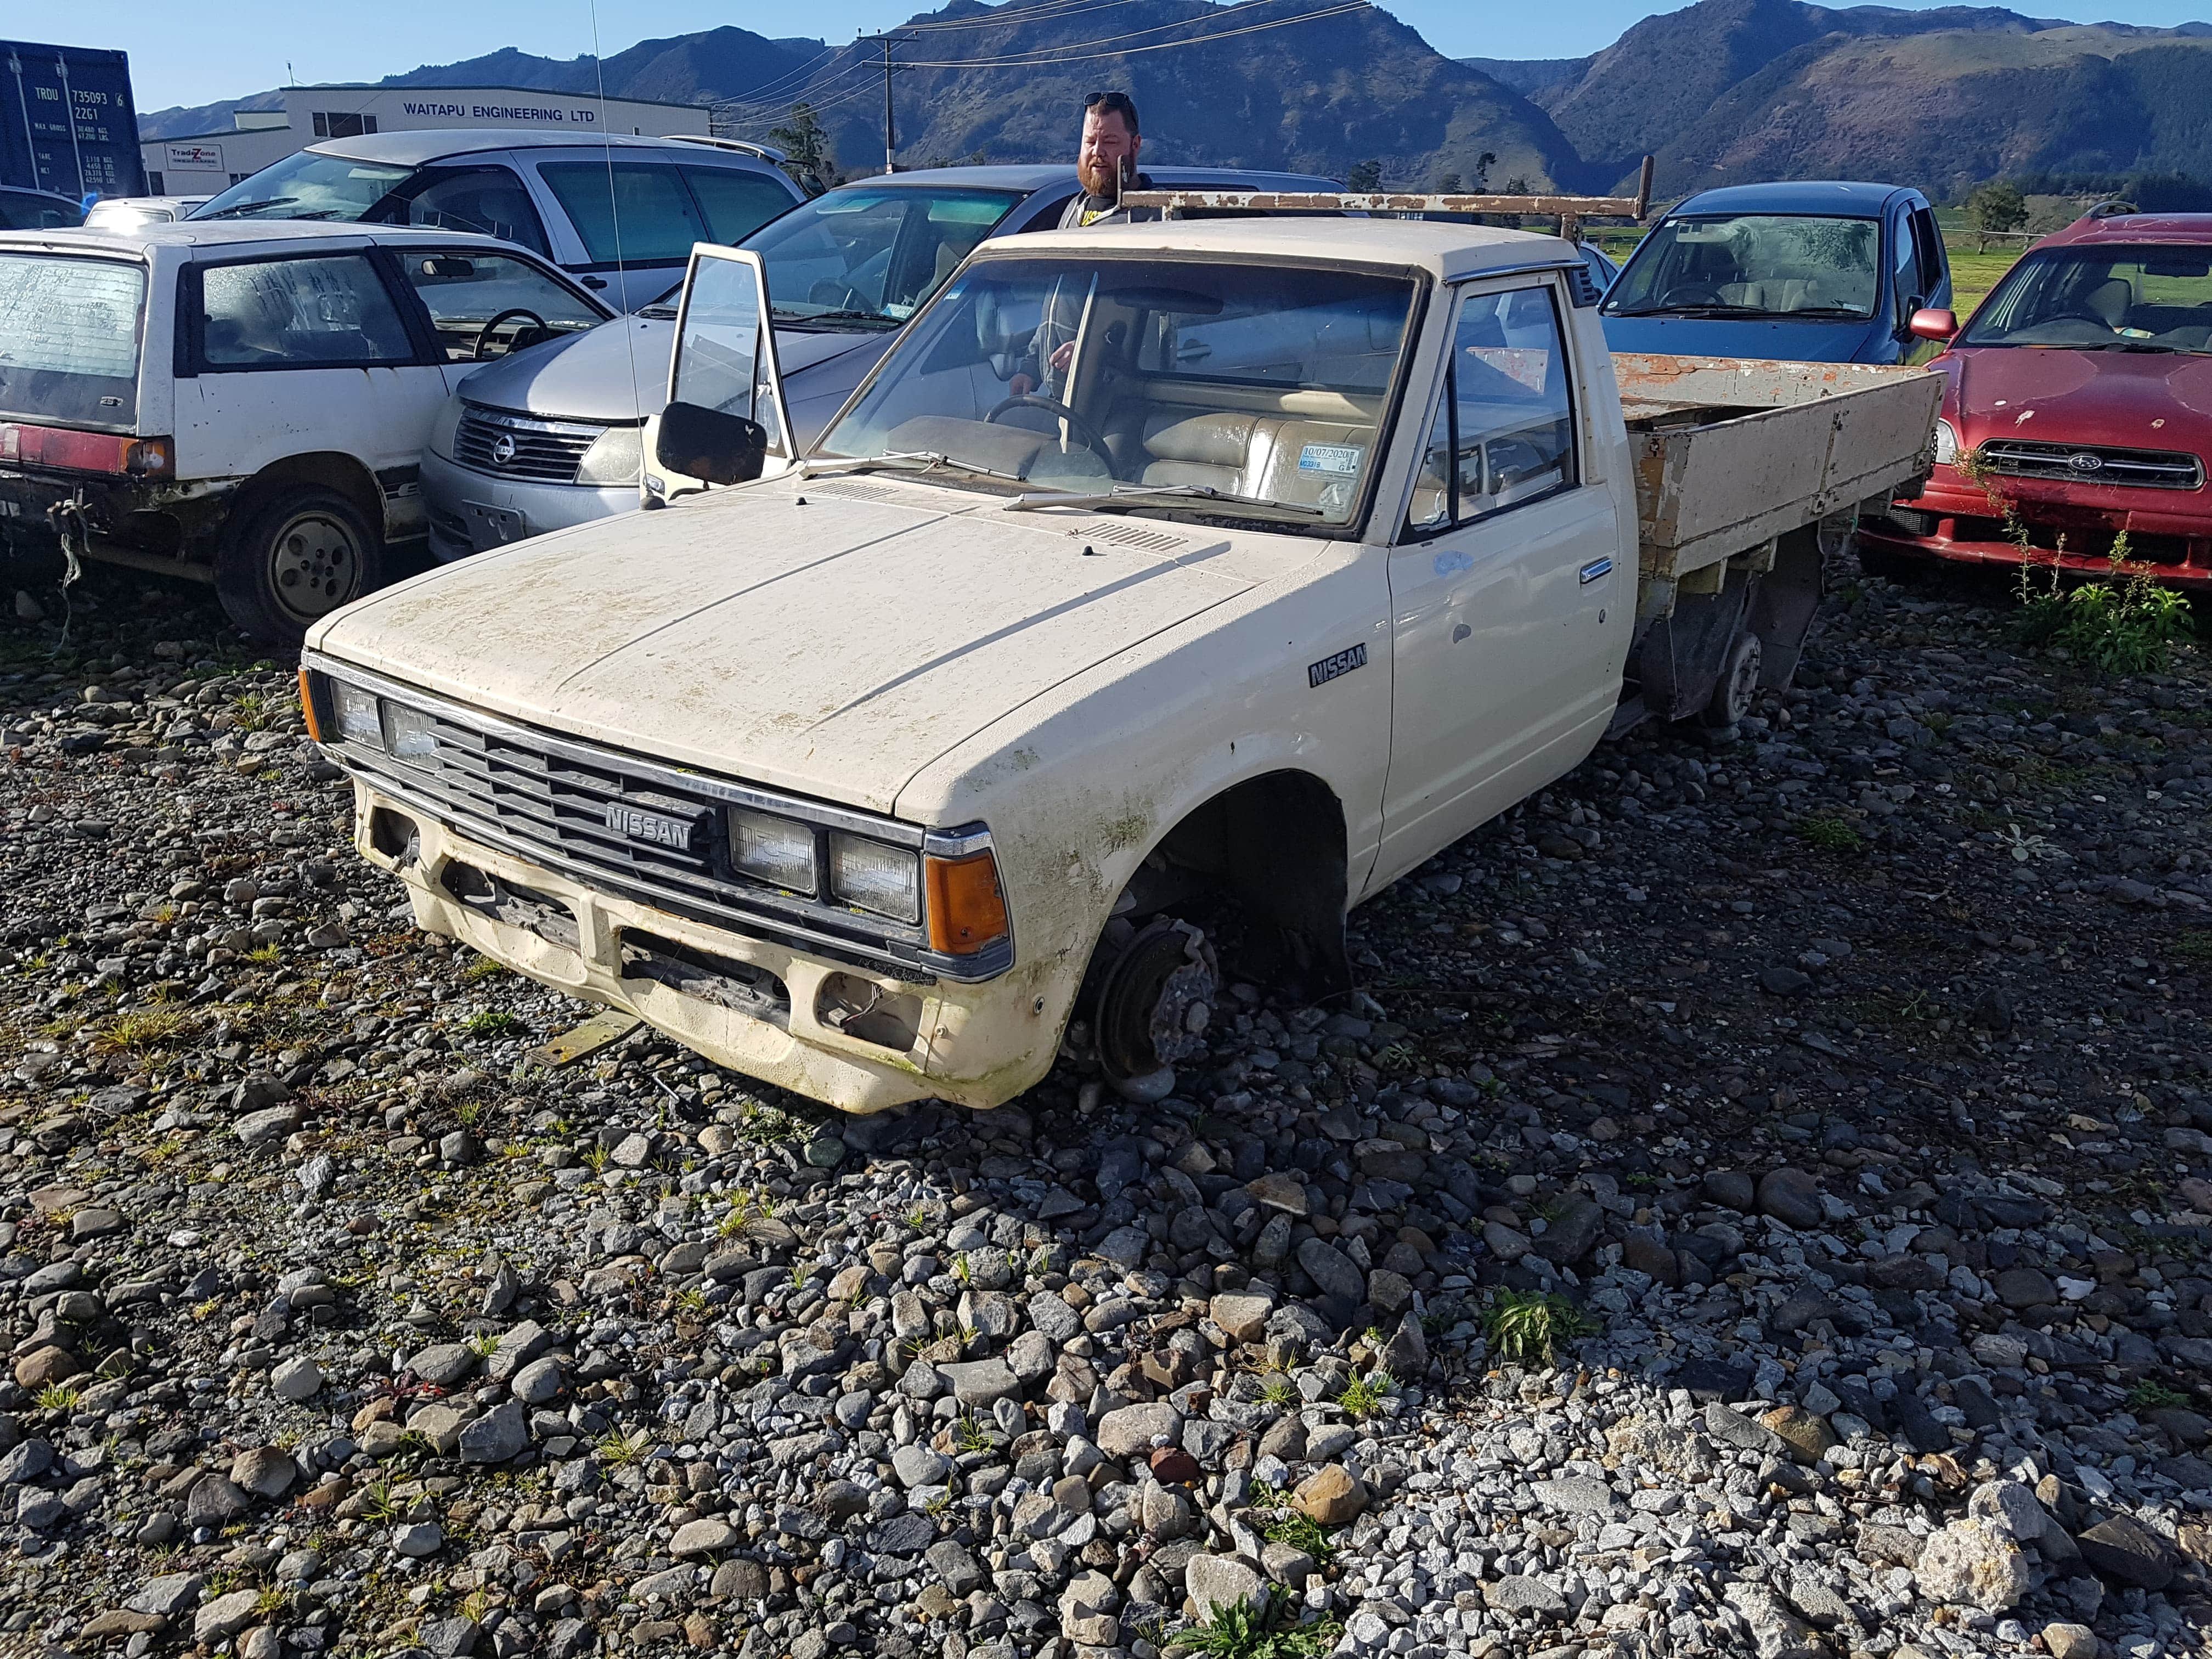
Long story short @- i5oogt - @azzar and myself were in takaka to buy yet another mk2 Mirage . The car was in the impound yard at Orange mechanical also in takaka. We went for a wander around their yard and in their , to be crushed pile was this cream nissan 720 no wheels. No bumper or plates. On closer inspection it had two rego labels........ It failed a wof on rust in the floor. The owner not wanting to spend the money getting it fixed. Decided it was the end of the road for the little ute. Strange since hed owned it for nearly 20years and had never taken it out of the valley. After contacting the owner a deal was struck and plates and wheels were obtained from his possession. The wheels having 4 near new maxxis commercial tyres. First hurdle was the takaka hill..... in a sd23 powered ute Not to be scoffed at the little ute chugged up the hill in 4th gear most of the way. (Had to find 3rd for the real tight corners). The sd23 was quickly proving itself as a force to be reckond with A quick stop in motueka to wash the moss and lichen off using @Slacker_Sam. Car care kit. And off we set to Christchurch. Register but no wof. Made it to murchison for a meal at the pub before dark. But after that was all nigh running. The sd23 was more than happy cruising along at 100km and seemed to be a set and forget in 5th gear up hill and down dale 5th gear did it all. 6hrs on the road from takaka to chc and over half at night. And over 450km in a ute destined for the crusher. Better yet it didnt use a drop of oil or coolant on the drive back
3 points
-
Good reminding, who hasn't had their creative ability smothered by the toils of daily life yet? Do we need a sticker etc?3 points
-
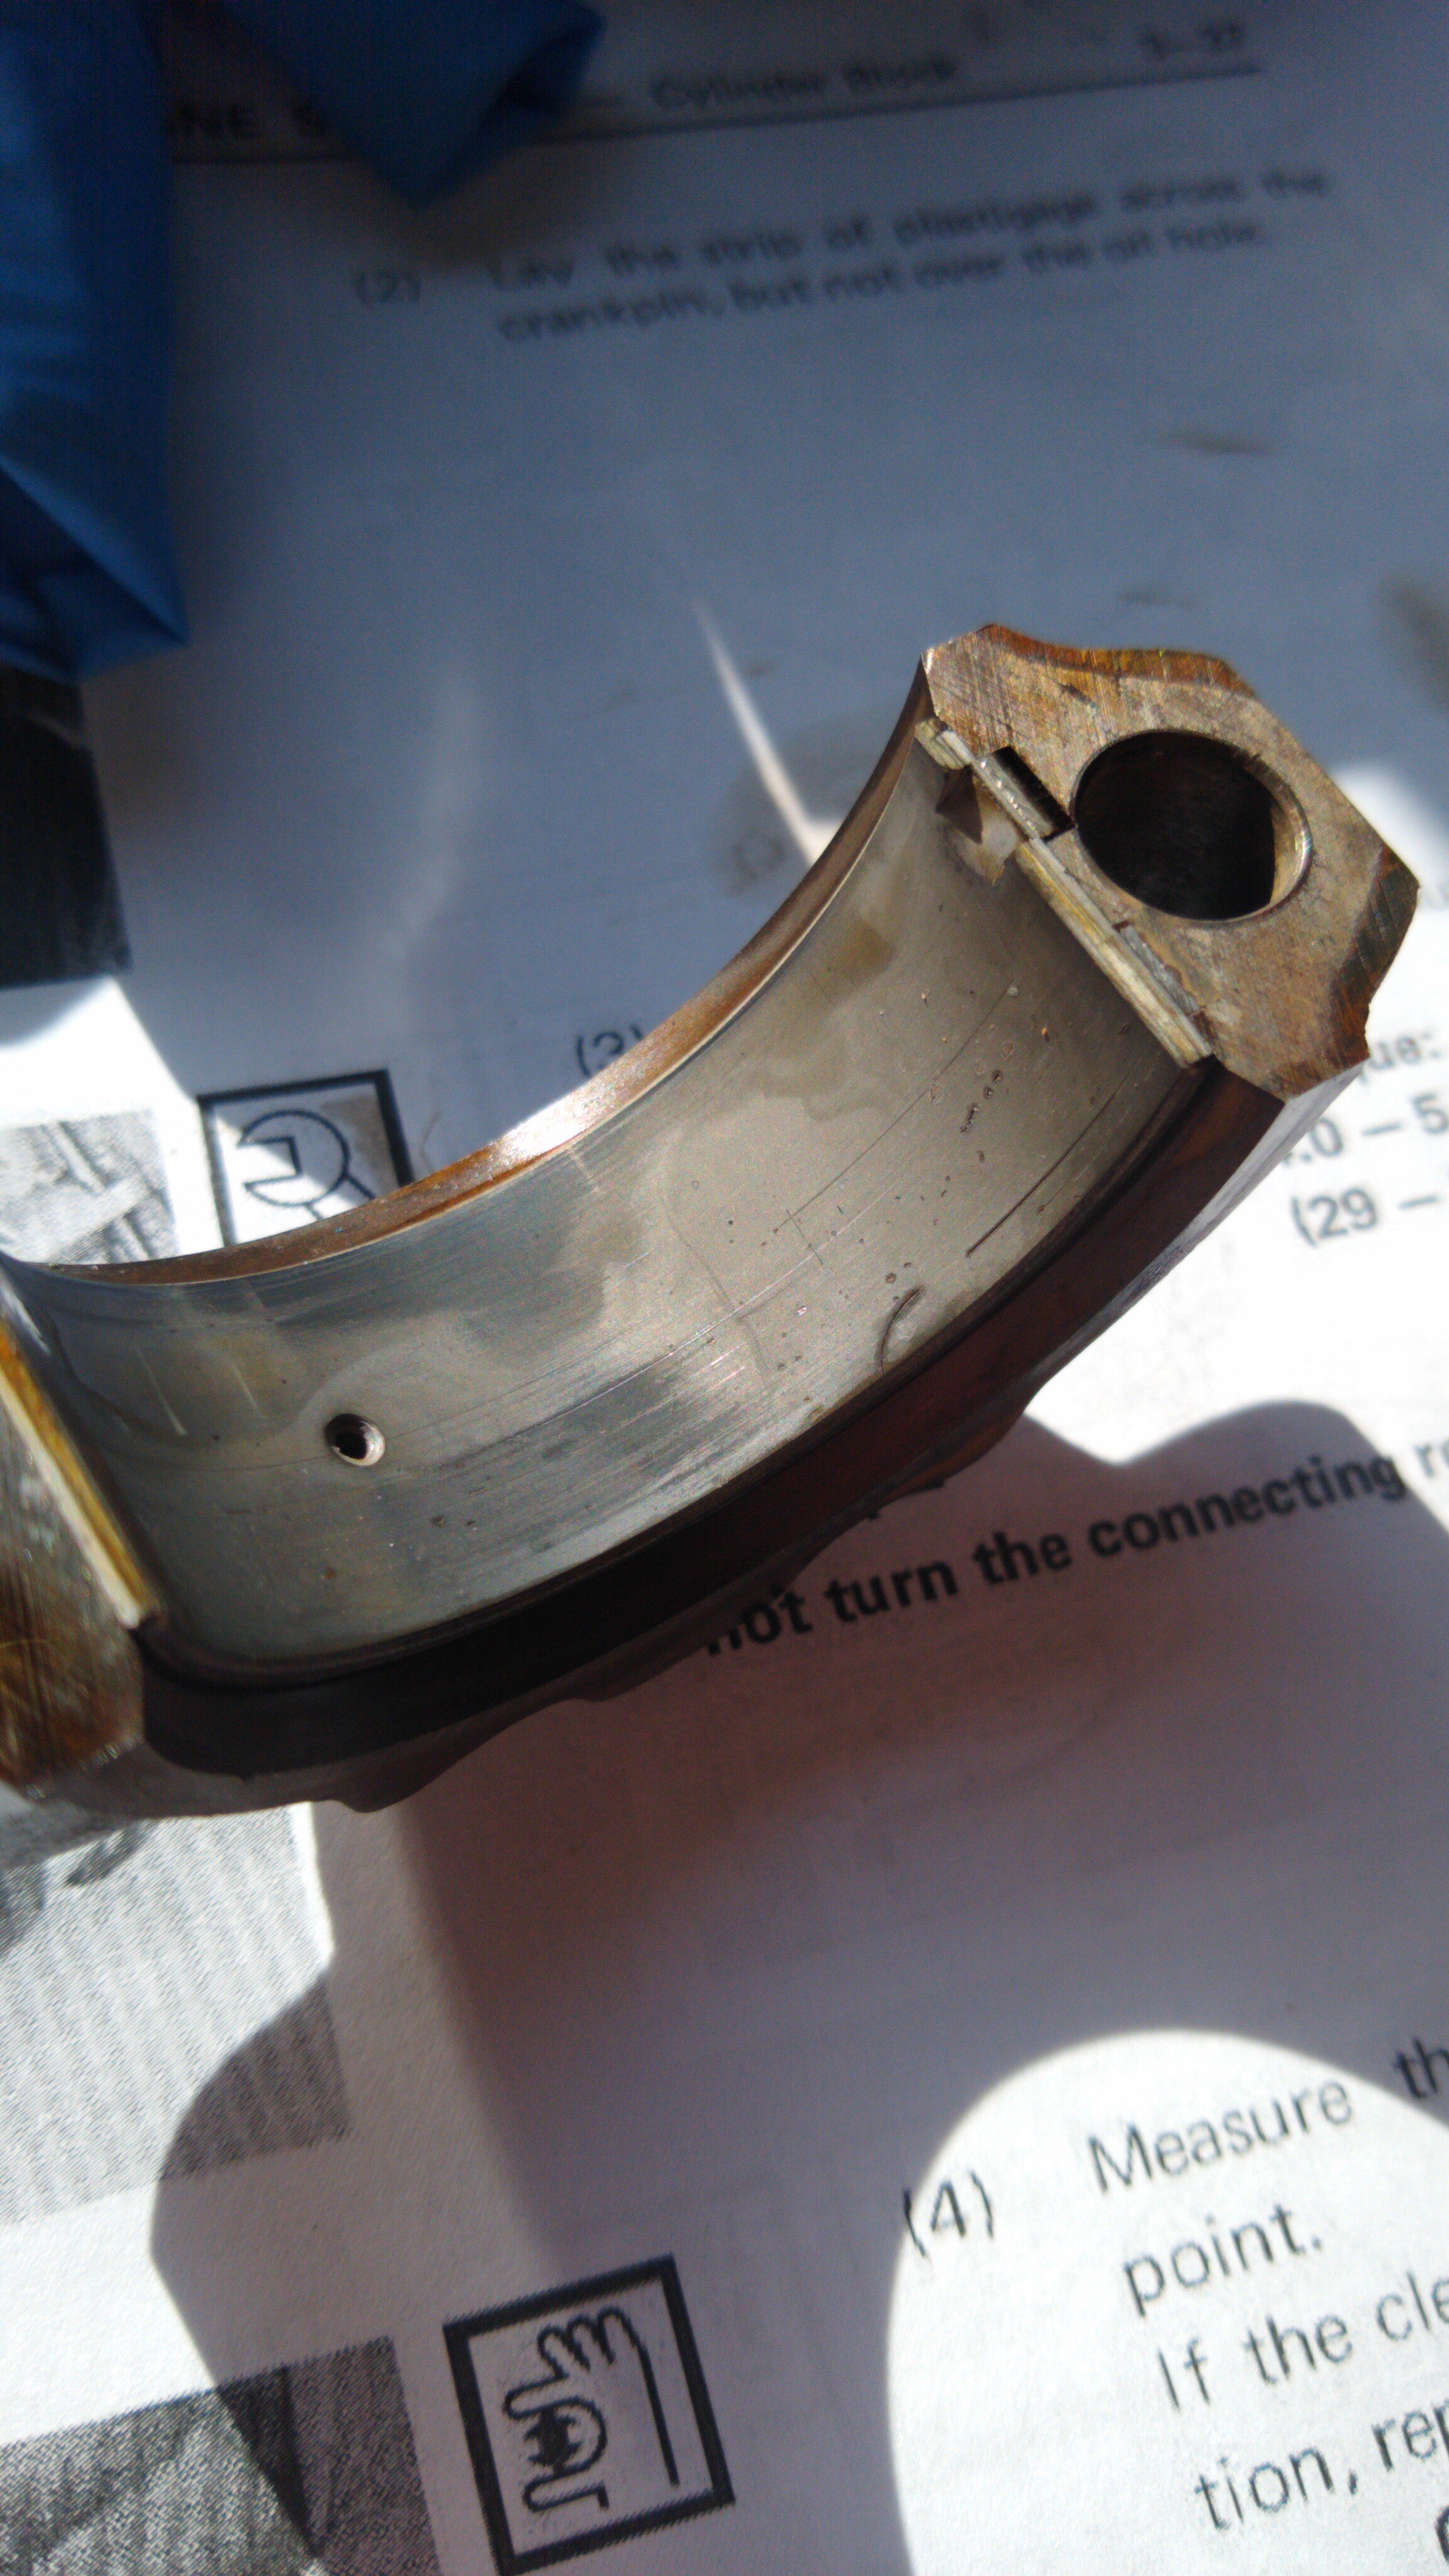
So I decided "right, I've had enough of that really slow leak from the sump gasket. I'll whip off the gearbox, pull the sump from the engine and sort that stuff out" Upon removing the sump I found some cake that looked like bearing material. Connecting rod #1 bearing didn't look the most flash so I decided "out with the engine" Upon removing the engine, most of the bearings weren't too bad but definitely worn. Next task was pulling the pistons Two of the pistons are cracked. A little googling indicates this is a pretty common thing on 4Ks. So the plan now is for the following: -port match intakes on head to manifold/gasket -drop cam and lifters off for a grind, something pretty mild -drop block off for a hone (maybe bore, but the bores look pretty good), new rings and pistons, block may potentially need to be decked if using aftermarket pistons -???? -profit* *probably huge loss, but maybe a gain in power The stupid thing is the car was running absolutely perfectly. I probably shouldn't have opened the can of worms, but I'm kind of glad I did. After this is all done I should hopefully be earning enough money/retired by the next time it needs to be done that I can just pay someone else.
3 points
-
THISSS.... Is a very expensive and difficult to get piece of discontinued Mugen equipment for a DC2R 2000 Honda Integra Type RX-932 by Richard Opie, on Flickr Why did I get it? Because I'm a stupid fucking magpie, that's why. I also have a Mugen exhaust and a recently restored header (which for some reason I never updated but OK), and wanted to finished off the intake, header and exhaust (I/H/E) holy trinity with a matching piece. So a friend of a friend found a wee shop in Hong Kong who had this. He subsequently bought it on my behalf, I sent him money, he sent me a large box, I dealt with the hassle that is customs, and voila. Here it is. 2000 Honda Integra Type RX-945 by Richard Opie, on Flickr I am going to read this manual, and figure out how it installs. There's a lot of parts. 2000 Honda Integra Type RX-953 by Richard Opie, on Flickr This is the airbox, and the velocity stack that locates inside the inner gaurd. Vs the stock arrangement, it has a HUGE volume. I'm going to assume there is some kind of science involved in the shape, and volume of it. Because well, justifying it. 2000 Honda Integra Type RX-940 by Richard Opie, on Flickr The airbox attaches to this bellmouth with the biggest V-band clamp I've ever seen. Apparently this particular part is quite responsible for the Mugen setup producing some better numbers than most other units on the market. I'm not a surgeon, so I can't comment with any real conviction. Really nicely made piece of kit however! 2000 Honda Integra Type RX-947 by Richard Opie, on Flickr This thing stops all the nasties getting in, and claggin up my 'tec. It's really important that you keep fine particles away from your VTEC. K&N make this. So you can just do washing and oiling like you do with all the other K&N things and it'll last forever. Or at least for a few thousand KM this gets driven every year. 2000 Honda Integra Type RX-950 by Richard Opie, on Flickr It is REALLY important to have a sticker. So here is the sticker, that usually goes on the shiny top part of the airbox. I'm gonna scan it, so I can get replacements made when I inevitably wreck the other one while I'm doing my best impression of an apprentice signwriter whom hasn't yet read the dictionary definition of "self adhesive." The shiny stuff is sticky tape. In true Japanese tuner fashion, you use that to stick the trumpet onto the end of the airbox. No lies. Join me next time, for the part where I swear, scratch my new parts, cross thread some bolts and take some nice photos of it so it all appears super mint and well installed.3 points
-
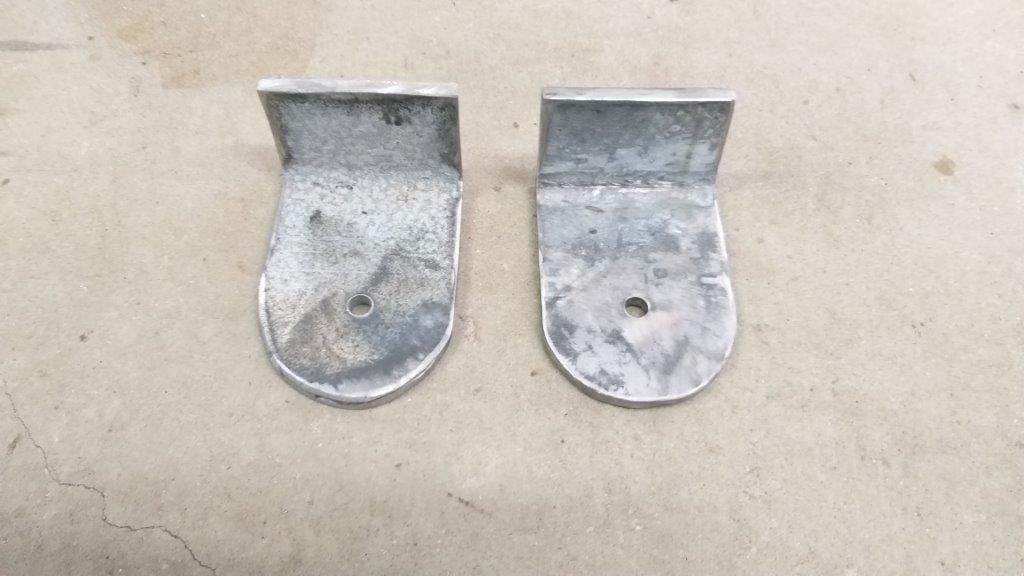
Another wet day today. Hunkered down under the carport to keep dry and entertained the neighbors with the soothing tones of my grinder. Managed to complete the two lower engine mounts and most of the right hand side upper mount. Just got to tidy up a few rough edges and drill the mounting holes in the upper mount and then I can test fit this side.
2 points
-
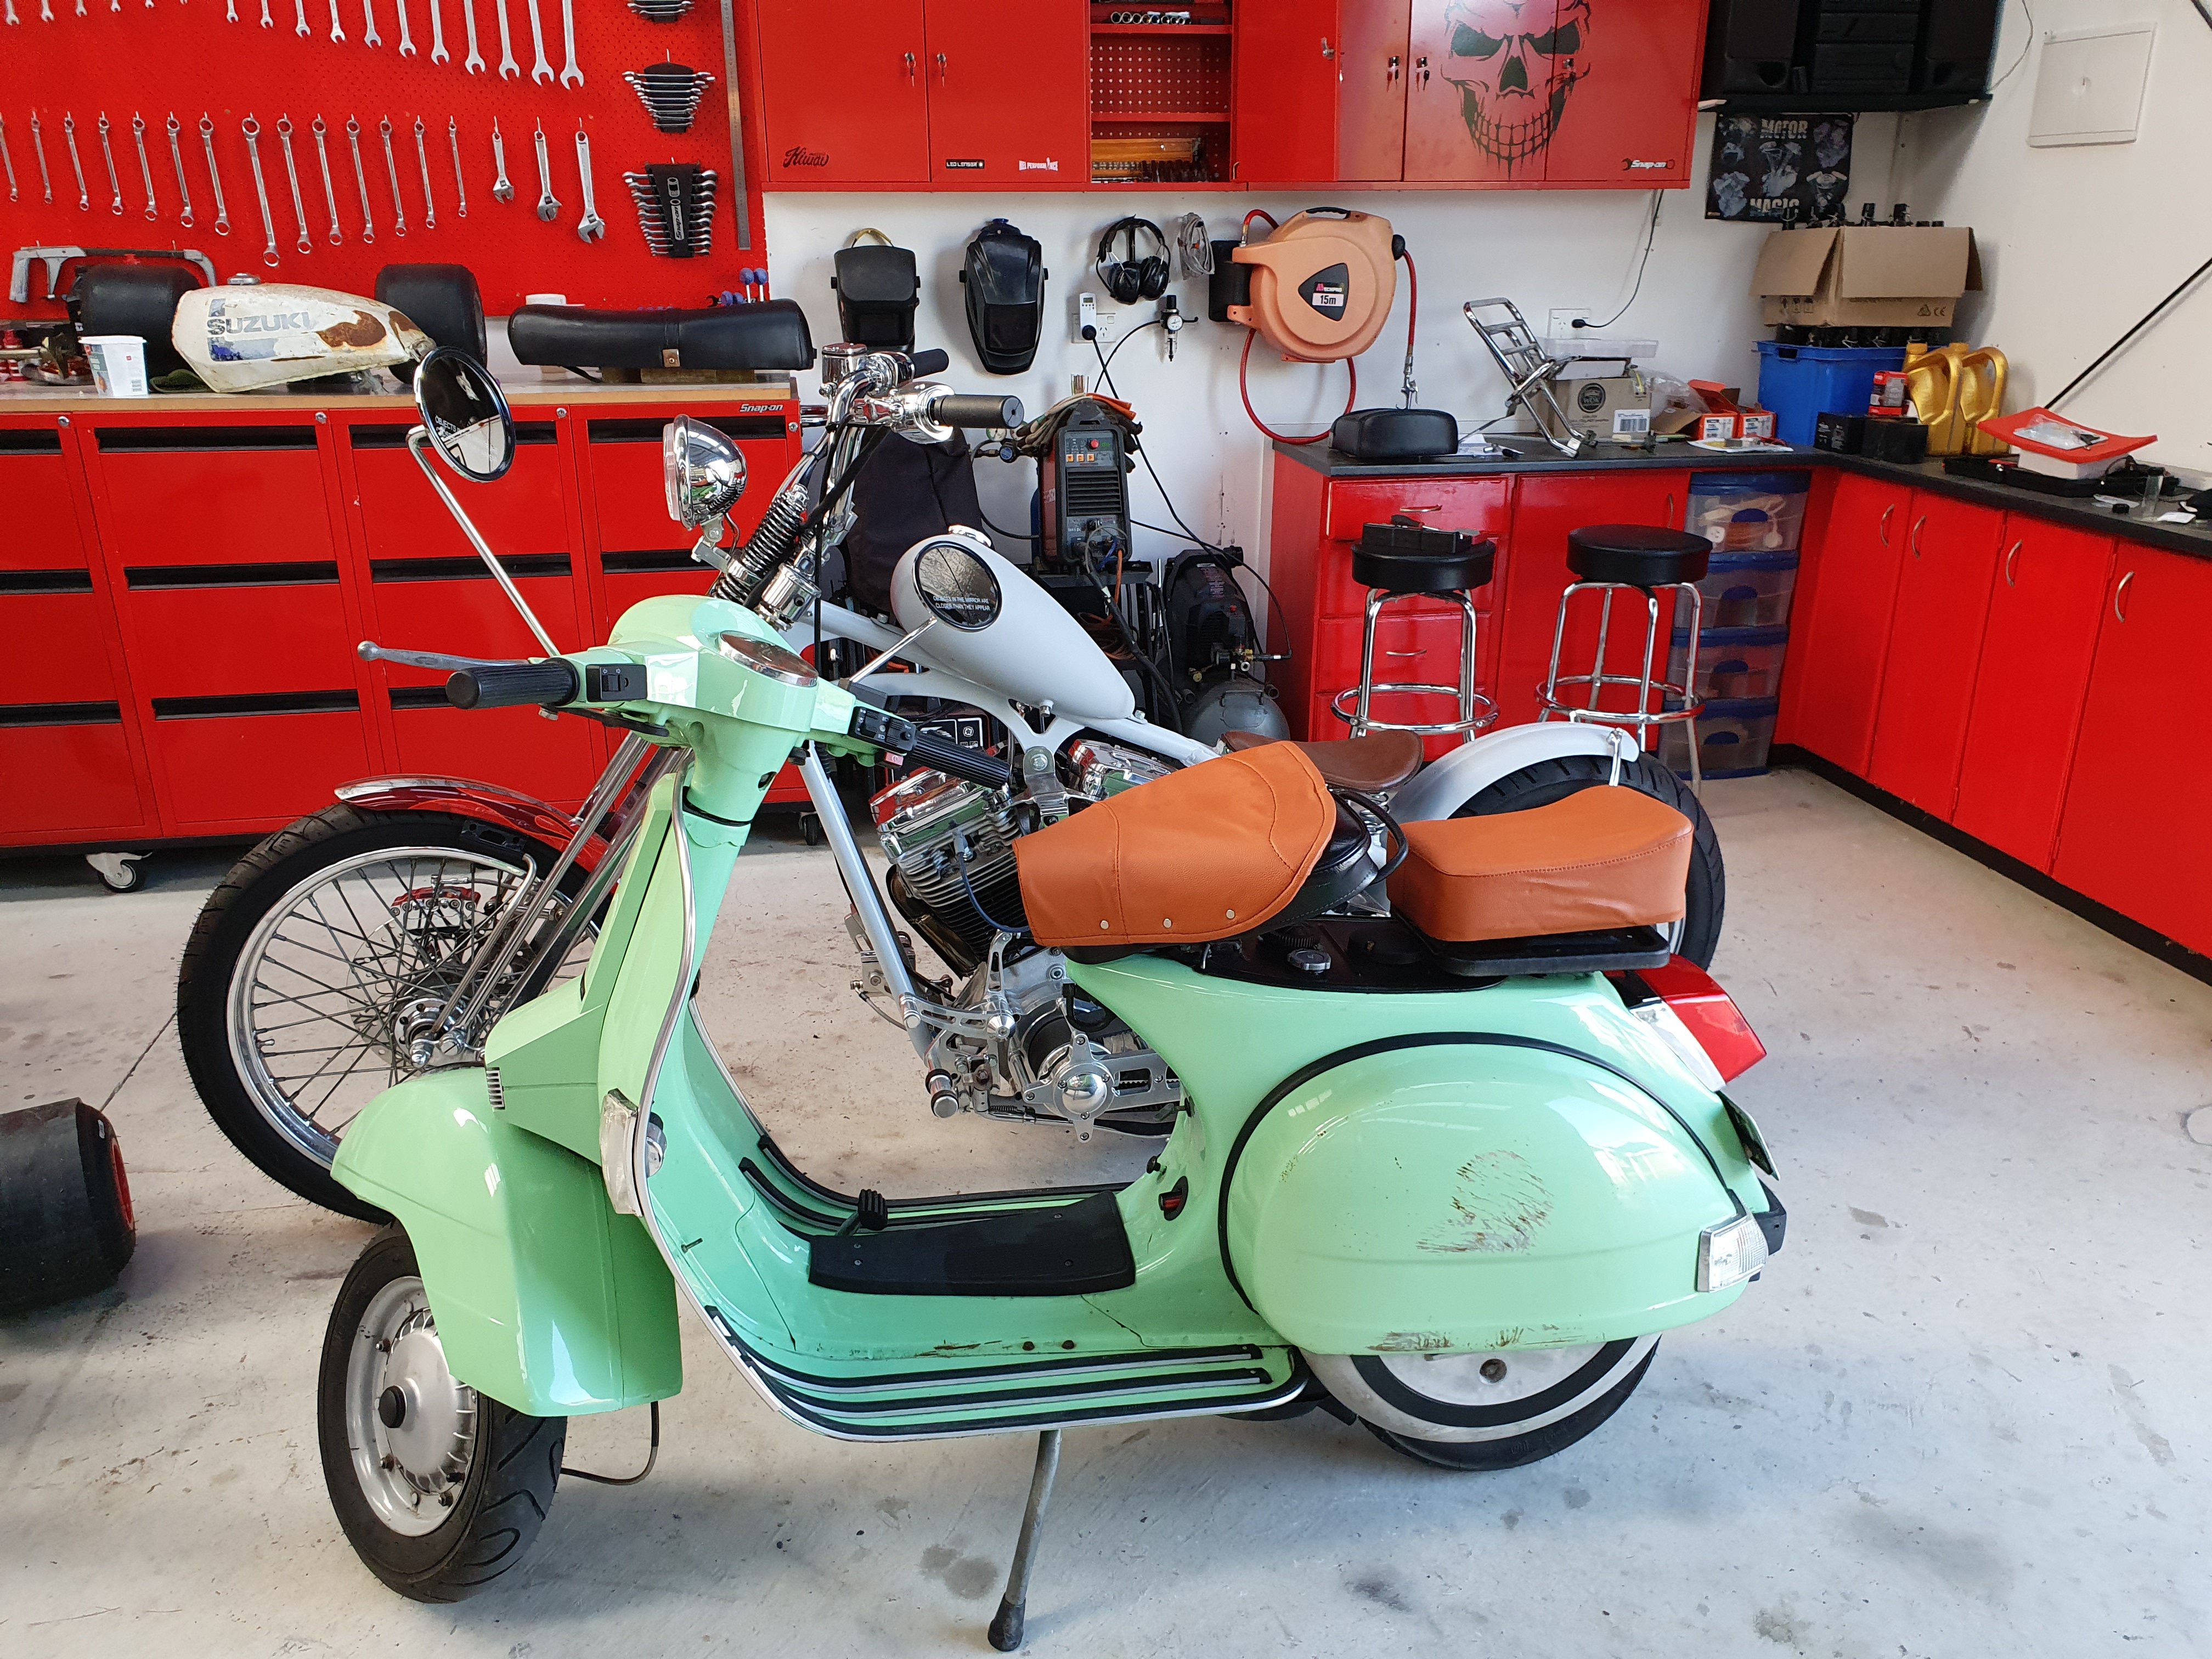
My brown seat covers arrived in record time. They're just sitting on top loosely in this pic. For now I'll just keep the black ones on, but if I decide to go ahead and repaint it another colour I'll put them on. Im still not totally sure what I'm actually trying to achieve with this scooter? But man am I having fun riding it. Any excuse to ride to town to get something I'm there. I'm thinking of taking up smoking just so I'll have to do more regular trips to a dairy or gas station.
2 points
-
Finished up those flares tonight, the back ones are surprisingly hard to get a pic of in the shed light. I am pretty pleased with them, there were a lot of constraints to work within, but they came up good. I have also sorted the wiper mech, reassembled the dash and fixed the clutch hose. Tomorrow I'll get some more stuff to remake the mud flaps and have yet another go at stopping the power steering pump from leaking. Again. It's really minimal but the wof guy mentioned that it should be sorted.2 points
-
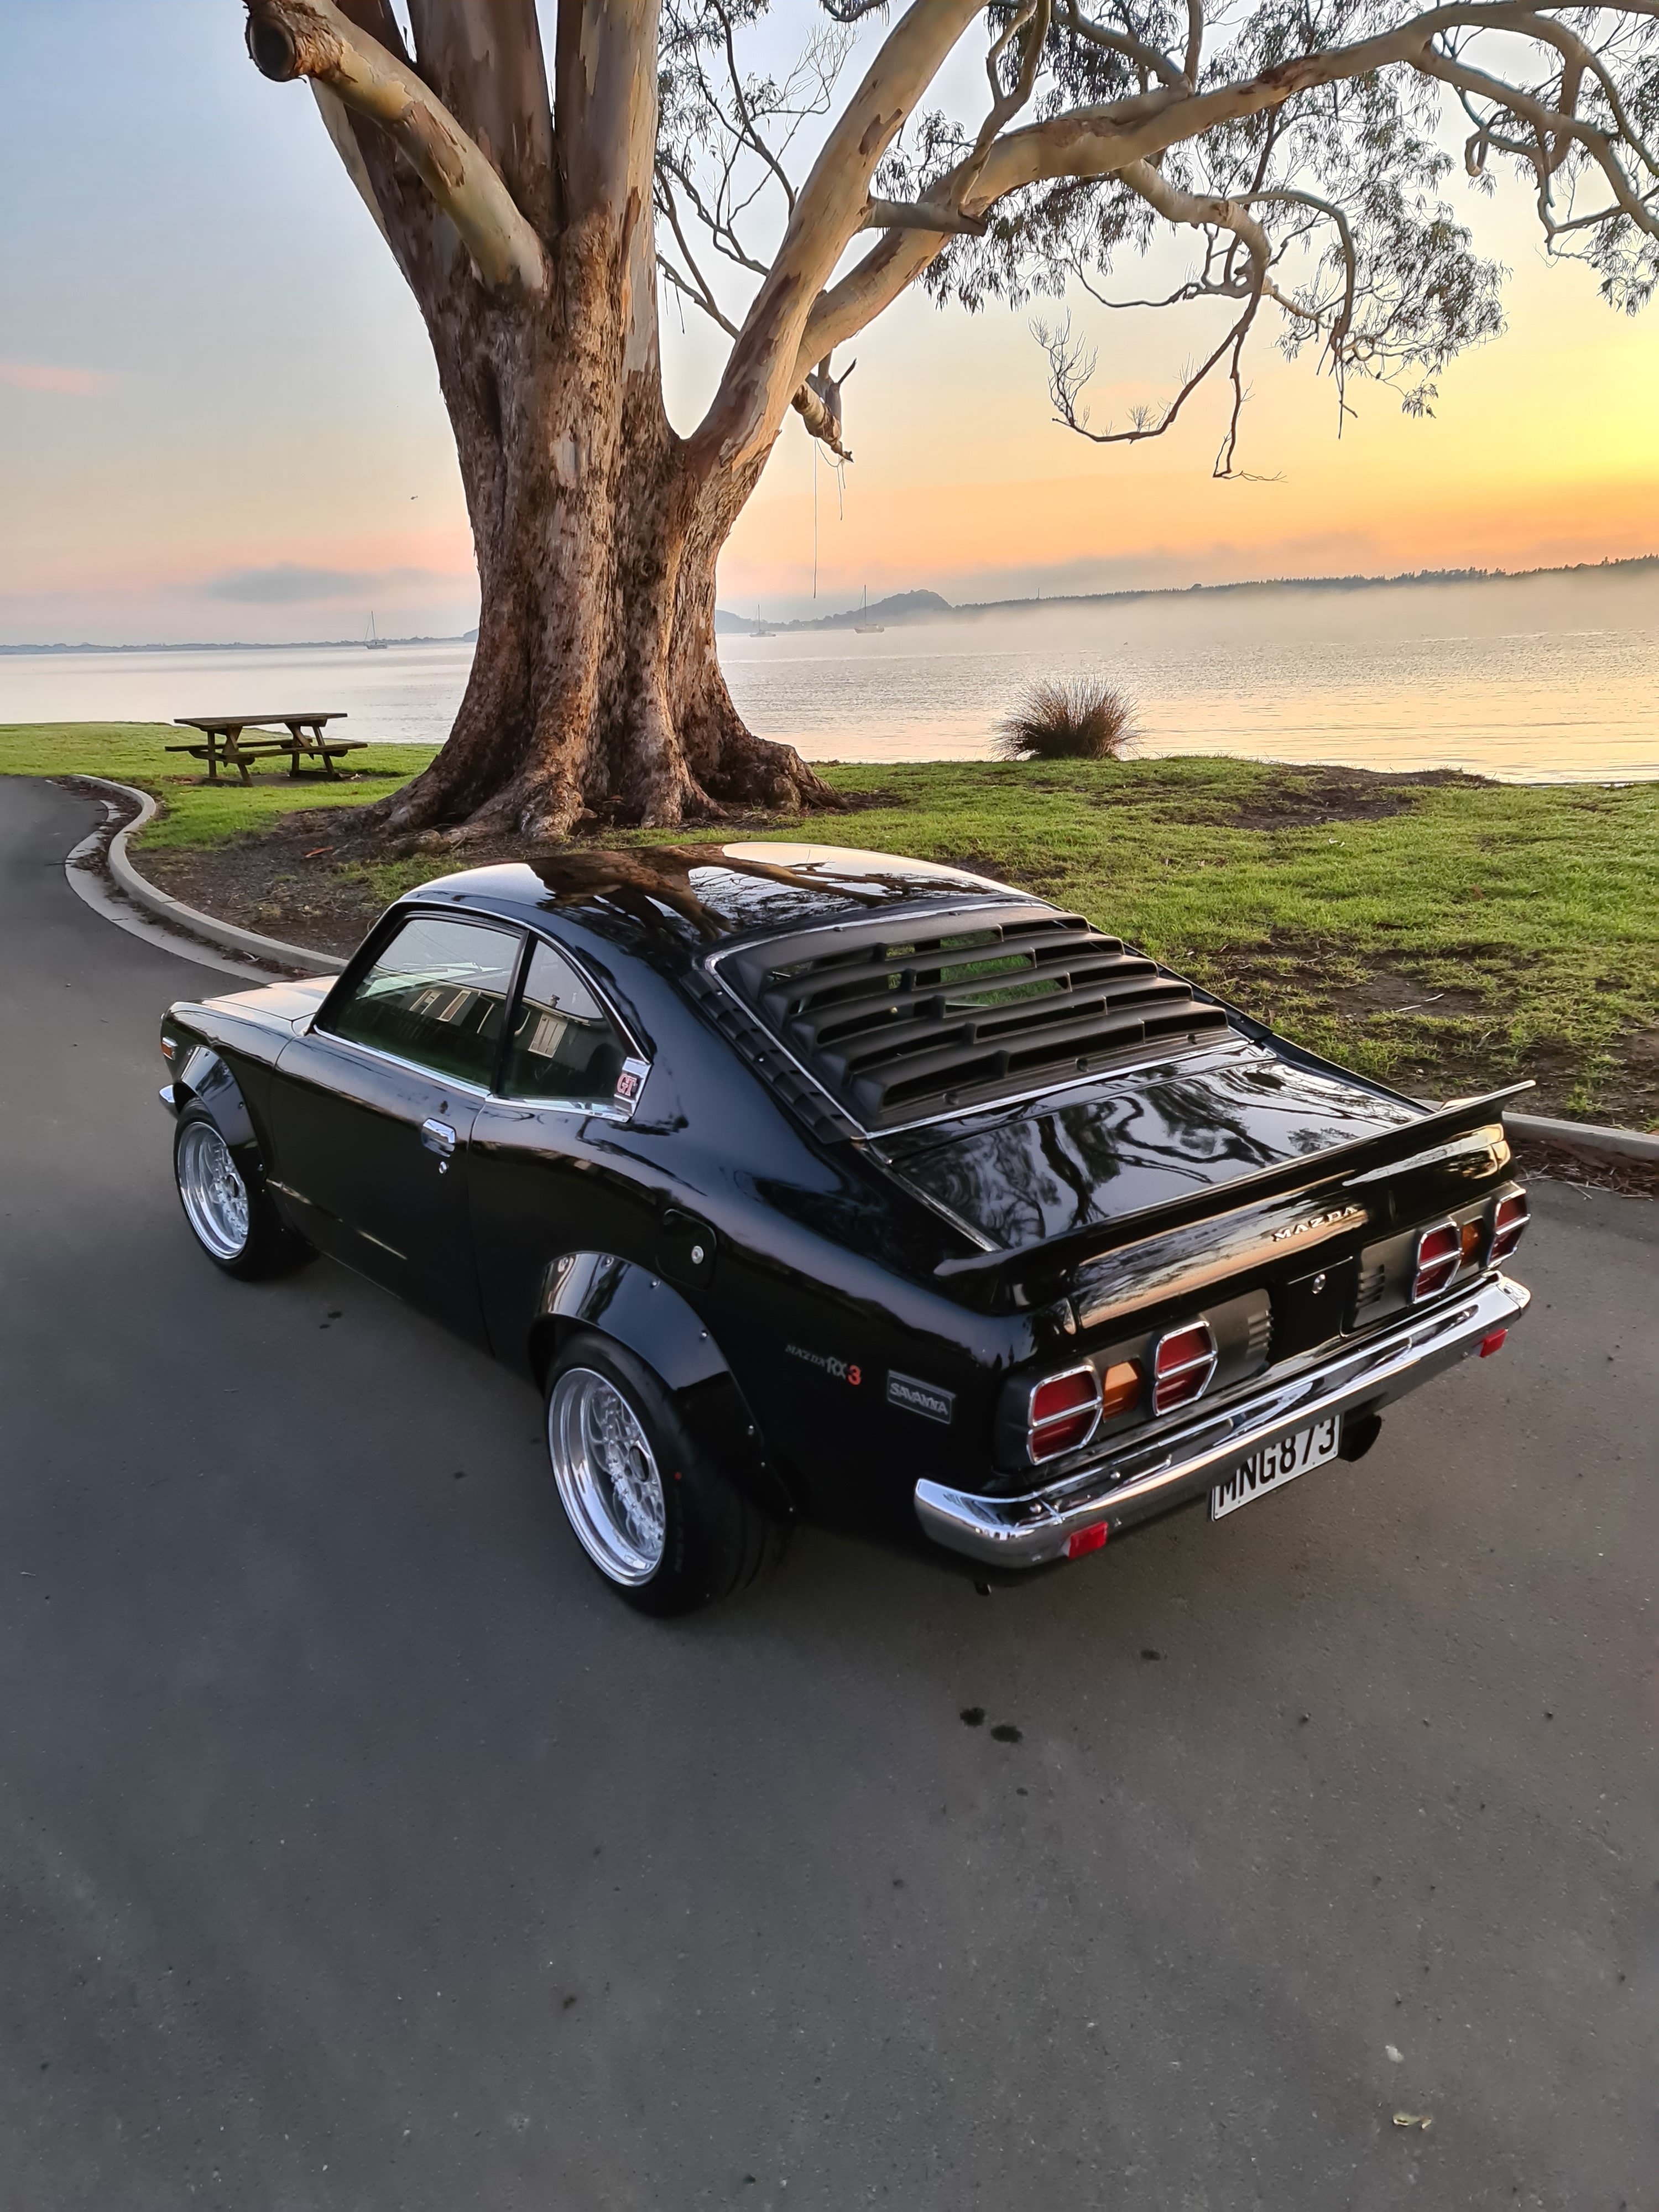
Well here it is ! After working away since picking this up in December last year in a bit of a state here's my version 1 of the Mazda. Car was a mess when I got it so we've been busy in the shed with the deadline of Chrome Expression Session this weekend. Couldn't have done it without a heap of mates an legendary business's! Steve at The Shed Rust Repairs for the rust work Tony for the panel and paint Hayden at Jokers Wild Kustoms for hijacking the car and getting it running while i was away at MCM Marc at RE- Wires NZ for fitting it in for coil repairs ASAP after dyno V1 Mark at Revolution Engine Services for locking me in a last minute dyno tune tomorrow Toby for polishing the wheels and trim Andy Duffin at 3 Rotor Racing for sorting a new spoiler last minute before paint Grant at Cooper Tyres Waihi Beach for heaps of tyre fitment swaps and a last minute pre chrome alignment Jimmy T for painting the dash topper and gauge surrounds @64valiant at Midnight Upholstery for retrimming the dash topper Gav at Precision Workz for redrilling the wheels and fab work Super stoked on the finished result
2 points
-
Busy weekend. 2nd half worked well. Little removable corner inserts look clean. Next I need to make a new inner core and figure out where to put some risers. Should be close to going to the foundry!2 points
-
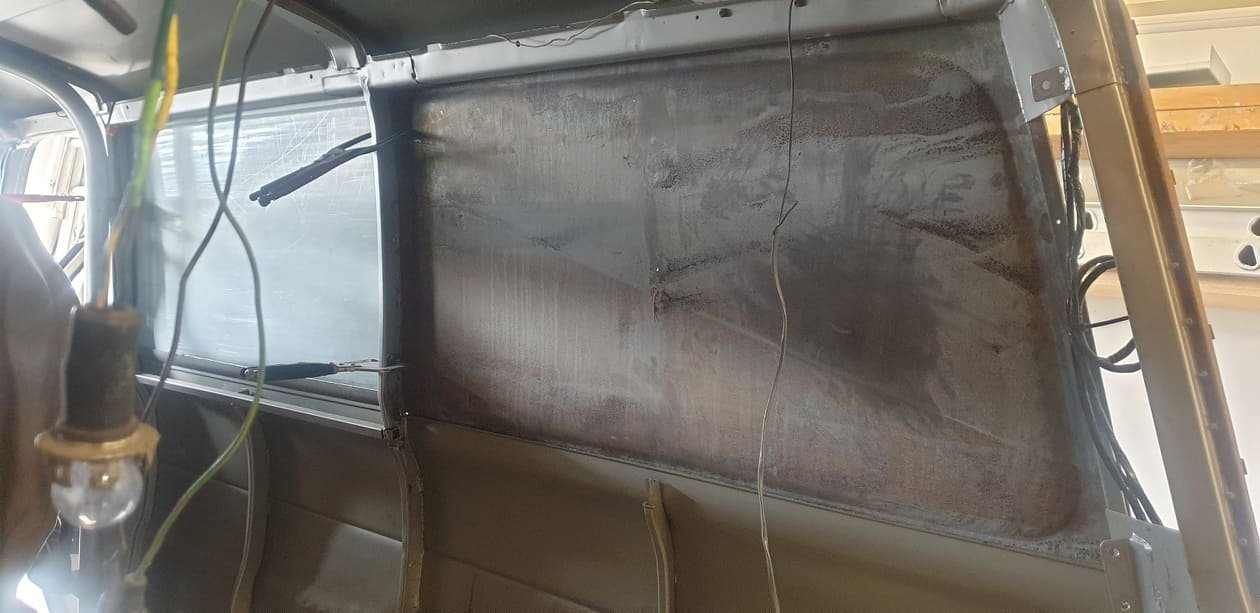
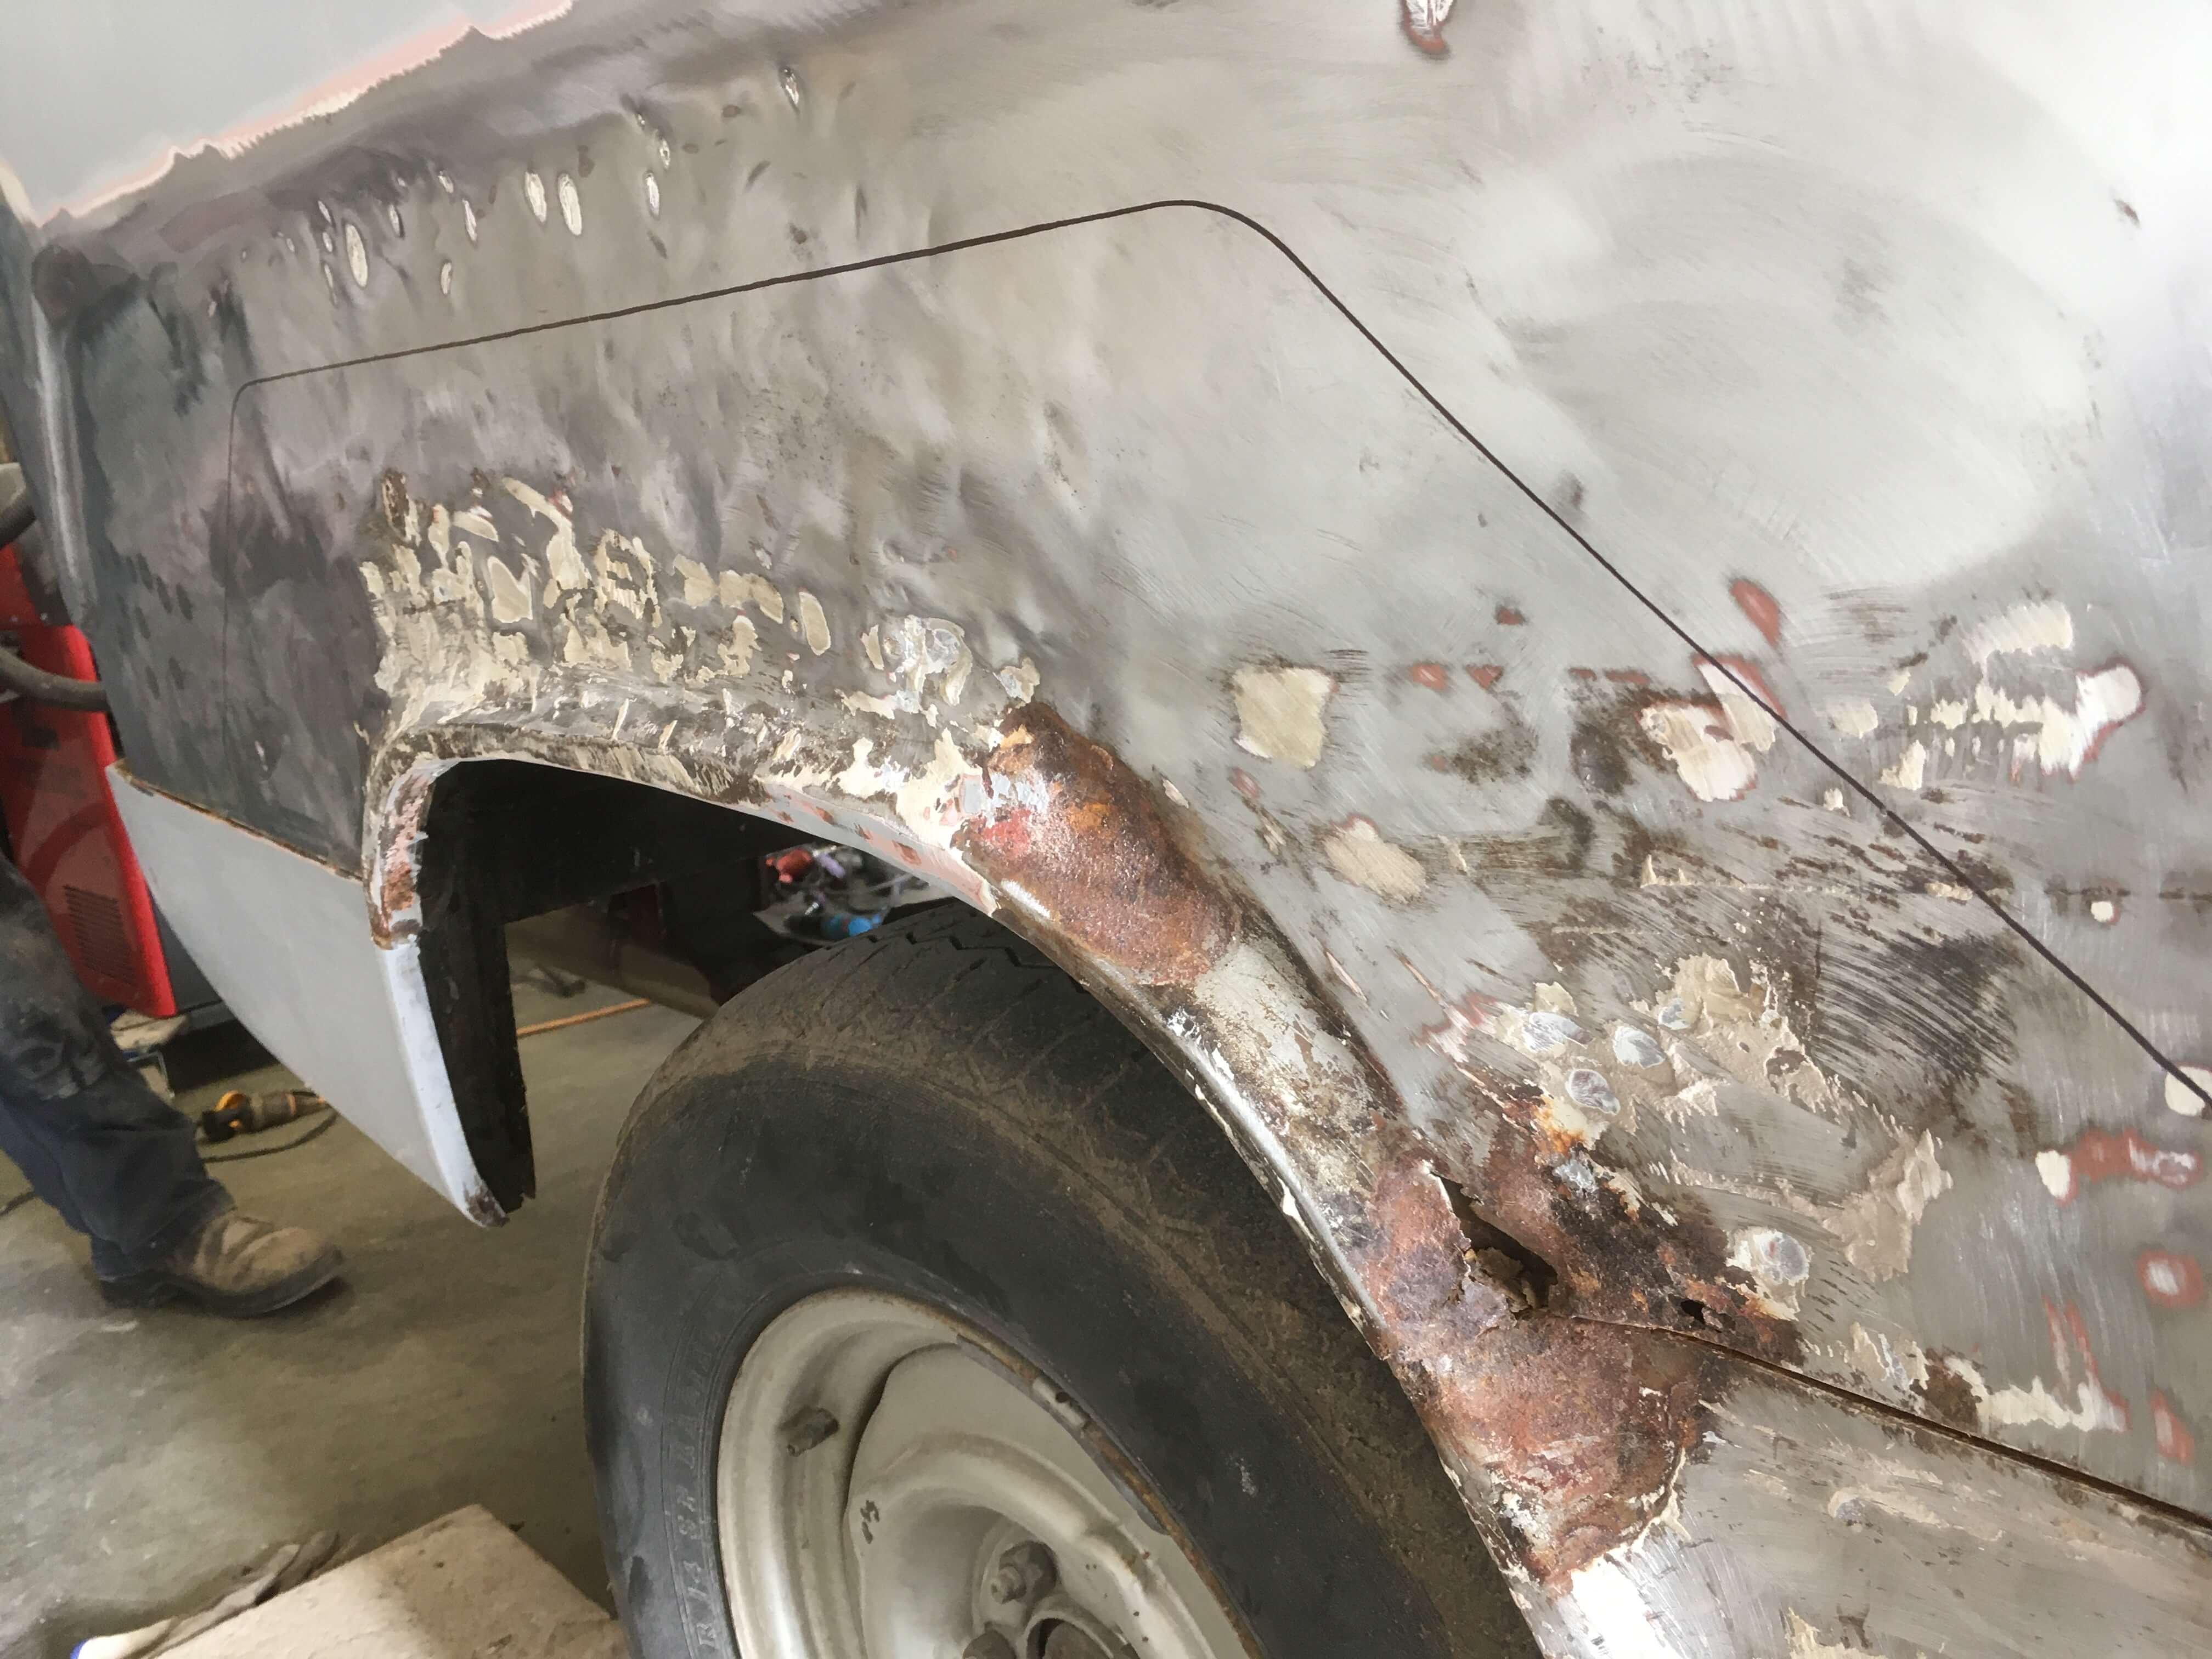
LHS all done, so on to the RHS. It is much worse, but we were kind of expecting that! Some bodgy repairs done it it, probably in the 1970's. Looks like it had taken a hit in the RHS just behind the door, and extending rearwards. Bash the dents out a bit and fill it full of filler seems to have been the order of the day! We will replace the wheel arch with a repair panel that Ralph supplied, which will deal with a lot of the ugly. A new panel is being folded up to replace the whole panel behind the door, to delete the window https://oldschool.co.nz/index.php?/topic/45289-browndogs-1972-v8-transit/page/4/
2 points
-
Foot flat for 12kms from culverdon to balmoral reserve this was maximum speed Oh and the speedo read like 8kms fast...... Shes not winning any races
2 points
-
@JustHarry enjoying the start of the takaka hill road
2 points
-
Back to the dyno today after sorting the fuel system. Made 355whp @26psi. It's safe to say an 11sec pass is coming up2 points
-
The lake smoking a joint with the smoke from the joint is dust kicked up by small motorbikes on the gravel road round the lake?1 point
-
Got the steering rack out and removed the tie rod ends, also will replace the rack bushes while its out and give it a paint. Ive got a set of rack boots as well which I may also do but the ones on it aren't too bad
1 point
-
Decided to do the passenger rear wheel well Needs a few minor touch ups but came up ok
1 point
-
Repairs with a hot glue gun, not the best but it worked as a temp fix
1 point
-
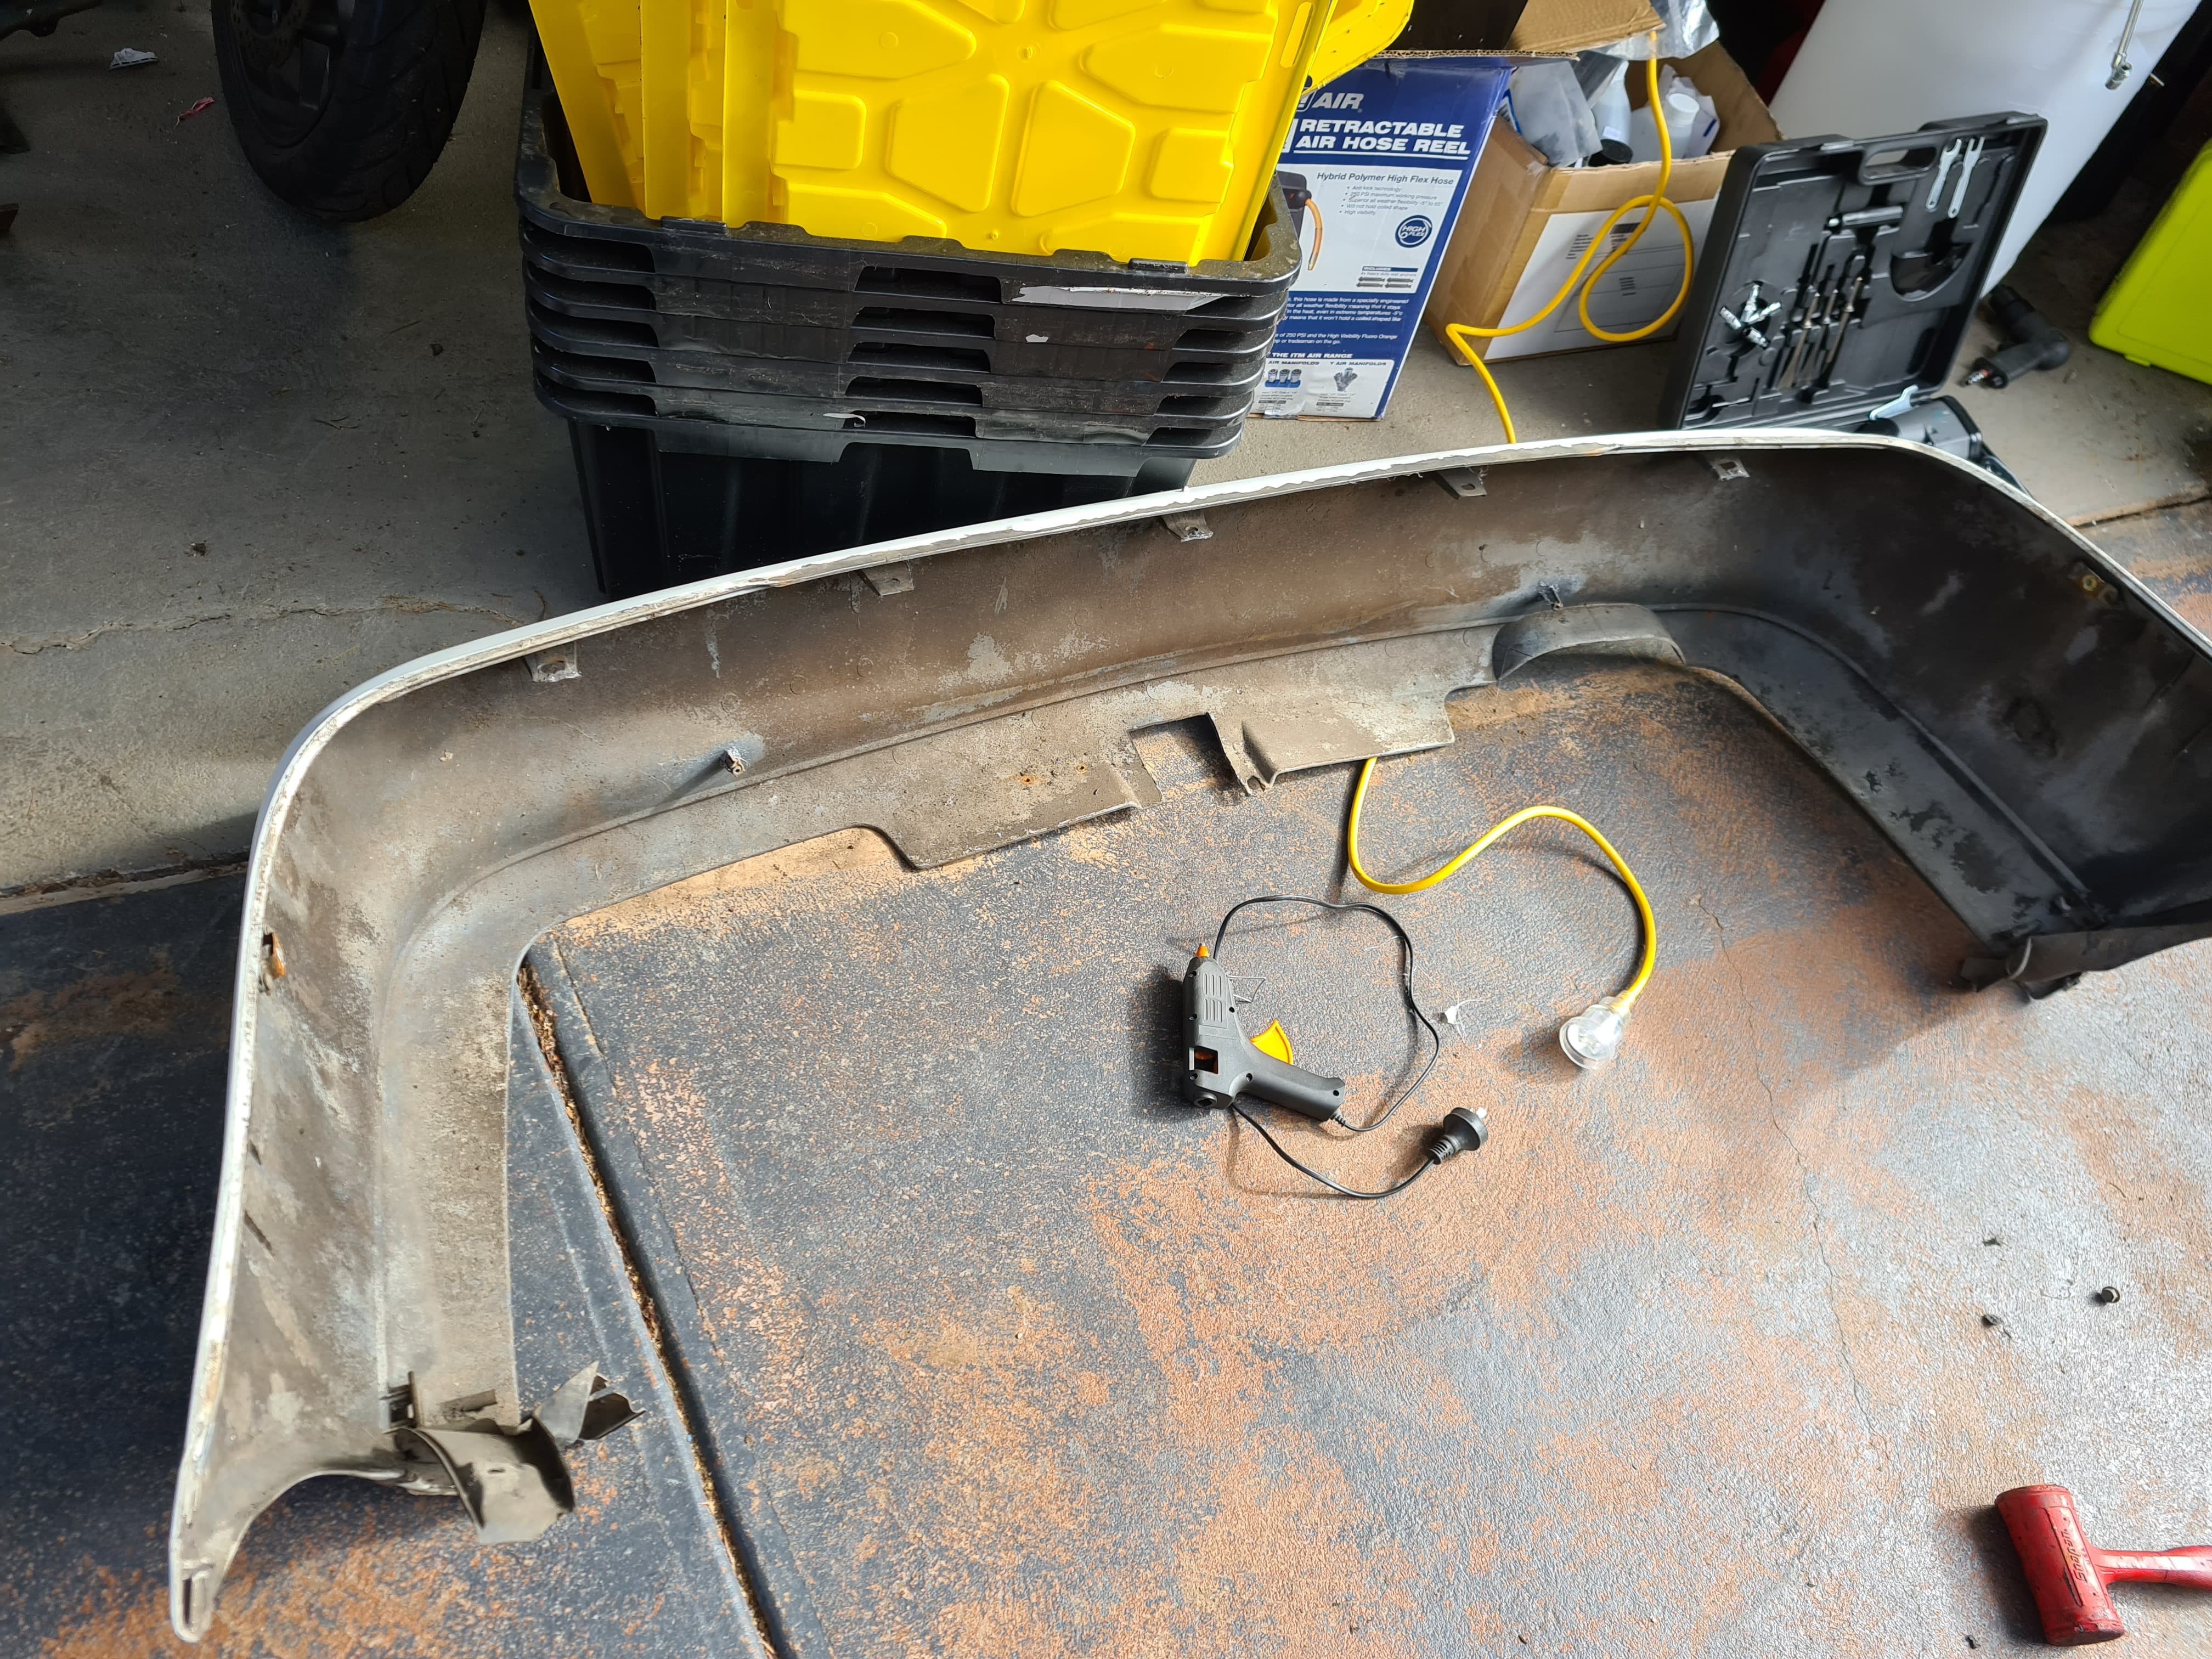
Give it all a good scrub to see what I was working with Discovered some damage to the rear bumper bar and the rear bumper mounts so repaired that as best I could
1 point
-
someone I know had this old 40s Buick that had no front windscreen but he found one someone had stored a 327 chev engine on top of then dragged it across the concrete floor with the engine still ontop, he got one of those diamond cone things and it worked very well, the huge deep scratches are gone.1 point
-
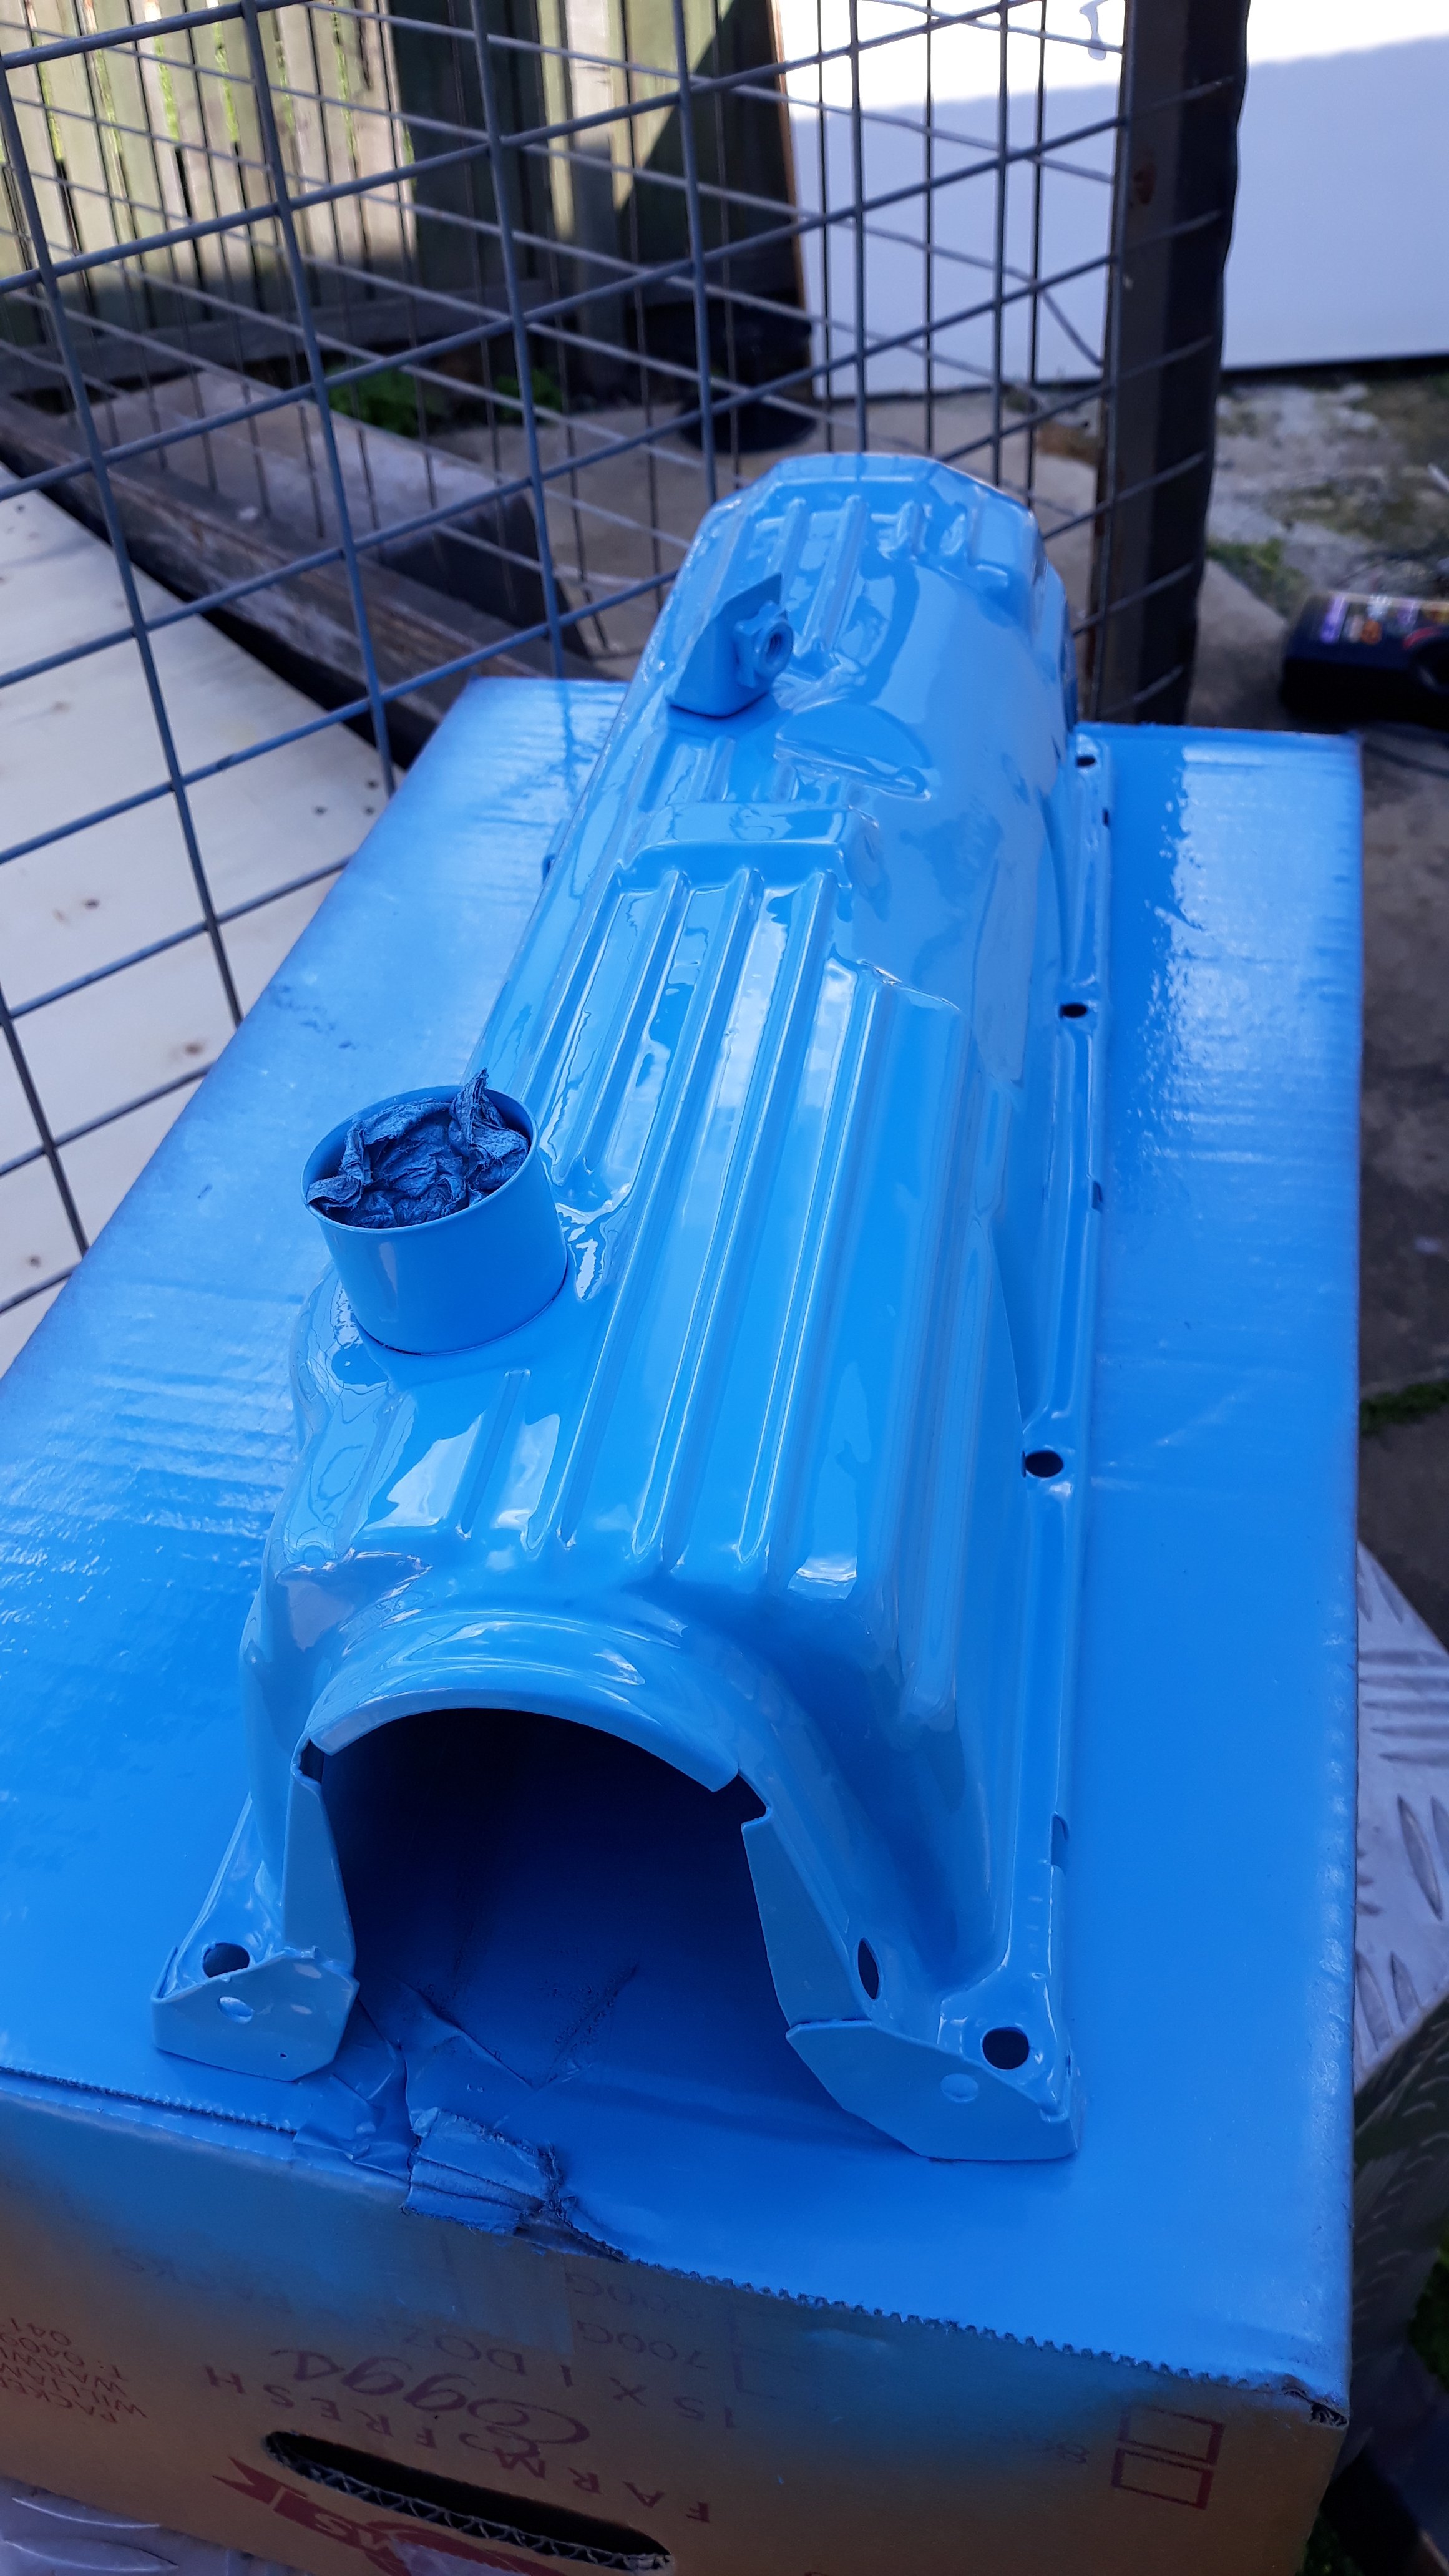
Drags again last Saturday. 11.7 @ 121mph. The photographer captured some great shots of the tyre wrinkle. I'm making some cosmetic changes to the engine. Rocker cover painted in 2K same colour as the body, Olympic blue. The inlet manifold, turbo inlet pipe & bov pipe are getting powder coated satin black, I will have them back next week. Really happy with how the rocker cover turned out.
1 point
-
Roof is finished. I got very wet doing it but it's done now.
1 point
-
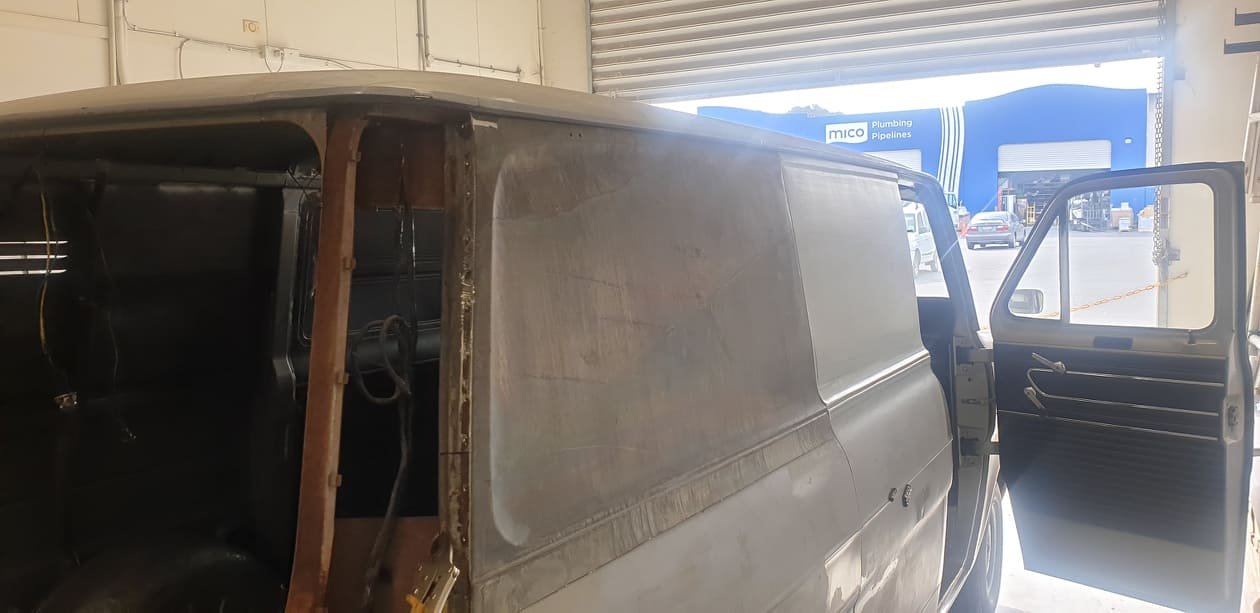
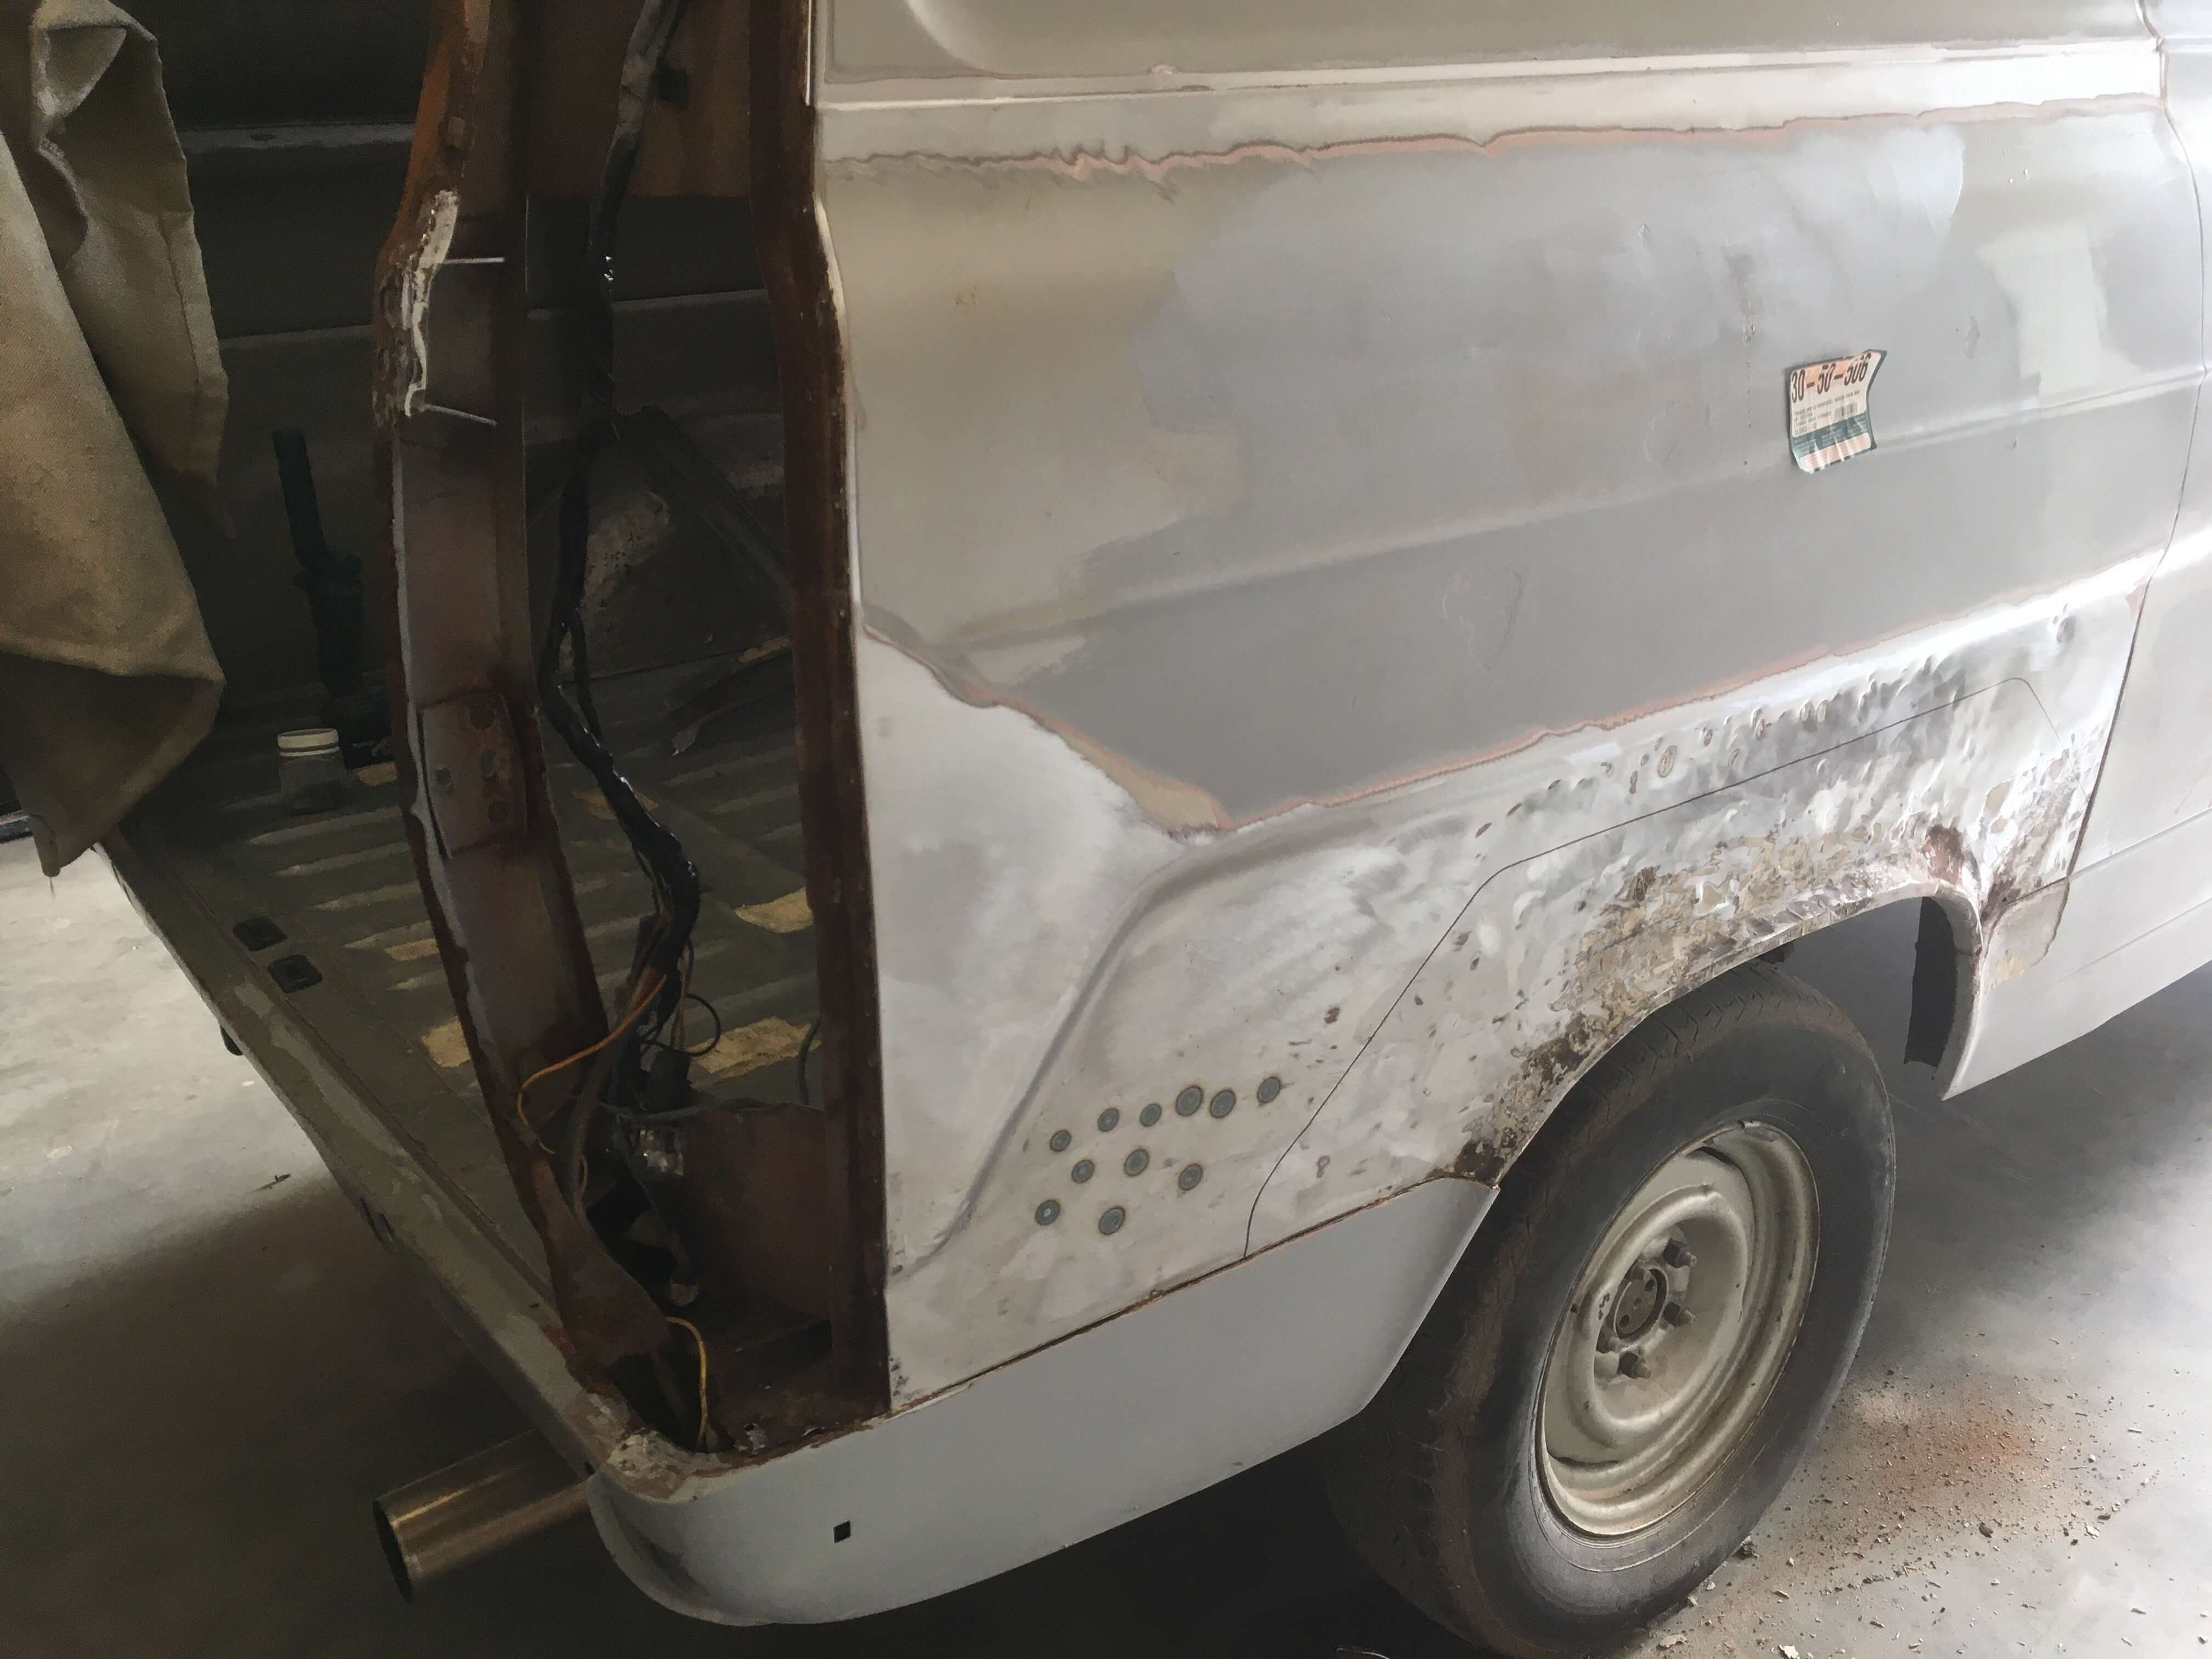
little update, RR wheelarch was quite a mess, needs a lot of love!............. https://oldschool.co.nz/index.php?/topic/45289-browndogs-1972-v8-transit/page/4/
1 point
-
I took the Holden down for the first inspection for the Low Volume Cert. Fundamentally the car is OK, still have a list of 30 things to fix, most of them are easy, bolts to change for longer ones, Fit spring washers, confirmation that things were put back in the factory location, minor adjustments to make. I'll print the list off and smash it out.1 point
-
Up early to get some niggling things done, quite nice ticking things off... and a few things to tidy up, but she's on 4 wheels for the first time in 3 years... Still got a noise from the dust shield to sort, brakes to install properly, and steering tie rods to align but that can wait till it's in the other shed. Plan is to put this in house garage and shift the bikes out to my man-shed, might even get a couch out there if space allows, will be next weekends job... Will need some manpower to shift it, but the other garage has a large concrete driveway so will be easier to fill the big hole in the engine bay using the crane.1 point
-
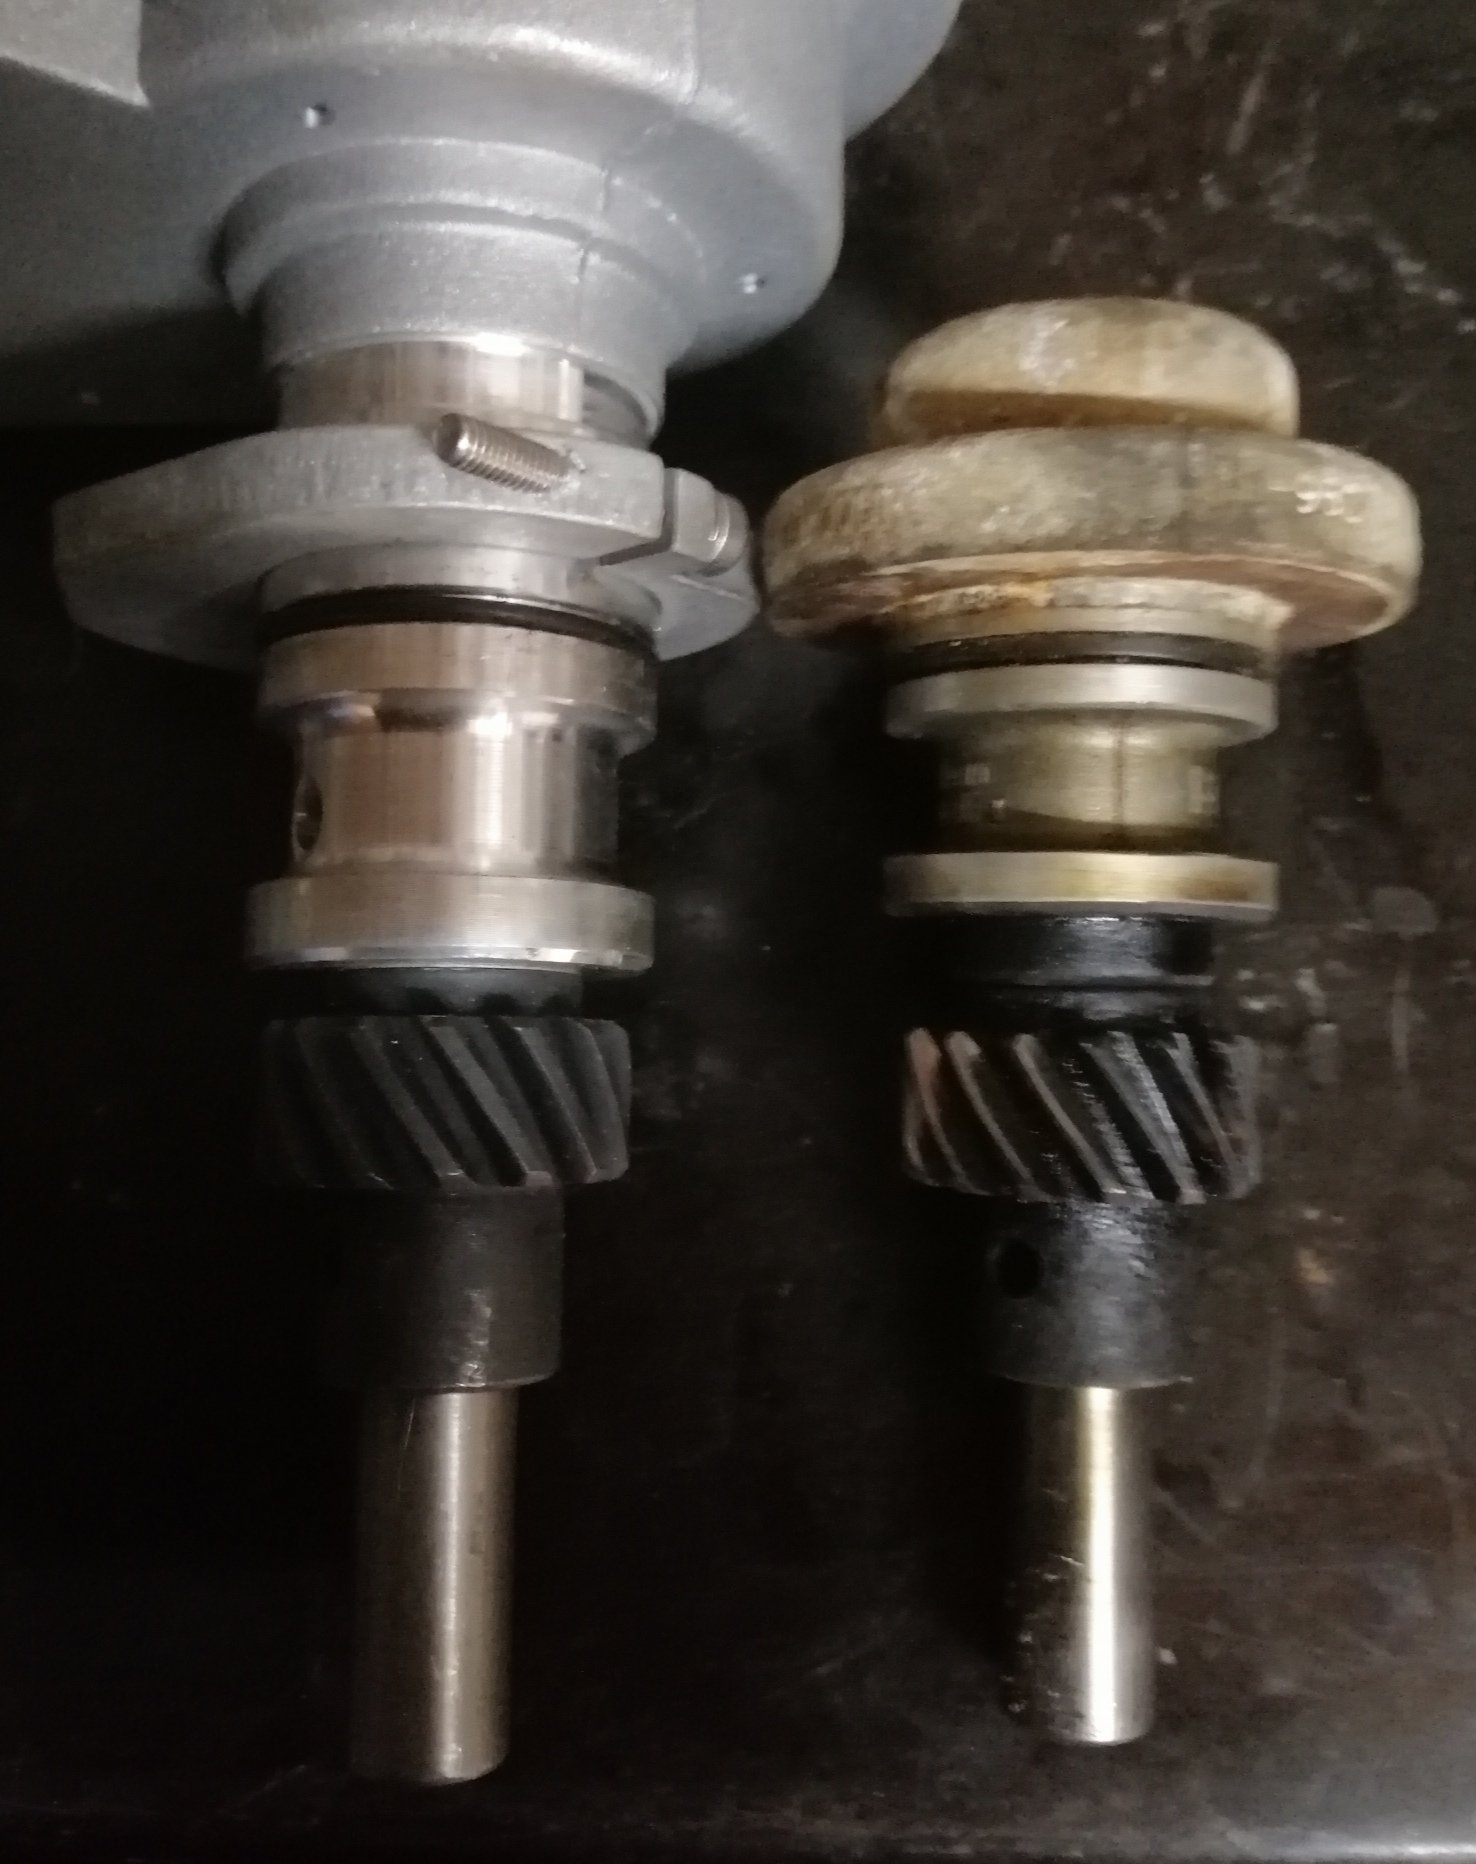
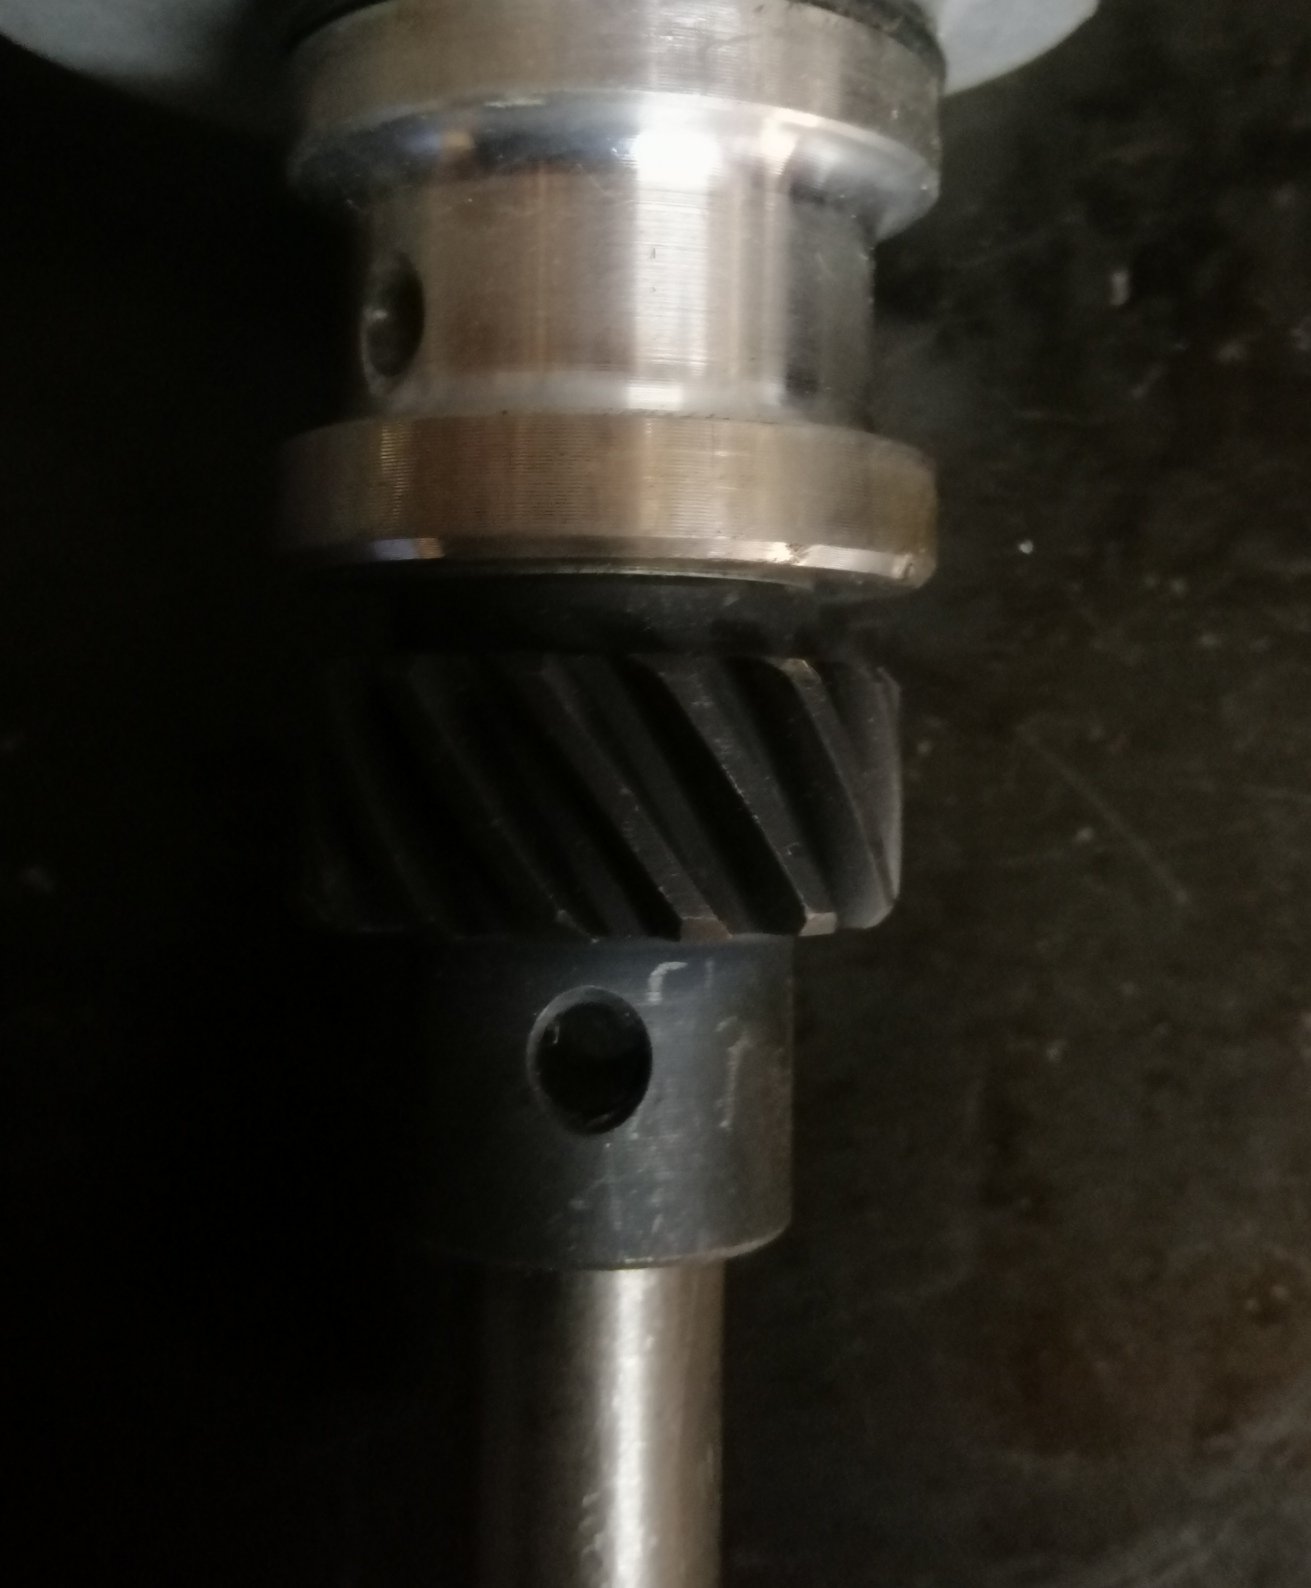
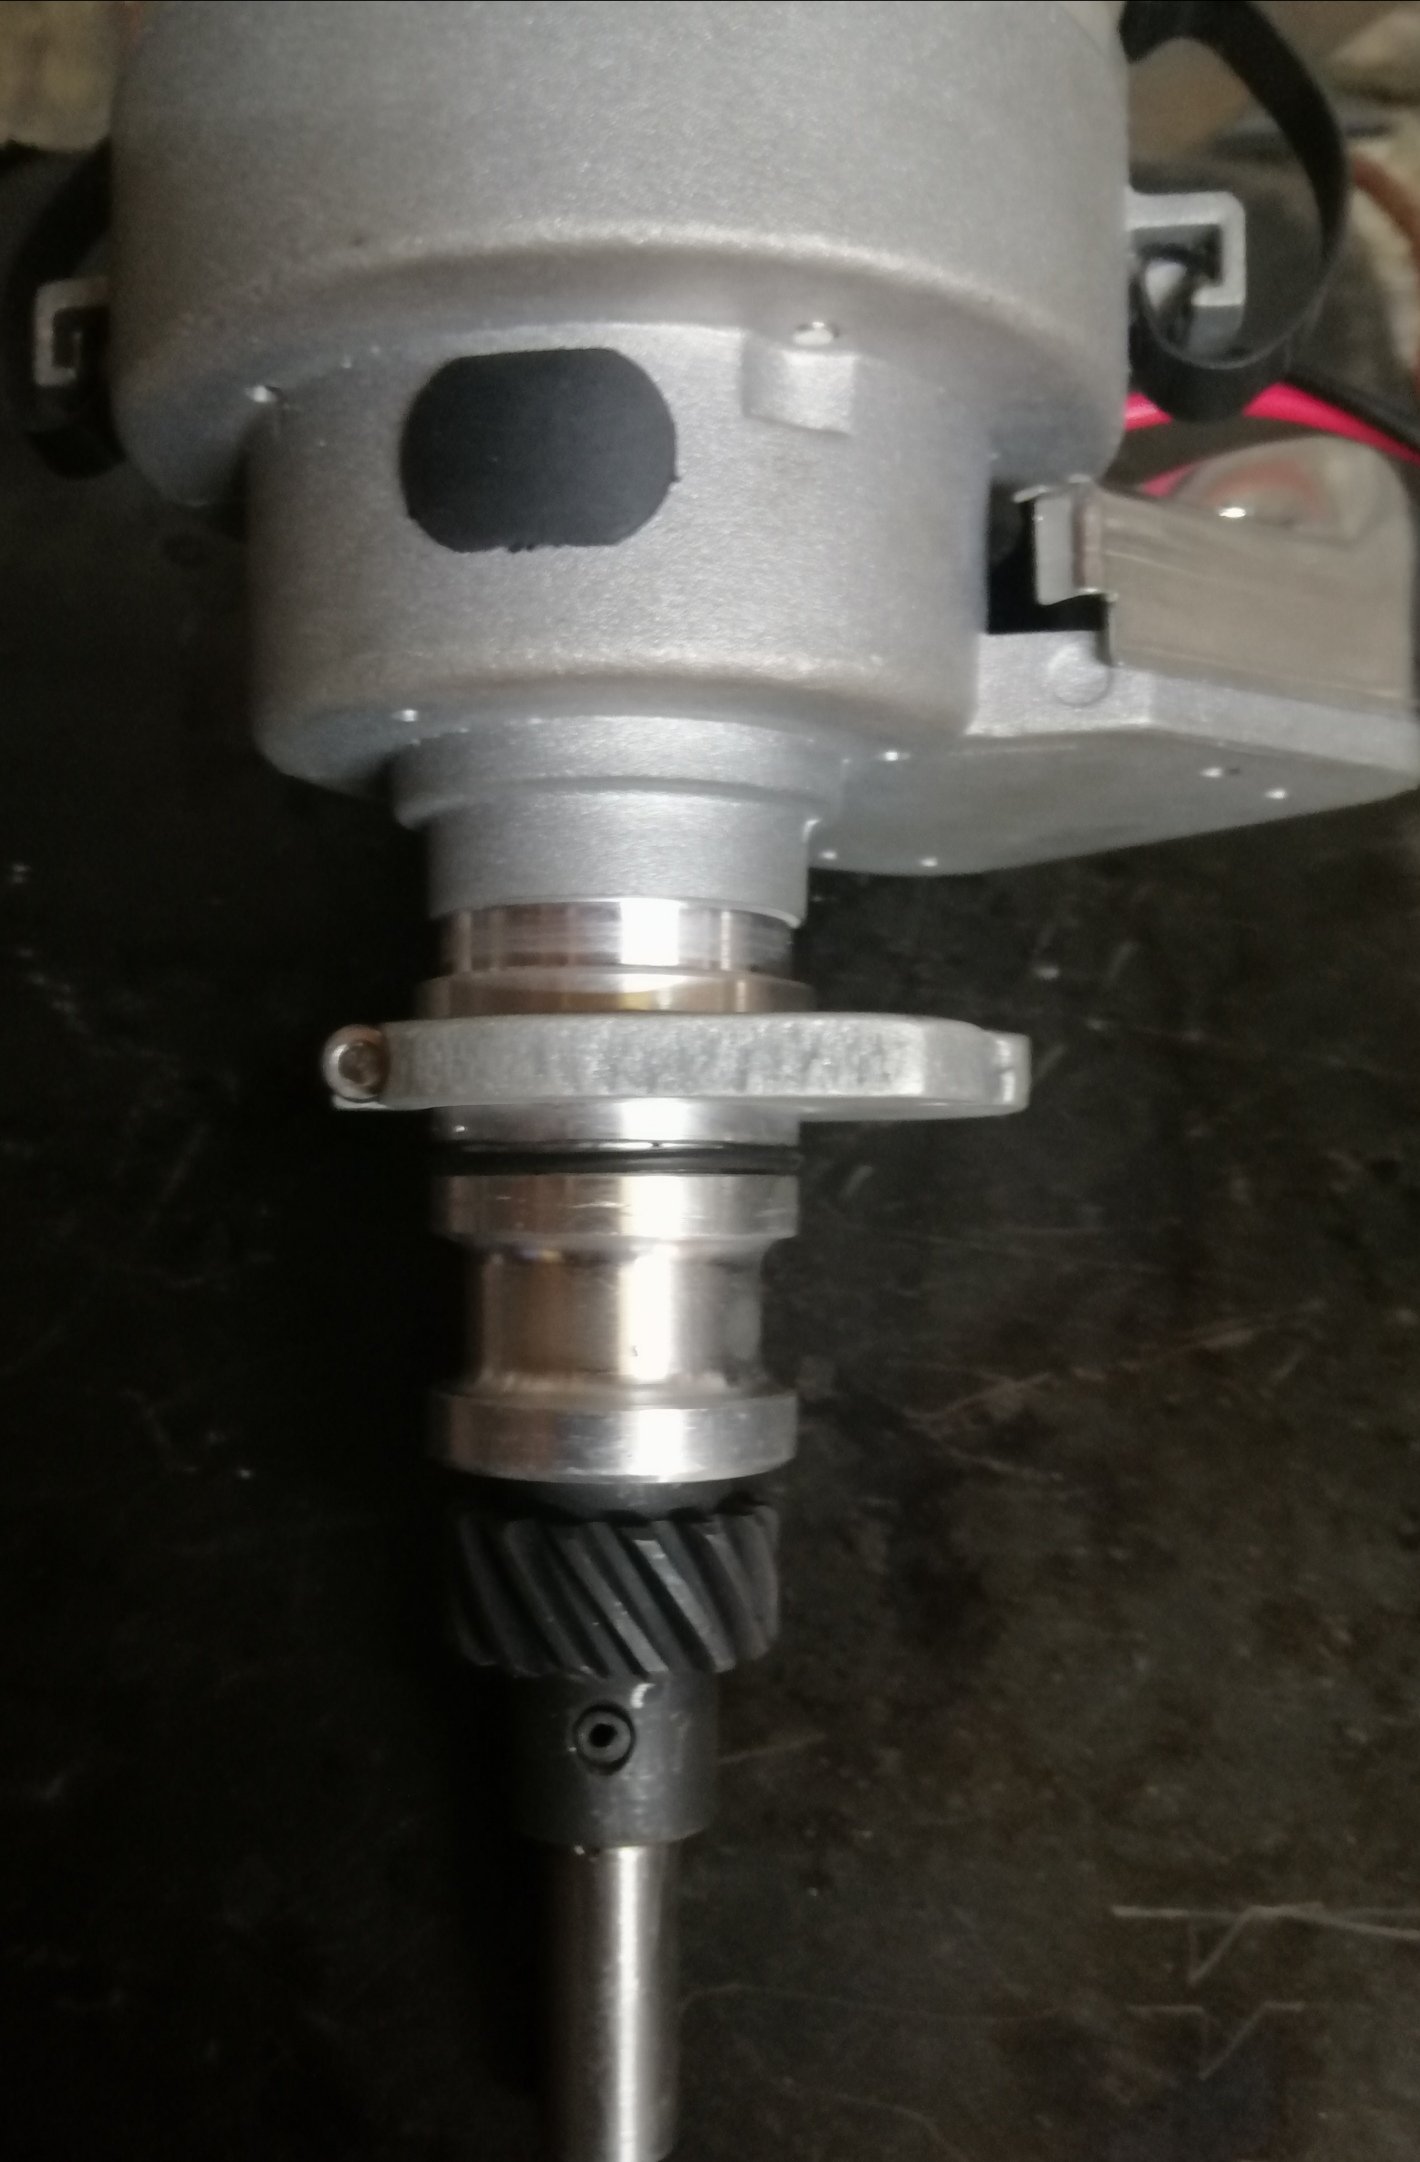
Here I go, late Saturday night and another installment. Because that's how I party... I thought I'd post up a pic of all the other bits safely tucked away on my beautifully arranged 'Honda Goldwing cylinder head apartment storage facilities. At the right height to peer at when needed (maybe for a mojo boost one day - "oh yeah.. that's what the rest of the engine looked like before I pulled it apart, chopped it up and started a whole can of worms type project from it") Here's a piston storage rack that would make Maclarens factory effort look like something from scrapheap challenge.. Carefully laid out heads- these engines have identical heads, cam carriers, cams etc for each side. Don't mix them up!.. All covered up by a lovely sheet so not to get covered in dust. (It makes it like a secret stash of engine goodness).. Now back to the block/engine casings. I'll call it a block from now on, ignoring the fact its two halves. So I have now got to re-mount the oil pump on the opposite side, higher up and turned 180 degrees from where it was originally mounted. It has to go about here... I also had to work out a new way of getting the oil from this new position to the oil filter and then onwards to the starting point of the main oil gallery. Here's a lovely picture you can ponder over. Best pondered with some strong coffee... The standard oil filter location. This is on what was the front of the engine but is now the back and right where I wanted to put a cross member to hold the engine up. Not to mention a big chunk of that lower half of the casing has disappeared after I chopped it off, right through the original oil filter centre line... So that had to go. I looked over the engine and eventually worked out a spot that would suit a new filter pedestal to be mounted so allowing easy access for filter removal. It also had potential to allow for a Mazda style oil cooler or a take off plate to suit a normal oil cooler. It was going to mount roughly about here... It was going to require a big hefty lump of alloy to start with. But I was on lockdown along with most of NZ. Luckily the local engineering workshop that I go to for many bits of random steel stock was doing 'essential' jobs for some industries still running. The workshop foreman left me a lump of alloy in his letterbox that happened to be on the way home from the supermarket shop. This was a lucky thing! Here's the lump of alloy after a lot of it was turned into many many little tiny shards of alloy... I'll get back to that lump later. Next thing was make some flat areas that I could mount things on and line stuff up with. The block was split in two luckily I was able to clamp it to the bed of the mill. I machined the inside so... I had to do this on both sides in different areas. One side had to be machined to suit a new location for the oil pump. On the other casing i machined out pockets to take machine bits that would locate new oil pump feed and return pipes. I was going to do oil the pipe work in alloy using the same size pipes and o-rings as previously used by Honda for the original setup. But now I'm getting ahead of myself and even forgetting where I'm at in writing this. In fact - many times as I looked over the oil line layout I was scheming I would get a bit confused. I felt like this bloke who had just turned up at this new city for a job interview and discovered his phone was dead, his map was 40 years out of date and he didn't speak the local language... So where was I?... Machining things and making a mess of the floor, trailing alloy swarf everywhere inc into the housetruck. Not making friends with Hannah or the cat. Anyway. That oil filter pedestal/mount? needed a flat pocket to mount to. I machined away the casing so creating such an area... On the other side of that I machined out a matching pocket. It began sort of like this... ..and continued like ... Because it was so fun I took away more alloy... Now I had a nice location for the mount. This would be pulled into the outside pocket with a custom gasket sealing it, via bolts from the inside going through another bit of alloy that would be machined to help locate the pipes in and out. From the outside it would sit like this... I drilled the mount and then set about to tap the M18 thread. But I didn't have a M18 tap. Its lockdown so borrowing one from someone was out of the question. But I did have a few spare old Mazda V6 oil filter mounts so I nicked the threaded pipe from one of them and made a tap... It worked fine (phew! ) .... I then turned out the oil groove to suit the Honda filter. I didn't take a photo of this but you'll see it here as I was drilling the oil ways through... Drilled and tapped some mounting holes... Now I had a lovely oil filter mount... Annoyingly I didn't take any pics of the oil pump mount but I can describe it. The oil pump bolt via three bolts to a alloy plate. This plate is bolted to the inside of the casing via bolts that come from outside through spot faced locations... The oil pump shaft runs backwards towards what will be the flywheel area where it will be driven by a series of two chains off the crank adaptor - sort of like the original. But backwards and on the other side. That you will see soon along with a network of machined pipes and fittings that almost need a subway map to follow. More soon....1 point
-
Well it is looking quite a bit more staunch now Edit, I now have a vin plate for it, so it is in the system. Next is a warrant check, then the cert check, then compliance. Yay probably.1 point
-
So made a wee bit more progress. Unfortunately I don't get the time I would like on this build but still. So number plate lights out for a refresh and LED treatment. Look amazing attached to the bumper, once removed and stripped down it is a different story. Actually writing under there. Next up was the boot loom. Dealing with lighting only on this loom. Tail lights, numberplate lights, hi stop, and untilize the factory earth which wasn't being used when I stripped the car :/ All ready to be terminated.1 point
-
That's the exact conclusion I came to as well. Why ITBs? Because ITBs.1 point
-
OK so I had the engine sitting there in pretty much the spot I wanted it. I had taken loads of measurements and pondered many aspects in an attempt to really look into the future and pick up on any potential problems that could arise. It was pretty obvious that the bodyshell was going to need a fair bit of chopping about in the tunnel region (ooooooohhhhh I can see the originality preachers trembling already..) and that the engine was too low in its nether regions. You can see it here. Its not stupidly low and I have seen worse but for a car that has to navigate our driveway with its rocky surface it needed to be better... It had a nice burly bottom but my intentions were to raise that and make a removable sump plate. Still with fins though to help keep the oil cool. Here's what the underside currently looks like... I pulled the engine out and sat it on the bench. The Imp then got its little Datsun heart bolted back in place and reassembled to working order (yay for no more leaks I thought..but it still leaks because British) I poured myself a whiskey. It might have been a few. I studied the crankcase and sump carefully... I then went over my plan of attack. My main issue was the oil pump. It was going to have to move further up in the block so I had to find a suitable place to mount it. I also had to work out how I would drive it. Originally it there was a larger spur gear running off the crank, driving another spur gear. Off the centre of the spur gear was a sprocket which ran a chain down to a sprocket on the oil pump shaft. The oil pump shaft ran not one but two oil pumps. The main pump in the sump area and a smaller scavenging pump in the clutch housing area which squirted oil up over all the gears. The shaft also ran through the main pump to the front of the engine (what is now going to be the back) and powered a water pump. A bit tricky to picture? Well here is a stunning bit of pencil art I did just now ... Plus a photo of the all those gubbins on view at the back. The driven spur gear is missing in this pic but you can see the splined hub it slides onto with the driver sprocket on inner end... Honda had made it all very neat but also all very complicated for what I required. I just need one main oil pump to feed the bearings. So I move the oil pump up. Fine. I'll mill a flat area and make new mounting blocks to suit. But because I have removed the spur gear arrangement (no room for that lot with a custom flywheel planned for the crank) I'll have to chain drive the pump with sprockets (at the correct speed too). OK. That should be easy enough. But no spur gear means the pump will be running backwards. Oh bother. So how about I mount the pump on the opposite side of the sump casing and so turn it around. The shaft is long enough because it goes right through the pump each way. I took the pump apart and checked if this was feasible. It was. Yes! Now why not just run an external oil pump and dry sump it etc ? Well mainly because I am not Mr Money and hence prefer (have) to do it as cheaply as I can with what's at hand (more of a challenge this way and more satisfying too) Also- if I use the Honda pump and keep the required oil routing sensible then it sort of remains factory. I am also going to do my very best at keeping the external look of the engine as clean as possible with a nice uncluttered engine bay. That's just the style I like. Plus we were only just into lockdown here and I wanted to crack on, get as much fabrication as I could done while on my ' holiday in the shed '... So now I had a plan to follow and could start chopping things up. I chopped it just below the engine mounts I intend to use. There is a myriad of long bolts running through the cases clamping them together. The main larger ones are all up around the crank area. Then another two lines of smaller ones below (which hold the cases together under the against the loading of the transmission shafts- now gone) Plenty enough bolts so the lowest are now gone. This lot will be stronger when I have finished with my idea. I kept chopping it up. Took a bit more off because it was fun. Lovely alloy too I might add. Very clean castings. Ended up with an engine a fair bit shorter in height... I got the cuts pretty square and straight. Made easy by the fact that Honda had nicely added reference lines for the purpose- just like on a pack of butter... Now I had to mill it flat. It would take decent sized knee mill to clean up something this size and awkward. Or how about a little drill mill, a steel bench and a big plate of steel I had rescued from a Japanese dentist chair I stripped for bits... I had to position it just right and use the swing on the radial drill mill to run over the cut edges. It looked a bit suspect but it worked fine with light cuts. After the bottom of the sump case was flat and square I then milled a flat area on the face below the crank flange. This would leave a good flat surface, perpendicular to the crank centre line, to mount a plate with an idler sprocket on it for the oil pump drive I had sort of nutted out in my head (but really had not gone any further then just that and it could well have been just nutty) That area ended up like this... The pump would fit somewhere in here like this... Then I threw the lot on the fire... and swept up all the alloy chips that seem to have gone everywhere! When it was nice and warm I welded some new flanges on. Very carefully and slowly I tacked them, taking my time to make sure they stayed true and square and keeping it warm in between tacks. They did. Yay I welded as much as I could reach with my torch along the tricky edge leaving just a few spots that I'll seal at build time with JB weld. It turned out so good that I barely needed to give it a tickle with a larger file, more just a clean up and sits square on my bench. Straight edge reveals my bench is indeed flat too- I had to check! I was so happy at this point because it was one bit of the conversion I feared could go wrong - however I think the warming up and that fact the block is a complex very rigid shape helped keep it all straight. I sat back with a cup of tea and admired my nice burly flanges that I will bolt a plate to...1 point
-
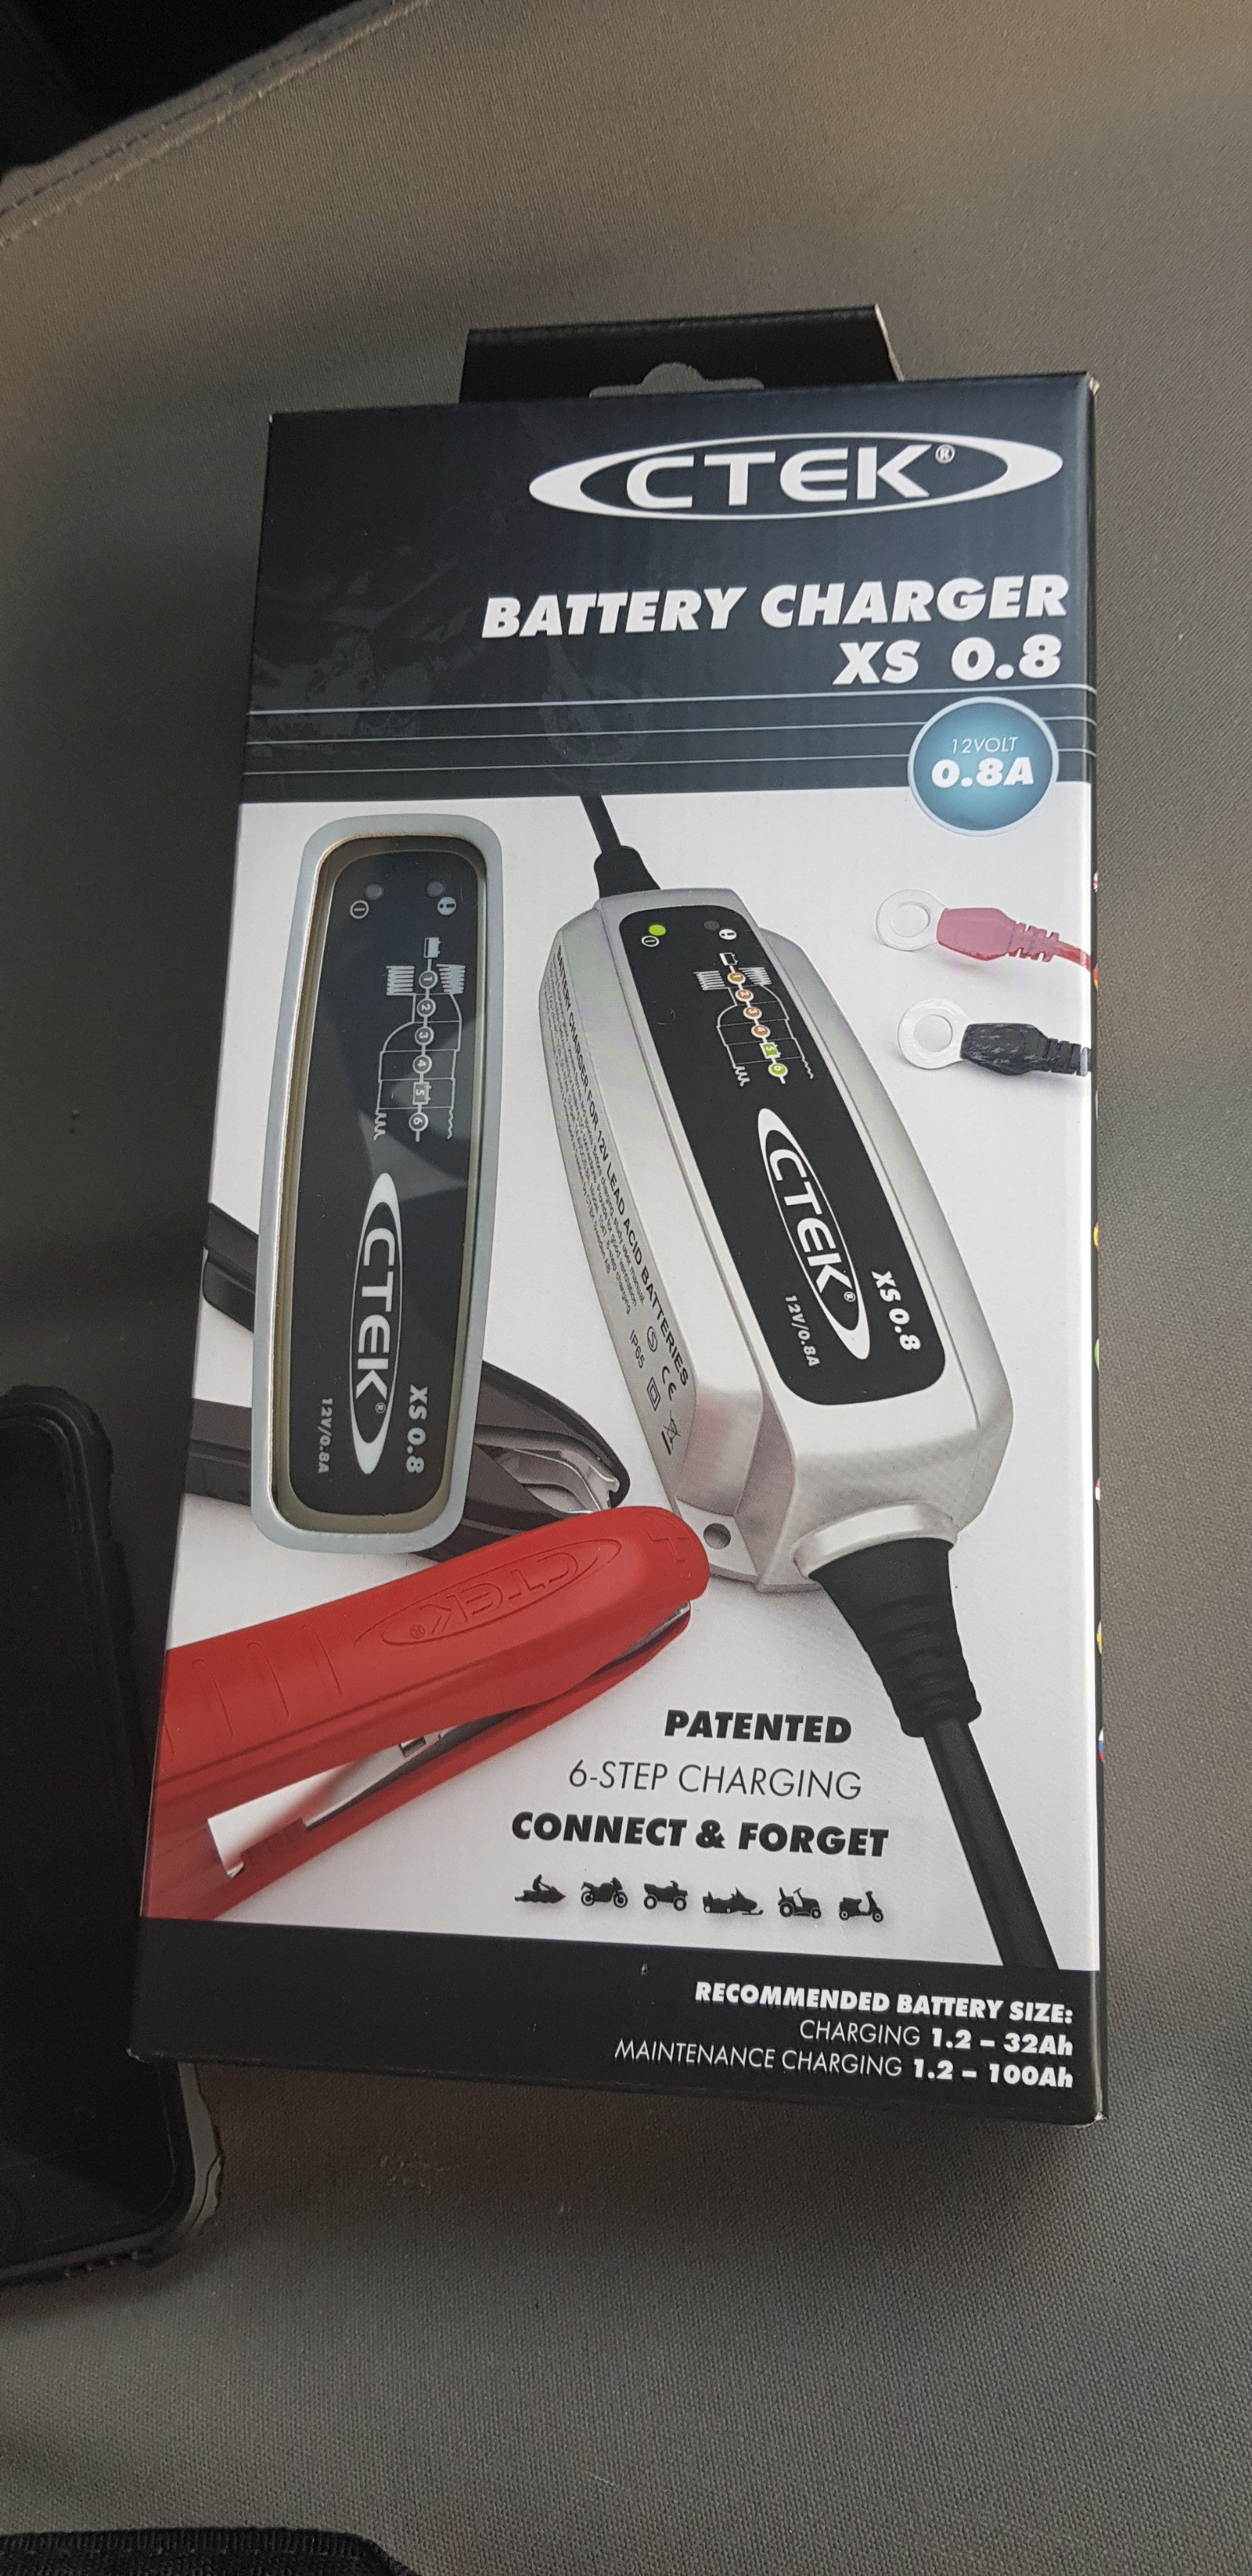
Fitted an Aliexpress handle. Makes the bike really easy to lift and turn around, great mod for the money. Bought a Vapor for very cheap, and picked this up today from PB tech. Was hopeful that its Desulphating function might increase battery capacity but it only did that mode for about 30 seconds, so it's unlikely. Need a new battery but at least this should mean i can reliably start the thing this coming weekend.
1 point
-
Organise them then fellas. Thats what made me organise rides. Because all that existed for a long time was for bigger stuff. No fun for smaller bike riders when they're sharing the road with bigger ones in a group setting. Would be cool to see you there though.1 point
-
bump - I sold this about 1.5 years ago when I needed some coin to do grown up things (renovate house) regretted it deeply, this weekend just been I went and picked it back up off the guy who I sold it to. it now has a vvt-i 1jzgte and MAXX ECU all scratch built loom by nz wiring, that about all he changed, got raised up and put on some china 17x9's. while I was in wellington I picked up a set of bcnr33 wheels and slapped them on it and lowered it back down to a semi acceptable height. The plans are smash an r154 in it before I blow up the w58 doing silly stuff, then later on I will put a TD06 on it and hopefully make around 350kw just for shits and gigs, also potentially some 15's of some sort again would be nice. will also unyucky the intercooler pipes. Couple of pics from before I sold it with 9j mk1 on the back and current pics, needs to come down 6mm or so in the back to get it sitting level1 point
-
Milestone today. both my girls went solo. Pretty brave of the wee one, she can't hold it up as legs are too short...1 point
-
Woohoo. Dipped into the 11's last Saturday. The bias ply slicks performed amazingly!! Chopped 0.3sec off my 60ft and 0.5sec off my ET. One of the runs at 121mph. I had read horror stories about mixing radials and bias ply so after making lots of calls and taking on advice I ended up with a set of used Avon ACB9 5x22x13 bias ply formula ford tyres up front. The car ran straight as an arrow on the strip, a lot more stable than previous runs on semi slick radials.
1 point


.thumb.jpeg.e0a4bff61111e0c8c7396950fcc94da1.jpeg)


.jpg.4037f542dc2a540be0b3c54bf249c6b2.jpg)


This leaderboard is set to Auckland/GMT+12:00