Leaderboard
Popular Content
Showing content with the highest reputation on 07/22/20 in all areas
-
Well great news, and slightly delayed, the Covid19 pandemic allowed time for a bathroom sink(!!) Made from an old brass preserving pan, and brought the copper pipes down to the valve taps. Stoked with it! Prior to this great update, we spent a day coating the walls with $100ish of driveway anti-slip - stops all the dust escaping the 25 year old tilt slabs and seems to keep it a more moderate temperature, but in hindsight it made the walls really rough to touch as there is evidently sand in it... I should've understood how it was anti slip. But anyway it's still far better than dust and can confirm second winter round, it's bloody warm in here and that is without any heating and still exposed roof. Since lockdown it's become my full time office space until the travel industry picks up again, so I've spent many hours (and dollars) on artwork and instructing old mate what furniture to make me. But finally finished off the feature wall with a favourite picture from my parents work, Rod Millen in the RX7 in the Santa Monica Hills. I spoke to him yesterday and he confirmed it was the first "official" test of the 4WD RX7 (other than around the workshop streets at night) and his team mate explained how it was 3 images cut into 1 image. Also over lockdown it became home of various additional rotary projects, from the strip down of the 12a Twin Dizzy for the RX2 to starting up and restoring the Sachs rotary bike. It's currently home to both 808s which is surprisingly fine as the floors cleared out more so they don't really get in the way. Have started discussions with alibaba about a car stacker for when the RX2 ever eventually moves in. A massive shout out to the great people who have given us amazing additions as well! Got given a vintage fuel pump from Rodney's vast collection of 60 of them, and a oil can from the airport he used to book out to test the Celica for Pikes Peak, amongst some signage too. Got some amaaaaazing signs like Rotary Engine Specialist and rotary goodies (on lease apparently ) from @73crownwagon and with some brilliant new LED lights straight from Mr Jackson @UTERUS it's coming along really well. Also picked up this cool Turkish rug to hide the petrol stains the blue 808 caused, and protect the floor from the oil leaks the rotary provides. Pretty sure I've forgotten a lot of things but yeah, it's still fucking cool to be here tbh.20 points
-
OK so I had the engine sitting there in pretty much the spot I wanted it. I had taken loads of measurements and pondered many aspects in an attempt to really look into the future and pick up on any potential problems that could arise. It was pretty obvious that the bodyshell was going to need a fair bit of chopping about in the tunnel region (ooooooohhhhh I can see the originality preachers trembling already..) and that the engine was too low in its nether regions. You can see it here. Its not stupidly low and I have seen worse but for a car that has to navigate our driveway with its rocky surface it needed to be better... It had a nice burly bottom but my intentions were to raise that and make a removable sump plate. Still with fins though to help keep the oil cool. Here's what the underside currently looks like... I pulled the engine out and sat it on the bench. The Imp then got its little Datsun heart bolted back in place and reassembled to working order (yay for no more leaks I thought..but it still leaks because British) I poured myself a whiskey. It might have been a few. I studied the crankcase and sump carefully... I then went over my plan of attack. My main issue was the oil pump. It was going to have to move further up in the block so I had to find a suitable place to mount it. I also had to work out how I would drive it. Originally it there was a larger spur gear running off the crank, driving another spur gear. Off the centre of the spur gear was a sprocket which ran a chain down to a sprocket on the oil pump shaft. The oil pump shaft ran not one but two oil pumps. The main pump in the sump area and a smaller scavenging pump in the clutch housing area which squirted oil up over all the gears. The shaft also ran through the main pump to the front of the engine (what is now going to be the back) and powered a water pump. A bit tricky to picture? Well here is a stunning bit of pencil art I did just now ... Plus a photo of the all those gubbins on view at the back. The driven spur gear is missing in this pic but you can see the splined hub it slides onto with the driver sprocket on inner end... Honda had made it all very neat but also all very complicated for what I required. I just need one main oil pump to feed the bearings. So I move the oil pump up. Fine. I'll mill a flat area and make new mounting blocks to suit. But because I have removed the spur gear arrangement (no room for that lot with a custom flywheel planned for the crank) I'll have to chain drive the pump with sprockets (at the correct speed too). OK. That should be easy enough. But no spur gear means the pump will be running backwards. Oh bother. So how about I mount the pump on the opposite side of the sump casing and so turn it around. The shaft is long enough because it goes right through the pump each way. I took the pump apart and checked if this was feasible. It was. Yes! Now why not just run an external oil pump and dry sump it etc ? Well mainly because I am not Mr Money and hence prefer (have) to do it as cheaply as I can with what's at hand (more of a challenge this way and more satisfying too) Also- if I use the Honda pump and keep the required oil routing sensible then it sort of remains factory. I am also going to do my very best at keeping the external look of the engine as clean as possible with a nice uncluttered engine bay. That's just the style I like. Plus we were only just into lockdown here and I wanted to crack on, get as much fabrication as I could done while on my ' holiday in the shed '... So now I had a plan to follow and could start chopping things up. I chopped it just below the engine mounts I intend to use. There is a myriad of long bolts running through the cases clamping them together. The main larger ones are all up around the crank area. Then another two lines of smaller ones below (which hold the cases together under the against the loading of the transmission shafts- now gone) Plenty enough bolts so the lowest are now gone. This lot will be stronger when I have finished with my idea. I kept chopping it up. Took a bit more off because it was fun. Lovely alloy too I might add. Very clean castings. Ended up with an engine a fair bit shorter in height... I got the cuts pretty square and straight. Made easy by the fact that Honda had nicely added reference lines for the purpose- just like on a pack of butter... Now I had to mill it flat. It would take decent sized knee mill to clean up something this size and awkward. Or how about a little drill mill, a steel bench and a big plate of steel I had rescued from a Japanese dentist chair I stripped for bits... I had to position it just right and use the swing on the radial drill mill to run over the cut edges. It looked a bit suspect but it worked fine with light cuts. After the bottom of the sump case was flat and square I then milled a flat area on the face below the crank flange. This would leave a good flat surface, perpendicular to the crank centre line, to mount a plate with an idler sprocket on it for the oil pump drive I had sort of nutted out in my head (but really had not gone any further then just that and it could well have been just nutty) That area ended up like this... The pump would fit somewhere in here like this... Then I threw the lot on the fire... and swept up all the alloy chips that seem to have gone everywhere! When it was nice and warm I welded some new flanges on. Very carefully and slowly I tacked them, taking my time to make sure they stayed true and square and keeping it warm in between tacks. They did. Yay I welded as much as I could reach with my torch along the tricky edge leaving just a few spots that I'll seal at build time with JB weld. It turned out so good that I barely needed to give it a tickle with a larger file, more just a clean up and sits square on my bench. Straight edge reveals my bench is indeed flat too- I had to check! I was so happy at this point because it was one bit of the conversion I feared could go wrong - however I think the warming up and that fact the block is a complex very rigid shape helped keep it all straight. I sat back with a cup of tea and admired my nice burly flanges that I will bolt a plate to...13 points
-
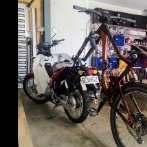
Progress, all the last bits and pieces came together tonight. Ended up hard-tailing the ass end cos tyre guard clearance might be an issue with my fat ass.. Tasks left, need to true the front wheel cos it is a little wobbly and the tyre is so wide that it rubs a little bit on the inside of the fork legs. But not so bad it will be a major issue. Also need to get a little bit of tube to finish hardtailing the rear end. Got it on the ground and running, put it in gear and rode it under its own power about 2 metres but to go riding required outside moving cars and it was dark so no go tonight - still going to call the small move under its own power a victory. Oh yeah - the idle note is the perfect pop pop pop pop pop with a healthy rasp when I give it a twist.12 points
-
Long story short @- i5oogt - @azzar and myself were in takaka to buy yet another mk2 Mirage . The car was in the impound yard at Orange mechanical also in takaka. We went for a wander around their yard and in their , to be crushed pile was this cream nissan 720 no wheels. No bumper or plates. On closer inspection it had two rego labels........ It failed a wof on rust in the floor. The owner not wanting to spend the money getting it fixed. Decided it was the end of the road for the little ute. Strange since hed owned it for nearly 20years and had never taken it out of the valley. After contacting the owner a deal was struck and plates and wheels were obtained from his possession. The wheels having 4 near new maxxis commercial tyres. First hurdle was the takaka hill..... in a sd23 powered ute Not to be scoffed at the little ute chugged up the hill in 4th gear most of the way. (Had to find 3rd for the real tight corners). The sd23 was quickly proving itself as a force to be reckond with A quick stop in motueka to wash the moss and lichen off using @Slacker_Sam. Car care kit. And off we set to Christchurch. Register but no wof. Made it to murchison for a meal at the pub before dark. But after that was all nigh running. The sd23 was more than happy cruising along at 100km and seemed to be a set and forget in 5th gear up hill and down dale 5th gear did it all. 6hrs on the road from takaka to chc and over half at night. And over 450km in a ute destined for the crusher. Better yet it didnt use a drop of oil or coolant on the drive back11 points
-
Bit of details It's a 1995 nissan 720. Has a sd23 2.3 non turbo diesel. Making a cuntsmashing 73hp. 5 speed floor change. 206,000kms allegedly genuine. I almost believe to be true as it drives so nice and it's not completely worn out. Also the old Barry I got it off didnt seem like the sort of person who would wind it. Real povo spec. Dash doesn't even have a trip meter. Gave it a decent clean after work today. Got all the takaka dirt and spiderwebs out of the dash. Blacked the tires and washed the body. Almost looks presentable What are my plans for it? I dont know. Has a few rust holes in the floor that I need to deal with. But likely slam and differnt wheel. And maybe zutututututu Who knows8 points
-
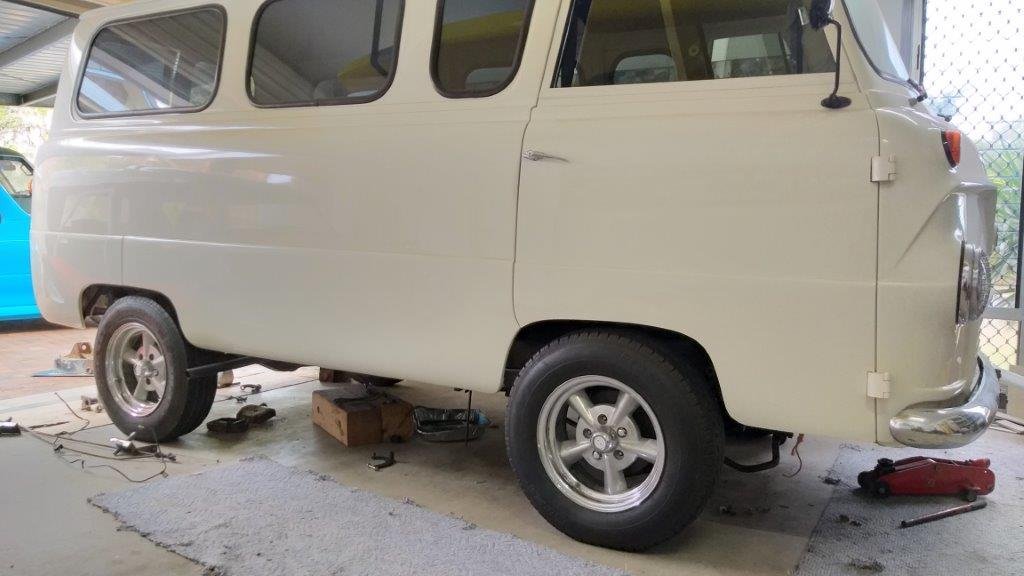
Next step is to glue each of the thinner plates to the thicker plates. The bolt that passes through the U bracket will hold one end to the chassis leg and I'll drill another hole at the other end of the thicker plate for the second chassis mounting bolt. Looks like I'm going to be drilling some holes tomorrow. Oh and now that the front suspension is all tacked up I dropped the van onto its wheels for a look see - bit of a teaser shot below. The back is slightly higher which gives the Thames a nice raked look - typical of what the modified vans back in the 70's looked like. The front arches are filled up nicely. The HiAce rear axle is narrower than the Starwagon front end which will allow me to run wider wheels at the back. I'm pretty happy with the result.8 points
-
Runner system printed. Crazy how fast this printer goes. Only took 7hrs8 points
-
7 points
-
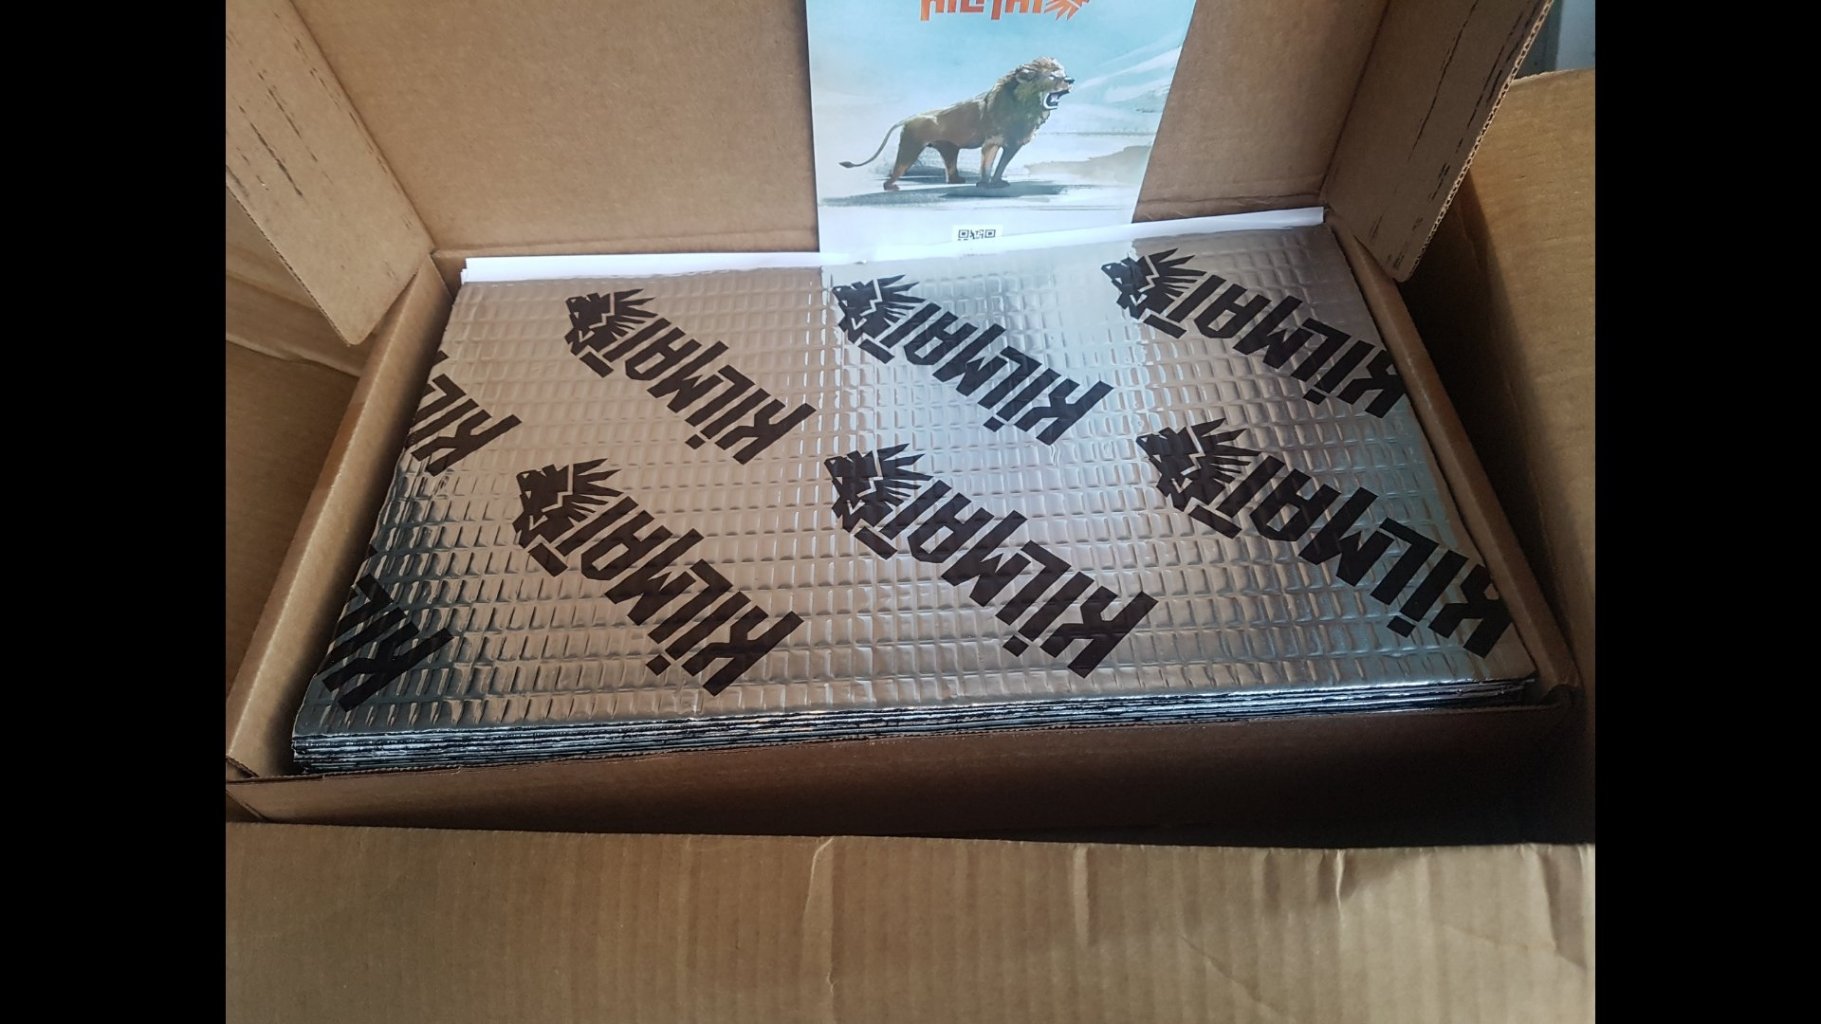
yeah i used it in my kombi what @JoKer linked if from my build thread but all my images have dropped off the cloud. i originally saw it used from @oftensideways and then got some for my kombi. would trade again.6 points
-
It would be 22 hours of sleep, an hour of eating etc , half hour of cleaning and half hour of general 'fuck you' cat stuff...6 points
-
M8, I don't know any of you, I'm just out for a ride.6 points
-
Gearbox time. As mentioned in the last post I was pretty set on using a Subaru Transaxle. I could also have entertained an Audi unit or perhaps a Renault 21 item but they are harder to find and more expensive. Subarus are everywhere! So way before I had found a engine to buy I started looking. Now initially it was a Legacy front wheel drive trans that I was looking for but when I realised that early Leones also came out as front wheel drive with a smaller lighter 5 speed Transaxle they got added to the list. Not as easy to find though! Then one day a leone boot lid popped up local to me on my Trade me favourite search. I contacted the seller on the off chance that he might have a box. He did. In fact he had two. A early 1600 item and a later 1600/1800 unit. So we went for a drive and paid him a visit and what a thoroughly top fella he turned out to be. A mechanic by trade, ran a local garage before retiring and now works from home on locals cars. However its what he does in his past time that was really interesting. He has been building small hover craft for years and became well known for building one with wings that could fly.... https://www.youtube.com/watch?v=xhGN4gFYPLk But I digress. He had some boxes because he had been using subaru engines for his hovercraft. So I bought a couple of boxes (one which came with a 1600cc subaru engine attached) , two starter motors, an 1800 ring gear. All for bugger all because I think he just liked the nuttiness of my plans for the Imp. So here is a box. The earlier 1600 in the small casing. about 4 kgs lighter with a smaller diff and takes a smaller flywheel.. This next one is the one I'll use... Its a later Leone 1600 T71G which shares the same slightly bigger stronger casing as the 1800cc. Ratios are 1st 3.636 2nd 2.157 3rd 1.266 4th .885 5th .725, Rev 3.583 - these coupled with a 3.9 final drive ratio should suit the Imp pretty well on its 13" 175/60 wheels. Here it is again next to the stock Imp box. Its not too far off but the gear selector is higher and points up at an angle. The box is also taller at the rear so the tunnel will need to be raised and the removable cross member chopped about. At 35kg its about 9kg heavier than the Imp box. I can take that. An interesting and very handy fact is that the box selector rod works in exactly the same way as the imp item, even the movements in are pretty much the same in travel both in rotation and back and forth ! So that is nice. Now as discussed previously there is the fact that the Honda will be rotating this boxes input shaft in a direction opposite to the norm. It has been done successfully with Audo boxes and I know of a fella who has run a box backwards behind a 440ci engine with no dramas. I'd also had the discussion about the new thrust loadings with a fella in the UK who's into Goldwings. Came to the conclusion that being a Japanese box from a much heavier car, optionally with a Turbo. So its not been to much of a worry however more people have questioned it and now I was really curious. I decided to strip the spare 1600 box down (same internal structure but a smaller diff and different casing) I got as far has the last bearing and syncro hub to remove and my puller broke. I'll use friends press but even so I am now happy that it will be fine. 5th gear is the one with the least thrust area when run opposite direction but that wont be so loaded up. Here's some pics I took... A beautifully done bit of technical description in this one showing original (green) and new rotation thrust bearing positions. (My Samsung note phone needs a new stylus!) On a side note- it has to be the easiest gearbox I have ever taken apart (ignoring the fact I need a press to remove some bits from the shaft) so I will take the box I'll be using apart and rejoin the casings for mocking up purposes later on. Much easier on my back. So lets put the box away in the corner and get back to the fun bit. The flat six. I was really looking forward to seeing how much lighter it was gonna get as I removed all the un-needed bits from inside. With the alternator, starter, inlet manifold and coolant pipes removed I weighed the engine. It came up at 105kg. Diet time! I removed the rear clutch cover that has the slave cylinder built in. Removed the clutch unit. Took off the drive gear housing. Ohhhhhh. Clean and shiny. Neato. I was told that this engine was possibly a low mileage unit but I was not to know until I began to strip it. I was fearing sludge or bad staining inside the castings but its super clean. Here's a shot with a few of the spur gears missing and showing the various bits... Clutch unit added back but without the main rear casing on so you can see what it looks like.. This was fun. I like learning new engine layouts. Here's the front of the engine which will now be facing backwards. Cambelt covers removed and you can spot not one but two VR sensors for the Honda CGI ignition setup. It has a 12 tooth trigger wheel which with a tooth removed could be used as a crank angle sensor for the EFI I have planned. More likely I'll make a 36-1 wheel the same size for better resolution. There is also plenty of room for a cam angle sensor to be fitted- Ideally I would rather run this engine on full sequential injection if ("if !?.... hahahaha" they laugh..." he said if " ) I use ITBS. Cam covers off. One of them had some welding. I suspect that the reason is that the bike was crashed and one cover got hit. Fella who originally had this engine for his project had bought a complete bike. You can see the nifty hydraulic valve lash adjusters.. I removed the cams then the heads. Carefully stashed all the bits in order on a shelf I had cleared. All the bolts and bits were being placed in organiser trays I had bought for the project. I knew full well that this project could well drag on for a long time given life etc. With the help of Hannah we split the crank case and revealed all the gubbins inside... Lots of heavy stuff in there to weigh in! Yay. All this stuff I didn't need went in this box... and that box went on the scales... 35kg Sweeeeeeeeet! That's more like it. A little bit more to lose when I start hacking the crankcase apart. Now I'm aware that I'll be adding some weight back with a flywheel and clutch but hey- this is a good place to start. Its now a 70 kg flat six. Next thing to do was sit it next to the box and line some things up... You can see where I'll have to fabricate a bellhousing to fill that 40mm gap. The Imp was at this point in time 'up on blocks' as I had the Datsun engine out to replace the rear main seal and ring gear. How handy then because I wanted to see how the engine sat in place! I bolted the heads back on loosely and slung the lot up under the imp. I lined the transaxles outputs with the driveshafts so positioning the engine front to back. I took a few photos, took some measurements and noted some stuff. I then removed the transaxle from the equation so I could lower the car down so the engine would sit roughy where it will end up. I stood back and admired it. Wow! It just looked so bloody spot on in there! Man - if my juices weren't fizzing with excitement previously as I stripped the engine down they certainly were now. I'll let these last photos I snapped end this update6 points
-
attach camera livestream to kevin secret life of kevin, featuring car builds in the background5 points
-
4 points
-
4 points
-
3 points
-
3 points
-
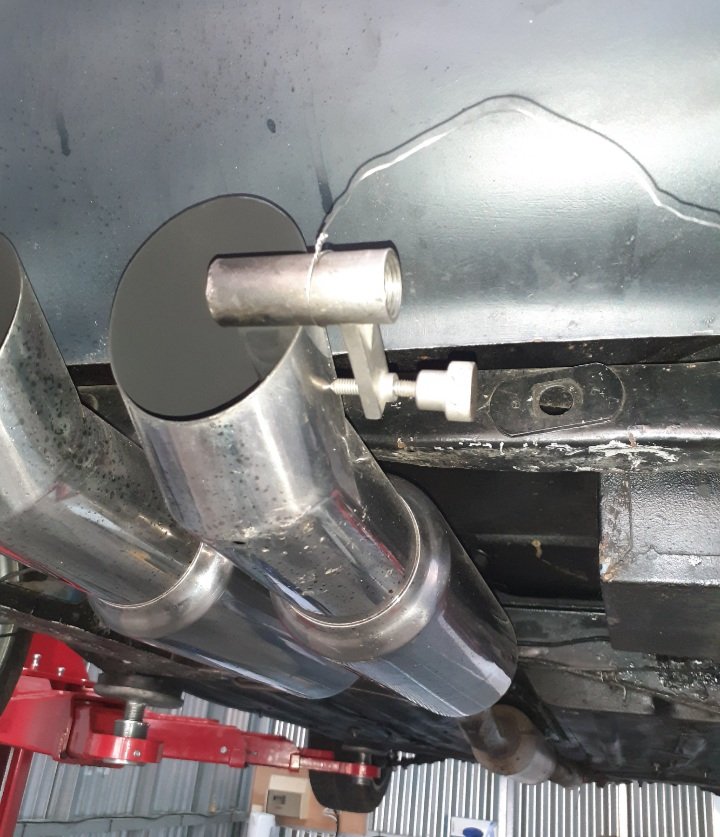
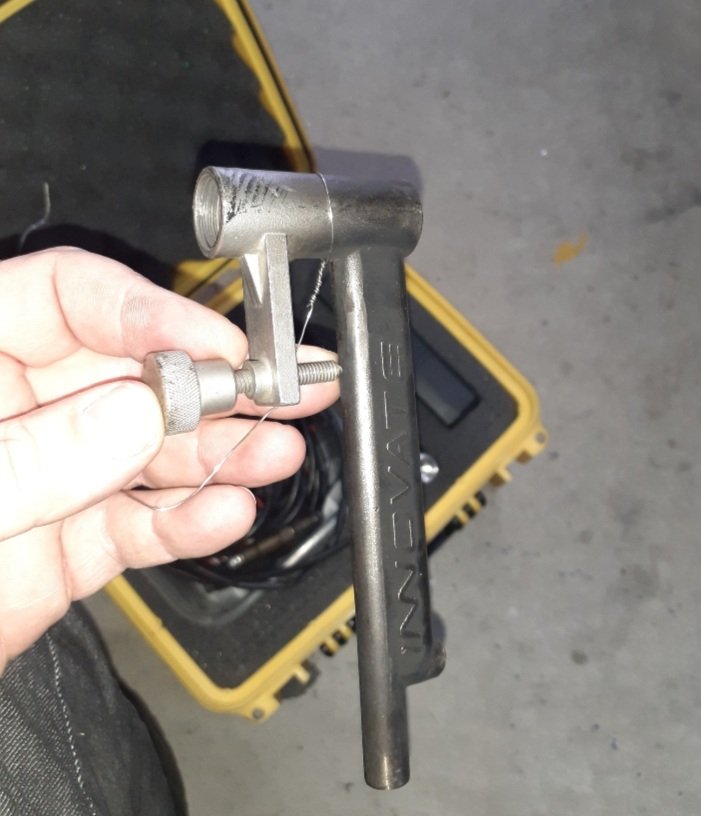
The wire is in case it falls out, the sensors do not enjoy bouncing along the road and are expensive to replace, this is something I learned the hard way3 points
-
I was thinking it would also make a great book, @yoeddynz has a way with words and skills that is a pretty rare combination.3 points
-
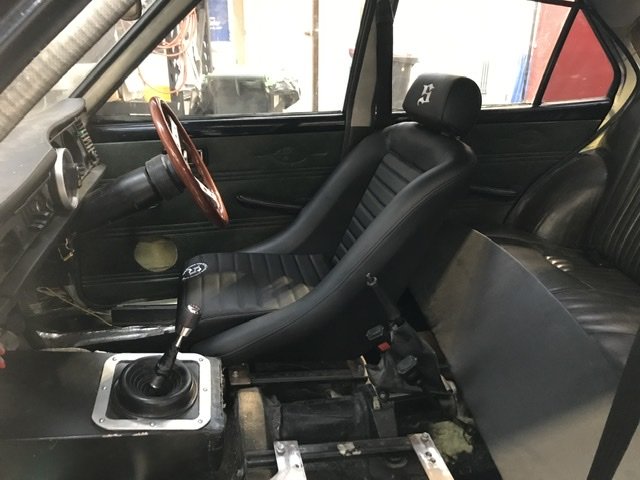
One of my new seats turned up. Stoked as. The other ones on back order until September but that’s fine. I need to recess the inner seat brackets into the floor 50mm as since day one I’ve been too tall for it and it’s not comfortable for me to sit in it. I’m going to do the gearbox and driveshaft tunnel and the seat rails all at the same time.3 points
-
Did the first mould. Patterns worked well but the sand started going of way quicker than I hoped. Less than 10mins. So theres some voidy areas inside that would be no good for casting. Can still use it for the first mould assembly though. Did a runner system. On the printer now.3 points
-
For aligning the two halves I have one pattern with holes going right through, other half only about 15mm deep. Clamp the two parts together, align, and run a reamer through into the 2nd part. Then install dowels on the lower half.3 points
-
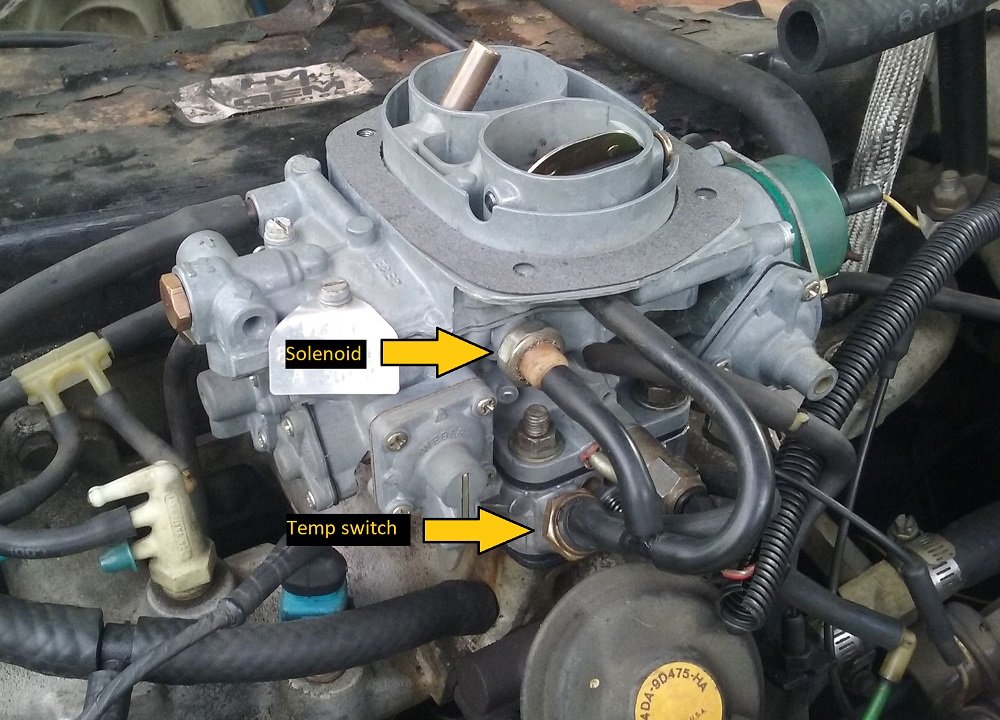
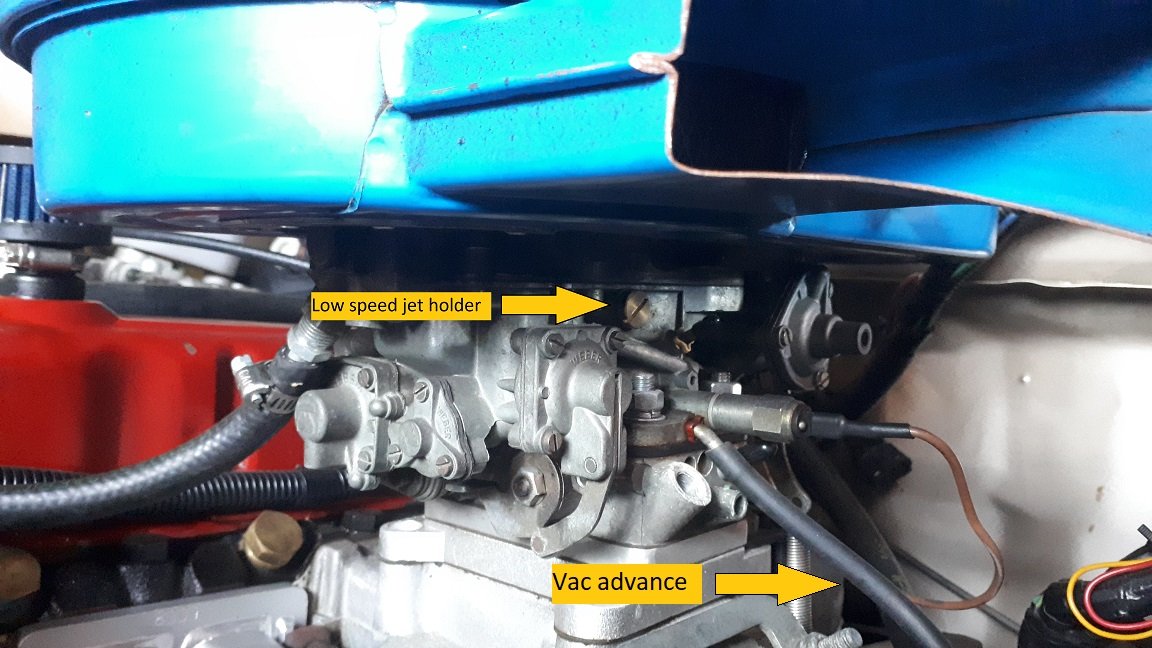
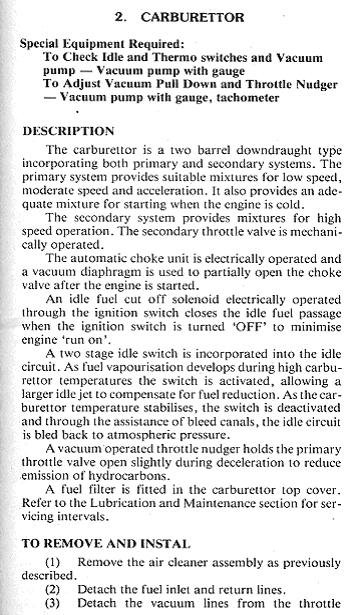
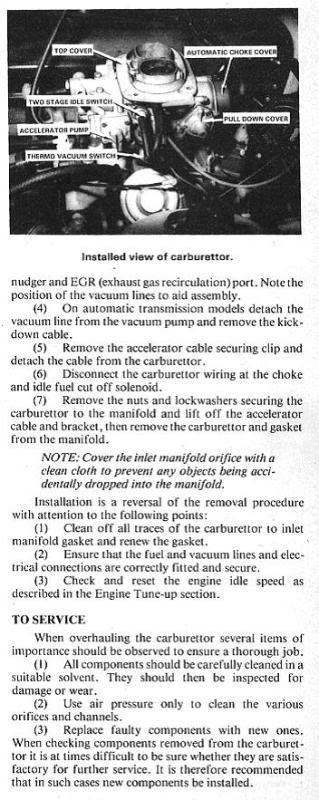
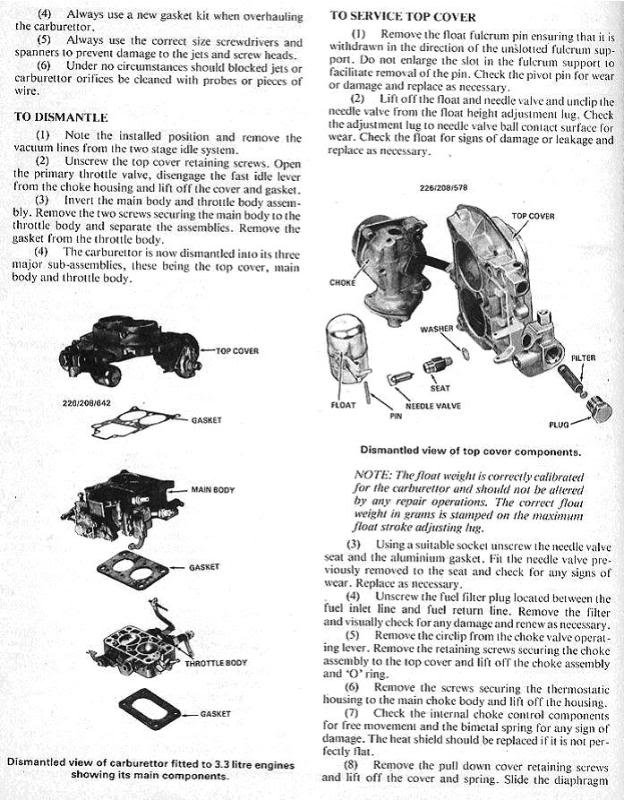
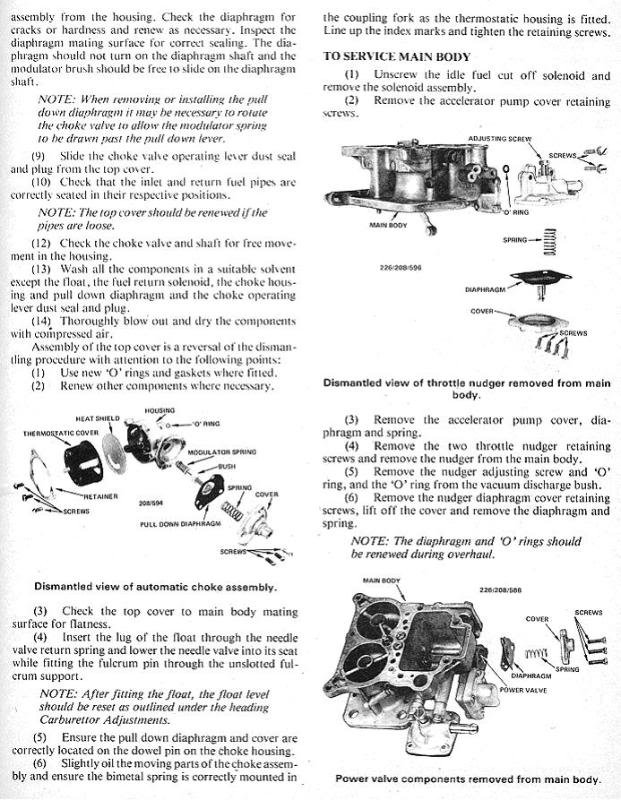
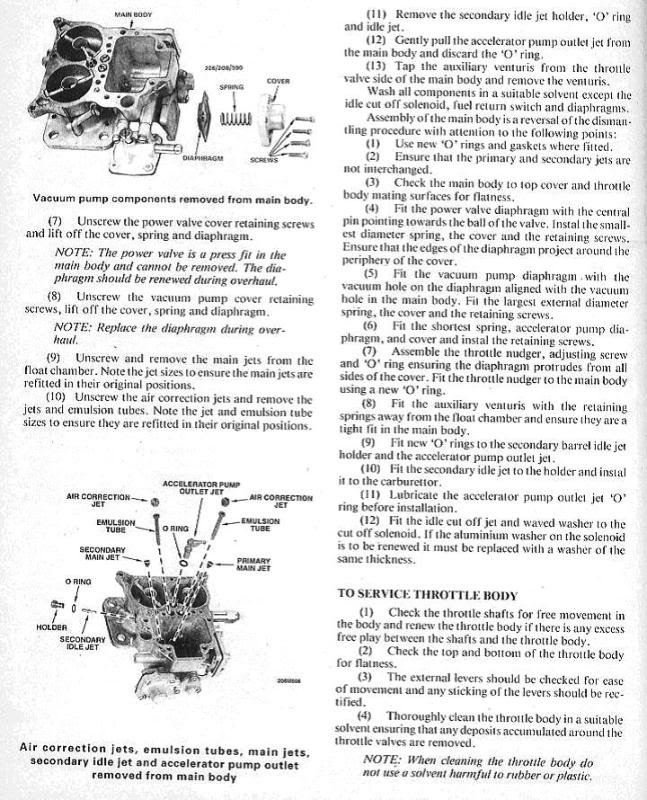
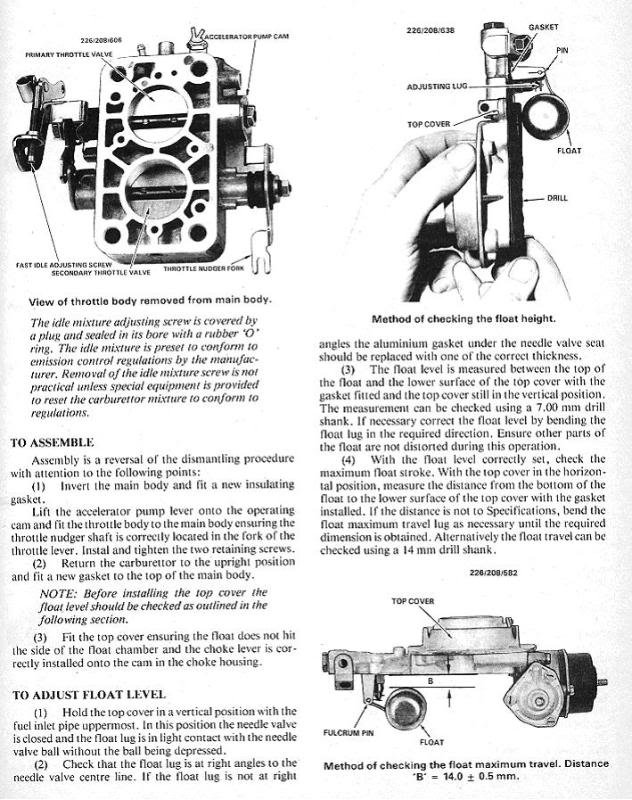
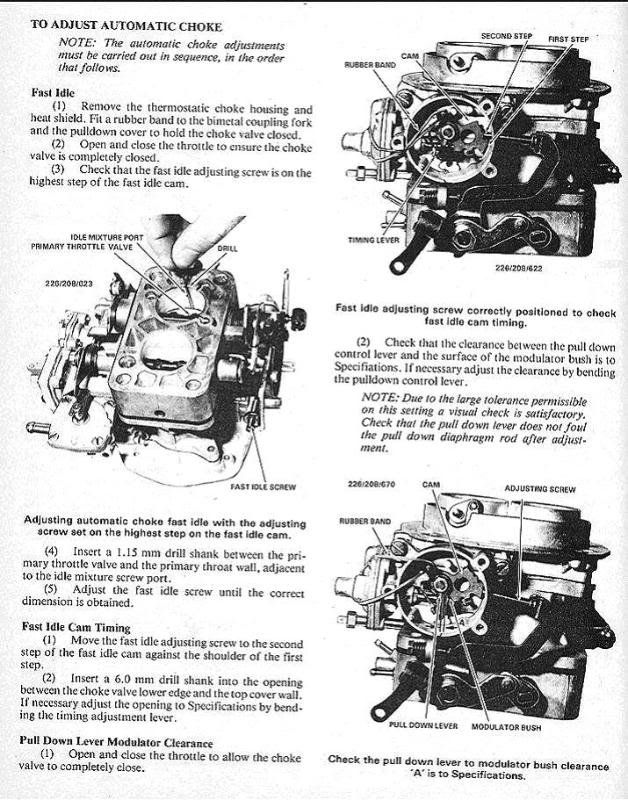
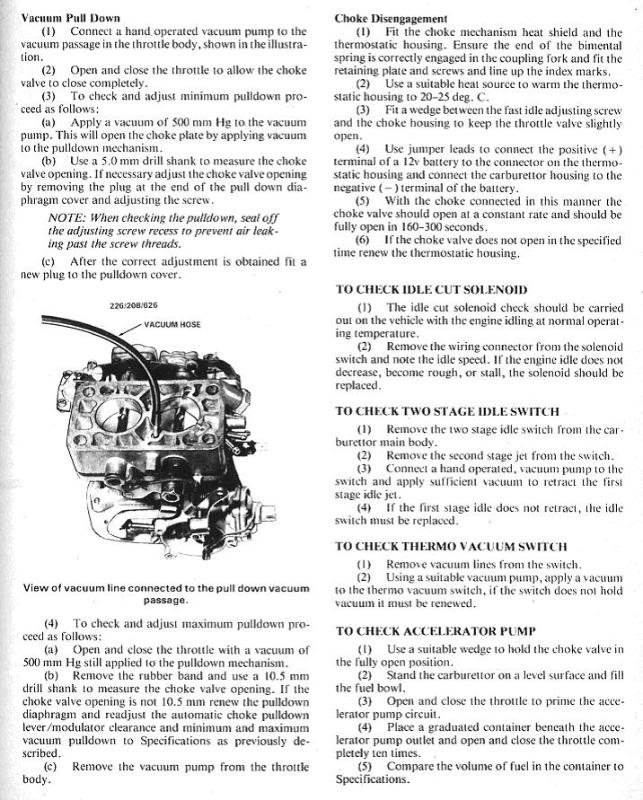
Here is some info on the Weber 34 ADM carb as found on the XE/XF Falcon. This was a popular carb for retrofitting onto other vehicles but they are have a couple of little quirks that can cause problems if you are not aware of them. Firstly there is the 2 stage low speed jet solenoid. This was an emissions control system that allowed the engine to run with one jet size when cold (think it was a 70) and when the engine warmed up it switched to a smaller jet to reduce emissions (possibly a 55). Problem is they get old and the little diaphragm inside fails allowing fuel to flow from the primary low speed circuit through the failed solenoid and into the line that supplies vacuum to the system. this causes the engine to run super rich. But don't worry there is a solution. The products that solve the problem can be found here. https://www.weberperformance.com.au/product_info.php?cPath=6_268&products_id=631 https://www.weberperformance.com.au/product_info.php?cPath=6_268&products_id=1345 This is a larger jet holder that deletes the solenoid and the appropriate jets to go with it. You will need to mess around with the jets to find the right one for your engine. I think I ended up with a 60 or 65 in mine. Here is a picture of the system on the standard carb and another of the carb on my car with the system deleted. You will note that all the vacuum ports except the vacuum advance are simply capped off because all the emissions control stuff is gone (EGR etc).2 points
-
Fitted an Aliexpress handle. Makes the bike really easy to lift and turn around, great mod for the money. Bought a Vapor for very cheap, and picked this up today from PB tech. Was hopeful that its Desulphating function might increase battery capacity but it only did that mode for about 30 seconds, so it's unlikely. Need a new battery but at least this should mean i can reliably start the thing this coming weekend.2 points
-
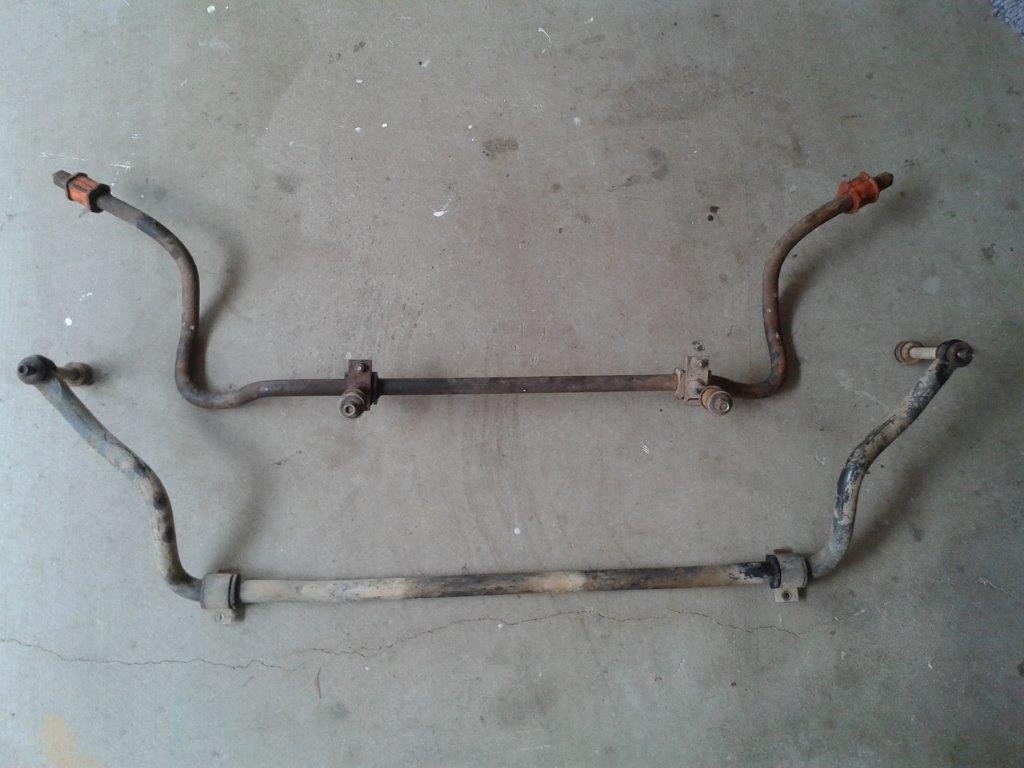
Woke up to a cloudy and chilly day today. Didn't feel like drilling holes in my strut brace mounting plates as it's pretty tedious especially when I only have a hand held battery drill to do the job with. Perfect weather for sipping cups of tea and lying on my old piece of house carpet under the Thames though, so I thought I'd crack into the stabiliser bar mounts. During my "proof of concept" phase I narrowed my choice down to the newer Mitsi Express bar which is the bottom one shown in the picture below. The upper one is the Starwagon equivalent but it is designed to work around the older drag link steering that the Starwagon had, so was clashing with the forward facing Express steering rack that I am going to be using.2 points
-
I am slightly tempted to put my semi-hot-shit bucket racing TF125 into it... But my concern is that it is probably a hand grenade, which is not going to be ideal in the Te Uruweras. The one I have a spare kick start mech from is just a pile of bits in a box.2 points
-
2 points
-
This may be useful to you to as well it shows the correct jets for the carb in stock form and this is exactly what I run in my car. These carbs are getting old and often people have messed around with them, changed jets for a particular application or drilled the jets. You can get tools for measuring the jets to ensure the orifice is the correct size, they are cheap and a very good investment.2 points
-
2 points
-
You can hire FOAMERS as your personal security J5. Payment in PGs and bum squeezes.2 points
-
I bet you could make a great youtube channel with these builds2 points
-
Cool, I found this thread that lathed up some wheels to ride on the extrusion https://www.festoolownersgroup.com/other-tools-accessories/router-sled-with-80-20/ but the above and below (?) multi roller style you linked to looks way better. In my head I was imagining almost identical to what you have built (box steel table with extrusion), but mounting at the extrusion ends rather than just shimmed to rest on top also seems like it'd be an improvement since then the table surface doesn't need to be mirror flat - at least for surfacing rigid slabs... Most of the slabs I've cut are 3.2m x 0.6-0.9m wide, so it is a fair run lengthways... Do you think the extrusion would sag at that length (carrying 2kw router)?2 points
-
Dam ill have to come for a ride out to your place. Good roads out there. Hopefully weather is better next month. Only a few more months and day light savings will be here and everyone will be rather enthusiastic again and chomping at the bit.2 points
-
2 points
-
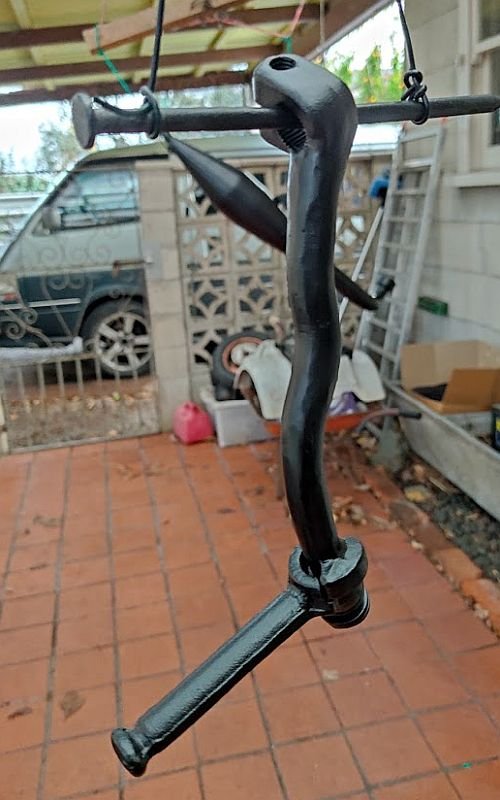
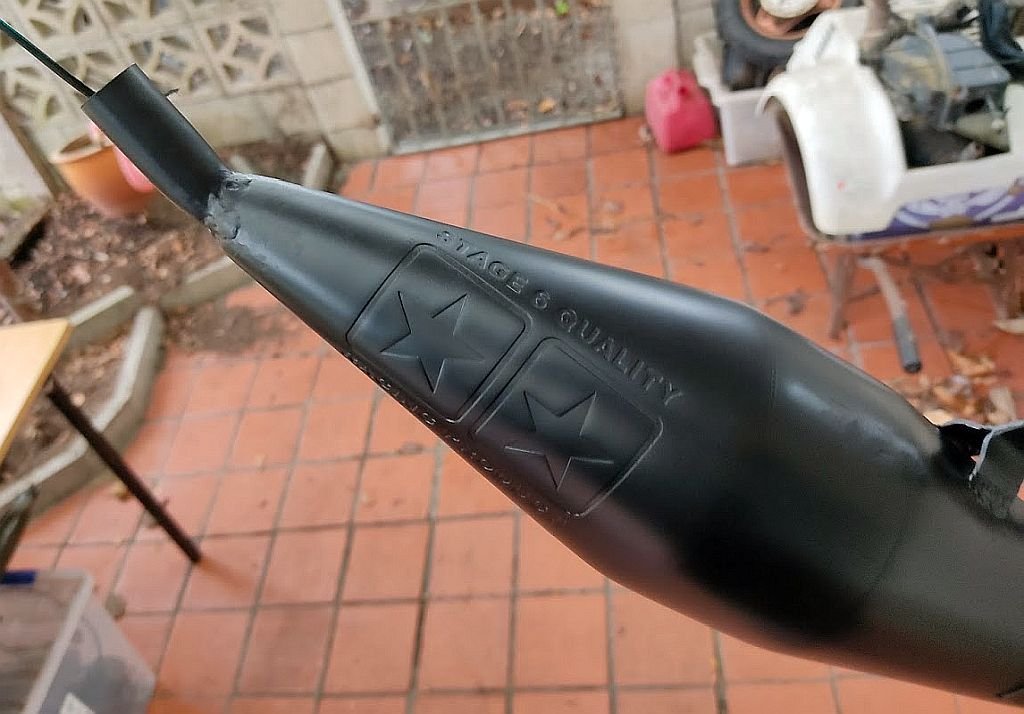
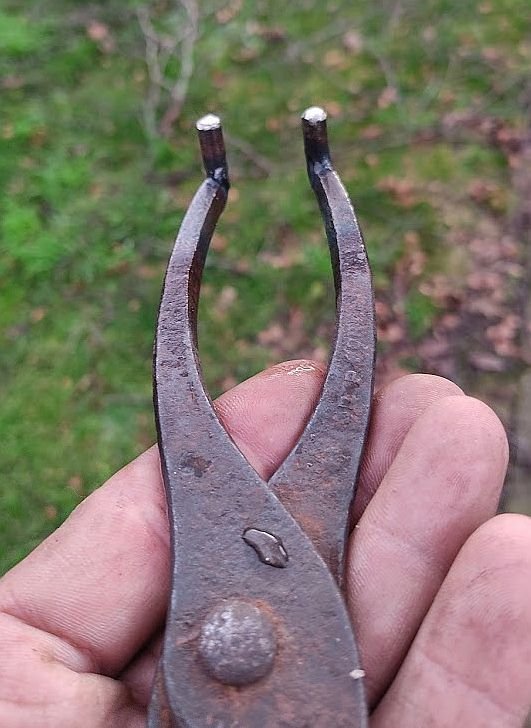
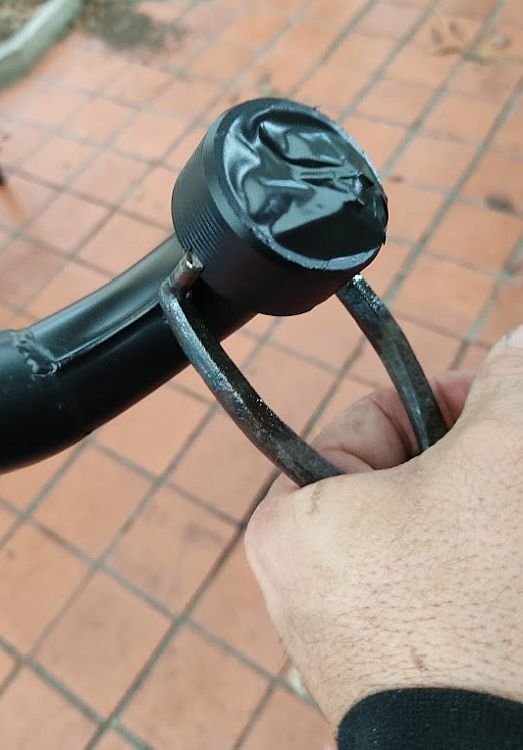
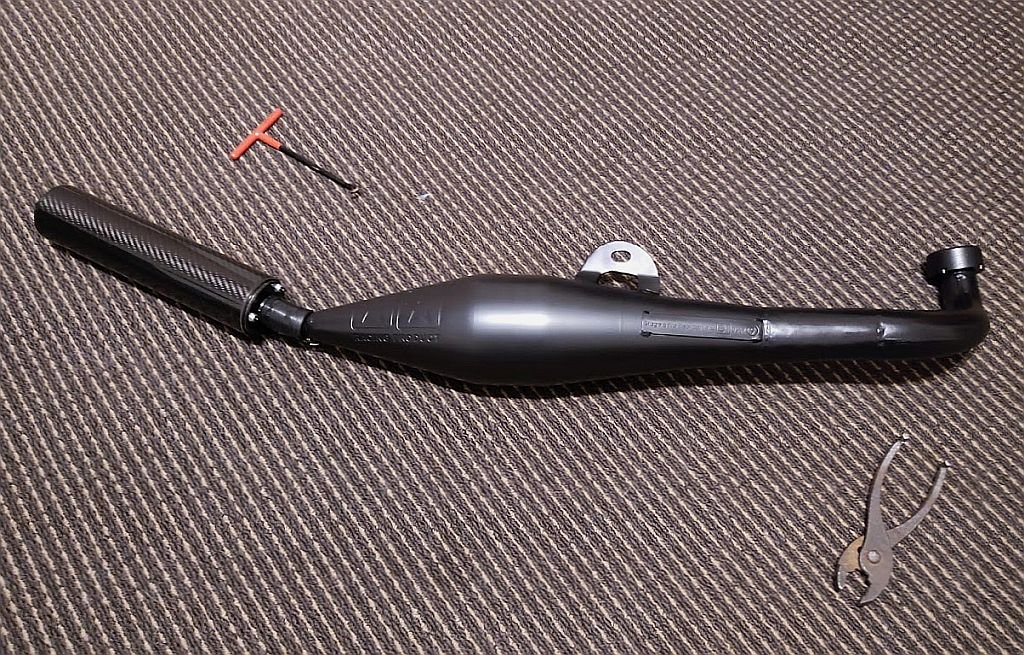
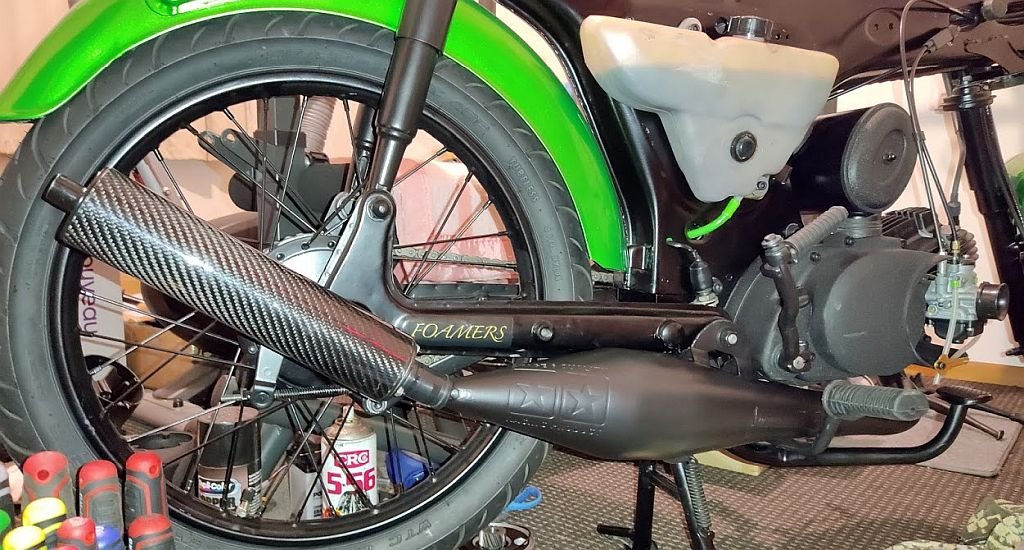
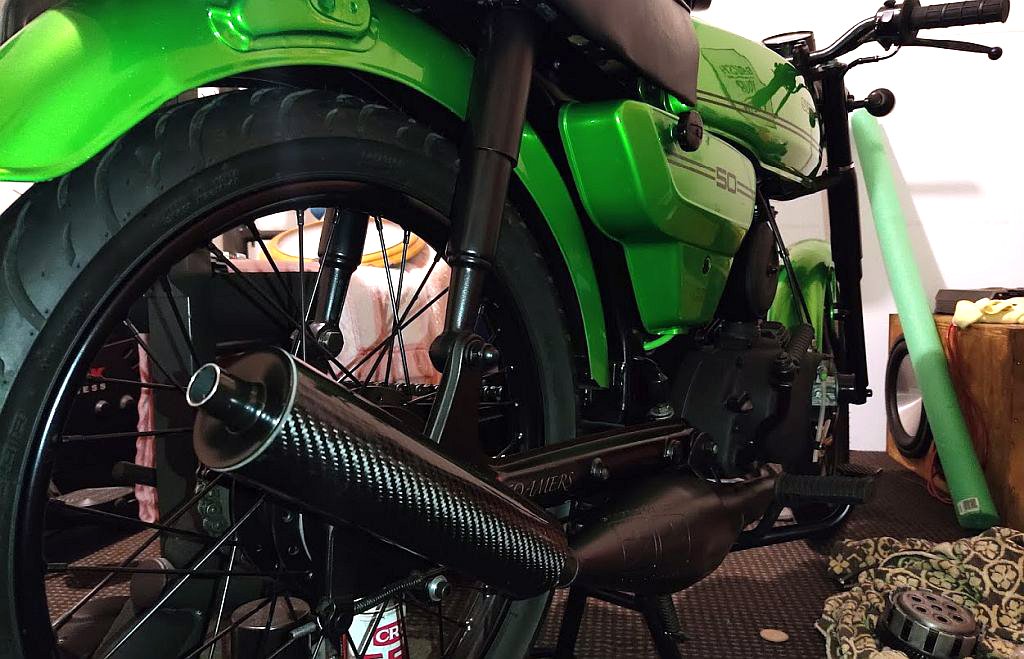
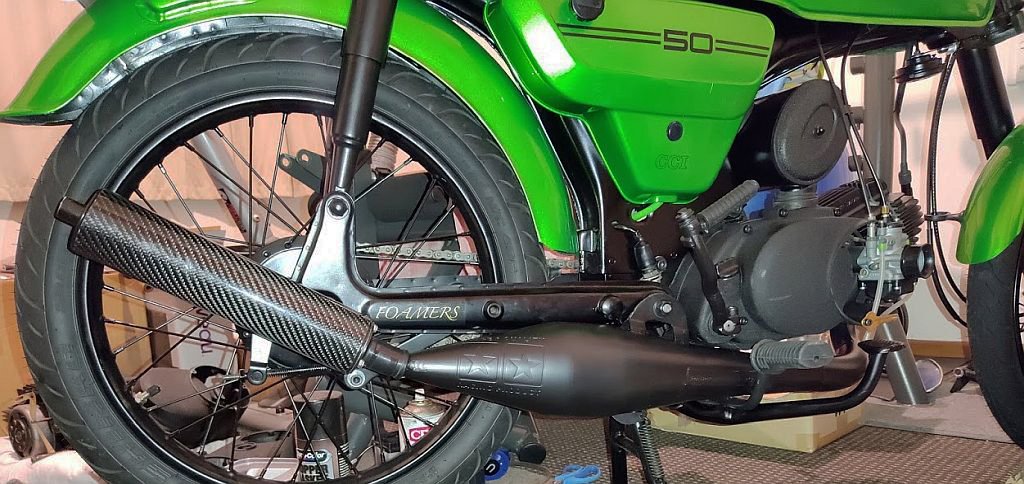
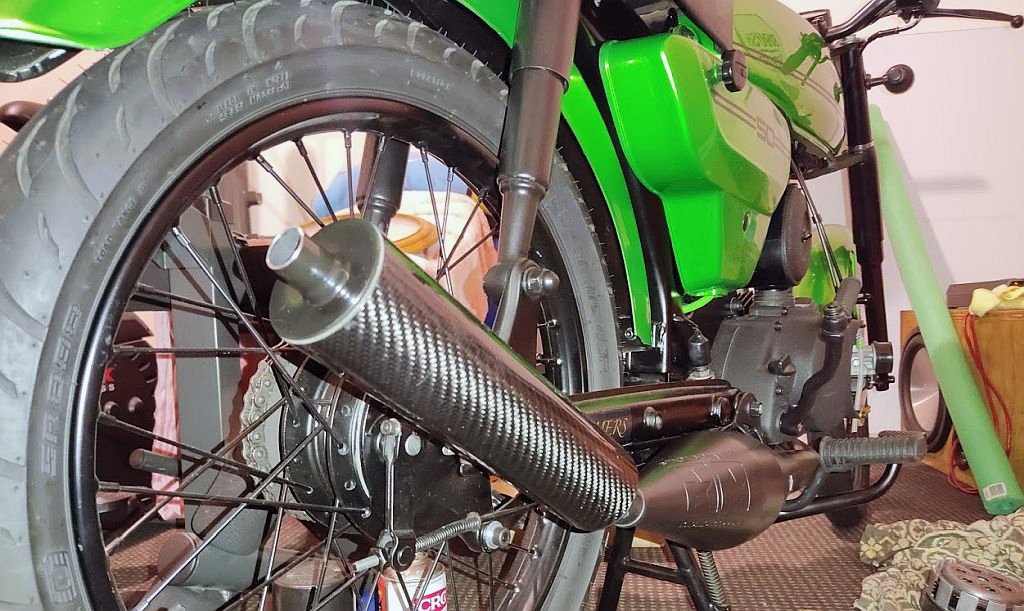
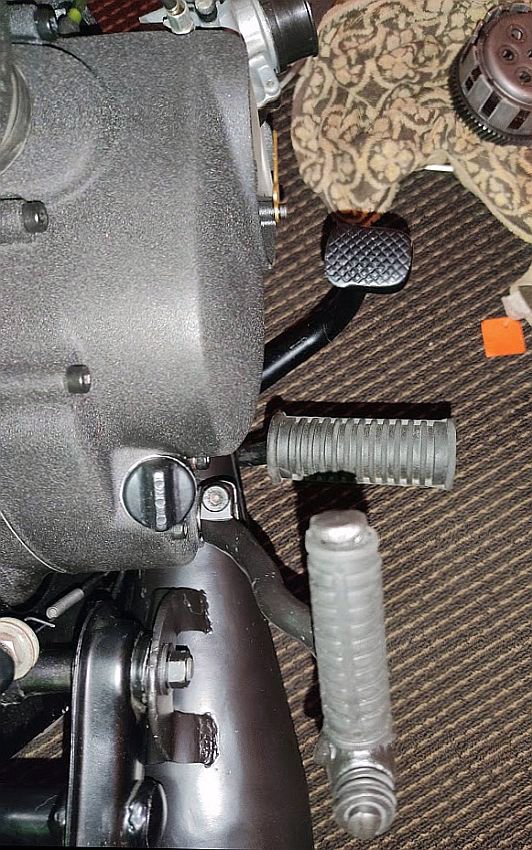
Cleaned up the kickstart by filling in a few spots with TIG filler then ground it back, swapped out the glass beads in my blast cabinet for some medium grit garnet, that worked real well to key the pipe and kicker. Quick coat of CRC Hot Black high temp paint (highly recommend it over VHT!) And old pair of pliers + a chopped up drill bit were repurposed into a pin wrench Assembled the pipe, pics are a bit crap, we changed to LED bulbs and my camera isn't loving it. Ended up grabbing a 32x38x2 copper flat washer to use as the gasket, really needed 32x40 so I used a smear of maniseal to glue it into position on the flange, fingers crossed that it didn't move and that a non-crush washer actually seals! Threw the tank etc back on, finally looks like a bike again! Also noticed the other night that the kickstarter is meant to be on an angle, gave it a go and while still not great, I can actually get my foot on the peg now lol Long rides aren't going to be too comfy hahaha Just need to fill the gearbox with oil, drain the petrol tank and mix up a couple liters of 2t for it to run on while the oil lines prime and it should be all go to fire up! Will print off a degree wheel and chuck a timing light on to make sure I got it at least close lol2 points
-
All in good time.. I have nice bit of 'project thread update buffering' built up. I going to eek the updates out so I don't use up my buffer much. This way I can fool everyone into thinking I'm out there working super hard on the project in the cold shed - when instead I'm actually cosied up inside next to the fireplace, with a fluffy cat, a cup of tea and reading other peoples build threads.2 points
-
2 points
-
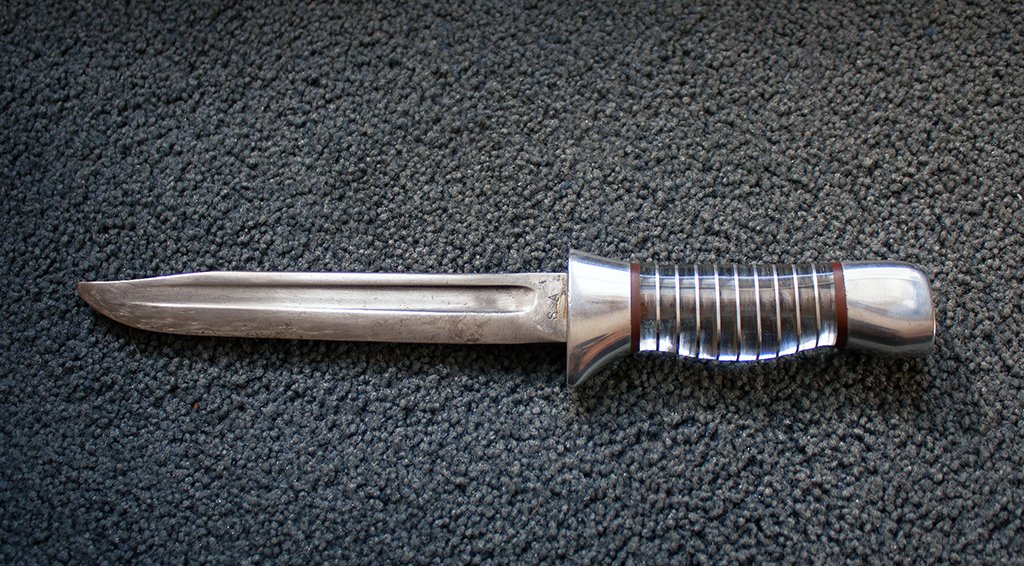
I may have posted this before, but tidying up over the weekend I found some of the stuff my Graddad gave me before he died. He served in the Pacific in WW2, fighting alongside the US Marines, then I think he was wounded and came home, after seeing some pretty bad things (he swore never to own a Japanese car). This knife is one of the objects he made/modified, a US marine fighting knife with the handle he made out of perspex from shot down Japanese planes... I always thought it was a Ka-Bar (Knife attachment, Browning automatic rifle) but the markings show it was the earlier PAL model RH-36, made under licence to equip US troops... Some Barrying tells me "The PAL was one of the most used 'commercial' knives during WW2. Before the intoduction of the Ka-bar there was a serious lack of fighting/utility knives and many marines purchased commercial hunting knives to overcome this shortage until the PAL-36 was supplied. Originally the knife was designed by Remington and when their cutlery deartment was bought by PAL they kept the original dsignation RH-36 (Remington Hunting, Blade type 3, Blade length 6")..." Some of his campaign stuff, should get this framed really...2 points
-
That last pic of yours is pure sex Alex, I hope you are going to run a pair of 40 IDA triple throat Webers from an early 911 on the Goldwing motor.2 points
-
2 points
-
1 point
-
1 point
-
1 point
-
1 point
-
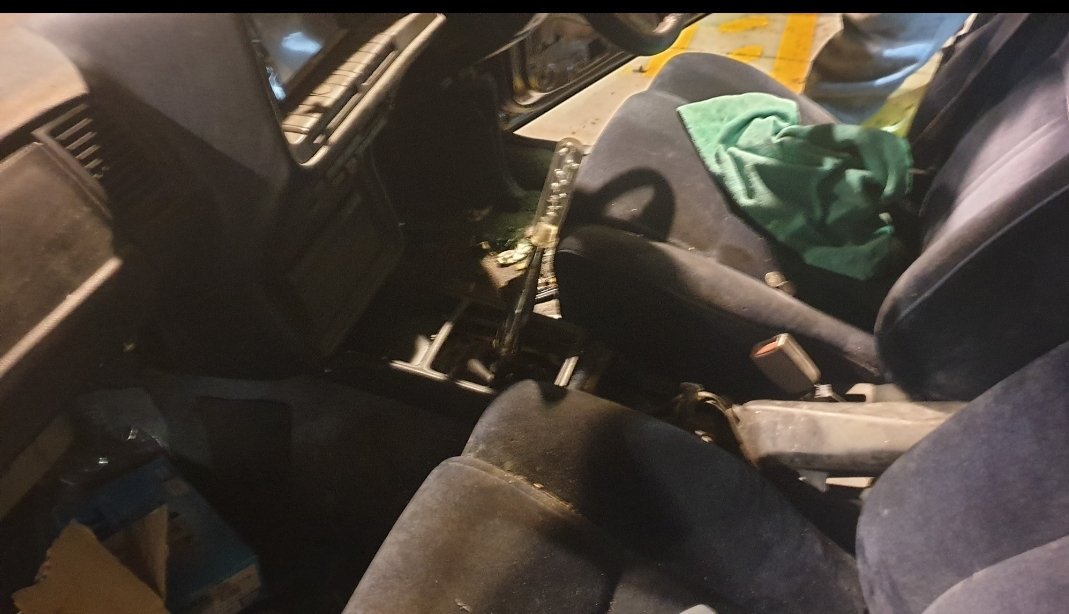
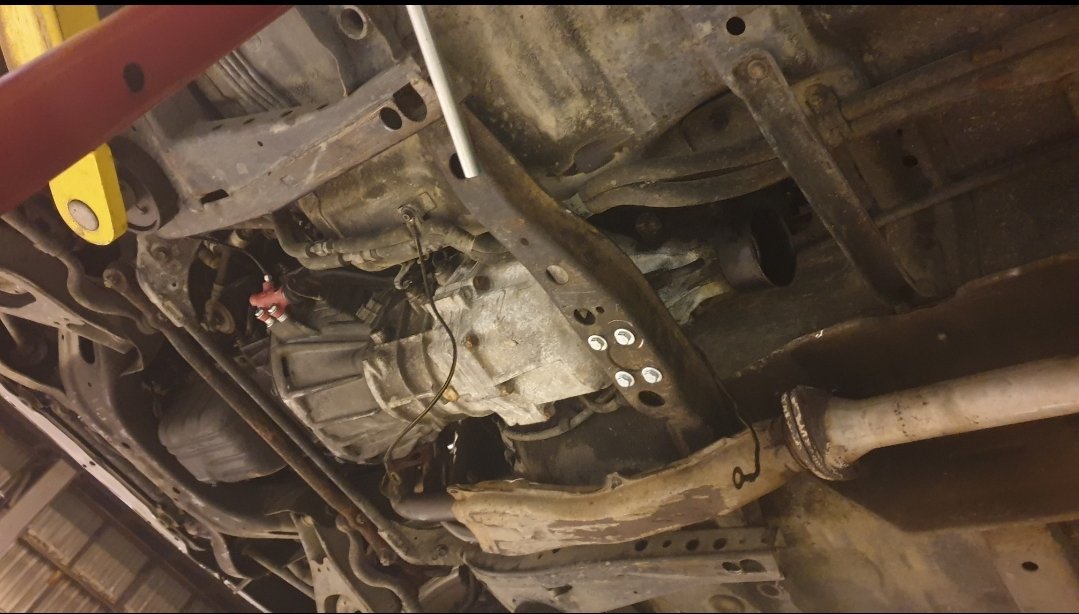
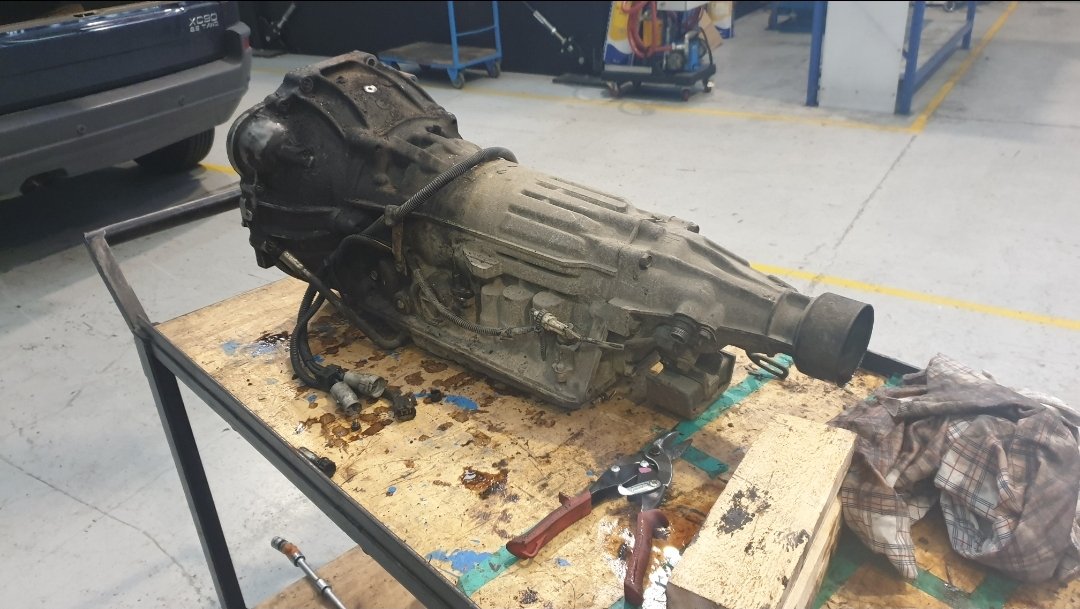
10 straight hours with my father and myself saw the auto ditched and the manual fully bolted into its new permanent home. The swap was very easy mostly due to me thinking about all the parts I may need and pre buying. This even included a new rear man seal because I figured now would be a good chance, looked like it was weeping a little too! The win of the day way the auto trans cross member being very usable for the manual, all that was required was mount holes drilled 30mm further up the chassis. Win! Other wins include the shifter poking through dead center of the centre console hole, and all the bolts being fairly straight forward to reach once the gearbox was unbolted and allowed to drop down at the rear. Good times ahead, with a driveshaft to be sussed and the rest of the clutch parts fitted, handbrake also needs a fitting and probably some electrical wrangling of the AT ecu.1 point
-
1 point
-
I also commissioned a new clutch cable for it. Upon fitting it, I hunted through another box of hoarded shit and found a clutch arm cover as that was missing off this bike. Once I got it all together, it became apparent why... The clutch arm clamping bolt was fouling on the cover. I did a lot of head scratching, shifted the arm a spline, which made it hit on the other side... I was about to give up and come to the same conclusion as the previous builder when I had a bit of a revelation. I turned the arm up the other way, put it together, adjusted the cable, lick of paint on the cover and bobs your dads ex brother in law.1 point
-
Man this things got a history. I’ve spoken to the owner that originally fitted it with a 12A in 2004 that sent me some photos of some actual photos. Then I found a couple of market place listings with photos from 6 years ago complete and then 4 years ago as a rolling body. Then a friend of mine who is close with the couple I bought it off sent me some “photo shoot” pics they did when they had it painted. I’m not sure whether to feel honored or humiliated haha1 point
-
A few pics of the new exhaust, which I forgot to post yesterday. Collectors feed into 2 1/2" diameter pipes, which feed into the first muffler. Then it's a single 3" all the way back, with a resonator just behind the rear axle. All 304 stainless, and TIG welded by someone with much better skills than me! Probably a bit overkill for the 300 or so horses, but who doesn't like big diameter stainless? ! Discuss: https://oldschool.co.nz/index.php?/topic/45289-browndogs-1972-v8-transit/page/4/1 point
-
So the first task after the bathroom extension was to have a kitchen area along the back wall. Kitchens are expensive, even for the kitset things. So after a bit of Facebook market searching (never expected to find good stuff on there) I came across a yuck cabinet thing that can only be described as the wooden entrance piece to school camp where 1J5's were stored in the top, and school bags below, and maybe one of those weird clear grey/brown mugs on the top too that a relief teacher sipped from occasionally. Well this thing was also bloody heavy but only $50 so we hoisted it up into the van and to the shop, and I spent 3 days regretting my purchase. Had various ideas for it, tested different woods to see how food-grade polyurethane held up, then eventually stumbled upon a sale of ply at Bunnings and was sold. We sanded up the cupboards and drawers and took the top piece off. Spent another few days testing between paints and stains, with the matte black paint turning out chalky and holding fingerprints, so I settled for an outdoor satin black deck stain. Don't tell the Bunnings paint lady though or she has a meltdown. Ended up sacrificing the left had drawer and cupboard for a Bunnings showroom special oven and hob, and the shelf found it's final place but not by choice, because the chemicals in the floor coating has stuck the feet to that position. So it stays. And the legs are off a commercial cooker that were the cheap price of free. After that we went to work on the dirty/laundry area, but didn't want the machine visible because it's not cool and industrial, and wanted an area to clean car parts etc. Went with the cupboard theme of black with ply top and genuinely impressed with how it all came together, especially with Leonard. And other than those jobs, we had to get some of the bathroom done after months of procrastinating over different ideas. I got Ryan to leave some of the concrete bare, because I wanted to still have some of the tiltslab in the room, so I put what I thought was polyurethane on it, just turns out it was some wood varnish (definitely don't tell Bunnz lady) and it worked a treat, stopped the concrete dust and allows the water to run off. I waterproofed the shower over 2 days, the second day took 3hours straight of coating but old mate Missy and Ice Cube got me through. Then I found a tiler and it all went well until we were one tile short to finish. A few days later it was all tickety boo. Note to self though: if you've never had a dual shower head scenario going on before, do ensure the dump head is turned on first and not the shooty one. Stephen wanted me to have a photo of the shower on and a beer in the soap box, so turned it on full steam with old shooty head pointed at me and the camera. So the camera is thoroughly clean now. Next we are finishing off the final wall, and deciding an idea to make a bathroom vanity. Any ideas are hugely welcome - we got some galv feet off AliExpress which are lush so that's idea one.1 point
This leaderboard is set to Auckland/GMT+12:00




.thumb.jpeg.e0a4bff61111e0c8c7396950fcc94da1.jpeg)





.thumb.jpeg.910c6632f6e66e8cba89476e83b41634.jpeg)
