
Leaderboard


Popular Content
Showing content with the highest reputation on 07/01/20 in all areas
-
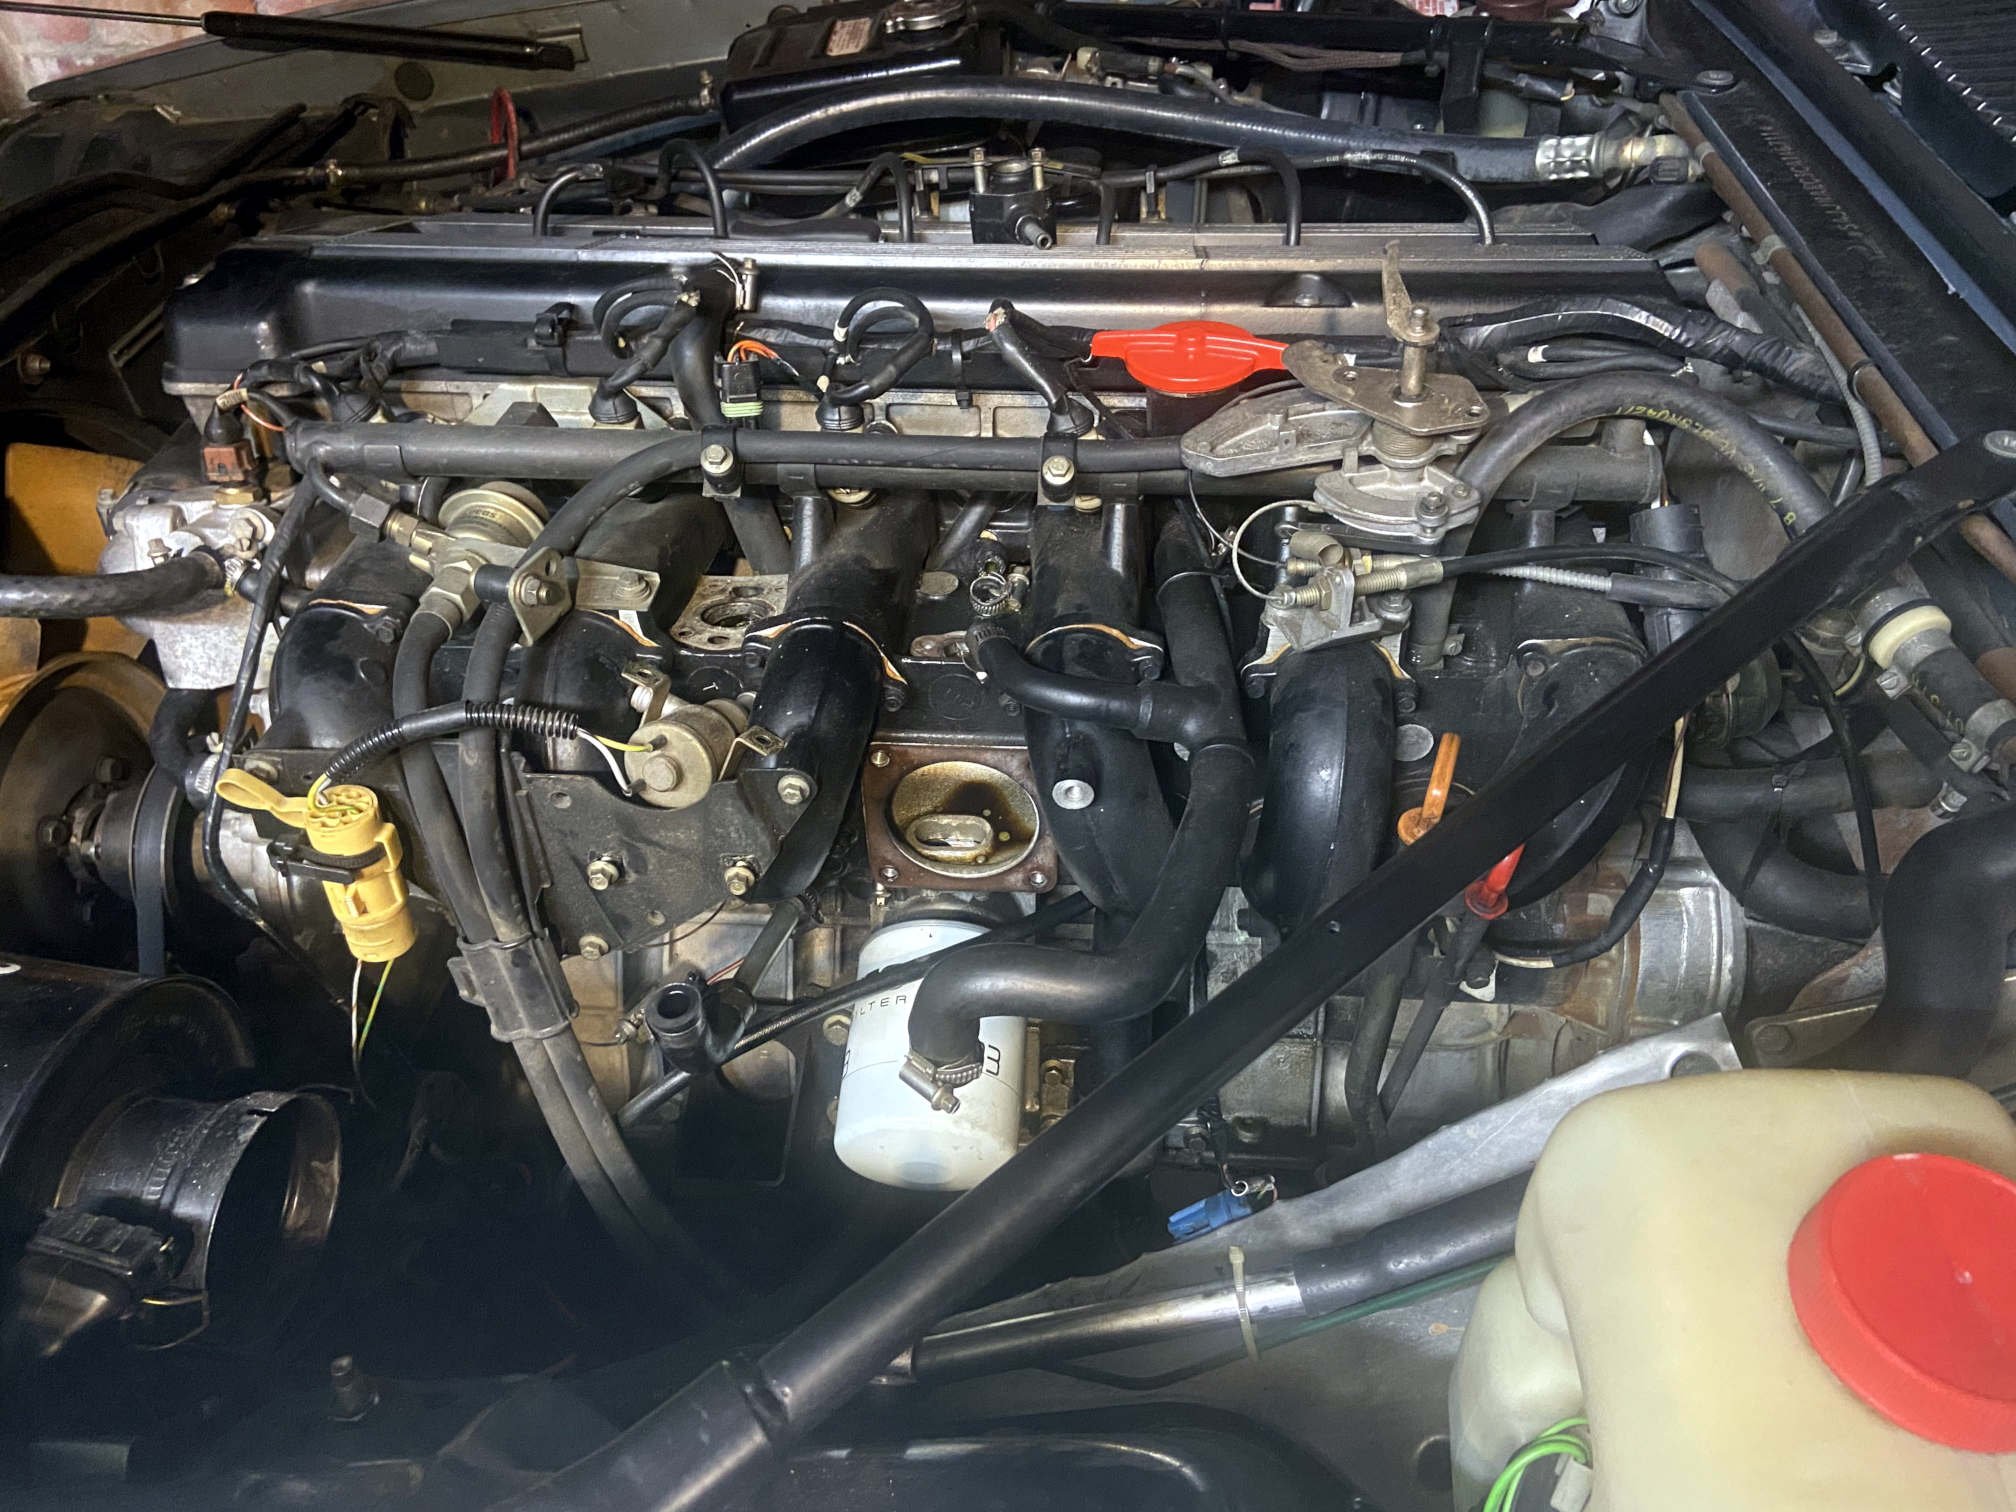
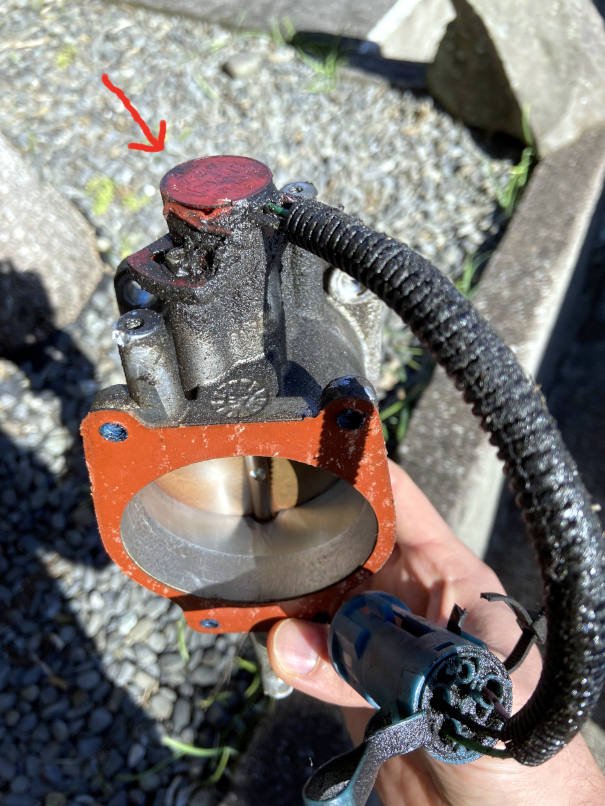
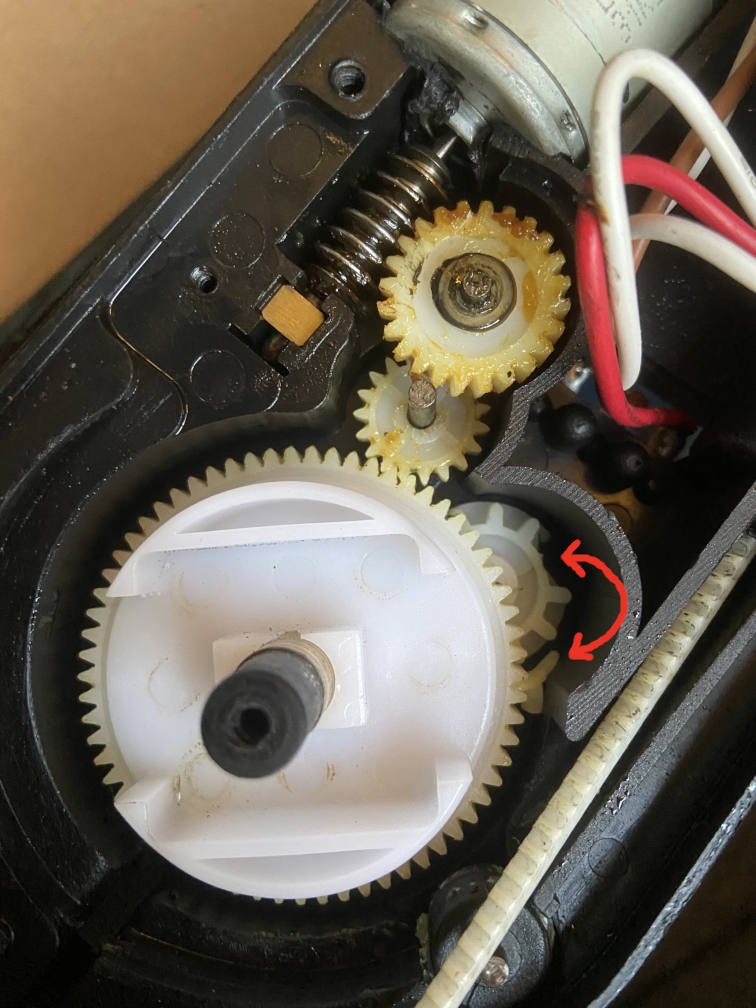
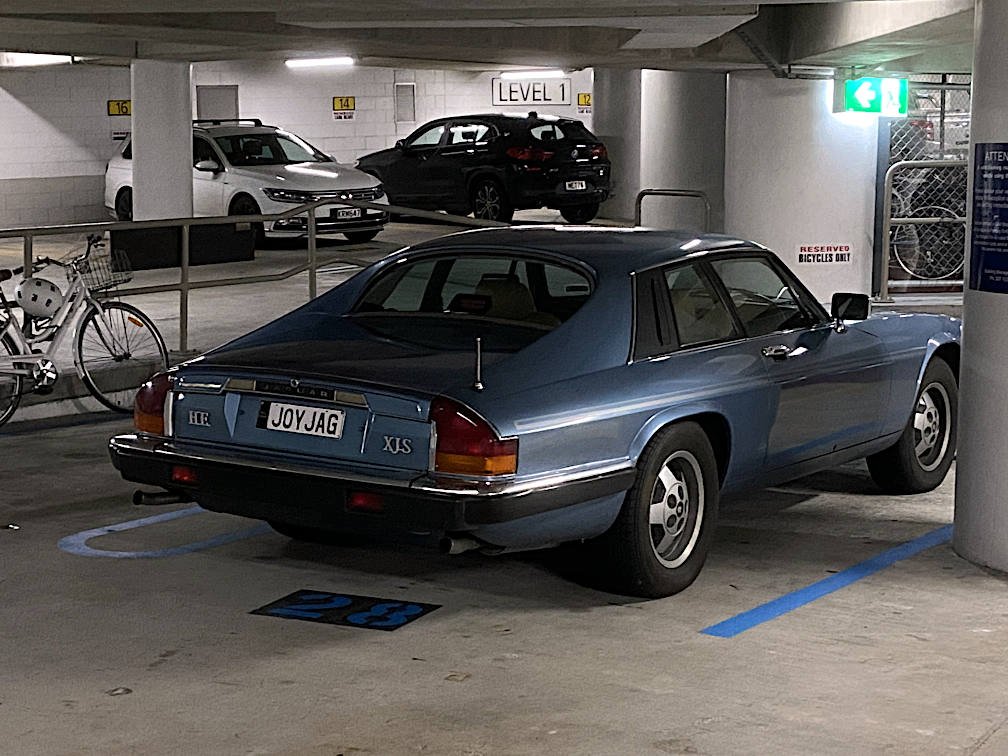
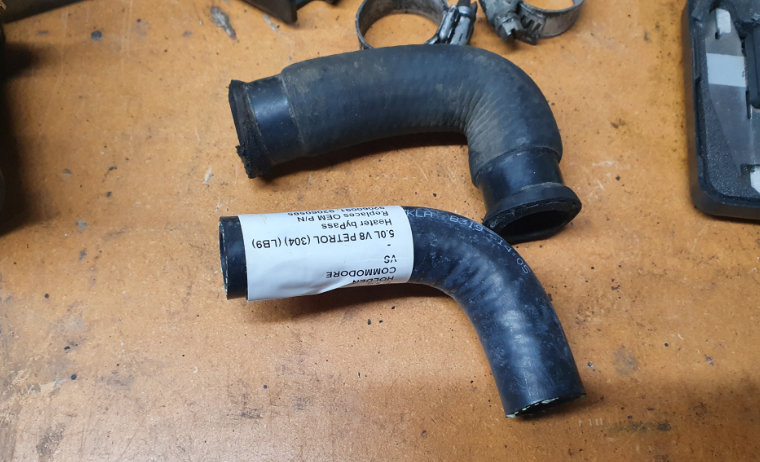
In my last post I thought I'd made the idle better, but it turned out I just made the car idle faster when warm and hardly run at all when cold. So I kept researching. Most results relate to the more-popular V12 engine, and you also have to contend with the fact that the AJ6 had at least two different fuel injection systems on it over the years, with and without various anti-pollution devices. Here I've removed more of the intake bits to check for gunk and vacuum leaks: Some crankcase oil must end up condensing on the throttle plate and running down into the throttle position sensor mounted underneath it (TPS arrowed, throttle assembly shown upside down): I cleaned the TPS and measured its resistance. It seemed correct and linear except slightly higher at idle than immediately off idle. I measured and adjusted the throttle plate gap, reassembled everything and followed the idle setting procedure. Basically you fake the coolant temperature reading to cause the idle stepper motor to close, then you unplug that and set the base idle speed with the air bypass adjustment screw. I couldn't quiiiite achieve a low-enough base idle even with the air bypass fully closed, which I guess isn't ideal. The idle speed seems good now (hot and cold), but the car still struggles into life if it hasn't been started in a day or two and its idle still stumbles a bit. I tried new plugs and I tried spraying flammable stuff all around the intake to check for more leaks, but no luck. The next step of the idle setting procedure is to check the exhaust CO at idle, but I'll obviously need to find a shop to do that. I think you adjust the CO with a calibration screw on the airflow meter. My iteration of the AJ6 engine has no exhaust gas oxygen sensor, therefore I guess it just bases the fuelling on the AFM reading, a wing and a prayer? (fun fact - this is better than the early AJ6 EFI which just used manifold vacuum with no possibility for calibration - the vacuum would deteriorate at quite low mileages because the engine's valves didn't seal very well, or something nightmarish along those lines...) Anyway, my aftermarket electric aerial destroyed itself already. A piece of a little cog broke off and jammed the big cog..... ....but the Jaguar inline fuse did not blow. Instead the motor got very hot and began to melt the surrounding plastic, until a wire connected to the motor burned through. Electric aerials are very important and I couldn't deal with mine being out of action, so I bought another of the same brand. When I opened it up to oil the crap out of it, I noticed it had been revised - the cog which broke in the old one is now made out of a black material in the new one. Hmmm. Also, I spotted this XJ-S (not mine) with a lame personalised plate: It looks like they've parked their planet-pillaging V12 in a bay reserved for bicycles only, which of course they could get away with....because they've got a Jaaaaaaag.
 11 points
 -
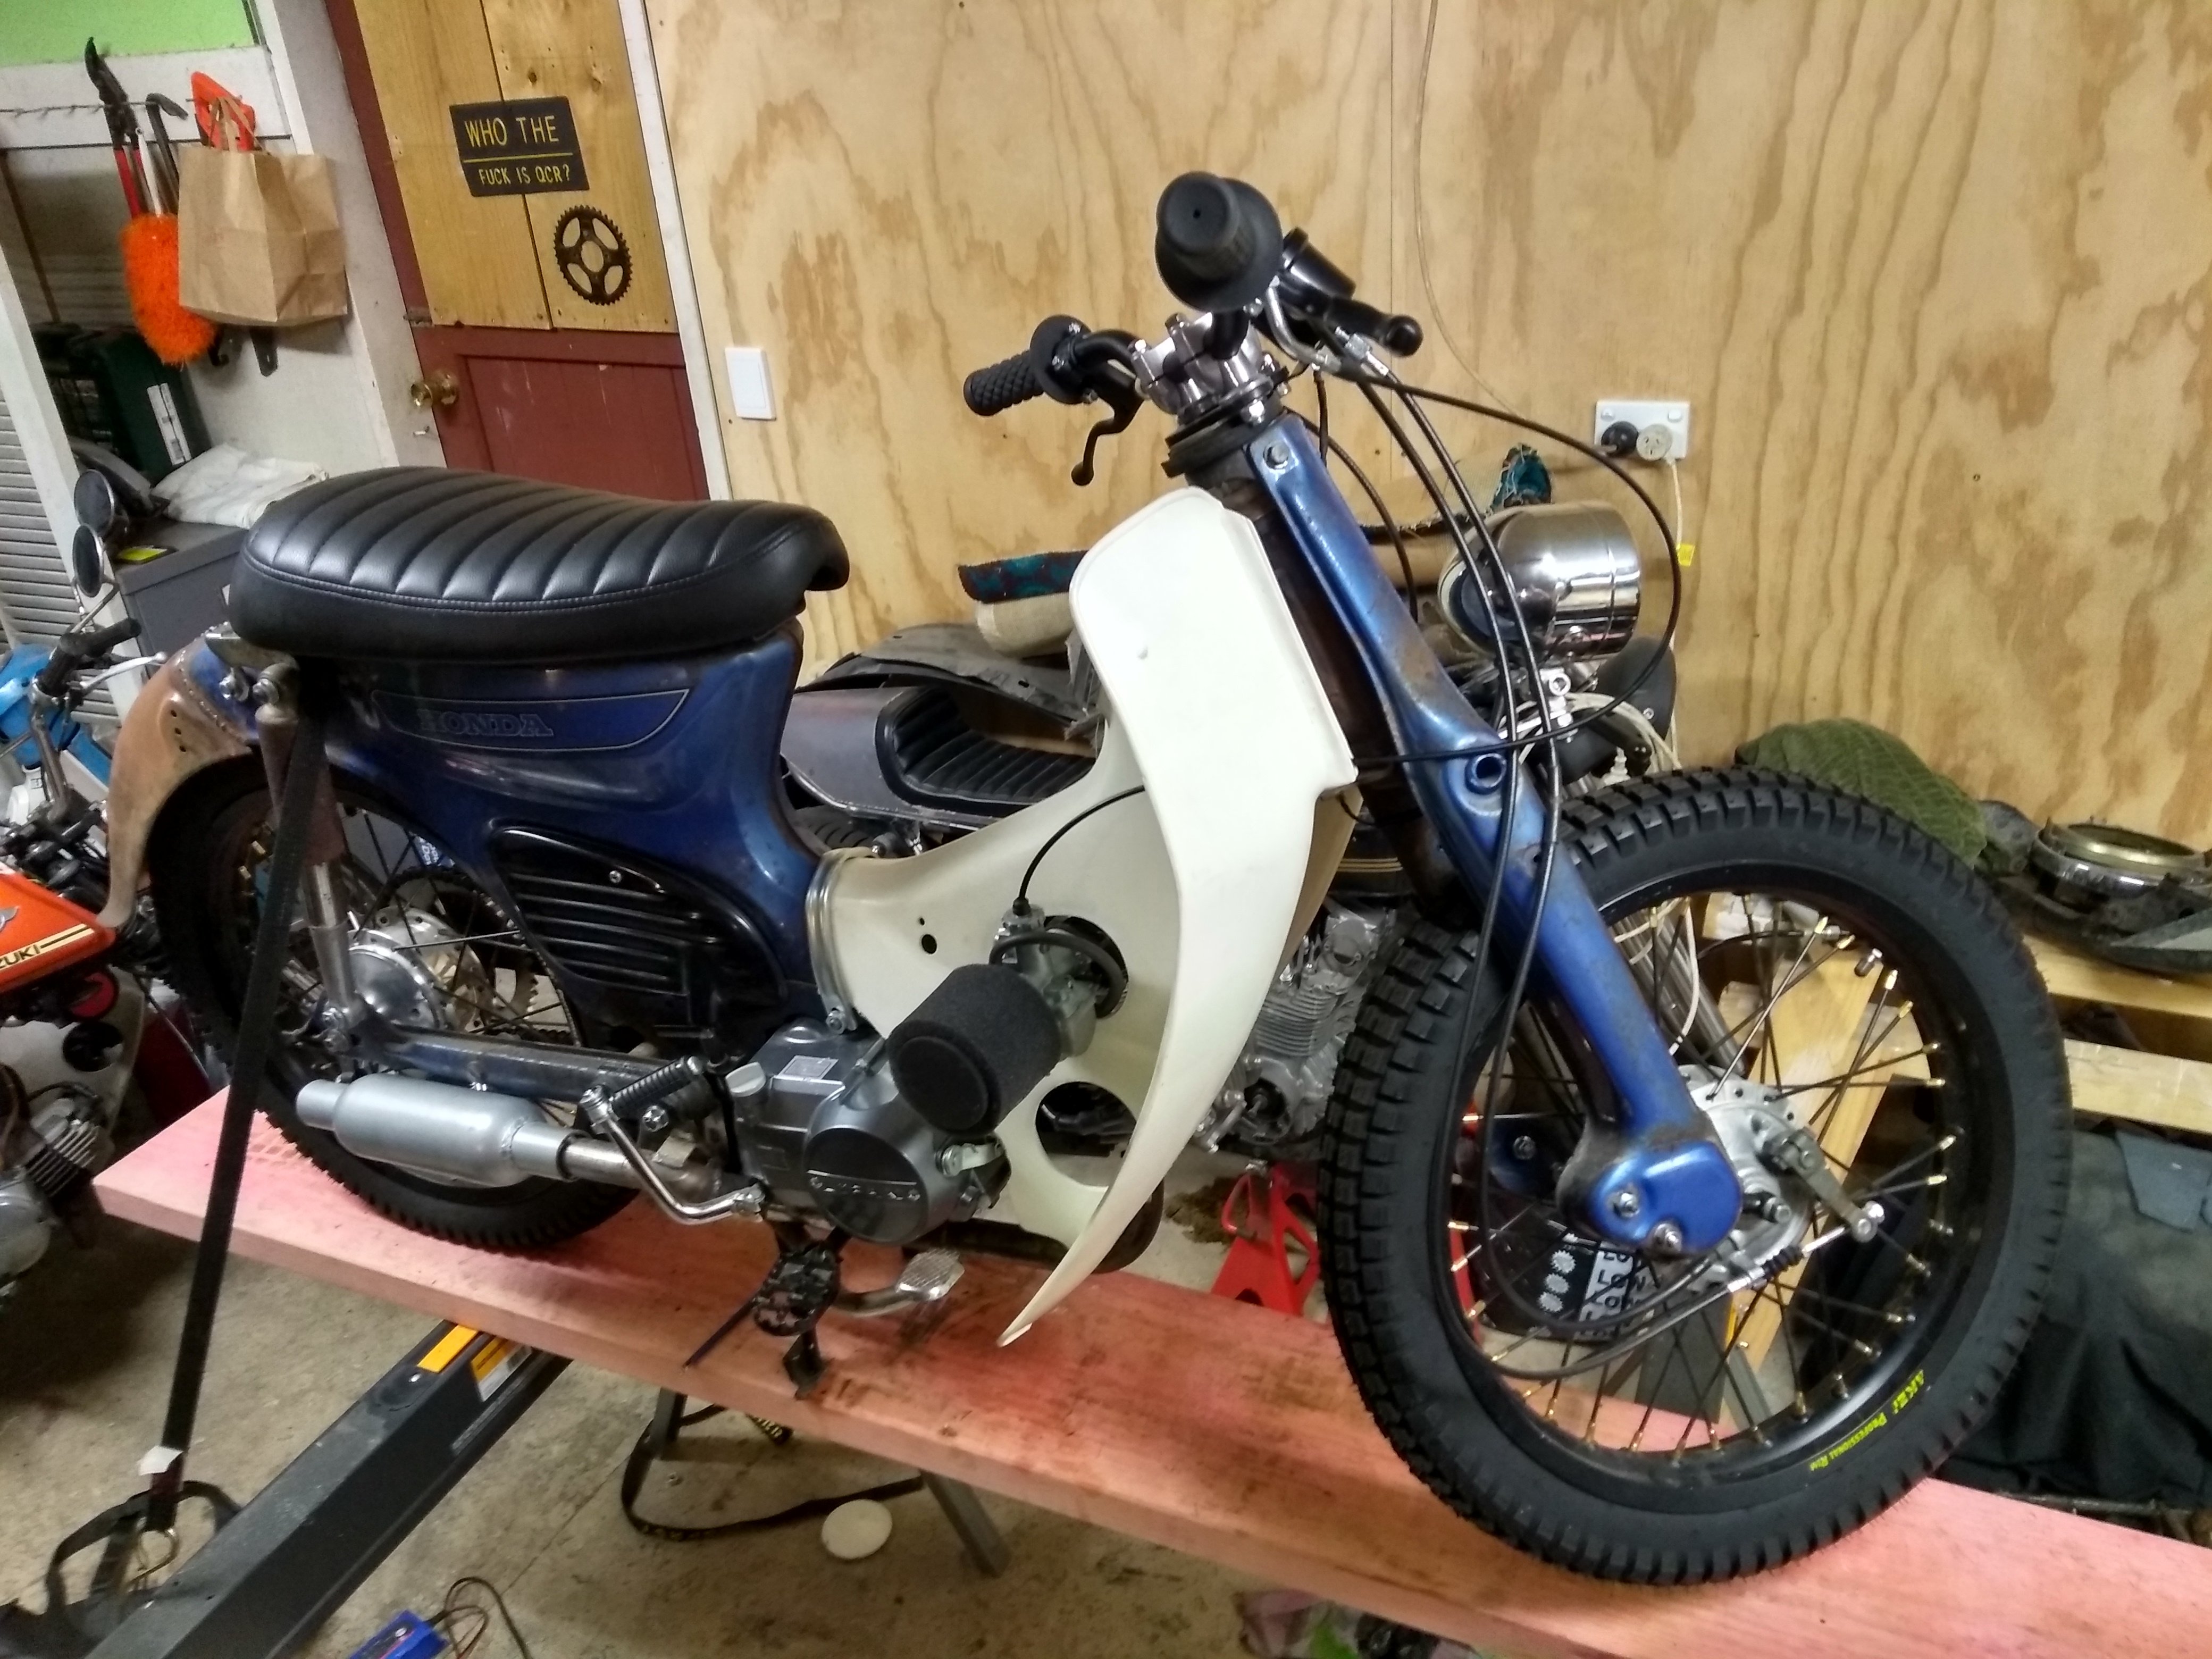
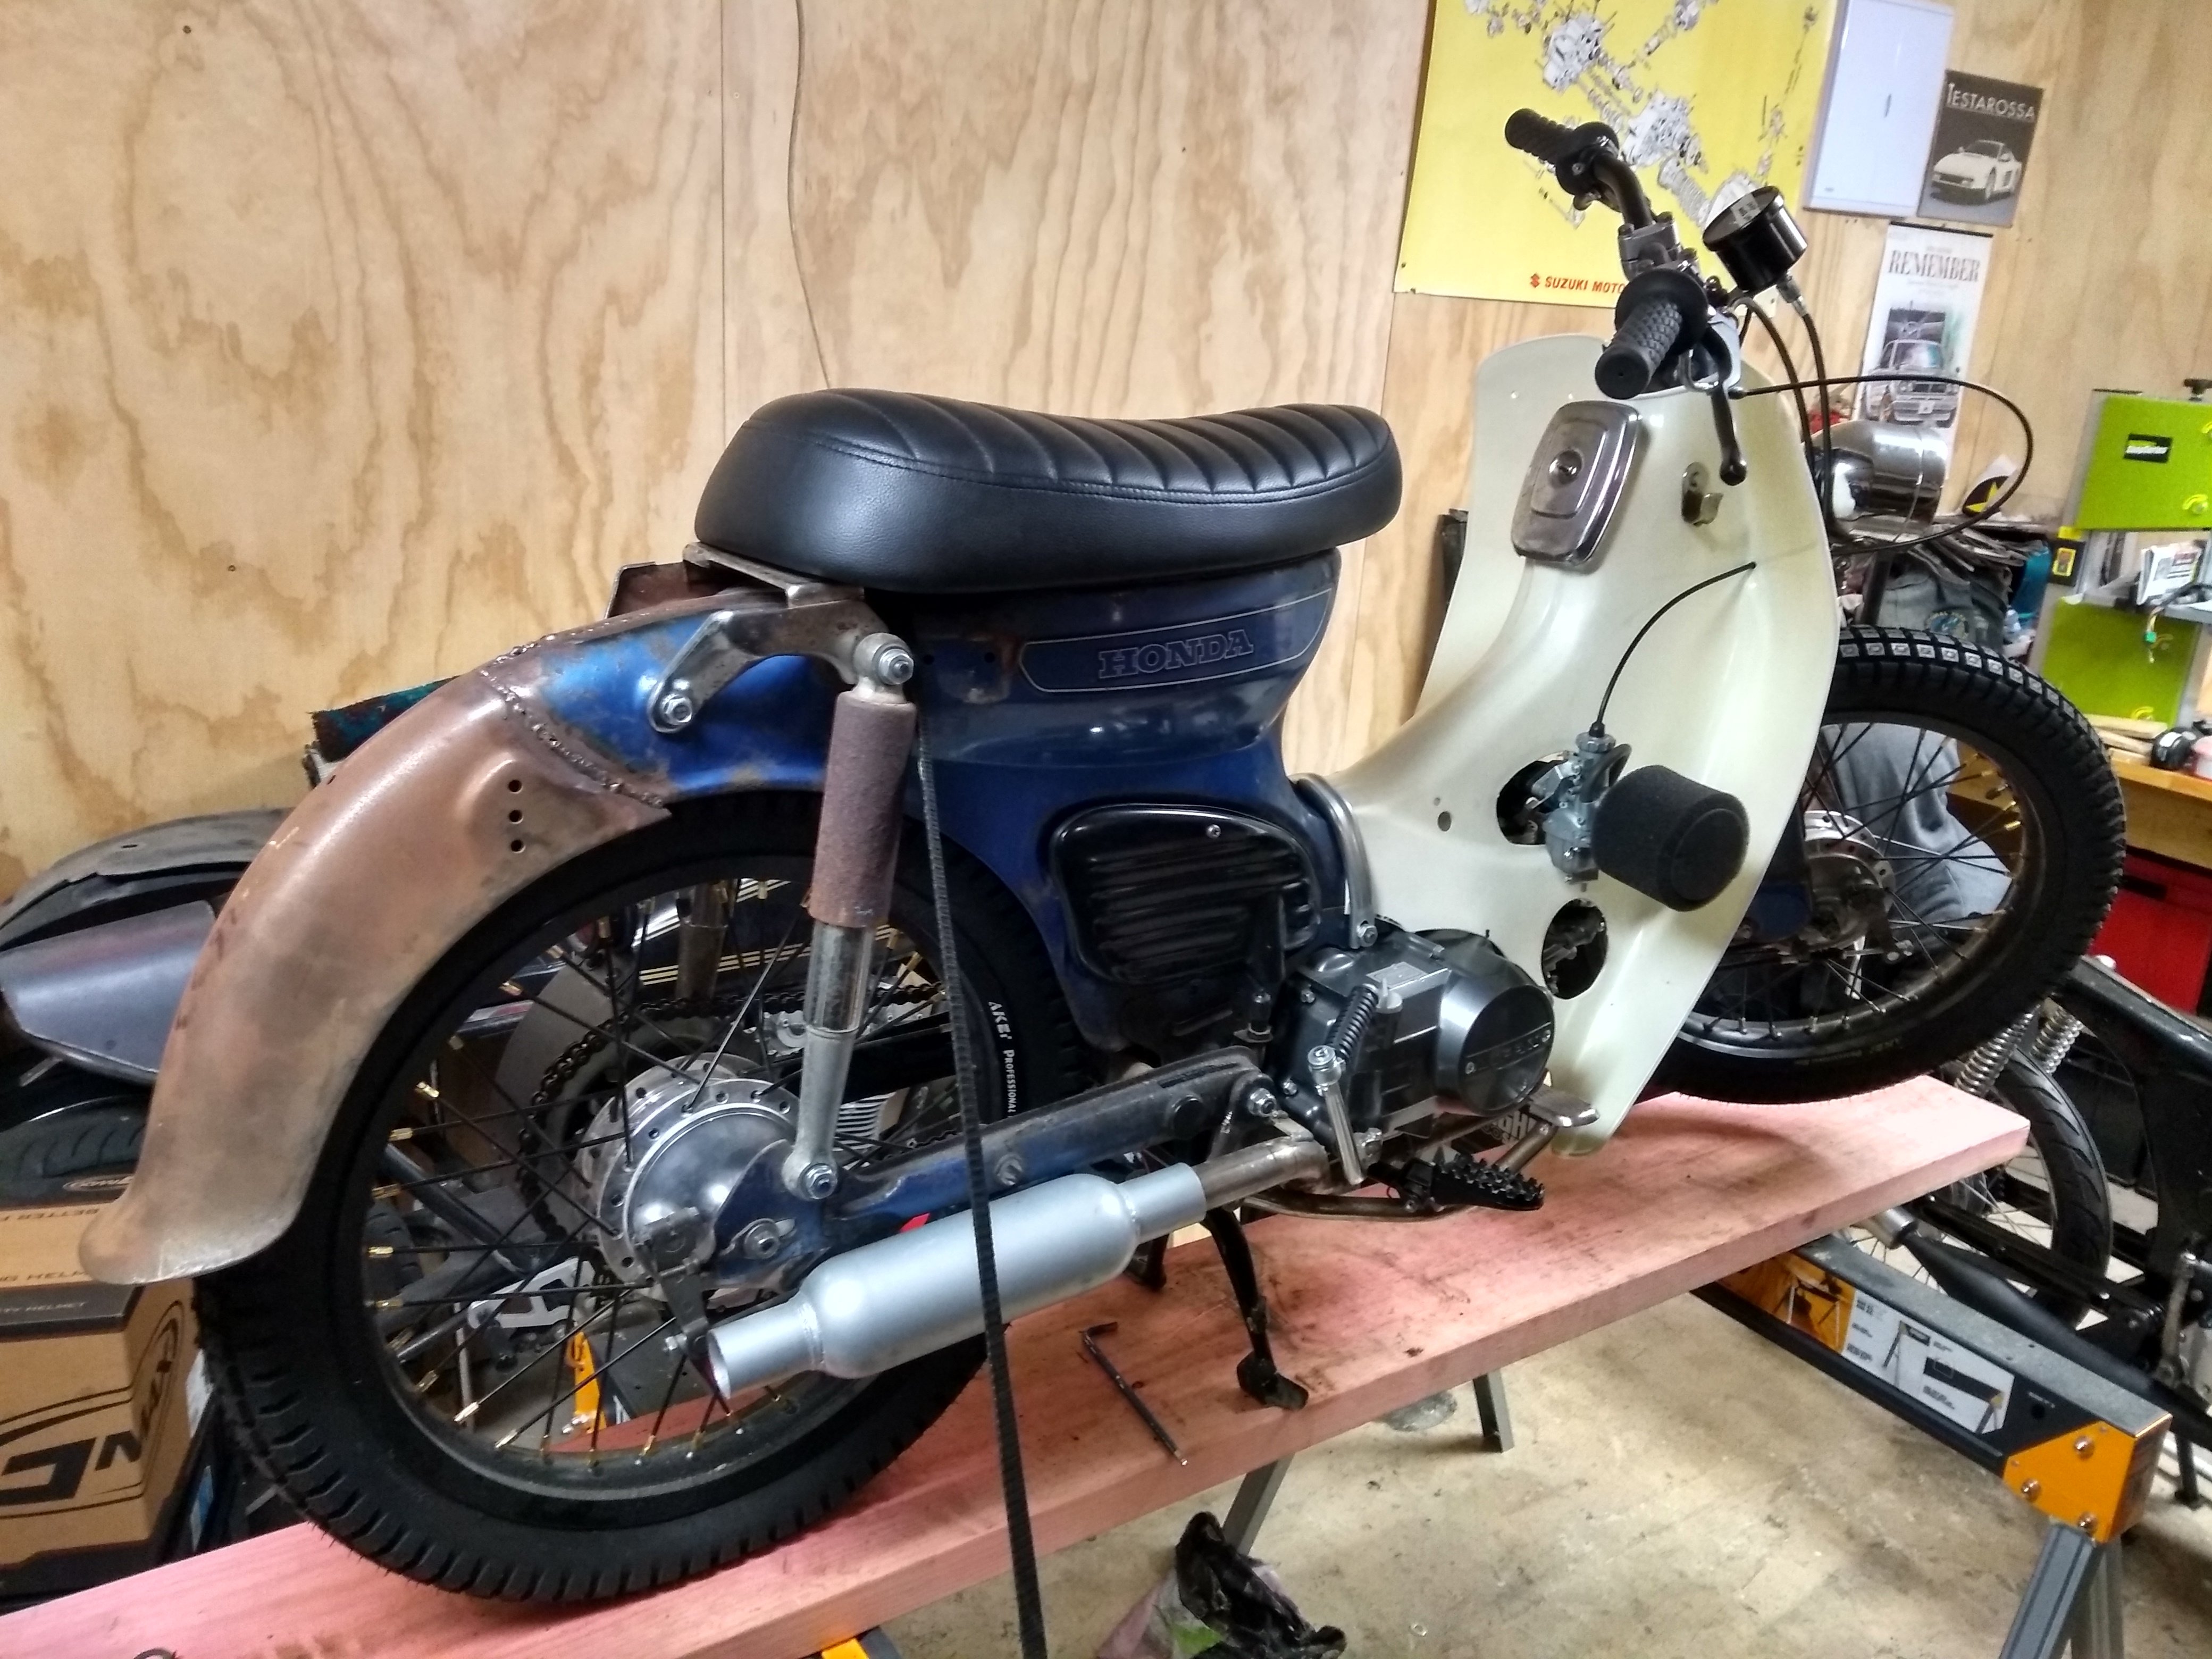
Pretty much ready to roll, need to weld on muffler and lose the centre stand. Then shakedown followed by a bunch of fixes. Thanks a shit tonne to Goat, Seedy and the general peanut gallery who make an appearance each week to encourage me with farts and general wise cracks... PFT After Summer will be the strip down and tidy up, right now I'm going rat-rod spec.
9 points
-
Current levels of foam for this7 points
-
a bit like this lovely lady did, but only with much better style.... edit; the words that came out of her mouth when she caught me taking the photo....wow. Kevin bloody wilson would have blushed!
7 points
-
Do we have a backup bike sorted or should I chuck a new belt on smokey sue mk2 for 55kph of small wheeled punishment5 points
-
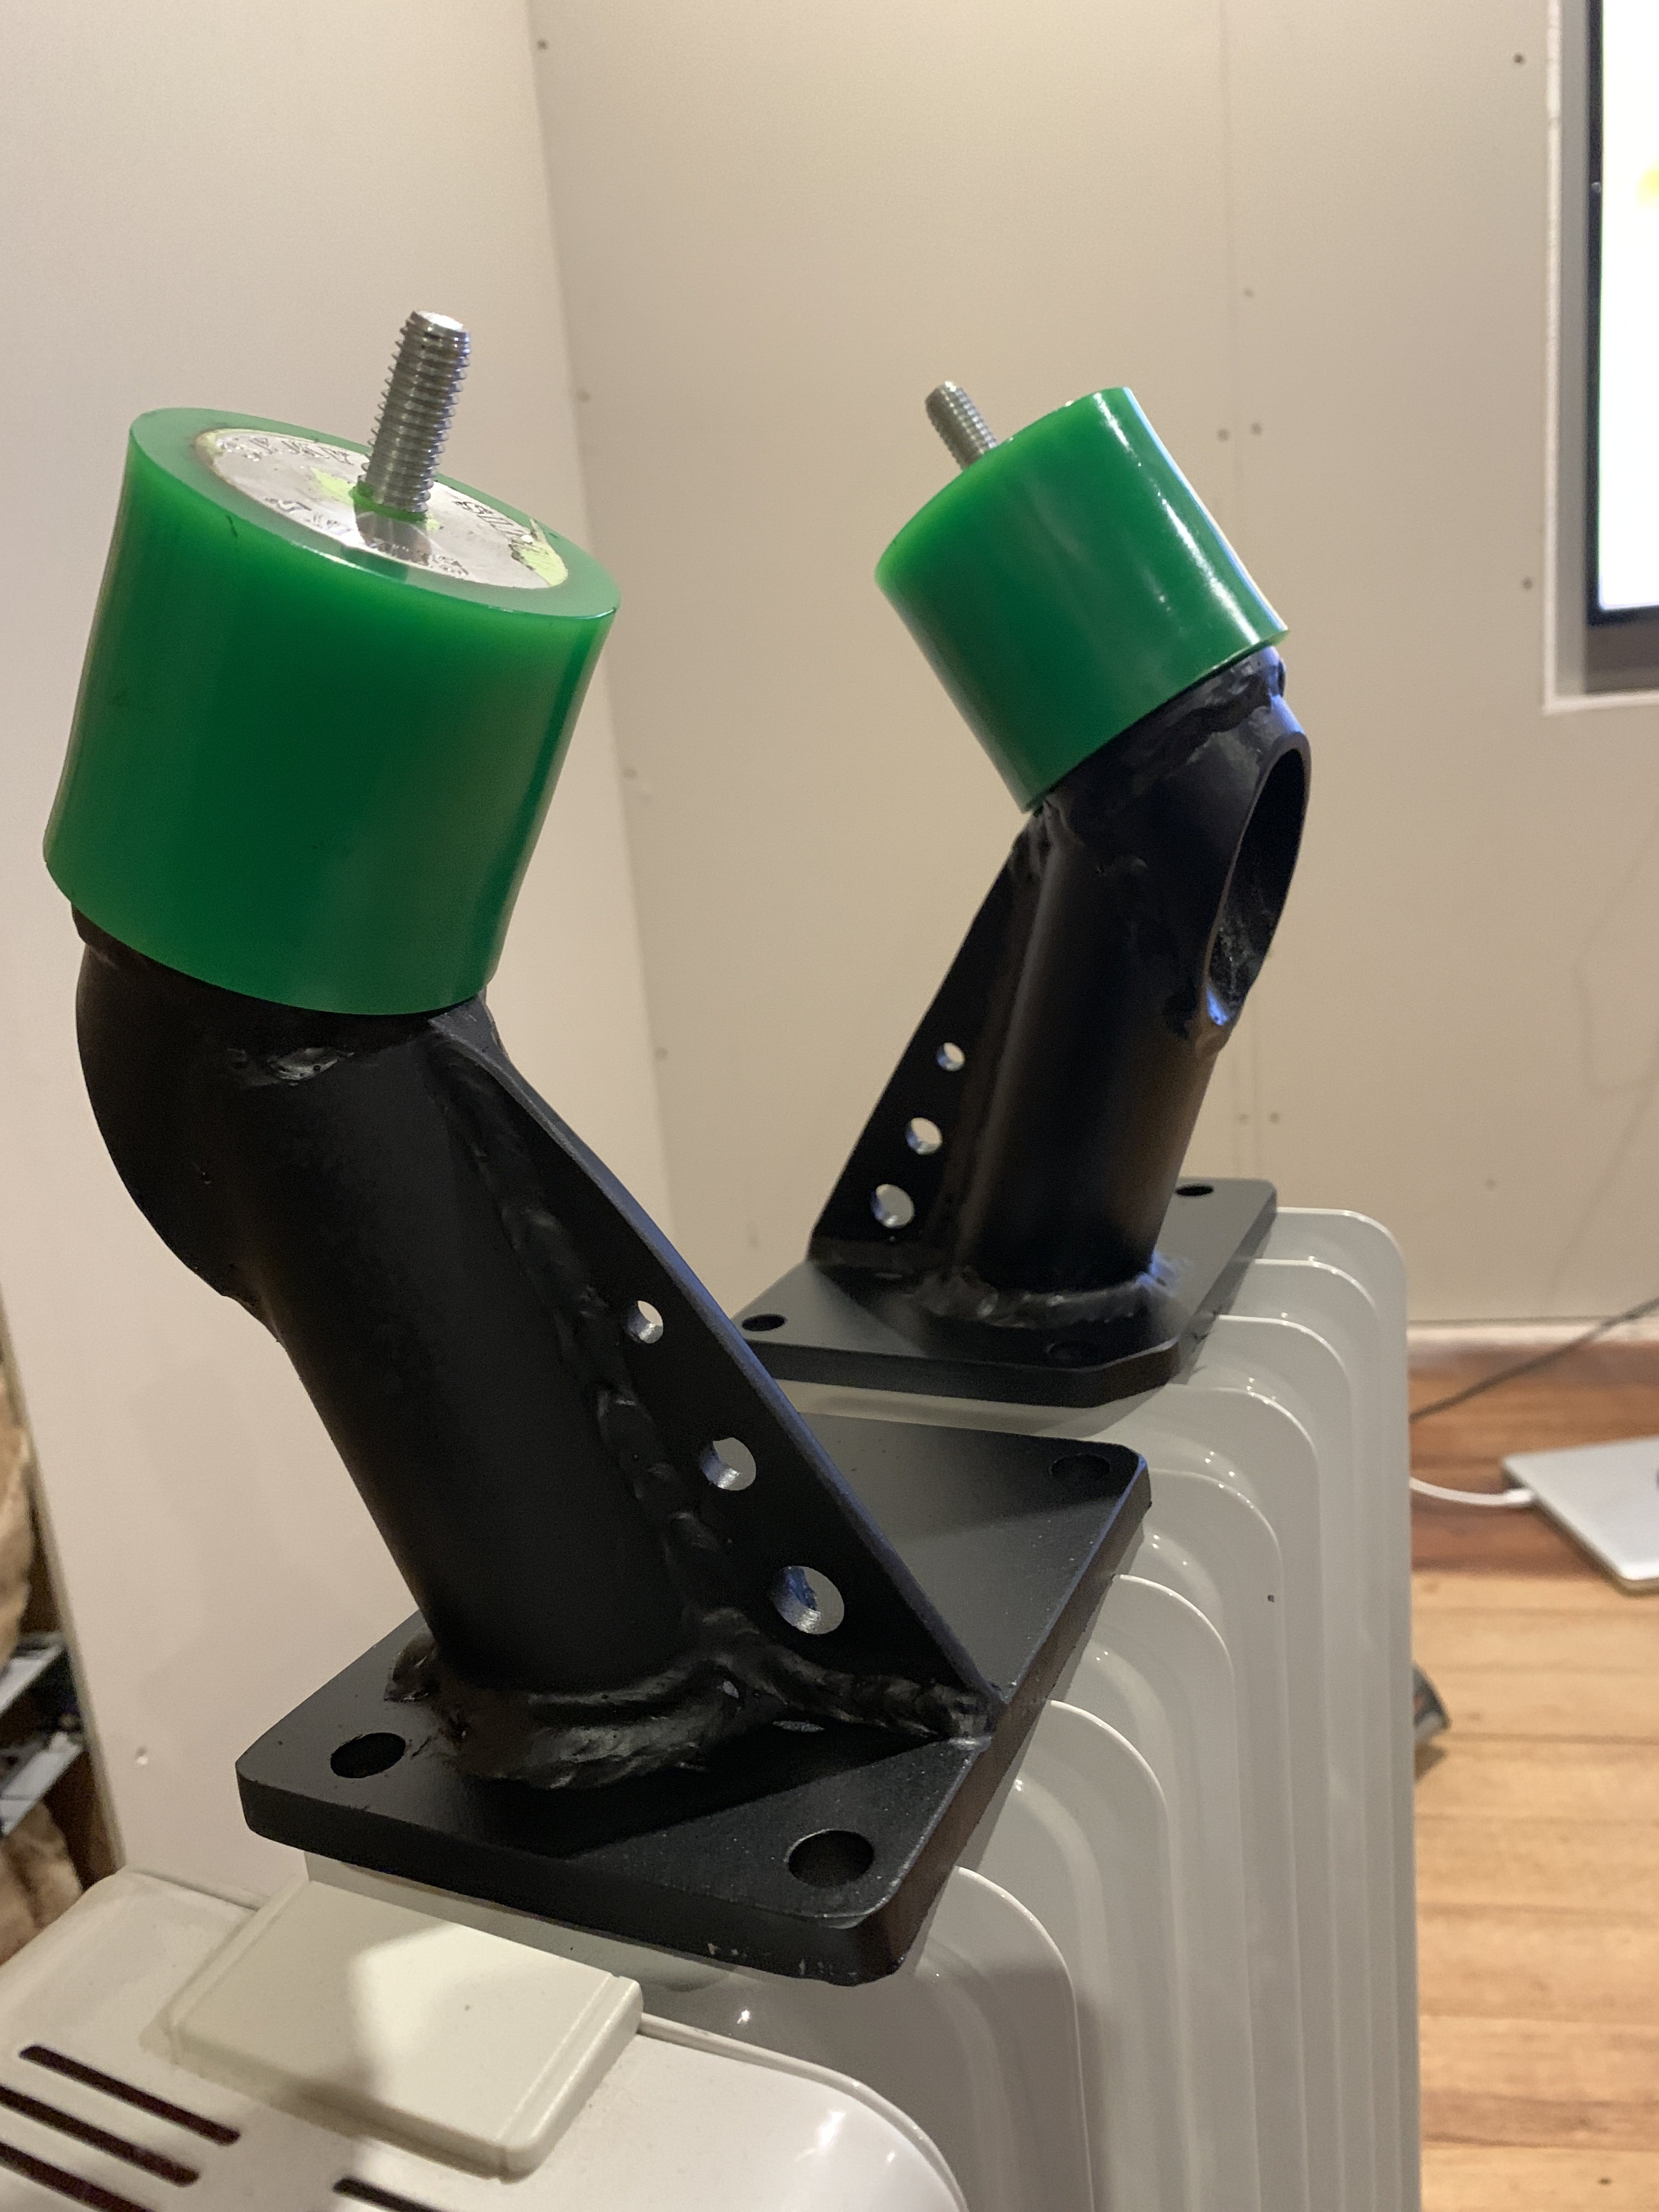
Yeah that'll be appreciated Today's gc award goes to Jarrod at the mount shop Henderson. Mega friendly helpful dude. I ordered a set of mounts so the engine might actually stay contained. Ordered at lunch and they were delivered by the end of the day. Pic of mounts as text is boring Cdl auto parts also have jets to suit the 34adm and were nice and helpful on the phone unlike a certain specialist. Once I figure out what jets I need I'll be ordering off them5 points
-
Shits sorted, I stripped and checked the clappers, all is well. I have paid less for entire functioning cars than I did for the brake pads in there, bitches better be good. The only thing holding me back from assembling it all is finding the correct rod end for the drag link, as I have modded the y60 drag link to suit the steering box setup I want to continue using it. This means sourcing a rod end; left hand thread, M22 x 1.5 male, taper to suit Y61 axles. This is proving more difficult than I imagined. There is one out of a Nissan Condor that might do it - SE4381L, but I might need to buy one to check the taper. Anyone have any hints? I am wait for a reply from Superior Engineering in Oz, we will see.4 points
-
How good is the Friday night soggy biscuit gonna be3 points
-
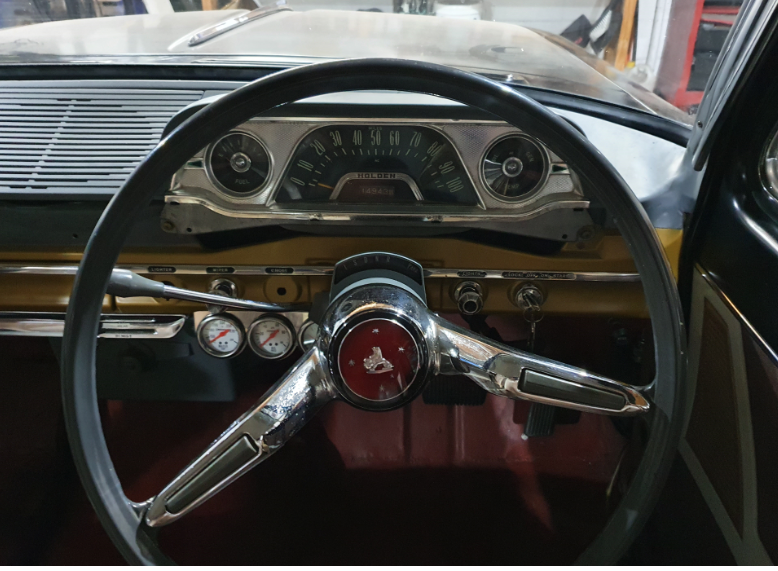
A fair bit has been done since the last update. I spoke to Trevor at Holden Diagnostics. We agreed that the tune was causing the issues, and he could sort it out. The guy who did the original tune has been known to have trouble with VT engines. I had a bunch of people coming round from work on Saturday night and wanted the car running. Trevor sent me a spare memcal and said send your old one back when all is good. Thursday night I fitted the new for the water pump. The old one looked pretty tired. I put the throttle body and everything else back together and fired it up. Then swapped out the Memcal and all good. I spend a lot of Saturday working on the car. a couple of hours went into getting the wiper motor fitted. I had made up an adapter plate ages ago which was fine. The challenge was getting clearance for the motor body on one side and the actuator arm in the plenum chamber on the other side. Using a couple of washers under one side of the adapter plate did the trick. Sorry no photos. I also put in my Dakota Digital interface box to make the speedo work. This is mounted behind where the kick panel will be. Hopefully it wont be annoyingly loud. To night, June 30, had been my goal date to have the car finished. I finished off the wiring for the wiper motor back to the switch, installed the instrument panel, and went for a drive. I consider this a win. It has got some real get up and go, the brakes actually work pretty good and the steering is OK. The exhaust is too loud, so a balance pipe will get made, the engine idles at about 1200 in drive, I'll have to work that out, and there are still lots of finishing off things to do. Not to mention registration and certification. Here is the view from the drivers seat
3 points
-
It's off the rotisserie for now! Needed to sort out the driveshaft which require the engine and gearbox to go back in. Got the axles sent away to be shortened and resplined by 105mm a side. That meant I should make an attempt at swapping the Altezza LSD and the 4.1 CWP into the diff head. No pics because I didn't really know what I was doing. But for those that are interested I ended up using the LSD side bearings and swapped the Estima pinion bearings onto the 4.1 pinion. The Altezza pinion bearings where thicker which made the pinion gear hit the diff case. I couldn't get the wear pattern right because I didn't have any shims other than the two that were already on the pinions. Got it close enough for the time being, will buy some shims or give it to someone else to finish off. Decided to run Coil-on-plugs instead of the dizzy relocation kit, mostly just to keep the engine bay looking simple and clean. Got a set of 1NZ coils, I'm thinking of casting up an adapter plate for them. Got the SQ engineering down-pull throttle linkage installed and got the accelerator cable shortened to suit. Made a vacuum block off plate, since I hope none of that stuff is needed anymore. Also at some stage I filled all the unneeded holes in the front radiator panel. Modded the accelerator pedal so it sits a bit closer to the other pedals, as before it was way off to the right. Two-piece driveshaft all mounted now too! Think I got the angles sorted after spending far too long trying to work it all out. It's an Altezza driveshaft with the front half shortened (yes I know the front section u-joint phasing is 90° out). In this photo you can also notice the sills have been strengthened (somehow missed that update somewhere). Used some 3mm angle and welded it the full length and ground back, so it's now really straight! Then boxed it back up to the floor, to try and stop dirt and moisture getting stuck in behind. Makes lifting the car along there way nicer! This is the centre bearing support mount, much thought was also put into this! Hopefully it's fine being welded to the seatbelt mounts haha. Still needs some doubler plates welded on to the other side of the tunnel.3 points
-
I chipped away at the rad piping and associated stuff this week, and finally kicked the old bitch into life on Saturday morning for some functional tests. The setup appears to work better than before, the return pipe is noticeably cooler than the out, and it didn't get hot enough to kick the fan in although I let it idle for quite a while after getting it up to temp. This is positive. During the week I swapped out the locking hubs on the y60 axles, these had some nice manual lockers, whereas the y61 axles came with some factory auto lockers. I did manualise these though. I also made some mesh guarding for the rad to prevent stone damage. I just tek screwed this on but will replace those with rivnuts when I get around to it. On Saturday morning I picked some rotors up and cracked on with refreshing the swivel hubs. I give them some extra loving apart from the swivel scraper, I replaced the bottom swivel bearing on both as they were a little corroded, plus the main inner axle seals plus the inner hub seals. I washed the wheels bearings out and repacked them, everything looked pretty good otherwise. The axles were on a pallet sitting on some trestles, so after doing the first one I moved the pallet outside to spin it around for better access to the other side. At this point my forklift spat the dummy and stopped working, rather inconveniently sitting halfway out the shed door. I had just topped it up with diesel, and a similar thing happened the last time I topped it up. My guess it there is a whole lot of crap in the bottom of the tank and it sucked up something ugly. This annoyed me considerably. I did eventually get it going but it isn't happy, it will need some more loving I imagine At the time I ended up dragging it out of the way and craning the axles onto the truck deck so I could continue work... The results of the weekends work; Mmm shiny. Next job is to strip and check the calipers, I have some EBC yellowstuff pads on the way, they should be here tomorrow, so it should all be together and ready to go into the truck in a couple of days.3 points
-
Had new bars for monkey turn up yesterday while I was sick at home sweet tiny narrow things, pretty stoked on them Now I think it looks a bit wack / fronts too high for the bars. considering lowering headlight/fork badge so the windshield top is same height/lower then the bars2 points
-
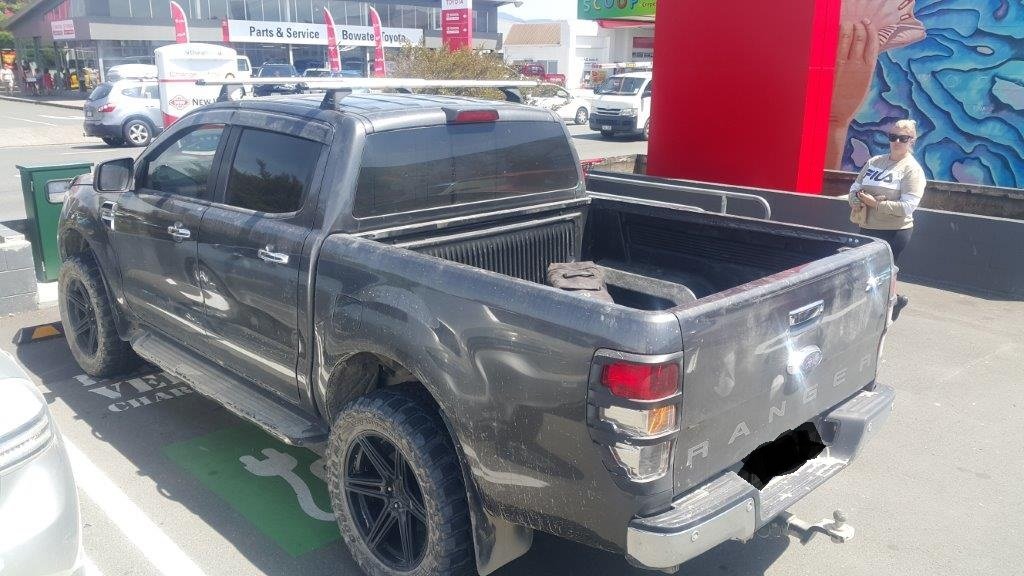
It would be most appropriate if you got a pic of your xjs parked across multiple hairdresser car sorry ev charging point parks.2 points
-
@KKtrips get in her jim2 points
-
Entrants, as of 30-06-2020 9:26pm @johnnyfive Daniel, aka Ruckus guy, aka Grom guy. @GuyWithAviators @UTERUS @MopedNZ @TimShadboltfan27 Shannon D Daniel W @Shakotom @Threeonthetree @Tumeke Brudda @Tumeke @keltik @Vintage Grumble @Truenotch @Mr Vapour @tortron @WankBankA100 @BLIZZO @anglia4 @mark105 @RUNAMUCK @Duke Blackwood @HighLUX @Mitch.W @Beaver @00quattro00 Bucket Barry on bike @MaxPower (Vehicle) @rumrum @slacker.cam @sentra @Dolan @Itchybear @Deliboylurker @Kass @Chunky_t @Thphantum (vehicle)2 points
-
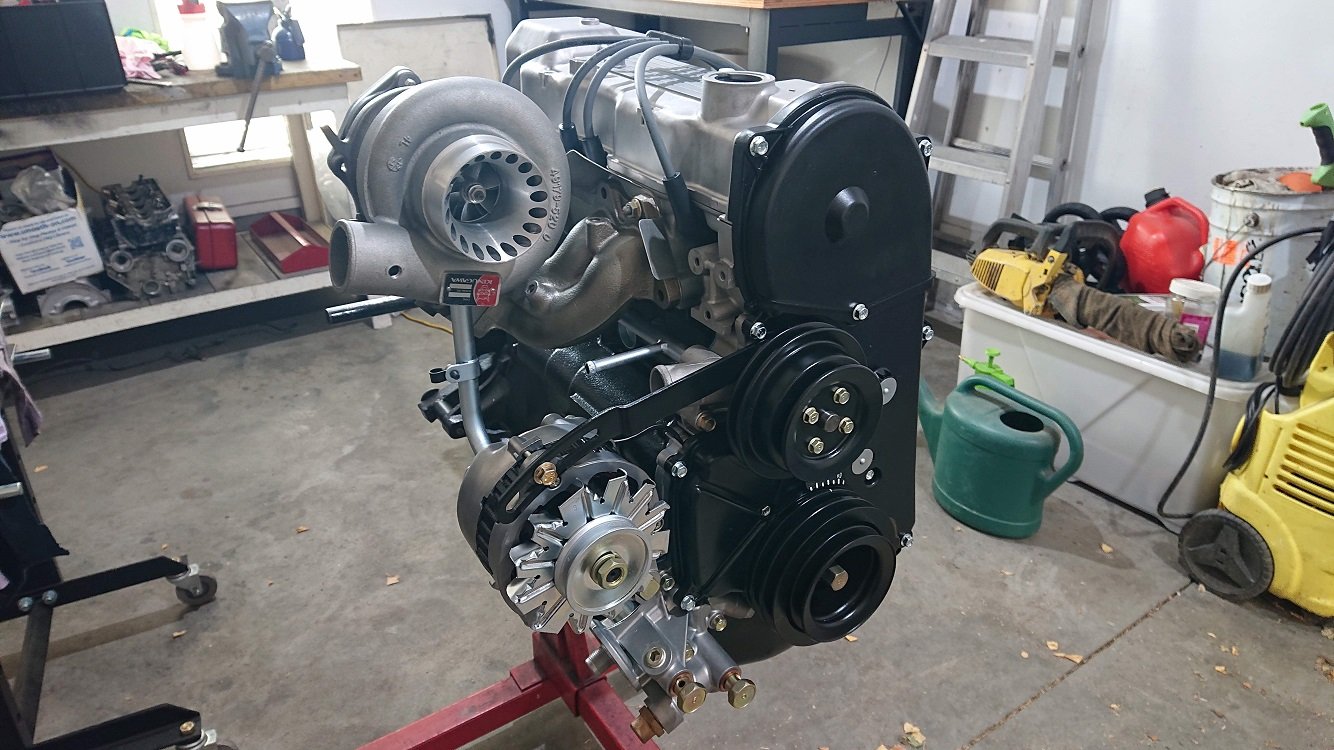
For some reason this thing came with the wrong alternator pulley. It had a 13A belt pulley and the rest of the engine needs an 11A belt so I ordered a new dual row pulley from franklin engineering. Top notch stuff they make and seriously reasonable prices for quality Nz made products. Ordered an oil sender block at the same time to run my oil pressure and temp gauge senders. Will fit that in the next couple of days.
2 points
-
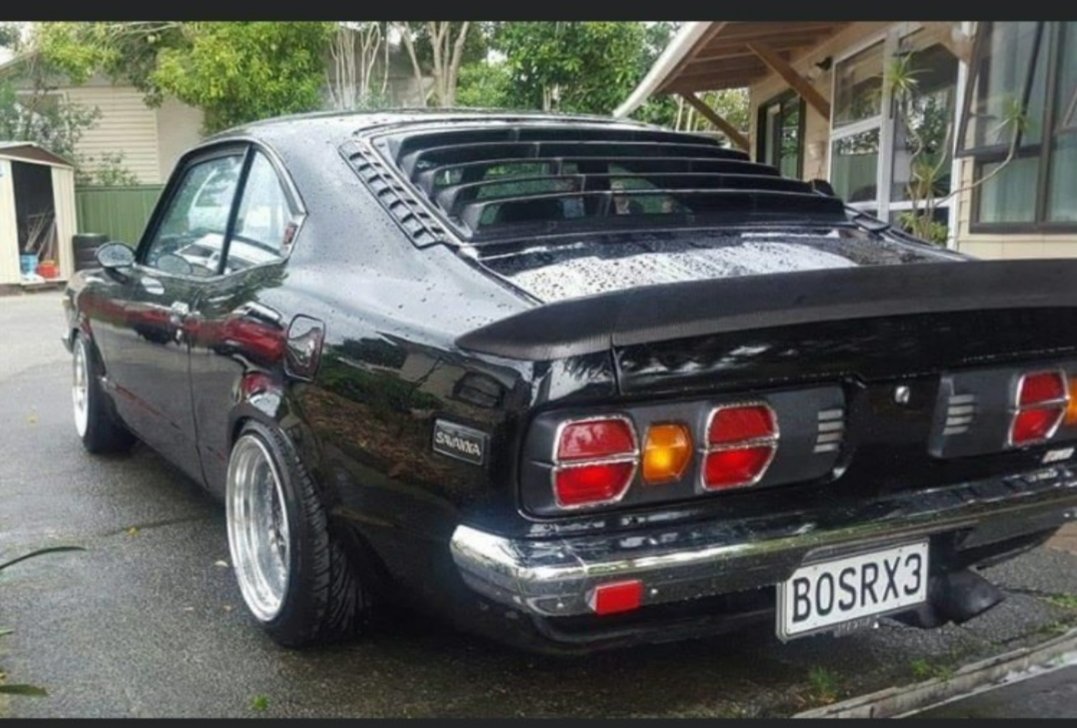
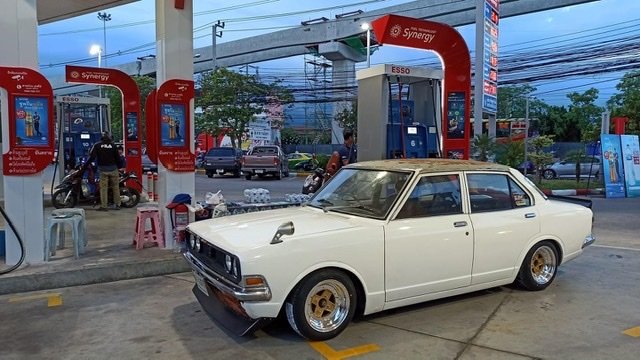
Few bits and pieces sorted in the last week, Scored a set of louvers for it, got sent a photo of it previously when it had them before flares, looked good so grabbed them for a rainy day( will see if i run them with the flares or not yet) Also had a mate repaint the gauge surrounds as i sanded off the black to find the factory silver had been sanded off so didnt have much choice but to repaint it so it was tidy. While he was there got him to repaint the dash topper black. @64valiant has the dash topper for retrimming at the moment, soon as i have that it can go back together. Booked in to go to rust repairs this weekend, I also booked it into Chrome Expression Session so time to get shit moving and get it there haha. Next 4 or 5 weeks going to be all go!!
2 points
-
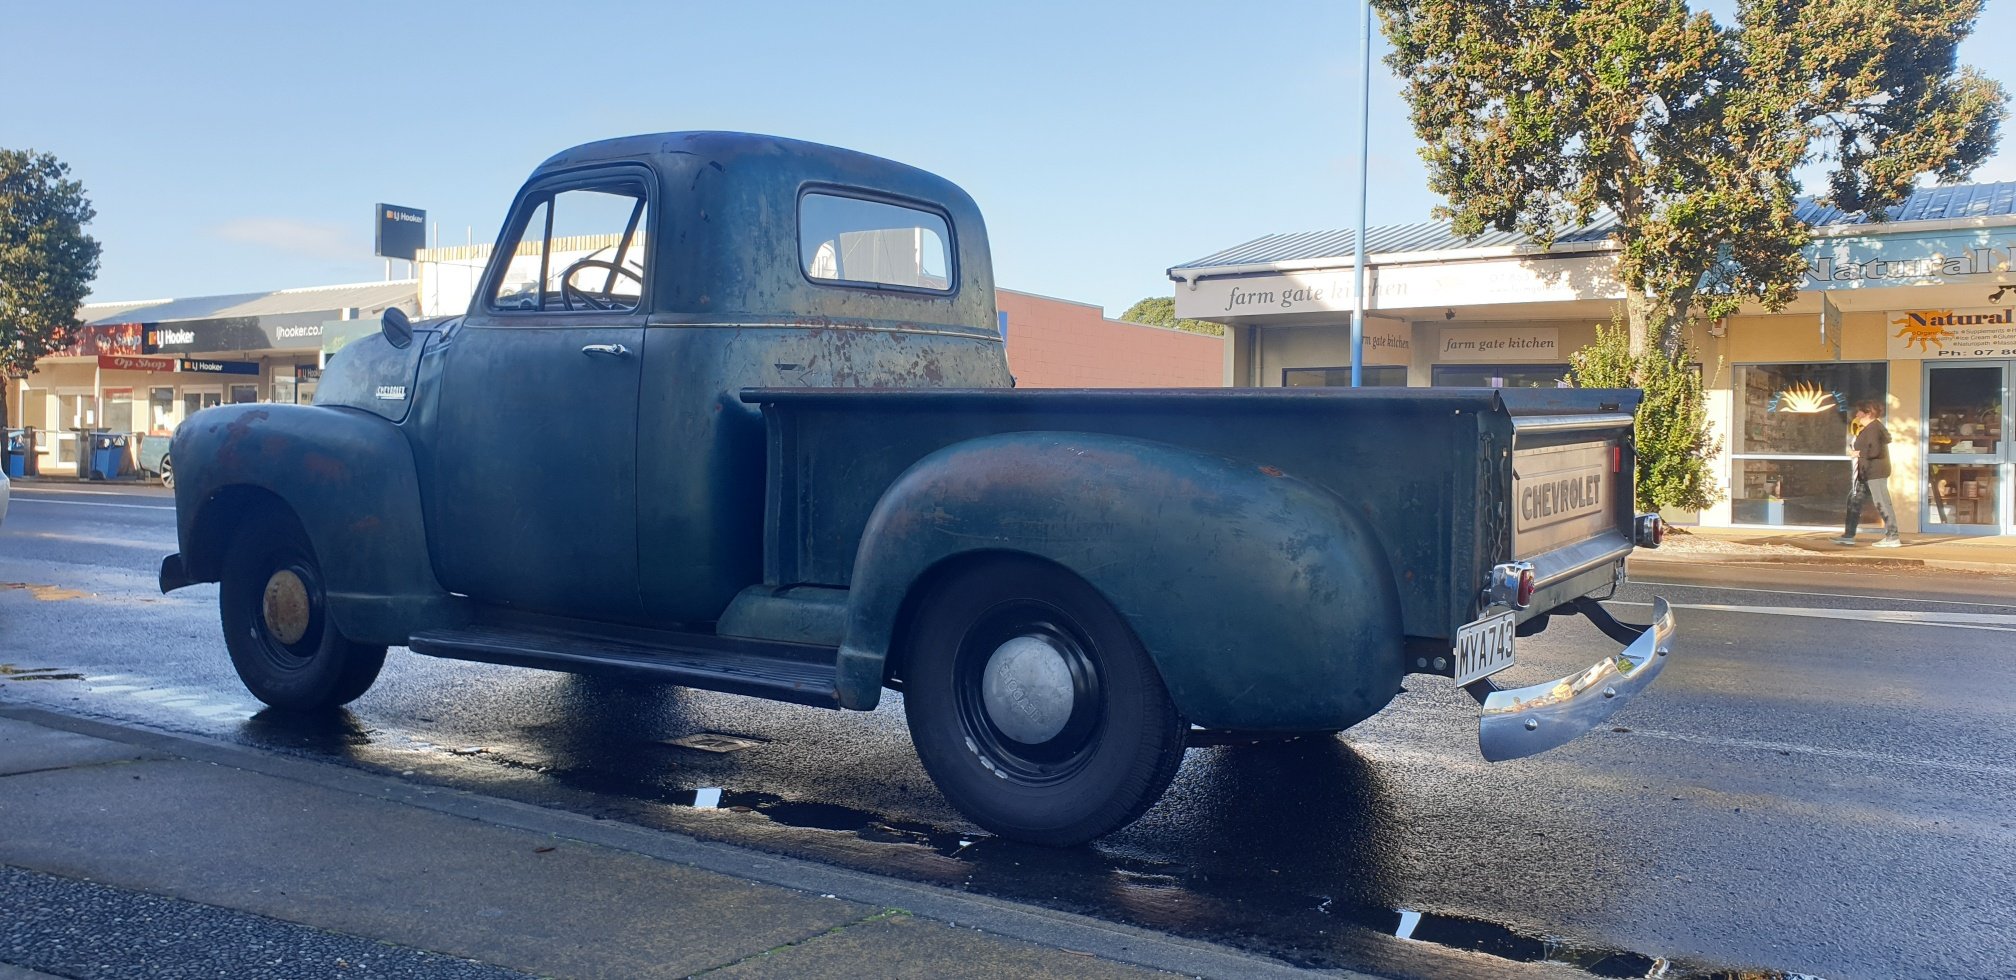
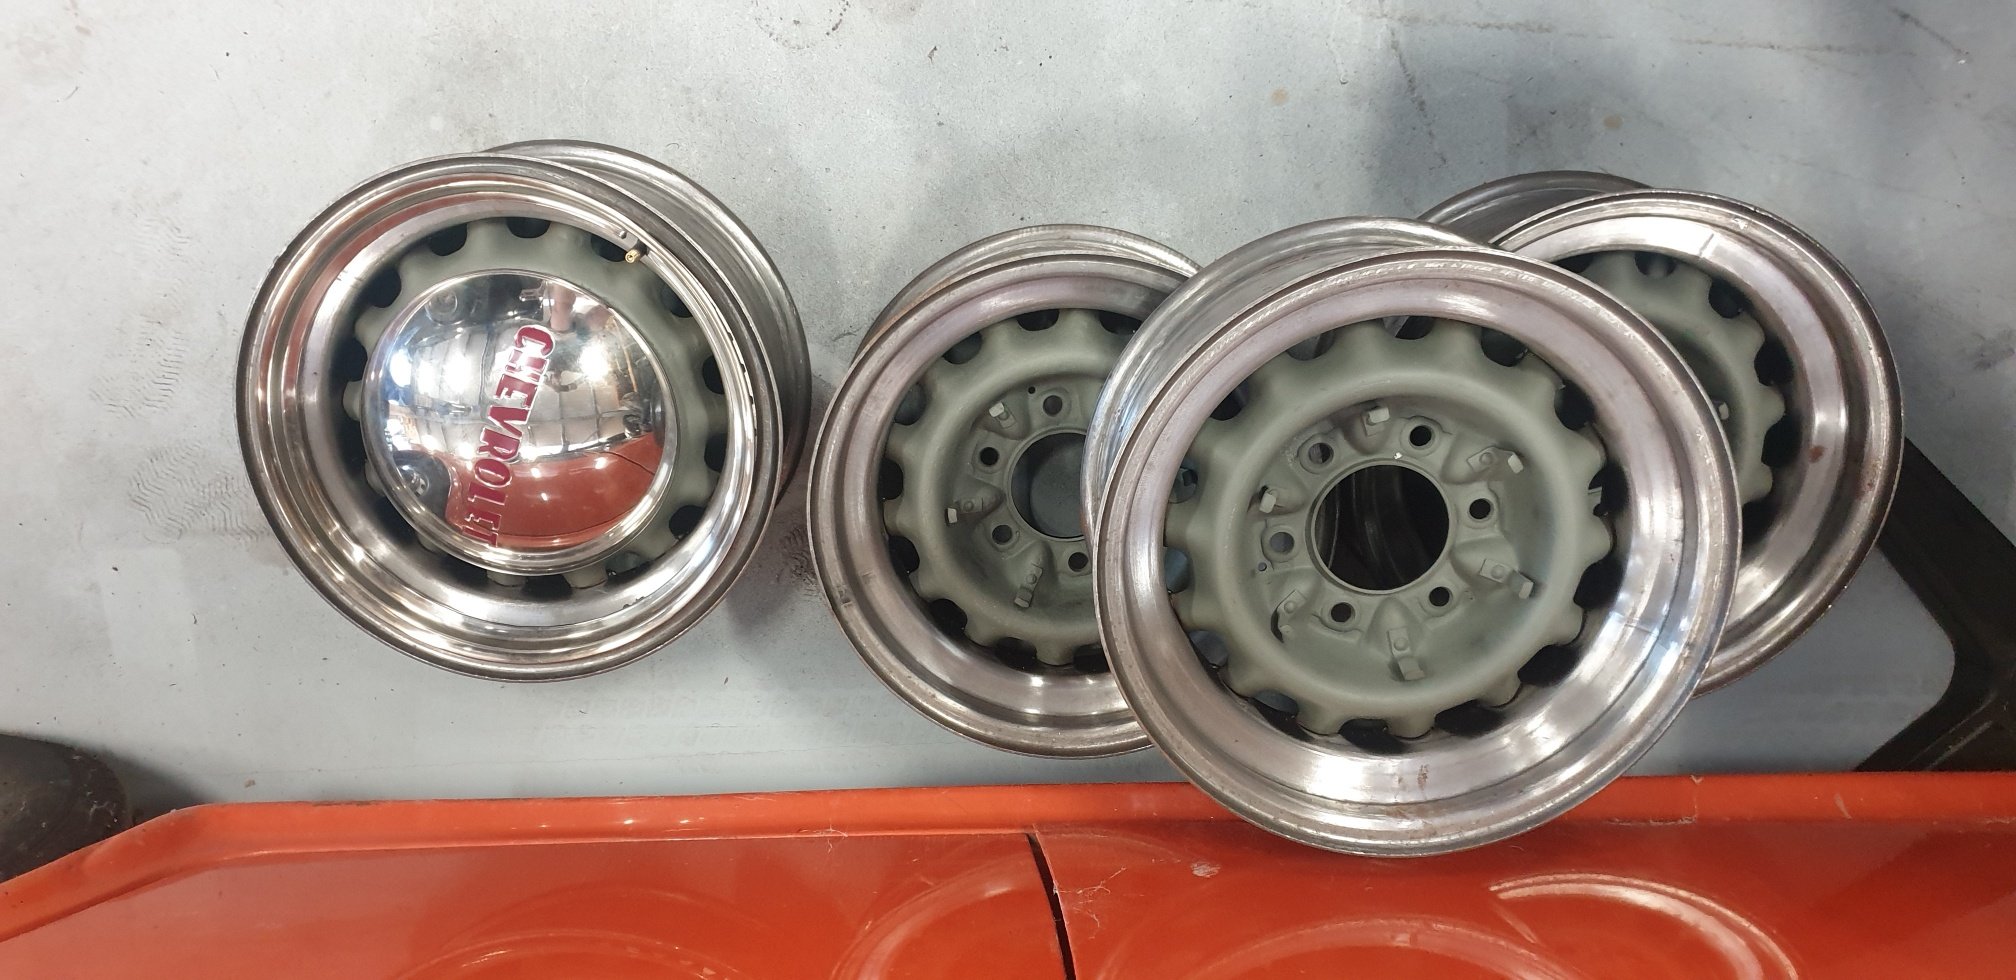
Took the truck for its first major drive on the weekend did a 40km return trip out to Waihi Beach and she run flawlessly! Have had the Artilleries rebarreled as after sandblasting they had a heap of holes in the barrels. Wheel and Frame in Cambrdige rebarreled them with 7 inch barrels instead of 5.5 they were factory. Centres were riveted in from factory so they drilled these out and welded the centres into new barrels. Mate lined up to paint these this week then the whitewalls can go on!
2 points
-
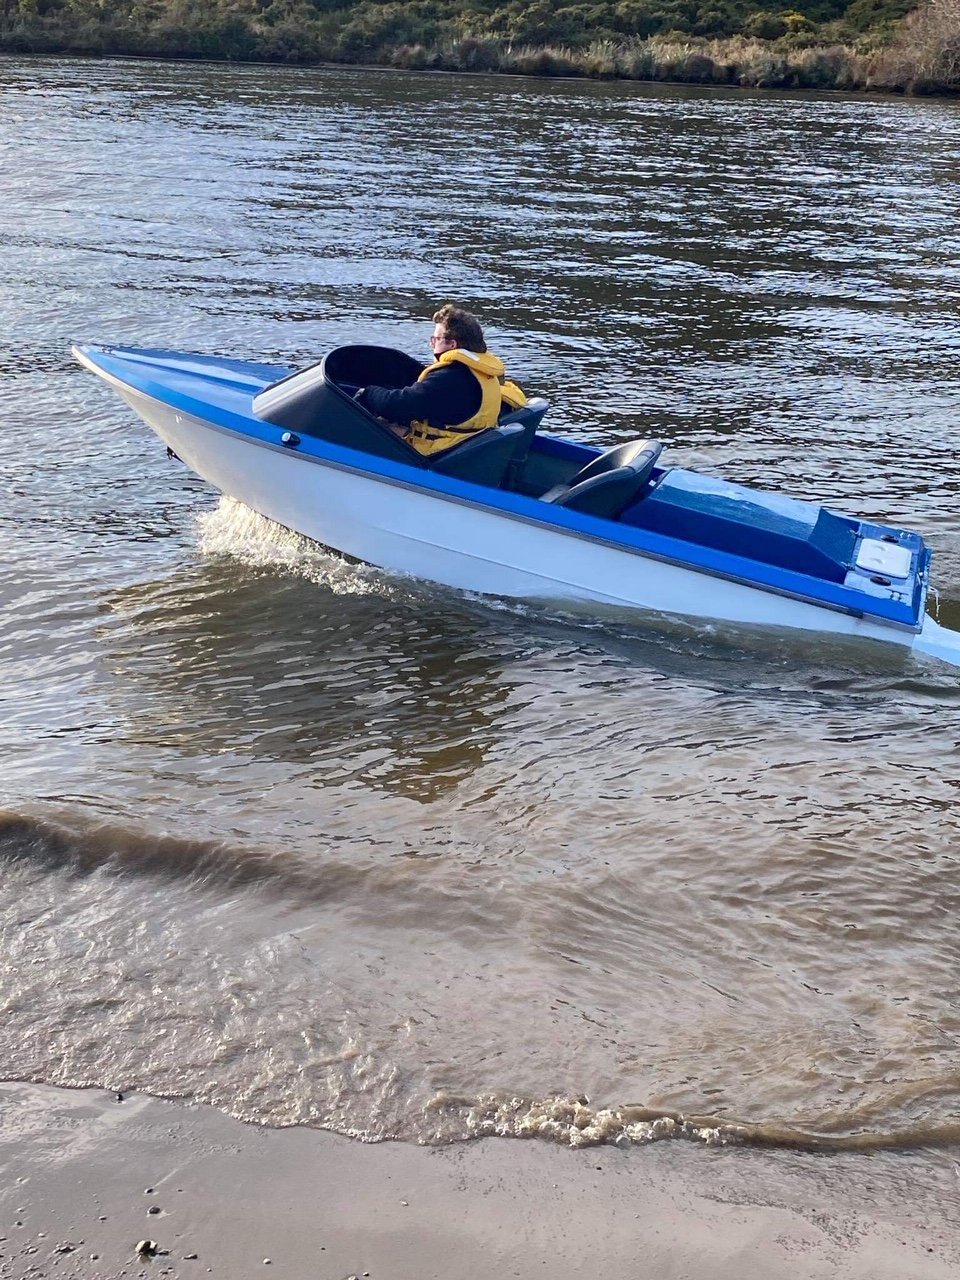
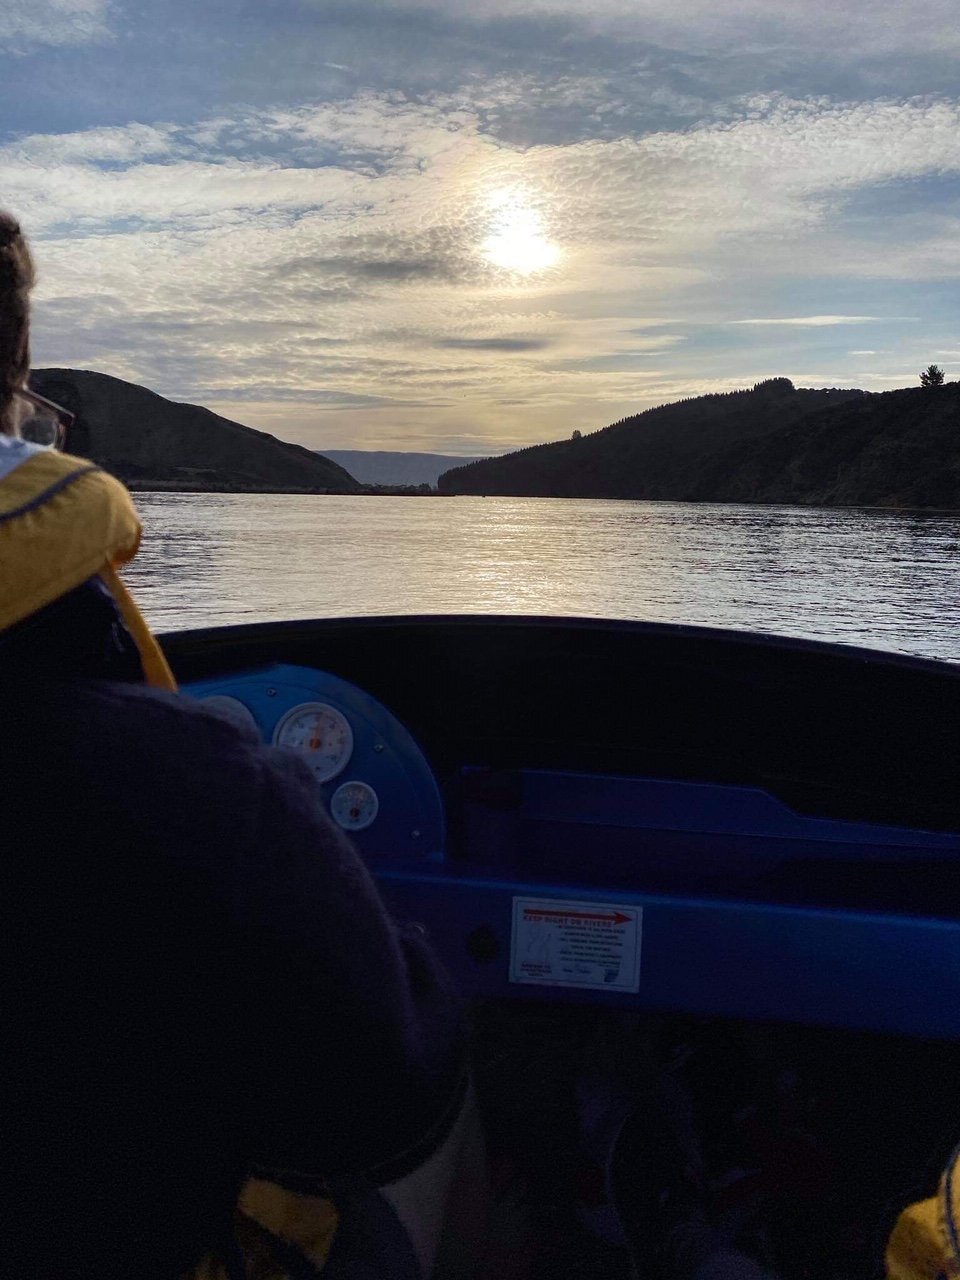
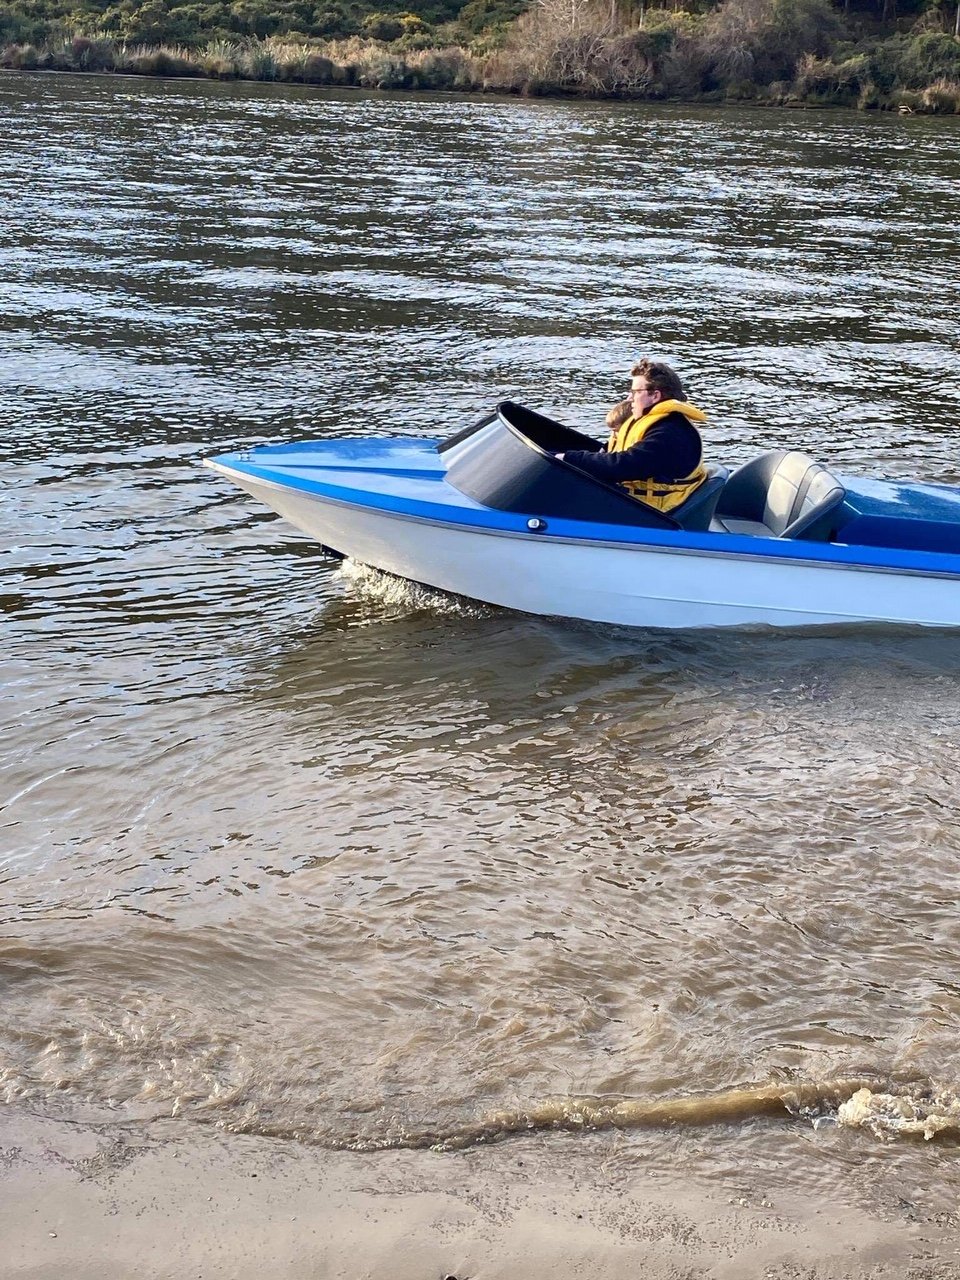
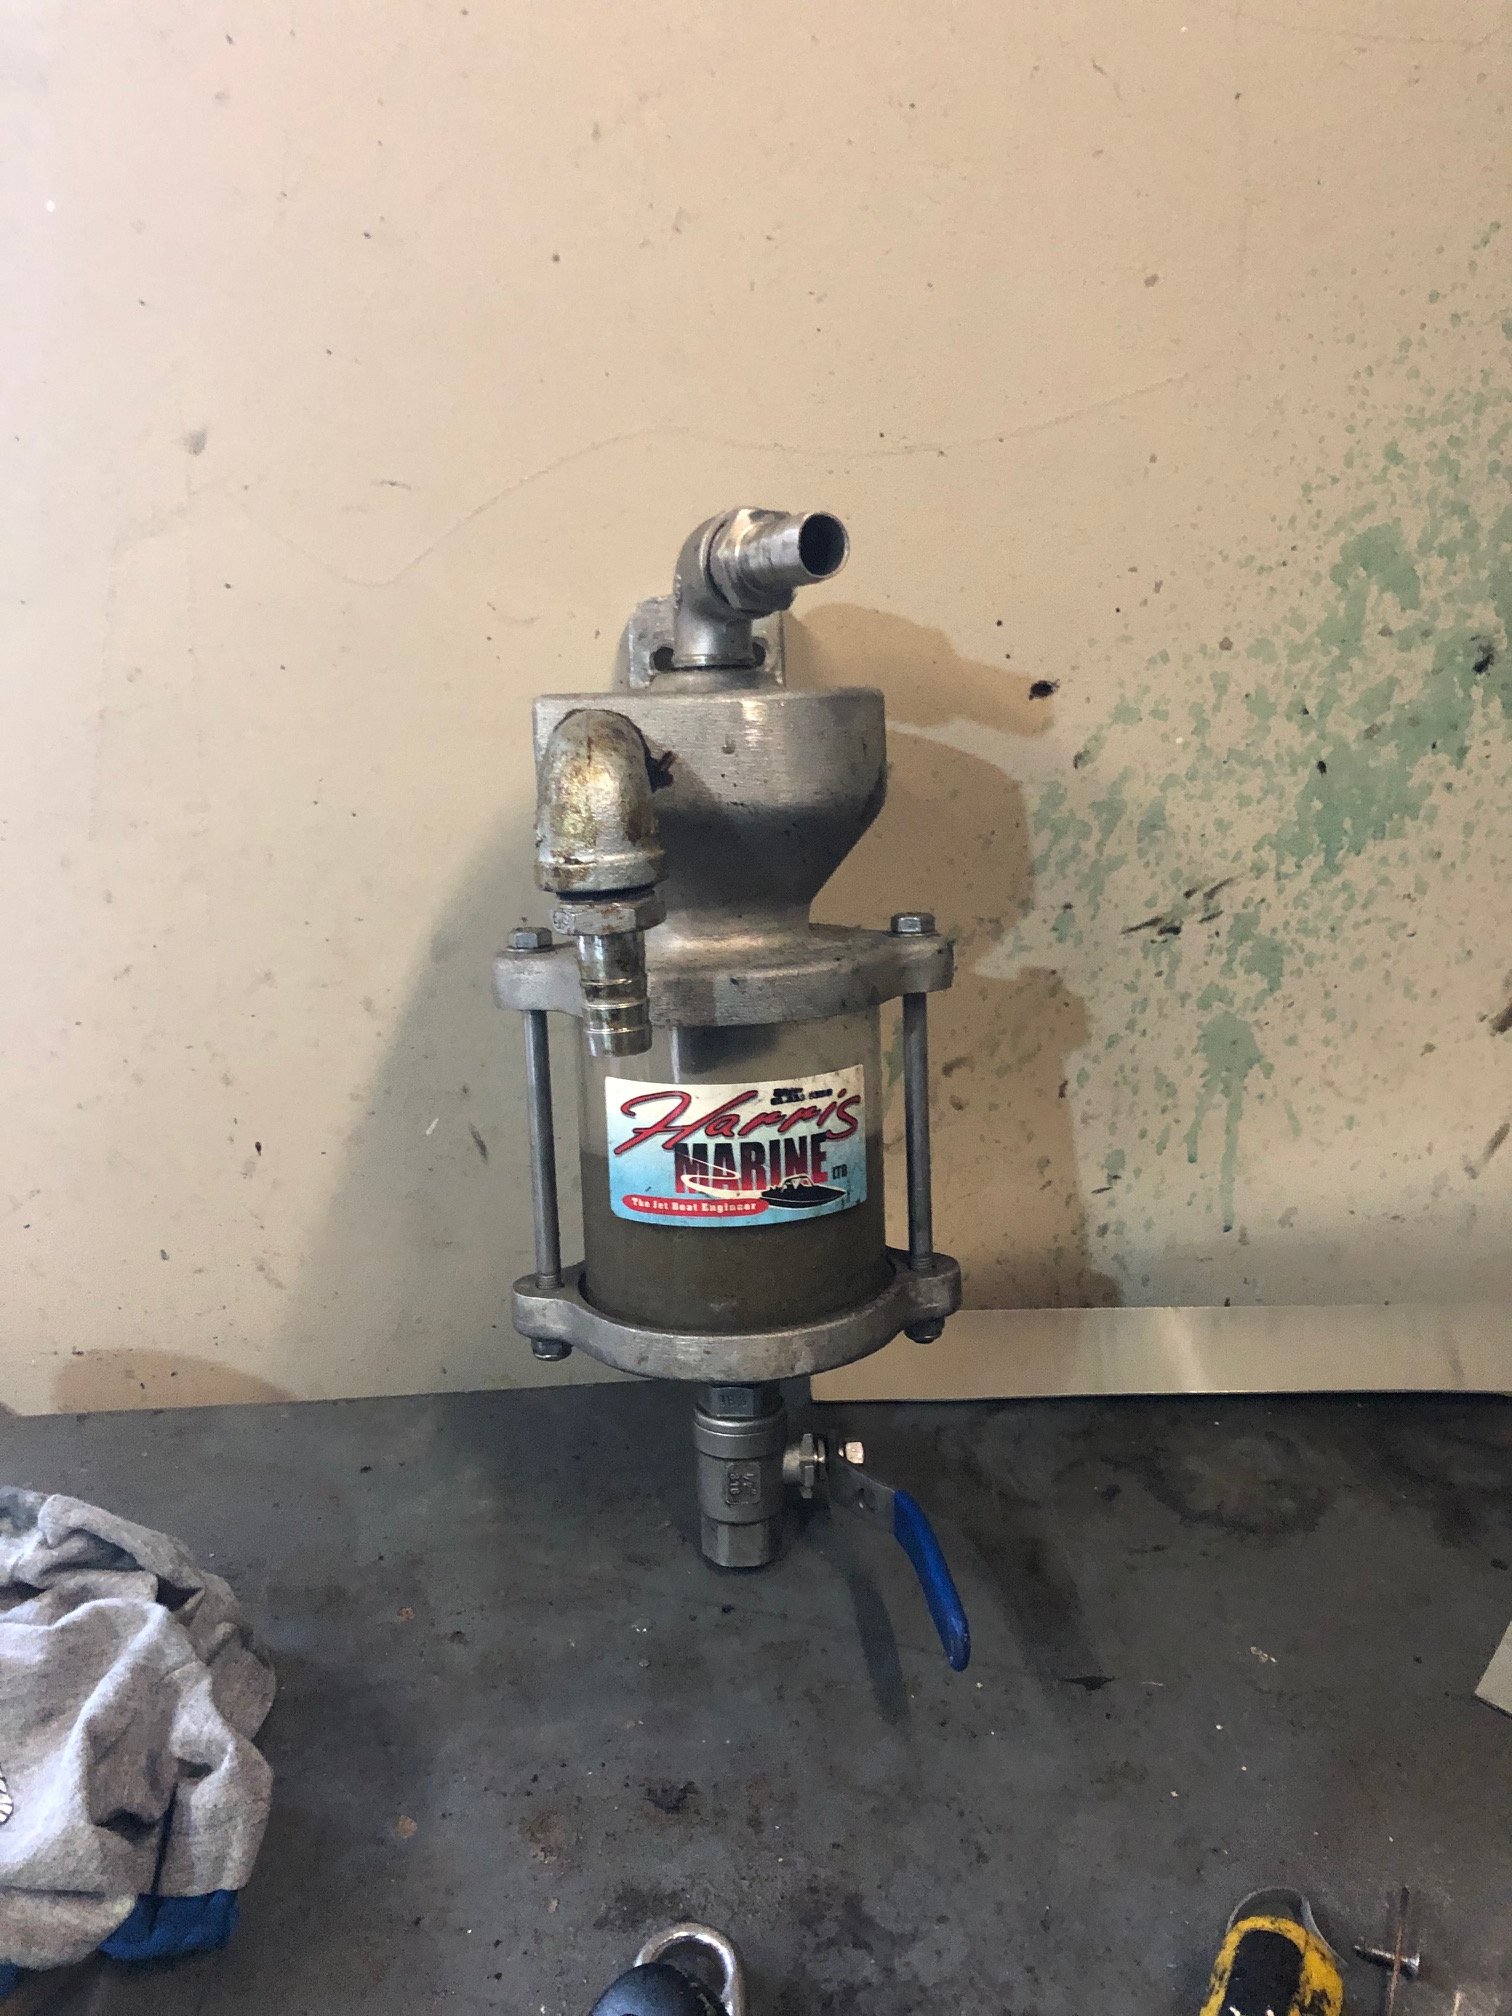
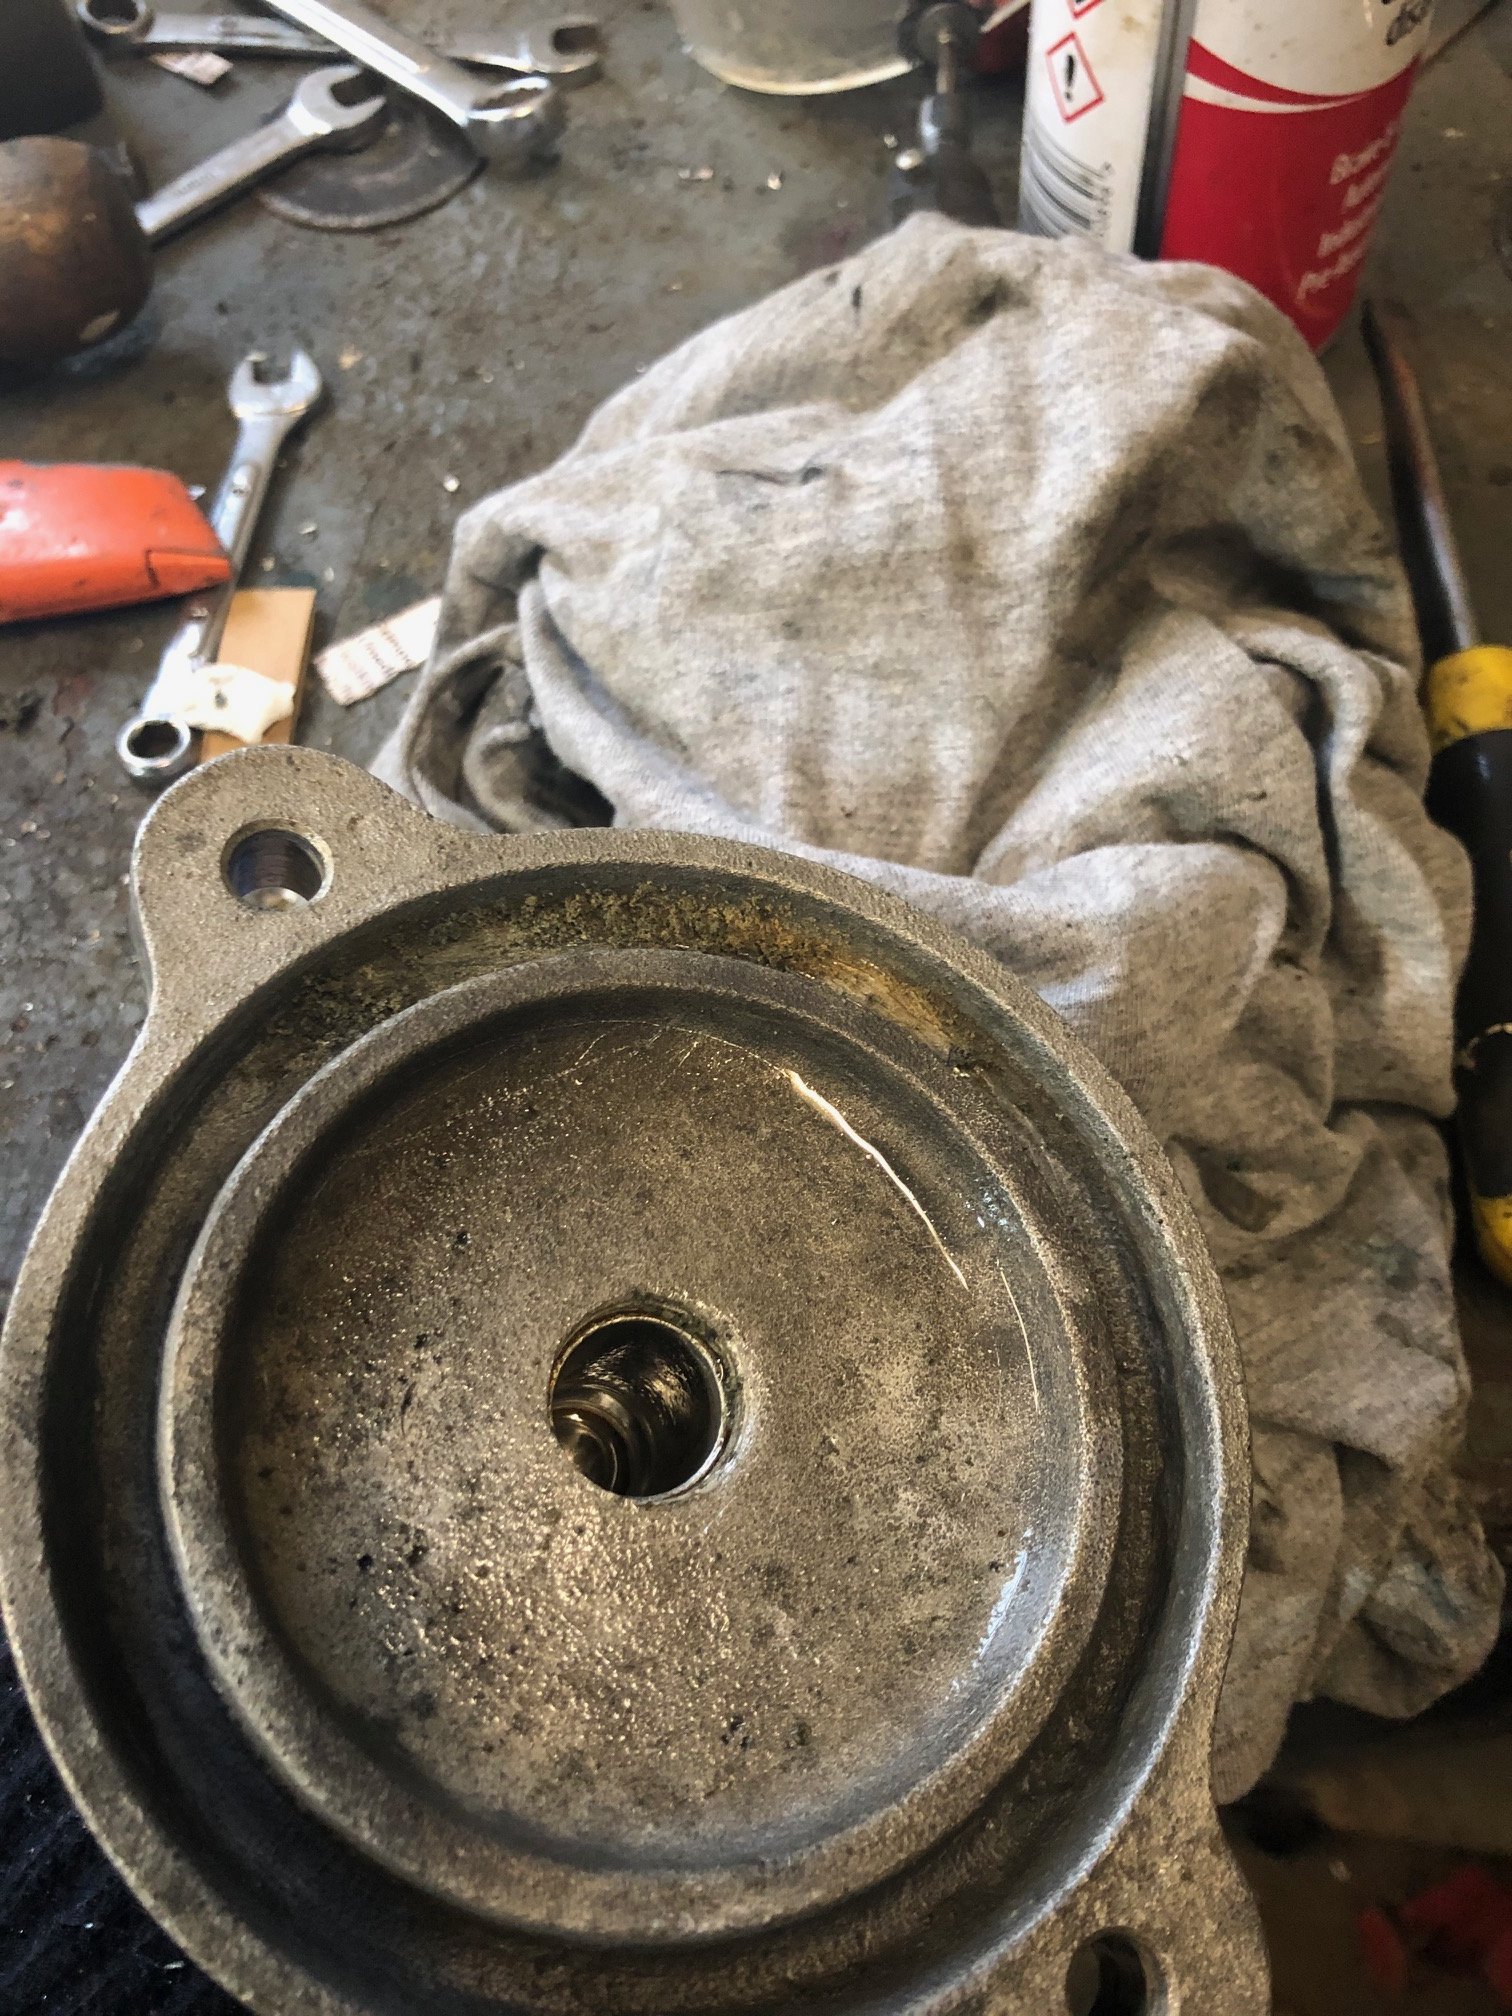
Got it out this weekend.... had reset the tune on it and it starts/idles alot better, still not perfect without ICAV but good enough.... trying to track down a log manifold so I can setup an O2 to do some proper logging/tuning. Also, when I did my sale inspection I noticed a decent amount of water collecting in the bilge. Mr mechanic seller wasnt to phased and was happy to use the pump most of the time to clear the bilge, I used this to negotiate thinking that either the jet unit for the bolts holding the keel plastic on would need resealed. Turns out the solution is way easier... water is fair pissing out of the lower seal on the sandtrap. Where the seal fits to the housing was loaded up with old silt and preventing it from sealing (likely pulled apart in a hurry and never cleaned), likewise the seals are old and caked up with grit. Should be an easy fix....
2 points
-
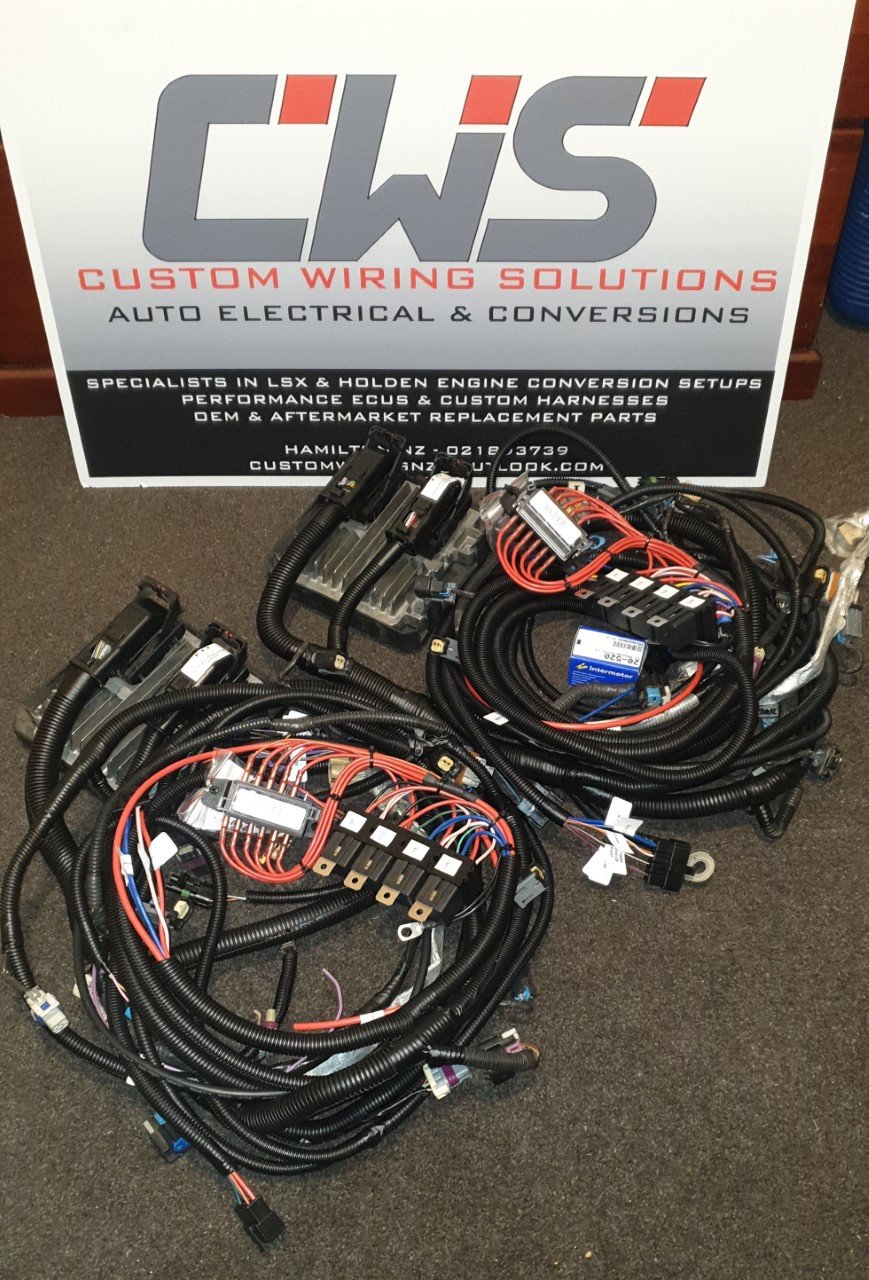
Big thanks to Drew (vk327 on here) for whipping up looms for me and the brother. While I'm sure an LS1 loom isnt toooooo hard, these later model engine ones turned out to be relatively complex and I am so fucking glad I didn't bother attempting it. There are a few little quirks that would have 100% caught me out, like the fact that my loom that came with engine was missing plugs and shit. Drew knows all the ins and outs which meant that the final product is essentially as good as it can possibly be for tuneability and coolcuntness. ECU/PCM now has base tune on it to roughly match cam, so I should be able to drive it down to the tuners for a tidy up and the all important power/torque figures. I should probably do a skid soon.
2 points
-
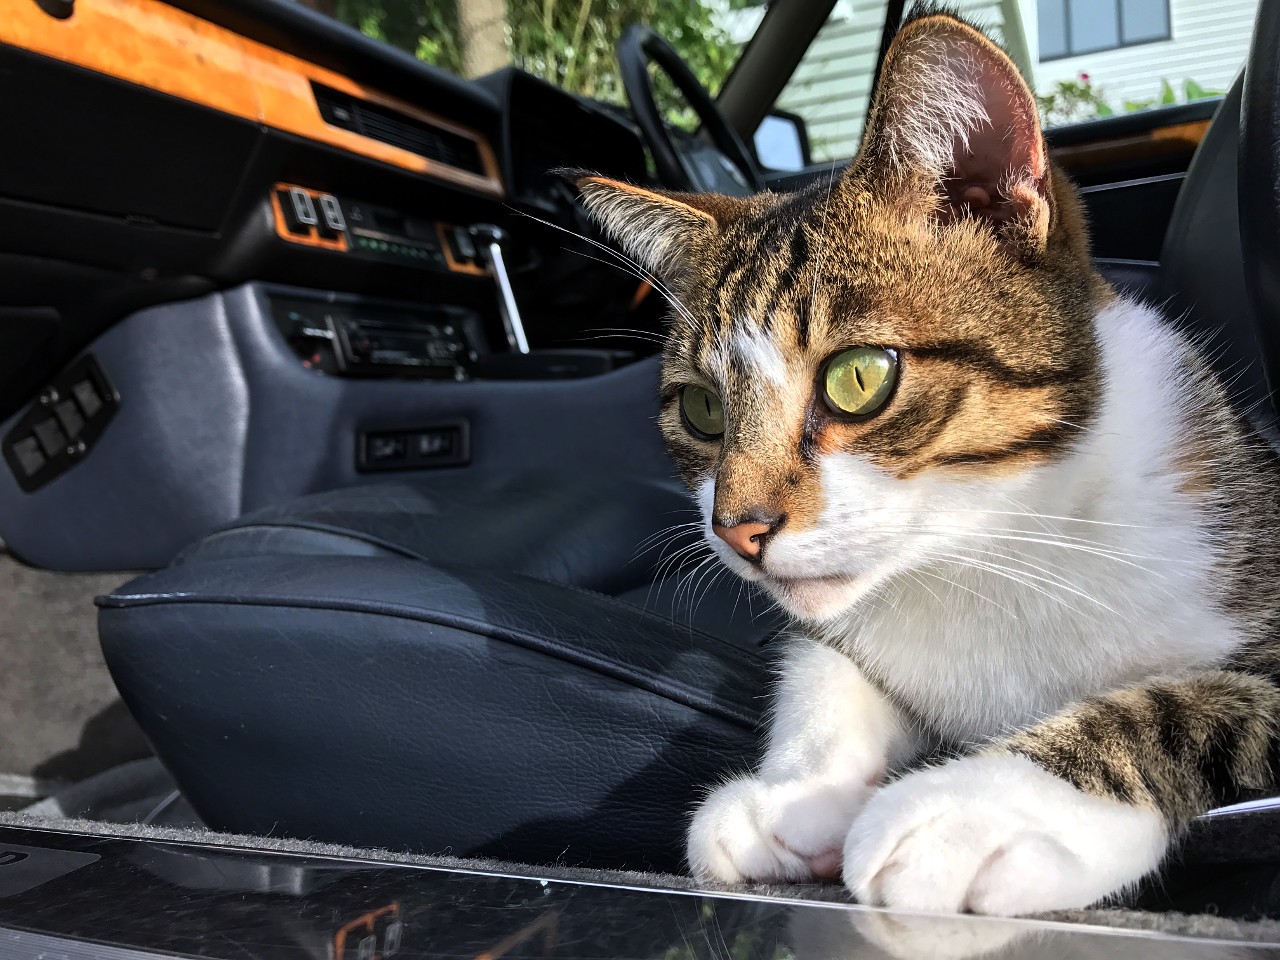
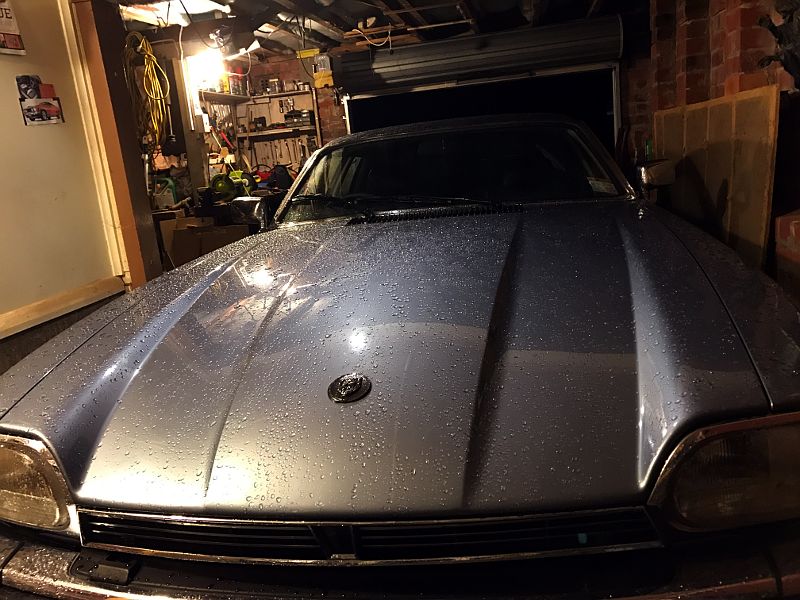
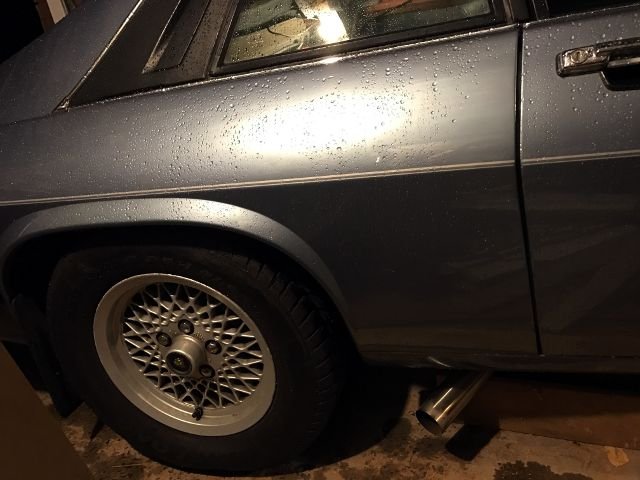
I'm back, ...and I've got a Jaaaag. "He's bought a grandfather clock!" 1988 Jaguar XJ-S 3.6L six cylinder auto - not a V12 big cat, more of a house cat: Such car, much pussy cat.. but why? I bought my poor Alfa 33 as a budget daily driver 14+ years ago. This time I was buying more of a weekend toy, so I decided I should get a midlife crisis an old man's car a hopeless British Leyland anachronism a coupe with at least 6 cylinders and maybe even some market value. I considered the Z31 300zx, C4 Corvette, third gen Firebird / Camaro, BMW 635CSi.. and then I realised none of those are in my buyers guide, "Lemon! 60 Heroic Failures of Motoring" by Tony Davis. Where's the fun in that? With the XJ-S, I'm on my third Heroic Failure car in a row! Also, why wouldn't you buy one of these. DOHC 24 valve, all alloy fuel-injected motor, independent rear suspension with inboard disc brakes and a limited slip diff. it's basically a high performance weapon. It's so awesome that it needs six shock absorbers and six coil springs. It's got luxury covered too - climate control air conditioning, heated seats, heated electric mirrors, leather, wood, chrome, and a trip computer to impress your stockbroker mates. All this for similar $$ (today) to an old Ford Escort. Best of all, because it's only a 2-door 2+2, it's so compact that it fits in my garage very well... I don't have any good photos yet, but it's a stock '88 hardtop in Arctic Blue with the mesh alloys, blue leather seats and no rear spoiler. Impressions: A barge. Smells like an old car. The long bonnet look means the windscreen is in your face. The low roof means you sit on the floor with the seat reclined to get enough headroom. The exhaust is too quiet, so the soundtrack is mostly a bunch of mechanical whinings and grindings and miscellaneous grumbling and wheezing. Plans: Fix stuff, fix more stuff, fit soundz, work on making it better to drive and subtly hot it up enough that classic car snobs disapprove of me. Oh the fun I'll have. Discussion: https://oldschool.co.nz/index.php?/topic/58671-thousand-dollar-supercars-1988-jaguar-xj-s-36/
1 point
-
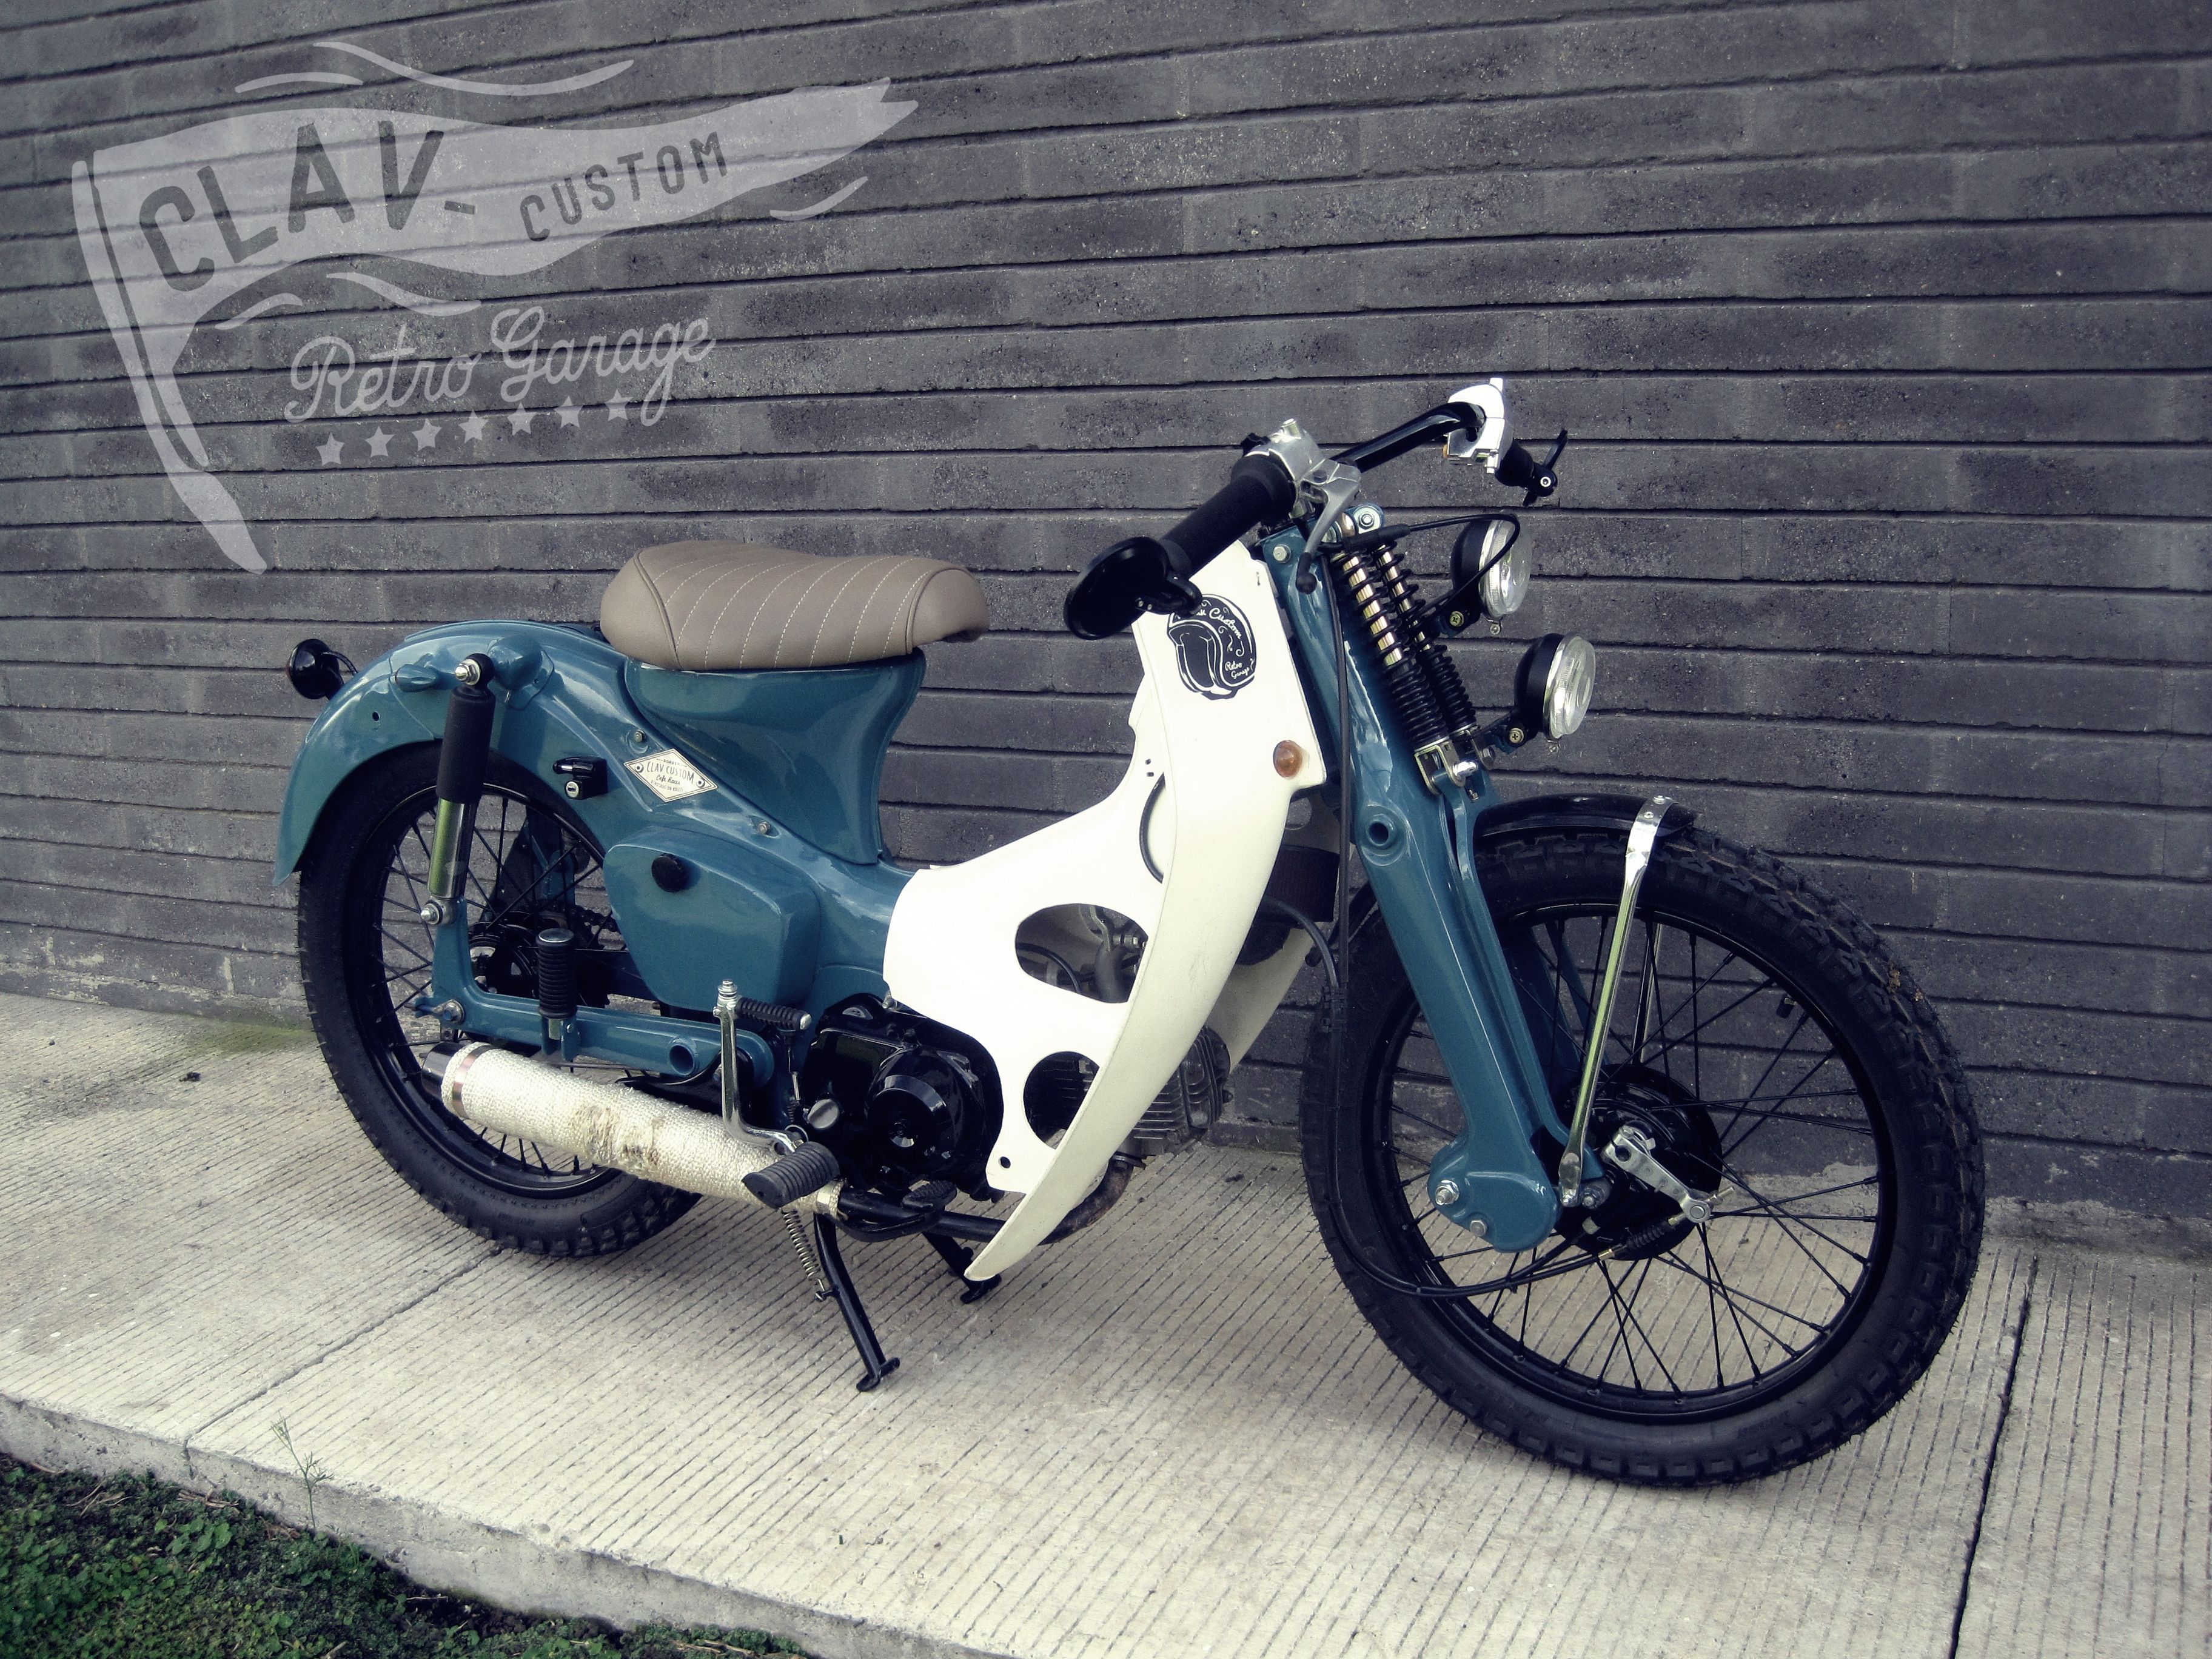
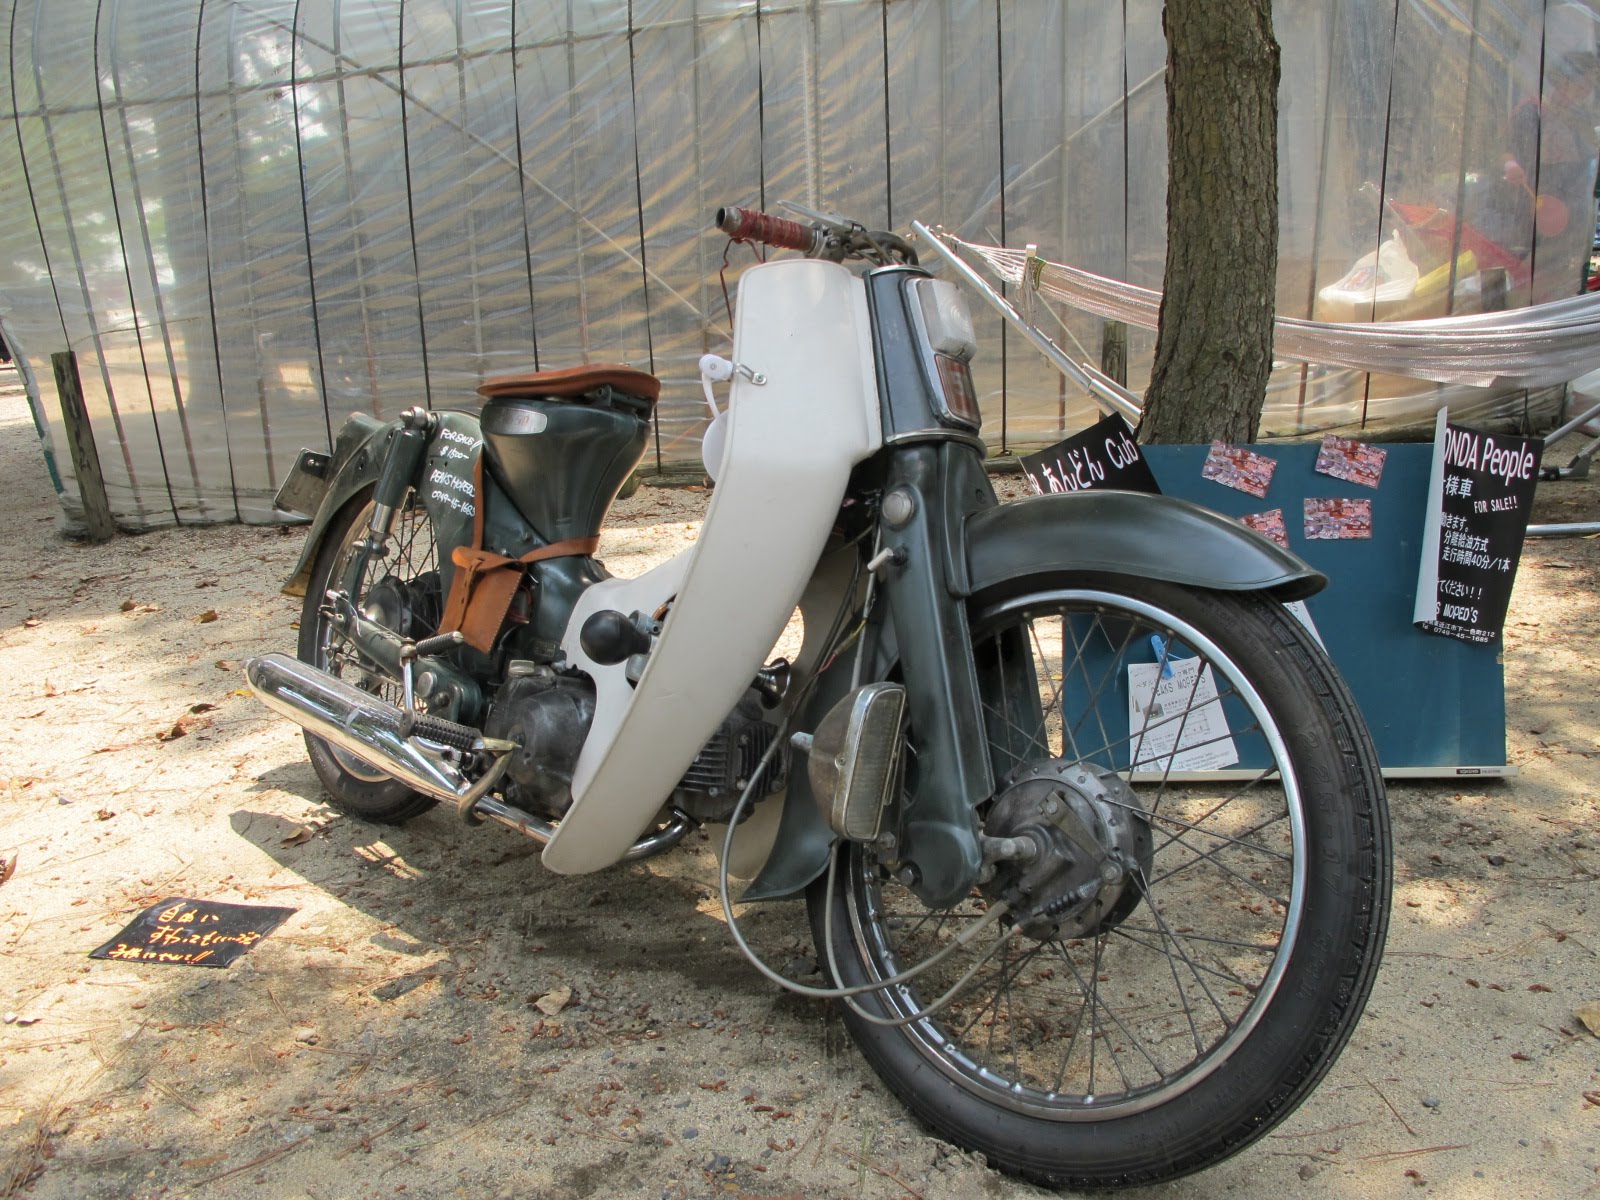
Many moons again I bought a Cub deluxe from fellow member @kicker and I've had it sitting in my lockup with very little riding so it sat there and the throttle had semi seized but I have a desire to hoon it over summer. So I took it to a local Scooter shop who told me they owned a ton of these, they proceeded to charge me $125 to "look at it" (a compression test, adjust the point gap and look in the fuel tank) then tell me it would cost at least $500-1000 and up to $2000 to get it running. Which, as you can imagine, made my eyes water a bit more than normal. I approached @Hayholes mum who told me to pull my finger out, I grabbed it back from the scooter shop and its now at his workplace waiting for me to strip it down. This is how it looks right now. But I am in negotiations to swap the frame for a Cub standard that does not have the rear fender trimmed because that's my preferred look. Plans are for a bit of slam, clutched 125cc, some wider tyres, BMX bar conversion, low mount headlight and knee height speedo. I'll also splash out on some new rims if I can afford it. Fortunately most parts are available on Trademe for these thing meaning it's fairly cookie cutter stuff. Having been a mechanic for a lot of years I should have looked at it myself but for some reason bikes scare me. Now I know how much they charge an hour I'll never be going to a bike mechanic ever again. These are some of my inspirations right now... I'll update some pics as I proceed through the strip down and rebuild process. Let's hope it's one of my quicker projects...
1 point
-
1 point
-
Thanks @Roman, yeah about 16 months on now the old back is about as healed as it will ever be, but mostly good. It's all starting to take some sort of shape, which is good, still hoping to get it done this year, but so much has come up financially/in general that it might be a bit of a mission. Definitely ready for Nats 2021 though.1 point
-
I just caught up on this thread - holy shit about that crash! Glad you were okay from that. This is looking friggen awesome, A++1 point
-
I'm calling it done; nothing says finished quite like mismatching grey paint and a pin-up girl decal.
1 point
-
Got all my forms filled out, acommodations booked, filled the gas bottle for the weber, all i need is bourbon and other stuff and Im sorted. @HighLUX did you sort a bed for gissy?1 point
-
Good work KK!1 point
-
Super cool to see this thing progress KK ! Enjoy the shakedown rides !1 point
-
So I'm a retard and didn't connect the fuel to the inlet so the bowl was dry, it was connected to a vac port and sucking fuel in through the vac hose on the inlet lol. it runs less badly now, rill rev out if gently open the throttle but if you give it a stab it backfires. will need to re figure out the vacuum lines and get a wideband (and get into the injection as thats easier for me to understand) and see if it is lean or rich on accel1 point
-
Yep, goes in the tailstock drill chuck, it's free to move on the arbor. Back half takes 2" dies, front half takes 1" dies. I still need to make adapters for 13/16", 1.3" and 1.5", but the cost of dies is so crazy that I probably won't make them until I need to. I had a test hoon with it earlier, it cuts like 80 mm of M8 thread in about 10 seconds. Single point threading that length would take me forever and probably turn to shit due to part deflection.1 point
-
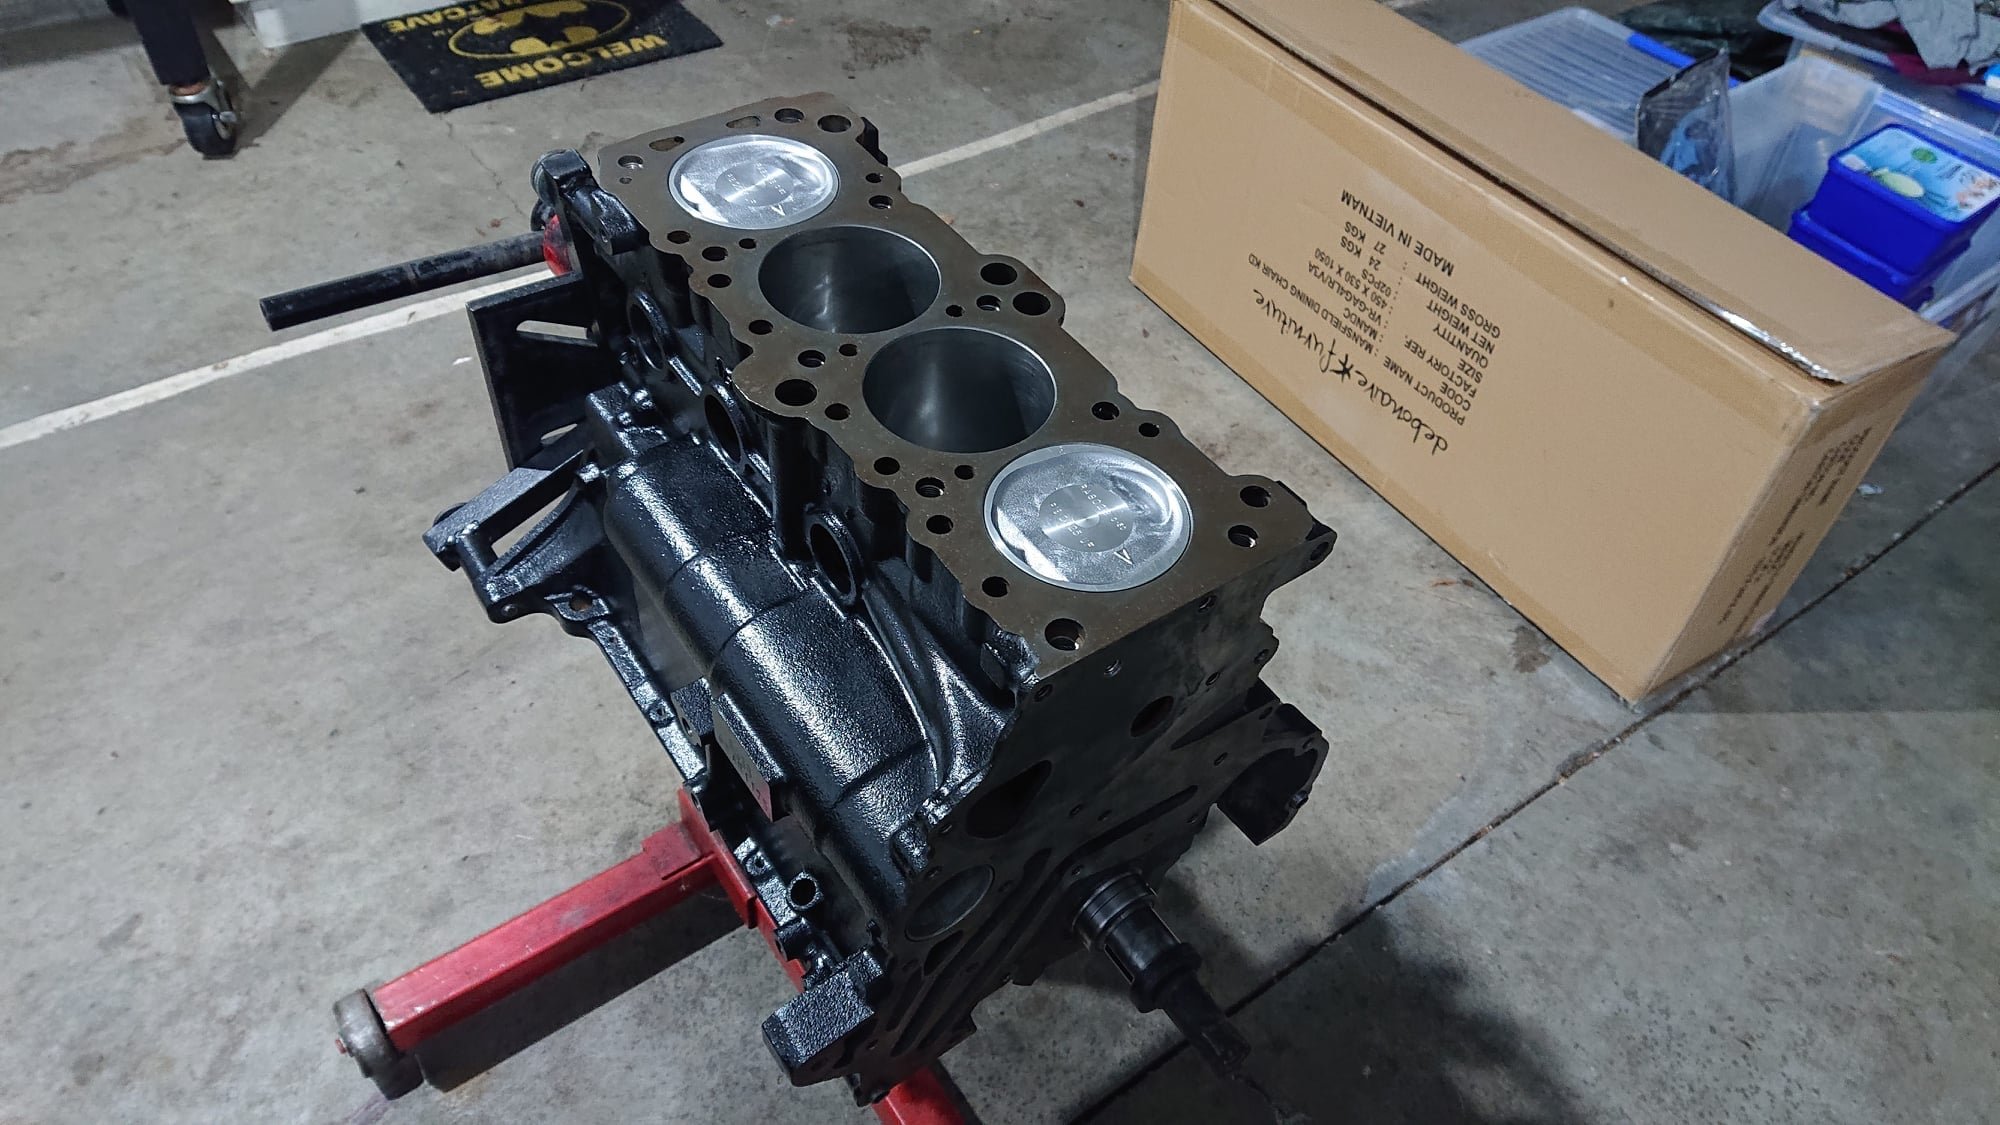
Heads are fucked.. Cracked, Cracked Crack close up.. Cracked in between spark plug and valve.. These are in the same place on both heads So that's pretty annoying but to be expected.. Gonna have to split the case to clean it out, no point doing this only for it to fail later on so with that in mind stroker crank and 1776 barrels should give me 2007cc. Just have to bore the case but also have to bore any heads that replace these.. might as well get a new set already bored for bigger barrels, 9 hundy for a pair ready to bolt on bar bit of port work I want to do. *sigh* Prob about time for this.. https://oldschool.co.nz/index.php?/topic/74619-yetchhs-more-problems-than-i-expected-bay-kombi/
1 point
-
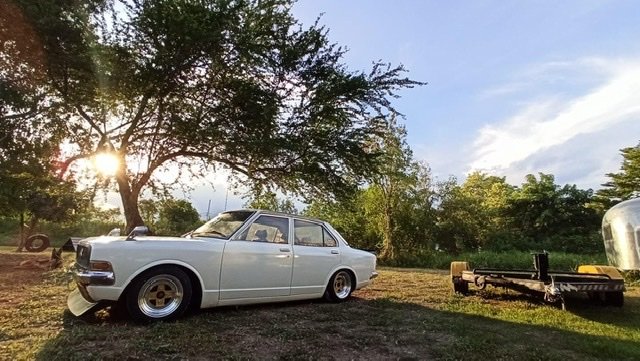
Bit of a shakedown run out to Lake Sumner over the weekend. Back in her natural habitat, gravel roads. Went like a champ!
1 point
-
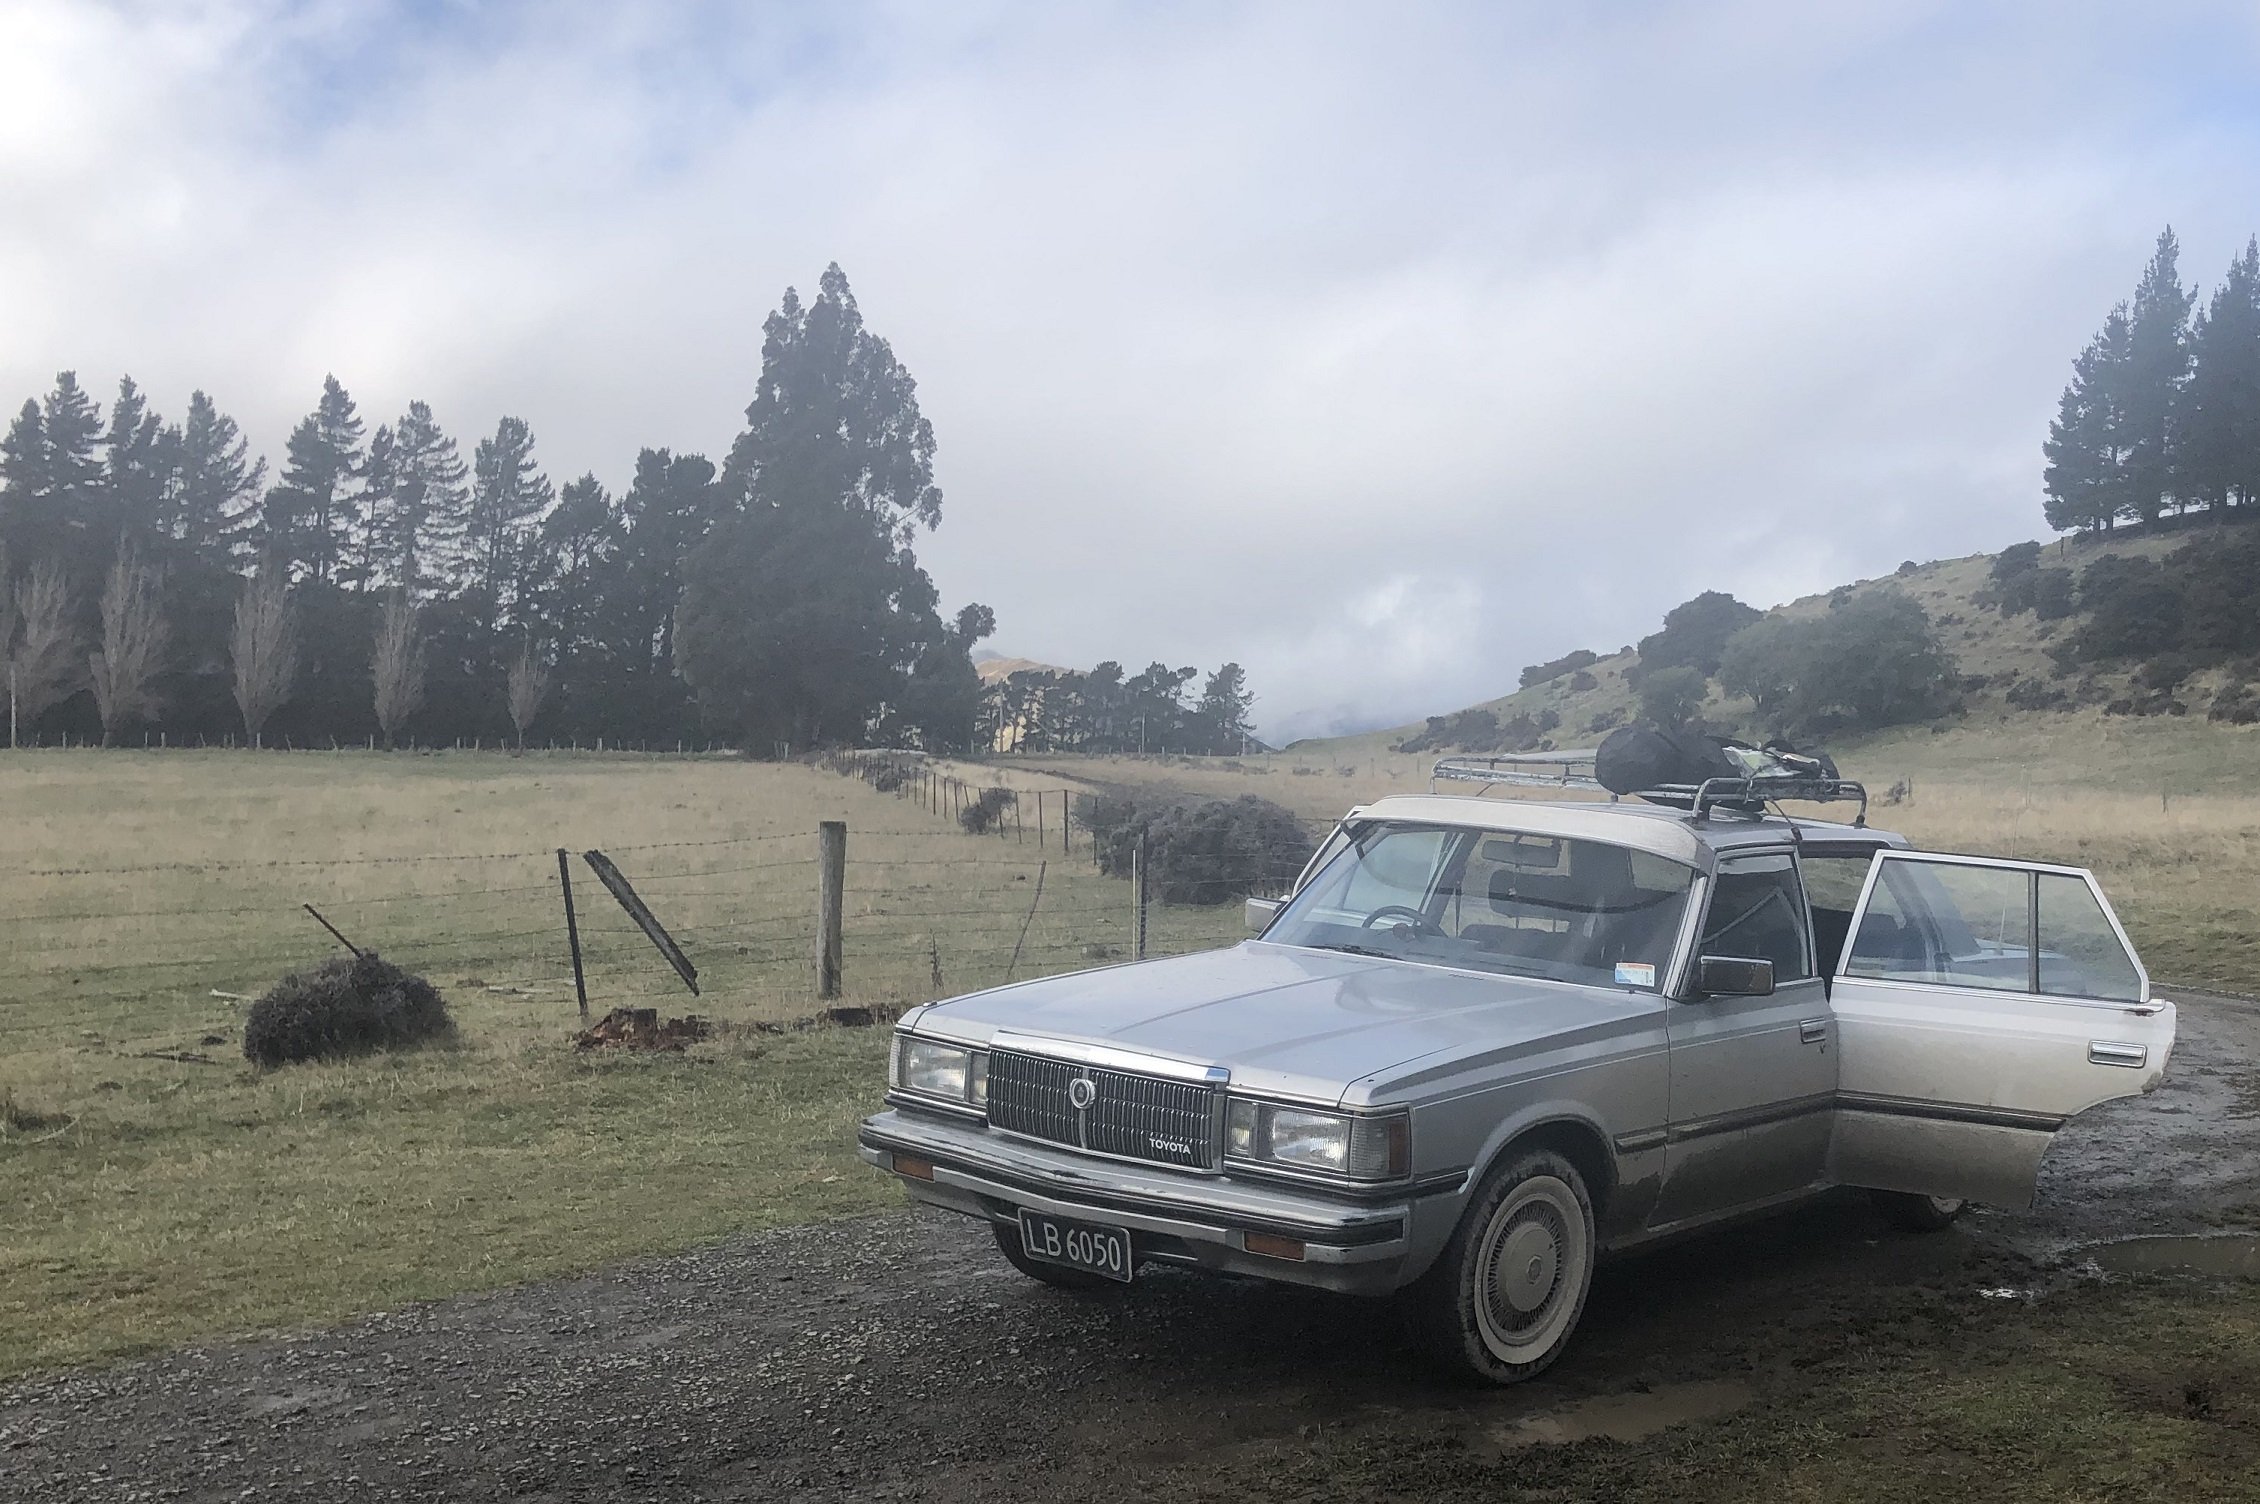
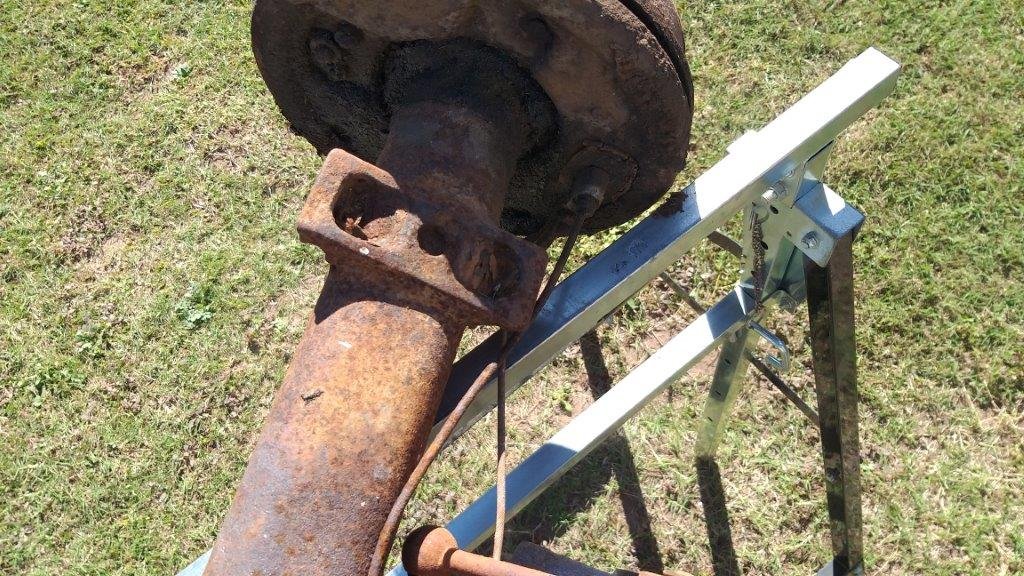
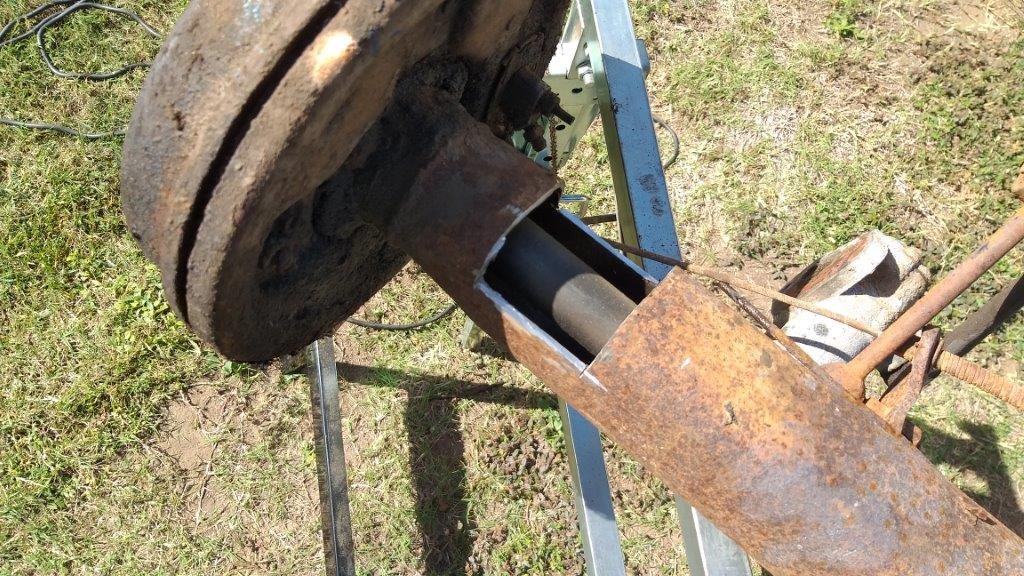
Having set a new direction I started puzzling the next steps. I'm still keen to replace the Thames rear axle with the Toyota. Reasons being greater availability of spares and diff ratios for the Toyota as well as bigger drum brakes. So current thinking is to fit up the diff first and then I can fine tune the front to match by making up some spacers between my newly fabricated front beam mounting brackets and the beam itself. Getting the front beam further away from the chassis gives me the added advantage of dropping the engine and gearbox lower to the ground which not only buys me a lower centre of gravity, but also gives me more clearance between the chassis rail and my clutch slave cylinder which up to now have been in close contact with each other. The gearbox bell housing will also clear the rear wall of the engine box whereas before they were touching and I was looking at having to notch the wall. So all round I'm killing a few birds with a single stone. With this all decided yesterday I set about sorting out the axle perches for the Toyota diff. I took a bit of a short cut by cutting the original Thames mounts off the spare Thames axle that I picked up in New South Wales earlier in the year and that has been languishing in the back of my other HiAce parts van since then. I felt a bit guilty for destroying the old housing, but it's for the greater good. A quick cutty, cutty with my favourite little grinder of angles and I'm half way there. Just need to glue them onto the HiAce axle
1 point
-
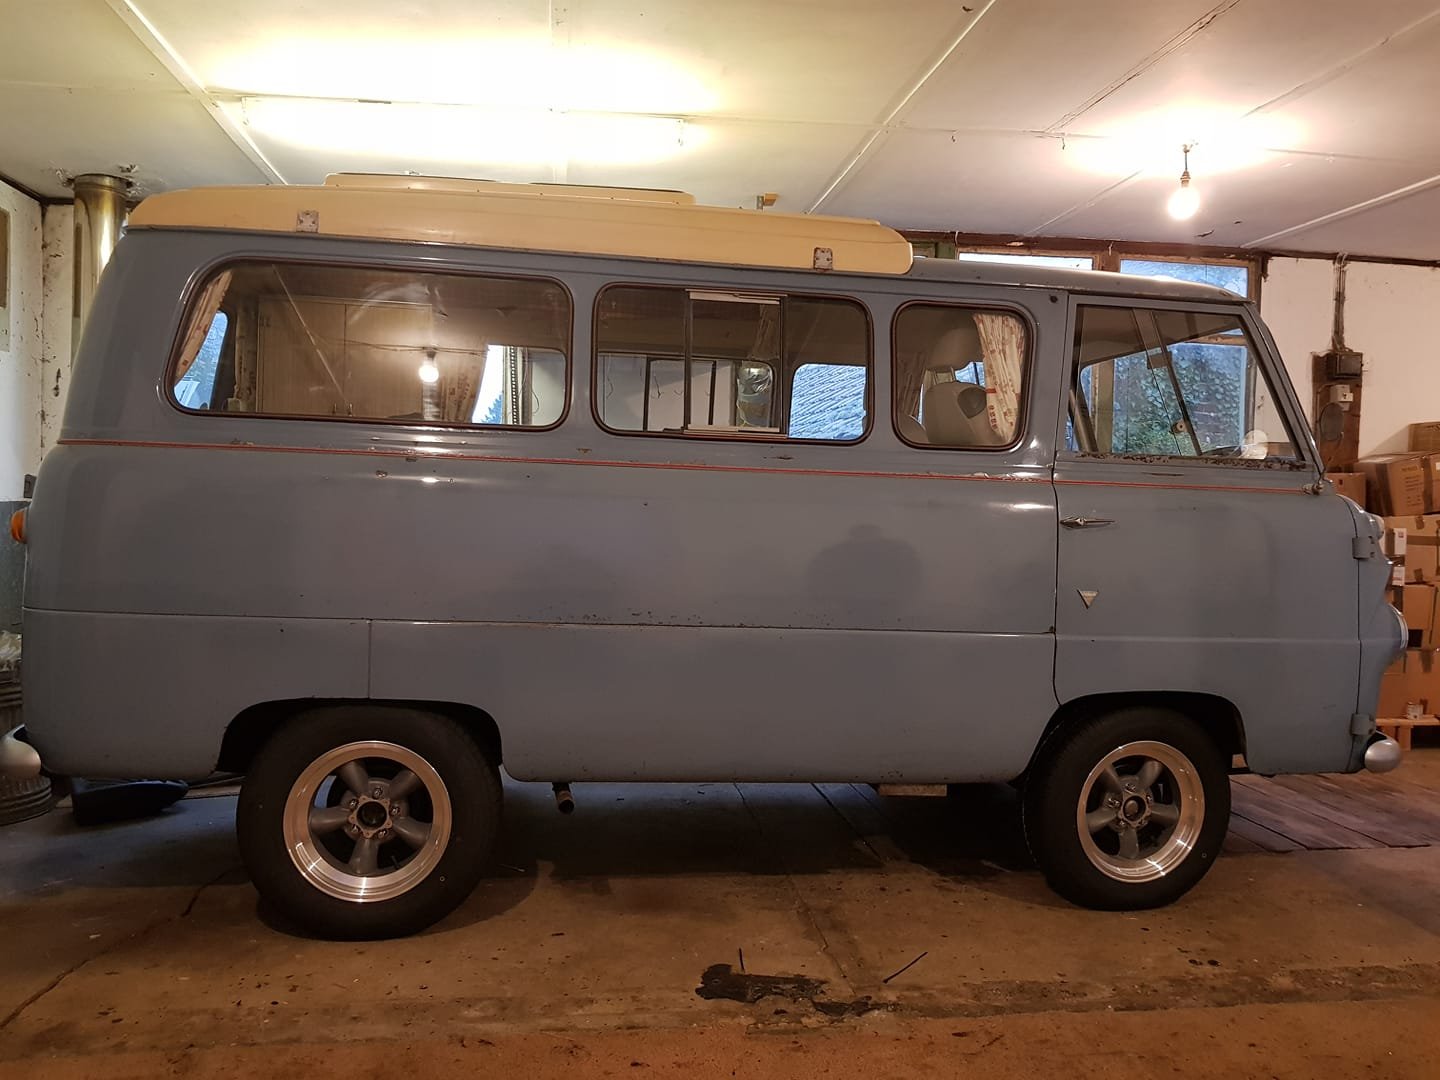
So looking at the "path of least resistance" I've decided to stick to something closer to standard road height. Not only does it solve my rubbing front wheels, but it addresses a few other smaller challenges including a steering rag joint that is rubbing on a chassis leg. Someone on the Book of Faces posted a pic of their Thames running on 15 inch diameter Torque Thrust 2s at standard road height. He is running 6Js up front and 7J rears. The 15s fill the arches really nicely. The Torque Thrusts give a similar look to the Dragways, but the chrome on my Dragways is flogged and would cost moonbeams to re-chrome. The Torque Thrusts are alloy so no similar problems going forward.
1 point
-
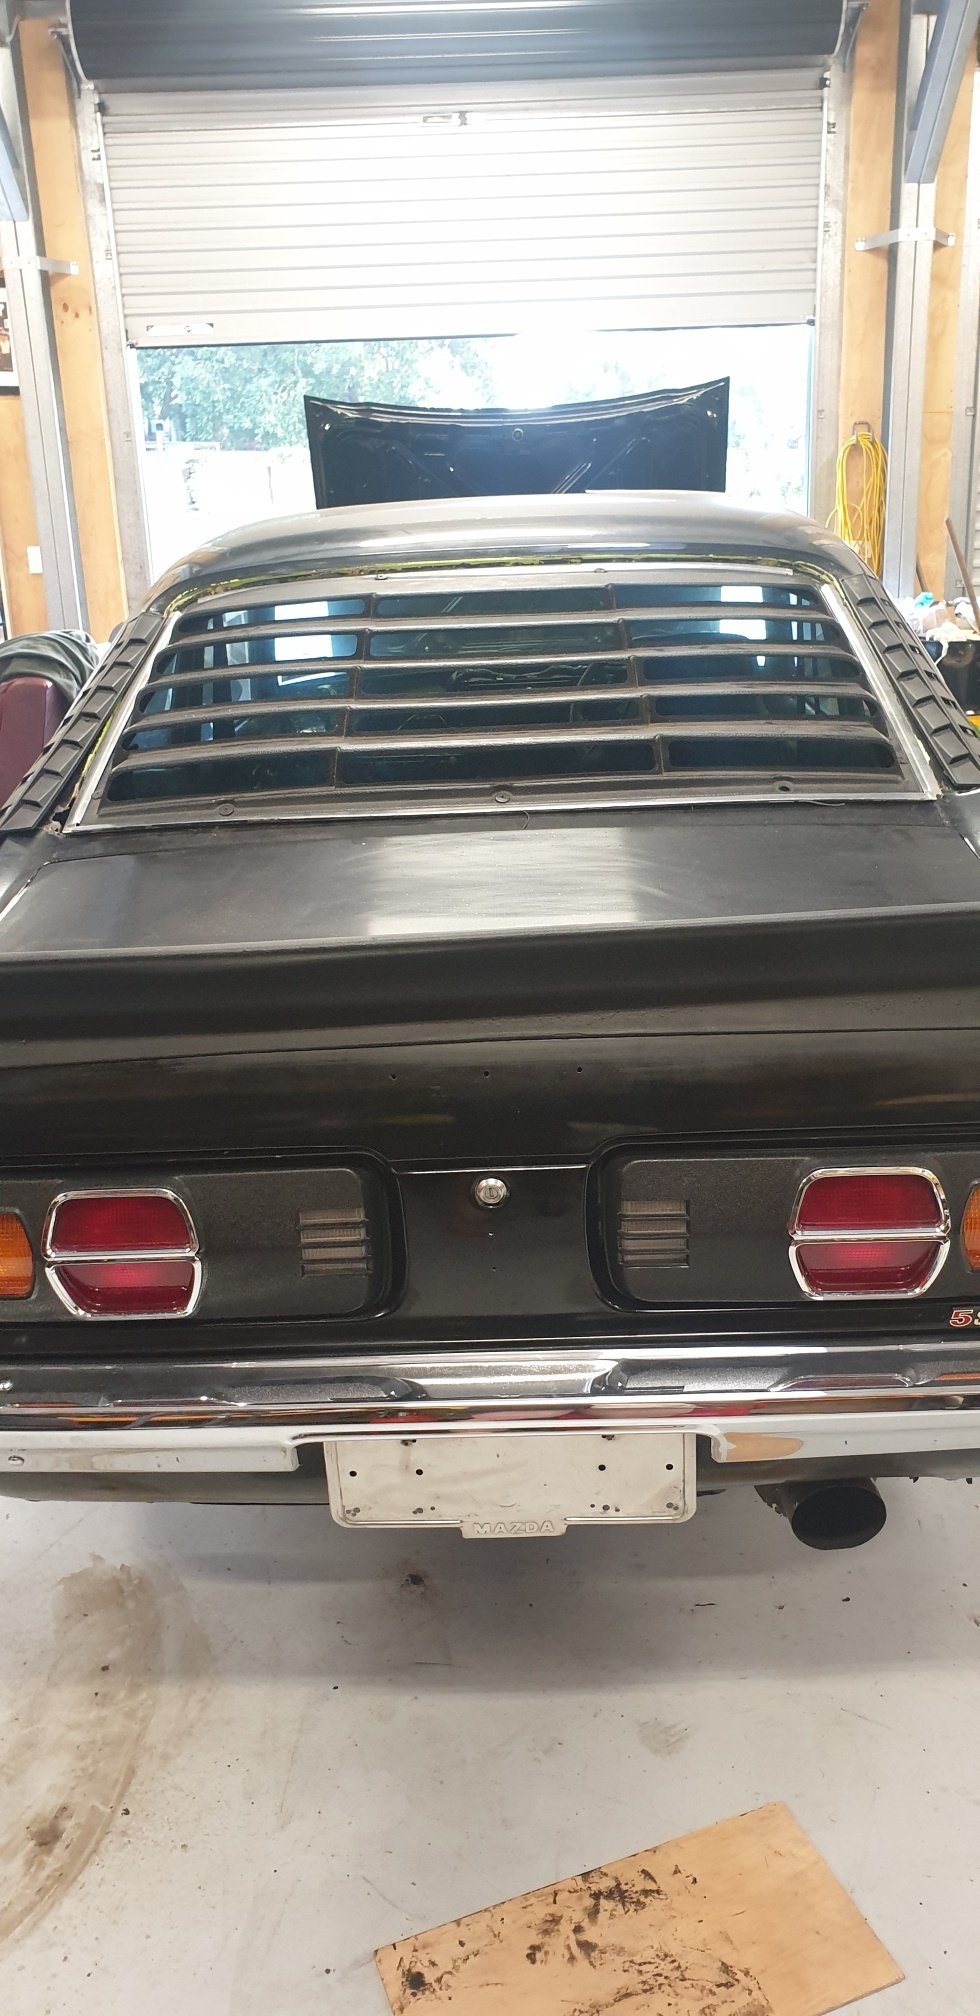
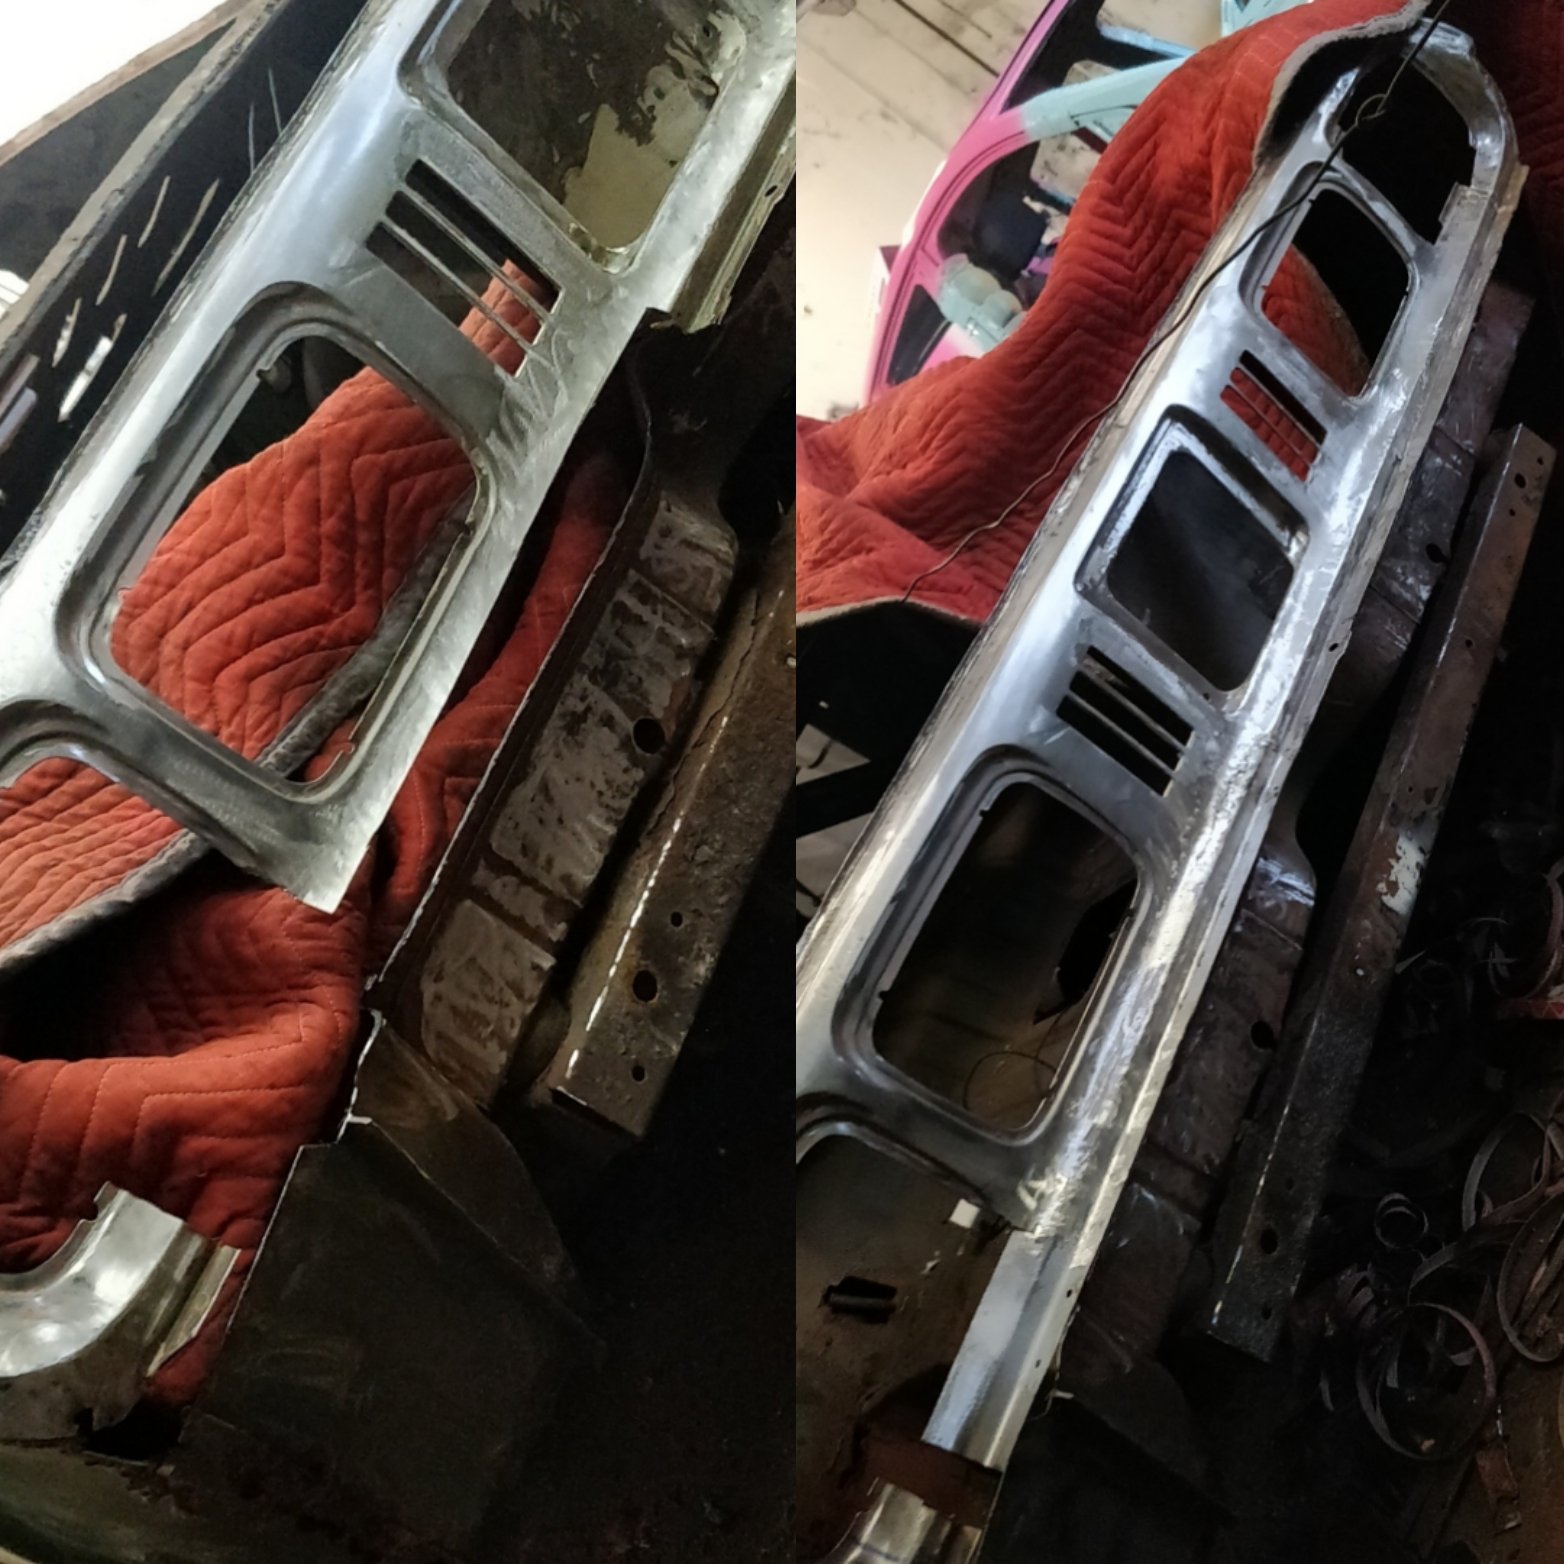
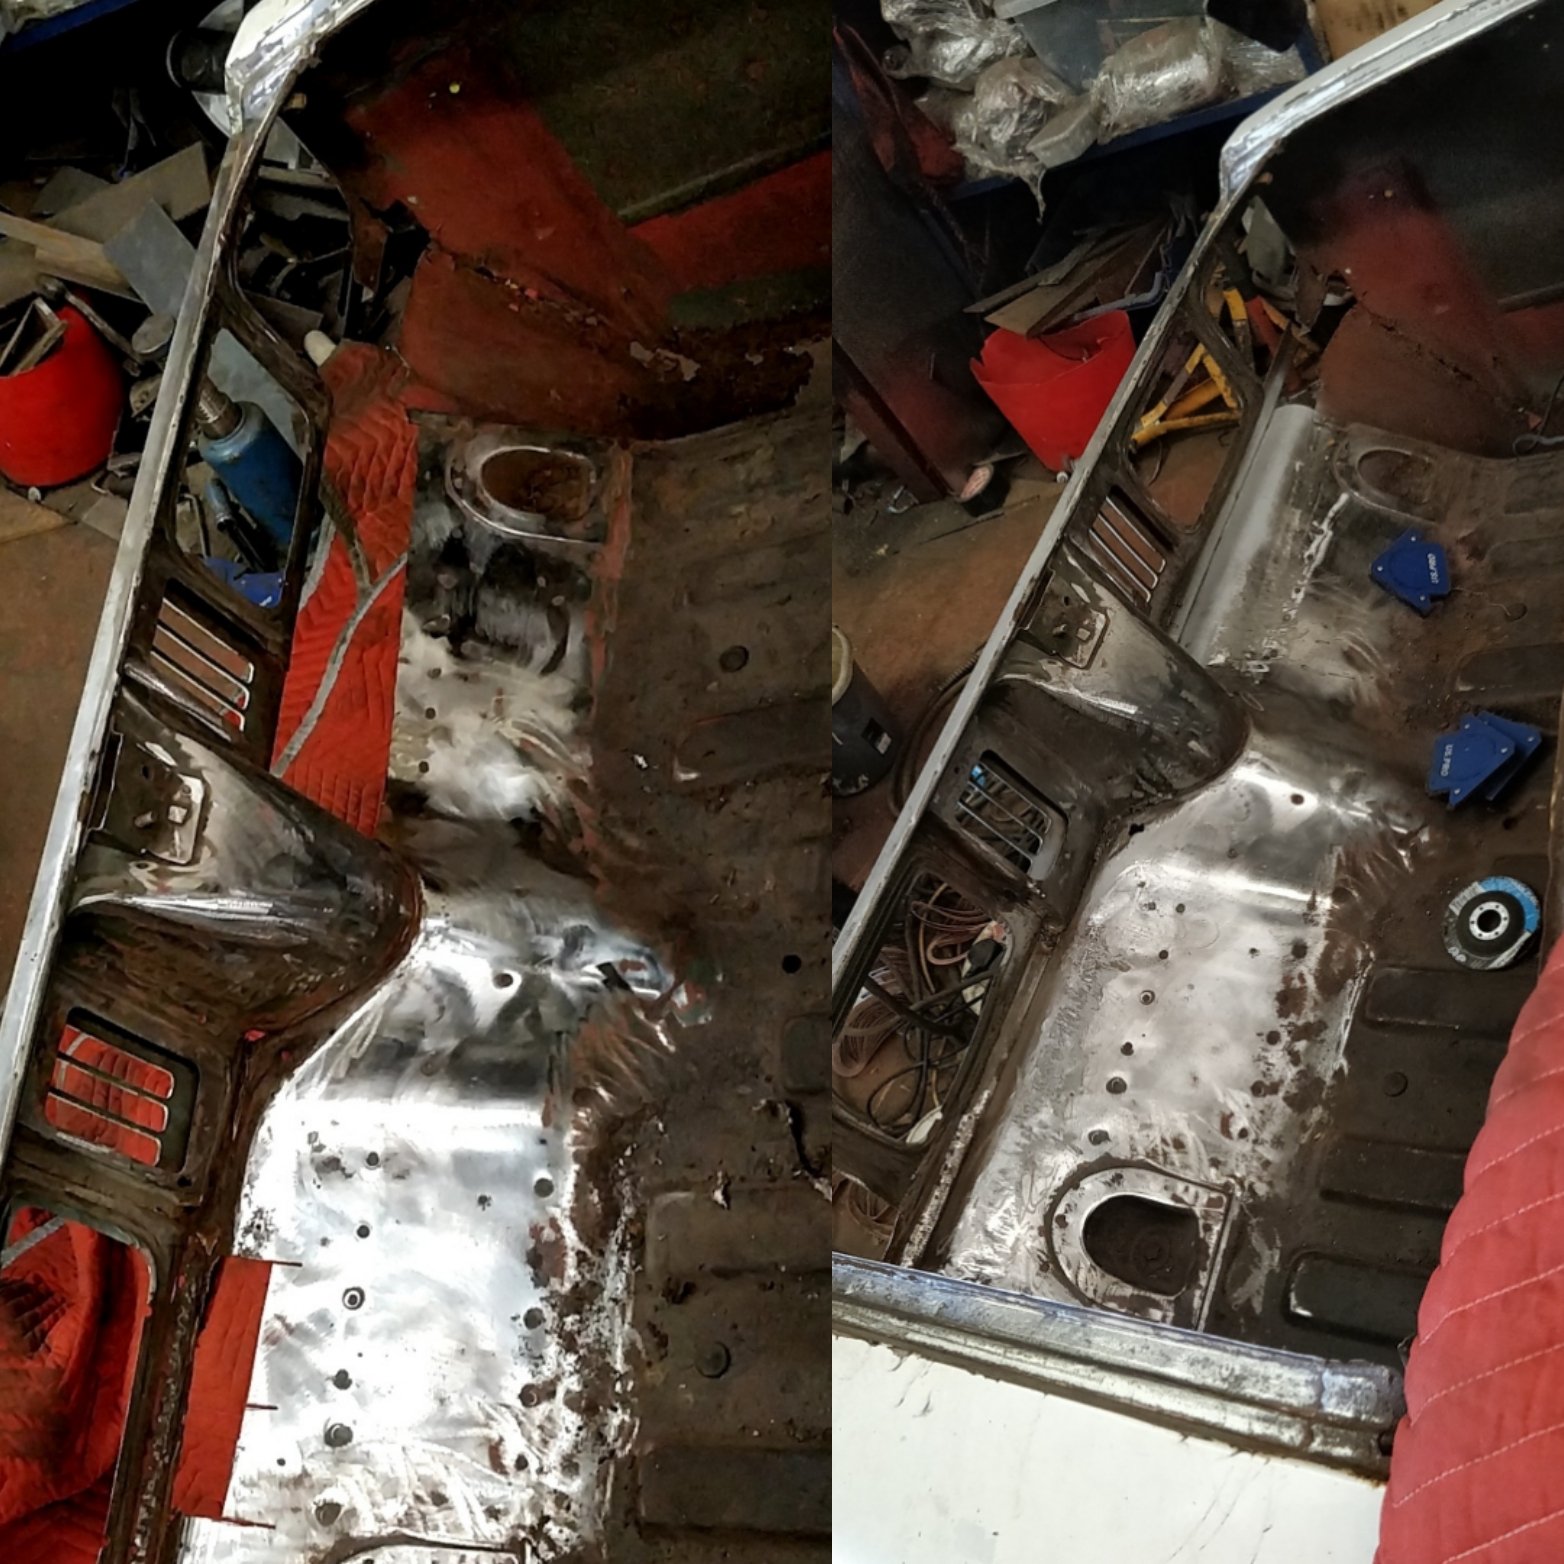
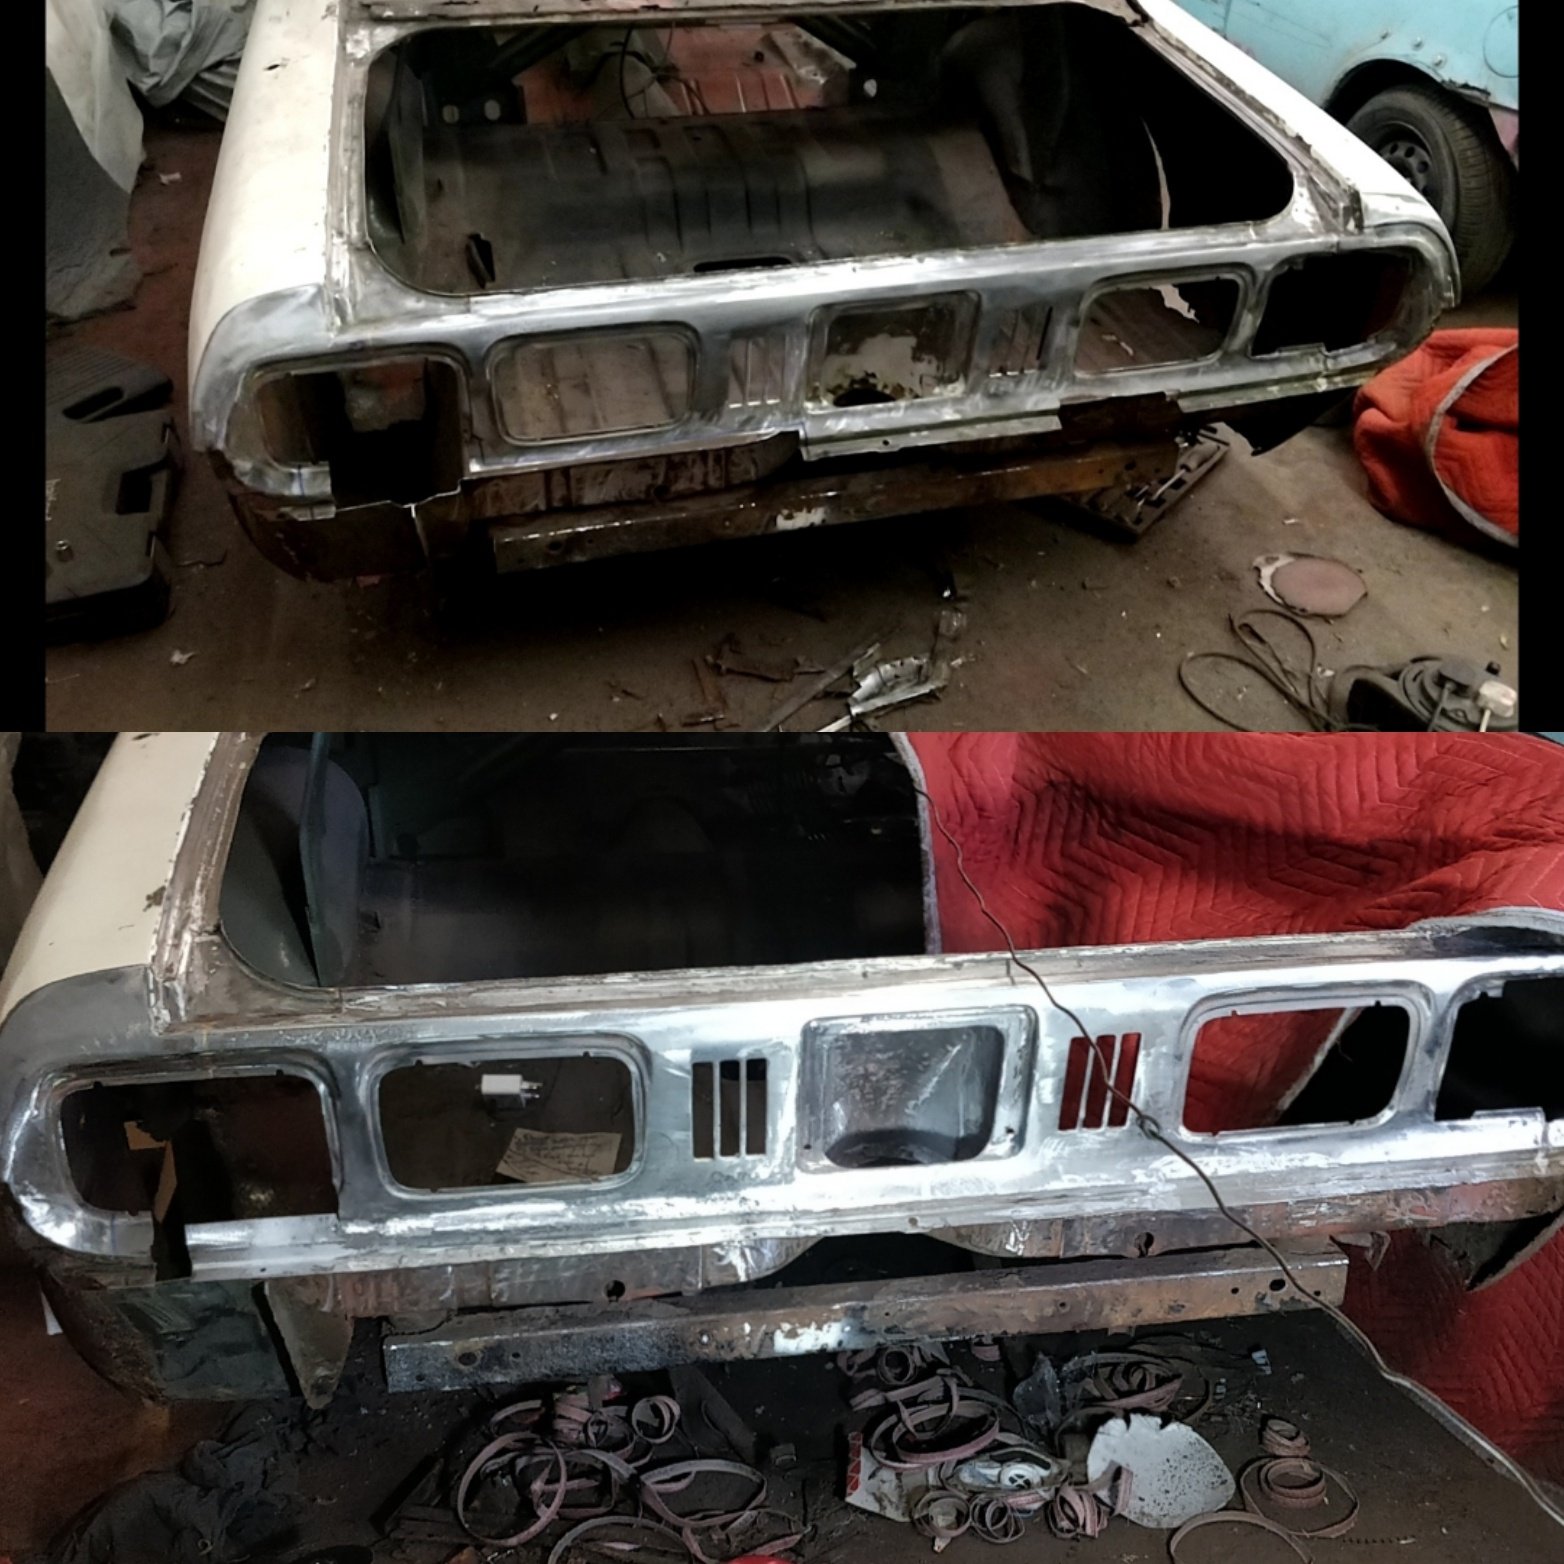
More back panel progress this weekend.
1 point
-
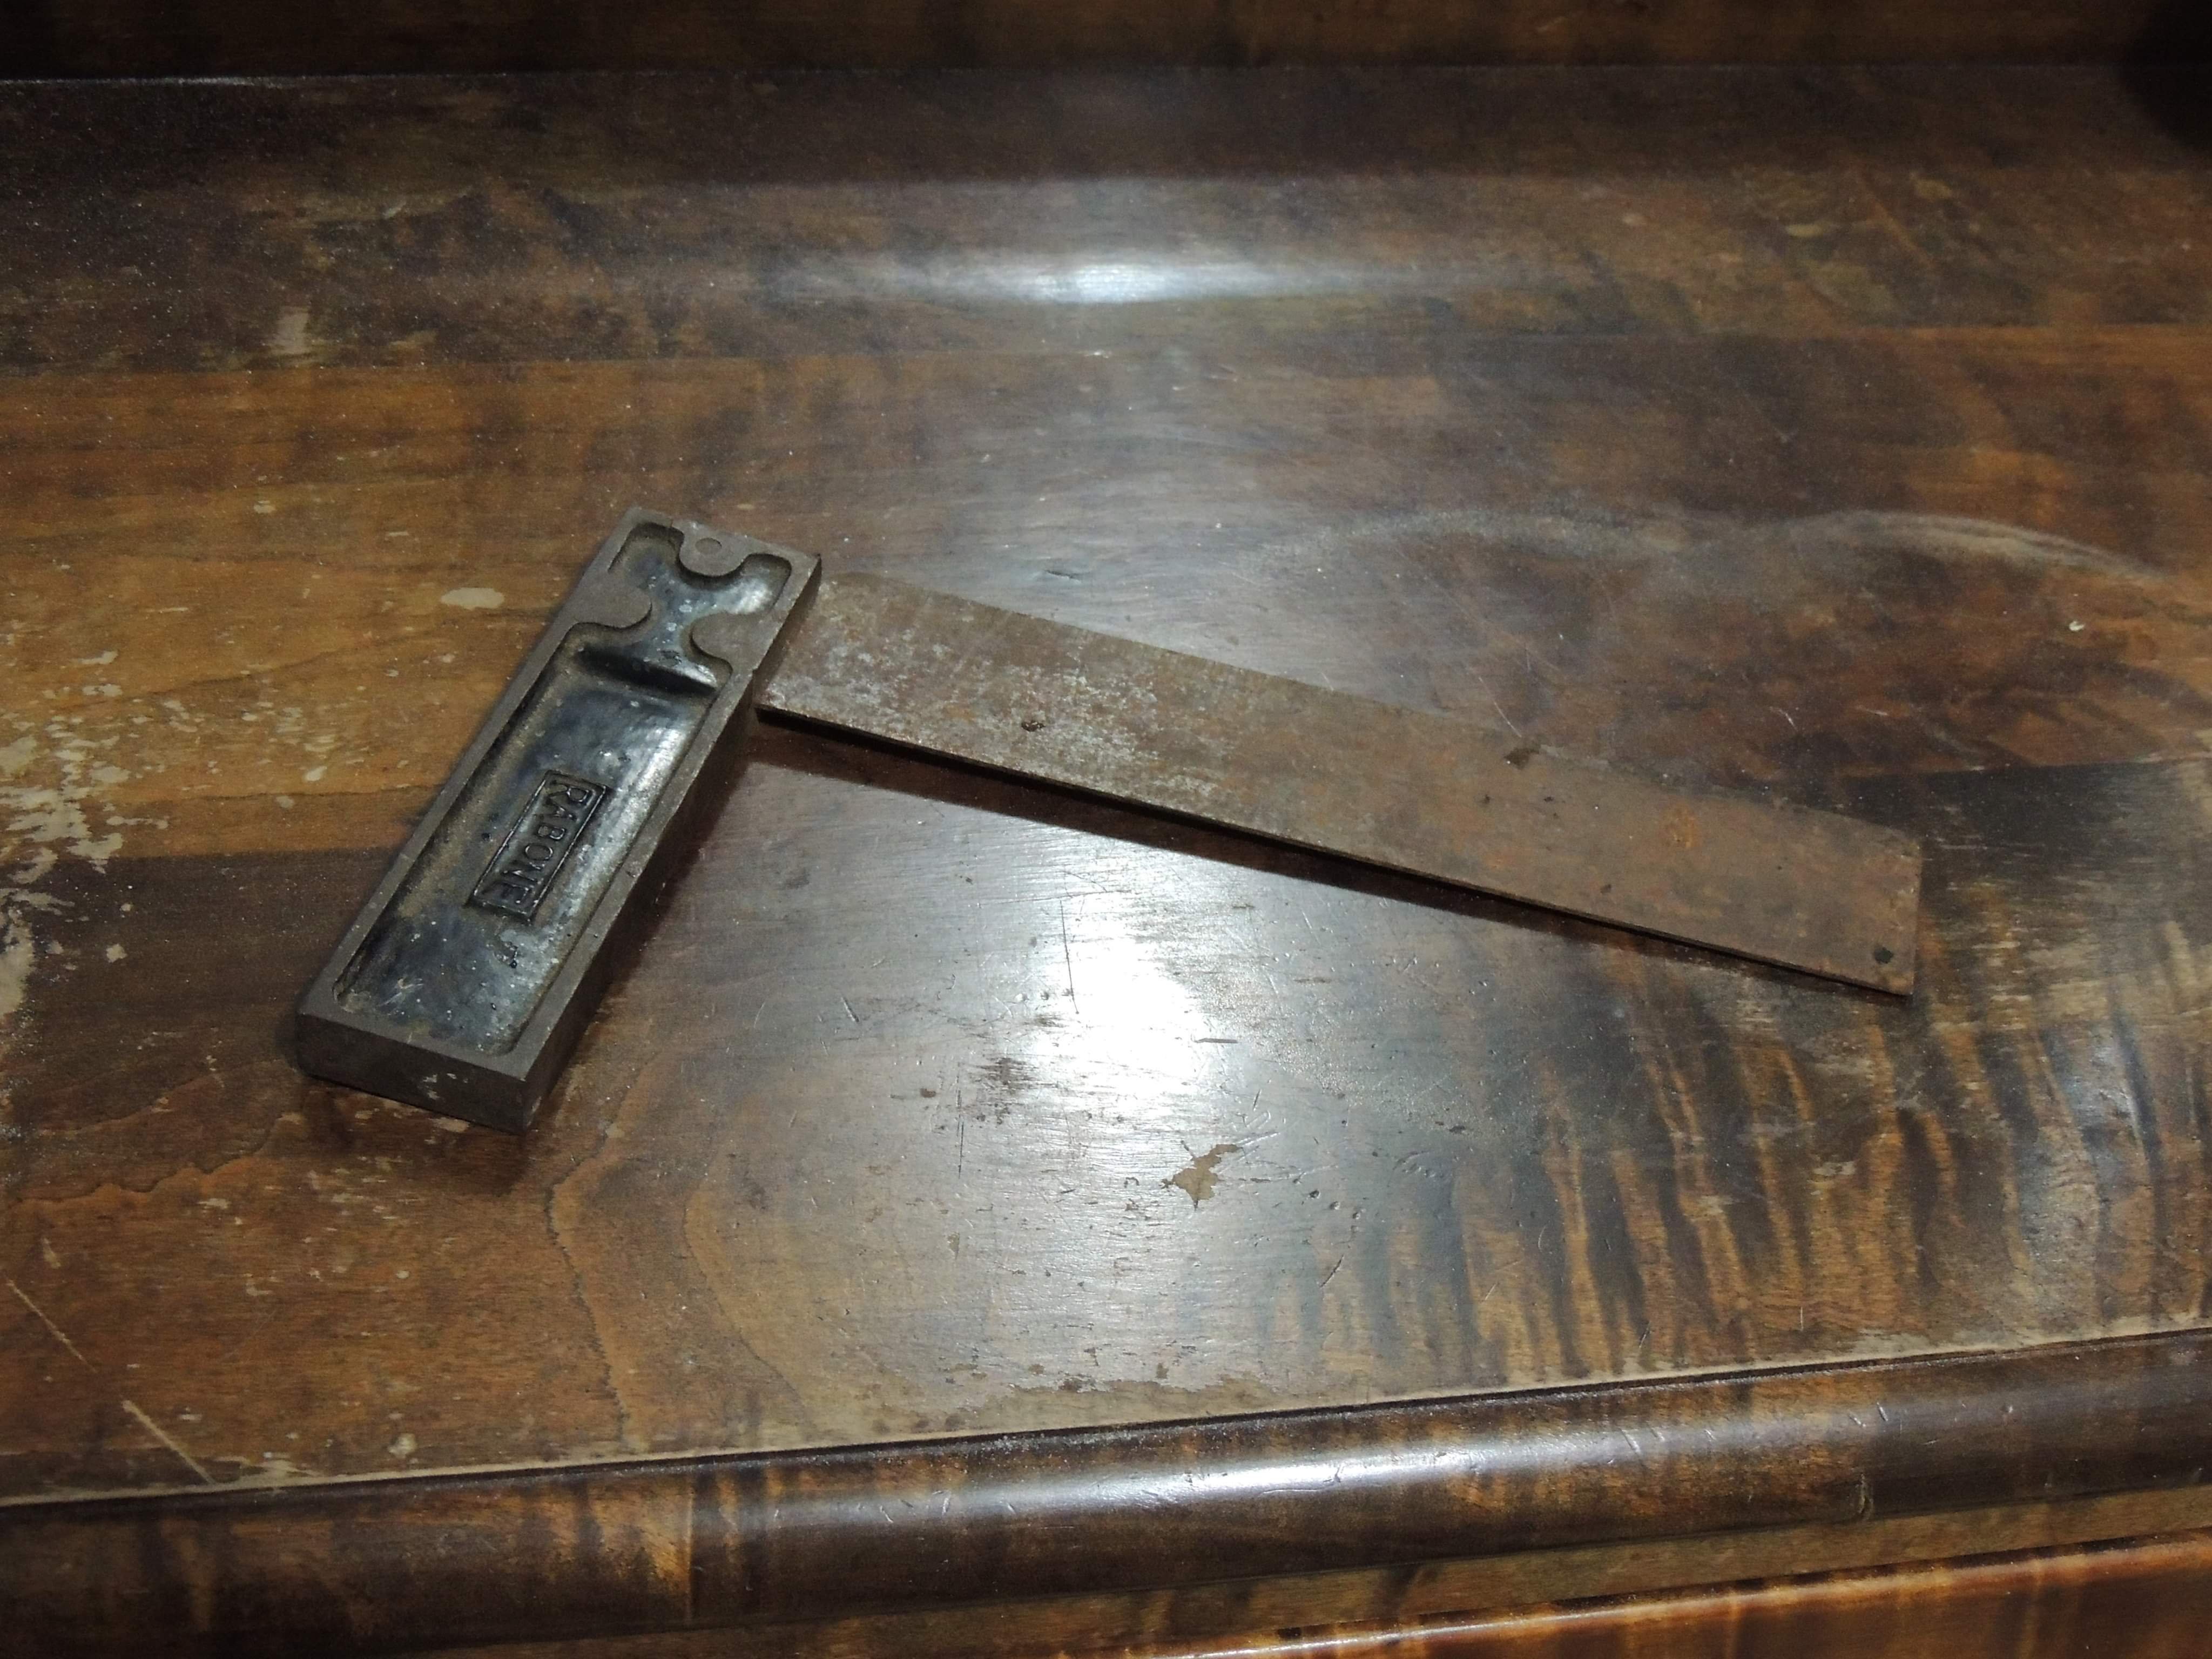
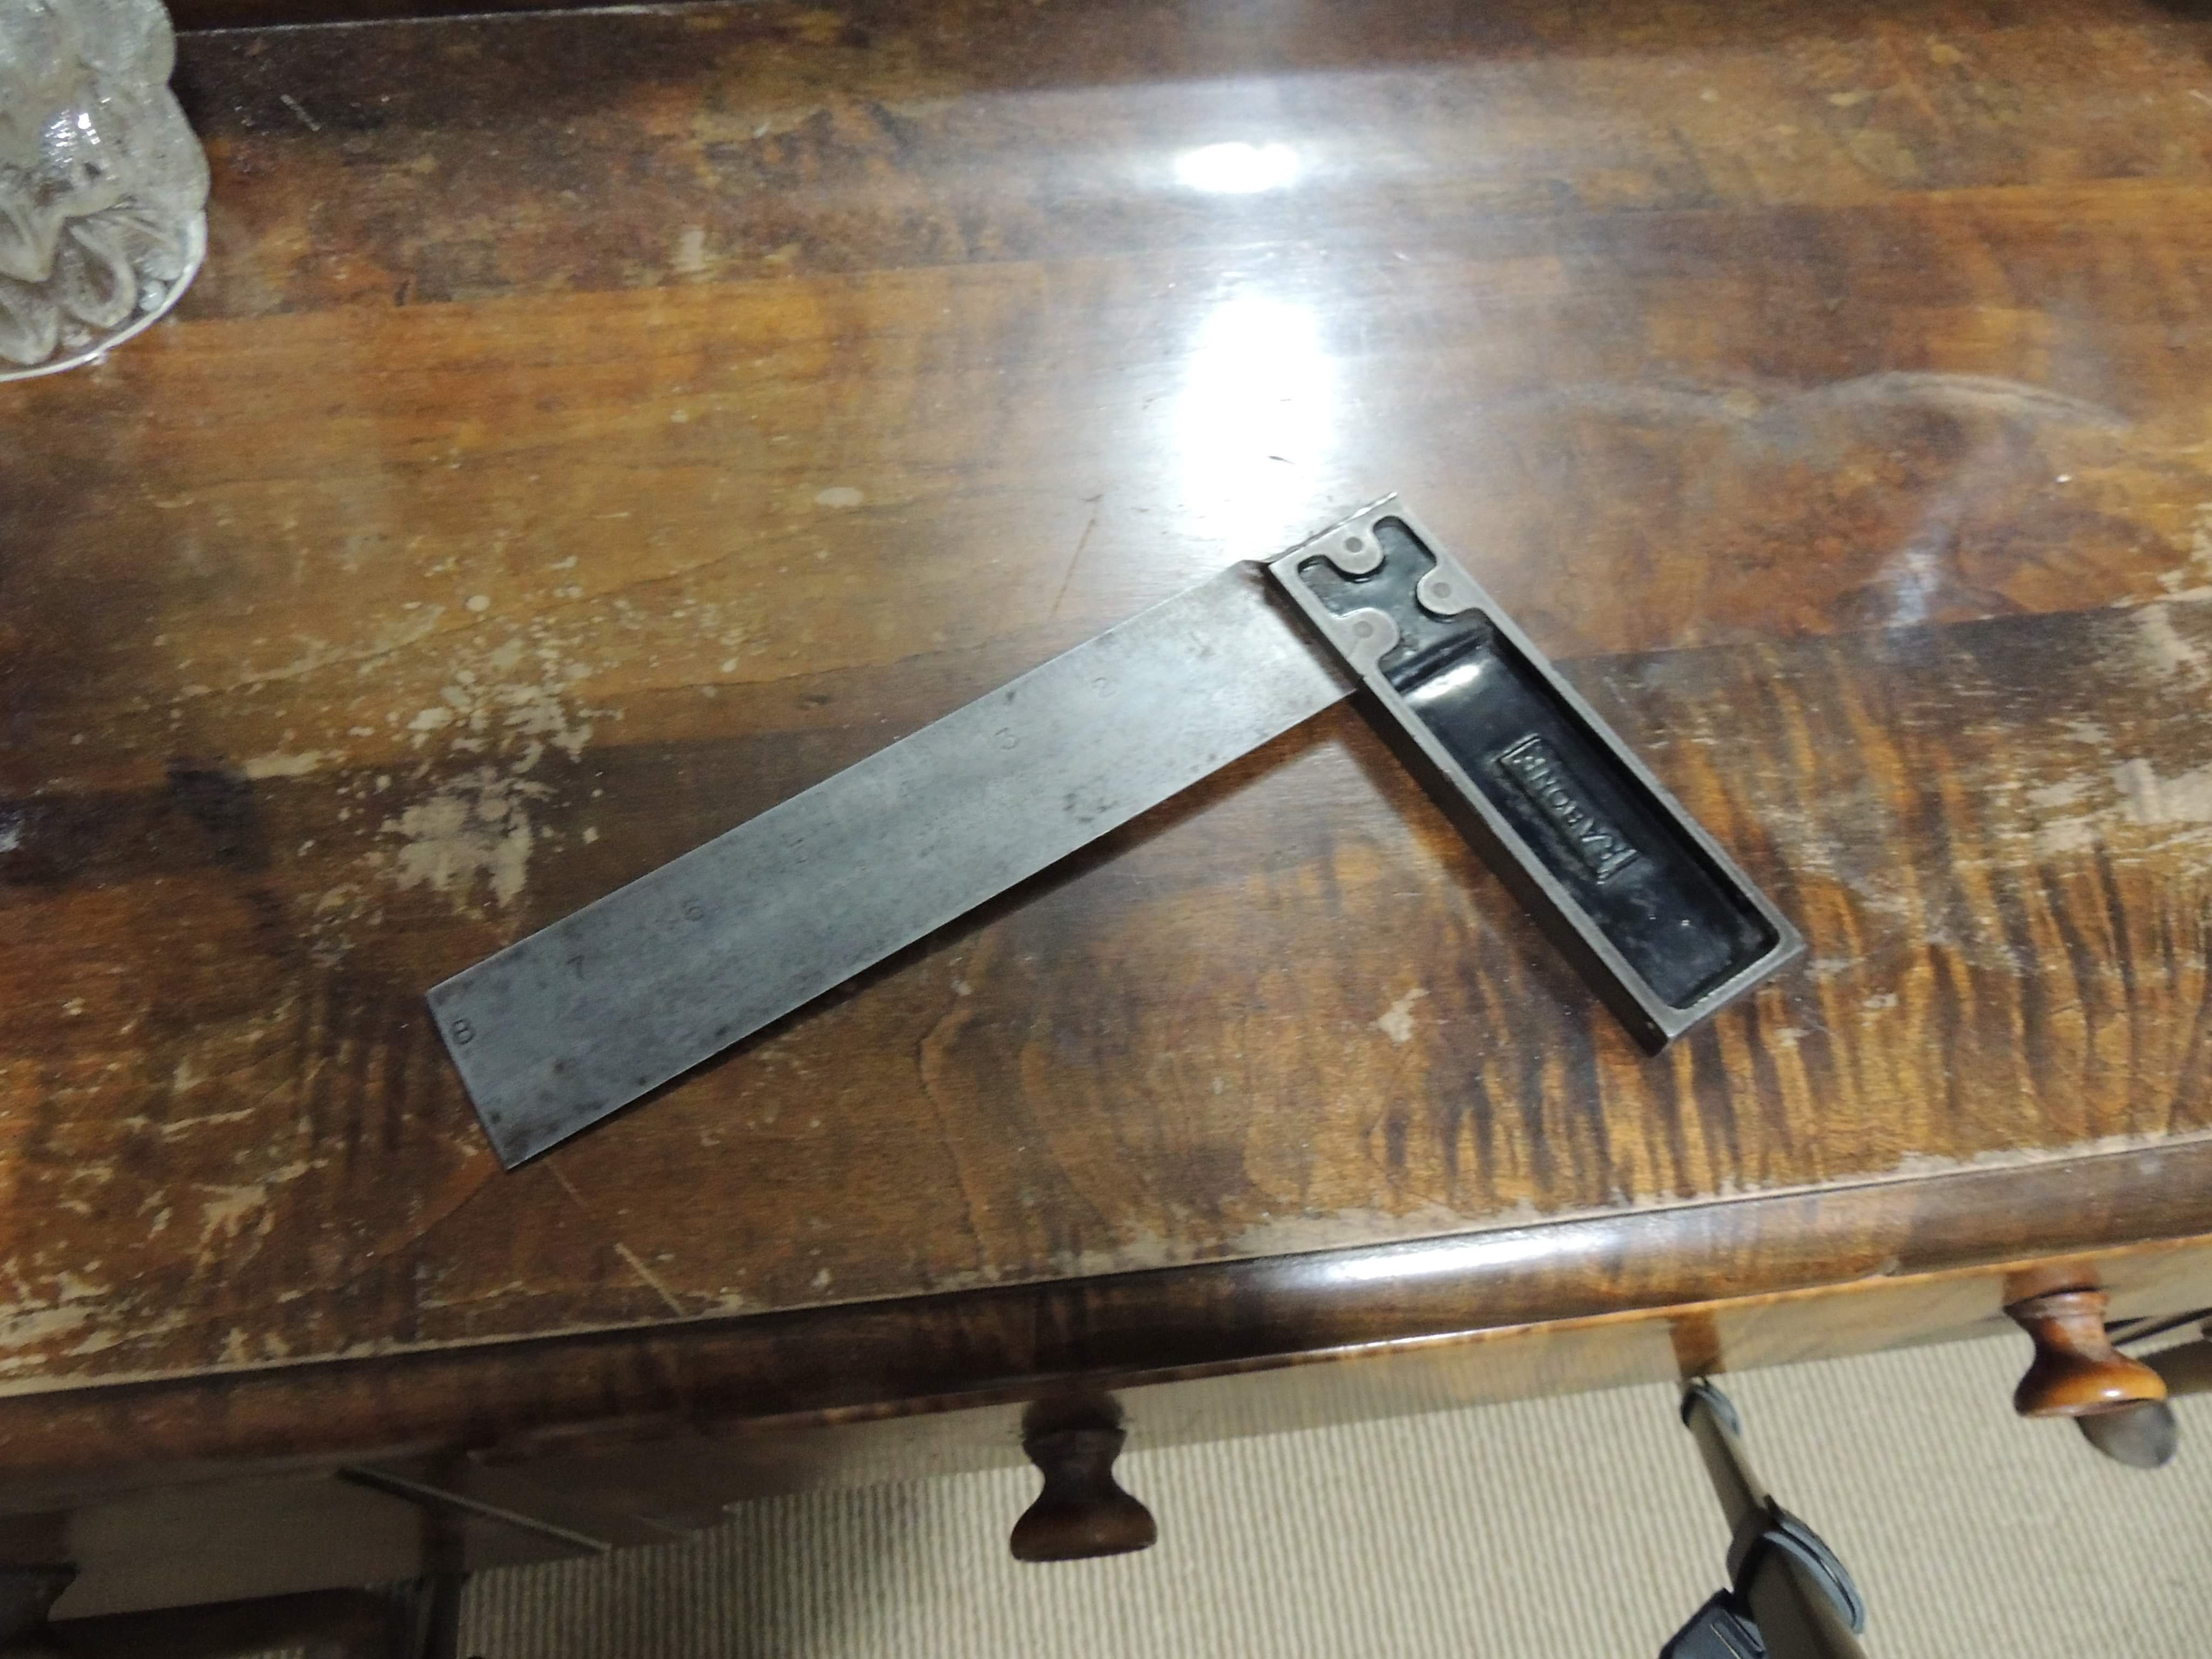
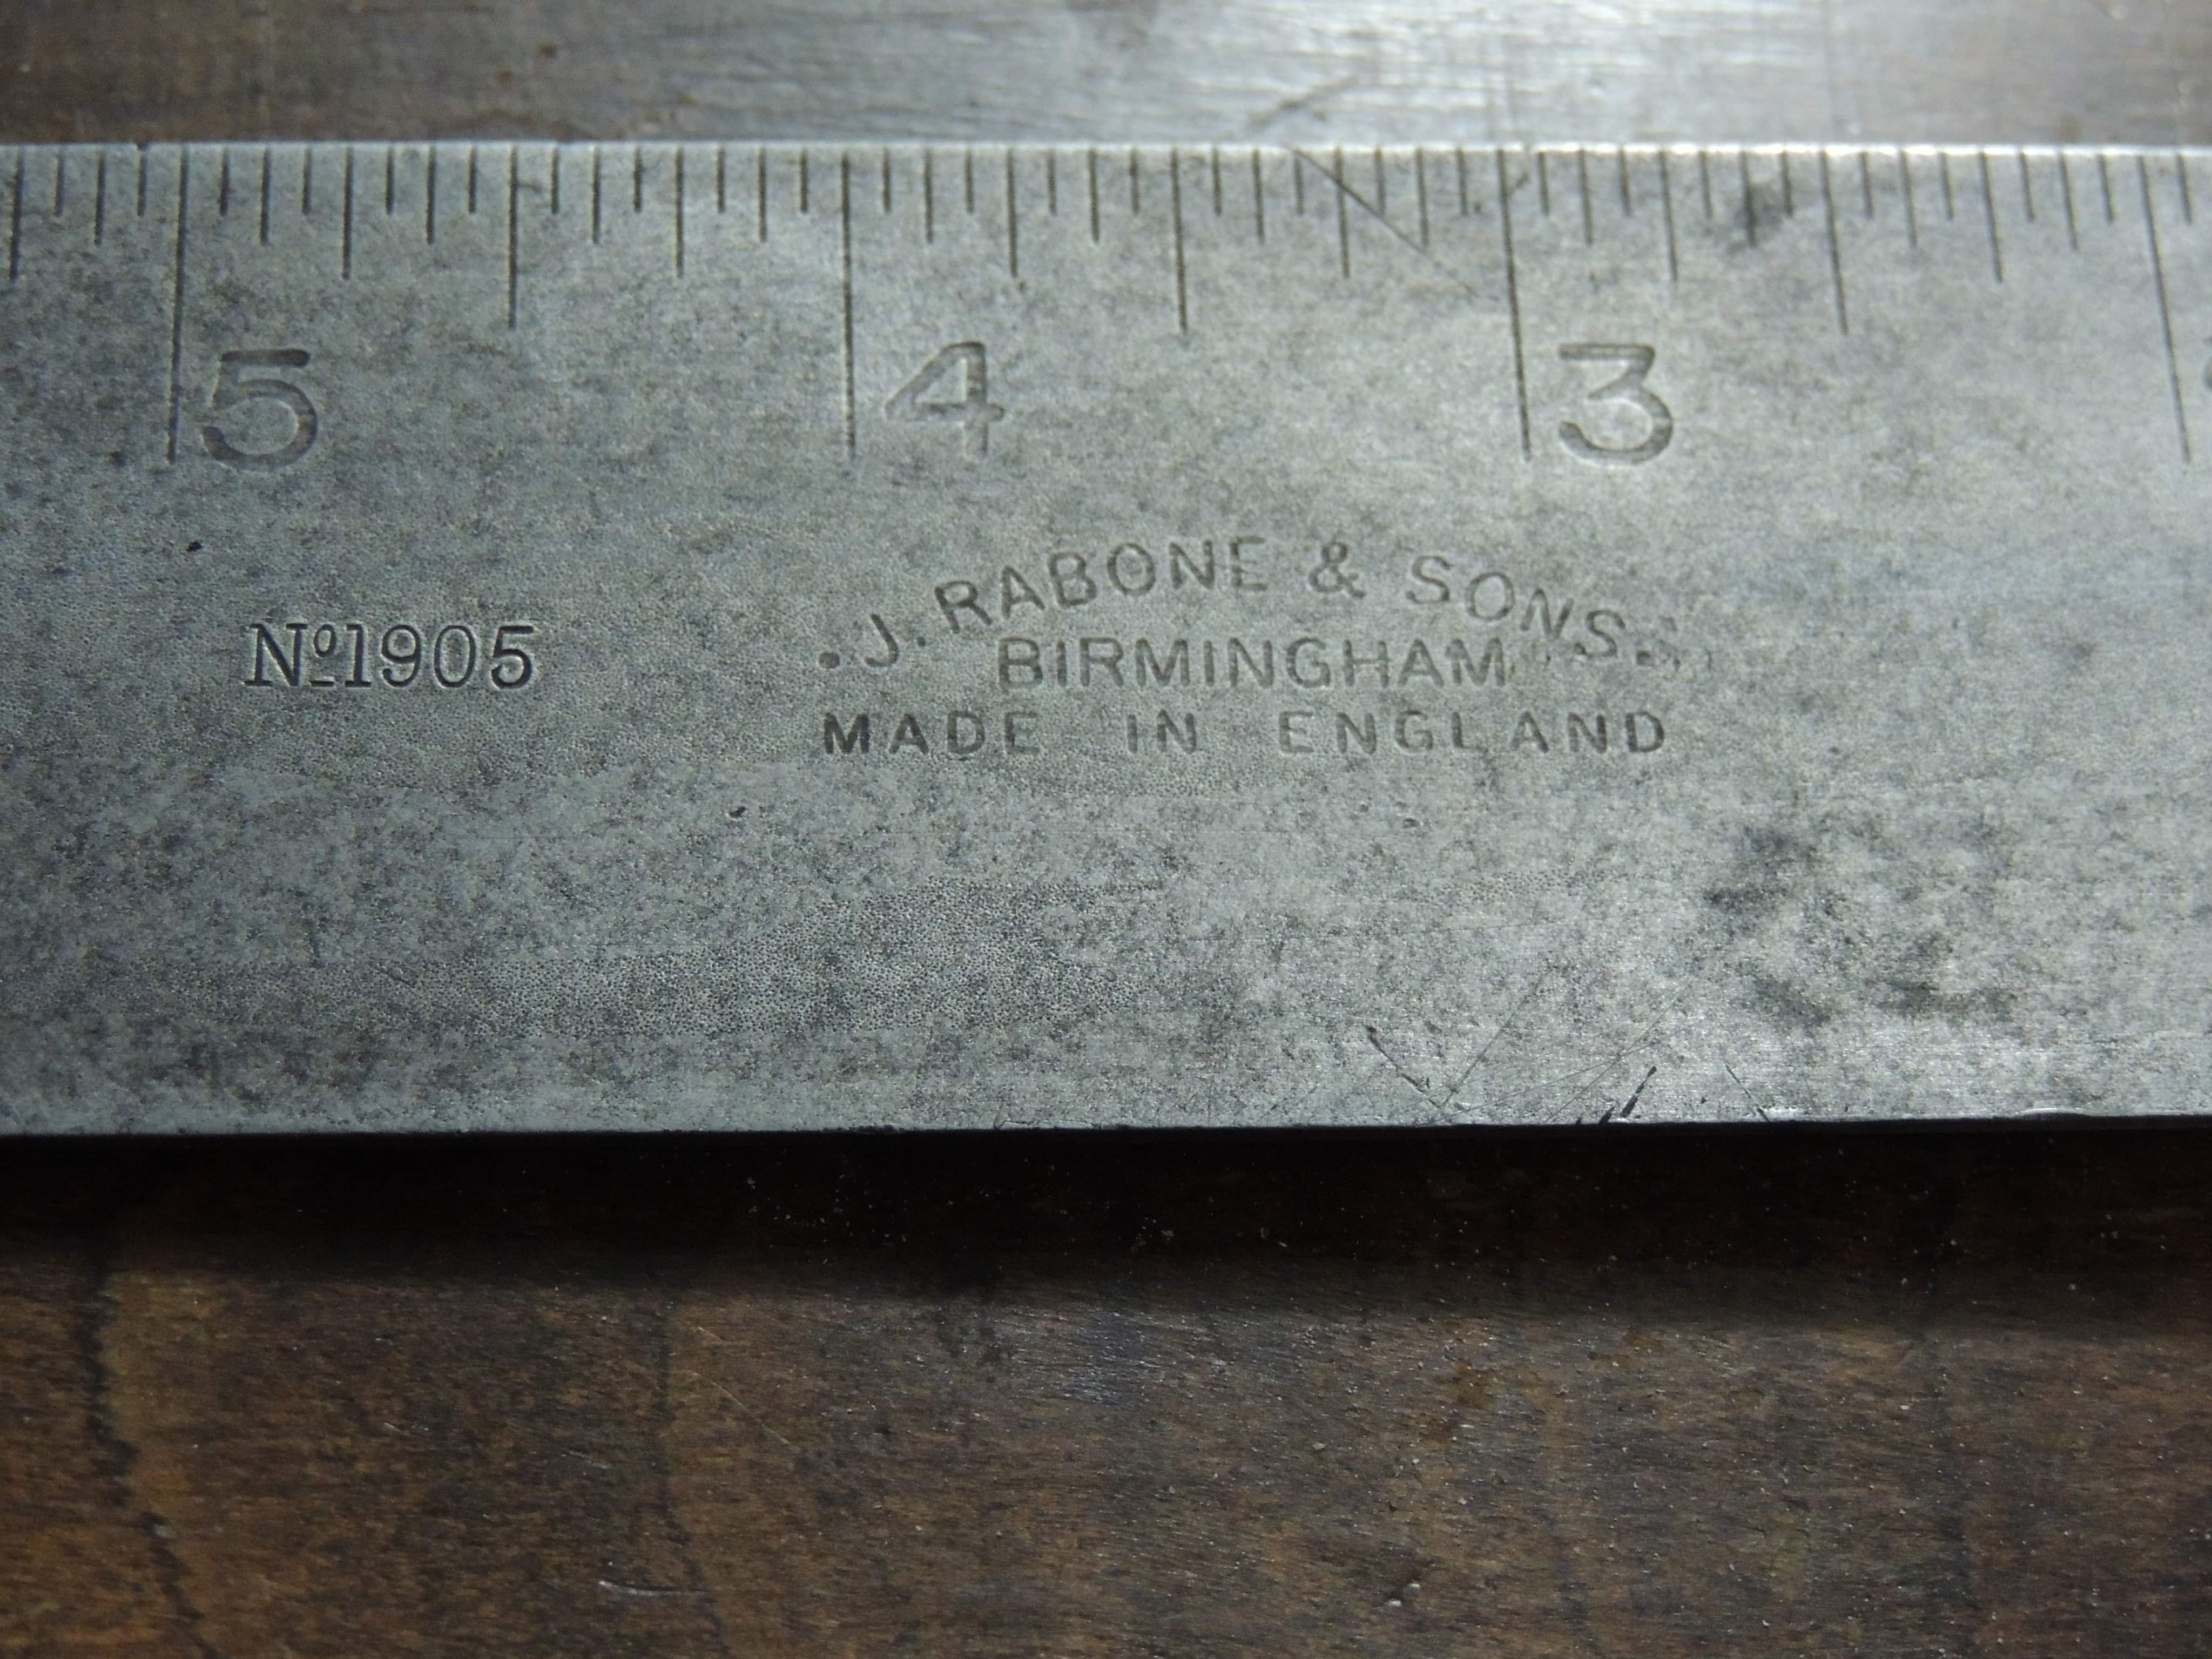
I bought this and a trowel today for $3 . Didnt expect much but it had weight to it. An hr with some wet and dry and it turns out its got some age and was a good make in the good old days. 'Rabone no1905 8". '
1 point
-
Some good looking things arrived, if these bad boys don't sort the brake issue then I'm not sure what will. They look fucking monstrous. This is not even the most expensive brake upgrade available, but definitely not cheap. Some good y60 axles may come available very soon if anyone wants any. Old = 295mm x 20mm rotor, single pot. New = 306mm x 34mm rotor, 2 pot. The splash shields have been adjusted out of shape by the floor, they will need a bit of loving. I'll probably do the wiper seals as one looks a little weepy. It looks like the original 15's will fit over the brake setup, this is good. The axles are a bit wider than the y60 ones but with some 33x10.5 tyres the actual width will be pretty much the same as it currently has 33x12.5s. I did model this in solidworks to make sure that was the case but time will tell. Fun fun.1 point
-
I went to the NZ prison supplier and said give me something that's going to cause permanent disability to anyone who thinks.about going.over my fence1 point
-
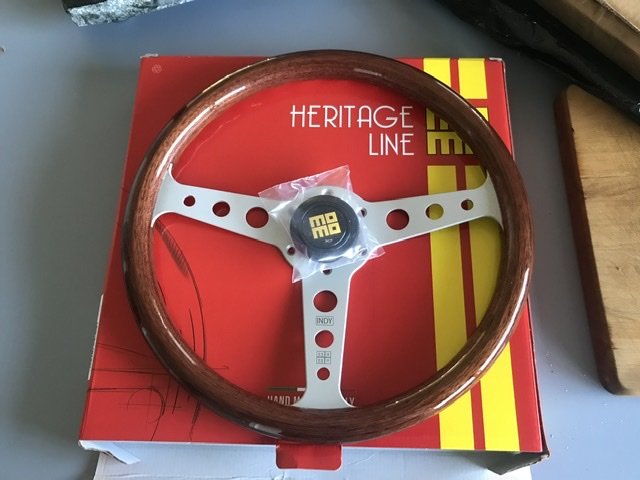
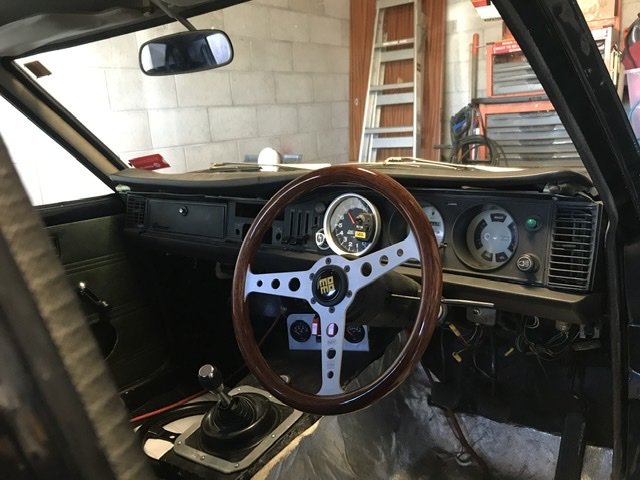
This arrived today! I always wanted a really nice wooden steering wheel for a classic and after uming and ahing over a nardi I decided to go with this momo Indy. I think it looks the part. A shame the rest of the interior doesn’t match yet. also found some inspiration for what I would like to do with wheels and jdm lip.
1 point
-
So my expensive engine mounts from the USA were shit. They looked nice but engine was high and way off centre. I tried my hardest to accept it and move on but fuck that. Made new engine mounts that sit engine about 30mm lower and way more central. In the interests of making the certifier think I’m not a cefiro person, I tried to make them look ok. Had very limited resources as can’t buy stuff in lockdown so it’s made from 2” pipe and a mix of 10 and 5mm plate. I kept the old Sikky urethanes just cos then it’s not a complete waste of money? It’s welded to fuck so shouldn’t let go anytime soon... currently getting the paint baked on.
1 point
-
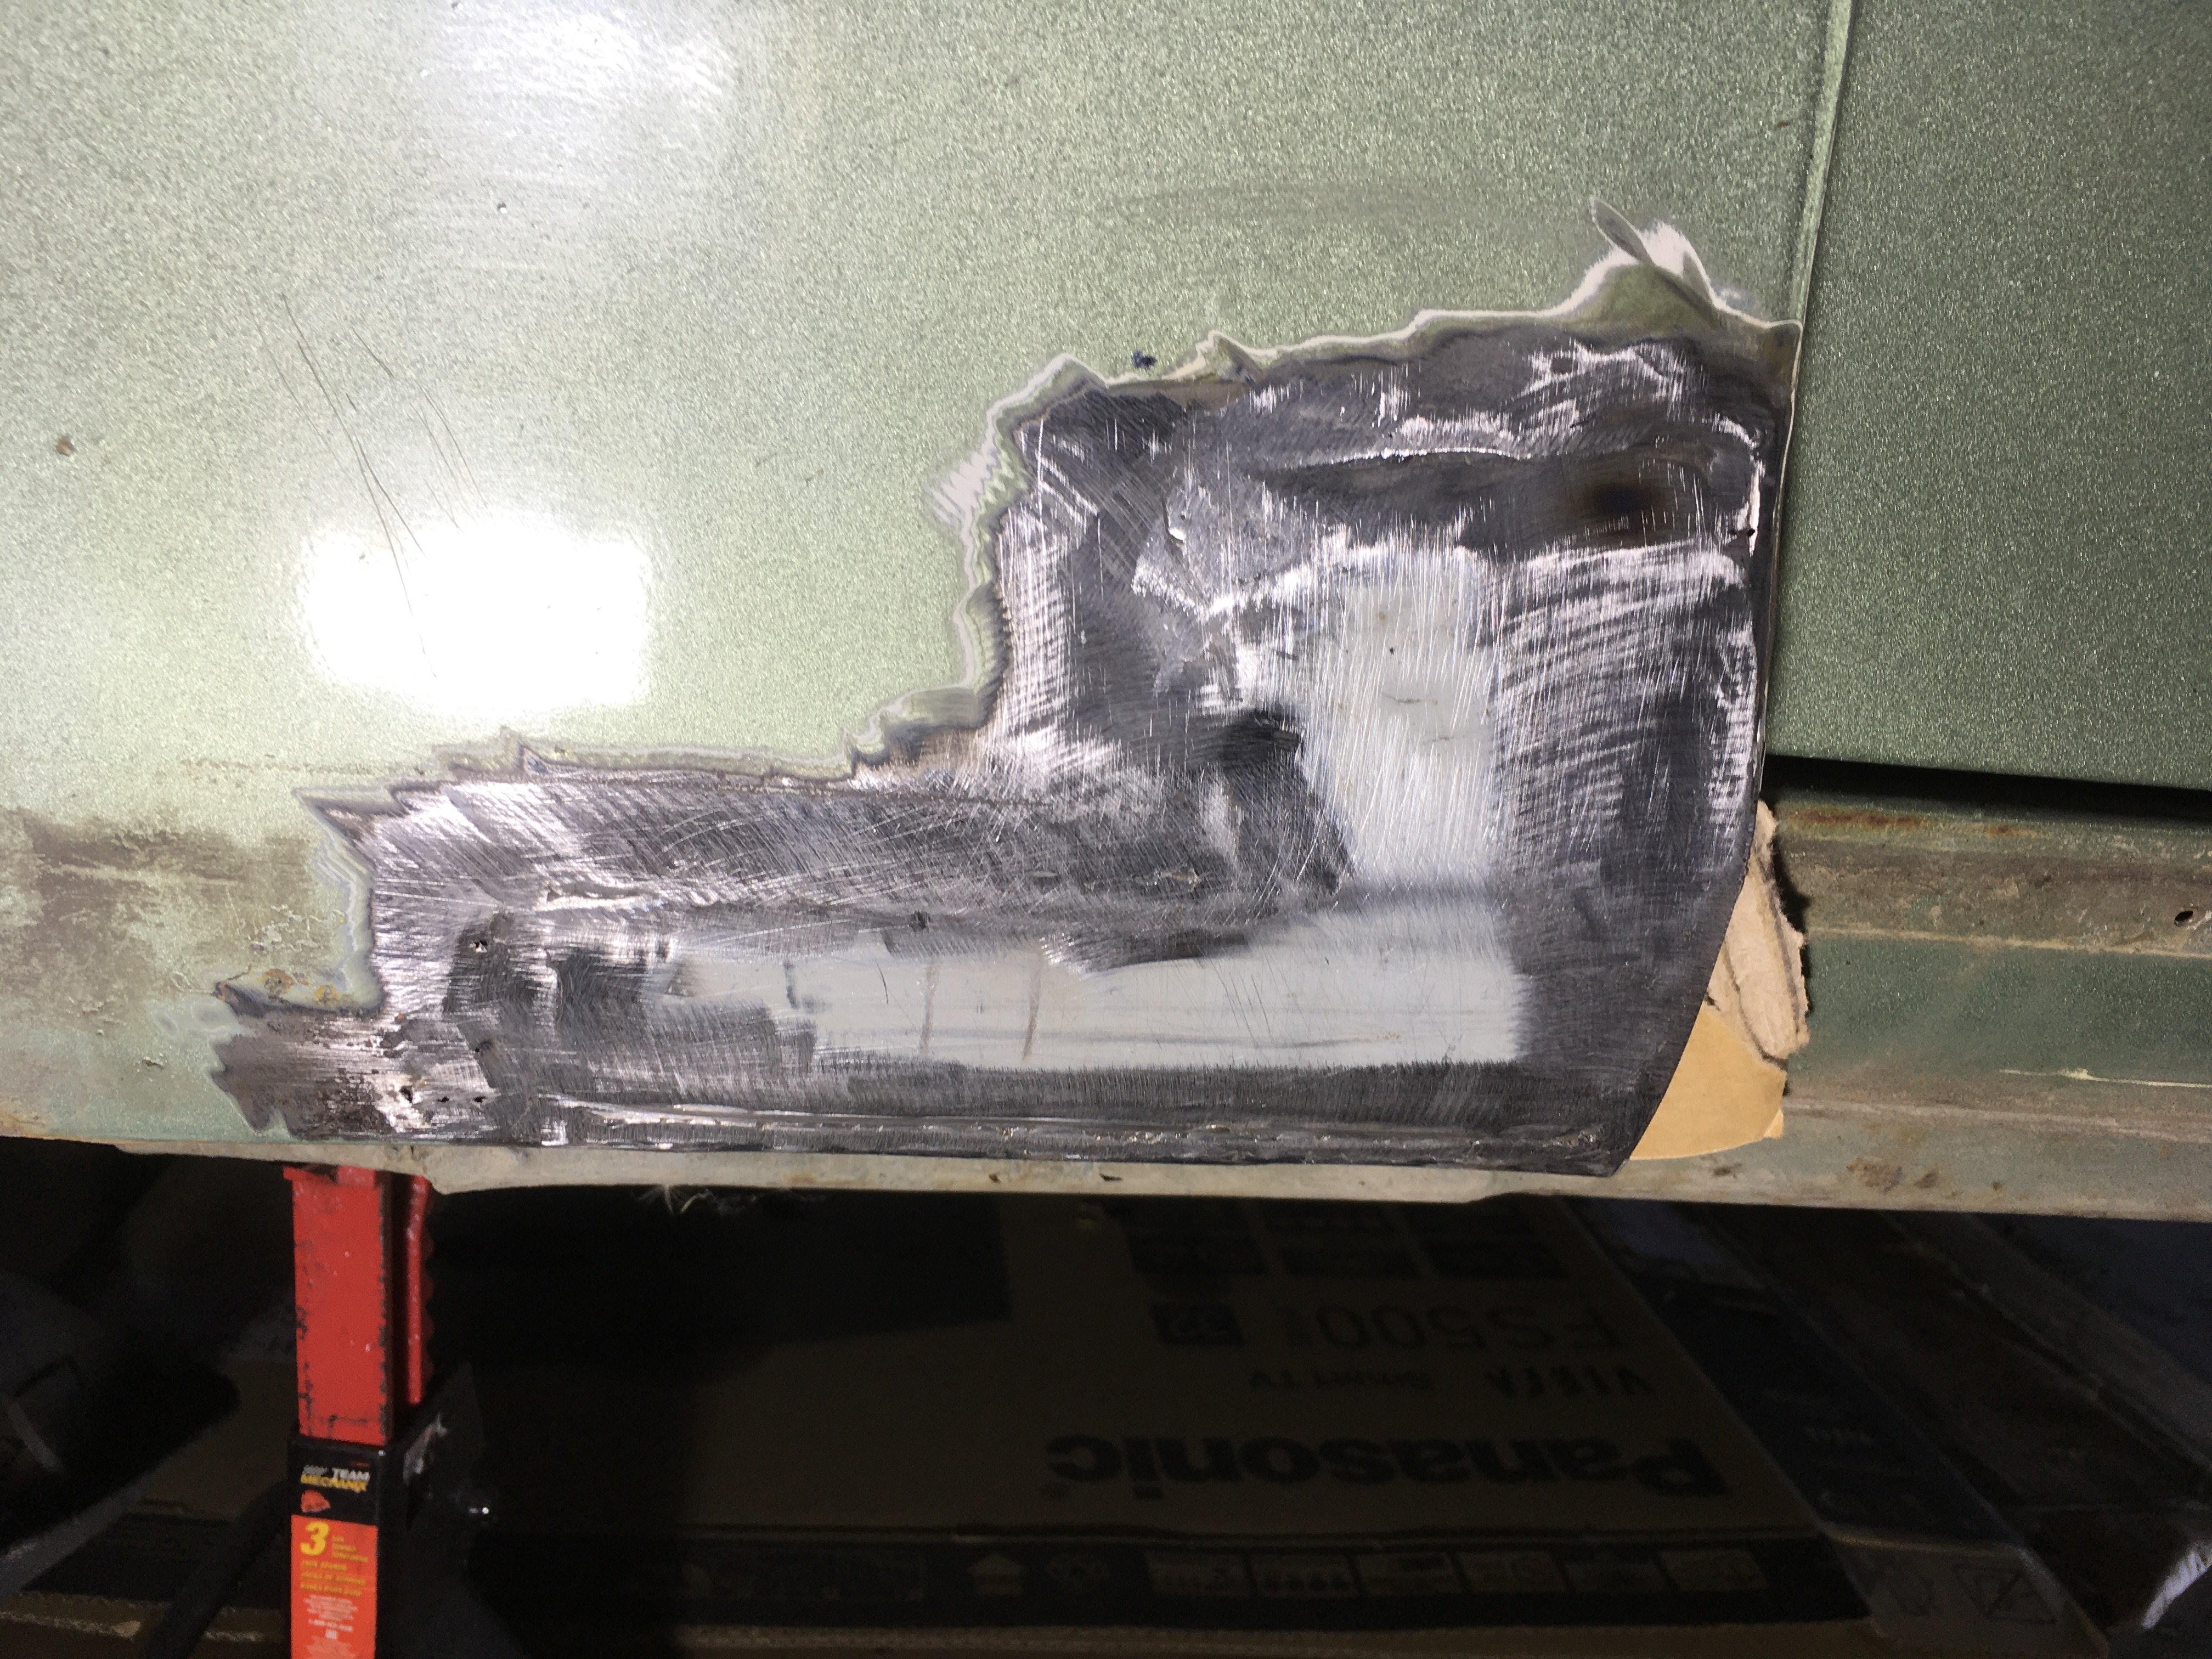
This is the first time I have done panel work. I am pretty happy with how it turned out. Tell me I’m doing it wrong here:
1 point
-
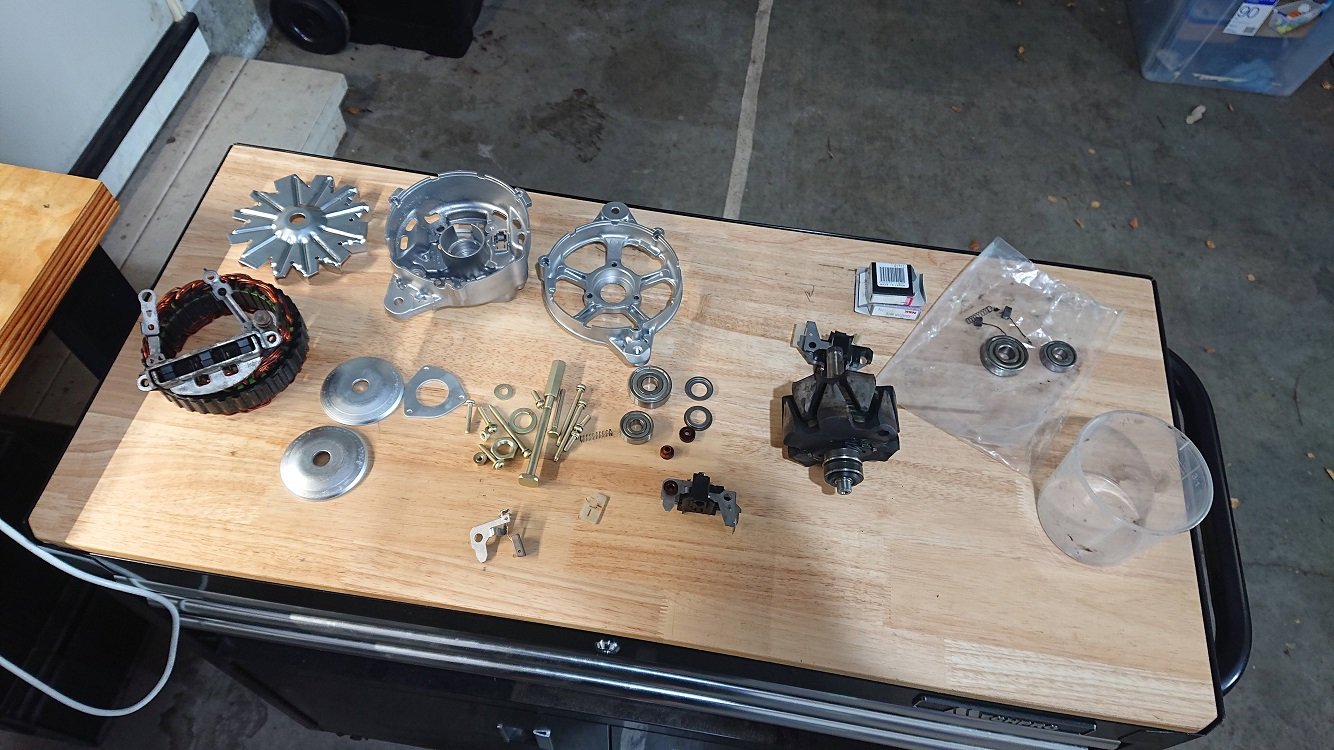
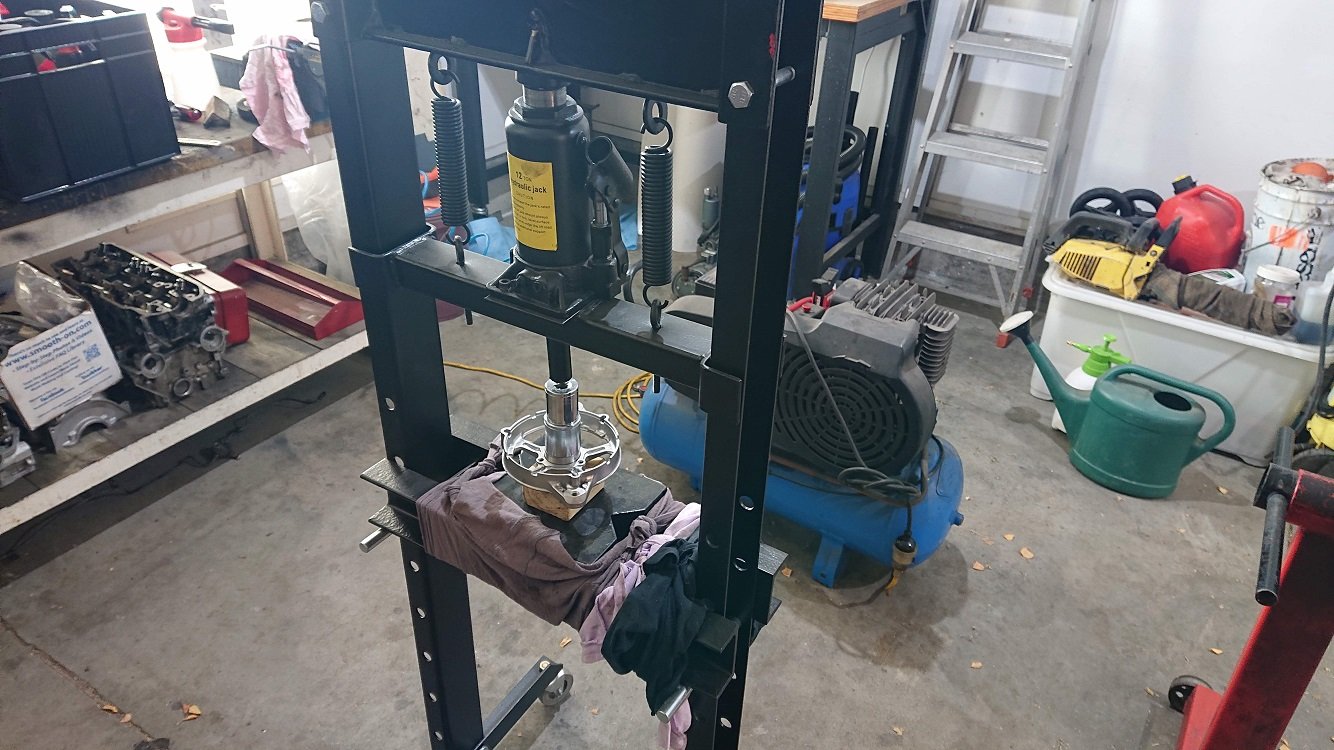
HOLY FUCKING SHIT IT IS HOT TODAY. Needed a quiet easy project to do in the heat, collected up all the bits for the alternator jigsaw. A couple of months back the alternator on the side of the 4g52 in the truck at the moment spat the dummy, brushes were doneburgers. I couldn't find a replacement one second hand locally, as they're different to the ones fitted to 4g63's, which are pretty common. I grabbed a 4g63 one anyway, thinking I could at the least harvest some bits from it. Turns out the voltage regulator / brush holders are the same, so I swapped those over and my truck was charging again. This left me with a super crusty 4g63 SOHC alternator, with worn out brushes and dry bearings. I took it apart, ordered everything it needed and vaporblasted / zinc plated everything. The replacement reg / brush holder I ordered was damaged in shipping, so I harvested the new brushes from it and swapped them into the reg / brush holder that had originally been in the 4g52 alt. Then had to remember where all the plastic isolators went. Got it reassembled with some new bearings pressed into place too. My workspace is just a typical internal access double garage. I don't complain as its better than what many people work with, but It does mean I need to keep things mobile, and stored away when not in use. This is about the cheapest press that money can buy, but does the job for 99% of what I do. Putting it on wheels was one of the best things I've done, as its so easy to store out of the way the 360 days a year its not needed ;-). Nothing more super exciting about the job, everything seems to fit up. The zinc plated fan and pulleys are a little bling though, they might get some rattle can black action. In other news the 1/4 BSPT to AN-4 adaptor turned up, so I could fit that to the back of the oil filter housing the start eyeing up the turbo oil feed. I'll need a 45 on the oil filter housing end, and a right angle on the turbo end, plus some heat sleeving. The bits to make the ignition leads also turned up. I got the spark plug ends all done, but the manifold / coils are still at work, so couldnt do those. Next week maybe, but I'll be away up in the Coromandel for Ledfoot, so maybe not. Now I think it'll be time for come cider in the sun.
1 point
-
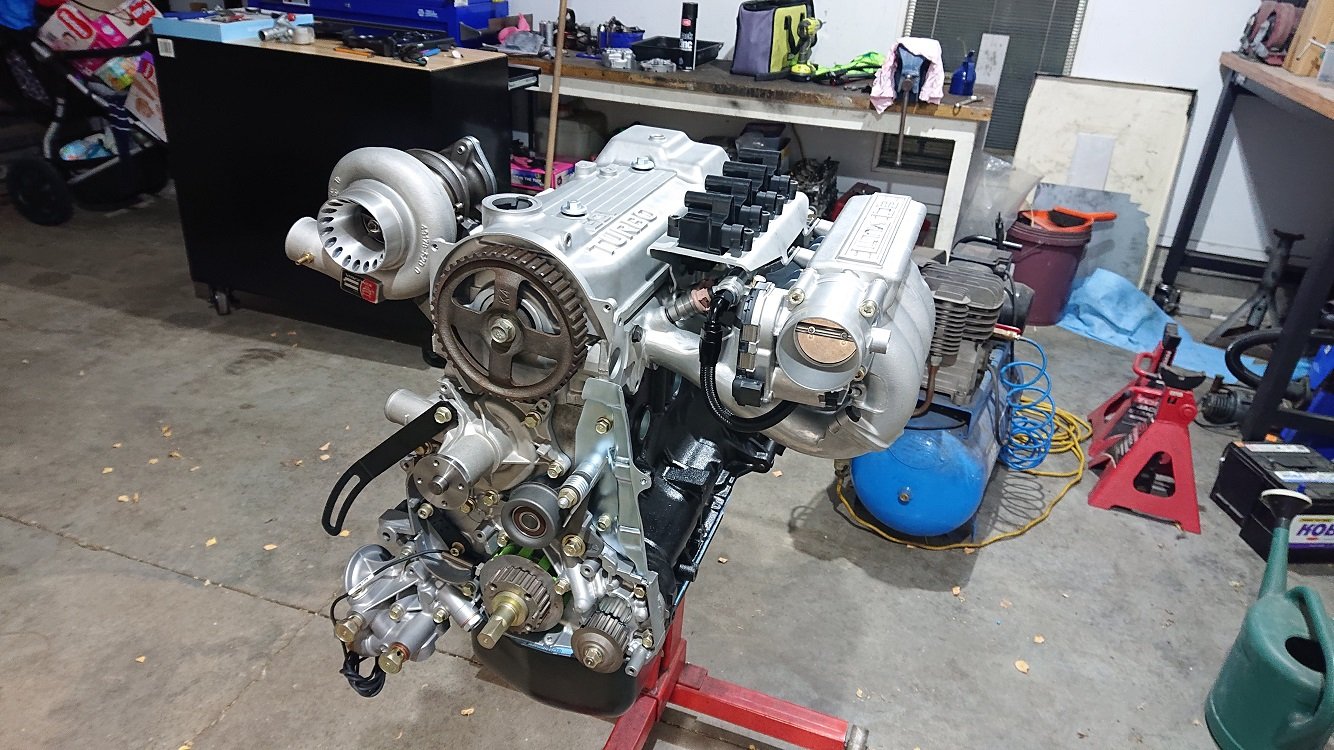
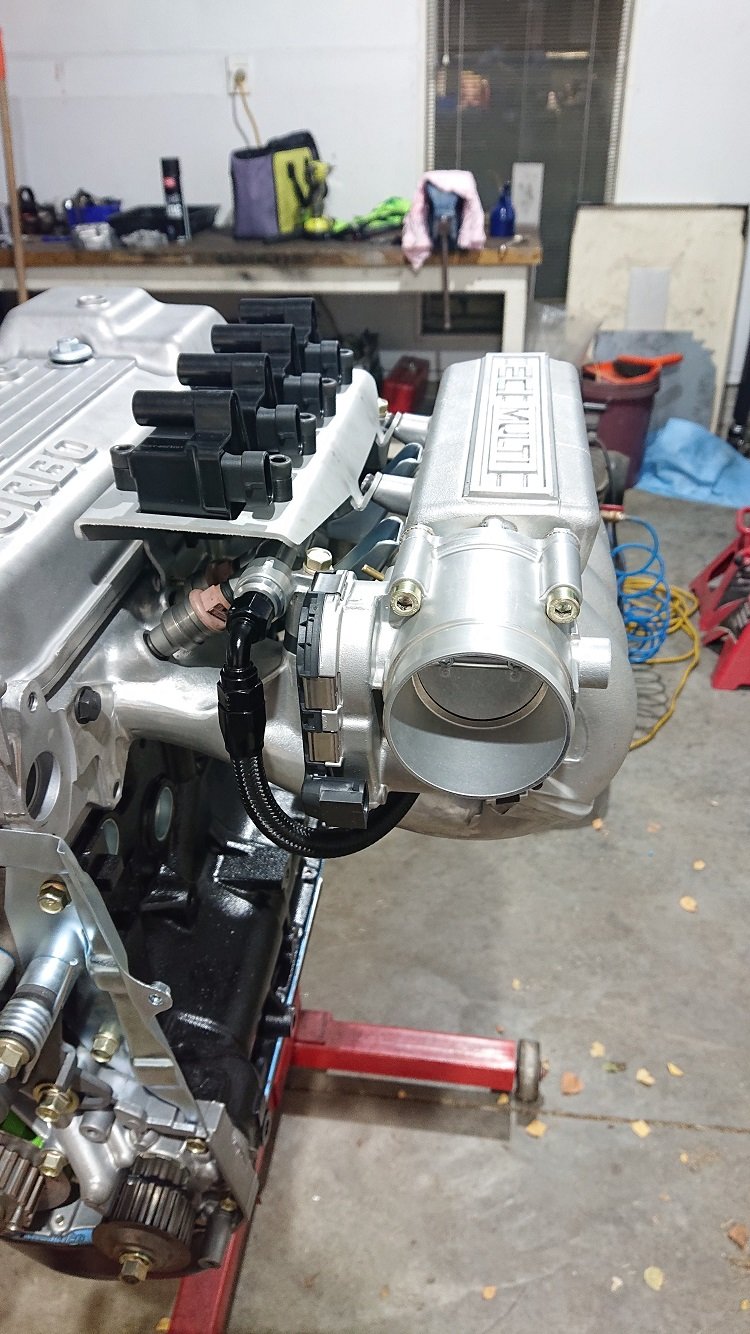
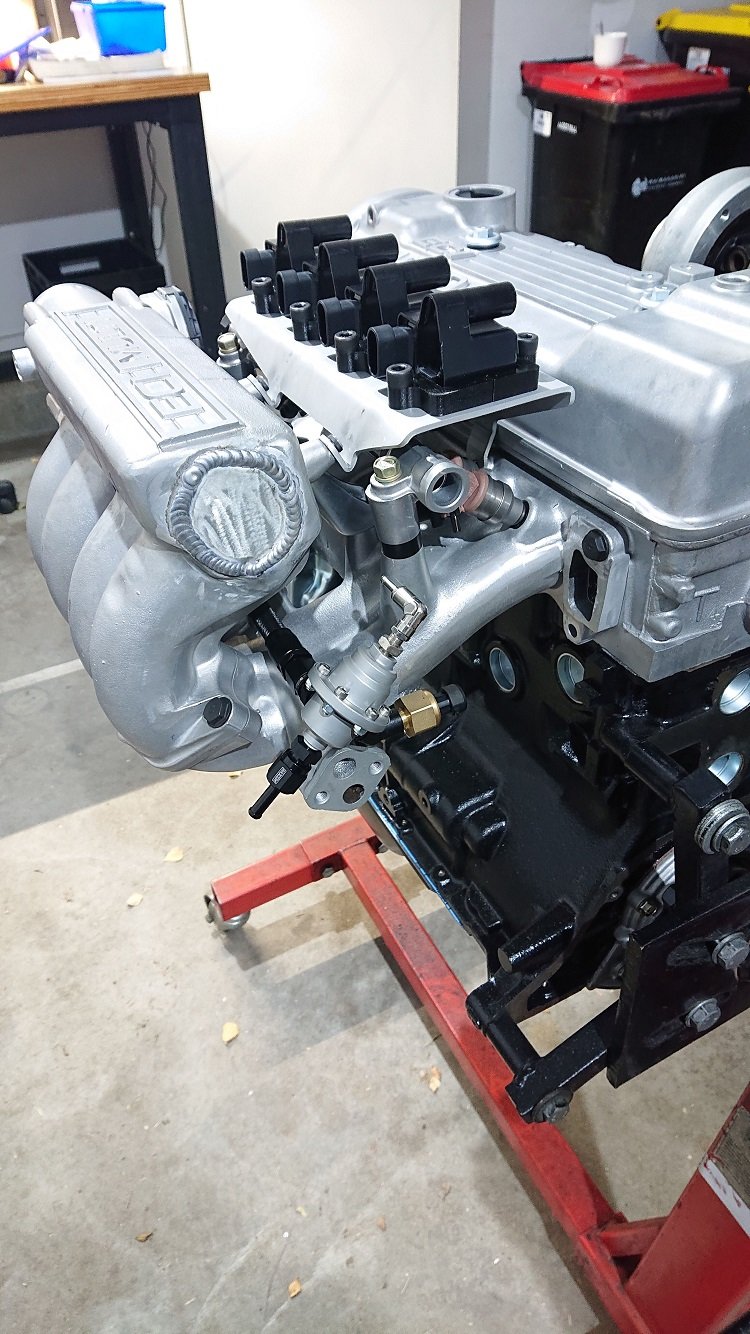
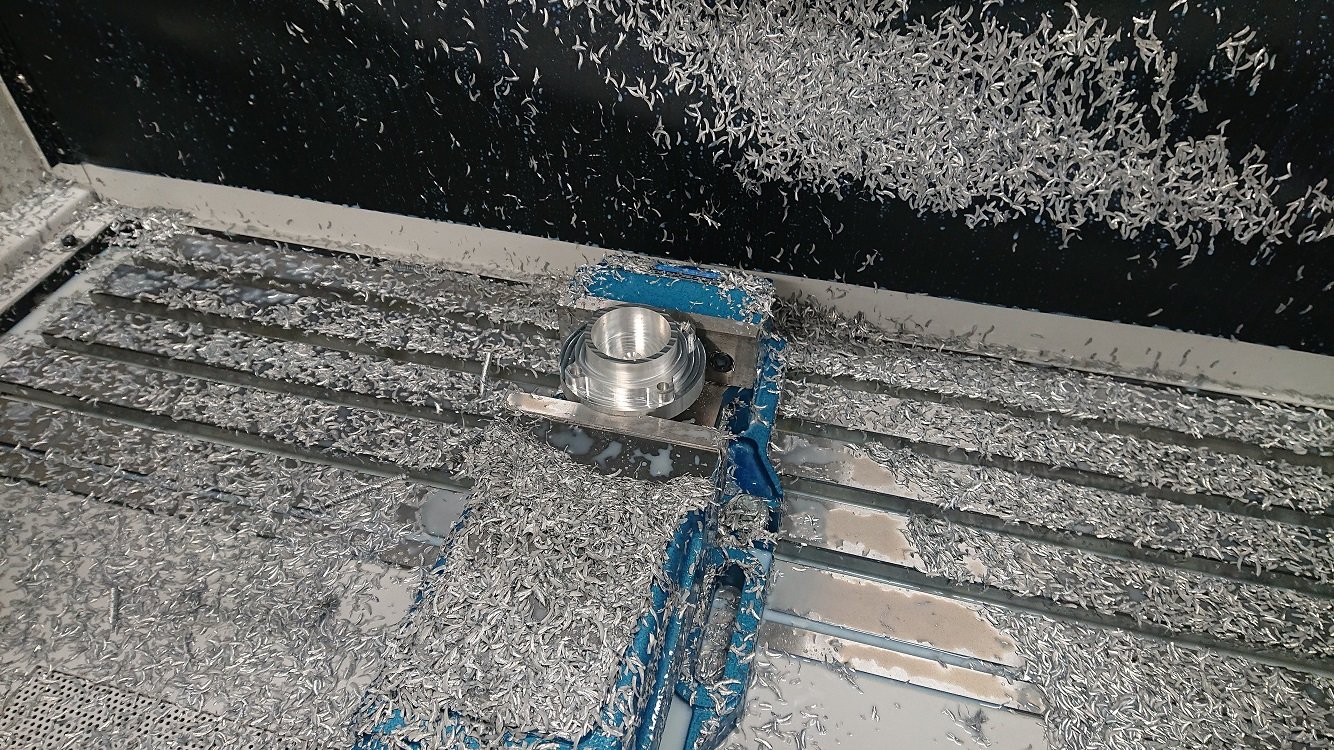
Bugger all progress on this in the last week unfortunately. Lots and lots of kids (include my own's...) birthdays organised and attended though, hah. I got the throttlebody flange machined. Went perfectly as soon as I added coolant. I'm almost wondering if this 6061 isn't heat treated, and that's why its gummier than I'm used to? Anyway I made lots of chips and released this object that was hiding inside the bar-stock. I got it tacked into place also so I could check the fitment of everything. Shot myself in the foot with the fuel rail though! I got some weld in AN-6 plugs for either end, thinking it would be nice and weldable like the rest of the Mitsy castings from this era (in my experience anyway). It is not. It spits, goes mad porous, and generally doesn't behave at all. Luckily I tested this on one of the mount ears that needed to be removed anyway for the throttlebody to clear, so no harm to the actual pieces I need. I've since ordered some M18x1.5 -> AN-6 adaptors, and tapped the ends of the rail accordingly, will seal it with some buna-n bonded washers. I'll have to machine the end surface of the fuel rail nice and flat for this, but no drama there. The weld in bung is just sitting there in that shot, its a nice fit, shame I can't use it. Sorting the fit of the FPR now. It's Tomei one that I took apart a years ago to clean out as it was full of junk, thus the bolts holding it together instead of rivets. The housing was all scratched up so I've blasted it. They're a nicely made piece of gear, the diaphragms are really tough, but I hate how they mount, it's really annoying using the PCD of the clamping bolts. I haven't quite figured out what I'll make for it yet, but something will come to mind I'm sure. This end of the fuel rail will also have an AN-6 fitting, to a 5/16" barb. As my truck is a sport model, its got a feed and return fuel line already, which are 5/16" and 1/4" respectively, thus the 1/4" barb on the bottom of the FPR also. I just need to put in high pressure rubber hose instead of the carby stuff, and fit an EFI pump after the tank (decided not to go in-tank, too much faffing at this stage, will just live with noisy external pump for the moment) and that should be the fuel system sorted. The pressure sensor is a low cost brass bodied one, but is still a Honeywell part, and safe for fuel, just $70 instead of $170 ;-). It's coming together slowly, the turbo looks ridiculous (...ly awesome), but it really is just an EVOIII 16G, the compressor cover makes it look much bigger. I've got the front plastic engine covers painted now, and it looks nice and tidy with them on. Once my fuel line fittings turn up I can go a better dry-fit of everything, a little bit more scanning and then design the weld on thermostat housing, which I'm really procrastinating about.
1 point
-
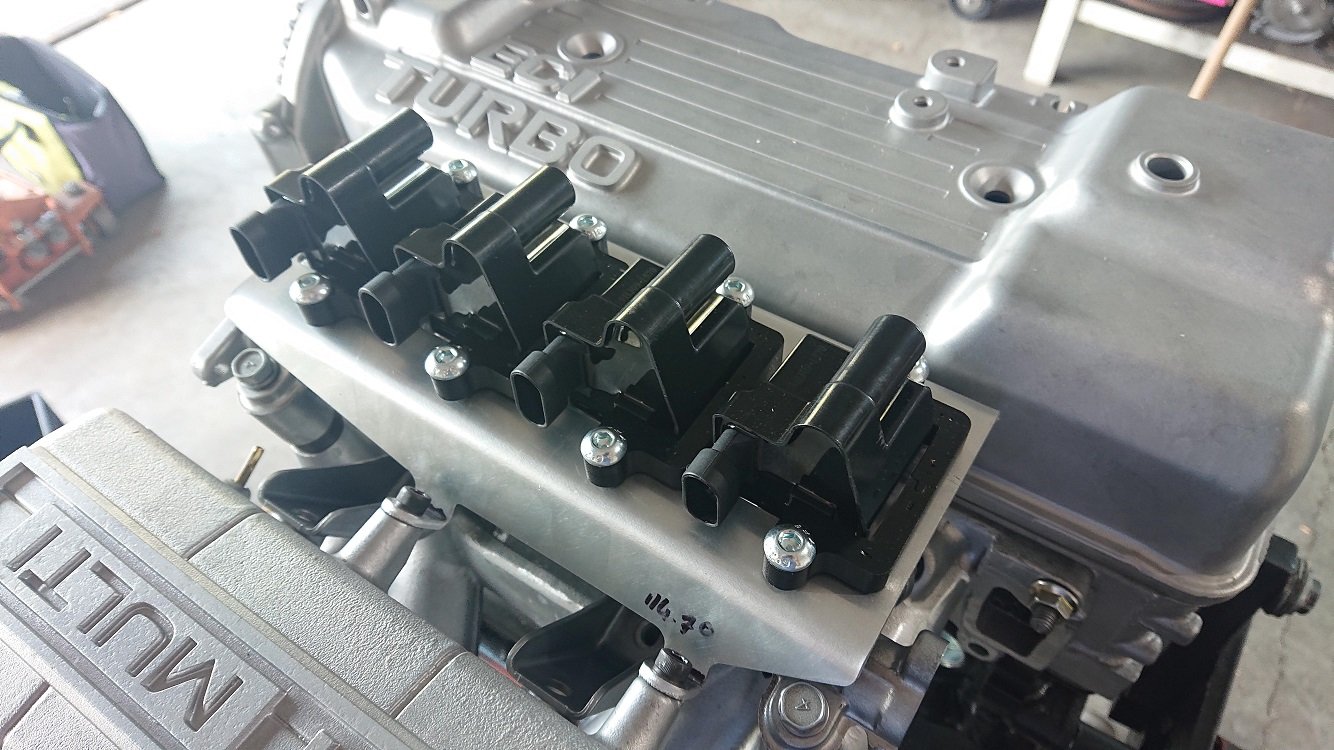
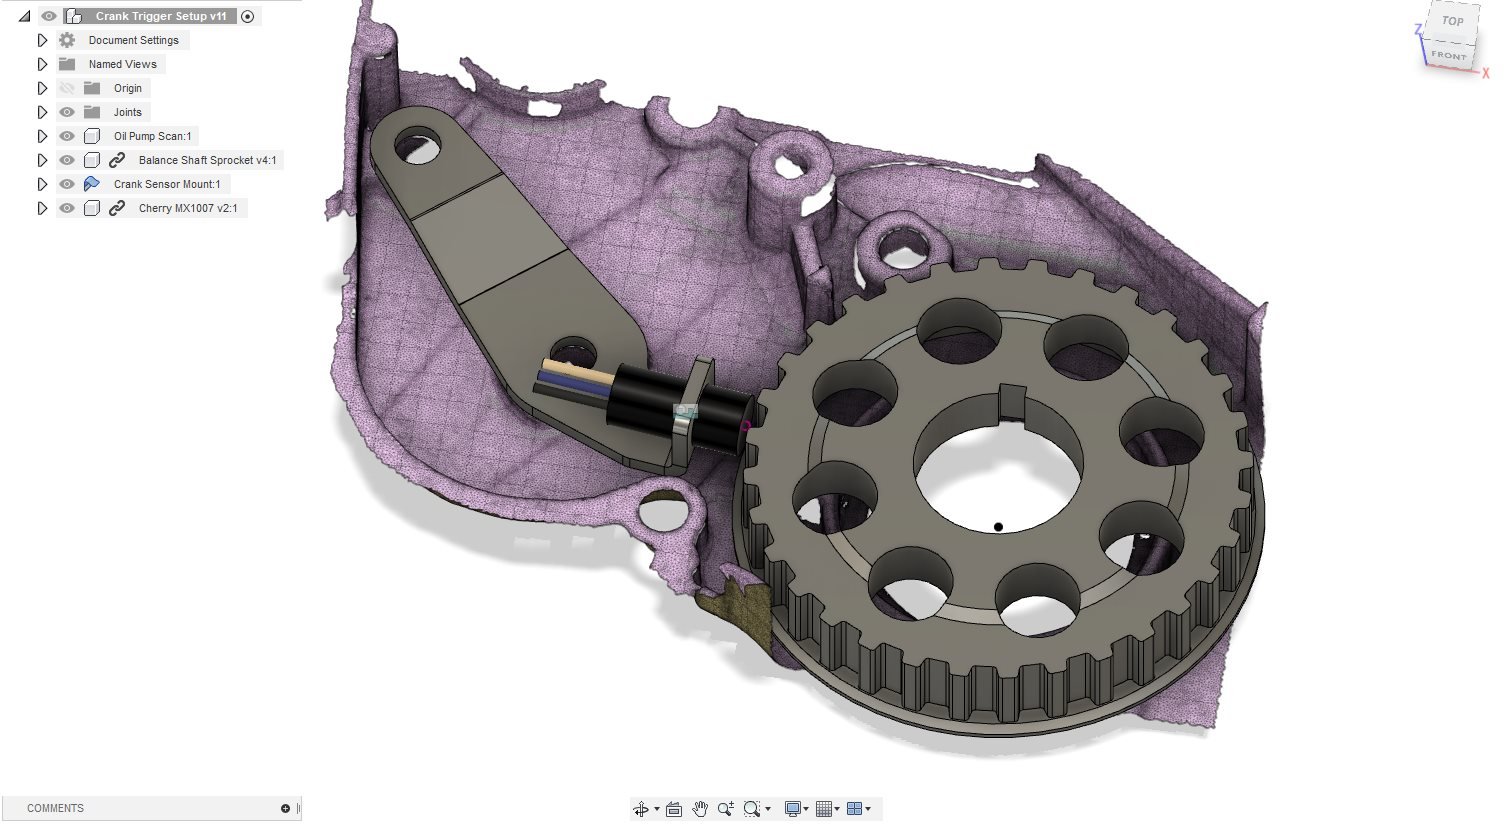
Well, the momentum got a little lost unfortunately, life got in the way for a wee bit. Managed to get a couple more things done though. One good step forward, but also a couple of annoying steps back. First, the backward steps; my modified dizzy cam trigger idea would work, but it really crowds the area where I need to build the thermostat housing. Not impossible, but just really annoying. Dad was around the other day and we were talking shit and he noticed a little nubbin sticking out of the factory cam... So I think I'll make something up to use that as the trigger tooth. A mount that uses the cam tower bolts. This means that I'll have wiring inside the rocker cover, which gives me pause for thought... But motorsport wiring is something I've got a lot of experience with, and I'm confident I can make it reliable :-). A GS1005 sensor, booted and potted, with DR25 sheathed M22759/32 wiring and It should stand the test of time. I'll make up a custom half-moon seal for the back of the head for the wiring to exit out of. The other step back was also trigger related. I've got a Link ECU for this, and it clearly says in their doc that the crank trigger wheel needs to have a number of teeth that divides into 360 with no remainder... Damn integer math! The SOHC balance shaft sprockets have 32 teeth, so that's not going to work :-(. This is a pretty easy fix really, I just need to machine up a replacement for the sprocket that has a number of teeth that divides in 360... I modeled up a replacement with 12 teeth and printed a test to make sure it would clear everything, its all good. I've shamelessly ripped this off from the kiggly racing trigger kit, but its like $400 to get one of those landed and I'm just not keen to open the wallet to that extent on this thing. I've gone with 12 teeth, dictated by the tooling I've got on hand to make the cuts, hah. Although now that I think of it, we've just had a new EDM wirecutter turn up at work, if I waited a few months I could do any number of teeth I want on that... Ahhh future me's problem. 12 tooth is a little coarser that I'd like with a 272 cam, but all it will mean is a little bit of timing jitter at idle. I'll tell myself it'll just make it lope a bit more at idle and I'll look cool at the lights. Yeah, sure. Right on to the win! I got the coil mount I designed up profile cut and bent it up, and golly gosh, it actually fits! There is something uniquely satisfying in seeing something you've only designed in CAD as a physical object in the real world. I need to get the right fasteners for it, and I think i'll paint it wrinkle black, as that's what the rocker cover will be (with polished lettering of course, because 80's). I'd love to get rid of the ECI-Multi on top of the inlet manifold, because the text is around the wrong way and it drives the OCD nuts, but I cant think of a tidy way to do it... Any ideas out there? I bent it up on a combination of a press-brake and a big finger folder. It needs mild persuasion to get the bolts in place, but really only half a mm or so, which I think is pretty decent for a 3mm sheet metal part with those angles. What I really should do is spend some time calibrating my fusion360 sheetmetal profiles to the tools I have available. Maybe next week? Probably not. I can start on the pattern for the wiring harness now the coils are mounted, that will be another great job to get ticked off. I'll be building it out of offcuts and what not, but will keep it nice and tidy, Fun times :-). Hope this post made sense, I'm 4 ciders deep and waiting for pizza for dinner. Hmmmmmmm Pizza.
1 point
-
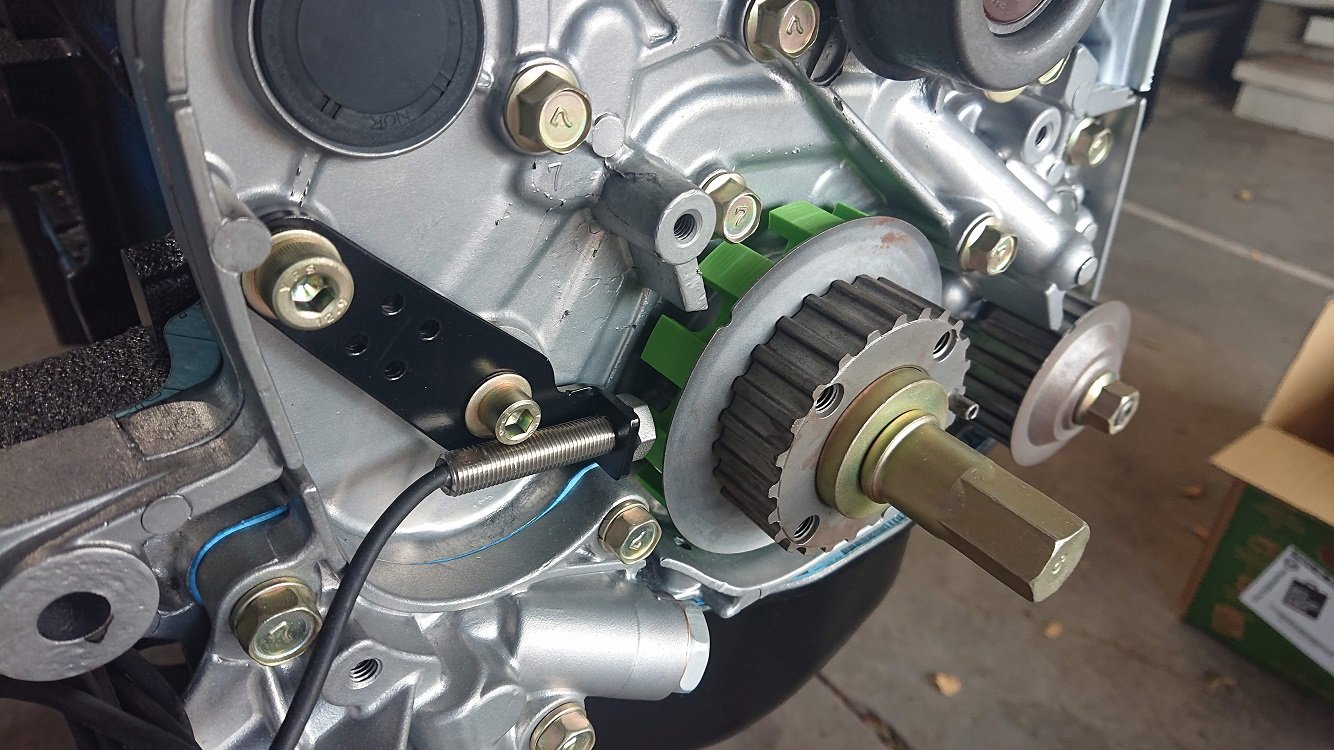
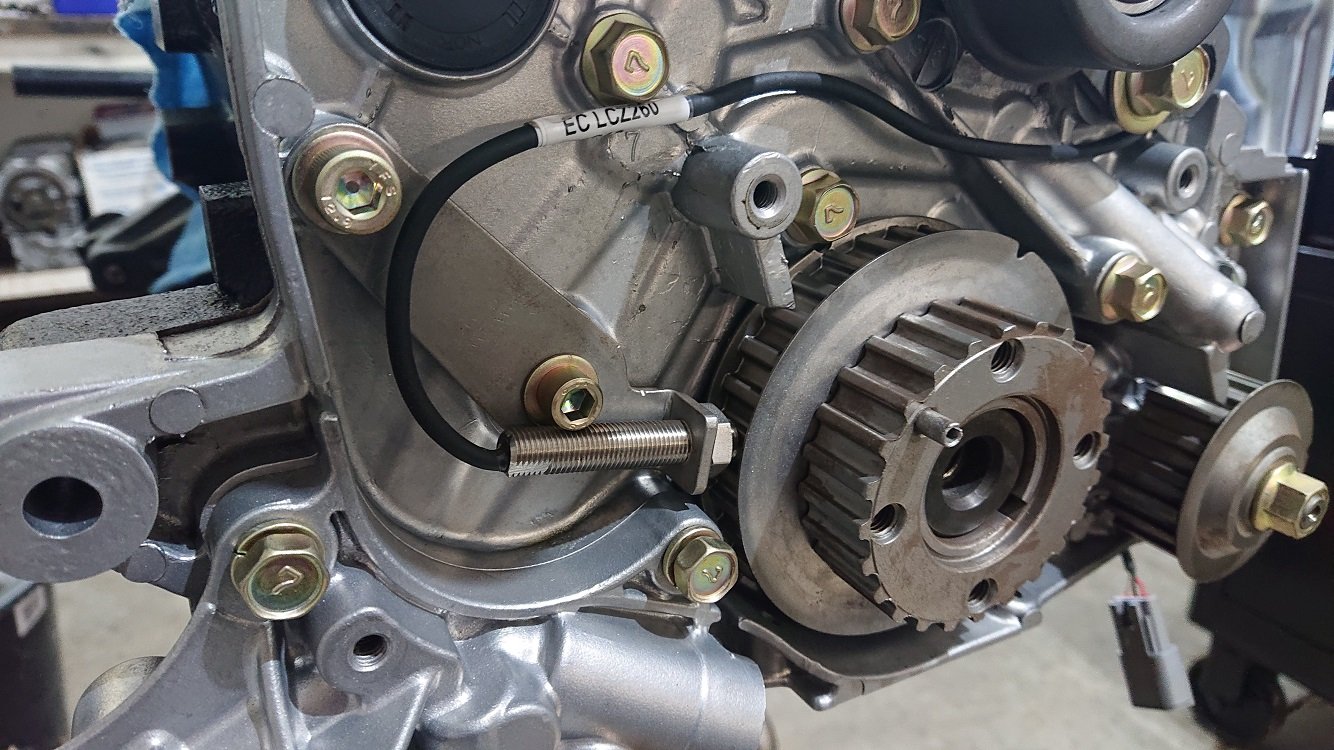
The motor for this thing is a case of using up parts I've had under the bench for many years. Before, and while I was at Uni I was a register biscuit at Repco, and took the opportunity to stock up on bits I knew I'd need one day. Even finding a lot of this stuff can be hard these days, let alone the high price so much of it seems to now command! The block is a really early Starion one, so is stamped G63B and is wideblock. It also has no oil feed for the rear bearing of the upper (RH) balance shaft. This is great, as I'm deleting these anyway for simplicity, so its an oil feed I don't need to block off. They early blocks were tapped M8x1.25 for the timing tensioner stud and clamp bolt. The stud, bolt and tensioner I have are for a later block, so I've drilled and tapped these positions out to m10x1.25. One of the bits I grabbed before leaving Repco was the last set of 4MKRY-8028(050) pistons they had in stock. Moly top ring, 0.5mm oversize and a later model ring design that is a little smaller, giving the pistons stronger ring-lands. They have a 12.3mm bowl, which should land me at around 8.5:1 static compression. Still pretty low, but good for a daily. Better than the stock 7.6:1 the motor originally had! I had MPL in ChCh machine the block for me (also many years ago!), and we went for 0.05mm piston to wall. Its larger than the factory spec for SOHC gear, but on point with the later DOHC turbo specs, and I should be seeing similar amounts of heat. I'll be running fuel injection and coil per plug on this motor, with a Link ECU, so I need to get good engine position information to the ECU. I don't have any distributors for these motor knocking around any more, and I don't like the look of them hanging out the side of the head, only being used for engine position information. Plus, IMO crank position information should be directly measured at the crank, not from a cam driven element via a timing belt that whips around. Although I've deleted the balance shafts, the crank sprocket for the belt is still there as it's also a spacer for the timing belt sprocket. You can remove this and replace it with just a spacer, but it looked like a good spot to take some crank speed information from. I had a couple of gear tooth sensors (Cherry GS1005/7) rattling around in a drawer, and as this isn't a missing tooth measurement, they should work well for this application. They don't work well in missing tooth scenarios because the tooth that ends the gap causes a much larger change in magnetic flux density (which is what the sensor is really measuring), and it stuffs the automatic calibration the sensors have built into their ASIC's. I was chasing this problem for a solid week on a a race motor I was tuning, it sucked to find! I did a temp setup with some blutack and it gave a good signal on the scope, so I went ahead with it We've got some great 3d scanning gear at work, so I took a quick capture of a relevant section of the front timing case / oil pump. A bit of noodling and modelling I came up with a simple sheet metal bracket, made out of 3mm steel. The Cherry sensor had too large of a diameter to get it in the right place, but I found a honeywell sensor with a 3/8-24 thread which has a decent temp and vibration rating and seems to work well. Scope measurements when spinning the sprocket by hand (the crank key is removed) show a nice square pattern, will see how it goes when the engine is actually running! Kiggly racing do a very similar setup, but it's around $400, and I don't really want to part with that ;-). The short block is pretty much assembled, just waiting on the timing cover / oil pump gasket to arrive from amayama. Finding all the right fasteners I had done a very average job of bagging up also took quite a while! I've done a full dry assembly now though, and I should have everything.
1 point
-
We’d decided we were going to tackle 42 traverse. Which was a great choice for a shakedown ride imo. Adventure50 handled it quite well, 4t motor is just lazy and loves being held wide open to bounce up obstacles. Did a few jumps, bashed through a bunch of puddles, and succeeded at most hill climbs (let down by lack of rider skill mostly) apart from the really wet slippery clay ones (like picture) due to lack of tyre grip, as the SR241 trail tyres just clogged up. Cleared instantly though once back onto the more solid bits of the trail. relocating the airfilter into the frame was good, as it increased the wading depth. However we still had to carry/float the bikes across as a section of this was mid thigh deep. Even made it up to see some snow only issue on the day was I lost the exhaust nuts -my fault for not double nutting/using lock nuts. And could go for some firmer front springs as it bottoms out fairly easily. / less bent fork tubes might help too. however we only did 42 one way as on the way back Andrews bike broke and we had to walk it out. So I need to go back to ride it both ways again. #cape1 point
-
Just thought I would update this just so it didn't disappear into the nevernever, but then realised I had actually made progress since I last posted on this thread. So firstly my excuses for not doing much... Got hit by a drunk driver, (he was speeding, no license, no WOF/reg since 2008, etc, real winner), lost control and crossed the centre line at well over 100kmh. Hit us and we did a barrel roll (at least one, not quite sure). Mum and our little dog were in the passenger seat, were mostly fine (Mum headbutted the window) but luckily avoided worse through sheer luck (it didn't actually land on her side at the front, went driver front, passenger rear, etc) and Mum held the dog as we went over so she came out unscathed. I however fractured my spine (roof came down to say hi to my head), luckily nothing too major as far as spinal injuries go (compression wedge fracture in my thoracic spine, loss of about 35% height on one side of one of the vertebra), but meant that I couldn't lift anything for what turned out to be about 3 1/2 months. Stupid thing was I was also reaaaallllly gutted about losing the van too (I know "it's just a vehicle, they're replacable, bla bla") but it was a 92 4WD 1KZ-TE Hiace Supercustom, and was fucking awesome. In really good nick, only 200,000kms on it (not a lot for one of them). Only had it about 5 months. Anywho, have mostly recovered from that (happened mid March), and then the other thing that has eaten my time is the tiny house in the background. Been working on it off and on, a lot of off while I did my study etc, for about 3 1/2 years, and it's finally almost done, move in in August is the goal. Will share photos in another thread at some point once it's finished and looks less like a building site. On to the ute, before the accident, I had actually made some progress and taken a few photos, so here goes: Bought adjustable arms for the rear, RAW shocks, Dobinson 4" lift springs, as well as an adjustable panhard rod, all roughly set up until I get the engine properly mounted and the front done so I can measure the angle on the output of the gearbox to get them equal. Sat the body on, and the shortened tray. Need to lower the cross bar to the height of the piece of timber that's clamped on there. Body is just sitting on the pieces of timber at the moment, but that puts it at the right height for everything to fit Mocked the front end up, tacked together the shs rad support so that I could mount up the radiator and intercooler (which is probably to small, will likely get on same thickness and width, just taller and notch the bumper so it sits in, then holesaw the front for airflow. Have done a bunch of research, small jobs, bits and pieces etc, since then, but not a lot. Once the container is done in the coming month, this will start getting time and money thrown at it again. I desperately need to get some paint on it soon (probably just primer until I have everything properly mounted and can do the bodywork), as the fine rust film on it is getting less fine, and it is a Datsun. A big part of going forward with this is getting the engine (RB25/30DET) so that will require some financing, hopefully in the form of selling my Mitsubishi Challenger. If anyone knows of one, preferably a runner as I don't want to do a refresh on it (for the sake of time/expense) at this stage, let me know. Also need to order some parts from Superior Engineering in 'Straya, so that is gonna cost some money too. Let me know what you think in the discussion thread: Cheers, Hayden.1 point
-
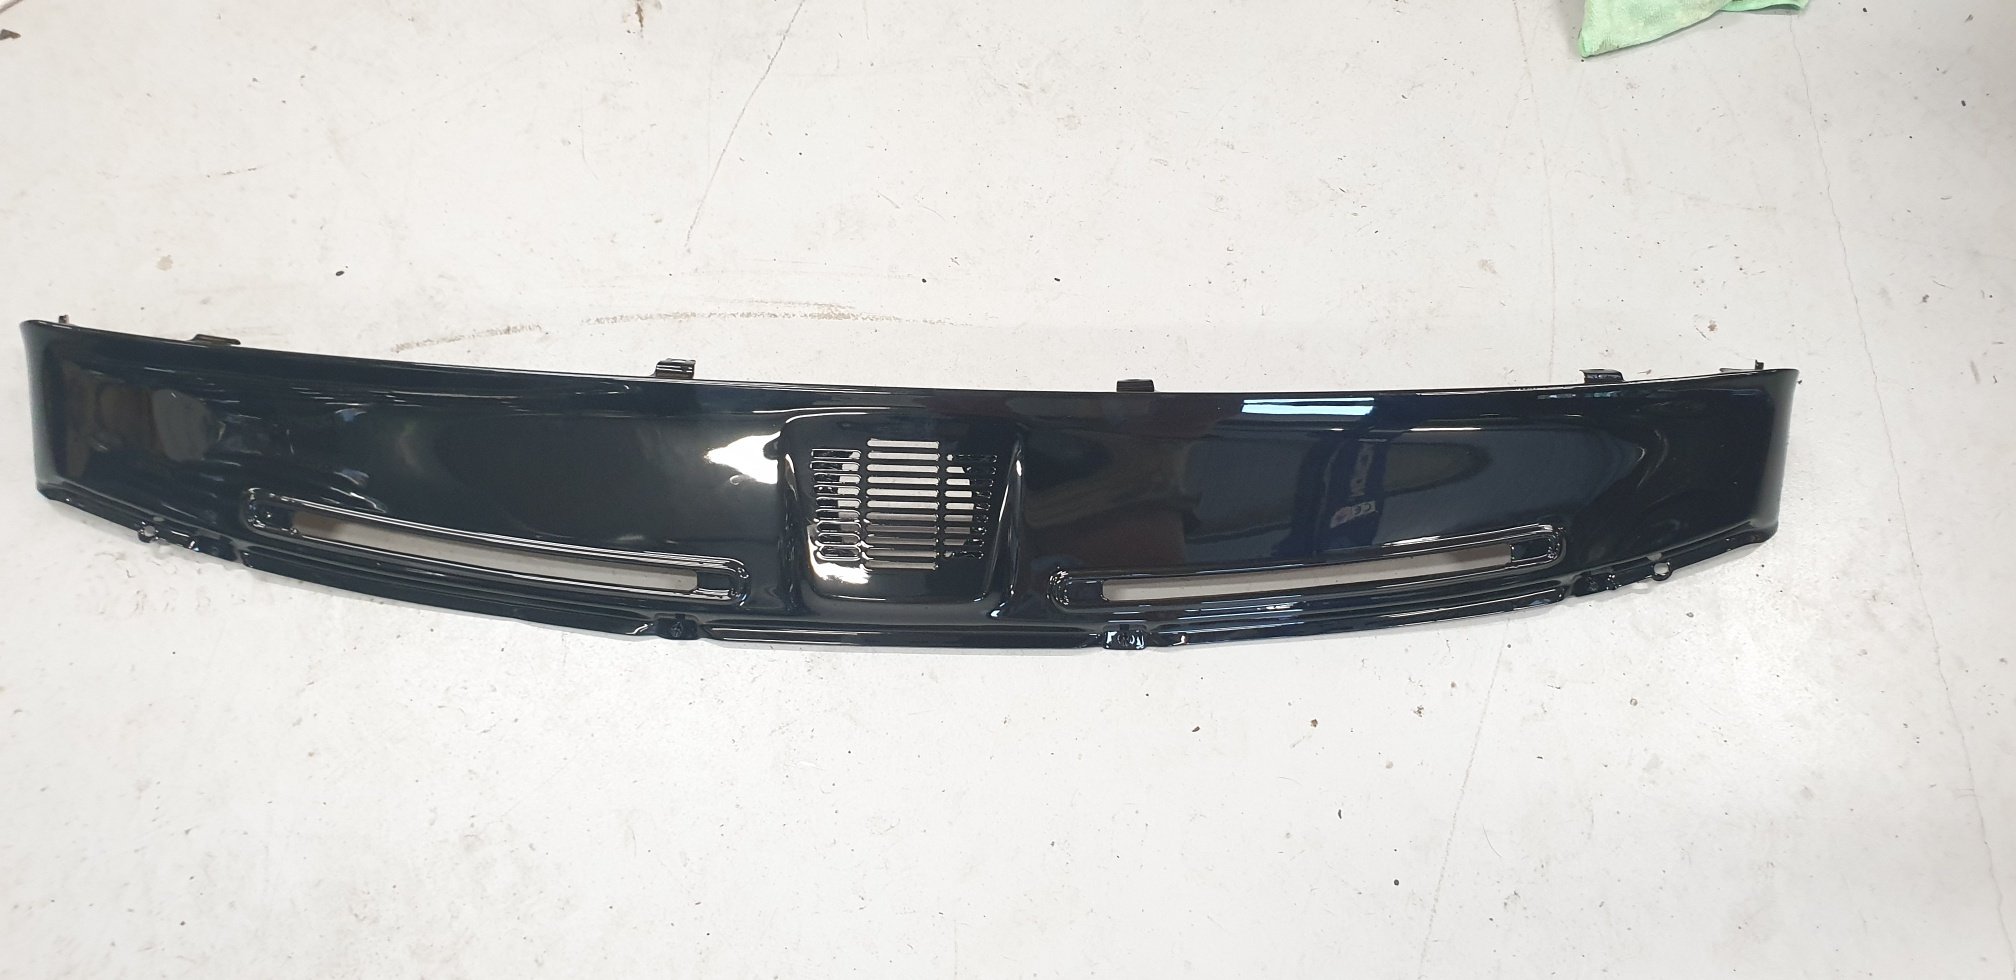
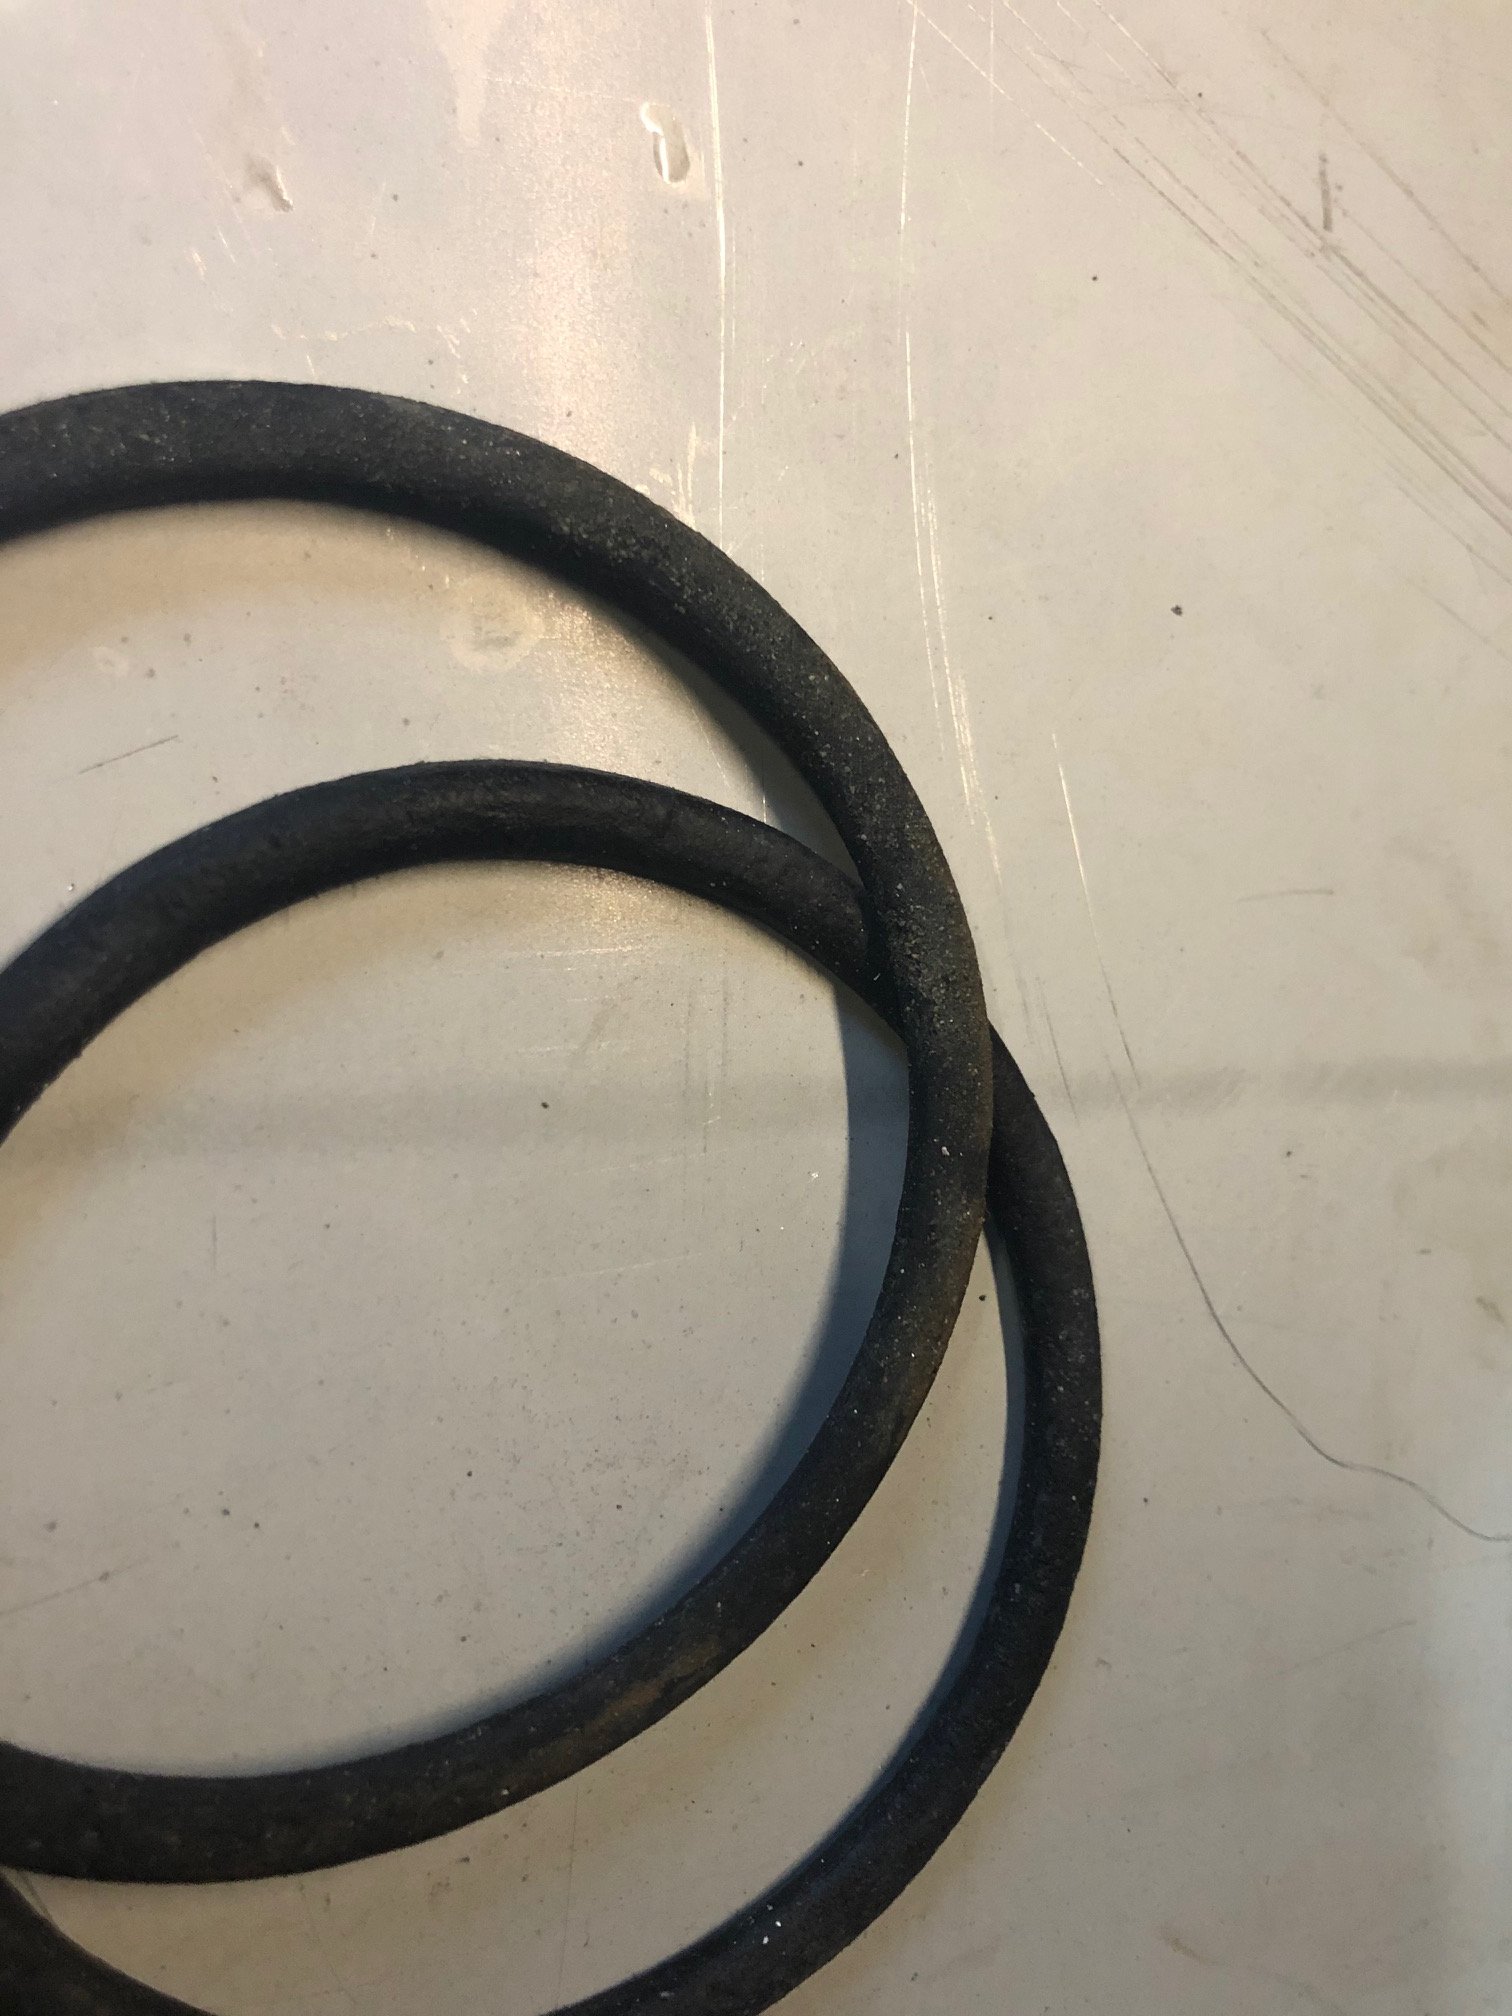
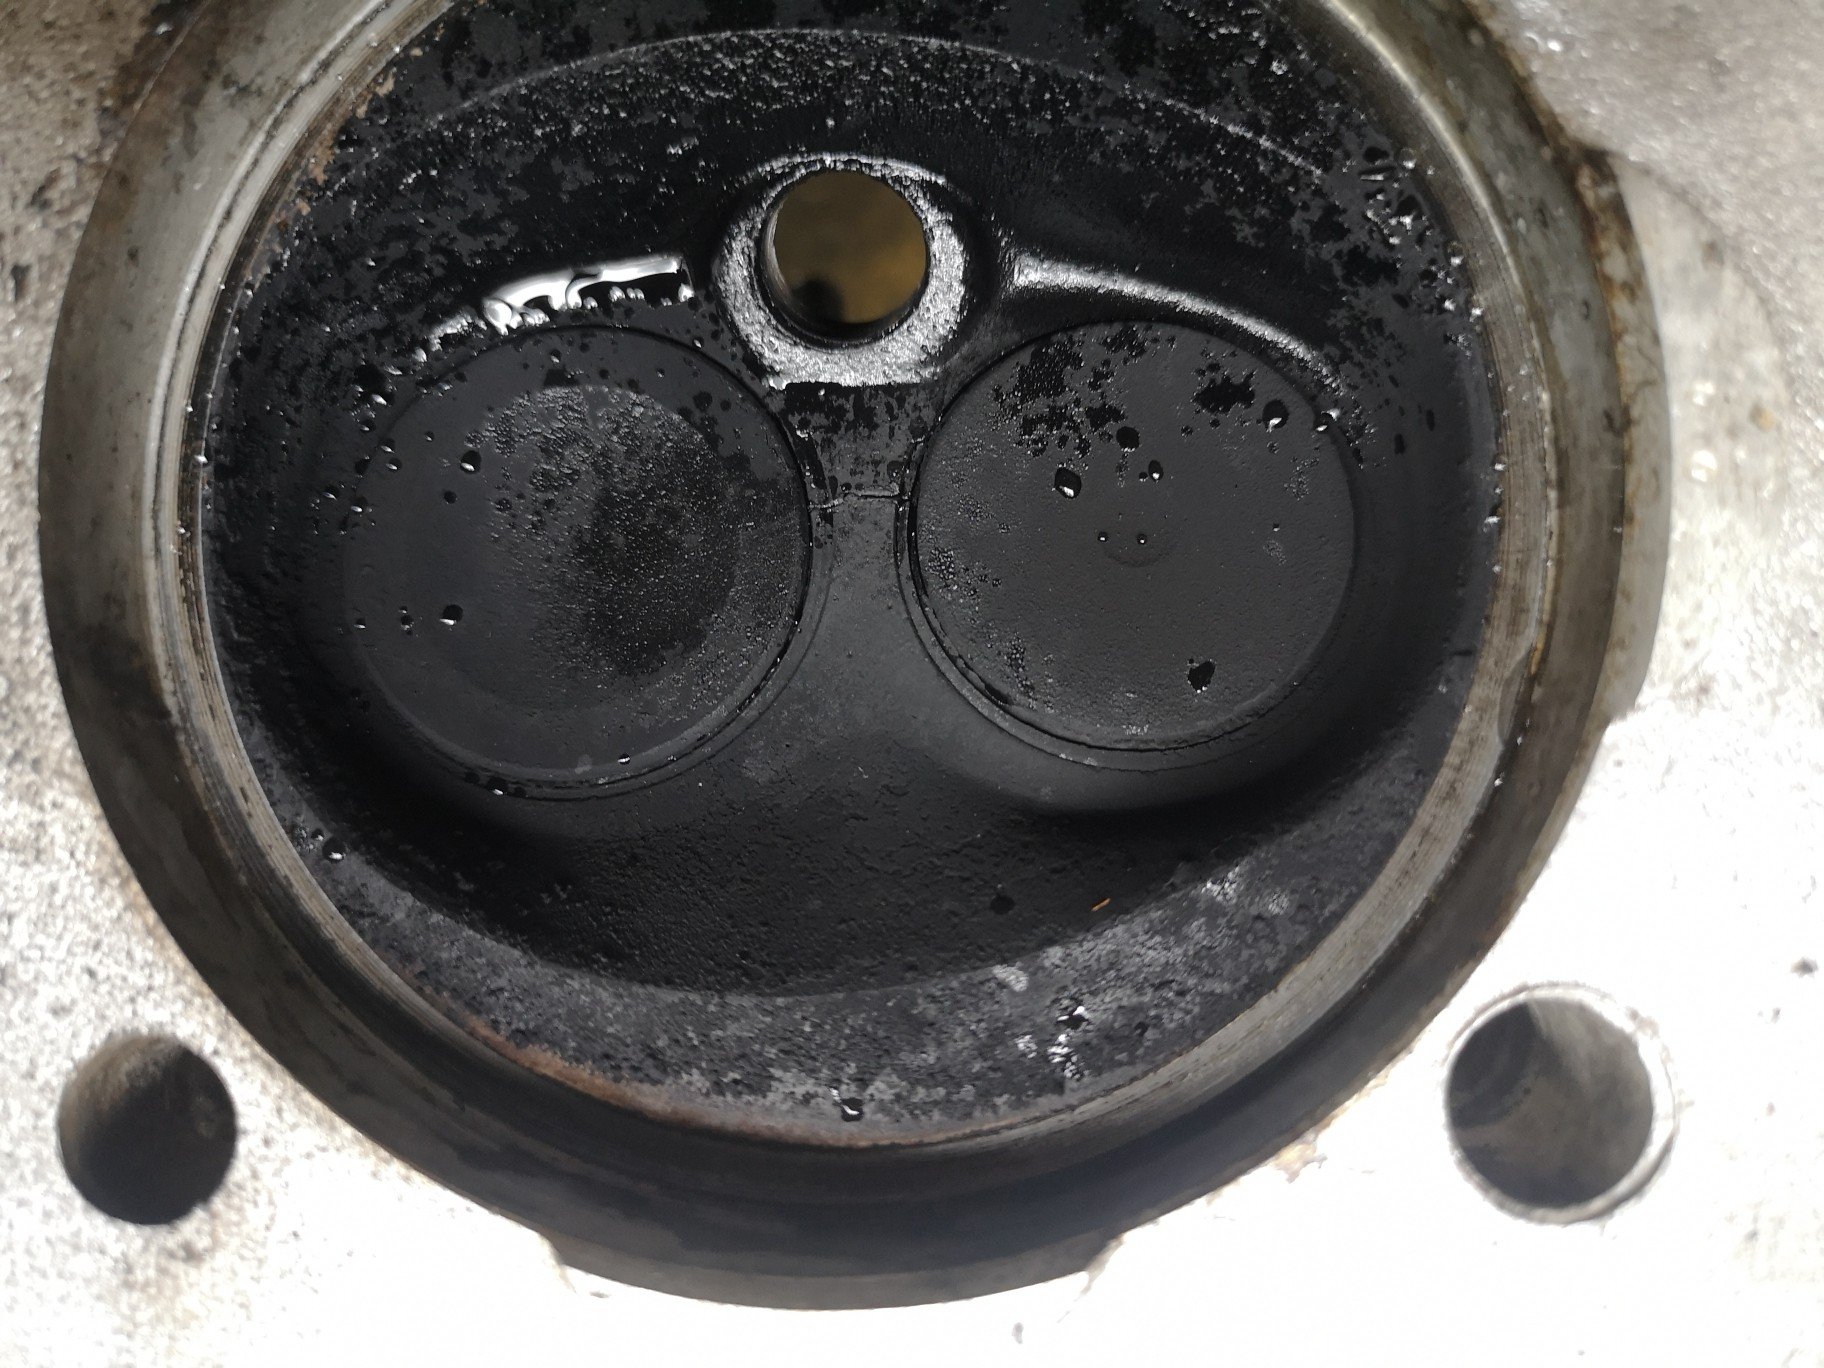
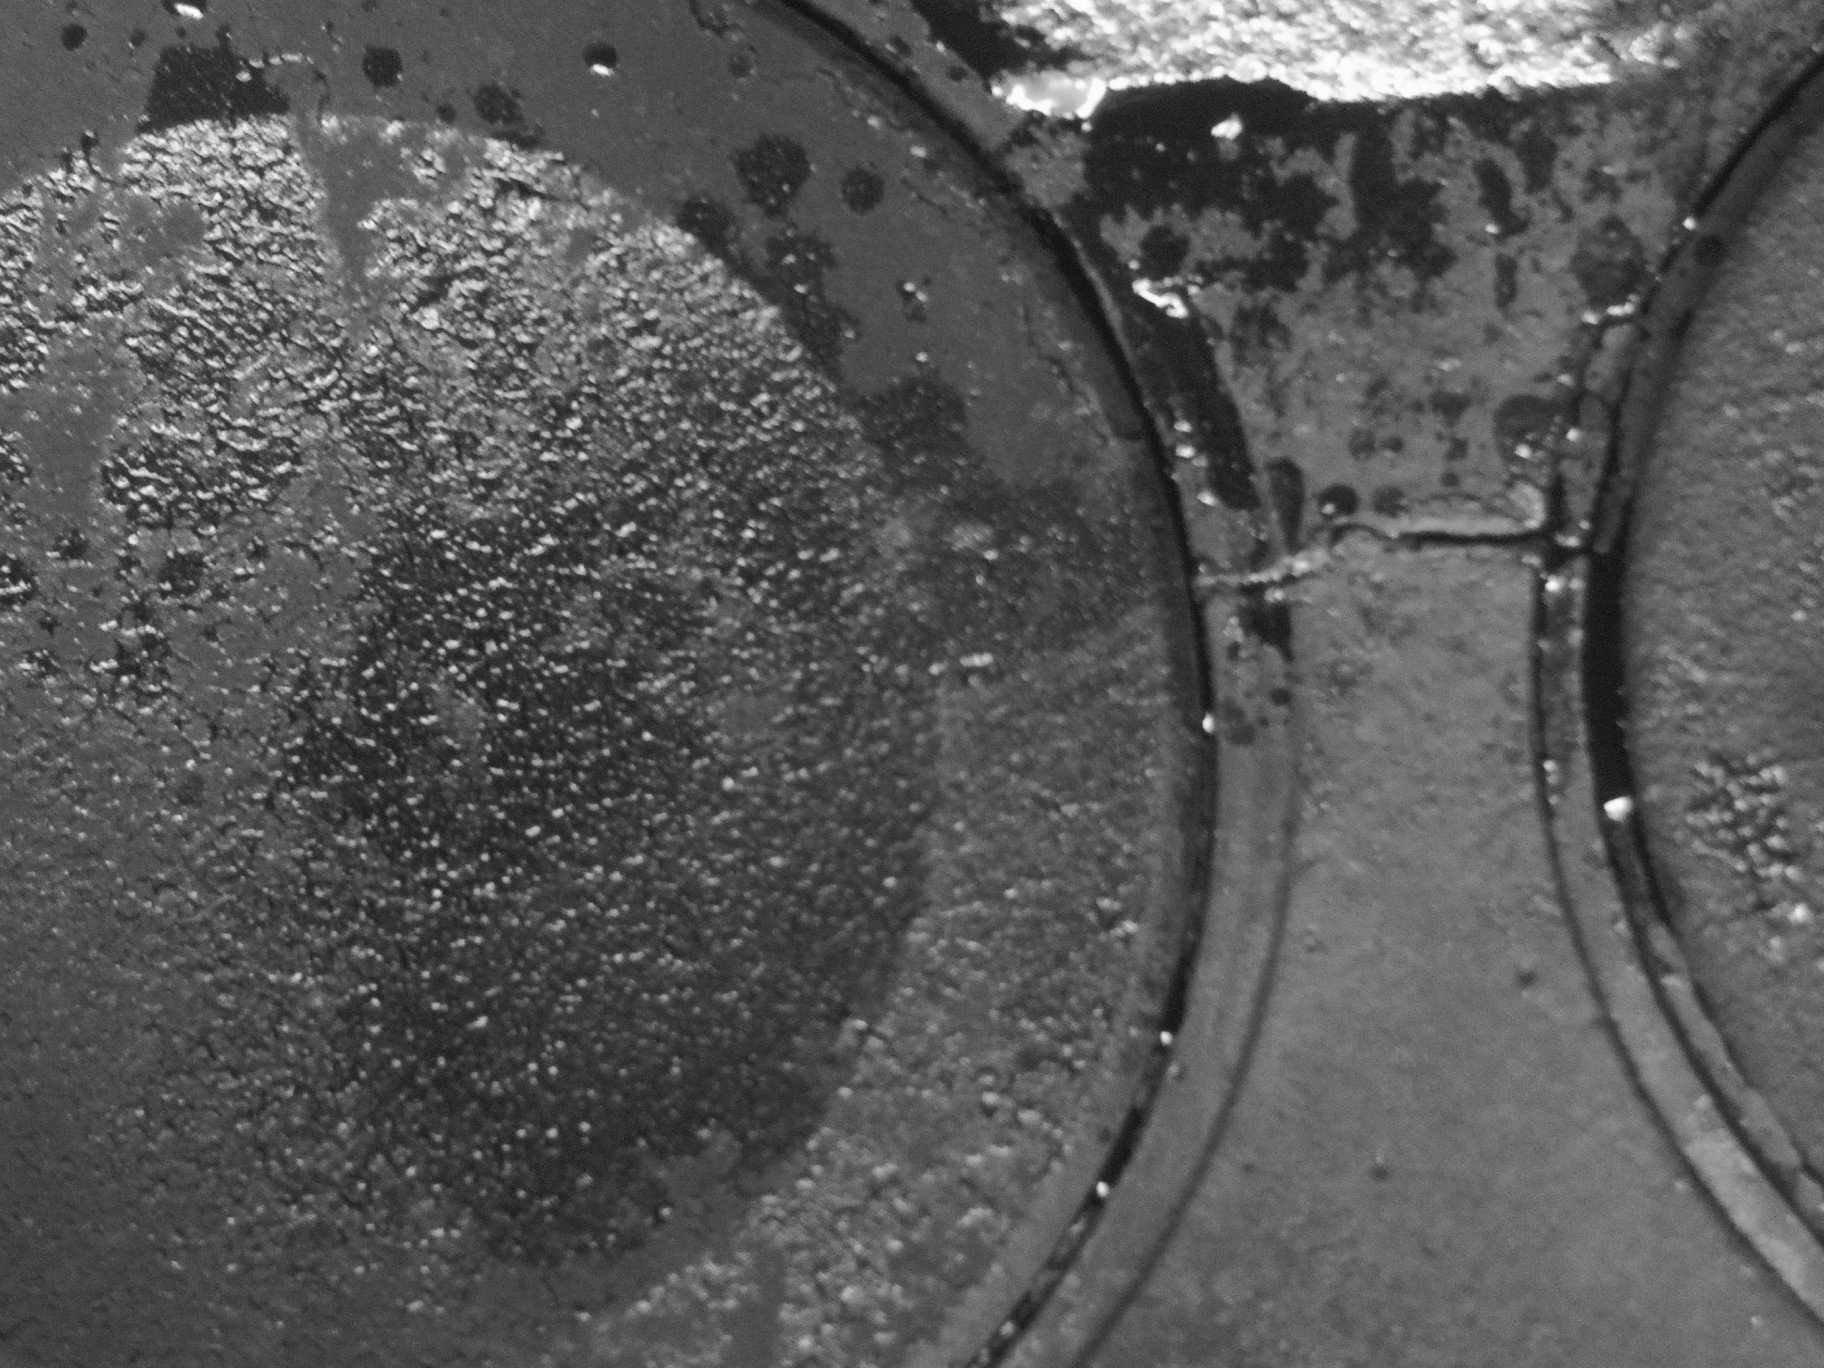
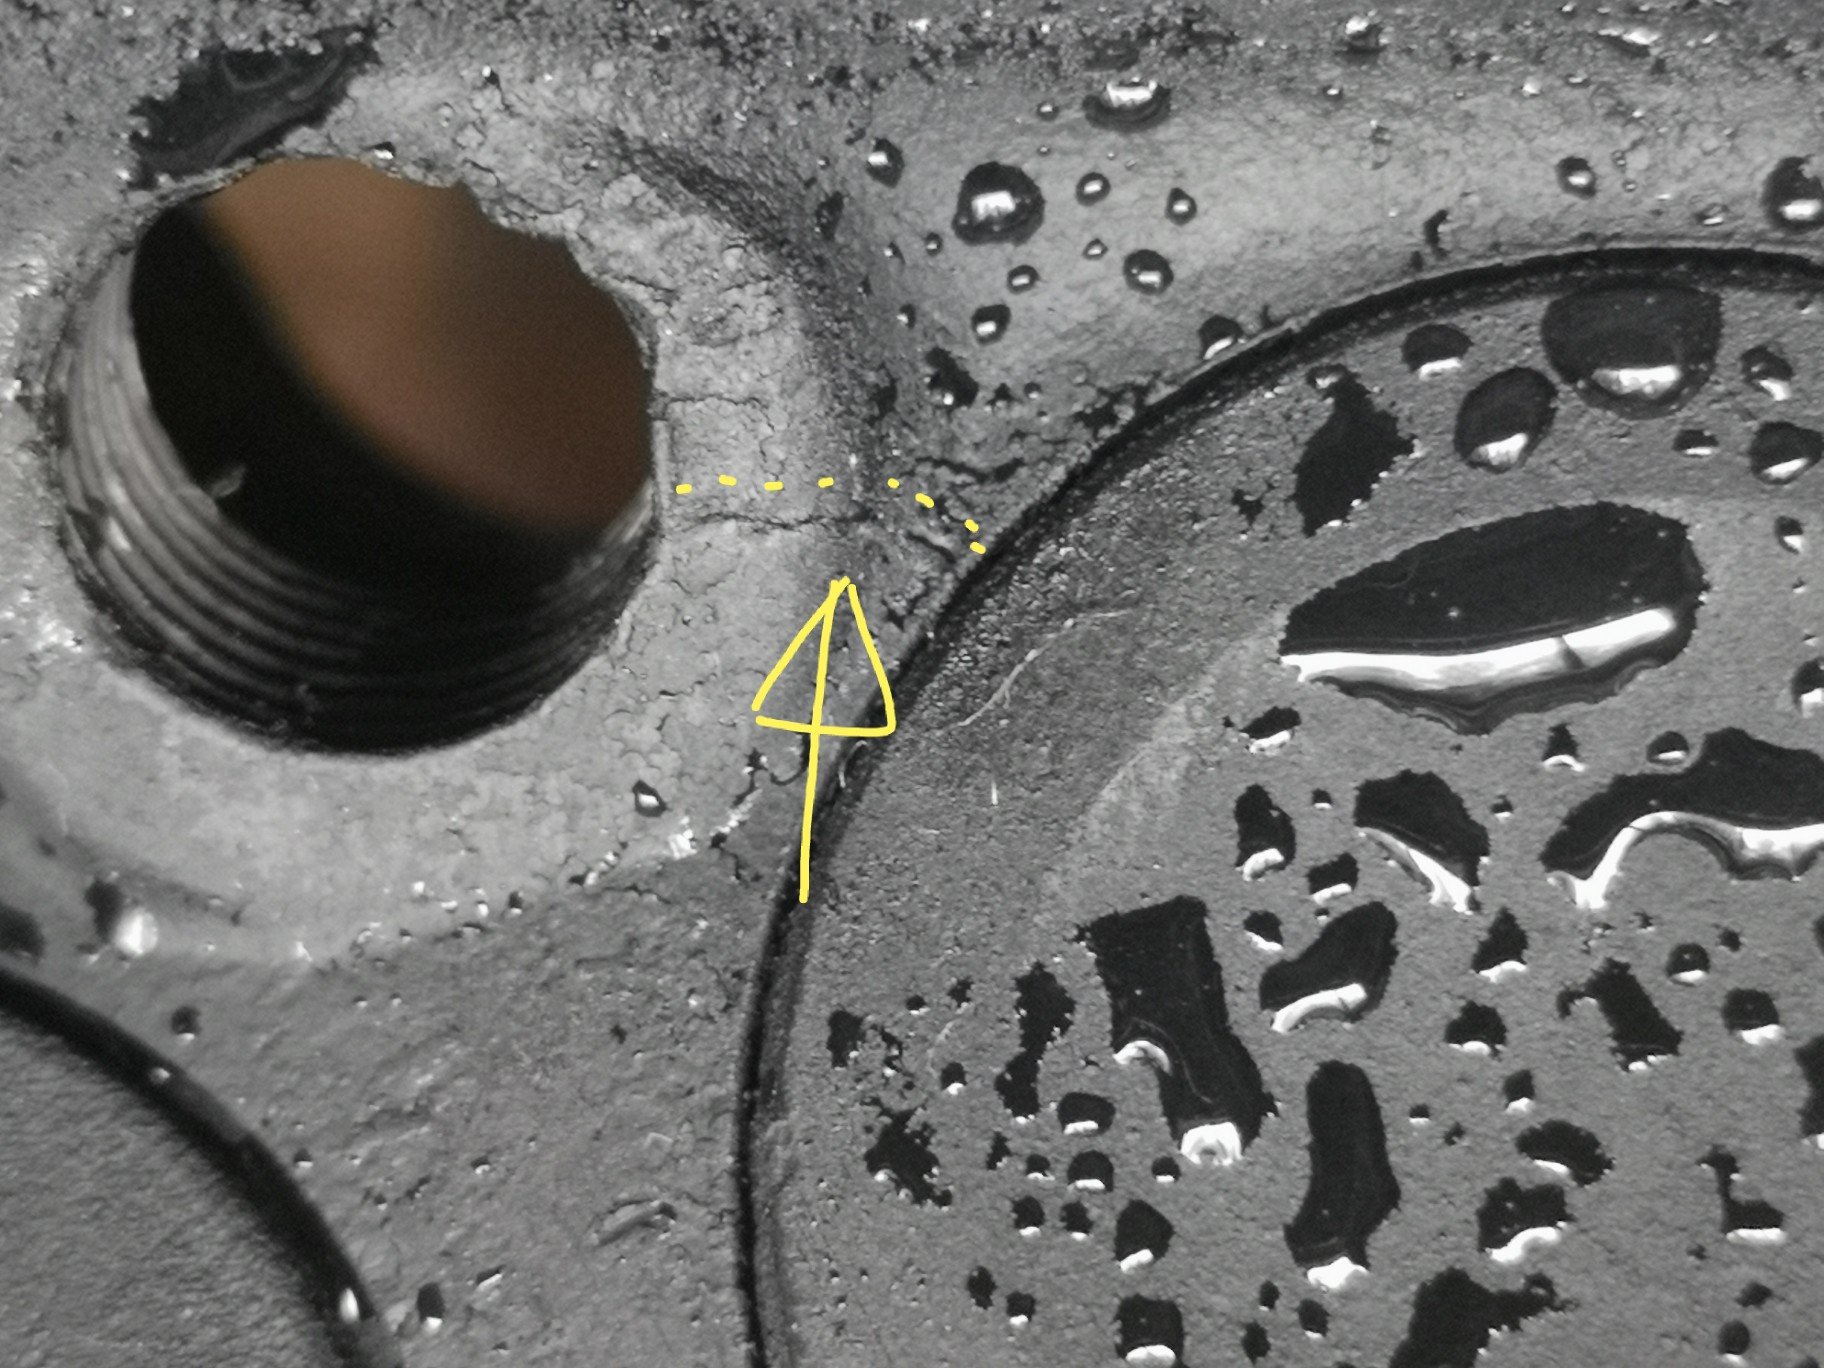
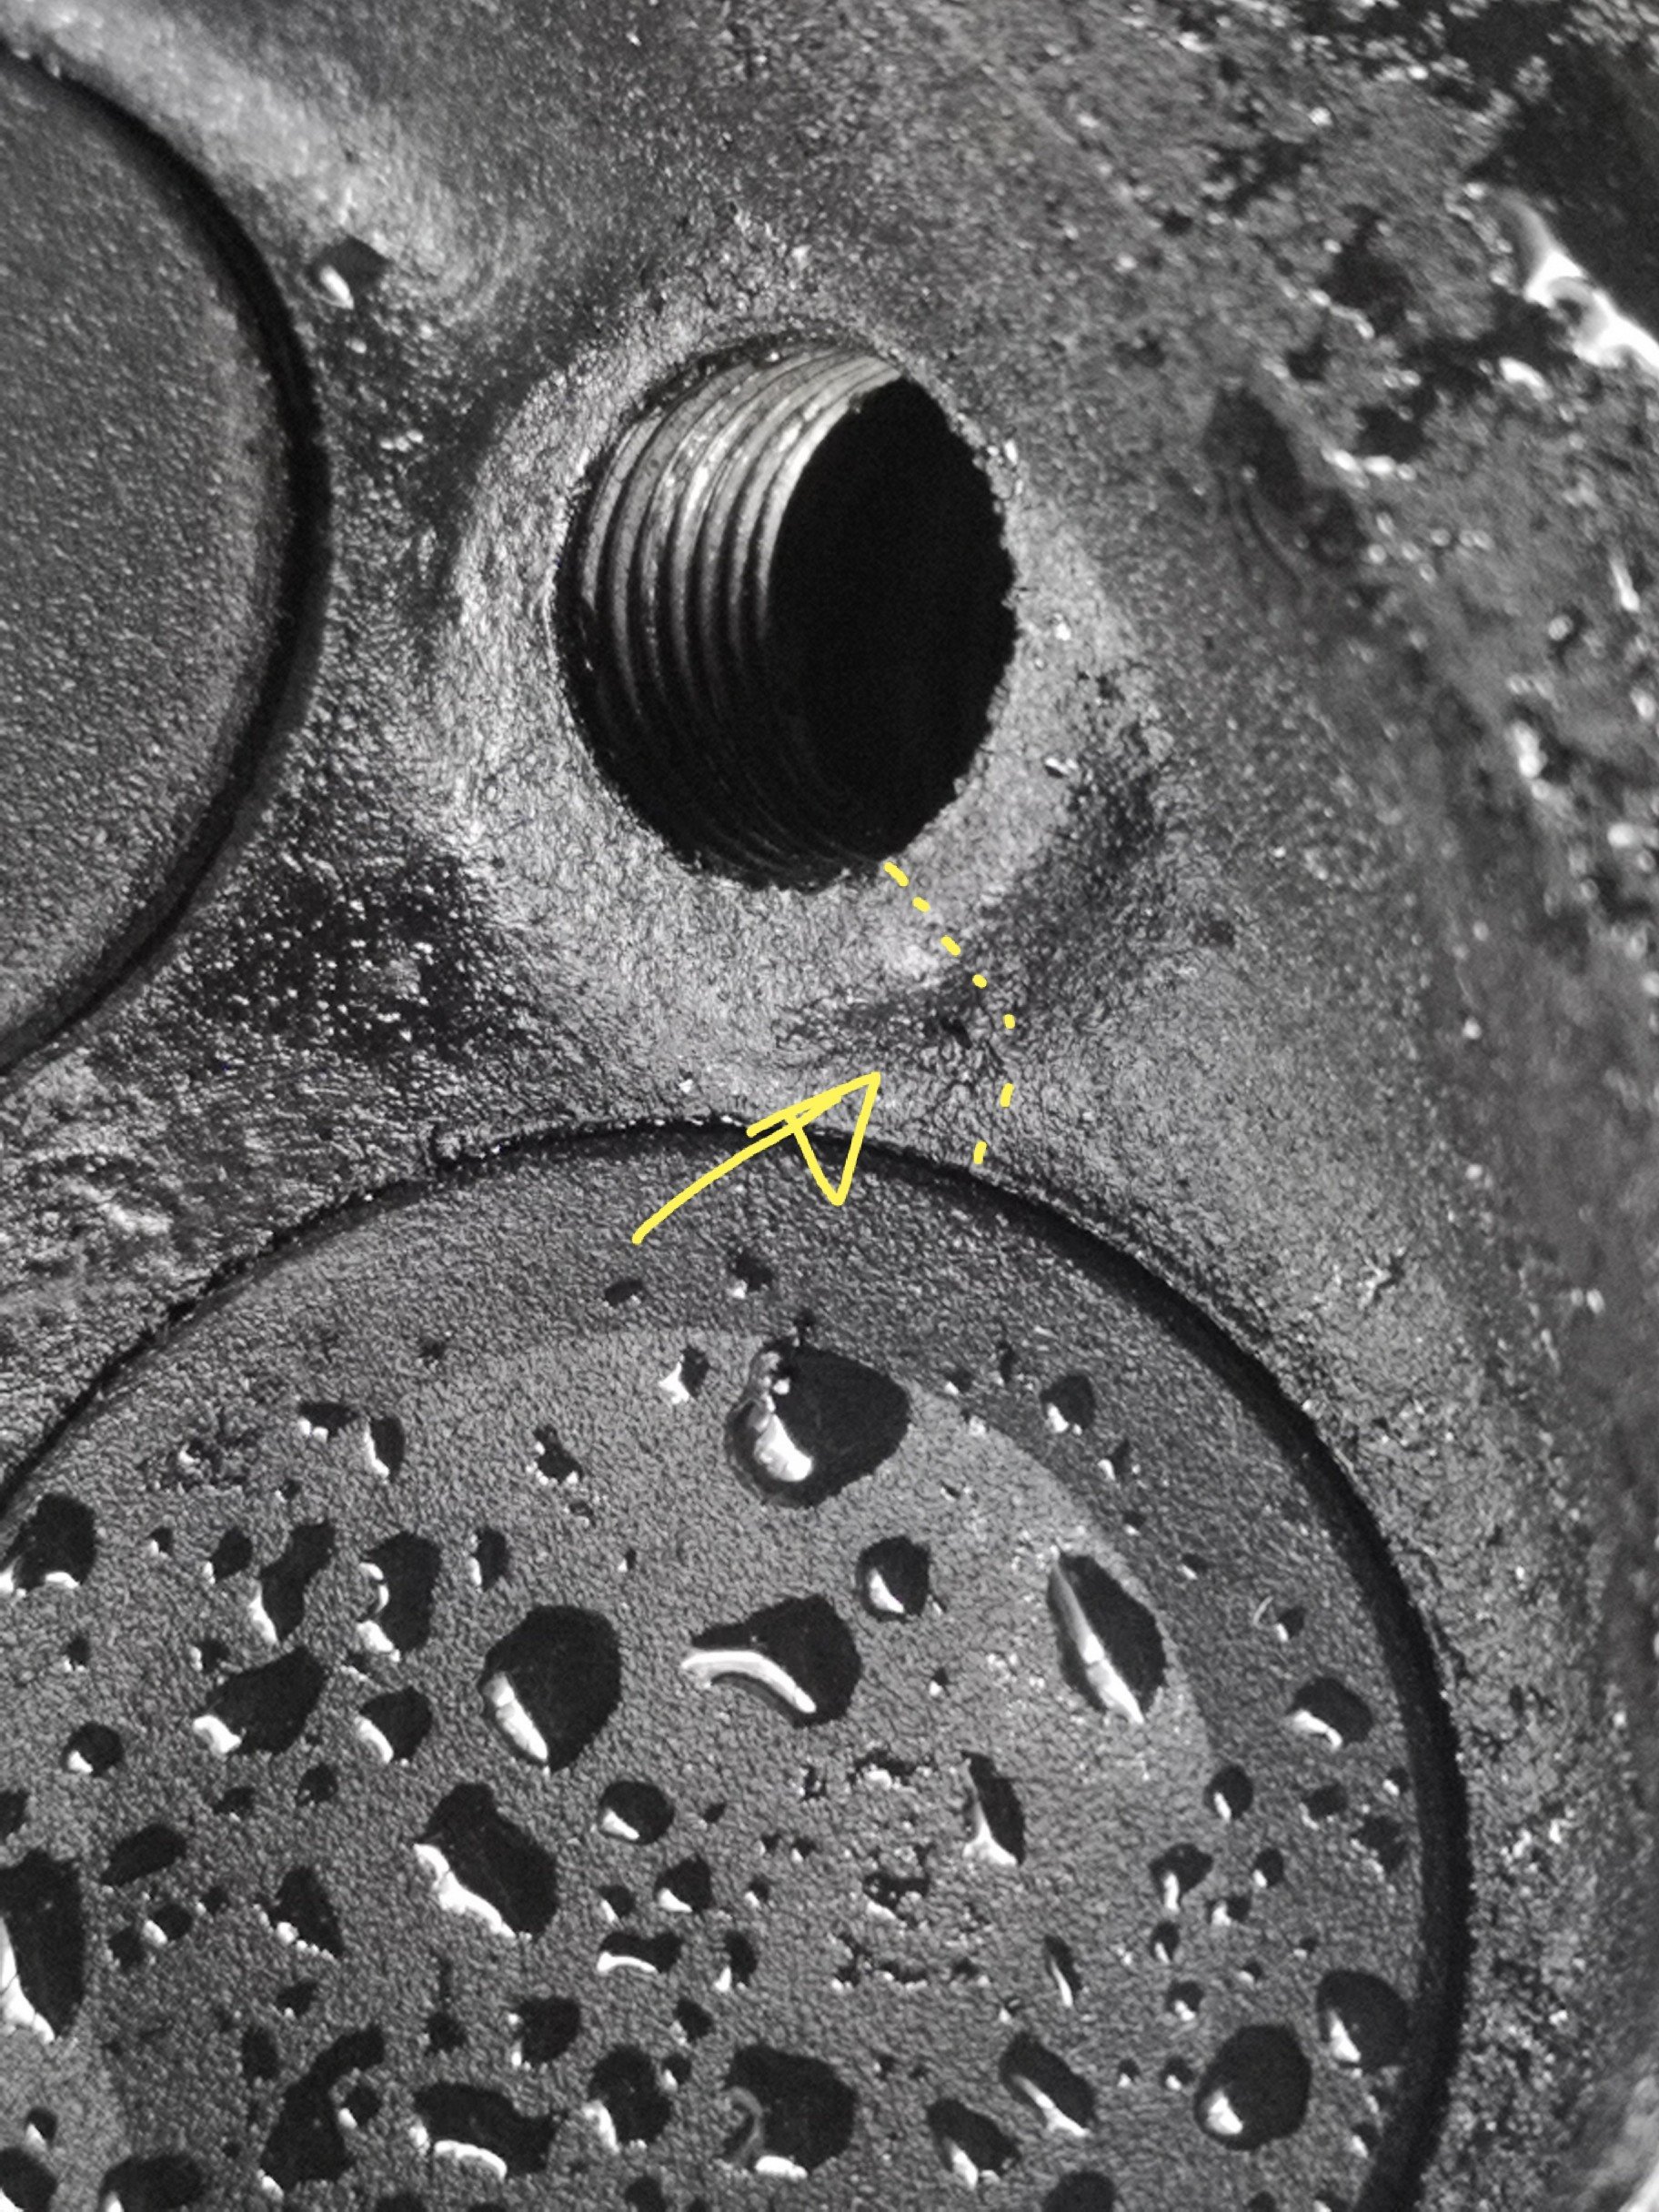
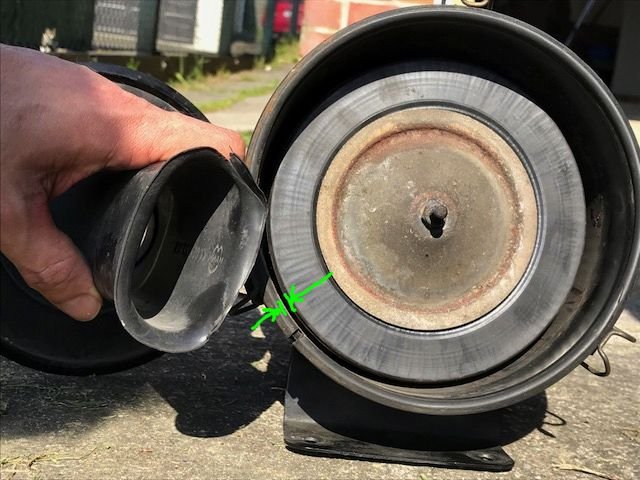
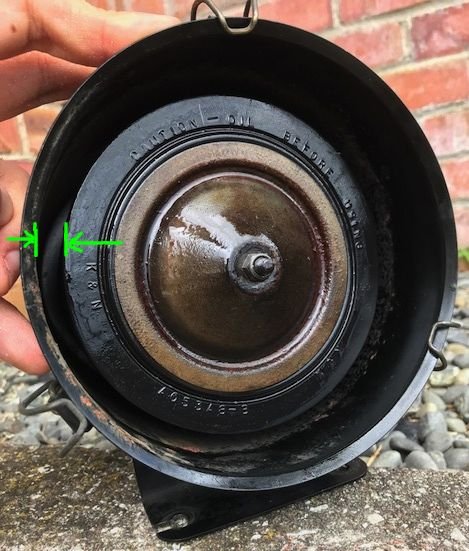
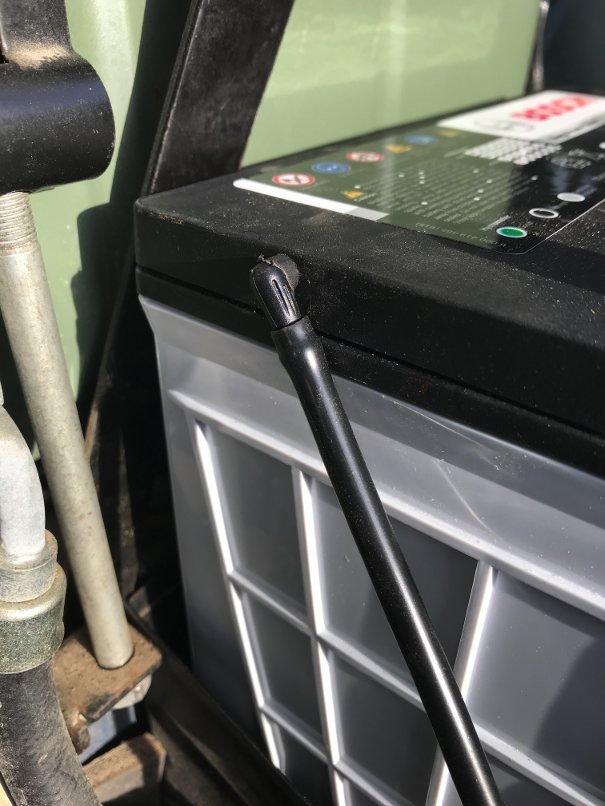
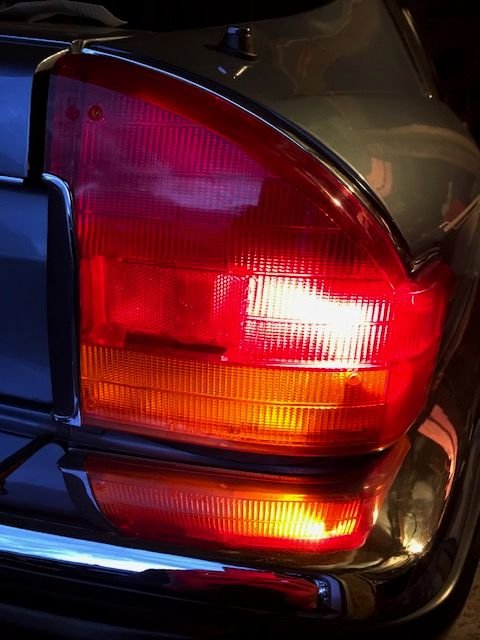
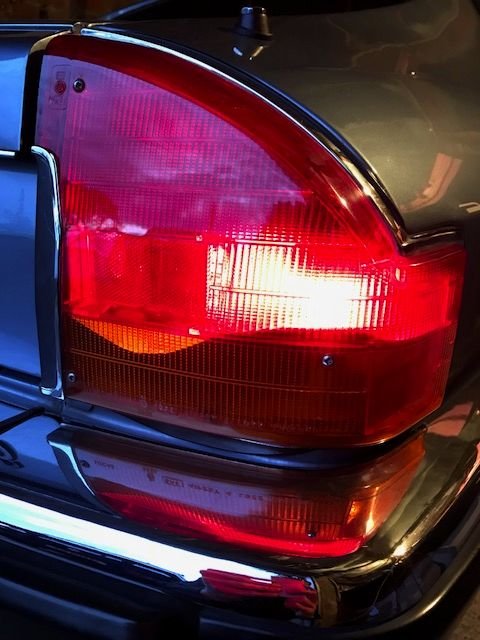
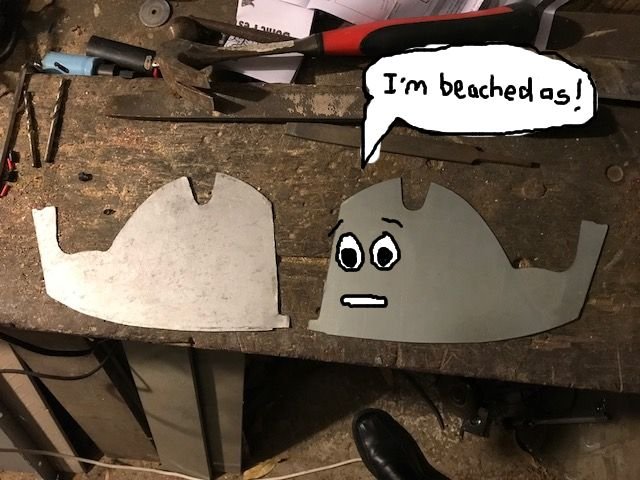
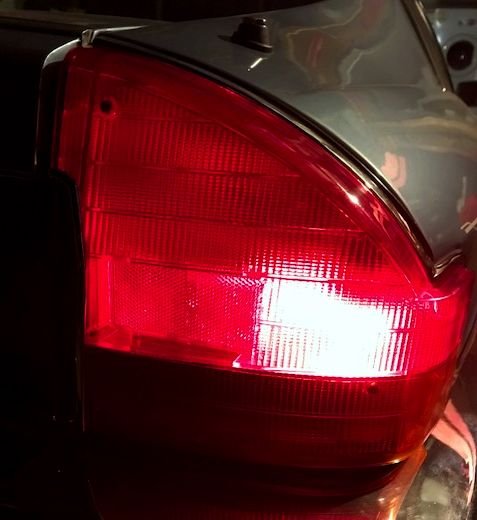
I promised a zorst recording. I hoped to record some runs up to redline under load, but this will have to do for now. It already took me ages to edit out all the smoke. I think the exhaust sounds more like what you'd want from a car like this - payoff for the hassles and fuel economy. It's no lumpy V8 burble, and of course it would be more interesting with carbs and a manual transmission, but it'll do. Even if the auto sometimes keeps the engine at a steady maximum rasp up hills, which sounds like someone's cutting grass with a line trimmer... Also, gotta love that ultra refined starter motor, for sneaking out to the club late at night. =\ Pity that this plan..... ....wasn't going to work, but I'm happy enough with the result. I also ended up increasing the induction noise, because I decided to check the air filter and found this: The filter diameter seemed a bit big for the housing, leaving a gap of only a couple of mm as shown by the arrows. Despite appearances, the gap was pretty uniformly small the whole way around. Rather than think too hard about whether that total area could in fact be adequate for a whole 220 horsepower, I ordered a K&N filter which has a smaller diameter: I'm also now running this with the intake snorkel removed. Despite the long intake manifold etc, there's some decent induction noise at large throttle openings (kinda the whole point if I'm honest). I could have gone for a pod filter, but I read that it's important not to alter the airflow pattern through the type of airflow meter sitting right behind this filter housing. The changes I've made don't seem to have made the car run any worse. What else... I got some piping to suit the vents in my battery and carry any corrosive fumes outside the car, equivalent to the system the car apparently would have had when new: When I got the car, the RHS rear light was missing its internal divider so that the tail light bulb could illuminate the indicator and vice versa: That was stink, so I made up a temporary divider out of cardboard. It wasn't long before the cardboard started to warp: That looked pretty dumb, so I made a proper one out of metal, using the divider from the other side as a template. Here they are: Now it's sweet.
1 point
-
He'd buy the V12, run straight pipes, paint it in camouflage and imagine he was in a military tank.1 point


.thumb.jpeg.910c6632f6e66e8cba89476e83b41634.jpeg)


This leaderboard is set to Auckland/GMT+12:00