
Leaderboard


Popular Content
Showing content with the highest reputation on 07/01/20 in all areas
-
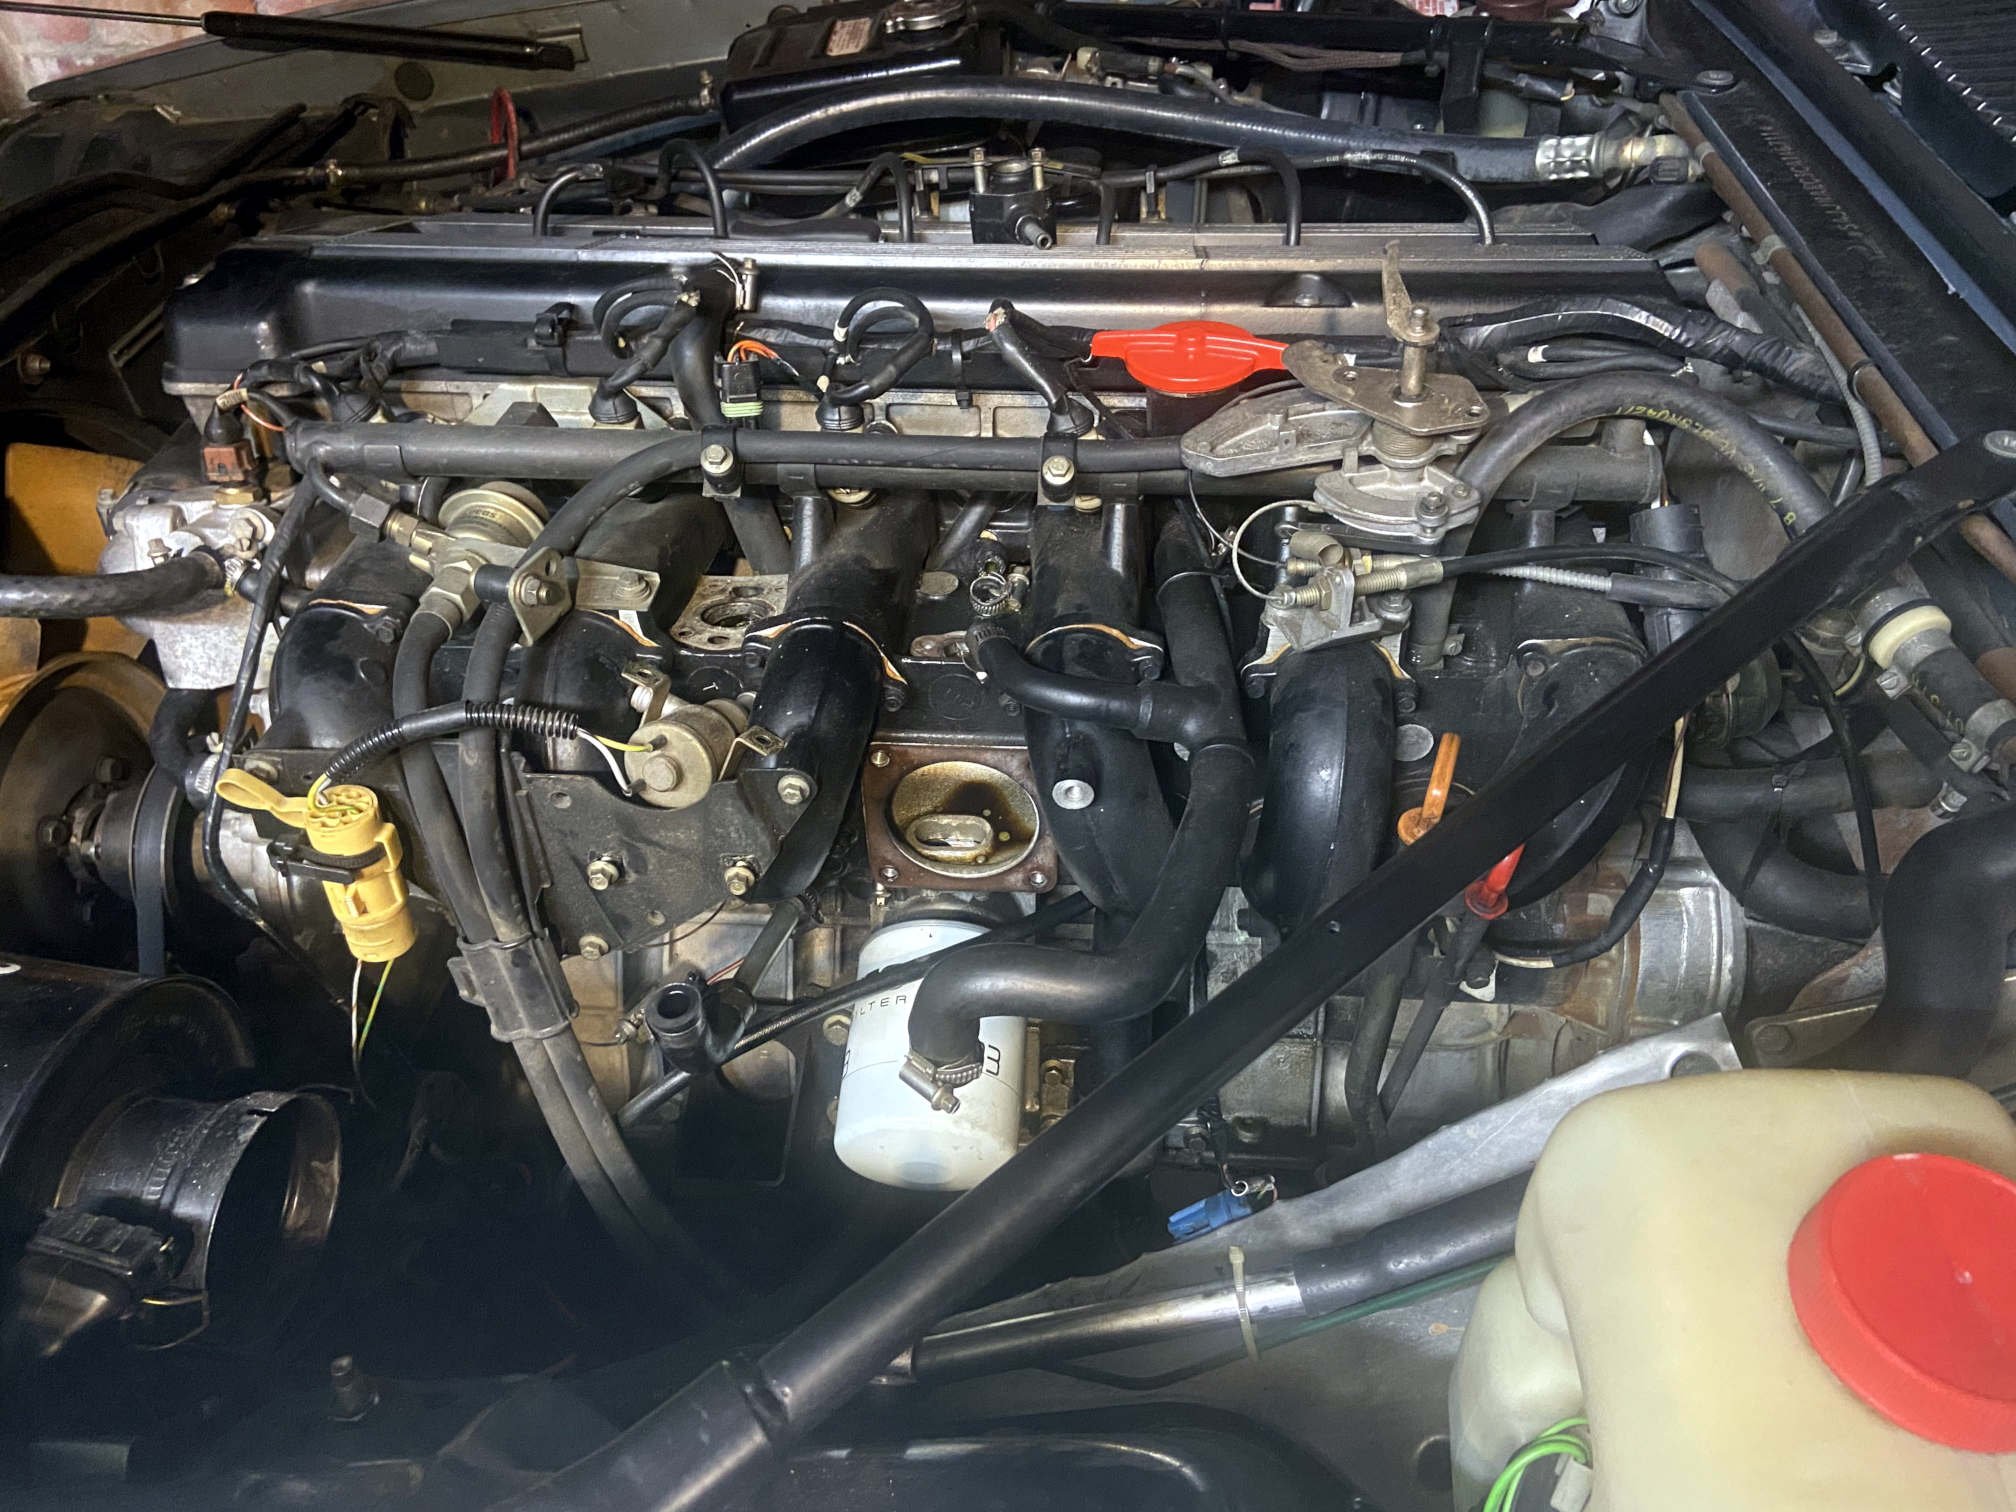
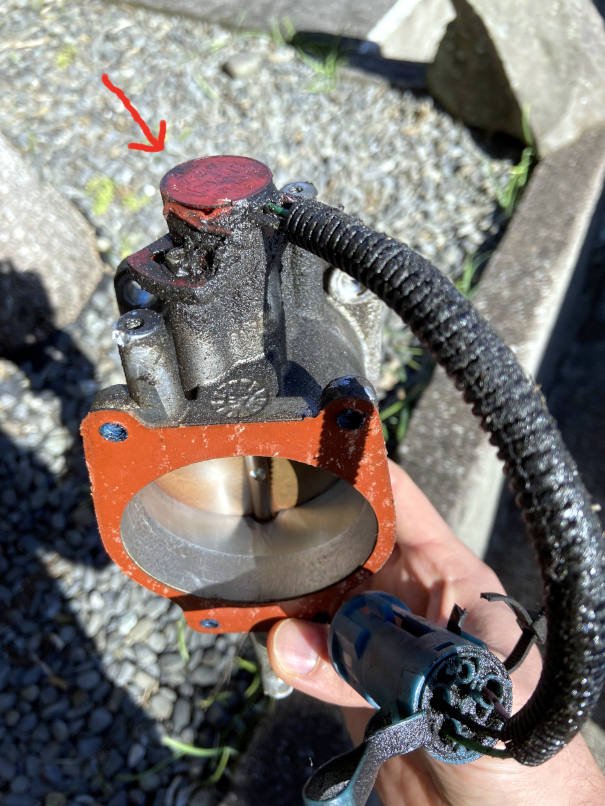
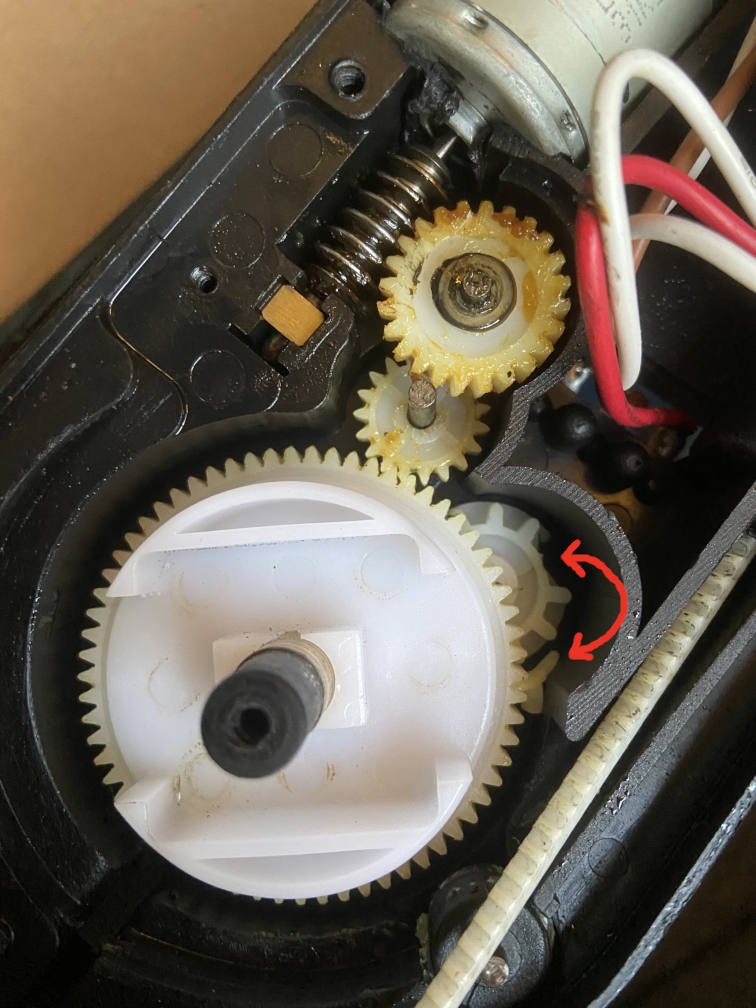
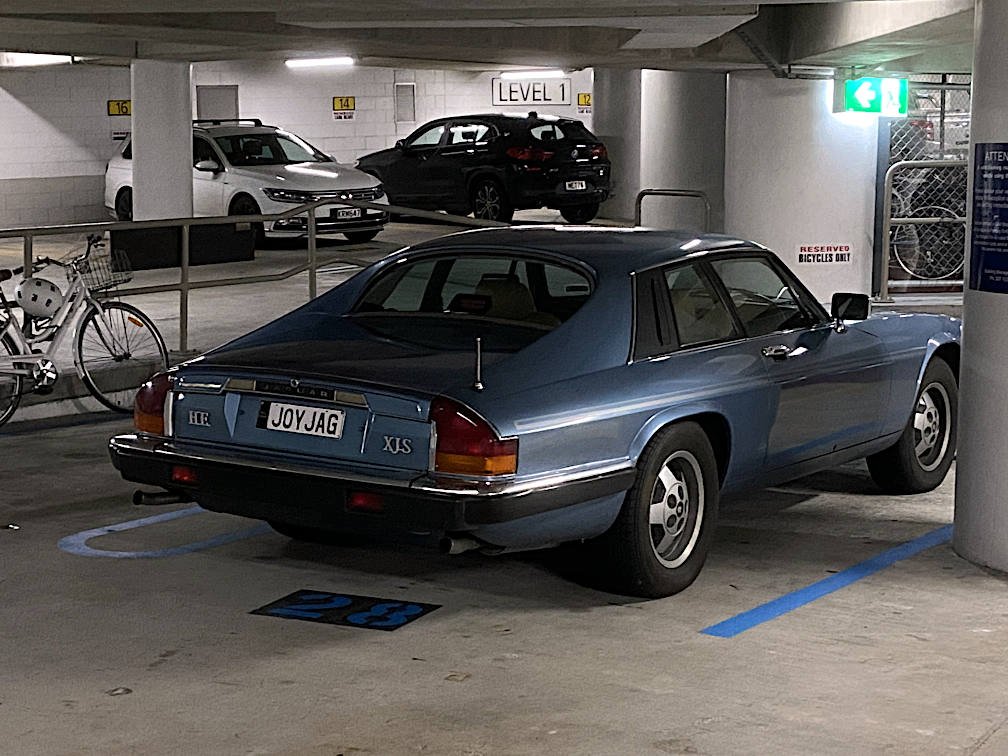
In my last post I thought I'd made the idle better, but it turned out I just made the car idle faster when warm and hardly run at all when cold. So I kept researching. Most results relate to the more-popular V12 engine, and you also have to contend with the fact that the AJ6 had at least two different fuel injection systems on it over the years, with and without various anti-pollution devices. Here I've removed more of the intake bits to check for gunk and vacuum leaks: Some crankcase oil must end up condensing on the throttle plate and running down into the throttle position sensor mounted underneath it (TPS arrowed, throttle assembly shown upside down): I cleaned the TPS and measured its resistance. It seemed correct and linear except slightly higher at idle than immediately off idle. I measured and adjusted the throttle plate gap, reassembled everything and followed the idle setting procedure. Basically you fake the coolant temperature reading to cause the idle stepper motor to close, then you unplug that and set the base idle speed with the air bypass adjustment screw. I couldn't quiiiite achieve a low-enough base idle even with the air bypass fully closed, which I guess isn't ideal. The idle speed seems good now (hot and cold), but the car still struggles into life if it hasn't been started in a day or two and its idle still stumbles a bit. I tried new plugs and I tried spraying flammable stuff all around the intake to check for more leaks, but no luck. The next step of the idle setting procedure is to check the exhaust CO at idle, but I'll obviously need to find a shop to do that. I think you adjust the CO with a calibration screw on the airflow meter. My iteration of the AJ6 engine has no exhaust gas oxygen sensor, therefore I guess it just bases the fuelling on the AFM reading, a wing and a prayer? (fun fact - this is better than the early AJ6 EFI which just used manifold vacuum with no possibility for calibration - the vacuum would deteriorate at quite low mileages because the engine's valves didn't seal very well, or something nightmarish along those lines...) Anyway, my aftermarket electric aerial destroyed itself already. A piece of a little cog broke off and jammed the big cog..... ....but the Jaguar inline fuse did not blow. Instead the motor got very hot and began to melt the surrounding plastic, until a wire connected to the motor burned through. Electric aerials are very important and I couldn't deal with mine being out of action, so I bought another of the same brand. When I opened it up to oil the crap out of it, I noticed it had been revised - the cog which broke in the old one is now made out of a black material in the new one. Hmmm. Also, I spotted this XJ-S (not mine) with a lame personalised plate: It looks like they've parked their planet-pillaging V12 in a bay reserved for bicycles only, which of course they could get away with....because they've got a Jaaaaaaag.
 11 points
 -
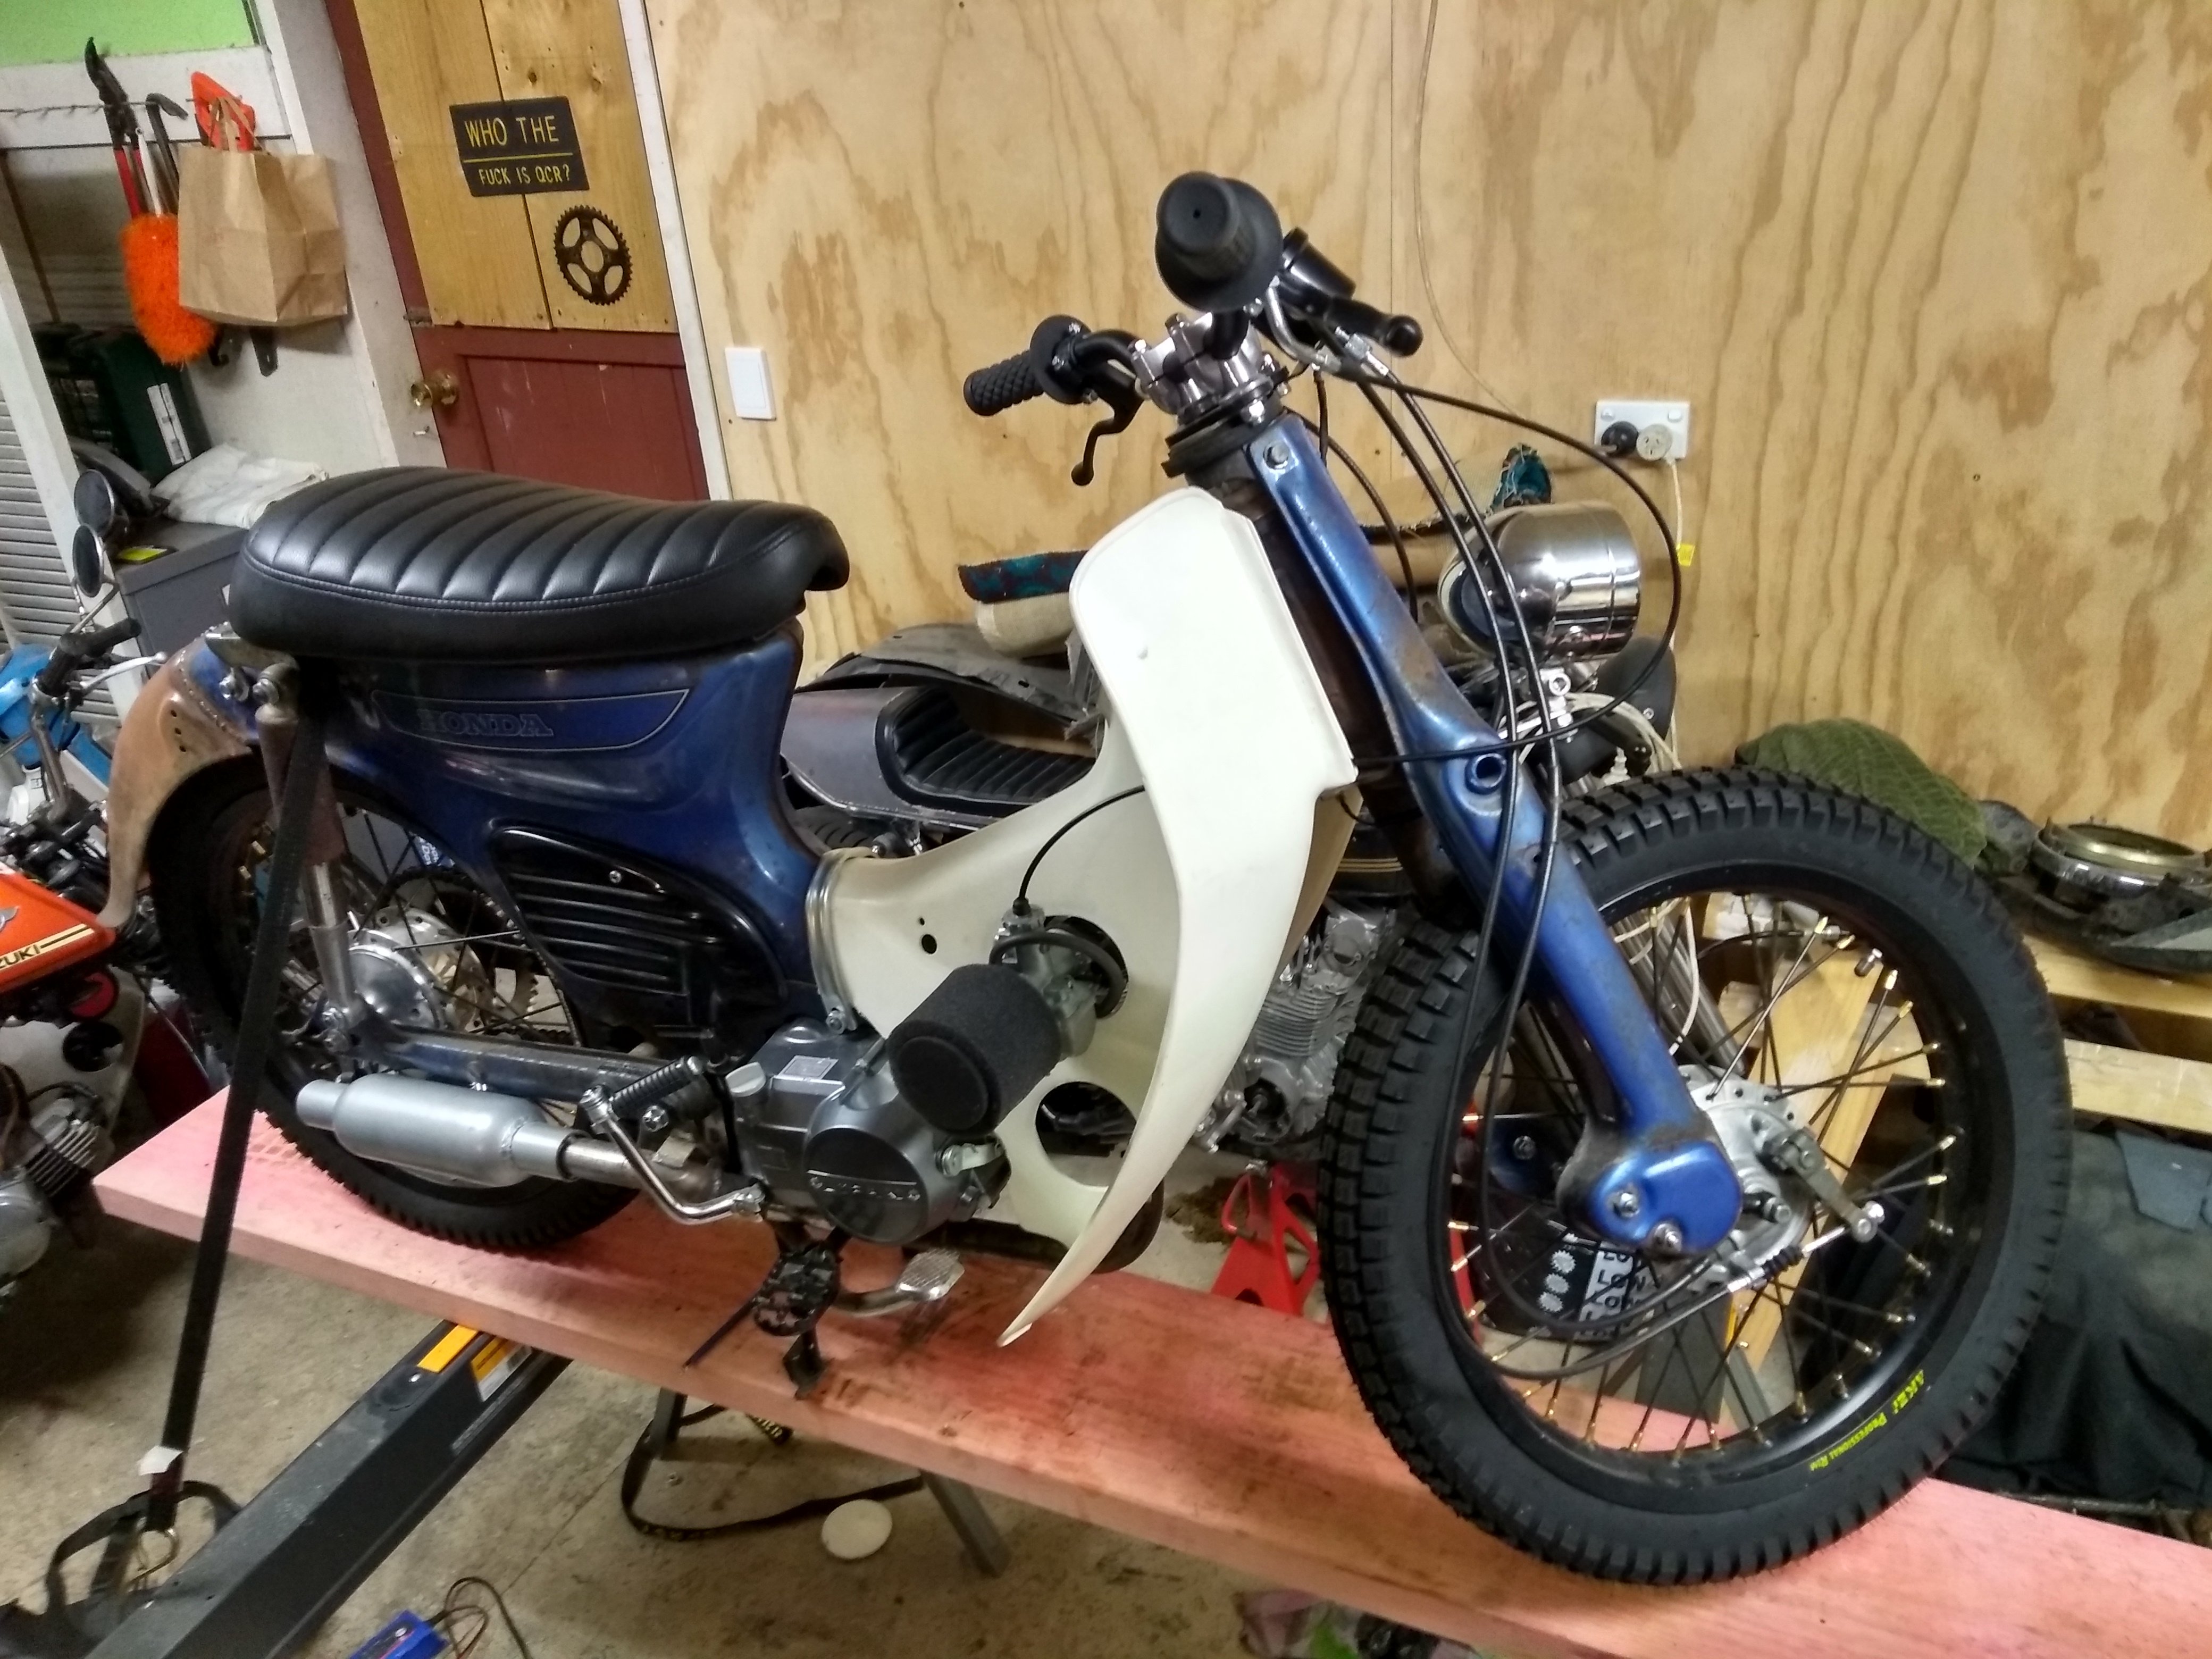
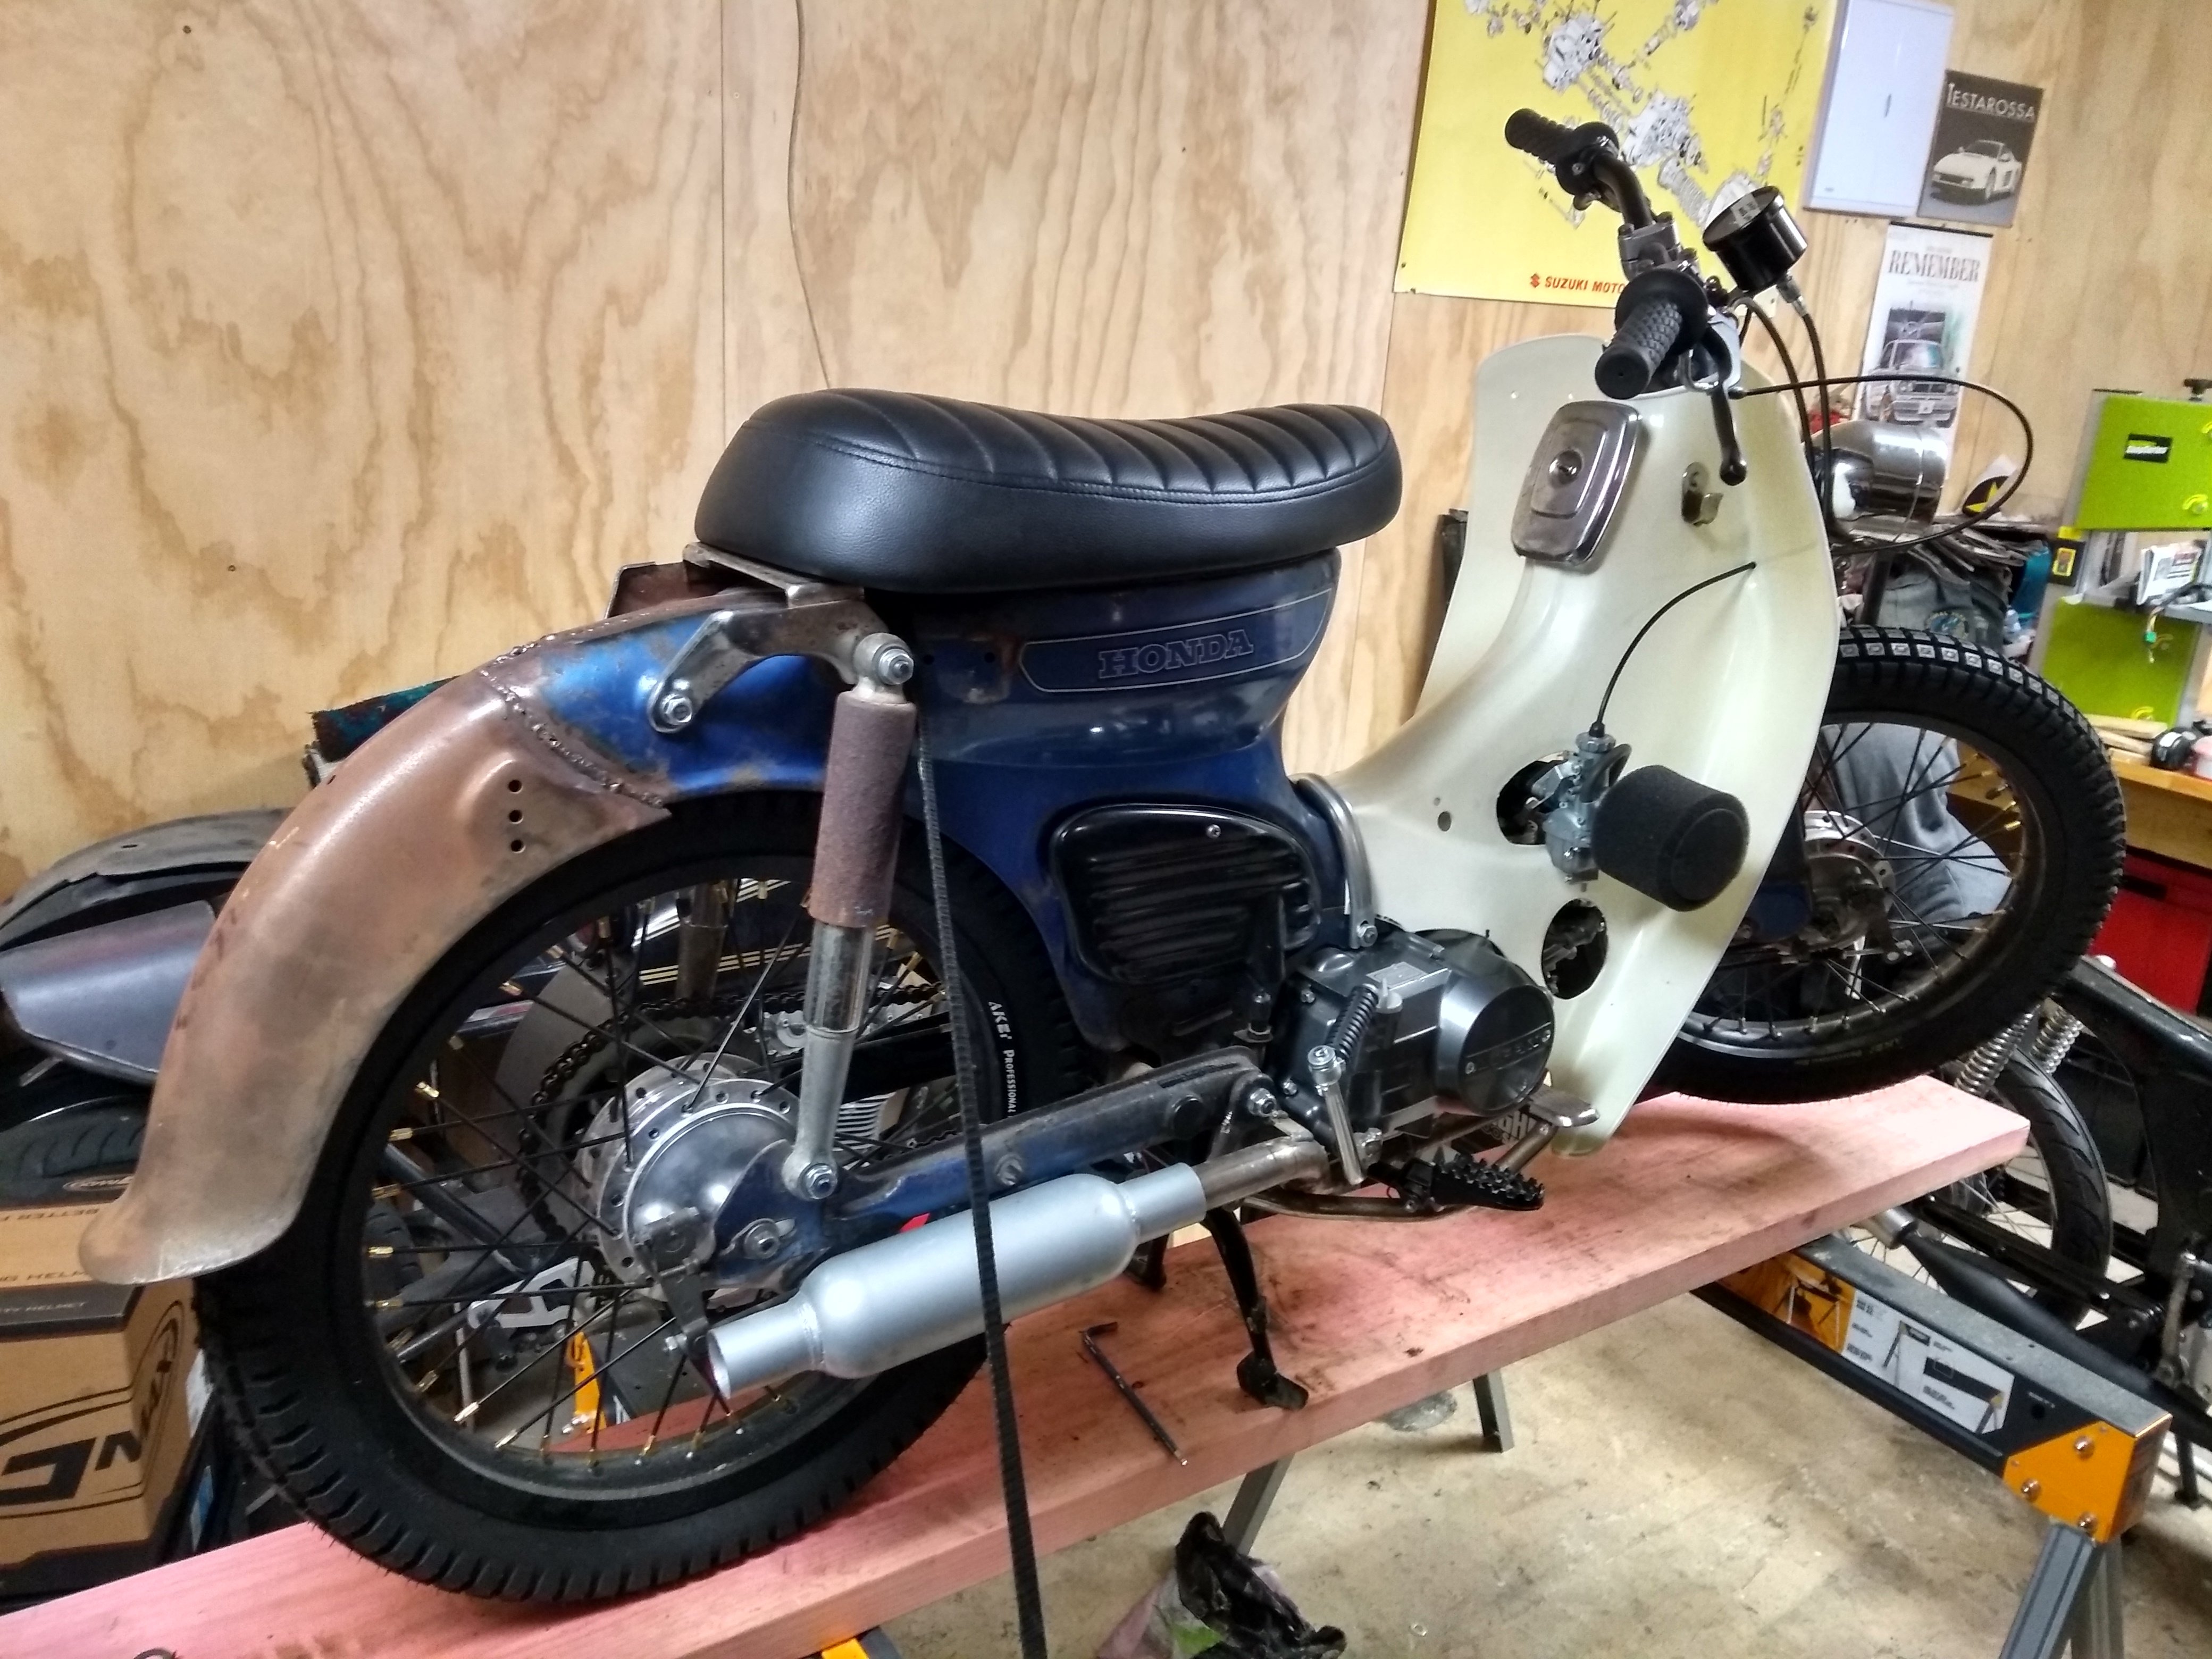
Pretty much ready to roll, need to weld on muffler and lose the centre stand. Then shakedown followed by a bunch of fixes. Thanks a shit tonne to Goat, Seedy and the general peanut gallery who make an appearance each week to encourage me with farts and general wise cracks... PFT After Summer will be the strip down and tidy up, right now I'm going rat-rod spec.
9 points
-
Current levels of foam for this7 points
-
a bit like this lovely lady did, but only with much better style.... edit; the words that came out of her mouth when she caught me taking the photo....wow. Kevin bloody wilson would have blushed!
7 points
-
Do we have a backup bike sorted or should I chuck a new belt on smokey sue mk2 for 55kph of small wheeled punishment5 points
-
Yeah that'll be appreciated Today's gc award goes to Jarrod at the mount shop Henderson. Mega friendly helpful dude. I ordered a set of mounts so the engine might actually stay contained. Ordered at lunch and they were delivered by the end of the day. Pic of mounts as text is boring Cdl auto parts also have jets to suit the 34adm and were nice and helpful on the phone unlike a certain specialist. Once I figure out what jets I need I'll be ordering off them5 points
-
Shits sorted, I stripped and checked the clappers, all is well. I have paid less for entire functioning cars than I did for the brake pads in there, bitches better be good. The only thing holding me back from assembling it all is finding the correct rod end for the drag link, as I have modded the y60 drag link to suit the steering box setup I want to continue using it. This means sourcing a rod end; left hand thread, M22 x 1.5 male, taper to suit Y61 axles. This is proving more difficult than I imagined. There is one out of a Nissan Condor that might do it - SE4381L, but I might need to buy one to check the taper. Anyone have any hints? I am wait for a reply from Superior Engineering in Oz, we will see.4 points
-
How good is the Friday night soggy biscuit gonna be3 points
-
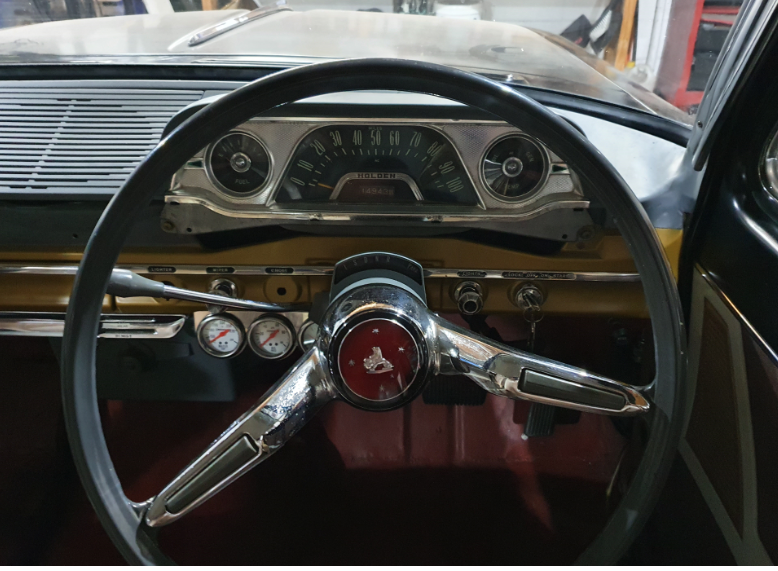
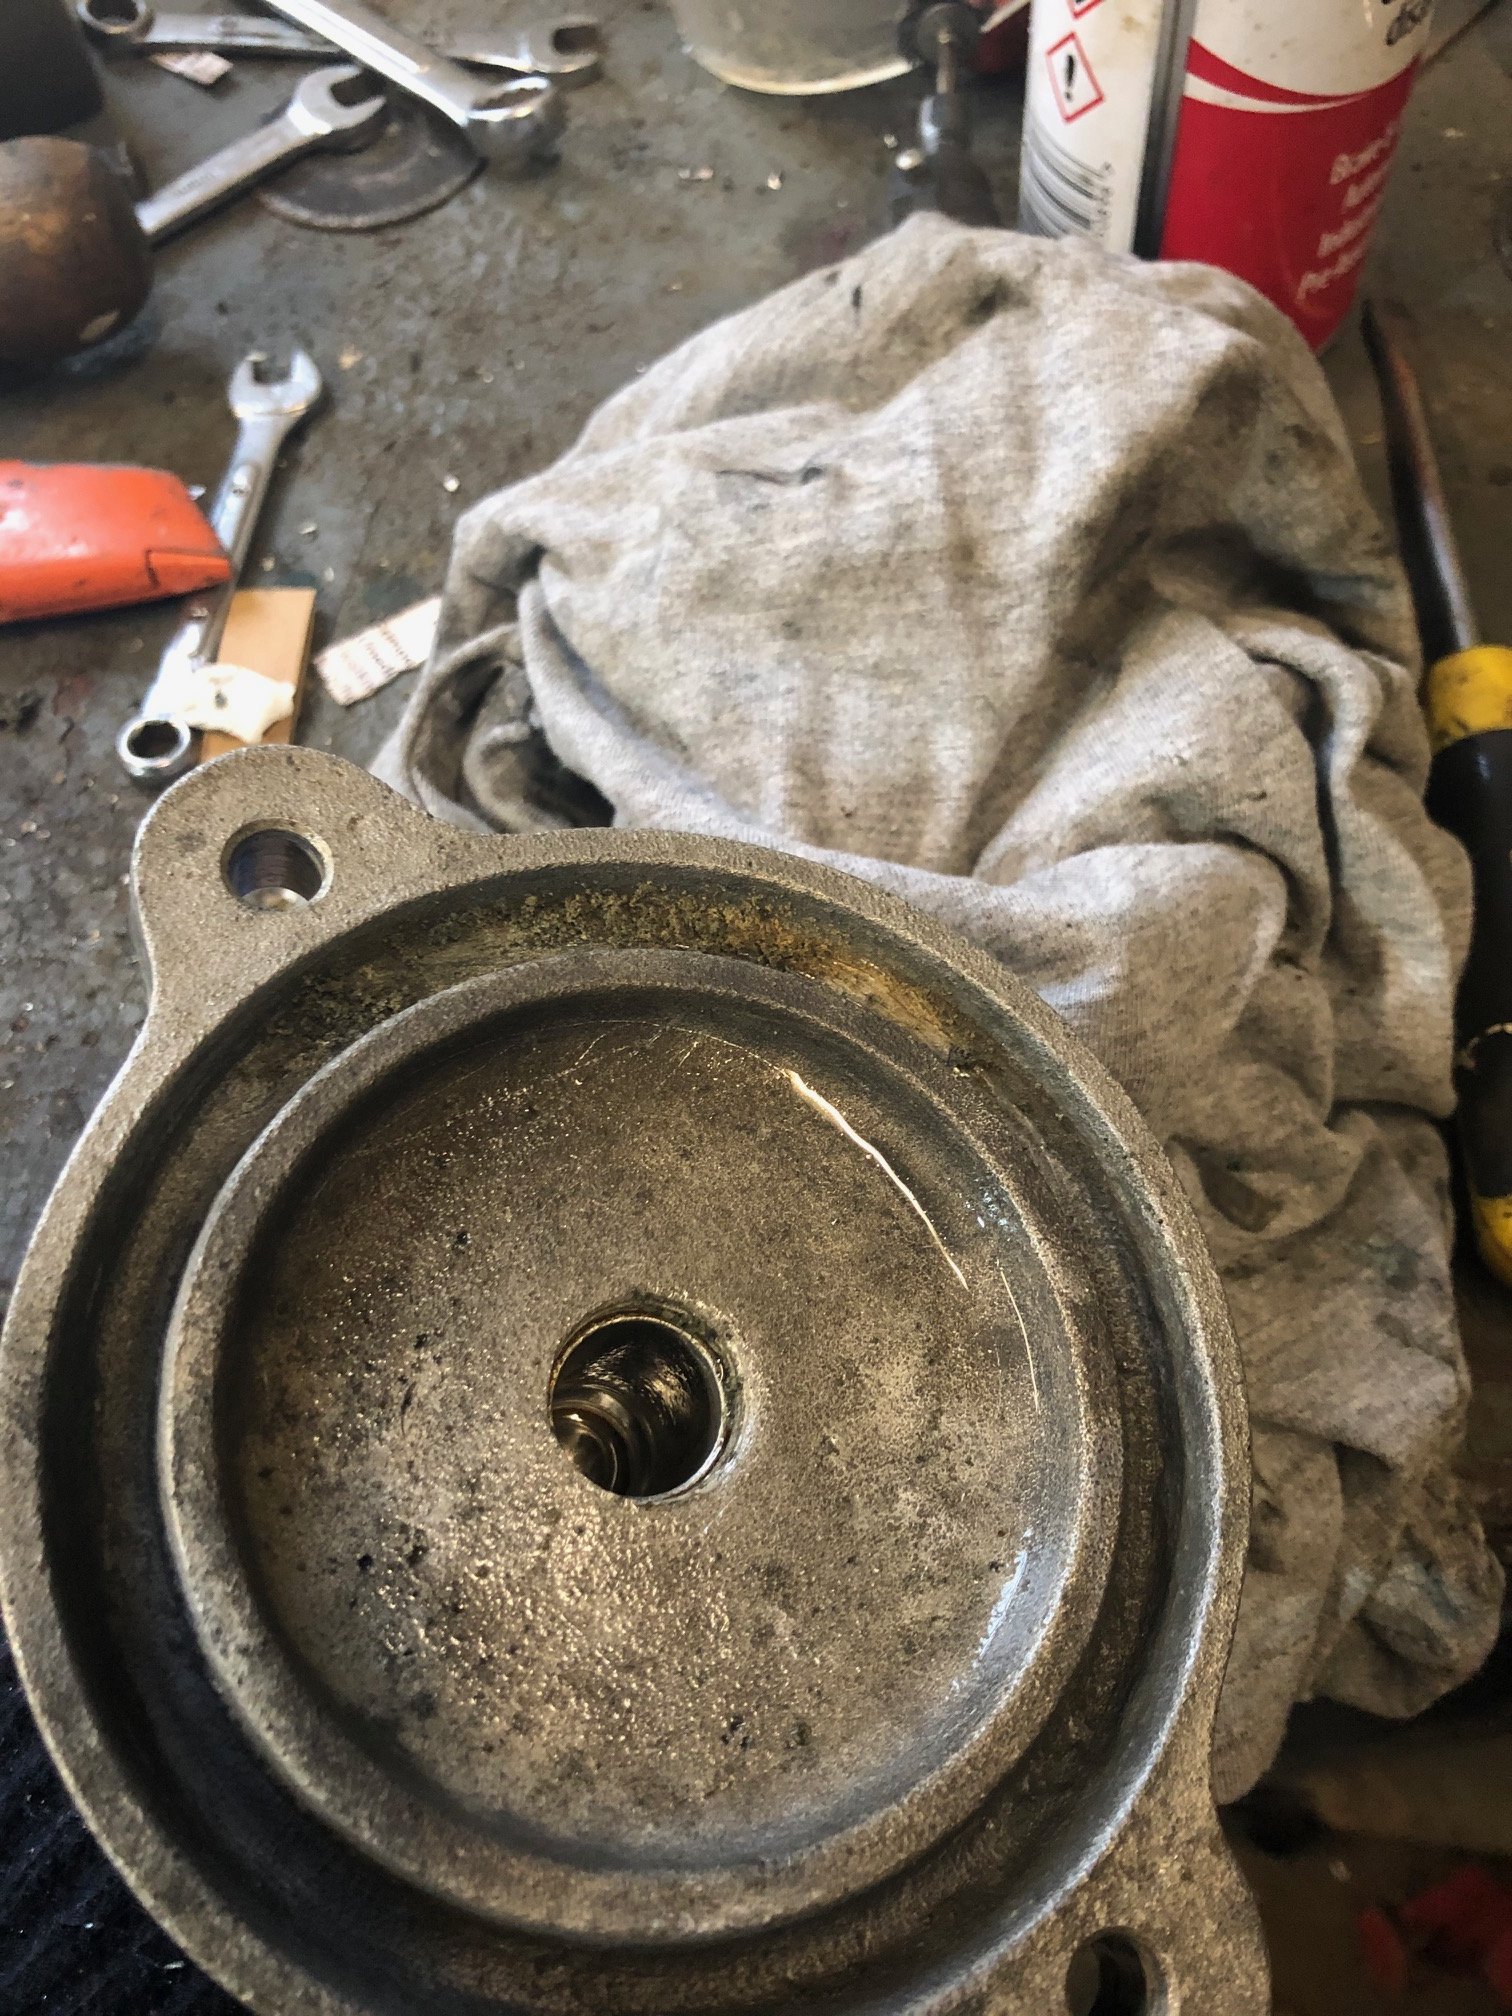
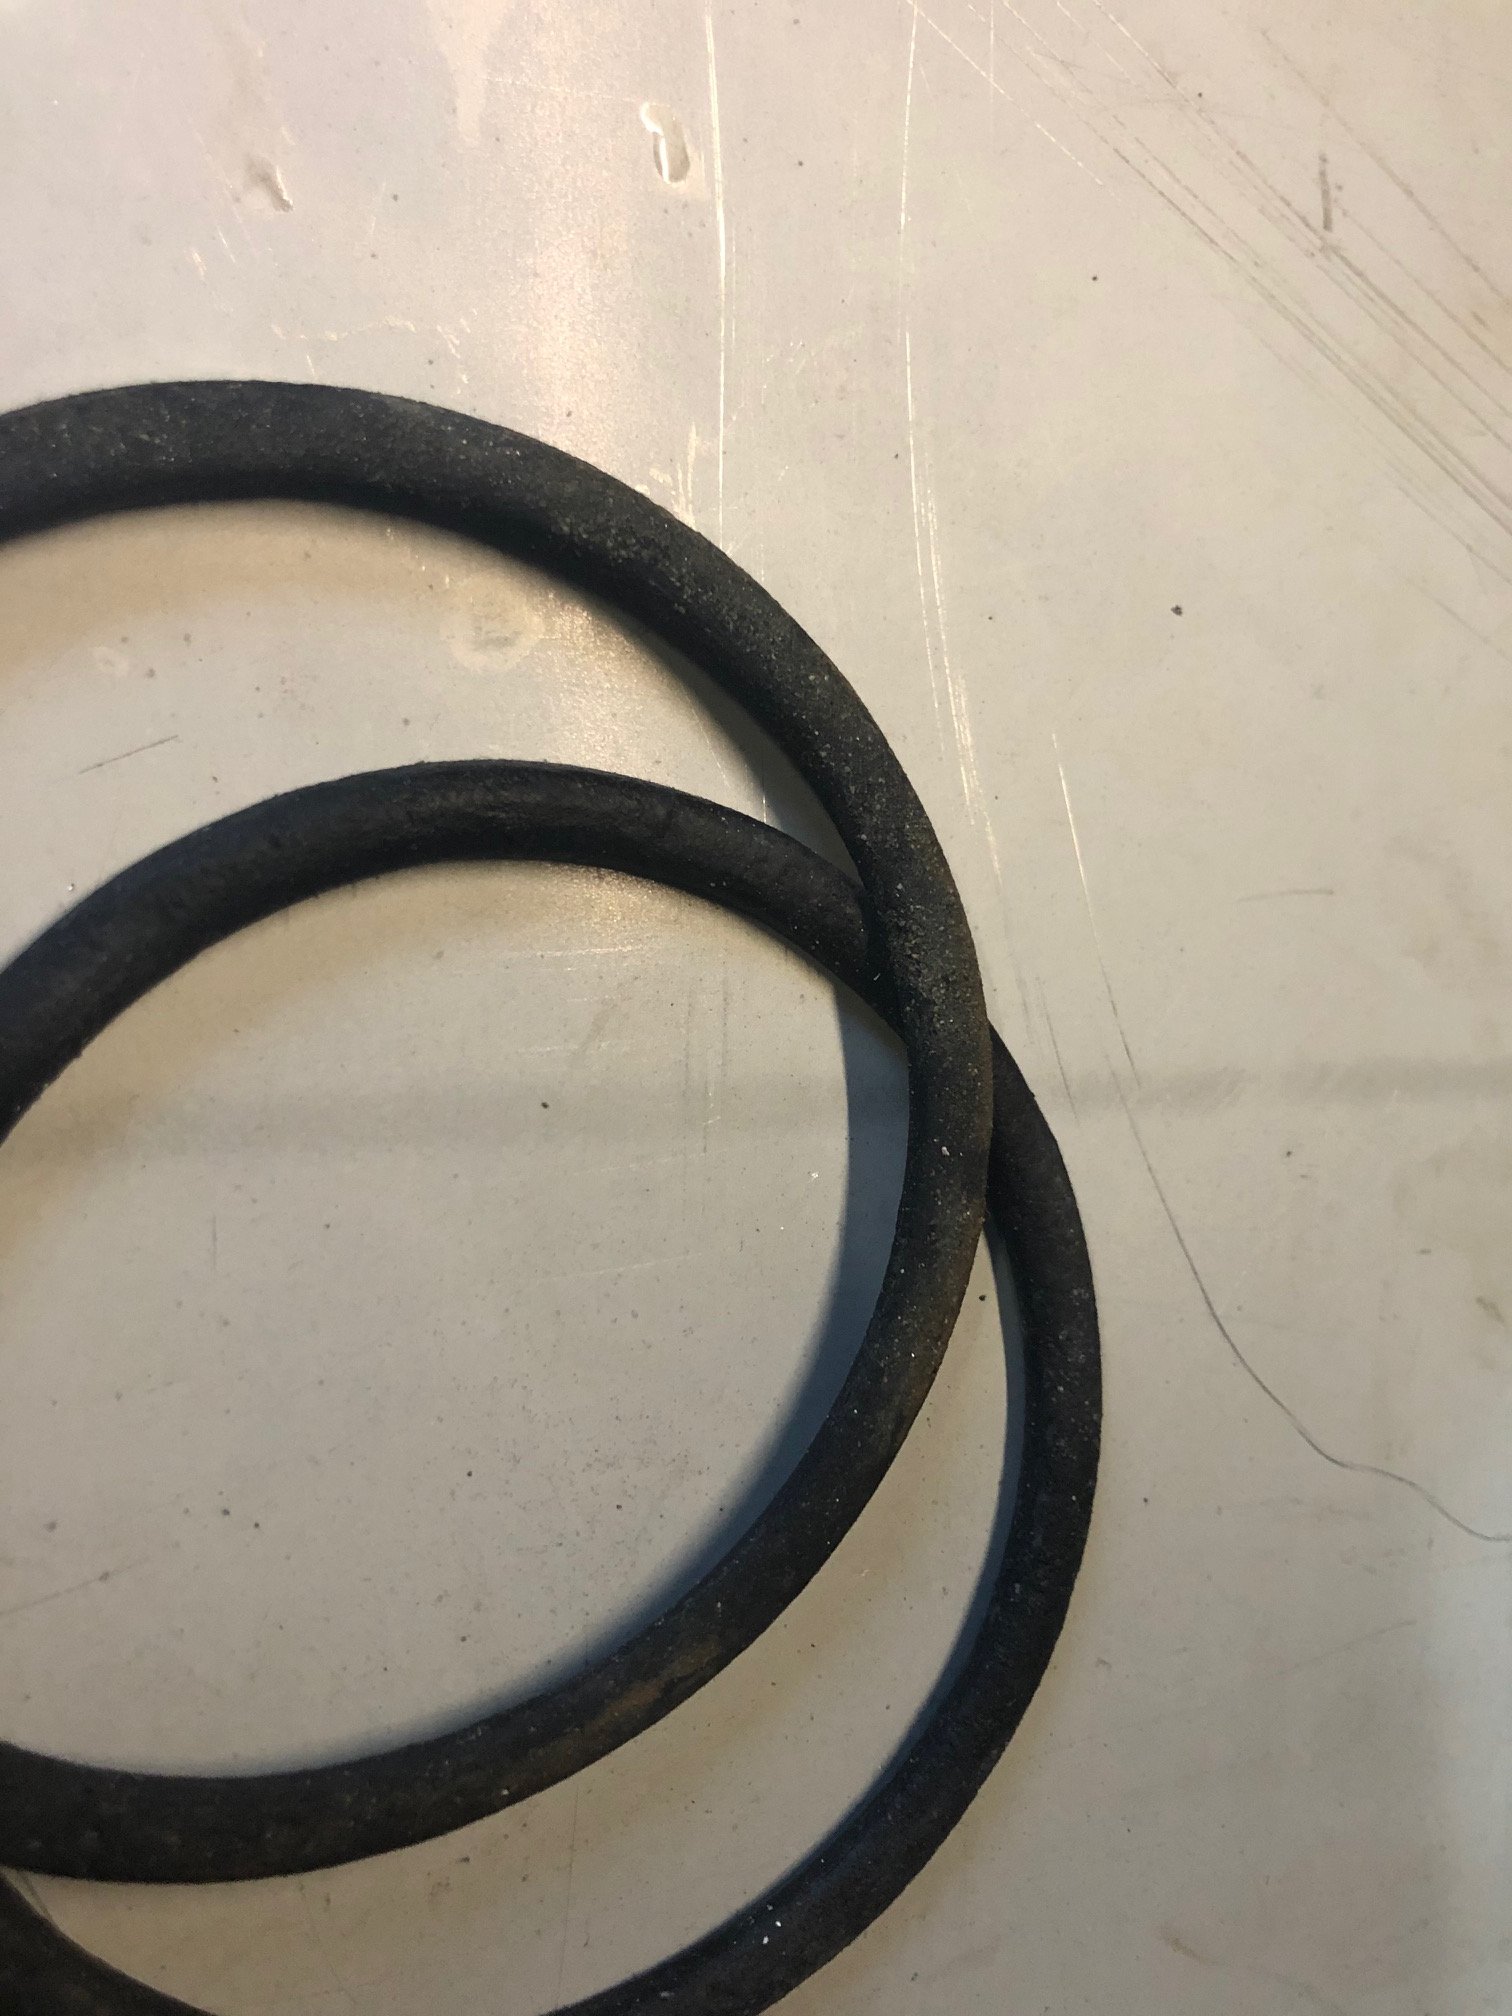
A fair bit has been done since the last update. I spoke to Trevor at Holden Diagnostics. We agreed that the tune was causing the issues, and he could sort it out. The guy who did the original tune has been known to have trouble with VT engines. I had a bunch of people coming round from work on Saturday night and wanted the car running. Trevor sent me a spare memcal and said send your old one back when all is good. Thursday night I fitted the new for the water pump. The old one looked pretty tired. I put the throttle body and everything else back together and fired it up. Then swapped out the Memcal and all good. I spend a lot of Saturday working on the car. a couple of hours went into getting the wiper motor fitted. I had made up an adapter plate ages ago which was fine. The challenge was getting clearance for the motor body on one side and the actuator arm in the plenum chamber on the other side. Using a couple of washers under one side of the adapter plate did the trick. Sorry no photos. I also put in my Dakota Digital interface box to make the speedo work. This is mounted behind where the kick panel will be. Hopefully it wont be annoyingly loud. To night, June 30, had been my goal date to have the car finished. I finished off the wiring for the wiper motor back to the switch, installed the instrument panel, and went for a drive. I consider this a win. It has got some real get up and go, the brakes actually work pretty good and the steering is OK. The exhaust is too loud, so a balance pipe will get made, the engine idles at about 1200 in drive, I'll have to work that out, and there are still lots of finishing off things to do. Not to mention registration and certification. Here is the view from the drivers seat
3 points
-
It's off the rotisserie for now! Needed to sort out the driveshaft which require the engine and gearbox to go back in. Got the axles sent away to be shortened and resplined by 105mm a side. That meant I should make an attempt at swapping the Altezza LSD and the 4.1 CWP into the diff head. No pics because I didn't really know what I was doing. But for those that are interested I ended up using the LSD side bearings and swapped the Estima pinion bearings onto the 4.1 pinion. The Altezza pinion bearings where thicker which made the pinion gear hit the diff case. I couldn't get the wear pattern right because I didn't have any shims other than the two that were already on the pinions. Got it close enough for the time being, will buy some shims or give it to someone else to finish off. Decided to run Coil-on-plugs instead of the dizzy relocation kit, mostly just to keep the engine bay looking simple and clean. Got a set of 1NZ coils, I'm thinking of casting up an adapter plate for them. Got the SQ engineering down-pull throttle linkage installed and got the accelerator cable shortened to suit. Made a vacuum block off plate, since I hope none of that stuff is needed anymore. Also at some stage I filled all the unneeded holes in the front radiator panel. Modded the accelerator pedal so it sits a bit closer to the other pedals, as before it was way off to the right. Two-piece driveshaft all mounted now too! Think I got the angles sorted after spending far too long trying to work it all out. It's an Altezza driveshaft with the front half shortened (yes I know the front section u-joint phasing is 90° out). In this photo you can also notice the sills have been strengthened (somehow missed that update somewhere). Used some 3mm angle and welded it the full length and ground back, so it's now really straight! Then boxed it back up to the floor, to try and stop dirt and moisture getting stuck in behind. Makes lifting the car along there way nicer! This is the centre bearing support mount, much thought was also put into this! Hopefully it's fine being welded to the seatbelt mounts haha. Still needs some doubler plates welded on to the other side of the tunnel.3 points
-
I chipped away at the rad piping and associated stuff this week, and finally kicked the old bitch into life on Saturday morning for some functional tests. The setup appears to work better than before, the return pipe is noticeably cooler than the out, and it didn't get hot enough to kick the fan in although I let it idle for quite a while after getting it up to temp. This is positive. During the week I swapped out the locking hubs on the y60 axles, these had some nice manual lockers, whereas the y61 axles came with some factory auto lockers. I did manualise these though. I also made some mesh guarding for the rad to prevent stone damage. I just tek screwed this on but will replace those with rivnuts when I get around to it. On Saturday morning I picked some rotors up and cracked on with refreshing the swivel hubs. I give them some extra loving apart from the swivel scraper, I replaced the bottom swivel bearing on both as they were a little corroded, plus the main inner axle seals plus the inner hub seals. I washed the wheels bearings out and repacked them, everything looked pretty good otherwise. The axles were on a pallet sitting on some trestles, so after doing the first one I moved the pallet outside to spin it around for better access to the other side. At this point my forklift spat the dummy and stopped working, rather inconveniently sitting halfway out the shed door. I had just topped it up with diesel, and a similar thing happened the last time I topped it up. My guess it there is a whole lot of crap in the bottom of the tank and it sucked up something ugly. This annoyed me considerably. I did eventually get it going but it isn't happy, it will need some more loving I imagine At the time I ended up dragging it out of the way and craning the axles onto the truck deck so I could continue work... The results of the weekends work; Mmm shiny. Next job is to strip and check the calipers, I have some EBC yellowstuff pads on the way, they should be here tomorrow, so it should all be together and ready to go into the truck in a couple of days.3 points
-
Had new bars for monkey turn up yesterday while I was sick at home sweet tiny narrow things, pretty stoked on them Now I think it looks a bit wack / fronts too high for the bars. considering lowering headlight/fork badge so the windshield top is same height/lower then the bars2 points
-
It would be most appropriate if you got a pic of your xjs parked across multiple hairdresser car sorry ev charging point parks.2 points
-
@KKtrips get in her jim2 points
-
Entrants, as of 30-06-2020 9:26pm @johnnyfive Daniel, aka Ruckus guy, aka Grom guy. @GuyWithAviators @UTERUS @MopedNZ @TimShadboltfan27 Shannon D Daniel W @Shakotom @Threeonthetree @Tumeke Brudda @Tumeke @keltik @Vintage Grumble @Truenotch @Mr Vapour @tortron @WankBankA100 @BLIZZO @anglia4 @mark105 @RUNAMUCK @Duke Blackwood @HighLUX @Mitch.W @Beaver @00quattro00 Bucket Barry on bike @MaxPower (Vehicle) @rumrum @slacker.cam @sentra @Dolan @Itchybear @Deliboylurker @Kass @Chunky_t @Thphantum (vehicle)2 points
-
For some reason this thing came with the wrong alternator pulley. It had a 13A belt pulley and the rest of the engine needs an 11A belt so I ordered a new dual row pulley from franklin engineering. Top notch stuff they make and seriously reasonable prices for quality Nz made products. Ordered an oil sender block at the same time to run my oil pressure and temp gauge senders. Will fit that in the next couple of days.
2 points
-
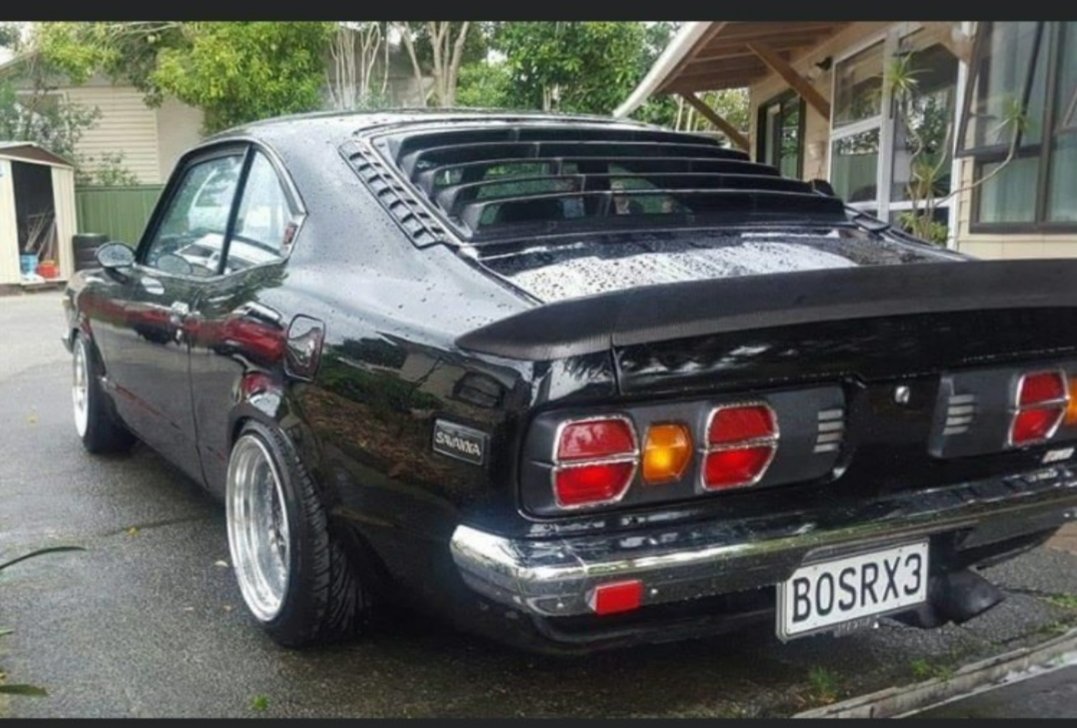
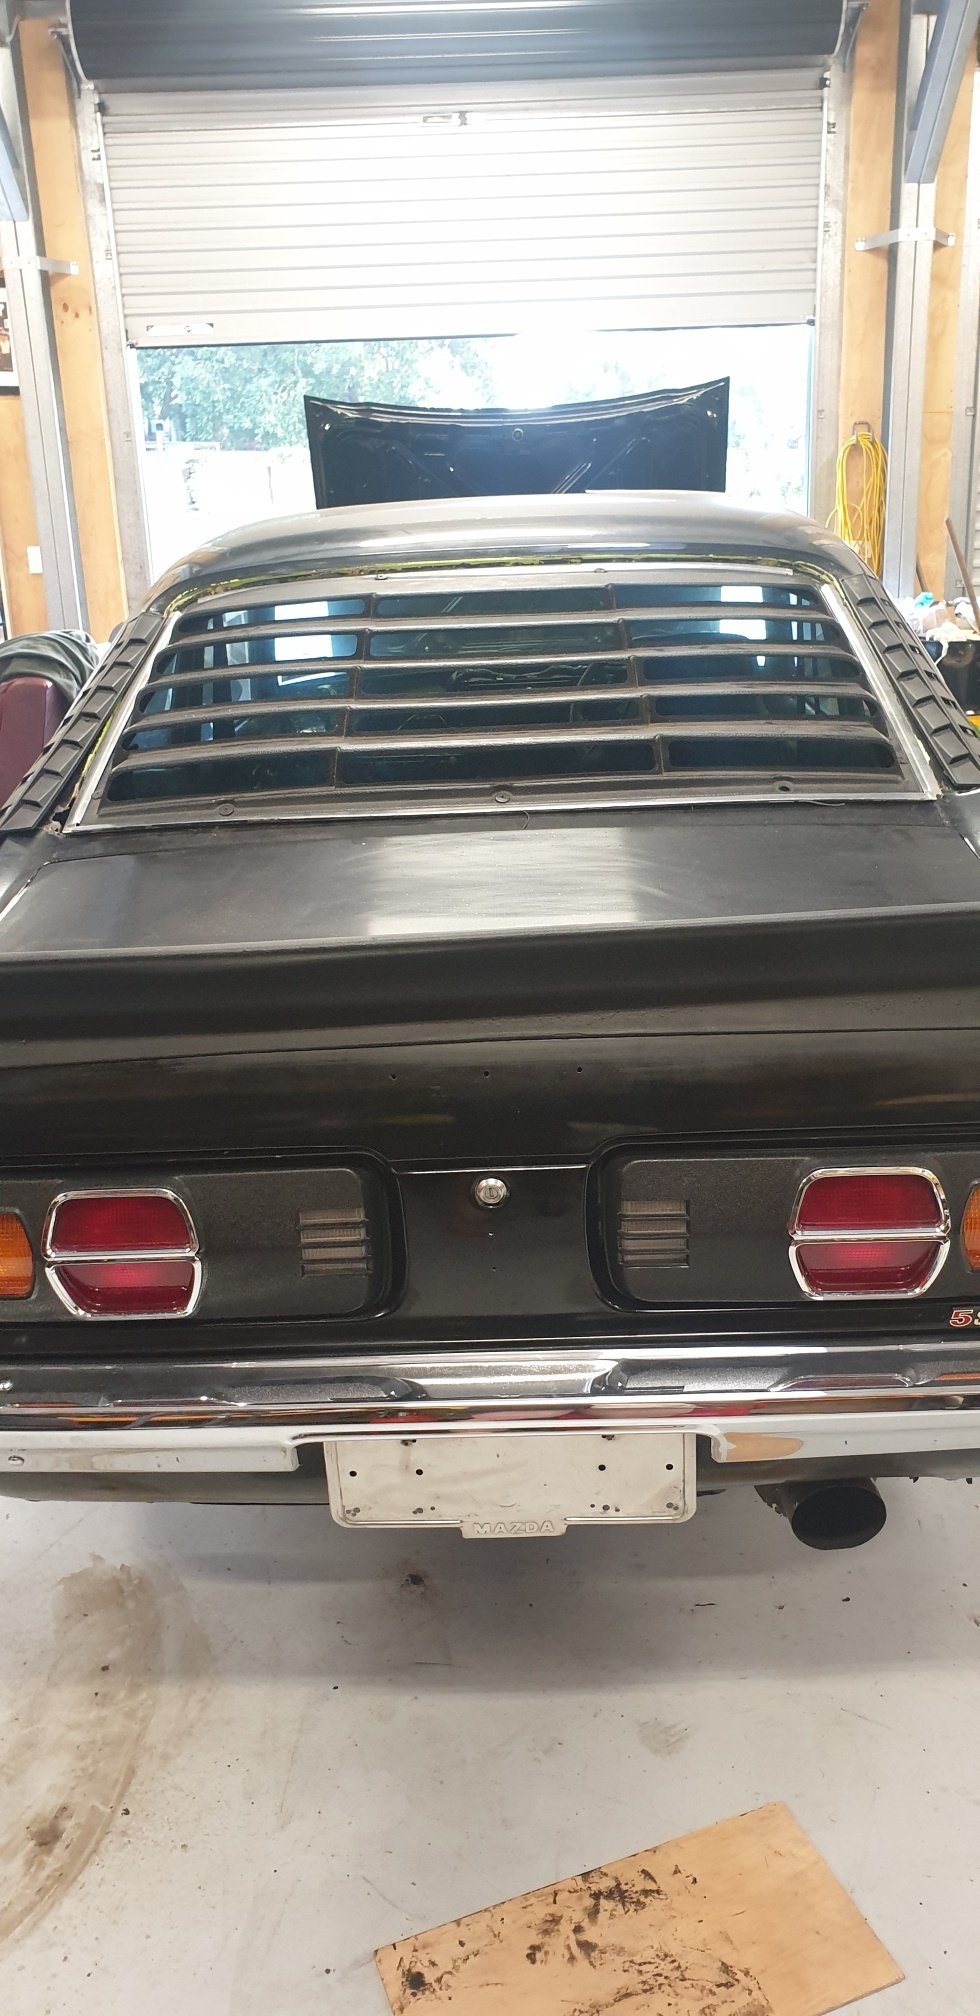
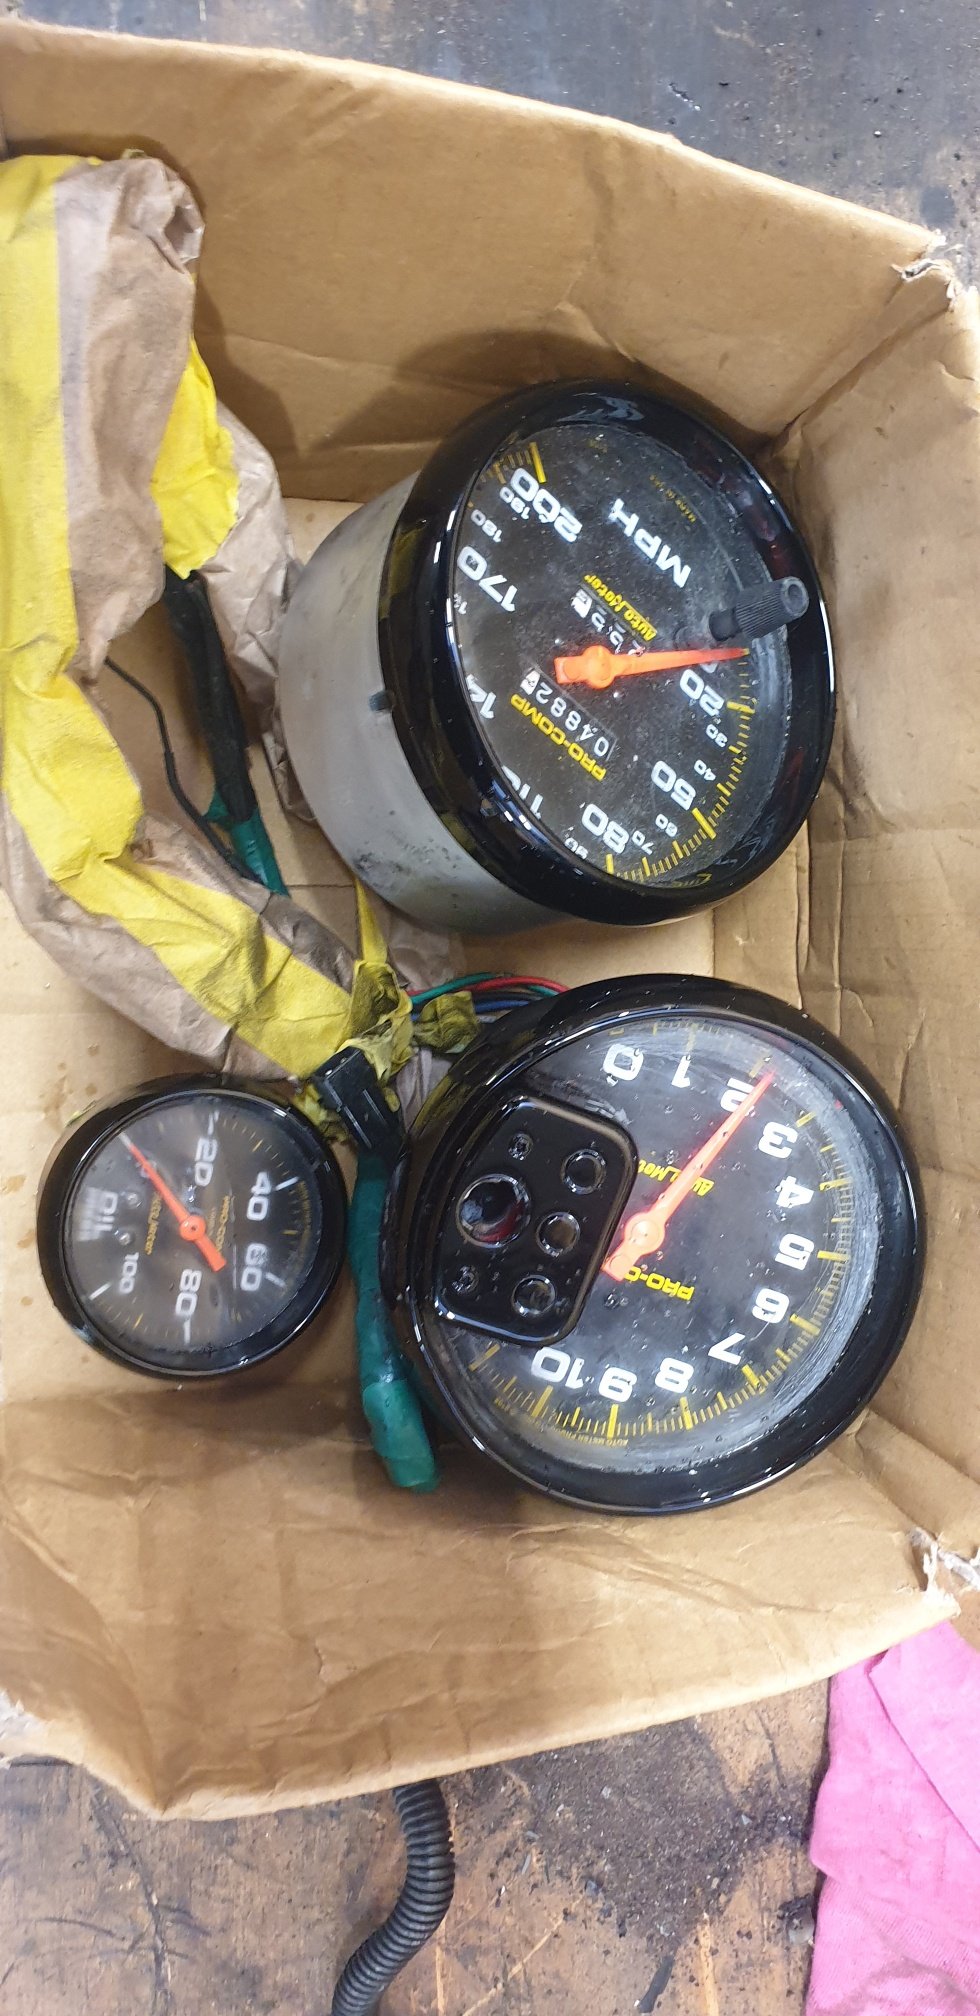
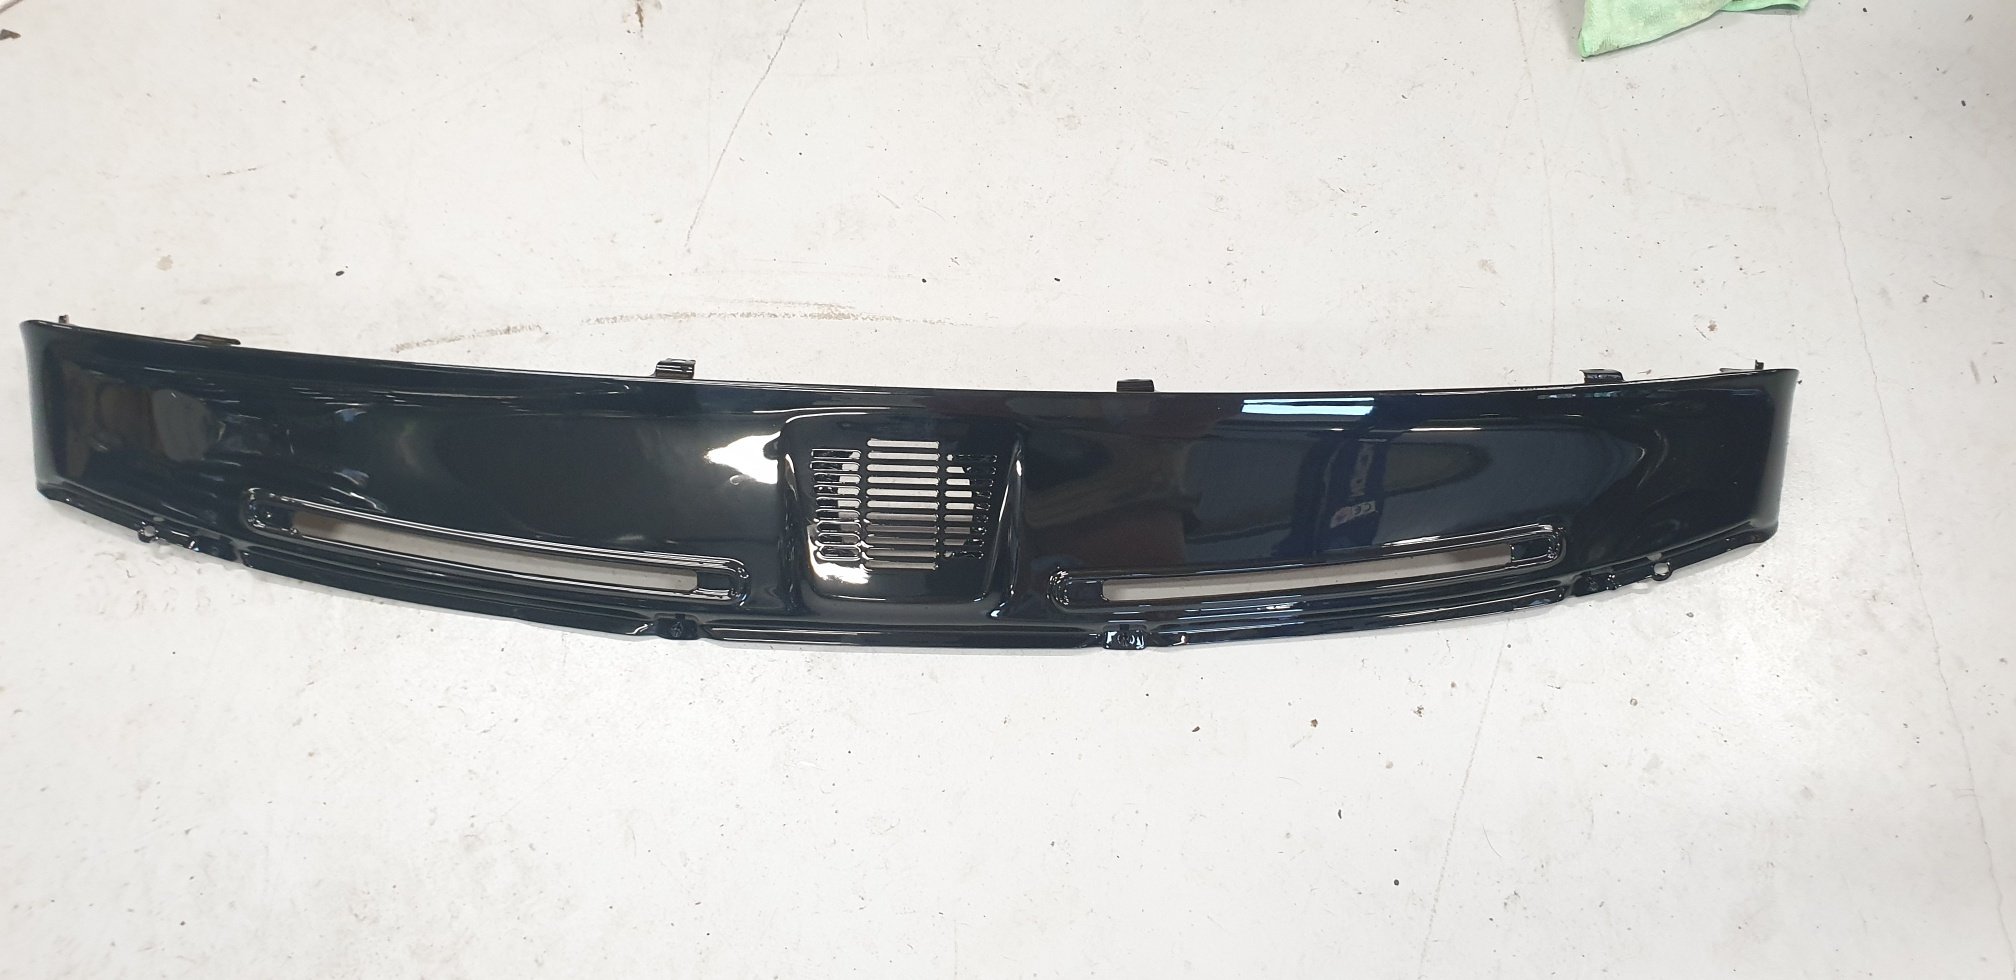
Few bits and pieces sorted in the last week, Scored a set of louvers for it, got sent a photo of it previously when it had them before flares, looked good so grabbed them for a rainy day( will see if i run them with the flares or not yet) Also had a mate repaint the gauge surrounds as i sanded off the black to find the factory silver had been sanded off so didnt have much choice but to repaint it so it was tidy. While he was there got him to repaint the dash topper black. @64valiant has the dash topper for retrimming at the moment, soon as i have that it can go back together. Booked in to go to rust repairs this weekend, I also booked it into Chrome Expression Session so time to get shit moving and get it there haha. Next 4 or 5 weeks going to be all go!!
2 points
-
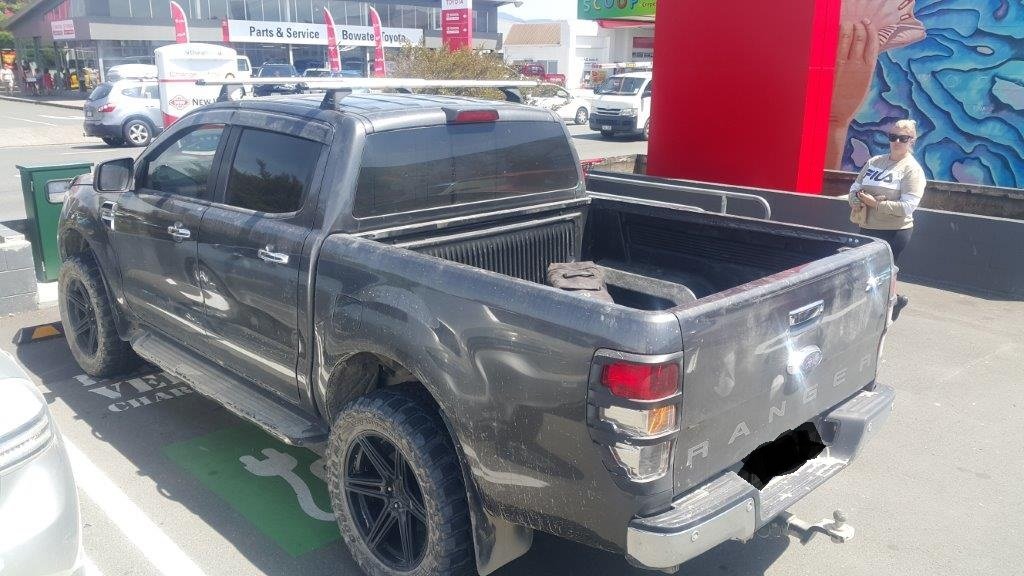
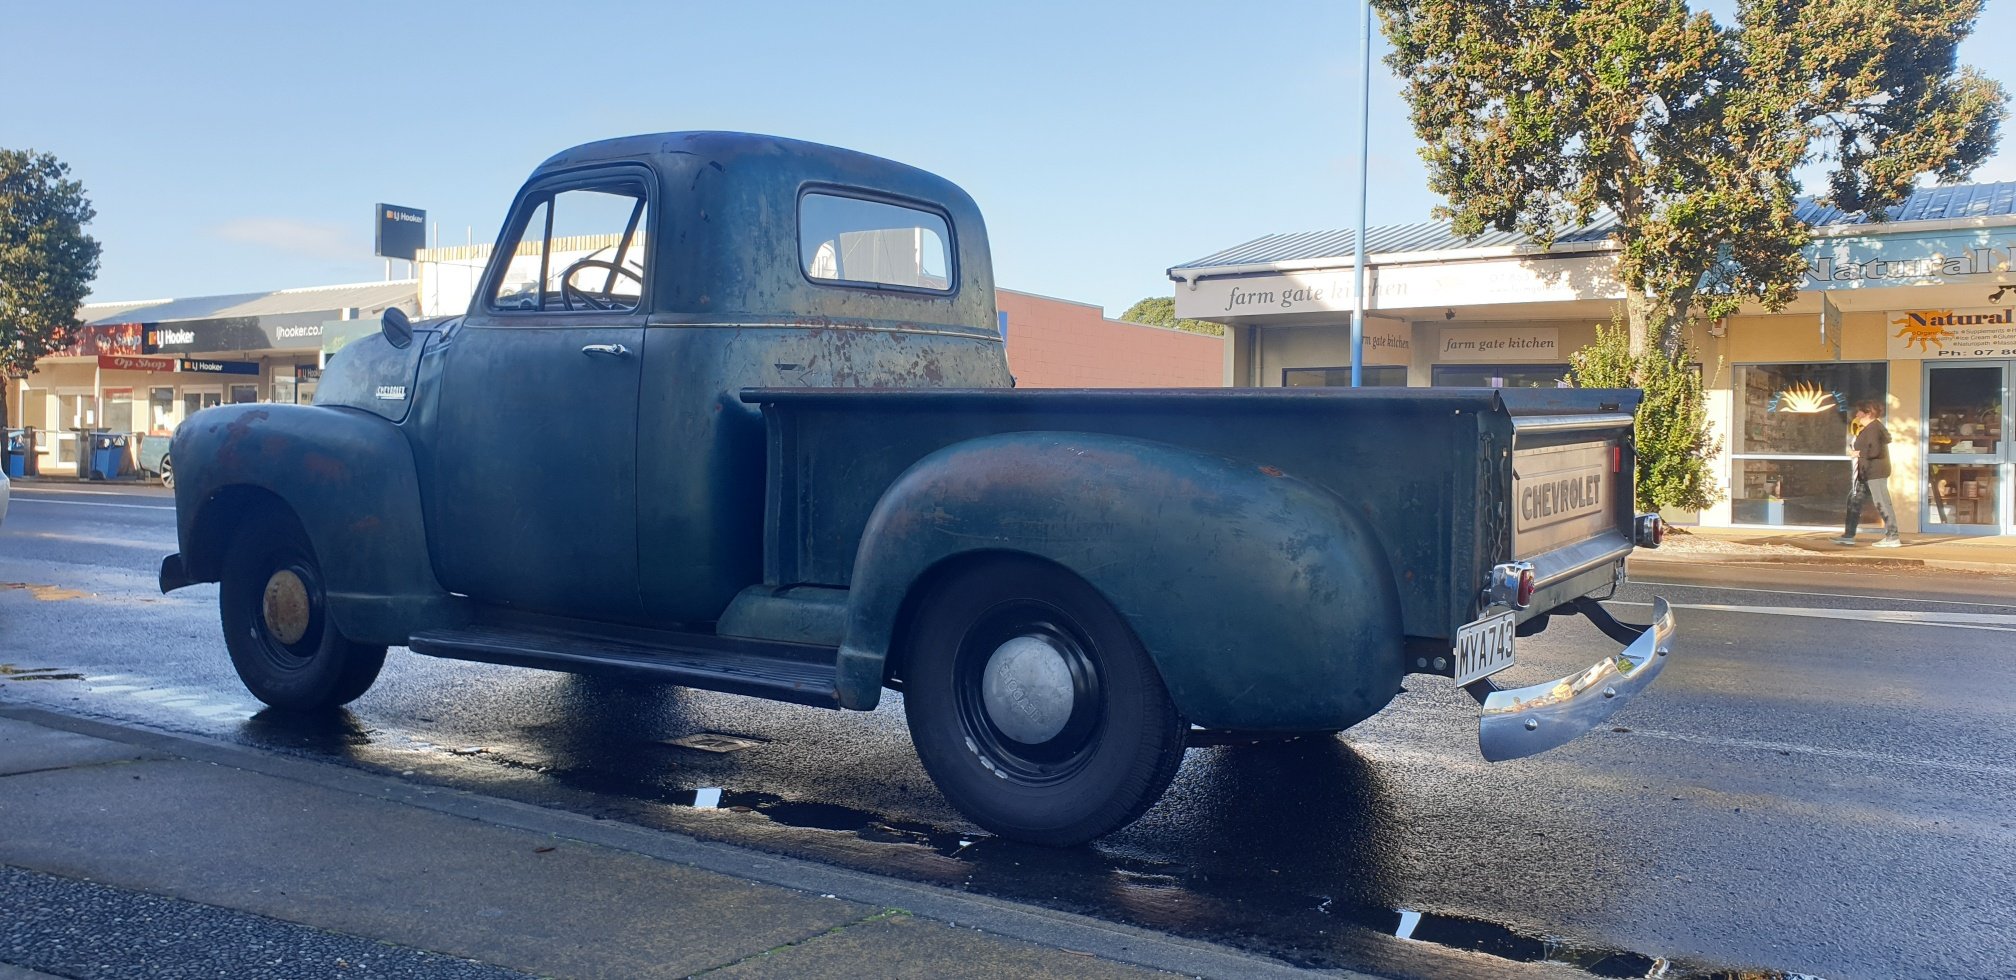
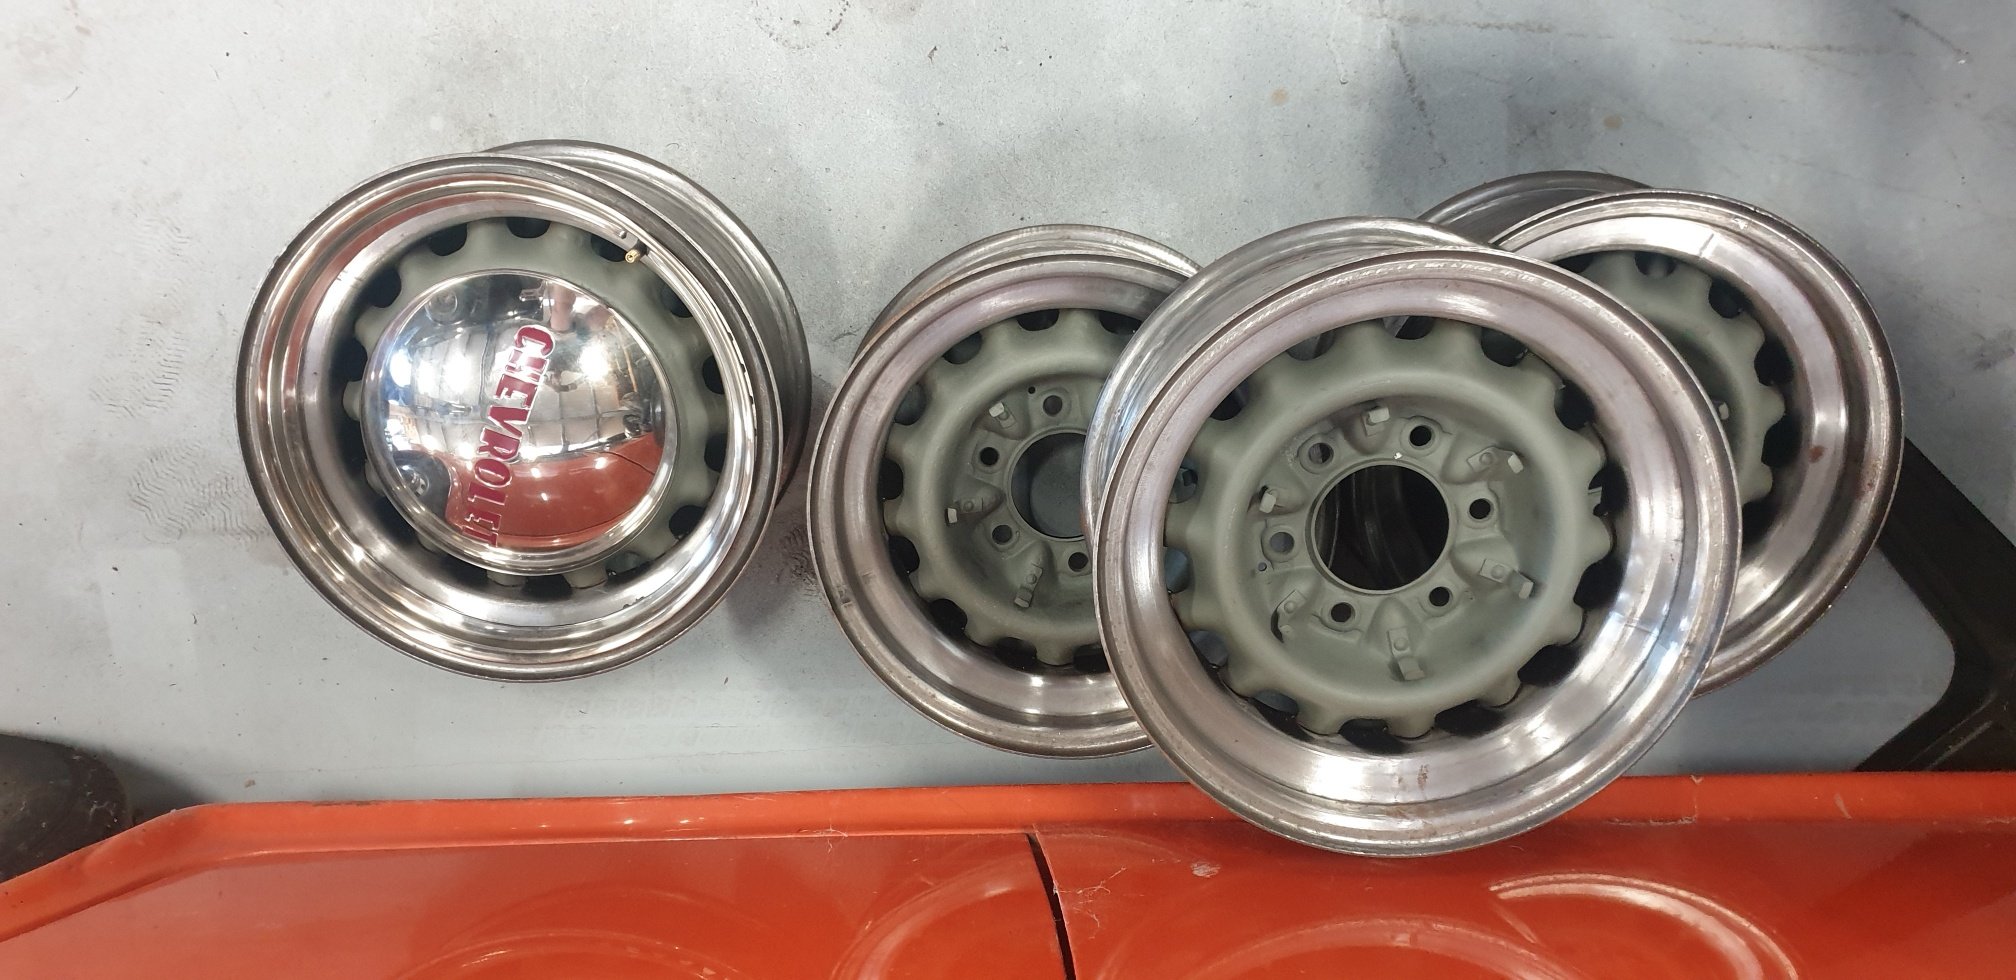
Took the truck for its first major drive on the weekend did a 40km return trip out to Waihi Beach and she run flawlessly! Have had the Artilleries rebarreled as after sandblasting they had a heap of holes in the barrels. Wheel and Frame in Cambrdige rebarreled them with 7 inch barrels instead of 5.5 they were factory. Centres were riveted in from factory so they drilled these out and welded the centres into new barrels. Mate lined up to paint these this week then the whitewalls can go on!
2 points
-
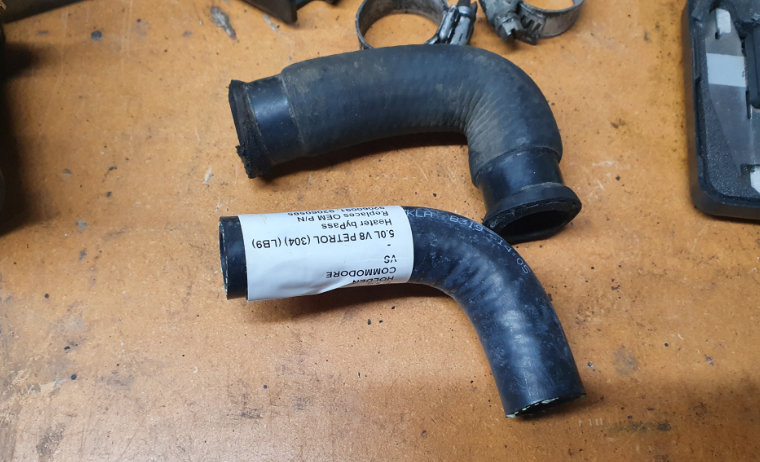
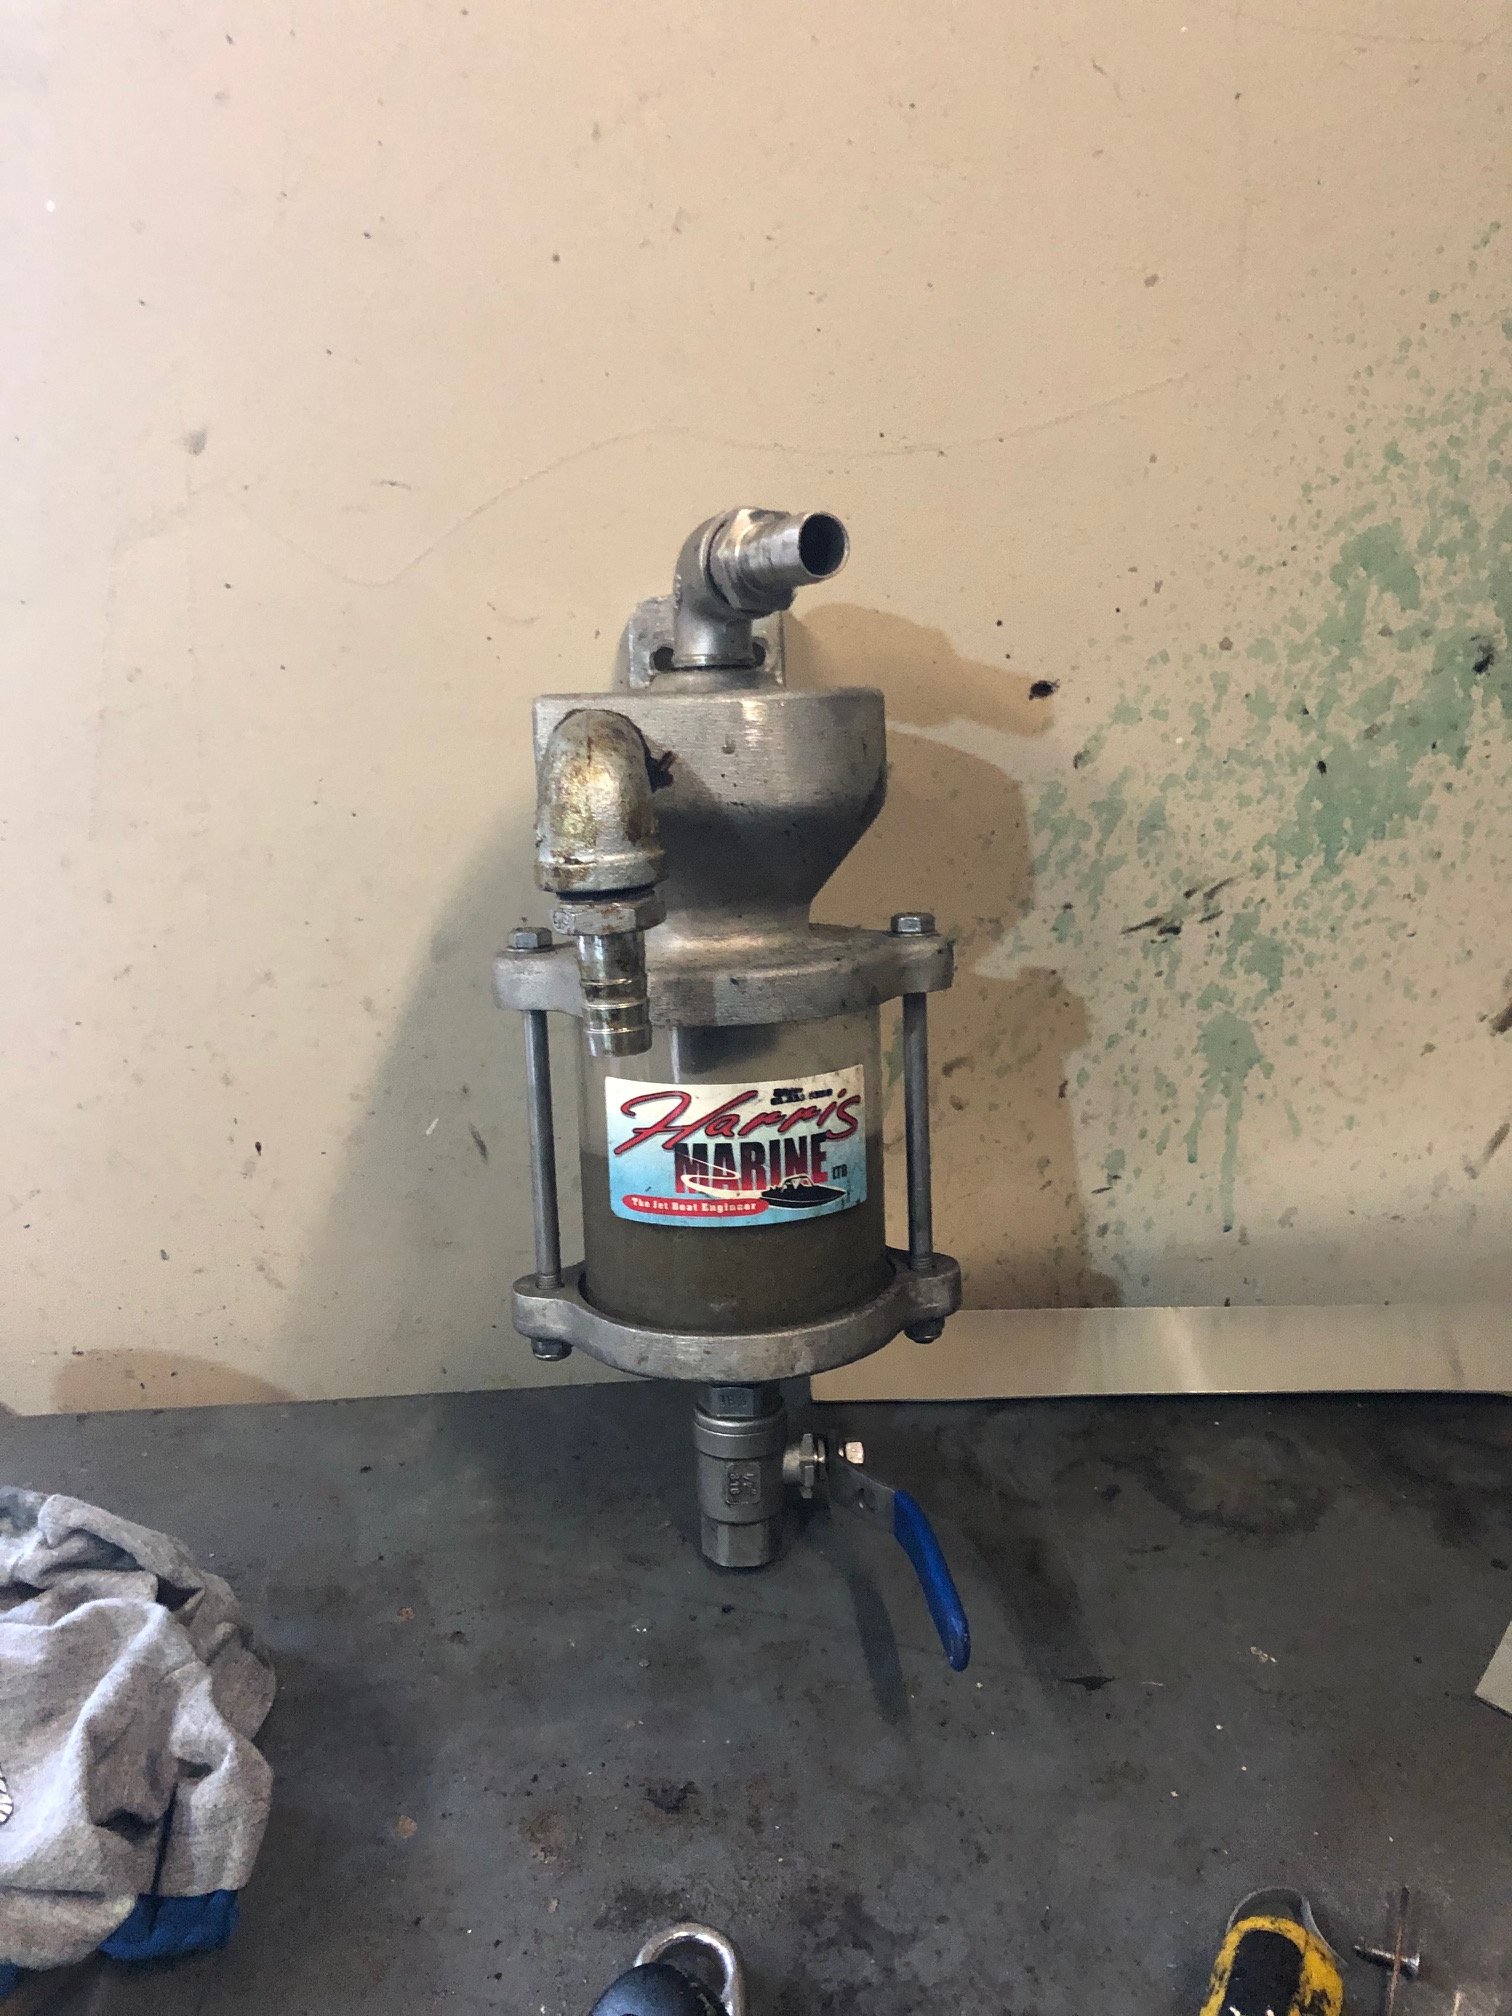
Got it out this weekend.... had reset the tune on it and it starts/idles alot better, still not perfect without ICAV but good enough.... trying to track down a log manifold so I can setup an O2 to do some proper logging/tuning. Also, when I did my sale inspection I noticed a decent amount of water collecting in the bilge. Mr mechanic seller wasnt to phased and was happy to use the pump most of the time to clear the bilge, I used this to negotiate thinking that either the jet unit for the bolts holding the keel plastic on would need resealed. Turns out the solution is way easier... water is fair pissing out of the lower seal on the sandtrap. Where the seal fits to the housing was loaded up with old silt and preventing it from sealing (likely pulled apart in a hurry and never cleaned), likewise the seals are old and caked up with grit. Should be an easy fix....
2 points
-
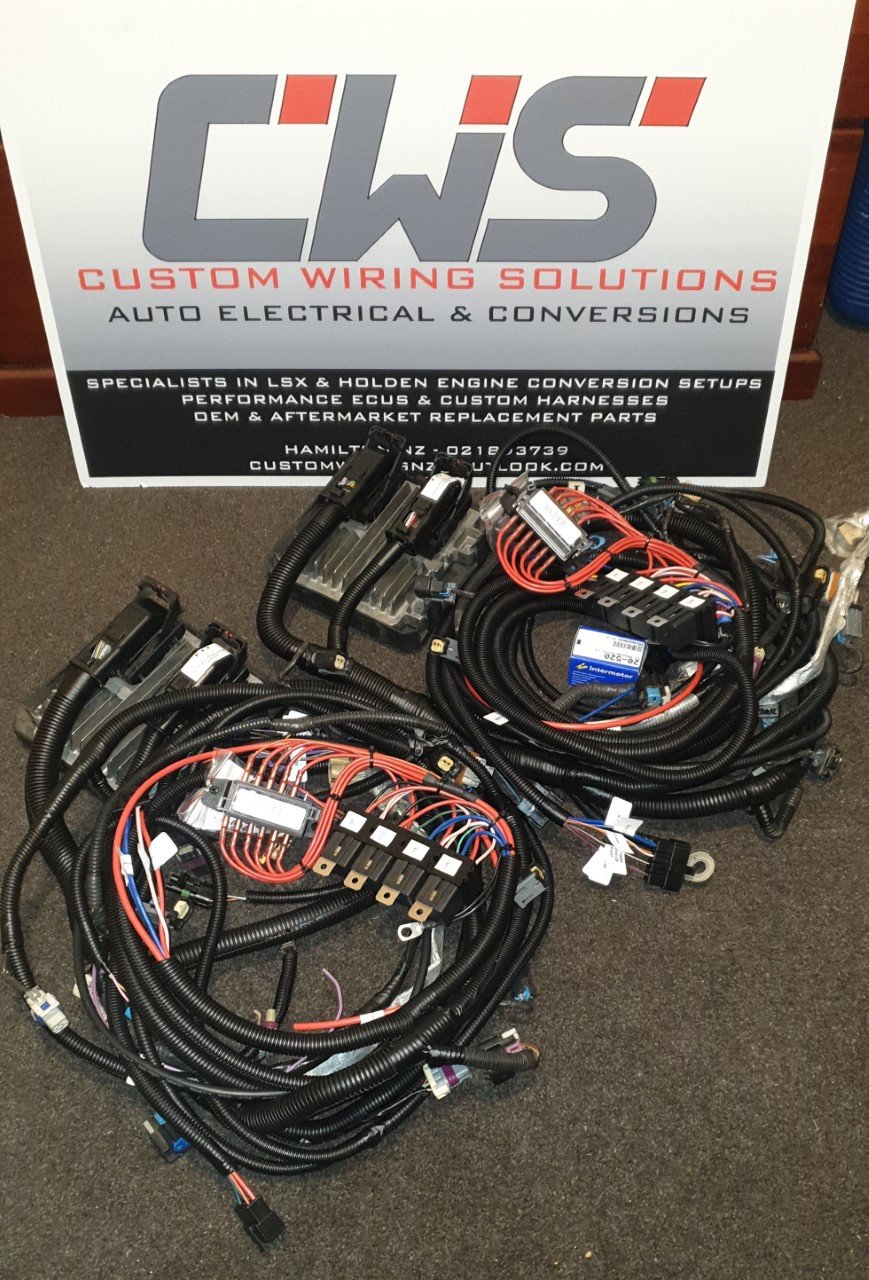
Big thanks to Drew (vk327 on here) for whipping up looms for me and the brother. While I'm sure an LS1 loom isnt toooooo hard, these later model engine ones turned out to be relatively complex and I am so fucking glad I didn't bother attempting it. There are a few little quirks that would have 100% caught me out, like the fact that my loom that came with engine was missing plugs and shit. Drew knows all the ins and outs which meant that the final product is essentially as good as it can possibly be for tuneability and coolcuntness. ECU/PCM now has base tune on it to roughly match cam, so I should be able to drive it down to the tuners for a tidy up and the all important power/torque figures. I should probably do a skid soon.
2 points
-
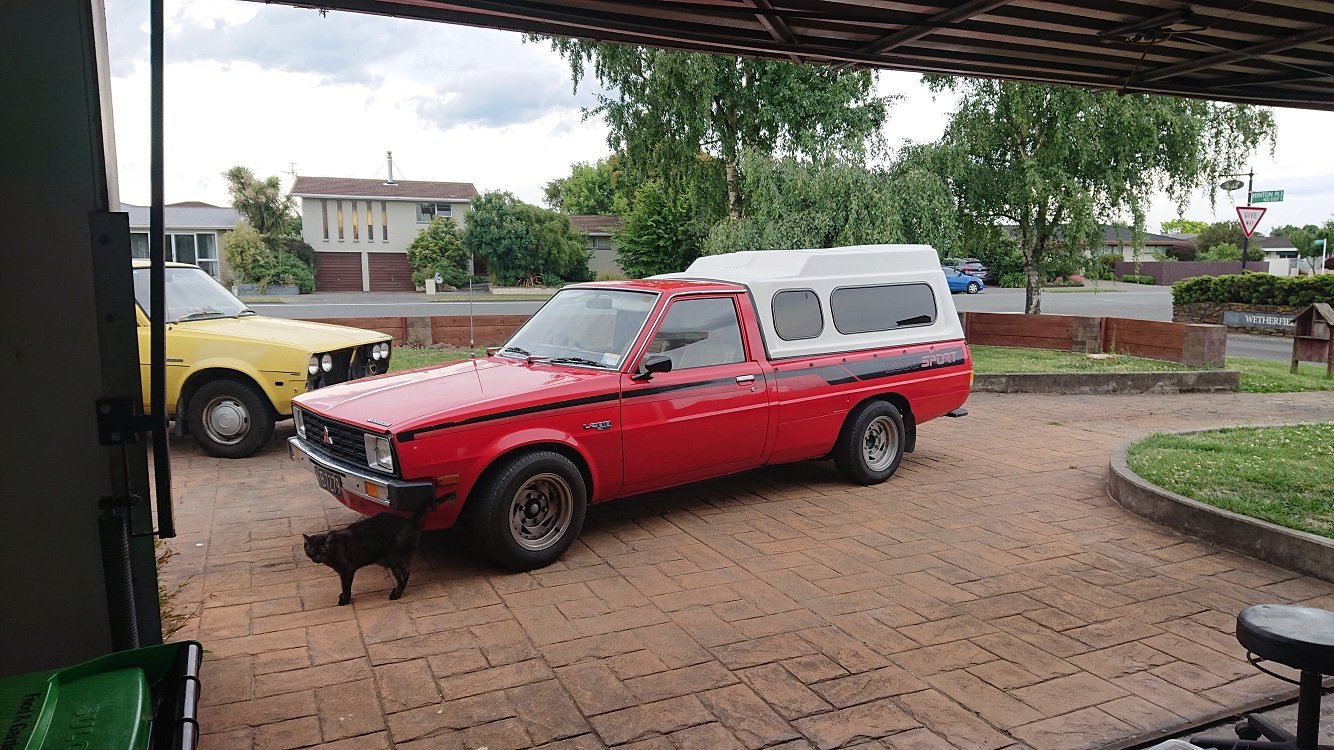
This ute has been a constant fixture in my life for many years now, and its pretty easily my favorite vehicle I've ever owned. It's never let me down, when something does break its so simple you can fix it on the side of the road, and it just gives you 'feel good' vibes when you drive it :-). I bought it from the original owners year ago, and it had never been more than 20k's from Sheffield (where it was sold new) in its life. It's in good nick for one of these, with no major rust issues to speak of. The cab corners are all good, and the wellside is also rust free and pretty much dent free inside too. The canopy has never been off it, and the tray has always had a ply-wood spoil board in place. The interior shows its age though, with dash cracks and worn out bench seat. I've done a bit of work to it over the years. Did a major overhaul of all the suspension and brakes a couple of years ago. Everything under there is brand new or rebuilt. 2" blocks in the back, 2" drop spindles in the front with 2nd gen vented brakes. 1/2 a coil off the front to get it sitting even. Everything poly-bushed, wheels are $50 cheapies from trademe I tidied up. They're probably due another tidy up by now, but I think i'll be changing them out for something else (wider) in the near future. For the first years of owning the truck it was just a weekend vehicle, used for taking the garden waste to the refuse station, helping people move things around, etc. I had euro-diesels as I was commuting big k's each week for work... However at the beginning of 2019 I scored a fantastic job in Christchurch, so I no longer have to spend 12.5 hours a week commuting to and from work. When you add that into your work hours each week, its just too much time being idled away. As of a few months ago the euro-diesels are sold and the truck is performing daily duties. So, its time for the second round of major modifications: 4g63 SOHC 8V. TD05 Big 16G turbo (EVO III). Galant MPI injection. 2nd Gen 5 Speed gearbox (possibly with a Starion gearset, if the ratio's are better). 3.54:1 gears, with and LSD center. Starion seats fitted general interior update. I'm hoping for a good 200 buff horses to the rear wheels. Truck weighs in at around 1250kg's, mostly at the front I assume, so it should make it pretty lively with an LSD and 195's. Should be able to get better economy too, with the 5 speed (currently its a 4 speed) and the taller gears, and better fuel system. Not for the first few months I'm sure, as I'll be deep in the loud pedal a lot I'd say, but after that I'm hoping things improve ;-).
1 point
-
Fuck yea I see 7 penny pinchers on that list. Def gunna win the gang fight this year1 point
-
https://assets.autodata-group.com/sites/technical_images/150000/images/150123.png Might work?1 point
-
The pump runs off to the side of the main gear set, I'll find a diagram shortly1 point
-
Mine is down at Lyndale Motors getting sorted because i was having a mare. I got a guy off FB to send me some pics that kinda help. I can forward them to you.1 point
-
Although feel free to ride off fences and into cliffs.1 point
-
That is your one @chris r
1 point
-
1 point
-
Here's a tool I've been making recently. I still need to make a good handle for it, but to be honest the cap screw is probably stronger than any handle I could make. The clutch in the middle is hardened to reduce the risk of galling when it slips (adjustable preload, allows slipping when die binds or you hit a shoulder)
1 point
-
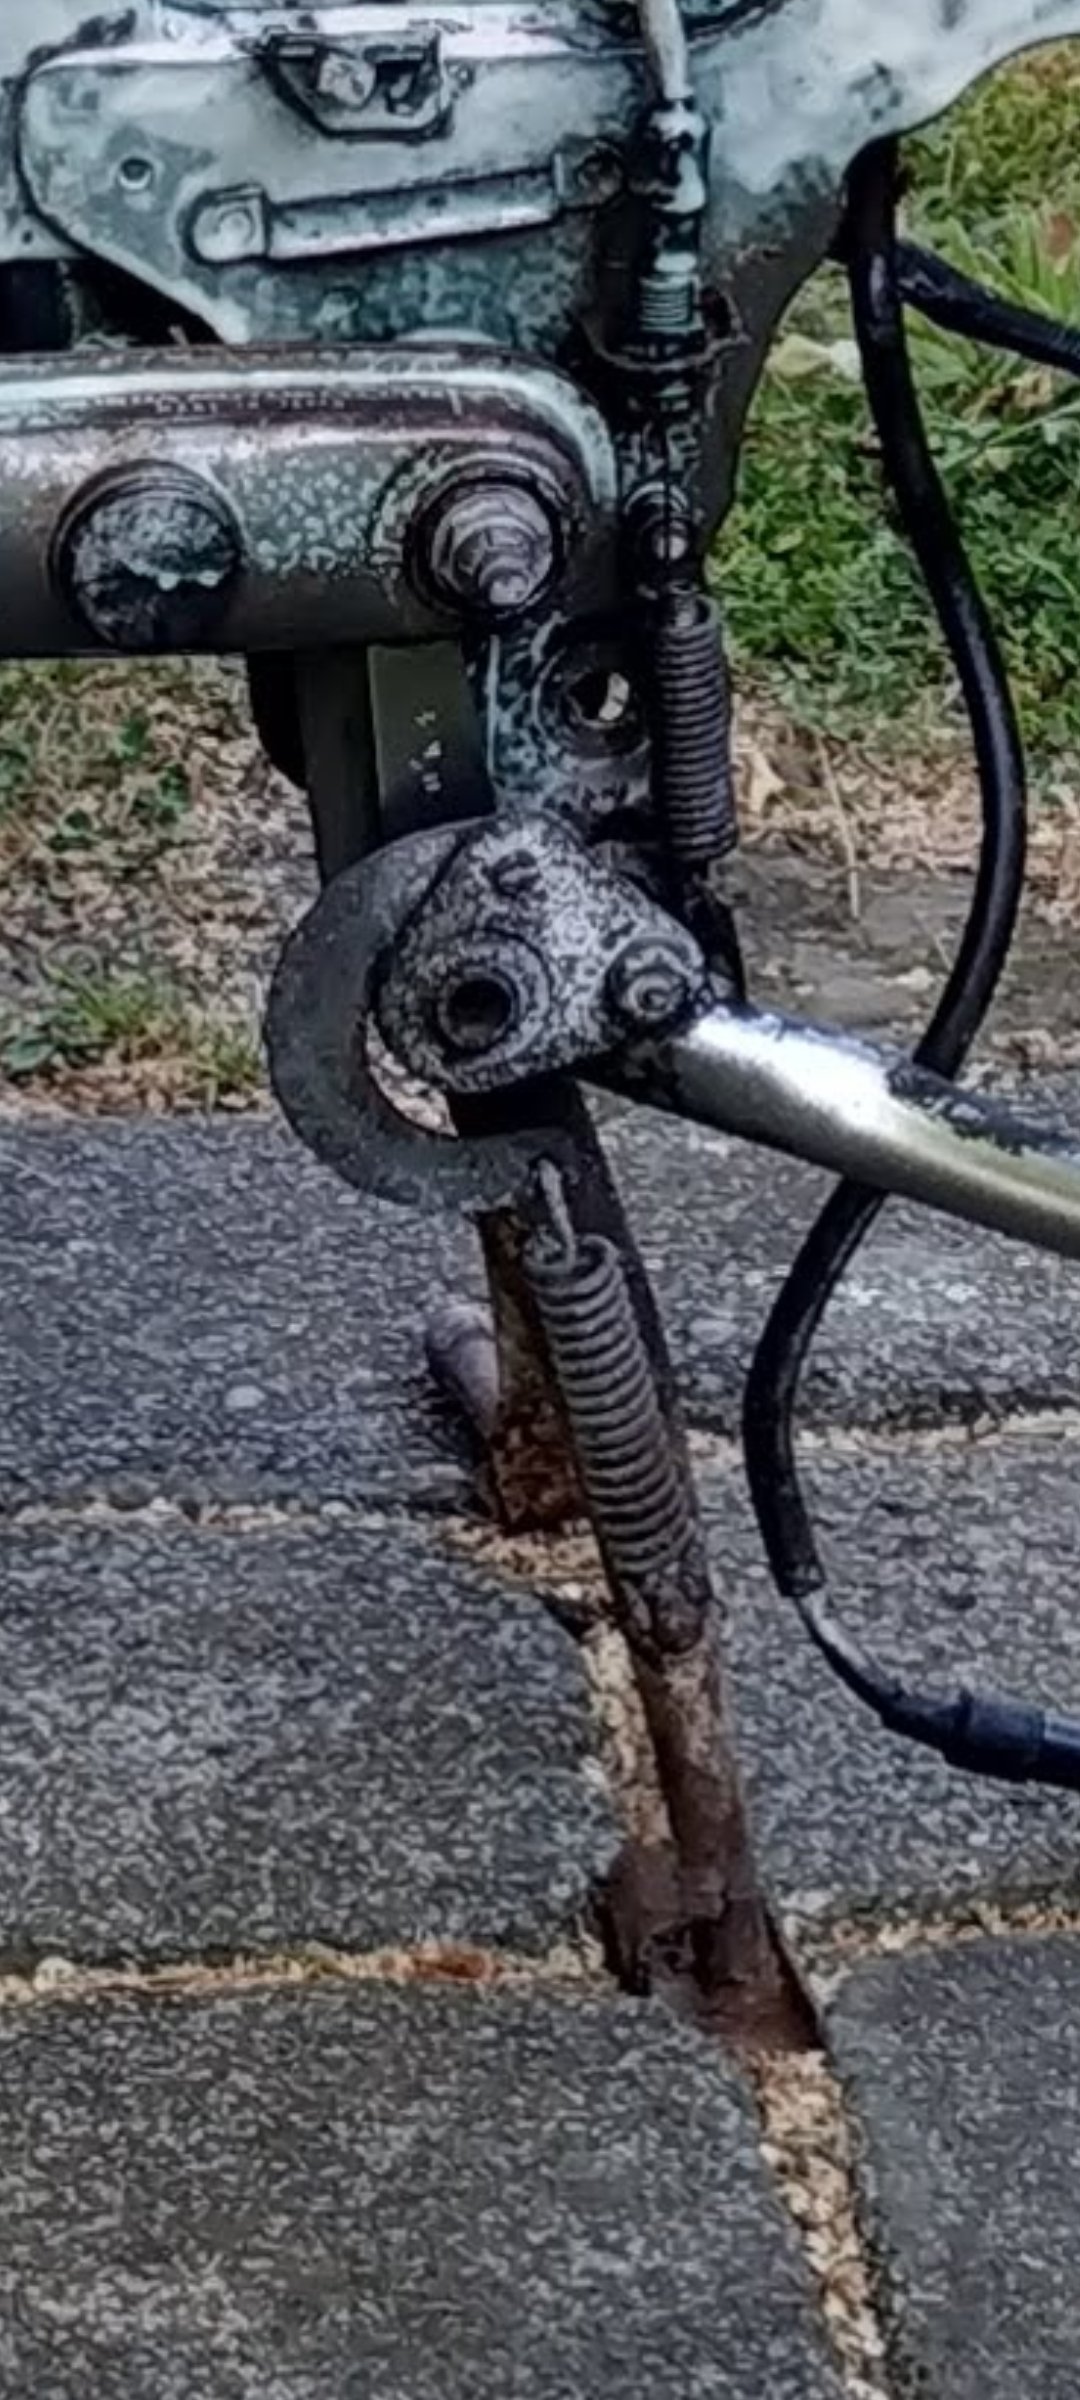
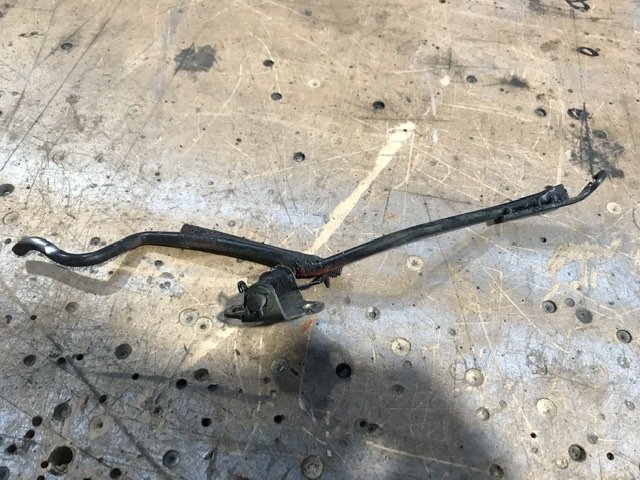
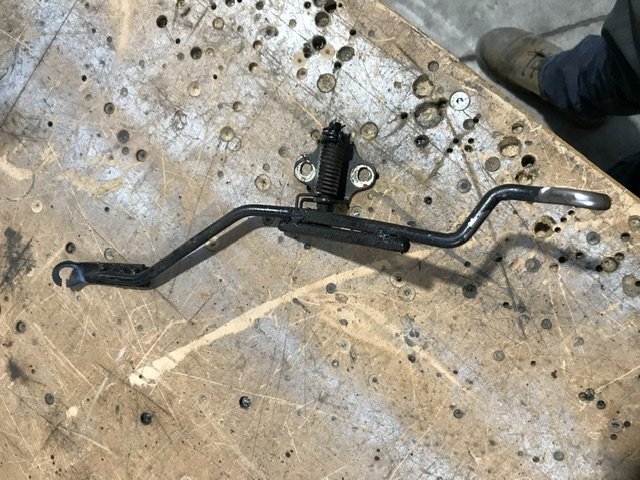
Right, babies 2 weeks old now so can continue playing with this thing. Worked our I’m still not getting full throttle. It goes well but not as fast as it should. Had a look at the accelerator pedal, found the problem. FUCK OFF, seriously?! Never have I spoken a truer word..... Made a nice new one and gave it more pedal travel. Guess what, full throttle now actually makes power, real power! Wheel spinning, ear grinning neck turning power. I’m a happy man.
1 point
-
I’ve got a mate keen to drive in support if no-one puts there hand up. He has a 4WD and a chainsaw and a drum kit.1 point
-
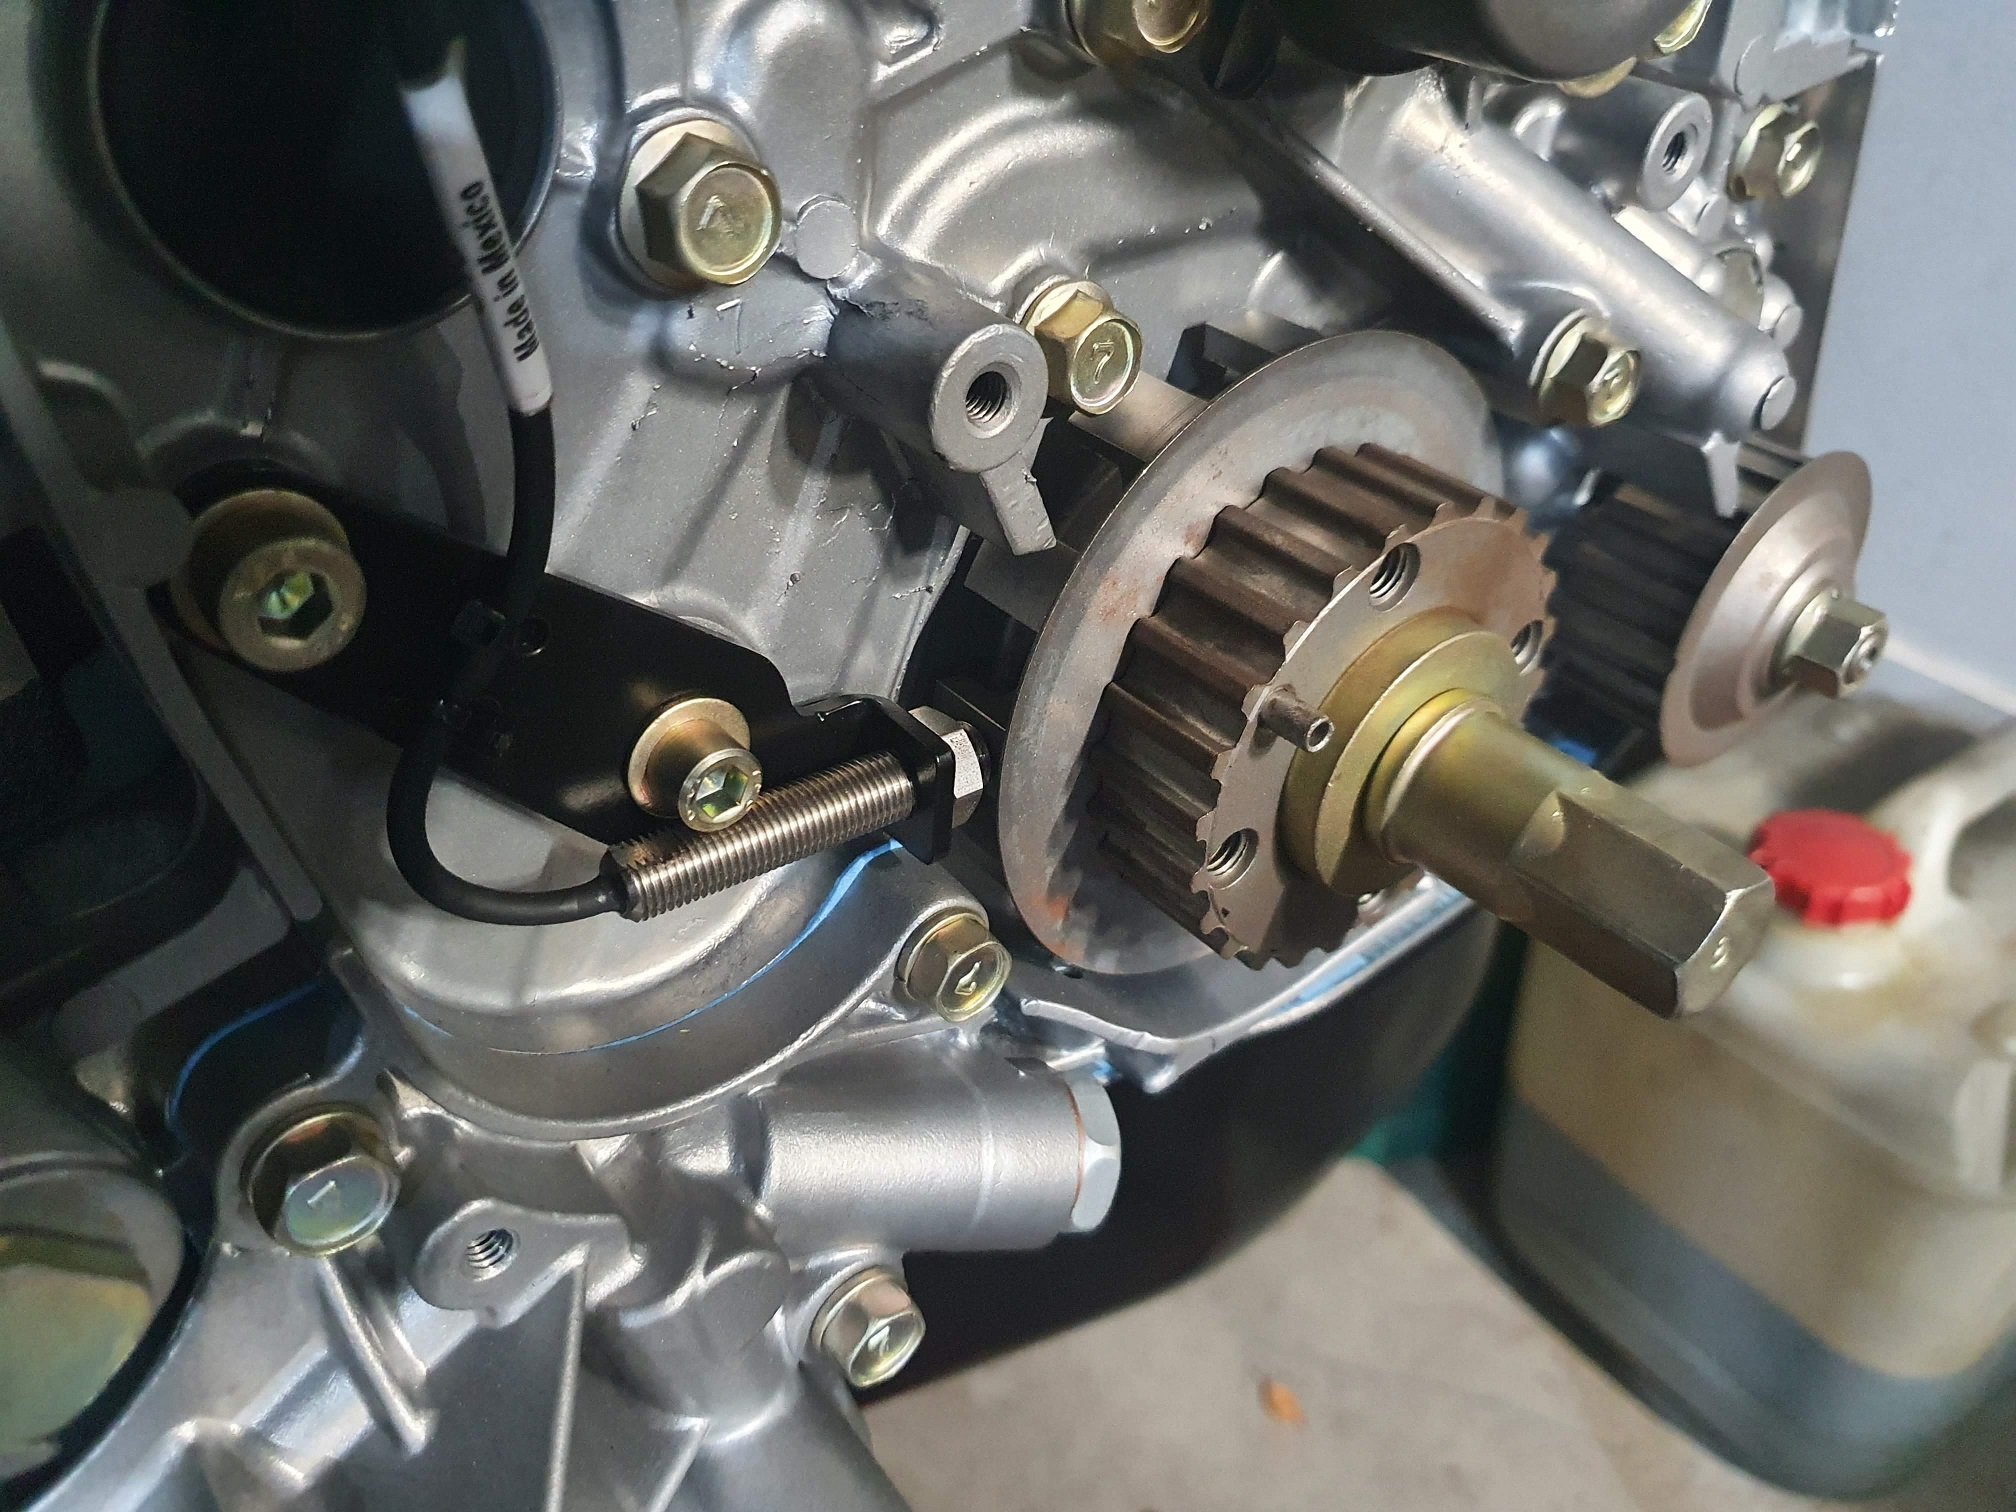
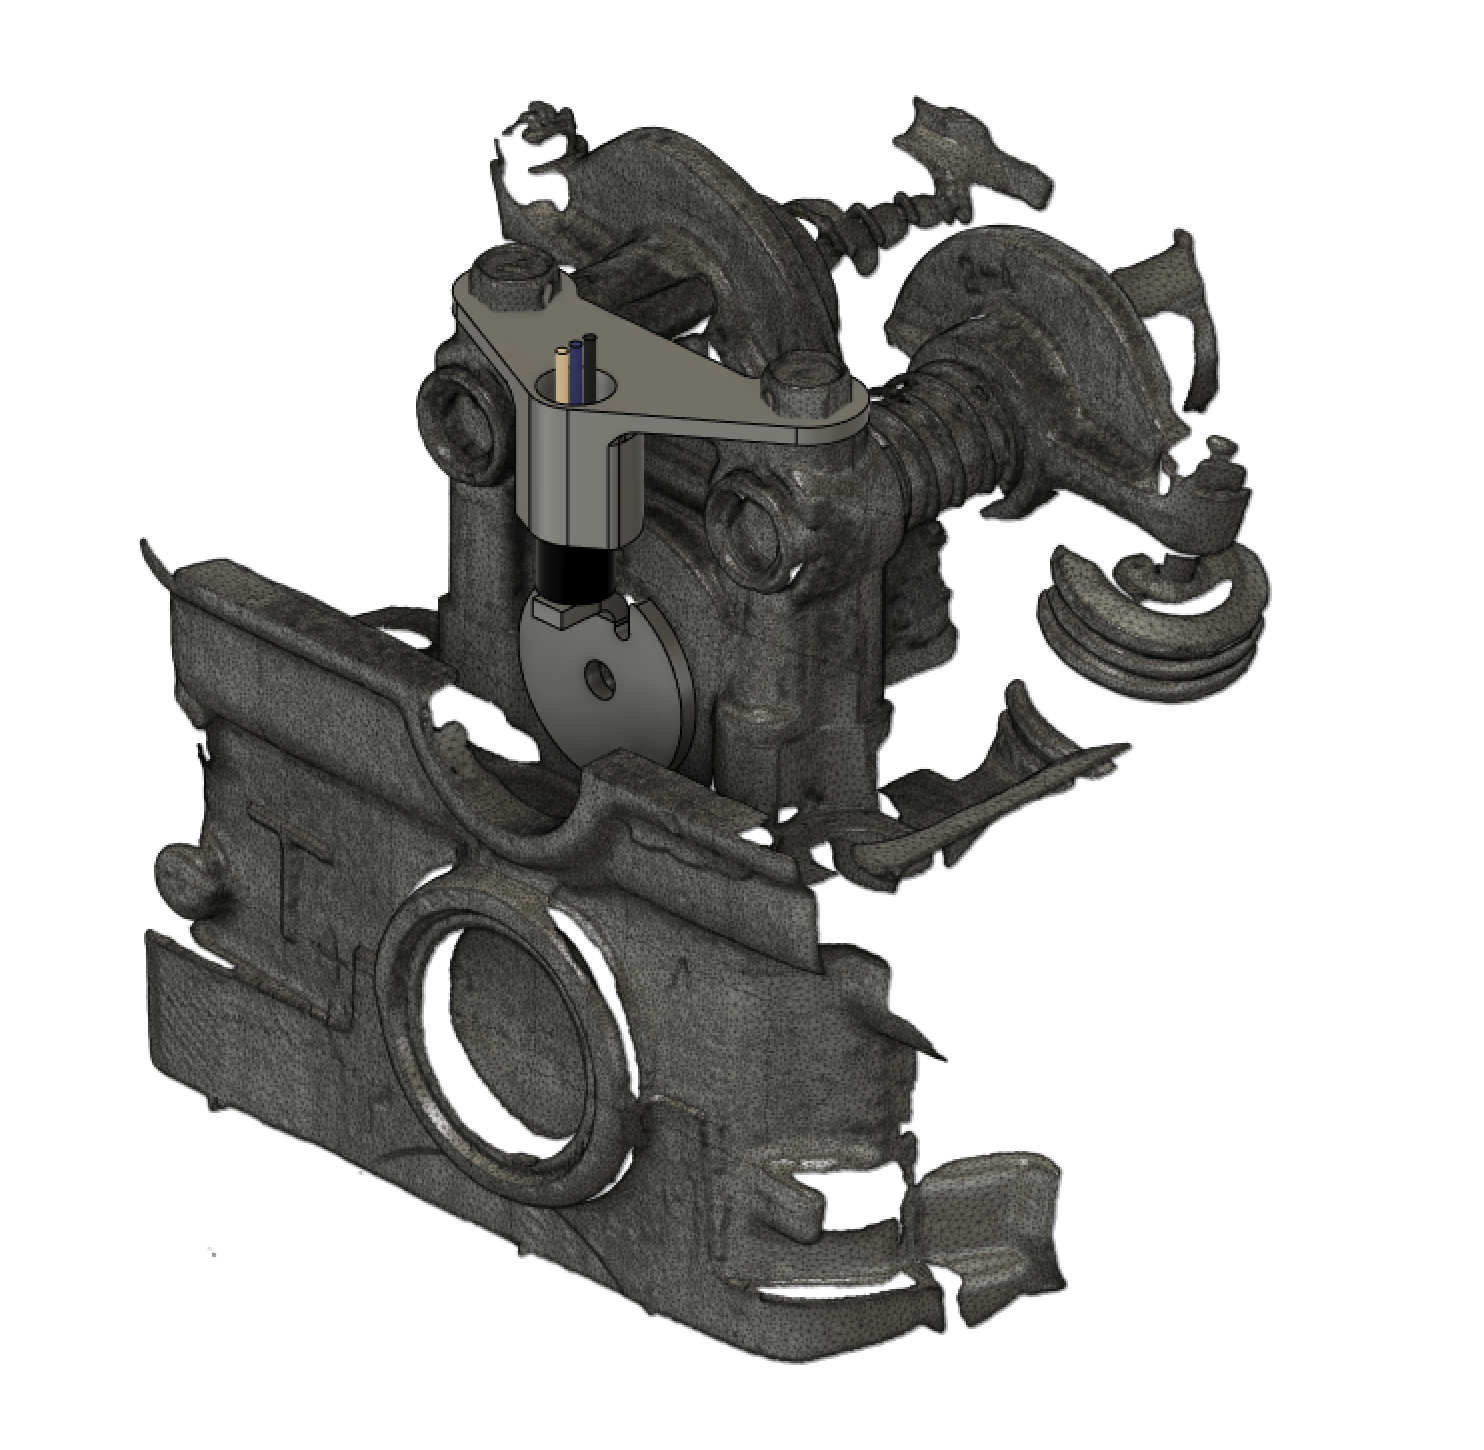
Small update, but this actually took me most of the day to get done... Well, after I was done with daddy duty this morning. The majority of the day was reminding myself how the tool and work coordinate offsets are setup on the mill I'm using. Prototrack controller, would not recommend. I'm not a machinist by any stretch of the imagination, but managed to get the crank trigger wheel carved out without too much bother and nothing broken. I still wish the 32 tooth balance shaft pulley would have worked. If I didn't already have a Link Fury ECU for this thing I would have purchased a Life Racing one just so I could have used it, much cleaner solution. The new one weighs within a bee's dick of the original. I could have made it lighter, but I already had an 8mm drill setup, so that's the size speedholes it got. I set the clearance on the sensor. These hall effect ones aren't as sensitive to the gap as VR sensors, as the ASIC's inside them which convert the VR signal to a square wave have auto calibration logic built in. This is why they don't work well with missing tooth setups, as they calibrate to the big signal spike after the missing tooth, and then miss all the regular teeth. Secured the cable with some ties and it's pretty much job jobbed. I've got yet another idea for the cam sync, I think it could work pretty well, but I need to check the rocker cover clearance. I'll put an IP68 cable gland on the back of the head casting and pot / sheath the wiring to make sure it'll live inside the rocker cover. There are a few diesel vehicles out there that have wiring inside the rocker cover, so I reckon it'll be okay :-). It'd be great if I could pass the wiring out of the half-moon seal, but that space is now occupied by the spinny single toothy thing, which would not end well if the two interacted with the motor running. I'll change the wiring on the sensor to some nice ETFE insulated stuff, twist and sheath it in DR25, pass it out the cable gland (which will be sealed in with something... I think maybe threebond?). Then I can set the clearance, loctite the shit out of it and its jam-nut, pot the top and it should be good. Probably. At least till I'm driving it in the pouring rain one evening in a rush on the way home from work because I'm in trouble for staying late to work on cool shit... and then it's bound to shit out... But that's a bridge to look forward to in the future!
1 point
-
I am still working on this thing. Took some photos today as I dragged it out of the shed to turn it around to do some work on the drivers side. Don't judge me too harshly, obviously there a lot of things half done on this, but I reckon it's looking good. I call the look Mad Max meets prerunner. Next goal is to get all the bar work finished and drag it in to work to get it blasted and primed so I can put some raptor liner on it.1 point
-
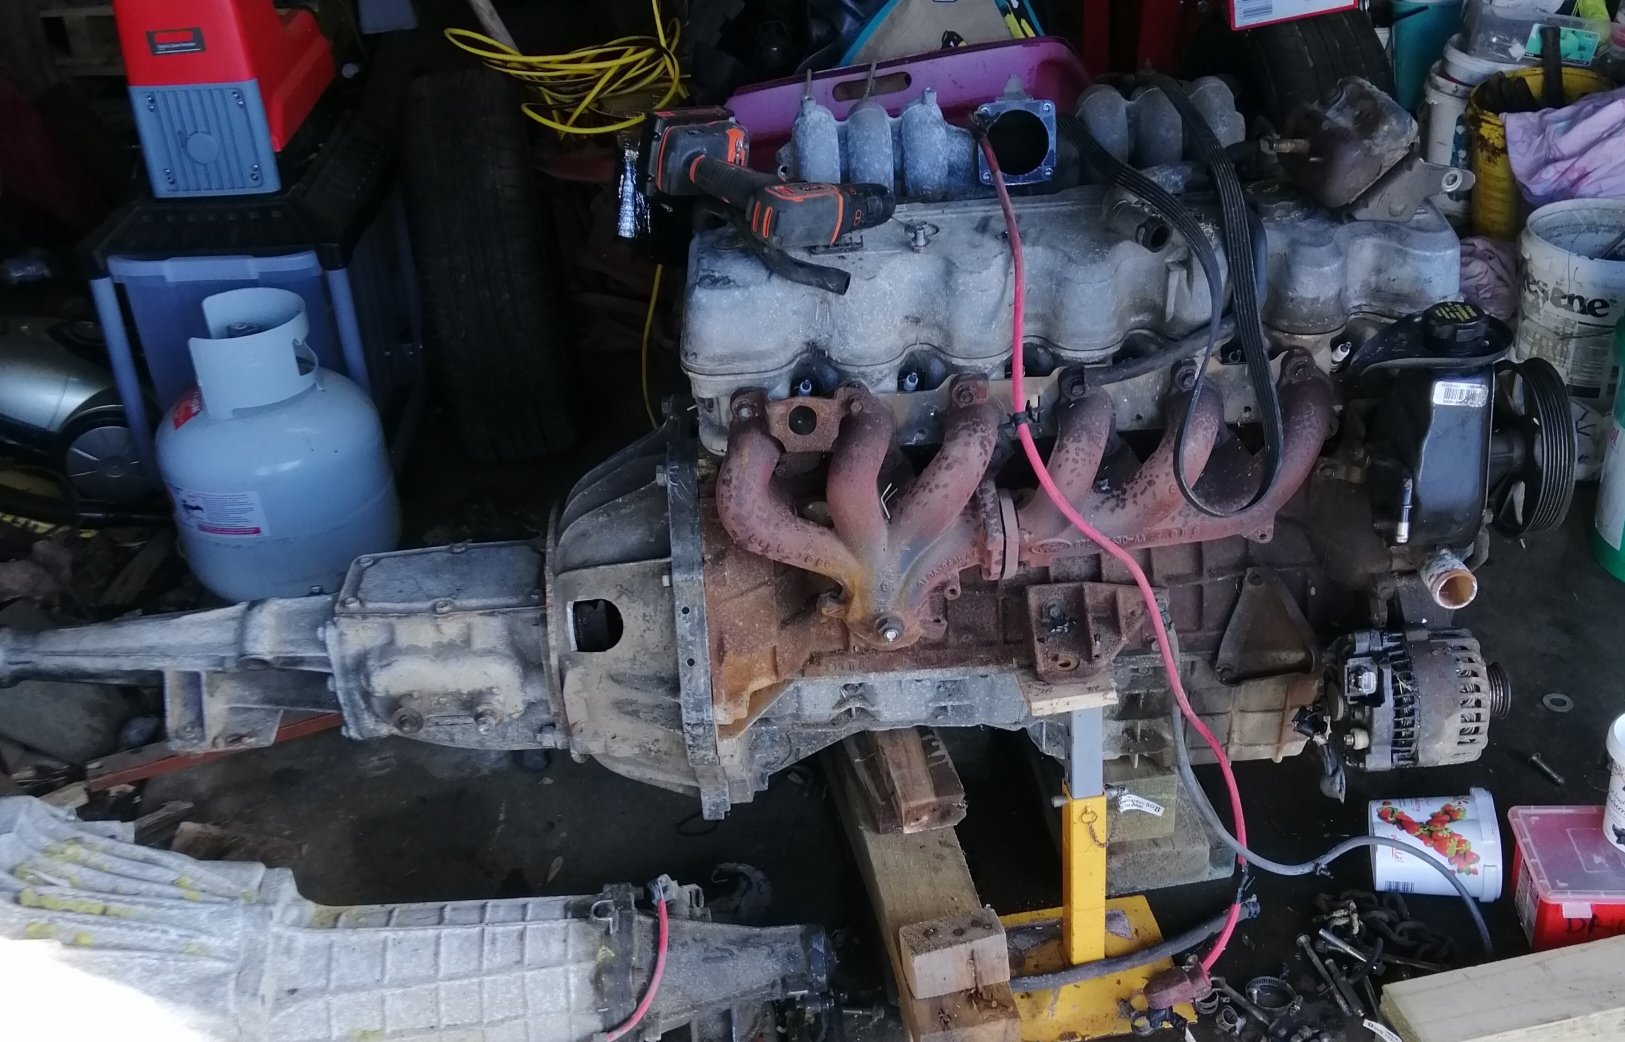
Quick swap over this morning. Hasn't got a flywheel at the moment, at least I can mock up. Manual setup come out of a dirt car
1 point
-
DC2R Phone (33)-Edit by Richard Opie, on Flickr DC2R Phone (36)-Edit by Richard Opie, on Flickr Wheels, meet car. Yeah good. Caffeine and Classics tomorrow if the weather holds!1 point
-
2020-06-26_08-08-47 by Richard Opie, on Flickr Finished. Tyres and stickers. Good.1 point
-
bump - I sold this about 1.5 years ago when I needed some coin to do grown up things (renovate house) regretted it deeply, this weekend just been I went and picked it back up off the guy who I sold it to. it now has a vvt-i 1jzgte and MAXX ECU all scratch built loom by nz wiring, that about all he changed, got raised up and put on some china 17x9's. while I was in wellington I picked up a set of bcnr33 wheels and slapped them on it and lowered it back down to a semi acceptable height. The plans are smash an r154 in it before I blow up the w58 doing silly stuff, then later on I will put a TD06 on it and hopefully make around 350kw just for shits and gigs, also potentially some 15's of some sort again would be nice. will also unyucky the intercooler pipes. Couple of pics from before I sold it with 9j mk1 on the back and current pics, needs to come down 6mm or so in the back to get it sitting level1 point
-
Project other is going all right. So I bought some wheels. I've long lusted after a set of SSR Type C, however do not like the price that tidy examples command. Some chance Facebook Marketplacing saw these things turn up. The description simply read: Honda wheels 17-inch. Coaxing the seller through a few extra pics confirmed they were SSR Type C, 17x7.5-inch forged wheels. They weigh 5kg a piece. They looked rough. I bought them for next to nothing, and did a roadtrip to Wellington to get them the first weekend we hit Level 2. Great idea to also get out of Auckland, get some driving in, and see some people I hadn't in a really long time. This is what I got. 98272862_10216632842556010_1422751630977138688_o by Richard Opie, on Flickr Assorted tyre sizes. Pretty haggard in the paint department. Some of Australias finest export quality matte black I expect. 99048908_10216650052466247_8180097297808359424_o by Richard Opie, on Flickr With the tyres off things didn't get any less ugly. The full scope of the repairs needed started to become apparent, more of which is detailed below. 99006202_10216650056026336_8451286377600909312_o by Richard Opie, on Flickr 99078092_10216650054786305_4216971291200061440_o by Richard Opie, on Flickr 99138489_10216650053066262_530452122030833664_o by Richard Opie, on Flickr 100086434_10216650053946284_2533449599859818496_o by Richard Opie, on Flickr And more. But anyway I dropped these into Wheelfixit in Wairau for a look and a quote, turned out they were totally repairable and it wasn't even very expensive. Step 3, was acid dipping, kindly taken care of by Kwik Strip in Te Atatu. Again, bargain prices and criminally fast turnaround. As in, these were done in the space of several hours. 100597172_10216707809990149_7015287452575203328_o by Richard Opie, on Flickr 101063927_10216707810710167_197262320282370048_o by Richard Opie, on Flickr 99291047_10216707810350158_3946752332850528256_o by Richard Opie, on Flickr Some were worse than others, with signs of surface corrosion evident on some of the wheels. I also cleaned up the kerb damage on the one non-bent wheel by gently filing and sanding, enough so that the lip retained it's profile and was not 'flattened' too much. But then, for my final trick, paint. Of course I suck at paint. But I know some blokes who don't. Ben and Nick took the job on for me, and gave em a splash with Porsche Weissgold, with a satin clear over the top. To say I am stoked on the result would be an understatement. 101952115_10216857720217811_7586636871987907807_o by Richard Opie, on Flickr 104433228_10216857720617821_5444337198238180490_o by Richard Opie, on Flickr 102458703_10216857721577845_1496879978836587088_o by Richard Opie, on Flickr And that's that, so far. I am going to get some stickers for them in due time, and probably some tyres. Run em for a bit then put them up for sale to the period-correct JDM piners. Unless I decide I quite like 17s and keep them on. But 16s was probably the ideal... anyway, thanks for looking.1 point
-
We did tweak the base plate or Holley pattern template to suit the manifold better. Here's the other vid I took of it being cut1 point
-
So the car parts gods smiled on me today. Spotted a falcon and thought it looked it had a carb. I wandered over to try and figure out vacuum lines. That's not a carb... Yoink1 point
-
New name. 2000 Honda Integra Type RX-927-Edit by Richard Opie, on Flickr New tail lights. AU/NZ spec facelift types with the CREAR WINKER. 2000 Honda Integra Type RX-879-Edit by Richard Opie, on Flickr Side profile for shits and/or giggles, been playing around watching tutorials on commercial editing etc so easing into it. 2000 Honda Integra Type RX-894-Edit by Richard Opie, on Flickr Over lock down, I also finished the caliper rebuild and assembled them. They're coated in HPC of some sort, whatever the flashest one was, in a finish to mimic the OEM ones. I'll do the rears in due course. Also detailed the inner arches and front suspension, it's all very clean in there now. Will try for some pics a bit later. Rears to follow, again. 2000 Honda Integra Type RX-917-Edit by Richard Opie, on Flickr1 point
-
With a bit of massaging, trimming and drilling, got the new motor mounted into the frame Still need to add some reinforcing once I get access to welder again1 point
-
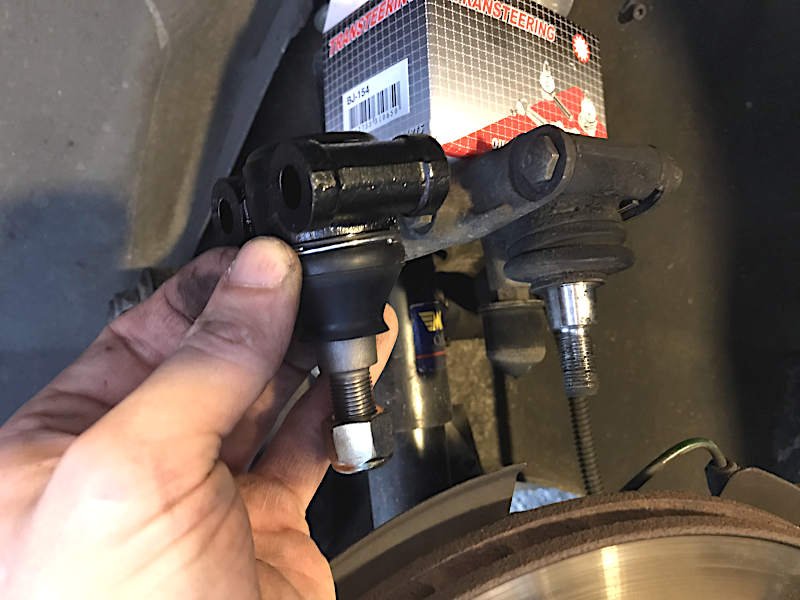
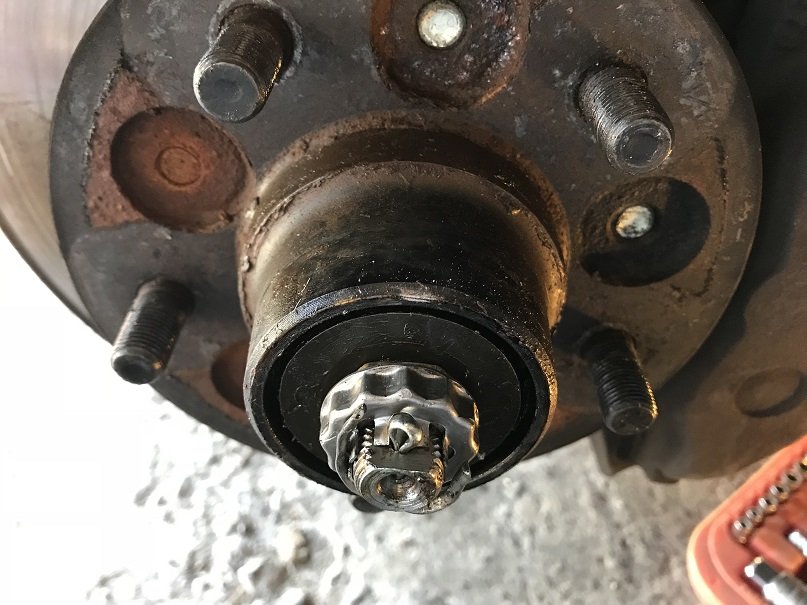
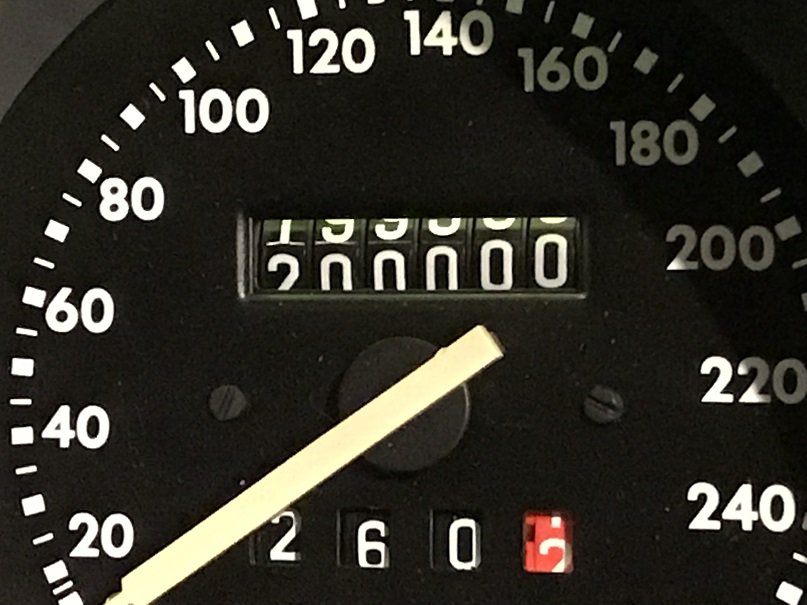
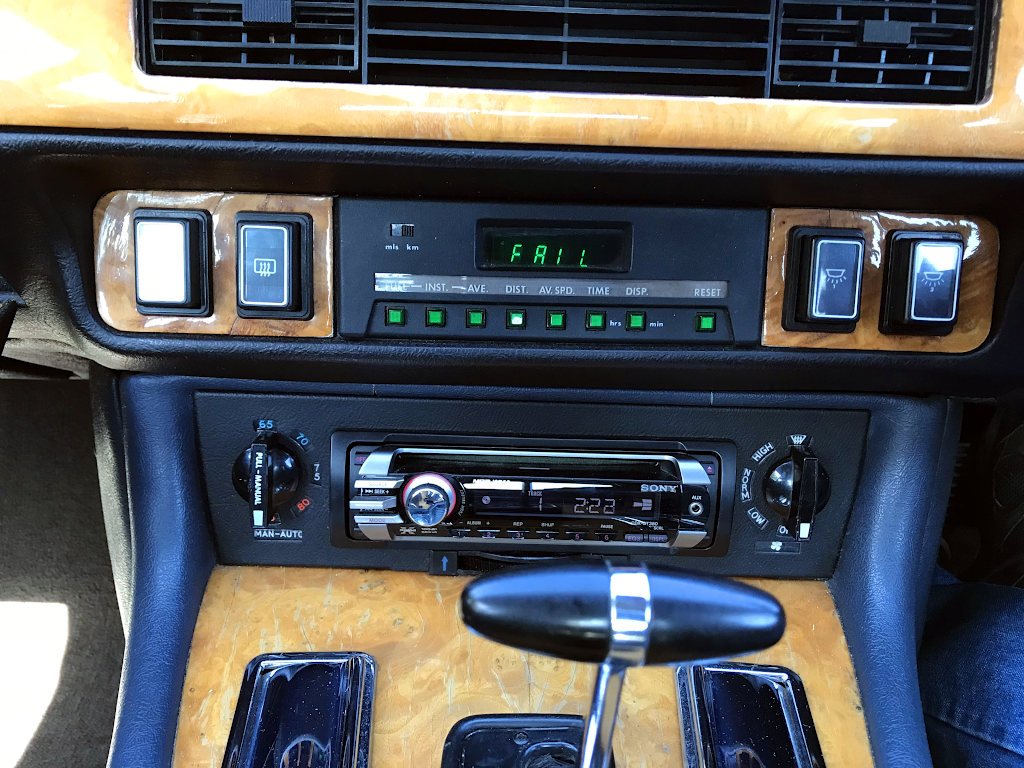
So I did the upper ball joints as well.. ..but it wasn't those. The push/pull play at 6 and 12 o'clock was still there. So I looked at how to adjust the wheel bearings.. I was expecting it to be horrible but it was easy, and now the play is gone. Should have done that first. Alas, the vibration is still not quite gone. It's probably just something I have to live with in a British car which has made it all the way to..... 200,000kms. So I got a new obsession instead. The engine doesn't run all that well - it has a random half-stumble at idle and low rpm.. You can see the misfires by watching the shaking of the motor, and although it appears to smooth out if you raise the rpm sufficiently, the higher engine speeds could possibly be disguising the problem. The car has also never really started that well from cold. I checked the spark plugs and they looked amazing to someone who has never owned fuel injection before. I looked for bad connections and vacuum leaks, since the ECU directly reads manifold vacuum (in V12 cars, the ECU is in the boot and its vacuum line has to run the whole length of the car, because why not... ). Nothing stood out though. Several tanks of fuel system cleaning pills didn't help either. Today I took off the airflow meter and cleaned it, and this did make an improvement. The raise in engine speed on startup is more pronounced, and the idle speed seems to have raised slightly which makes the car coast better / makes it not decelerate as aggressively when you lift off the accelerator. But just like my reduced 80kph vibration, the shaky running issue's still detectable. I'll try a compression test and then randomly change every ignition system part, idle valve, fuel pressure regulator and injector before giving up in 6 months from now. The Jag let me know what it thinks of my diagnostic skills:
1 point
-
Hey y'all. Hypothetically, is there any way to reverse a lapsed registration? I'm pretty sure the car in question fell off hold in May 2017 and the owner didn't realise until it went for a WOF the other day. I've heard there's a form you can fill out to reverse the cancelation process, is this true? Asking for a friend.1 point
-
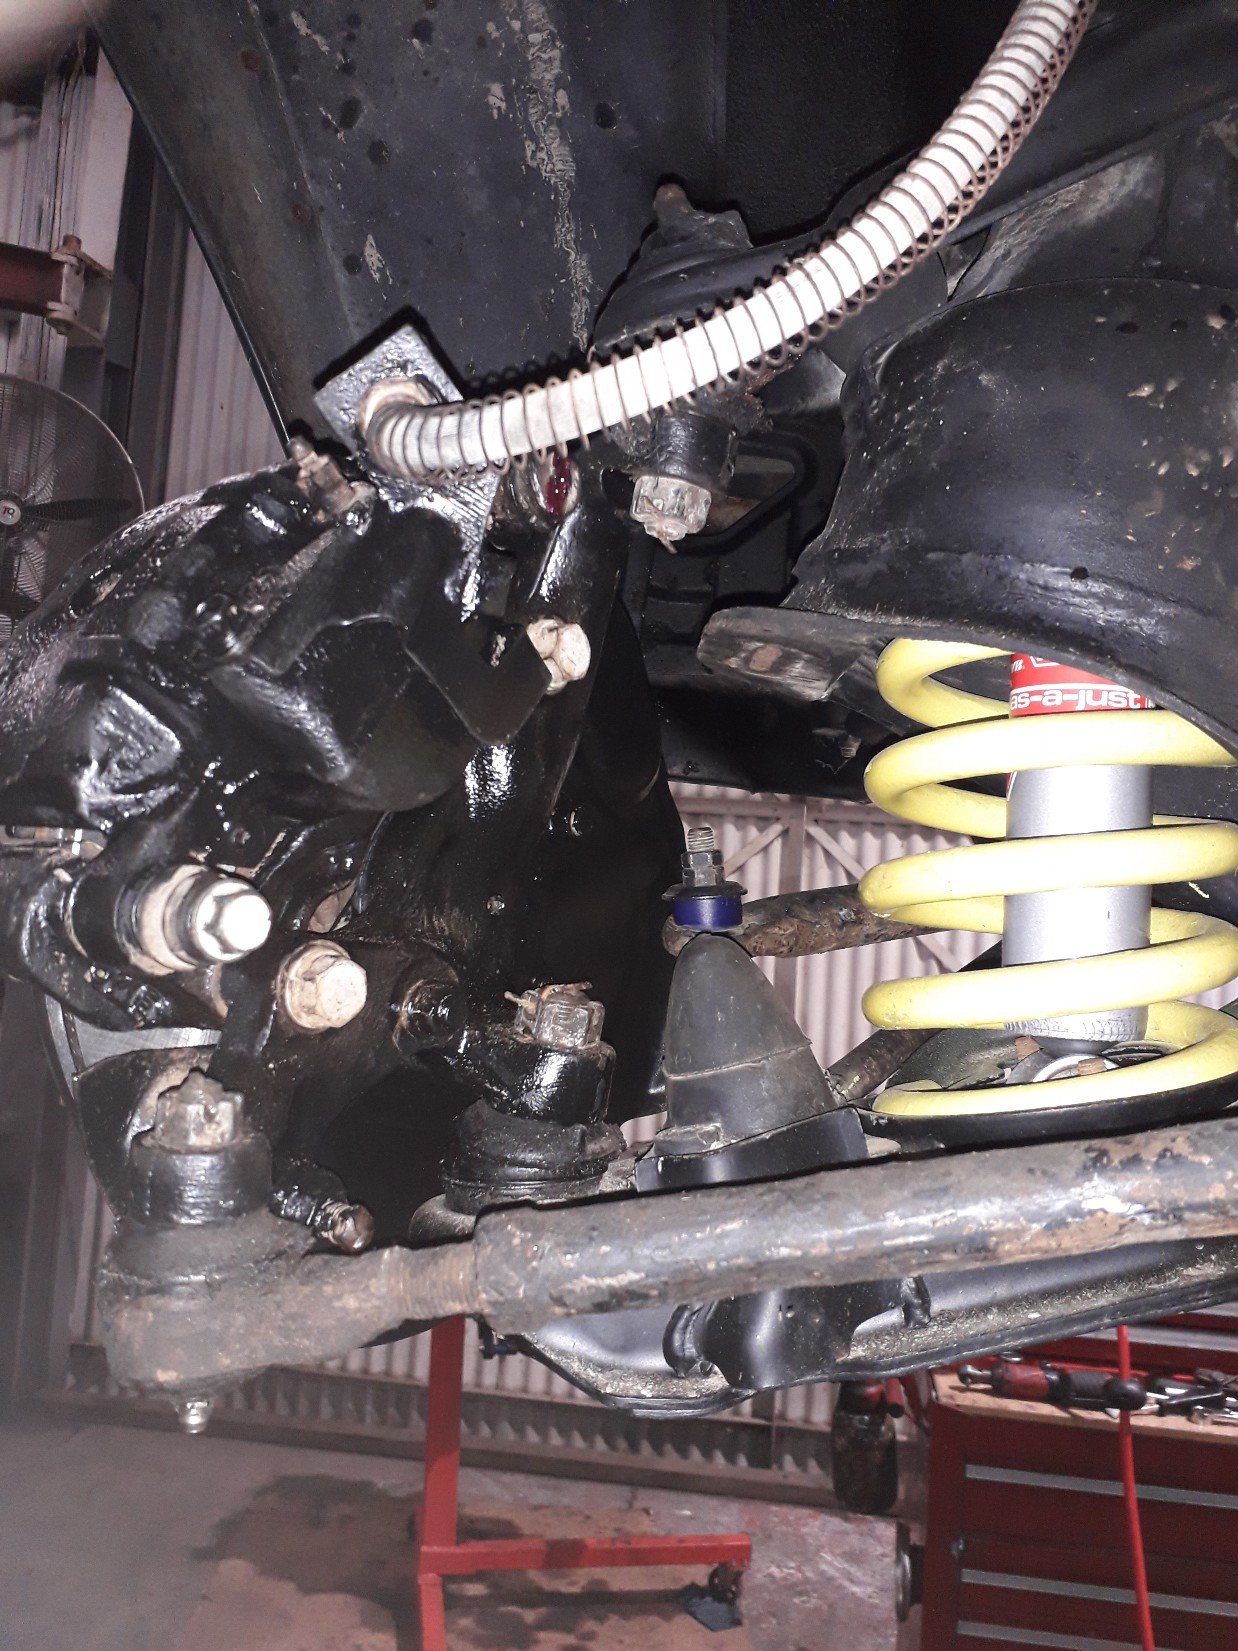
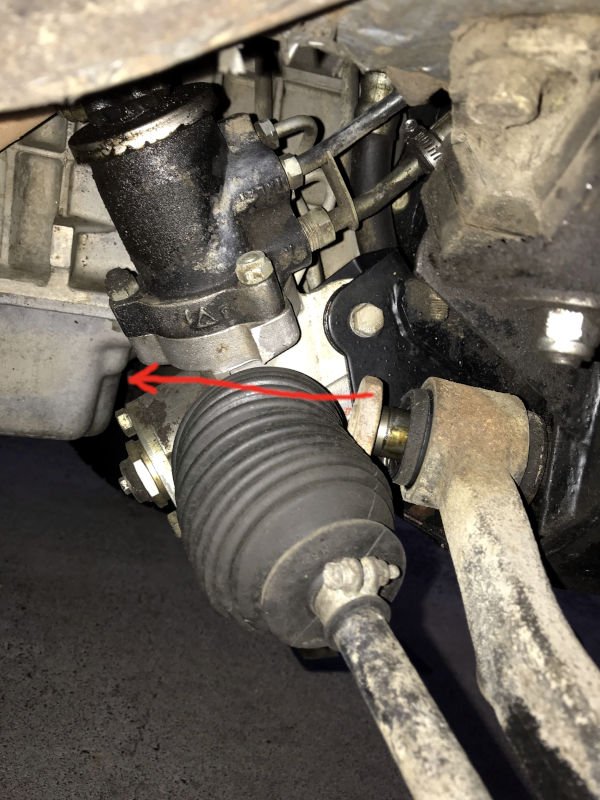
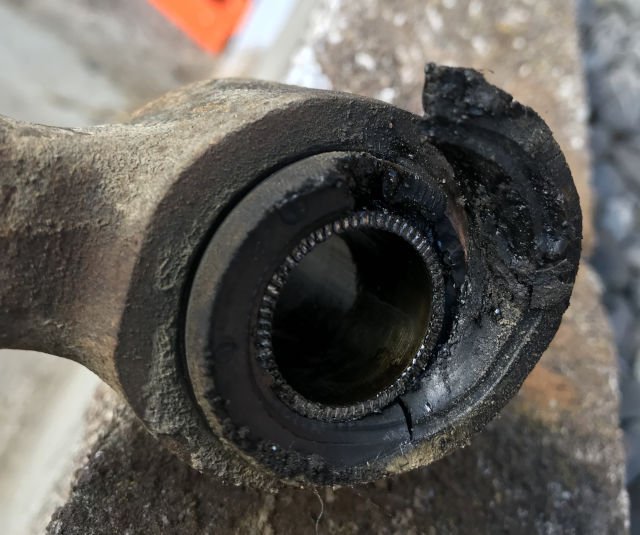
I passed another WOF, by deliberately seeking out a garage who wouldn't fail me on my chipped headlight glass or my worn front brake discs. I'm going to send the Jaag for a wheel alignment to see if it fixes the vibration, so first I had to change the remaining lower wishbone bushes on the more difficult side of the car. I wasn't looking forward to this, because the whole steering rack had to be unbolted so I could move it down and sideways out of the way of this fulcrum shaft: Not sure why Jaguar couldn't have made these fulcrum shafts insert from the front of the car where there's nothing in the way of withdrawing them. Still, the whole reason for doing these bushes was on this side of the car. The inner edge of the bush below had looked bad while the wishbone was still on the car and I couldn't get a good look at it: Actually its mechanical integrity was fine, despite that bit hanging off. And when I say 'fine', I mean relative to how hard it was to replace! Reinstalling the steering rack was horrible because it's a tight fit (I had to use a jack to push it into position) but you've got to precisely line up the rack and its shim thing with the subframe bolt holes. Reinstalling the suspension spring was also horrible because of trying to get the bolt holes in the spring pan to line up exactly with the wishbone while the spring's compressed, so that I wouldn't cross-thread any bolts. Because I can't work on this side of the car in my tiny garage, I had to do this work in view of my neighbours. Trying to align bolt holes in the dark for a conspicuously long time, hands grimy, lying on the ground with moths and mosquitoes, while people passing by correctly conclude that I'm crazy. But it's back together now. =) I noticed that the power steering pump appears to leak, but it's in a horrible spot and I'm not about to tackle it myself. I'm booking the car in for its first visit to some Jaaag specialists, so I can ask them about all its other rattles and whines and clunks. The impossible quest to make a Jaguar into a good car continues.
1 point
-
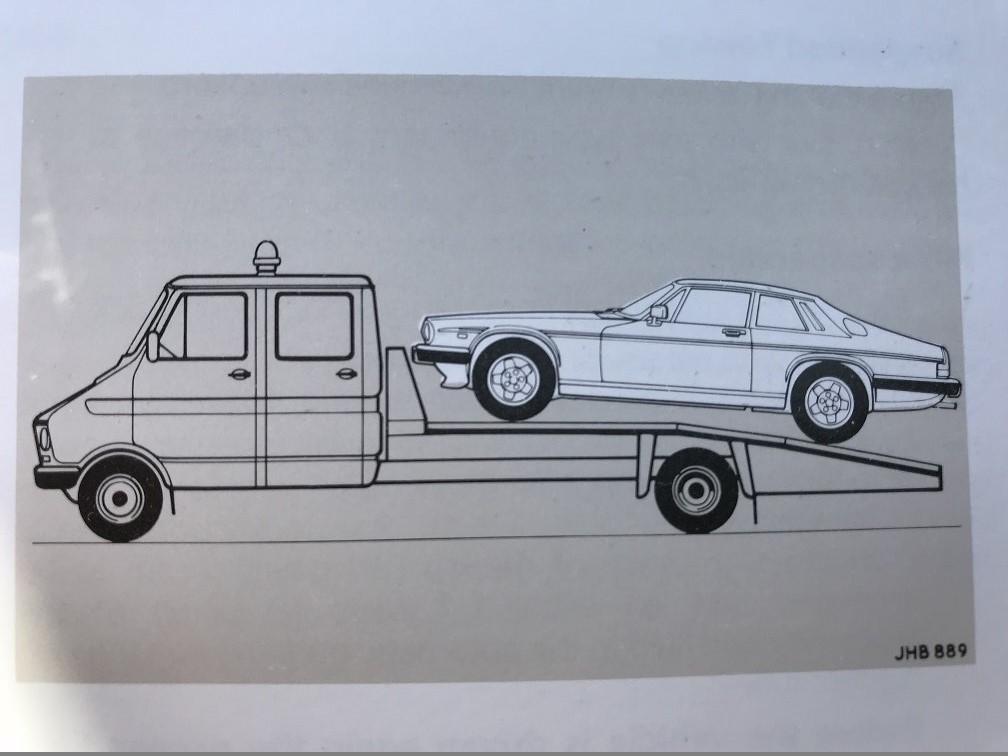
My Jag has finally been returned to me! The bill was very scary , because.... I ended up having to cover the funeral expenses of the mechanics who decided to try their luck in the next life. And then the rest of them went on trauma counselling / bereavement leave*, so the job took two months... I listened to the survivors tell their tale. Every nut and joint put up a fight and had to be soaked overnight, the whole rear subframe ended up coming out, and it was all because someone had apparently installed the handbrake pads upside down! This allowed the pads to move such that the backing plates were grinding away at the discs and starting to chip bits off. Jaguar changed the rear suspension for the last four years of XJS production, moving the rear discs outboard. Can't think why. After having not exactly the kindest introduction to the costs of old British luxury grand tourer ownership, I've made myself a new t-shirt design out of owners manual images: Still, I can't say I didn't warn me. And now I have nice brakes, a new WOF and reg and my 'zorst volume is turned up! What does an AJ6 ('the other Jaguar engine') sound like with half its mufflers removed? Not as good as a garbage Rover straight six ironically, but stay tuned! * Not really. Nobody died. Geez.
1 point
-
He'd buy the V12, run straight pipes, paint it in camouflage and imagine he was in a military tank.1 point
-
Ask yourself. What would Lemmy do?1 point
-
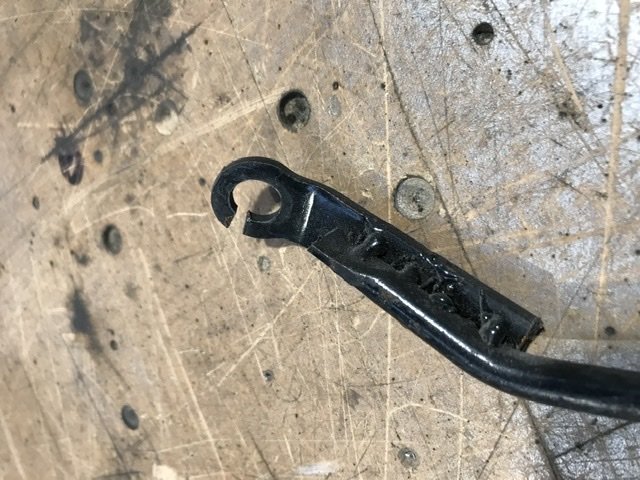
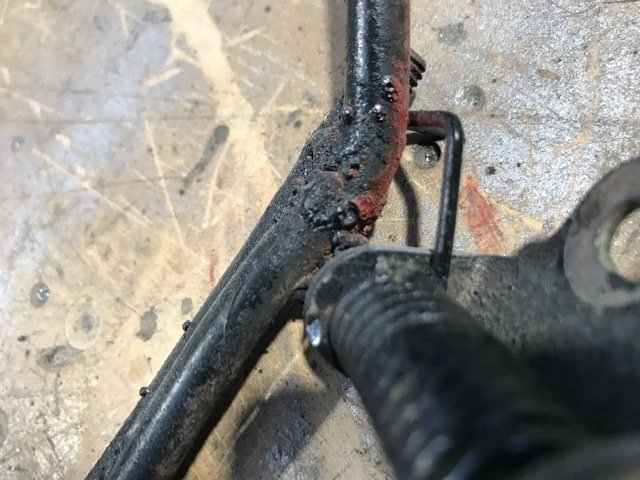
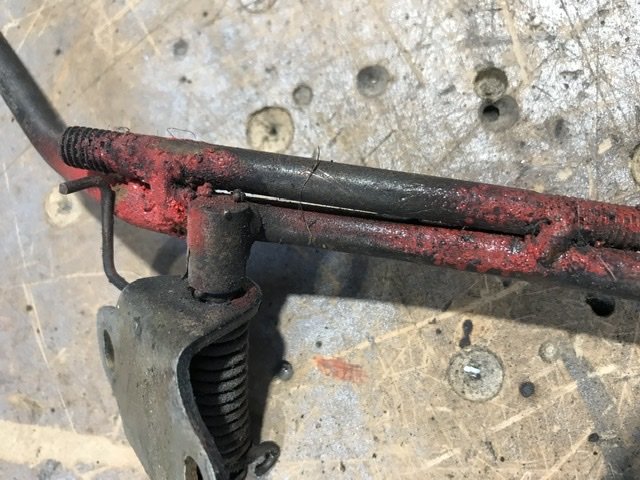
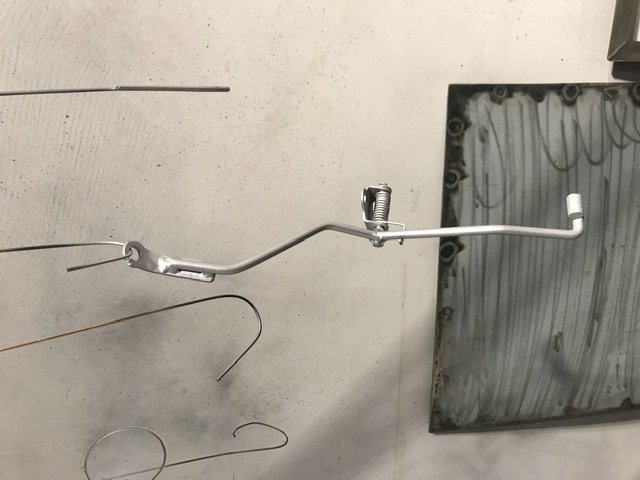
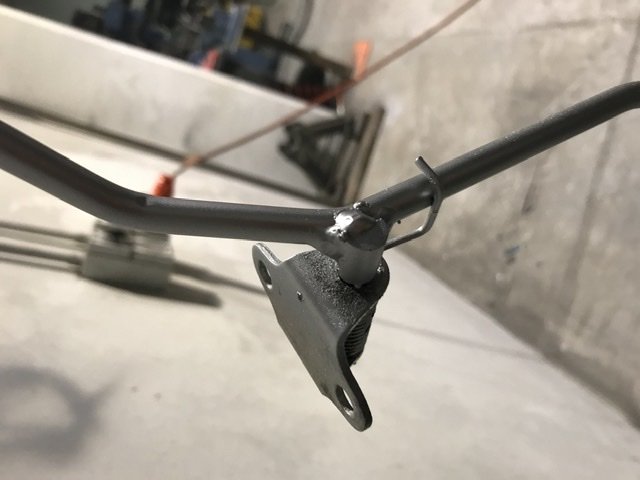
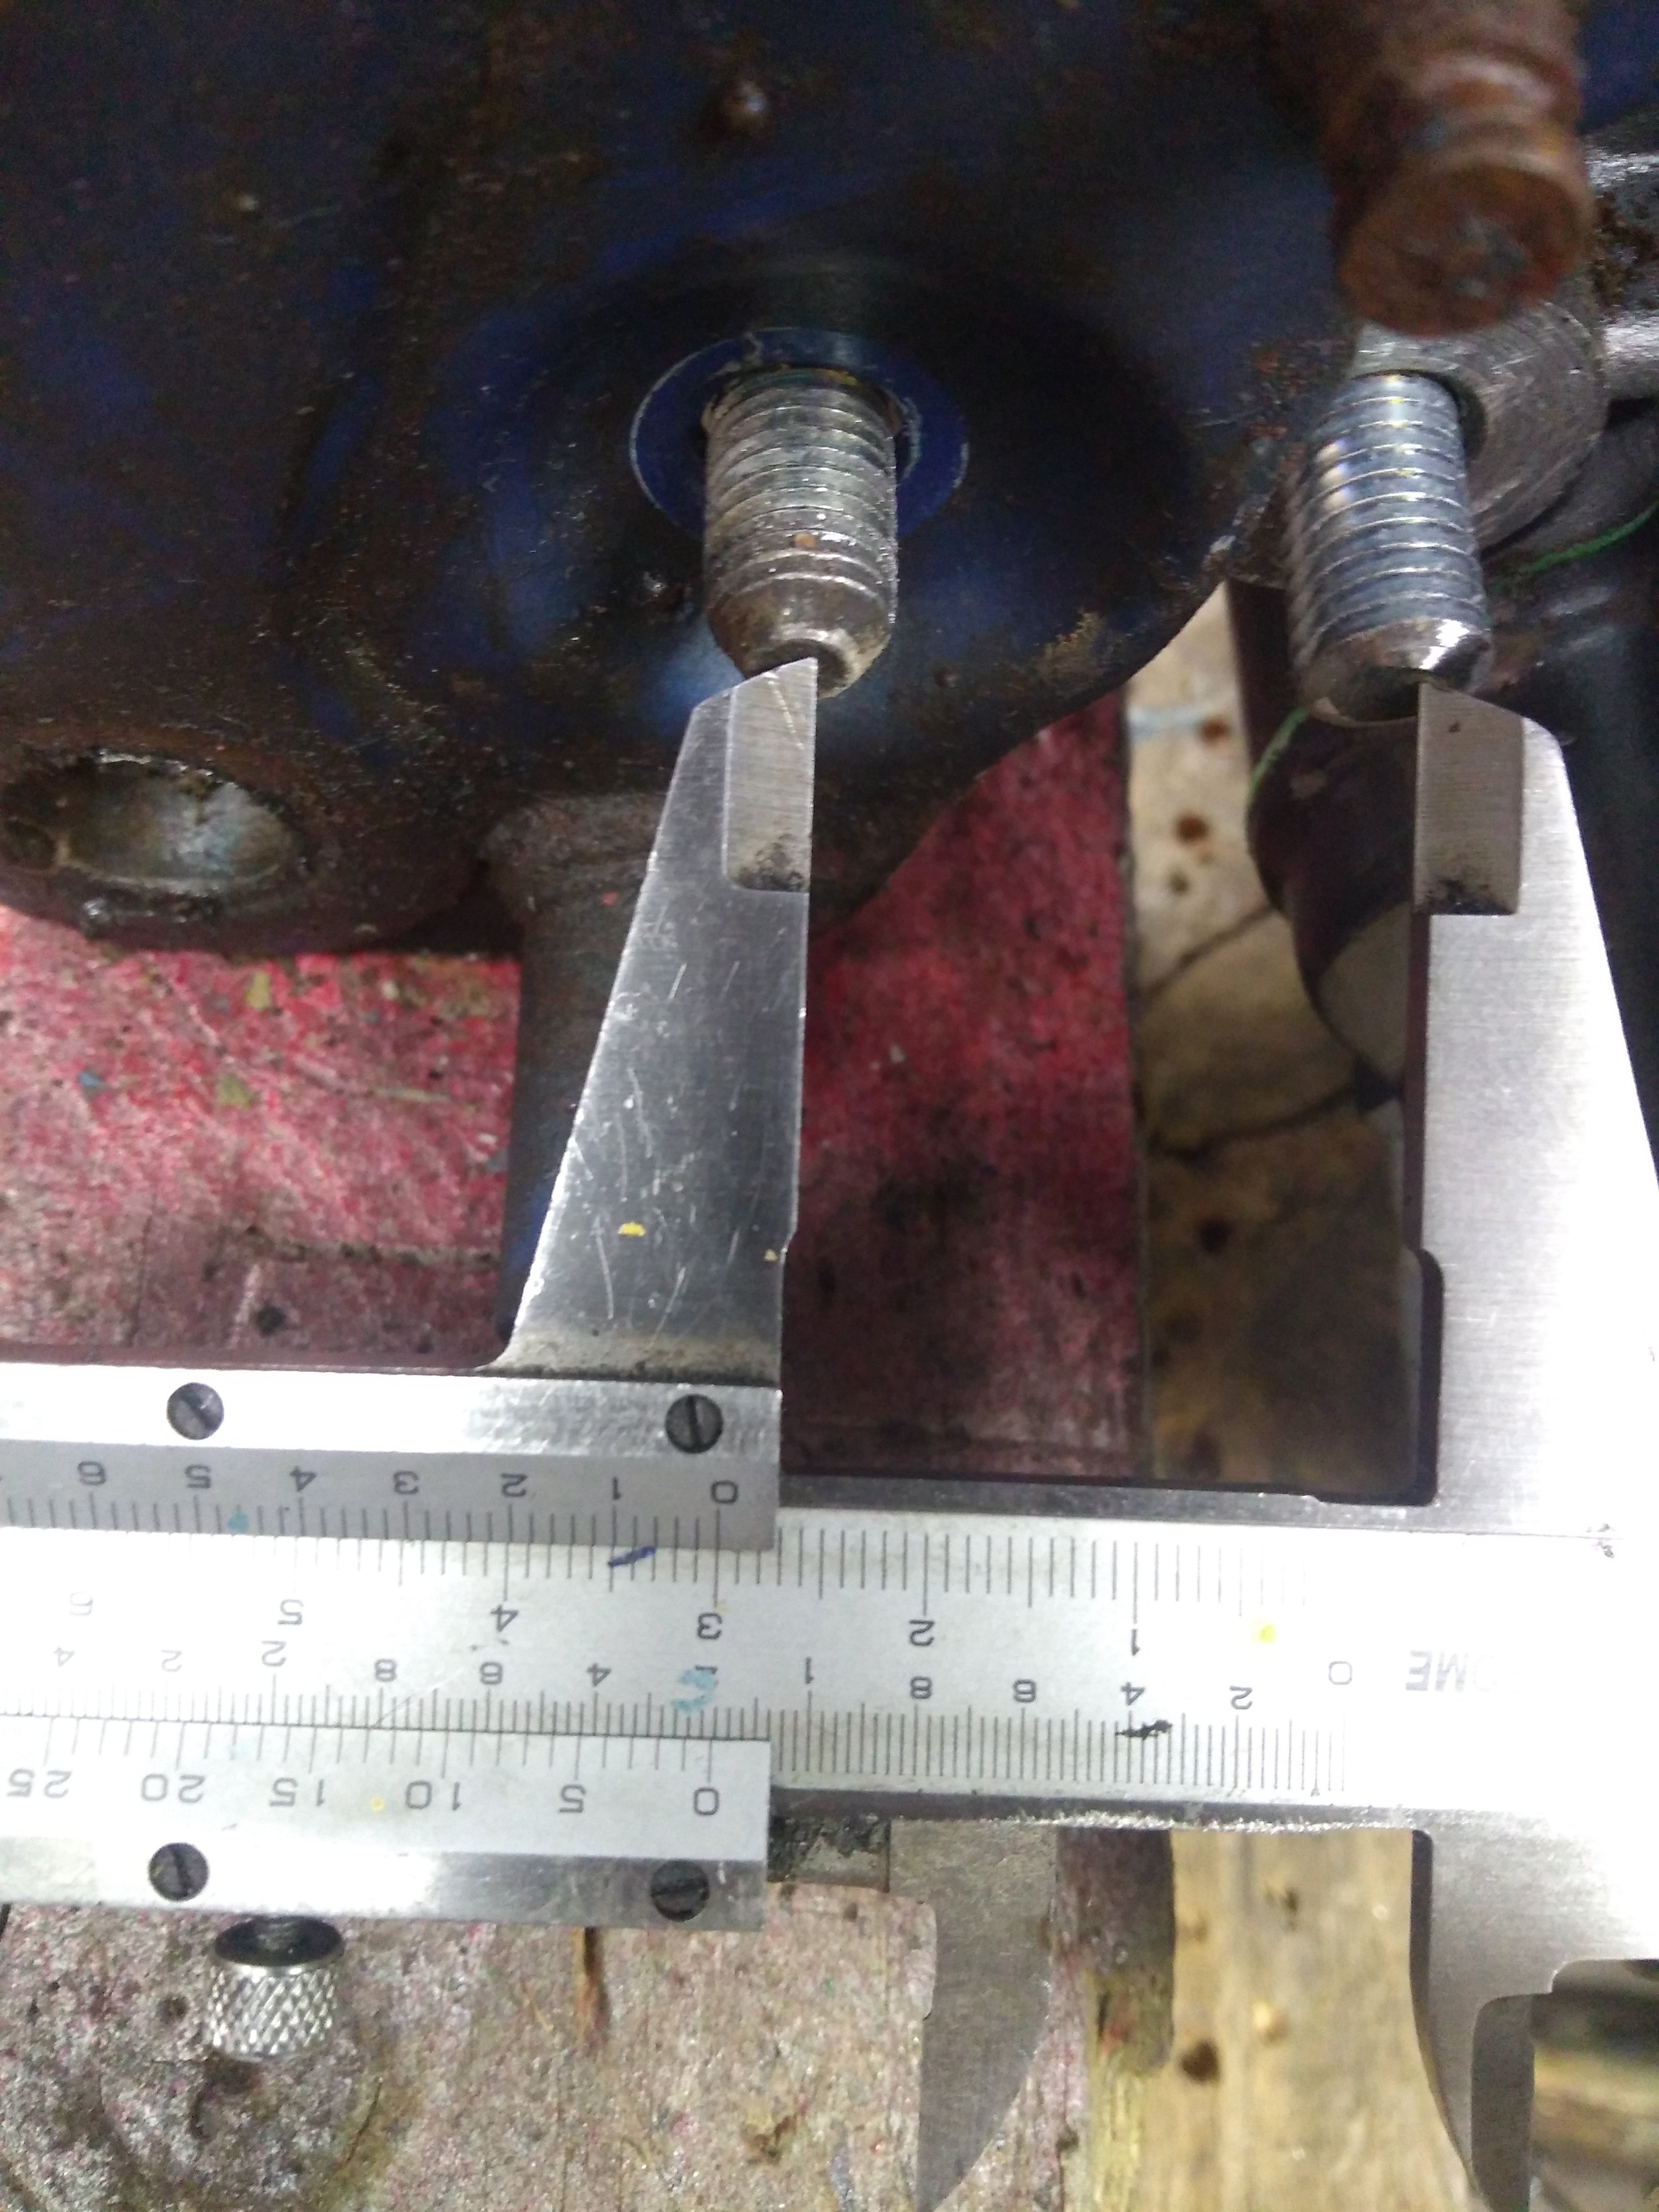
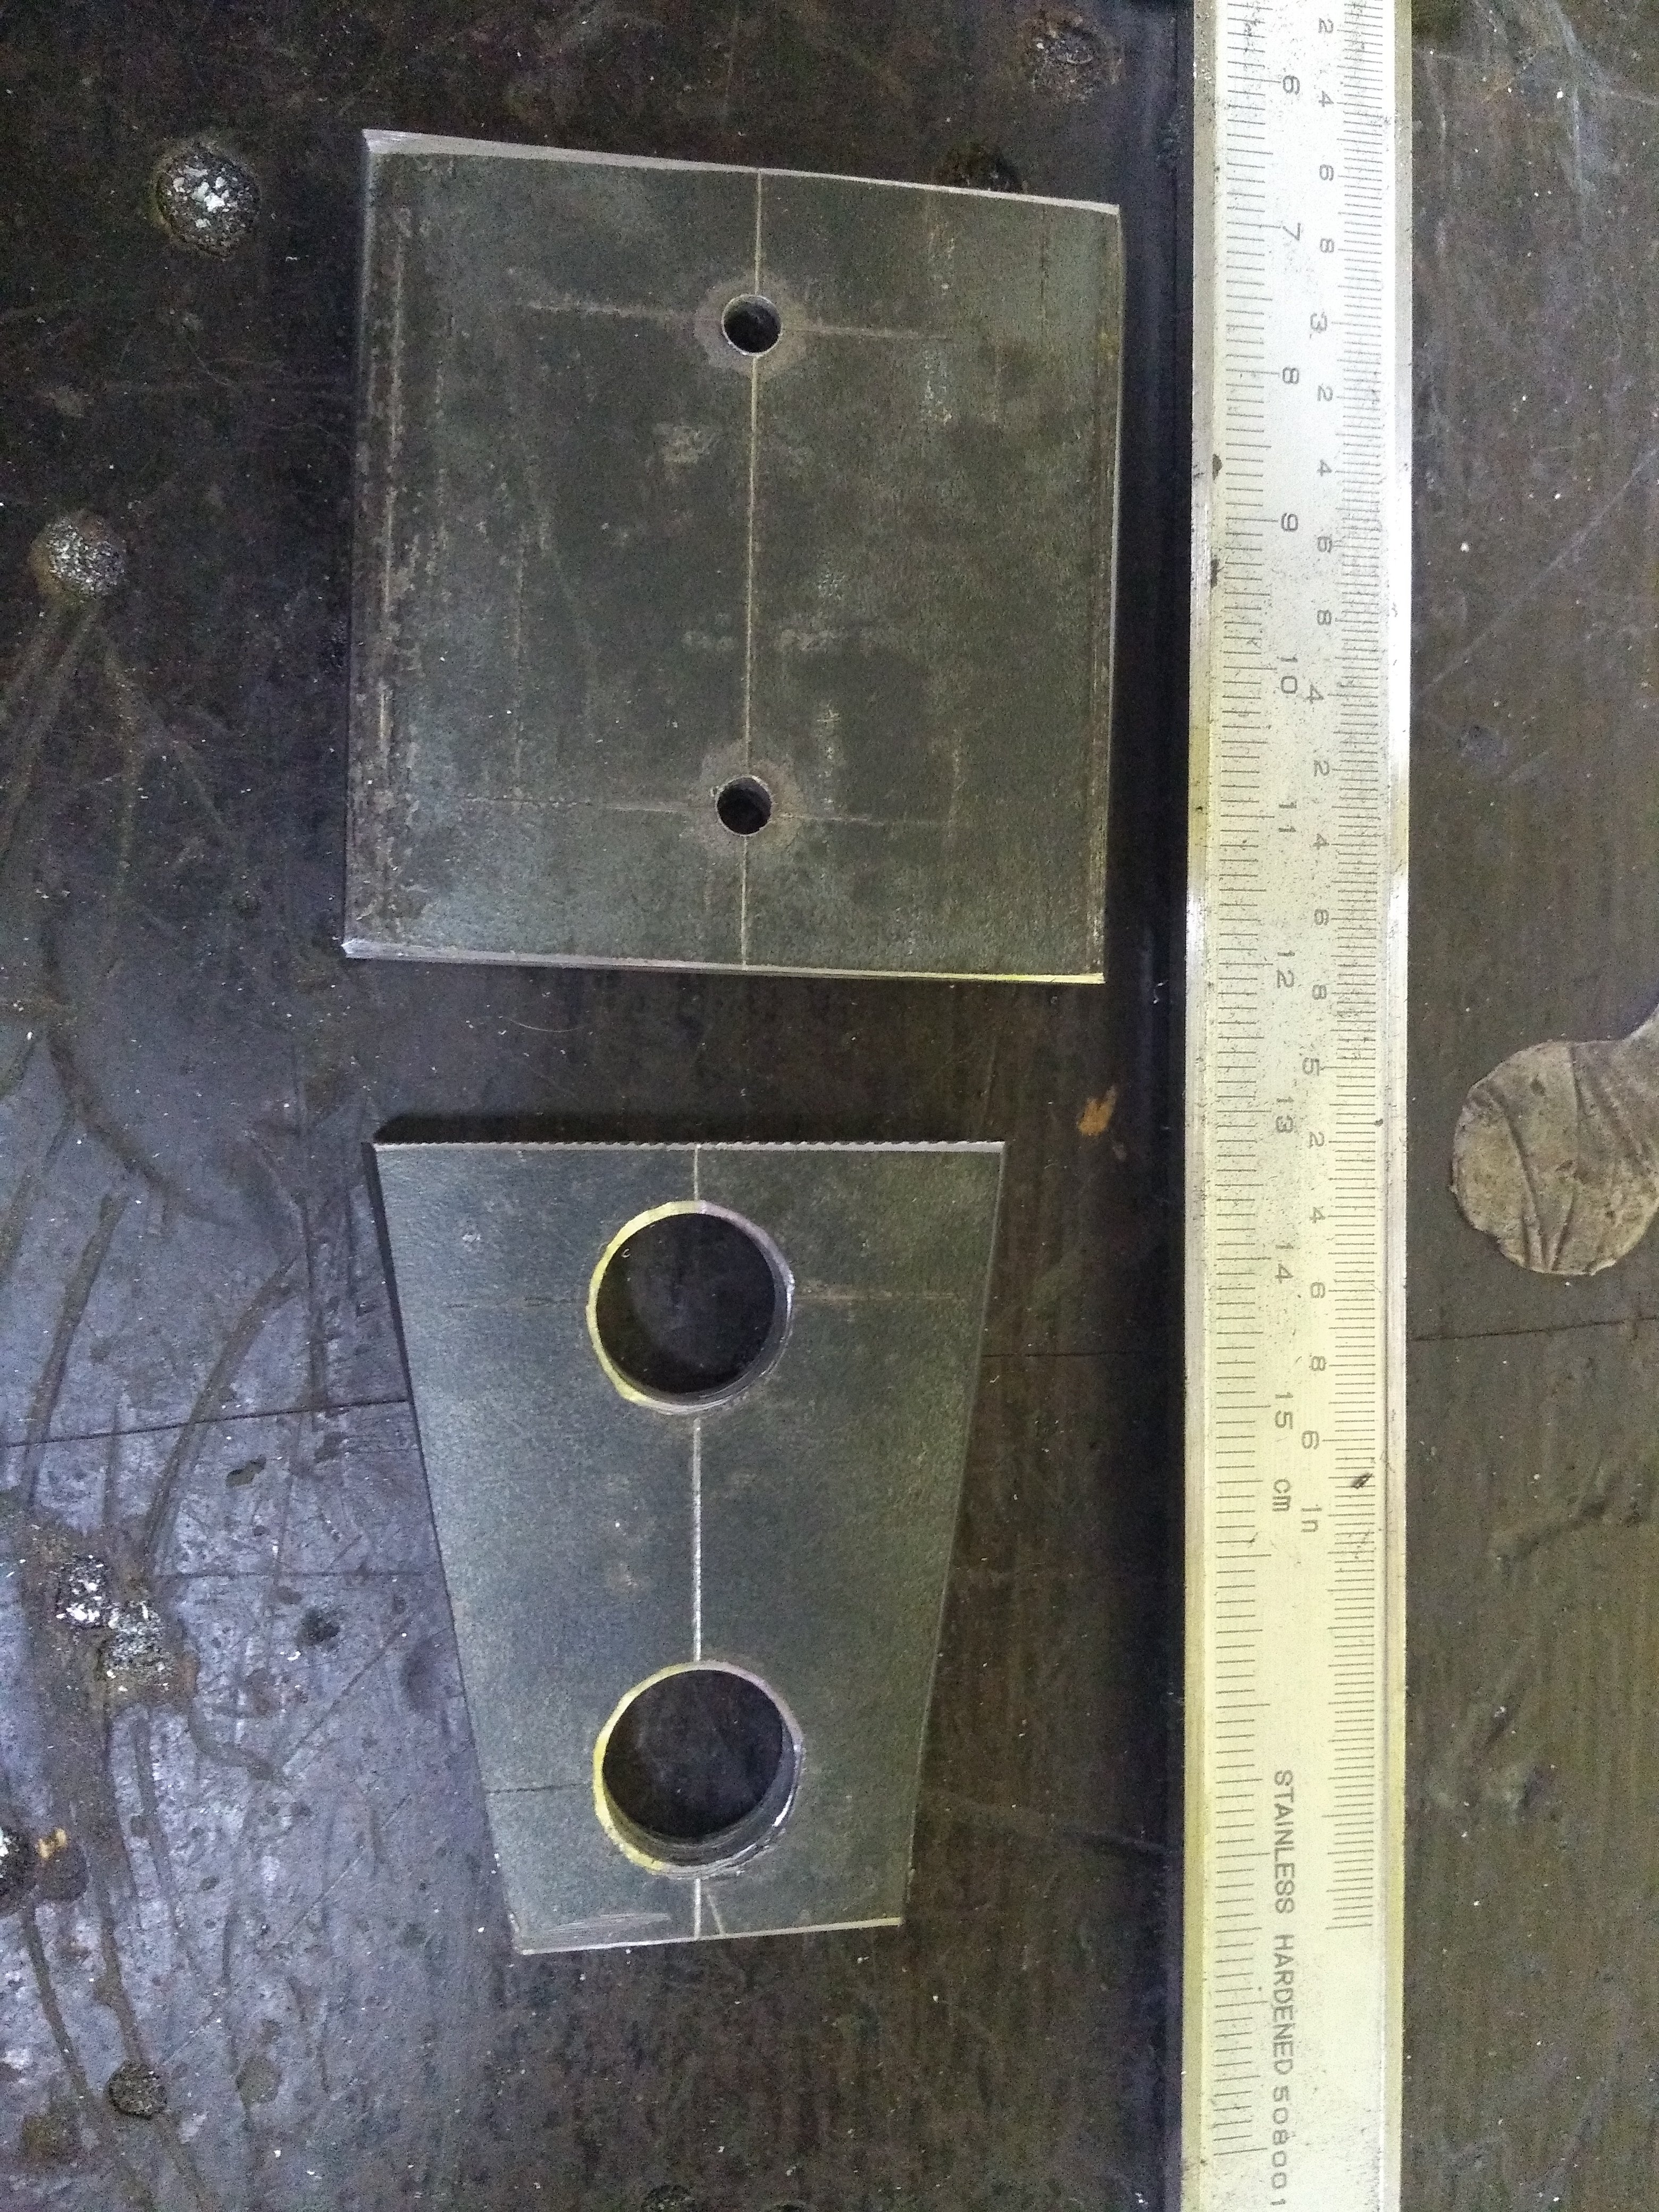
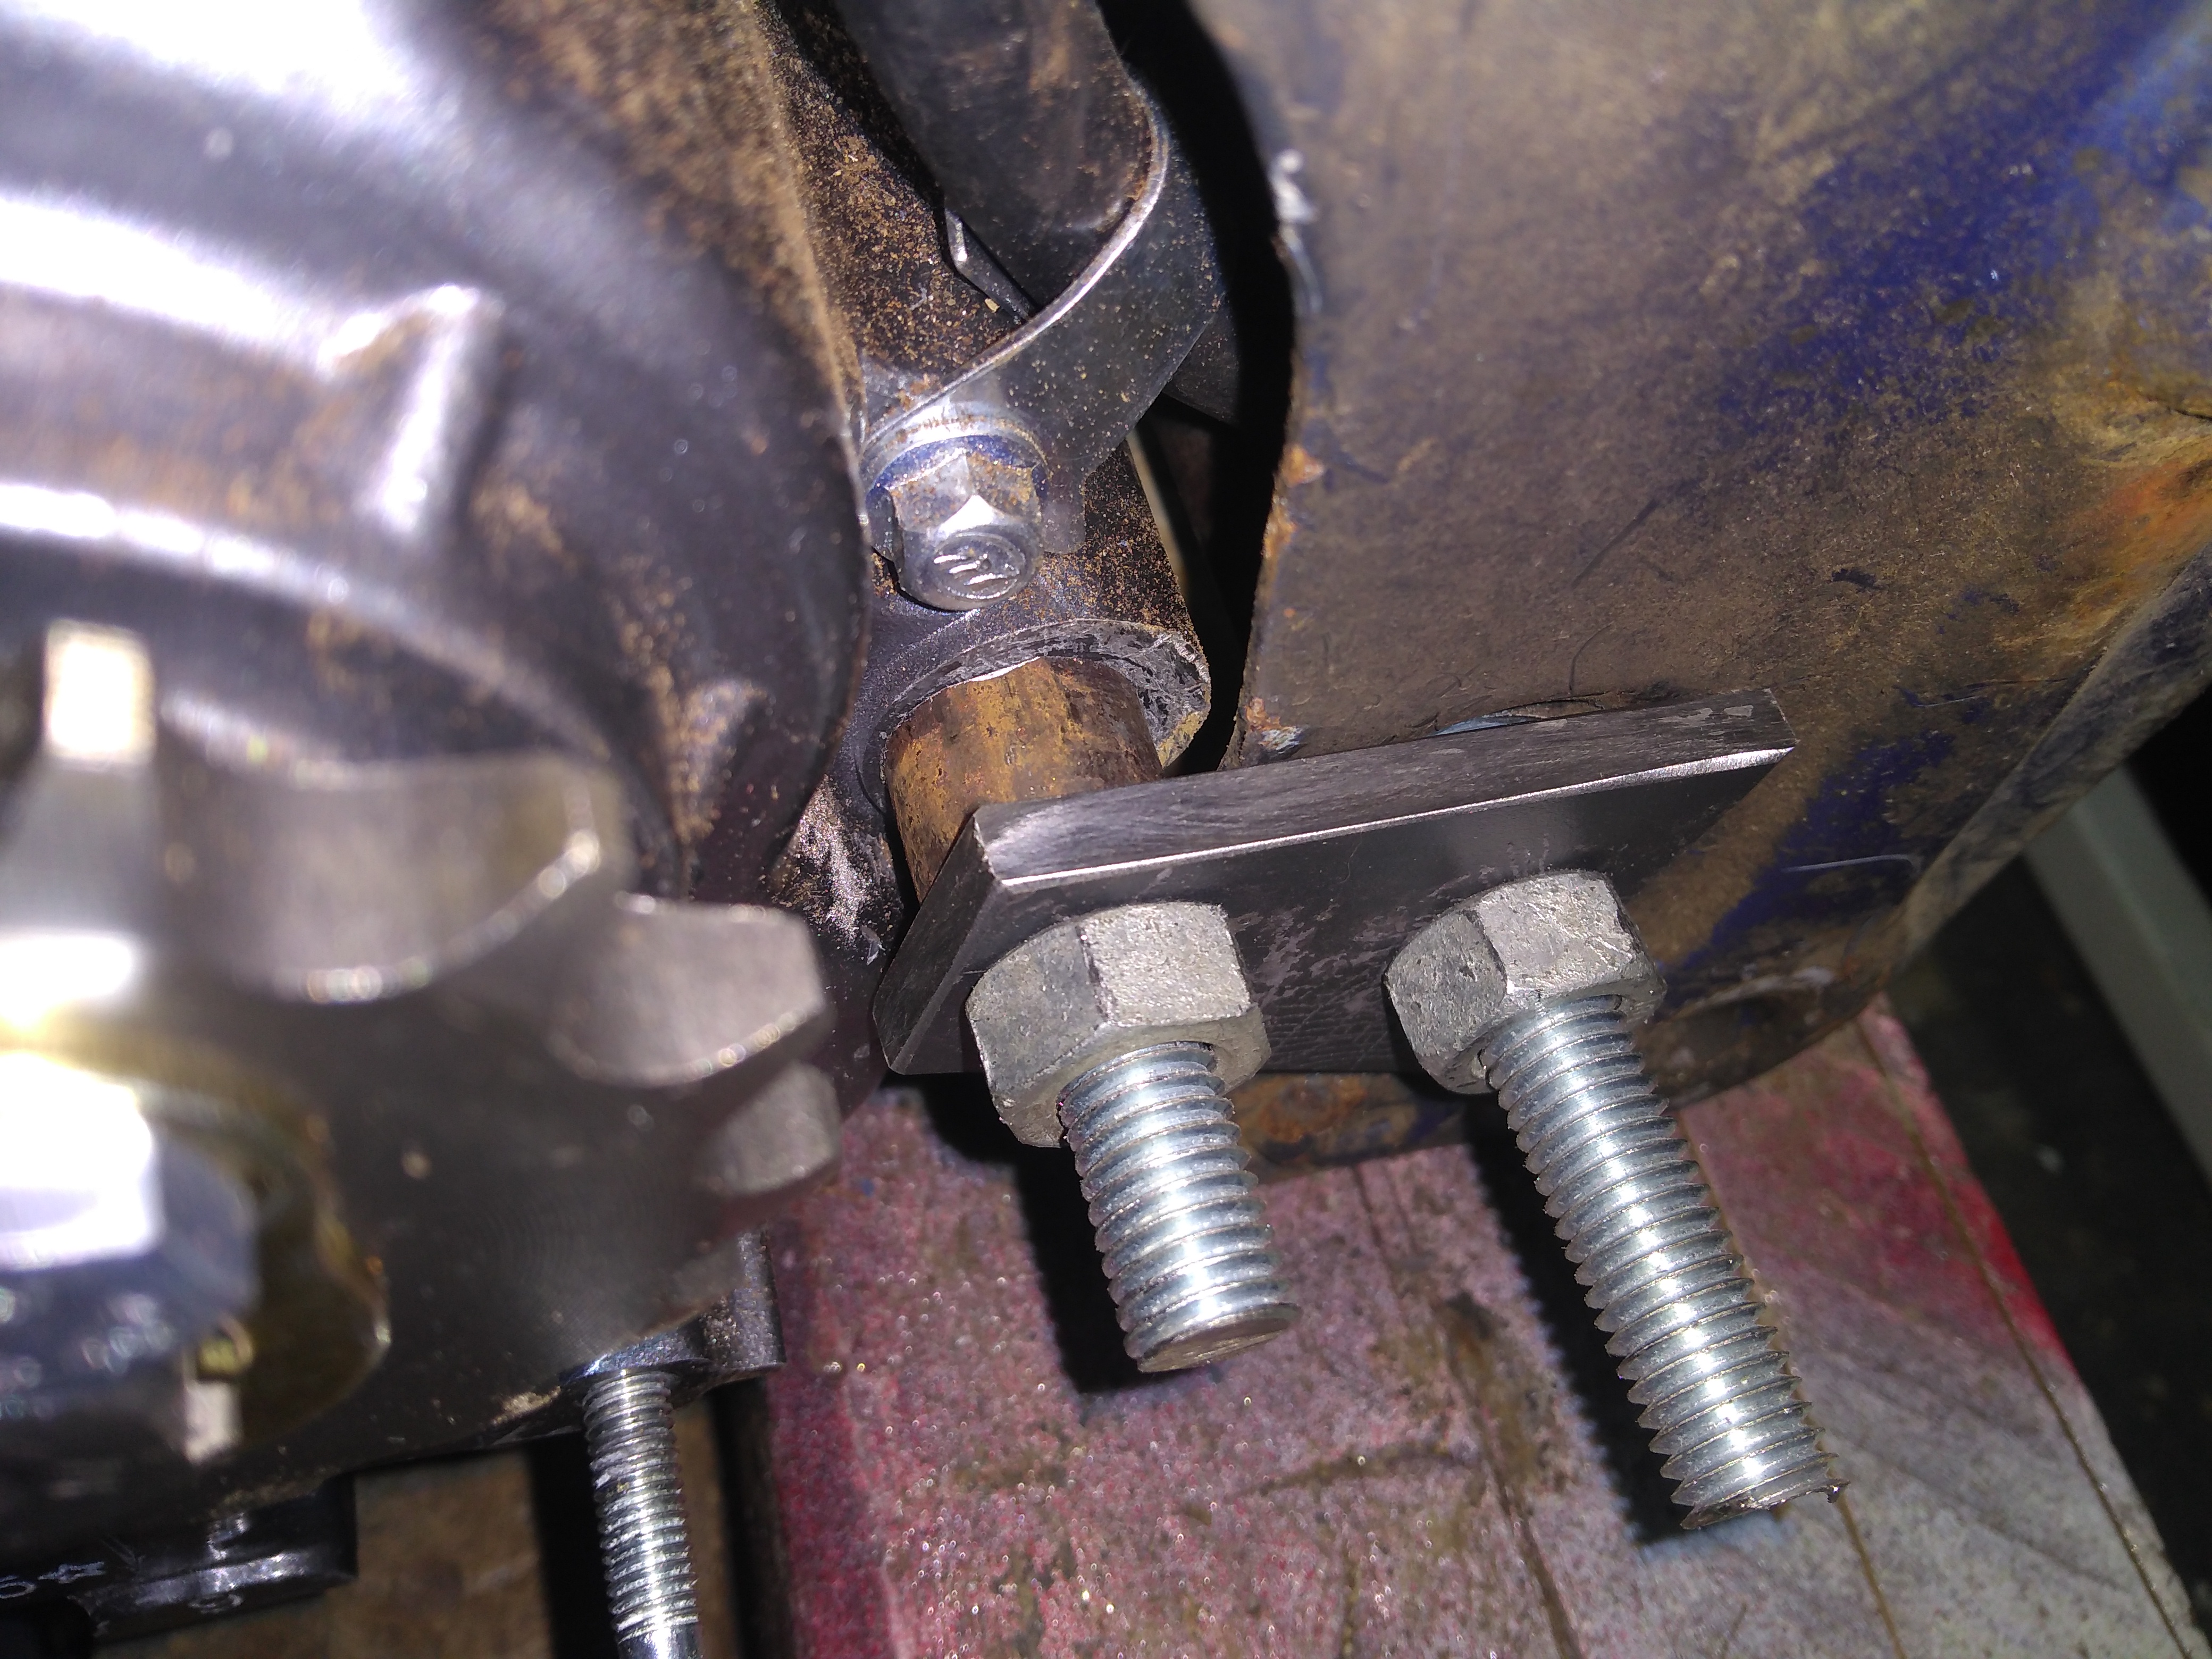
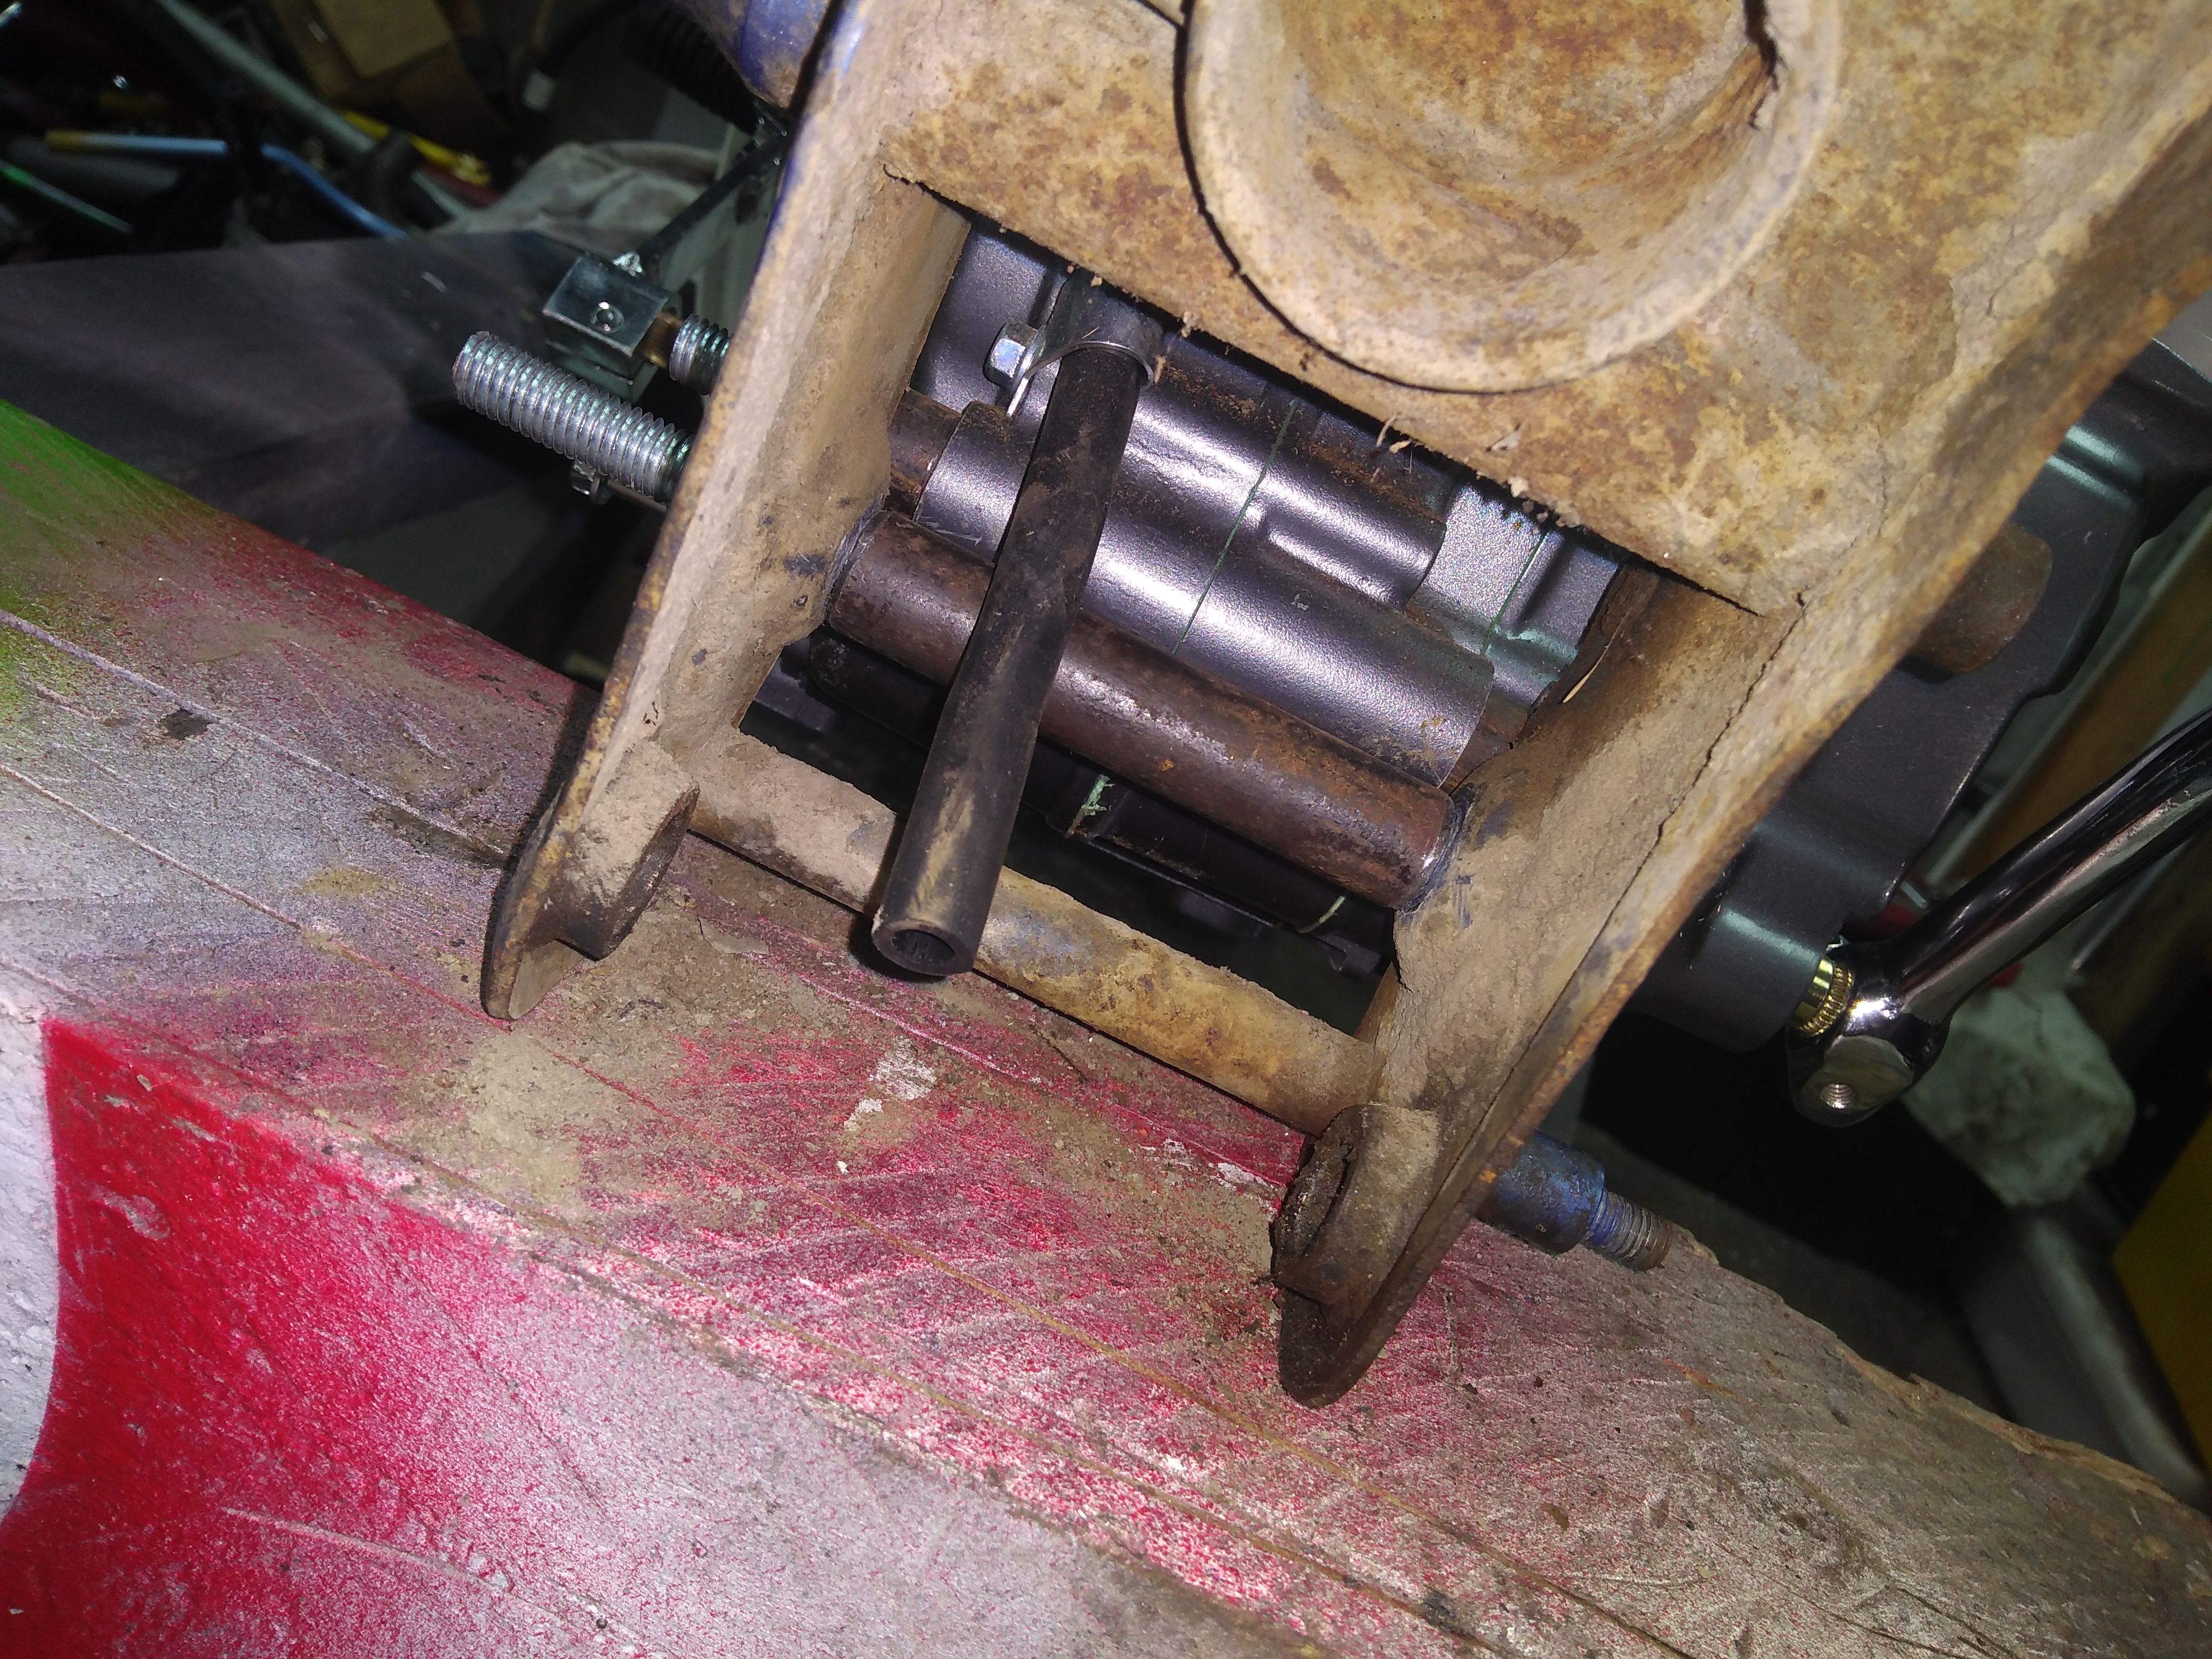
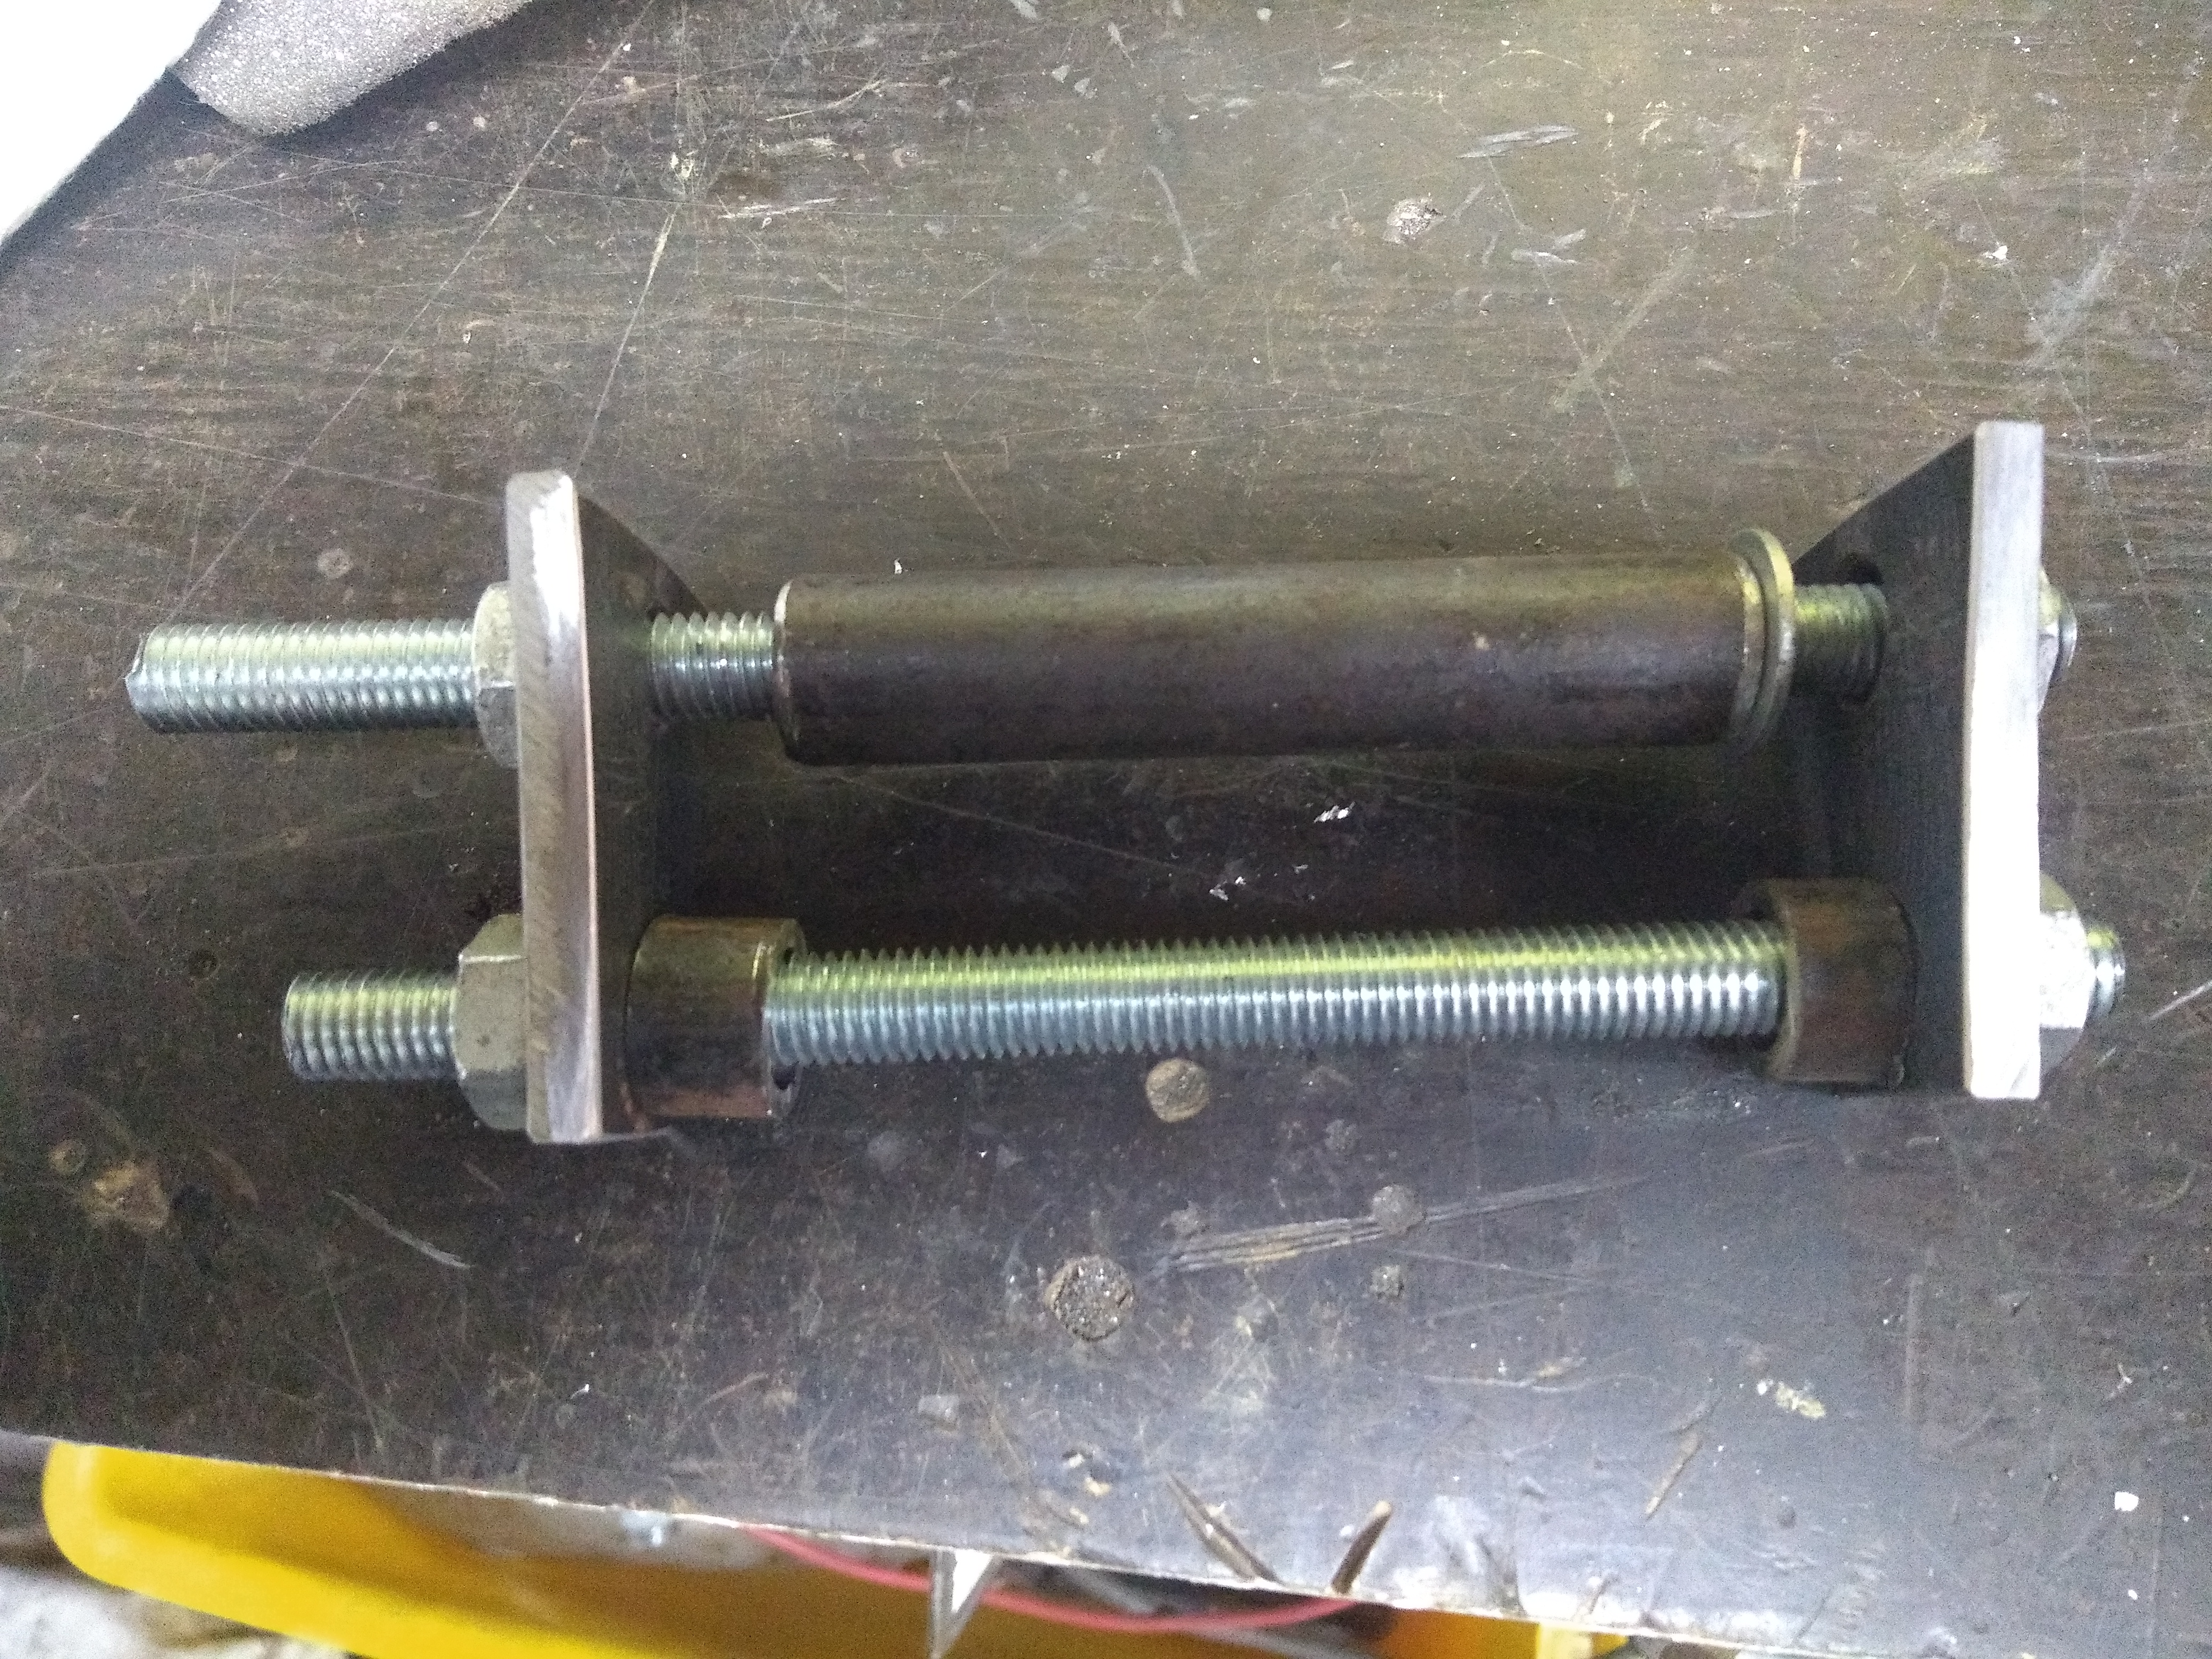
Tonight's job was making the engine mount, engineers, please bare with me cos this may be painful to look at, but my engineering skills ain't that flash.. First was put the engine where I wanted it to sit and measure the distance between centres from the original engine mount location to the new mount location. (which was 30mm BTW) Next cut some 50mm x 6mm strap to 50mm lengths giving me 50x50x6 plates. Drill 2 pilot holes 30mm apart along the centre line of the plate and drill them to 11mm (10mm bolt plus wiggle) Cut down the sides to a nice taper then repeat x 2 Next measure the gap from the engine to the plates with them bolted in, each side was different (8mm one side and 10mm the other) Also cut a spacer to go where the engine used to sit (90mm wide but I fucked up so have to add a wee washer on one side to pack it out) Fit the plates with spacers and tighten it all up, VOILA! a mount is born. And here are all the parts back out of the bike. I intend to radius the corners of the plates and weld the small spacers to the plates and then weld the plates to the frame. But I ran out of time tonight. It was incredibly strong as it was by just tightening up the bolts, but for longevity I reckon its probably best to weld the plates in place. I may linish down the smaller spacers yet, because it might be a mission to get the engine in and out with the snugness it possesses currently. Anyhow if you have any criticism then fire away. Although this seems a much easier method than the way other people have described to me how they did it. Also I won't be using threaded rod in the final version - I just used it for mock up purposes this time around.
1 point
-
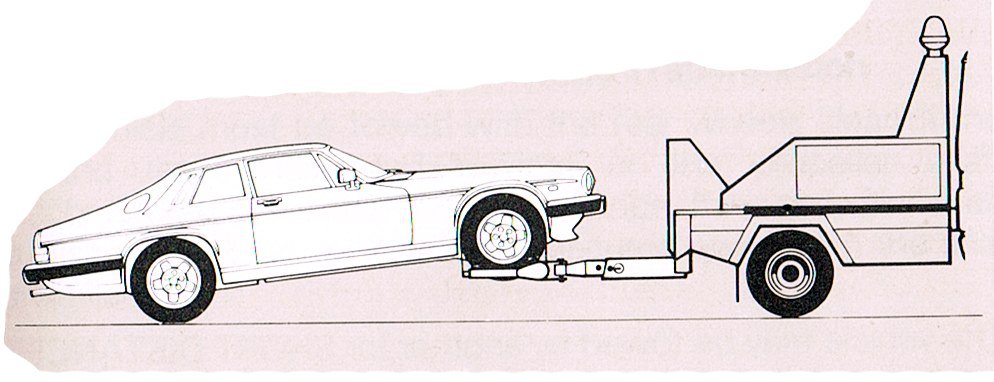
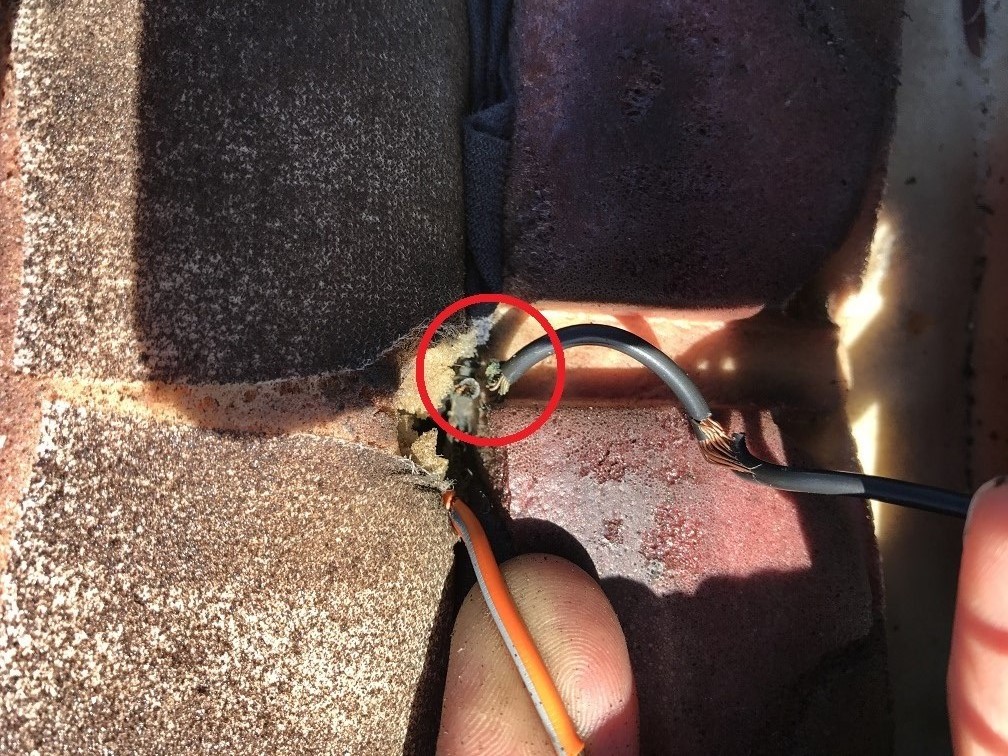
I've been trying to resist driving the Jag too much because of the condition of the rear brakes, thinking that my local Jaguar Barry was ordering me in some brake parts and would be contacting me any day once they'd arrived. Long story short, brakes not fixed and I need a new Barry. =( Meanwhile, the drivers seat had come loose and the seat heater wasn't working, so I took the seat out to have a look. What's it mounted with? Bolts that take a Torx T35. The seat heater wiring insulation was brittle and cracking and the wire had broken at an inconvenient point: I used a crimp joiner thing to fix it, and confirmed that the seat heater was working with a current clamp before putting the seat back in. Fortunately the reason for the seat being loose was just the rail coming unbolted from the frame (Jaguar appear not to have used washers), and I found a compatible replacement for the missing bolt. Now I use the seat heater at every opportunity, but considering the state of the wires and the amount of sag in the Jaguar seat bases, I don't imagine it will last long. Rather, one of these days it'll attempt to catch my arse on fire. Another thing I "fixed" is the squealing from one of the two cabin ventilation fans. I thought that the squeal plus a lack of air from the central vents meant that the motor wasn't spinning, so I took the fan out to test it. This wasn't actually too difficult - only some of the passenger side of the dash had to come out. The fan housing was getting a little rusty but the motor was OK and the brushes weren't too worn, so I lubricated it heaps and wrestled it back in place. I then realised that the central vents only lack hot air, but cold air works fine once I understand the controls. Still, the undignified motor squealing did spoil the ambience and I'm glad it's fixed (or at least stopped for a while). While trying to understand weird things about the dash, I checked the owners manual. I got a laugh out of this section, which aims to psychologically prepare you for life as an XJ-S owner:
1 point


.thumb.jpeg.910c6632f6e66e8cba89476e83b41634.jpeg)


This leaderboard is set to Auckland/GMT+12:00