
Leaderboard


Popular Content
Showing content with the highest reputation on 06/24/20 in all areas
-
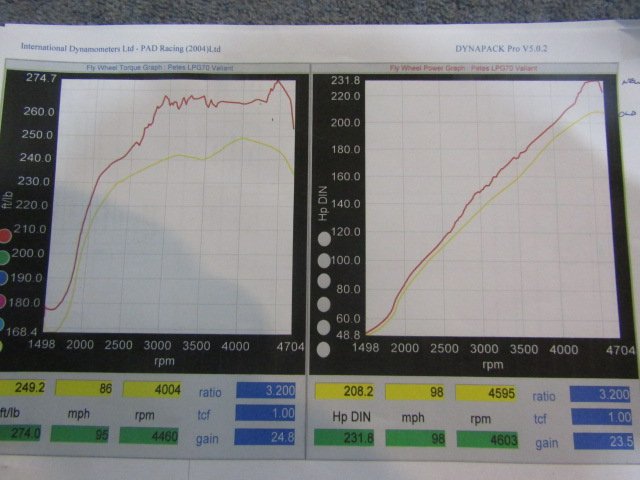
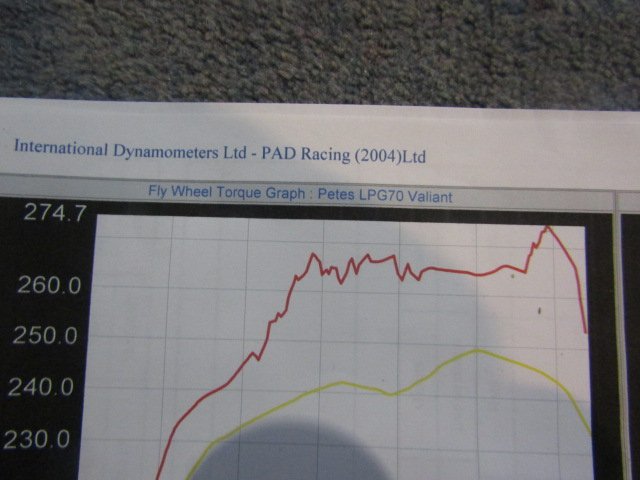
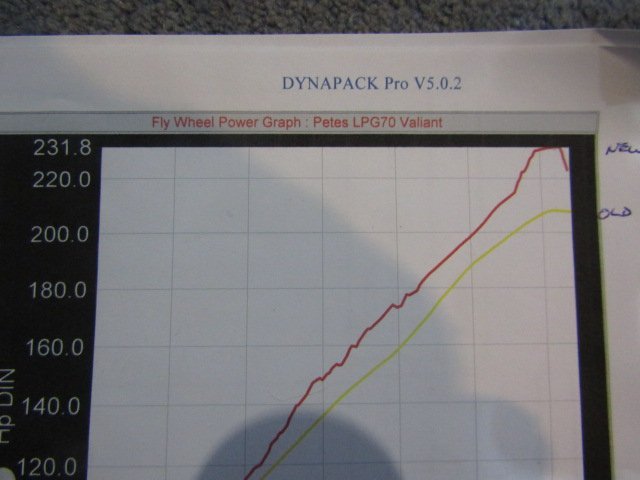
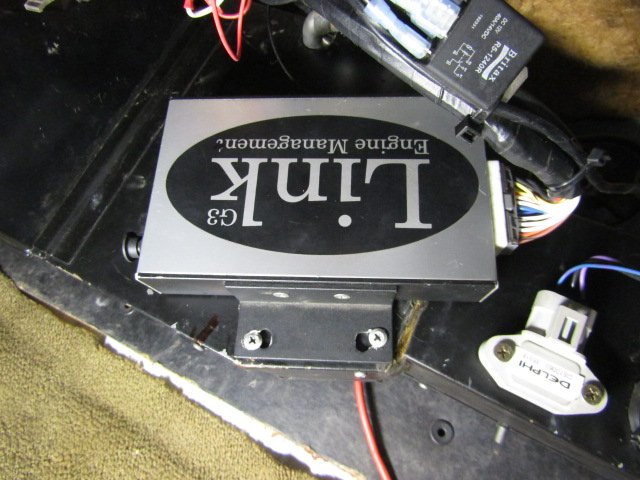
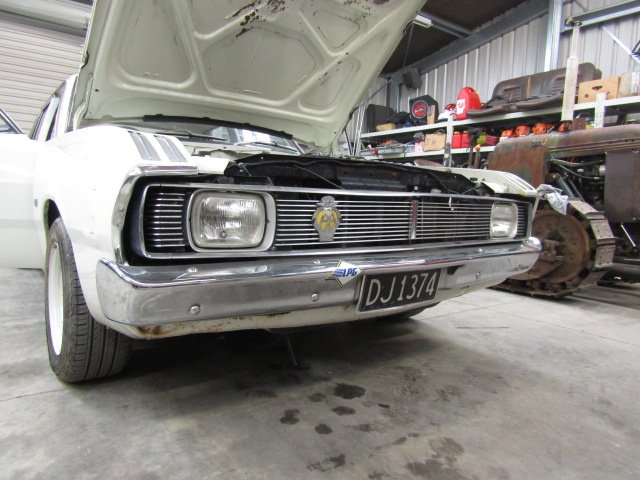
Woo hoo. Got this going over lock down. Put a new set of Eagle HT leads on as the old ones were tracking. Dropped the car off at the dyno shop on Sunday night, the drive there was a bit fraught. The car backfired into the intake and shot the caps off a couple of vacuum ports, I pulled the overflow hose off the radiator and plugged the hose tails with it on the side of the road, called it good and carried on. Was worried all yesterday. But. Good news. All went well! Gary adjusted things to 231.8 hp at about 4700 rpm and 274 ft lbs at 4700 rpm, Has max torque from about 3000 to 4700. It's 30 hp more than previous. The G3 works awesomely. Apparently it has ended up with a very unusual advance curve feels like it works well though, very well. Apparently there is about %20 driveline loss with a dyno like this so my 231 hp eguates to about 275 flywheel hp, on par with an E48 Charger! but with a 4/1bbl carb and sausage cooking gas! Anyway heres some pics of a couple of graphs. Apparently the hub dyno wouldn't fit into my low wheel arches with out the body being jacked up which caused the dyno to rattle a bit. I'm told thats why the line is a bit wobbly. Wobbly lines or not, it goes really really well now. Smooth, powerful, and lots of torque. Super pleased. The yellow line is the shit original "rebuilt motor" Red is the re rebuilt motor and Link G3 looking after timing.
 15 points
 -
bump - I sold this about 1.5 years ago when I needed some coin to do grown up things (renovate house) regretted it deeply, this weekend just been I went and picked it back up off the guy who I sold it to. it now has a vvt-i 1jzgte and MAXX ECU all scratch built loom by nz wiring, that about all he changed, got raised up and put on some china 17x9's. while I was in wellington I picked up a set of bcnr33 wheels and slapped them on it and lowered it back down to a semi acceptable height. The plans are smash an r154 in it before I blow up the w58 doing silly stuff, then later on I will put a TD06 on it and hopefully make around 350kw just for shits and gigs, also potentially some 15's of some sort again would be nice. will also unyucky the intercooler pipes. Couple of pics from before I sold it with 9j mk1 on the back and current pics, needs to come down 6mm or so in the back to get it sitting level13 points
-
@piazzanoob popped over and gave me a hand refitting the manifolds so they actually seal. Bit of rtv and a extra set of hands did the trick l! It was still running like a bag of dicks until we figured out which one of the three vacuum ports needed to be connected....12 points
-
And Im back, actually been doing a bit of work on this. Previous plans have led to abject failure, so have taken a deep plunge to do this right, once (although cheaped out on gearbox a bit) Have started selling off most of the engine bits and gearbox shown in previous posts here, and Im sure I will be left with a pile that will be added to the cupboard of broken dreams.. If anyone needs a new T3/T4 turbo, eboost 2 , tubosmart wastegate and bov... all for sale and more, listing in FS sooon. I have bought a Mendeola 2D box with a vertigate shifter, pro ringed, spool set up. Not new, but the previous owner put 980hp to the wheels through it, so it should hold up. Also bought a new engine, it is 3 months away, basic specs are 90 stroke x 109.5 bore , G42-1450 turbo, methanol injected (8 injector set up). Going away from any thoughts of street driven to dedicated drag car. Pic is similar to what it is, without the mount and inlet/exhaust going the other way for a rear engined set up. There is potential for a lot more HP than I think I will be able to put through the chassis I have. Longer term a tube frame chassis may be the go. I started this thread 7 years ago..... pre death is now the goal...
10 points
-
Went to a wrecker I discovered on Facebook, found a lot of sweet 910 parts and various other things, had a field day! Well two field days, one look around wasnt enough lol Two pair of headlights - one pair complete and the other pair NOS bulbs Two SSS grills Twilight Rust free coupe boot lid with Turbo-X badge!9 points
-
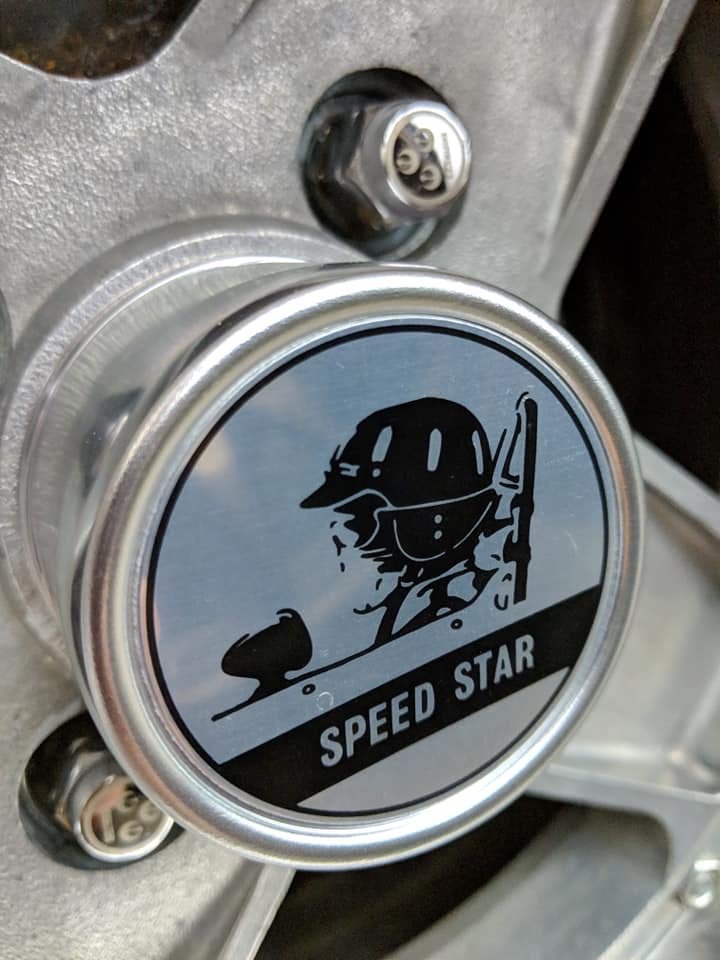
New shift knob for the 910! Super rad in the light! Also a pic from a Sunday drive the other weekend5 points
-
Picked up another style taillight, just the one side only though which frustrated me as soon as I put it on car after a quick polish as I knew I'd need the other side! Quite promptly found the other side in Japan, just a guessing game now on how long it'll be until regular postal services operate again!5 points
-
I was at the back in my modern daily and saw 99% of the screen. was pretty decent actually They didn't seem to give a fuck about seat belts with the cars going in. I think that's more a don't take the piss and jam 11 people in your tiida4 points
-
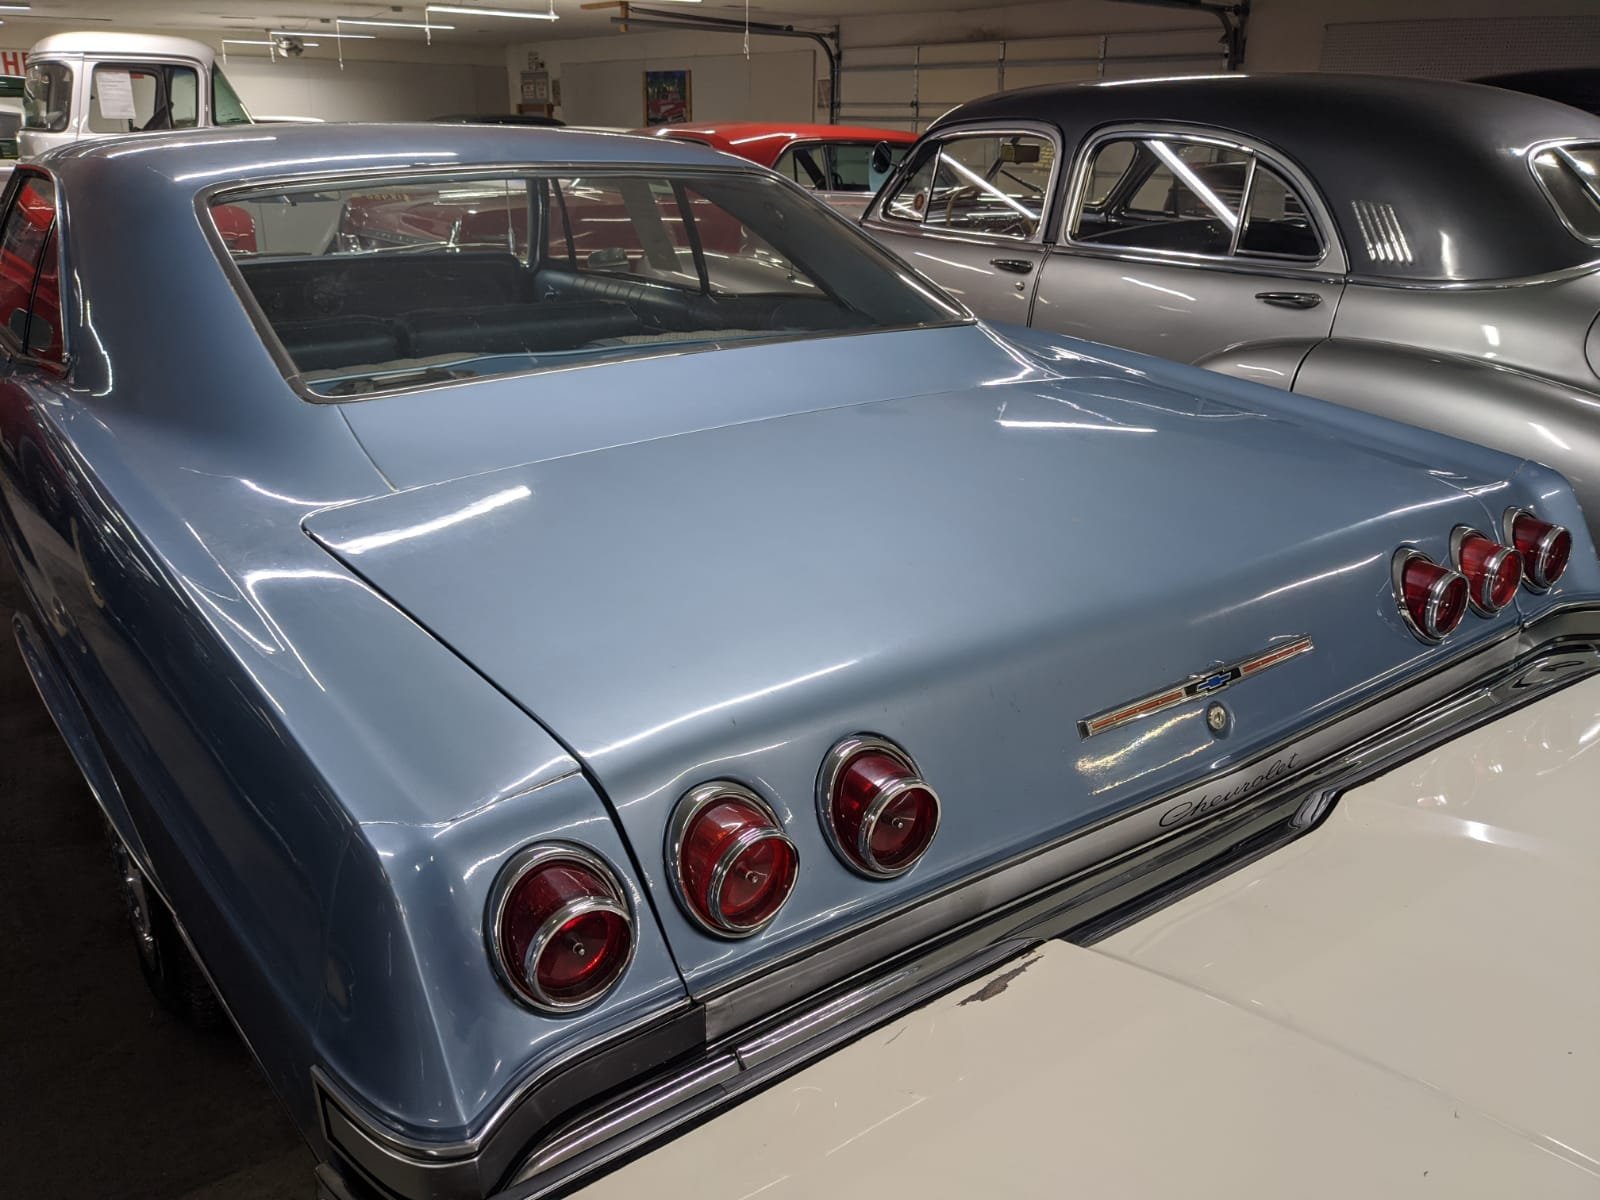
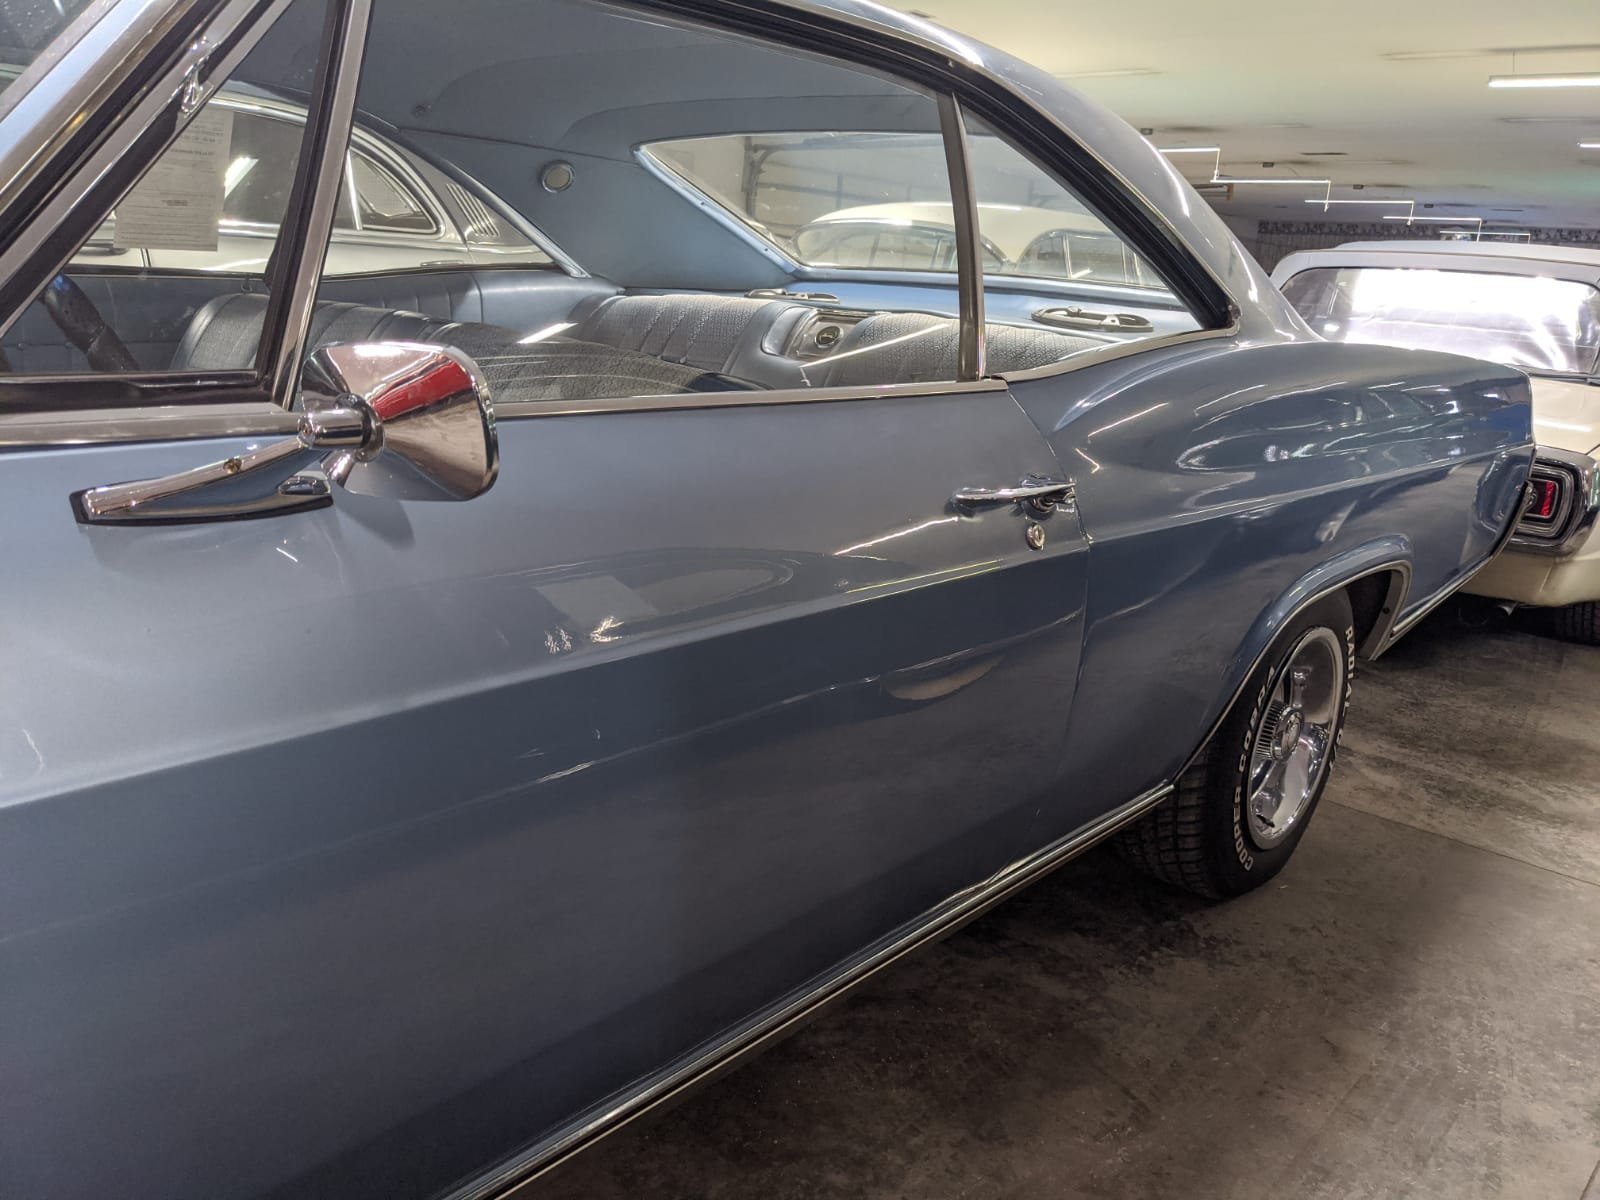
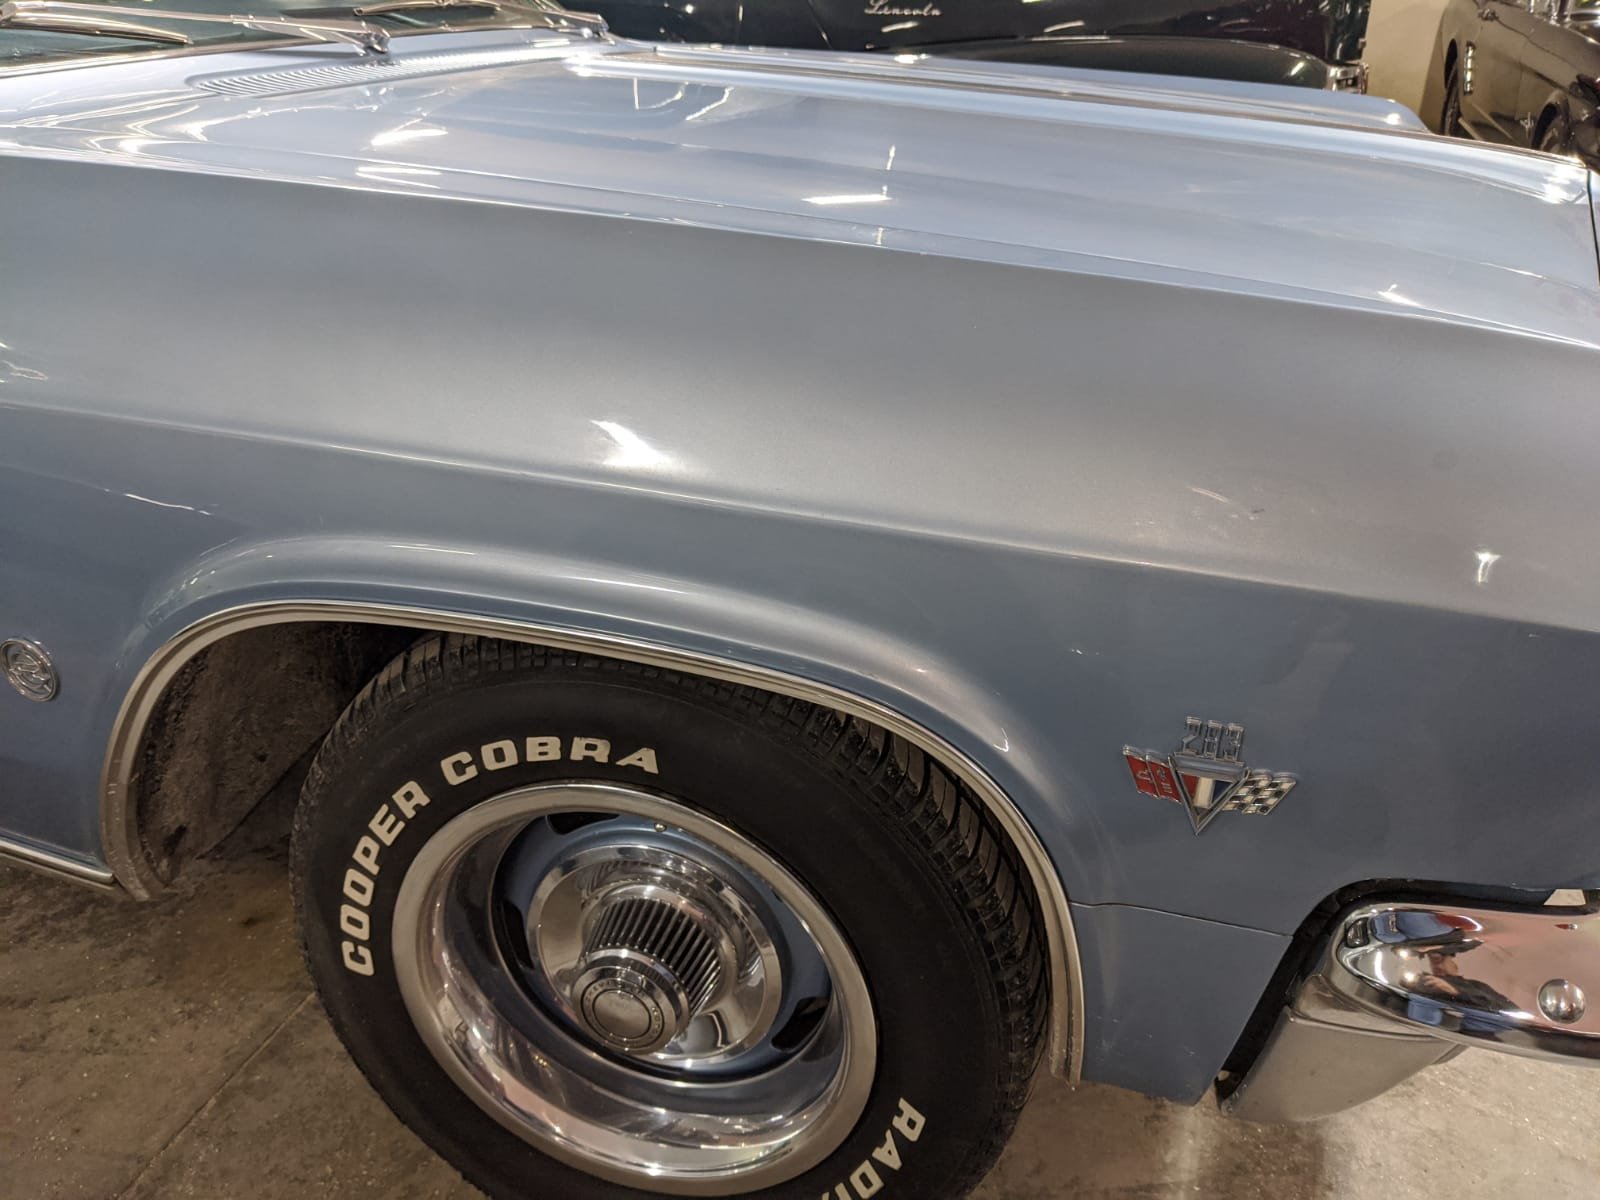
Much success! Got a VIN, Wof and Reg today! All ticked off and ready to roll. Now time for a few mods, Artillieries, whitewalls, hub caps and beauty rings Split manifold and exhaust Fit the Fulton Visor Lower Then she be ready for summer cruising.
4 points
-
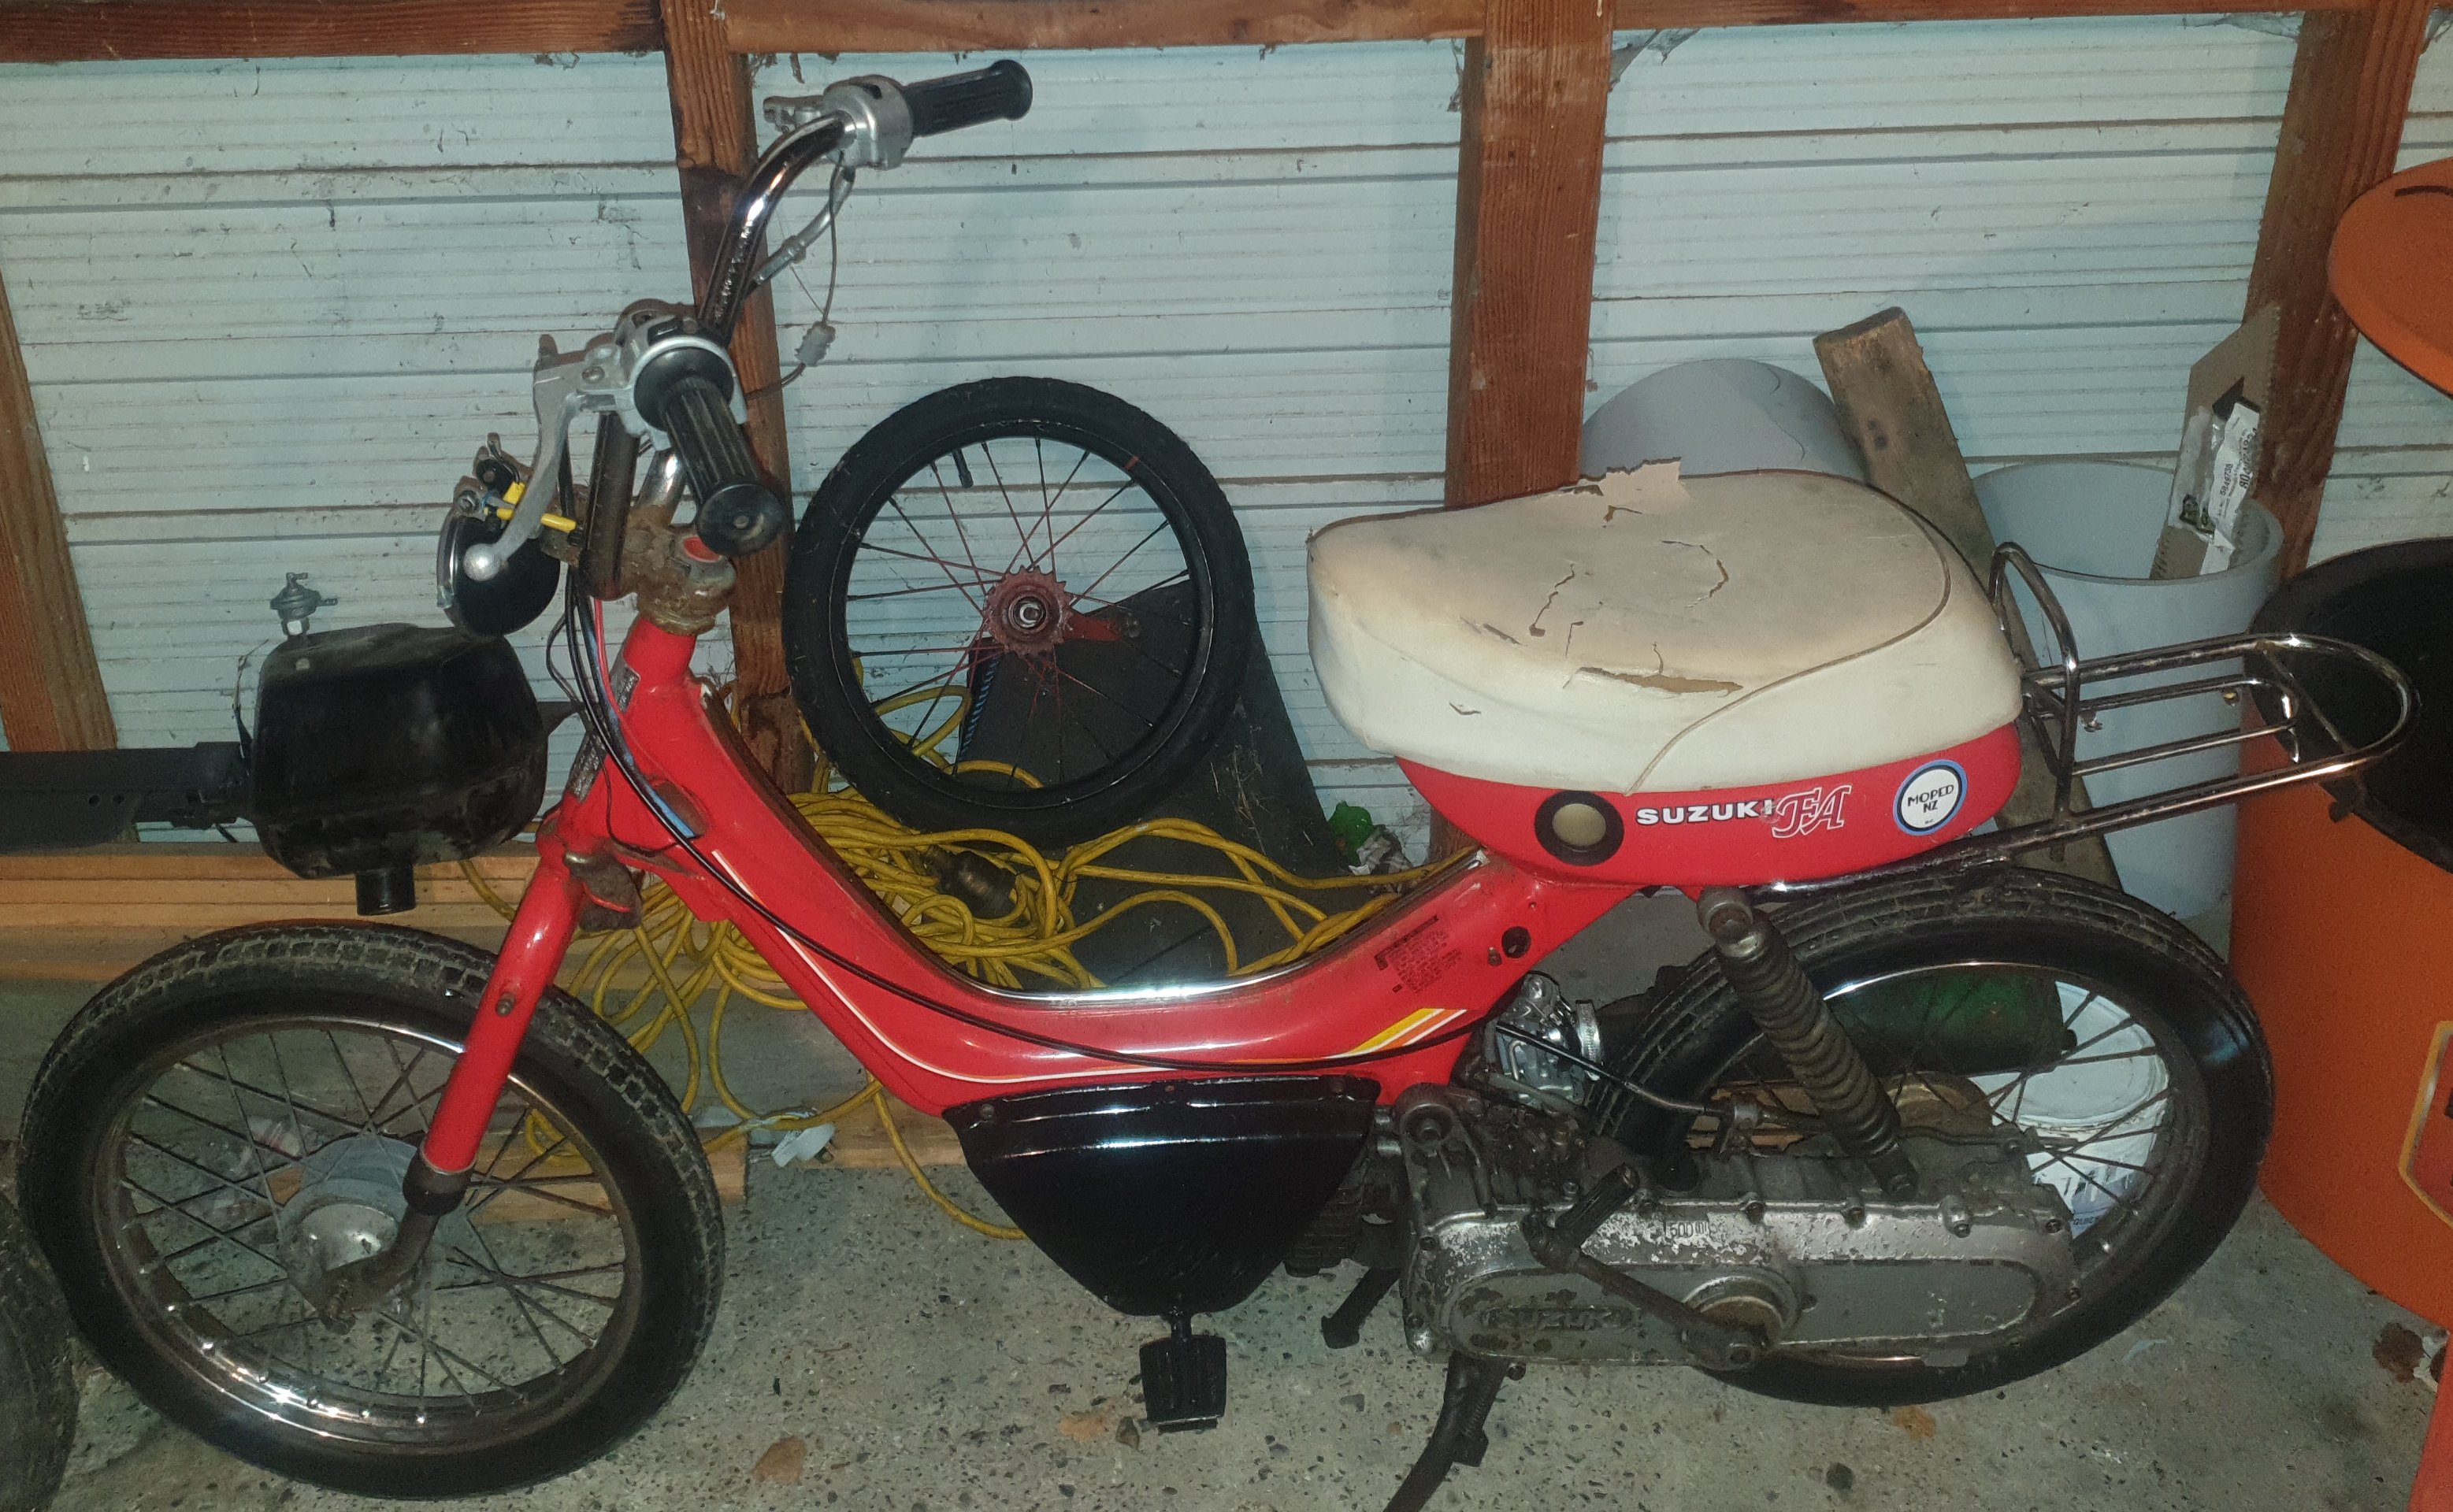
So i had a vmoto milian And a pgo moped both didnt go... And swaped them for another fa50.... BUT this one ruuuuns yuus. So the new plain is to simply pull of the good bits of the old 1 and put on this one choice
3 points
-
This isn't cranking along as fast as I want, so much other shit is getting in the way. I have also done some redesign on the table, I'm thinking of using T slot to mount the rails. This will save some hole drilling and allow for much easier adjustment. However bits are slowly trickling in, a 2.2Kw water cooled spindle and VFD;3 points
-
I can confirm that Waikaremoana Holiday Park has cabins available if you call them directly. Booked a 5 bed fisherman's cabin for the 28th.3 points
-
I'd poke a drinking straw down number one spark plug hole, and see where actual tdc is.3 points
-
bit of a /ling thread jack, but anyone wanting a good shakedown/cant wait til november to ride with a bunch of sweaty dudes, PPSC are organising a ride from the hawkes bay up to waikaremoana for an overnighter. looking at the last weekend of august, 29-30. if that sounds appealing to you just send a fax my typist Gladys and she can telex you an information pack.3 points
-
heres the pics that i couldnt post yesterday. 2020-06-22_07-55-31 by sheepers, on Flickr 2020-06-22_07-55-58 by sheepers, on Flickr 2020-06-22_07-56-05 by sheepers, on Flickr 2020-06-22_07-56-12 by sheepers, on Flickr 2020-06-22_07-56-22 by sheepers, on Flickr3 points
-
Some good looking things arrived, if these bad boys don't sort the brake issue then I'm not sure what will. They look fucking monstrous. This is not even the most expensive brake upgrade available, but definitely not cheap. Some good y60 axles may come available very soon if anyone wants any. Old = 295mm x 20mm rotor, single pot. New = 306mm x 34mm rotor, 2 pot. The splash shields have been adjusted out of shape by the floor, they will need a bit of loving. I'll probably do the wiper seals as one looks a little weepy. It looks like the original 15's will fit over the brake setup, this is good. The axles are a bit wider than the y60 ones but with some 33x10.5 tyres the actual width will be pretty much the same as it currently has 33x12.5s. I did model this in solidworks to make sure that was the case but time will tell. Fun fun.3 points
-
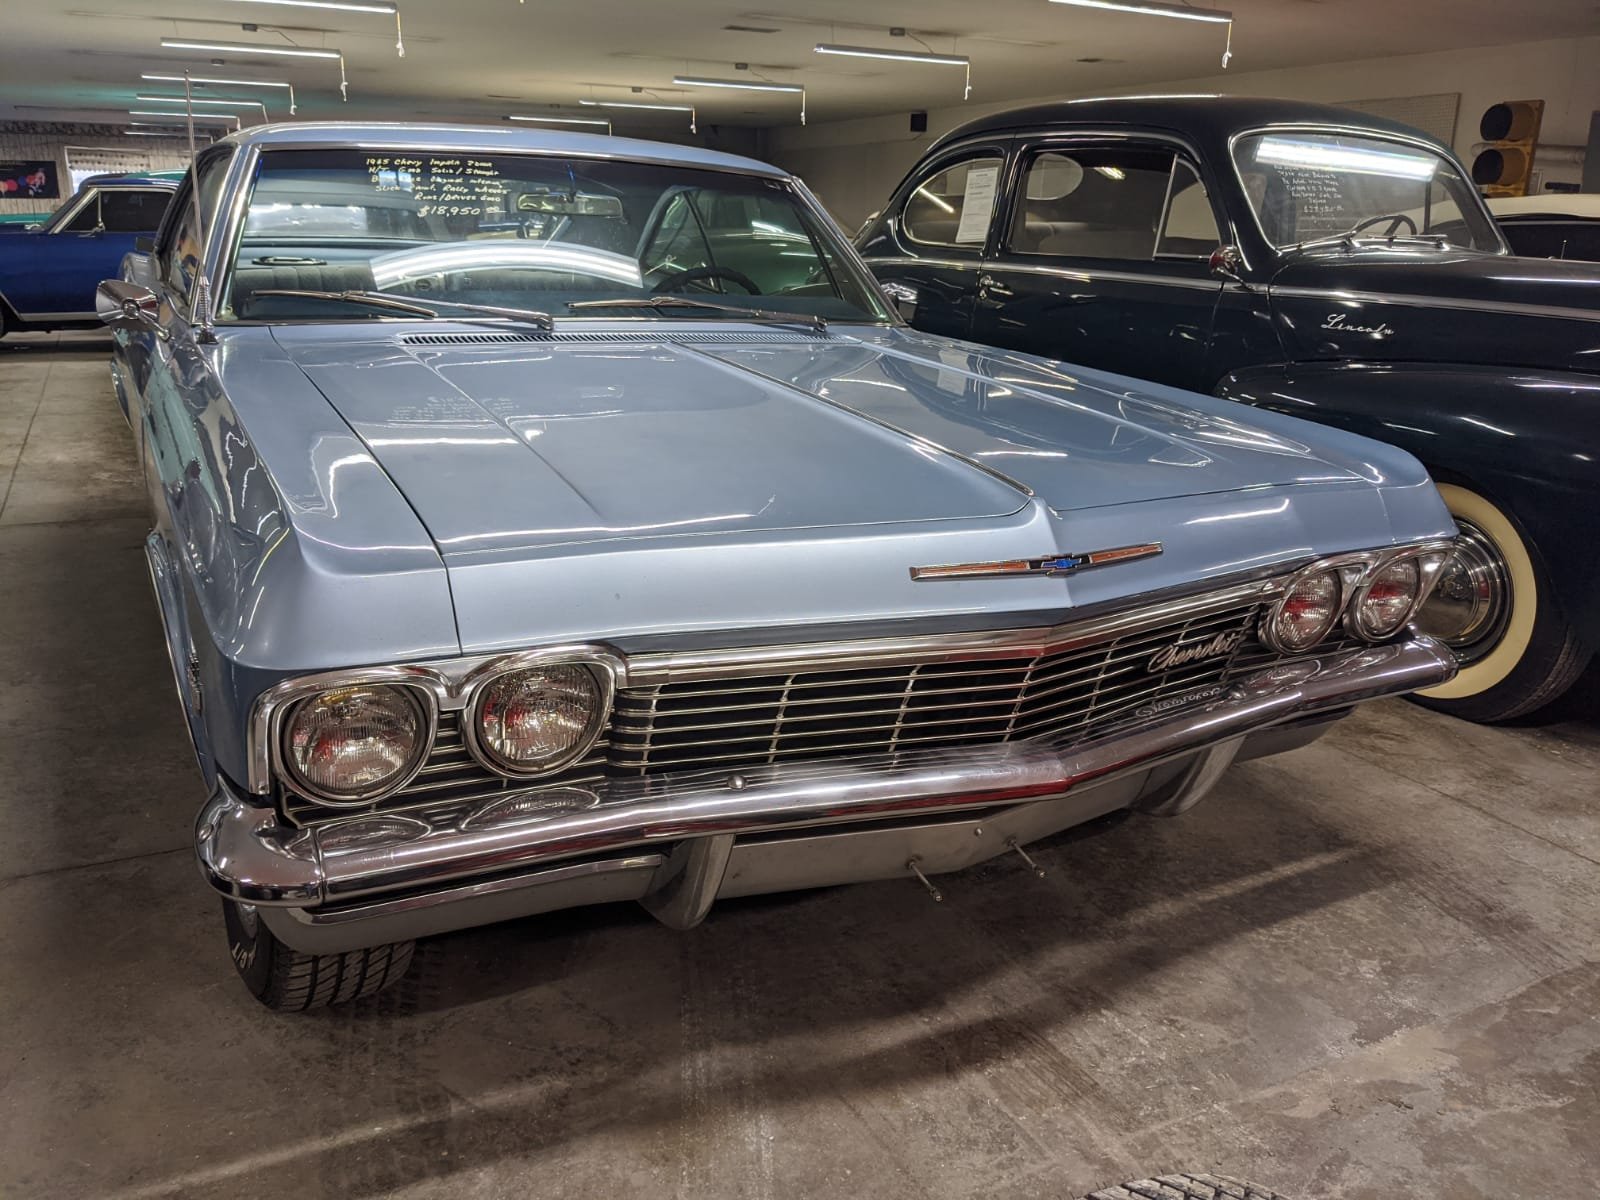
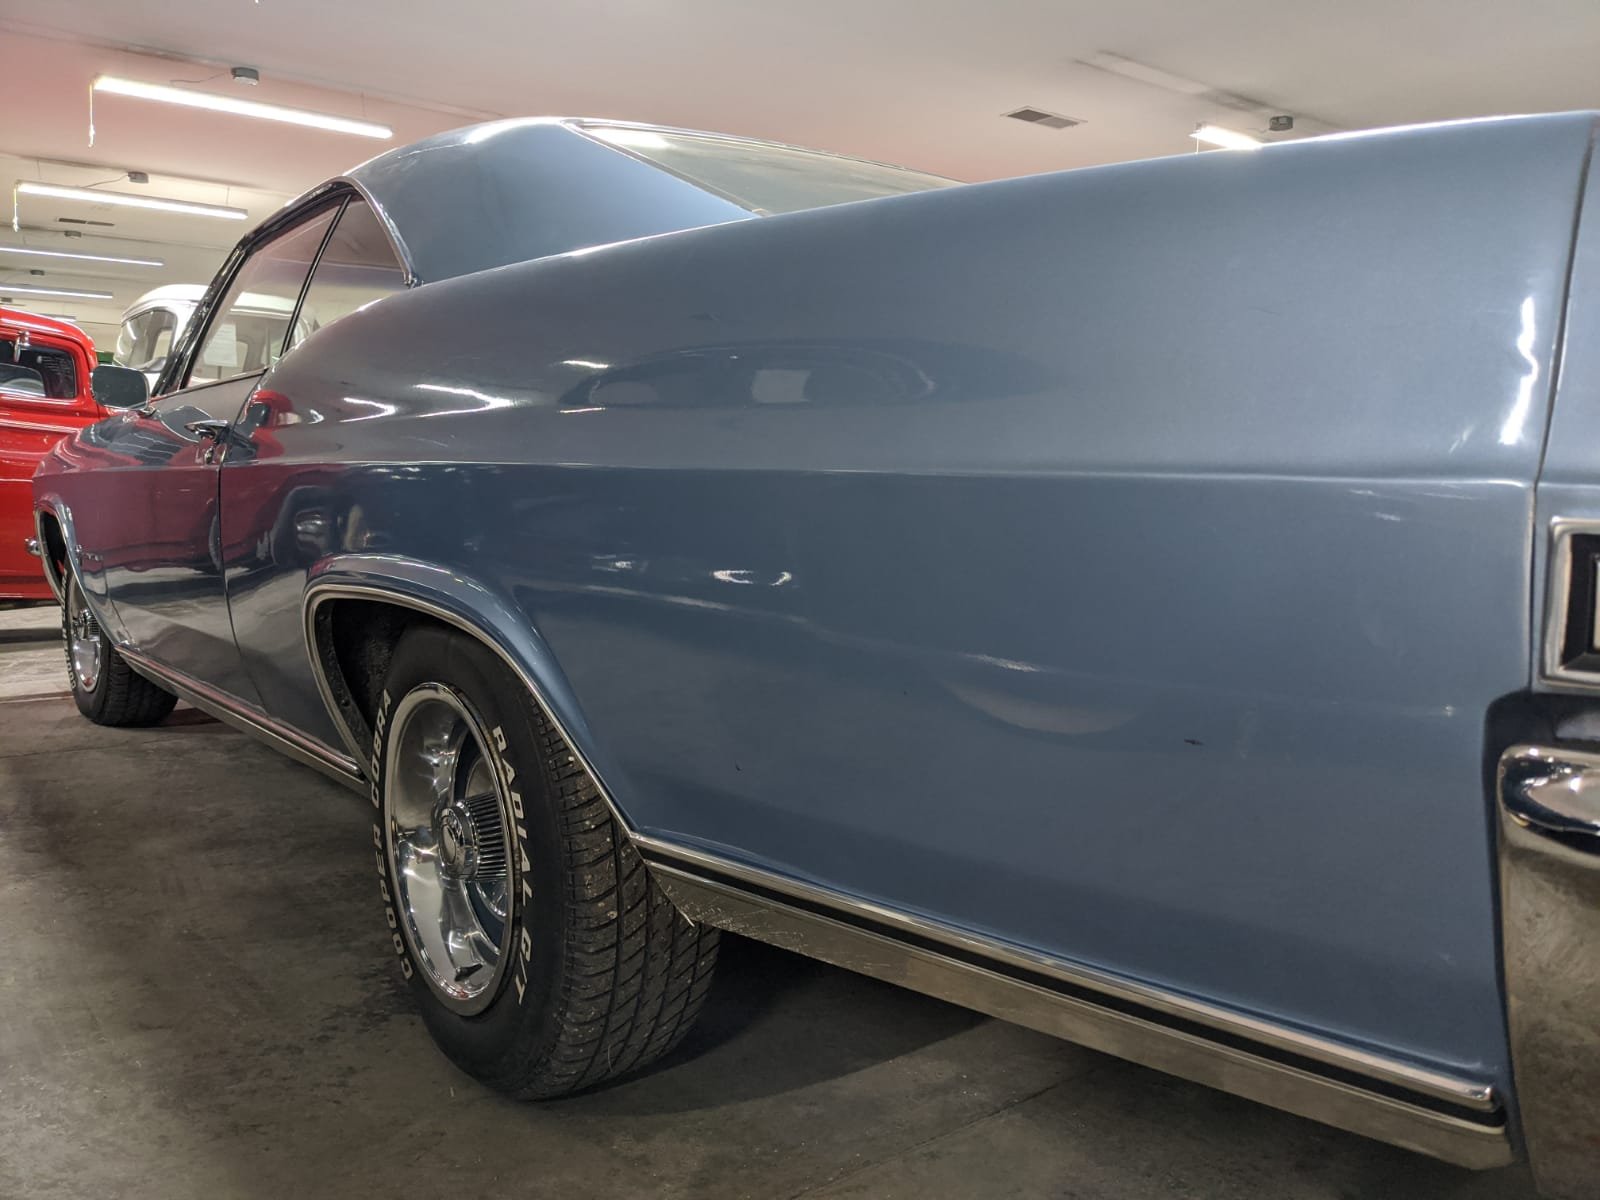
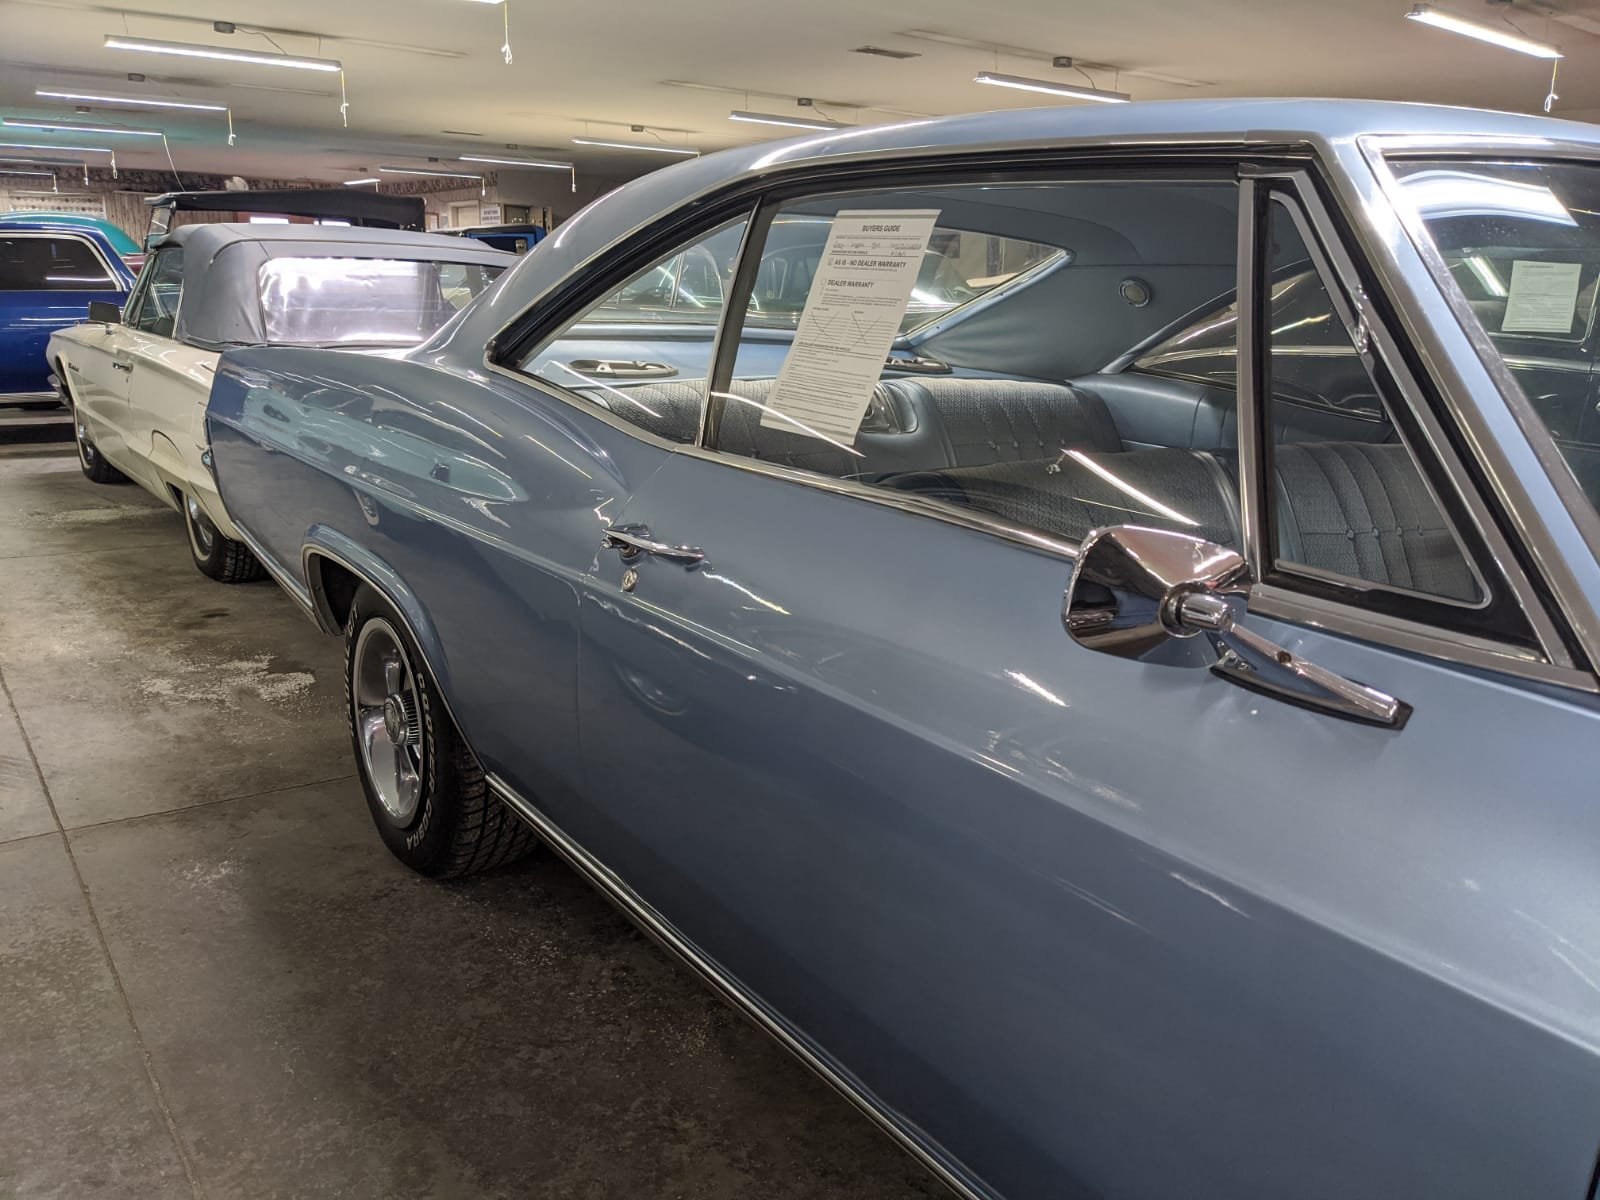
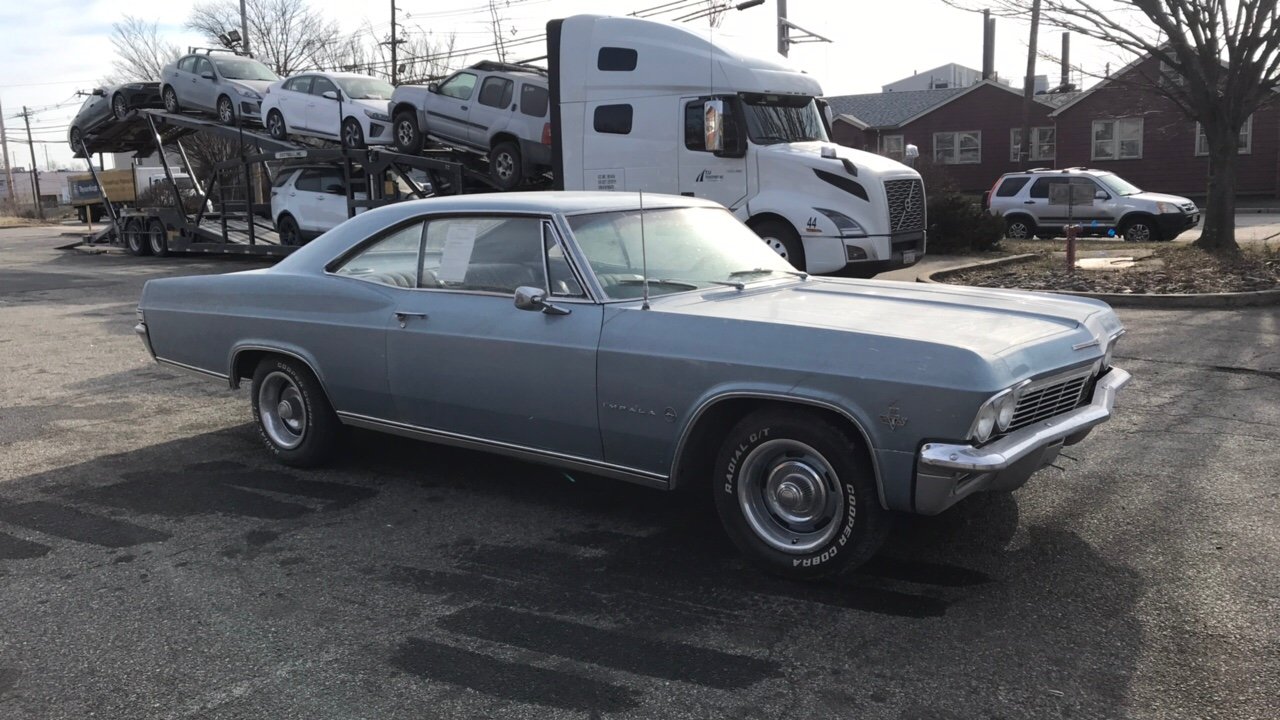
Hi, Thanks everyone for the advice. Pics of my car below. Currently sitting on the wharf in New Jersey awaiting to be shipped. So hopefully I will be able to get it here and certified to enjoy this up coming summer cruising. Cheers
3 points
-
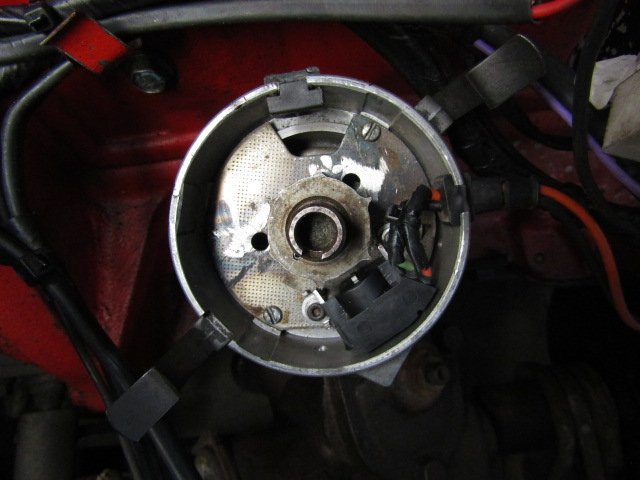
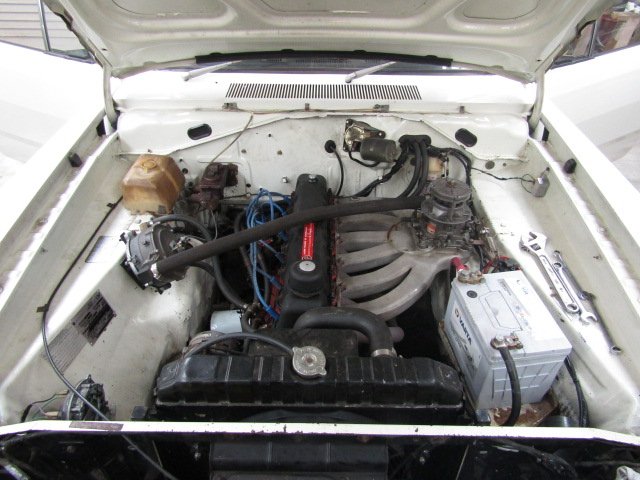
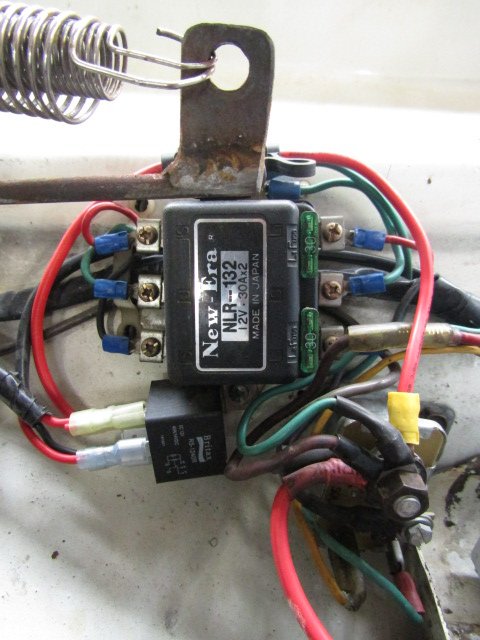
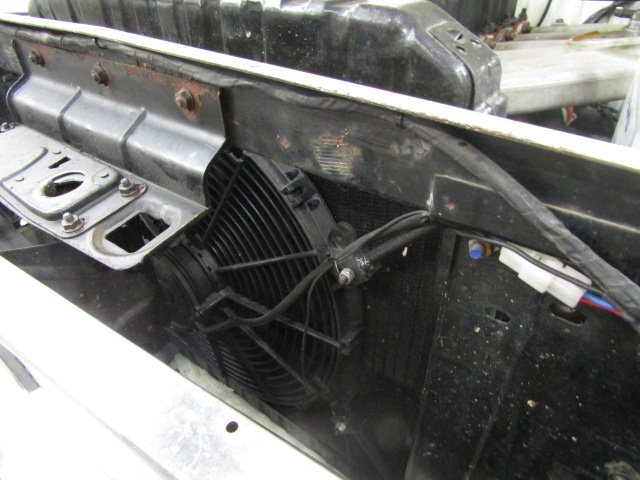
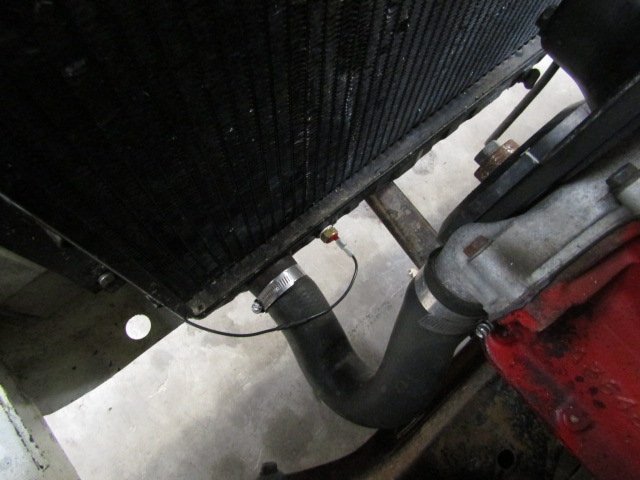
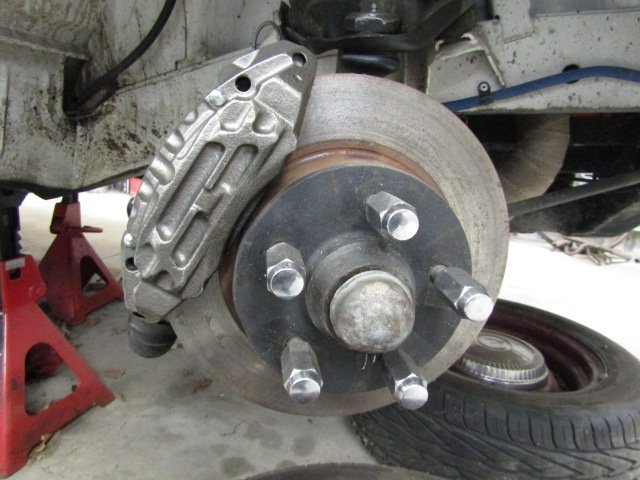
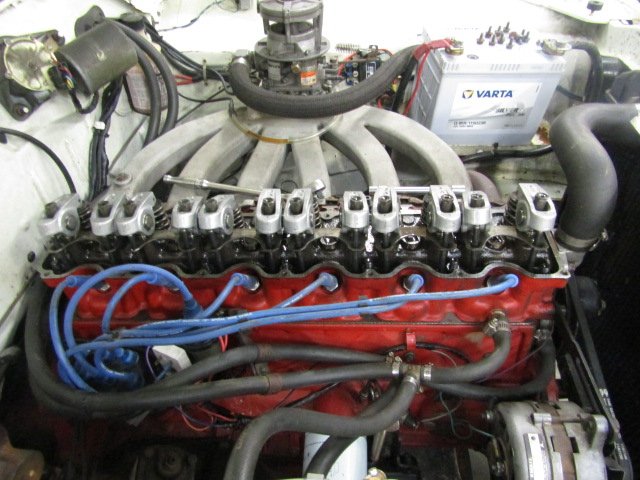
Well well, Link in and working, took more than I thought it would, Couldn't get a spark at cranking speed, mucked around and mucked around. Swapped pick up with a Mazda/Toyota unit, brought a new battery the old one was cooked anyway still no luck. Took the whole thing back out and took it to the tuning place. LOL, G3 was looking for a different signal, changed the parameter and away we went. All back in now and working well. Japanese pick up worked out well, the advance plate is gone all together now, which simplified things alot. Also I modified this distributor to take a plastic Slant Six distributor gear. They are about $1.50 off ebay, a hemi 6 one is almost impossible to get, bronze ones are available but they wear out quickly and make the timing scatter. I have a Link and Ignitor attached to my heater box. Also added some H4 headlights, and a big relay. Now I can see in the dark! Replaced the finger chopping fan with an electric one, got all hi tech with a thermo switch even. Pics of hilux calipers fitted. This is on the AP5 but same diff. Easy to do and well worth the effort. Roller Rocker flex because I reset my tappets with a view to get this dynoed once the world goes back to normal.
3 points
-
I'm calling on some advice from those that know the Mini A series engine a bit better than I do. Mrs Flash owns a 1974 1100cc Mini Moke that we bought a while back. There are signs that the engine has been apart before and it’s always suffered with an intermittent misfire that new plugs, points and condenser didn’t solve. I figured if I ignored it long enough, it might go away, but sadly not. The misfire got steadily worse and then last week it got to the point where it died and it was a battle to re-start it. When it did eventually start it sounded really sick. So I figured it was high time that I investigated the issue. As a first step I popped a timing light on and noticed that at idle the timing mark was intermittently jumping around. I then pulled the distributor out and discovered a huge amount of play in the distributor shaft. I decided to invest in a new 45D electronic distributor rather than having my tired old 29D refurbished. The new distributor arrived yesterday afternoon and I set about installing it this morning. It's at this point that things started to get interesting. When I went to re-fresh the timing marks on the flywheel with a bit of white paint I discovered that the dull painted marks placed by a previous owner are not actually on the correct flywheel factory markings. I decided to ignore these home-made marks and proceeded to use the factory flywheel timing marks to setup the engine at the correct position for cylinder 1 using the procedure outlined in my Moke repair manual (cylinder 1 at TDC on compression stroke with factory TDC flywheel timing mark aligned with the pointer). I then installed the new distributor and it's at this point that things became really interesting. My repair manual states that with cylinder 1 set to TDC the key at the bottom of the distributor should align with the slot in the distributor drive shaft and the rotor should point at roughly the 1 o'clock position. In my case with the new distributor snuggly fitted into the distributor drive shaft slot the rotor points at the 3 o'clock position. This, together with the presence of the home made timing marks on the flywheel has got me wondering whether at some point in the past the gear at the end of the distributor driveshaft has been set a tooth out. Does this sound like a reasonable assumption ? Thanks for reading Picture of Moke as everyone likes pictures.
2 points
-
Got to enjoy the little things!2 points
-
Pretty much right. Centre bearing flange should be around 3° off gearbox flange like you say to make the ujs work. This can be up or down btw (you drew down). Diff angle should be the same angle as centre bearing flange, but some say to angle it slightly up to counter suspension twist when accelerating. Personally I think yes for a race car, most of the info I've found on the internet comes from Americans setting up drag cars. I'd be pretty much bang on for a road car.2 points
-
Aaaaaand I'm registered Fizzing.2 points
-
Two things: 1, the flywheel can slip on the crankshaft rendering the timing marks useless. 2, the intermediate dizzy adapter drive ( the bit that has the gear on the bottom and slot at the top) can be installed incorrectly.. 2 is more likely than 1, and given your description sounds like it could be a tooth out. Which means you run short of timing adjustment on the mounting slot. The above suggestions from @RUNAMUCK and @nzstatoare definitely all good, I would start with a tdc vs crank position check because it's easy, and sometimes crank pulley removal can suck with the engine in the car, bearing in mind you cannot 100% trust flywheel marks. You could also add some fresh tdc and 10 degree marks to the crank pulley area as a rough timing light guide. EDIT: if the chain slackness is of concern perhaps watching the dizzy rotor or rocker gear whilst turning the motor clockwise and then anticlockwise slightly would give you an indication of timing gear wear.2 points
-
Will grab some vacuum, fuel, and brake booster hose to replace what's Missing/old/fucked. Went to replace the hoses and the new ones are way to short which is a bit of a cunt. Supercheap took 6 weeks to send them so they better bloody take them back. The drivers flare nut was tight/stripped af so it'll be getting replaced soon2 points
-
Hey Hamilton crew. I'll need a hand packaging and addressing all the nats shirts that need to be sent away. Perhaps we should have a bit of a mid week meet up to sort this out sometime soon? @64valiant, @mark105, @Beaver, @Archetype, @Geophy, @Yowzer, @Zeubin, @WankBankA100, @flyingbrick2 points
-
heres a photo just after i got it all driving and running properly. hasn't changed much from this photo apart from being about 10mm lower all round
2 points
-
too many diffs aye. the front one will go down!1 point
-
Flux core welds on my Morrie have been fine for 10 years, it's not the welds it's the surface prep. Just make sure the surface is probably prepped, wire brush down, good sealing paint before primer1 point
-
@piazzanoob I'm thinking this could be the problem but hope not! but yeah will check it's got 12v when running. Leads test out ok with a multimeter and look In good condition, have picked up some new plugs will open the gap up to 1.3mm as standard on the blue motor.1 point
-
Didn't think we were discussing fuel economy... no-one sensible brings up a conversation like that with these old girls hahaha.1 point
-
Fellas, thanks heaps for the suggestions and advice. Armed with the extra info provided I'll poke around a little more later today and will let you know what I discover. Thanks again.1 point
-
Small update: Carbs arrived! They took a while to get here thanks to old mate Covid but they are ready to go. Head has been at Kennely Cams here in Christchurch for a couple weeks. Ended up commiting to some custom cams, a skim, some springs and a couple other wee bits too. Will post cam specs when I pick the head up! Nick from MFS has been given the green light on the manifold. That’s hopefully 2-3 weeks away. Starting to come together! Got a lot of bits still to sort out, ignition being the main one, but fuel and wiring will also need attention too. Will post more pics when I get my good camera back!1 point
-
I don't believe in imperial so re tapped the manifold Chopping board carb spacer I tapped the adapter plate but didn't have any bolts long enough. Popped into bunnings for a bit of threaded rod and some loctite All bolted together1 point
-
Nice car. Welcome to OS!1 point
-
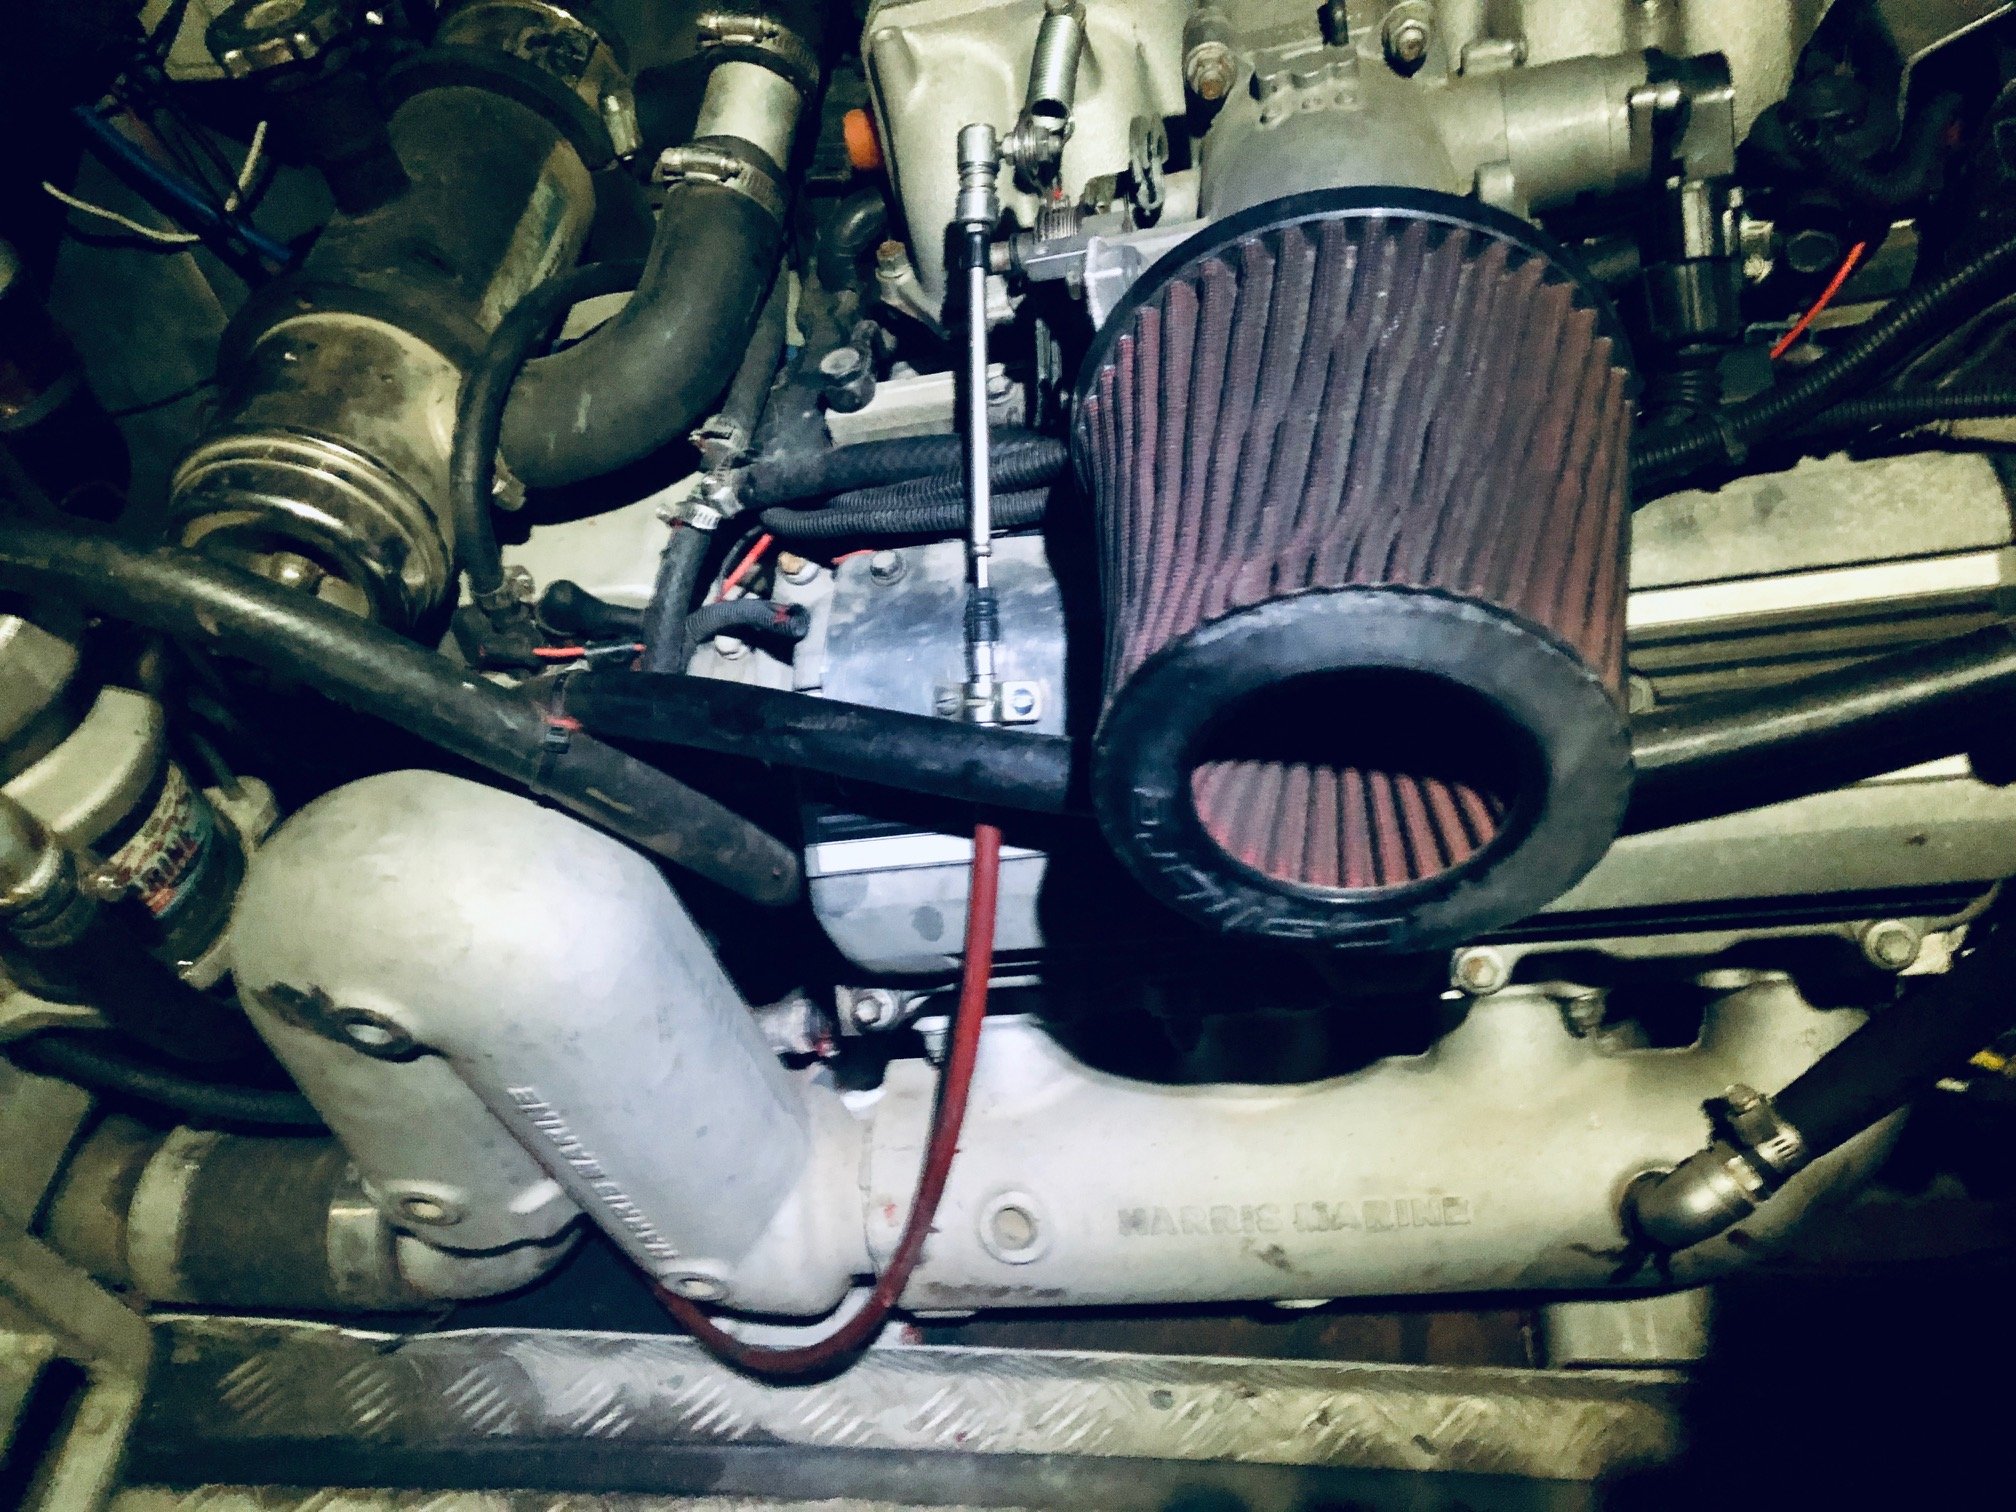
Some more tweaking tonight... apologies crap pics at night with head torch... The more I got into the throttle setup I found 2-3 other things I didnt like. First was the foot pedal... Its a home made affair but functional enough, pivots on m5 bolts with nylock nuts. Doing nothing drastic I just ensured there were washers at every pivot, used a dab of marine grease everywhere and snuged it up so it moved smooth with min drag. Drilled at each corner to hold it down to the checker plate (with ply underneath) The cable was next, ideally you wouldnt use a morse cable here, you'd use a normal cable to reduce friction and have a return spring at both the pedal and throttle body. I think they did this to get away with one (heavy) return spring, and coz Jet Boat. Anywho it in a bit of a coil in the bottom of the bilge so I pulled it out, checked for kink and then re-routed in a gentle curve round the back over the top of the jet unit - its quite a long cable.... Then the throttle assembly itself... lots wrong here, the clamp holding the cable isnt square to the throttle shaft so its tweaked the pivot sideways, the spring is barely holding on. Also since the arm has been pulled its now contacting an alloy boss on the side, both the position of the cable clamp and the protecting sleeve is preventing full travel of the cable. Result being that this thing was only able to run 1/2-3/4 throttle at any point in time... Bunch of small tweaks.... moved the cable clamp, removed the cable sleeve and cut down the offending boss. Now we have full throttle and it returns correctly to idle position when you take the foot off the pedal. This will do for now, ideally I'll run a proper cable at some point in the future. Made me think... previous owner reckoned it wasnt as powerful as it should be.... did I mention he was a mechanic and managed a workshop....
1 point
-
I went to the NZ prison supplier and said give me something that's going to cause permanent disability to anyone who thinks.about going.over my fence1 point
-
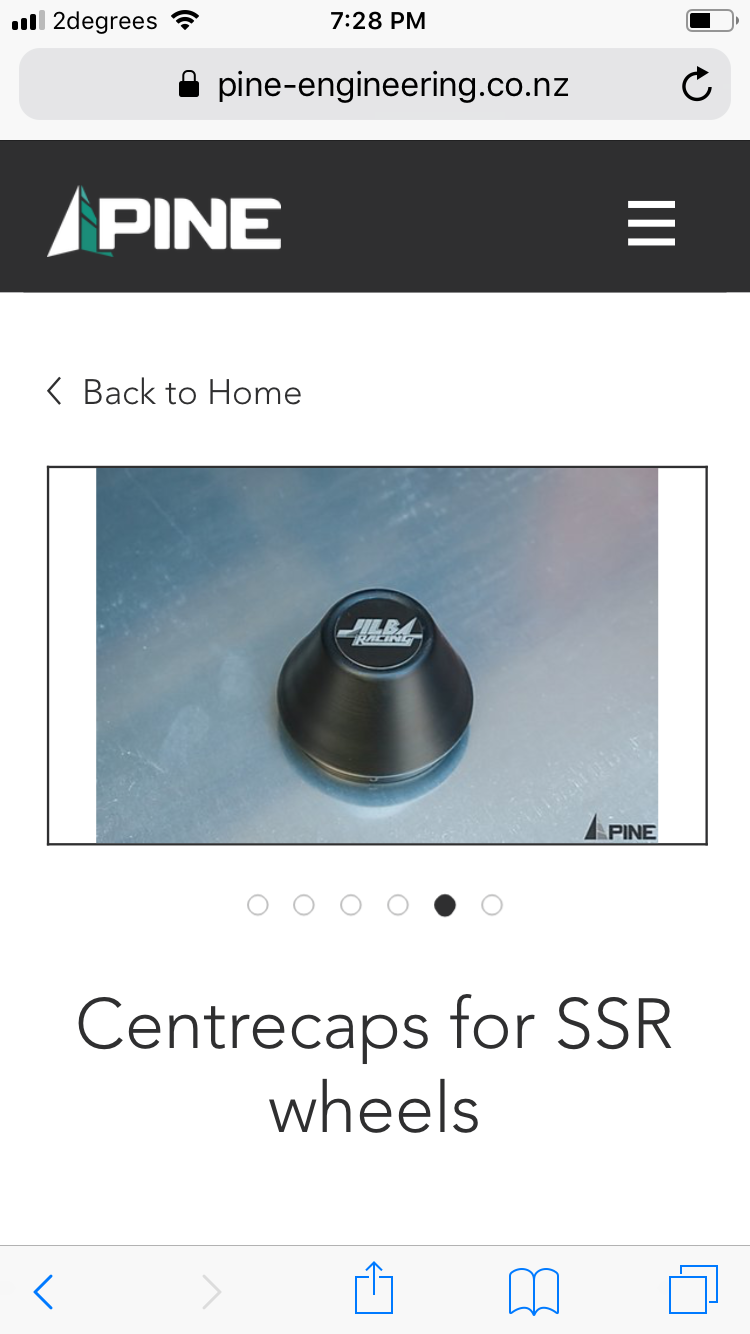
I need to decide what I’m doing with caps too, these conical ones are correct, but they look great without too. I tend to like a more traditional squarer cap if any?
1 point
-
Time to freshen up the wheels then. Silly me had a can of paint in the DG fridge during lockdown but didn’t think of it. 1983 edition! Cool that they bolt in and aren’t sandwiched.. was gonna mask the bolts and leave in place but they came apart lovely and fast. now i should get the spokes vaped to retain the factory machining marks1 point
-
Bit of a mockup1 point
-
Pretty well detailed now. Bearings, seals, cam timing, compression ratio all realistic. Now need to do waterpump, oil pump and drive to supercharger. Dont have drawings for any of that though so need to wait until the Bugatti Trust is open again.1 point
-
1 point
-
I did a bit of research on that type of battery, they dont vent under normal circumstances but have a venting system for if they get over pressurised- like if they get overcharged. Checked with LVVTA and that means they have to be vented outside the car, either by a vent tube if the battery has the provision for it, or put inside a sealed box which vents outside the car. Protected against short circuits I've always interpreted as having the positive terminal covered so a stray wheel brace in the boot or similar cant short the 2 terminals, and the cable routed away from sharp edges etc1 point
-
Skeet skeet felt really good to finally drive it again, change gears, and get past 7000rpm. the falcon has been ok for daily duties but it’s not in the same league. Might need to sandbag it to get back to old ride height now there’s no towbar and less bog
1 point
-
1 point
-
Not wanting to be a smart arse or anything but I've always bled brakes on my own using a rubber tube, blocked at one end with a slit cut in the side. Just keep pumping away at the pedal keeping an eye on the reservoir, it's always seemed to work for me. If I need to come up with a theory why it works I'd probably say you're forcing the air out, not trying to trick it out ? I can't imagine I've just been jammy over the years. /two penneth...1 point
-
THIS FUCKING TIME! On recommendation from some other painters who do home jobs outside work, I went with Baslac 2k and high solid through RA Johnstone. its fucking sweet, covered like a boss. I gave them the tin with the dregs from the first time I painted it a few years ago and it seems a good match. Haven’t had it in the sun yet but wag better than the orangey metalux stuff I’ve been spraying and sanding off lol i changed up my style a bit and whipped the bonnet and boot off to reduce overspray dry spots. Shot Michael laid on a 60% foundation coat after flicking come on any rub throughs or dark patches and let it go tacky then 2 decent coats and a final, 20% thinned full-bore last coat. i got a moth stuck in the first coat and a flake of paint off the masking but both were recoverable. otherwise it went perfectly. it has a tiny peel to it but it might flatten out after the fact, the heaters and lights are still on in the shed.1 point
-
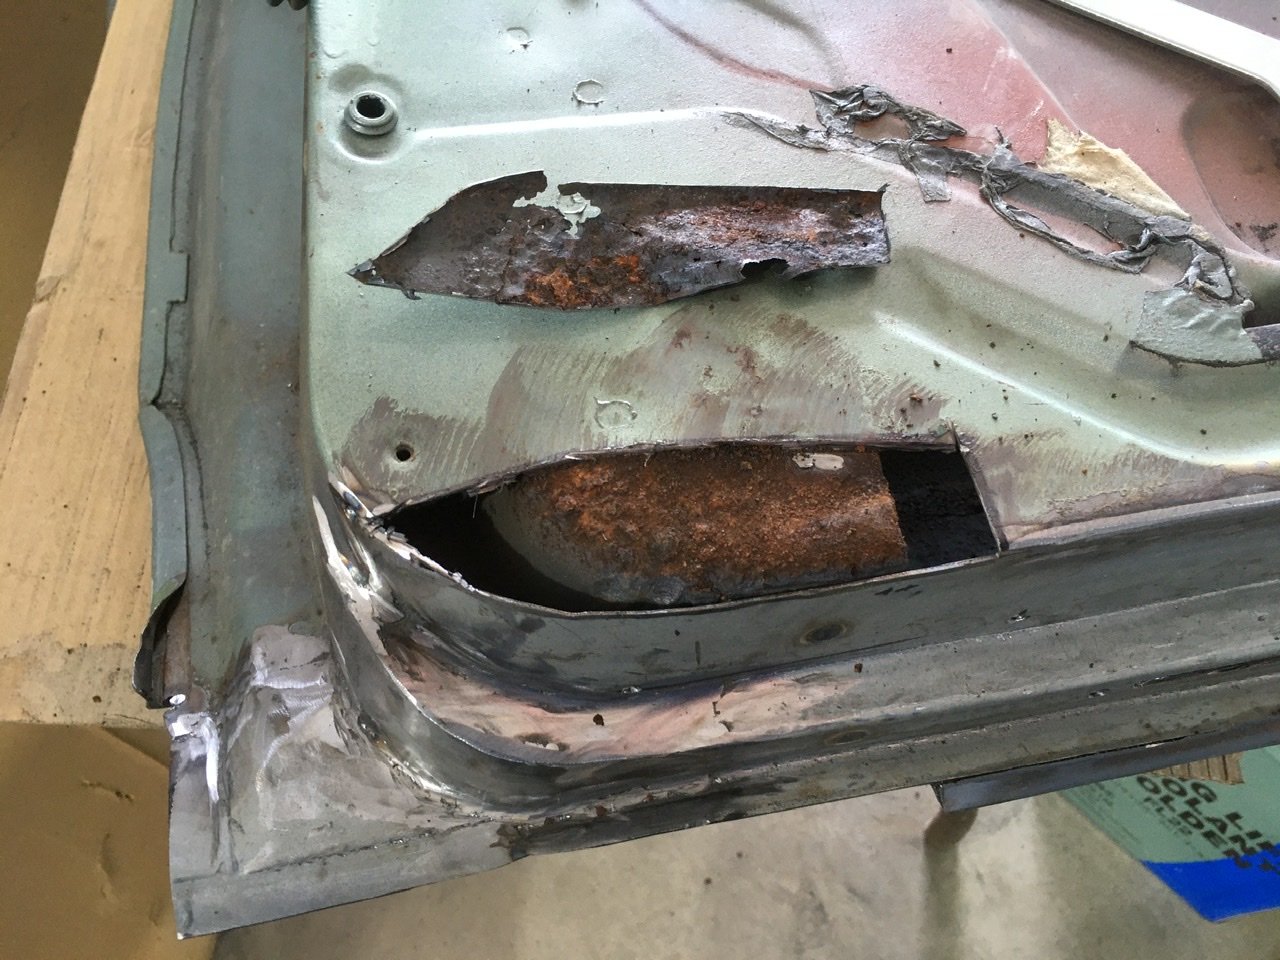
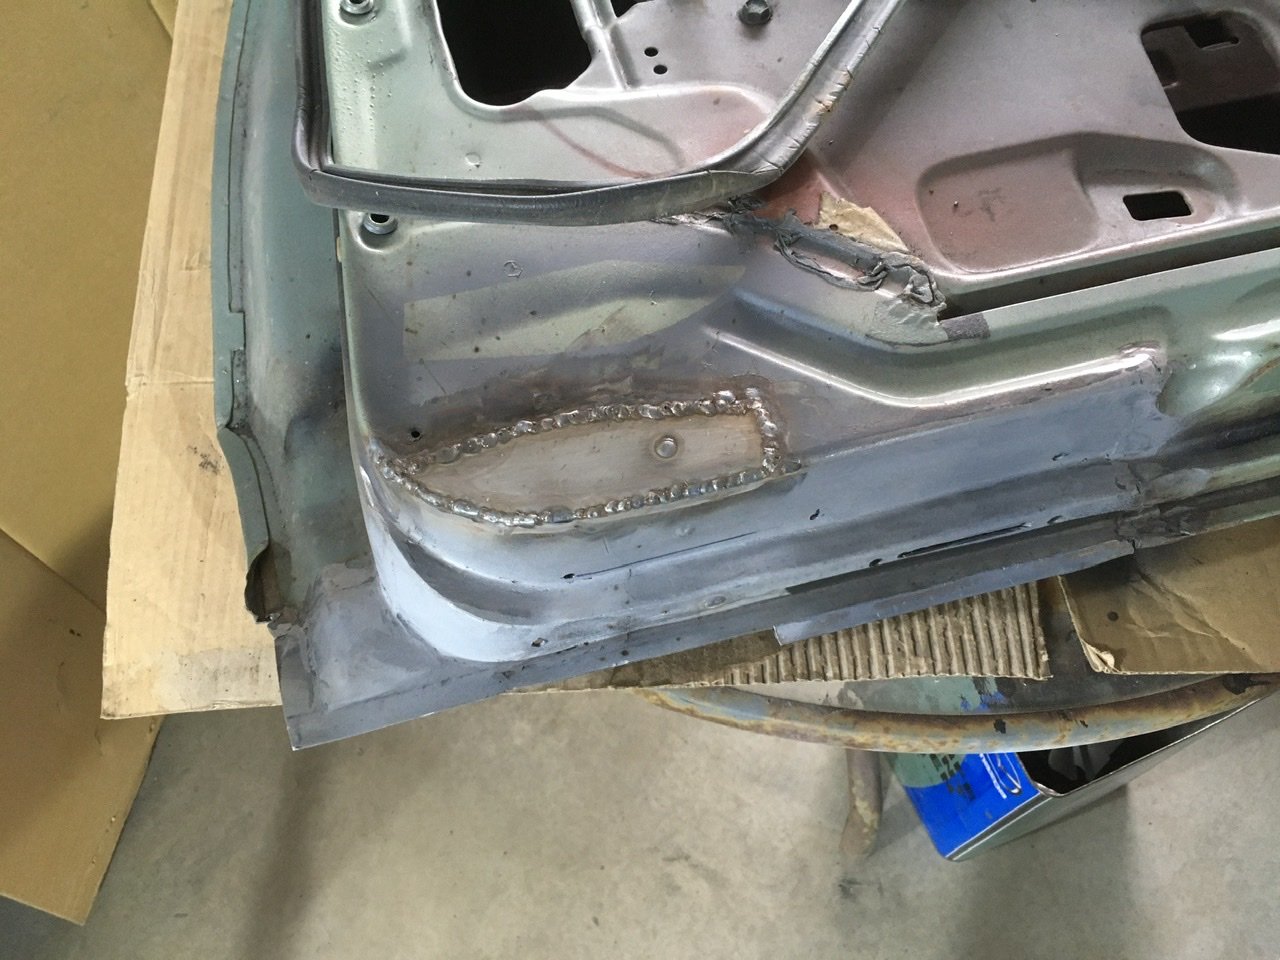
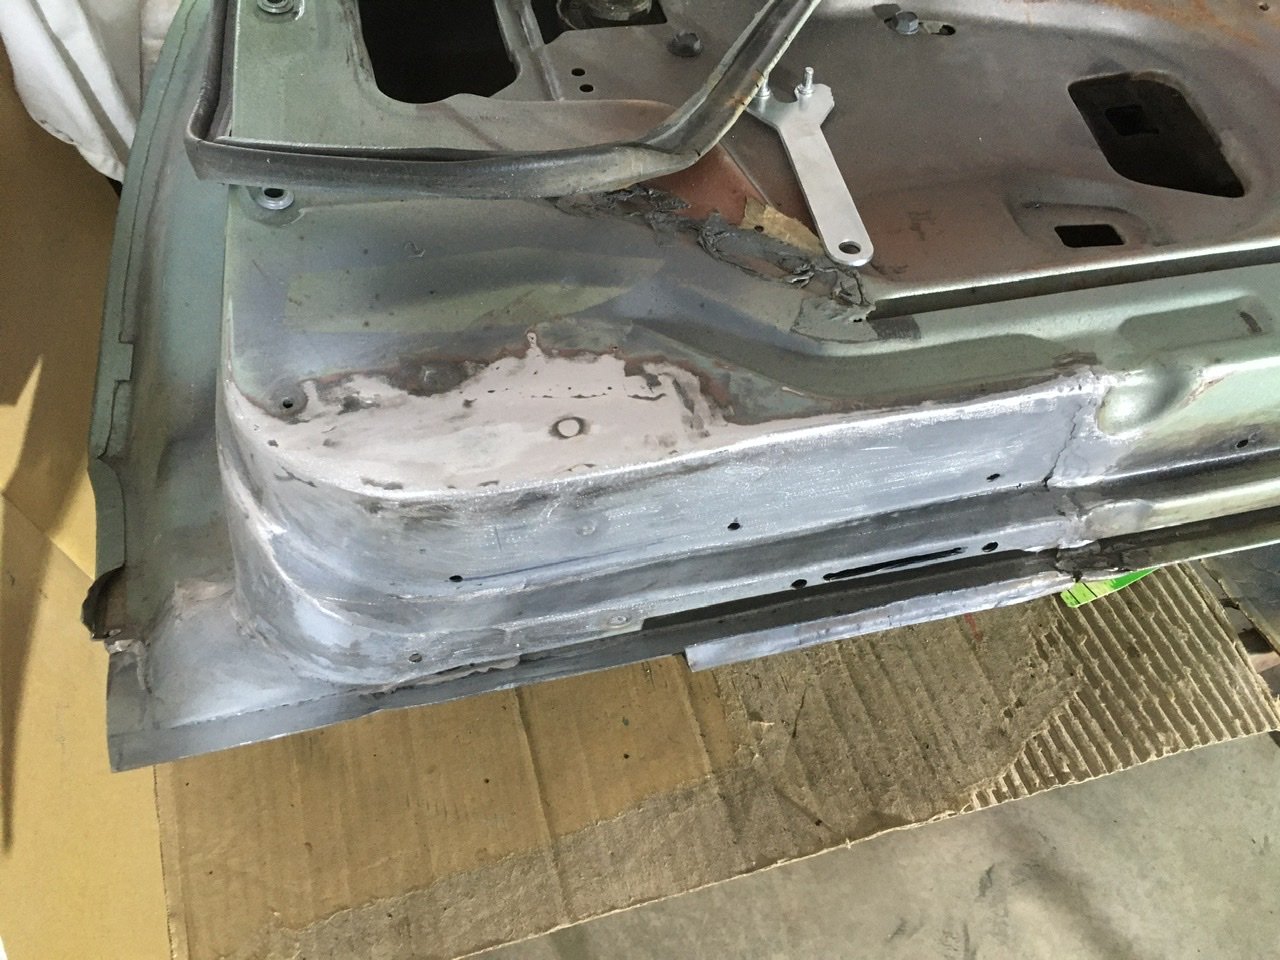
Still ticking over with this I did clean this rust up and give it a paint before covering it up. Ordered a tool shed power file to finish off the welds. Waiting for that to arrive.
1 point
-
One year later...... So shortly after my post I packed my bags (including a JAP crankcase) and hopped on a plane to the Uk on the big OE. I’m working in the vintage car world over here and have had some pretty amazing experiences. After spending so many hours looking at pics of cyclecars and the like it’s pretty neat to be at the events where they are running and get a real feel for them. One of the coolest trips I have been on was in Mark Walkers GN Thunderbug. A 4.2 litre Vtwin in a light weight chain drive chassis is definitely a good formula.... Some pics from the last year... Have many more to put up. With so many good vintage car events over here i need to get a car built so have been working flat out on the engine after hours and have made a fair bit of progress Cases bolted together and set up on the rotary table with a mandrel through the drive side bearing boss. Using the boring head to fly cut the decks Drilling and boring the cyl stud and follower holes prior to tapping 3/4“ 20 tpi cycle thread, mmmm lovely..... After all holes drilled and tapped and cyl base spigots bored Next up barrels1 point
-
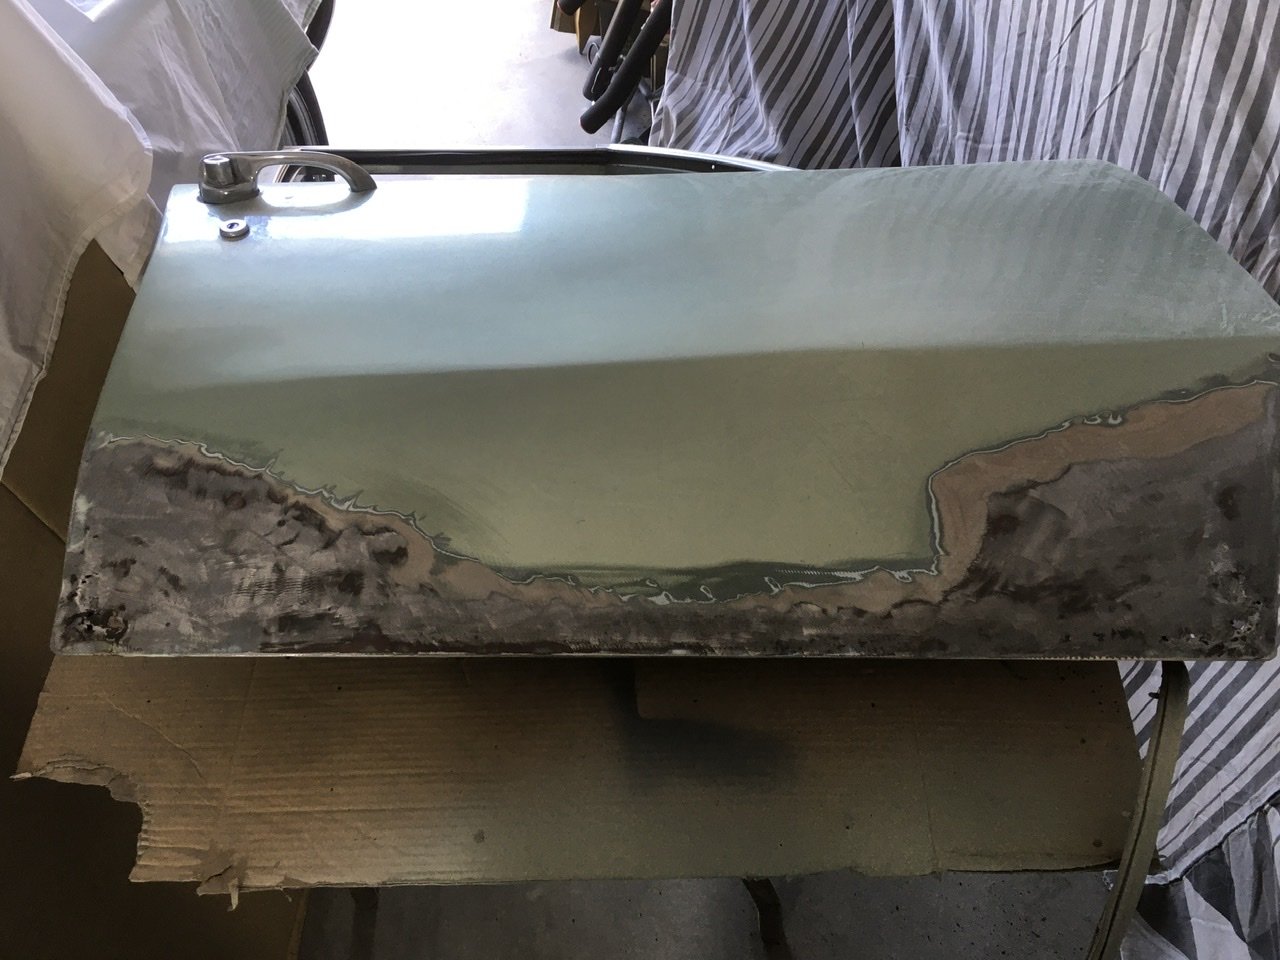
Got some hardener and sanding discs last nite so let’s try again.1 point


.jpg.6084b4a2025e3ca53c9b6c575ee78ab0.jpg)


.JPG.3e50ee772e5c262e75f48ea004002243.JPG)


This leaderboard is set to Auckland/GMT+12:00