
Leaderboard


Popular Content
Showing content with the highest reputation on 05/03/20 in Posts
-
Then this evening I accidentally spilt paint on it, Luckily it was the right paint, so I left it.
 21 points
 -
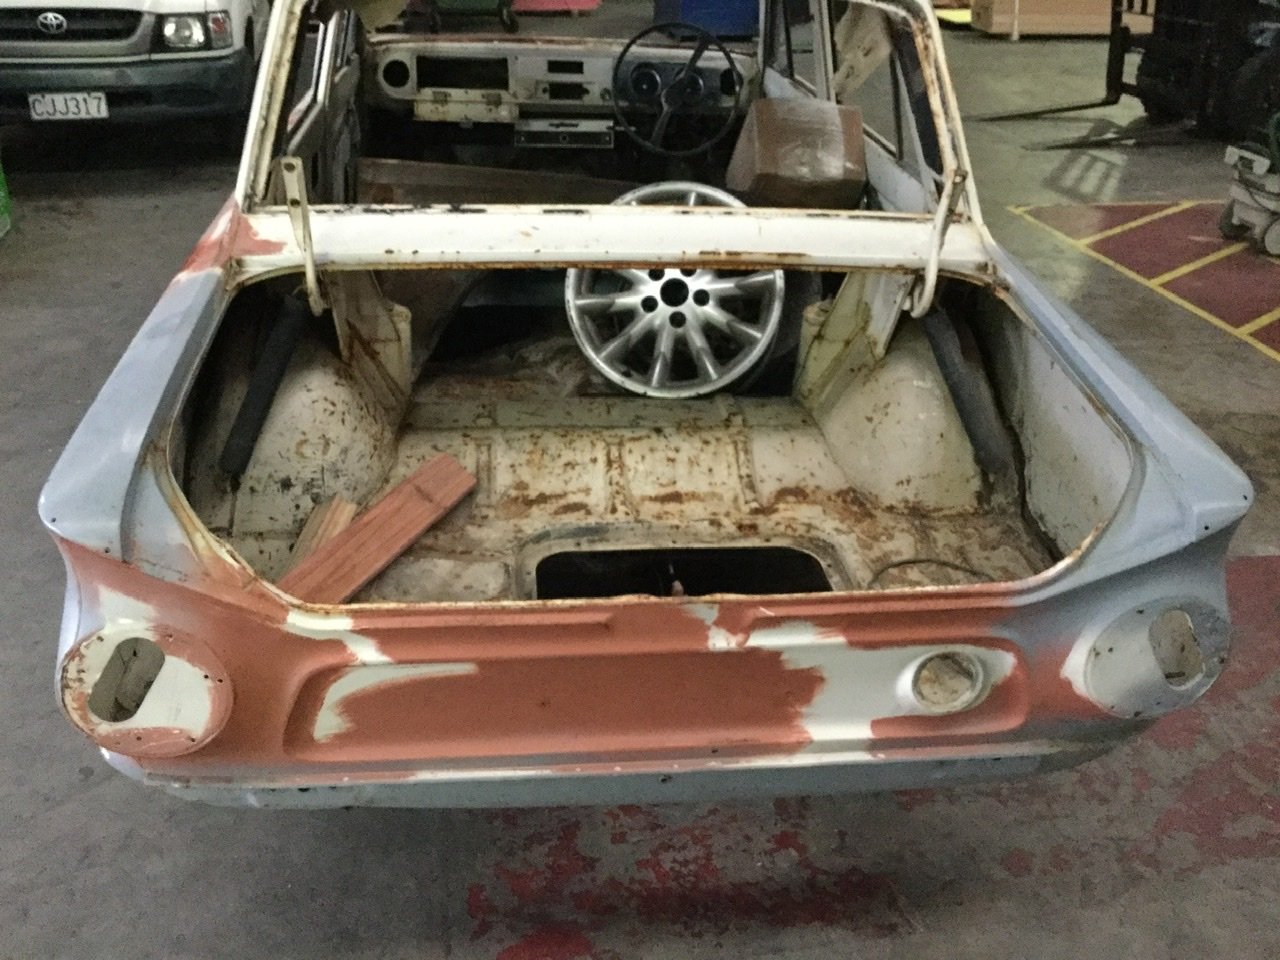
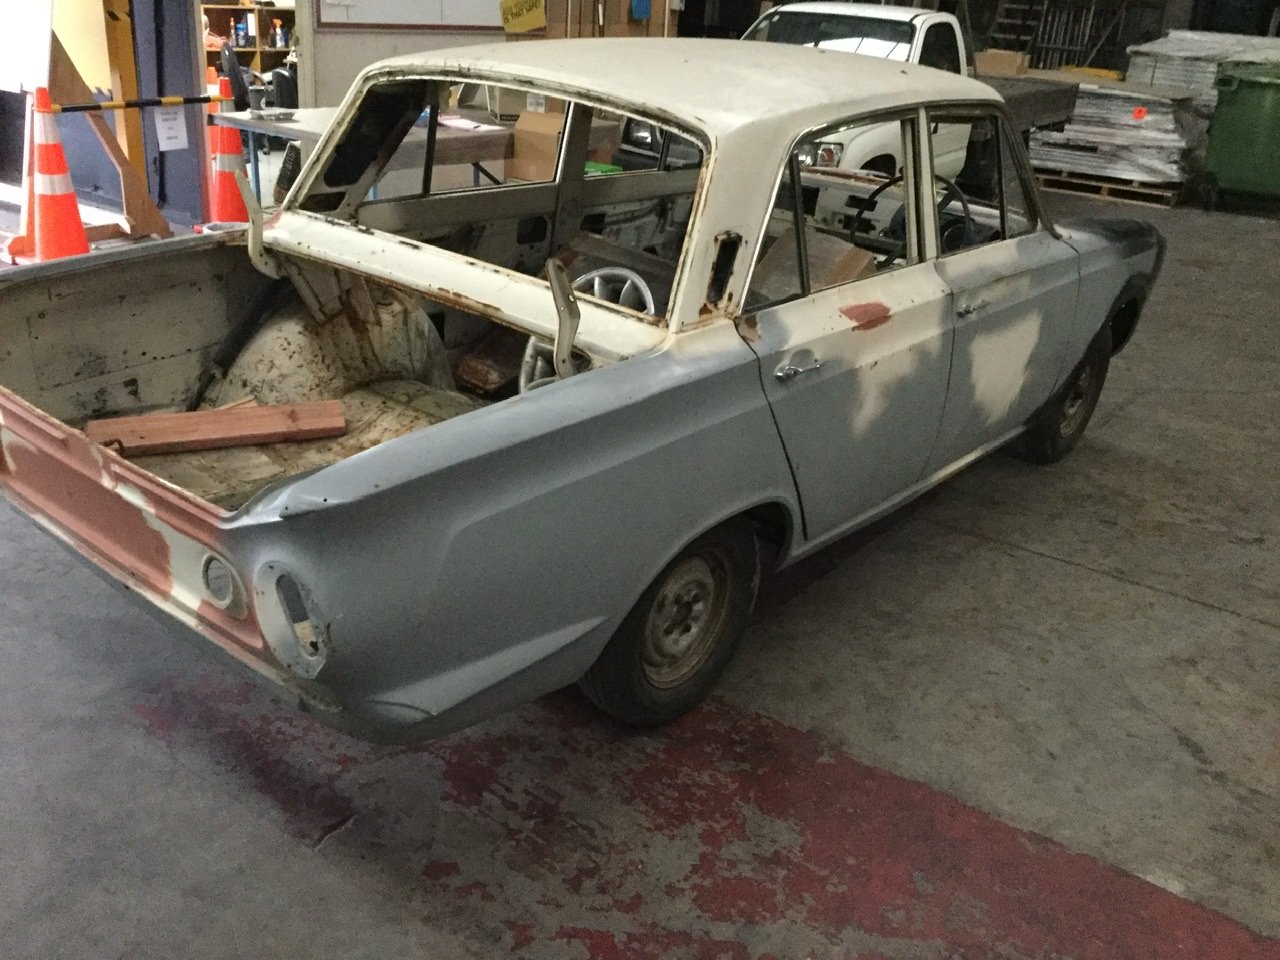
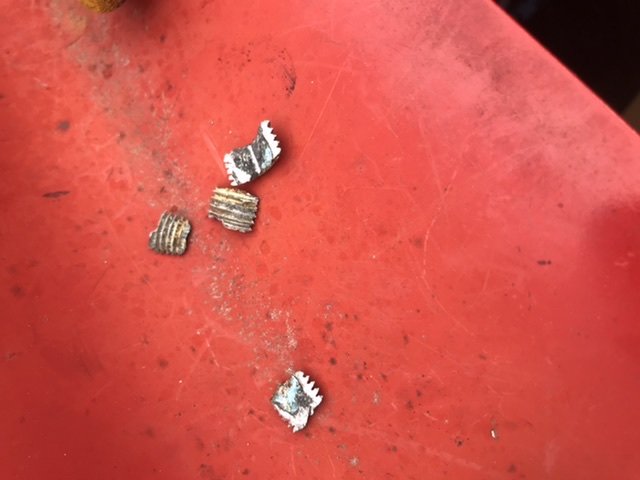
i was worried about the added load to the other bolt once i took this bolt out. 2020-05-03_04-47-41 by sheepers, on Flickr so i did some analysis on the loading. its pretty interesting what results came out from my experiments. ill save you the details but you can bet that things weren't good with that one bolt removed. in fact, according to my calculations the structural loading on the rest of the frontal impact zone, even at moderate speeds, went way past the design loading that the other bolt was capable of withstanding. as you can clearly see from the graphed results, things were bad. stupid graph by sheepers, on Flickr so, what to do? ive been in this situation before, some of you may recall my dilemma with the lower suspension arms that failed due to over stressing one mounting point. you can see the stress point in this xray of the lower member. tooth failure by sheepers, on Flickr there was nothing else i could do. i had to remove the other bolt. and another bolt. and the other bolts. 2020-05-03_04-48-20 by sheepers, on Flickr seeing as how the bolts were no longer stressed and everything was at equilibrium i knew i could rest easy. then i had a thought, since all these parts are now lying on the floor maybe i could tidy them up a bit? so i proceeded to move the mess from the inner guards to the bench. 2020-05-03_04-48-20 by sheepers, on Flickr 2020-05-03_04-48-02 by sheepers, on Flickr 2020-05-03_04-48-09 by sheepers, on Flickr unfortunately removing the mess from the inner guards left them without any rust protection over the bare steel. ill need to figure out some way of protecting the bare steel...............................15 points
-
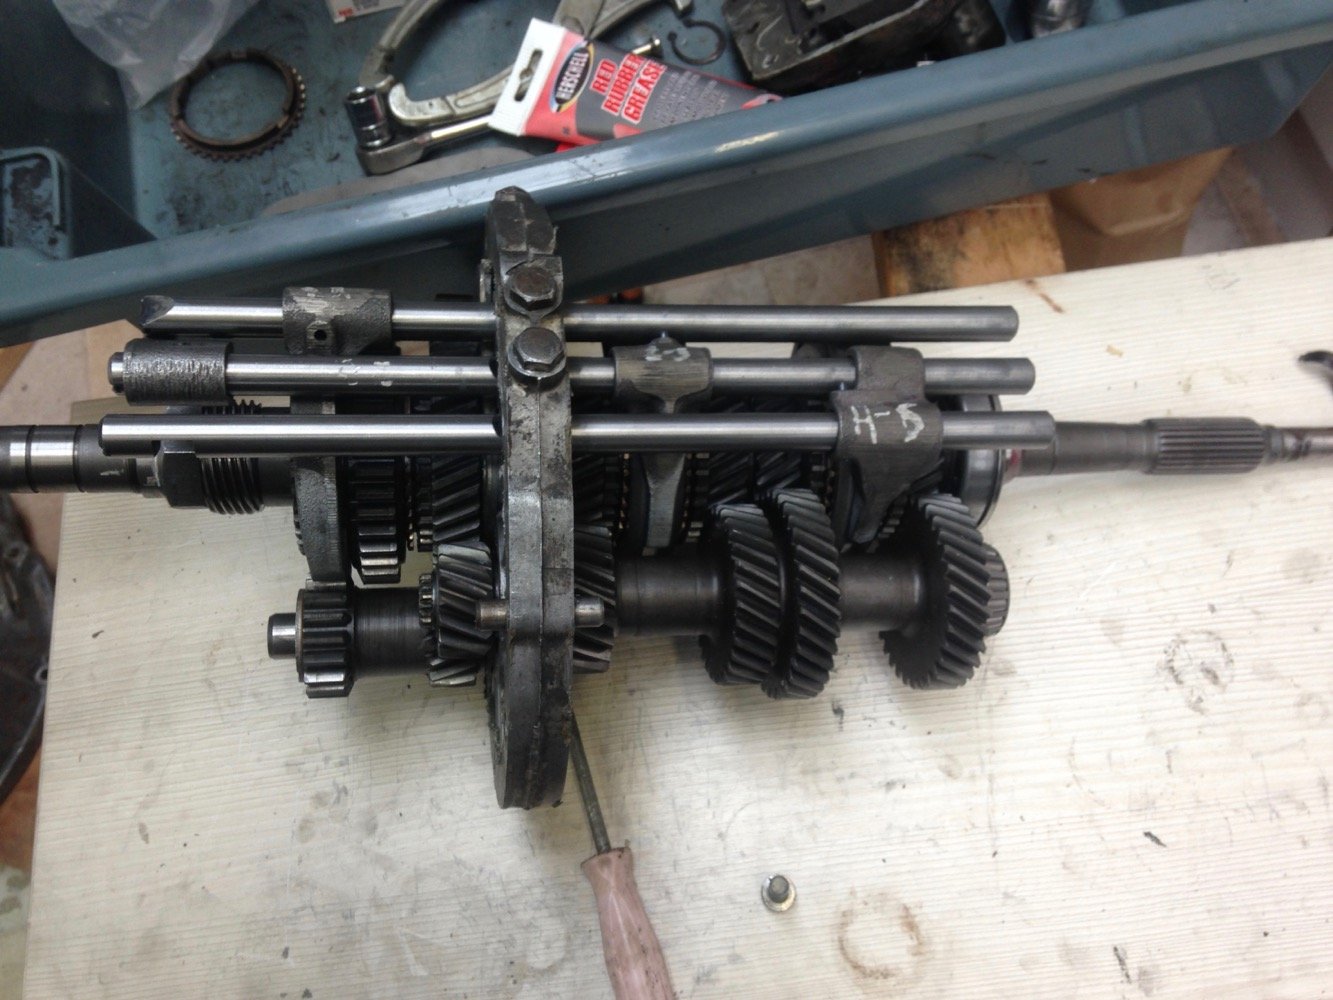
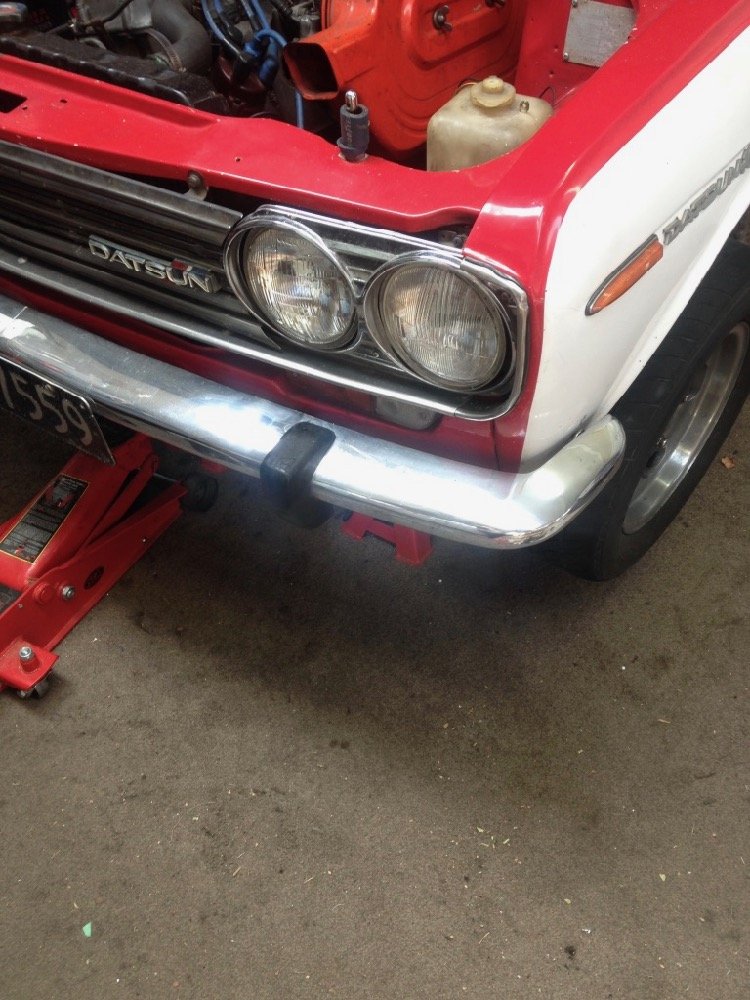
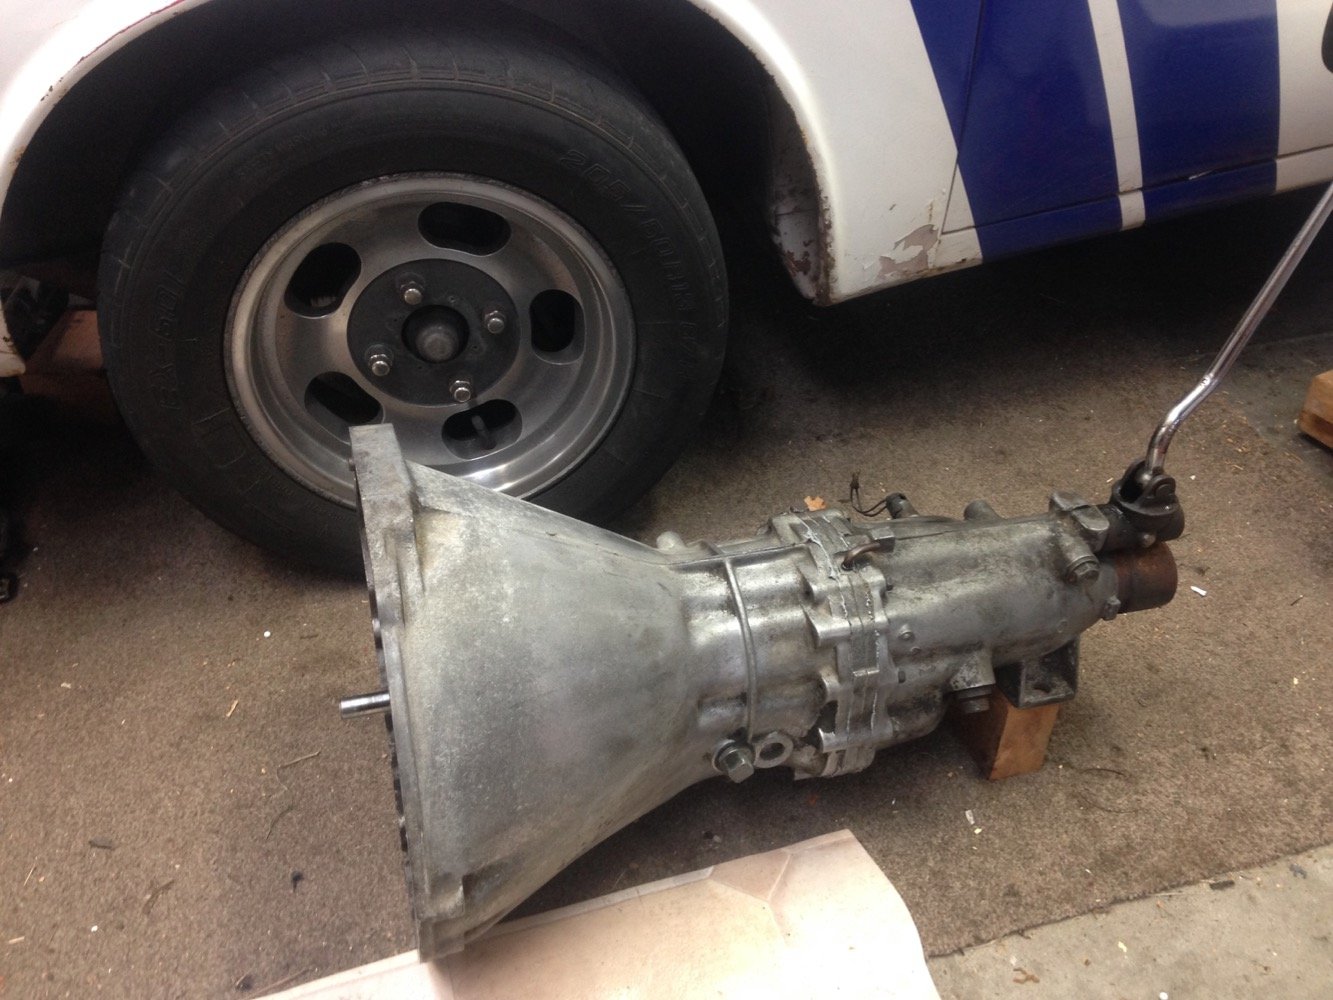
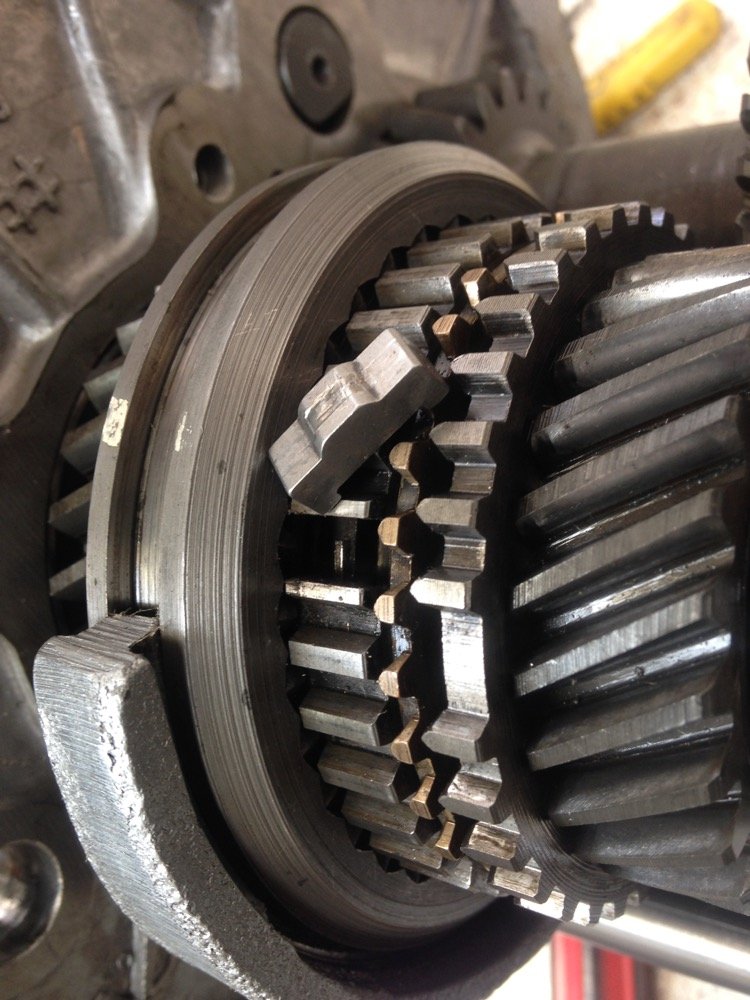
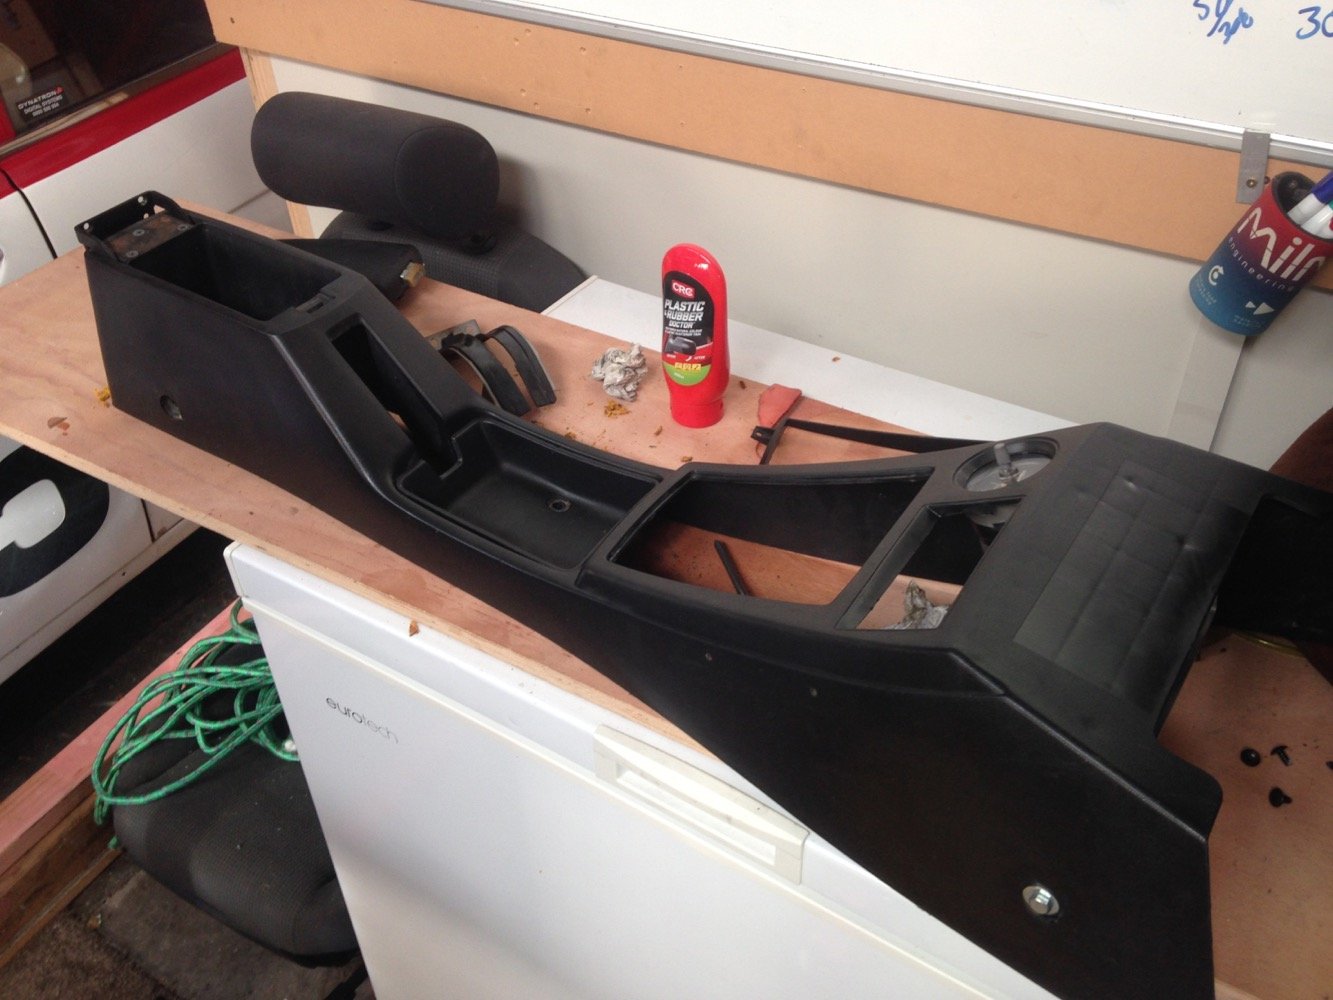
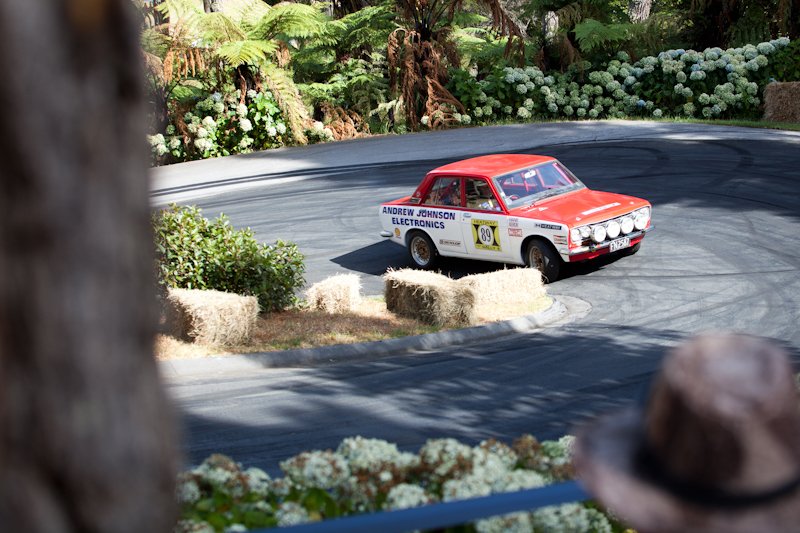
Welcome to the New Year Datsun thread, year of the dogleg.. Work on the new motor stalled due to Christmas break and needing funds for a special Datsun event - Leadfoot 2020. Mid last year I made a few sneaky phone calls and managed an invite for my father to compete in his 1975 Heatway rally car that has been resurrected. As the story goes, a few weeks out from the event, his co-driver convinced Wishart Helicopters (Now Helicopter Line) to sponsor their entry, they stripped the running gear from Dad's 68 1600sss, swapped it into a bare shell and had at it. With only a few pics and good stories left I figured he needed a good event to bring the car out for the first time. While he wasn't near the top of the impressive field of entries, the car ran, sounded and looked the part, We had an amazing weekend which made all the travel and preparation worthwhile. With lockdown now in effect, the motor build is well and truly on the backburner, like alot of NZ, surplus spending is a luxury so i focused on what I had in the shed. This gearbox really tested my patience, advice given was to test everything before fitting, the linkage bellcrank is a tricky beast, it however, was a breeze... This little shi(f)t insert was the source of my pain. Every time I put it together, these would fall out of second gear synchro. Somehow I was slow to learn that the front cover acts as a travel limit for the shift rod, once installed, no problem. Once the box was together and shifting nicely, I popped it back (if only it was that easy on my own!) first test drive and it really did not want to shift 1-2, so out it came (Again) Issue was tracked to the spacers on either side of the sandwich plate bearing, swapped them over, and everything lined up much better - thats the punishment for many months between strip and rebuild! The only saving grace was carpet on the workshop floor, made life much more comfortable. Final lockdown task was cleaning up the centre console from the 200sx the gearbox came from, hot soapy water and plastic doctor, very nice and suits the care 100% Test drive was short lived with a squealing alternator belt, but proved the gearbox was happy, this morning I swapped out the belt for a spare and went for a quick drive, while it ran terribly, a tank of fresh gas brought her back to life. And that brings us up to tucking the car away for the winter, fingers crossed for some pottering about this winter, getting ready for a spring time hoon!
12 points
-
Went to the garage this morning and found the wrinkle fairies had been busy..... Well pleased with how that came out so decision decided on the cam cover. Spot of magic paint, (plus a sneaky beer) and left it in the sun..... Came back 30 minutes later & what is this witchcraft ? Good choice me thinks. I'll let it dry for a couple of days and then have a go at sanding back the lettering. In the meantime I'd better clean the engine bay up. / pics when it's back together.9 points
-
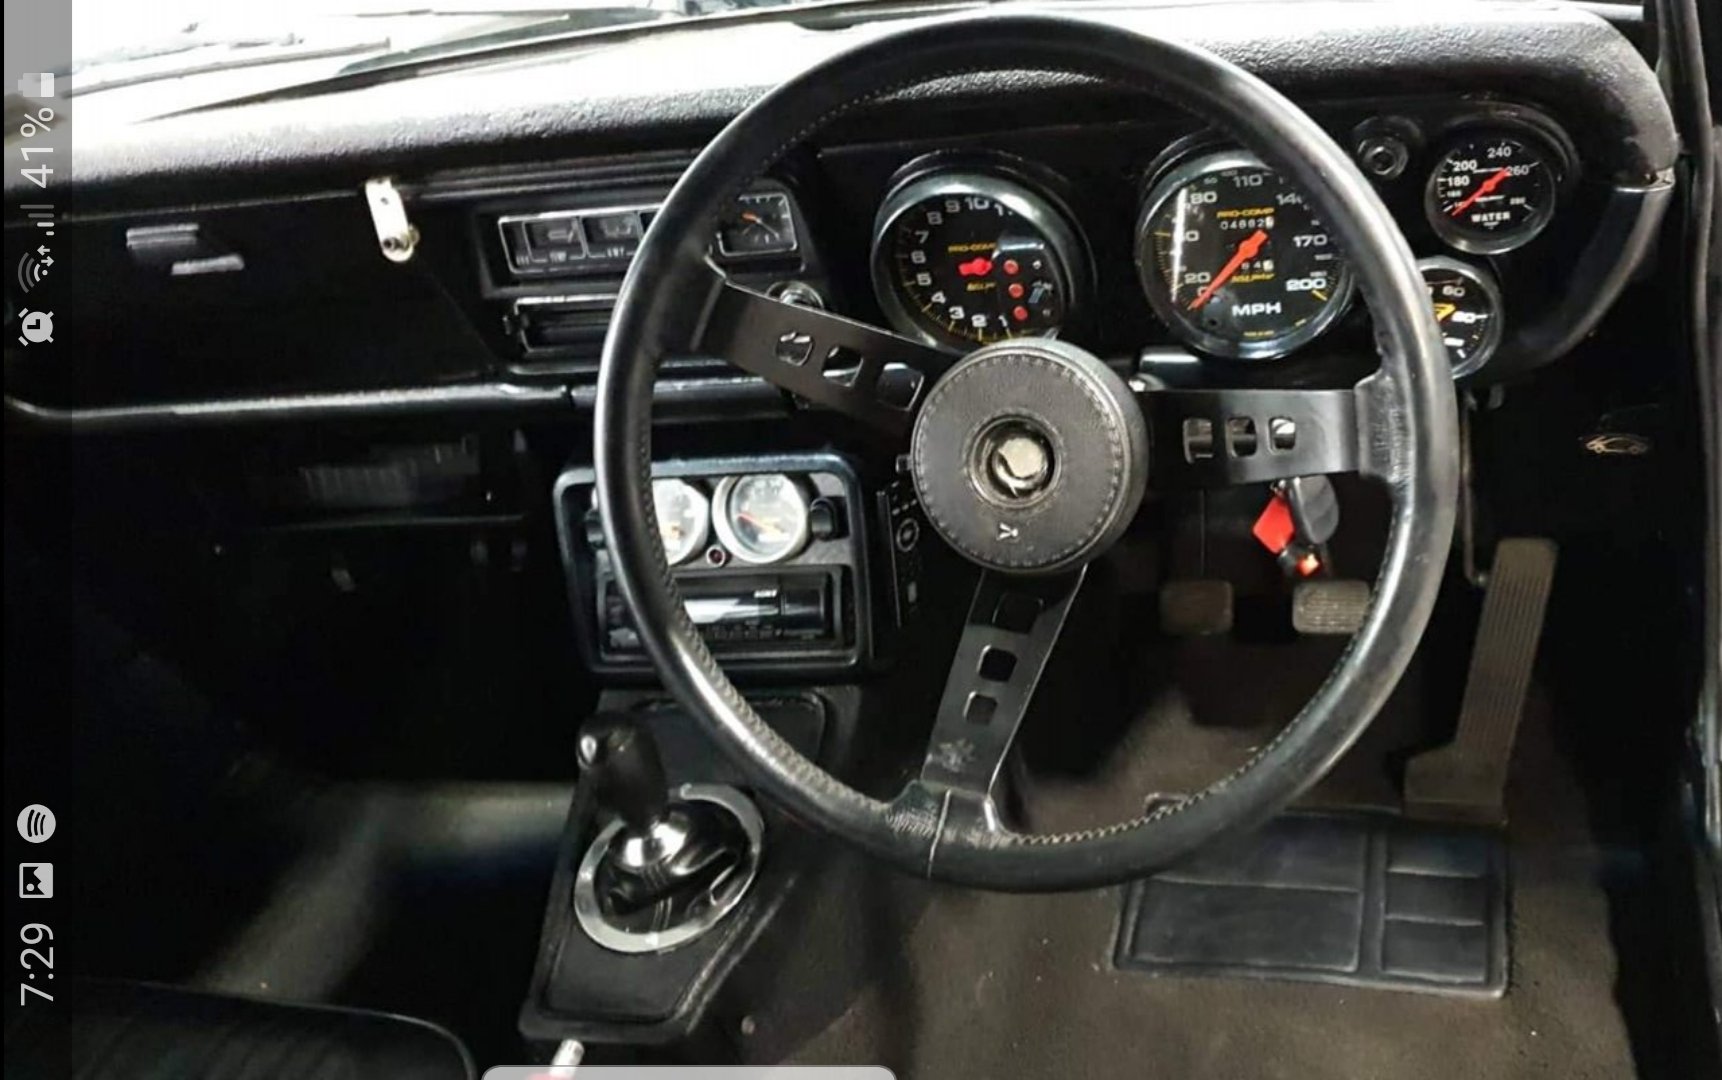
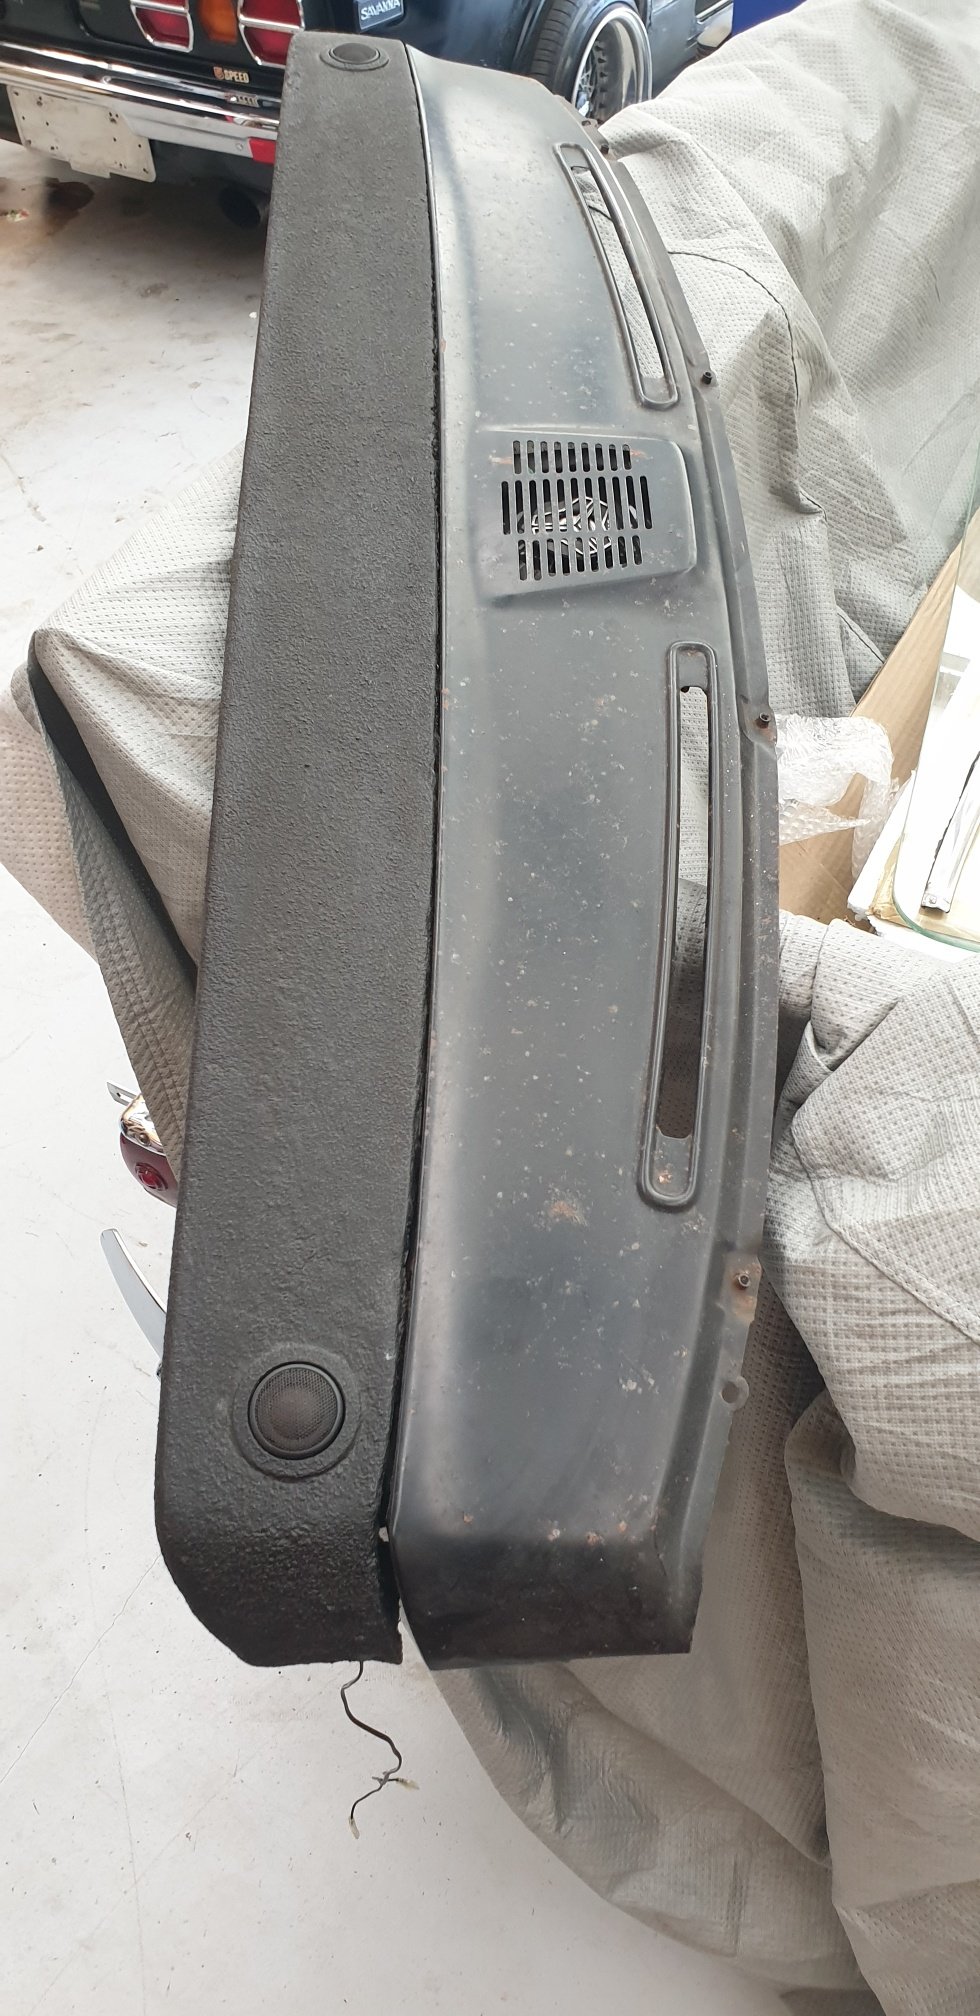
So when i got the car the dash topper, gauge cluster, centre console had all been black winkle painted. Had a modified factory cluster to fit a set of autometer guages. Black wrinkle paint not really my thing so decided ill put the dash and cluster out and clean it up and repaint it satin black. So pulled the dash out, tried to clean up the topper but wasnt having much success so a quick call to the man @64valiant and will be getting the dash topper over to him to trim in a nice black something. Will repaint the steel part of the dash top while its out too. Got the gauge cluster out to clean that up which also turned into a can of worms. Ended up finding a brown factory cluster with speedo etc to either run factory cluster and flick the volts gauge, mount tacho below dash next to steering column and change the gauges around in centre console so only the ones needed are left. But then after that also found a factory black cluster with no gauges so will have a look how easy its going to be to modify that one (tidly and not wrinkle painted) to fit these gauges back in similar to as they are now. Both of them are on their way to me so will see what happens when they get there and make a plan to tidy it up as best as possible without buying a heap of new stuff.
7 points
-
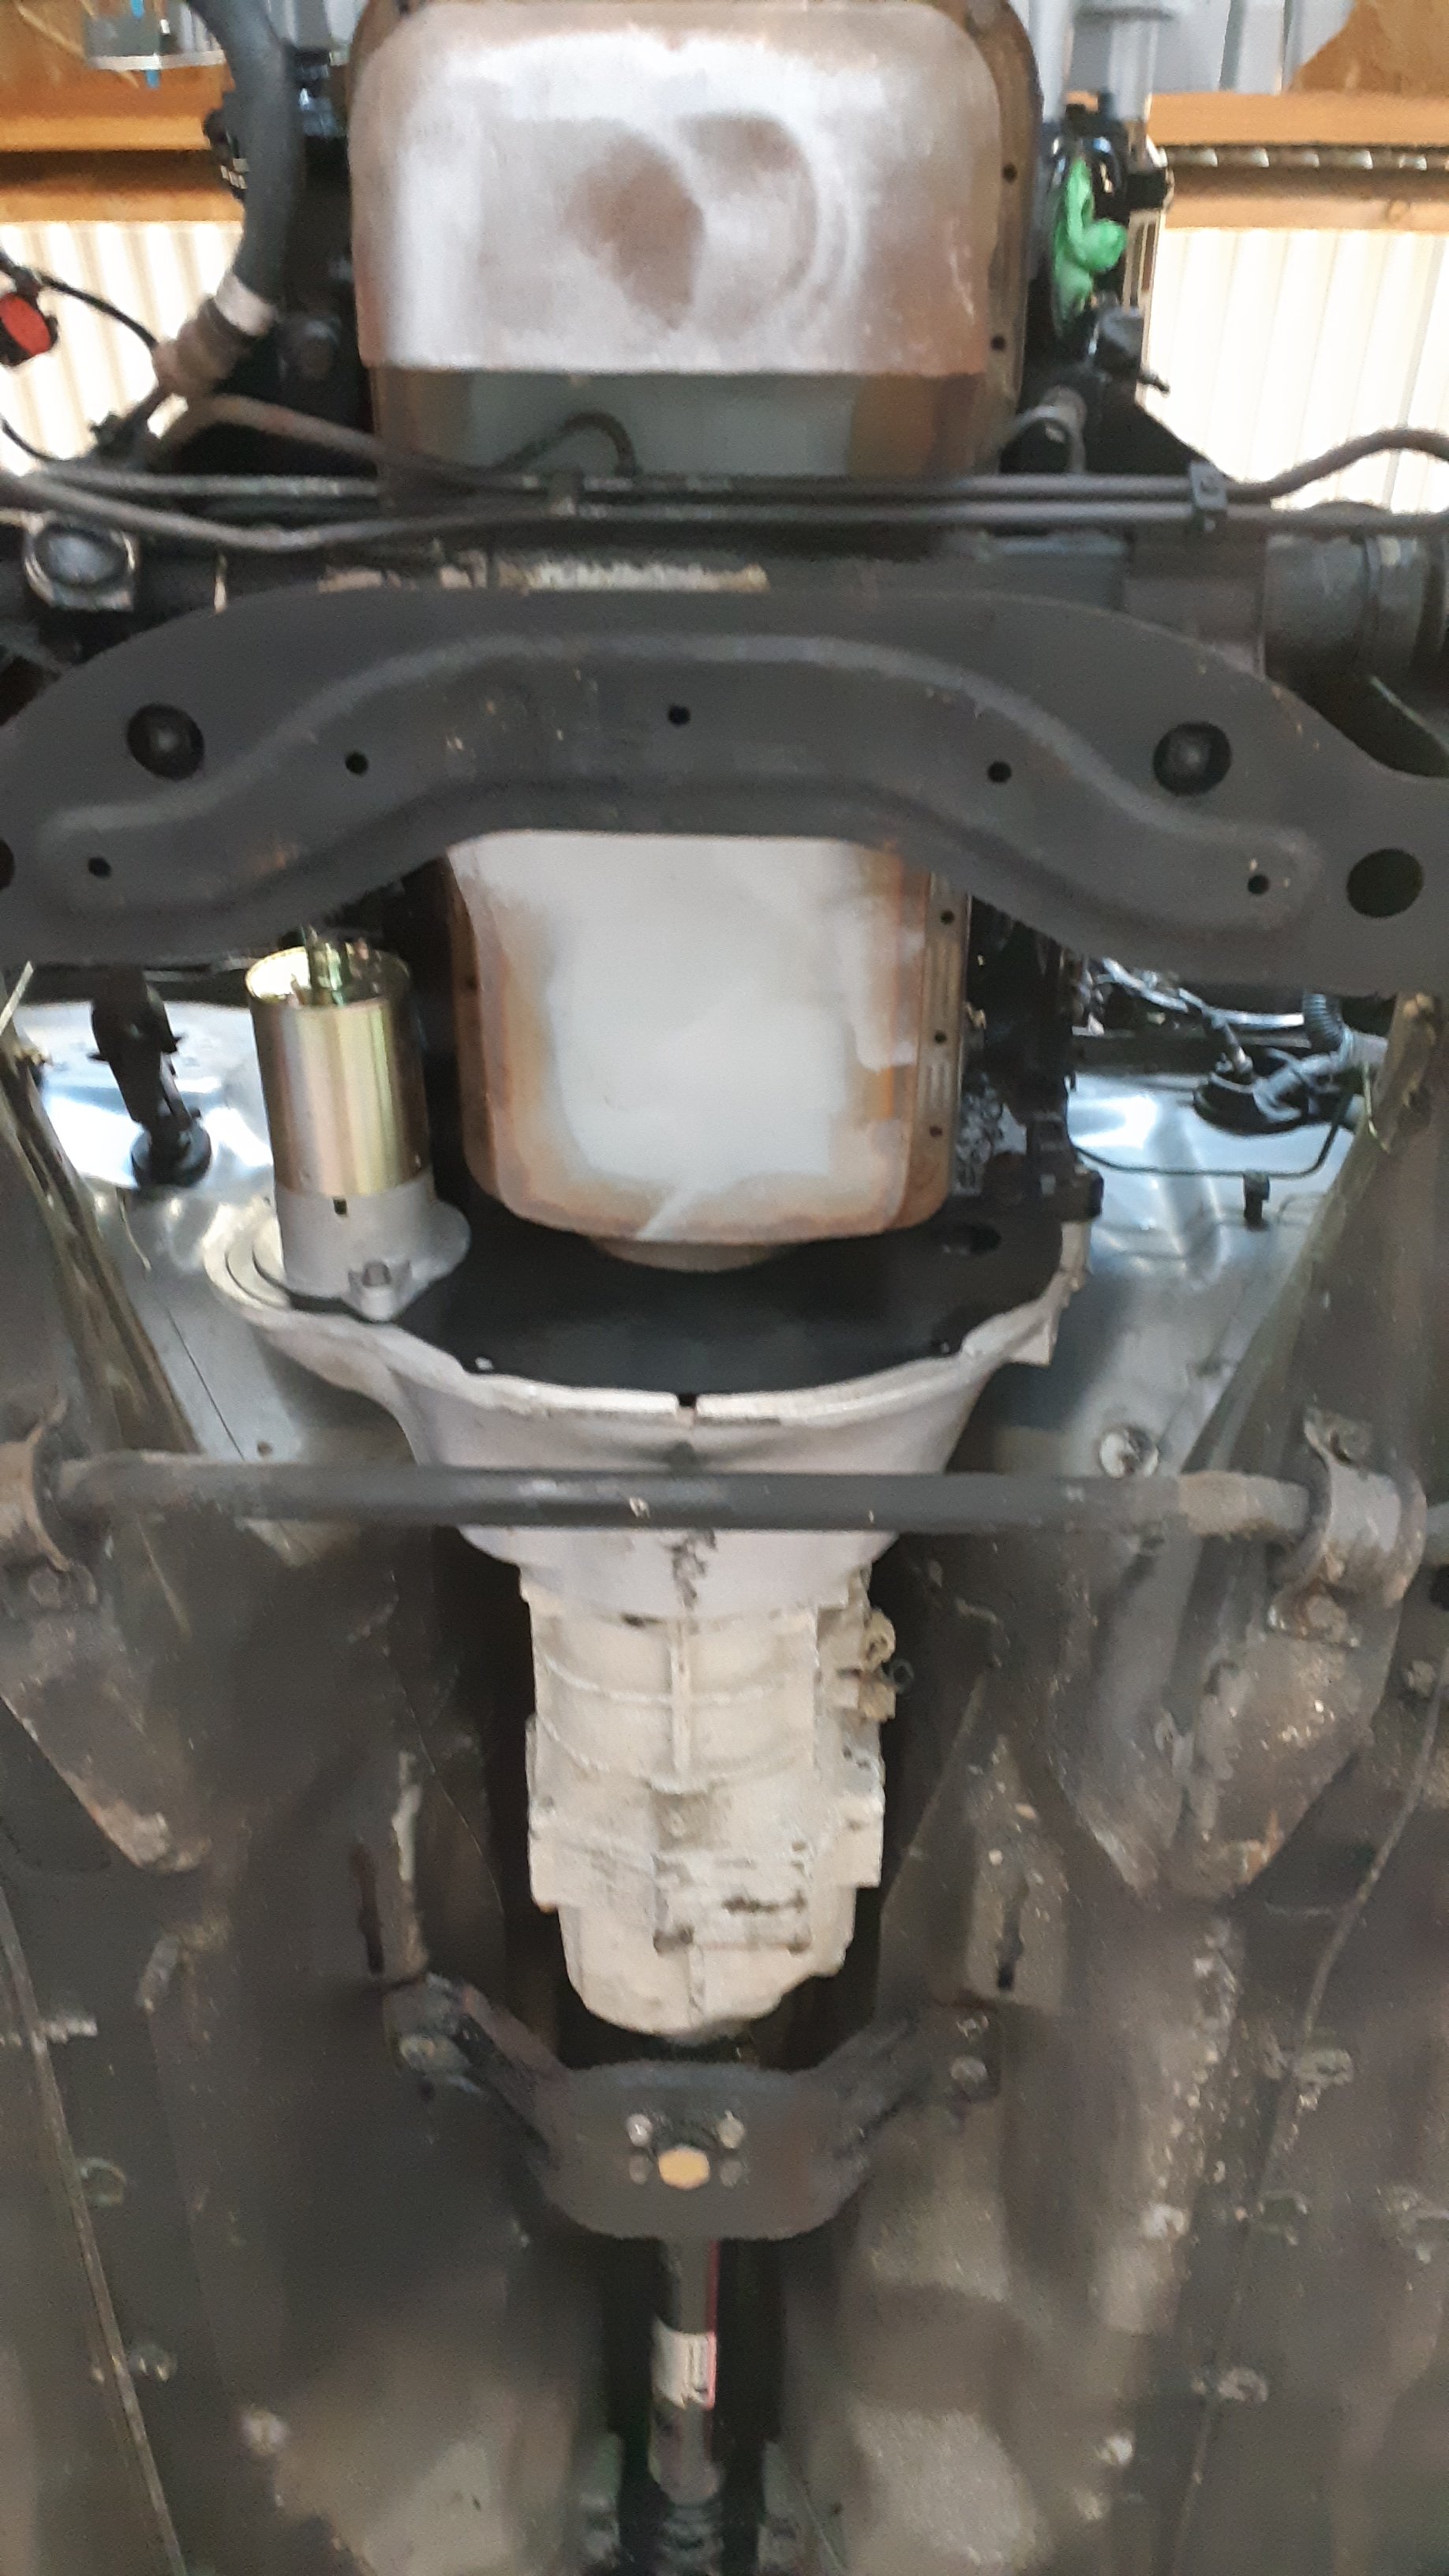
Underneath. W55 box.
7 points
-
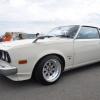
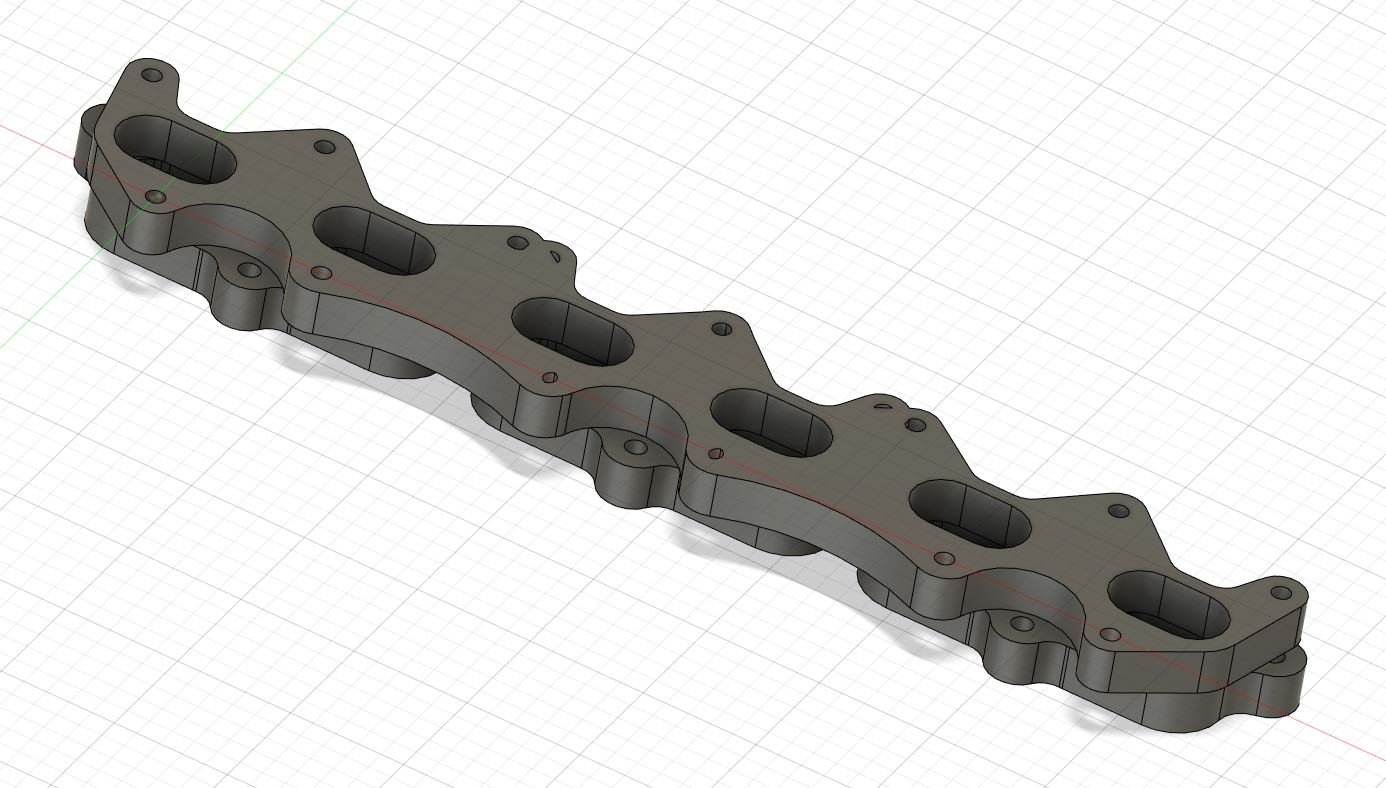
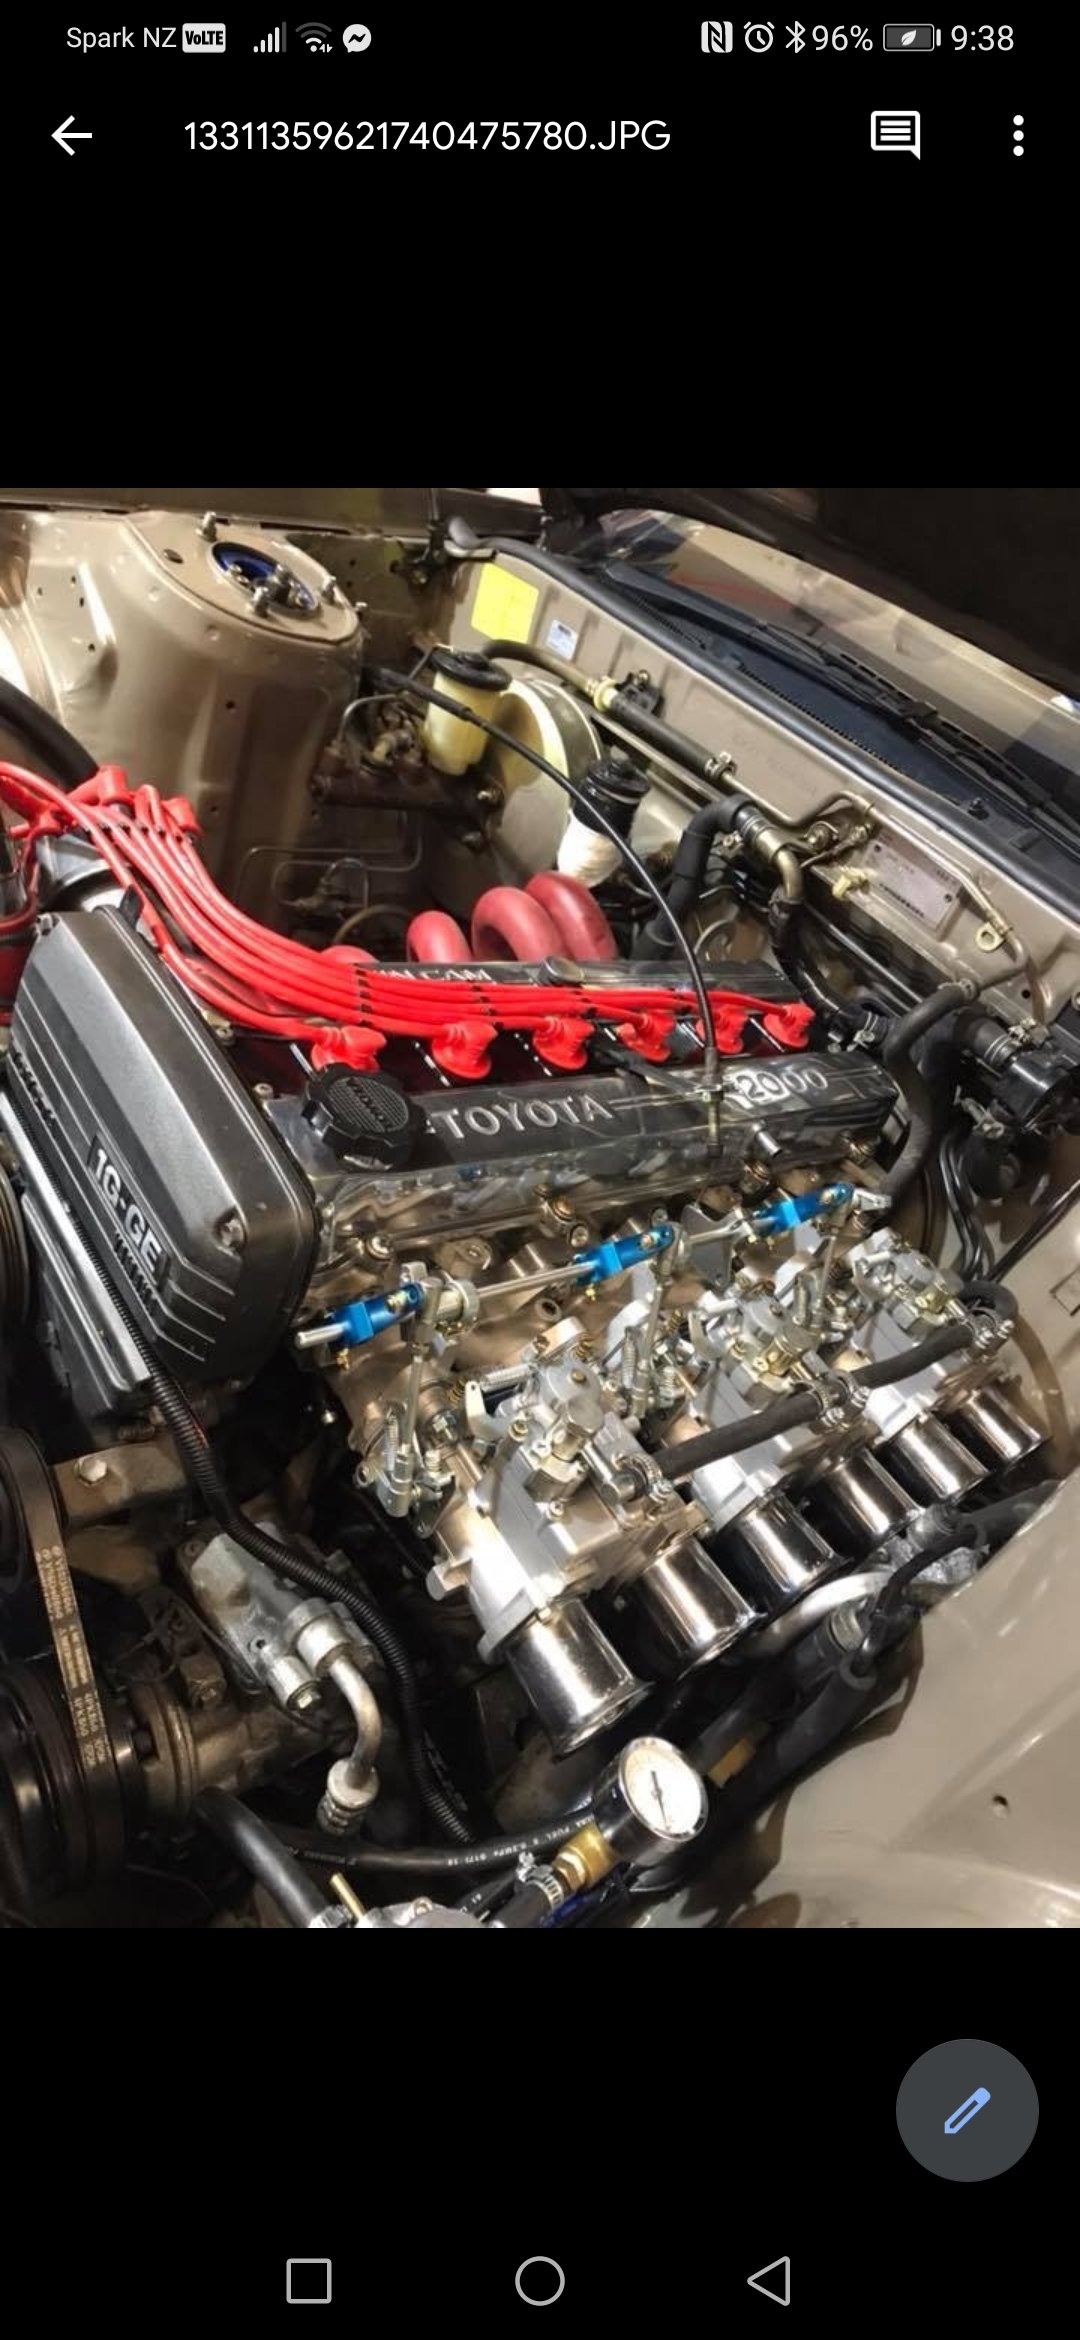
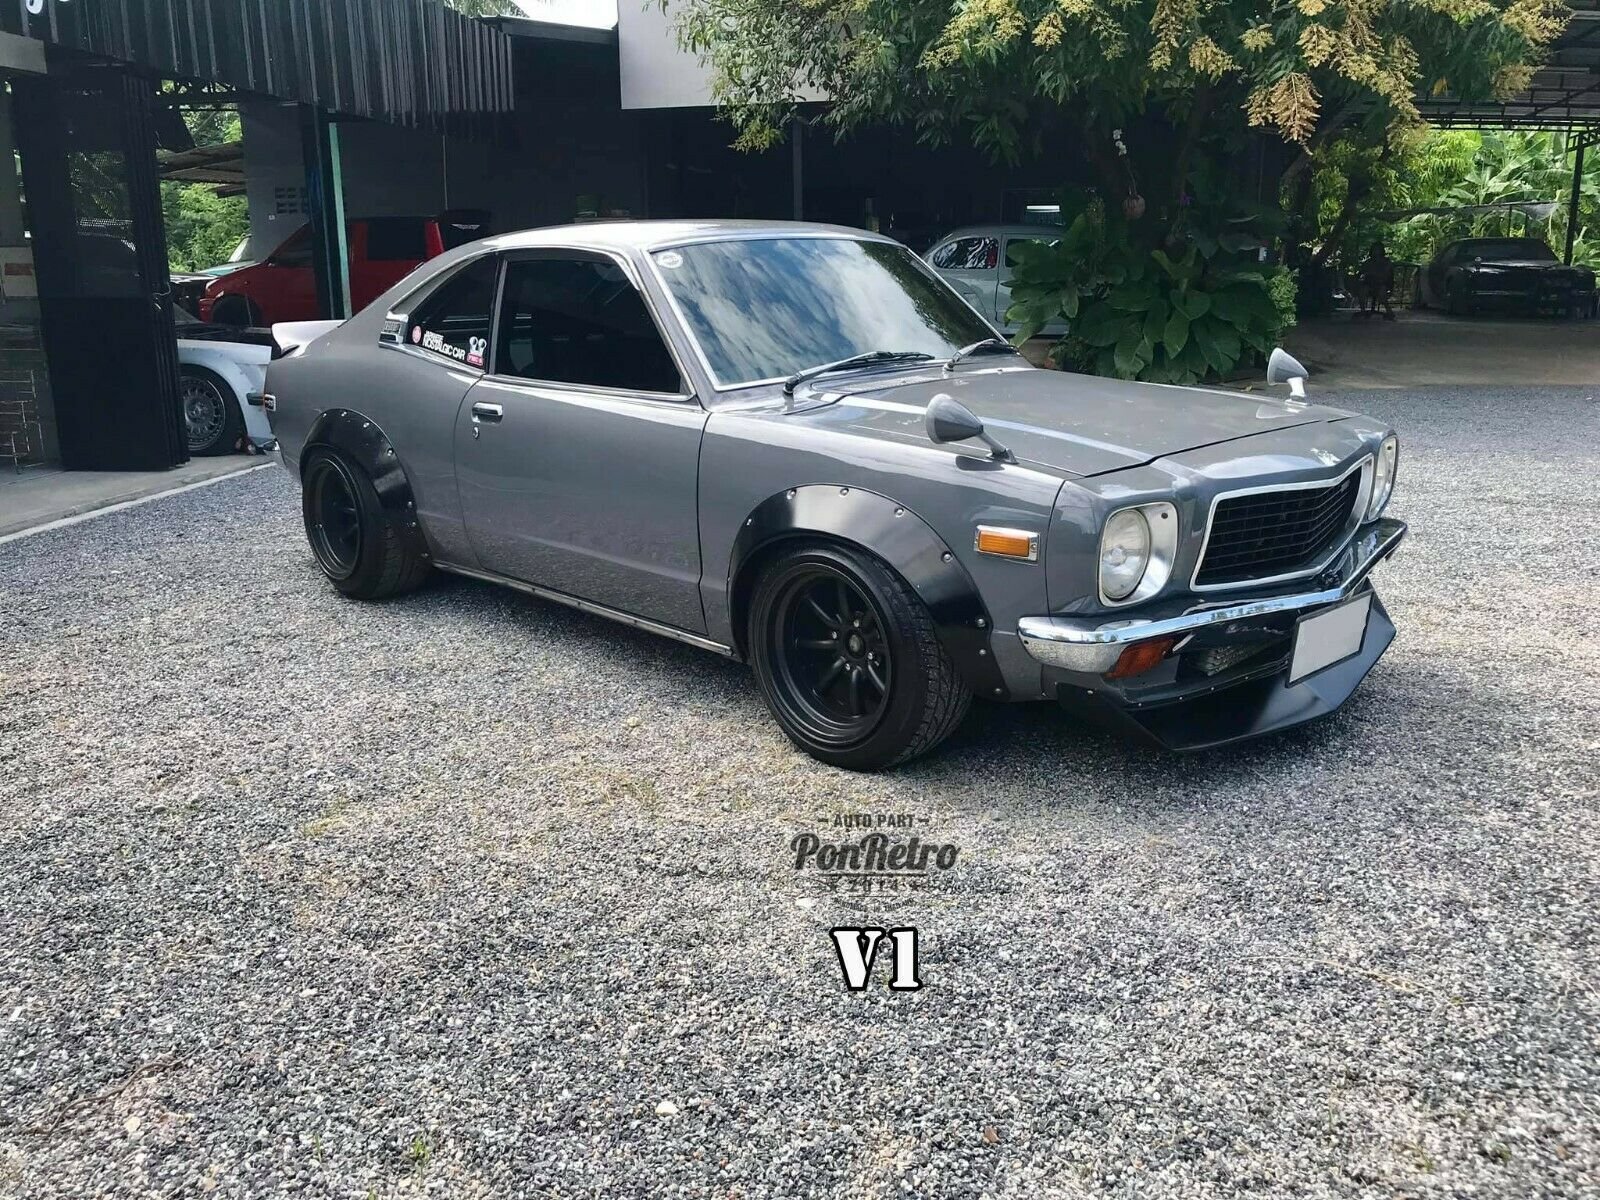
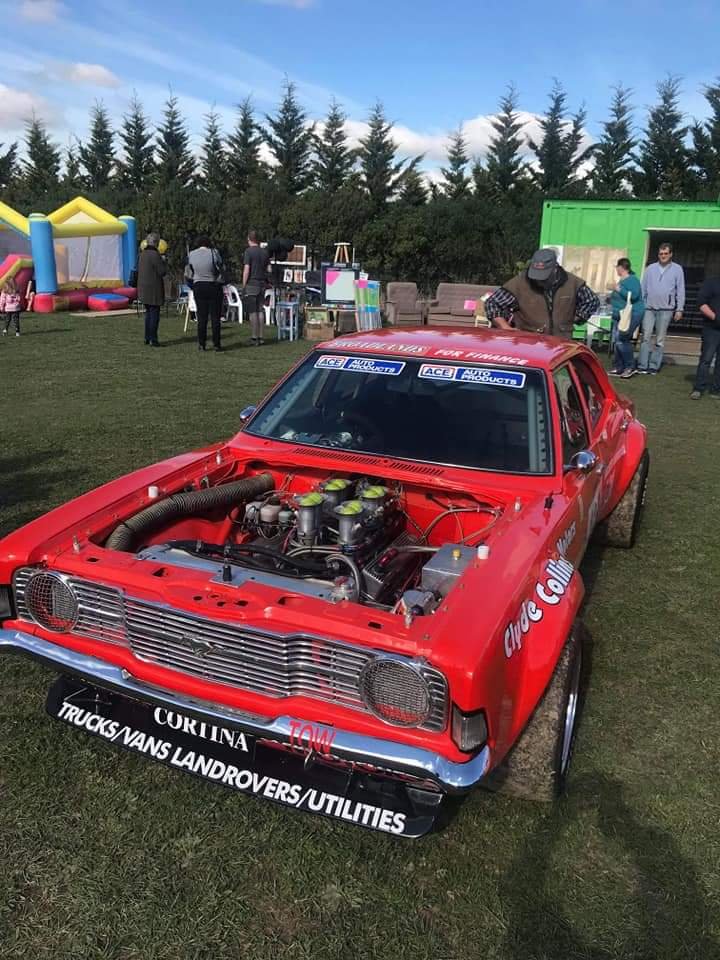
Spent much of the last week measuring and thinking about the manifold for the Carb Conversion. Think I have that sorted, so will try to get some more progress this week on getting one made. I have a spare 1ggte head that turned up this week which has been useful to just look over. Had a manifold flange quickly drawn up so I could figure some small details out. This was for my original plan which was to use two 4age Weber manifolds (easy to buy) and have a conversion flange on the head. Am leaning away from this at the moment. Also attached is the one picture that kicked off the carb idea.
7 points
-
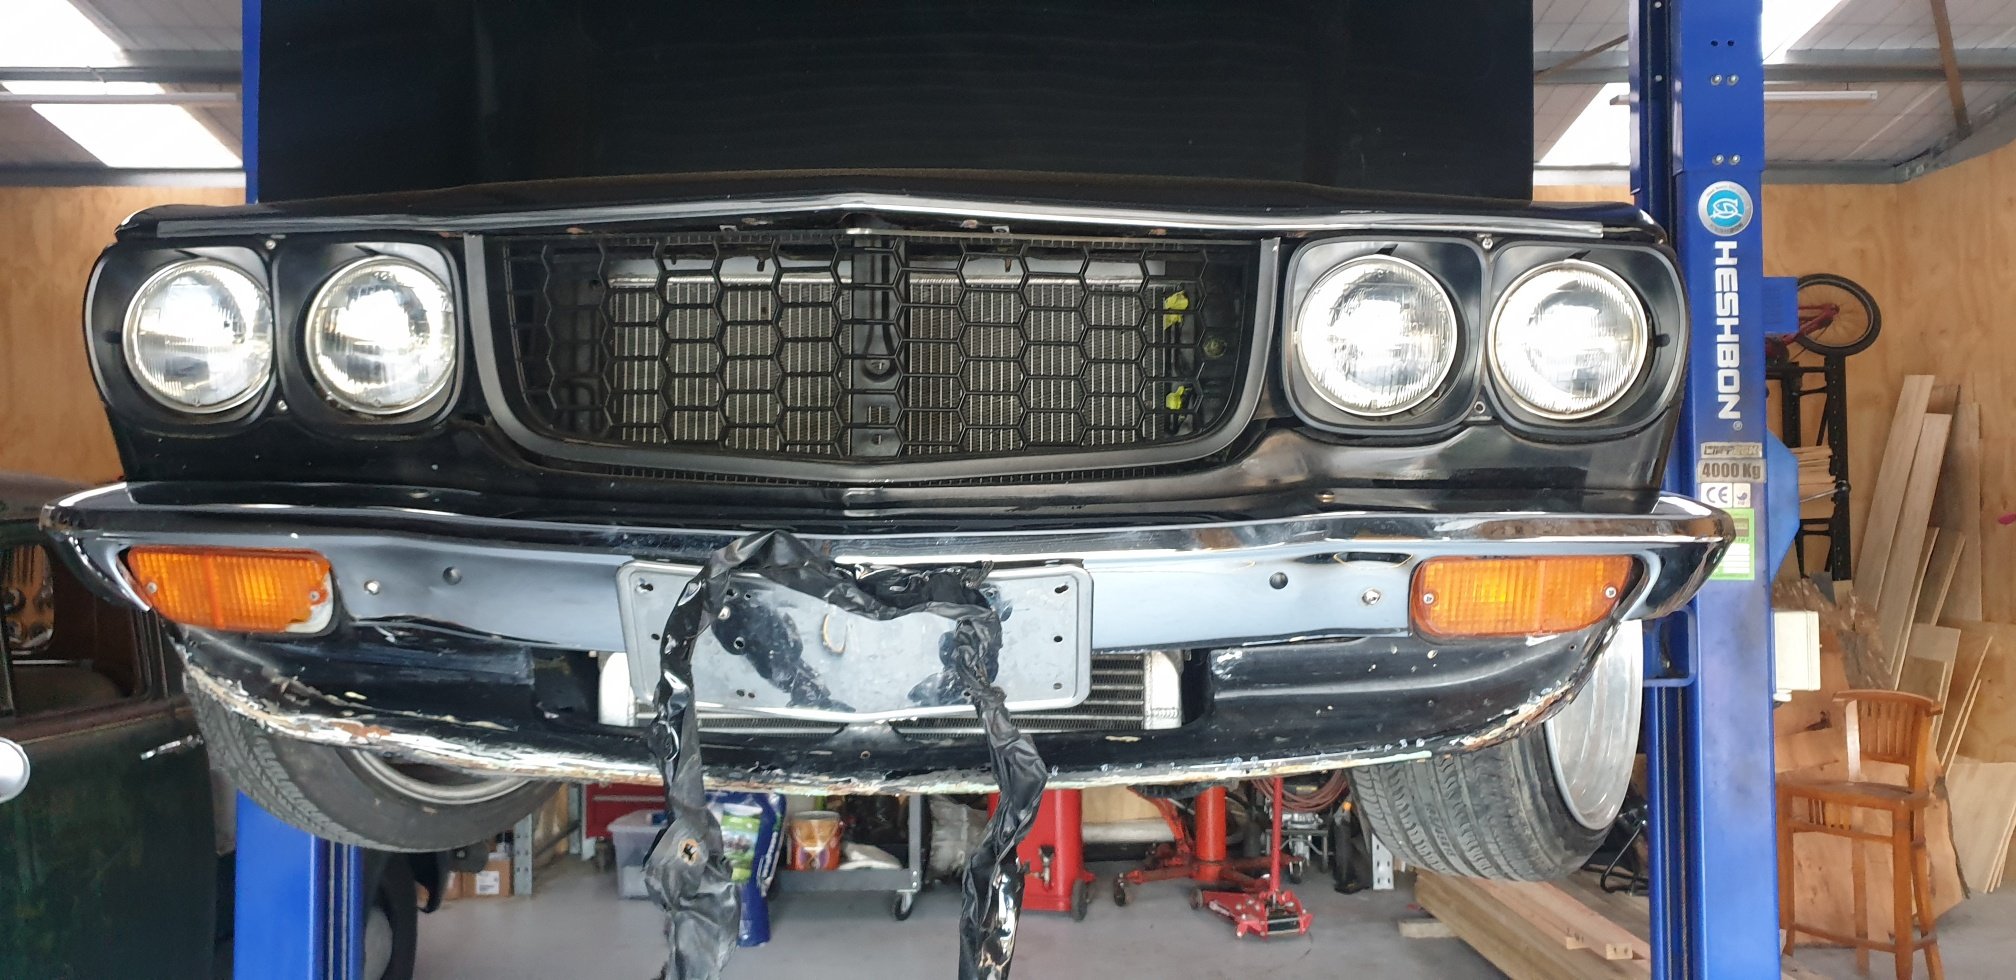
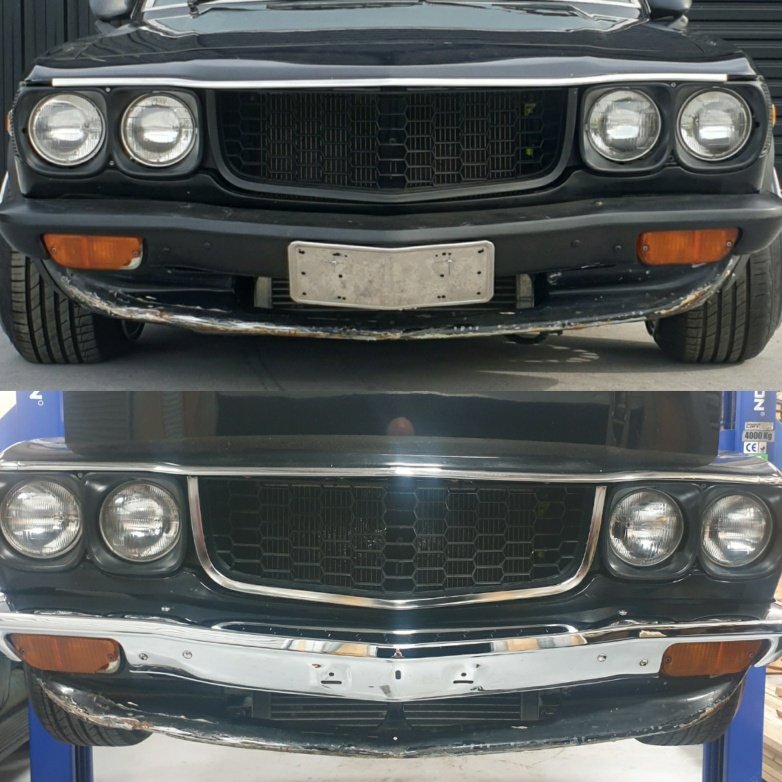
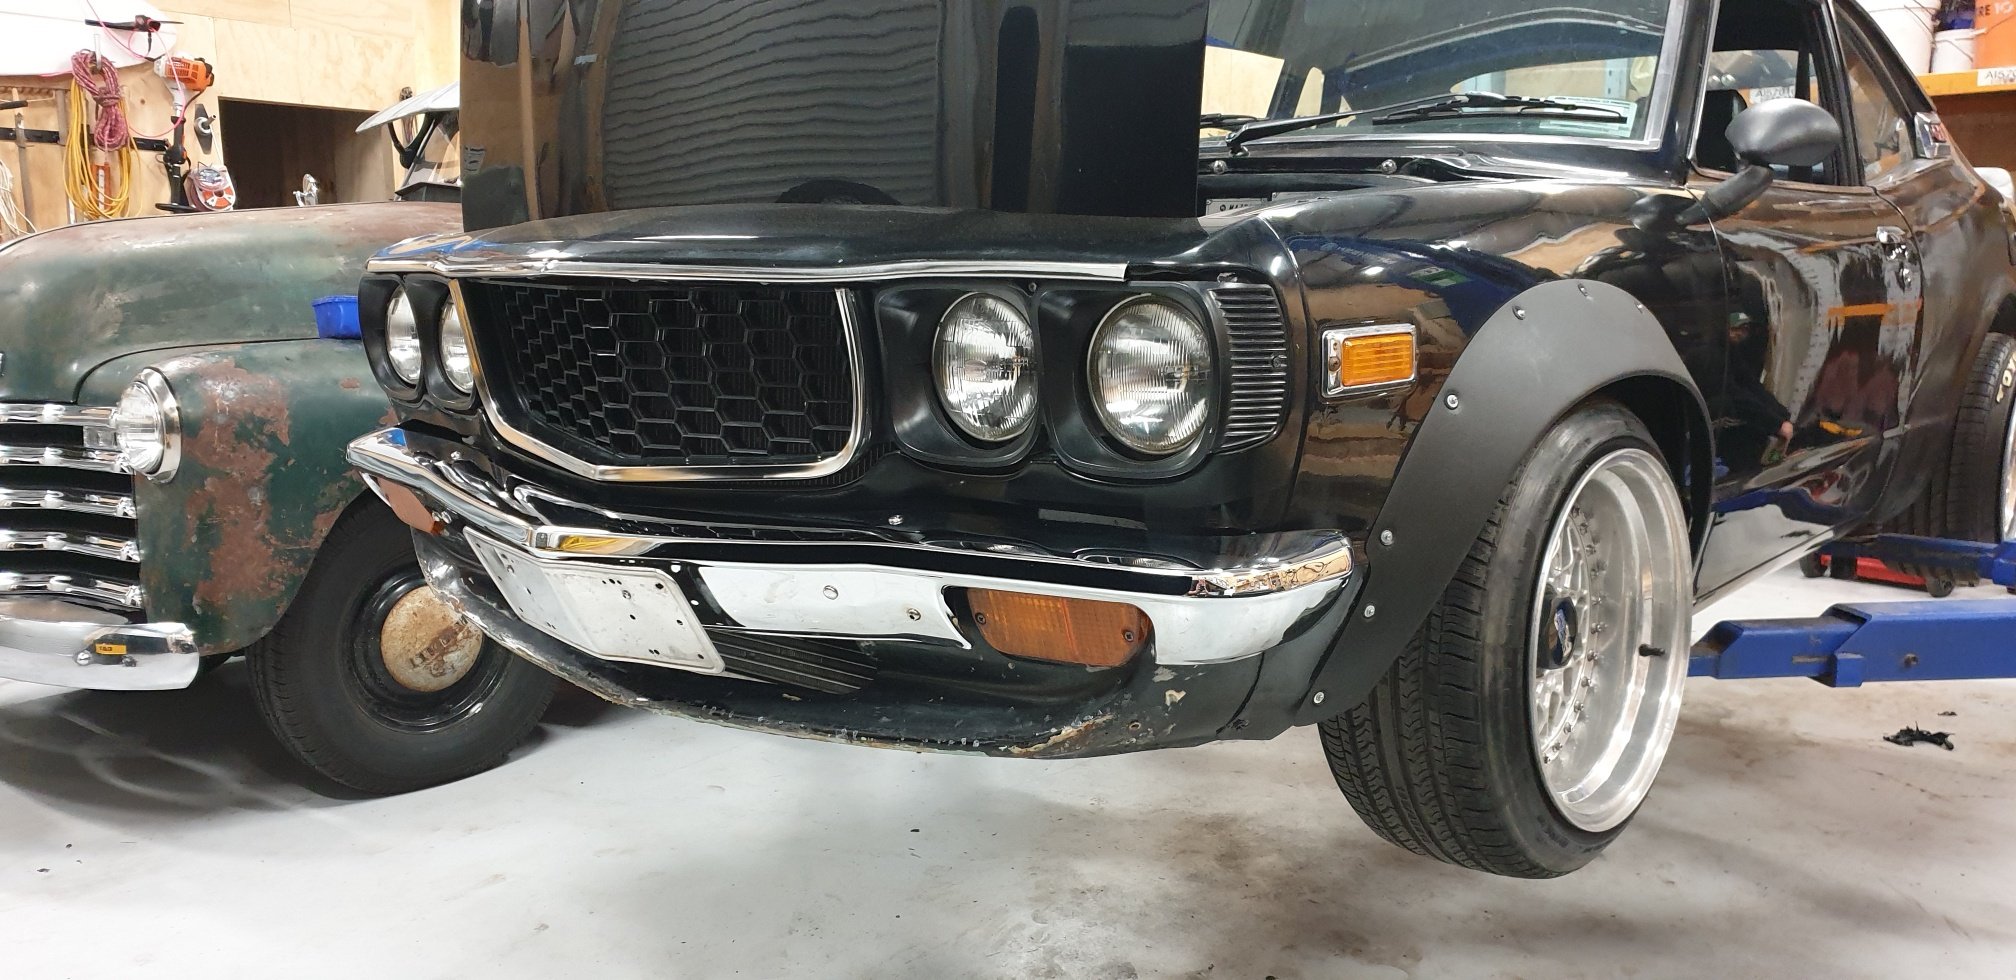
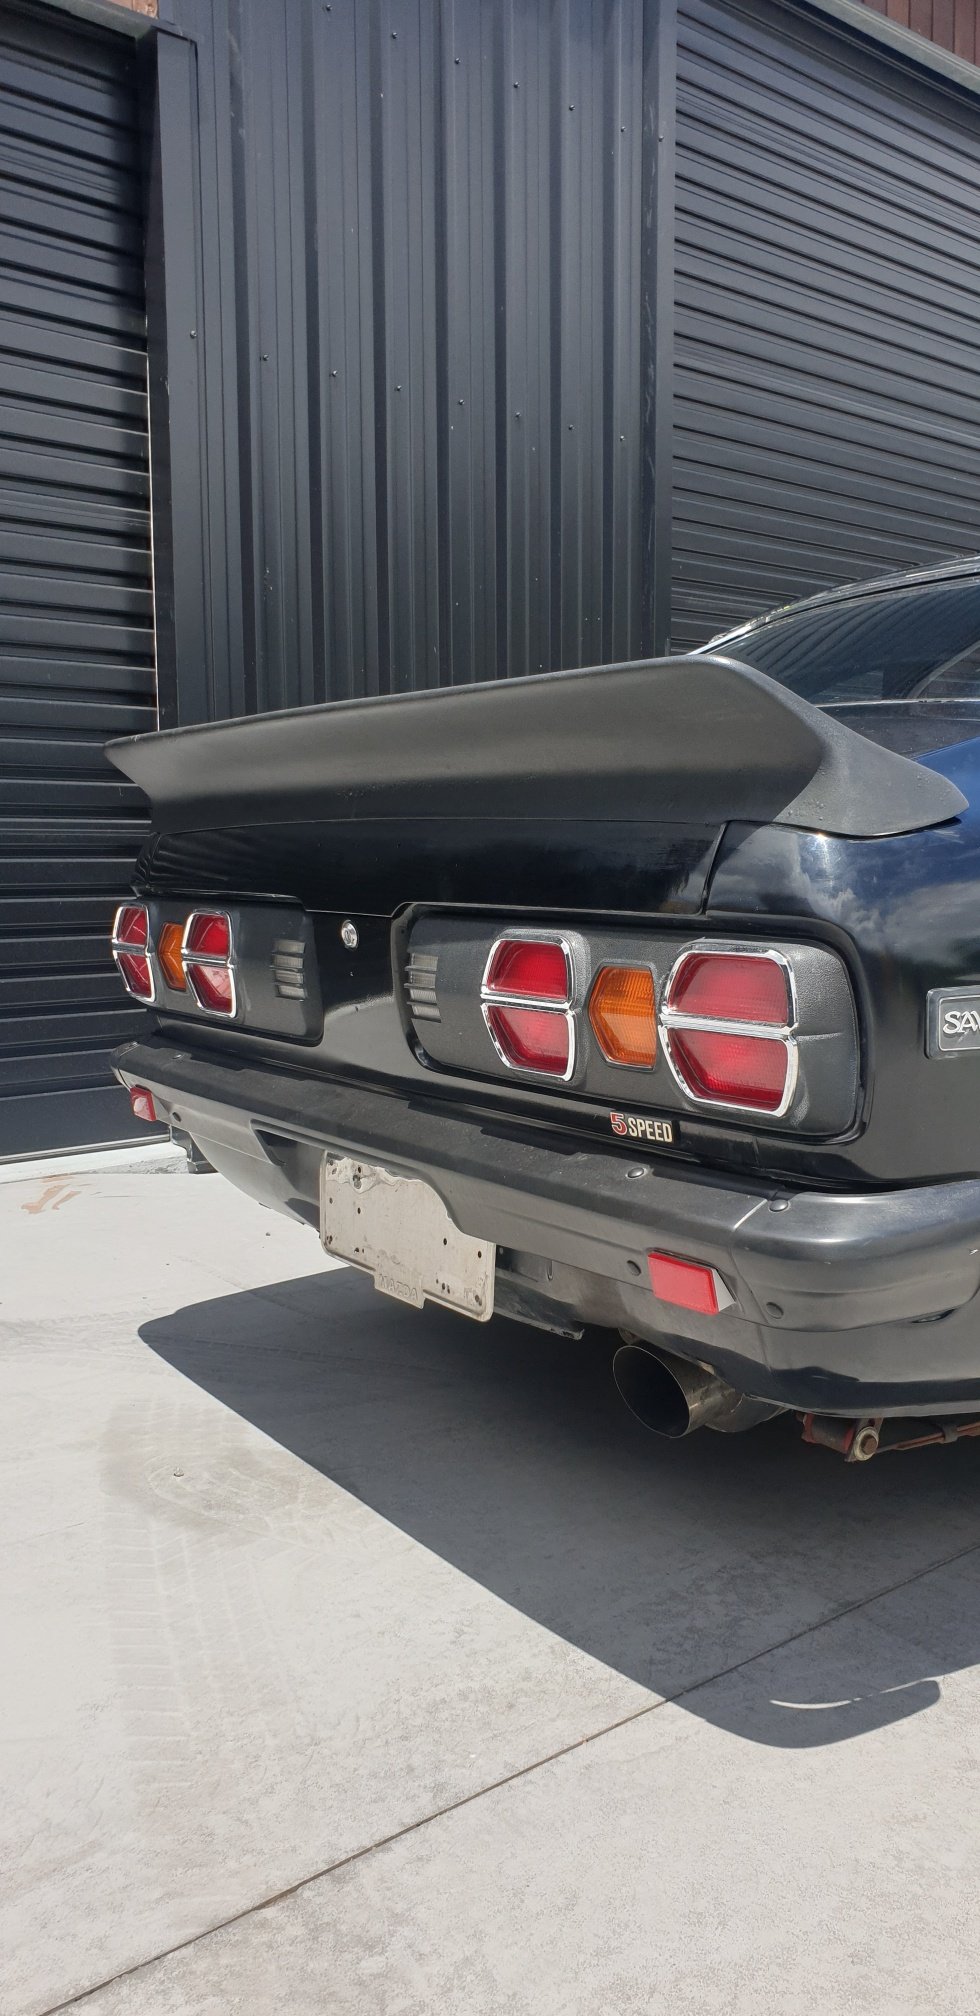
So when i got the car the front and rear bumpers and the grill surround trim were plastidipped black. Not really my thing got to have chrome on a old school car. Managed to peel it all off to reveal very tidy and mint chrome which was a relief. Couple of before and after shots, very happy with the outcome.
7 points
-
Ordered online from the smits group/spray store website. Prices were what I was happy to pay and from the first place I found shipping. No idea if it's the cheapest or best place to get it. I've been flatting back the clear this weekend, gave that bog trick a go and it does work pretty well, but was super slow going. I later went back and re watched the video, he started sanding with wet 320 and said you could even use 240 and best I had was 400 so that's probably why, I was getting worried that the extra effort required to cut down through the filler would end up with me rubbing through the clear on the perimeter of the filler. Didn't happen thankfully. But since I noticed all the runs while I was still painting and stacked on a few extra layers, it's actually been really easy to cut them out with a careful hand and just the wet sand paper. I havnt been able to track down any razors, but I'm not sure I'll need them. Results so far are super good and it's looking like the whole job may come out bloody nice once finished. About 35% done with flattening the car, then have to move through the gritts which will be pretty quick. Then polishing fun, which, fingers crossed will be super rewarding after all the work.6 points
-
I still have this. Still building it. I get slower at doing things the older i get.
6 points
-
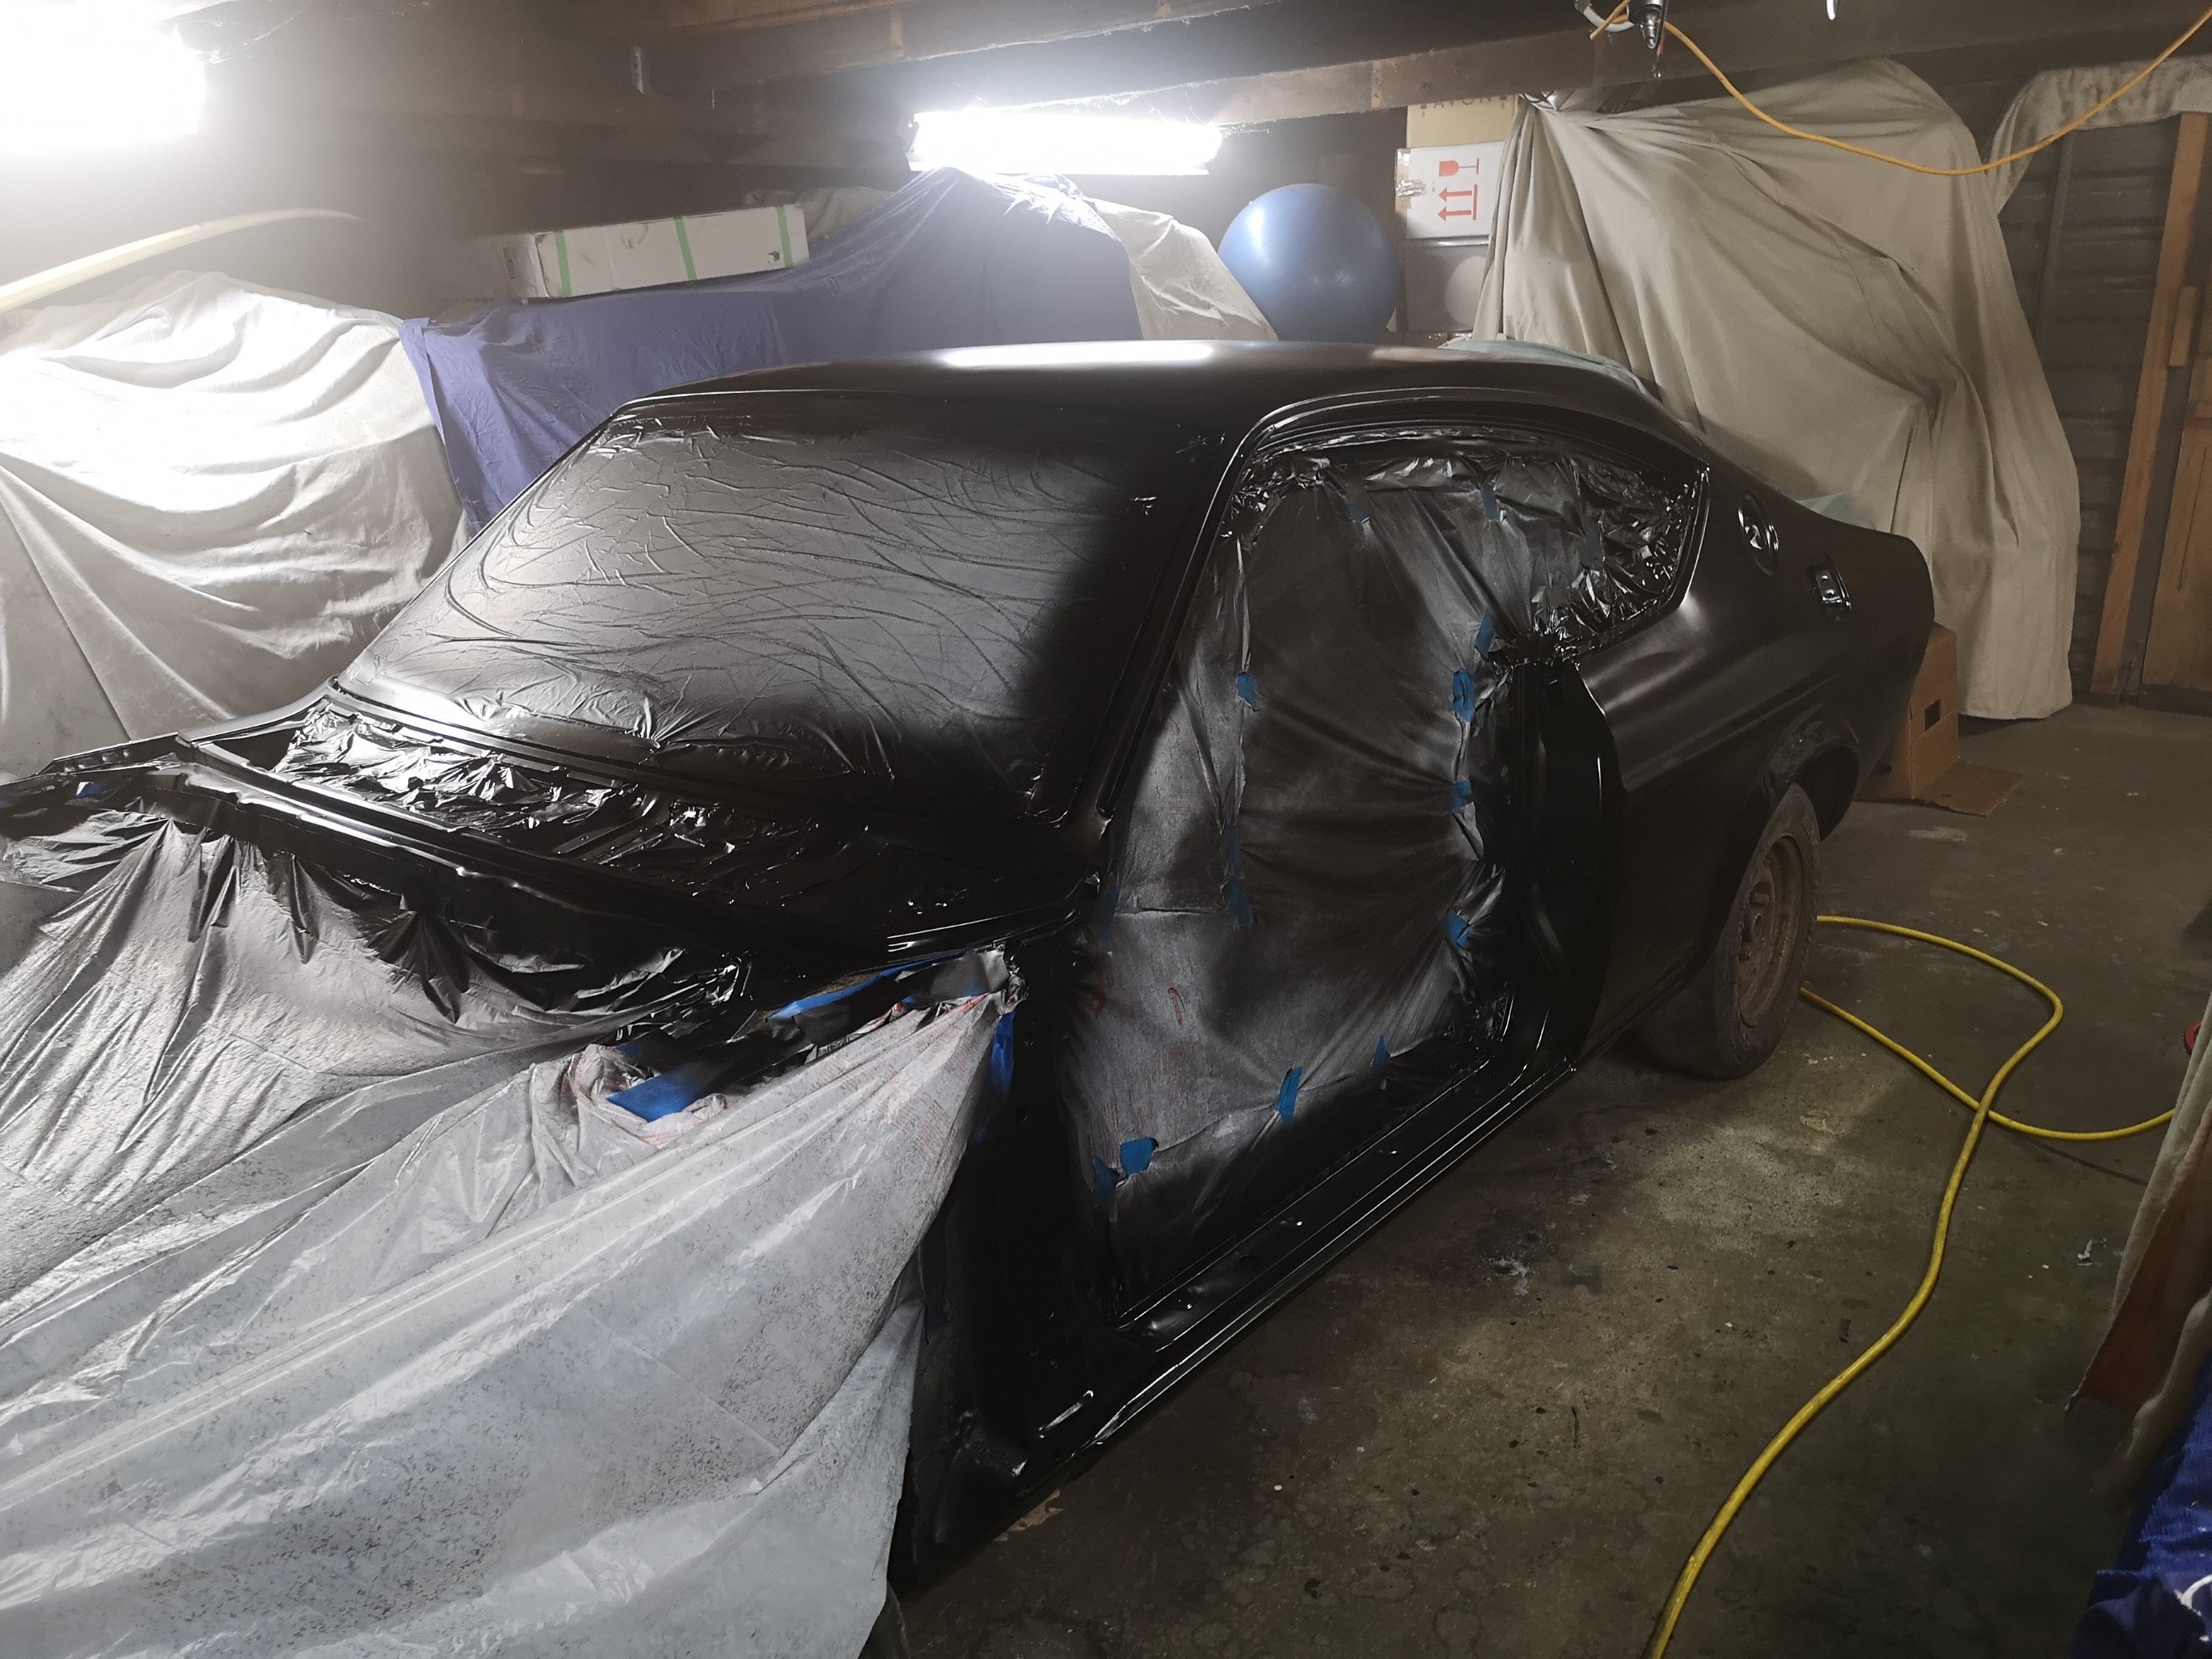
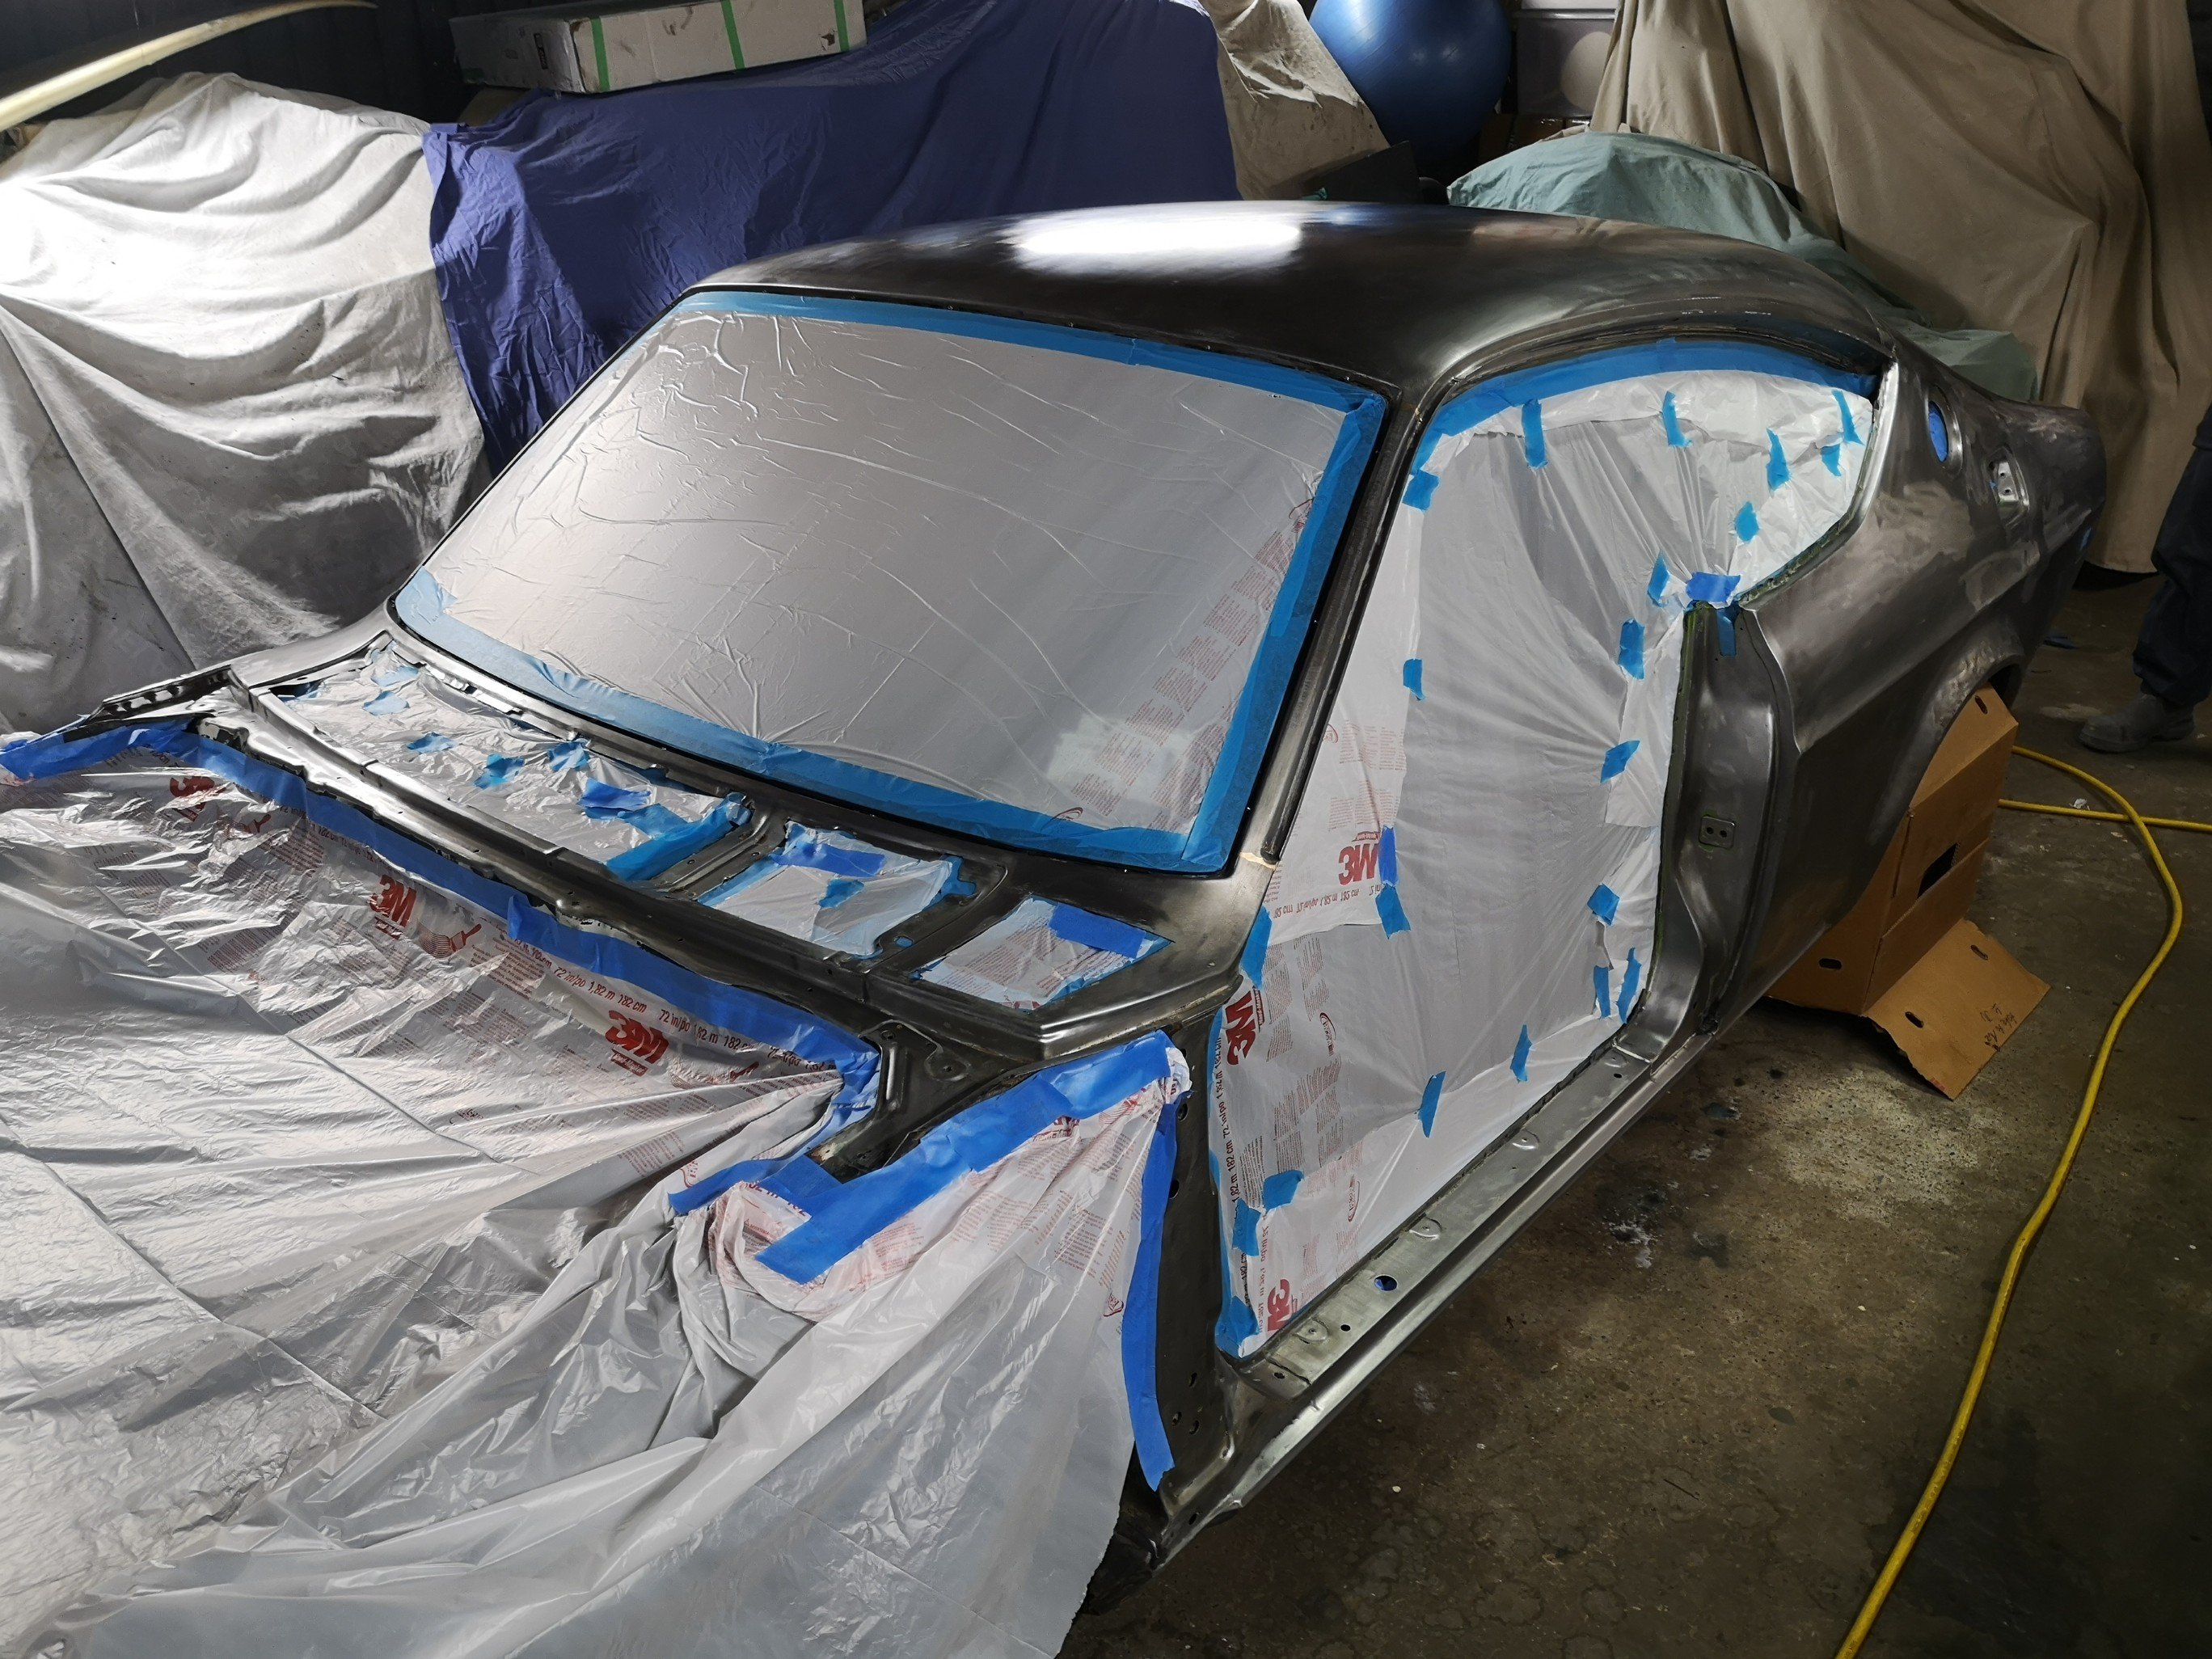
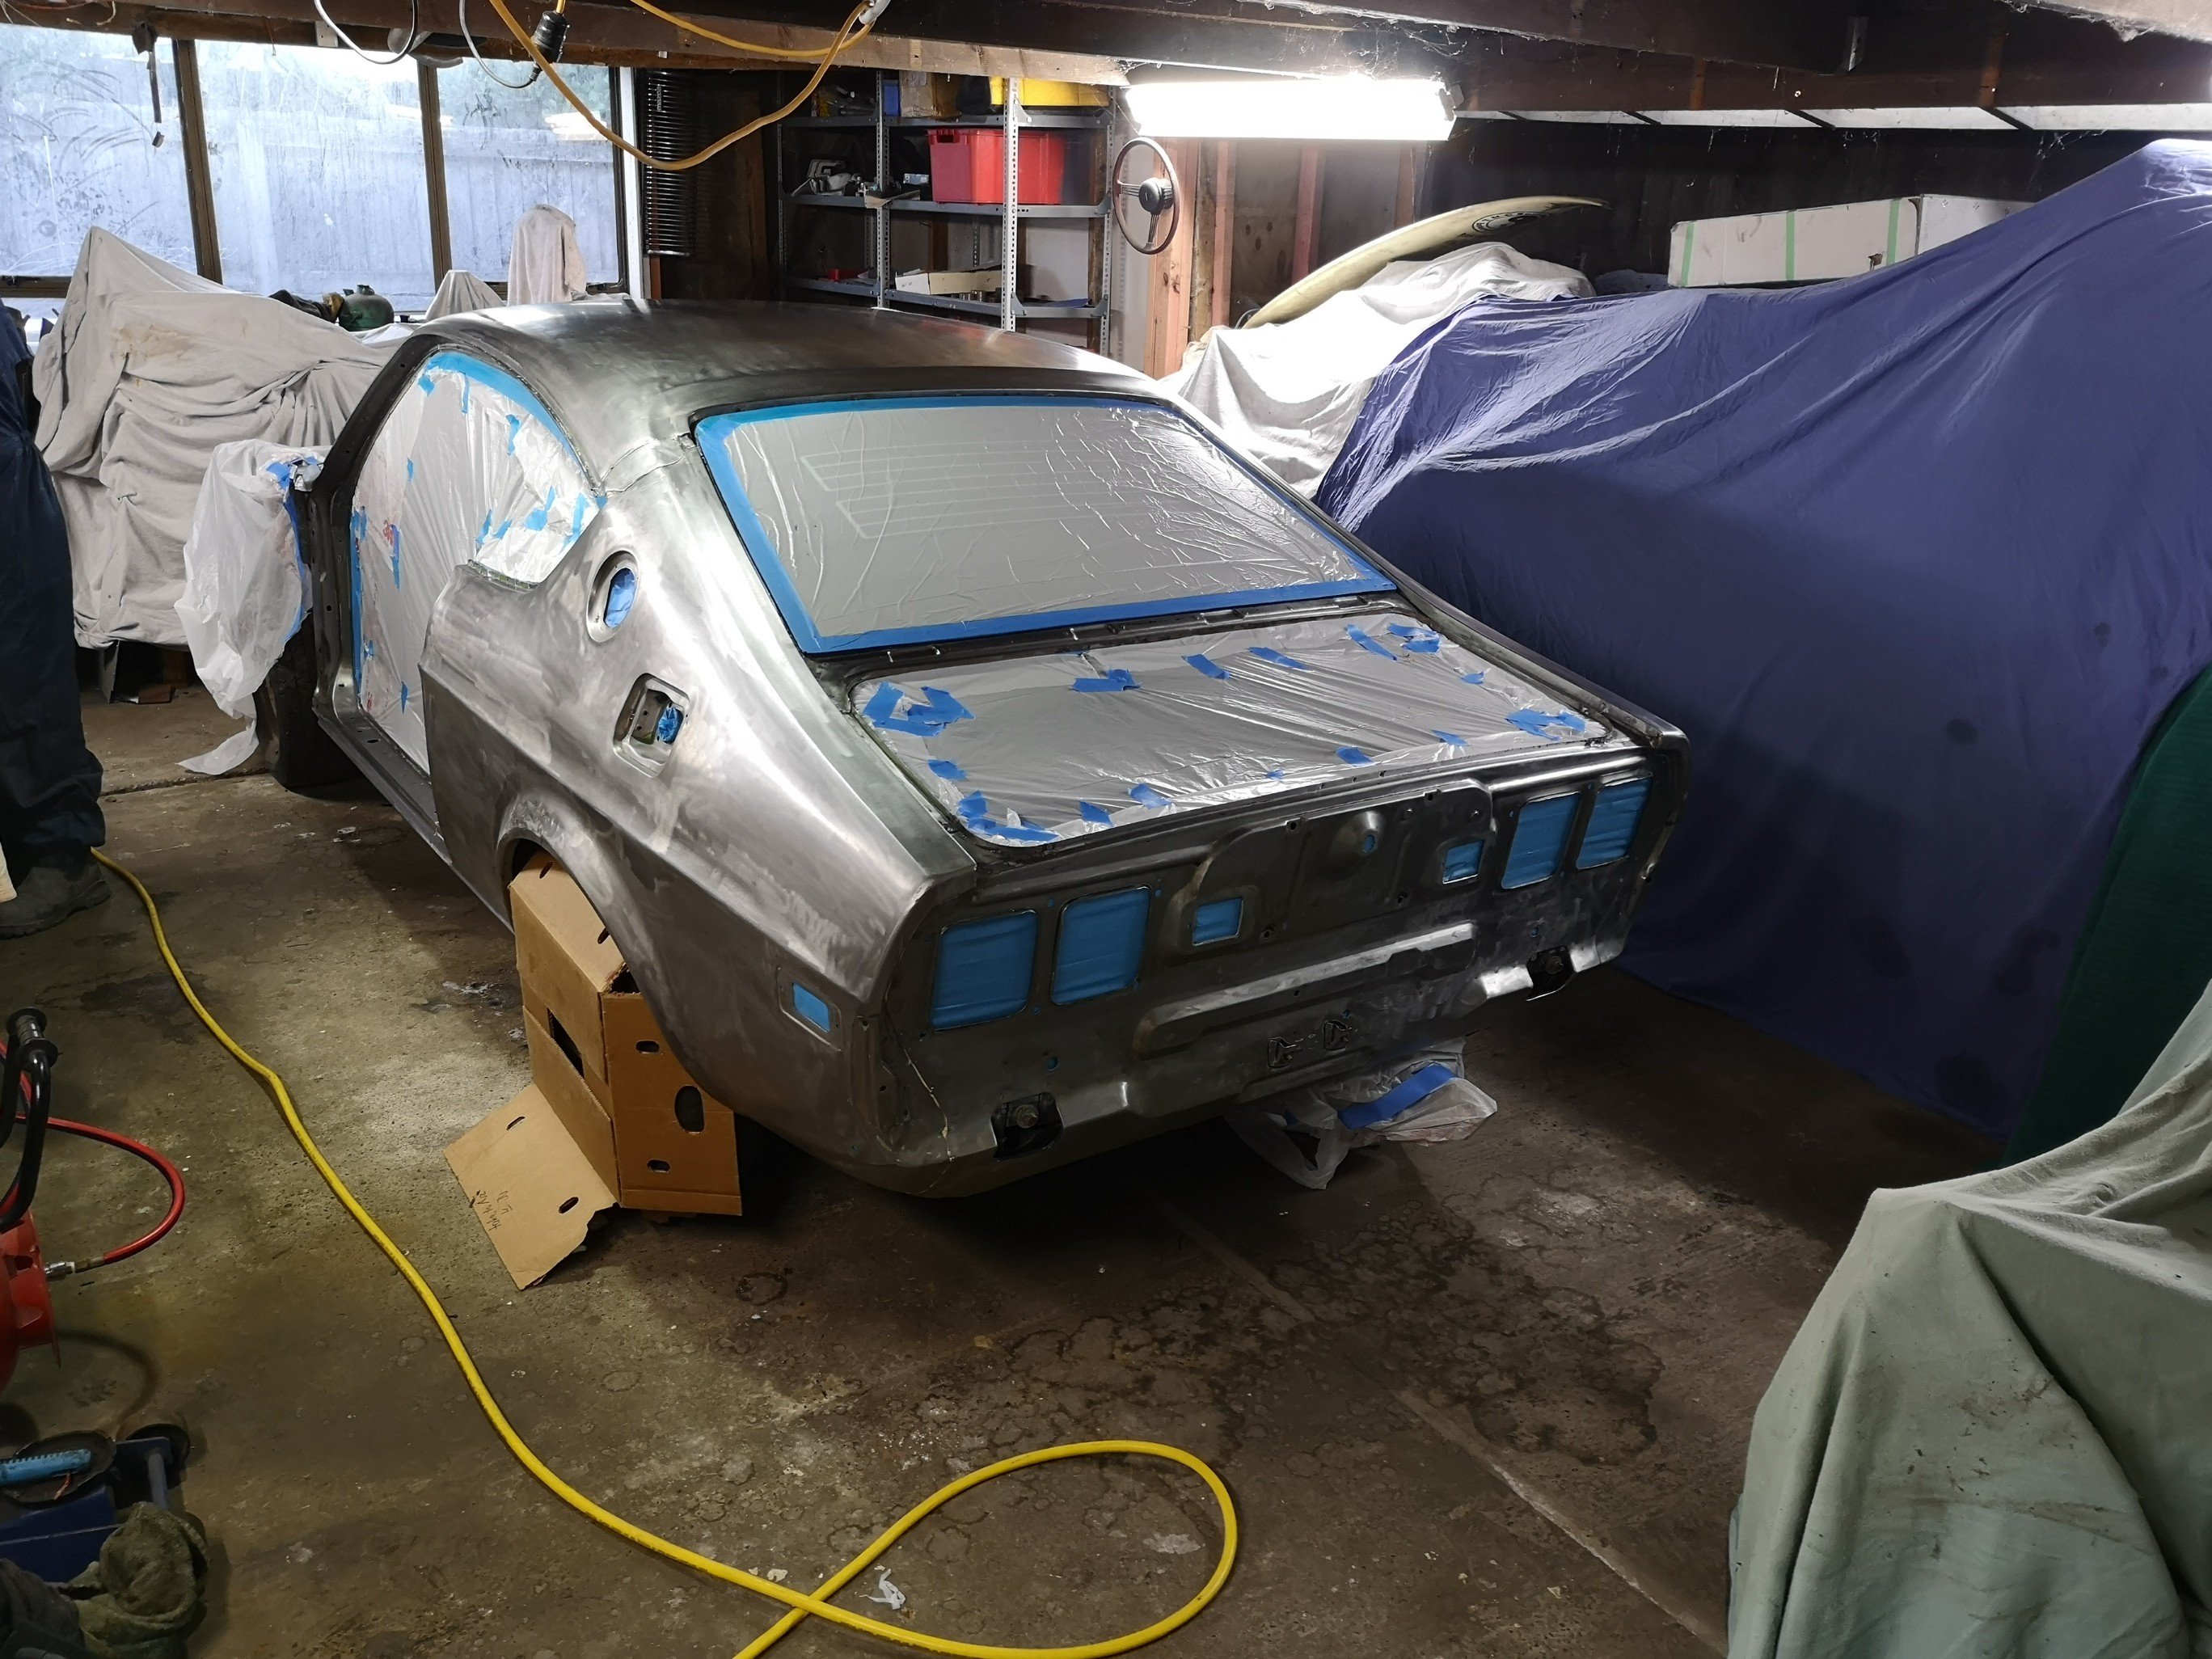
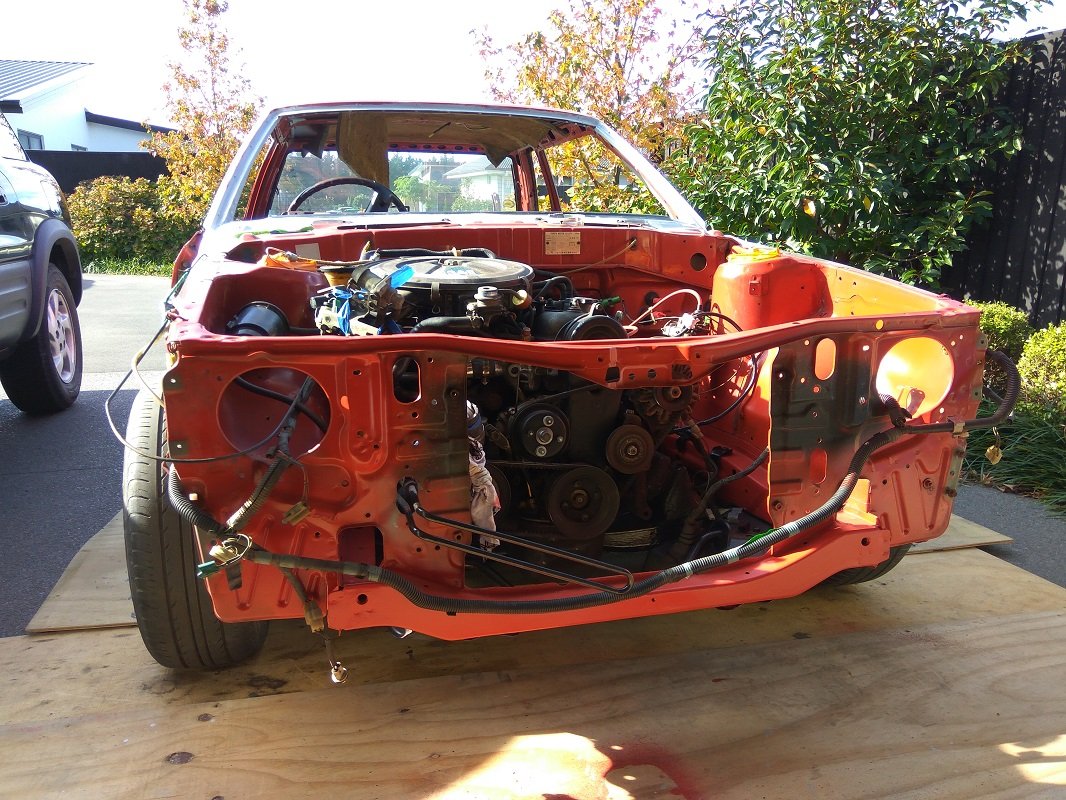
This is how the car has been sitting for the last week and a half.. So this morning I went down there and got busy rust proofing and scotching and prepsoling. And masking..
5 points
-
i didnt like the colour of this bolt. i decided it was the wrong shade of red and you know when somethings gets in your head and you cant let it go? well the colour of this bolt got to me. so i decided to take it out and repaint it. 2020-05-03_04-47-41 by sheepers, on Flickr5 points
-
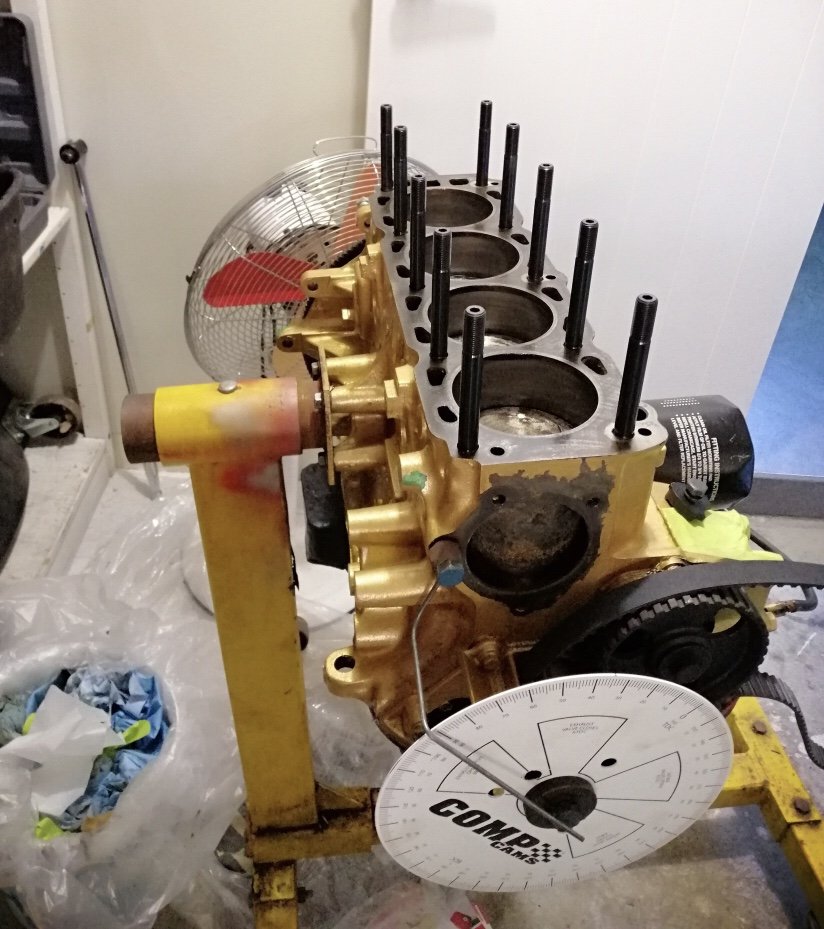
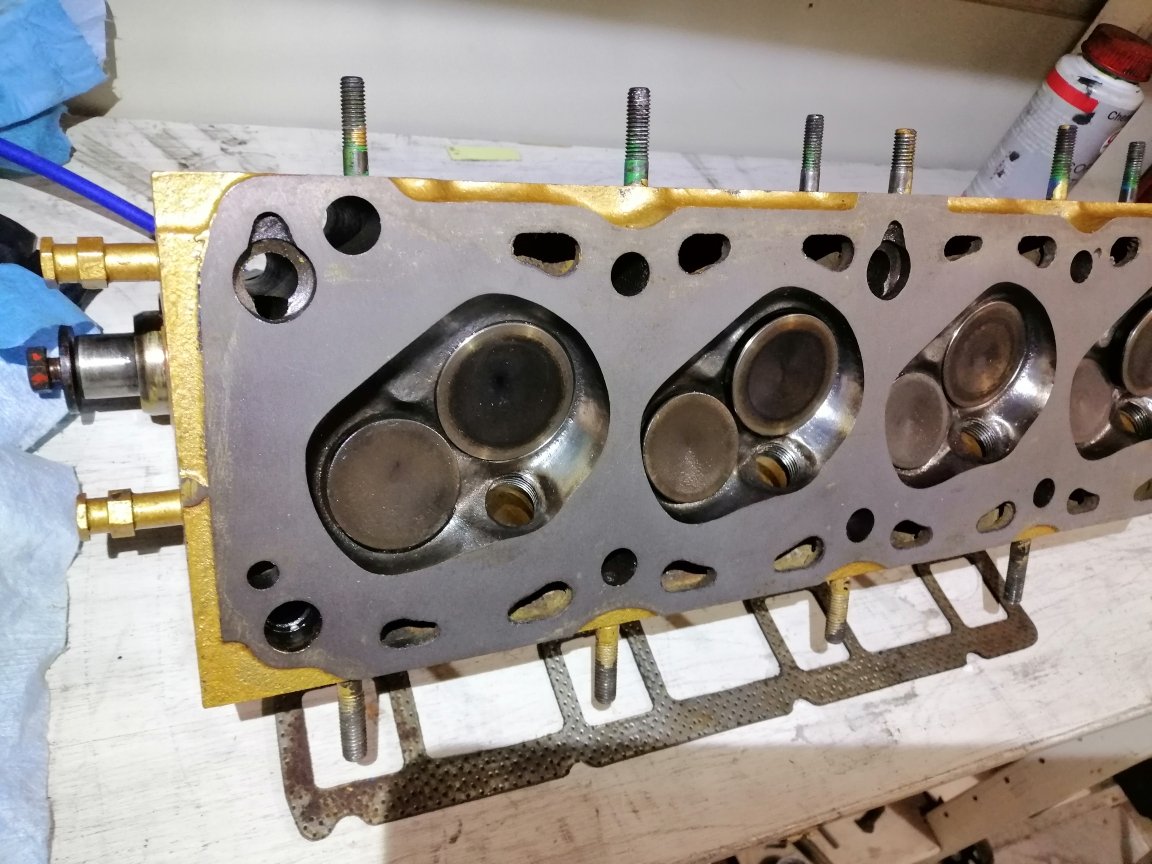
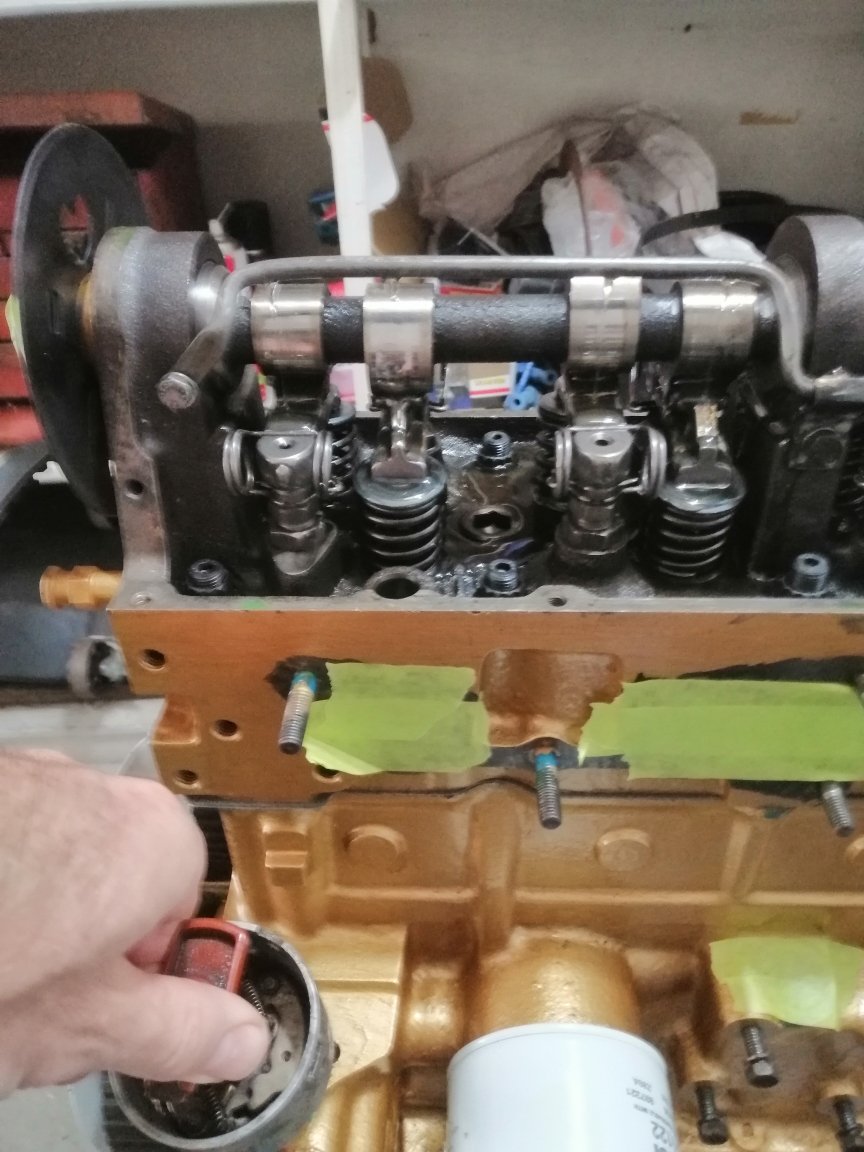
Yay! I got some more work done and and update before another year passed! Still not flash when the update at the top of this page (6) is from 5 years and 4 houses ago. Not too bad though when one of those houses was a 2 year sabbatical on a boat with my family and we moved to a new city. Latest house does not have room for Felicity so she is stored at a friends house and it’s been far too long since I have seen her. Thankfully the engine is home so I can make a little progress. Have done some really important things like painting. Then tried to remember how this lot went back together after pulled it apart over a year ago... Bit of beer assisted head scratching and it was easier that I thought. Looks sexy front and centre and has new electronic points. Just hope it works as well as it looks? Had the genius idea of gutting an old worn dizzy and pulling the drive gear off so I can pump up oil pressure without turning the engine Resulting shell on the right. ARP just look so good. looks like someone has given this a bit of love? Valves look a bit larger than standard and maybe some smoothing been done? I was happily surprised that my genius gutted dizzy easily pumped up enough oil by hand to pour out the oil spray bay! I thought I may need to get a drill on the end of it.
5 points
-
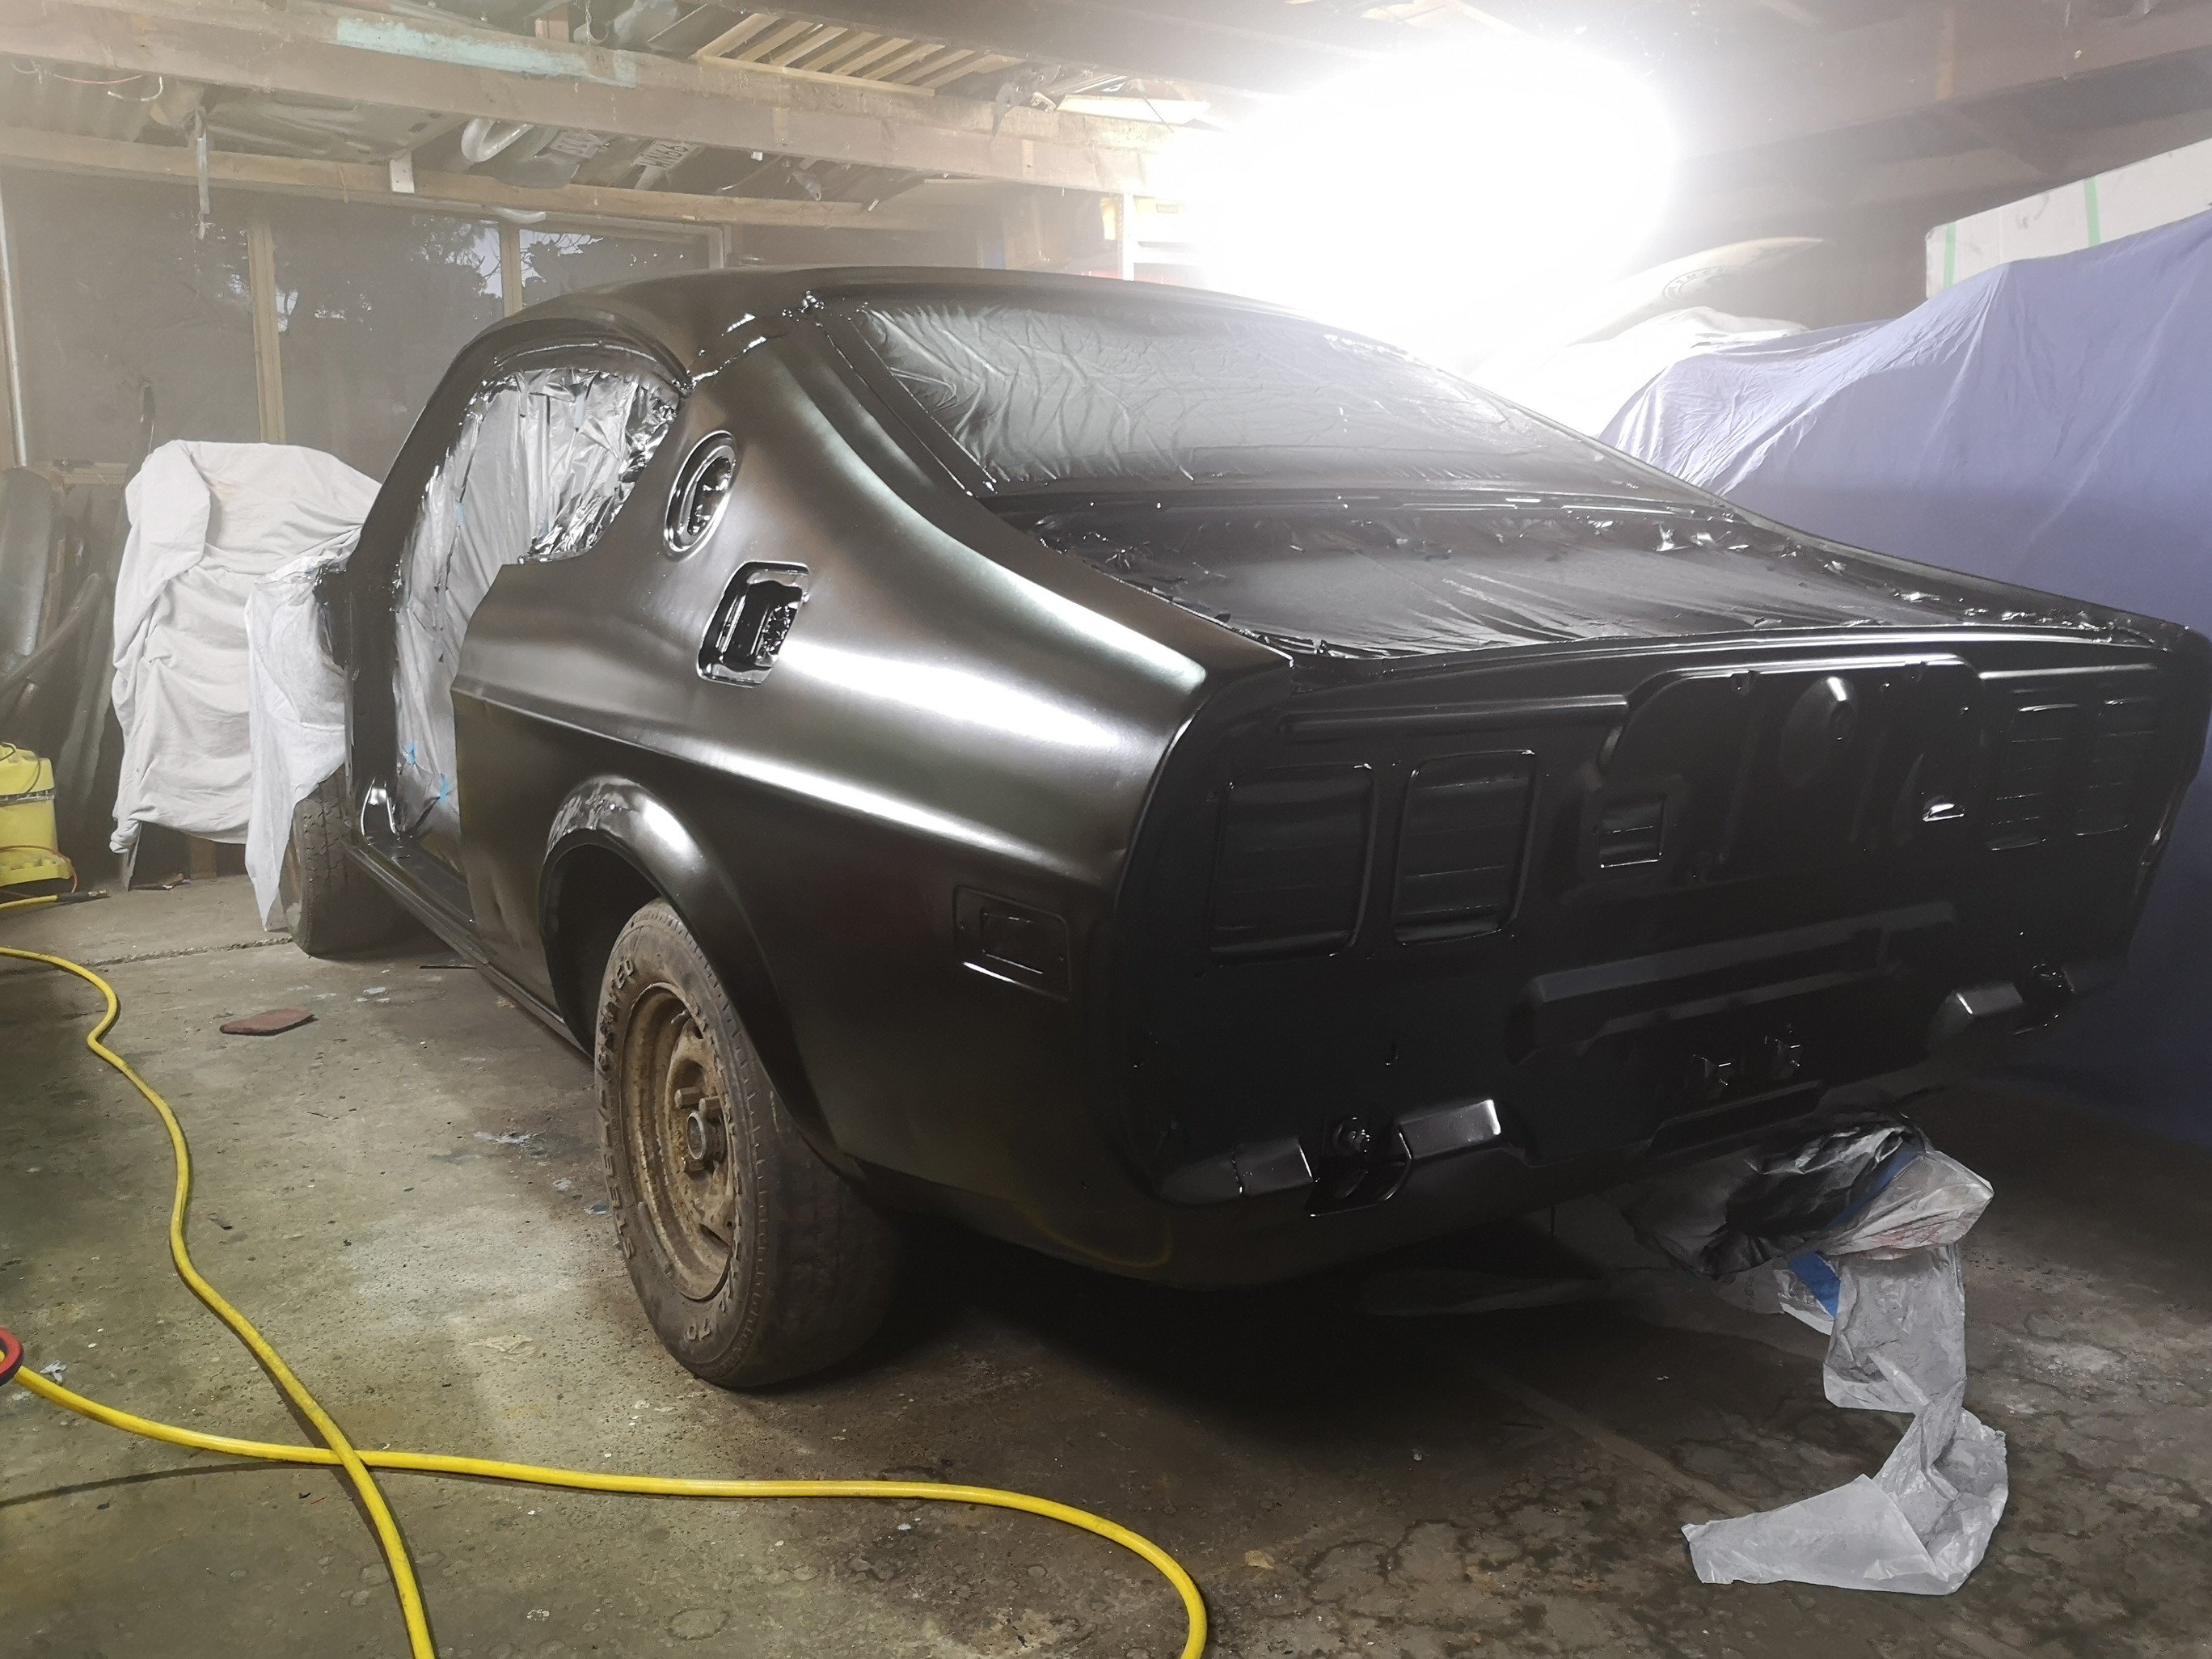
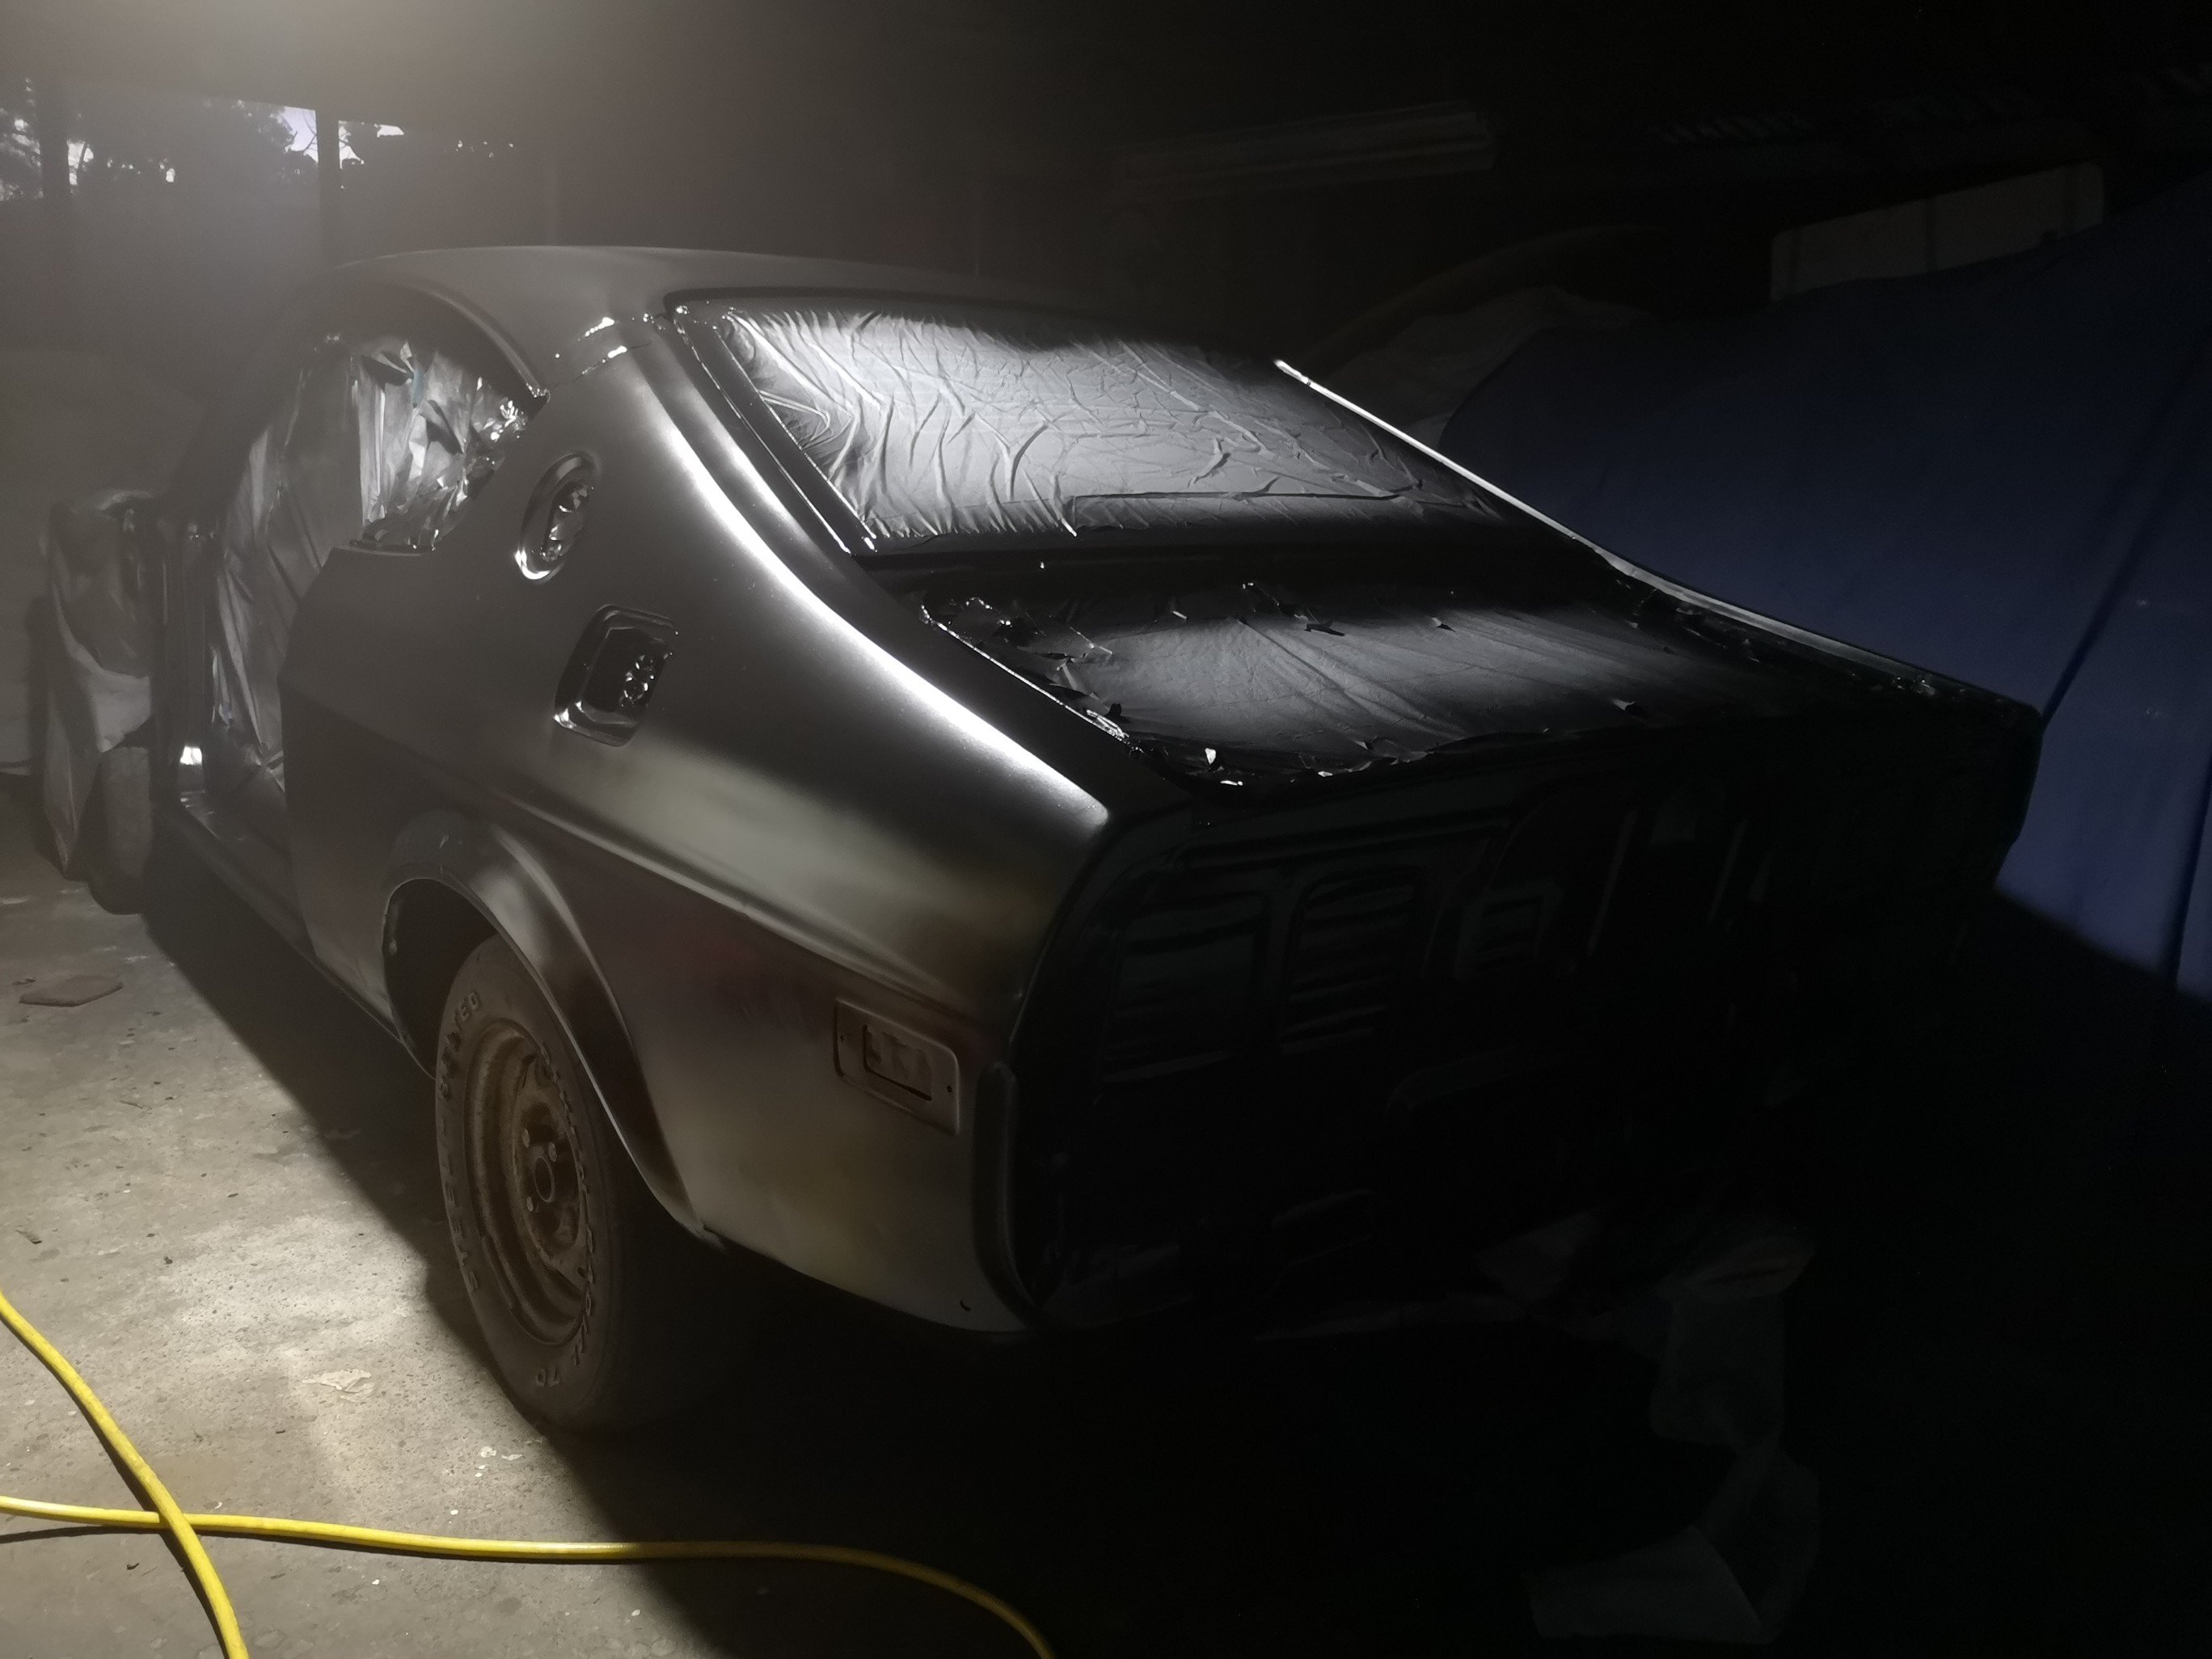
Job done, finally.
4 points
-
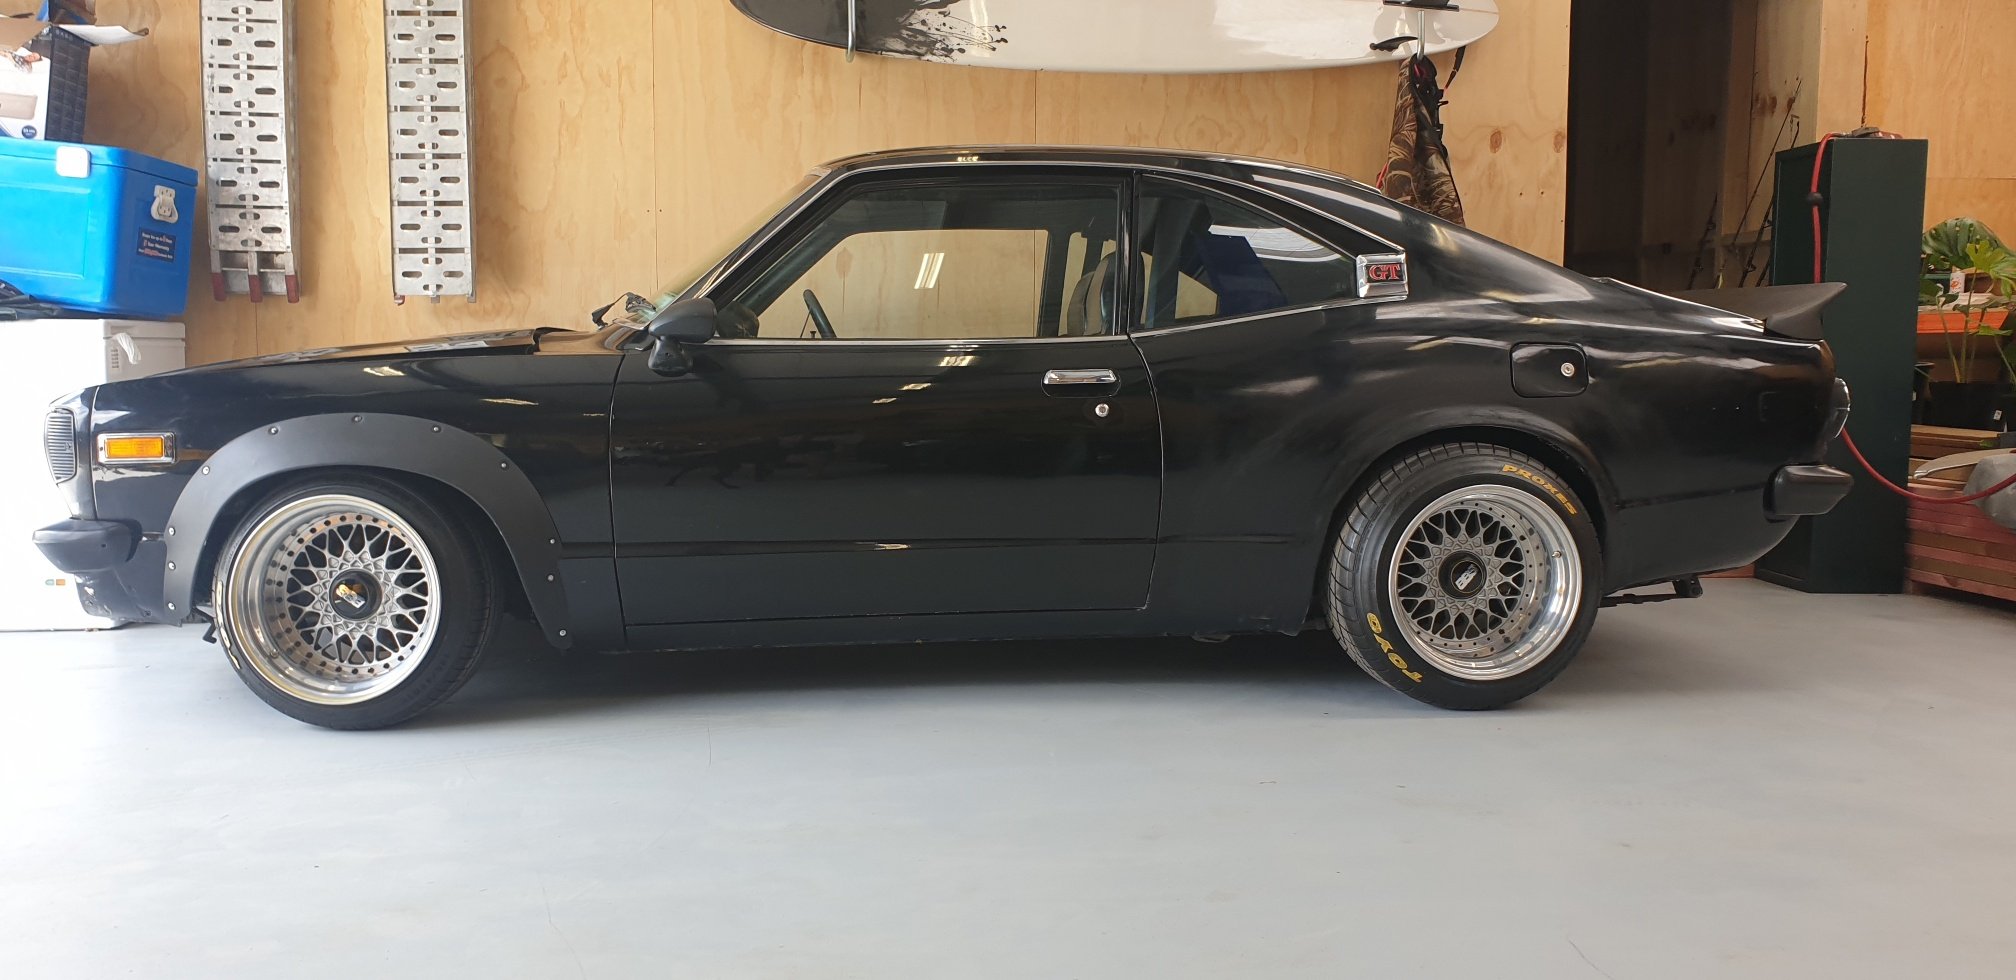
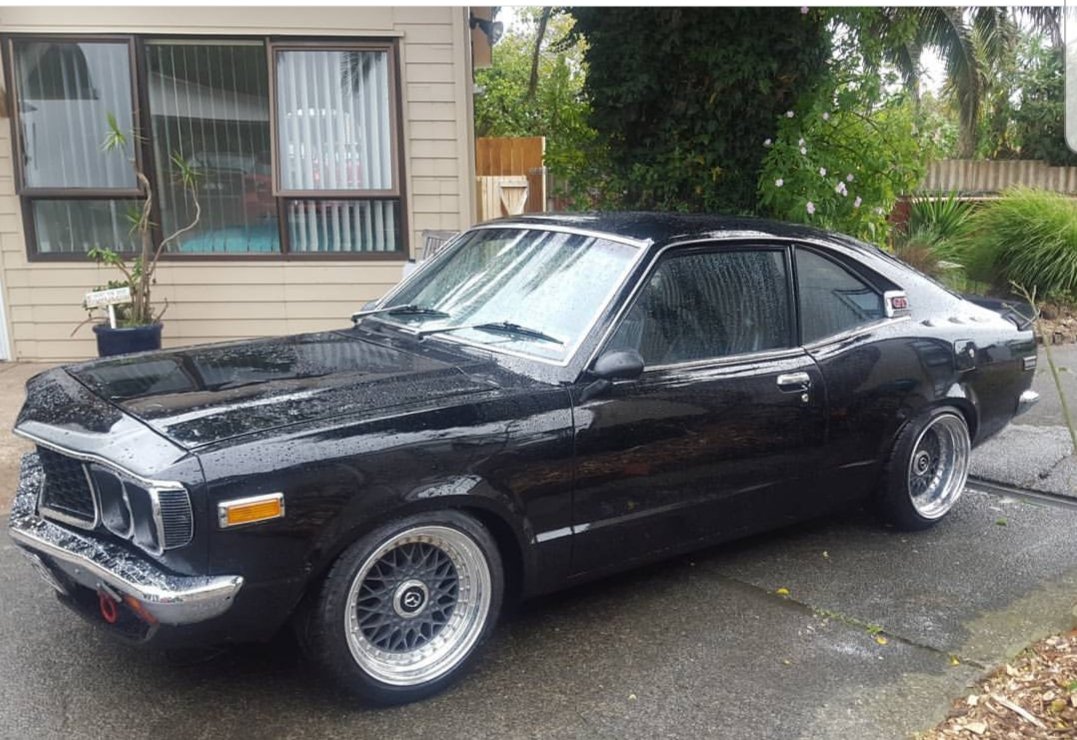
Hi all, Long time lurker. I brought this car out off Dunedin 2 and a bit years ago, off a friend of mine who id hounded for a while to be able to buy it off him. I brought it Reg on hold, no wof, motor not running, manual swap not quite complete, and the interior in the boot. Car is a Hardtop, with the eagle Mask front end, my favorite combination! A buddy of mine and I drove down, threw it on the trailer and brought it home. Car was originally a 1geu, Auto. It had a 1gge and W57 stabbed into it, but a long way from running. Once it arrived home i reassembled it to see what was missing. A pic form the day i picked it up In the 2 years following that i battled my way through making it run. Someone had REALLY funked up the motor loom, and most of the time was spent chasing that. A few spots of rust were removed, Engine painted and freshened up, engine bay painted (twice god damn it). Interior was re instated, wiring loom tucked, coilovers, bushings, booster delete, proportioning valve, strut brace and eventually a full respray. Among a thousand other jobs December of 2019 the car was certified for everything, luckily it went through with very minor issues. Car as it sits now While in lockdown ive been chasing issues with the factory EFI. I hate this EFI system, it is rubbish. Probably more of an issue because of the muppet who tried to fix the loom for the owner before me, but none the less its been a nightmare. So to cure it, ive started collecting the parts to do a full conversion to side draft carbs. Triple webers seem to be the answer in my mind anyway. Thats all for now, ill detail some of the process in future updates, and specifically the carb conversion. Thanks!3 points
-
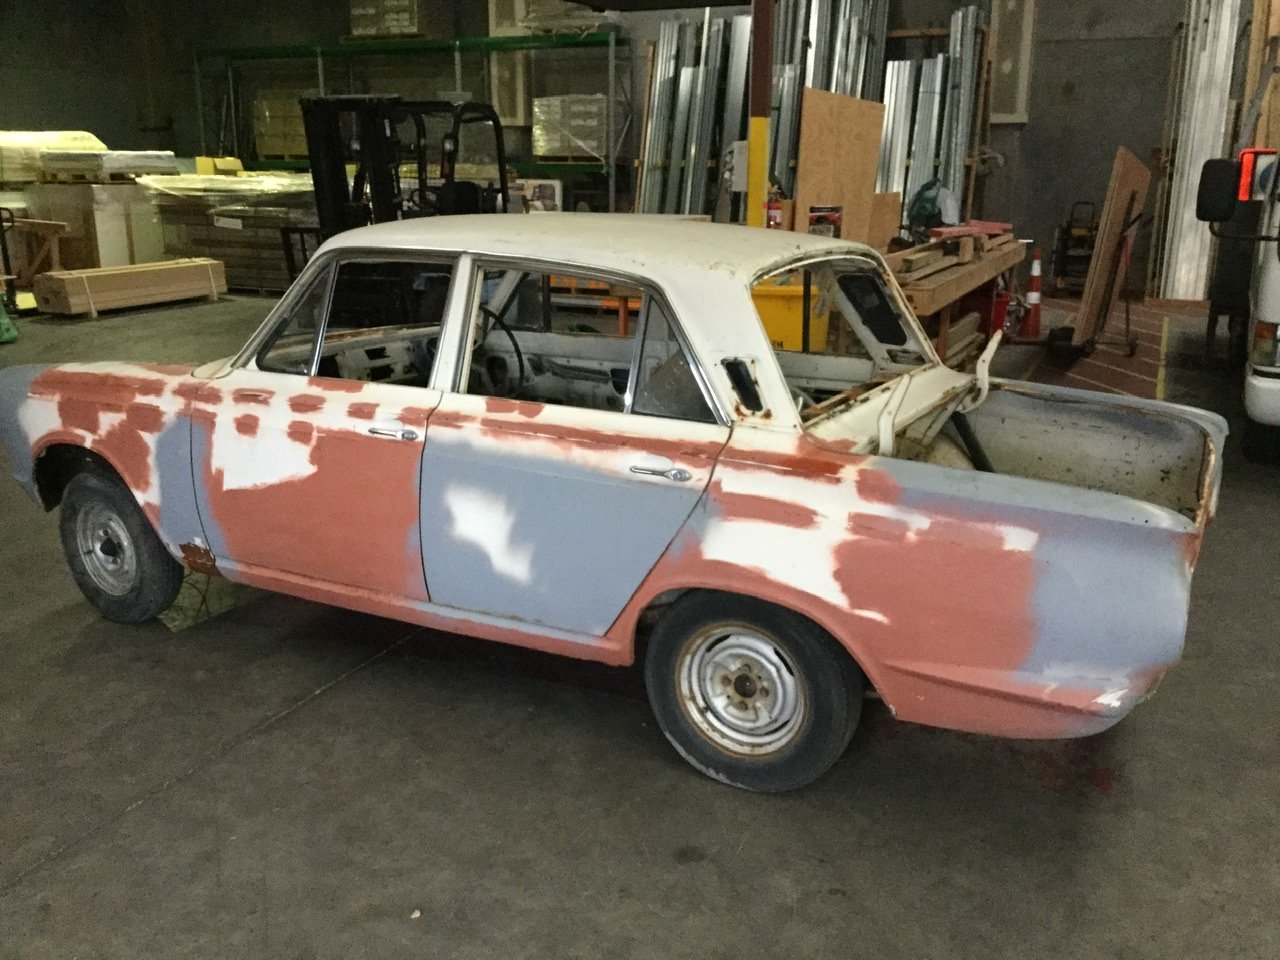
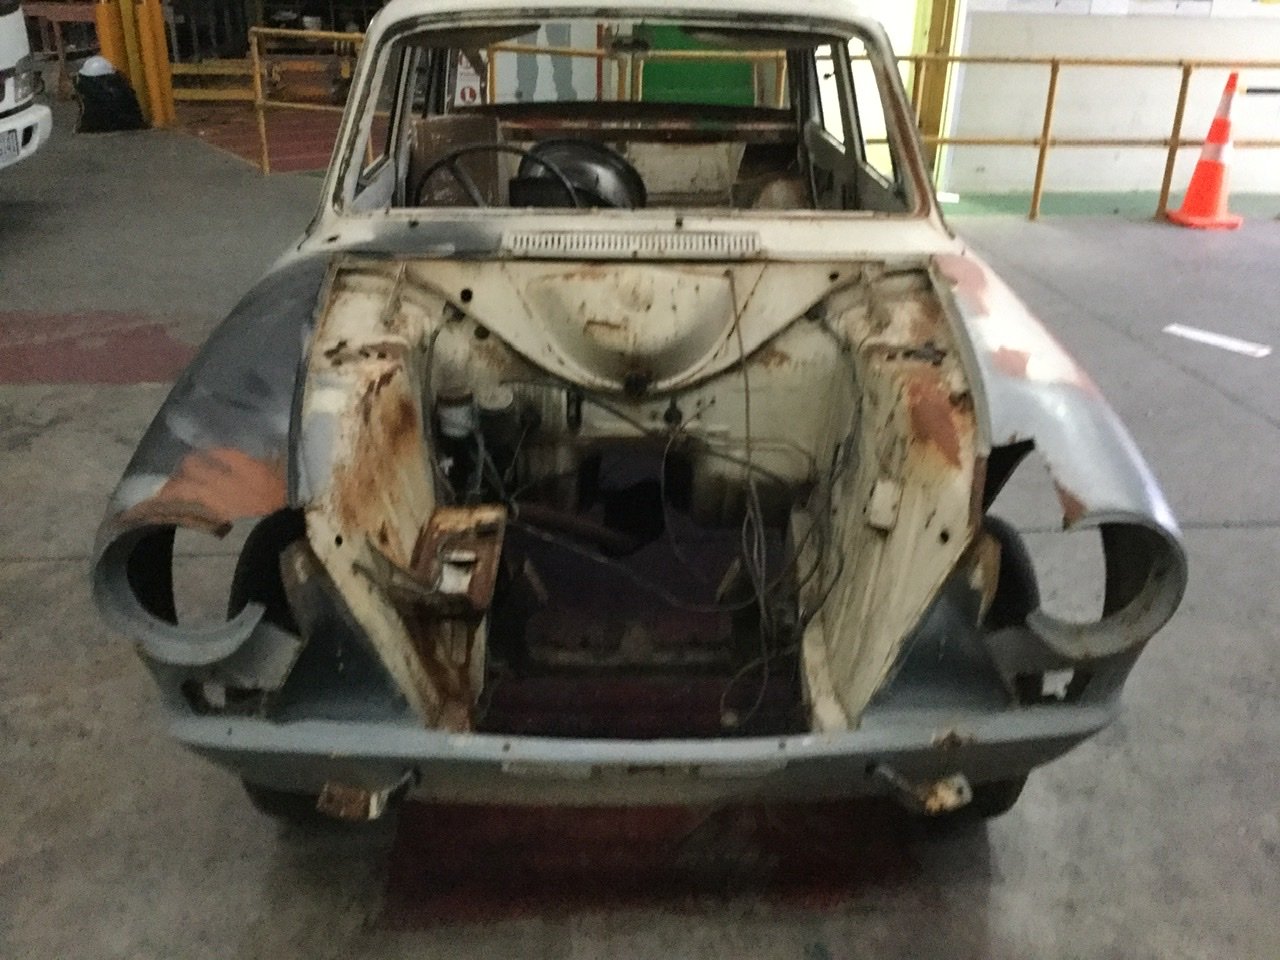
While I’m waiting for my Mk 1 GT 2 Door to come back from the paint shop. I’m going to build this into a rat build. Anyone got any experiance with a satin clear coat over what’s there on the exterior? Discussion: https://oldschool.co.nz/index.php?/topic/72206-66gt’s-rat-mk-1-cortina/
3 points
-
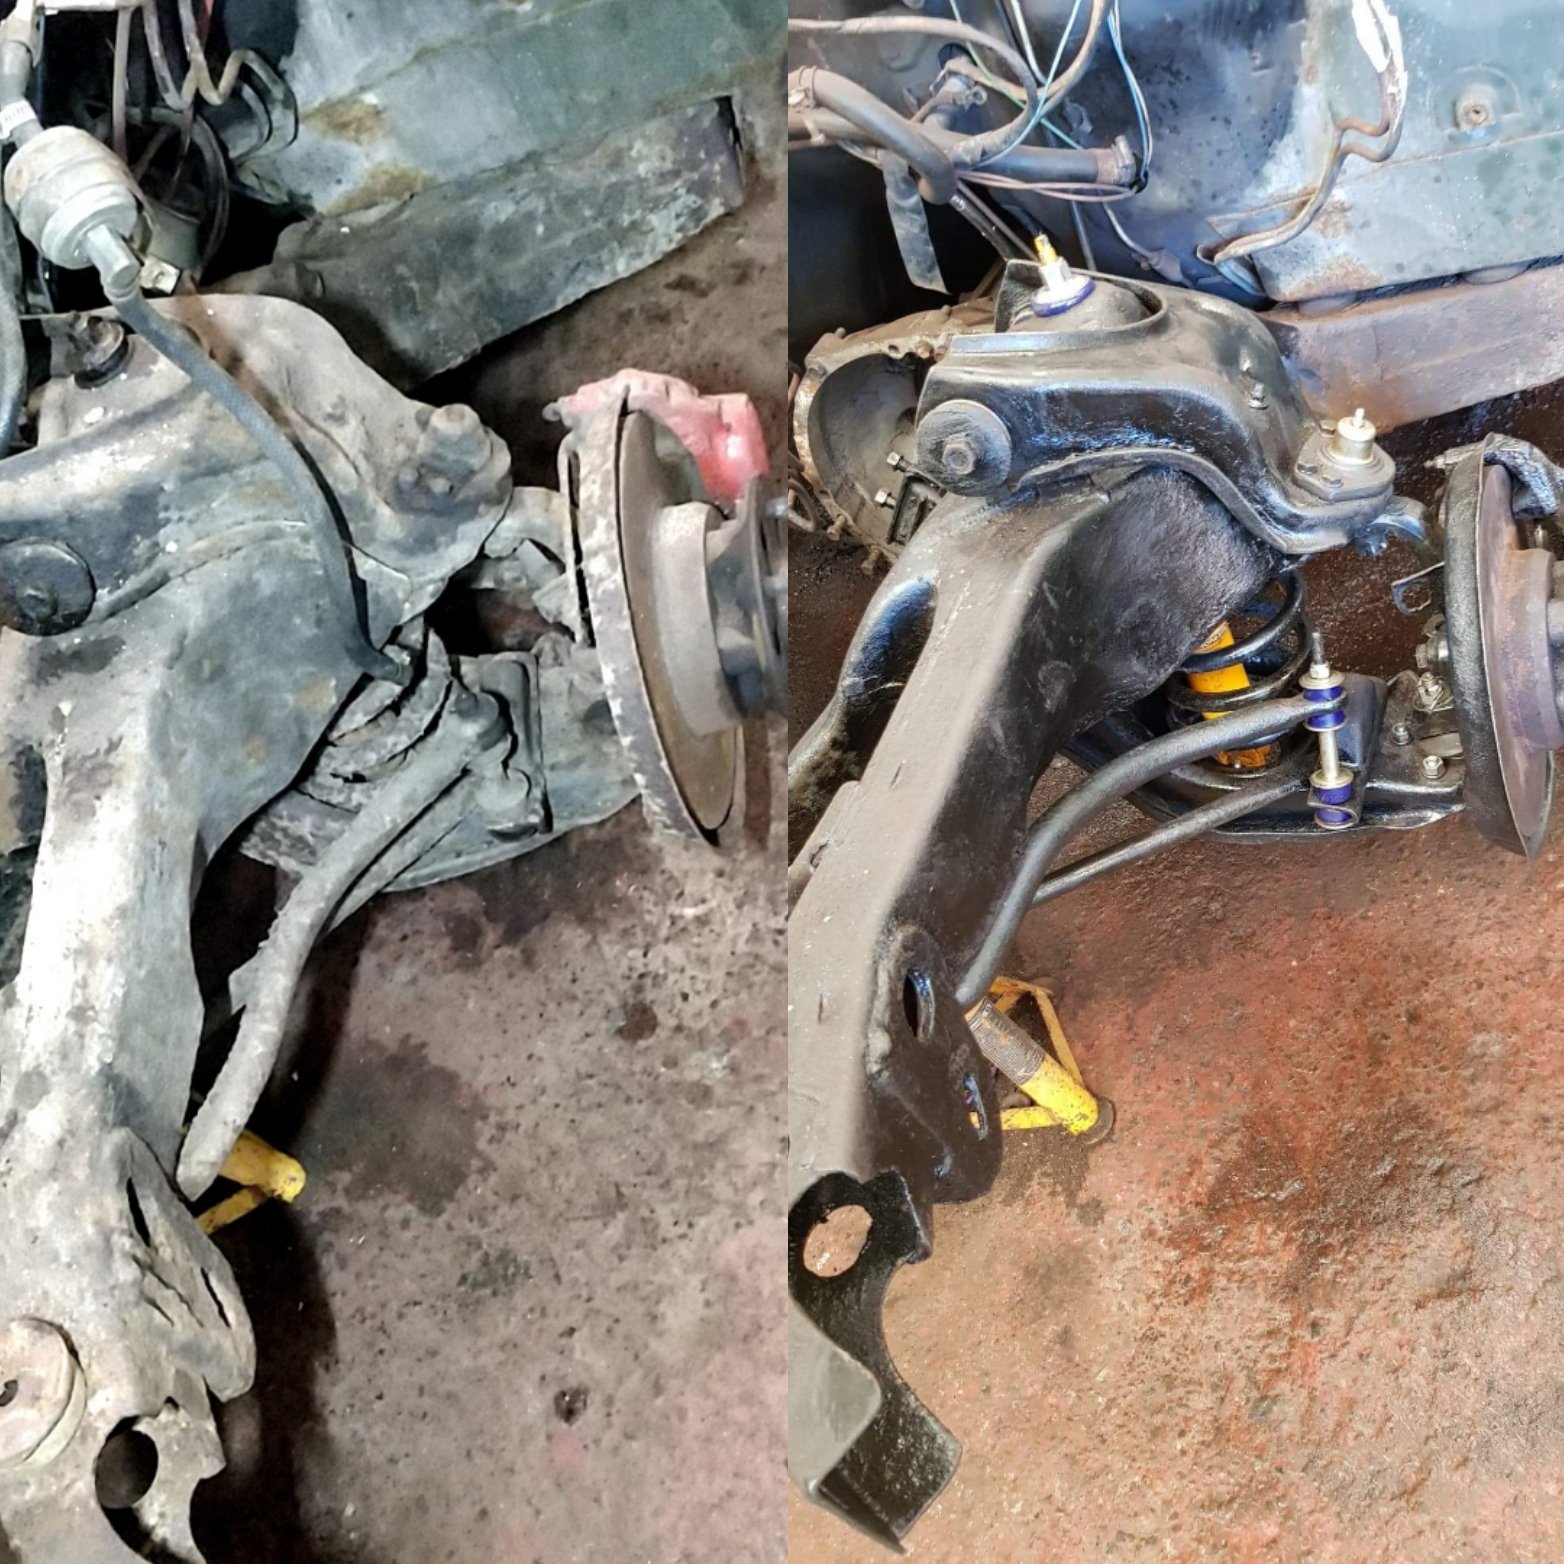
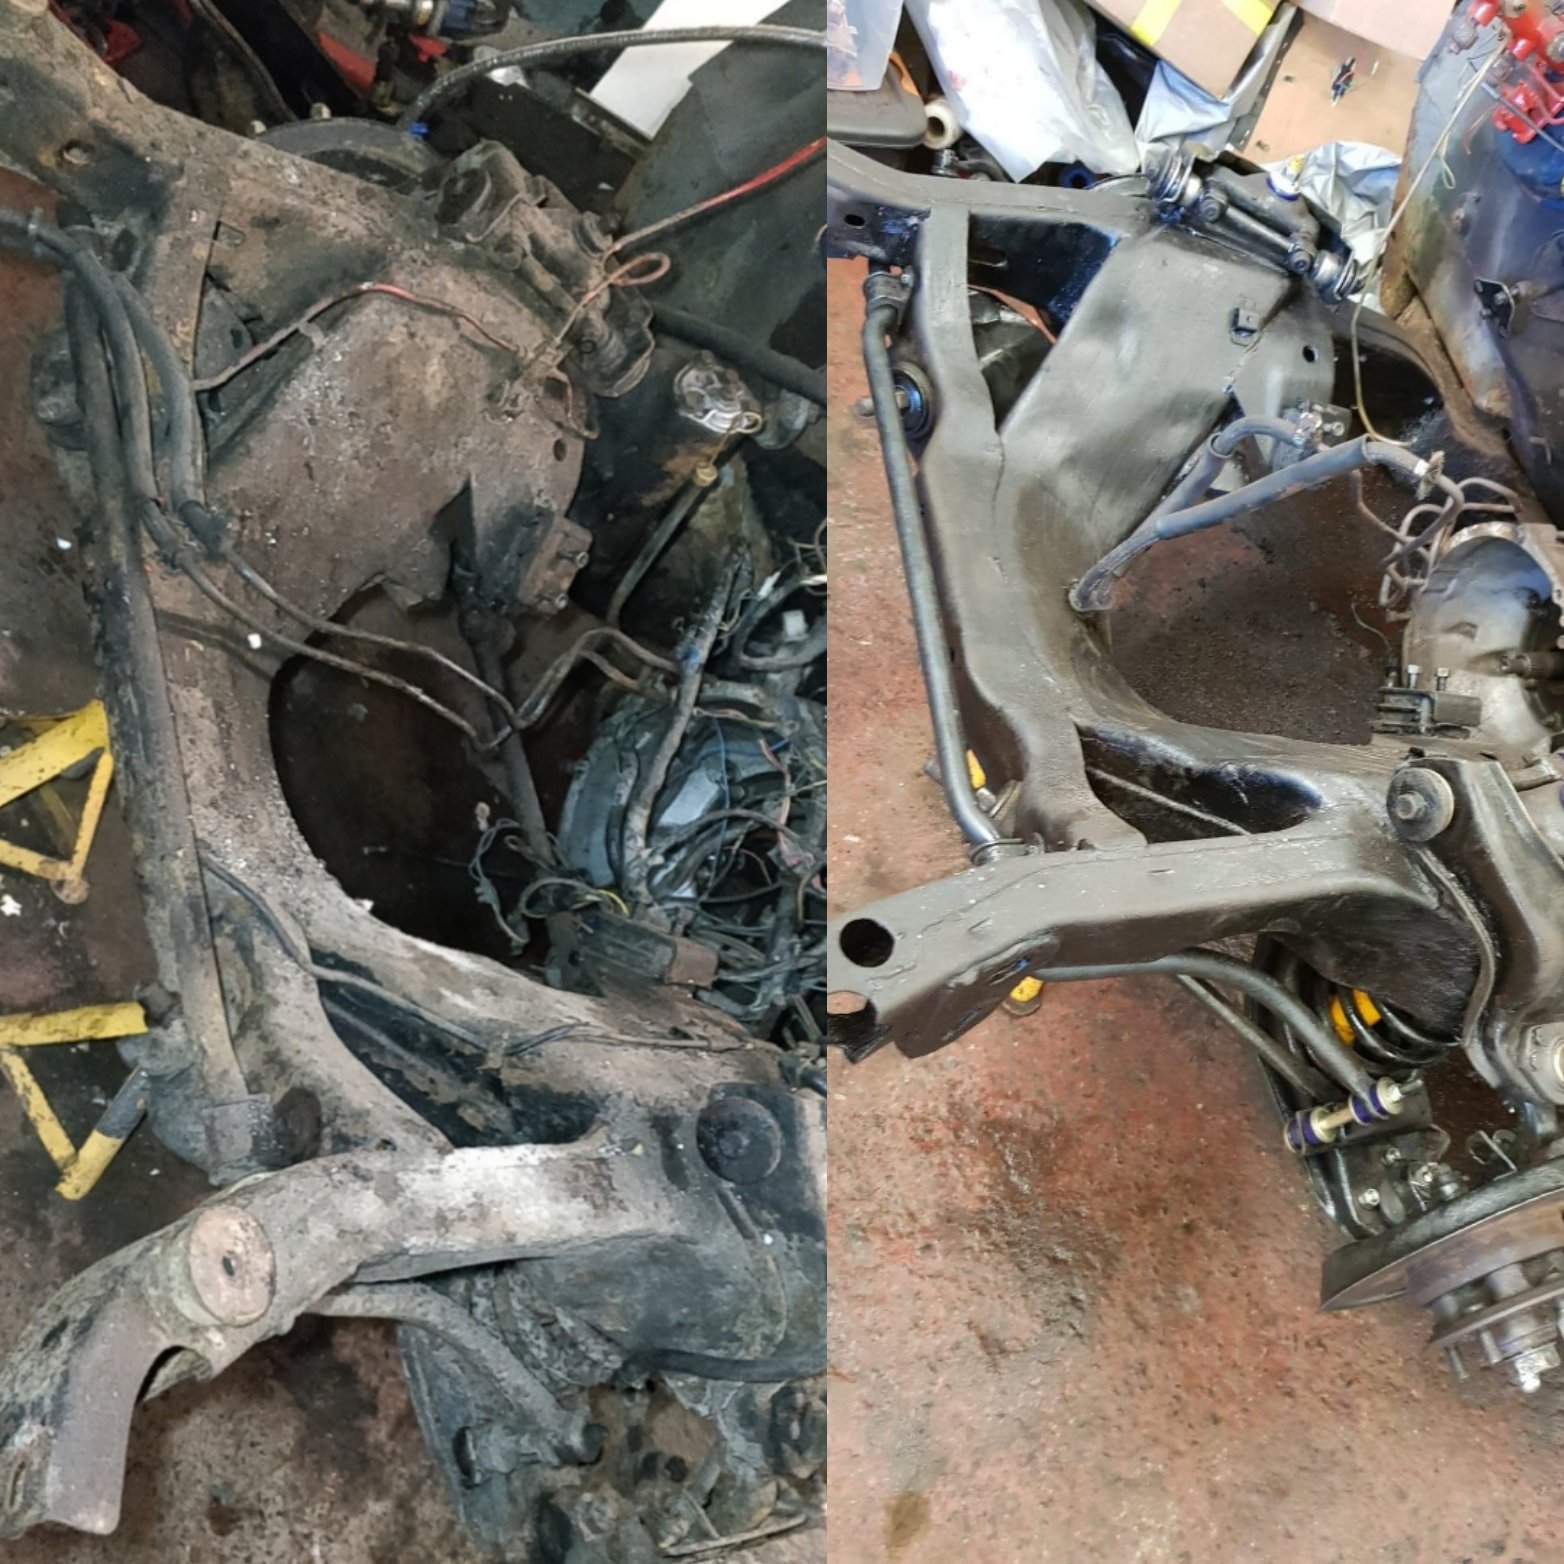
First job is to get all the suspension out of it and build a dolly for it. I know what engine I will be using in it so someone one will pick it as the build goes.3 points
-
Pete on a burgman smoking galloise and drinking laphroaig ftw3 points
-
Next up after getting busted buying flares i got back into working on the truck to get it sorted for Beach Hop. Had a week long break at the end of Jan to go for a boys roadtrip to Muscle Car Madness in Rangiora (if you aint been an like old cars and beers you got to go , its hectic as fuk) Anyway whilst i was away the mrs rustled some mates together to get the car and take it to another mate who knows a thing or two about rotarys to get it going (wasnt going when i bought it) . Long story short was a bit of a mess few things round the wrong way and what not and so got that sorted and got it running. Came home after a week long trip with the boys and got thrown the keys and told to go out to the shed to start the car haha. Nice crisp sounding motor starts mint as hot or cold so pretty happy with that. Will get it on a dyno and checked up and tuned before i go leaning on it too much. Couple of vids of start up and driving Next update coming soon3 points
-
*build a 2cv based bike2 points
-
@V8Pete you are required to buy a shitty bike and come on this2 points
-
We have done a few Fenix at work, all full alloy units. Most seem to be OK, but we have had a couple that leaked out of the box, and one that was physically damaged in the box but the box wasnt damaged. They have been pretty quick to swap out faulty units for us. They are cheap though, so yeah. I wouldn't use one myself, i'd rather pay the money and have a radiator shop recore an original one, or go for a good aftermarket brand if its something more common.2 points
-
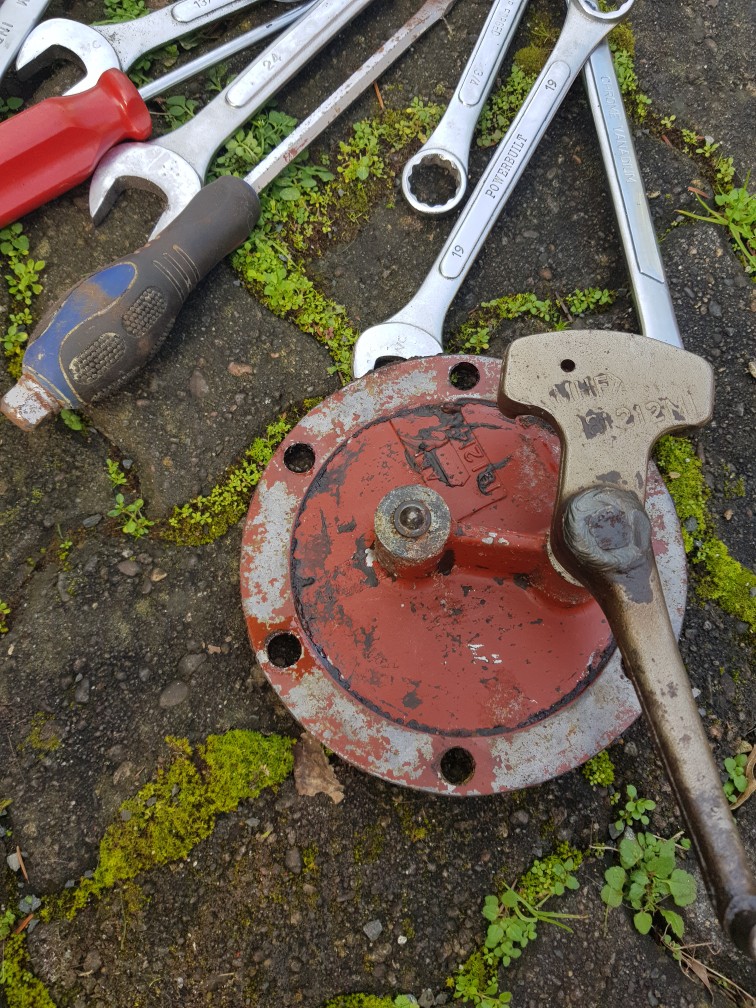
Load testing2 points
-
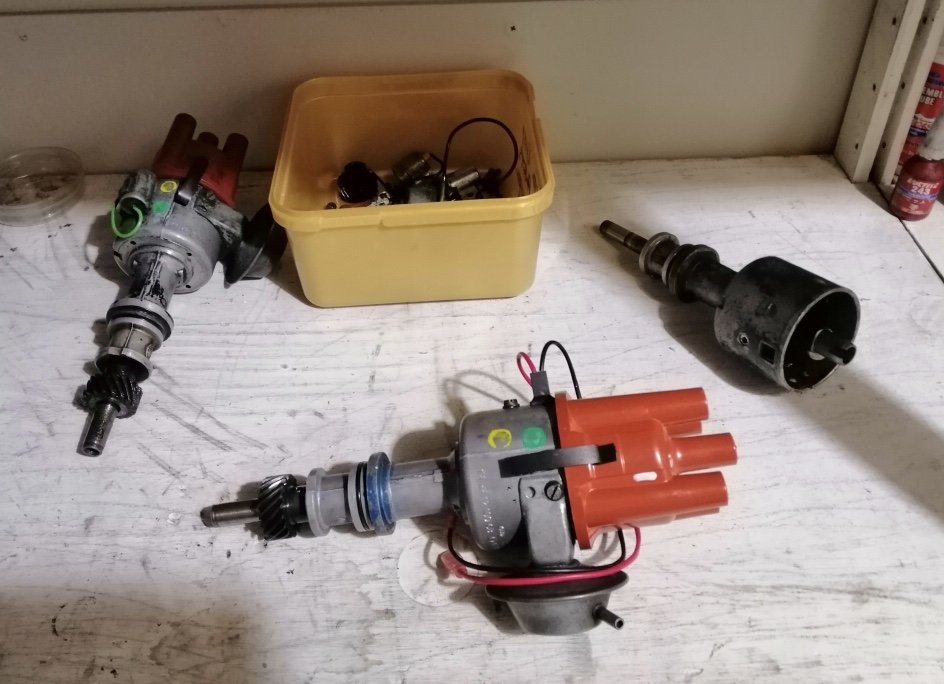
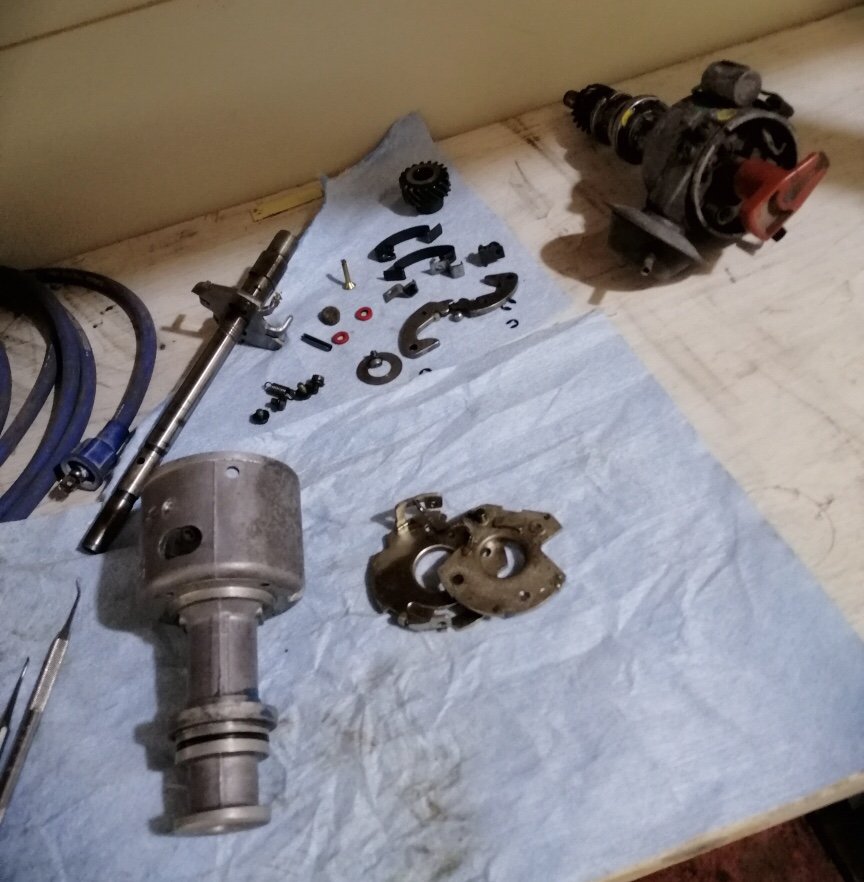
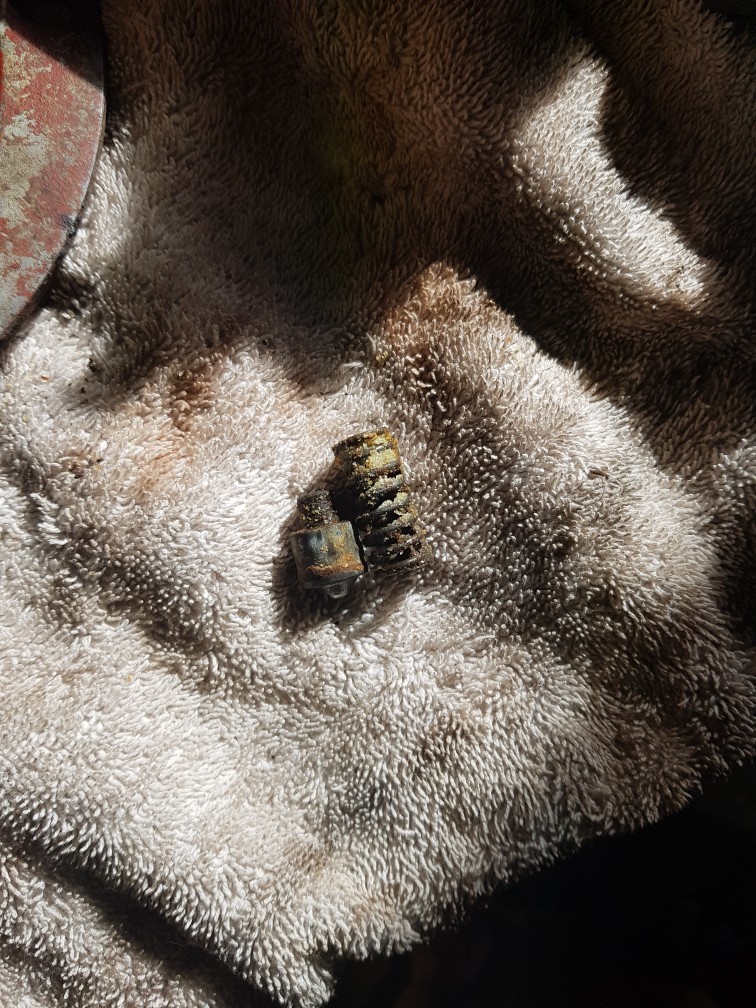
I've been chipping away at that corroded boat anchor motor. Bits of it were OK (starter fine, alt could be ok) but the carbs had inhaled water for years, so lots of the motor is junk. I was quite interested in getting the distributor assy off it (have disassembled most of it) but I think the cog / gear wheel at the bottom of the shaft may be corroded solid. I haven't been able to split the engine cases to see in there, even with all the bolts out. I may just give up on it soon. I had hoped to have a spare to match the spare engine I have.2 points
-
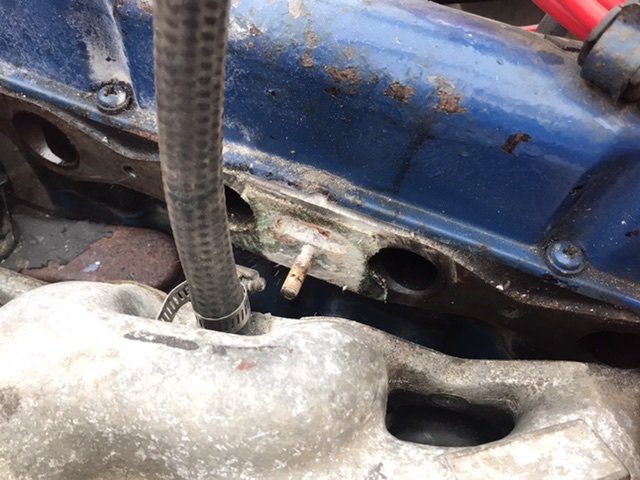
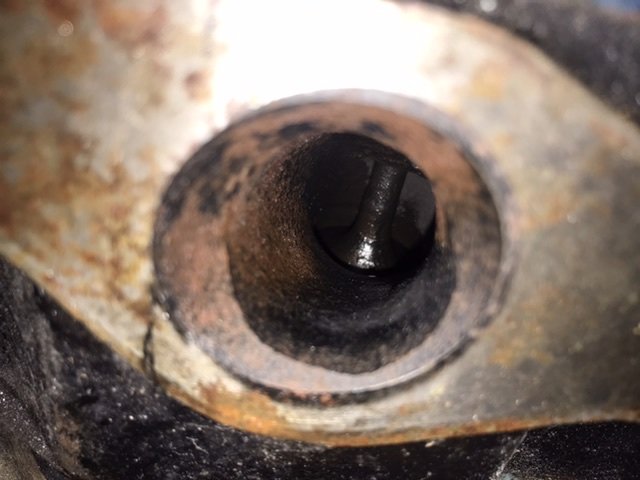
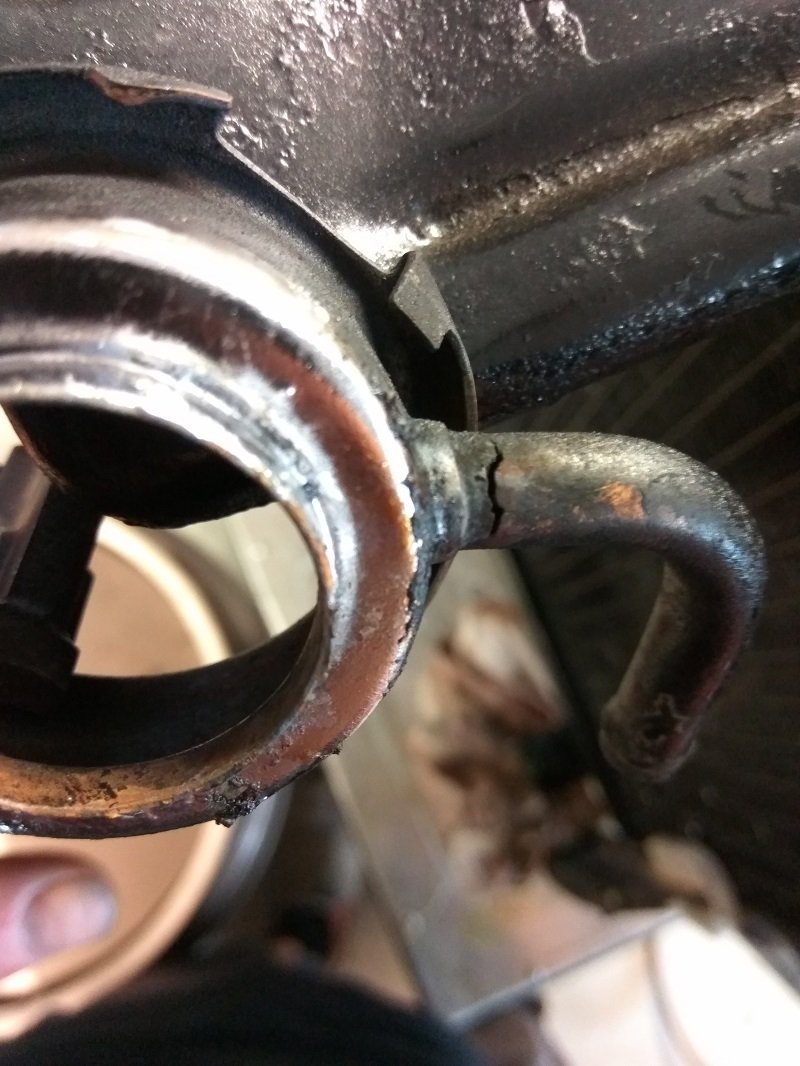
The plan today was to make up some temporary radiator hoses to get it running. Managed to hack out the broken fitting, will buy a new water pump anyway but wanted to do some testing today. Hacked: I then found a fitting that worked, put some rtv in it since the threads were damaged. Again, just temporary. I was going to block off the hose since it is just for the heater But thought I should loop it to the other end. Pulled off the hose from the intake manifold and found it was completely blocked with white powder. It was rock solid, had to drill it out. Ended up having to take the intake manifold off and found it was blocked in the head too. I must be some kind of long term reaction with the brass fitting? That oval recess above the stud in the centre is meant to be open and is blocked with more white powder. This stuff came out easy though. Can now see into the head with no blockage. Need to buy a new intake manifold gasket now. Checked out the intake ports and they look like they could really do with some basic porting. It’s not even uniformly round lol. I’ll compare the gasket to the intake port and manifold runners to see.
2 points
-
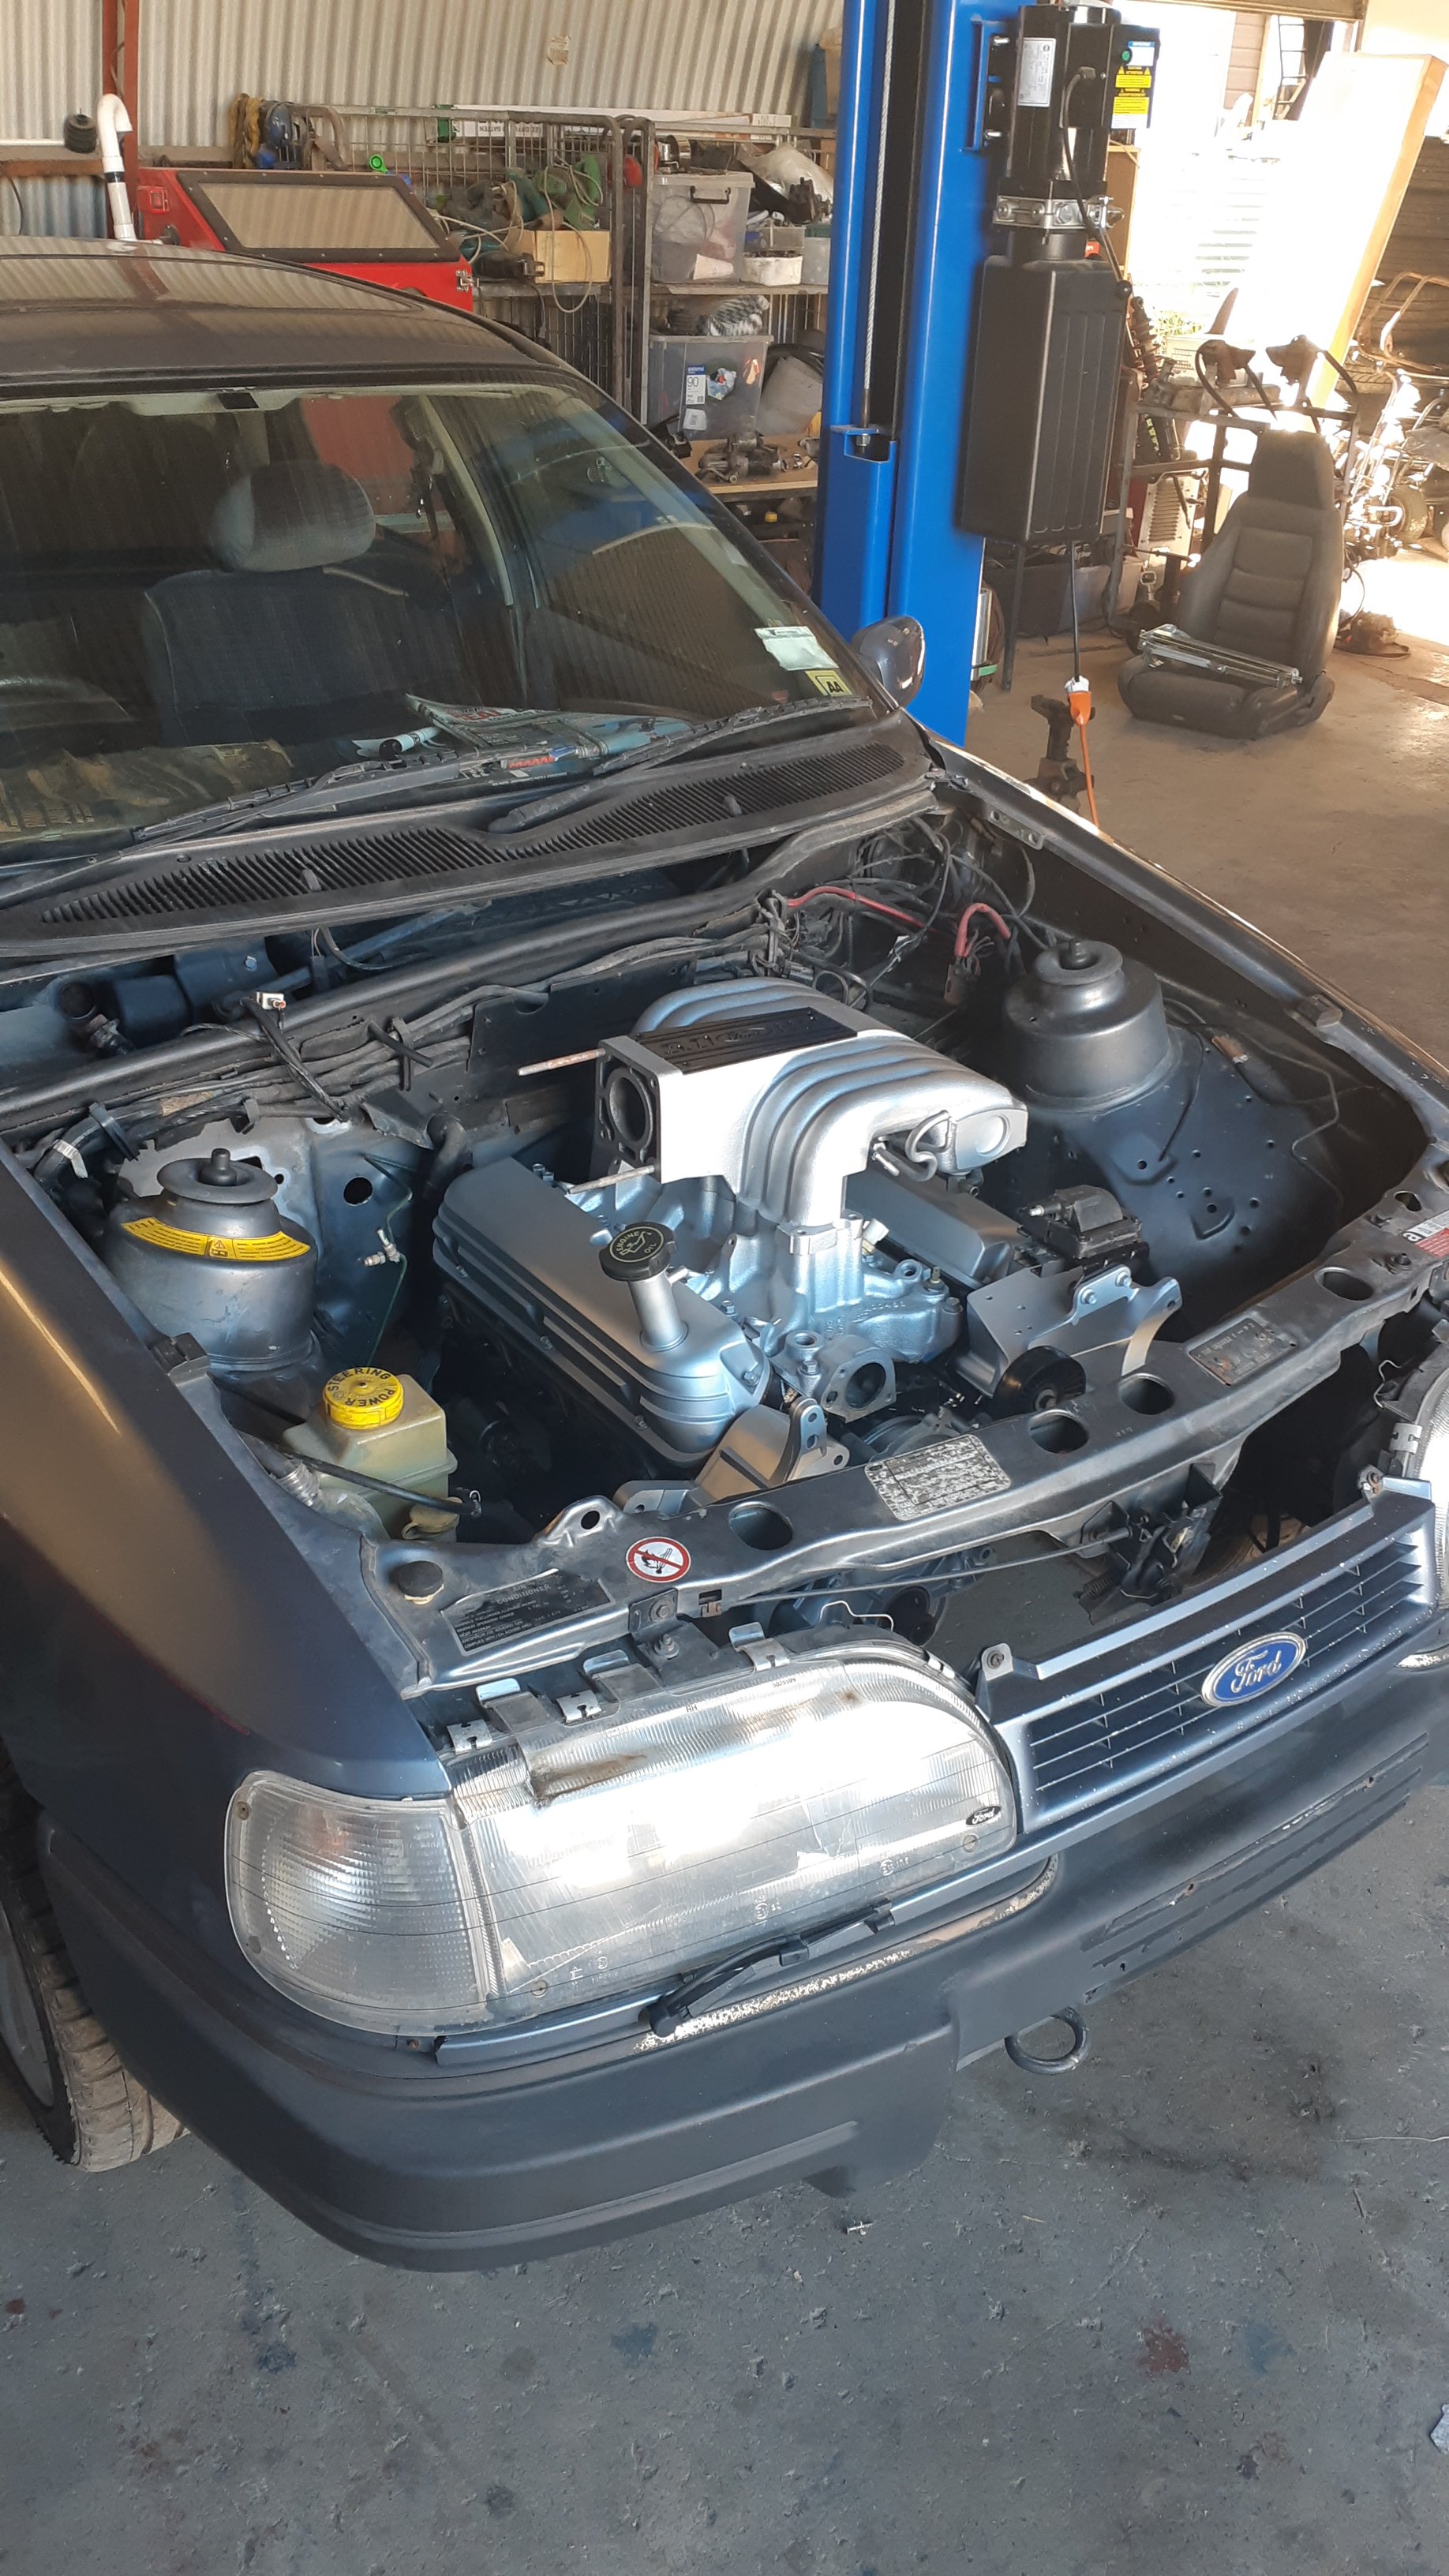
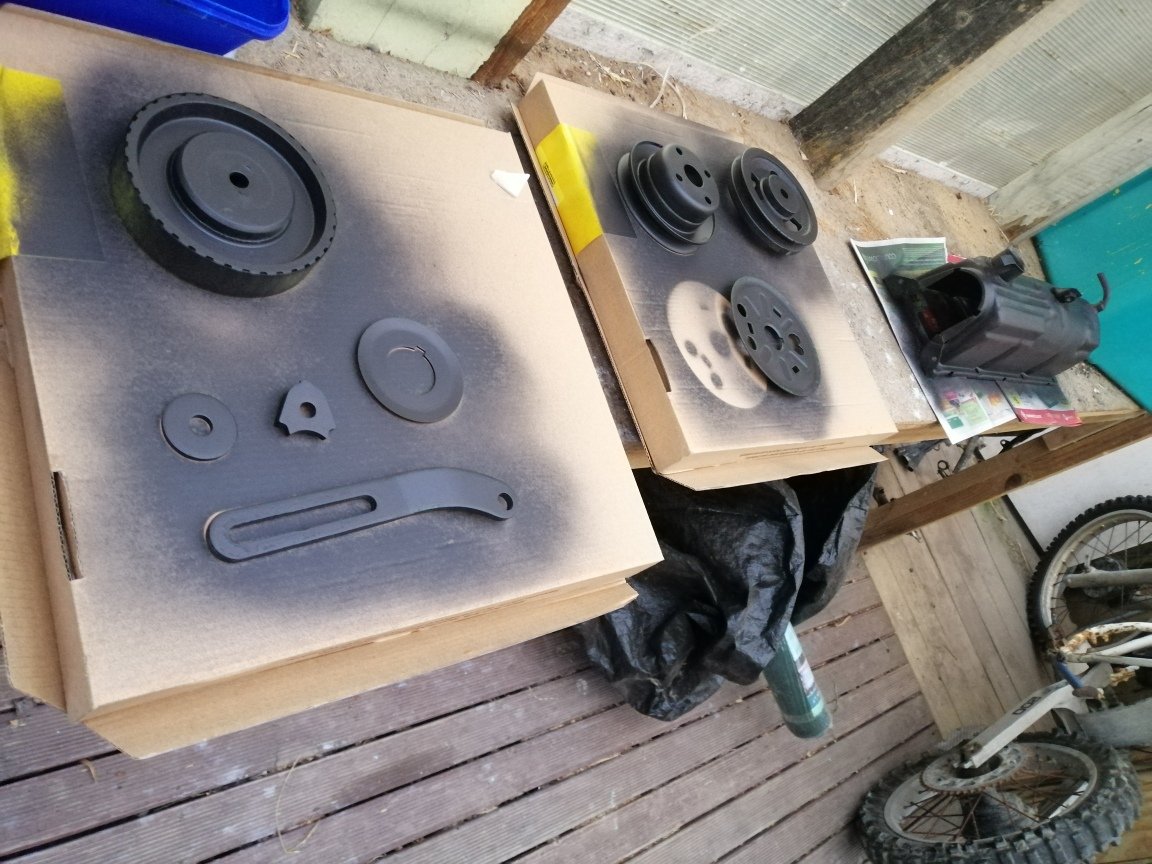
G'day. 6 weekly update... A few little things are going to get done thanks to lock down boredom/family avoidance. Engine bay needs a bit of a tidy. It's mostly just dirt but the cam cover & air cleaner look a bit shit. Had the big debate about polishing the cam cover or going wrunkle funnish. Black wrinkle won and was ordered but I thought I'd just mess about with some 3000 grit & a bit of Autosol coz it was a nice day. Looks OK for not too much bother, may just go with it. Sprayed the air cleaner though. Yes, not orange. After about an hour it was starting to crinkle up quite nicely Went out later and it was looking ace. No pics/ it was dark. Sooo..... What's it going to be for the cam cover ? Not sure, I'll choose in the morning /Prace bets now.2 points
-
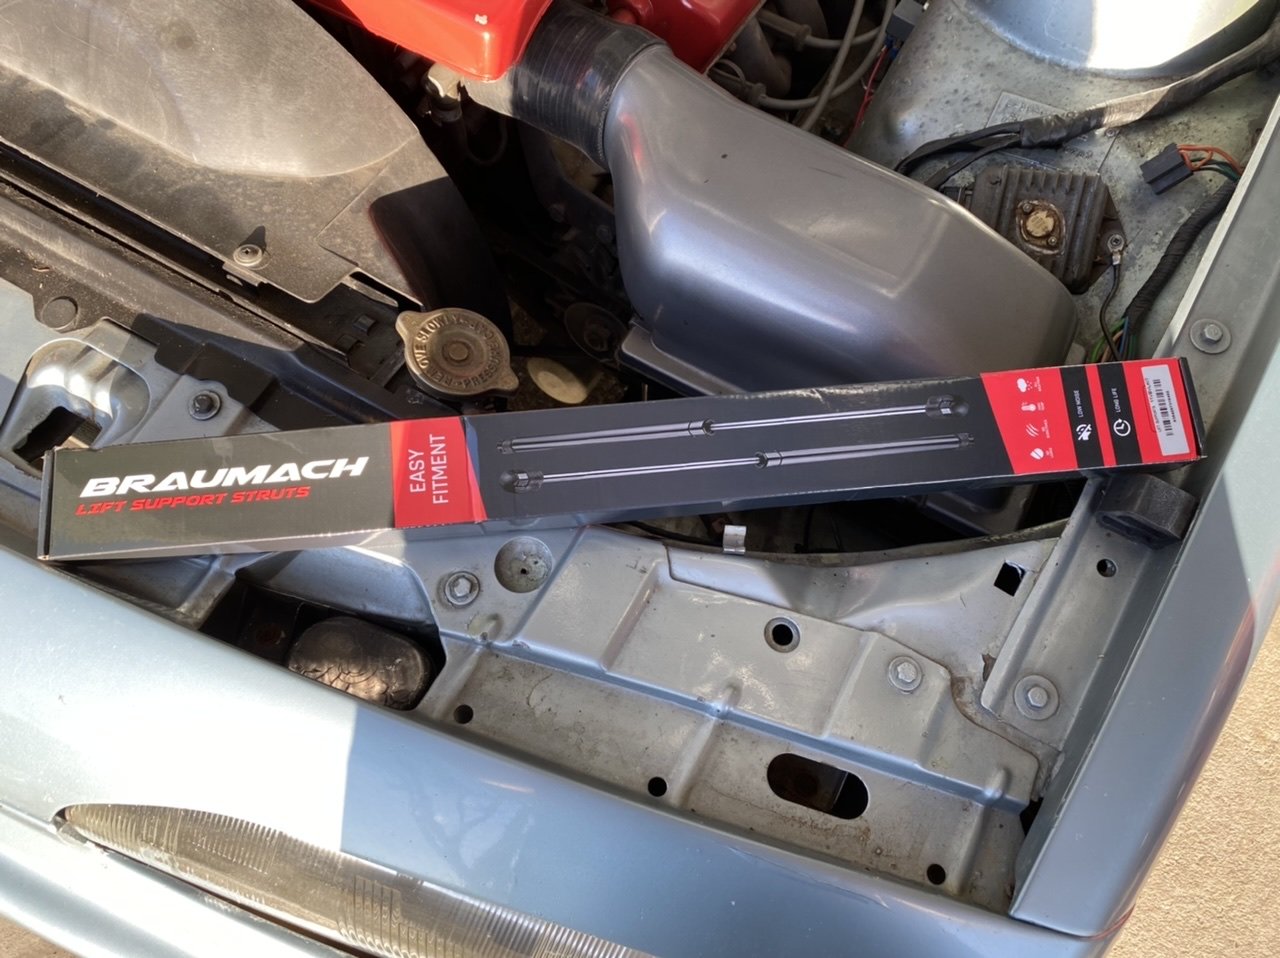
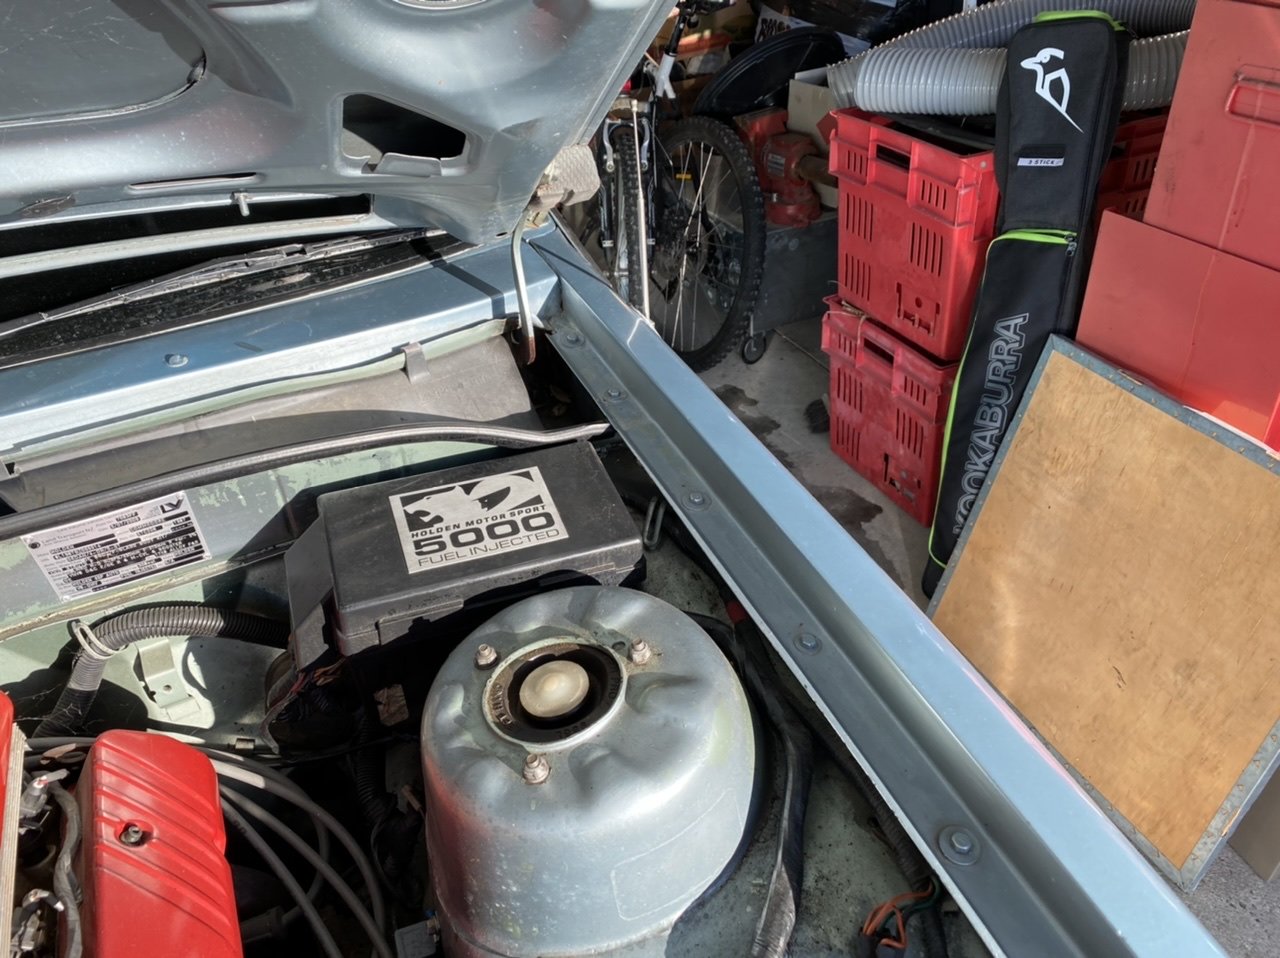
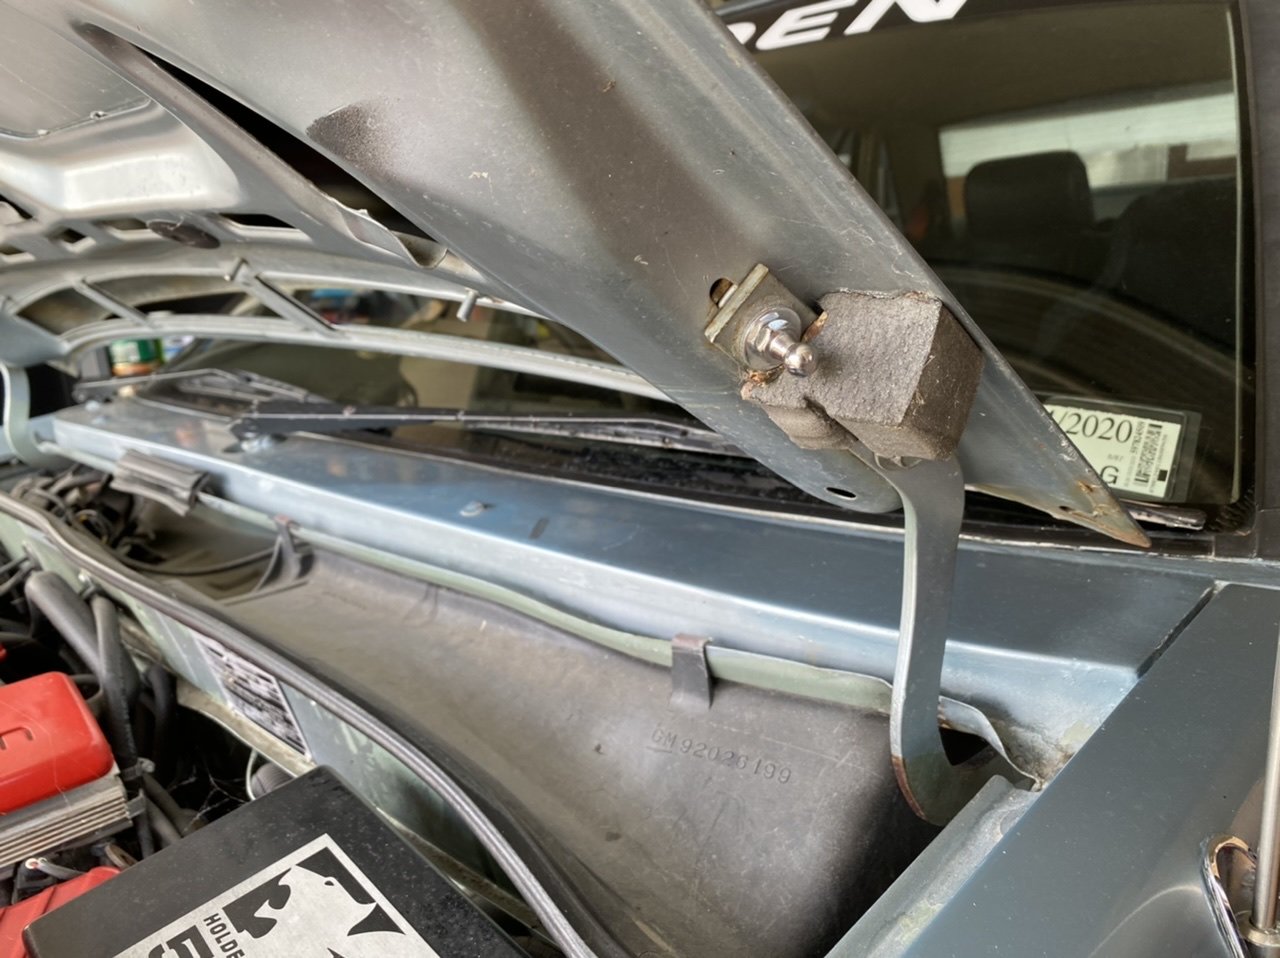
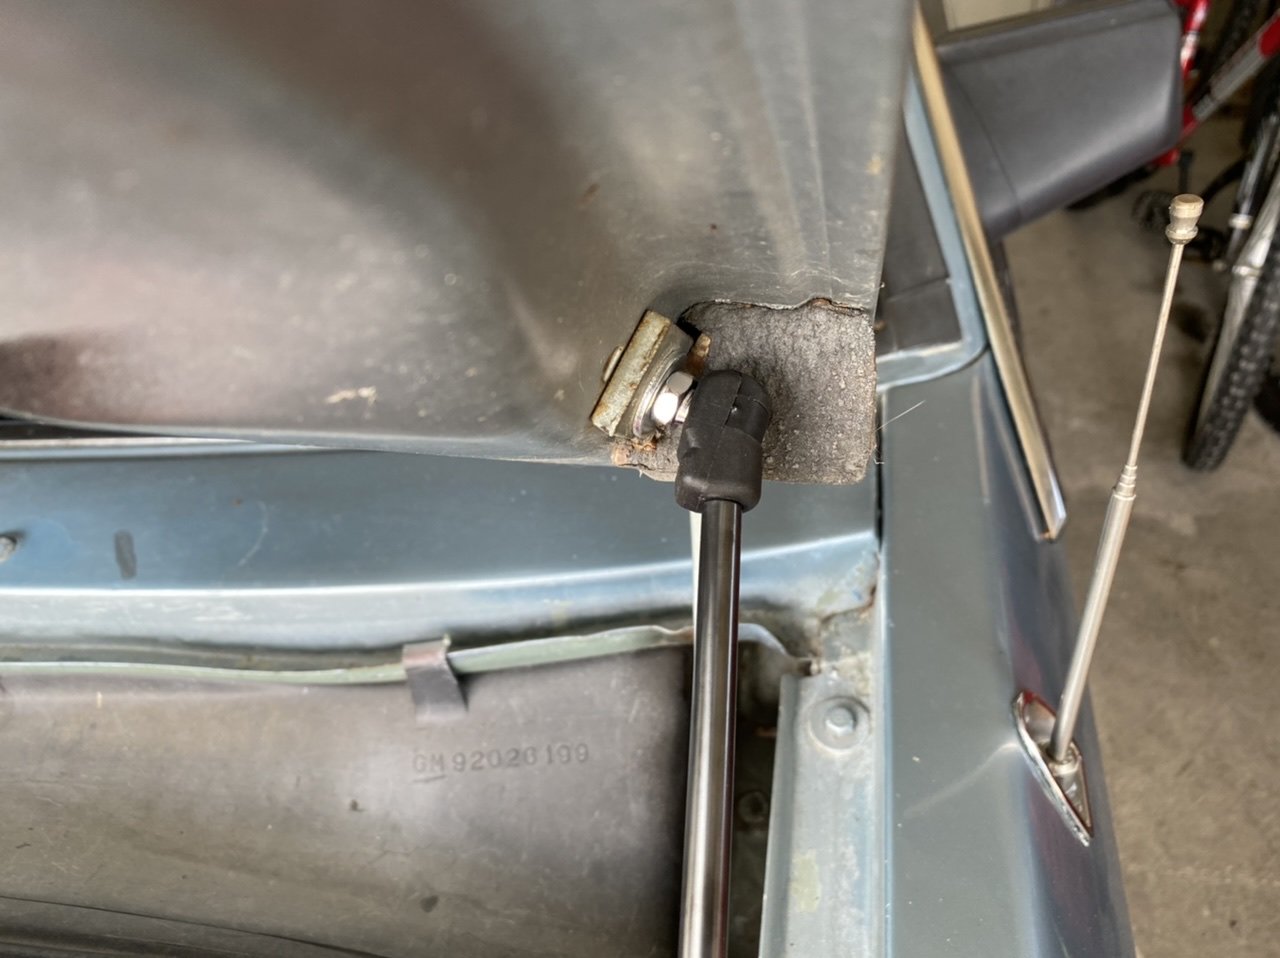
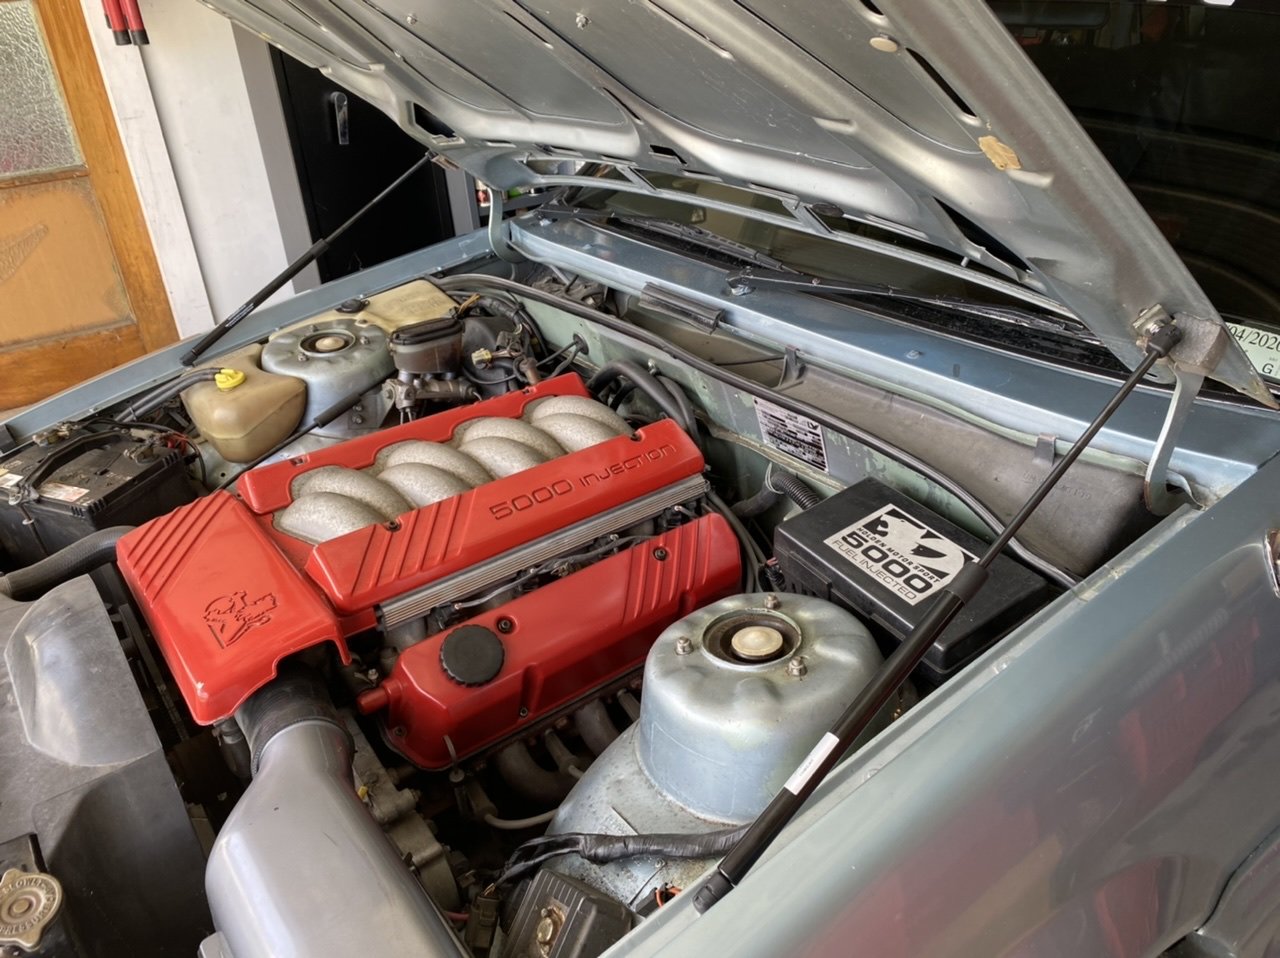
Righto.. first quick easy mod.. when I picked this up and spent a couple of days getting to know her, I soon discovered how damn heavy the bonnet and boot are to open due to the body kit. The boot is still on the agenda to be done (fibreglass rod works well for now), but the bonnet was a straight forward fix. Onto eBay to buy this kit from a supplier in Aus. The only thing I did differently was flip the struts compared to the information I was looking at because of the angle of the head at one end suited it being fixed to the bonnet end rather than the guard end (in my humble opinion) Struts in a box: Starting point: Replacing the hinge bolt on either side with one of these: Then the same along the guard.. third bolt up from the front gets replaced: This is where I chose to have the angled head of the strut. Probably could have been on the guard mount, but visually it looks better this way for me: And the end result. Bonnet latch needed a slight tweak for the bonnet to release a lot easier but I don't think that was related to my install. Well worth doing this mod I reckon!
2 points
-
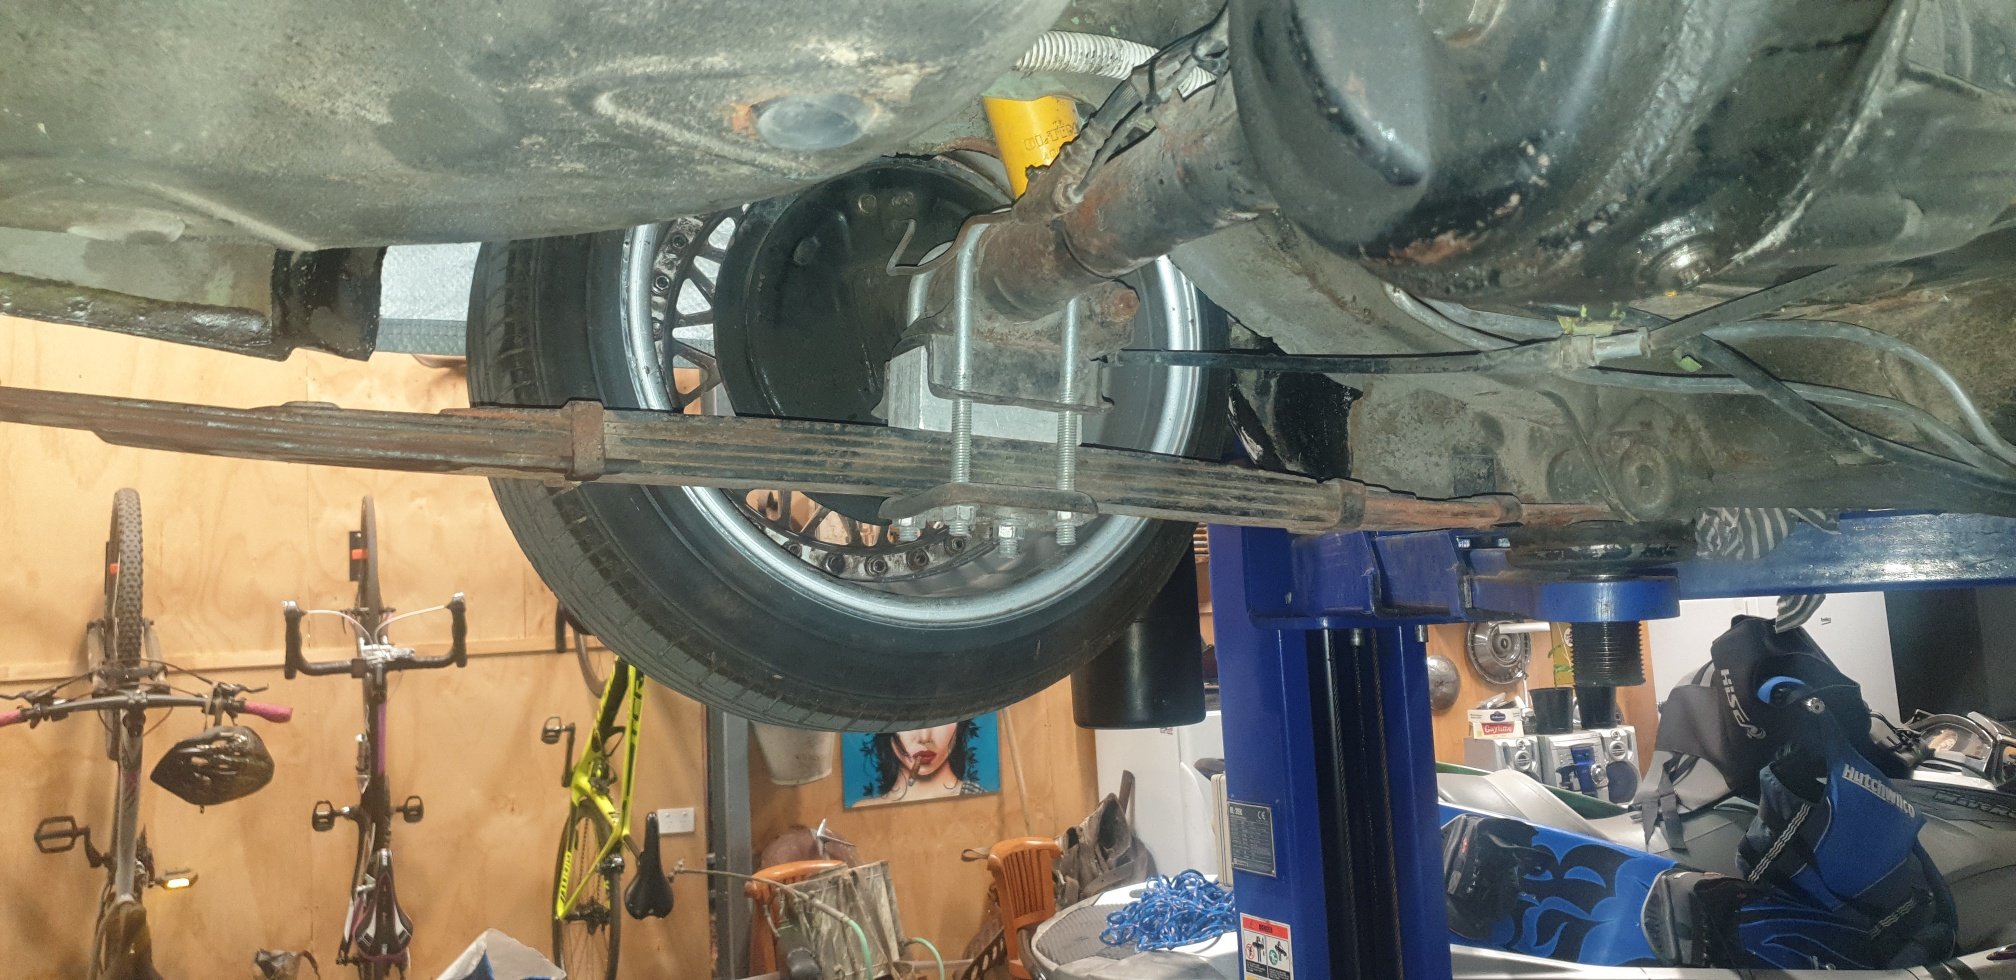
So got sick of looking the primer/bogged rear quarters so spray bombed them with some satin black cause it was hurting my eyes looking at it in the shed till i get it sorted properly. Took it for a drive, couldnt even get it out my driveway without the guard rubbing on the tyre and basically stalling the car. Turns out on further investigation all the load leaves had been flipped to lower it some more, so basically had no spring tension in the rear. Pulled the leave pack apart and put everything in the right place, slightly raised the car but made it actually driveable an doesnt come close to touching the guards now! Couple of pics of it and the springs before unflipping. Yarns here
2 points
-
Been a Veedub fan since my teens, collection stuff that lived in a box for ages, found a bird cage stand and re purposed it as a shrine to the VW. Couple of semi rare items, the red 50/50s one year only Australia and Italy, also some Snowflakes up the top. VW lounge light, used a big valve for the stand, actually casts a VW emblem on the roof above.2 points
-
They don't have that high a failure rate. They don't last as long as old style radiators, but 10-15 years, maybe 20 if it's not German. Most last longer.1 point
-
Plenty of factory rads are aluminium with plastic ends.1 point
-
Sorry if I come across as negative, but it was generally a pretty miserable experience doing the conversation to end up with such a shit product that only just works.1 point
-
Going back to work monday means i had to reassemble the front end properly today, refit dizzy, power steer pump and crank pulleys. Not happy as the parts from oz still havent turned up so i will have to do it all again when they do. Need to get my other wagon infront of the shed to load up all my work tools and toolboxes so have to move the ute. Started straight away and promptly smoked out 3 properties and the wifes freshly hung washing. #DatMitsiLife1 point
-
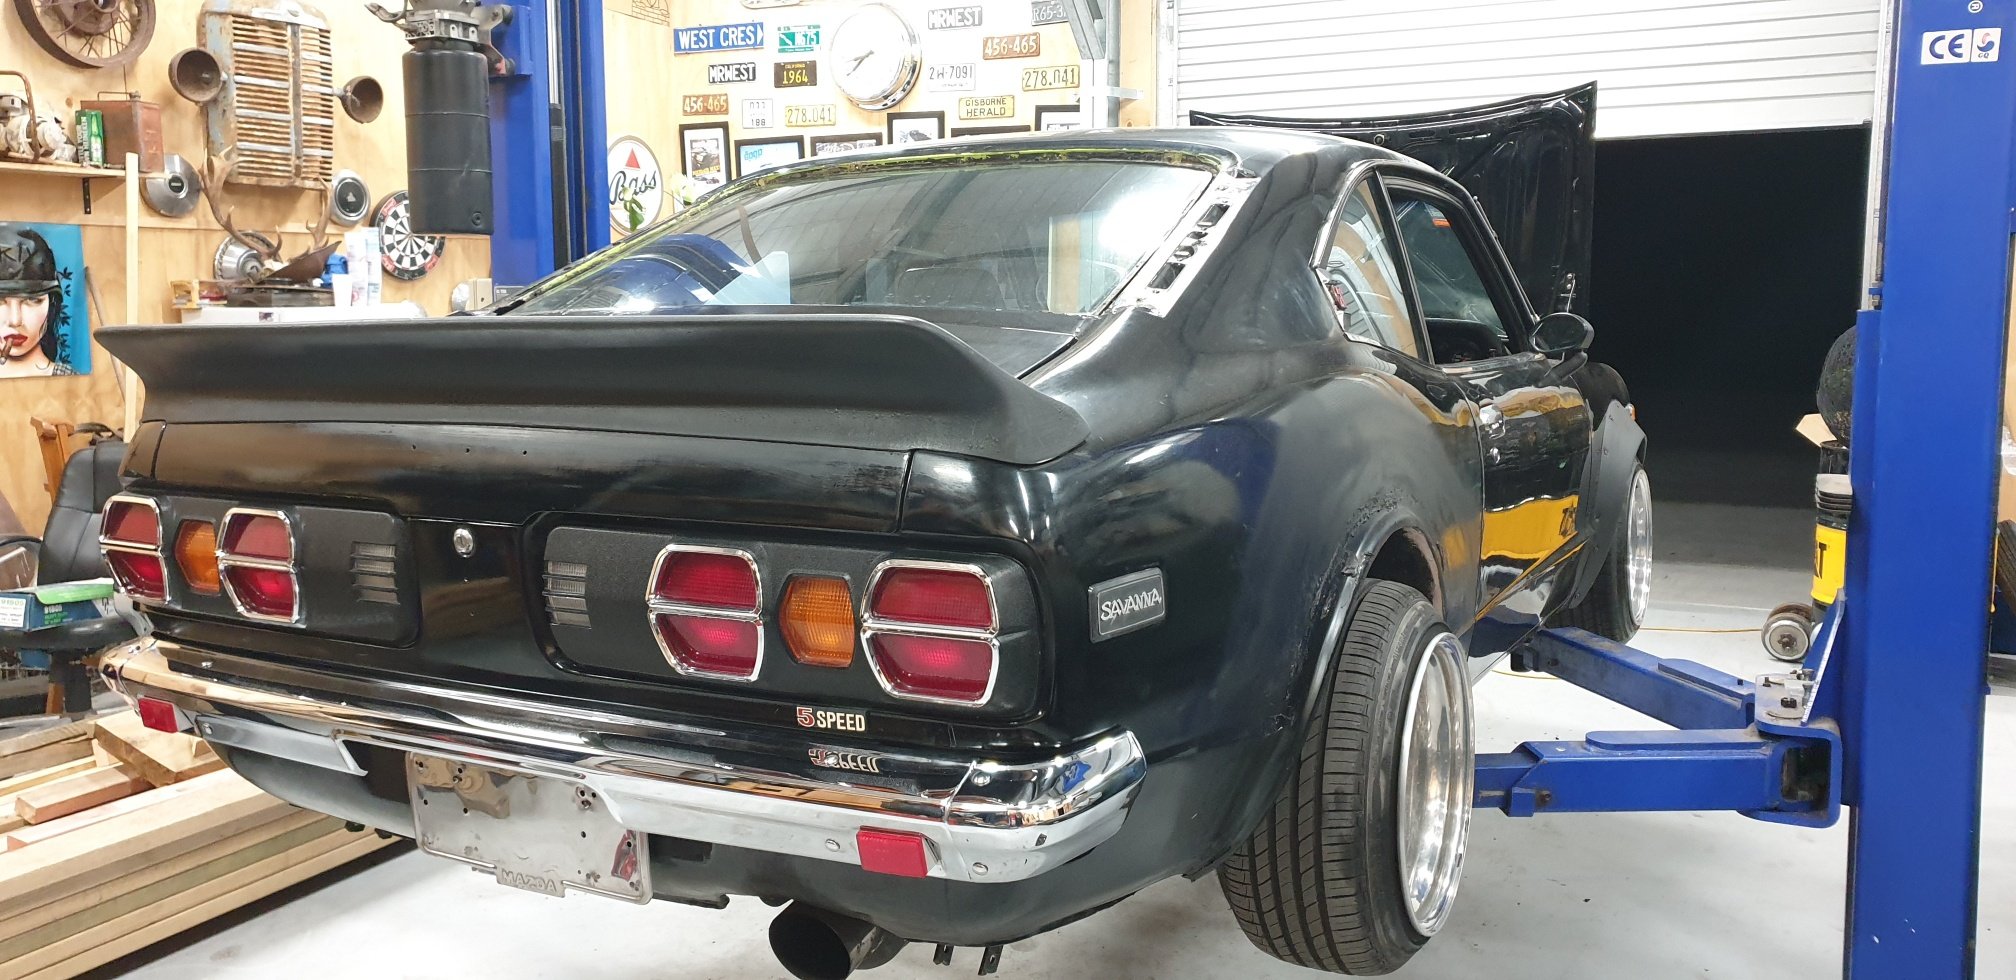
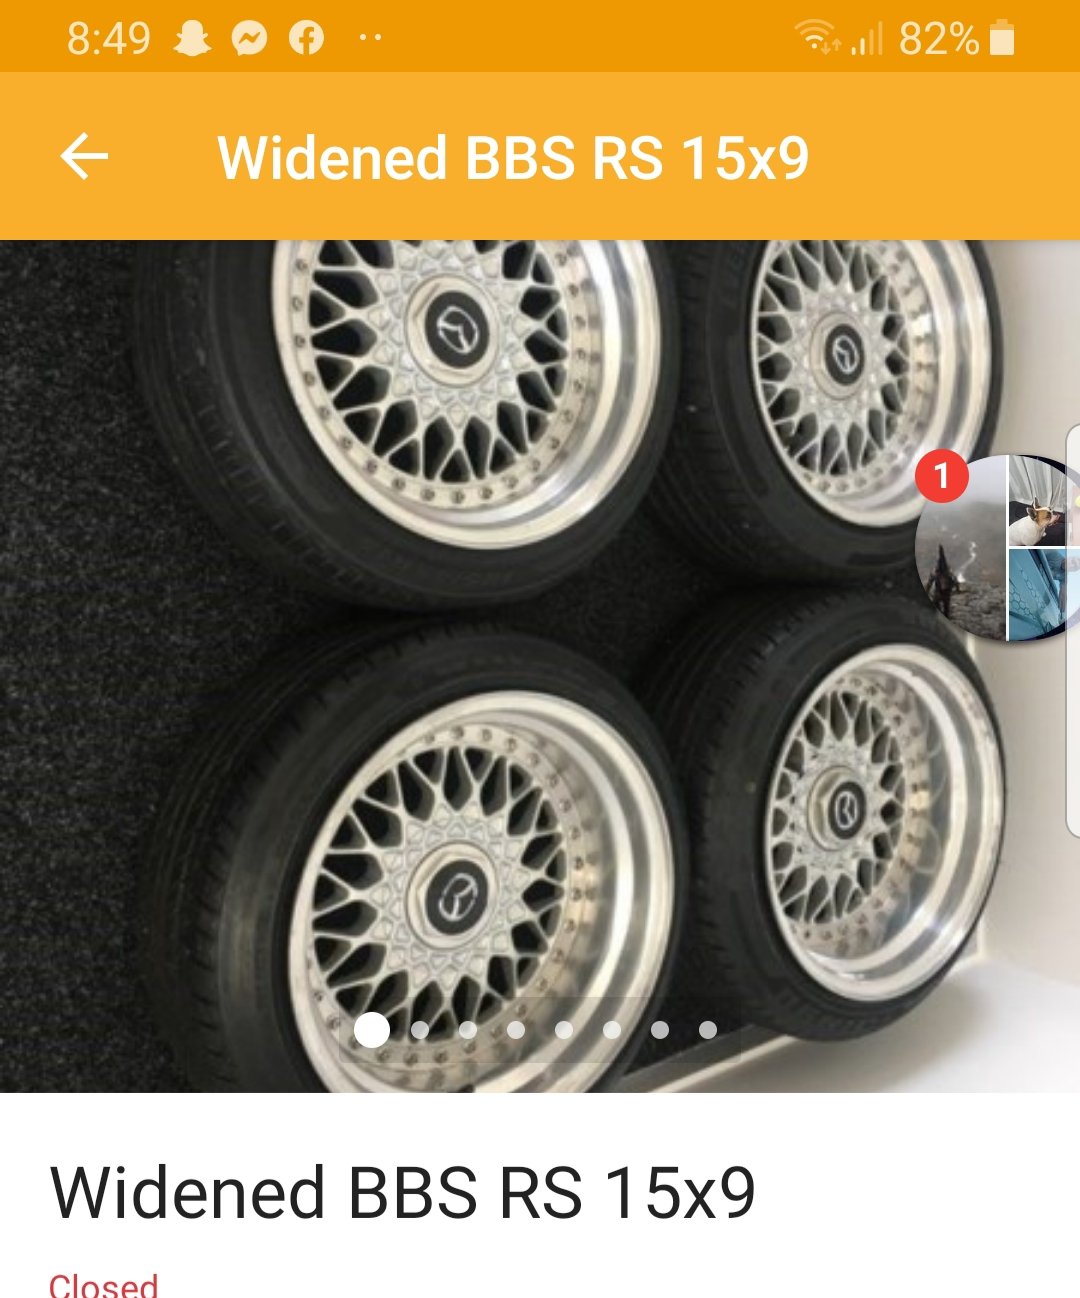
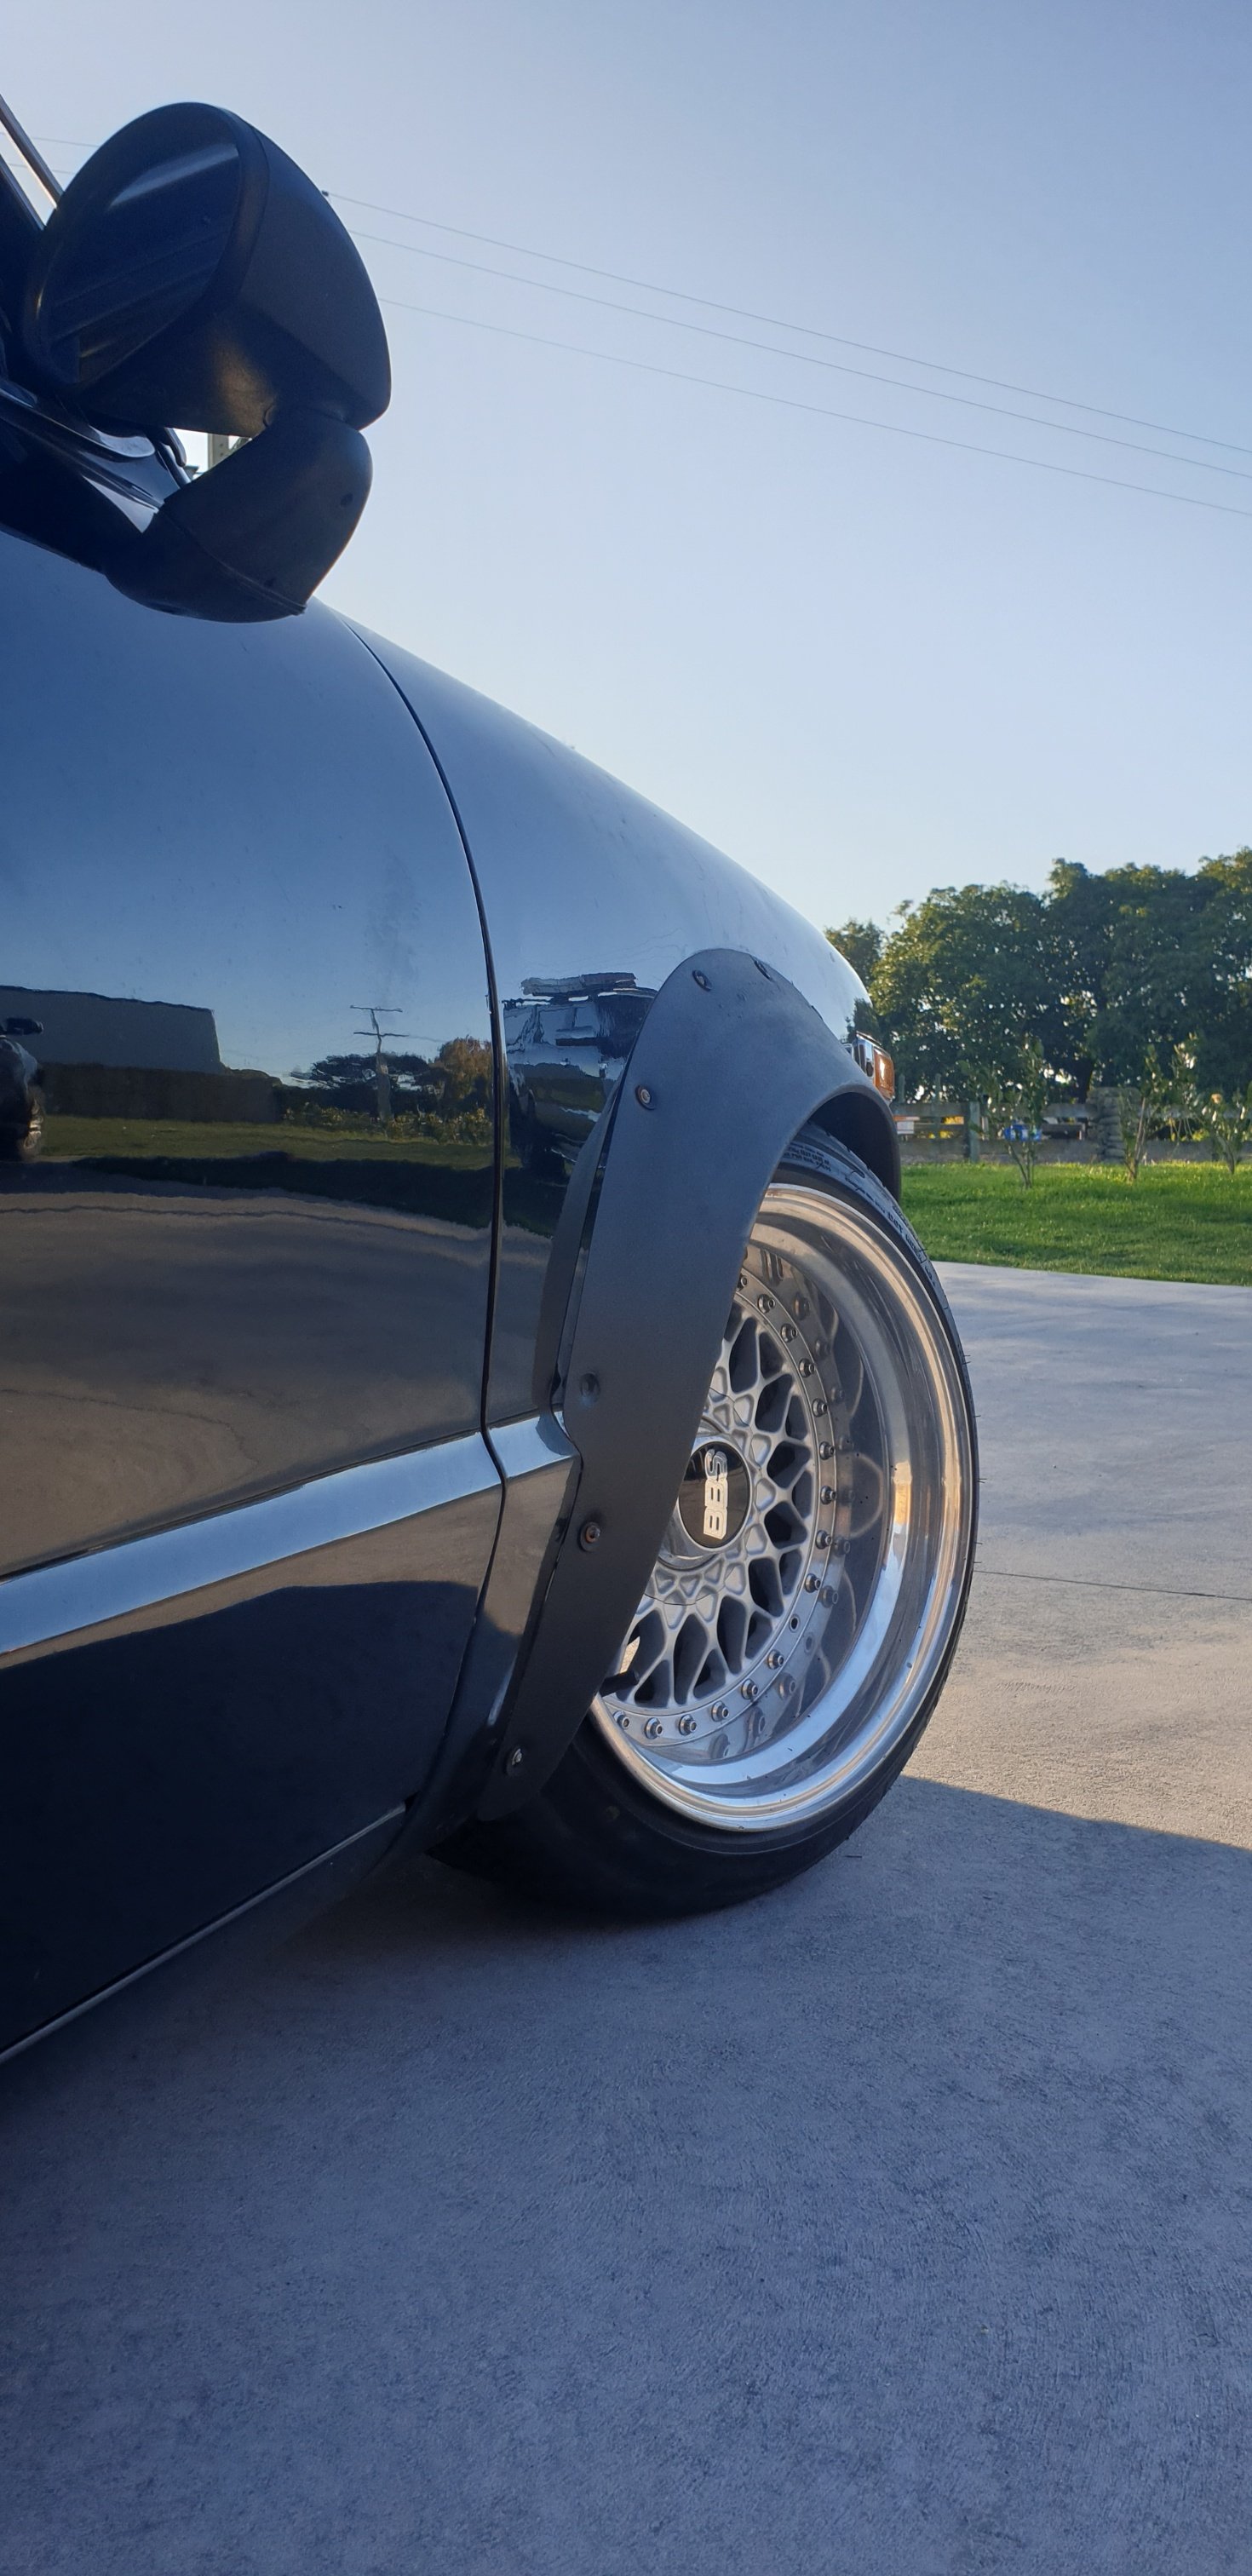
Tonights up date. So the car came on 15 x 10 on the front and 15 x11 on the rear, which are ultra wide especially when they had super streteched 195 & 205 on them. I was a bit on the fence about running them as to make them look semi decent needed alot wider tire on it which could of been tricky space wise. Was browsing trademe for lips to relip them slightly narrower if some lips popped up, ended up finding a set of 15 x 8 & 15 x 9 BBS RS on trademe with Mazda stud pattern. So went and grabbed them , turns out they were the wheels that used to be on this car before it had the flares. Have put the 9s on the front and put the 10 off the front onto the back. Will switch tyres around to run a 205 on the front and get some 225/40 or similar for the 10 on the back.
1 point
-
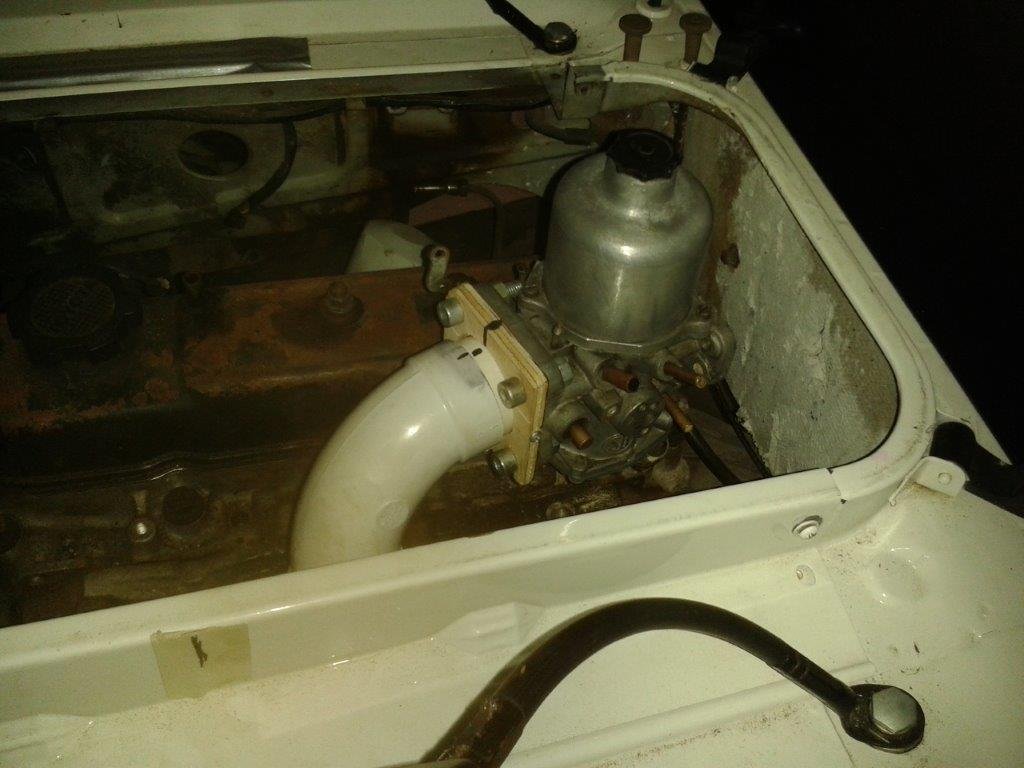
I ended up ordering a 2inch aluminium 90 degree bend which arrived earlier this week. Spent a bit of time fine tuning my drain pipe and plywood mock up and then test mounted the SU carb to check clearances. Crappy pics, but you get the idea.
1 point
-
Take the wheels off add some trellis round the base and a shonky deck off the door......,,
1 point
-
Todays update, The deal was no working on this/spending money till the chev truck was vinned/sorted for Beach Hop. Whilst on xmas holidays with a bit of spare time i managed to find the guy who makes the flare kits in Thailand with a listing on EBay. The car came without the rear flares they had been lost somewhere along the line. He agreed to sell me a new set of rear steel handmade flares to match the fronts already on the car. so fired away an order for those which didnt go down well with the boss But what can she do when they are already on their way haha. These turned up in late Jan and are yet to go on the car but will do when it goes to get a few wee rust gremlins sorted. Couple of pics below of how they look with the flares on from the seller/maker. Yarns
1 point
-
Went for a hoon up and down drive yesterday. Essentially done now.
1 point
-
@Kimjon if you pass your wire through a tampon it scrubs the dust and some oxidation off the wire before it gets into your rollers and makes them skid. Old panel beater Barry trick that seems to work.1 point
-
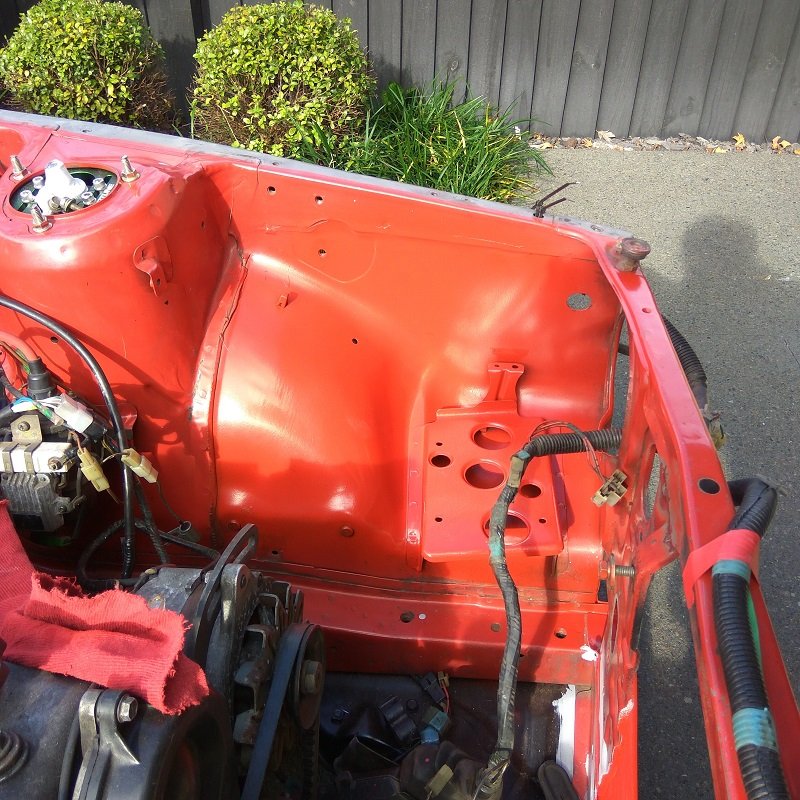
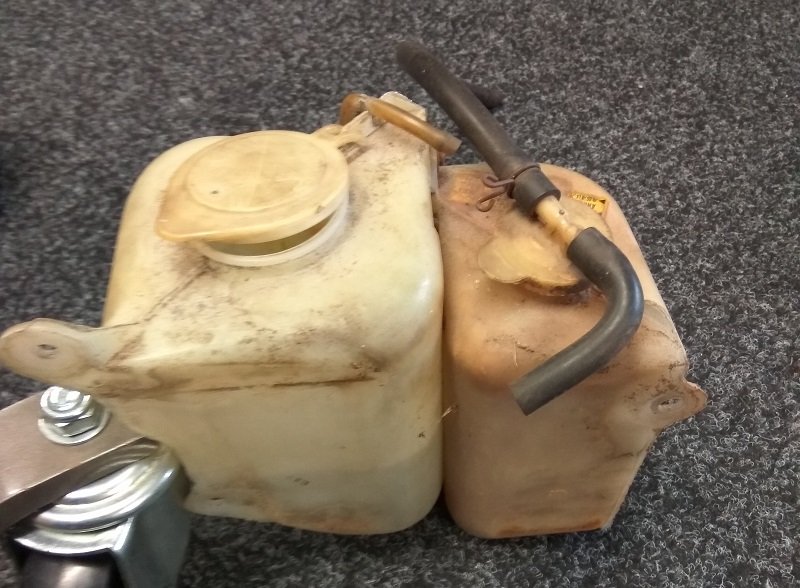
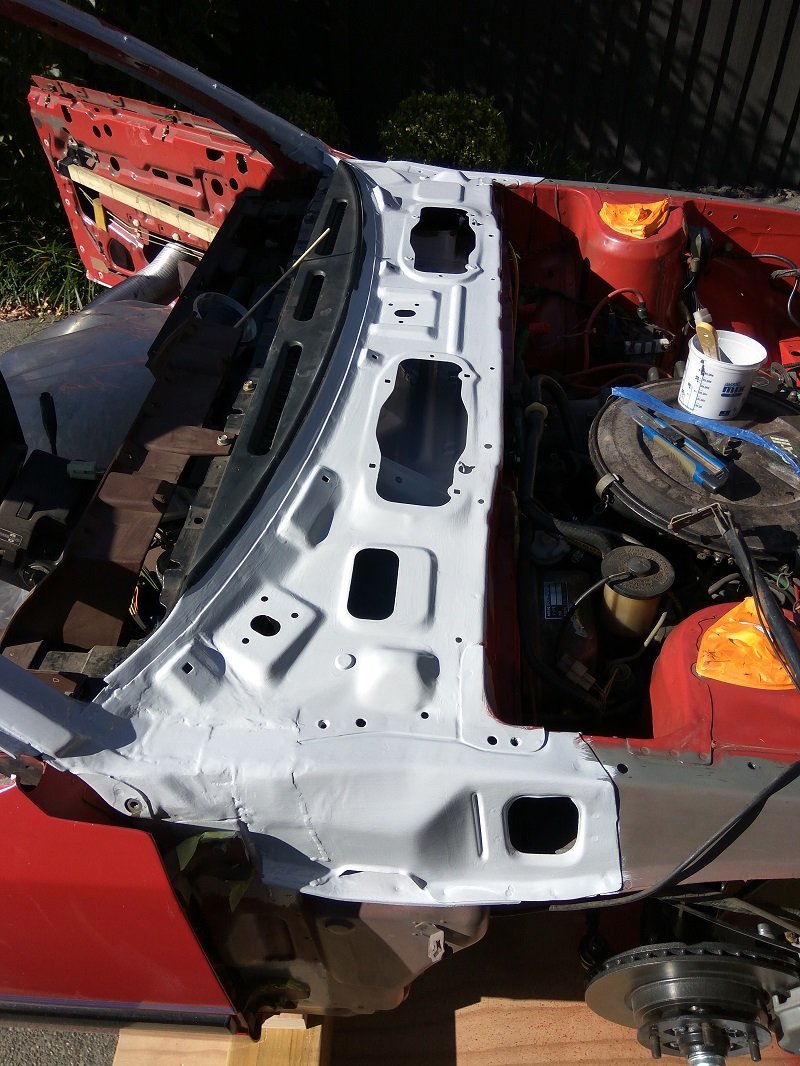
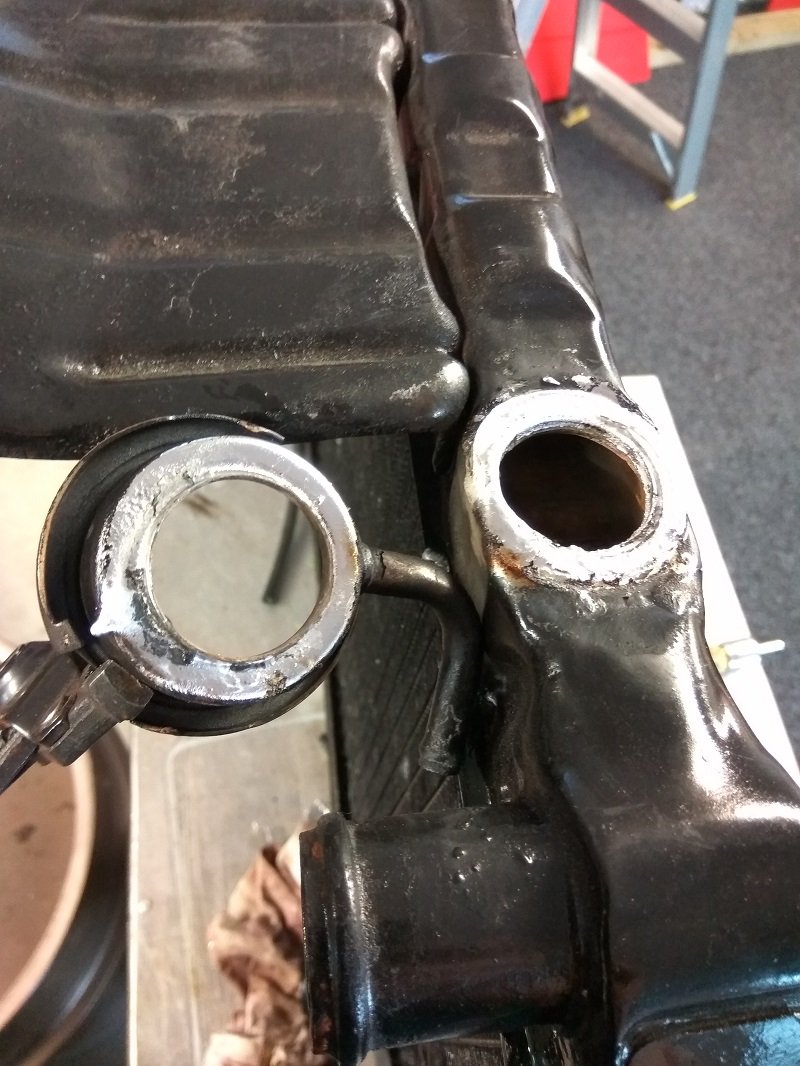
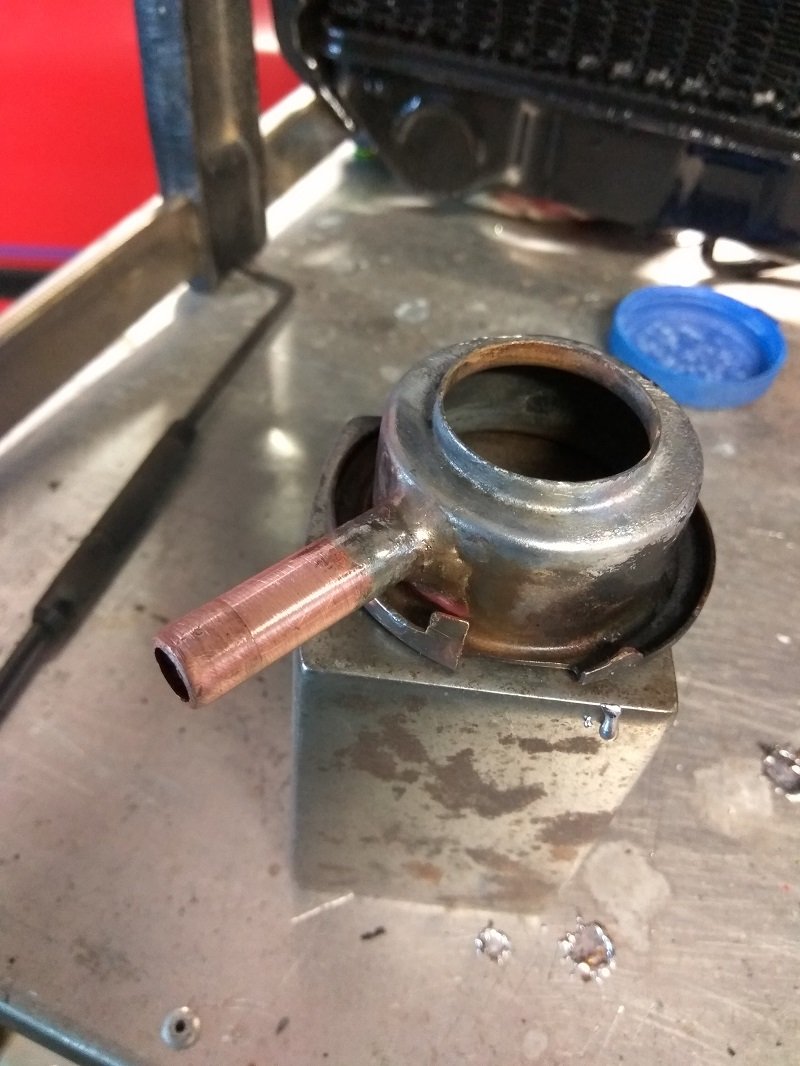
Two updates in one month, lockdown eh... Have been epoxy priming lots of things, under wiper area, gave it a good scrub out, clean, and epoxy. Some areas that I couldn't reach to remove every tiny bit of surface rust I sprayed 3-4 times with Brunox, then epoxied over the top. It wasn't that bad to begin with, but figured i'd stop it now. Any water that gets into that area now has a clean run along the epoxy (to be top coated I guess) and out the side of the car. Have some seam sealer so will do along the front edge to stop any water ever getting to the firewall metal panel sandwich. Also finished painting the radiator area, so the brackets on the underside got another coat of paint. The radiator support area got two coats of epoxy after a lot of wire wheeling and surface rust treatment. Then a couple of coats of red. Now I just have to be careful to not scratch it. The brackets on the underside are currently not bolted up as I want the paint all 1000% dry before bolting the surfaces together. So with all that paint work done (photos aren't 100% current as I don't always remember to take them), I installed the radiator. I had a slow leak on it fixed before lock down. So was expecting a nice and simple job. I should have known... turns out there was a relatively large (to the pipe size) crack on the overflow pipe on the radiator. So after a lot of pissing around trying to fix it in place, I removed the whole neck. I then removed the existing pipe as solder would not stick, even with flux and a super good clean. Got some 3/8" copper out of the van and dremeled it down in diameter to fit in the hole. Braised it up and called it good. At some point i'd like to throw a Fenix radiator at it, as this one is past it's used by. But it will do for now as the whole system will still have a bit of shit in it. So once that is nice and clean i'll look at new rad. Some before and after pics of the overflow / washer bottles, as they were rather grot. Lots of scrubbing later after splitting them apart, they came up much nicer. Also removed the brake master cylinder and will replace / rebuild that at some point. So yeah, some pics. Battery tray which was super rust pitted, spent a long time on the wire wheel. Epoxy, epoxy, paint, paint. Front on, have since fit the loom back in place and painted black the areas seen through the grill. Epoxy finished in this area now. Red top coat to go on, and whatever top coat colour I have lying around for in the gutter. Washer / radiator bottles before And after, enough time spent on these that I had priced up universal ones. Wouldn't look right though, so I soldiered on. All fixed back in place with new bolts from "Car Clips" based in Dunedin I think. Didn't take much heat to pop this off. My gas torch is not suited to this job at all, so you'll notice solder here and there. Even on low it's enough to send the solder running. Such a small crack, such a massive pain to fix. Copper pipe installed, took longer to sand it down to size than braise it in place. And job done, find out tomorrow how porous the cooling system is. This part at least should be sound.
1 point
-
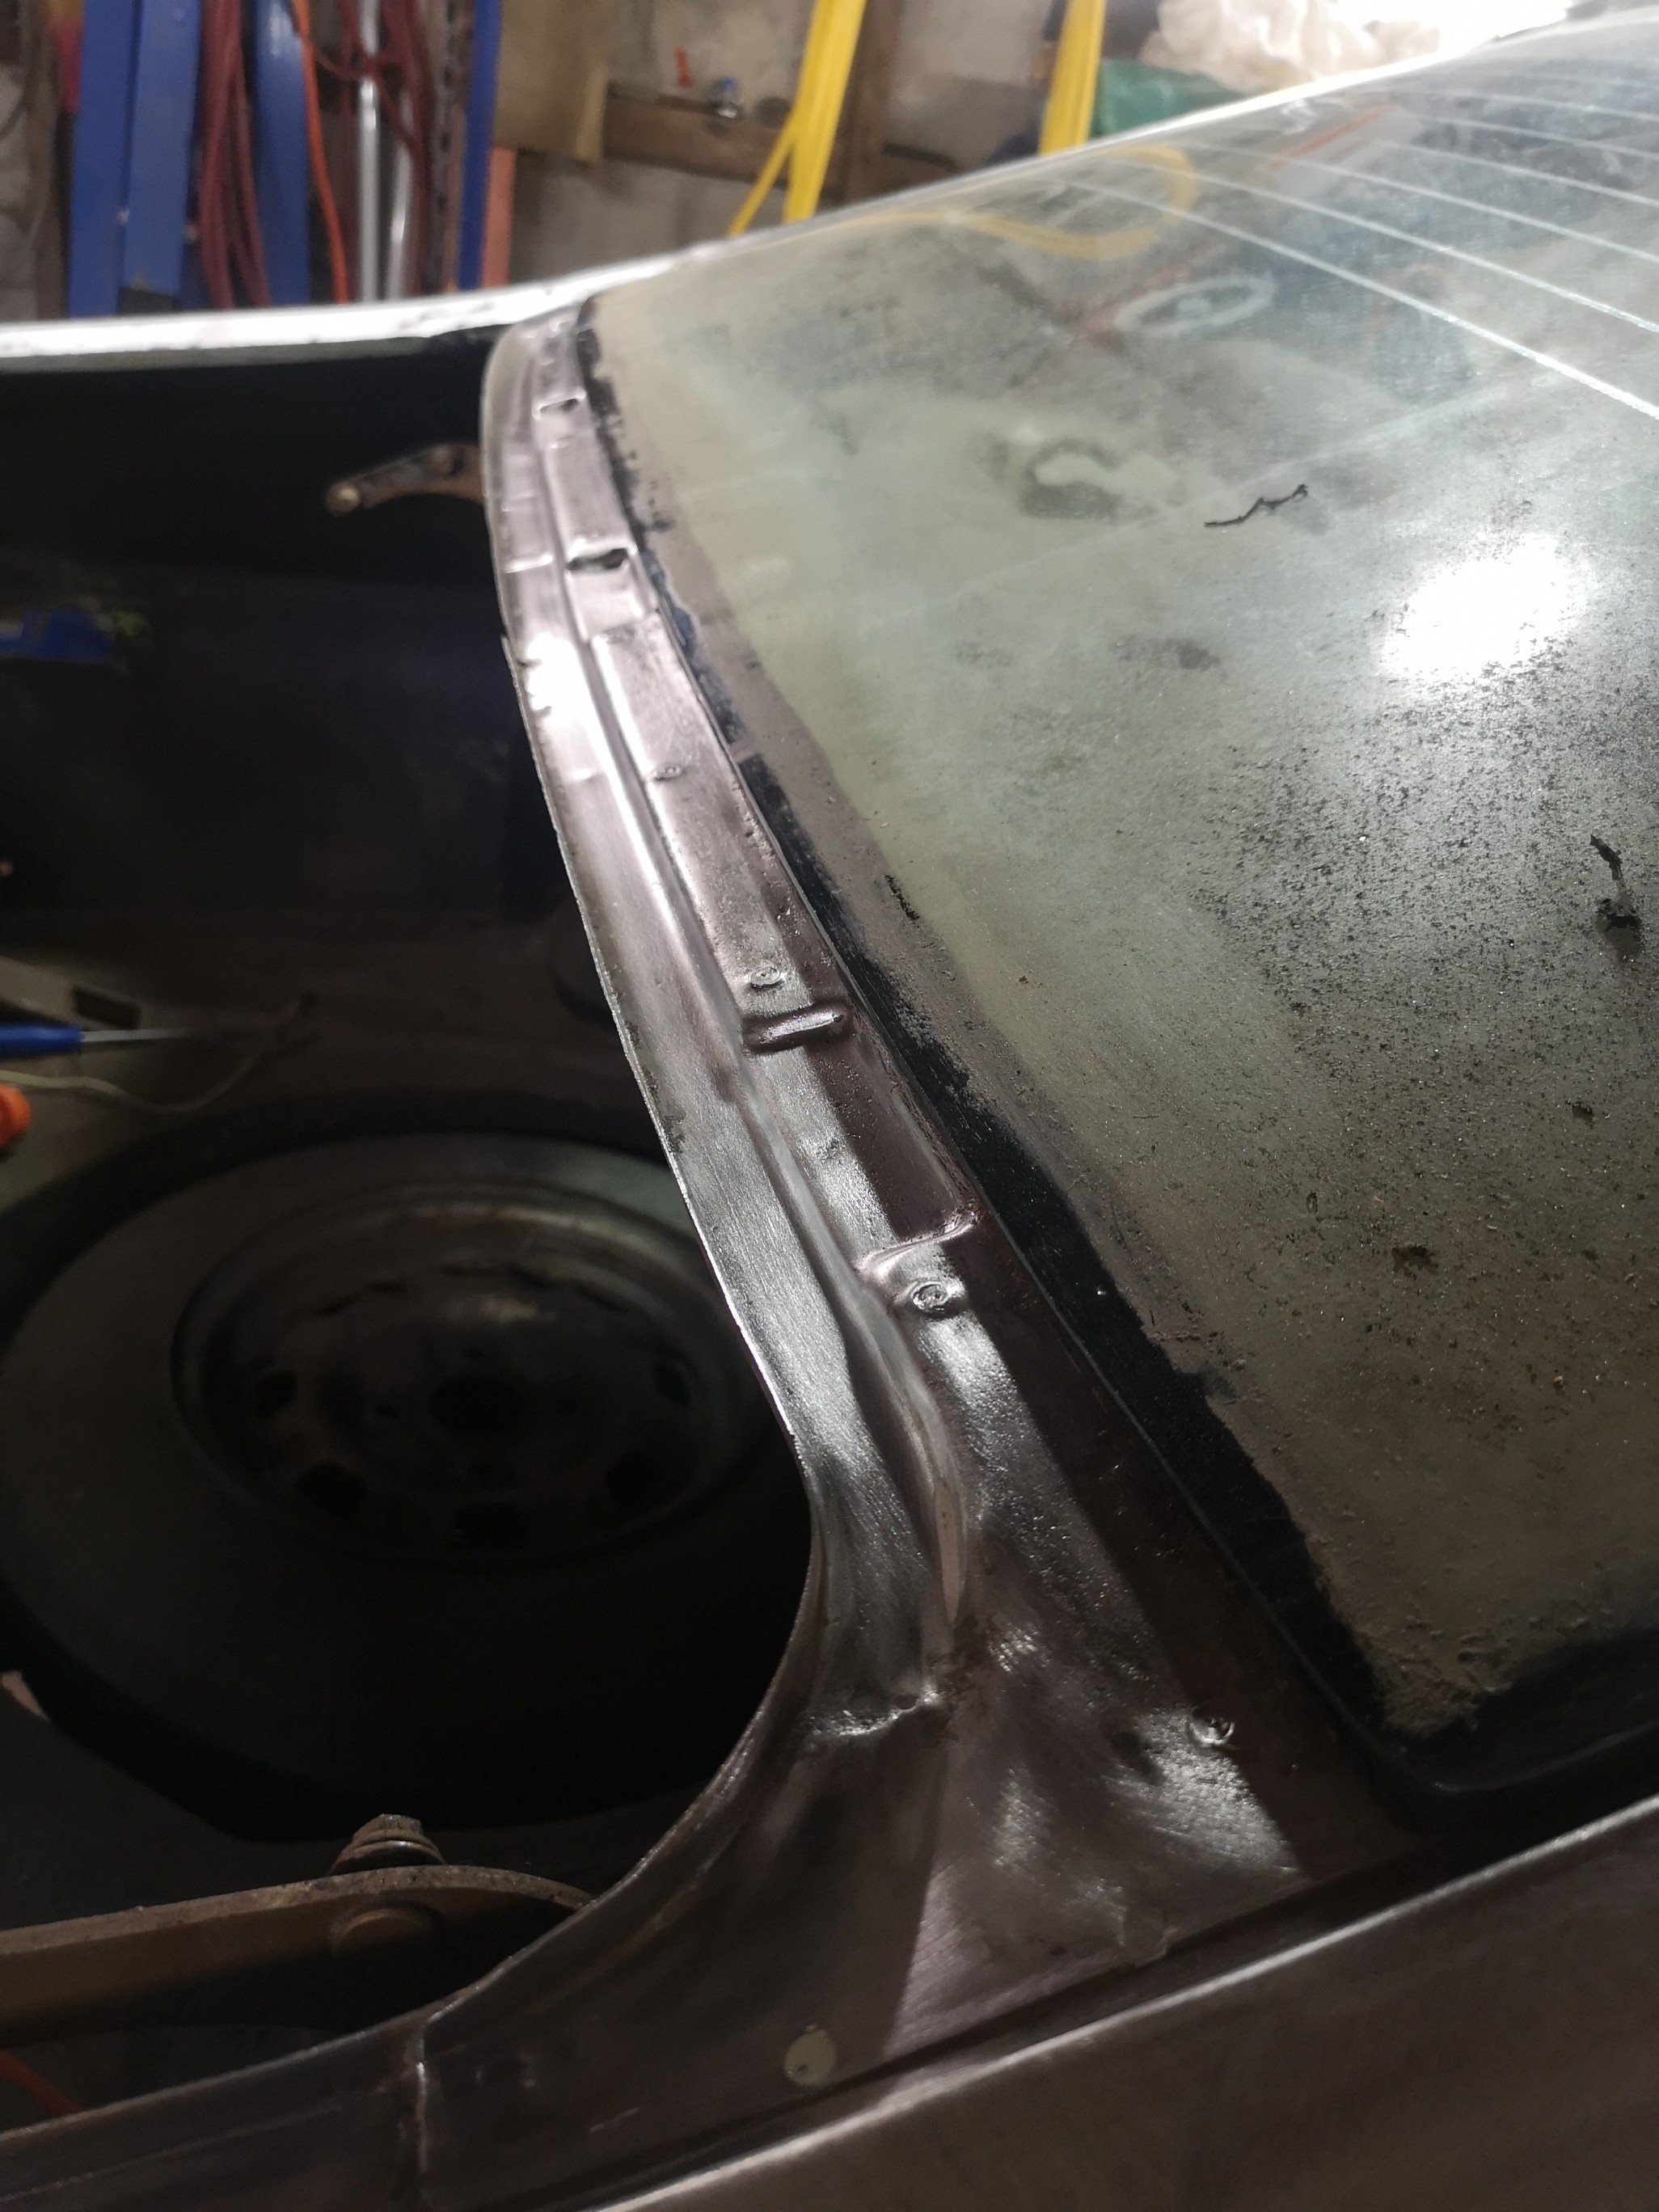
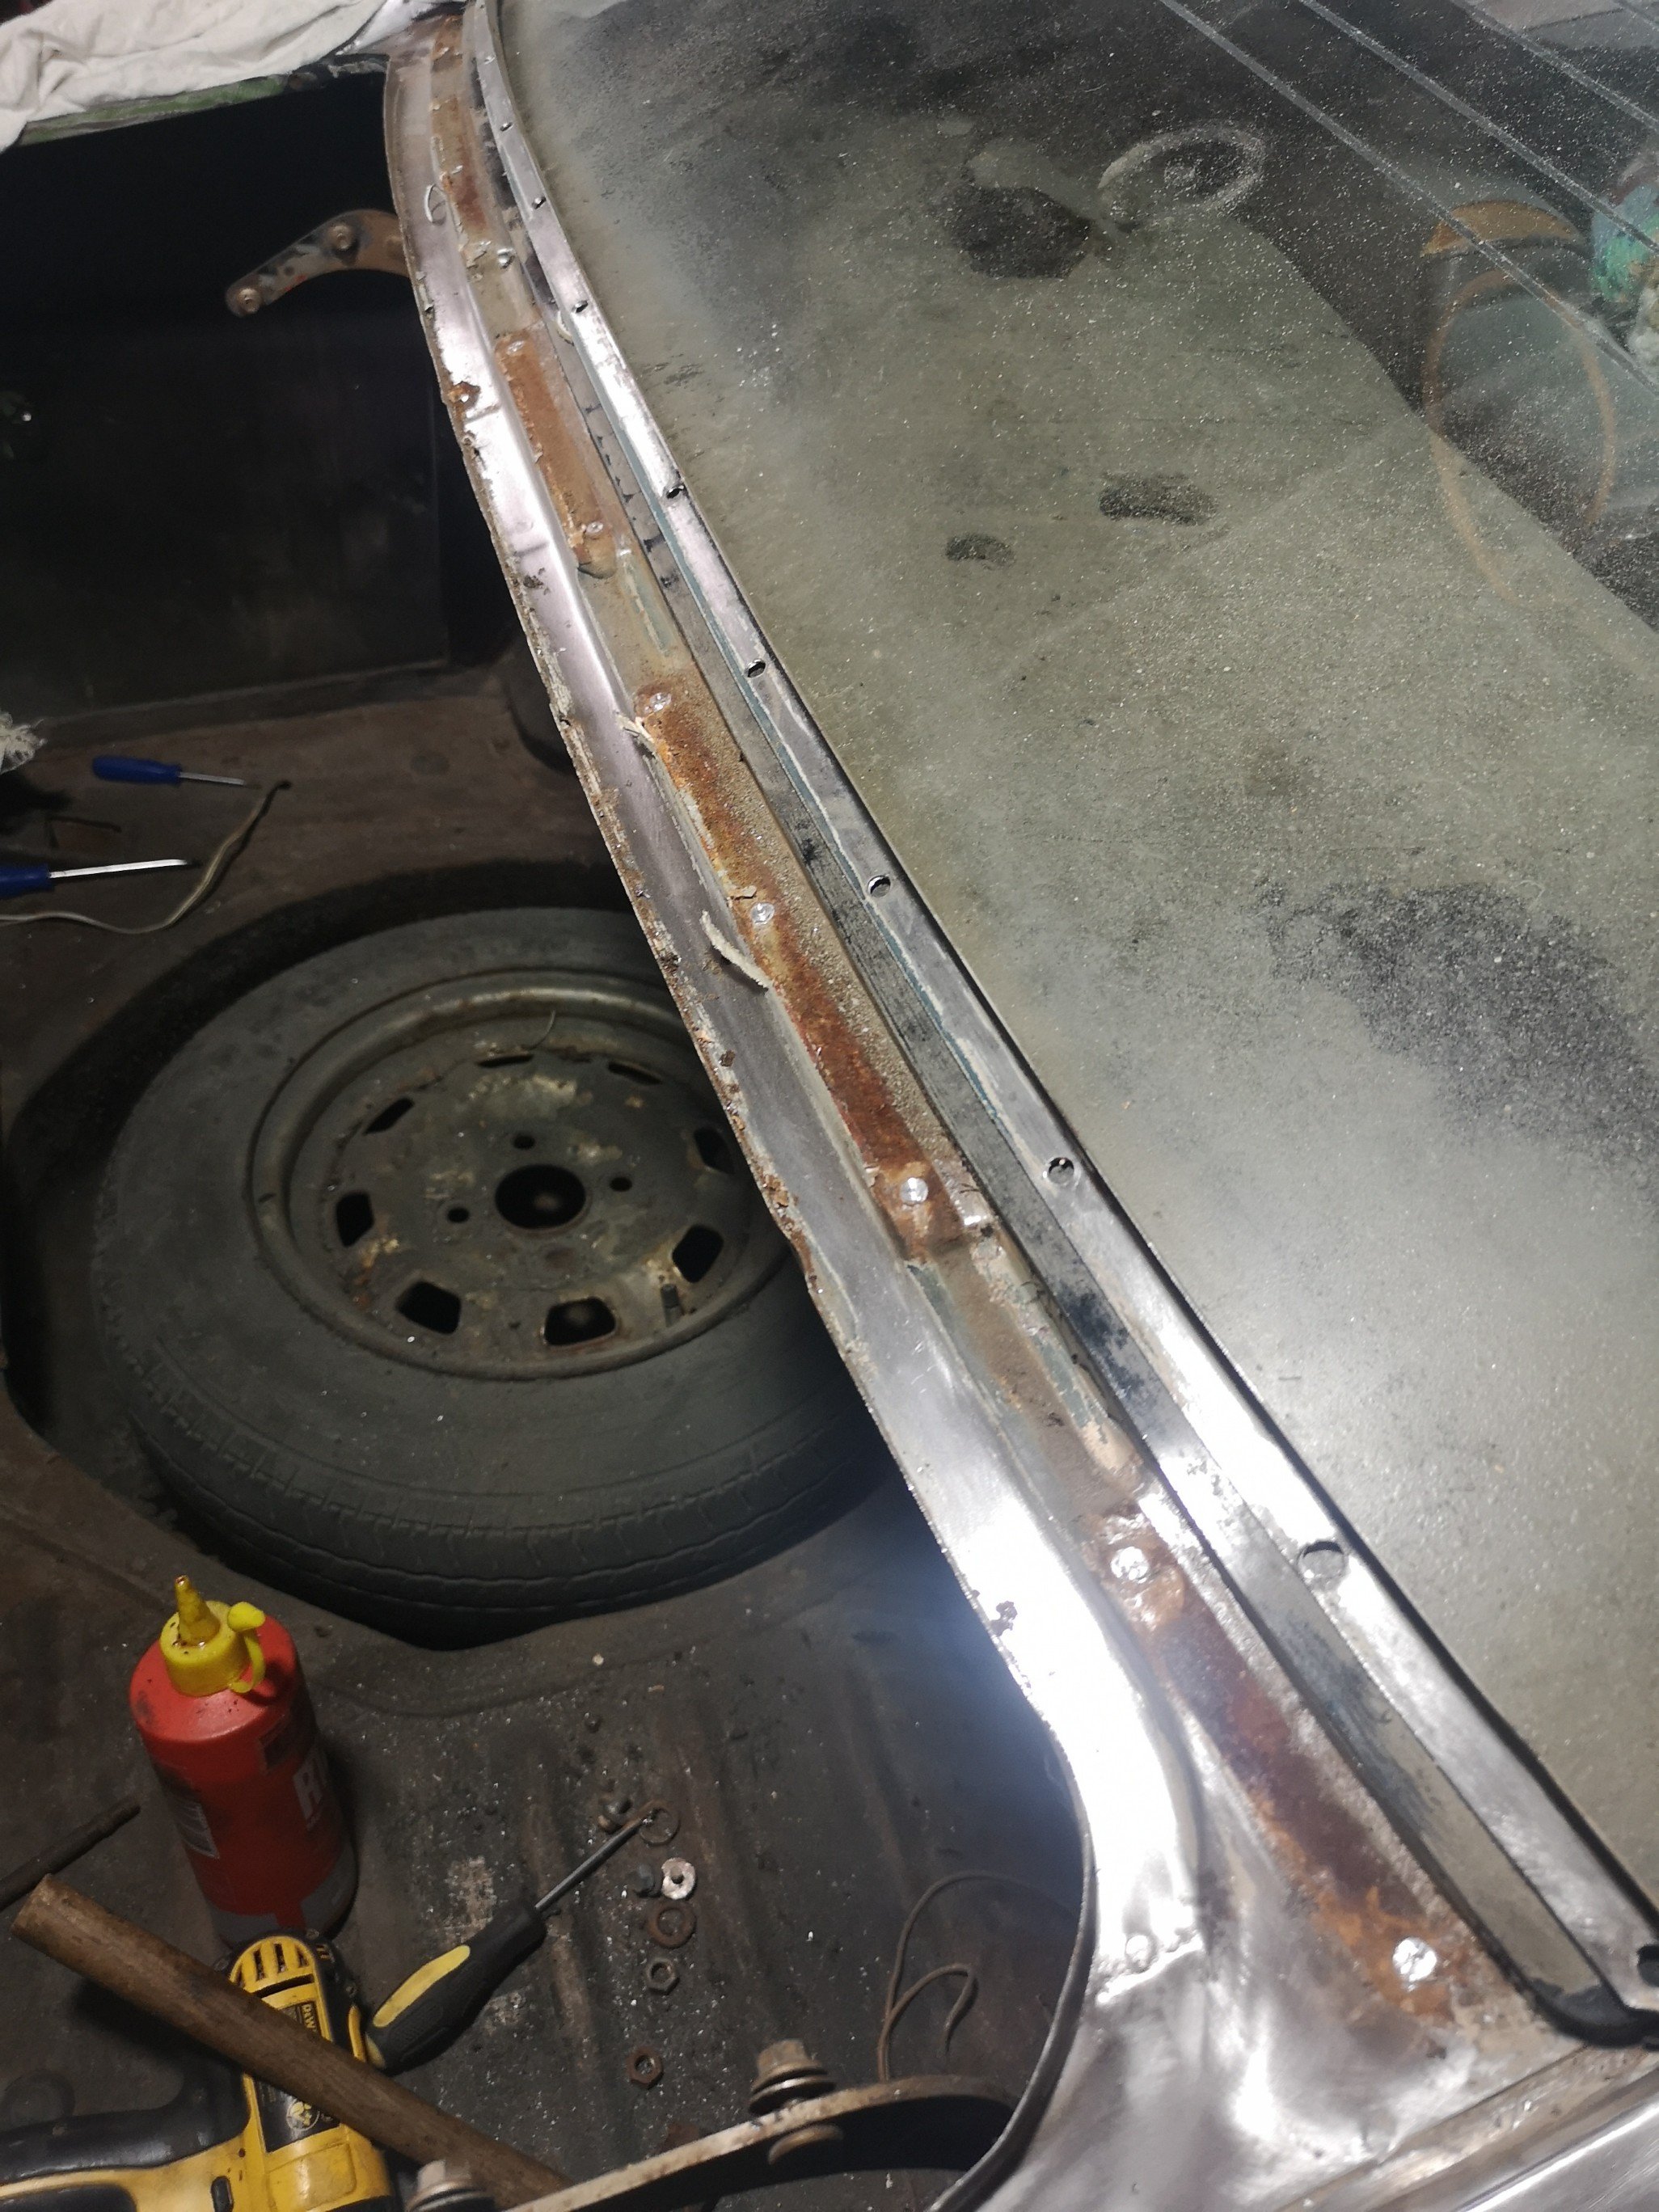
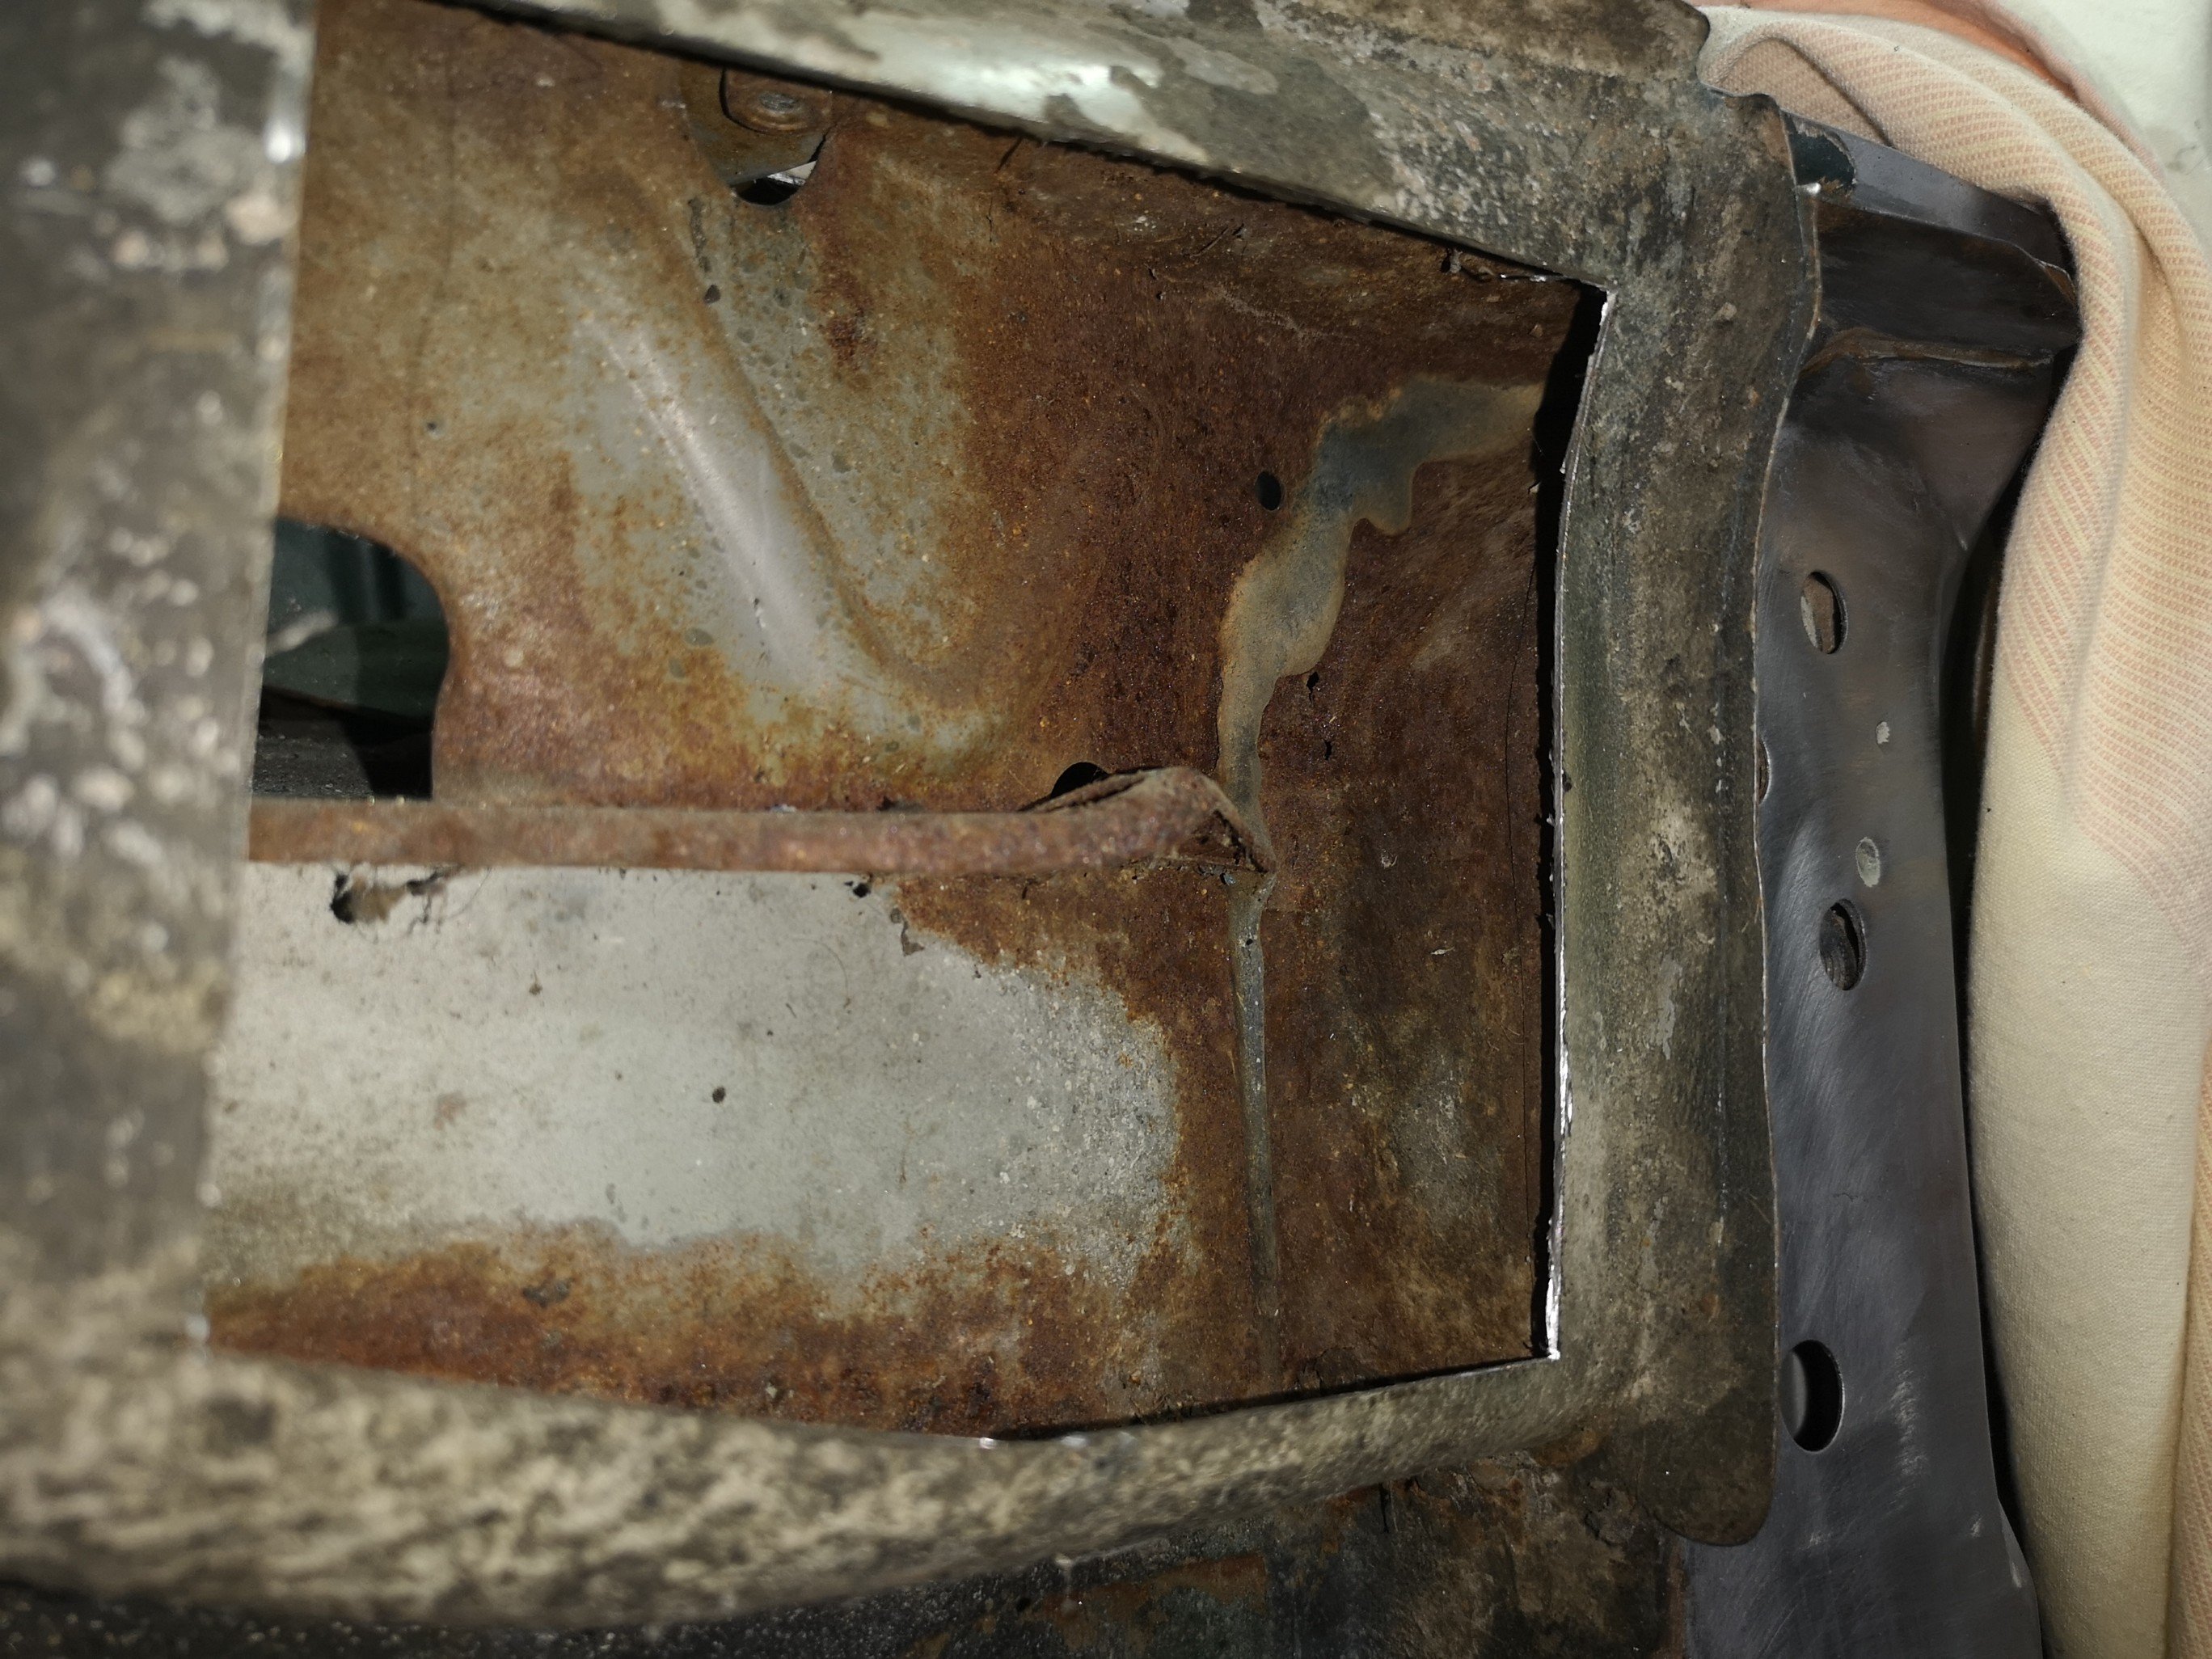
Glad I took this bit off, some nasties in there that would no doubt make themselves known down the track further.. Gave it a good stripping, gonna treat all of the bare steel with phosphoric acid and scotch brite before I paint, I'll prime this bit first then weld the strip back on over it. Also cut another hole to try and access the hard to reach bit. Have come up with a plan to cut it out. Might need some more gas first. Lots of surface rust under there. No where near as much on the other side. I think it stems from the fact that there is a little drain in the windscreen frame that should have a piece of hose on it. It's there on the other side but not this side. Might have to coat it all liberally in fish oil once I'm done..
1 point
-
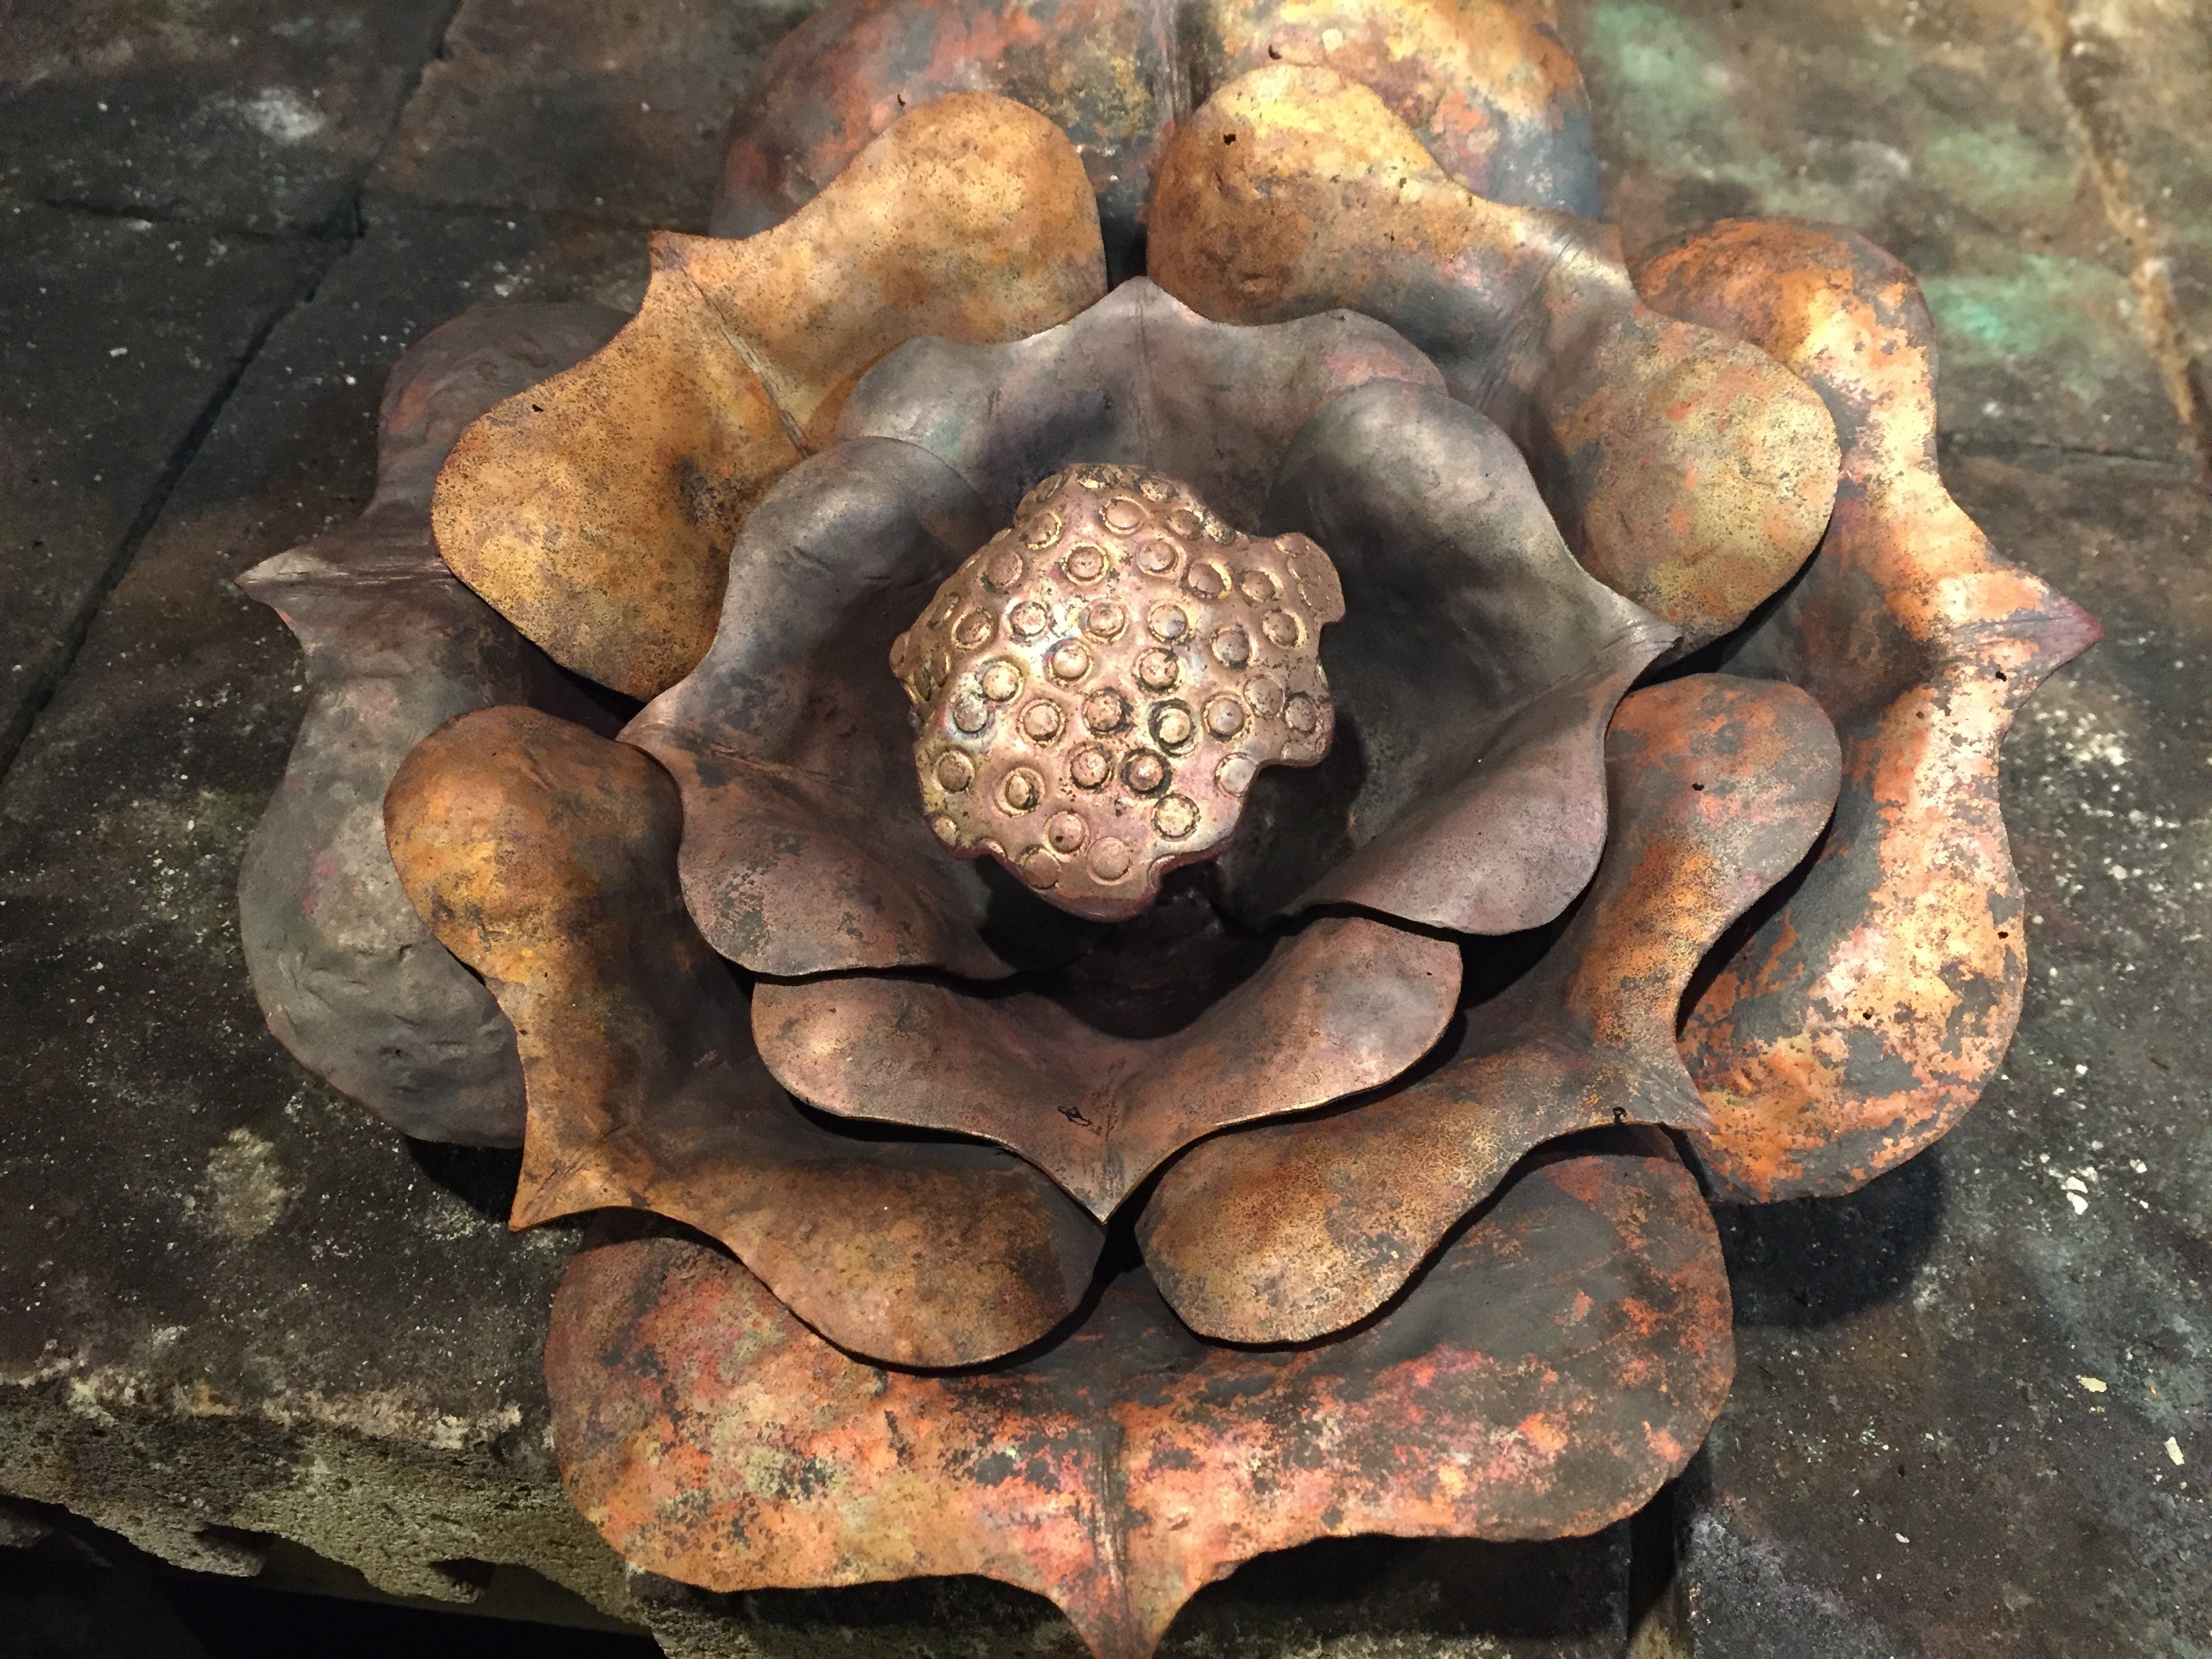
I'm also still got this image stuck in my head
1 point
-
Update: it's running again, albeit on 3 but I think no.4 lead is crook. I noticed that rotor was pointing between 1 and 3 when at tdc, don't know how I didn't see it before, pulled dizzy out and turned round a bit so rotor lined up a bit nicer towards 1. Put dizzy back but it had a flat on bottom of shaft that didn't line up so pulled it out and turned the groove down in the hole with a screw driver, put dizzy in turned key and it went thankfully. I'm not sure what happened for it to be out but. . . It's good for now. Just thought I'd put a update on this Cheers for ya help1 point
-
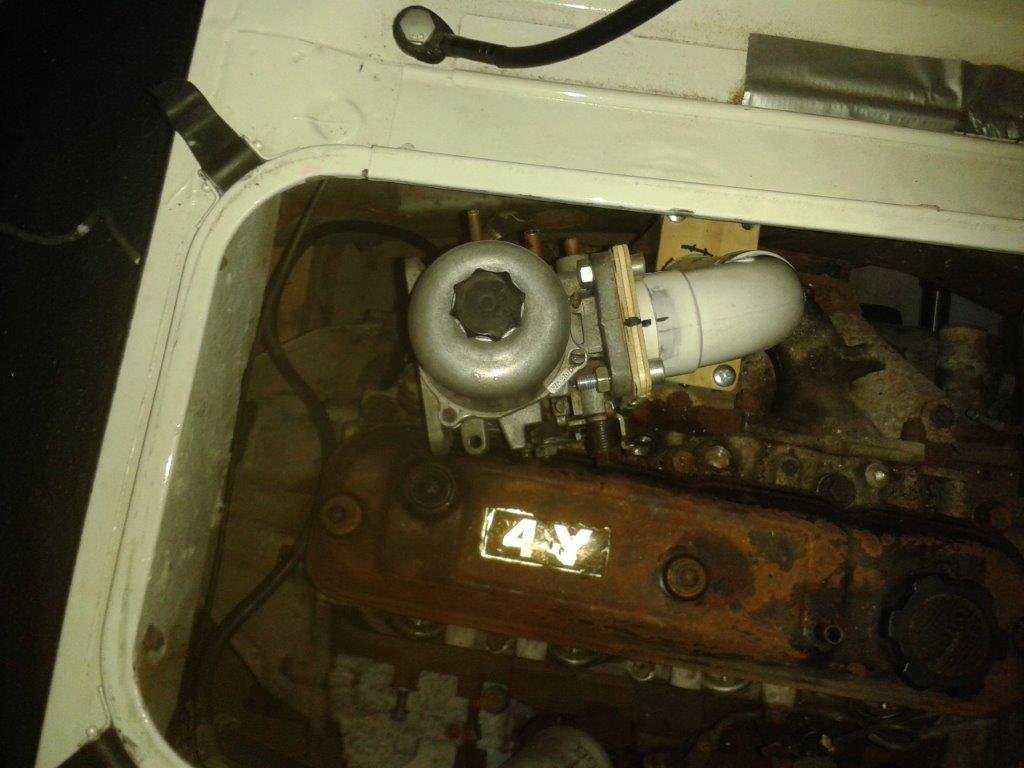
I was originally planning to make the SU adapter out of steel, but I have a mate who is able to do aluminium welding and due to the limited tools that I have available I figured it would be much easier to fabricate the plates that I need out of the softer material. Following my philosophy of re purposing as much as possible from my donor vans I set my sights on making something out of what is left of the dodgy looking aluminium bull bar off the Starwagon. I started off by pulling it off to reveal its true glory.
1 point
-
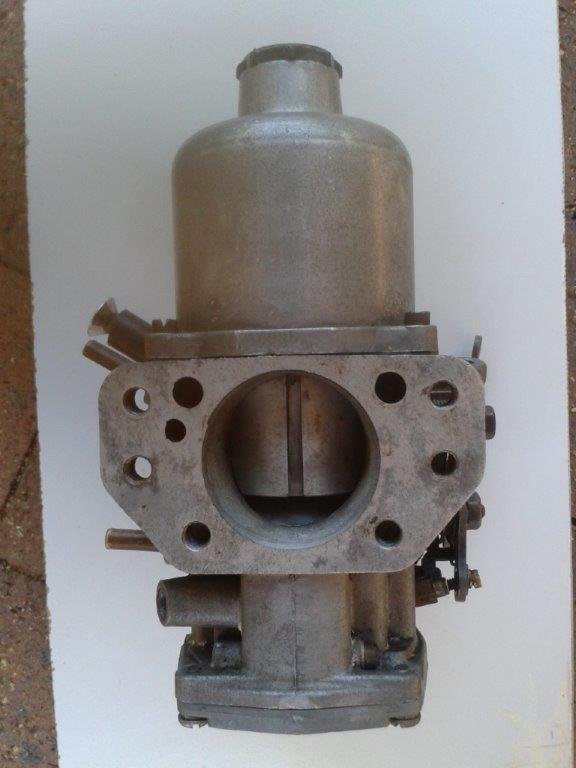
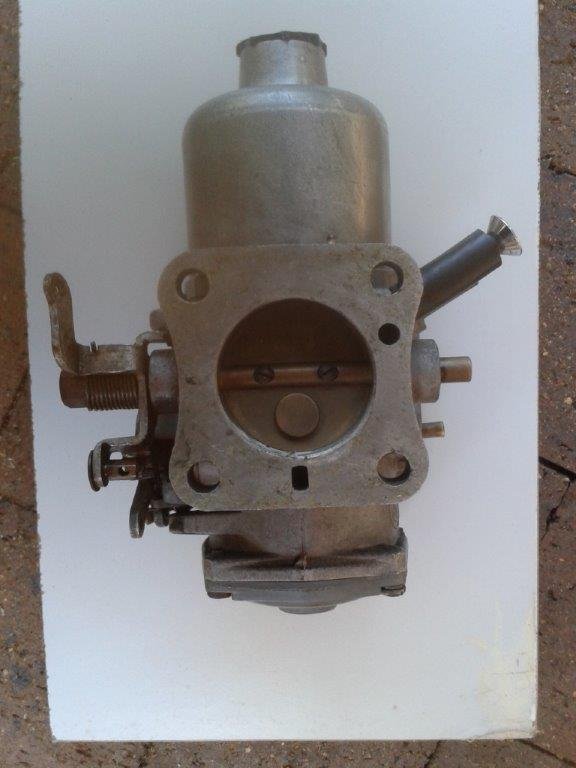
Late last week the courier arrived with the SU carbie that I scored for a decent price off a guy in New South Wales. It's a HIF 44 so should do the trick. So thanks to everyone who nudged me in this direction.
1 point
-
i put the front bumper back together and put it back on and it looks ace, i did however forget to take a picture so yea.... anywho i did some other stuff. the rear muffler was too big, hit the ground a lot and made the car way to quiet so i fitted a smaller one. it doesn't hit the ground and the car is louder which is good. old muffler with custom flat bottom, 2020-04-06_05-10-26 by sheepers, on Flickr new muffler. 2020-04-06_05-10-17 by sheepers, on Flickr so the next thing i wanted to do was make new bits for the tops of the rear bumper. the ones i had were fucked so i made some new ones out of 8mm aluminium plate. ill let the photos do the talking but some points to note, the only file i used for this whole process is the one pictured which is called a dreadnought file if you've never seen one before. there is no better file for working with aluminium, you can get a great surface finish with these files if you know how to use them and they will remove heaps of material very fast too. things they dont like however include filing steel, that will fuck them. the other thing is that i used my 60mm DA sander/polisher to go from file finish to polished because DA sanders are the best thing in the world, get some. 2020-04-06_05-10-09 by sheepers, on Flickr 2020-04-06_05-10-00 by sheepers, on Flickr 2020-04-06_05-09-29 by sheepers, on Flickr 2020-04-06_05-09-46 by sheepers, on Flickr 2020-04-06_05-09-38 by sheepers, on Flickr 2020-04-06_05-09-20 by sheepers, on Flickr 2020-04-06_05-09-06 by sheepers, on Flickr 2020-04-06_05-08-56 by sheepers, on Flickr 2020-04-06_05-08-46 by sheepers, on Flickr 2020-04-06_05-08-35 by sheepers, on Flickr 2020-04-06_05-08-25 by sheepers, on Flickr 2020-04-06_05-08-15 by sheepers, on Flickr 2020-04-06_05-08-06 by sheepers, on Flickr 2020-04-06_05-07-48 by sheepers, on Flickr 2020-04-06_05-07-39 by sheepers, on Flickr 2020-04-06_05-07-31 by sheepers, on Flickr 2020-04-06_05-07-22 by sheepers, on Flickr 2020-04-06_05-07-12 by sheepers, on Flickr 2020-04-06_05-06-55 by sheepers, on Flickr 2020-04-06_05-06-45 by sheepers, on Flickr1 point
-
Hako's being doing daily duties as the Hilux is busted. Normally there'd be no way I'd drive a car as nice as the Skyline around at the end of December but the weathers warm (10 degrees, fucken Bahamas aye) and dry and they've not salted the roads for a while. Also the Hilux is busted, I may have mentioned that. The VW has no heater tubes connected and has started shitting out once it's warm so Skyline it is. It's been great, I forget how much of good o'l car it is. Been having chats and pics taken and friendly waves. I'm such a tart. I'm not really, I find it a bit embarrassing TBH but it's pretty cool that folks dig it. Temperature gauge pegged 130 earlier. Oops. Couple of cracks in the radiator tubes, looks like it'll need a re core. Topped it up and it's fine now. Sorry no pics, but I'm pretty sure there are some out in internet land. Chur.1 point
-
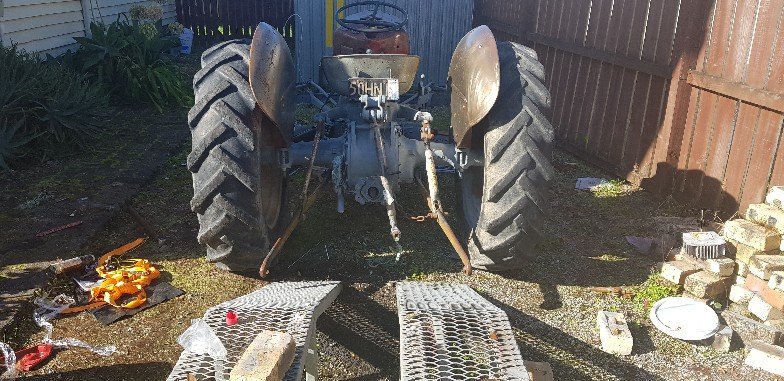
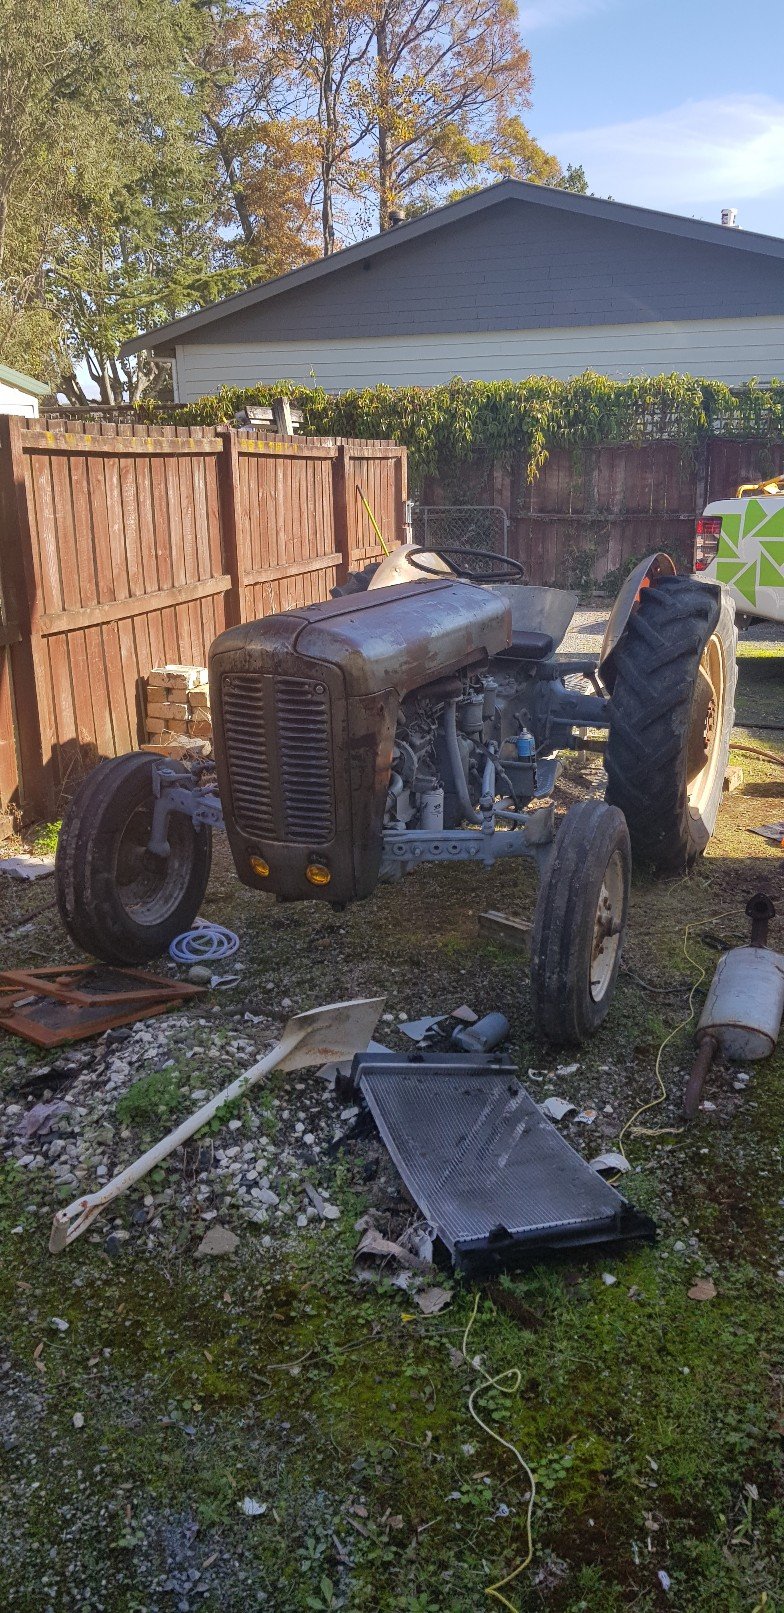
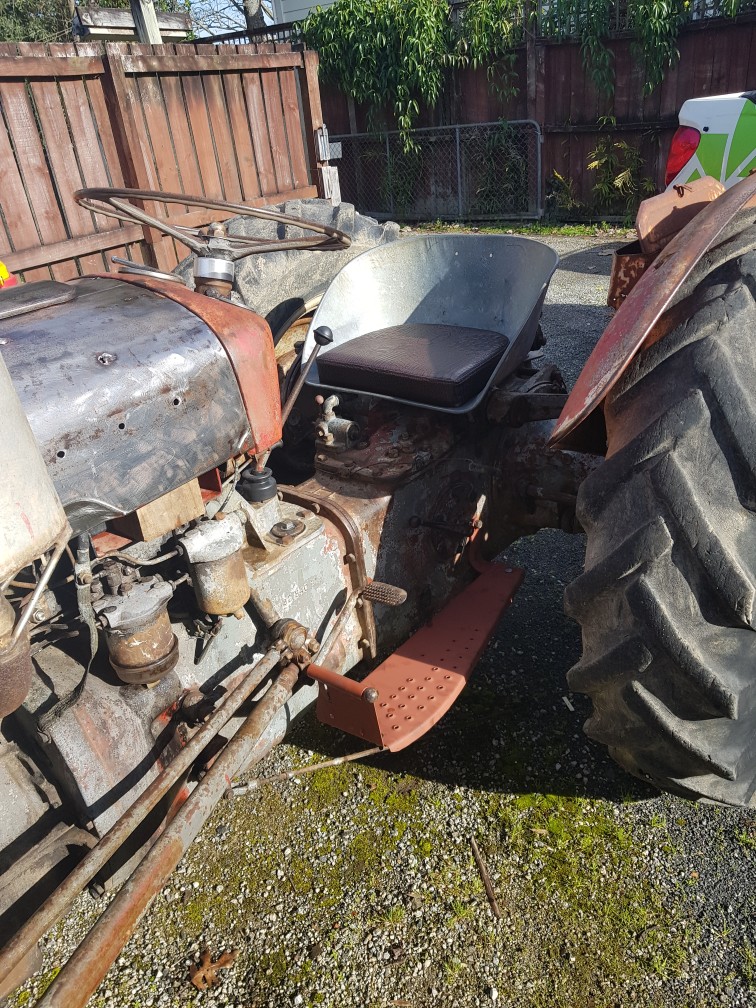
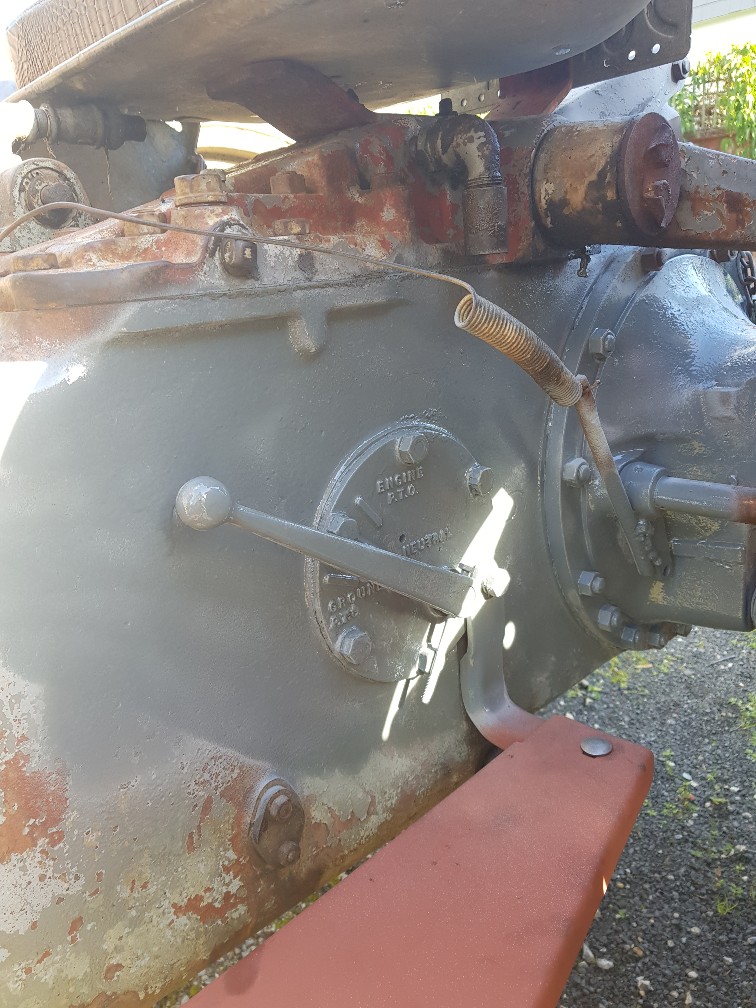
When i had the tractor running the other day I tried a few times to get the PTO engaged. Not a huge amount was happening there. Even more concerning was that the PTO shaft appeared to be locked solid. Today I pulled off the PTO lever side cover (these things are awesome aren't they?!!" and discovered that it was stuck in ground drive PTO mode. The detent plunger was siezed solid in its passage so that moving the PTO lever was impossible. What i thought was lever movement was actually the handle rotating around the shaft because of a broken rollpin. It was seized enough that i had to eyeball a location and drill a hole from the outside of the housing so that I could punch the detent plunger out. I'll have to plug this hole somehow - probably will tap a thread in it and use a grubscrew. So that is another thing off the list I also did a whole lot of de-greasing and water blasting- then trialed a little paint Have decided to go with CRC zinc-it grey (lol) covered in penetrol. Also fitted new footrest
1 point
-
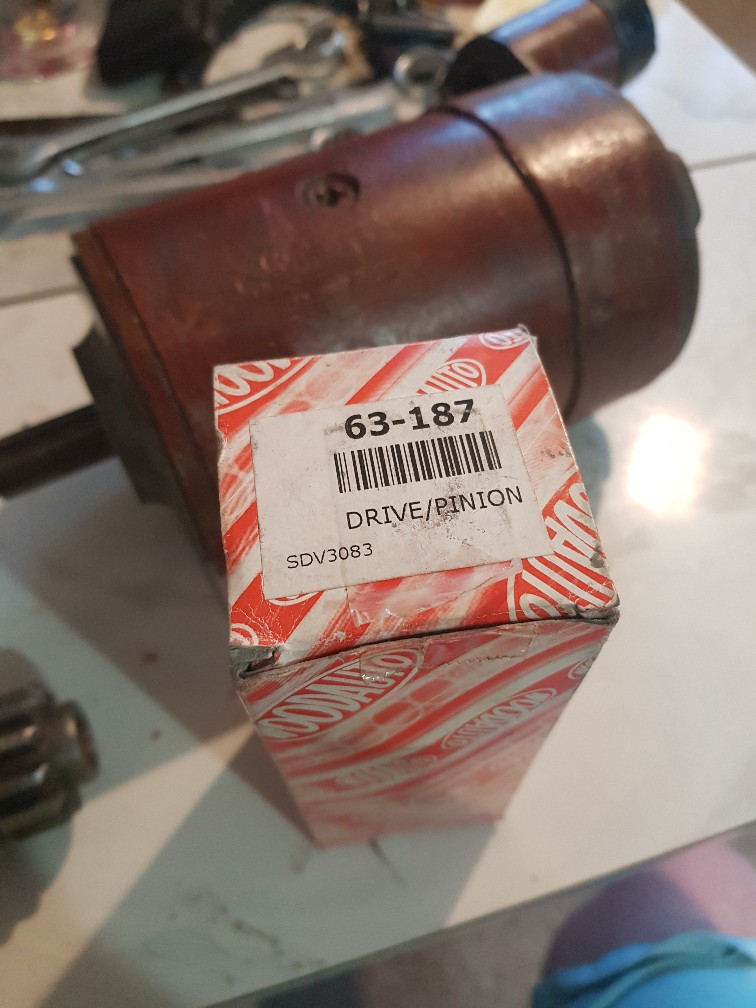
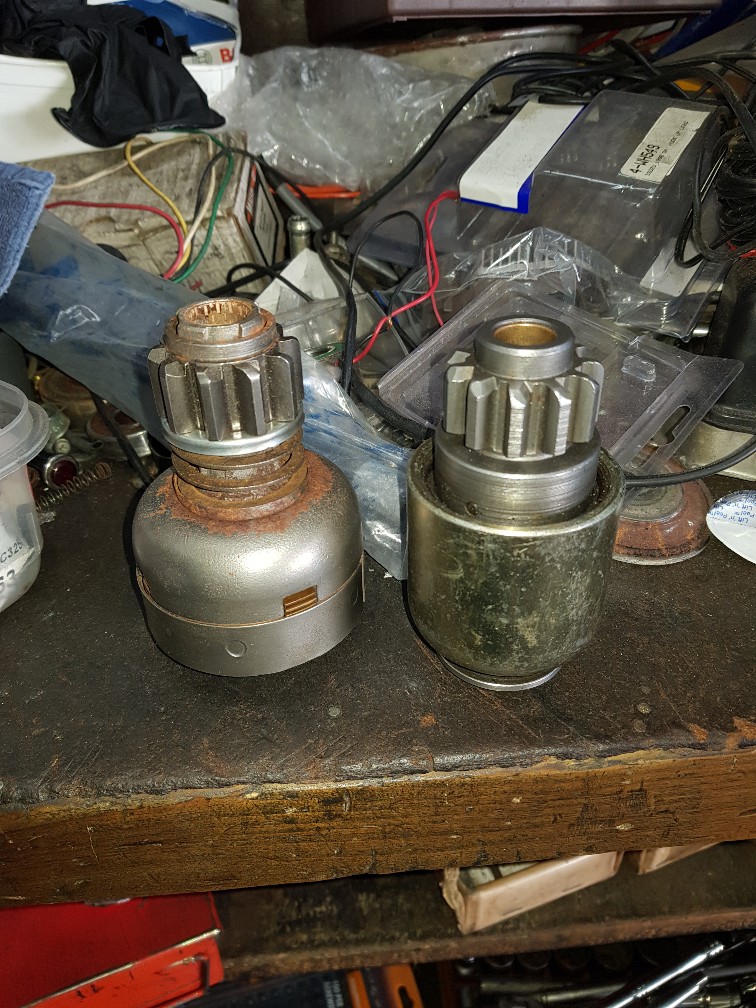
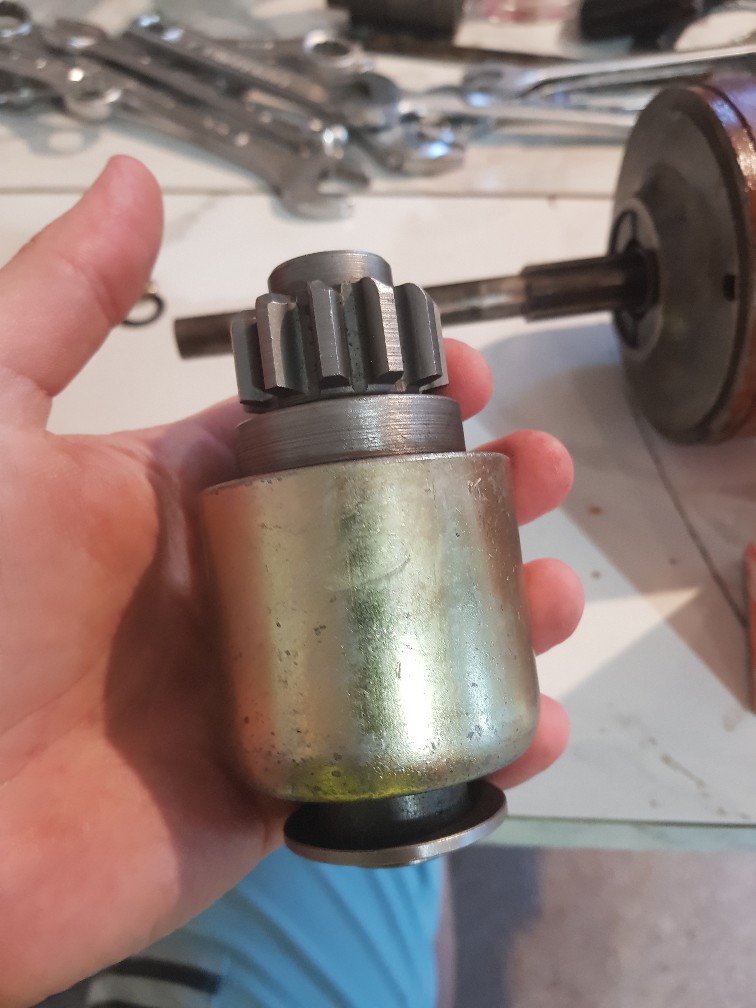
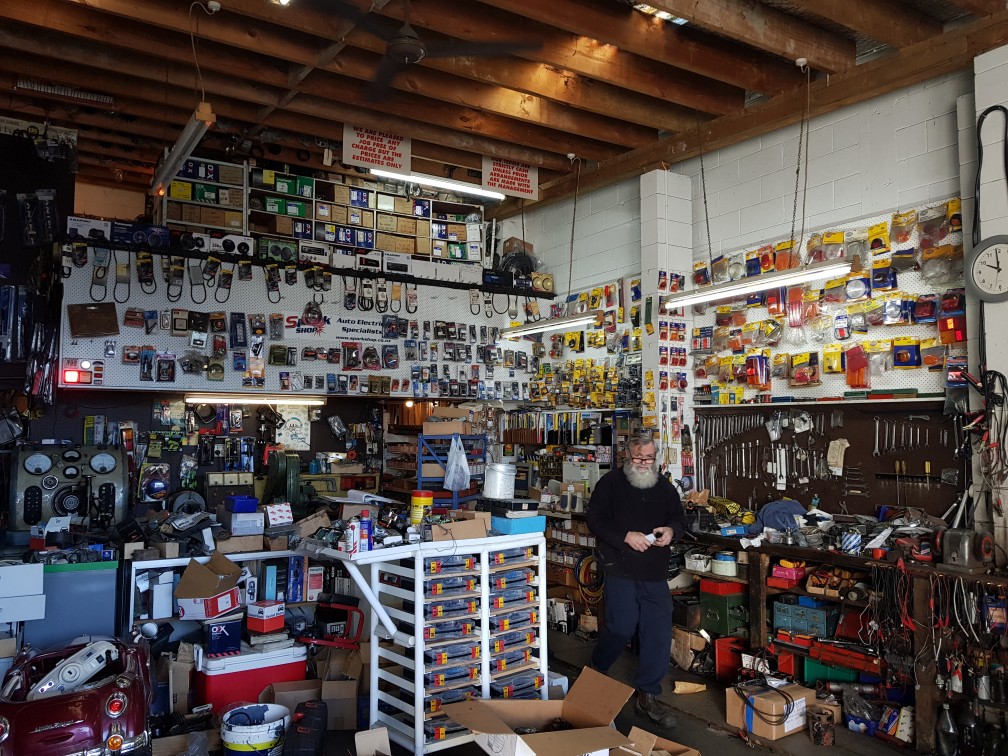
Went and met a super awesome barry in Thames who actually rebuilds starters and alternators. This guy is the ONLY person I'd spoken to who had any idea about my starter problems. He had a replacement part on the shelf for $140 and was happy as to show me all of his NOS spare parts and impossible to find bits and pieces. Every other person tried to sell me a new starter! I'd highly recommend him to anyone with old electrical stuff that should work but doesn't.
1 point


.jpg.5d40a8d38182835445ae809a40e3b086.jpg)
.jpg.6b6a4134662ee7d00e9c591ad3b09e34.jpg)


This leaderboard is set to Auckland/GMT+12:00