
Leaderboard


Popular Content
Showing content with the highest reputation on 04/22/20 in all areas
-
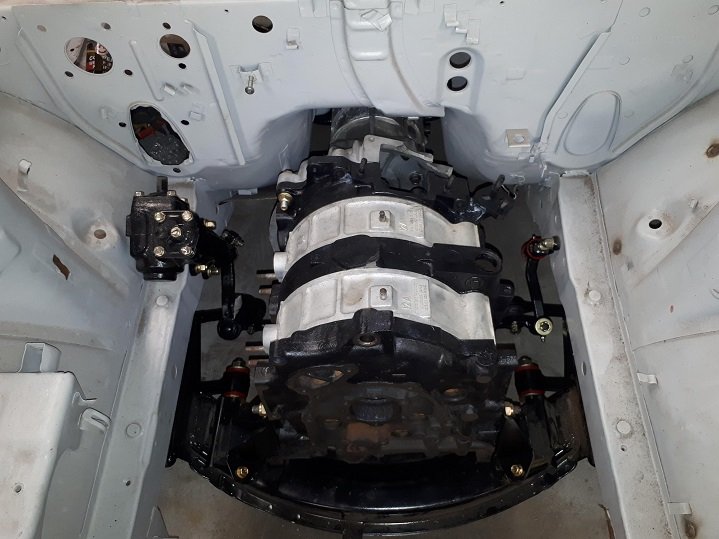
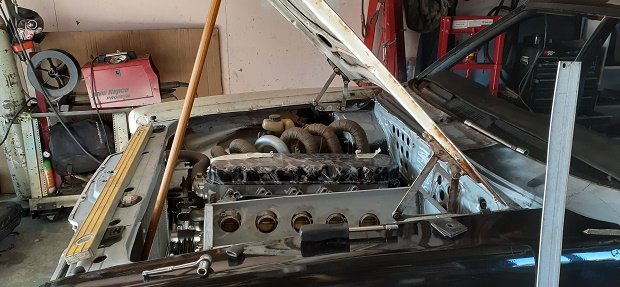
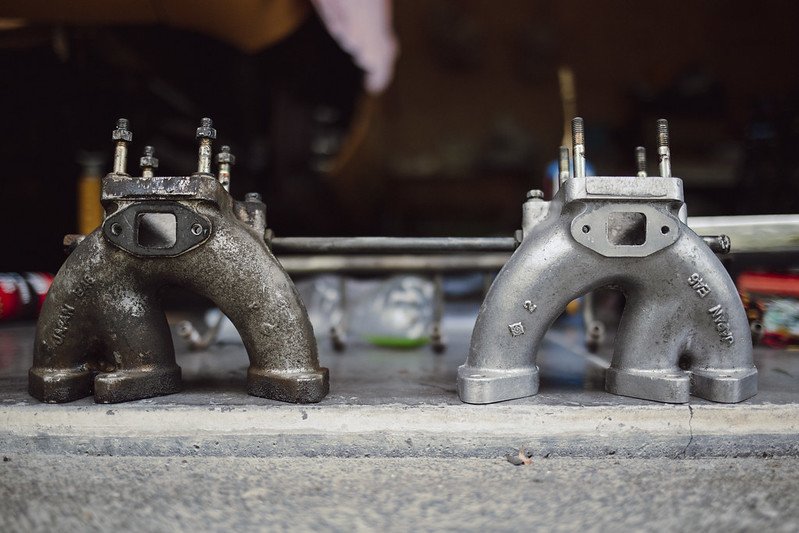
In keeping with the 'factory improved' theme I'm running with, I located an old 12a twin dizzy rotary engine to rebuild. It was near complete which was a big bonus. I also pieced together a dummy block to mount into the car after sourcing the correct engine crossmember, so I could start sorting all the ancillaries etc. Stripped the motor down, cleaned up and bead blasted the alloy parts ready for modification. The last pic shows what factory improved means, more on that later, but you can see already what Ive had to deal with, its not a survivor "OG" car, i do like to see original looking cars, but rotaries to me have to sound a certain way, therefore it had to brap! so the call was made - 12a Twin dizzy bridgeport!
 16 points
 -
painted the spoiler and put it on. i think it looks ace. the other thing i did was to move the rear flares up to suit the wheel and match the arc better. something i wished id done ages ago. moving the flare allowed me to move the wheel out a bit more to fill the guard, it can easily go a bit more and ive ordered some wider spacers for the back. 2020-04-22_03-10-59 by sheepers, on Flickr 2020-04-22_03-11-06 by sheepers, on Flickr 2020-04-22_03-11-19 by sheepers, on Flickr 2020-04-22_03-11-29 by sheepers, on Flickr14 points
-
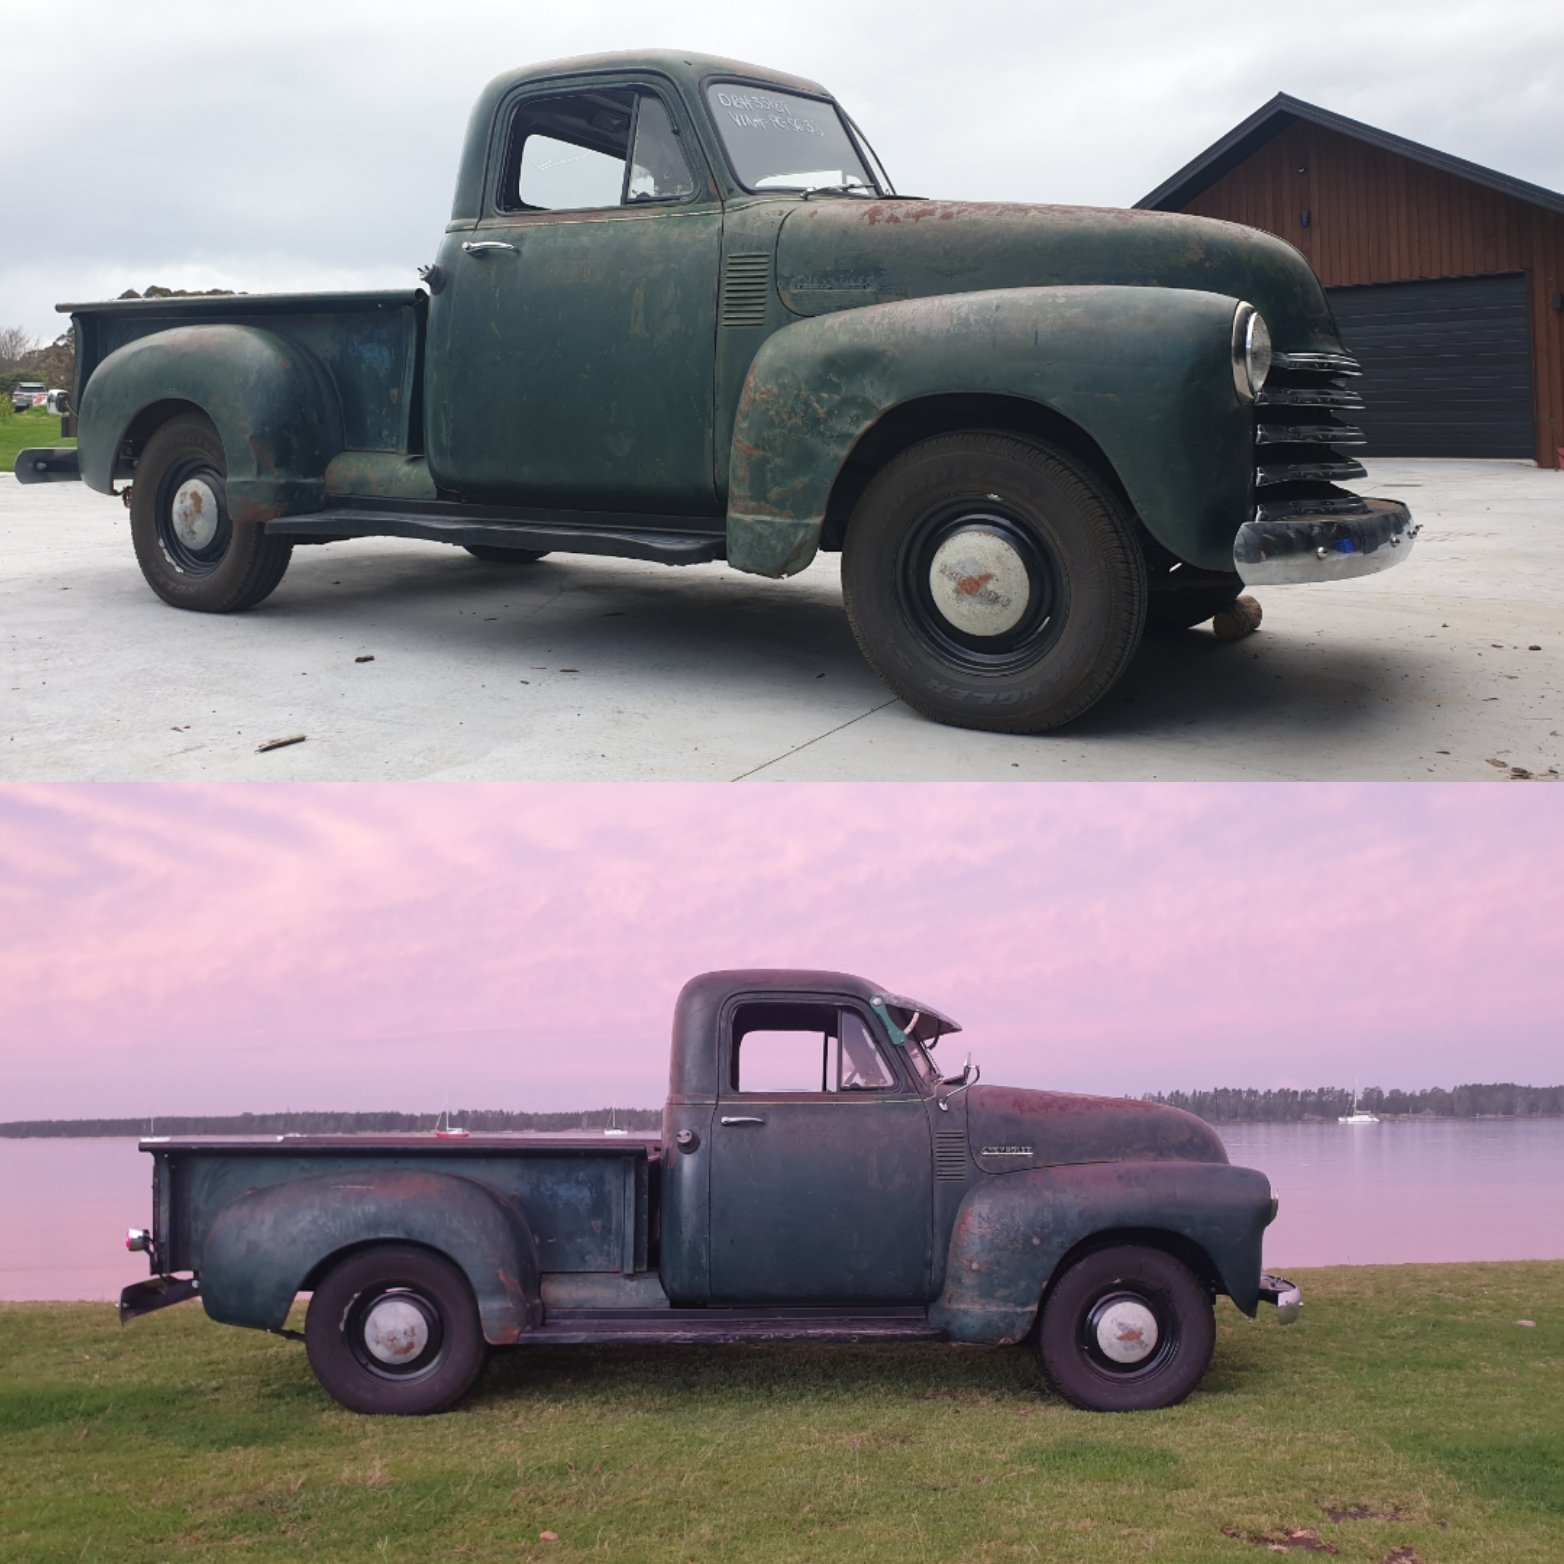
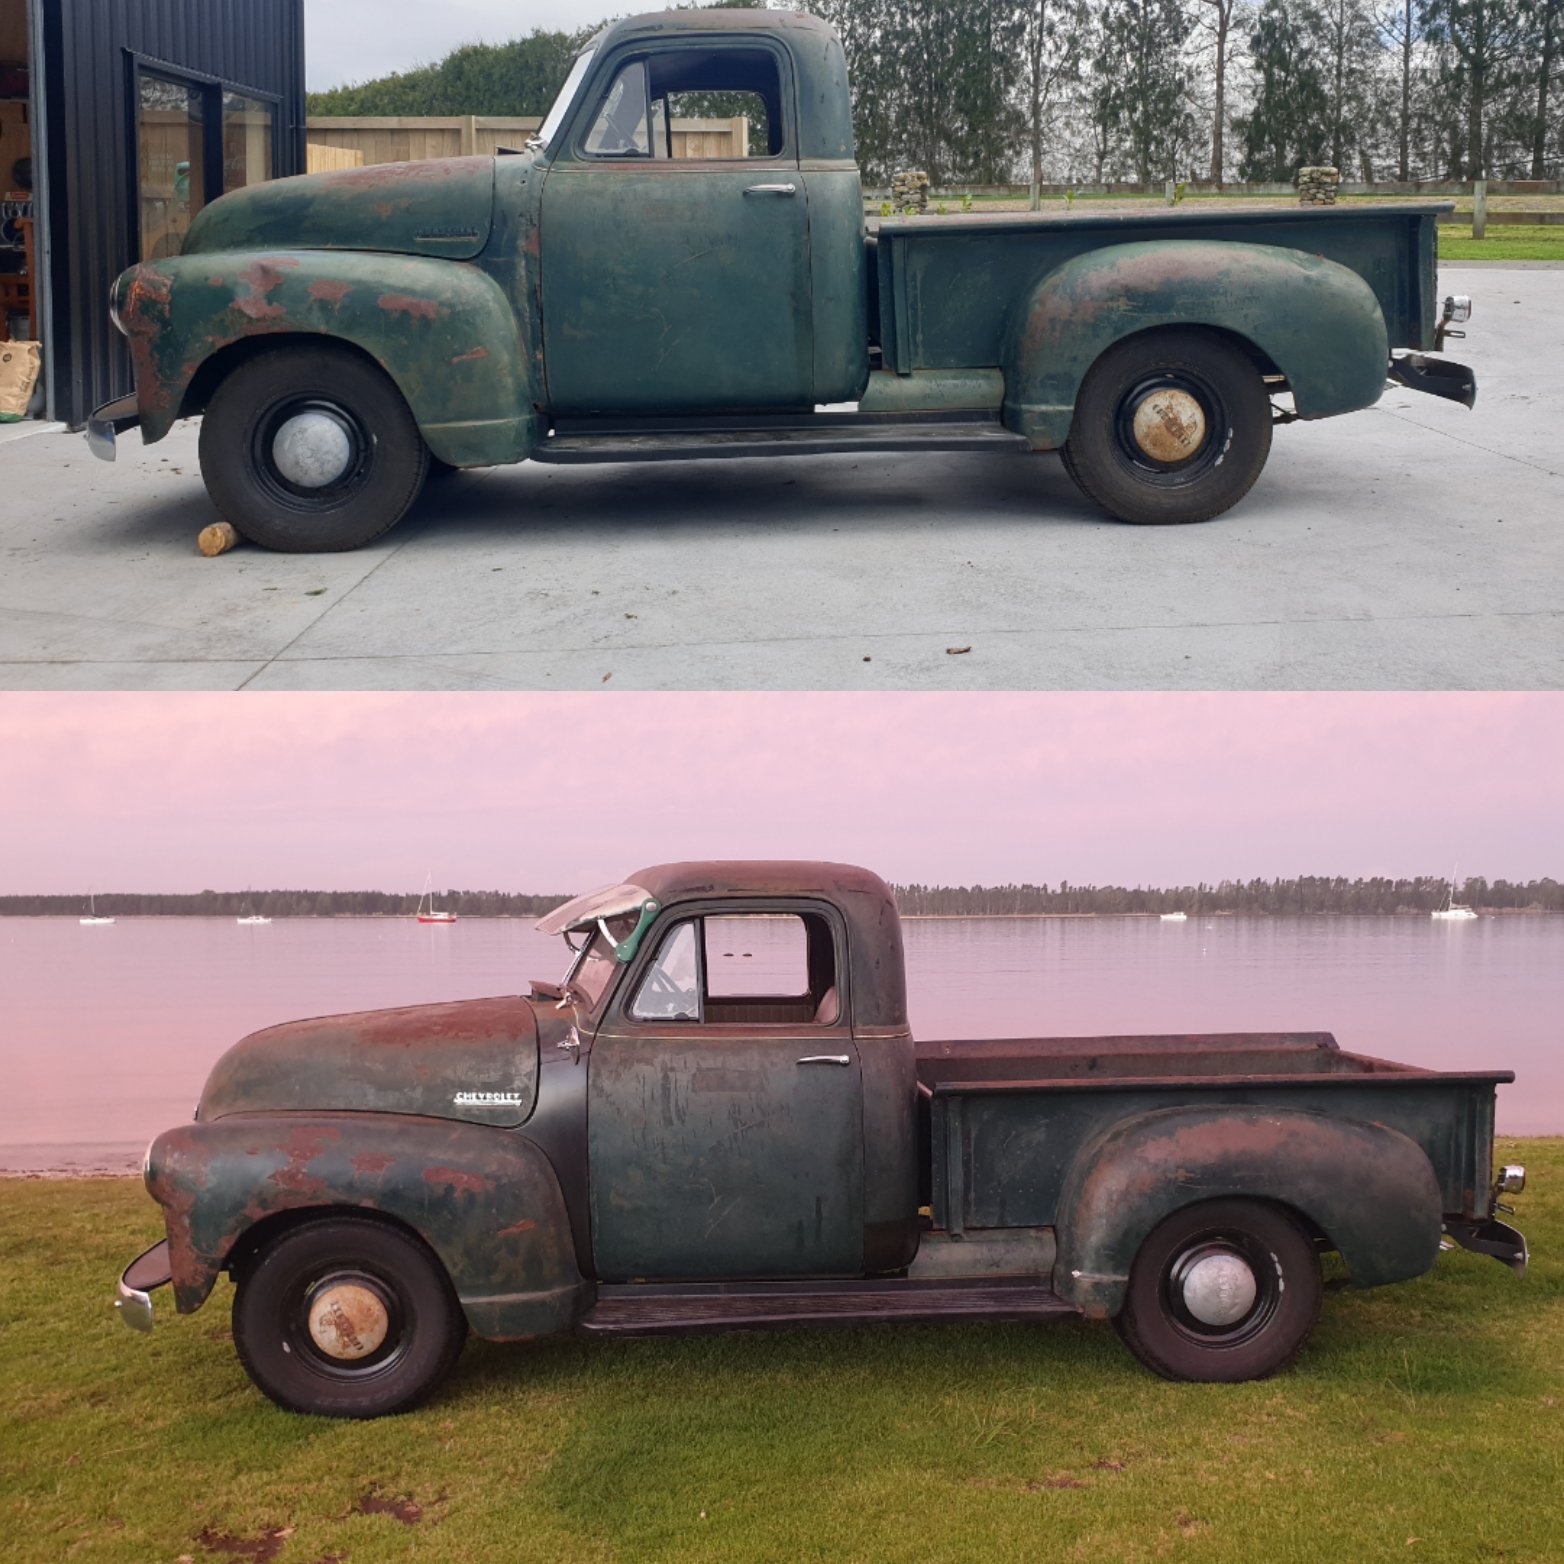
Got the truck back together and driving now. Have put the running boards back on and shes nearly ready for vin! Took it for a quick jaunt up the road to grab a couple photos last night. Heres a couple of before and afters of the whole truck before/after rust and dent removal.
12 points
-
11 points
-
We spent a few days panel beating, block sanding and roughing in the body work. It's now ready for filler primer but have to wait til after lockdown to get materials. Overall it wasn't too out of shape. The worst bits being the beaten up front guards and rear passenger door took a fair bit of time to get the body line straight.10 points
-
Also, here's the front end all back together with the new grill
8 points
-
Decided after tuning the carbs to the best I could, and spending a day cleaning it, that an essential drive to the super market was needed. I may have stopped to take some photos too! Doug out the contents of the glove box... hopefully what Ive done in the last few weeks hasn't void my warranty! I decided to remove the bumper over riders, so so happy I did. transformed the front and rear of the car. Also sanded cleaned and painted the front grill and the horns that sit in behind the lower valance. Also painted the tow eyelet. Alot of things had crappy over spray on them, I believe the car was resprayed in the 80s or 90s... Next on the list is todo something about that exhaust! Have been talking to Z Story, so things will come but probably not till later this year Need a very fine paint brush... Will add it to the list! So yea! thats where I got too in 3 weeks of lockdown. There are a bunch of little things I didnt document but the big stuff is there. I have put the car back into the garage and am hoping to get back home to Chch as soon as Level 4 lifts. Untill next time!
7 points
-
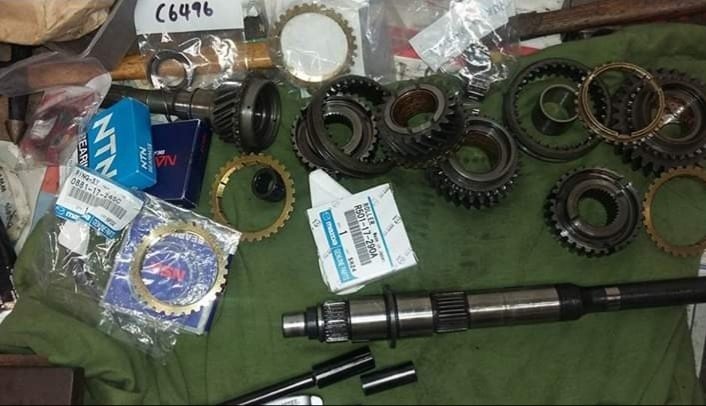
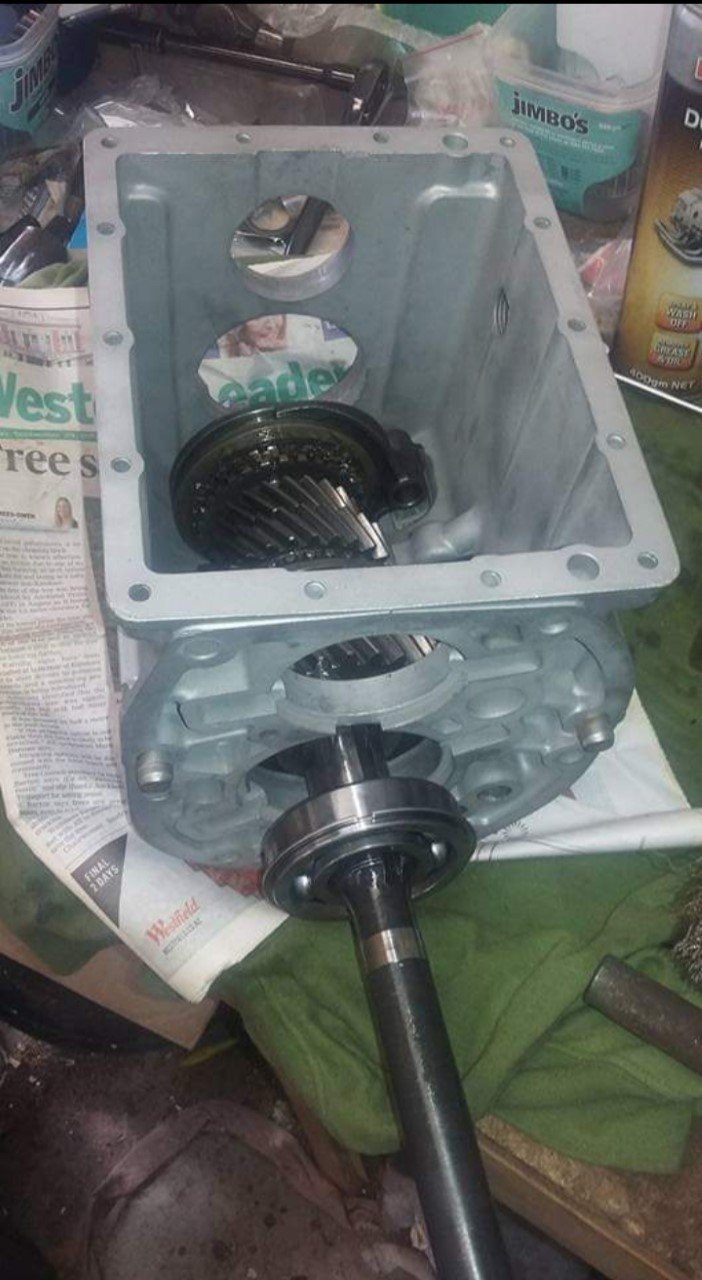
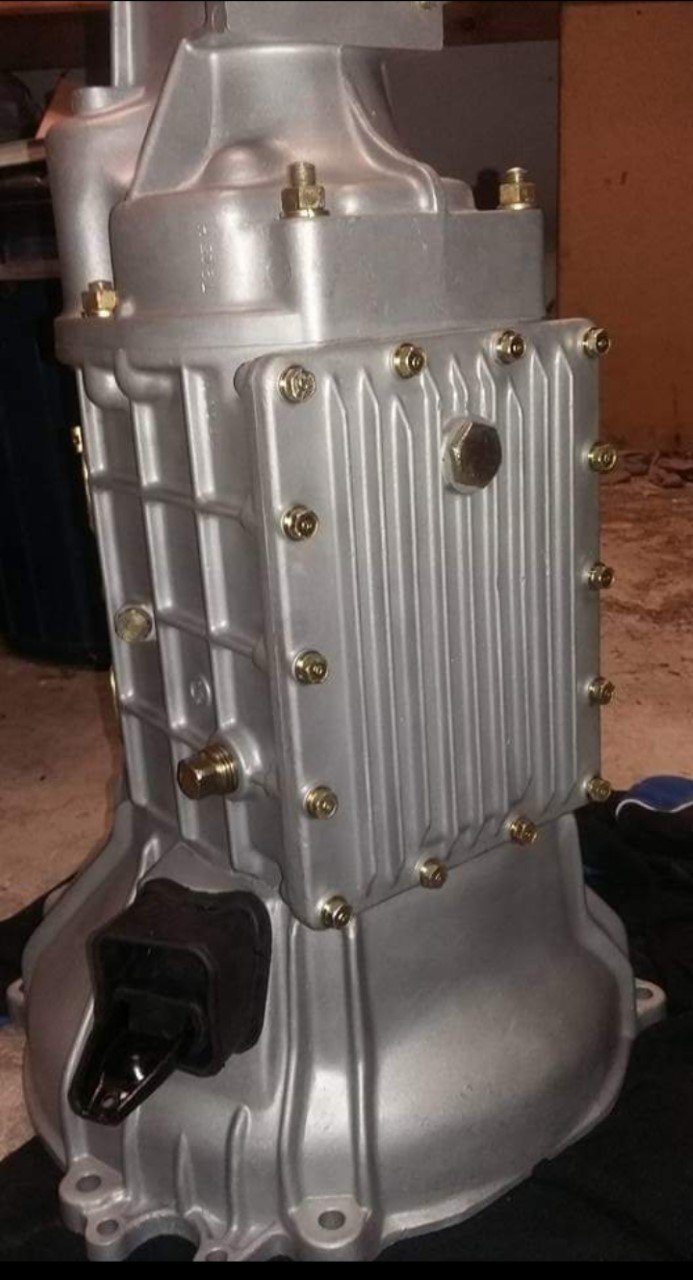
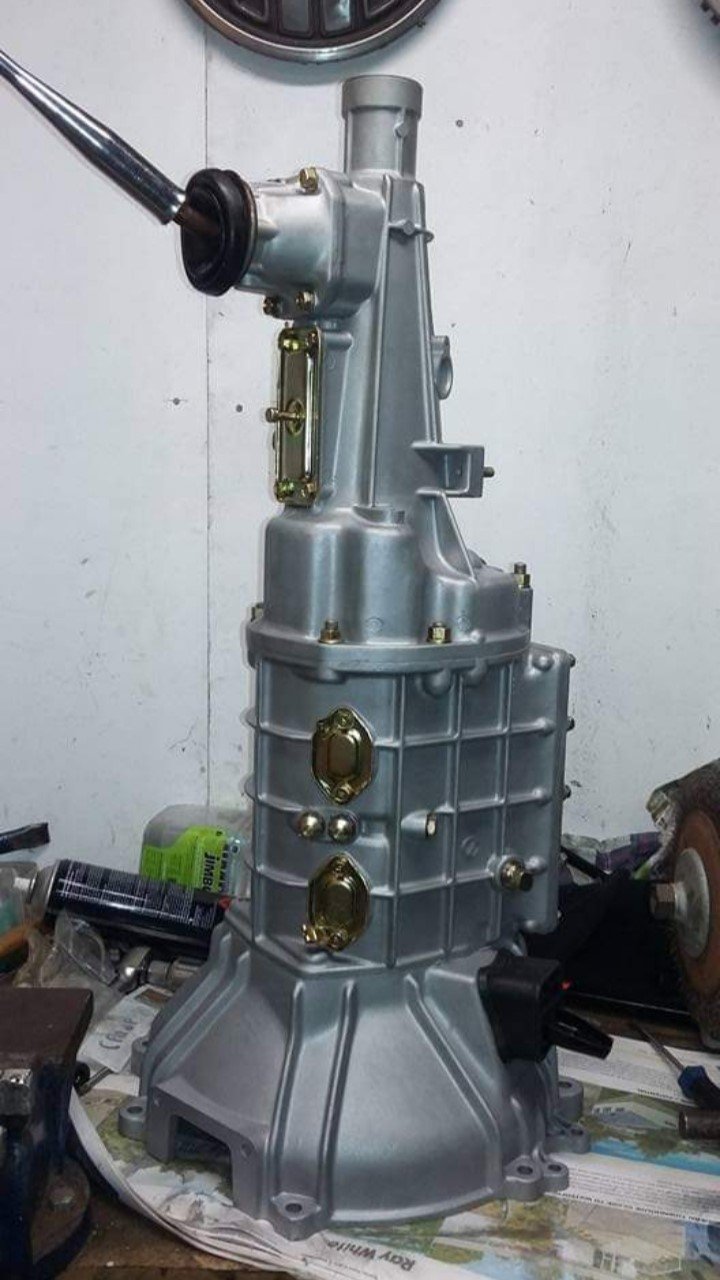
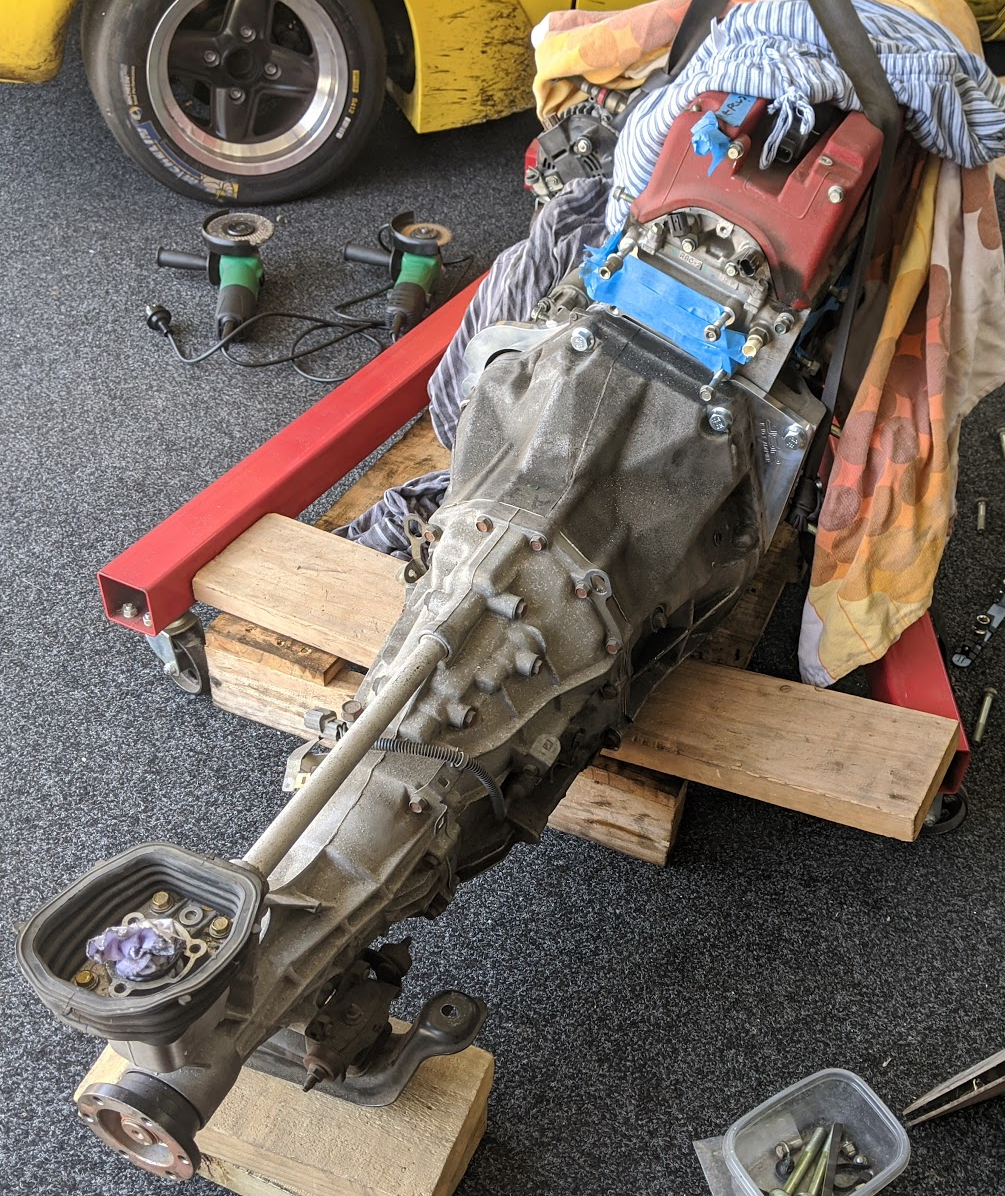
Gearbox! Located a factory Rx2 4 speed, and have completely stripped and replaced all bearings, synchro's, seals etc. Bead blasted the casings, clear coated them and re-plated the rest.
7 points
-
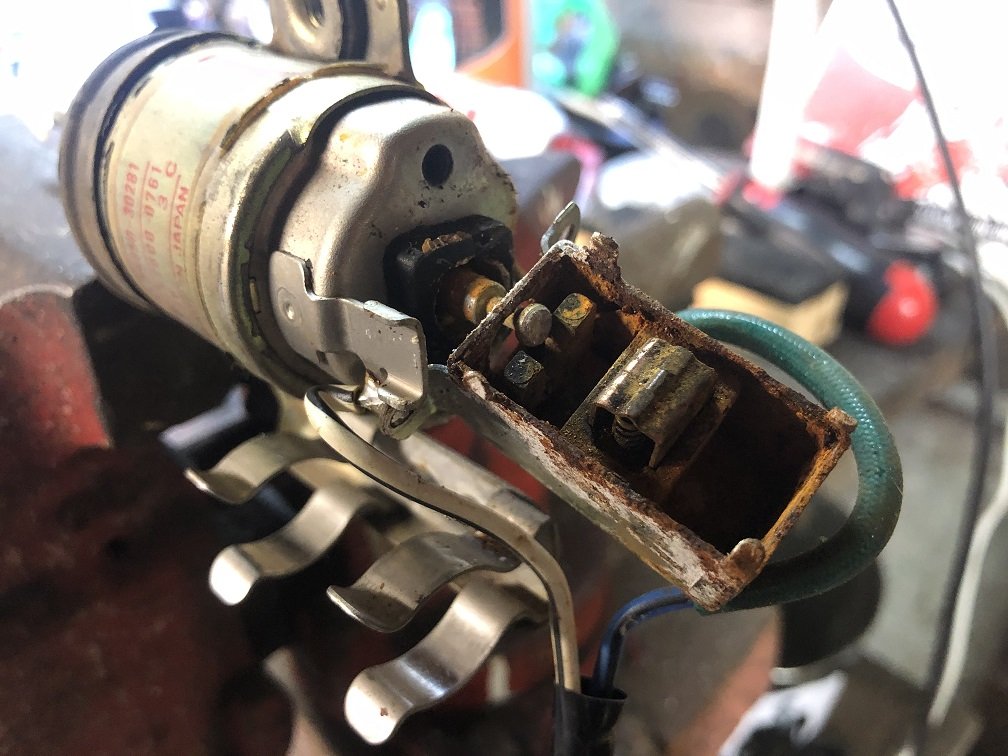
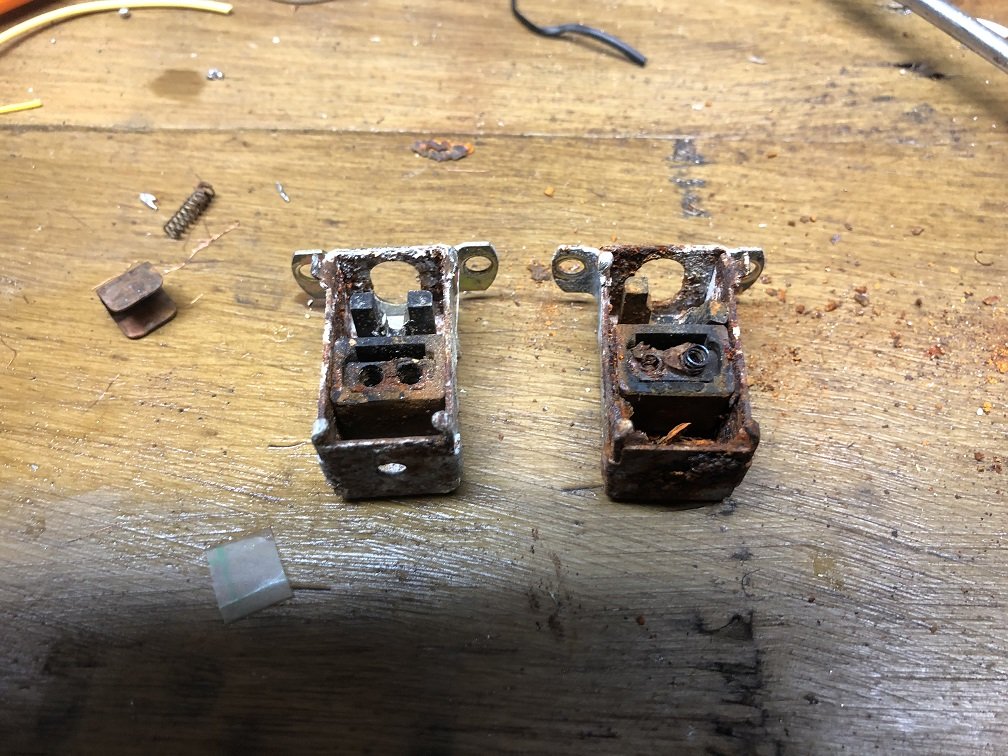
At the start of lock down hell I wrote a list of things to get done, which is further up the page. I have been knocking them off bit by bit, or at least getting to the point that I need to buy stuff. Old fuel pump removed from the tank and new on e fitted. Turns out the connectors inside the tank were corroded when I started checking before putting everything back together. I had anther tank off an earlier car (VR commodore from memory) and this had a better set for the wiring. New pump swapped over to the VR pickup and all checks out with a muliti meter. Thought I would check out the fuel gauge and make sure the sender would work before it all got put back in the car. Turns out that the original fuel gauge works ok but is totally incompatible with the commodore sender. All Holdens up to 1971 use 30 ohms full, 0 ohms empty. Commodores use 30 ohms full and 300 ohms empty. The first call after lock down will be to Robinsons instruments to see if they have an easy fix. If not it will be to get the original sender out of the old tank and see if its usable. Next job was to fit the heater controls and make them work. I have found a heater, they were an option and my car never had one, and spent a fortune getting a new core installed. I had bought a HZ Holden heater tap at Kumeu a few years ago from a guy selling new Holden parts. I had also bought an Aliexpress choke cable to use as a push pull. Here is the heater tap in the engine bay. The tap didnt come with the clip for the cable, they are available And the heater controls Tonight's job was to finish bleeding the brakes. I had started and run out of fluid. I was talking to a mate about it and he gave me some not very old stuff he had sitting in his garage. The fronts bled up and gave a nice firm pedal. Went to do the back ones which appeared to be good. Got my son who was helping to stand on the pedal and no stopping on the back wheels. I pulled the shoes off one side and pulled the dust caps of the wheel cylinder, lots of rust. That explains the no brakes. Might be a good time to do a rear disc conversion. I understand that commodore rear discs will go on a Salisbury diff with out too much fabrication.
6 points
-
I had some sharnes with @scooters recently about old FMC log skidders, I was saying that as a kid a friend of Mum and Dad had a friend who worked for FMC and gave us lots of promo material etc and that Dad had made a wooden toy based a FMC skidder that had been a huge favorite when I was little. I asked Dad to send me a photo of it to pass on to Scooters but I think Dad's a bit bored and he went next level on the photos. They are too cool not to share. So to clarify I didn't make any of this stuff, Dad did 30 plus years ago.6 points
-
Made some progress yesterday. Fitted cam, valves etc, torqued things up and set plug gap, points gap, timing and valve clearances, and tried to start it. Had spark so thought it's be easy. Nope, kicked and kicked and kicked till I was a sweaty mess without even the slightest cough. Was wondering if timing was 180 degs out, then checked spark again and very weak, so had a think... That's right, these things need a good battery to start, checked and 4V. Doh... Chucked it on charge and decided to drain the old fuel for good measure, plus a new plug. Barried up another battery and was rewarded with a fat spark, so tried it out and she burst into life... Went for a quick hoon up the road but underestimated how useless the old 6v lamp is, especially when it's pointing at the sky. No moon out and no streetlights so was almost completely blind. Thought it best to park up for the night... Lunchtime today checked the battery, had risen to 6V but drained to 4v almost immediately so wired in the spare battery I had temporarily connected. Burst into life almost immediately so quickly threw the covers on and some extra fuel into her... And went for a much less scary hoon, seemed to go alright but was only round the block so no real test. Look forward to a better run when I can see how it goes over a distance. Looks good with the stickers though... Seems to have almost the same top speed in 3rd or 4th, not sure if gearing would fix that, didn't have gps running but seemed to be around 80kmh. Did a compression test when back and it's around the same as before I did rings, an acceptable 158'ish psi... So overall a win, lockdown plug chop here we come...5 points
-
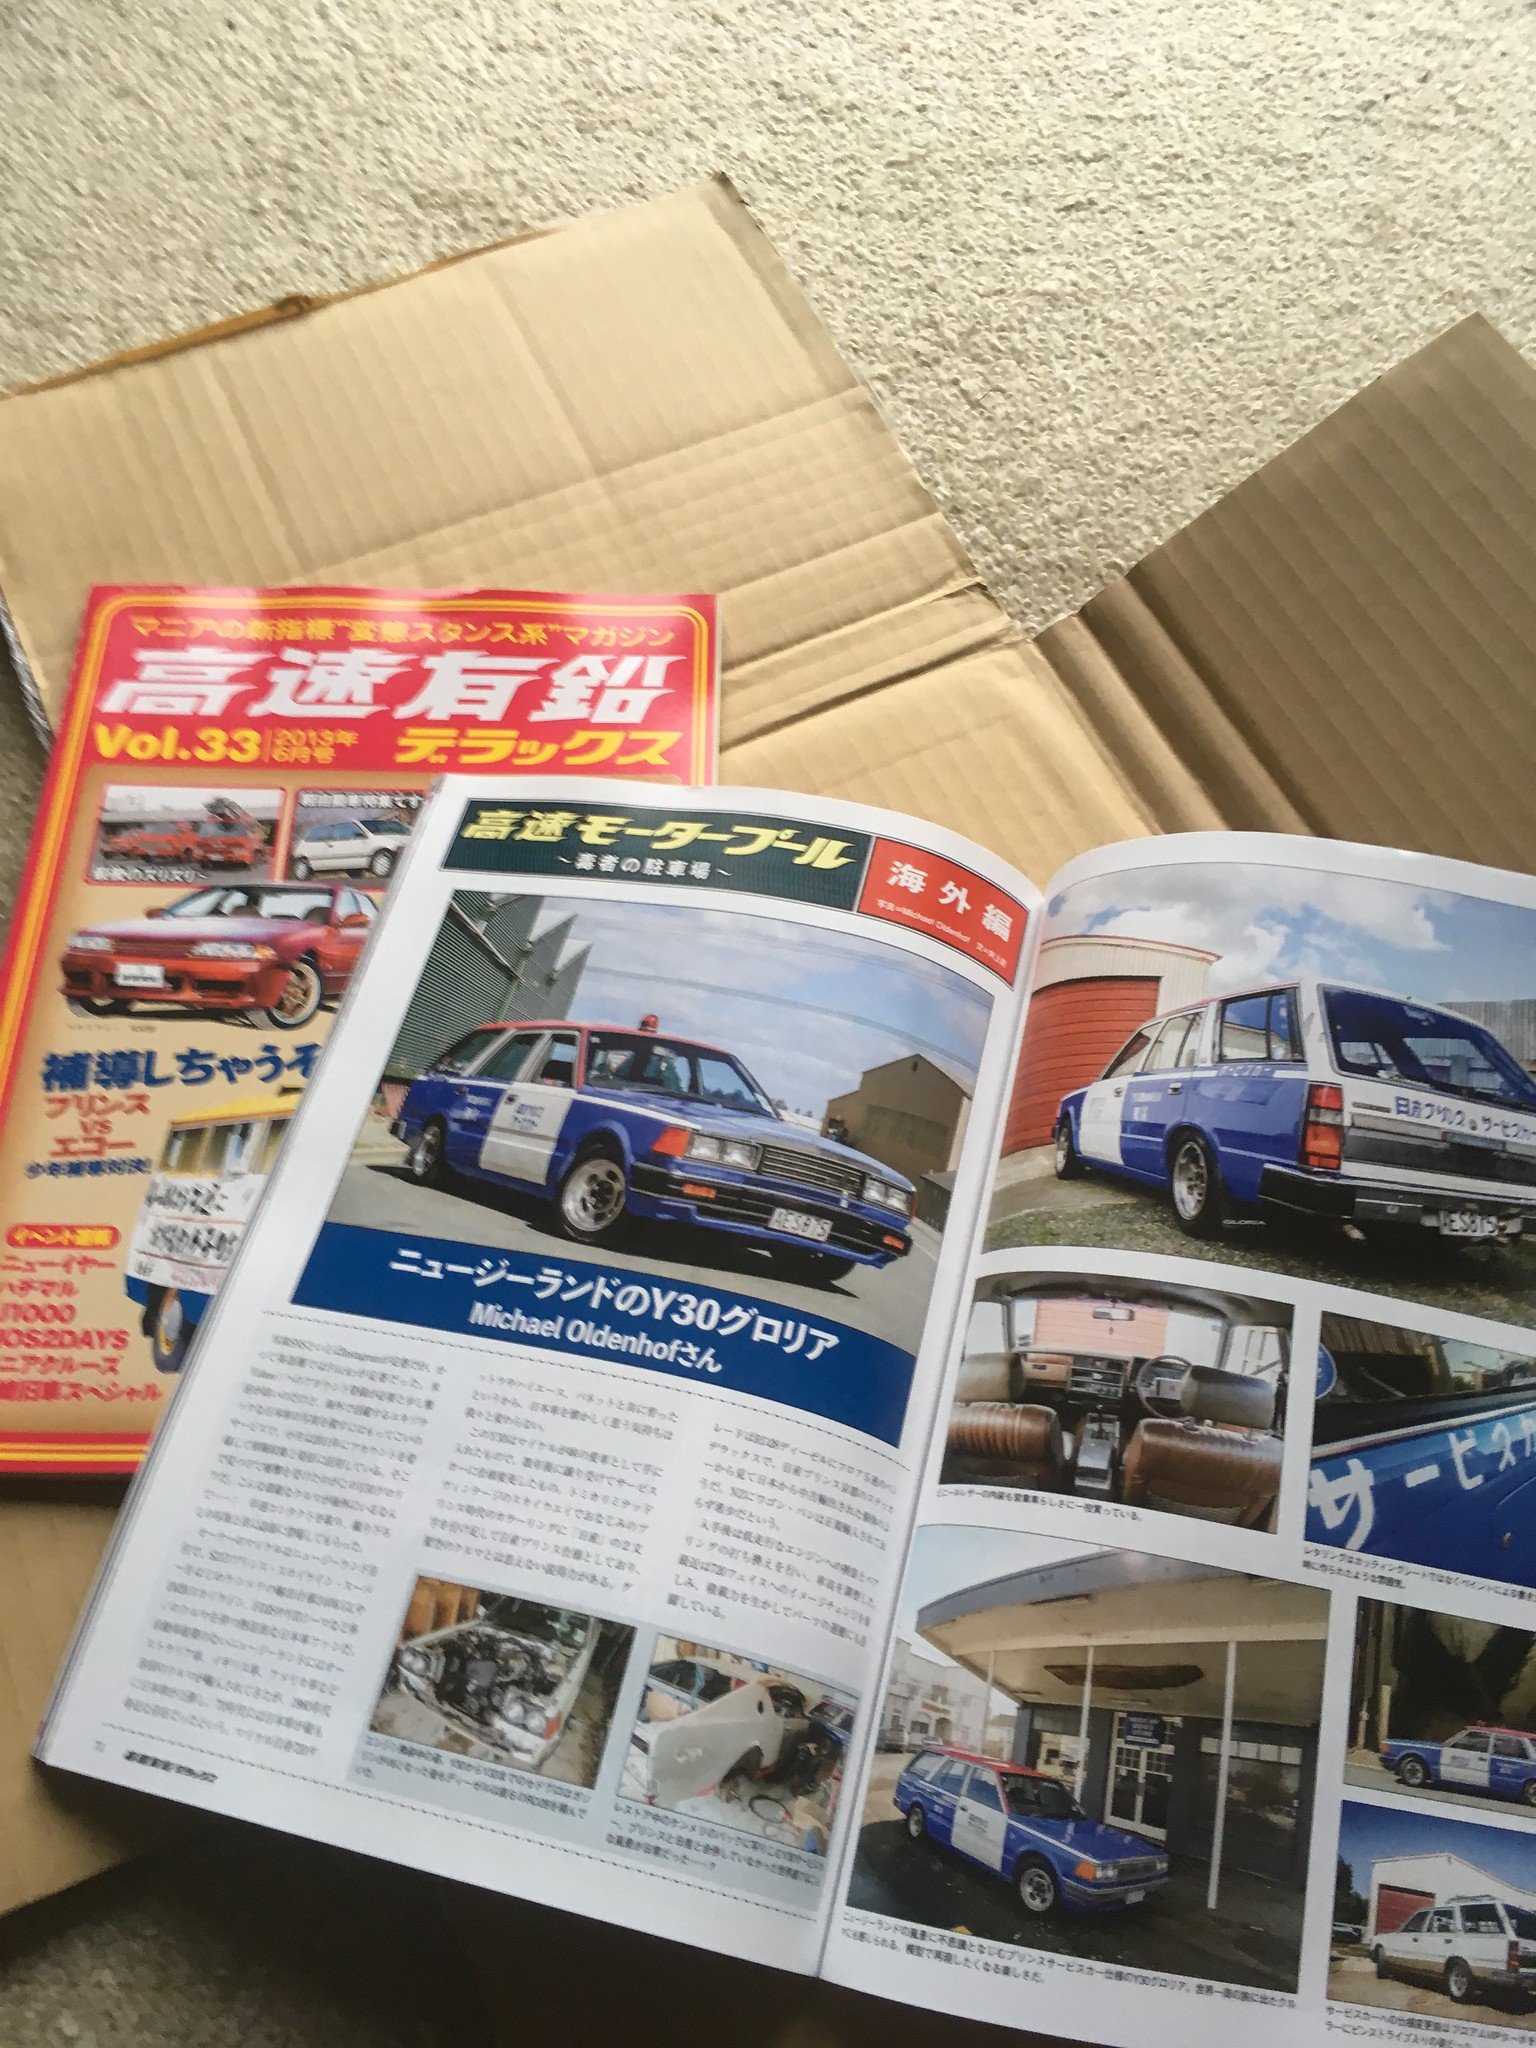
Oh, I was contacted by a Japanese journalist and it also featured in a magazine in Japan, the author sent me a copy..
5 points
-
Teaser: Now interestingly enough a certain someone @Roman had some interesting comments on this engine in 2007 on another forum. and than went onto have a long discussion about the merits vs the BEAMS
5 points
-
Best i get on to fixing the yellow machine. Hopefully 3rd time lucky she makes it to the end. Not trying my luck with points this time, CDI conversion here we come.5 points
-
Hey you giant legend @Thphantum. Keen? Well be starving on the side of the road without you. Much love, Everyone. X4 points
-
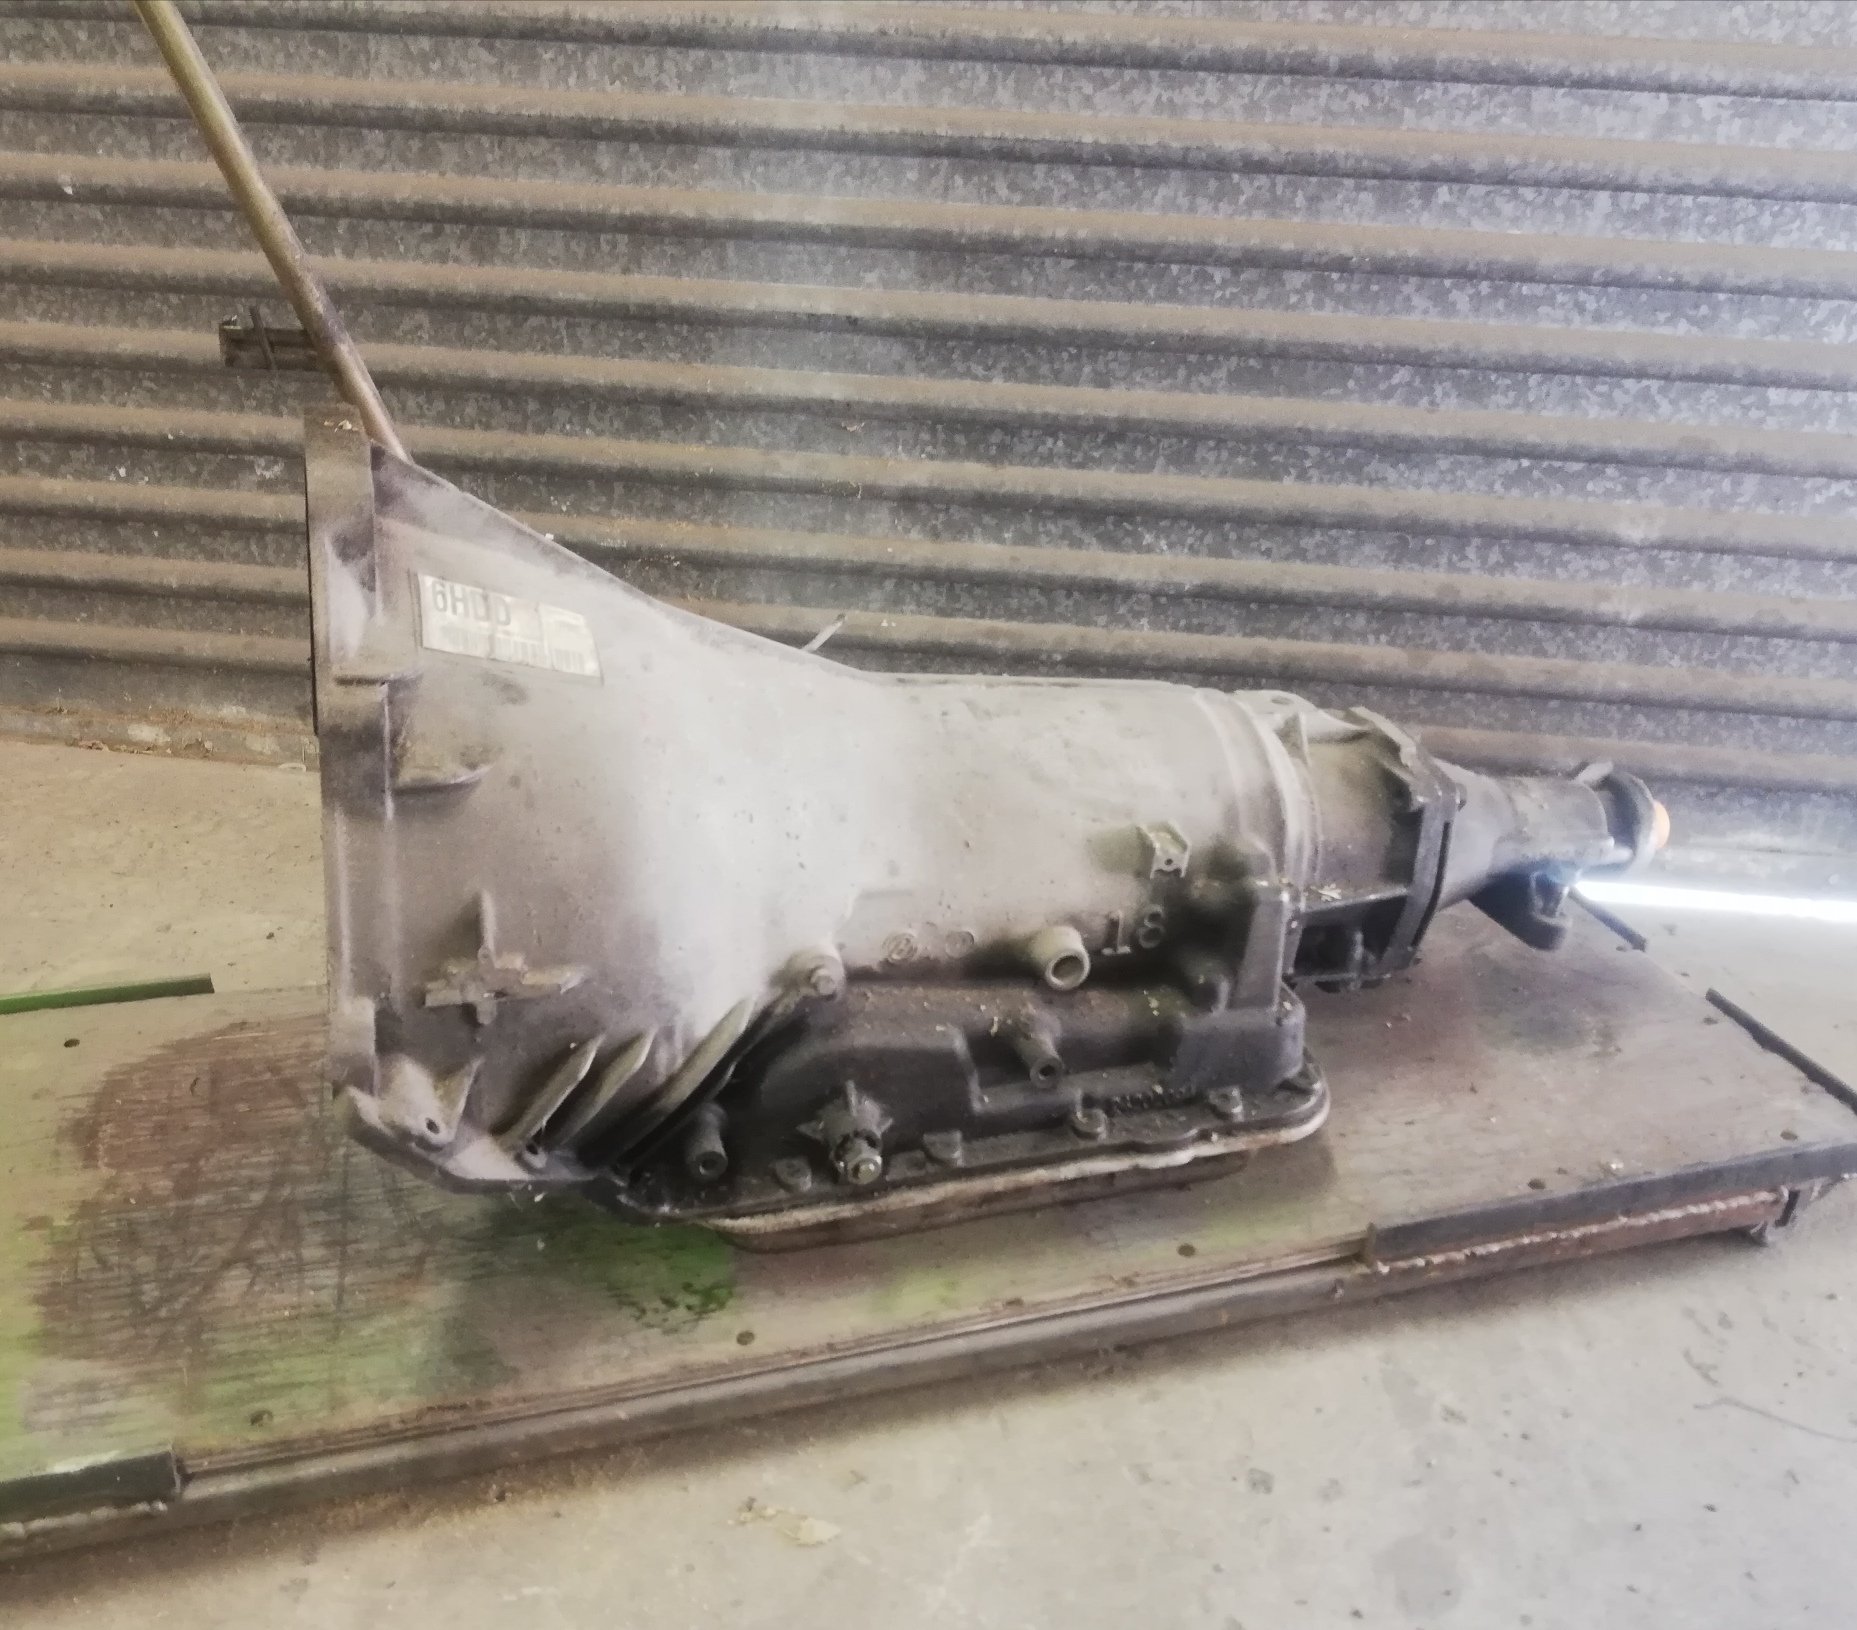
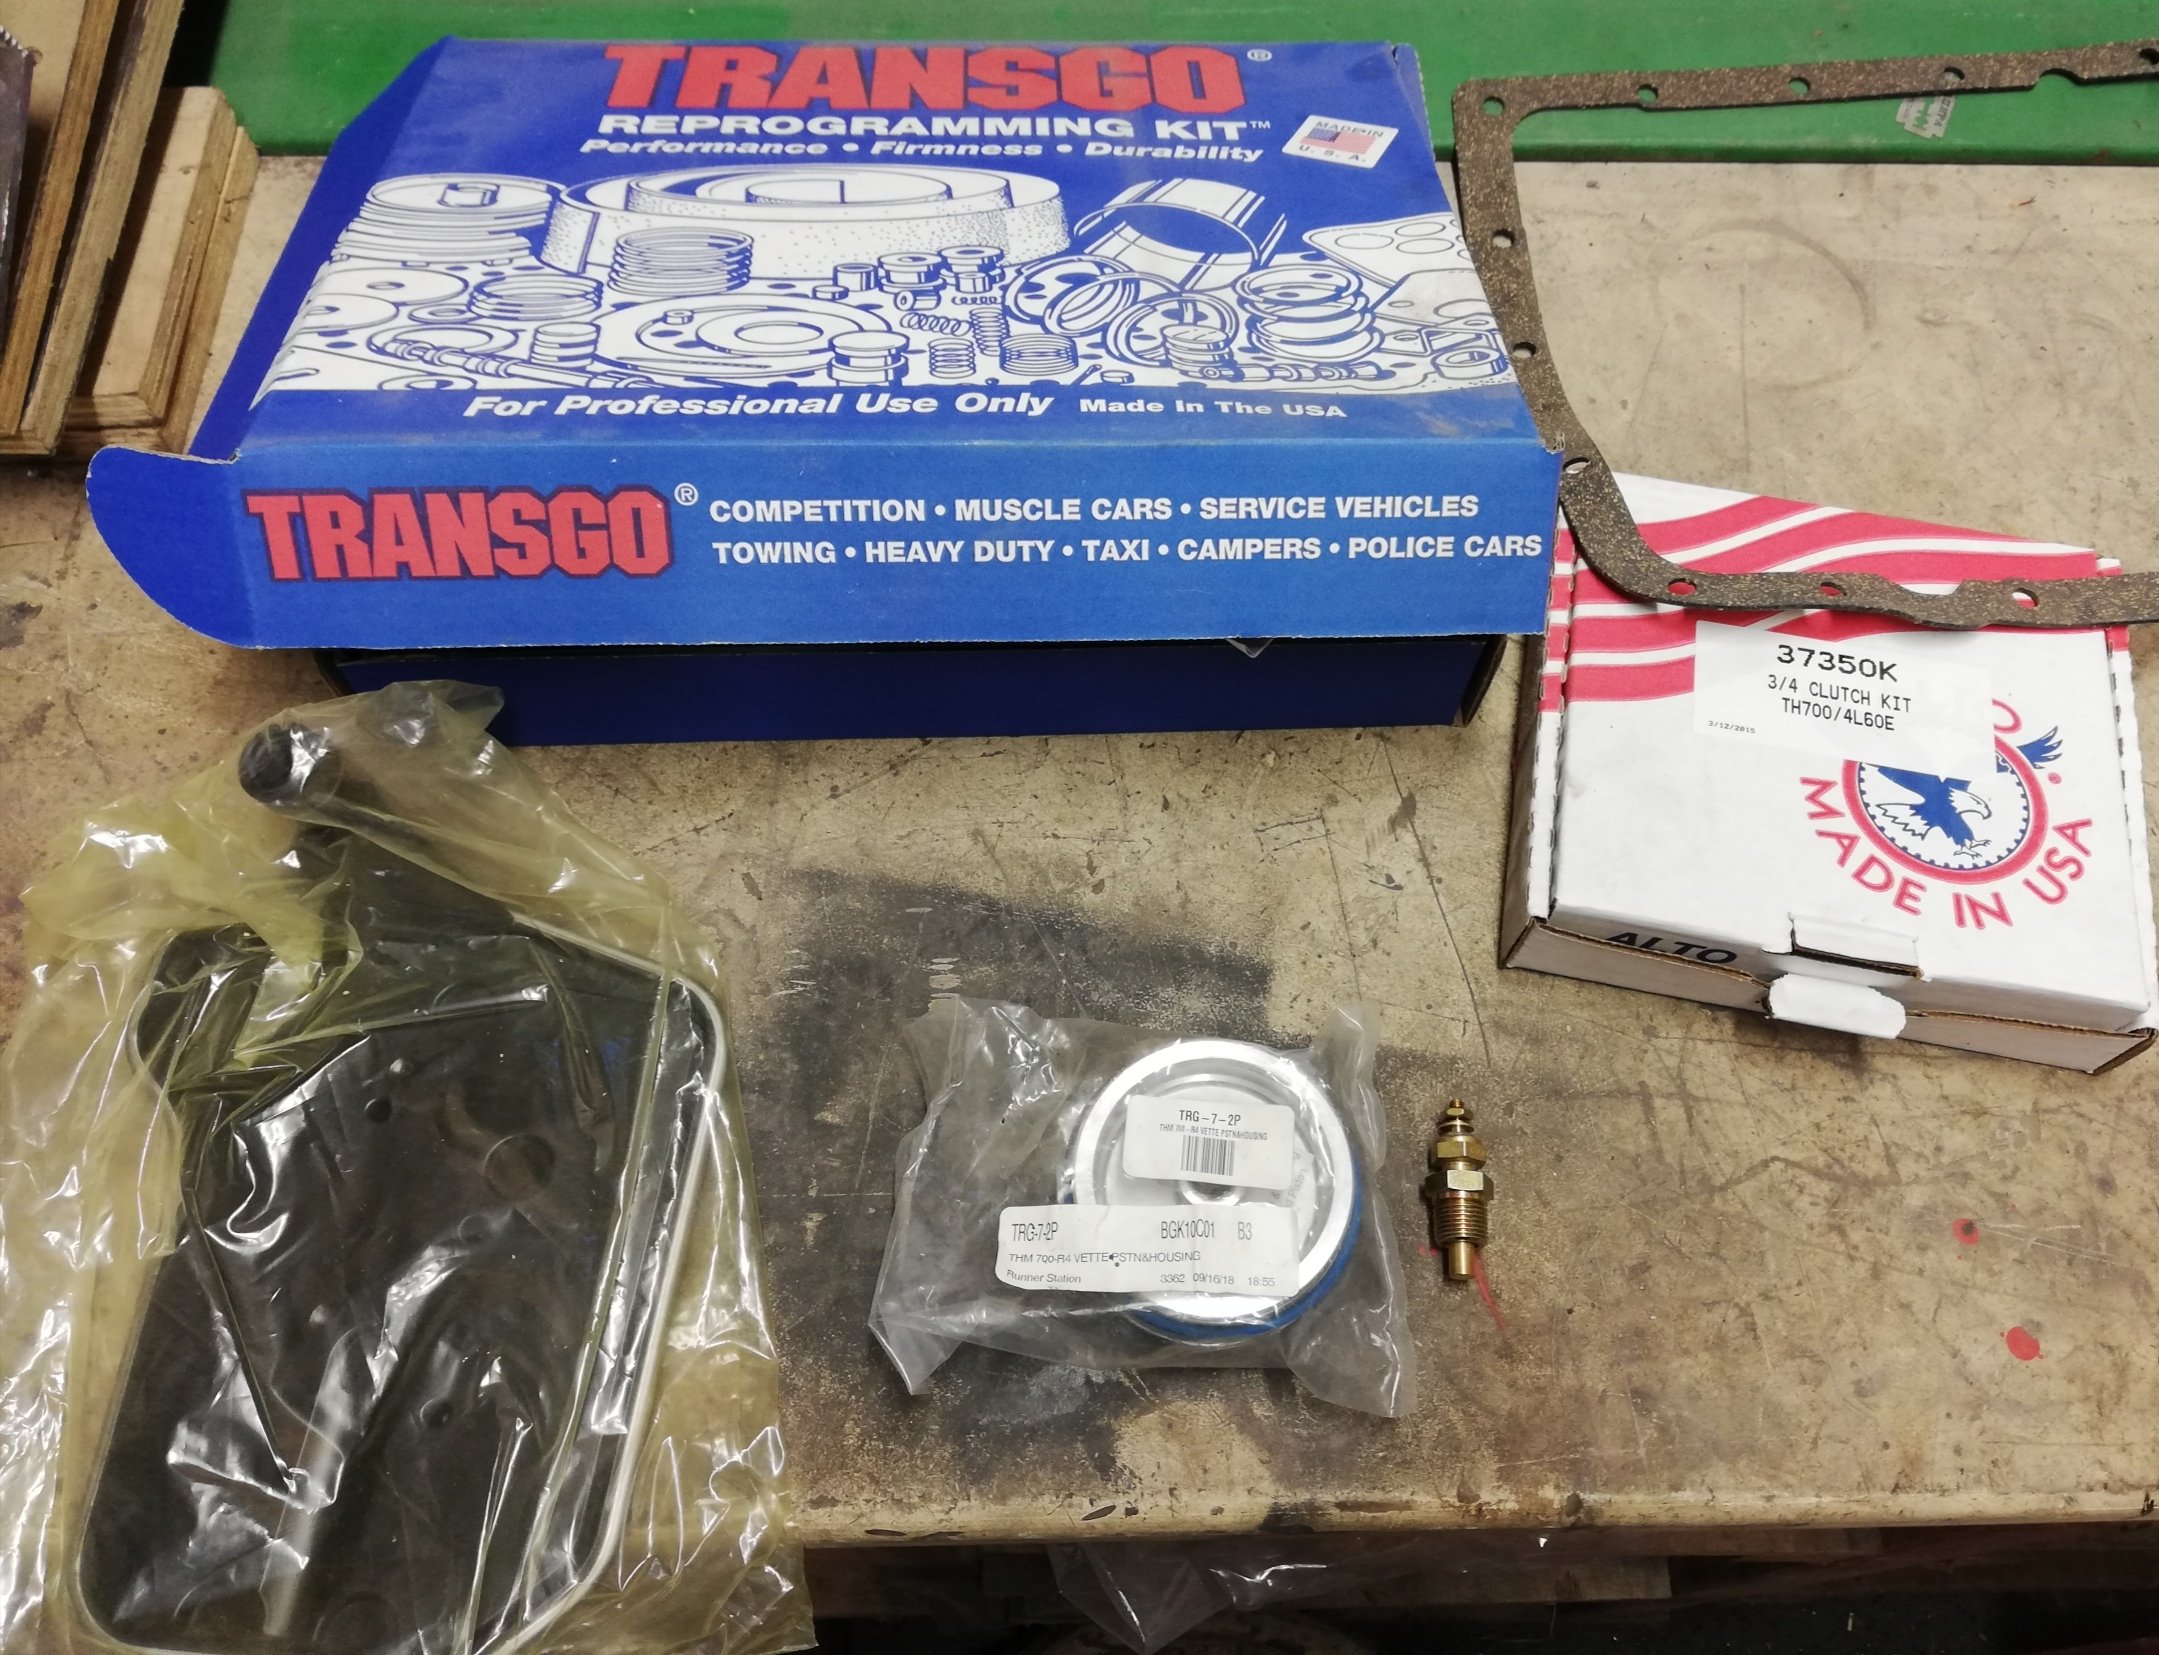
Gotta do an essential shop before any more work on the tray or body mounts. Next biggest pile that's in the way in the shed is the VS engine and trans. Pulled the 4L60e off and degreased it Dug out the bits I already ordered for it at least 12 months ago Shift kit, corvette servo, uprated 3/4 clutch pack, improved pistons, also fitting a temp sender and a drain plug to the pan. Probably I will now order a whole seal kit because I don't want to pull it out and apart again.
4 points
-
So this thing has never had a back seat since it has been in the country. I just bought one along with matching belts, etc. ex-Japan. Who knows how long it will be for the container to arrive but if nothing else it will be a little bit more saleable with a rear seat.4 points
-
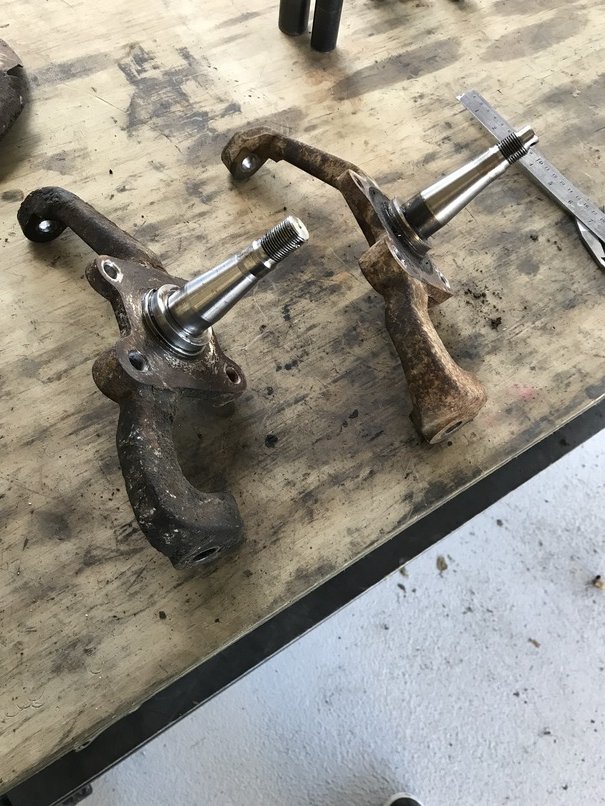
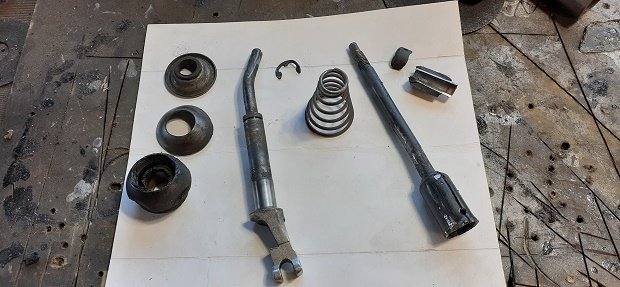
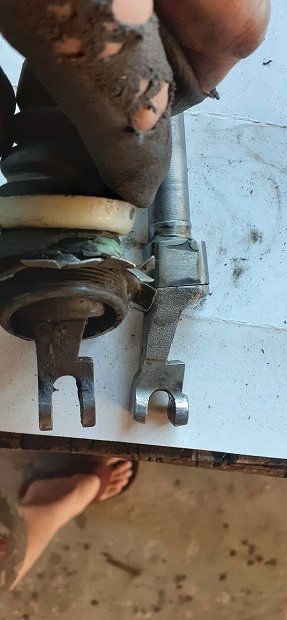
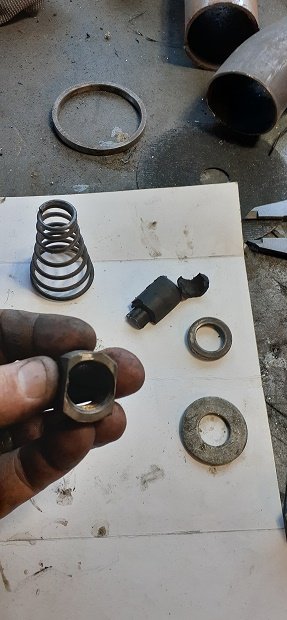
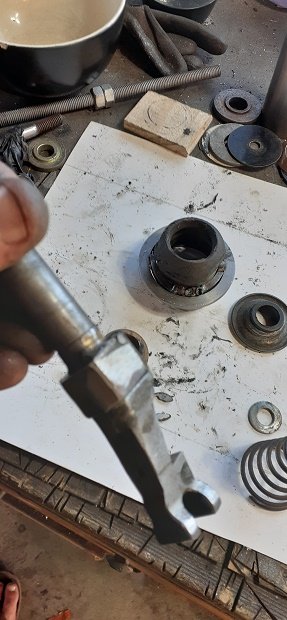
After a bit of comparing I've found the drum hub and disc hub are the same apart from the top balljoint tapered hole being bigger in the 2nd gen and the thread being different for the wheel bearing nut/split pin. The drum backing plate and the disc backing plate (has caliper bracket mounts as part of it) use the same bolt flange, and the wheel bearings are the same. So I can keep my arms and steering and just bolt on the disc backing plate, calipers, rotors/hub. done some measuring and it looks like I need to copy my mates booster tube, I'm just not going to shorten mine as much as his so I can still remove the clutch master cylinder without having to remove the booster.
4 points
-
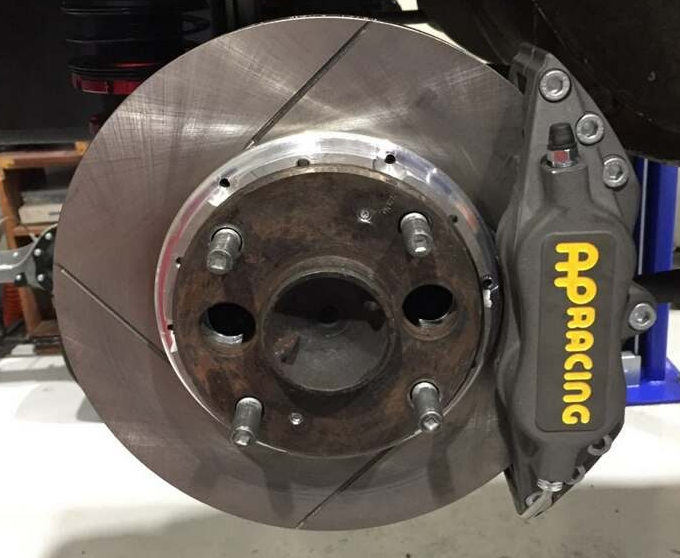
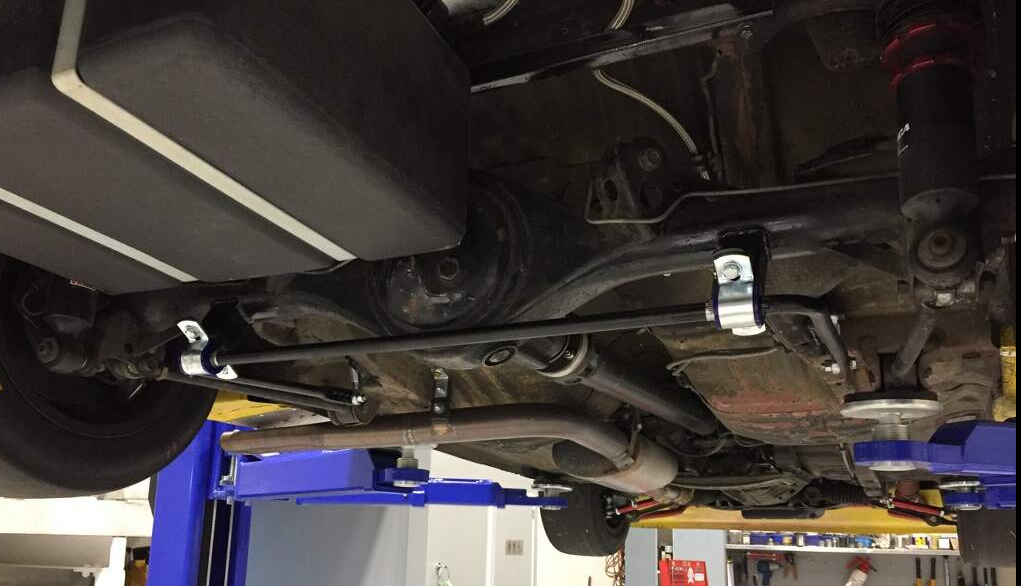
Been a while since I've updated this. Decided to do a cold airbox around the existing filter. Made no difference to intake temperatures, still up around 40 degrees, i suspect it's heat soak through to the filter plate where the sensor is mounted. I've been struggling with keeping the rear brake temperatures down, and it's been meaning the front have been doing more work and they started getting a bit hot and micro cracking. Also into the hairpin which is where the brakes are the hottest the car just hasn't felt like it's slowing as fast as it should considering the weight, which I picked was the rears going to hot and losing the friction. Before they become full cracks in the rotors I had to sort the rear out to relieve the strain on the front, some new AP Racing rear brakes, same calipers as the front just 20mm wide instead of 25mm, with full vented 2 piece rotors were fitted. It's a very tight fit behind the rear wheels so they are slightly smaller in diameter than the front. Thankfully that's finally got all the temperatures sorted, and both front and rear are now way down, so that's finally solved that issue, don't let anyone tell you the rear brakes do nothing on the track... I've been struggling with the new suspension. Changing so much at once made things hard to diagnosis some of the issues. I have now added a rear sway bar which has certainly helped in keeping the nose down now and helping with the turn in. However the car has been shuddering under braking and had no grip, tried softening everything still didn't help. Turns out the valving and pressure in the shocks is way to hard i.e SuperTourer figures (for a car that's significantly lighter), not sure what's gone on there, but getting revalved now, waiting on the lock down to end to get them back. But I've decided it's time to move on to Evolution 4 of this build. Evo 1: Street Car with 4AGE Evo 2: Race Car with 4AGE Evo 3: Street Car with 3SGE Evo 3.5 Race Car with 3SGE Evo 4: Race Car with ???
4 points
-
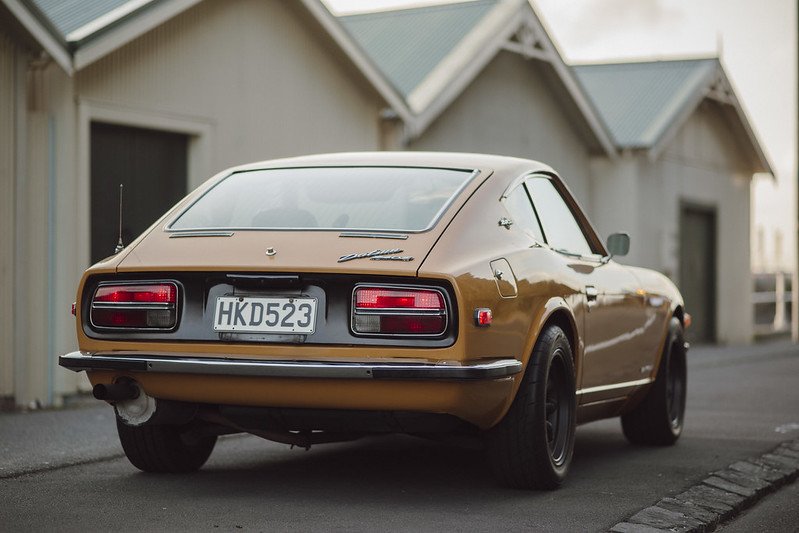
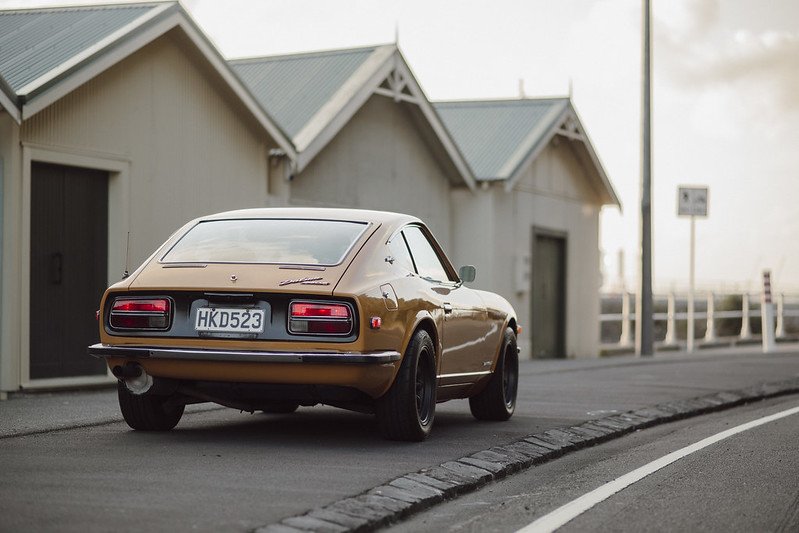
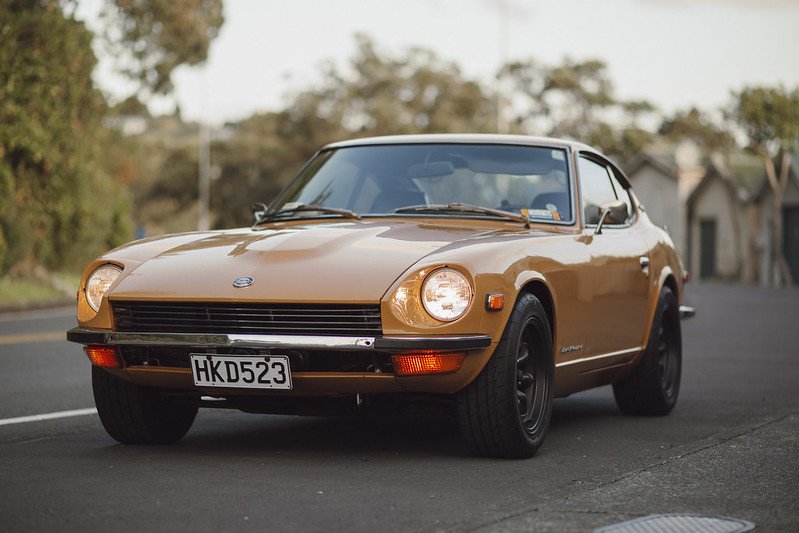
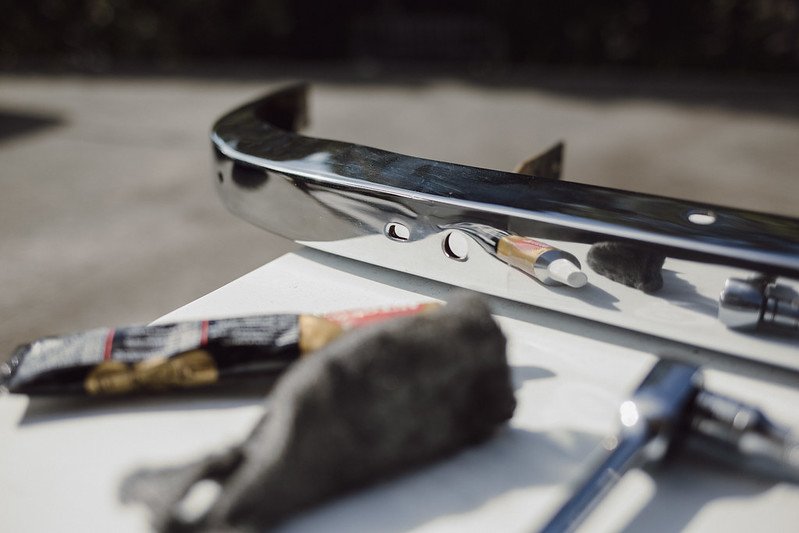
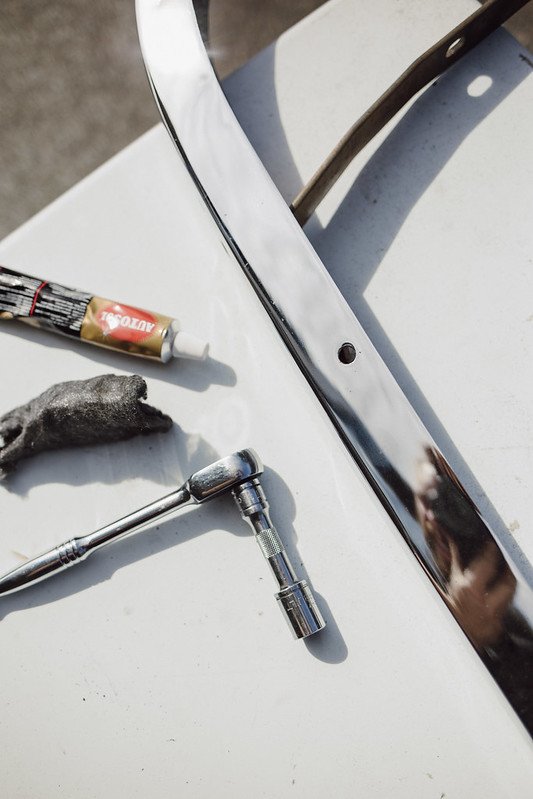
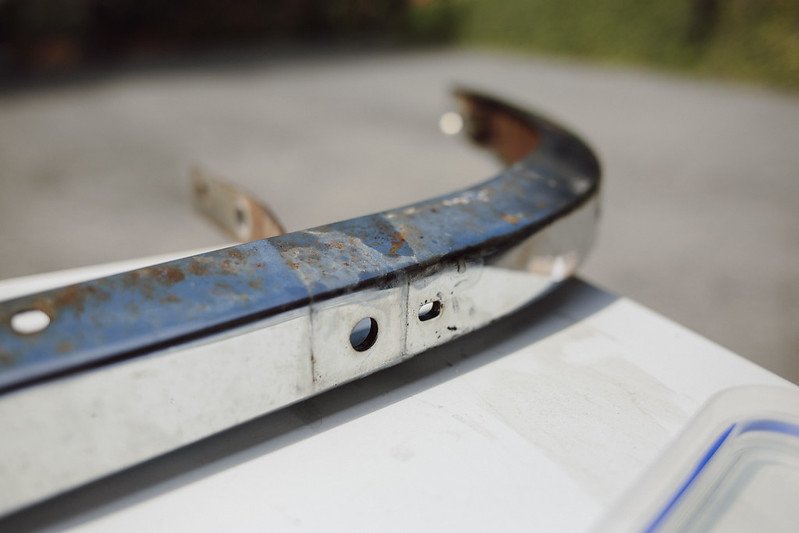
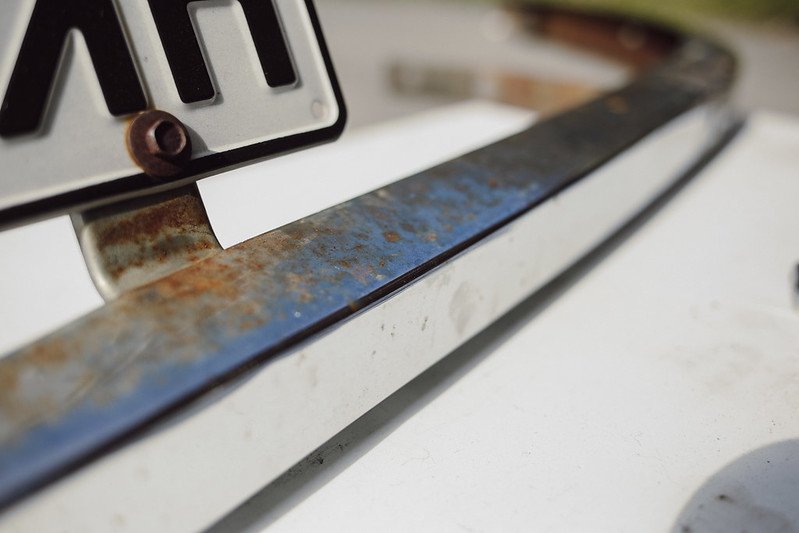
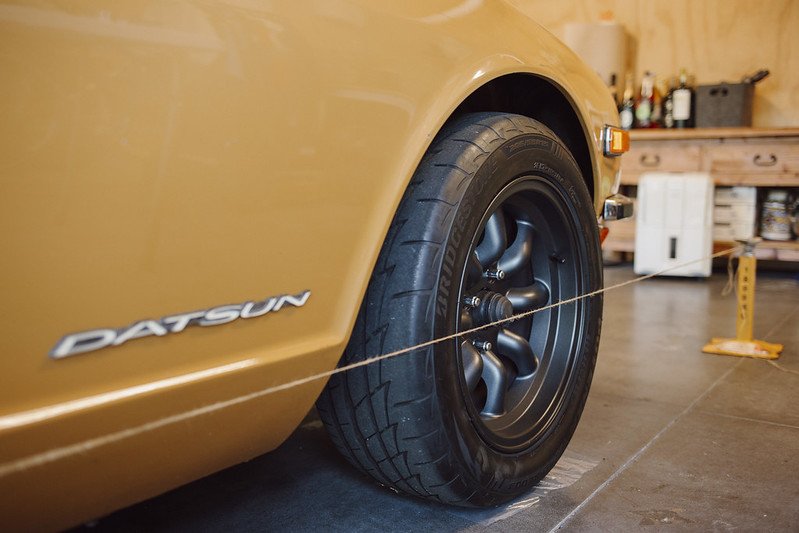
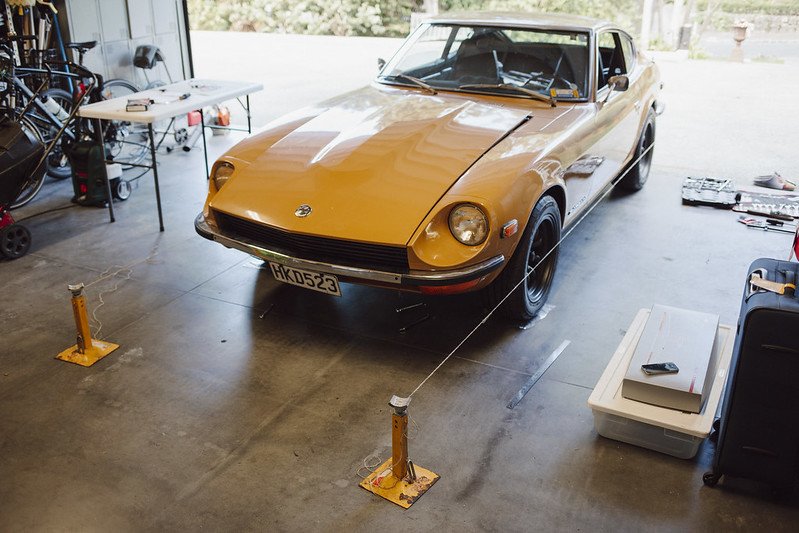
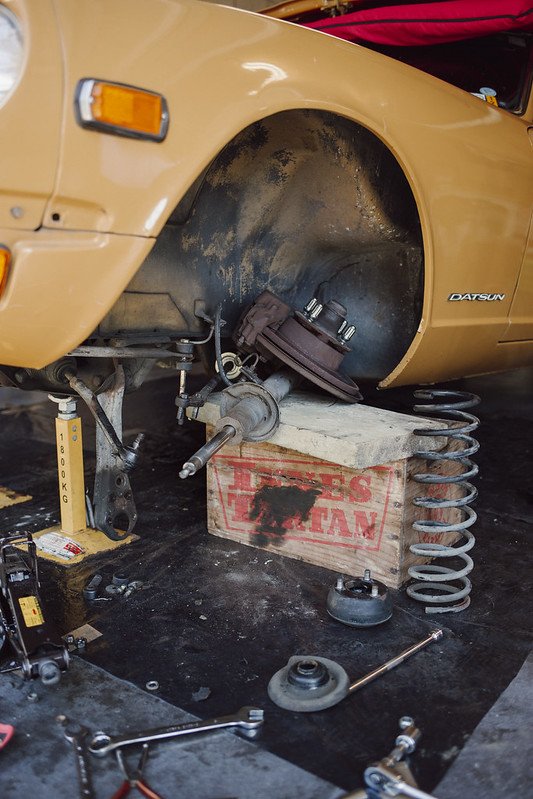
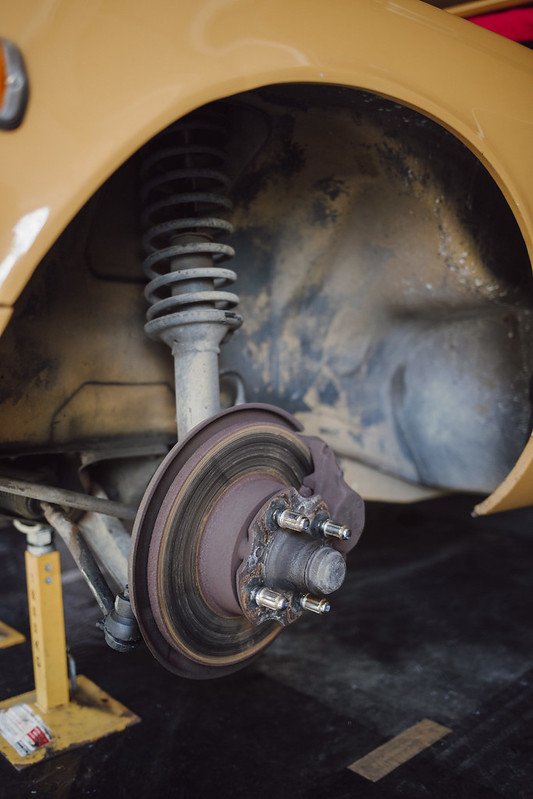
The chrome had definitely seen better days... I really wanted to get everything straightened and re chromed before I installed the new rubber I had. however I had come this far so I decided to see if I could restore some life into them. Lots of grime and service rust... a few hours with some #0000 steel wool and hey presto! Looking pretty damn nice. good enough for now, thats forsure! When I did the suspension I also installed new outter tie rod ends, after doing my best to match them up the original measurements, I quickly found out my new ones were longer. There is only one adjustment on the Z, front toe. I had worked at tyre plus through high school, so wheel alignments is kind the only thing I know about. However that was over a decade ago and I had only ever done it in the shop! quick jump on youtube revealed the 'two axle stands and string method' Worked a goddam treat!! I put the front tyres on the some thin plastic, made it super easy to adjust without having huge tension in the steering rack
4 points
-
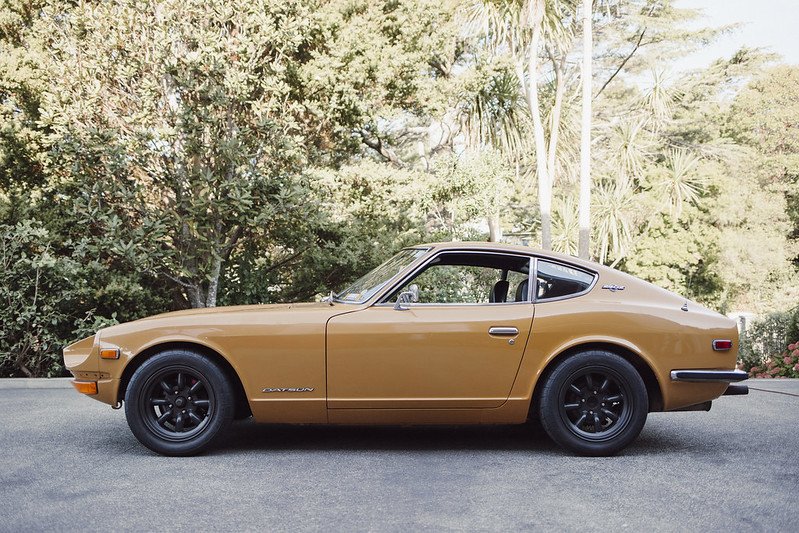
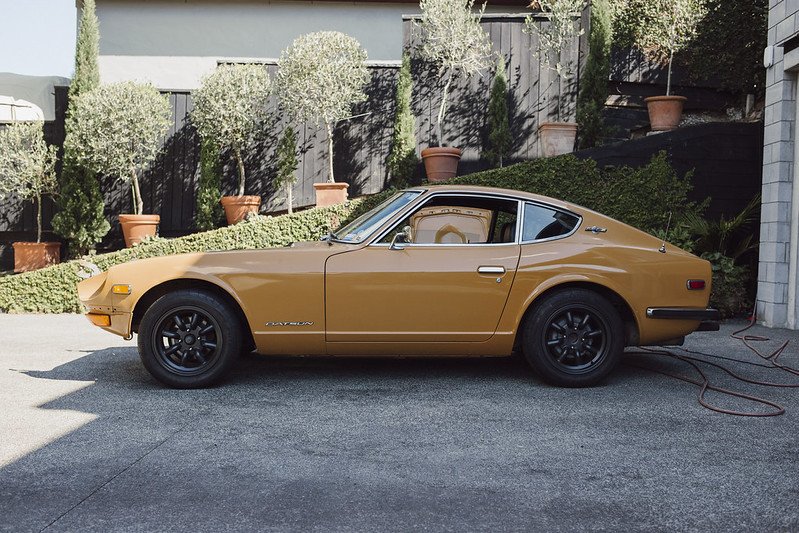
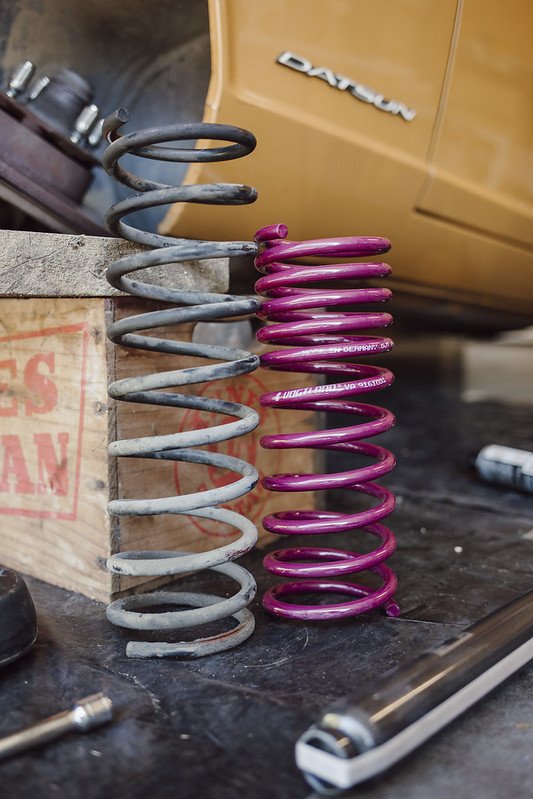
Phase 2... Its always driven me nuts, how the 240z sits nose up. After looking through and reading hundreds of threads about spring options for the Z I settled on a set of Vögtland springs. There is a seller on ebay who sells them in the US combined with staag shocks. I couldnt find much info about the shocks, however at the time I purchased them back in 2017 I was trying to ball on a budget. I will most likely look at some adjustable replacements in the future, but for now they will hopefully sort my visual problems! Added to the list : Clean up and paint the calipers, new rotors new pads... for the next time Still super happy with this choice. Even though I know there are lots of keyboard warriors upset with them not being original Watanabes I have no way to bleed the brakes, so the entire process had to be done without removing the brake hoses. DO NOT RECOMMEND. It sucked. but I got there slowly... Serious Lakers vibes going on.... out with the old.. in with the new. After doing all four corners, and then doing one again because I forgot the bump stop This was the final result! Im super stoked with it, I know its not low enough for most peoples liking, but to me I wanted this car to remain looking pretty original and stock. I think this spring set up achieves that perfectly... Plus it sits level! the biggest sigh of relief.
4 points
-
I’m in! @Duke Blackwood will be keen and we might try and get Bucket Barry to leave his rolling workshop behind and ride a bike4 points
-
Alright, alright, alright! Without knowing what the rest of the year has up its sleeve, how about we try have a thing to look forward to. Subject to change possibly, who knows! Would anyone like to go for a bike ride in late November 2020? 27, 28, 29? Being rather busy at the moment, and for the foreseeable future, this time round I propose we just do last years route in clockwise direction. What you reckon? Friday 27th will take us from near Ohope, through Opotiki, the Old Motu Road, Whakarau Road, into Gisborne. Party on Garth, Party on Wayne. Saturday 28th will take us from Gisborne, through Parikanapa Road to stop at Tiniroto for lunch, through Ohuka Road onto Waikaremoana for the night. Serenity. Sunday 29th will take us through Te Urewera, past Ruatahuna and Galatea (with potential for death lunch at Murupara), we carry on over Lake Matahina Dam, through Awakeri & Taneatua, and finally through Stanley Road to our conclusion. Phooar. ride '19 final by John Bell, on Flickr Entrants, as of 25-11-2020 @ 8:44pm @johnnyfive Daniel, aka Ruckus guy, aka Grom guy. @GuyWithAviators @UTERUS @MopedNZ @TimShadboltfan27 Shannon D Daniel W @Shakotom @Threeonthetree @Tumeke Brudda of @Tumeke @Truenotch @Mr Vapour @tortron @WankBankA100 @BLIZZO @anglia4 @RUNAMUCK @Duke Blackwood @HighLUX @Mitch.W @Beaver @00quattro00 Bucket Barry on bike @MaxPower (Vehicle) @slacker.cam @sentra @Dolan @Itchybear @Kass @Chunky_t @Thphantum (vehicle) Brudda of @TimShadboltfan27 Jamie F Paul A Tofa / Chris R Dean W @Jonathan shaw Greg H 38 riders 2 vehicles If theres anyone who has missed out at this point, speak up and we'll see. Last year for comparison. Will try keep this updated as details come to hand/I can be bothered.3 points
-
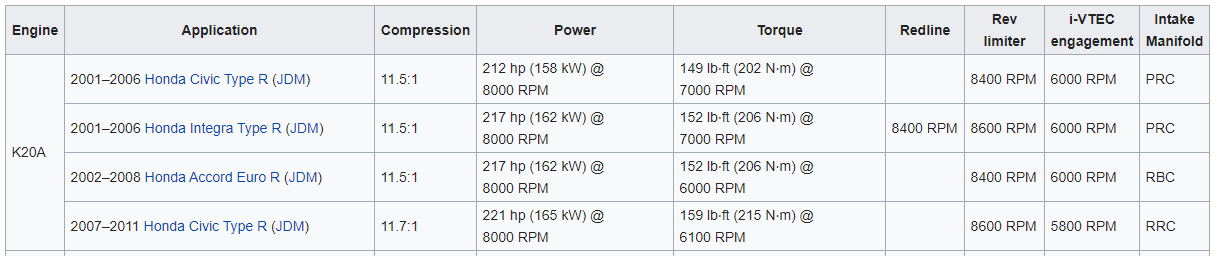
So as has been guessed it's a Honda K20a Euro R motor (Basically same as Type R, but more on that later.) These only come in fwd layout, so obviously that's going to make things challenging. They came in the following cars So Why Change? The 3SGE Beams Blacktop is a good engine, it's been very reliable and I've had no issues, however when you look around there is very few of them around the world which means the aftermarket support is limited and there are very few experts with them. CelicaRA and Harris Engineering (Previously Lyn Rodgers) being the main ones who have any experience modifying them significantly, the older 3SGE engines have a lot more support. Being RWD already they are cheaper than putting a K20a in and if you keep them internally stock they are a pretty good package for a lot of cars, but they are a cast block so weigh a lot more than an aluminum one. I wanted a little bit more power. I wanted to remove weight from the car. I wanted better aftermarket support. I wanted to keep the engine internally standard for now for reliability. I wanted easy availability of them. Why K20a vs F20c? The F20c is hard to get and not cheap. Honda took what they learnt from the F20c and made the K20a so it's a better engine, and also more supported. Why K20a vs K24 Need to keep in the under 2L class. Why is there such a large aftermarket support for the K20a/K24? The USA, Honda produce so many cars for them and they made ones which feature a detuned variation of the K20a which means all the companies got stuck in producing performance parts, and as the engines are so similar it's basically a massive parts bin of bolt on parts. Why Euro R version? Ideally (will explain later) you would go for the FD2 version as that's the best by a little bit, however as these are newer they are much harder to find. DC5 ones would be next on the list but they are also very popular so hard to find. The Euro R version however is relatively easy to get. The Euro R is slightly different, it runs a different ratio gearbox with different mounts and wasn't produced for the USA, so makes support for it just a little bit trickier with some items. It has balance shafts in the sump attached to the oil pump, and the ports on the head are supposedly slightly smaller (might be a good thing) (but where manifold bolts up is the same), the head water outlets are slightly different design. However pistons, cams, valves, water pump, cam cover, pretty much everything else is the same. You can think of the Euro R K20a as being a K20a Block but with a K24 head, but running all K20a Type R internals. Being it's similar to a K24 head that means you can take advantage of all the K24 parts available, while still using K20a Type R parts for everything else. It's not a major but does have an impact on some things. e.g if you need to do anything with the sump (which you should baffle) you need to get rid of those balance shafts, luckily this is just a case of bolting a oil pump kit from an FD2 on (which many stores sell). The ECU is also not tune able unlike the other versions, for me that was a non issue as i will be using an aftermarket one. It also runs the best intake manifold out of all the K20's (RBC) which everyone wants to bolt on to there K20's for more power. The Conversion Package So after looking around I decided to go for a Euro R complete engine conversion package from Strong Hondas Auckland, they were great to deal with and I ended up getting one with 112'000k's, was completely hassle free, and would have had a warranty if not for it going in a racecar. So for $3,390.00 incl delivered to CHCH I got the following. Engine Gearbox (with LSD) O2 Sensors Gauge Cluster Headers Driveshafts + Intermediate Shaft Shift Lever + Cables Engine Loom + Body Loom ECU Clutch Pedal + Master Cylinder Brake Pedal Flywheel + Clutch (worn) Intake manifold + throttle body All sensors except Air Intake Sensor. Misc Cooling Hoses Obviously that's a lot of money, but if you were doing a conversion into another Honda that is a bloody bargin for everything you get. So after I sold off things I didn't need, the engine is currently owing me $981.73... And I'm still to sell: Gauge Cluster Headers Engine Loom + Body Loom ECU Throttle body That's a pretty good starting price, but I have to buy conversion parts so they will add up quickly...
3 points
-
hooo leee shit yeah3 points
-
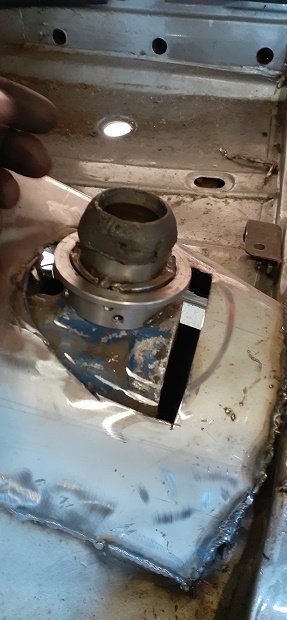
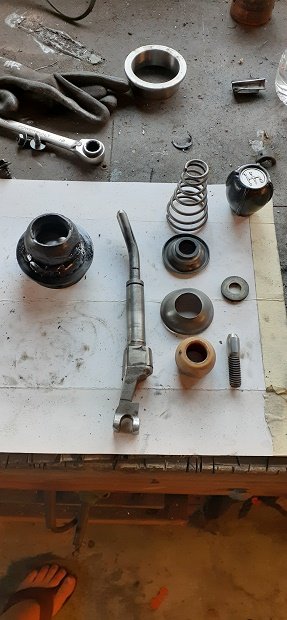
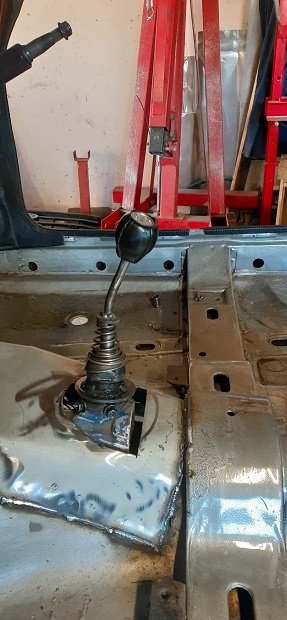
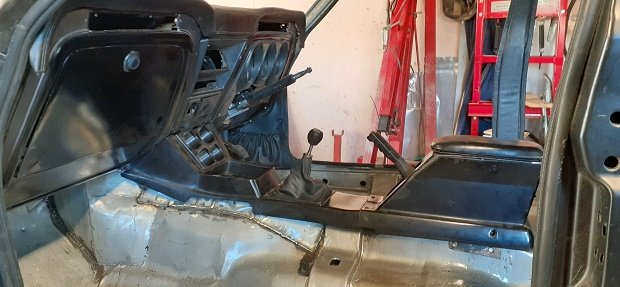
Well i went to finish fitting the airbox and for some reason it no longer fitted as it should (motor has been in and out a few time since then.) So this led to me redoing something i wasn't 100%happy with.... The way the motor sits so i lowered the mounts as far down as i could and cut the top of the tunnel off and made some 20mm spacers to lift the gear box up.. Now it sits so much better and the gearbox to driveshaft to diff is a better angle ..... As for the airbox not fitting as it use to (had an idea i was planning on doing to this anyway as the box is solid mounted and the trumpets will move inside it) Sooooooo seats out..center console out..top of tunnel cut off. Engine lower down on the mounts and gearbox spaced up 20mm New top made (it sits alot higher than factory so i had to make it to the shape of the center console ) So that led to me thinking about the shifter .. It was tall sloppy and the throw was ridiculous.. I have searched in the past and then spent somemore time yesterday searching for a short/quick shifter for it but there arnt any. .you can rebush them and that helps ..there was a guy on ebay selling home made ones years ago for stupid money and not anymore.. So i thought i would have ago at making one....so i pulled it apart I did also look at escort shifters as the thread is the same and you can get them off the shelf....but the ends are to different. So the throw factory is 120mm from 1st to 2nd and 60mm across the gate to 3rd and 4th.. I found a 20mm thick nut that fit perfectly over the shaft and cut it down to the same as the shifter base and i put a weld ontop of it as well The plastic thread on the shifter are crap (much like all ford ones) and wear out... i had some 40mm mild steel tube and it was a close size to the plastic threw...But i coulnt thread the bottom of the tube to fit the gearbox hole.... so i had a v clamp sitting on the self That was a nice fit over the outside of the shifter hole so i drilled 4 holes and its held in nice and tight with 4 grub screws. The vband was a lot bigger than the 400mm tube so i cut up a huge washer i had and used bits to center the tube and make welding easier It was at this point i ran out of welding gas yesterday...got some from a mate last night.. so its got some shitty gasless tacks holding it together and i pressed the plastic shifter base into the tube after cutting it to the size needed and stopped taking pics .but last night i welded it up cleaned it up and gave it a paint... cut the top of the escort shift off so the gearknob was a good fit. all together and mounted. throw from 1st to 2nd is now just under 60mm and sidewas to 3rd and 4th is now 30mm so i halfed the throw and it feels so much better and at a better hight. Center consoles back in and they sit a lot higher but you cant really notice it My heater ducting also turned up and i got the wrong size but a trial fit lets me know it will work perfectly. all back together .. and now i can get back to the airbox
3 points
-
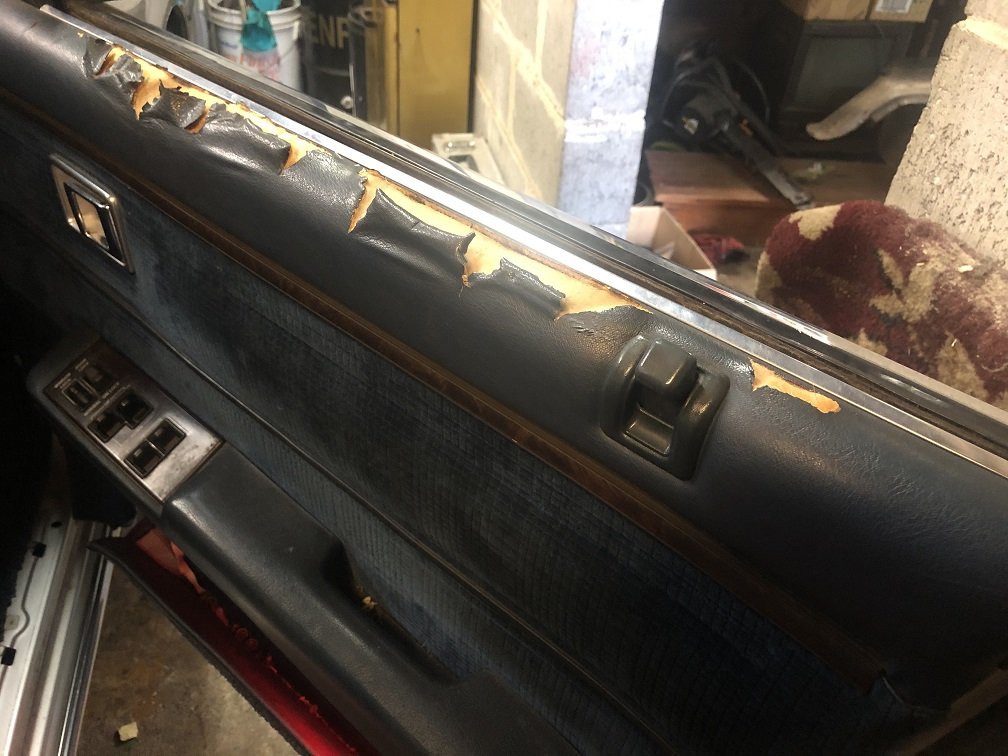
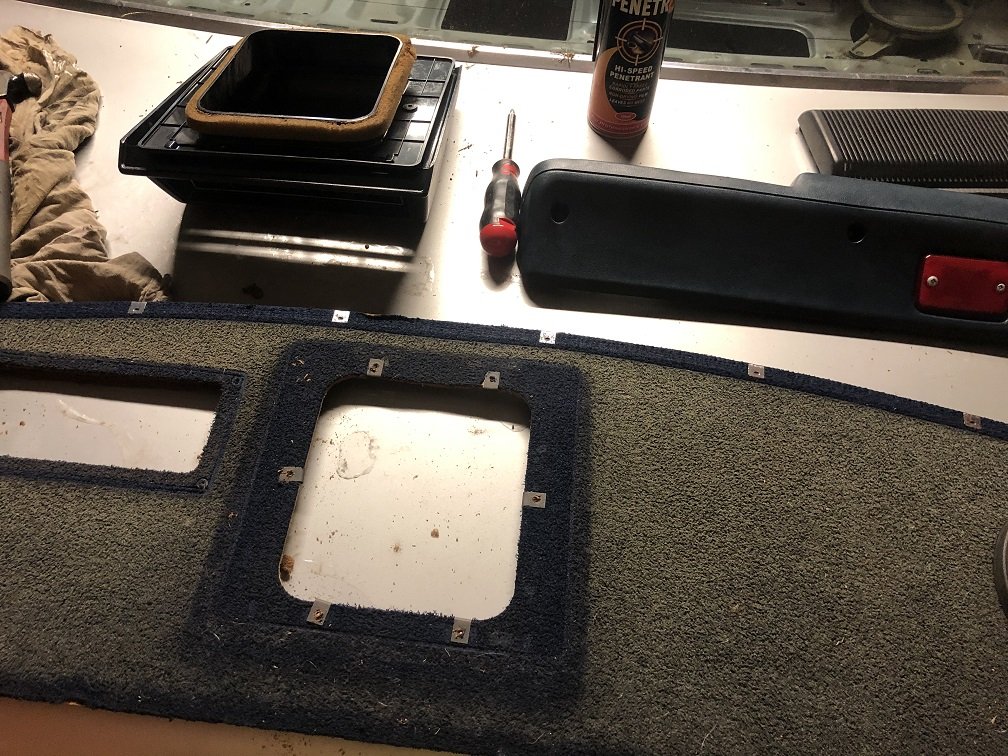
The top of the door cards has been falling apart for a long time now, and the parcel tray carpet was turning to dust from all the UV. I managed to send them away & get them back before lockdown, Derrick at NZ Vinyl did a great job at a great price. The central locking hadn't worked for 5 years, turns out the solenoid contacts were just rusted out. Some cleaning & spare parts brought them back. It now locks the doors above 30kph again which freaks passengers out! That's pretty much all I can do from home. After the lockdown its off to work for me to repair some rust, replace the shocks, new rear tyres, driveshaft hoops, wheel alignment and WOF. Then hopefully book in Cert! Looking forward to some long road trips all over the place very soon!
3 points
-
Little bit of end of the day progress. Funny how a bit of blue masking tape makes it look like you know what you're doing. /I don't know what I'm doing3 points
-
Hah, had a tonka once.. Dad got it from the dump cabless , made a cab out of some 4x2s and painted it with timbacril.. Loved that truck.3 points
-
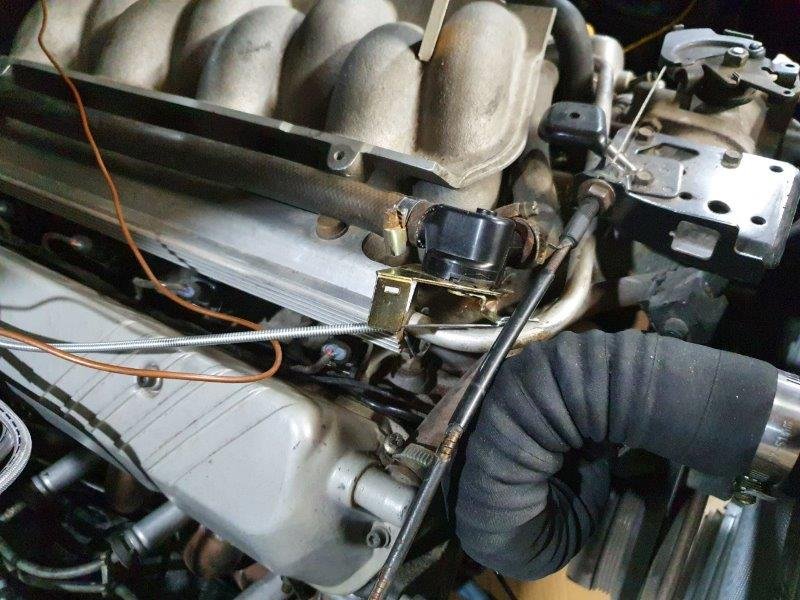
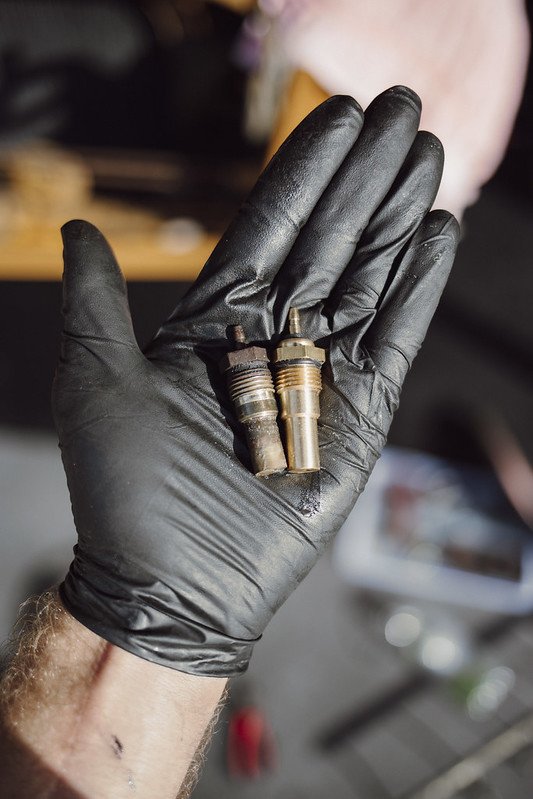
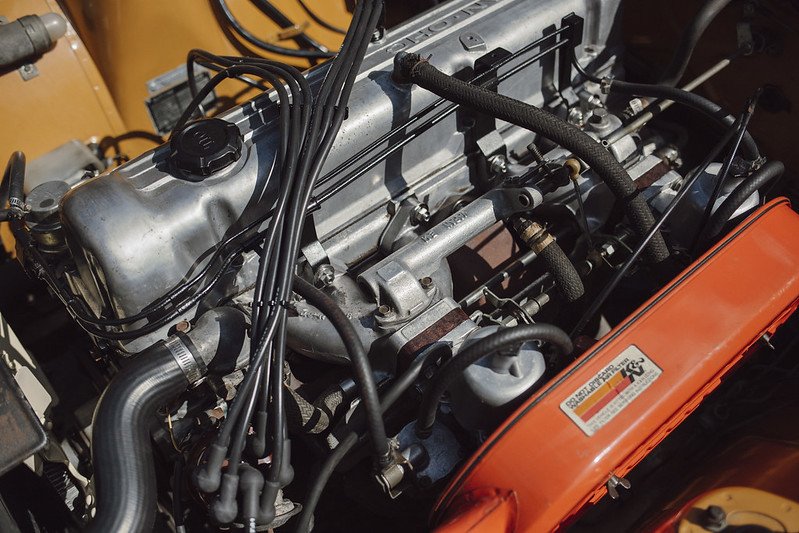
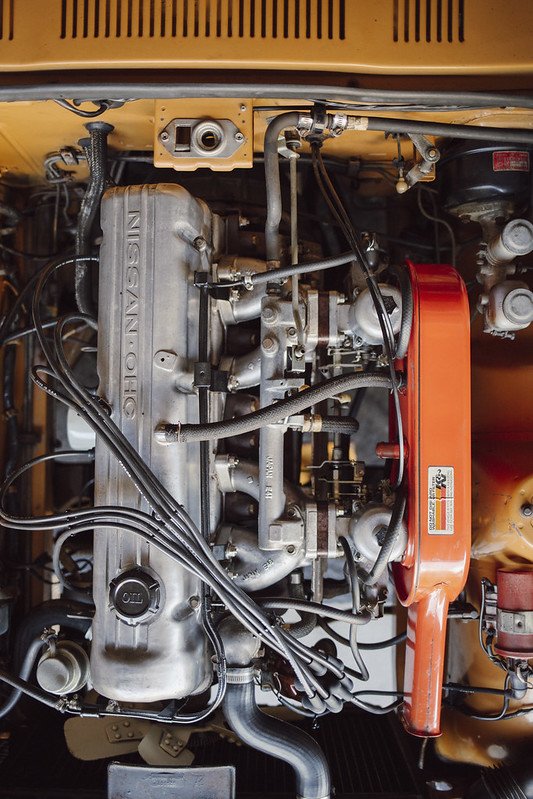
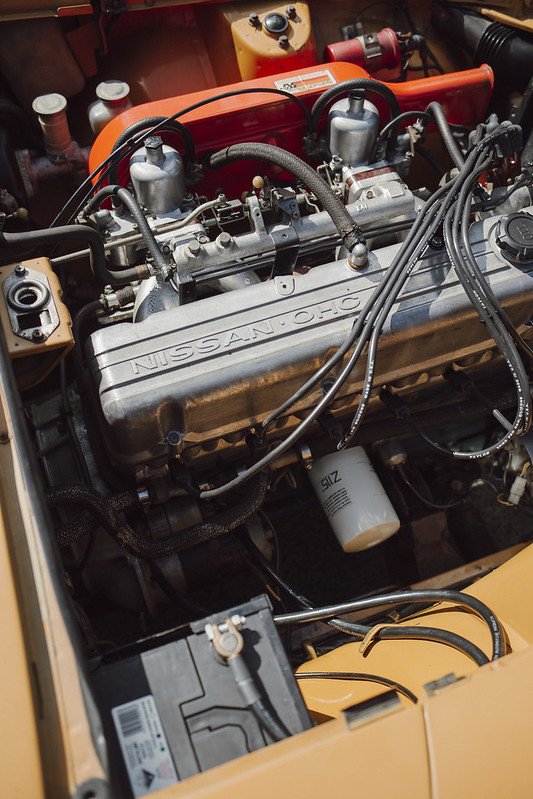
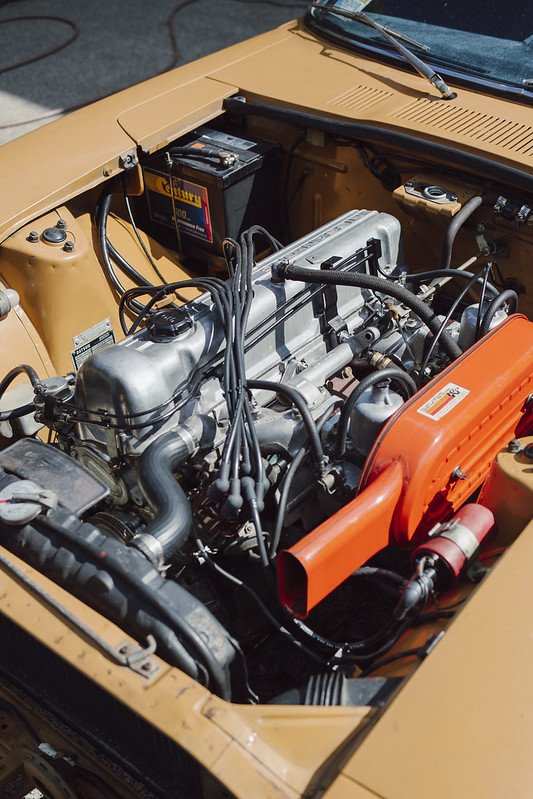
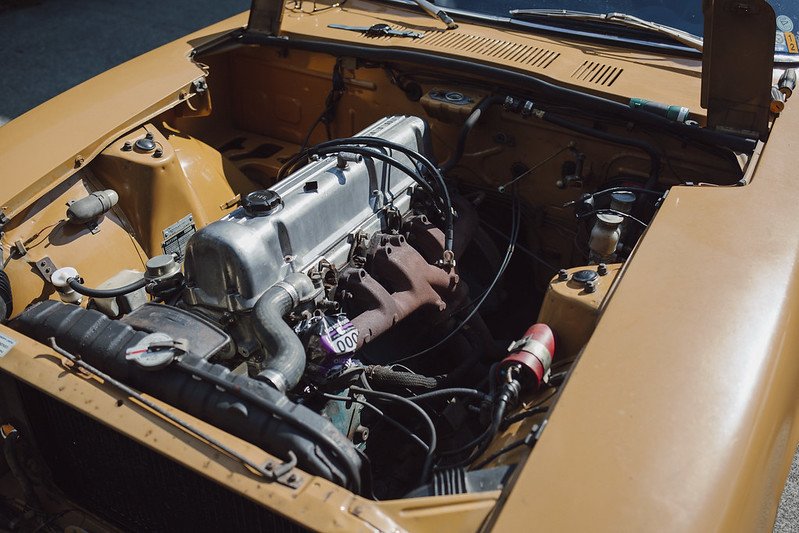
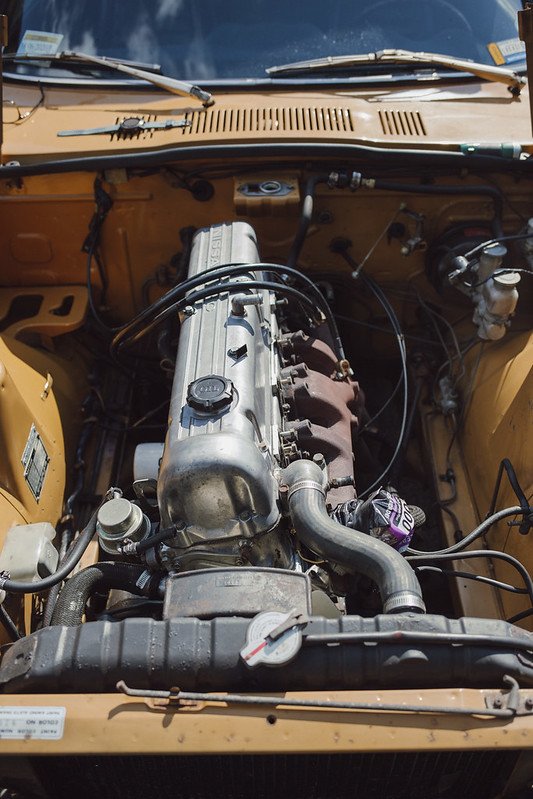
In my box of spare parts was a new water temp sensor. Was looking forward to finally knowing how hot the car was getting... had been just playing it blind for years. Unfortunately at this point my documentation of the process left much to be desired. I spend around 7 days covered in grease polishing things and didnt really pick up the camera, so now we skip to the after images. I painted the fuel rail the runs around the valve cover black with some paint I found in the garage, I cleaned and rebuilt the carbs, new plugs, new plug wires, new cap and rotor... The new JDM balance tube sitting centre stage, no more smog valves and shit covering everything... Im happy for now at how the engine bay came out, Im not embarrassed to open the bonnet anymore. It looks right, it still looks 50 years old, but tidy for 50 years old. The paint on the air-box was surprisingly in really good condition... just needed some TLC Since these photos I installed the pertronix ignitor and a new coil. I actually relocated the coil down into the engine bay, to tidy up the upper engine bay. Really happy with it.
3 points
-
Gonna chuck down and expression of interest in this one aye. Will see how Employment and the year pans out3 points
-
I like bikes and men.2 points
-
I mean not bad for a complete random pile of parts hahha
2 points
-
Just the aftermarket support make the K series a win. If you are feeling rich Fit some Kinsler ITB's please2 points
-
Will be interesting to see how this fits height wise in a starlet engine bay. Beams motor is annoying for tallness but K is a bit more again I believe. But maybe not so bad with a 20 instead of a 24. Hopefully works out well without too much trouble but my understanding is you'll probably need a sump made too. I'm genuinely looking forward to an honest comparison of beams vs K motor in the same car, same dyno etc etc. In terms of power, weight, how it drives, yada yada. It's so hard to get genuinely comparative information without so many external contributing factors making a difference. Is that the BMW box it's mated up to? Gonna be awesome2 points
-
True. The more I think about it, spending $80 and having it all done in a couple of hours is looking much better than pulling the diff, replacing bearings and seals, changing the handbrake cable and lots of fucking around.2 points
-
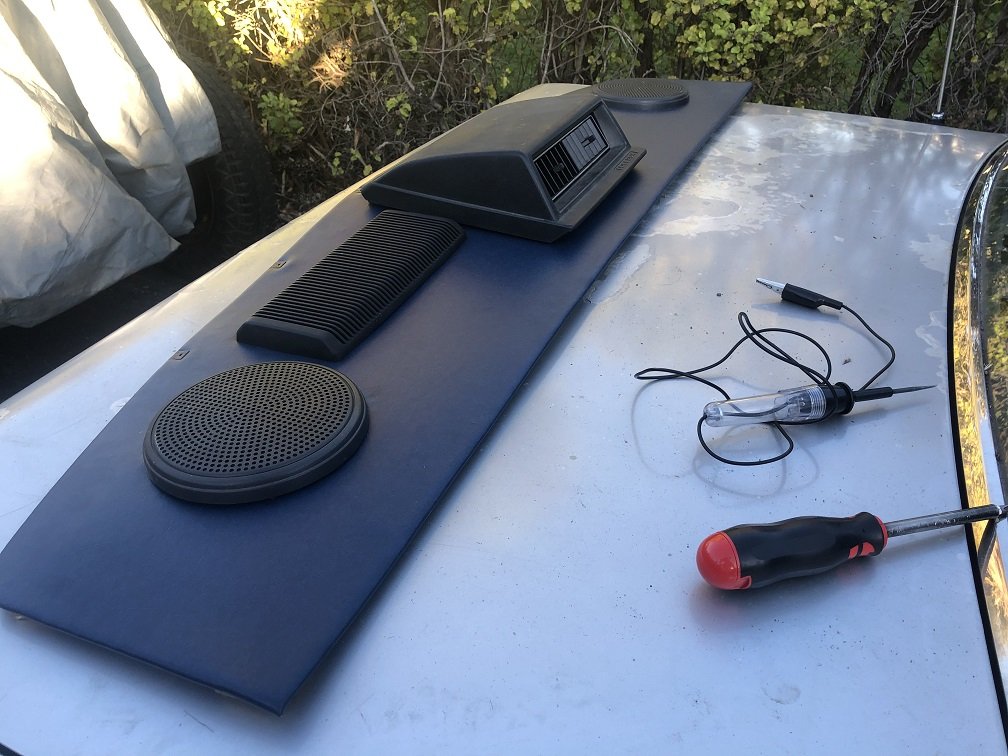
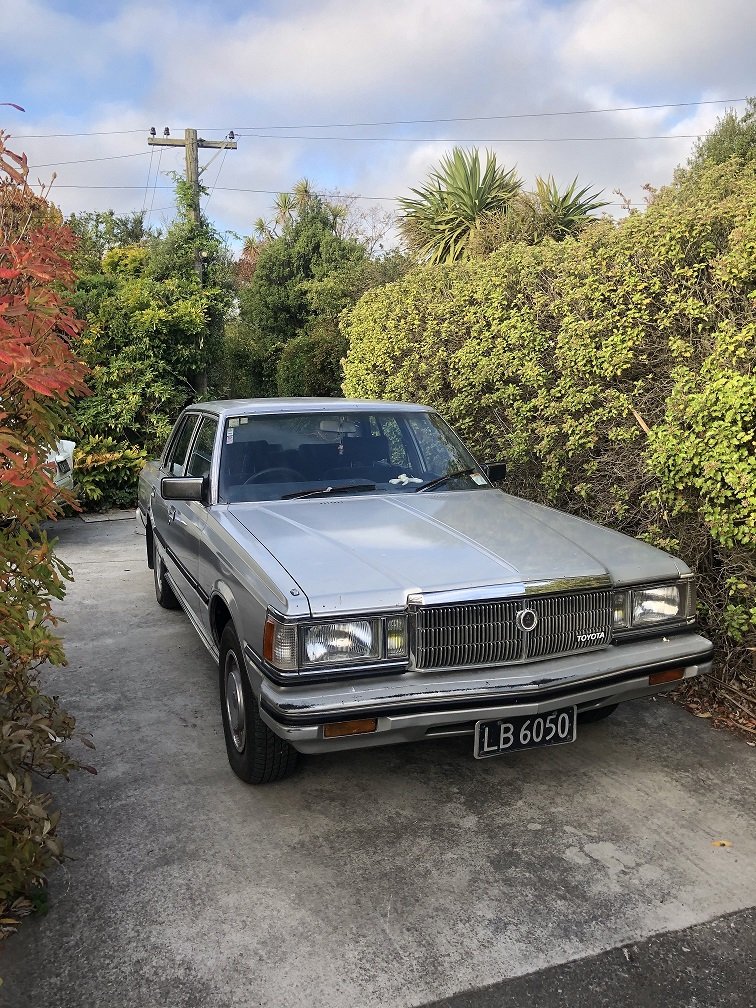
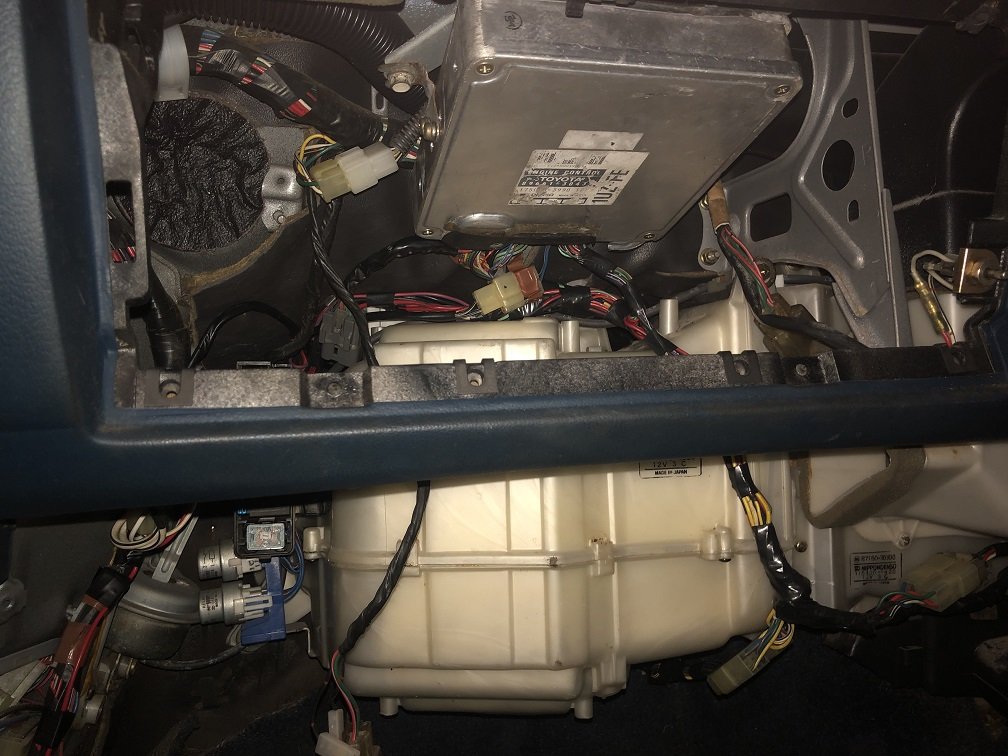
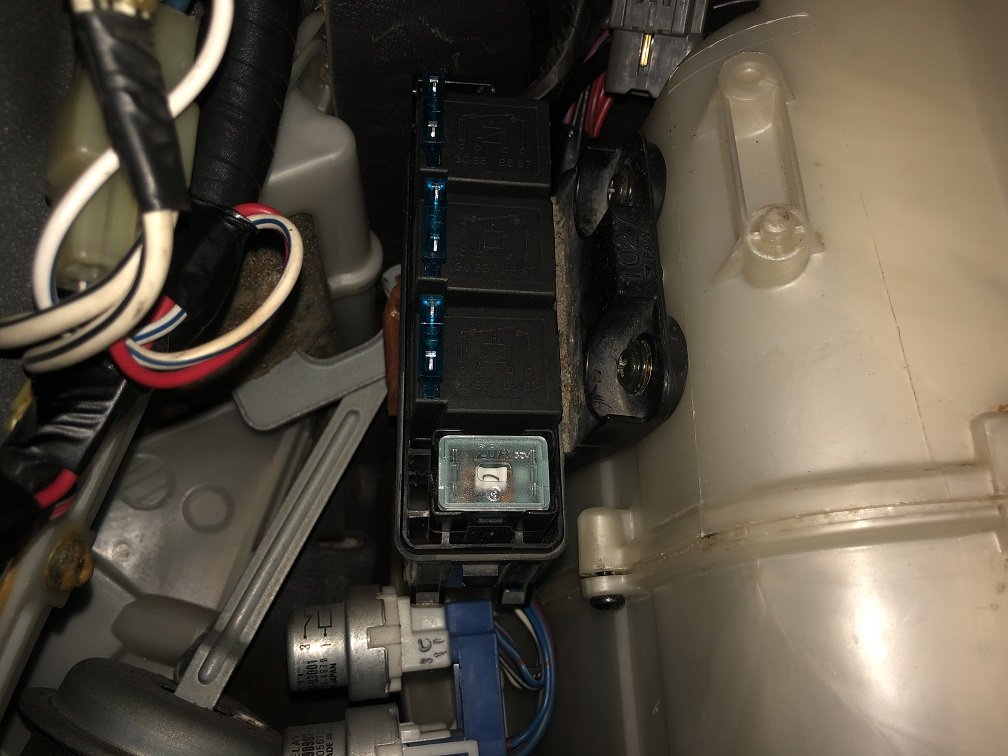
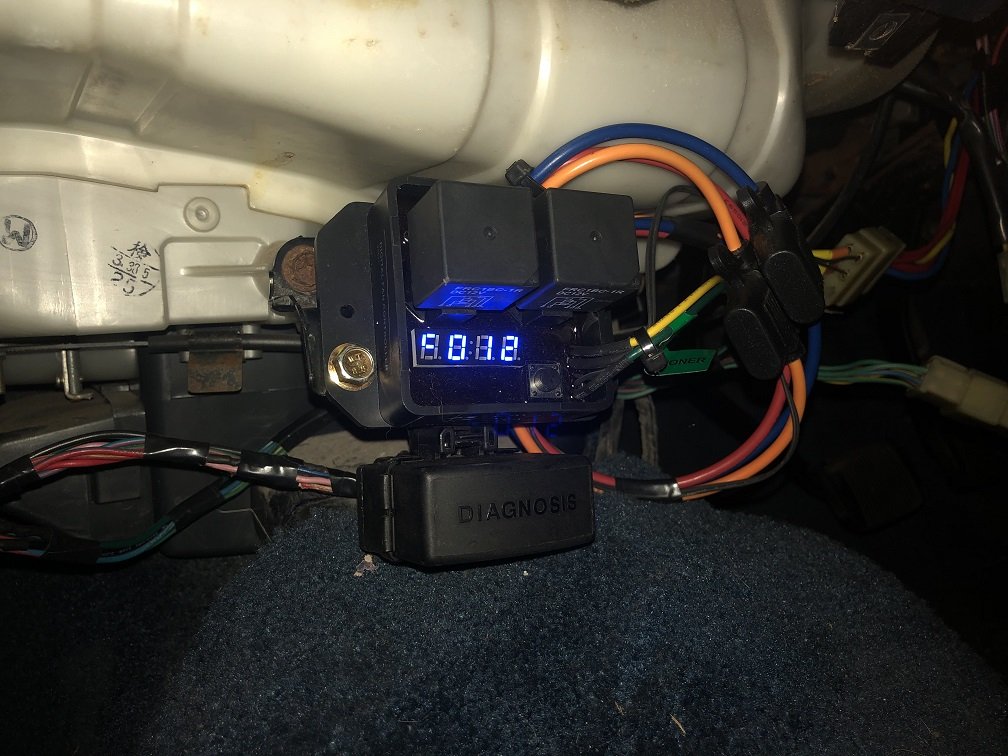
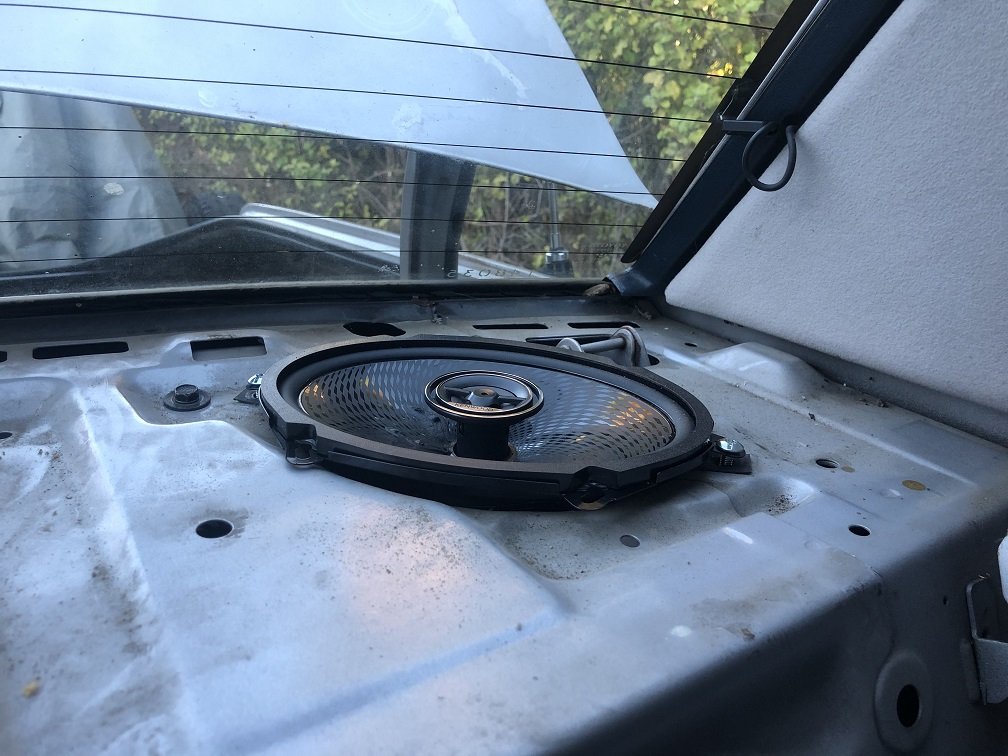
Great weather to push her outside & get stuck into the interior. The ECU fits nicely above the glovebox where the 5M ECU would have gone on the EFI model. Then the airbox can go back in and the relay box and fan controller/diagnostic port fit on nicely. Feels good to finally have the engine wiring complete! I'm still getting fault codes for the missing trans computer unfortunately. They are dormant in the ECU but they throw the check engine light up when the engine is revved up. I have heard it's possible to wire in an old Surf trans computer to keep it happy, but it might be easier at this stage to wire in a timer relay to kill the check engine light 10 seconds after startup. That way if I have a hard code for something more serious ill still spot it on startup. I've also replaced the speakers front/ back with Sony/Kenwood. They actually sound really good just running from the factory stereo which is surprising.
2 points
-
It's not a cheap swap, but there is some stuff that would make it easier, I will be very detailed. I can't weld so the main fitment will be done by Bert @ palmside exhaust done by JPW Performance and I think I can do the rest with off the shelf parts. Feel free to ask away here happy to answer questions, I am working with Speed Science on giving them updates for their facebook, so I can't get ahead of those, but I can be a lot more detailed here. 2L K20a Type R motor The rear sway bar made a huge difference, the car was so much flatter, even with the valving wrong in the shock it was an improvement. I had Bert drive the car and he picked up the valving being wrong straight away, but said overall the car handled really well, so fingers crossed the car is transformed when i get the shocks back. Here's with no sway bar. Here's with the sway bar.2 points
-
can be done. need to change to the disc rear end axle bearing and seals they have a different seal width to accommodate the difference in backing plate thickness, bearings and seal kits from vk v8 sailsbury commodore should work2 points
-
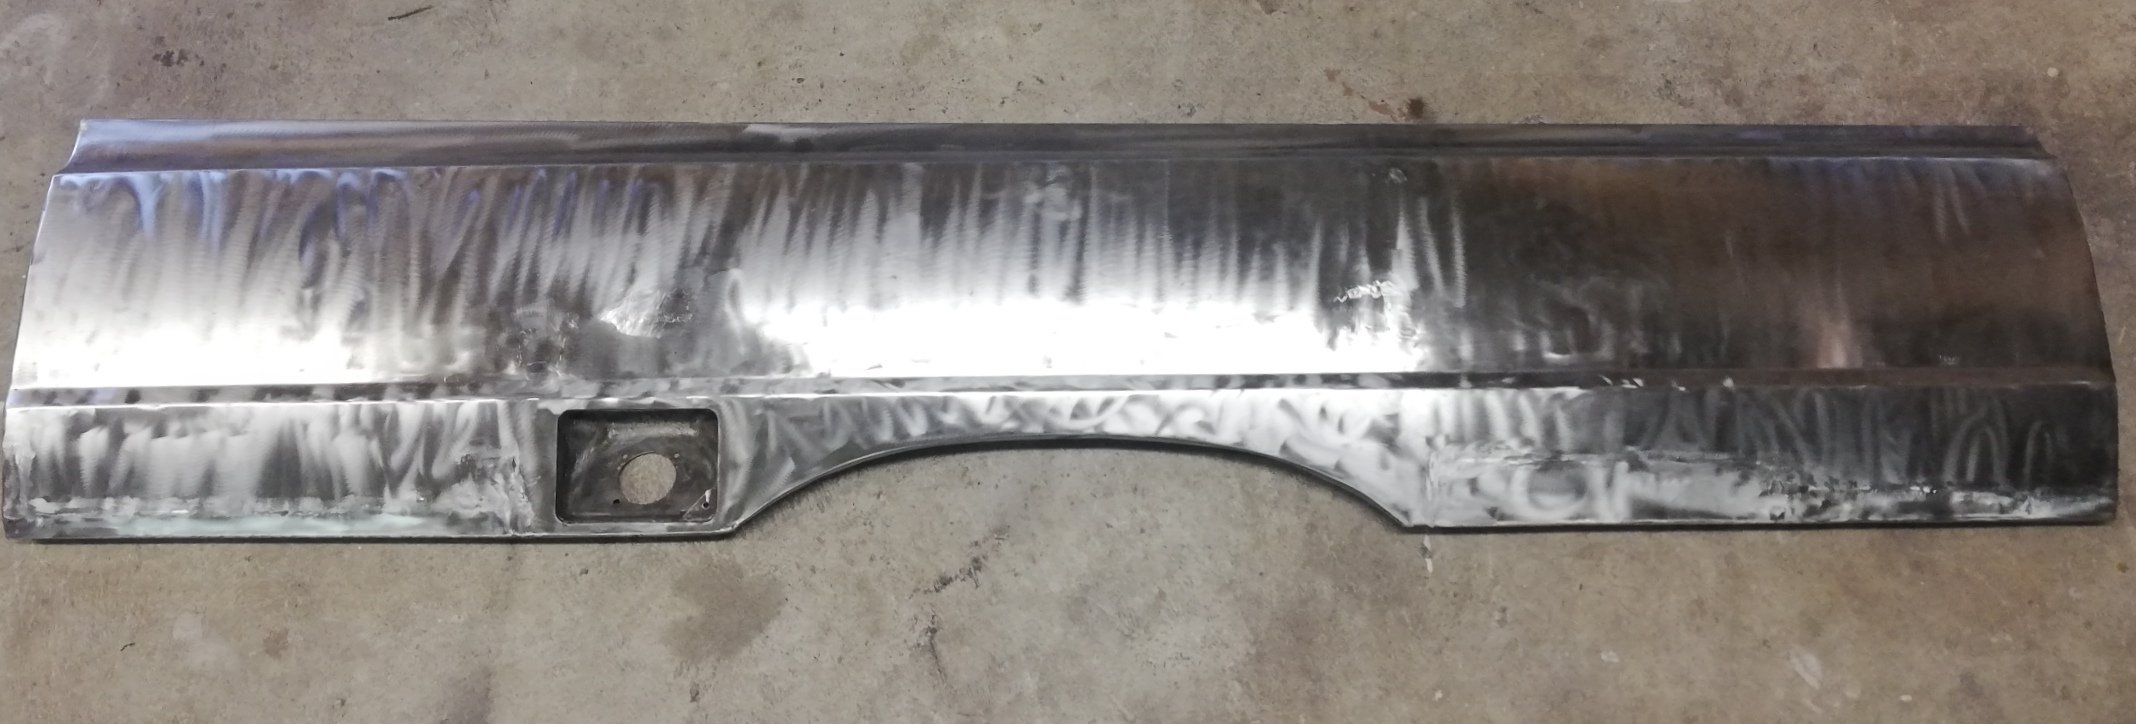
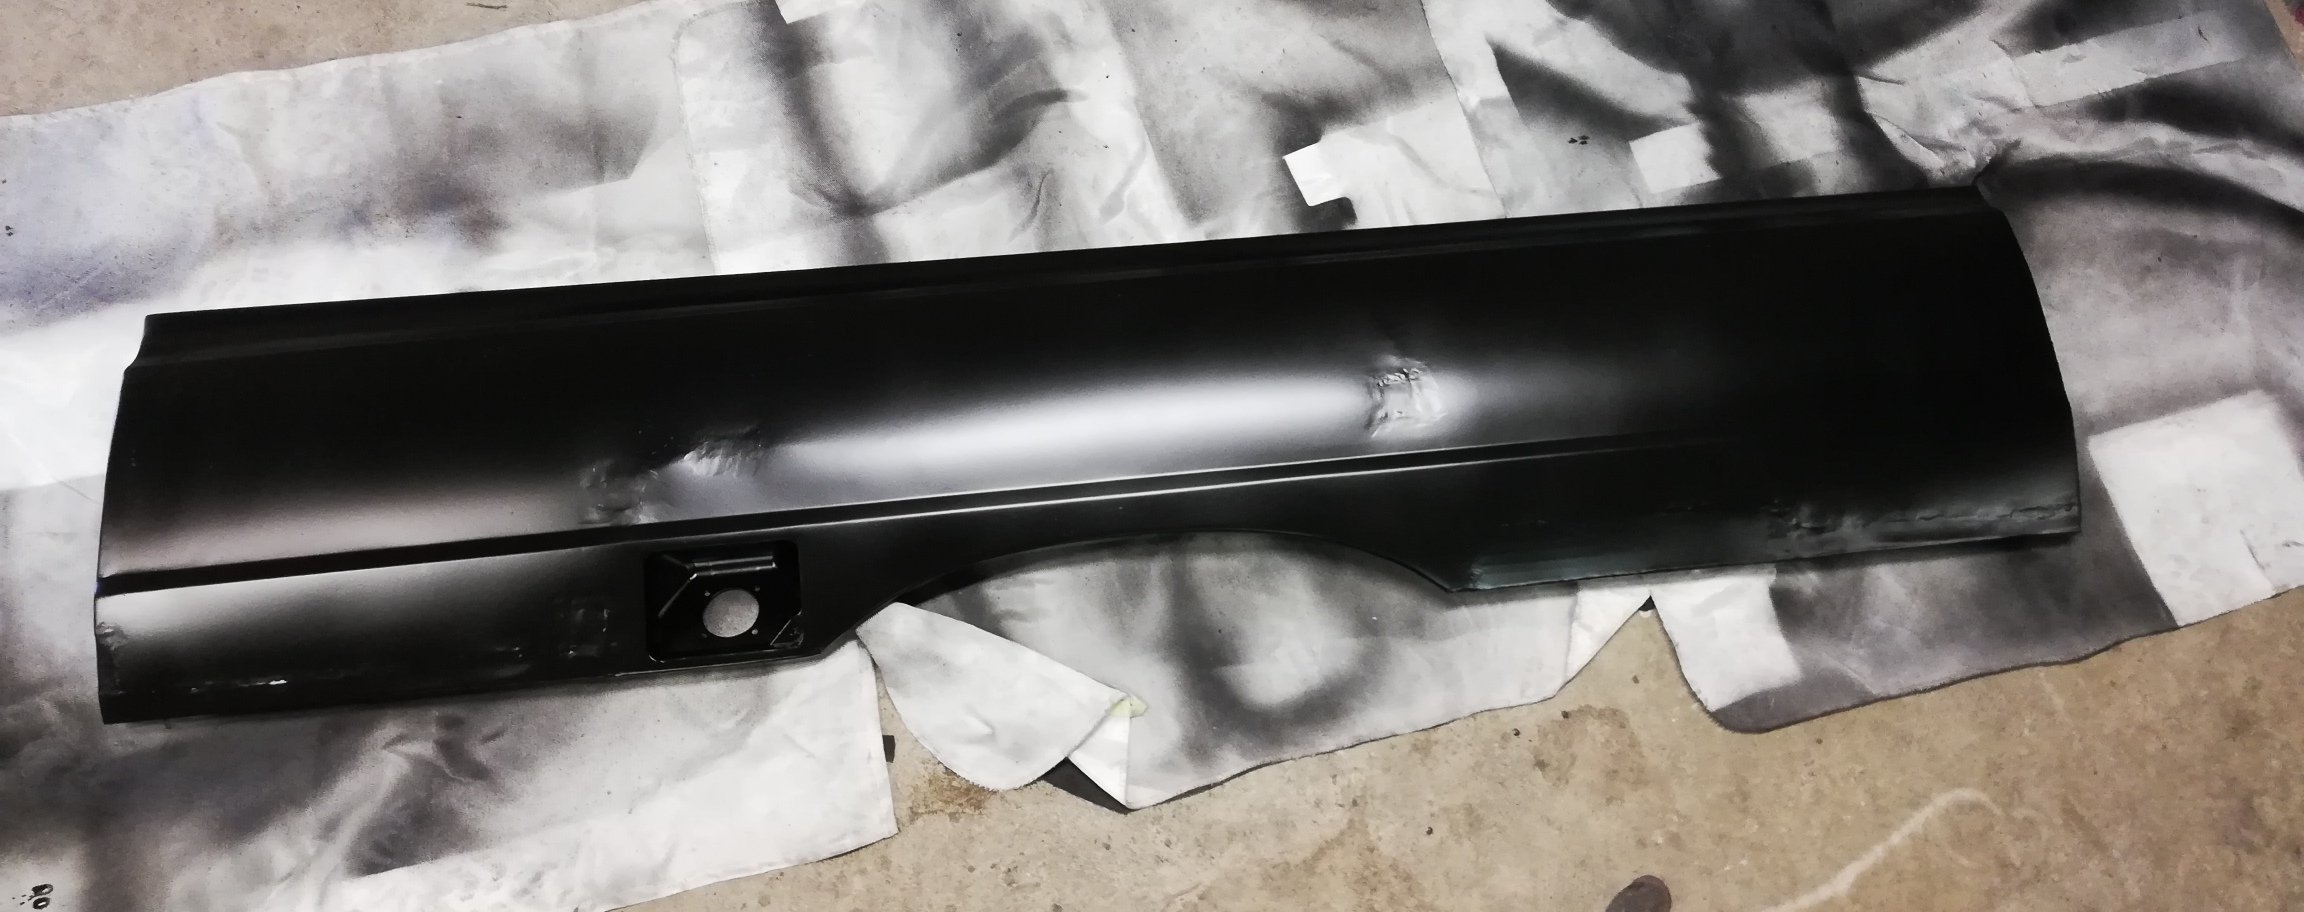
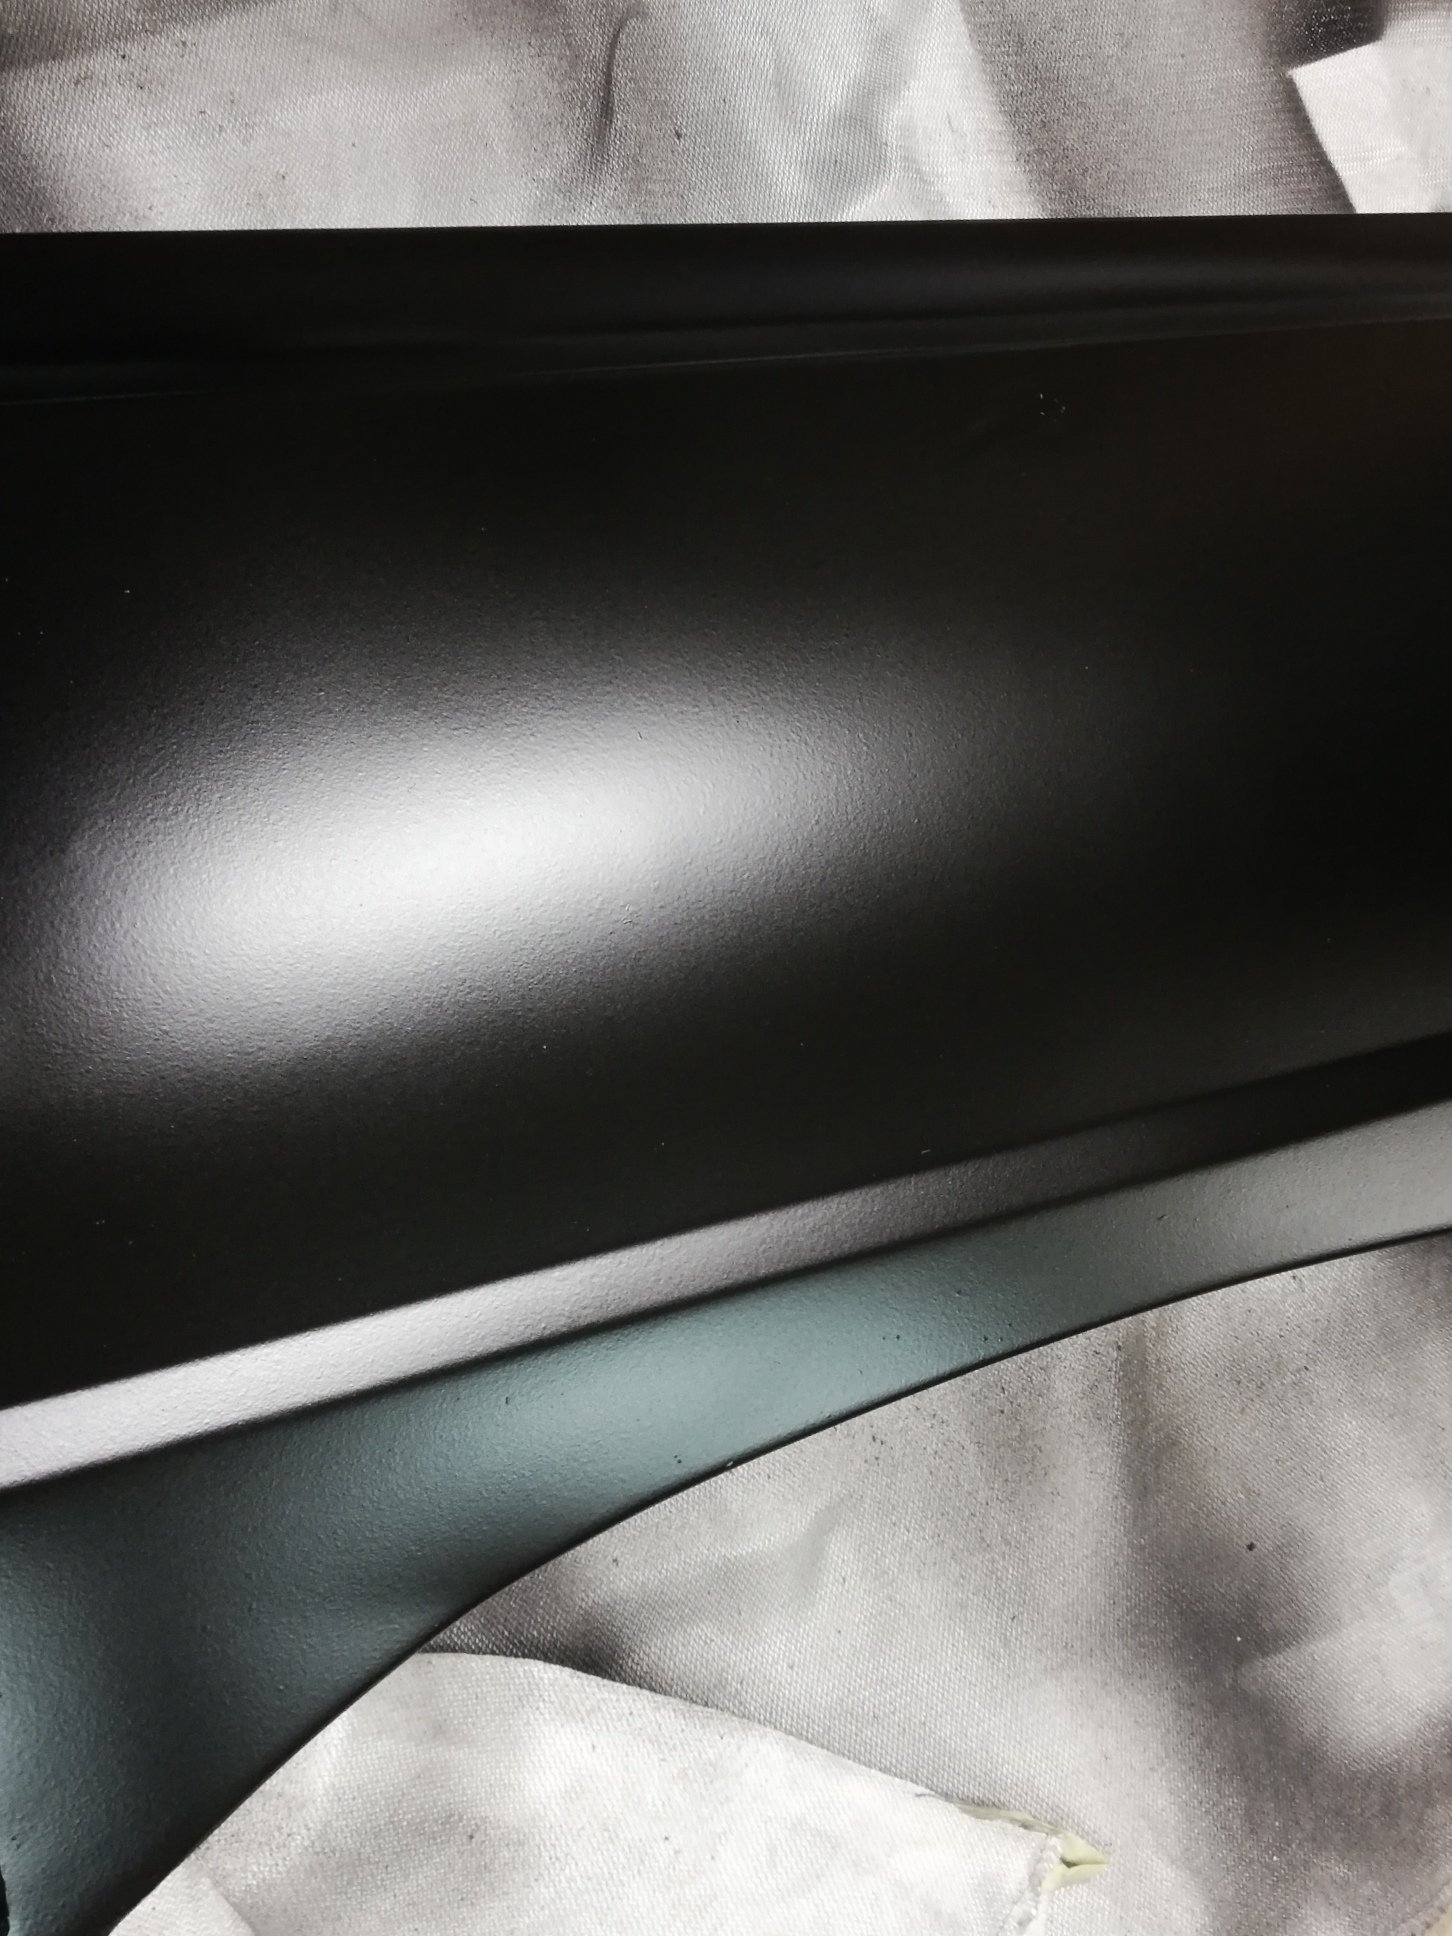
An excessive amount of welding and grinding later And then I found out you can just buy a replacement panel So I did that lol can you imagine Gave it a quick hammer and dolly before 2 coats of durepox. Pretty good tbh, I'll give it some final tweaking when it goes back on the tray, but I think some fill primer should get it 90% there
2 points
-
I pulled the valve cover and went to town with some scotch bright and steel wool. I decided against going wrinkle black, wanted to keep it more original. This photos are after many hours of degreaser, scrubbing and water blasting. The inside of the front guards were covered in a thick layer of 50 year old dust and crap. Amazingly the head is silver!!!! and some of the block is blue... One day I will pull the engine and re build it, for now though, limited skills, fuck all tools, by myself in a garage, this was as far as I was going to go. Its amazing what elbow grease can do at removing grease. I may have destroyed my parents driveway however... I wish I had a wire brush on a drill... however I did not. I did however have 4 weeks in lockdown...
2 points
-
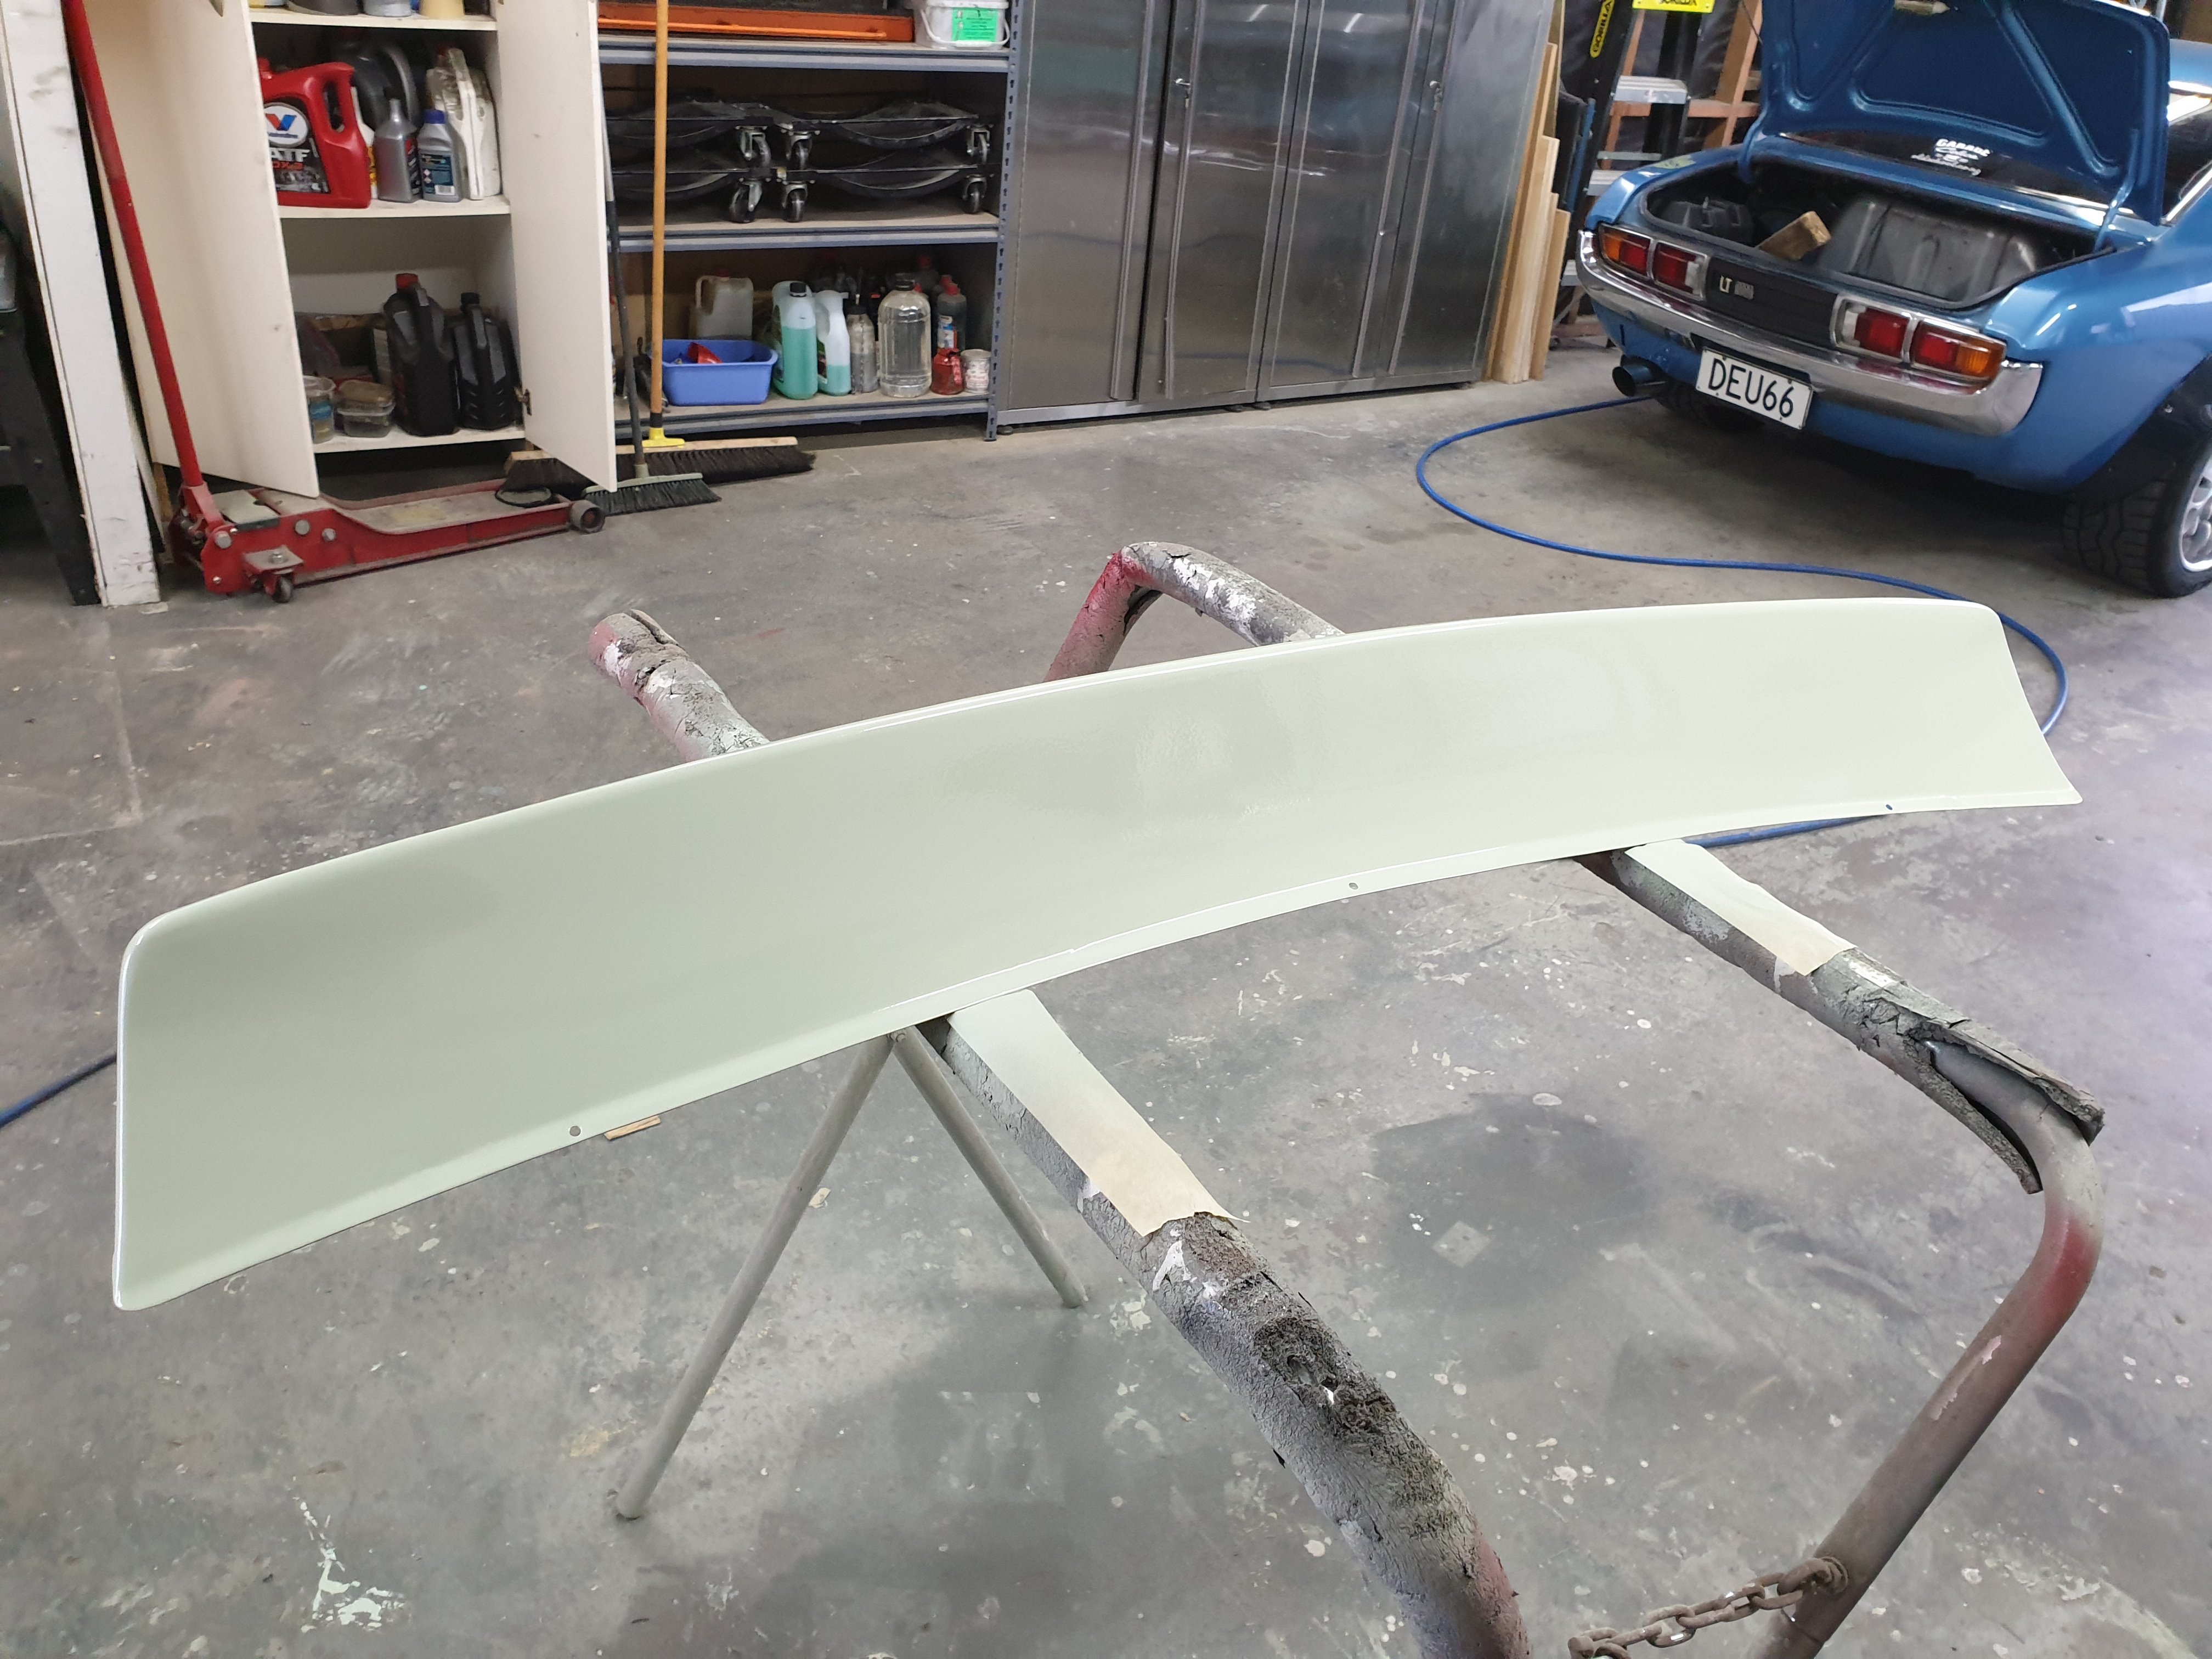
I forgot I had this spoiler. The homes it came with were in stupid places so I drilled some new ones and welded up the old ones. I fitted it to the car then blazed some more primer on it. Tomorrow I'll give ir a sand and put some colour on it.
2 points
-
I wanted to install a fan on the intercooler as it is in a fairly low airflow position and in my head one way to lower the EGT's would be to actually have the IC do something. With this in mind I managed to wrangle a 10" maradyne 24v fan from one of my suppliers, this arrived on Friday. Some skinned knuckles and swearing got the intercooler out of its position without having to remove the deck, just the one deck panel and some mesh from the front, but it wasn't fun. Just as well the fan is reversible as I had to change it to a pusher configuration, as this was the only way this assembly was ever going to get back in without removing the deck. I modified the mount bracket so it would actually fit, then chucked it back in; Sweet. Now for the bodging. I didn't really want the fan to run all the time otherwise it was just sucking up ergs at idle and I reckoned it was only when boosting that it needed to kick in. So I thought running it off a boost pressure switch would be the go, but I didn't have one nor any realistic chance of getting one either. Enter a Jap spec 2y carb I took off the townace a few years ago. This is encrusted with many many vacuum actuators and switches, most of which I pulled off for inspection. I tried modifying the actual electrical vac switches to run off positive pressure but this wasn't so great, mostly because my stash of springs didn't have one light enough for it to be realistic. So this was the next best option; That microswitch I had in a stash. Pretty soon it looked like this after making a bracket and a screw in ferrule; Then I had to make a T so I could take boost pressure from behind the gauge to run it. Just as well I have a shit load of old taps and dies and brass hex stock and a lathe and fucktons of time. Then I slapped it all up under the dash and wired the microswitch through a relay to run the fan. Excuse the ugly vacuum manifold thing down there, I made that when I put in the vac and boost gauges. Then I wired up a temporary indicator light and took it for a run up the road, it worked! It comes on at only one or two psi so I swapped out the spring to try and get it closer to 5psi but the only one that would fit was too heavy, so I put the old one back in. I will try and find something slightly heavier when we are allowed to shop properly again. In other news the alternator is sorted, I got one sent once the embargo on car parts was eased, although in the meantime a mate of mine gave me his fucked one (whilst maintaining social distancing measures obvs), I cleaned up the slip rings and put it back together and it worked just fine. The sent one produced slightly more jibbers on my bench top test setup, so that's what was put back in. So I guess there is a spare. I also tested the 4wd, it was sweet except for the linkage banging on the exhaust when in low range. I just needed to space that off slightly from its pivot and all was well. I did a couple of full noise launches down the driveway purely for testing purposes, nothing broke and it hooked up pretty well. The power steering continues to work but was leaking even more than before, so it came out again for the 11th or 12th time for some reservoir to pump O ring and washer seal loving. This is now sorted 100% I believe. Fucking better be. Apart from a couple of other fiddly things that I didn't bother to take pics of that is it. As you were.2 points
-
Yes hello I would much like to attend this on the forztard Hopefully 7 months is enough time for the last of my aliexpress parts to show up so I can finish the build2 points
-
Im gonna go for an early retirement on this one. Strapped some wheels to the back. smashed the throttle some more in the air. helped a little, still nose diving. tried in rwd, surprisingly not much different. pretty close to being out of suspension travel. super unkeen to fix bent truck. Not saying no more jumps, just don't wanna push it any further In saying that i think its done pretty, well for something that wasn't built to do jumps. Now i have a big fuckoff jump in my back yard. what to do with it.. Did I try going faster. yep.. Hit it at about 55kph. about 20m length. or 65 foot because seems to be the universal jump measurement, sound impressive. got pretty high too . . . . . . . . . . . . . . . . . . could prob jump the GC?2 points
-
I'm going to commit to this this time. I have a shit RV50, I'm gonna shove a Lifan up it and I'm gonna be there. Or I wont.2 points
-
Shit yeah. Been chipping away at my Cape special this week too #4 strokes are for wankers2 points
-
Another fine day on the West Side. Nearly done ! First job, cut off all the bits I don't need. Next, continue with my jammy luck in the parts hunting. I need a sturdy bracket approx 5" long with plates set at 90 degrees both ends, but with an angle so the tyre won't cover the rear lights. Oh, and it would be nice if the bolt holes were exactly right to fit the tyre mount. Rover P6 tow bar from a car I had 15 years ago ? That'll do nicely. I did have to paint it though. Shame. All I have to do is get some 6mm plate and make a plate for the wheel to bolt to. In the best tradition of gluing the wings on your Airfix Hurricane before the paint's dry, I mocked it up just coz I wanted to. And it still works with all that tyre on there. Hopefully get it finished tomorrow and then I can get on with the paint. Or at least the primer.2 points


This leaderboard is set to Auckland/GMT+12:00