
Leaderboard


Popular Content
Showing content with the highest reputation on 04/05/20 in all areas
-
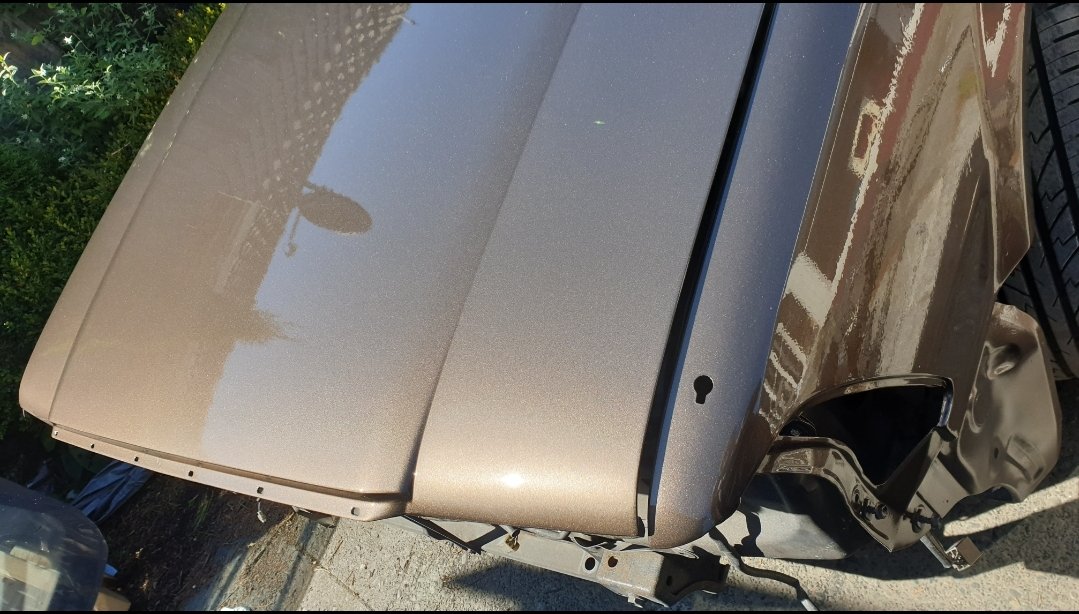
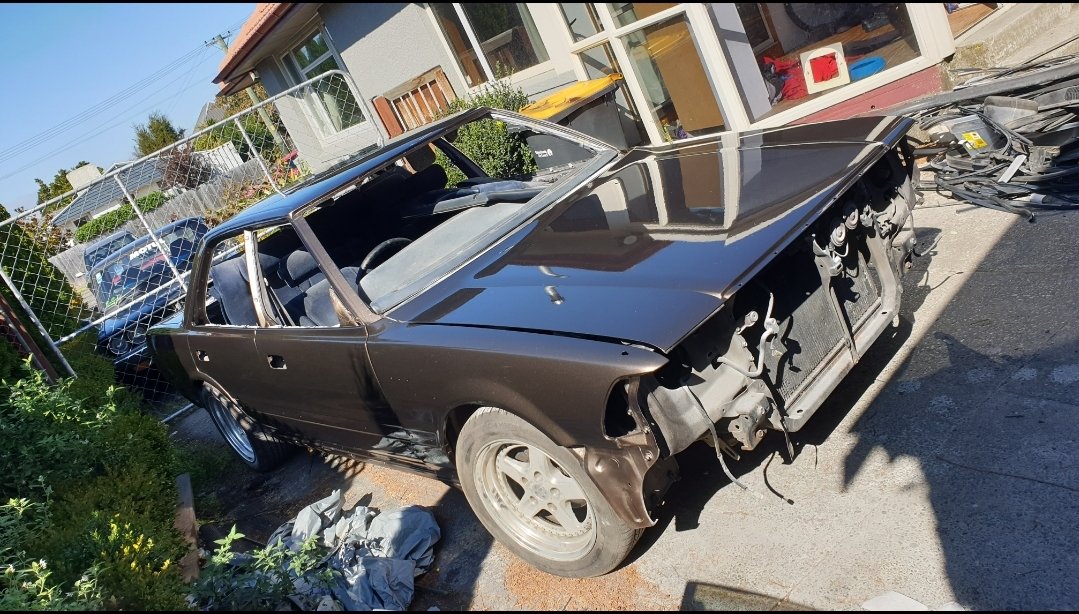
some time later... So much for a new roof being decent. about the time I went to filler prime the roof around a hot day, my spray gun fucked out. Borrowed another and off we went. I primed my mrs enginebay too. then today I see the next few days weather is a bit pooze for this sort of thing so I pushed on and then primed in 2K black primer. I had a spare tin and needed cheering up, hence black. Pretty happy with it, still some repairs to go however17 points
-
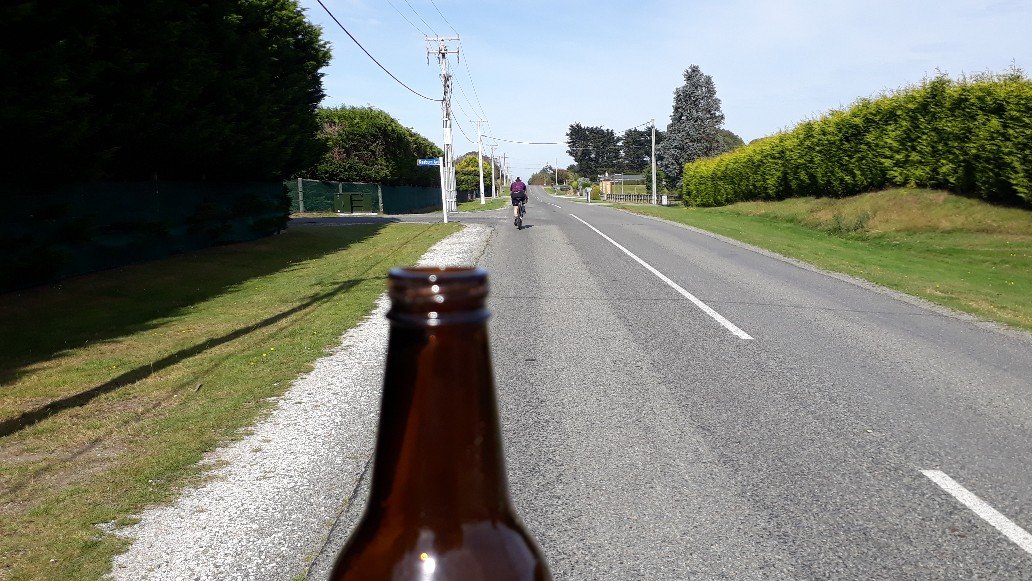
So with controller flipped, I discovered I could get around 30km/h on the flat, and GPS mapping showed this was pretty accurate. I was keen to test endurance so just hooned round the block, a bloody hoot not pedalling. Still have to sort cable routes etc but effectively still in prototype stage... Was hot and I was feeling chuffed, so grabbed a stubbie... Which gave me an idea, a 4km circuit round the block, with some gentle hills, almost the perfect distance to chop a stubbie each lap, game on... So merrily hooned around, passing lycra cyclists, waving to kids and tipping my stubbie to dads working in their yards, grabbing a fresh one each lap. (daughter was taking these pics)... Then suffered a puncture the furthest I could get from home (rear is dead flat). Think I felt it happen on a fast corner I was attempting to take at full noise, knee down style... So endurance test canned, but bloody happy how it went. Exceeded my estimates, going for over an hour at full noise with very little pedalling. Although time is misleading as it doesn't account for stubbie pit-stops (7). But over 30kms is bloody brilliant. Measured voltage after walk home and was 33.3V. Think controller cuts out at 30... So still have a bit to do (brakes, gears, sort cables etc) but it met my calculated speed and distance expectations, and got a lot of smiles from people I passed (although they may have been chuckling at the happy looking Barry day-drinking on his contraption). Wife even had a go... So a bit to fettle, and I still have the bonus 48V motor I was sent in error, plus I bought a spot welder so can make up a more compact battery for the next one.14 points
-
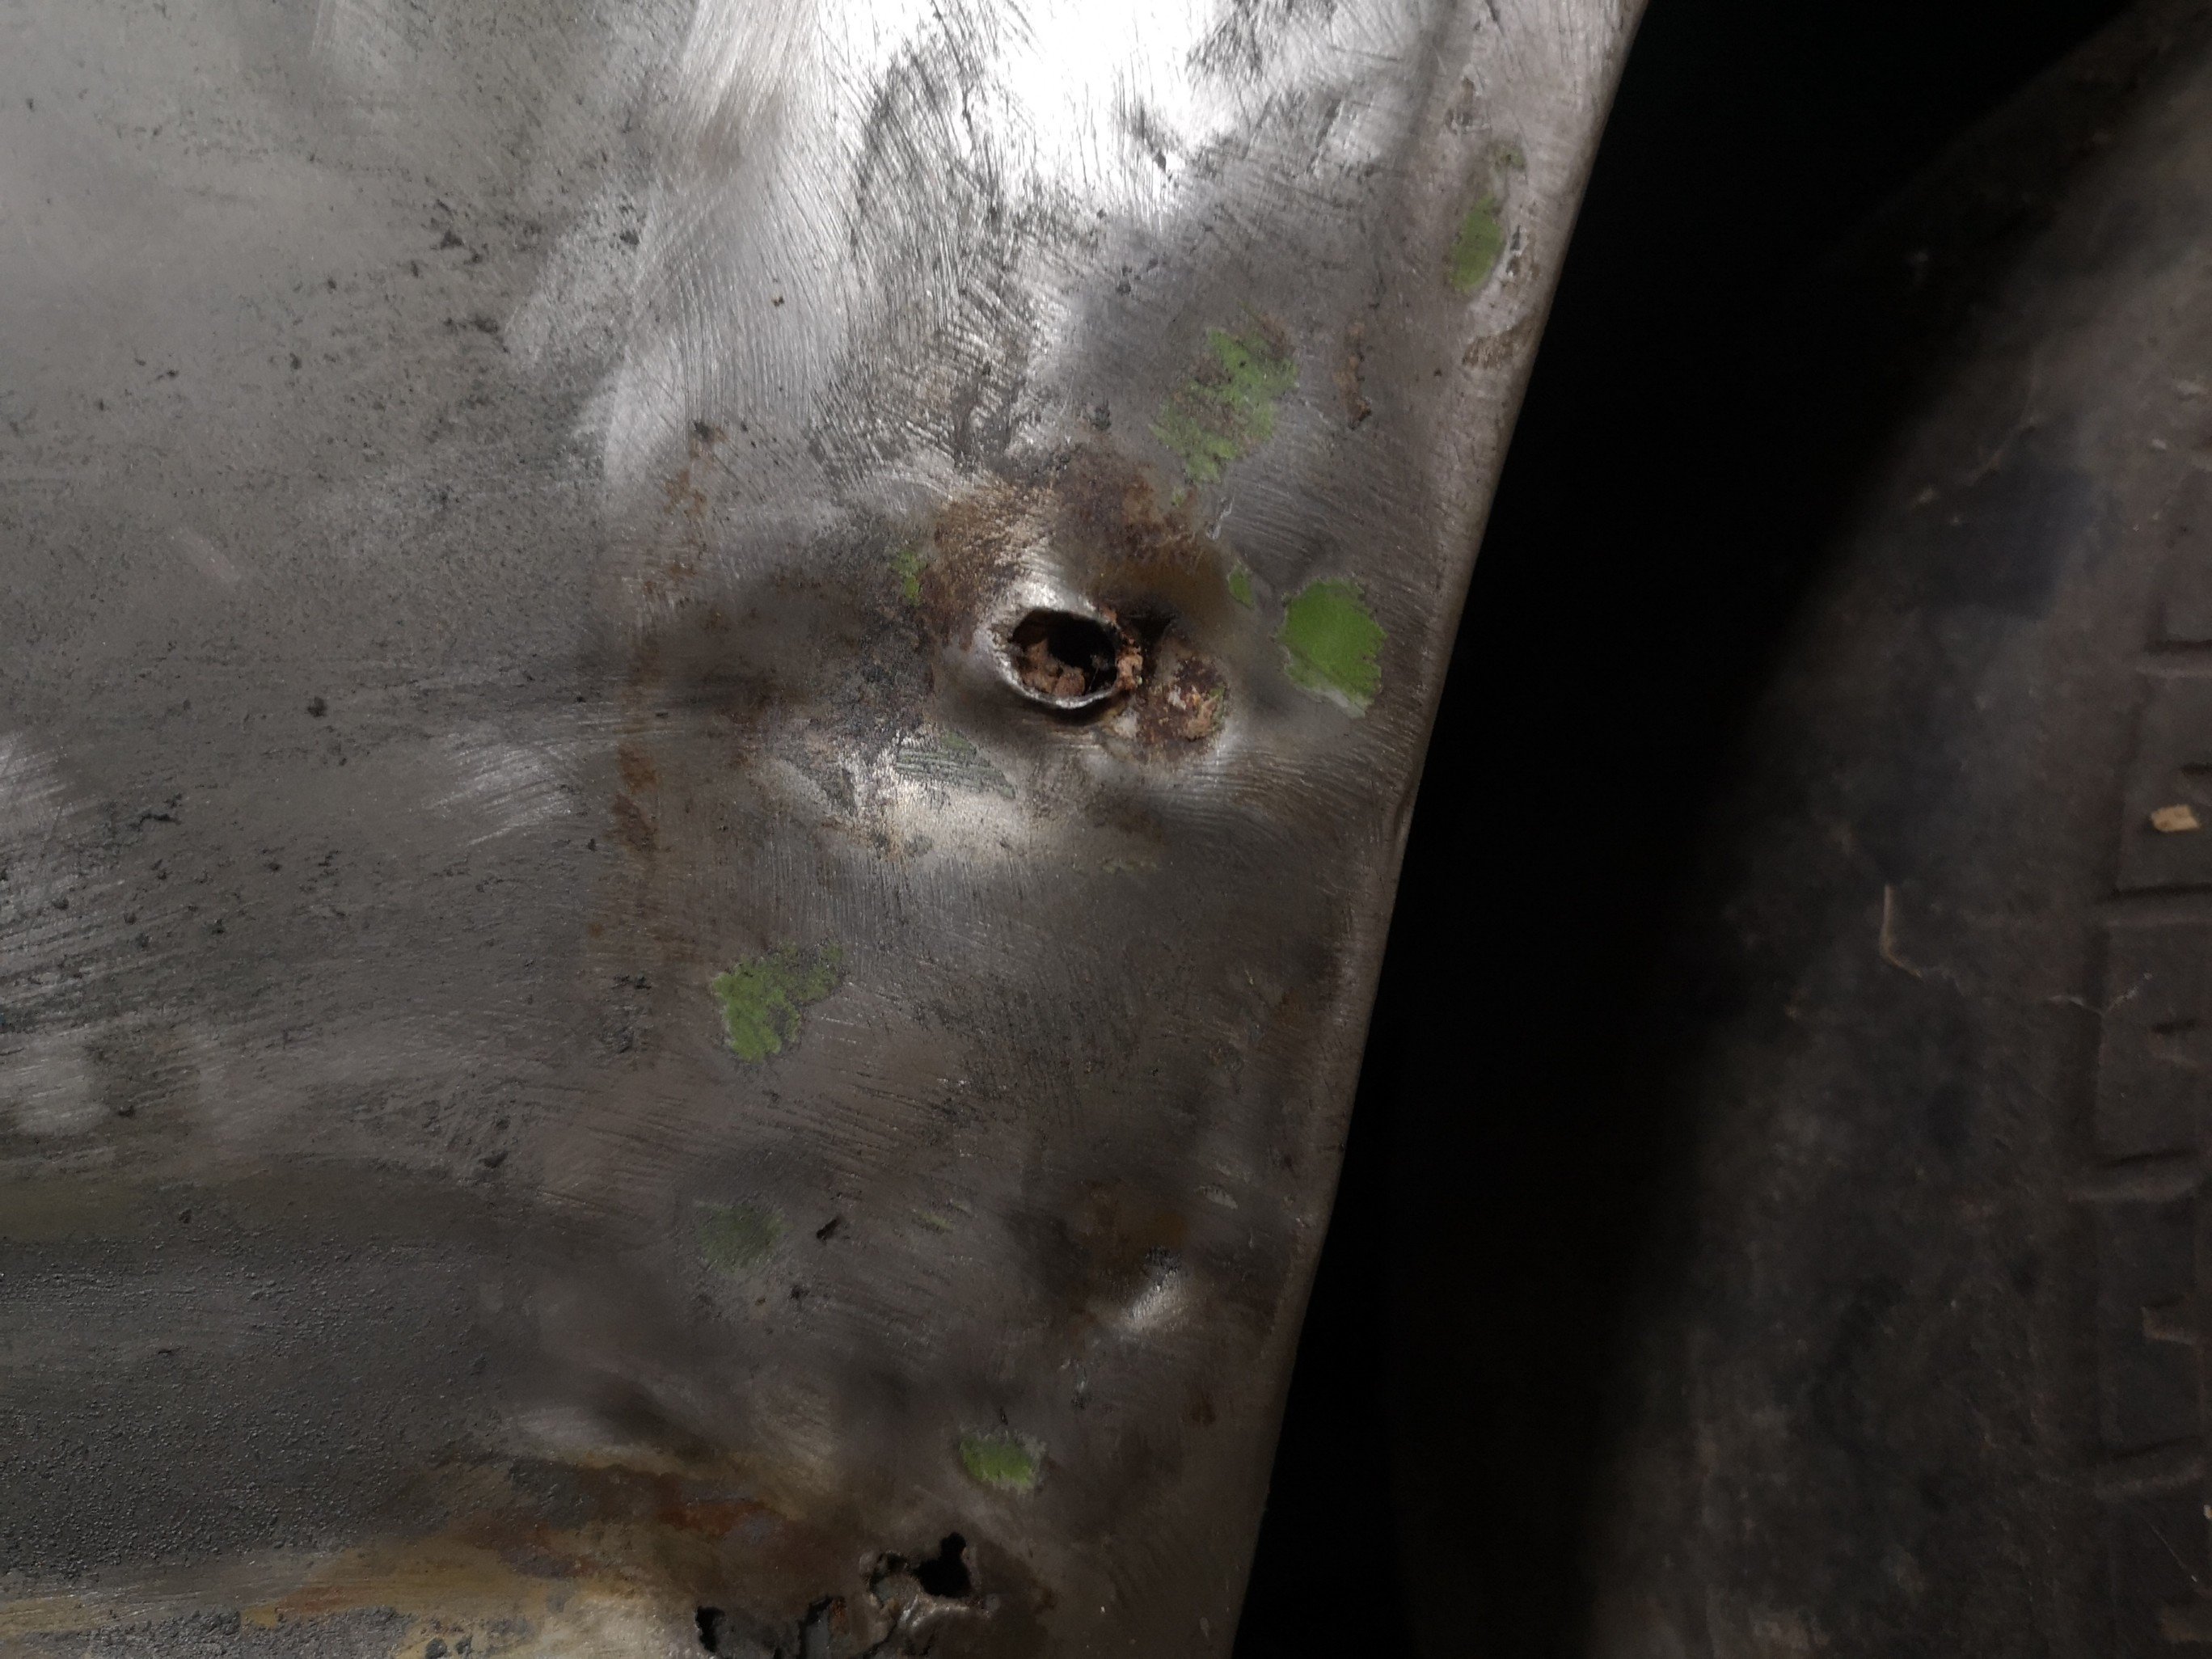
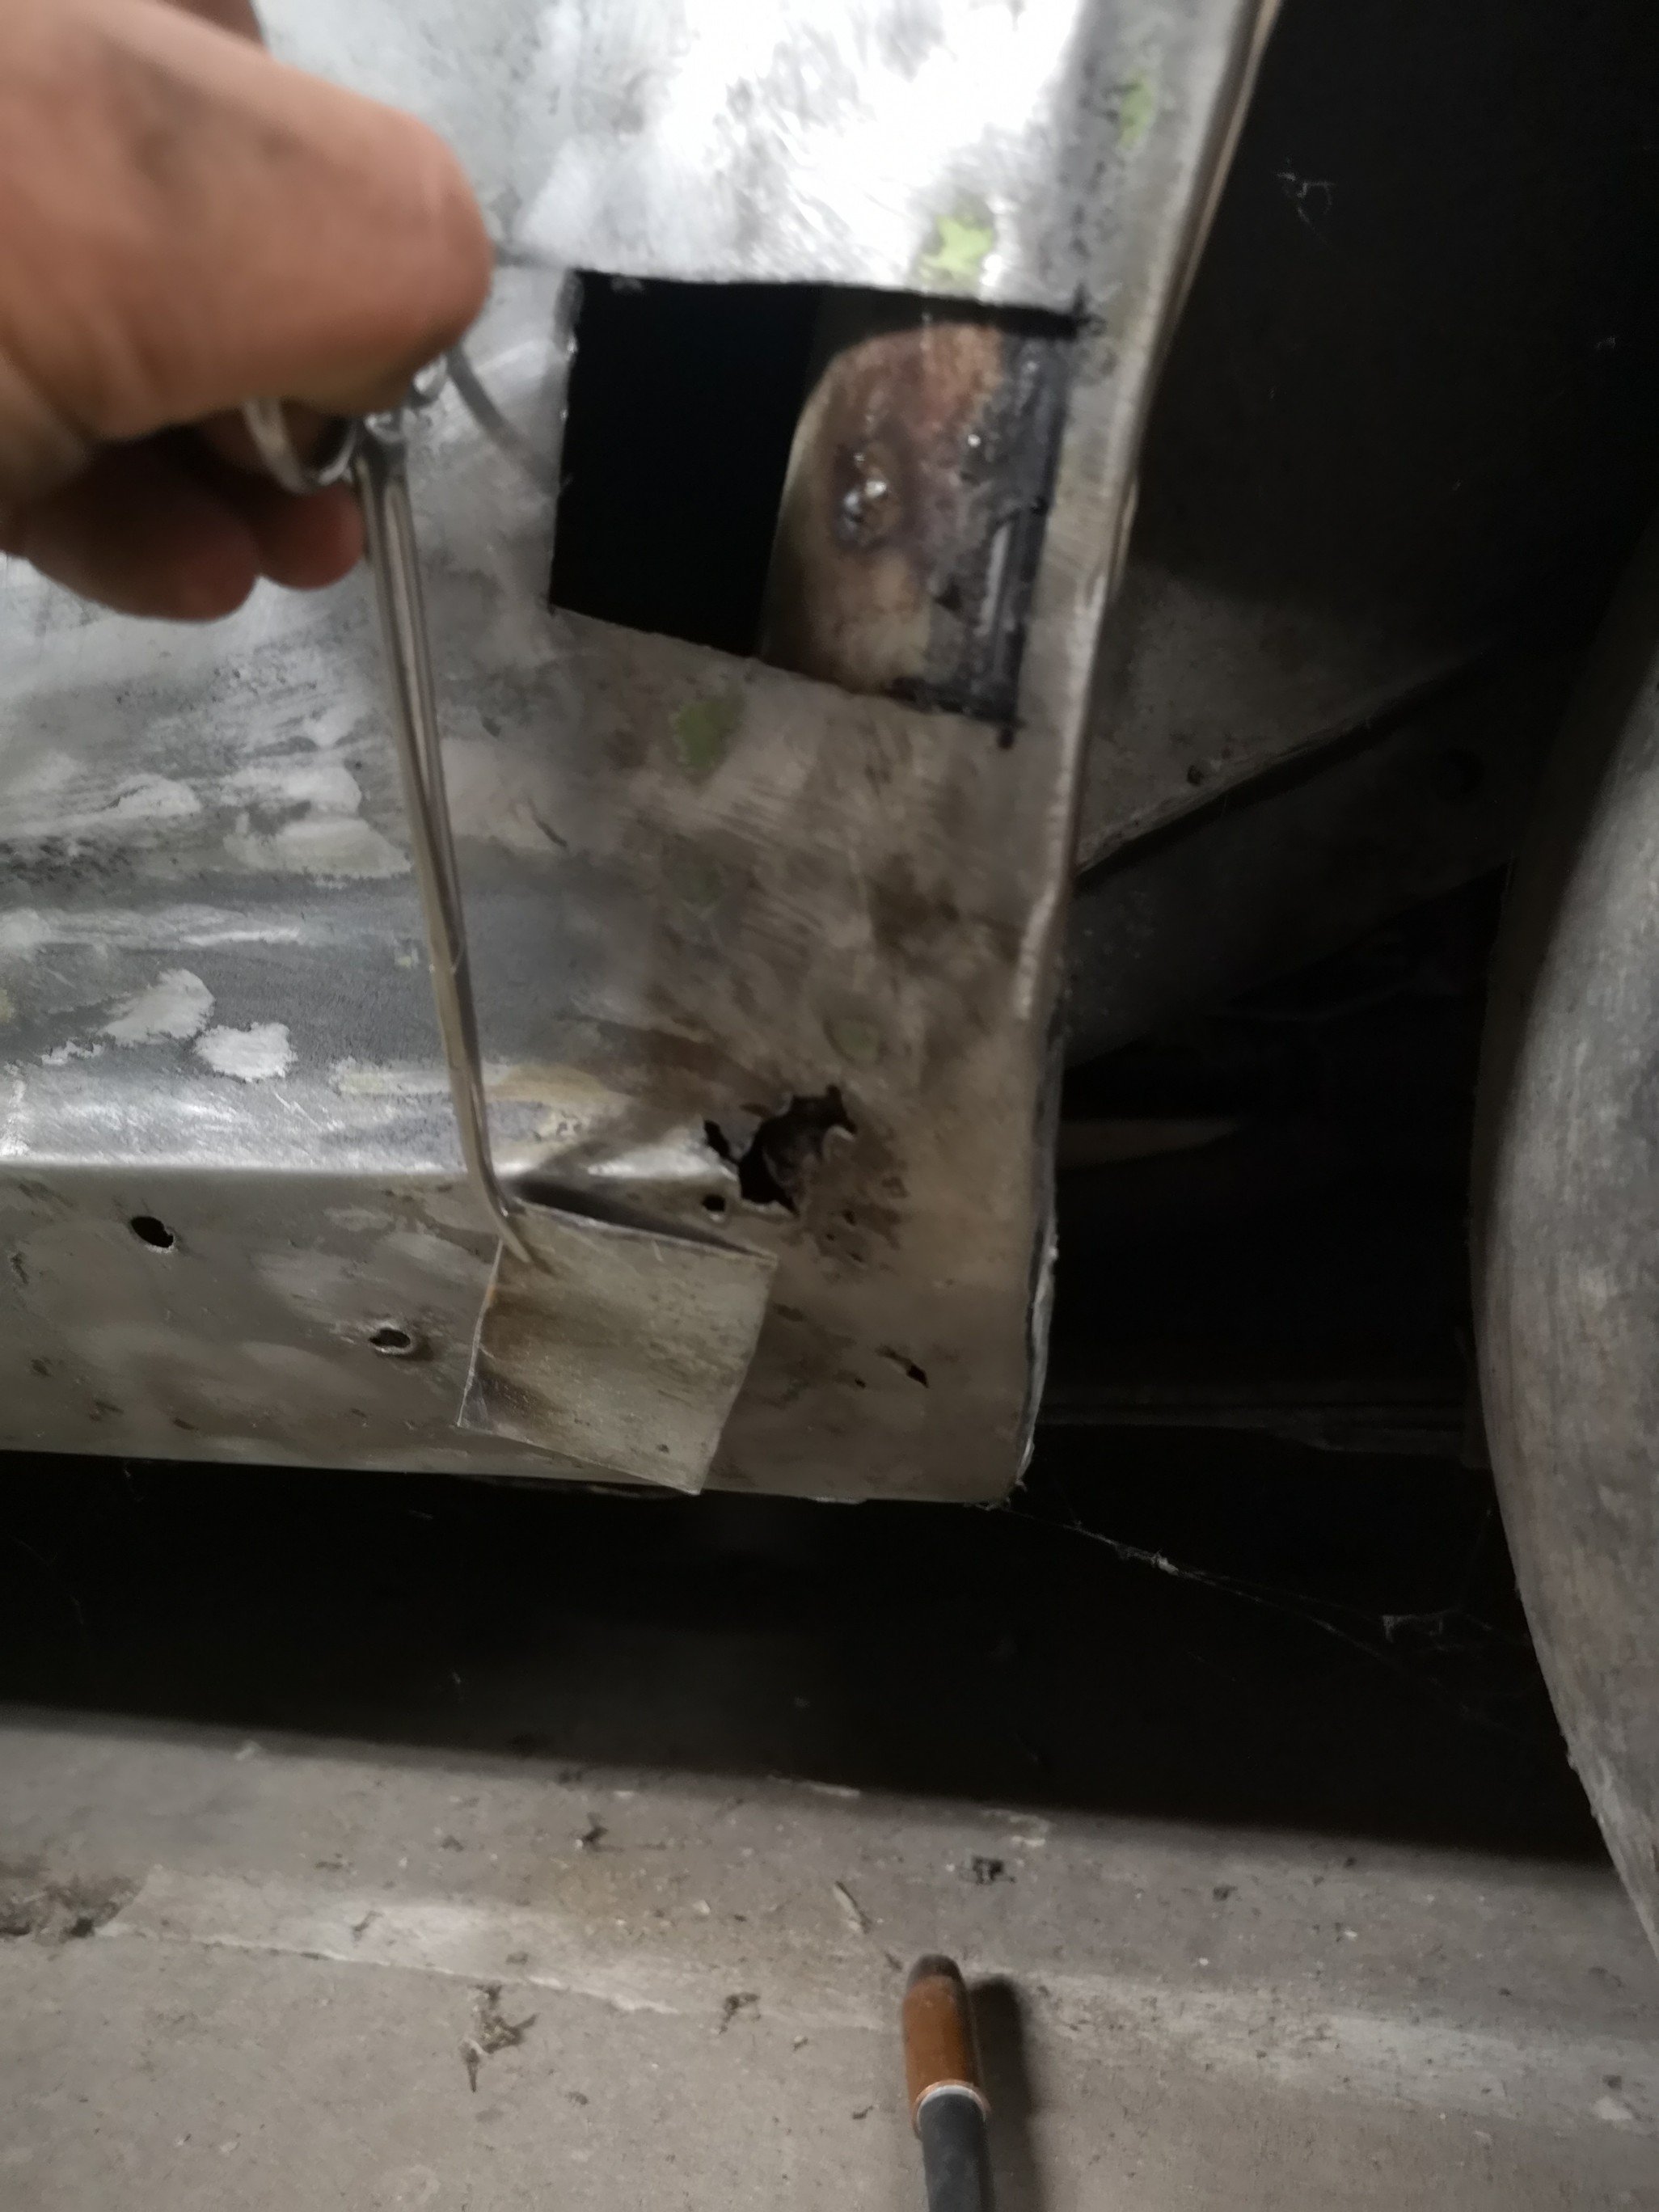
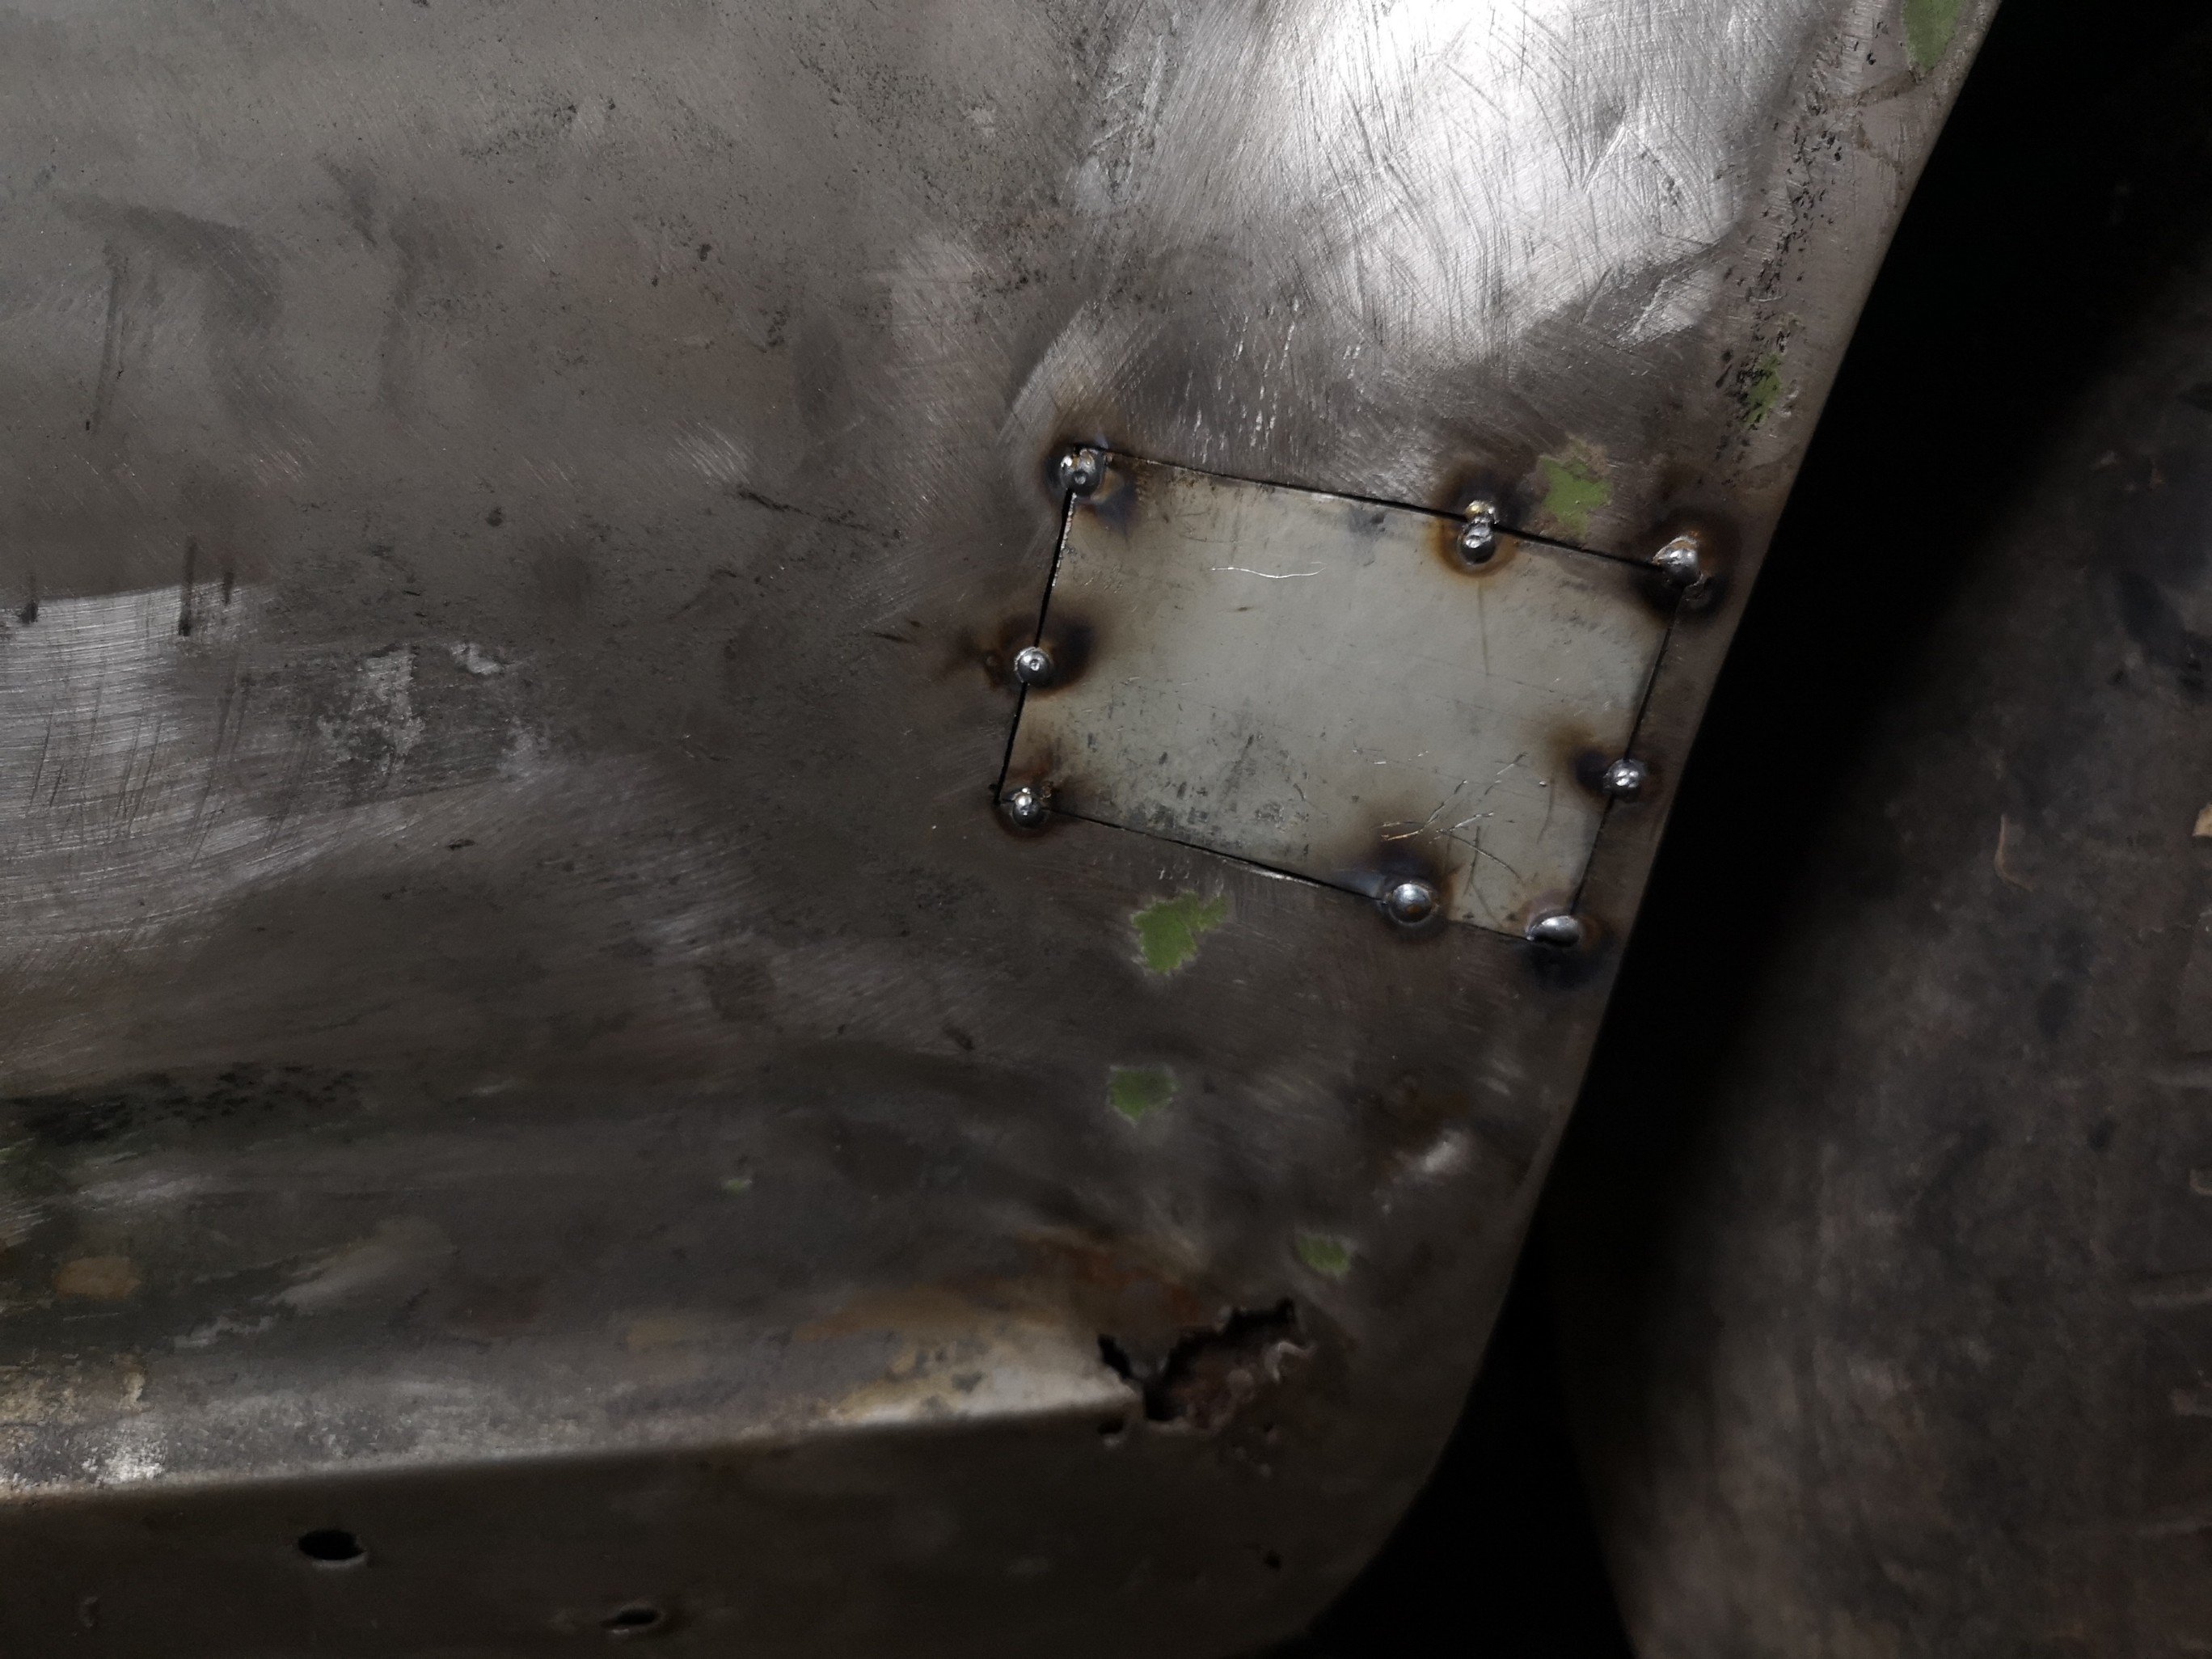
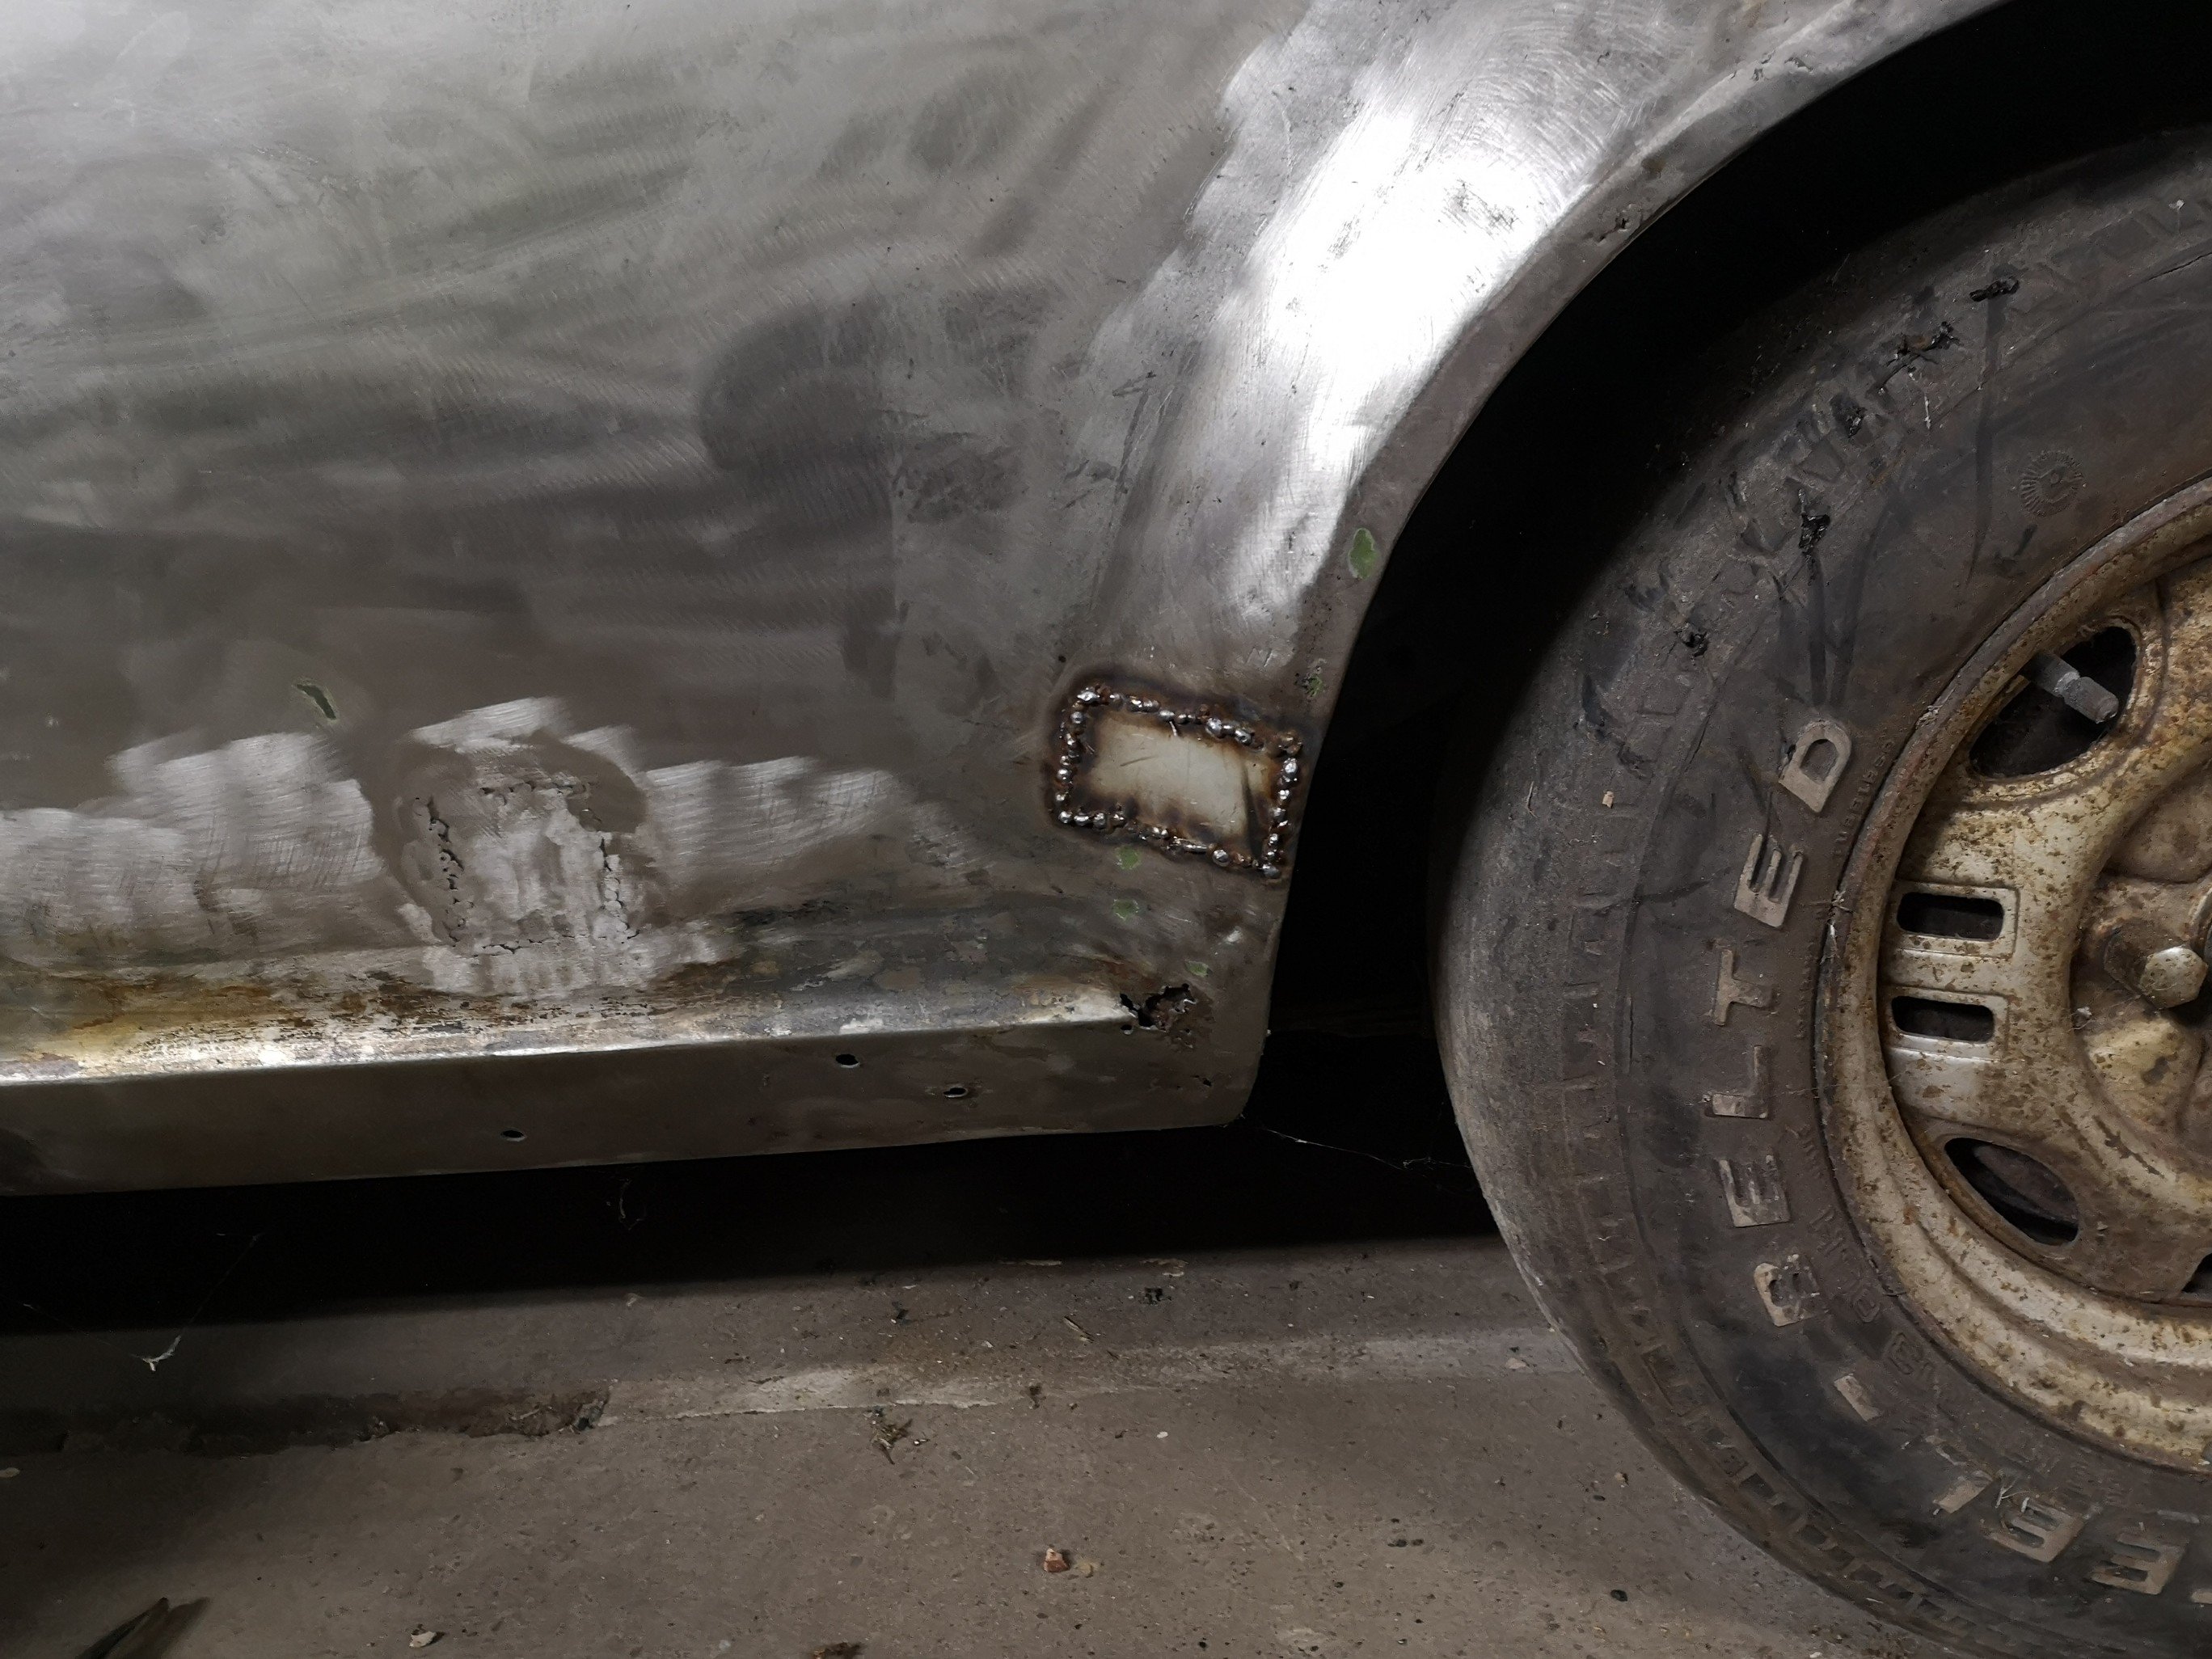
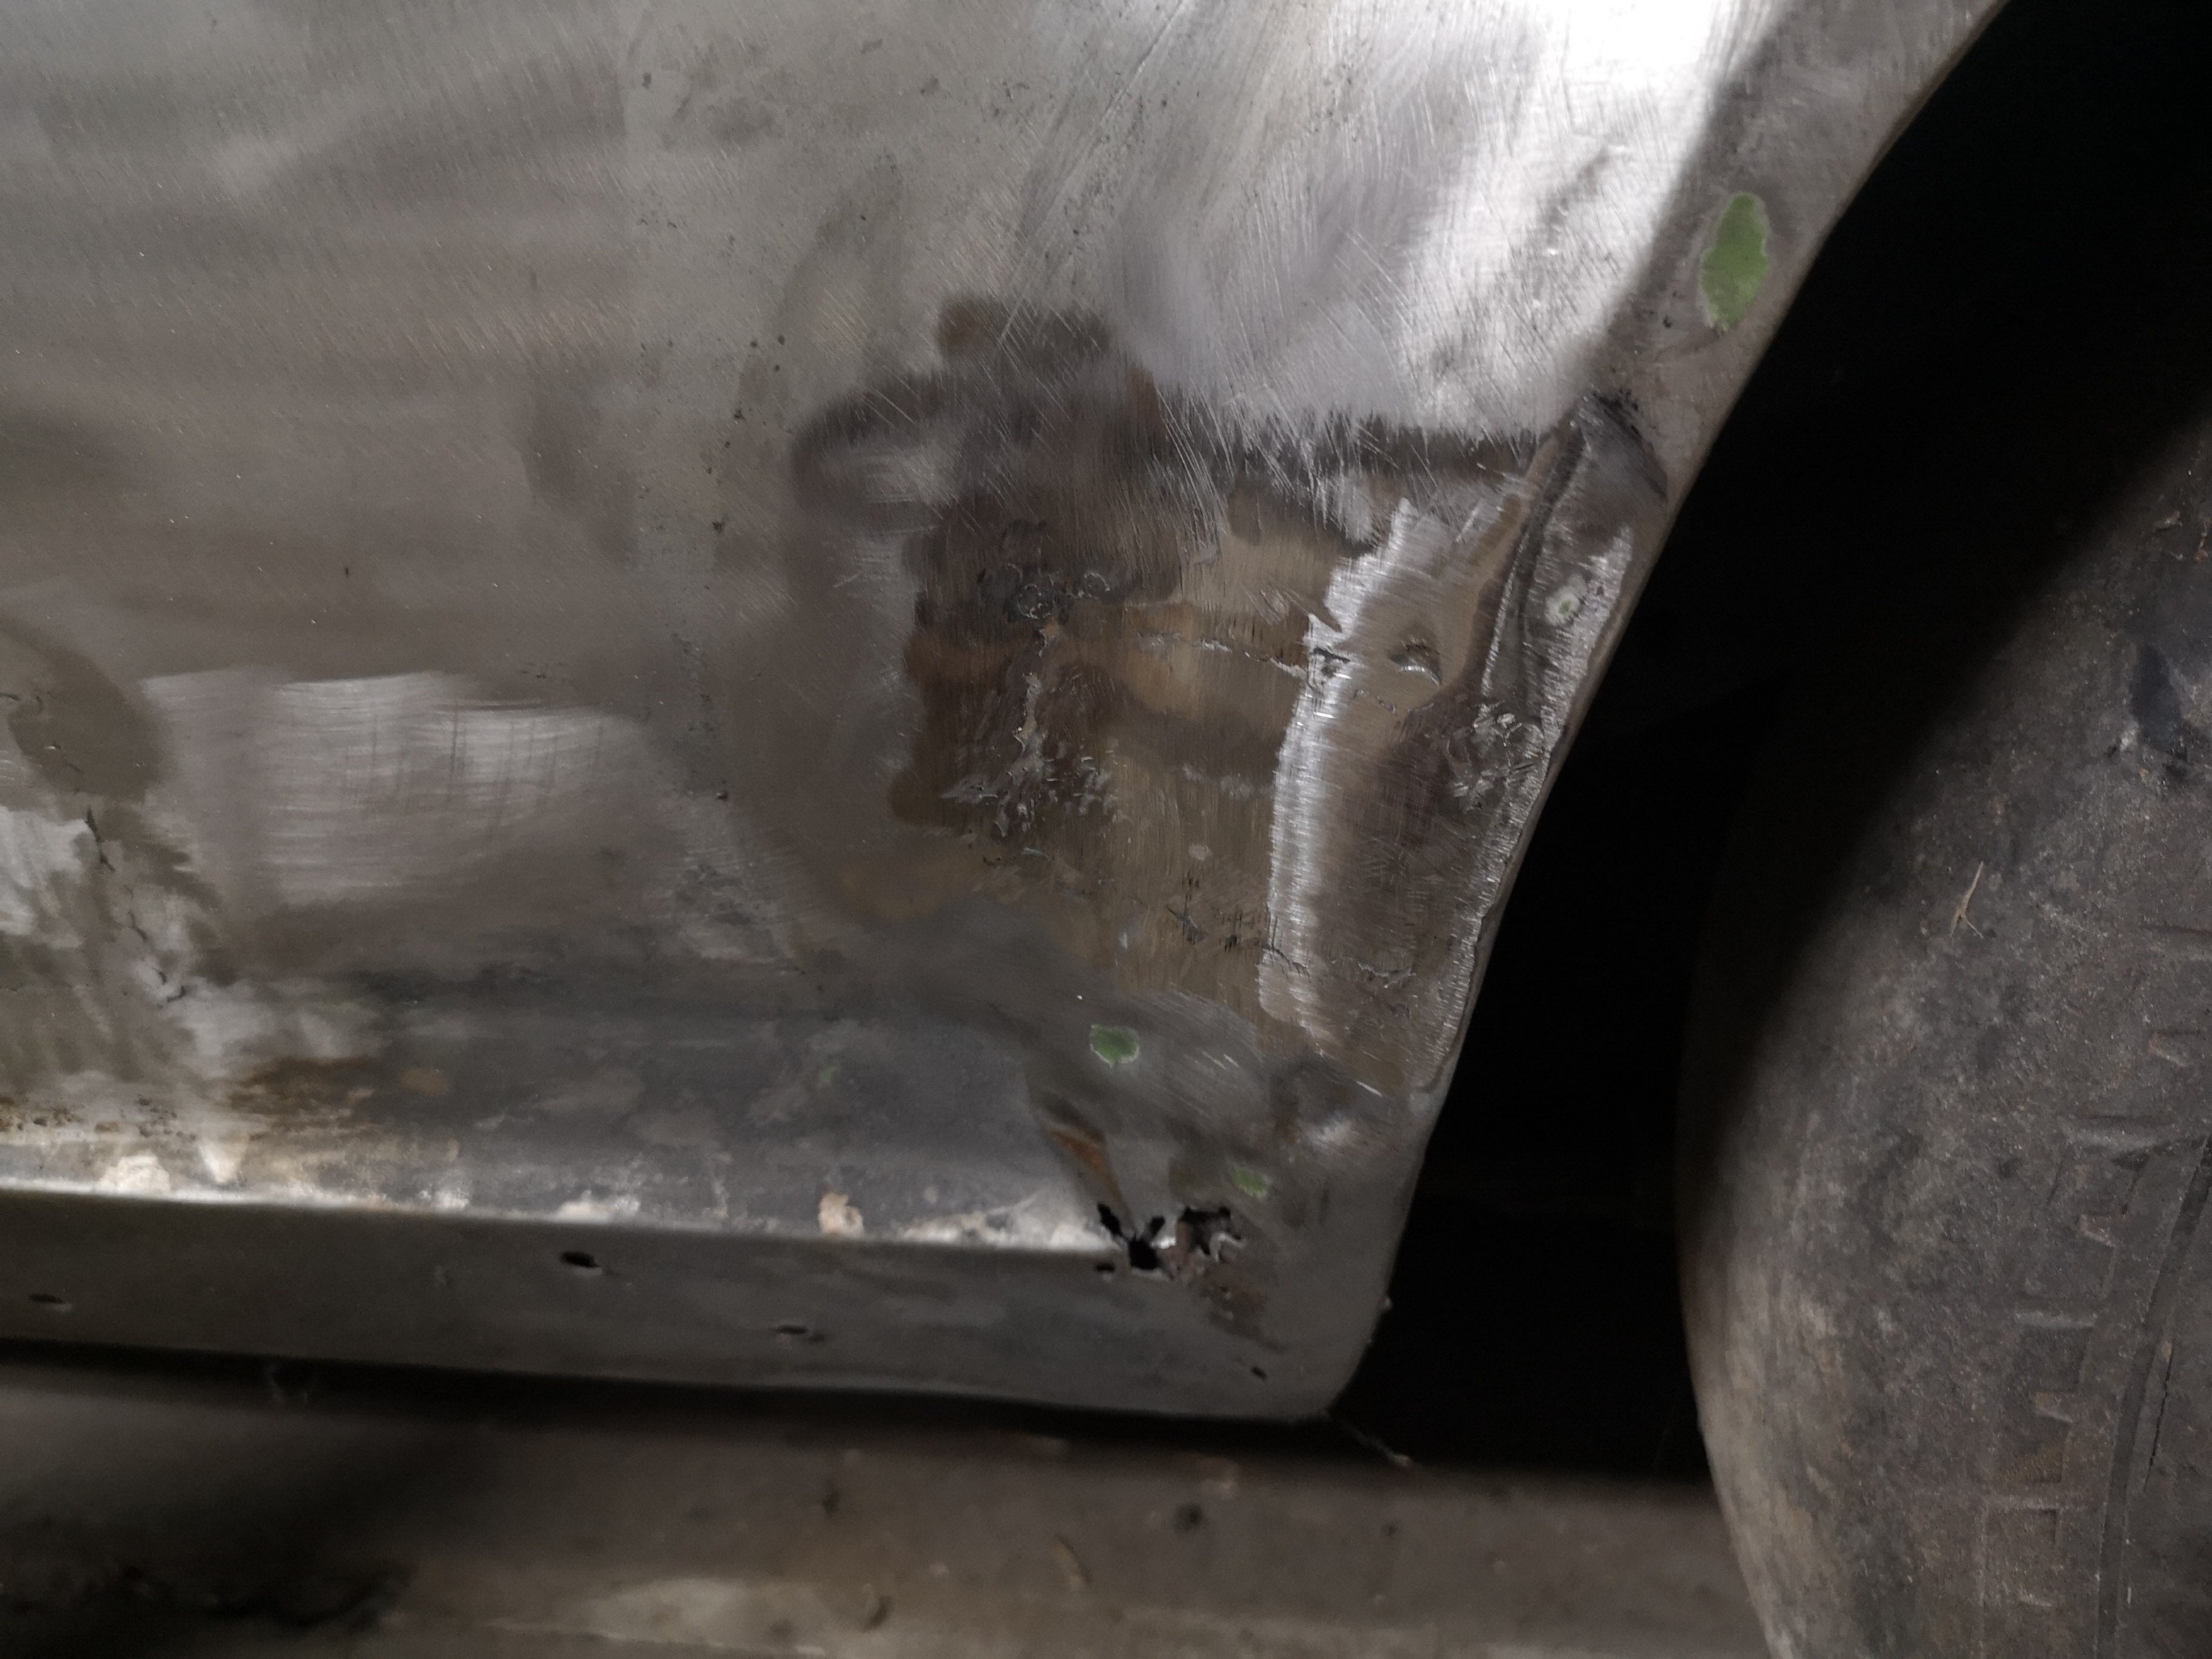
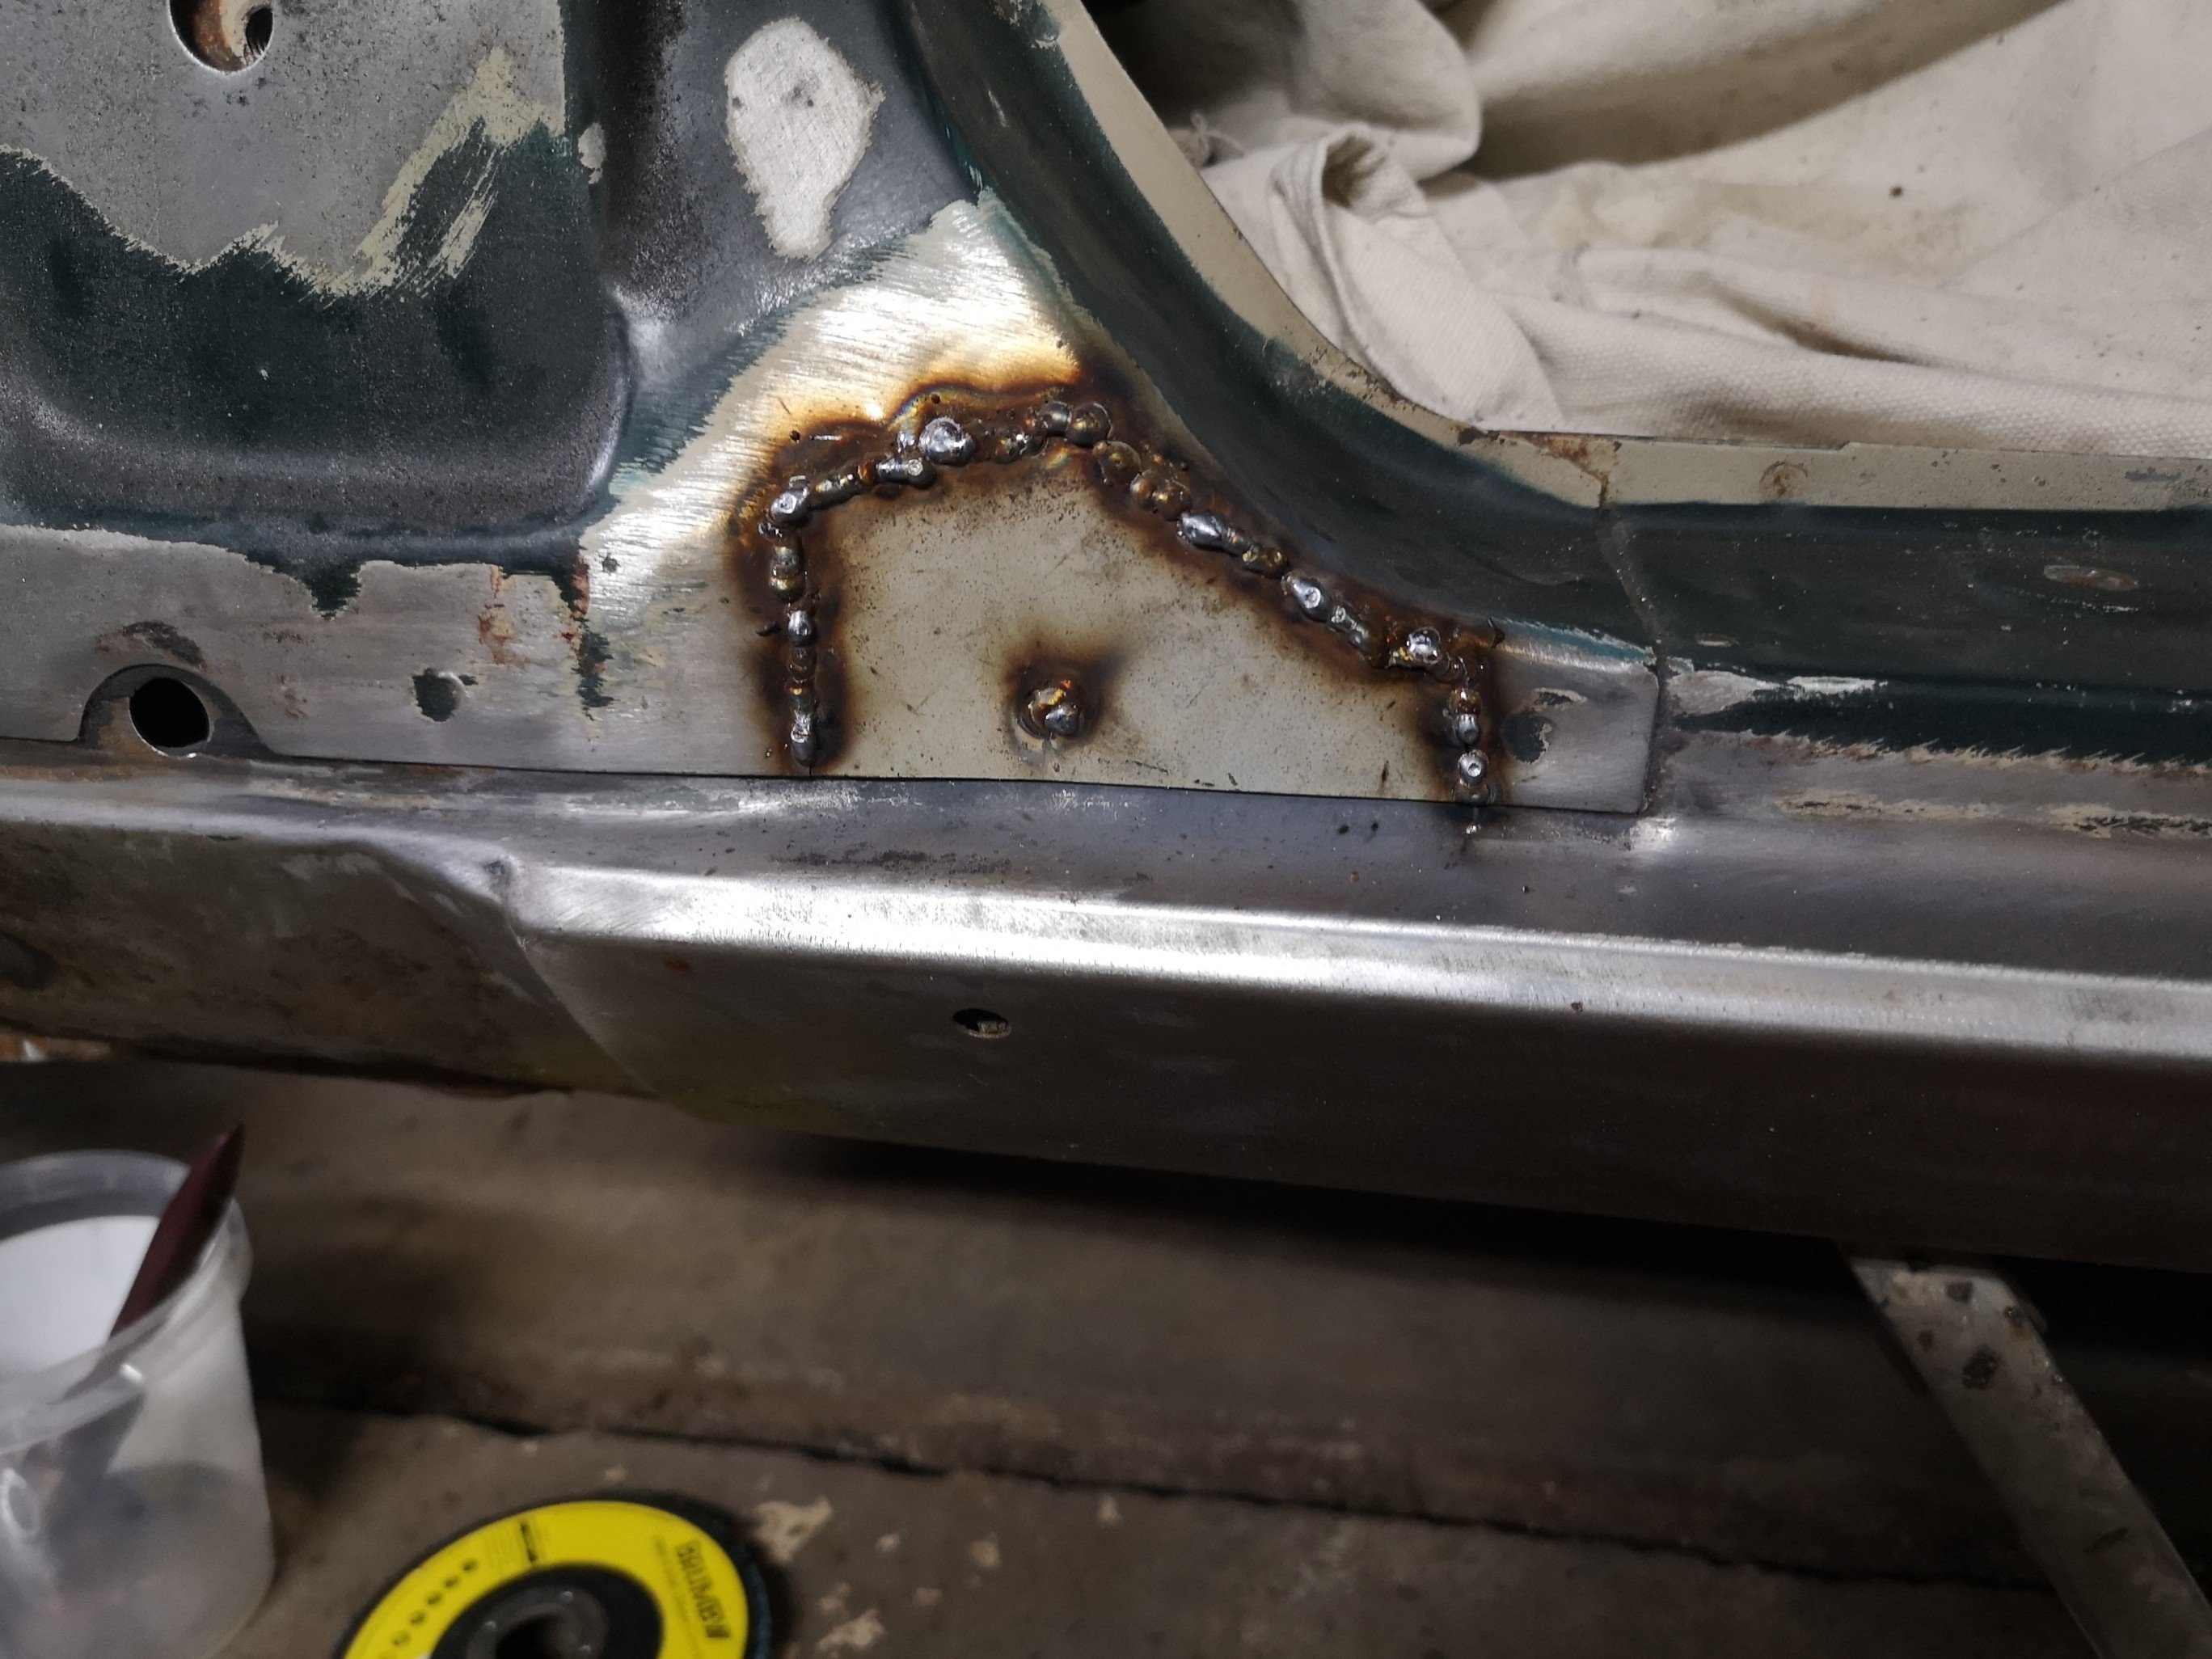
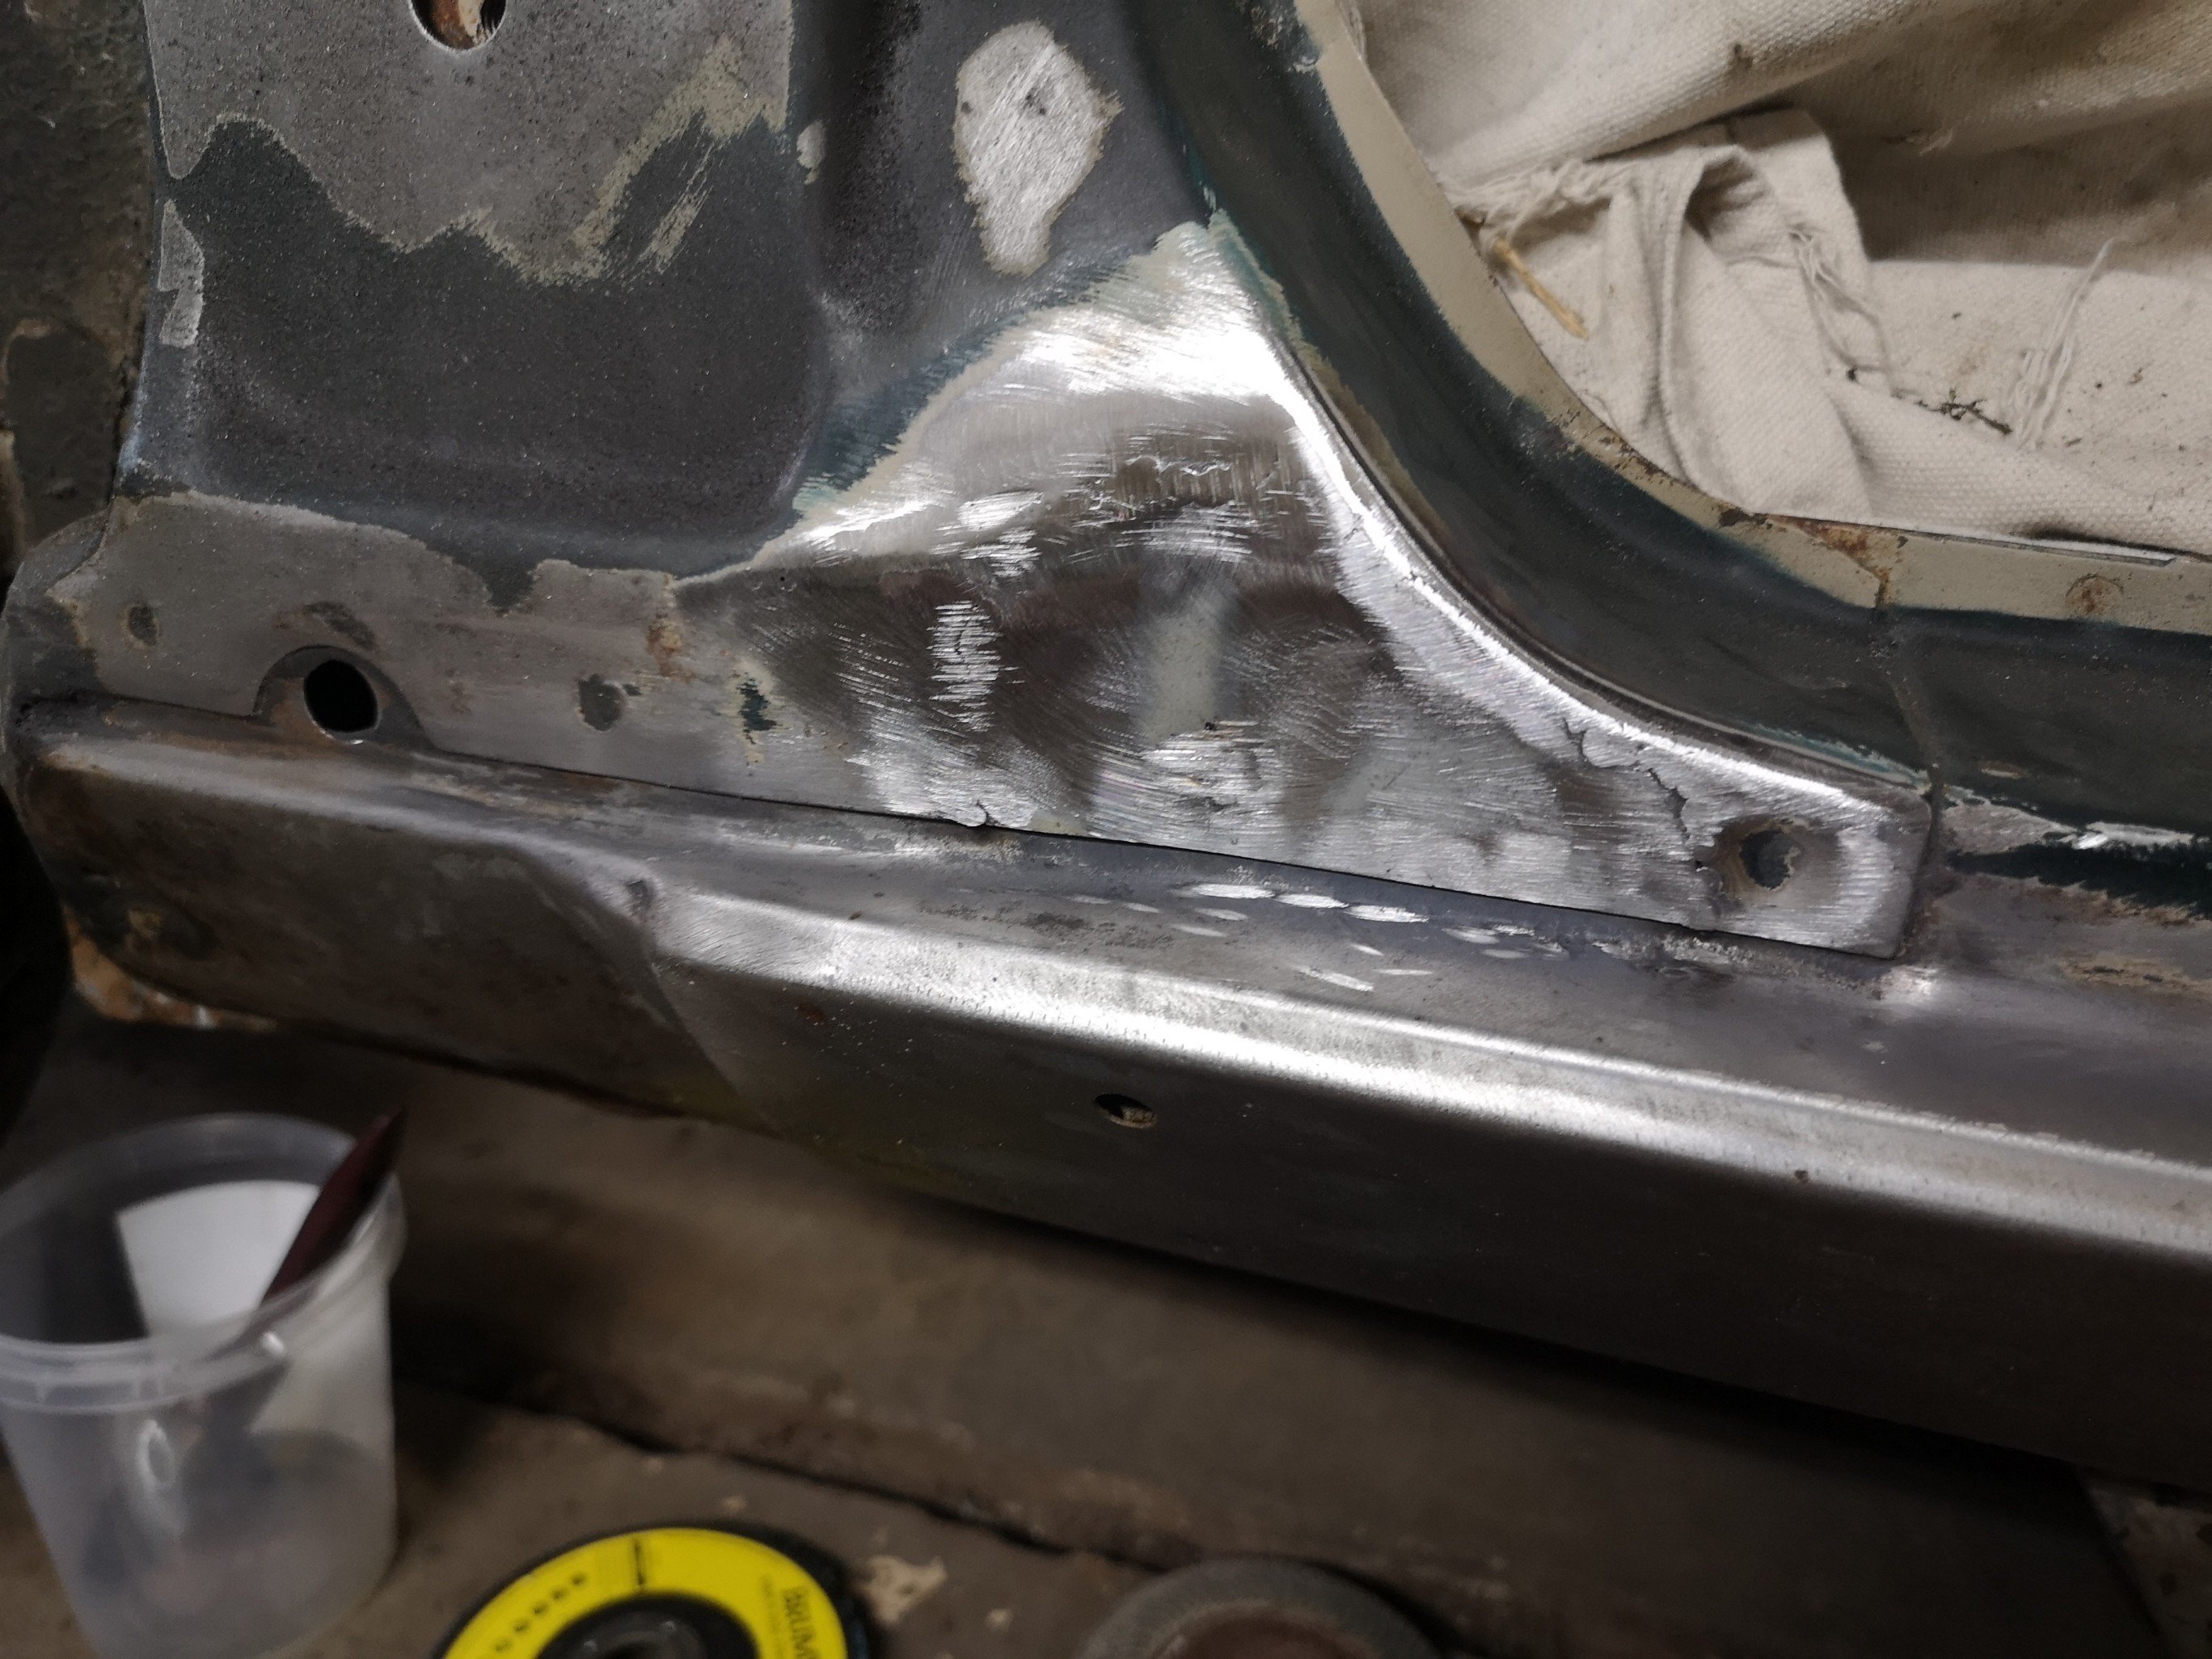
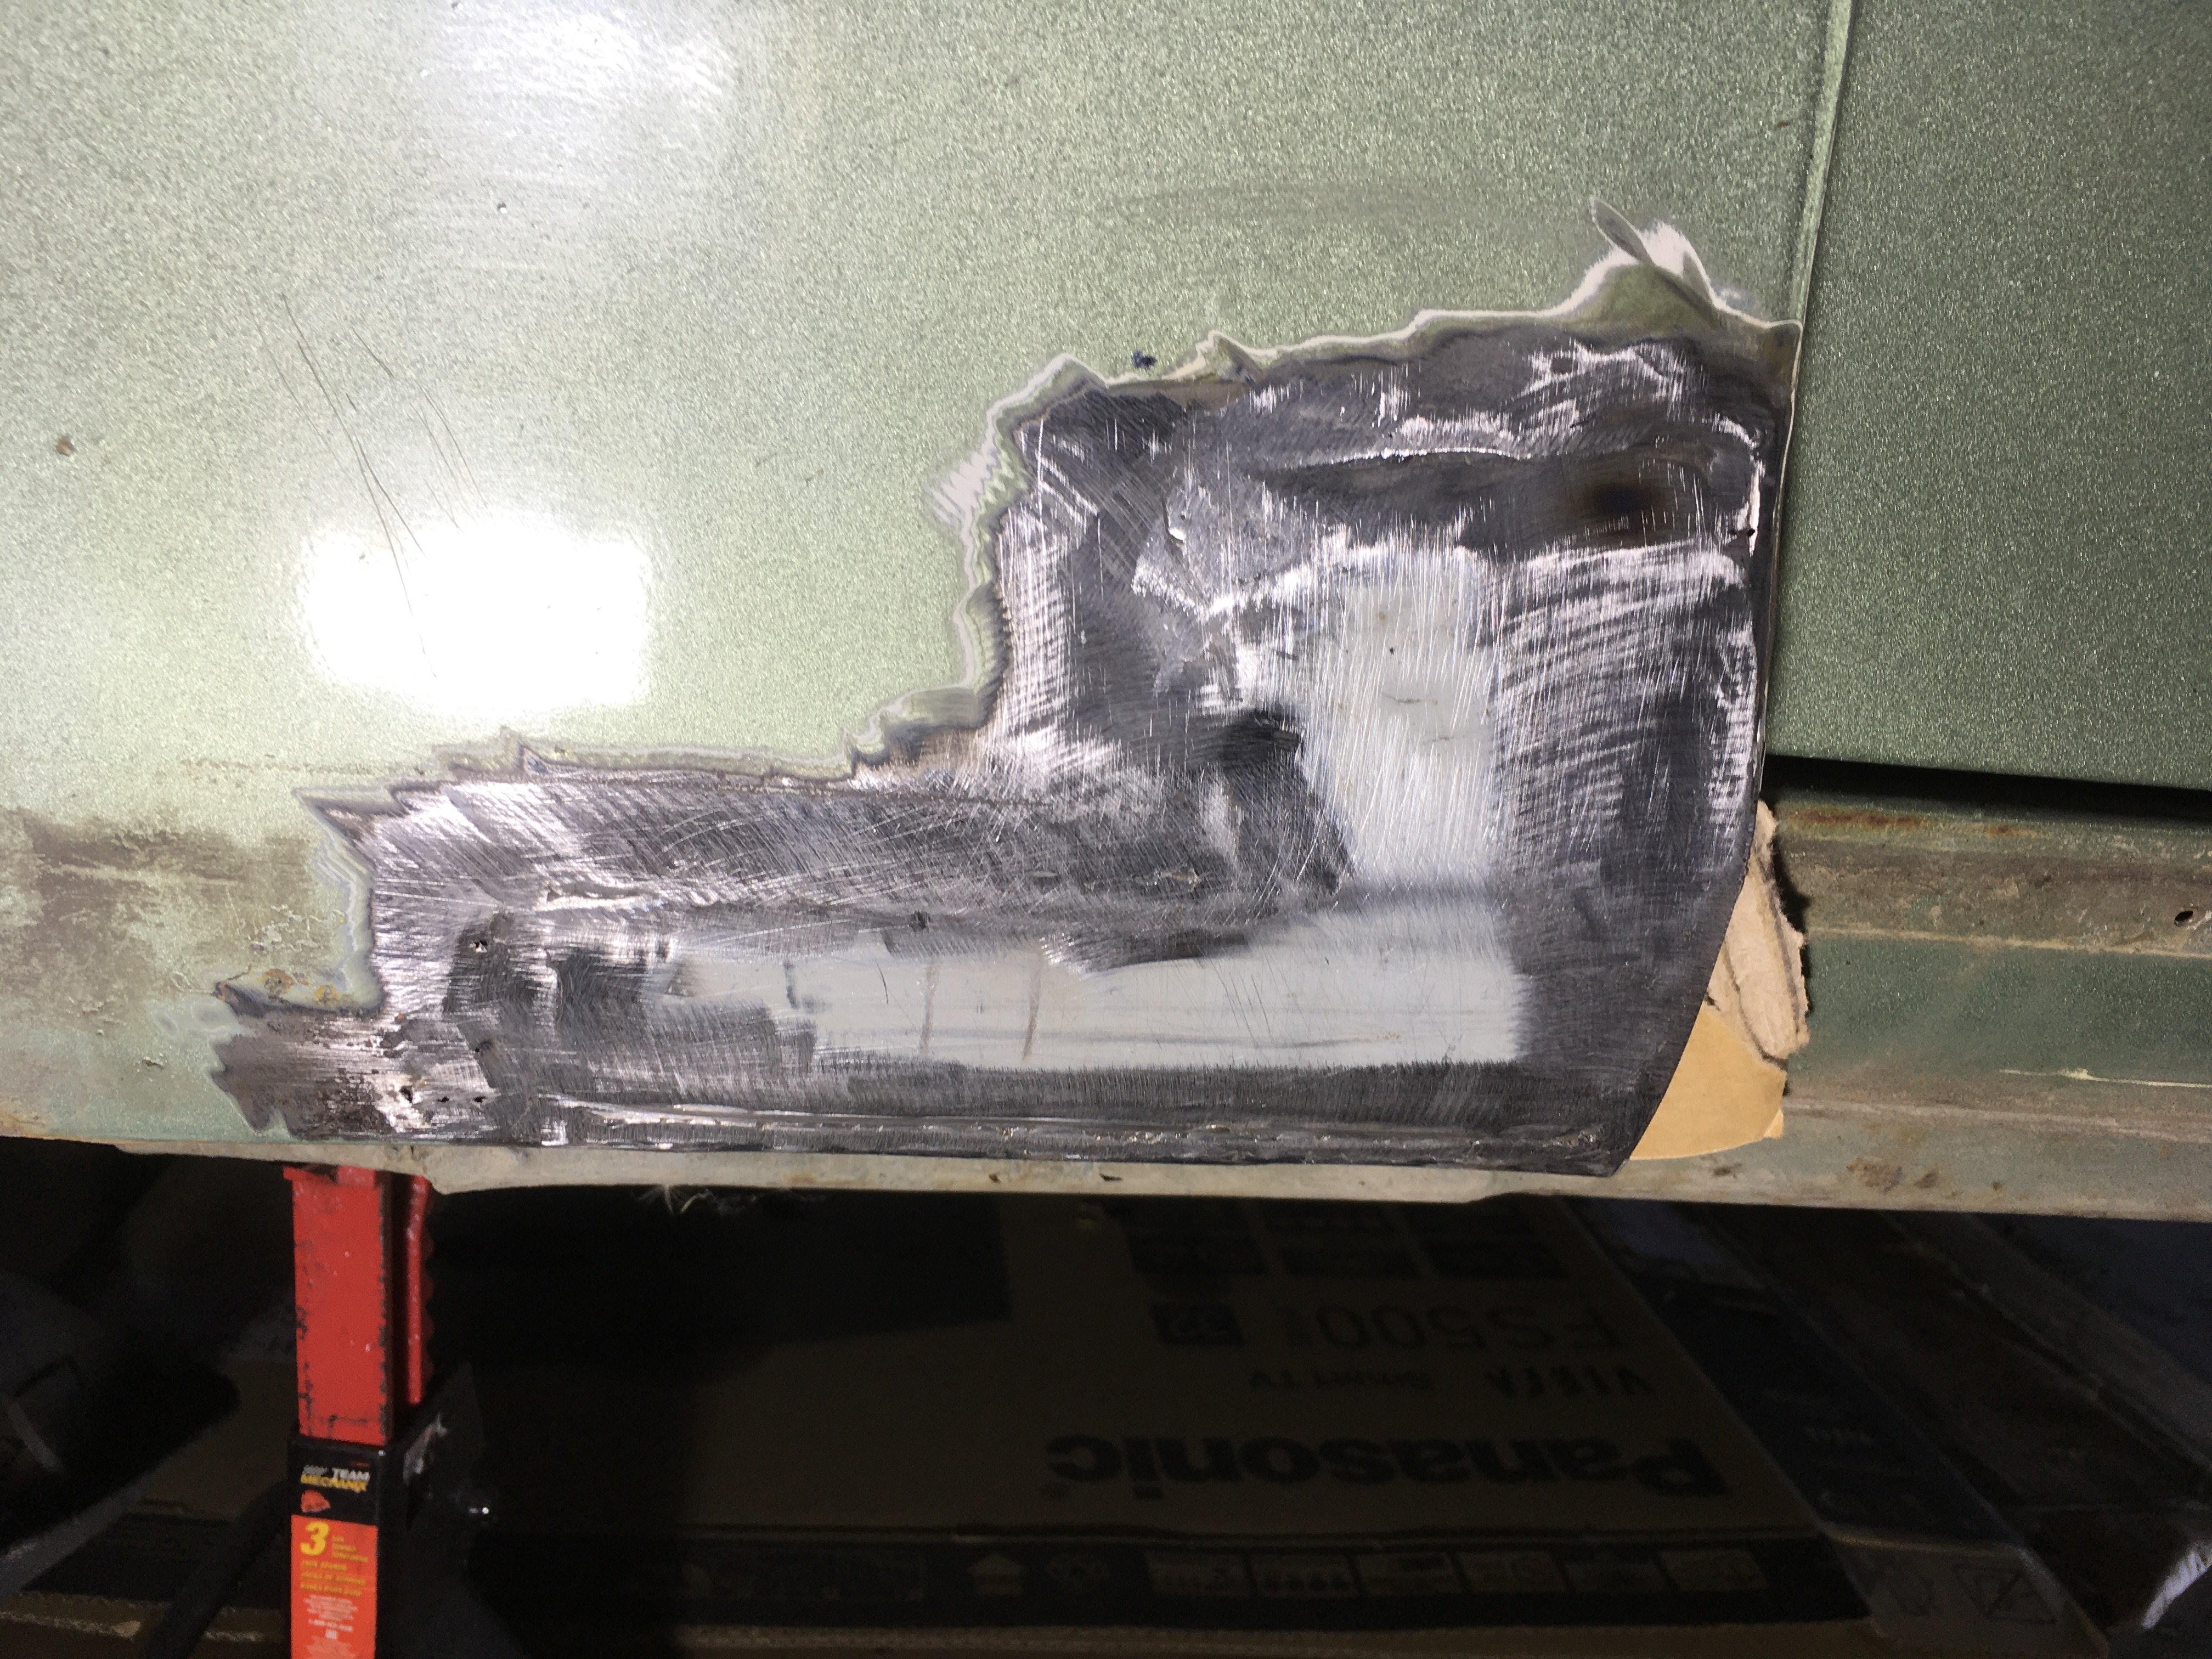
Second was the first of a couple I need to do on the shit passenger rear 1/4, Ding coupled with a shit hole for holding the trim, they screwed right through to the tub on the other side so I plugged up that hole too, Had a small delay whilst test fitting the patch and dropped it through down into the sill about here, Took me fucken ages to try and get it out, thank god for dad's veterinary tools Not to fussed about these repairs, my panel work isn't good enough to replace the arch as needed so I'll just settle for getting rid of the rust and shit bits for now/ever.
 13 points
 -
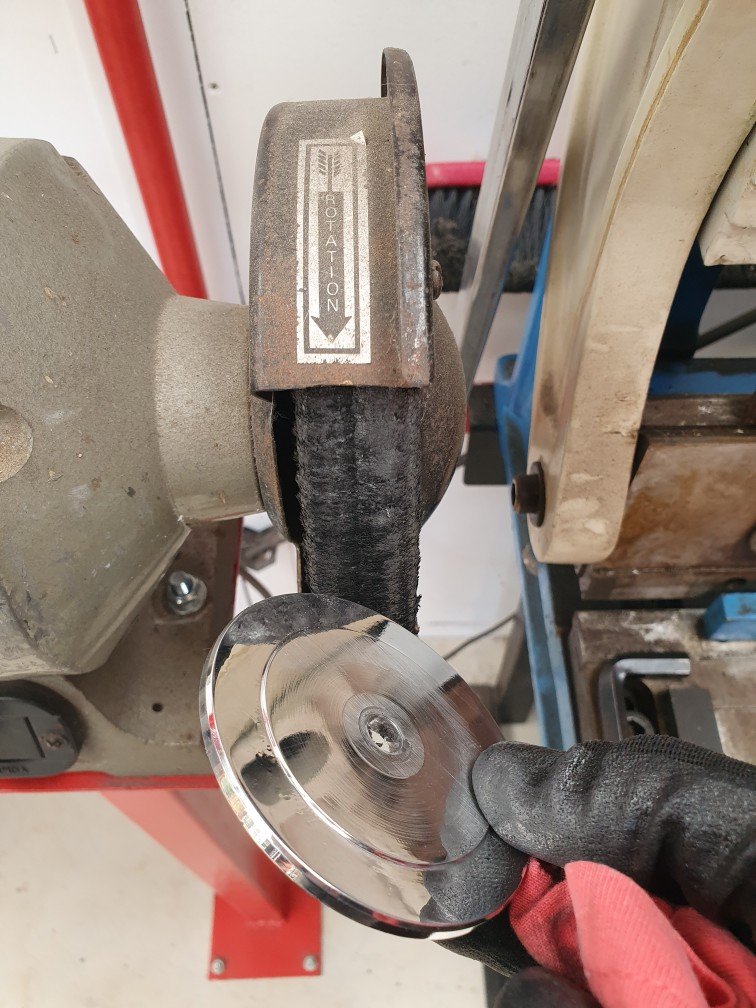
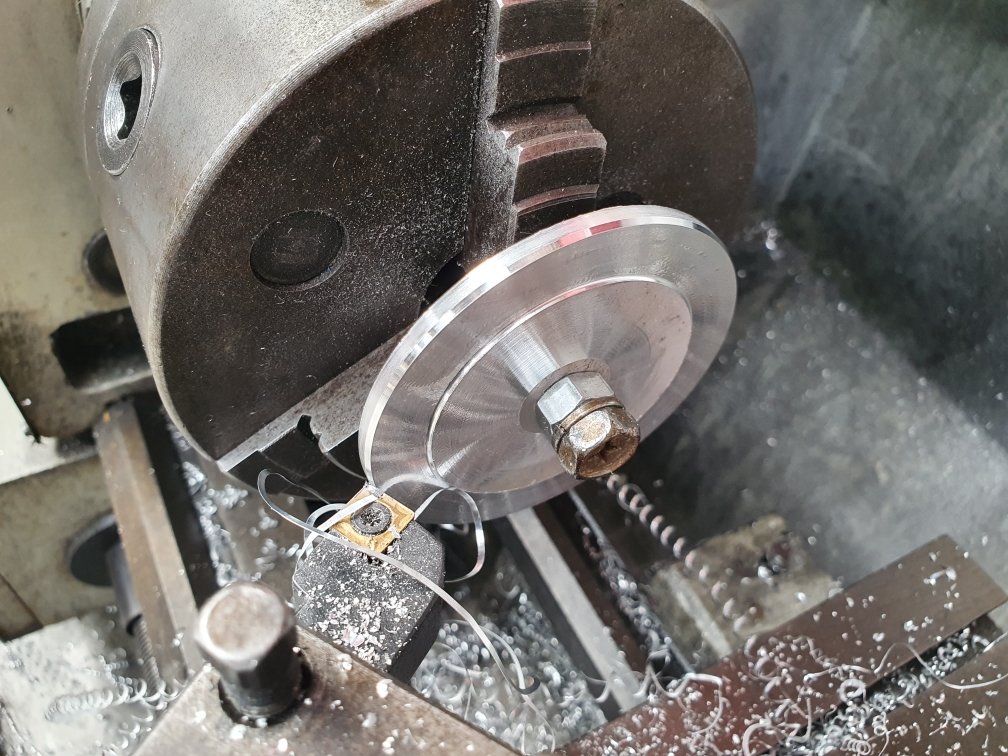
I have this coffee mug from 1944. It is the only one I use due to its perfection of size, finish and history. Like a twat I dropped in in the sink and it has developed a crack; So today I decided to make a double skinned stainless one that will be difficult to break; I started with so 80mm pipe, put it in the lathe and applied some heat, this allowed me to flare the top edge a bit; Then I got so into it I forgot to take anymore pics like a legend, so this is the finished result. It appears to work ok. I should probably find some better pipe sizes and do it again later but better. The outer skin I had to make from some sheet and the butt joint is skanky. But it'll do for now... Edit; coffee doesn't leak out and it stays warm. It also weighs really quite a lot.12 points
-
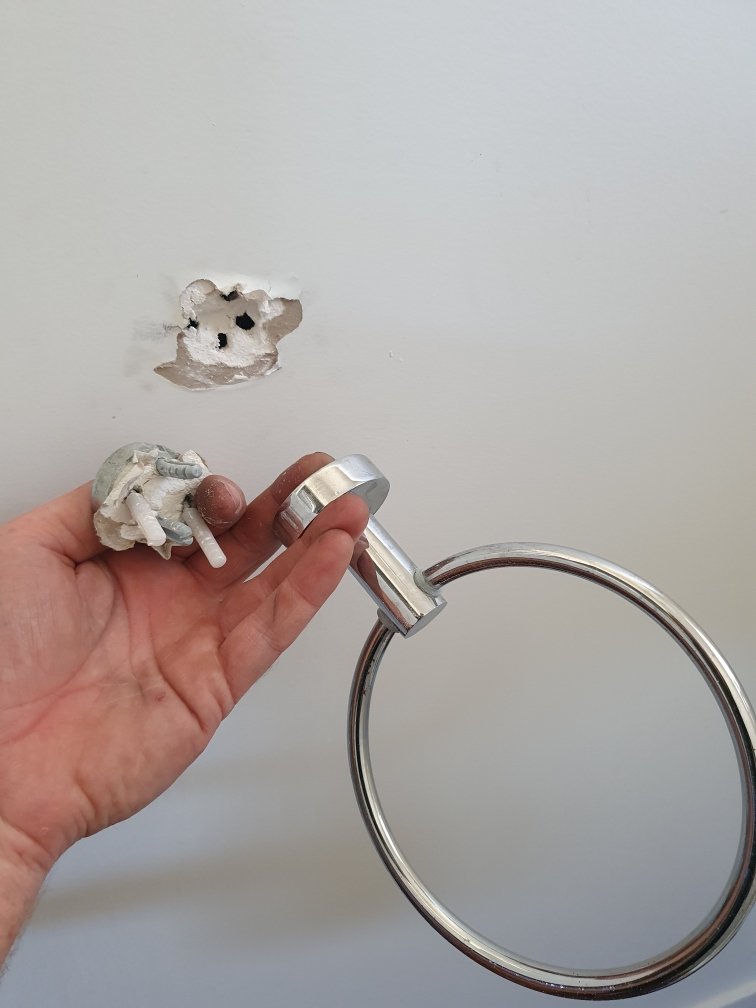
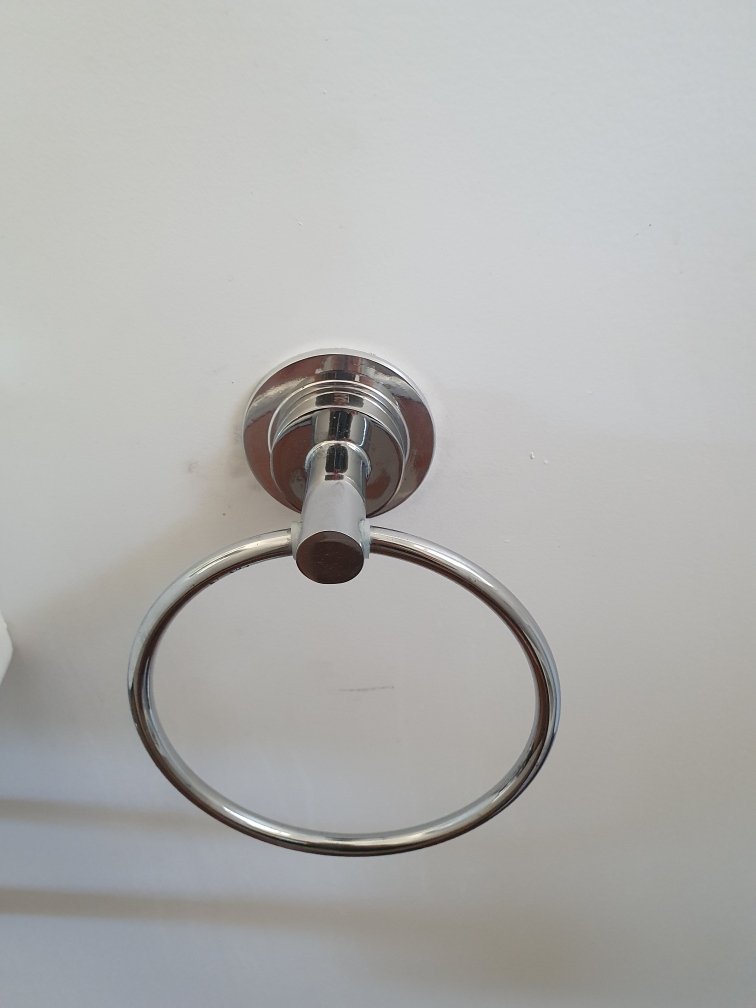
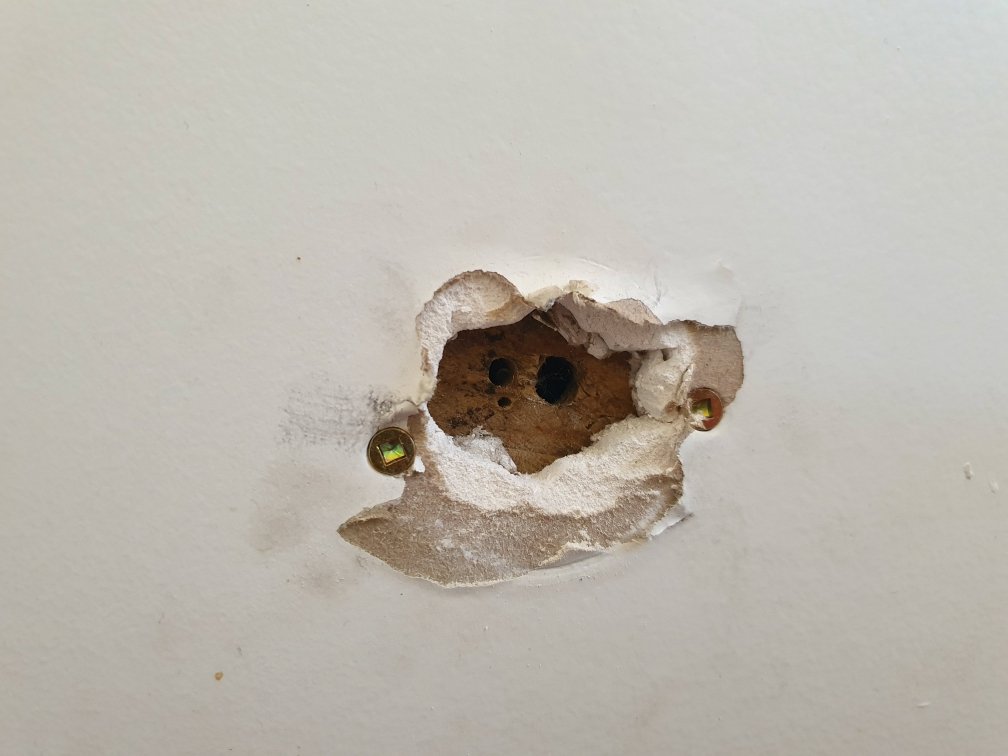
Anyone with kids will appreciate that half your life is spent cleaning or fixing the path of destruction they leave in their wake. Apparently the towel holder isn't rated for climbing on...go figure eh!!! Nothing some serious over engineering can't fix though. And finally
10 points
-
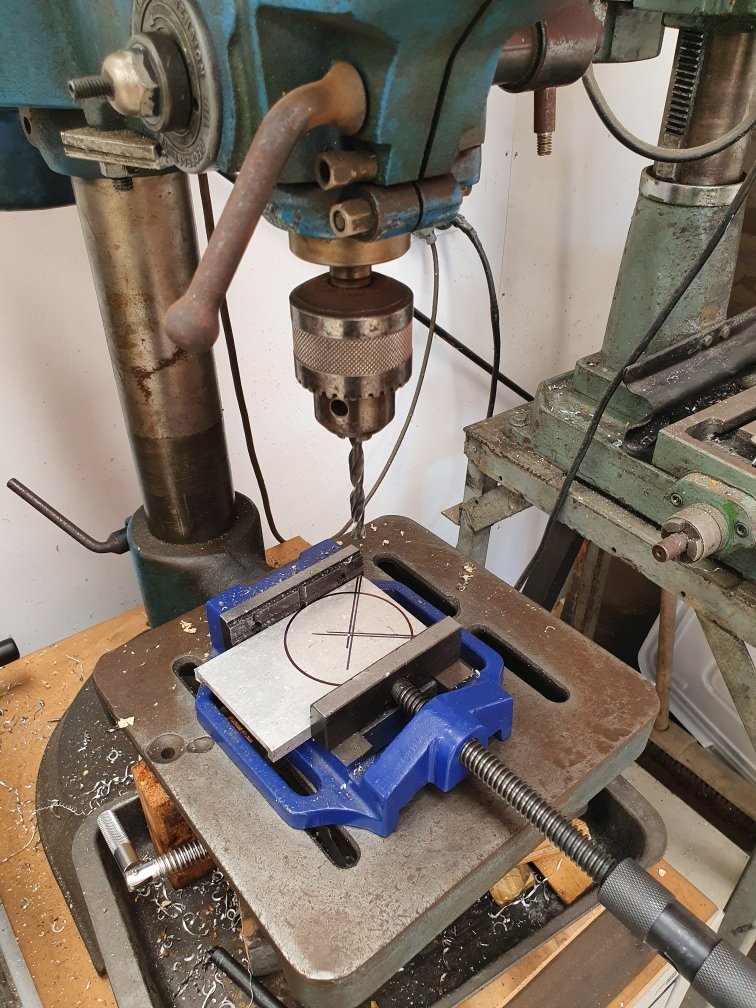
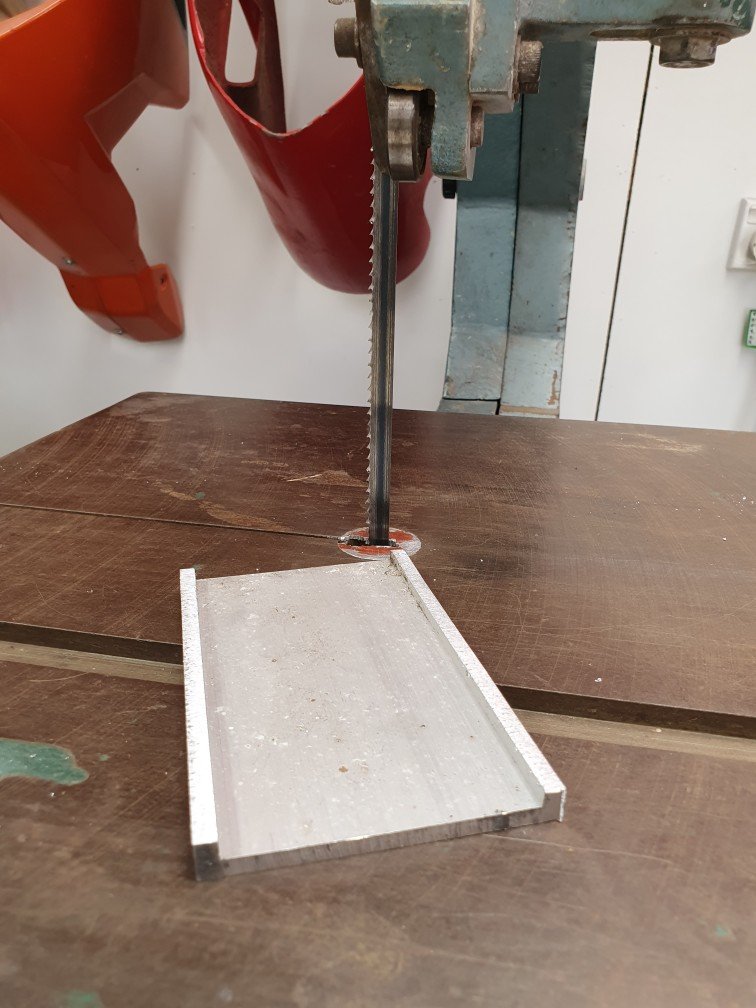
Well it's been the better part of eight months since the last installment. There's obviously not been nearly as rapid progress, however, I feel that enough has happened to finally make it worthy of a post. To begin, I finally moved into a new place in Auckland with access to a closed in double garage. I do have to share it with a flatmate's car but I'm very glad to finally have the car back. However, ever since I've been working pretty much constantly so haven't had a lot of time to work on it. That said, I found a nice sturdy bench on marketplace, got given a vice from the old man, and started to get myself established. I'd been holding off on buying a grinder and panel beating tools until I could find a really good deal. In the meantime, I started drawing stuff and making plans. The first being what to do for my air filter. I went through lots of designs in my head before finally getting this down on paper. The original design took all the right mathematical ratios into consideration from this document: http://www.nsxprime.com/w/images/9/9e/(Blair_and_Cahoon)_Design_of_an_intake_bellmouth_Sept._2006.pdf It had the right trumpet length and radius and all the bells and whistles. It's designed to slip over the end of the throttle bodies with a snug fit and a pair of grub screws top and bottom to secure it. It was a pretty good looking design in my opinion. But as the saying goes, no plan ever survives fist contact with the enemy. When I went to check the available space on the car, I realised I had about half the height space I would have needed, hence the reduced trumpet height and the filter being sunk down over the top of the bell mouths themselves. It's designed to use a K&N E-3515 filter which is basically the biggest one I could fit. At this point I planned to make it from aluminium and teach myself to weld it up properly. Since I don't have an AC TIG, I was going to make a weekend trip back up to Whangarei and use my dad's lathe to make the trumpets and his welder to stick everything together. That was until people started getting sick. My partner and I booked time off months in advance to go on a fake Easter weekend with her family back up north. It's been a bit of a tradition for the last few years and lets us get away without having to deal with huge crowds of people on real Easter. That was booked for the 20th through to the 23rd of March. The weather wasn't great so we came back to Whangarei from camping on the Sunday to reports of the COVID situation getting worse. I figured it would be a bit shit to be stuck inside for a month with no tools to work on the car so I finally bit the bullet and bought a grinder, drill, regulator, TIG rods and tungstens, and borrowed some panel hammers and dollys from dad again. No sooner had I got back from shopping to where we were staying in Whangarei, the news of the lock down was announced and my partner decided that there was no way we were going to head back down to Auckland to be by ourselves, when she could be with her family up here the whole time. So here I am with all the gear and no car. Stellar. Eventually, I got bored enough to start thinking again. I started making a cardboard mock up of the intake to check its feasibility, especially how difficult it would be to make from flat sheet materials. To start, I did the maths and divided up the trumpet shapes into 16 segments which I could cut out of cardboard. This was a good proof of concept. I was gearing up to make the other two when my father in law suggested that I could make the whole setup from carbon fibre. He makes his own telescopes at home, including a seven odd foot tall one with something like a 14" mirror, all handmade. He has done a bit with carbon fibre and suggested I use his lathe to make a mould and lay the whole lot up instead of struggling with a welder. Well, hanging off a lathe for a day or two was a lot more appealing to me than playing arts and crafts so I swiftly pivoted and started to make it happen. Starting by printing out the profile of the trumpet and transferring it to some scrap flat bar, I made a profile tool for the lathe. It's only mild steel but it's still harder than the MDF I plan to use. Then I stacked up said MDF and screwed four layers together to get the height I'd need. Finally, I threw it in the chuck and began pecking away at it. It didn't leave the nicest finish but I wasn't too worried because I was about to encase everything in resin. The wood makes for a good scaffold but the resin should give me the smooth finish I'll need for a good release. I mixed up the epoxy and poured it on, only to realise that although I was assured the mix ratio was 4:1, it does pay to confirm for one's self. This is what happens when it's actually supposed to be a 5:1 ratio. It was off gassing like a mother and started to rise like one of those baking soda and vinegar volcanoes you make as a kid. When I did peel the tape off, it was so full of bubbles and voids, there was nothing for it but to take it all off and start again. Skipping a few steps because I'm out of practice with taking photos of everything I do, this is the result of re-machining the resin. There is also a few layers of primer on top, as well as a couple layers of clear coat. Now would be when I would put some mould release compound on there and start the lay up process. I say would because I don't have any carbon fibre yet so I'll have so I'll have to wait until the restrictions ease. I plan to attempt to make the mould for the other parts of the design as well so I'll update that as it happens. In the meantime, I'd appreciate any feedback on the design and process on the discussion thread in my signature. Cheers.9 points
-
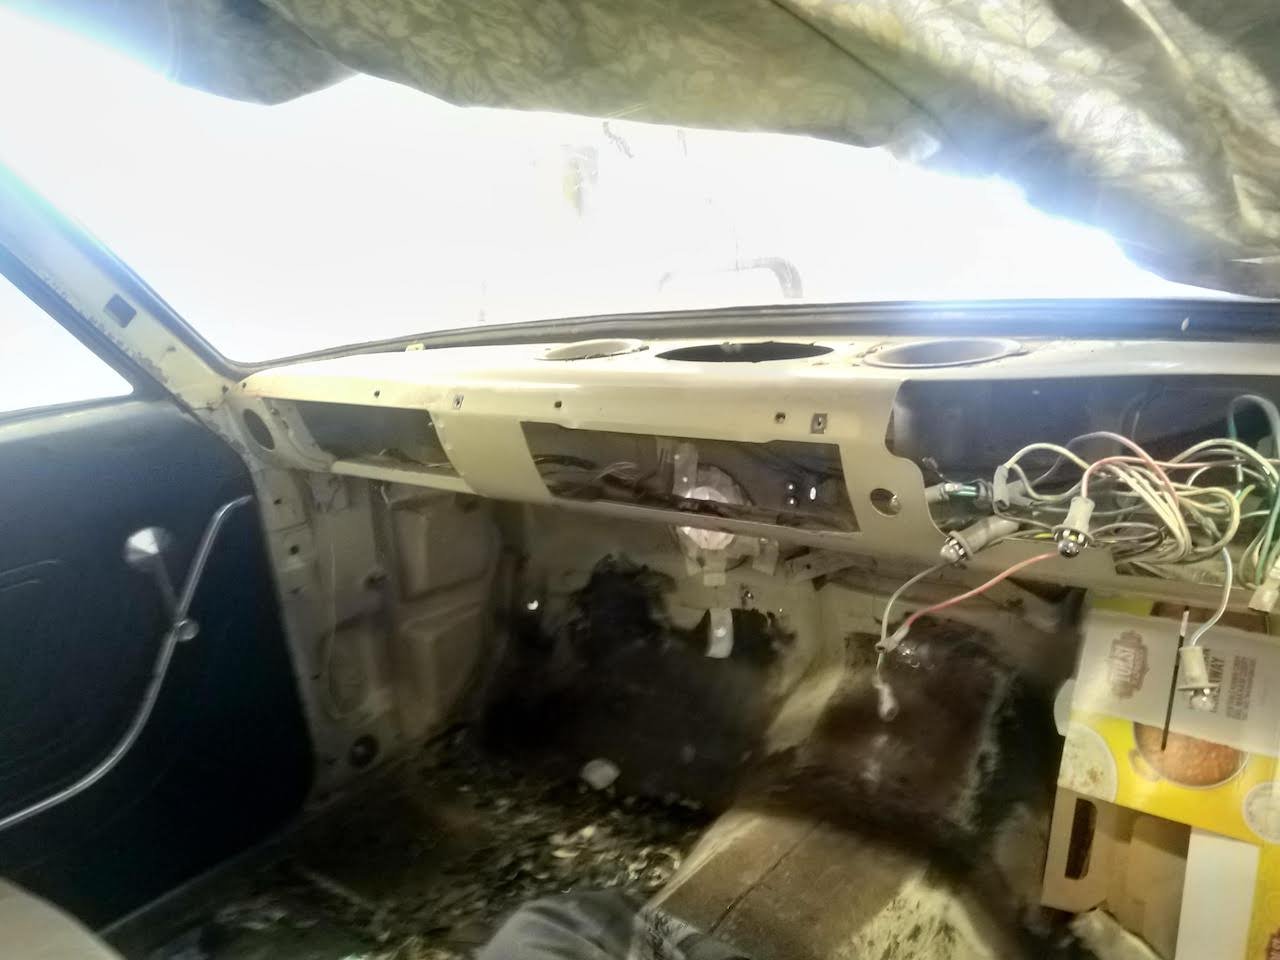
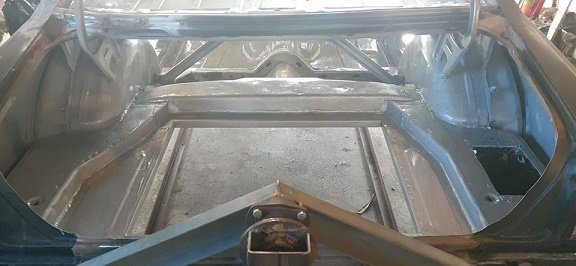
Slowly but surely making some progress on this. Got the engine bay stripped and into epoxy primer. I've removed the dash and the first bit of sound deadening. Bit of rust under the sound deadening, but nothing major so far. Found a small hole around the size of a 10c coin but that should be easy to sort. Planning on cleaning floor back with a wire wheel and treating with Brunox, before overcoating. Probably will just brush it on, doesn't need to look pretty.
8 points
-
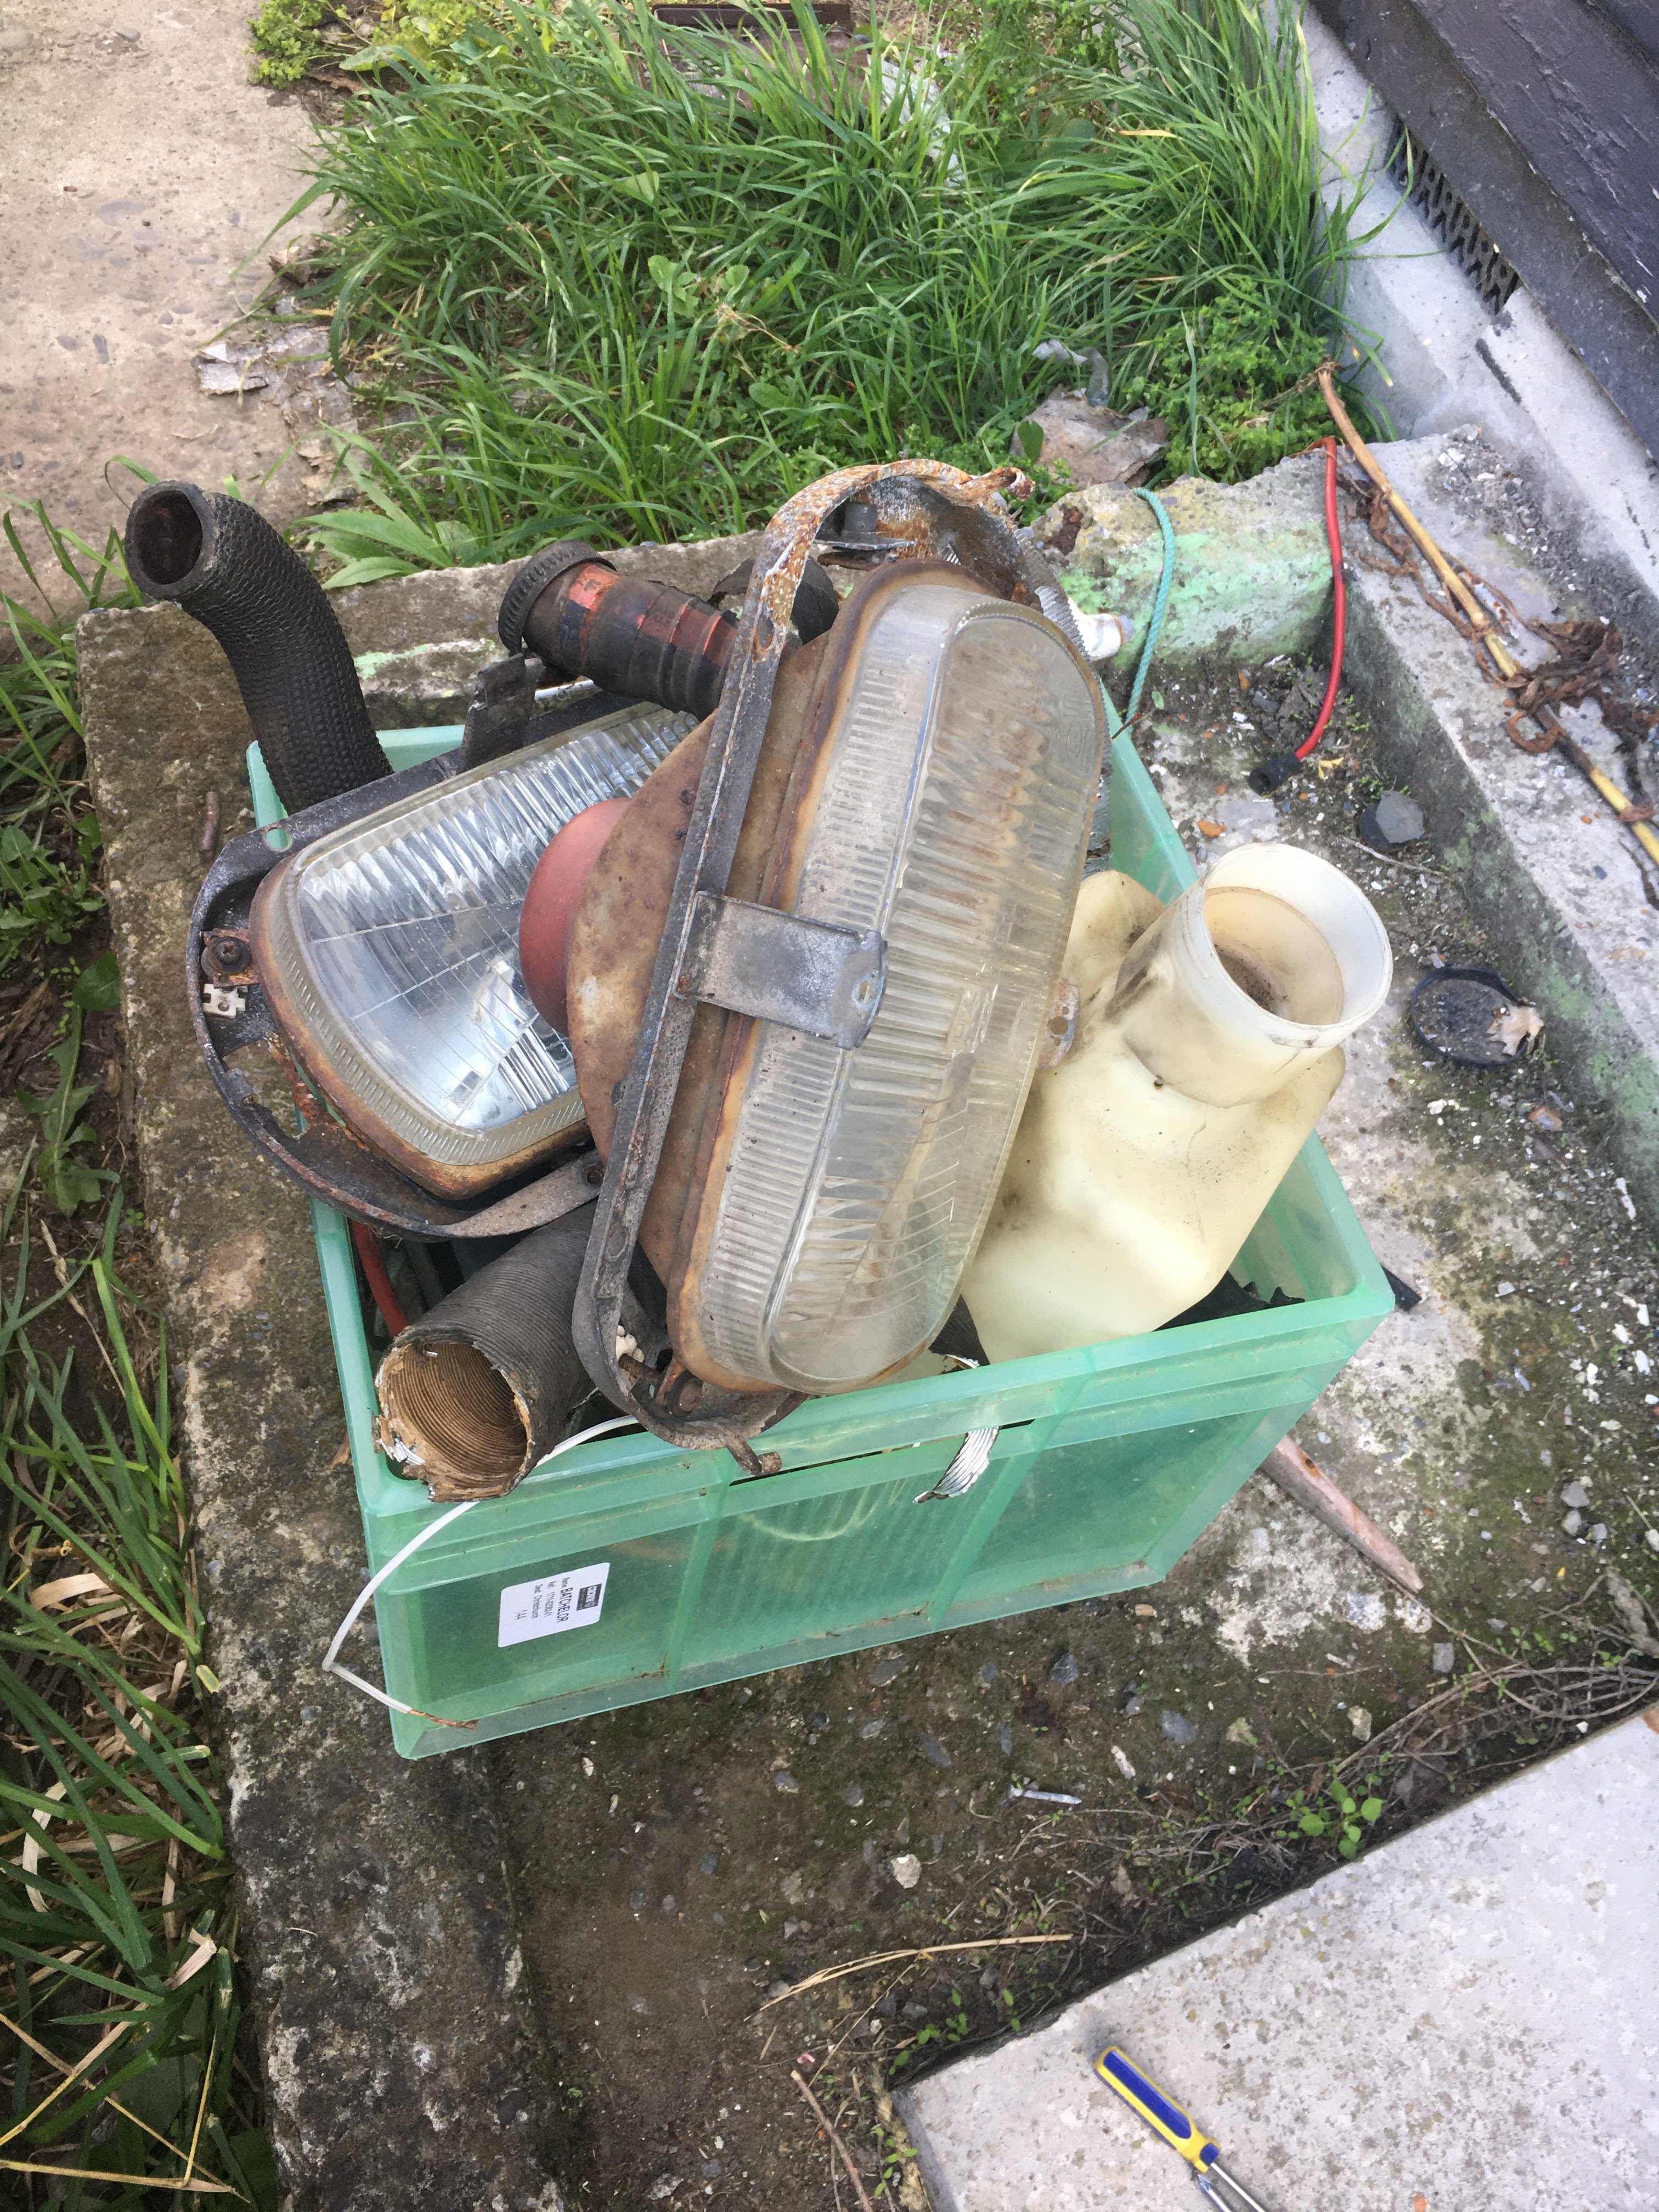
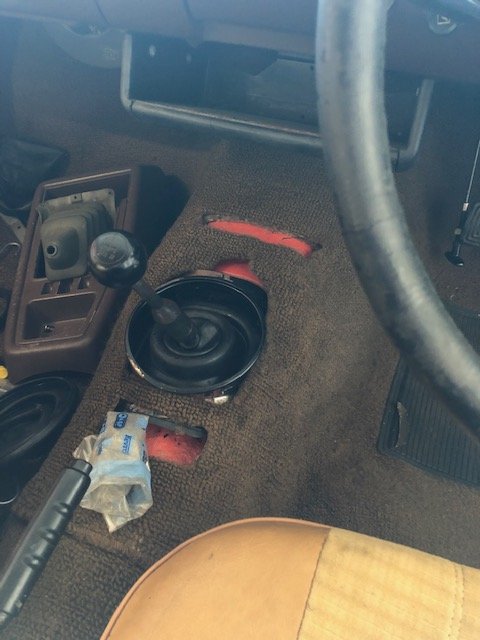
This mornings haul.... This afternoons mission is to pull out the Haynes to find out where the screws are to unmount the Blower and the Braking system. This entire car seems to be built with self tapping Philips head screws, I've been able to do it all without changing screwdrivers.
8 points
-
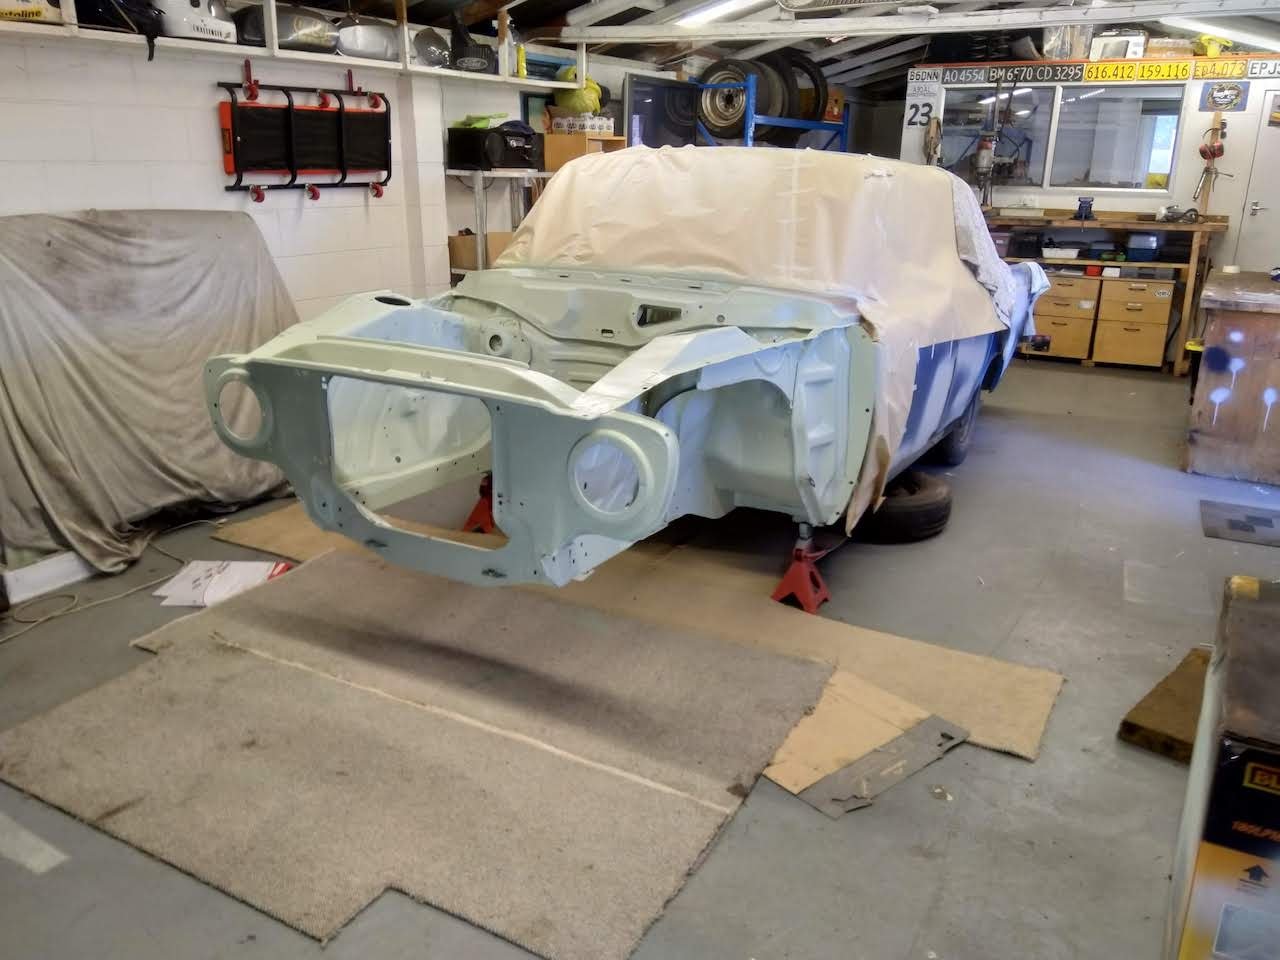
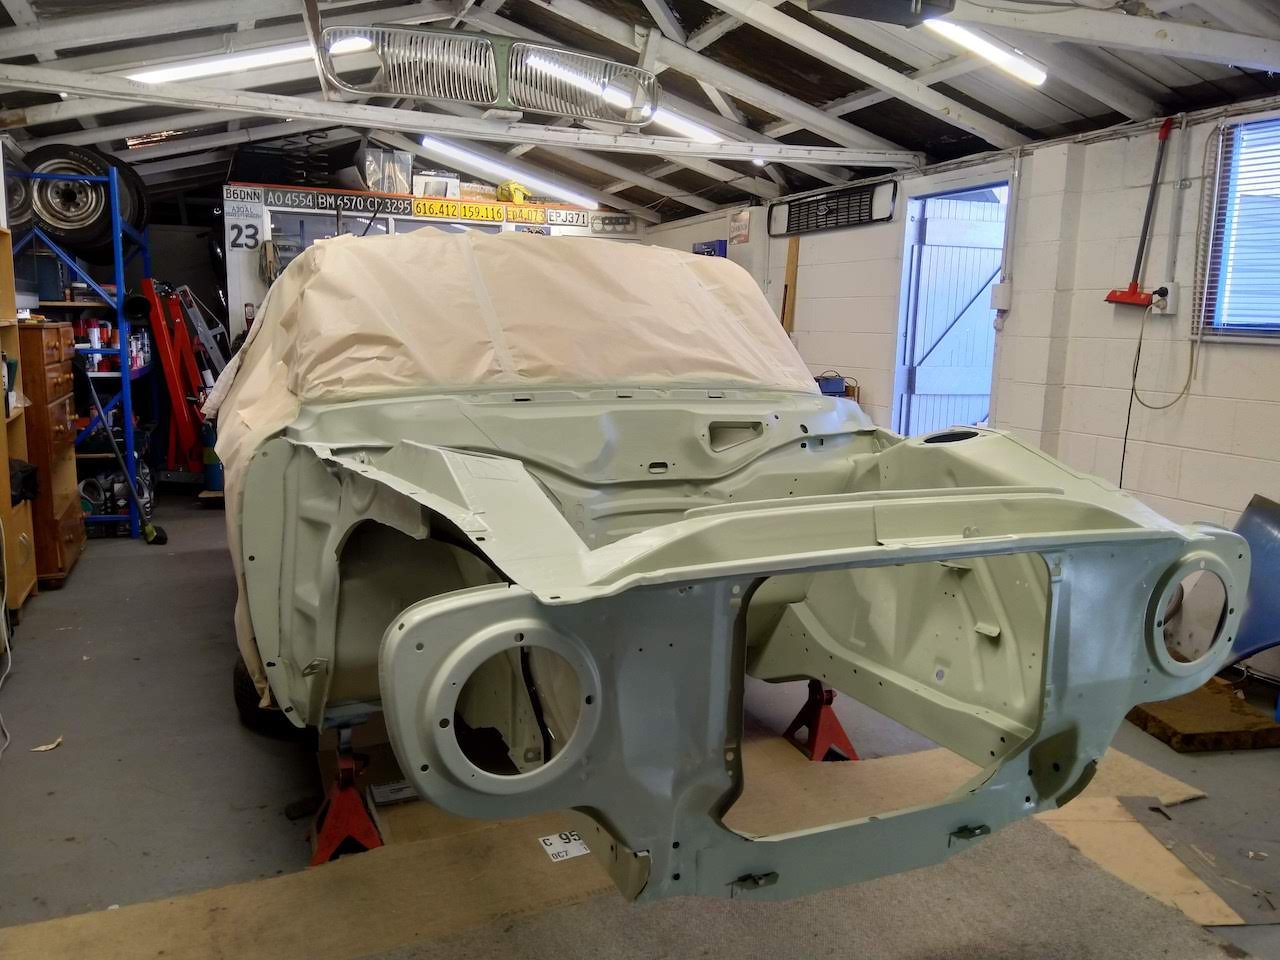
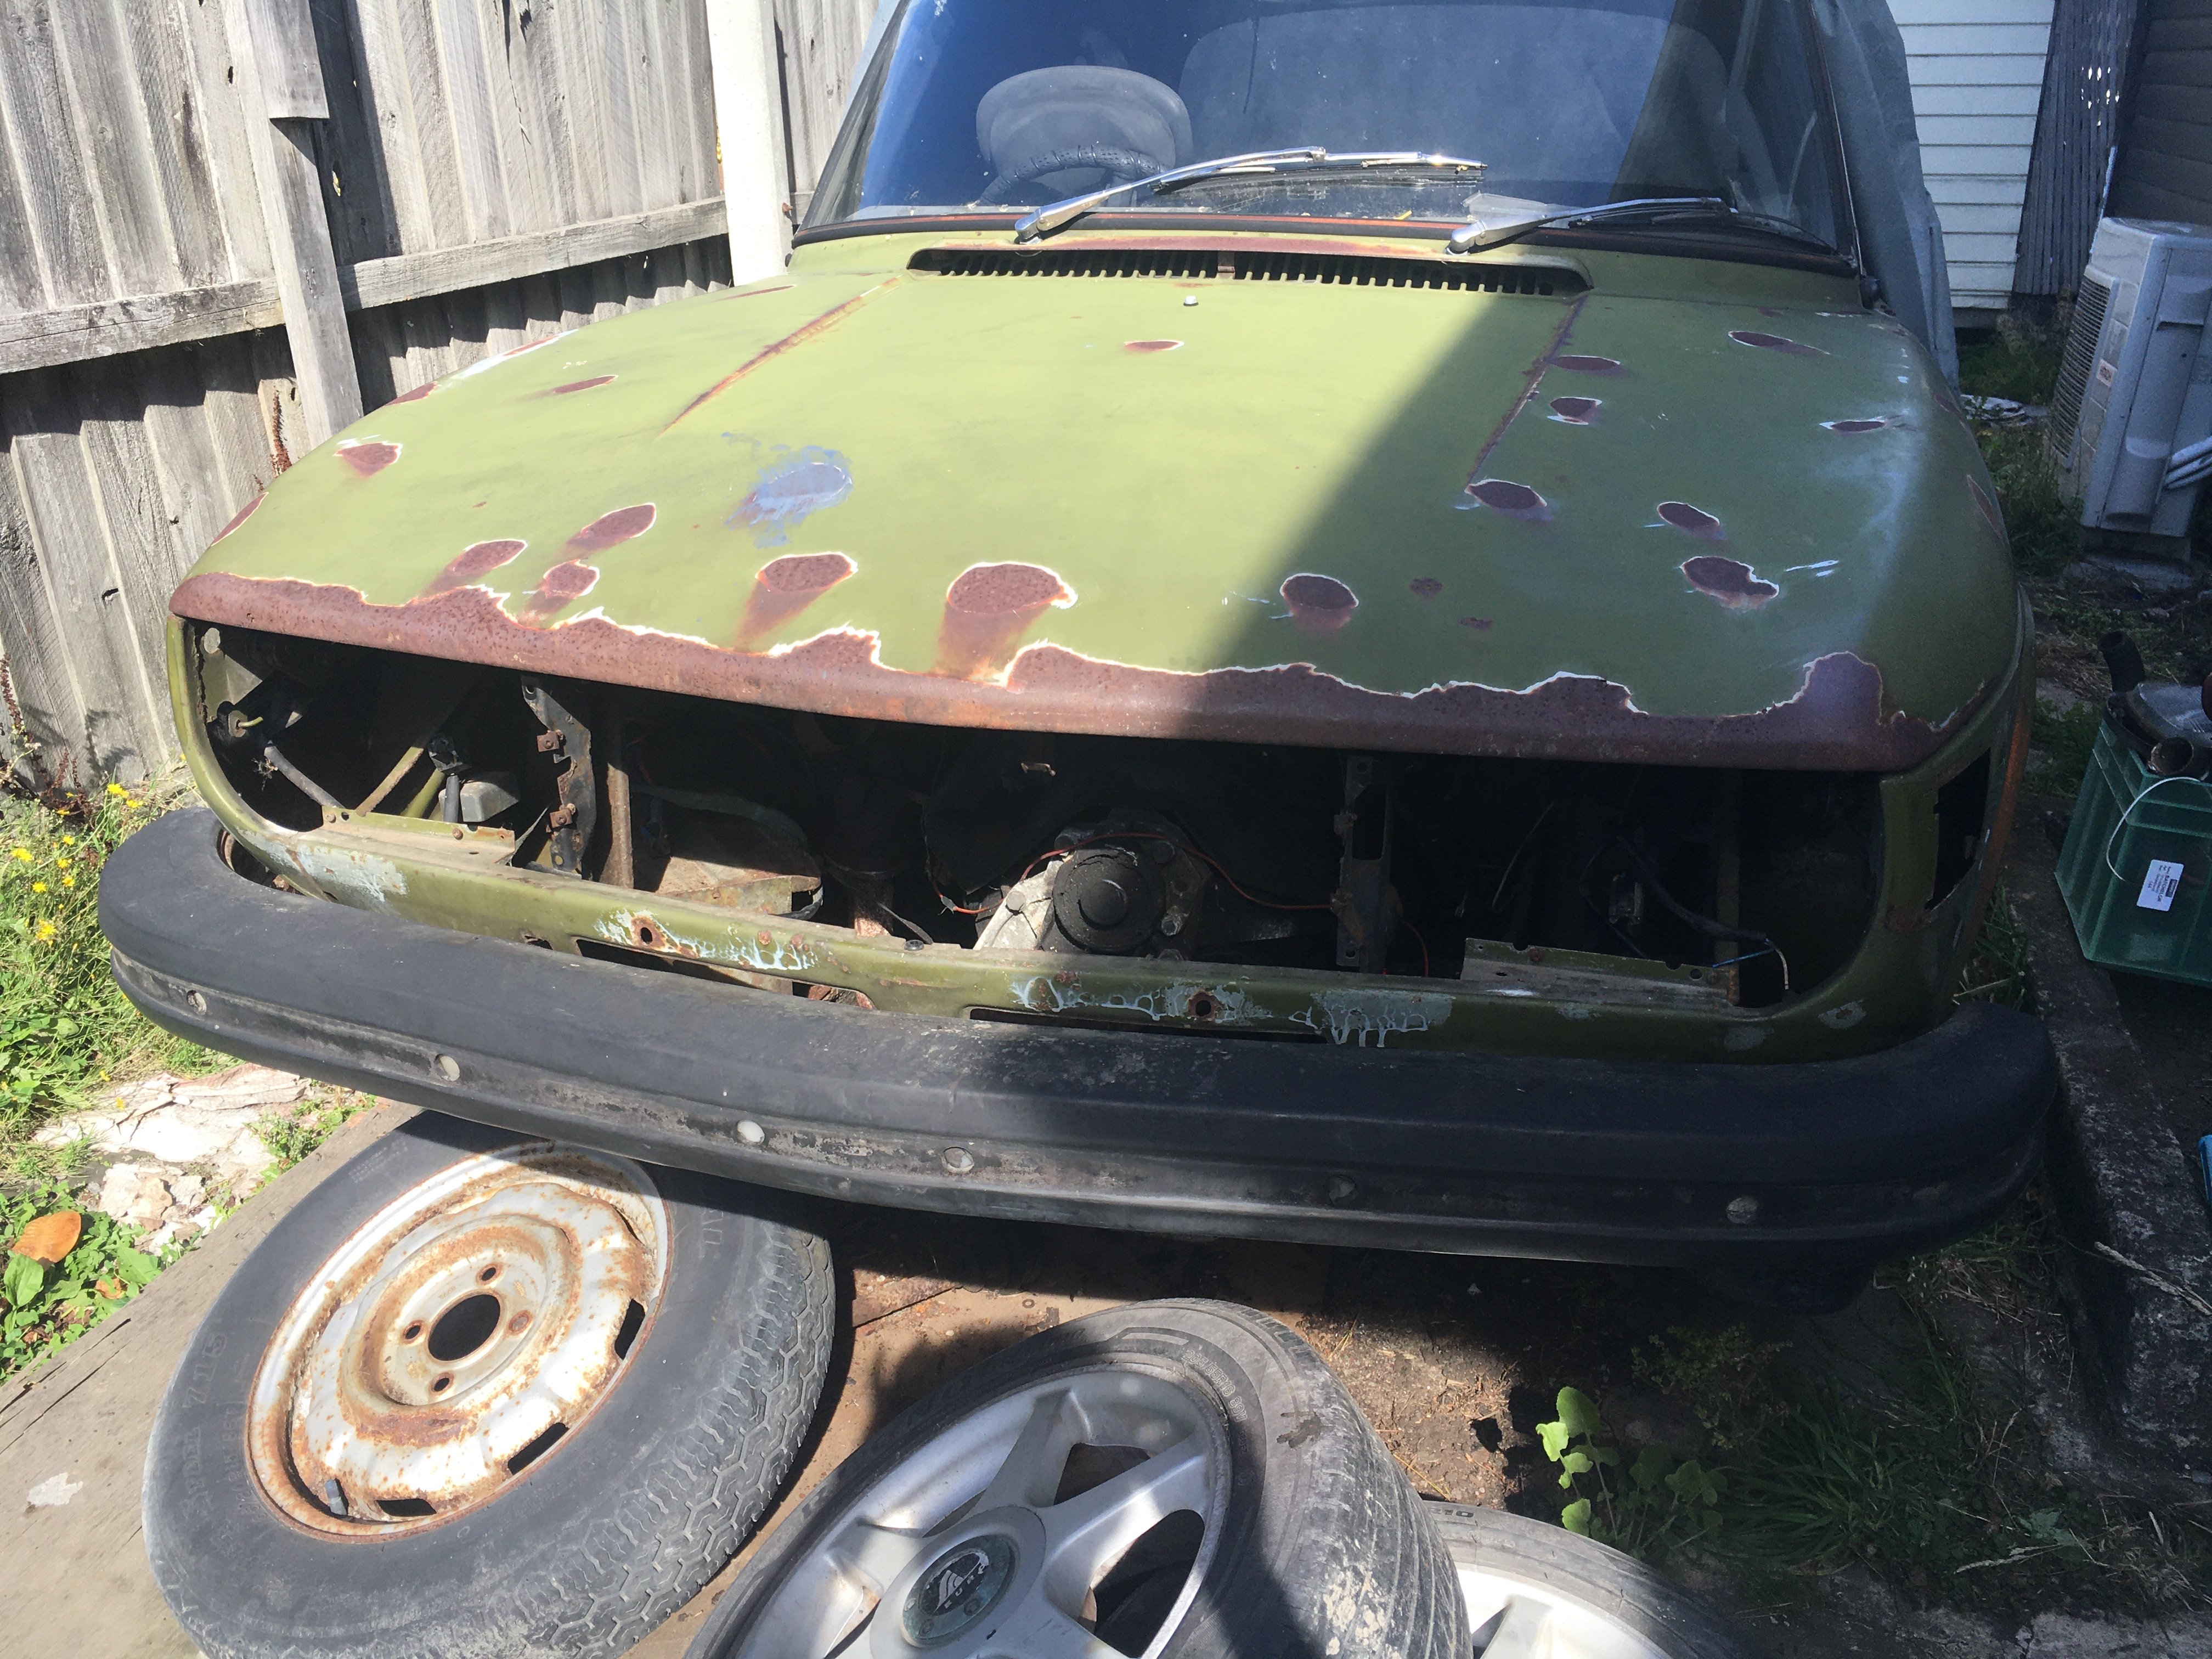
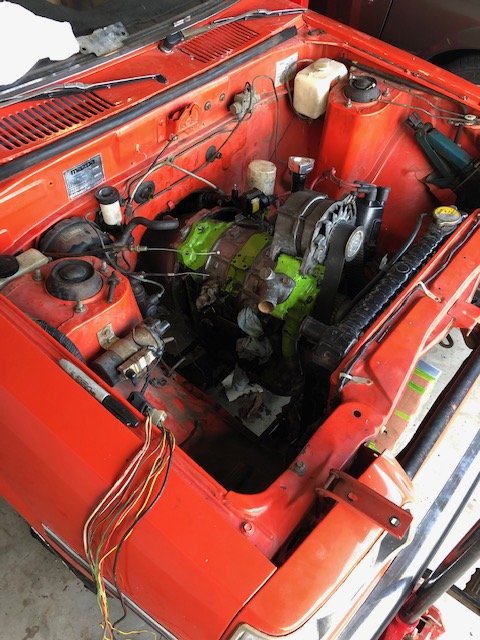
Turned a Swedish Bombshell into a toothless old crone...Part of the plan while we're all under house arrest to strip the engine bay ready for a cleanup and paint.
8 points
-
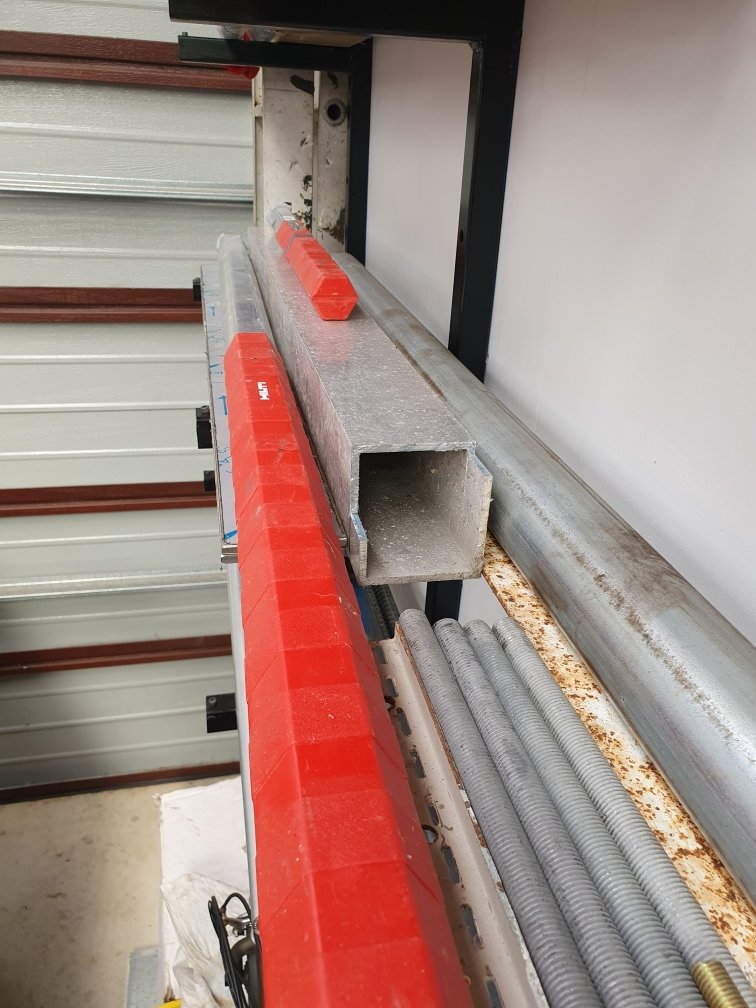
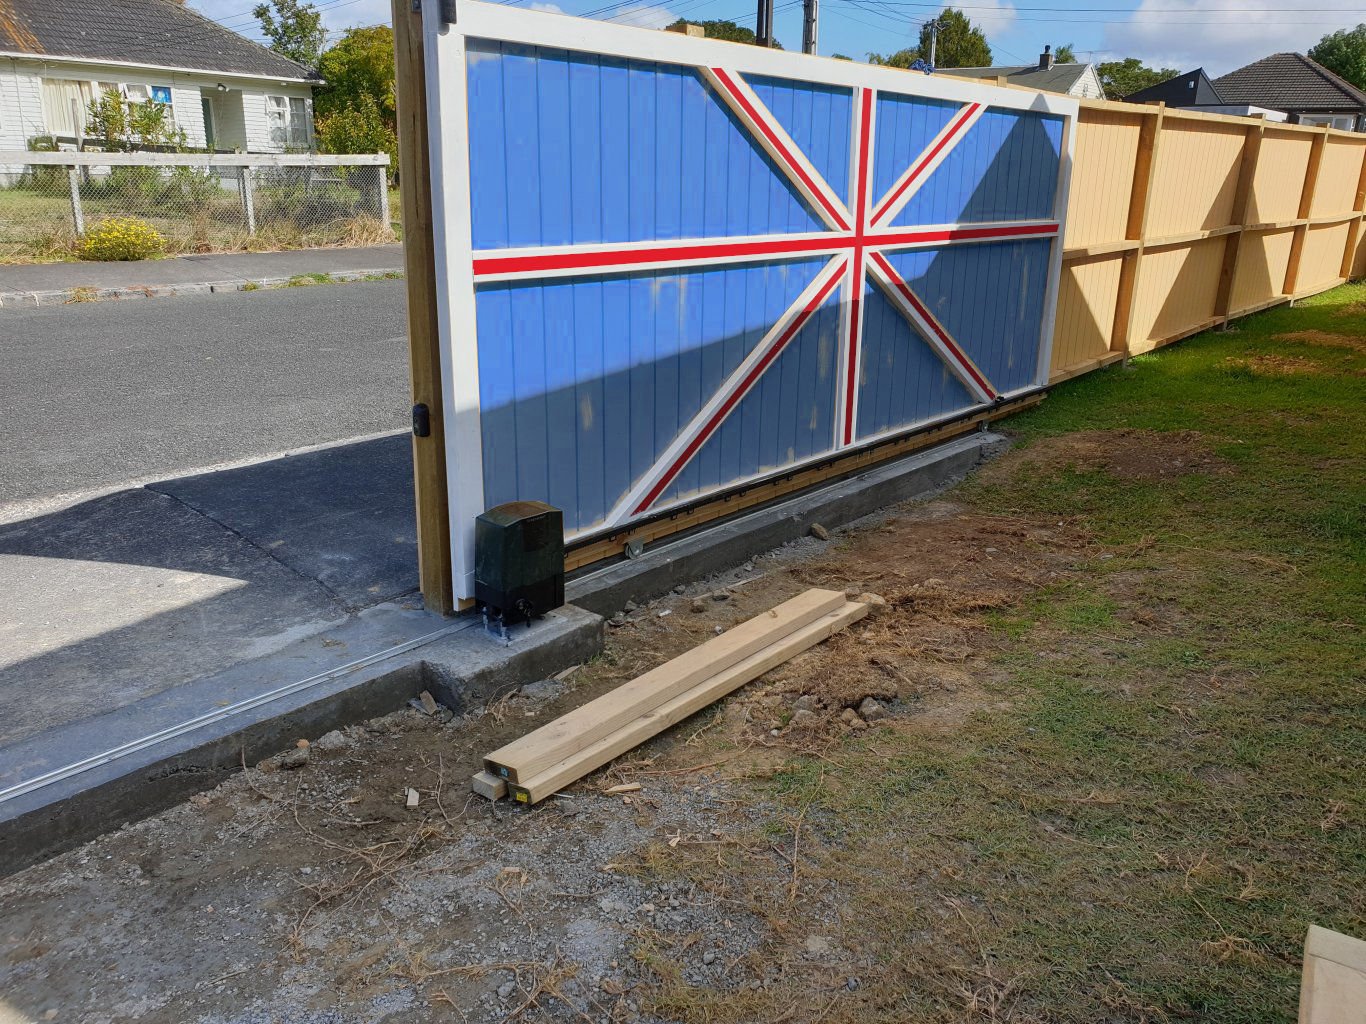
man she has been some time since the last post..... I think old mate @Geophy ended up getting some steel and i asked him to get me some right angle in the end. Welded that on and then it really started to get in the way at the shop. Invited old mate Geophy over again and got him on the grinder he went over allllllll my welds and made them flat for me. Making it easier to stick the cladding on when i am ready/have the money. the main reason was so i could get it painted and get it out of the work shop. we had been planning on moving the shop and it was not going to be able to fit in the new shop. I had re upholstered a chair for a mate and he owed me a favor so i hit him up seeing if he could paint the caravan before i had to leave it sitting out side. boom! Not the best of paint jobs but we have paint so its now sitting at my mums place out in the weather as we move places and sort our own lives out again. I would really like to get back into it and get it covered in for at lest winter. so i think thats the next goal. By cladding and material for the floor.7 points
-
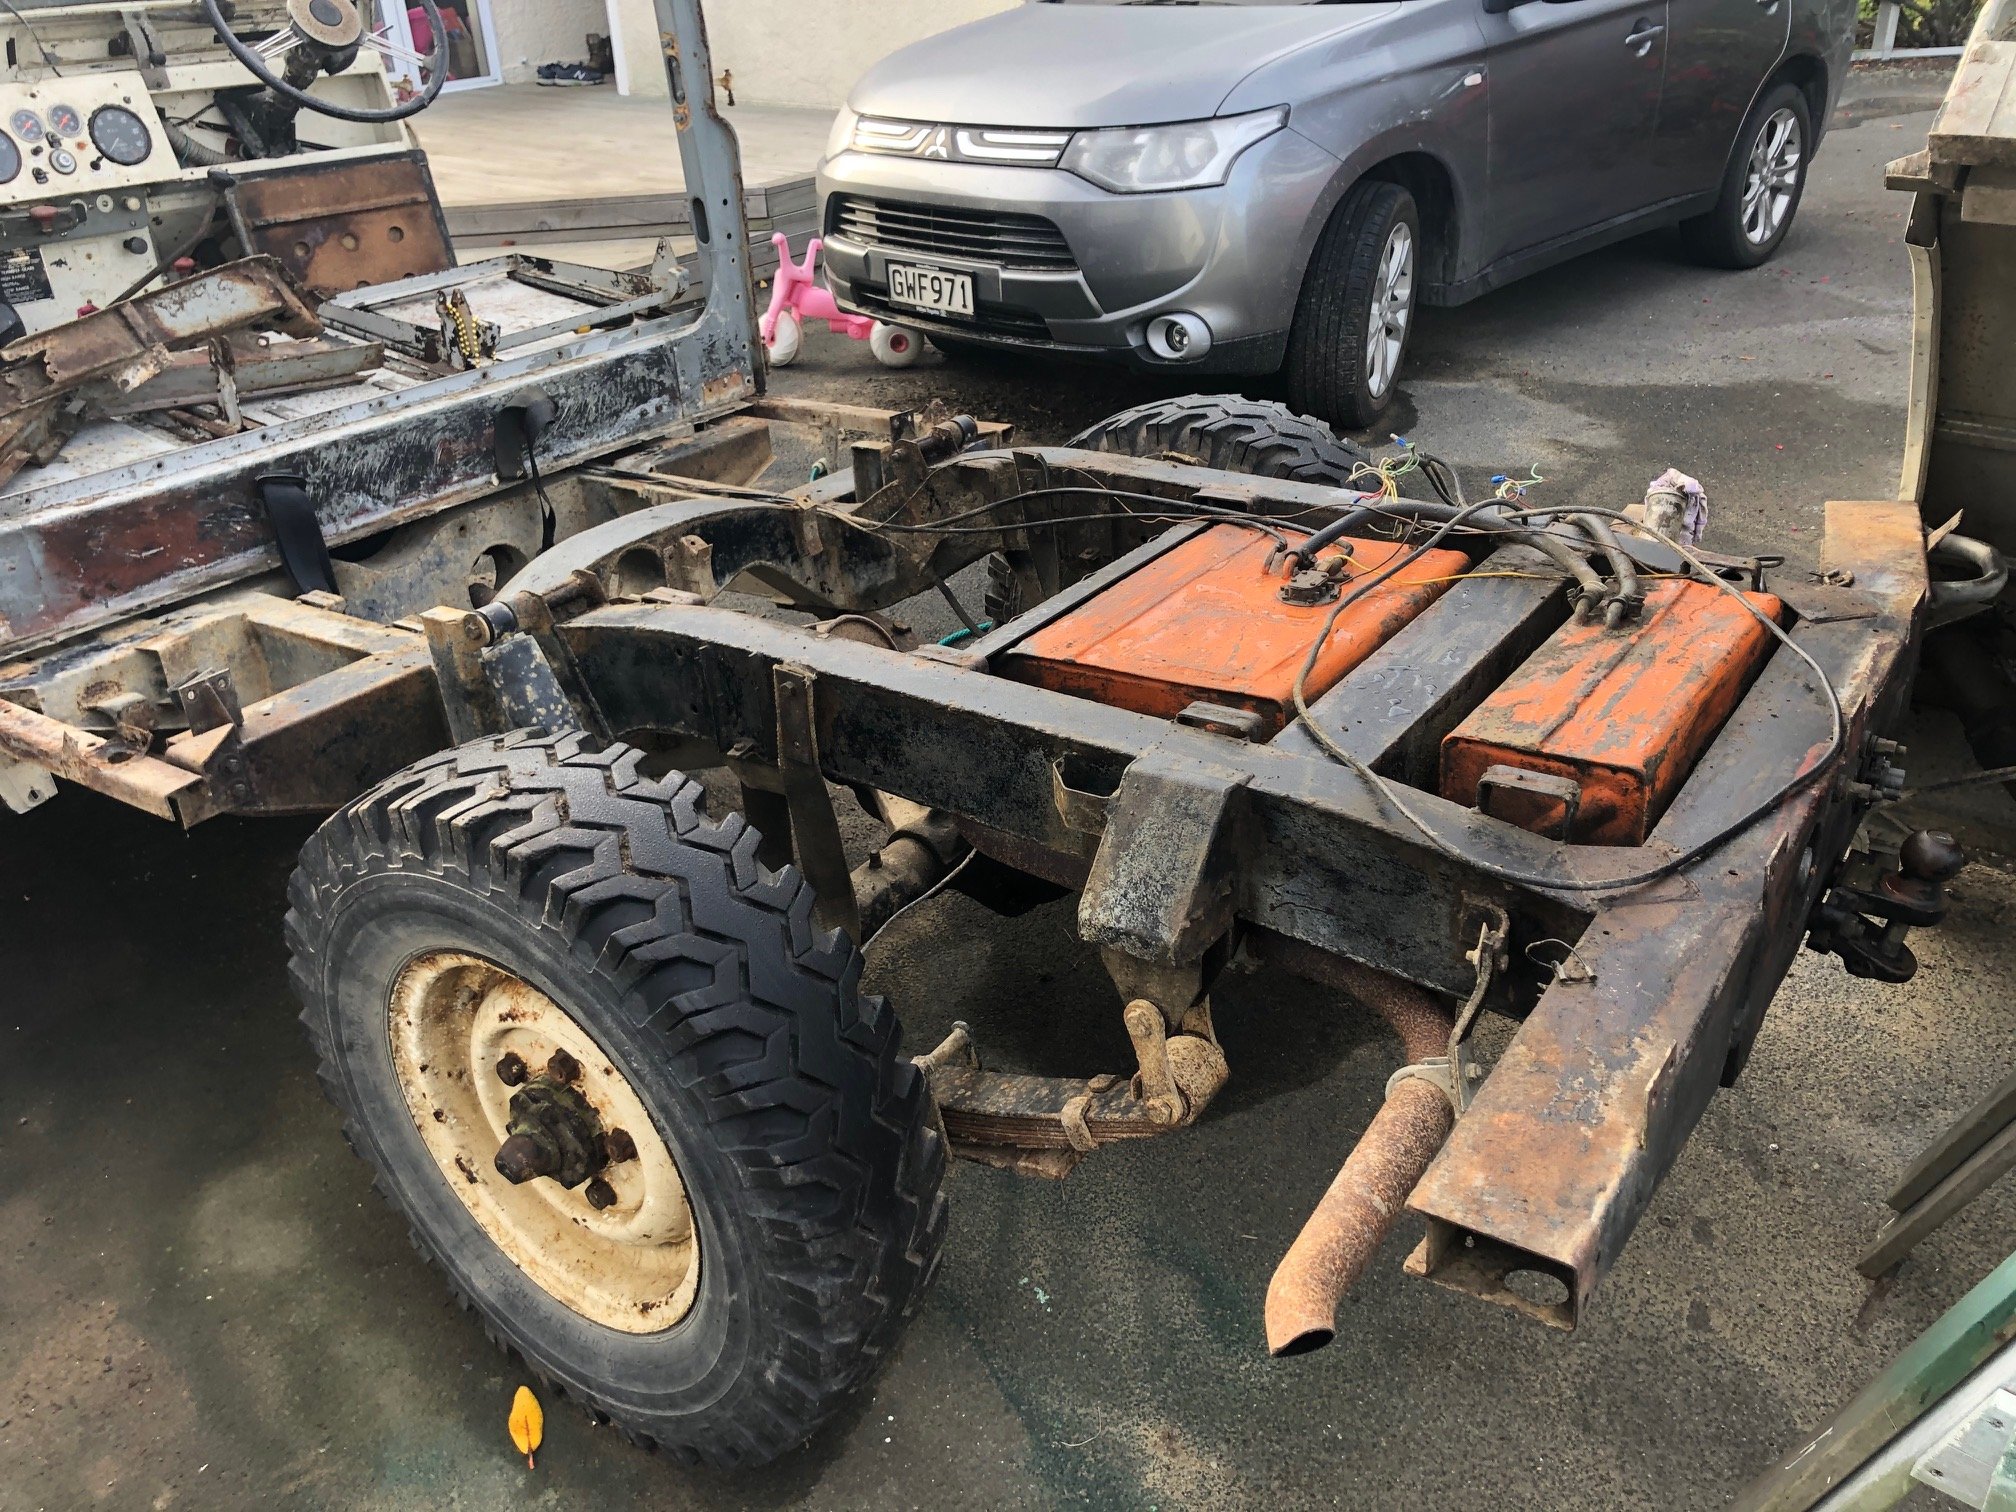
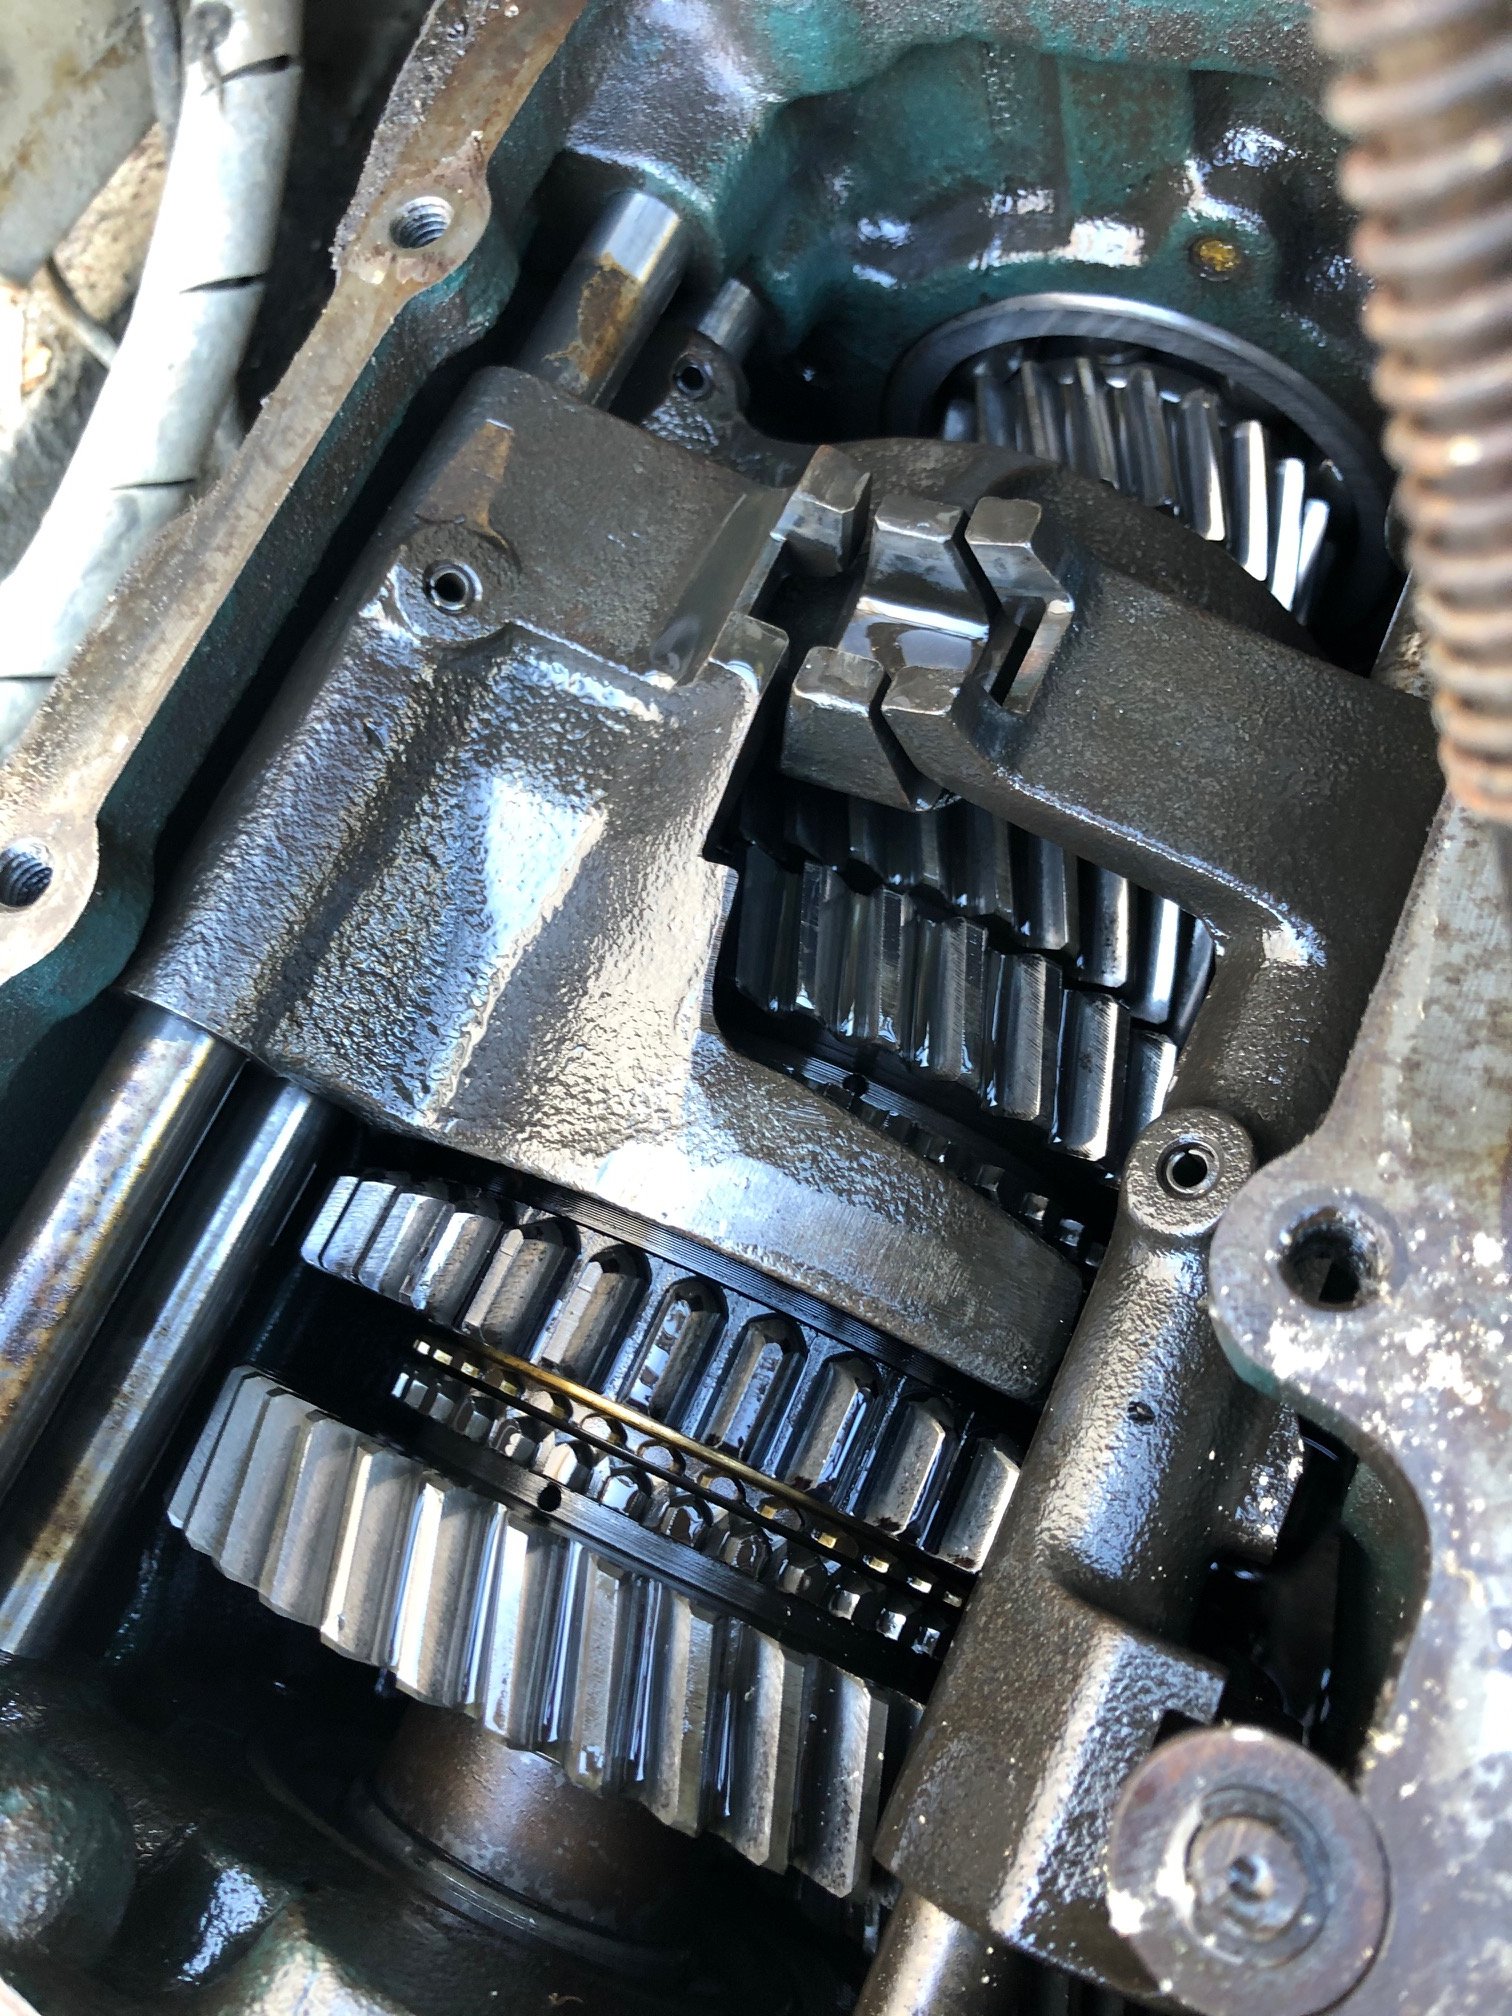
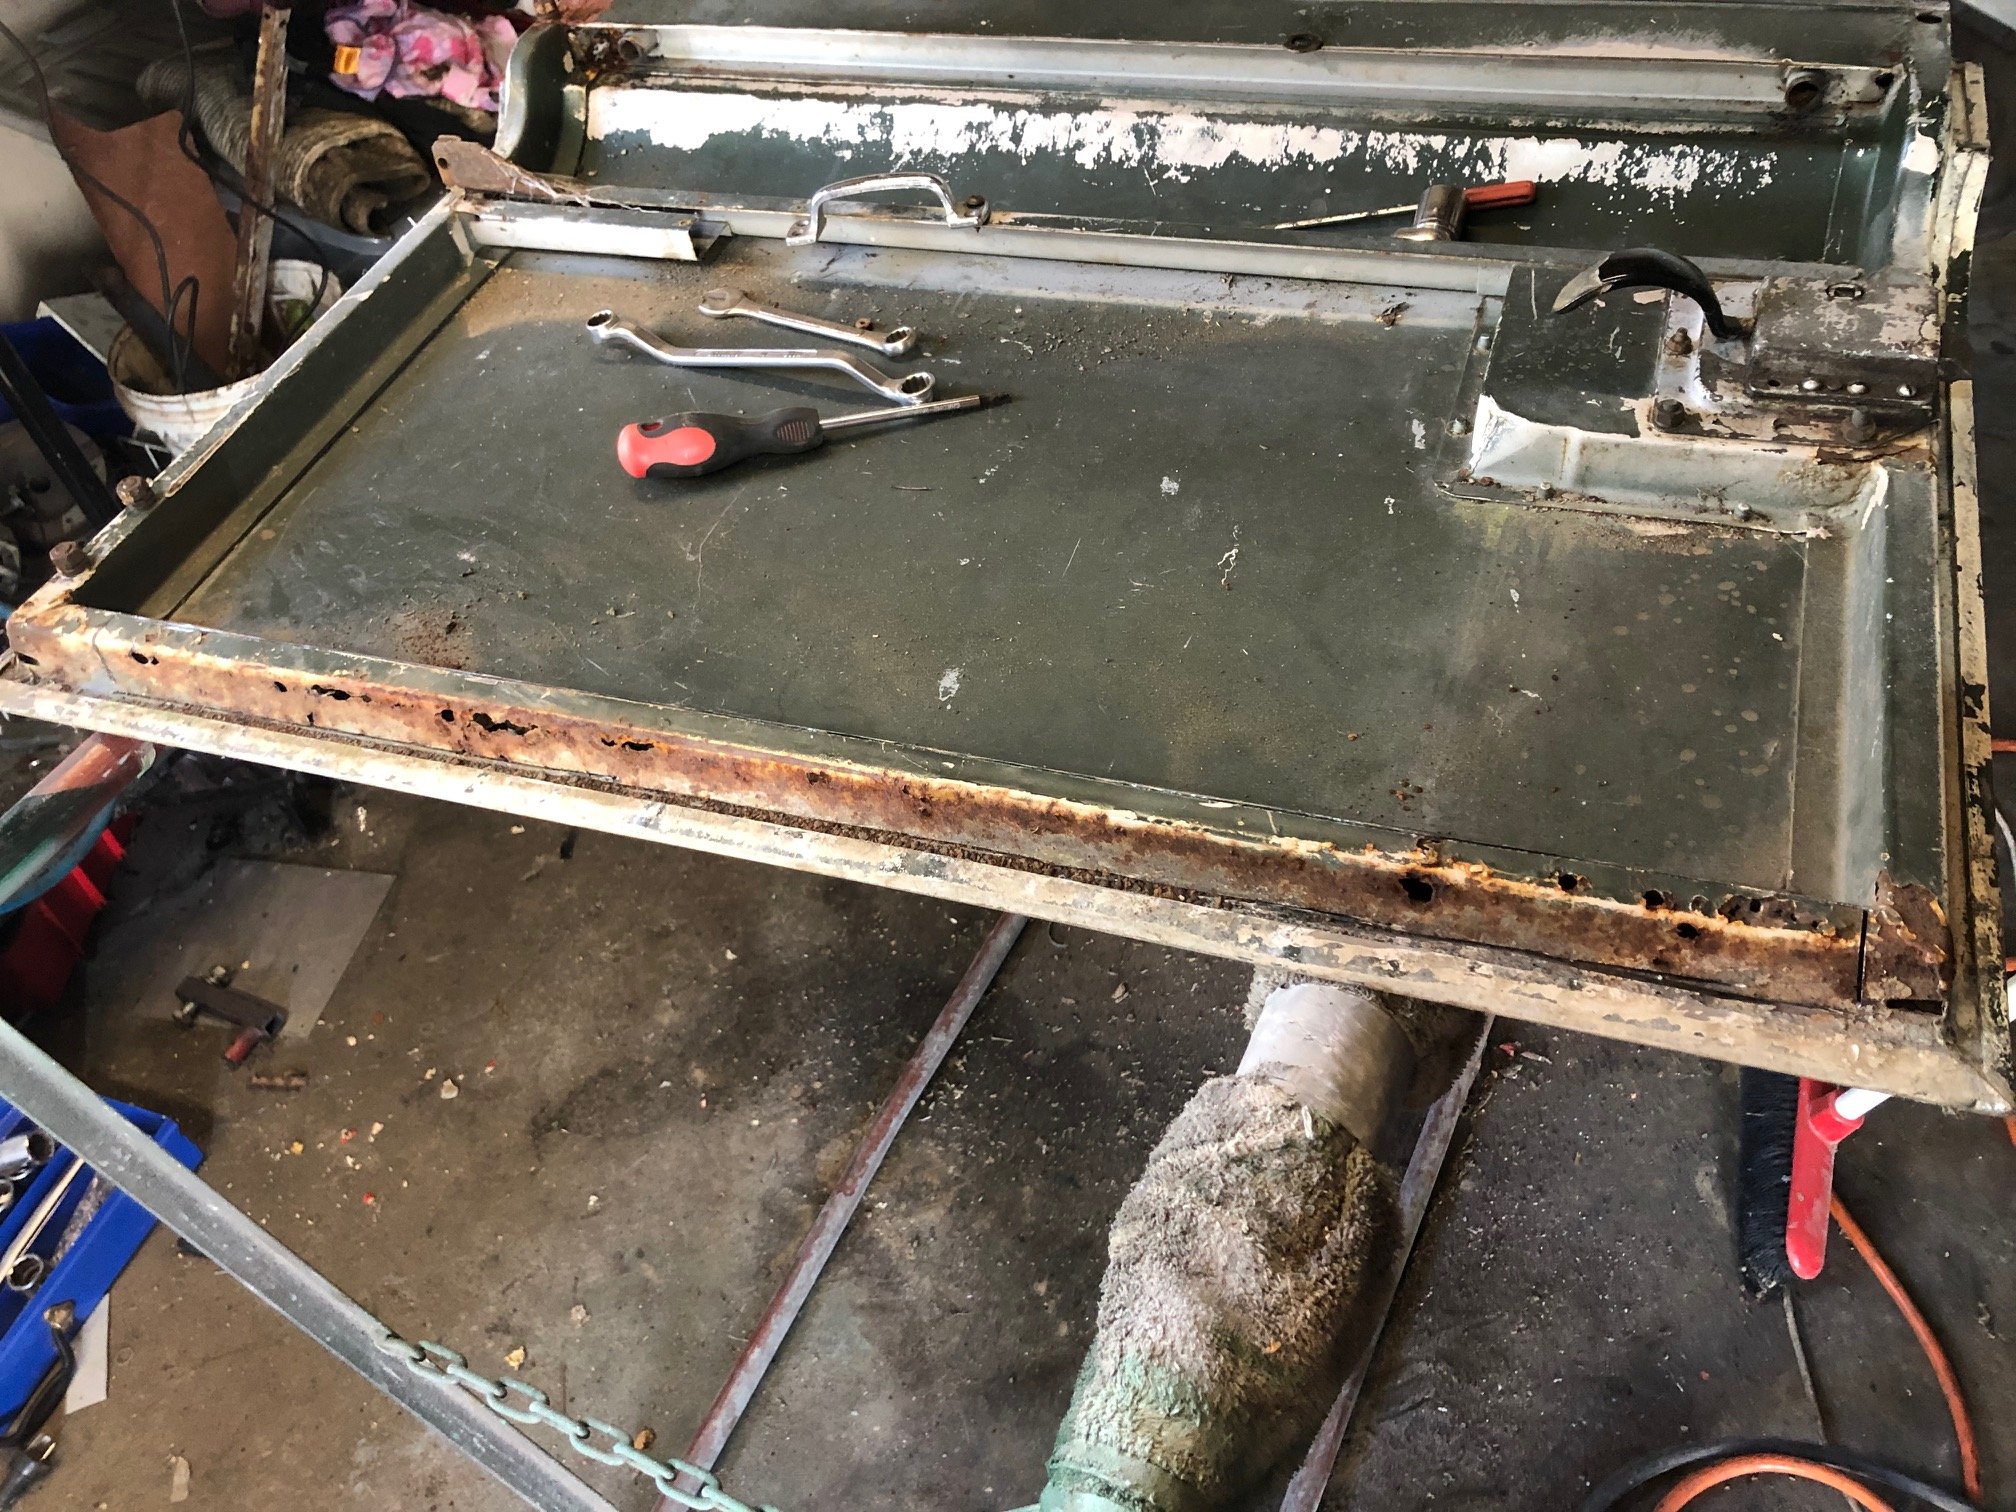
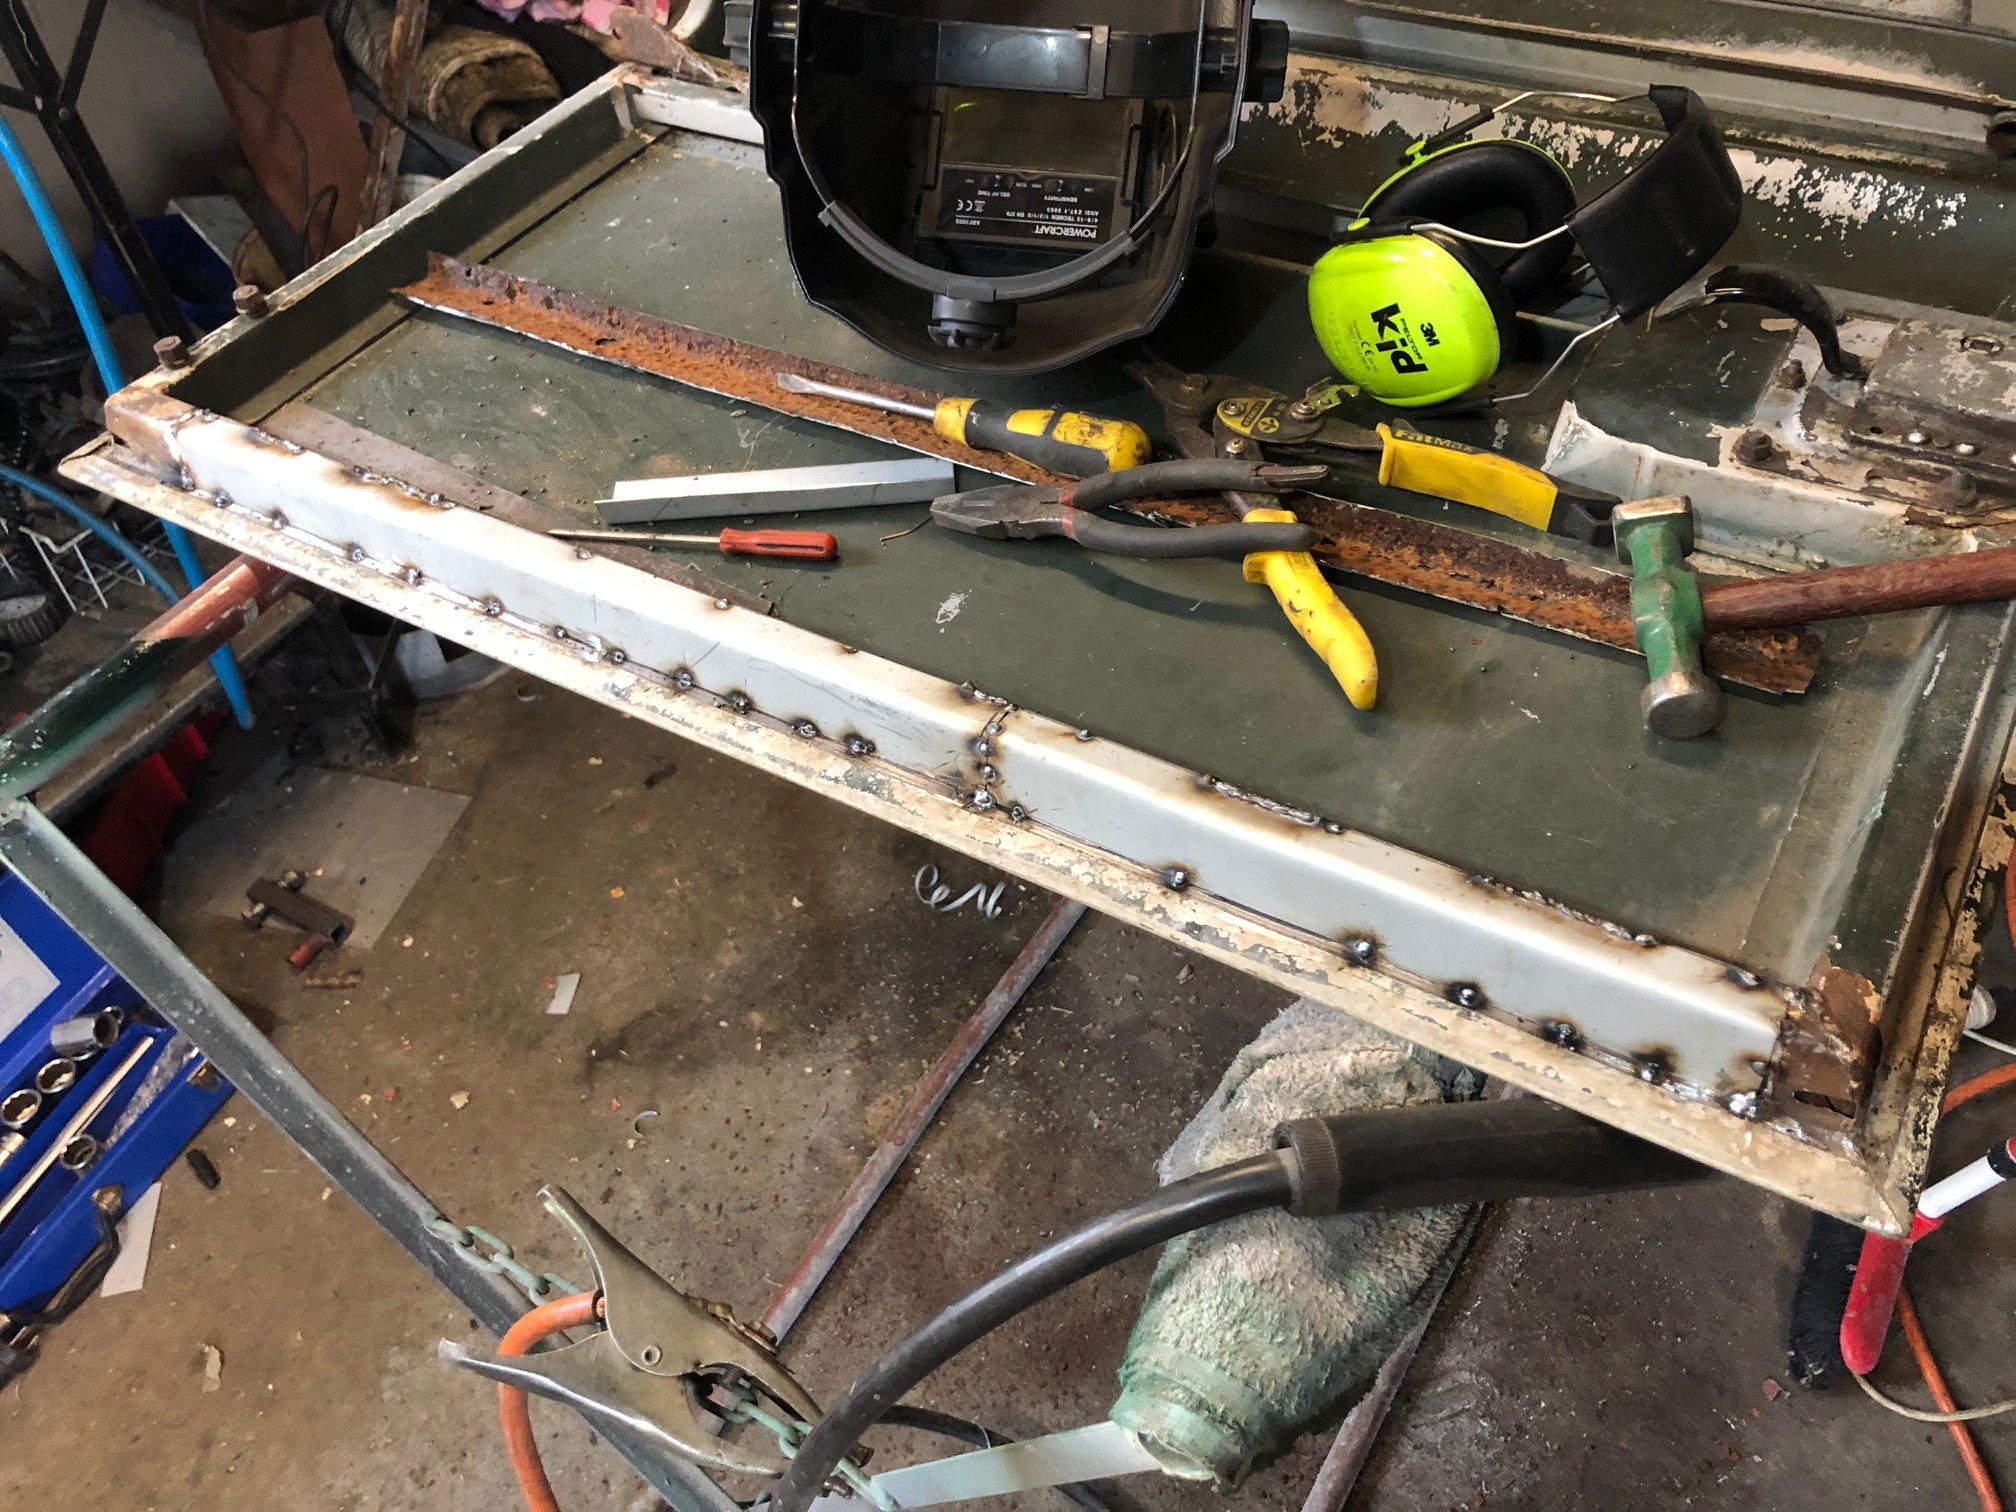
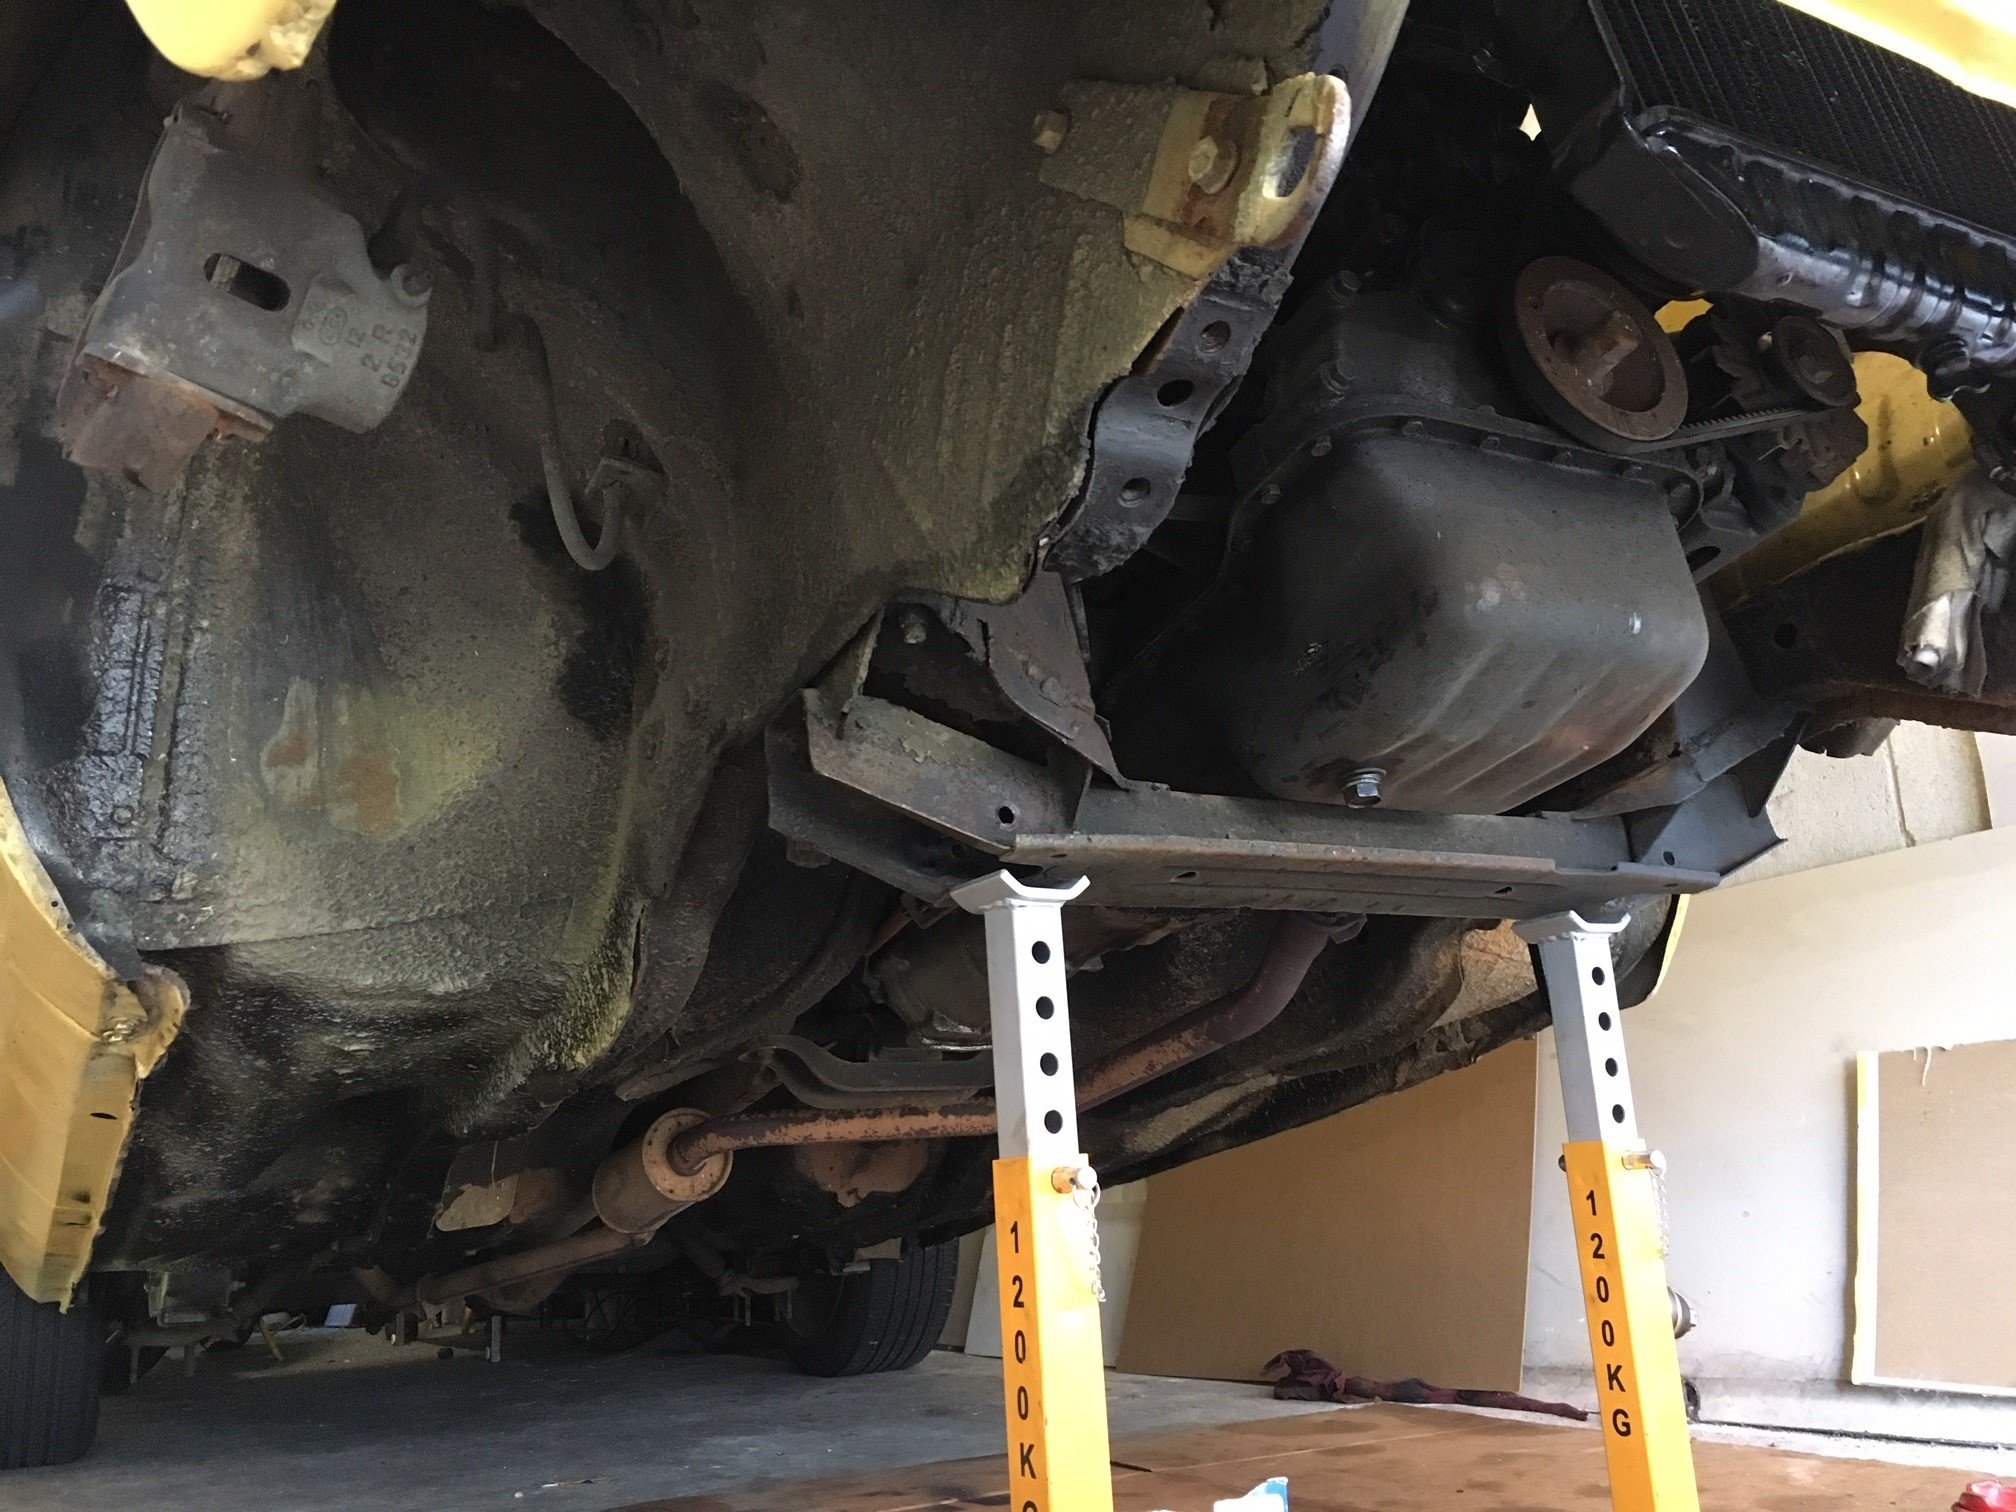
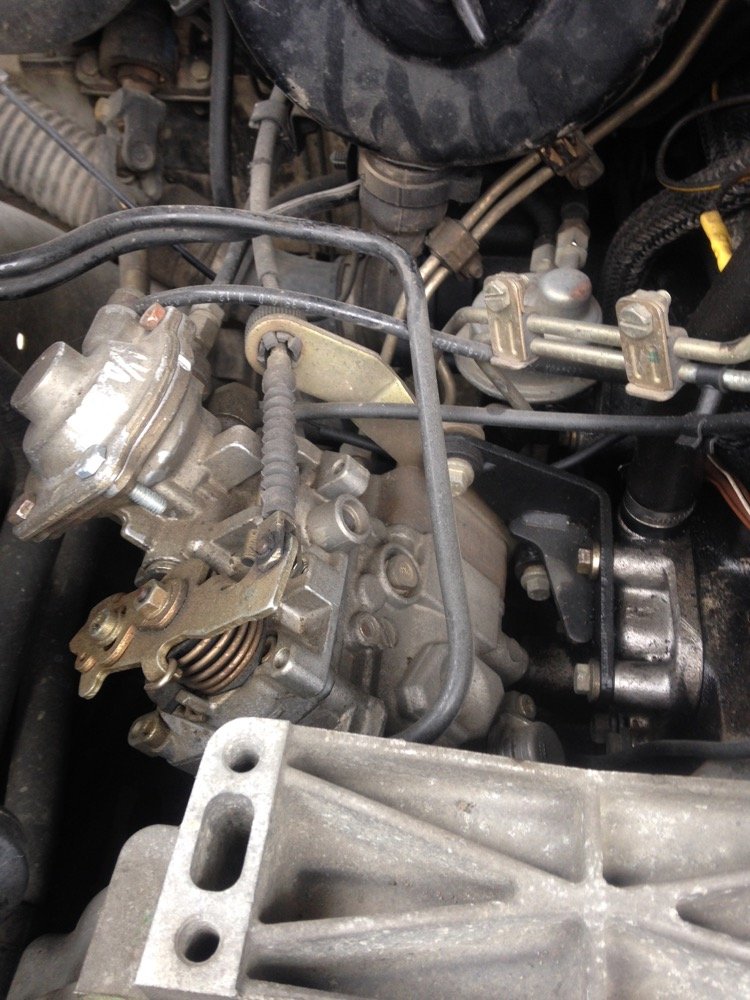
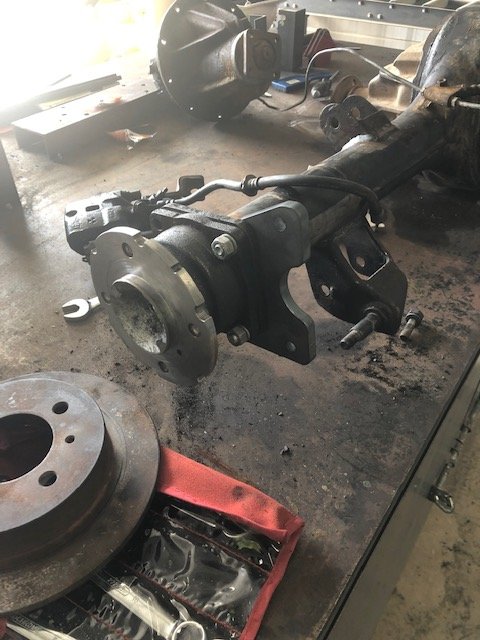
Did a a bit more... Hosed most of the crud off. Pulled the diff/spring assembly off and lowered the tank out. Noticed that it has a hole in the corner that someone has tried to goo up so that will have to get fixed... Also pulled the top cover of the gearbox (I still have no idea what model it is) and was quite pleased, considering the work this thing has probably done its in good nick. The shifter assembly is a custom job so I have some ideas to make the whole thing work alot better. LR transfer box has all of the seals leaking (no surprises) so will end up pulling it for a basic refurb. Onto some more of the fun stuff... Steel frames in all of the doors need work. I'd make this in one section if my folder was wide enough. Thinking about not going through the hassle to filler/prime the body and just metal finish as good as I can and go epoxy/colour...
6 points
-
Slight shudder from takeoff if you don't pedal assist but otherwise pretty smooth. Can ride hands free no bother with throttle in cruise control mode. Little bit of motor noise but not much more than the ticking of rear hub if you're not pedalling. Best bit is pedalling you feel like a machine and can zoom past proper cyclists. Cos it's not obviously an ebike can sense their frustration as you casually pass chopping a beer...
6 points
-
Well I must say I do love the new Recaro seats. They are so comfy and hold you in place soooo much better in the corners. I had still been using it heaps through summer. Got a shot of it next to an I8. Huge cars!!!... What else? We took the Imp over to Blenheim for the big classic car show they have there. Its getting bigger every year and I have kept missing it each time. Not this time though! The weather was a perfect Med like blue sky day and the cars that turned up for the show were a really nice mix of everything. My parents came along too. My dad is 87 and not too fast on his feet having pretty bad lungs now. I was worried he would struggle but I kid you not- he seemed to perk up more every minute and flitted about all the old cars really quite animated. It was great to see and I'm so happy he made it along. Mum loved it too and we met some great people. Pics.. The show.. Dad pondering if he could have fitted a V10 into his Moris traveller he once had, or maybe the 120y wagon they had... Hannah's favourite car of the show (and her dream car)... Some sweet old boats there... Me next to dad, holding a 8 month old Kelpie puppy(my favourite brand of dog, we used to have one).. The Imp (wtf the Toyota Pius was doing there we don't know..)... There was actually a car there that made the Imp look huge... The Imp was popular, being bright blue and the only one there. Lots of people checking it out all morning. I printed off some photos of the restoration onto a4 sheets and stuck them in a plastic binder with a quick note for each. People I spotted seemed to enjoy the read and I imagine it made for more admiration for the little car that was rescued from a field. The trip to and from Blenheim was fun and uneventful. The Datsun engine impressed again with its thriftyness by managing 44.8mpg and that was with some spirited motoring too Drove some nice roads near my old home town. Very very dry over there and sadly they still have not had much rain. But fantastic grape season if that's your thing. Once back home I decided to put the car up on the hoist and deal to a couple of jobs I have been putting off. Those of you with a good memory may well remember the state of the ring gear. It was worn badly in two locations, 180 degrees apart. This meant that it had a 2 in 4 chance of stopping roughly near one of those spots. It seems that sods law dictated a sliding scale of when it would stop and this scale was linked to how many people are around when I would go to start the engine. Worse if those people were probably of the type that think 'oh that a nice old car but they are very unreliable'. When the time was right the starter would ignore my want for turning over the engine and instead may a horrible loud racket as it wore the ring gear worse. I would have to then sit the car in 4th gear, put my foot out the door and rock the car- so moving the flywheel around just a bit. Then start the car and drive away red faced as the people now watching tut tutted... Never did it do this on our property btw... The other thing was that the rear main seal was leaking badly. Bad enough that the clutch was playing up and I'd have to think carefully about where I was to park the car when going to the country club* for fear of meeting those same people again and only going to reinforce their misguided opinions about old cars. I had the chance to replace the seal when I took the engine out way back at the beginning. But remember who I am - a tight wad who likes to save money and $25 seemed like an awful lot for a seal that 'looked ok' Silly me. So out with the engine then. Made easier by using my special custom made bespoke 'Datsun A12 engine cradle' Here's the worn ring gear. I drilled it and broke it off. Removed the old seal. It was indeed very hard and not very sealy. More like a ceramic ring then a seal.. The oil had coated the clutch disc.. Luckily that cleaned up sweet with a load of brake cleaner and was deemed good to use (please refer to note above about tight wad..) Went to my old workplace, Autofocus in Nelson and used the gas set there to remove the good ring gear from another flywheel that came on the A15 engine I had bought. I then dropped it onto the A12 flywheel... With that done the engine was given a quick clean whilst out and slung back in place. Oh but not before making using the opportunity of an empty engine bay to size up a different engine. That however is secret squirrel and will be announced later in the year The Datsun was all plumbed and wired back up. It started straight away and after bleeding the coolant system I took it for a hoon. Clutch feels great and no horrible starter noise roulette... However..... the bloody speedo gave up and decided that the needle should reside at around 90 mph. It had been getting ever so more optimistic over the last few months and I had read that the springs can weaken. It doesn't affect the odometer which is mechanically linked to the speedo cable, just the speed reading. Now though, having just fixed some other issues my 'unreliable old car' decided to throw another at me. When I returned home from said hoon the needle decided it would resolutely remain at around 60 mph even when the wee car was stationary. So this happened... I'm so glad that I had added plugs to the wiring birds nest that resides behind the instruments because it made removal much quicker and easier. I took the speedo apart and found this... It seems that the sponge sealing which fits between the telltale warning lamps and the speedo face had broken down and crumbled into the speedos magnetic disc area so creating drag. I'm not sure but it was messy in there with lots of friction. Rather then muck about trying to clean it all out I instead pulled the spare speedo head from my stash of Imp parts and fitted that instead. I removed all traces of the old foam, opened my little alladins drawer of various foas and double sided tapes and stuck on some new stuff... This lot will be binned in the future as I fully intend to replace the whole cluster with nicer modern gauges (but with a classic style to them) including moving over to an electronic speedo head. Speedo cables and all their wobbles can leave by the back door thank you please. So since the world has gone a bit weird and we all have extra time I decided that instead of refitting the dash into the car in the poor evening light I would instead do an update. I'll refit it tomorrow. One other job to look at is a rattle from the steering rack. I think I know what it is and I have already stripped and inspected a good spare that I might swap in. Other than that I'll just get back to using the Imp, obviously only for shopping purposes at this point in time. I now have plenty of other tinkering jobs to do and hopefully in the next update there will be some very exciting news * I don't actually belong to a country club. But I do like a spot of lawn bowls....5 points
-
Evening. Another lovely day in the old U of K. Skimmed and painted the B-pillar repair, needs a bit of stopper before paint but it's good enough for a country job. Even looks passable up close Push bar next, fabricated a jig for accurate cutting and aligning /screwed it roughly to a plank. Mocked up. Decided to lose the clamps in the end. "essential" trip to get it welded at Steves Then back home to paint it and nail it on. Yeah, right. Had to take the front everything off to fit it properly. Ran out of light and being bothered in the end. Not really a problem, I've got a few spare weeks....5 points
-
Got her rollin' yesterday Started by fitting controller into the fake vintage leather bag I got from Ali. Was a tight squeeze, especially as the throttle connectors were wrong (M-M) so I just rigged some strip connectors, and I taped up the wires I didn't need (PAS sensor, headlight, brakes and cruise control)... And thumb throttle couldn't be taken apart so had to remove the 50-yr old grips without buggering them to slide it on. The left one resisted gentle heat/wd40 spray, so decision made, throttle on right... And made up a heavy gauge power cable between battery pack and controller. This was around 8-10mm sq cable with XT60 connectors each end, and still measured around an ohm resistance. Not too many options if I want to keep batt pack at rear though. Couldn't find my cable ties so just insul-taped things together for trial run. Need to punch some brass grommets into bag at rear so can cable tie to stays, it wobbles about a bit... And still have no brakes, the pads are very hard, worn down, and cables at max adjustment. Will replace pads and make new cables when I can. BUT, when I plugged everything in and turned on the controller it ran. Quick test run showed me the controller was on upside down, (not reading 62km/h) I learned the throttle locked on at full noise if you hold it on for ?? seconds, so first corner was a bit hairy, no brakes and full throttle. I could either rig up a brake switch or just learn to blip throttle to reset when approaching corners/intersections. Bloody pleased it went though, back to garage for a few tweaks before proper test run...5 points
-
So Yeh nah, the norgren air filter things didn't work. I took it for a blast on the beach, was probably like 10km away from my car, and it lost all power. The little filter things had got saturated with gas and stopped breathing. Luckily an easy fix, I just cut them off and it ran sweet again. So I thought I'd give plumbing them into the air box a try. I've welded a nipple on the very bottom of the plenum to connect too, this will also act as a drain if a float sticks and floods the plenum again. I also replaced the restricor tape with a bit of flat bar. I also did a dodgy patch on the exhaust, and put some flat bar over it to protect it a bit, as it's the lowest point. I also started building a simple trailer for transporting this thing. It's not going to have springs, and will have a hinged draw bar so it can tilt, so I don't have to have ramps. Regards, VG.5 points
-
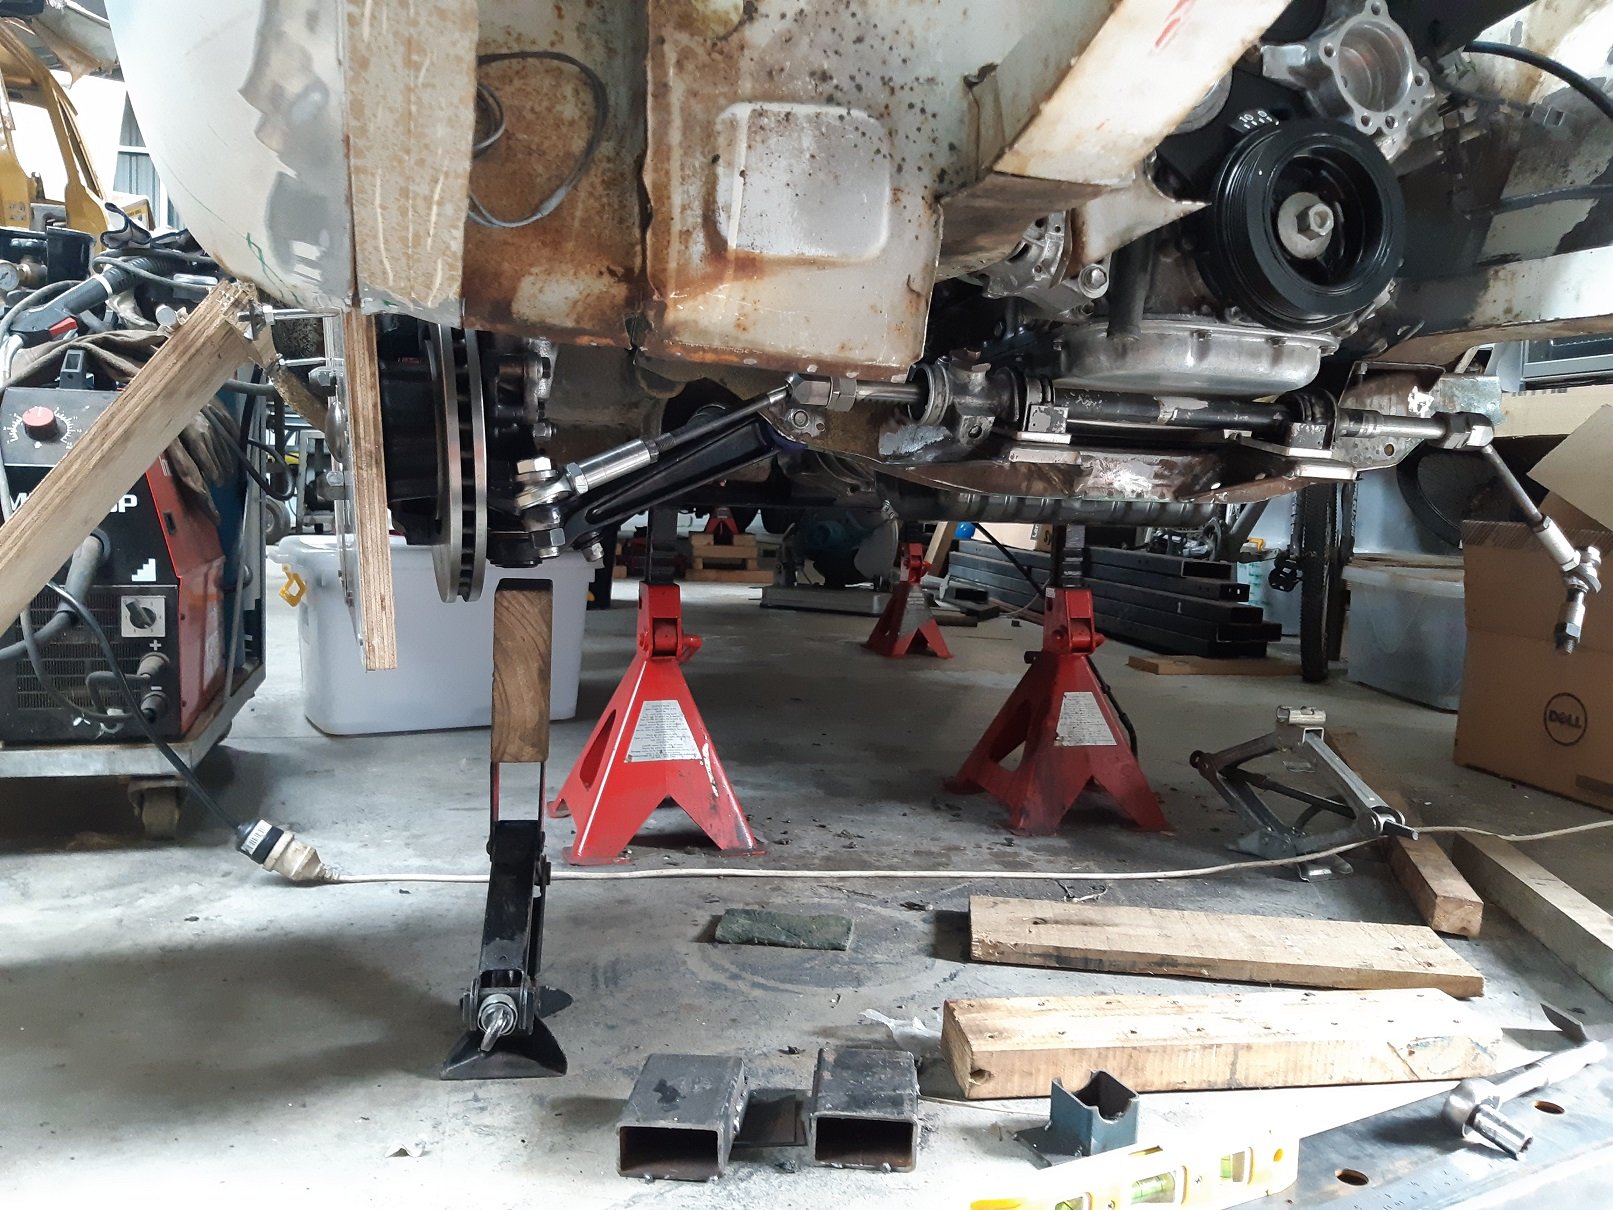
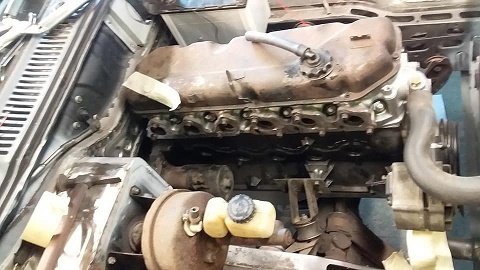
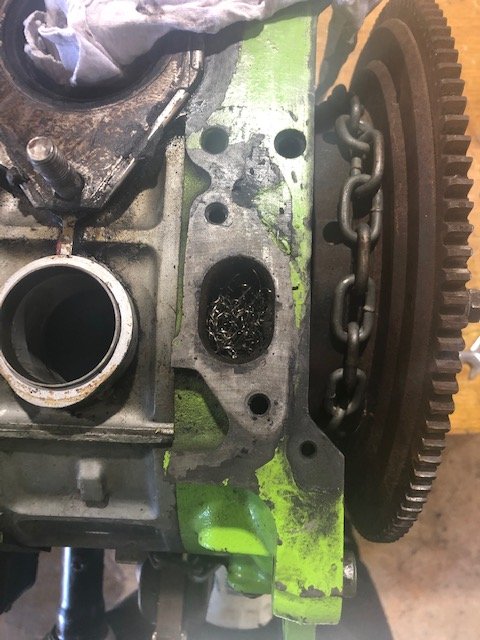
Looks like i should be able to fix engine back to pretty much 100%, lockdown spec The bad; it has spun 2 big end bearings, shells in pic below were worst. All the rest of the bearings in the engine look pretty tired as well. Crank isn't too bad, but would need a grind to be usable. plus seems it has already be ground in the past, so in the bin it goes. Oil pump hasn't let go or anything but some bearing material has gone through it, bin as well. from there onwards everything looks clean, oil filter has done its job Good news is I have a bran new crank and oil pump. Both are for another project Ive been collecting parts for. Means that goes back down the list, but rather have this thing running. Rods are all good. some very light marks on one of them, shouldn't be an issue. pistons and bores look perfect, although i haven't taken pistons out as may not be able to get hold of a ring compressor. Have managed to sort some new main and rod bearings, should be here early next week. Have also done the oil restrictor mod, to the oil gallery that feeds the head. keep more oil in the sump at high rpm Tl;dr : putting this junk back together with new crank, oil pump & bearings.5 points
-
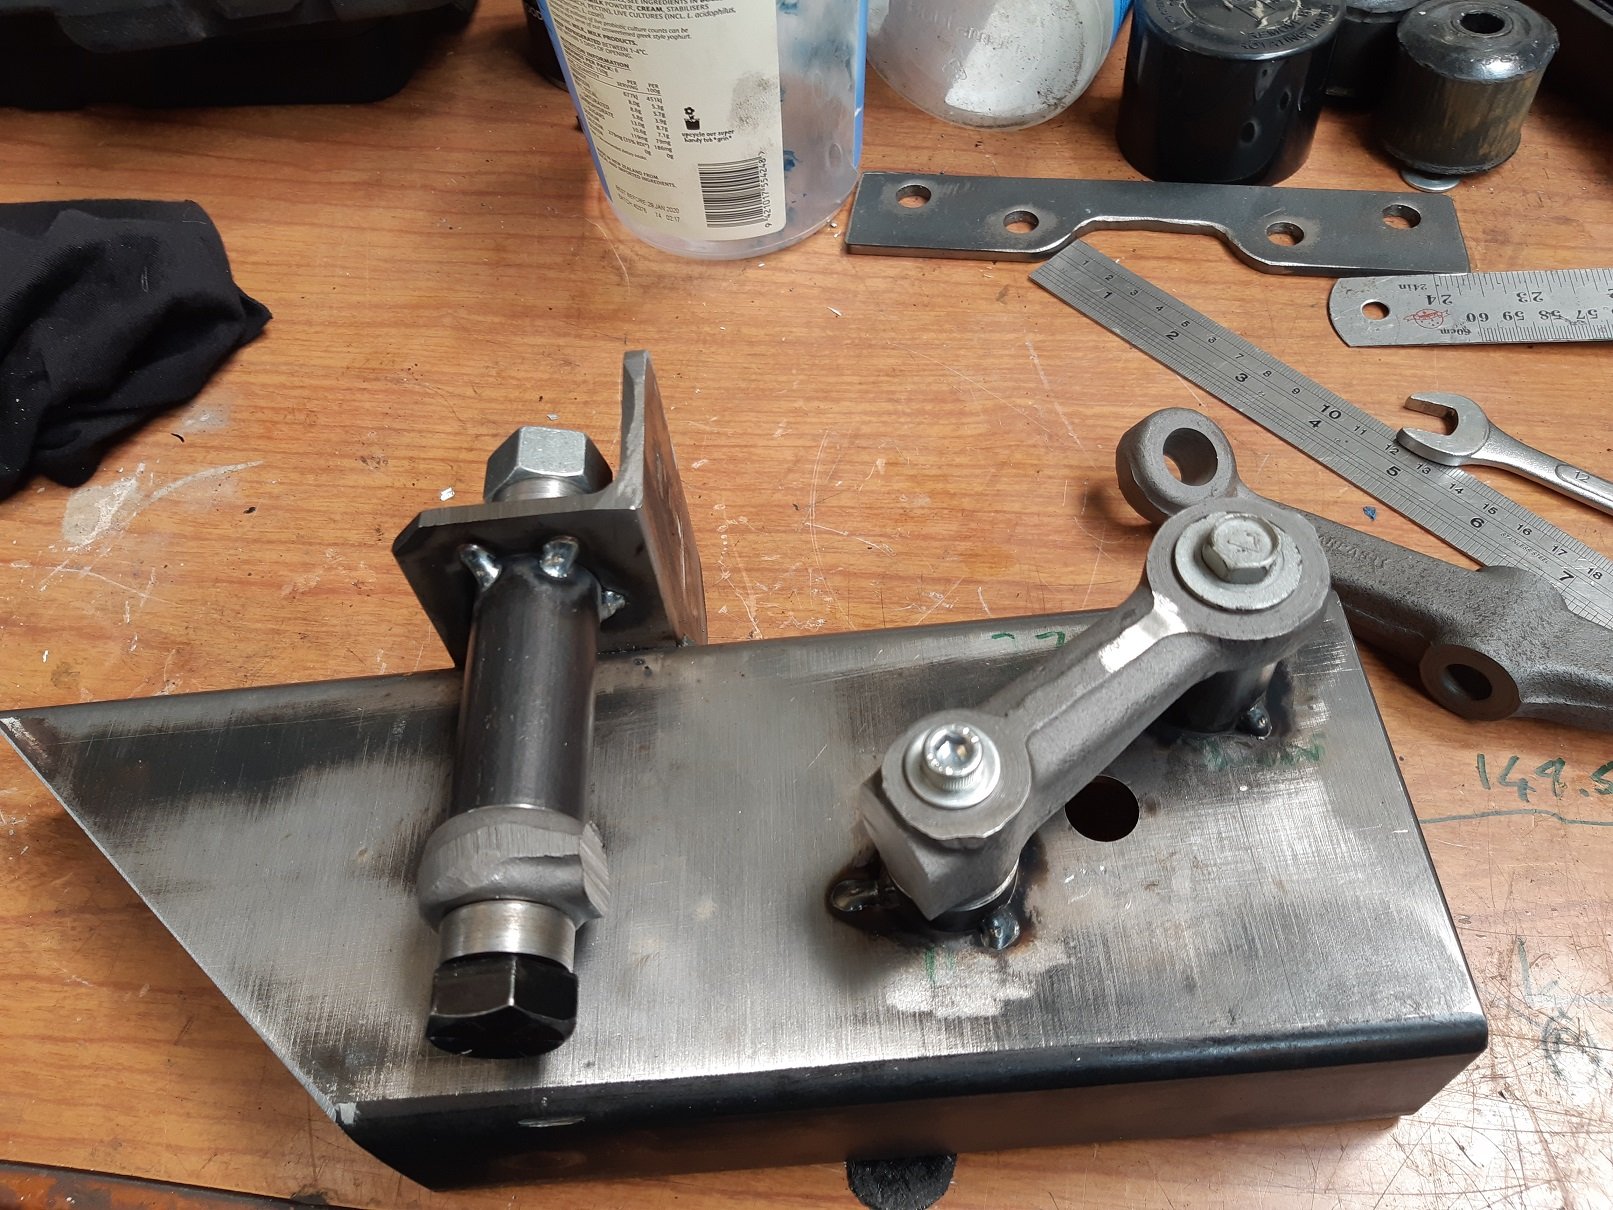
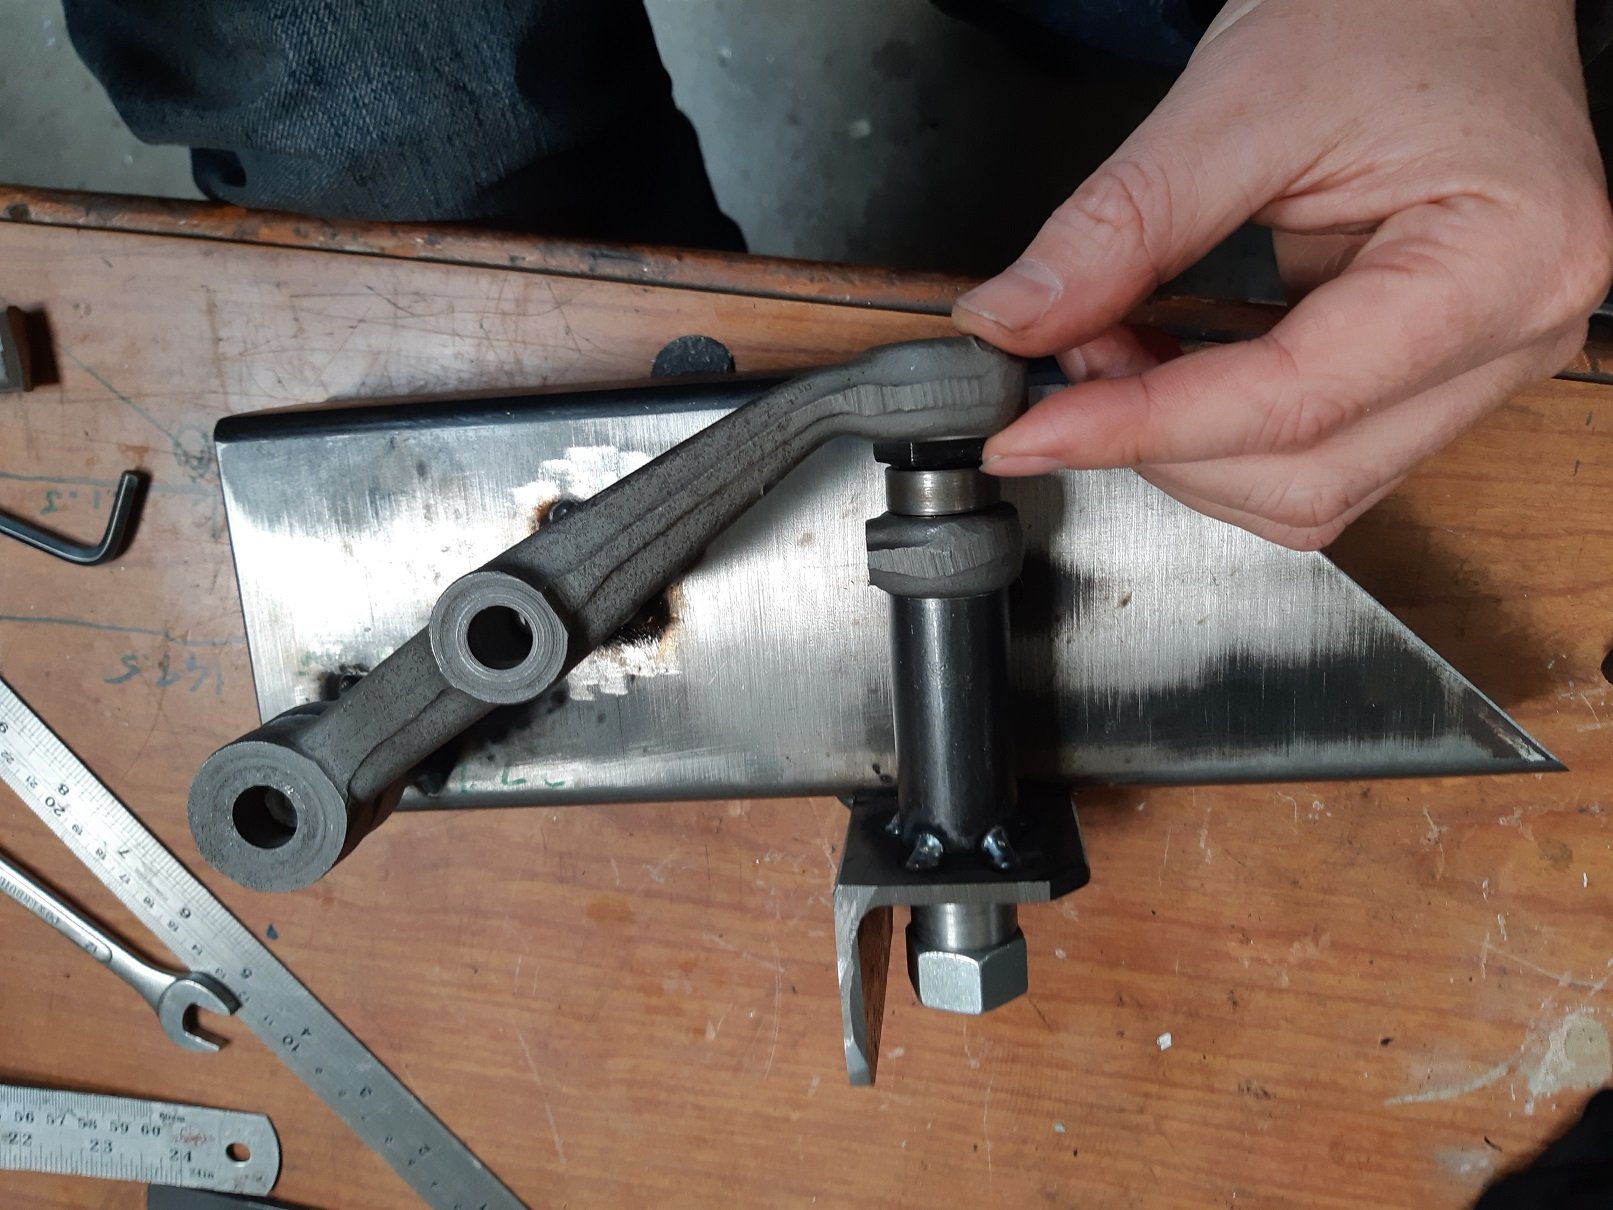
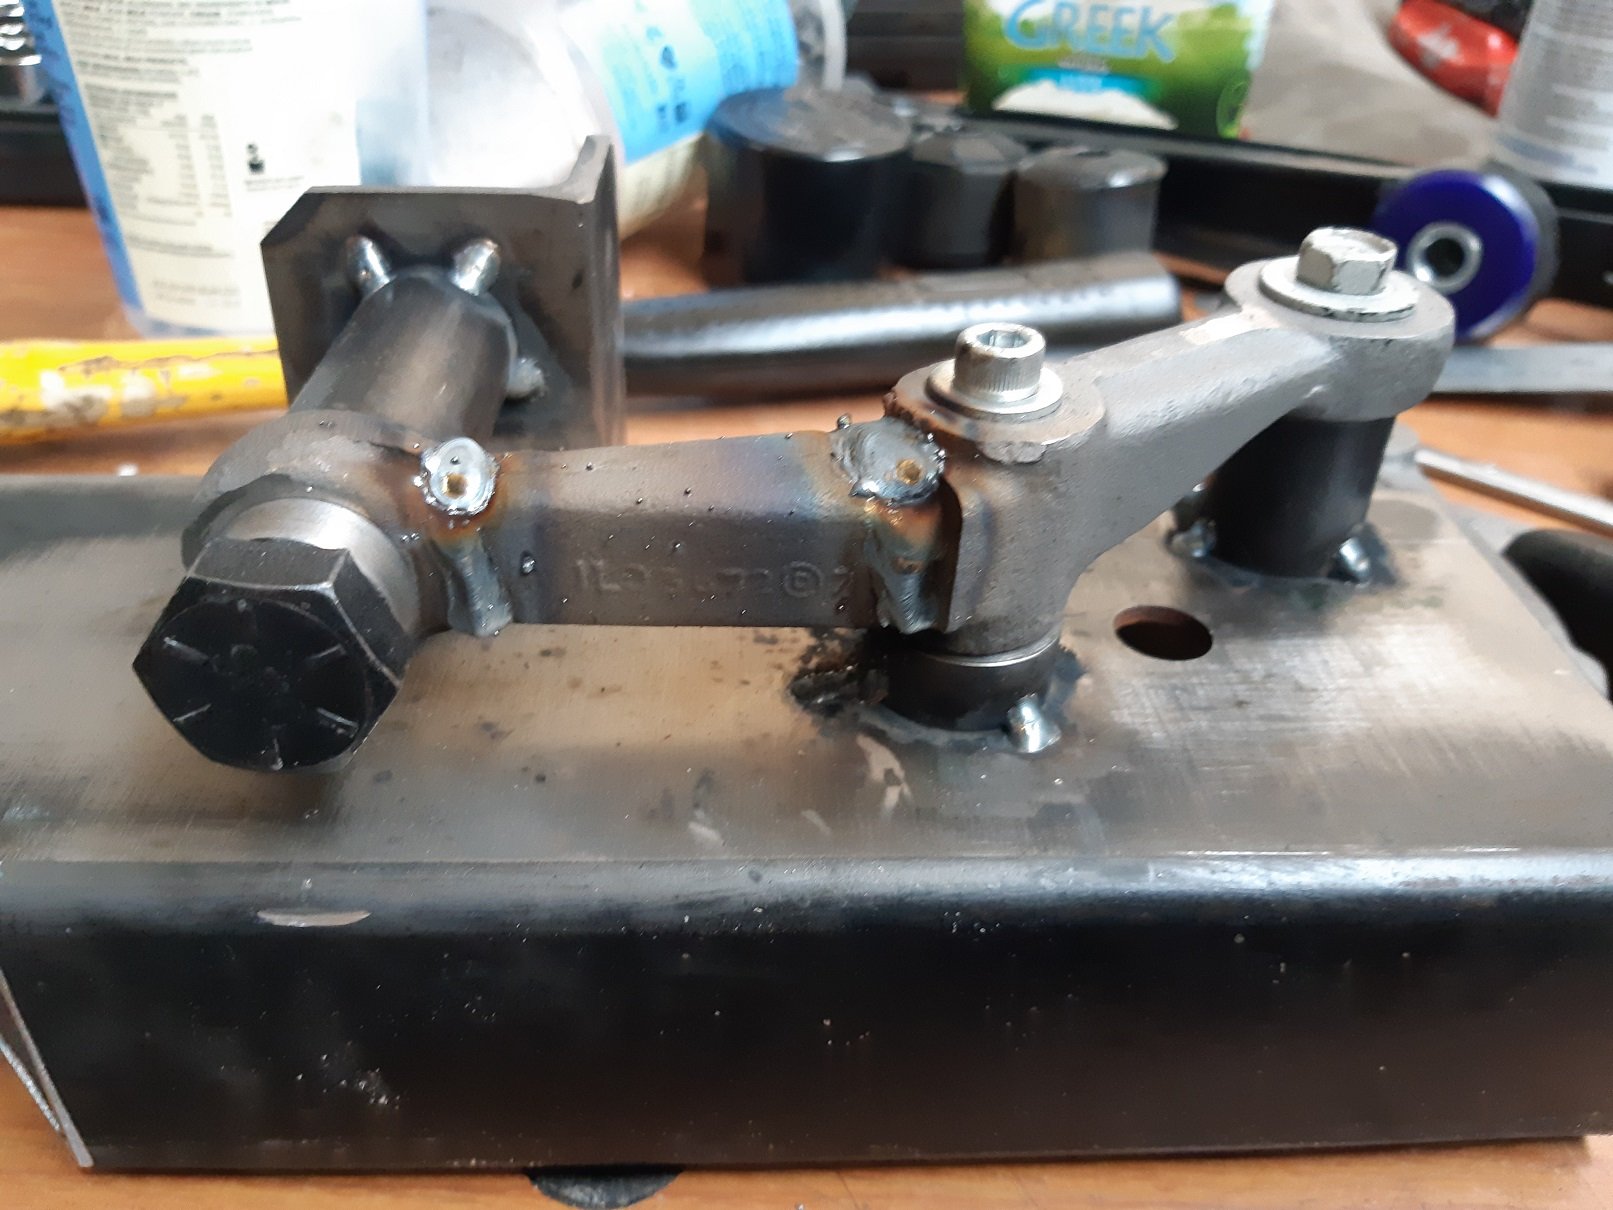
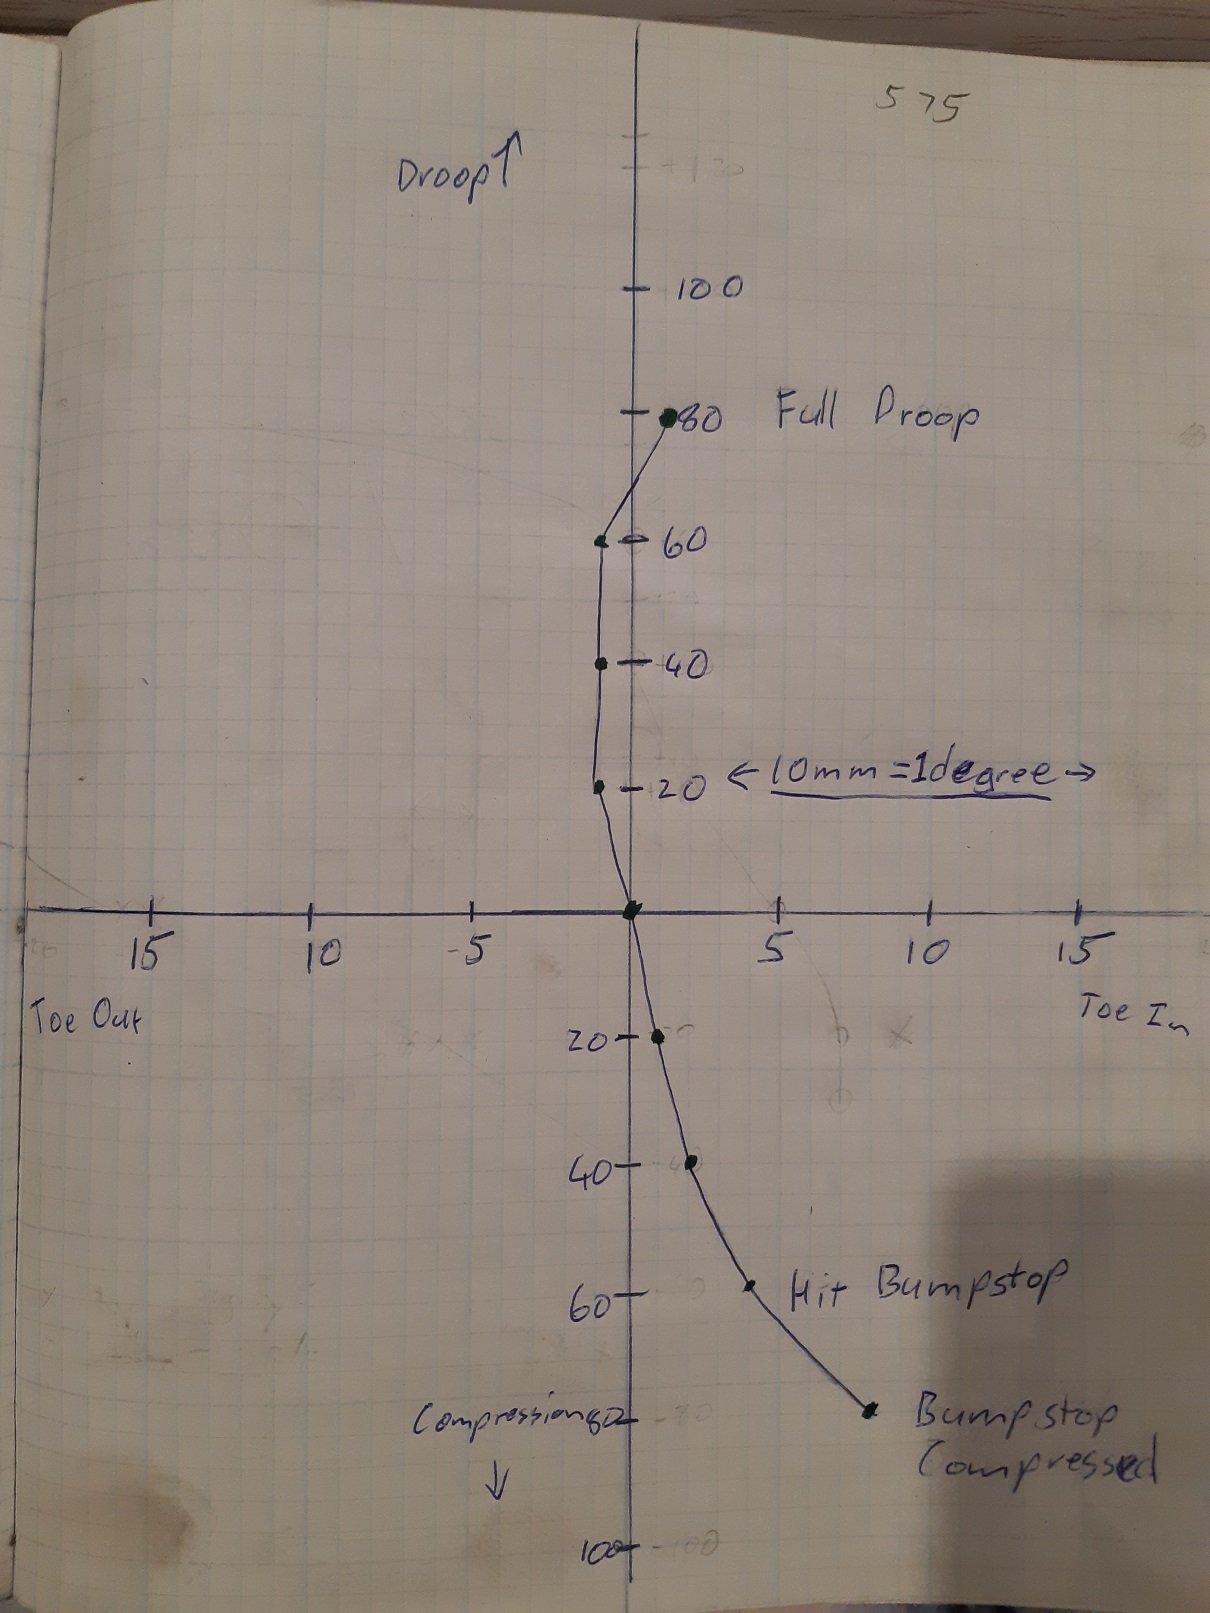
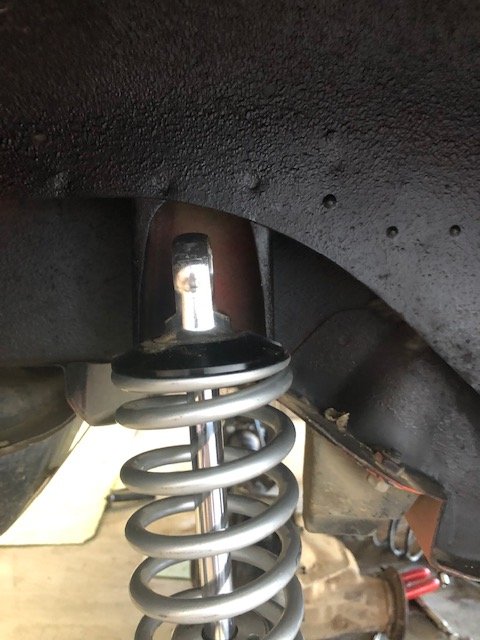
Using my bumpsteer measuring thingamadoodah and fucking around with spacing the tie rod end and rack mounts I found that the tie rod end and the steering arm needed to exist in the same space. So I sacrificed a spare one to modify so I can continue mocking up. I made a jig to hold the end in the right place for welding. Here is the one from the other side to see how far it's moved up. . And totally legit welding. safe as. This is just for mocking up. Once I get the height right for minimal bump steer, I'll mill the final ones out of a block of mild steel and have tapered holes so I can use the factory tie-rod end and not fuck around with rose joints, bolts and spacers. I've been using the LVVTA bumpsteer pdf thing. https://www.lvvta.org.nz/documents/infosheets/LVVTA_Info_04-2010_Bump-steer_Measurement_Background_Information.pdf My measuring thingamadoodah has the points 575mm apart, so each mm of toe is 0.1 degrees. With my hacked steering arm, the tie rod end is mounted below it. This is with a 3mm spacer, it's the best I've got it so far. If I remove the spacer and move the tie-rod end up, the line on the graph indicates the tie rod end is too high. If I have two 3mm spacers, the line says it's too low. I'll have to make some 1mm spacers to see if I can fine tune it further. To flatten out that curve I think the whole tie rod has to be longer, but then I'd need a shorter steering rack.
4 points
-
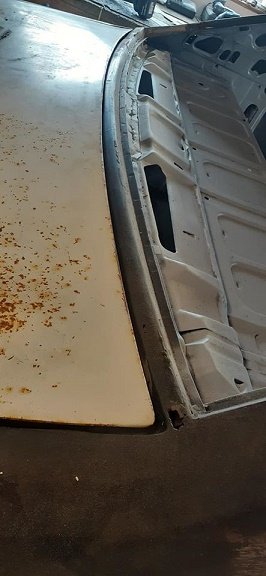
Fixed the few bits of rust in the boot ..straightened the are the boot lock bolts to..straightened the boot rubber lip and aligned the boot itself... Degresed the boot...metal prepped and coated in POR15.. While aligning the boot I found that strip between the bottom of the window and the top of the boot isn't very good...so once the world goes back to normal I'll have to find one....( cant get rust repair panels for that) so will have to come off another shell
4 points
-
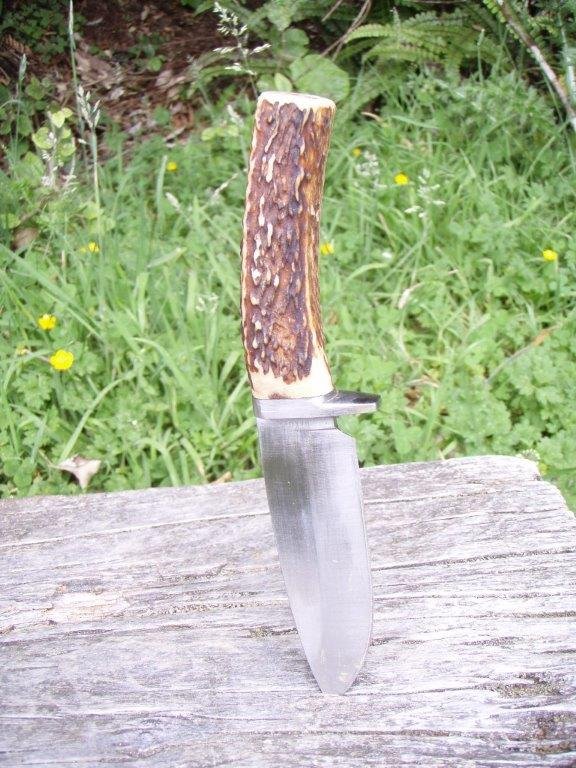
Knife made from circular saw blade. So sharp it'll "Cut ya just lookin at it"
4 points
-
The wife commissioned me to build a swing for the child. I started pre lock down, so had all the steel/chain/shackles/hose already. I didn't get paint, so it ended up silver, as that's all I had. Made the baby spec seat out of some rubber I had laying about, and the adult side is made out of old conveyor belt. I had to make it in three bits so I could get it out of the shed/into the back yard. I've also assembled a hut the father in law made, and reconditioned a see-saw the wife had as a kid. Next up is reconditioning/modifying the old slide (also wife's) in the background.4 points
-
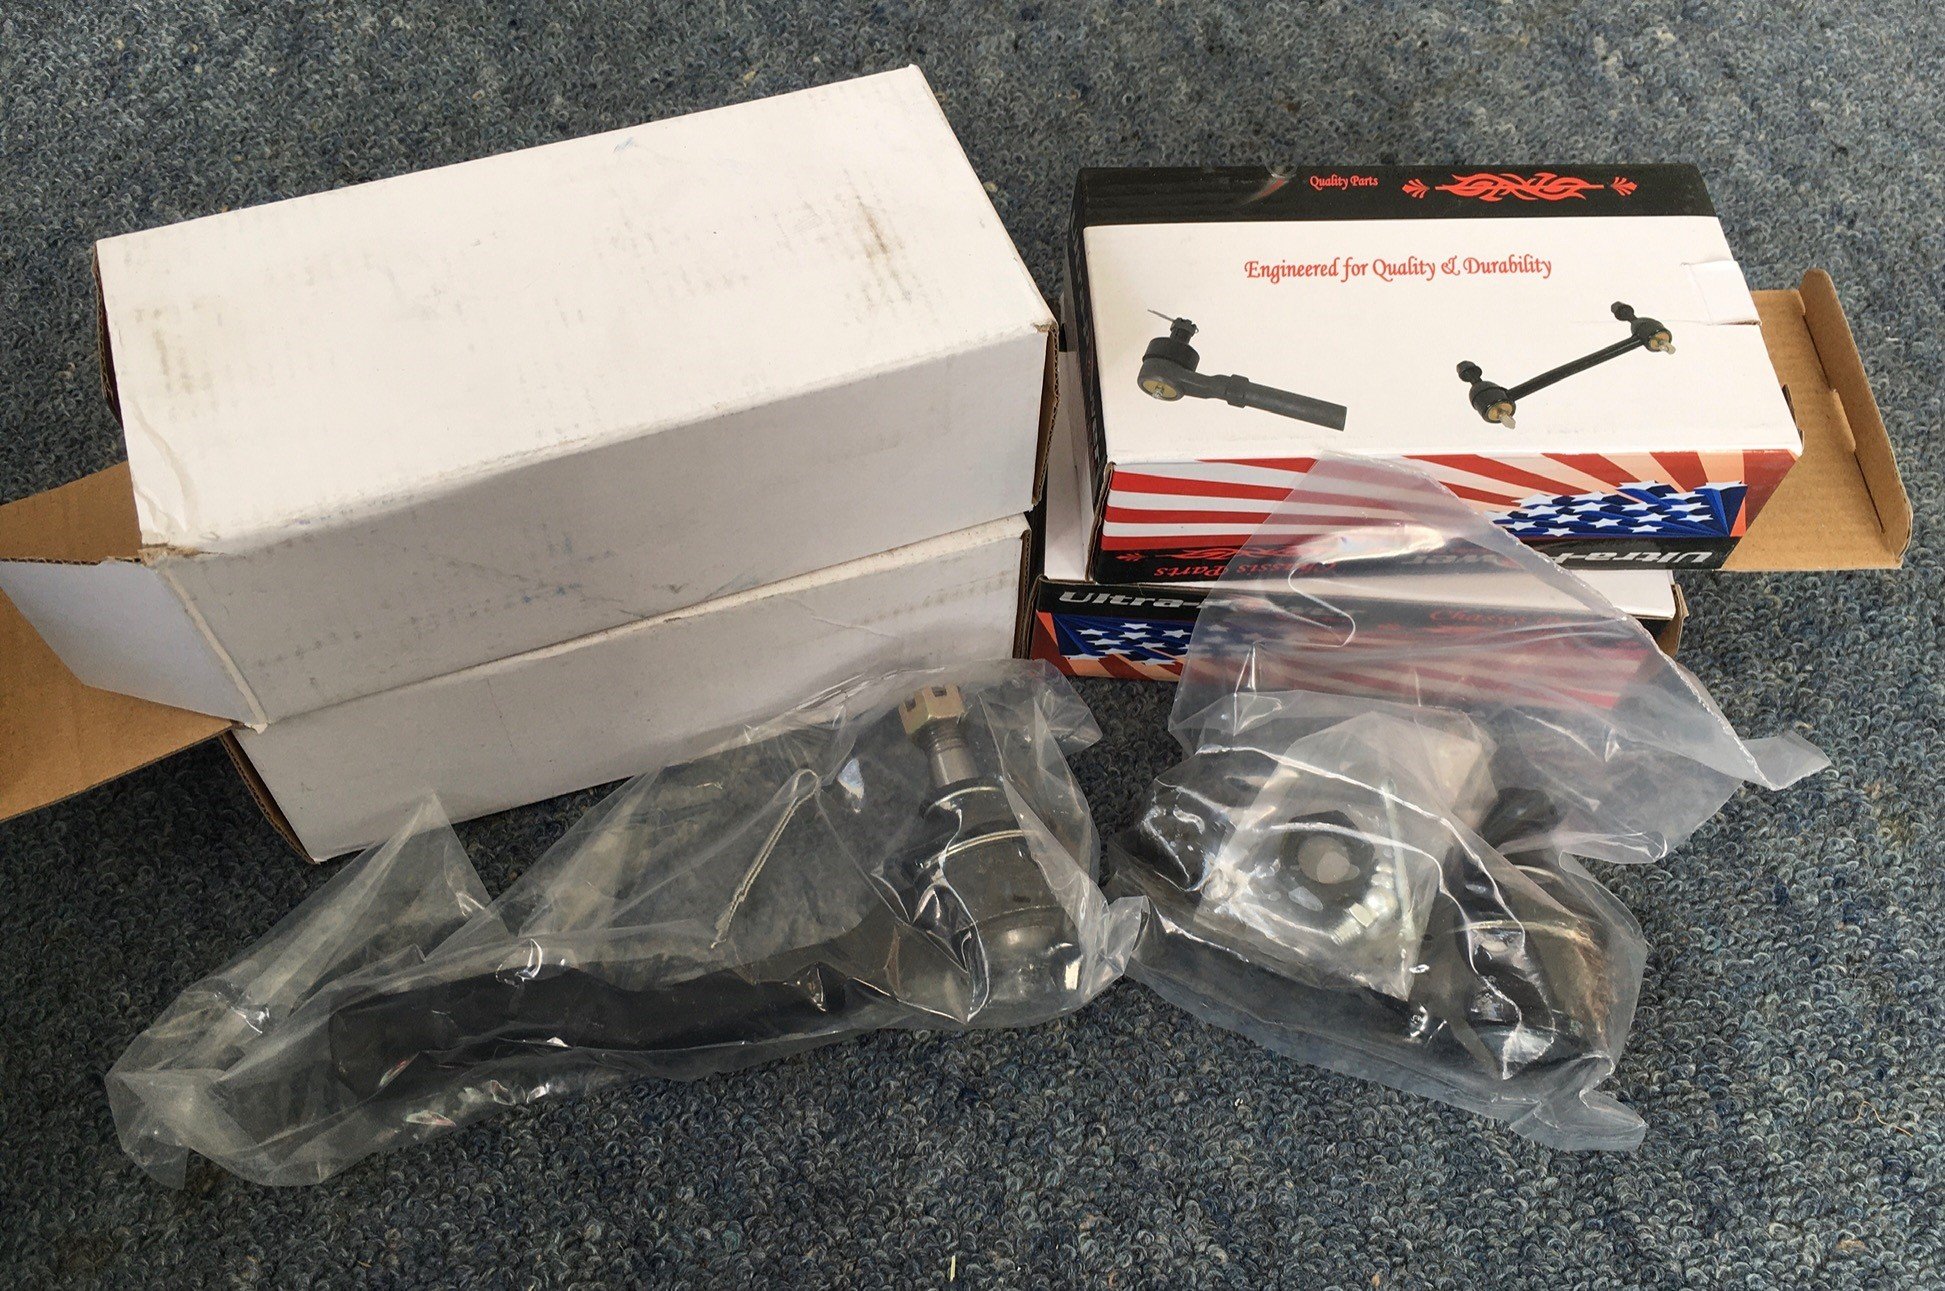
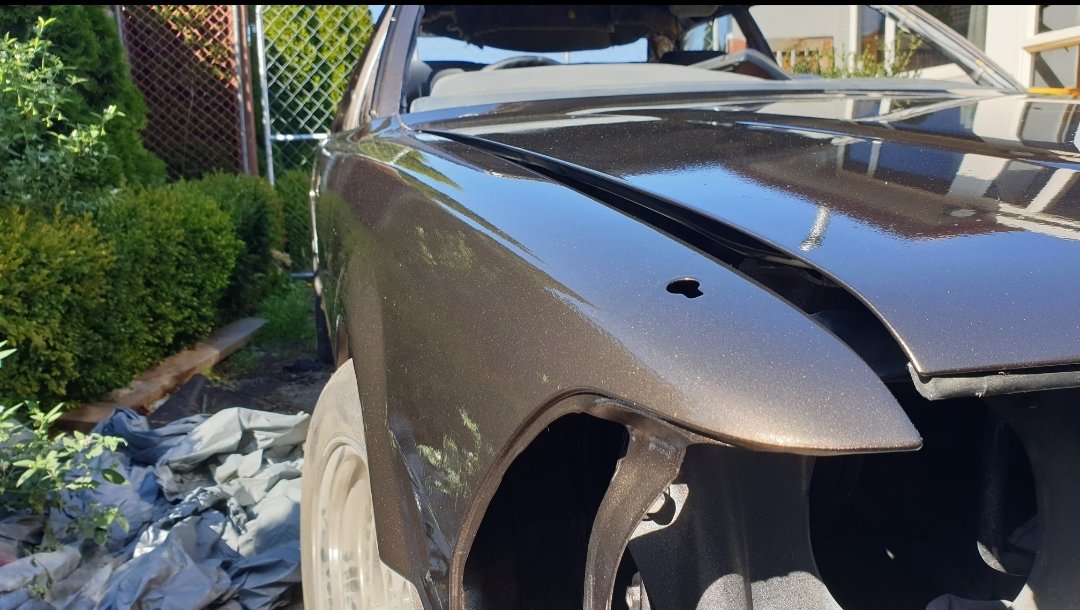
The grill and headlight surrounds had a few scratches and paint was chipped in a few spots. Had a 1/2 can of 'r32 skyline grey' left over that I'd used to paint the 929 grill with, so figured having a matching colour for the light surrounds and grill would be good. Quick sand and mask up then paint. Can't really tell the difference between the grey and the black it used to be unless you were looking for something different. Also ripped out the front end suspension and have been replacing the tie rod ends, balljoints and a few bushes. 3rd old mazda I've bloody done this on in the last few years, but always good to replace all the split boots and cracked bushes under the front end. Will give a few bits a clean and paint while I'm under there too. Should have it back together in the next few evenings.
3 points
-
Did the other side, but I don't think it really needed doing...gaskets looked okay. But at least that's one thing to not worry about eh?
3 points
-
Don't drop it, you'll break the sink3 points
-
Update.. so being stuck at home has got me thinking so the 4 door I bought to chop up to fix the GT, I have decided to build a rat replica GT in order to shake down the running gear that’s going into the 2 Door GT. Plan is to blast the underside, inside, inside the boot and engine bay and paint ermine white and leave the exterior it is apart from maybe a seal coat. Dash and doors inside will be done in satin black.3 points
-
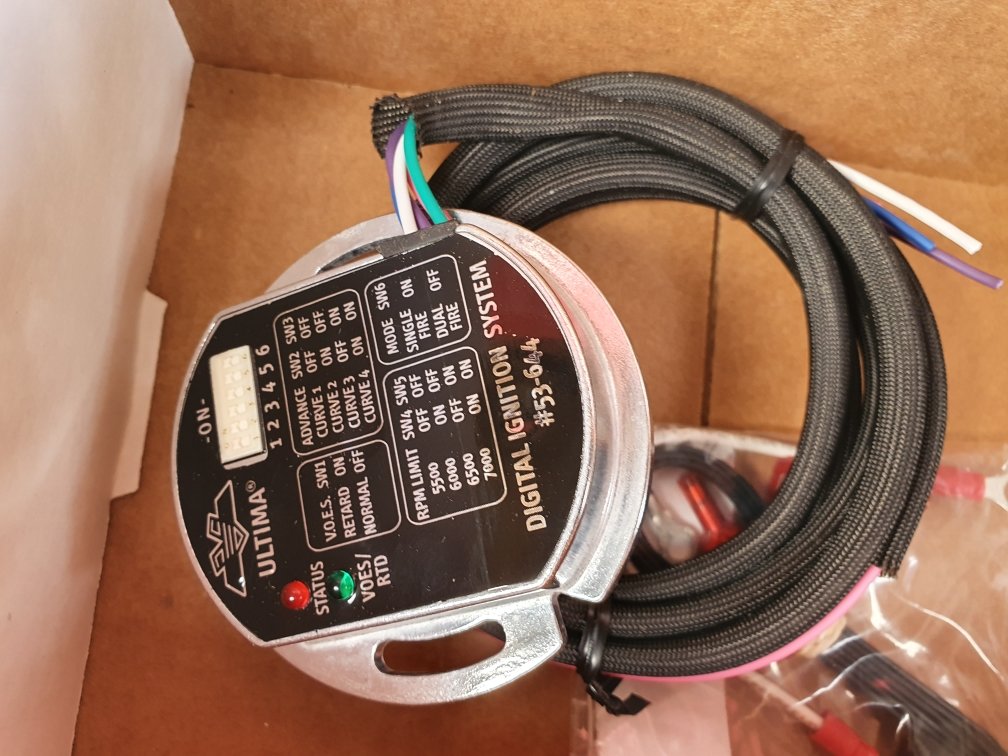
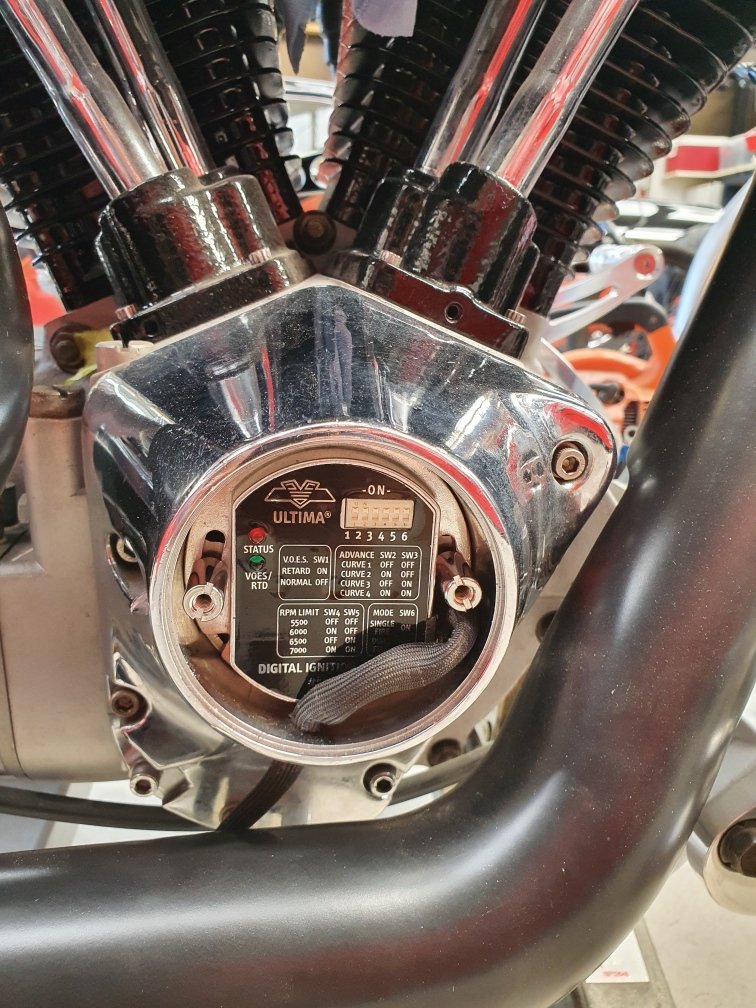
Installed a fully programmable electronic ignition system. It has a myriad of torque curves to choose from already pre mapped in the system. Just select your parts and riding style and compare with the selection on offer and dial it in. Had to install a new rotor behind it, then this just popped in. I put timing in the middle and will fiddle with it later. Timing cover back on, looking sweet! I've got a big lumpy cam in this motor, so may take a bit of trial and error to find the right ignition program...but I'm not going to over think it right now.
3 points
-
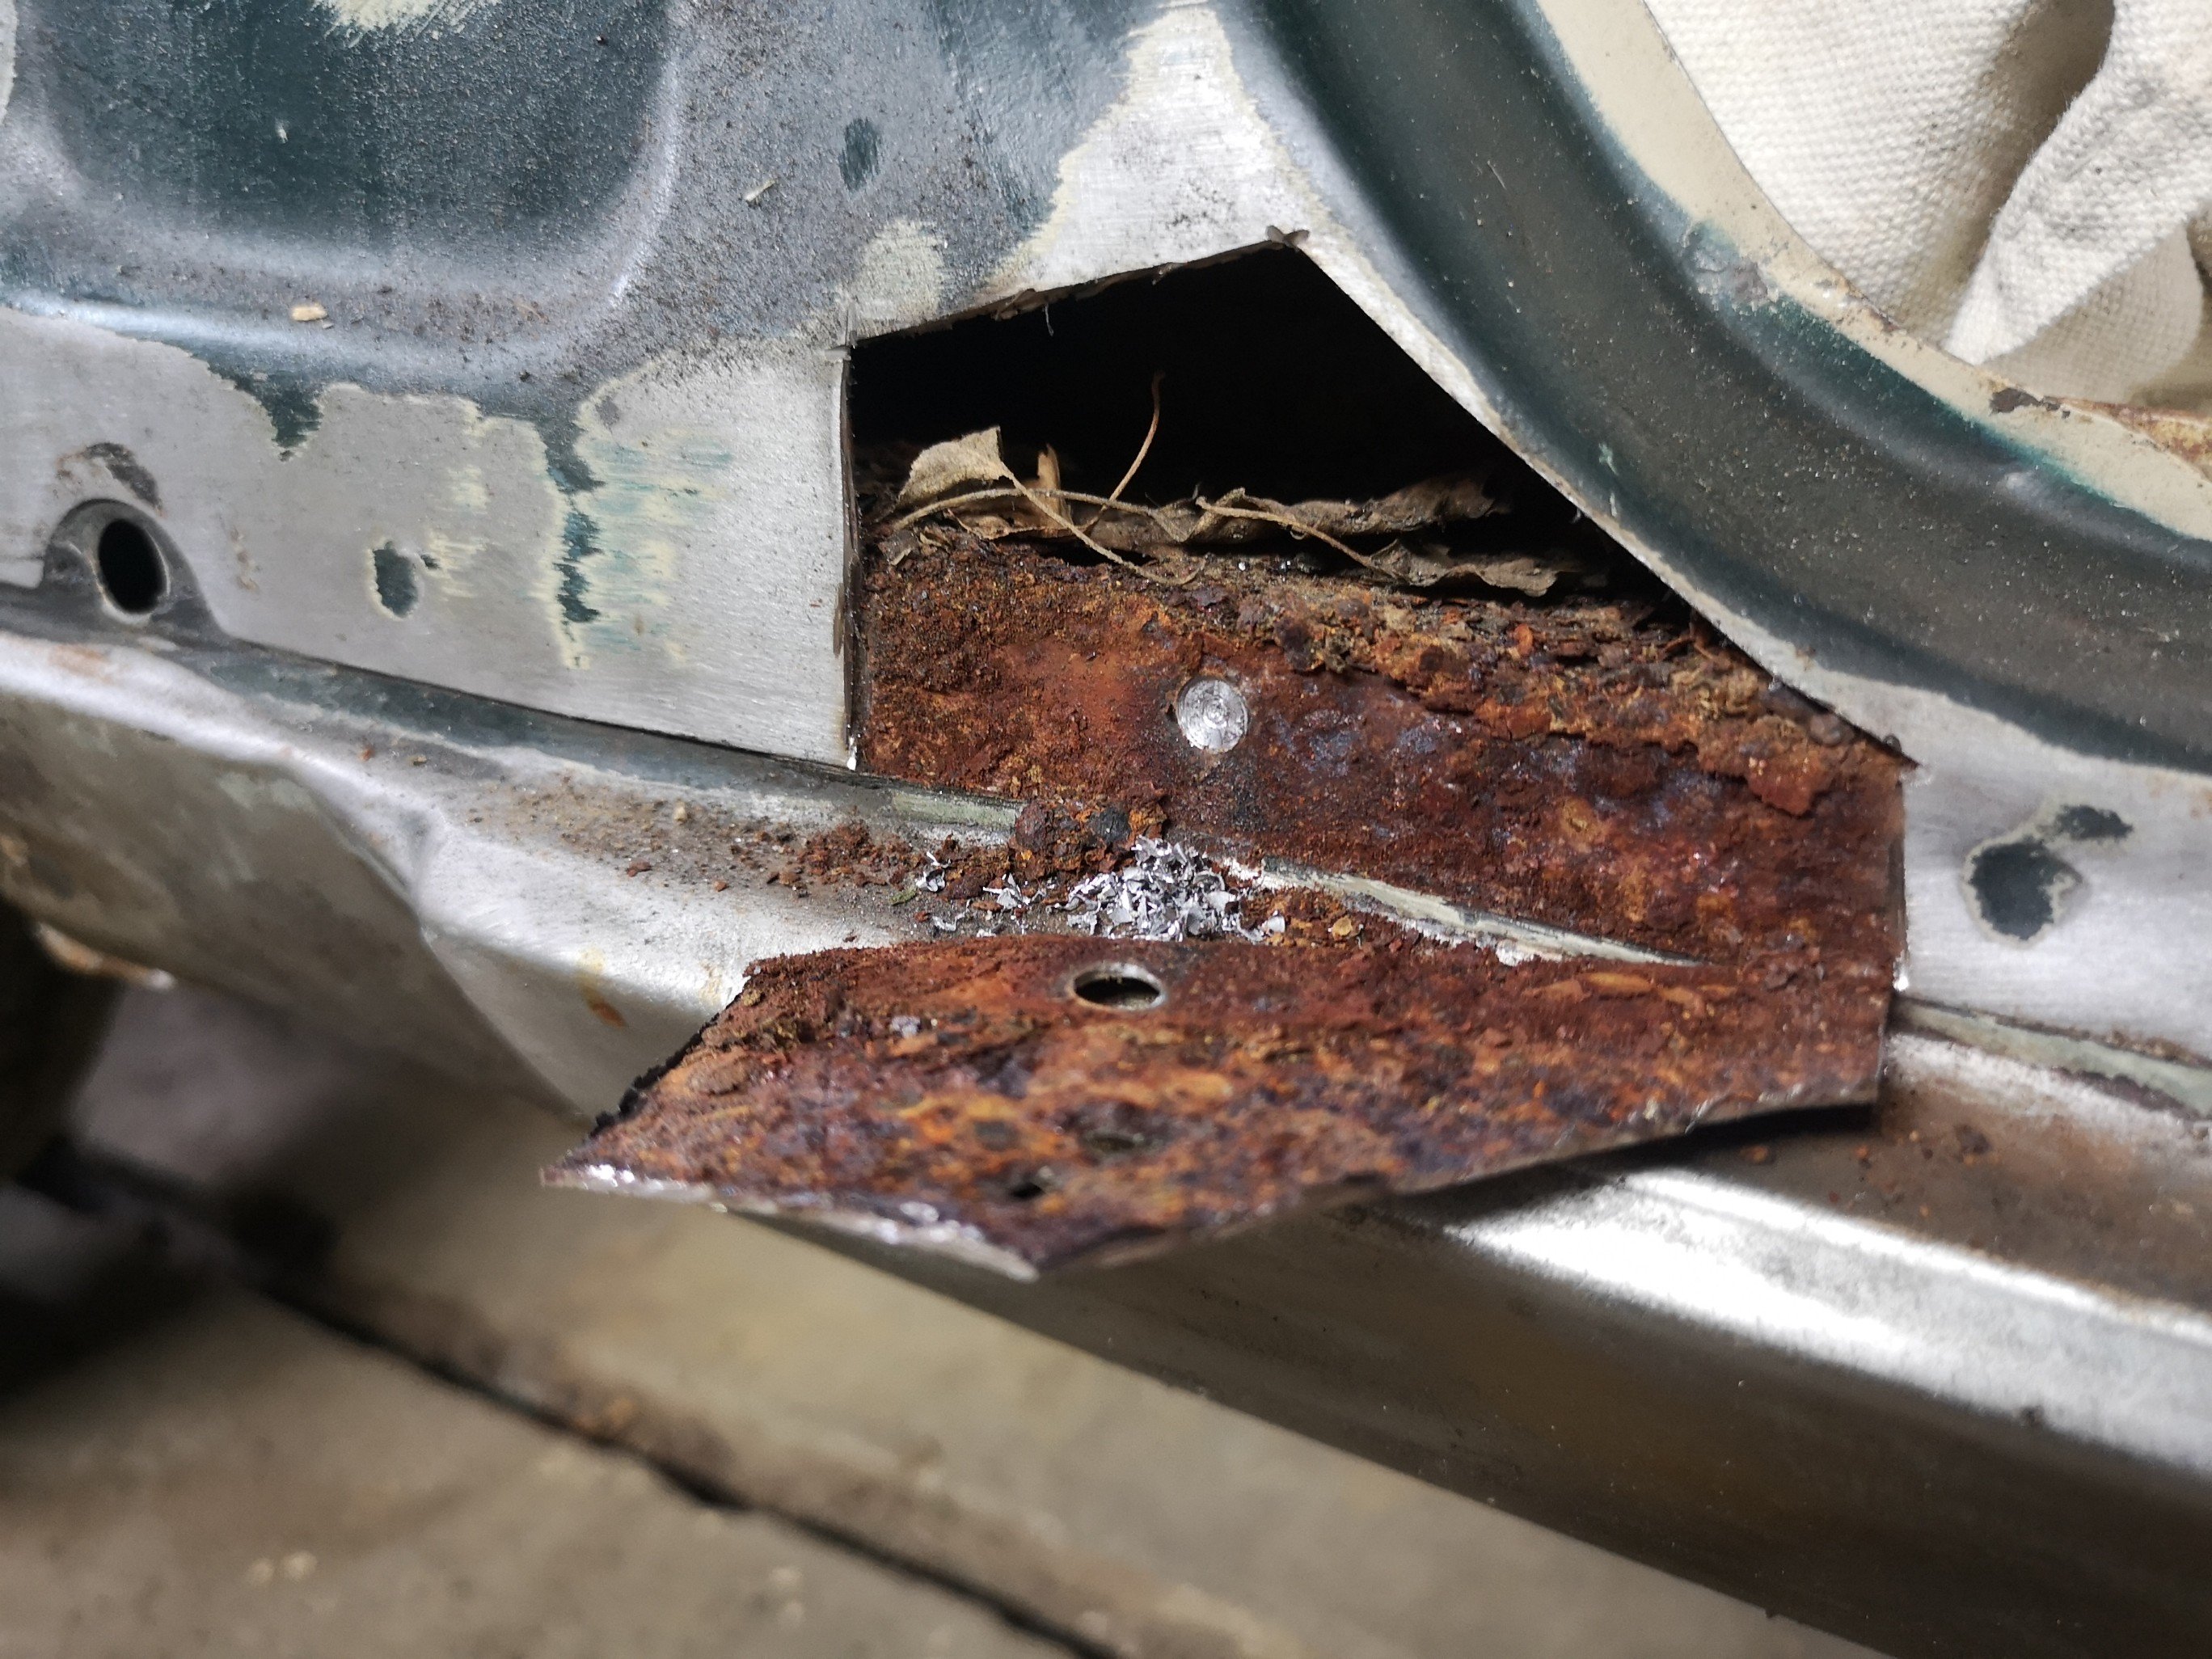
Had a bit of time to spend on this so I did a couple of rust repairs, 1st was a couple of holes in the pass A pillar, there's a bit of an issue I discovered above and below this this in the wiper plenum and floor which is gonna take some figuring but I'll start with this, Cleaned up as best I could in there and got some rust kill, primer on it, most of what you see there is rust from the cut piece, gonna fill it with cavity wax eventually..
3 points
-
The clears a bit of a disaster really and reasonably gutted, so many things I'd have done differently in hindsight. But it's done. Drove it into the sun yesterday and it's not all bad news.
3 points
-
Haha there it is again. I saw a recent post on facebook of the engine running. I wonder in what state? The guy I knew that had owned it for ages until recently, said the cooling system was so rusty it was like washing out sand but did get it running. The brake seized and he left it for a long time. I still have mine, hasn't moved. Haven't heard anything from the original guy who built the 7 NZ originals in the 70's. Think I need to give up on him finding any paper work. I have heaps of things to keep me busy in the lock down but maybe I should have another look at getting the engine started.3 points
-
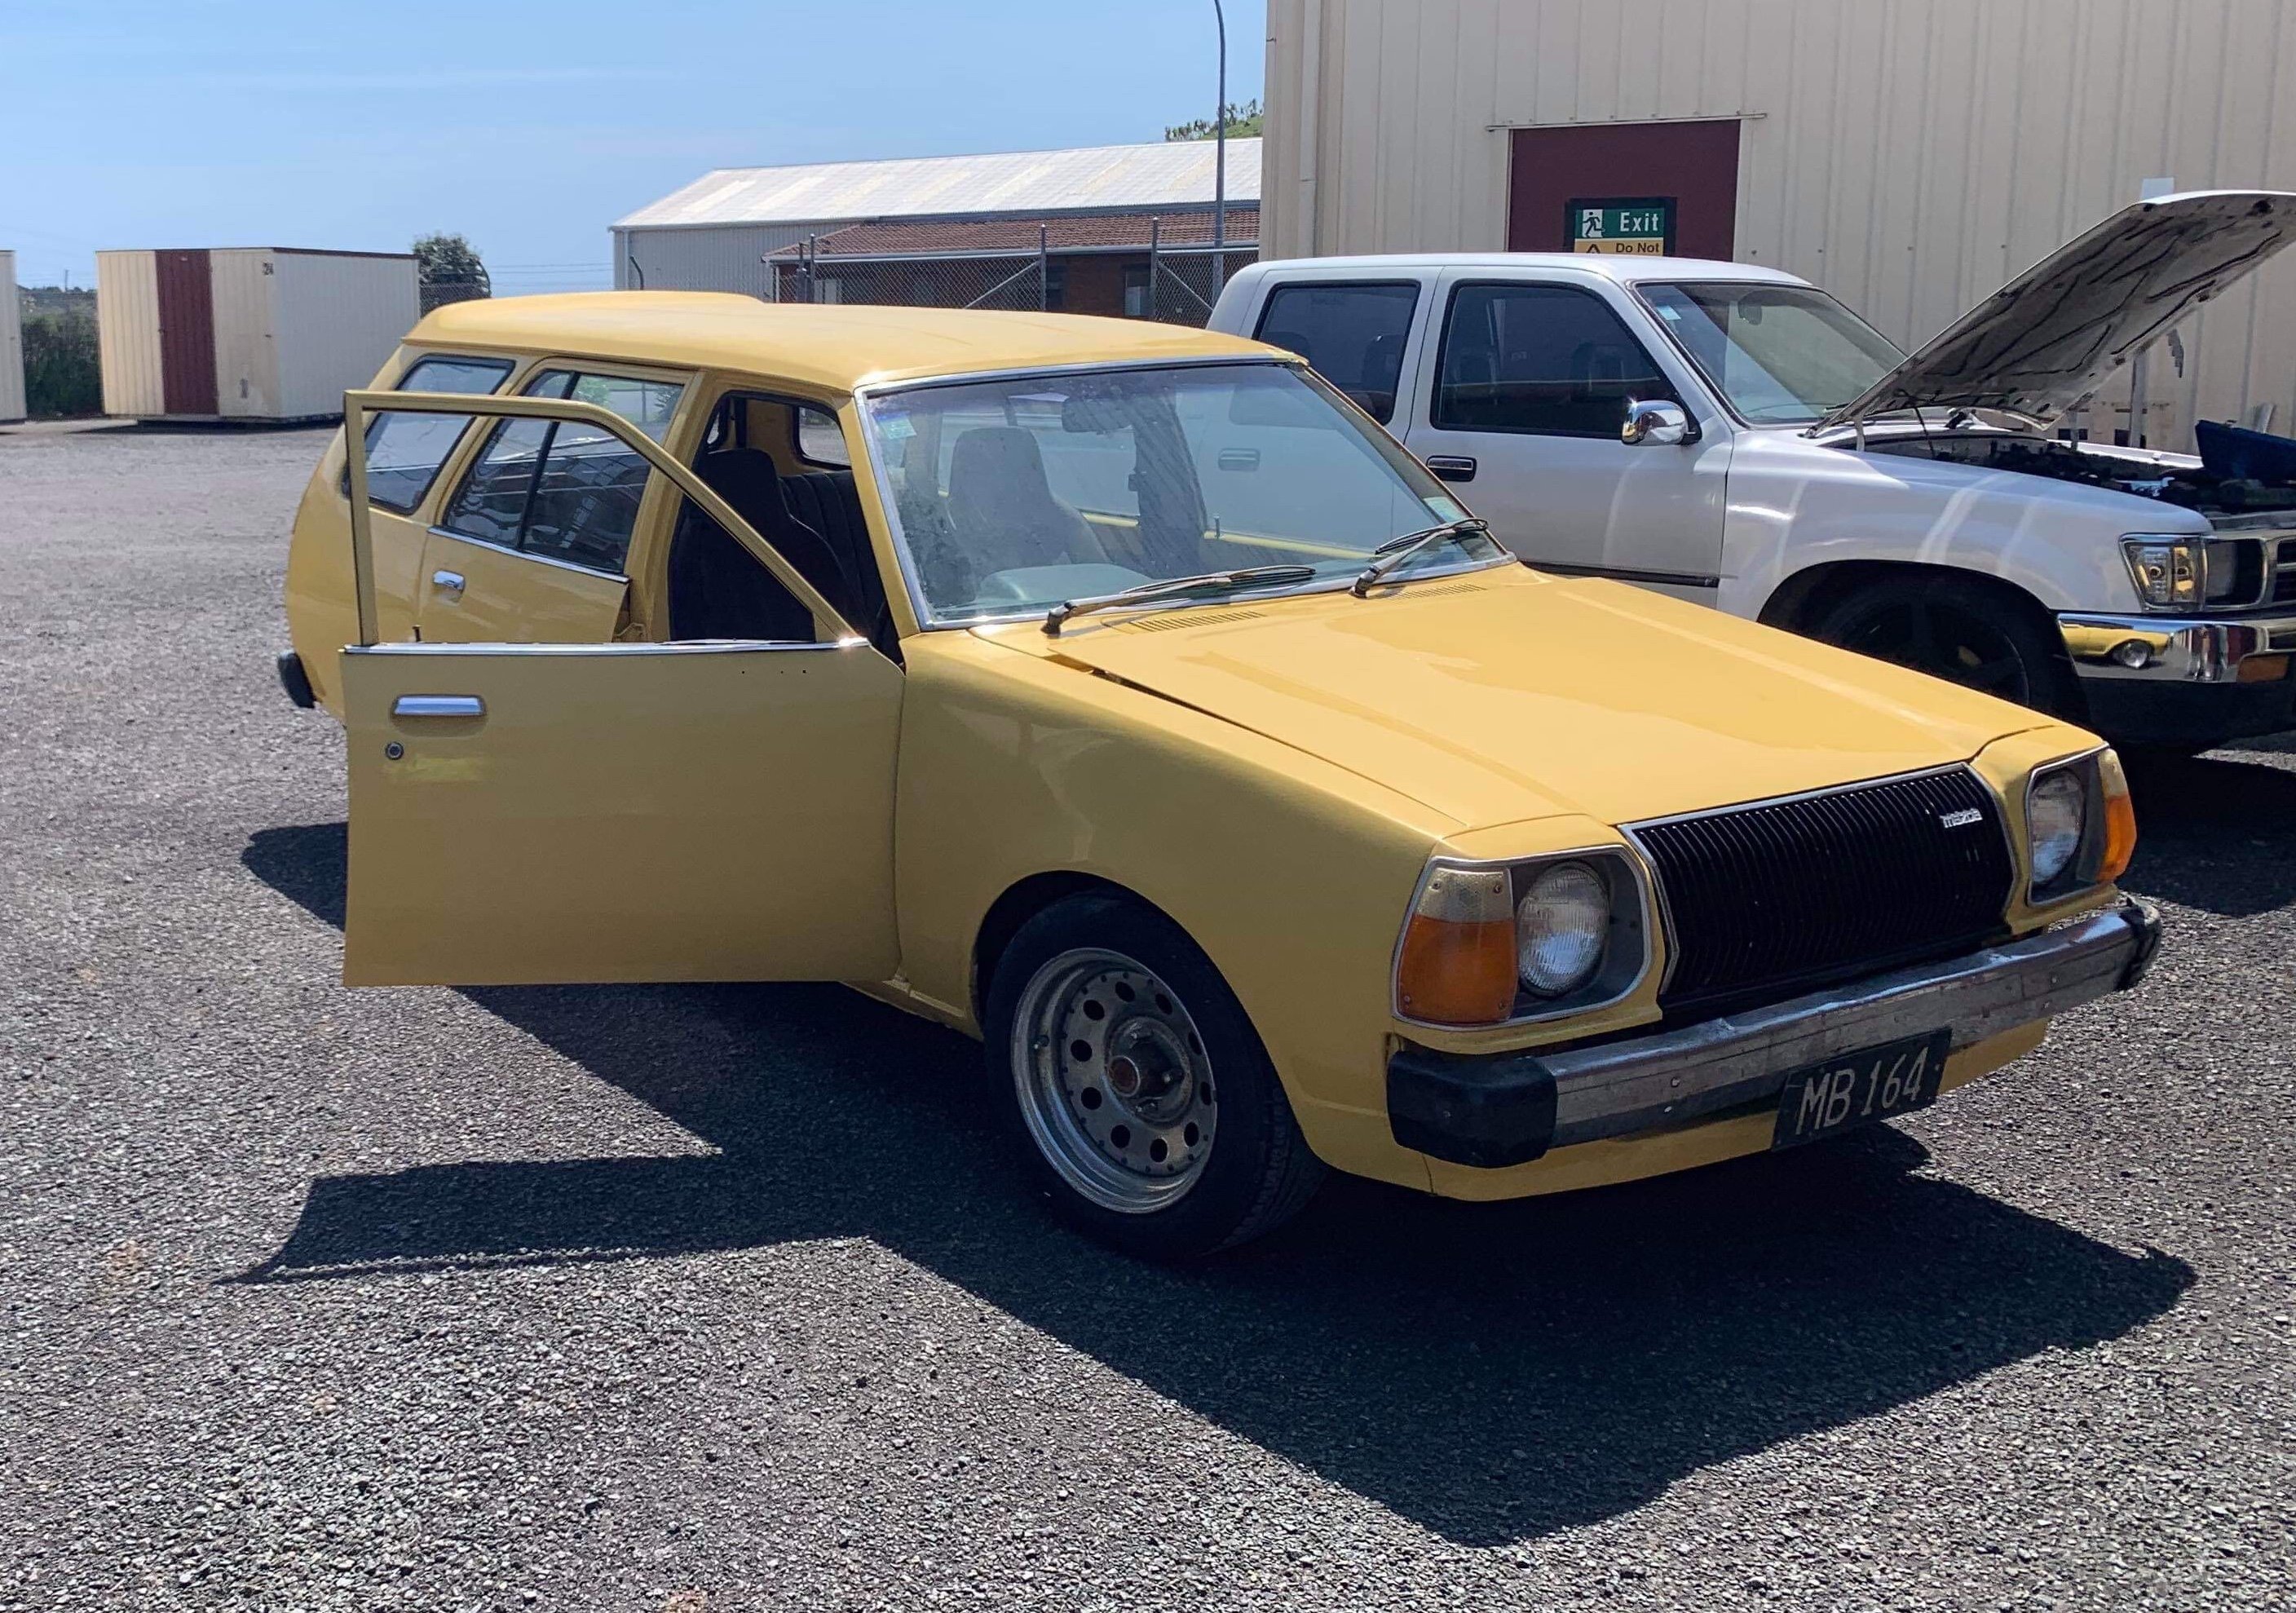
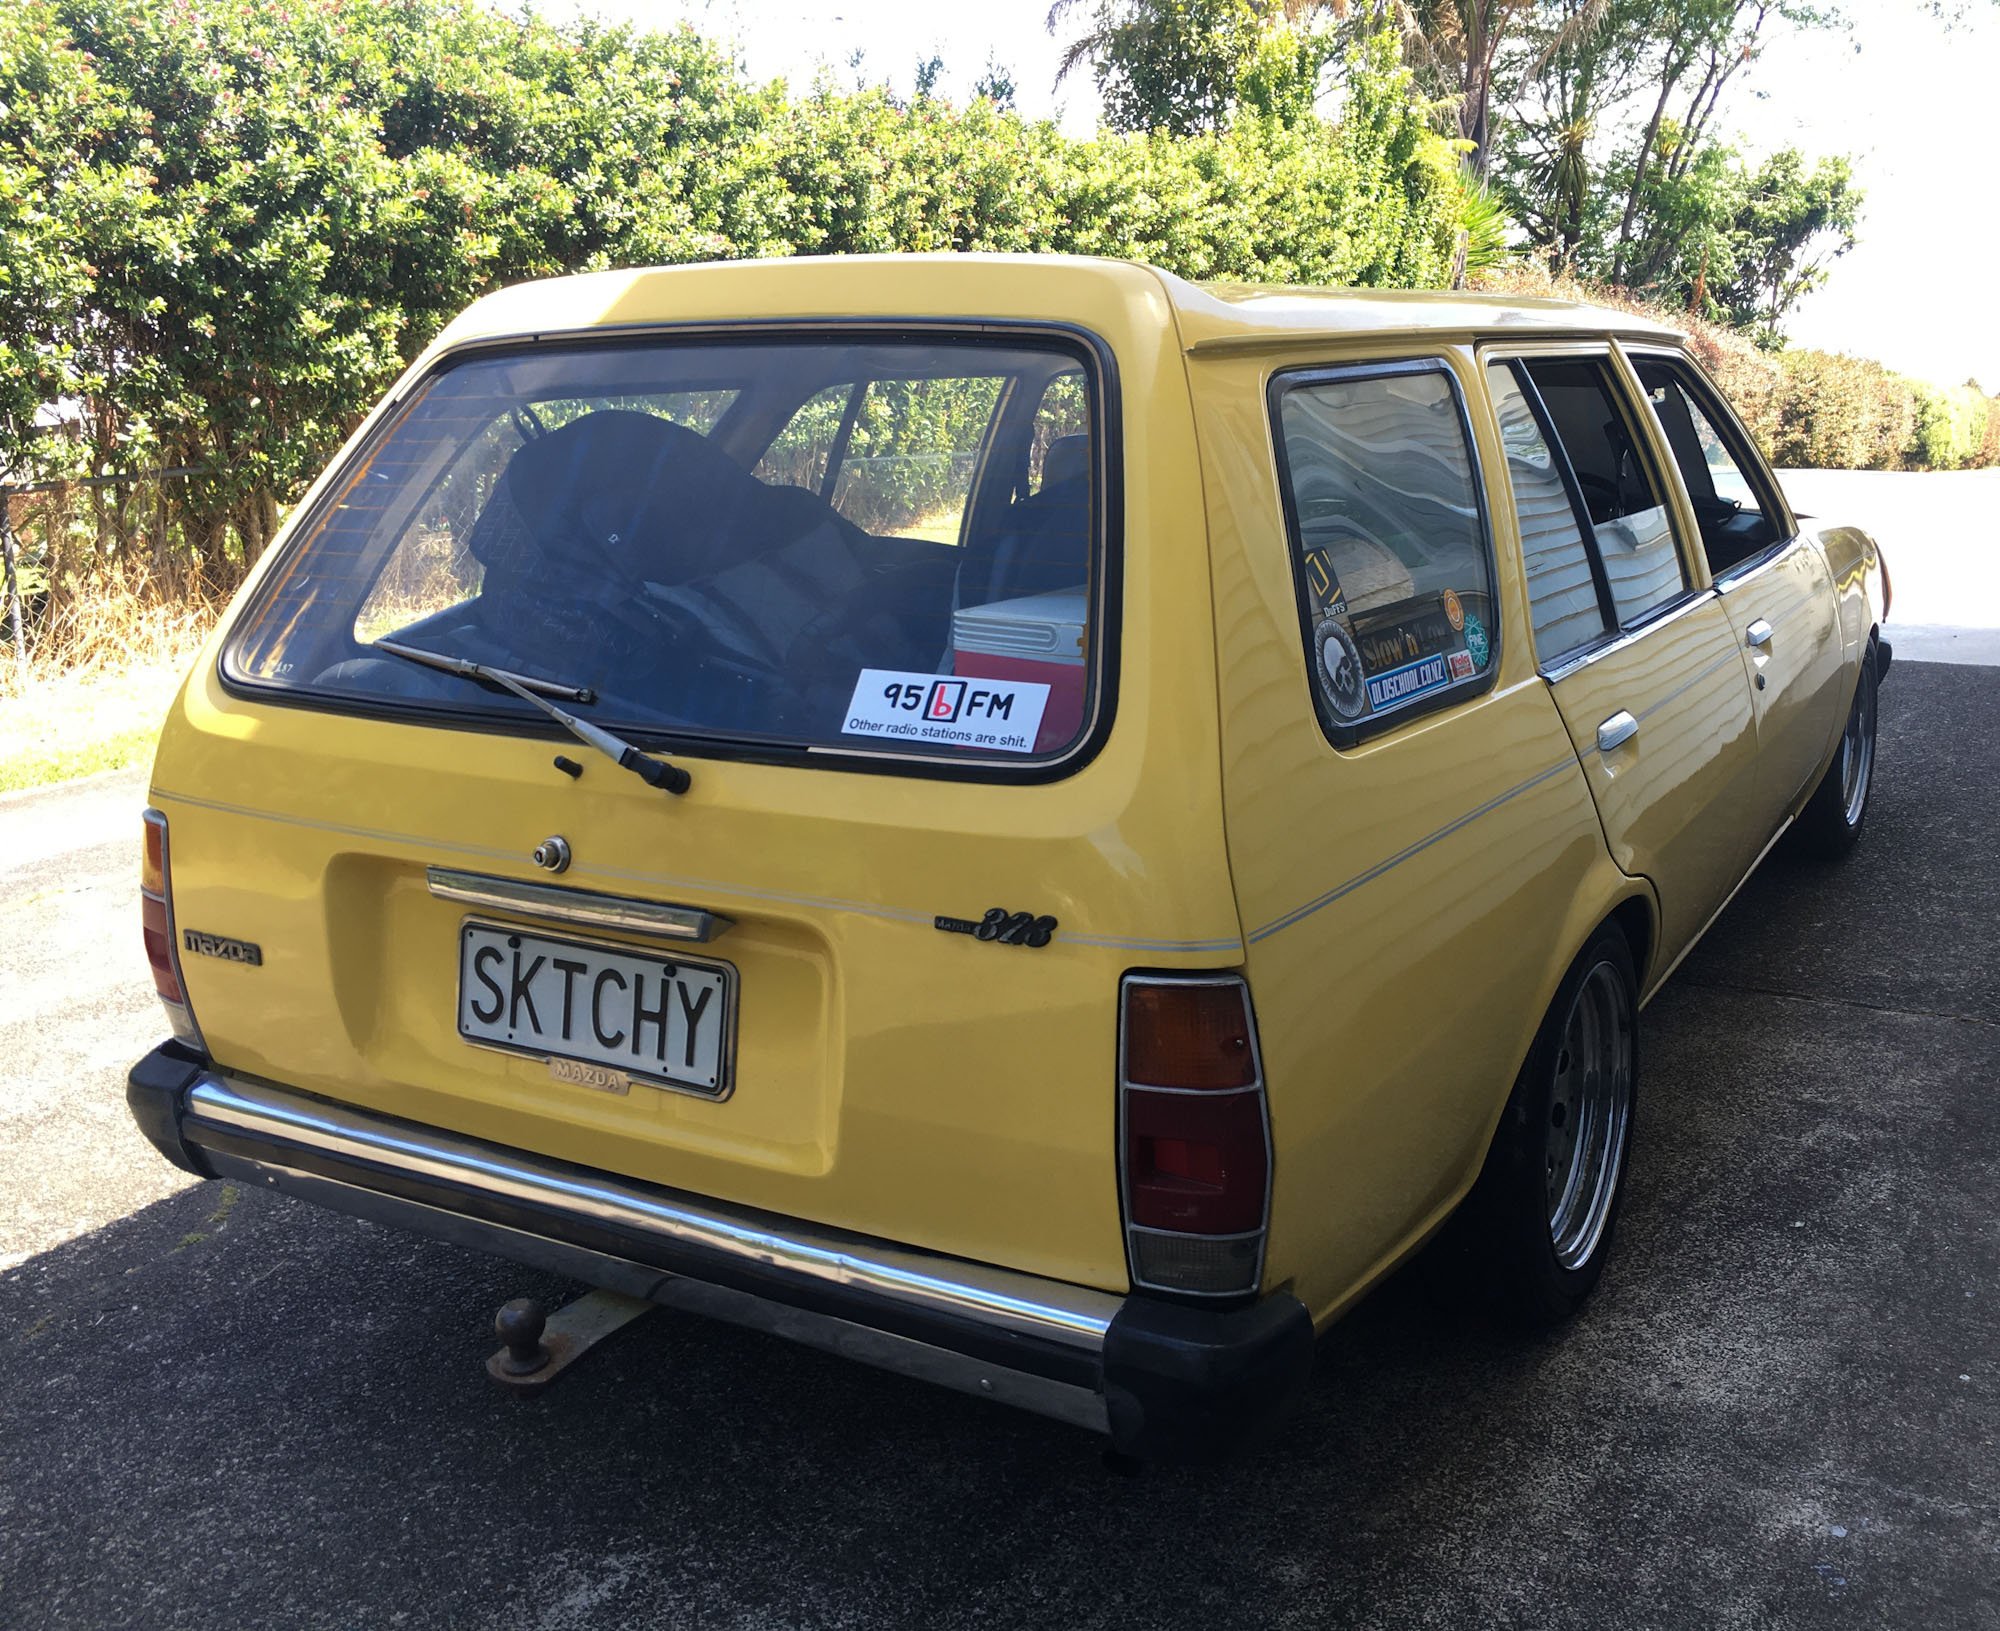
I did say I wouldn't start a build thread for this - but meh, am a bit bored and it'll give me a reason to document all the little things I end up fixing / changing on this. After selling my rx929 I had a little bit of money set aside to buy another old car. Even though mazda's are silly money for what your money gets you, I just 'had' to get another. Ended up being offered a 323 wagon and 323 hatch for the same amount of dollars. Wagon won, cos wagon > hatch ... hindsight though I probably should have gotten the hatch, cos it was a lot tidier than the wagon was! Had been chatting with the guy in New Plymouth for a few weeks about buying it, and eventually agreed a deposit and I'd fly down and drive it back. From pics it looked tidy ... we all know that story. Anyways, I arrive in New Plymouth, the guy picks me up, and we go look at the car. Starts fine, runs ok, body doesn't look anywhere near as straight as the photos show I ask him about the radiator "it looks pretty shit, does it leak?" "nah it's always been all good for me". First round of hills I'm climbing out of New Plymouth and temp gauge starts rising ... lame. Radiator is well and truly fucked, so I'm filling up a plastic bottle I have with puddles of water (luckily there'd been recent rain) and topping up the rad. Rinse and repeat this annoyance the whole drive home back to Auckland ... Found a better 2nd hand radiator and had that patched and tested at a radiator shop, so that's all fixed. Long story short - probably shouldn't have purchased, but it's a wagon, and I lub old mazdas. Plans will be tidy / fix the little things as they need it, find some other wheels once I've saved a bit of $$ and properly sort the front suspension as the springs I recently got made up aren't captive. And maybe a touch lower in the back too. 1st pic - what the guy sent me before I bought it. 2nd pic - lower springs 3rd pic - pin stripe I added (left overs from 929 wagon). Will probably re-do in black.
2 points
-
You could definitely bludgeon someone to death with it.2 points
-
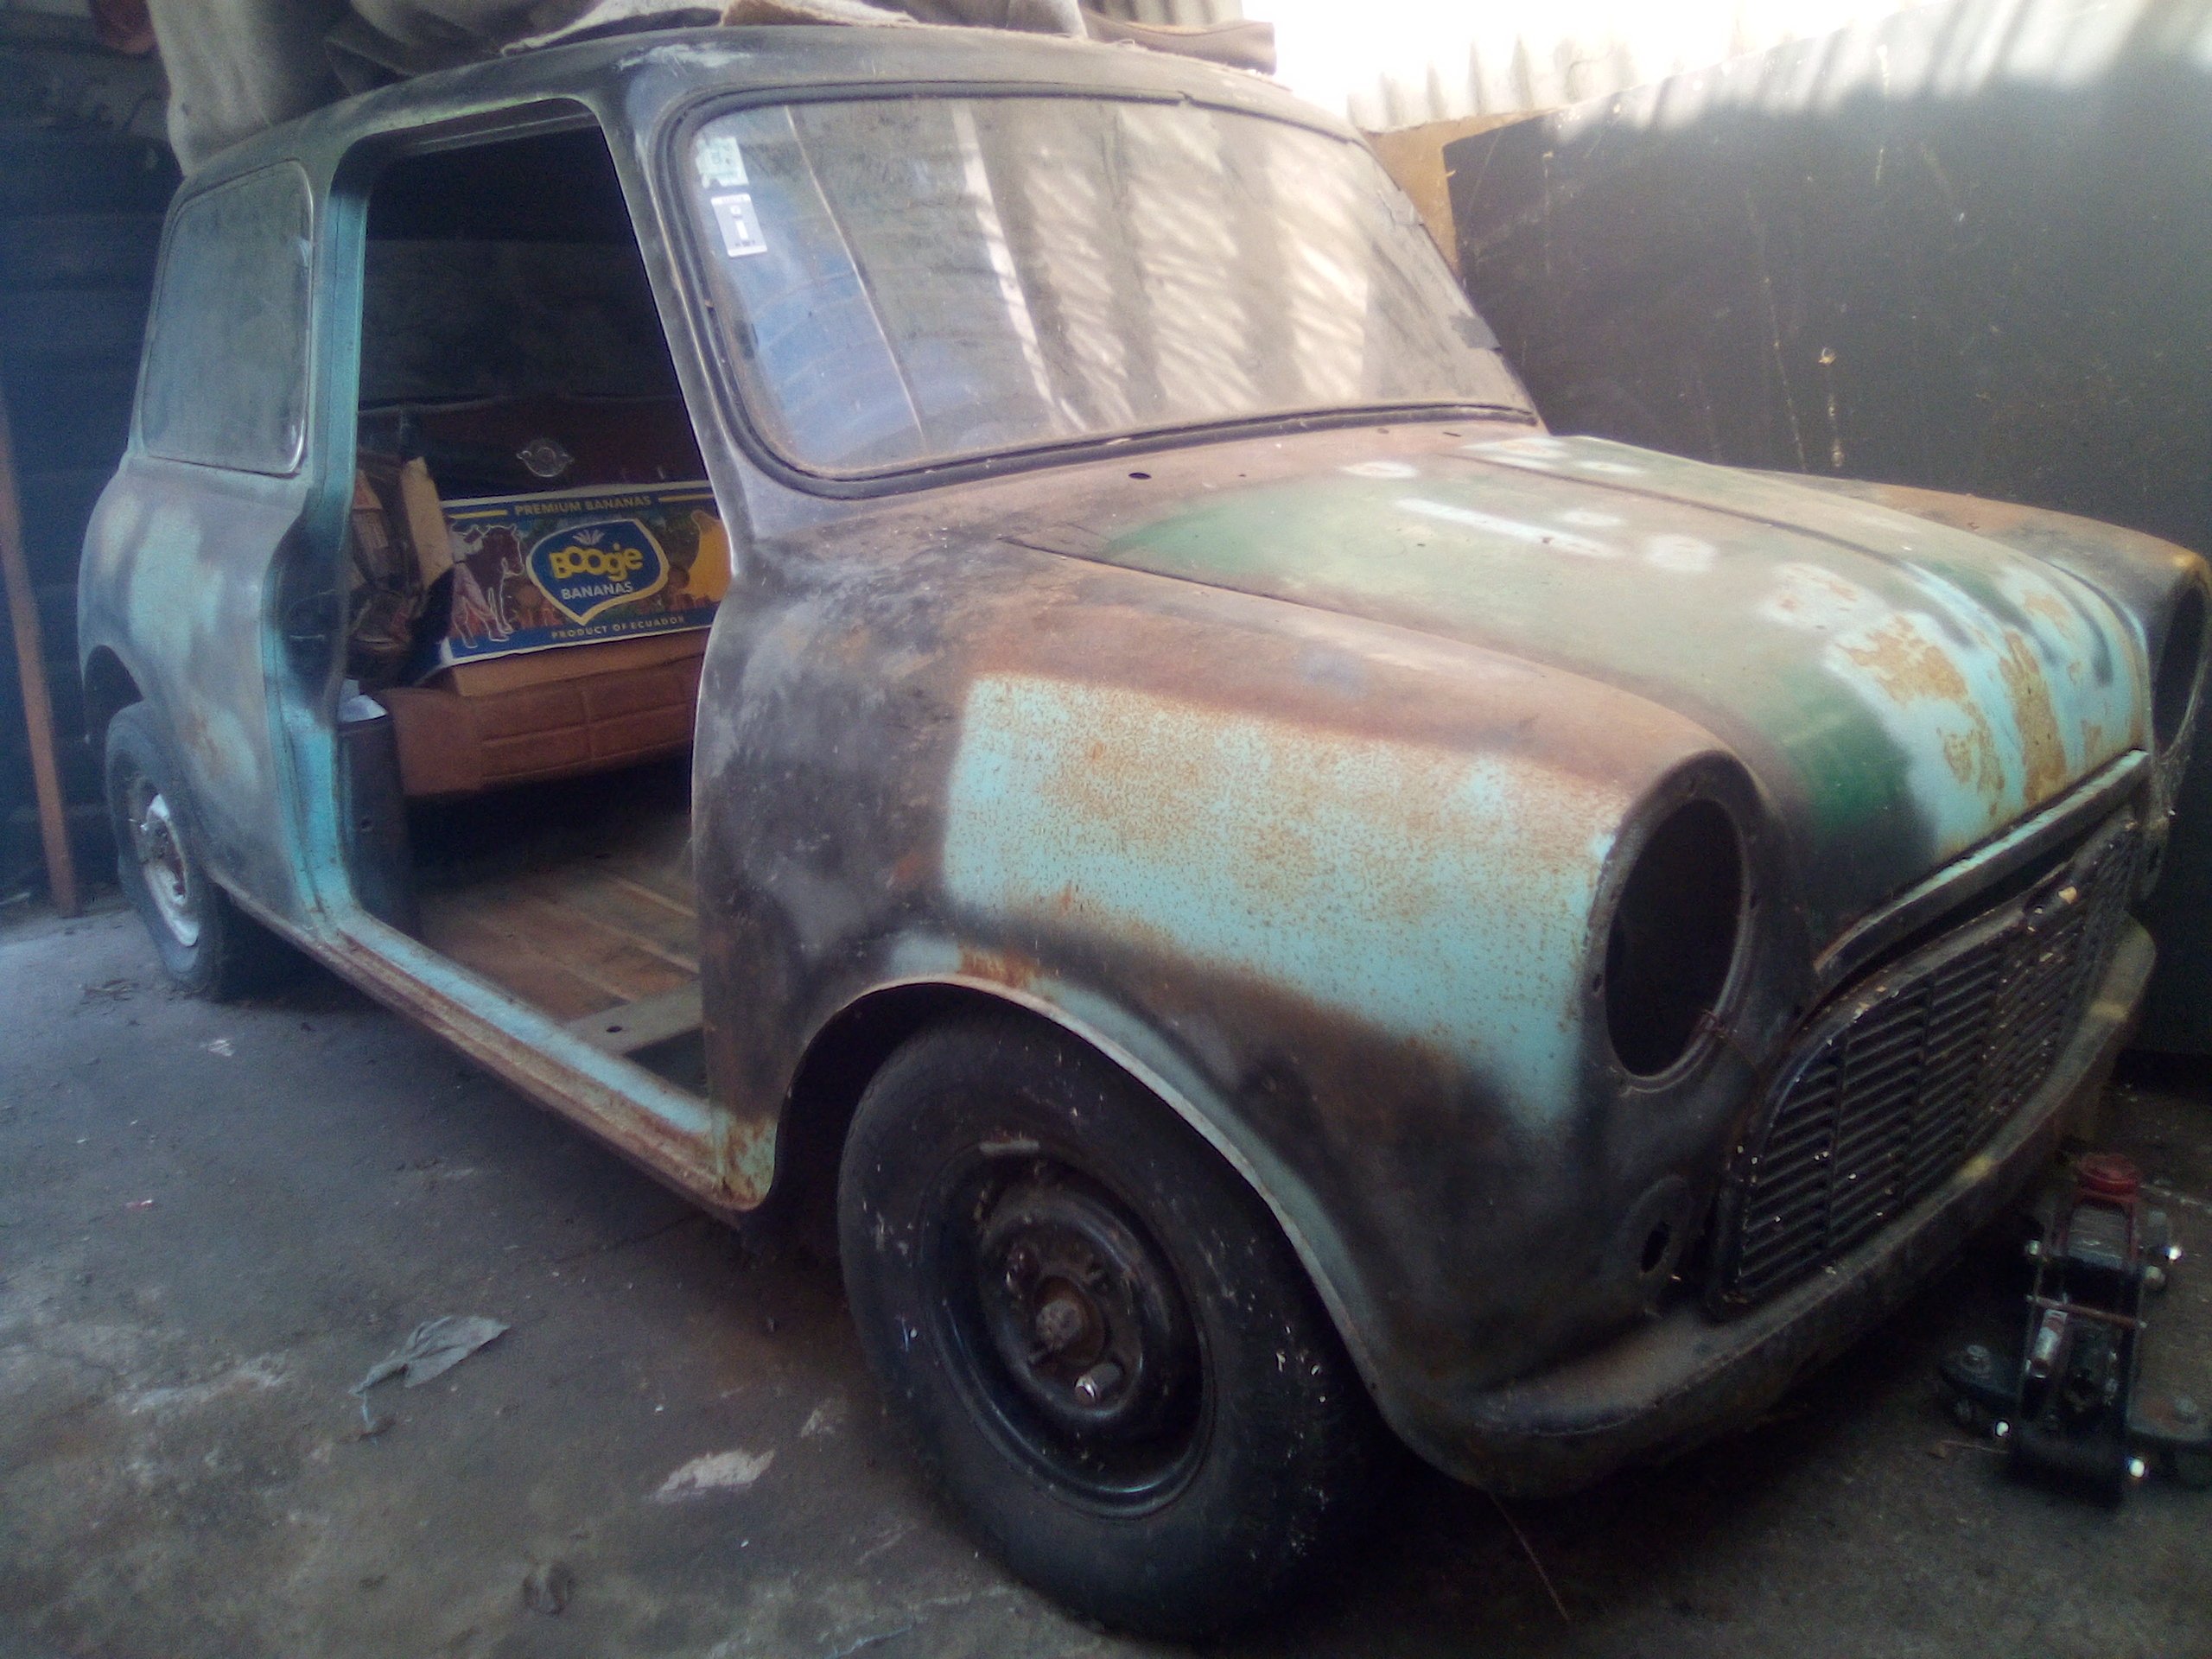
Project mini, De-seamed. Do you have parts, suggestions?
2 points
-
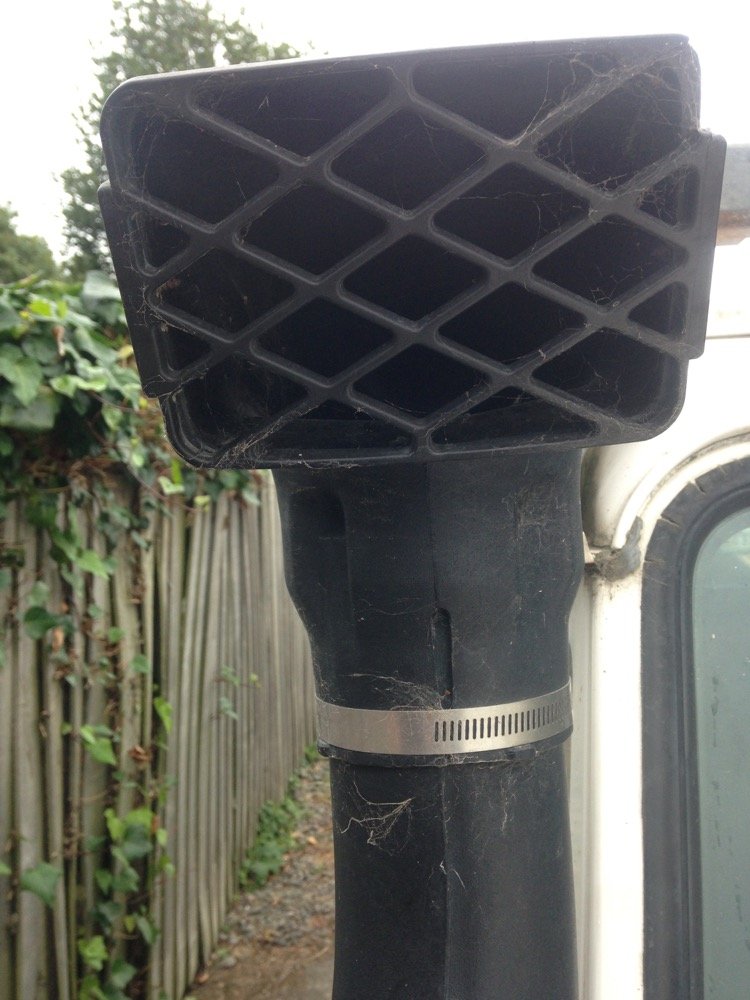
Earlier this year I went for a 4wd mission to scope new hunting areas and came to the realisation that I was choosing spots based on where the Niva could go and not where I wanted to go, the big barrier on the east coast is rivers, and the fiat motor hates water! We managed 15min up this valley before being forced to cross the river, issue with the twin cam is the spark plugs are located in the valley between the two cams, any splash of water is directed here which promptly kills the engine, normally mid-current. We turned around and headed home, on the way back I was pondering methods to prevent water but nothing was simple or failsafe. What I needed was a snorkel, diesel, raised breathers, longer wheelbase and bigger wheels........ With this in mind I set to work.... The snorkel was easy, pretty much bolt on Diesel pump to fiat twincam was tricky, but with a big enough hammer it went into place Bigger wheels needed clearance, overload springs were installed This all took quite some time, and the result somewhat best enjoyed with a cup of tea in hand Unfortunately i've replaced the Niva with a more suitable vehicle for my current needs. I have access to a garage not too far from home that once lockdown is over it will be tucked into, My mind says I should sell it and move on, but I can't bear the thought just yet of parting, its been a great toy over the years and really is a hoot to drive, sadly I just don't have the space for so many cars! Before parking up, I plan to carve out some rust to be sure there is no deterioration, parked up in WOF condition is the plan, ready to hoon should the urge arise.
2 points
-
Got the plug out, was a bit worried as thought it was going to be a cunt. Also found some dodgy/damaged wiring for the alternator so pulled that out (need a few bits to repair it). Looks like some suspect oil lines as well (diesel life so vacuum pump on back of alternator) so think I'll replace those. Oil return on turbo is also clearly leaking and making a fucking mess so I'll pull that off as well and will be good to replace a few bits there. Hopefully this will limit the horrid oil leaks this thing has. Obviously can't do much till the world returns to normal, but no drama, will be nice to sort these little things out once and for all.2 points
-
2 points
-
Found the boost leak, one of the threads on the inlet manifold inlet was stripped and my rubber gasket was flapping like a my arsehole after a vindaloo. Must have done it up Archer tight - tighten it til it strips, then back it off half a turn. Managed to get an m8 recoil kit and sorted it, no more funny noises. I took it for a spin just now, it is boosting to 10psi which feels really quite lively. The EGT's are getting up to 600deg which is a bit much considering it's only acceleration load, it really needs a boost compensated fuel pump but this will be a lot later I reckon. I'll dial it back a tad and see what happens. It might need a fan on the intercooler, I have wiring for it now. The power steering is still playing the game, now I just need a functioning alternator. Good times. Pic edit for interest2 points
-
This is the first time I have done panel work. I am pretty happy with how it turned out. Tell me I’m doing it wrong here:
2 points
-
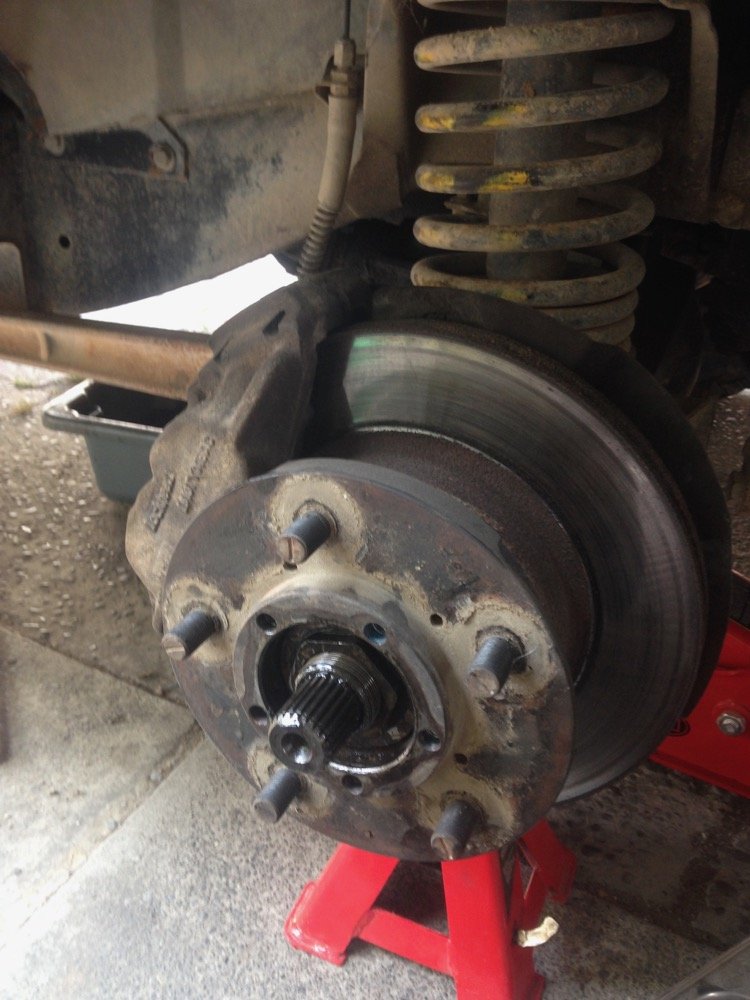
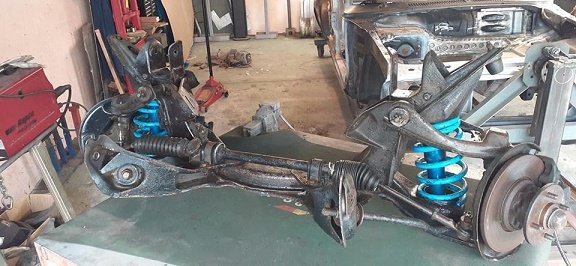
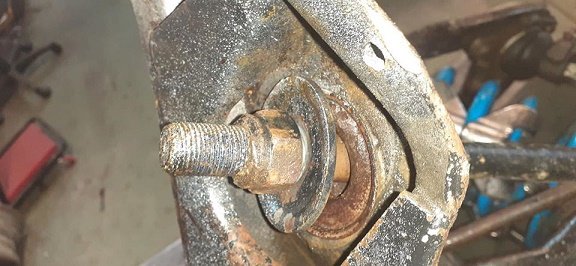
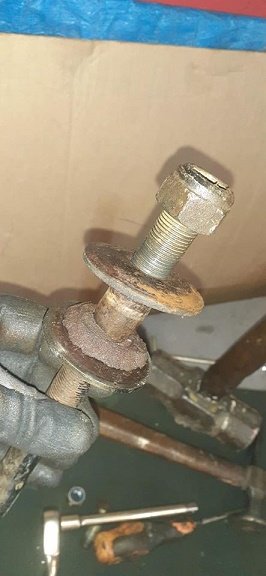
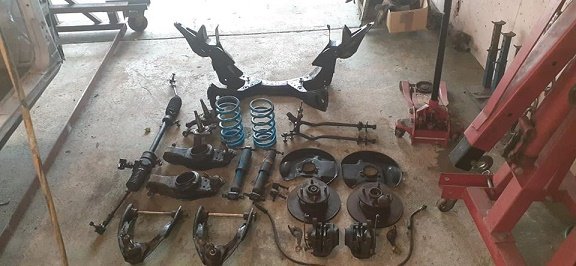
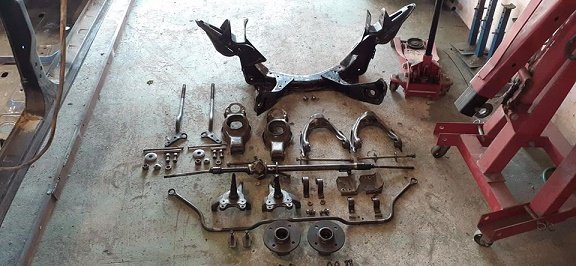
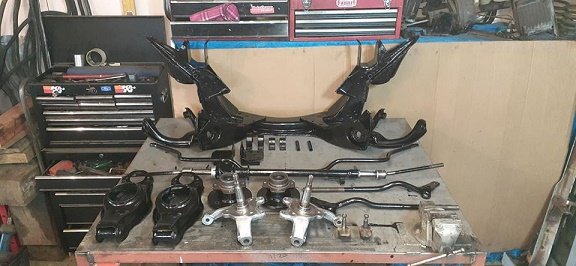
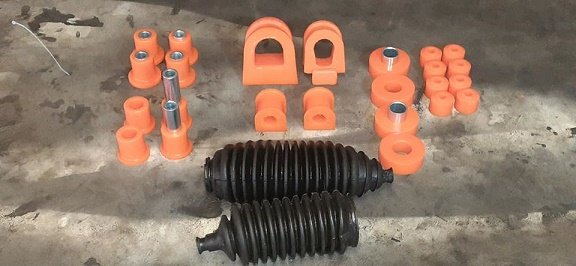
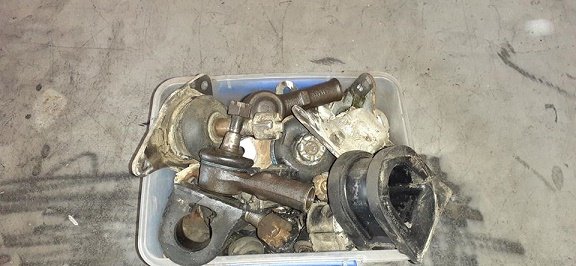
decided to have a play with something other than rust /welding/cutting/making.......turns out pulling a 44 year old front end isn't as easy as undoing some nuts. the front end most of the bolts had to be cut and studs pressed out..most of the bushes were none existent .(i have a set of bolts front another front end ) all stripped down after a couple of days with wire wheels on my drill press and some de greaser and a wipe down and coated in POR15. i bought a full bush kit last year and found 2 good condition steering boots in my parts shelfs and all rebuilt with what i have ...still need to get some new tie rod ends upper and lower ball joints and decide on discs and what calipers to use......and some split pins and thats the front end completely done.........once the world returns to normal. and the crap left over.
2 points
-
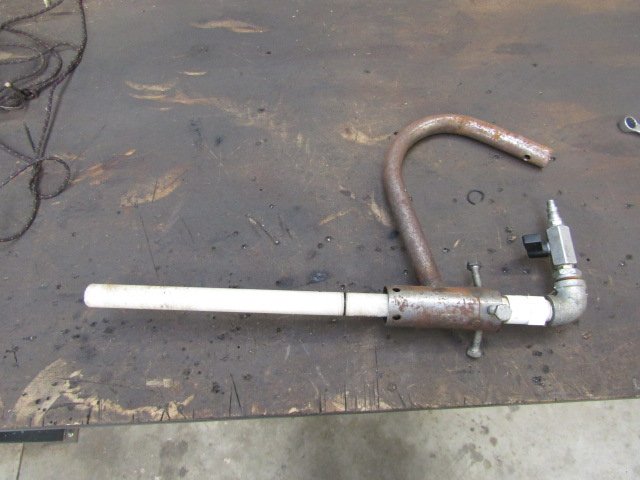
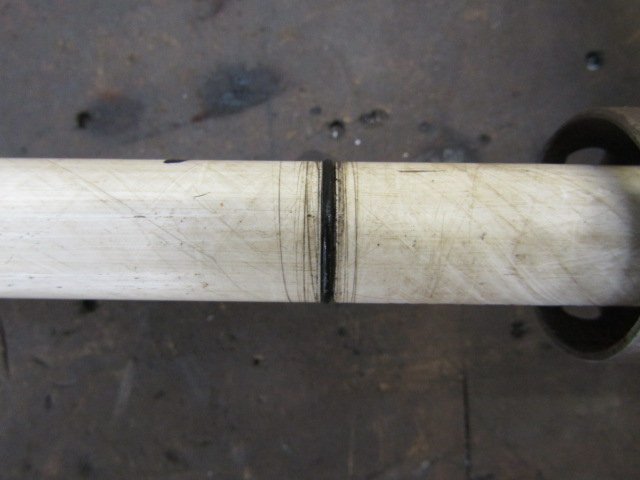
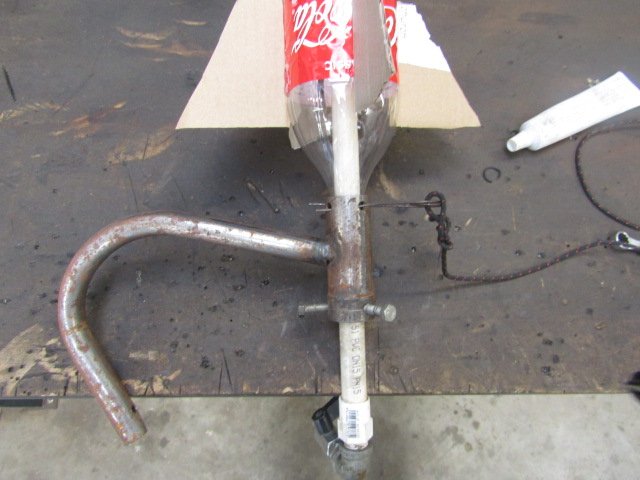
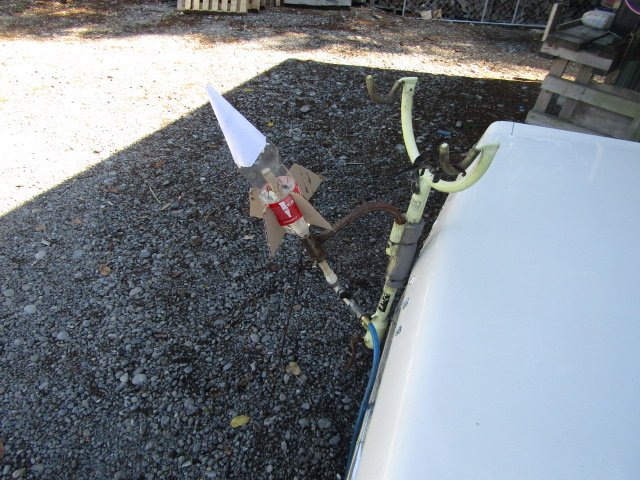
Another thing I did a while ago, someone might like to copy to amuse them selves/kids. Bottle rocket launcher, pretty simple just some PVC pipe, a ball valve and a collar to catch the bottle. Goes pretty well off the compressor. Shallow groove that holds an O ring to seal the inside of the bottle neck The O ring sits under the collar. I got a bit carried away using a lathe to make this. The pin holds the bottle on with the small ridge under the cap. We find that about 1/3 water and as much air as the compressor can supply gives best results, It mounts on a bike rack so it has a nice solid base to sit on. @scooters
2 points
-
2 points
-
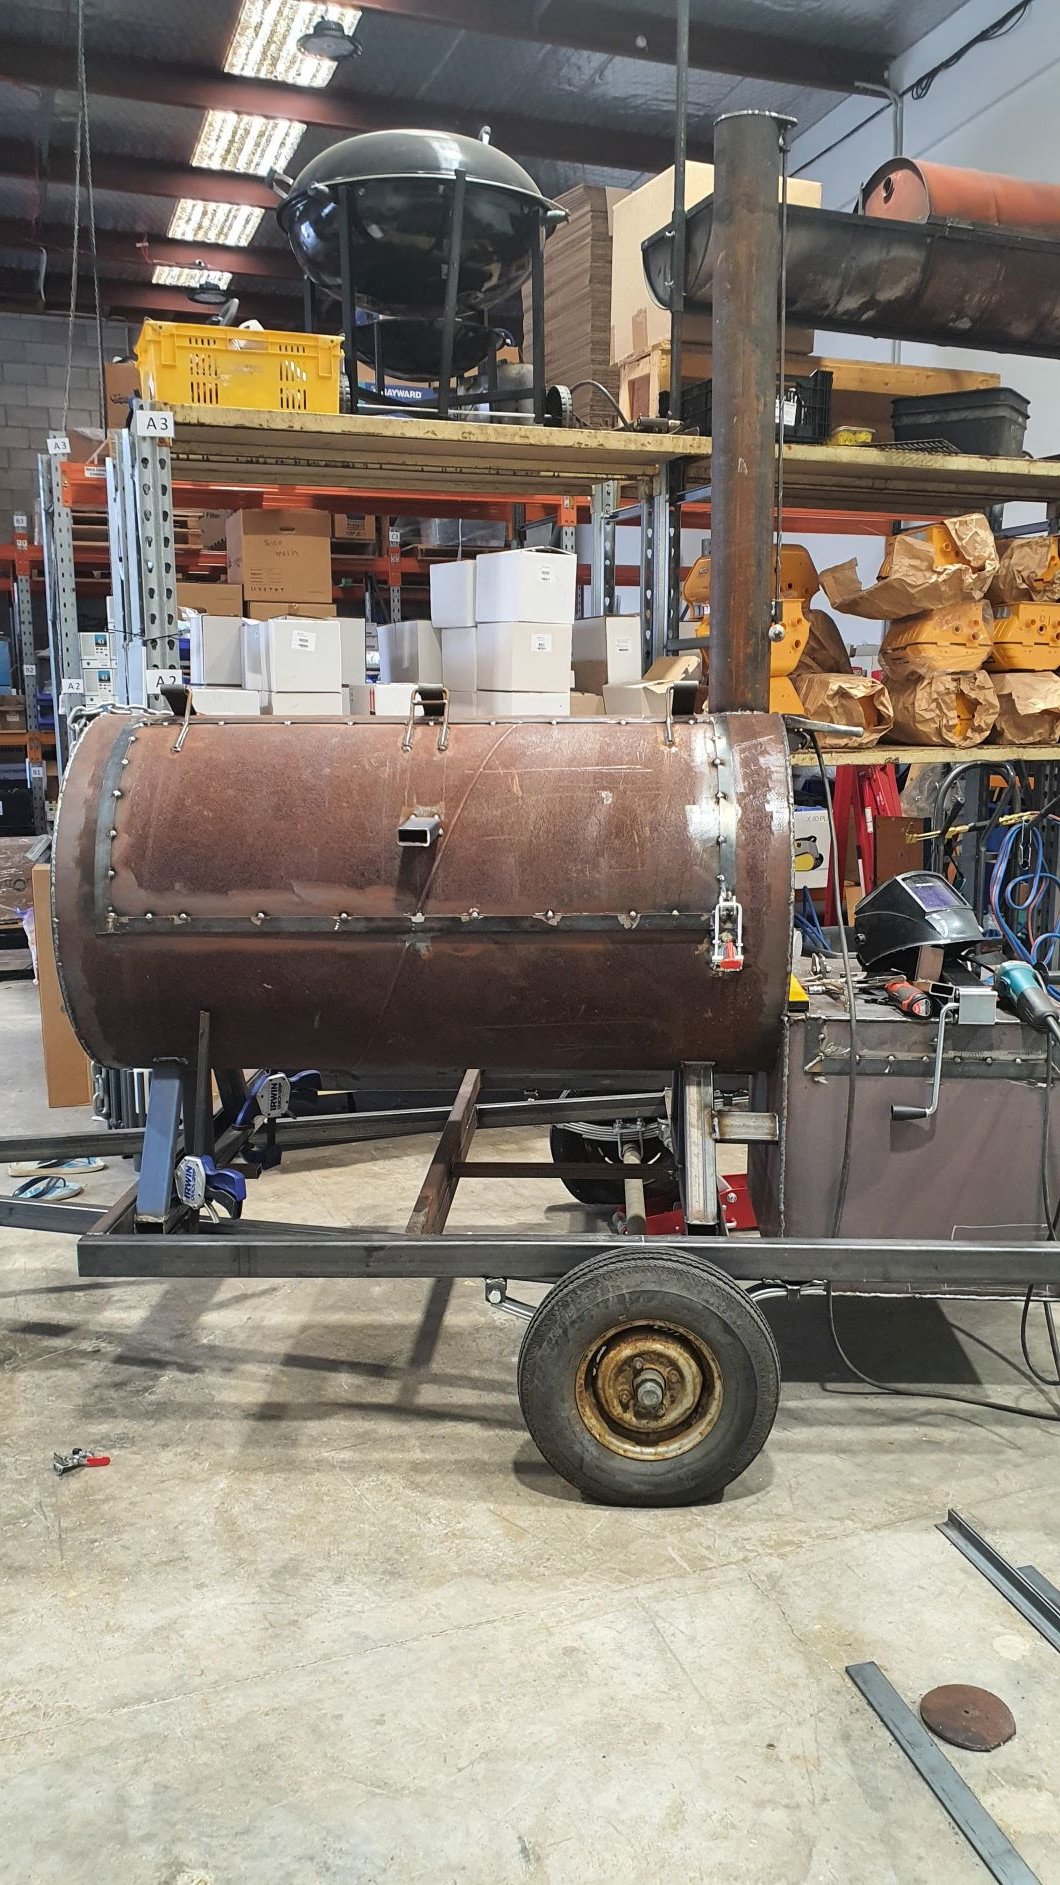
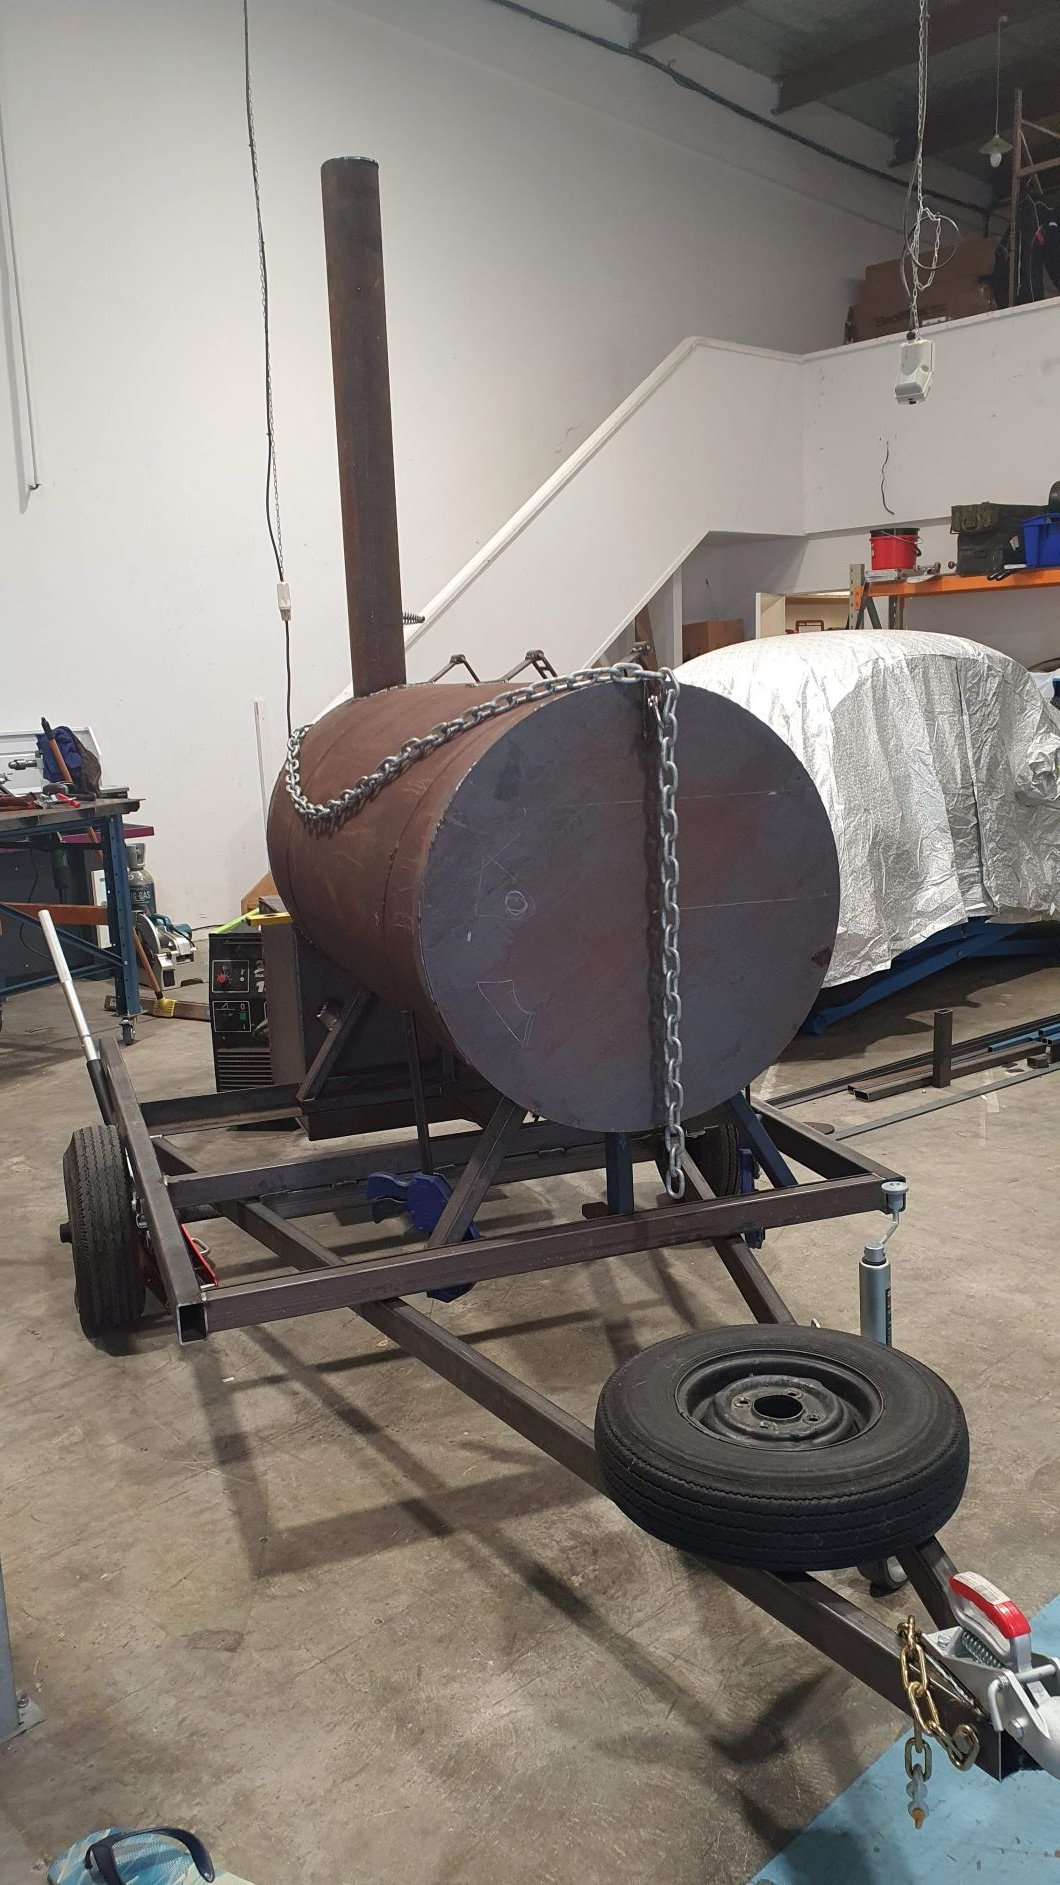
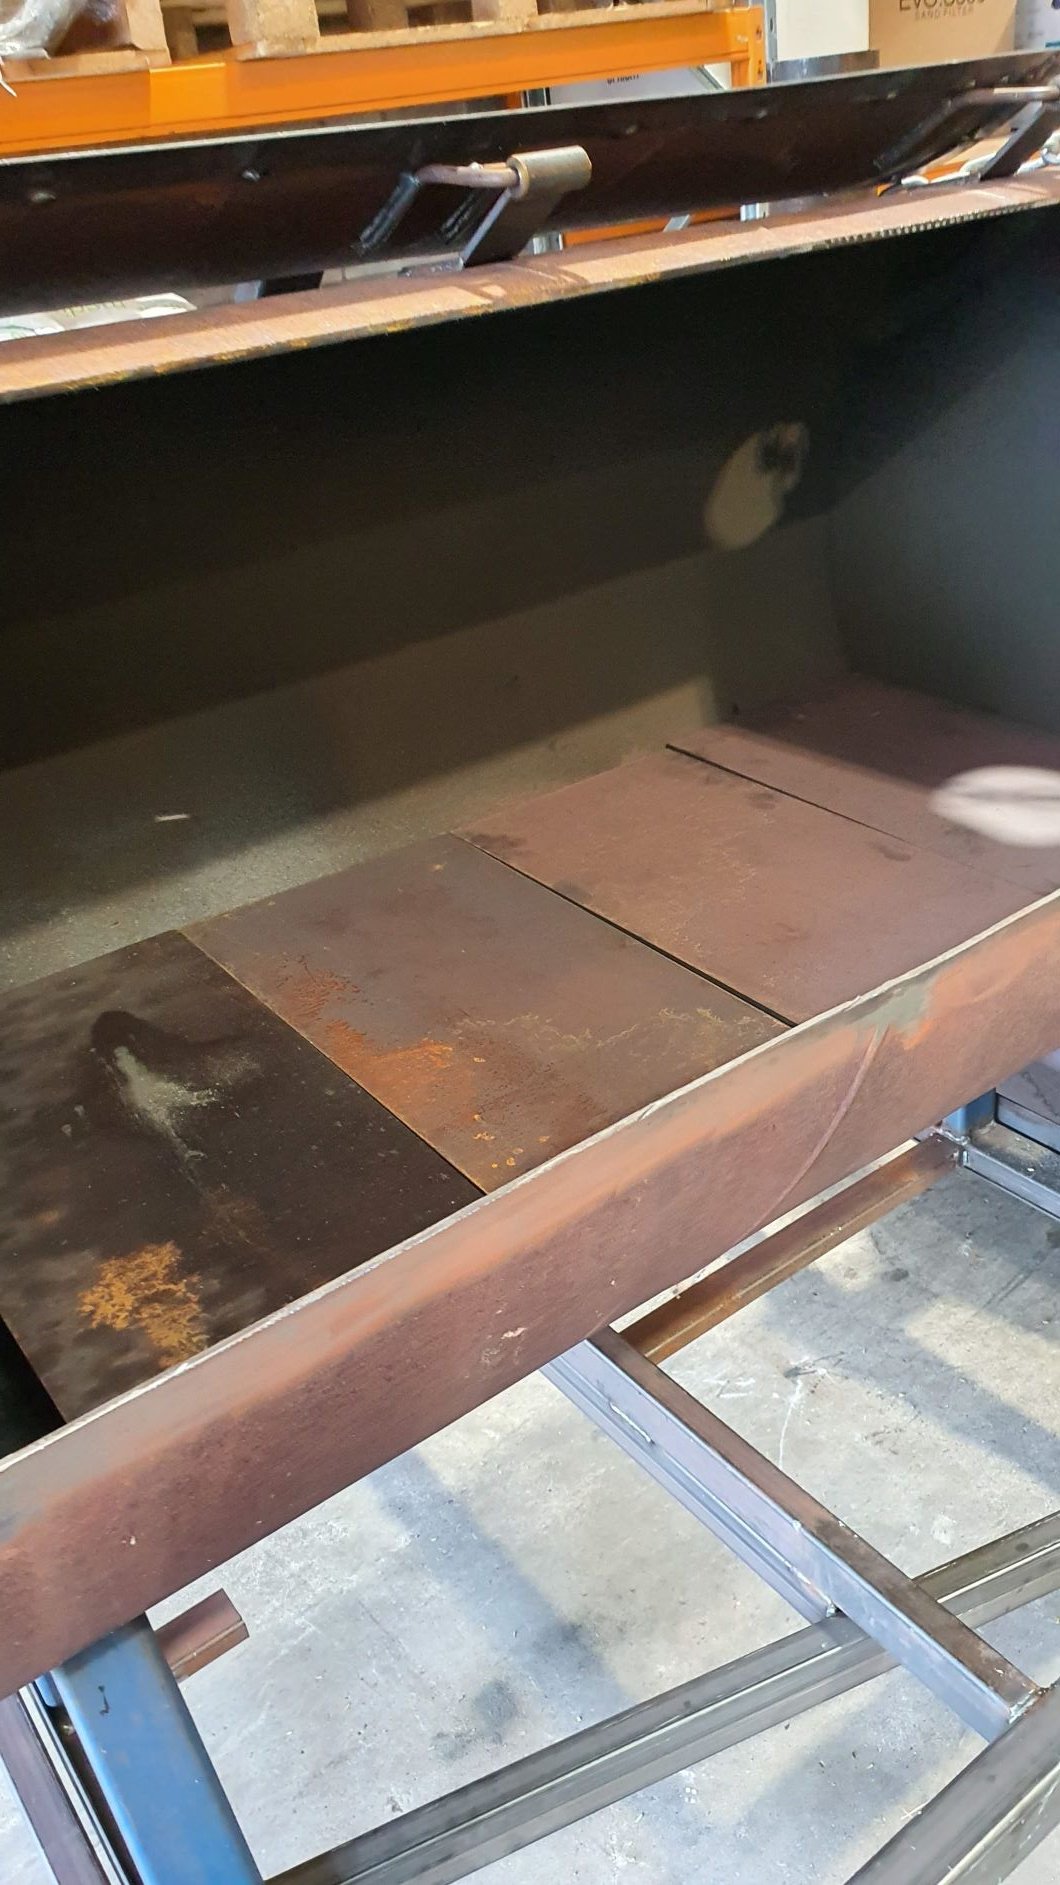
Trailer axle running styley mini wheels, may change this later but runs sweet at the moment. The door sprung pretty bad when I cut it, bottom RH corner was probably 15mm twisted out, i tried to straighten it, chains, 10t bottle jack, oxy torch etc.... ended up using a big pull down latch that drags it into place... Chimney is 5" ID and 1200 high, made the damper Still have to make up woodbox for trailer and maybe beer dispensing from there too, will see how it ends up. All the internal fiddly stuff needs to be done, baffles are just sitting internally right now. And the worse bit is, its at work, and I am non essential, so it gets to self isolate for 4 weeks while I think about it... Cant wait to start a fire. Upside is my welding is a lot better, although some of it is still shit.
2 points
-
Sadly folks I will be the bearer of bad tidings as the ultra micro 1 cell world have all been discontinued even the 2 cell jobs are pretty much gone, for a while there they released one every 6 or so months, lucky I was a bit of a hoarder. Now I wouldn't say these little jobs are for everyone, they are very small 40 to 50cm and they are light so windy conditions are a no no. Here's a few from my fleet, the multi wingers, Waco, Fokker DR1 and Avro Cadet, the first two are re-paints the Cadet is converted from a Stearman. Where the Cadet came from. Gotta love the Spitfire, Mk IX painted as an airworthy one in NZ, the Mk VIII as one that flies in Oz, long nose FW 190. Here's the Spit with her lid off pre paint job. Mustangs, well two at least the Yak 3 modelled on one that flies in NZ and the Fiat G59 are converted from Mustangs. The camo P51 painted up as a RAAF machine the red and white one up the back a famous Reno Racer "Strega" she has a kick up the bum as I converted her to 2 cell. Where the Yak came from. And here's the Reano Racer with the 2 cell set up shoe horned into her! Multi engine jobs. Bit on the multi soon............2 points
-
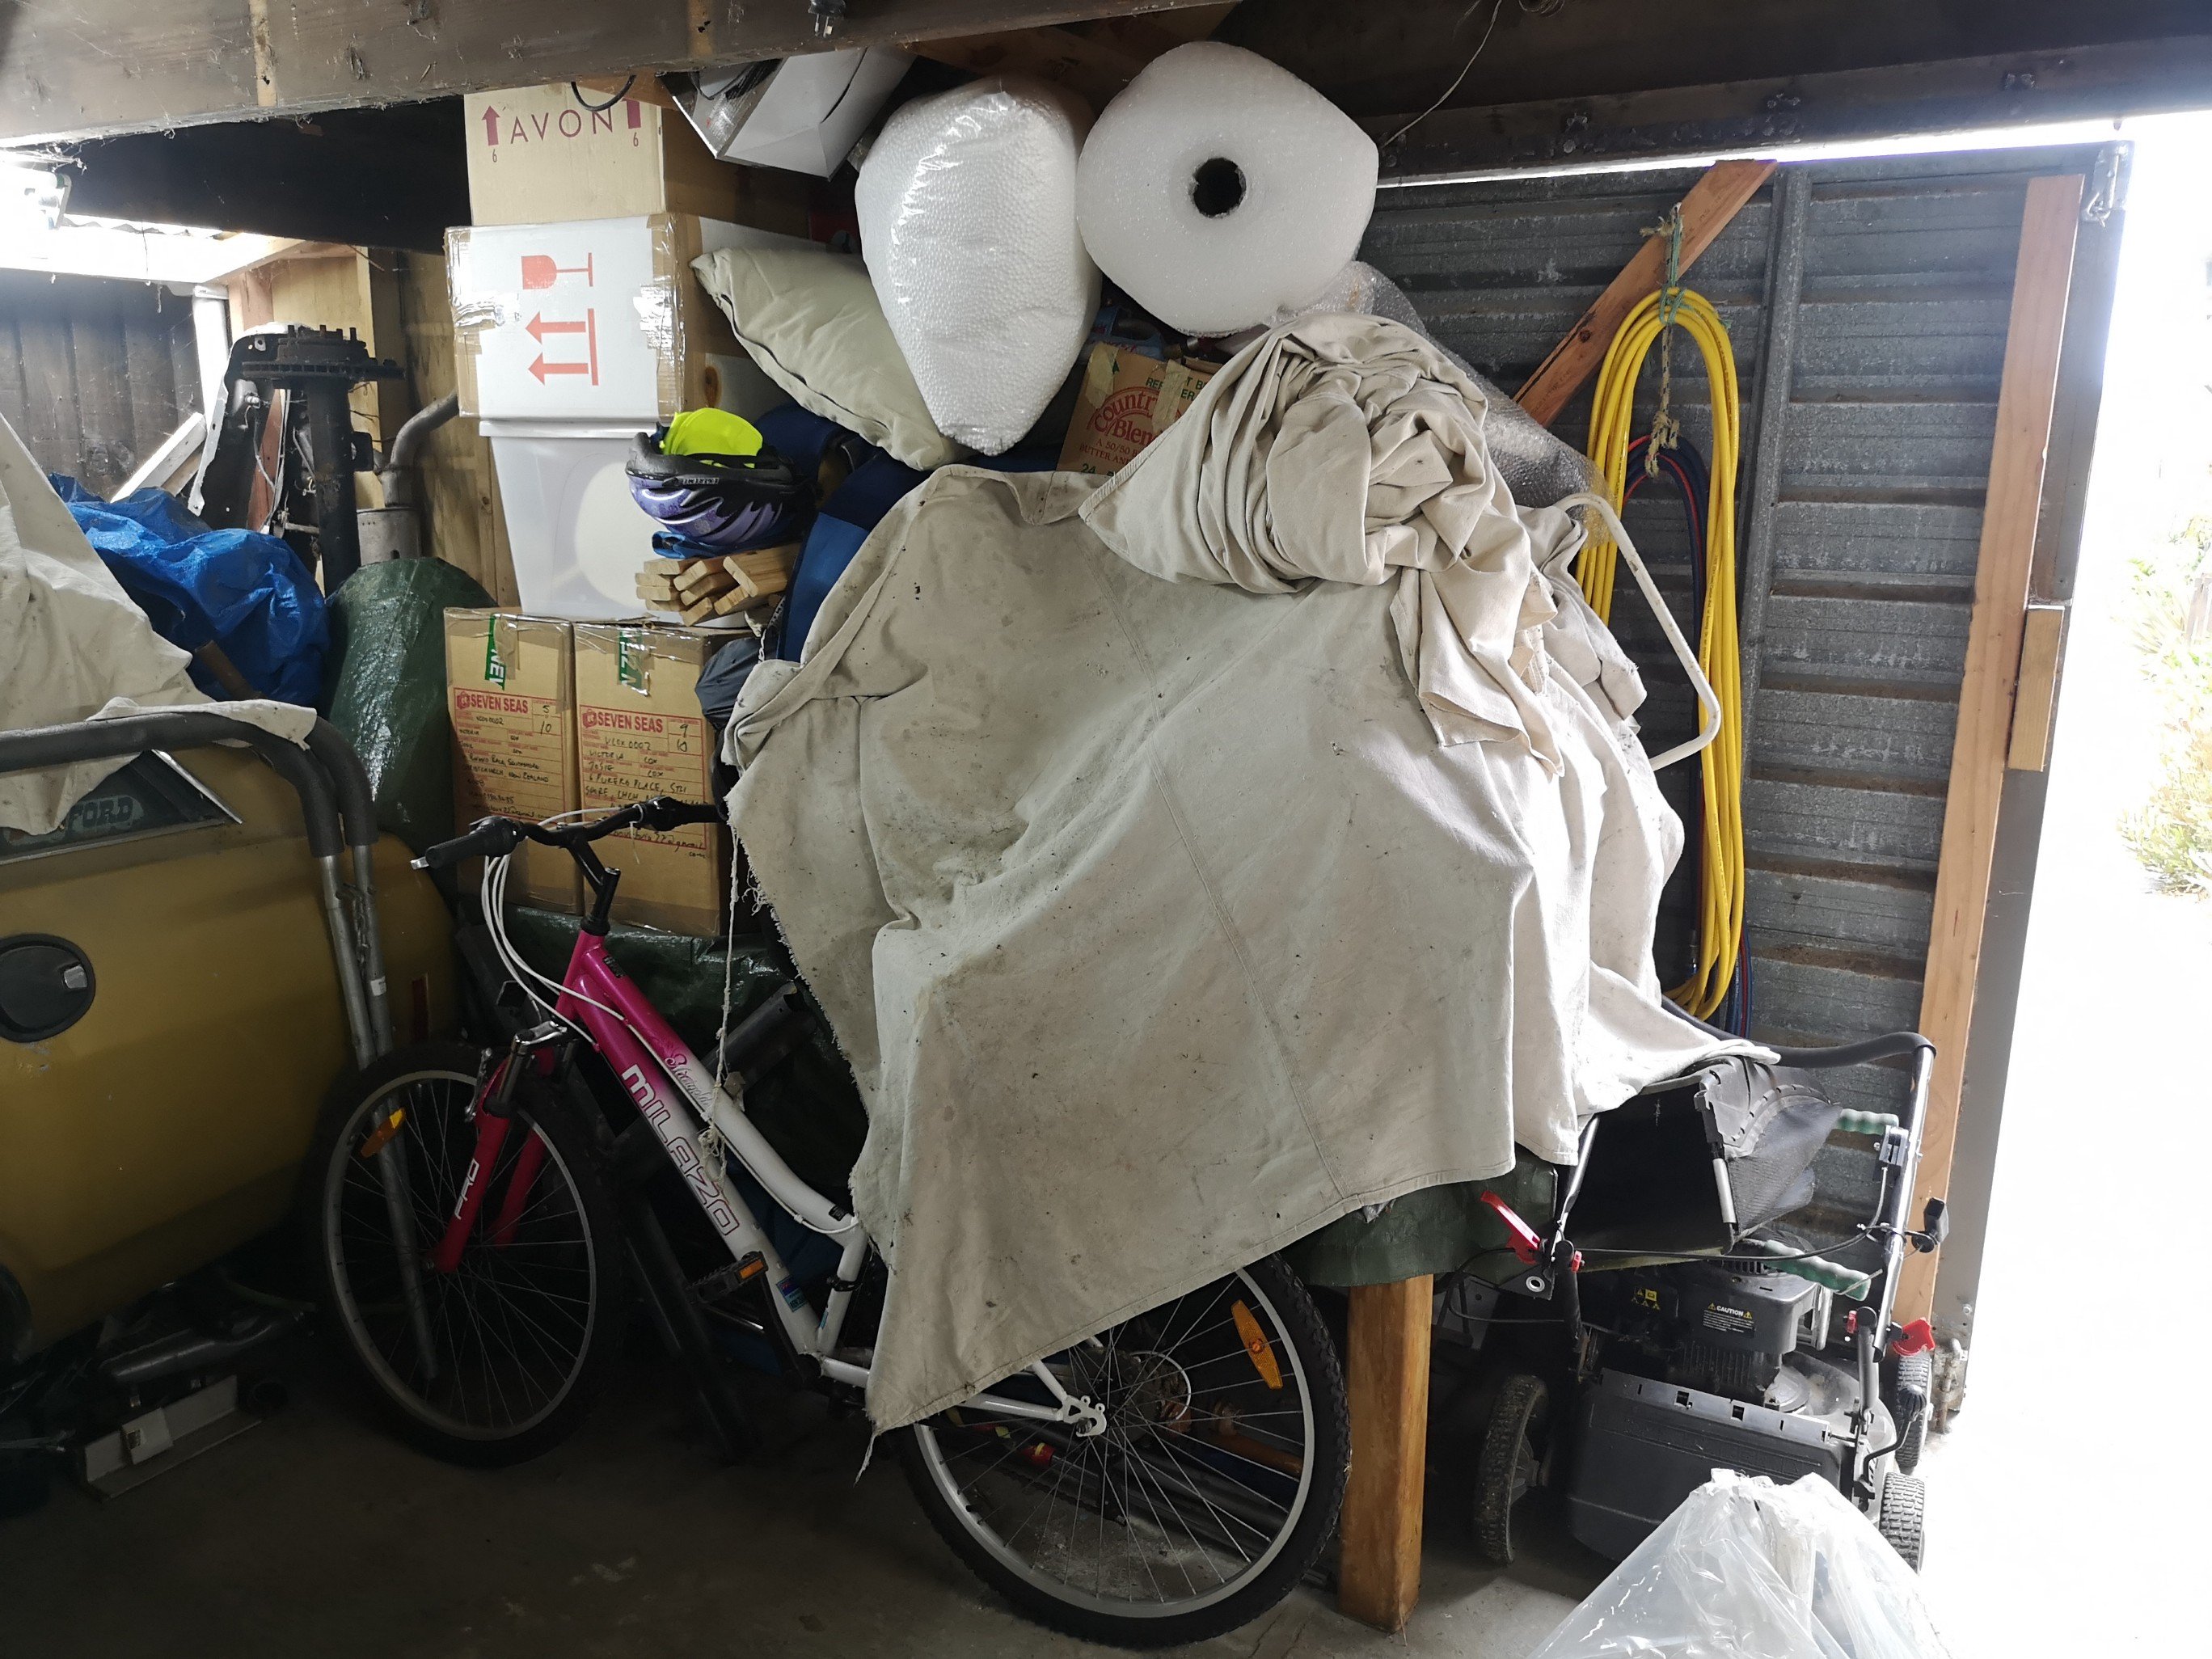
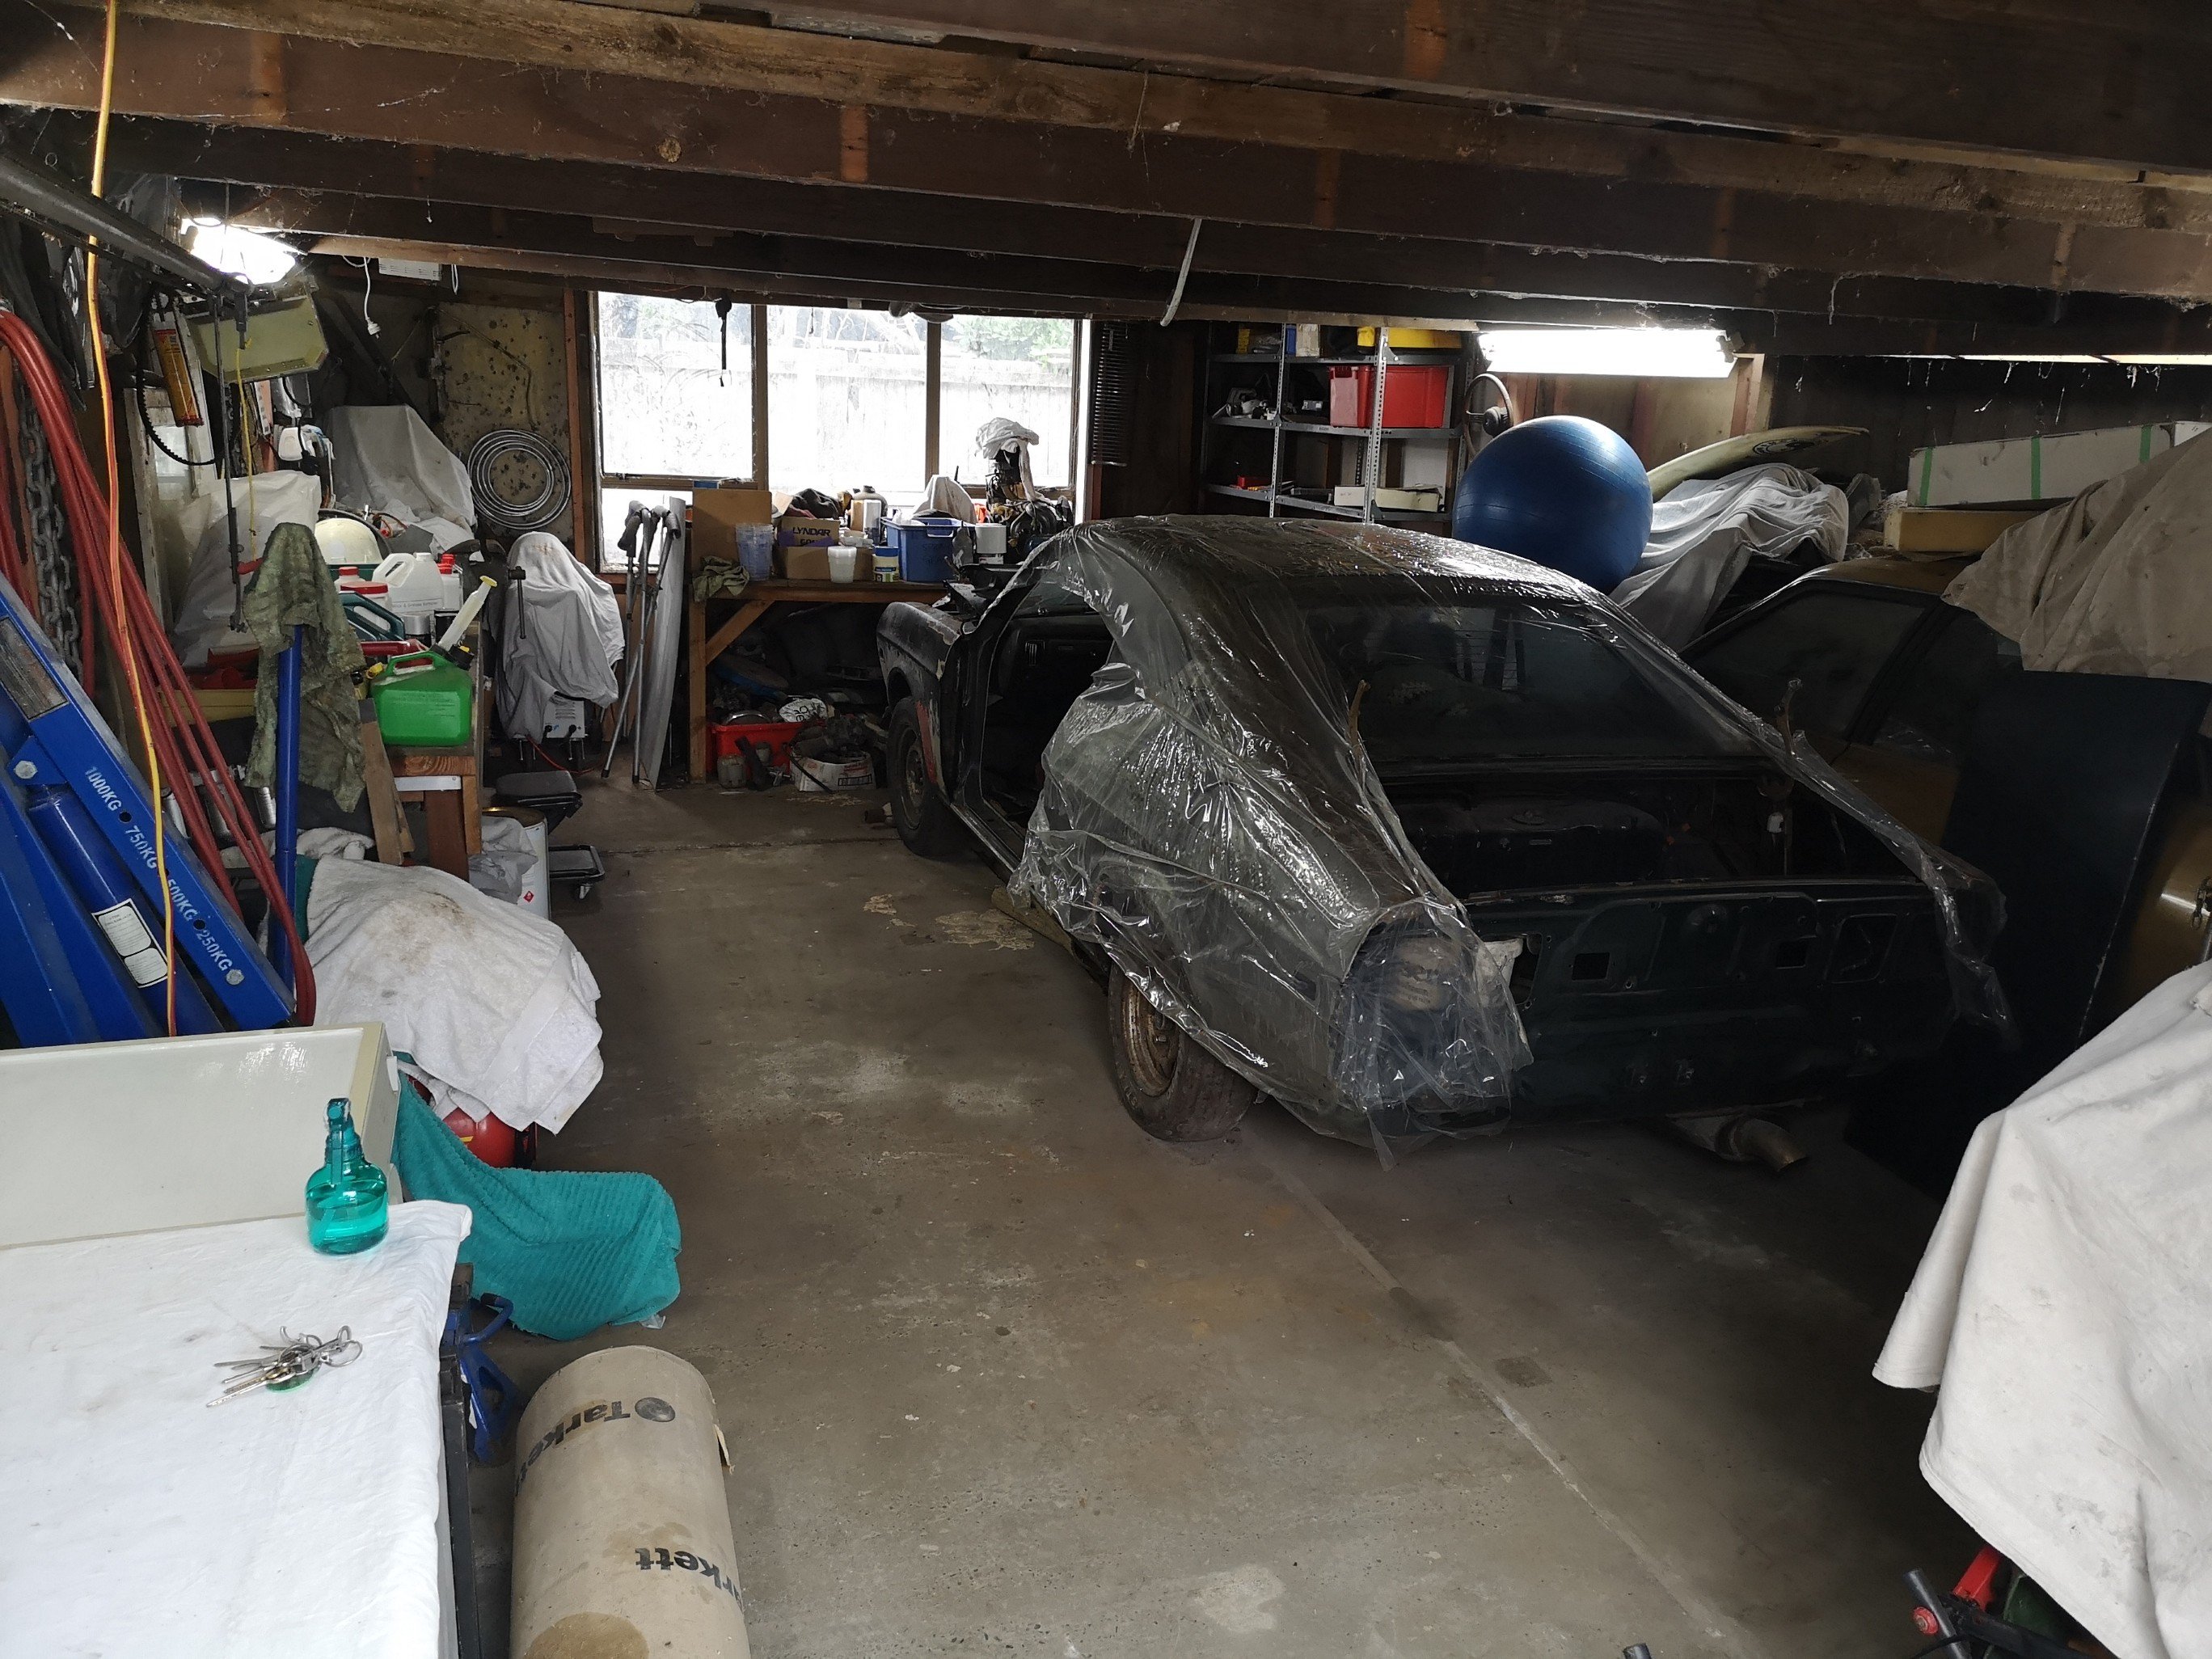
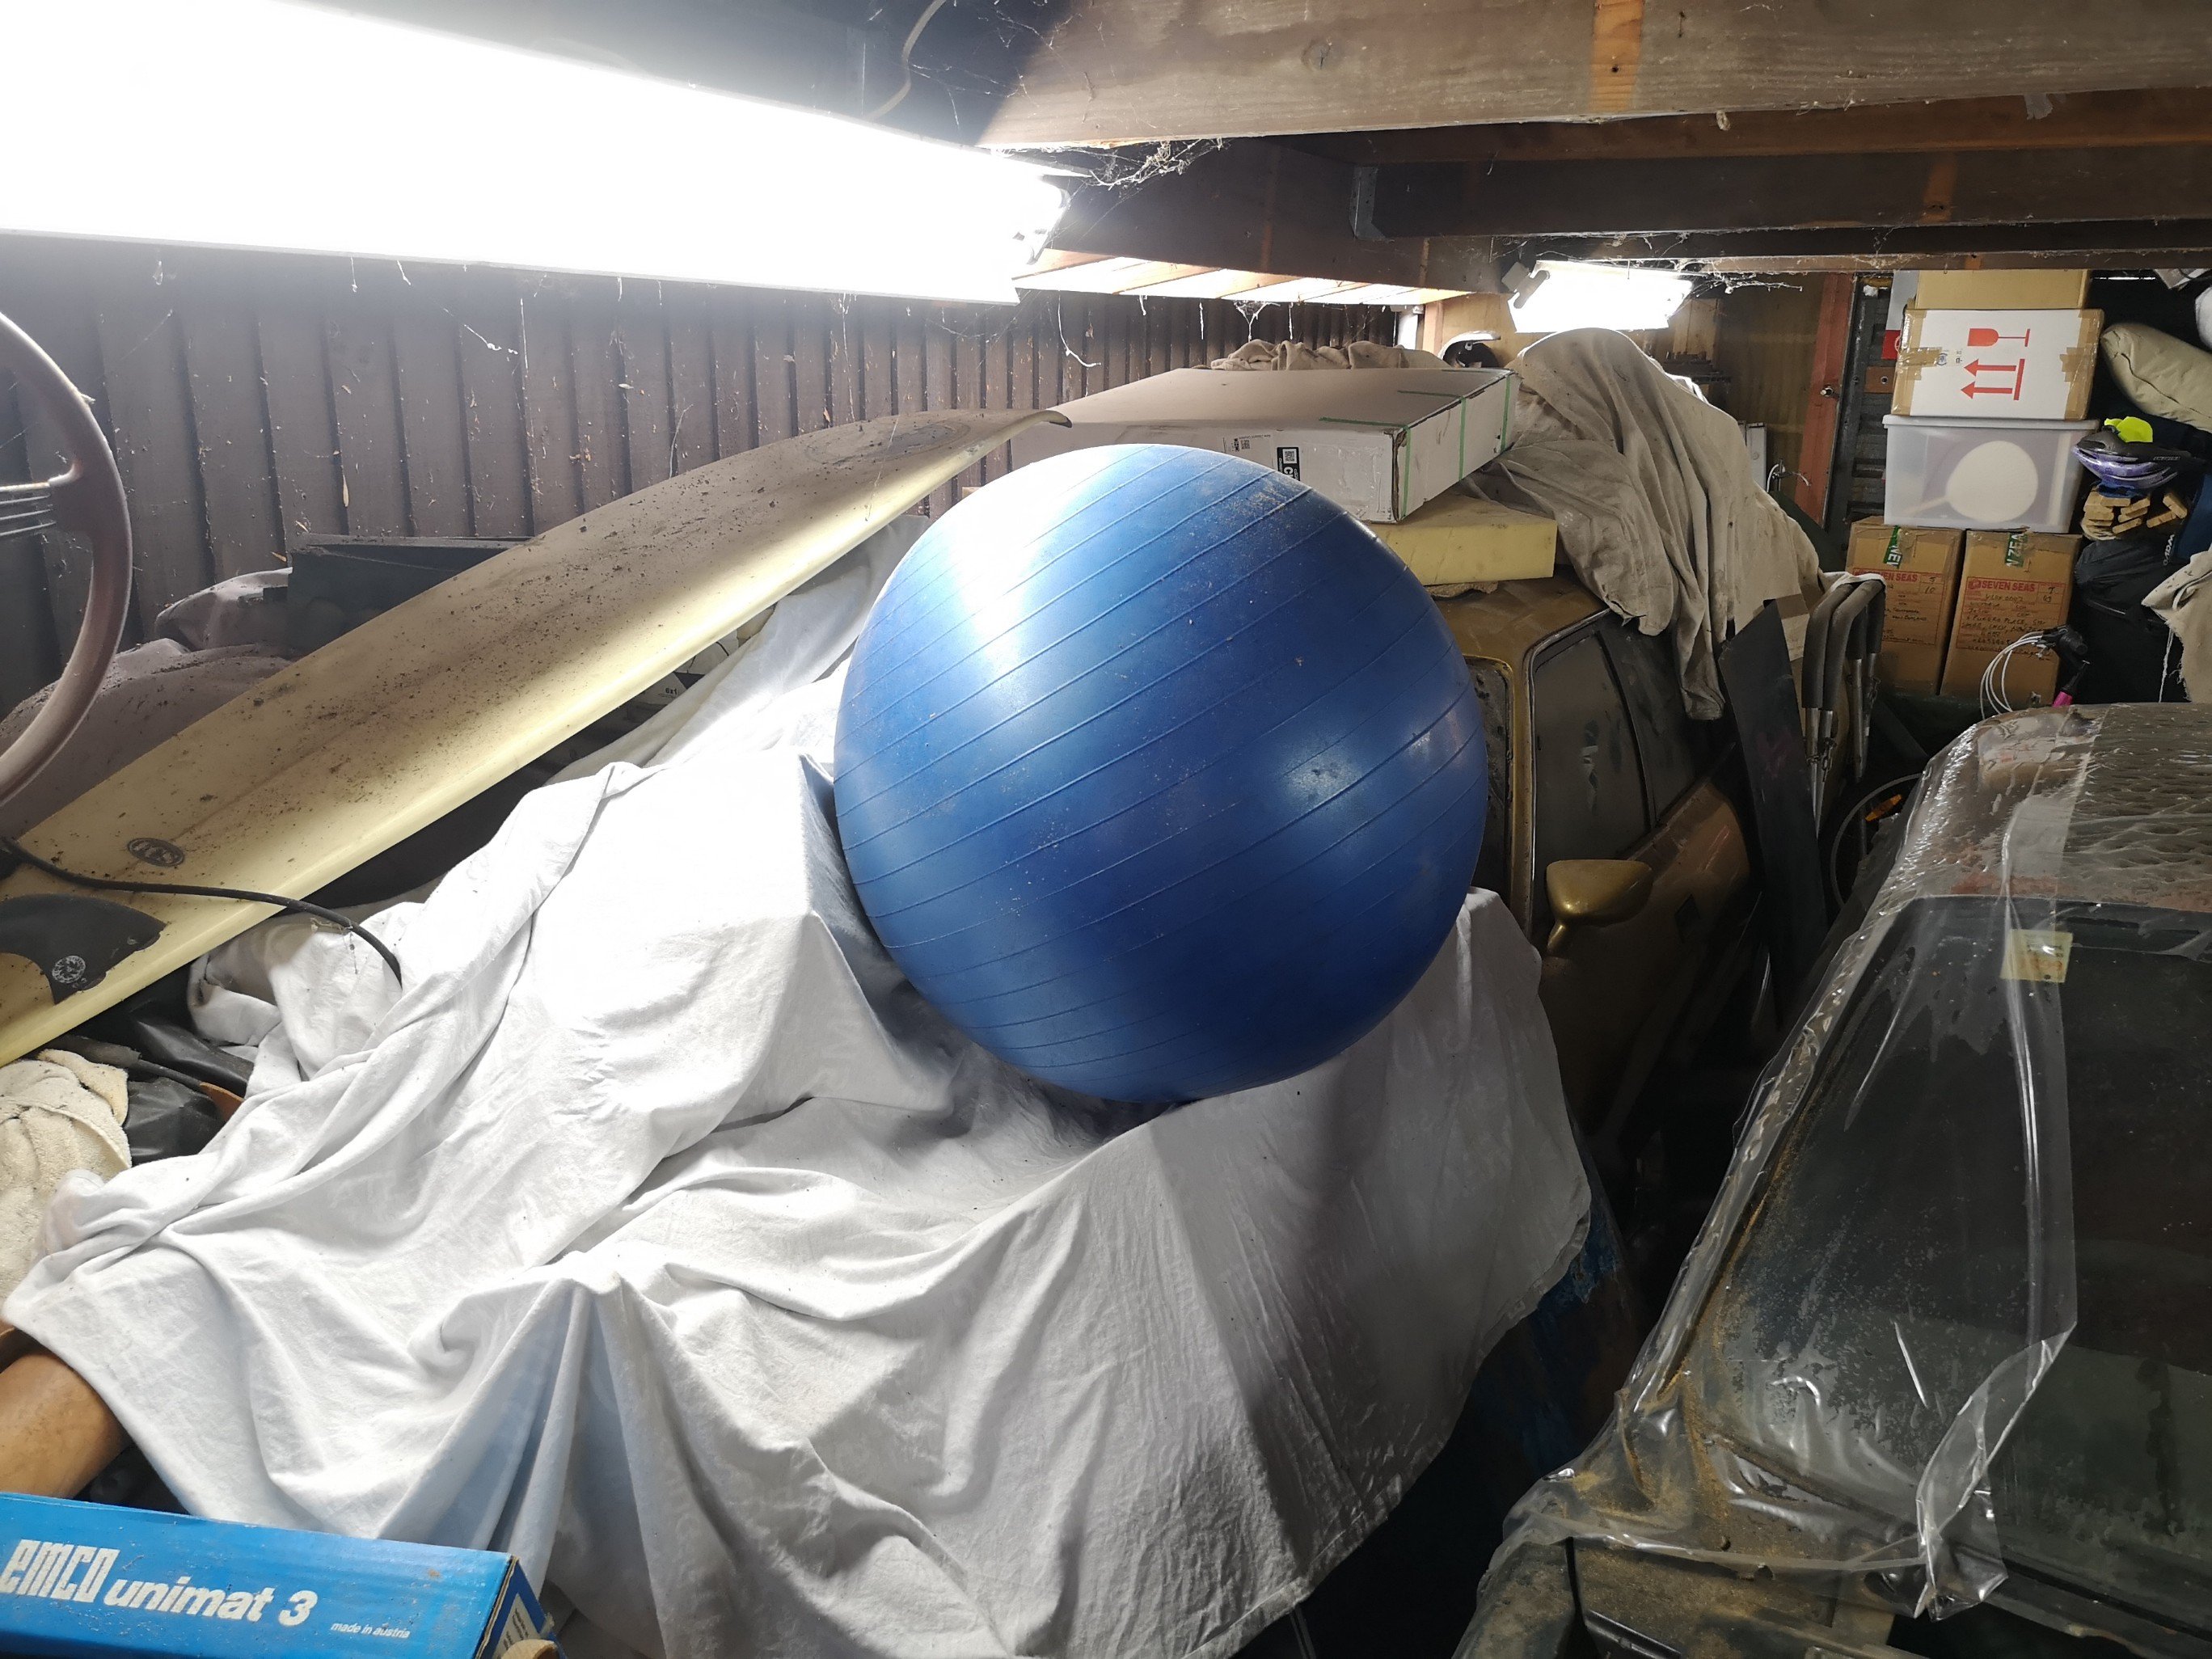
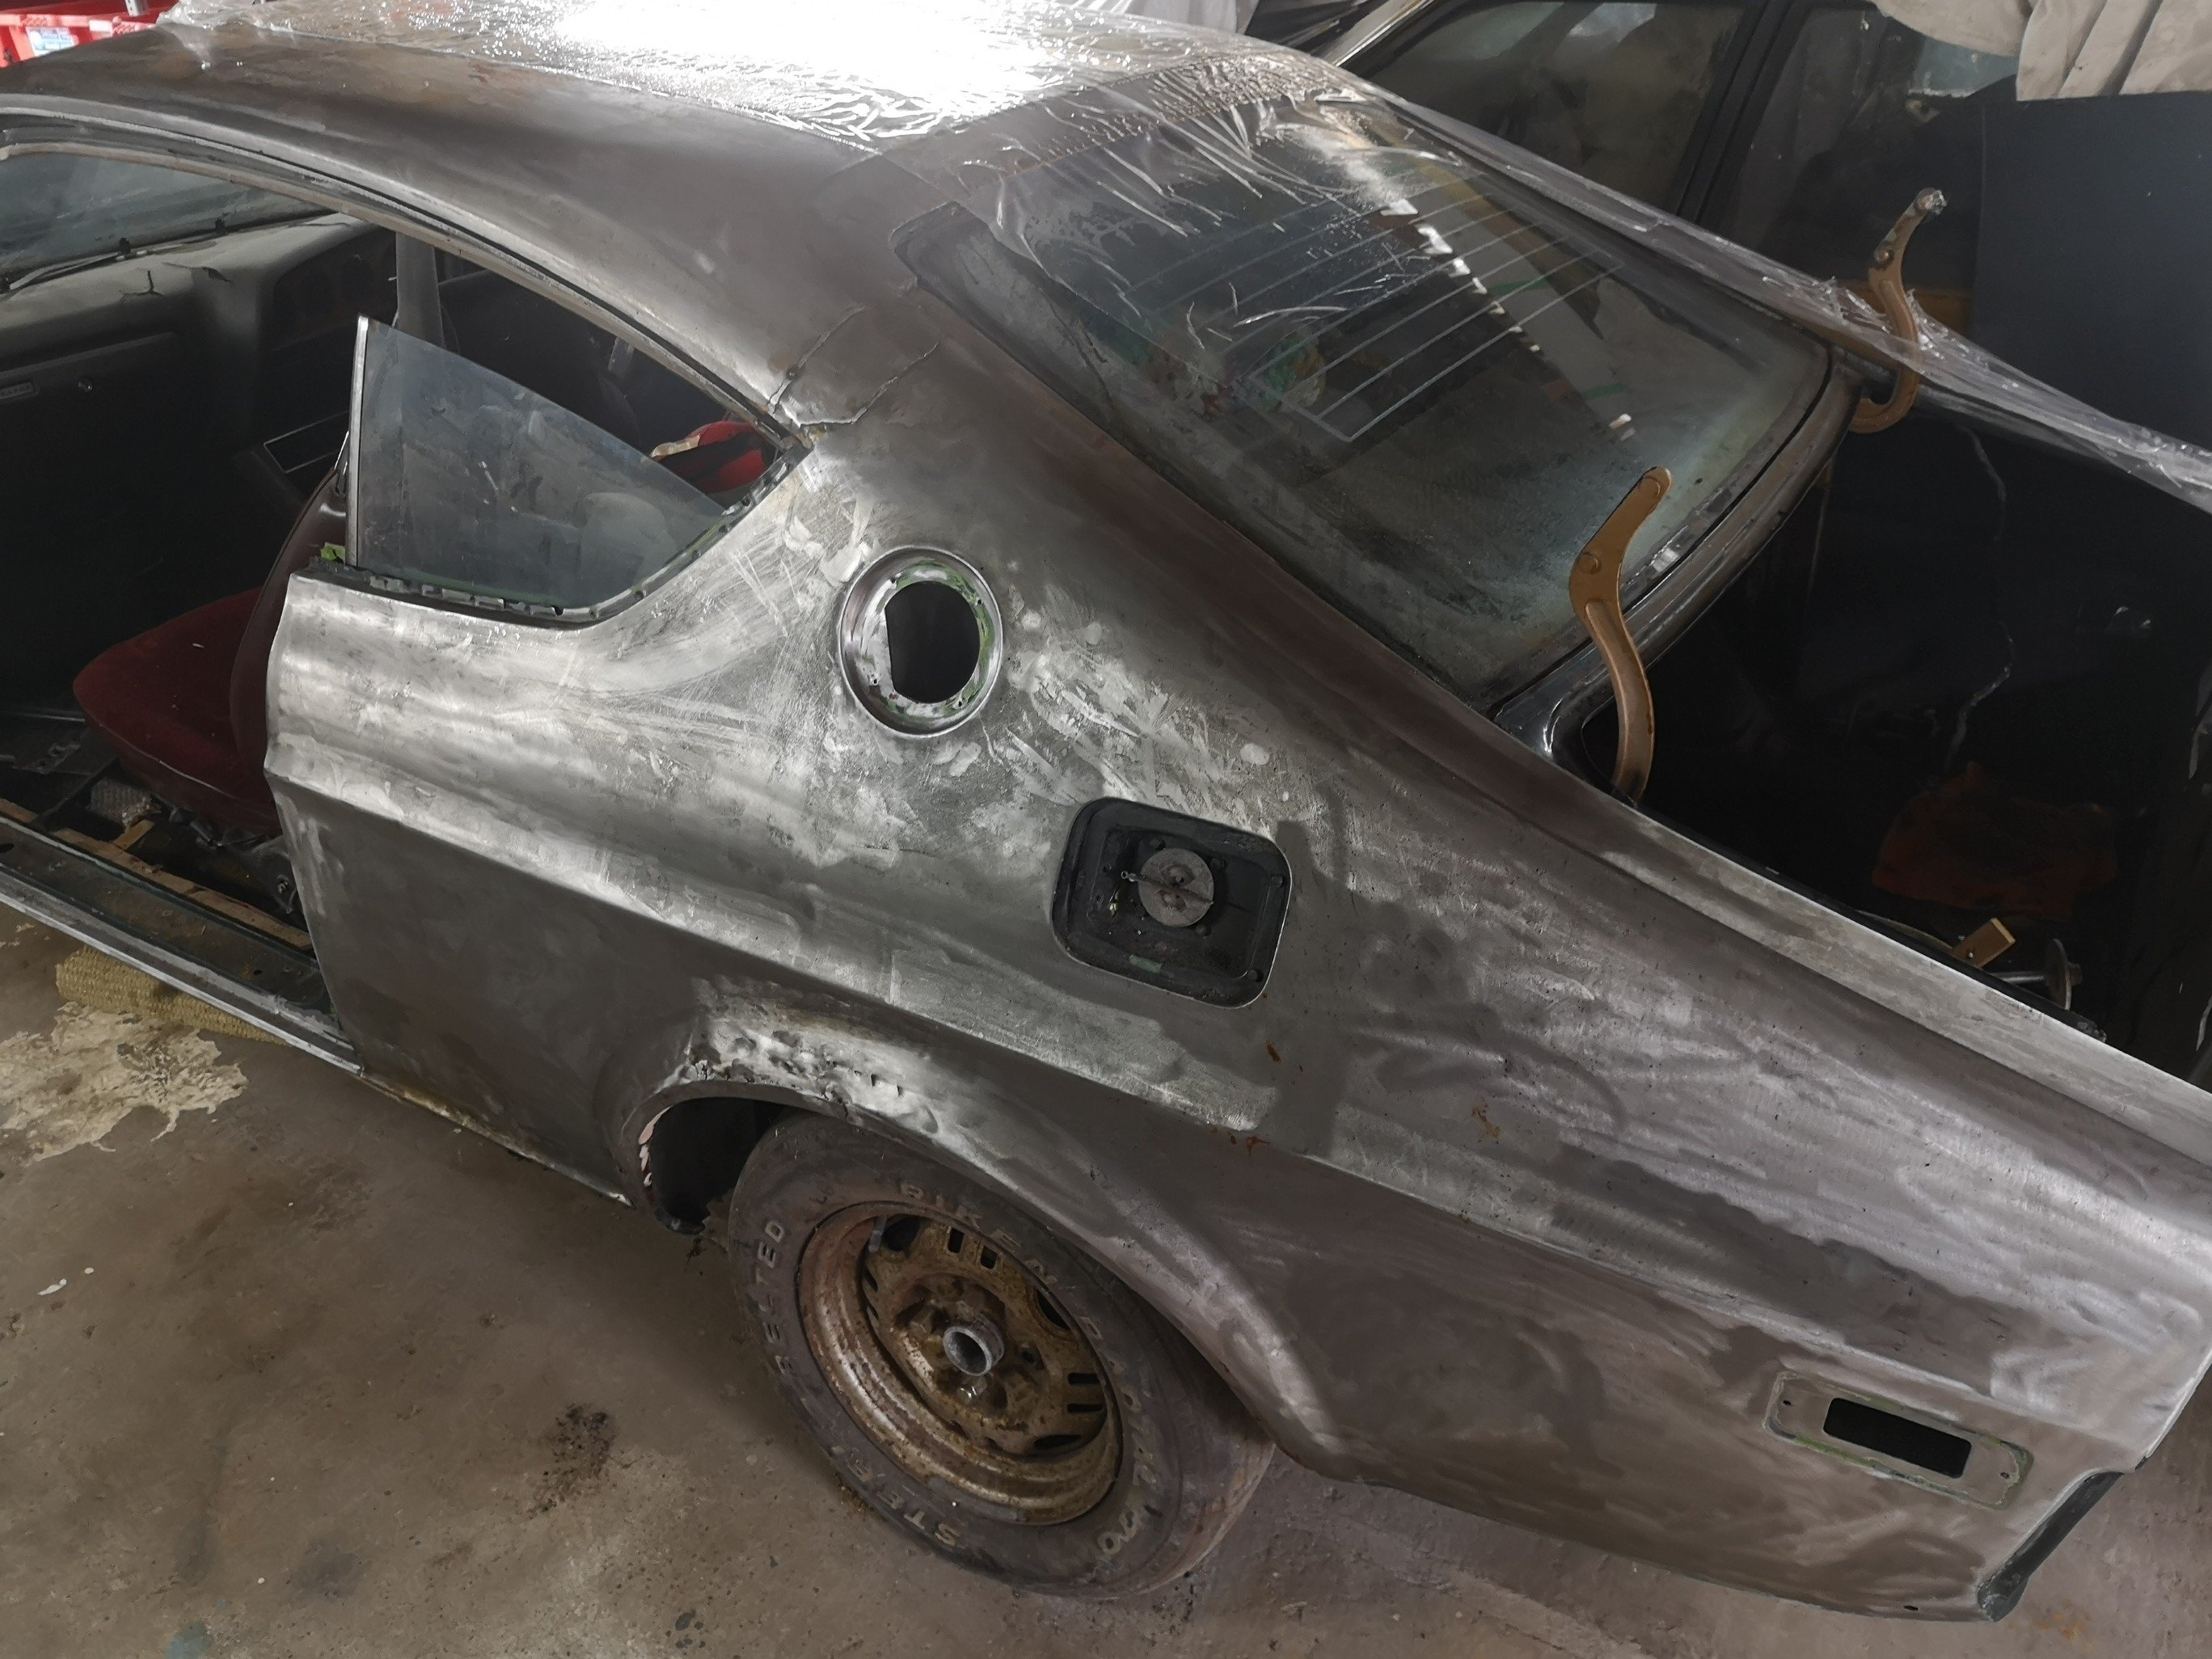
Had a bit of a tidy up today so as to make some room.. Forgot to take a before shot but this pile of shit, Was all over this, Much like this, Under that pile of shit (and car parts) is another car.. Anyway, pulled some of the pallet wrap off that I covered it in to stop rust, And she looks pretty good considering the last time I touched her was almost 4 years ago, couple of bits of surface rust from a dripping roof but otherwise should be good to go. The only hold up could possibly kid duty in these strange times..
2 points
-
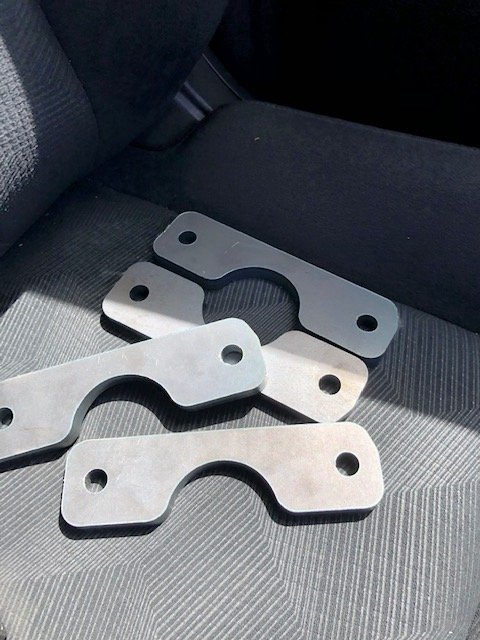
Crikey! Its been over 3 months since I last updated this thread. The reason being I have been busy just enjoying summer and driving the Imp whenever I can. Its such a hoot . I'll use any excuse I can to take it for a hoon. We have now covered over 3500kms since getting it on the road at the end of May last year. Considering we work from home so no commute I was quite surprised at how much its had! Its been incredibly cheap to run (very easy to get over 40mpg while still having a laugh) and is sooooo much fun to trash along on windy roads. The reception we both get whenever either of us uses it for a shopping run etc is fantastic. It really does make people smile- which is nice A few various friends, some from Oldschool, have also taken it out for a good thrash. Its really interesting seeing how different people drive it, their style, ease with the handling and gear change, confidence. Generally they have all found it super easy to drive and all seemed to love the handling. If only it had another 50 bhp... I have done a few little jobs here and there to improve it. Back in the last exciting episode I left off with some sexy photos of a new Hitachi carb. I swapped the relevant linkages/cable stops I had made for the previous carb across onto the new one , bolted it in place and hoped for the best. Started the car up but flooded it because the new carb seems to have a more effective choke. Cleared it and started it proper. Straight away I noticed how better the engine sat at idle. I few twiddles of both the throttle stop screw and the idle mixture and I had it running sweet at idle. I then took it for a hoon up the road. WOW- what a difference. No more flat spots, the transition off idle was smooth as, the transition onto the secondaries was smooth. No stumbling when coming to a stop and a super smooth idle. The jerkiness at slow speed in high gear was gone. Overall a huge improvement. Best $120 I'd spent in ages!! Here's a pic of said wonder carb.. Next job on the list was to improve the brake pedal feel. They work really well but I would still prefer a firmer pedal. I knew that the original Honda Civic brake hoses on the front were far too long, needlessly long. So that was a good place to start. I ordered a pair of new stainless braided hoses from Nelson brake services, impressed I was with the previous set I had them make for my Viva. $55 each which is a bargain. I fitted them and noticed a big improvement in feel. much nicer firmer feel with a better defined bite point on the front. But it can still be better and I think that its possible the brand new Lada master cylinder fitted has a slightly weak seal. If I press hard on the pedal and hold the pressure the pedal will slowly sink. I can also pump the pedal up a bit harder and I have done so many attempts at bleeding it I am pretty sure there is no air in the system. @NickJ ever so kindly sent me a spare set of seals he had. However Nick has warned me that they are from the same vendor he got the master cylinder from, which did come wrapped up in newspaper with these two fellas on the front... Interestingly the seals are a odd shape I have not seen before in a brake cylinder. They have a curved edge, like a worn o-ring outer rather than a lip that is forced against the bore like most brake seals I know.... I thought this was possibly the problem but after some googling it turns out that this master cylinder design and bore diameter is a very commonly used item across many Fiats, ladas and some other brands. So the seal design must work fine in use. Hannah's mum has come over from Blighty for a holiday and essential sun. So over a few weeks previous to her boarding her plane I kept an eye out on Ebay UK for anything interesting. She ended up bringing this stash of goodies... Apart from the very obvious Marmite with proper actual taste I bought a Haynes cutaway book filled with lots of Terry Davey's best pics, plus two old magazines with road tests on Imps- one of which was printed at the release of the Imp and is filled with heaps of articles, photos and fold out pages with extra large exploded diagrams. A total treat for any Imp nerd and one which kept me thoroughly delighted while reading it in the sunshine on coffee breaks... Lastly and more recently I have decided to sell on my Viva wagon. I'm not using it and have utterly fallen for the charm of the Imp. I would rather someone else make something of the wagon and what money I get for it can go towards this car (as well as another few projects in mind, and probably pushbike stuff...) So with that in mind I decided the VIva did not need fancy Recaro seats but the Imp does. The Mx5 seats are ok but not quite as figure hugging as I like, nor do they seem to offer the same lumber support that the Recaros do. Plus the Recaros just look so damn nice and fit in well with the little nippy go kart like car ethos I like in Imps. I was worried about them being a lot heavier but they only weigh 3kg more each. I can live with that for the comfort they offer! So I had to add some slightly wider spaced mounting points. Because the mx5 seat mounting points were welded on the back/inside of the box sections before they were welded on the floor I had to instead make up some flanged threaded bosses... which I then tigged in place (rather then risk mig splatter everywhere)... It was when tigging I remembered the steel was zincalume and made my welding a bit messier then I had hoped as the fumes came through... But all good and strong. I shortened the reach adjust levers while I was at it.. I also had to fix the mountings for one of the plastic covers which no matter what I did with the old push in plastic rivets would always come loose and rattle about . I machined some wee stubs and epoxied them in place... This (blurry..) pic dates the seats somewhat... (kids- ask your parents) I finally mounted them in proper and they look great. Much better to sit in and they also swing forwards further than the Mx5 seats - which to be fair really were never designed for a car with rear seats were they. The Recaros have a more suiting mixture of grey and black which suits the interior better I think. However I'll still keep looking for some suitable red leather sports seats much like the ones in my previous Viva for they were the best looking seats I've yet seen, although being slightly wider for 'larger" Alfa Romeo drivers and covered in slippery leather they were in use a little less hugging than these cloth Recaros. So that lot takes us up to date. Next on the list is to fit some carpet, now that I seem to have finally sealed the windscreen properly although the car has not seen much rain recently- its been so dry here since the start of December. I'm still tempted to play with injection. I bought a spare engine for $100 from the local wreckers. Its a 1500 and has the later oval port head. Larger ports and larger valves. We stripped it down together and its pretty good as far as wear goes on the guides etc. Certainly a good head I can clean up and fit without any machining. I have a inlet manifold to suit. However.... I may still yet re-power it with another engine, yet decided on. I do really like the idea of regaining my rear parcel shelf, currently cut to allow the valve cover to go through, because its missed and would be very handy for the weekly shop! Datto engine in the van after pickup... A tiny little tool box a found at the warehouse which was just soooo cute I had to get it... Goes here.. A tiny little trailer we built for some locals kayaks. Had to size it up... I sold the race car shell and it headed south to Queenstown on what was a comically huge transporter. Fuck I laughed... My Imp making other normal cars look huge... Finally my parting shot- because well... I just like this photo2 points
-
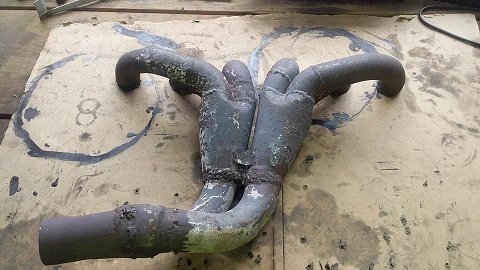
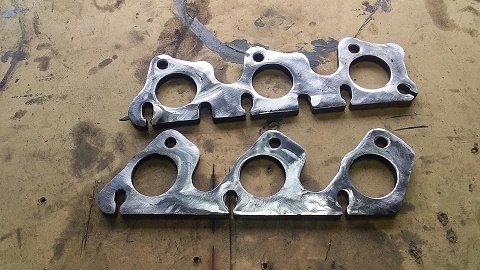
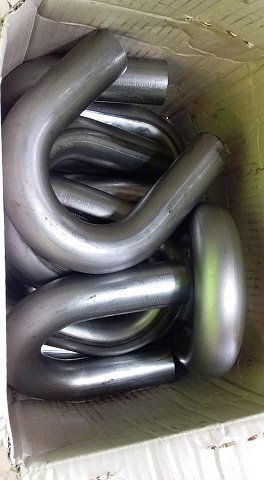
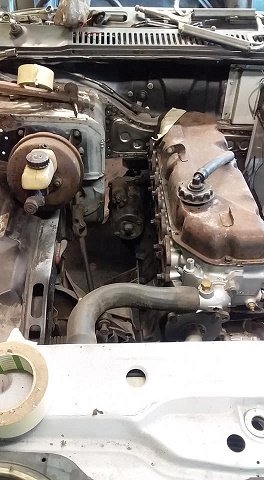
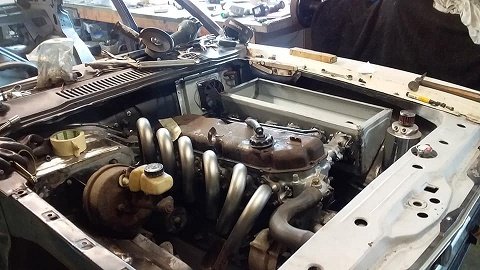
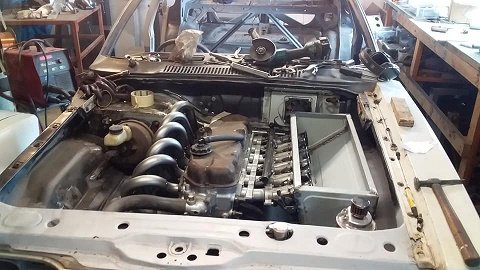
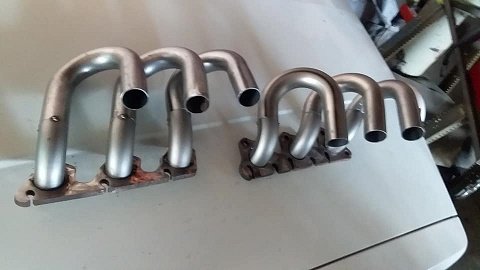
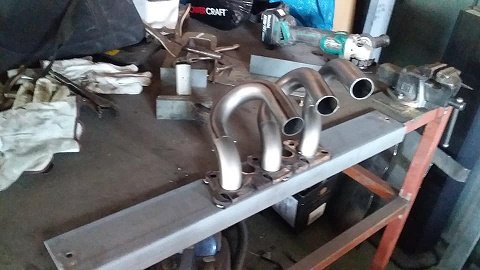
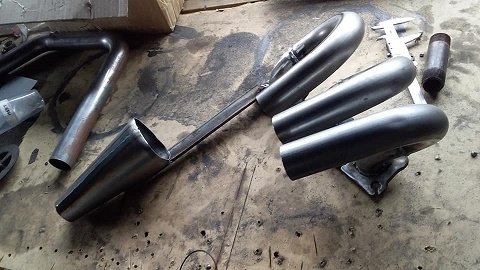
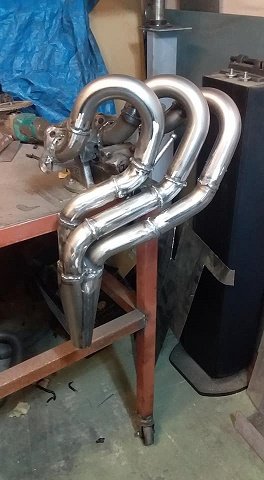
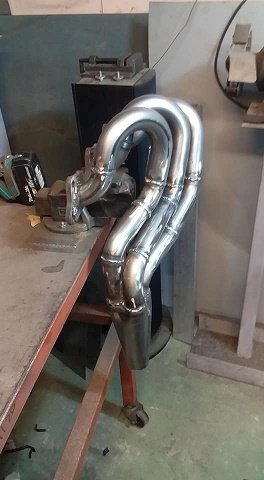
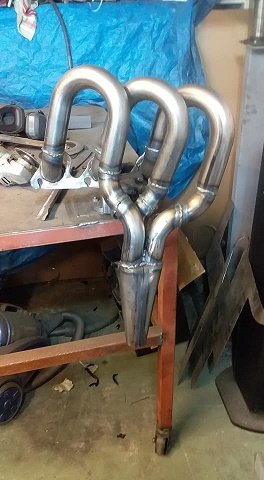
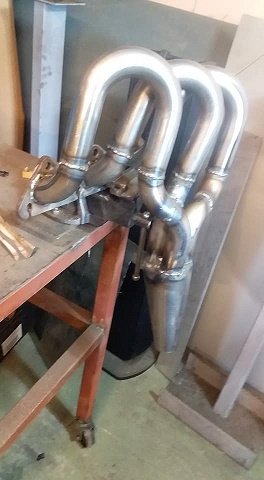
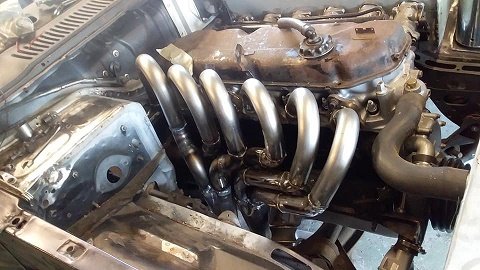
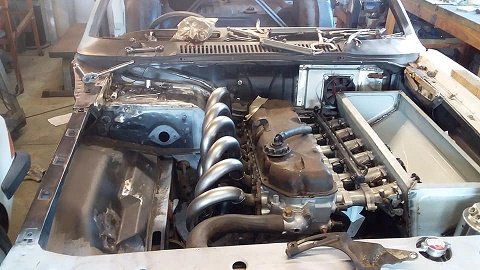
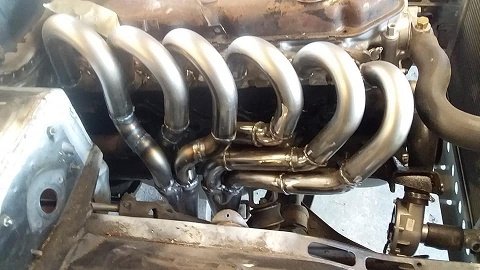
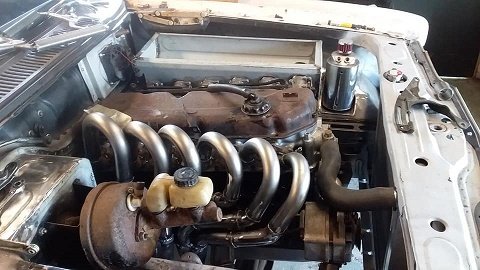
this is the 1st set of headers iver ever made and no i cant tig weld so mig was used........they will be wrapped to cover my shame ........and heat. so i dont like any of the off the shelf headers for the 4.1 and much prefer the huge looping JDM style headers .. these are the crap headers that cam on the motor. the only good part was the flangers so i cut them off to re use. i was talking to a guy in aussie that builds high performance 200 and 250 xflow motors and he said the ideal set up for a street car and will work with a lot of setups. 6 into 2 using front 3 and rear 3...41mm tube 660mm primerys 3into 1 collector.....then 2" -2.5" dual exhaust to the rear of the car with mufflers and a v8 stlye x pipe.. so i ordered some bends.........and i got all 6 within 10 mm of the 660mm and each other. at least there is room to play with then started with the setup i wanted it to look like before i build the rest. then made the rest front 3 rear 3 bolted in
2 points
-
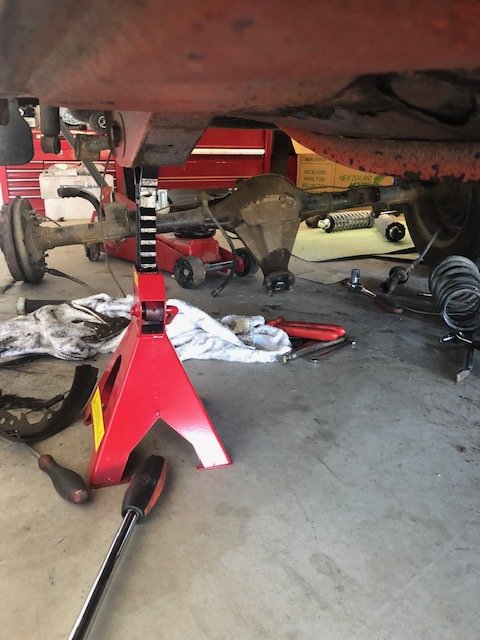
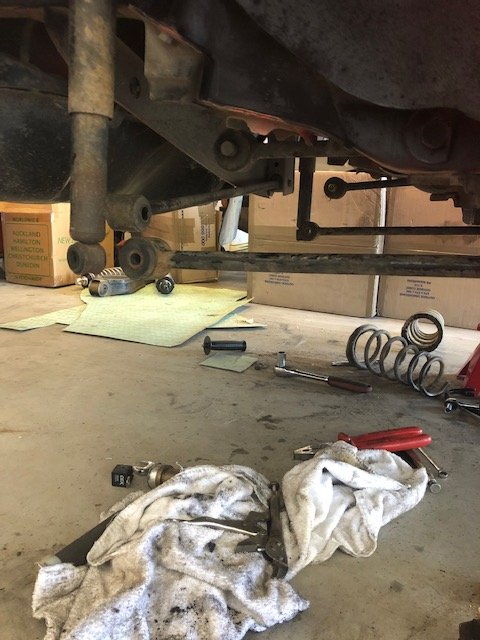
So I got to removing my standard diff today in preparation for the lsd. I purchased a pair of Rear lower Control arms from an rx7 to remove the big ugly 323 ones that incorporate the rear spring perch. After installing them in place of the originals with the standard diff in they’re a little too long, but that’s no issue. I’ll either shorten them, or lop a section out and add some fittings to make em adjustable. i did run into a bit of a predicament with the qa1 rear adjustables. id known they needed a bit of modding on the car, so putting it out there with everyone to gimme some feedback as to wether it’ll work.
1 point
-
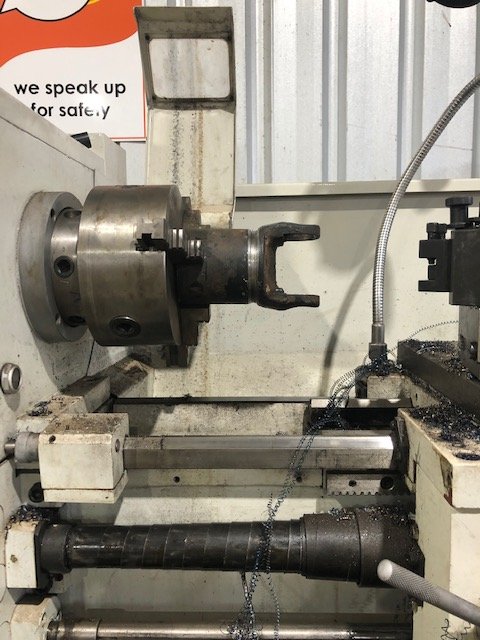
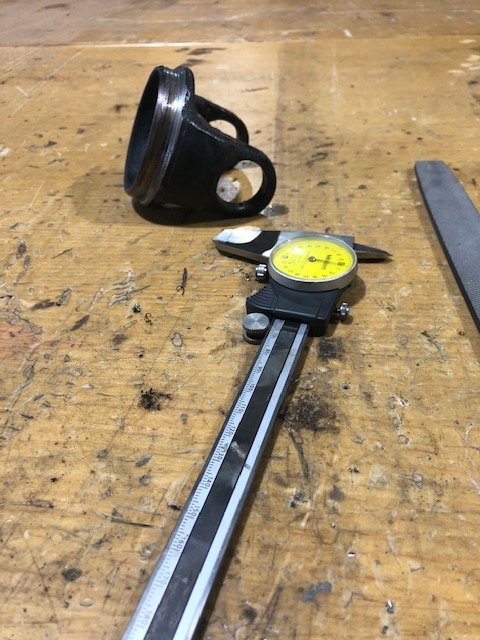
Time To drop it all back in and see if my 12 hour day was a success!!! too right it was!!! In other down times I machined the universal joint/yolk off the driveshaft that came with my LSD head, as well has have some spacers Lasered for my callipers to mount. now I can say the diff is all but done!! Just a lick of paint, seal the head to the housing and install it ready to fill with oil
1 point
-
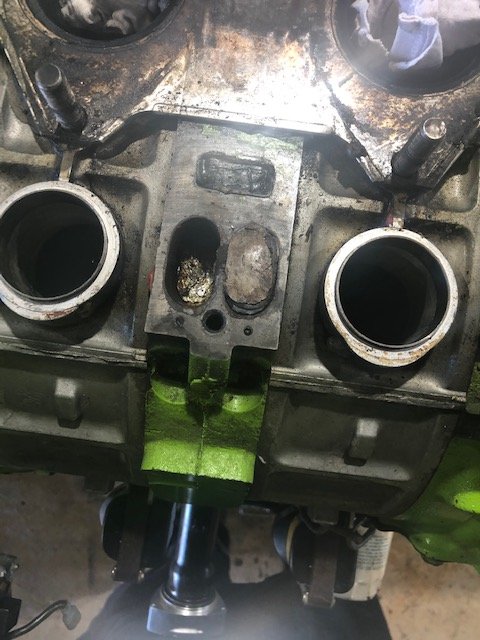
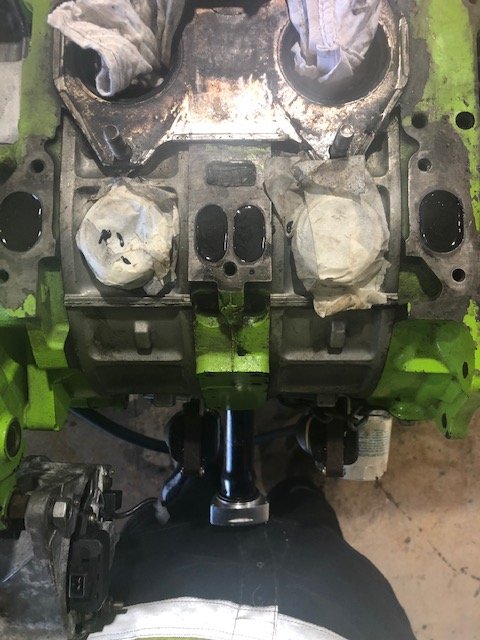
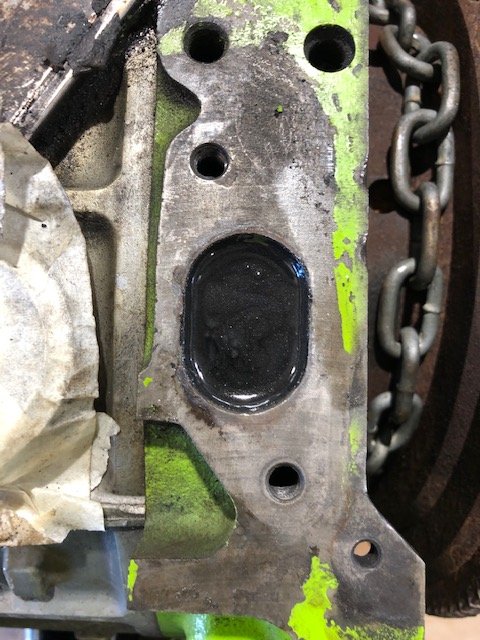
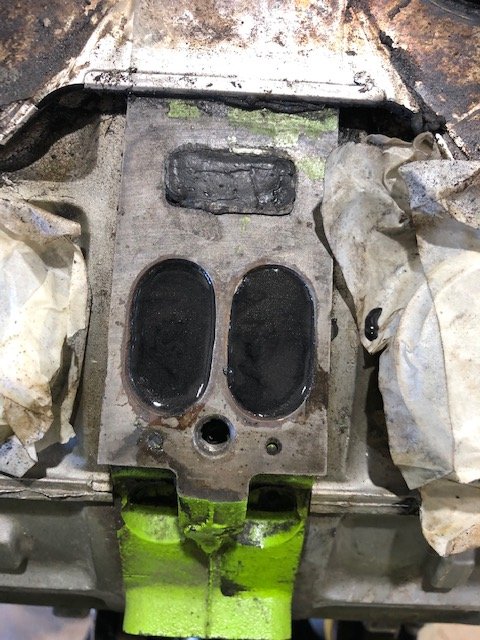
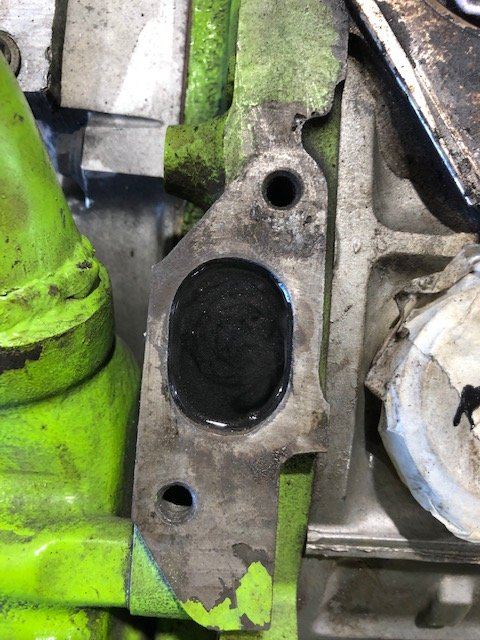
I’m not sure if it is just me, but I wasn’t too impressed with how the back half on the inlet ports were filled. I know into the block they were devconed appropriately, but it must be an Aussie thing to only fill it halfway and then put tin foil or steel wool to same a buck or two.... cheap cunts. So I then needed to pull that shit out and seal it properly...
1 point
-
So yea, no luck sourcing brushes, just as well I have a lot of useless shit lying around; Makita 9" grinder brush Vs worn Safari After a bit of loving with the file Into the carrier I cleaned up the slip rings in the lathe, you can see why I won't bother too much with this alternator, that ugly bit of shaft is where the seal from the vac pump is supposed to do its work. The whole alternator was full of oily shite, this is the culprit I imagine. I chucked it all back together and got charging voltage no problem at all, a triumph for bodgy cunts everywhere.1 point
-
So with the idle circuit sorted, I figured after working on getting a little bit of air into the engine, the next logical step is to figure out getting lots of air in as well. I'm not sure if I've mentioned it before but I plan to use the original BMW linkage rods to actuate each TB. They are stainless from factory and hard as a coffin nail, so I'd really like to avoid machining or drilling them as much as I possibly can. Because I basically can't. So I won't. I actually considered this way back when I designed the intake flanges, spacing them out the same as they would have been on the V10 in the first place. This meant that all the cross drilled holes in the link rods already line up with the throttle bodies and I can use the factory linkages and everything is peachy. Also, being originally off a V10, the rods were too long for the banks of three per side that I'm using. This left me with a handy little overhang on which to mount a custom eccentric throttle wheel. So with the help of @yoeddynz once again, and a little bit of maths, I designed this: Using the standard Escort's pedal throw of ~46mm, it gives you a little over 1/3 (7/18ths) throttle opening at half total pedal throw and the remaining 2/3rds ish with the remaining travel. Hopefully this strikes a good balance between fine controllability and spongy pedal feel, like you get in so many modern fly by wire setups. Unfortunately I won't be able to know for sure for a very long time, but, such is life. Using that neat little drawing, I spun this up in the lathe with the four jaw chuck. Probably the most offset job I've ever done. Thought the bloody thing was gonna jump out at me any second when it hit its resonance. Here it is mounted on the link rod: With that done, the next thing was to make a bracket to hold the throttle cable. I'm using a standard Escort throttle cable shortened by about 150mm and with a late model style barrel end on it. This lets me use a standard pedal and clip and not have to worry about modifying anything on that end of the deal. Here is what I came up with for the bracket: It is made from 2mm sheet to match the original bracket. This means the clip system on the end of the throttle cable fits in snugly. As you can see it is mounted to the idle circuit tubing. And here it is in place: And full throttle: Finally, I had to connect each bank together. I ordered some rose joint rod ends from china with a left-hand female thread, and repurposed a right-handed example from my original twin carb setup for the Pinto from way back. Then I modified a pair of the factory linkages to be parallel at half throttle but with one above the rod and one below, while still picking up the original holes in the link rods. This should mean that each rod should rotate at the same rate but in opposite directions for the entire arc. Finally, each rose joint is connected by a stainless steel rod with opposite threads on each end to allow for fine adjustment of length and to balance each bank properly. I also made up a couple of lock nuts for each end. So finally, this is how it all looks in action from the driver's seat: With that all done, while I was in there, I installed the proper vacuum rated flexi hose for the idle circuit. Looks flash as now. Not sure what the next job will be but I'm sure it will end up on here at some point. Cheers.
1 point


.thumb.jpeg.384ff72c8d2b0ee0d34a7bdedb55bdcf.jpeg)


.jpeg.40d4e568a75fc59c94b75b3b5b379914.jpeg)
.jpeg.1e8d5c9b9bbbc274498996007e7dadbb.jpeg)


This leaderboard is set to Auckland/GMT+12:00