
Leaderboard


Popular Content
Showing content with the highest reputation on 04/01/20 in all areas
-
Finished the other side 4-link mount. Bought some more wheels too. 13x6.5j SSR MKII's. Gave them all a beadblast and polish, still need some paint at some stage. Bought some new screws for the headlight trim, gave the trim and headlights a polish and assembled them. Made some new chassis rails out of some 50x50x2.5mm box section. It nearly perfectly slid over the existing chassis rails, which was ideal for plug welding it. The front of the rails/foot well section has gained 25mm of ground clearance now, which makes the sills and chassis pretty much flush, before the chassis was quite a bit lower. Also extended the rails to go all the way through the rear seat foot well and up to the rear chassis section. Should be way more rigid now! Cut out the floor that was hanging lower than the chassis rails and made some new panels and welded them in. The other side is a bit more work, as it will have an exhaust tunnel going through there as well. I should hopefully be able to tuck the exhaust right up above the lowest point. Once that's done the sills and chassis rails will be the lowest point in the centre section of the car. Might need to look at whether I raise the front crossmember or not.26 points
-
because the v8 is giving me the shits i wanted to actually achieve something so i did some work on this. spent most of the day cleaning and painting this fancy grill for it. as usual i was to fucking useless to take any photos of what it looked like before i started but just imagine it looking fairly shit. 2020-04-01_04-43-05 by sheepers, on Flickr 2020-04-01_04-43-15 by sheepers, on Flickr 2020-04-01_04-43-22 by sheepers, on Flickr16 points
-
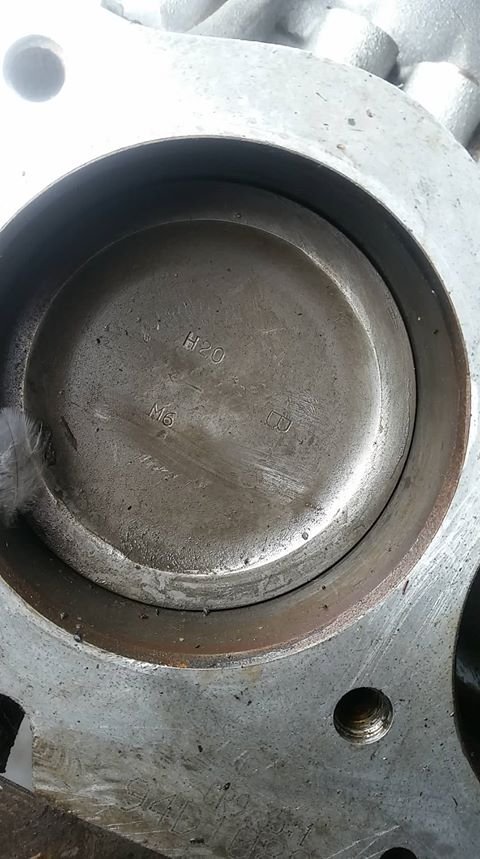
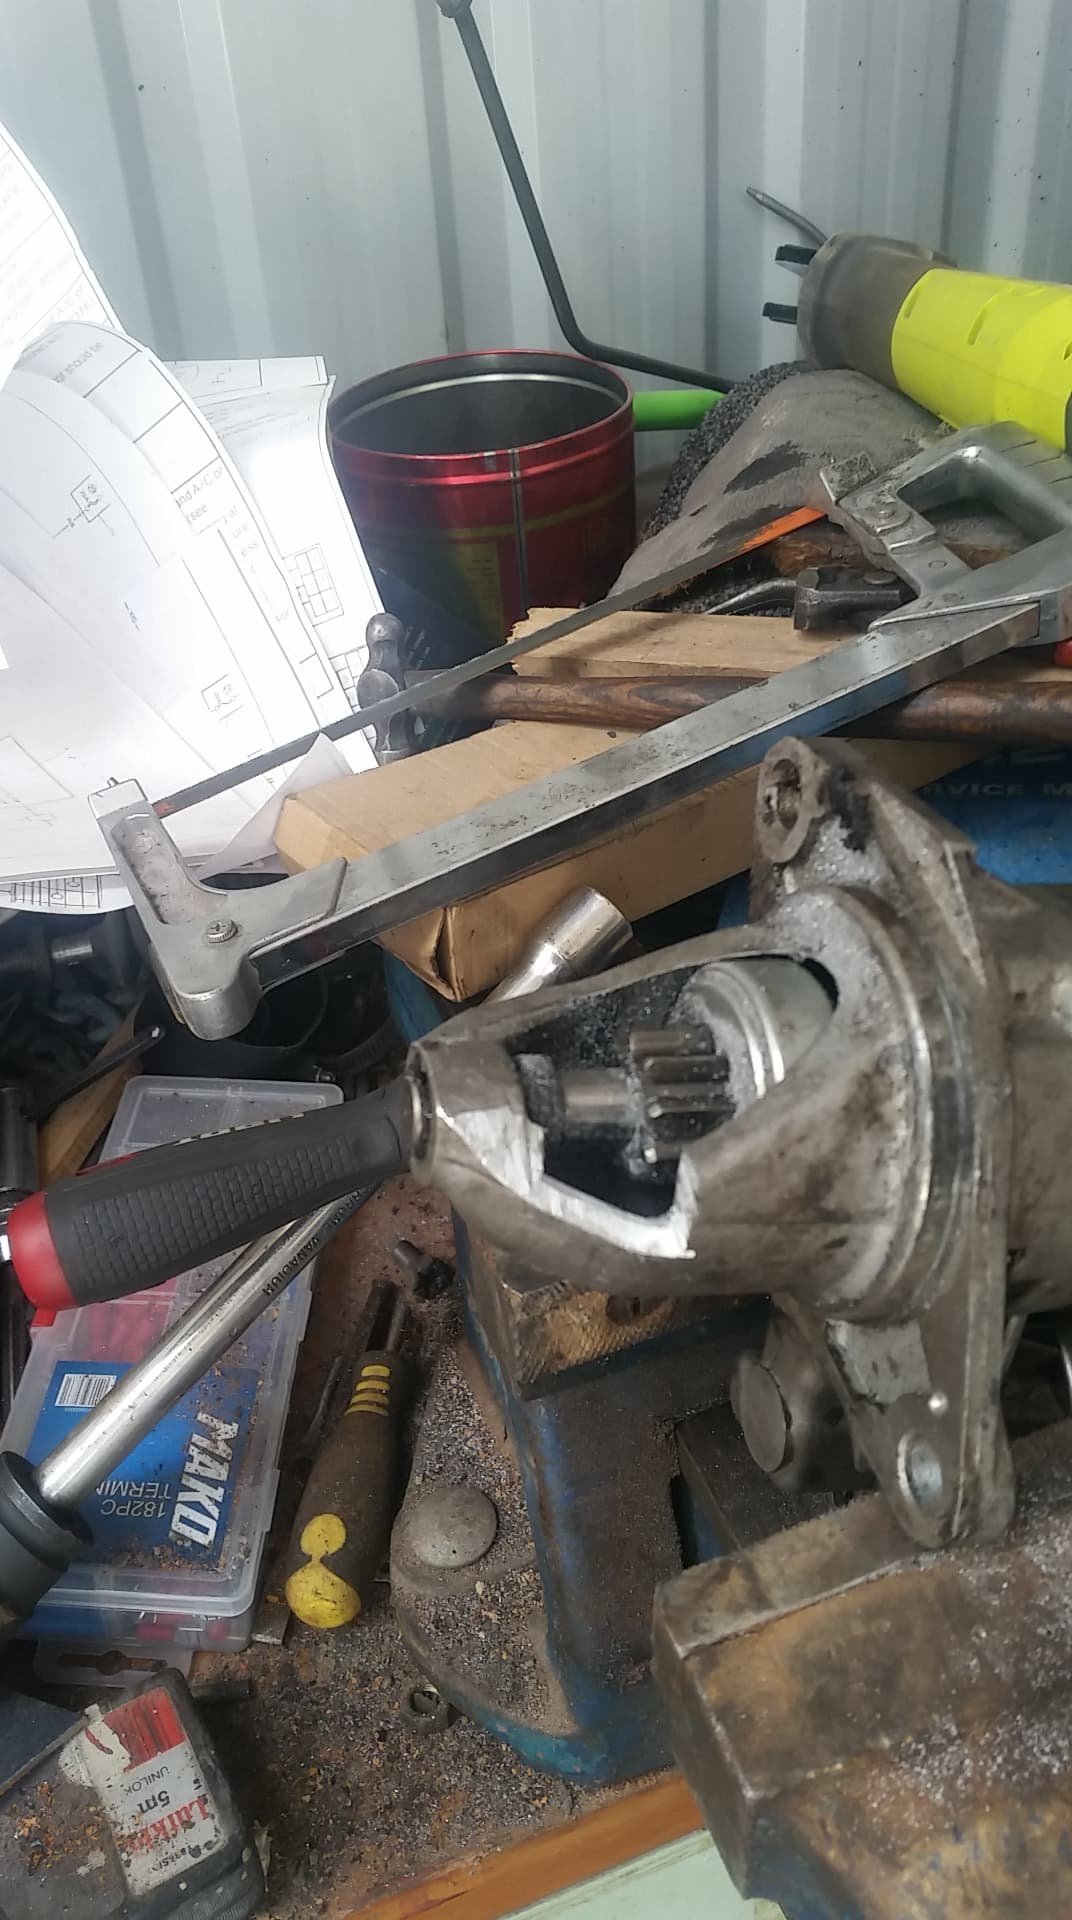
I'll save the long story and go straight to the money shot (this is me squeezing on the radiator hose) So yeh, that's pretty obvious whats gone wrong. This is all in behind the cambelt, that's the bottom pulley/gear at the bottom of shot. Would be an easy fix if anything was open.....6 points
-
cheers team. i was sick of looking at a fisher and paykel appliance. i had originally wanted a different style graphic but just didn't work out and i kept coming back to find this bus. very happy to see it done. i just need to get back to the shop and finish lowering it.6 points
-
*waits for barry to call asking if we can cert his 56 f100 he imported from america so he can take it to the supermarket *5 points
-
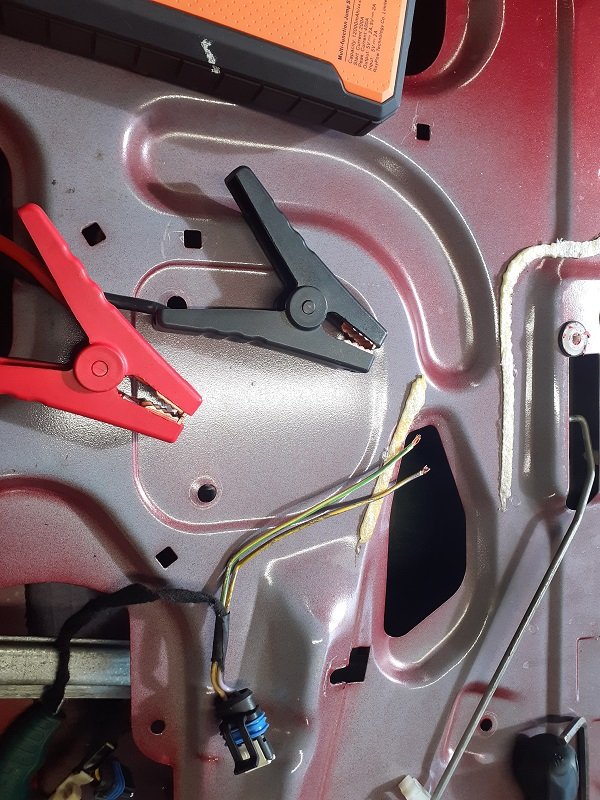
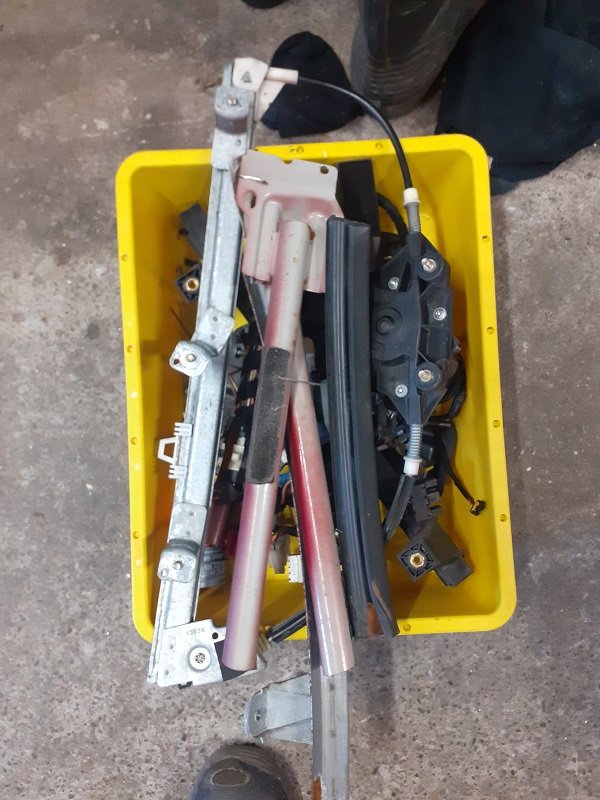
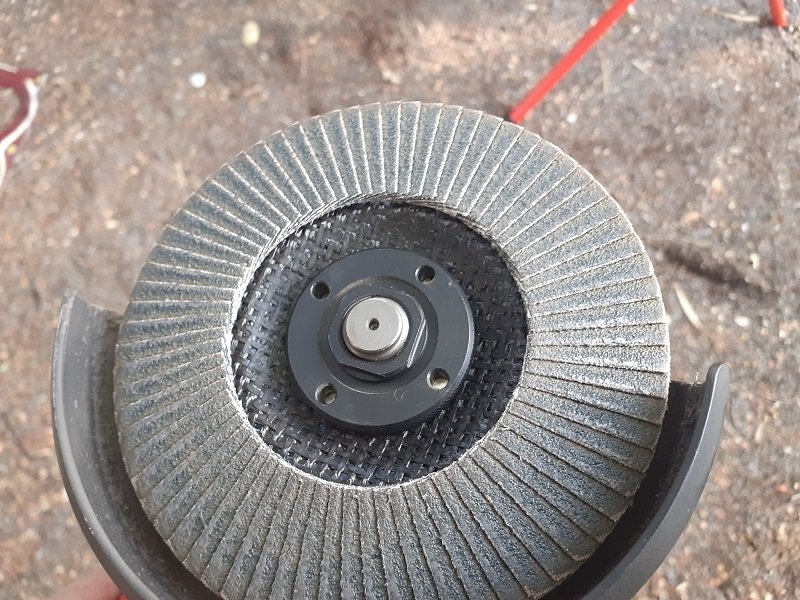
Door Trim Off. Used Jumper Pack to wind window down to enable removal. Fuck these are handy. Bam and the Steel is gone. If in Doubt, Chop it Out. Well on the way, still go a bit to tidy up before starting on the other side. Will weigh it tomorrow and see how much came out. Enough to justify a beer anywyay. Used one of these Emery Tape Flapper Wheel Disc things for the 1st time on this door. (On Panel steel at least). Fuck they're awesome, they remove a surprisingly large amount of material and are really good for creating round radius edges, also great for trimming the burrs from the cutting discs. A+. Would trade Again.
 5 points
 -
Working on installing an H165 in the Y. Getting a bit over replacing the H150 heads, the A14 seems to destroy them... Cut H150 perches off, realigned and welded onto the h165 housing. Found a driveshaft in the shed, 1275mm long. Aligned this up and seems to fit well with the larger diff. Not sure what this is off? Something A series. Would like to acquire another one if anyone has one. Working on a bracket for the handbrake now, will be using the h150 120y cable. Need to offset the mount by 100mm to fit the h165 diff Aiming to wire wheel the diff and get it painted this weekend and installed next week! Thanks corona Come have a yarn while your stuck at home!4 points
-
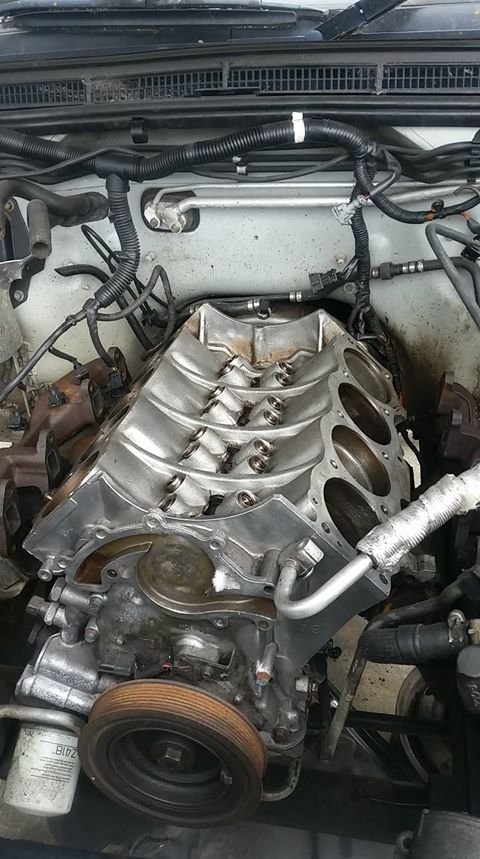
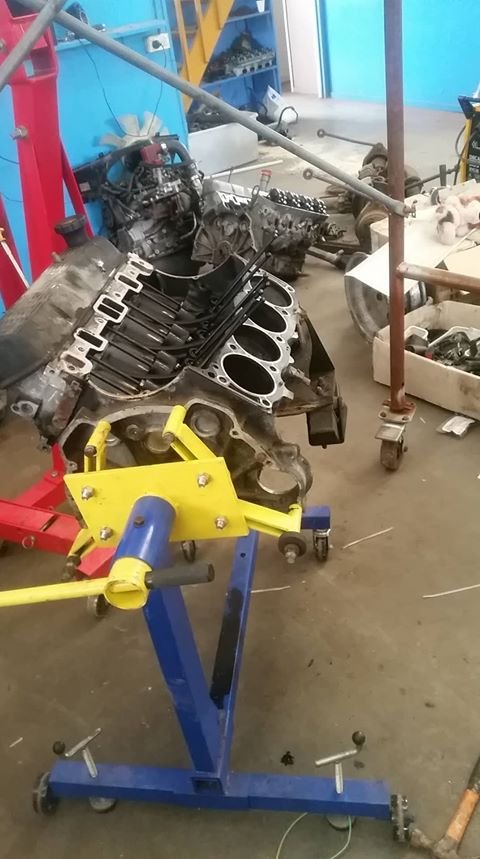
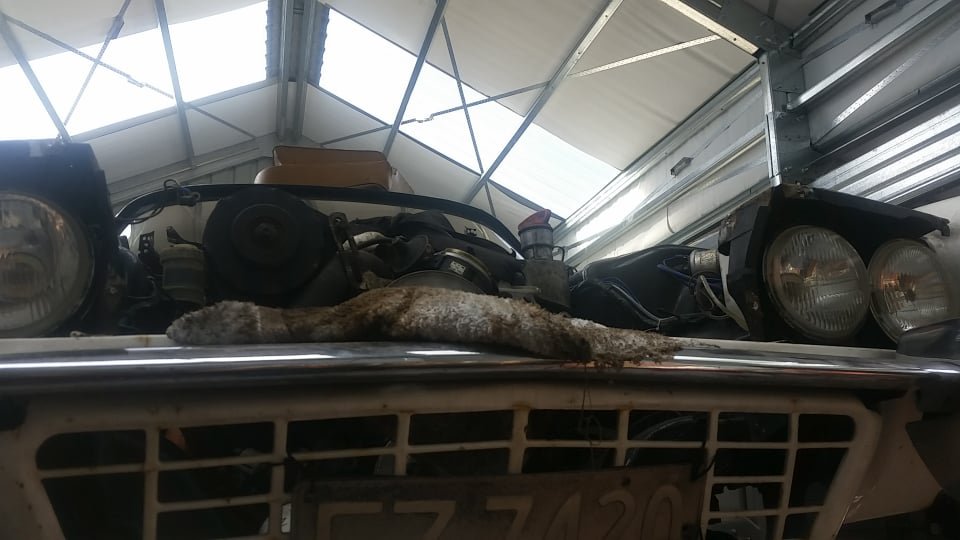
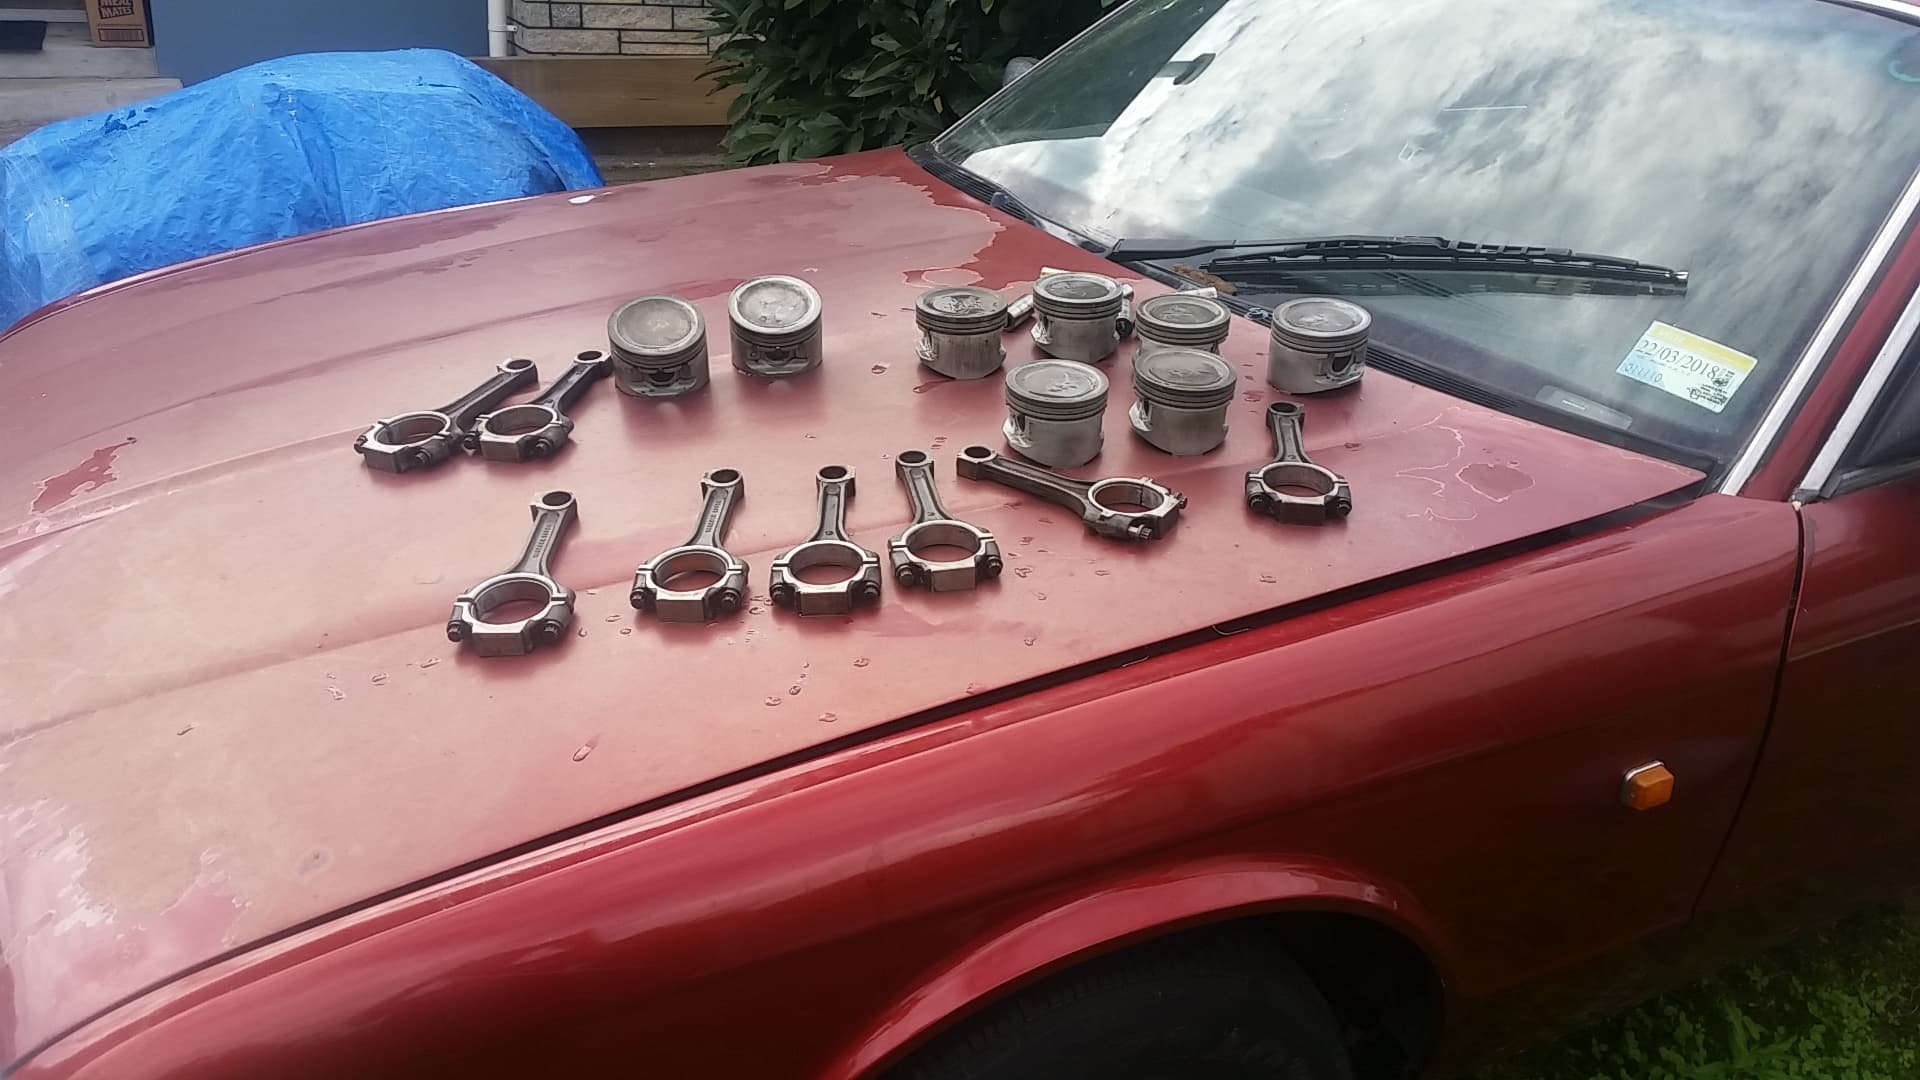
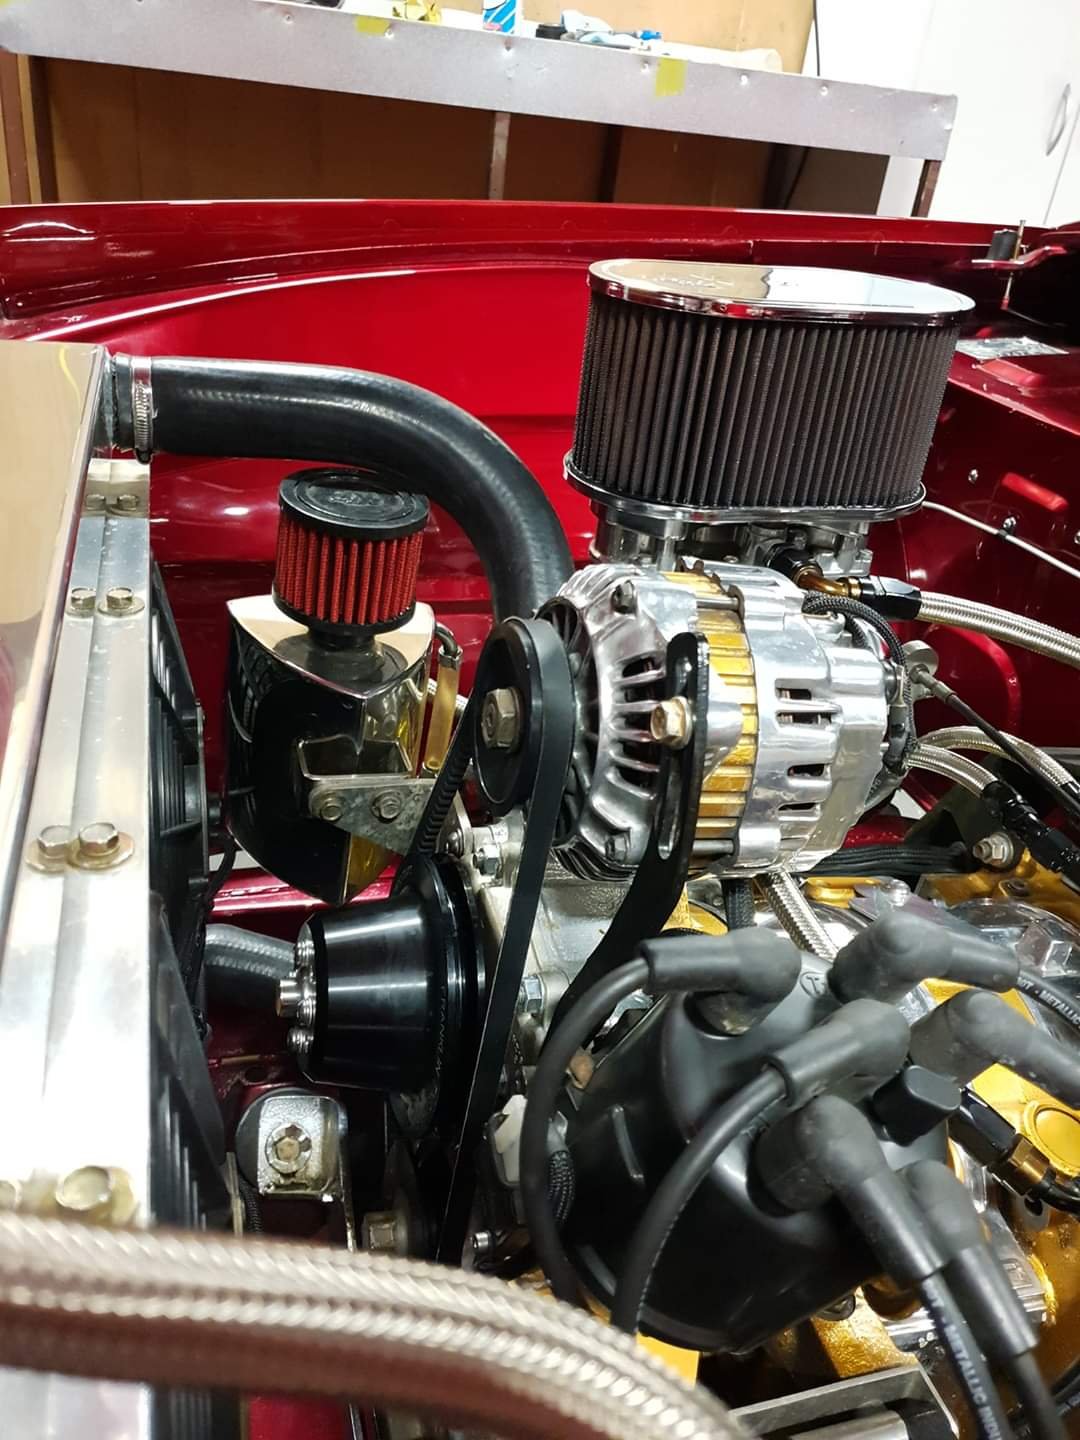
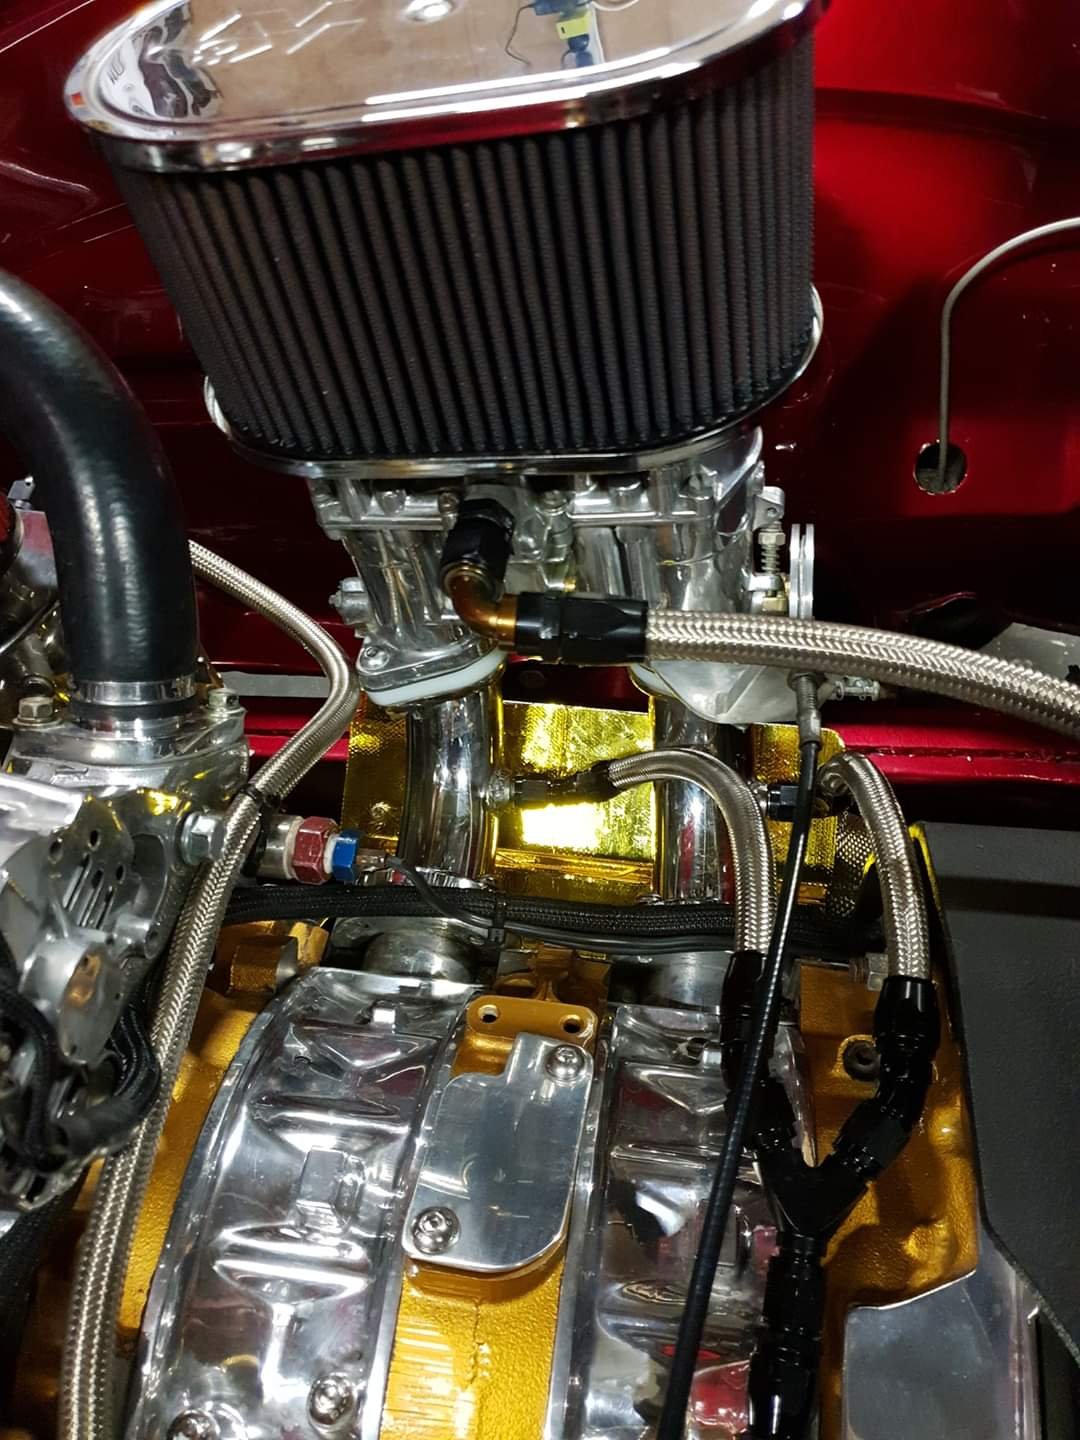
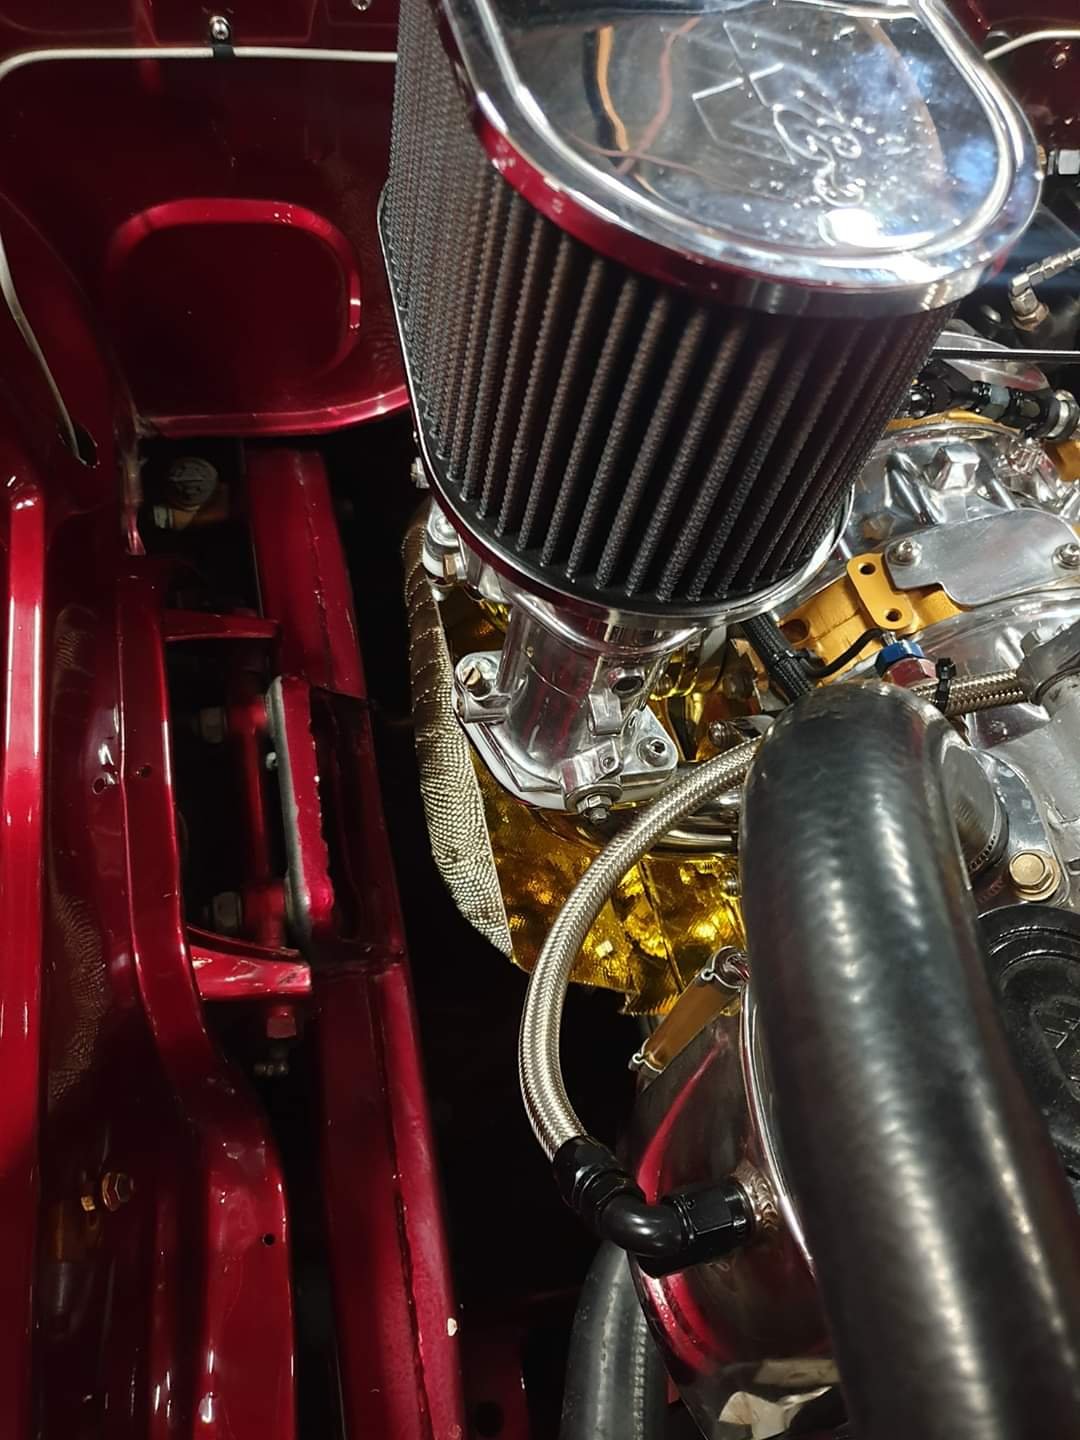
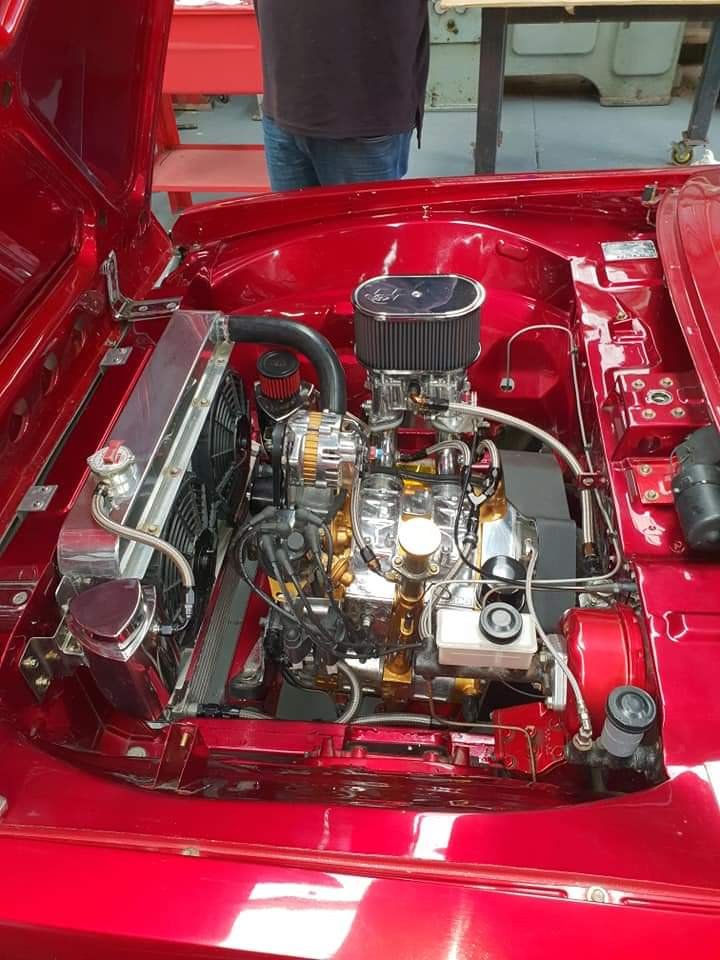
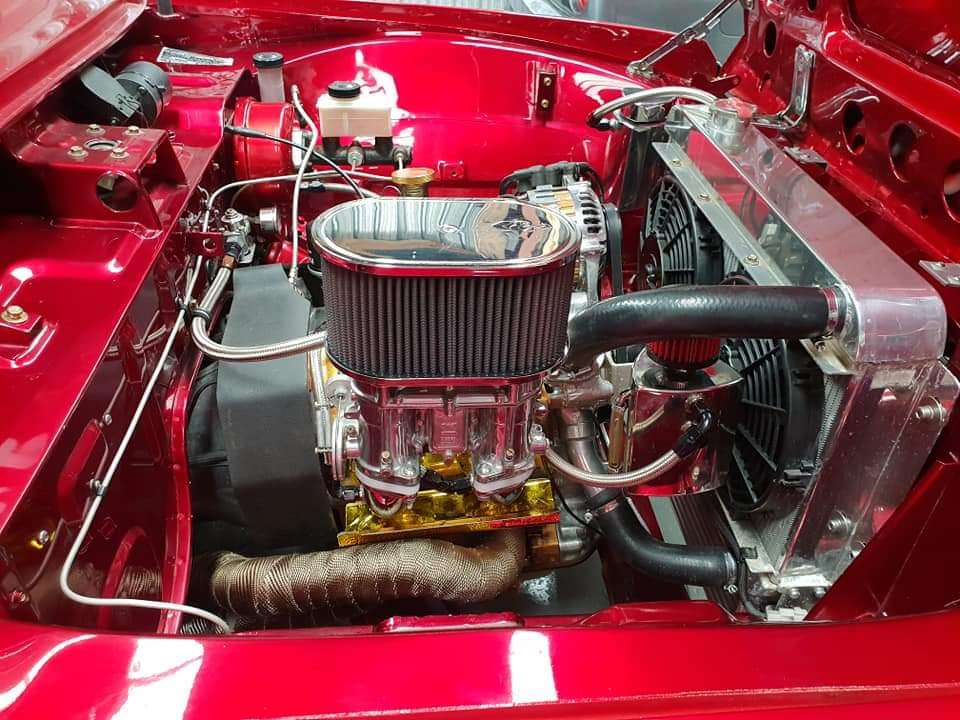
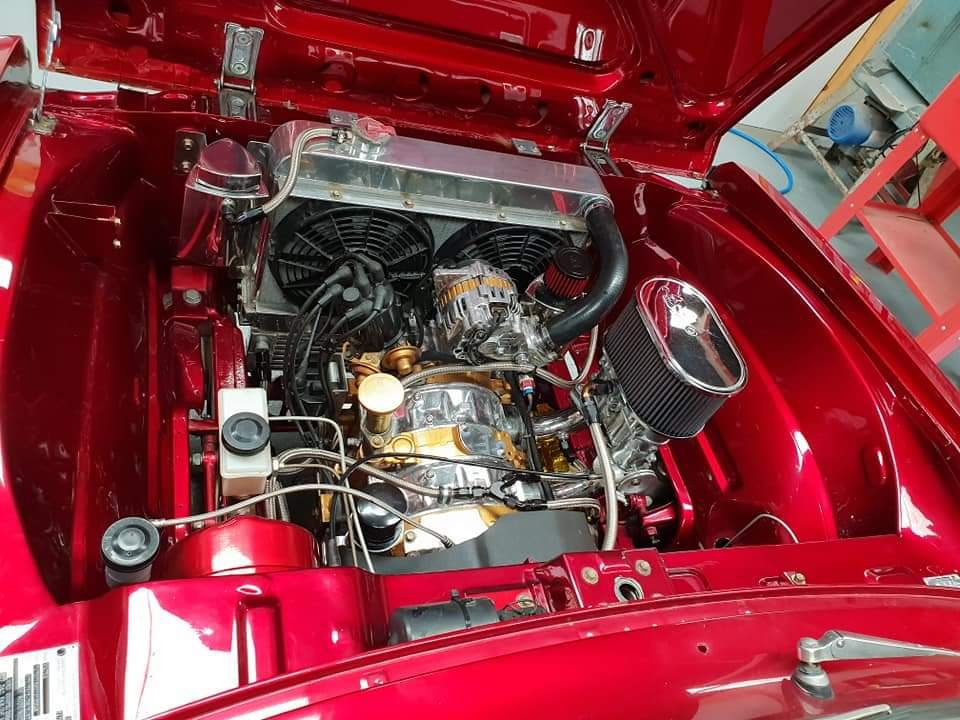
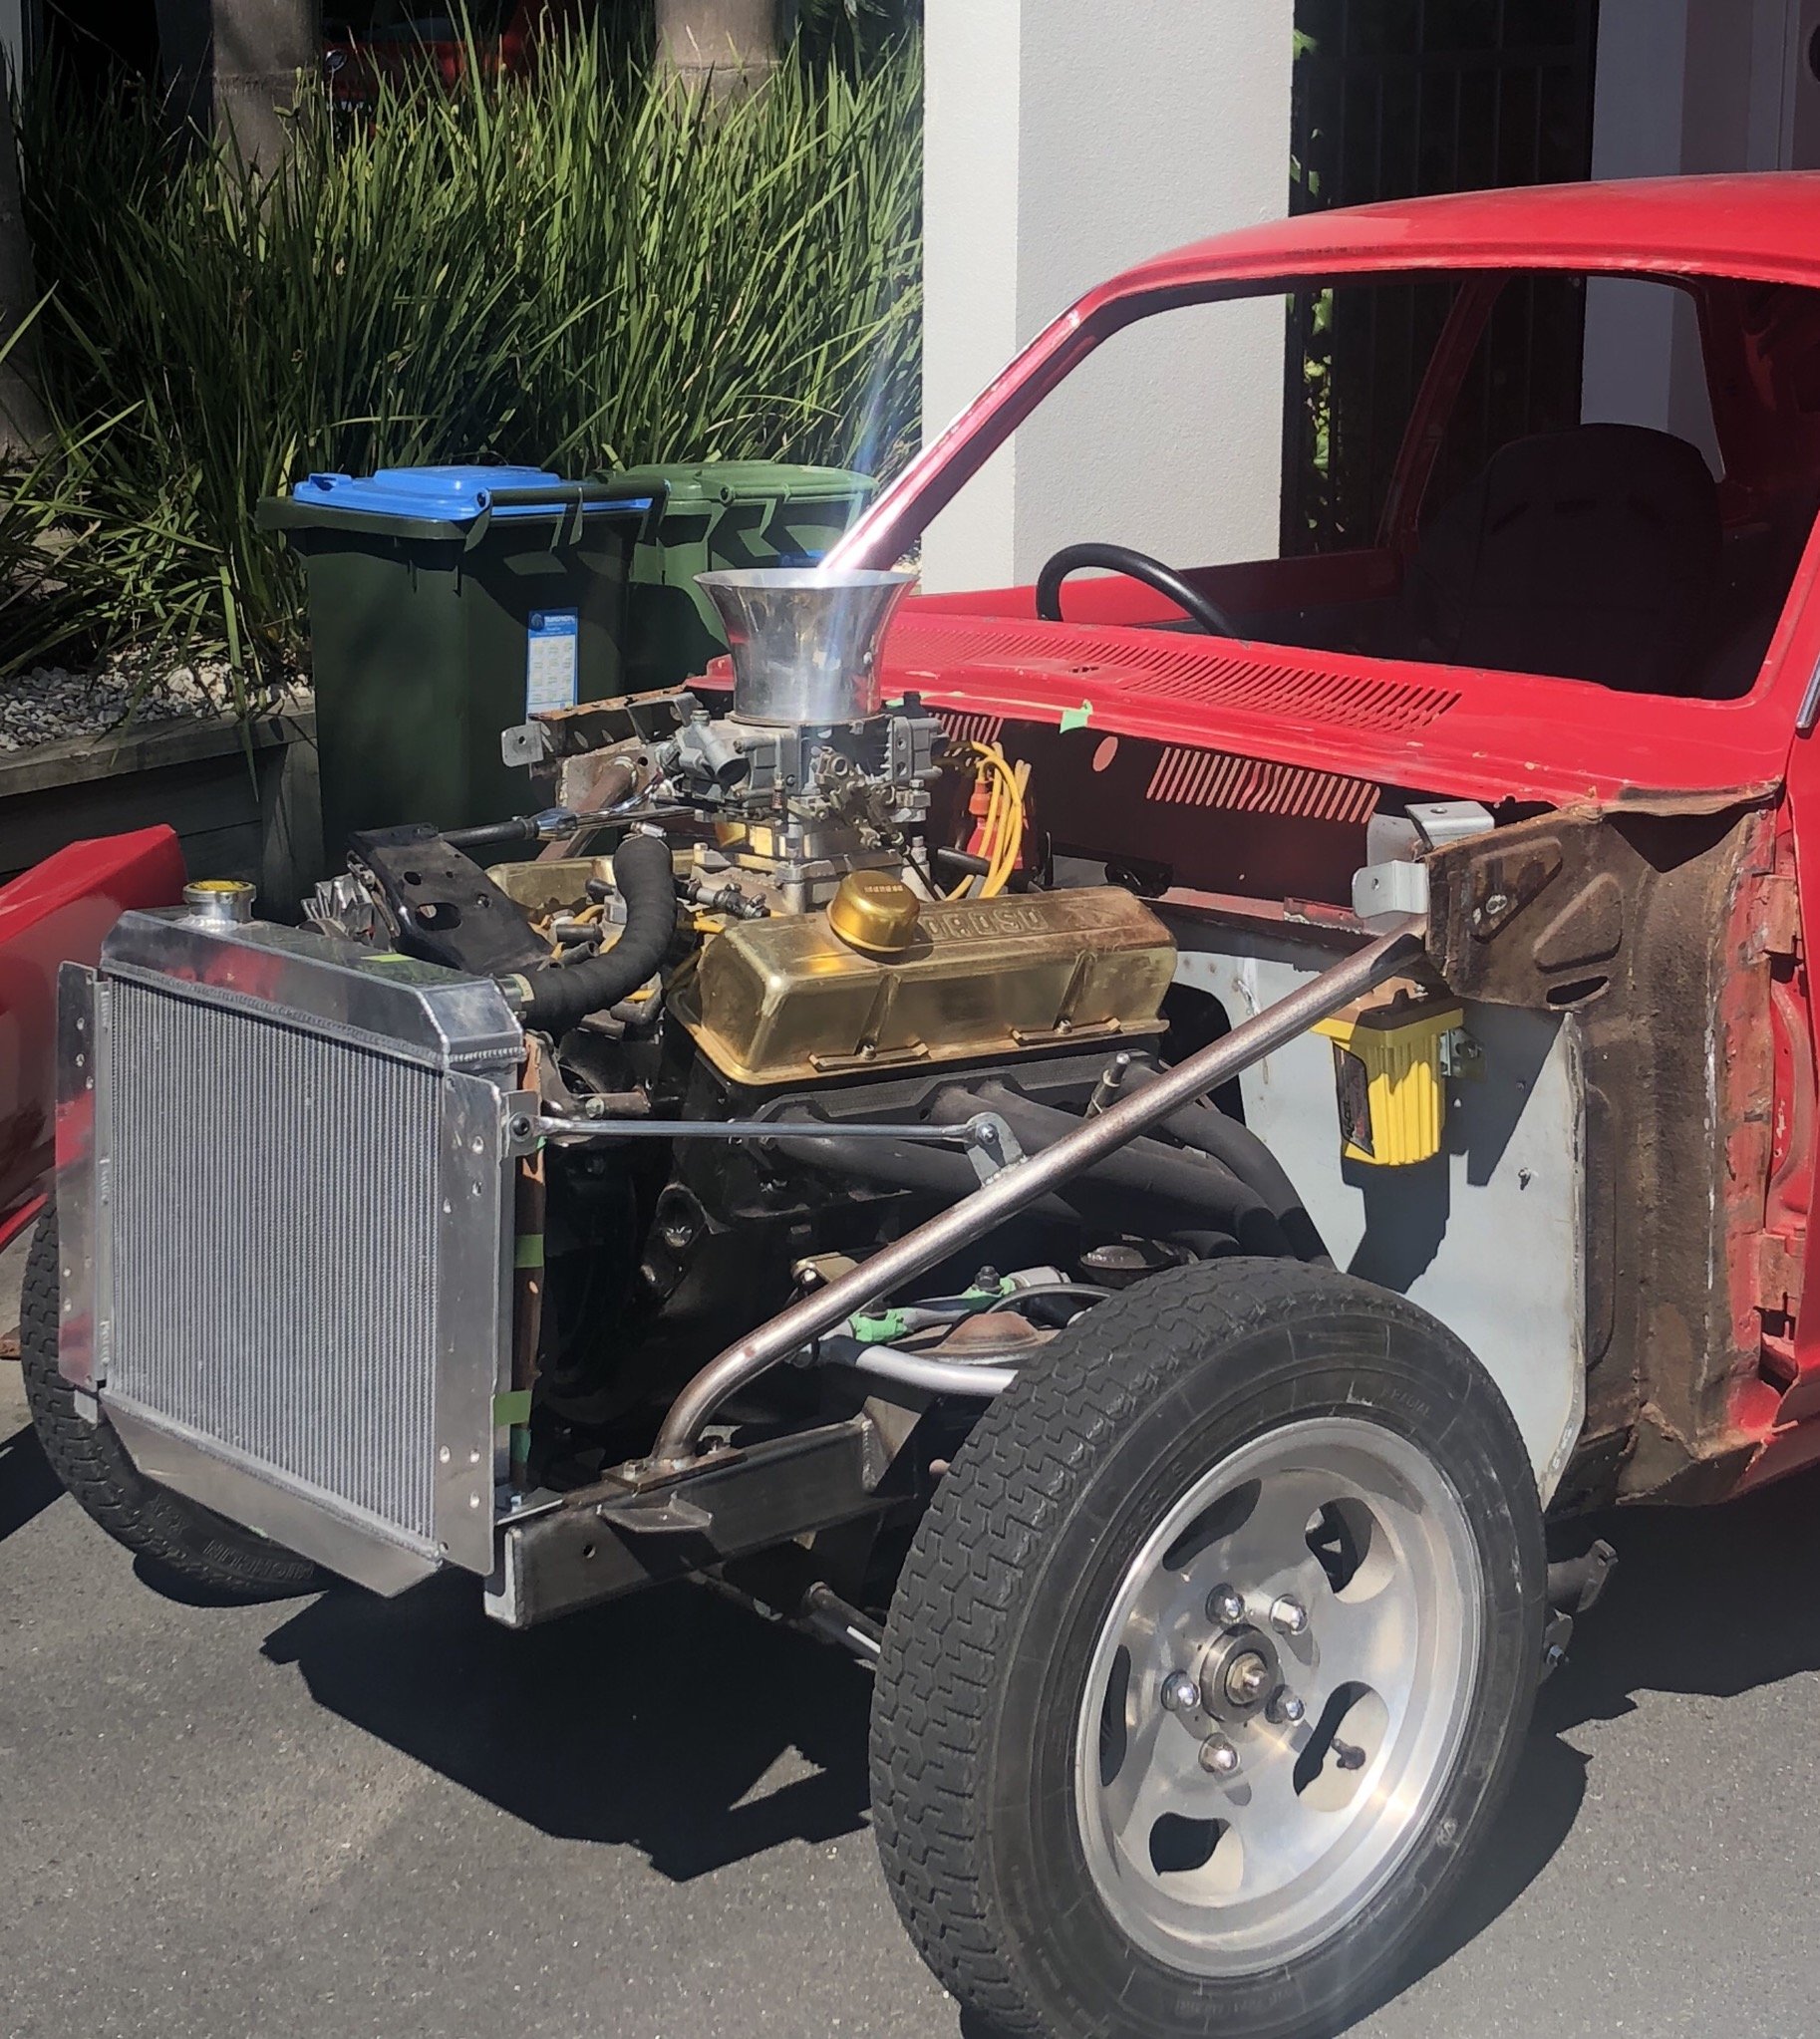
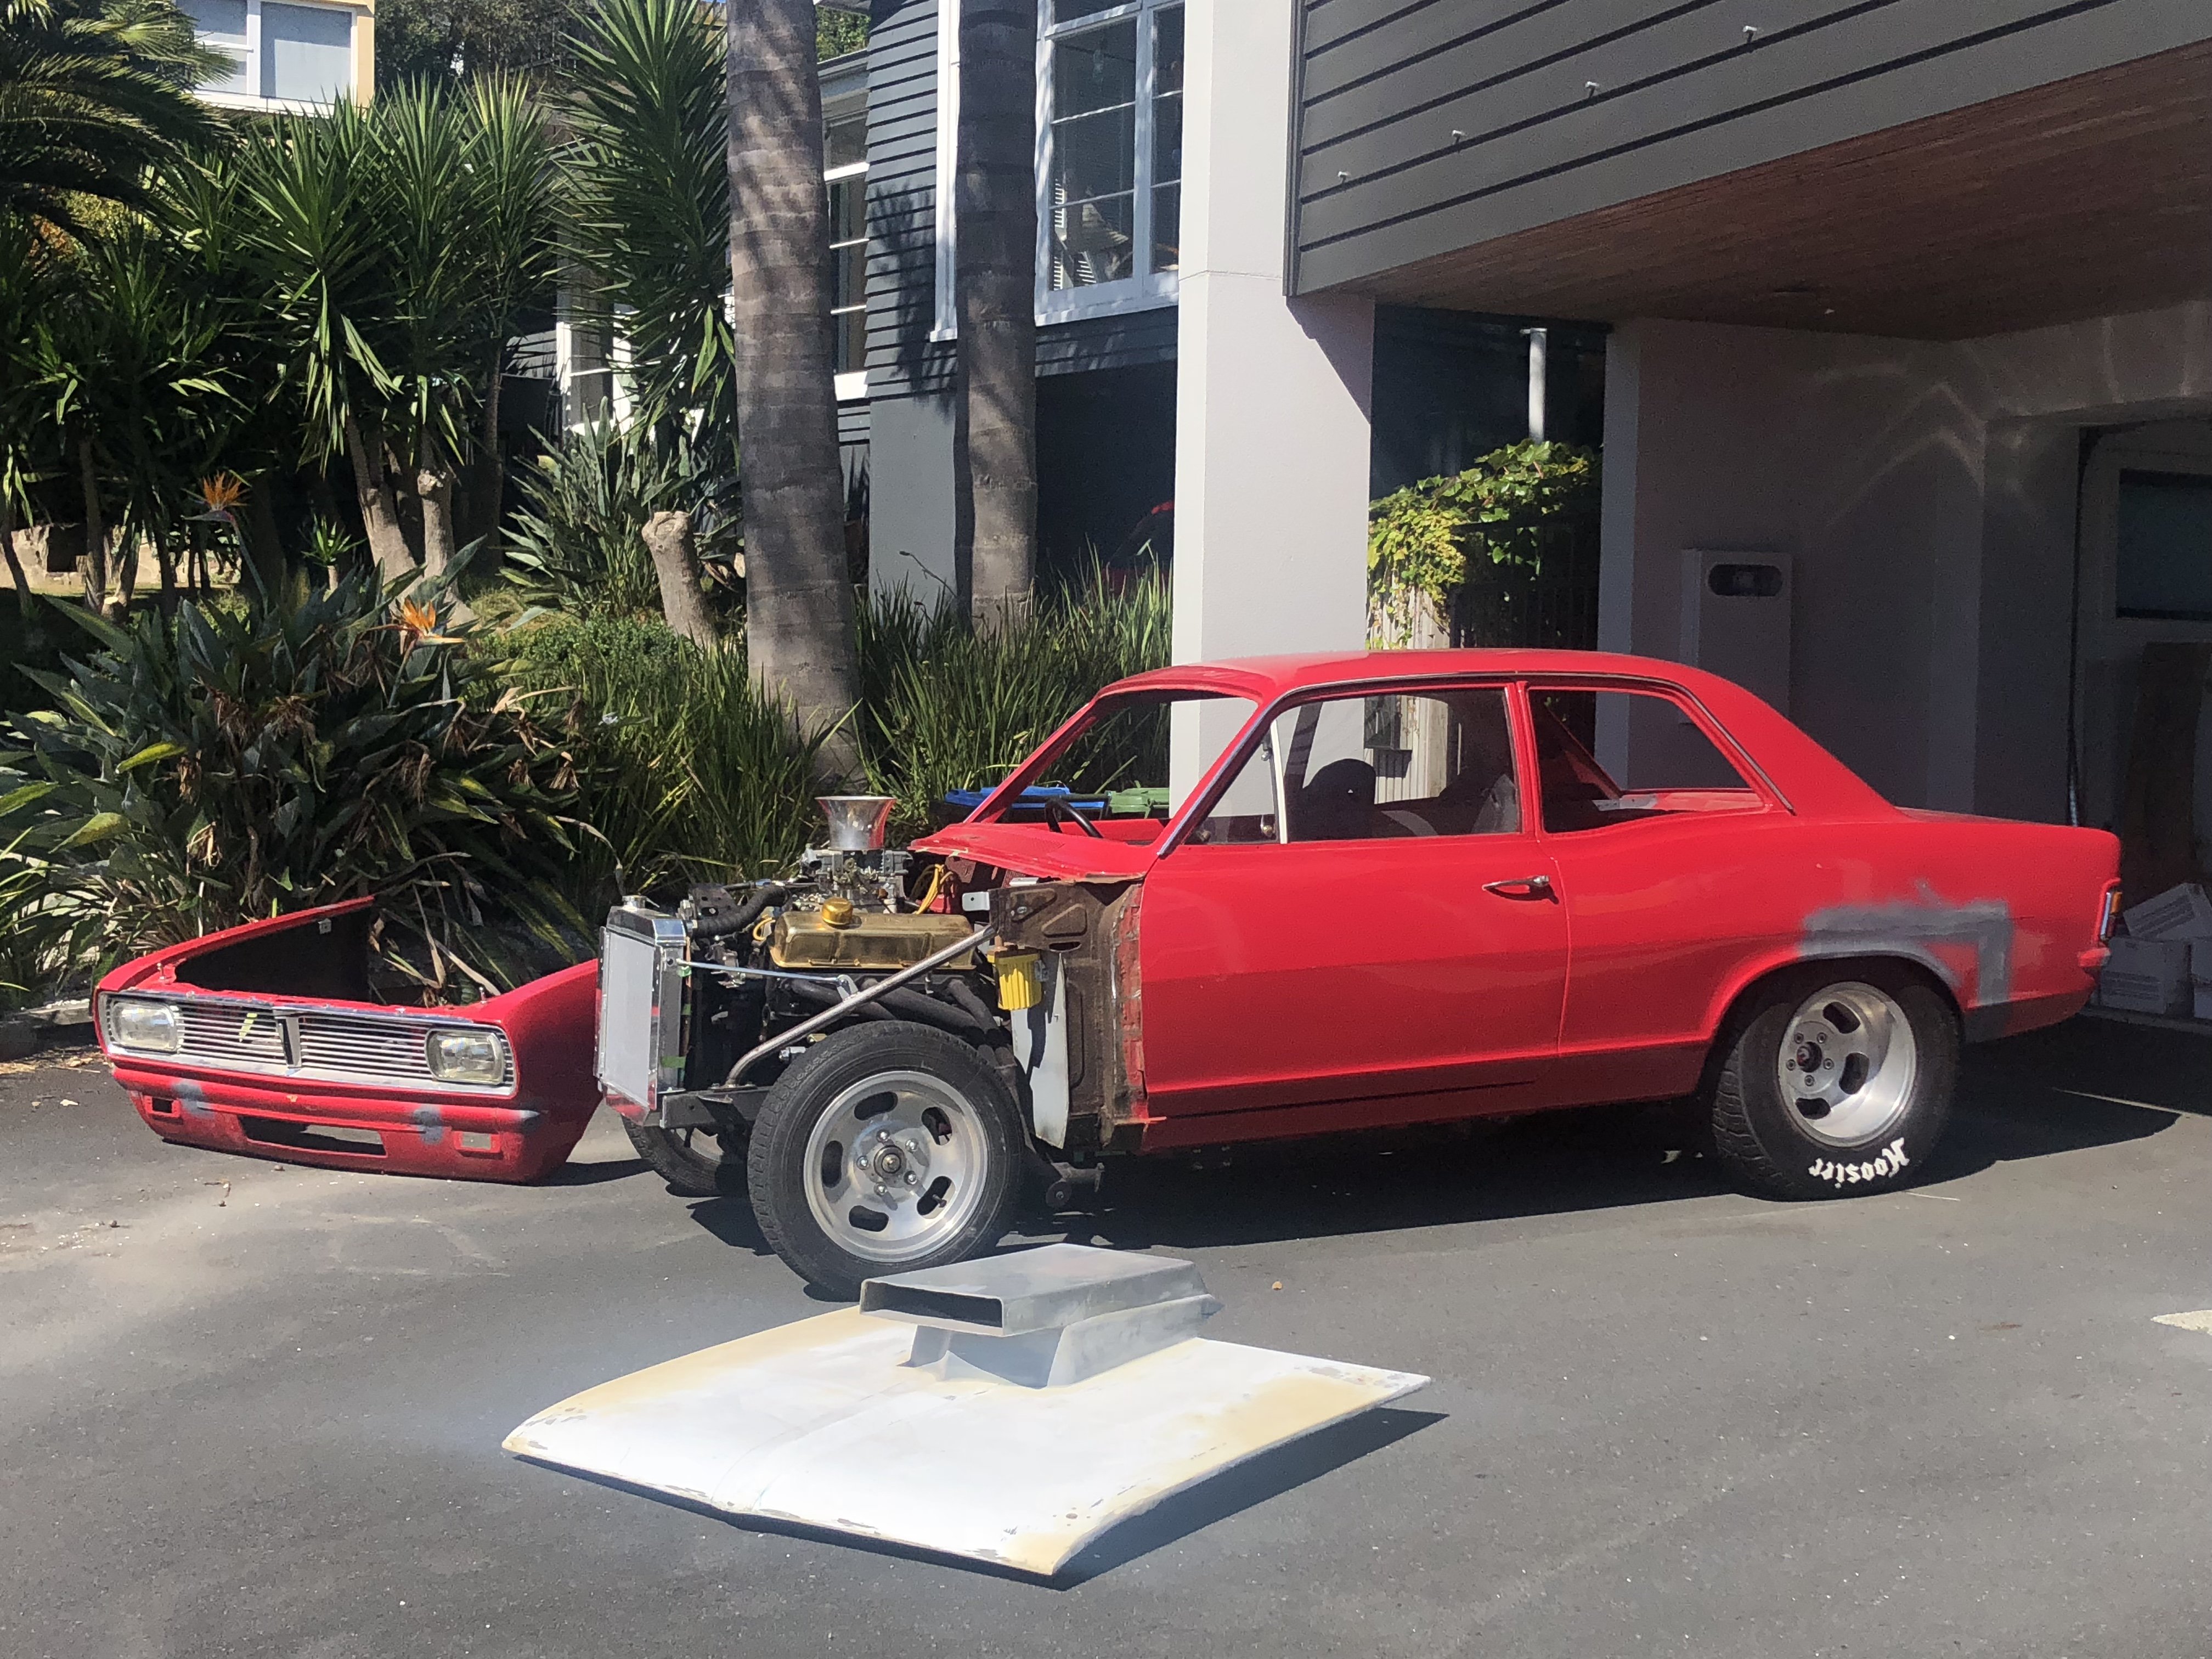
Stage 4: the engine. its tired, blowing more smoke than my grandfather and taps like Gene Kelly. So tbh i have been planing the engine swap fro a few months now, First i brought a whole land rover for the 4.6L V8. (yes that is another 3.5 and a Honda city turbo engine in the background) while stripping this down i was looking at cams and found a hot auckland cams cut that stated "Needs increased compression ratio" and well that is like saying go nuts. so i looked around at how rover mad both the 4.6 and 4.0l engines have the same 9.35:1 ratio. I then found that the only difference is the pistons and this is how they made the 8:1 ratio low compression ones. so well i brought a 4l bottom end so with my maths if the 4.6 pistons in a 4l block lower the compression ration then the 4l pistons with a 4.6 stroke will raise it to about 10.75:1 (only 0.25:1 higher than a stock 3.5L P6 engine) perfect armed with a box of bits that i got just befor lock down I have started the clean up process (Rods and pistons chilling on a jag) as a touch of madness hit... i removed the spot welds on the front rad support... less angle for the v8 to get in and out of the bay then i got bored and well may have made a starter fit in the body as the solinoid did hit the chassis... not no more with a slight tweek to its angle And some new mounting holes well now you are up to date hopefully more to come soon
4 points
-
yea, the "yay this vacuum bleeding might fix it" bubble has burst. its better, but a trillion miles away from being a usable car. im fucking over it, it can sit in the corner pissing me off every time i look at it for a while. in the mean time ill work on other cars. if/when i go back to it ill try adding water at the back of the motor somehow, or some fucking thing. but for now it can get fucked.4 points
-
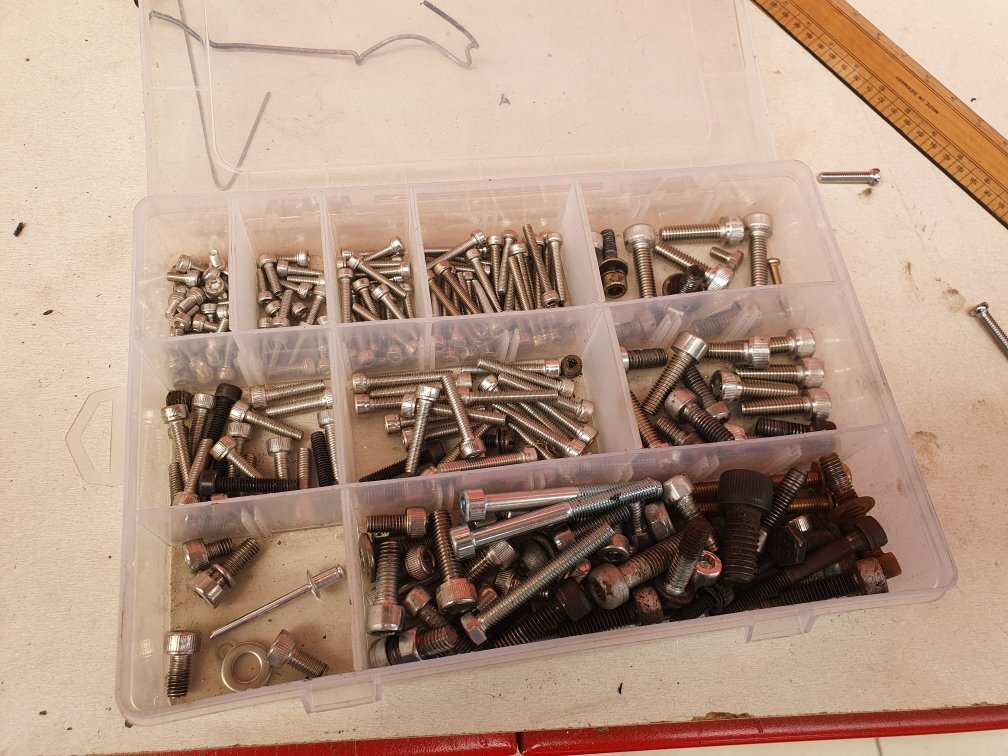
Those machine screws offended me so much, I hunted through every container of random bolts I have until finally finding some 6/88875" or whatever the fuck they are cap head screws. Thank fuck for that.
4 points
-
yea ive just been dailying this and going places slowly. its just got its first warrant after compliance which it flew through no drama. now thats done i thought id put on the new big brakes that i bought for it a while back. usual story, LN106 hilux calipers with DBA272 rotors (which the guys at castle hill Auto One in Sydney got made as a small batch because DBA dont make them anymore) and R32 GTR pads. bit of trimming of the backing plate and it all bolts on. these calipers work a million times better with the 1" master cylinder than the factroy two pots do. much better pedal feel and way better progression of the brake pressure. anywho, its all back together and working so now ill spend some time bedding it all in but its already a zillion times better. 2020-01-27_12-25-25 by sheepers, on Flickr 2020-01-27_12-25-36 by sheepers, on Flickr 2020-01-27_12-59-14 by sheepers, on Flickr also these aren't the wheels im keeping on the car. it will in the near future get some jet black steel smoothies with small moon caps so you wont be able to see the red calipers.4 points
-
did a bit of long overdue maintenance on this thing, I vibrated the speedo to bits with too much gravel riding on the motu, ordered a mmc speedo and slapped that on, waiting for my new headlight to arrive too. old new replaced the clutch which was long overdue, started slipping before distinguished gentleman last year and I packed some washers behind the springs to give it some more clamping pressure and just left it but as it worked I just never put my new clutch in, decided to smash that in and man it feels so much better, leaver is so much lighter new spring on the right vs old ones3 points
-
One word - EPIC!!!3 points
-
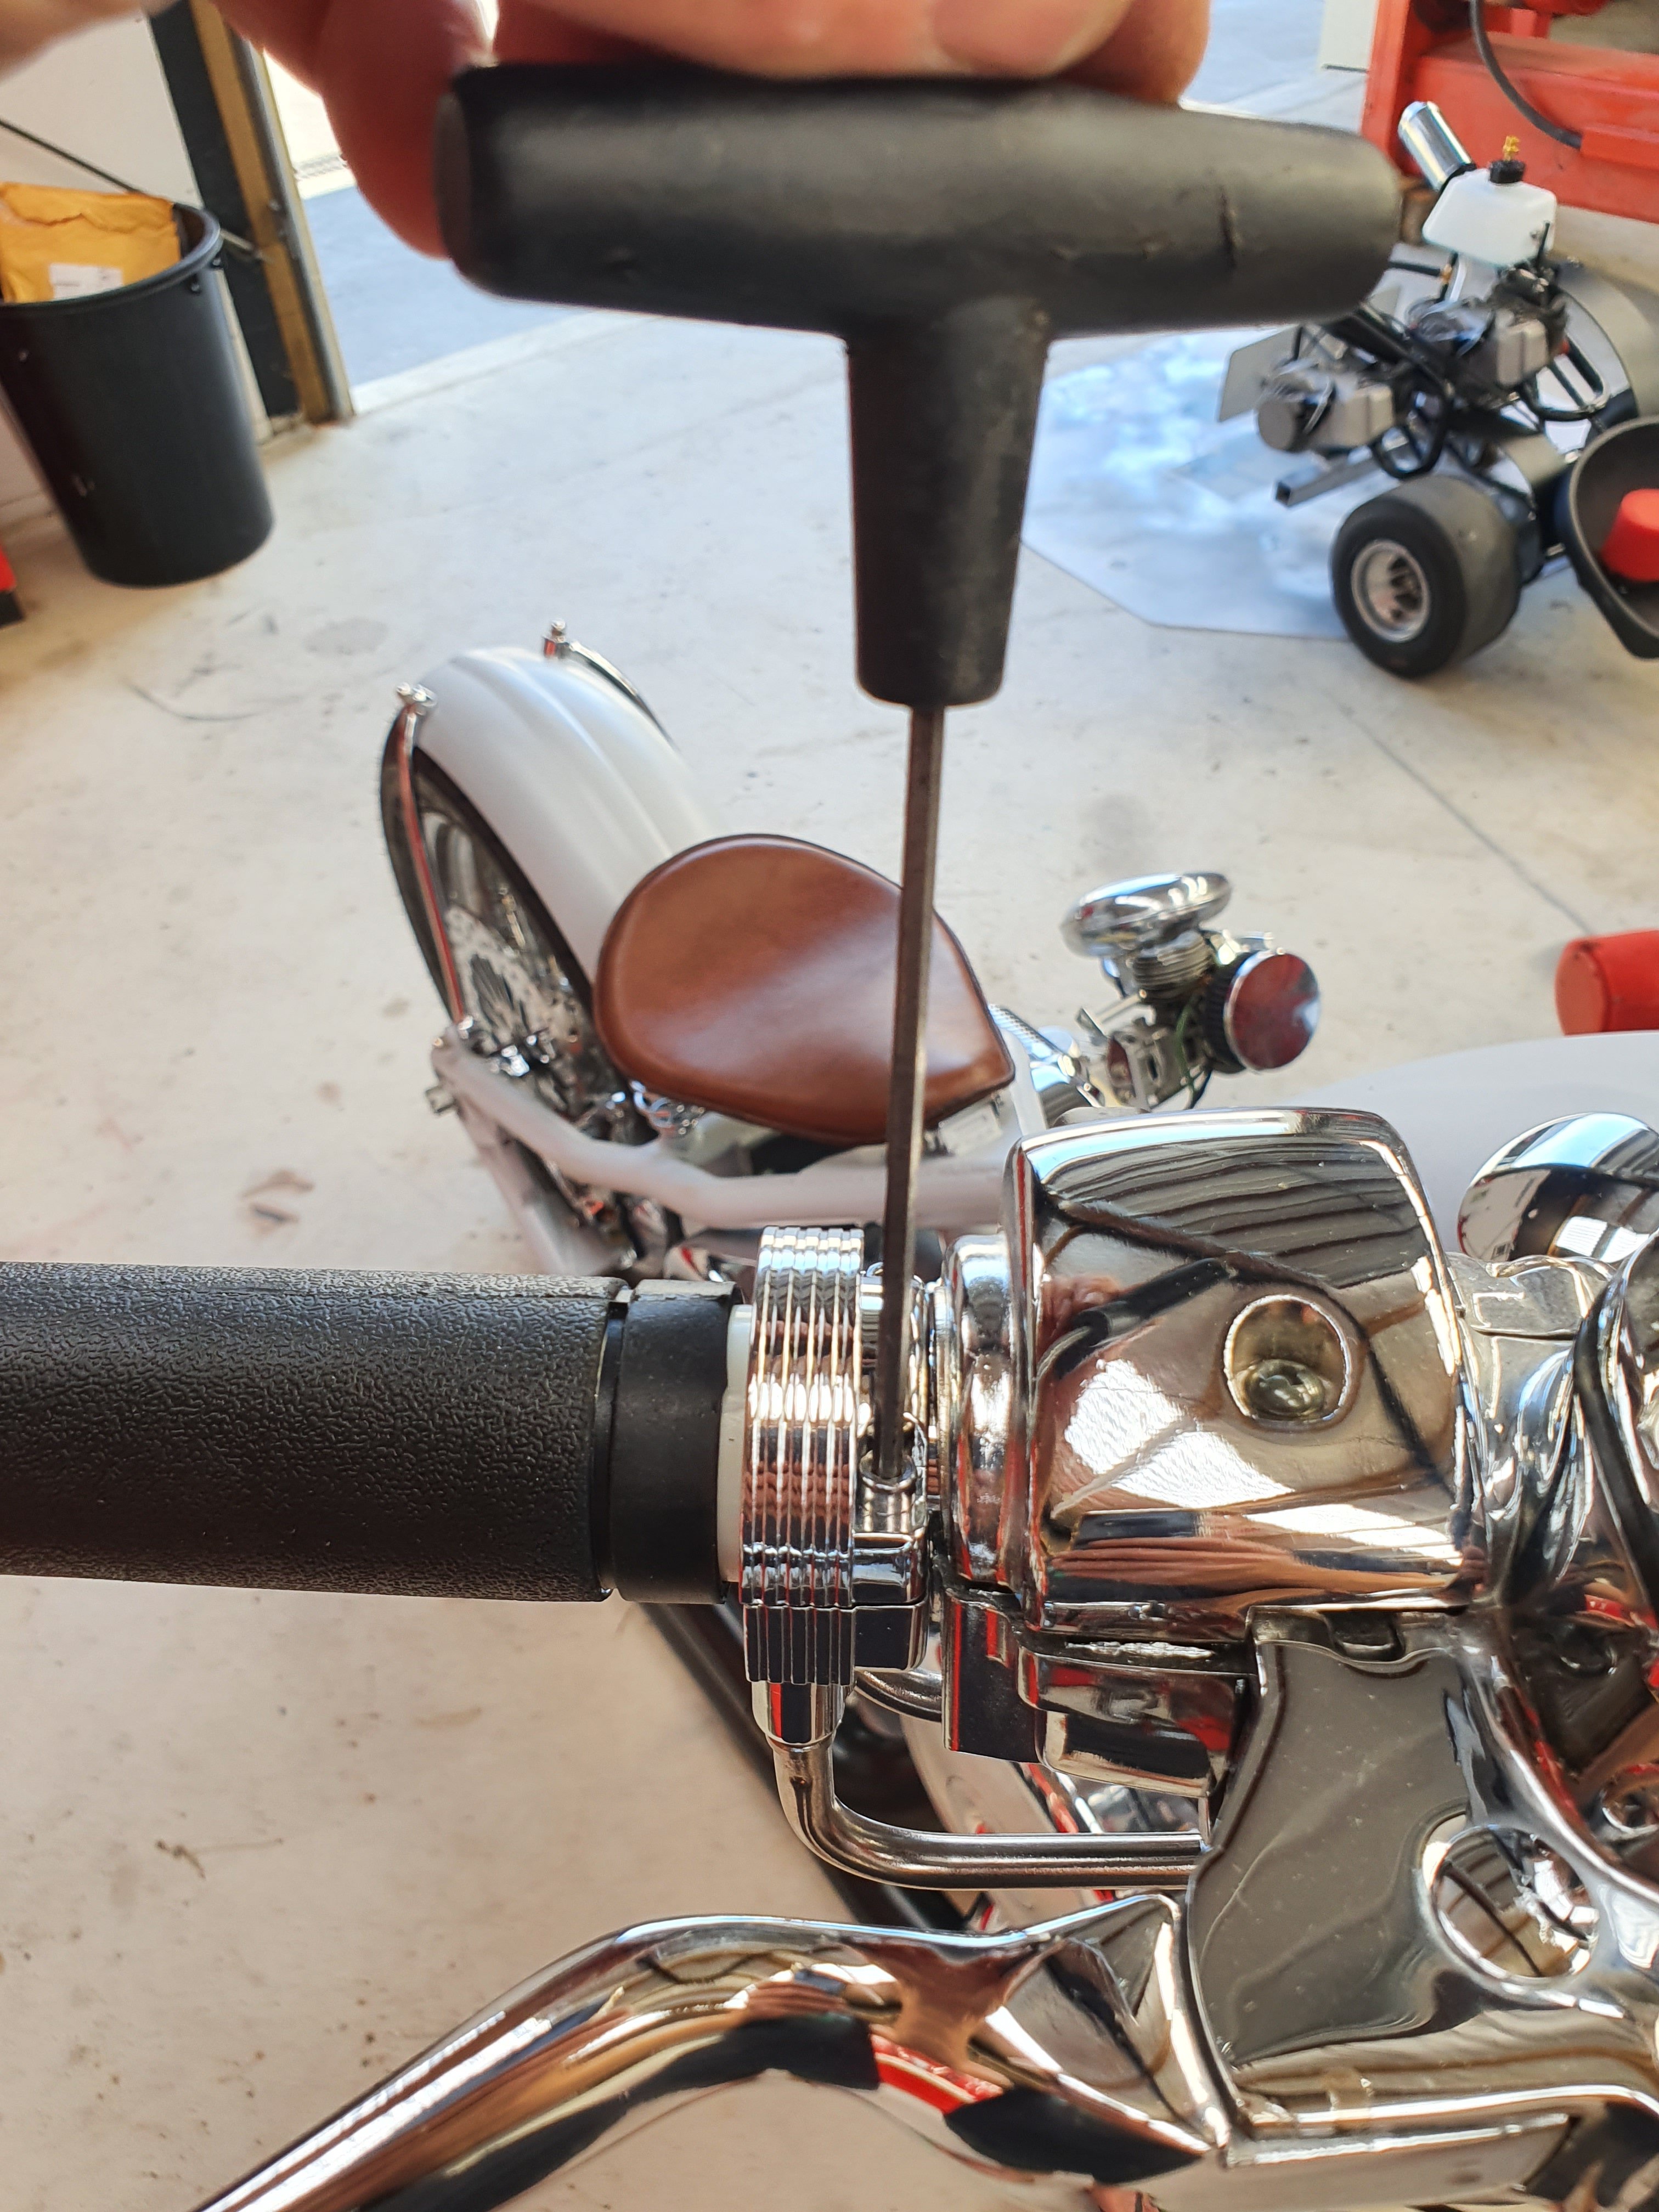
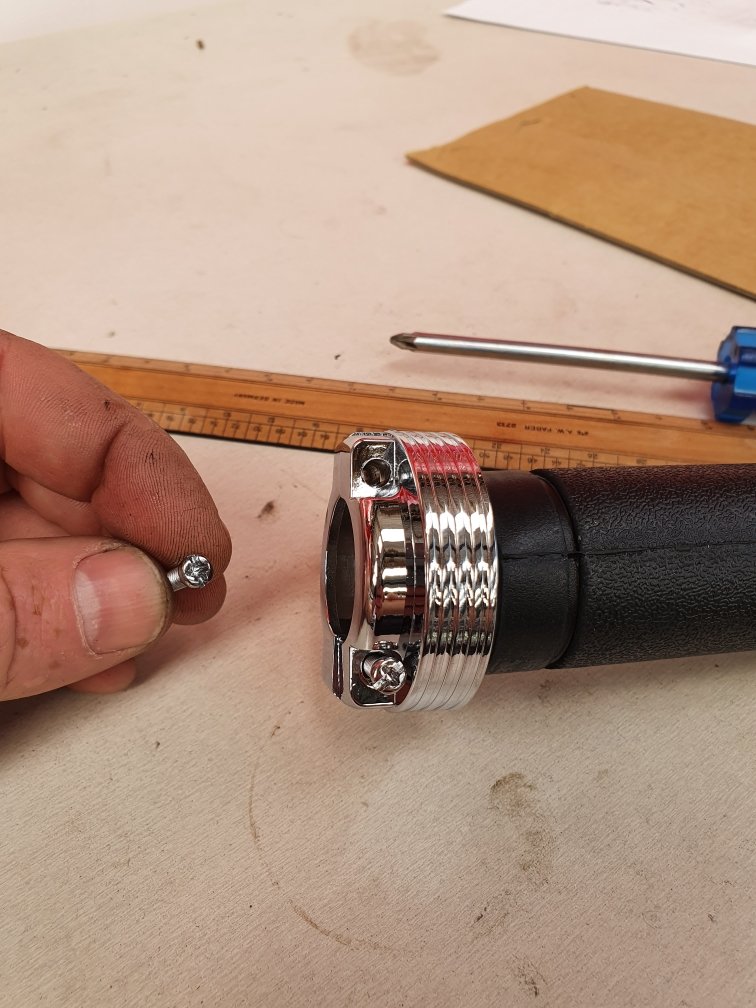
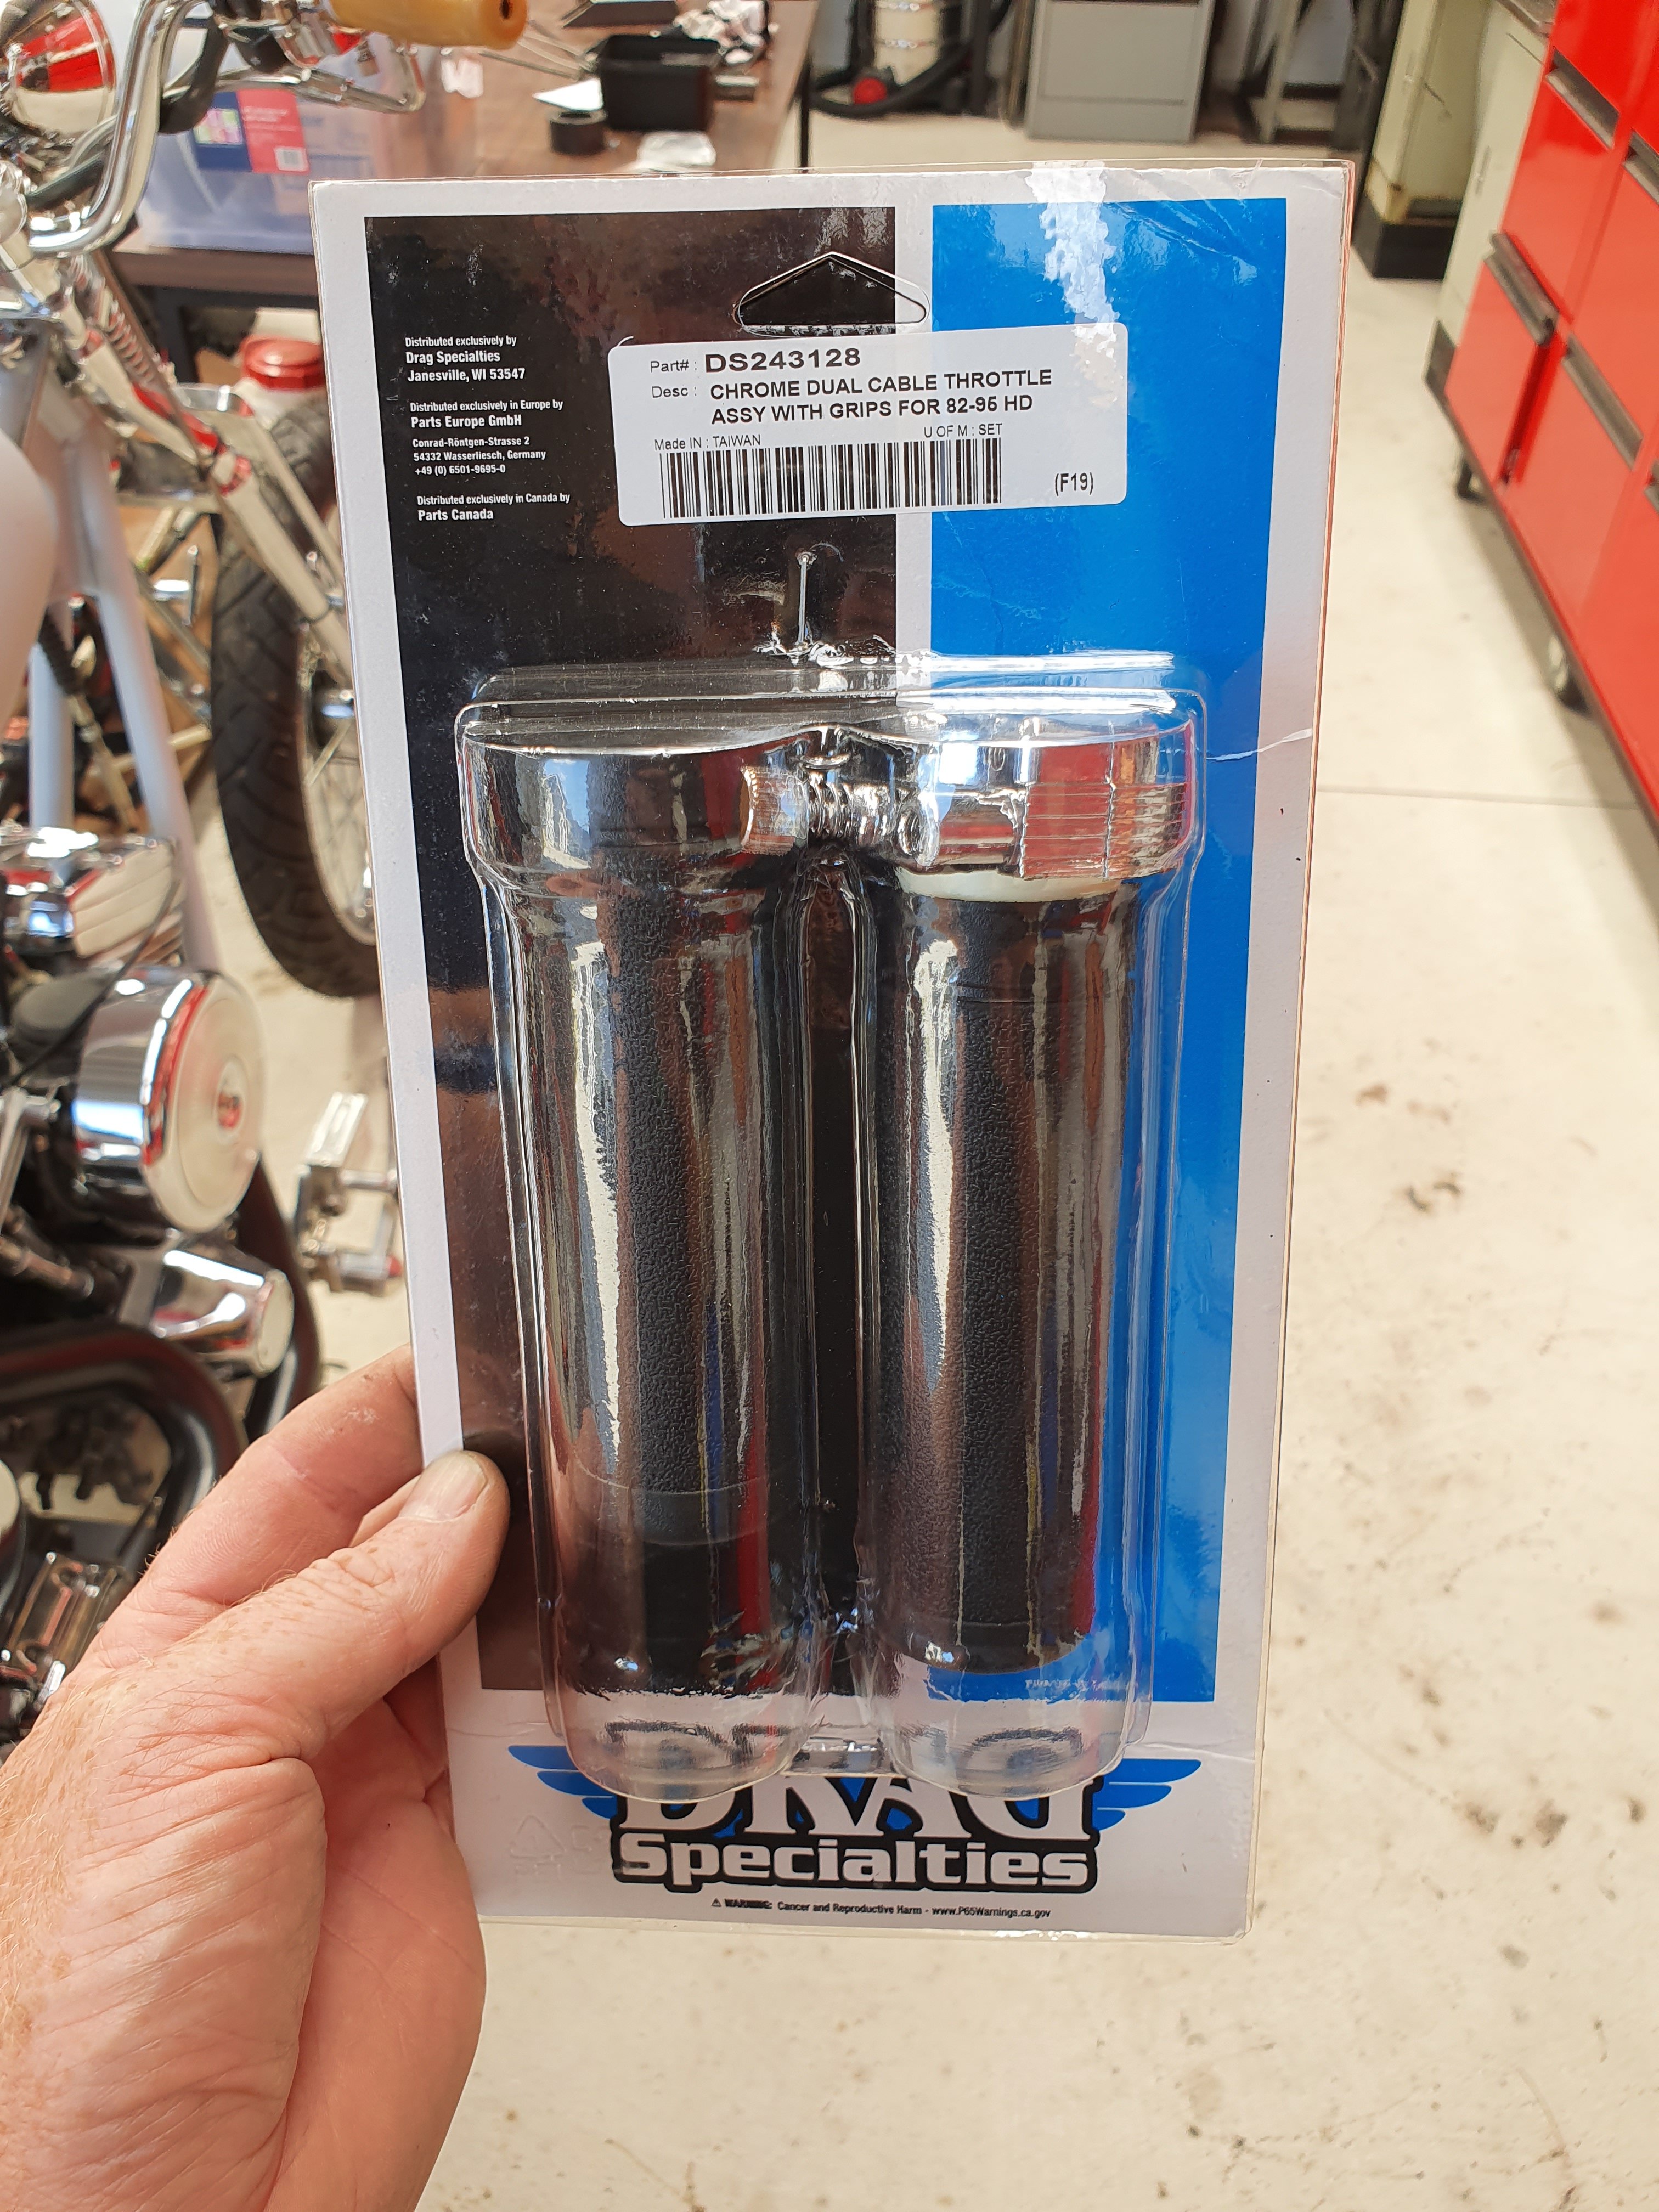
No fucking around then... First thing I noticed was cheap Philips head machine screws. Wtf...who does that. You would think there's something in here that would fit. But no, not only are they cheap shitty Philips heads, they are cheap shitty god dam imperial Philips heads...cunts! Fuck you America...fuck you and you cunty perseverance with an antiquated measurement system... Anyways, rant over. And installation was reasonably straightforward. I had to drill out the shoulder on one of the cable bosses to get it to fit, but other than that it basically bolted on like you'd expect it too. Looks okay, probably preferred the brown grips? But not losing sleep over it.
3 points
-
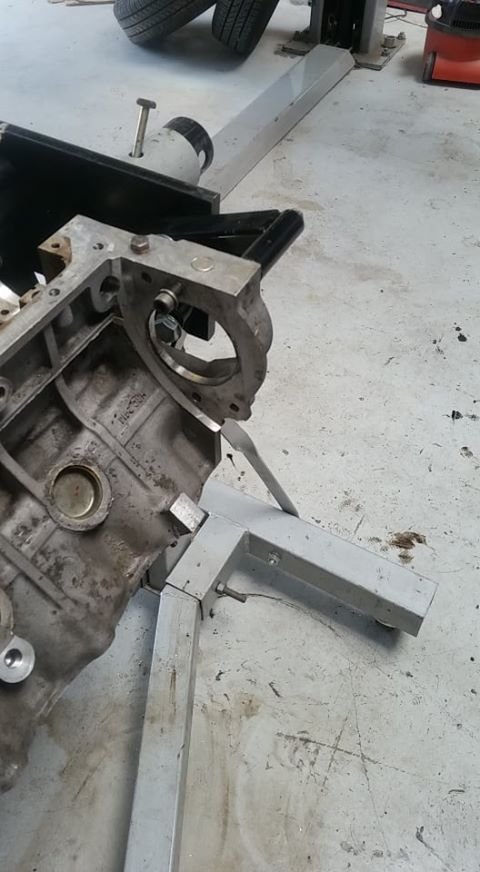
Pulled the front of the car (well some of it anyway) off yesterday (better access), followed by radiator, fan, crank pulley, AC compressor (that's fucked anyway). Found coolant sitting behind crank pulley where I saw it running from, but still no clear leak point. Water pump looks dry. Think Ill try fashion up a radiator bypass hose and run the engine up and see if I can see it squirt.3 points
-
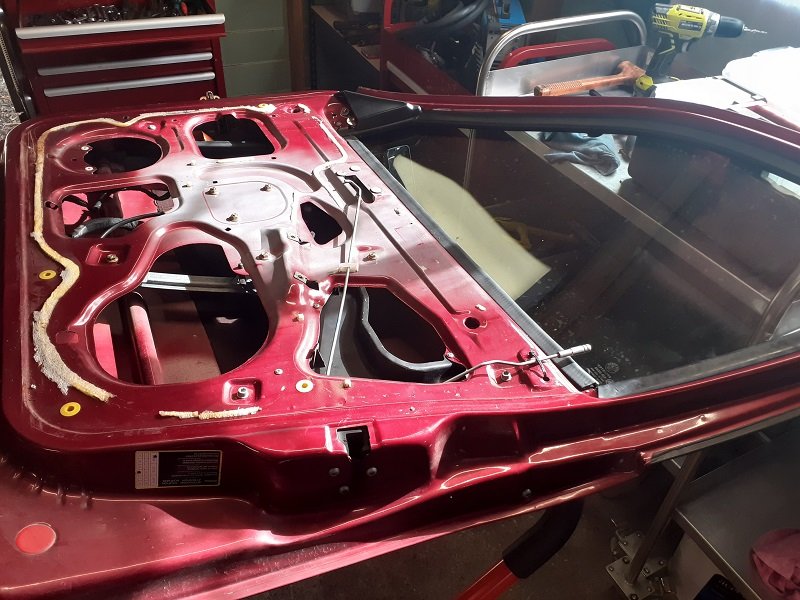
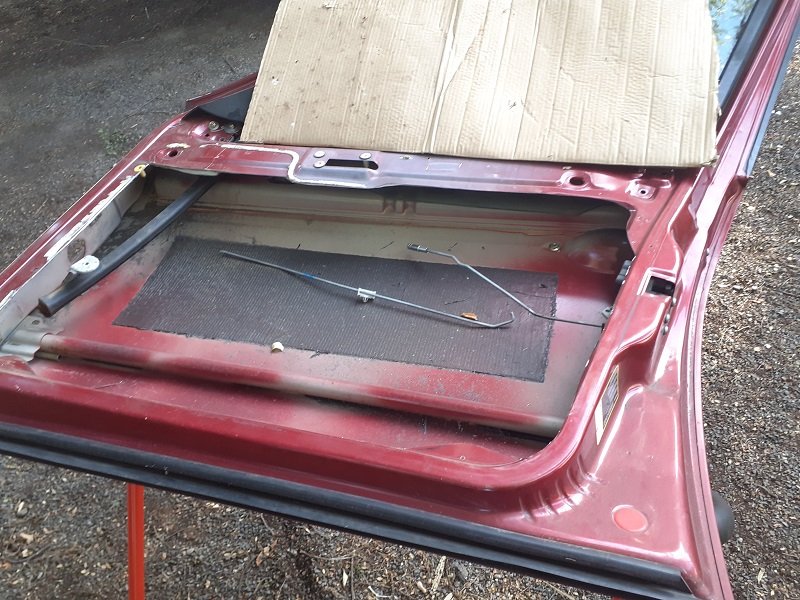
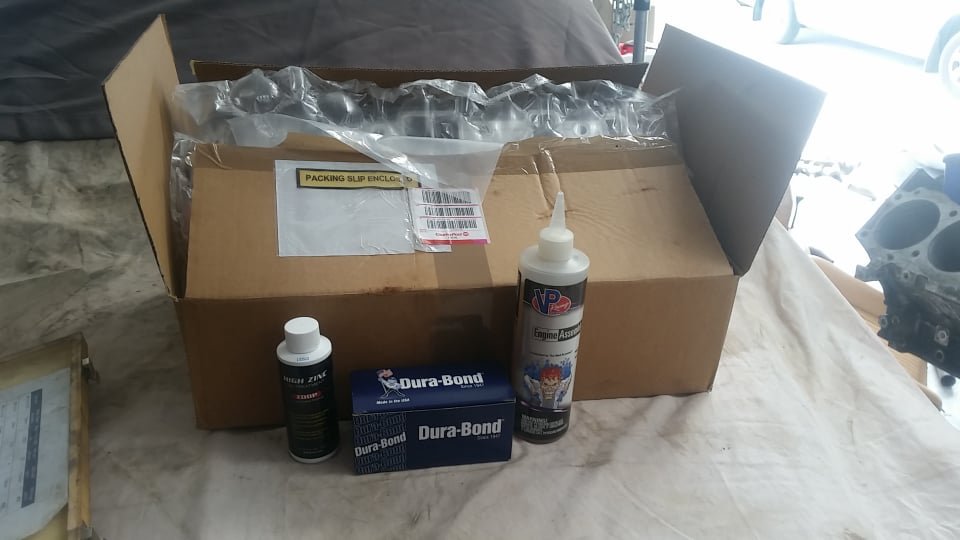
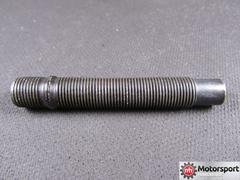
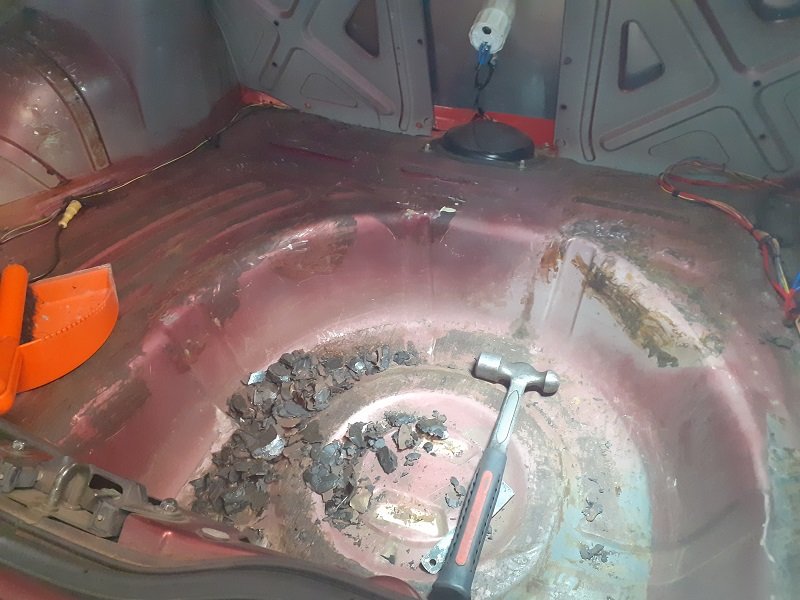
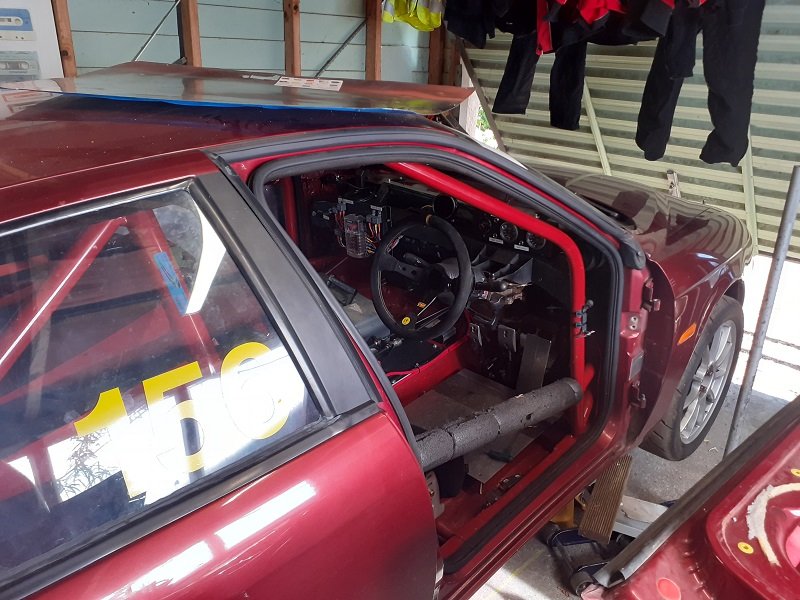
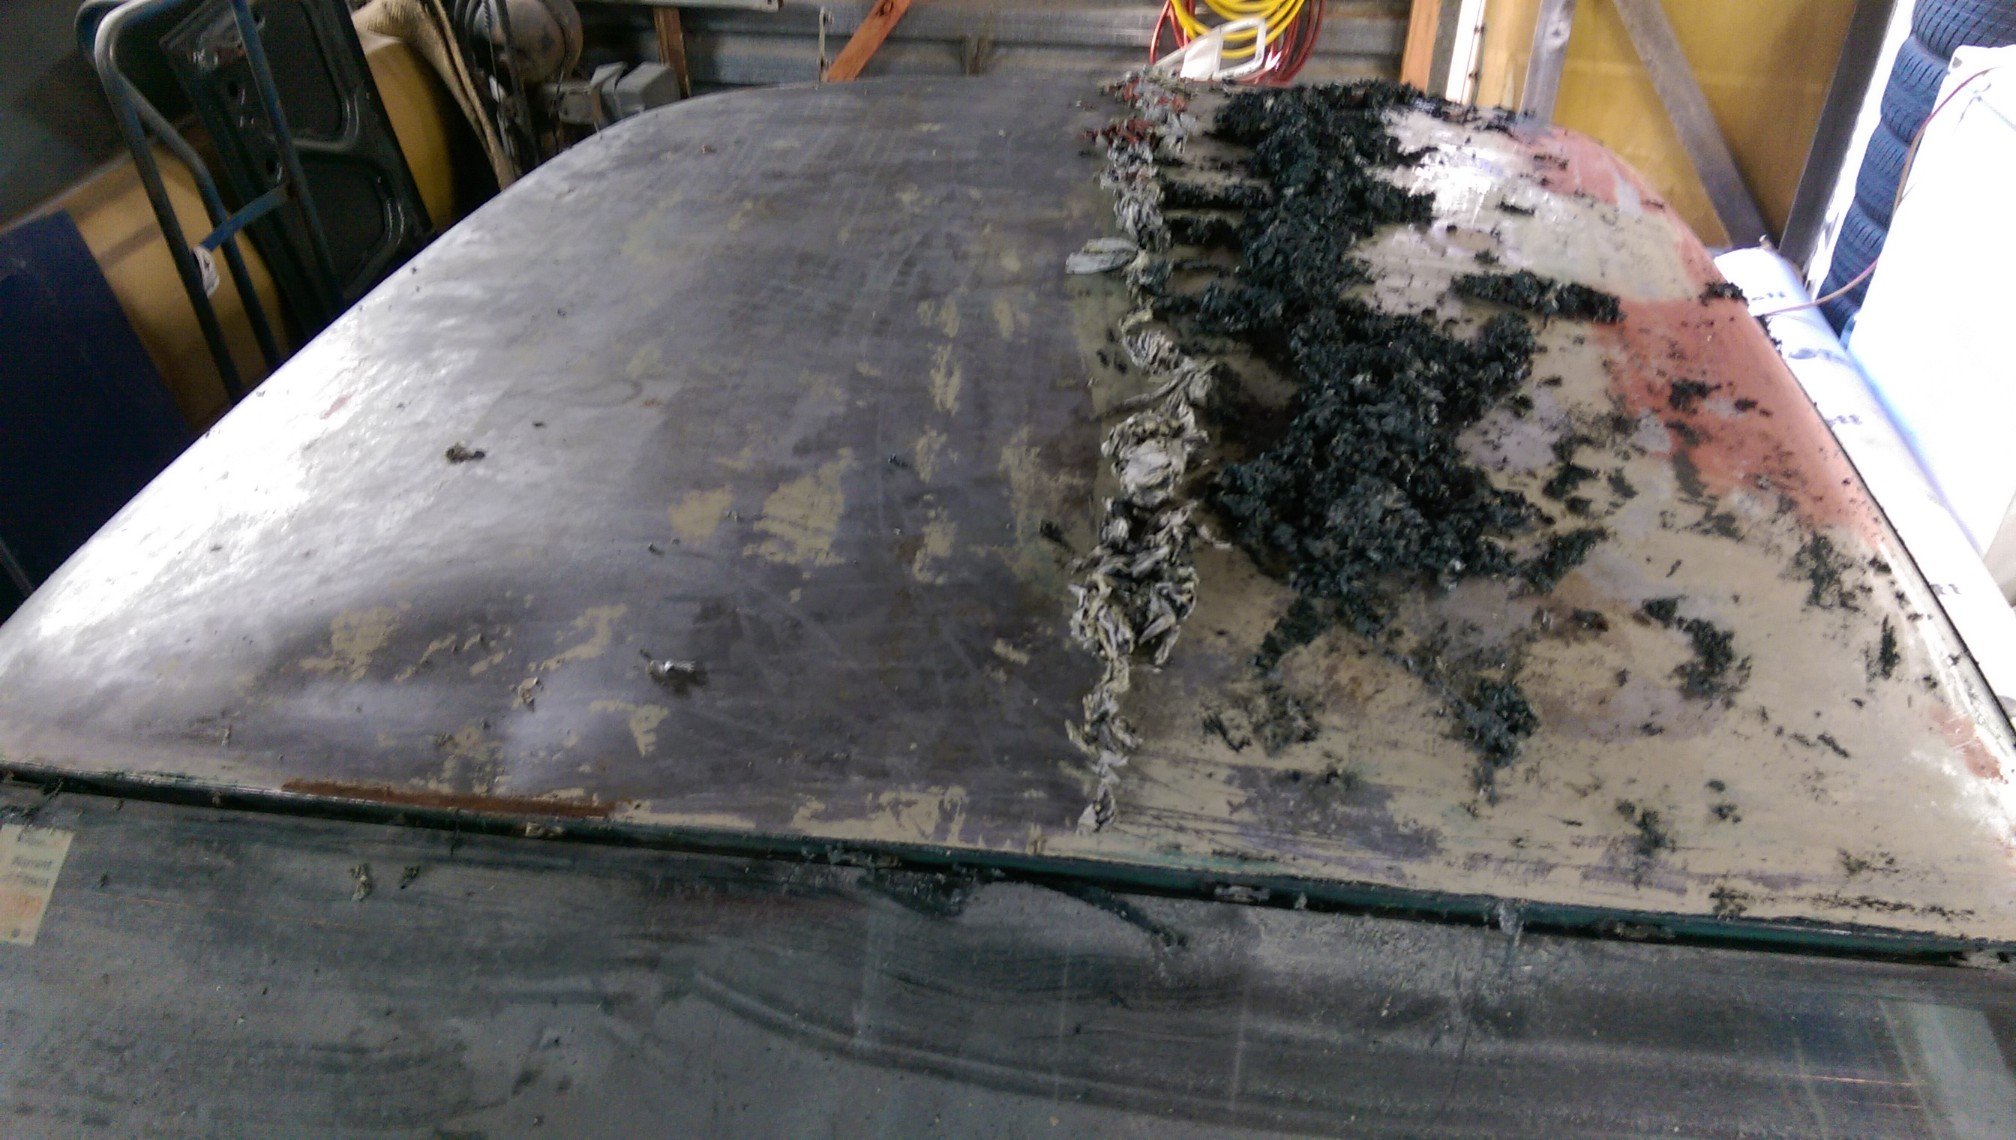
Damn, whilst half of the country is on forced project progress leave, I've been classified essential. My partner too is essential and so I have volunteered to take on our 12 Hour Night shifts over the grape harvest, that way someone is at home with the youngling during the day (albeit sleeping). Anyway updates will remain few and far between and generally completed at unspeakable hours of the morning. Today I ran over the Wheel Stud situation, and I've just completed my order for some of these bad boys. Originally this lovely European machine was fitted with wheel bolts, which although does reduce unsprung weight at the wheel, is just completely impractical when wheels come on and off as often as they do on a "race" car. The ones currently fitted don't have a shoulder between the two threads to tighten up on. They have been a royal pain in the ass ever since I fitted them. Supply for decent wheel stud / extensions is dismal in NZ. So I desperately tried to make what I could find work, tack welding them at the back of the hub to attempt to secure them. The thread quality of those and the wheel nuts I used also leaves much to be desired, so I'm hitting the reset and hopefully the replacements will be a permanent solution. No idea when these will arrive in NZ, could be a week, could be 3 months, fuck, could be 12 months in our current predicament. Finished removing the sound deadening in the boot area. I also wondered why I didn't finish this. Shortly after starting with my painfully monotonous manual removal method, I understood why. Next time Dry Ice. Anyway the car has finally had all it's sound deadening removed after nearly 7 years. Bam. Door Off. (The quick release hinges on modern cars are fucking sweet, 2x 6mm bolts and the door just slides up on off) The 2 Rear Doors have perviously had the lightweight treatment, and are really fucking light, they even have Lexan Windows, which were cut down out of a rolled Fiat Uno Club Car. My goal is two Lexan the 2x Front Windows and Fit a Slide Window on the Driver's Side. But current estimates are about $900 for a sheet of Lexan. So that may not happen for while. Just wanted to put in on the Authority Card really. Anyway the wiring has been disconnected for quite sometime so I started the Nip, Tuck and Liposuction, to remove all the redundant internals and extra weight.
3 points
-
https://youtu.be/jm1zm8_oIOo3 points
-
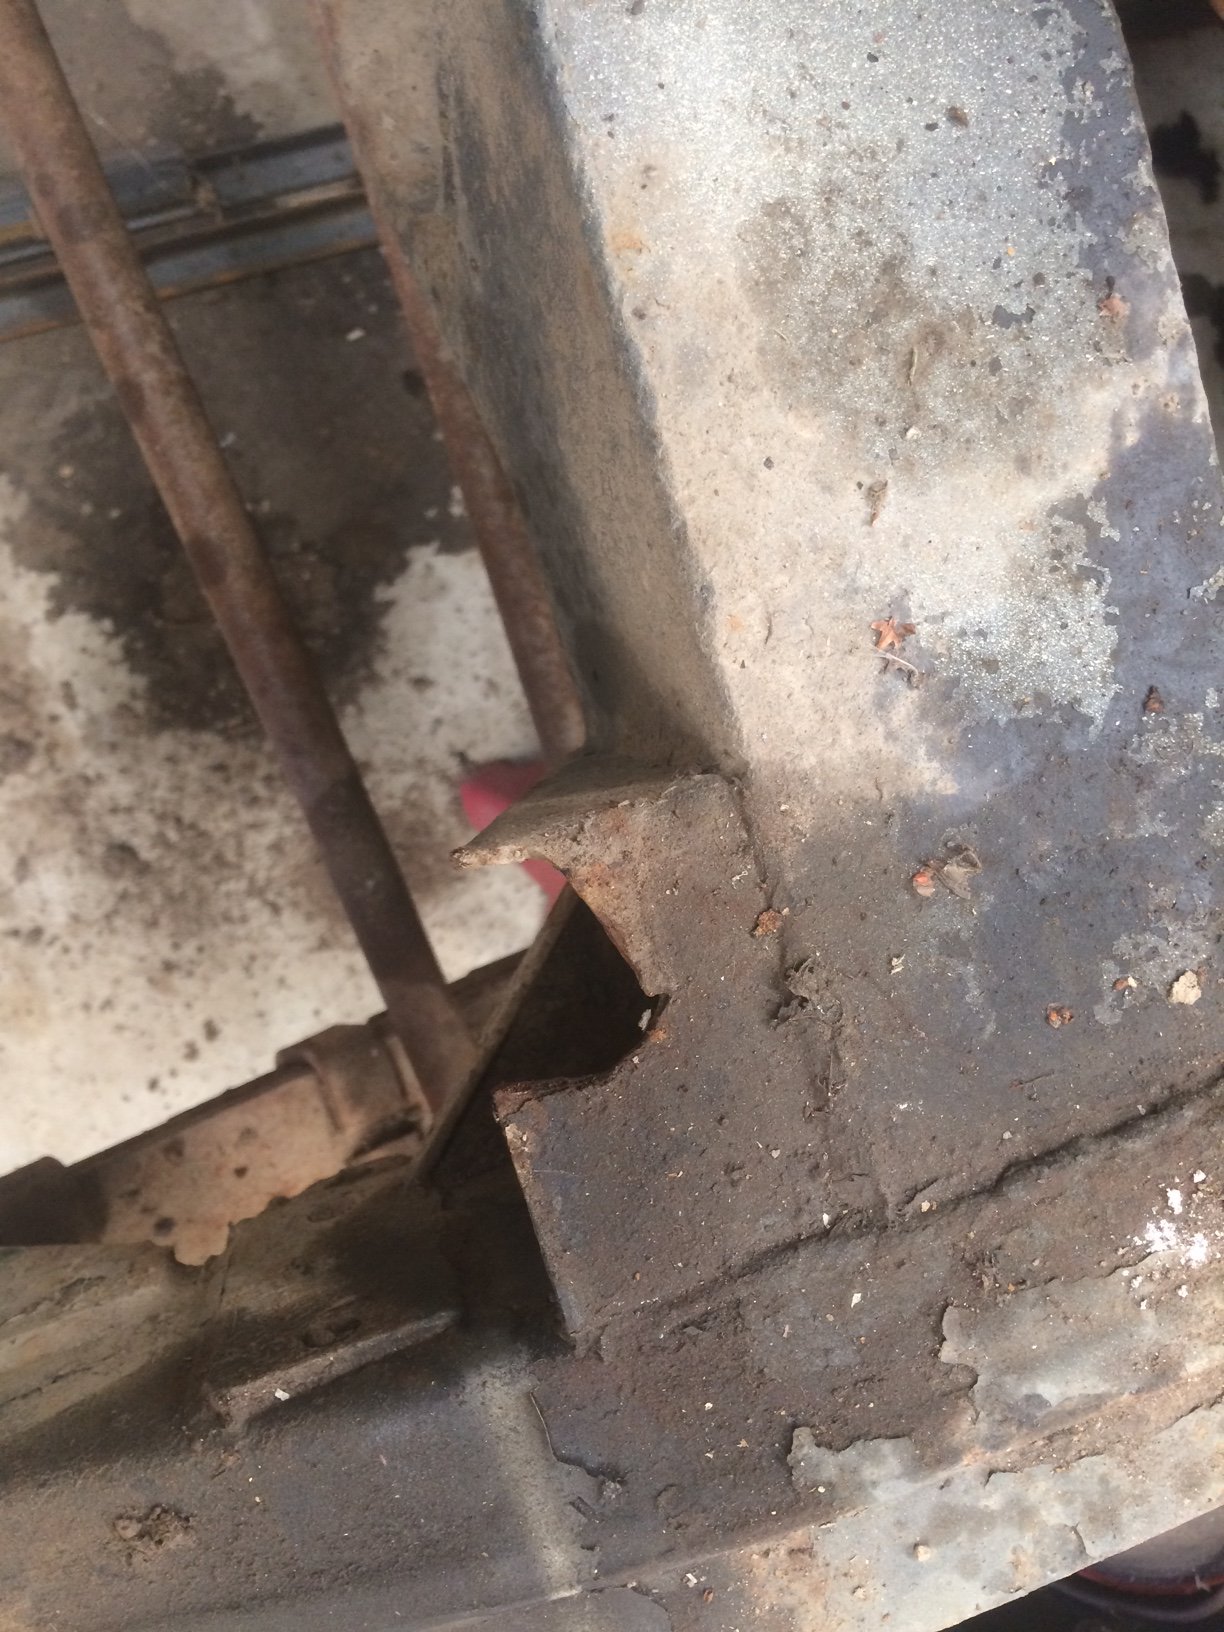
Another day, another panel. And it stopped raining. I managed to get the radiator panel off after soaking the remaining bolt overnight and then applying heat this afternoon. The mounting tab should look like this: the other side looks like this: and the centre one is snapped clean off. The panel itself is one of the two major assemblies that are made of steel, the other being of course the bulkhead. It has a bit of grot in the bottom, but should be quite salvageable. The next step was to spend an hour with my head inside the wheel well very slowly hacksawing the head off a munted bolt in a very confined space. This is not mood enhancing. It’s still better than dwelling on the possibility of losing my job in an industry that has been all but destroyed by Covid-19 lockdown. Landy buffs may recognise this panel: It’s the inner splash guard which is bolted to the guard at the top, and bolts through the footwell panel in the bulkhead at the bottom. Obviously all the fasteners were unbelievably rust welded. And no, it’s not meant to have a jagged half-moon section missing. However, happiness as replacements are available and not too spendy because Landrover. Now, behold some typical series Landy rust. This is the bulkhead outrigger on the driver’s side: The footwells on both sides have also had patches in the past, and may need re-doing. The meccano set is slowly falling apart... I think I’ll take the doors off next, then the cab roof and see where we go from there. Undecided about whether to take the bulkhead off the chassis or not. I’ve been told it’s a big undertaking, but I can also see some of the repairs could be tricky if it’s left in place.
3 points
-
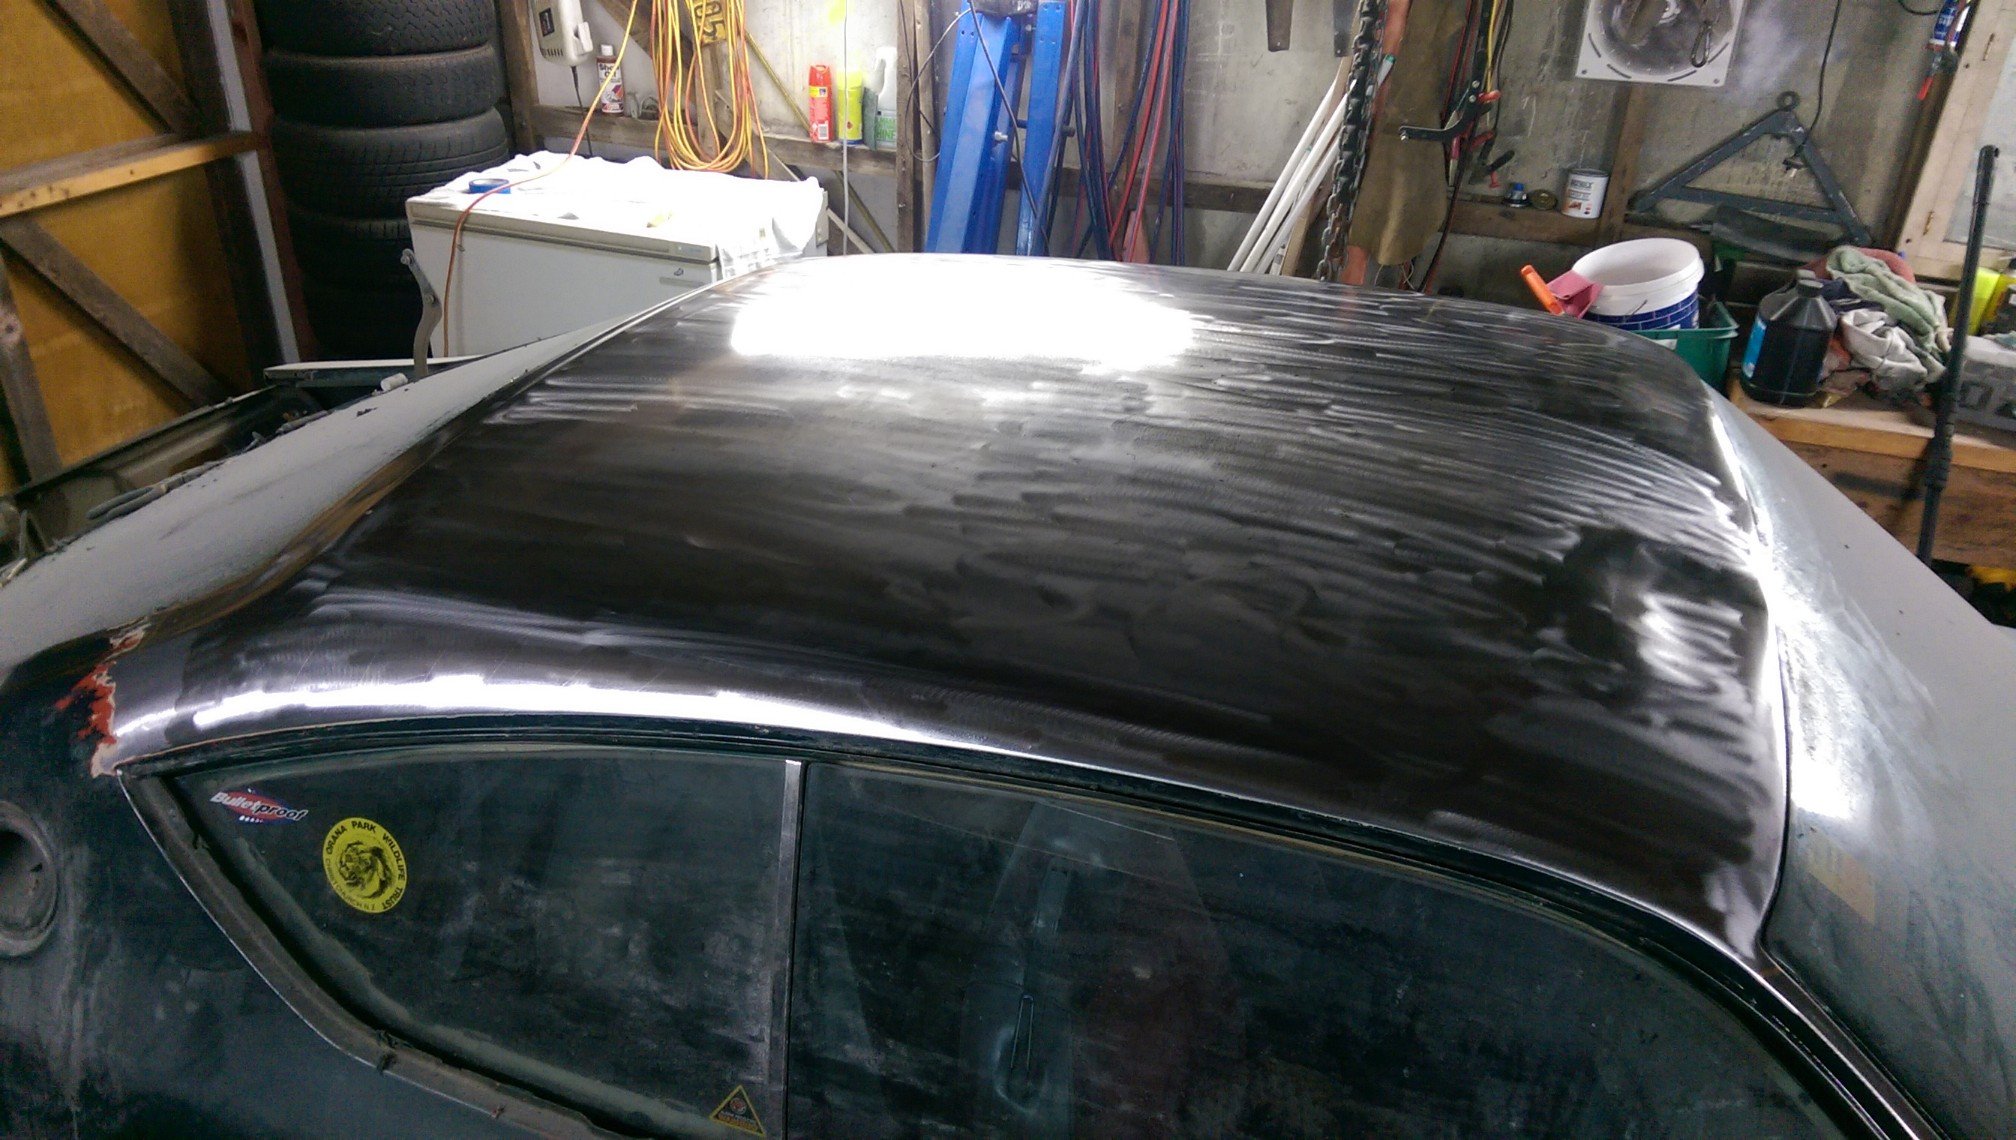
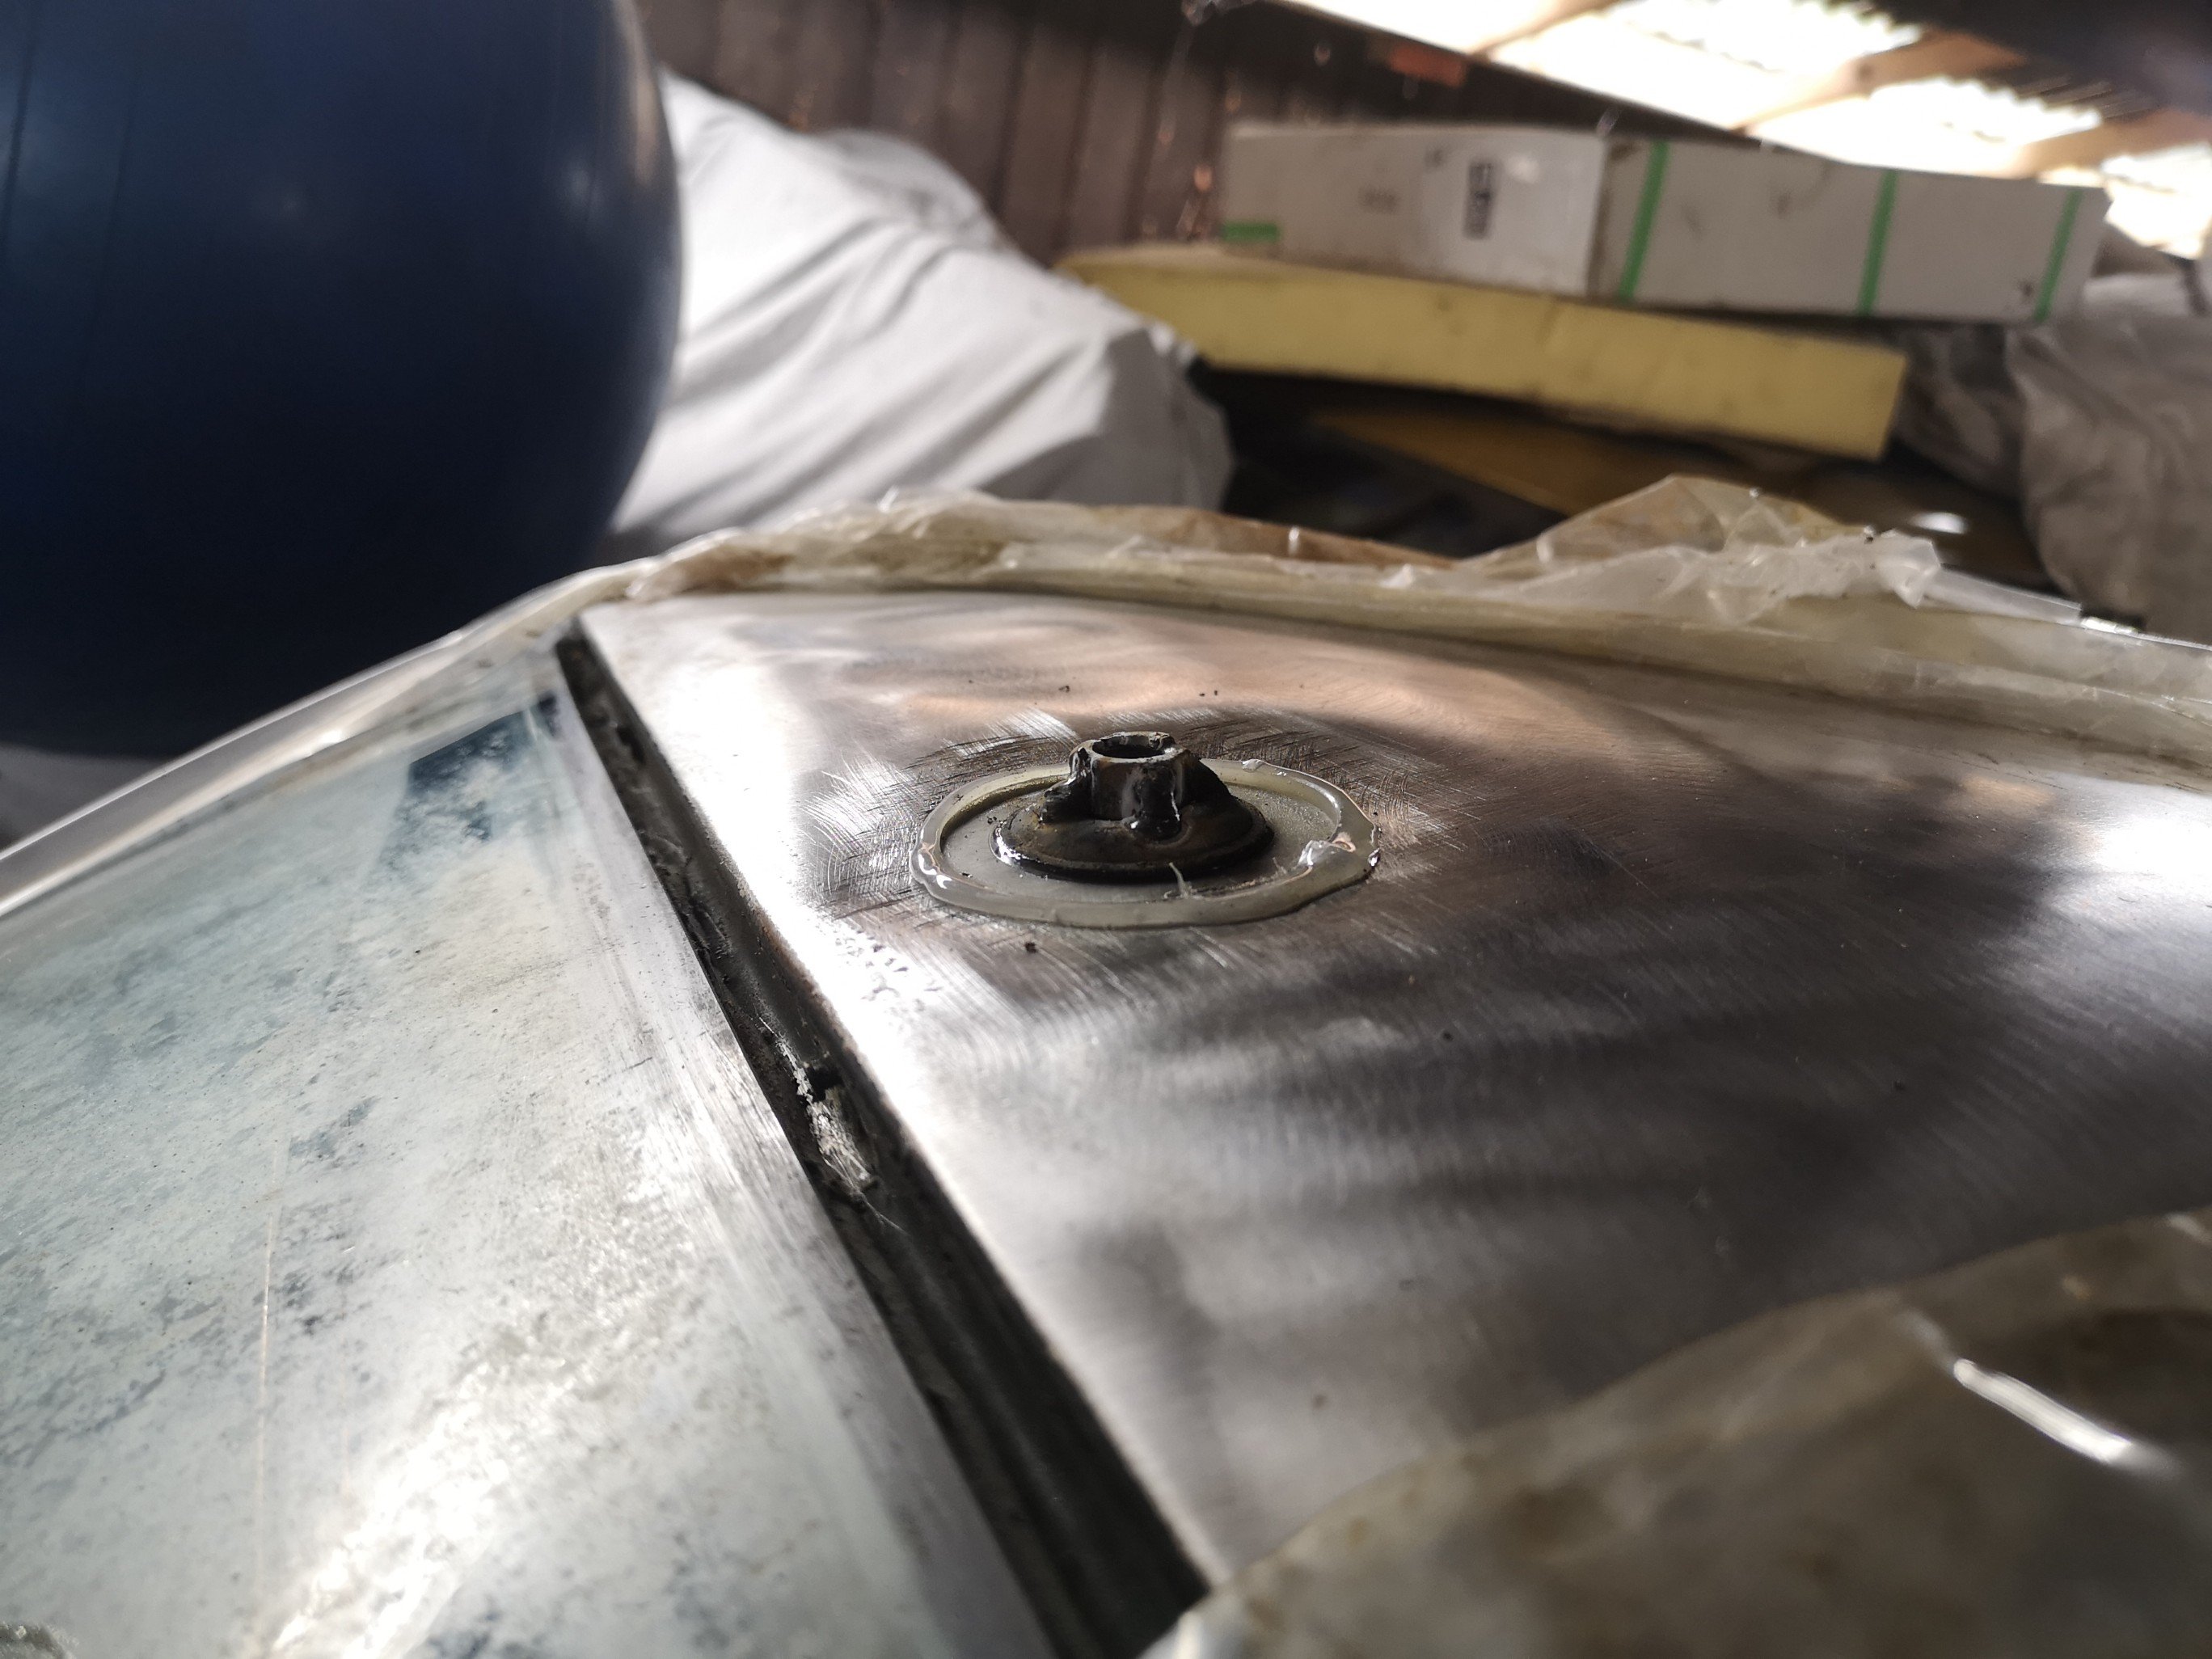
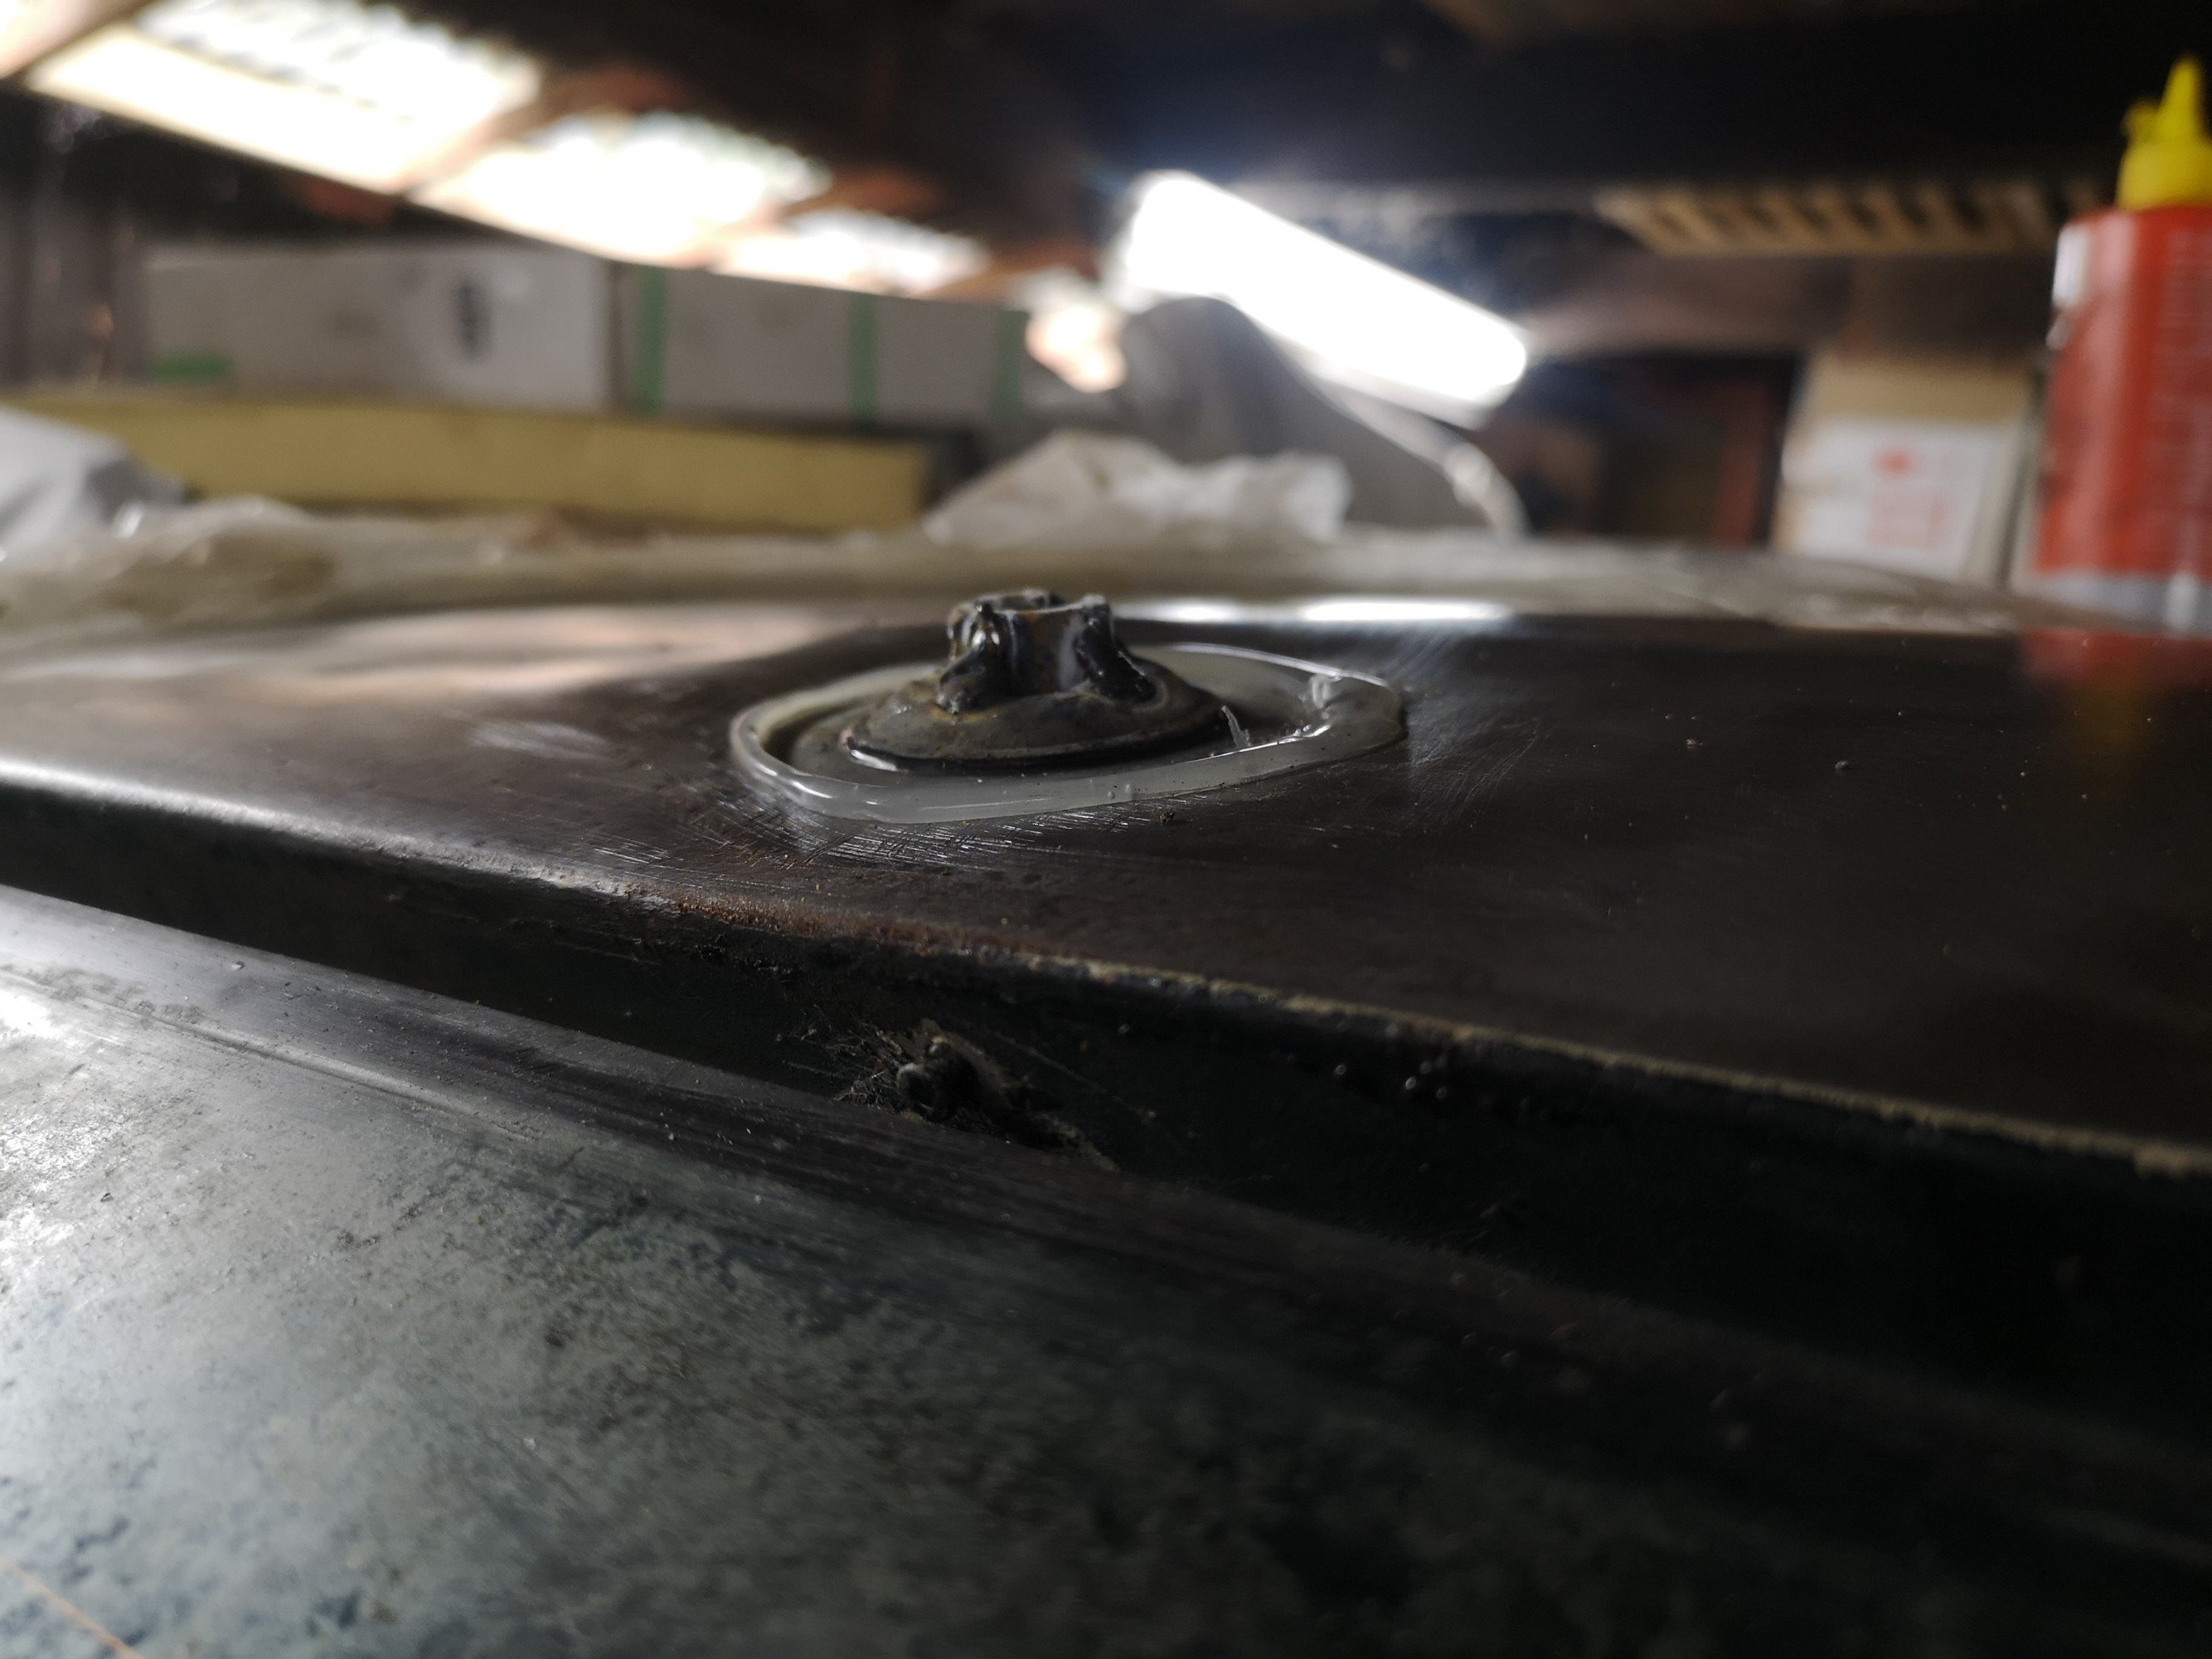
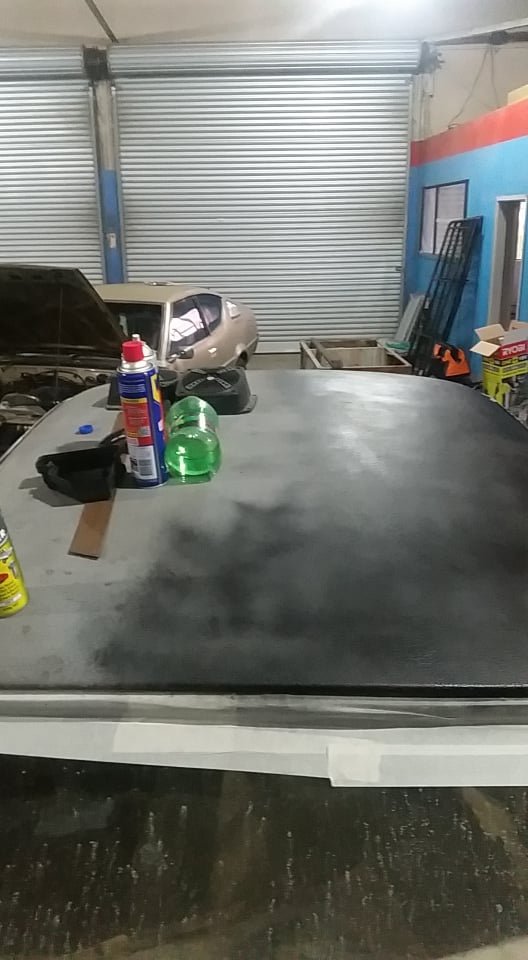
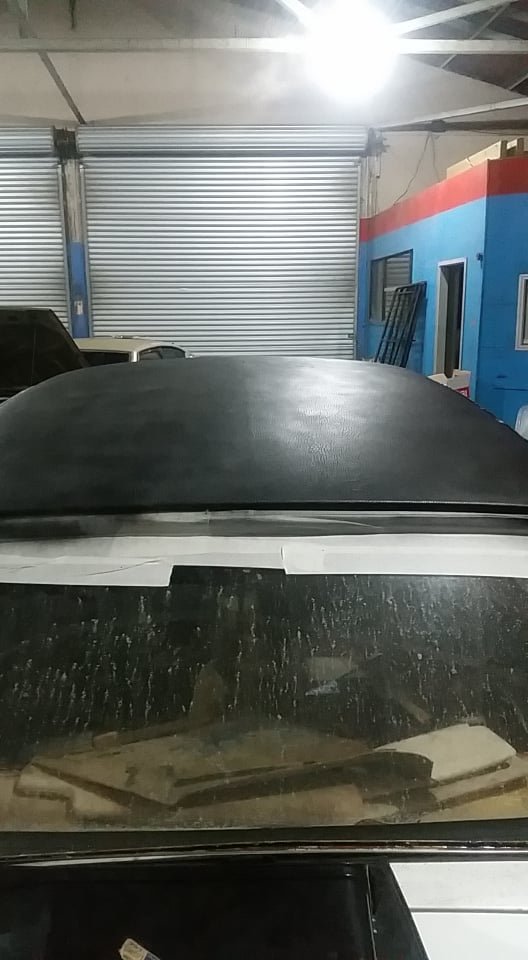
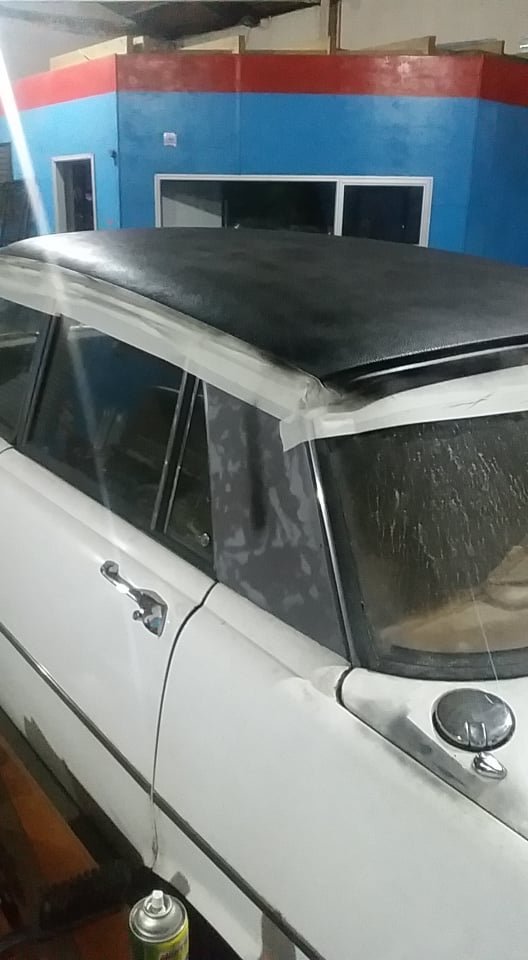
Had a crack at pulling the ding out of the roof without pulling the headlining out.. I bought one of those little 45mm suction cups from supercrap, they, are, shit. Couldn't even get any suction on a flat pane of glass let alone a flat panel. Decided to try the hot glue technique and initially it was shit too as it would barely hold on, then I discovered I had to warm the panel that it was sticking to as well now it sticks like shit to a blanket.. Had one more go doing it with the sca sucker and managed to pull half the ding out but that was it. That thing is shit. Welded a nut to a washer and glued that on, then screwed some threaded rod into it and made a rudimentary slide hammer. Works good but I ran out of time. This is the ding, have no idea how it got there it just "appeared" when I got it out of storage. This shot is obviously when I stripped it. And this shot is after I hit it with the strip disc. I did manage to push some of from the inside but the rest is to far up inside the structure to get to without removing the lining, not to keen on that. Today's effort, the bigger ring of glue is the attempt with the shit sucker. This is the first attempt with the washer that I heated up and melted into the existing glue, first pull definitely moved it but it takes 10min each time you reapply as you have to wait for everything to cool down. Works pretty well tho, I'll have another crack at it tomoz.
3 points
-
Oh god and how did I forget, I also demuffled it with the help of @Geophys chop shop, so its running full straight pipe. Sounds....wait for it.....GLORIAous (get it?) Not long ago I got to hear what it sounds like driving from outside the car when Geophy drove it home for me after I picked up my new ute. Didn't quite realise how ridiculous/awesome it sounds. Basically a big safari/turbo diesel 4x4 at full chooch, but its actually just a semi slammed wagon driving at a moderate speed.3 points
-
well then this covid-19 kicked in and beach hop was no longer happening and i didn't have any idea when i was going to be moving into the new shop. so i mentioned to a few people that i was going to try lower the kombi, had a few things to bolt in and hopefully lower it. @Beaver @bobby1930 and @Geophy popped over and well bolts didn't want to come off which wasn't really an issue just meant the kombi would be in the middle of the shop till i sorted it. no real drama didn't know when i was moving. i had mentioned to a mate a while back With beach hop on the way i really wanted to mix the kombi up a bit and add something a bit different to it. other than it been a white box. I had mentioned this style to a mate a couple of times in passing and he said shit i draw that up for you. wasn't to much longer he popped passed work and traced the wheel arch/door and said it'll cost _ _ _ _ _ _ _ amount. i said hell yeah go ahead which i wasnt really fused about happening any time soon now that beach hop was off. but then covi-19 really kicked in. 2 nights out he turns up and slaps this on the side. and now the kombi is stuck in the old shop with new graphics on it and no wheels or suspensions till lock down is off or till i can lest get over there to bring it to the new location.3 points
-
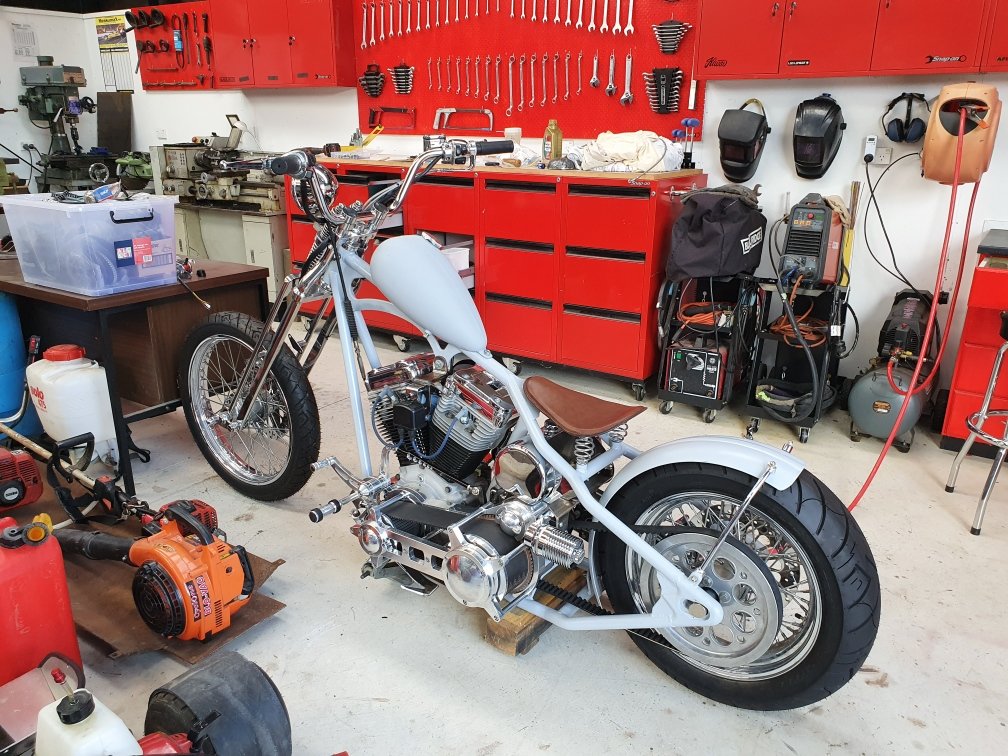
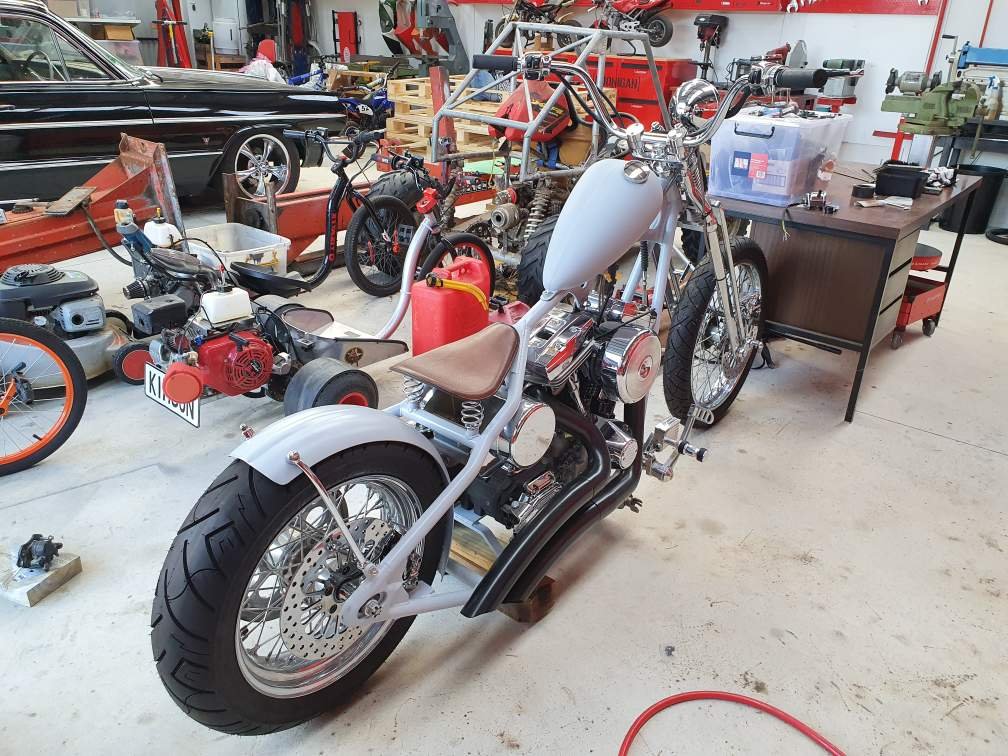
got a little bit more done today. made some CAD templates. transferred and put onto steel and smashed a hole in and again made some cross braces to bolt the seat up to. and was left with this subframe kit tonight, gonna weld it all up tomorrow and may start making the seat base too.2 points
-
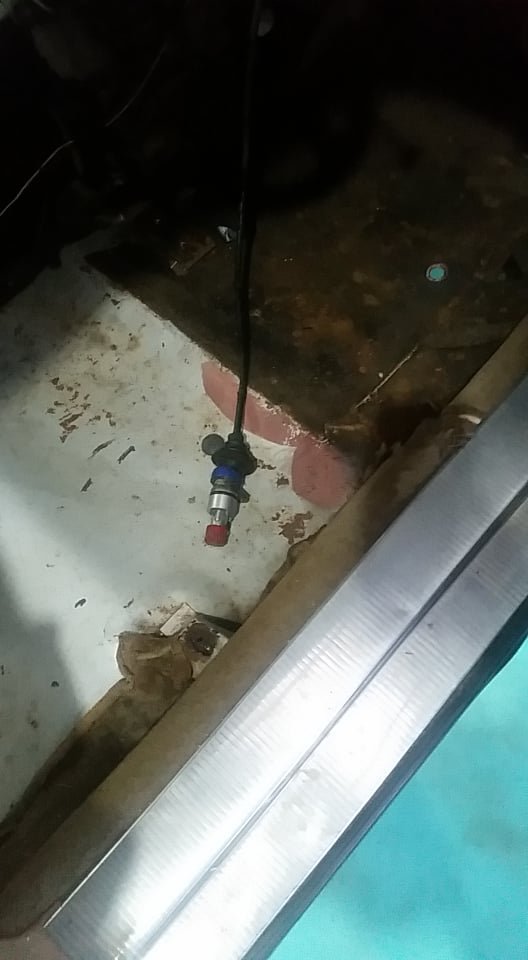
Right update time, well i'm stuckin isolatio for 4 weeks so what better thing to do than to work on the rover... so I am (hopefully ill be able to get a fait bit done) Stage 1: clean up, eg paint the damn roof. its been bugging me for years that the vynal on the roof has been this faded gray (48 years of sun will do that) so i cracked out some old vinal die i had from when i painted some of the interior of my civic and set to work Started with this one side and it looks better but looked really dark when i put it on but hey ho its on now first take on the roof (yes i know the rear screen looks like trash) Roof covered, ok actually doesn't look bad Really good comparison of before and after in neutral light Stage 2: fix the speedo, never was connected when i bult the car (Jap speedo drive in T5, english cable on speedo) Fixed, with nothing more than zip ties and a bottle cap
2 points
-
yea, you may be right. but the water take off to the heater is way higher. and the return from the heater is right into the feed for the water pump/stock. fuck, ill be the stoked if i can somehow fix this by just bleeding the heater hose, but logic tells me that its probably not going to be the case unfortunately.2 points
-
For WoF? Only essential vehicles can get WoF's during lockdown. Trucks/taxis/delivery vehicles etc. Also the word is that police will be lenient on cars with WoF's that have expired during the lockdown, providing the driver passes the attitude test and they aren't just out for a jaunt to the beach to cough on someone elses kids.2 points
-
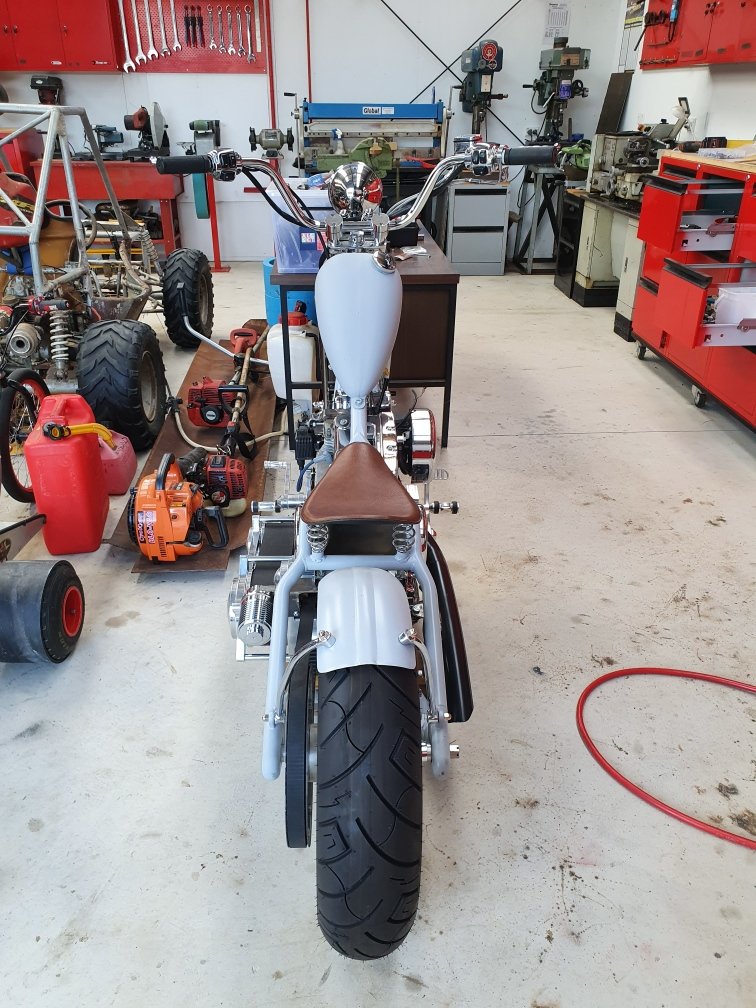
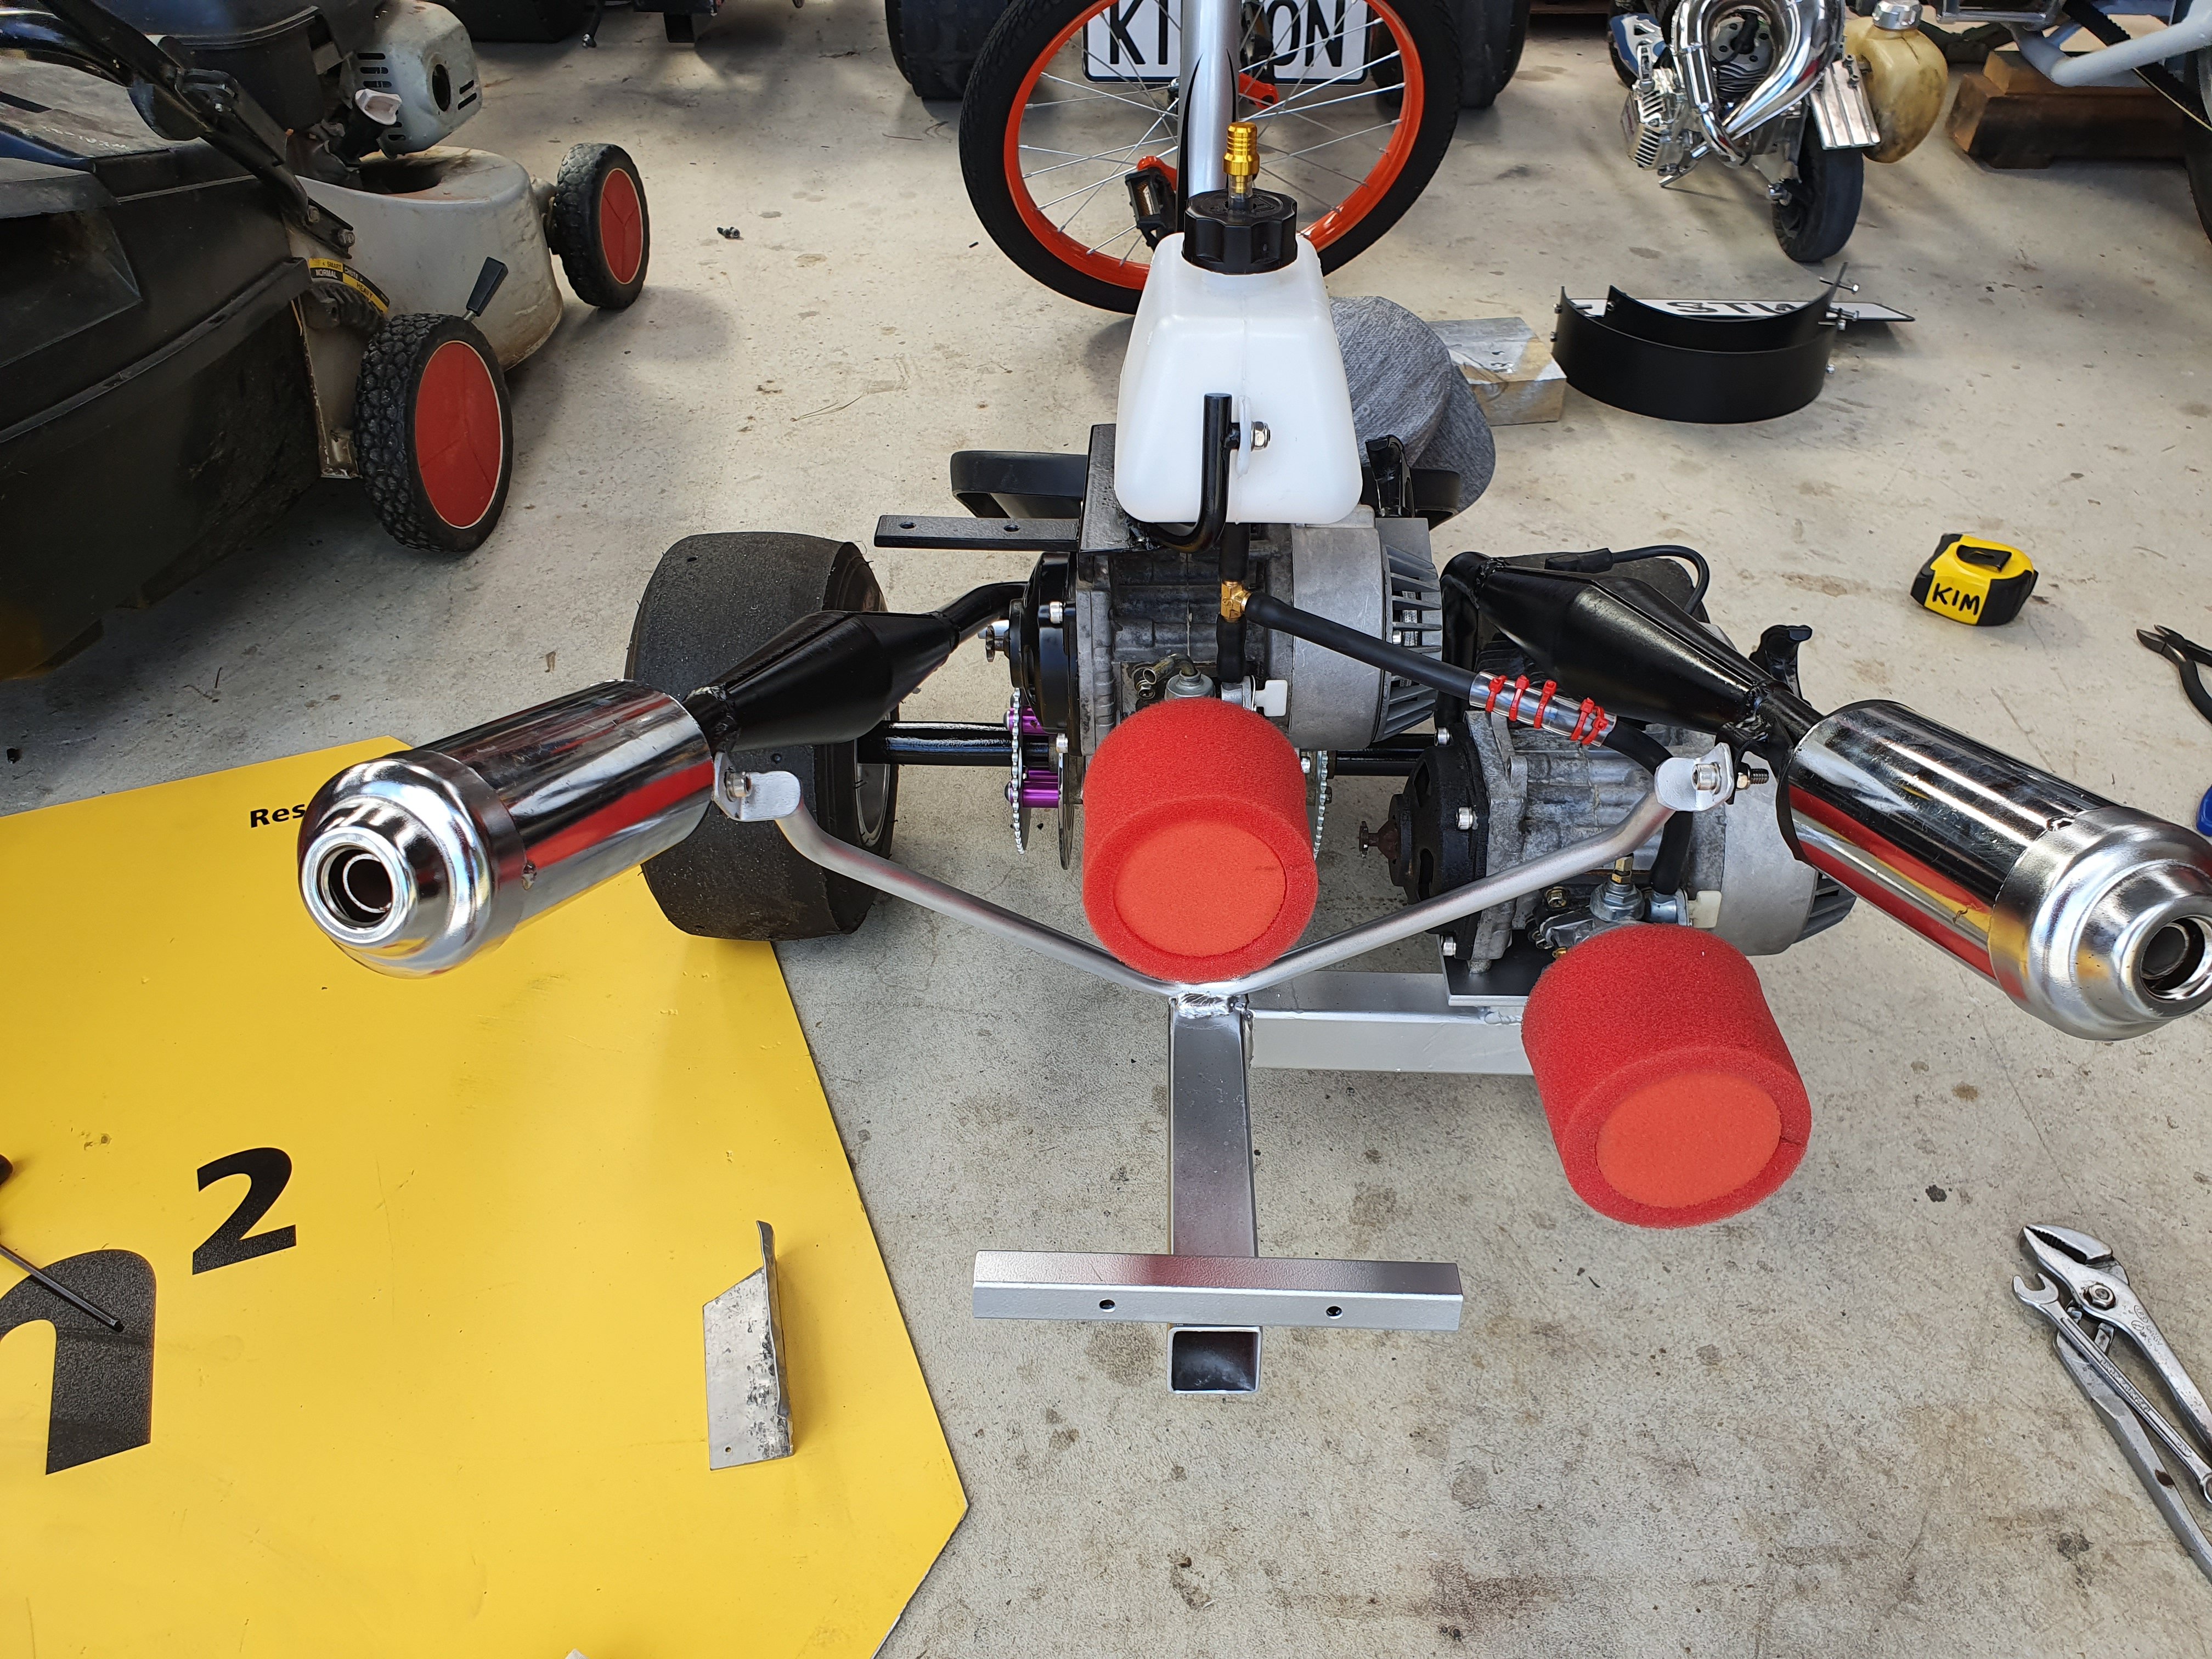
Brommmm broommmmm!!! Fully working. I've ordered brakes off Ebay to suit. Need some pvc sleeves and done. But those are bolt on parts that will take 5 minutes to install, so pretty happy with it really all things considered.2 points
-
Online is near impossible. Spend the 10 minutes to put the bumper back on and live happily ever after.2 points
-
If you are worried, put the bumper on.2 points
-
You have answered your own question there. As long as it can’t hook anything or hurt someone you are fine.2 points
-
What centres the wheel to the hub? It usually needs a hubcentric ring but if the centre of the hub is a snug fit to the wheel centre then that typically would suffice - but check if your certifier would be happy with that. Also yes it can be attached to the wheel, but that is not the desired method so might be looked at sideways by the certifier.2 points
-
Sat in the sun and laced up rear wheel today. Used spoke washers as the old Sturmey Archer hub has thin flanges, and new spokes have too big a bend radius... Threw it in the wheel stand and bearings were adjusted so loose it wobbled all over the show, so cleaned, greased and adjusted them... And all set up on the home office desk to tinker with... Quite theraputic doing this when stressed, wonder if I could get away with it at work... [Edit] might need 2 washers on each spoke to fit right. Dang, lucky I have time...2 points
-
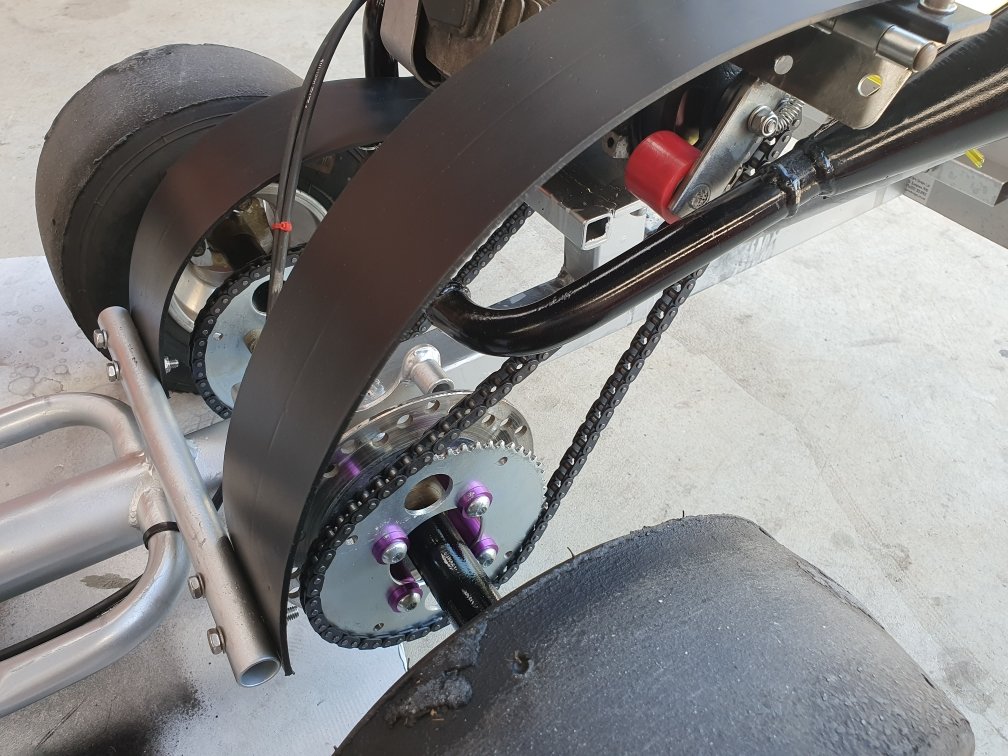
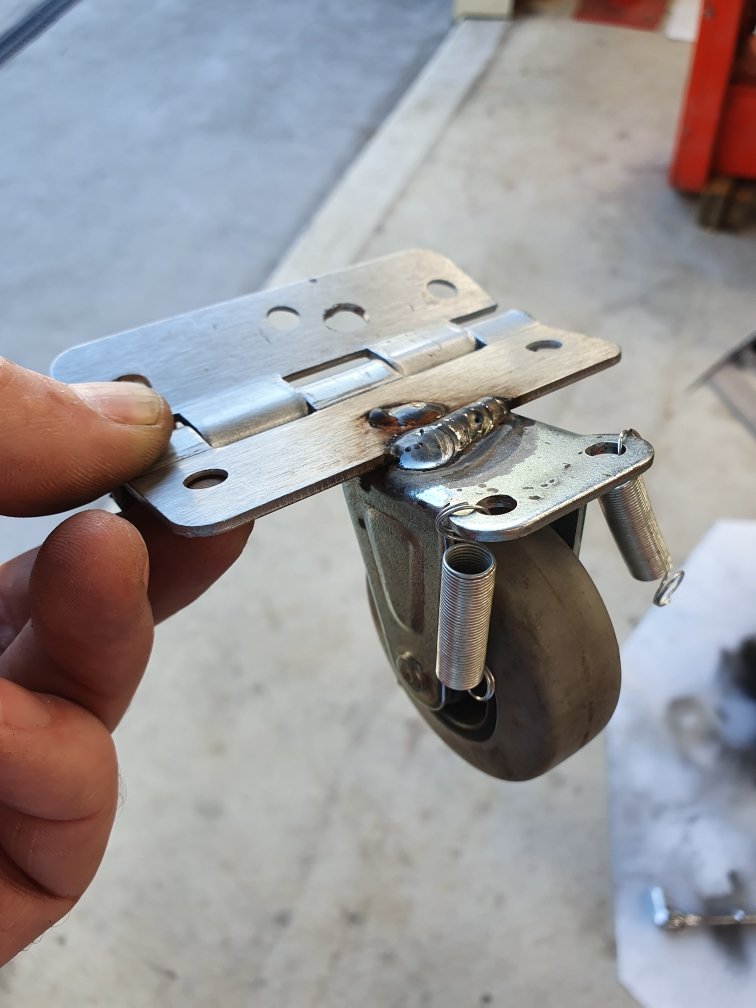
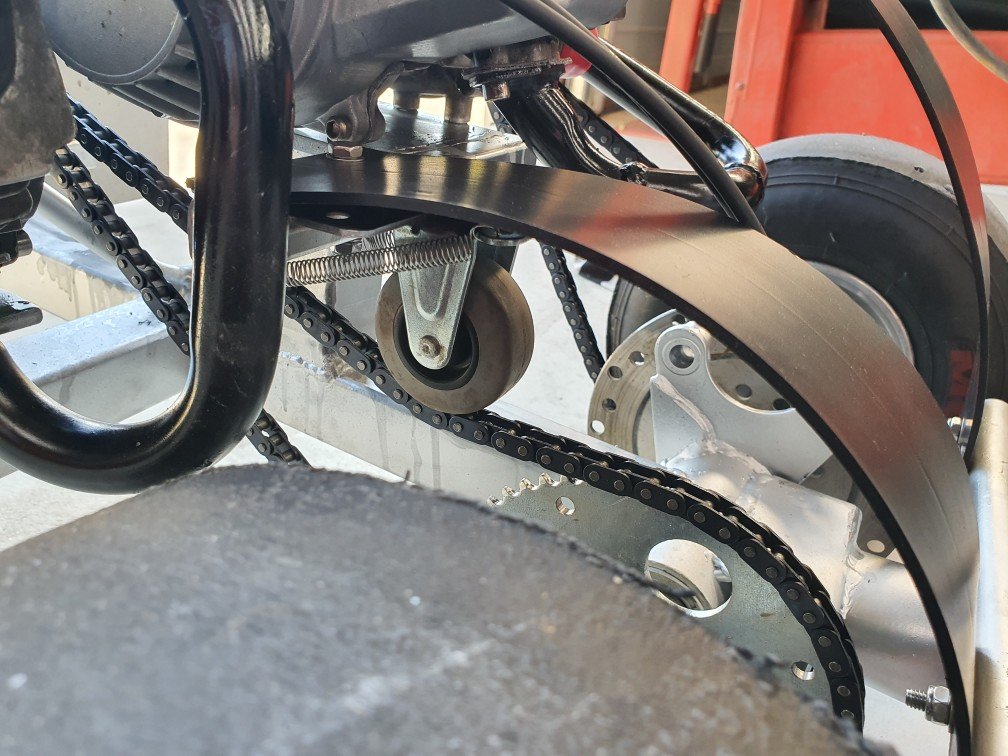
Made a chain tensioner out of a door hinge. LH side And RH side All prettied up...finished!!!
2 points
-
2 points
-
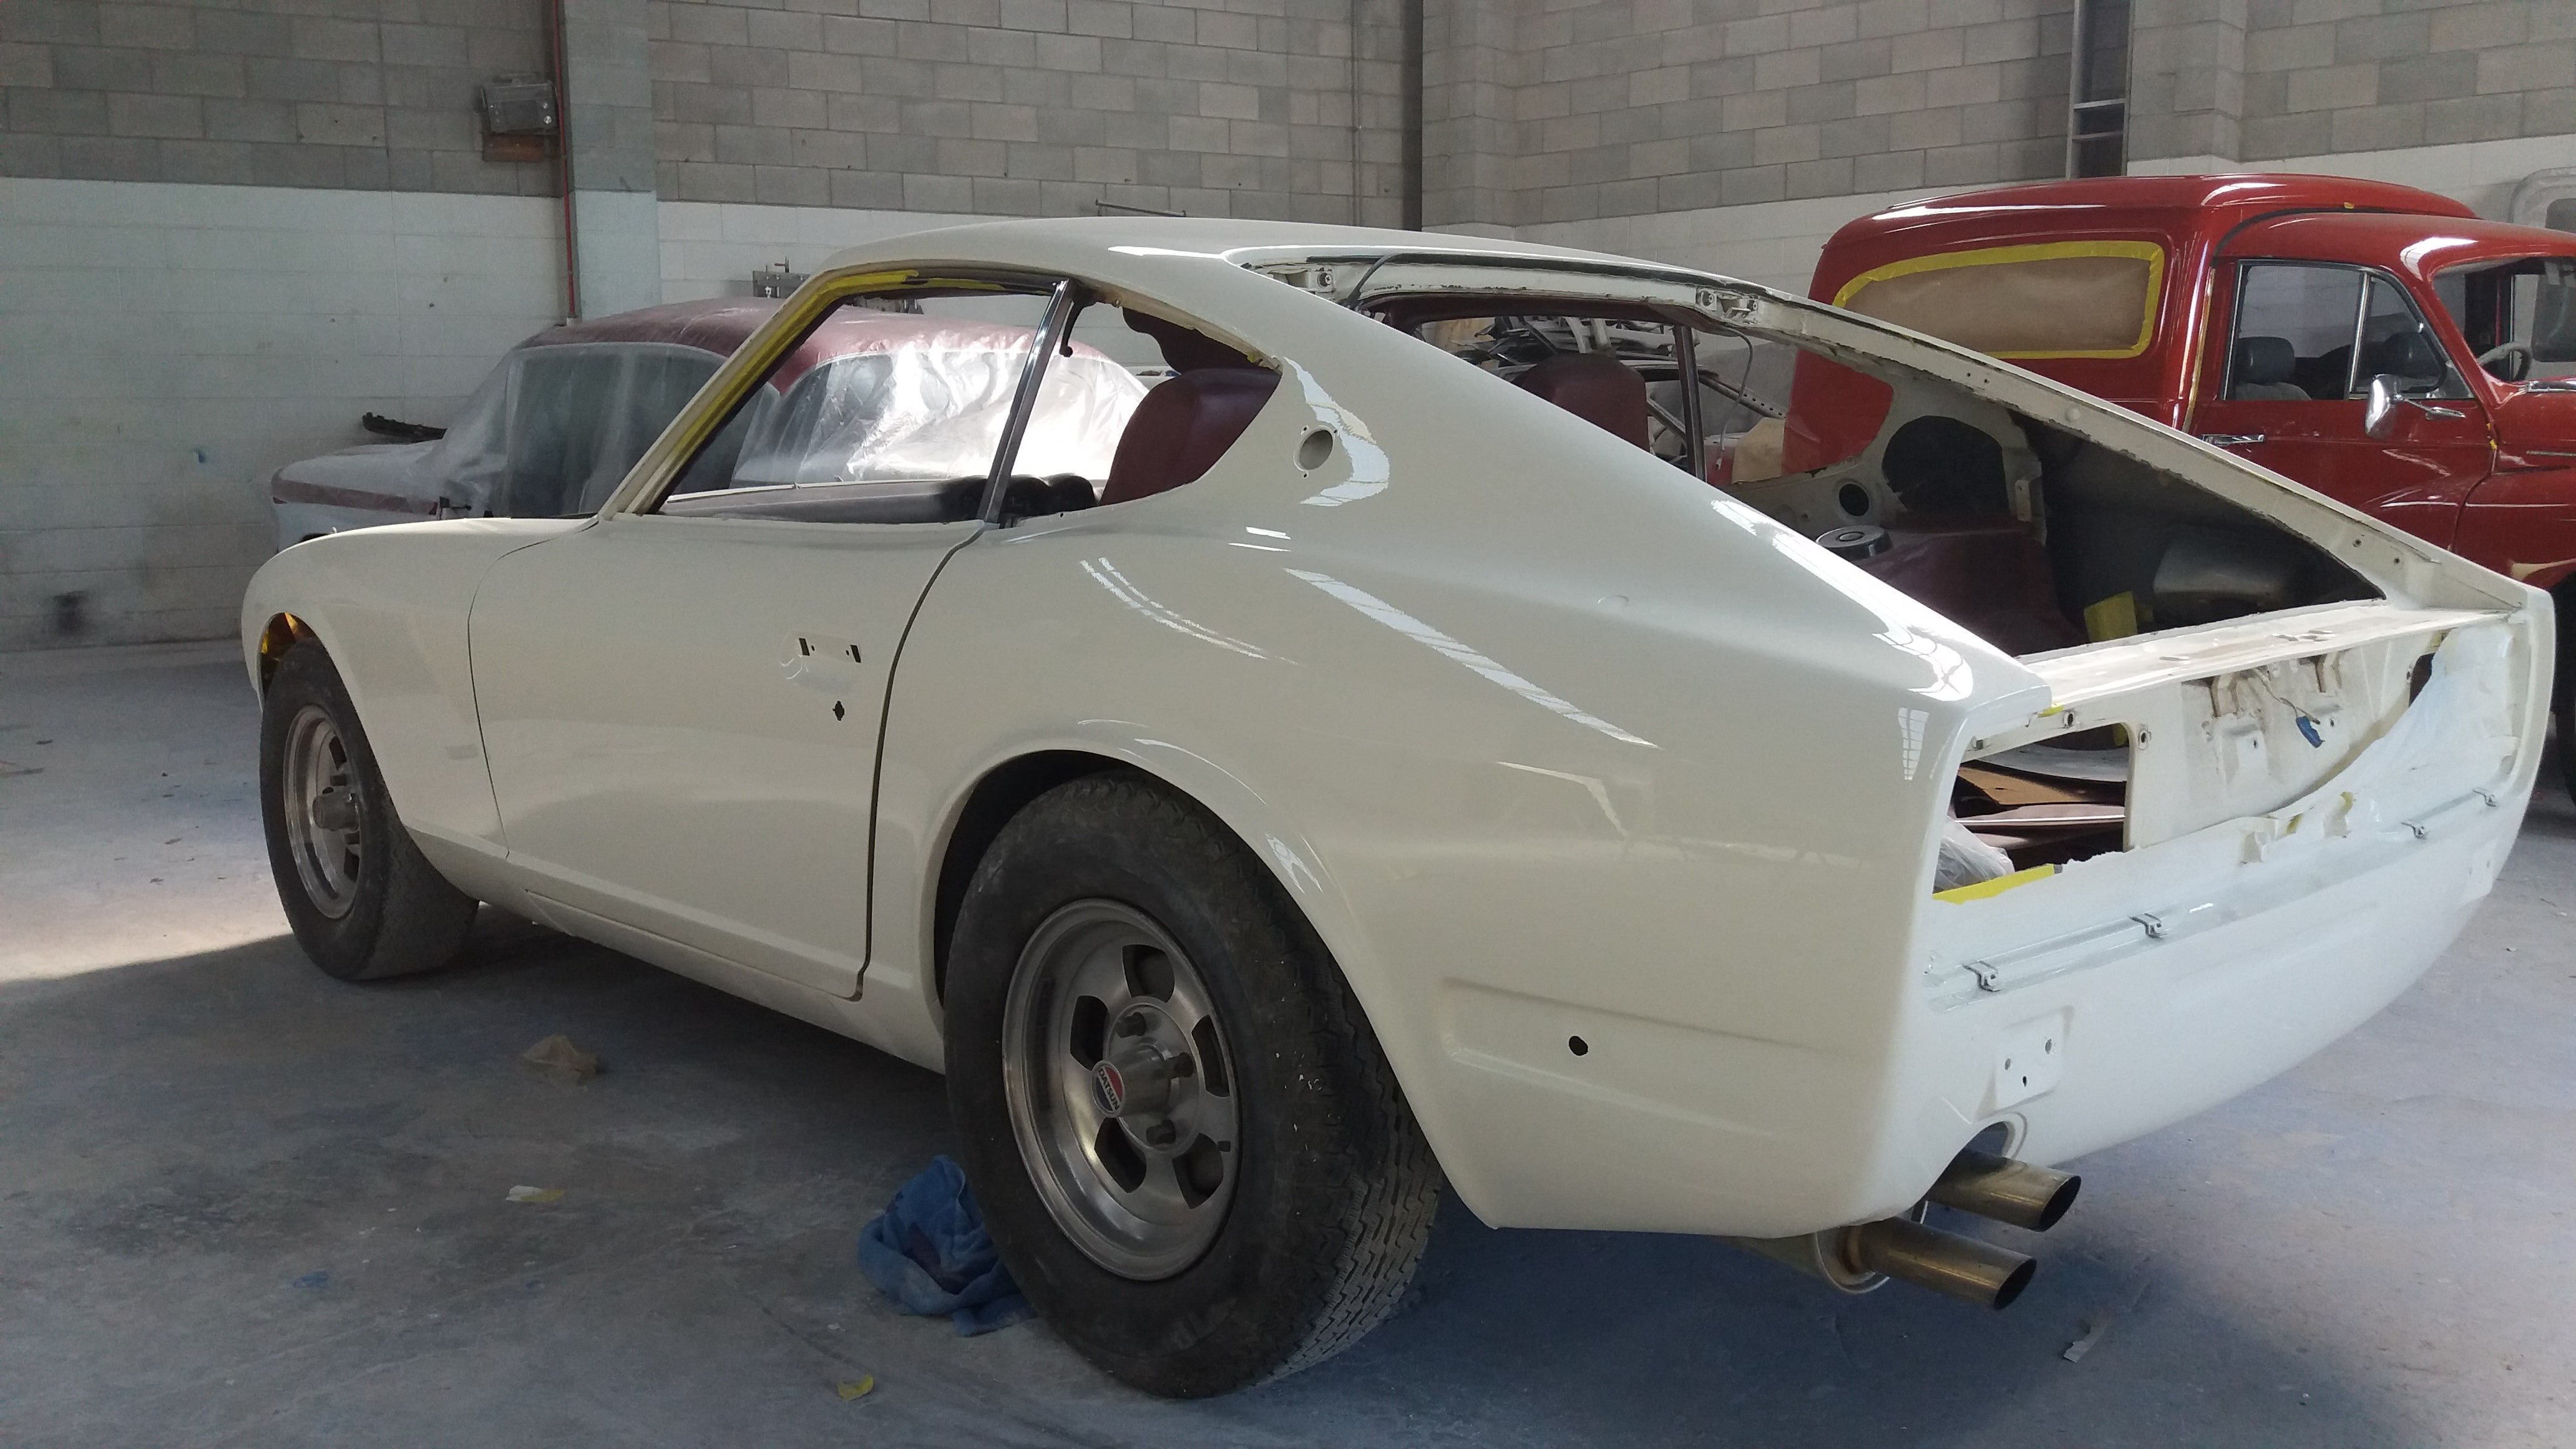
Finally got the front clip off..was a bit of a mission drilling out all the spot welds and there is a panel that runs inside the fender that attaches to the side of the firewall that I wanted to keep as it seals up that area but you need to carefully pry it away and cut the spot welds without wrecking it. does make things so much easier to work on and best of all it is really light. the other bonus was it revelled a couple of really bad rust spots that I wouldn’t of known about until further down the track.
2 points
-
i might be making some progress with this. ive been vacuum bleeding the coolant system and then heat cycling it for about 4 days now and its taking a bit more water each time. the temp climbs a lot slower now and it almost can maintain temp. it still climbs with it sitting idling and the fan going but its a bunch slower. i will drive it around as much as i can as see how it goes. im also chasing a random intermittent coolant leak that comes and goes at the weirdest times. it coming from the bottom heater hose but it leaks weirdly, like when the system is at full pressure after its been running and its hot it doesn't leak, then it will drop some water over night when its cold. but not every night, its a bit unusual but ill keep fucking with it.2 points
-
After the prep there was some PAINT!!!! I took heaps more photos putting the windows and badges plus interior, headlights, bumpers (were a bastard to line up again) and all the other stuff back on but a bunch have corrupted so that's lame. So damn shiny!
2 points
-
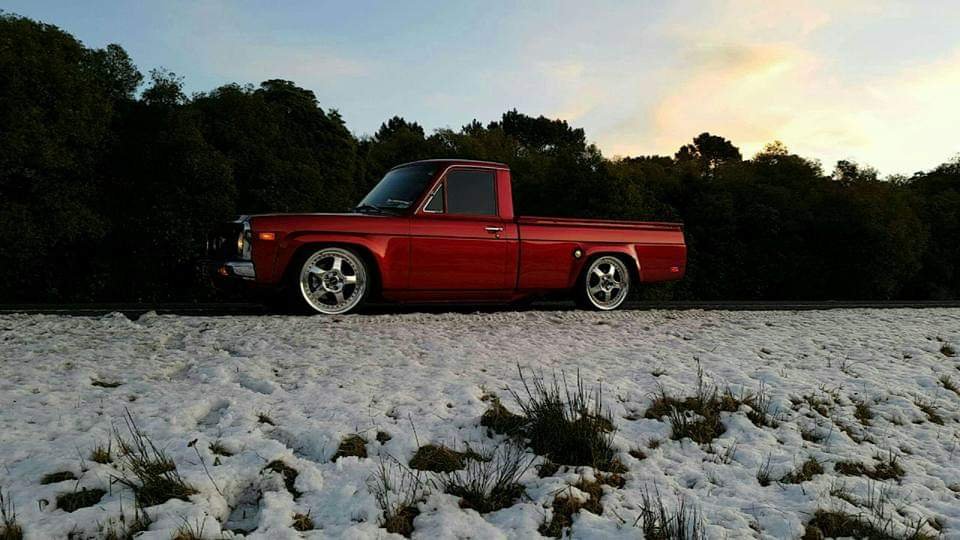
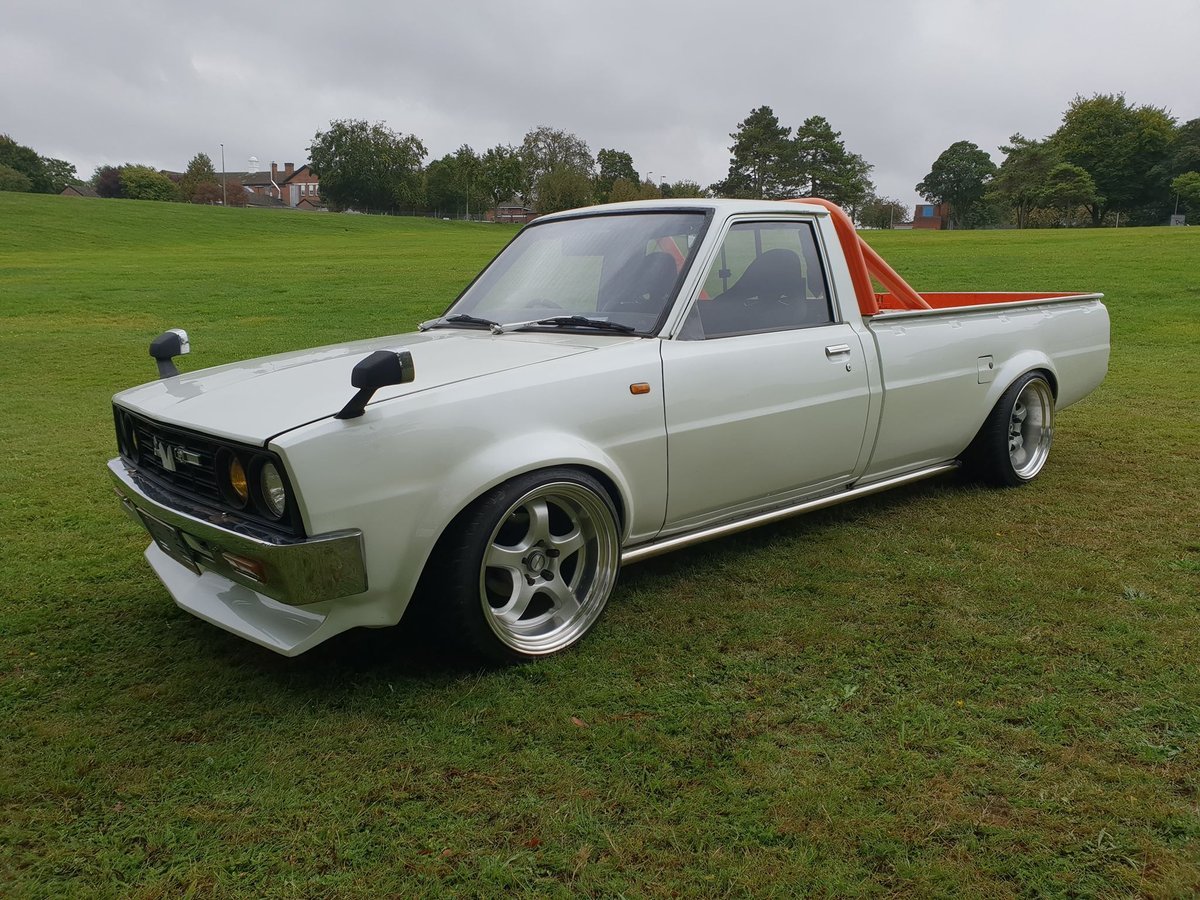
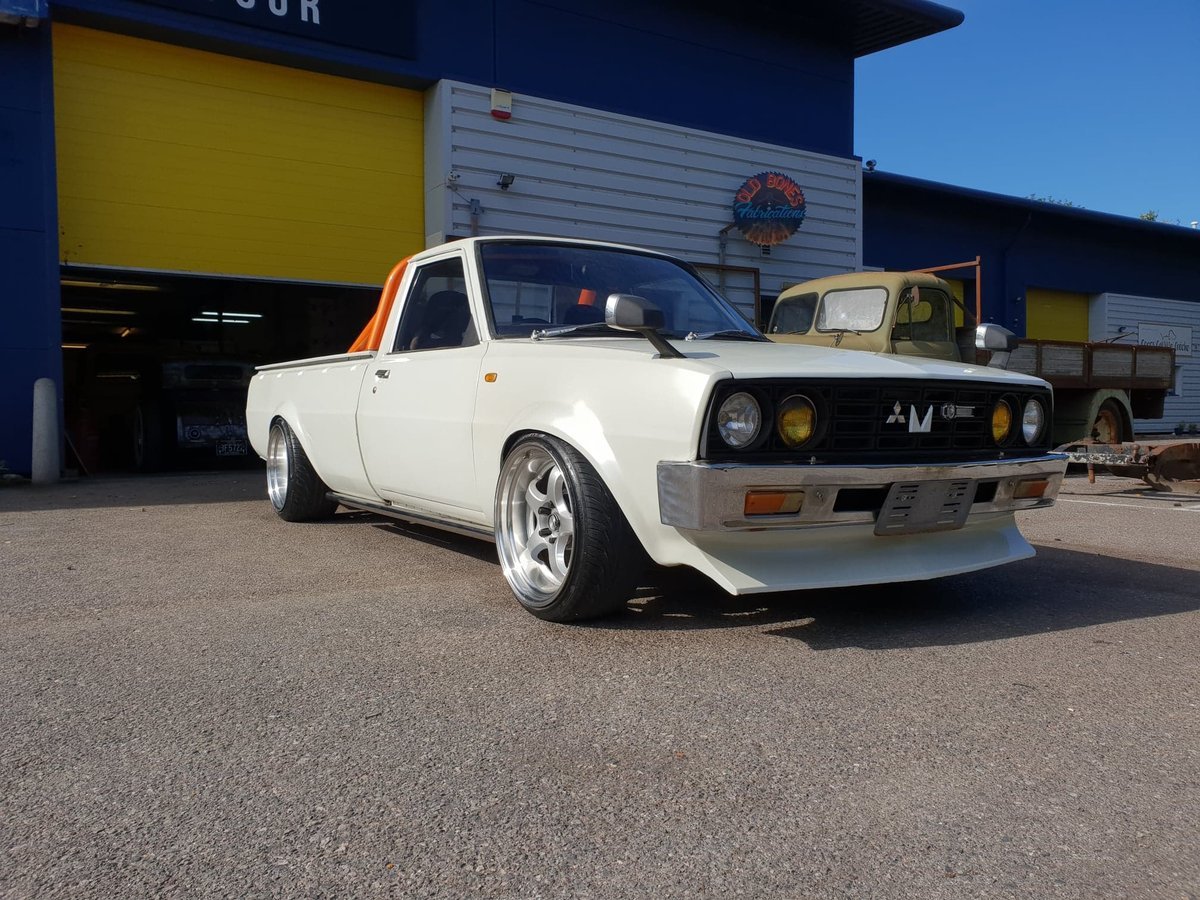
Warning: No actual work in this post! I found some pictures of an L200 I really like though, thought I'd put them in here to keep track of them as inspiration. I'd go for slightly smaller wheels, and probably a box style flare. I like the bar in the back though, but a smaller diameter tube and not orange. :-).
2 points
-
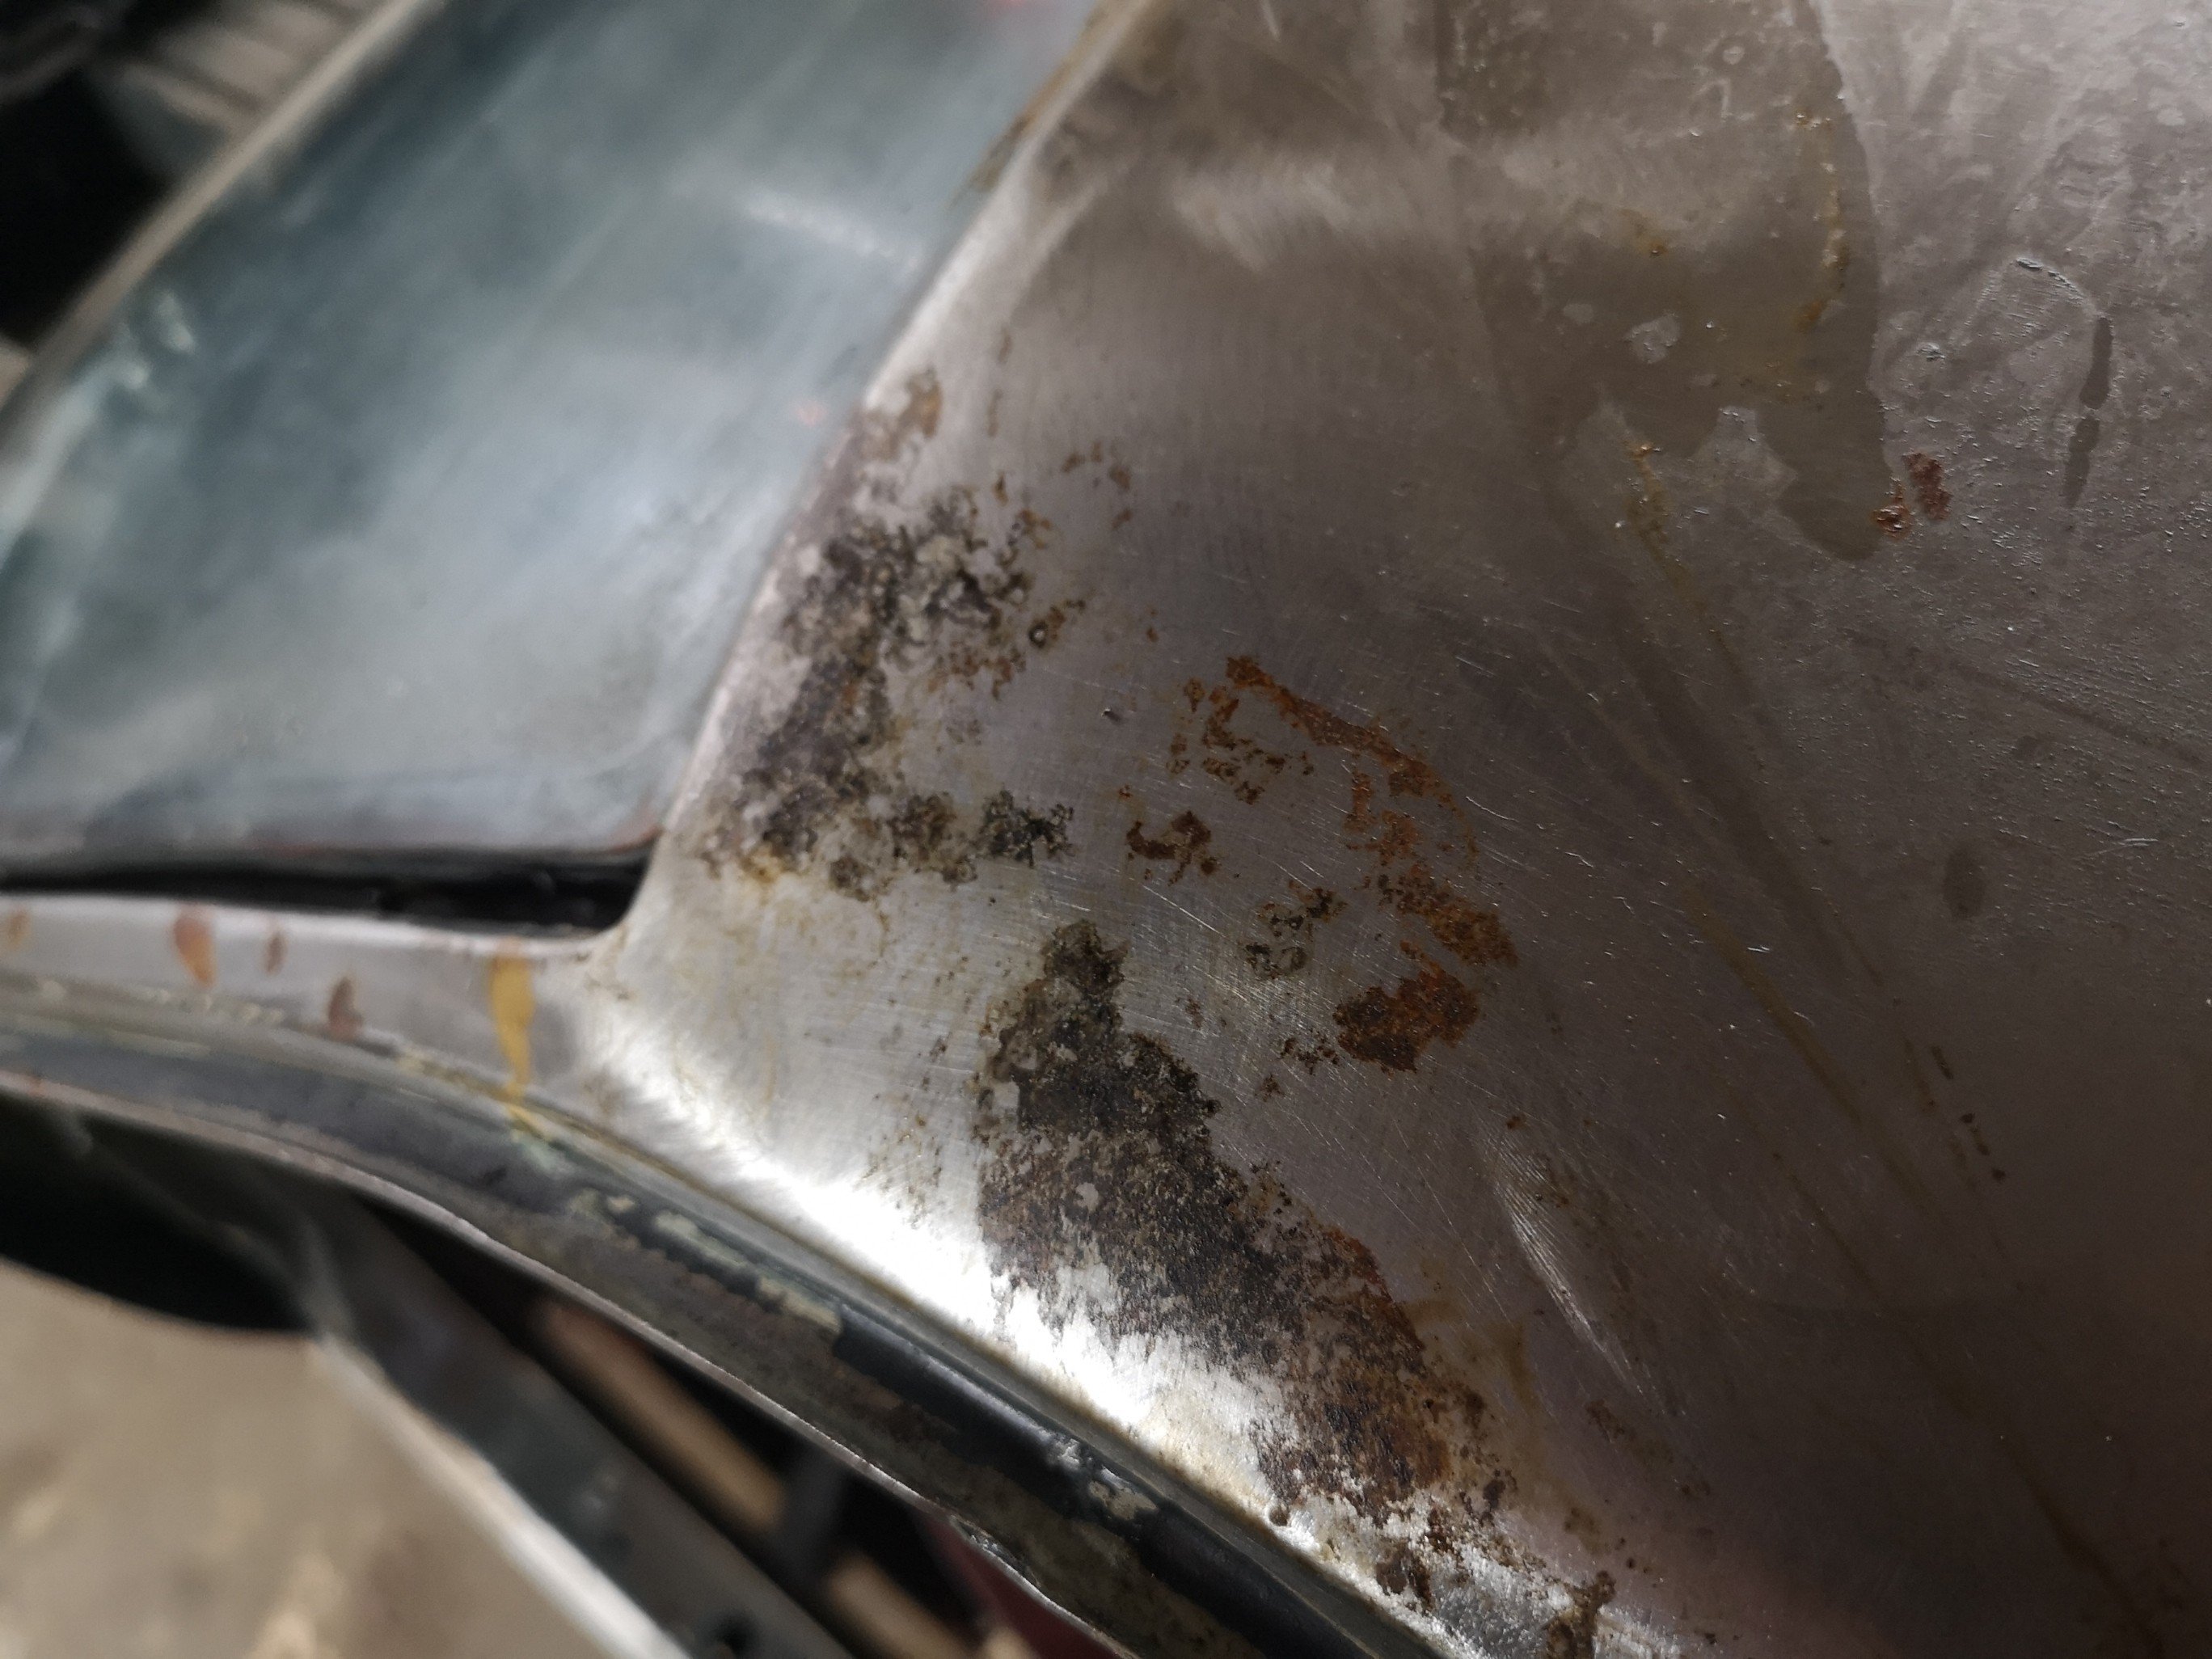
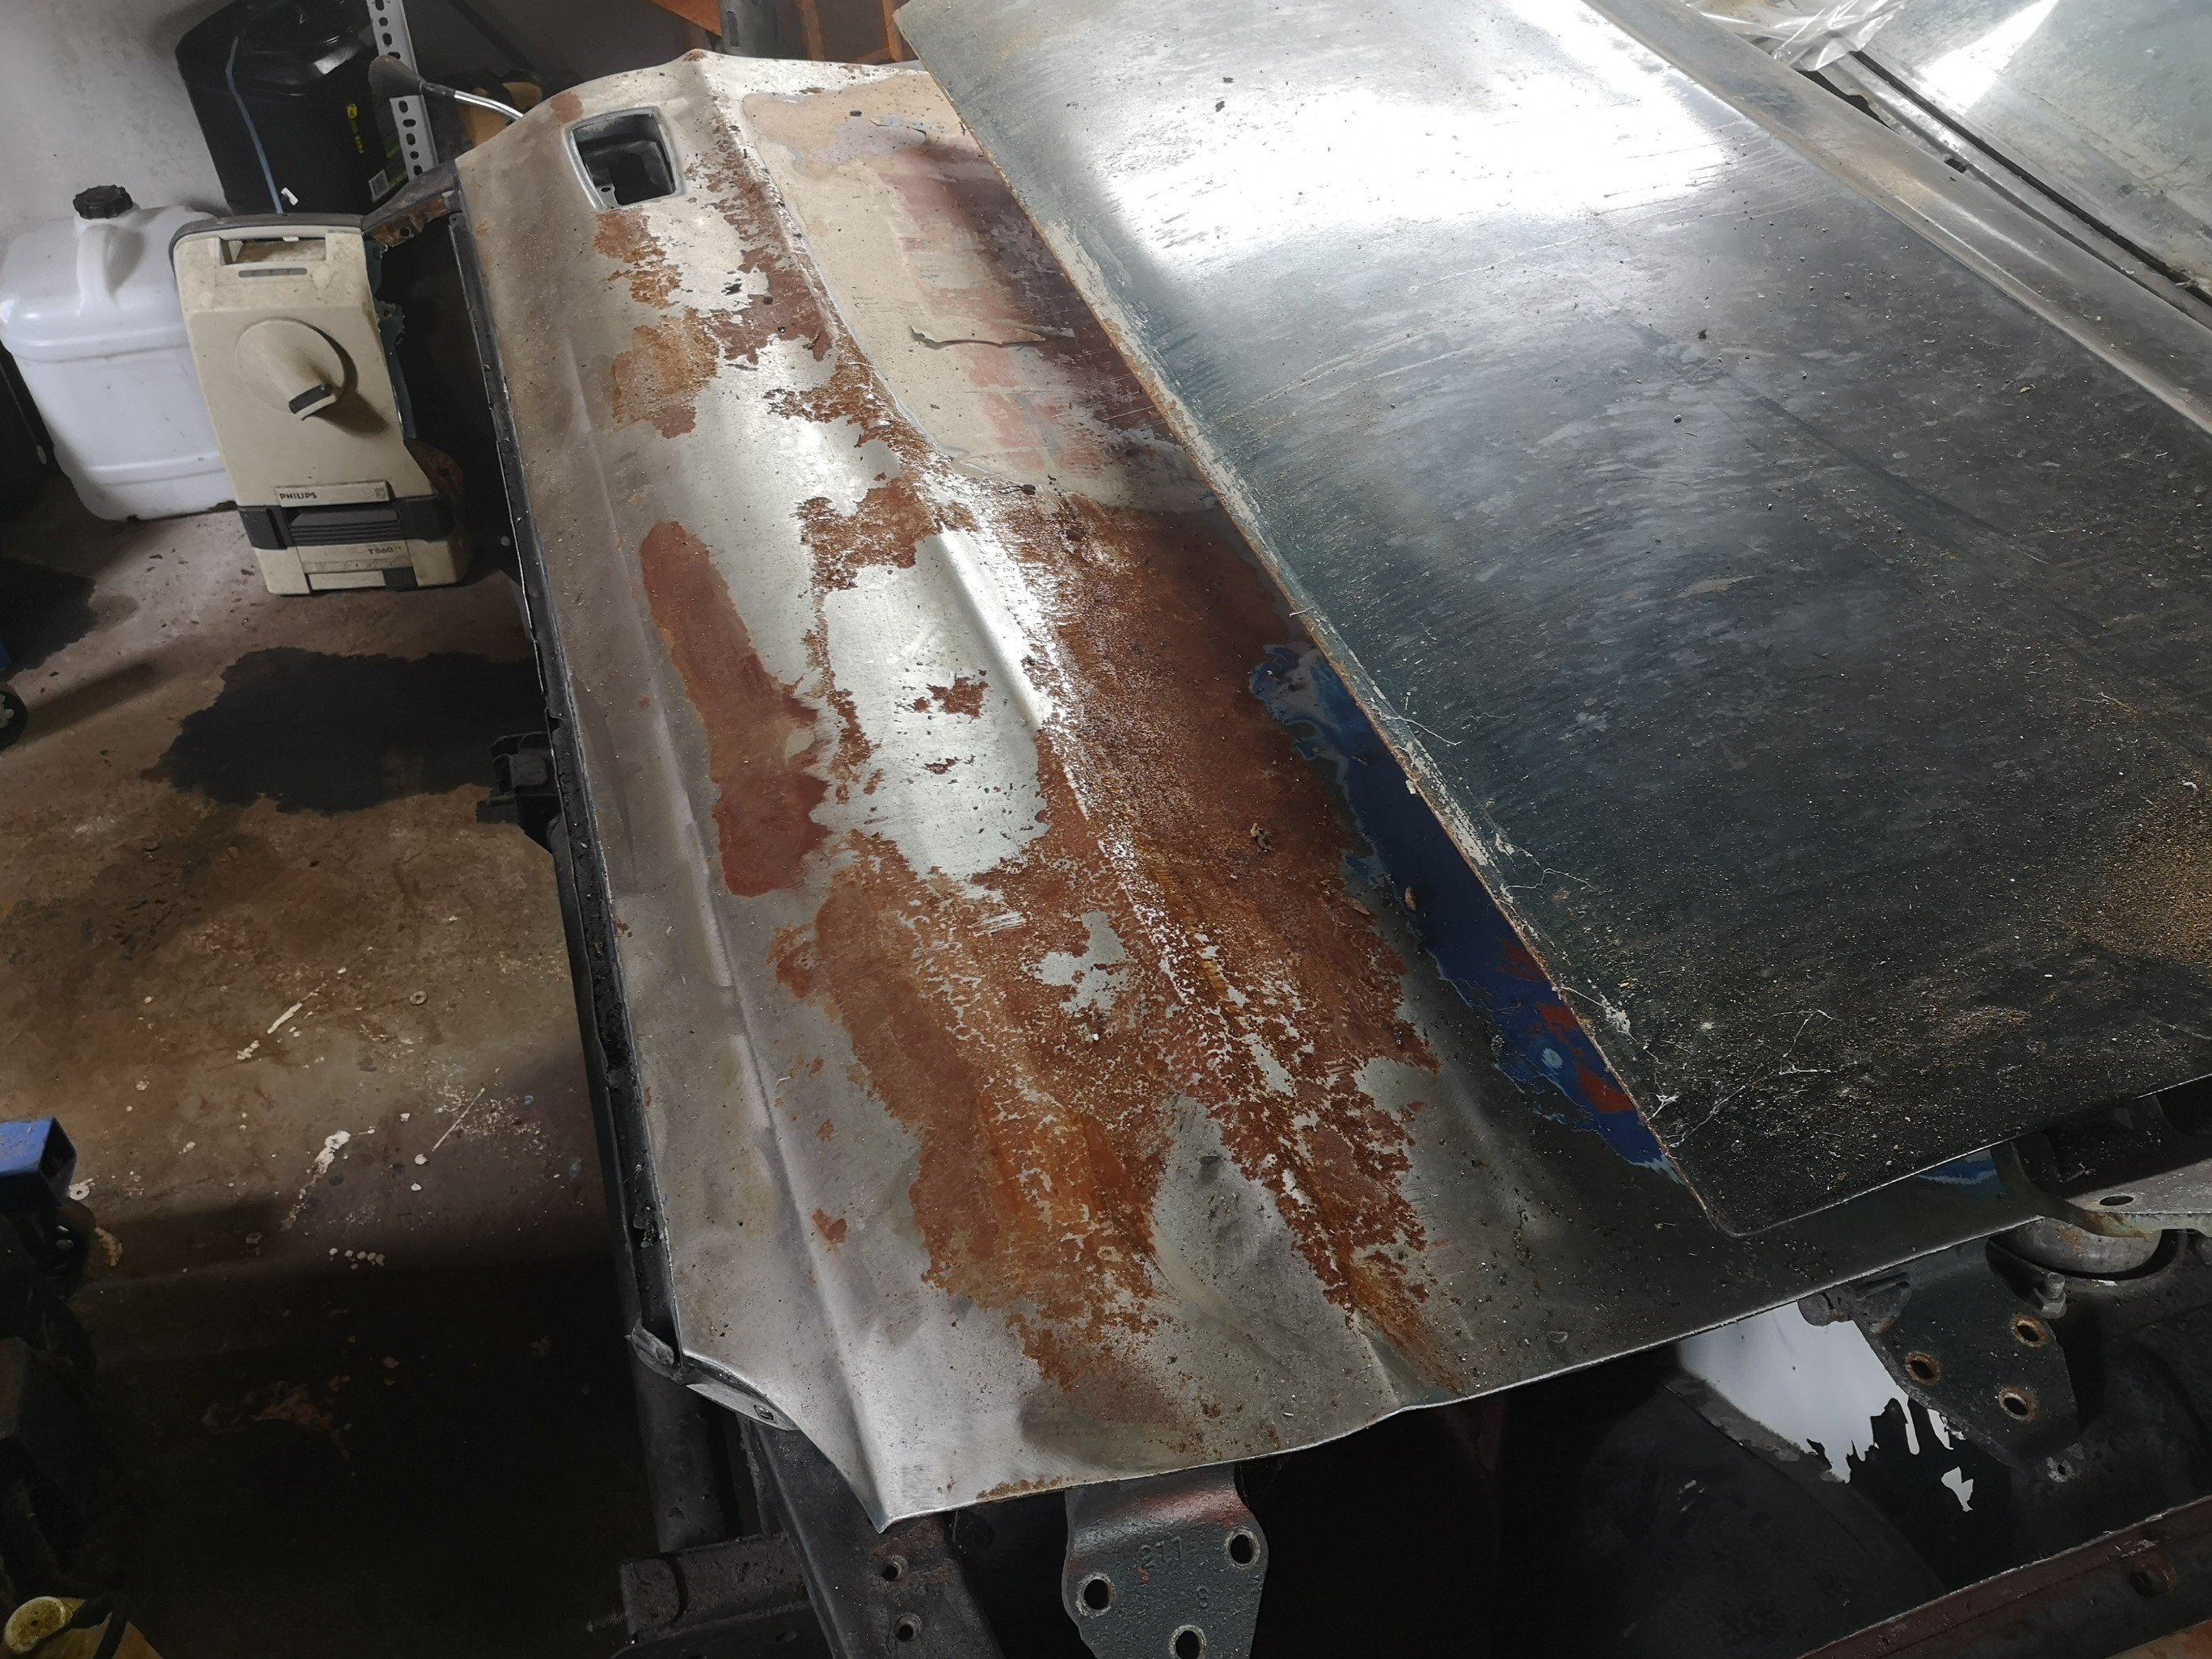
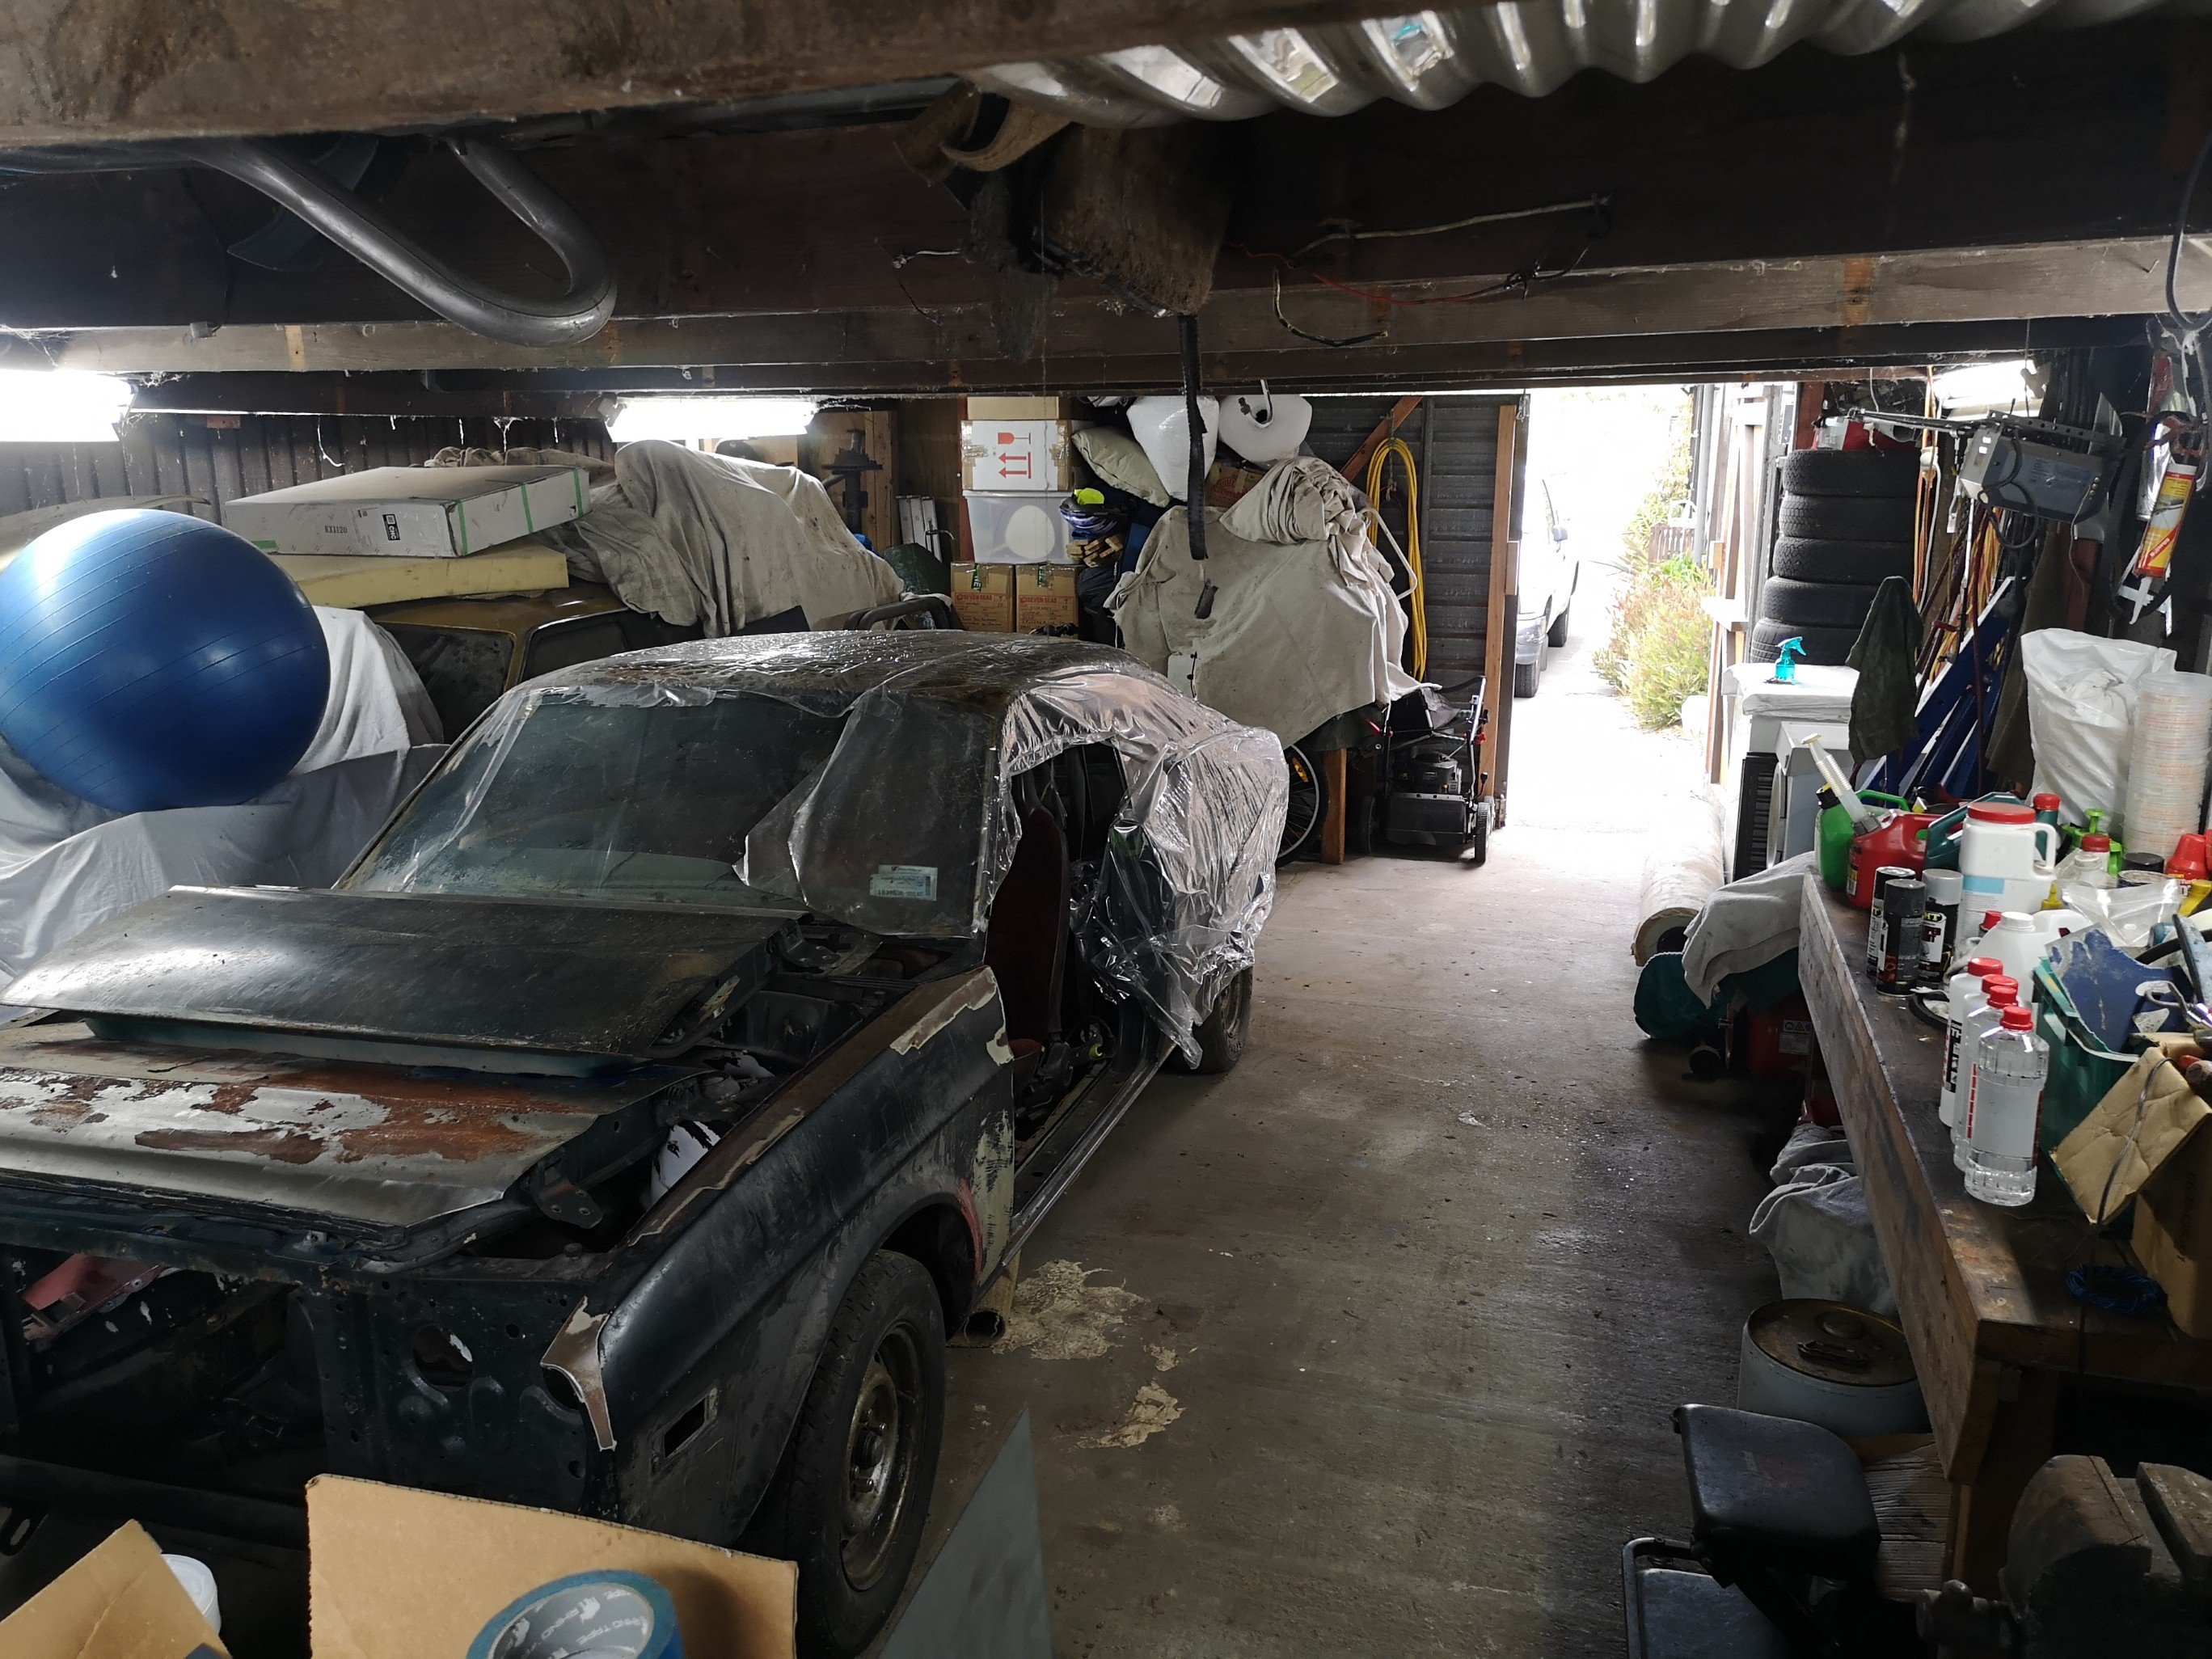
Gave it a coat of wd 40 before I wrapped it, tried to keep it away from the seams as much as possible but it did the trick, theres a couple of panels that I didn't do but even they aren't as horrific as I thought they would be. The worst of the surface rust is here, But is pretty minor. The roof on this garage was totally poked so mum had some new iron out on last summer.. Soooo much drier in here now which I guess helps with corrosion. This door wasn't coated for some reason.. Still, not bad really, just surface shit. Another shot just because.. Fuck I've got too much shit..
2 points
-
Made a start modifying the 4-link mounts. As you can see they originally hang quite a bit lower than the sill. New mount all welded up. Should be heaps strong enough! Cleaned up a bit. 17mm socket just fits through the channel to tighten/loosen the bolt. Might swap to Allen head screws, as the paint/underseal mightn't leave enough clearance. The lower arm is nice and level now. Next was to do the upper arm mounts. This is it all done coming through the floor under the rear seat. The seat just doesn't fit, but should be an easy fix by bending one of the wire spring things a little. Top arm angle looking much better. The arms should intersect pretty close to where I guessed the instant centre of the car will be. Just have the other side upper mount to finish off. Sent a bunch of stuff of to be zinc plated. Some didn't turn out as shiny as I'd liked, but not all of it's that visible and I think I'll get the engine and gearbox mounts powder coated any way.2 points
-
Filled about 50 holes in the engine and removed all the brackets I no longer need. Laser cutting a sheet of all the filler pieces made it way quicker and easier! Where the chassis rail kicks up at the firewall is a known place where cracks can form. There was already one about 8mm long on the passengers side. Made some gussets and welded them in. Found some previous repairs around the rear hatch on the body. I think they just ground out the rust spots here and then bogged it up. Cut out and welded new steel in there. Another one here, this time just a piece of steel brazed over the top of the rust holes. Fixed! As well as a few more bits around the seal. Picked up a pair off TA22 Celica fender mirrors from YAJ, that you can kinda see. I think they look good, but hard to tell when half the cars missing. Bought a Estima F series diff. Stripped in right down, cut off all the brackets and then noticed one of the housing tubes was very bent! One end was out by at least 10mm. Had a go at straightening it, wrapped some chain around the tube and some big u-channel, and then used a bottle jack and heat to push it out. Came out pretty good, close enough to then shorten it. Drew up a jig that held it all square and inline. Shortened it by 105mm a side, so it's the same dimensions drum to drum as the factory diff. Bought some MRP adjustable 4-link arms off @Cdarust Got a Altezza Torsen LSD head to swap in. Made some upper and lower brackets for the diff. Borrowed @oftensideways rotisserie. Going to raise the rear 4-link body mounts up. About 50mm higher for the lower mount, which should make the lower arm level and somewhere between 50-100mm higher on the top arm. The angles are currently far too much and I've gone this far so may as well, will be good to get rid of the lower body mounts as they're the lowest part of the car. It shouldn't effect the rear seat too much either.2 points
-
Those frost plugs look like they are a little bit of an issue for L and R series nowadays - the test of time is starting to creep up on them i'd say. 2x L series (one LD and one L26) ive pulled of late have met their demise through frost plug issues. I suppose it depends how looked after the cooling system is previous to you. If it was me i'd smash a quality new water pump on there as well just to be sure. Its great to see this this still out being used - keep up the good work.1 point
-
in my fucking around with the crx I found a louvred with chamber gave me the least amount of rasp and least bad note (its a honda afterall). I started off with cheap louvered m&h resonators, and then went for a adrenalinR1 point
-
The mail just keeps turning up. Ordered this a week ago from the USA and boom, in my letterbox today. Not 100% sure on the black, I kind of like my oldschool "coke bottle" grips. But it's an easy thing to change.
1 point
-
Mint paint, prior to a carburetor leaking fuel all over it. Turns out VHT "aluminum" paint isn't fuel resistant. Paint washed off like water. Fuck it, patina paintjobs are all the rage these days aren't they?
1 point
-
Sadly folks I will be the bearer of bad tidings as the ultra micro 1 cell world have all been discontinued even the 2 cell jobs are pretty much gone, for a while there they released one every 6 or so months, lucky I was a bit of a hoarder. Now I wouldn't say these little jobs are for everyone, they are very small 40 to 50cm and they are light so windy conditions are a no no. Here's a few from my fleet, the multi wingers, Waco, Fokker DR1 and Avro Cadet, the first two are re-paints the Cadet is converted from a Stearman. Where the Cadet came from. Gotta love the Spitfire, Mk IX painted as an airworthy one in NZ, the Mk VIII as one that flies in Oz, long nose FW 190. Here's the Spit with her lid off pre paint job. Mustangs, well two at least the Yak 3 modelled on one that flies in NZ and the Fiat G59 are converted from Mustangs. The camo P51 painted up as a RAAF machine the red and white one up the back a famous Reno Racer "Strega" she has a kick up the bum as I converted her to 2 cell. Where the Yak came from. And here's the Reano Racer with the 2 cell set up shoe horned into her! Multi engine jobs. Bit on the multi soon............1 point
-
Stripes look fucking cool man. Well done.1 point


This leaderboard is set to Auckland/GMT+12:00