
Leaderboard


Popular Content
Showing content with the highest reputation on 03/21/20 in all areas
-
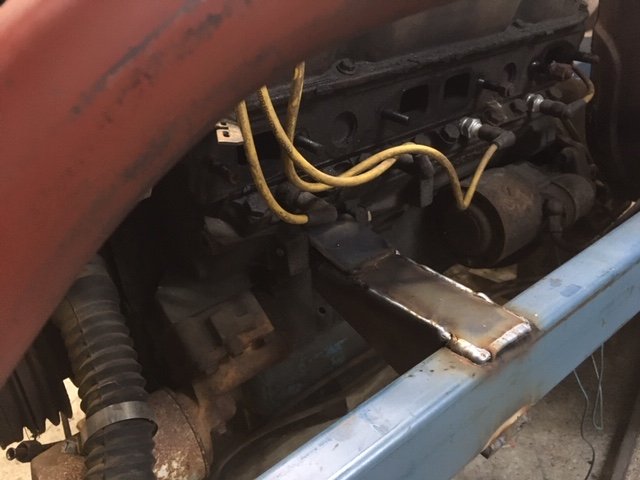
Suspension brace didn't fit with new plenum. probably could have made the plenum 15mm shorter and it would have. but good excuse to make lightweight version brace. Almost ready for test run to the wall of shame for the old one9 points
-
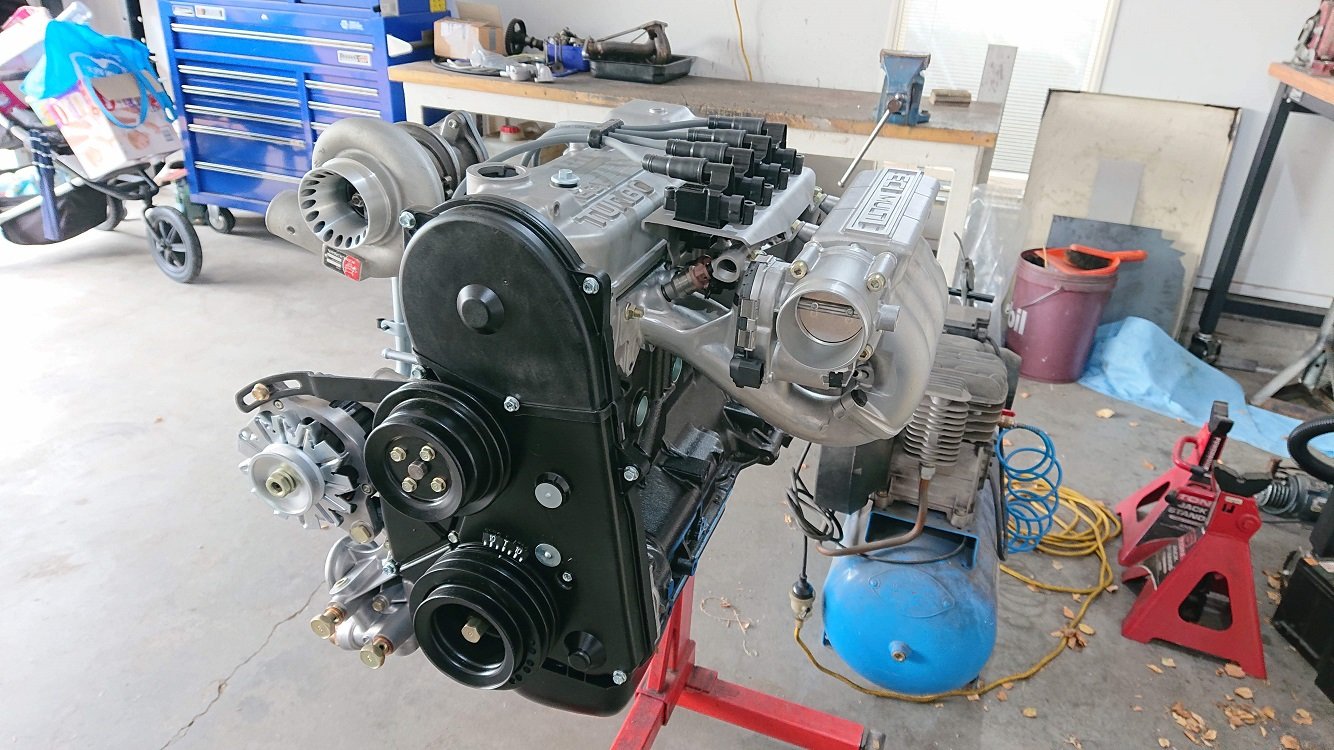
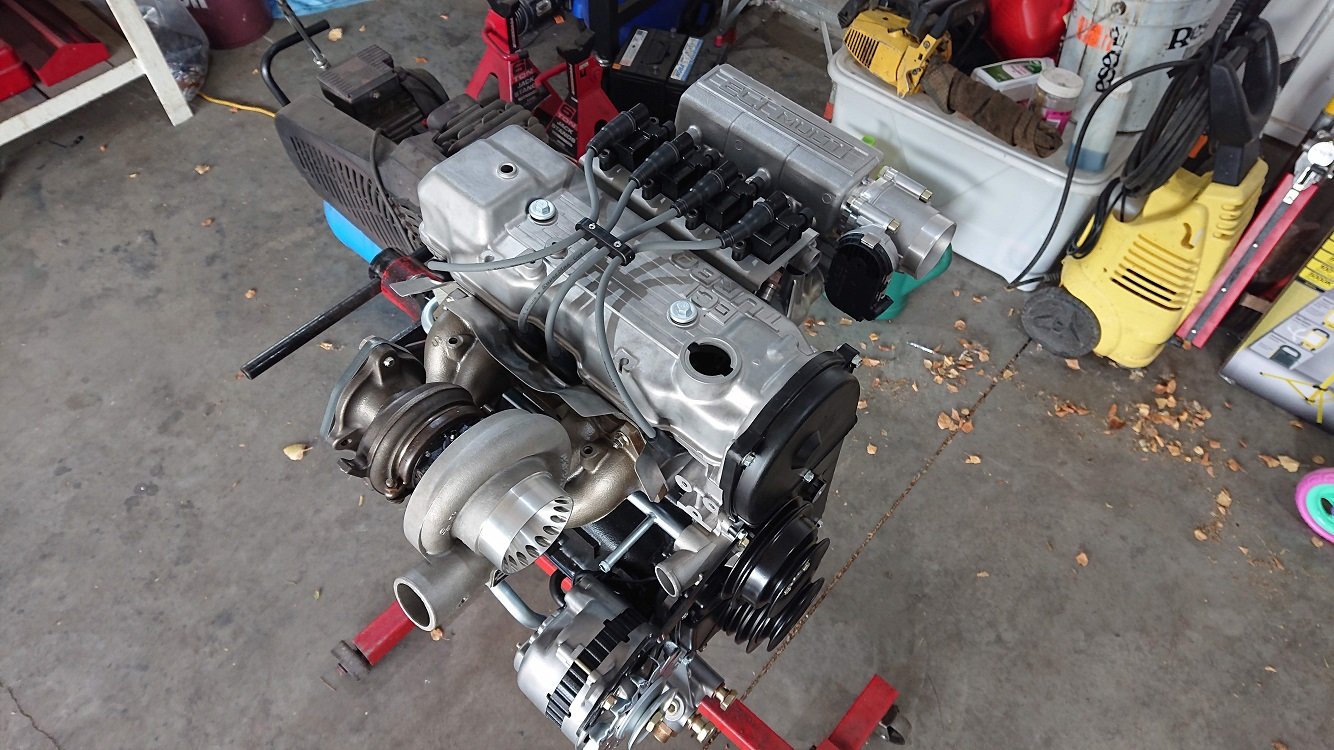
Completely forgot that I didn't update since before drag day. The morning of drag day I went right past the dragstrip and ended up in Hamilton, where a 2JZ-GE engine found its way onto the trailer I happened to be towing. It's been sitting around since I picked it up in December but this mornings purchase prompted me to get into it. These came up and I had to have them. They're a set of 6 40mm Individual Throttle Bodies to suit the 4A-GE engines, that have been adapted to a modified 2JZ inlet. It utilizes the standard fuel rail and injector setup, with a piggy-back ECU for fine tuning. Overall a pretty neat little setup. Hard to find stuff like this for the 2JZ as 95% of aftermarket is to suit the turbo engines. It'll prove to be a good learning experience with wiring and all that stuff, but I look forward to the challenge. Spy the 1G-E extractors Only on there for a mock up. I'll be on the lookout for the 1JZ stock tubular exhaust manifold to modify. I'll also need to find a turbo valve cover etc. This far, for my engine I still need: Alternator P/S pump Flywheel, clutch etc ECU Mechanical Fan (or do I go electric?) Overall it'll certainly give the wagon that extra bit of "unique" I've been looking for.9 points
-
Fwiw I have a 1uz with M112 on top, have a custom bronze/copper radiator 650w X 60d X 450h -a single 400 dia fan pulling air when needed. It sits around a 1/3 on the gauge while moving however even idling at the lights takes it quite quickly past the 3/4 mark to just below panic stations - start any sort of forward movement and itis back into "normal" mode. Motor has about 100k on it, 20k with the blower and has done the heat up while idling from day one - the motor it replaced had around 40 k with the blower on top (120 all up) and did not do this - have never got to the bottom of why. I have had the motor in and out a few times due to foolishness and have never had an airlock in the cooling system. Have driven around with blower disconnected after I left the accessories belt behind and it did the same thing. Have replaced the water pump - no difference. I just try not to look at the gauge while stuck in traffic now...8 points
-
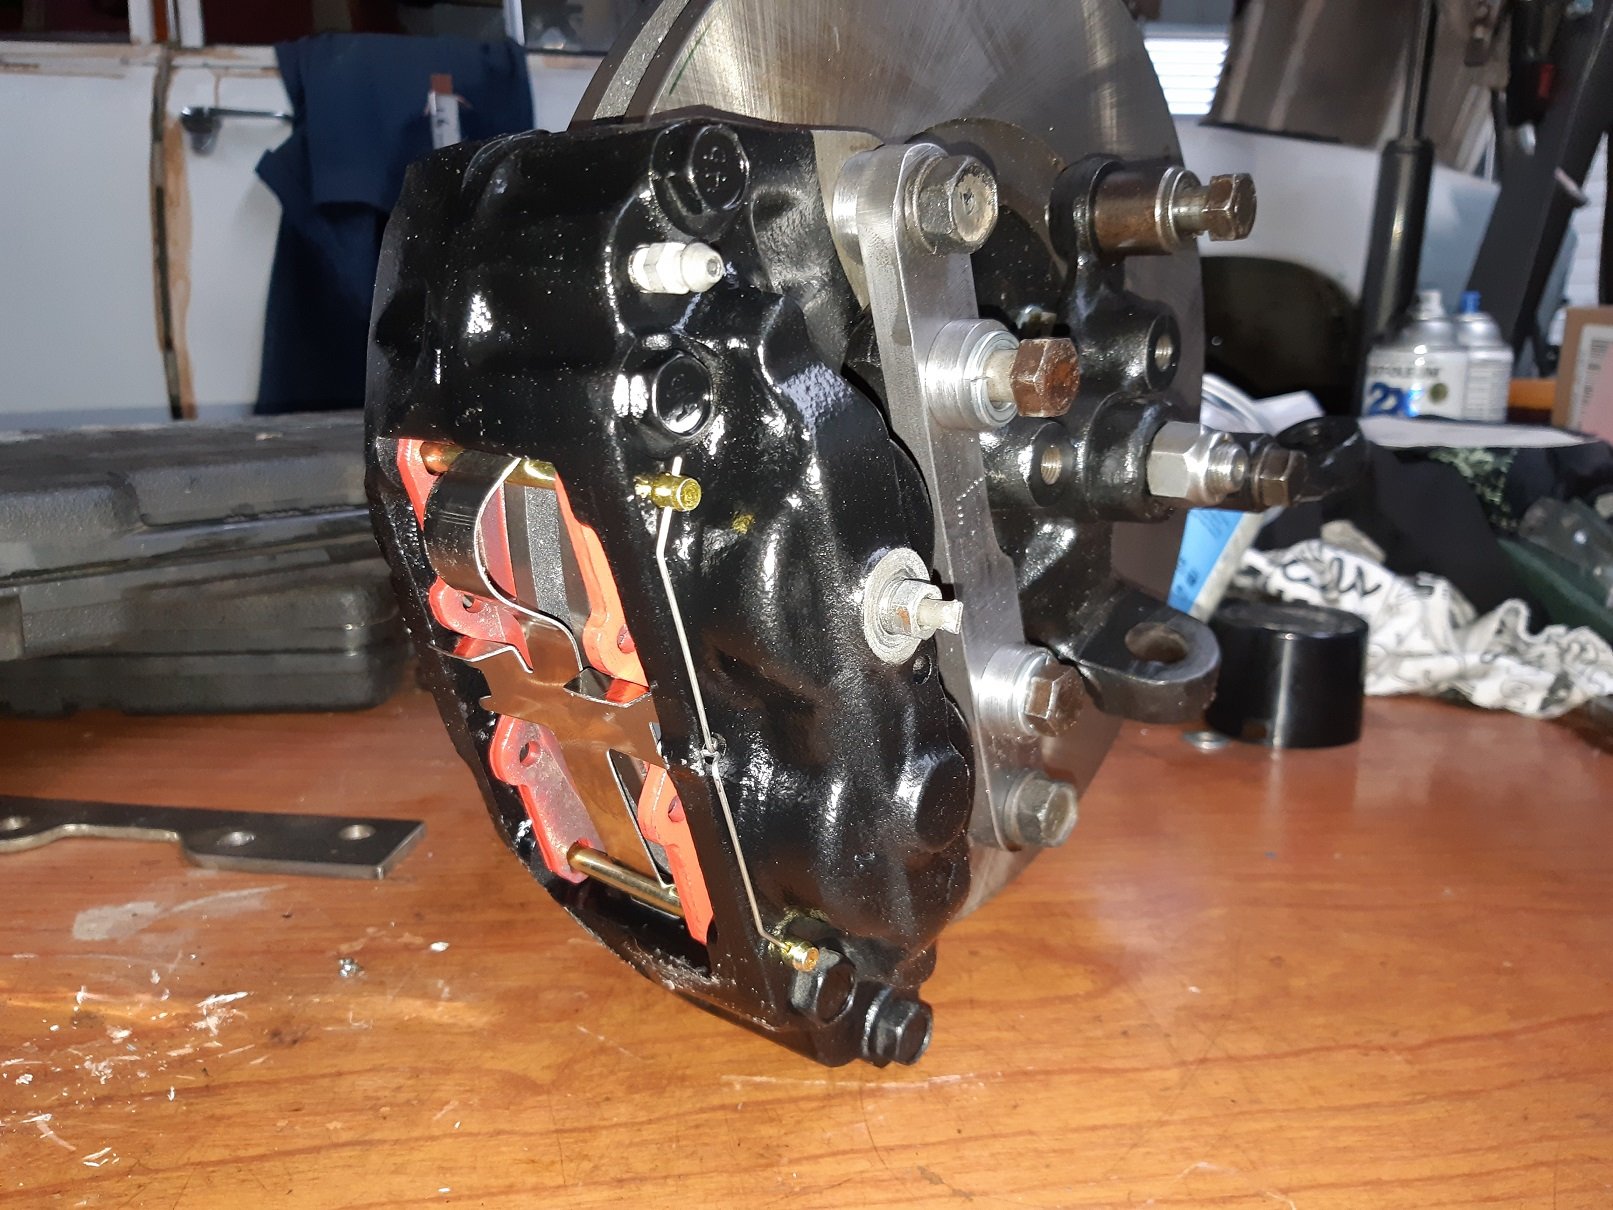
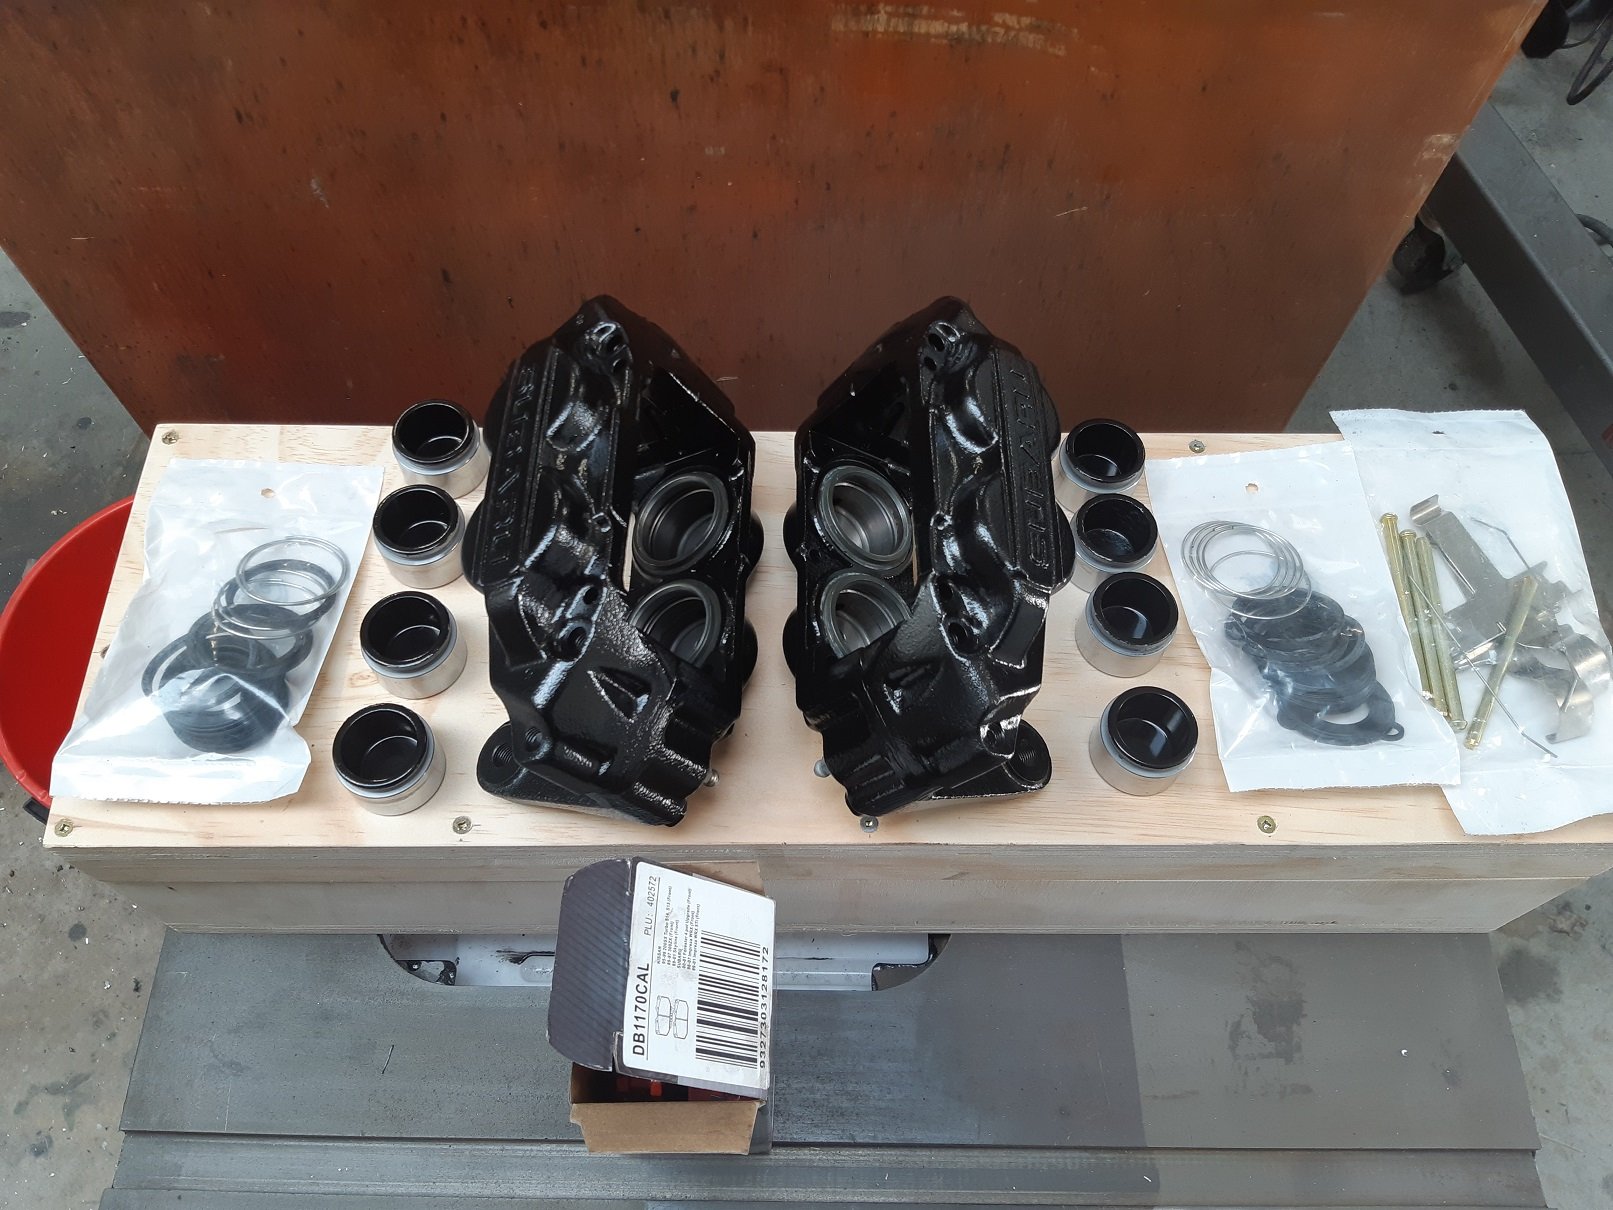
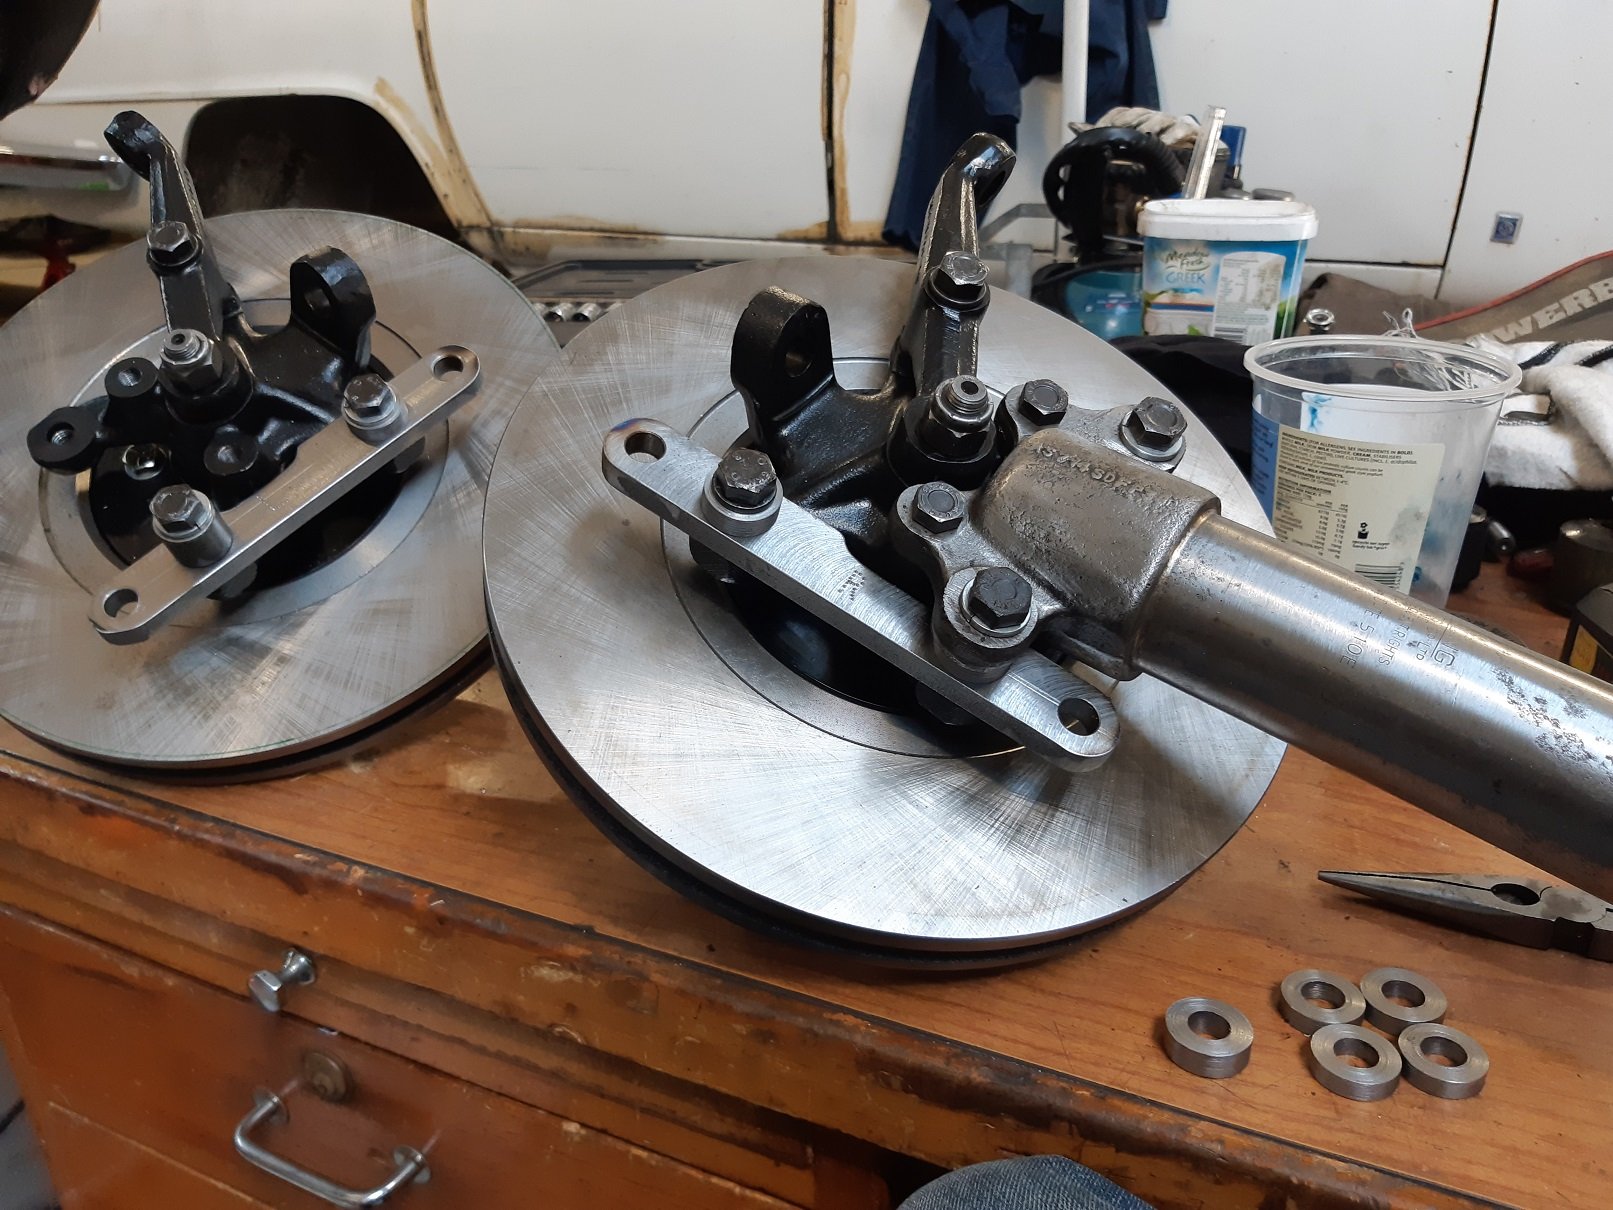
Calipers are rebuilt. I had to use the original retaining spring ring things that hold the seals on as the replacement ones were too short and made the seal bunch up between the ends. I made 3 sets of spacer before I got the thickness right so the disc is in the middle of the calipers. The spacers still have to be tig'ed on and the brackets painted.
 7 points
 -
Forgot to add this crucial pic!
6 points
-
Suzi 250 project ready for rego inspection, fitted some lower bars which I'm thinking about flipping and going lower. The new muffler was a little noisy so added a baffle and some steel wool to shut her up a little. Second hand fenders and paint, exhaust wrap, new seat some electrical tinkering, oil, filters and new plug, she's a goer!5 points
-
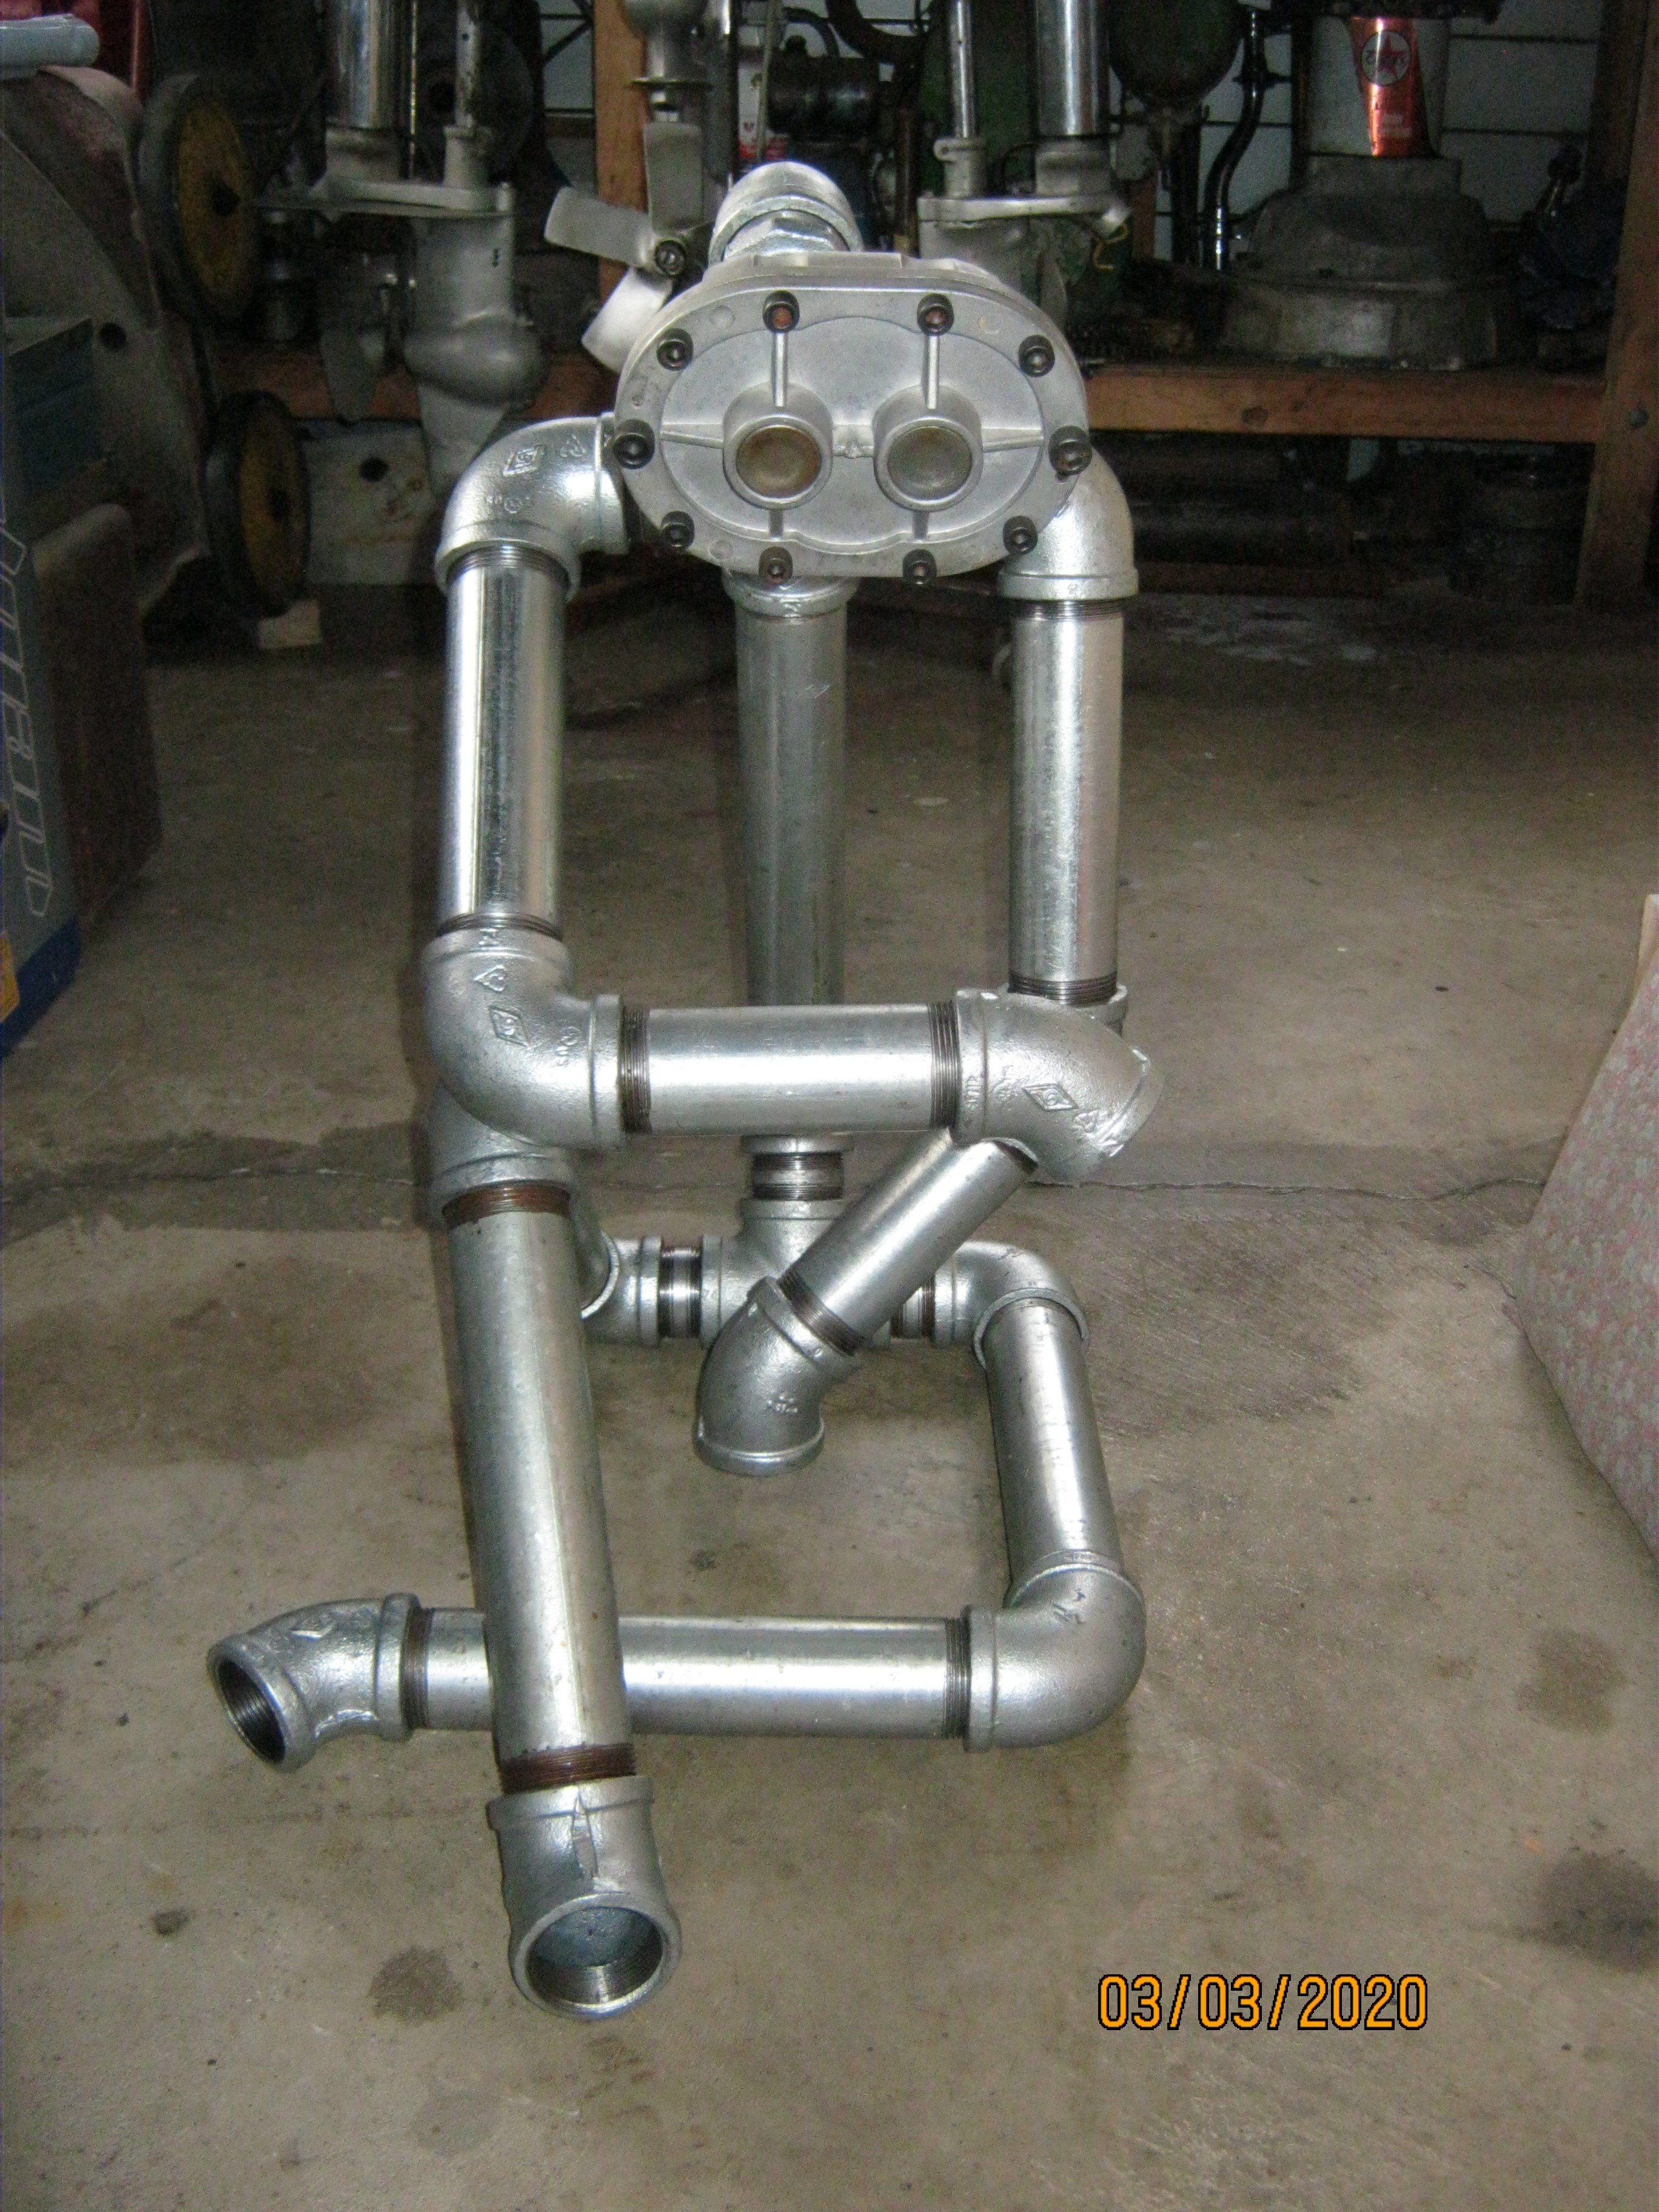
I was quite taken by a pipe guy on the instagram pics & vids thread so built one for my wife. Working out a lady to go with him now.
4 points
-
3/4 race cam m9. They look small until you need to put it in a suitcase. I got a cam gear too. Will sort springs and retainers when back in nz. I chose it based on some good dyno results a magazine ran on a similar setup a few years ago and got really good results Specs are Lift: .456"/.428" Duration: 256°/268° Lobe Separation Angle: 107°/111° RPM Range: 2000-72004 points
-
Yeah you sum it up perfectly @MopedNZ I dont wanna ruin the good thing we have going with small bikes running tuned up "50cc" engines by being too pesty at a time when less pest is best3 points
-
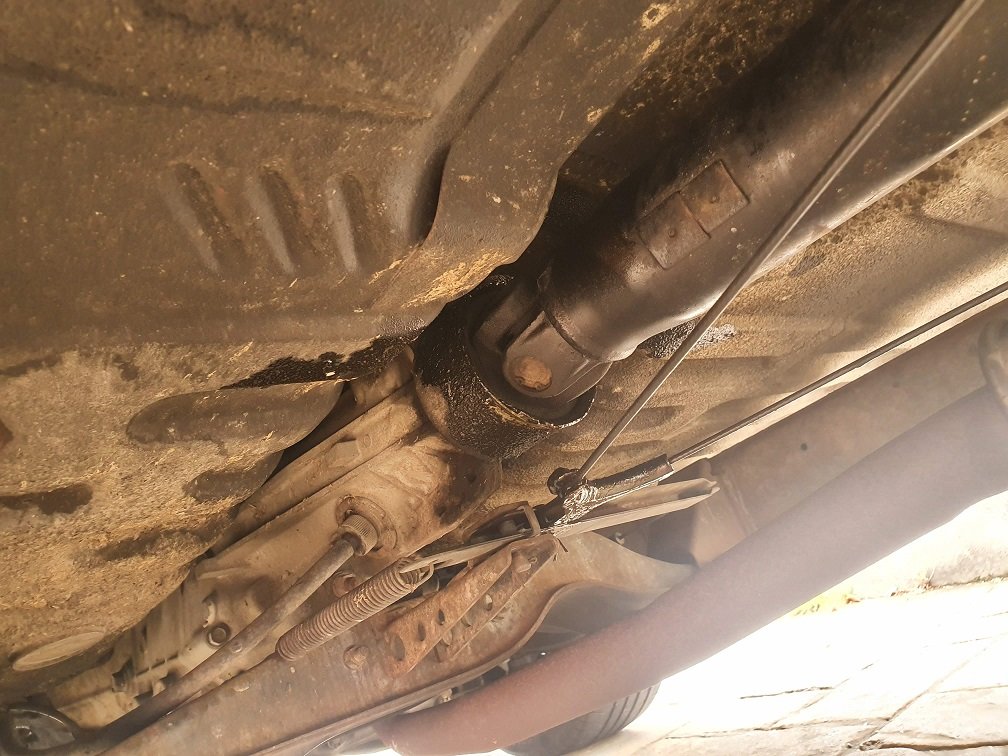
Haven't had huge motivation level behind working on this the last month, so not a lot of progress really. Work is pretty hectic atm with the whole COVID-19 thing... I suspect I'll either get absolutely zero time to work on it in the next month, or the Uni will close down and I might have more time that I know what to do with... Anyway, I drive this thing with headphones in most of the time, listening to audiobooks. This means I don't hear all the sounds it makes. My headphones were flat the other day, and I drove home without them... Really really odd noise was coming from the gearbox area, related to vehicle speed. Didn't take a lot of sleuthing to find the problem: This was completely dry just a couple of months ago when I put the new diff in, so it's let go in a pretty decent way. Managed to get a replacement seal and the use of a hoist as I don't like rolling around on the ground if I can avoid it. About a 15 min job to swap it out, took longer to refill the gearbox than swap the seal. Seems fine now, no weird noise and no leaking... I sort of suspect the output shaft support bush might be flogged out, but this gearbox will be replaced once the new engine goes in anyway, so as long as it holds oil I'll be happy. Silly regular maintenance instead of mods. Lame. Front left wheel bearing felt a tiny bit loose too, so gave that a nip up, and tightened the hand-brake cable too. Once I fix the exhaust leak at the manifold - exhaust point it would probably actually pass a warrant!
3 points
-
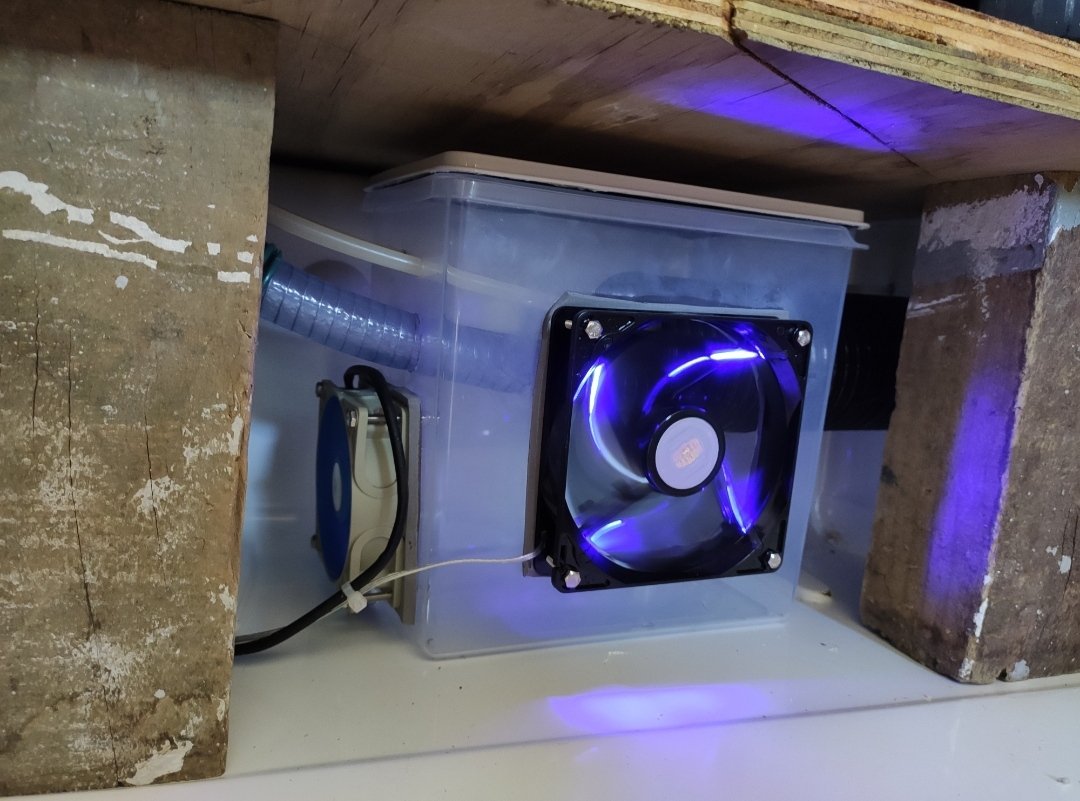
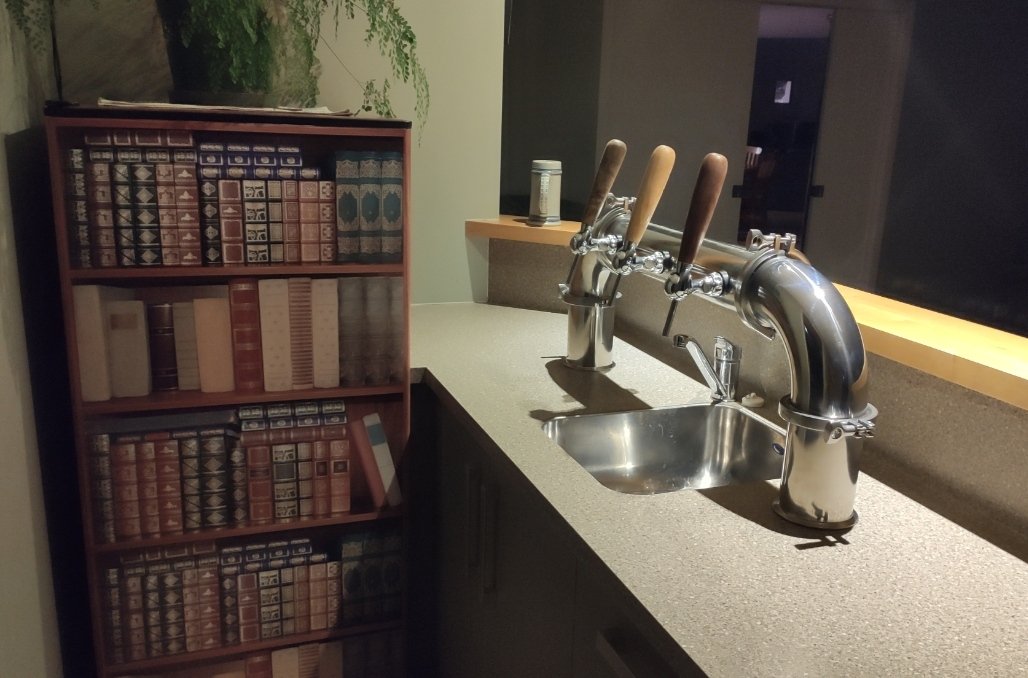
And here's what the inside of the fridge/airbox looks like: And as finishing touches I vinyl wrapped the serving fridge and spun up some new tap handles: Kauri Puriri Final product:
3 points
-
The planets were aligning, and I thought for a minute there I'd be joining you lot. But would agree with @HighLUX at this point, possibly all go for solo rides at our respective locations instead. Not quite the same though eh.2 points
-
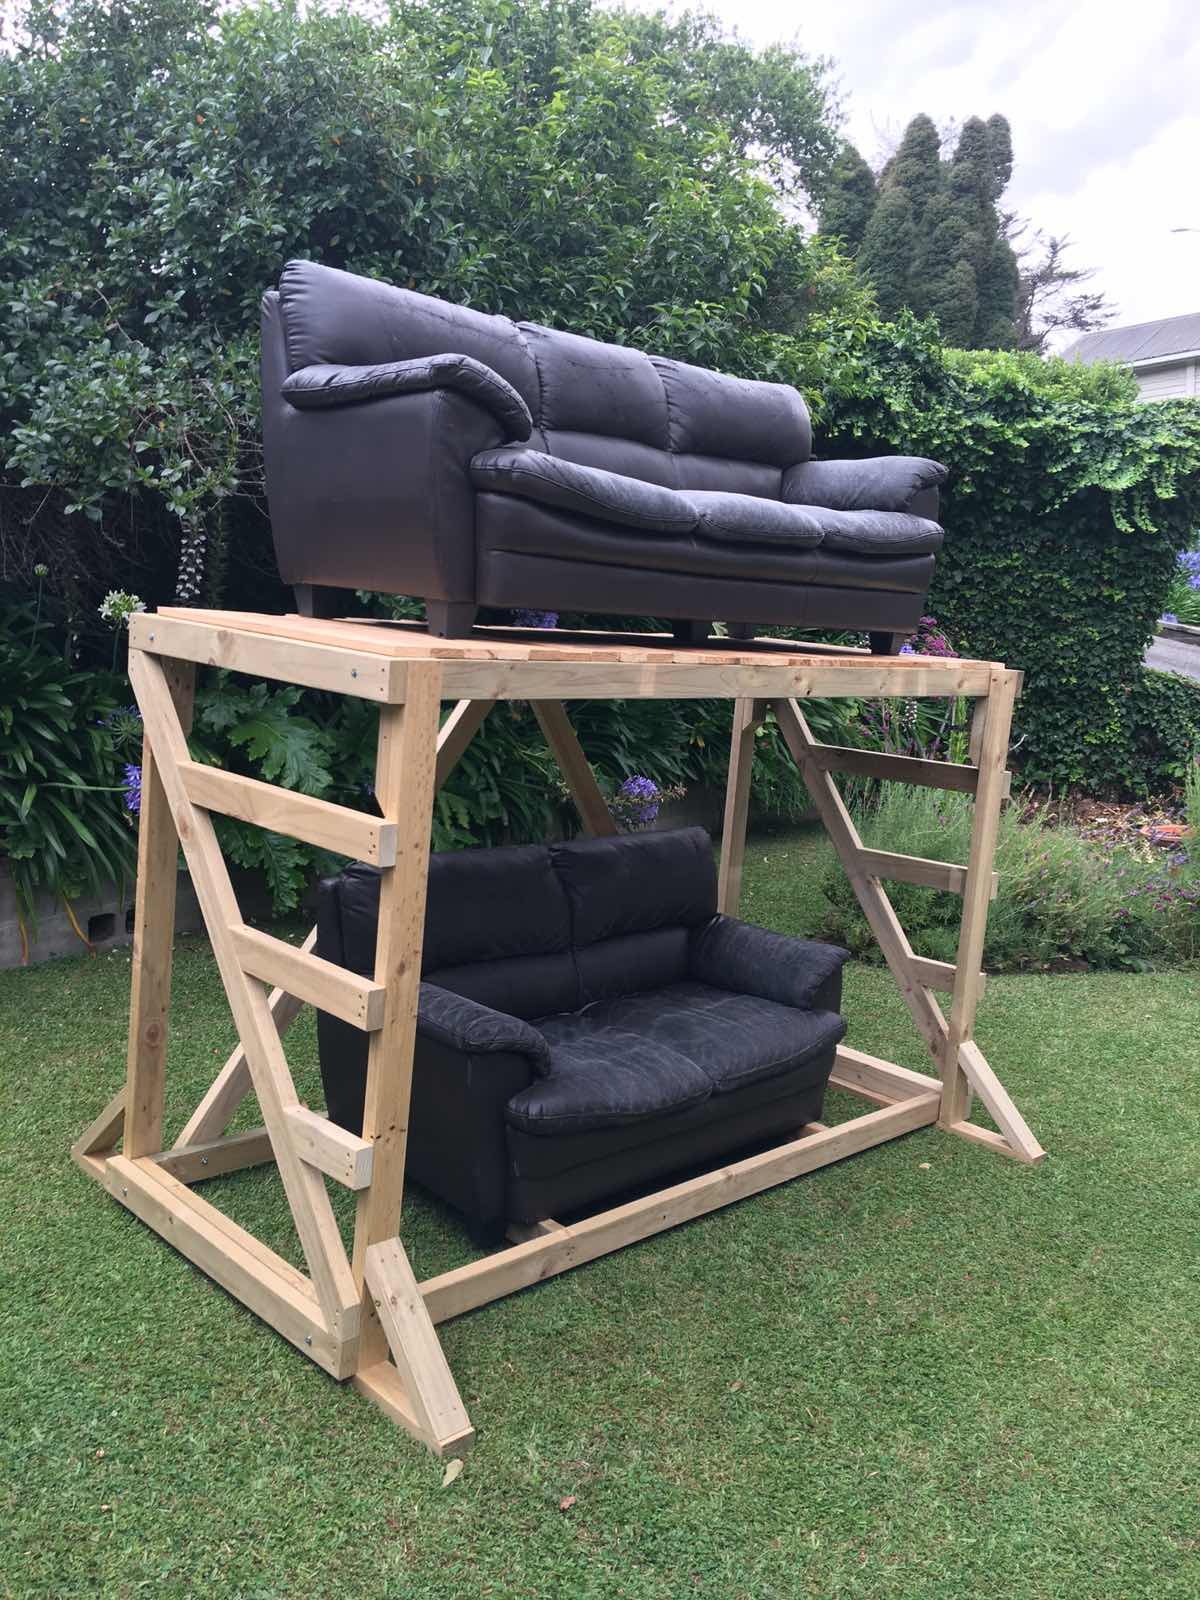
Friend built this for outdoor movie nights. It was epic to use. https://www.trademe.co.nz/a/marketplace/home-living/lounge-dining-hall/lounge-suites/other/listing/2577428291
2 points
-
2 points
-
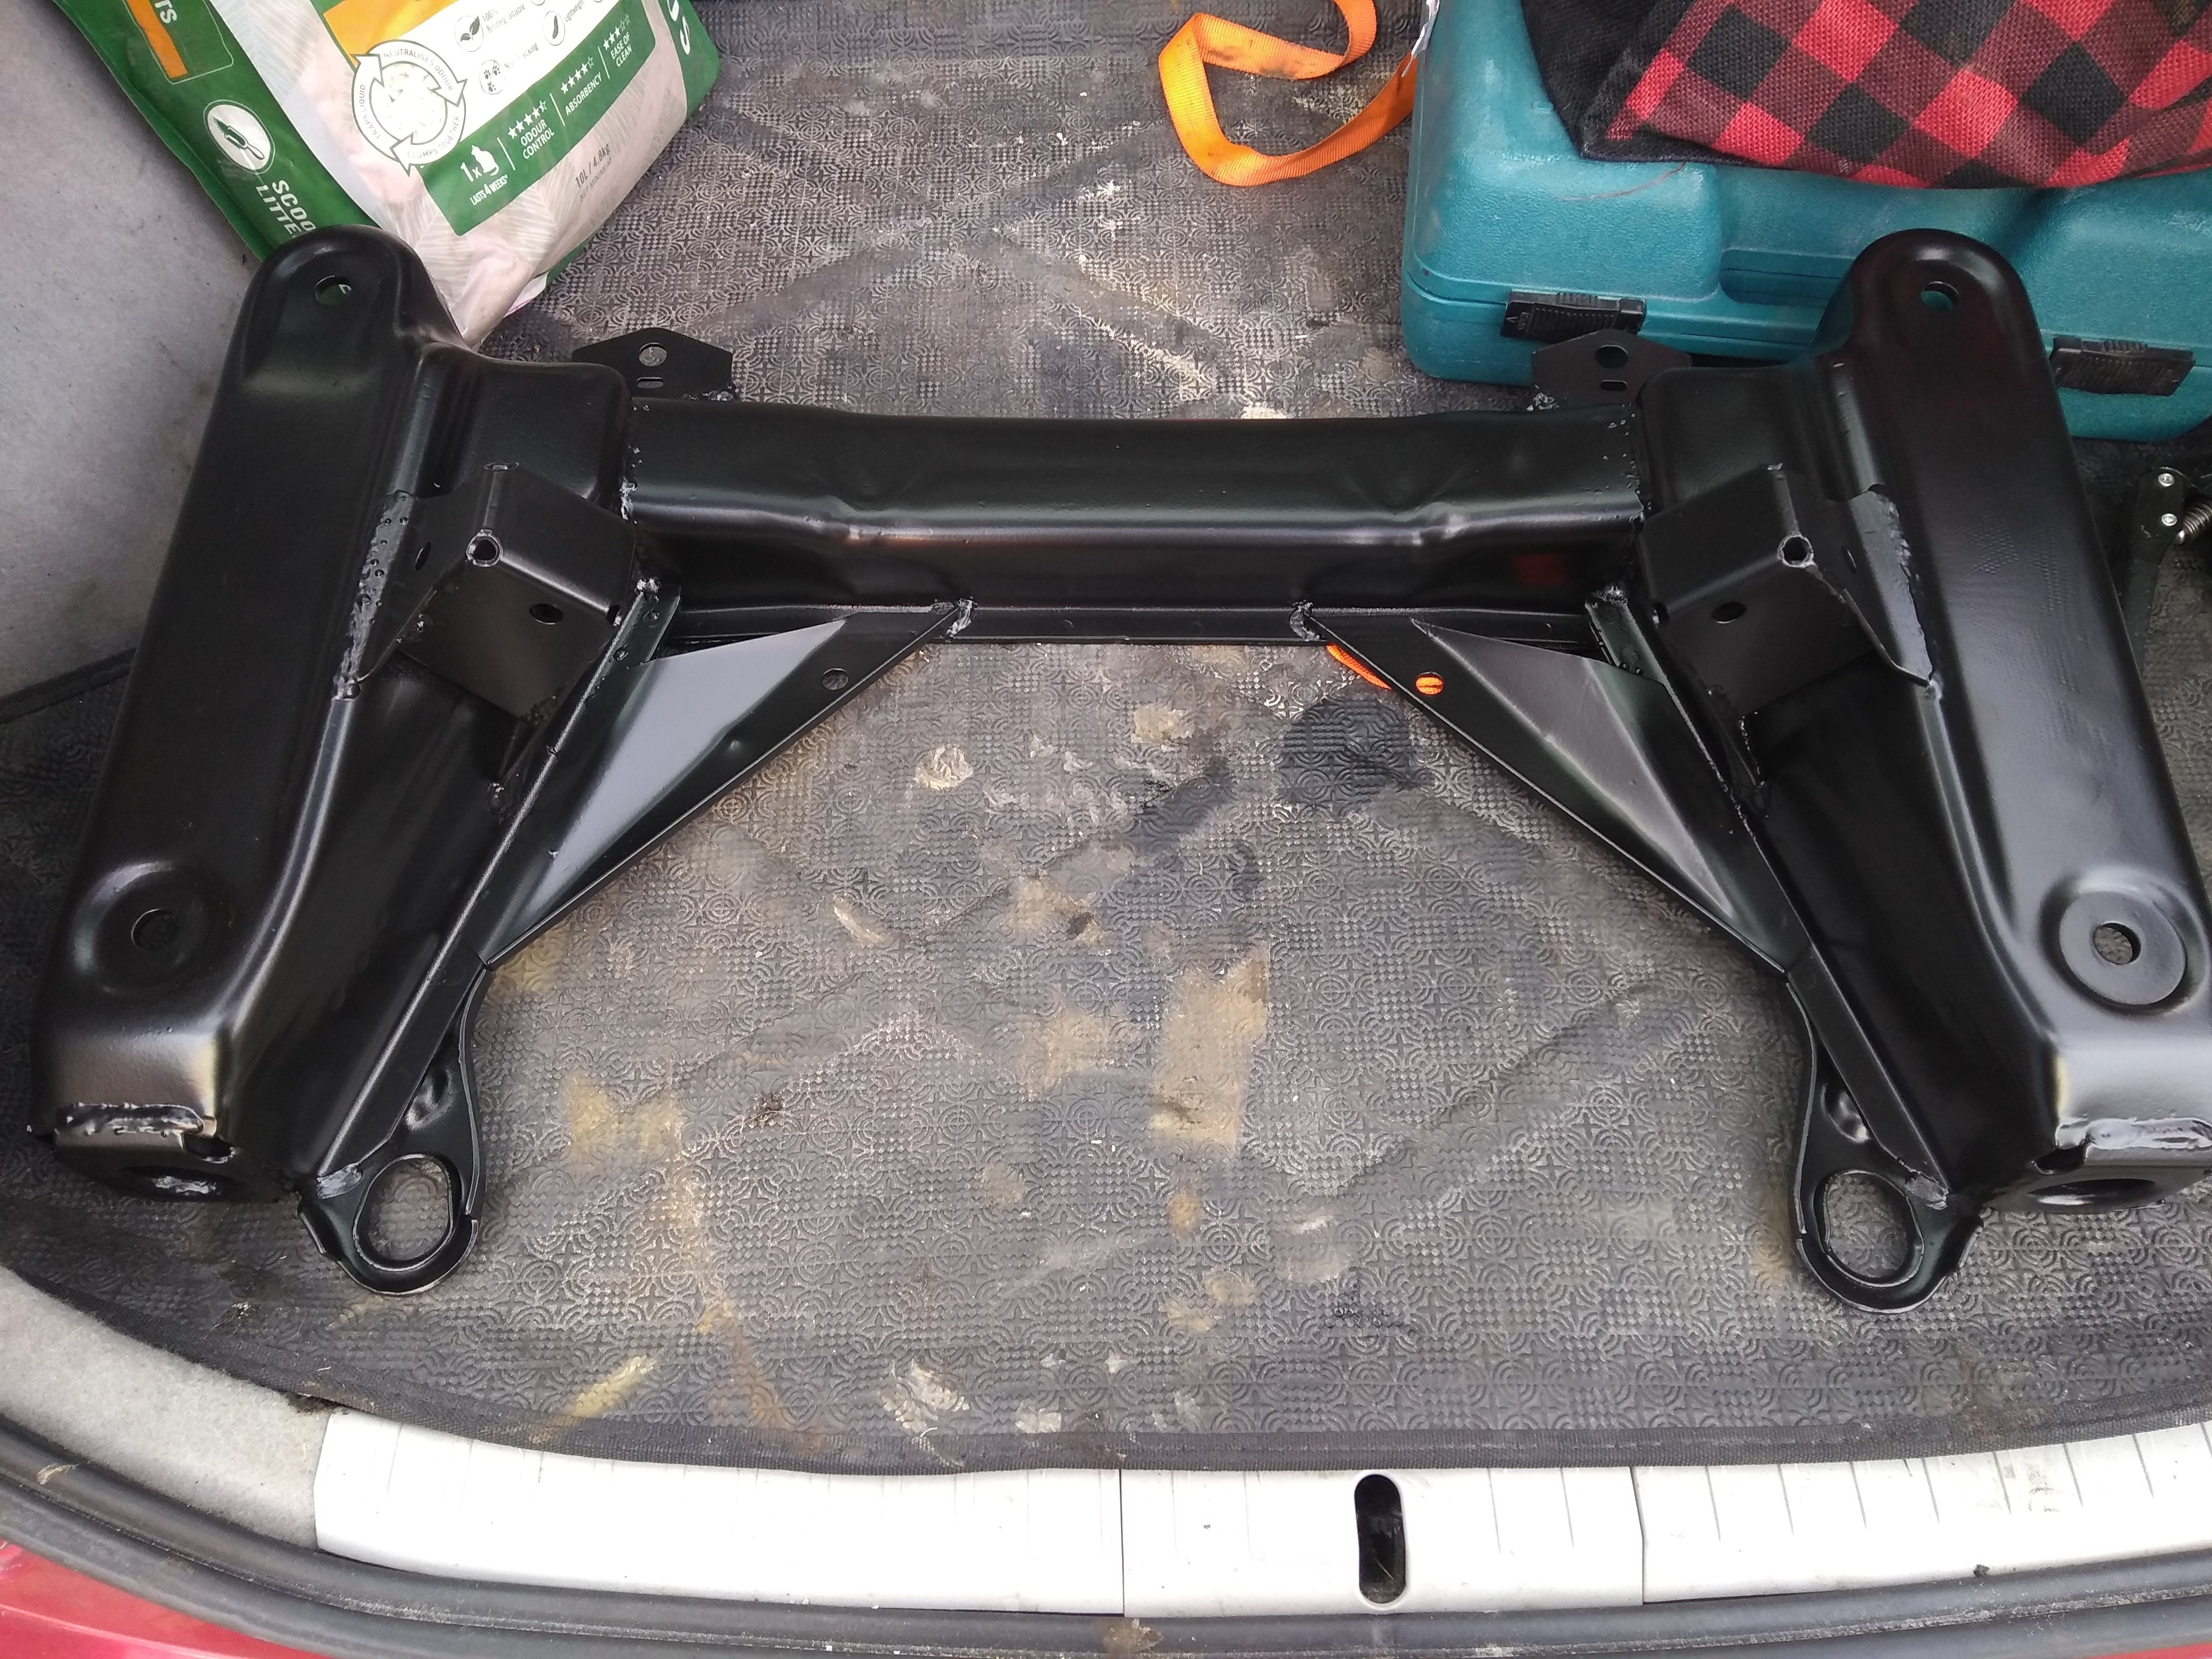
Last couple of weekends I stripped every last part of the front suspension down and prepped it for paint. Sent the steering rack for a rebuild and crossmember for blasting and powdercoating and got the crossmember back today. This Saturdays job is to paint all the bits and reassemble with new buses, joints, links etc. Should be tight as a goldfishes anoose once its all back together. Pic 4 Fred
2 points
-
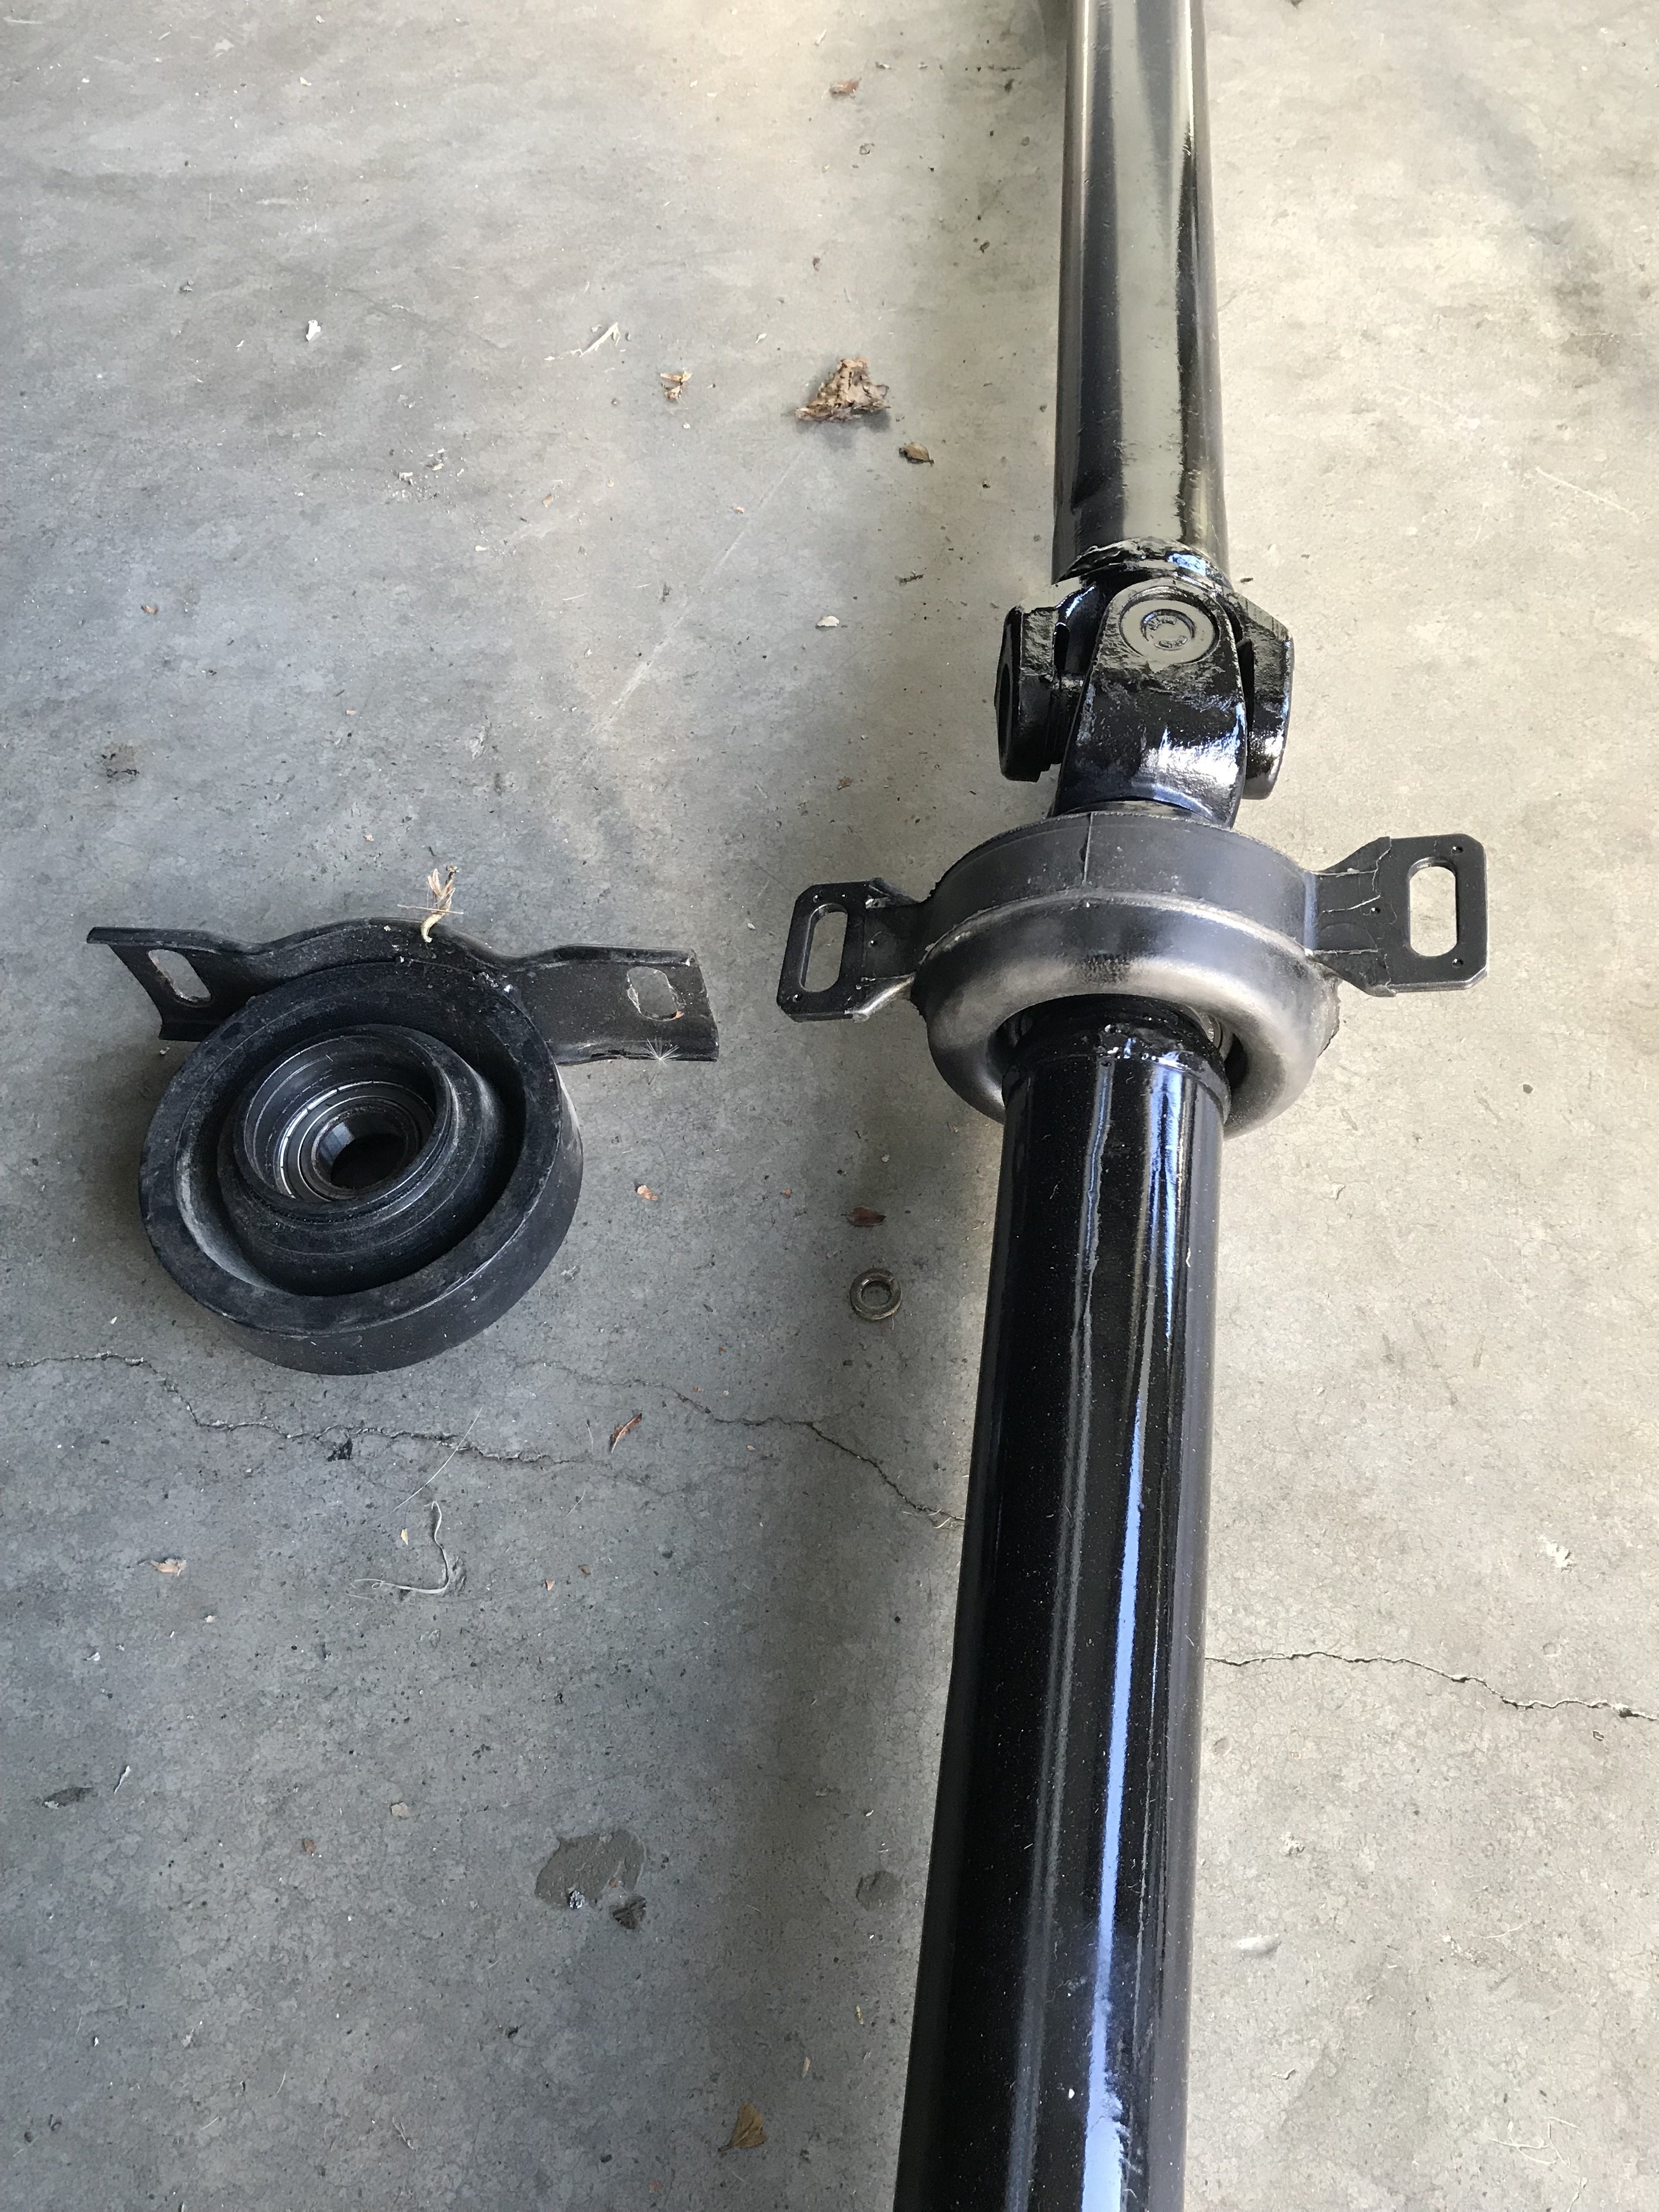
Also hanger bearing swapped over, really hoping this gets rid of that vibration!
2 points
-
ready to go back in the hole, looked pretty good internally only replaced the bearings and the seals. Also with @Slacker_Sam.'s help managed to track down a hanger bearing that looks to be what I need, fingers crossed it solves the vibration.
2 points
-
I don't think I've ever made threads for any of my current bikes. I don't do anything particularly interesting with them from a project perspective. Just attempt to maintain and improve where I can. This will mostly be pics. XR650R, have had for about 5yrs, probably only ridden actively for a year or two total of that time. Goes (IMO) hard. Probably too hard for me. Previous owner reckons it had been taken out to 680cc. It has a aftermarket CDI, noisey boi exhaust, and would probably benefit from a carb. Took it to the drags a couple times, 12.7s quarter was the best I managed. Gets pretty lively on gravel. Rode it around and have slowly attempted to sort out its issues, few more yet. Have safari tank and big stator, an the right set of wheels sitting there for it. One day. When I got it. 11536025_10155674571955099_4189236658958656570_n by John Bell, on Flickr IMG_20151219_091851 by John Bell, on Flickr 15325216_454106908046730_4447607667093221977_o by John Bell, on Flickr 23333047081_0e0871bc32_z by John Bell, on Flickr IMG_20160306_104356 by John Bell, on Flickr IMG_20160306_113924 by John Bell, on Flickr Made a spacer IMG_20180726_163359_HHT by John Bell, on Flickr IMG_20180726_170446_HHT by John Bell, on Flickr Bought some black bits IMG_20181028_180740 by John Bell, on Flickr IMG_20190525_123410 by John Bell, on Flickr 48240827_948318268625589_5533612005623070720_o by John Bell, on Flickr 47573781_948318068625609_5746037085173710848_o by John Bell, on Flickr1 point
-
Was having similar thoughts depsite being majorly keen as fuck. It won't be long before people are on the hunt for others they consider to be doing wrong things and it could bring the wrong attention. Still really want to go. But yeah. Shit is very different now.1 point
-
Probably a Carter 4070 https://www.nzperformance.co.nz/carter-4070-72gph-6psi-fuel-pump I run one directly to the carb - no regulator - on the Mercury and it seems OK. I do have it mounted at the back of the car down by the gas tank.1 point
-
Hi,,, registering interest1 point
-
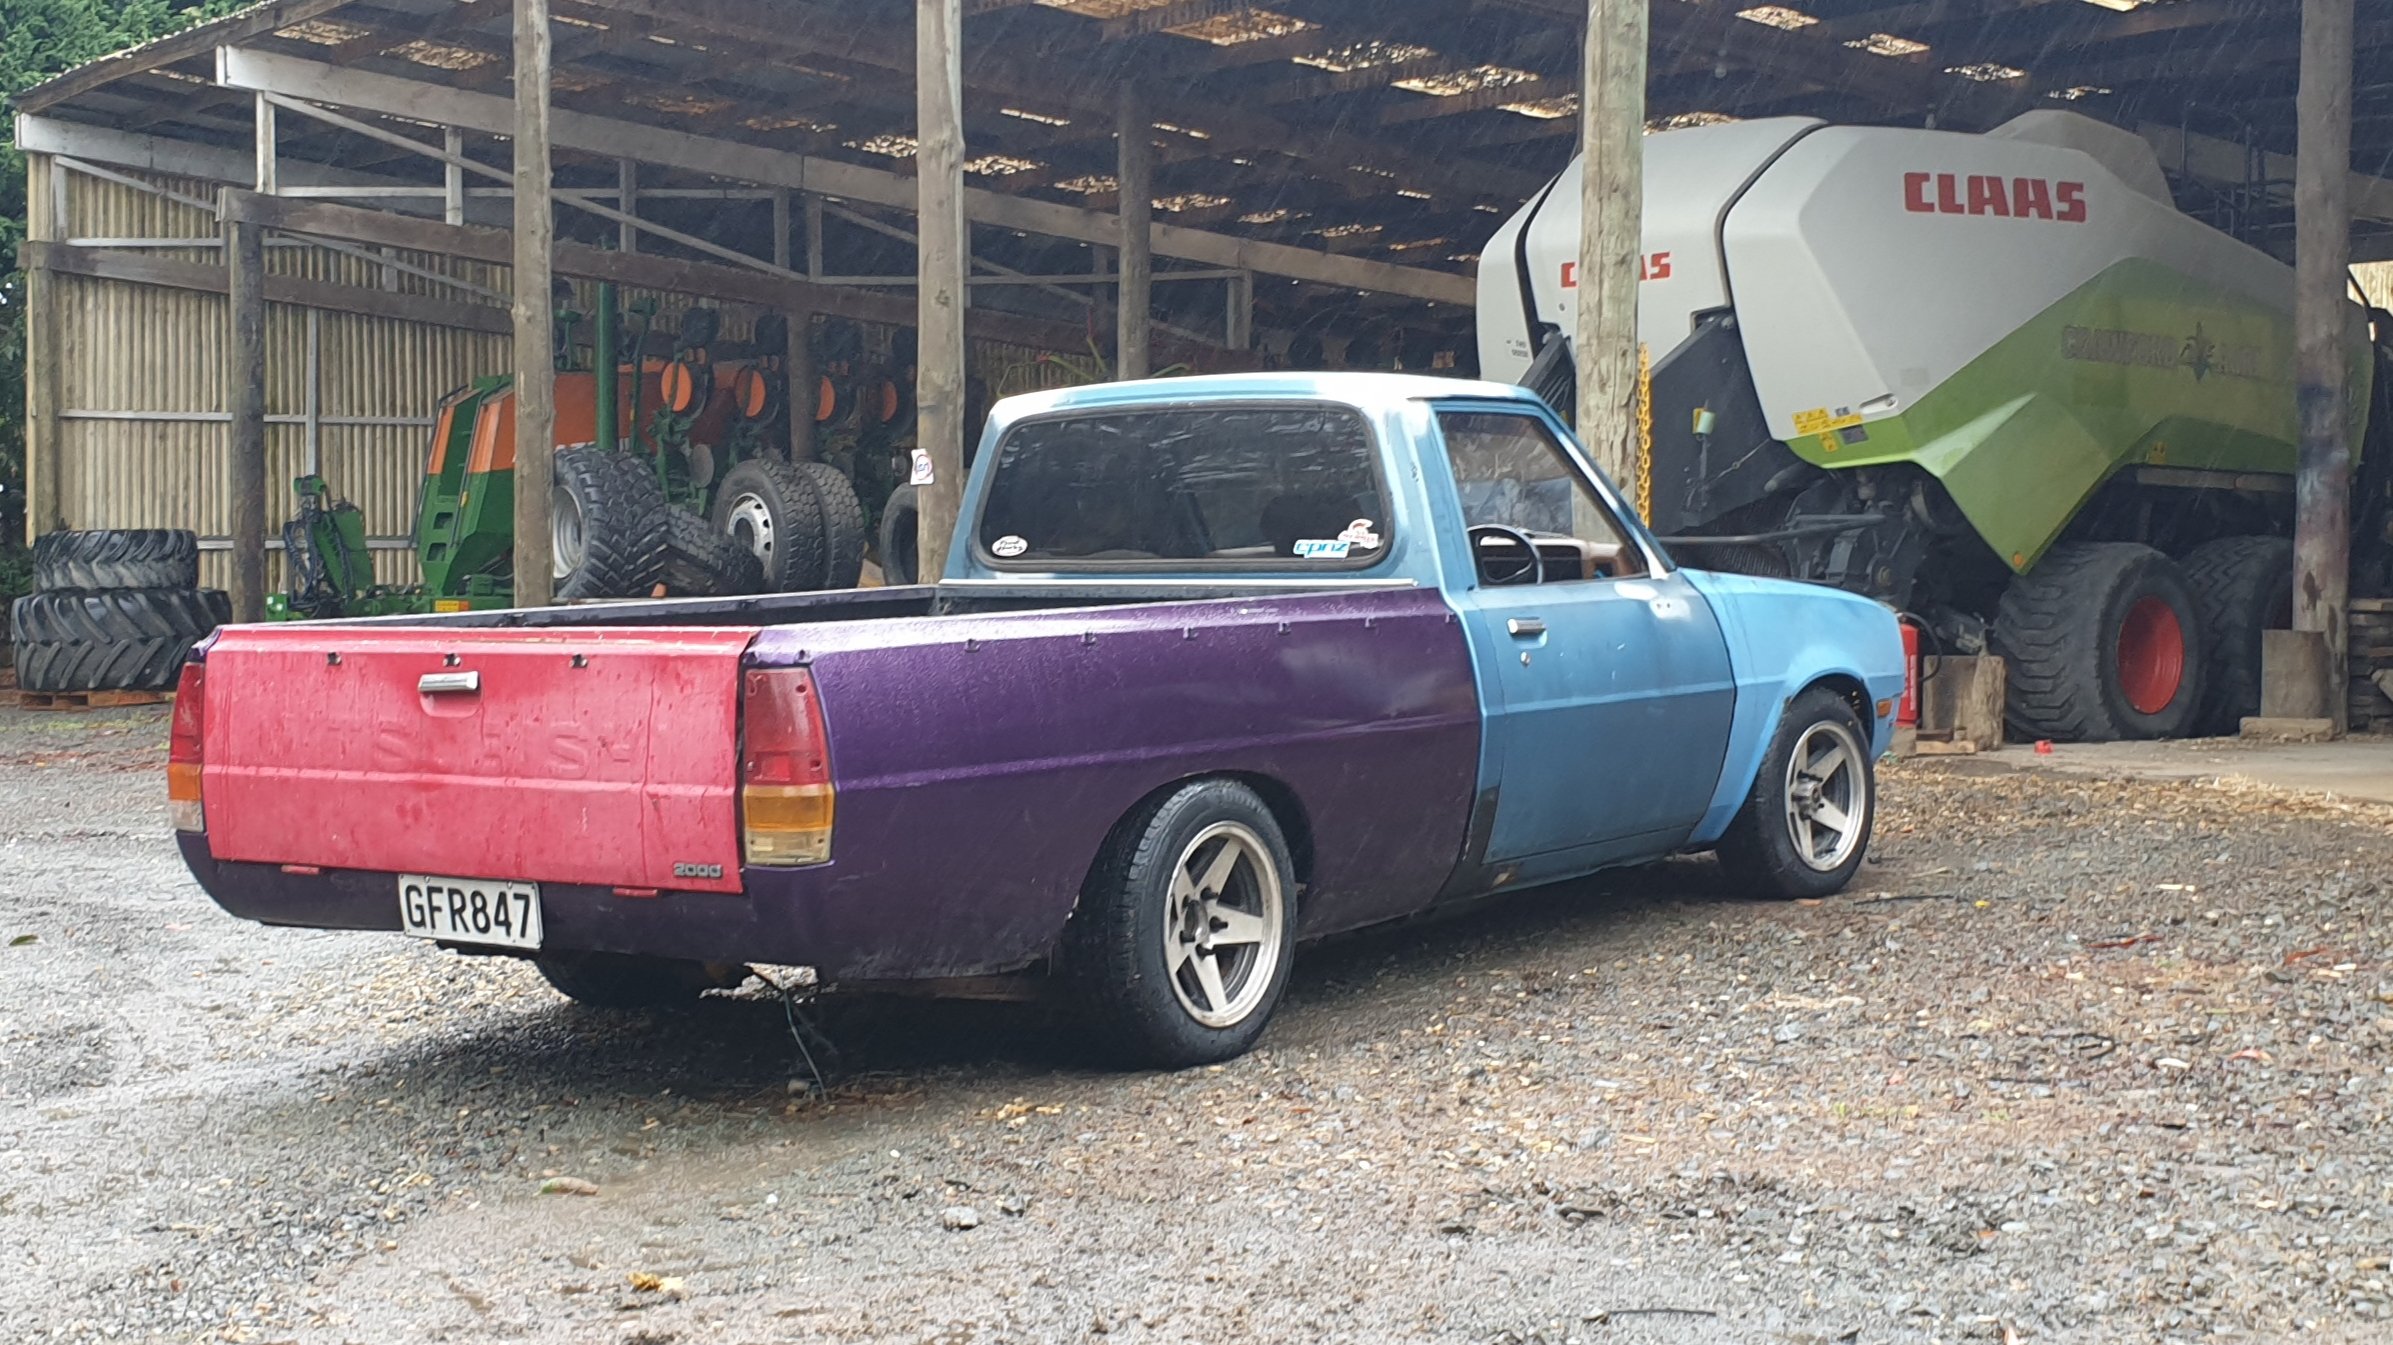
With the postponement of beach hop I've decided to go back to taking my time with this build, I just simply wasn't getting enough sleep trying to push for a target that was hard to achieve with doing long hours at work aswell. Hopefully I dont get any ridiculous ideas in the meantime but I've found a gsr 1800 dohc turbo motor but I think the wise decision is to leave this ute how it is and the gsr motor will be better suited for my ex lancer but time will tell...
1 point
-
That was a great meet. Nice to see everyone and Parrot Dog had the tasty treats. Special shout out to my gal Cholula!
1 point
-
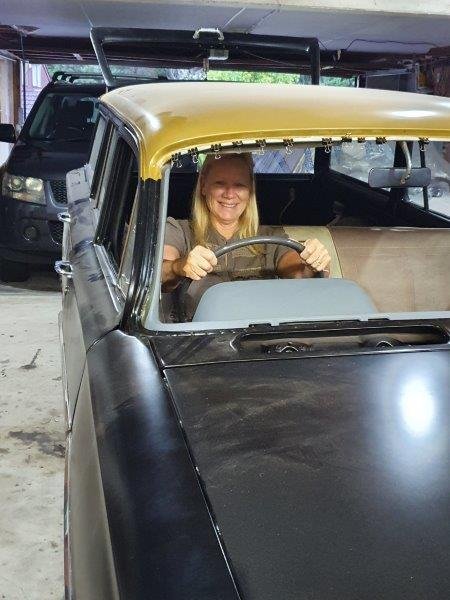
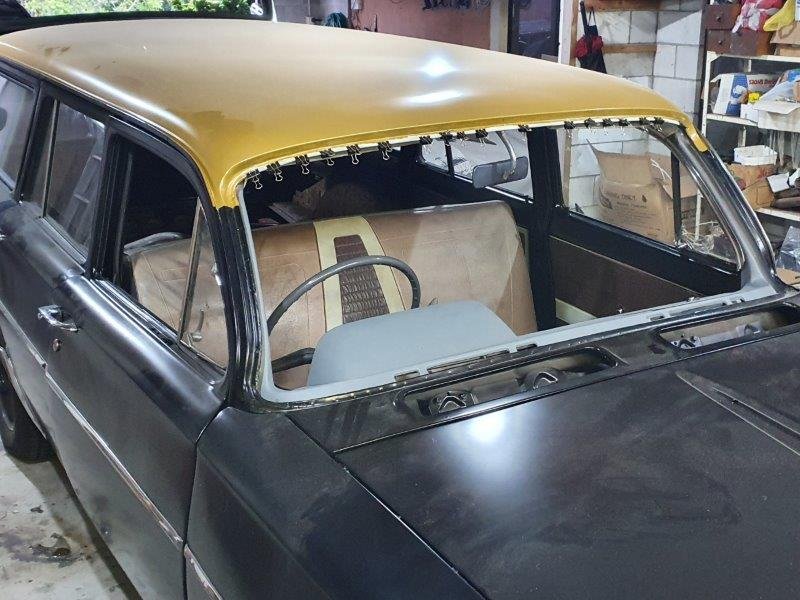
With the wiring in the car pretty much done I put the front seat in. I need to check that the ECU missed the seat - Yes. Then there was the gauges that I had mounted under the edge of the dash board, I was worried that they would take out my left knee - again no problem, can see them as well, volt meter is not in line of site but that is not really important. I got into fitting seat belts until I ran out of bolts. When I was at Zebra wreckers a while ago I get a bunch of the factory low profile bolts which are going to the floor mounts. The ones under the back seat will use normal 7/16 UNF bolts. Here is my wife pretending to go for a cruise With the big steering wheel and 185 front tires the steering is not very heavy, should be fine when driving around. The column shift is fine, can only get Park, R, N, D, 3. I'm not worried about the extra gears. The neutral lock out switch on the torana column is fine, I adjusted it up a while ago.
1 point
-
Sorry, had a brain fart, just remembered this. 1. Yep, good stuff, lead-acid goes bad when left discharged. 2/ yep, later in the arvo, (more below): Yeah, 36V panel (which is probably open circuit only, it falls when you load it up - the regulator sorts that out), and some sort of regulator to drop it to 28.8V (charging Voltage) It all just comes down to Amp hours, really, if the fridge does what it says on the tin, your pair of 12V 100Ah (e.g, you didn't say) batteries will run the thermo-elec for 100Ah / 4A = 25 hours. Then of course, your battery is dead and you can't drive home. If you want to charge that all in say 6 hours of (full) sunlight, you'll need a 16A charger so 28.8V x 16A is 460W input + losses. Lot's of people set them up this way, BUT, doing that will fuck your batteries in short order: If you fully discharge lead-acid, the lifetime (cycles) plummets. at 100% discharge ~200 cycles (deep cycle battery), 50% only discharge gives ~450 cycles, 30% gives ~1200 cycles. So you need more battery than you think ($$) This website is good. https://batteryuniversity.com/learn/article/charging_the_lead_acid_battery You'll actually only be able to poke 70% recharge in with ideal conditions in 5-7h (bulk charge), then the battery charger changes over to soak charge, then the battery needs 12 - 16 hours to finish charging. Con: Never happens in winter / forest Pro: During that soak charge time, you now have excess capacity (if in full sun), so fridge etc loads will run direct off solar. If it's a sunny day. Con: Rain, fog, cloud, you could be looking at 20% solar output opnly. Every now and then (month or 2) you're going to want to do an equalisation charge (16 - 24 hours) to make sure all the cells top off. This means putting more solar on the roof doesn't help (the batteries charge faster, it just takes time) So you @yoeddynz living off grid needs 4 times as much solar as you think (rainy days), and 3 times as much battery, or your batteries will degrade fast You can't charge them fully, so if fully off grid, they're going to degrade anyway. You'll get away with it for a while in a bus, of course, if you have enough not to go flat, and can go home and soak charge. if you want to ensure very reliable power availability, even more $$ Of course, there's whatever else onboard there for loads (stereo, laptop?) and, charge/discharge and conversion inefficiencies (prob ~90% each), add them all to the Ah (Amp hour) tally. So: what you save on the fridge, you're likely to pay way more for in extra solar and storage capacity needed. Use a LVD (low voltage disconnect) to make sure gear doesn't over-discharge your battery (and fuck it). Often built into the charger, or cheapish separate. Probs don't need to isolate all that junk when starting, all those loads are small ( fridge, 4A) compared to starting (200A for 3.6 seconds [ i.e. 1/1000 of an hour] is 200/1000 = 0.2Ah). They just add up over time (4 Amp Hours, 24h = 100Ah) Simples, and ugly.1 point
-
Over the weekend I'll embark on Phase 2 of the project. This entails getting my complete donor HiAce drive able so that I can confirm the running condition of the supposedly reconditioned 4Y as well as the condition of the drive train. As part of the exercise I'm also going to convert the HiAce from rod shift gears to cable shift so that I can prove my concept. I'd like to take this opportunity to thank those of you have guided me along the way thus far. I have no physical support mechanism across here in OZ so I greatly value all of the encouragement, comments and suggestions that have been put forward regarding my Thames project. I also value the detail that others have provided in their own build threads as this is often fruit for thought. I really appreciate the oldschool community. Thanks all.1 point
-
1 point
-
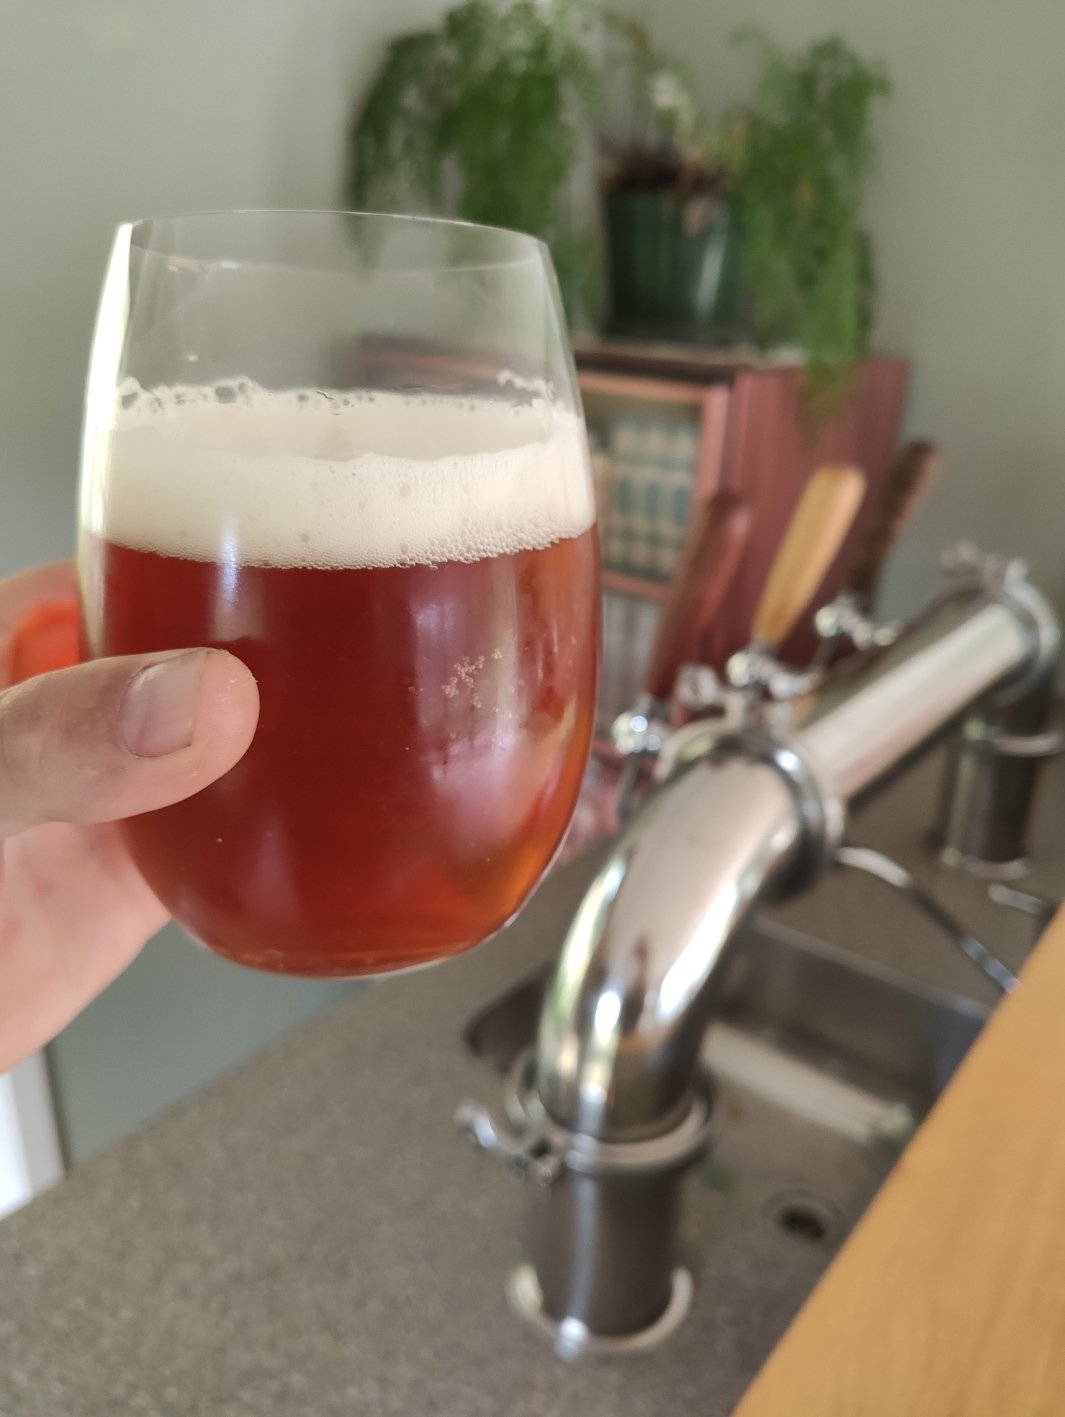
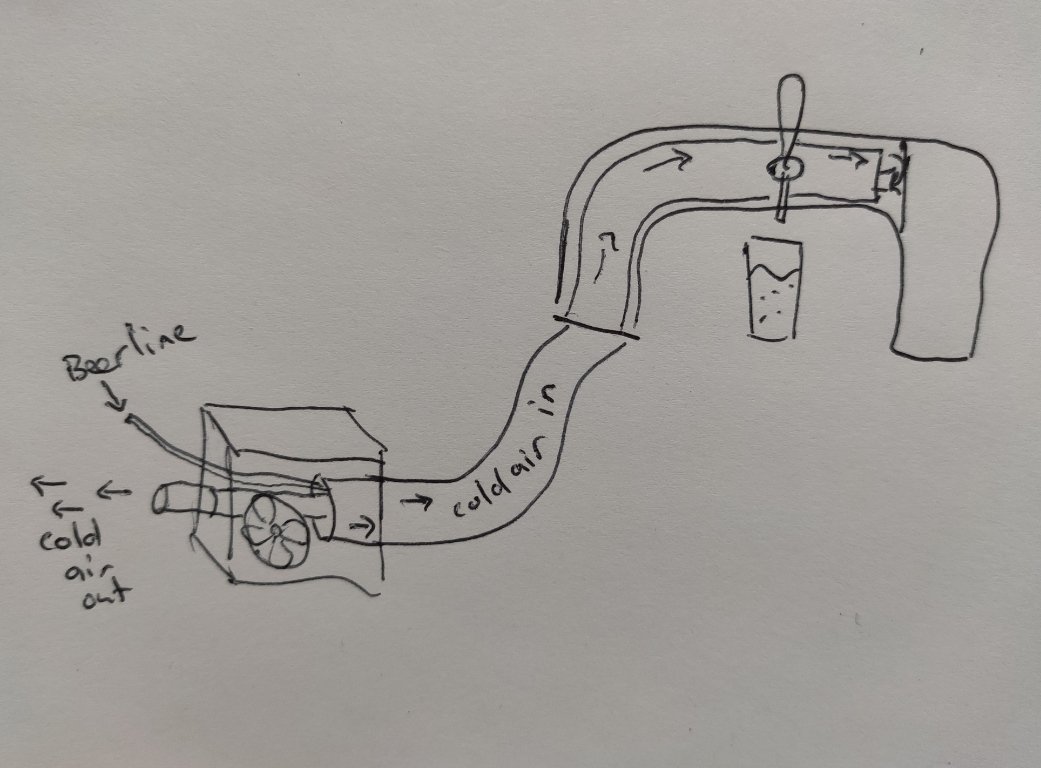
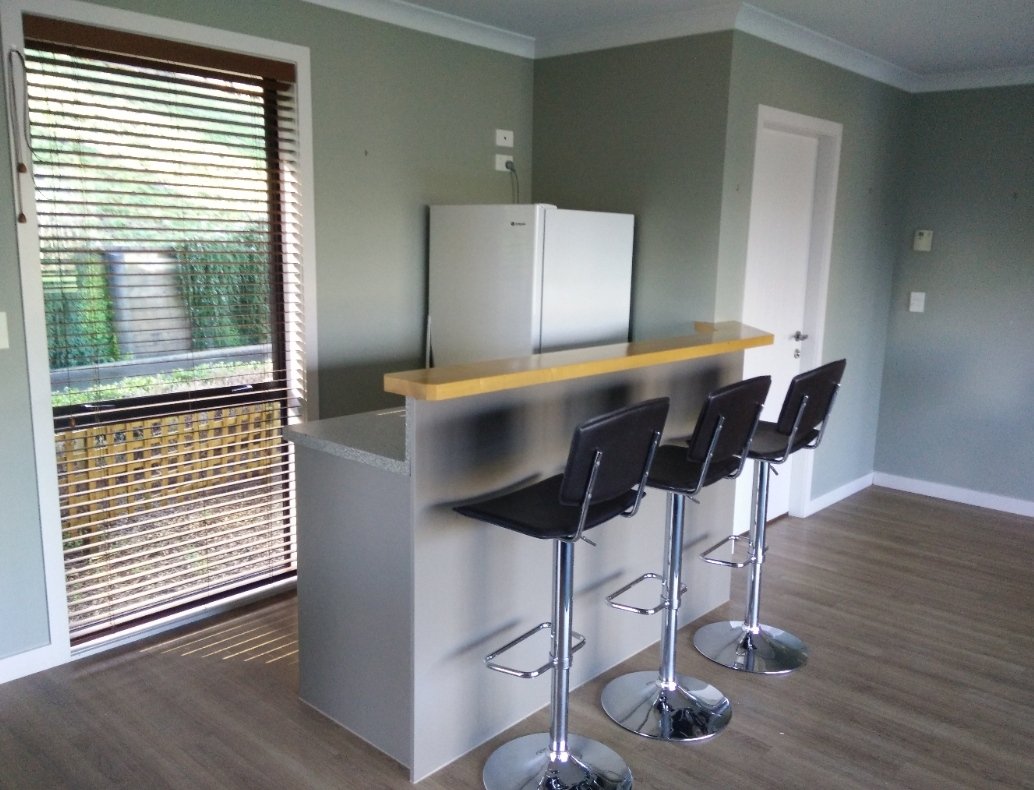
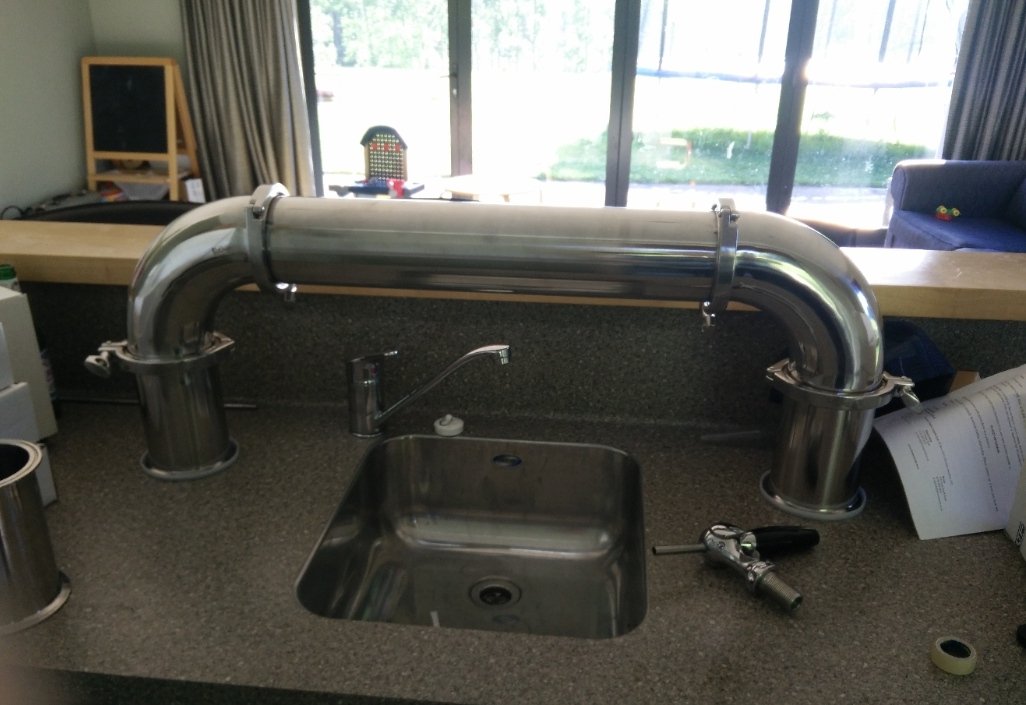
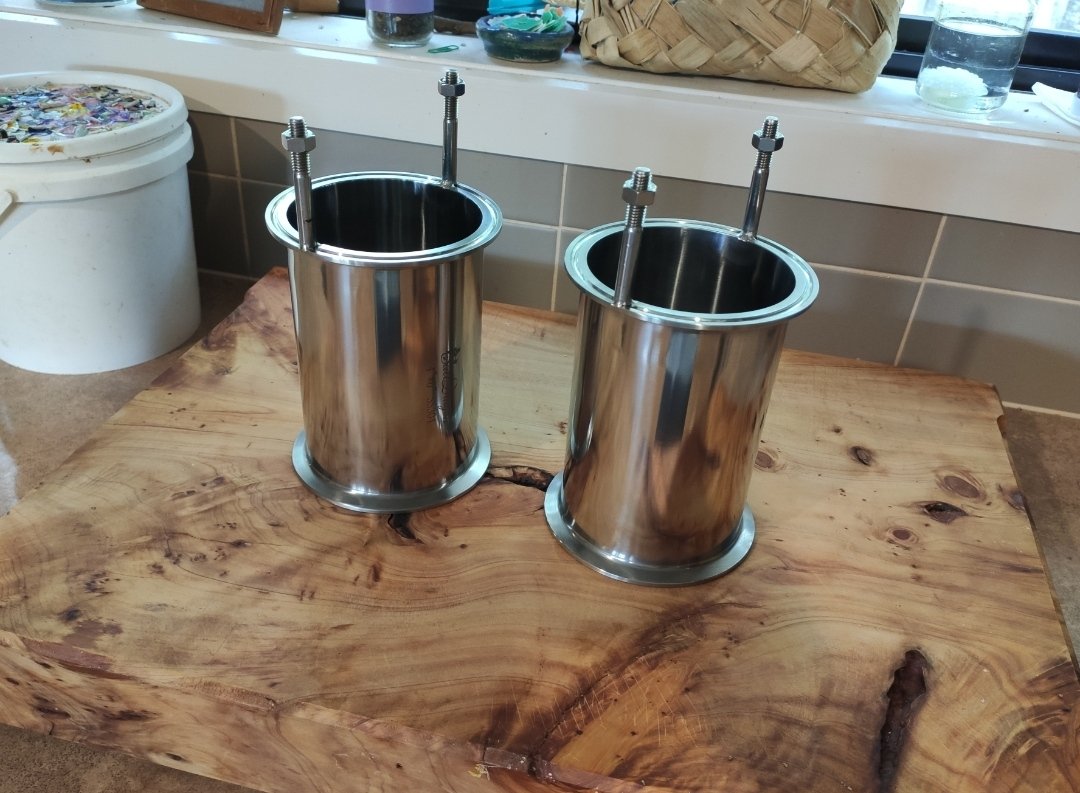
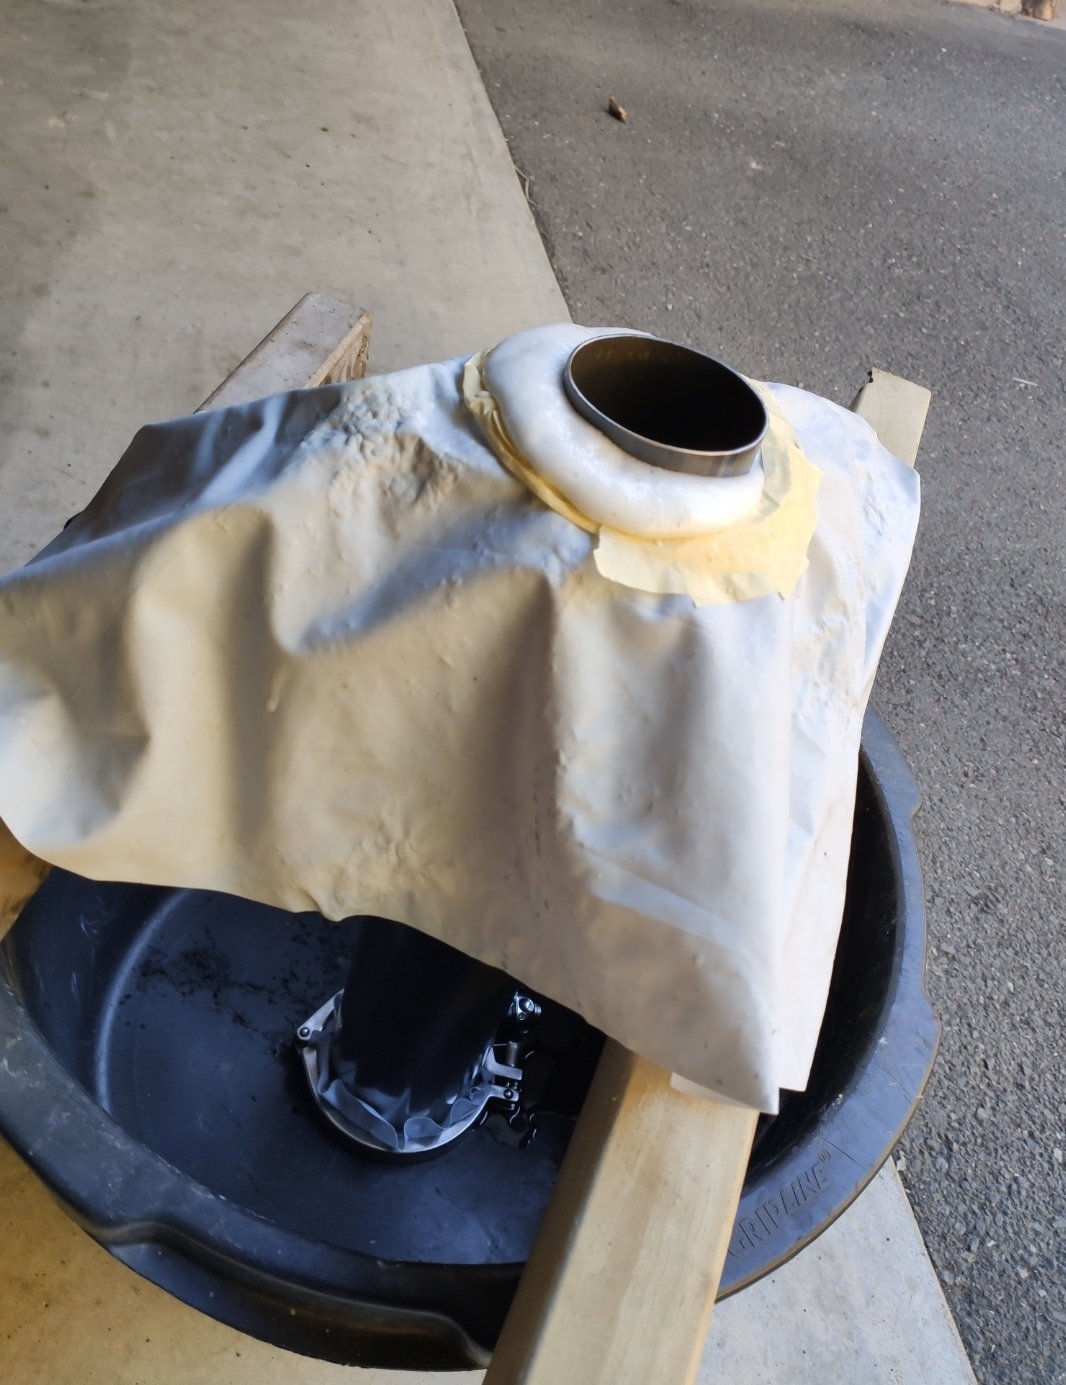
Another project that's been distracting me from getting the damn Hilux finished: Home bar/beer delivery setup As can be dredged from the archives of this thread I am a keen home brewer, and have wanted to setup a fancy beer font setup since our new house already had a basic bar: For the font I bought some shiny Italian taps and some 4" sanitary tube and elbows (dairy spec), that uses triclamps to section together. Here is a test fit (sans taps): Then welded on some legs to fix it to the bench, and buddy CNCd up some tap adapters radiused to the tube. These are acetal as you want the taps insulated from the font so the fridge doesn't have to work too hard. Delivering keg beer from a remote fridge sounds easy enough (recall tui ad), but there's actually some engineering involved as the temperature spike that happens to the beer when it leaves the fridge and hits the tap causes the CO2 to come out of solution = glass full of foam. So somehow you need to keep the beerlines and taps cold all the time, and since I wasn't prepared to spend $1000's on a commercial glycol-cooled setup, I decided to try an air-cooled design ala: Basically in the bottom of the fridge that houses the kegs is a plastic box with a CPU fan pushing cold air up a main tube that houses the beer lines and exposes the back end of the tap to cold air. The tube also contains a smaller diameter return line that allows the air to turn around and return to the fridge to complete the circuit. The first implementation of the above did not really work out, I used some ~3" diameter plastic 'oil suction hose' as the main tube and I was hoping the 5mm wall thickness would be enough insulation, but the font got really cold and the fridge ran pretty much constantly. At that stage decided to go all in and cast some insulation into the font body, which was a bit scary given the cost of the stainless pipe: I also insulated the section of tube that runs between the fridge and the font, which together with the above got the temp leakage under control.
1 point
-
Have run through a bit of a list now and got an idea on where to go to from here. We will be starting with getting the vehicle mechanically sorted so stay tuned for updates shortly. Tai
1 point
-
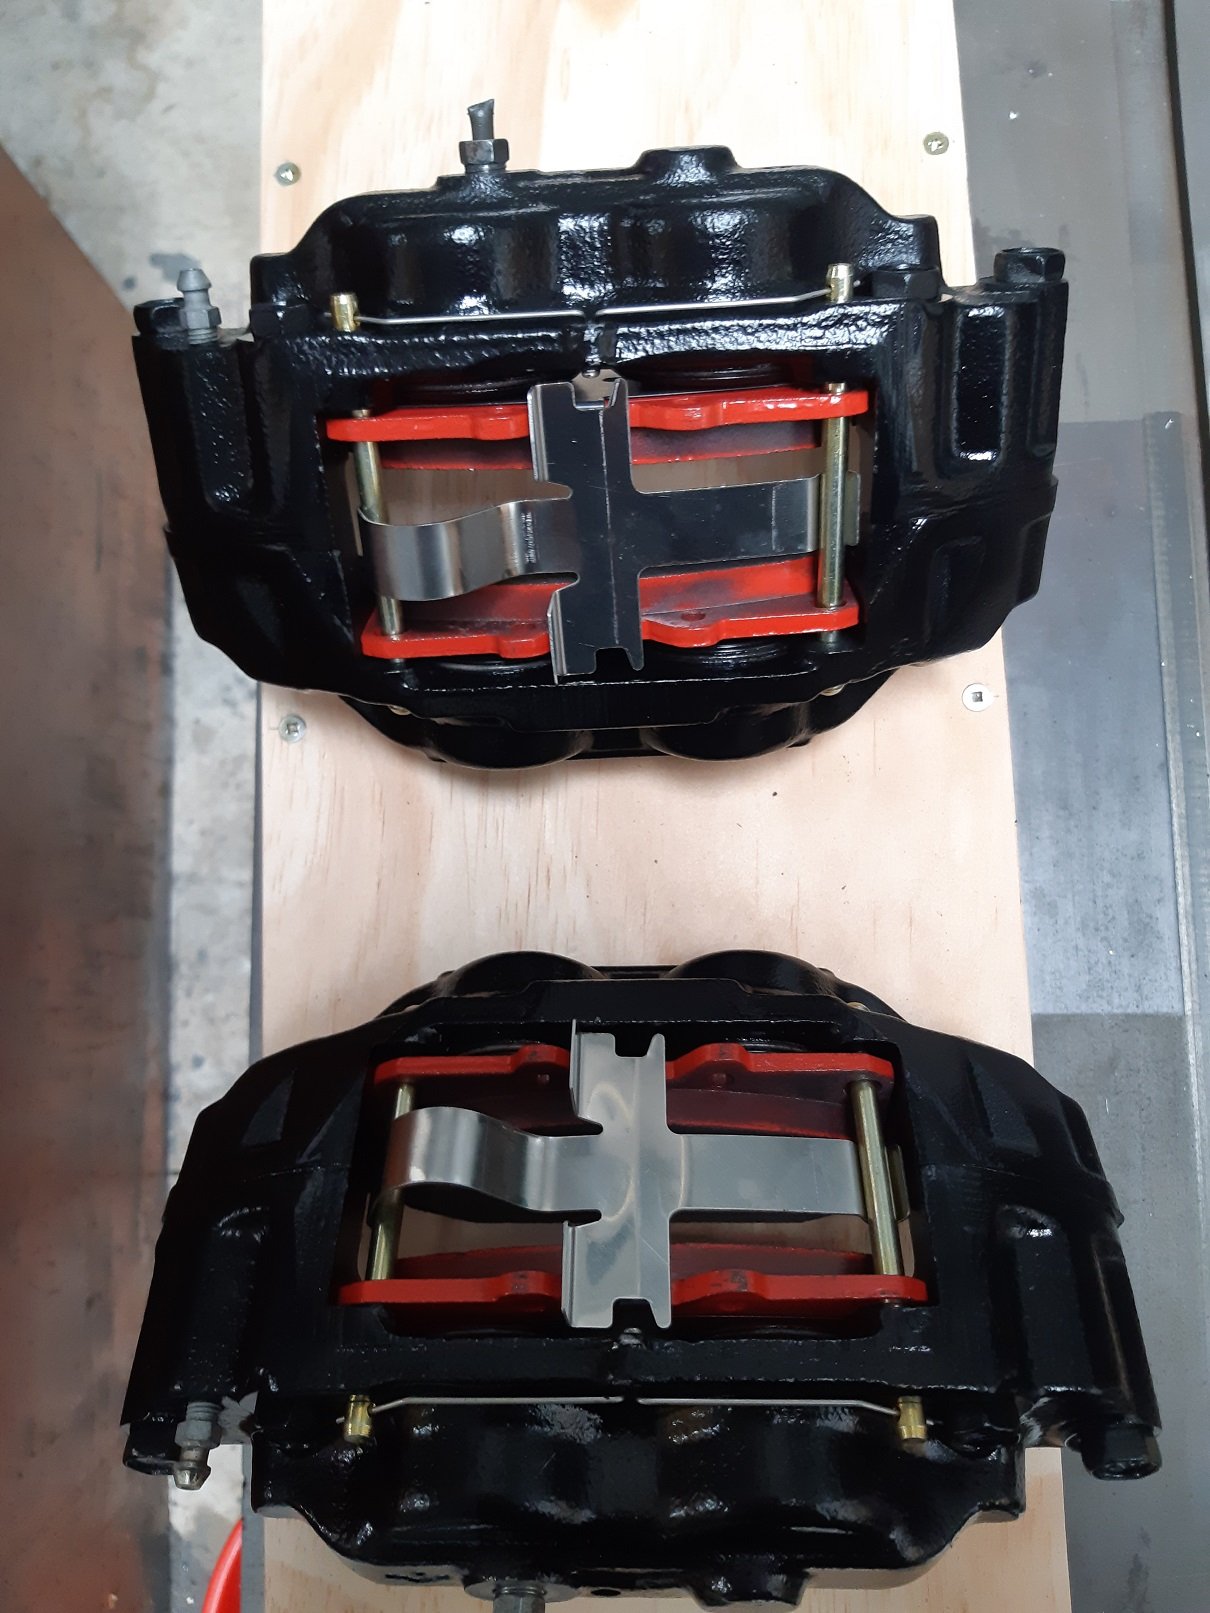
Both calipers are cleaned and painted. I split them before painting to install the new o-rings between the halves. The pistons are good on the outside sealing surfaces, but the inside was a bit rusty, so I wrapped the outside in tape and sandblasted the inside, then painted them with caliper paint so they don't immediately rust again. I'll give them a few days for the paint to harden some more before I assemble them. I've made the caliper brackets for both sides. And all the spacers. I'm going to wait until both calipers are assembled then fit them so I know 100% that the spacers are the correct thickness before I weld them on, just in case. The spacers on the top of the bracket are for the strut, also so I don't need to get shorter bolts.
1 point
-
Also picked up a childens CRF50 earlier in the year, because fuck it, why not. Bought a big pile of Aliexpress parts then got distracted by, 1988 XL185S. Amusingly similar to the XR200 of my youth. Probably could be considered 'shed-find' condition. WOF expired 1998. Rego on hold. Looks better in photos but might be one of the nicer things I own. Carb seized, I might have been too mongrel un-seizing it, so it has a china carb now. Had the rear shocks tickled up/regassed. Bought a new front guard to replaced the crazed/brittle one. Might try for a WOF next week on the 32 year old, original tyres. Its a bit scabby from sitting in a damp environment, but I'm happy. IMG_20200224_180439 by John Bell, on Flickr IMG_20200310_174637 by John Bell, on Flickr IMG_20200314_124427 by John Bell, on Flickr IMG_20200314_114515 by John Bell, on Flickr IMG_20200314_114525 by John Bell, on Flickr IMG_20200314_125051 by John Bell, on Flickr IMG_20200314_125045 by John Bell, on Flickr IMG_20200314_130507 by John Bell, on Flickr IMG_20200314_130519 by John Bell, on Flickr IMG_20200314_130937 by John Bell, on Flickr1 point
-
Found these two mid 90's XR200 in a shed from my teenage years, sold them, because even Honda can't make a bike that will stand up to teenager on a dairy farm. IMG_20180624_125712 by John Bell, on Flickr That led to me eventually buying a mid ninties XR250R. Which is everything the 200 is not. Double discs, actual power, better suspension. This one is a little bit beat up, but mostly intact, and has done fairly low KM. Currently attempting to get it a bit nicer and possibly go through the registration process. IMG_20190517_101943 by John Bell, on Flickr IMG_20190517_124333 by John Bell, on Flickr1 point
-
Picked up a 'modern' CT110 a little while after that, then another. Both ex-DX-mail. Fitted LED lights, stereo, and cruised around the farm/east cape. Currently daily-ing one for dairy farm duties. IMG_20161206_191827 by John Bell, on Flickr IMG_20161203_133231 by John Bell, on Flickr IMG_20161203_131732 by John Bell, on Flickr IMG_20171006_164819 by John Bell, on Flickr IMG_20171102_082449 by John Bell, on Flickr IMG_20190916_105230 by John Bell, on Flickr IMG_20200102_052754 by John Bell, on Flickr Bought a Hi-Lo 110 from a dairy farmer with a broken frame, stripped it for bits. Bought an old 90 with a sad motor, sat the parts next to each other, still waiting for them to combine. IMG_20171116_185208 by John Bell, on Flickr1 point
-
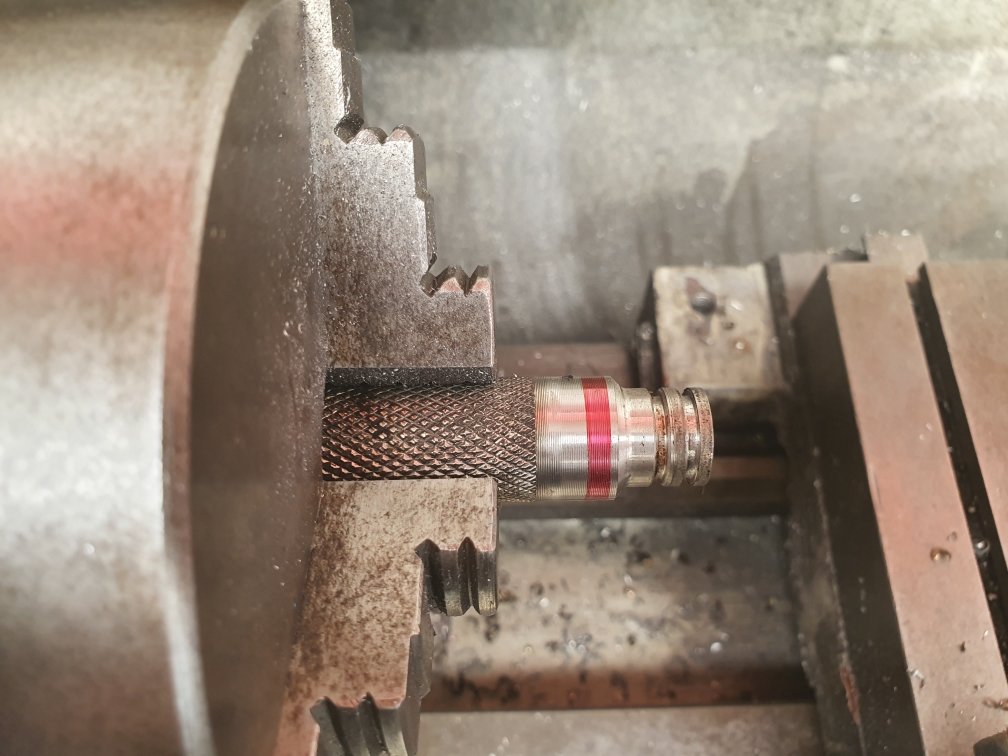
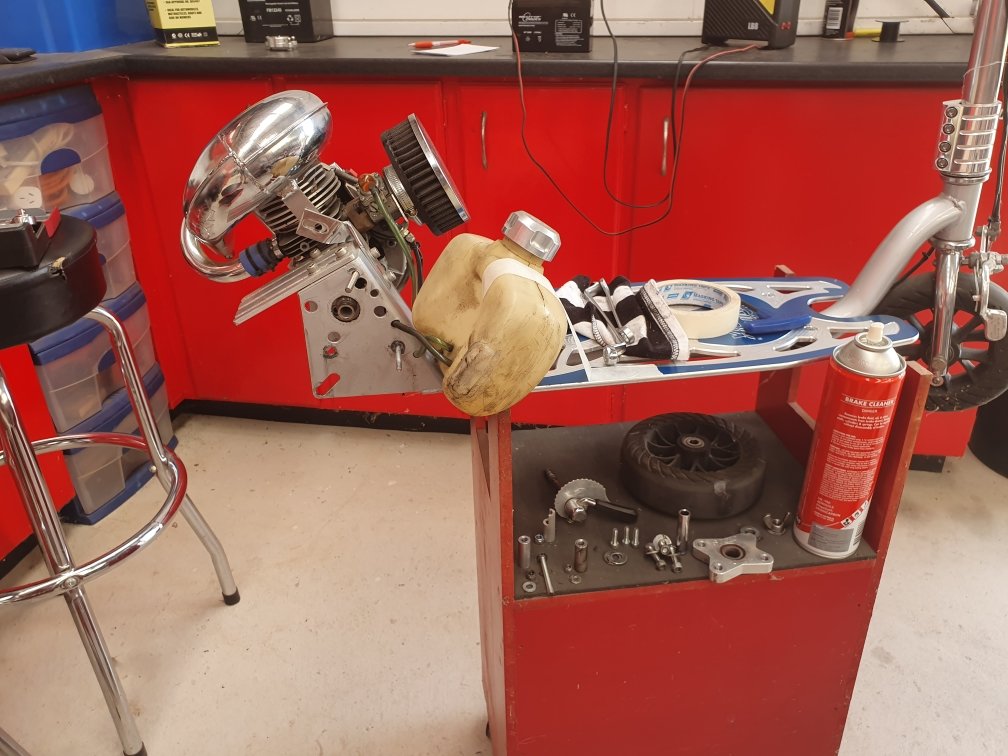
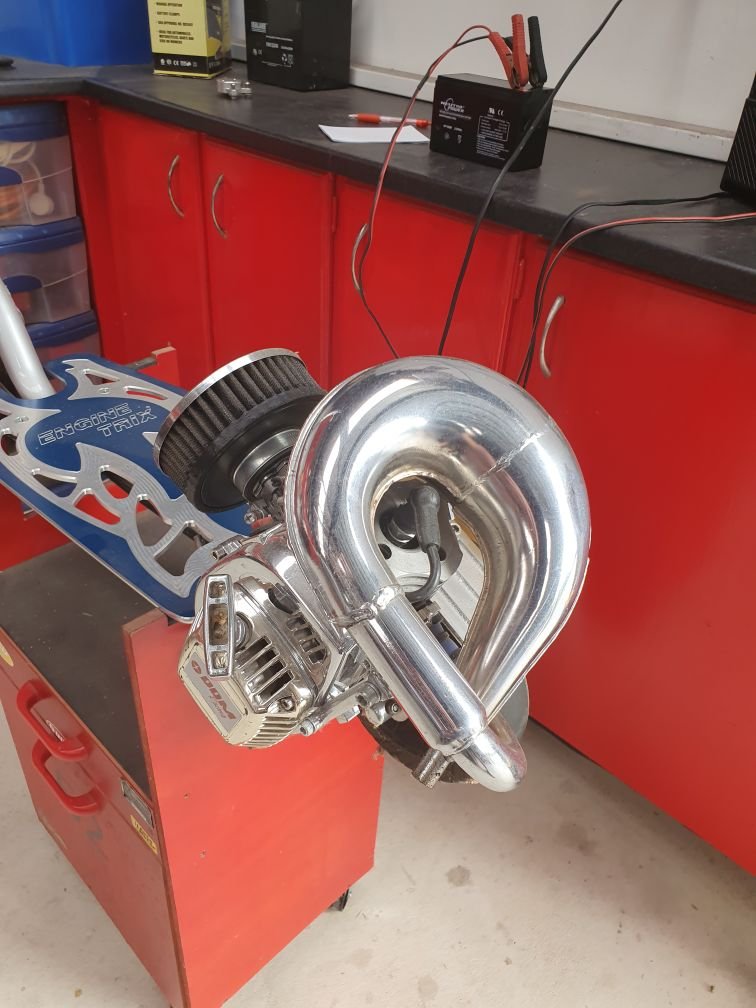
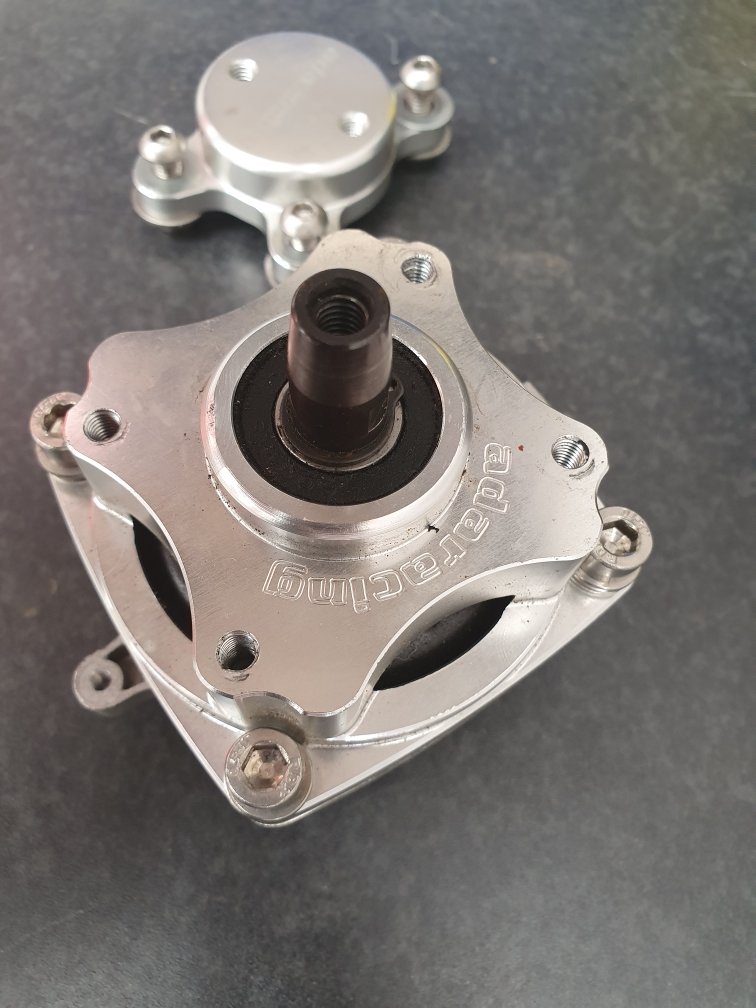
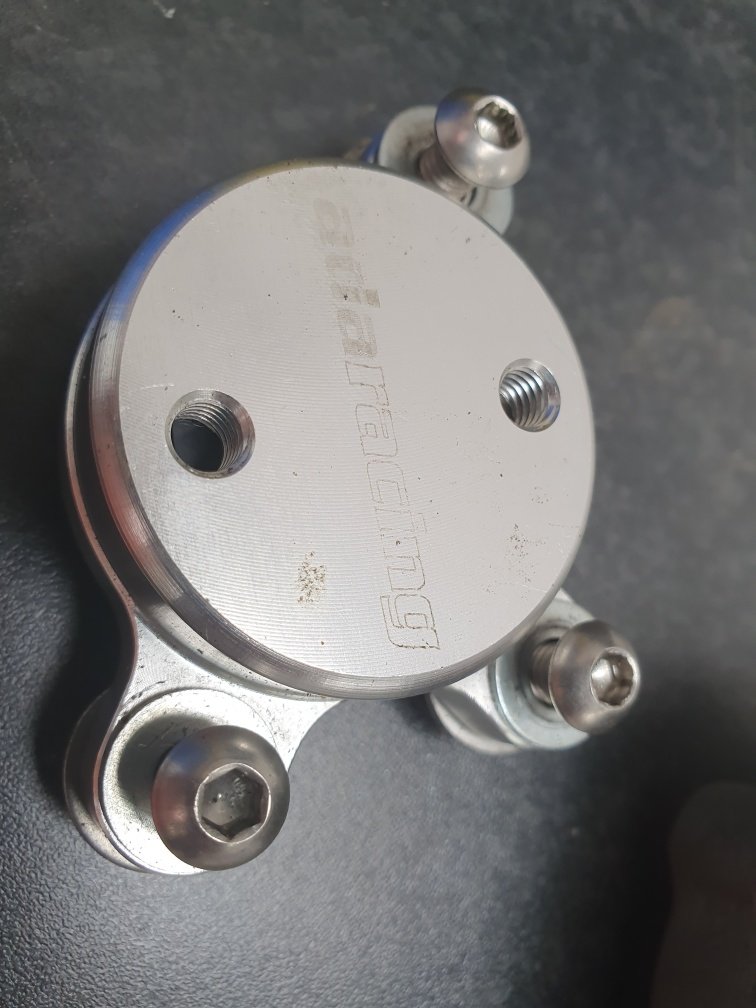
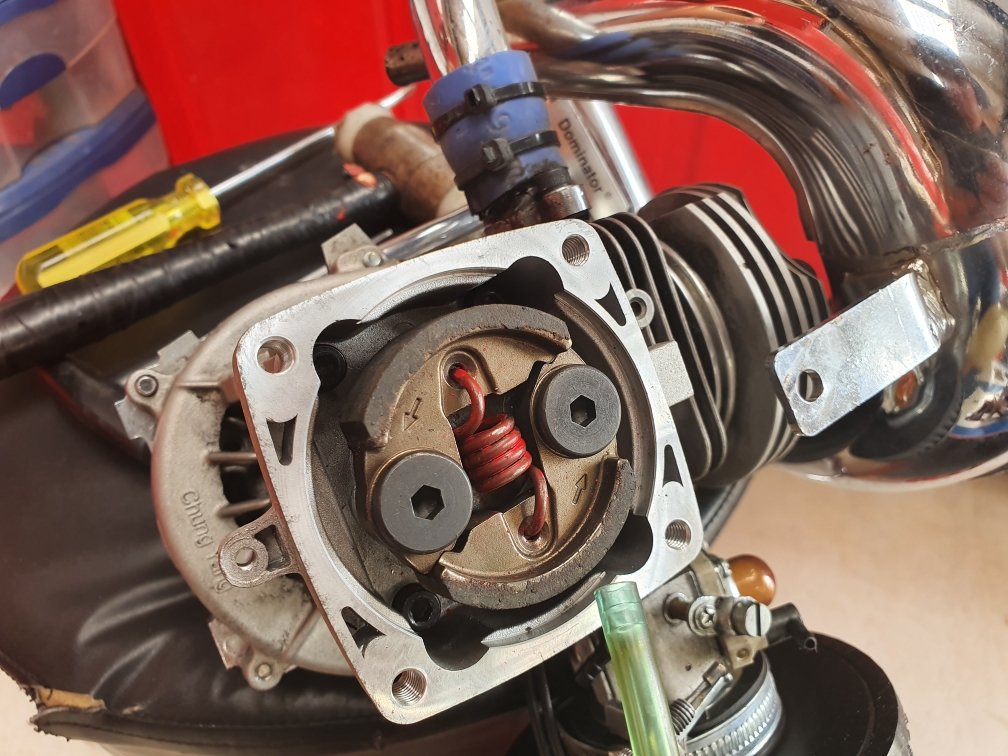
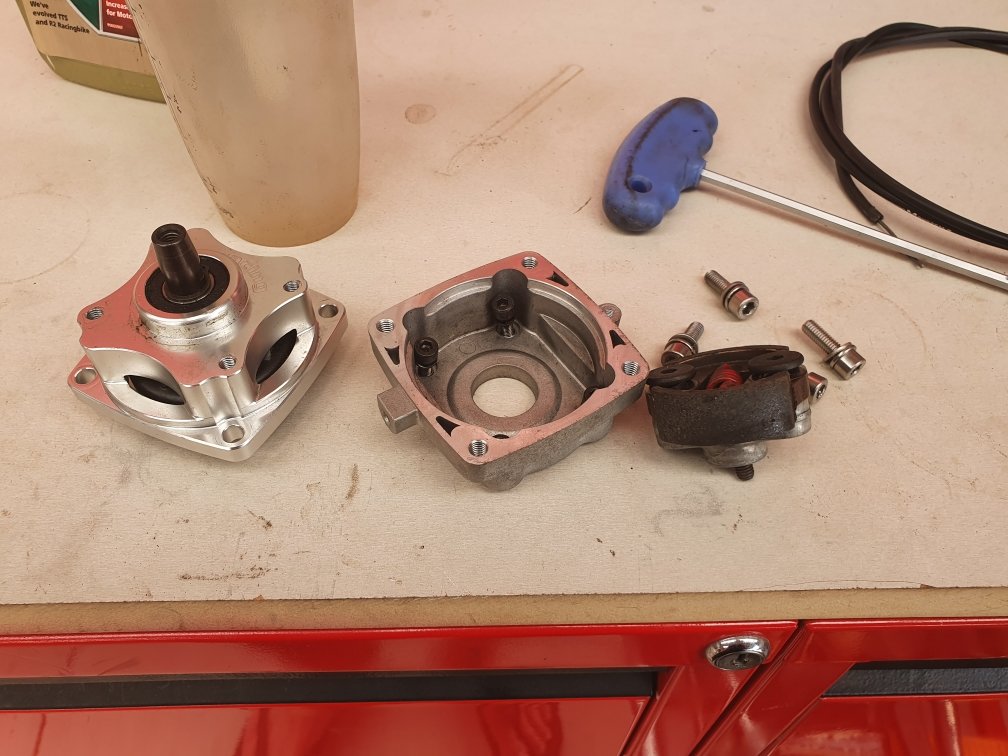
Added a clutch to a goped, so it's no longer direct drive. I can come to a stop and the engine can keep running, then go again. Normally gopeds are direct drive, so if the motor is running you have to be moving too. If you stop completely, then engine stops. Until now: This is something I've wanted to do for over 24 years ever since getting my first goped, but price and availability were always a bit of a barrier to achieve. Pictured are the clutch internainternals mounted in place. ADA make a kit that converts it to a 54mm clutch, and a cnc machined adapter that gets it to go back onto the frame with the right spacing. Sweet bit of gear, pretty high end stuff. I had to make my own spindle to convert it to take a 3rd bearing support, but it was a pretty easy job having done a few of them now. Weird lifetime goal to have...but i feel like I'm clocking life right now!
1 point
-
It sure was nice. Yeah I think basically as proposed above will be the business. Need to sort my life out and look at a calendar. Keep pestering me.1 point
-
Also cleaned up the round port manifold, trying out some por15 manifold paint this time the VHT flameproof is flaking off the last manifold I painted (maybe I didn't prep it well enough I can't remember), after looking in the engine bay I think the pipes coming out the side are going to foul the engine mount so might need to cut them short and plug weld them
1 point
-
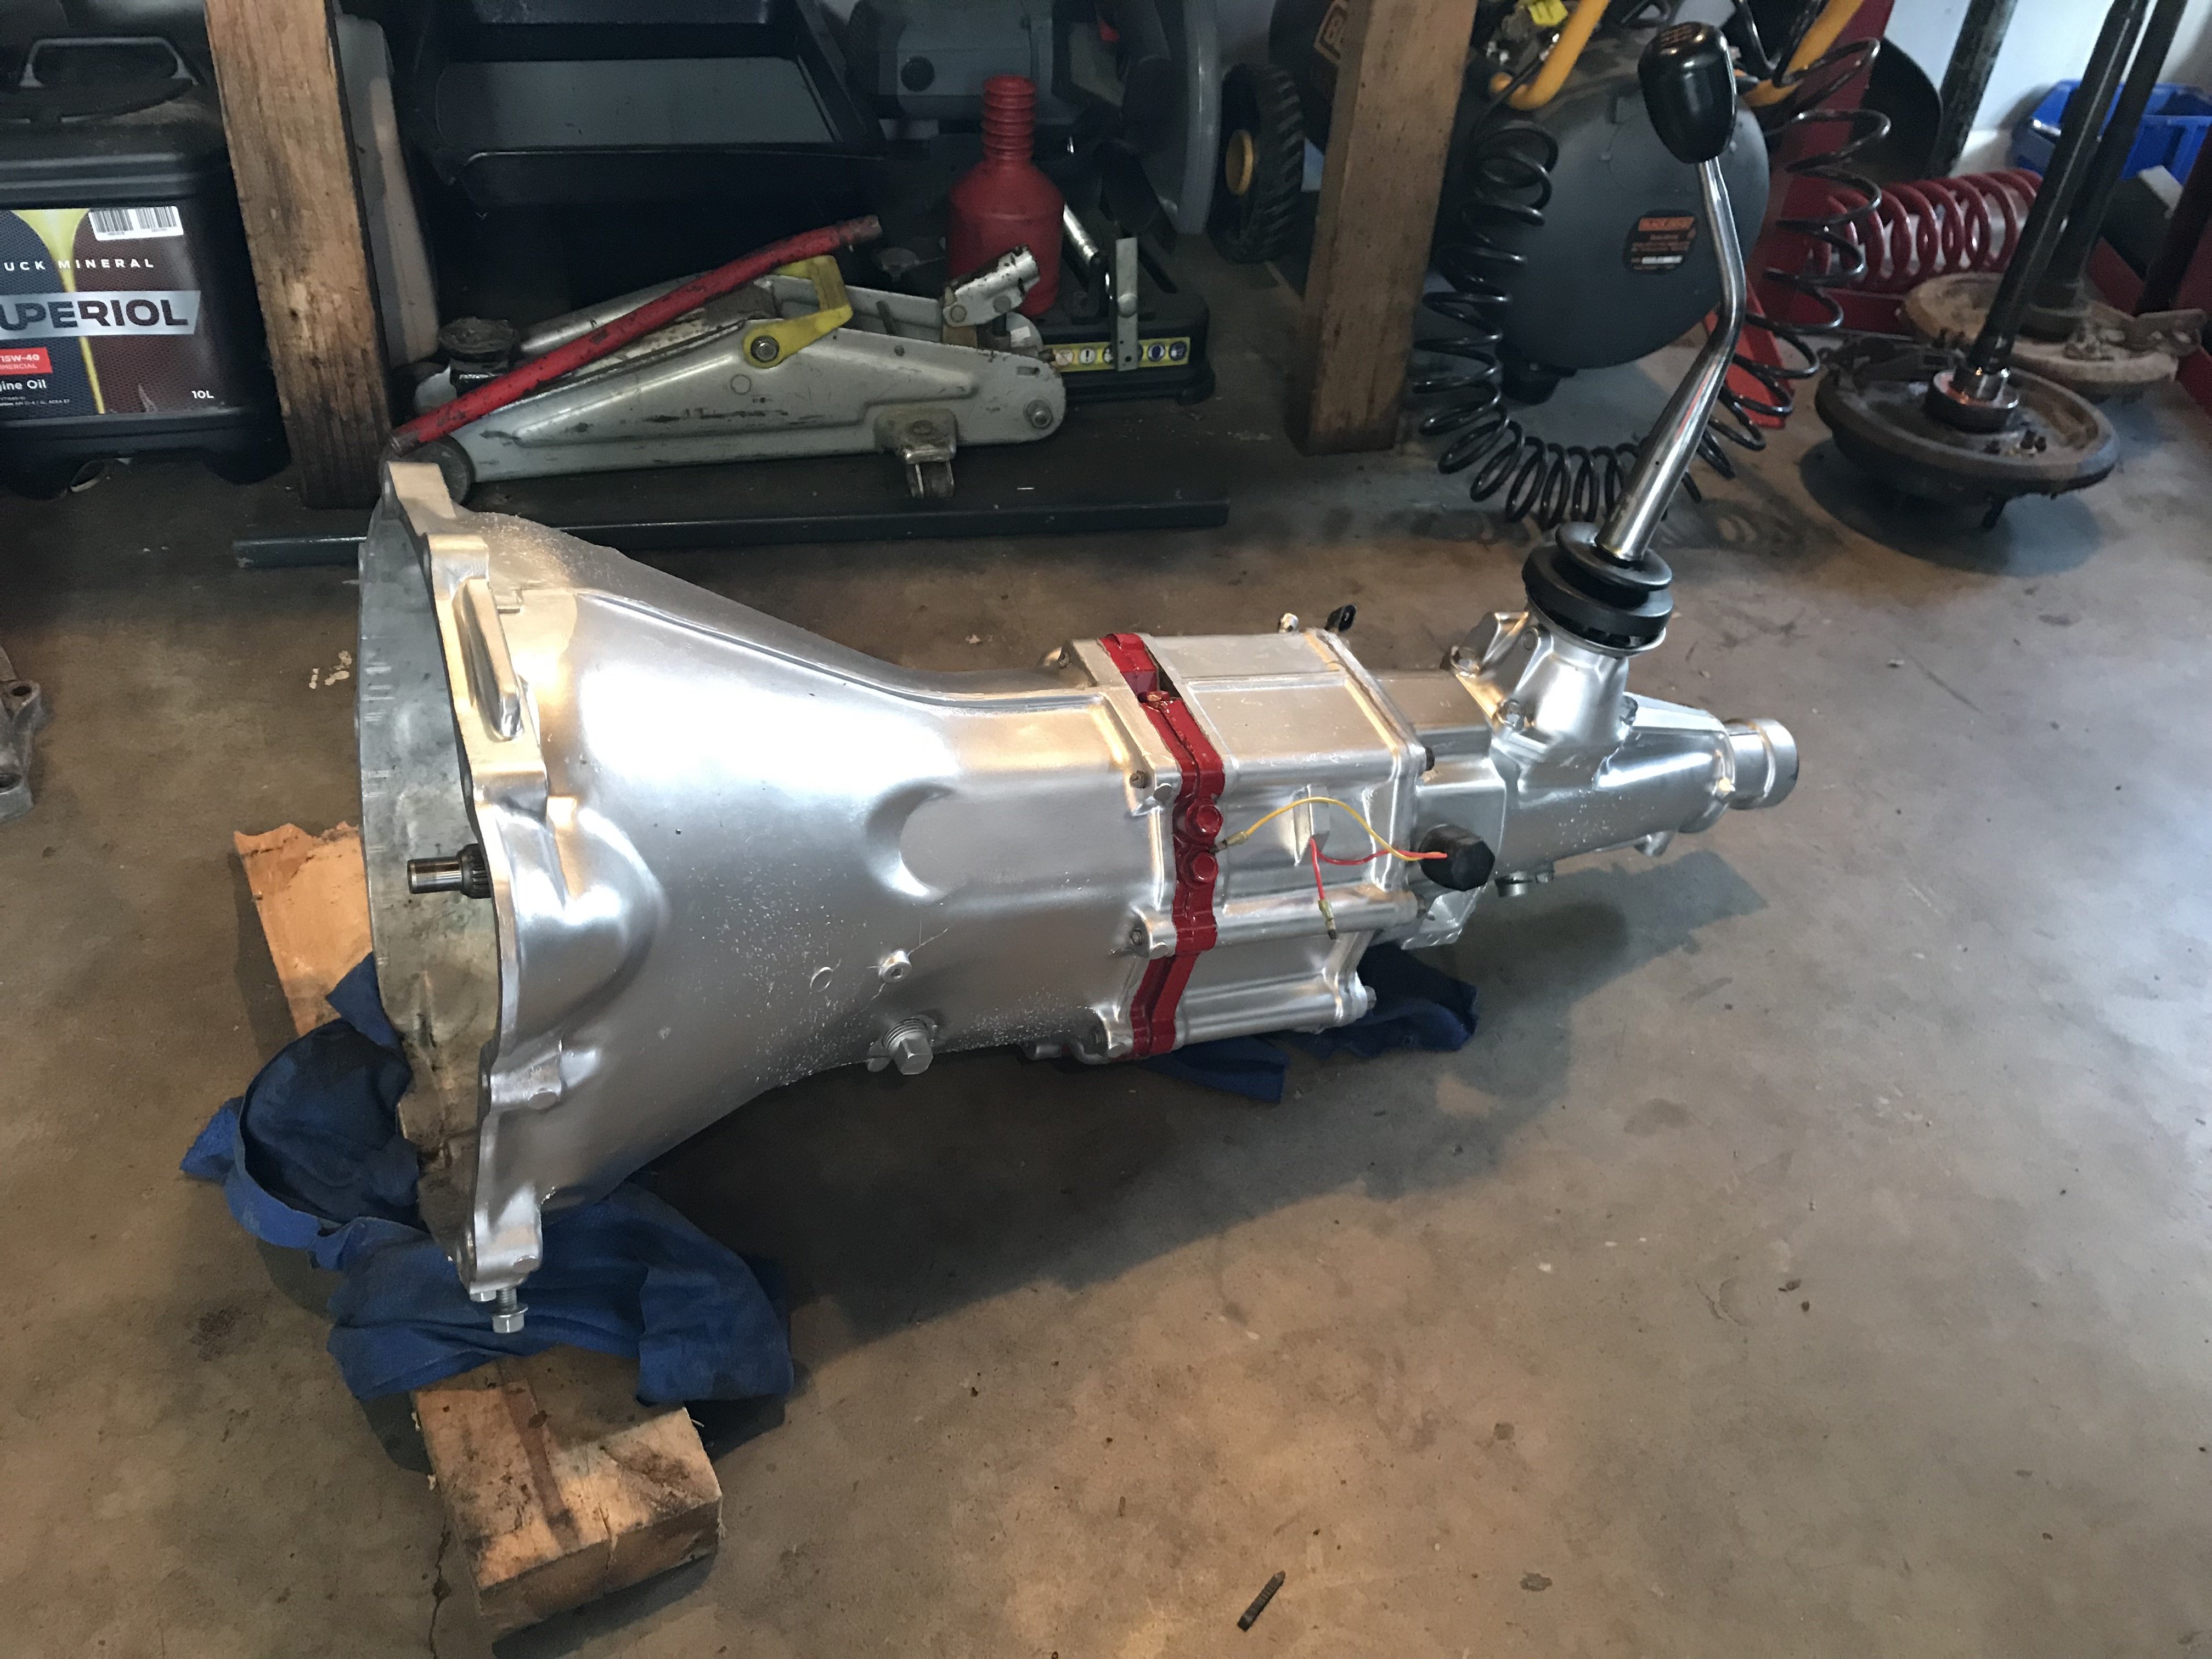
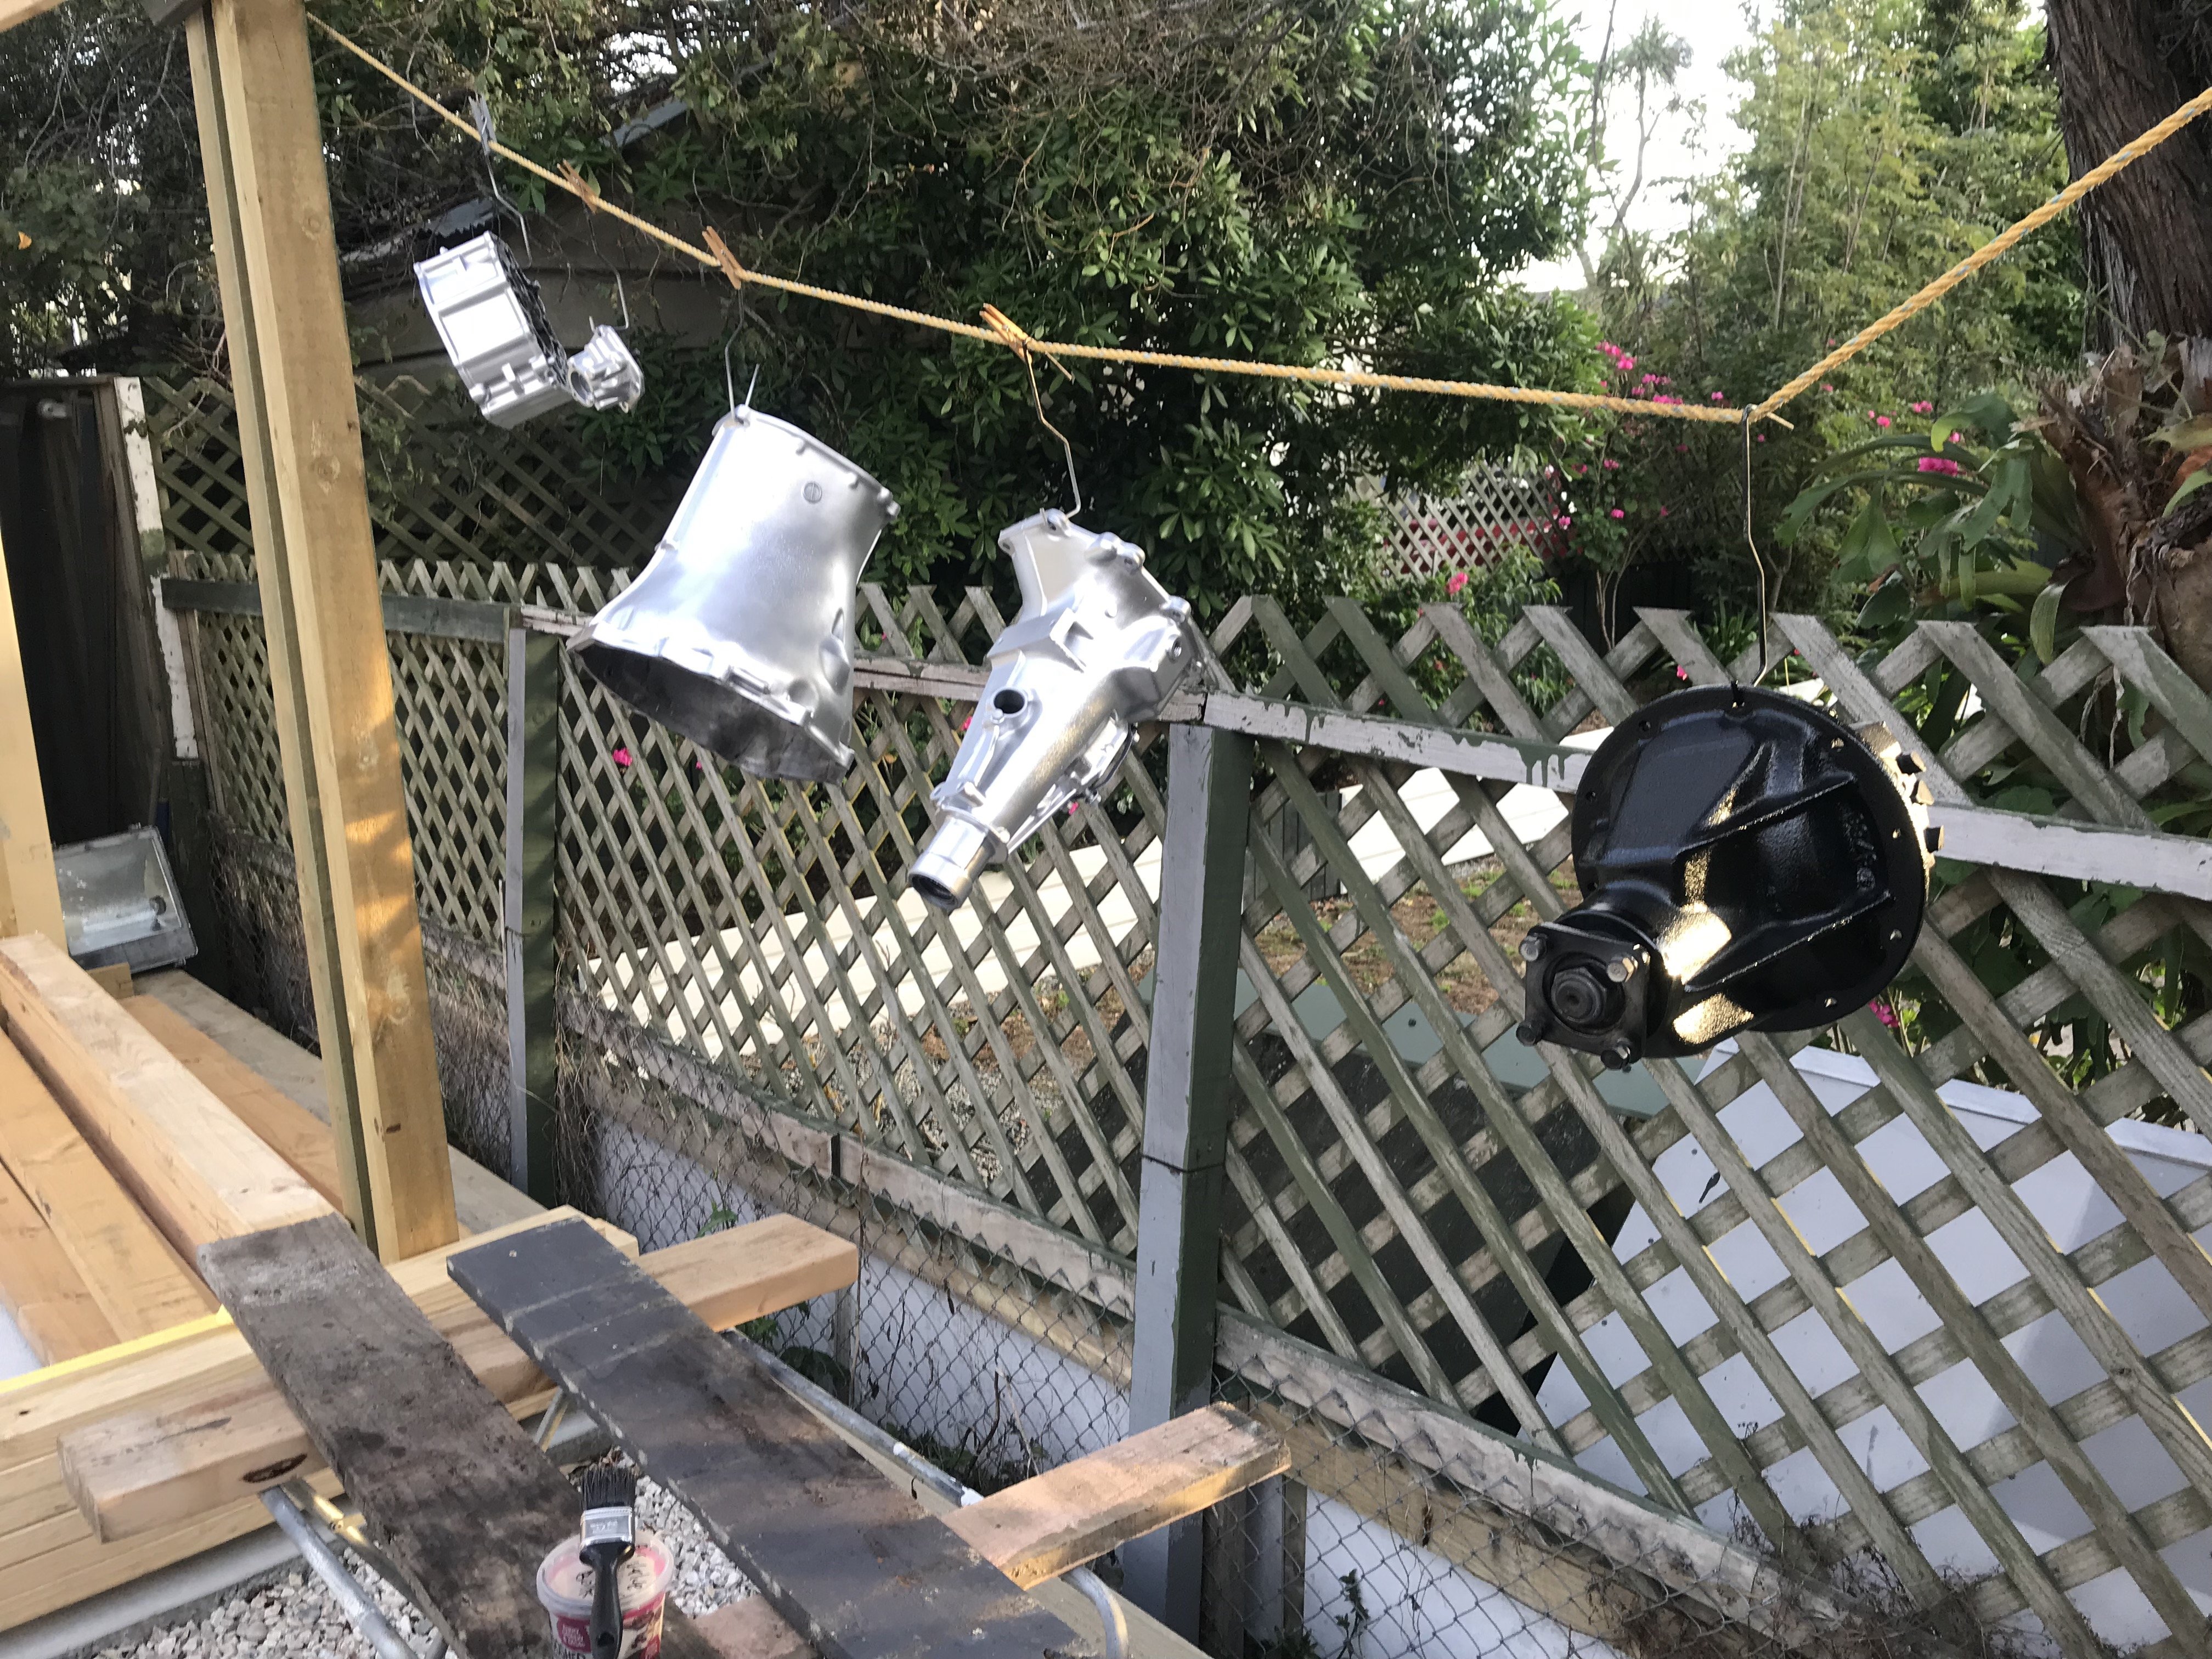
Lick of paint for the gearbox before it goes back together with new bearings. hopefully be a lot quieter than the one in there. cleaned up and painted the 4.3 ratio nugget from the courier I stripped, fingers crossed it drops the revs a little bit I think it has something like a 4.8 from the factory in it.
1 point
-
Ok is not that fast just faster than it was, and spin wheels friendly. Did a gps accel test, 0-100 in 12 sec.. Does rev out a whole lot more tho, excited to go for a big drive.1 point
-
Made a start modifying the 4-link mounts. As you can see they originally hang quite a bit lower than the sill. New mount all welded up. Should be heaps strong enough! Cleaned up a bit. 17mm socket just fits through the channel to tighten/loosen the bolt. Might swap to Allen head screws, as the paint/underseal mightn't leave enough clearance. The lower arm is nice and level now. Next was to do the upper arm mounts. This is it all done coming through the floor under the rear seat. The seat just doesn't fit, but should be an easy fix by bending one of the wire spring things a little. Top arm angle looking much better. The arms should intersect pretty close to where I guessed the instant centre of the car will be. Just have the other side upper mount to finish off. Sent a bunch of stuff of to be zinc plated. Some didn't turn out as shiny as I'd liked, but not all of it's that visible and I think I'll get the engine and gearbox mounts powder coated any way.1 point
-
guards welded to bonnet
1 point
-
Waiting on TM seller to get back to me about a purchase & hoping to secure time off. But late to party and tentatively keen.1 point
-
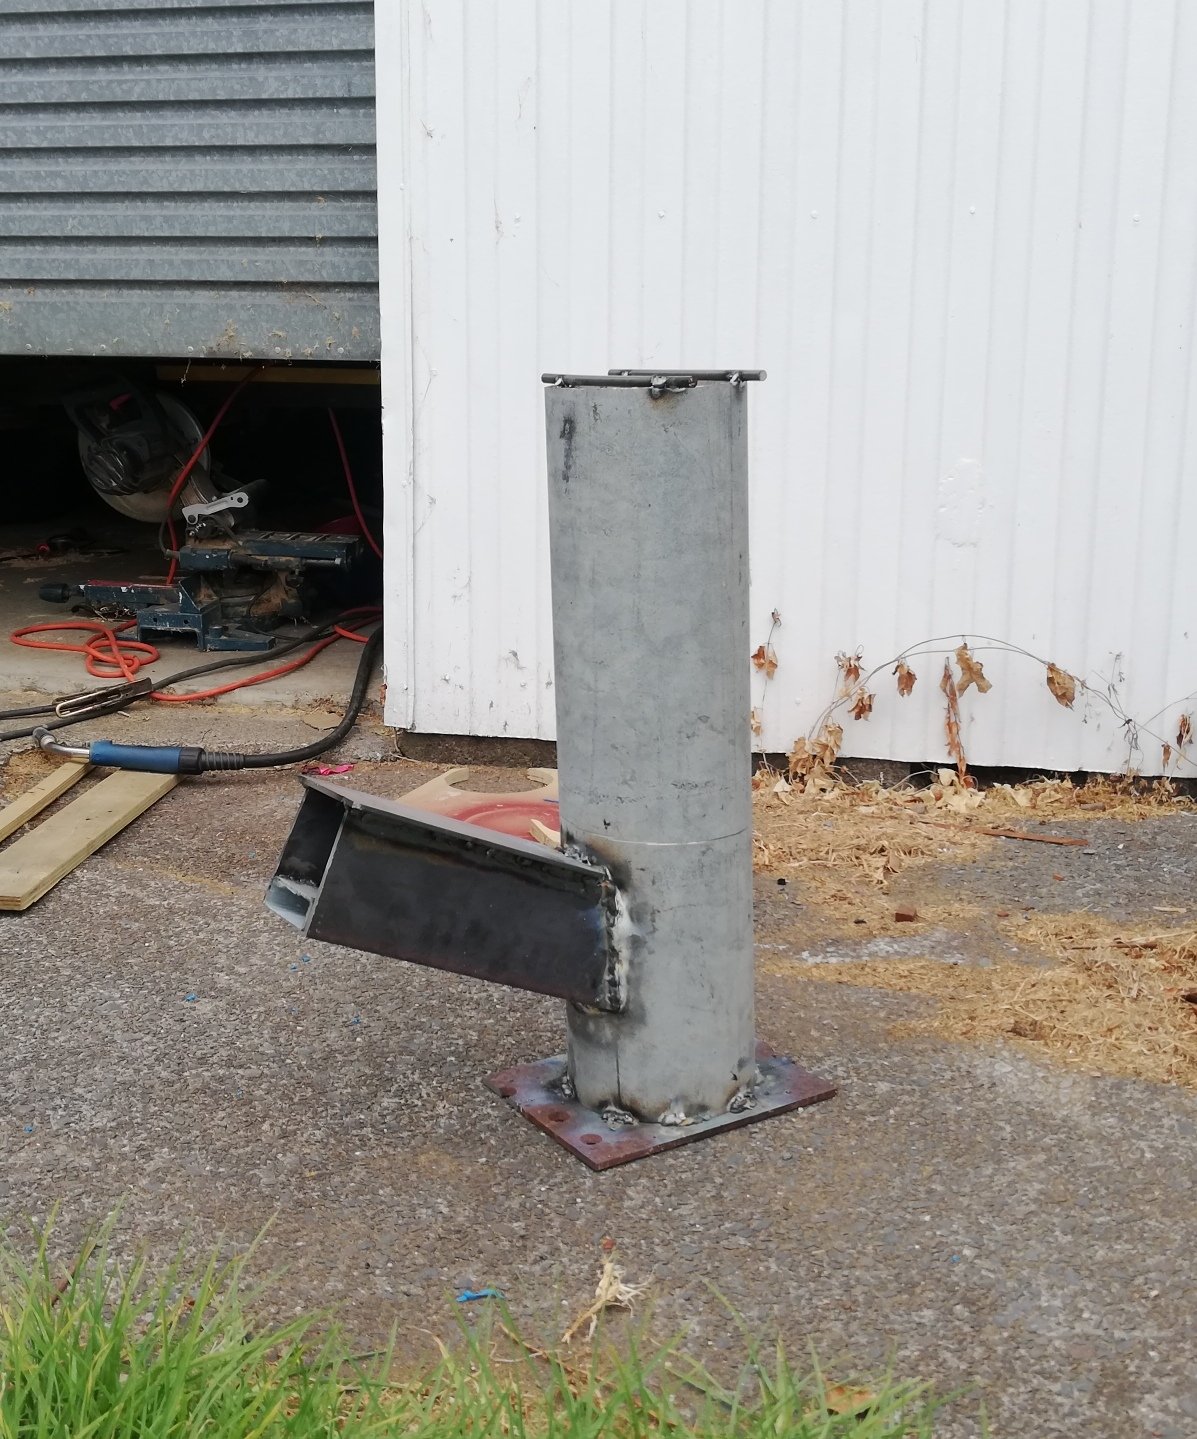
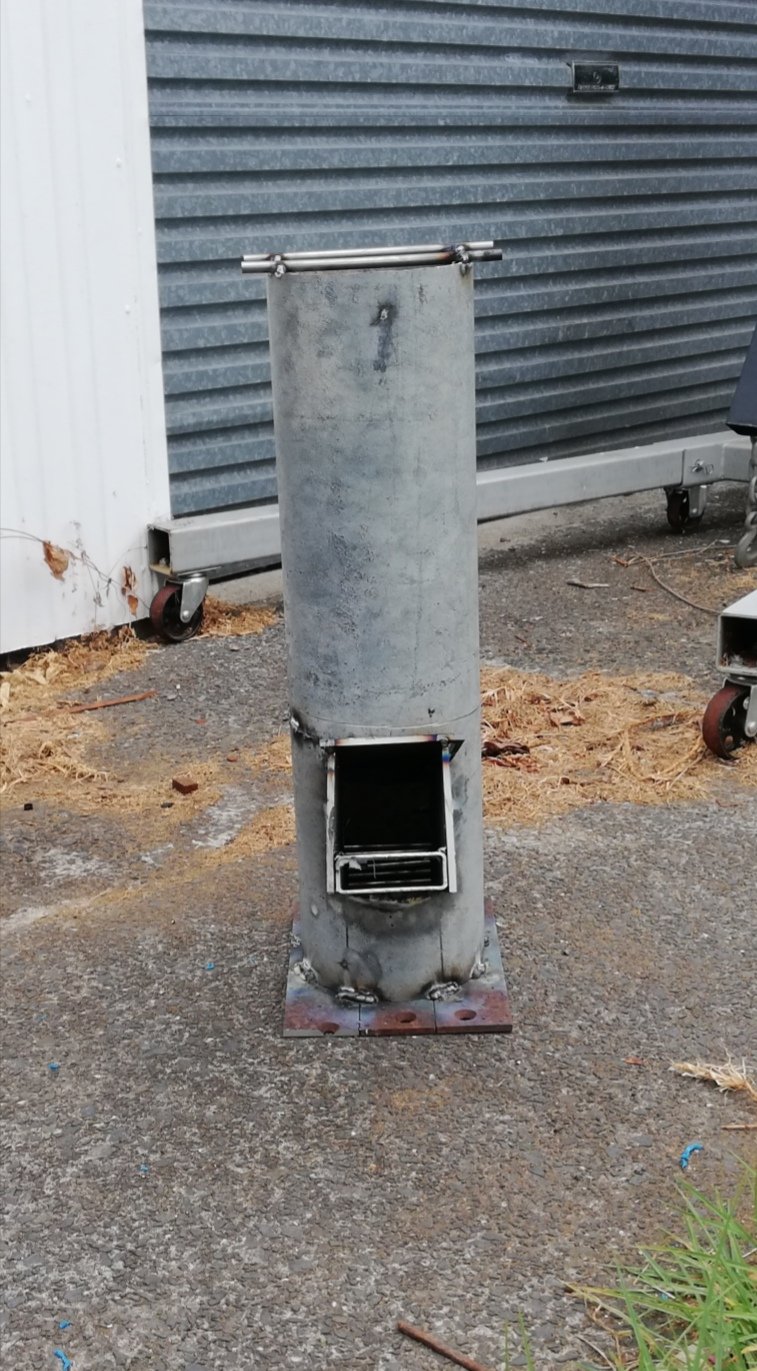
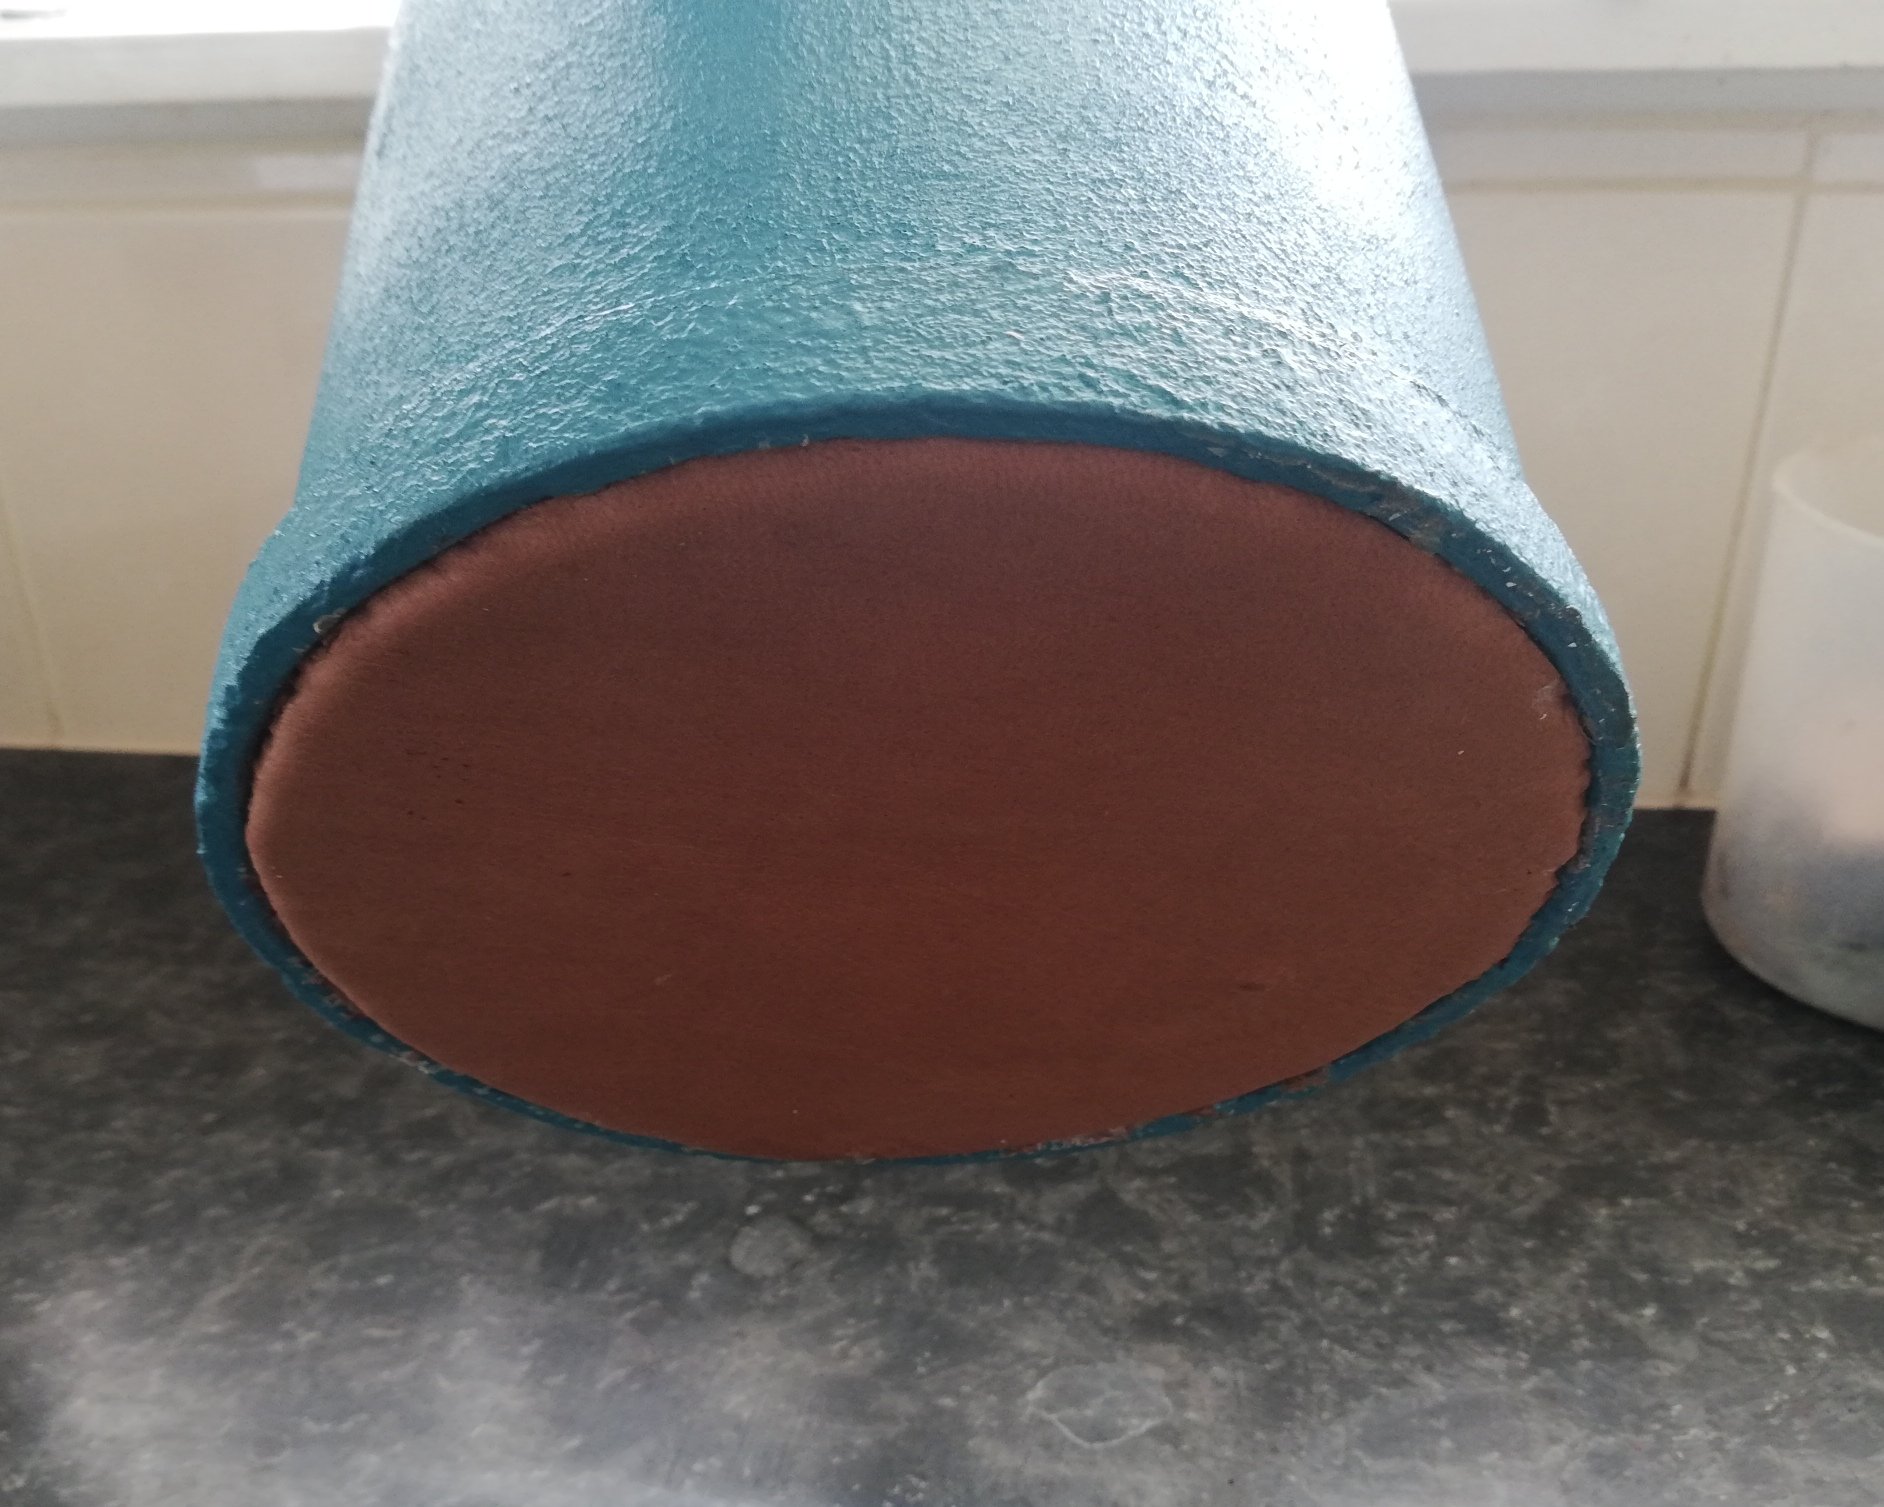
Had some pipe left over (it's also splashed in pigs blood from homekill, so it's a pleasure to weld yum yum) A decent little length, looked about BBQ height, so I scrounged up all the rusty scraps that were too good to throw out, and made this rocket stove. Should have cleaned it up better and not welded outside in the wind. But a tidy up and some Potbelly paint should tart it up. Once I've cranked some temperature in it to burn off the galv as I don't want zinc in my food. lower bit is solely for air intake. Might fandangle something up to control it for simmering. Although fuel is probably the best way to control temp.
1 point
-
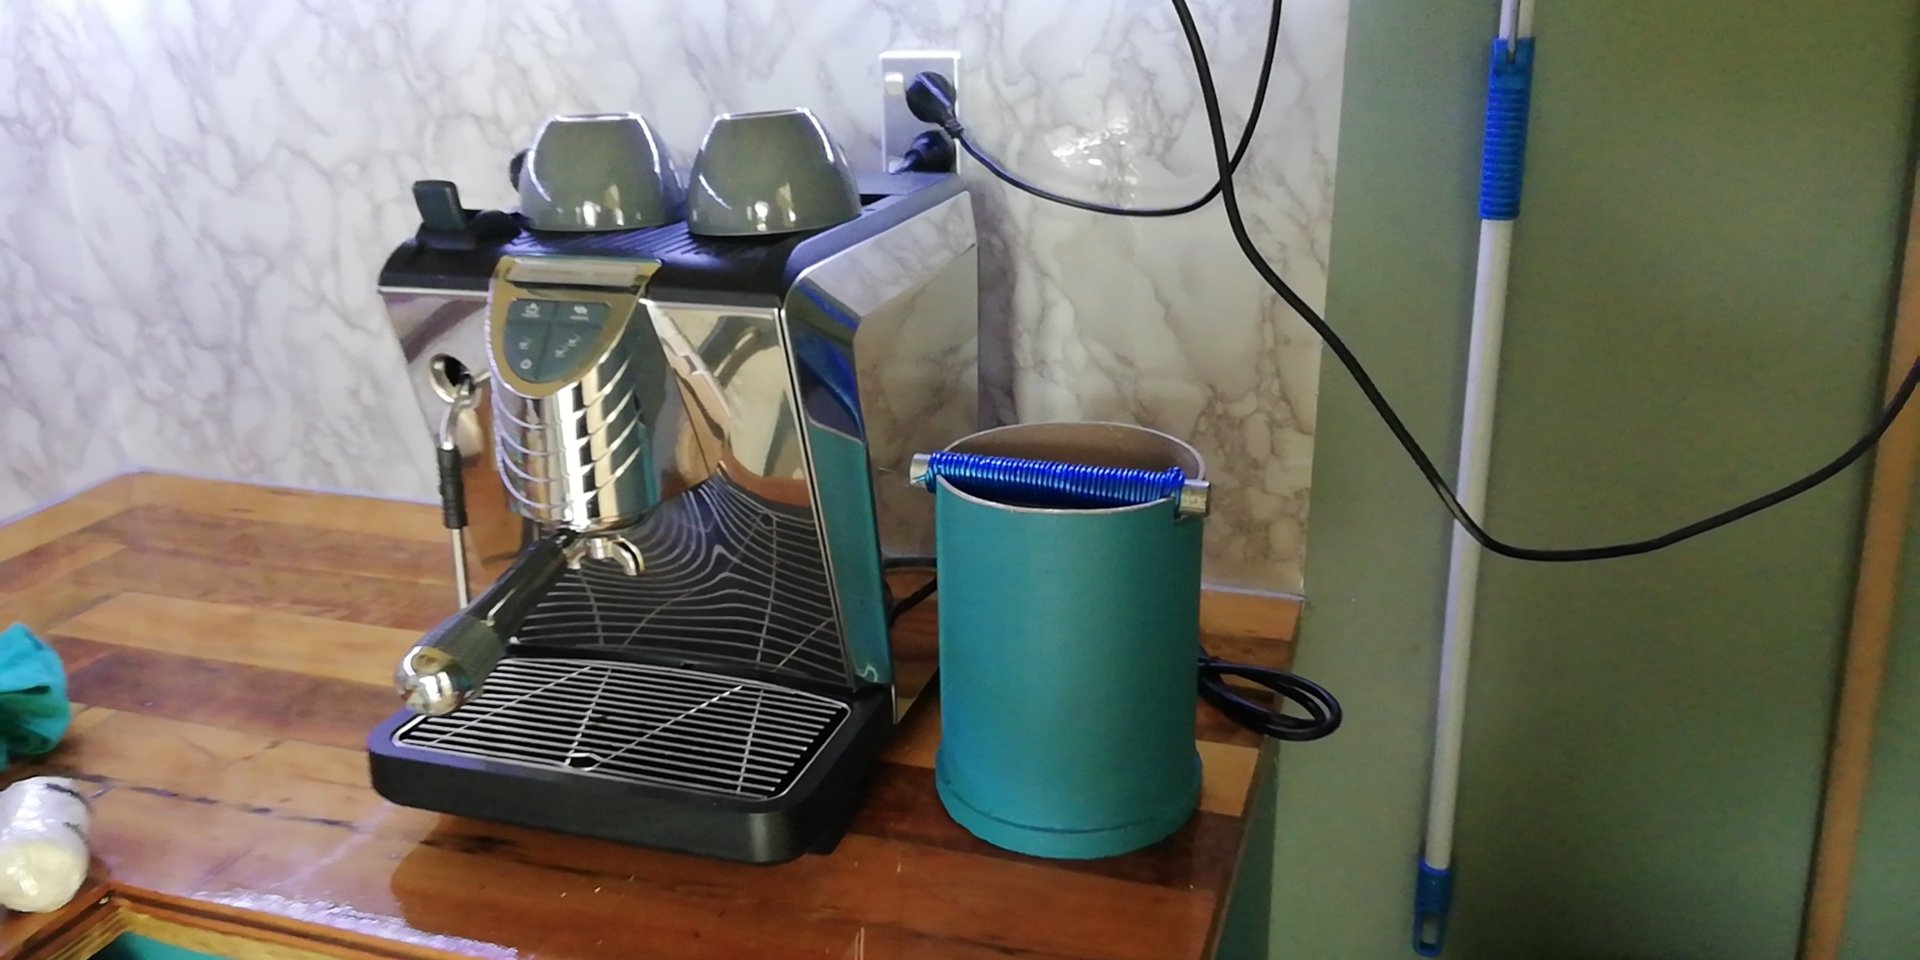
Knocked up a knock box for coffee grounds Scraps of steel pipe, plywood, leather and washing line
1 point
-
Work and real life have been pretty busy recently, so haven't found much time out in the garage. Students are back next week too, so work is likely to be a bit hectic for a bit. I did manage to get the ignition leads built this afternoon. It's really starting to take shape. SOOOO many nickle and dime jobs to do though. Still need to machine that trigger wheel. I've tapped the fuel rail for M18x1.5 fittings that I'll seal in with bonded washers... But the M18x1.5 -> AN6 adaptors are coming from China, and everything out of there is on the go-slow due to the virus. Not that I'm complaining (much), its got to be pretty horrific. Once those fittings are here though, and I can permanently fit the fuel lines, I can sort the front thermostat housing. Really really procrastinating about that... :-/. Also, I really need to build a garden shed and get all the gardening gear out of the garage.
1 point
-
I think you're looking for the word "niche". I was confused about what this had to do with female children of your siblings.1 point
-
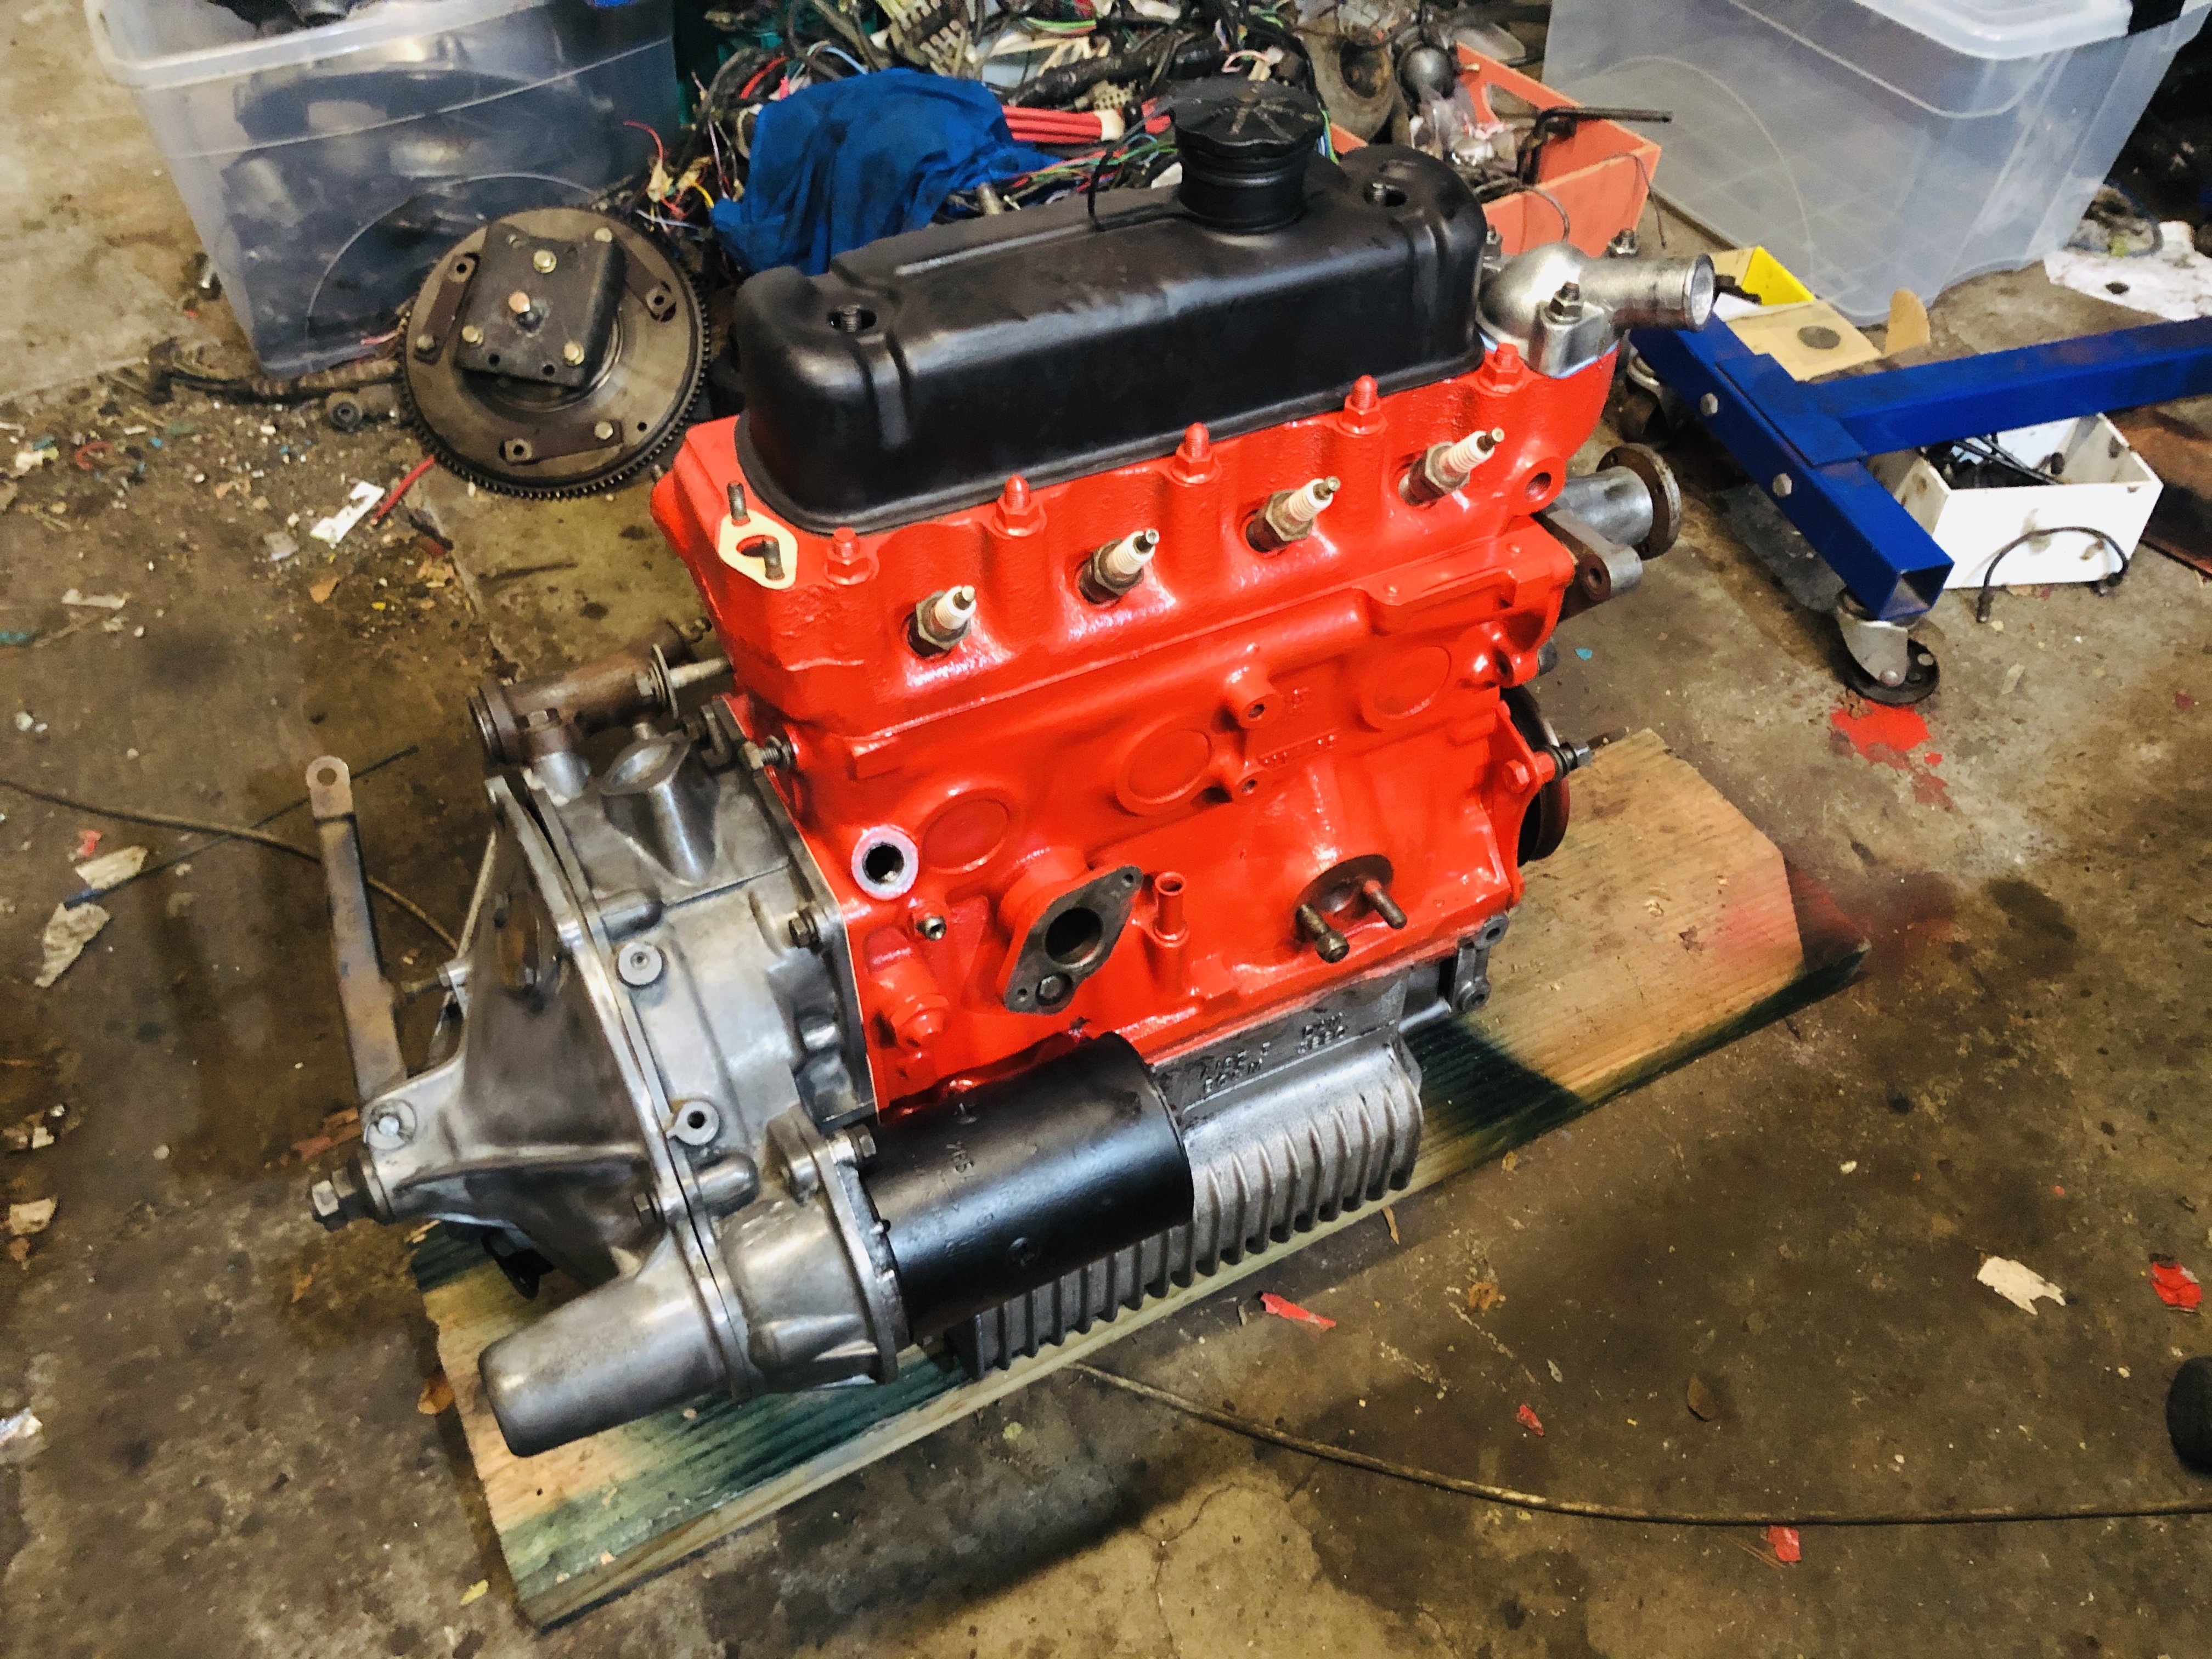
Making progress. Completely std build using good S/H parts and all new bearings/rings. Once I got all the required parts it’s gone together reasonably well.
1 point
-
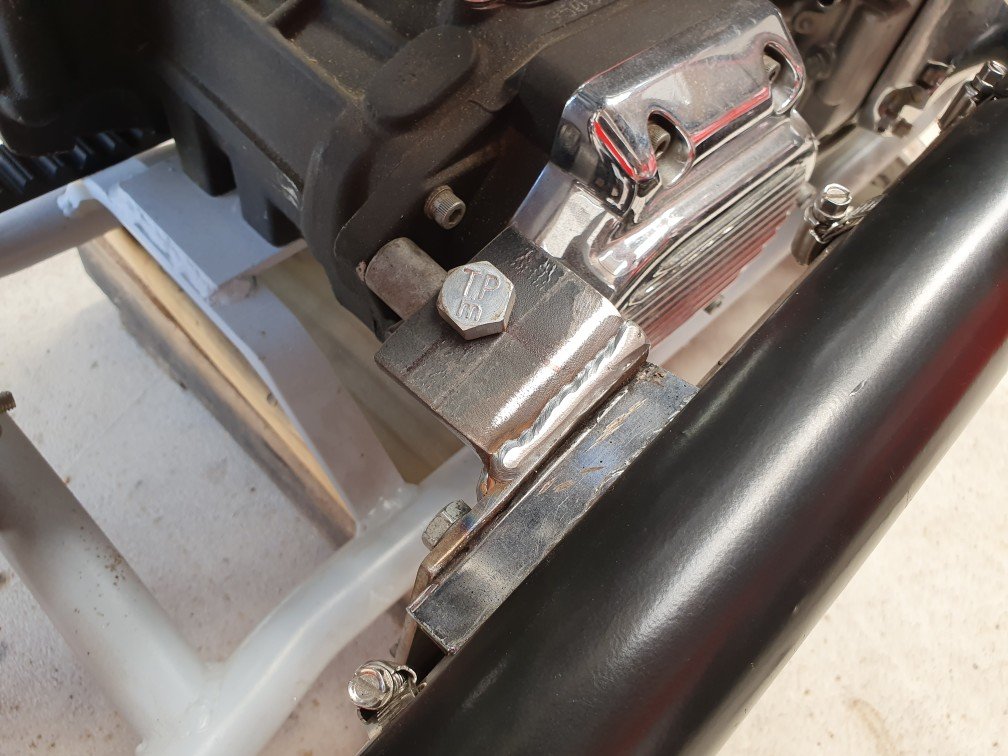
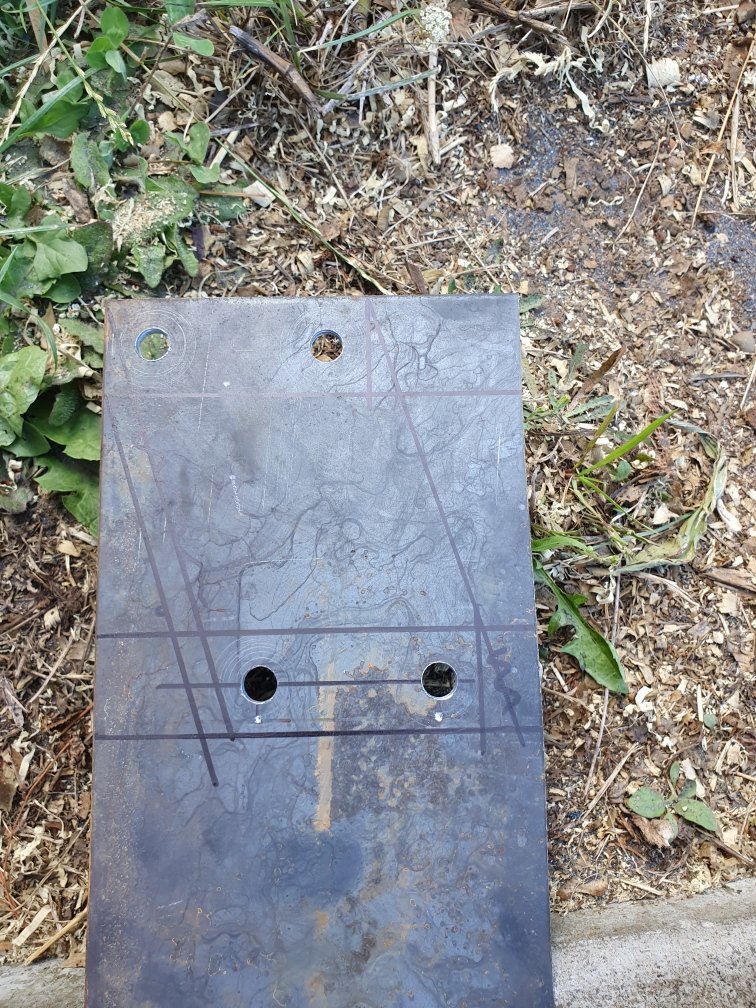
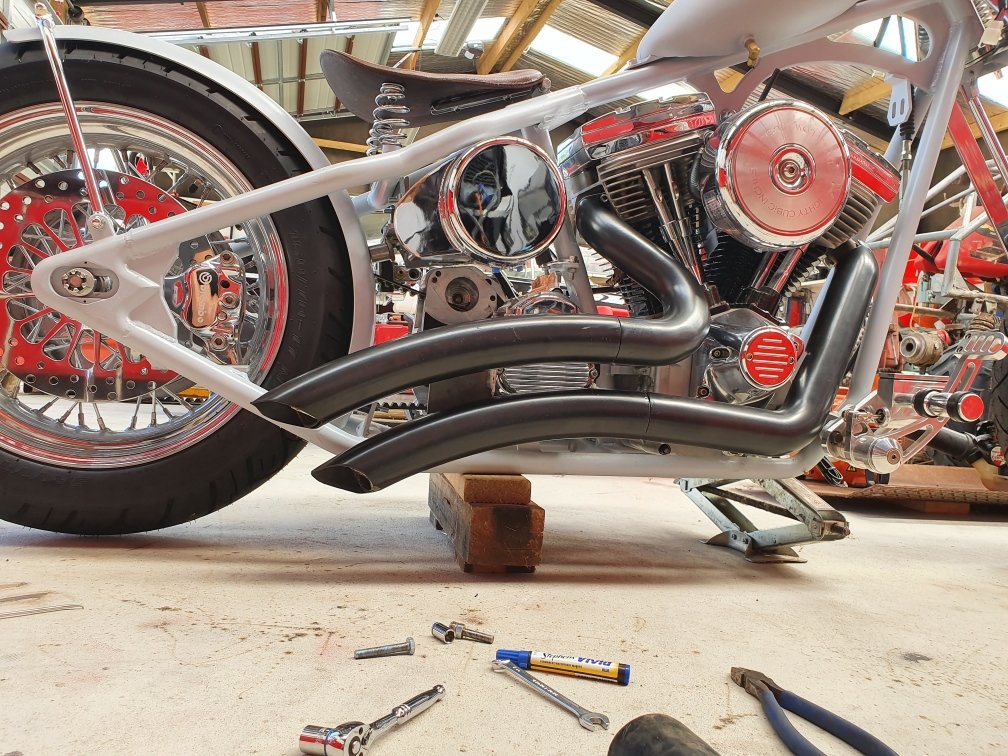
My exhaust had a terrible bracket on it that sucked! My OCD couldn't handle the fact that the two pipes weren't parallel. Over a 400mm section where they run along side each other, the gap was out by 10mm from front to back. I saw this as an opportunity to fix two problems. 1) make it look right to the eye 2) raise the lower pipe by 15mm and the upper pipe by 5mm. This will really help with ground clearance, maybe not completely solve it...but certainly won't hurt. So: Marking out, lifting the holes by 10mm. And looking at the pipes for nice sweeping parallel lines. Success!!! So, lower pipe is now 15mm higher than before, with nice clearance around all the bits you don't want a hot exhaust touching. Happy as fuck! I'm probably going to cut the lower pipe mid span and shorten it by about 40mm to bring it inline with the upper pipe and my frame angle where it heads up to meet the axle. But that can wait for another day.
1 point
-
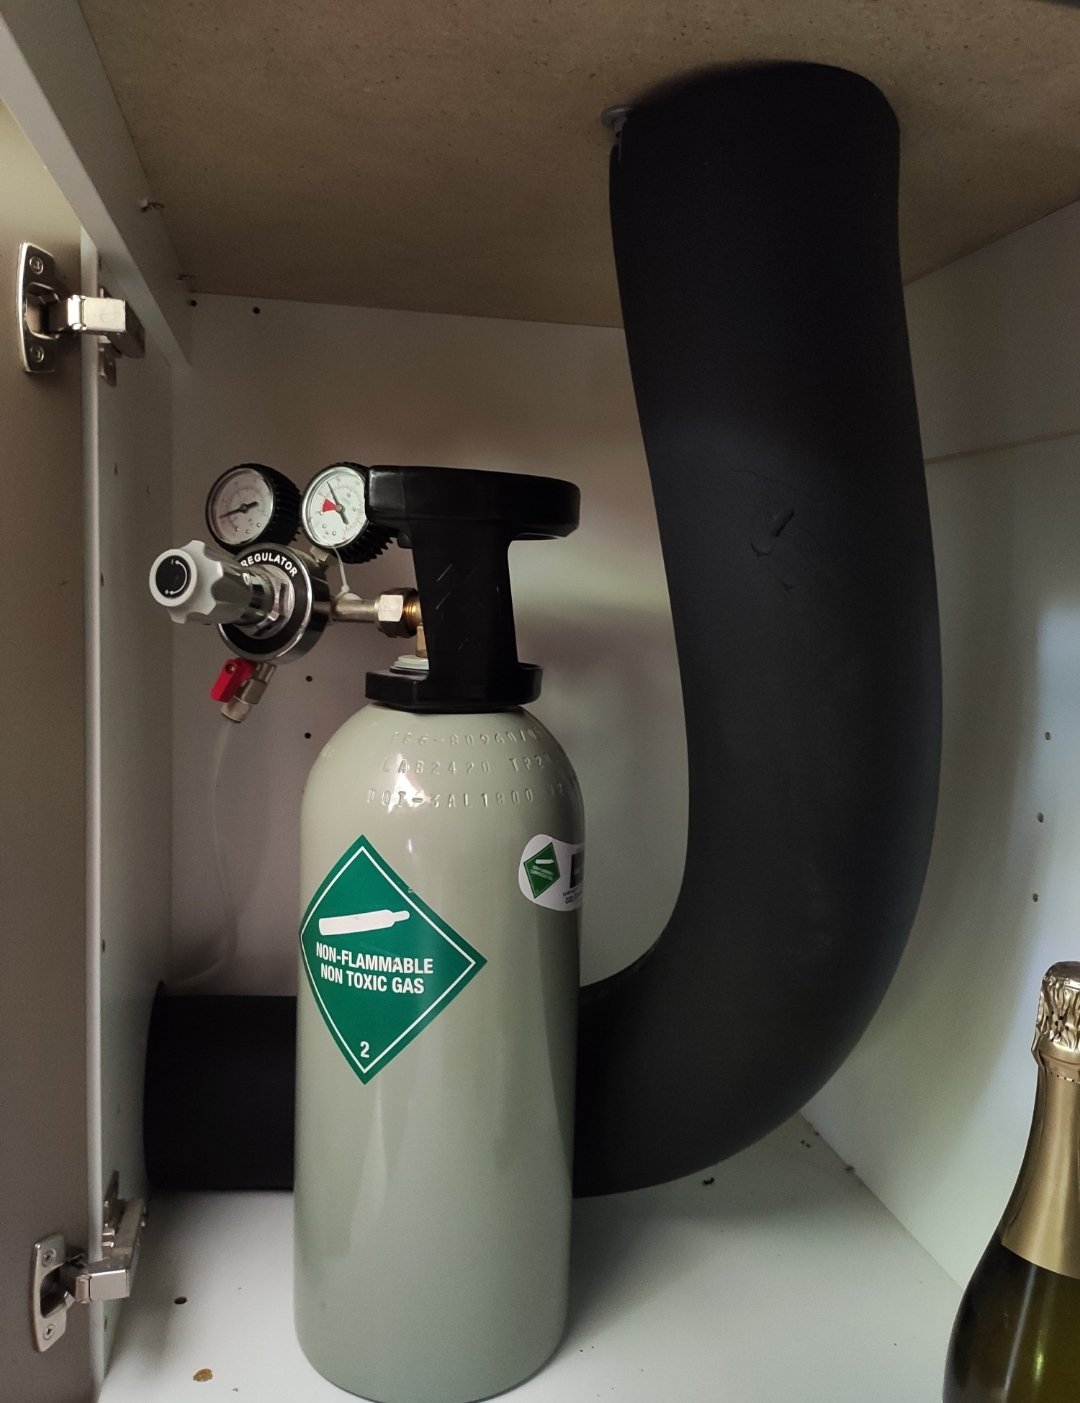
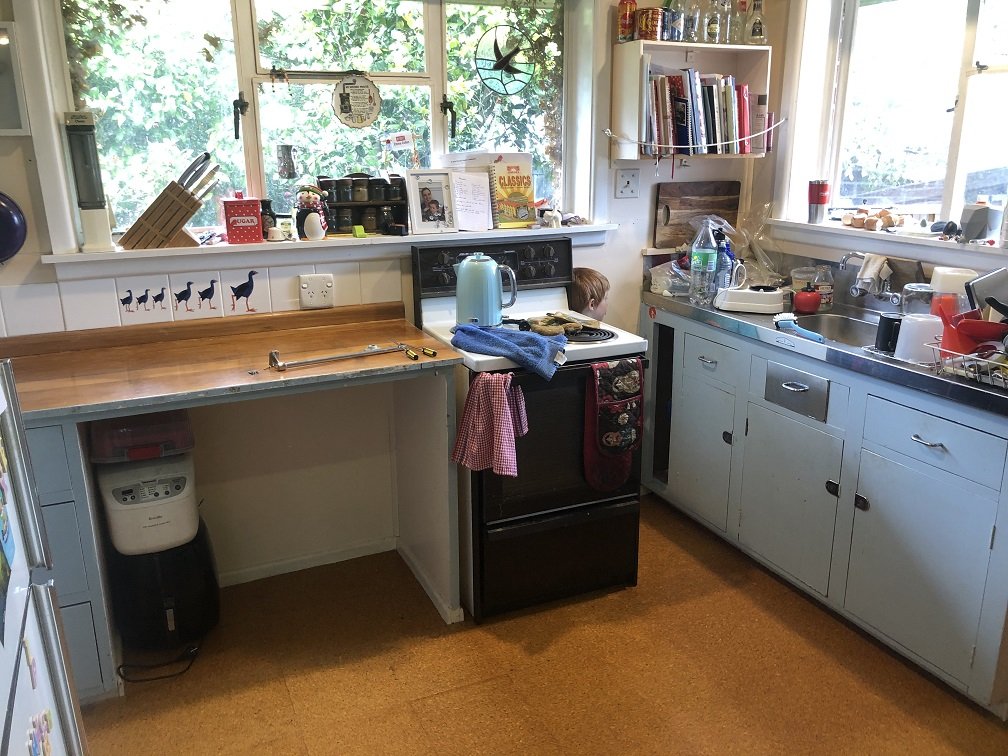
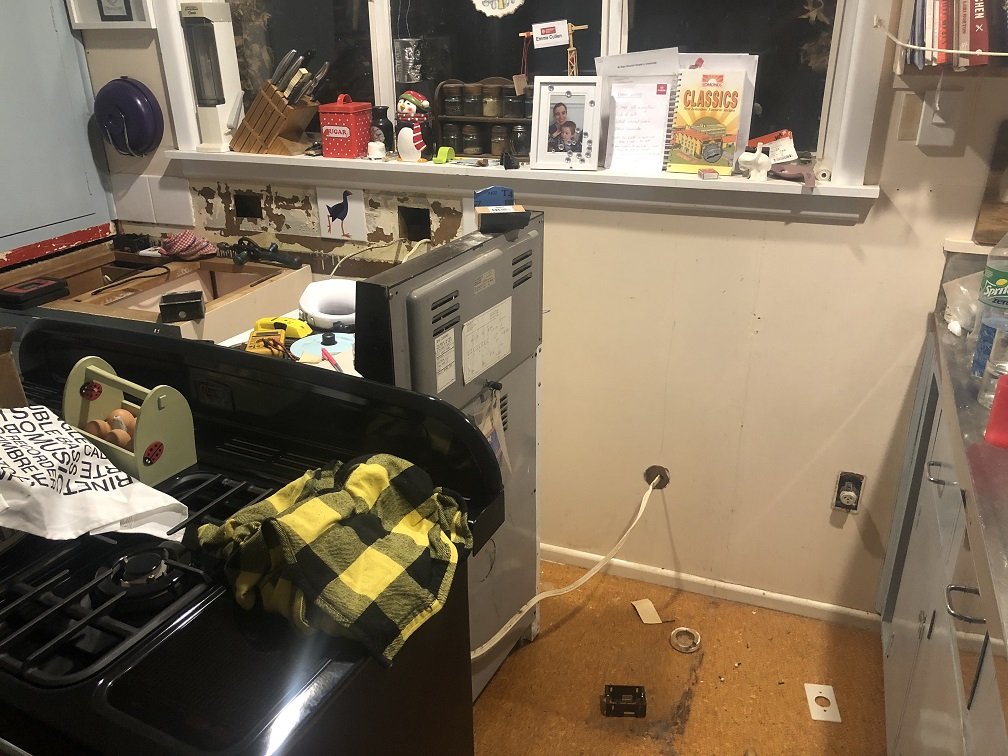
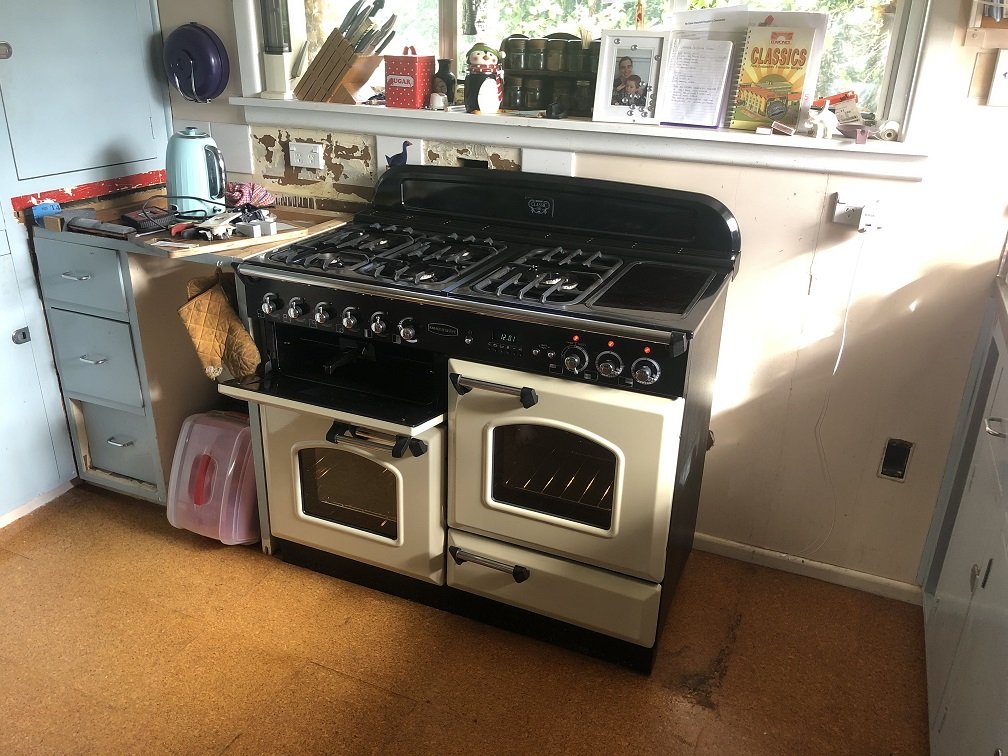
I needed to install the oven I fixed up from a few pages back. Kitchen Tax is real though, people talking about spending all sorts of silly figures on kitchen reno's. I decided to throw it in myself, bar the gas plumbing. I quite like the old cabinetry so I just built up a new cabinet to match the old, save replacing the lot. I also uprated the range plug & switch & shifted the outlets to suit the new benches. A bit of tiling and edging to finish off, but now we can get stuck in to cooking up a few feasts!
1 point
-
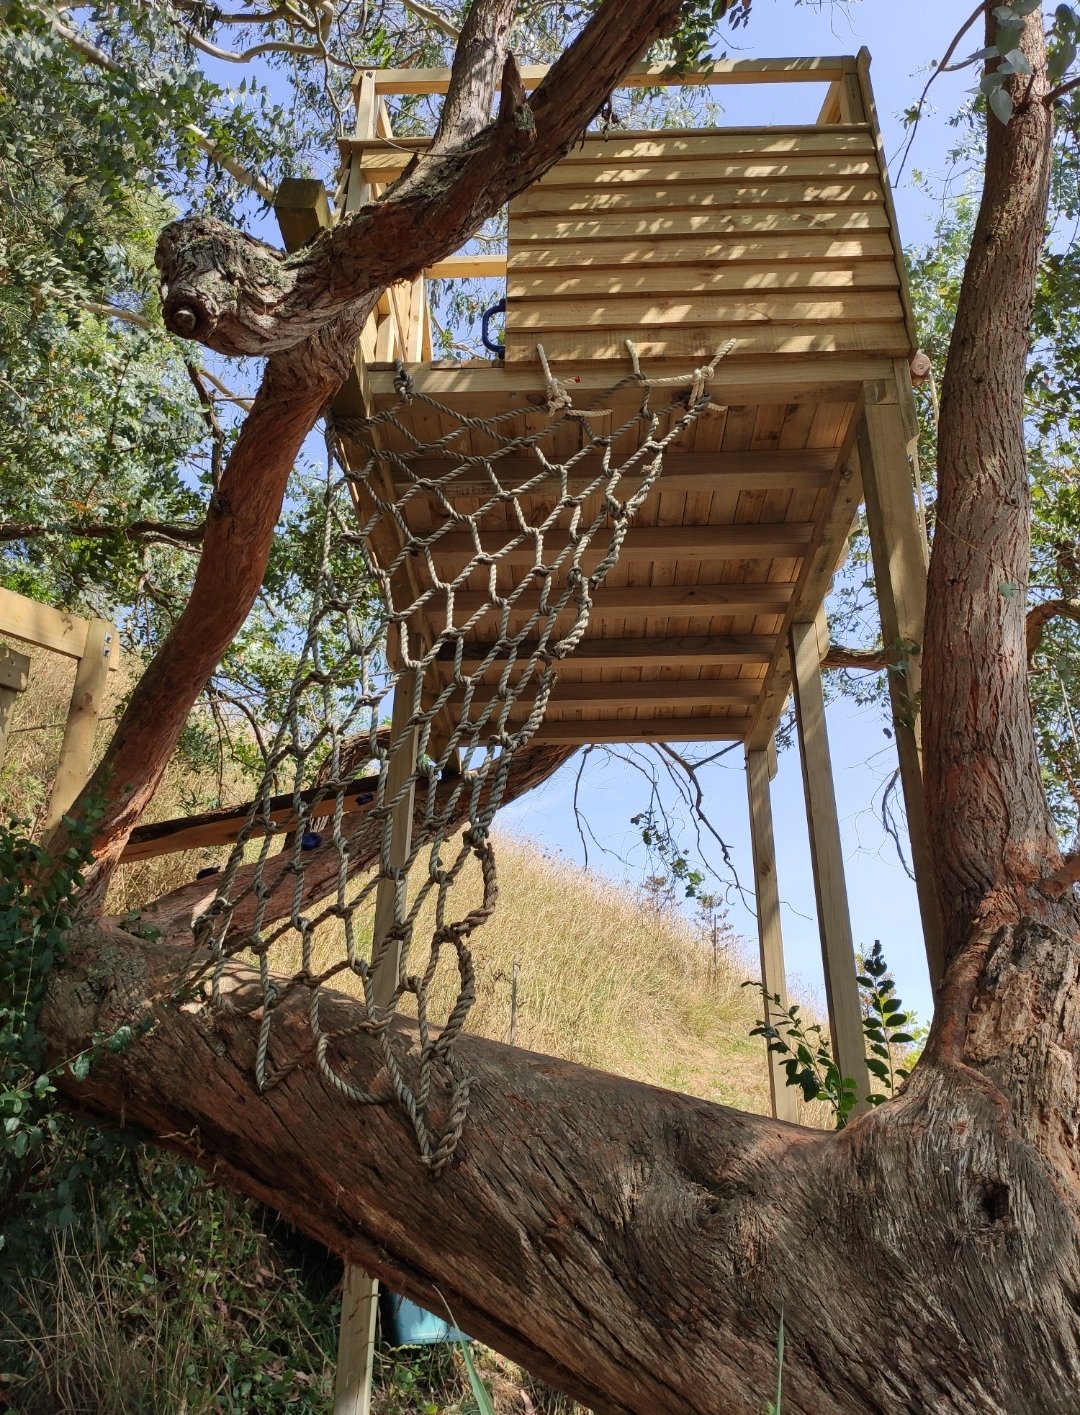
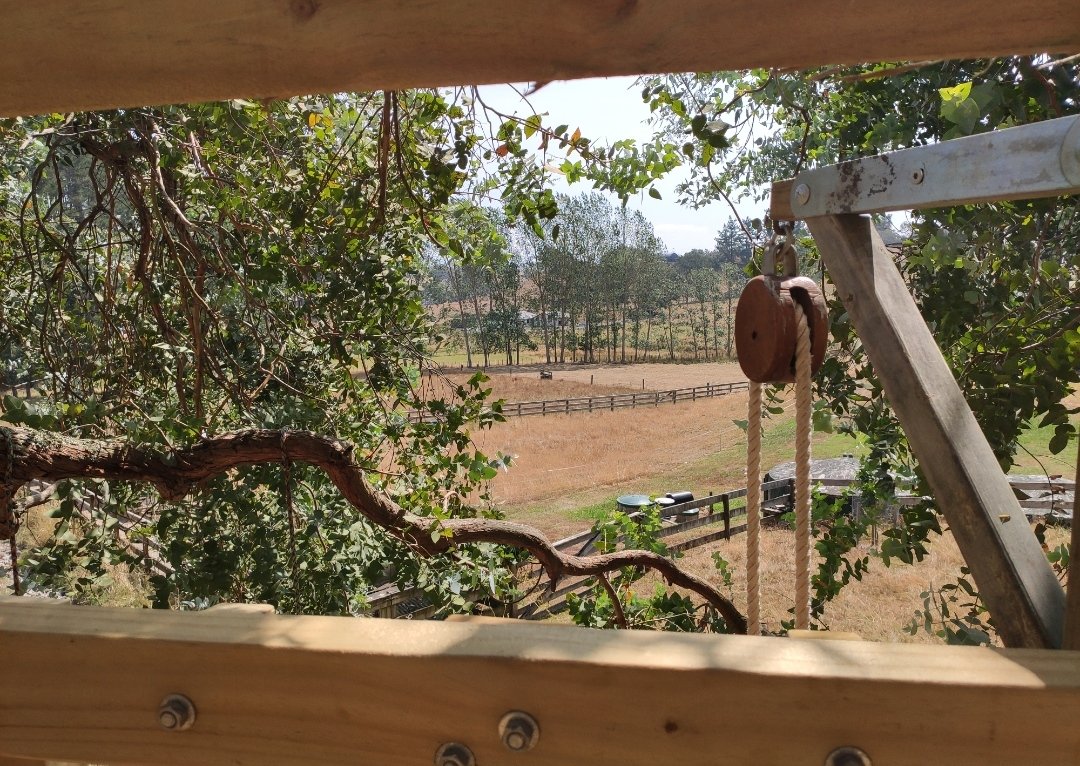
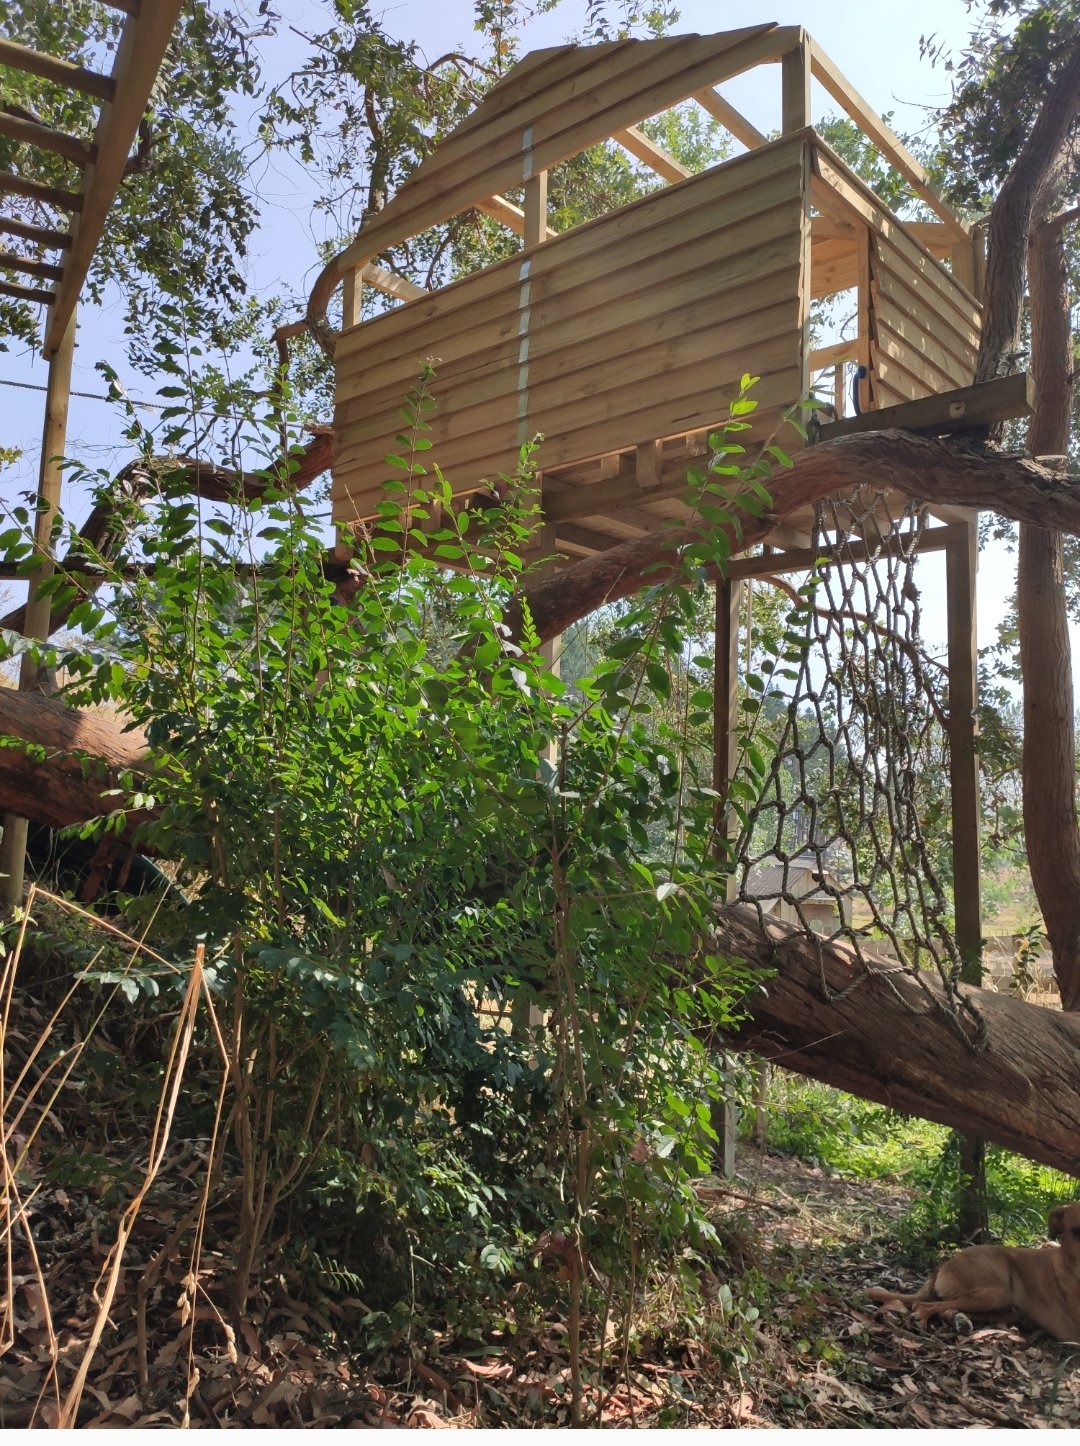
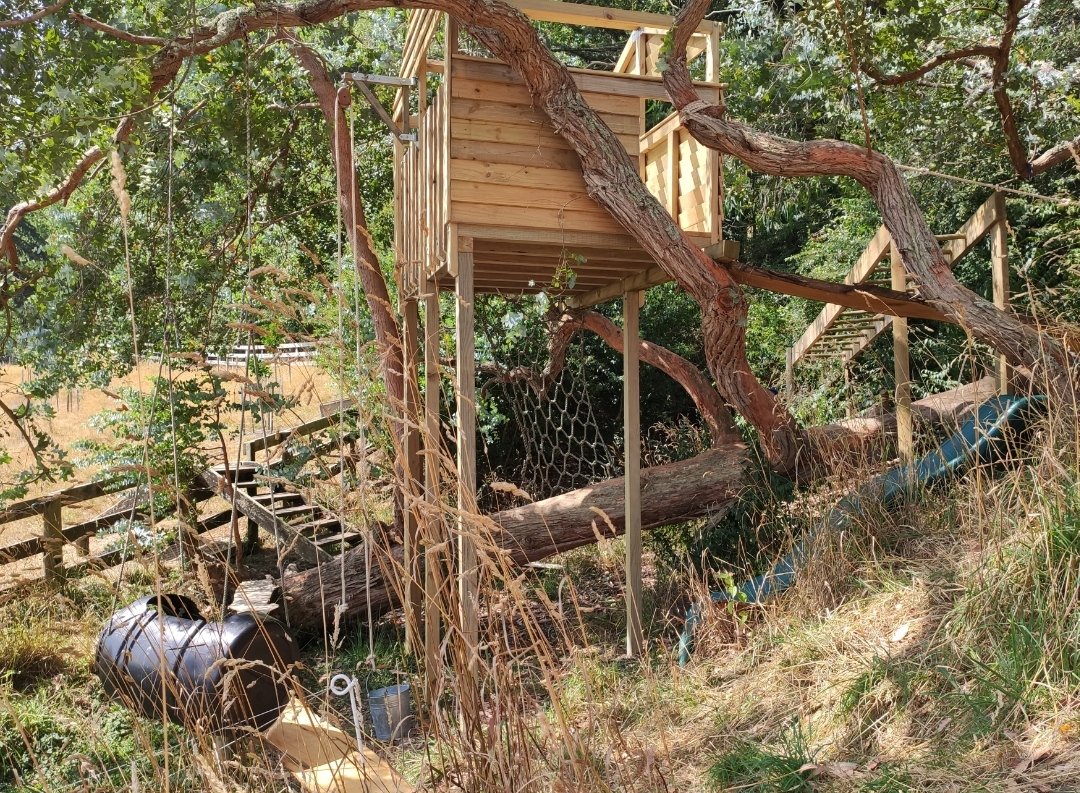
School holidays project with the boy, super fun building this kinda stuff get to channel yet inner 8yr old. Still needs iron and a few other things, but mostly there: View from the top deck, stoked with the pulley scored it off TM as salvage from some old ship
1 point


.jpeg.4f2770cd743ffa6c2b82c9b905e44233.jpeg)


This leaderboard is set to Auckland/GMT+12:00