
Leaderboard


Popular Content
Showing content with the highest reputation on 02/27/20 in all areas
-
Cool kids wear fresh Lids14 points
-
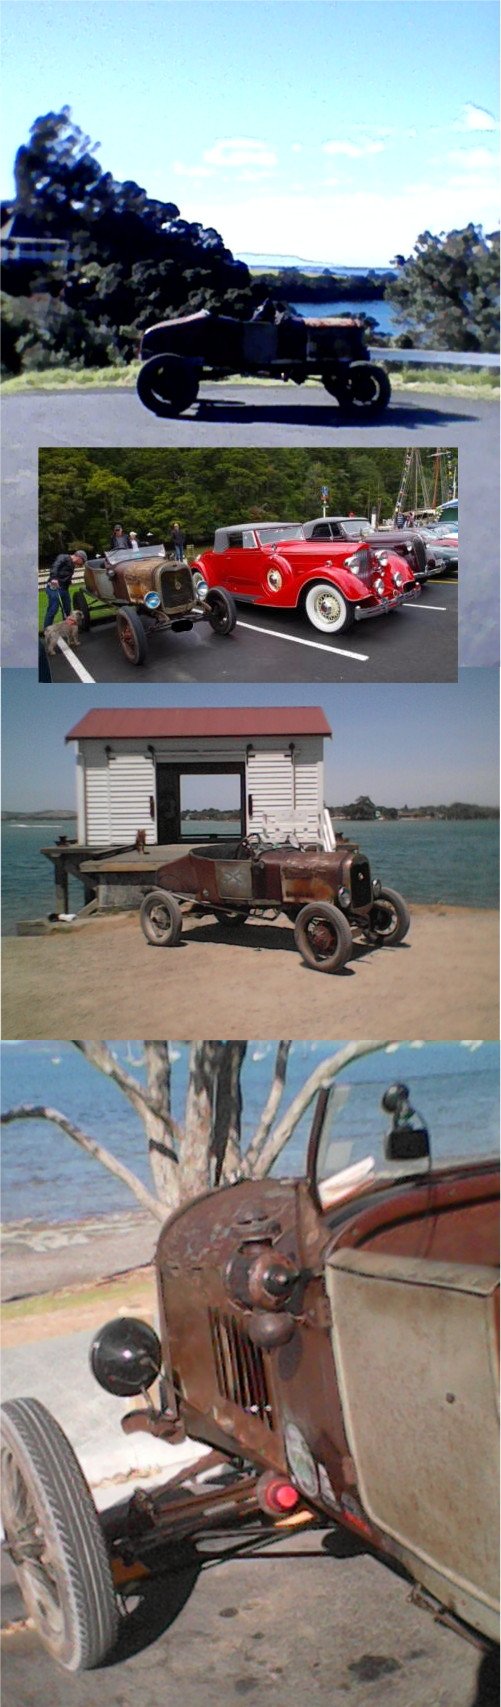
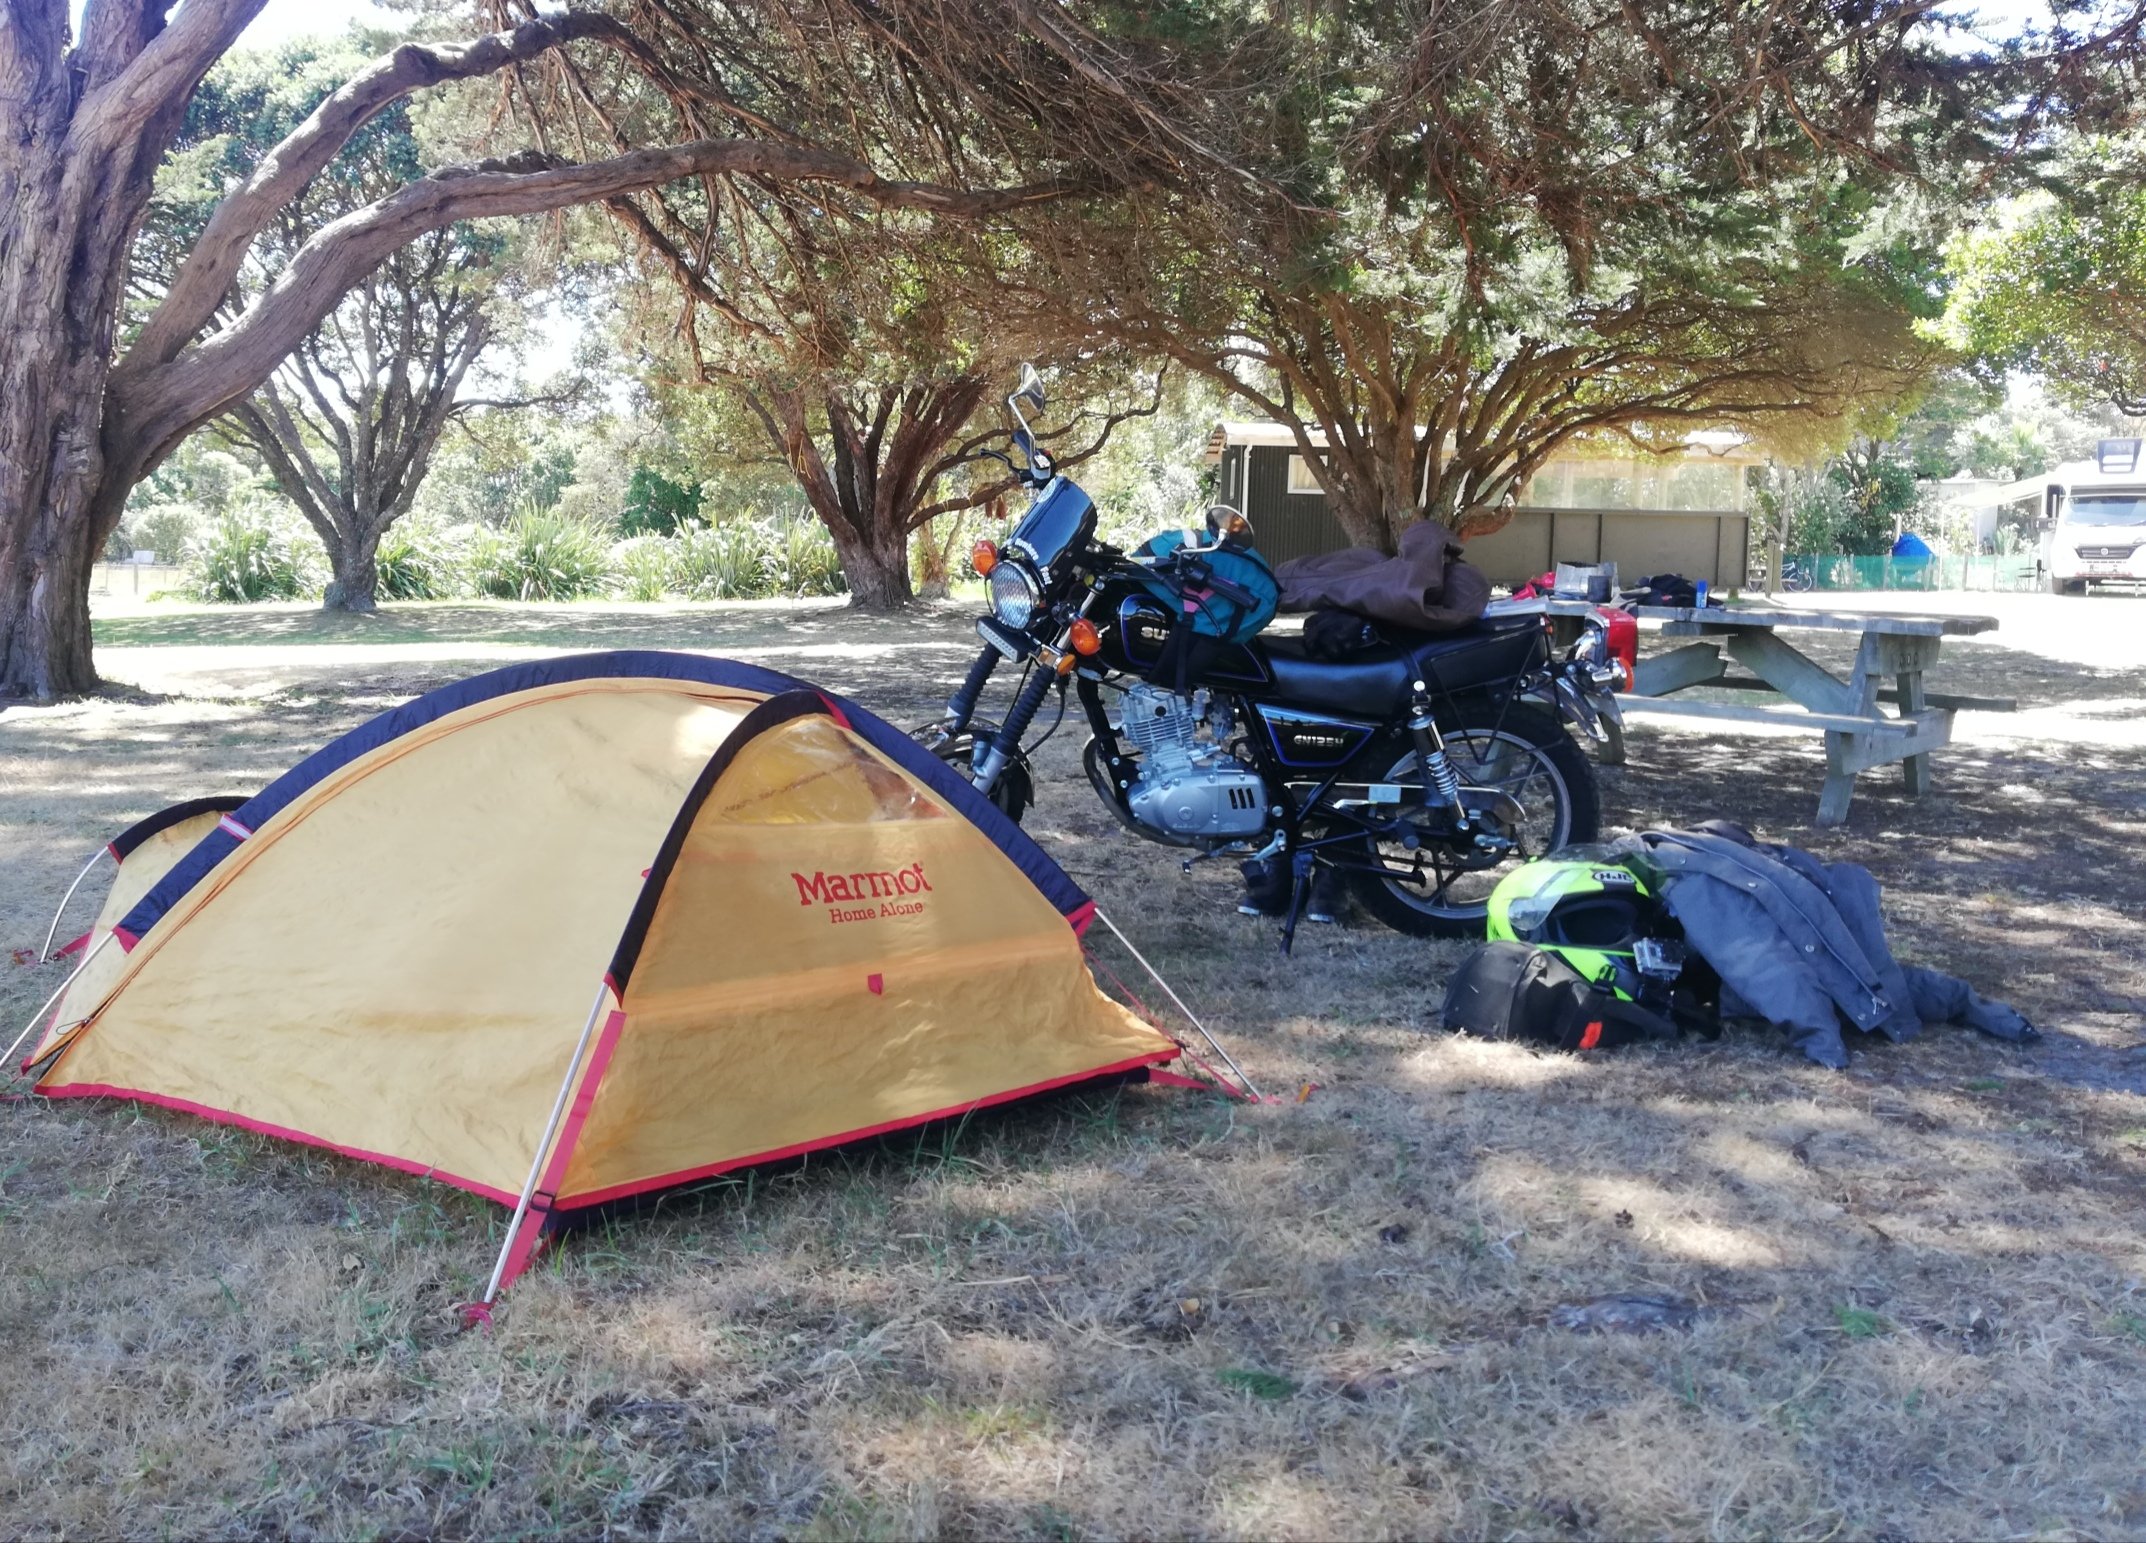
Most of the old pictures died but i'll see what i can do to replace them. So i learned you can use a pocket knife to carve totara & chewing gum to make a makeshift oil plug, or a frost plug. Just some pictures of some travels.
 13 points
 -
Made a start modifying the 4-link mounts. As you can see they originally hang quite a bit lower than the sill. New mount all welded up. Should be heaps strong enough! Cleaned up a bit. 17mm socket just fits through the channel to tighten/loosen the bolt. Might swap to Allen head screws, as the paint/underseal mightn't leave enough clearance. The lower arm is nice and level now. Next was to do the upper arm mounts. This is it all done coming through the floor under the rear seat. The seat just doesn't fit, but should be an easy fix by bending one of the wire spring things a little. Top arm angle looking much better. The arms should intersect pretty close to where I guessed the instant centre of the car will be. Just have the other side upper mount to finish off. Sent a bunch of stuff of to be zinc plated. Some didn't turn out as shiny as I'd liked, but not all of it's that visible and I think I'll get the engine and gearbox mounts powder coated any way.11 points
-
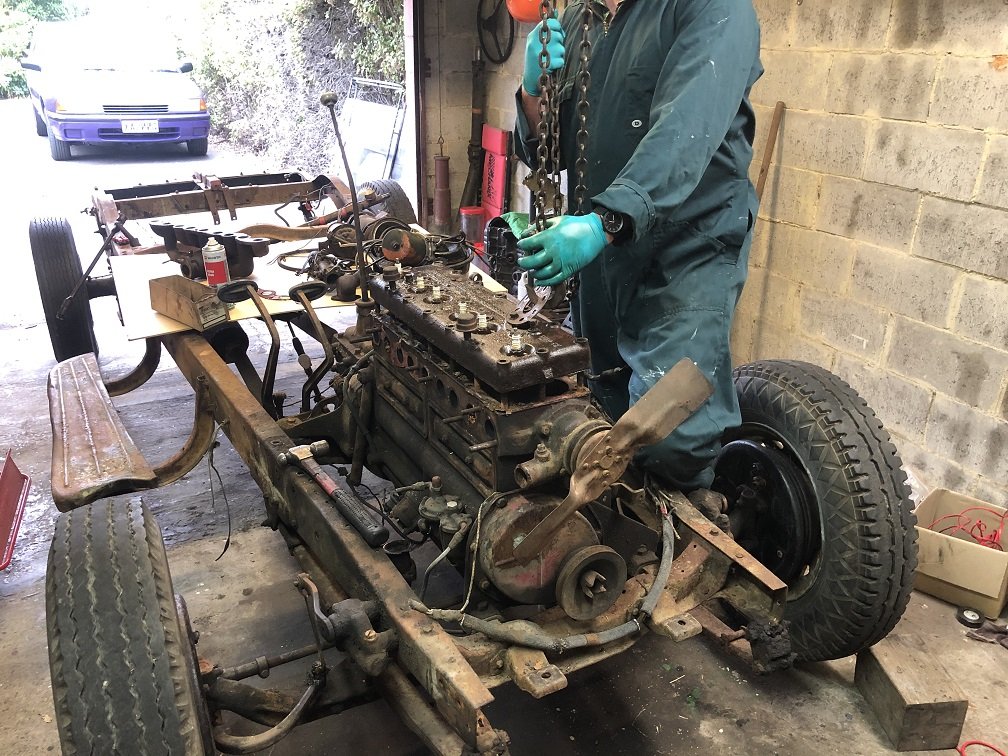
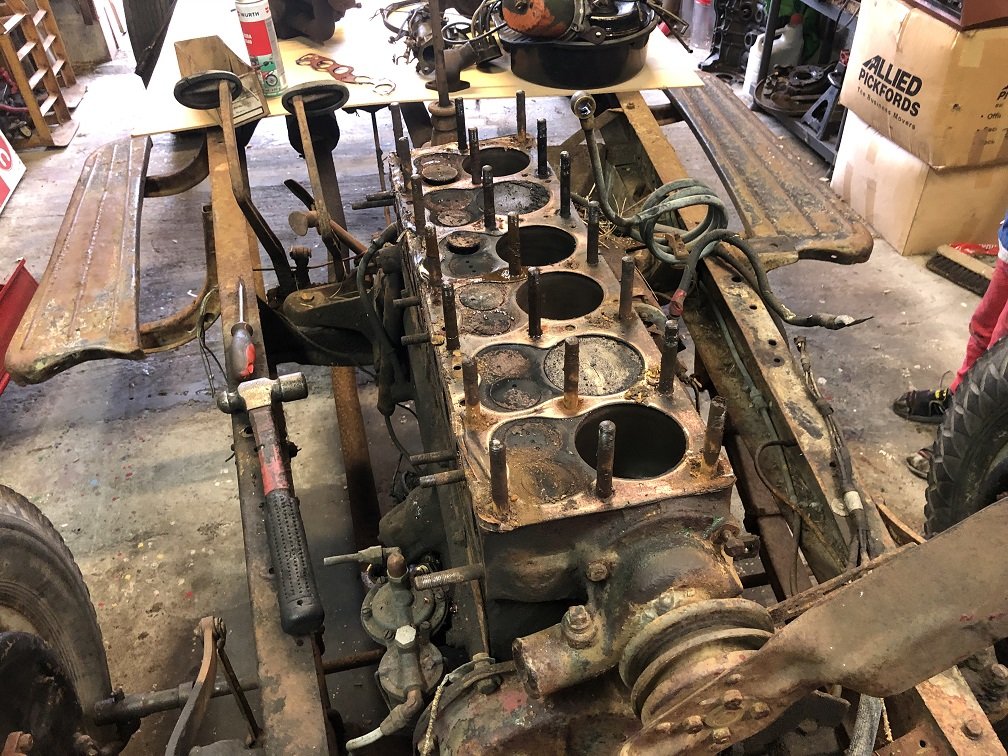
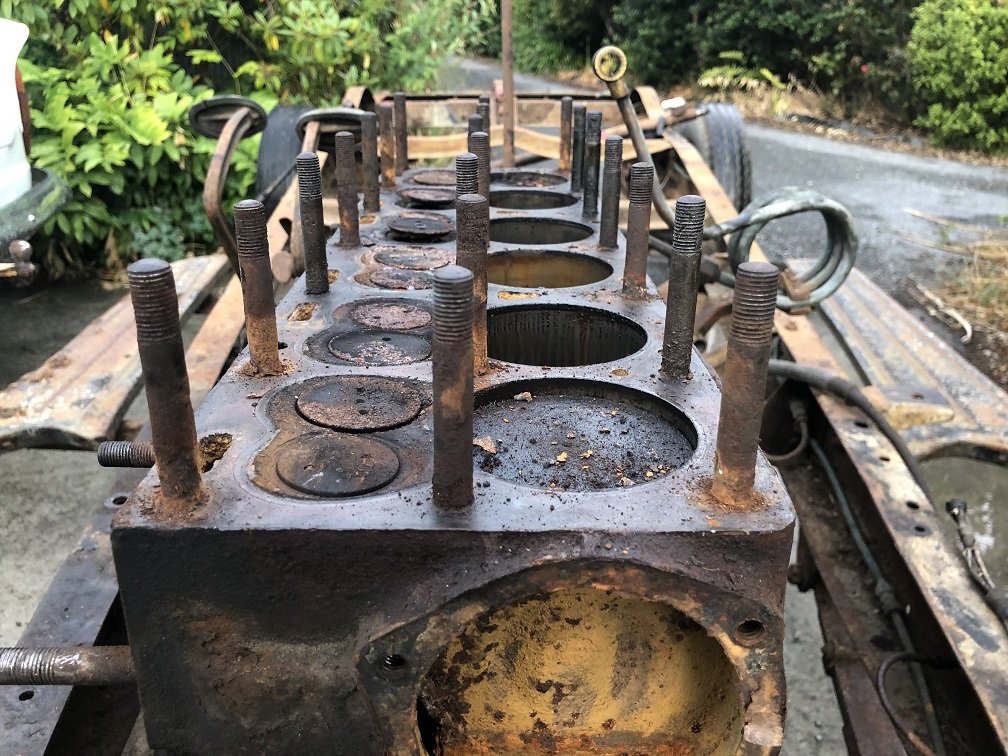
We've set ourselves the goal of having this run under it's own steam before Christmas, only time will tell if that's realistic. 21 head studs and 35 years of rain, not a great combo. We had the engine crane hooked to the head almost lifting the front wheels off the ground before she shifted! Minimal bore damage from what I can see. The valves aren't pretty, but what is on this so far. We'll keep tearing this down and drop the bare block to the reconditioners for closer inspection and start a parts hunt.
7 points
-
All very painless. Lots of rust converter poured down the pillars and copper sprays for days Soz I remembered about pictures as I finished with the black zinc Fluked the rail, even the chrome clips on6 points
-
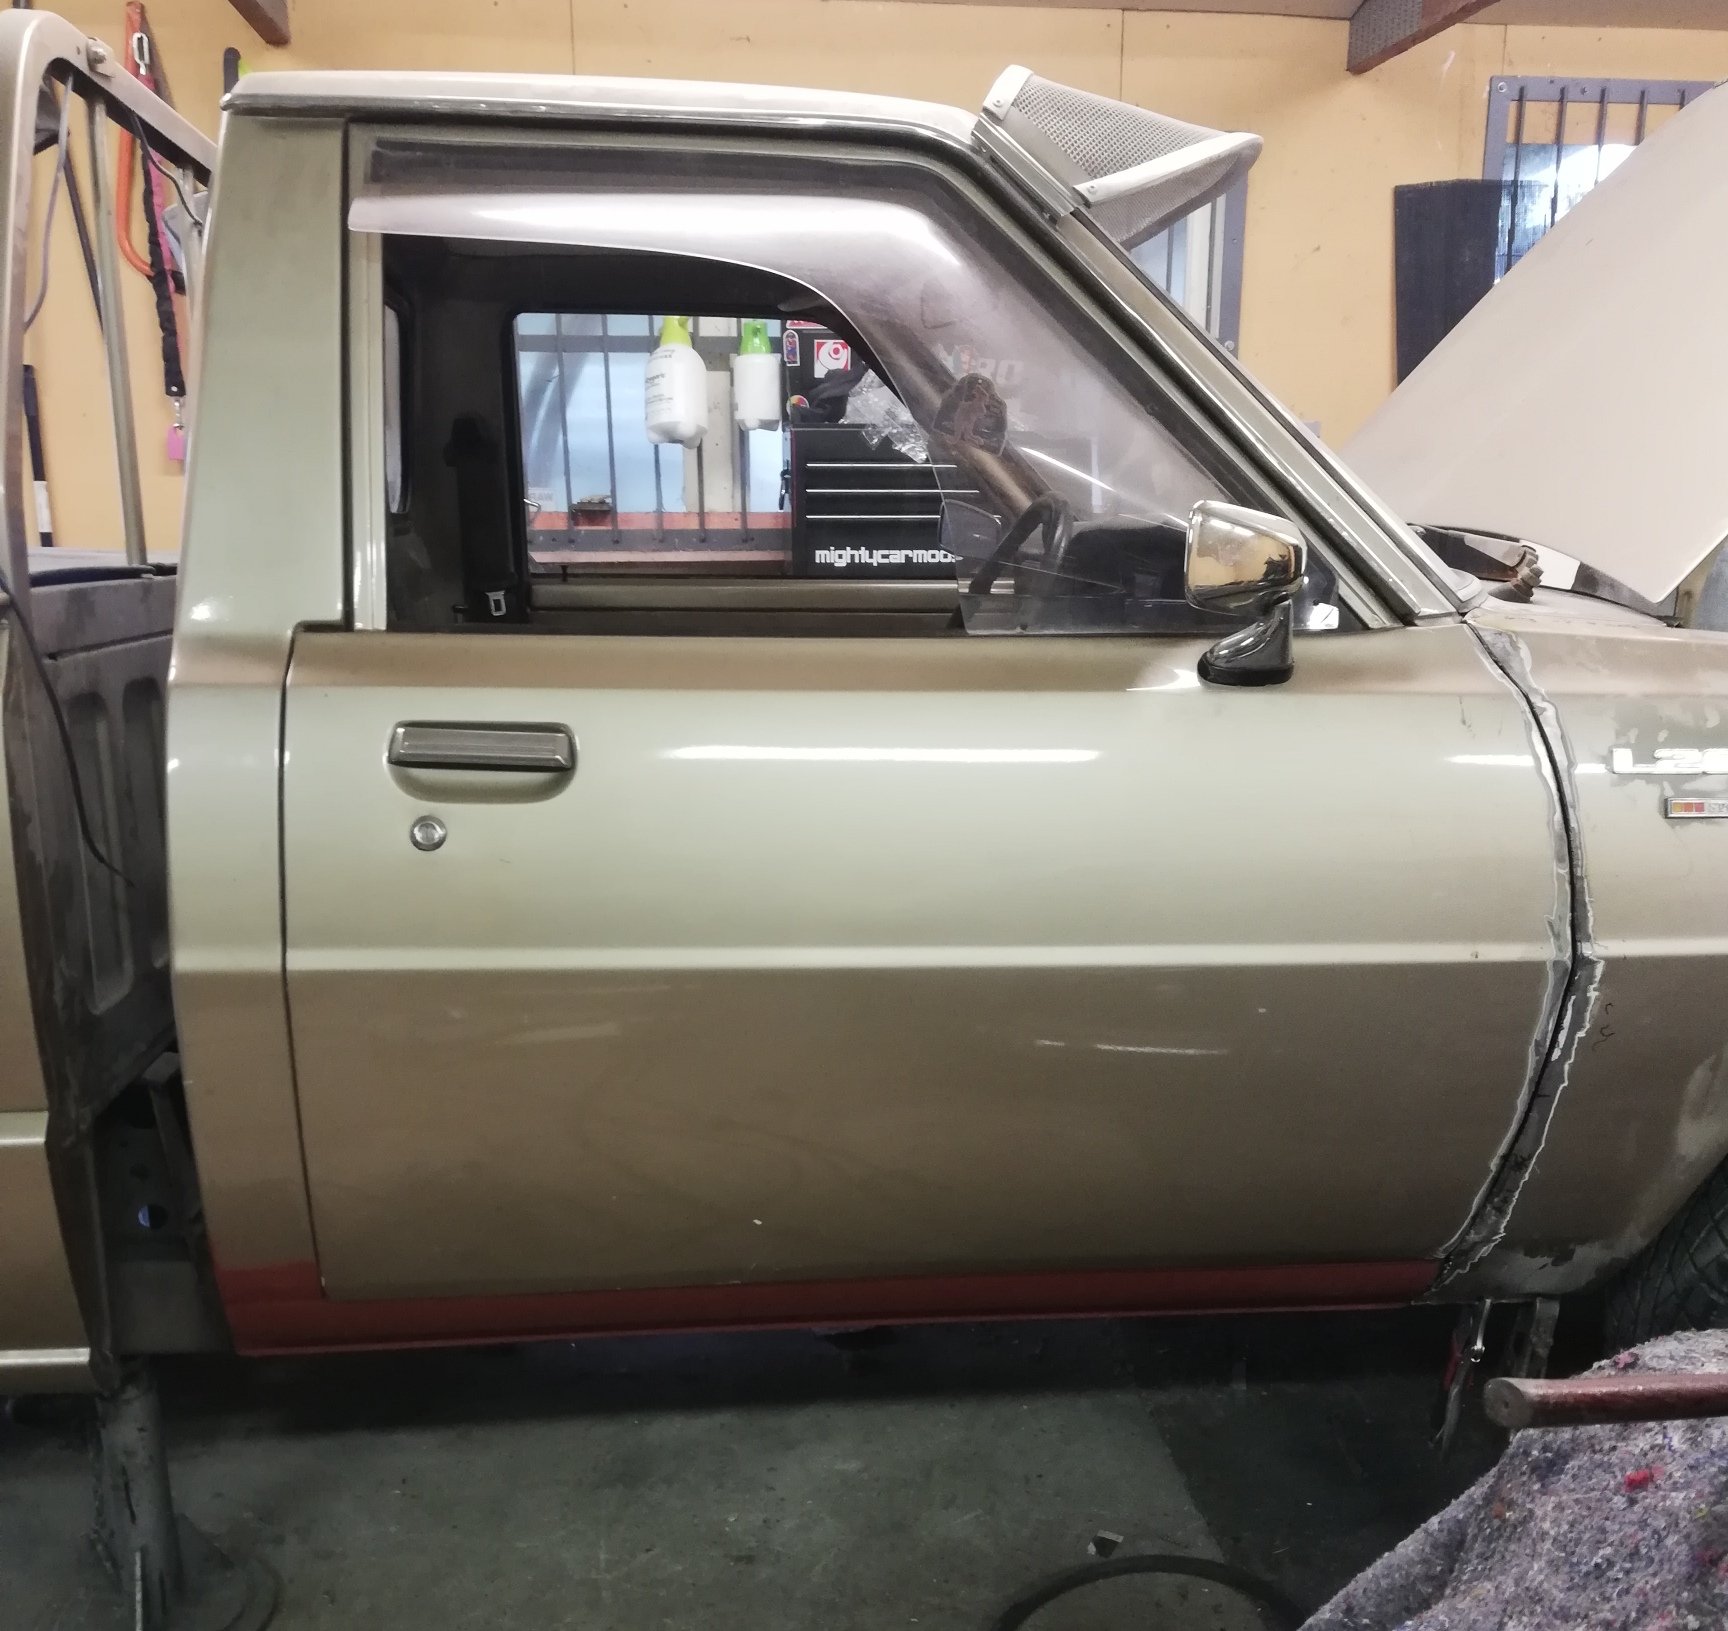
Door fits Opens without hitting anything Closes without hitting anything Is parallel with B pillar Is parallel with sill opening Sits flush everywhere All it took was totally reshaping the guard. Some spots were way out. The rear mounts had been welded on crooked. Added about 5mm in some places and skimmed a mm off in others Need to add a little at the A pillar, and probably add a little to the A pillar bottom edge itself. That lower bend/angle was different on the B pillar,door,and guard. At least it closes now FFS
5 points
-
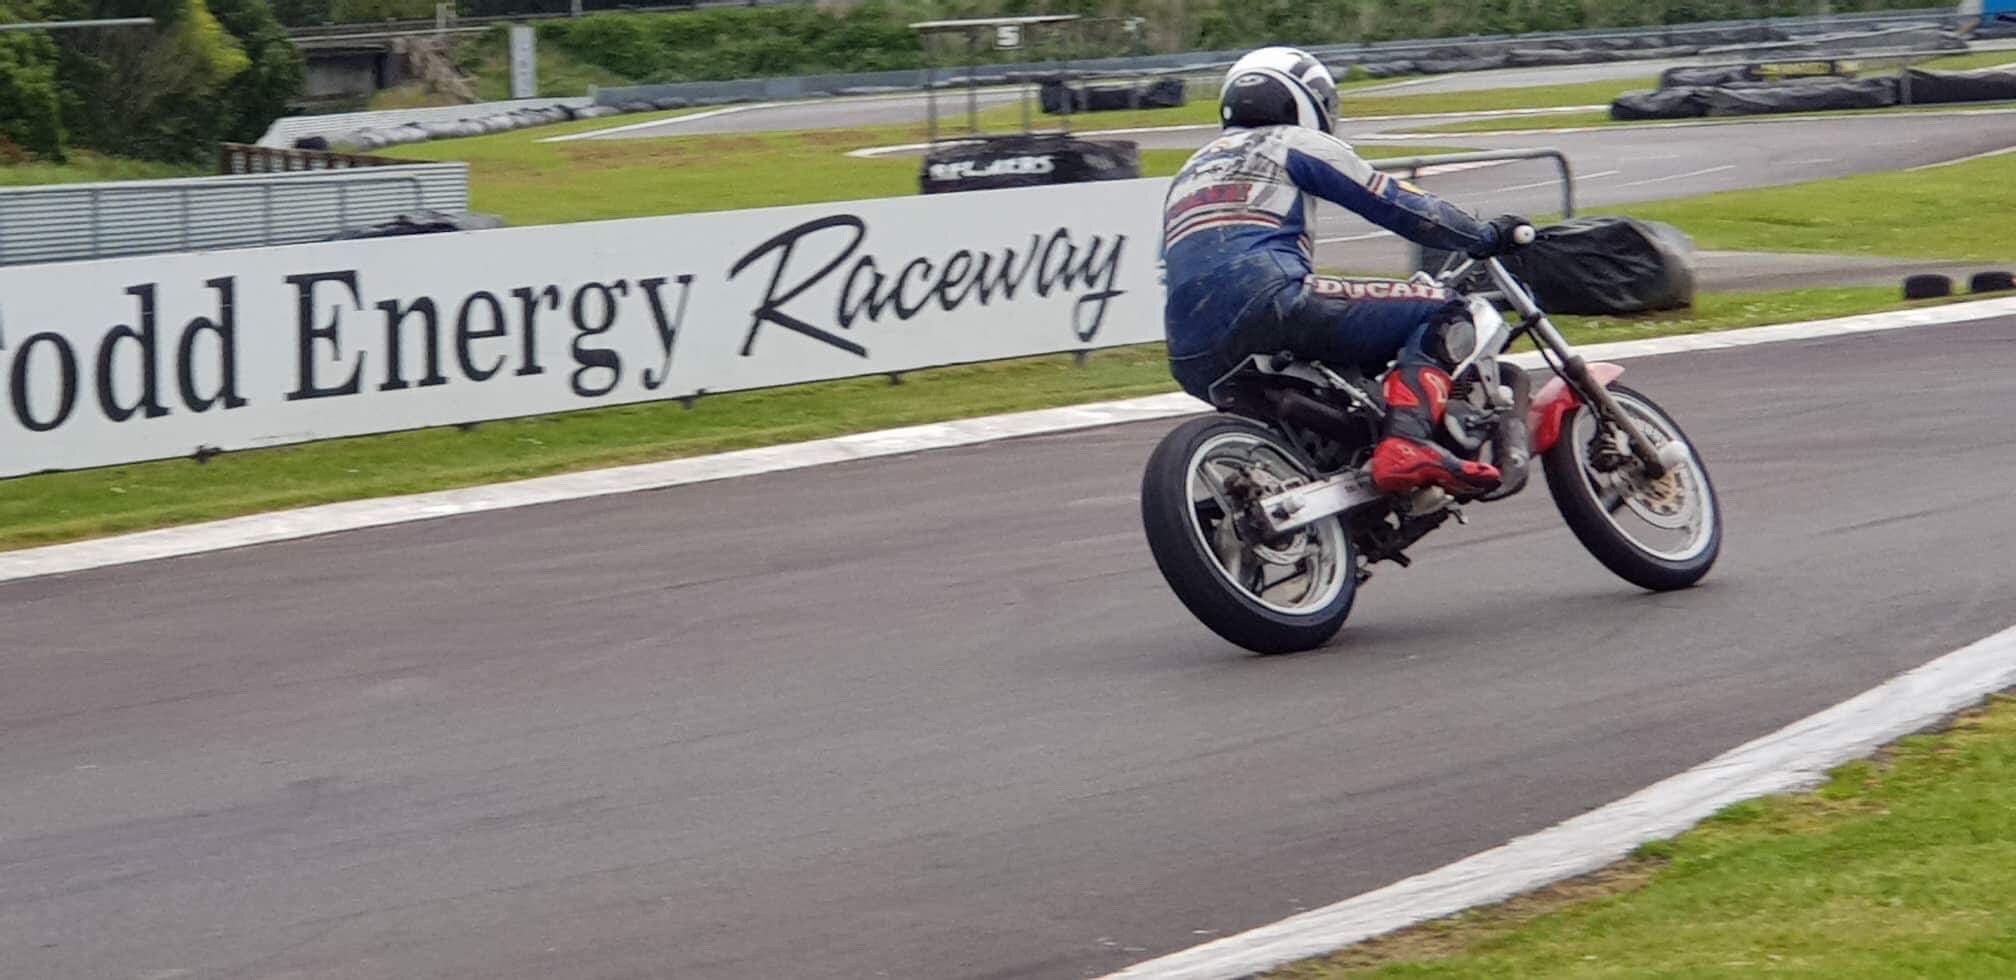
It's woffed and regod, beats most cars on here5 points
-
OK, i tried to replace as many pictures as i could, sorry about them being mostly massive though. Wow that's an old photo. It made a friend half it's size.
5 points
-
5 points
-
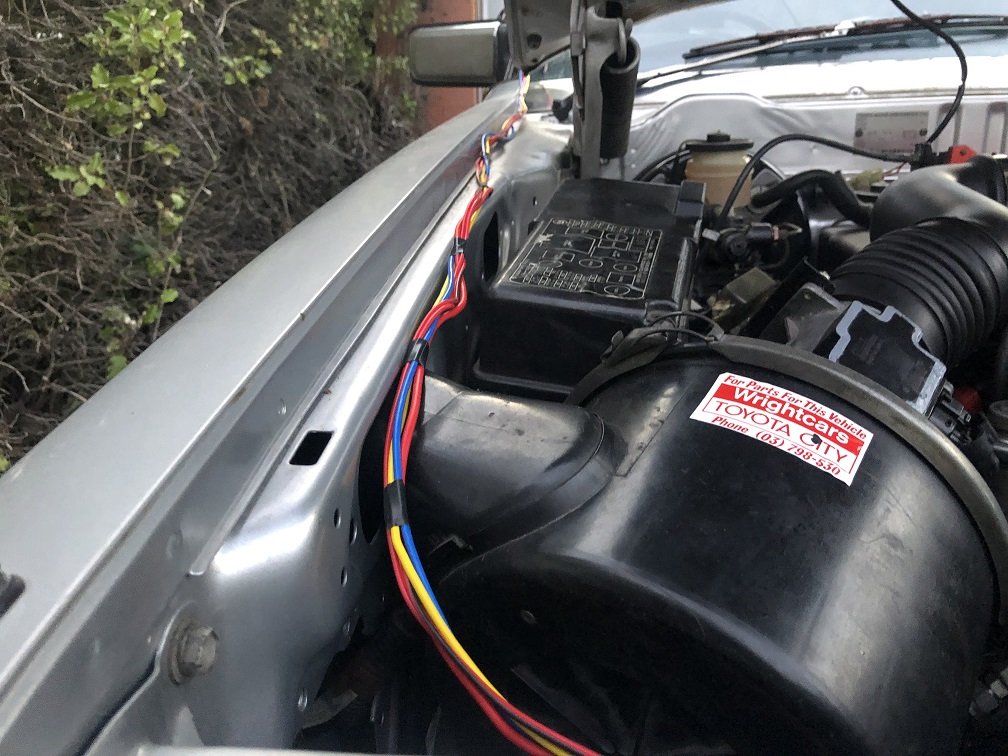
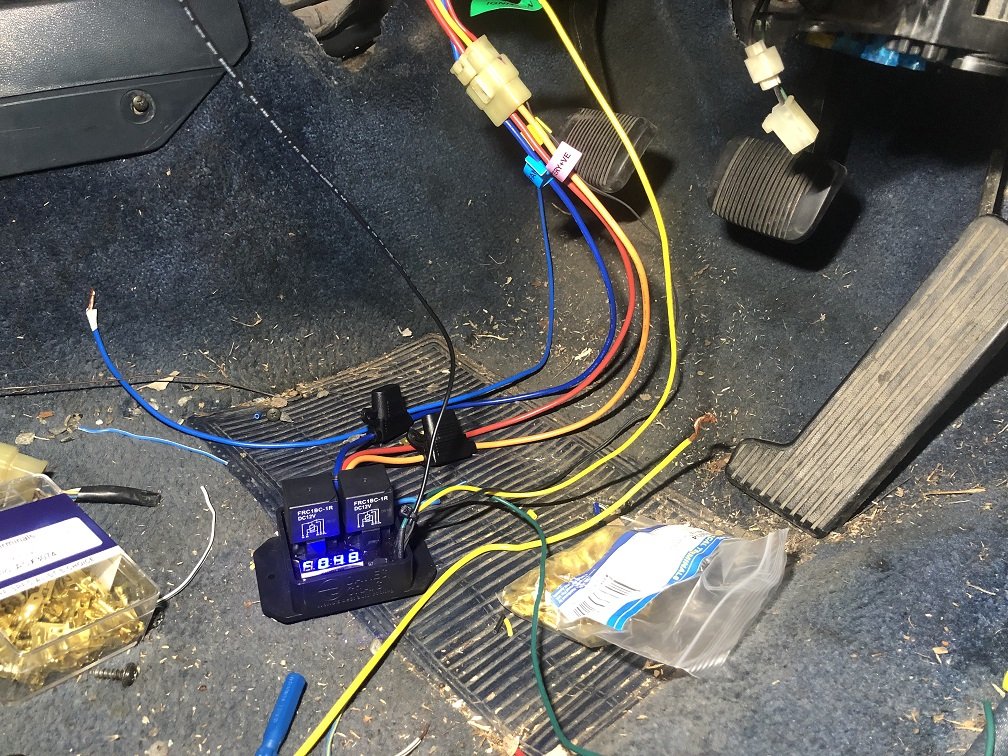
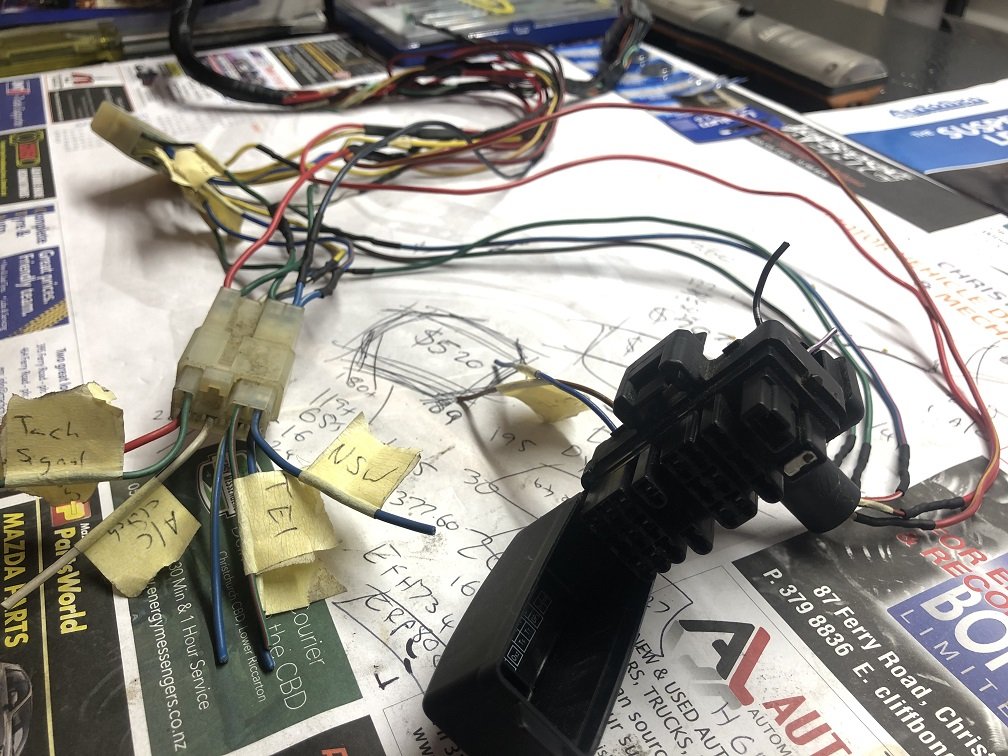
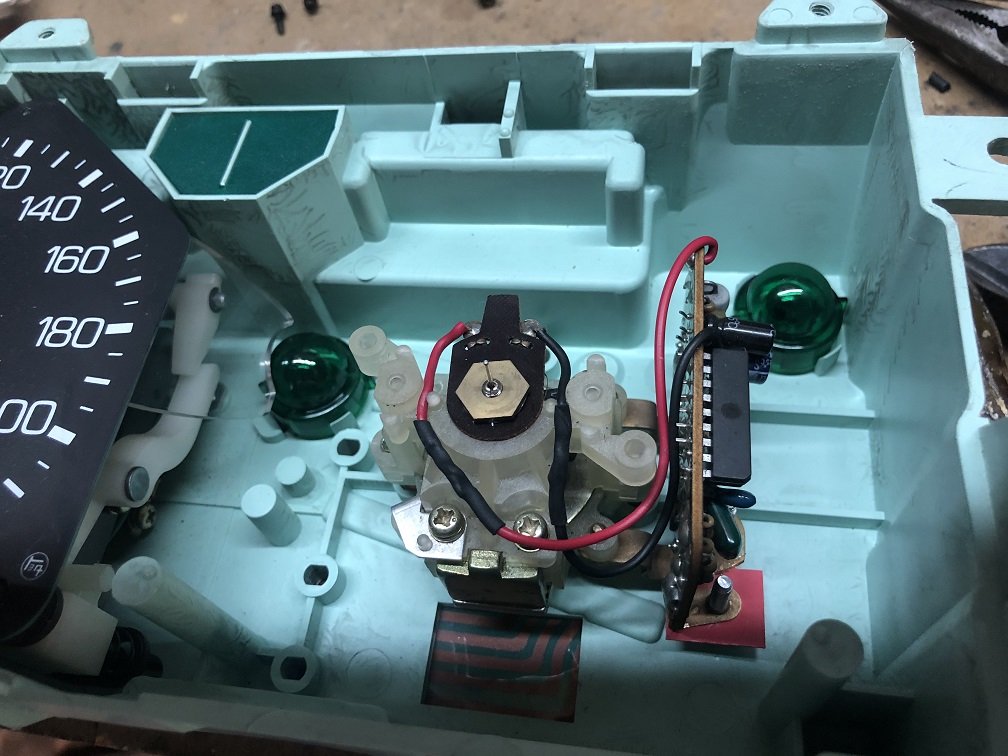
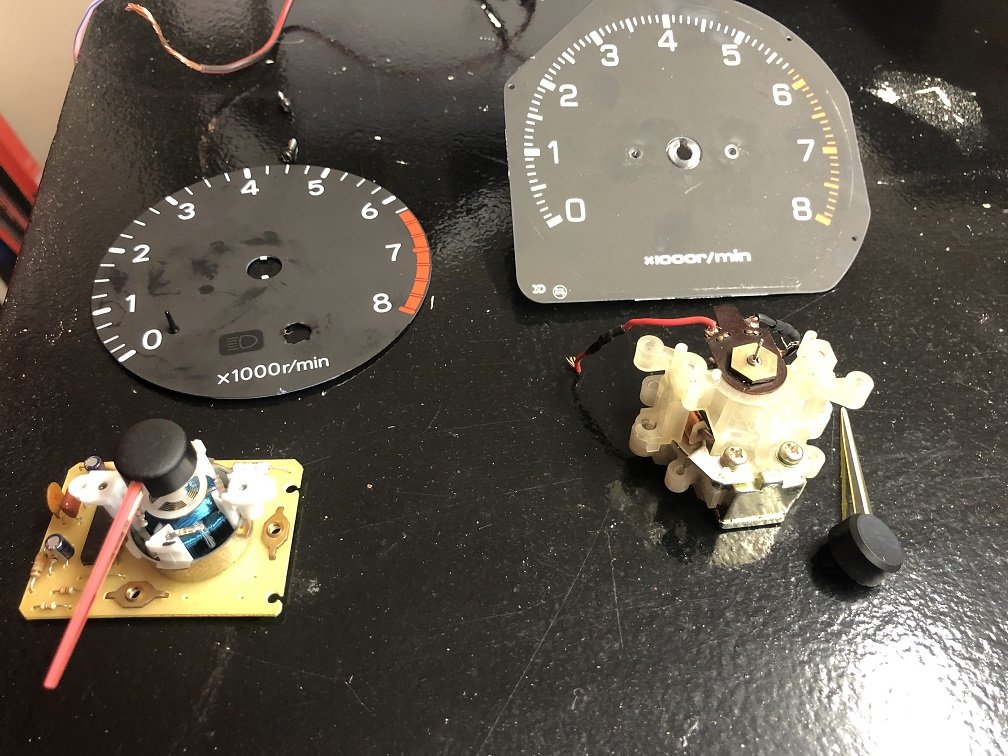
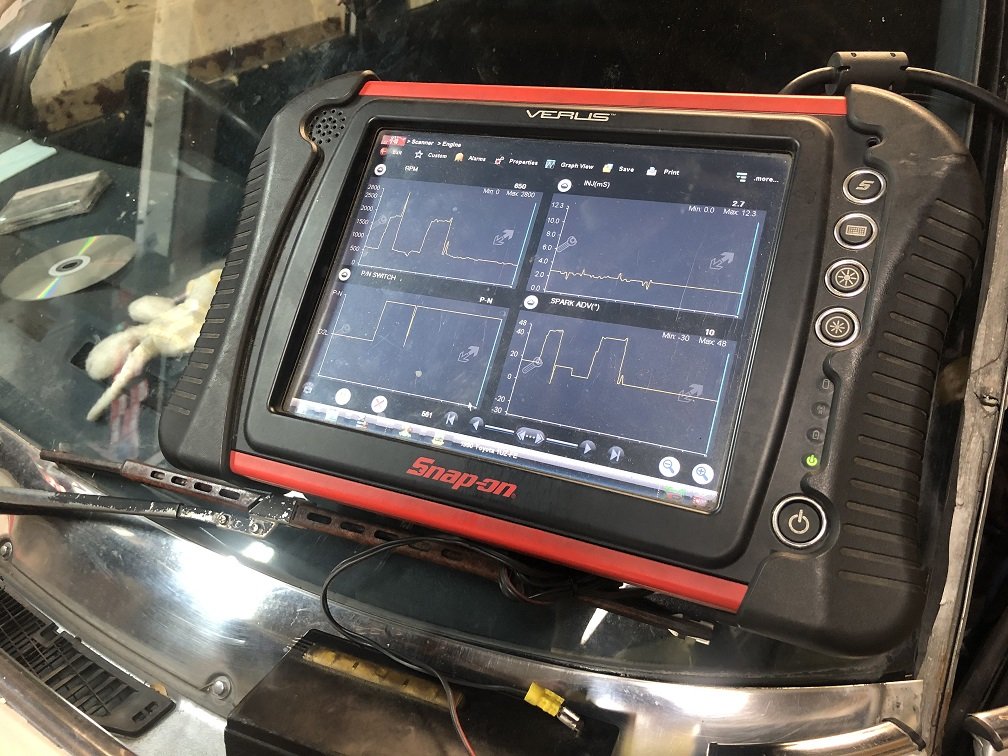
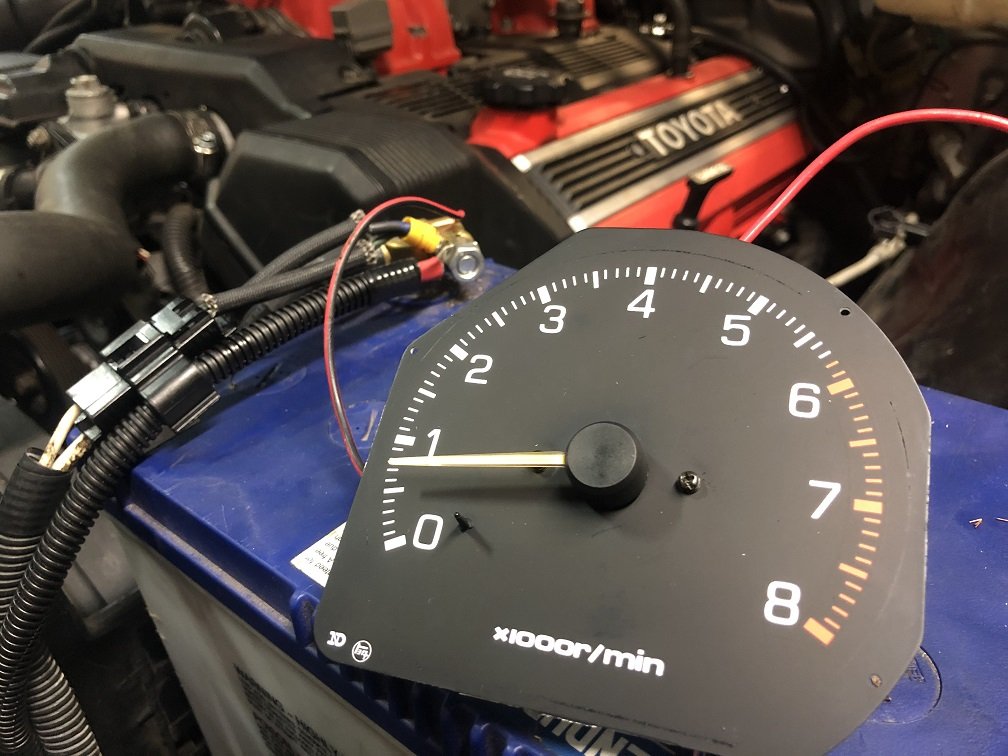
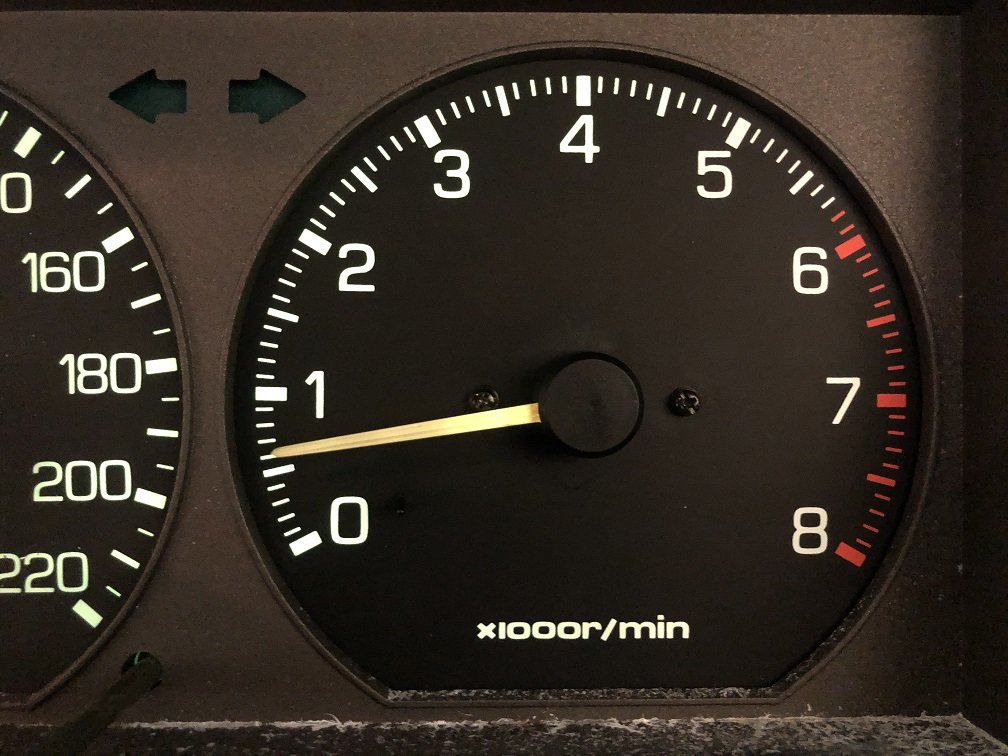
Next up is the fan controller. I got a 2 speed controller from Davies Craig, if the temp doesn't drop enough after 10 seconds of the first fan it kicks in the second fan. Also has an A/C trigger for when I get to that. I've seen a few of these mounted under bonnet but it isn't advertised as water resistant so I wired it up under the dash. That way I can have radiator temp while driving if needed. Once I mocked up length it's all been tucked under the guard with the rest of the loom. The early 1uz doesn't have a Te2 pin on the under bonnet diagnostic connector to trigger live data output, but it does have one on the ECU. I've gone and wired in a standard Toyota connector under the dash with Te2 for live data with the hope of getting a Toyobd1 Bluetooth dongle at some stage. They are hand made by a cool Canadian bloke so take some time to become available. Next up is Tach. Keen to keep the stock look inside so I swapped in the guts of a RX60 4cyl Cressida tach hoping that would give me an accurate reading. It did for about 5 minutes but then died. Swapping in the original 6cyl tach did the same thing. Maybe they didn't like the trigger signal from the ignition module? The newer style of tach from a 90's Corolla has the same bolt spacing for the card. I just needed to drill out the needle 0.5mm and fit a needle stop, the newer style has no internal limit to rotation other than the clock spring. Beautiful. I quite like the font on these older dashes the more I look at them. Next up is sorting the check engine light and possibly stealing a speed signal off the rear of the cluster for the ECU to avoid a pesky fault code.
5 points
-
Ok so it was the swing arm that was bent. Got a second hand one and banged it in for a test fit, sat perfect! Stripped off all the old paint and surface rust then brushed on some rust converter to kill all the rust in the corners. Here is as it sits now. Next is stripping again back to bare metal and hit it with the etch prime then in the 2k black. Easy.
4 points
-
Re water pump, I glue the gasket to the pump with a very light smear if rtv, then fit it and pull the bolts up tight from there. Give the o ring and where it sits a good dose of rubber grease and put it together.4 points
-
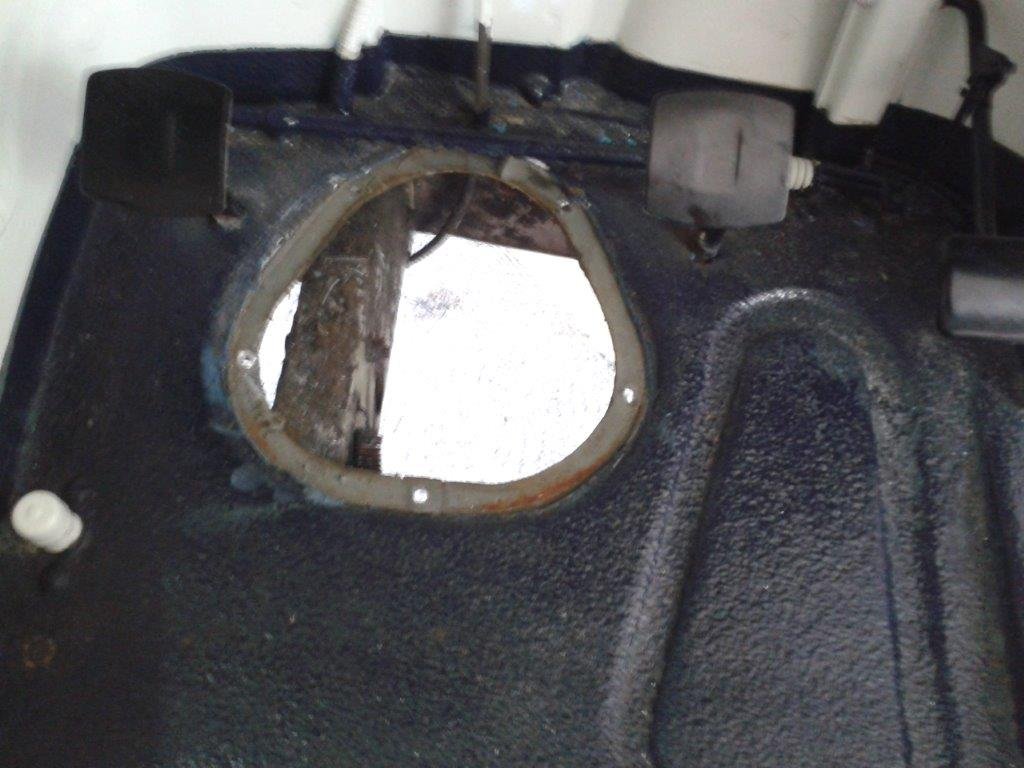
With the steering column out I quickly pulled the side cover off the steering box and a nice mixture of brown sludge, water and a little bit of oil came out. Nice ! No wonder the steering was almost seized. I'll strip the box at some stage to see if it can be saved as I'm planning to keep all of the original mechanicals intact in case someone ever wants to put it back to original. So with the column and steering box out of the way I was able to cut all of the riv nuts holding the outer edge of the hacked cover plate. I then carefully lifted the cover plate a little bit at a time whilst cutting through the Rhino line with a Stanley knife until I had gone all the way around. The final result doesn't look too bad.
4 points
-
Umm... People say strange things? https://youtu.be/VXRBjEnpMwY https://youtu.be/-MEn4SMv-4s4 points
-
Filled about 50 holes in the engine and removed all the brackets I no longer need. Laser cutting a sheet of all the filler pieces made it way quicker and easier! Where the chassis rail kicks up at the firewall is a known place where cracks can form. There was already one about 8mm long on the passengers side. Made some gussets and welded them in. Found some previous repairs around the rear hatch on the body. I think they just ground out the rust spots here and then bogged it up. Cut out and welded new steel in there. Another one here, this time just a piece of steel brazed over the top of the rust holes. Fixed! As well as a few more bits around the seal. Picked up a pair off TA22 Celica fender mirrors from YAJ, that you can kinda see. I think they look good, but hard to tell when half the cars missing. Bought a Estima F series diff. Stripped in right down, cut off all the brackets and then noticed one of the housing tubes was very bent! One end was out by at least 10mm. Had a go at straightening it, wrapped some chain around the tube and some big u-channel, and then used a bottle jack and heat to push it out. Came out pretty good, close enough to then shorten it. Drew up a jig that held it all square and inline. Shortened it by 105mm a side, so it's the same dimensions drum to drum as the factory diff. Bought some MRP adjustable 4-link arms off @Cdarust Got a Altezza Torsen LSD head to swap in. Made some upper and lower brackets for the diff. Borrowed @oftensideways rotisserie. Going to raise the rear 4-link body mounts up. About 50mm higher for the lower mount, which should make the lower arm level and somewhere between 50-100mm higher on the top arm. The angles are currently far too much and I've gone this far so may as well, will be good to get rid of the lower body mounts as they're the lowest part of the car. It shouldn't effect the rear seat too much either.4 points
-
The old pics in your build thread don’t work. Can you put up a pic of the whole car so we know what all the people are talking about in your hidden camera vids?3 points
-
If you have new seals, put them in. Put rubber grease on the inner lip.2 points
-
My first thought was to try to uncover the heads of the bolts with a die grinder. Instant fail. Gotta tell you that Rhino liner is pretty tough stuff. Sticks like the proverbial. Looked underneath and discovered that the bolts fix into riv nuts, so thought okay if I can cut the riv nuts off with an angle grinder I should be able t punch whats left of the bolts out from below. Only problem is that the steering box is in the way so you can only get to one of the riv nuts. At this point I was getting pretty desperate and figured the easiest way forward would be to hack the cover plate to get the steering column and box out and then take to the riv nuts once the box was out of the way. With the steering and gear shift columns in place surrounded by the floor mounted clutch and brake pedals there isn't much space so I carefully drilled a whole lot of little pilot holes around the edge of the cover plate then followed up with a larger drill bit to overlap the holes. With the holes drilled all the way around and a straight line cut across with my tin snips it was easy enough to pull the remains of the cover plate out. Not one of my proudest moments, but needs must and I reminded myself that I'll need to fabricate a modified cover plate anyway as the HiAce steering and gearshift columns are much further apart than the Thames ones. The remains of the cover plate captured for posterity.
2 points
-
Thats a cool shot on the beach there Rusti. pretty amazed that you would put the wrong hood on your 2022 dodgy wofed electric car tho WHO WOULD DRIVE THAT2 points
-
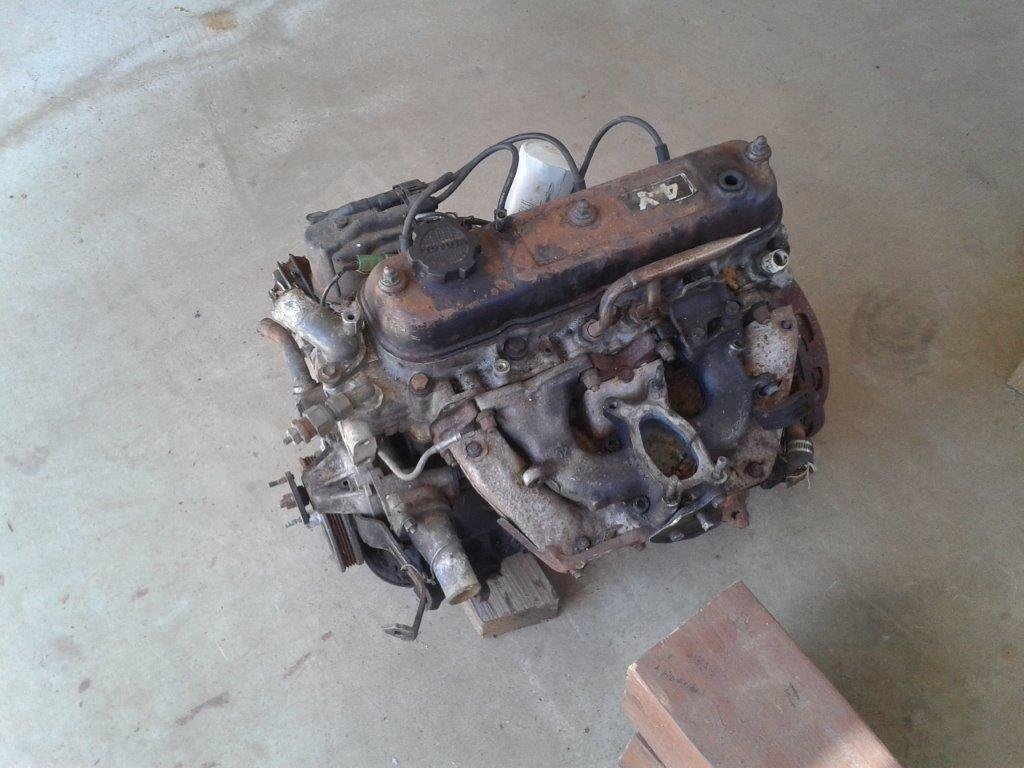
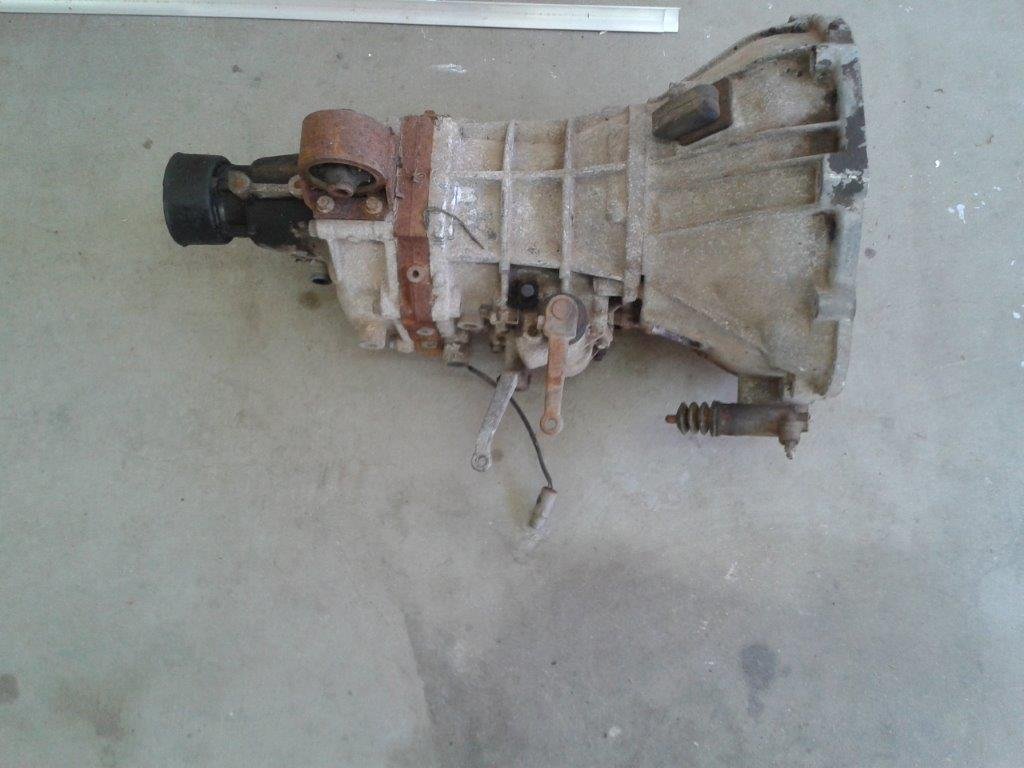
After morning smoko I thought I would crack into the next step of the "proof of concept" so I headed into the back garden to retrieve my mock-up 4Y motor out of the back of my second Toyota donor van. Loaded the motor onto my trusty wheel barrow and moved it under the back carport so that it is out of the weather. Grabbed the loose Toyota gearbox at the same time. First order of business was to take some measurements to see if the mighty 4Y will fit in the puny Thames engine box. Results of prelim measurements are as follows: Mighty 4Y - 510 mm wide at widest point. 670mm long from back of block to front of viscous fan. Thames - 505 mm wide at widest point. 654 mm long from back of block to front of fixed fan blades. So from the look of the width I should just be able to squeeze in the 4Y. From a length perspective I suspect that I may need to ditch the viscous fan on the 4Y if I'm going to retain the original Thames radiator. Nothing that an electric fan can't fix if this comes to pass. I still need to take some comparison measurements of the two gearboxes but I'll do that tomorrow.
2 points
-
2 points
-
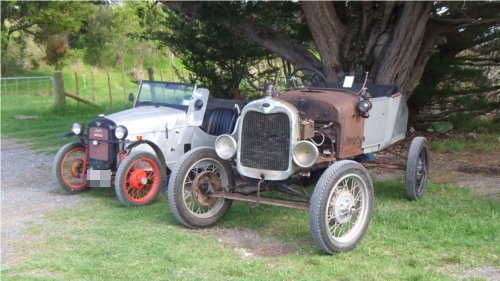
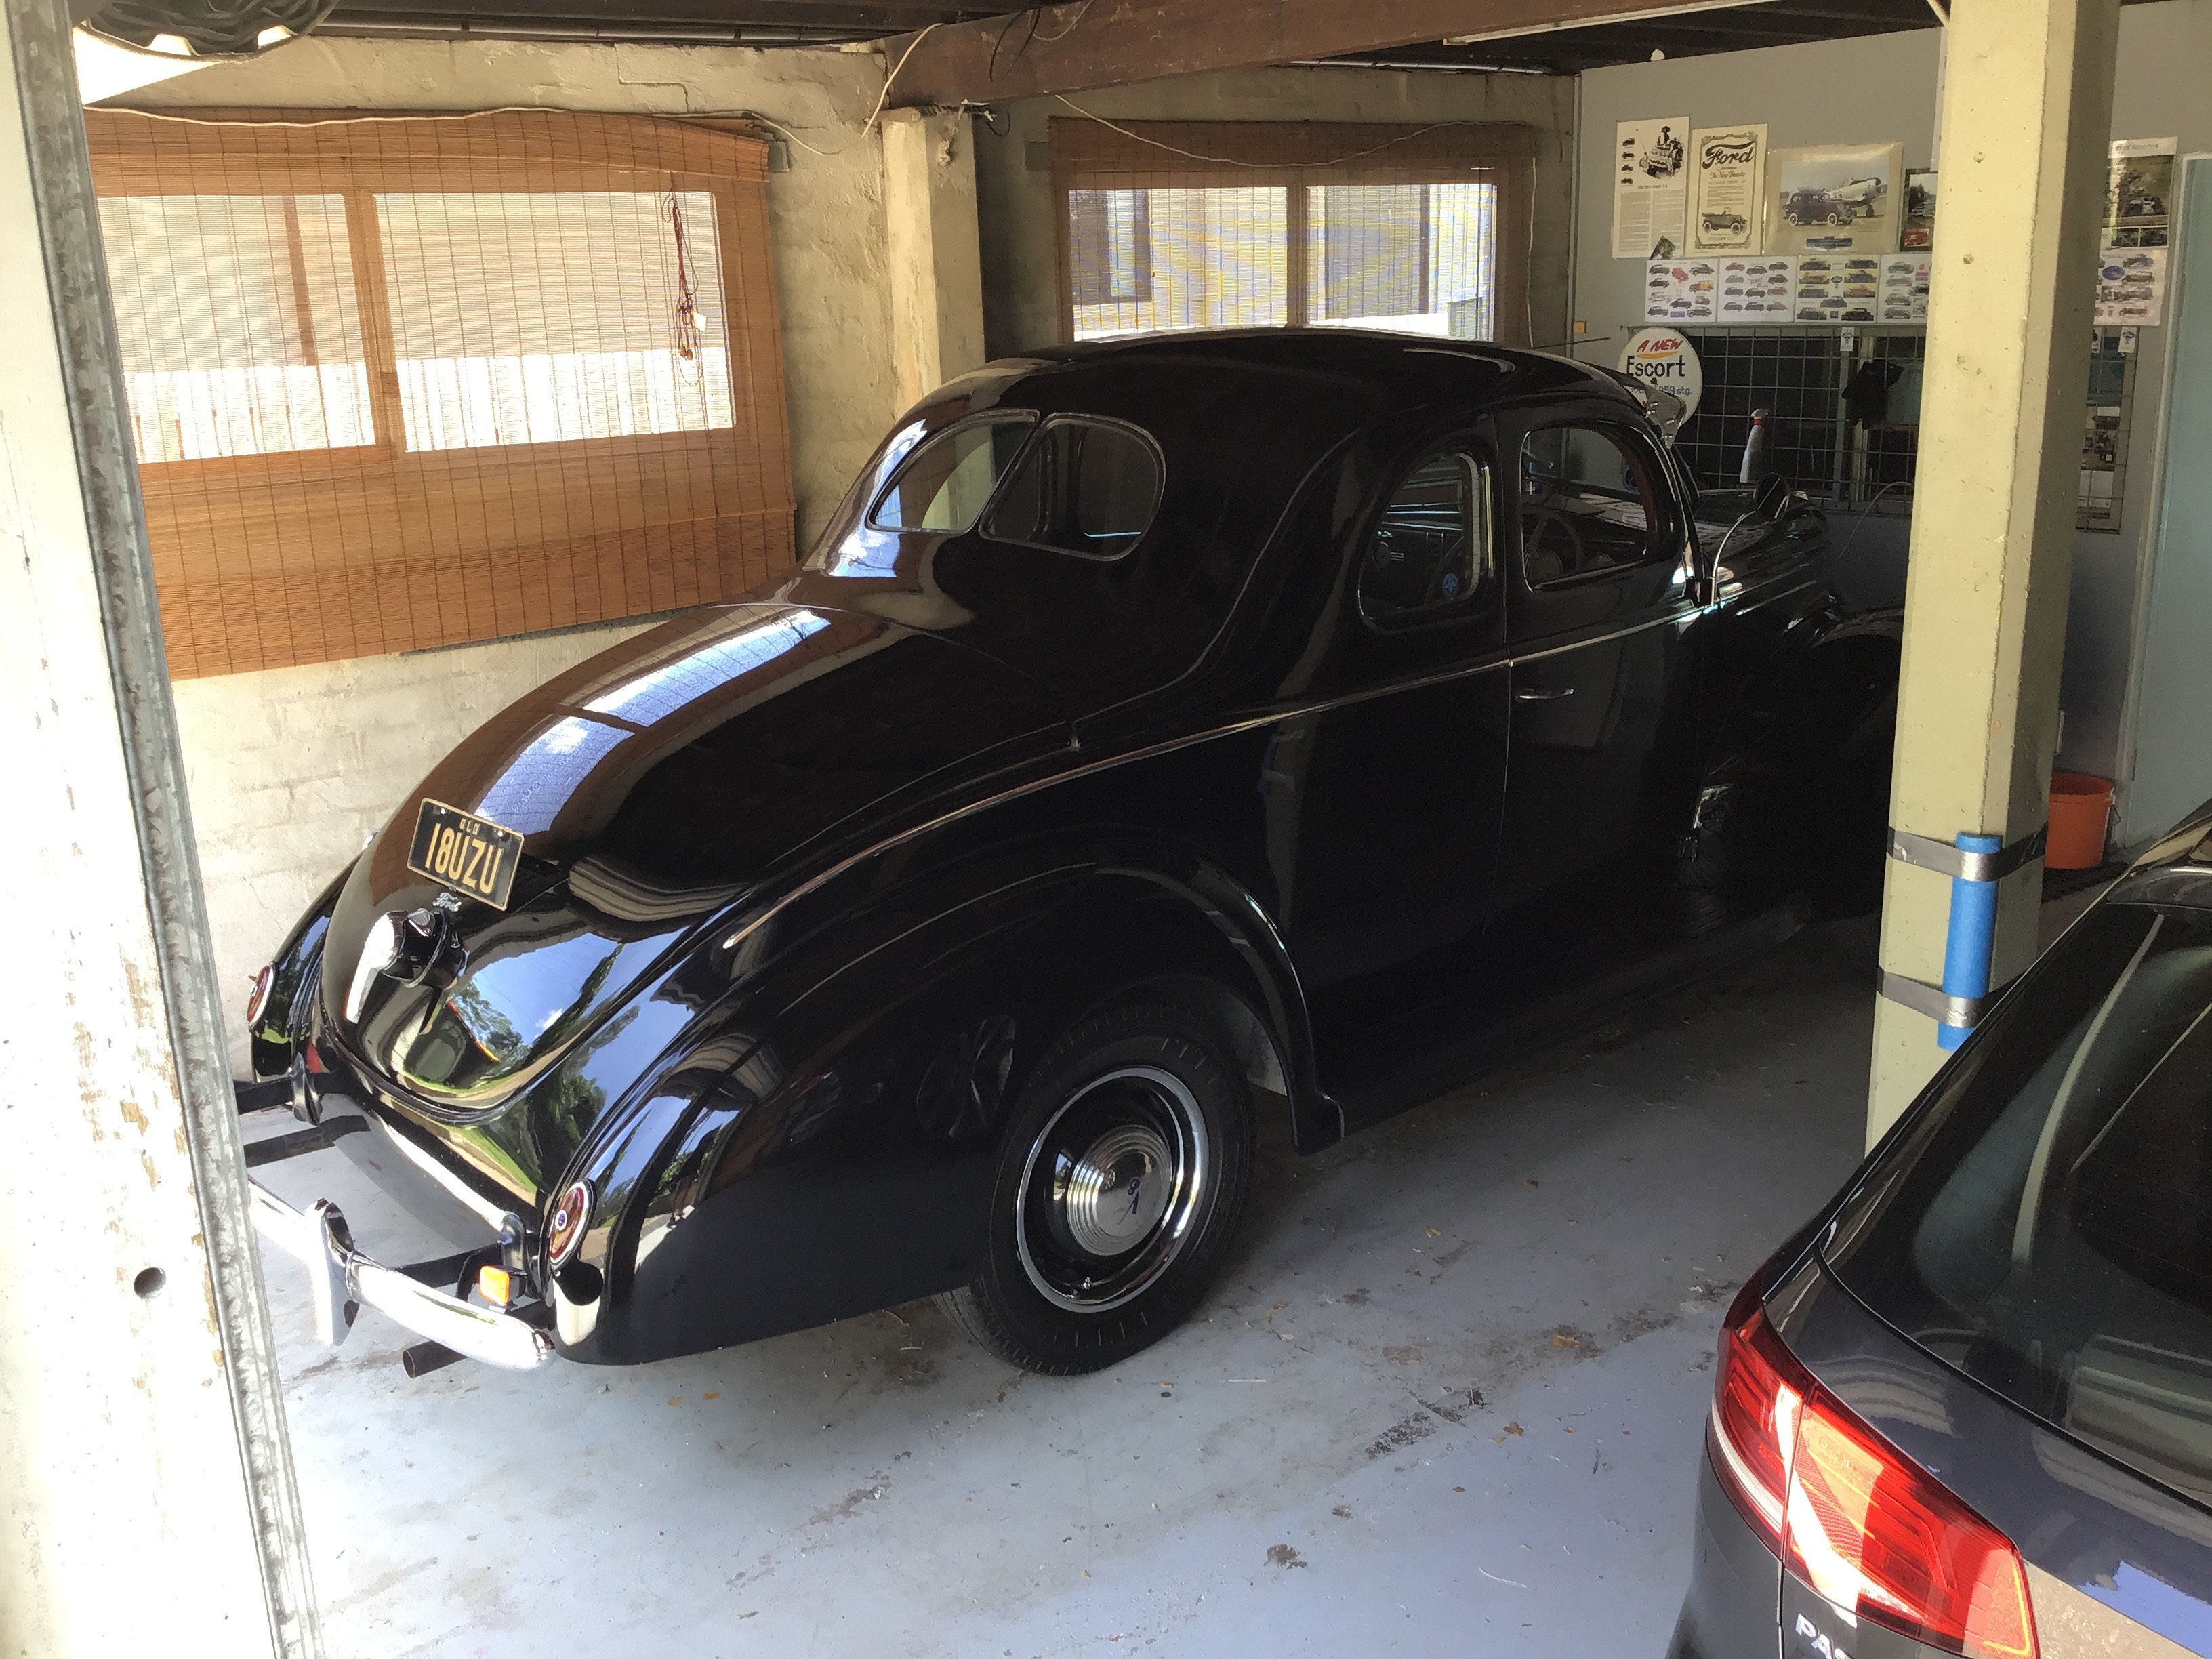
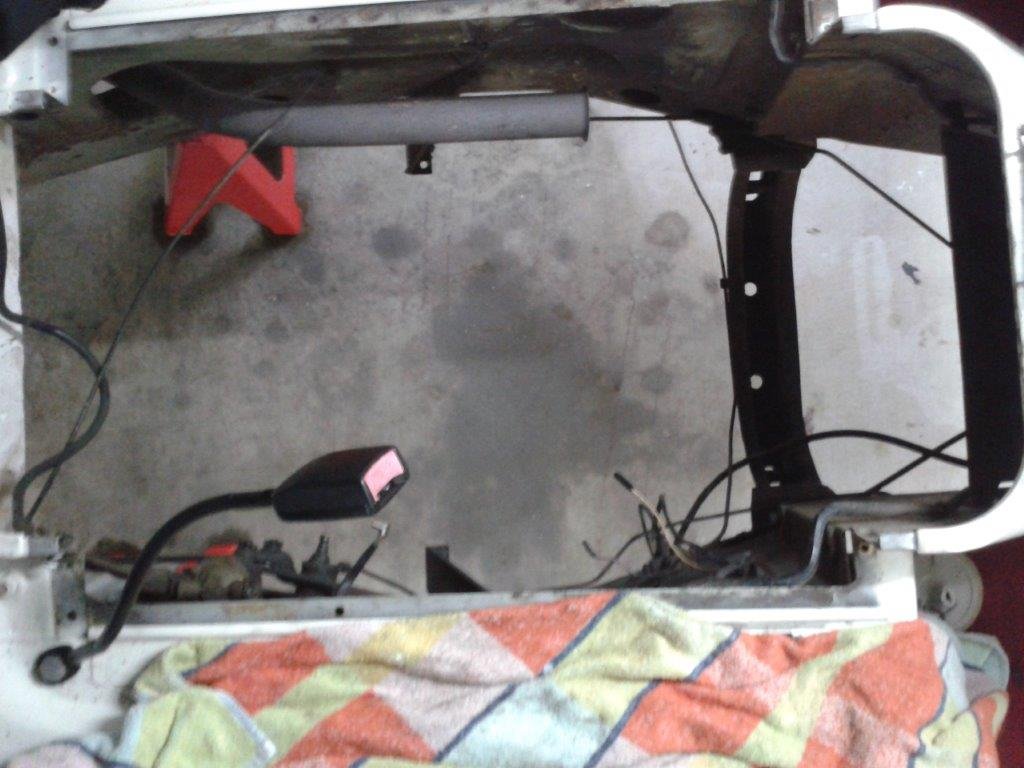
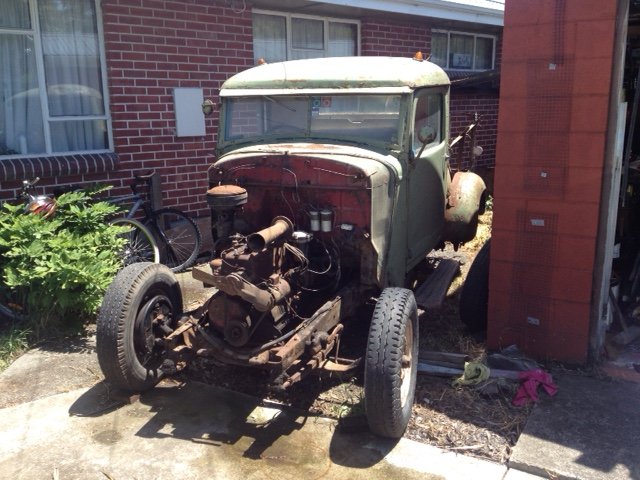
It’s been over a year since I’ve posted about the ford. I Have only just gotten it to the stage where she can be driven. The brakes took me so long to do.And all I did was replace the master, wheel cylinders and brake lines. Gave it a good clean and enjoying it before something else brakes on it.
2 points
-
Cab off and away last night for wood rot repair. We are thinking of not painting the cab until after it's re-registered so the chassis tag & WOF sticker etc are undisturbed to make the process as smooth as possible. Now that it's short enough it can fit in the garage and we can hoist the engine out & get the chassis cleaned up. Keen to do some laps in its current state!
2 points
-
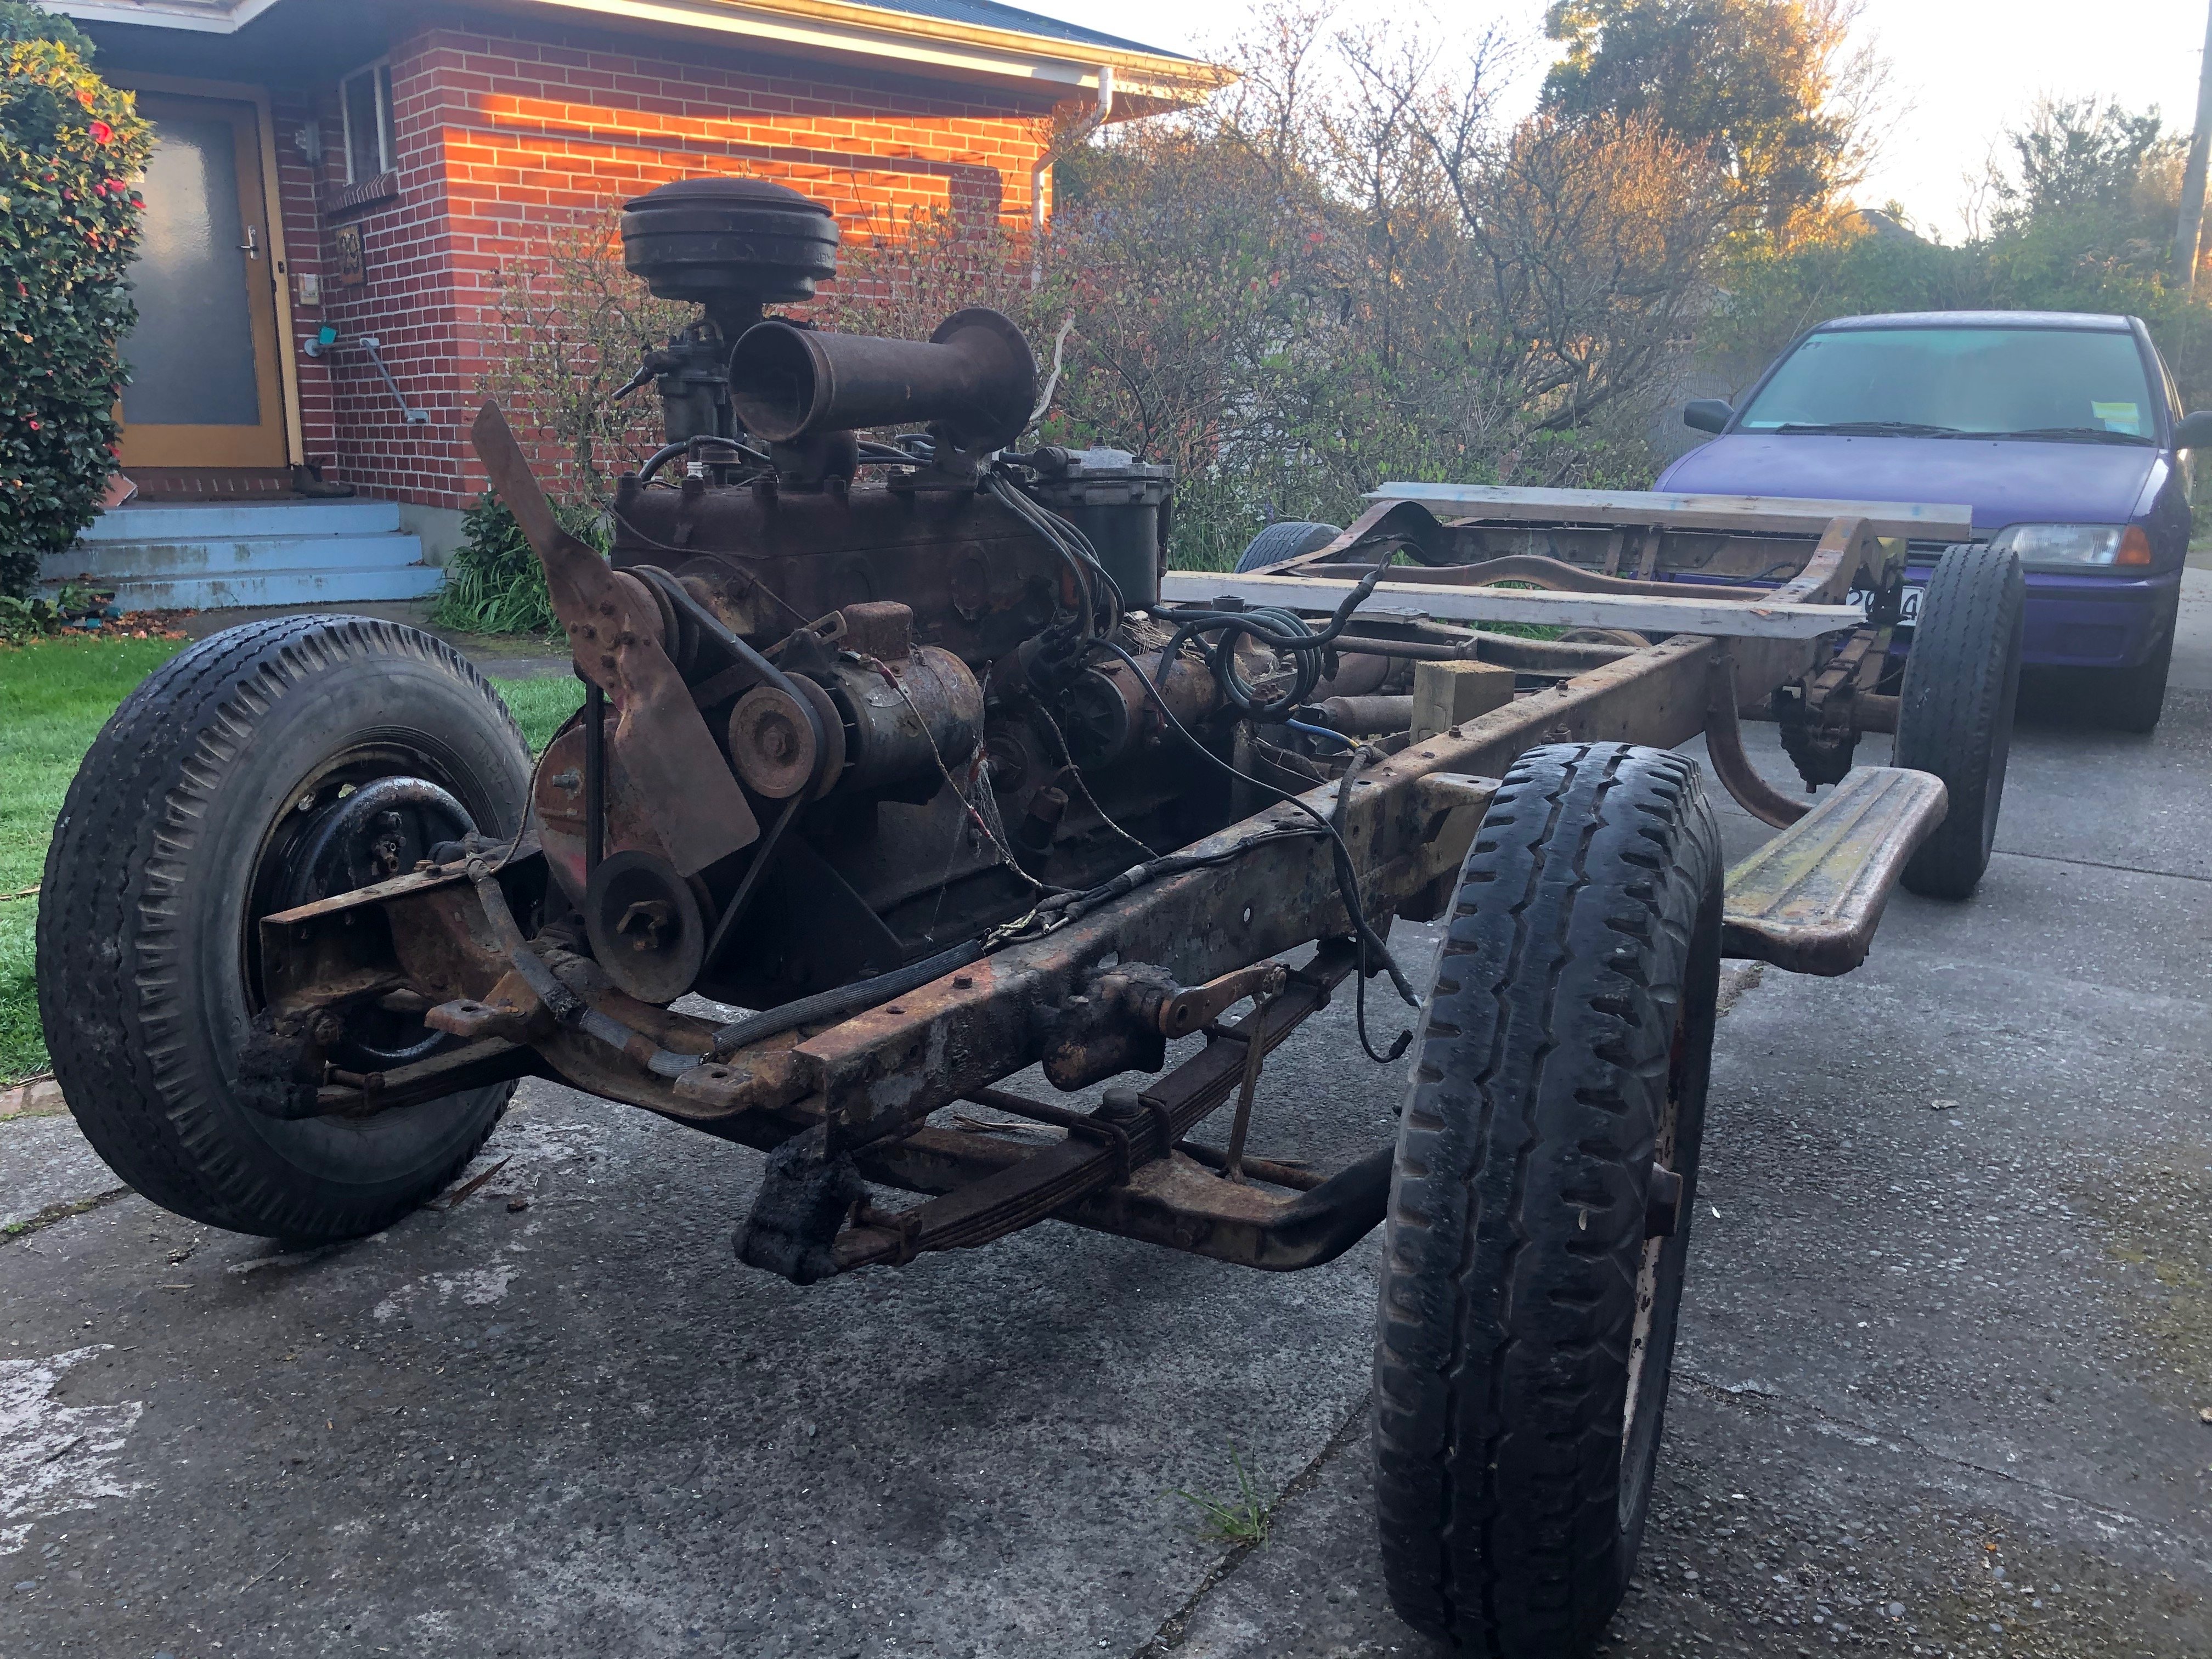
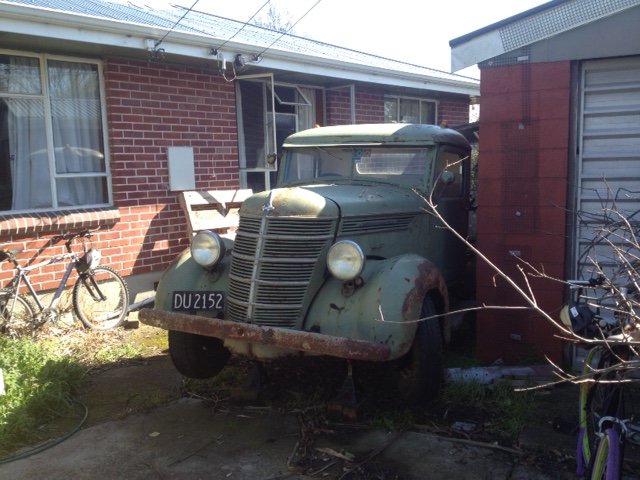
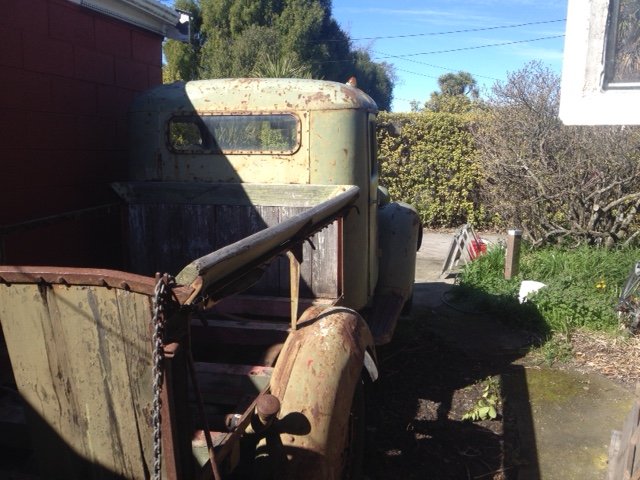
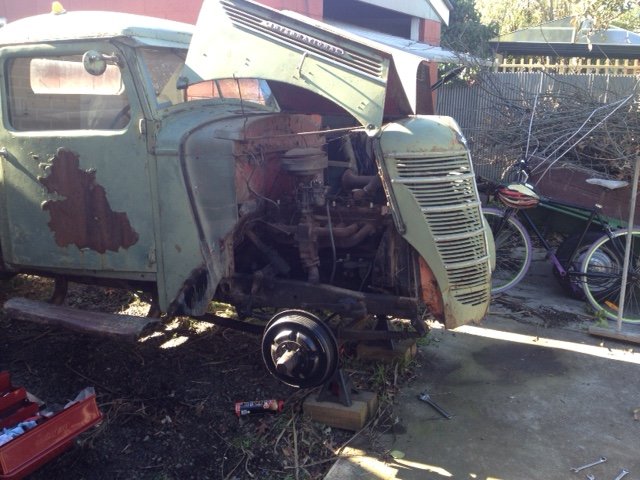
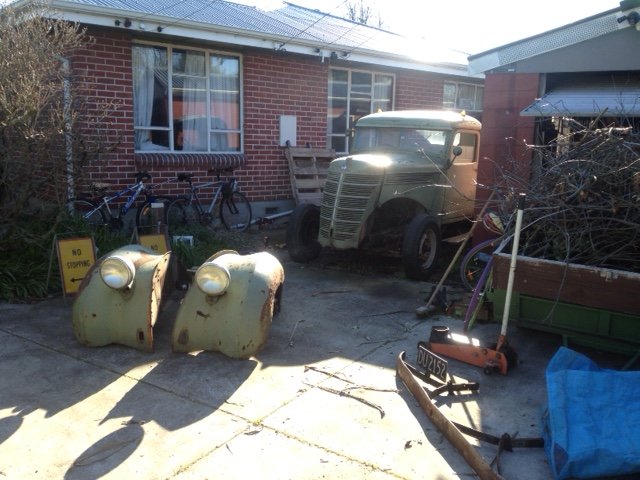
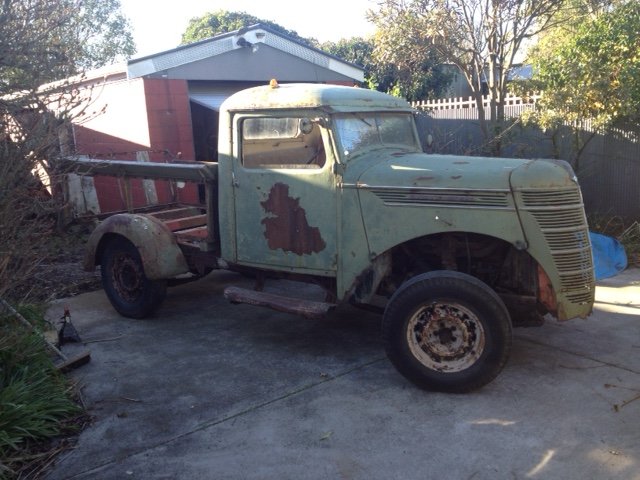
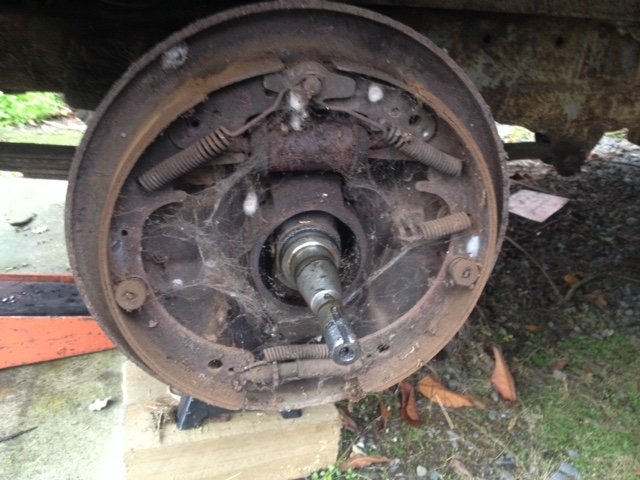
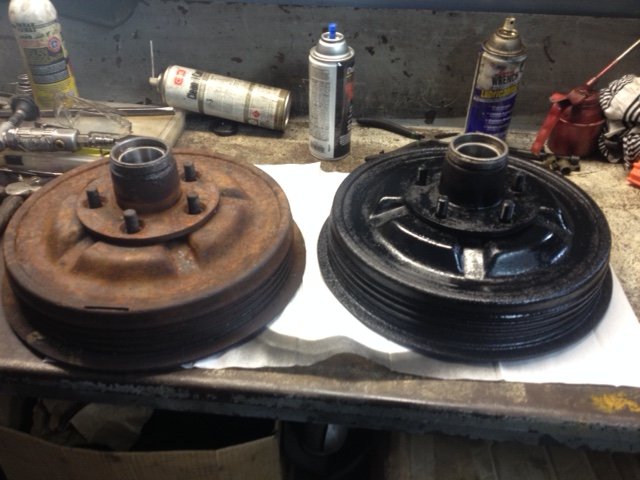
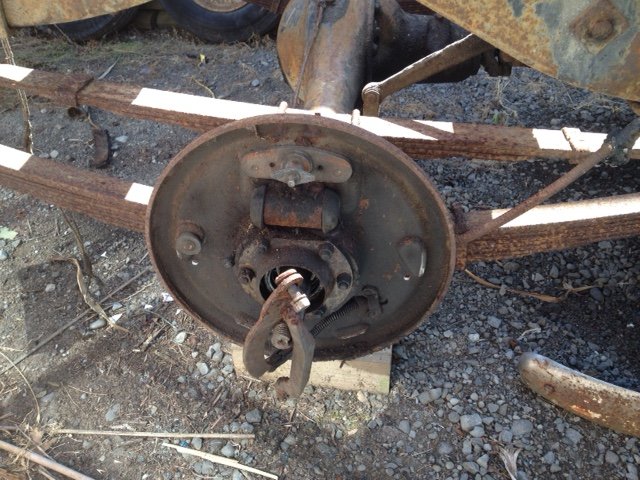
This old girl is an ex-military truck that has been in the family of a good friend of mine for a solid chunk of last century. It's only recently been pulled out from under the Macrocarpa it's called home for a few decades. The loose plan at this stage is to get it mechanically back to new, but keep it looking like it is now. Over the last few months I rebuilt the front brakes, replaced the wheel bearings & had the master cylinder re-sleeved. Today was a beaut day for getting more done. So many seized bolts though! Got both guards off & the steering linkages straightened/cleaned up. The front is back on the ground, next I'll tackle the rear brakes & fuel tank. It hasn't run in a bit, but does turn over by hand. I'll get the engine out for a look over after I get the body off. I do like the rat-rod look. We won't be going that way, but I can see the appeal. Anyone here play with these old things? Anything I should look out for? Cheers!
1 point
-
Wat year? Live in the now maaaan1 point
-
Which left me with this vast open space .... not.
1 point
-
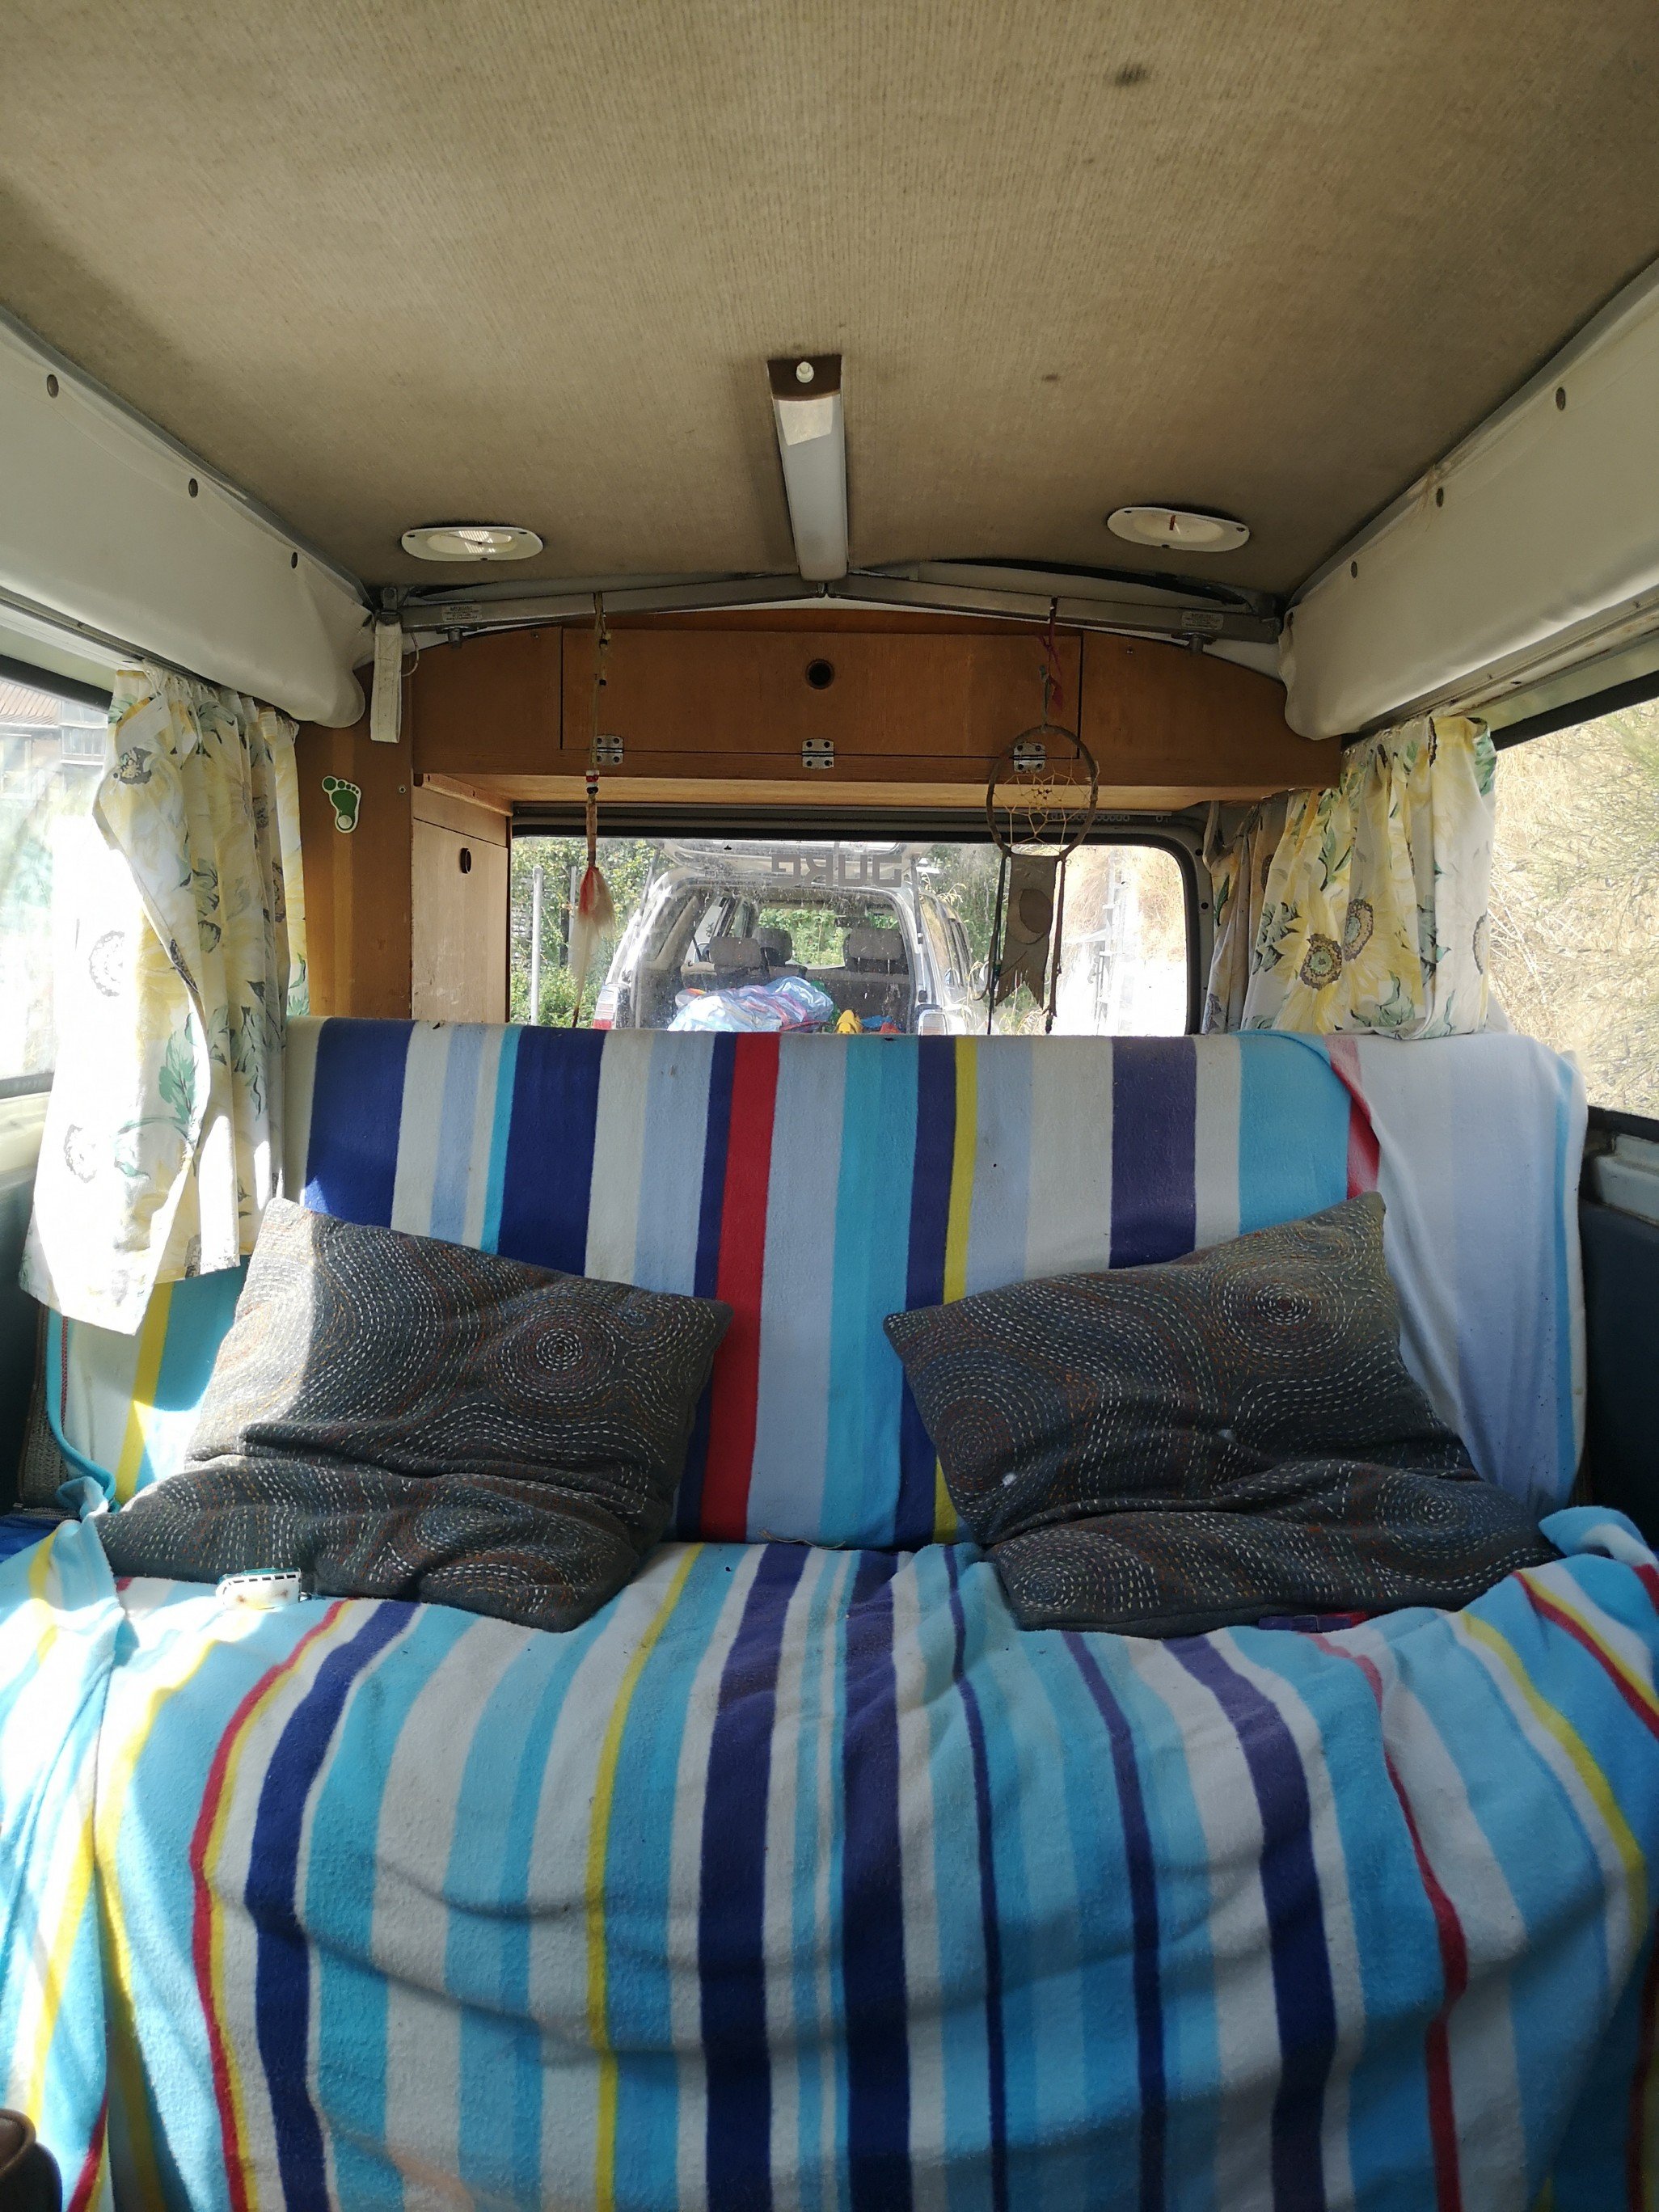
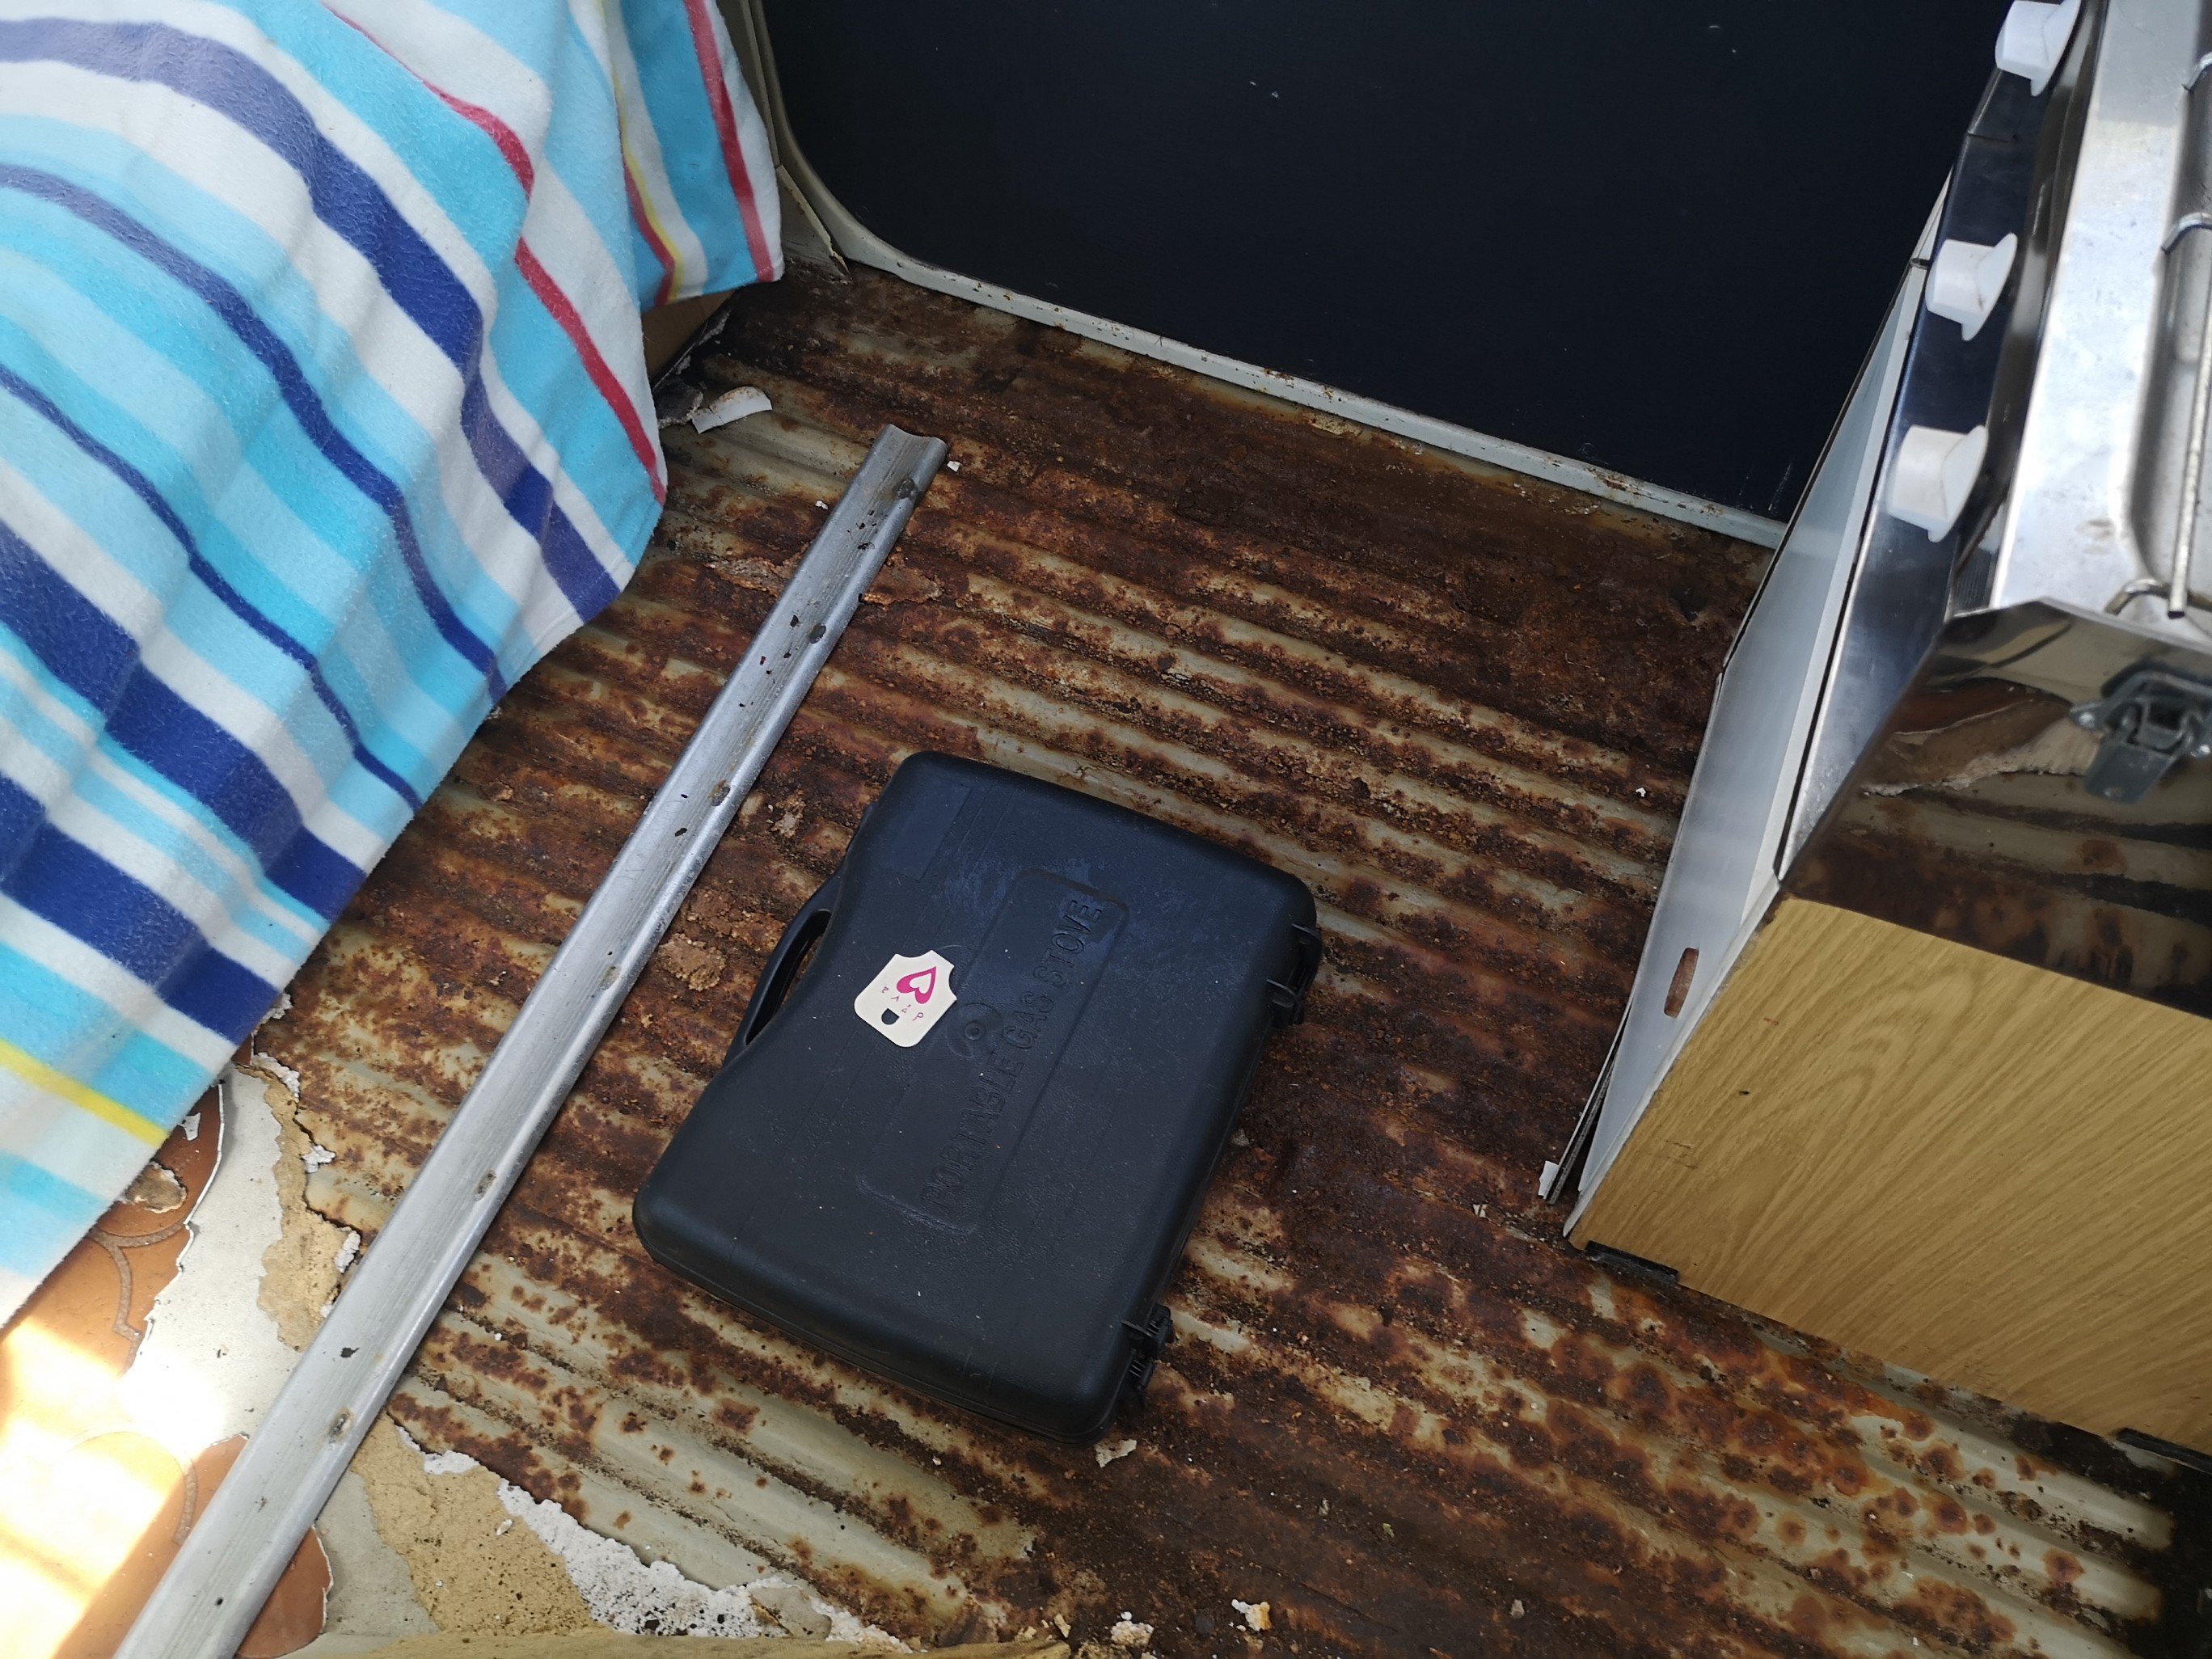
Some interior shots.. Bit of rust in the floor which is disappointing..
1 point
-
Damn i havent updated this in way too long. Long story short, the X-flow dropped its oil on my way to work about a year and a half ago. Bang, rod out the side... Threw in a Pinto, didnt measure the starter throw out and chewed the starter so it sat for a while. Pulled the pinto out and its now living in @d.p.n.s MK5. Few plans for the mean time involving an EFI V6, ITBs, T5 gearbox, and maybe an SC14.... And of course a post isnt good without a photo1 point
-
1 point
-
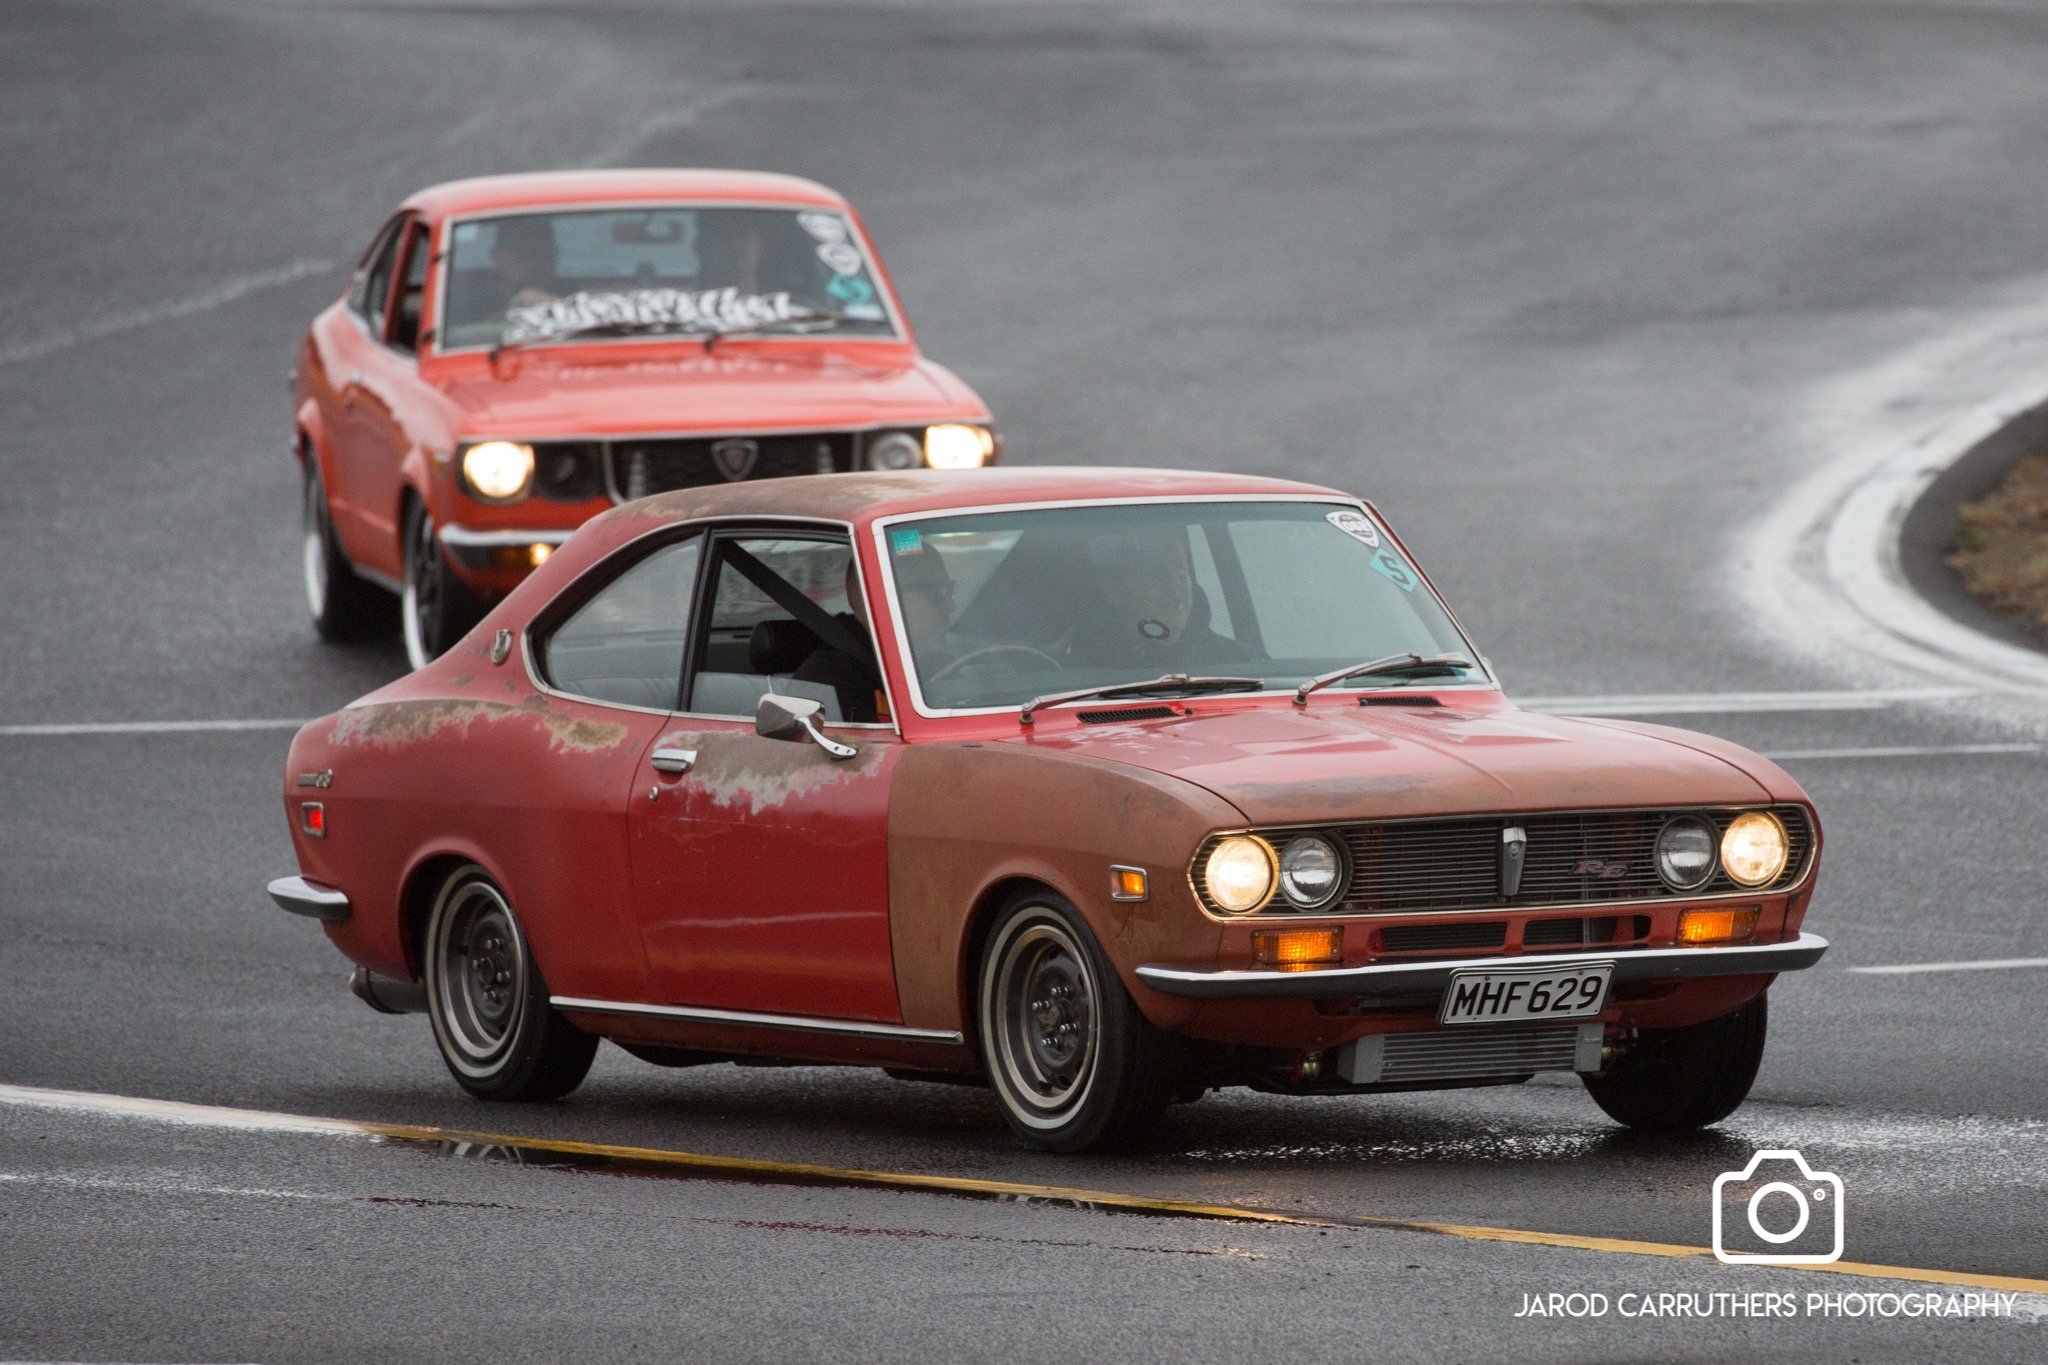
Photo props to Jarrod Carruthers
1 point
-
Some good things have happened to the Accord since the last installment! I gave it some CV boots, thankfully the inner and outer are the same size, because both boots on the L/H axle were split. Fun fact - pre-facelift Accords have CVs at both ends, but later ones like this one have tripod joints on the inner. Confused the hell out of the bloke at BNT, anyway. It passed another WOF last week without any hiccups, and we've taken it for decent number of road trips around the upper North Island. I even slept in it after Crate Day, which honestly turned out to be more cramped and uncomfortable than I thought it would be. Still working on tidying up the front end, there's a sedan at a wrecker down country who might be able to supply the grille bits. The passenger side carpet is pretty rotten and it got consistently damp in the rain, which was a pretty good indicator that there were holes somewhere that there shouldn't be holes. I broke the unwritten rule of old car ownership, that being "don't pick at that bathroom sealant, you won't like what's underneath it" and lo and behold after chiselling away the layers of Selley's Bathroom Adhesive in the windscreen plenum chamber there was a decent hole. After taking out the wiper motor I found another hole, so out came the cutoff disc and the welder. Just to be safe I pulled the dash out so nothing caught fire, to be honest this is probably the first time this car has seen the hot end of a MIG torch in its life. I made up a couple of patches, binned them after I found more scabby bits near where I was welding to, and then made up some bigger patches. Glued them in with the metal gluestick, and hit it all with some epoxy. Might spray some underseal in there yet, or I might just spray it all with fish oil and put up with the smell for a couple of weeks. Otherwise it's been plain sailing, the front seats need some more foam because as far as I can see they don't actually have springs in them, just a layer of heavy foam which has disintegrated over the past 39 years. Local content laws dictated that as much trim as possible had to be made here, which is why we didn't get the neat colour coded interior fabrics that everywhere else in the world got, we got beige or beige. I pulled out the amplifier that was tek-screwed through the floorpan underneath the passengers seat and the lil' Johnny spec head unit that was flopping around the dash and wired in with three core house cable, and wired in a period '80s Clarion spindle mount unit - less doof, but more class! It needs a set of TS-Xs for the parcel shelf next time i'm near Buyee.com. Here's some pictures of it enjoying the scenery1 point
-
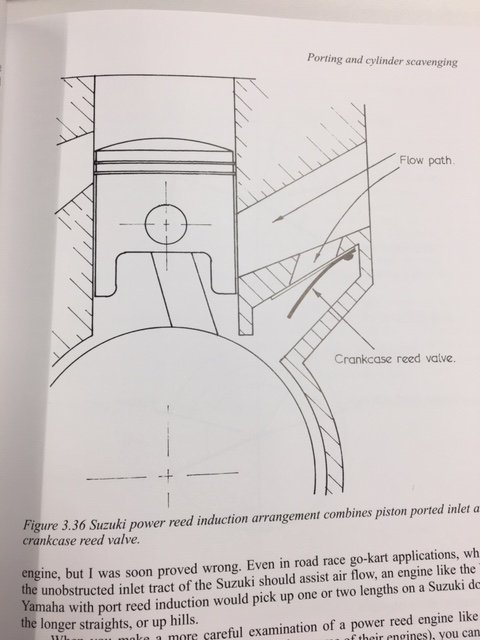
The last piece of the puzzle to date has been the engine itself. My search for that elusive horsepower led me down the rabbit hole of port timing. I raised the barrel 1.5mm Raised the exhaust port roof 6.6mm (+ the 1.5mm) Lowered the floor of the inlet port 10mm Cut the inlet side of the piston skirt 10mm This theoretically results in port timings of 195°Ex/128°Tr/185°In, however I haven't checked it with a degree wheel yet. Originals were 155.5°Ex/118°Tr (didn't bother to measure inlet because of the reeds). As well as taking the 1.5mm back from the top of the barrel, I machined the head about 1.1mm and used a thinner gasket to get from 17.5cc to 13.7cc (8:1CR to 10:1CR - Uncorrected) This gave me a squish band of about 1.8mm, which is about 0.8mm higher than I would like it to be. These engines have a bizarre piston port/reed inlet system that suzuki trialled in the 70's. Basically it just ends up being shit at both. So I've blocked up the reed port and massively adjusted the piston port to make it a piston port engine only. Comparison of before and after inlet port sizing: Have you ever seen someone precision machining their piston with an angle grinder? You have now!
1 point
-
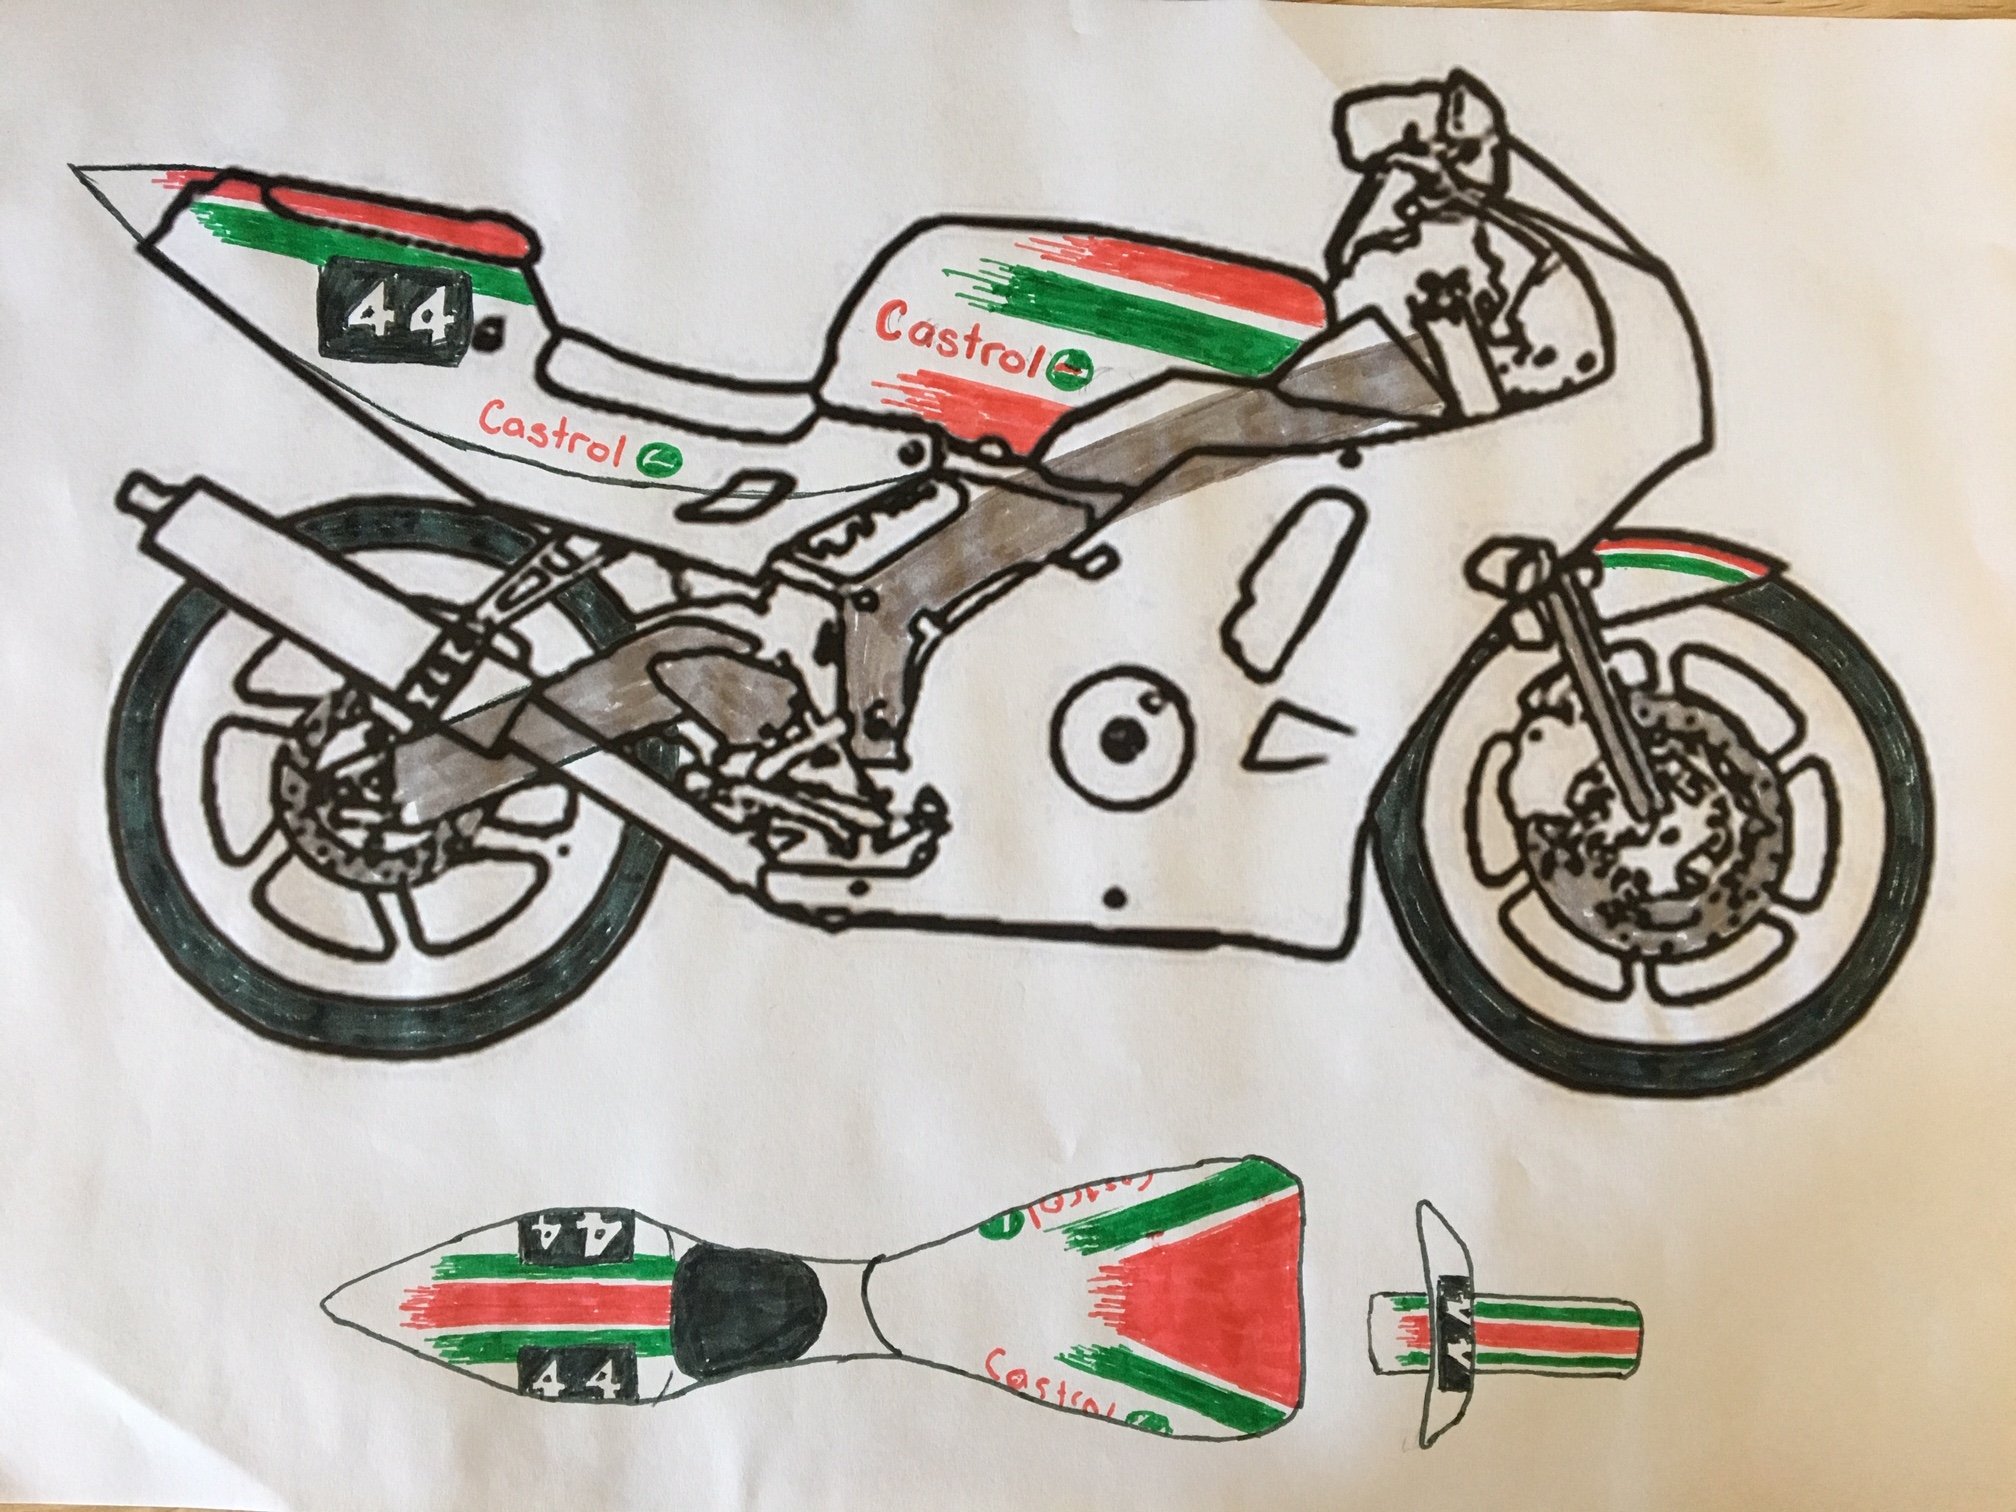
I also made it look heaps better, cos if its gonna be slow its gotta look good doing it.
1 point
-
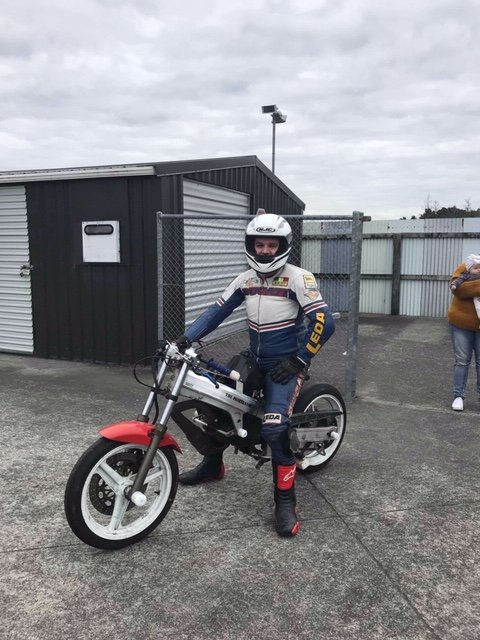
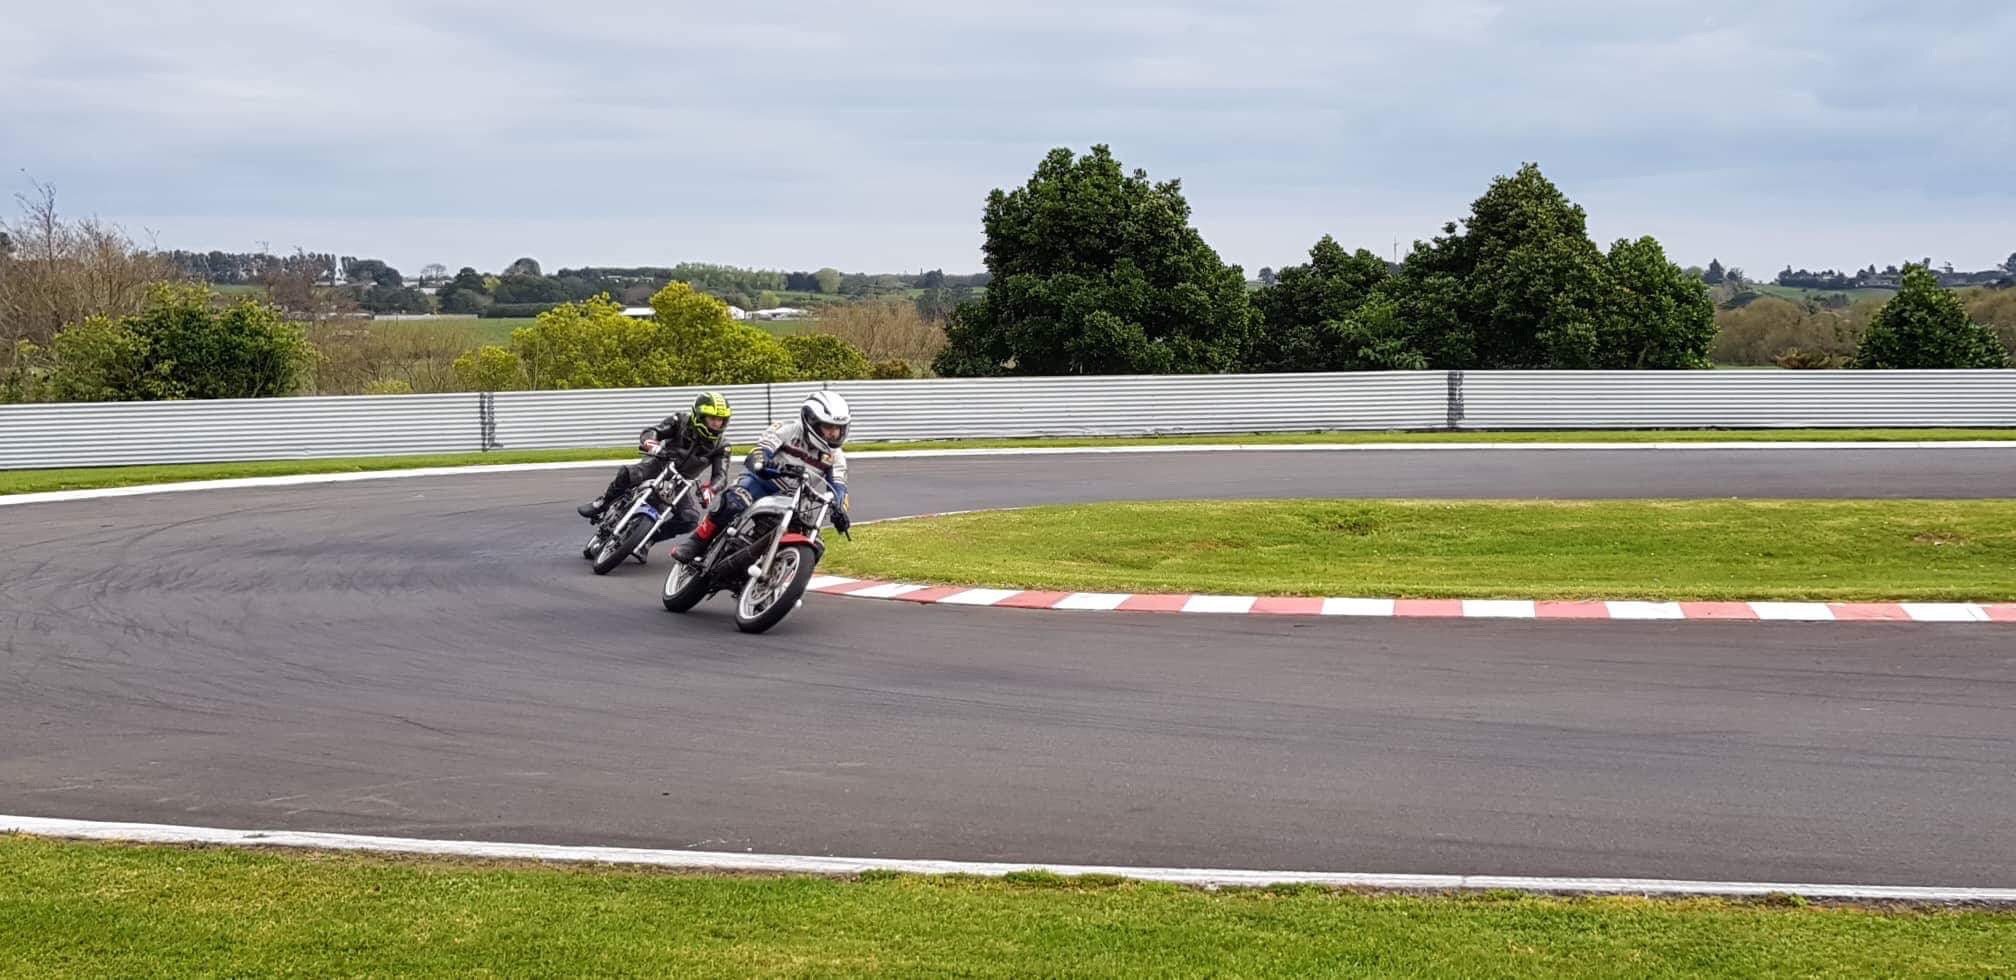
Then we ended up with a little munchkin on the way and decided to move back to New Plymouth. In the mean time dad and my brother were getting into the idea of bucket racing as well, so we approached the local kart club who were quite open to the idea so long as we executed it properly and above all, didn't damage the track or their reputation. A couple of months of organizing and planning and we had access to the track for a shakedown. I hadn't managed to finish any fairings/tank at this stage, so the bike was totally bare bones. It went really well, and fantastic fun to ride.
1 point
-
Cheers all for attending. Yeah sorry was late notice posting details, but the date is always the same 3rd sunday of January. (kumeu weekend). next new year meet will be 17th Jan 2021, put it in your calendar? Check the facebook link in first post, theres some pics in there already. Also looking to do an autumn meet this year, end of march or easter weekend. This page is usually updated first once i organise a meet ----> http://jap-olds.nz/
1 point
-
Tomorrow! Weather is mint. Theres a bunch of cafes across from the entrance at 'the goodside' so park up and grab a bite/drink. See yas there!1 point
-
Bought a set 13x6.5 Work Equip 01's. Will refurbish them and then decide if I want to run them. Also scored this off Yahoo Auctions a while back. Has the plugs and also came with some black dash parts. Decided on how to raise the tunnel. Bent the handbrake section up to match the height of where the old gearbox tunnel top piece had to go. Then made up some filler pieces to fill the gaps. Plan was to keep it looking as factory as possible. Had to remake the crossmember as it needed to be built up higher. Used some tube that matched the radius and bent it to suit. Welded in filler pieces. Cleaned up. Next was to make some strips to fill in the sides. Had contemplated making them with the factory swagings, but decided it would be easier to flatten them out and make the strips flat. Then the tunnel to firewall gap needed filling. Made a paper template, transferred it to the steel, cut it, formed it and it nearly fitted perfectly first try. All cleaned up. Up next was the firewall cutout for the dizzy blank cover to sit in. Tried again to make it look factory, which I think turned out pretty good. Stripped out all the sound deadening with dry ice. Have only cleaned off the residue from the passengers seat and footwell area. Pulled out all the wiring as well. Need a F-series diff now.1 point
-
12th New Year Jap oldschool meet. 20th January 2019, 11am - 2pm Massey Uni, University Ave, Albany Auckland, tier carpark outside 'the ferguson'. This is an annual event held on the 3rd sunday of January. It happens to also be Kumeu Hot Rod show weekend. Loosely based on classic Japanese and Euro oldschool cars . pre 90's preferably.. But that is not strict at all. Bring your car, have a yarn, and wear sunscreen coz she's usually a scorcher! Cruise to event, meeting at either Greenlane McD's or old Westgate outside starbucks 10am ish, depart 10.30am. Those in attendance make the call when to depart. No booze, burnouts or stupidity please. Facebook event here https://www.facebook.com/events/343090929864368/ map of carpark https://maps.google.co.nz/maps?ll=-36.733106,174.703518&spn=0.000955,0.002064&t=h&z=20 Past events here http://jap-olds.nz/ Hope to see yas there!1 point
-
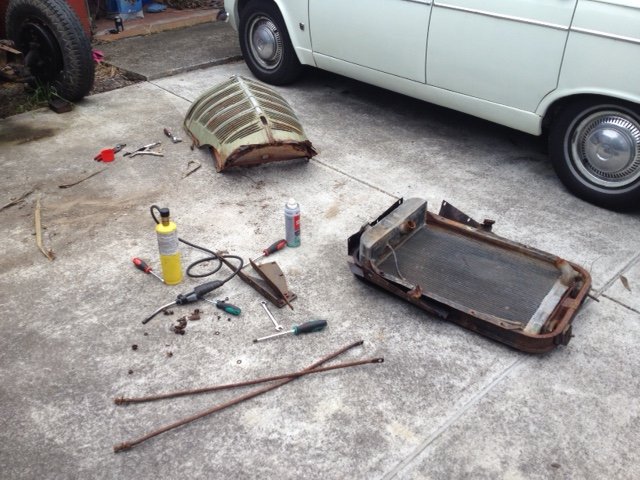
What a slack guy! I've been pretty busy over Christmas, but got a chance to put a few hours into this lately. We finished pulling the nose to bits and sent the panels away for a bit of love. Next step is getting the body off so I can fit this thing in my garage and crane out the engine. The radiator really fought us coming out, it's away getting a re-core priced up. And the rear brakes are also getting rebuilt. Once that's done we should be able to push it by hand, prob for the first time in 20 years!
1 point
-
Heads up. The usual late notice but, this is happening More details in thread once confirmed. https://www.facebook.com/events/215537258907263/ Date: Sunday 22nd January 2017. 11am - 2pm. (starts thinning out by 1pm usually) Where: University Ave, Massey Uni Campus, Auckland. lower tier carpark outside 'the ferguson' bar. Cruise meetup points at the usual places Greenlate McD's and Westgate outside ASB 10.15am, depart 10.30ish. Someone in attendance gather those there and make call to depart. For previous meet galleries and FB posts.. www.jap-olds.nz1 point
-
Accuweather saying 55% shower at 1pm so good to go.1 point
-
1 week to go1 point
-
ke10 and early ke2 with leaf front spring i believe had a 3 bolt steering knuckle. would be same ball joint as a KP. dont have vented disk tho. EDit: and they look totally different with ball joint sitting outside of the 3 bolts. So its not corolla knuckles.1 point
-
1g-eu manual says: Use API grade SC, SD, SE, SF or better and recommended viscosity oil. Gives a chart for recommended viscosity vs atmospheric temperture. mega frozen balls to 10'C use 5W-30. but dont. -22'C up to 30'C you could use 10-30W. 10W-40, 10W-50 starts at -22'C ish up above 38'C 15W-40, 20W-40, 20W-50 starts at -12'C ish up above 38'C. seems 15W-40 is about the sweet spot for NZ temps. oil pressure (warm) at idle speed .. more than 0.3kg/cm2 4.3psi 29kPa at 3000rpm ... 2.5 - 5.0 kg/cm2 36 - 71psi 245 - 490kPa says when bleeding lifters, dont pull them apart. gives leak down test specs.. 20kg takes 2 -7 seconds/1mm after the first 2mm.1 point
-
I wouldn't say it a big difference in power. less weight in the ae82 so be faster than your ae101. 20v needs the revs to make power. be curious to race a std fxgt! I would've gone blacktop if i had a choice but picked up a complete ae101 for dirt cheap and had the setup sitting there waiting for a chassis. Its a relatively simple conversion except for wiring which not everyone's cuppa tea. flat spot... maybe check tps position, map sensor and fpr hoses have no splits, put some injector cleaner in the tank. um, check water temp (green) sensor is plugged in nicely.1 point
-
lookin forward to somewhere different1 point
-
So yeah.. DATE: 28th March 11am- 2ish WHERE: Omana Park invite / share https://www.facebook.com/events/930230393684275/ https://www.google.com/maps/place/Omana+Regional+Park/@-36.8813806,175.0183402,15z/data=!4m2!3m1!1s0x6d72b5d87103d699:0xf00ef62249ccdb0?hl=en1 point
-
the joys of organising events apart from REunion enthusiasts.. would the saturday 28th be an issue?1 point
-
Date: Sunday 18th Jan, 11am - 2pm Place: Massey Uni Albany, University Ave, outside 'The Ferguson' bar. Cruise meeting points at Westgate outside pizza hut or greenlane McD's 10am, departing 10.30am ish. kumeu hot rod show same weekend and 4'n'rotor nats the following weekend. No booze, burnouts or stupids! Previous meets and info can be seen here http://toycrazy.net/gallery/classicjap/classicjap.html Facebook page coming... https://www.facebook.com/events/ ... Please invite friends and tell anyone you know who may be interested. This event relies on word of mouth! hope to see you all there Will be advertised on the following forums (links to be updated) Oldschool.co.nz toyspeed.org.nz zclub.co.nz MR2OCNZ NZGem NZDatsun SCONZ Post up if you know of others of interest Discuss in this thread1 point
-
facebook page for pics https://www.facebook.com/events/902781863094799 late notice on there as usual.. invite invite invite1 point


This leaderboard is set to Auckland/GMT+12:00