
Leaderboard


Popular Content
Showing content with the highest reputation on 01/23/20 in all areas
-
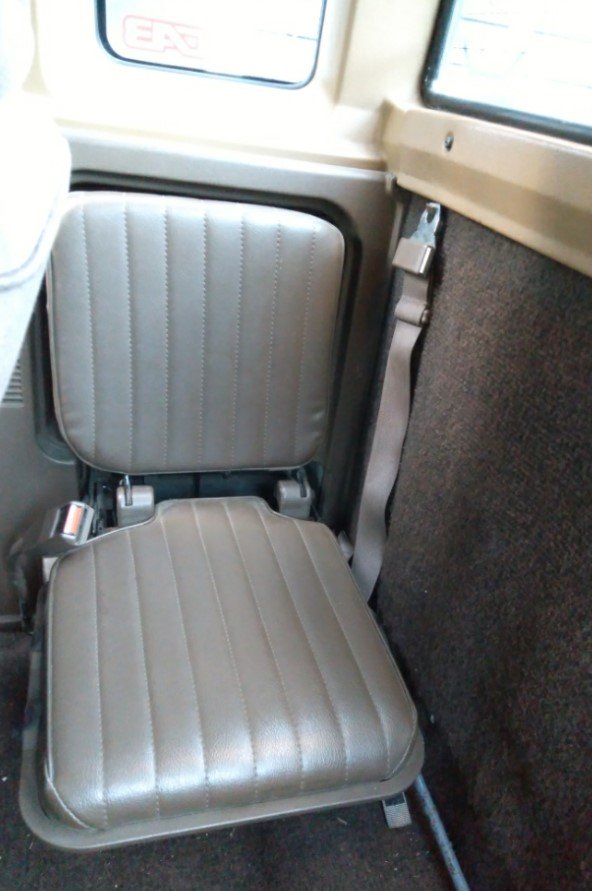
Filled about 50 holes in the engine and removed all the brackets I no longer need. Laser cutting a sheet of all the filler pieces made it way quicker and easier! Where the chassis rail kicks up at the firewall is a known place where cracks can form. There was already one about 8mm long on the passengers side. Made some gussets and welded them in. Found some previous repairs around the rear hatch on the body. I think they just ground out the rust spots here and then bogged it up. Cut out and welded new steel in there. Another one here, this time just a piece of steel brazed over the top of the rust holes. Fixed! As well as a few more bits around the seal. Picked up a pair off TA22 Celica fender mirrors from YAJ, that you can kinda see. I think they look good, but hard to tell when half the cars missing. Bought a Estima F series diff. Stripped in right down, cut off all the brackets and then noticed one of the housing tubes was very bent! One end was out by at least 10mm. Had a go at straightening it, wrapped some chain around the tube and some big u-channel, and then used a bottle jack and heat to push it out. Came out pretty good, close enough to then shorten it. Drew up a jig that held it all square and inline. Shortened it by 105mm a side, so it's the same dimensions drum to drum as the factory diff. Bought some MRP adjustable 4-link arms off @Cdarust Got a Altezza Torsen LSD head to swap in. Made some upper and lower brackets for the diff. Borrowed @oftensideways rotisserie. Going to raise the rear 4-link body mounts up. About 50mm higher for the lower mount, which should make the lower arm level and somewhere between 50-100mm higher on the top arm. The angles are currently far too much and I've gone this far so may as well, will be good to get rid of the lower body mounts as they're the lowest part of the car. It shouldn't effect the rear seat too much either.21 points
-
been doing some wiring. i found it pretty hard to take a photo that showed what ive done so the pix are a bit shit really. just imagine i had no loom at all, then i did. its a whole new world having new plugs and looms to make everything. i learned a whole bunch making this and im really happy with how its come out. i now have the body interface to sort out which will be a cool process and ill be able to fix heaps of stuff. bit of fucking around and then i can put the motor back in the car. 2020-01-23_07-16-12 by sheepers, on Flickr 2020-01-23_07-15-57 by sheepers, on Flickr11 points
-
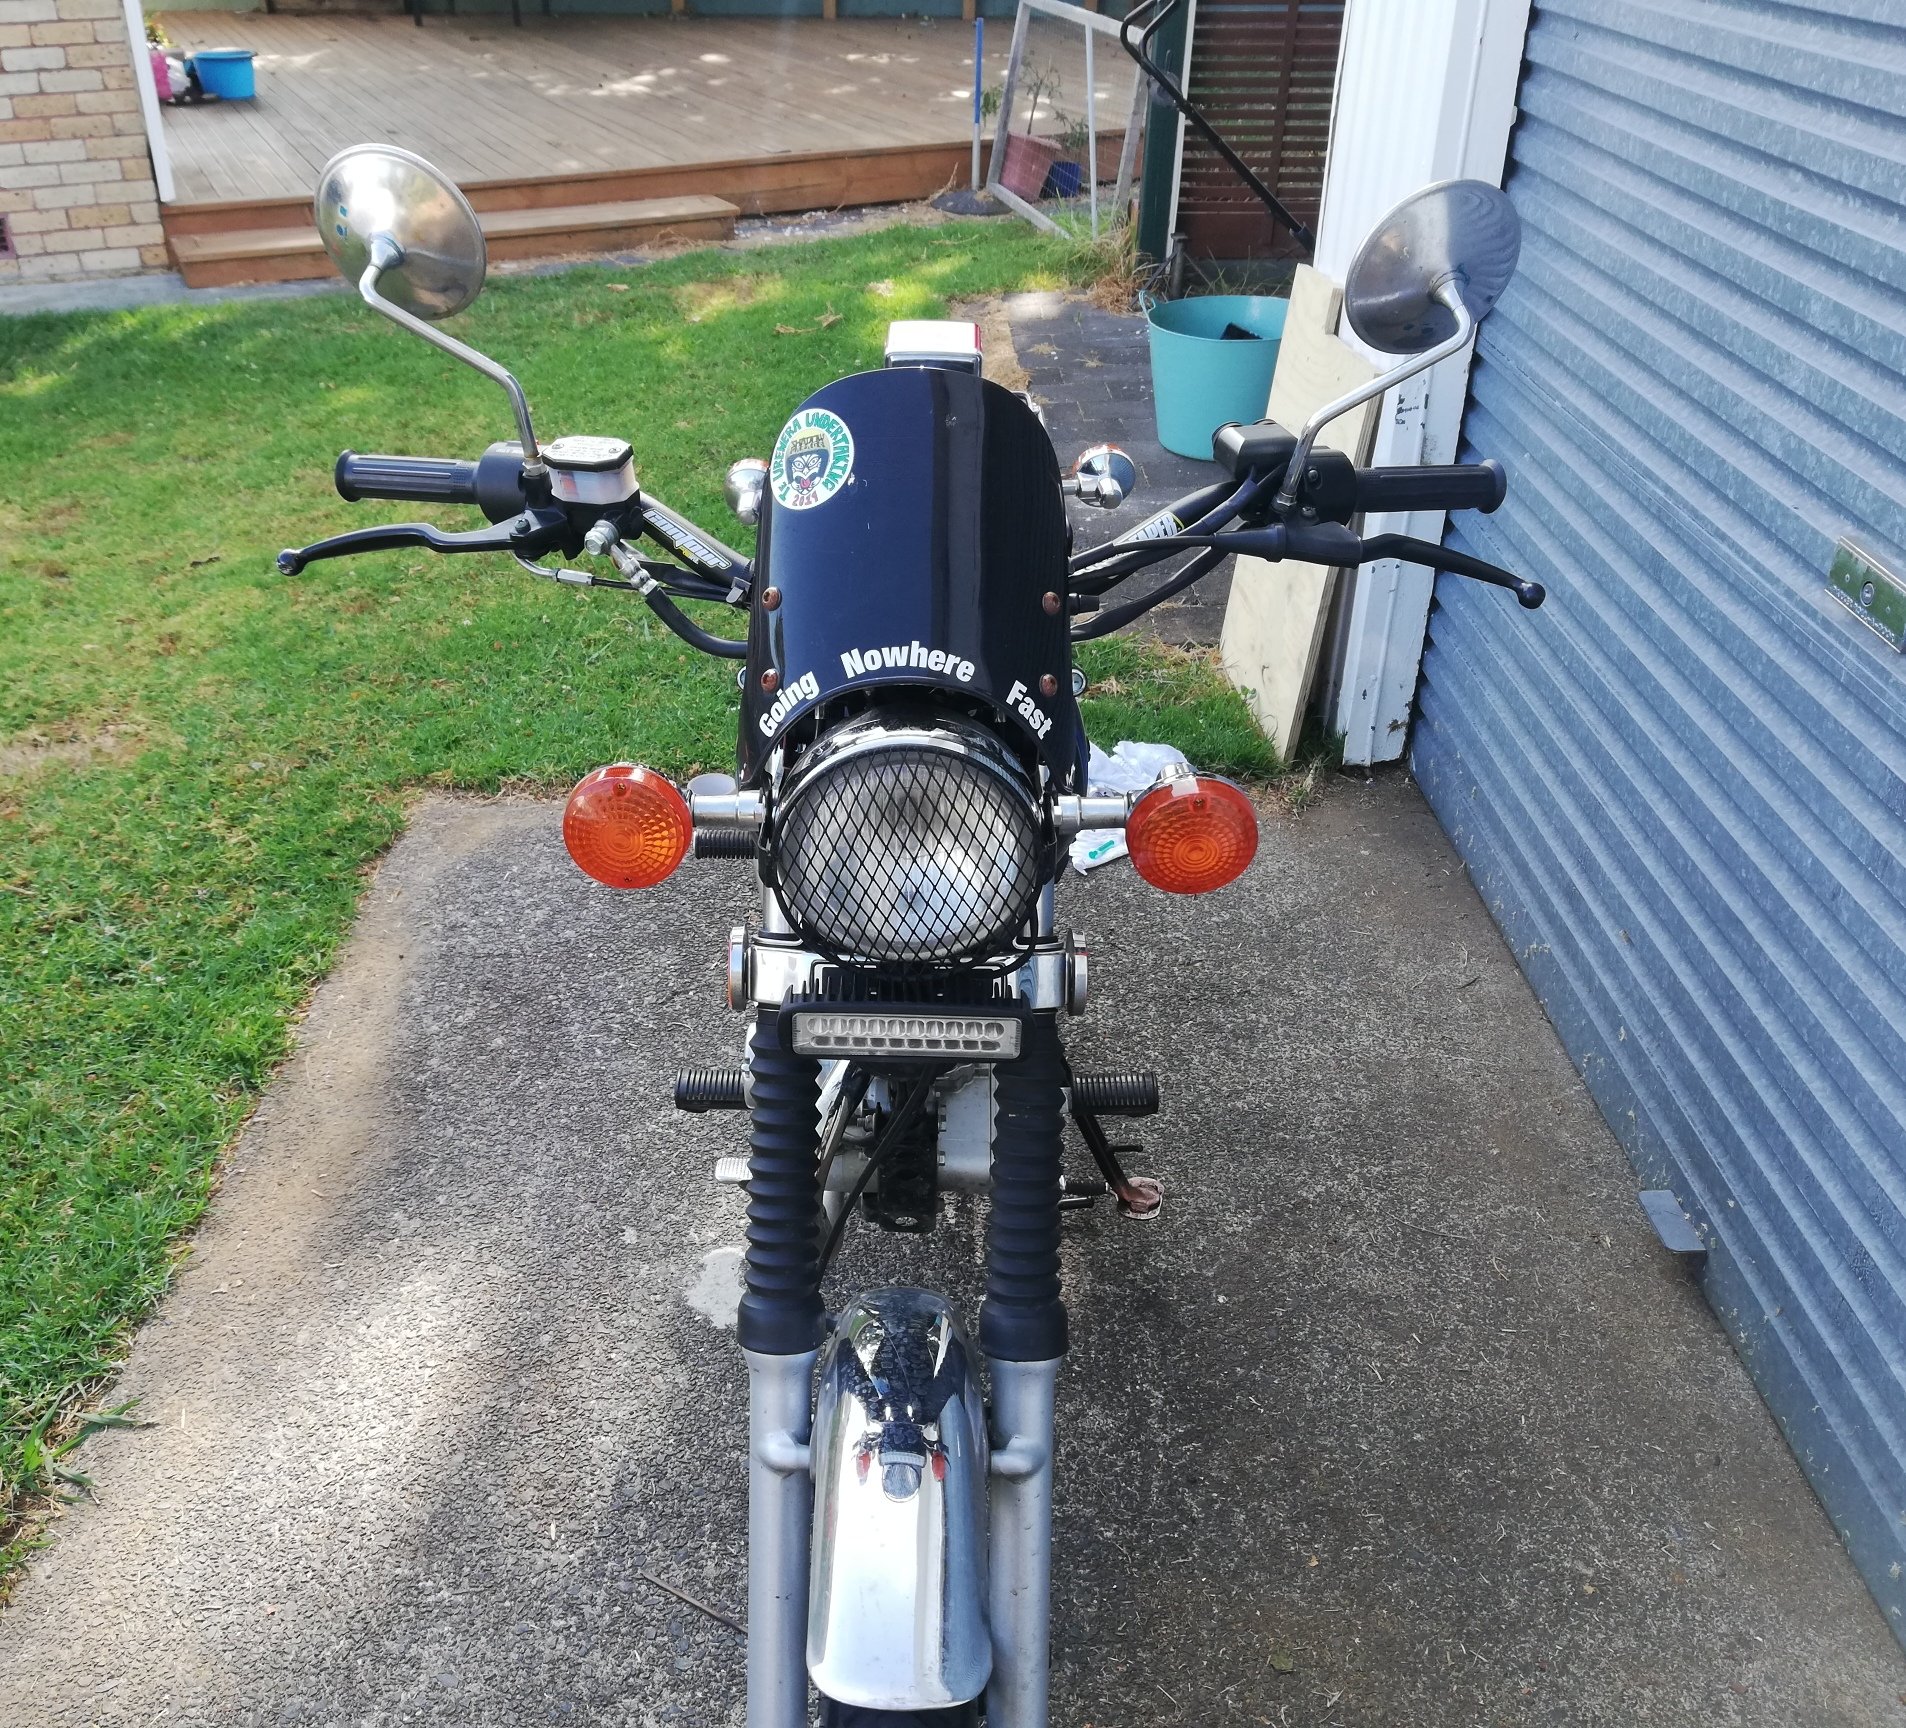
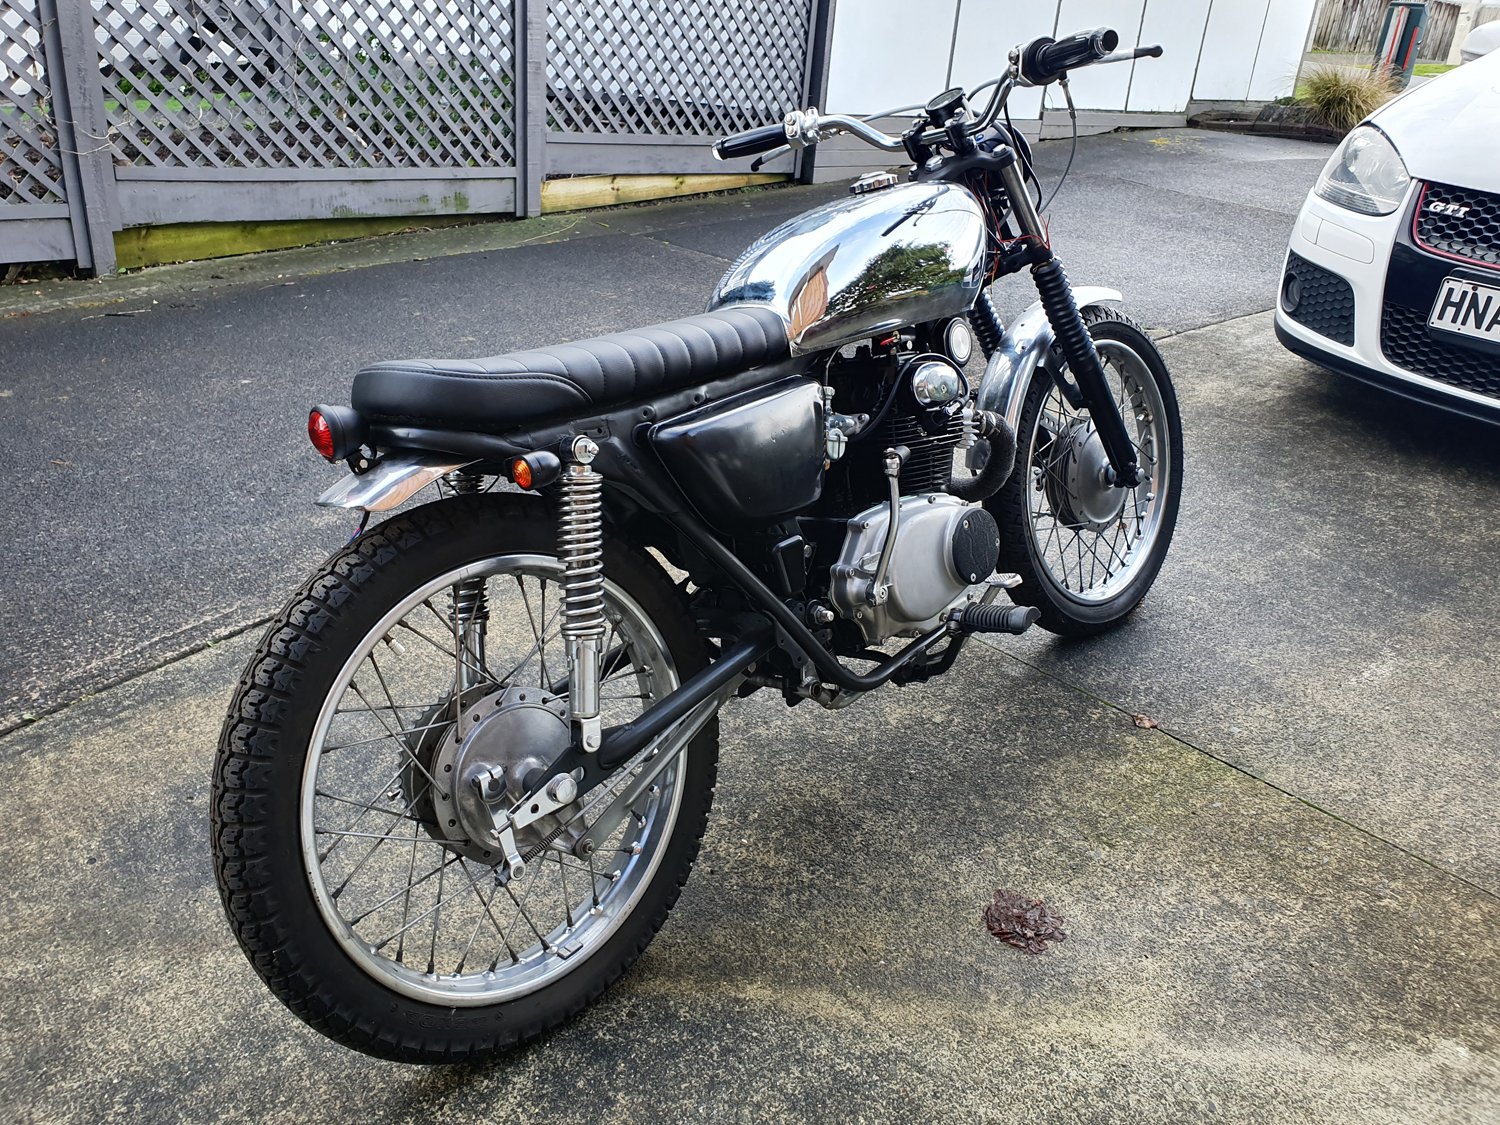
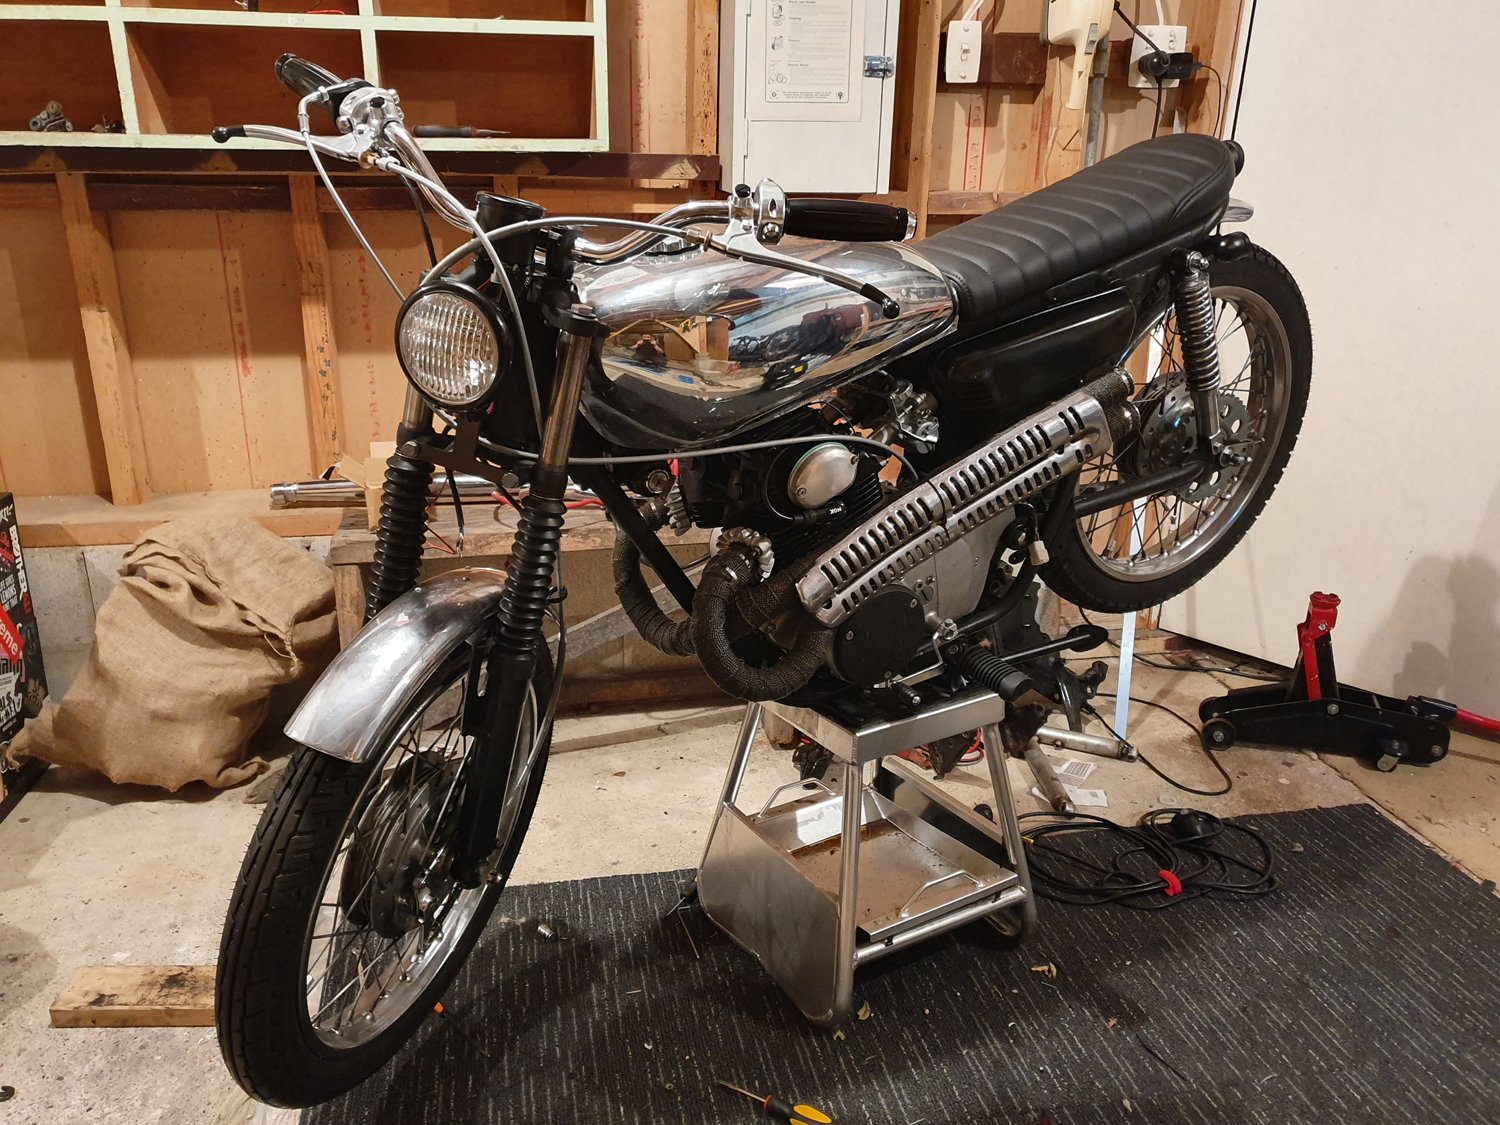
Protaper CR high bars and fat adaptors Bit wider and much less pullback. Might be nicer to control on gravel, and hopefully cause me to slouch less on long stretches. Probably going to be tight getting it in the shed now...
 6 points
 -
Funny you say that, i was thinking it didn't look factory. Managed to get 1/2 turn out of the bolt last night and seems to have fixed the oil leak, will be checking again tonight, amazing how far oil can travel to make a mess. Short of that, ill be removing it if it still plays up5 points
-
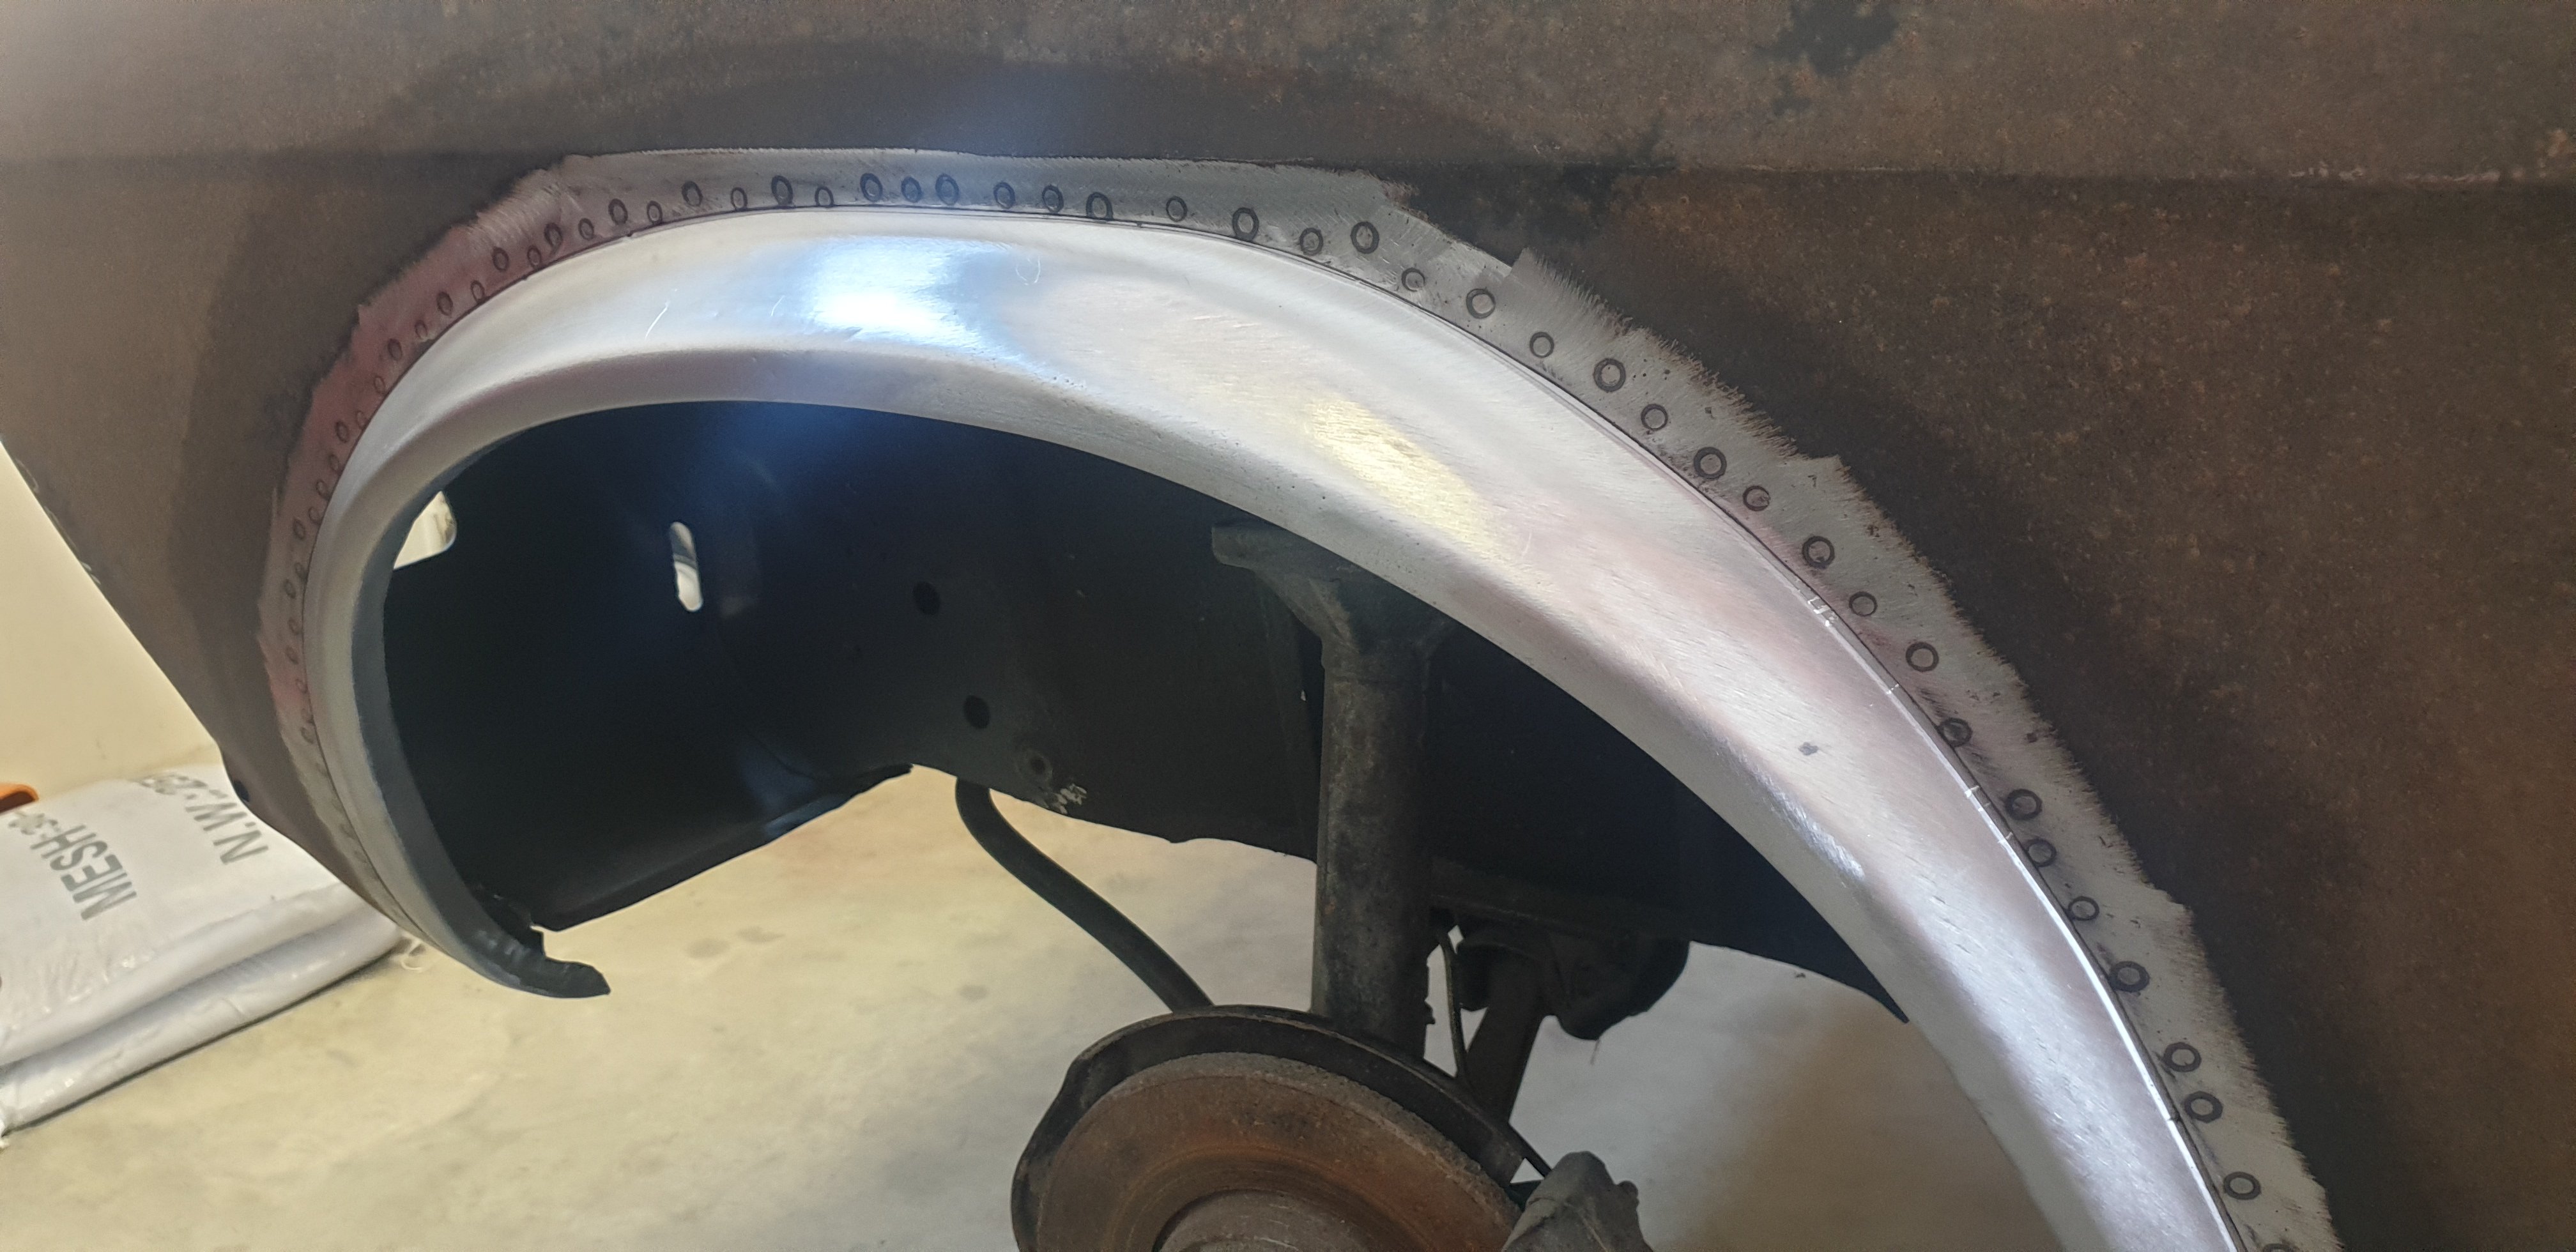
Both front flares have now been fitted, and what an awesome job he's made of them...
4 points
-
Need a quantum muffler to have max flow and no noise, 3" size only.3 points
-
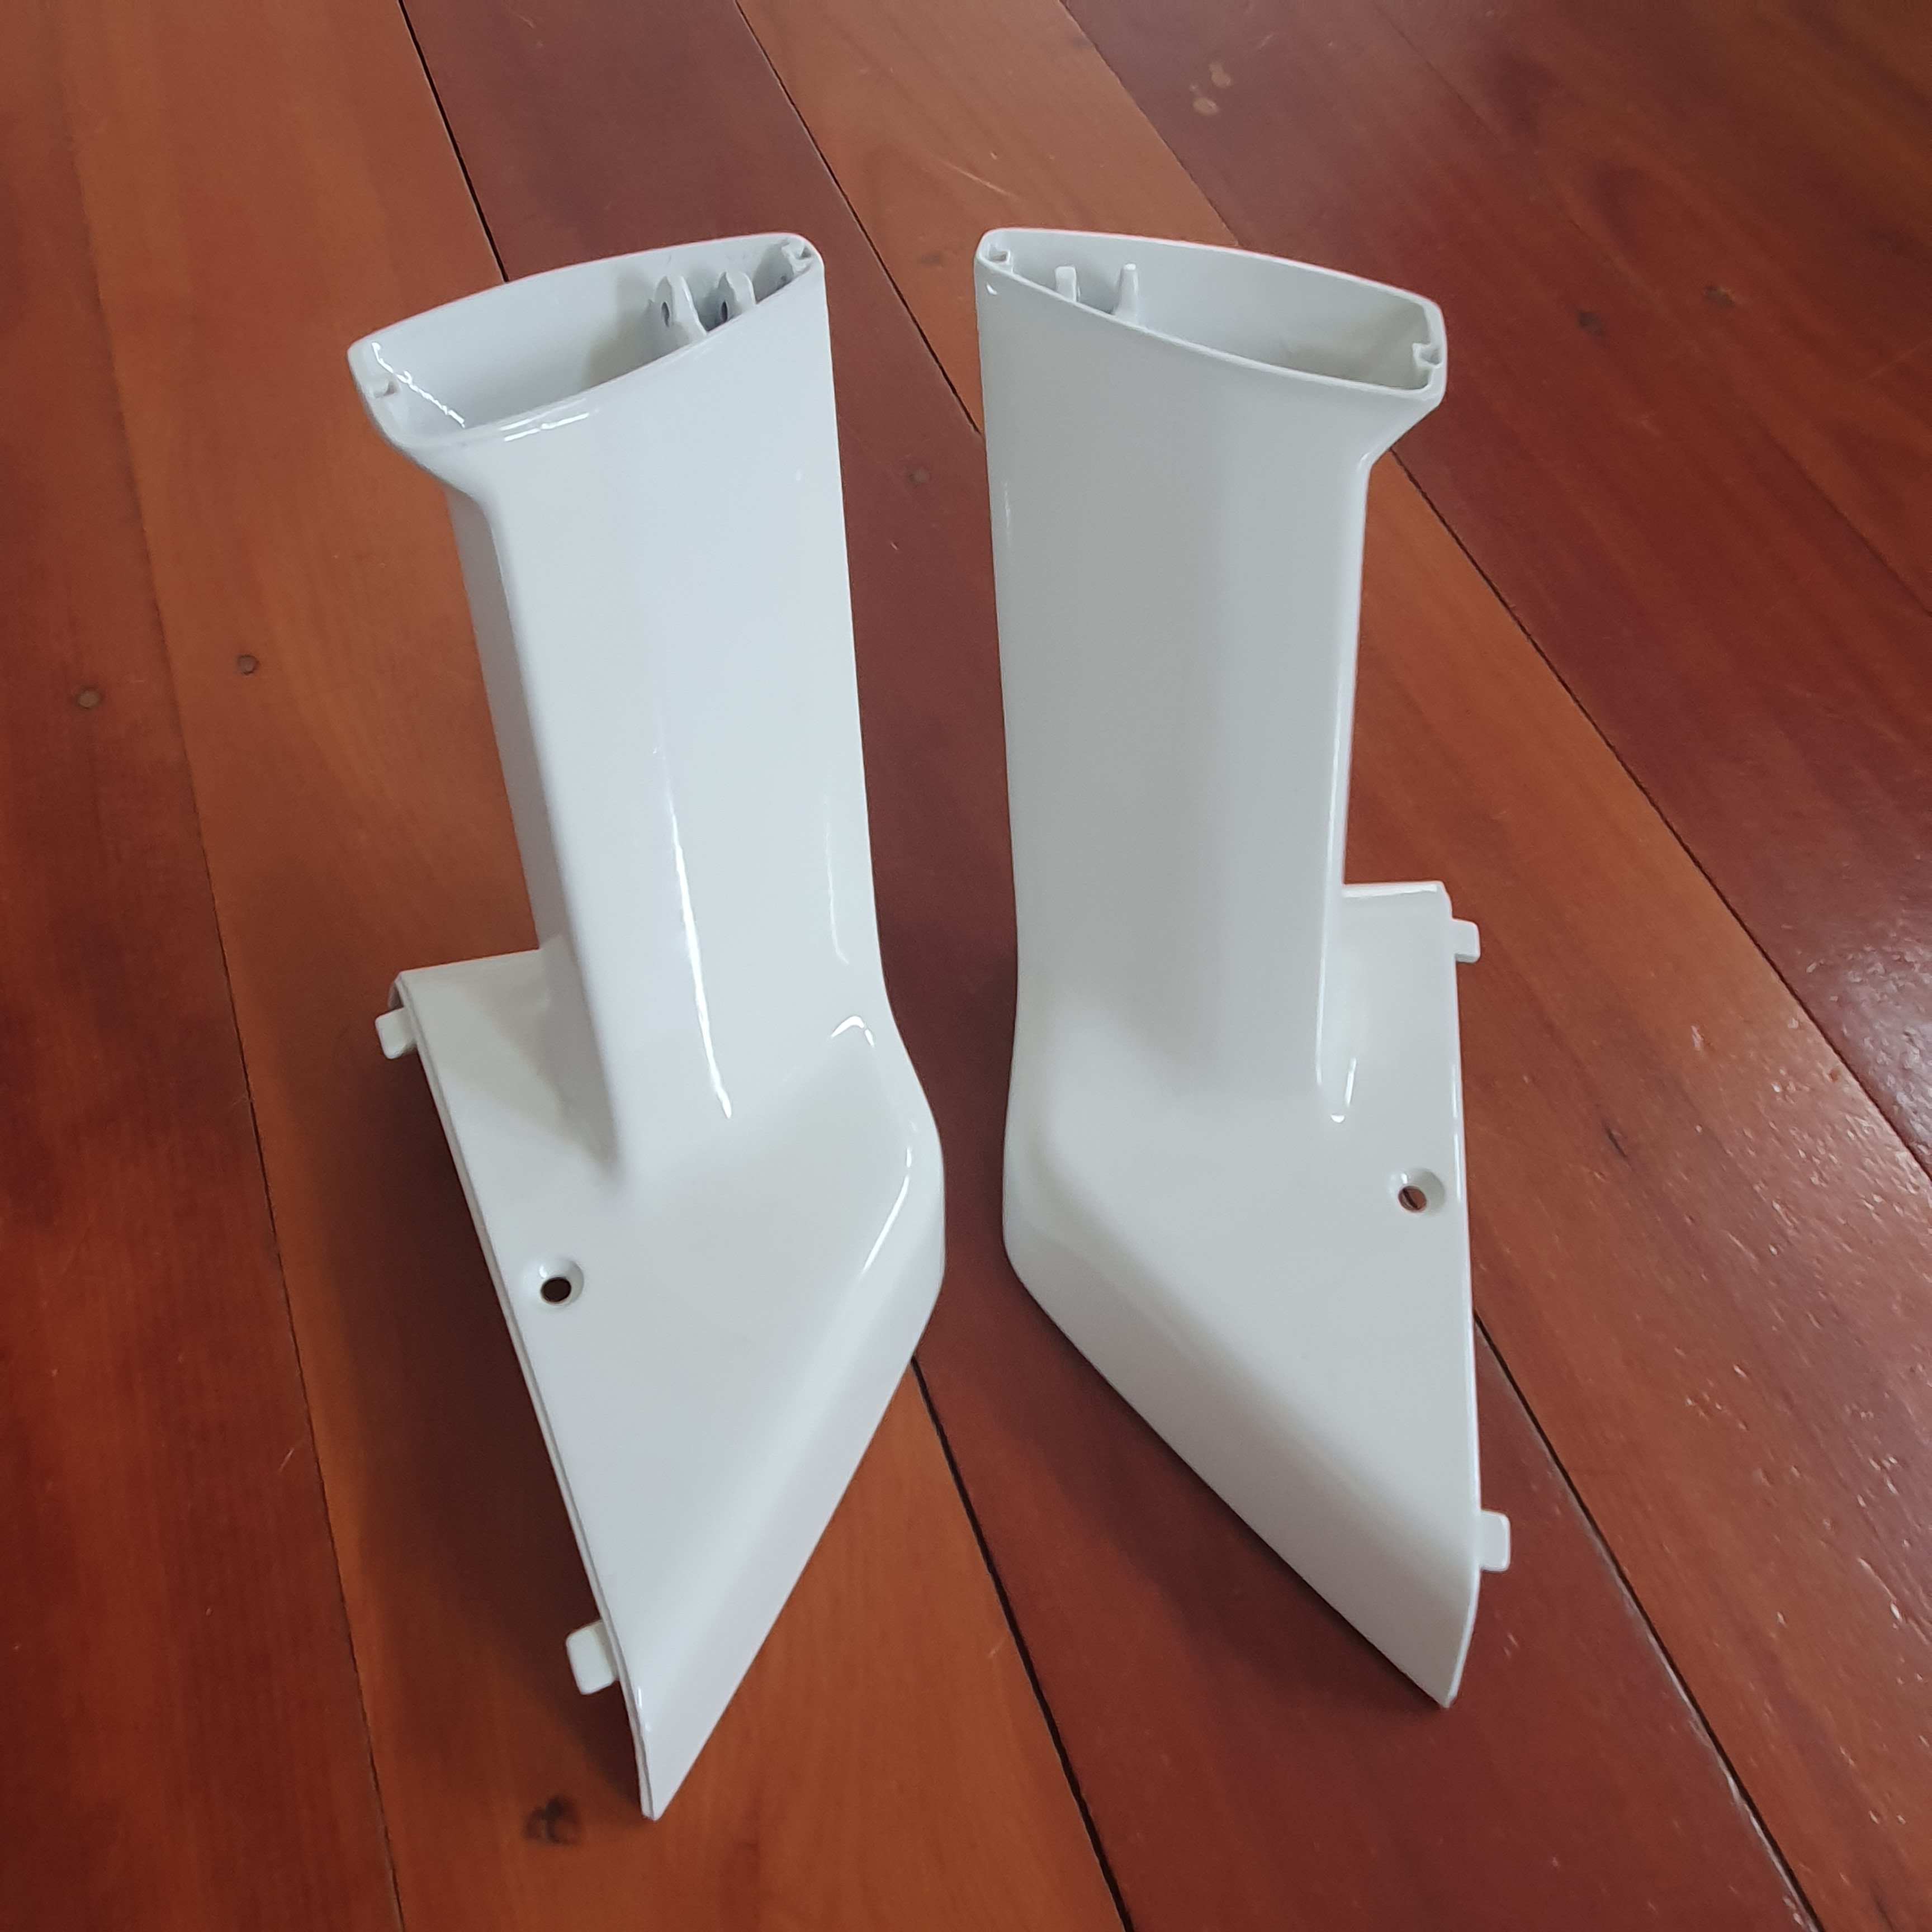
Fender mirror bases painted in factory 035 white
3 points
-
If the tyre size is outside the rim size listed in the ETRTO (tyre standard) and the LVVTA tyre size document then you can fit narrower tyres only if the manufacturer (not the wholesaler or retailer) supplies a letter saying so. Also - you MUST use the tyre brand and model listed on the letter. ie: you can't get a letter from Falken saying 205-60-14's can fit on 8" rims and then fit Supercats in that size.2 points
-
Both side panels have now been rolled and bonded in. Just waiting till the bonding agent cures before it comes off the hoist.
2 points
-
Making a start on the gearbox and transfer case. The gear box is called a LT95 and is a 4 speed manual box with integrated transfer case. What is cool about the early boxes is they used a Salisbury limited slip differential on all Suffix A vehicles (easy to spot spotted as they were all painted red). In addition to the LSD function in the centre diff, the centre differential could also be locked via a vacuum actuator. But only around 300 vehicles were delivered with this LSD and sadly mine isn't equipped with it. After the first pre production and first year vehicles (1969-1970) they moved away from the limited slip feature with the differential as the gearbox had a serious amount of whine and felt pretty agricultural and stiff. To stop this they removed the friction discs on the differential and replaced them with distance discs instead but still retained the Salisbury differential, only now not limited slip but still retains the locking centre differential. They also managed to retain the agricultural feeling and gearbox whine... Shot of the early friction disc. Shot of the later style with the distance discs. This bit freaks me out a bit so I have a friend Glen giving me a hand on it. It is not his first rodeo with these boxes so I am in good hands! Gearbox and transfer case are now broken down into bits for a check up. Overall it is pretty good apart from a toasted needle bearing, worn intermediate shaft in transfer case and a bit of play in the mainshaft. All the gears are in good condition which is great as they get expensive to replace. Most of the parts have now been plated and all new fasteners. Now waiting on seal and bearing kit as well as the main shaft from the UK. Looking forward to getting it back together and in the chassis. Calipers test fitted and looking great with that HPC coating. Now to fit the rest of the hard lines.2 points
-
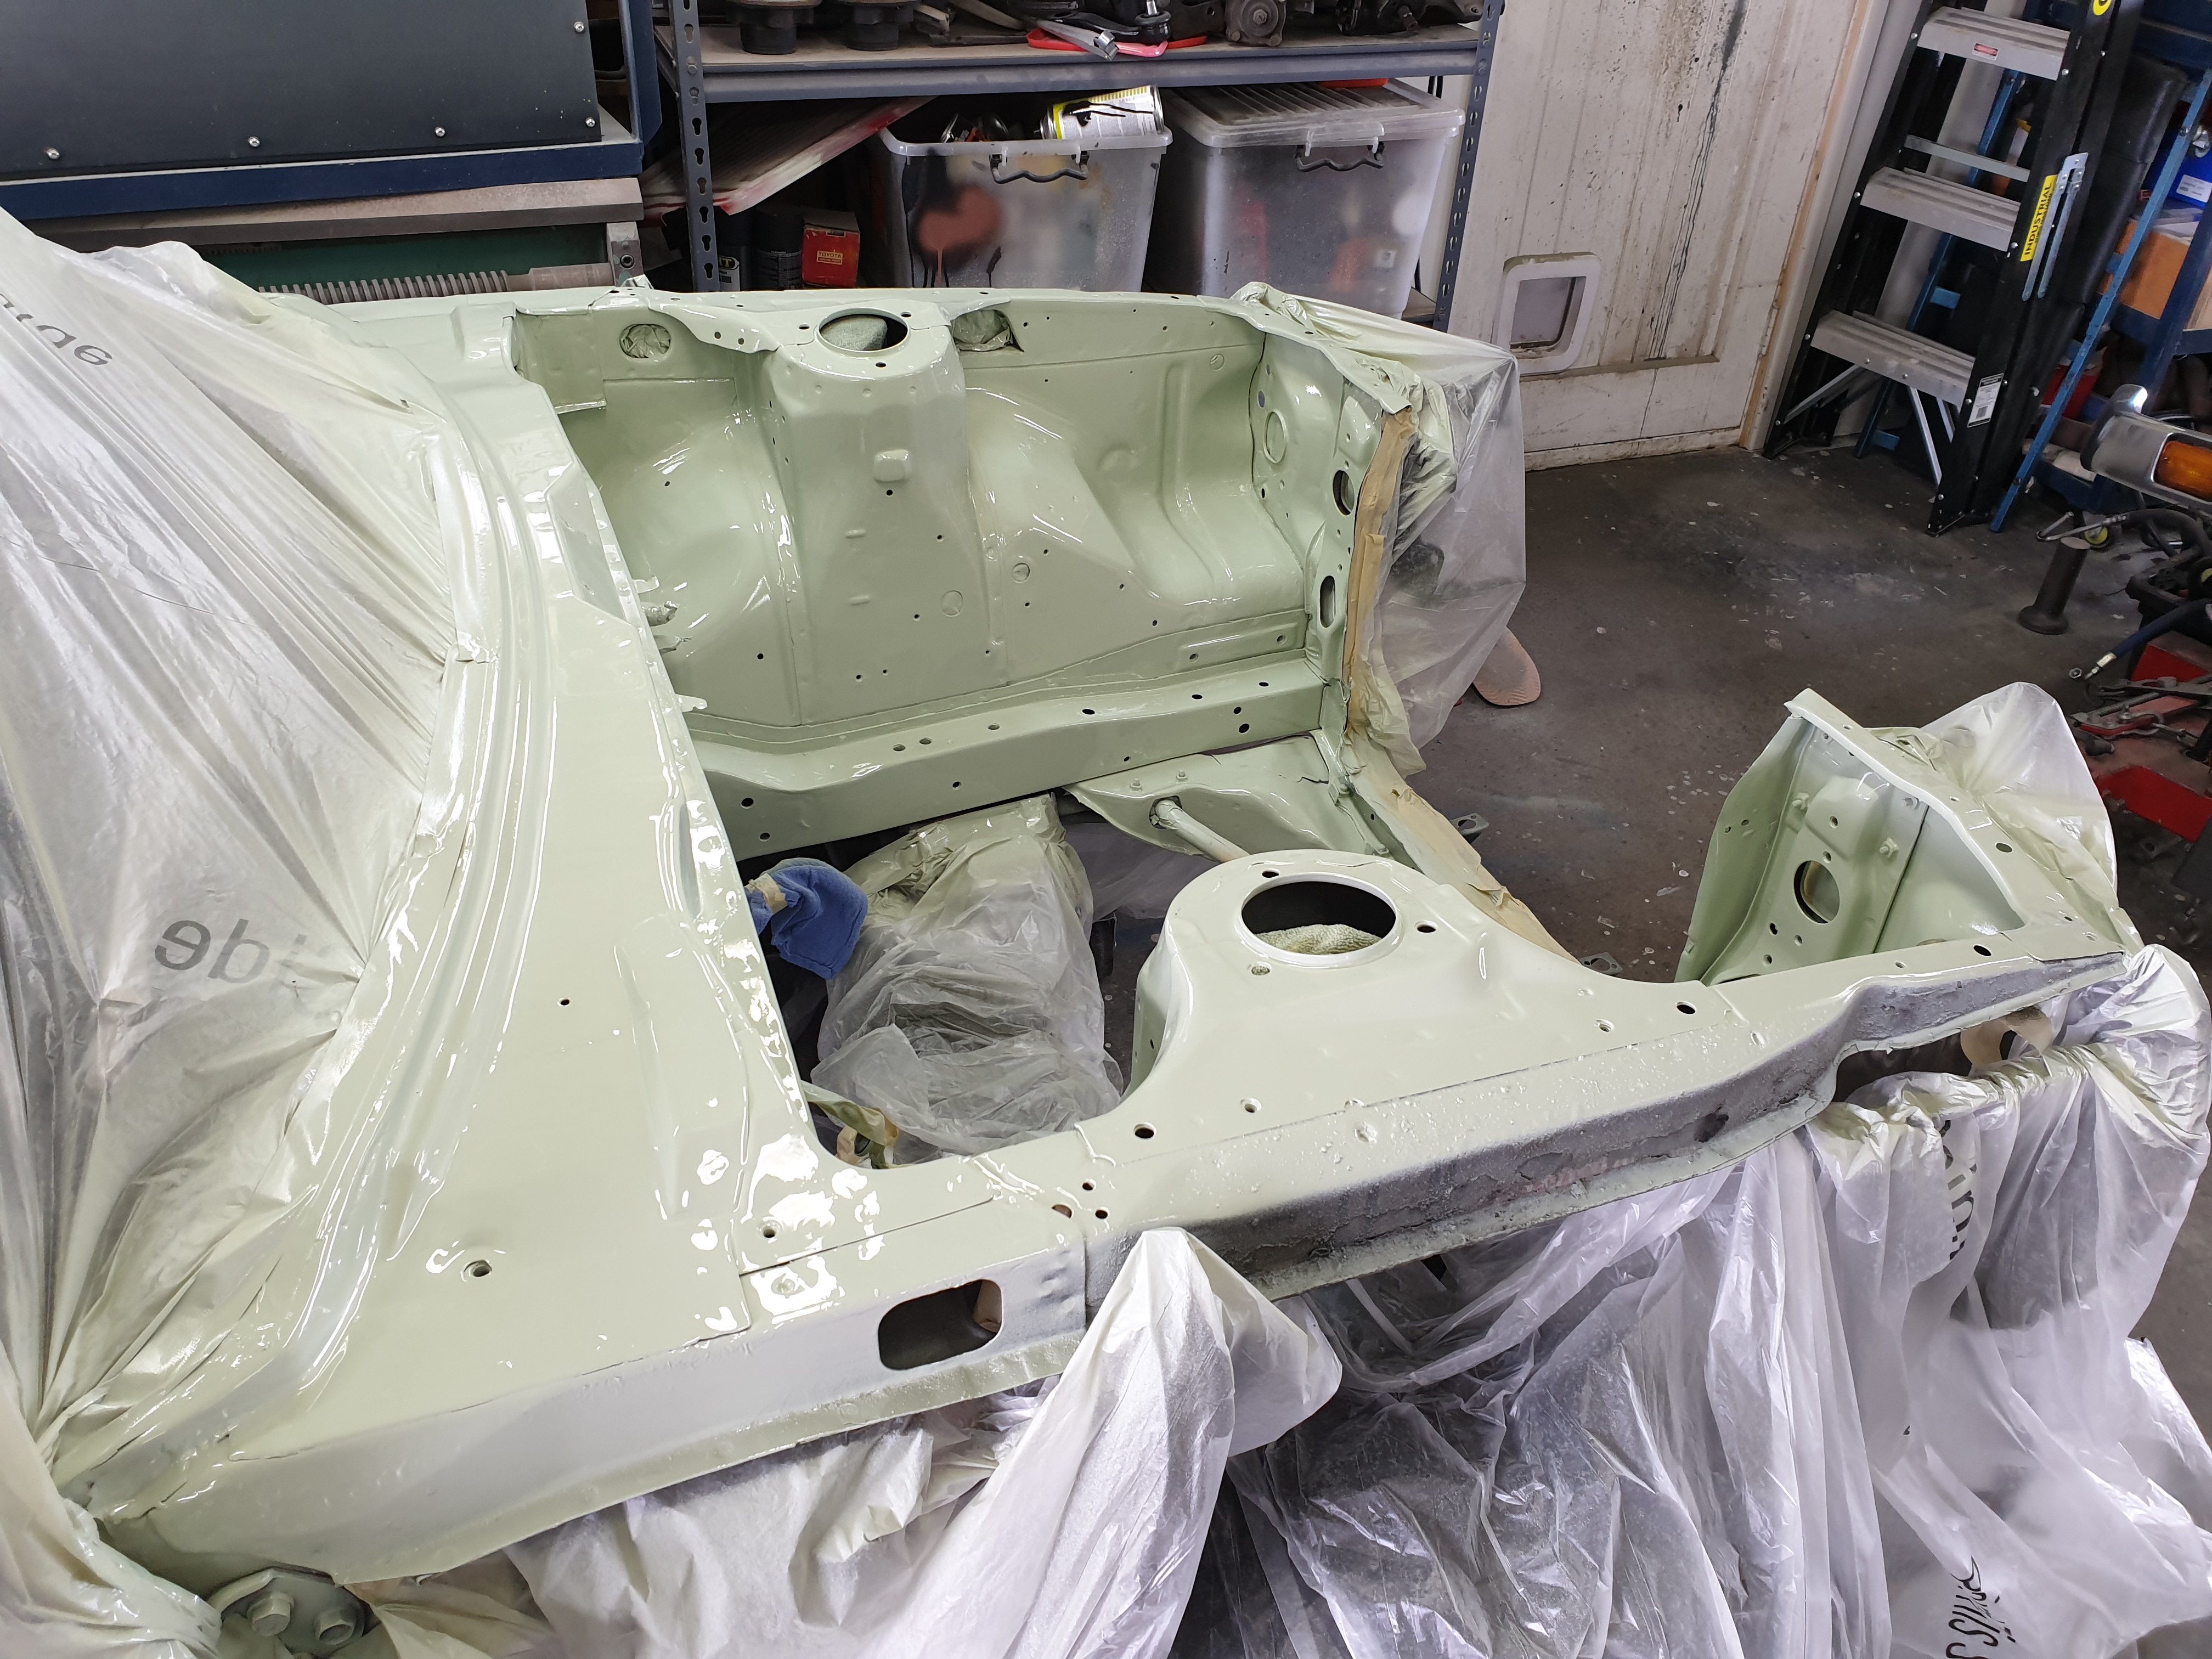
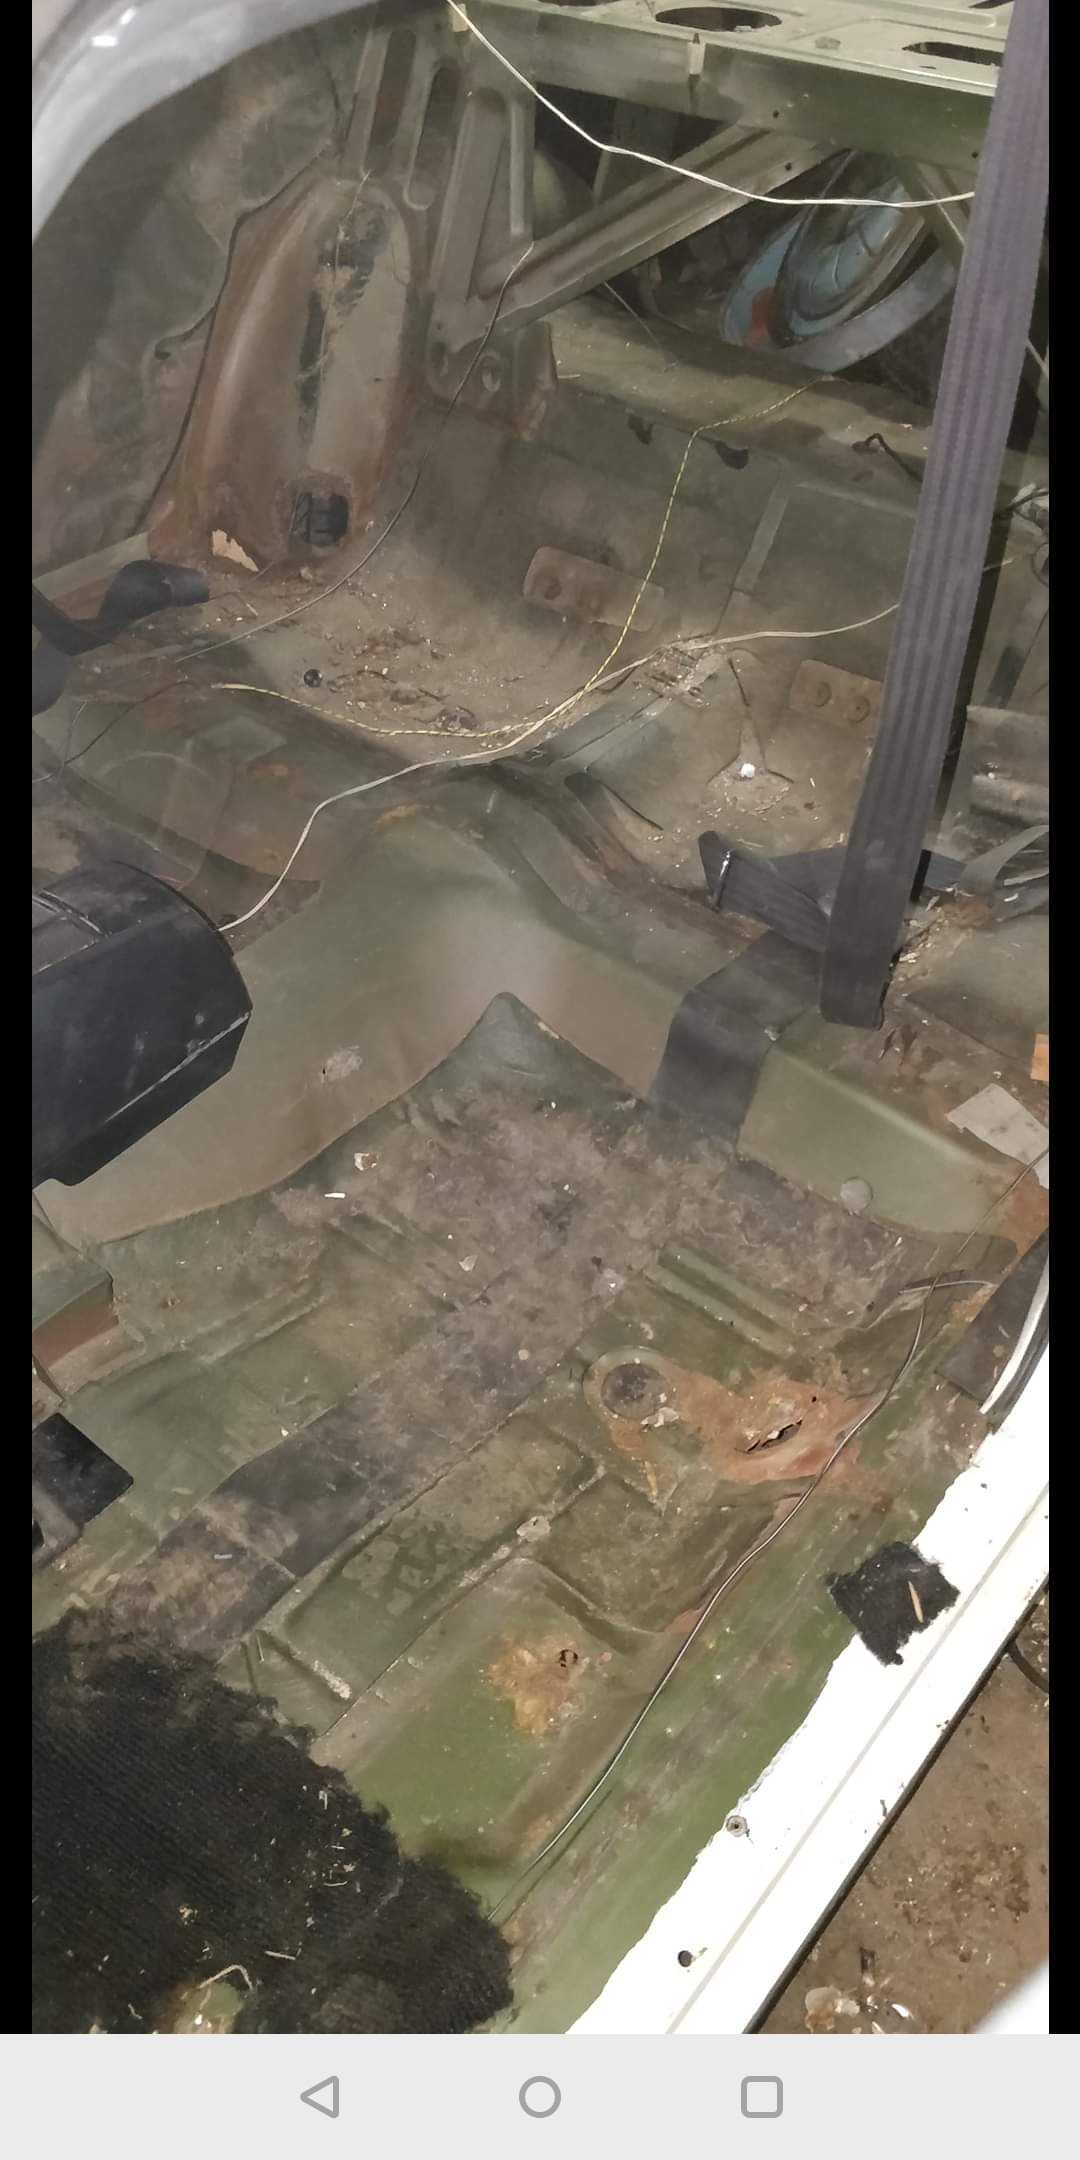
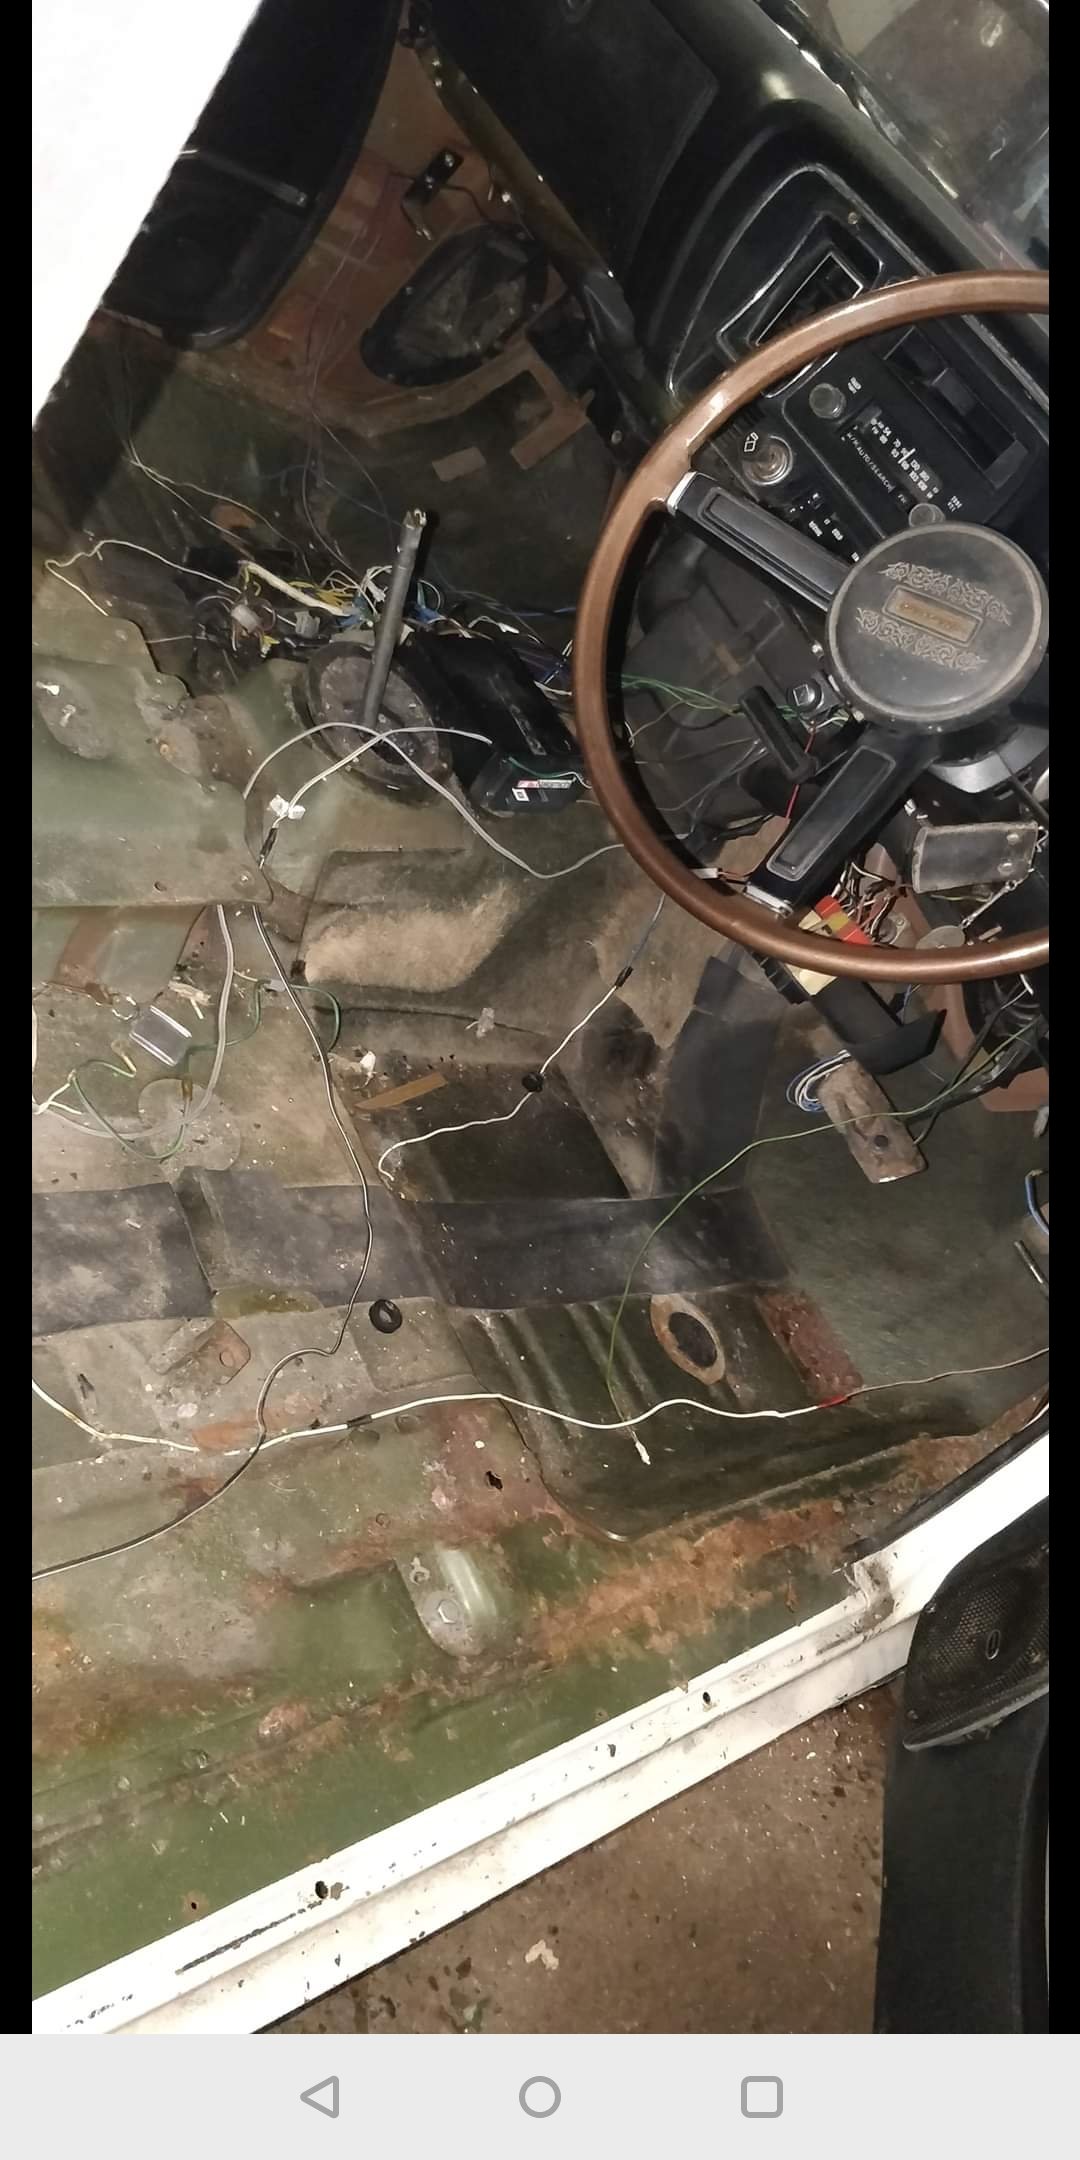
Bought a set 13x6.5 Work Equip 01's. Will refurbish them and then decide if I want to run them. Also scored this off Yahoo Auctions a while back. Has the plugs and also came with some black dash parts. Decided on how to raise the tunnel. Bent the handbrake section up to match the height of where the old gearbox tunnel top piece had to go. Then made up some filler pieces to fill the gaps. Plan was to keep it looking as factory as possible. Had to remake the crossmember as it needed to be built up higher. Used some tube that matched the radius and bent it to suit. Welded in filler pieces. Cleaned up. Next was to make some strips to fill in the sides. Had contemplated making them with the factory swagings, but decided it would be easier to flatten them out and make the strips flat. Then the tunnel to firewall gap needed filling. Made a paper template, transferred it to the steel, cut it, formed it and it nearly fitted perfectly first try. All cleaned up. Up next was the firewall cutout for the dizzy blank cover to sit in. Tried again to make it look factory, which I think turned out pretty good. Stripped out all the sound deadening with dry ice. Have only cleaned off the residue from the passengers seat and footwell area. Pulled out all the wiring as well. Need a F-series diff now.2 points
-
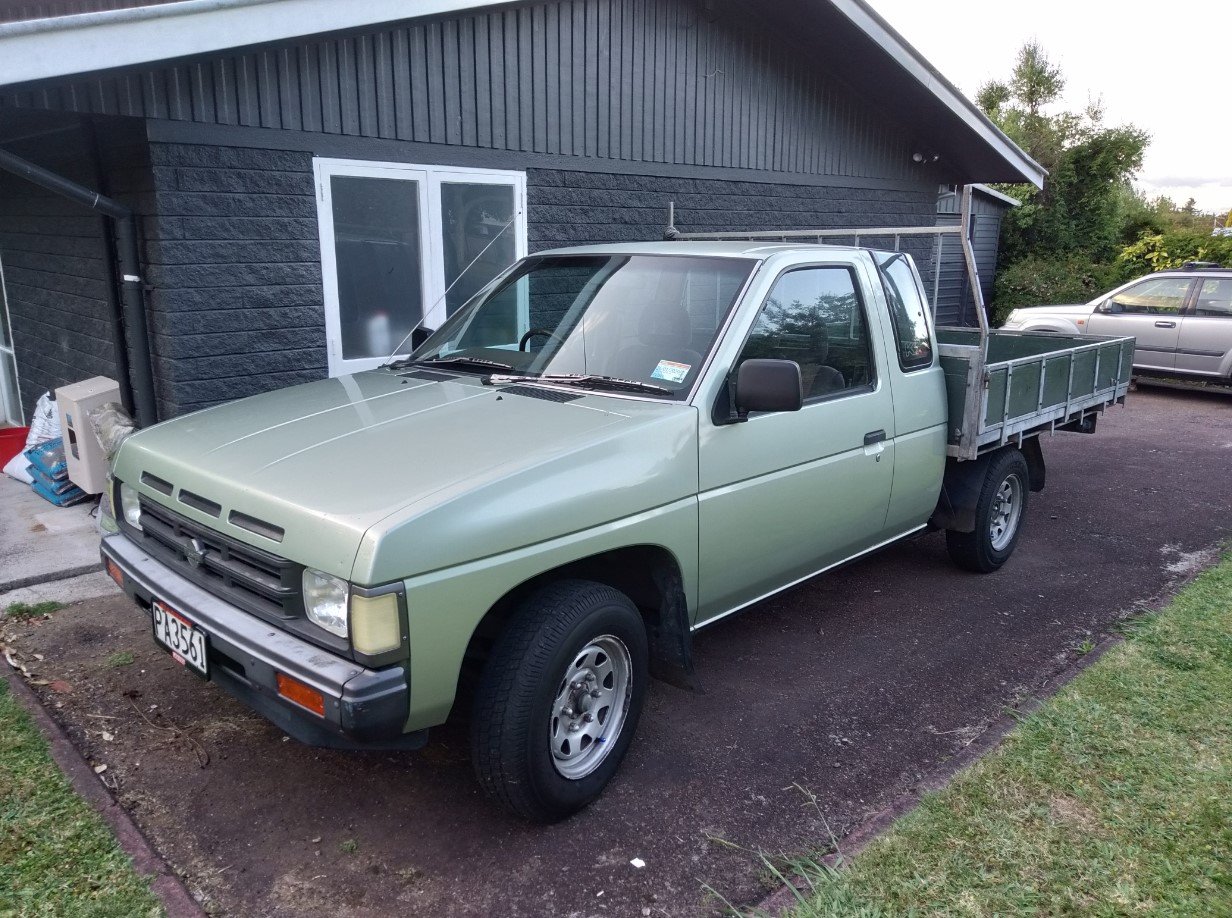
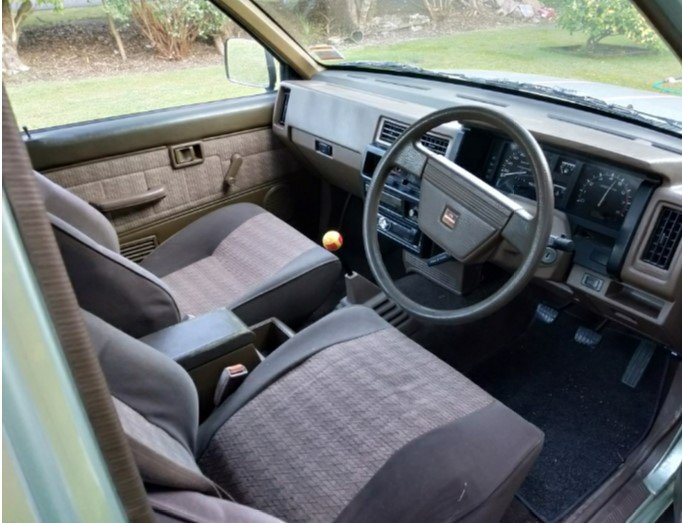
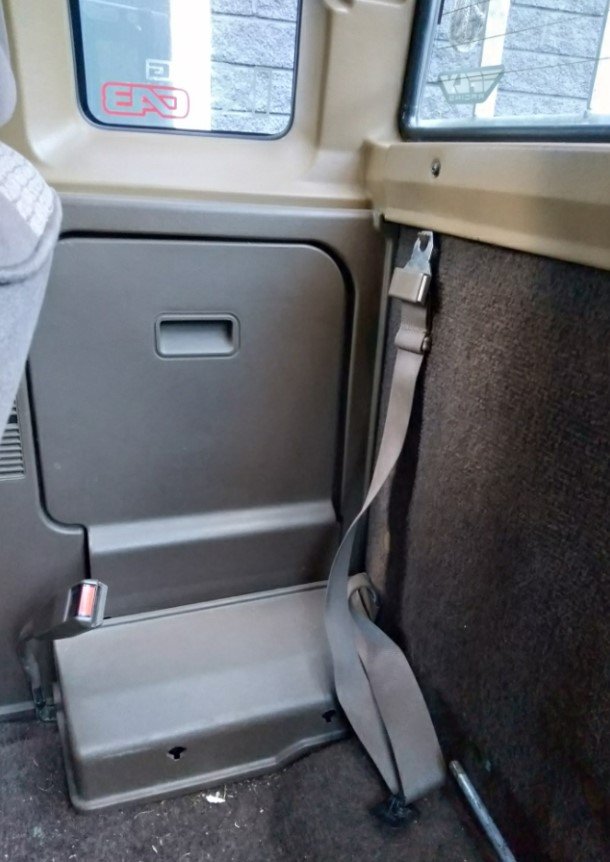
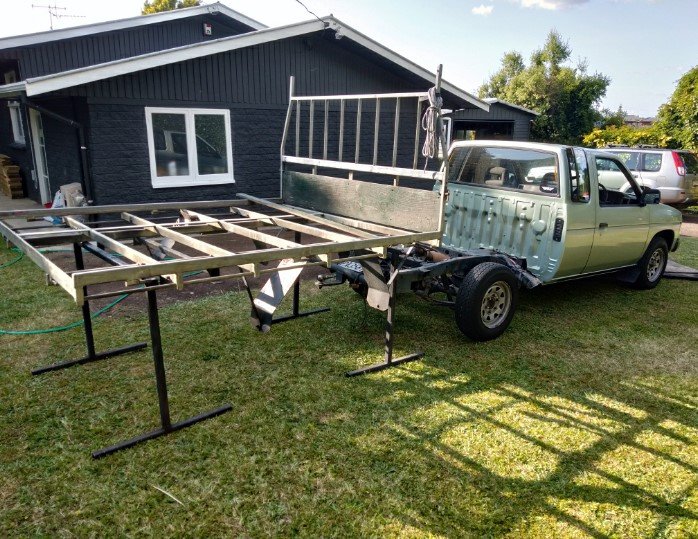
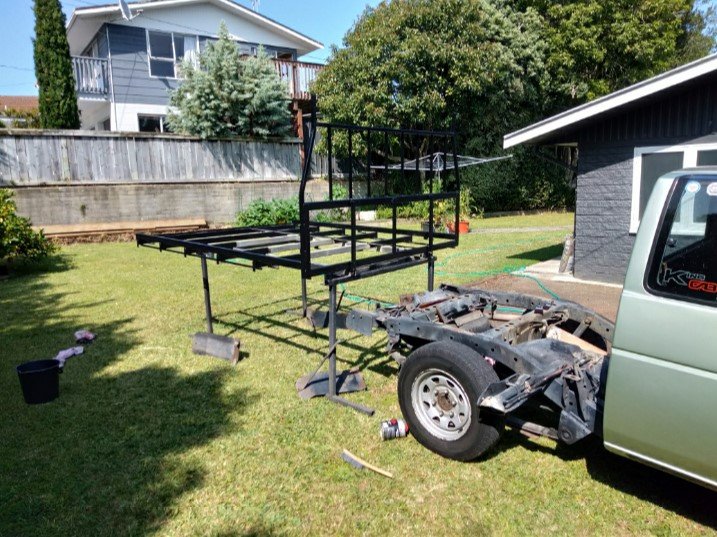
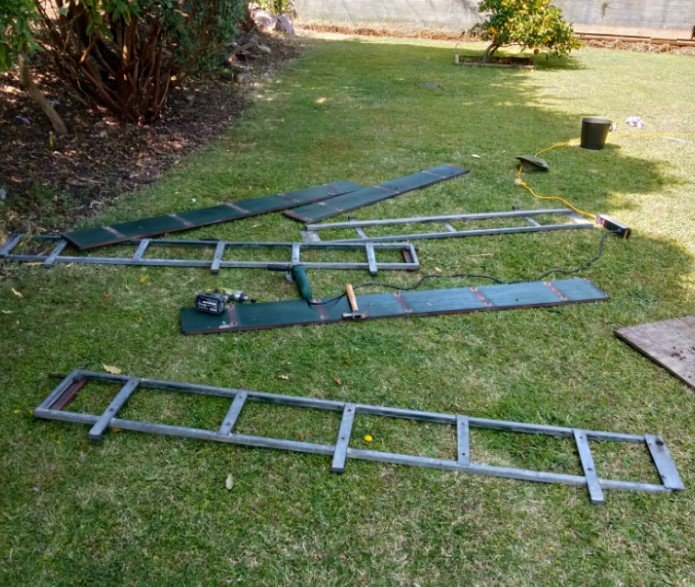
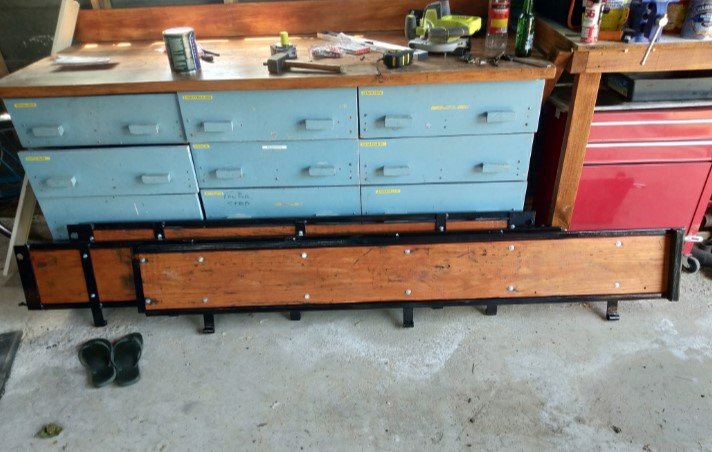
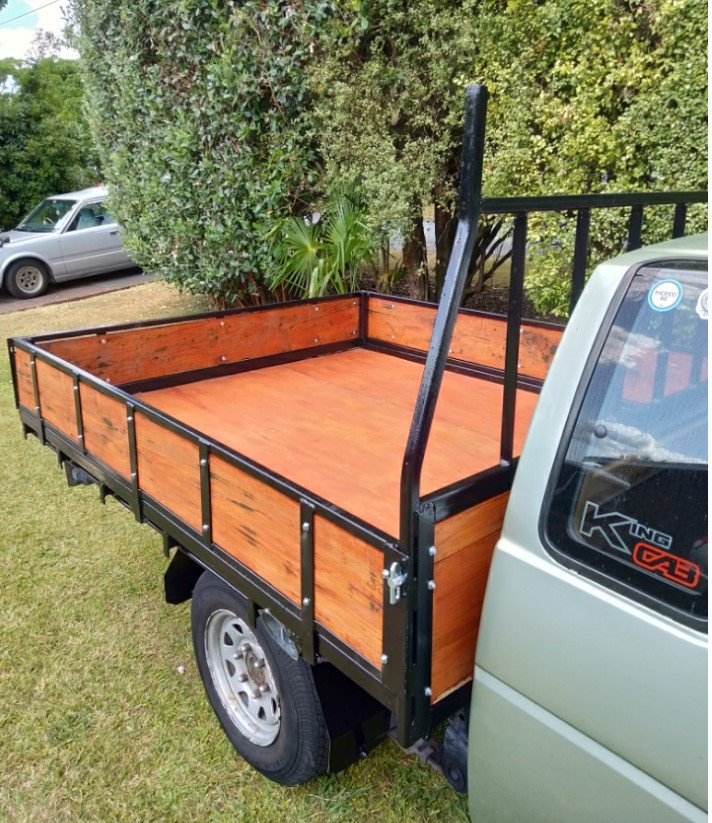
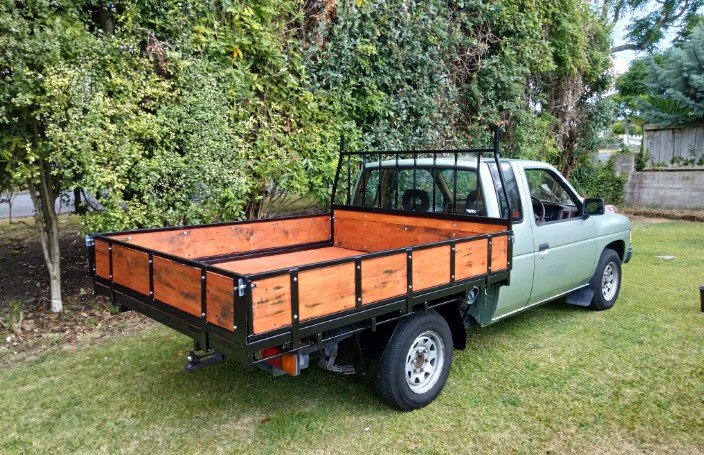
I've been wanting a ute for a while now as we are forever borrowing and or hiring trailers for odds and ends. Figured why not replace our little runaround car with a ute. Win win. I didn't want a single cab as I like the idea of having room inside for gear, and at a push, people. Wasn't so keen on double cab as that seems like overkill on the inside space (I have no friends anyway so don't need to fit 4 adults) and means a much smaller deck. Enter the king cab.... Spotted this locally and held off looking at it as I would have preferred a wellside. After not being able to find one that wasn't a heap of crap, I went and had a look anyway. Was impressed with how tidy it was (considering it's age, 1990) and pretty much had me sold on the spot. Bit of a haggle on price and picked it up the next day. 2.5 petrol (z24) and 5 speed manual. Does what it needs to do. Rear seats are legit, had four up yesterday (as long as the people in the back are reasonably small). Fold away for ample room for bags and whatnot which is awesome. Was pretty farmer joe spec, so decided to fix that ASAP. So as per the photos I got busy this weekend, and must say I'm pretty happy with the result. Reused the timber sides (hit them with an electric planer, my new favorite toy), new ply on the deck, and generous amounts of black paint. Next up is a bit of low and some wheels, then that'l be about it. It's got pretty bad drivers side (and fuel tank) sag, so have tracked down some second hand leafs for it, so will make a matching pair, chuck some blocks in, and wind the front down to suit.
1 point
-
Might be time to catch up for a beer1 point
-
Commenting to sub, don't know how to do it otherwise.1 point
-
Ok with me1 point
-
Buy a container?1 point
-
Spend 500$ and build a carport?1 point
-
Lol entropy muffler, that is all mufflers? all things apart from life maybe? They have some more surface area and some venturis hence more entropy? where the data?1 point
-
That leaky hose you got is not a factory fitment, rather an after-market oil feed to the head. Some barry's reckon triumphs need them. Others say it's a waste of time #sharn etc. I wouldn't feel bad about blocking it off with the right thread bolt and some thread tape and loosing it if it's being a pain.1 point
-
Plans are afoot.
1 point
-
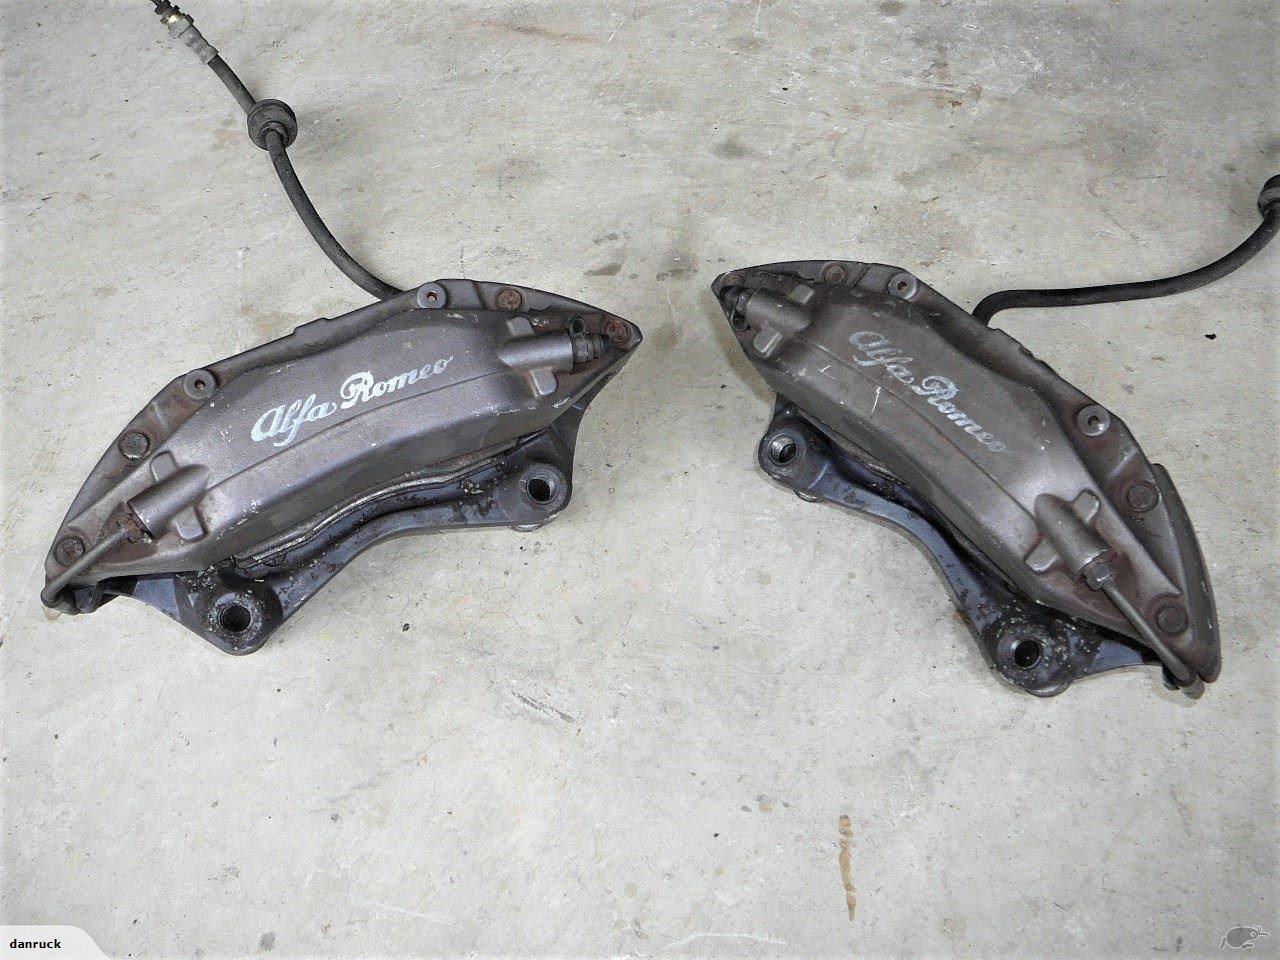
Oh yeah forgot. The brothers car has 4 pots and I got jealous so I bought some alfa romeo 166 brembos. I would assume that being Italian they'll leak until they blow up but painting on a BMW badge might resolve that. My theory is that the alfa brakes mounting holes are parallel (although not concentric) to the BMW ones which will keep the mounting bracket a bit more 2 dimensional. I have no idea if they'll fit but worth a shot for $200. At the risk of sounding shallow I wouldn't mind some larger discs for purely aesthetic reasons, but will see if the current disc is already a stretch. I feel like red Brembos is super cliche but these might end up red if I cant make the original paint look good. I wish the caliper rattle cans came in more colours. At least you can buy heat proof decals for them so they'll look the ducks nuts.
1 point
-
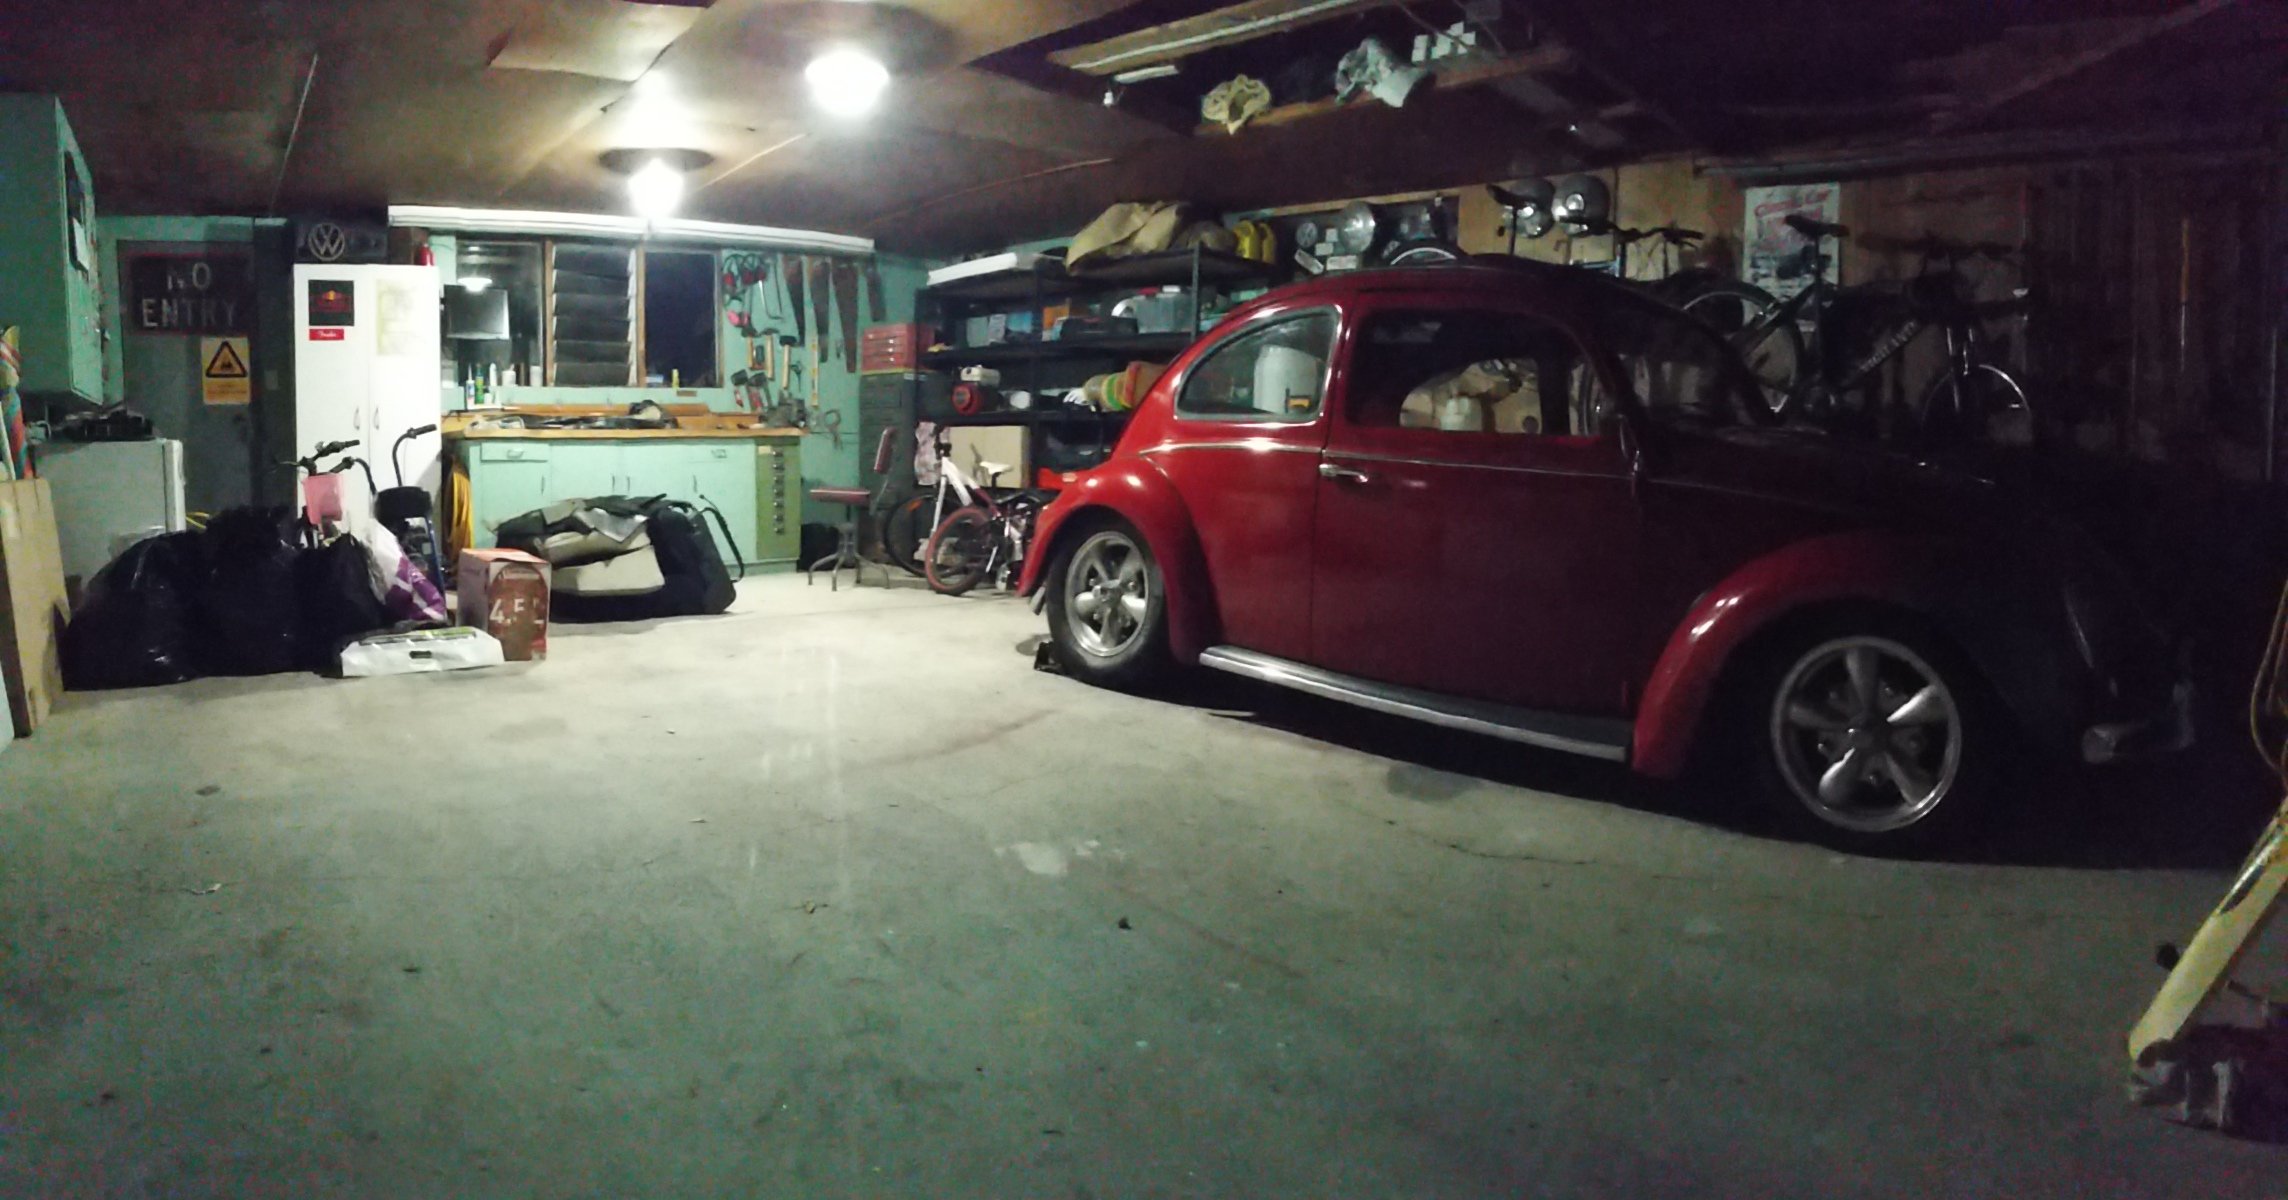
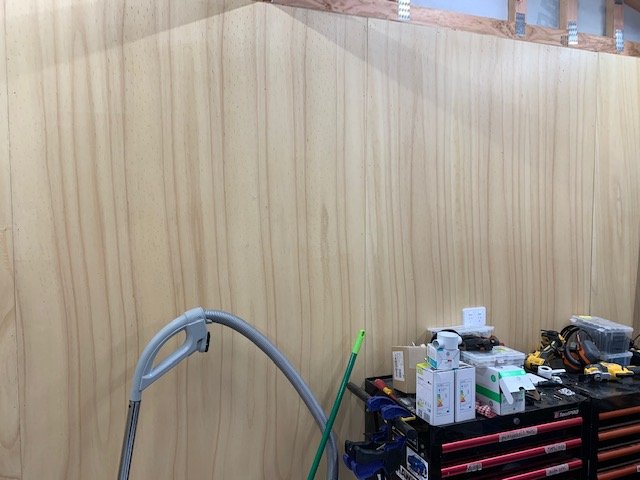
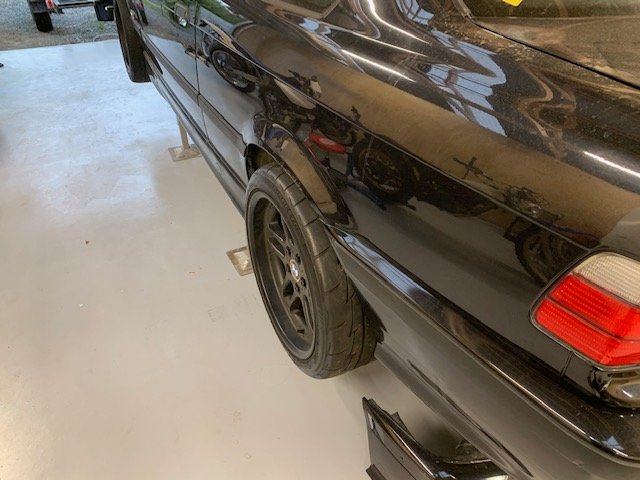
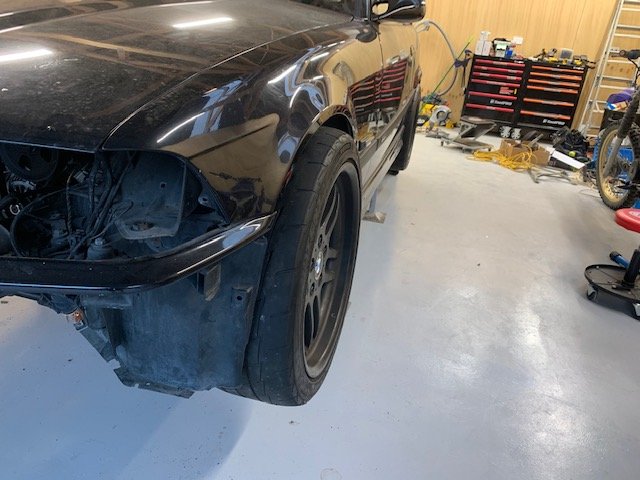
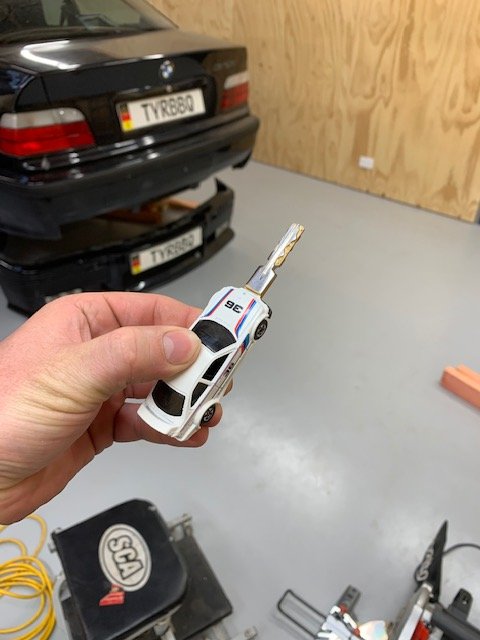
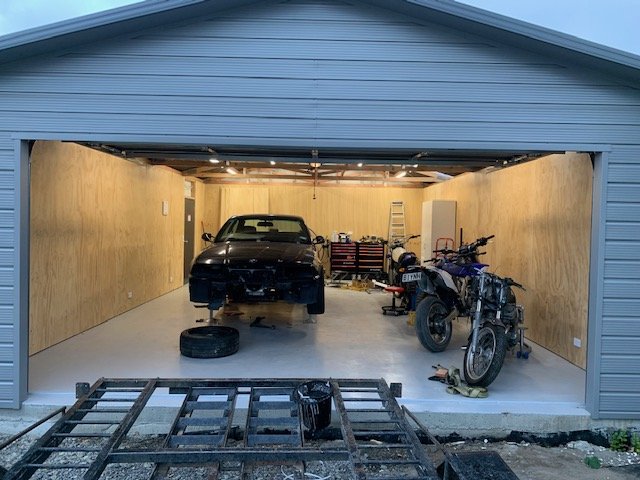
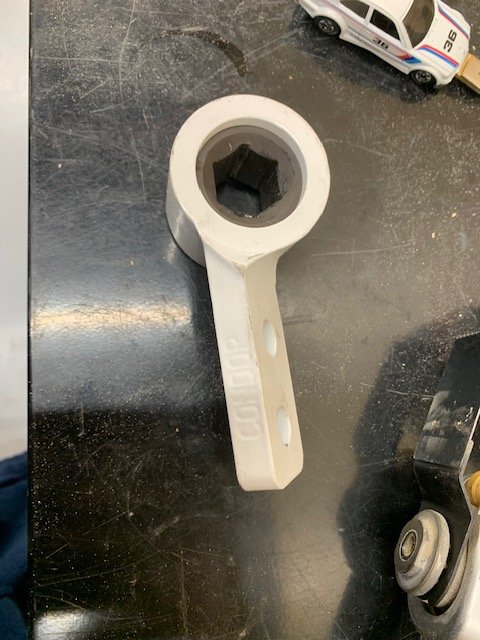
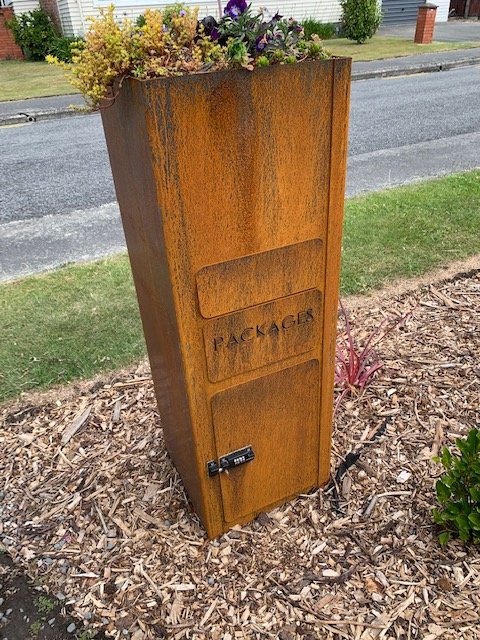
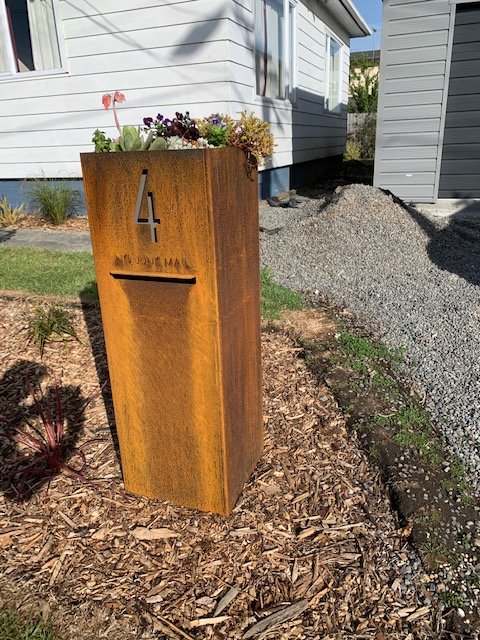
So I decided that the only sensible course of action was to build a garage worthy of projects. The car was stored at a mates for a while but I’ve since brought it home to papa and it’s front and (off)centre of the shed. I wanted to keep to a budget but by the time you’ve paid for the electrical gear and the ply and floor paint, it all adds up! Haven’t even poured a driveway yet which will sting. Considering the ply sheets are cheap bunnings spec I’m pretty happy with some of the grain Anyway... to the car. I bought a staggered set of M-parallels. If you’re not a bmw person you might not care about that, but beema people will fizz. They’re 18x8 +14 and 18x9 +25 (from memory) and have 235 and 265 RE003s on them. Keen to make em smoke. The rear is going to get 25mm spacers and the front has wider control arms from an E46. For those that don’t know, the arms push the castor forward a bit and the track out 25ish mm per side due to slightly different design. I bought Condor bushes to make that work, they’re pretty sweet but cost the earth thanks to NZD - USD exchange rate. Maybe I should clean that arm.. I ordered an over fender kit from Cliq but it’s been a fucking mare and nothing has been shipped, so I expect PayPal will refund me and I’ll be back on the hunt. Tempted to roll bolt on flares just for the OS lols but it restricts low low and I love slammed whips. Also the bf made me a sick Xmas present which broke shortly afterwards (he’s a sparky and maybe not such a fabricator haha) but I’ll fix it up, paint the body black, and hopefully use it as main key. Anyway if you’ve been following this build I’m sorry about the delay. Garage took way longer than planned. Hopefully less delays coming up, me and the brother have agreed that leadfoot 2021 is our deadline. Long drive from the south but would be sick! his FD Is coming along. Engine fit surprisingly easily and we going off the shelf headers for him which saves pain. Circle Track down in chch is building him a driveshaft as we speak and I’ll get one off them soon too. Also my letterbox finally rusted up and is starting to look sweet. Fucking couriers though, it’s been installed for months and not a single package has made it into the package slot. Oh well, I tried.
1 point
-
Makes a mess but seems to be cutting alright. It's pretty inconsistent on the back side, I'd be surprised if it was actually in balance before.1 point
-
1 point
-
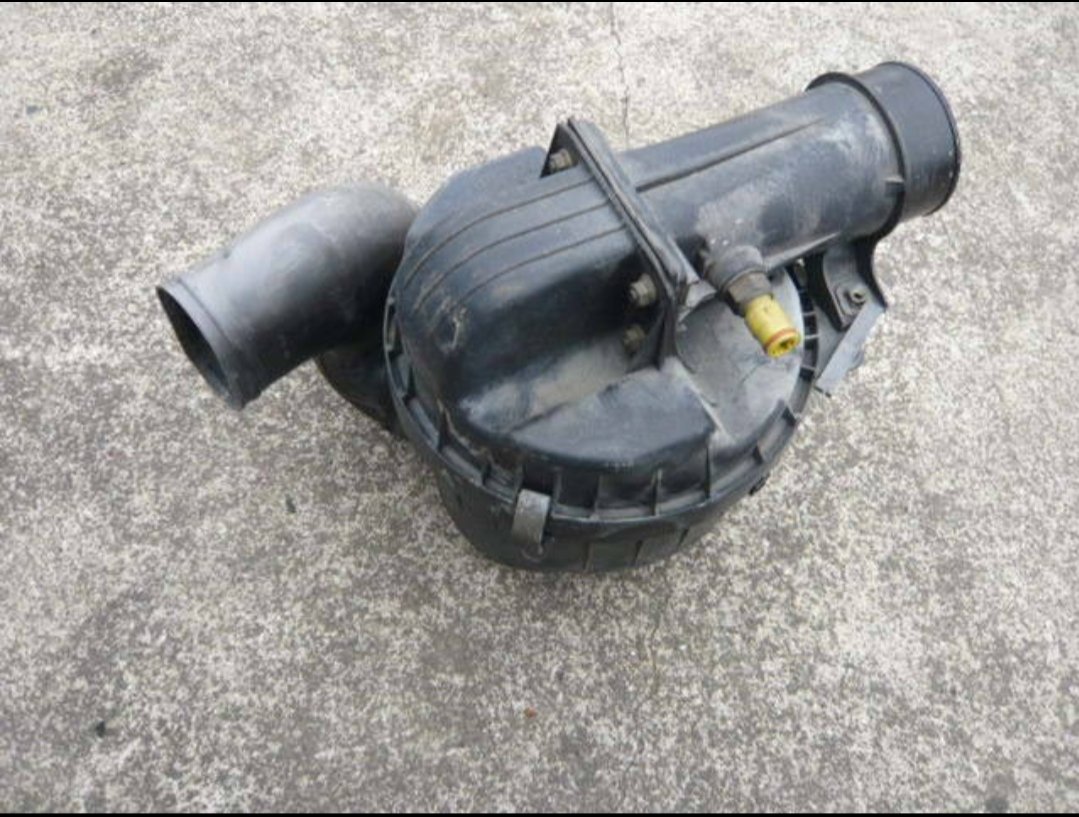
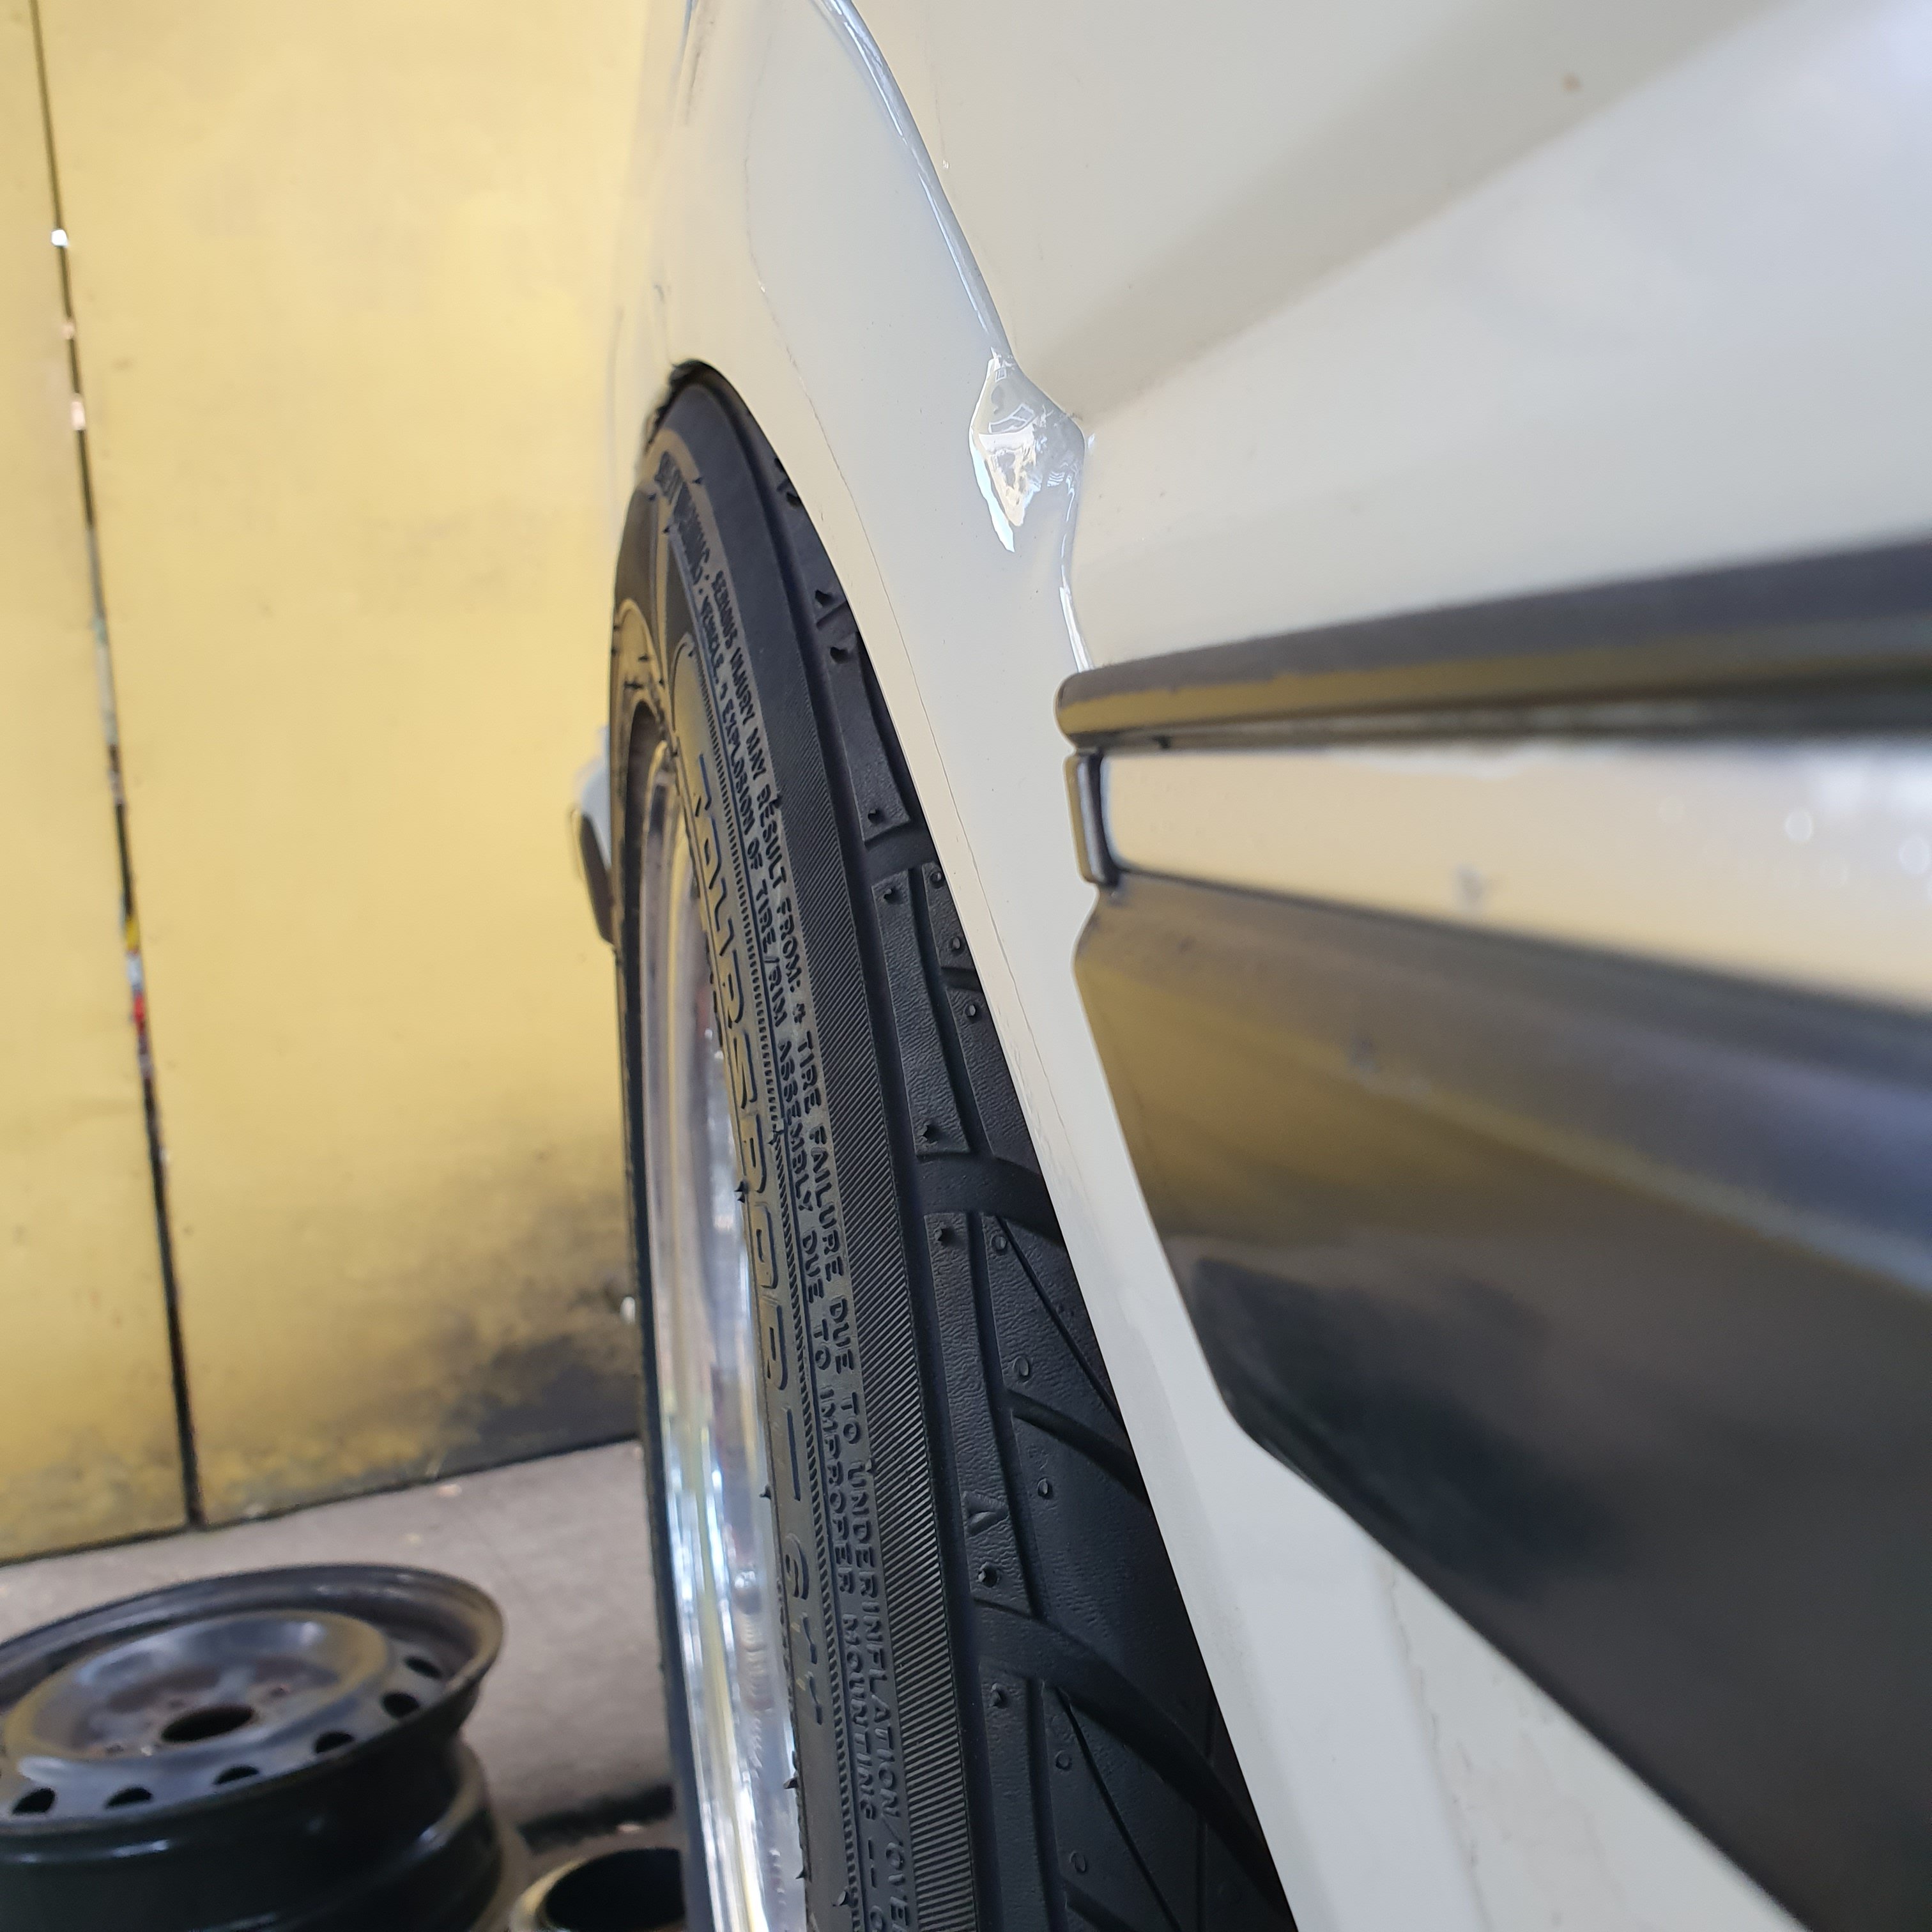
Chrome sill and arch trims put back on have managed to get the rear down to 250mm wheel hub to guard but untill I get to wheel alignment there's no telling if I'm within camber specs. Have ordered an airbox from a 1gge gx71 via yahoo. Doing some measuring on a friends car the intake pipe with temp sensor has the same pcd as my 1geu afm meaning I should be able to bolt it up to my stock airbox to keep things looking like the car came with the engine from the factory.
1 point
-
We followed the plan,shade, BBQ and ice cold drinks were bloody great after wandering around for hours. I met a guy from the early holden club that I spoken to on the phone and even got some headlight trim rings off. Made it worth the trip.1 point
-
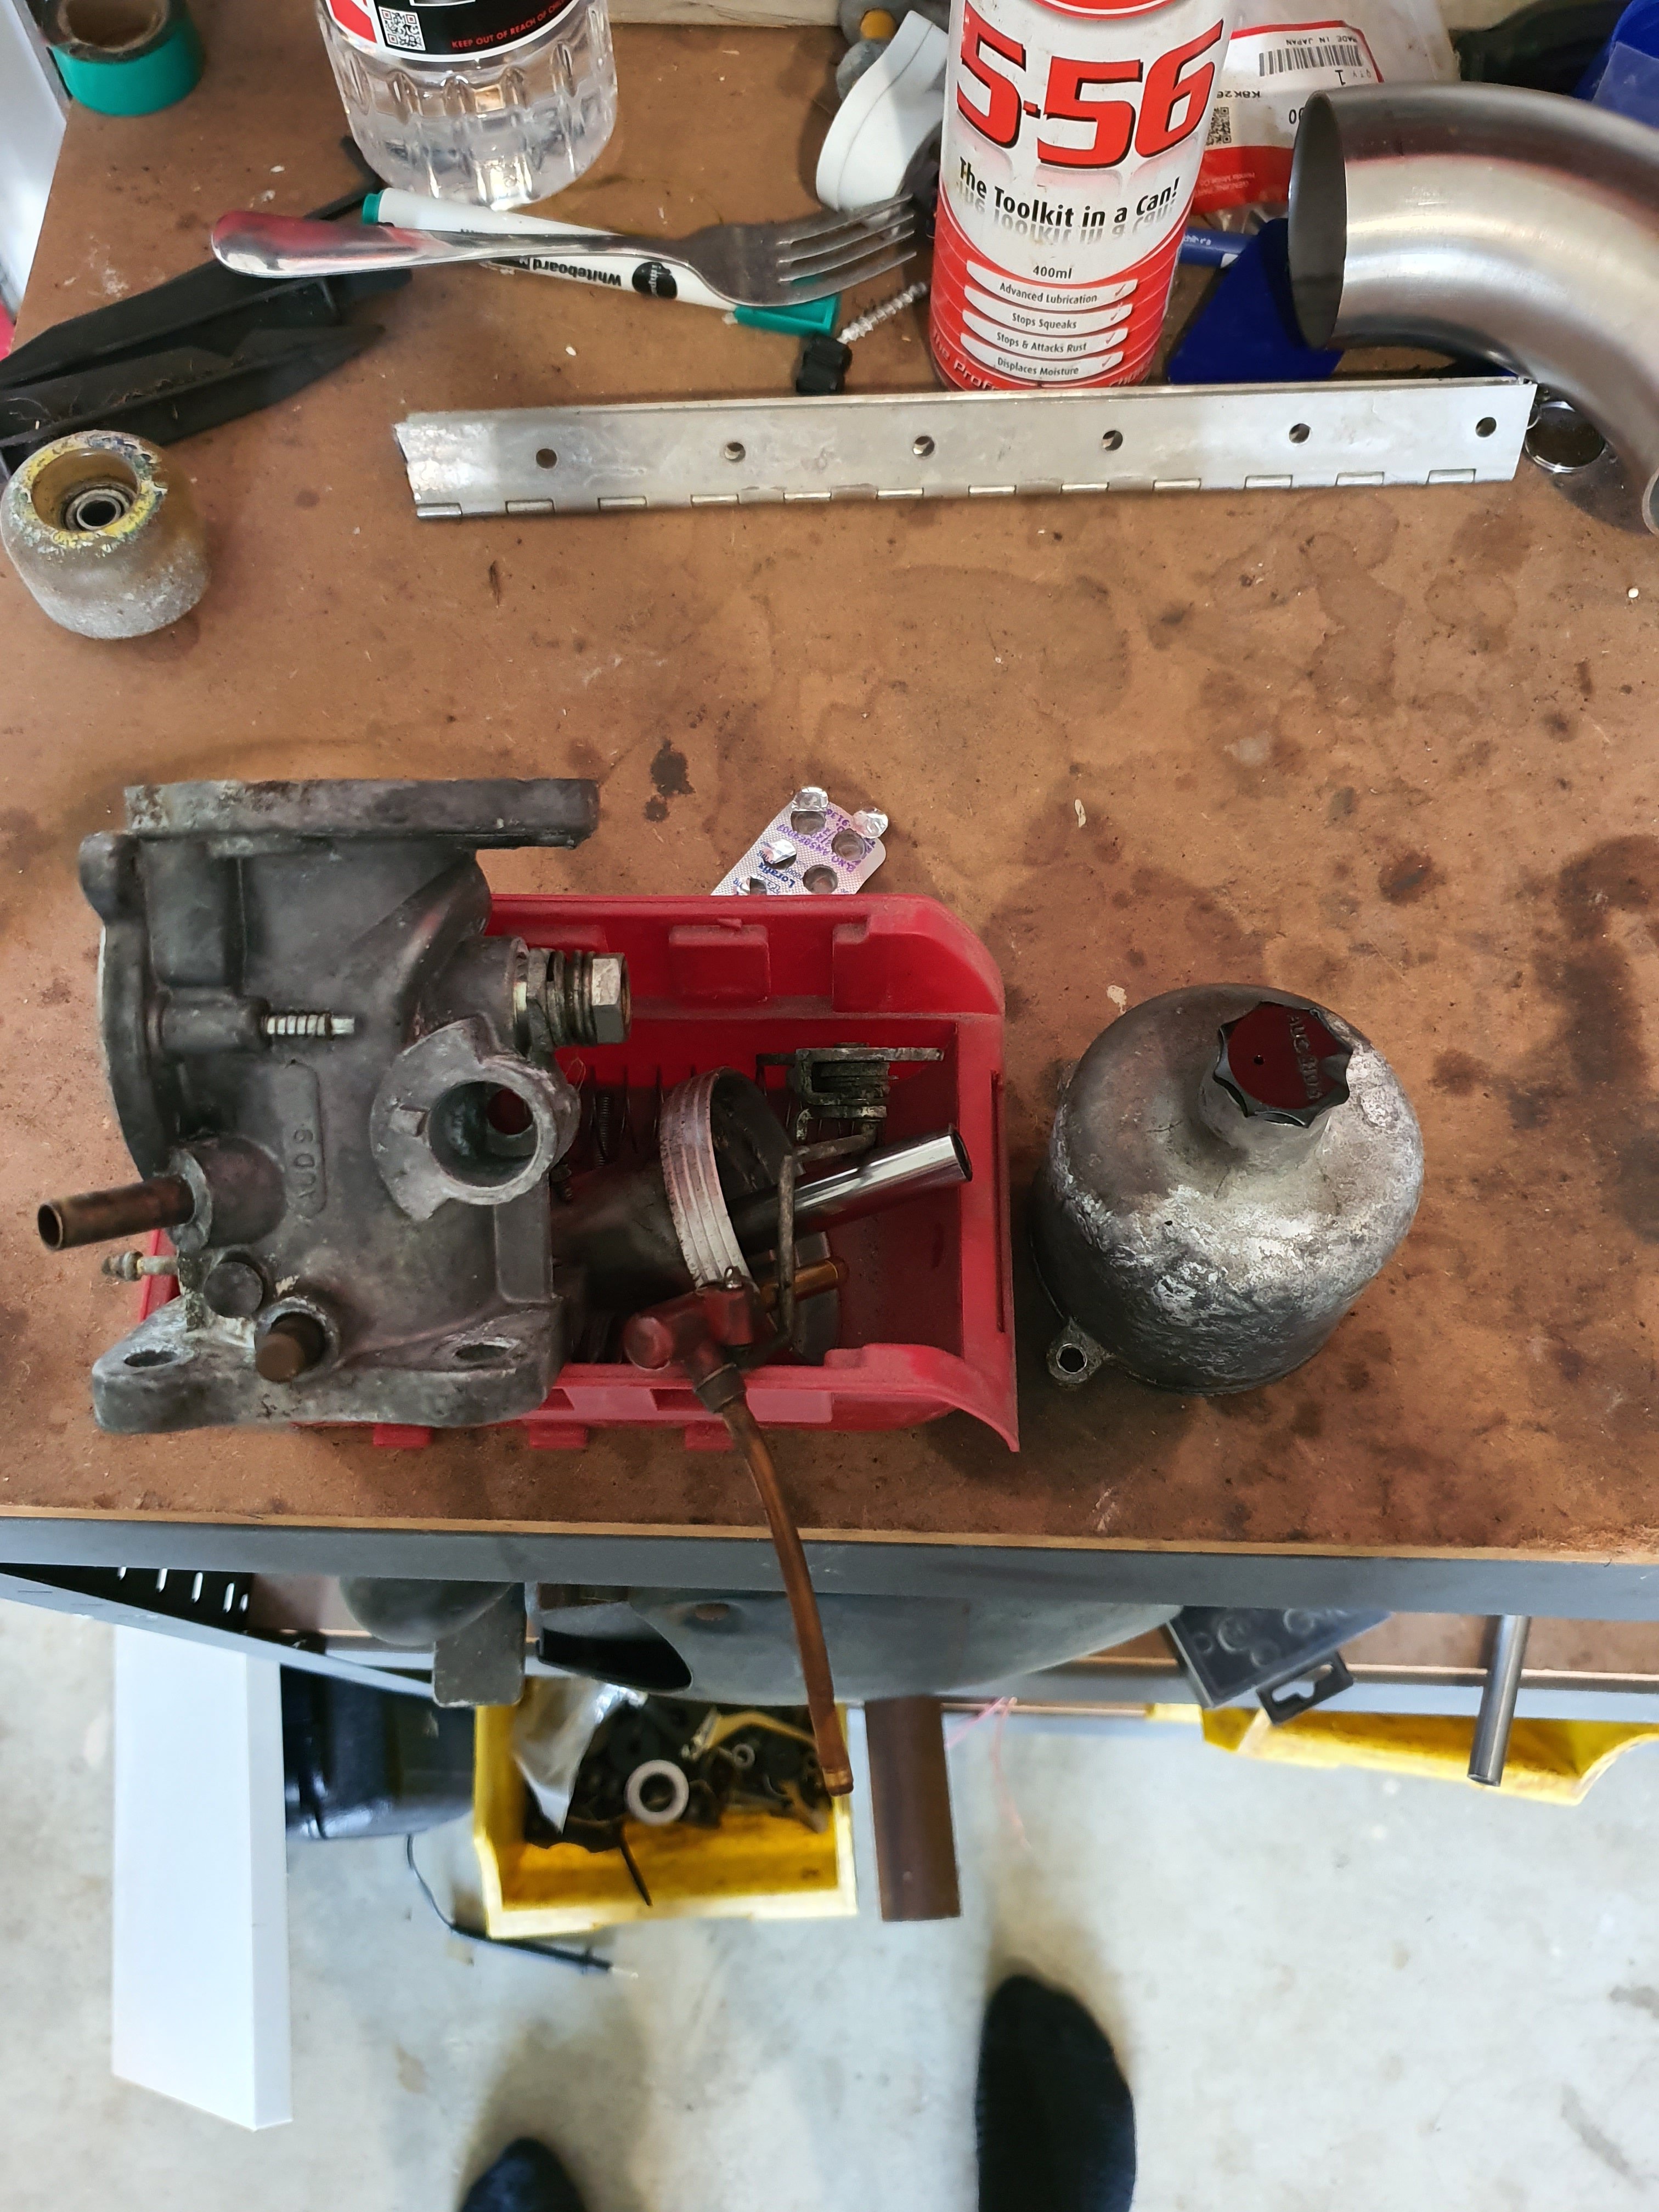
All broken down for its date with the ultrasonic bath at work. And polishing of the external bits. This engines getting an SU as well will have some cool shit done to it
1 point
-
Not having a good time. Probably should have sorted the subframe before shopping for tyres. May reluctantly end up running 7 inch rear and 7.5 inch front to get through cert.
1 point
-
painted some things black. booster, hood stay, windscreen wiper motor housing and hood latch. just the normal shit really. now thats done i will probably start working on the new engine loom. ive got new plugs for everything and new link looms so the motor will get a full rewire. 2020-01-17_05-53-42 by sheepers, on Flickr1 point
-
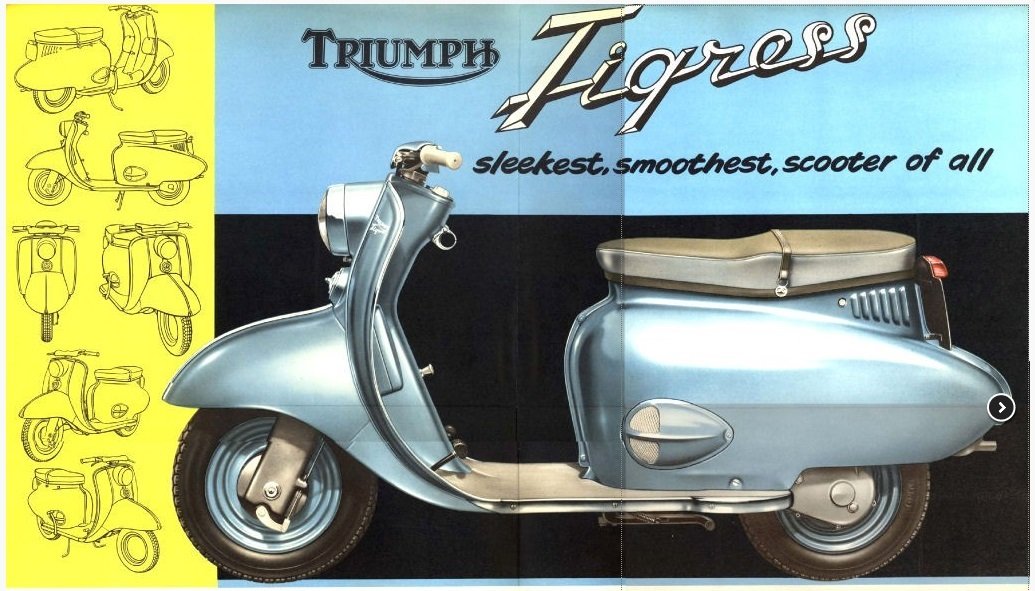
Shit that's cool. heaps of room for big batt pack, efficient frame mounted motor, big wheels, discs etc. and a stubby holder.... And yeah definitely a learning curve. I'm thinking of doing a classic electric scooter down the track, an old Tigress or BSA Sunbeam. Reckon putting batteries where the engine was and a grunty hub motor would be a hoot...
1 point
-
He removed the panel and rolled on edge into it to see what it would look like. As it turns out he can reuse the original panel with some clever magic he does when I'm not there taking pics!
1 point
-
well, that was fucking stressful. first time ever laying a candy/3 coat colour and it so very nearly went very very wrong. i completely fluked it and managed to get it looking right but i was seconds away from disaster on more than one occasion. im fucking turbo stoked with how it looks, its got some dust in it but i couldn't give a fuck, theres way more right than there is wrong and thats a fucking win. 2020-01-09_06-20-37 by sheepers, on Flickr 2020-01-10_07-39-39 by sheepers, on Flickr 2020-01-10_07-39-48 by sheepers, on Flickr 2020-01-10_07-39-58 by sheepers, on Flickr 2020-01-10_07-40-05 by sheepers, on Flickr1 point
-
sand, fill then prime again. i have the colour mixed for the top coat so ill be attempting to paint it red probably saturday. 2020-01-09_12-19-49 by sheepers, on Flickr 2020-01-09_06-20-37 by sheepers, on Flickr1 point
-
Primer.
1 point
-
re-did the passengers side. then it was time to start welding things into the car. coated the backs of everything with copper primer. then weld. it came out pretty good for a but joint that you cant get to the back of, its pretty flat as you can see, and its hollow as opposed to high with is great. 2020-01-04_05-03-02 by sheepers, on Flickr 2020-01-04_05-03-14 by sheepers, on Flickr 2020-01-04_05-02-45 by sheepers, on Flickr 2020-01-04_05-02-21 by sheepers, on Flickr 2020-01-04_05-02-14 by sheepers, on Flickr 2020-01-04_05-02-30 by sheepers, on Flickr 2020-01-04_05-02-37 by sheepers, on Flickr obvisly ill patch the hole at the back but i wanted to get the bottom part fixed in place before doing that. tomorrow ill do the passengers side and button up the last two holes and its done.1 point
-
i carried on today with more bits. 2019-12-30_04-47-11 by sheepers, on Flickr 2019-12-30_04-47-00 by sheepers, on Flickr 2019-12-30_04-47-19 by sheepers, on Flickr then i started on the other side. i noticed as i went along that i had made a mistake on the drivers side and i wasn't sure if i should make the passengers side correctly and re make the drivers side. the more i made of the passengers side the more it became clear that id over compensated and made the passengers side wrong as well. so i shut the door, went inside and sulked. ive decided that im going to re make both sides because im not happy with the ones ive made. not the end of the world, two days work more or less but id rather have these bits right because they are the first bits ill see as i open the bonnet.1 point
-
I wish my bike did 0-1001 point
-
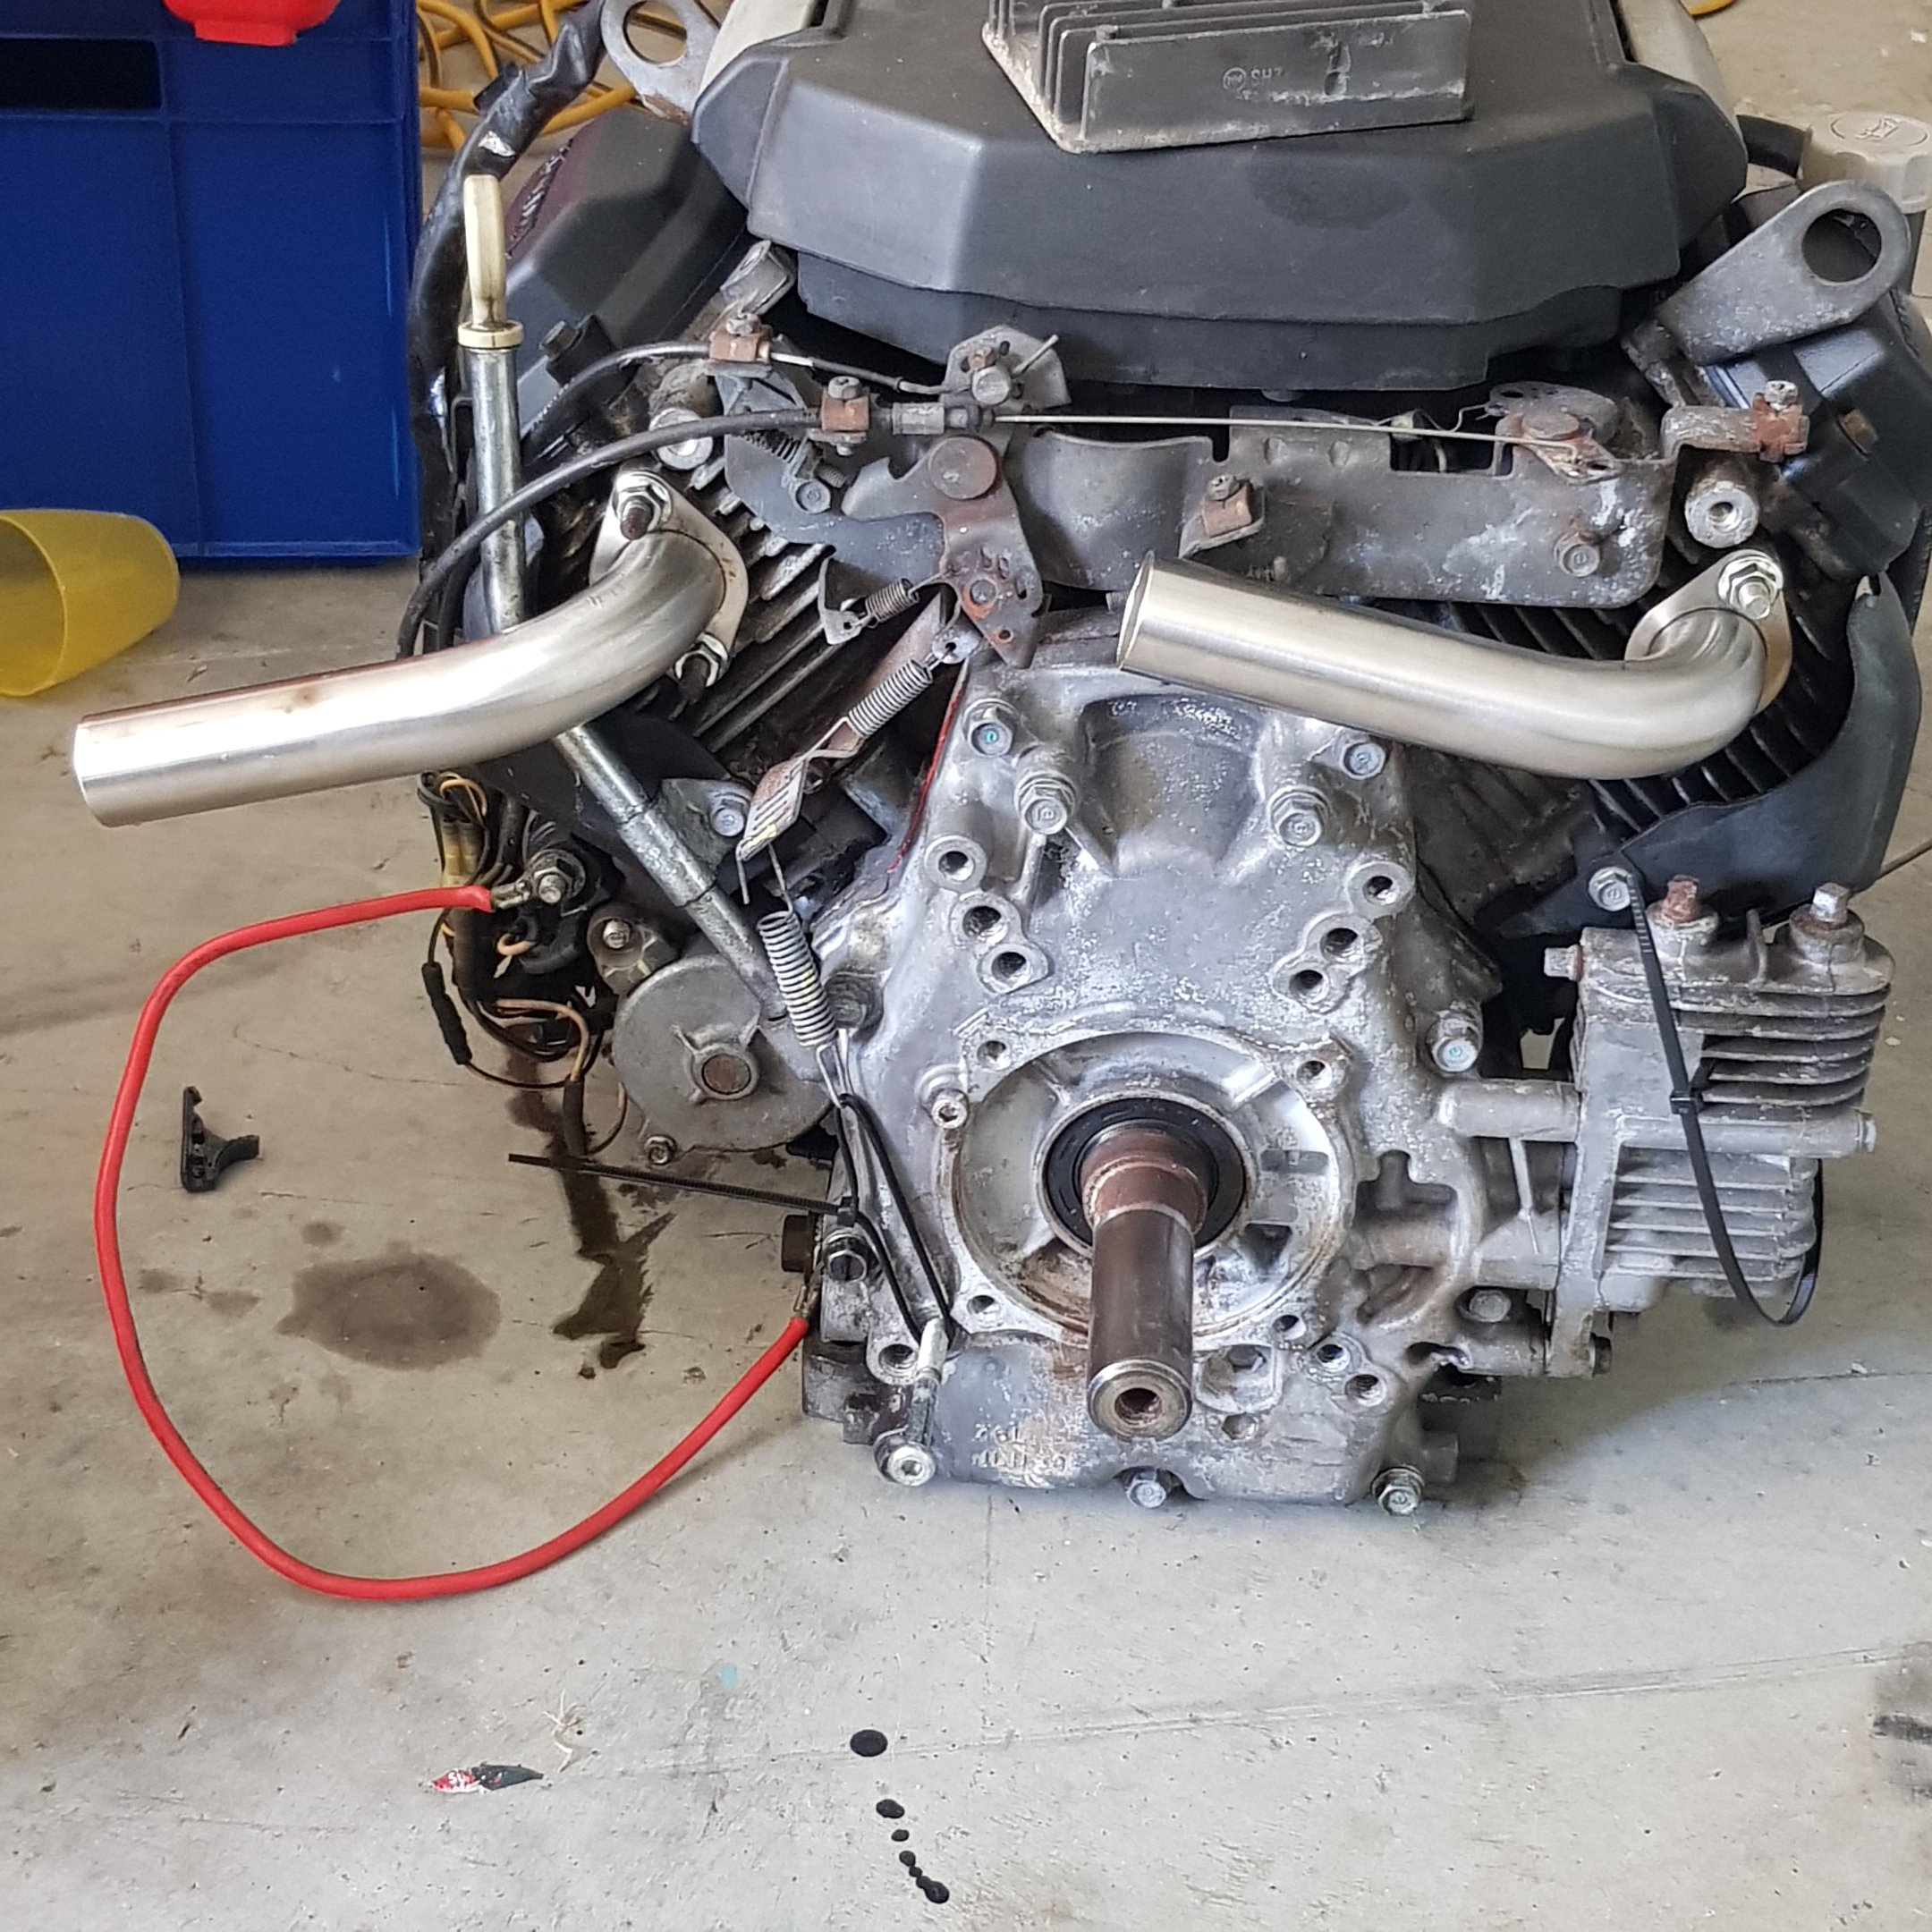
Made a set of zoomies! My neighbours are going to love me later.... muffler has long since been binned. This thing appears to have a blind turbo oil drain cast in ready to go, in the perfect spot so i think I'll be making this the turbo engine now being newer and 80cc bigger will help im sure. Also has more places to take oil off and an oil cooler.
1 point
-
Very clean in the floors apart from the rear arches which is a massive surprise and bonus - offset by a seized engine and no brakes
1 point
-
Two tyres the same size make a good bit of difference1 point
-
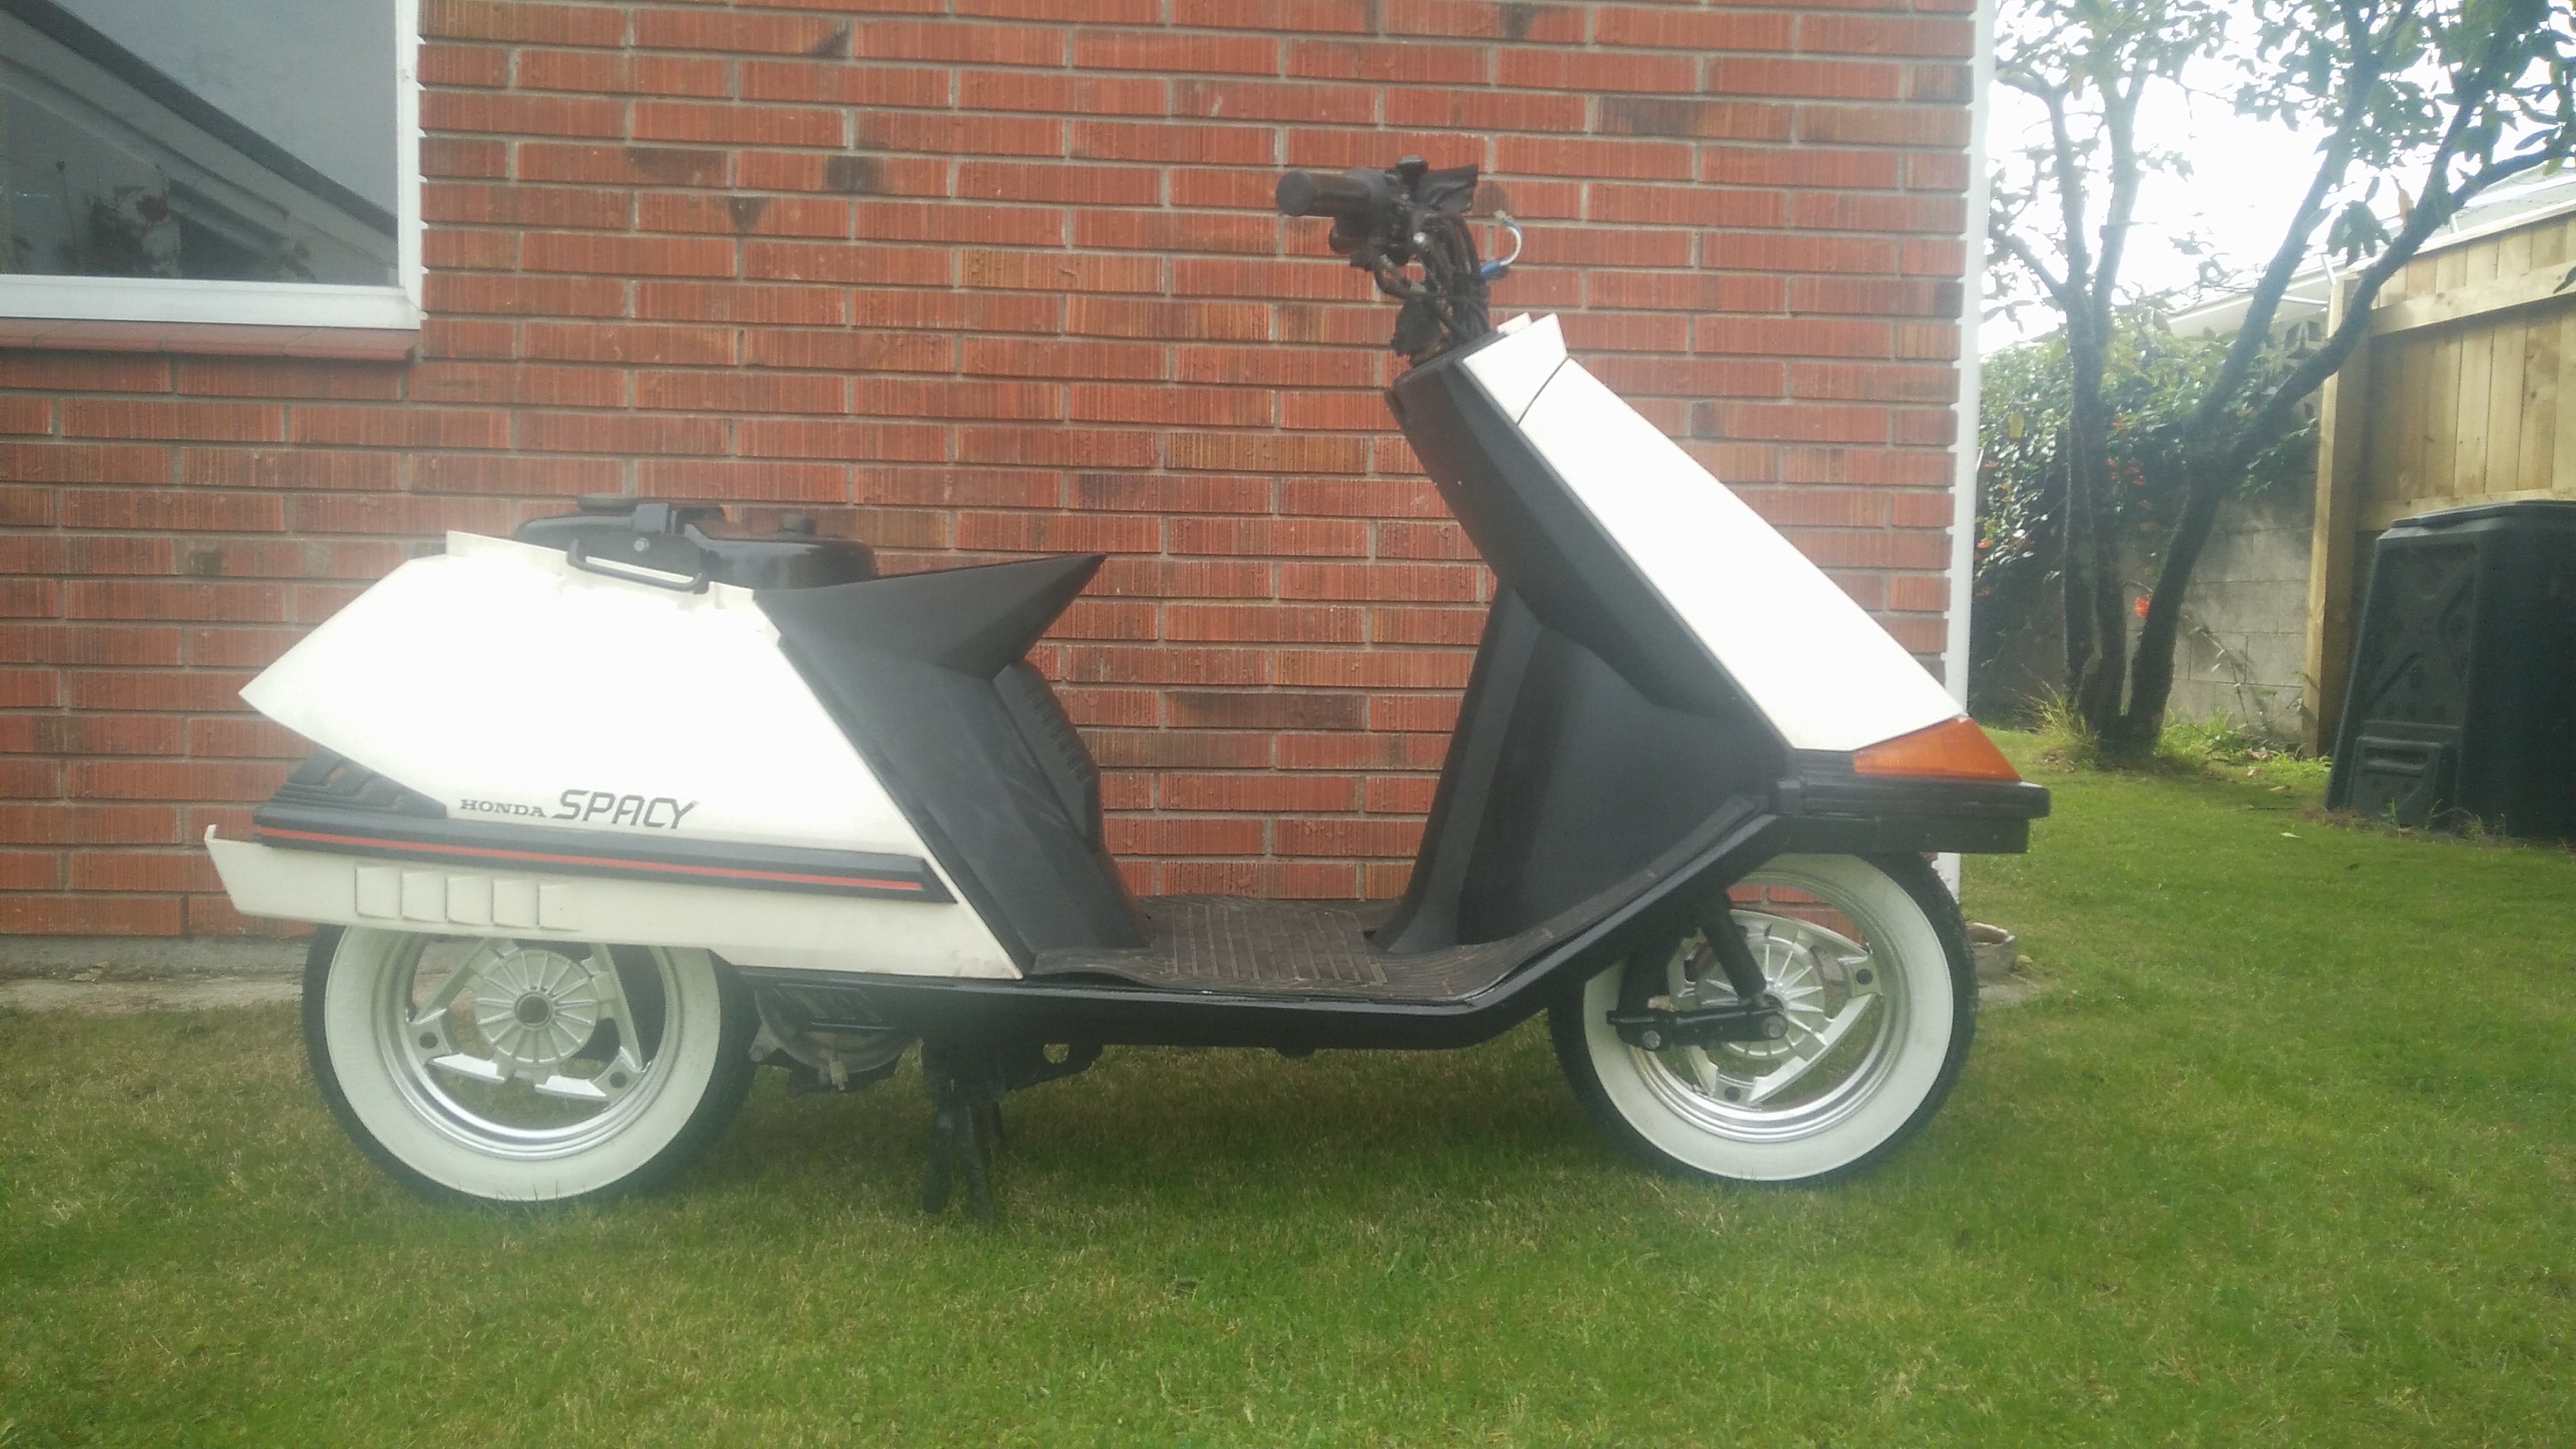
Thanks to @Raizer I got some Honda Gyro front shocks (already shorter than spacy by 10mm) then shortened the shock a further 20mm. At this stage I havnt cut the spring, its just got more preload to make it stiffer. The rear still isnt lowered (apart from when I sit on it), but need to sort out a kick stand instead of center stand as it drags a bit much even at this height. Once Ive sorted that then should be able to get it a bit lower Pic from previous page for reference Other than that, still just using it daily to get to work and its going sweet. Knocking sound from previous post was loose bolts holding center of the rear wheels to the rim
1 point
-
Decided to try and get this thing riding a bit nicer, previous suspension setup was a little soft and hit the bump stops a bit too often, and with the extra weight of a 4age it would of been worse. Went with a set of Fortune Auto's coilovers all around, since I'll end up chucking an F series or similar diff in and I have the skills to strengthen the rear strut towers. Picked up another pair of struts, cut them down and and blasted them. Wound them all the way down and the front ended up a little higher and the back's a bit lower. Might try and get the front down a bit more, to at least were it was. Made a stainless distributor blanking cover. Bought a Flo's upper water outlet, as it looked to be the much simpler and tidier way of doing the cooling system. Needed a RWD waterpump (inc pulley), thermostat housing and a little bypass pipe to complete the setup. And of course with everything else, when you change one thing you have to change something else. The FWD alternator bracket fouled on the thermostat housing, so I got a RWD one from Japan. Borrowed some Flo's 4age to K series engine mounts and made up my own. Sitting in the hole. Had to space the engine mounts out by 8mm, possibly because of the Cusco mounts being thinner than factory ones? Dizzy relocation kit installed, had to cut a bit of a hole in the fire wall for some clearance. Stripped the interior, pulled out the dash, heater, seats, carpet and scrapped off some sound deadening around the gearbox tunnel. Cut a big ol' hole for the J160 to fit. Probably didn't need to cut so much out, but to make it easy to drop out and fit, some extra clearance was needed. Also wanted it to sit up above the sills and chassis rails. Made up a gearbox mount. Added two extra body mounts further back so that it spreads the load a bit. Has heaps of ground clearance as well. The J160 shifter needed moving forward as it lined up with the end of the handbrake. Cut up the original shifter housing and welded it on to some ali tube and 12mm plate. Spent hours on our little lathe turning up the adapter bits. Works mint, barely any flex and feels like it should. Moved it 200mm forward from the Altezza position, 50mm more than the SQ kit and 40mm back from where the factory Starlet one was.1 point
-
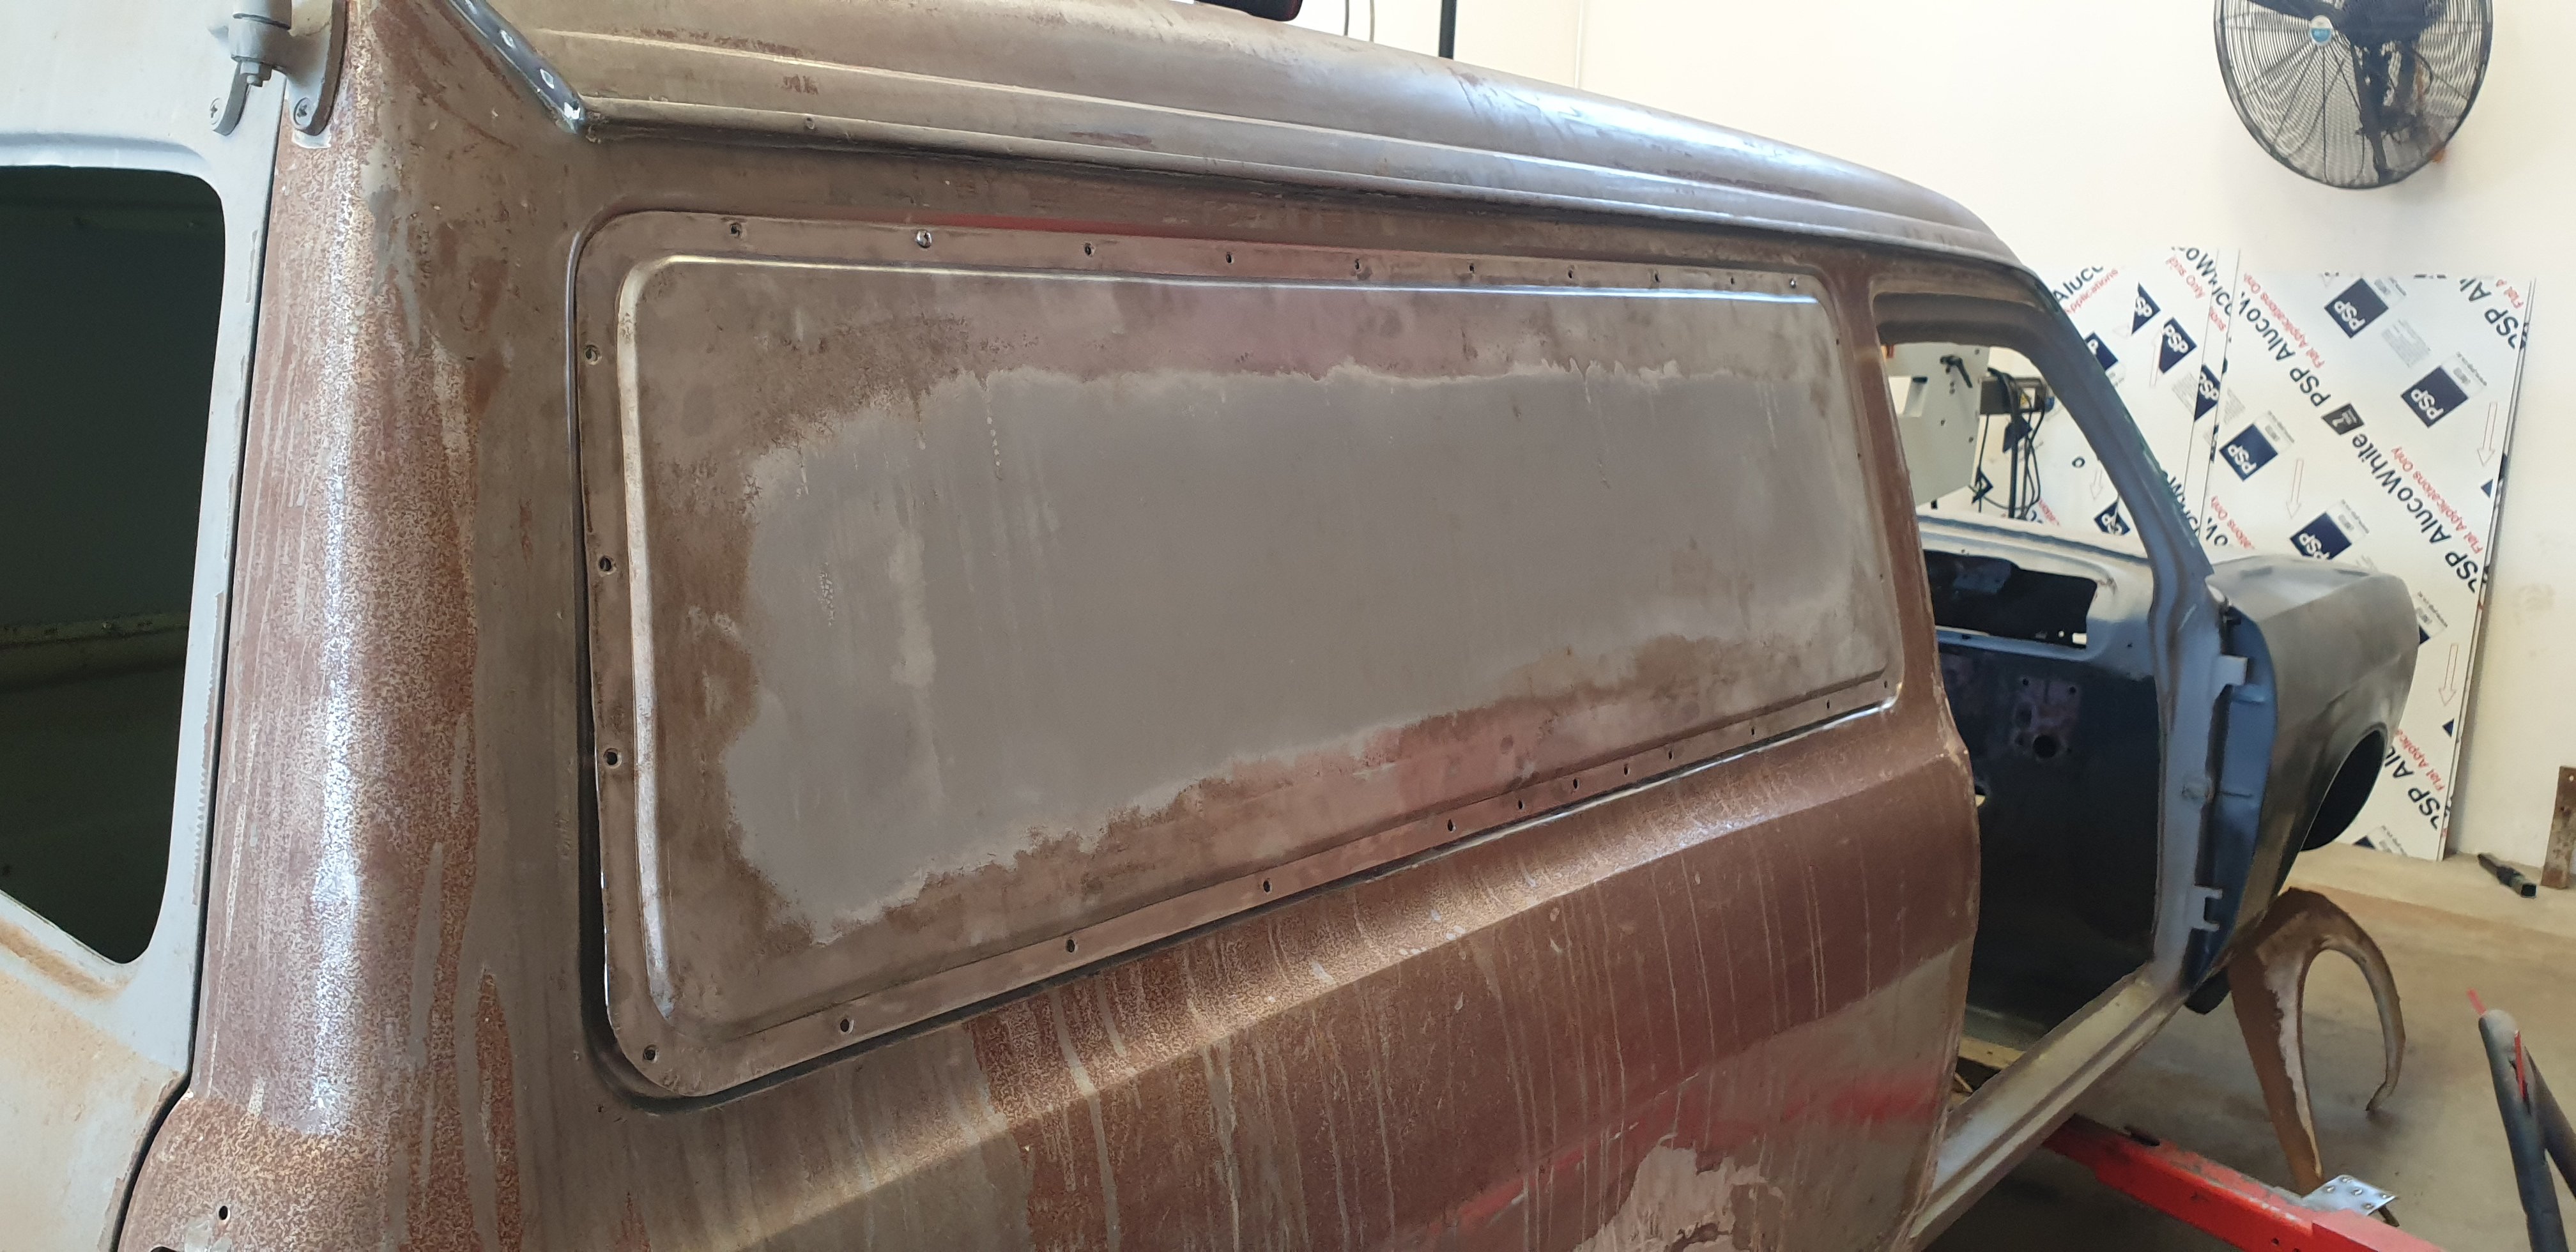
Stripped most exterior stuff off, except for the doors. Have cut off the a-pillar rain gutters after ajg193's suggestion, cleaned up all the rust underneath and plug welded them back on. Found some spots of rust on the hatch after removing the window. Most of it is just surface rust. Got carried away and stripped all the paint off the exterior side. Previously someone has stripped it and gone over all the rust spots and ground them out. Which I wasn't too happy about, but it seemed to have stopped it rusting further. Has a little patch welded in on the lower right as well. This top bit, just below the water squirter had a few small holes. Cut it out and made a patch to weld in, after I cleaned up the rust inside and painting it. All welded and cleaned up. Picked up a new engine! 4AGE 20V Blacktop!!! And a J160 6 speed. It already has the SQ Engineering adapter plate. The clutch/pressure plate and starter is already set up ready to bolt the two together. Pulled out the old 4K. Empty and dirty engine bay. Gave it a steam clean, came up heaps better. Test fit of the J160, definitely going to need to pull out the grinder! Laser cut out a 12mm stainless exhaust flange. Planning on building some high-rise headers at some stage. Ordered some goodies from SQ Engineering. Bought some Cusco AE86 engine mounts. Also have an AE86 water pump set up and some other bits on the way.1 point
-
First time it's seen daylight in about 3 years. Have just discovered a leaky rear shock so I guess I have to throw some more $$ at it haha.
1 point
-
Oh yeah, so this thing is pretty much done. Wiring is in place. Just need to splash out on the M-Unit to finish. I'll probably try tidy up the control cables somehow and also fit some nice exhaust tips to my cut pipes.
1 point
-
After 2.5 months and about 3,000kms of Chatham 'roads' the Atlas has seen some adventures. Unfortunately the clutch master cylinder has failed which makes driving a slight challenge, but I ordered a new one a couple of weeks ago and am hopeful it'll get here on the next plane. TBC. The engine's getting tired, and I'd love to fit some auto-locker diffs, but apart from that this truck is absolutely perfect for what I need. I lubs it.
1 point
-
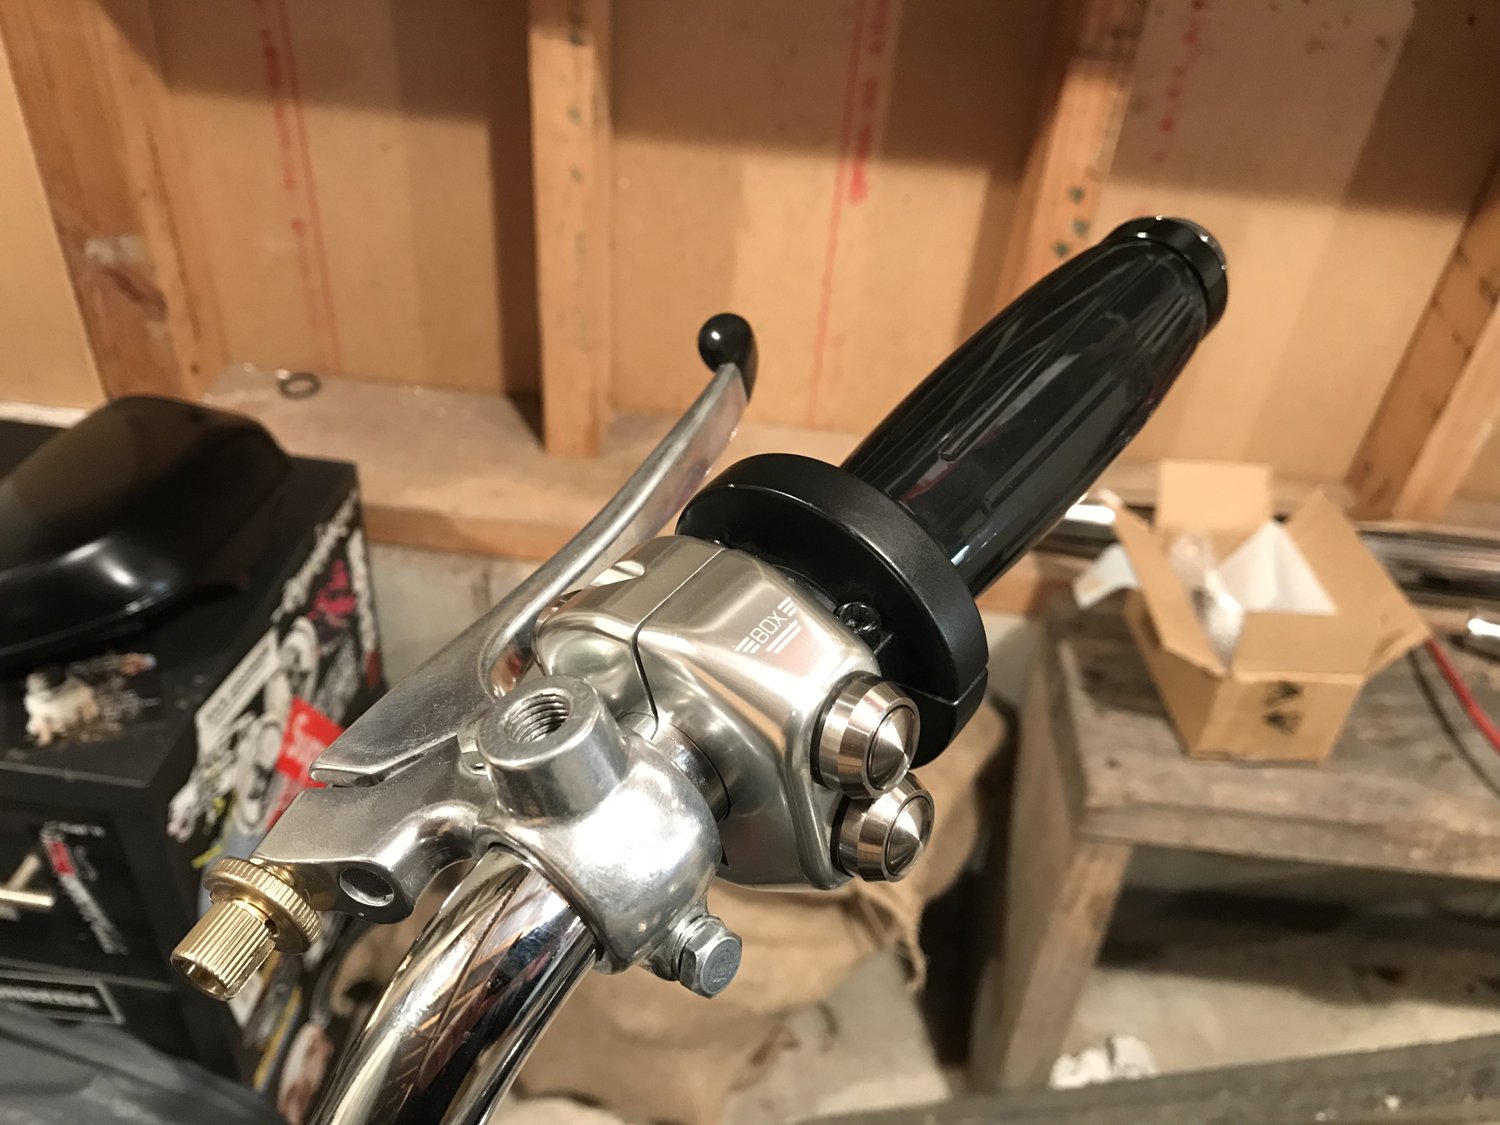
Installed the controls today by routing the cables through the bars. Pretty tricky but if you were good at the boardgame 'Operation' as a kid I'm sure it'll be a breeze.
1 point
-
got wheels sorted at M&T , admin can delete now1 point
-
Thanks for that man. Still a load of shit but meh. I'm sorted with factory specs going far beyond those. I wonder who set them. And whats stopping someone getting the correct size for cert then swapping them. Are they going to add tyres to cert plates? How are they going to measure an unstamped wheel on the side of the road? Might get out the punch kit and do some stamping.1 point
-
I guess it's really just a guide, and they said manufacturers ratings trump it. whichs kinda begs the question as to why they didn't just reiterate instead that all tyres must be fitted to rims that meet the tyre manufacturers width specifications. the 2nd part is what if your rims don't have an exterior width marking on them? you cant check actual bead width w/o removing the tyre i.e. now I'm thinking these wheels I have might only be 7" wide just with an exceptionally thick rim in the bead area.............. I'm thinking ultimately it will come down to not being a douche and getting along with your certifirer/wof man in the real world and satisfying them that the vehicle is safe as its their signature that goes on the cert/wof.1 point


.thumb.jpeg.e0a4bff61111e0c8c7396950fcc94da1.jpeg)


This leaderboard is set to Auckland/GMT+12:00