Leaderboard
Popular Content
Showing content with the highest reputation on 01/22/20 in all areas
-
Filled about 50 holes in the engine and removed all the brackets I no longer need. Laser cutting a sheet of all the filler pieces made it way quicker and easier! Where the chassis rail kicks up at the firewall is a known place where cracks can form. There was already one about 8mm long on the passengers side. Made some gussets and welded them in. Found some previous repairs around the rear hatch on the body. I think they just ground out the rust spots here and then bogged it up. Cut out and welded new steel in there. Another one here, this time just a piece of steel brazed over the top of the rust holes. Fixed! As well as a few more bits around the seal. Picked up a pair off TA22 Celica fender mirrors from YAJ, that you can kinda see. I think they look good, but hard to tell when half the cars missing. Bought a Estima F series diff. Stripped in right down, cut off all the brackets and then noticed one of the housing tubes was very bent! One end was out by at least 10mm. Had a go at straightening it, wrapped some chain around the tube and some big u-channel, and then used a bottle jack and heat to push it out. Came out pretty good, close enough to then shorten it. Drew up a jig that held it all square and inline. Shortened it by 105mm a side, so it's the same dimensions drum to drum as the factory diff. Bought some MRP adjustable 4-link arms off @Cdarust Got a Altezza Torsen LSD head to swap in. Made some upper and lower brackets for the diff. Borrowed @oftensideways rotisserie. Going to raise the rear 4-link body mounts up. About 50mm higher for the lower mount, which should make the lower arm level and somewhere between 50-100mm higher on the top arm. The angles are currently far too much and I've gone this far so may as well, will be good to get rid of the lower body mounts as they're the lowest part of the car. It shouldn't effect the rear seat too much either.9 points
-
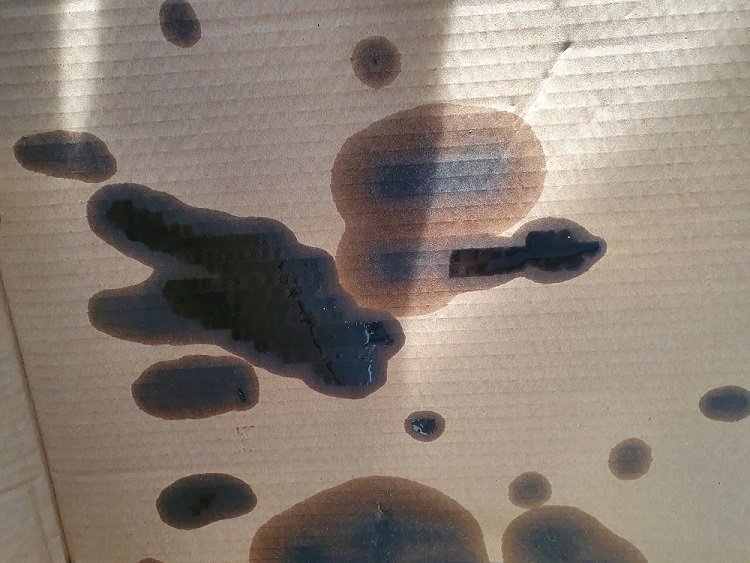
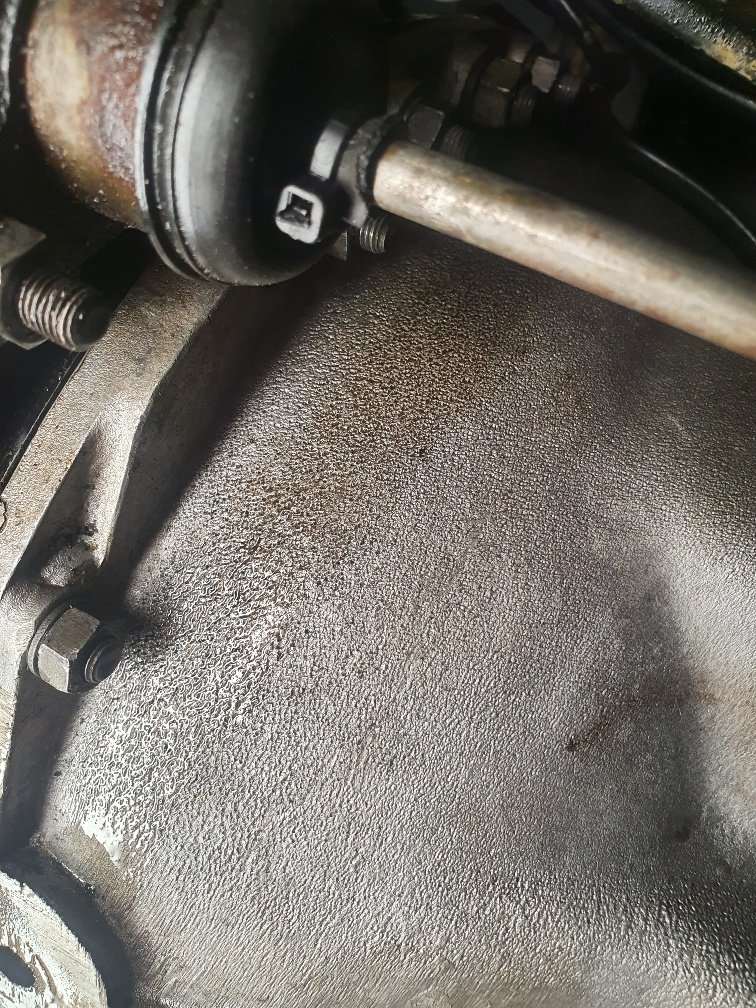
Once all this was complete assembled and then took it for its first drive in a couple months, has new wheels on it which are subtle different Got home, had a yarn to the old neighbor about his glory days in these and rovers as it was idling, and then backed it into shed, quick look underneath, Was not happy to find this Had a look around and was oil around the back of the block where it meets the sandwhich plate and oil appears to have run down the gearbox as this was clean when i installed it Had a decent look around top of the motor and theres a banjo at the back of the head that seems to have oil behind it, gave it a quick wiggle as by this stage was getting on late in the night, wouldnt move, so im going to remove tonight and replace copper washers as i cant see it being anything else, rocker gasket was also replaced at same time as the above Fingers crossed this solves the issue9 points
-
WOF yeaterday...again another clean sheet..so all leagal for anothe 6 months. when i swapped motors i also swapped the 4 speed back in...( live in chch..fuck all motorways...flat....my work school home round trip is 32ks) and i prefer it to the 5 speed. also put a quick shifter in and it makes it heaps better. almost had ghe old gjrl 3 years now and love it...second longest ive owned a car. lol.7 points
-
5 points
-
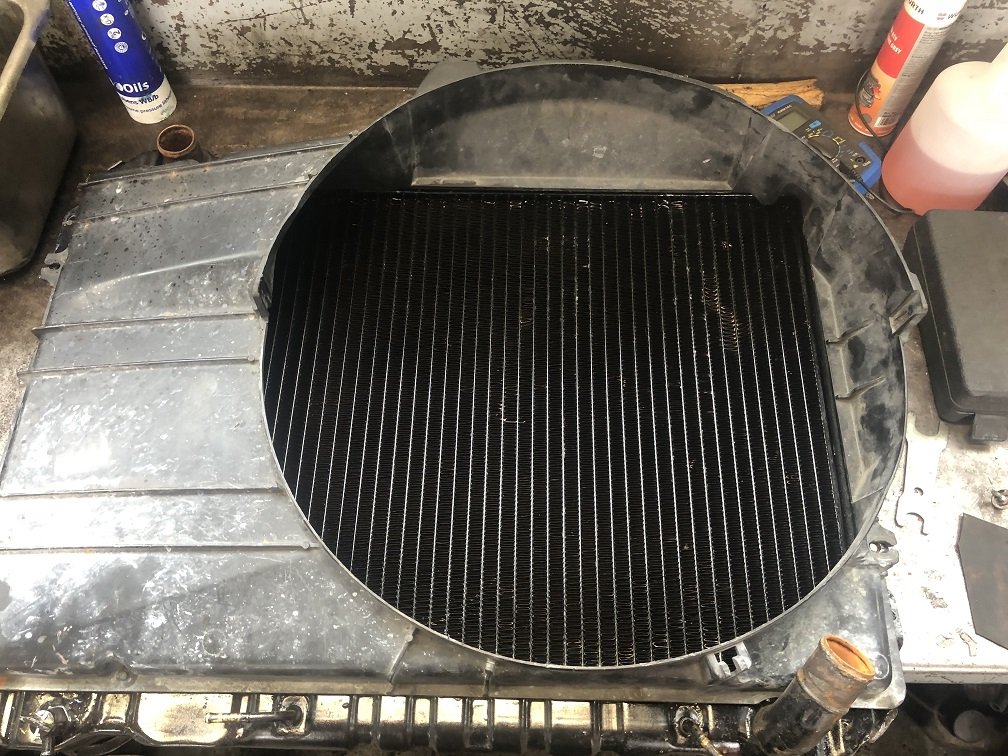
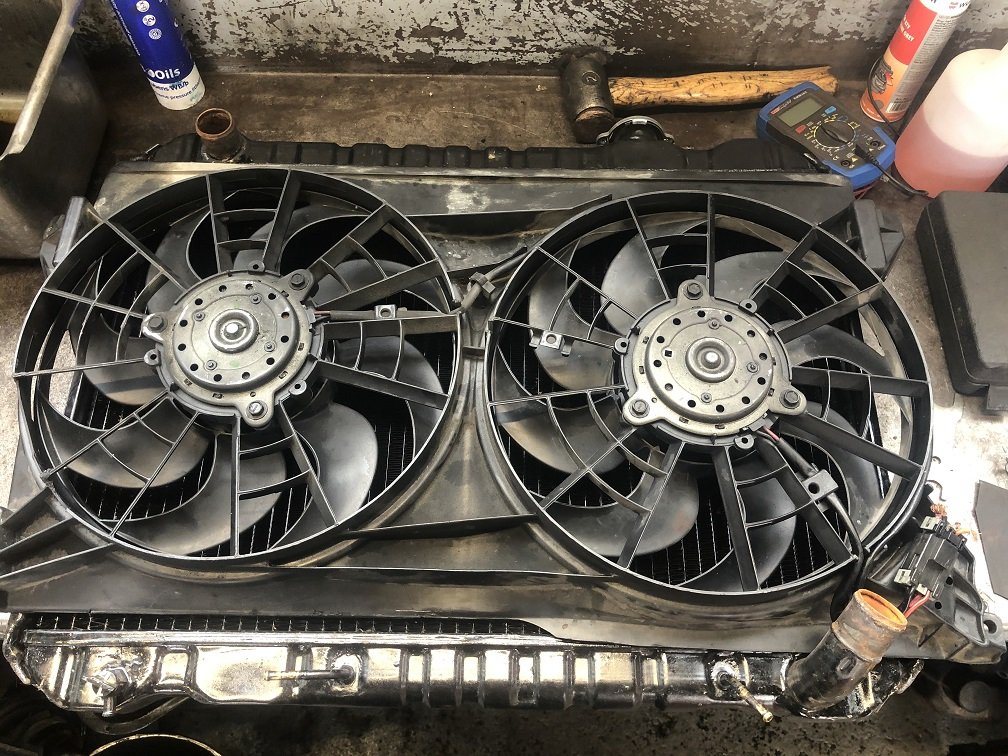
I had the old radiator re-cored by Burnside Radiators a couple of years ago, so no issues there. The 1uz came with the viscus hub fan, but it would be a pain to get a cowling to fit & I'm not keen for it to sound like a van. In keeping with the shoe-string budget I went climbing through the local wreckers with a tape measure & found a pretty bloody close fit. It almost looks like it was made for it! I'll do some minor trimming to fit it on, then wire it in.4 points
-
4 points
-
3 points
-
3 points
-
3 points
-
Not much happening with this, got it legal and drove it around a bit over christmas break. Had a few new wheel days Put the streets on for a change Finally fixed a front guard, to replace the one that had an incident with the wall at hampton downs about 5 years ago. pretty good for a spray can job Got another pair of 14x7 03's from old mate @Dudley . Finished polishing them, and some antique gold. after digging out the other pair i'd been hording, they needed same treatment. guard slightly different colour, but will do for now /forever. maybe in another 5 years will fix the bonnet Back to the OG look from 10 years ago except for 7's instead of 6.5's3 points
-
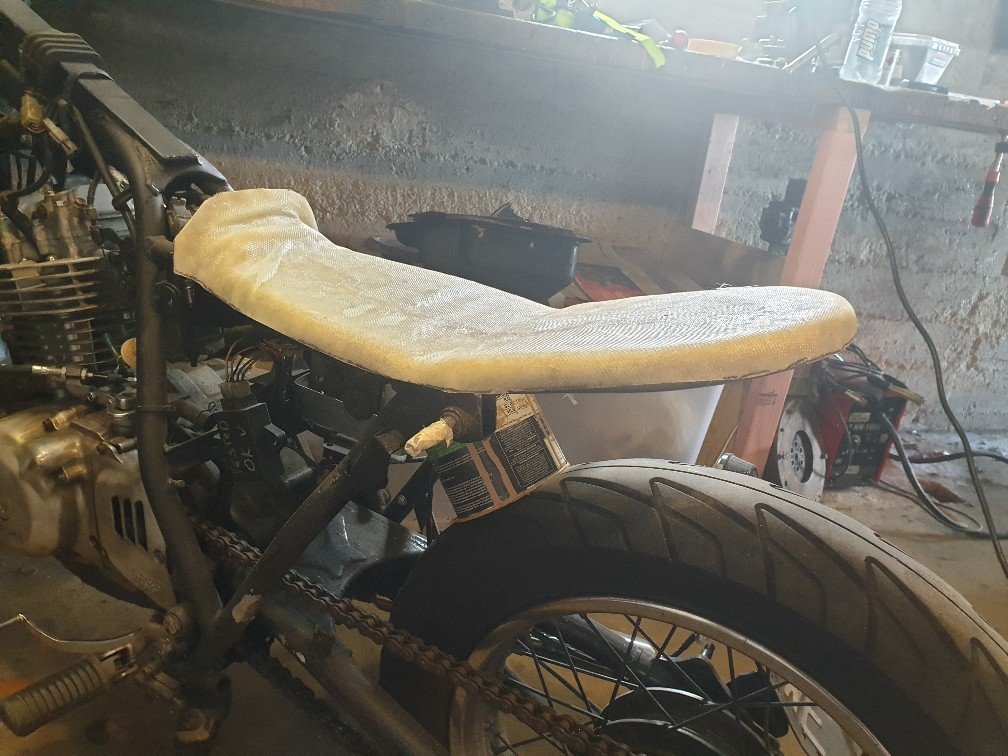
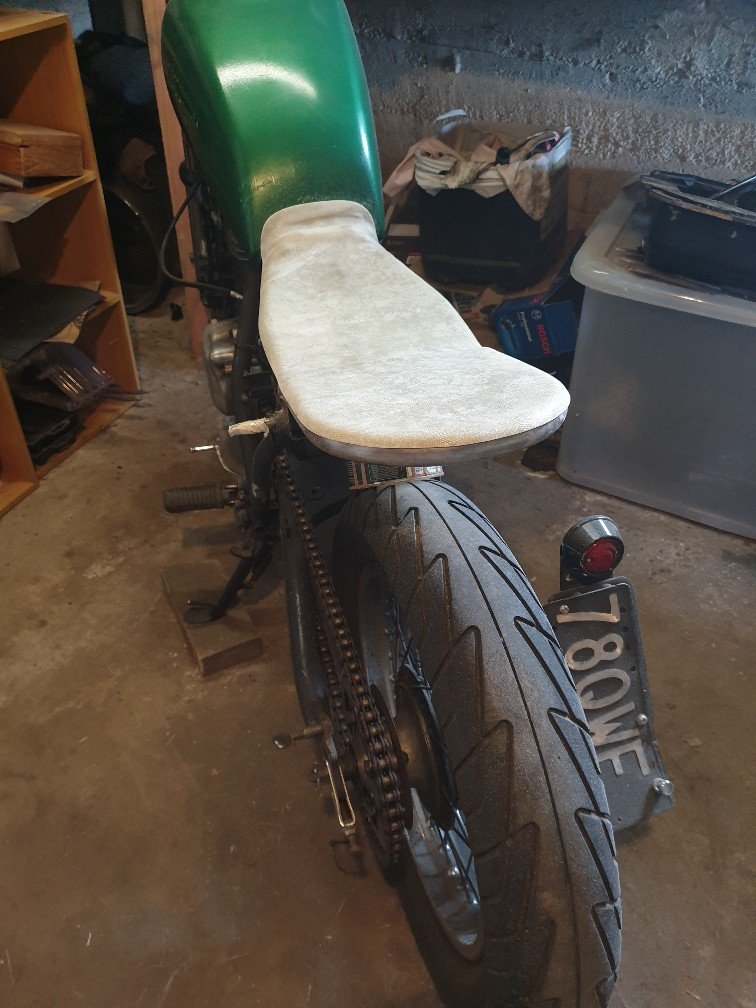
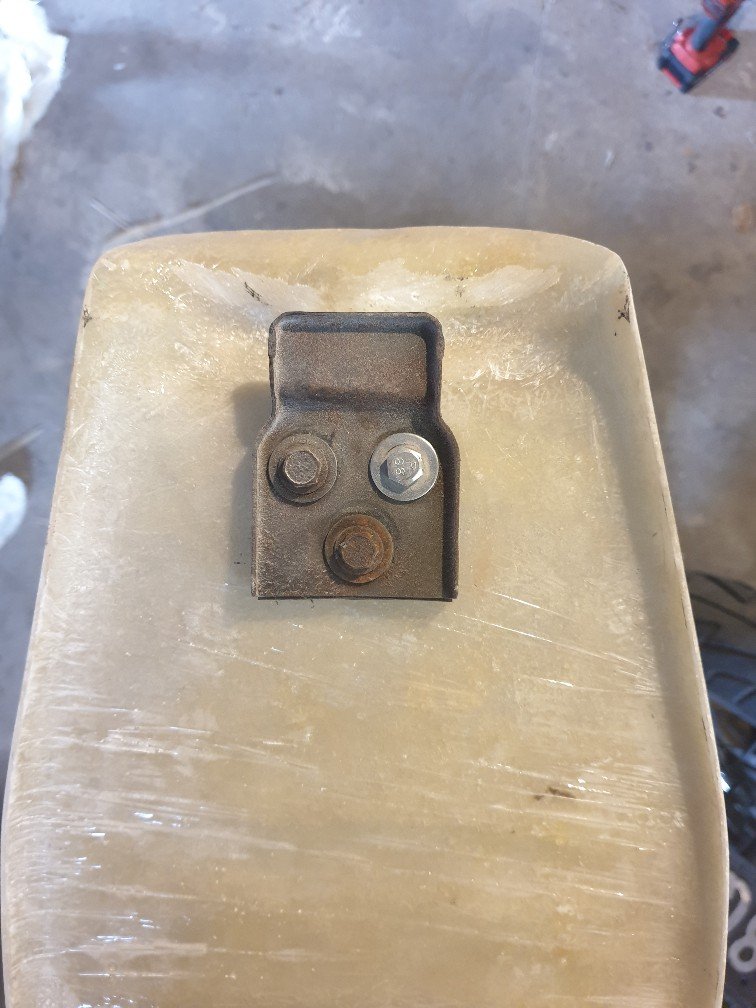
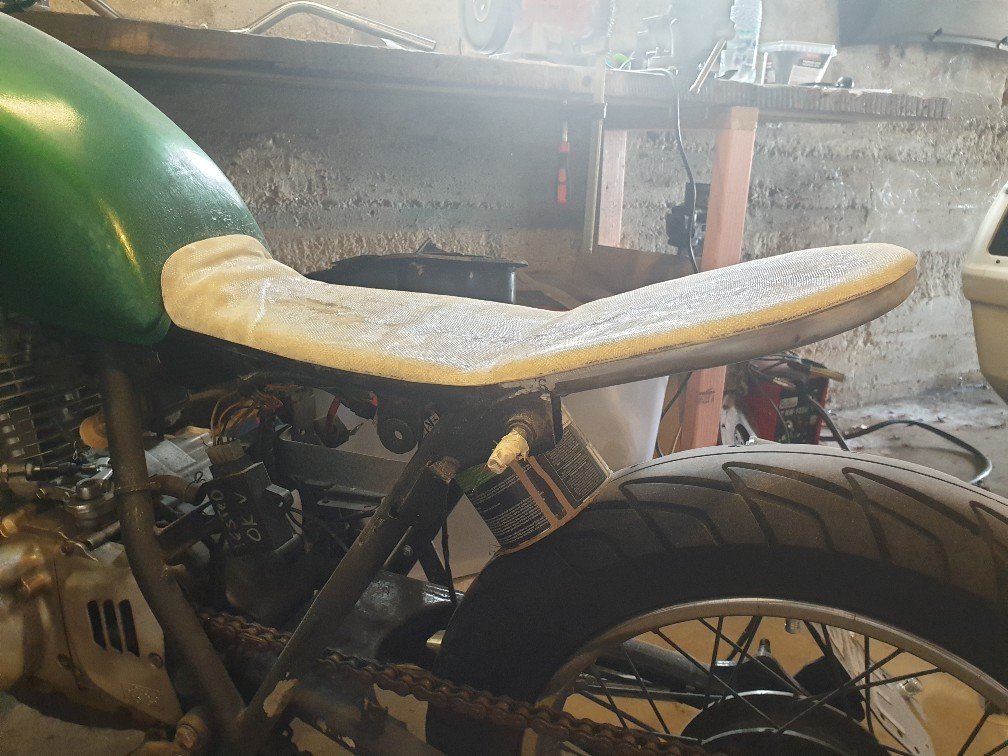
Was able to get some time in the shed last week so got those extra layers of glass down on the pan. There's about 6 layers on with a mix of 200g and 300g matting so should be plenty strong enough. Got out there today and cut it into to shape I wanted. Ruff cut it first. Final cut and sanded edges. Chose to have it roll over top only slightly so should hug the frame nicely even when the vinyl is on but leave most of the frame exposed . Also chose to go up the tank abit so itll have a nice transition into the seat. And lastly I found I was able to reuse the original Suzuki seat tongue (I dont know what it's really called) to locate the front under the tank, slips in nicely. Next job will be to add a tab at the back to lock it down and also two other tabs on the sides to attach the indicators. Then I can paint the frame and get on the hunt for some comfy foam to use3 points
-
Bought a set 13x6.5 Work Equip 01's. Will refurbish them and then decide if I want to run them. Also scored this off Yahoo Auctions a while back. Has the plugs and also came with some black dash parts. Decided on how to raise the tunnel. Bent the handbrake section up to match the height of where the old gearbox tunnel top piece had to go. Then made up some filler pieces to fill the gaps. Plan was to keep it looking as factory as possible. Had to remake the crossmember as it needed to be built up higher. Used some tube that matched the radius and bent it to suit. Welded in filler pieces. Cleaned up. Next was to make some strips to fill in the sides. Had contemplated making them with the factory swagings, but decided it would be easier to flatten them out and make the strips flat. Then the tunnel to firewall gap needed filling. Made a paper template, transferred it to the steel, cut it, formed it and it nearly fitted perfectly first try. All cleaned up. Up next was the firewall cutout for the dizzy blank cover to sit in. Tried again to make it look factory, which I think turned out pretty good. Stripped out all the sound deadening with dry ice. Have only cleaned off the residue from the passengers seat and footwell area. Pulled out all the wiring as well. Need a F-series diff now.3 points
-
Is anyone going to this or planning a stand? I have a whole lot of stuff that needs selling so can tag along/set up a stand/whatever.2 points
-
2 points
-
Cheers all for attending. Yeah sorry was late notice posting details, but the date is always the same 3rd sunday of January. (kumeu weekend). next new year meet will be 17th Jan 2021, put it in your calendar? Check the facebook link in first post, theres some pics in there already. Also looking to do an autumn meet this year, end of march or easter weekend. This page is usually updated first once i organise a meet ----> http://jap-olds.nz/2 points
-
Am going to attempt to install an interior plus some kind of noise insulation so I can hear myself think, Jesus Christ its loud in there! Also fancy new reel up seatbelts and see if I can get the ragtop to actually work.2 points
-
Get in touch with Kass at KP Upholstery if you want. Let him know I put you onto him. He's out Greerton and has done all my seats. Might have some nicer proper spec foam for you to get for cheappppp? 0273108620 - Worth a call anyway.2 points
-
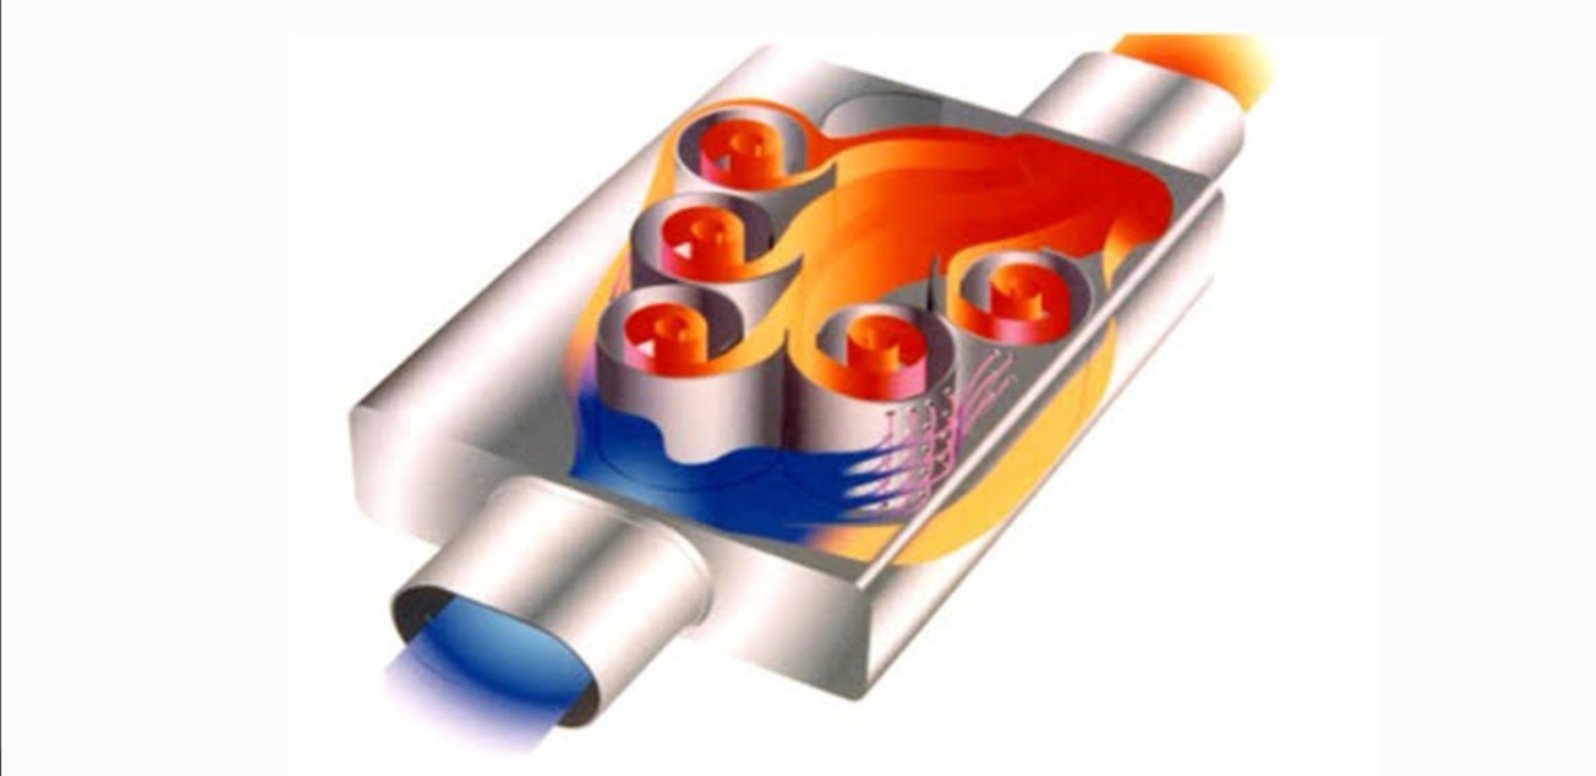
You could use something like this and put a 180 bend at one end https://www.redlineperformance.co.nz/product/universal-resonator-muffler-twin-25-1/2 points
-
Haven't tried anything like that. mostly straight though absorption, or multipass chambered. one im currently using is a combo of both seems to do a pretty good job on a cam'd 4age . its pretty big, which helps the cause. pics in link below. isn't pretty because is made from parts of the previous one that fell apart and junk had hanging about2 points
-
This would be a similar case in this size also. I did some research through our suppliers and found about 10 different brands that do the size. I can possibly look through the technical data of some of them to see which of them is the skinniest. @dspec_tt131 let me know what brand and pattern you've currently got and I can do some comparisons.2 points
-
Making a start on the gearbox and transfer case. The gear box is called a LT95 and is a 4 speed manual box with integrated transfer case. What is cool about the early boxes is they used a Salisbury limited slip differential on all Suffix A vehicles (easy to spot spotted as they were all painted red). In addition to the LSD function in the centre diff, the centre differential could also be locked via a vacuum actuator. But only around 300 vehicles were delivered with this LSD and sadly mine isn't equipped with it. After the first pre production and first year vehicles (1969-1970) they moved away from the limited slip feature with the differential as the gearbox had a serious amount of whine and felt pretty agricultural and stiff. To stop this they removed the friction discs on the differential and replaced them with distance discs instead but still retained the Salisbury differential, only now not limited slip but still retains the locking centre differential. They also managed to retain the agricultural feeling and gearbox whine... Shot of the early friction disc. Shot of the later style with the distance discs. This bit freaks me out a bit so I have a friend Glen giving me a hand on it. It is not his first rodeo with these boxes so I am in good hands! Gearbox and transfer case are now broken down into bits for a check up. Overall it is pretty good apart from a toasted needle bearing, worn intermediate shaft in transfer case and a bit of play in the mainshaft. All the gears are in good condition which is great as they get expensive to replace. Most of the parts have now been plated and all new fasteners. Now waiting on seal and bearing kit as well as the main shaft from the UK. Looking forward to getting it back together and in the chassis. Calipers test fitted and looking great with that HPC coating. Now to fit the rest of the hard lines.2 points
-
2nd drive with the prototype deflectors. this time a reasonably sedate cruise into work through 50/60kmh zones. previously this would have been semi uncomfortable and left me with an unpleasant wind blast feeling in my ears that lingered. today it was awesome, no different than driving a normal car with the window open. ill definitely proceed to making some nicer more refined parts.2 points
-
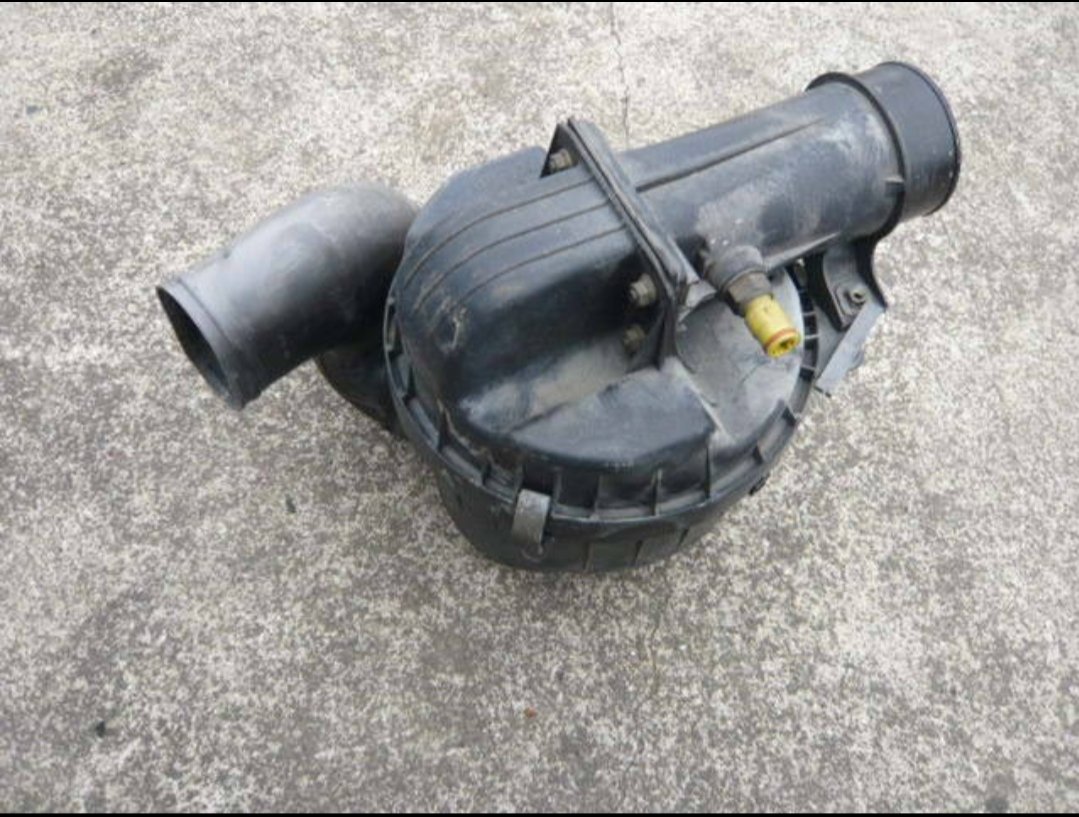
Chrome sill and arch trims put back on have managed to get the rear down to 250mm wheel hub to guard but untill I get to wheel alignment there's no telling if I'm within camber specs. Have ordered an airbox from a 1gge gx71 via yahoo. Doing some measuring on a friends car the intake pipe with temp sensor has the same pcd as my 1geu afm meaning I should be able to bolt it up to my stock airbox to keep things looking like the car came with the engine from the factory.2 points
-
2 points
-
POSTPONED TIL ALL THIS VIRUS SHIT IS OVER WITH Hello and Welcome Mr L. Warnock and myself would like to invite interested parties to a weekend of riding small bikes through the backroads of the Bay of Plenty sometime in March, the plan is as follows.... Dates set as 28/29 March Saturday - Meet in Mount Maunganui in the morning where there will be space to park vehicles for the weekend and head off via the harbour bridge and through Tauranga town to Welcome Bay where we will head into the rural hinterland and cut through to Te Puke via a scenic backroad that is mostly sealed with a small section of gravel in the middle of it, from Te Puke there will be 2 small sections of highway to traverse as we jump inbetween sealed backroads which will take us to the seaside township of Maketu for a bit of a relax by the ocean. From Maketu we will head back inland to Paengaroa where there is fuel to top up the thirsty steeds before a decent stretch of backroads(a mix of sealed and gravel) through farmland/forestry and native bush to end up at Lake Rotoma where after another small but scenic section of highway around the lake there is a nice reserve to enjoy a bit of a rest and a swim in the lake for those that are keen, from Rotoma its up Manawahe Road past the infamous helicopter corner of WRC fame to McIvor road which is a steep gravel goat track off the Manawahe hills to the Rangitaiki plains where we will hoon down Braemar road, have a quick look at the springs at Otakiri(where china is stealing our water from) and head back along a stretch of main road to Edgecumbe. Turning off at Edgecumbe we will follow the Rangitaiki river along more back roads to where it meets the sea at Thornton where there is the option to hoon along the beach for a few kms(or cut back along the road and meet up with the beach riders) just before Matata. In Matata there is booze/food/fish n chips/petrol etc right across the road from the camp where we are staying which is the Matata DOC camp. Its only $8 for the night and still has showers/proper toilets but is camping or roughing it for the night spec, the camp caretaker is going to fence off a corner of the camp for us all to take over. Beach is right there for a swim and can walk to get supplies if you run out of beer. There are other indoor accommodation options available indoor for those that want them but is up to you to sort this. Day 1 Main Stats: About 180kms of riding Mix of gravel and tarmac- roughly 50/50 3/4 gas stations to fuel up Food/beer/fuel 5 mins ride from accommodation Accomdation for the night at Matata DOC Camp $8 for the night pp https://www.doc.govt.nz/parks-and-recreation/places-to-go/bay-of-plenty/places/matata-area/matata-campsite/ Sunday - After a strong coffee and a cigrit for breakfast we will head off from the camping ground and straight back into the hills via Herepuru Road which starts off sealed then a section of gravel and back to sealed as we reach Manawahe Road again, back up Manawahe Road we will turn off at helicopter corner and head around the back side of Rotoma onto more gravel and native bush. Once in the native there is a side track called Porters Road which is basically some sweet pumice tracks with ruts/hill climbs where we can hoon around for a while do some jumps and test hill climbing skills. After that back onto Manawahe road which will take us out to Pongakawa and back on to sealed roads with some short sections of gravel then across SH2 and out to Pukehina where Lee has offered his place as stop for a BBQ lunch. After lunch and a cruise up Pukehina Parade its back onto Old Coach Road and follow a similar route via Maketu and Te Puke back towards Tauranga. A detour off the route down will take us through a short paper road and back into Papamoa where we will cut thru suburbia for a lap of mount main beach to pest the boomers and back to where we started on Saturday morning to conclude the ride. Day 2 Stats: 180ish kms of riding again 60/40 mix of sealed and gravel riding 4/5 places to get fuel BBQ lunch at Pukehina Backroad hoons and a cruise of the Mt to conclude the weekend Not to steal @johnnyfives thunder but the ride will be of a similar pace and conditions of the east cape rides for those that have done them Expect lots of narrow roads of the sealed and gravel nature, limited cellphone coverage in places but sweet scenery, lush swimming spots and great times on small motorbikes in the backblocks of this beautiful country. At this stage there wont be a support vehicle so you will have to be 100% self sufficient with carrying your camping gear but all the supplies you need the night are 5 mins down the road from the camp and having a reliable bike is a must because if you cant fix it roadside you will be on your own sorry. Entry Form https://www.emailmeform.com/builder/form/5YSMcG918TE13j Koha/donation to attend will cover the lunch on Sunday and incidentals1 point
-
thats the idle air (AAC valve) behind the throttle cable bracket. give that a strip and clean first the 2nd throttle cable attachment is for the cruise control actuator cable, and the cam bit behind that is to make the throttle open slowly at first to make it easier to control at low rpm that black cylinder is the traction control motor. it drives a 2nd butterfly in front of the main throttle and shuts when it detects you having fun1 point
-
1 point
-
1 point
-
pics of throttle body? from memory the 41 has a wax thermostat expandy thing on the bottom of the throttle body that ups the idle for cold start and the hot water pipes warm it up and make it back off. could be sticky. or as above, pull the aac valve off and give it a lube up1 point
-
1 point
-
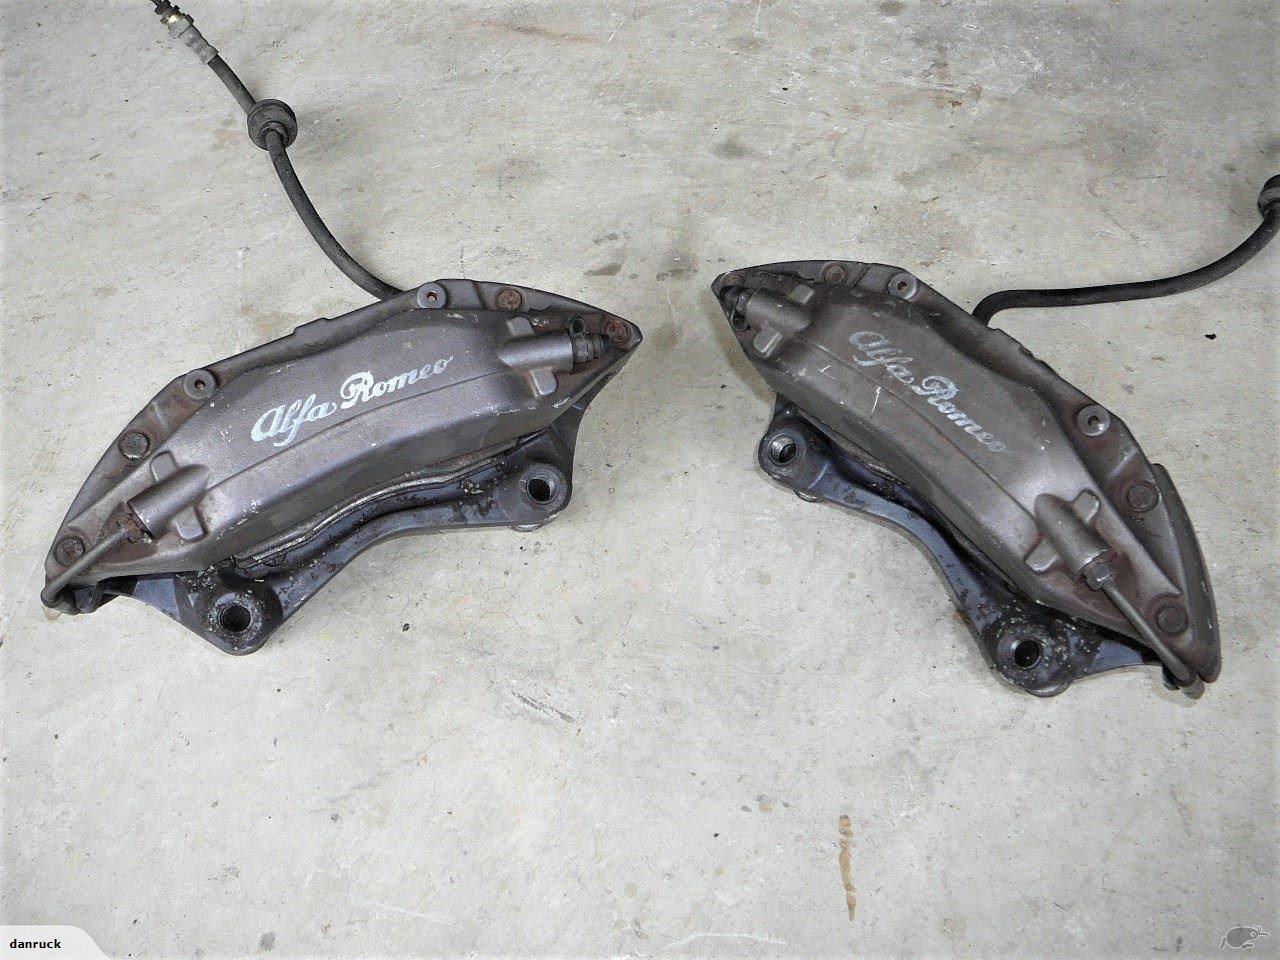
Oh yeah forgot. The brothers car has 4 pots and I got jealous so I bought some alfa romeo 166 brembos. I would assume that being Italian they'll leak until they blow up but painting on a BMW badge might resolve that. My theory is that the alfa brakes mounting holes are parallel (although not concentric) to the BMW ones which will keep the mounting bracket a bit more 2 dimensional. I have no idea if they'll fit but worth a shot for $200. At the risk of sounding shallow I wouldn't mind some larger discs for purely aesthetic reasons, but will see if the current disc is already a stretch. I feel like red Brembos is super cliche but these might end up red if I cant make the original paint look good. I wish the caliper rattle cans came in more colours. At least you can buy heat proof decals for them so they'll look the ducks nuts.1 point
-
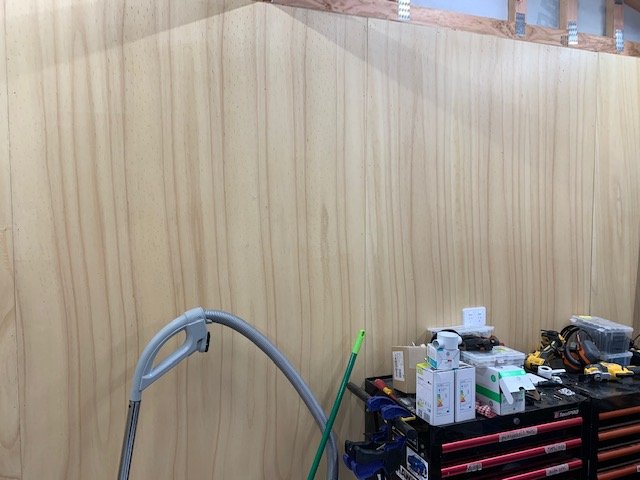
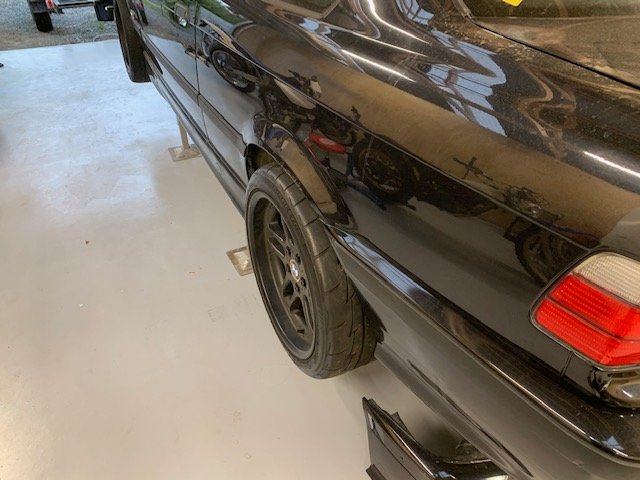
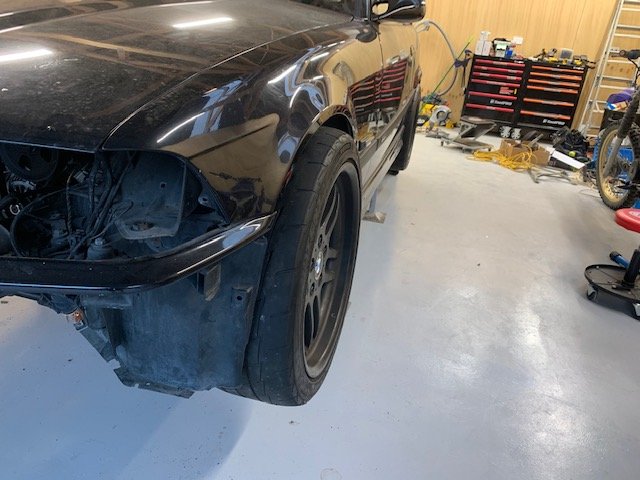
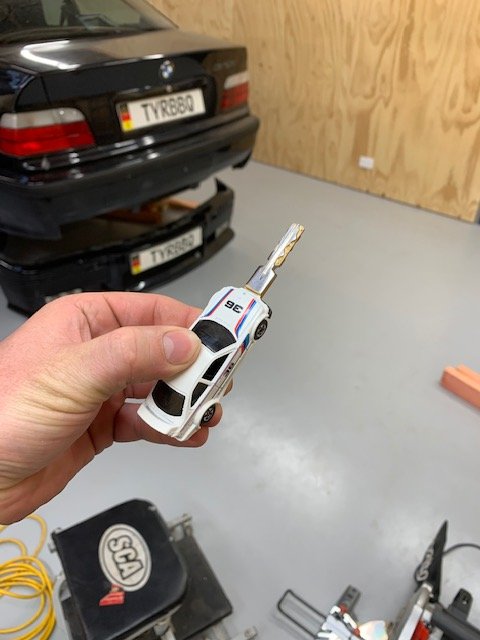
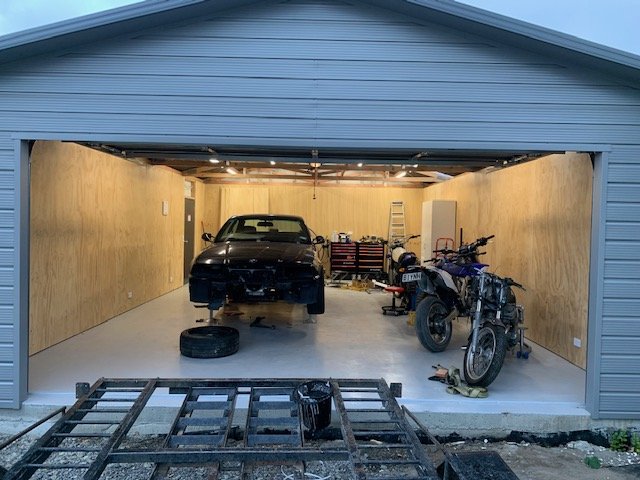
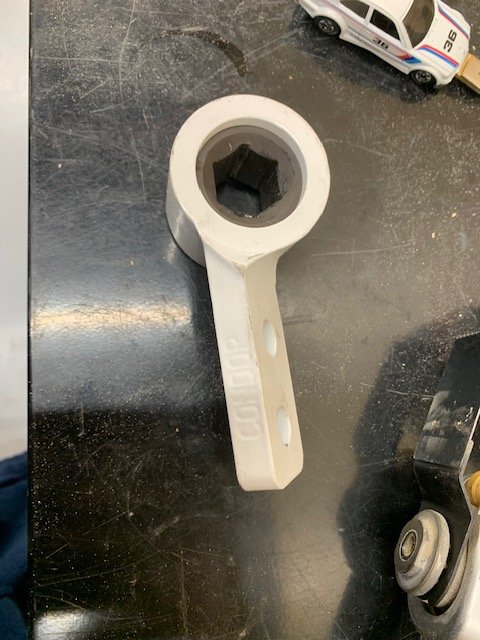
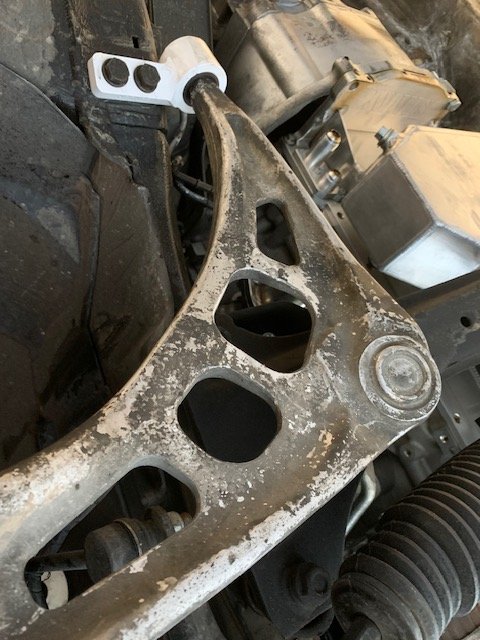
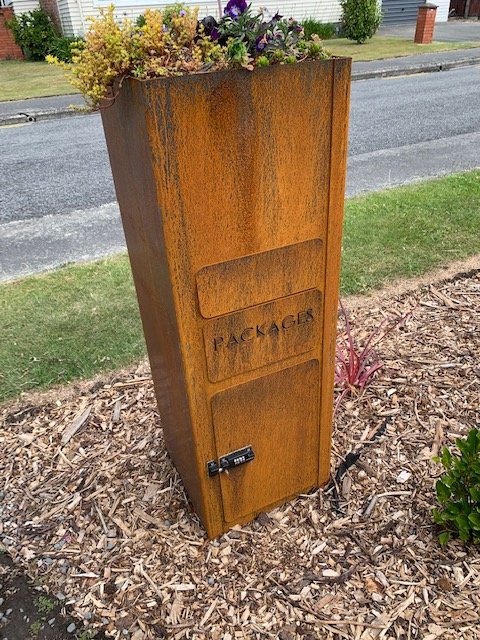
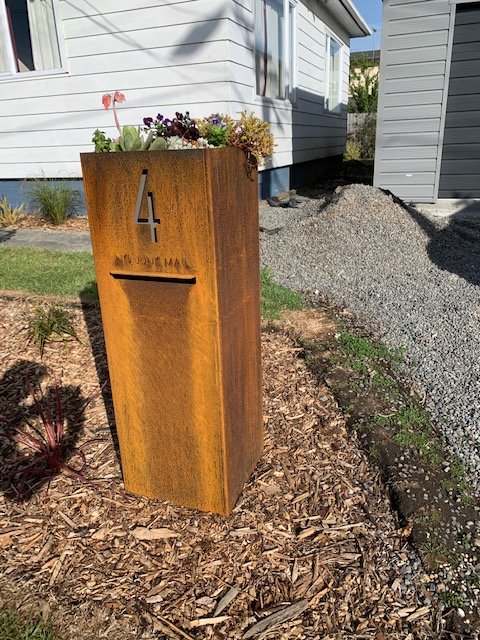
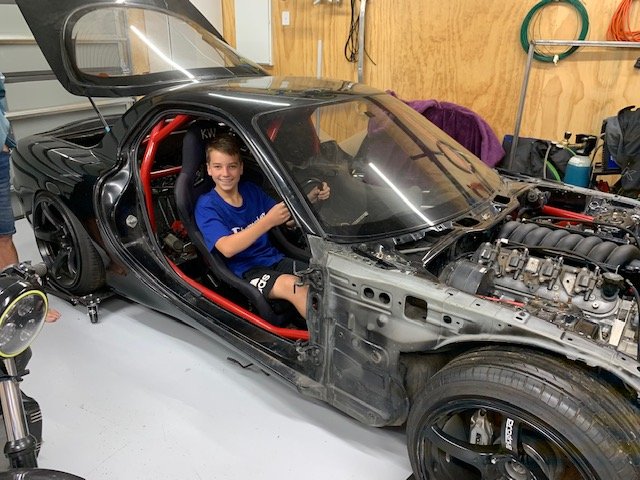
So I decided that the only sensible course of action was to build a garage worthy of projects. The car was stored at a mates for a while but I’ve since brought it home to papa and it’s front and (off)centre of the shed. I wanted to keep to a budget but by the time you’ve paid for the electrical gear and the ply and floor paint, it all adds up! Haven’t even poured a driveway yet which will sting. Considering the ply sheets are cheap bunnings spec I’m pretty happy with some of the grain Anyway... to the car. I bought a staggered set of M-parallels. If you’re not a bmw person you might not care about that, but beema people will fizz. They’re 18x8 +14 and 18x9 +25 (from memory) and have 235 and 265 RE003s on them. Keen to make em smoke. The rear is going to get 25mm spacers and the front has wider control arms from an E46. For those that don’t know, the arms push the castor forward a bit and the track out 25ish mm per side due to slightly different design. I bought Condor bushes to make that work, they’re pretty sweet but cost the earth thanks to NZD - USD exchange rate. Maybe I should clean that arm.. I ordered an over fender kit from Cliq but it’s been a fucking mare and nothing has been shipped, so I expect PayPal will refund me and I’ll be back on the hunt. Tempted to roll bolt on flares just for the OS lols but it restricts low low and I love slammed whips. Also the bf made me a sick Xmas present which broke shortly afterwards (he’s a sparky and maybe not such a fabricator haha) but I’ll fix it up, paint the body black, and hopefully use it as main key. Anyway if you’ve been following this build I’m sorry about the delay. Garage took way longer than planned. Hopefully less delays coming up, me and the brother have agreed that leadfoot 2021 is our deadline. Long drive from the south but would be sick! his FD Is coming along. Engine fit surprisingly easily and we going off the shelf headers for him which saves pain. Circle Track down in chch is building him a driveshaft as we speak and I’ll get one off them soon too. Also my letterbox finally rusted up and is starting to look sweet. Fucking couriers though, it’s been installed for months and not a single package has made it into the package slot. Oh well, I tried.1 point
-
Makes a mess but seems to be cutting alright. It's pretty inconsistent on the back side, I'd be surprised if it was actually in balance before.1 point
-
1 point
-
Well, the momentum got a little lost unfortunately, life got in the way for a wee bit. Managed to get a couple more things done though. One good step forward, but also a couple of annoying steps back. First, the backward steps; my modified dizzy cam trigger idea would work, but it really crowds the area where I need to build the thermostat housing. Not impossible, but just really annoying. Dad was around the other day and we were talking shit and he noticed a little nubbin sticking out of the factory cam... So I think I'll make something up to use that as the trigger tooth. A mount that uses the cam tower bolts. This means that I'll have wiring inside the rocker cover, which gives me pause for thought... But motorsport wiring is something I've got a lot of experience with, and I'm confident I can make it reliable :-). A GS1005 sensor, booted and potted, with DR25 sheathed M22759/32 wiring and It should stand the test of time. I'll make up a custom half-moon seal for the back of the head for the wiring to exit out of. The other step back was also trigger related. I've got a Link ECU for this, and it clearly says in their doc that the crank trigger wheel needs to have a number of teeth that divides into 360 with no remainder... Damn integer math! The SOHC balance shaft sprockets have 32 teeth, so that's not going to work :-(. This is a pretty easy fix really, I just need to machine up a replacement for the sprocket that has a number of teeth that divides in 360... I modeled up a replacement with 12 teeth and printed a test to make sure it would clear everything, its all good. I've shamelessly ripped this off from the kiggly racing trigger kit, but its like $400 to get one of those landed and I'm just not keen to open the wallet to that extent on this thing. I've gone with 12 teeth, dictated by the tooling I've got on hand to make the cuts, hah. Although now that I think of it, we've just had a new EDM wirecutter turn up at work, if I waited a few months I could do any number of teeth I want on that... Ahhh future me's problem. 12 tooth is a little coarser that I'd like with a 272 cam, but all it will mean is a little bit of timing jitter at idle. I'll tell myself it'll just make it lope a bit more at idle and I'll look cool at the lights. Yeah, sure. Right on to the win! I got the coil mount I designed up profile cut and bent it up, and golly gosh, it actually fits! There is something uniquely satisfying in seeing something you've only designed in CAD as a physical object in the real world. I need to get the right fasteners for it, and I think i'll paint it wrinkle black, as that's what the rocker cover will be (with polished lettering of course, because 80's). I'd love to get rid of the ECI-Multi on top of the inlet manifold, because the text is around the wrong way and it drives the OCD nuts, but I cant think of a tidy way to do it... Any ideas out there? I bent it up on a combination of a press-brake and a big finger folder. It needs mild persuasion to get the bolts in place, but really only half a mm or so, which I think is pretty decent for a 3mm sheet metal part with those angles. What I really should do is spend some time calibrating my fusion360 sheetmetal profiles to the tools I have available. Maybe next week? Probably not. I can start on the pattern for the wiring harness now the coils are mounted, that will be another great job to get ticked off. I'll be building it out of offcuts and what not, but will keep it nice and tidy, Fun times :-). Hope this post made sense, I'm 4 ciders deep and waiting for pizza for dinner. Hmmmmmmm Pizza.1 point
-
Fixed the welder with a bit of wiring tracing and looking at stzz. Took out the circuit board behind the wire speed knob, cleaned years of garage dust/metal filling mix off the board which could of been bridging some circuits and doing something funny then there was a big grey box on the board that I guessed was a relay so gave that a tap with a screw driver and its back to working properly which is great because I didnt wanna have to buy a new welder1 point
-
70 on the flat will be fine but if you wanna go bigblock then why not1 point
-
A couple months ago this got featured in the NZV8 magazine. @Snoozin did a wonderful job! Got sick of the doors not shutting correctly. Had my parent's bring back some Altman latches from the US on one of their trips over. Relatively simple to install, but modified a few things so they work a bit nicer and installed some electric solenoids. Need to sort some more door seals as these ones leave some large gaps in places. The final thing that needed doing to "finish" it off finally got done! Mark Dunn in Levin did an awesome job on the upholstery. We made new plywood seat bases and he built up foam for the seat. We made it thinner than the factory one, so I could sit a bit lower and further back. The seats are also way softer now! Some random pics from the past couple of months. At some stage I also swapped out the fog lights for the grill guard, as they weren't mounted that great and were cracking the bumper panel. Will modify them and put them back on one day. No.2 transmission is on it's way out. Can smell it burning the oil when going up large hills. Have changed the filter and flushed the oil and no difference. Took it up to drag day and it decided it only wanted to use third gear after the first run. Did a couple more 21-22 second runs and then parked up for the rest of the day. When we left it was back to normal. Unsure whats going on there. Had a suggestion it went into limp mode. Have another trans there that I could swap in and see what happens with that one, otherwise really considering manual swapping it!1 point
-
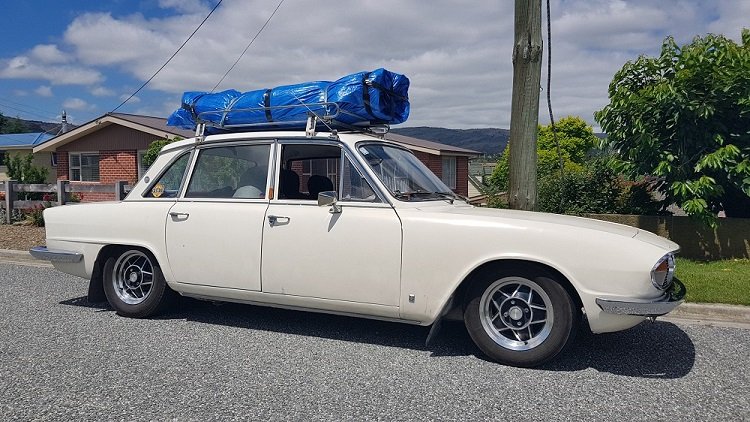
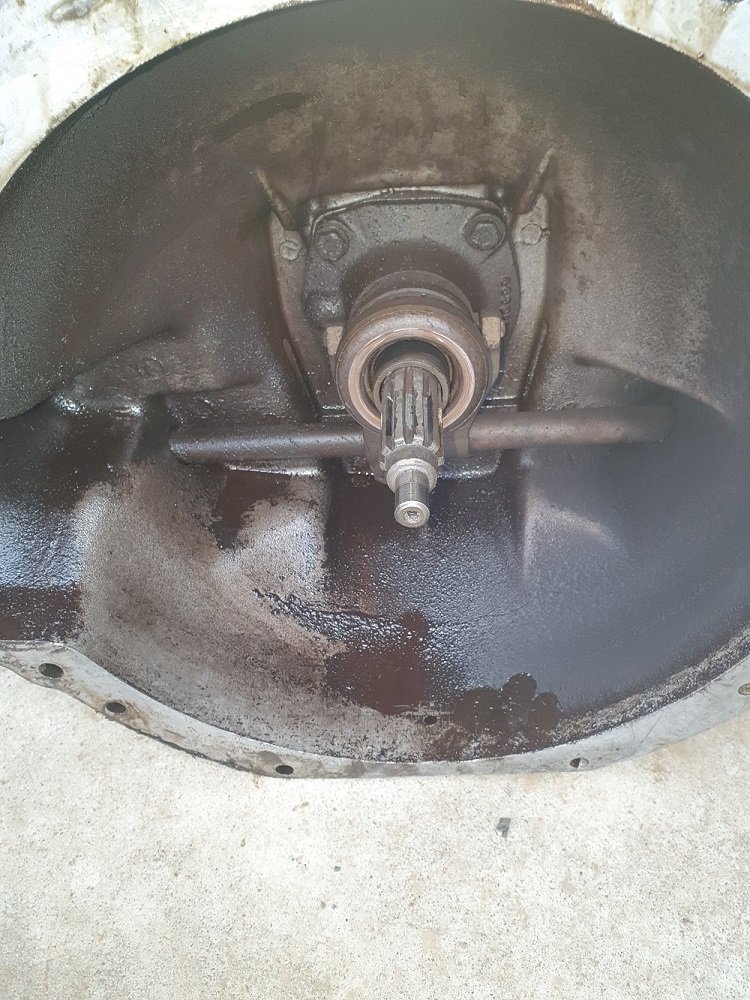
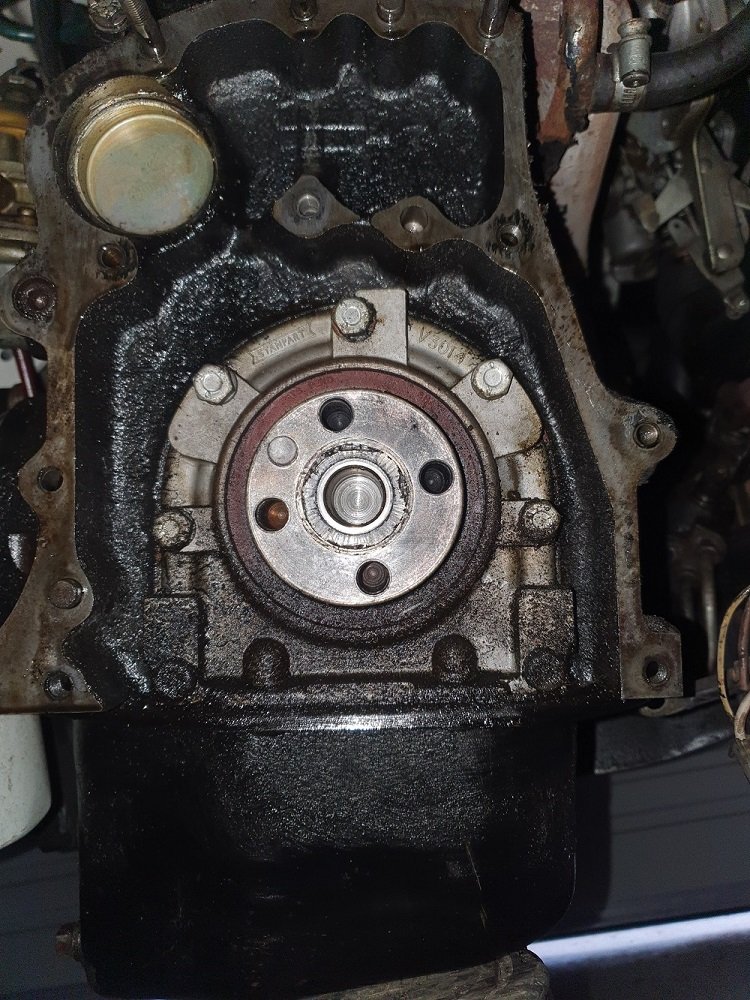
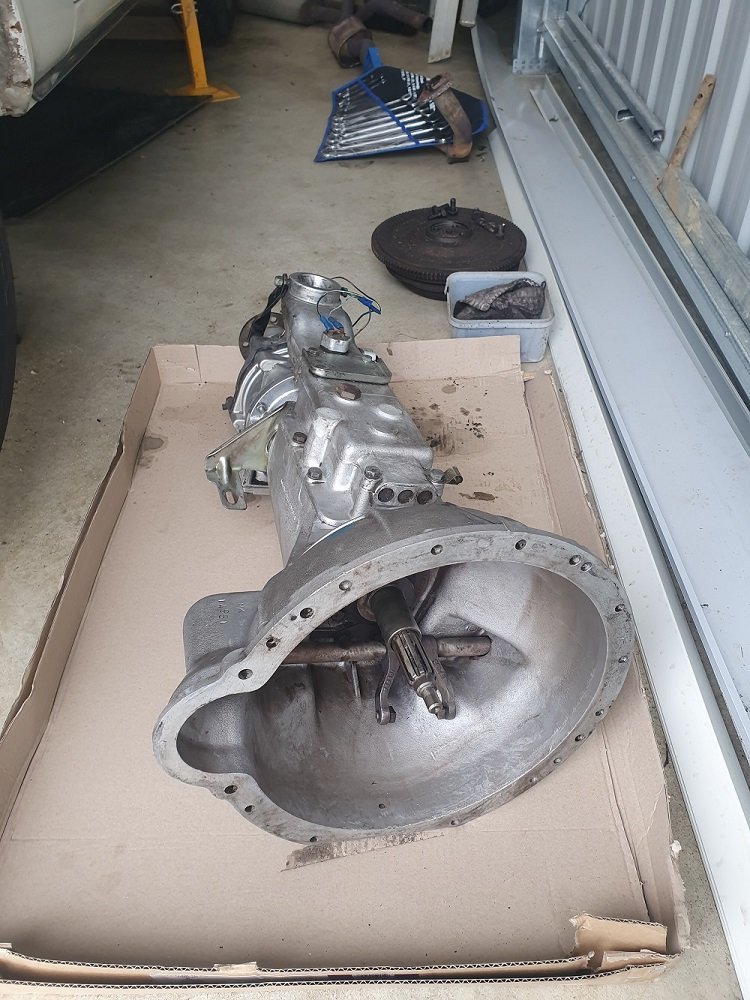
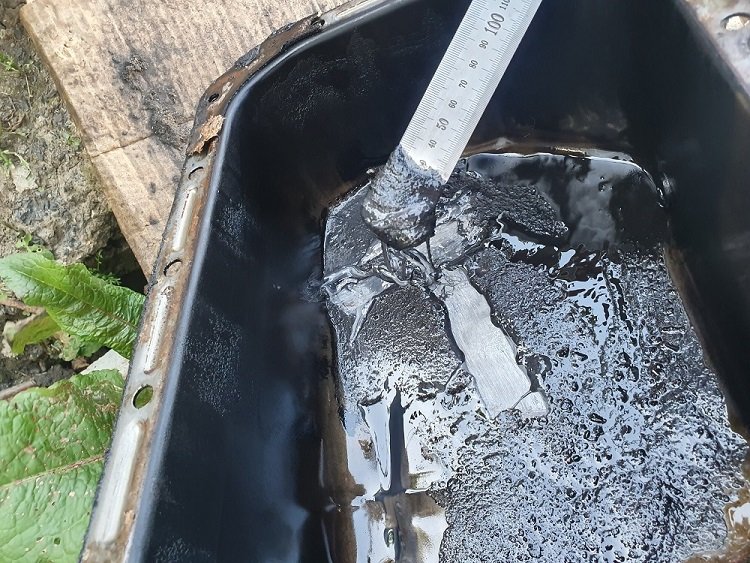
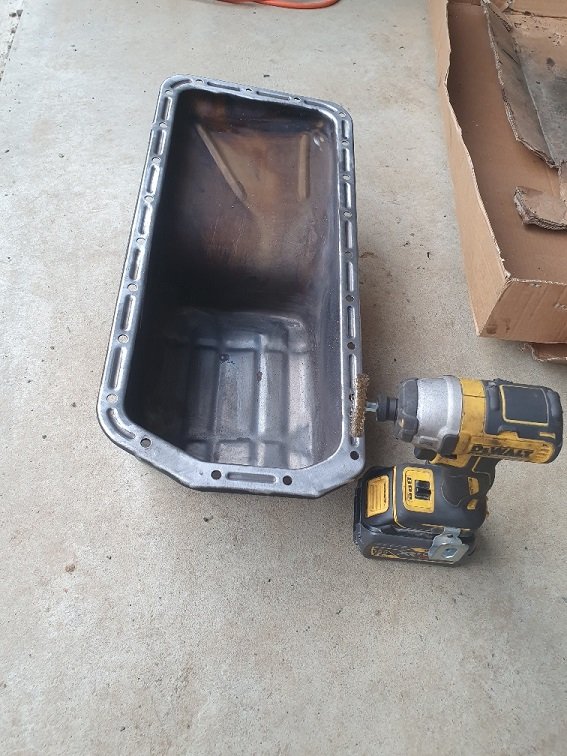
Not long after the above post i purchased a house so drove the car through to Central for what was supposed to be a few months until i built my shed. Approx 12months later it returned Took it for a wof, put on my new wheels (pics to come, due to the below it was only on the road one day) Turns out the rear main seal decided it didnt want to be a seal anymore and started leaking more than a British Car should Gearbox was a mess Cleaned up alright Appears to be the problem Took the sump off as thought ill do the gasket while im in there, found a lovely surprise This also cleaned up pretty good Taking out the whole rear end to do all the bushes and will underseal while everything is out. Reassemble and new exhaust just in time for summer hopefully!1 point
-
Decided to try and get this thing riding a bit nicer, previous suspension setup was a little soft and hit the bump stops a bit too often, and with the extra weight of a 4age it would of been worse. Went with a set of Fortune Auto's coilovers all around, since I'll end up chucking an F series or similar diff in and I have the skills to strengthen the rear strut towers. Picked up another pair of struts, cut them down and and blasted them. Wound them all the way down and the front ended up a little higher and the back's a bit lower. Might try and get the front down a bit more, to at least were it was. Made a stainless distributor blanking cover. Bought a Flo's upper water outlet, as it looked to be the much simpler and tidier way of doing the cooling system. Needed a RWD waterpump (inc pulley), thermostat housing and a little bypass pipe to complete the setup. And of course with everything else, when you change one thing you have to change something else. The FWD alternator bracket fouled on the thermostat housing, so I got a RWD one from Japan. Borrowed some Flo's 4age to K series engine mounts and made up my own. Sitting in the hole. Had to space the engine mounts out by 8mm, possibly because of the Cusco mounts being thinner than factory ones? Dizzy relocation kit installed, had to cut a bit of a hole in the fire wall for some clearance. Stripped the interior, pulled out the dash, heater, seats, carpet and scrapped off some sound deadening around the gearbox tunnel. Cut a big ol' hole for the J160 to fit. Probably didn't need to cut so much out, but to make it easy to drop out and fit, some extra clearance was needed. Also wanted it to sit up above the sills and chassis rails. Made up a gearbox mount. Added two extra body mounts further back so that it spreads the load a bit. Has heaps of ground clearance as well. The J160 shifter needed moving forward as it lined up with the end of the handbrake. Cut up the original shifter housing and welded it on to some ali tube and 12mm plate. Spent hours on our little lathe turning up the adapter bits. Works mint, barely any flex and feels like it should. Moved it 200mm forward from the Altezza position, 50mm more than the SQ kit and 40mm back from where the factory Starlet one was.1 point
-
1 point
-
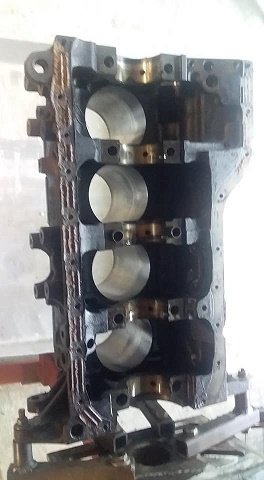
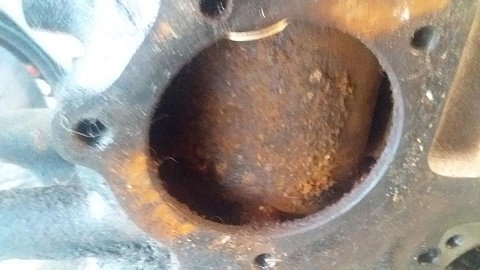
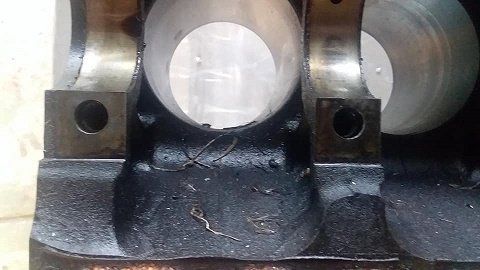
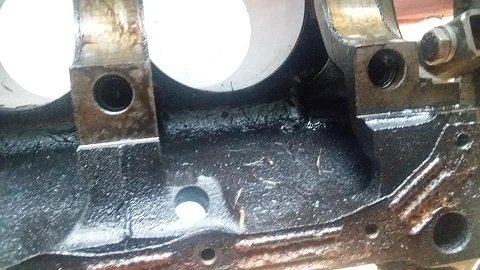
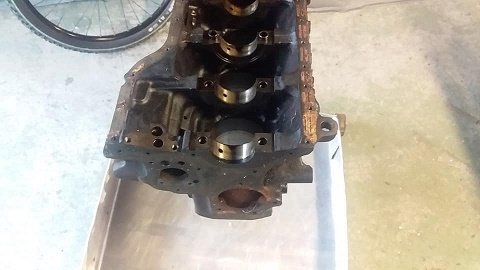
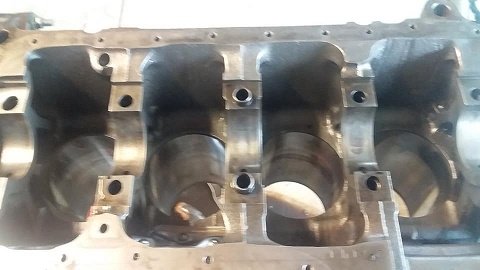
Engine is going to be rebuilt with a few new bits Previous bottom end was a silvertop bottom end. Balanced with arp rod bolts and toda 82mm pistons. rest stock. This time: Same toda pistons : awaiting new rings Brian Crower rods: just some off the self rods. mostly because they are around 100gm lighter per rod than what was in there ARP mains Toda Oil pump gears The broken stuff; Crank seen better days. Block had some unrelated pitting in the bores, looks like it had water or something sitting around rings when it wasn't in use for some time. mostly at the bottom of the stroke, so probably wasn't loosing any power from it. Head: valves look ok, awaiting 2nd opinion from engine guy So yeh no more 20v parts, had a spare 16v ze block and crank, will be base for new bottom end. Suspect that the valves have been starting to float. so will be putting these fancy beehive springs in. at the moment it has supertech singles. which are borderline for what im doing No#3 toast1 point
-
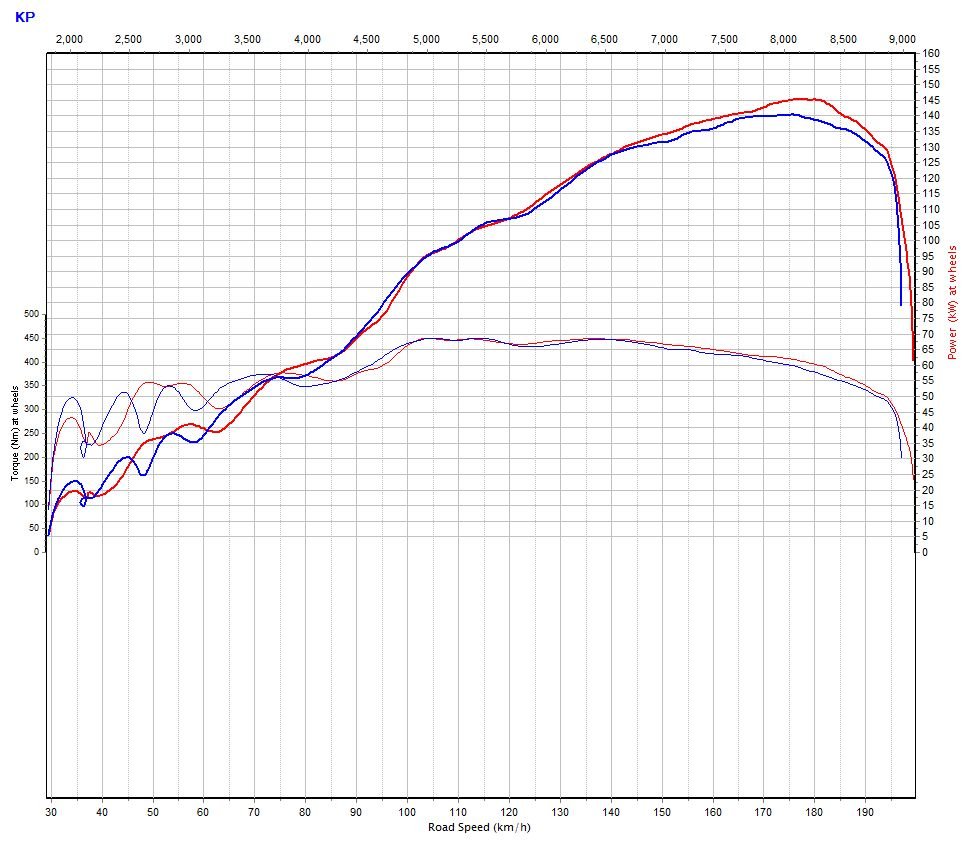
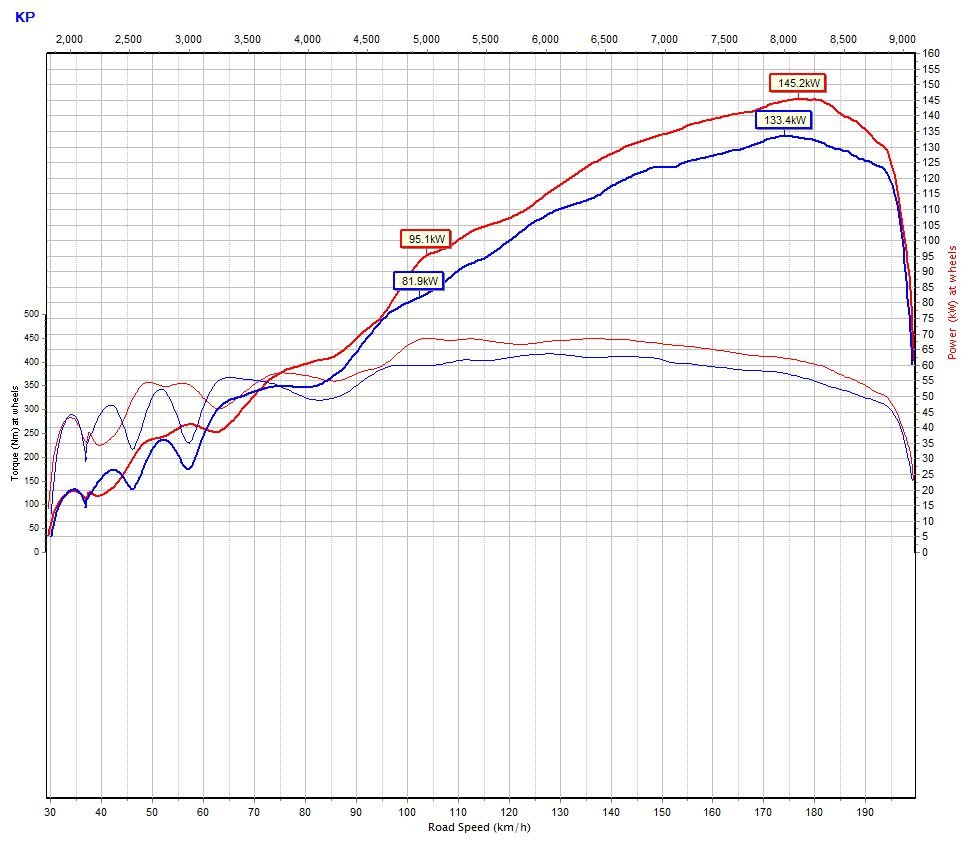
more dyno stuff.... Had to finish the tune after swapping to the small headers. Tried a few things while it was on there. First up; some time ago read something on the internet, that throttles may flow better/make more power just under 100% open rather than 100% open. Yeh nar; blue: 96% open, tried 98% as well same deal just a bit closer to red (100%) line. Maybe it needs even bigger throttles? they are 47mm Next is with the trumpets removed. the below removed all together was expecting some big losses, but not quite like this! over 10kw through the whole powerband.1 point
-
Moving pictures and loud noises version of last post. Got some decent sound quality this time1 point
-
6month update time, its been great driving the bug again, only real problems have been the electric fuel pump not pumping(earth being bad) and the right park light not working(also earth I guess?) headlight still works so ???The main thing was the brakes, or lack there of! After the whole, rear hard line episode, I had bled and adjusted them a few times and come to find when I reinstalled the handbrake cables the left one wasn't sitting its guide under the lever, which resulted in the shoe being on at all times, wearing away all the shoe lining and nearly cooking the rear brake to the point that a small bit of paint blistered off the backing plate and also braking the cable, nice.So, first things first, replace hand brake cables.here you can see the poor old cable. which is were I found the above shitfest inside the rear drums.lucky it still looks good!So with that fixed I took it to franks and got the rear bearings and seals sorted for good.(photo op with johns 63!)get the fucking brakes fixed! was franks professional assessment.Yes sir, New shoe and drum time. The thing was the brakes worked okay, heaps of travel on the pedal, and would pull up much better on the second pump, otherwise an emergency stop would just lock up the fronts there was no progression, just wooden and dead feeling.So I'm leaving work one shitty rainy night, the driveway is well over 100mtrs long, so I tend to give it a brat! in first, hook second, brat! and coast to the end to stop and lock the gate, and the gas pedal gets stuck down full tit!This is the first time in six months of driving this has happened, people say their life flashes before them, all I saw was bumper to bumper traffic crawling past and me t-boning some poor fucker at over 50mph! I hit the clutch, I killed the key and stomped the brakes, everything happened super fast, the front tyres locked up easy on the wet dirty concrete and I slide into the massive steel gate, bompa!!well damn.have roughly knocked it out for now, to cold to repaint so rattle canned it for now and kicked myself in the head a few times. Could have been much worse.the good!this looks better!quick matt black and thread lock the studs in.yep, worn out alright!New front drums.no oil everywhere in the fronts at least, I gave everything a good blow out and clean, guess I didn't take a pic?shiny new drumsswapped the bearing over front the old drums, I noticed the new drums have a groove to make this easier, the old ones didn't so there was only a tiny lip of the outer bearing to hit, managed without destroying the bearings.all fitted up.WOW! so much better to drive now! still need to bed in and might re-adjust soon, just to check, but it pulls up straight and quick, no shuddering at motorway speeds like they use to, very happy.At least this side still looks nice! Main thing its much safer and enjoyable to drive now you don't feel like death it riding shotgun with you.keen to start collecting some sound deadening and headlining materials over winter, I have big plans.1 point
-
1 point
-
Been a good week, cleaned up the floor on the interior, painted it, dynamat (hate you). Then did final install on the engine, inlet manifold and wiring and the up high alt, and ac compressor brackets, just waiting on the power steering pump. My boy cleaned up the interior panels on the front end and resprayed them, and the front end is sitting back where it needs to be.... AC is halfway done, wiring is started, fuel lines 90%. Power on for the next three days and hopefully have most electrical stuff and some other rats and mice done.1 point
-
Been pushing along... 5 lug rear end rebuilt with eaton tru track for 11's. Driveshaft rebuilt and balanced, although I screwed up the size on the last U joint. All the mounts are now fully completed and in, firewall painted with extreme rattle can goodness, fuel lines 90% there. Interior stripped out. Full week on it in a weeks time, hoping to smash out wiring and get the front end on.1 point
-
Seat Made a bolt-on seat frame out of an old Honda I had taking up space. As I don't have a pipe bender I made the rear hoop out of a lawn mower handle, just cut and welded to suit, and cost $2 down at the recyclers... Made the seat base from MDF. The rear hump was scored for $30 off tardme, I just cut it so the angles mimic the shape of the rear of the tank... Sandwiched some layers of MDF for strength, cutout sections fitted other parts... And bought a gel insert from ProPad as I wasn't sure about sitting on a plank on top of a shaky old iron... Glassed up the MDF for strength and waterproofing reasons, added some black to the resin to see how it went. Looked ok till I sanded it down... So painted it once done. Underneath there are metal locating plates that slot into recesses I cut in the steel frame, these are screwed in and glassed over as well... And just cut closed cell foam to suit, glued with contact adhesive and left recess for the gel pad... And topped with finishing foam to smooth out... Sanded foam to nice contour and took to upholsterer...1 point
-
Had the old girl off the road for a couple of years while iv sorted out sheds etc so about June i got stuck into this thing. Tidied it up and got a wof first pop. The water pump blew out after a few small trips around the region so i replaced that with a new one for $120 freighted to my door which was pretty good in my opinion. That was fine until i started noticing the water was going somewhere with no trace anywhere, eventually i lifted the passenger mat to find it chocker with green anti freeze as the heater core had given up. Took the entire dash out and got the end tank soldered and back together on Thursday night. Took it up to Mehtven in the weekend and stopped in at the Waimate 50. I can highly recommend this event, one of the best iv ever been to. 950km over the weekend and never missed a beat. Anyone who has lowered one of these knows the comfort of the bumpstops1 point
This leaderboard is set to Auckland/GMT+12:00








.thumb.png.46e518f714cdc319554c389f990e75a4.png)






.thumb.jpeg.e0a4bff61111e0c8c7396950fcc94da1.jpeg)

