
Leaderboard


Popular Content
Showing content with the highest reputation on 11/30/19 in all areas
-
Afaik everyone is alive7 points
-
5 points
-
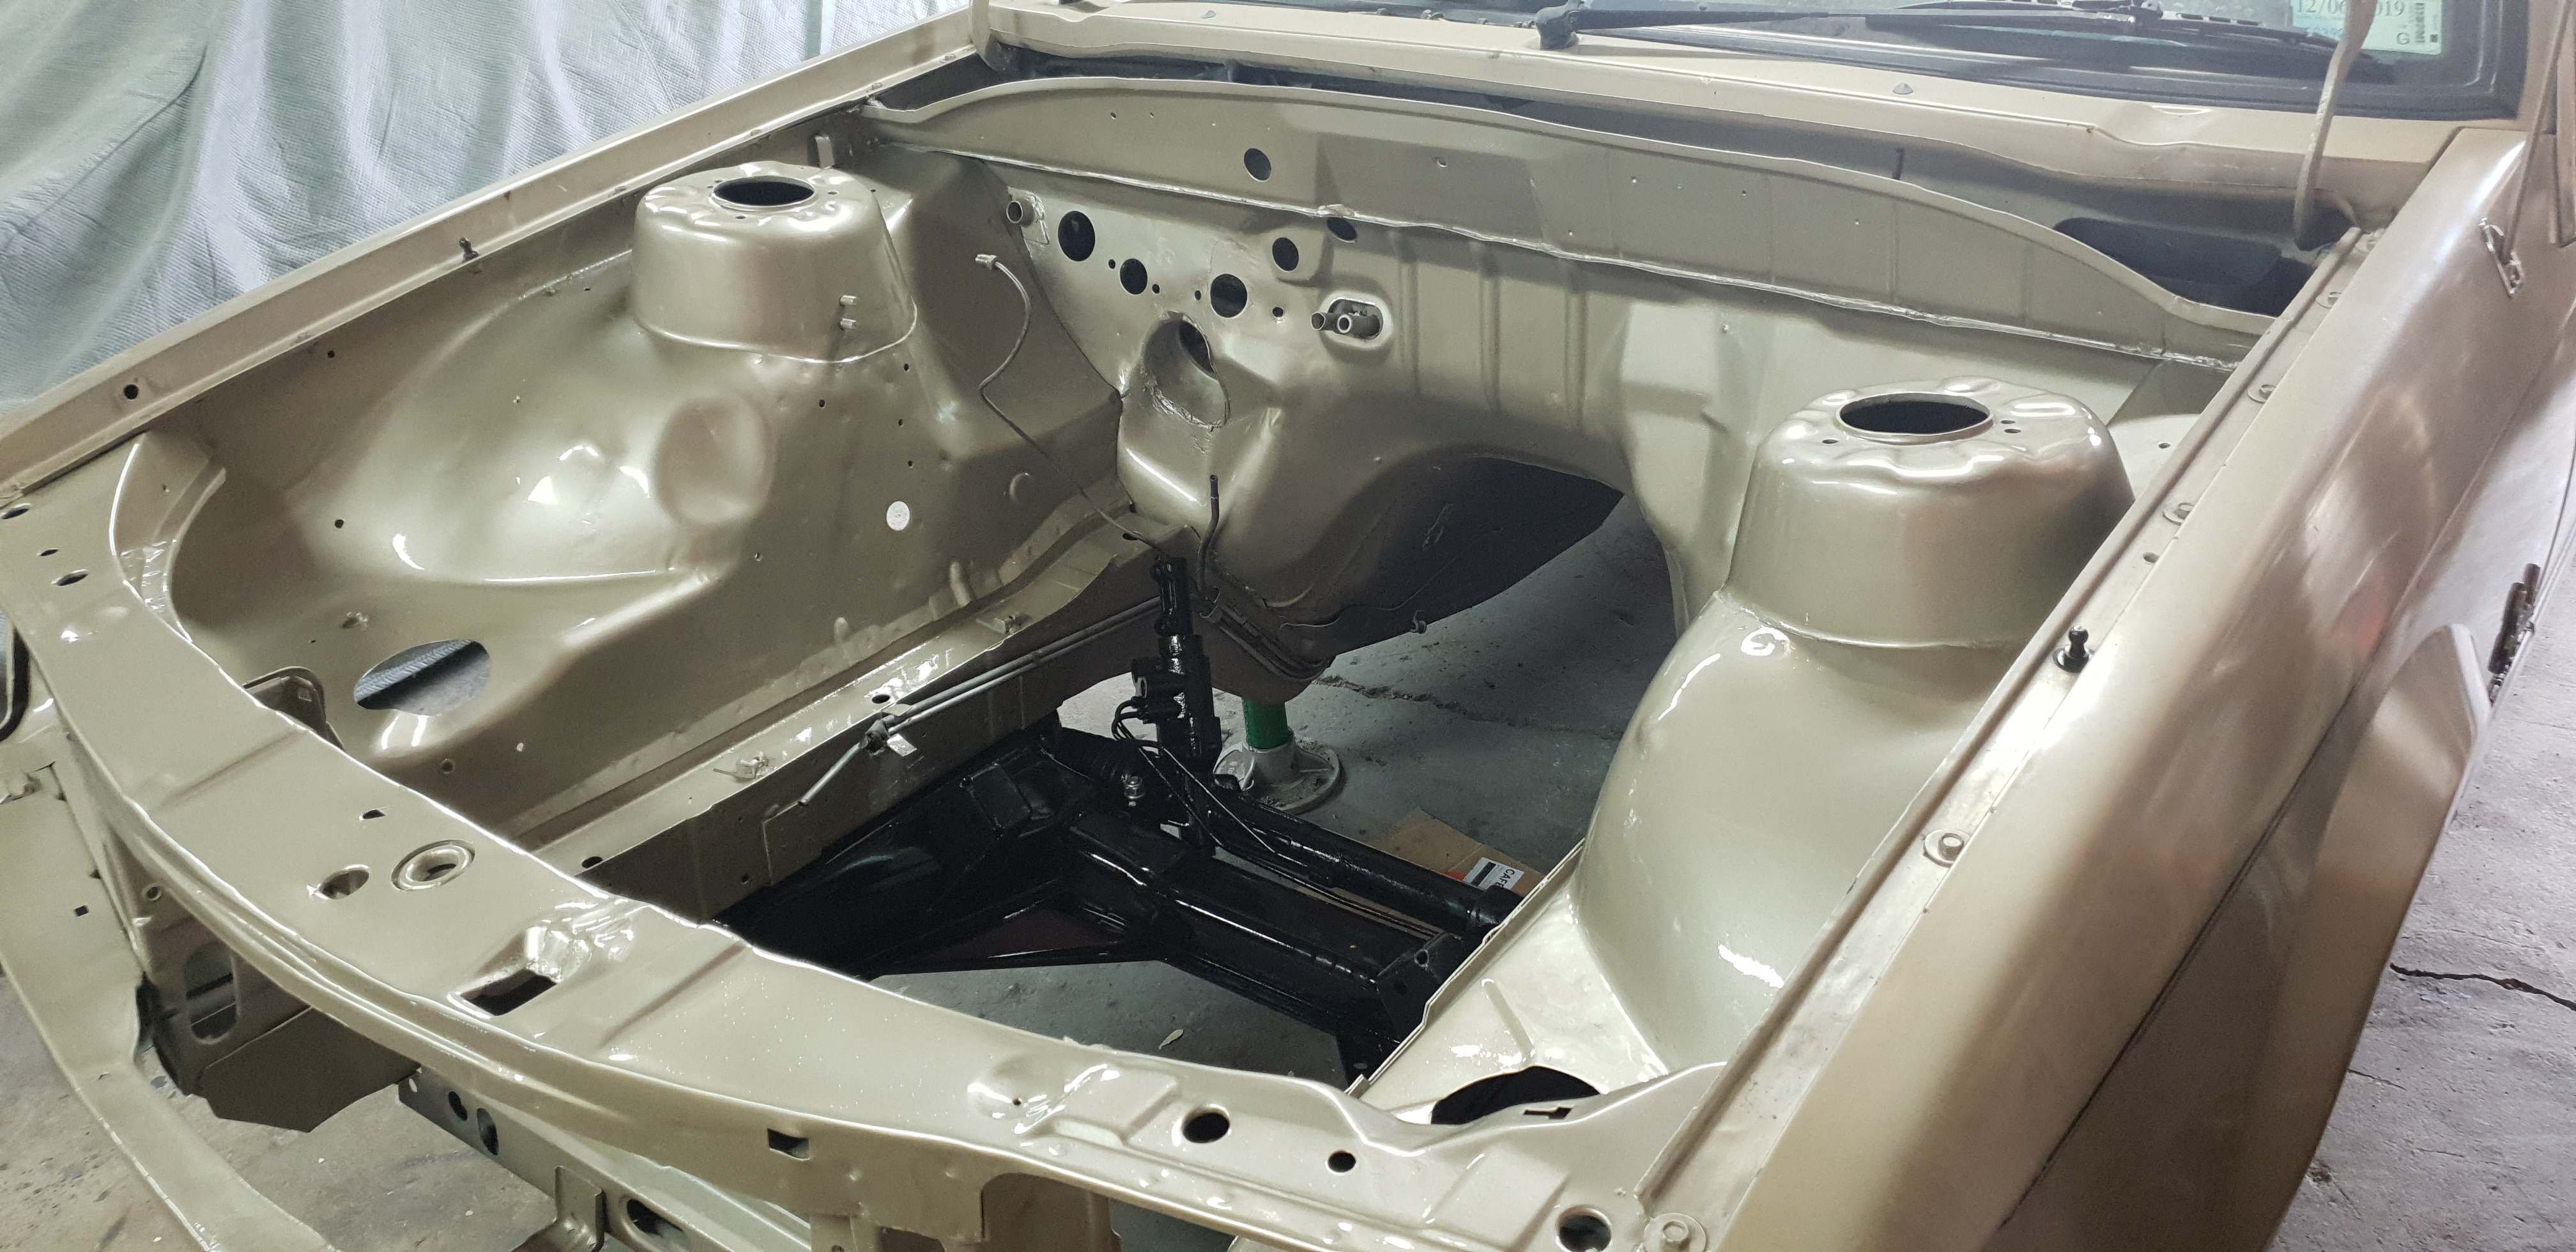
Starting to chip away at the paint on this. Bare metalled both sides of the bonnet, treated with some phosphoric acid then painted with epoxy primer. Didn't take any photos once I'd finished bare metalling, below is after the paint stripper starting on the bits close to seams and cavities. Got the first side done, will flip it over once the paint has dried and do the other side. Few wee runs, but generally happy enough with how it has come out.
 5 points
 -
Saving this years work boot allocation just for the undertaking. good shit. Looking good there Bart.4 points
-
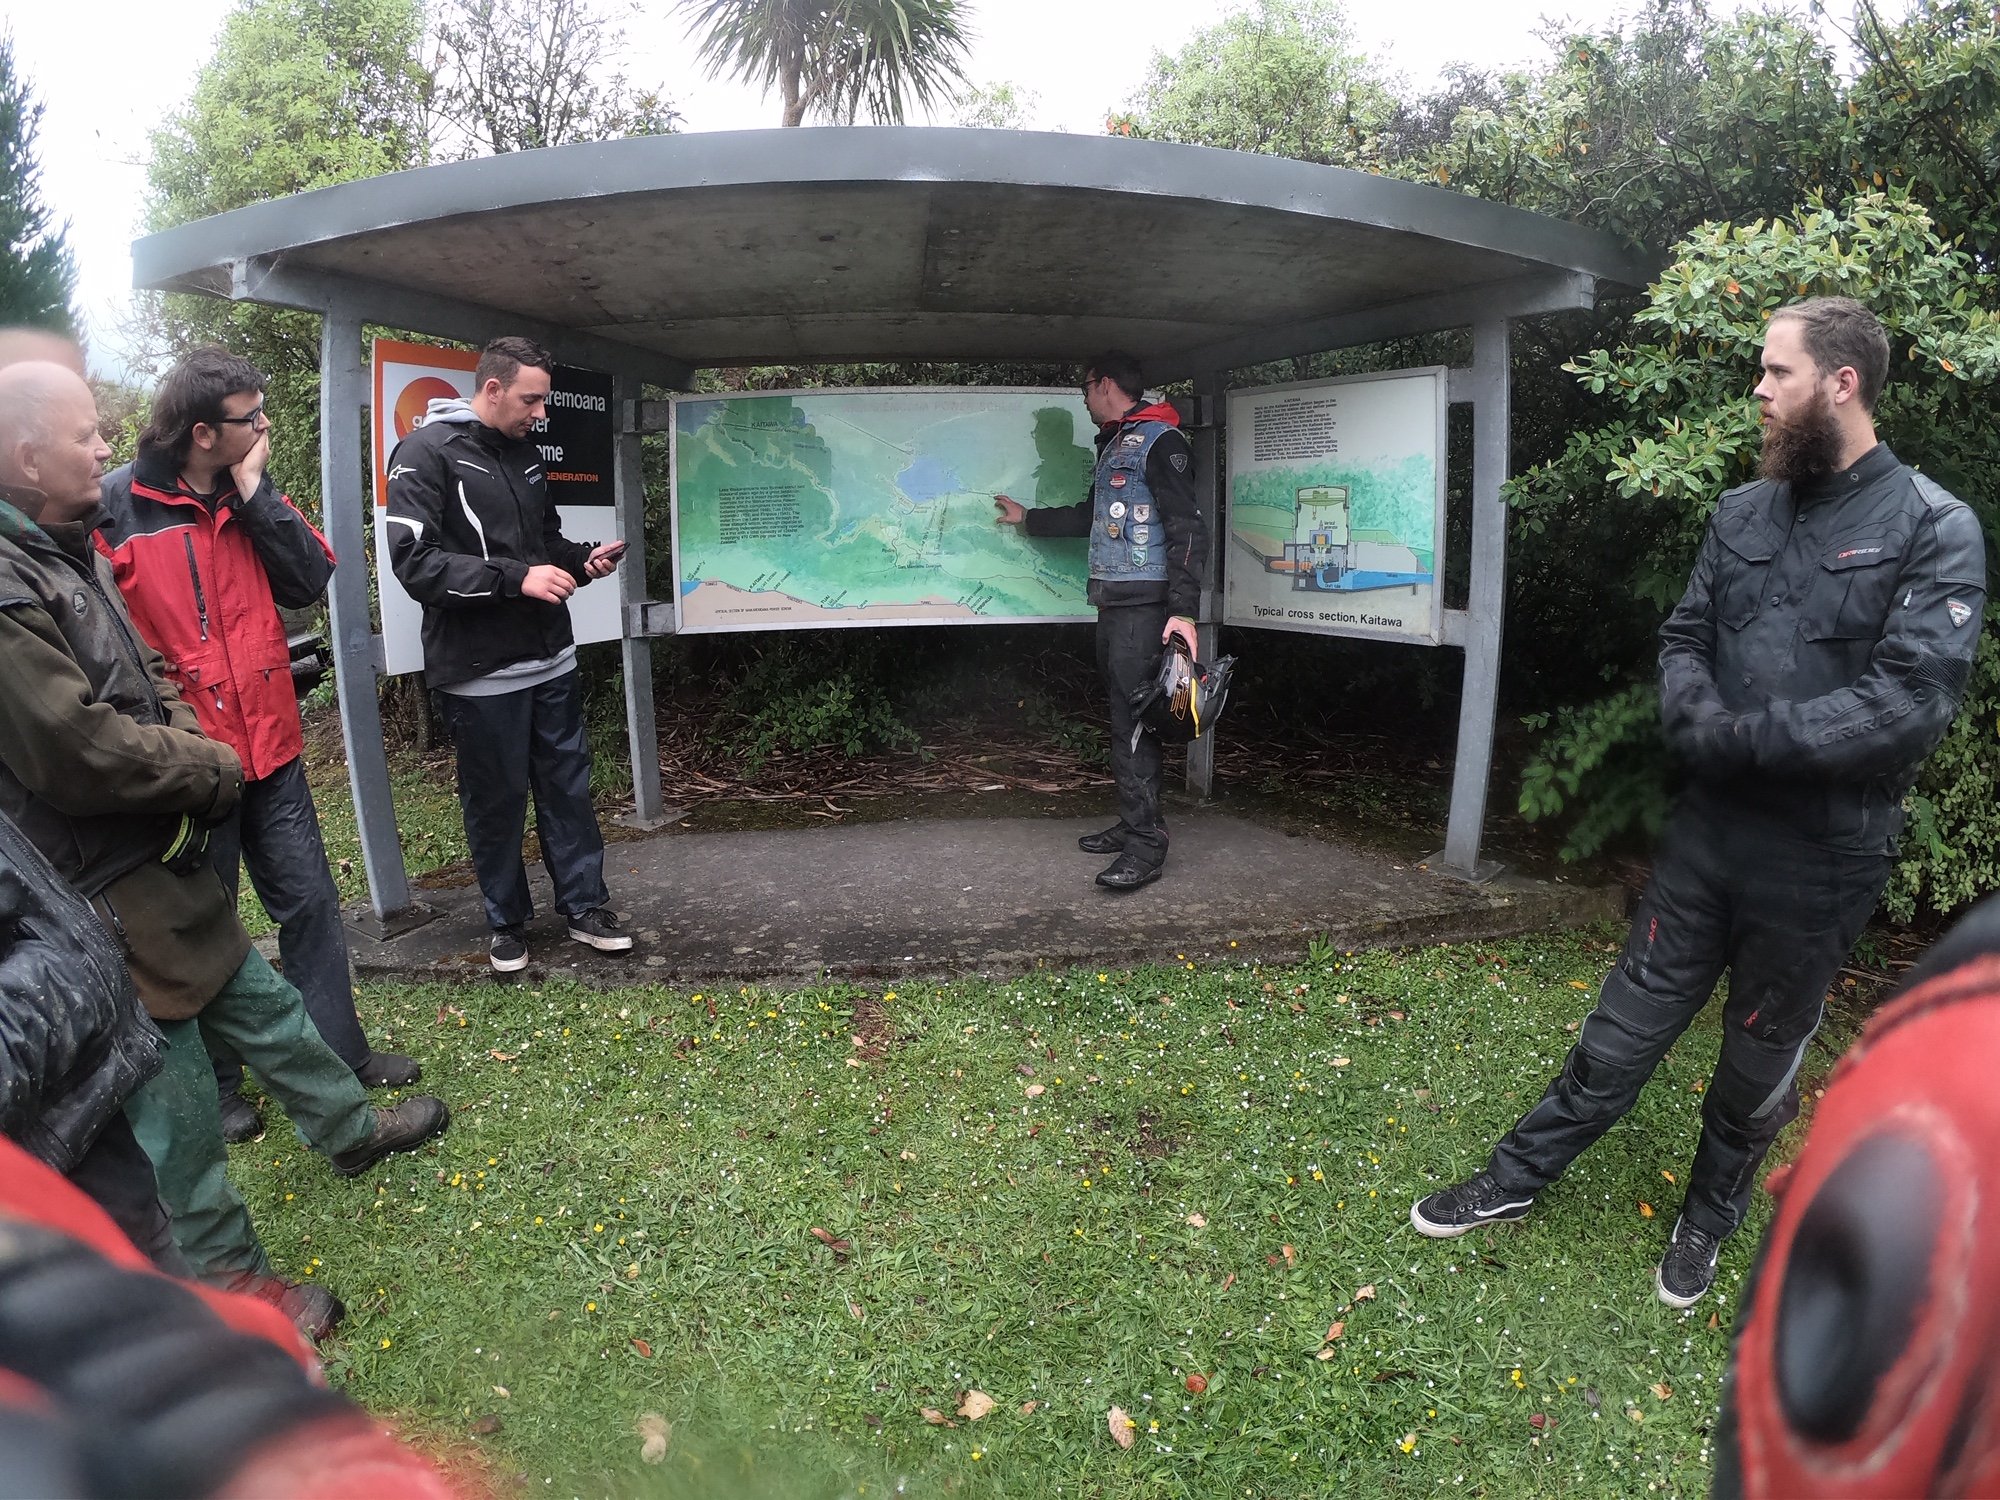
Beavers hydro-electric tour of Tuai was worth the price of admission
3 points
-
Gizzy party at 608 Wainui Road. Smoked beef brisket, and fresh fish on the bbq, band arrives at 7.
3 points
-
made some covers for the cam wheels and belt. they'll get a coat of paint when i paint all the other bits. 2019-11-30_04-52-29 by sheepers, on Flickr 2019-11-30_04-52-17 by sheepers, on Flickr 2019-11-30_04-52-09 by sheepers, on Flickr3 points
-
Serious FOMO for this event right now. Hope there is no soft seizing going on for you lads and the purple goannas are cold3 points
-
You guys should all subscribe to this welsh hippy on youtube: He also did a video on @h4nd's car3 points
-
Made it back to Tauranga all gee. Everyone else is getting their anus punished somewhere on the Waikaremoana road3 points
-
Sooooo pretty much there, have had first cert check, small amount of remedial to do (mostly done) but will be legal before Christmas, but wont make the drags unfortunately... Anyway, I have a persistent code that the ecu is throwing that is doing my head in, new trans feels weird and is currently overly violent, but it goes like fuck... which is nice. Had to change wheels also... have to say they are kinda growing on me, and its nice having some sidewall. Then Feb, its off to the panel beater to sort some of the gnarly bits out, and probably clear coat it for winter running.
3 points
-
today i made the other two brackets. i forgot to mention i use my 50mm DA sander/polisher to finish these types of parts. i use 150 grit sandpaper to clean up the belt sander marks and get them smooth then i used scotch brite on the velcro pad to polish them up and they come u mint. i thoroughly recommend getting yourself a small pad DA sander/polisher. they are so handy for things. 2019-11-28_03-21-45 by sheepers, on Flickr 2019-11-28_03-21-54 by sheepers, on Flickr after that i started making a mounting plate for the extra serpentine belt pulley ill need for the superdupercharger drive. once i know where abouts the extra pulley will go ill make a mounting boss and weld it on. 2019-11-28_03-21-35 by sheepers, on Flickr 2019-11-28_03-23-48 by sheepers, on Flickr3 points
-
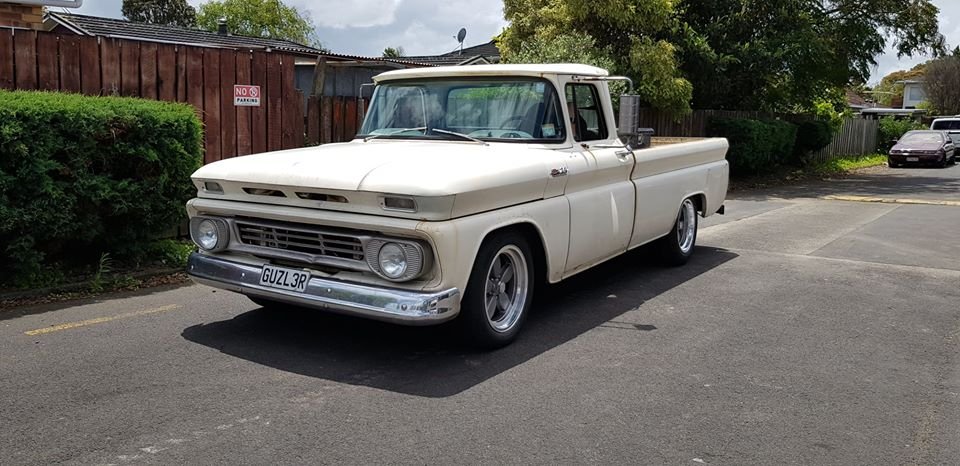
Hey guys and gals. Hopefully this is ok, it's a build from Tassie. Anyways, 82 ke70. Has had a few different plans. But currently desperately need to get her running for early next year. She has spent the last few years on a rotisserie, but progress has been good lately. It's work is almost done, chassis and body work basically done and engine well on the way.
2 points
-
Everyone looks traumatised.2 points
-
2 points
-
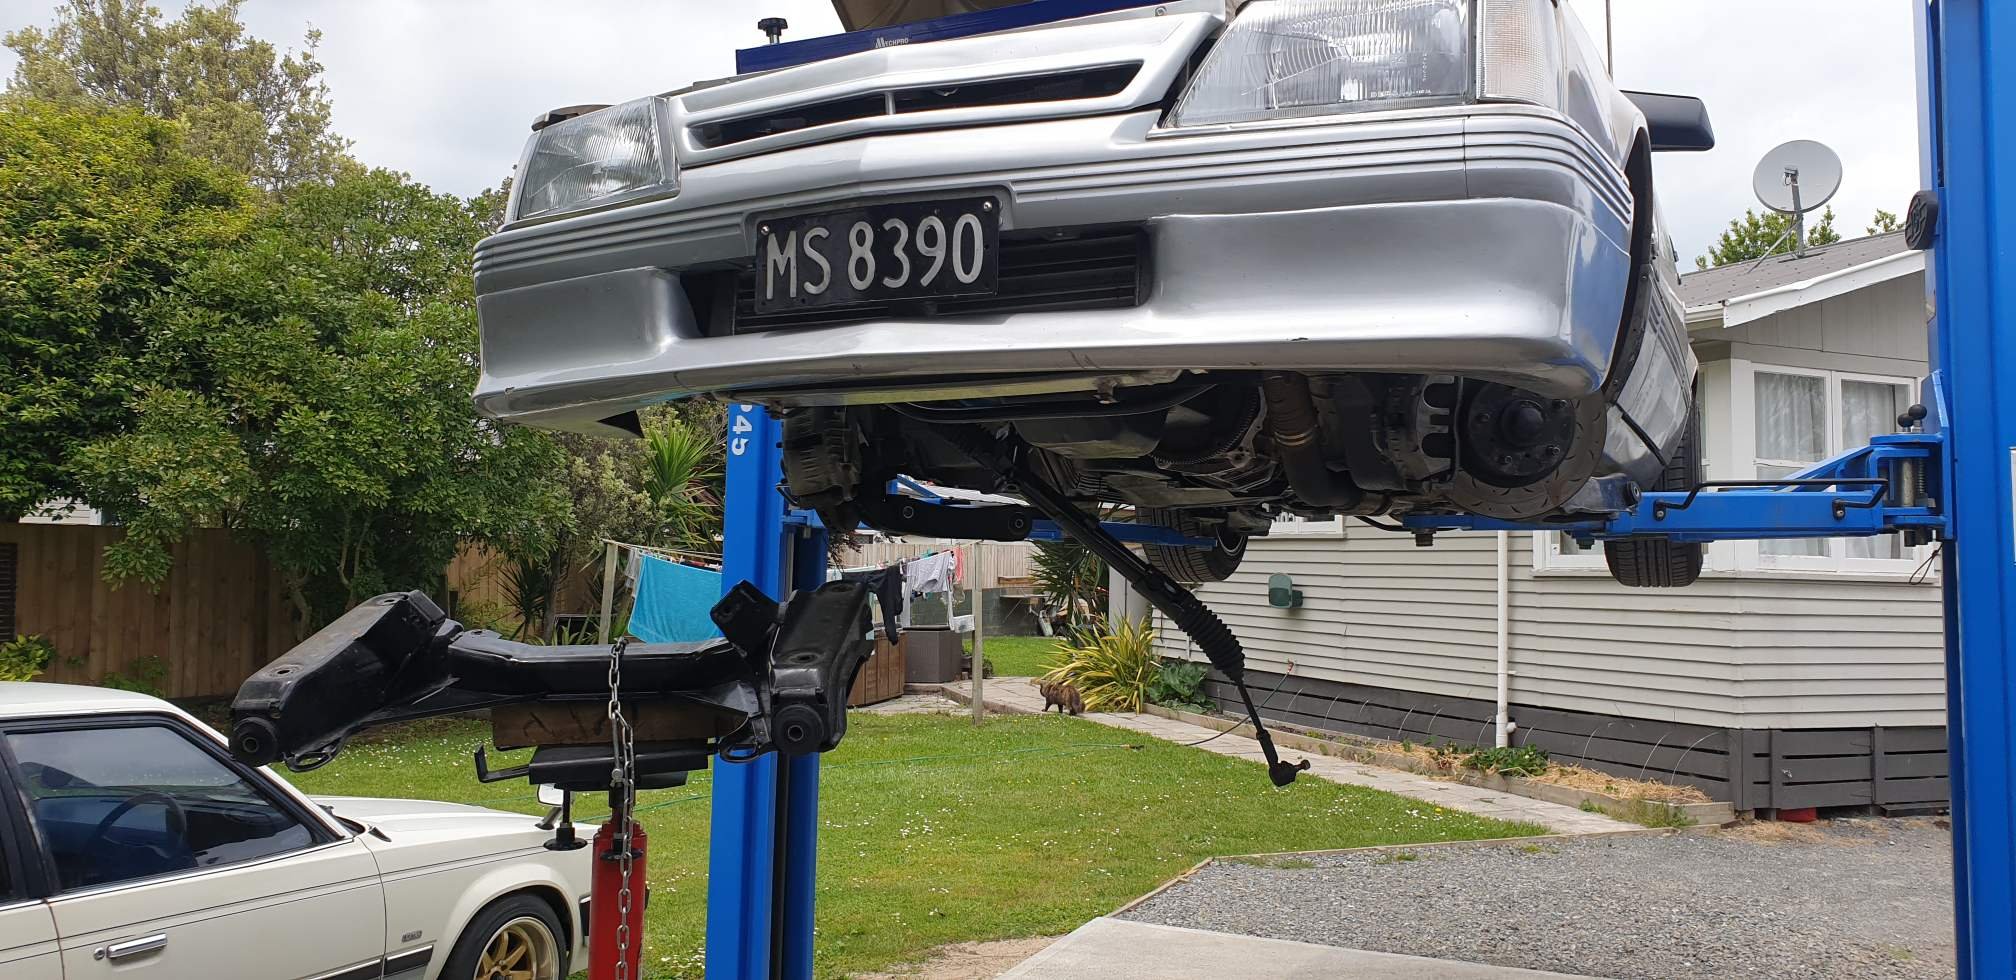
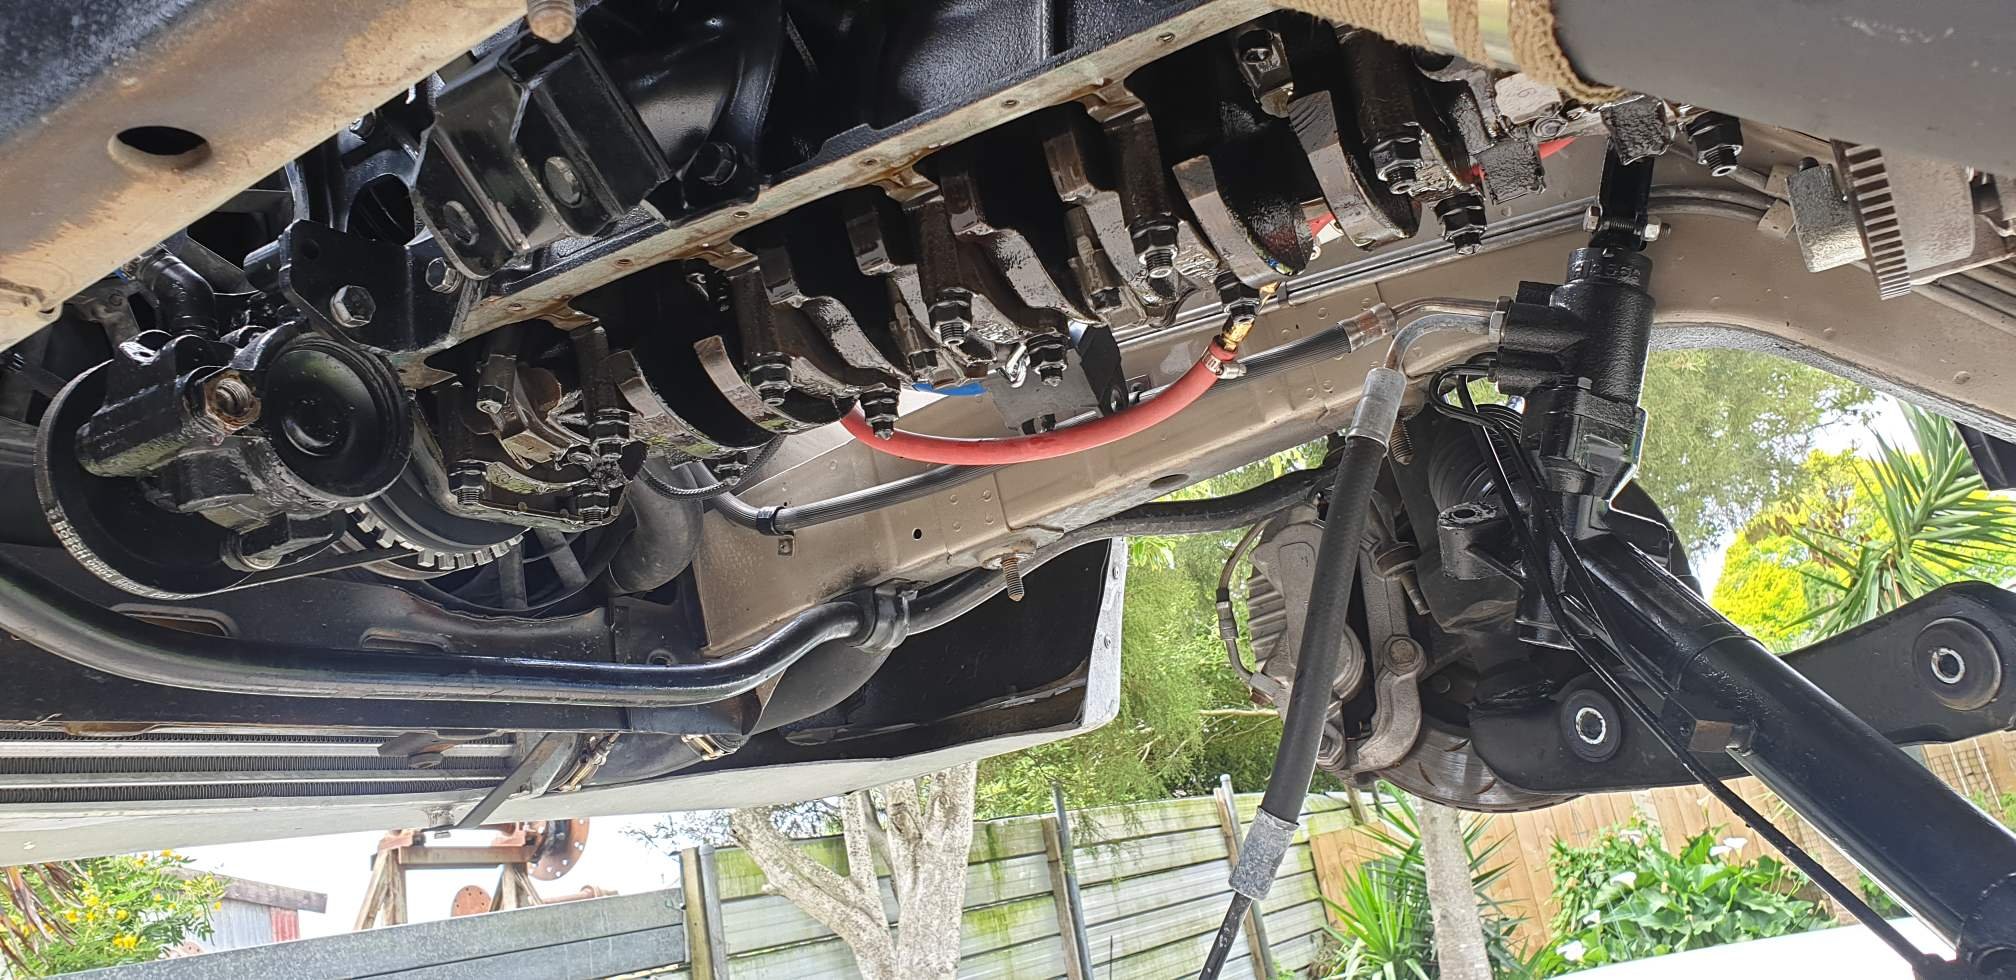
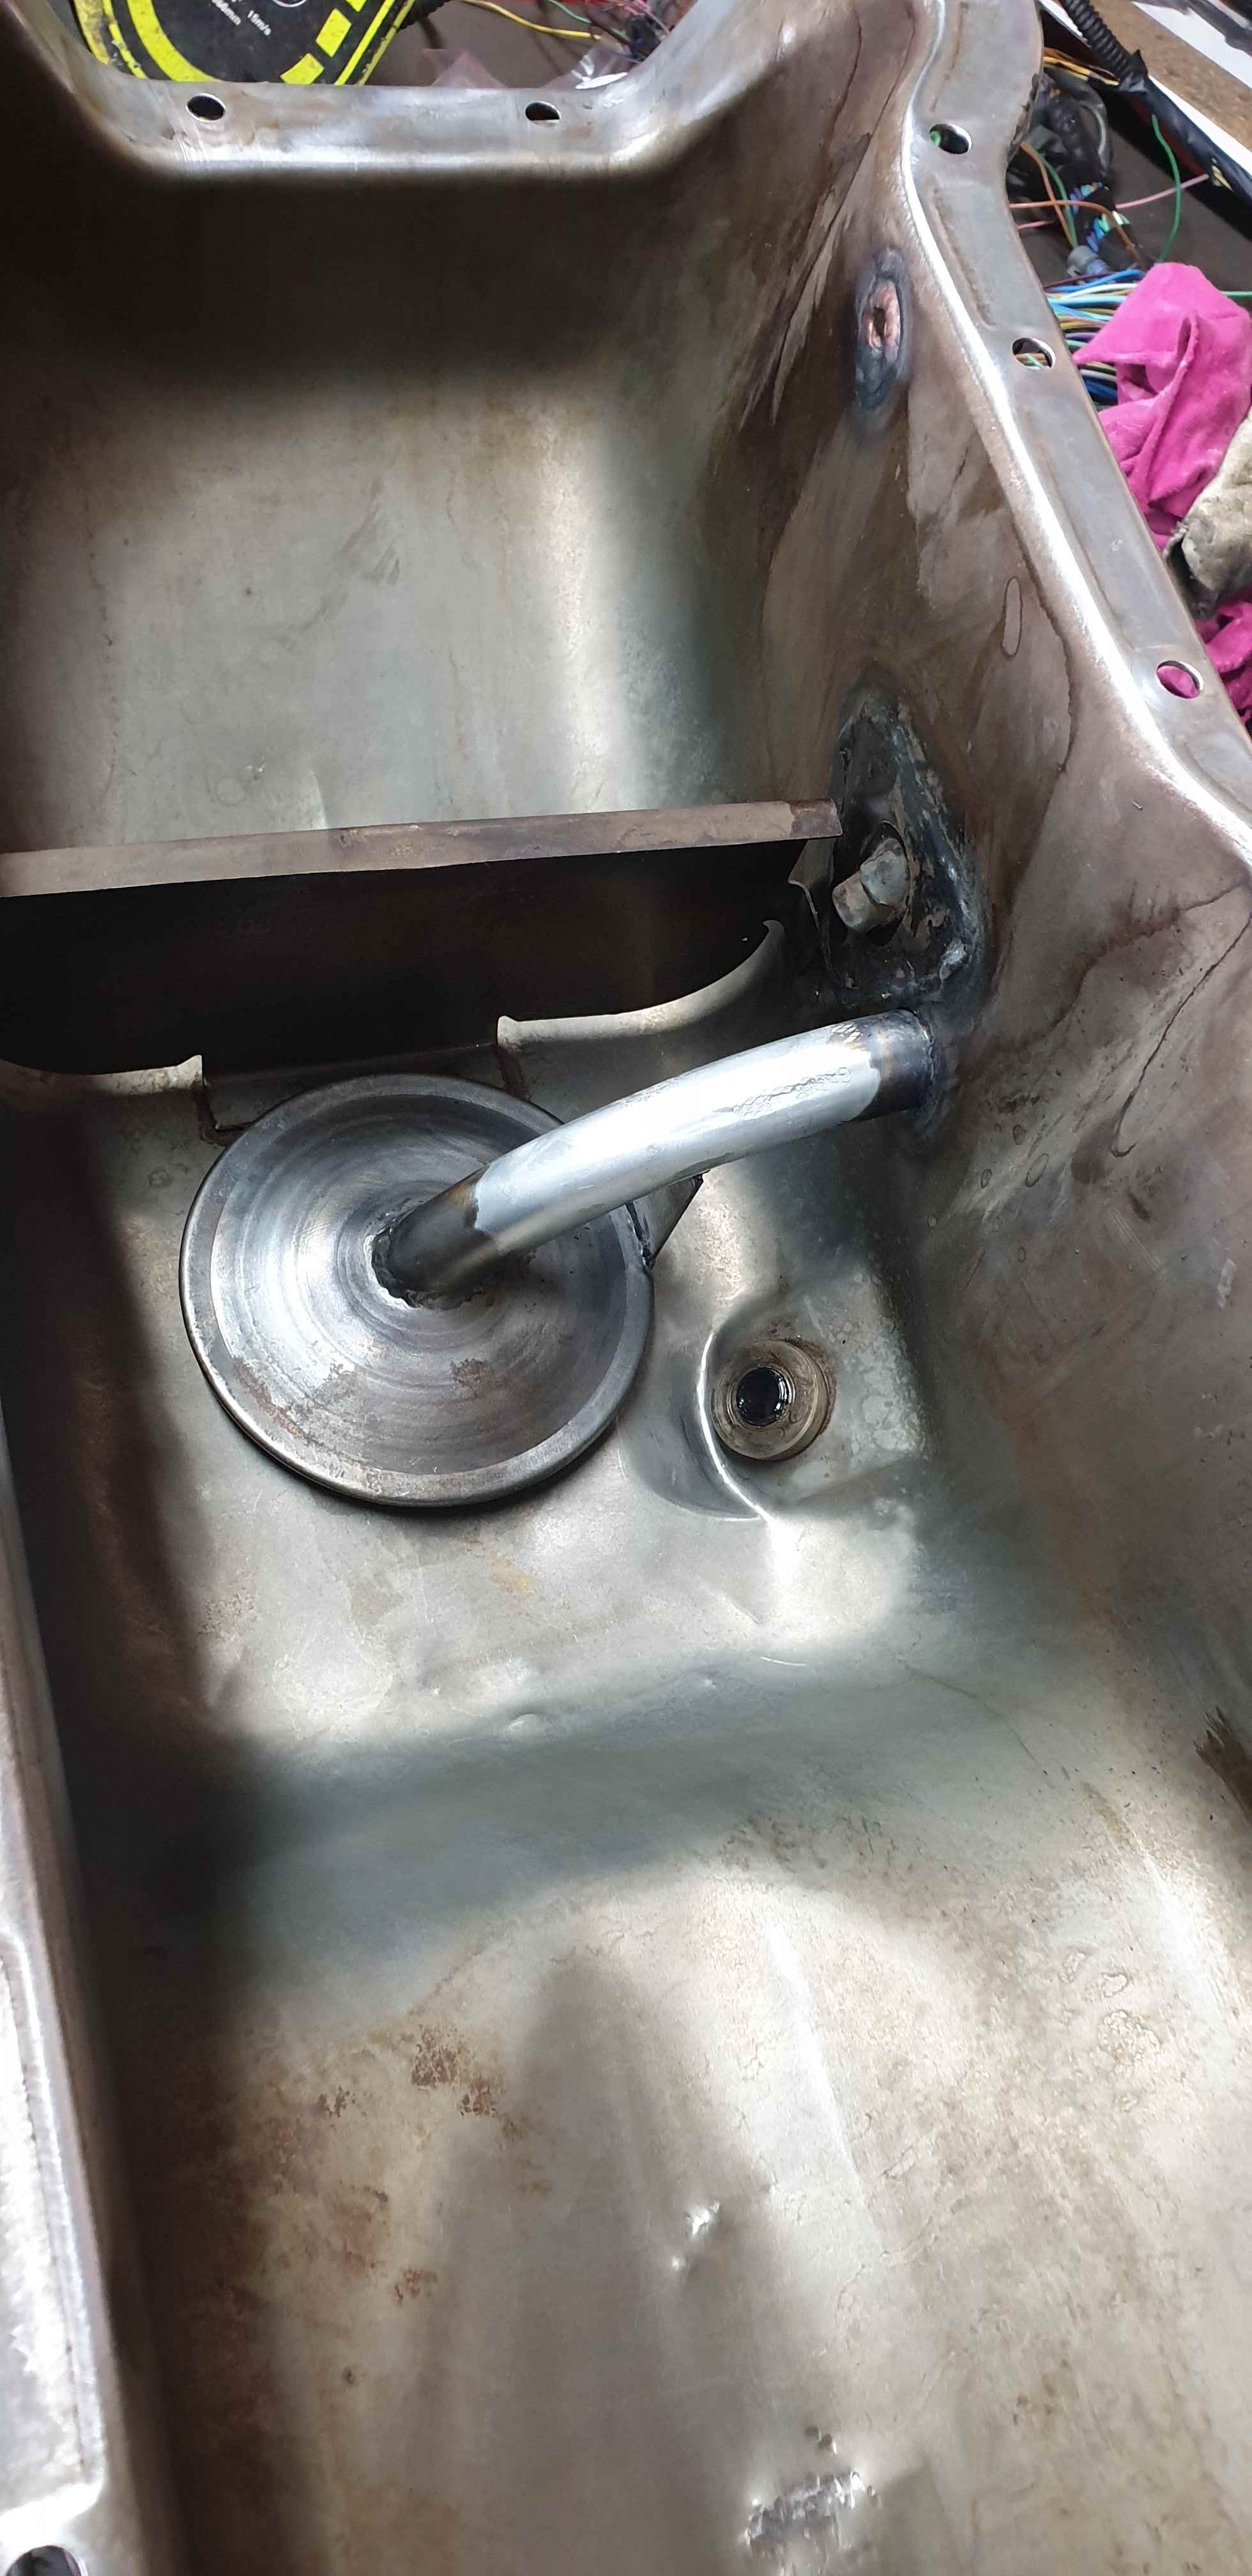
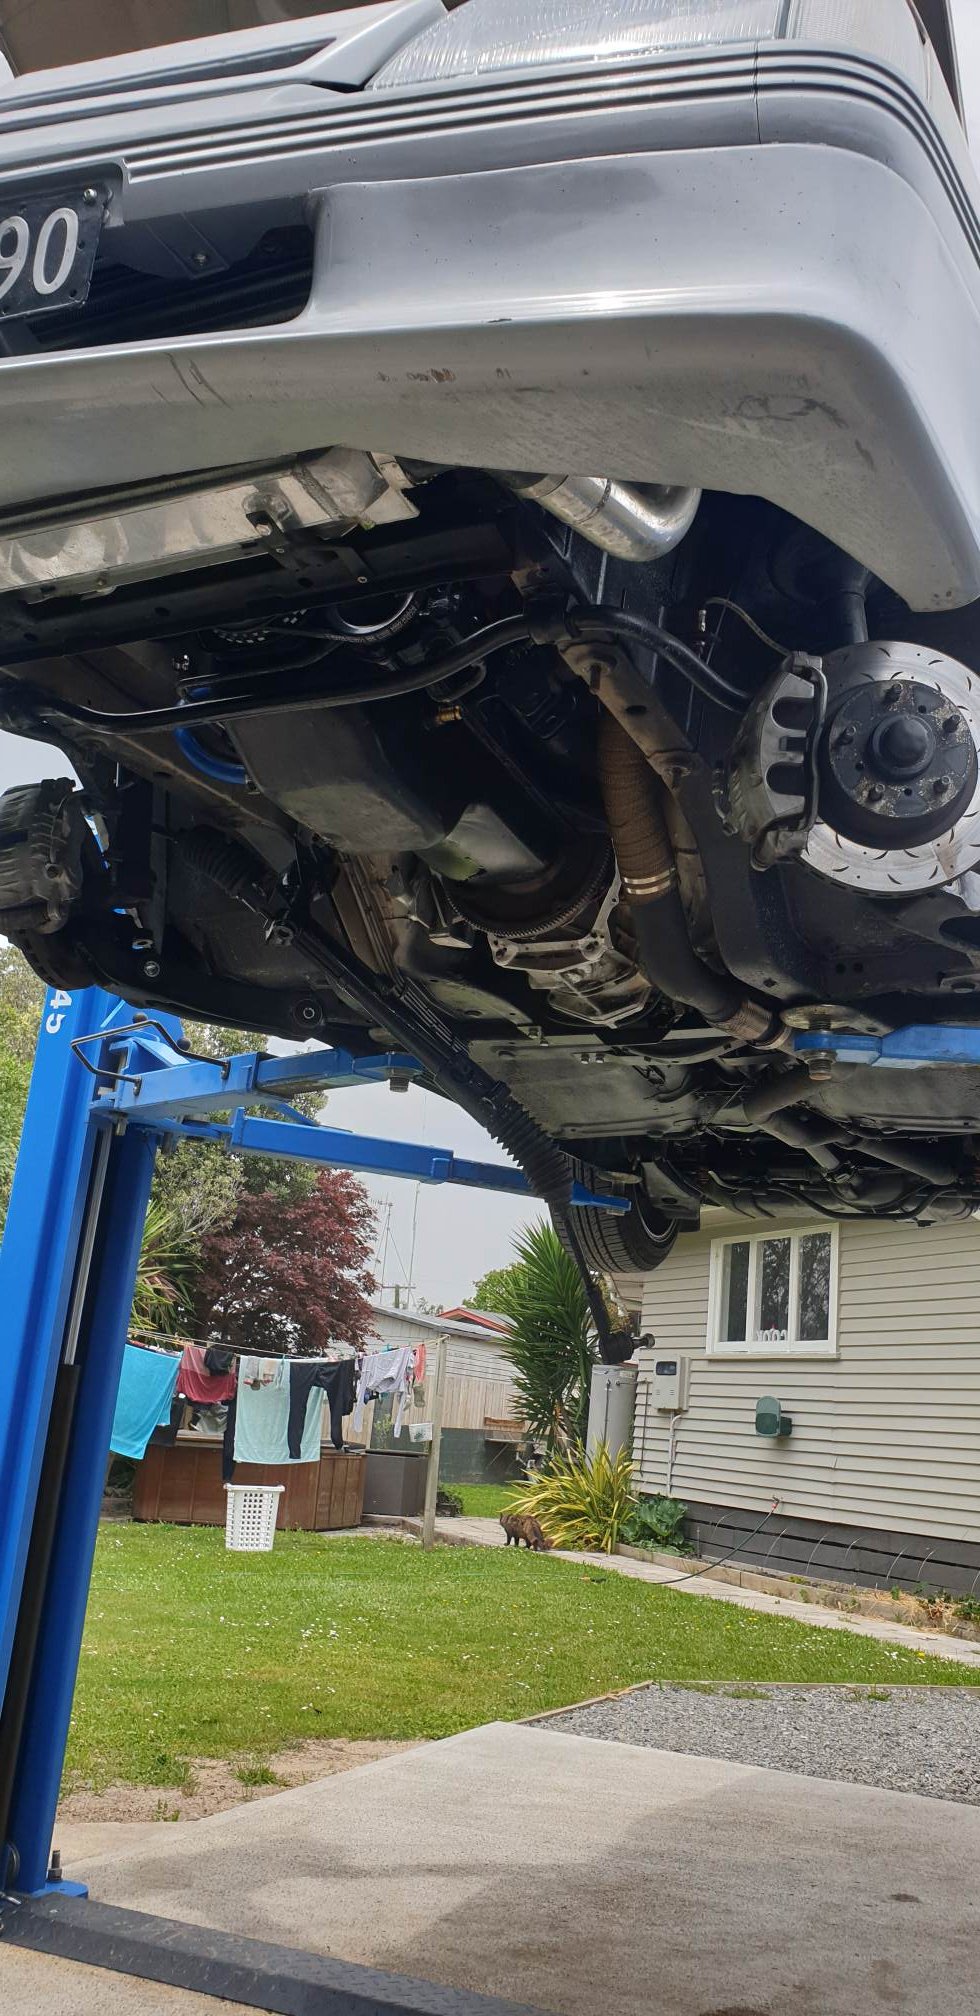
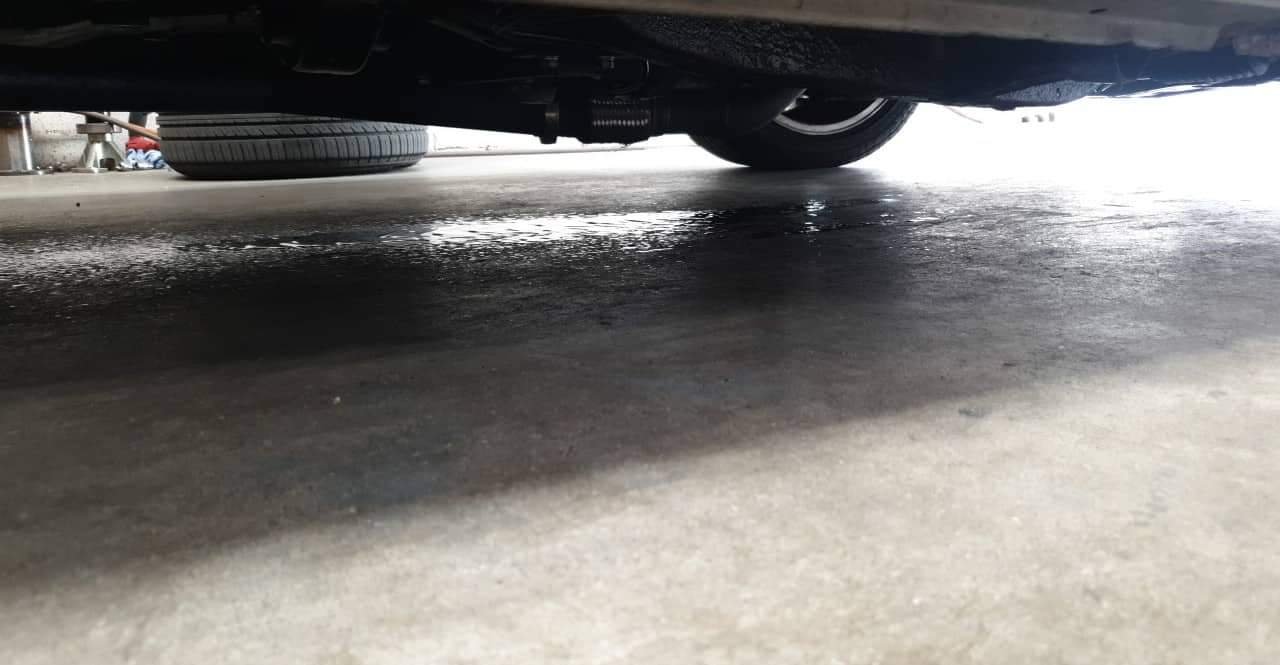
So after a few hours sleep after nightshift, got keen and stuck into pulling the sump since another new tool arrived the engine support beam made this way easier than having to pull the engine. Got the k frame out, sump off, welded in a couple breather fittings and went to town with the rtv and new gaskets. Pics tell the story better, also pic of how iv done the external 5/8" oil pickup in the sump. Fingers crossed this sorts the leaks. Bring on drag day
2 points
-
Time to get out of the big smoke and into the land of big smokes
2 points
-
Recently I've been developing the ignition system for this car. Ever since I put a brand new starter motor in, I was experiencing interference with the ignition system during cranking so I decided to finish building up the EFI distributor that started life in a 7K-E. The 7K-E distributor differs from a 4K distributor in that it has no advance mechanisms, is about 10 mm longer, has a bigger cap diameter and different rotor. Usually a 7K-E distributor cap is of the type that you clip the leads onto instead of pushing them on. I found a 22R distributor cap at repco that pretty much fits onto the 7K-E distributor, only needing the mounting holes drilled out slightly. This allowed me to use the original push on 4K leads. I also had to make up a spacer plate to put between the distributor and the engine block, this was relatively simple to just make out of some steel. The 7K-E distributor uses the same rotor as a 4A-FE and I'd assume 22R. This rotor worked perfectly with the cap. Having only 4 points for the VR pickup, the distributor wasn't exactly suited to a megasquirt based EFI system. Toyota used a system known as VAST, which basically used the distributor for base timing and would fire a spark when a signal came from the distributor unless the ECU overrides the module. I had no VAST module, so this setup wasn't exactly ideal as the megasquirt would just have to guess at the base timing (10 deg BTDC) based on the average speed of the engine. If using a basic 4 point distributor trigger setup you need to phase the distributor so the trigger comes in earlier than the most advanced timing you are going to use (ie 50 deg BTDC). Anyway, I did try to use the distributor with the factory 4 point setup (this was before I changed to the new starter), but I had problems with getting the engine to start. If the engine started, it worked somewhat well but the timing as no very precise. It was pretty clear that more data points (teeth) were needed. After that failed attempt I changed back to fuel only EFI and just kept using the car. Then the original starter motor stopped, the solenoid contacts were a bit burnt. I rebuilt the solenoid but I didn't trust it to work again so I bought a new aftermarket starter. The new starter was interfering with the ignition during cranking, causing tach spikes. The starter would also crank at a randomly selected speed every time I turned the key. This was making it somewhat annoying to start the car as it wouldn't always start on the first try. So I decided to go back to ECU controlled ignition and see if I could get it to work properly. I was considering using the flywheel of the engine as a VR trigger wheel, but I think they have 105 teeth, which isn't divisible by 4 or 2 so it wouldn't have worked with the megasquirt. My Barry lathe came complete with a broken quick change gearbox, and it just so happened to have a 20 tooth gear with an outside diameter of 35 mm - perfect for the distributor. I clocked up the distributor shaft in the lathe and turned the toothed portion down to 19 mm so the gear would fit over it. I welded the gear on, removed some of the thickness and knocked a tooth off to make it a 20-1 wheel. This first attempt actually worked quite well, the car ran great and the timing was accurate but I still had issues getting sync while cranking. I figured it was due to the small diameter of 35 mm not giving enough tip velocity at cranking speed to get a good signal from the VR pickup and decided to redesign the system. I used this setup on the dyno, and tuned in a good ignition map. The next attempt was to make a trigger wheel that went over and around the VR sensor, almost doubling the diameter of the wheel (so almost double the signal). The VR sensor needed to be modified slightly to sense from the outside. This modification consisted of welding a bit of gauge plate to the existing sensor so it would stick out more and removing some material from the VR sensor housing. I epoxied the sensor together after, to reduce any risks of bits falling out over time. I made a 30-1 wheel for this, but as soon as I put the details into TunerStudio, the ECU said "no". I somehow missed the fact that 30 isn't divisible by 4 and the ECU wasn't having a bar of it. The hole in the wheel is mainly to allow for screw driver access for assembling/disassembling the distributor, but it should also help (or make worse) the balancing from the missing tooth. In a bit of a huff, I ripped it all out and went back to fuel only mode for a few days before I built up the motivation to cut all of the pretty teeth off the wheel and try again. I used my Barry lathe to remove all of the teeth and then used a mill with a DRO to put 23 holes on a 61 mm PCD (set to 24 equispaced holes). These holes were 2.4 mm. I then cut up a 2.4 mm diameter mild steel TIG rod to use as teeth and welded them all in. After making the wheel, it was a simple case of heating it up, slipping it over the distributor shaft and hoping it would stay put - it did! Then I faced off the welded surface and reassembled the distributor. At this point, the new starter motor started to smoke and quite often not even start turning. I put the original starter back in the car and it worked perfectly (turning twice as fast with half the power). The car started up pretty much first try. After adjusting the distributor phasing in TunerStudio it now works perfectly and starts first time, every time. Looking back, the 20-1 setup probably would have worked fine using the original starter motor but this new wheel should be slightly more robust to signal noise. The car just runs generally slightly better all around. It now uses about 15% less fuel at idle, about 3.5 L/100 km at 50 km/h and 5 L/100 km at 85 km/h so I can't really complain. I also bodged up a cover for the J121 igniter module, so it looks a little more factory. Hopefully I will get around to making it a little more permanent one day but this will probably last 20 years. So basically I achieved my goal of having an OEM looking ignition setup that uses the ECU to control the timing.2 points
-
The 515,000km Maxima reluctantly dragged this back home yesterday but it was good until it got to my driveway & remembered it was a FWD dragging lots of weight up a gravel driveway at 930pm
1 point
-
You're just jelous1 point
-
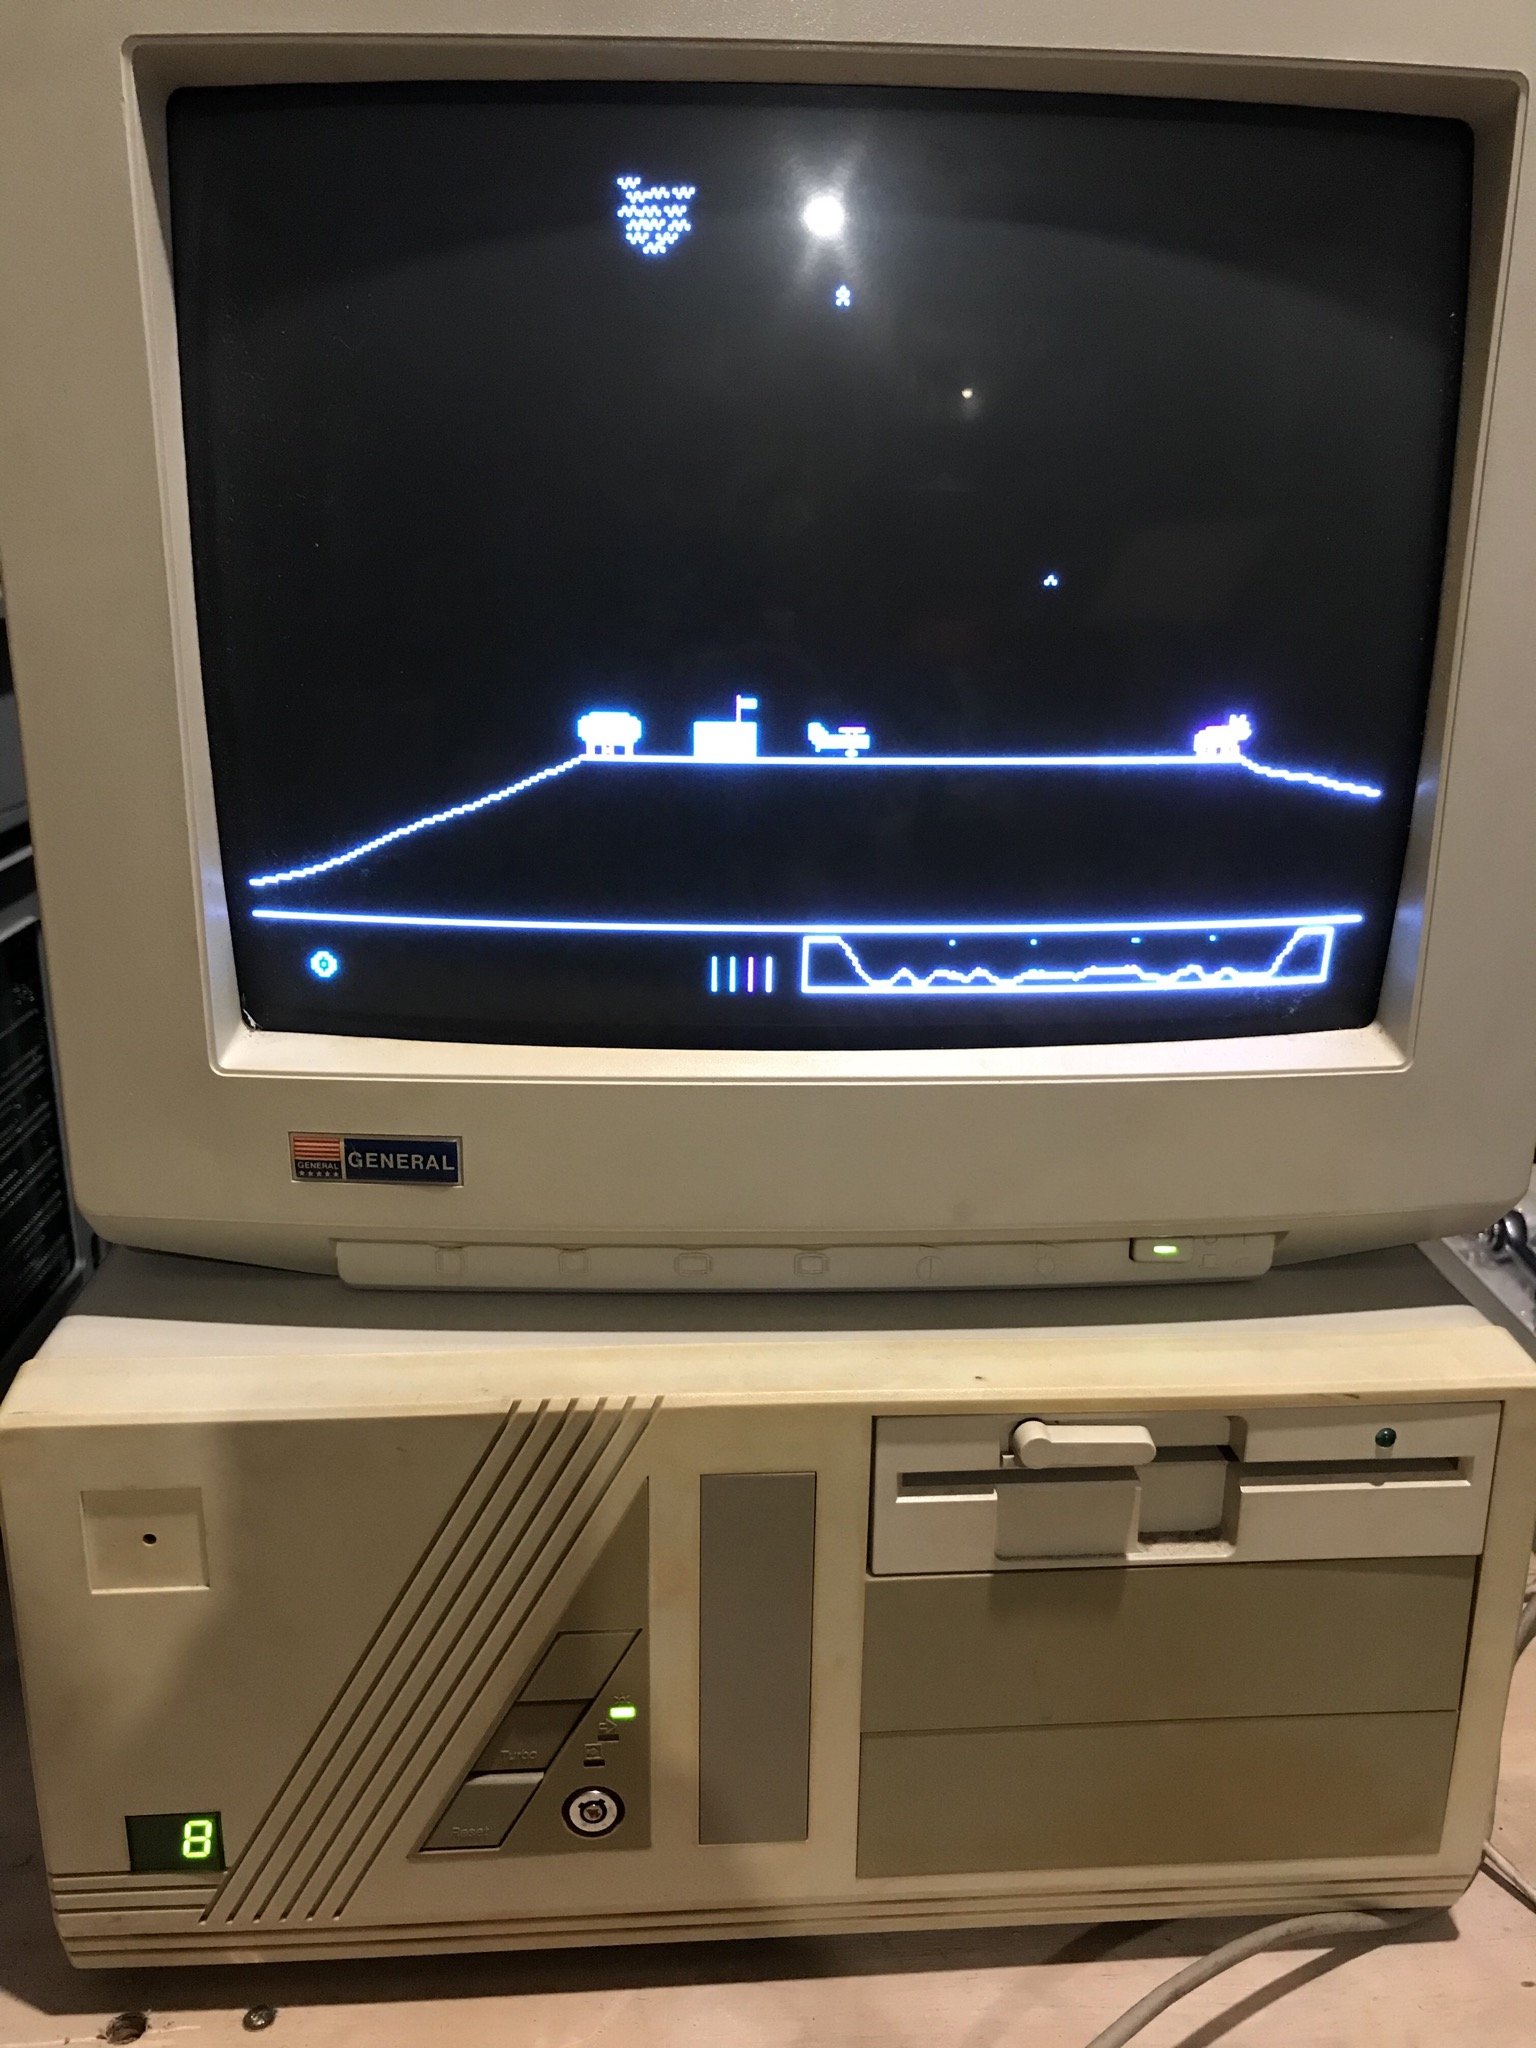
This thread is great, such fond memories of the computer my grandparents bought for us kids in 1992 - IBM 486 33mhz, 4mb ram, 128mb hdd, soundblaster, win 3.1, dot matrix printer, a single speed CD ROM drive that you had to put the disk in a caddy, then into the PC. Cost $7600, and more importantly ran wing commander II. Still have a dot matrix printer at work, its screaming always hits me in the feels. The (second hand) cyrix 266mhz that replaced it sometime in the 2000's seemed like such a huge jump forward in technology1 point
-
1 point
-
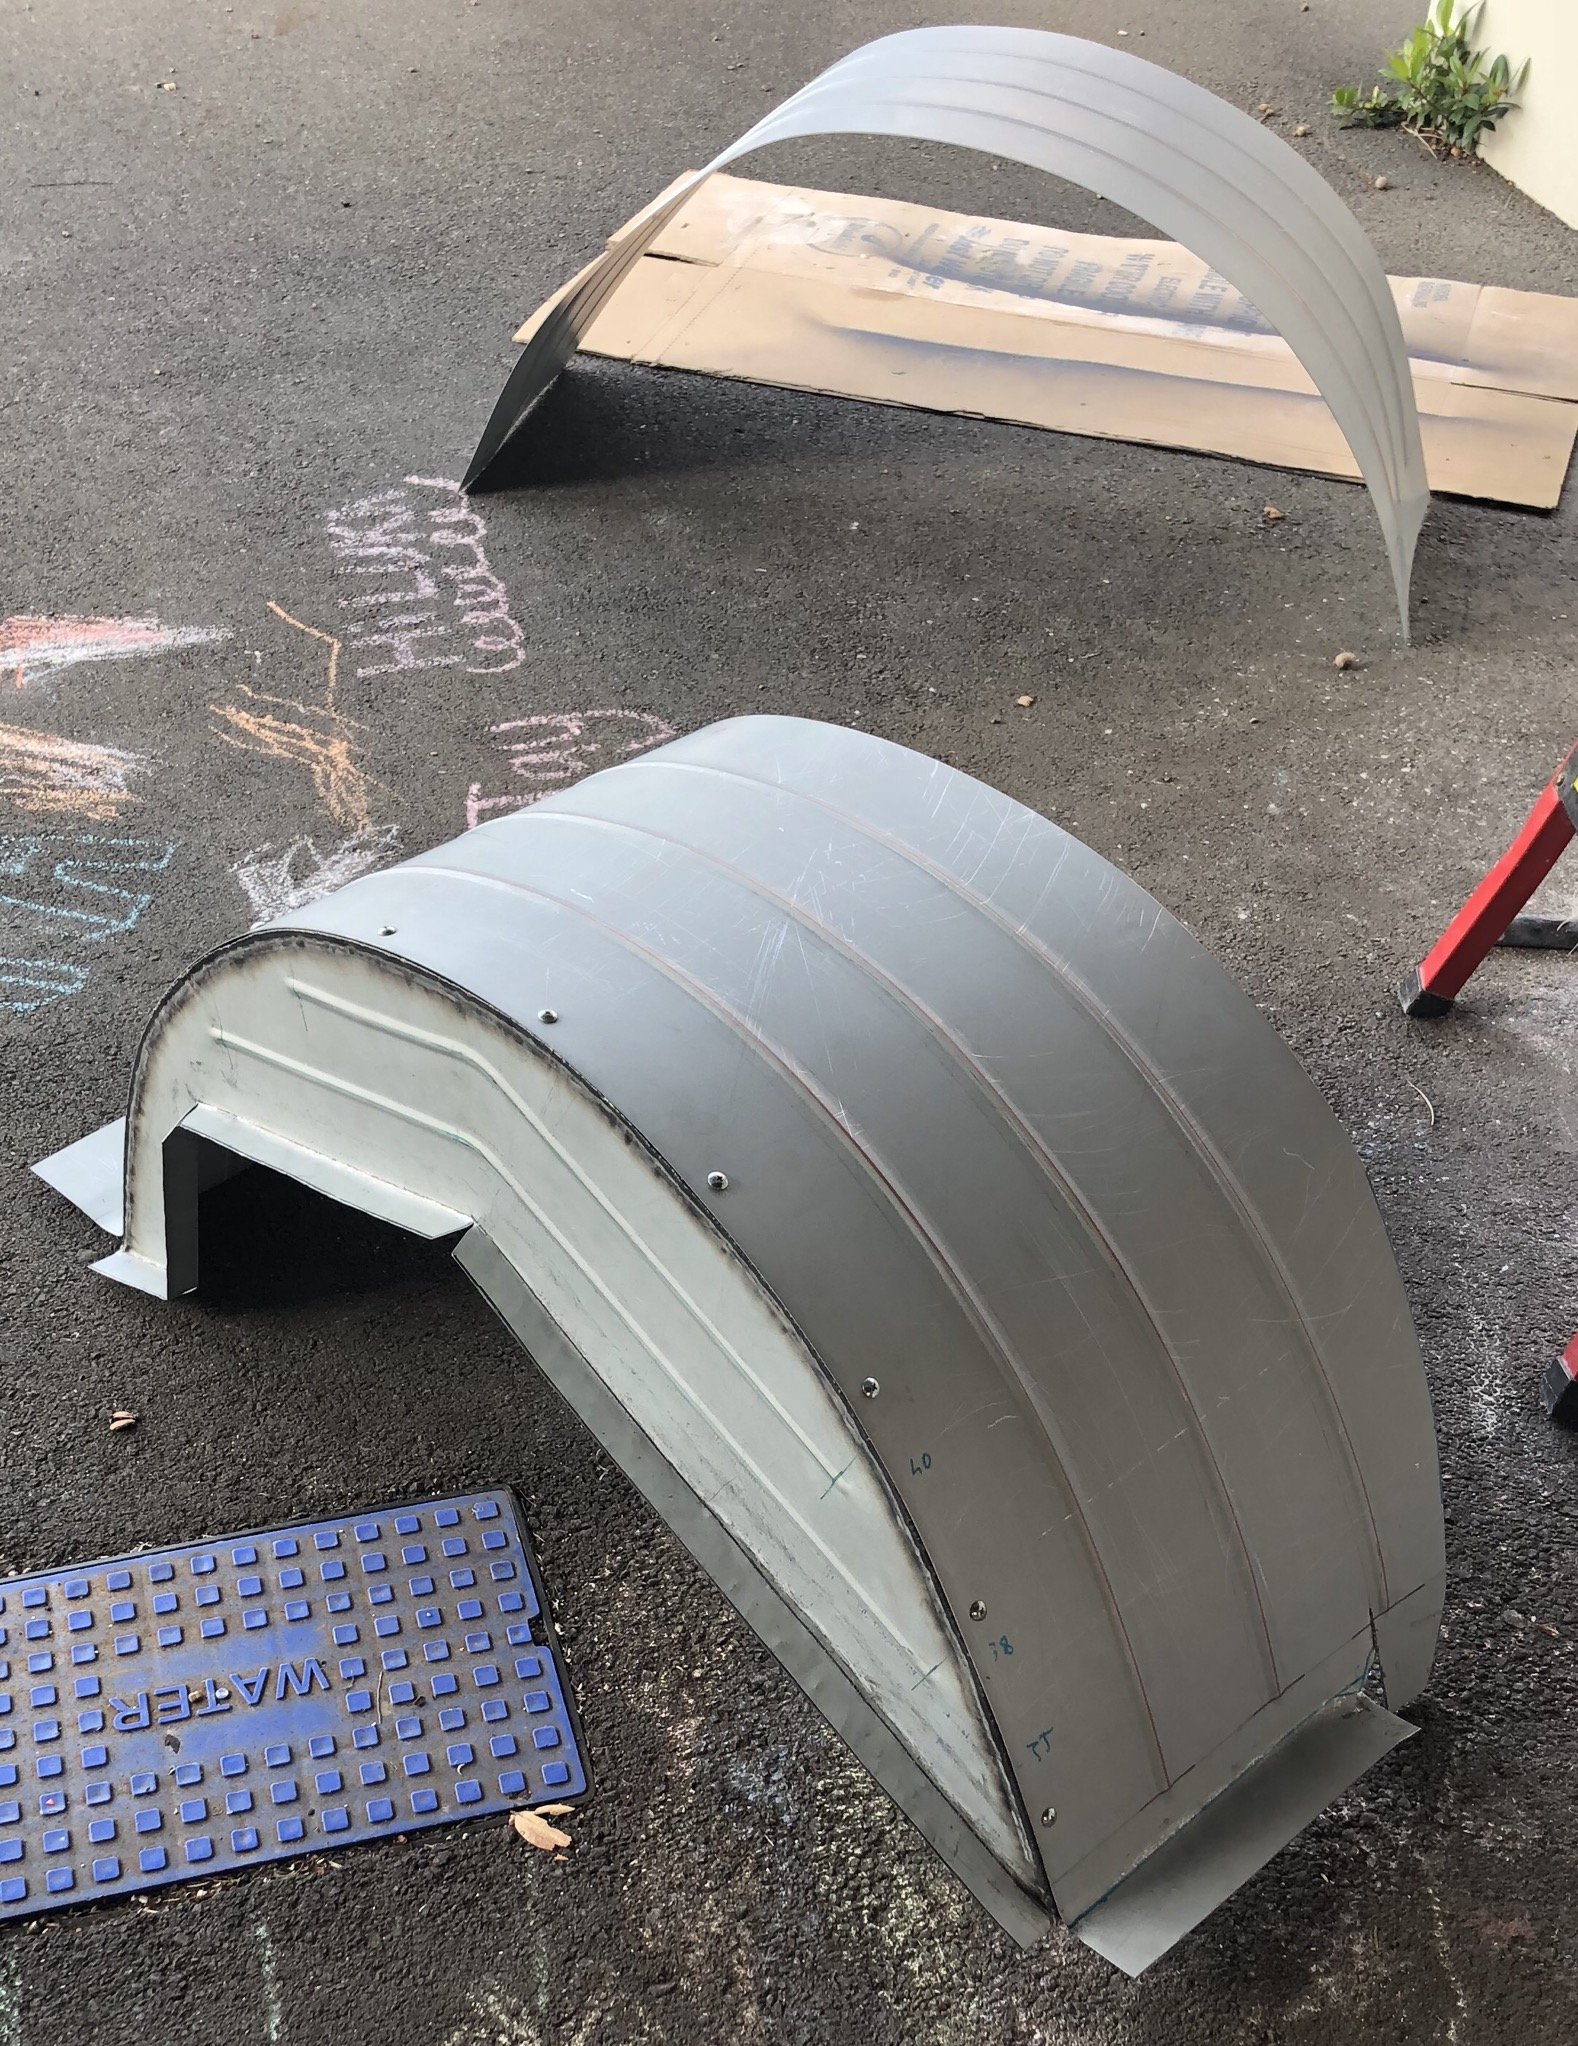
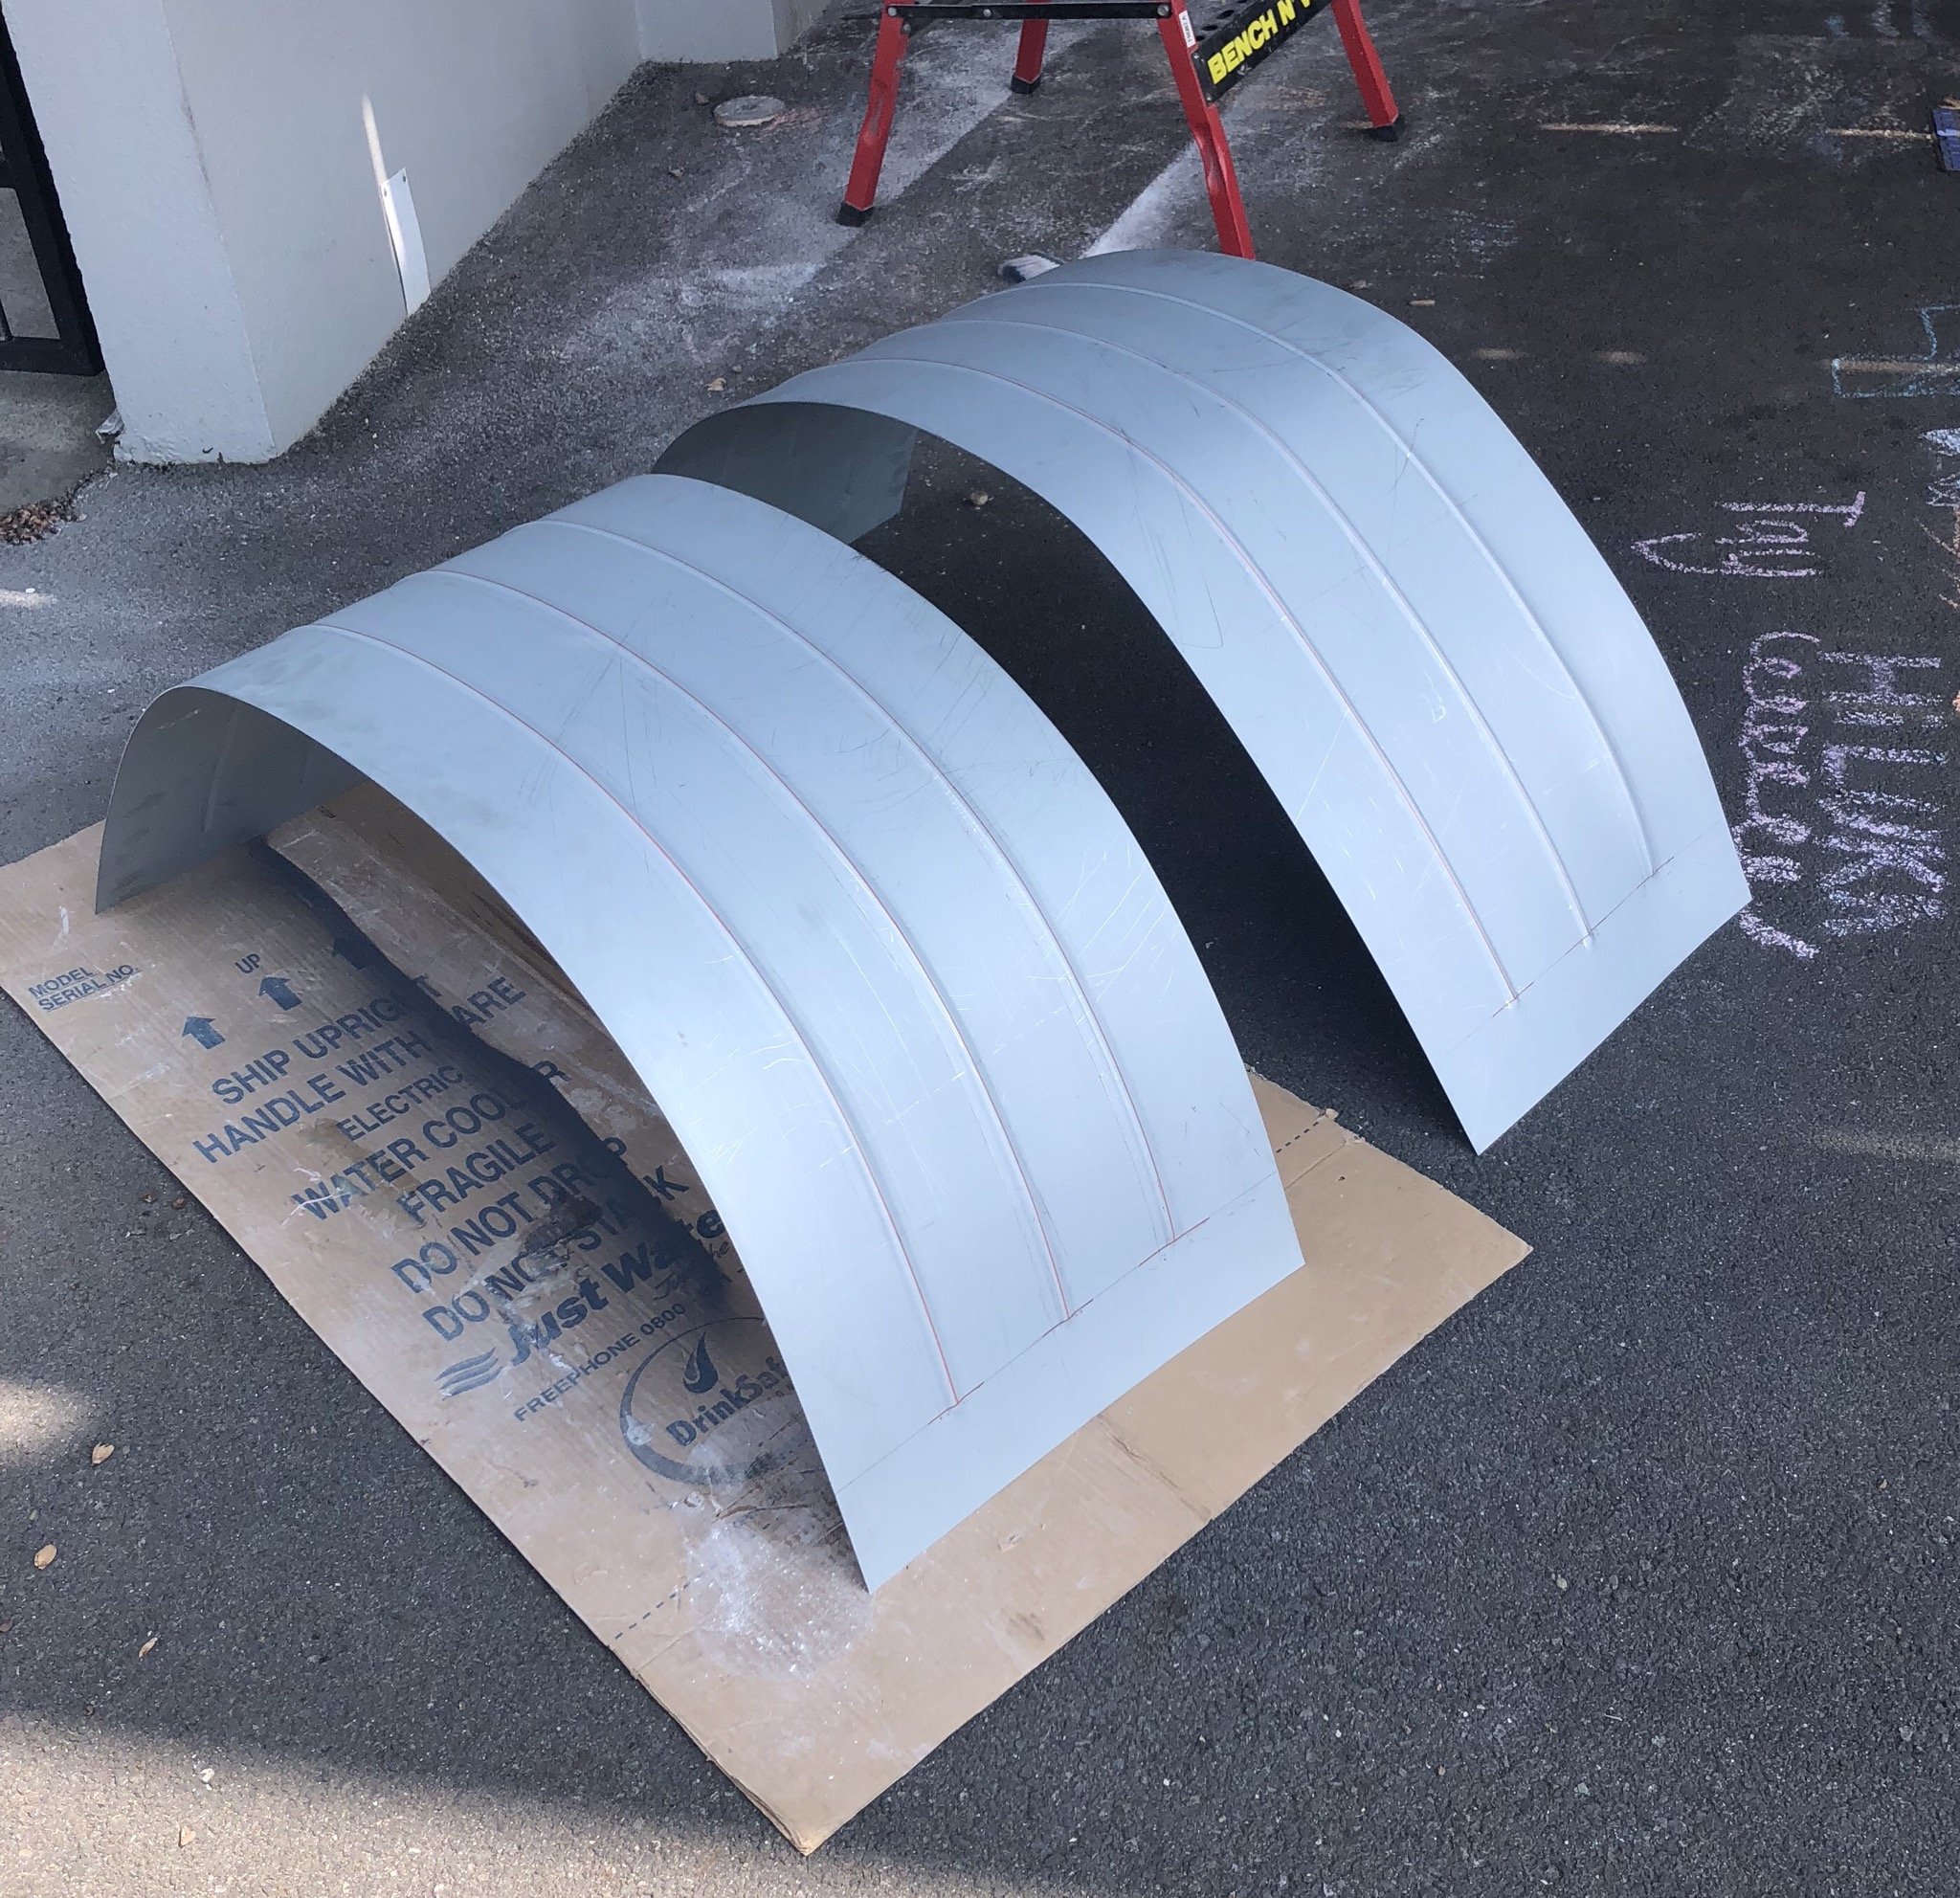
Main part of the tubs are rolled and made up the first tub.
1 point
-
thanks man. its 2mm sheet that i used. i welded both the inside and the outside so i could make a nice rad on the corner.1 point
-
Cheers guys, I'm not sure about everyone else but I think our room is going to have a quiet night in.1 point
-
Gisborne has turned it up this afternoon. Sunday (tomorrow) morning if everyone wants to meet at Caltex Makaraka. Few people have a very long day tomorrow let's aim to LEAVE at 8 am. Caltex - Makaraka 105 Main Road, Makaraka, Gisborne 4010 06-867 3449 https://maps.app.goo.gl/Z35gTNVmFM2jP1zd91 point
-
I just can't help but lol at your name and hope it's due to orange pubes.1 point
-
386 turbo button applied down to 8mhz and playing Sopwith 2 which I don’t think I ever had. Seems like they added a couple of hazards and that’s it.
1 point
-
My location for the 3% of the drive where we have service See my real-time location on Maps: https://maps.app.goo.gl/htLr4WQab5MdkH5661 point
-
in the last couple of days ive been doing a bit more. i dont actually know if im supposed to be or if its doing any damage but everything feels great and my back is super good so fuck it im going to play cars. so, last part of the fuel supply puzzle was making clamps for the fuel rail. today i did that. only made two because the belt on my linisher shit itself and i had to go get another one. i took some photos of how i did that. 2019-11-27_07-48-54 by sheepers, on Flickr 2019-11-27_07-48-46 by sheepers, on Flickr 2019-11-27_07-48-38 by sheepers, on Flickr 2019-11-27_07-48-30 by sheepers, on Flickr 2019-11-27_07-48-20 by sheepers, on Flickr 2019-11-27_07-48-12 by sheepers, on Flickr1 point
-
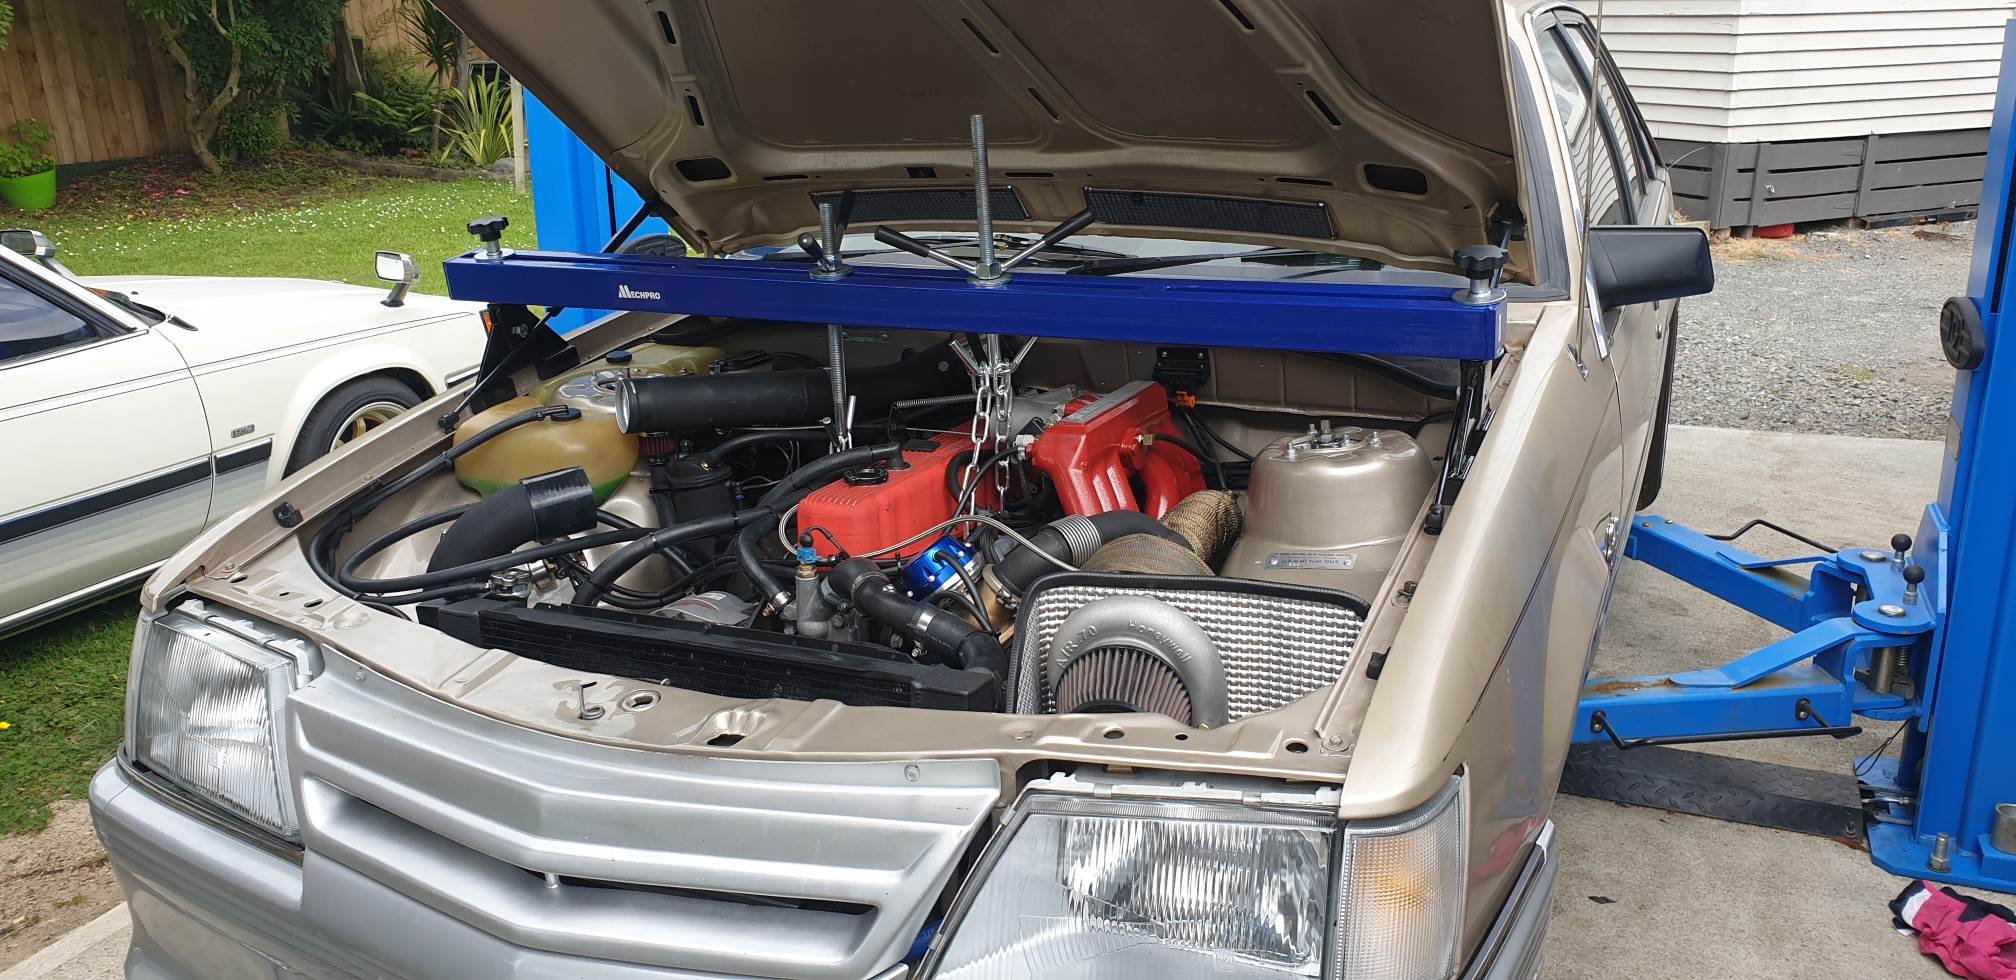
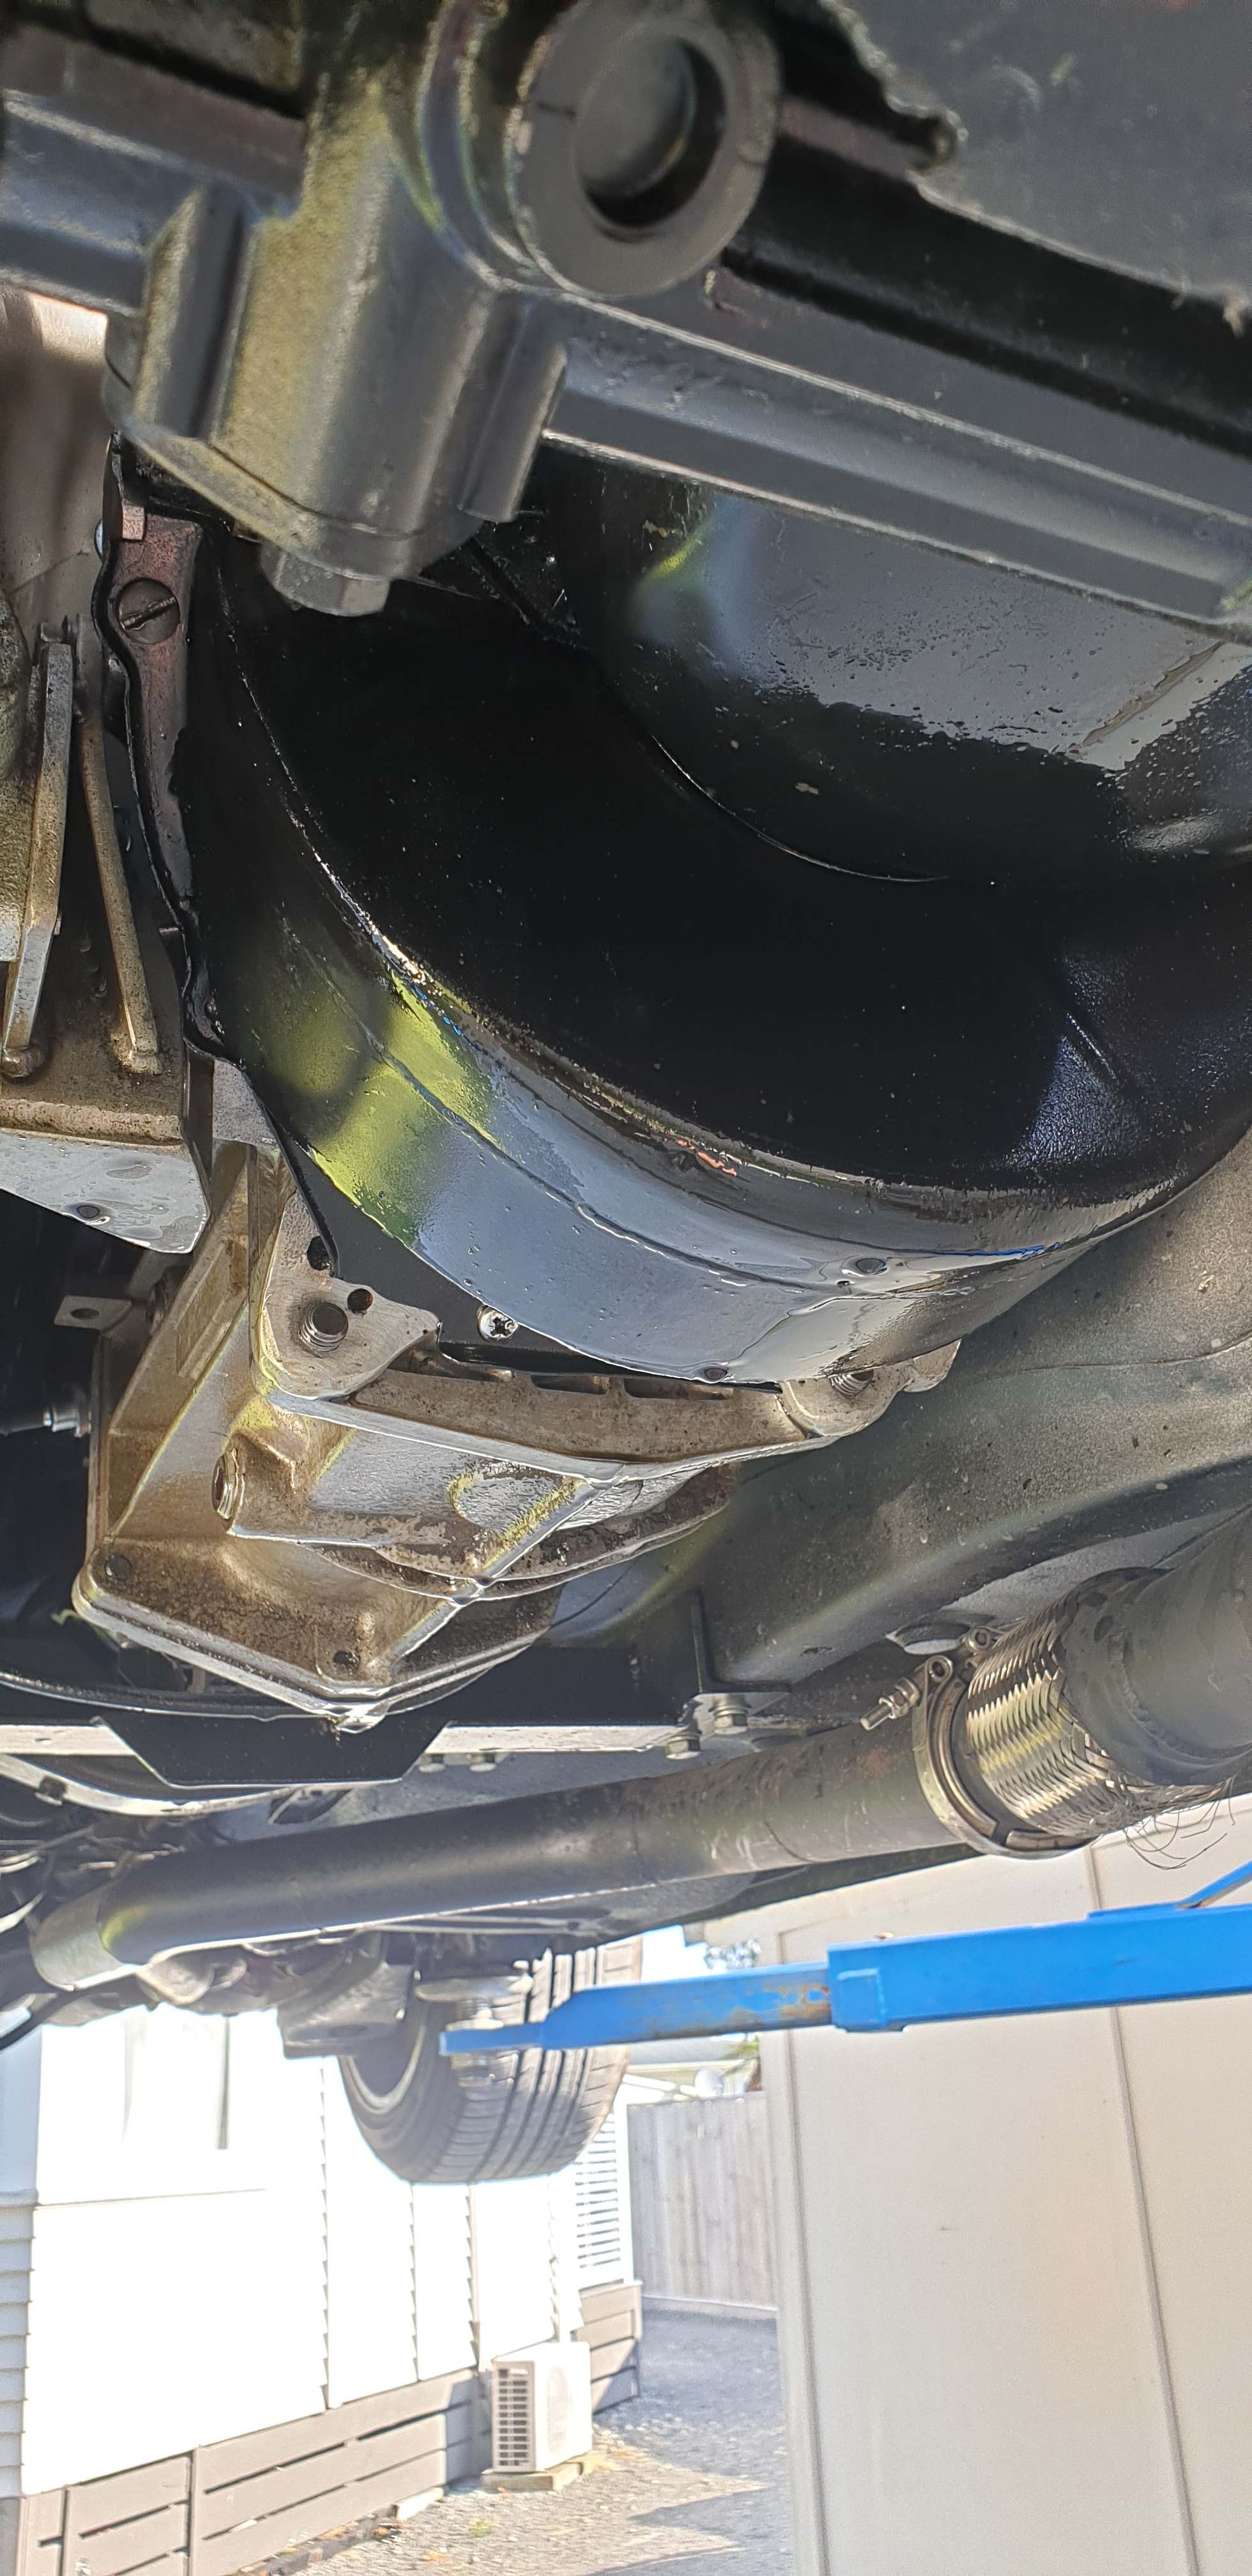
Well back on the dyno at protune yesterday, made some good power (175rwkw 445nm at 11psi) but found an oil leak, seems like this car just dont like dynos haha, at least i was only cleaning up an oil puddle on the dyno and not engine pieces Got home and checked it out, pulled the clutch dust cover...bonus its not the rear main rope seal. Waiting on an engine support bar to arrive and il drop the sump clean it up Gonna weld in a couple of sump breathers and go to town with the rtv Oh and all before drag day...
1 point
-
This would have been in '85. It was from Oakura, white with 2 gears available on the column shift. Rust holes behind the back doors you could fit a hand into. We drove it back to Hawera around the mountain to avoid the popo with only 2nd and 4th gears. I heard the engine blew up shortly after I sold it. That was a 1600 crossflow that i put in with a floor change box, I didnt have many tools so I cut the hole for the gearstick with a cold chisel and a big hammer. The paint was terrible, I put more than 4 litres of bog into it along with some roofing iron to support things. I learnt how much I don't like painting things when the hours of what you thought were spectacular prep ended up with a sweet grapefruit finish. Hopefully I have learnt some things since then.1 point
-
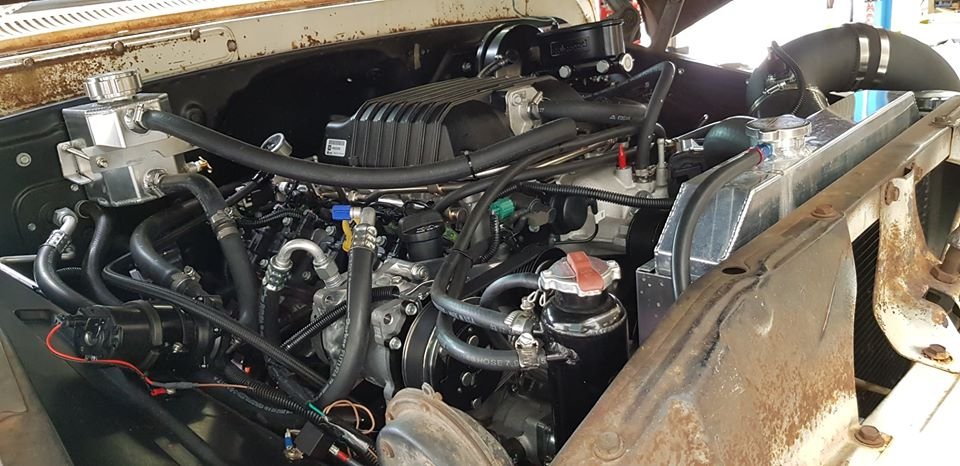
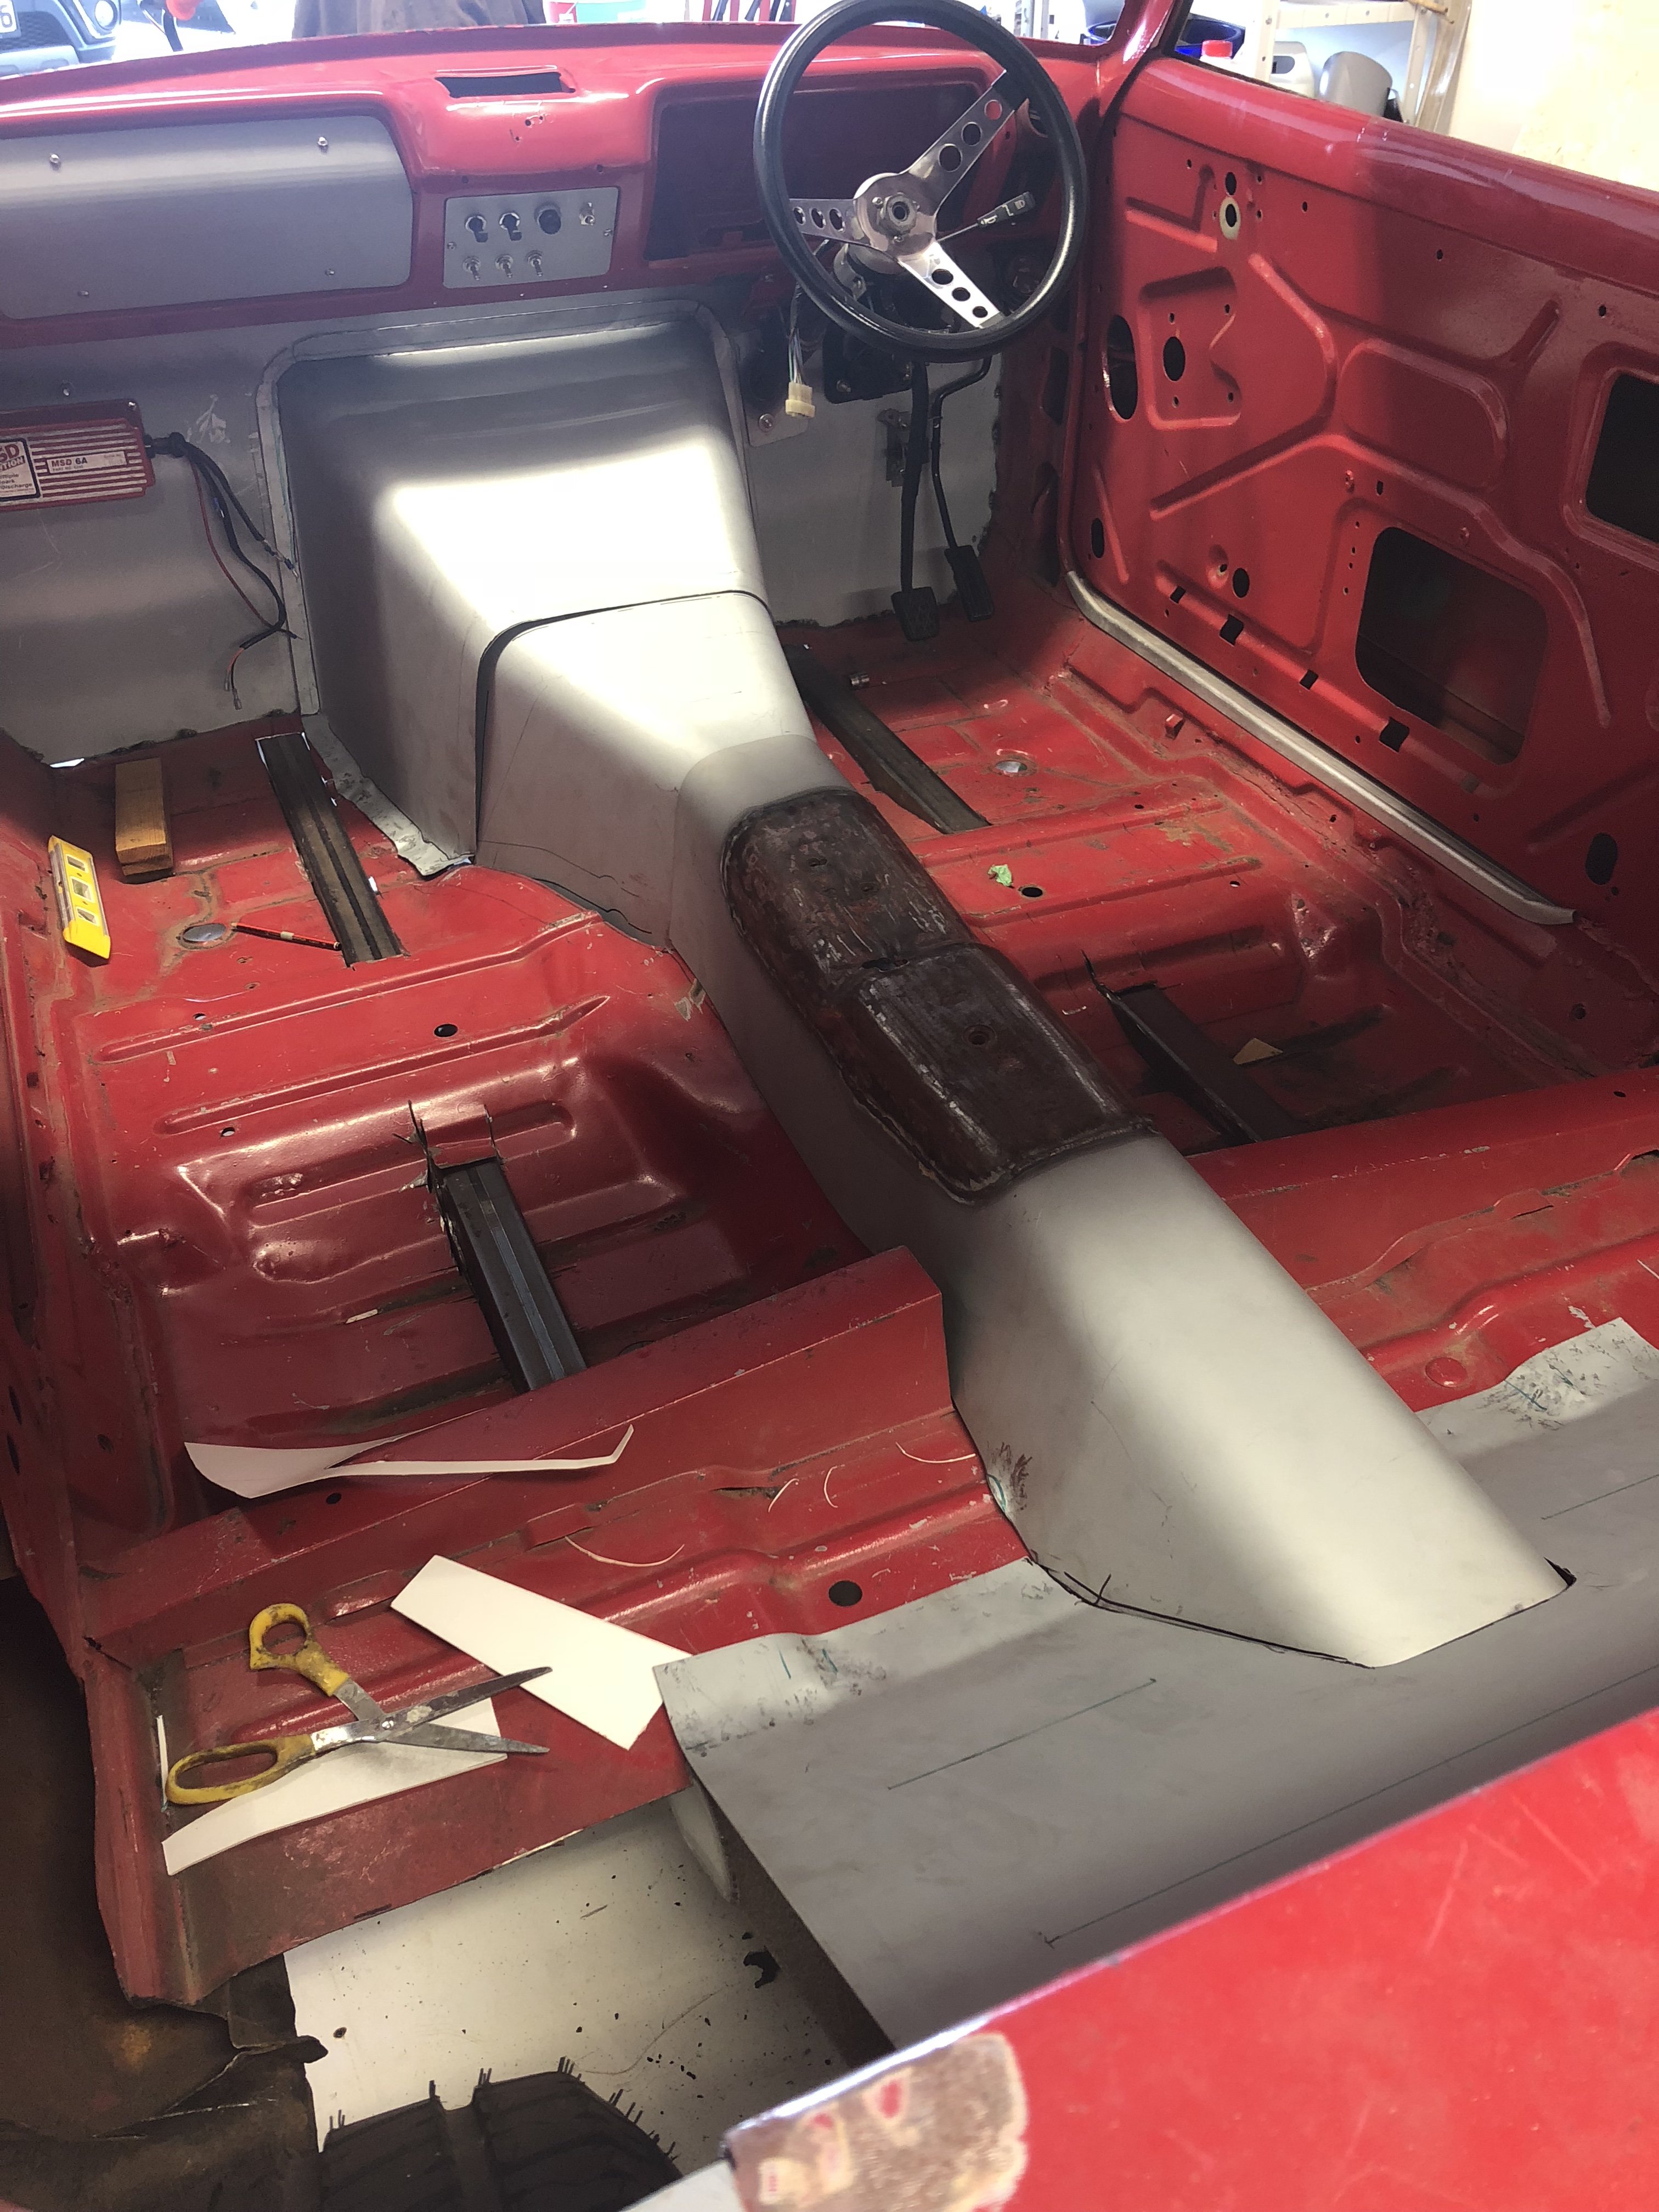
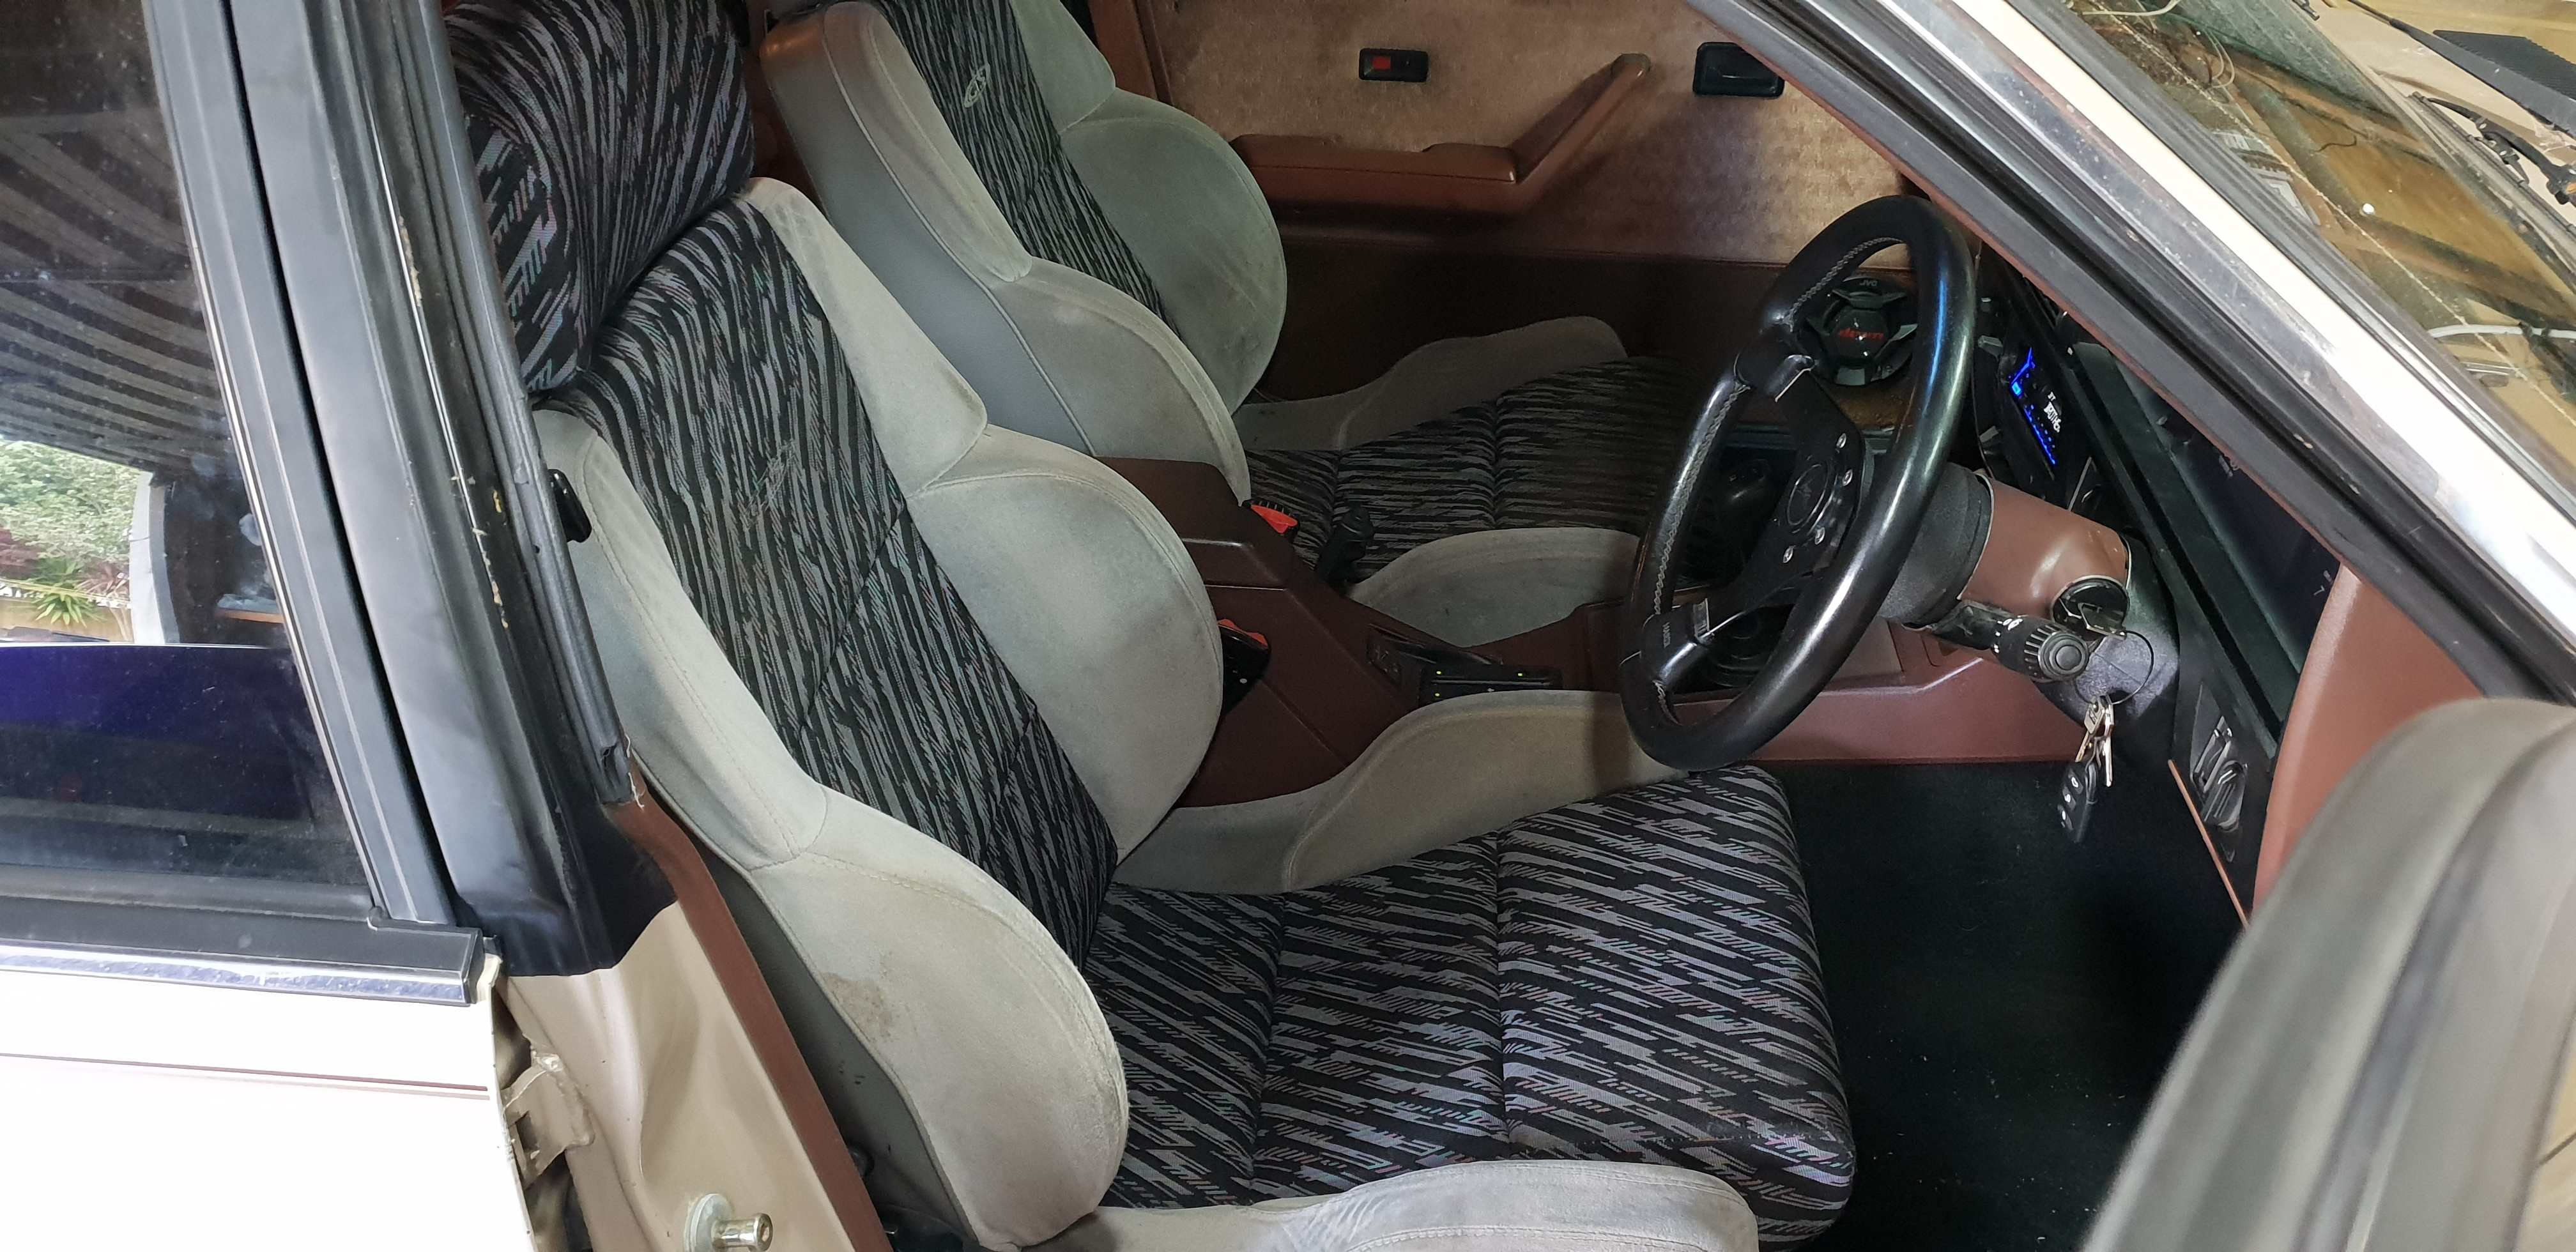
So I discovered that the actual gauges in the cluster are driven off 12v, not 24v. But not the lights or voltage gauge. This is potentially quite disappointing as I may have blown those gauges by running them on 24v already. We will see when shit is running, hopefully soon. On this basis I rewired the feed to the cluster which wasn't a big deal. While I was there I installed the EGT gauge and tidied up the wiring to this and the digital clock I bought and mounted. I know the EGT gauge is not sitting correctly, but this is so the relevant portion is visible where I will be sitting. I am a dick like that, the stereo in the townace is upside down so the control knob is closer to me lol. As the deck is now on hopefully permanently I checked all the wiring that I had done still made the correct things shine and blink etc, this was rather pleasingly the case. An air pump also arrived so I finished off the airbag install. The holes in the bottom just happened to be the right size for some M5 rivnuts. Every one of you should own one of these tools, fuck they are great. It has a relief valve so the bags can't get over 30psi and a gauge to check where it is at. This is driven off yet another DC convertor in the back by the batteries, which I will probably use with a series of relays to drop the trailer connection wiring back down to 12v so I don't blow up trailer wiring in the future. This has a conventional air fitting so I can also use it to pump up the tyres etc The body has to come off at least one more time so I can finish off the intake piping and sort a couple of other issues, but it is getting excitingly close to a first run...1 point
-
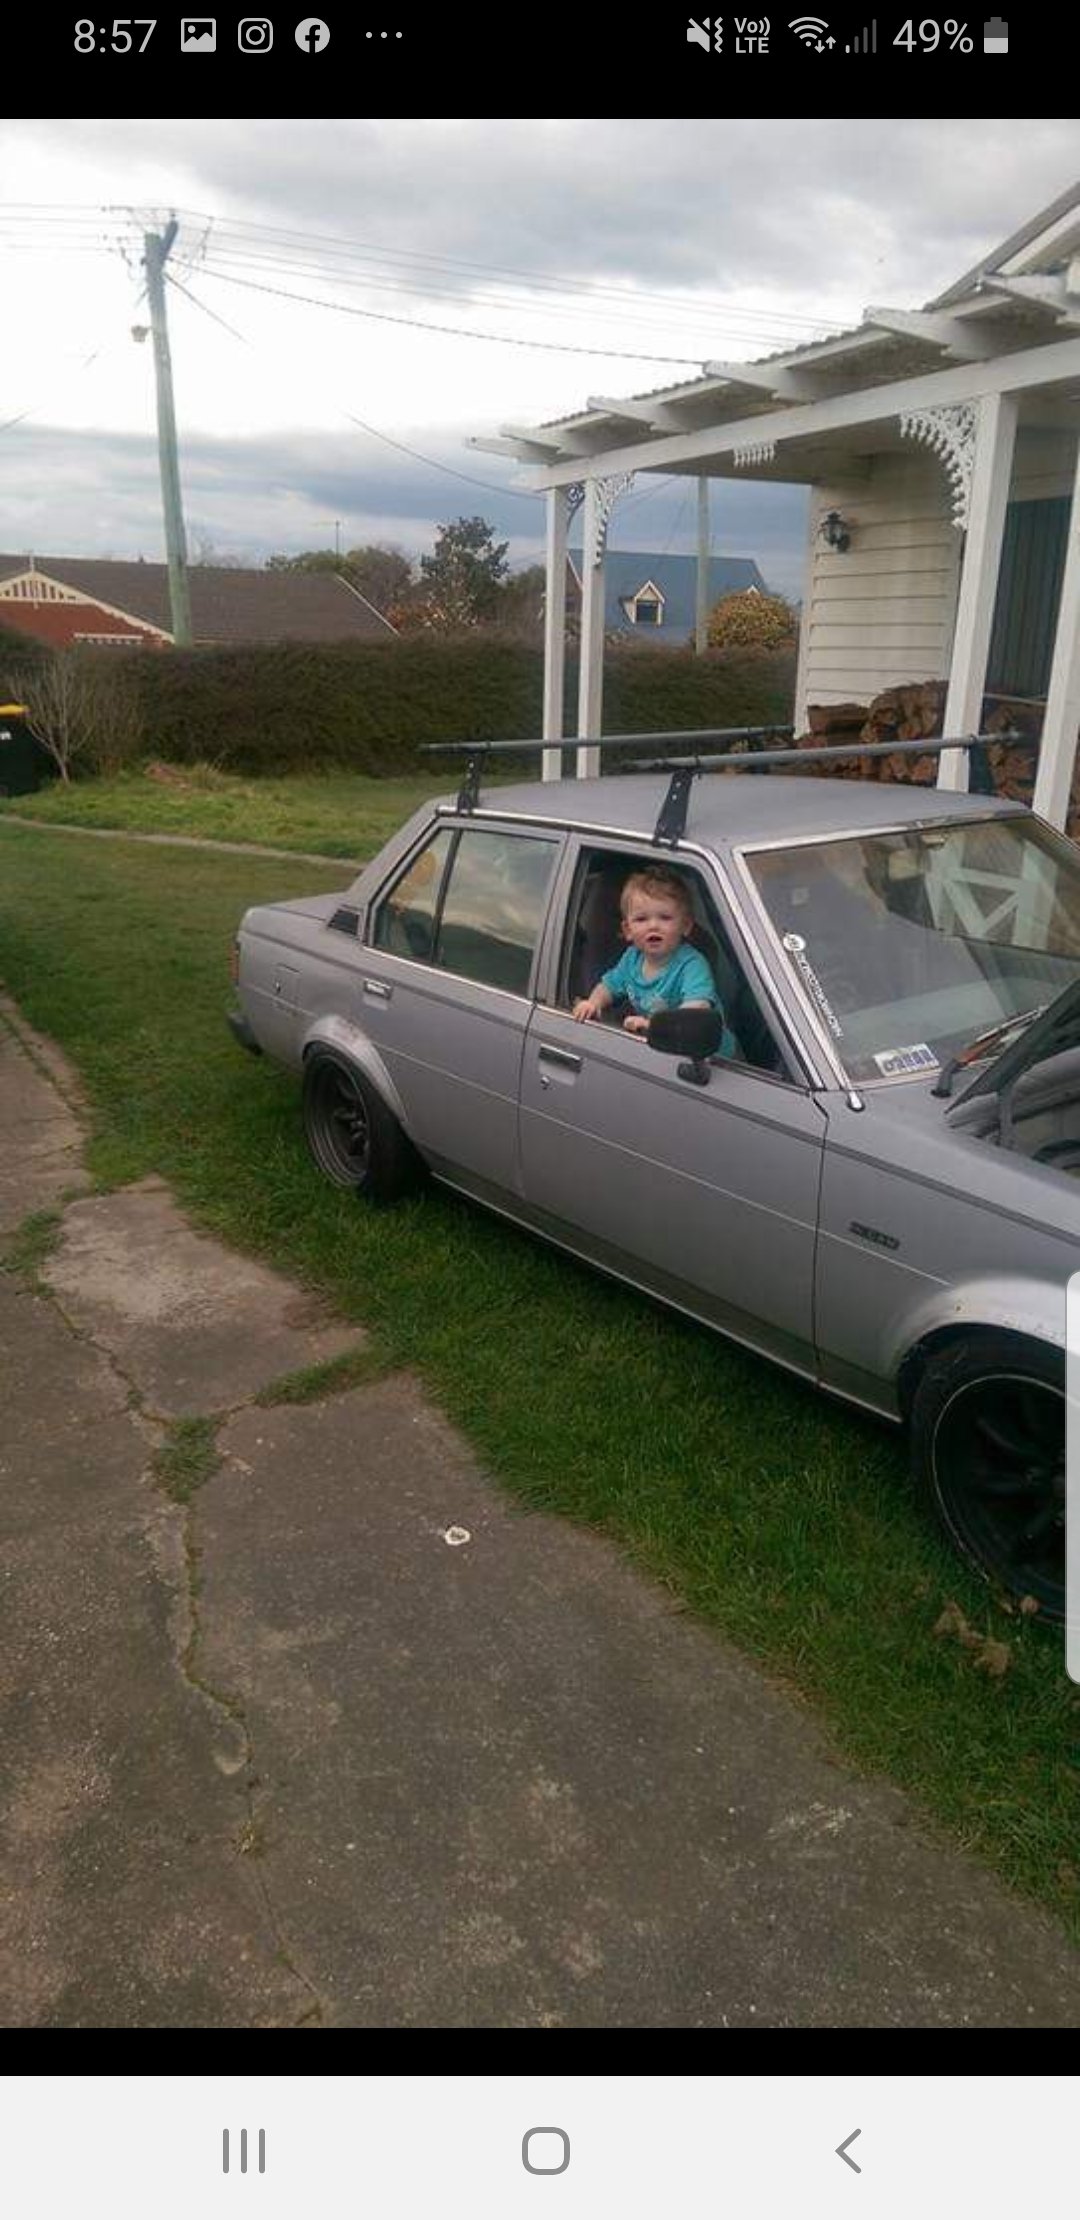
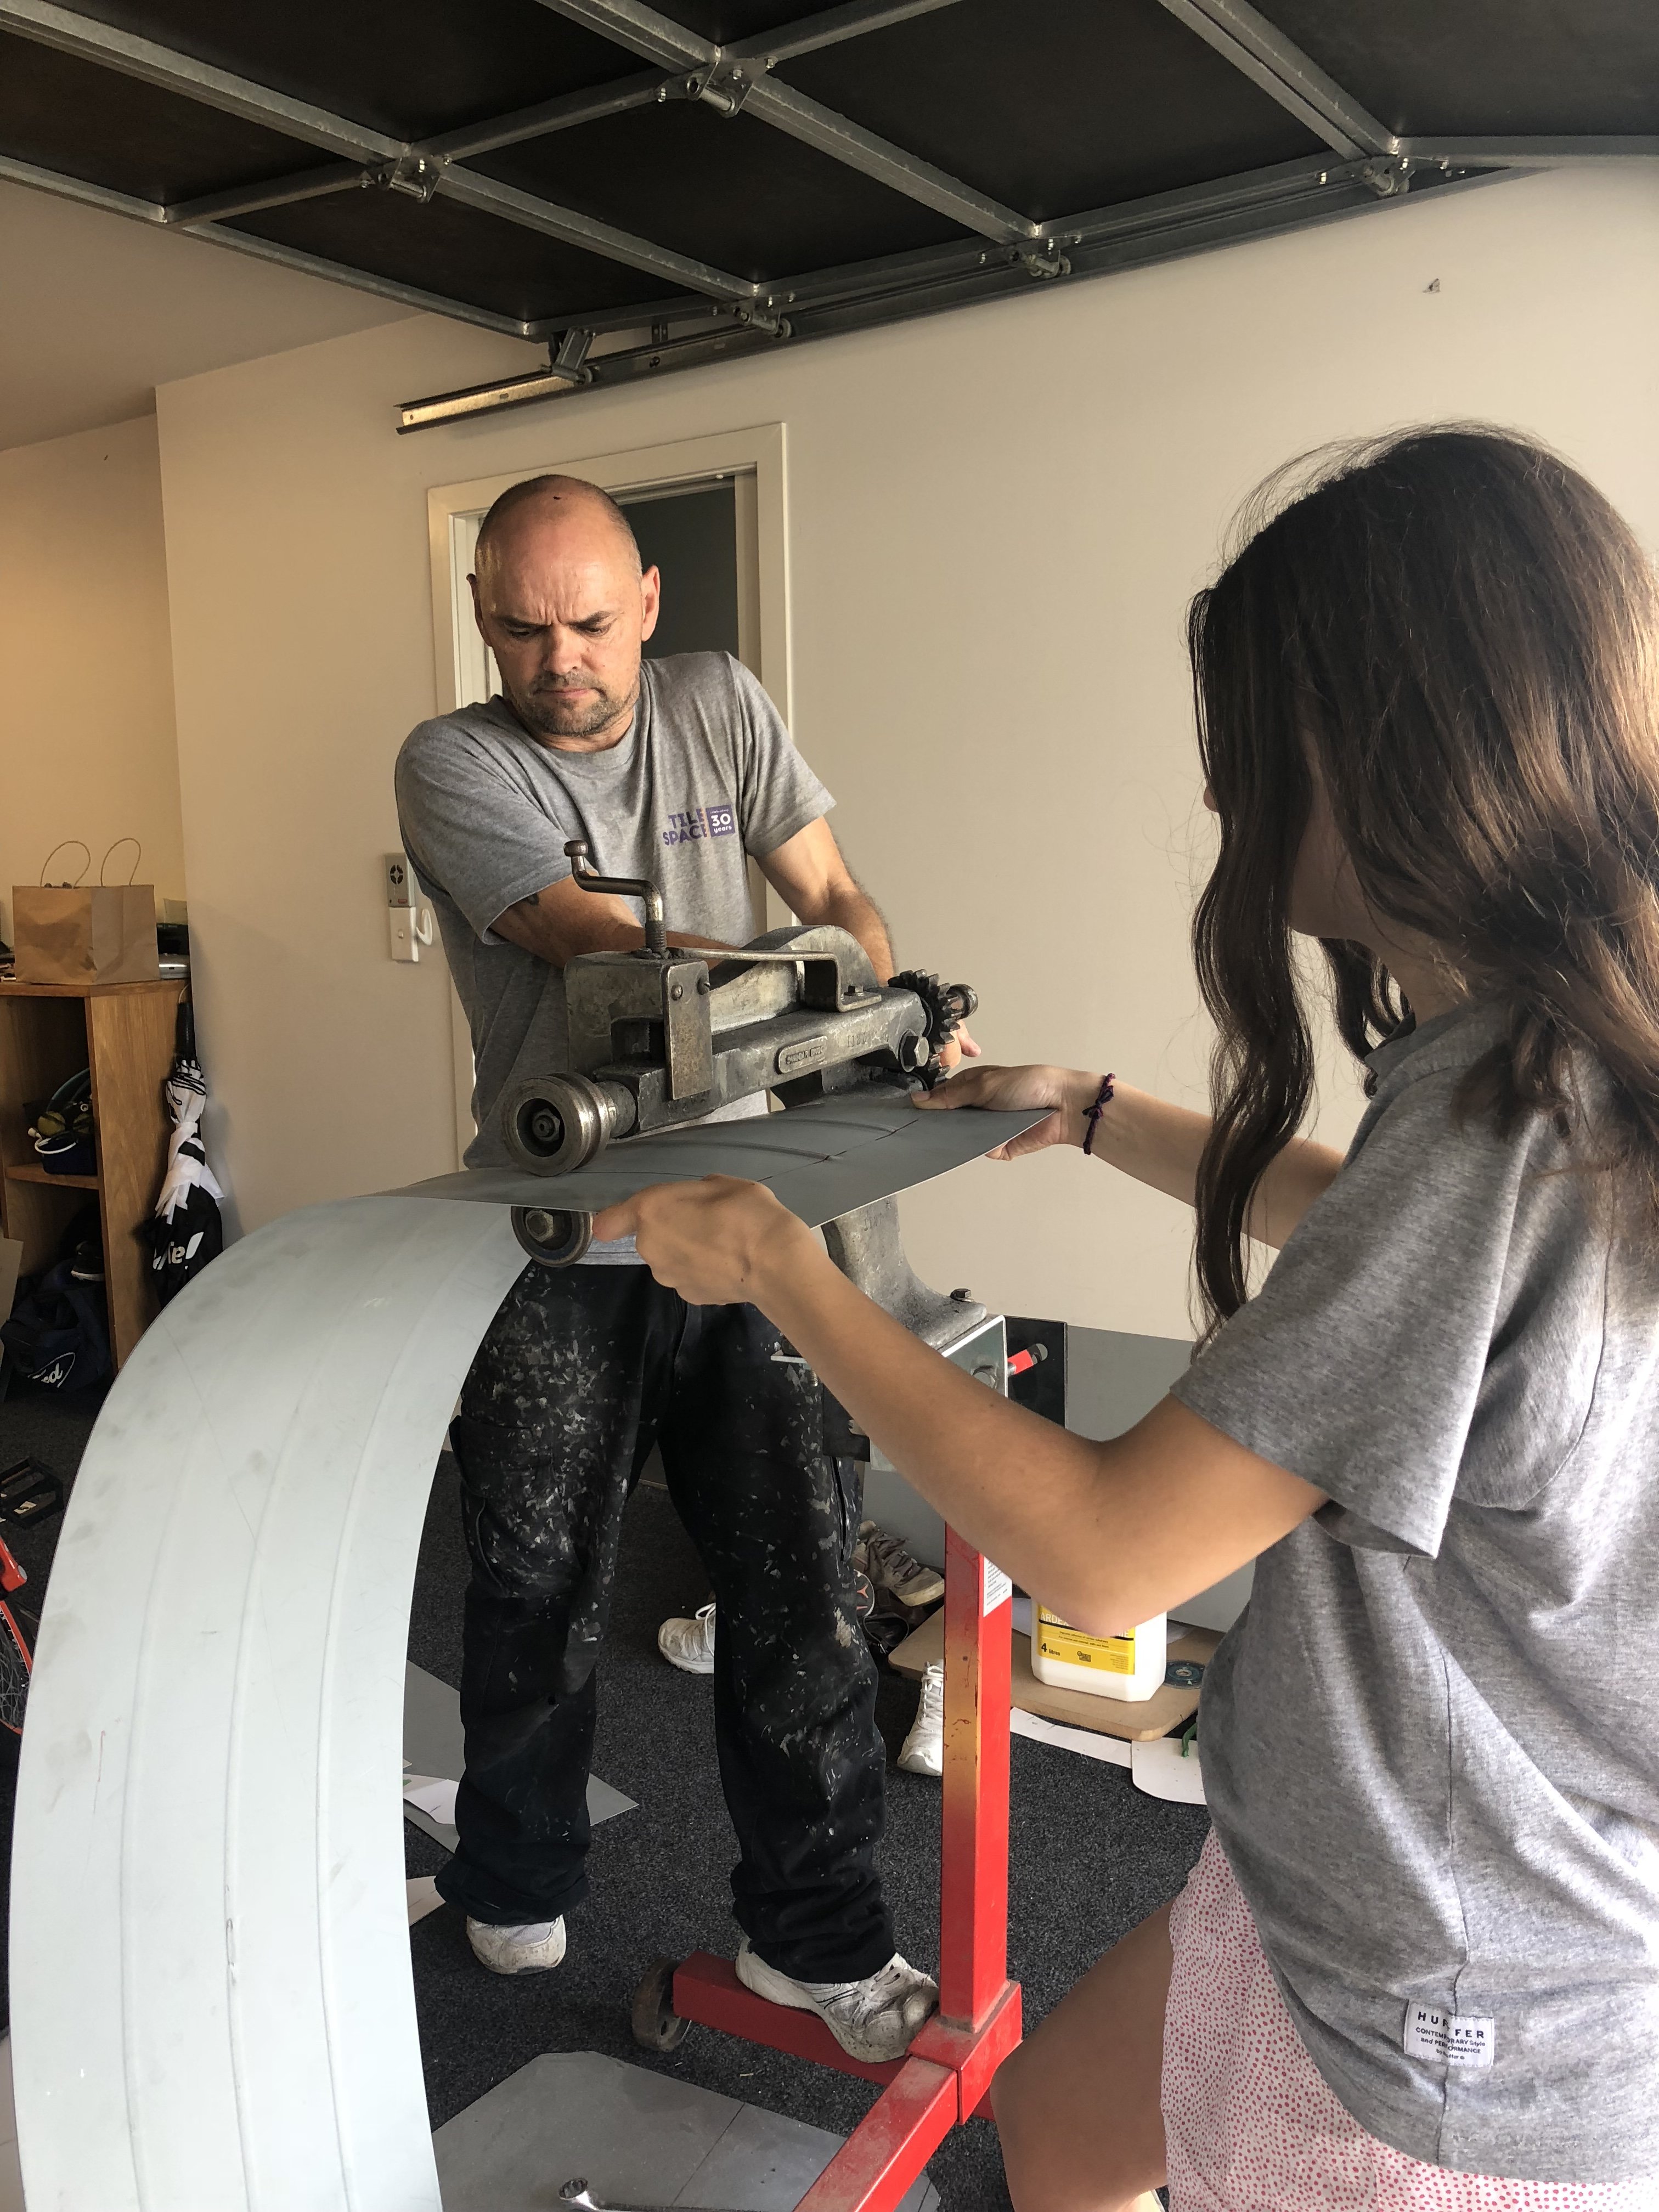
Me and my daughter been busy today.
1 point
-
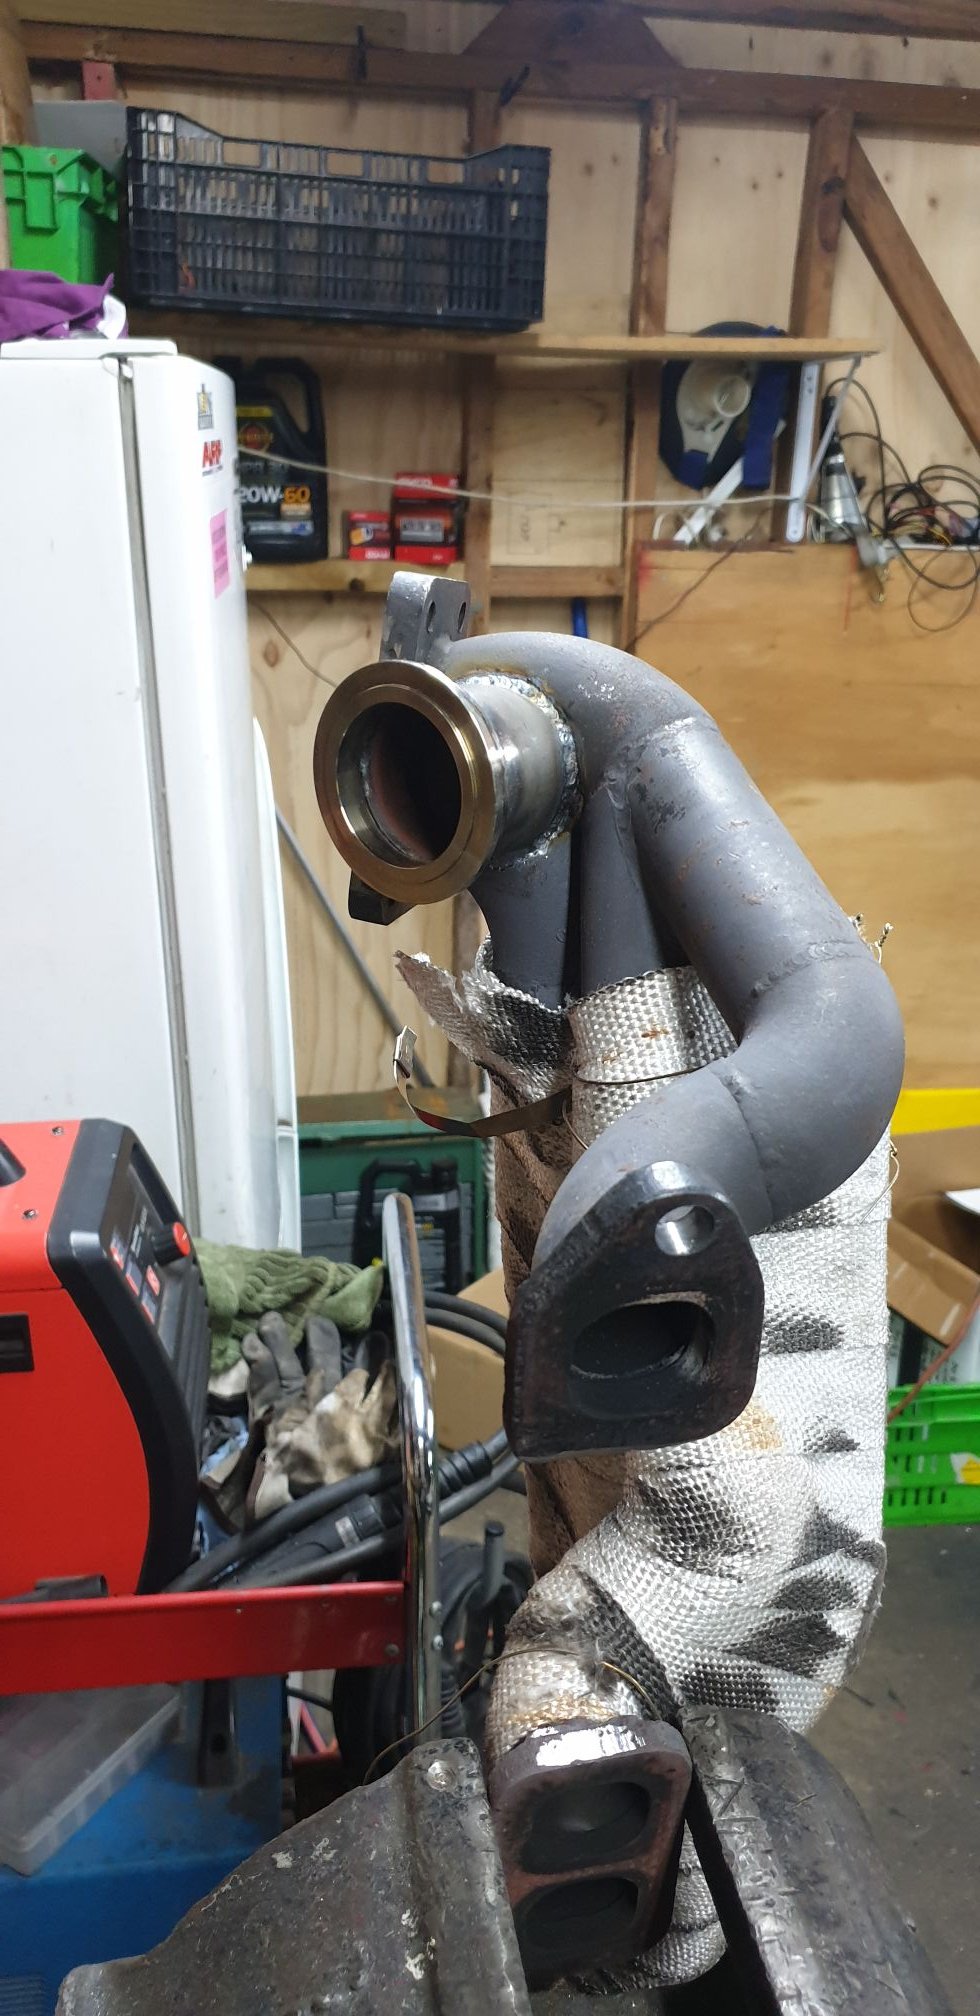
Making plenty more progress, but this bit feels like a bit of a grind for some reason. Probably cos I keep not quite finishing things because I need something, then getting halfway through something else before stopping cos I need something, then bits turning up so I carry on with the other.... and so on seemingly endlessly. Whatever you whining prick. This is what did get done, finished or not.. An exhaust. The tip is not 100%, I need to get the deck back on to finish this nice and tidy. Added an EGT sensor to the stumpy adaptor thingy so I know exactly when I am about to detonate the engine; Oil feed line to the turbly, probably needs a heat shield going past the manifold; Oil drain pipe from the turbly to the sump. This might get tidied a bit as it gets kindof close to the boost actuator rod; I also got given a boost actuator, some amateur sleuthing involving a tyre pump gauge and compressor tells me it is cracking the seal at about 15psi. I mounted this and discovered my bracket would hit the chassis, so I had to remake the bracket. It's all sorted but I forgot to take pics, maybe later you will be able to admire the simple elegance of this.1 point
-
1 point
-
if you have a club card at SCA, they will give you back the difference as credit if they go on sale within a couple of weeks anyway.1 point
-
They will all be similarly crappy.1 point
-
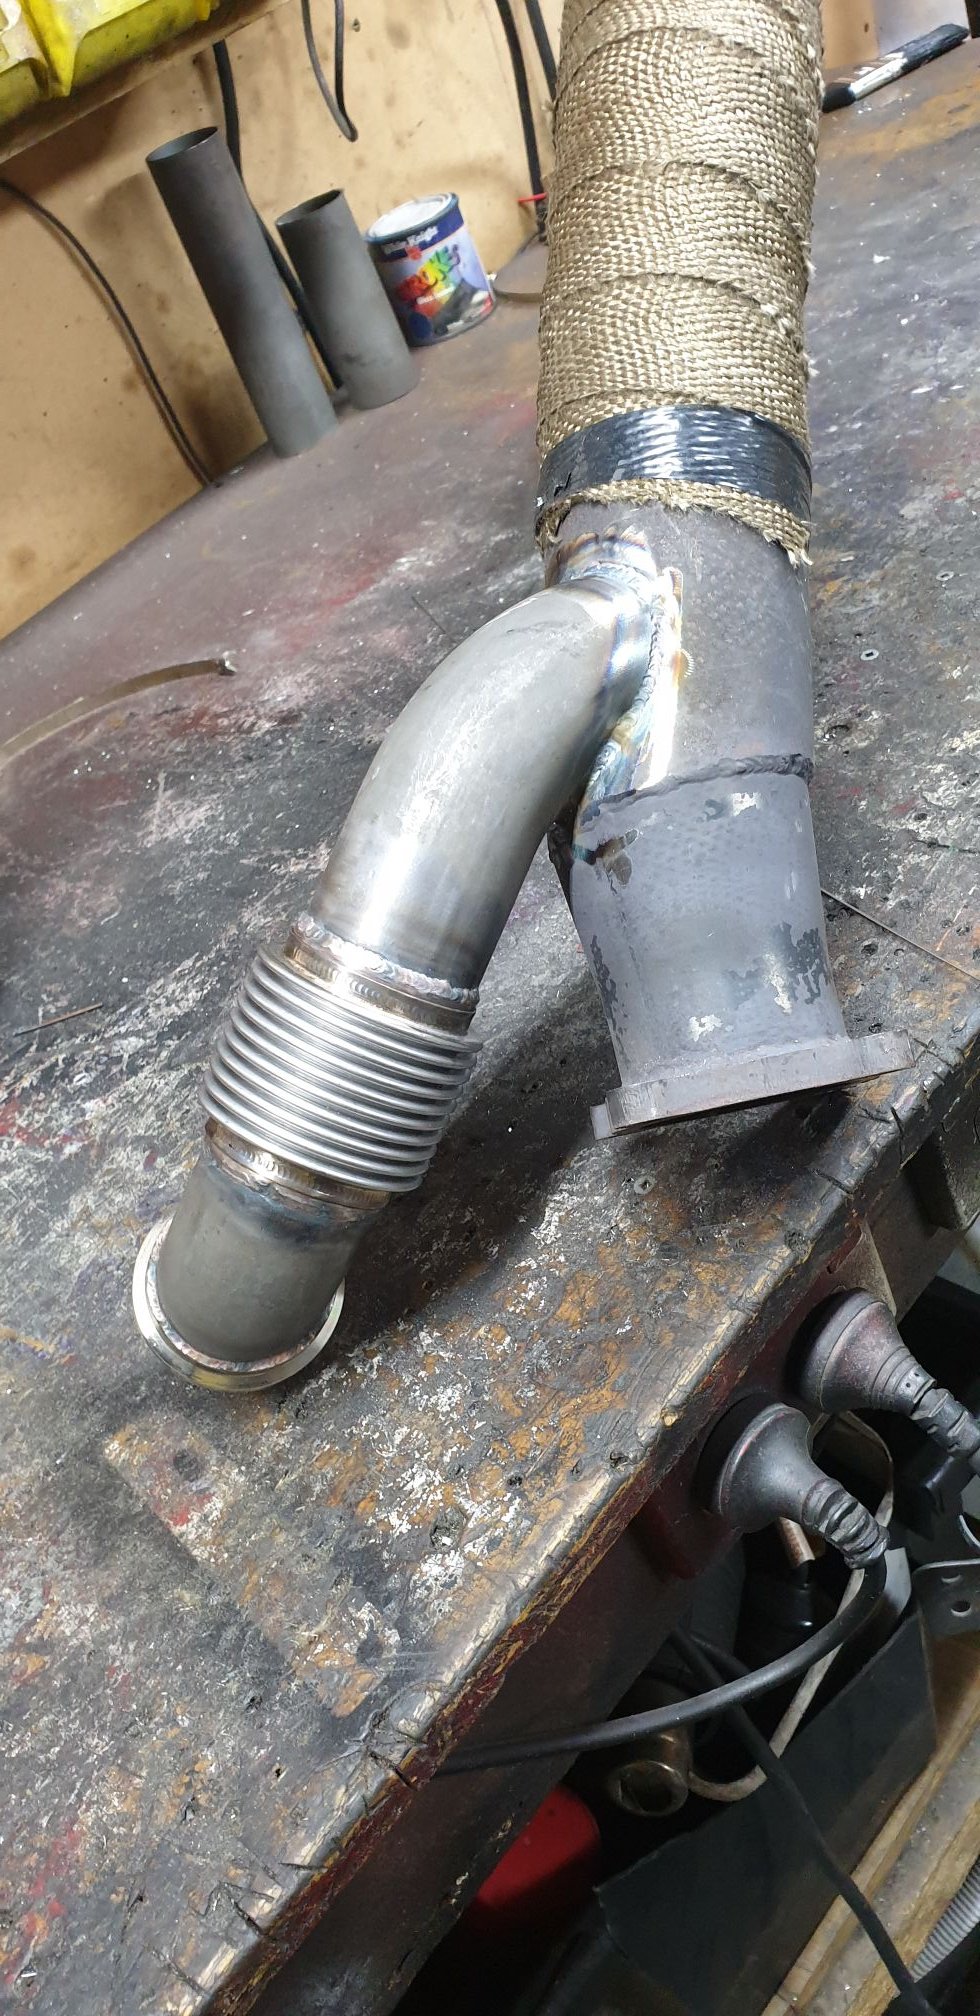
Thank god the headers and pipes are finally done. just waiting on a fine day to give them a coat of VHT Black.
1 point
-
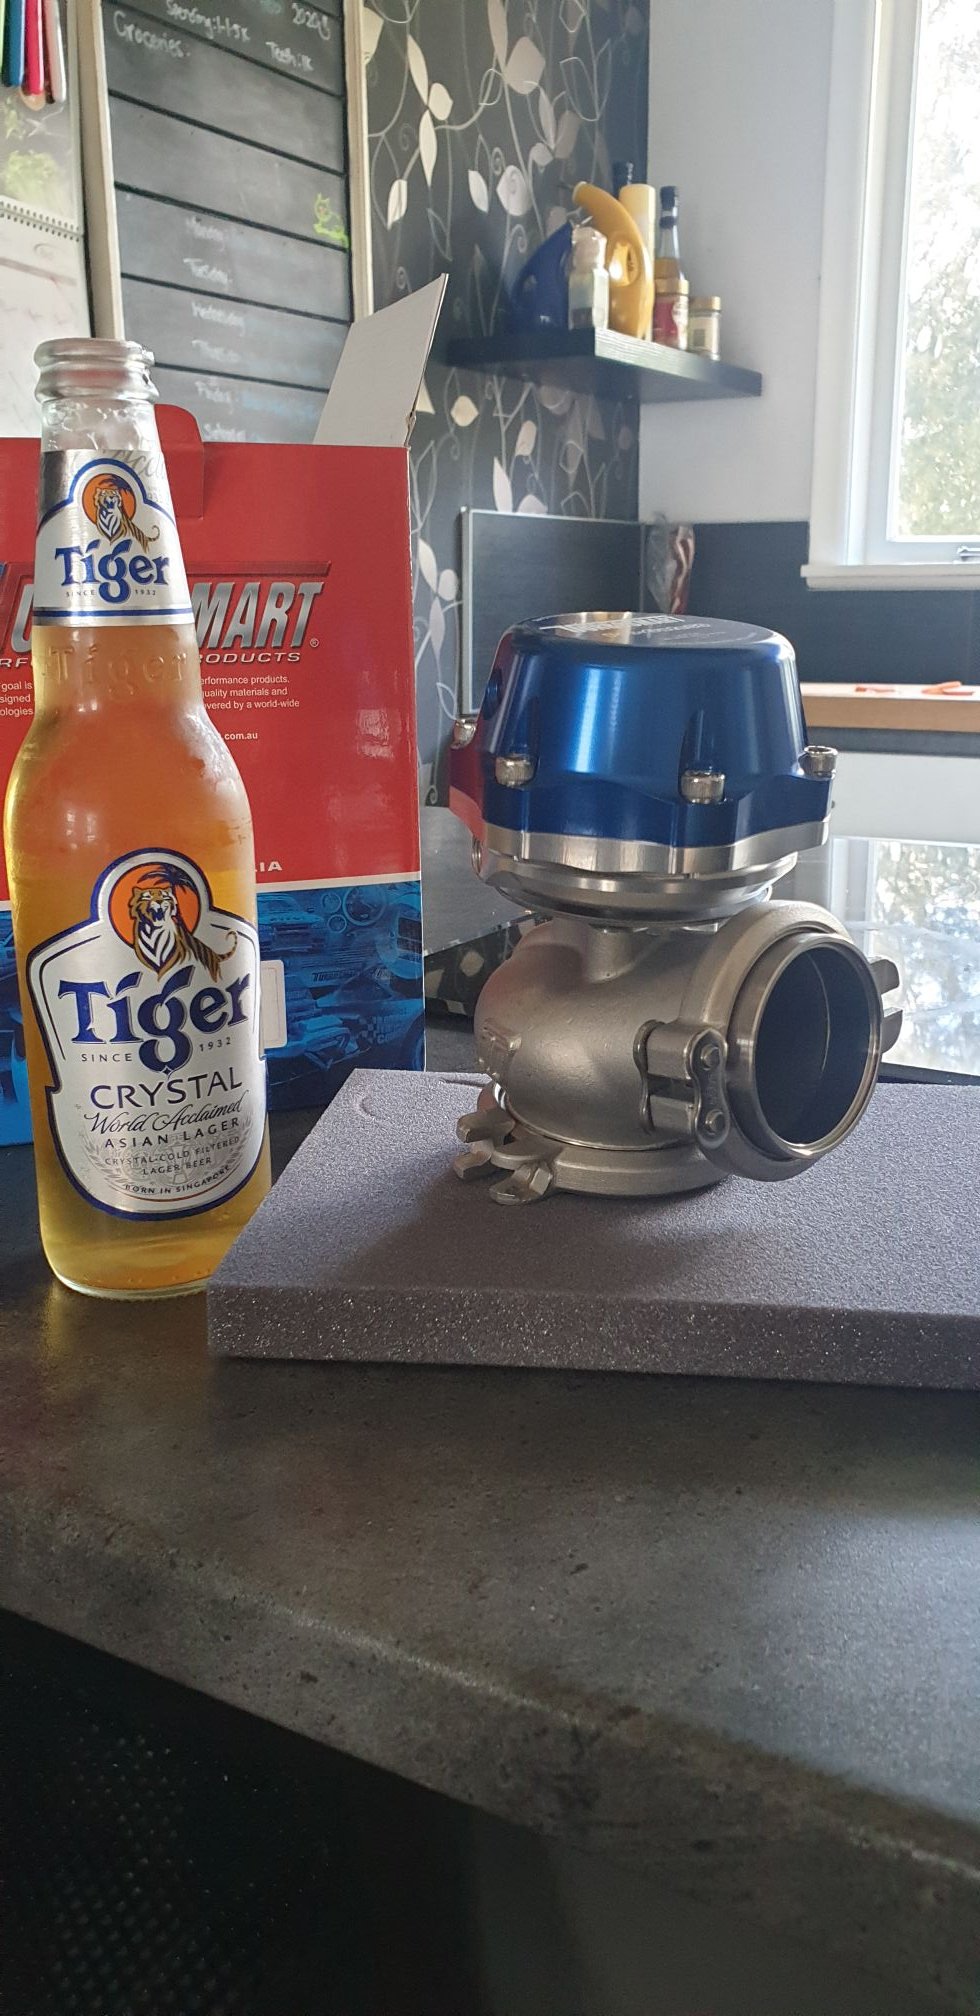
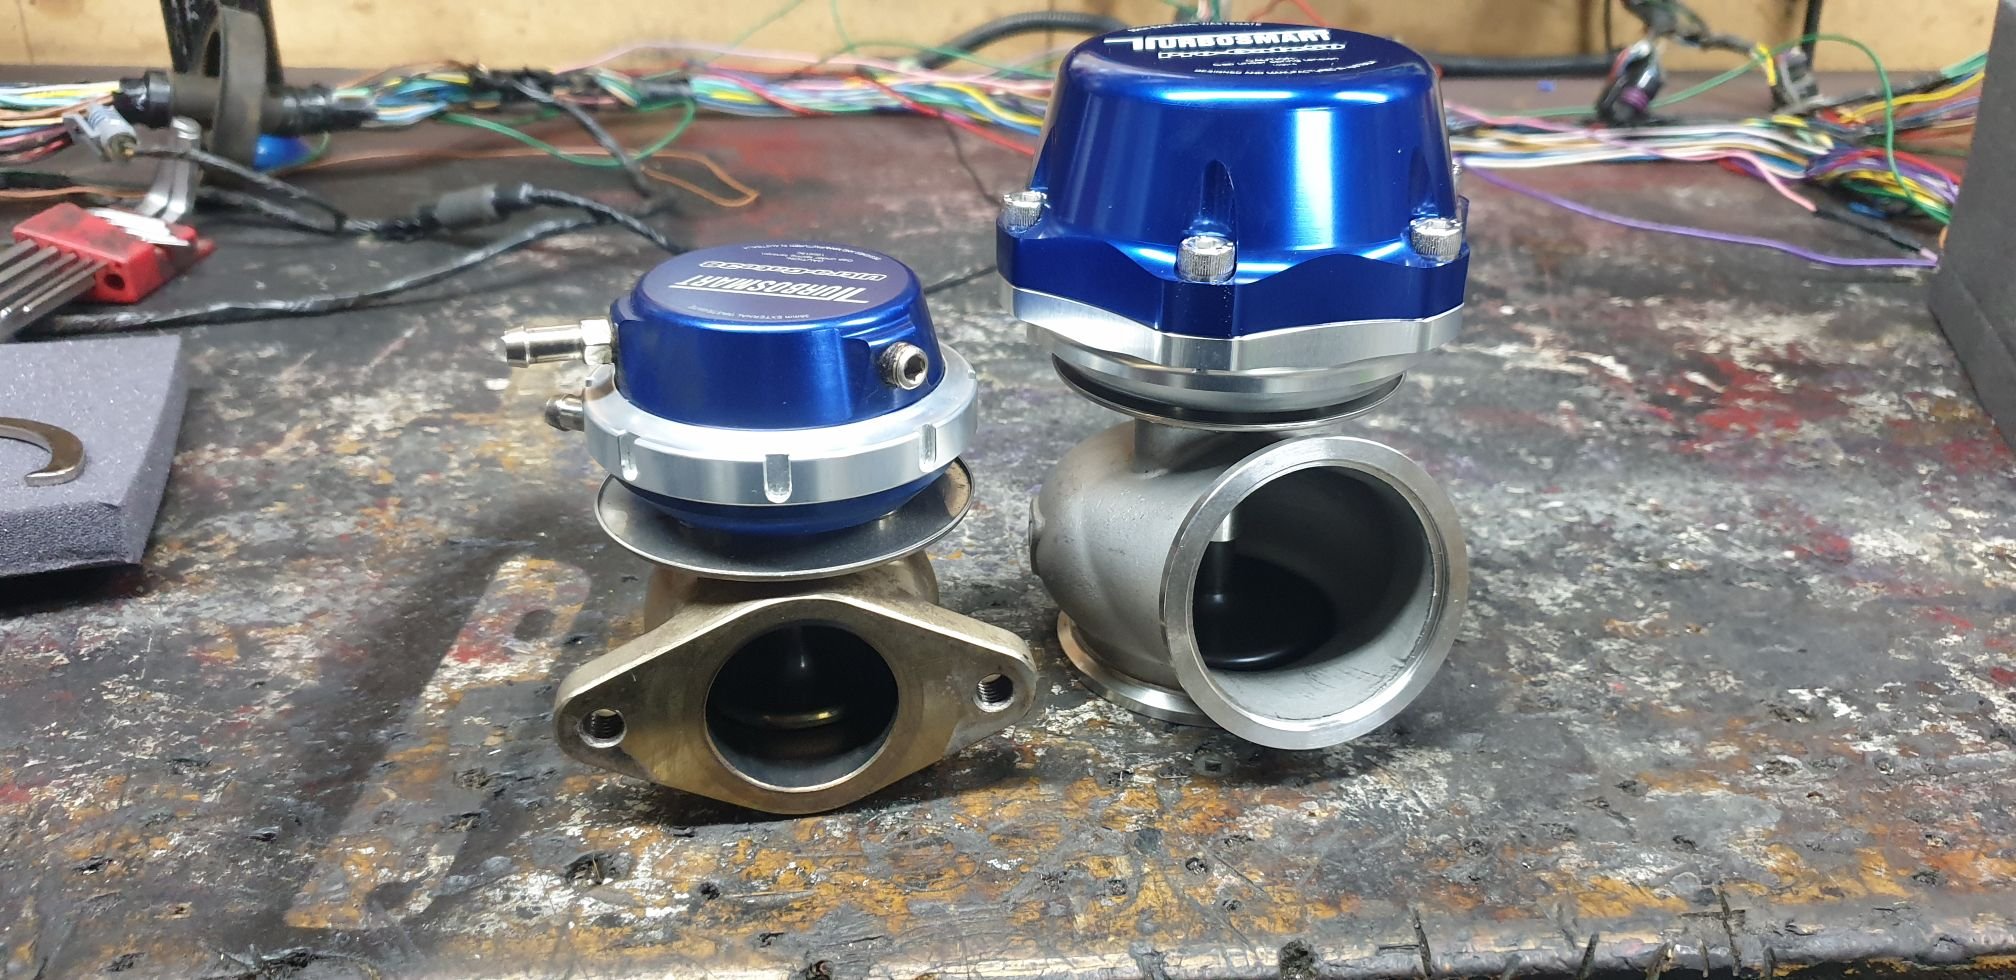
Had a rocker adjuster come loose sounding like an angry dwarf with a pickaxe stuck in the top end, easy enough fix didnt break anything and was just down the road from home. Decided to throw some more $$ in the because turbo bucket, brought a new 50mm wastegate to sort out the angry boost pixies, Booked for back on the dyno the week before drag day....
1 point
-
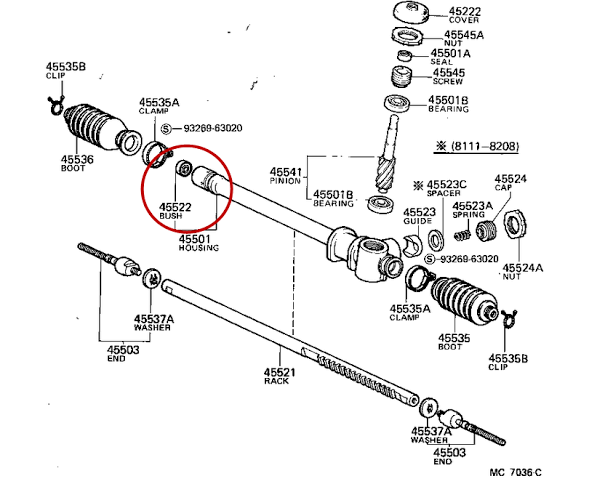
Axle cross often refers to the universal joint in the front driveshaft, although being ‘76 this shouldn’t have those and will have conventional CV joints I would have though. The other thing that can make a clunk in the driveline of these is the supporting bush inside the steering rack. My 1300 did this for a long time. Heard it right through the floor. Nolathane/Superpro still make this.
1 point
-
finally got a use for my VS HSV seats, painted the bay, and wired up the factory dash to be fully functional
1 point
-
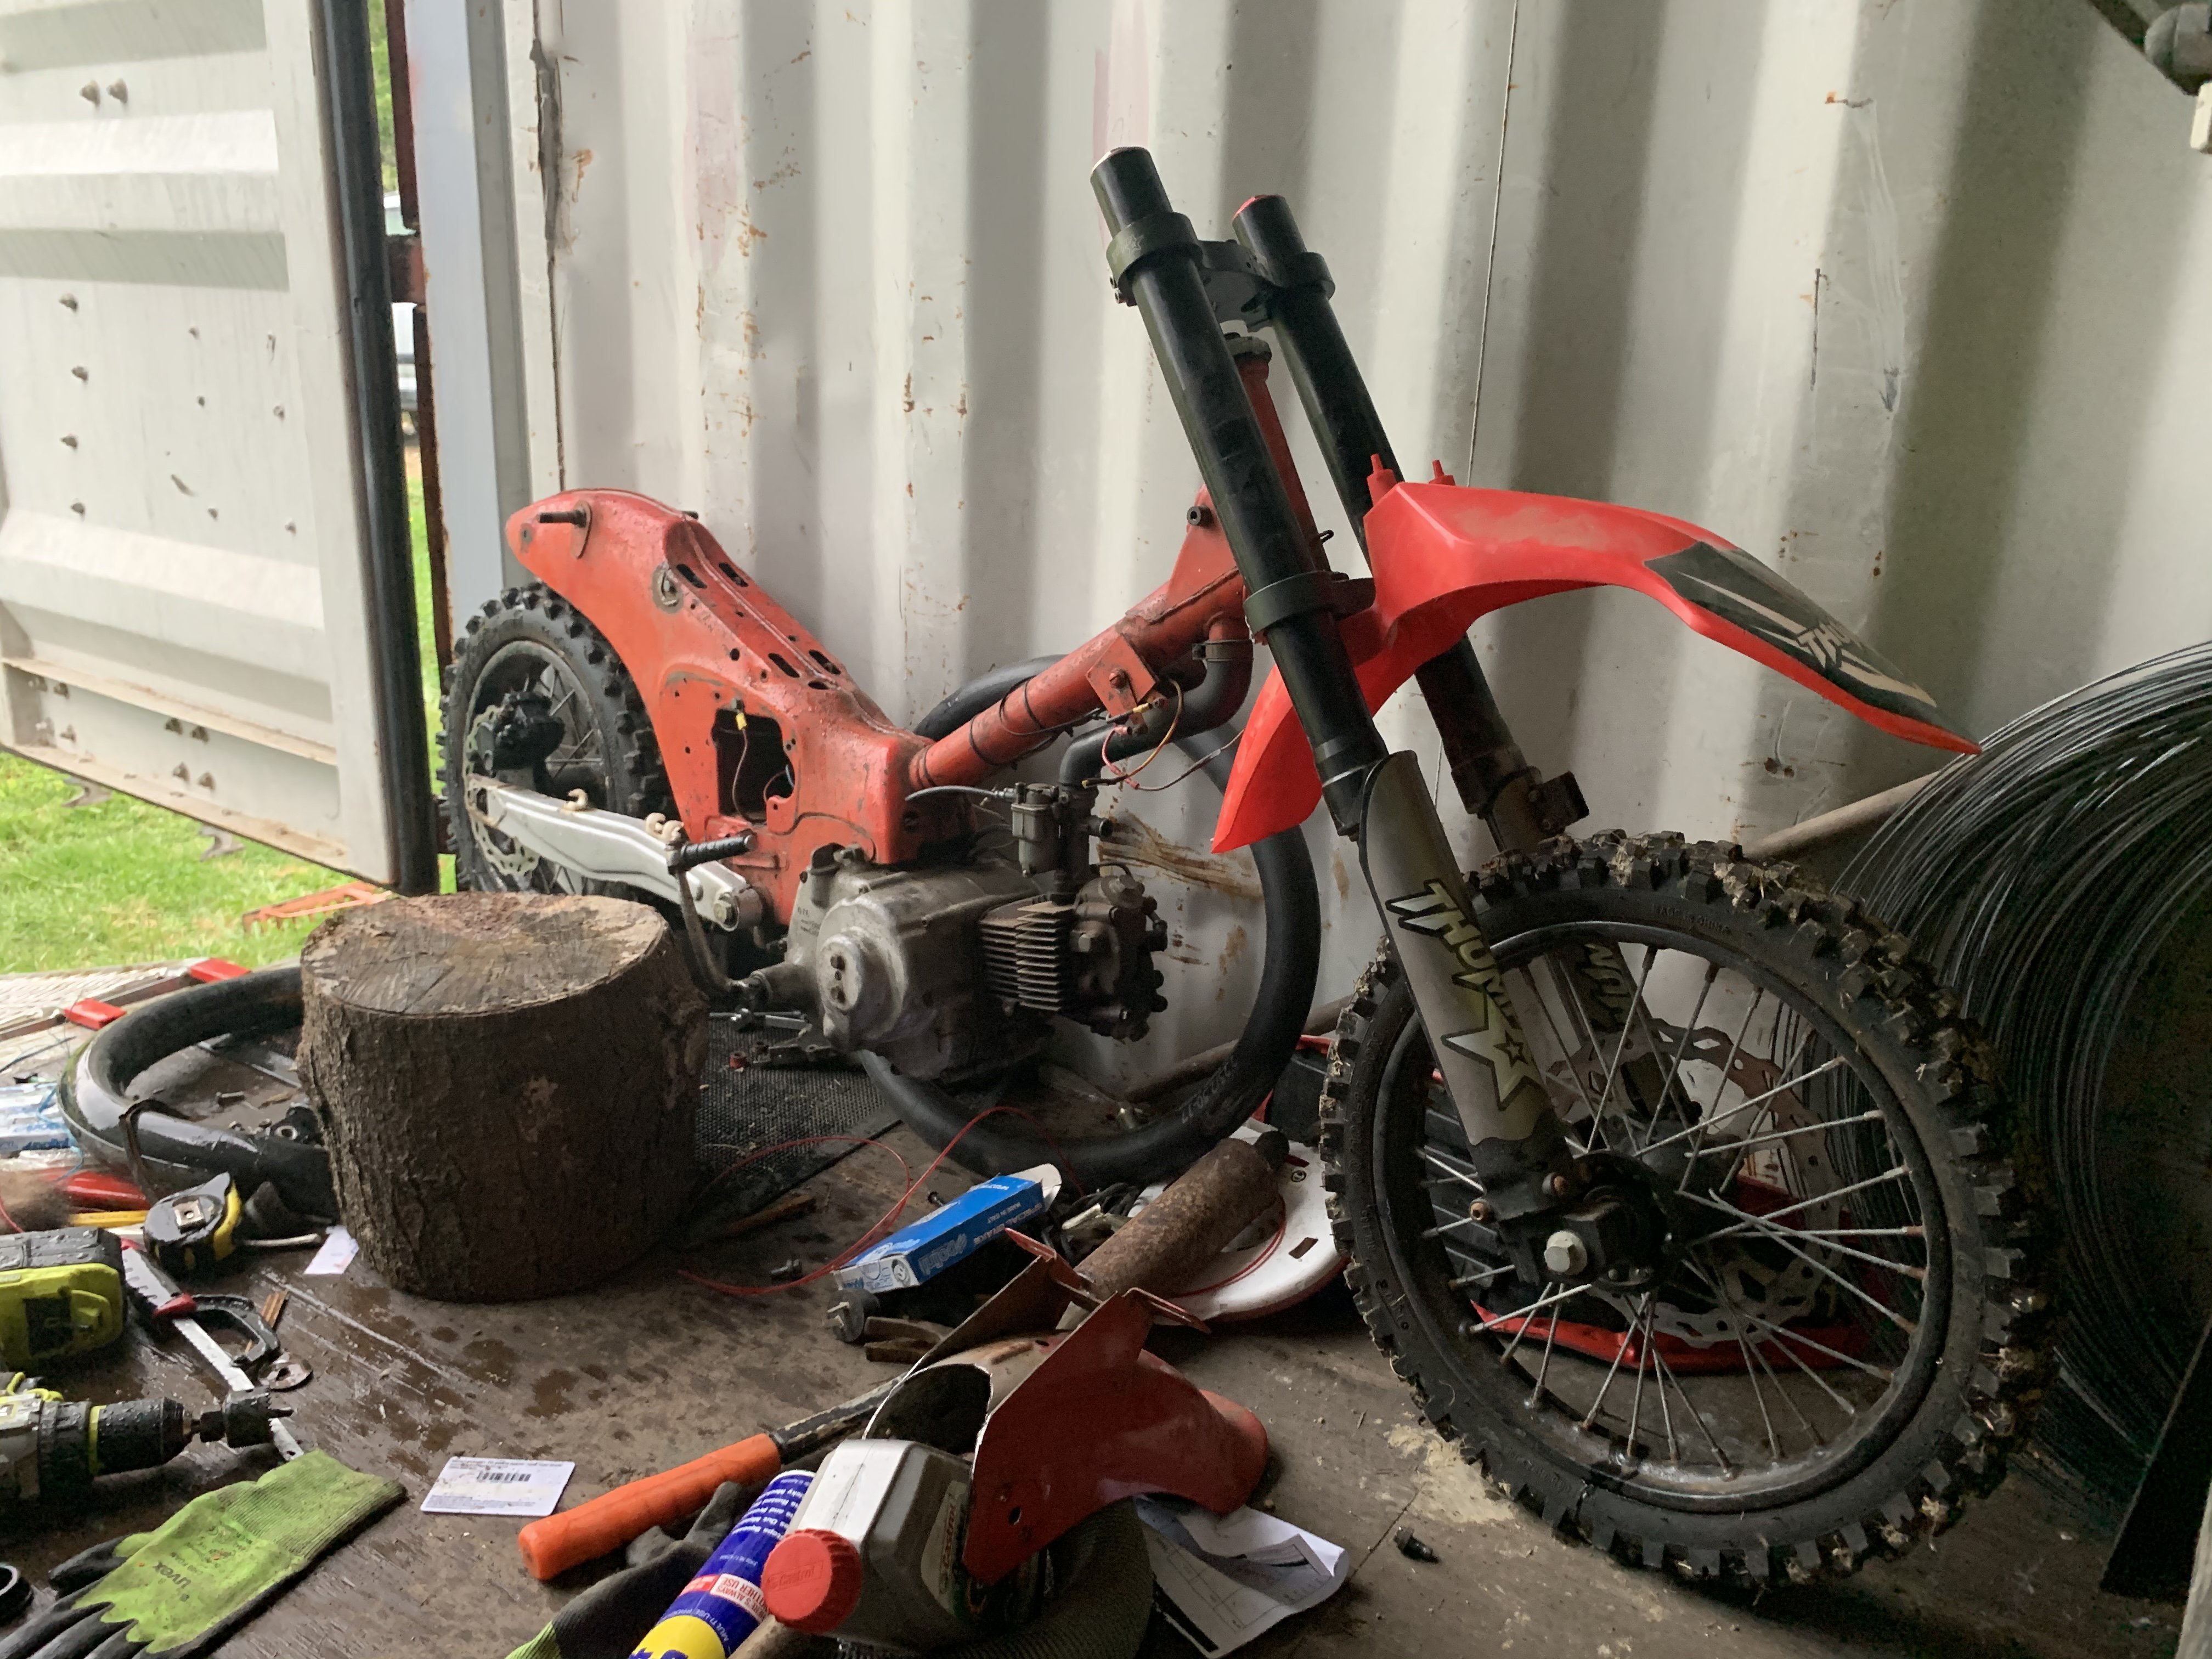
new street magic tyres arrived, wonder how much worse road riding will be shinko mobber 504 and 505
1 point
-
If wanted to spend the best part of 5k on an adventure bike set up it wouldn’t be on some shitty small Honda. Ah fuck wait. Dagnabbit.1 point
-
hi. so 8 years after i bought a supercharger and 5 years after i made a manifold for it im actually going to install it. old people like me will tell you about how times speeds up and you just dont know where the time went but this is fucking ridiculous. how the fuck has it been 5 years since i made that manifold? how? anywho. i took the motor out. its fairly depressing to look at the engine bay that i once spent so much time and effort on and see what a pile of crap it looks like now. still, me, and a few other people too, have done a bunch of Ks in this car. ive dailyed it for almost 8 years, driven it to invercargil and back, been to heaps of nats in it, leadfoots, Toyota nationals, thrashed it at countless track days, done 70,000Ks in it. and its NEVER missed a beat. not fucking once has it ever let me down ( you could count the time i blew the gearbox up but any idiot who puts a W55 behind a UZ deserves all he gets). cant complain about that i suppose. so now its time for a new look, a new motor and a new other things as well. first point of business, motor out, 2019-05-31_08-22-40 by sheepers, on Flickr 2019-05-31_08-22-32 by sheepers, on Flickr 2019-05-31_08-22-24 by sheepers, on Flickr as it now takes me 27 years to scratch my arse i doubt the progress i used to make on projects is going to be a thing again. so dont expect me to have this thing finished by monday as i would have done in the old days.1 point
-
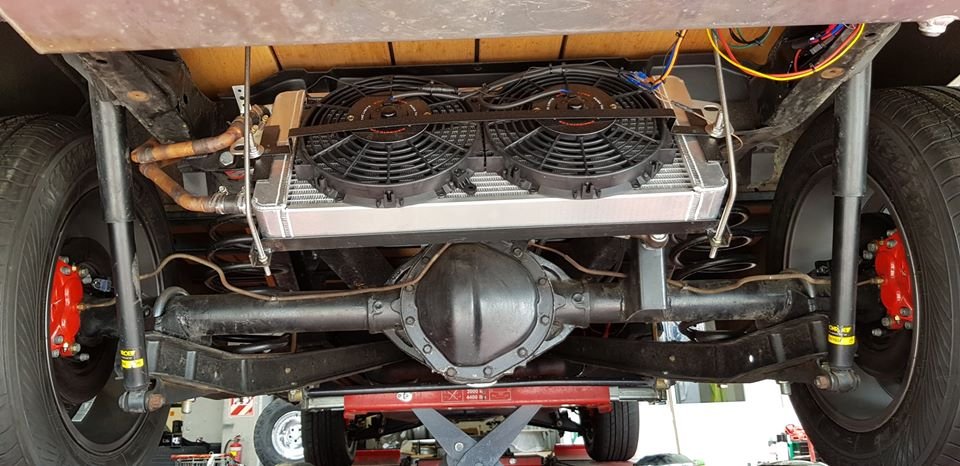
The car is also running the full return fuel pickup now too Zinc plating was only $5
1 point
-
Ordered pipe bends yesterday to start working on the headers. looking more eighties everyday.
1 point
-
1 point


.jpg.c051f4af56894710c9b52e2fec2c2399.jpg)


.jpg.e60b0e174655fff43d9d6ece8e556fc1.jpg)


.jpg.69c5192f3d1091d5c9fe6f2af4224e70.jpg)


This leaderboard is set to Auckland/GMT+12:00