
Leaderboard


Popular Content
Showing content with the highest reputation on 11/16/19 in all areas
-
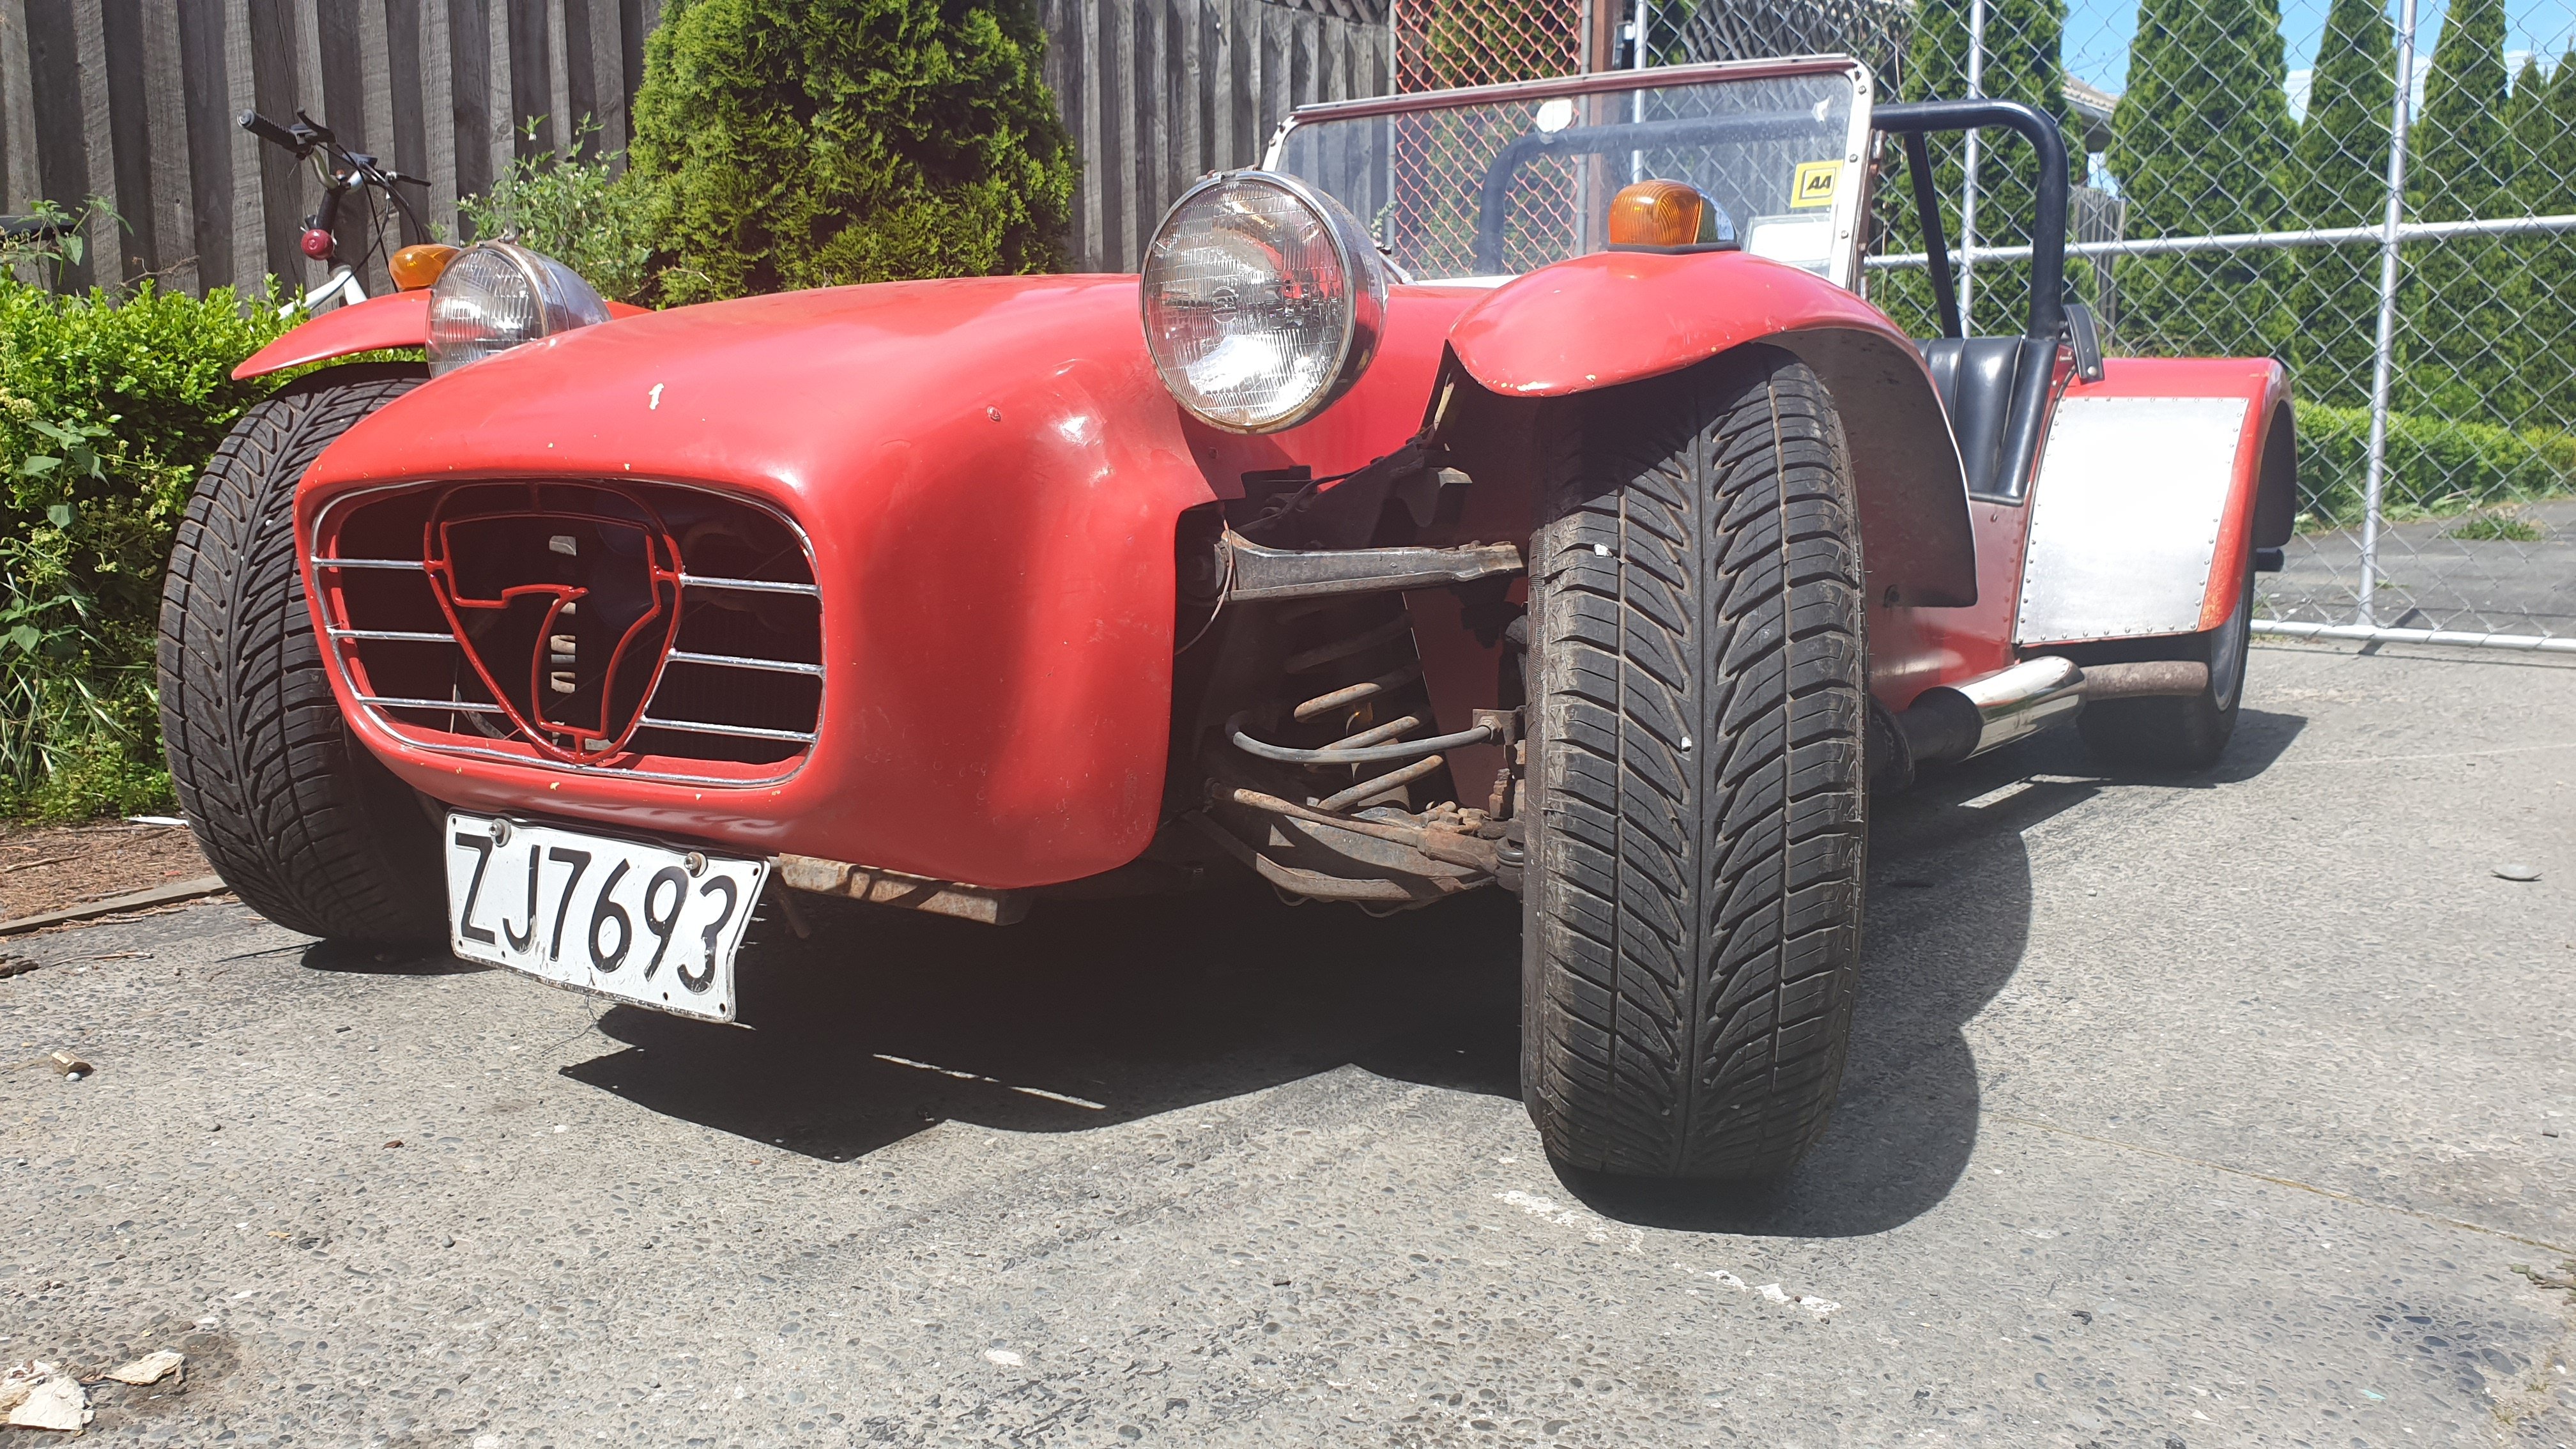
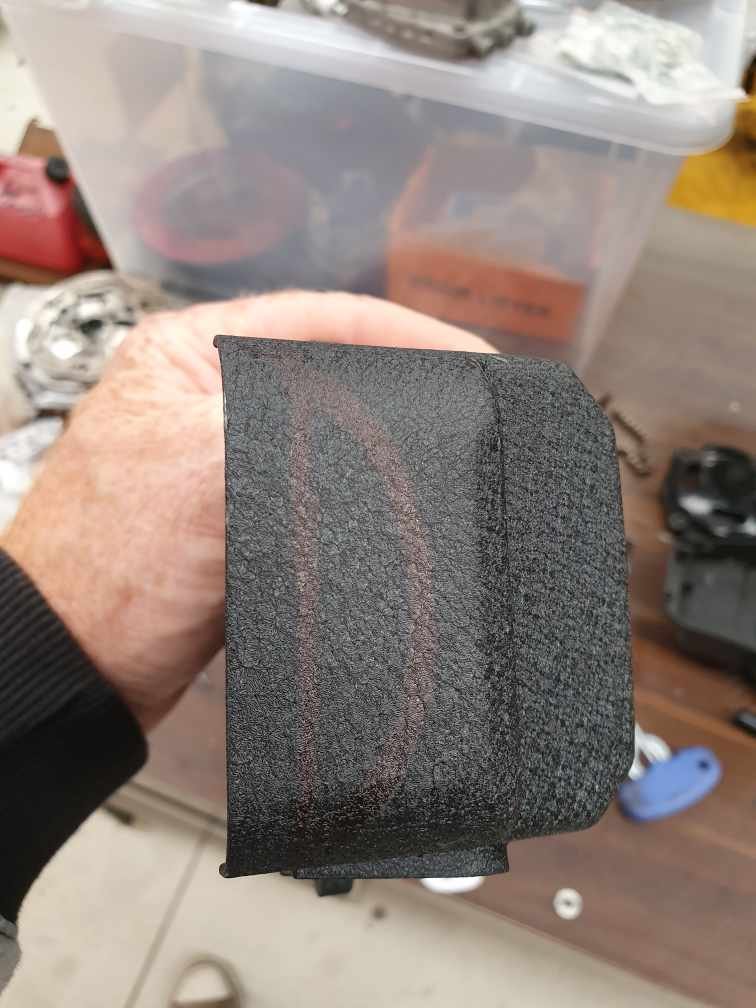
threw the seal kit into the carbs and no more leaks and no more lean spitting. (also put new O rings in the soft mount kit) went for a drive around the block and it cruised great but any time you tried to accelerate quickly it would hit the wall hard and sound like a rev limiter. not something you could drive through. clearly a major issue in the carb setup. Luckily i took photos off all the jets and tubes while i was rekitting them. Went inside for a coffee and looked up some suggested specs. found all the jets to be similar enough to the suggested specs that they were probably within tune, except for the venturi chokes, the were 30mm and suggested was around 35mm. Included with the car was a set of 34mm chokes, im not sure why the 30s were swapped in but i doubt it ever drove well. fitted the 34mms and it woke right up! still not perfect, but it runs pretty bloody strong! comes on cam (i heavily suspect its hiding something fun under the cam cover) pretty hard and sounds like the apocalypse at about 5000rpm. wof very soon and then ill have to try get some video. only new photo i have is of the grill i had a play around with painting. quite like it.
 10 points
 -
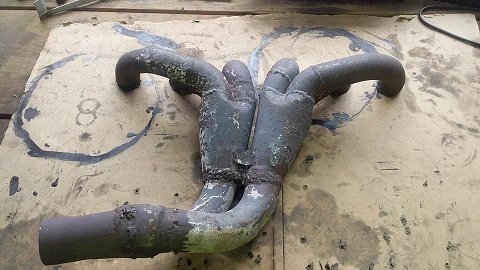
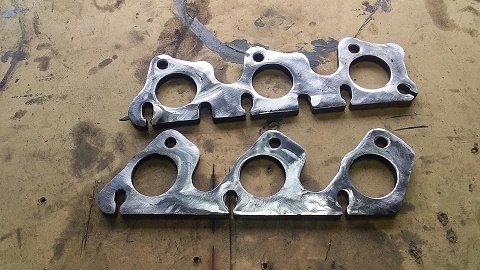
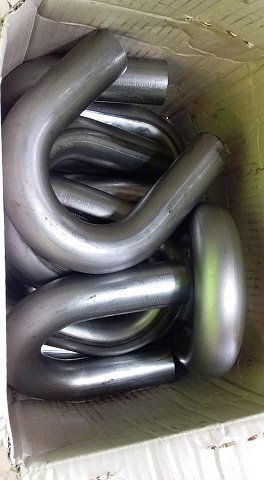
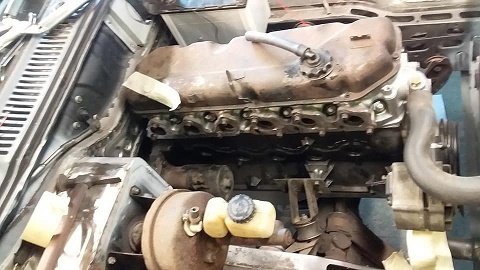
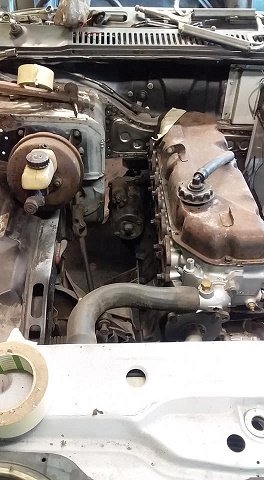
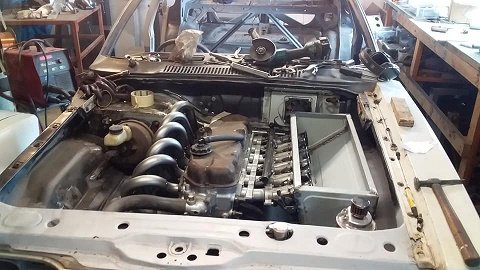
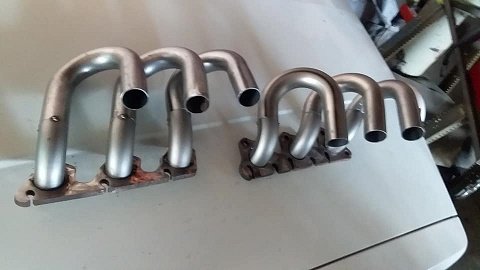
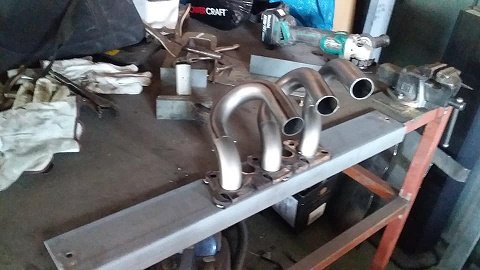
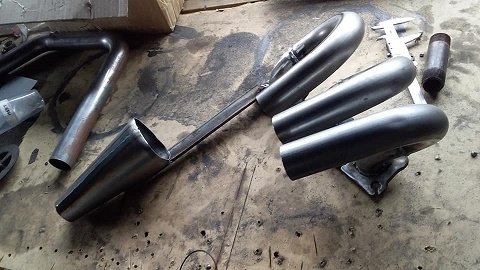
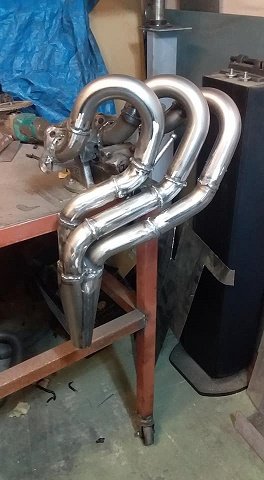
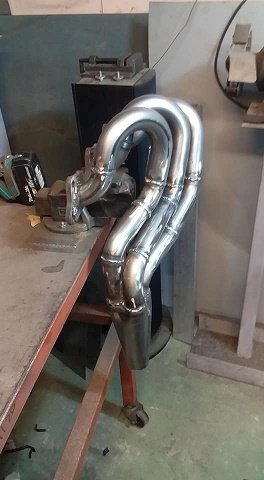
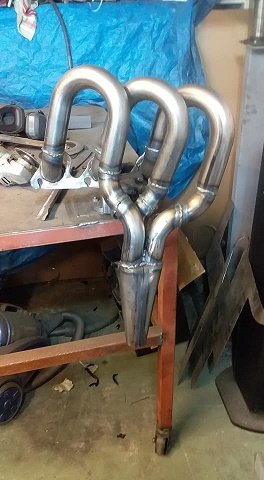
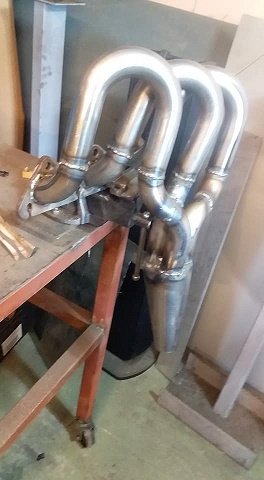
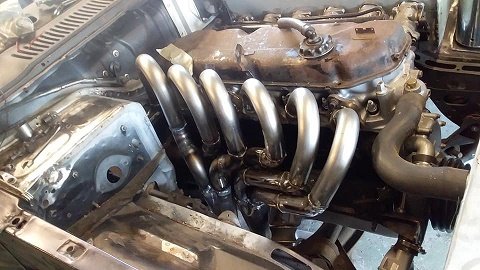
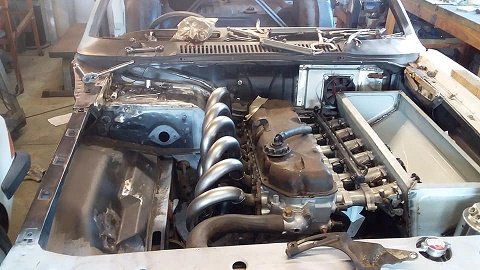
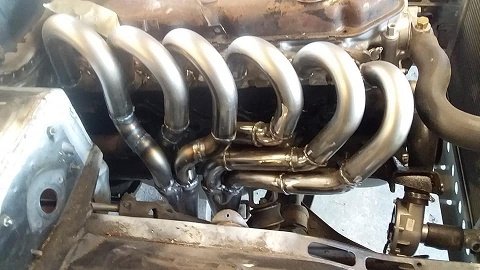
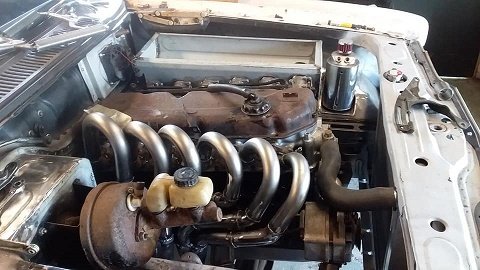
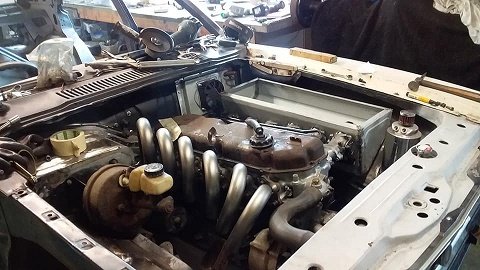
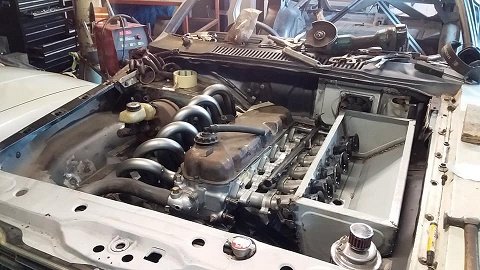
this is the 1st set of headers iver ever made and no i cant tig weld so mig was used........they will be wrapped to cover my shame ........and heat. so i dont like any of the off the shelf headers for the 4.1 and much prefer the huge looping JDM style headers .. these are the crap headers that cam on the motor. the only good part was the flangers so i cut them off to re use. i was talking to a guy in aussie that builds high performance 200 and 250 xflow motors and he said the ideal set up for a street car and will work with a lot of setups. 6 into 2 using front 3 and rear 3...41mm tube 660mm primerys 3into 1 collector.....then 2" -2.5" dual exhaust to the rear of the car with mufflers and a v8 stlye x pipe.. so i ordered some bends.........and i got all 6 within 10 mm of the 660mm and each other. at least there is room to play with then started with the setup i wanted it to look like before i build the rest. then made the rest front 3 rear 3 bolted in
10 points
-
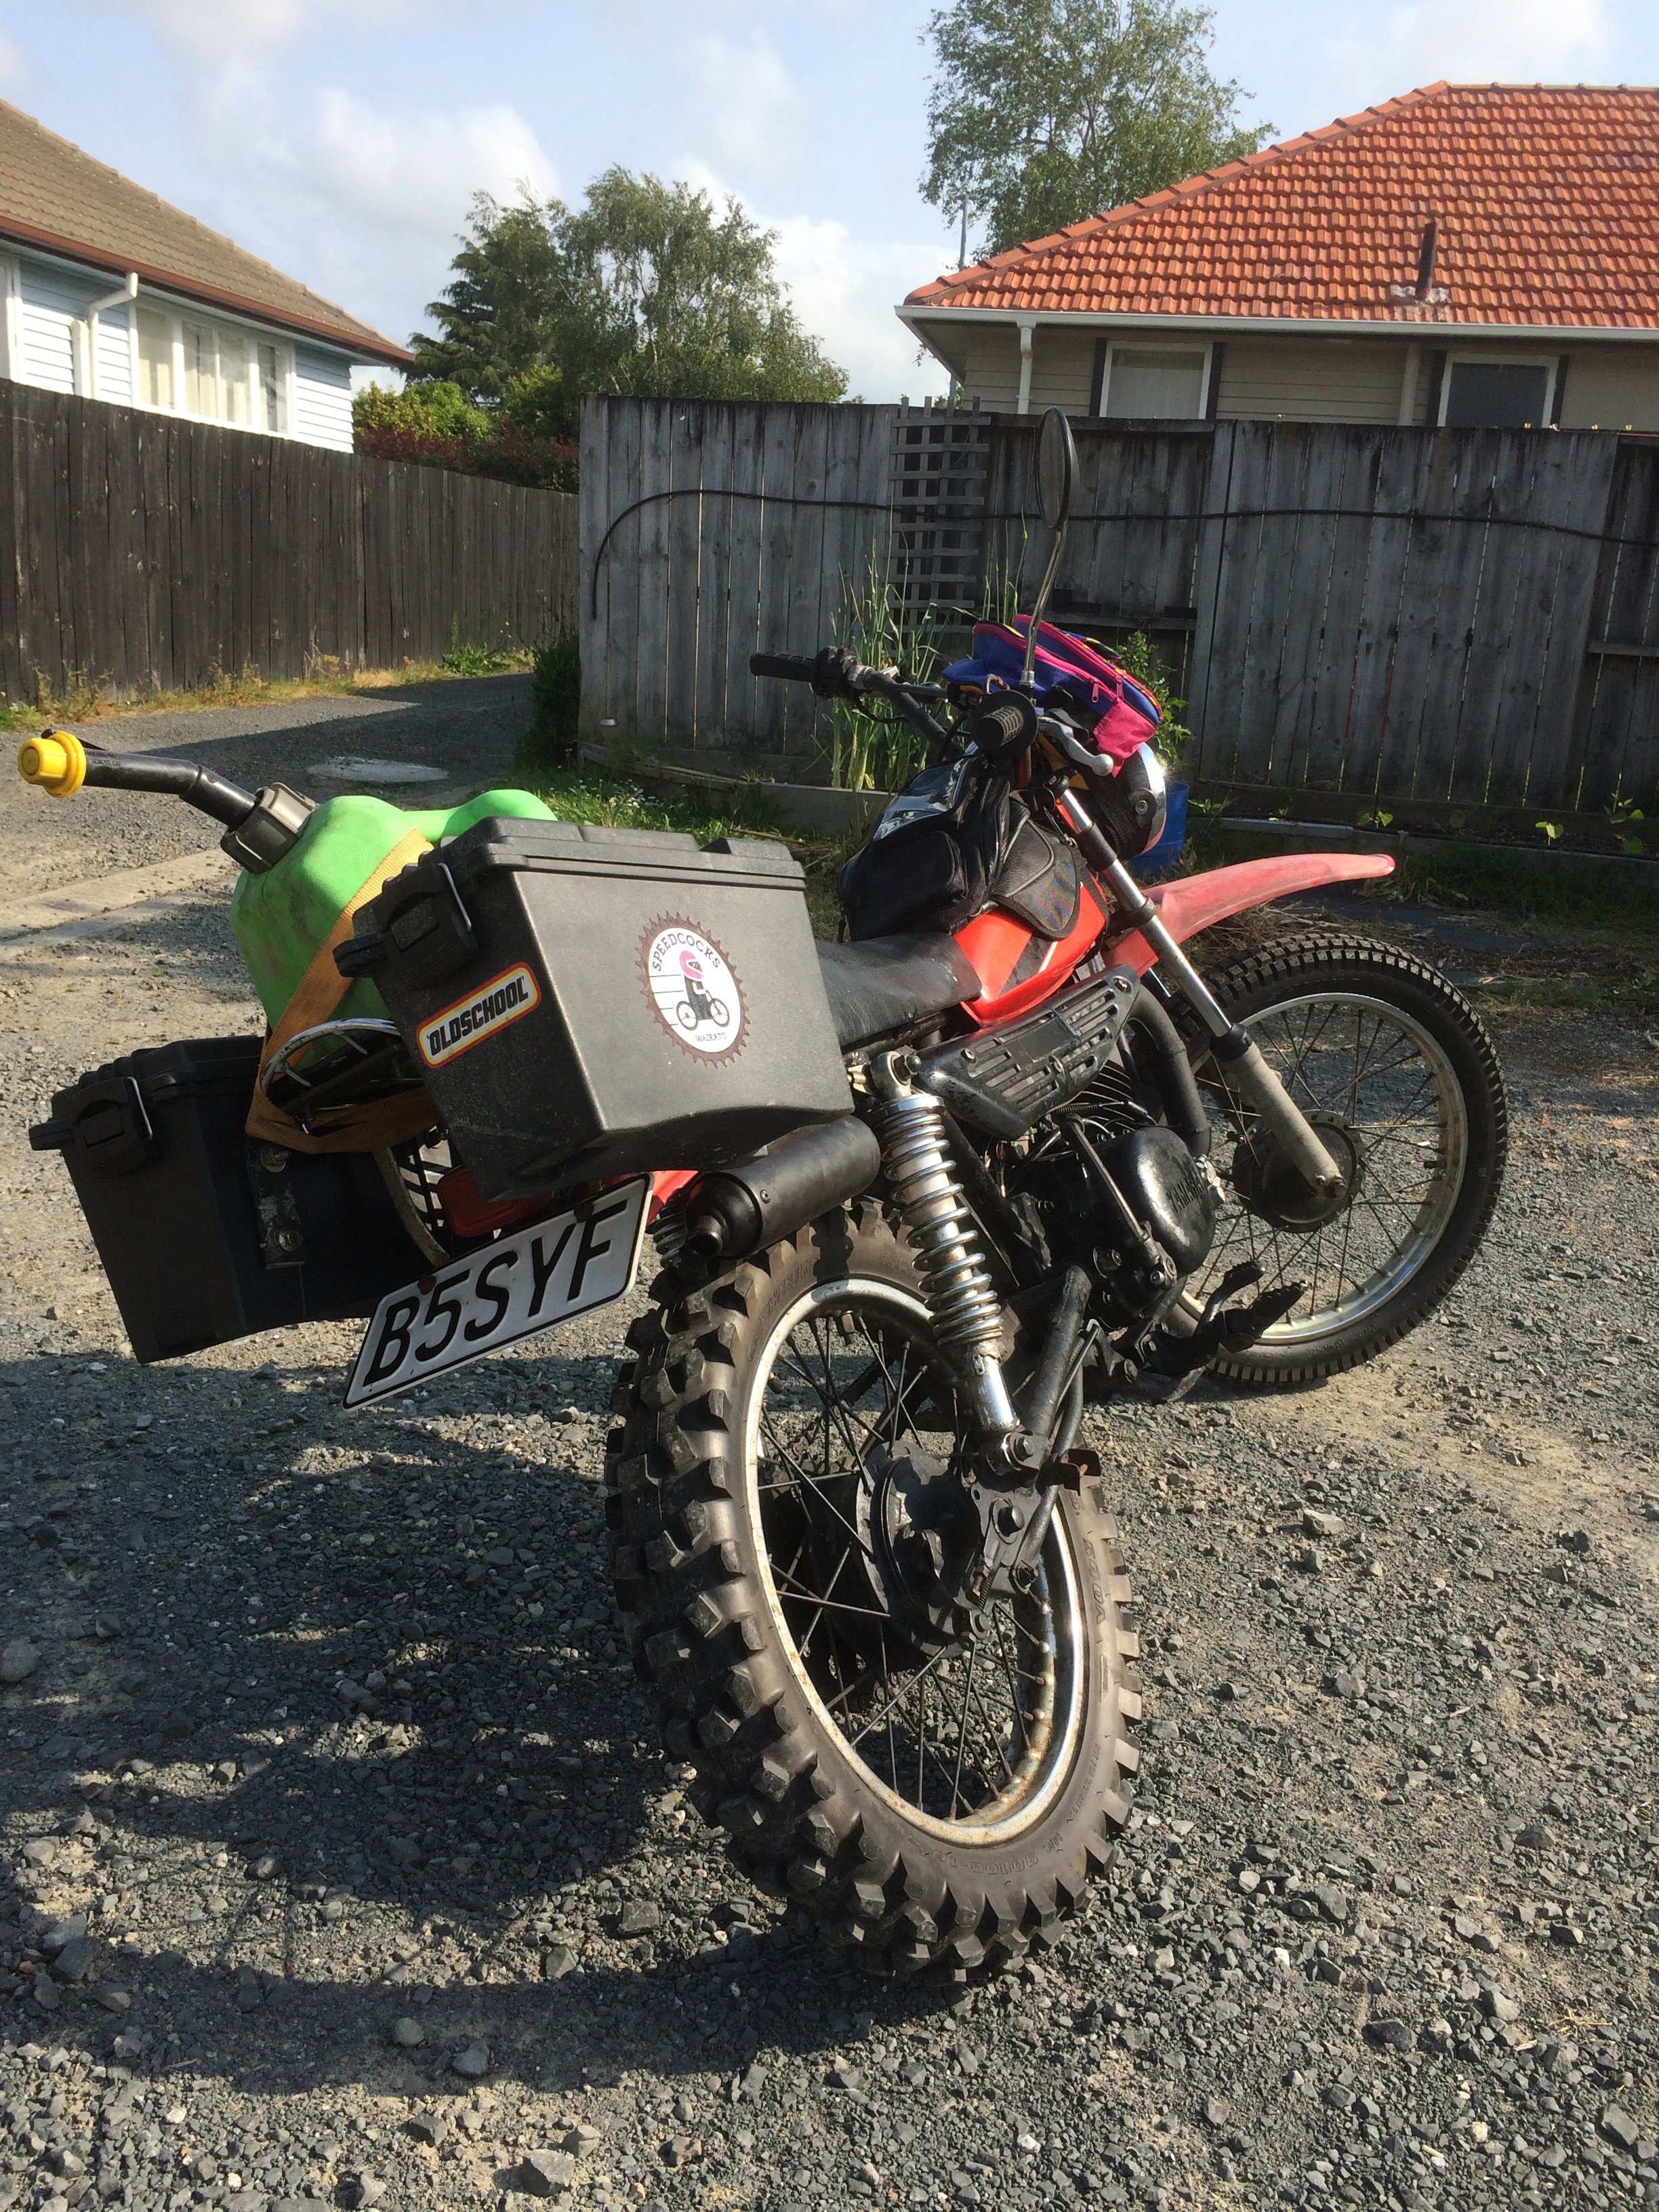
Fuel can, panini storage, tank bag and hypercolour handlebar bag fitted. The rack is from the FS1: I’ll need a backpack for undies and Brian Lowns too.
8 points
-
And just finished some assembly... And a test spin worried me as no obvious spark. Hooked it up to the drill though and while trying to hold the plug against the block got a decent belt, then after a good spin up it seems to be sparking well, even with a rudimentary points gap setting... And where I left it for the day. Fuel system to go... Got a temporary clamp holding it in place till some bits arrive and still have to fill gearbox and set points/plug gaps, but hopefully not far off a test run...6 points
-
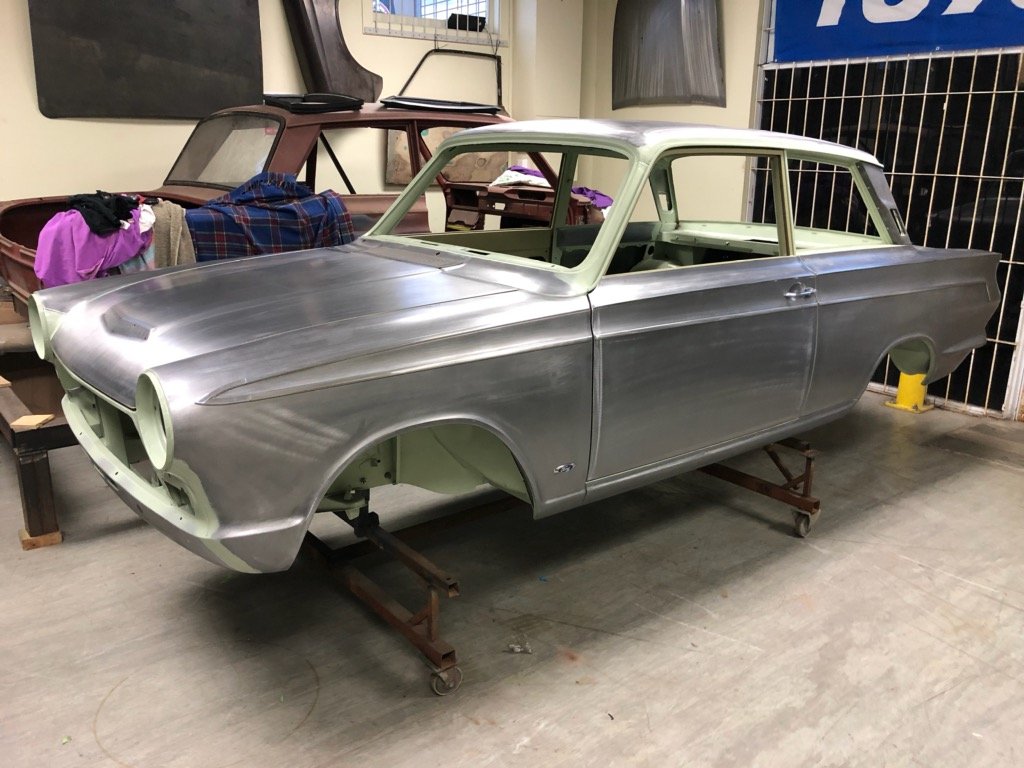
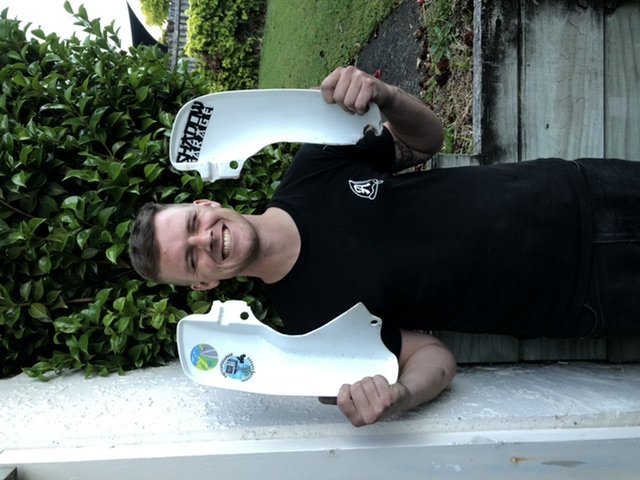
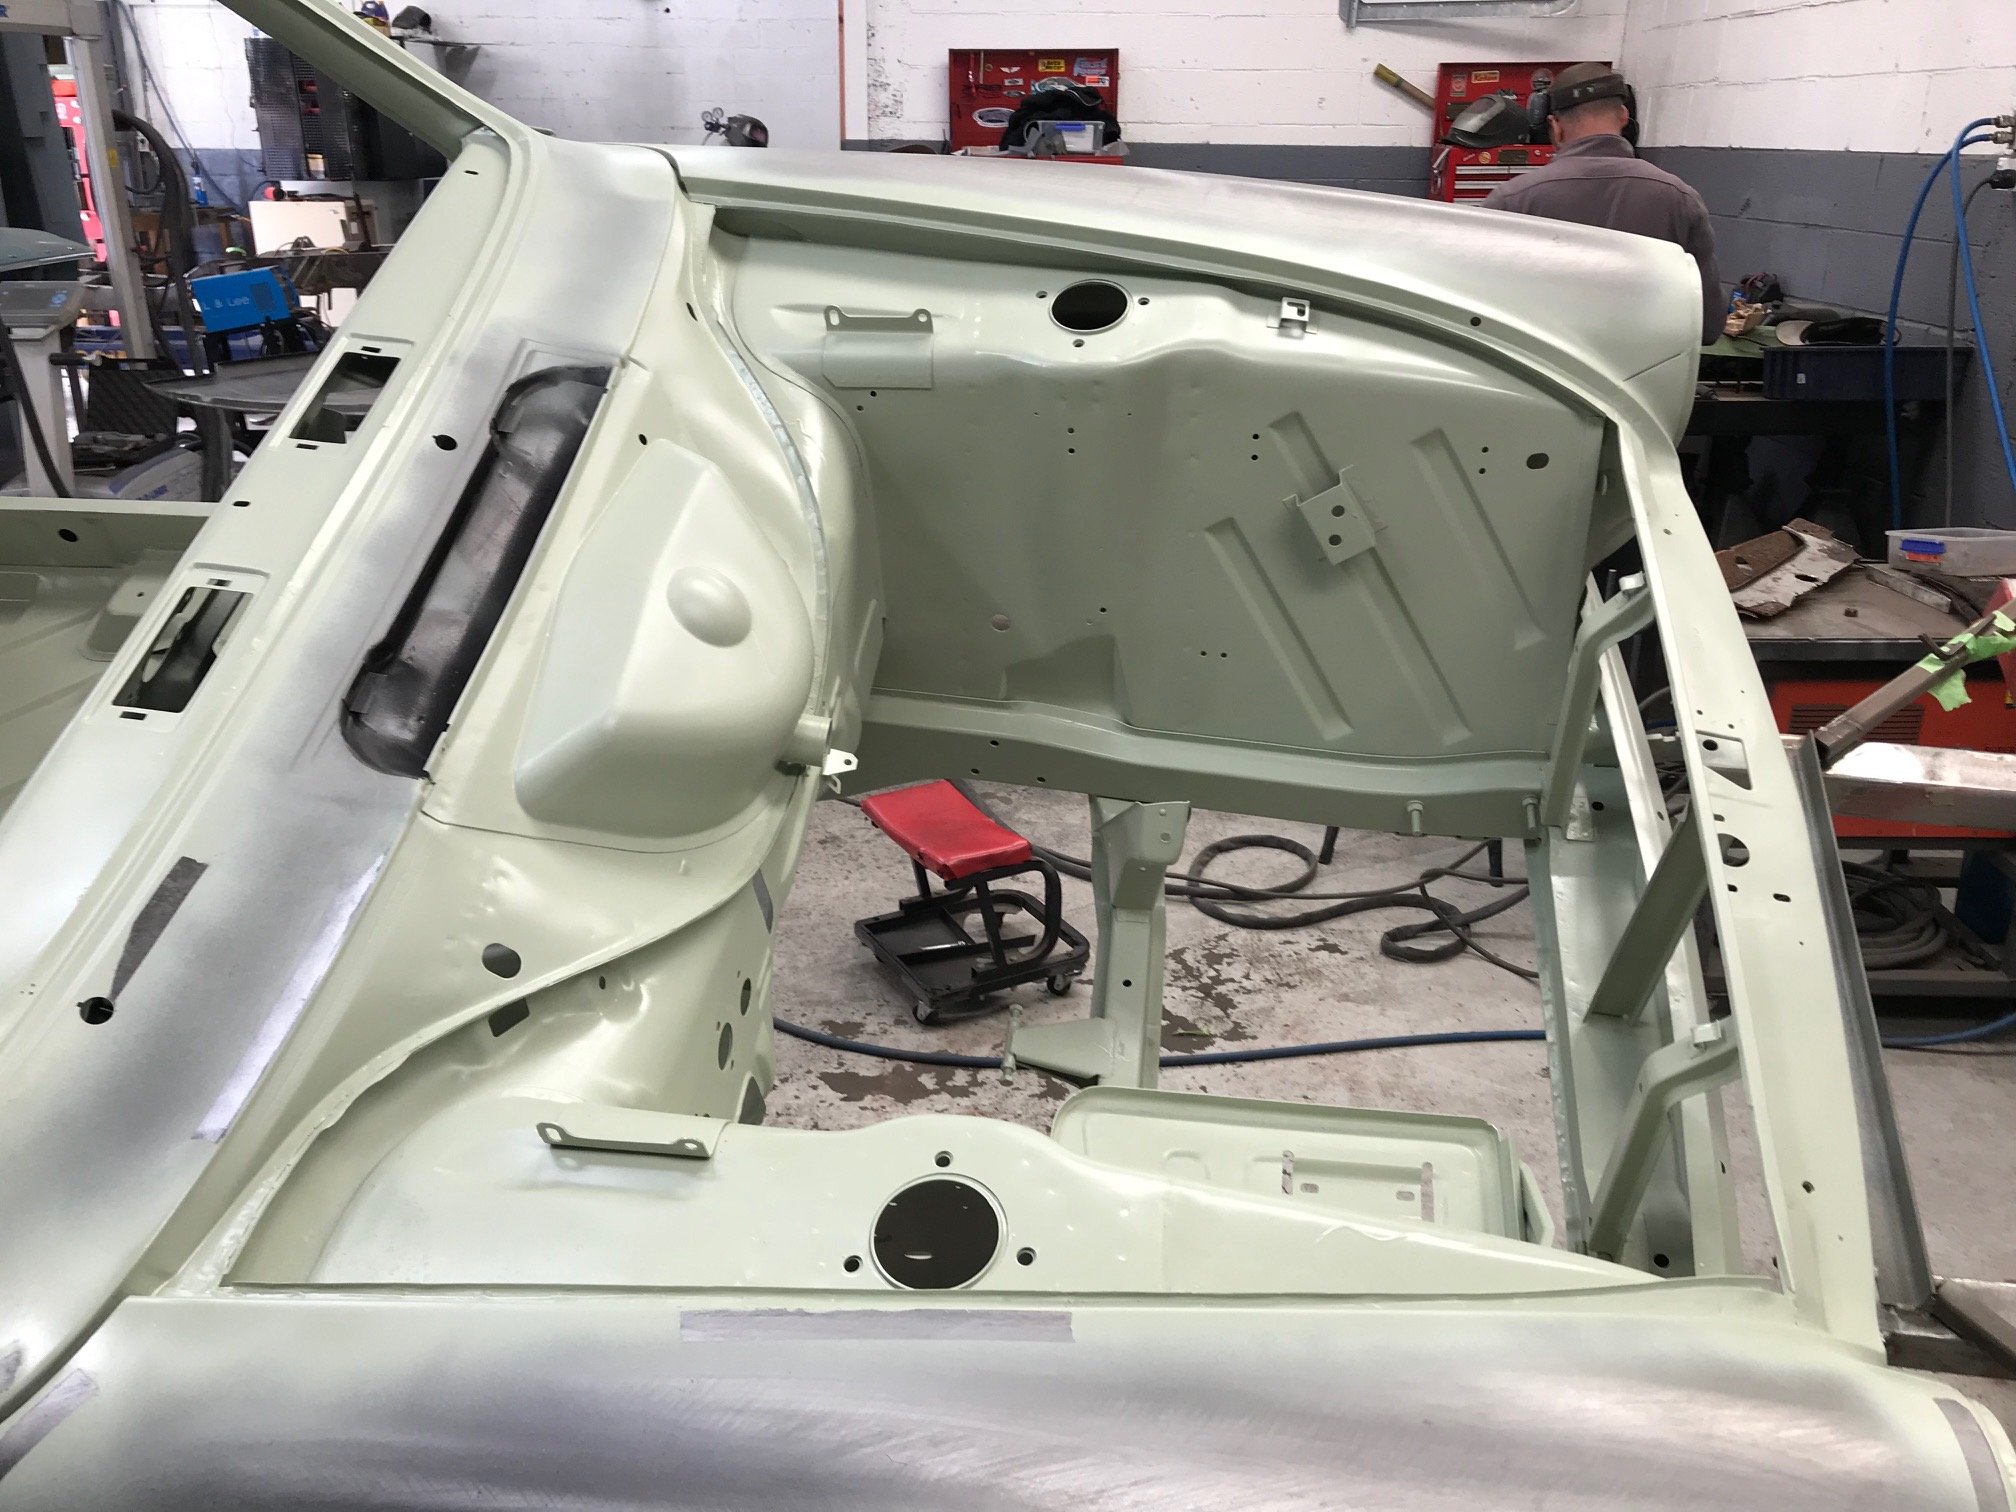
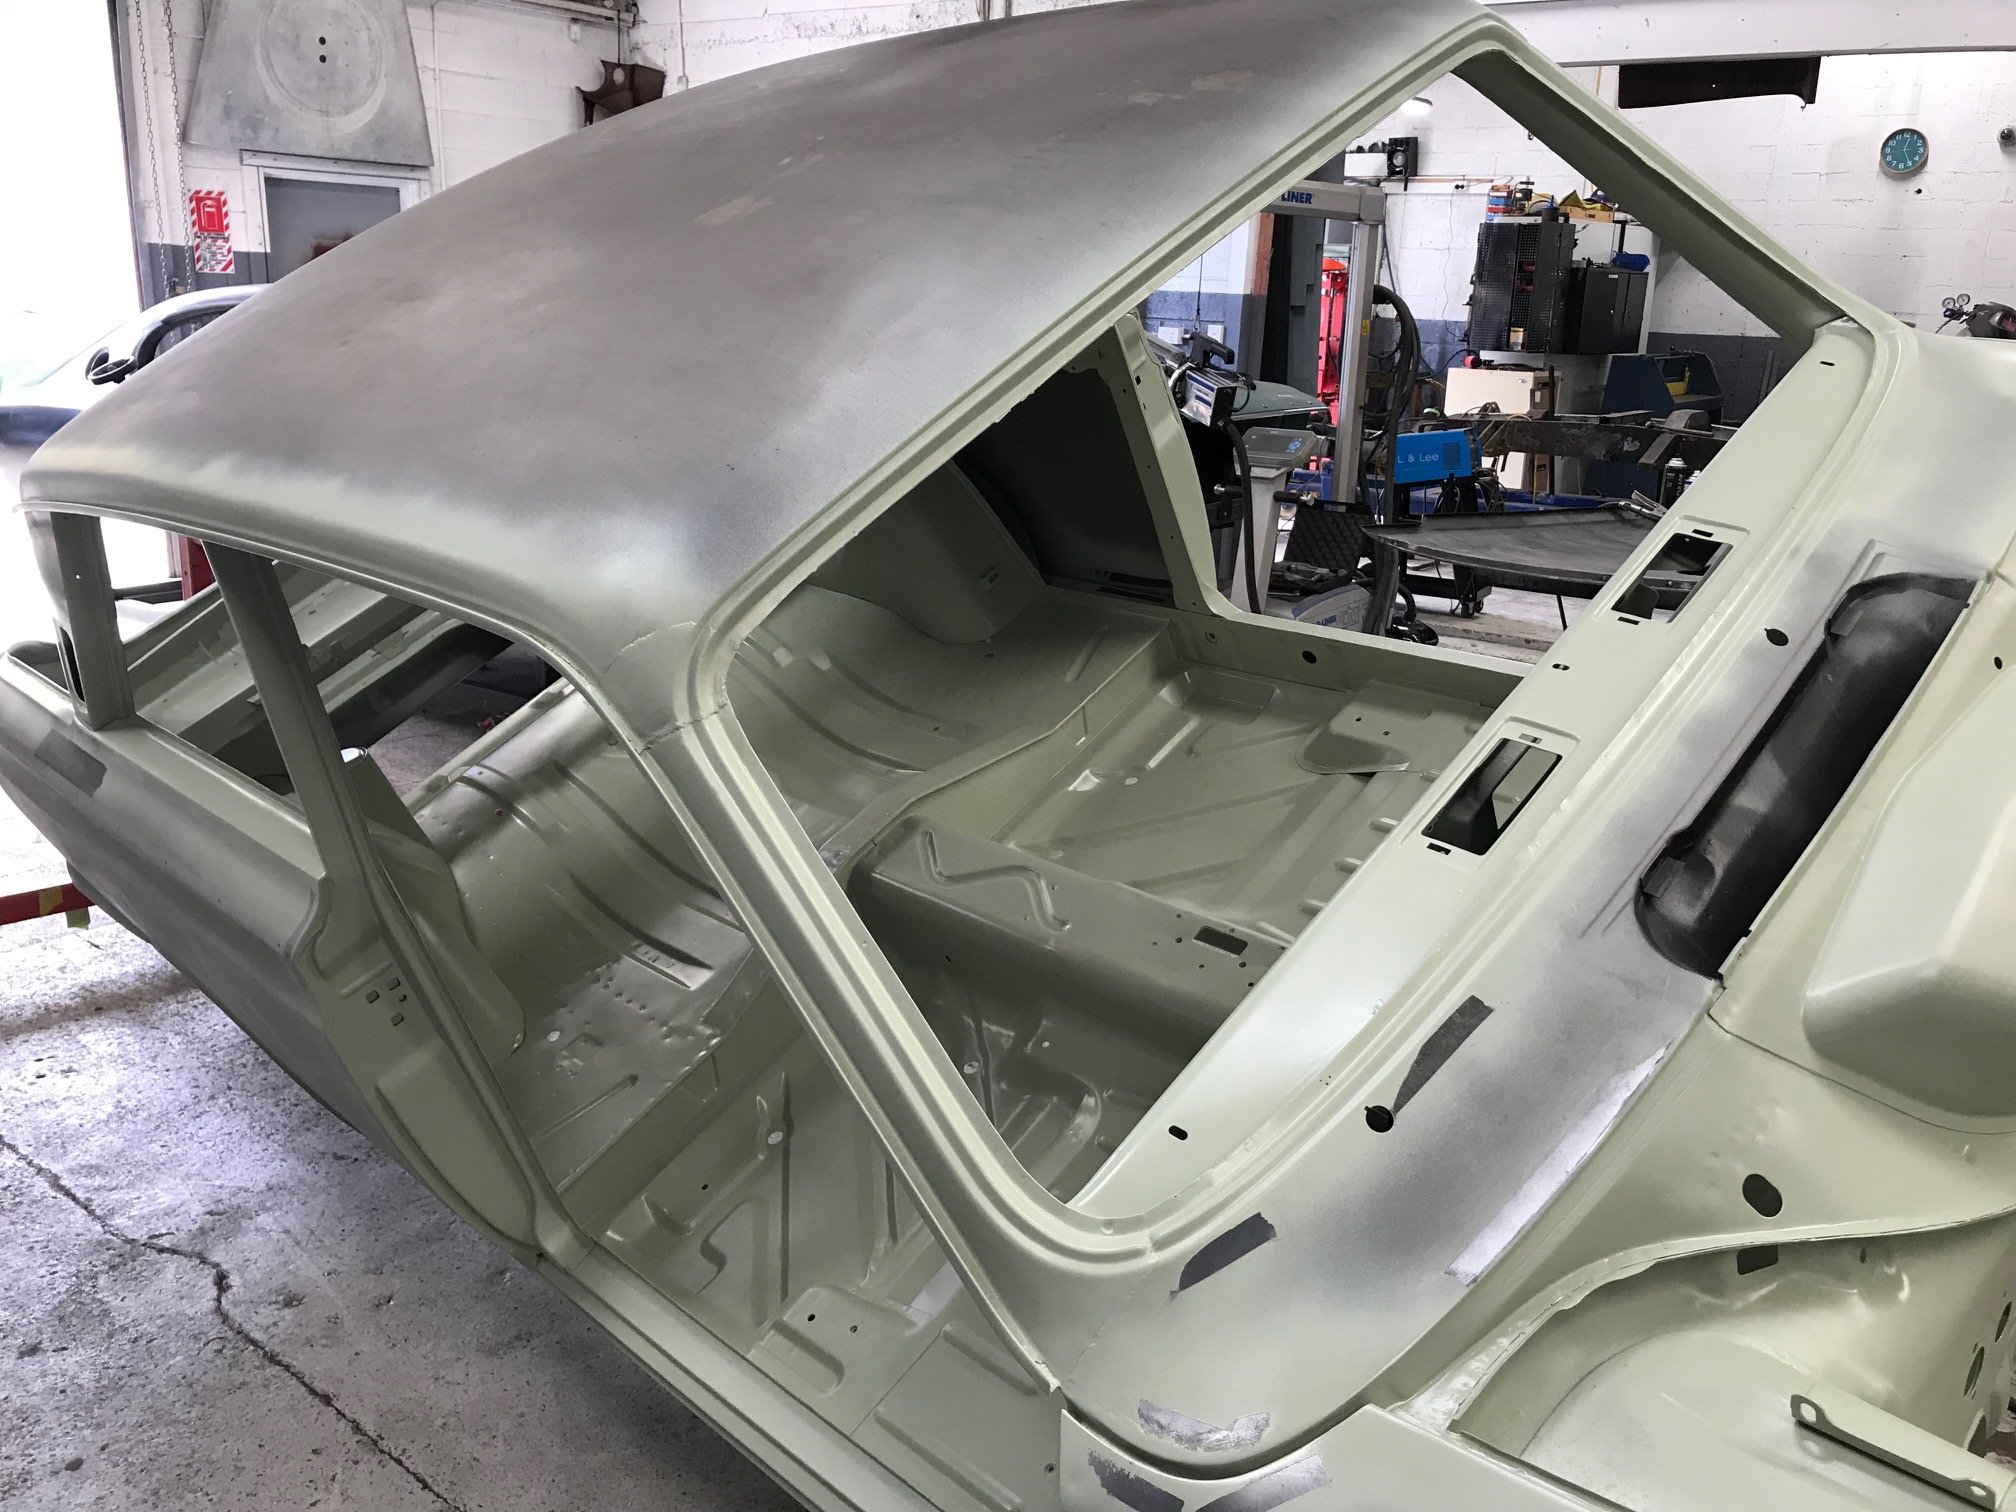
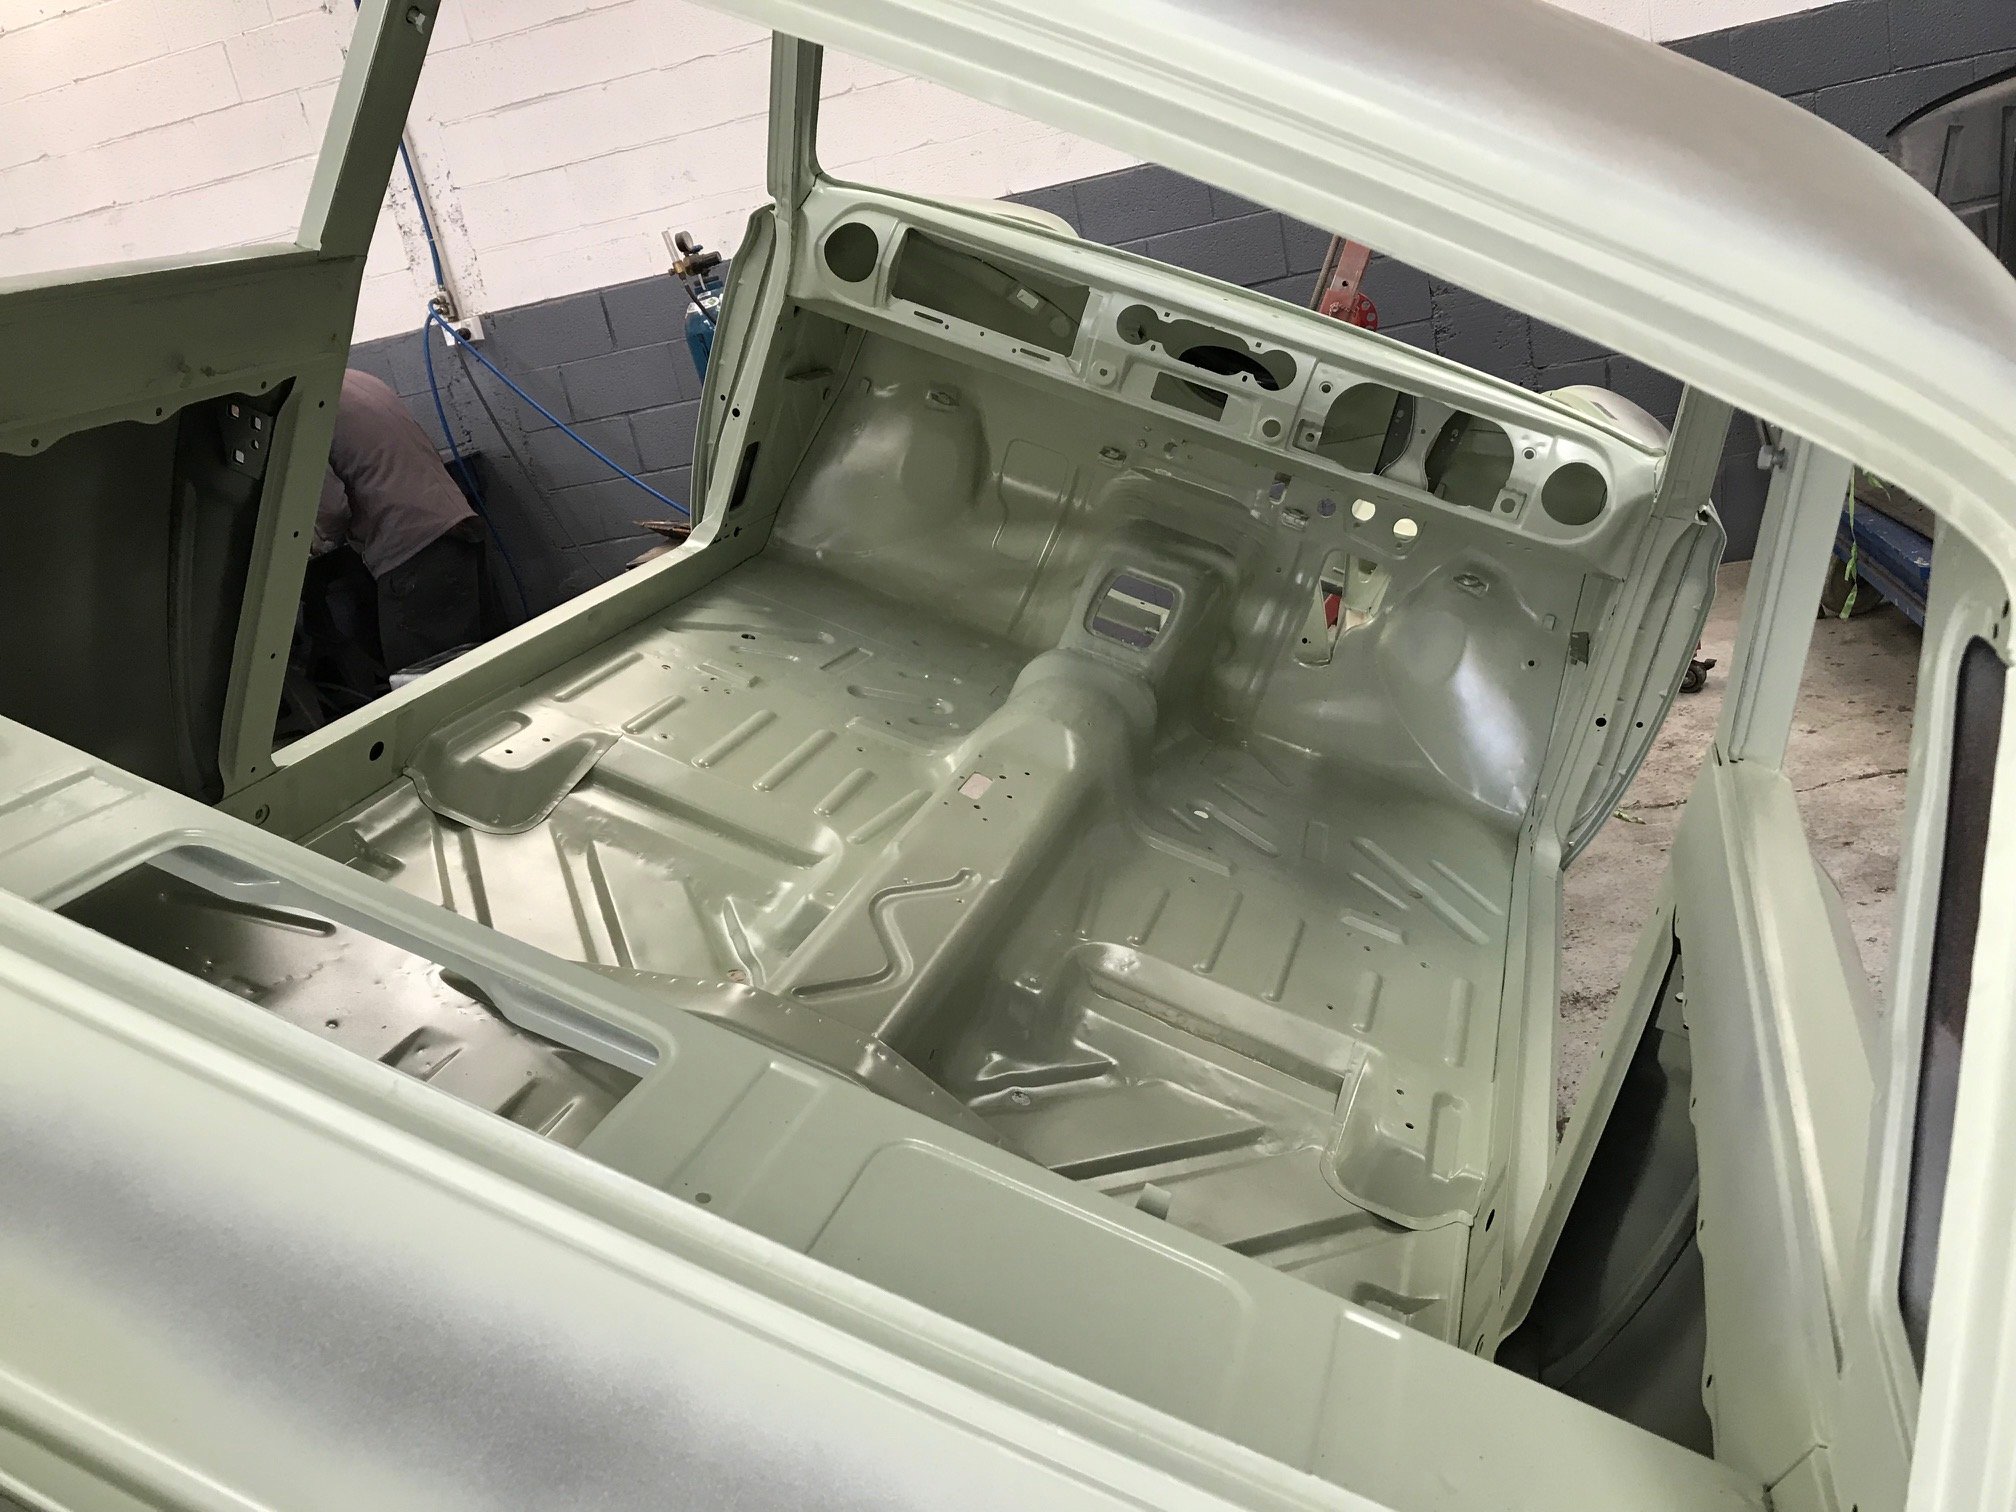
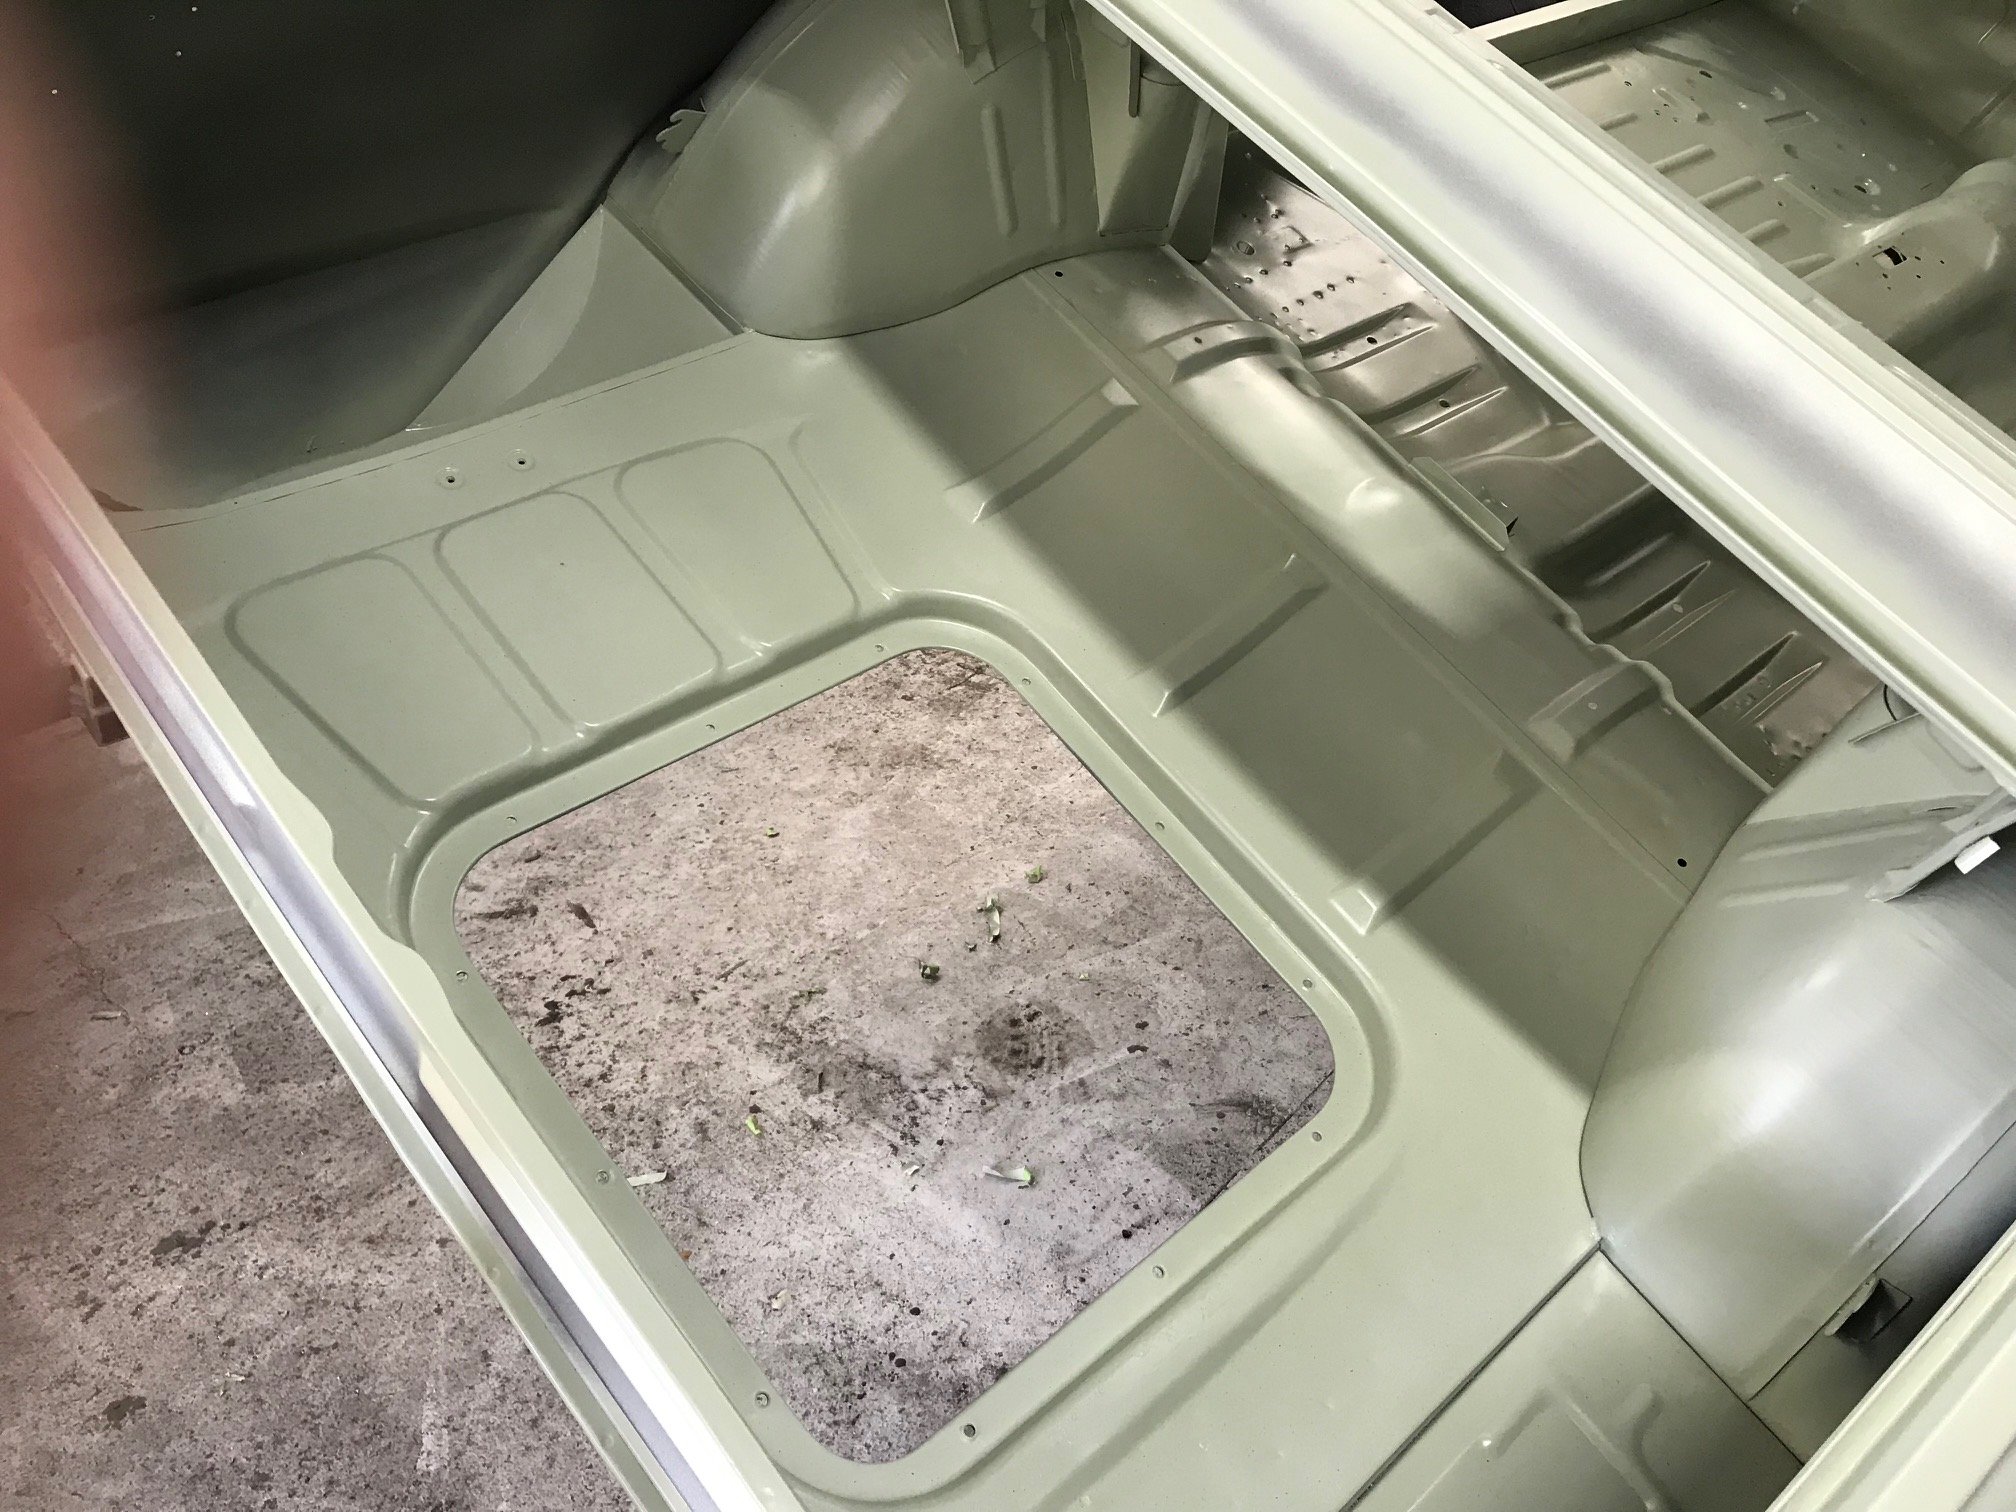
Ready for paint. The panel journey has ended and the quality is just outstanding. Thanks Greg at R3 Fabrications.
6 points
-
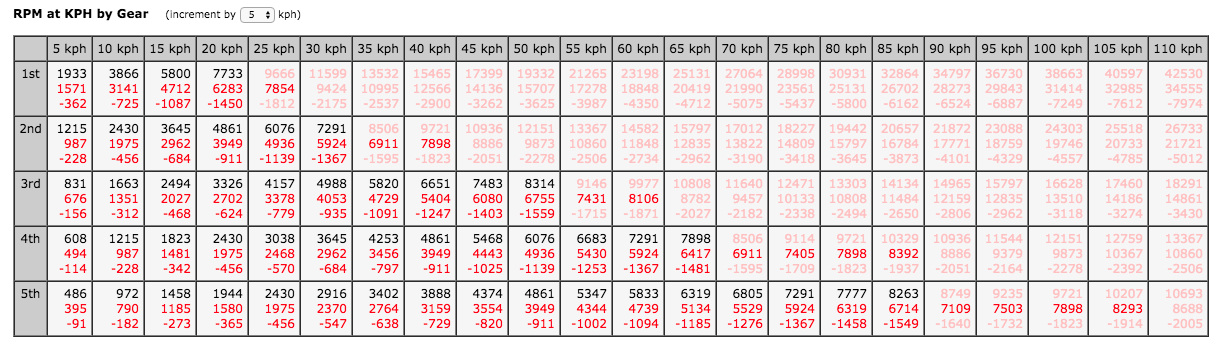
I've been chasing the cause of the seize since last weekend and have done a couple of things. The bike acts lean on the overrun, which is usually caused by a vacuum leak or a lean pilot circuit in the carb, so I've been through a few things in search of the lean hang. Replaced both crank seals - no change Set float level in the carb - no change Changed the reeds over (they weren't seating completely flat on the block) Changed 17.5 pilot jet to a 30 from another carb - it's now very rich up to 1/4 throttle, but still hangs and pops on the overrun Refitted air box properly (it was loose when it seized and could have been leaning the mixture) - still hangs Disconnected the oil pump and changed to premix I highly recommend Blackwood Yamaha in Cambridge for Yamaha parts. They were super quick to respond to my queries and I had my crank seals on the same day. Their prices are reasonable too. I took it for a hoon yesterday after work and it didn't seize, so that's a bonus. I'm using the old rattly cylinder for testing so I don't have to care if it seizes again. It went pretty well and cruised happily enough at 70-75k, but felt like I was wringing its neck at 80+. When it seized last weekend, I was doing 85kph, so I must have been pulling a few revs! It's hard to find information about the MX100, but the specs I've found online for the older DT100s say that the max power RPM is 7500 (pre 1980 DT100s have the same engine but with points instead of CDI). I did a few calculations to see what revs I was pulling at 85kph: (Black is standard gearing, red is my new planned sprocket size) At 85kph I would have been doing around 8300rpm! This is probably a bit hard on an old engine that's only designed for 7500-8000 max. The red numbers in the table show the RPM for the rear sprocket I want to fit - this will sit me at about 6700 at 85kph which is a much more manageable number! It will also allow me to wind it out to higher speeds when I need to. Here's a link to the wheel speed/RPM calculator I used: http://woodsware.aciwebs.com/gears/ I'm not convinced that the problem is fixed yet, but it's looking promising. I'll head to @Geophy's place on Sunday to use his ultrasonic cleaner to make sure the pilot circuit is nice and clean. Here's my list of what might have been the problem: Lack of lubrication resulting in high cylinder temps (trusting the original oil pump) Too many RPMs Air box boot not fitted properly - LEAN Partially blocked pilot circuit - LEAN Piston to cylinder clearance too tight on new cylinder Ring gap not set correctly All of the above I'll get the new cylinder back onto it and will go for another hoon and see what happens. It's under 2 weeks until the big ride, so the pressure is on!
5 points
-
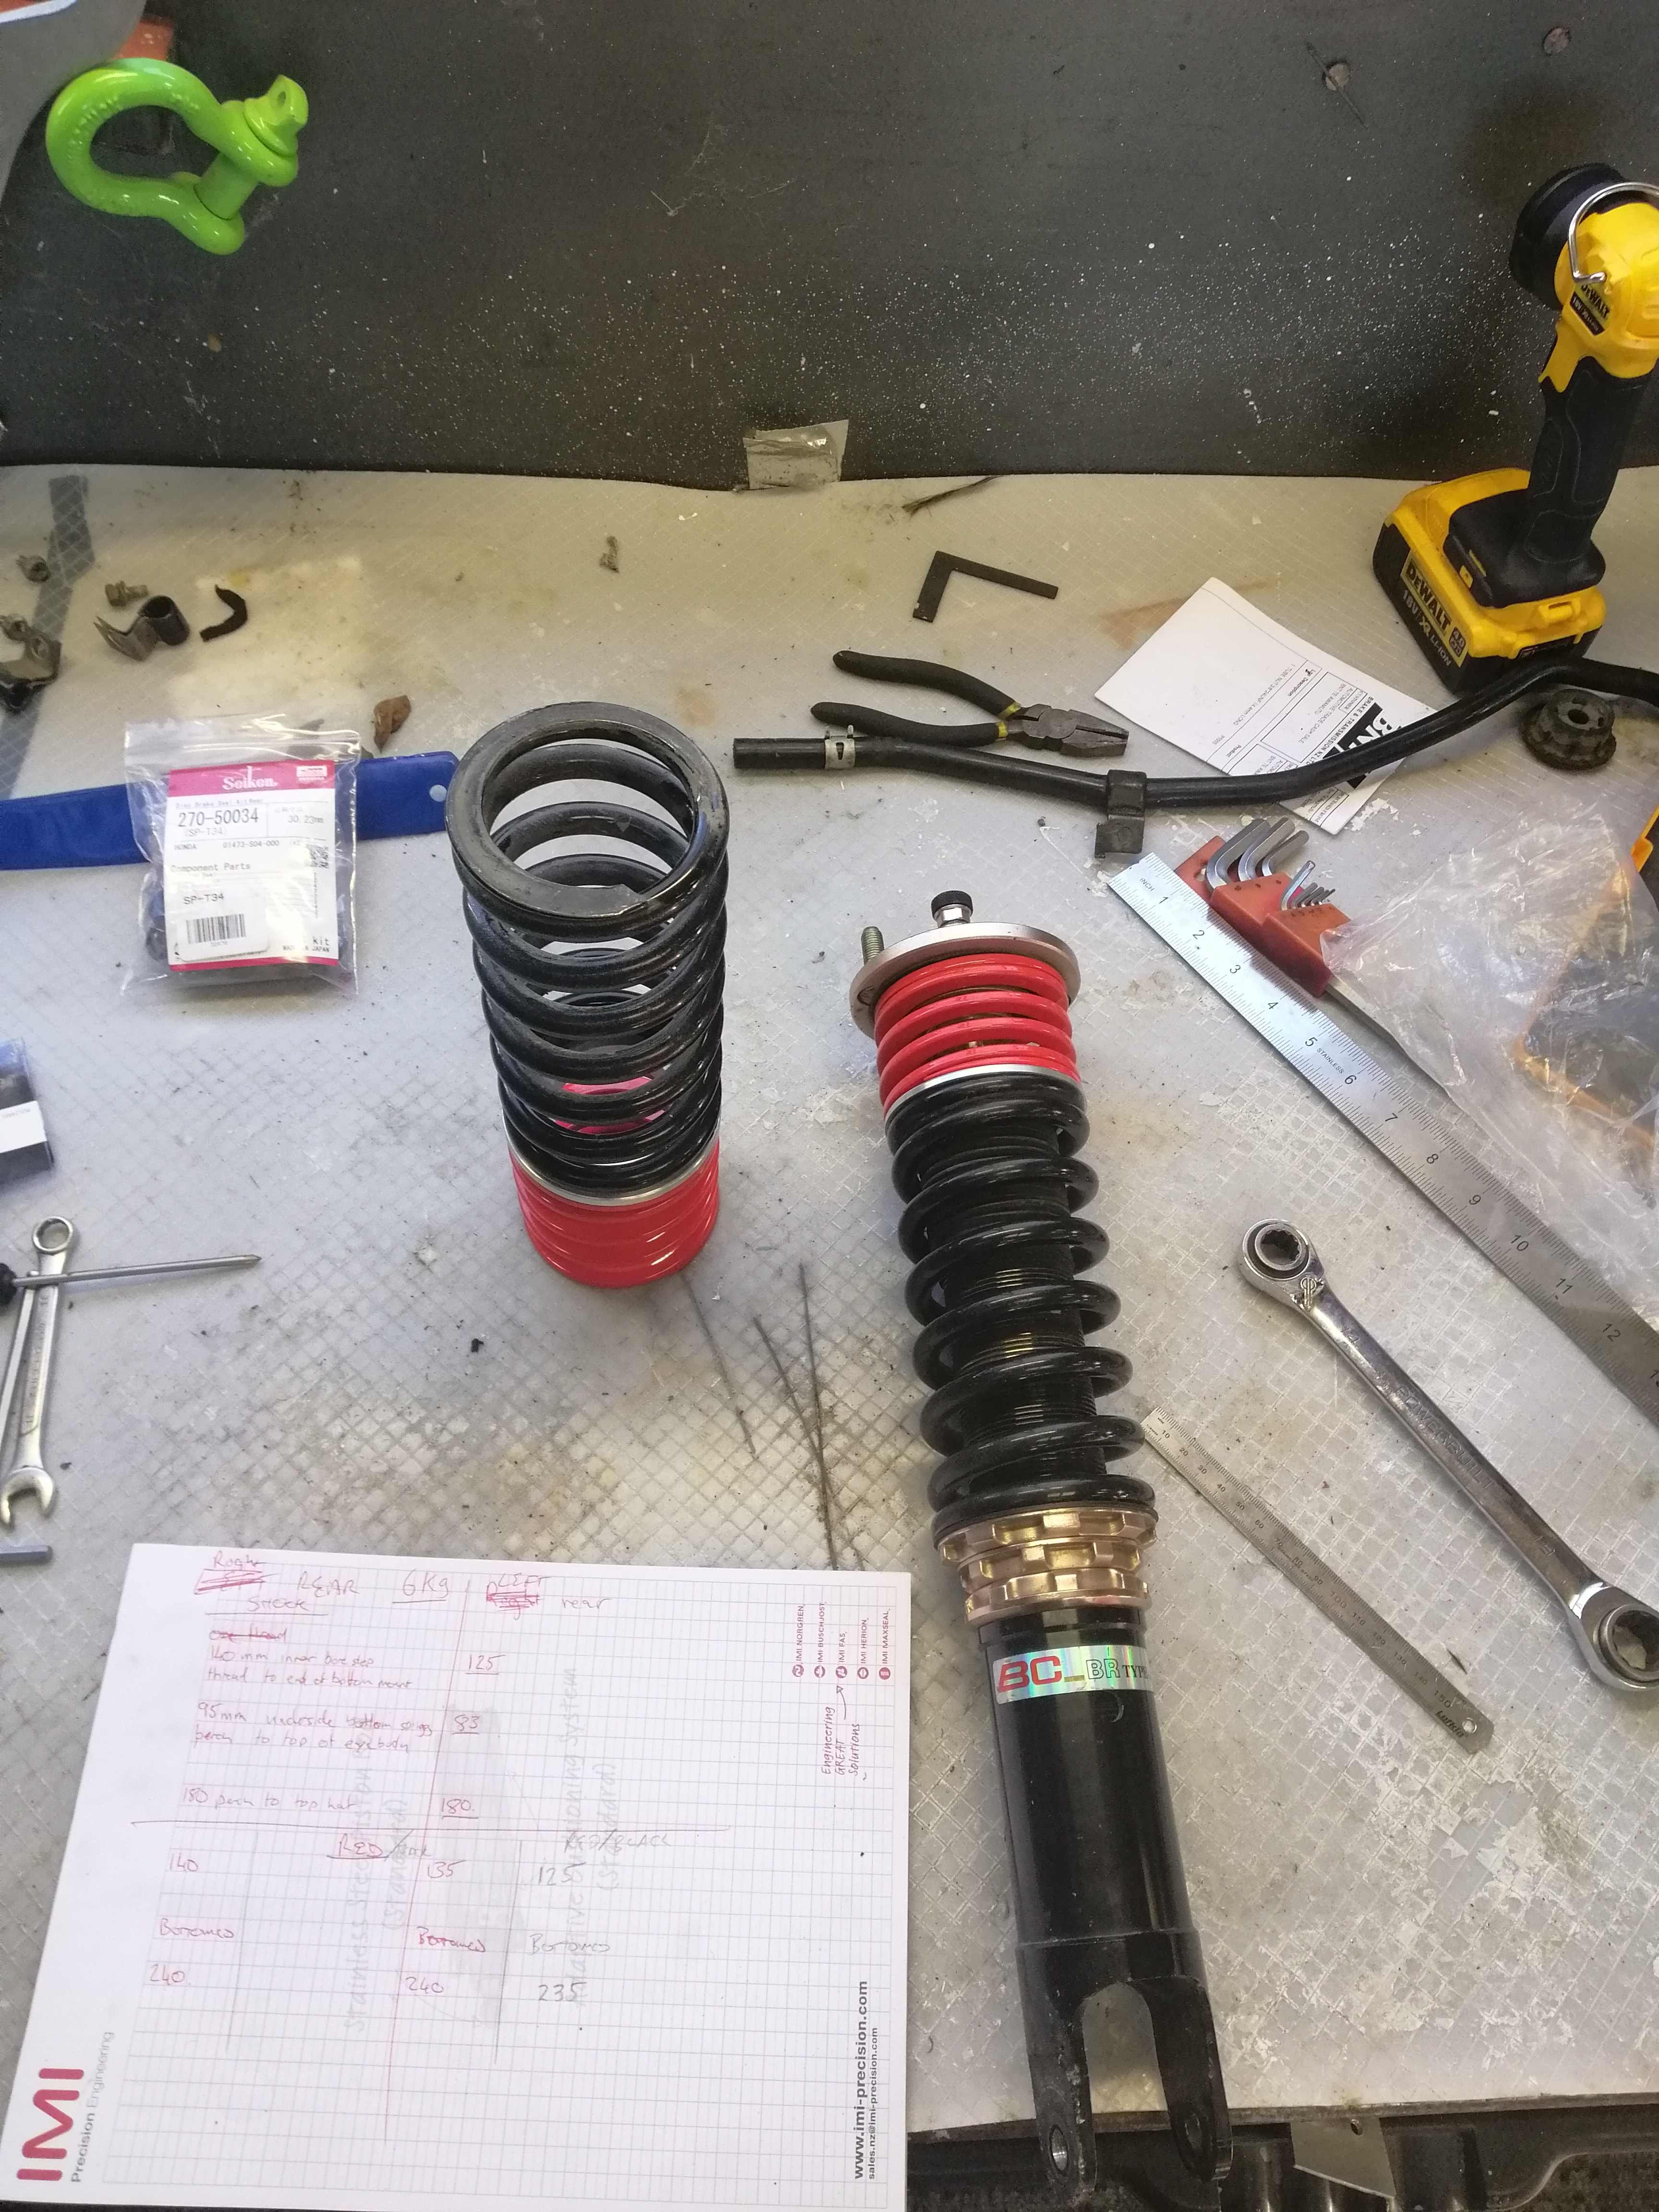
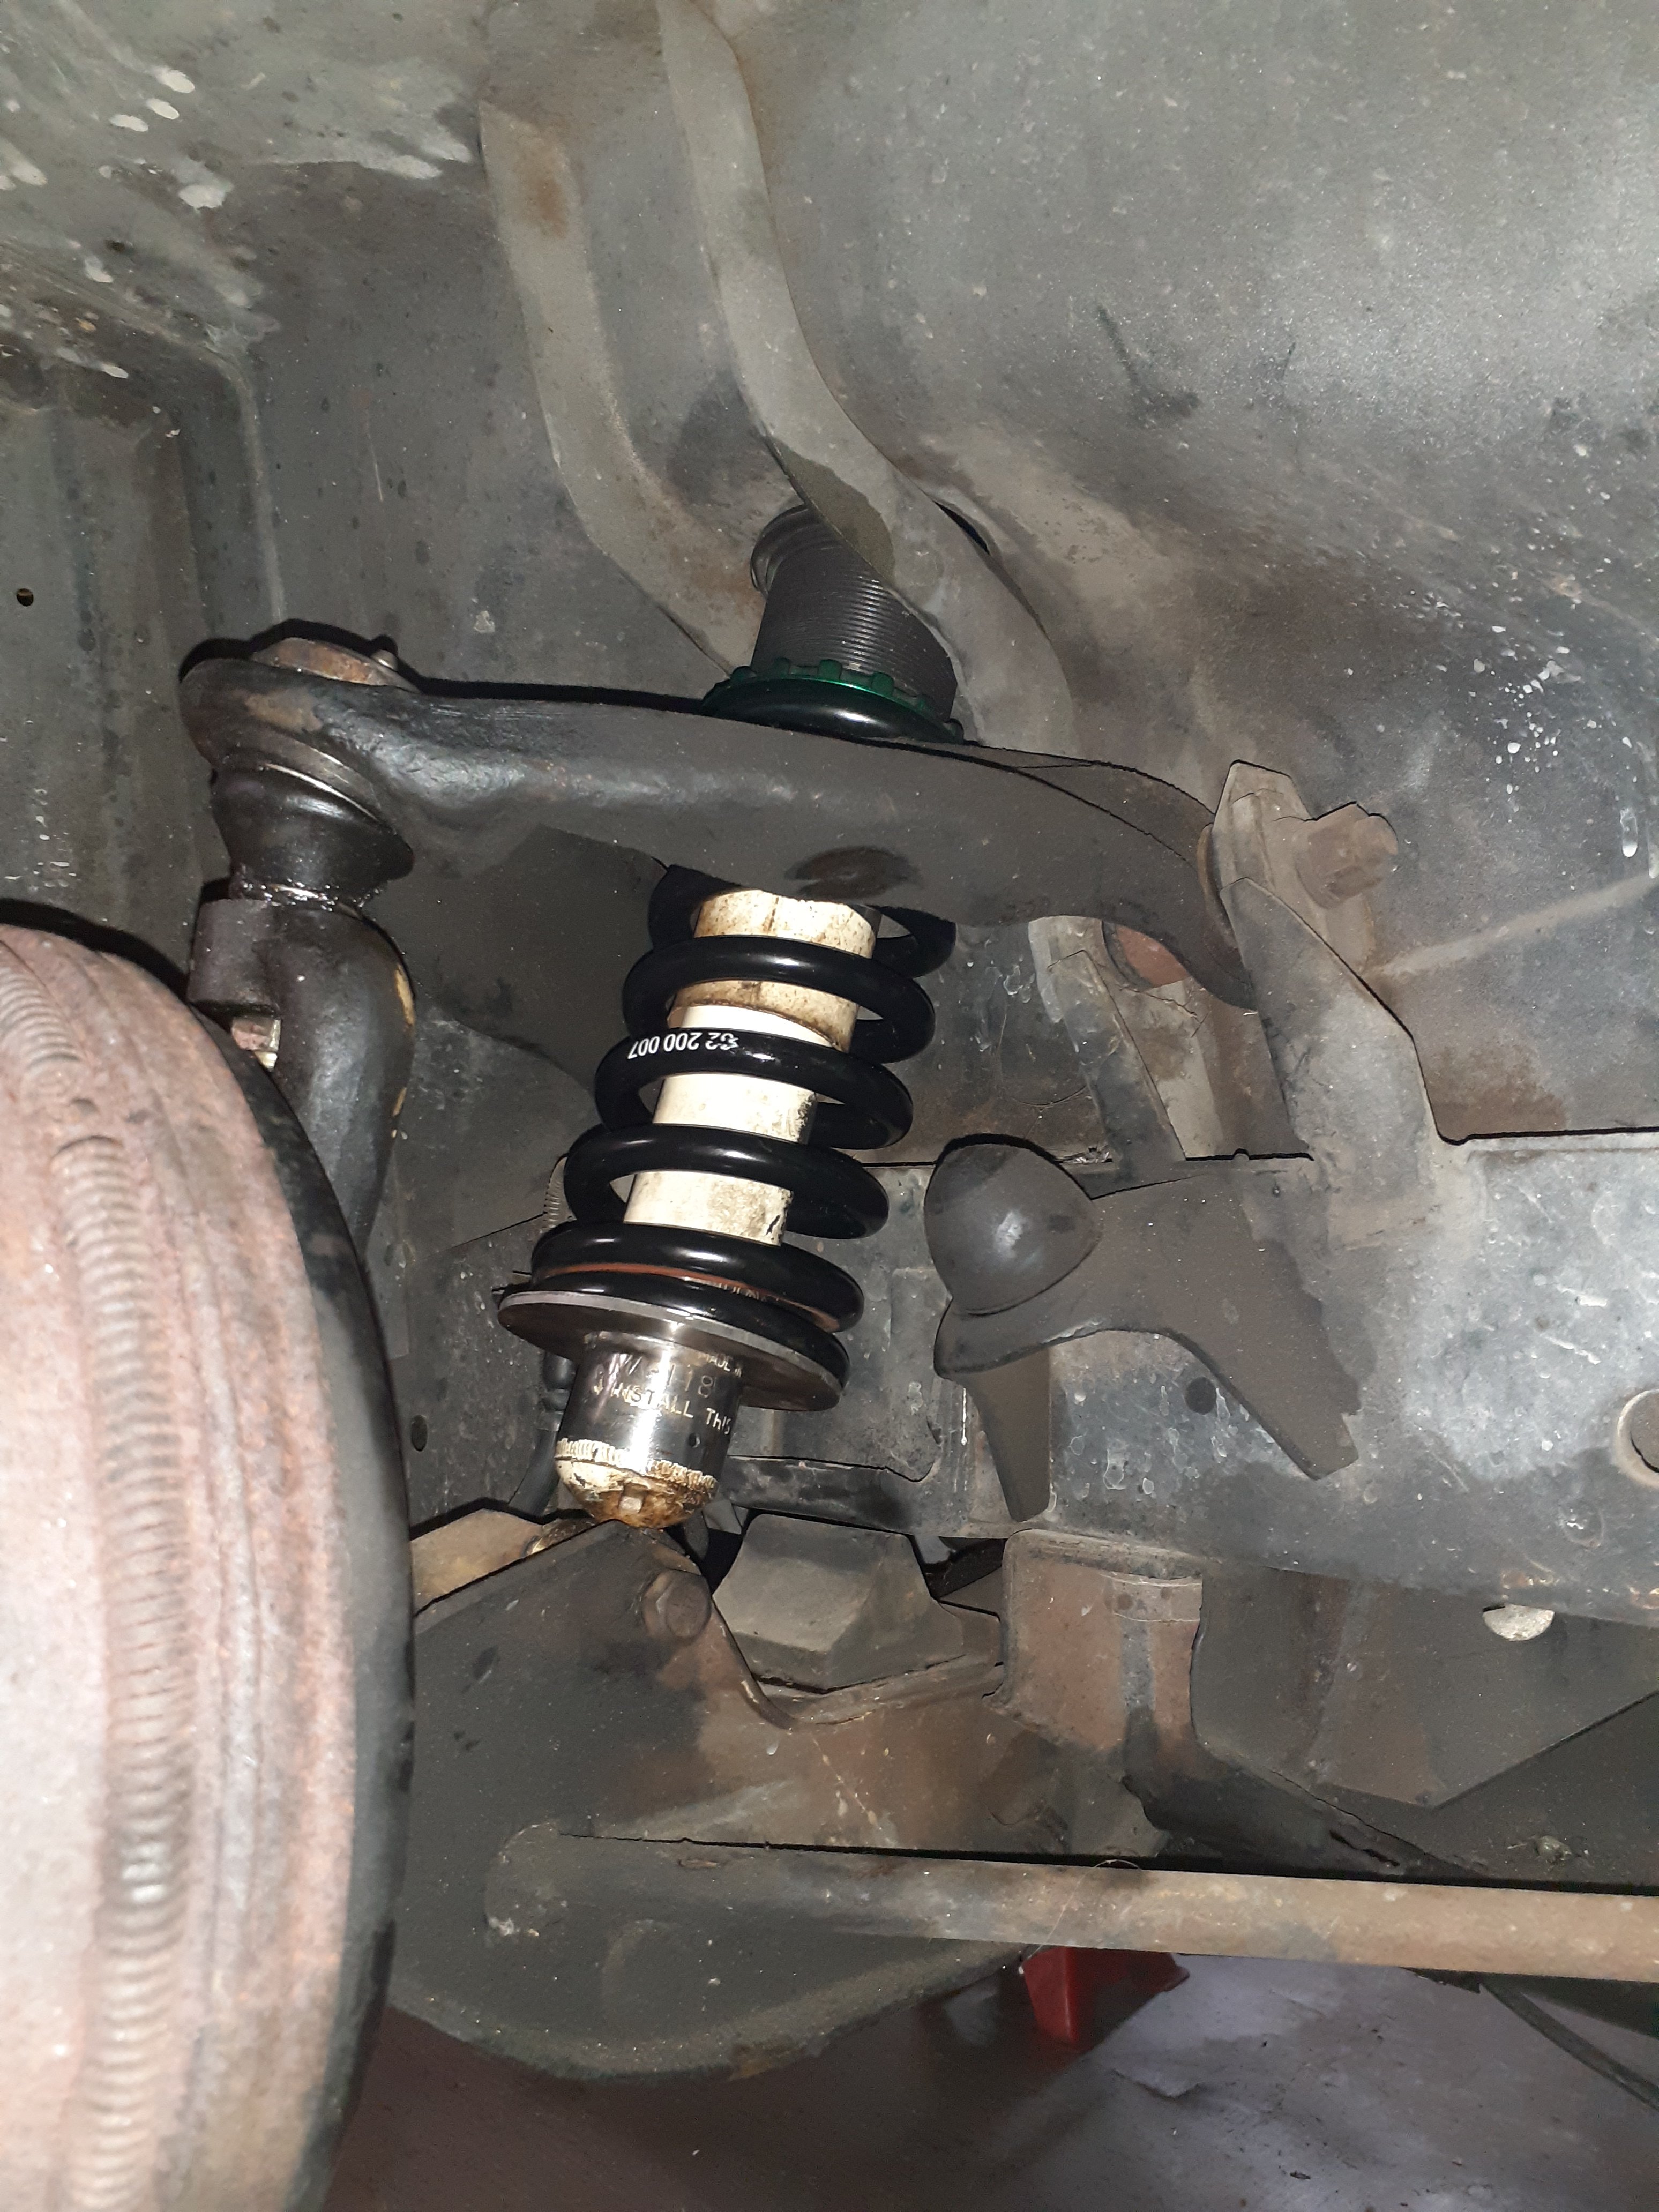
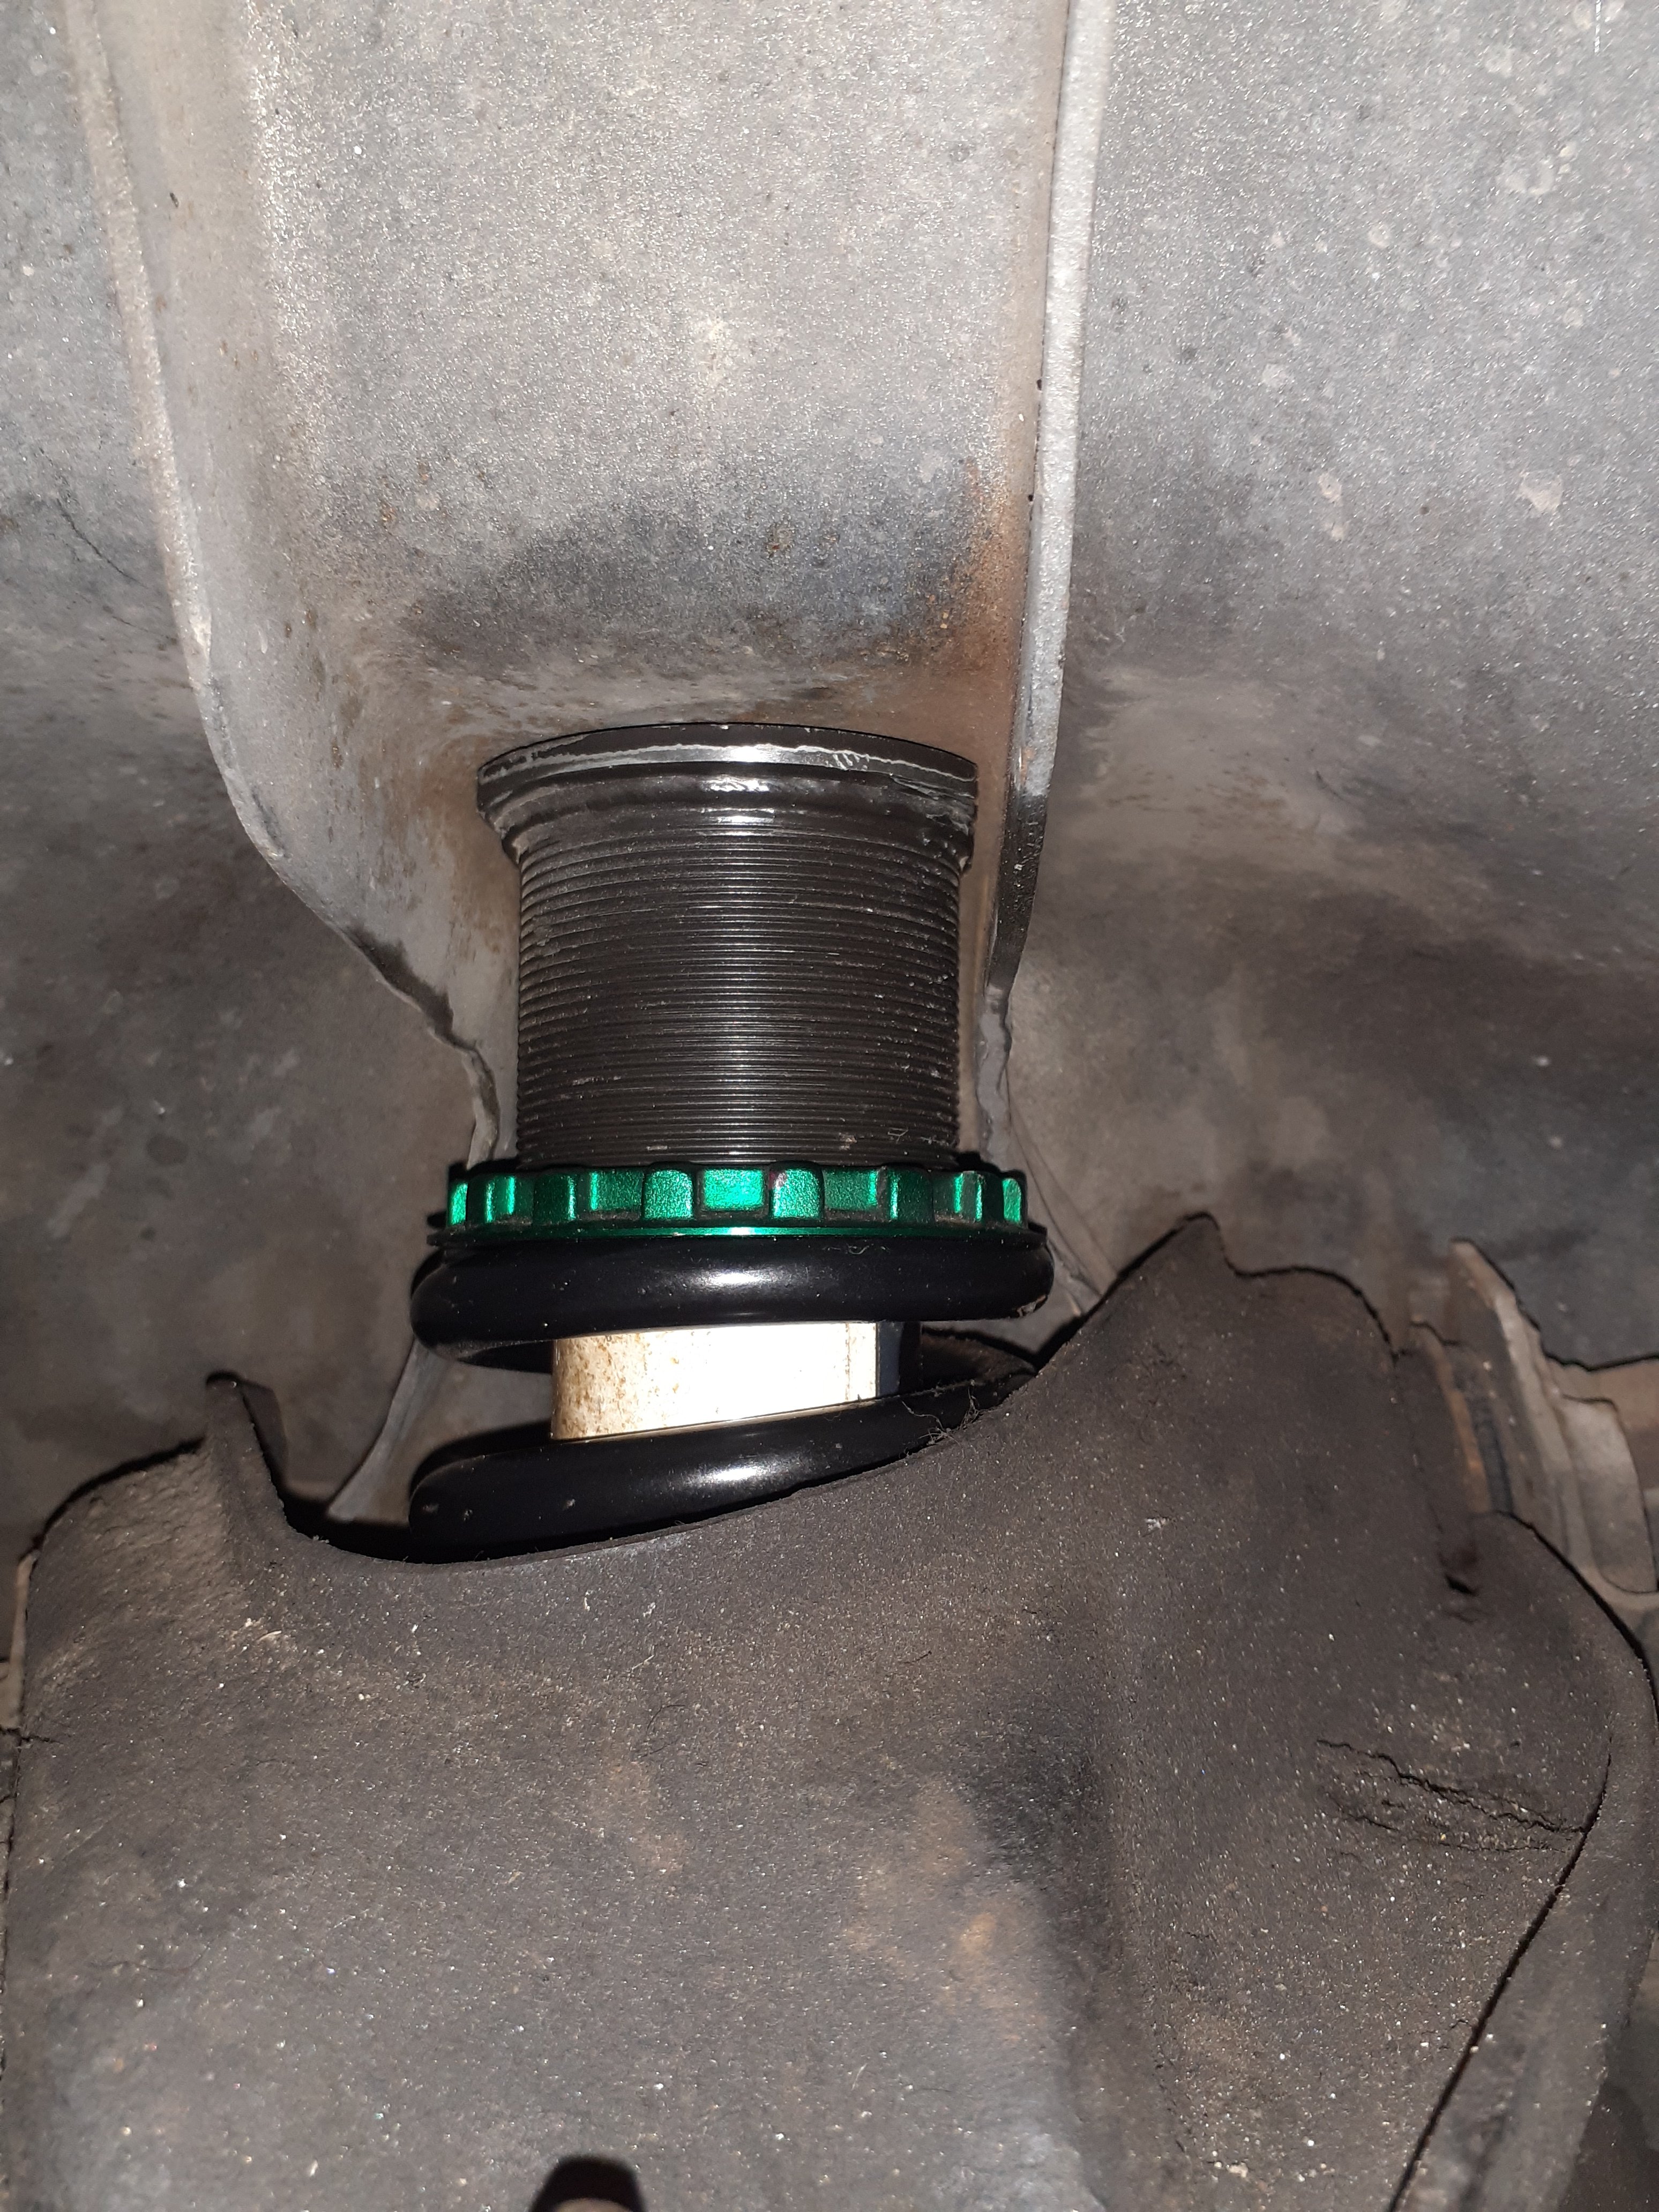
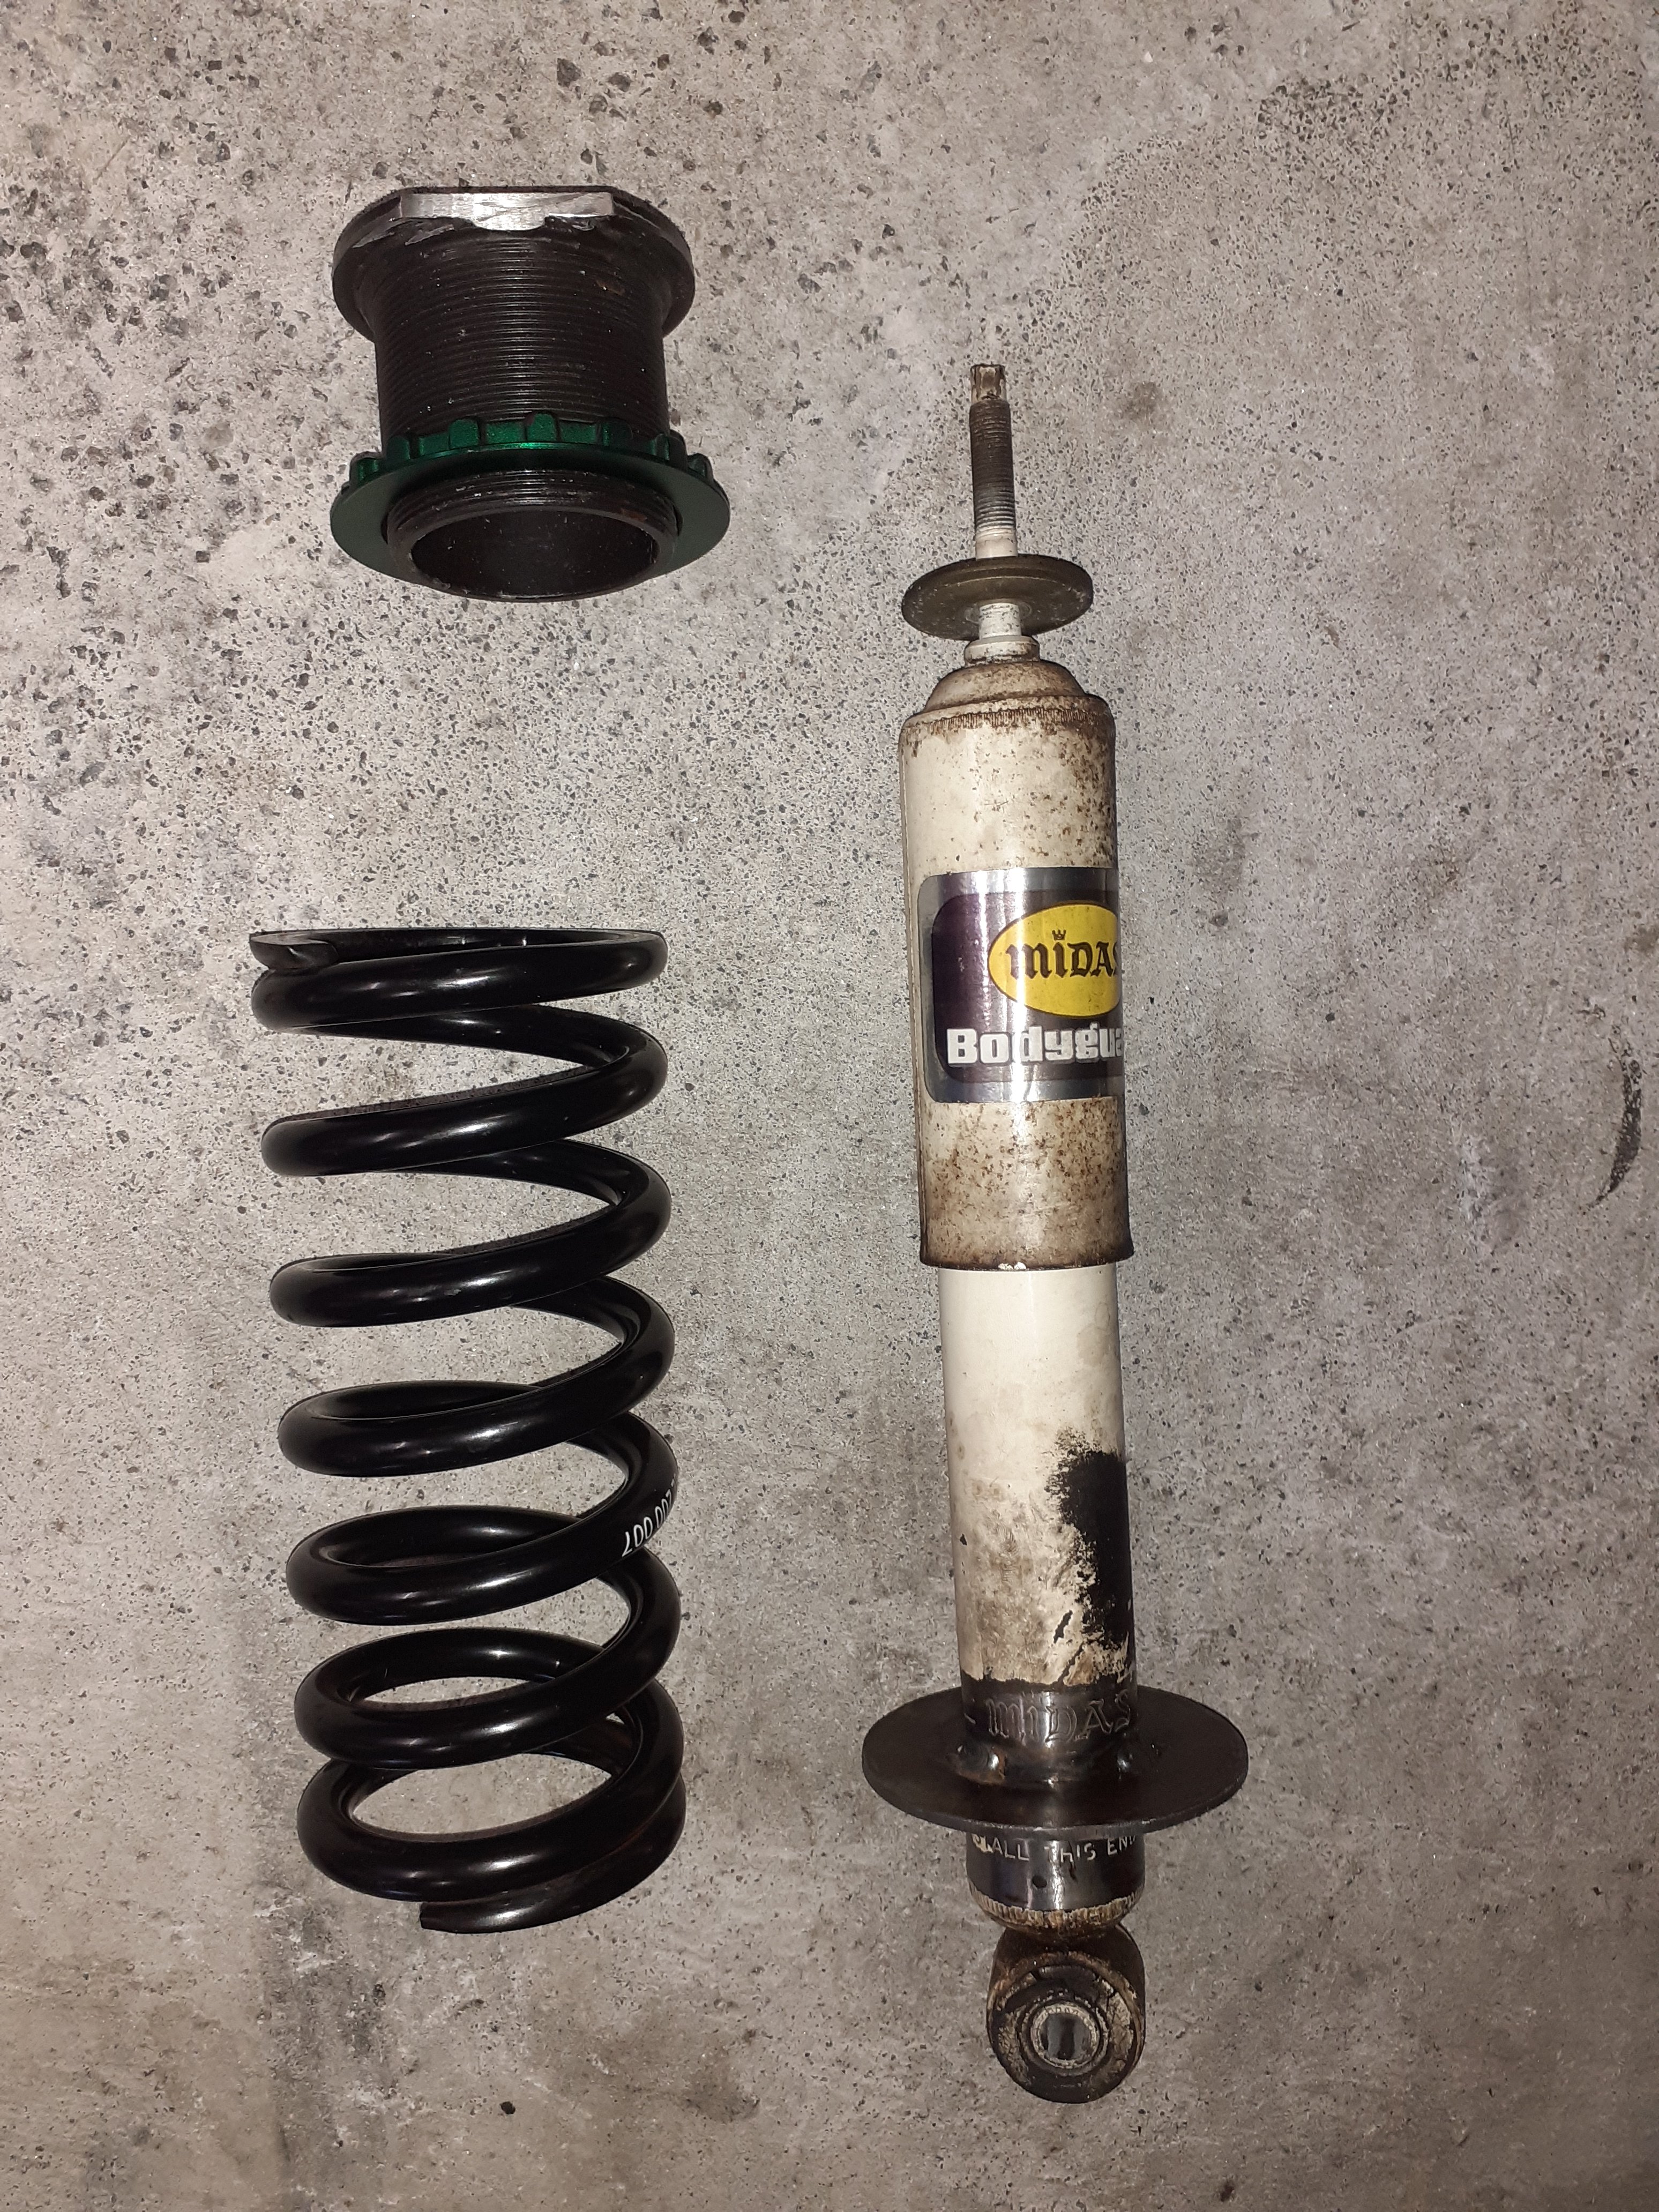
I don't have a lot if time for a flimsy 5 or 10 lb keeper, but a heavyweight second spring (80lb plus) can be quite an improvement.. I was able to give my honda an extra 30mm droop, as its light in the rear spring selection was a bit tricky.. Even with perch and lower body adjustment.. / goes good now.
5 points
-
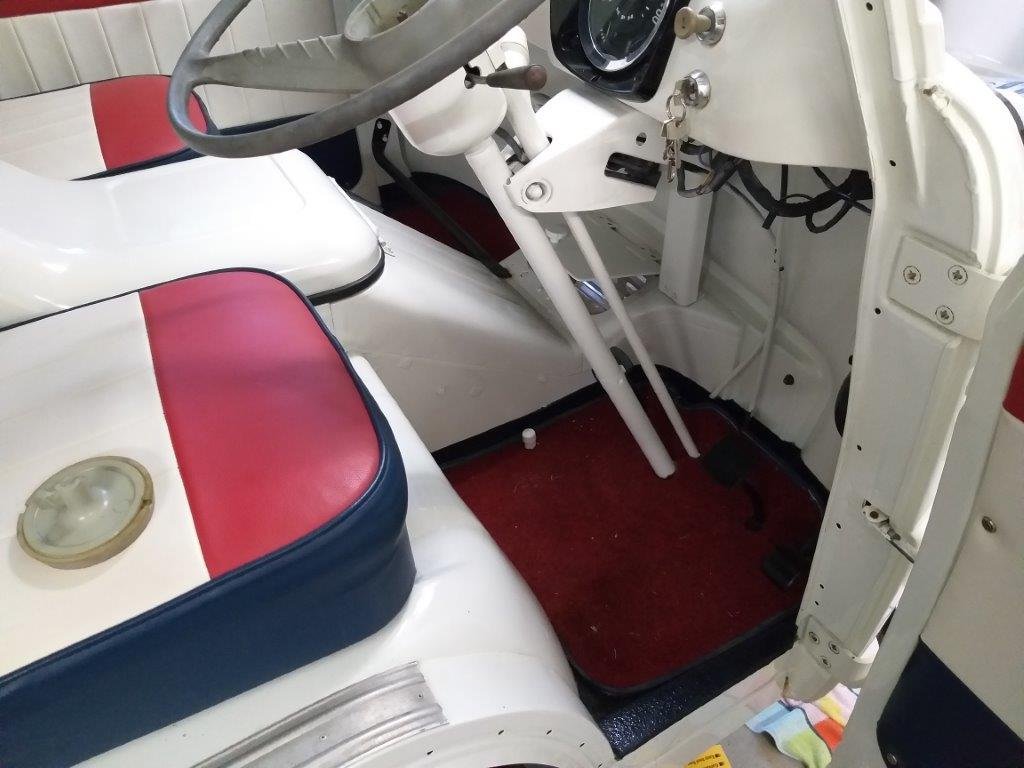
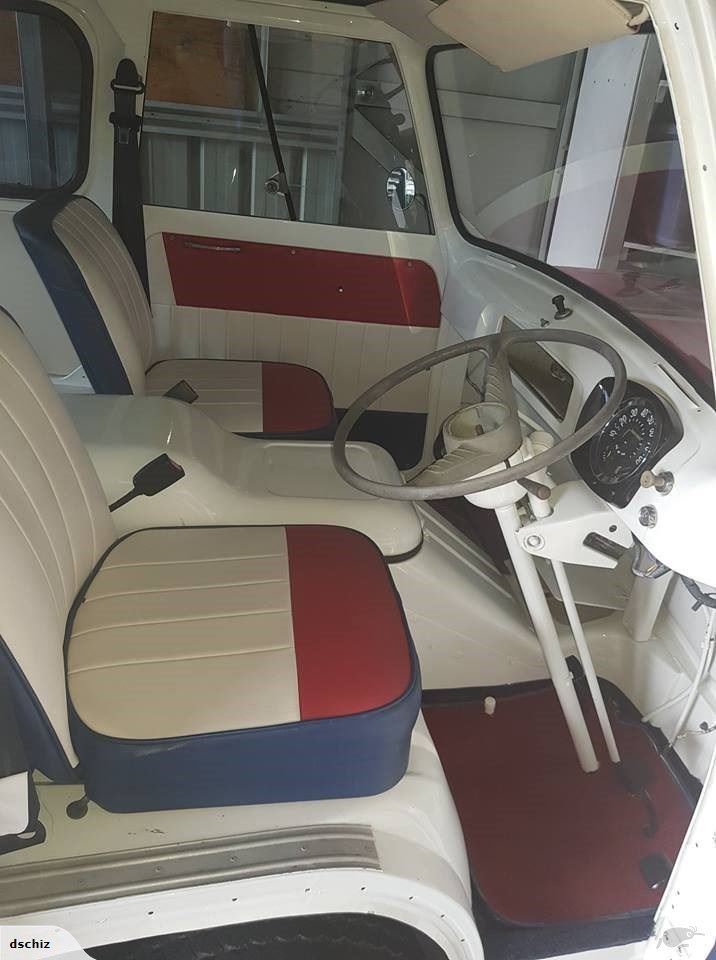
Thanks for supporting my HiAce drive-train direction sr2. Nirvana for me would be using the Thames as my daily driver whilst retaining the minimalist interior look and I can only achieve that goal if I stick to a column shift gearbox and a narrow enough engine to fit in the existing engine box. My HiAce donor has a 5 speed column shift which I am hoping to use as well as the Toyota rear axle. Engine wise I'm thinking of giving the 4Y a go. Sure it was originally designed as a forklift motor, so is unlikely to win any races, but like you say they go forever and parts are cheap and plentiful. The existing Consul derived motor runs okay for what it is, but parts are getting hard to find. Shot of the interior to show how minimalist it is.
4 points
-
Cheers man! Fresh rings (a +1mm overbore wouldn't hurt either), bit of a tidy up of the cylinder ports, take 1mm or so off the head to bump compression. Make sure it's got the 16mm carb, not common in NZ but some came with 12mm or 14mm. Intake disc benefits from a trim, I haven't got the exact timing numbers for the Suzuki R-T disc but I've been sent a cutting guide to match it. New crank seals are always a good idea and of course a spanny and rejet! Measure your header pipe, should be 32mm but some have a 28mm as a restriction.4 points
-
Wasn't going to paint the tank, quite liked the honest dents and grime, but when cleaning the inside with meths lots of old paint came off so stripped it back... Was interesting cos my bottle of Tergo strip had congealed. Tried smearing it on as a paste but didn't seem to be working, then brushed on some other stripper. Lotsa smoke and bad fumes so chucked it in a bucket of water outside and wire brushed the gunk off and scuffed it... And hit it with 3 coats of black Durepox. Deliberately left dents... Then looked at bracket setup. I'd bought a new used one as mine had a broken side tab... And after cleaning and tapping new threads where necessary it came out good for another few decades hopefully... Rapt with the new thrust block, came with clamp and chains etc for $10 from Simply Seagulls...3 points
-
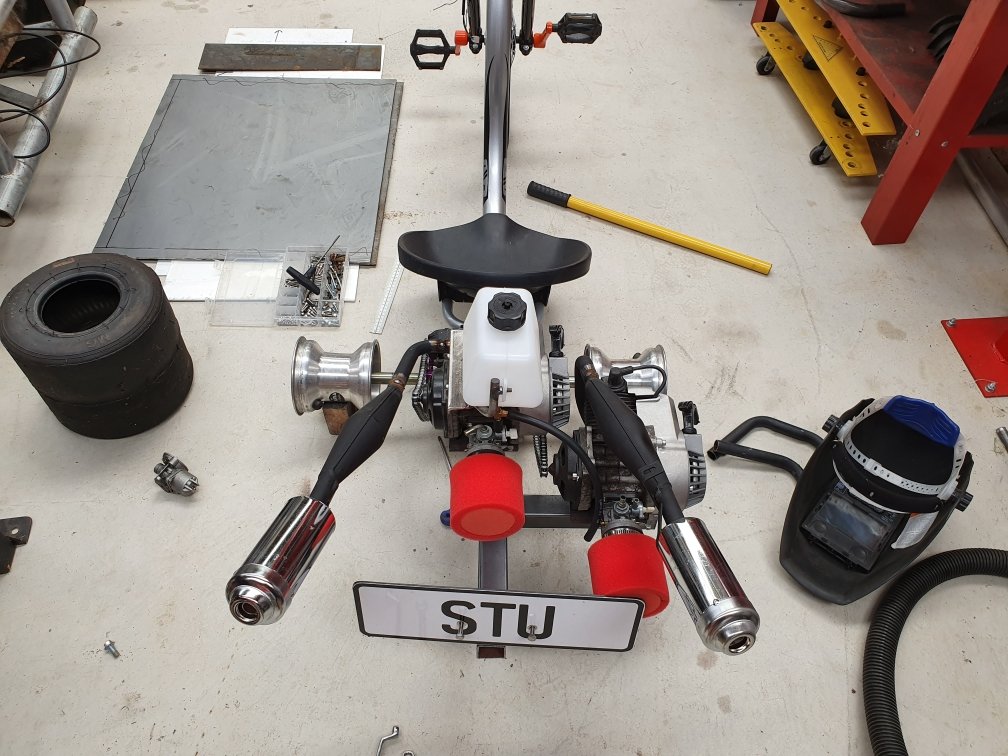
And got the exhausts sorted. I had to fudge it a bit to try make them line up in a relatively symmetrical way. It's just eyeballing...but its close enough to look about right. One is much shorter (95mm) than the other, but it will even out. Basically the longer of thr two will have more torque down low, then the shorter will produce more up high. In the middle of the rpm range they're going to be about the same. End of the day, none of that really matters as long as it does good skids!
3 points
-
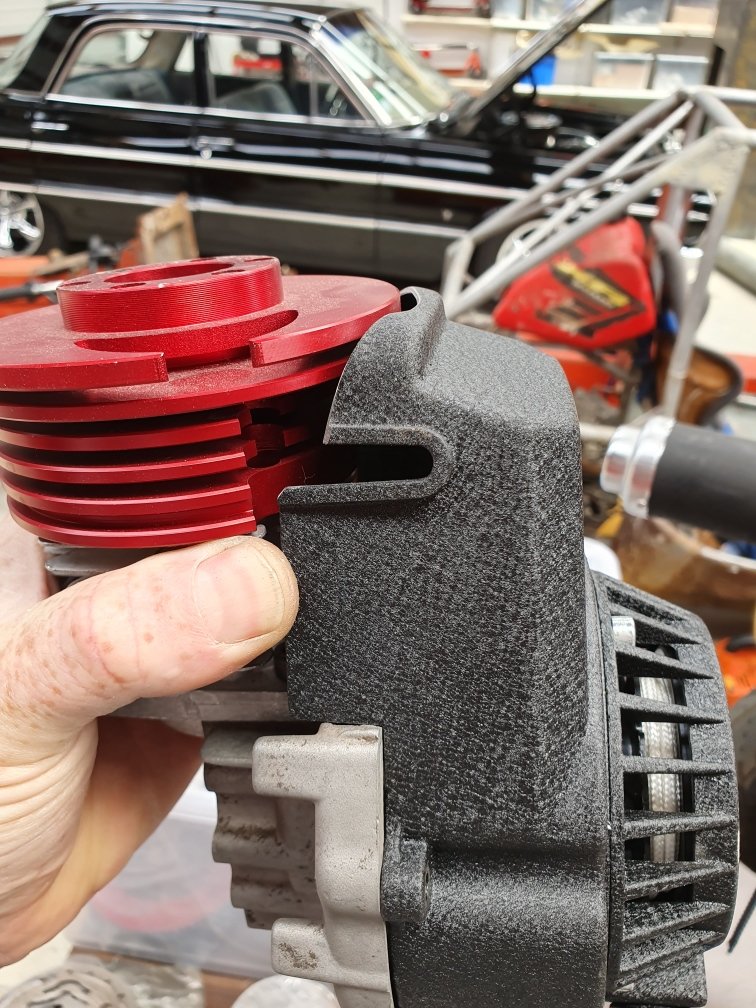
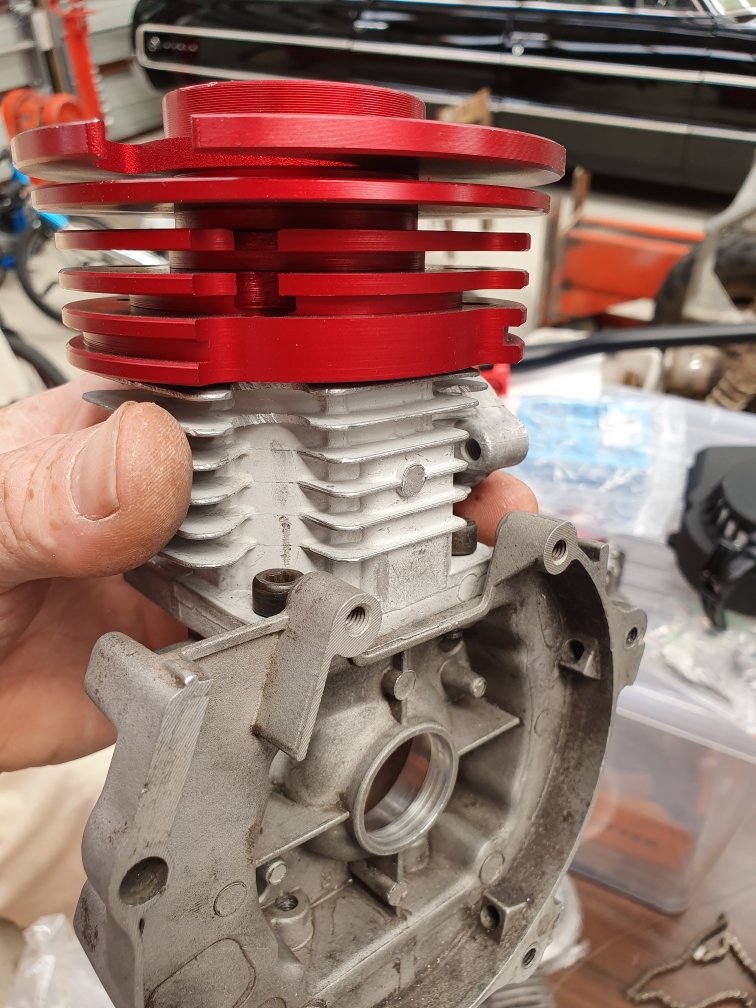
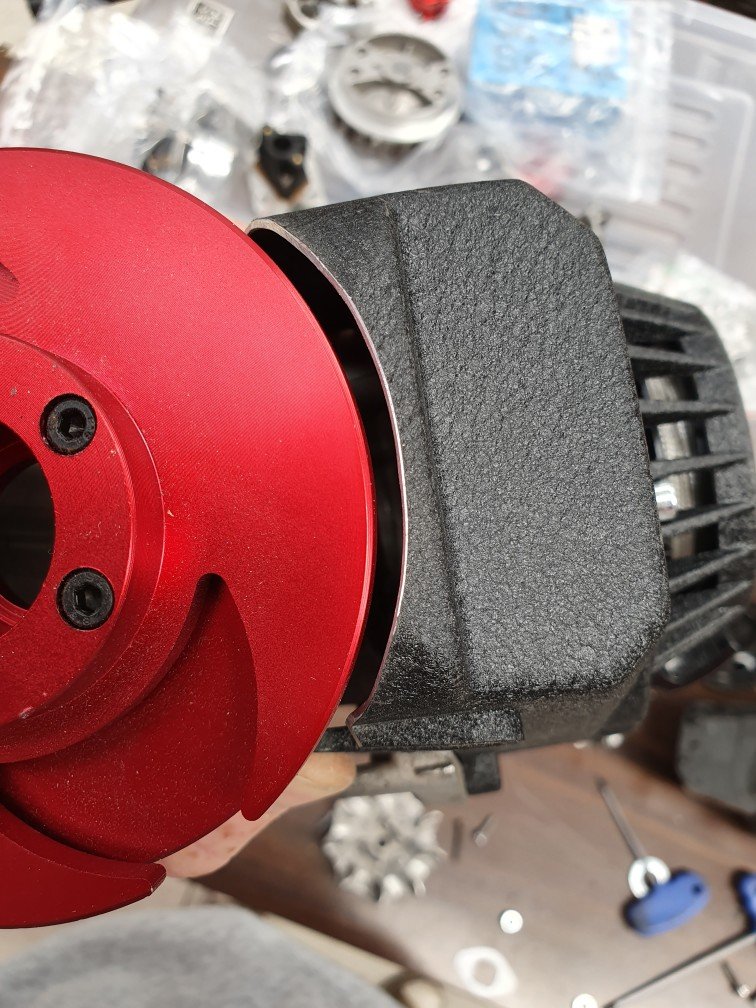
Been crazy busy of late with real work, so haven't spent any time on my fun projects. But for a bit of timeout today I took a break from work and did this: Dome fitted to cylinder, this allows me to set correct squish band tolerance. Pull starter cover now doesn't fit, so a bit of nip and tuck... Tadah...sorted. So nothing spectacular, but it gave me 30 minutes of tuning out time and a few steps closer to finishing it.
3 points
-
With the engine and trans in I started to look at what I was going to do for an exhaust I can choose 2 of the following 3 items Rh torsion bar Oil filter An exhaust that actually flows So I think the best option is to put coil springs in it and get rid of the torsion bars. I knocked up a dummy coilover using parts I had kicking around. I'll go see autolign this week and see if they can make a bilstein shock with a circlip adjustable lower platform and I can use the threaded one at the top. If this plan works I'll need to modify the lower arm inner pivot bush and strengthen the shock mount to cope with the weight
2 points
-
Yea foreshore and seabed! Keen for campsite carb rebuilds in Waikaremoana tbh. Keep it in your back pocket Jim. Mine runs a 30 standard and is suuuuuper rich at idle and 1/4 throttle I’m interested in anything that will lean it out down low.2 points
-
So did a bit of a small roadie on moped of speeeed today hahah palmerston to bunnythorpe to feilding back. Made a exhaust hit 70km with back wind even prety happy
2 points
-
Return too small/blocked/ regulator not regulating correctly and making the pump work hard ? Have you got a pressure gauge on it?2 points
-
Going with the setup you linked, with the perch and quite short spring. Hopefully it doesn't come to that, but figures I come up with suggest the car minus diff will be pretty light in the rear. So as you say, my options will be pretty limited. Can't actually source springs any lower rate for the rear of the car, rock hard place etc. Granted its a totally different chassis / vehicle usage, what spring rates are you running in the rear? Pretty sure yes, specifically designed to give much better performance on the road. Figured I was on the right track dropping the spring rate as low as I could. But that might not even be low enough. With them being progressive I was hoping that they'd droop a bit more before the spring rate bumps up on the rest of the travel. Fronts are easy enough as keeper springs can be made to fit no worries. I can see both sides of the coin, fitting stupidly high spring rates + keepers is a shit solution. But fitting much more suitable spring rates for the job + keepers to get 10mm more droop as per cert requirement doesn't seem too bad. I've spent the coin to get what I think will be suitable spring rates, coupled with custom valved to the spring rate shocks, I can't do much more really. Will dummy it up next week hopefully and see how it sits.2 points
-
While I get the point about rates here, adding droop with keeper springs is still useful. It stops cars from picking up inside wheels around corners and keeps wheels on the ground over big dips and bumps. @Bling - are the springs you’re using on an adjustable perch, or are they at a set height? If you can’t fit keepers and don’t get enough droop then adding weight at cert time is the only option (full tank of gas, couple of duffel bags full of concrete etc).2 points
-
Theres a hefty chance I'll be exceeding the breath alcohol limit. I enjoyed smash last year. I did.not enjoy the 2.9km limp there from.the motel. I'm also quite keen to go visit some local datsun fiends too. My adventure begins in under two weeks.......2 points
-
Well, Page 3... Rest assured heaps of work has been done on this, I'm just not sure how good I have been at taking photos. Got the body mounts all tacked up, and the tray welded back together Loaded them both up on the Lexus tow rig and dragged them into work one Saturday a few weeks back. Dropped the tray off to our resident sandblaster, had the whole thing blasted and epoxy primed, cost a grand total of 1x bottle of Jack Daniels, cheers work/Ian. Haha (Have since got it back, prepped it and as of yesterday is fully coated in black Raptor liner, loooks goooood, but forgot to grab a pic) Got the mounts welded in by a ticketed welder Bill from work (I know the ticket isn't so important/relevant but he is a much better welder than myself) took it by Shane Speight on the monday and got the ok on them, so I could go ahead and paint it. Got the flywheel and new clutch on, and finally got the engine in mated (ish, still need the last of the proper bolts) to the gearbox and one passenger side mount. Drivers side doesn't line up, only off by a little bit so will just make up a bracket between the block and factory mount, one of the jobs for this weekend. For the moment it is chocked up with an appropriate length of wood, custom yo. Put the body back over the top to do a final check for clearance, took a bit more off after this to make sure there is plenty of room for things to move. Put the intercooler pipes/joiners in to se what clearance issues I had for them. Cut as necessary, fold up patches, weld em in. Still more to do. That's part of this weekends jobs, worked on it last weekend but was doing paint stuff during the week (on the tray) so couldn't do any more because dust. Also semi-finished the removable rad support section, needs some more bits welded which are a lot easier to do now it is out. Got crush tubes welded in the rad support itself which I forgot to take photos of. Plans for the weekend are to finish the tray by cutting the aluminum checker (chequer?) plate to size as I have shortened the tray, and siliconing/riveting and screwing it down to finish it up. Other than that just more cutting, folding, welding, grinding etc, on panel steel. Might even make a start on the engine cover/firewall if I am lucky. Wish I had a bead roller to get some extra strength in this, but realistically it is probably all stronger than what I am cutting out as is. Chur, Hayden2 points
-
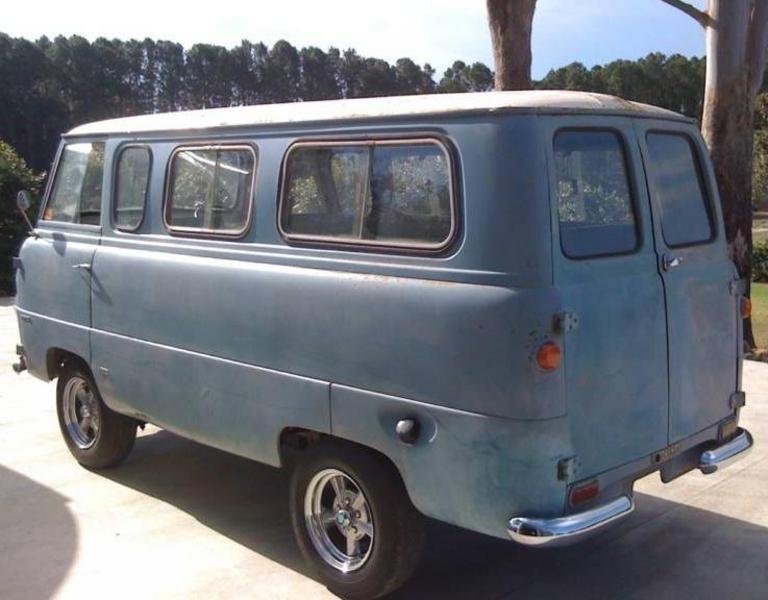
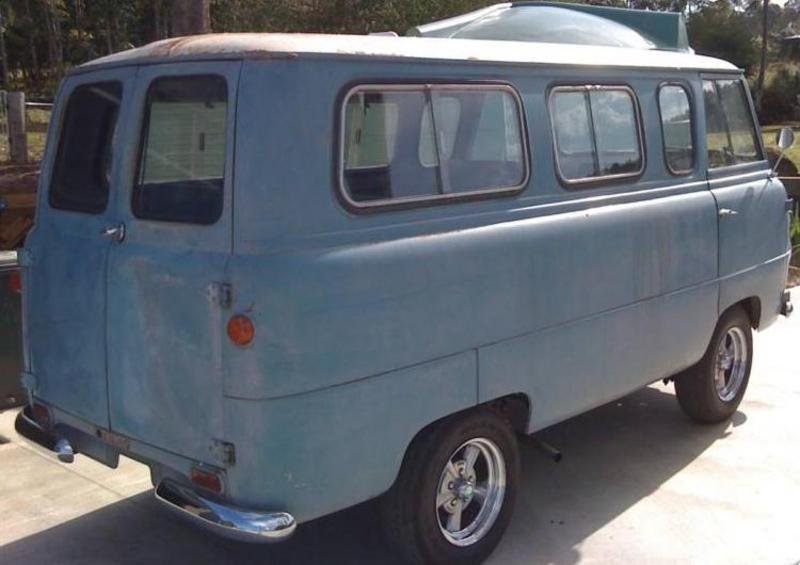
Whilst digging around the internet a few months back I came across a listing for my Thames dated around the end of 2010. This was just before the PO bought it and embarked on the bare metal restoration. At that stage the van was still in its original blue paintwork with heaps of patina. The wording for the listing is in pdf format so I'm unable to upload it, but it makes for interesting reading so I'll transcribe it into a posting when I get a chance. In the mean time here are some pics of the van as it looked back in 2010.
2 points
-
Outer camtree patterns 2 of 22 points
-
Nothing wrong with that, I lowered my wagon using an OBD2 tool, took 30 mins and didn't need to roll around on the ground unbolting grubby suspension parts2 points
-
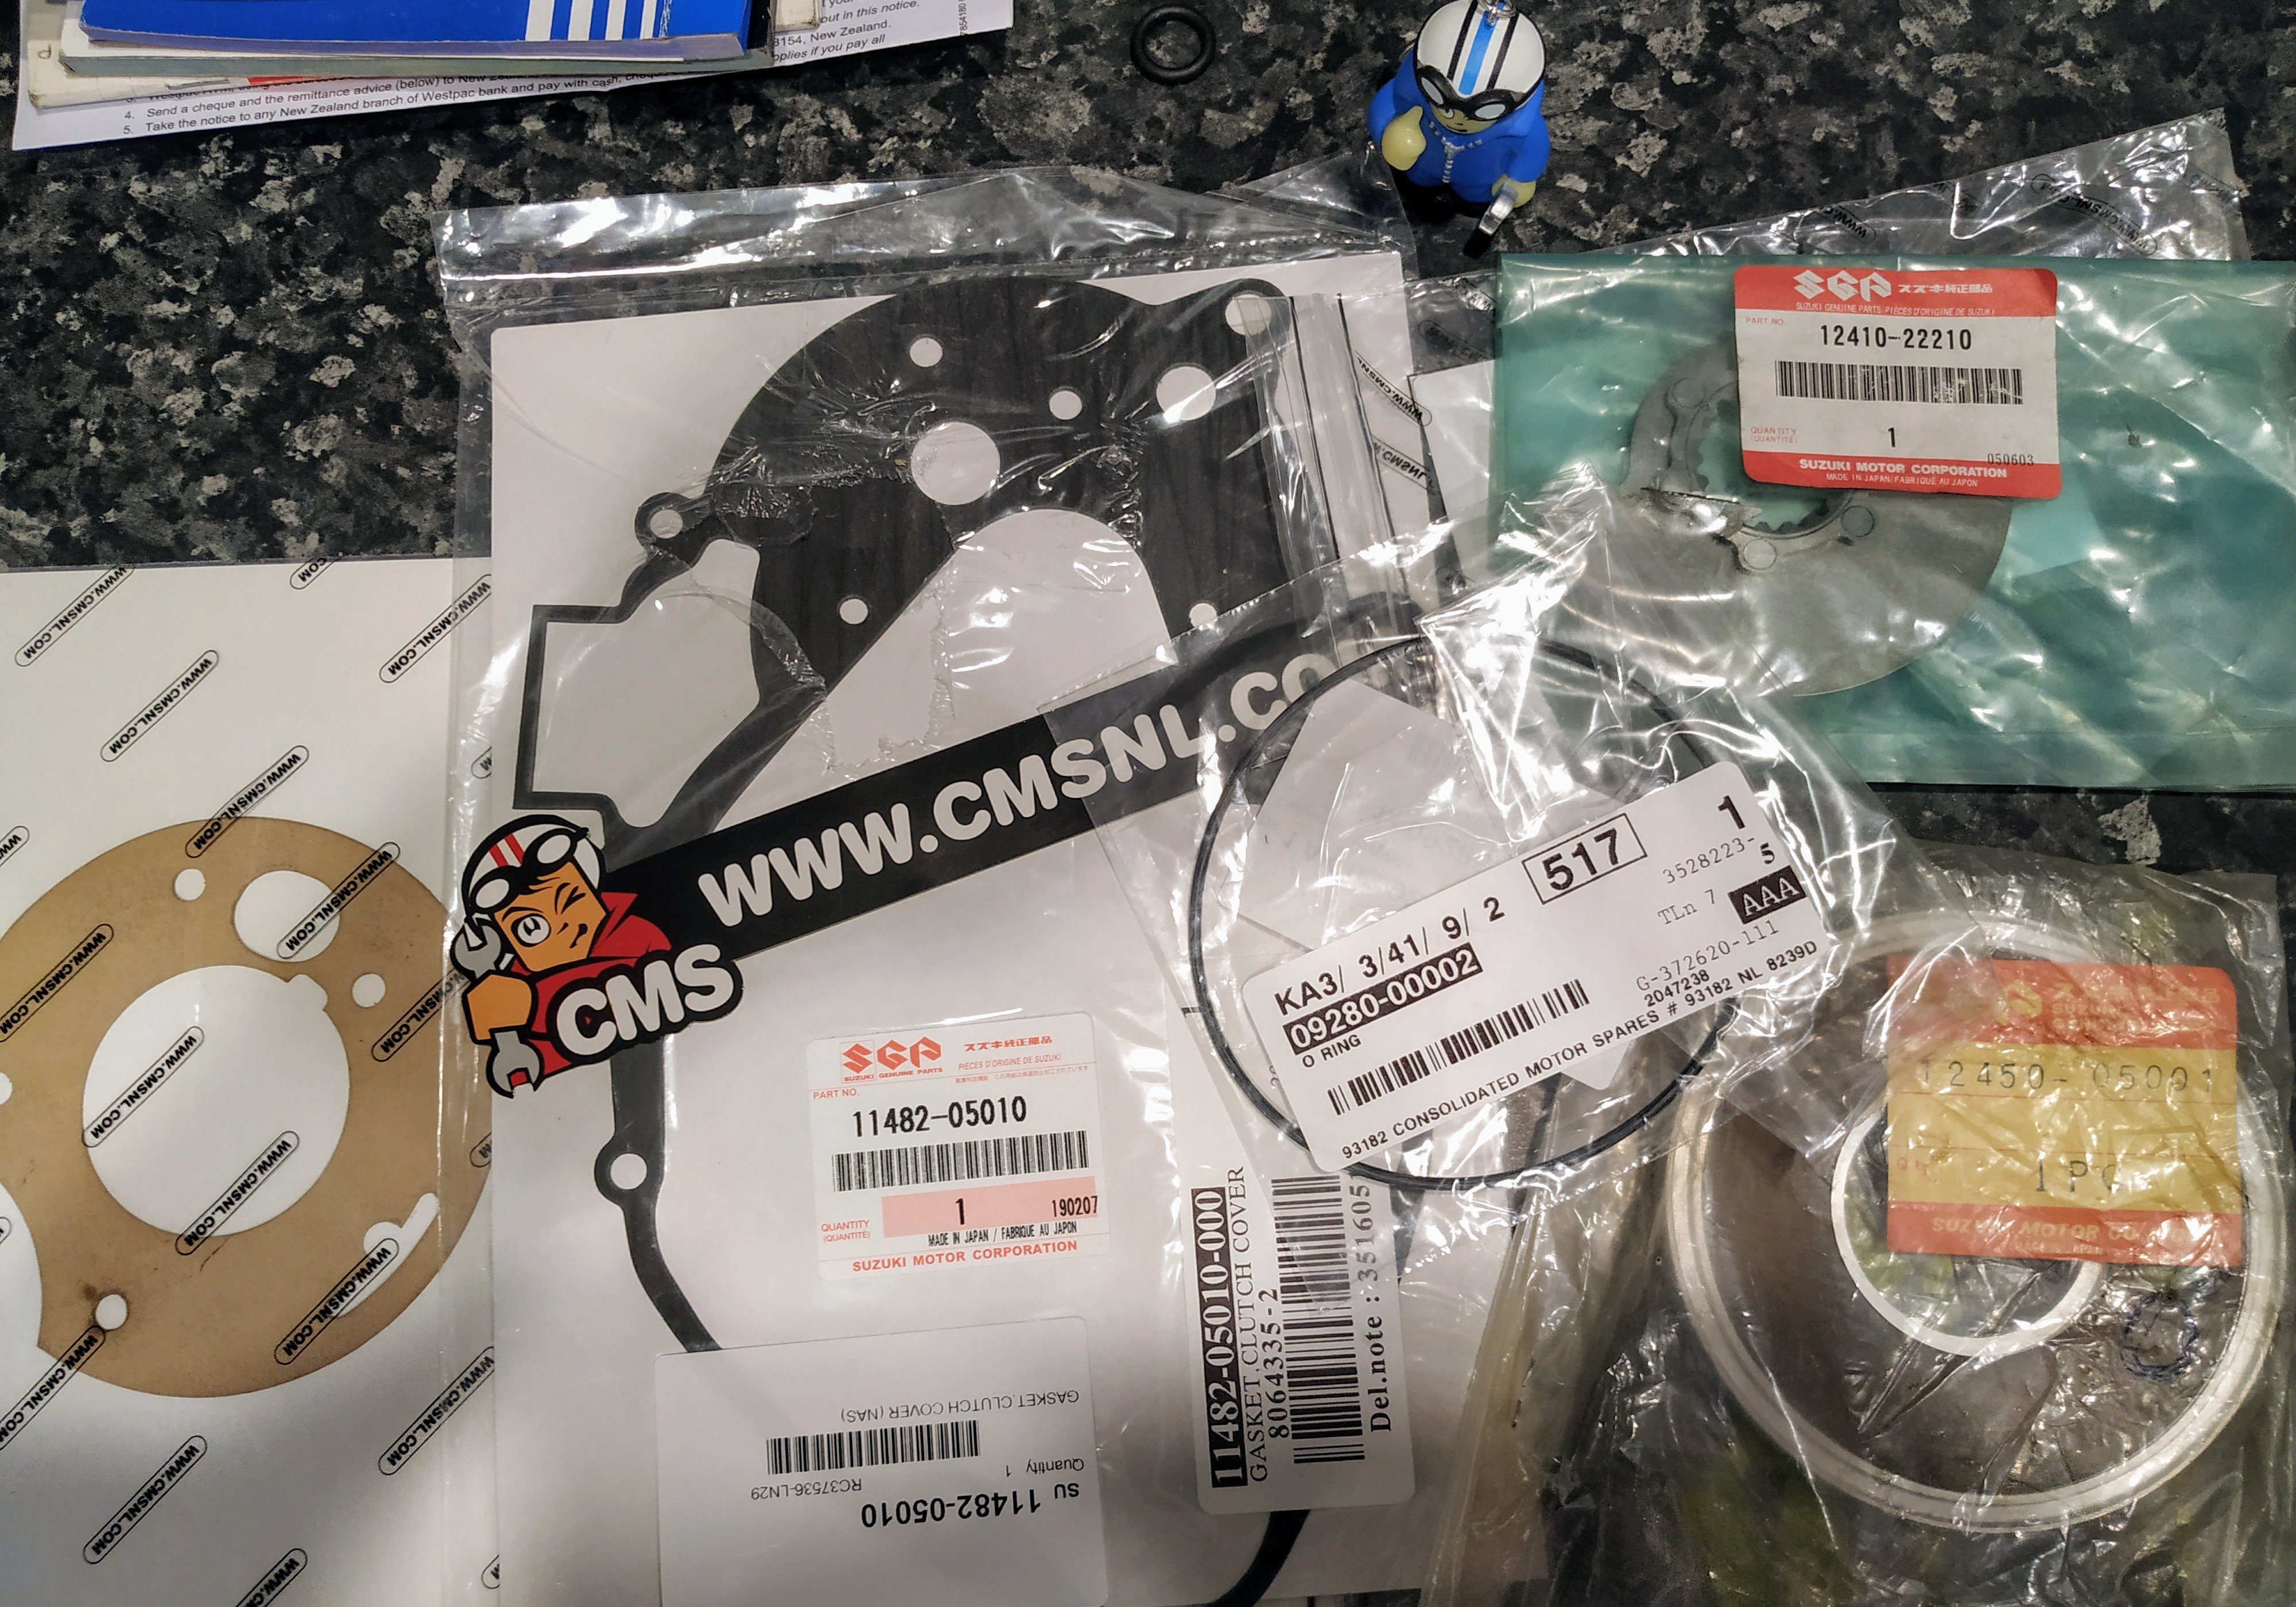
Probably have more from the build I can post, but not tonight. Have had issues with a nasty scraping clicking sound from the engine, at first I put it down to top end noise and tried to ignore it, but last time I had the cylinder off I got the Mrs to kick it over and the sound was still there, following my ear I'm 95% sure it's coming from inside the disc valve assembly. I'd noticed that at some point someone had munched up the heads of the 5 screws holding the inner valve plate in and the cross's were all jagged and rubbing on the plate, I replaced them when I put it together but the disc has a few decent gouges in it. I'm hoping the solution arrived today. Looking at the SGP stickers, there's NOS from the 70's, 90's and fresh new parts. Going to attempt cutting the disc for more nangs while I'm at it, have found a few timing specs to go off, so fingers crossed it works out!
2 points
-
Not even off page 1 and already time for an update! Whaka yeah! Bought a turbo manifold, seems pretty ok? Like is new, which is good but has obviously been sitting for a bit before being freshly powdercoated and sent to me, but will allow the attachment of the hairdryer for the turbo noises and that's what really matters. Is strong too so should be cool. Bolted manifold to engine, bolted turbo to manifold, clocked turbo. Bottom of both A-pillars looked like this. Then they looked like this... Cut the rust riiiiiight back. Most of this I am fairly certain was caused by poorly repaired rust at the top of the A-pillars, which allowed water behind the windscreen sea at the top, down the pillars, and then pooled in the wiper tray. Still needs a fettling and tidy up, but all 3 skins are in and replaced and strong af. didn't remember to get a photo of the passenger side but that's done too. Also in the above photo you can see the *ahem* clearancing needed for the turbo and manifold, this is fine as this area isn't occupied by wheel and tyre, as they stick way outside the factory guards. I will close this in with sheet steel shortly. Should be getting the pieces of steel I have had cut up for the body mounts today, been getting a really good deal on these through the engineer we use for work, he cuts them out of steel he has and just charges me the rate they pay for steel, no cost for cutting or anything. The labour may or may not get charged to whatever job we have going on at work at the time, but i wouldn't be surprised haha. A lot easier and more accurate than doing it myself, I don't have a bandsaw so I have to cut everything with an angle grinder, which isn't the best for parts I want to match perfectly side to side. Also bought my clutch, so will bolt the engine to the gearbox, and that will be that (here's hoping). Also bought a flange for the turbo to start the downpipe, and a heater matrix to try and start looking at where that will fit and how it will all work. Plans for the next week: - Get flywheel surfaced, bolt up clutch. If I get the body mounts tacked up, take off body, remove gearbox, mate together. - Tack in remaining body mounts. - Finish engine cover frame. If I have any extra time, start to close in with panel steel. Have teed up a guy at work to do the final welding for the body mounts for some liquid refreshments. He is a good/ticketed welder so will be good to have confidence that the body won't fall off while I drive it down the road. Let me know what I am doing wrong/I am a fool for thinking I can get this frankenstein done for Nats 2020. On a serious note, anyone who can help/has suggestions to do with tuning/ecus/wiring, please hit me up. I am no expert on most things, but wiring is something I worry may be a serious stumbling block, and I don't know if I will have the money available in time to just pay someone else to do it.2 points
-
Only a page 4 thread dredge, definitely not the worst I have ever done... So I did some more work, and spent some more/a lot more money. Bought this: RB25DET Neo, rebuilt as far as sealing the engine, i.e sump and oil pump not properly in, just keeping things covered. Forgot to get a photo of where it is now but is more complete, has throttle body, water lines, alternator, power steering pump. Have purchased a new timing kit (belt, idlers etc), needs a new oil pump as the gears on the one that came with it are showing signs of wear. Thanks to some helpful advice I have decided to stick with a standard pump with new Reimax gears, so that should be sufficient as this won't spend too much time on limiter like it would in a drift car etc. Have new coils (in pic) but am considering a wasted spark setup, as these have a rep for overheating the rearmost coil, and this will be tucked in behind the firewall, so could potentially be worse. Got the right brackets for the mounts finally sorted, from an RD28 powered Patrol. Other than that, It needs a new clutch (considering just an Exedy HD rather than a button or puk clutch due to driveability), need a new harmonic balancer/crank pulley (didn't come with one even though it was meant to, but such is life). I have a turbo manifold on the way this week and the Masterpower turbo can be seen chilling up on the toolbox in the back. Should be good for roughly 350-400hp if I do it all correctly, I will, at least initially, be happy with anything over 300hp atw. So while the engine is waiting on me to throw money at it (mostly the clutch so I can properly bolt it up, oil pump can be done in place), I continued removing firewall now I knew exactly how far the intake would come out from the engine. Marked it up with dazzle, then cut it out, didn't get photos of the fresh cut, but it made the floor fairly weak haha, there isn't a whole lot of original firewall left at this stage. So i put 20x3 flat bar around the perimeter, and plug/stitch welded it in for strength. Strengthened it up heaps. Original mounting plate for the steering column stuck out into the intake area, so cut that. That whole area still needs work so that the cover for the back of the engine (that I will make shortly) can be removed without having to unbolt the steering column, and so they both have enough space and fasteners to make a proper seal. Made some plates and closed in some holes that will no longer be needed for the clutch master, brake master, choke, etc. Needs tidying up, but I ran out of time on Sunday so it got some primer to keep it covered in the meantime. Pedal box will likely be a Wilwood floor mounted pedal box. Put the dash in chocked up with a bit of wood to see what clearance I had vertically and behind the dash for a heater box of some description, the stock one will most definitely never fit again. Likely use something like this: https://www.aliexpress.com/item/32968868437.html?spm=a2g0o.cart.0.0.c0973c005VMSGm&mp=1 It's compact and will do for windscreen defrost and pushing air through the vents, will just have all working at the same time to eliminate the need for any sort of directional matrix, and run the standard valve to determine the temp. I am trying to decide whether to try and make a scoop to direct air from the intake up under the dash or just blank it off and have it only recirculate internal air. Got a bit of time in the shed yesterday arvo and decided to try the intercooler that came with the new engine. Just tied on to the rad support at the moment. Cut a whole lot more plastic out of the grill and it sort of fits, good enough anyway. It is about twice the overall volume of the original so should be a bit better. Have made a good start on the body mounts, it is sitting on two of them at the moment plus propped at the front, but need to sort the rest. Will get them all tacked in, then get them checked by the local certifier, and get someone with more expertise than myself to buzz them in. However, forgot to get any photos of these. Damn. If anyone can help with advice or knows of someone with any of the parts listed above, then hit me up. Chur, Hayden.2 points
-
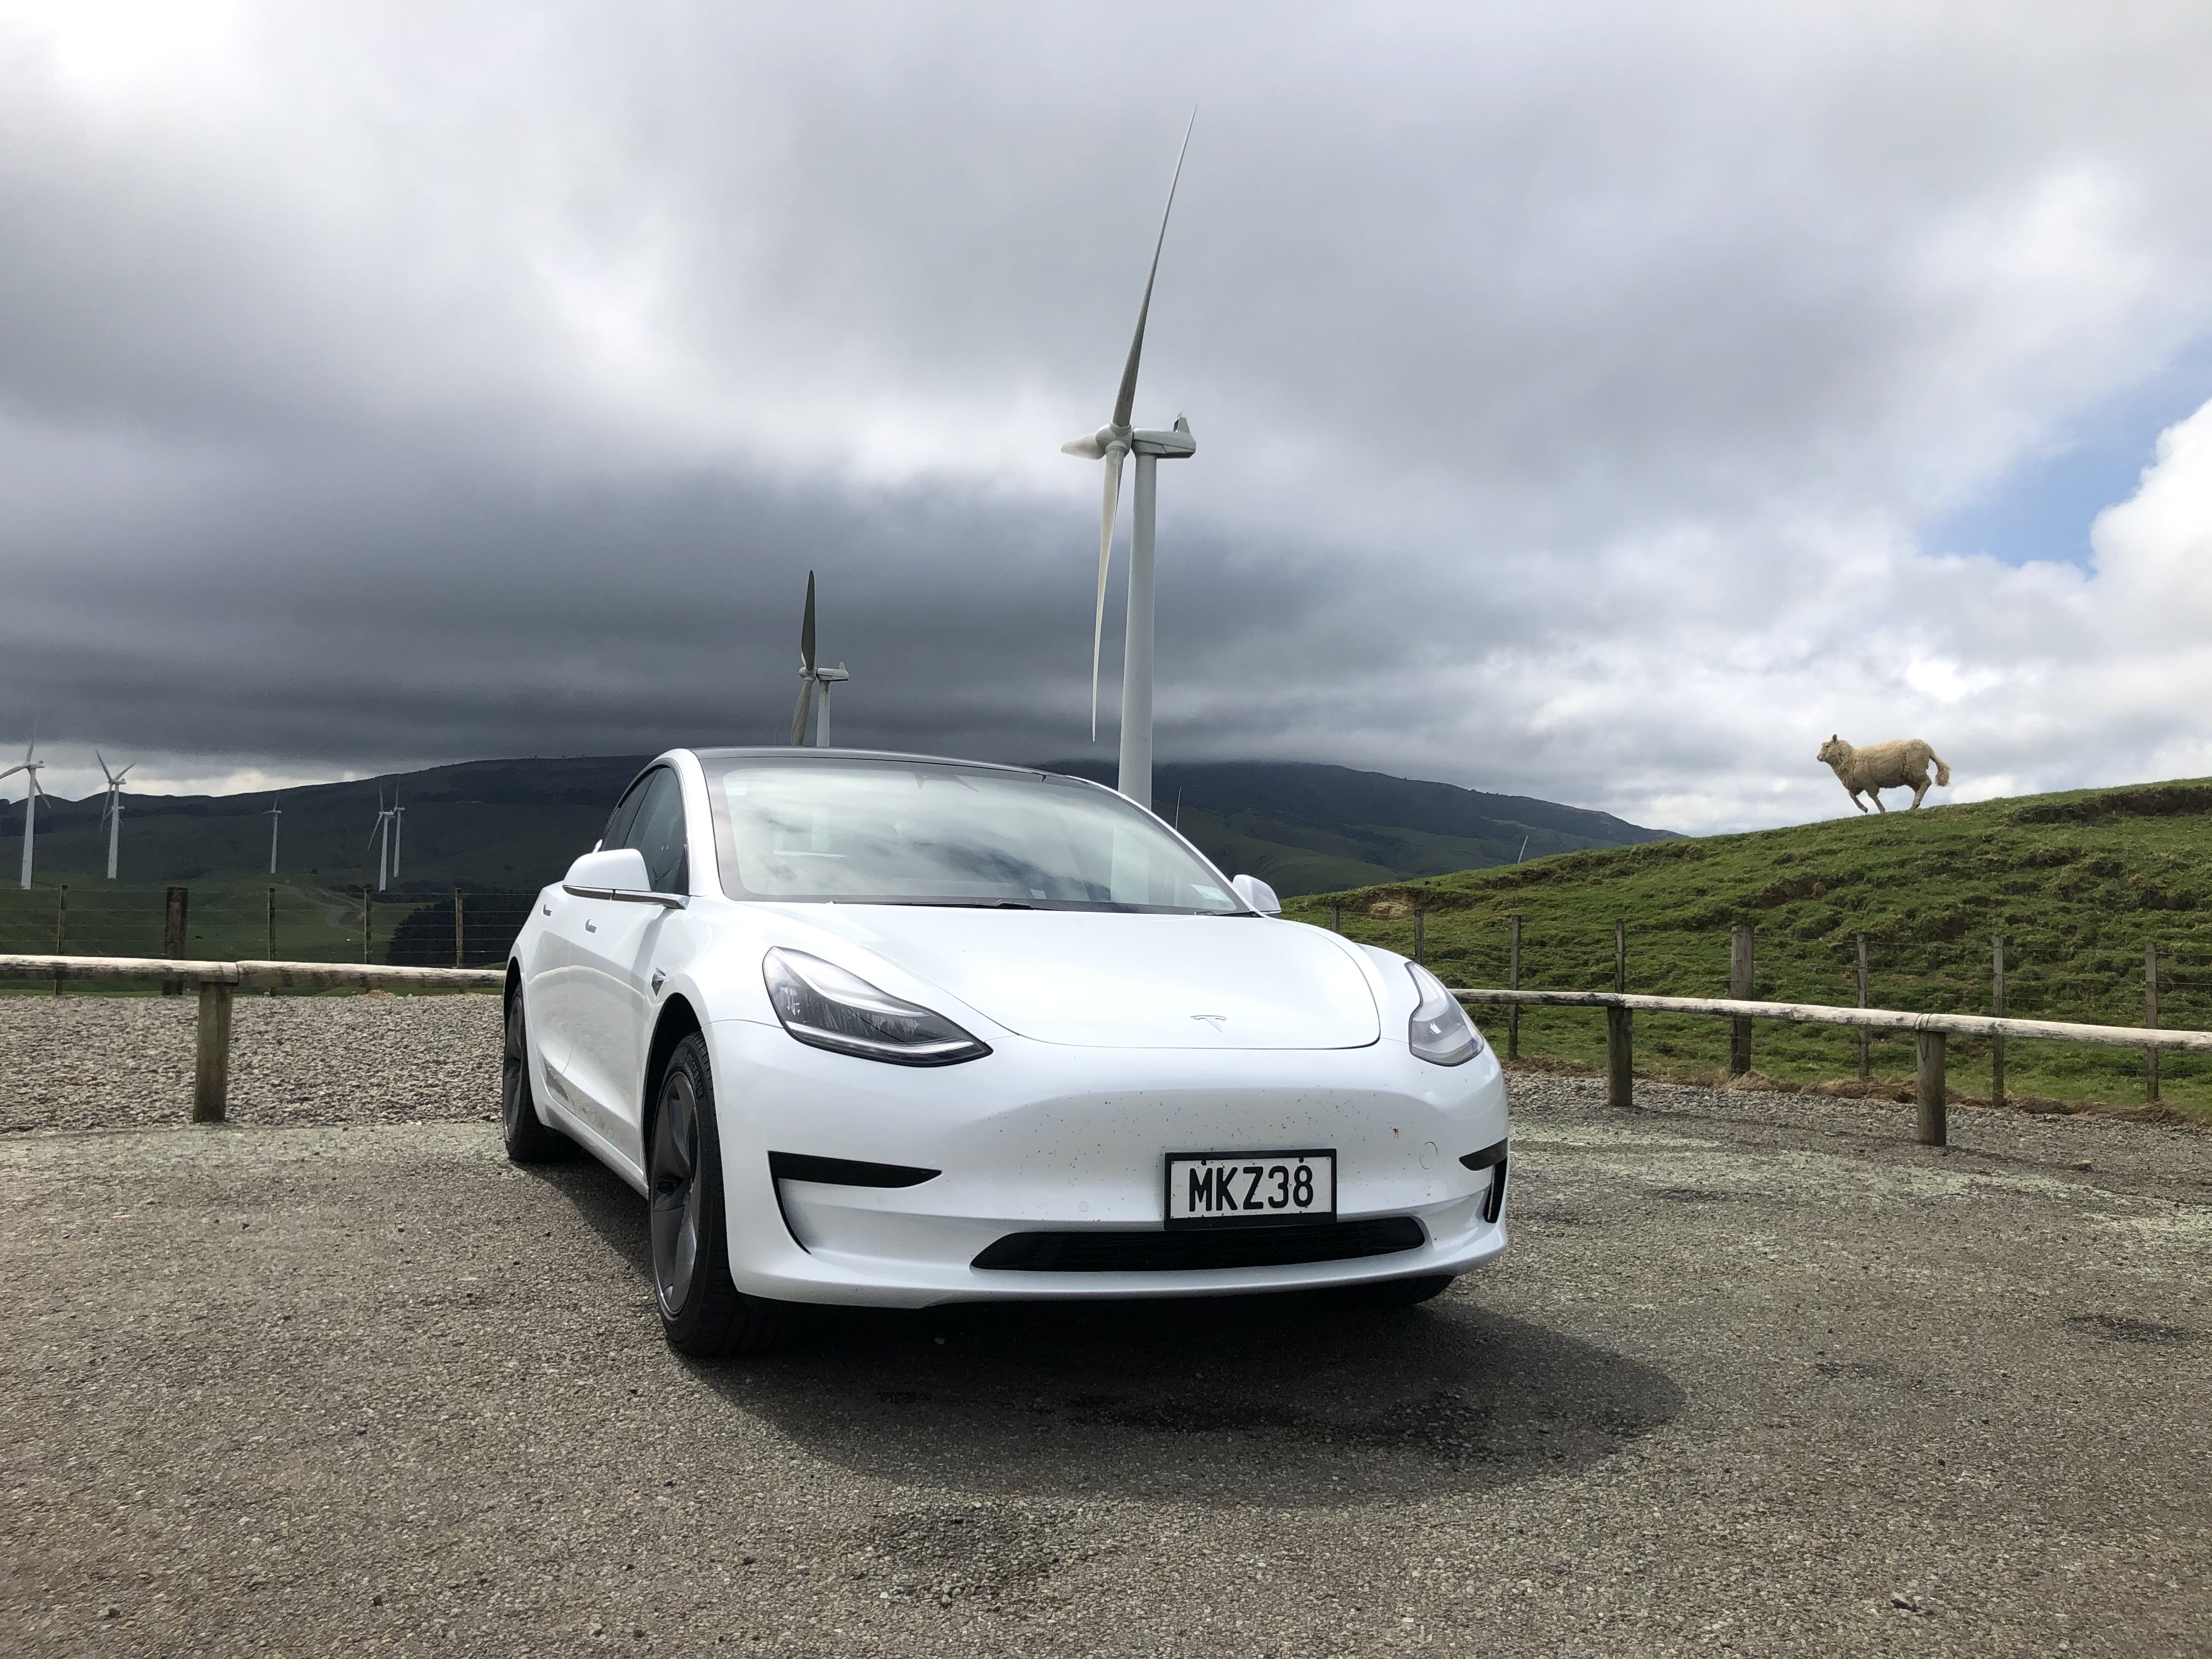
So I went and found the absolute most polar opposite vehicle to something oldschool If mods think this is a boring daily feel free to delete. My now 1 month old Tesla Model 3 Standard Range +. I have been a Tesla fan for many many years and it has been a long term goal to own one. So this is the new daily. All I can say is what an absolutely phenomenal vehicle. All you need to do is drive one of these and you will be sold. I am still into oldschool so dont get me wrong but man, these cars are really next level. Thought I would throw a post up as probably a bit out of the ordinary for oldschool haha. Anyone got an oldschool sticker for the back window ha? Here it is on its maiden voyage down south from Auckland:
1 point
-
Total Andy /ling but gizz 17.5 pilot to have a play with my RX125... will swap you a 30 if you need spare bits1 point
-
No crashes this year pls guys.
1 point
-
Nearly there. Out of time this weekend...but so close!
1 point
-
Hooting. Nice work my man. Top notch.1 point
-
The car is 165kg each side in the rear, the arm ratio for the wheel to the shock is around 3:2 from memory. I started with an 8kg rear, went down to 6kg, then added the 80lb helper spring. It is 'soft' but grips up well compared to the 8kg spring. No rear sway bar connected at present for hillclimb events. If i ever take it back to the track id reconnect the rear bar again.1 point
-
Love the project. I think your choice of the Hiace drive-train is a great way of adding some life to the old girl without needing extensive suspension, rear end and braking mods. It also keeps the option of converting back to standard when we're all dead and gone, everything's electric and the old Thames ends up in a museum! I ran a few 80's Hiaces some years back, the running gear was virtually indestructible and they had great pulling power for their day.1 point
-
Wow. This is awesome dude! Next level 2 stoke dedication! Have you got any recommendations for a not so wild setup? My maverick is tired and i would love a bit more pep. Not valentino rossi spec though. Haha. Just not first gear up my hill!1 point
-
Yep, the van has had a pretty easy life thus far. Original owner purchased the van in panel van format brand new in Brisbane in 1965 and immediately handed it over to Athol Hedges a well known Brisbane based bus and coach building company back in the day. The Athol Hedges team installed the side windows as well as installing a basic camper van setup. It was then exclusively used for holidays. I haven't yet been able to ascertain when the first owner sold the van, or when the second owner sold the van to it's third owner, but I do know that the third owner used the van as a daily driver to drive between Brisbane and the Gold Coast. During his ownership he did quite a bit on the mechanical side (new ball joints, rod ends, re-cored radiator, rebuilt carbie and fuel pump, brakes, belts and the usual service items). The third owner sold the van in 2010 with just under 69,000 miles on the clock. The fourth owner was the one that poured money into the bare metal restoration which was undertaken by Norm Clarke Restorations in Brisbane East. The van was meant to be a delivery van and mobile marketing tool for his wife's new florist shop, but the shop never happened and the project stalled. In the last 9 years the van has only done around 250 miles. I'm the fifth owner, so not too bad for a 54 year old vehicle. Here is a pic of the basic camper setup that was done by Athol Hedges. Sadly the fourth owner binned the camper setup and all that is left is the Athol Hedges decal that must have been affixed to one of the interior bits and is now lying in the box of spares.
1 point
-
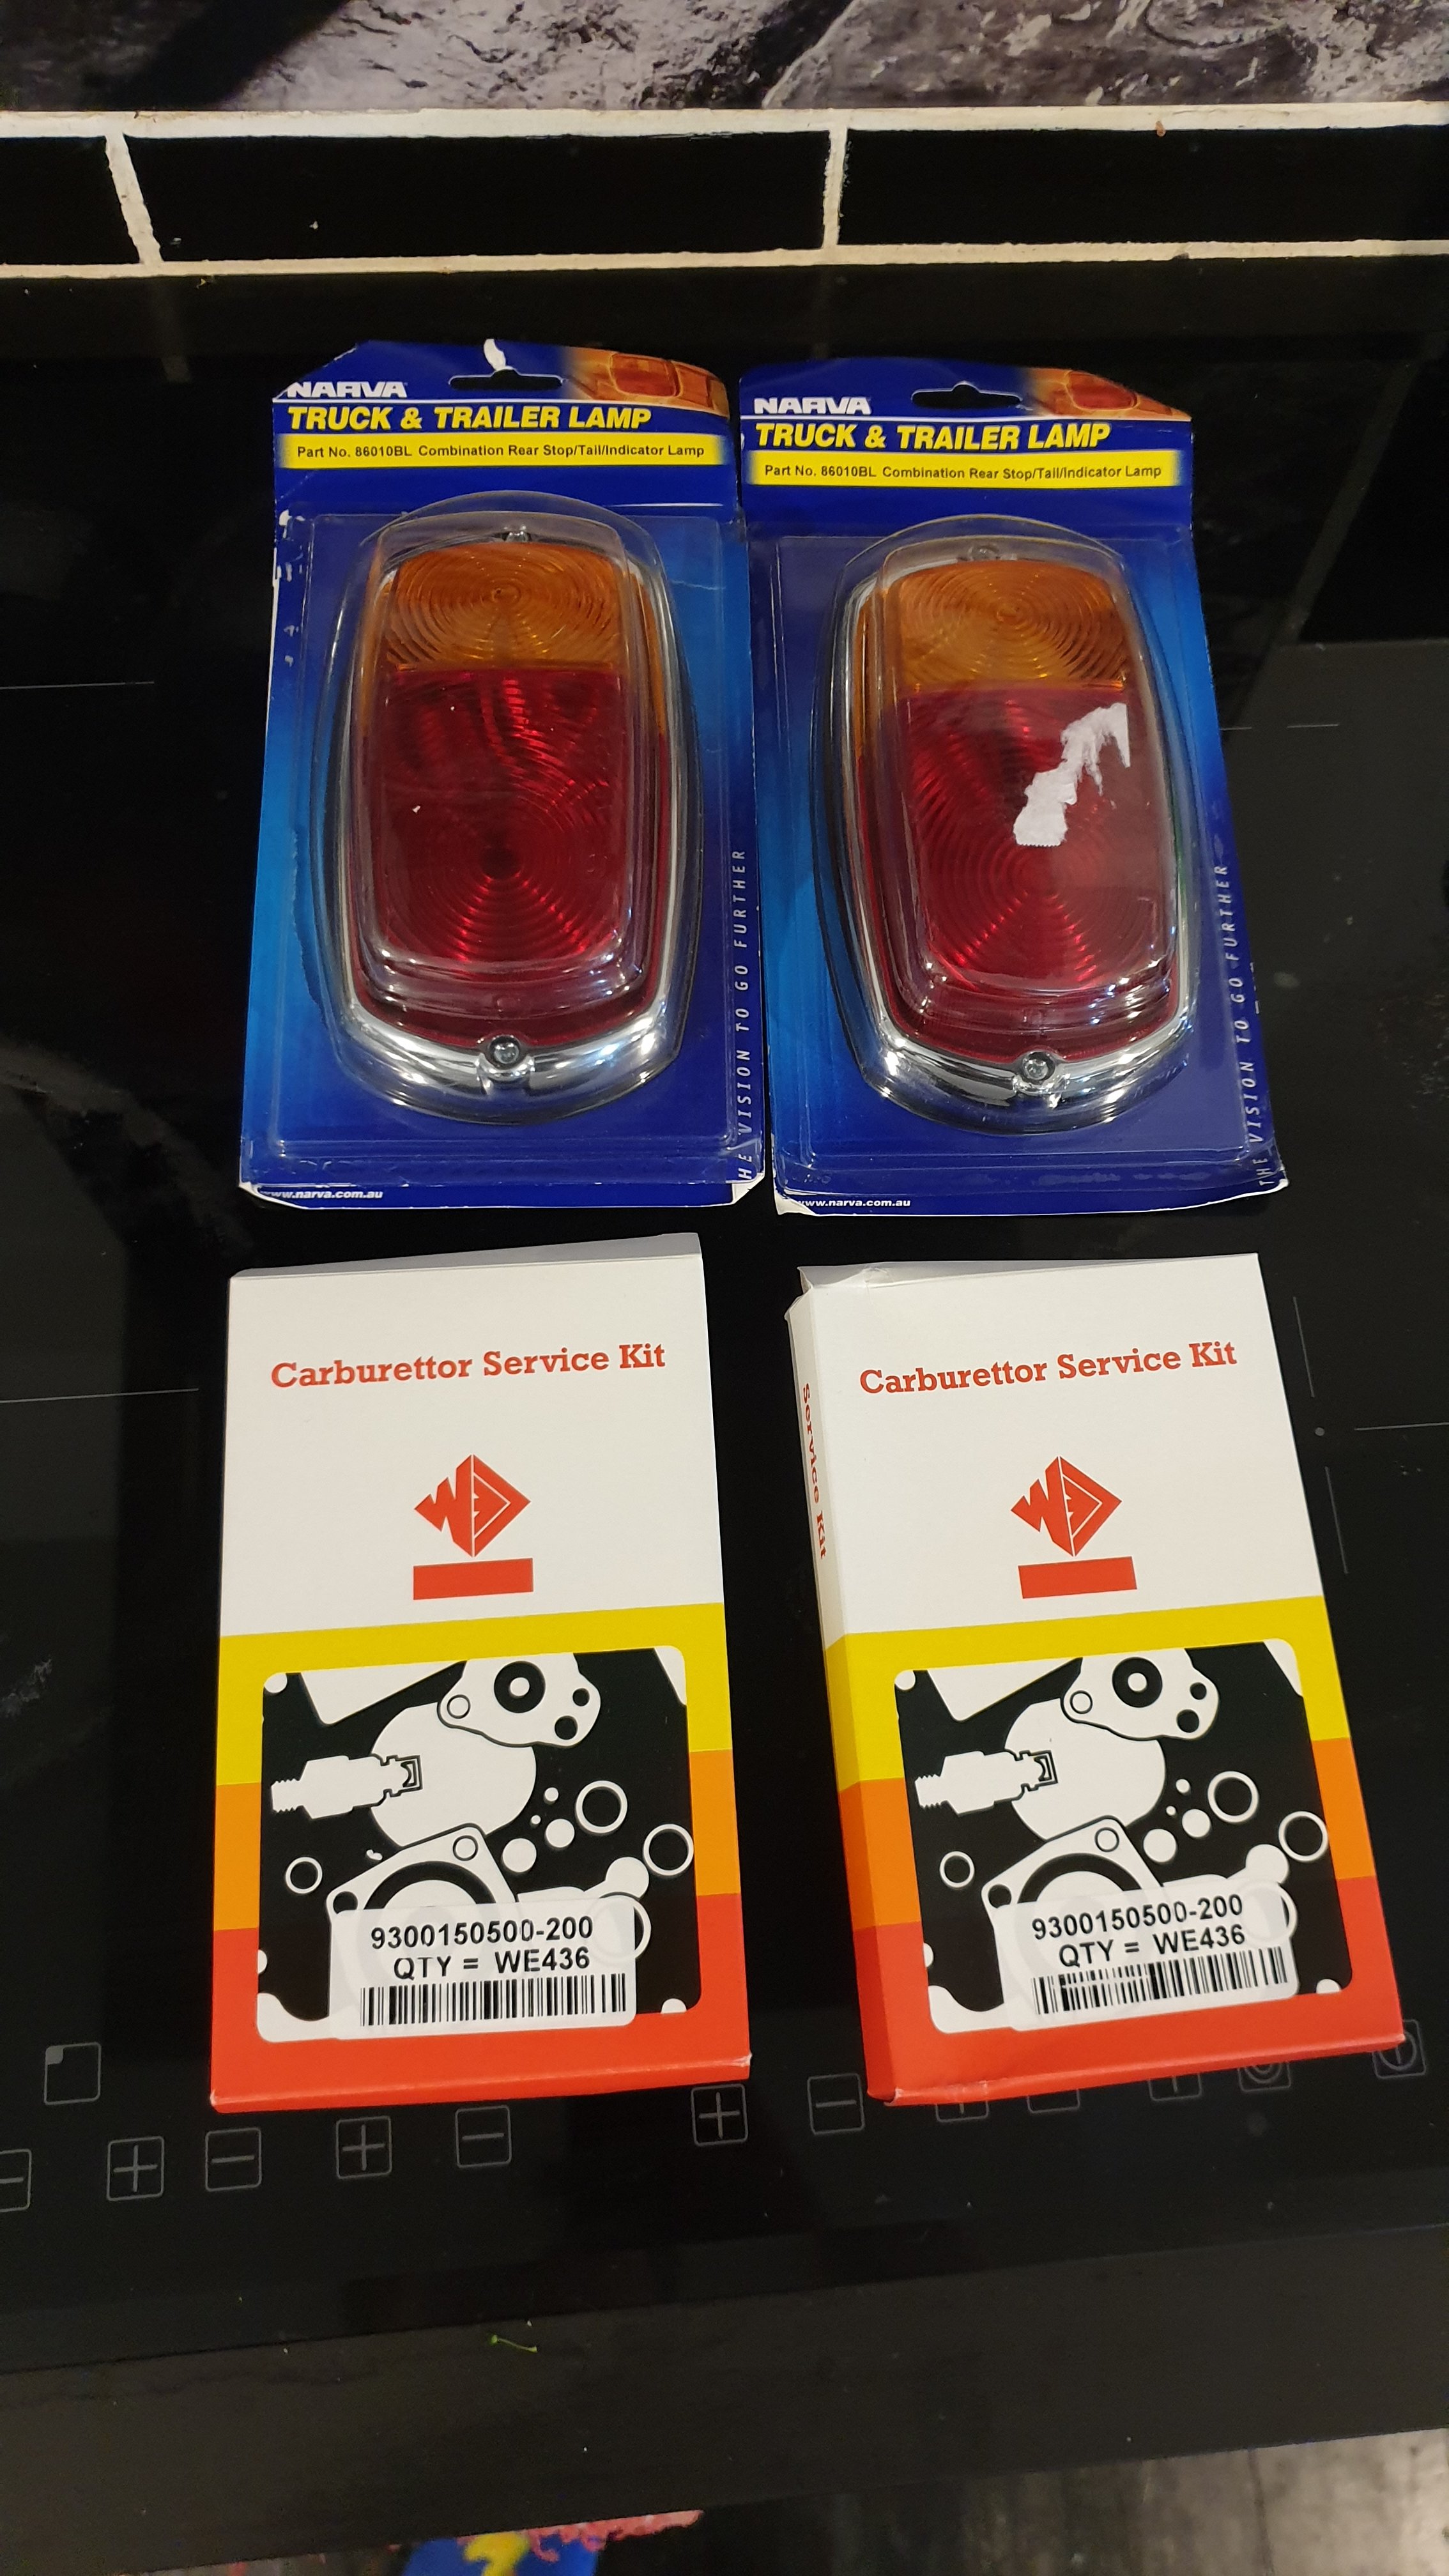
New wheel cylinders and the rear brakes are mint. Robbed the headlights out of the mx5 for this, still sealed globes so will order in some semi sealed units at some point. Tail lights and carb kits showed up too, so that should get it 99% over the line.
1 point
-
I'll send you a sticker when you tang and desprang.1 point
-
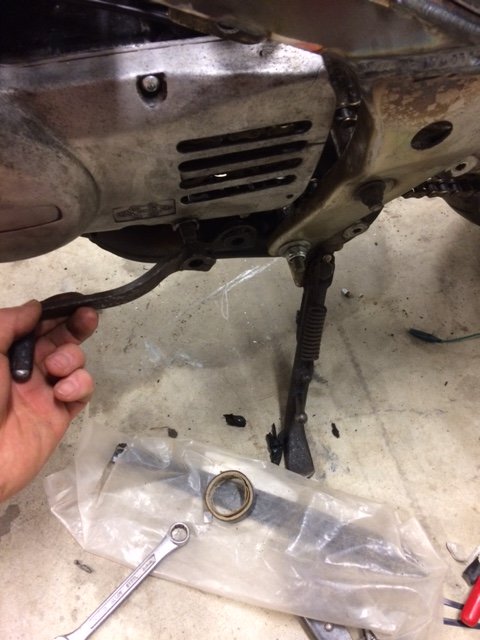
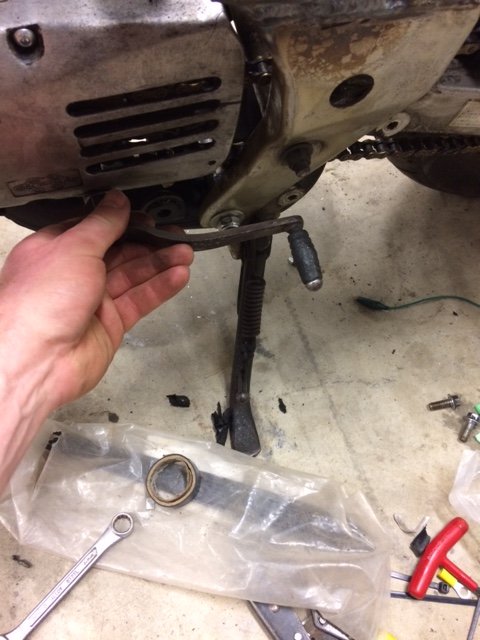
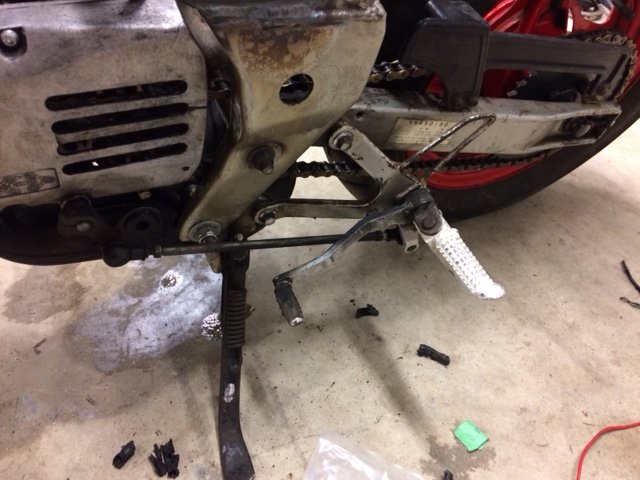
We just cut the factory peg off it’s steel mount, drilled a hole through it and mounted an FXR foot peg equipped with its own shift and linkage which didn’t require any modification, they were even the same internal spline!
1 point
-
some exhaust bits turned up so i made a start on my 1st set of headers ive made.... just need to get somemore bits and ill fully make them up.
1 point
-
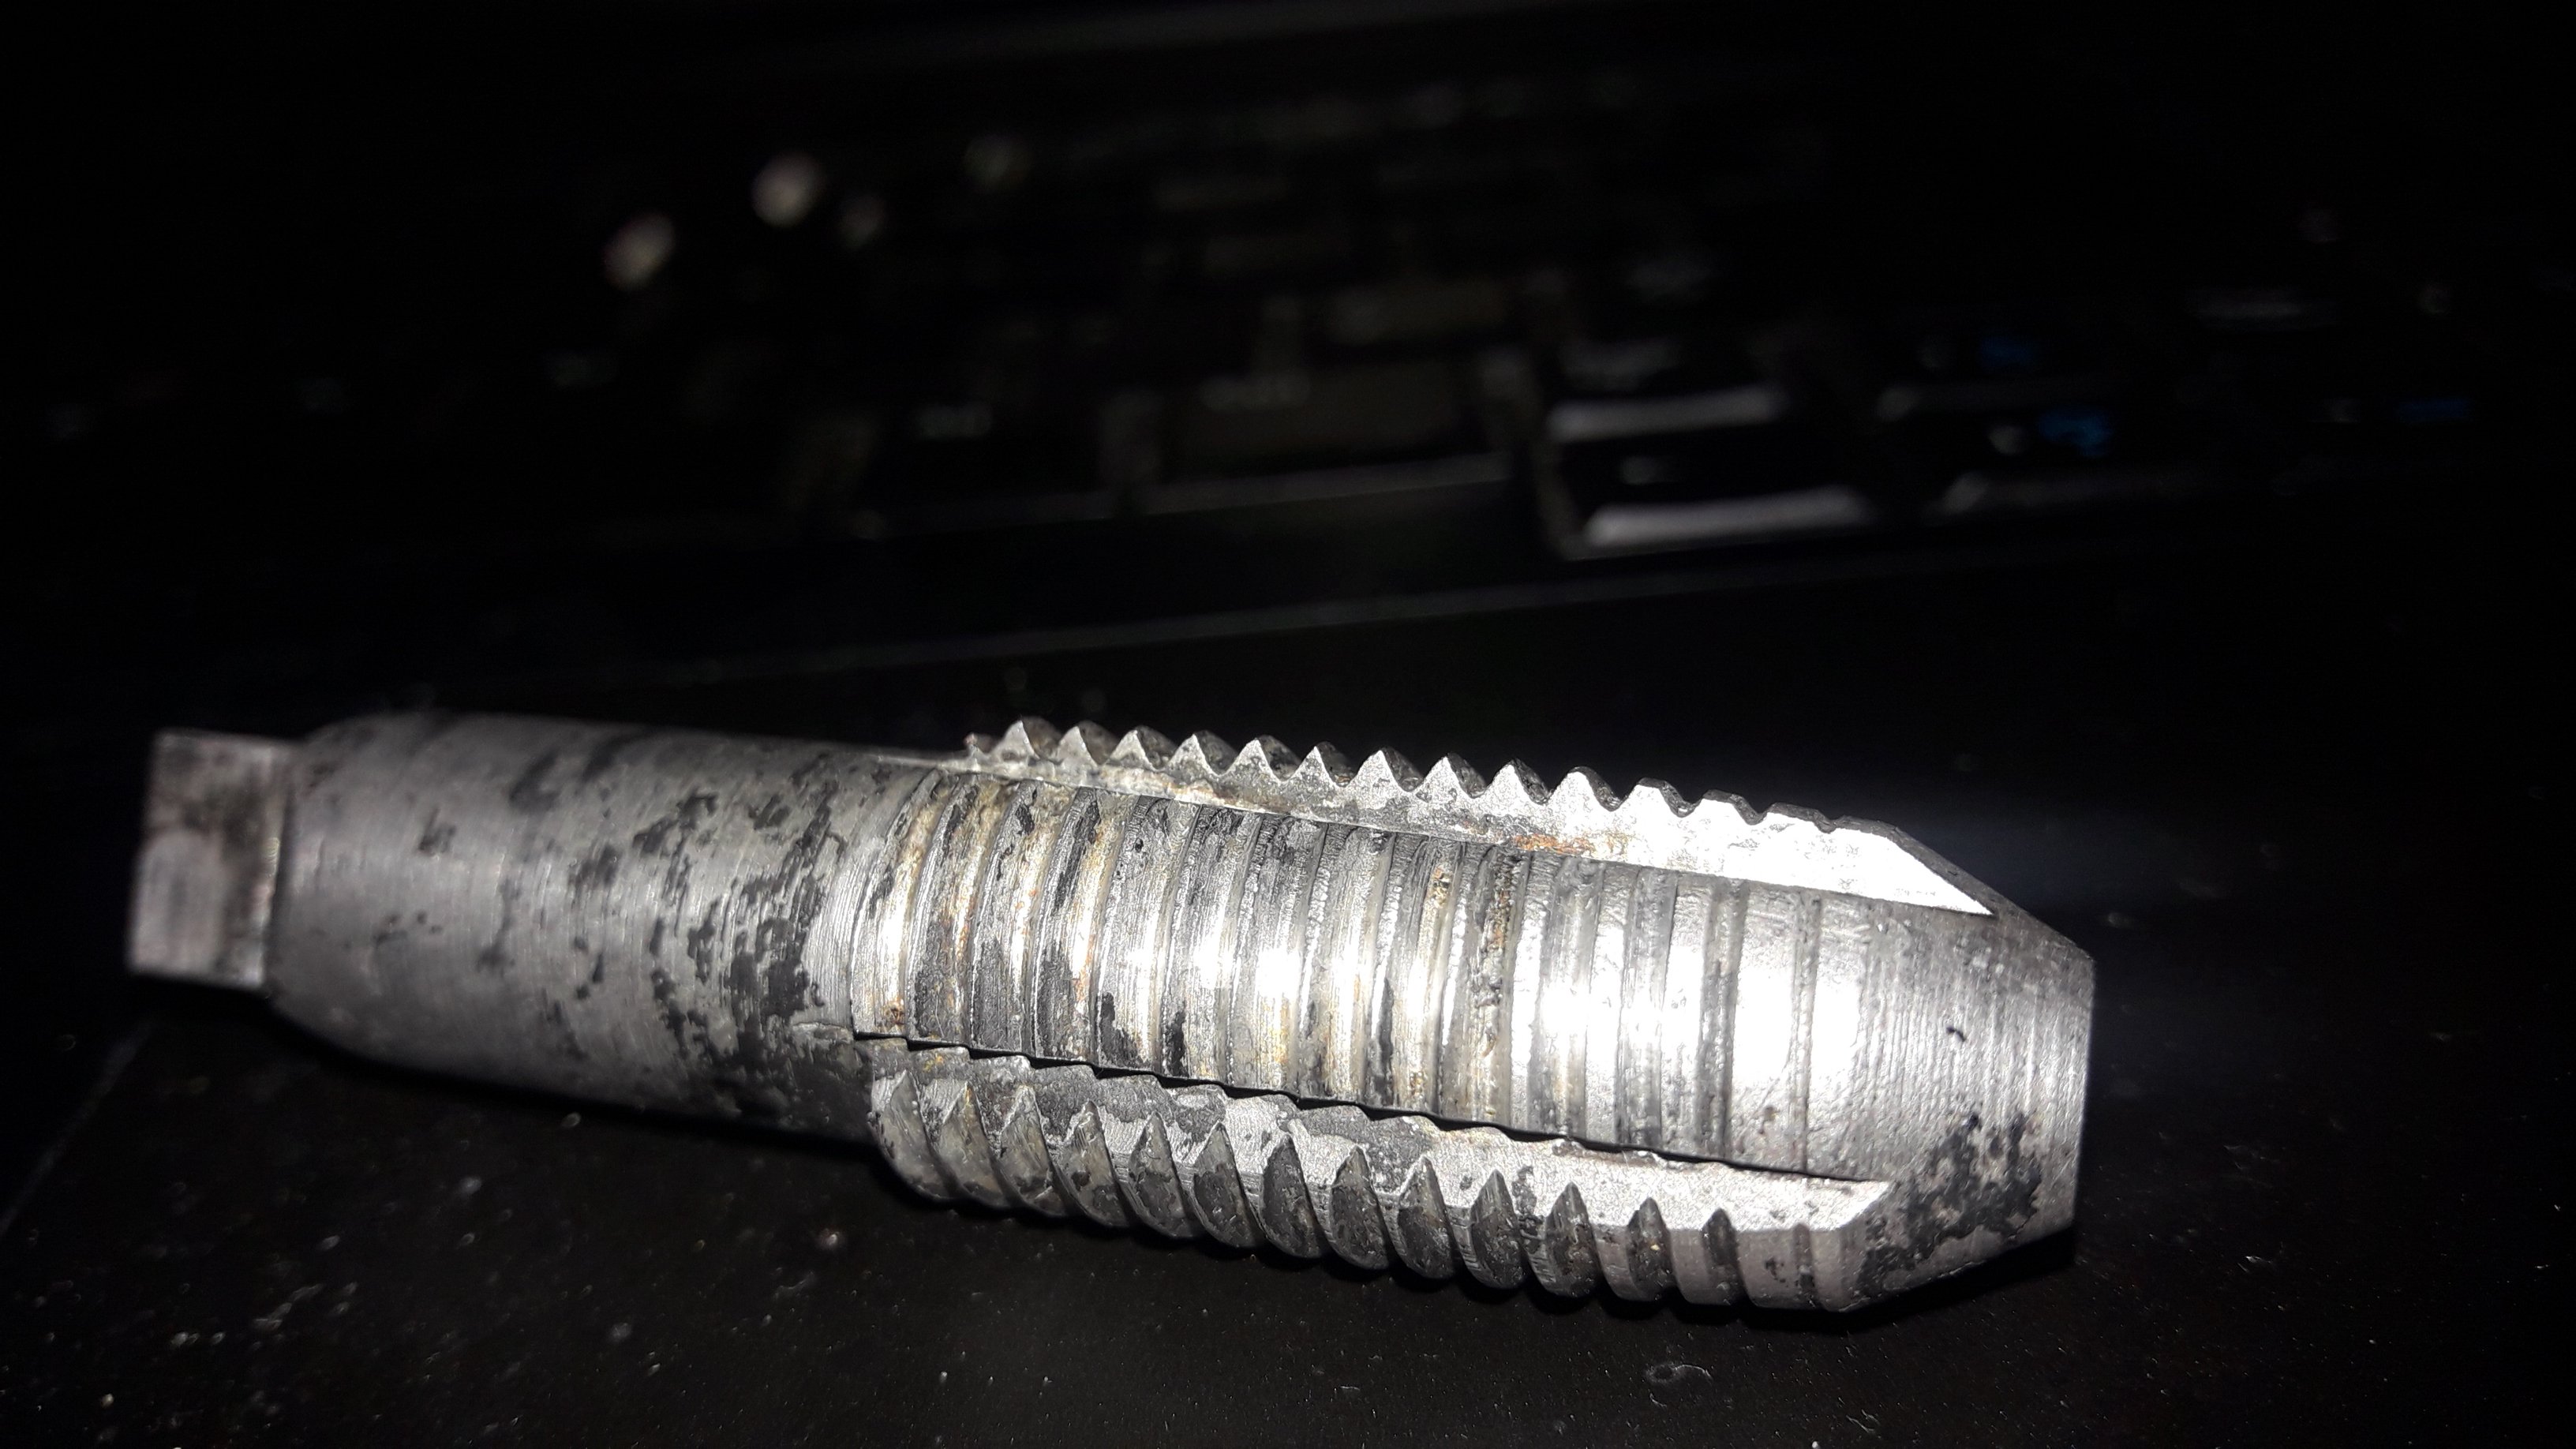
I made this pohara M16x2 tap on the Barry lathe as a test today. I'll need to get some actually hardenable steel (the black is from attempted hardening of unknown steel) and make a nice one. Will also benefit from a bigger end mill for cutting the flutes
1 point
-
The van furthest away in the pic has the motor and gearbox still fitted. The gearbox is a 5 speed column shift that looks like it has had a rattle can reco. The engine is a 4Y that according to the previous owner has been reconditioned. Both engine and gearbox are bolted up in the hole, but nothing else has been connected up. On the gearbox side of things the linkages are there but not connected, the drive shaft is sitting in the back of the van and the clutch slave cylinder is missing. The speedo drive is also AWOL with the speedo cable just hanging in space. On the engine side the radiator and exhaust are sitting in the back of the van and most of the electrical wiring and fuel pipes are all disconnected. So looks like previous owner lost interest mid job. Makes for an interesting time ahead for me. Anyhow I got today off as we are in limbo at the moment waiting a visit from the building inspector before we can carry on with the house, so thought I would spend a few hours trying to get the donor van running. Managed to find and connect up the wiring on the starter motor and the coil and fiddled around with the connections on the distributor until I successfully got spark at the points. Not getting spark at the plugs yet, but hoping to get some time on it tomorrow. First prize would be to get the engine running to assess it's condition. Thanks for reading.1 point
-
What's part throttle?1 point
-
Hmmm, that'll make changing the tyre a pain... Perfect! But then the K50 cylinder came with this: And just to make tyre changes easy Dropped it 25mm, ended up with the swingarm level, which for some reason is pleasing to my eye on any bike1 point
-
This thing goes still my boy has finally got the hang of properly giving it shit as of this weekend..... not sure whether i should be proud or shake my head.1 point
-
Yeh nah yeh, so after that ^ I got a bit of 4140 CG shaft, had some keys chucked in it for a box, and slapped it back in. Keys are tiiiight and everything fits much snugger due to shaft being correct size, so that's tops. I cut the keys a bit longer, so everything had a key under its total length for strength, and I went for internal threads on the ends as its way easier to do. Once it was back together, we took it back to the beach again, to finish off testing. It was running much better (put tape restrictor back in) and we thrashed around in it for hours with no dramas. I didn't get video of it, but i'm blown away by what it can get up, considering it has no articulation in the rear. It was strolling up stuff that decent 4wd's couldn't get up. I tried to keep the vid short, and not totally mind numbingly boring. You can't really tell in the video, but the road is bumpy as all heck, quite pleased how well the suspension works for how shit it is/road bike shocks and pivoting on bolts. I accidentally drove it through a few small streams on the beach, so washed it down when I got it home. While pushing it back into the shed I discovered one of the back axle bearing housings was broken, I think it may have been damaged when the axle broke, as its on the side that got wrenched around when we were towing it off the beach. By reviewing the footage, I worked out it broke on the last run of the day, so didn't do any real damage, thankfully. Hows that serenity? I decided if the suspension and steering didn't break after all that testing, it was probably good enough, so stripped the whhhooollllleeeee thing down for painting. So now i'm going to clean up some welds, cut out some weight, and then paint it. Regards, VG.1 point
-
Back from the blasters. A couple of minor things to do and it’s off for paint.
1 point
-
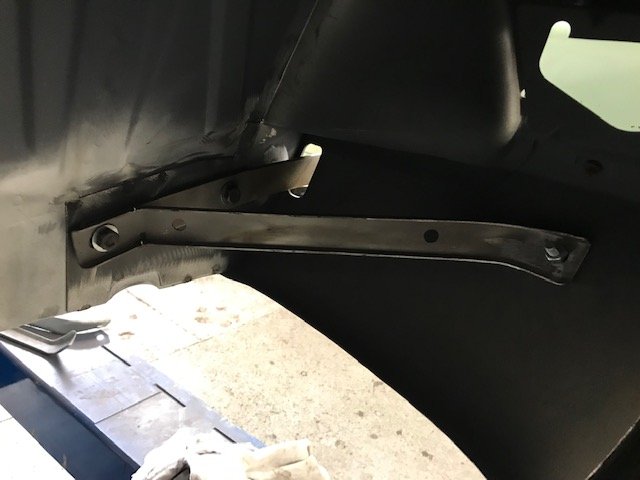
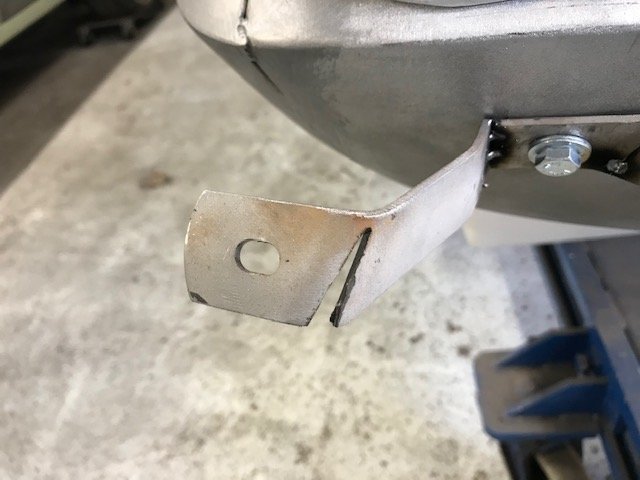
How many times have you heard ‘exact replica of original’ when it comes to copy parts? Nothing here a grinder, welder and skills can’t fix. Stevie Wonder must have been on the job the day these brackets were made. Got the back bumper and left front bumper stripped to repair again before recrhoming.
1 point
-
So short term plan is to tidy up a few small cosmetic bits and pieces. Longer term plan is to replace the ageing engine, gearbox and diff with something more modern and reliable. A disc brake conversion on the front is also on the cards. The engine box is pretty compact and the standard column gear shift is still in place.
1 point
-
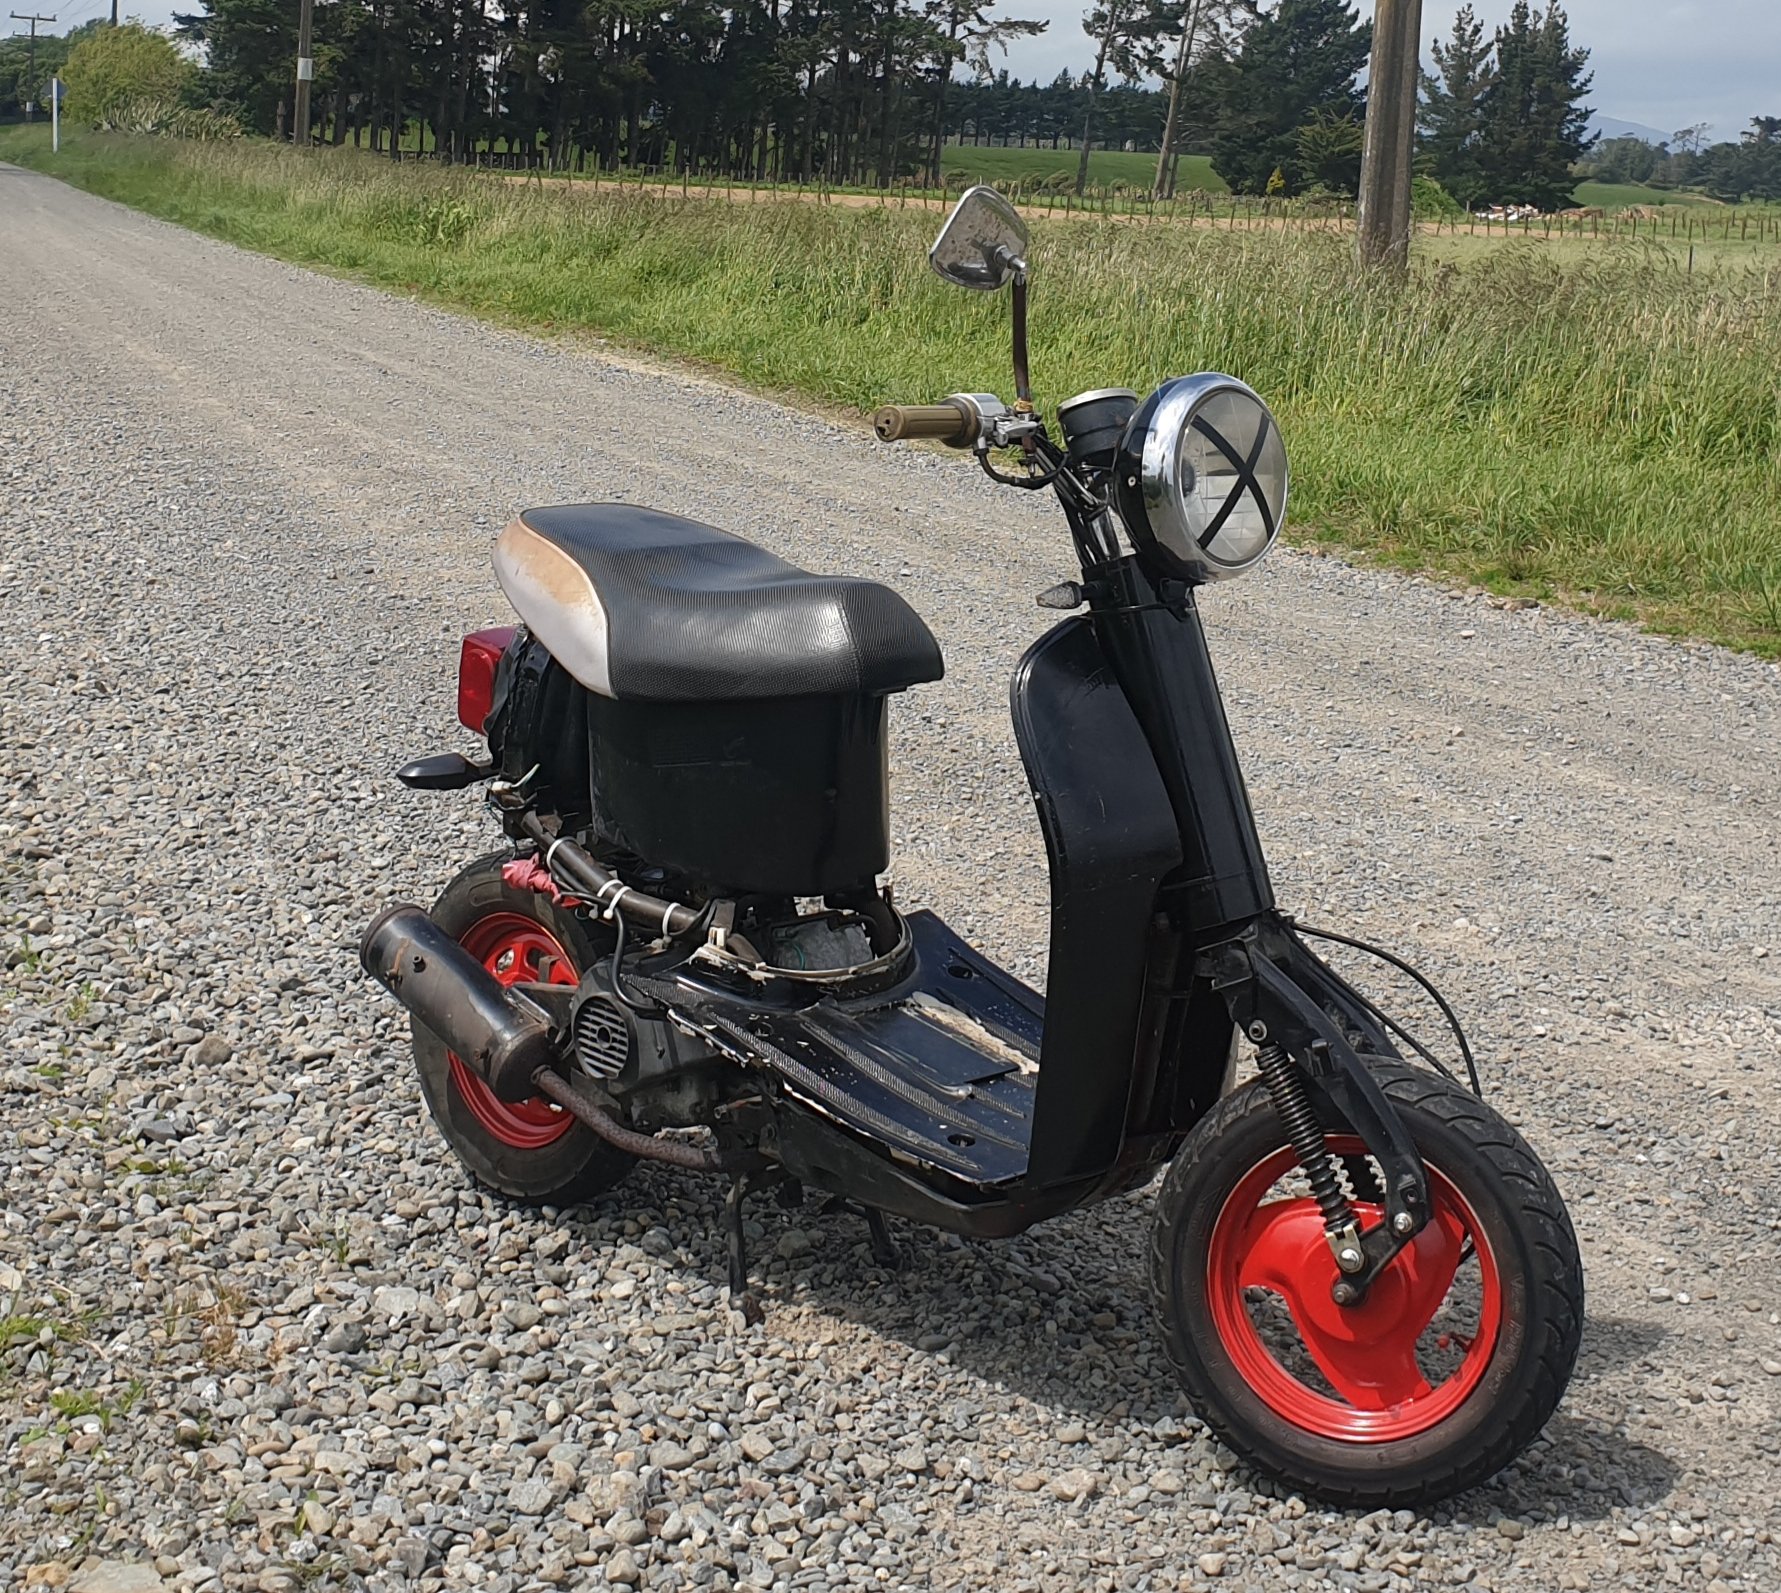
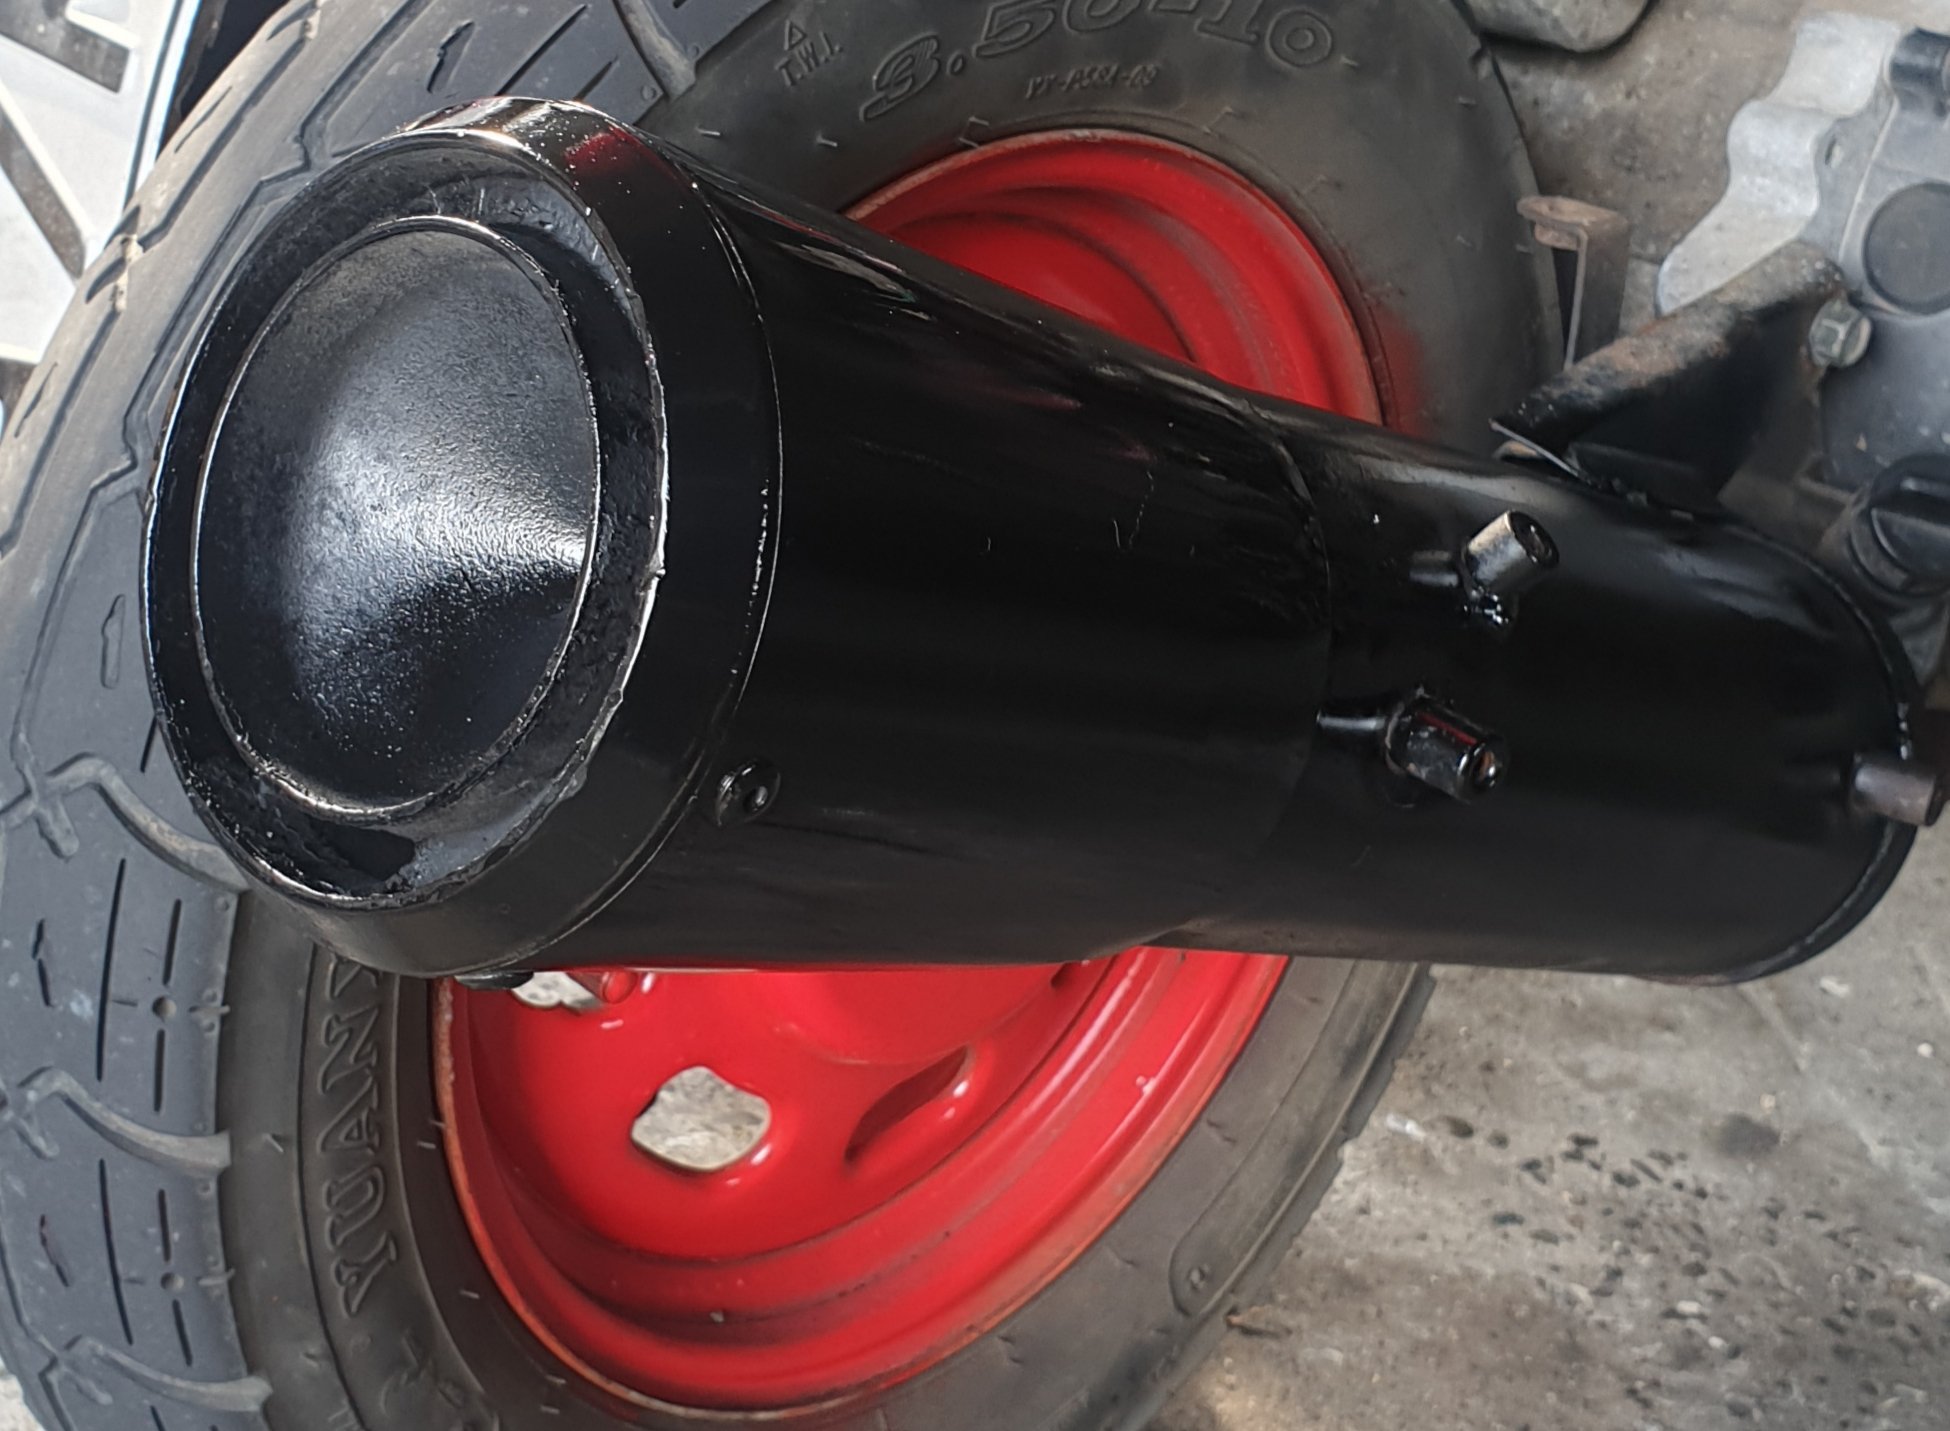
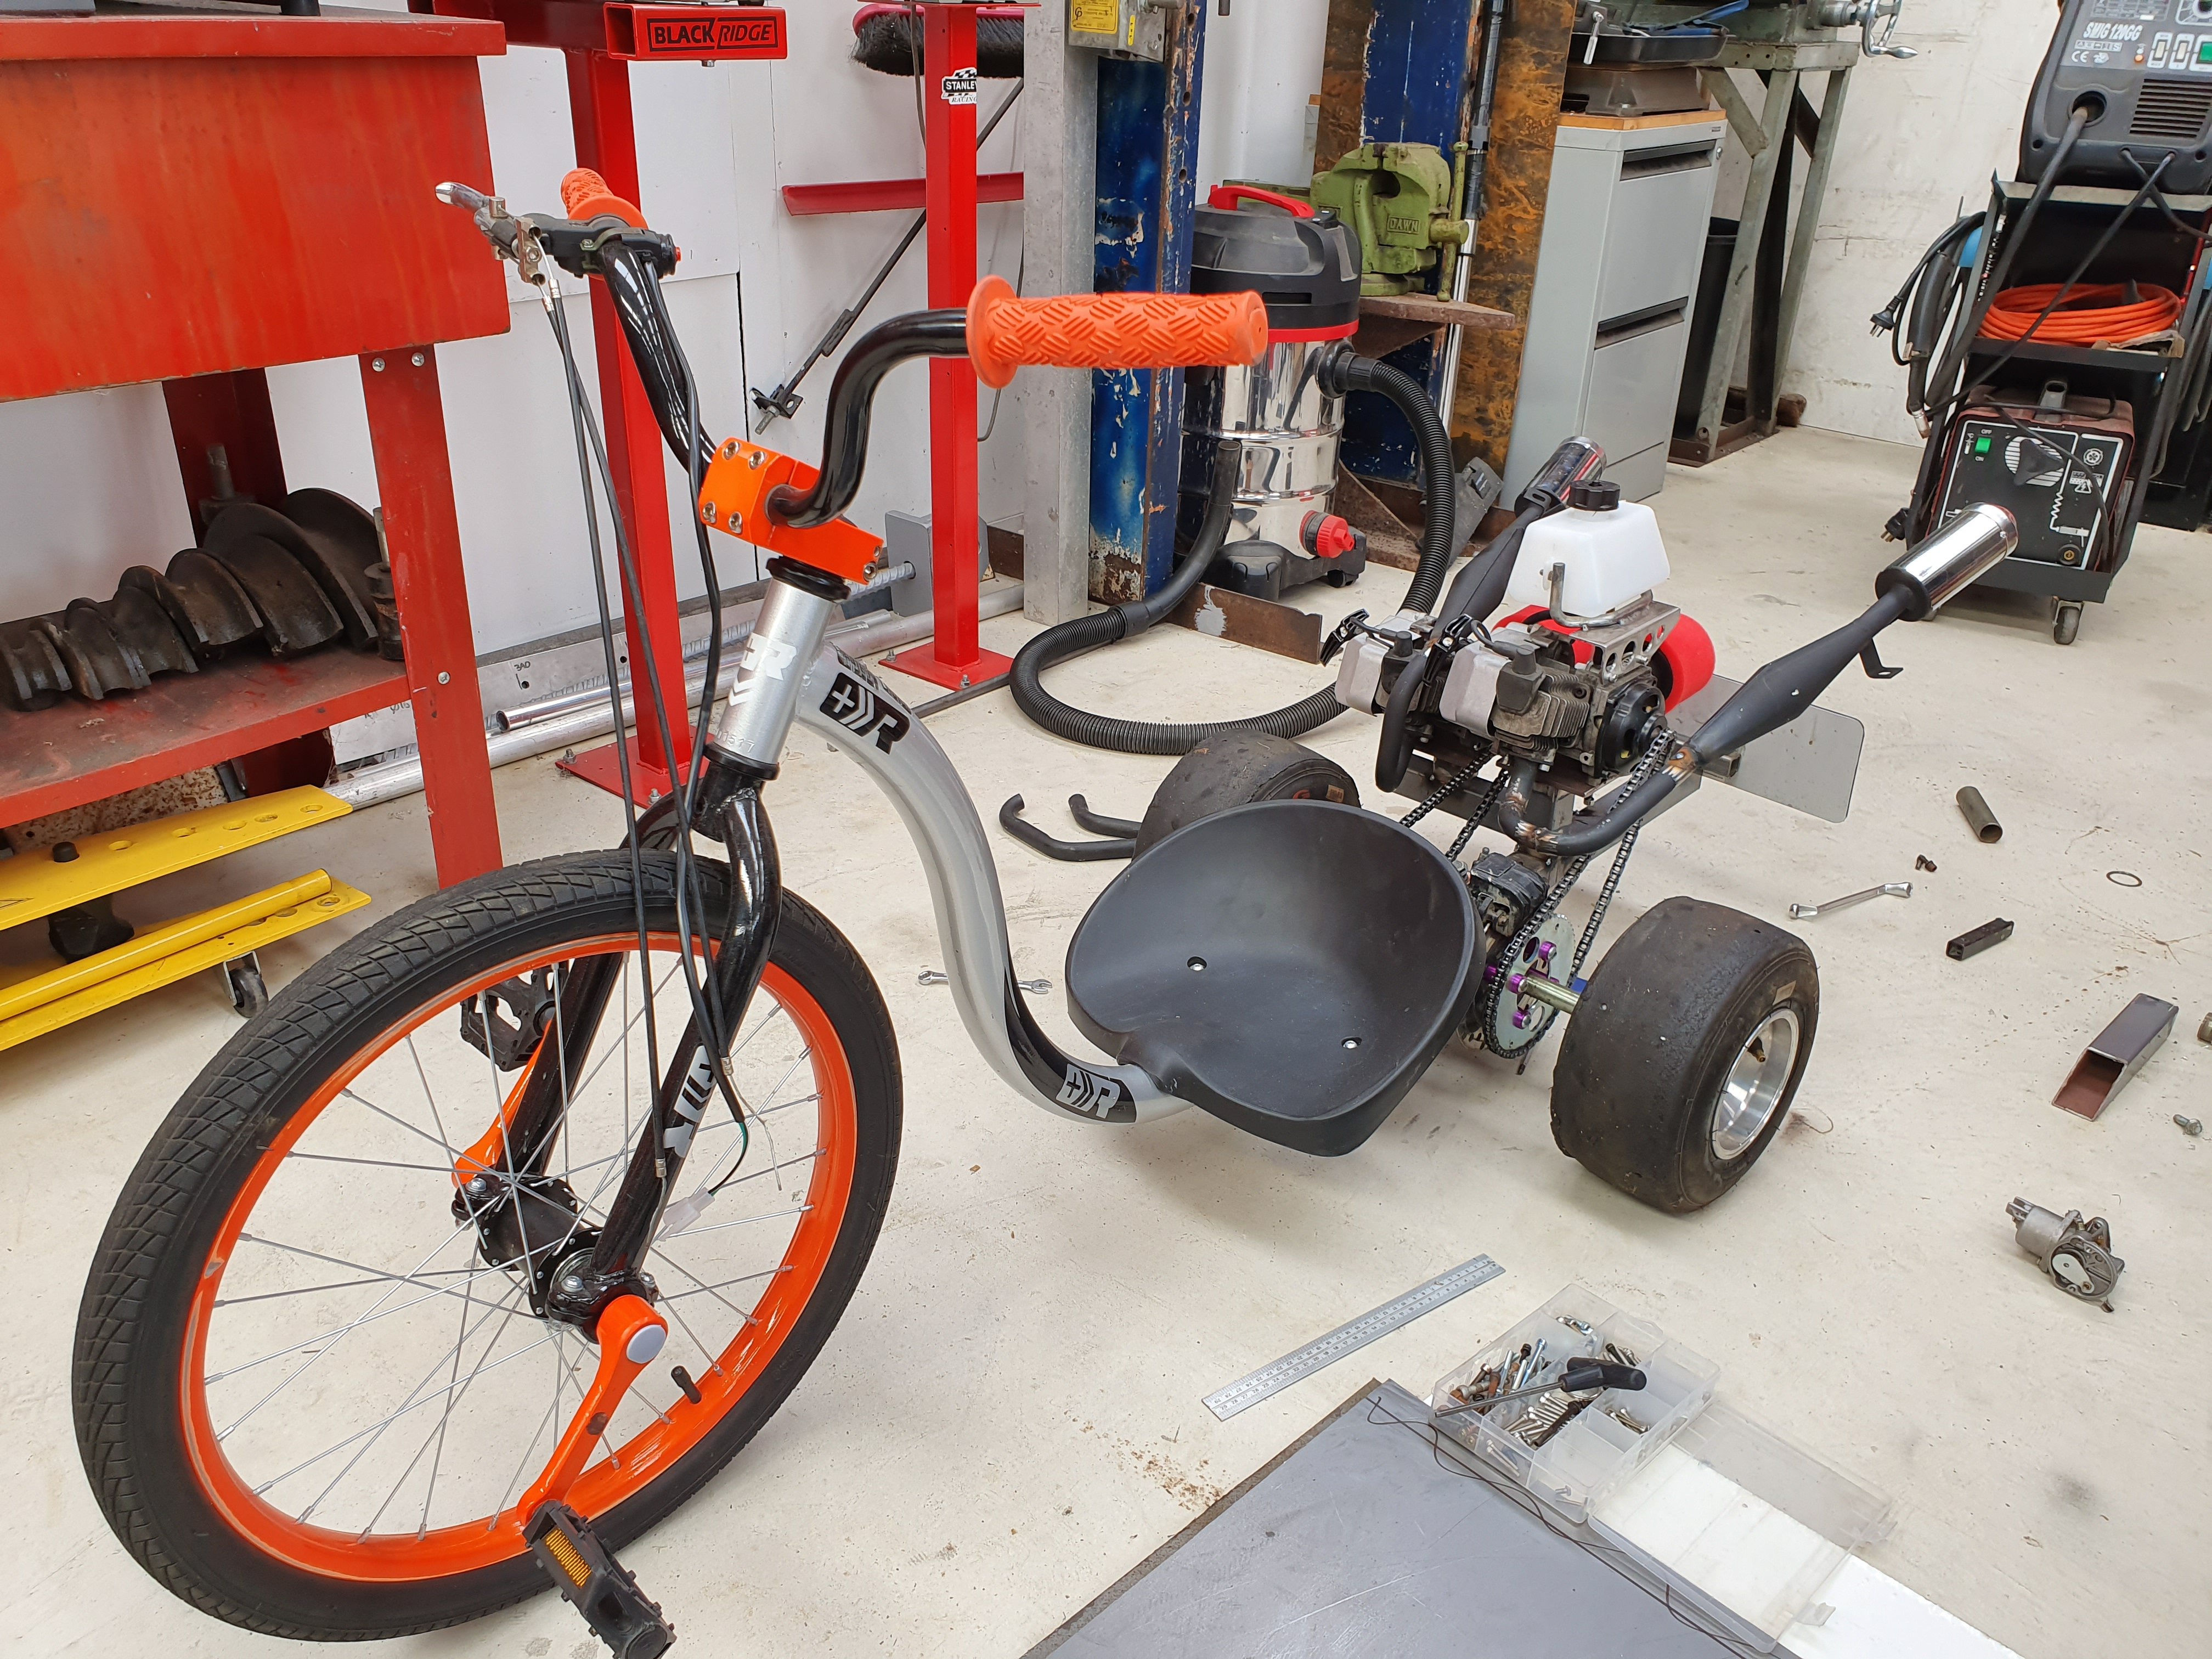
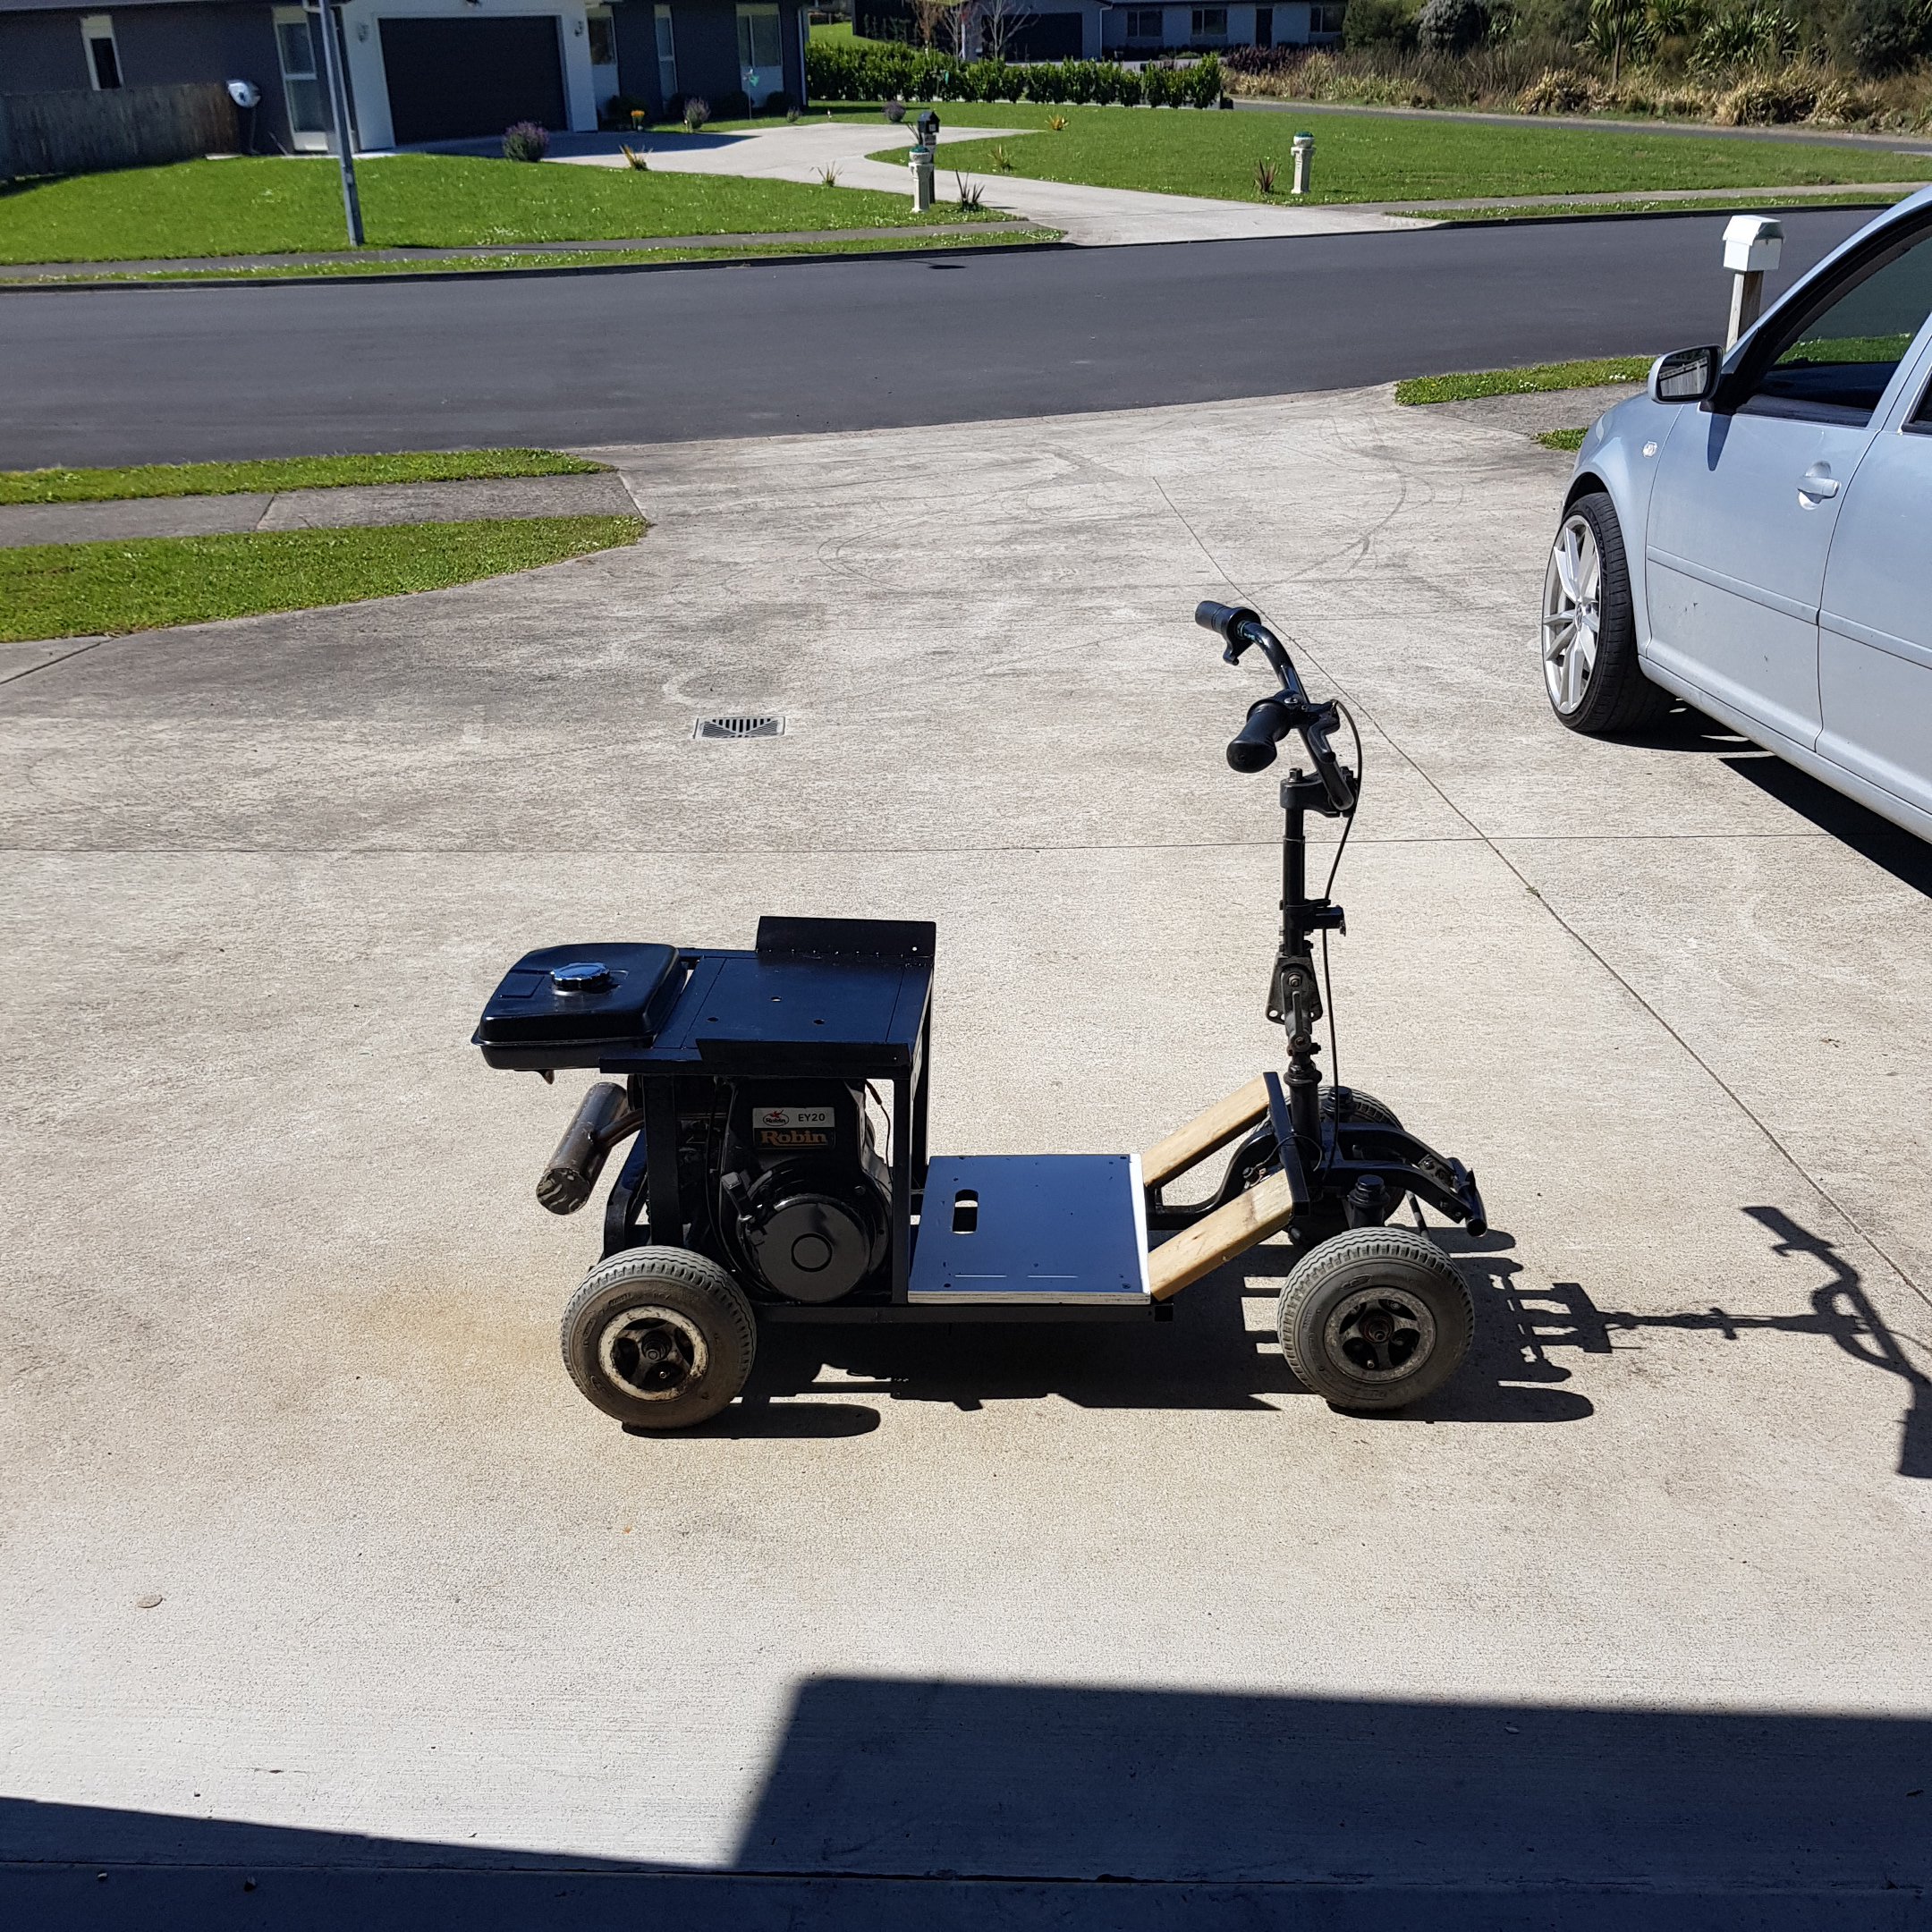
Proportions are comical as fuck and it uses plenty of plywood This has moved into first place as ridiculously fun transportation. Needs a seat cushion of some sort but perfectly ridable as is, i re used the fuel tank as it seems to hold hours worth of fuel..... enough for a weeks worth of liquor shop runs. New muffler has burned in to a nice gold colour and is really quiet which is great i can hear the tv over it.
1 point
-
Okeley dokeley, Did some more on this. Pulled the diff apart, as far as didn't take out axles or anything, just cosmetically, will check to see what it's like once it runs and go from there. Drained the oil and that looked fine, which was good, was honestly quite worried it would be half full with seawater. Put some new rotors on bacause shiny/old ones were shot and well past a skim to get them right Painted the rotors, baked them in the benchtop oven I conveniently already had (how cute) then kitted them out with new slide pins (only 1x cause it was munted), pistons, seals, etc. Shiny.... And all together. Shocks are RAW monotube 4" lift, should do the business. Wheel are new ROH 15x8 -22 with the secondhand 33x12.5R15s I acquired from @Stu They will do until it's done, didn't want to buy fresh rubber only to have it sit around and dry rot. The dummy engine, an RB25DE that doesn't have all its insides, long story, but it will do for mockup. Put it in the engine bay, got a couple of bellhousing bolts in just to get the faces together so I could see where it would sit. Which meant this had to happen... I will be incoroporating a hatch in the top of the gearbox tunnel to allow access to the rear plug/coil. The hole has been somewhat refined since I took this photo, and will need to be further dependant on intake and exhaust manifolds. I plan on running a forward facing plenum, but a cut n' shut may hug the block more and work better, I am not sure yet. If anyone has a Greddy type FFP on a RB25DET, if you could measure the distance from the intake flange face to the furthermost away point at both the front and rear of the manifold, that would be super helpful and appreciated. Not the best photo, but you can sort of see clearances will be minimal on intake (driver) side, exhaust should be fine (I hope) Heaps of clearance to the radiator at least in this position, this is with it just sitting there behind the rad support panel. Going to pick up this beast of a tray this afternoon, it has been made to suit a Safari ute conversion already so the mounts suit, it's almost perfect! Just need to shorten it a little at the head board end. Even comes with a 200l auxilliary tank if I ever feel like having $500 fuel bills. So that saves a lot of work adapting the other tray I had for the mounts, and is waaaaay more solidly built than the tray I had, so I am happy. Did this, which makes clearance for the front wheel/tyre, may need further trimming, will check once I can flex/articulate it, once the body is mounted. Trimmed this also, will be getting a tube/plate bumper eventually which will follow that line. Took this one as I was leaving the shed one day as I thought it looked tough, but also shows the rad support chop. (If anyone wants to buy the little gas/gasless welder in the picture here for a reasonable price, message me, it is getting in the way at the moment since I bought my new setup). The body is sitting slightly higher than the final height here as it is on the hoist, and I lifted it up, because I was test fitting these: This was after the first chop just to see that they would fit in the space I made, they got refined more, then I tacked the top on: Still needs some more refining, and a mirror image made for the other side, but I have a bench sander turning up this week that will make the job easier (easier to sand interior curves/straight lines) so moved on temporarily, and painted the rear half of the chassis. Will do the front half when I take apart the front for a freshen up, which will be once I have the rear back together. Makes it easier to move about should I need to move it/get it off the hoist if it can still roll on one set of wheels. After sanding: After a coat of POR15: Painted to just in front of the lower trailing arm mounts, so I can get the back end back together completely without worrying about getting paint on anything. And that is essentially where I am up to! Got to go and pick up that tray now, let me know what you think in the discussion (linked at TOTP). -Hayden.
1 point


.thumb.jpeg.384ff72c8d2b0ee0d34a7bdedb55bdcf.jpeg)


This leaderboard is set to Auckland/GMT+12:00