
Leaderboard


Popular Content
Showing content with the highest reputation on 11/15/19 in all areas
-
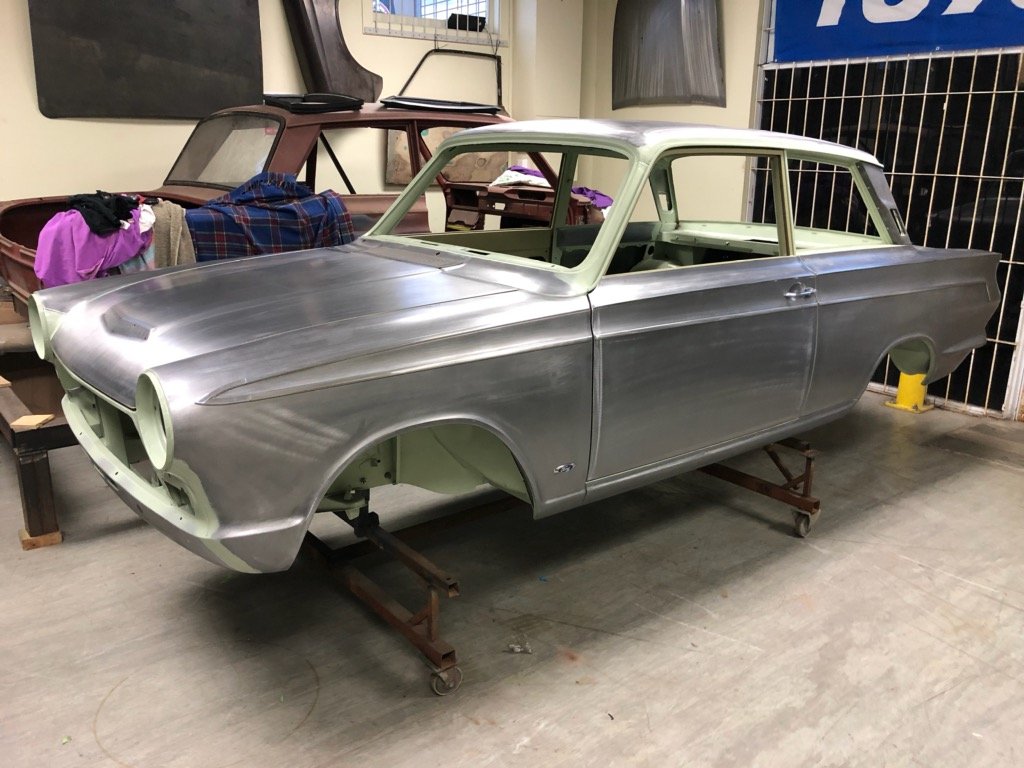
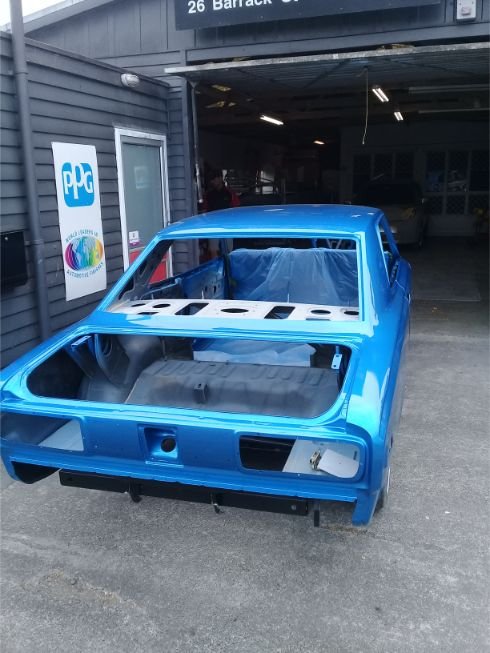
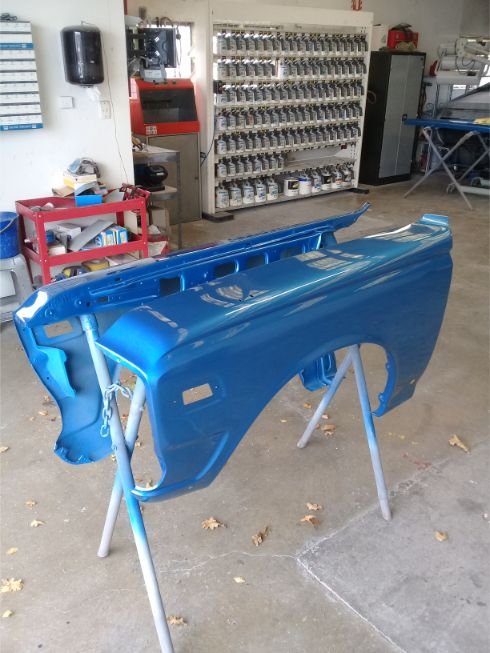
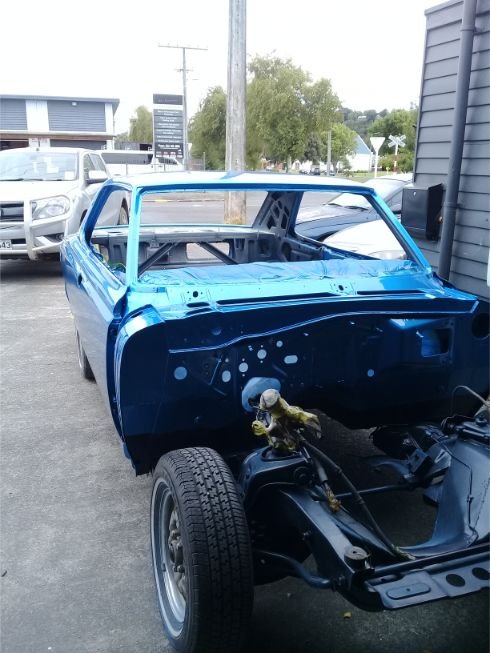
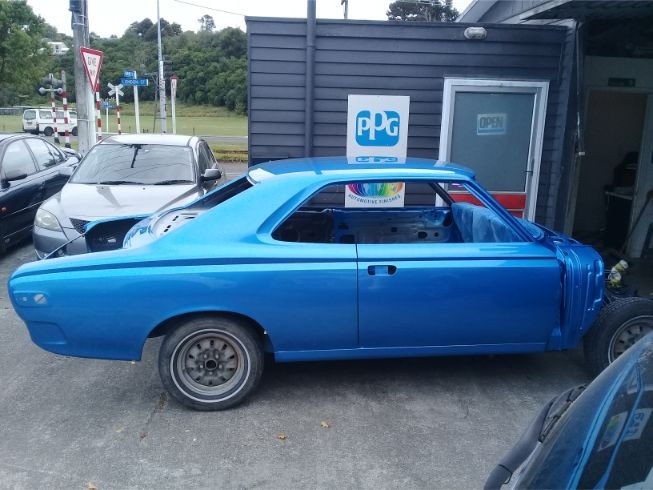
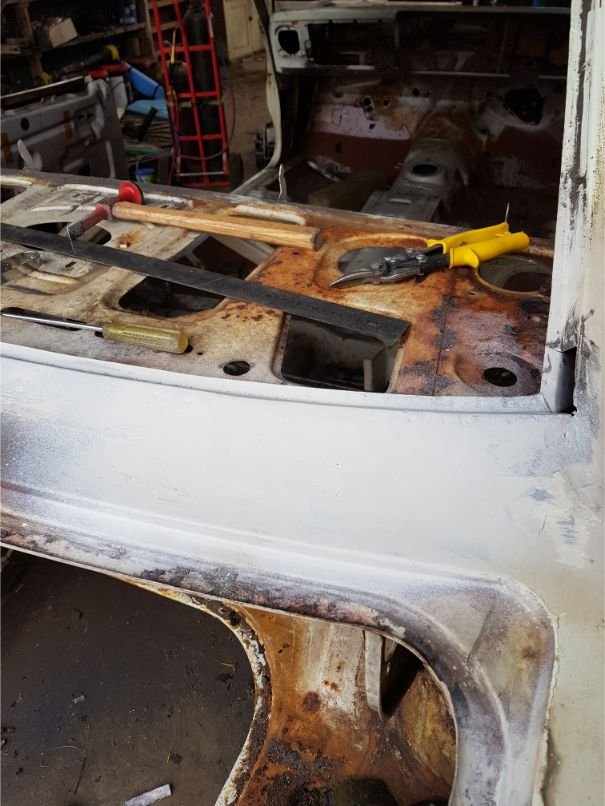
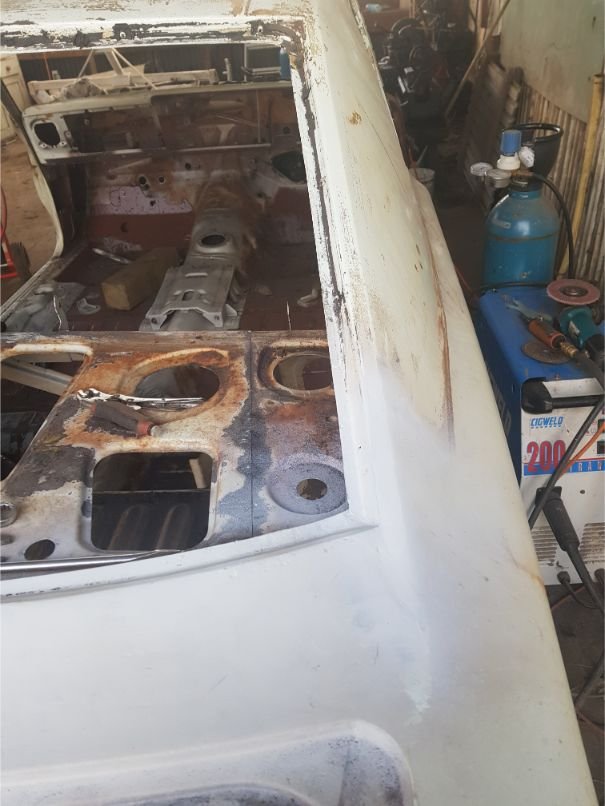
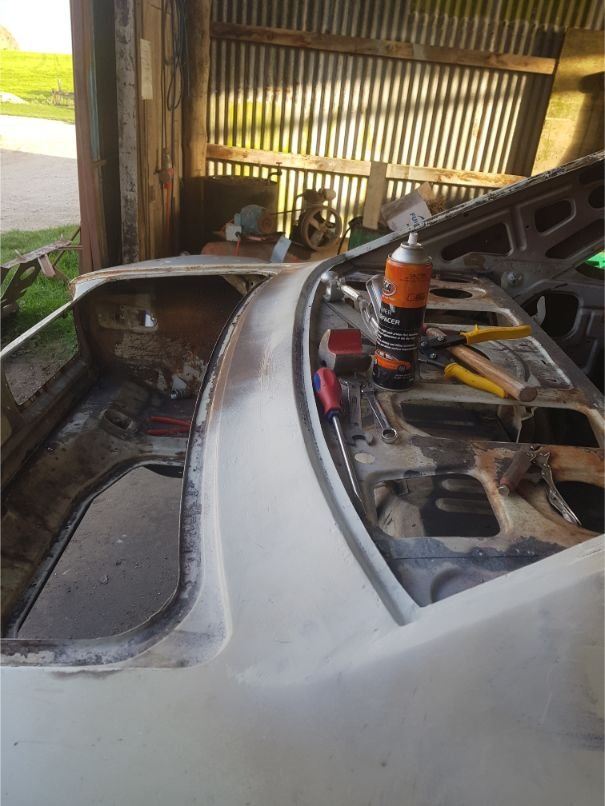
Ready for paint. The panel journey has ended and the quality is just outstanding. Thanks Greg at R3 Fabrications.
 14 points
 -
Hmhmmm.. Was a blown fuse to the pump..... she's alive Got no o2 sensor at the moment so I'll let it run on the base map for now and just adjust a couple of things8 points
-
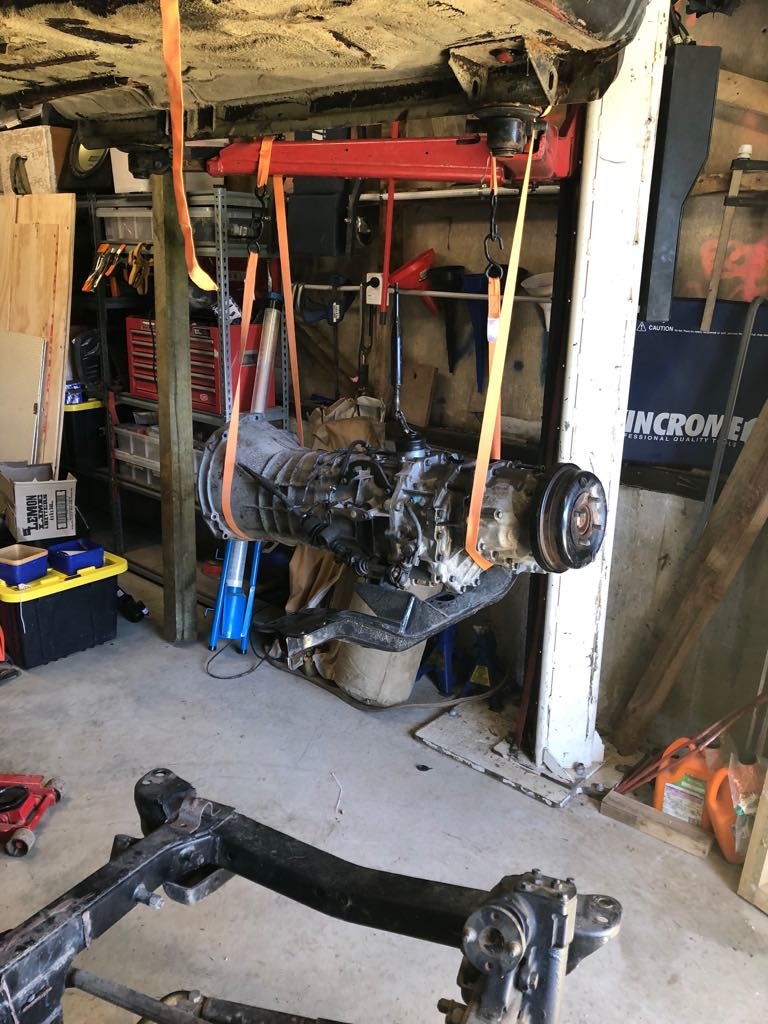
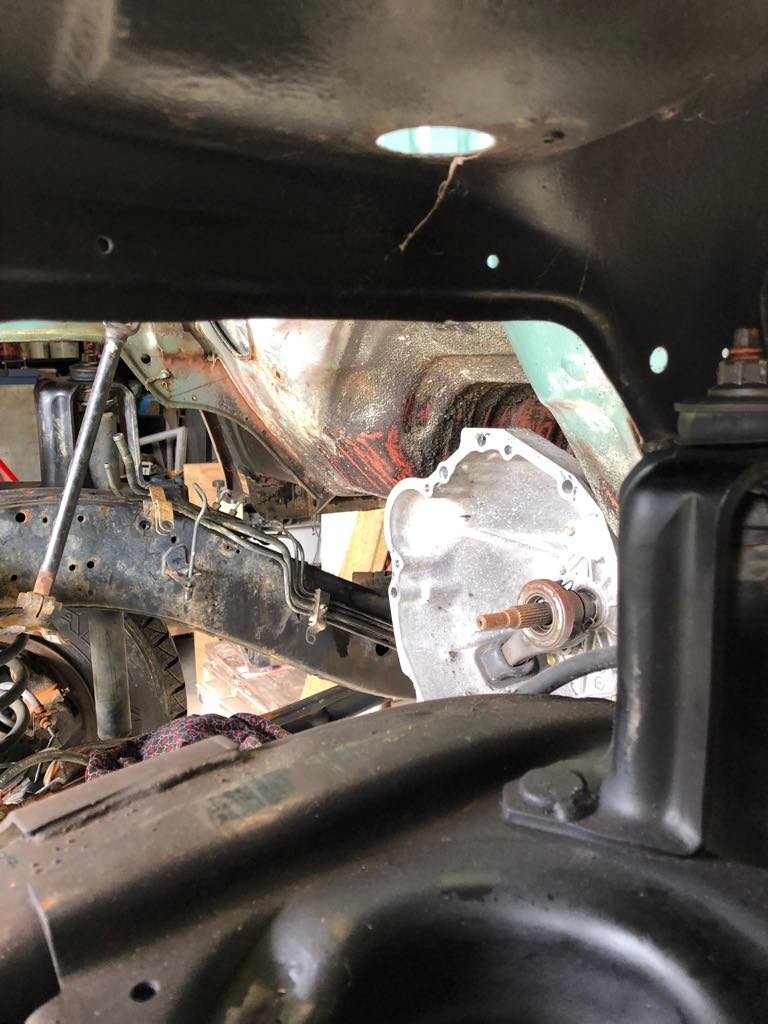
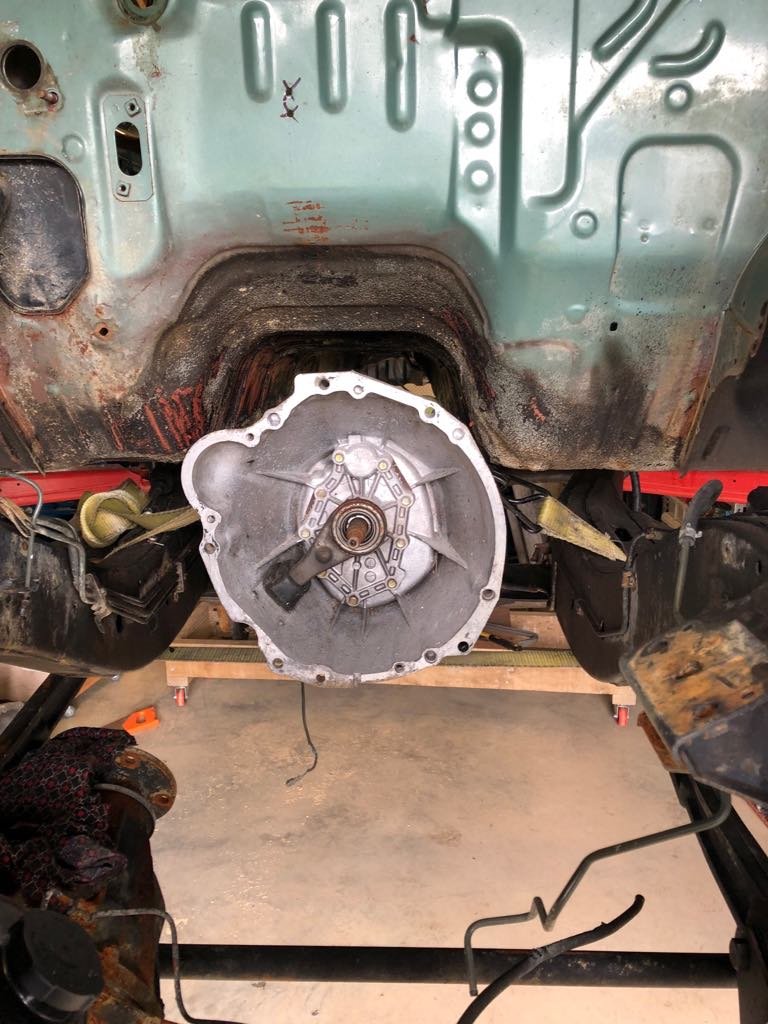
Well, Page 3... Rest assured heaps of work has been done on this, I'm just not sure how good I have been at taking photos. Got the body mounts all tacked up, and the tray welded back together Loaded them both up on the Lexus tow rig and dragged them into work one Saturday a few weeks back. Dropped the tray off to our resident sandblaster, had the whole thing blasted and epoxy primed, cost a grand total of 1x bottle of Jack Daniels, cheers work/Ian. Haha (Have since got it back, prepped it and as of yesterday is fully coated in black Raptor liner, loooks goooood, but forgot to grab a pic) Got the mounts welded in by a ticketed welder Bill from work (I know the ticket isn't so important/relevant but he is a much better welder than myself) took it by Shane Speight on the monday and got the ok on them, so I could go ahead and paint it. Got the flywheel and new clutch on, and finally got the engine in mated (ish, still need the last of the proper bolts) to the gearbox and one passenger side mount. Drivers side doesn't line up, only off by a little bit so will just make up a bracket between the block and factory mount, one of the jobs for this weekend. For the moment it is chocked up with an appropriate length of wood, custom yo. Put the body back over the top to do a final check for clearance, took a bit more off after this to make sure there is plenty of room for things to move. Put the intercooler pipes/joiners in to se what clearance issues I had for them. Cut as necessary, fold up patches, weld em in. Still more to do. That's part of this weekends jobs, worked on it last weekend but was doing paint stuff during the week (on the tray) so couldn't do any more because dust. Also semi-finished the removable rad support section, needs some more bits welded which are a lot easier to do now it is out. Got crush tubes welded in the rad support itself which I forgot to take photos of. Plans for the weekend are to finish the tray by cutting the aluminum checker (chequer?) plate to size as I have shortened the tray, and siliconing/riveting and screwing it down to finish it up. Other than that just more cutting, folding, welding, grinding etc, on panel steel. Might even make a start on the engine cover/firewall if I am lucky. Wish I had a bead roller to get some extra strength in this, but realistically it is probably all stronger than what I am cutting out as is. Chur, Hayden7 points
-
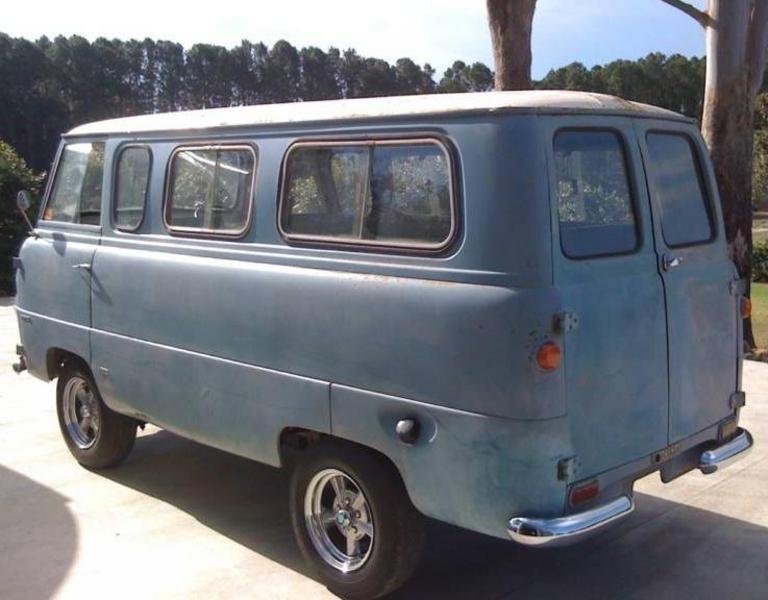
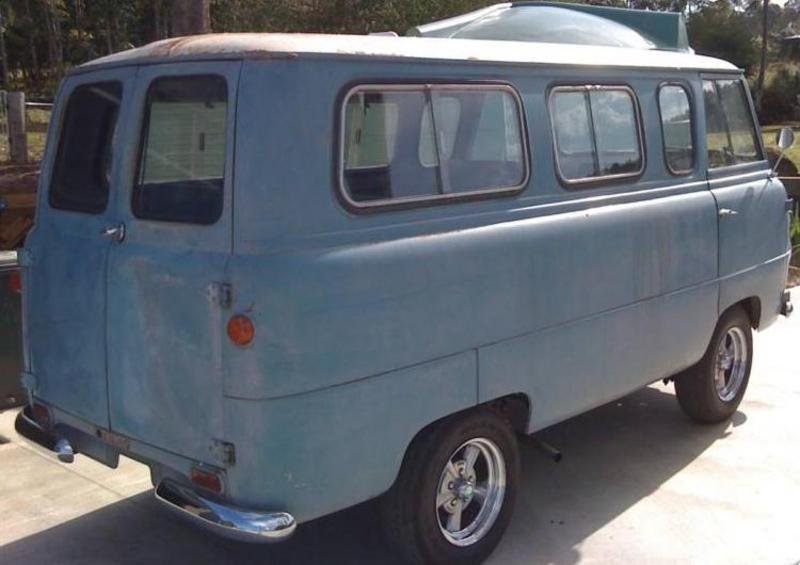
Whilst digging around the internet a few months back I came across a listing for my Thames dated around the end of 2010. This was just before the PO bought it and embarked on the bare metal restoration. At that stage the van was still in its original blue paintwork with heaps of patina. The wording for the listing is in pdf format so I'm unable to upload it, but it makes for interesting reading so I'll transcribe it into a posting when I get a chance. In the mean time here are some pics of the van as it looked back in 2010.
5 points
-
Outer camtree patterns 2 of 23 points
-
Hey Bob. Ha ha - I bet you've noticed my complete lack of activity on the Viva forum eh? No updates as far as work or mods- it has just been sitting there , barely used even as a daily. Its probably feeling a touch unloved, jealous even (if one is to anthropomorphise ones car that is... yeah. The new objectual four wheeled love in my life , little Impy, has stolen the limelight and poor old Viva has been pushed aside ..) I did move it the other day. Once the engine had been wound over enough to draw up some fuel via the mechanical pump it started fine and everything worked as it should. It now looking resplendent in its new location, safely tucked in front of our house (truck)..... Poor thing. Left outside to fare the storm we had last night while Impy and the latest edition to the fleet, the Datsun 180b got to spend the night safe under cover. (please ignore the Ford Mk3 Viva clone - its just another job)... I am still planning to re-power it and still sitting on the fence as to with what. There is a snarling wailing gusty V6 looking up at me from one side while n the other side I can see a more docile but lighter more economical Mazda/Ford Duratec L4 looking up. Hmmmmmmm? However for the immediate future we might well buy a 1256 that @AttySlungGatty has sitting spare just to give the Viva a little more oomph on the hills. I must add this. The Imp was always meant to be just a quick fling. A little bit of fun on the side. Smaller, more lithe and entertaining then the Viva. I was expecting to grow tired of the sneaky outings at night on country roads while the Viva slept unaware. I thought I'd finally see the Imp for what it was, a fun and youthful but quite impractical bit of dabbling back into my younger years of car hooning and that I would eventually dump it to the next owner and go back to my faithful, honest and practical Viva wagon. But no. The poor old slightly haggard looking Viva just sits there and watches me as I go off on yet another hoon in that 'little cute, energetic car with the pretty paint'. Maybe the Viva really does need a new dress and a better set of legs to win me back? ....
3 points
-
Short version of the story goes, the guys who sold me the pallet of 18rg parts to help me repair the corona engine also had a Lotus Seven replica also running an 18rg on twin weber 40s. Has been in their barn for the last 14 years, but recently they dug it out. Some fresh fuel and a slight fiddle and it was running again. I heard through the grapevine that he was was looking at selling it, and it had my name ALL over it. So several phone calls and a bit of time passed and a deal was struck. So a car I've always liked but never thought I'd really be able to own was mine, even better it was RG powered. Traikered it to the ferry, drove on, drove off, allegedly a quick fang through Picton and onto another trailer back to chch. From what I can see, the webers will need a rebuild kit thrown at them, an oil leak from the sump plug, probably just a new copper washer, and the wiring for the lights repairing. Then wof time! Included in the deal was a roof, doors than can also zip in half, and a torneou cover which can also zip in half speedster style. I love it so much, even my wife admitted it was really cool, and she's usually indifferent to my cars.
2 points
-
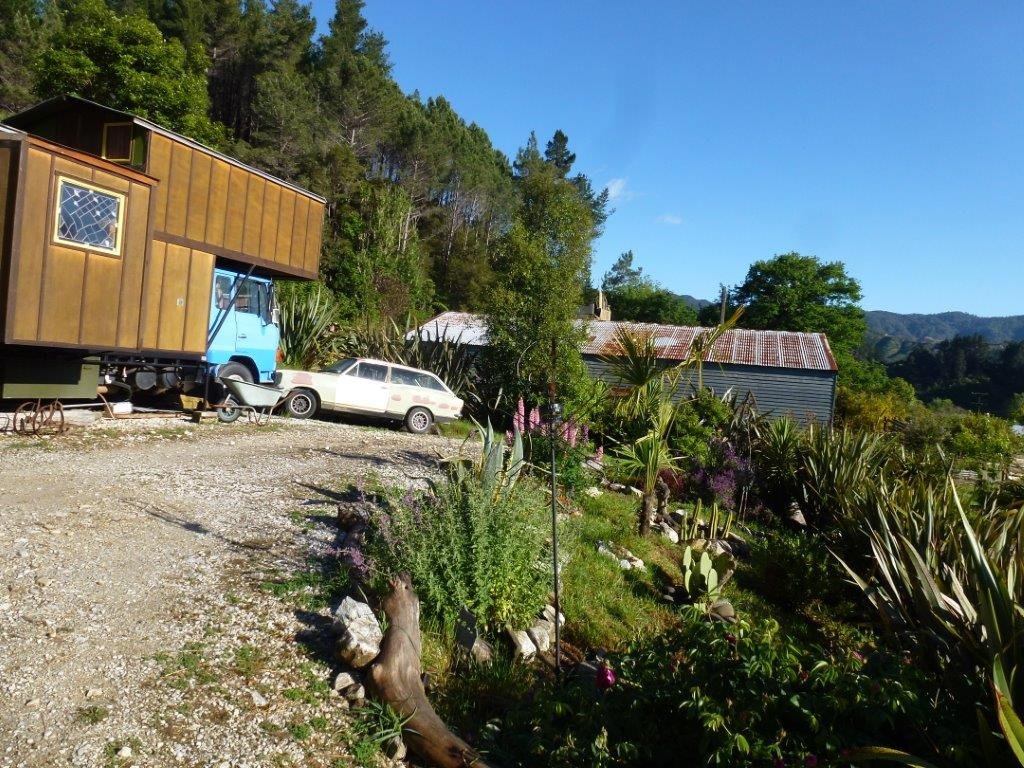
Yep, the van has had a pretty easy life thus far. Original owner purchased the van in panel van format brand new in Brisbane in 1965 and immediately handed it over to Athol Hedges a well known Brisbane based bus and coach building company back in the day. The Athol Hedges team installed the side windows as well as installing a basic camper van setup. It was then exclusively used for holidays. I haven't yet been able to ascertain when the first owner sold the van, or when the second owner sold the van to it's third owner, but I do know that the third owner used the van as a daily driver to drive between Brisbane and the Gold Coast. During his ownership he did quite a bit on the mechanical side (new ball joints, rod ends, re-cored radiator, rebuilt carbie and fuel pump, brakes, belts and the usual service items). The third owner sold the van in 2010 with just under 69,000 miles on the clock. The fourth owner was the one that poured money into the bare metal restoration which was undertaken by Norm Clarke Restorations in Brisbane East. The van was meant to be a delivery van and mobile marketing tool for his wife's new florist shop, but the shop never happened and the project stalled. In the last 9 years the van has only done around 250 miles. I'm the fifth owner, so not too bad for a 54 year old vehicle. Here is a pic of the basic camper setup that was done by Athol Hedges. Sadly the fourth owner binned the camper setup and all that is left is the Athol Hedges decal that must have been affixed to one of the interior bits and is now lying in the box of spares.
2 points
-
Yeah everyone is more than welcome to do what they find more interesting; or pest from place to place. I think he's a 5 minute ride from the motel up the coast. I may be offering non drunk doubling services. May also take people around on my bike if they're too drunk to ride. But we'll see what happens.2 points
-
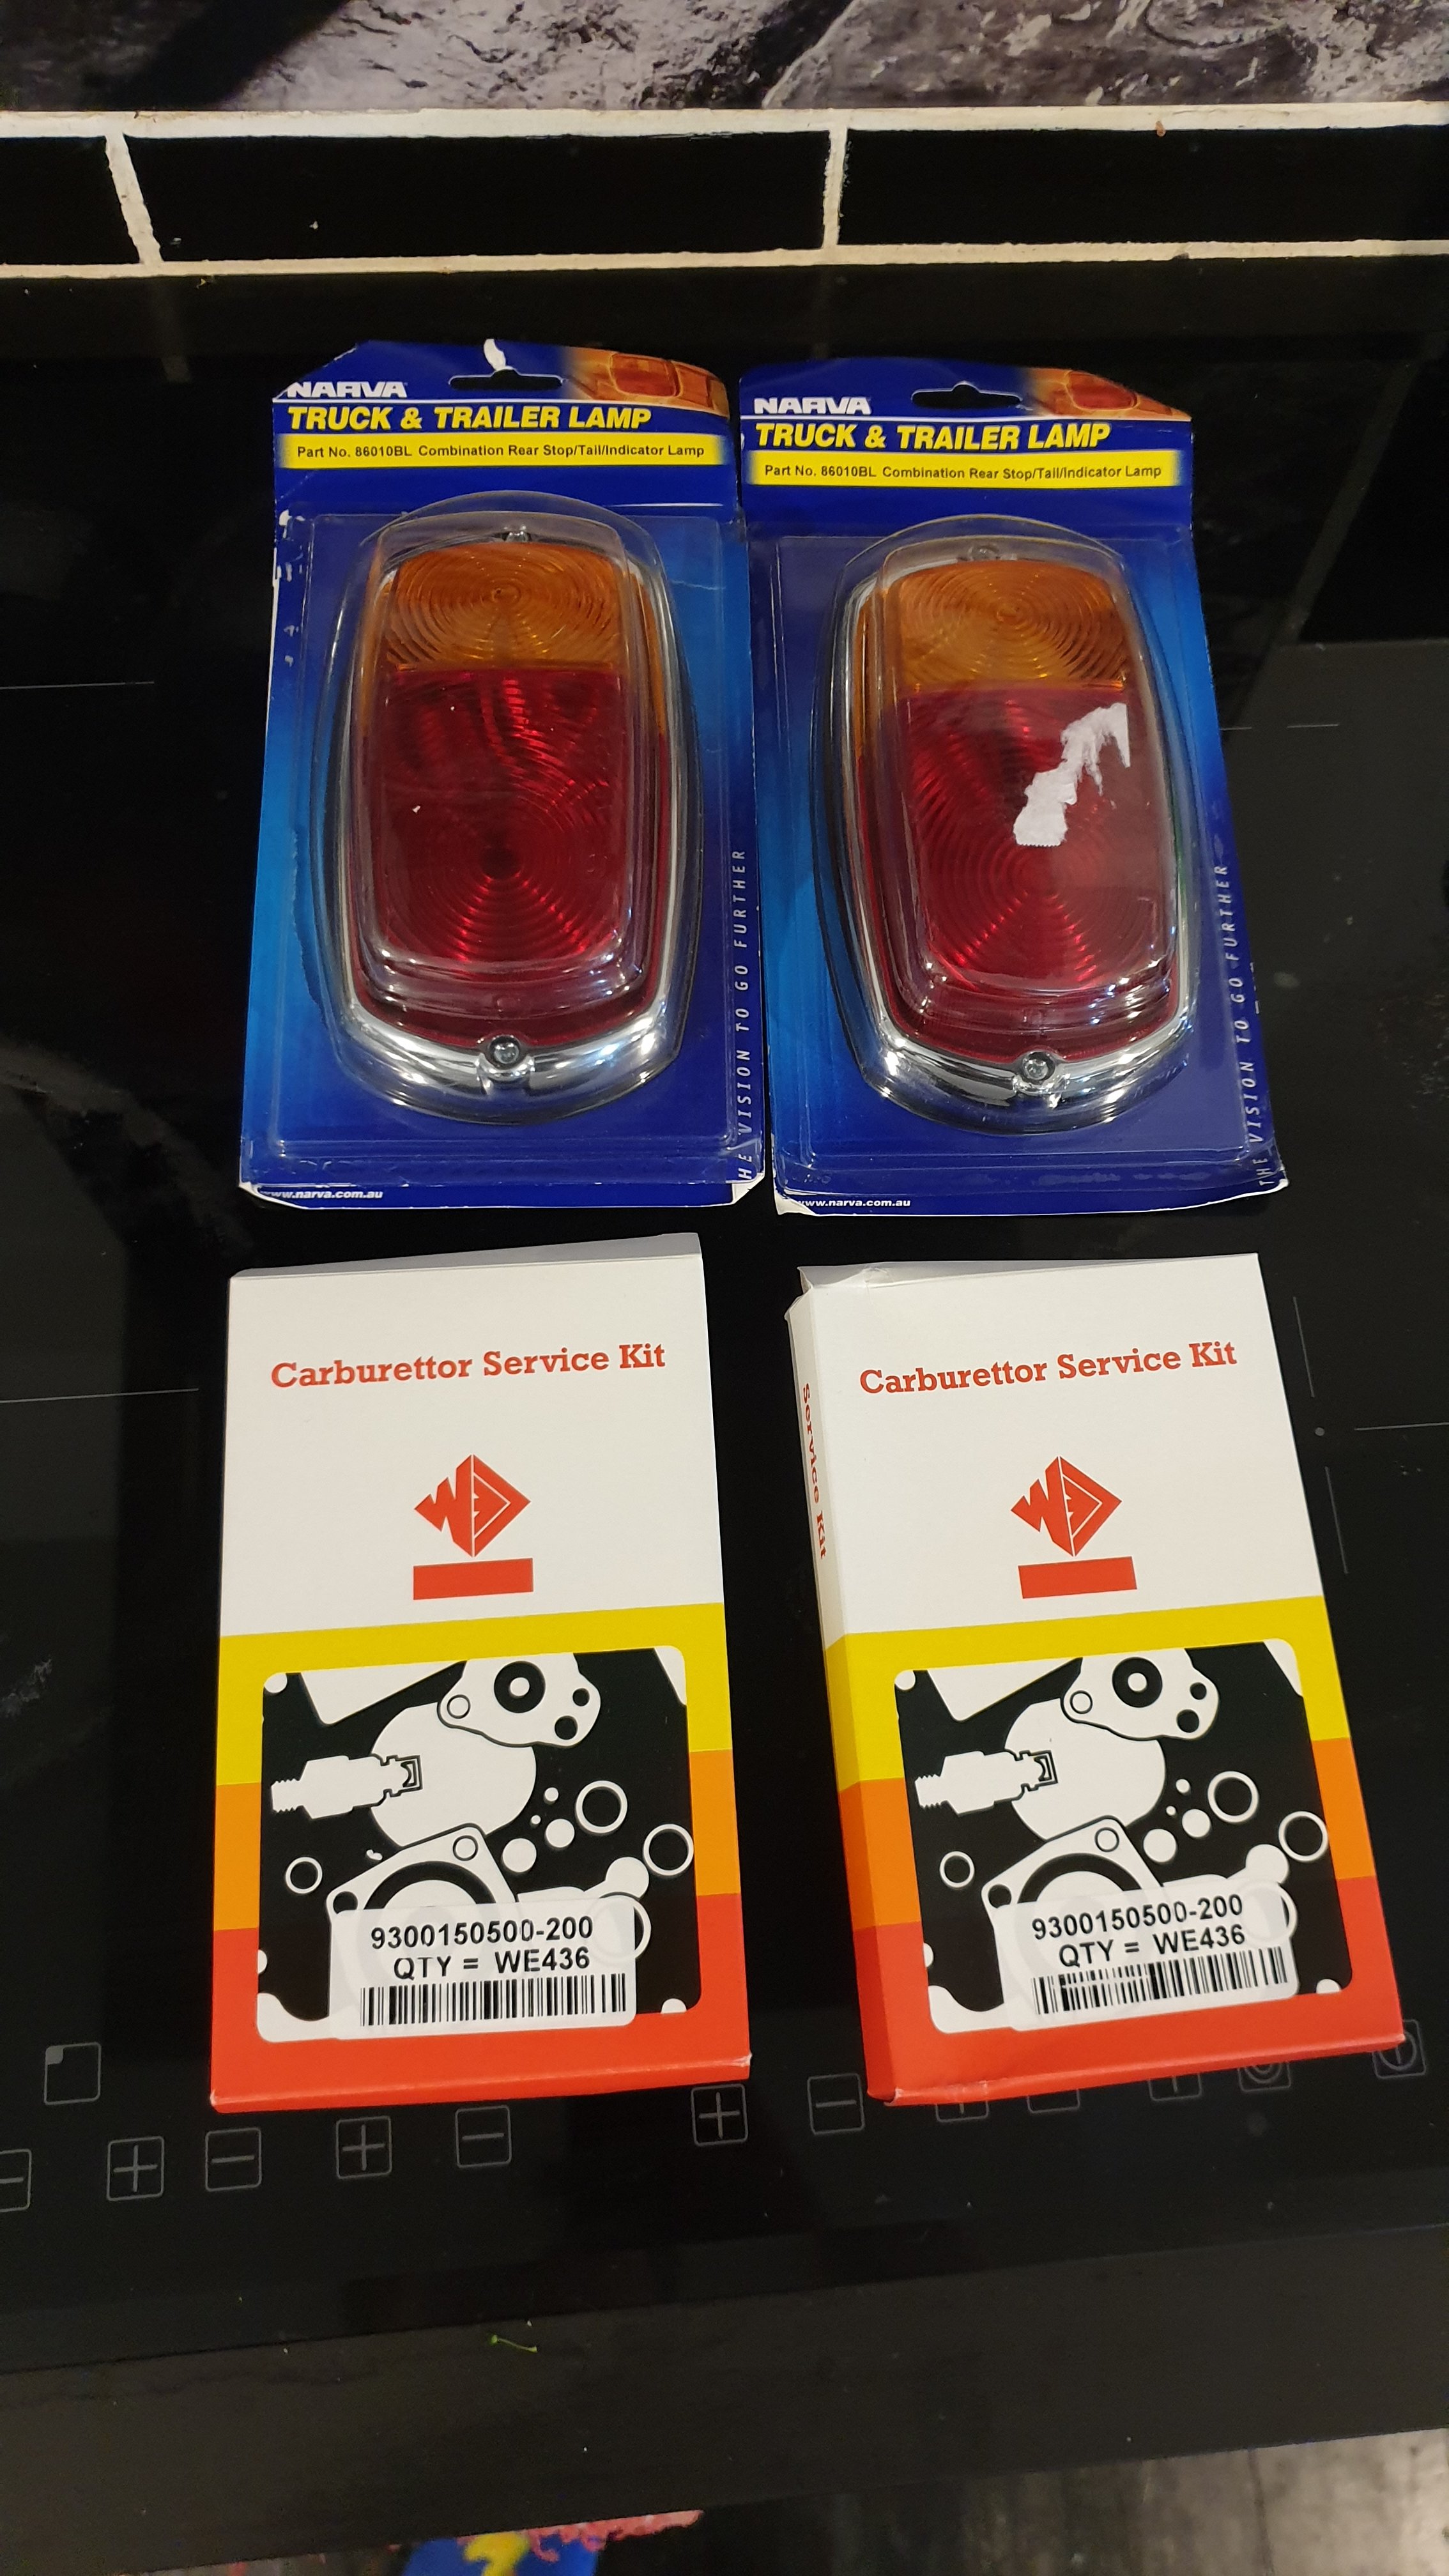
New wheel cylinders and the rear brakes are mint. Robbed the headlights out of the mx5 for this, still sealed globes so will order in some semi sealed units at some point. Tail lights and carb kits showed up too, so that should get it 99% over the line.
2 points
-
2 points
-
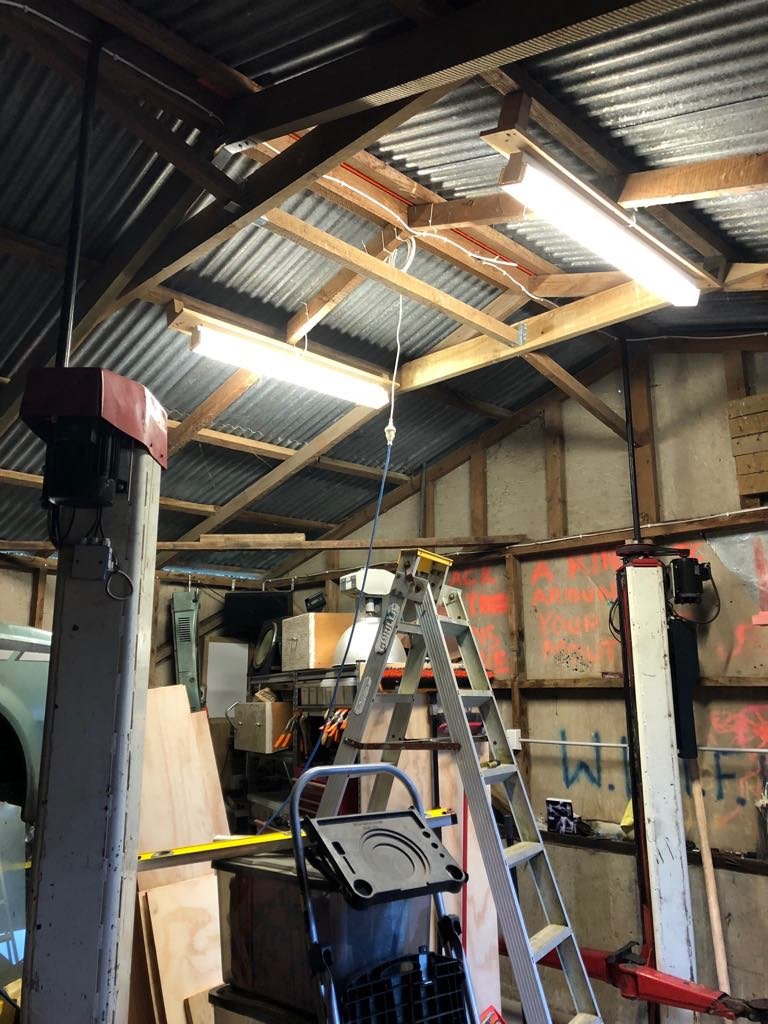
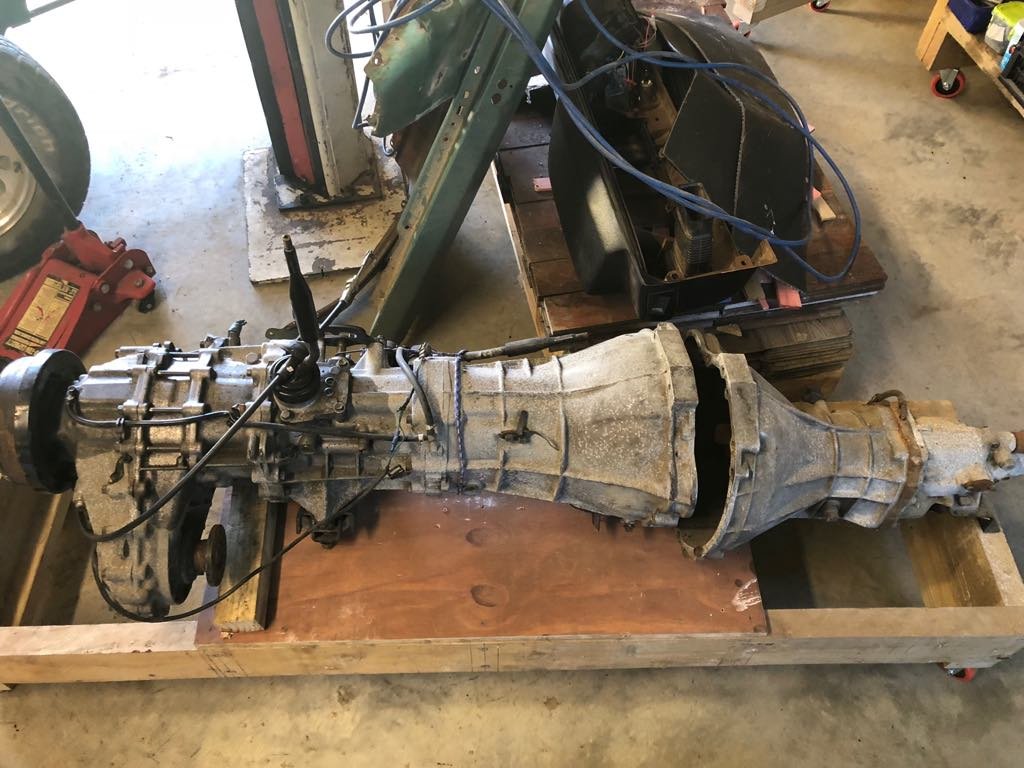
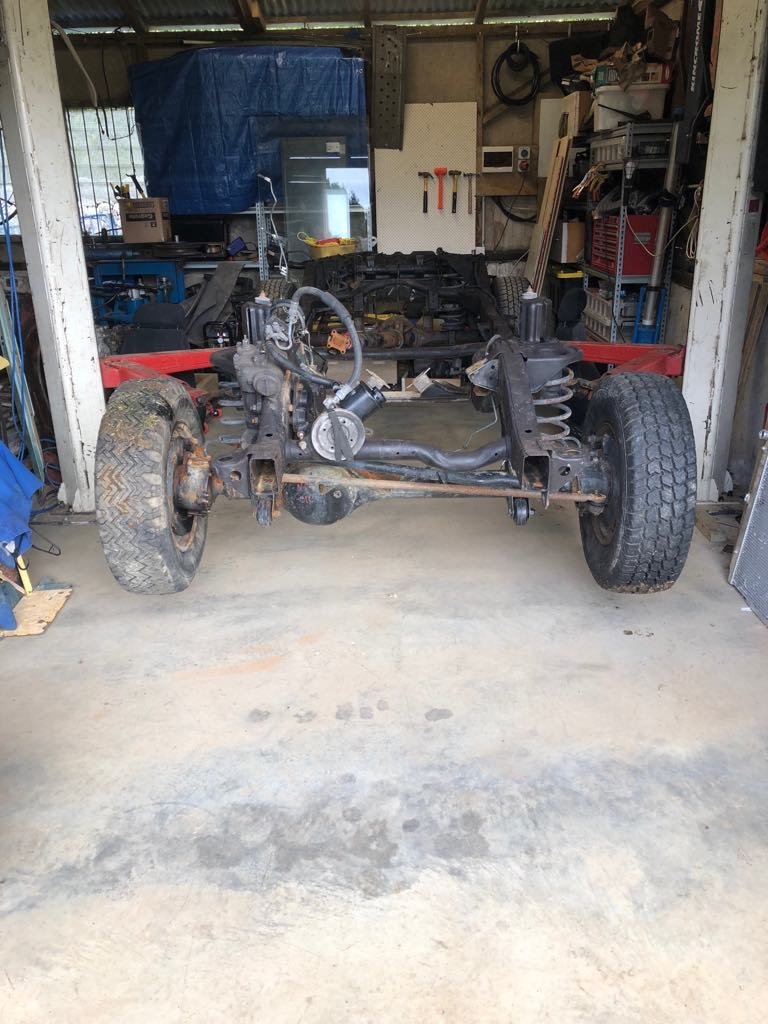
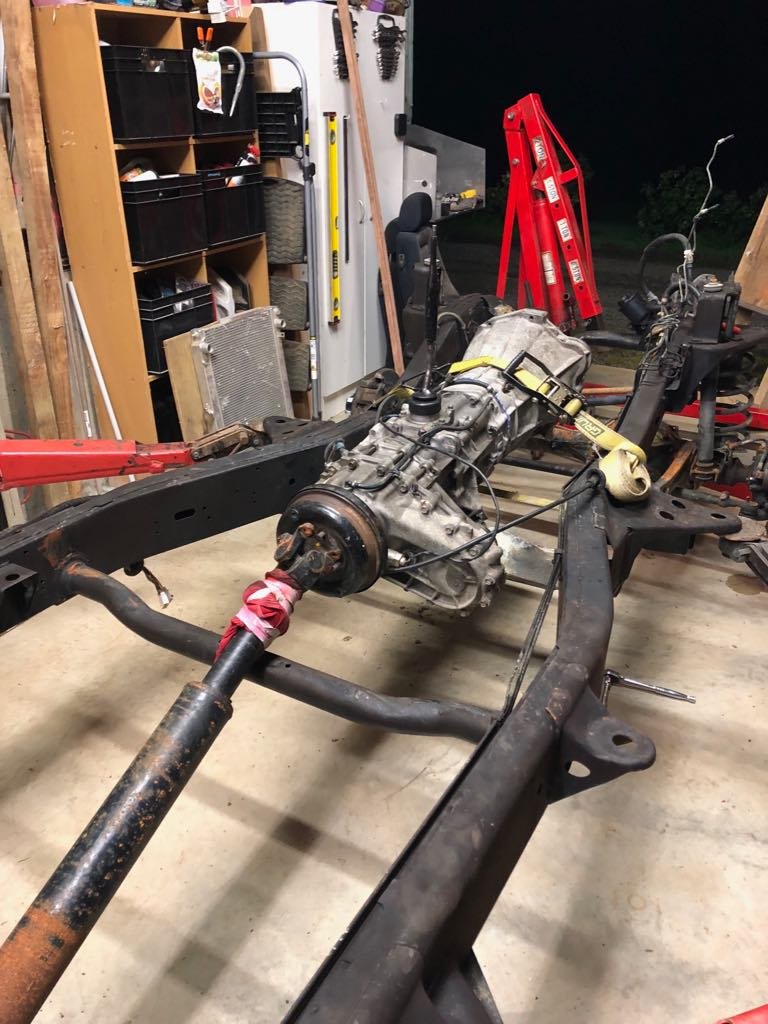
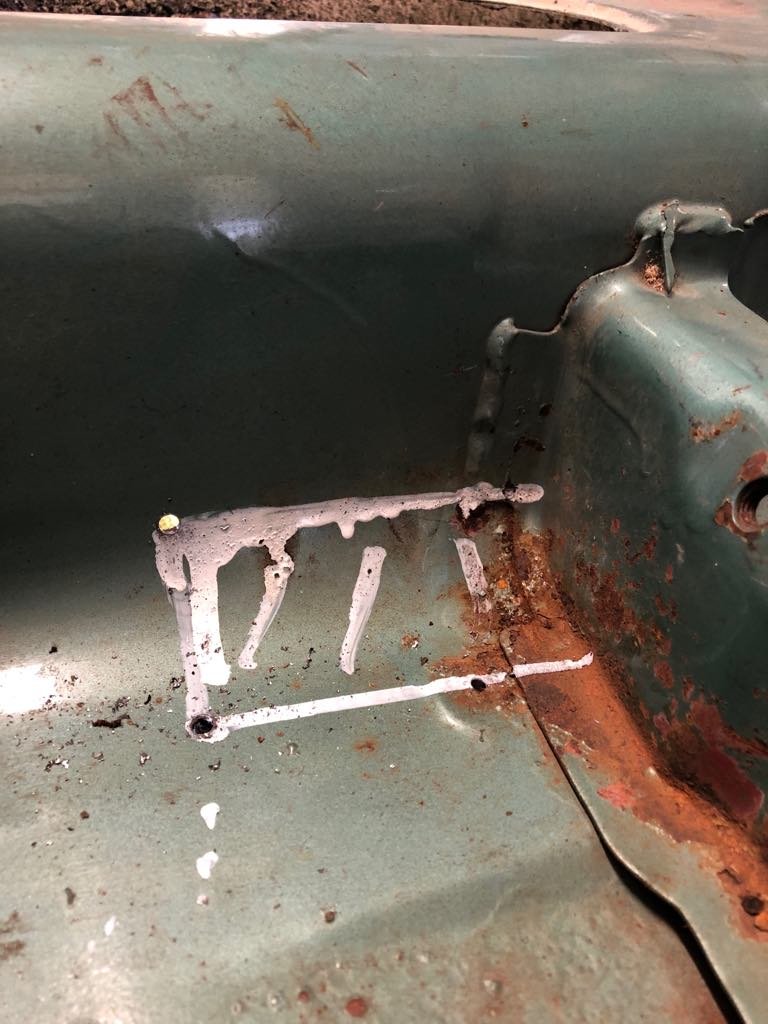
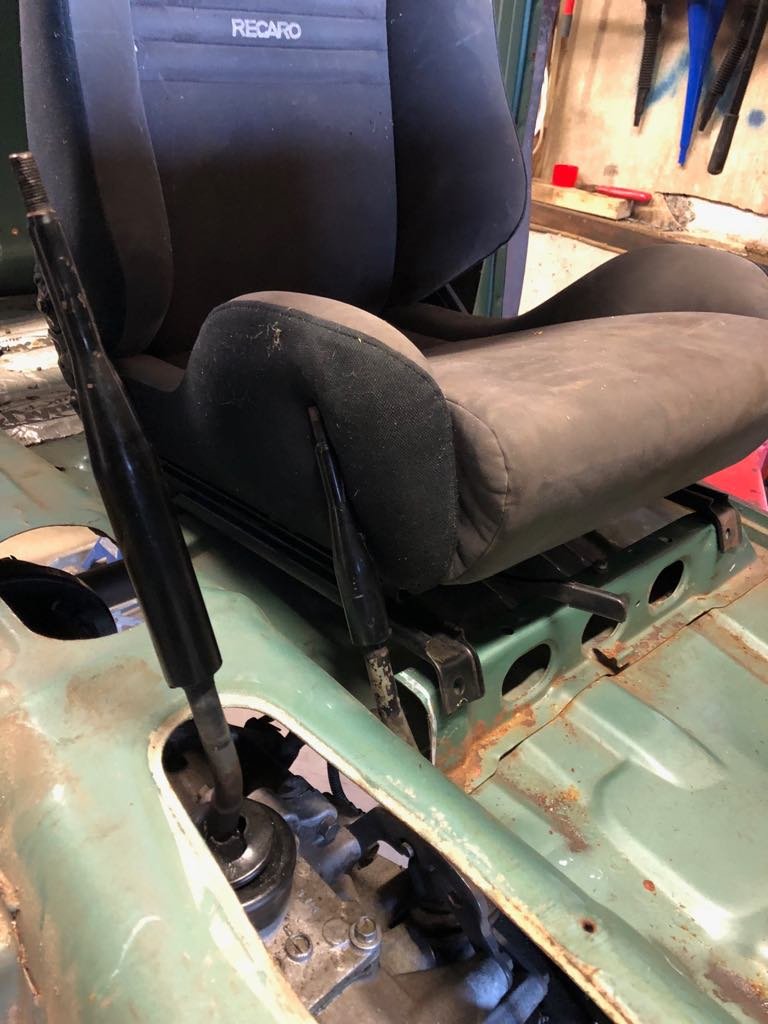
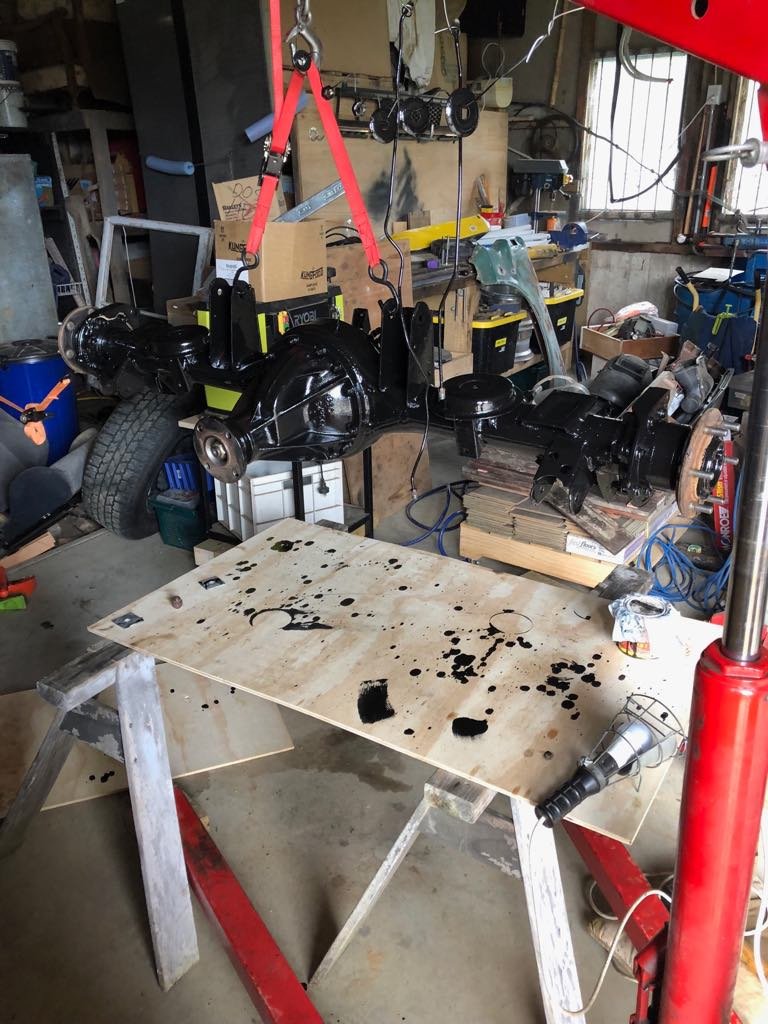
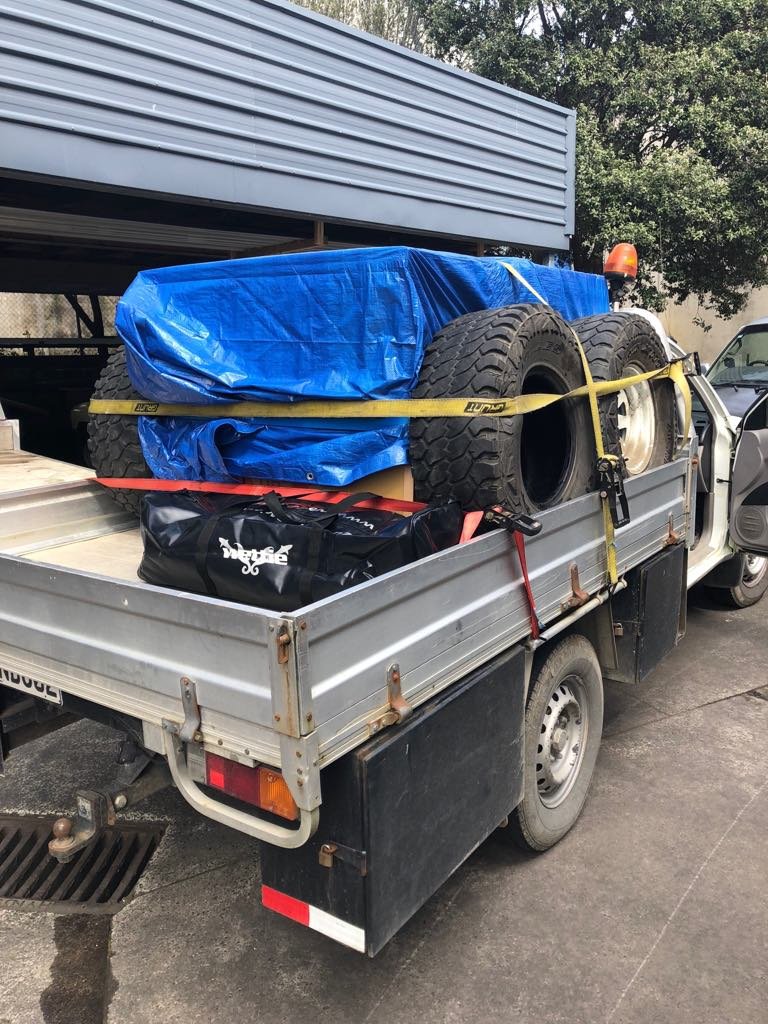
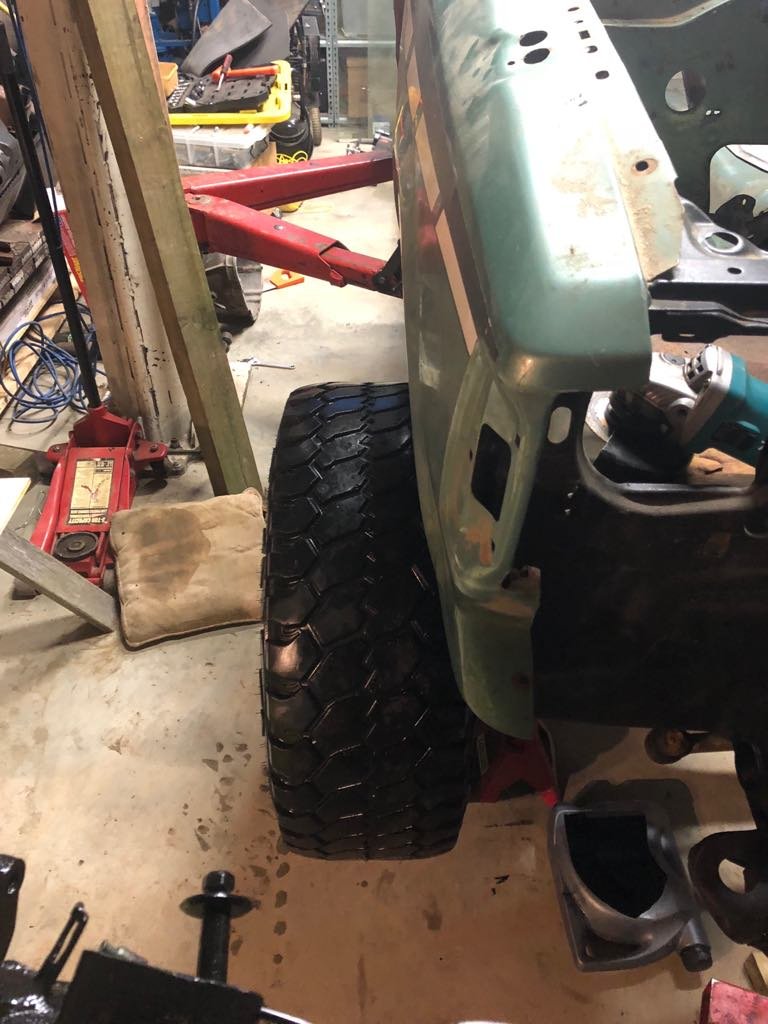
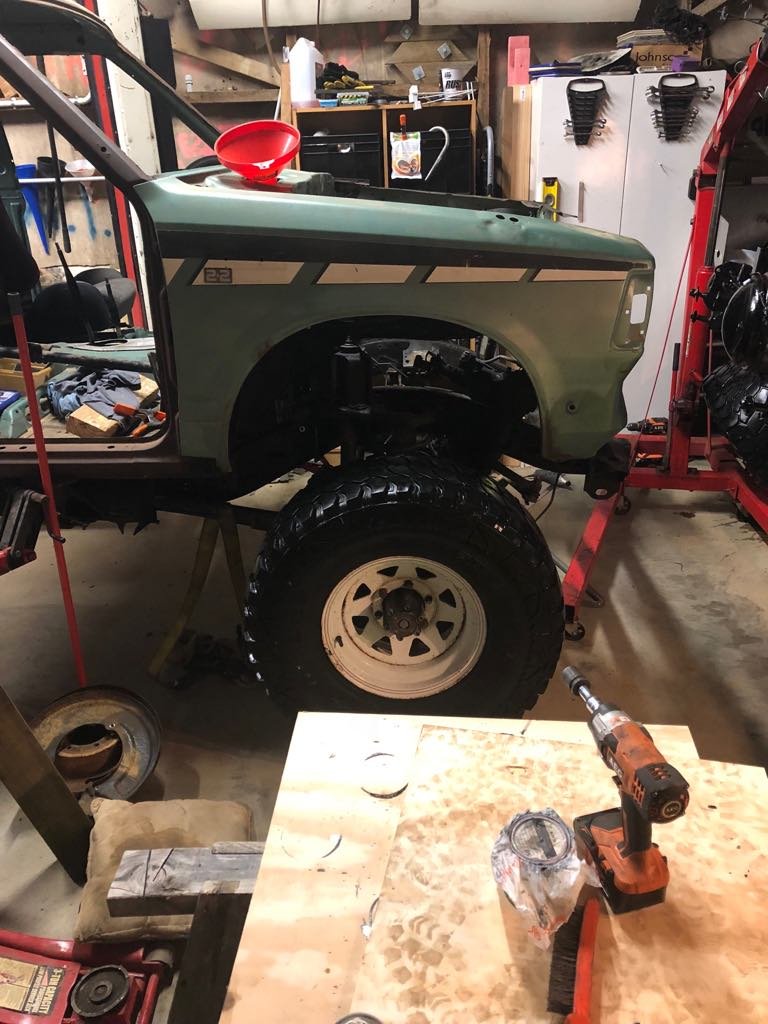
I did have a thread for this, but it didn't get worked on for several years, and I think it has gone. So, start again. (Picture here of Datsun when I first got it if I can find one) I have/had (depending how you look at it) a 1985 Datsun 720 4wd. It was gutless, it had rust, so it was a Datsun (not a Nissan haha). I thought I would pull it apart for some rust repairs and paint, that was (too) many years ago, it snowballed, I ended up disassembling the suspension, driveline, painting a lot of things, modifying the gearbox to accept an RB, bla bla bla. Then this year, I had been chipping away at it, I had finished study and finally had a decent job. And one day as I was doing something I looked at it and decided I wasn't going to be happy with it when it was done if I continued down the path I was on. I couldn't add too much power or things would explode. I couldn't get aftermarket parts to improve things like ride height and driveability (not easily or cheaply anyway). So I thought, "stuff it", and decided to just do what I wanted in the first place, and had always said I wouldn't do because of cost essentially, but yeah, now I'm just going to be irresponsible for a bit and throw money at this thing until it runs and drives and I am happy with it.. So the basic equation is: GQ/Y60 Patrol chassis and suspension, diffs etc. 4" suspension lift and all the goodies that go with that. + RD28 gearbox from RD28 factory patrol. + RB25DET from your friendly neighbourhood Ceffydrift/Skidline. + Datsun 720 King Cab body, with factory body mount points, adapt the chassis to suit. + 33x12.5 R15 tyres on -22 offset 15x8 steel wheels. + Flat deck because practicality (I do want to use this thing once it is done)/ease of adaptation to Patrol chassis, and adaptation to toolboxes etc. = Profit??? /more likely major losses. But profit in happiness. Have done some work so far, but a lot of time/money has gone into setting up my shed to make this project as easy/efficient as possible. I modified the roof in the shed: (Ignore thee strange writing on the walls, it's an old farm shed that has slowly been modified to be my garage, there are lots of .22 sized holes in the walls, and there were gas lines in the ground when we dug it out to put in the floor) So I could install a hoist, which has multiple uses: Lift it up to put it on a dolly, damn these things weigh a whole lot. On a dolly next to the gearbox from the Datsun with an RB25 front housing swapped onto it. Slight size difference. Patrol chassis in place. RD28 gearbox. Unfortunately this chassis originally had a TD42 (which it didn't come with, but there was no way I could use anyway as it was waaaaaaaaay too big), so the driveshafts don't work, but will have a look to see if Beattys Drivelines have any listings or if I can source replacement entire driveshafts to suit. Nissan Lego! With the body in about the only place it will go, i.e. engine will fit behind radiator support with radiator under the panel, gearstick in a useable position, etc. Will likely need to cut and box the firewall/tunnel. Had to cut out this bit as well as some of the seat support to let the transfer case shifter come through. With that cut out the shifter comes through the factory shifter hole, bit further back than normal, but still very useable, and with a slight tweak to the actual shifter the transfer case shifter will work fine and not rub on the passenger seat. The picture above is with the shifter in 4th so that is as close as it gets/have checked it in all gears. Currently tidying the rear diff: Painted in POR15, will get new rotors and rebuilt calipers shortly. Then will go back in once I buy the last pieces of the rear suspension lift, which will give me enough time to tidy/paint the rear of the chassis. Has an LSD which seems to be in good condition, which will do until it is on the road and then I can think about an air locker. Went to Auckland the other day, got some tyres from @Stu, bloody nice guy, nice to meet you in real life after all these years of seeing you on forums. Sharp price too. Pictured here with my parents flash new couch and a whole bunch of new free diving gear, was an expensive day all up haha. (Please excuse the twist in the tie down, I know, I'm embarrassed for me too) If you are thinking: "Gee, that looks like a fairly low offset wheel, and you are already putting them on a chassis that was designed for a significantly wider than the body than what is going back on it, are they going to fit?" Then the answer is "Yes?" Gonna have to make/buy (I don't know of any 200mm ish wide you can buy?) some fairrrrrrlllllllyyyy hectic flares, but I really don't want to reduce the offset, so that is what I am sticking with until such a time that I may be forced to do otherwise. They should be fine this way, will just be a case of trimming the sheet metal to suit. Look, honestly, if this were an exercise completely in practicality, then I would have failed. But mostly it's an exercise in "I do what I want", then deal with the fallout. So I call that a win! I get my new welder this week (HF TIG, MIG, Arc w/ spool gun) so looking forward to having a play with that, and potentially making a start on the design for the chassis to body mounts/posts, will make up something up then get them ok'ed by my local certifier and welded up fully by a mate I hope, my welds aren't up to crucial parts like this and I feel like there are better places to practice on. At the moment it is sitting on the hoist with the chassis on axle stands. I will make a discussion thread shortly and link to it at the top of this post, let me know your thoughts, constructive criticisms etc. I will try to keep this updated, I am good at taking photos of stuff usually as I do it, just terrible at actually putting those pictures up. Cheers, Hayden.
1 point
-
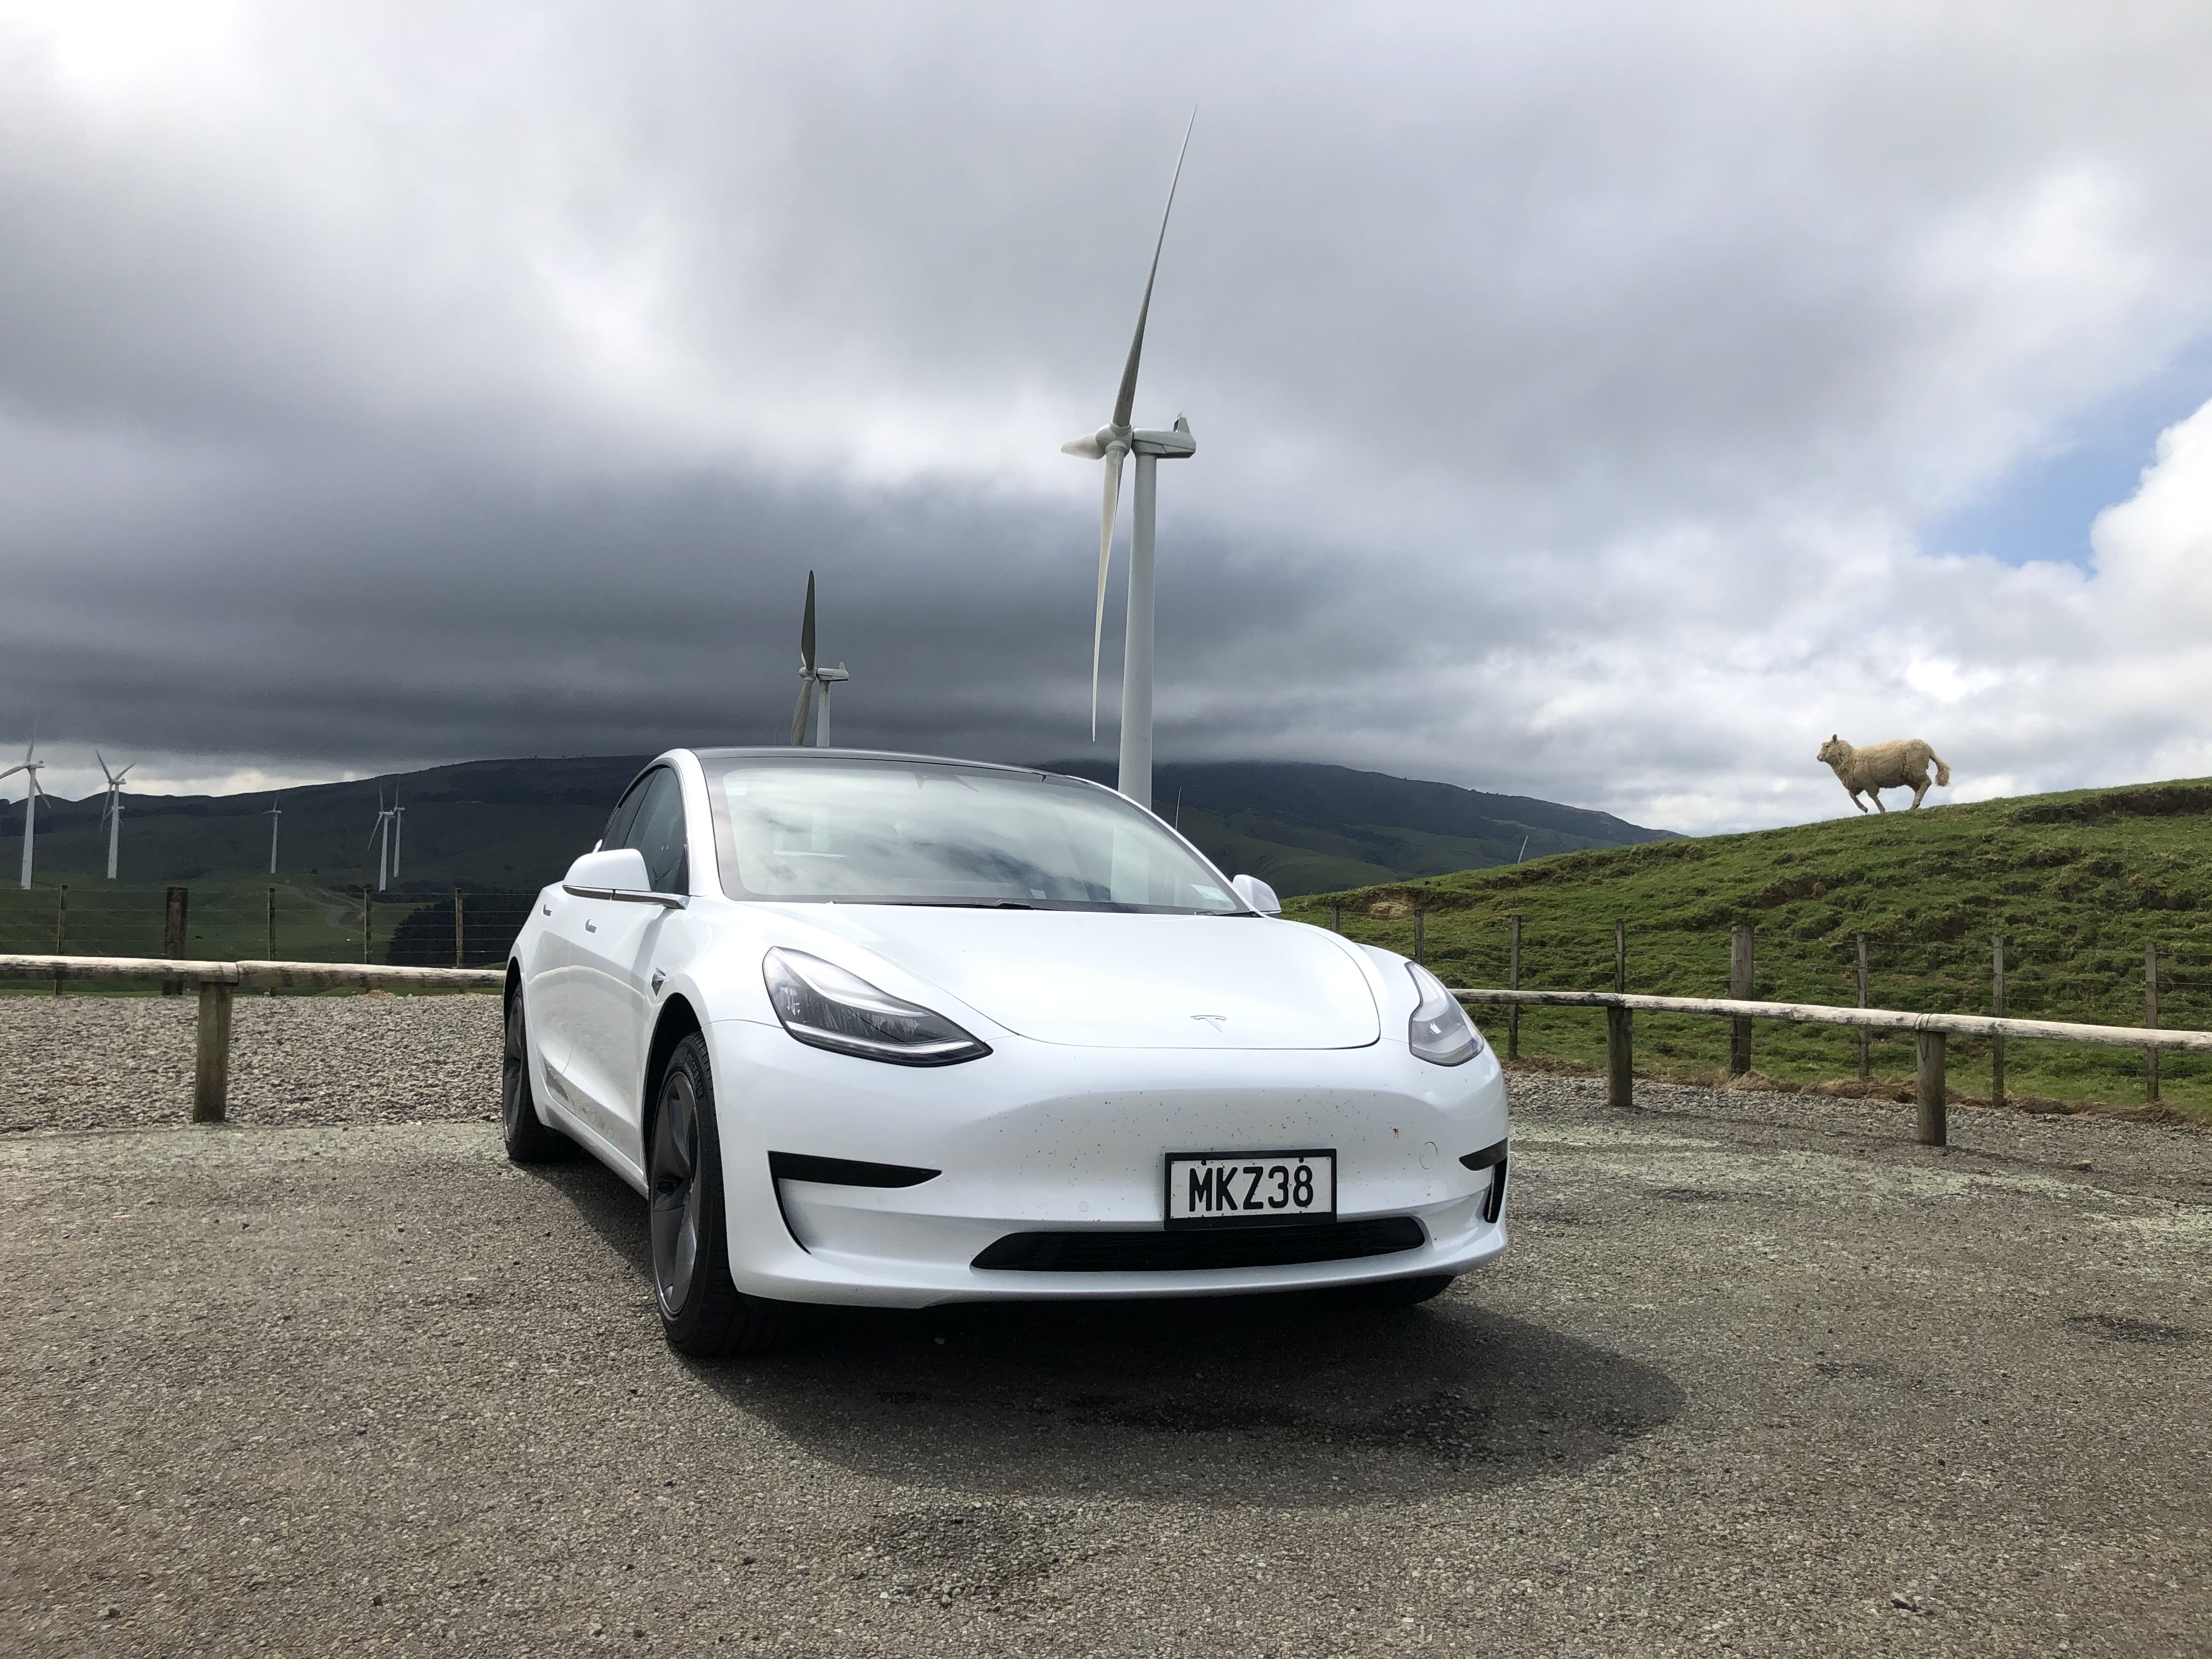
So I went and found the absolute most polar opposite vehicle to something oldschool If mods think this is a boring daily feel free to delete. My now 1 month old Tesla Model 3 Standard Range +. I have been a Tesla fan for many many years and it has been a long term goal to own one. So this is the new daily. All I can say is what an absolutely phenomenal vehicle. All you need to do is drive one of these and you will be sold. I am still into oldschool so dont get me wrong but man, these cars are really next level. Thought I would throw a post up as probably a bit out of the ordinary for oldschool haha. Anyone got an oldschool sticker for the back window ha? Here it is on its maiden voyage down south from Auckland:
1 point
-
Theres a hefty chance I'll be exceeding the breath alcohol limit. I enjoyed smash last year. I did.not enjoy the 2.9km limp there from.the motel. I'm also quite keen to go visit some local datsun fiends too. My adventure begins in under two weeks.......1 point
-
Unless you have short and super hard springs then 40mm of compression should be easy otherwise you are going to need lighter springs. Droop should be manageable too, just takes some braining to figure out the best way to adjust your adjustables to get it.1 point
-
Yeah will be running adjustable coil overs. Was speaking to someone running higher spring rates and keeper springs is what they had to go with. Different chassis though so I guess i'll just have to put them in and see.1 point
-
I kinda liked that i could beer scooter/walk to my bed from Smash Palace after some sharns and quite a few handles. How far away is this lawn from town @MopedNZ?1 point
-
Hi Gordon, wow, it looks like it was a really tidy one to begin with! Funny how some of these old commercial vehicles survive so well, when there are so few of them left!1 point
-
Brake linings? Try Diggers Brake and Cable He might be able to sort you out1 point
-
I ticked another thing off the list today - The key wouldn't work in the boot lock. I either didn't have enough fingers or couldn't get it apart when I did the door barrels. Google maps took me to three non locksmiths that definitely were not there. Fourth time lucky and it was actually there and I got it sorted. No pics as everyone knows what a key looks like.1 point
-
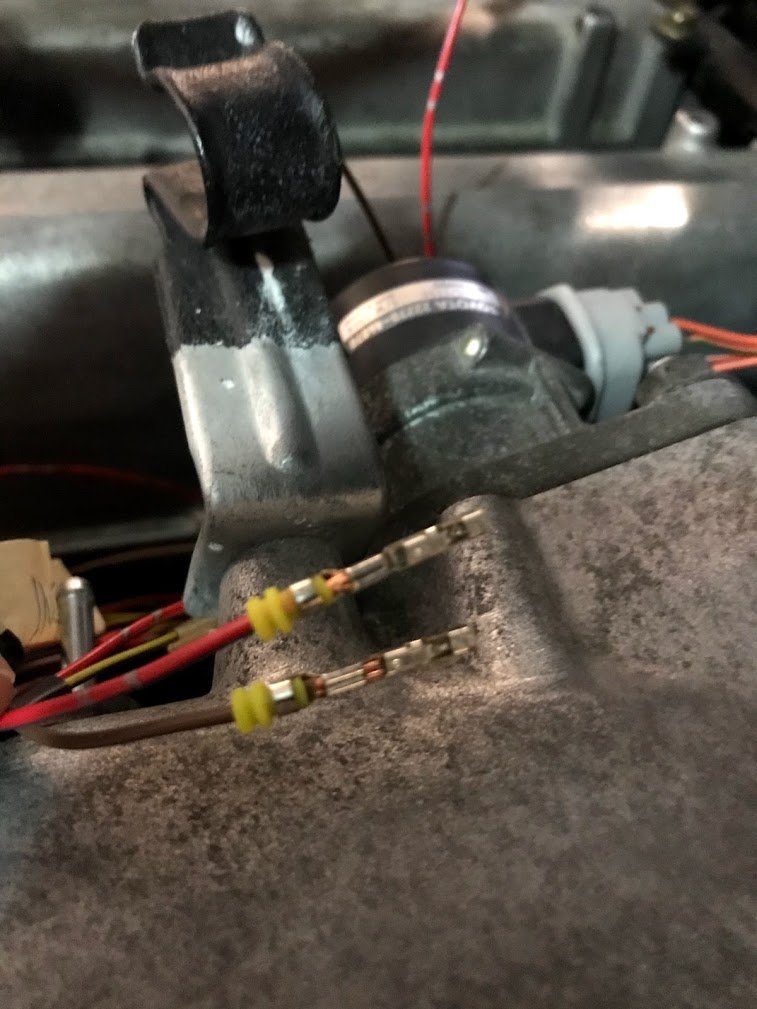
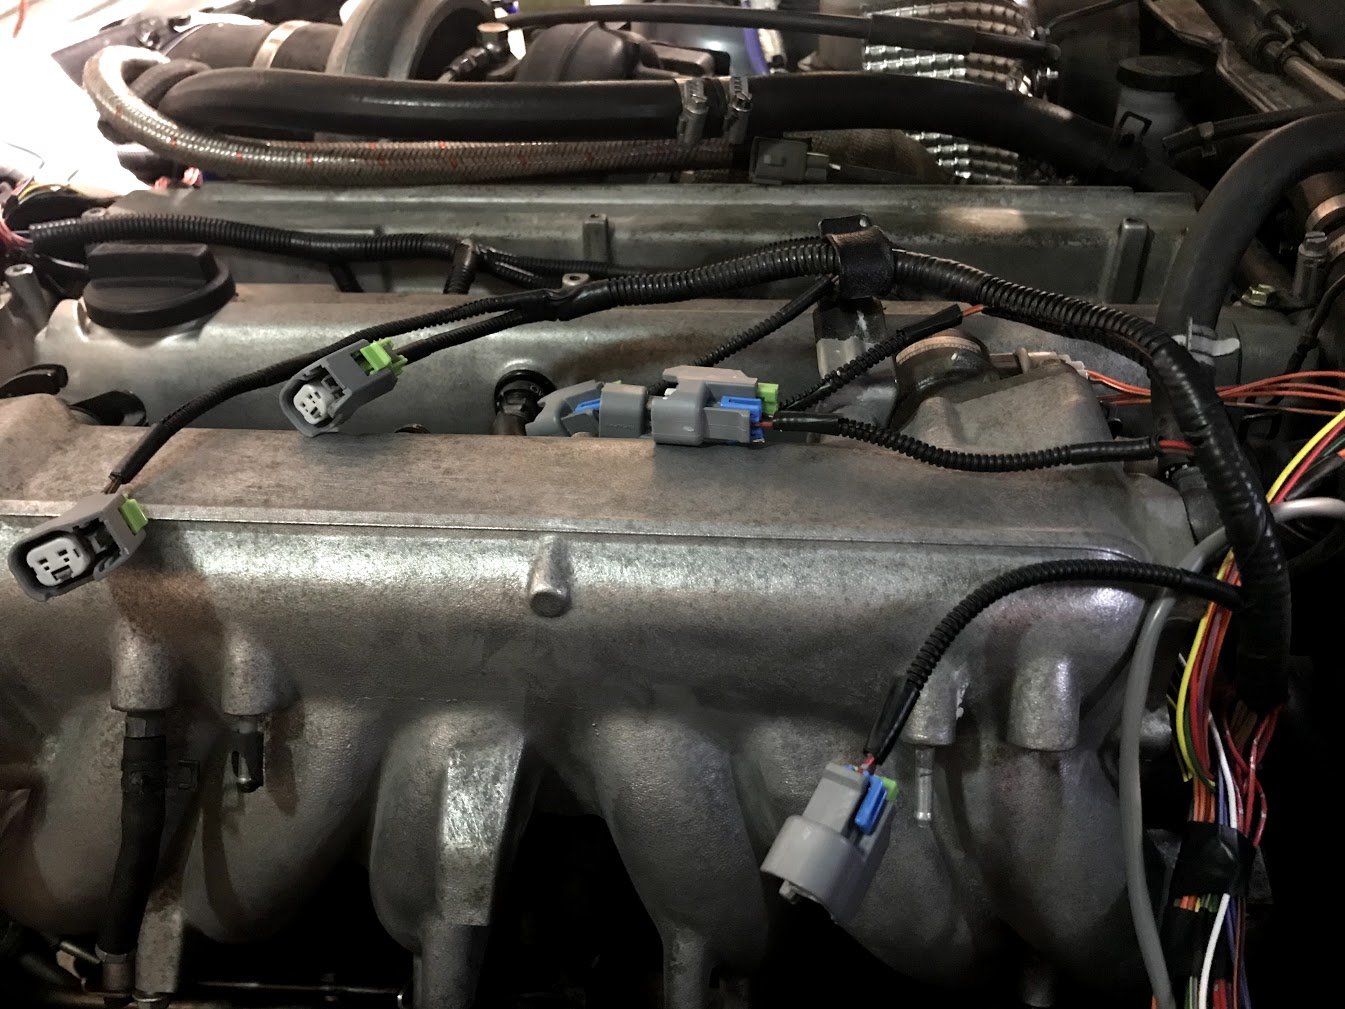
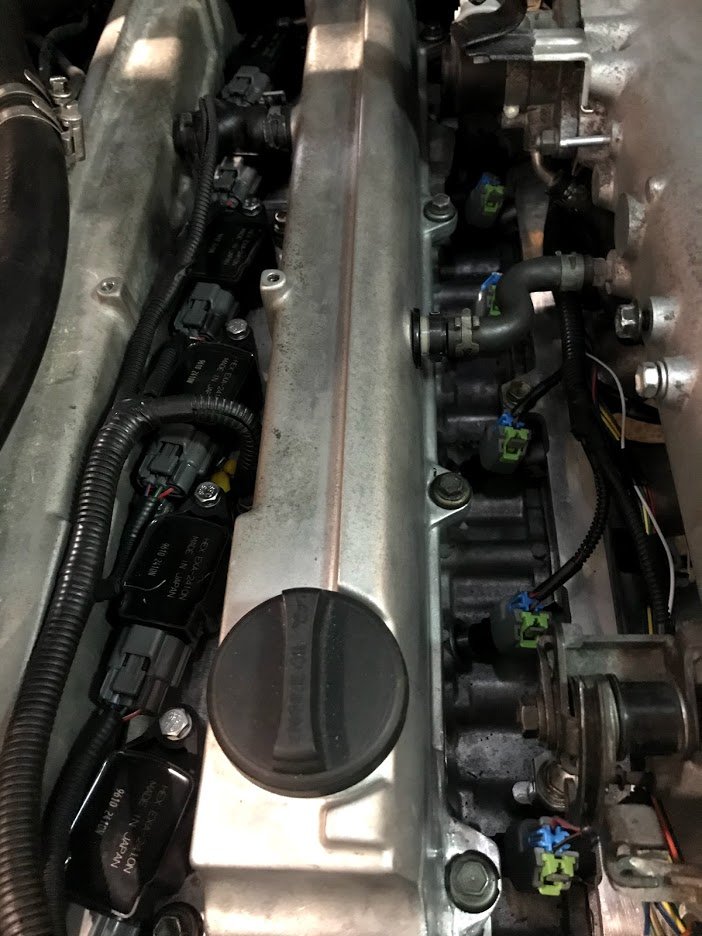
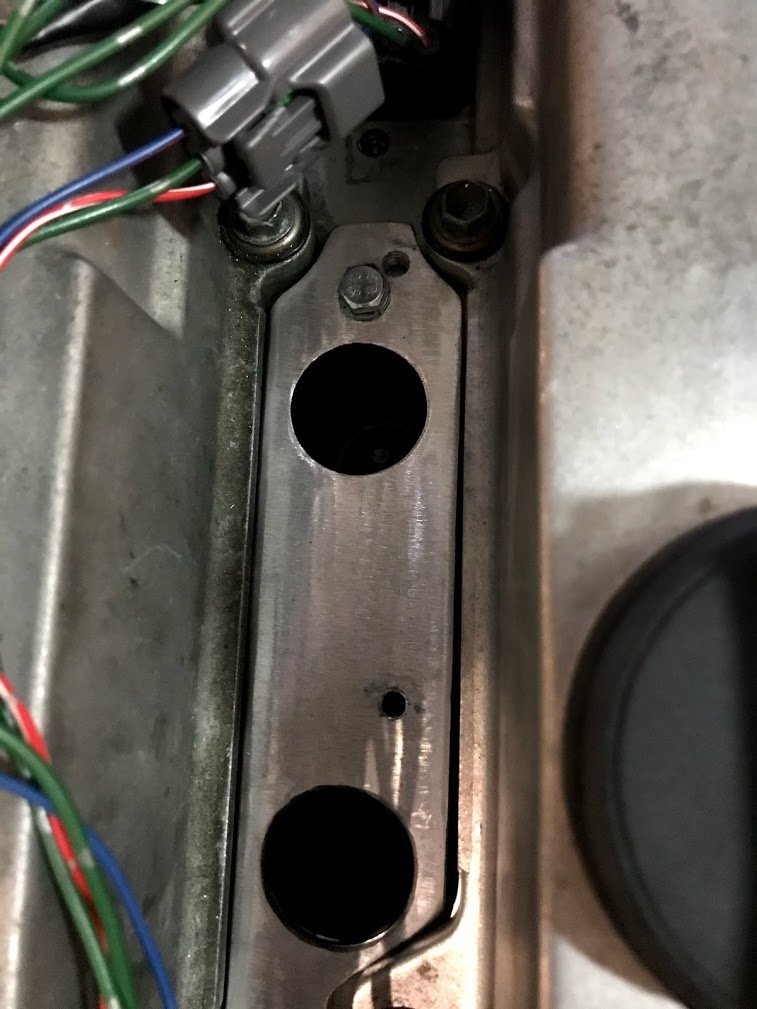
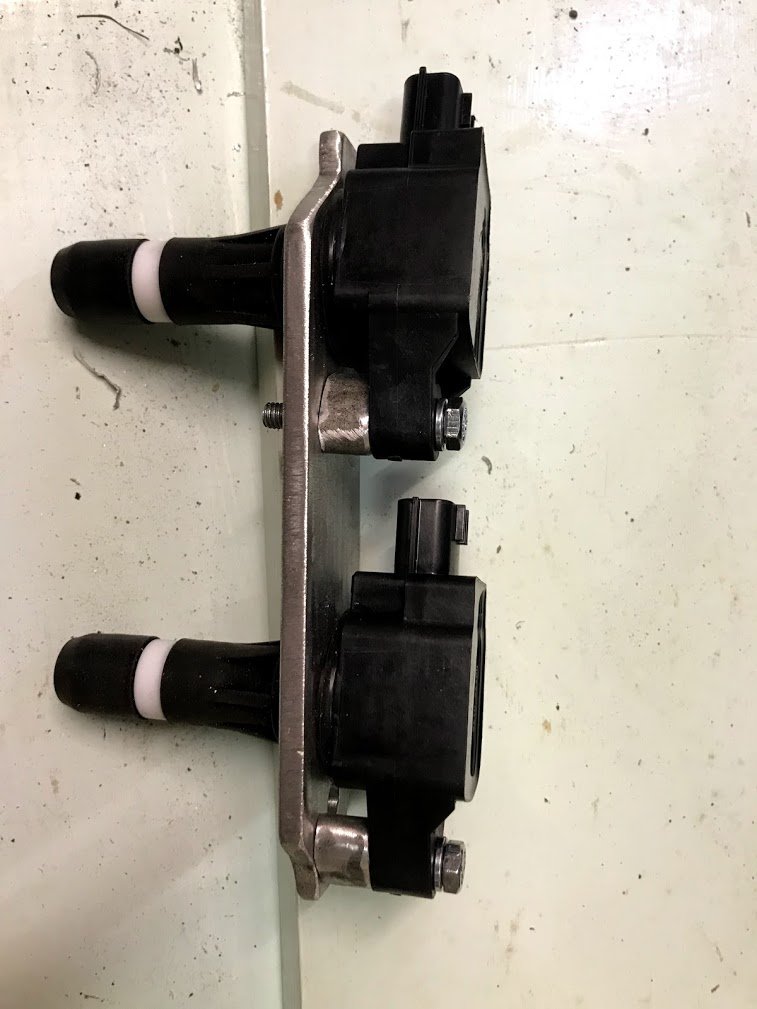
I bought a good crimping tool because I was struggling to get nice crimps using the Fuller auto wire stripper that happened to have the right type of crimp in the handle. It was such a piece of shit, well it stripped wires nicely at least. New tool is about 1 million times better and makes it a much more enjoyable. Nice out of focus crimps: Completed injector plug section: Also completed the Coil on plug stuff and that section of loom: There is bugger all room for the COP loom plugs, a couple of mm clearance between each plug and the mount for the next coil, but I guess they weren't designed to be there. The space for the coil mount bolt hole is small too, if I move it anywhere else the loom plug touches the cam cover or the other coil. But its in there! I ended up making up some spacers out of some random scrap tube, I think it might be A/C hard line? Then oval'd it to fit in the space. Might tig it to the plate but its good as is: I'm contemplating seeing what the stock clutch will handle on the dyno instead of taking it all out. I mean it handled 260 wheel kw's so I wonder if it'll handle 300? Probably not...
1 point
-
Open vs close times may differ on a pneumatic solenoid operation due to the volume of the shuttle (unless balanced shuttle). Even then they wouldn't be exaaaacccttly the sane. It wouldn't surprise me if the times listed are plus minimum open deposit time. More like a design duty of the solenoid rather than something useful to start your calculations fron. That sort of rate may also beat the daylights out of the needle seal and piston. Also does a change in viscosity effect the actual cycle rate say a thin cold glue could be effectively be easier to apply quickly than a thickish hot glue. We use nordson glue gear (at a much slower rate) they seem reasonable, with the odd failure.1 point
-
Nothing wrong with that, I lowered my wagon using an OBD2 tool, took 30 mins and didn't need to roll around on the ground unbolting grubby suspension parts1 point
-
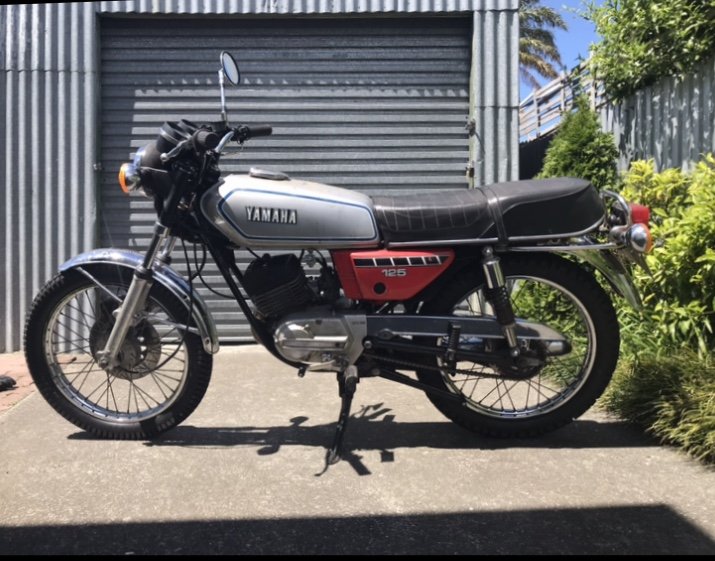
Aaaaand she’s legal as a drug sniffing beagle! i described my revin process in the revin thread, but today I got this thing back on the road. Stoked as fuck. even get to keep the original plate! 68 Gag em since last update I decided I thought I’d bang some off road-ish tyres on it considering my main premise for this bike is light off road duties. I managed to track down a PPSC control tyre Shinko SR241 in 2.75 x 18 for the front and a Shinko SR244 in 3.00 x 18 for the rear. The front needed a bit of a massage and some self clearancing to fit, but the rear fits comfortably. well what now!?!! I need to get the seat recovered and paint those side covers in original silver. Decided I’m gonna keep the OG silver tank and it’s patina, and get some decals done. then perhaps make some tasteful scrambler mods.... Bring on the Te Urewera Undertaking!!!
1 point
-
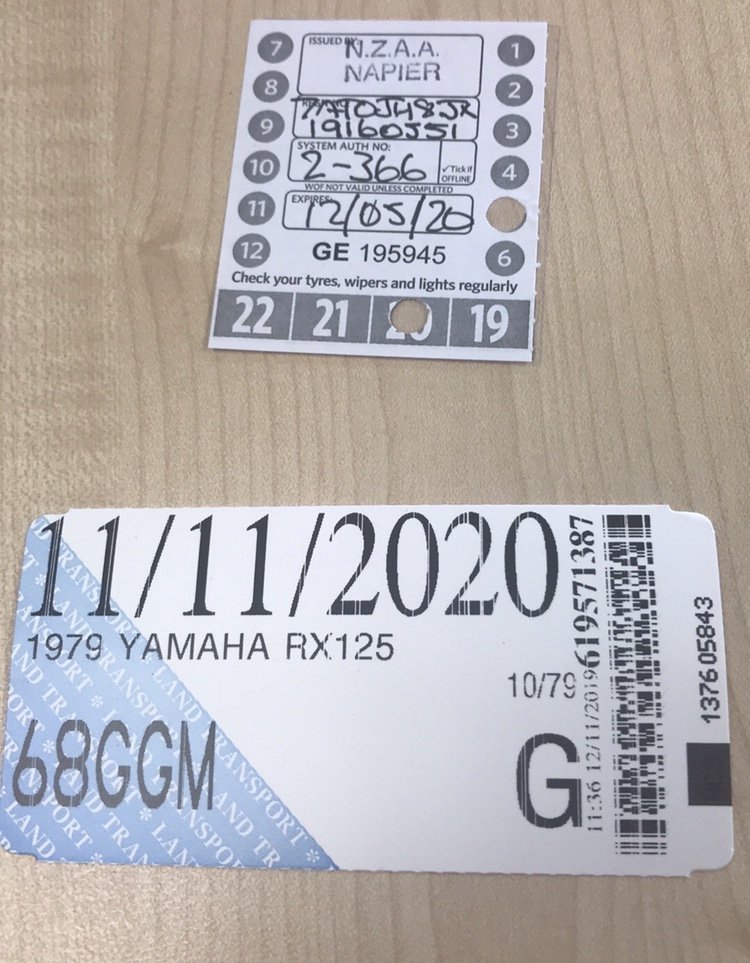
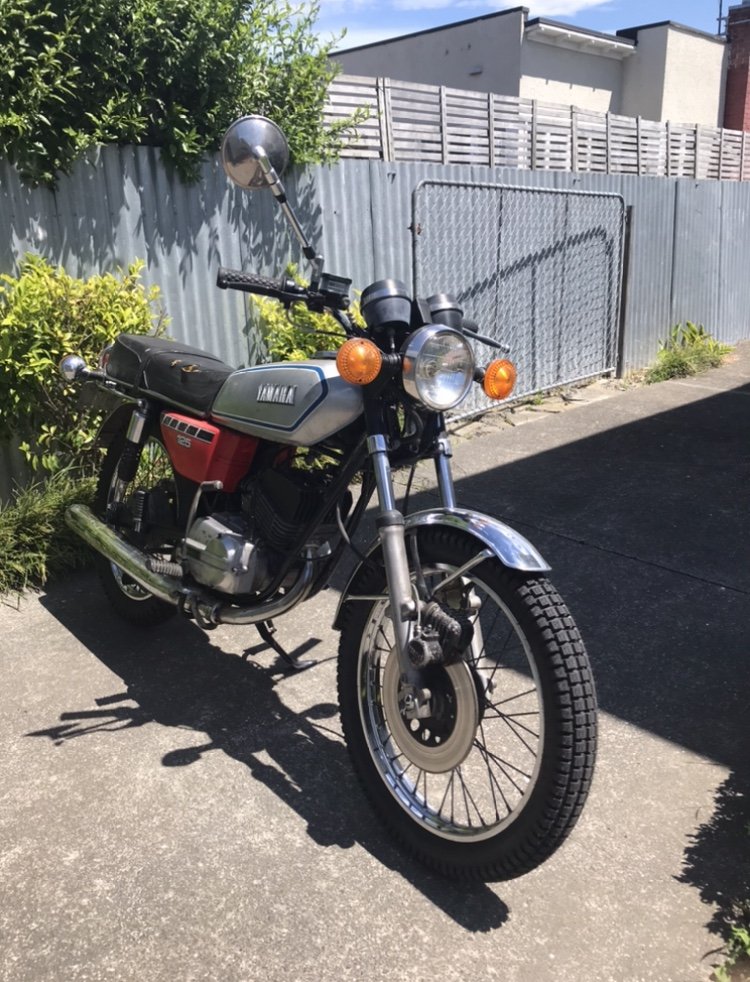
Hello all. I now have some first hand experience in re-registering a motorcycle that has previously been registered in New Zealand. so I thought I would re-cap the process for those interested. Note: may vary for cars. the motorcycle in question is a 1979 Yamaha RX125. This particular bike had not been registered since 1986 and was not recorded in the NZTA data. The only proof of previous registration was it’s original plate and attached wof tag. a few months back I walked into the AA testing station in Napier and asked for everything I needed before taking it in. The helpful gentleman told me I required two things; proof of ownership and proof of previous registration in New Zealand. He stated as the bike was pre 1990 I did not require a brake declaration. for proof of ownership, AA provided me with a standard statutory declaration form which I filled out and had declared and signed by a notary public at the Napier District Court. This took all of two minutes to obtain. for proof of previous registration all I had was the wof tag and number plate which the inspector accepted. i rung them up yesterday morning and booked the bike in for the following day (today). Dropped bike off at 8am and by 11:30 they text to say it was finished. When I got there the inspector asked me to show all the lights and indicators etc worked. Then they ran it through what I assumed to be a standard wof check which it passed with no issues. the cost was $180 then registration for 12 months on top of that. they even re-used my original plate, even without having to get the authority myself from that lady at NZTA which was great. all in all a very easy process and the guys at AA Napier were extremely helpful and efficient. hope this helps for anyone who wanted up to date knowledge on how the process works.1 point
-
40mm bump 40mm droop from ride height. Depending on the car and suspension and bumpstop type, can include some bumpstop compression in that figure1 point
-
Then this happened
1 point
-
Surprised myself and had a few weeks left so started into the rust repairs Came up pretty well, no filler needed
1 point
-
This is running again. with some some mixed results. Makes the same power as the old setup, with almost identical power curve. This is good, wasn't expecting it to make anymore power. runs nice. Swapped in the big inlet cam. As on old setup made another 15kw on same boost, but ran junk. (see top of this page) Ran better on this setup but still rough idle. Now where it gets weird; Had to add a decent amount more fuel, but only had very small power gains over stock cams. Tried all sorts, no dice. Still unsure whats going on. Ended up swapping back to stock cams. One major benefit of the itb setup is how well it runs down at idle. before with the big plenum and single throttle it would stall out real easy. much below 1000rpm and would just die. now it will go right down to 500rpm and keep chugging along. Have also added a simple on/off air bypass solenoid. programmed for idle up on cold start and when fans come on. Also doesn't vibrate it self to bits like the old setup. Still need to fix and tidy some stuff up. plus finish the tune. then im a gonna go destroy the paddock Next up steering servo for full scale rc hilux:1 point
-
So entered this ol thing at the Smash Palace Bike show this yesterday. Seen a bike show near Gold coast earlier in the year and all the bikes had thier own displays so took some inspiration from it and I created a display that was fitting to and a Monty Python skit Im a LumberJack and im ok. I work all night and sleep all day. Quite fitting for me as ive worked night shift the whole time ive been building this bike. So I scored some wood chip from work and a few rounds and put a Axe and Saw into them and had this as my displaye. I won MVP of the show for my display which I was quite surprised about.
1 point
-
This is one of those weird things where the more bits you put on it the smaller it looks1 point
-
Quick picture of the garden art.
1 point
-
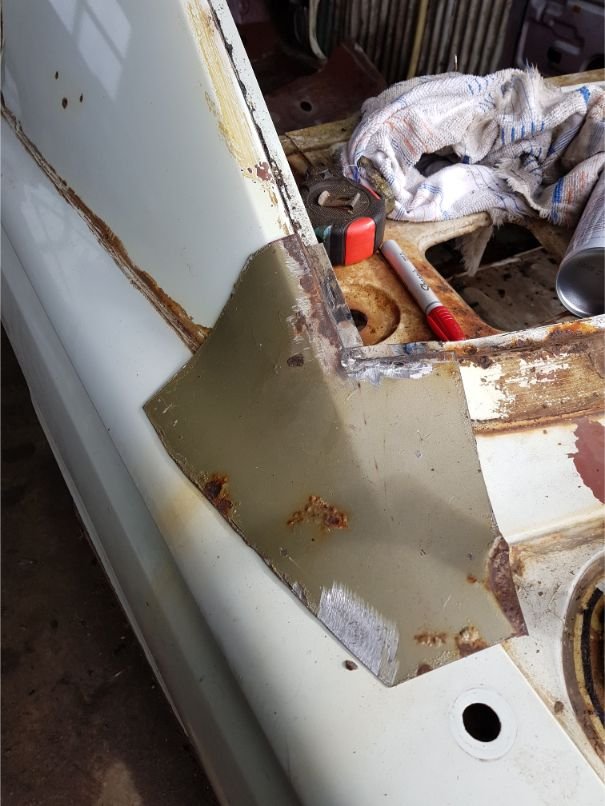
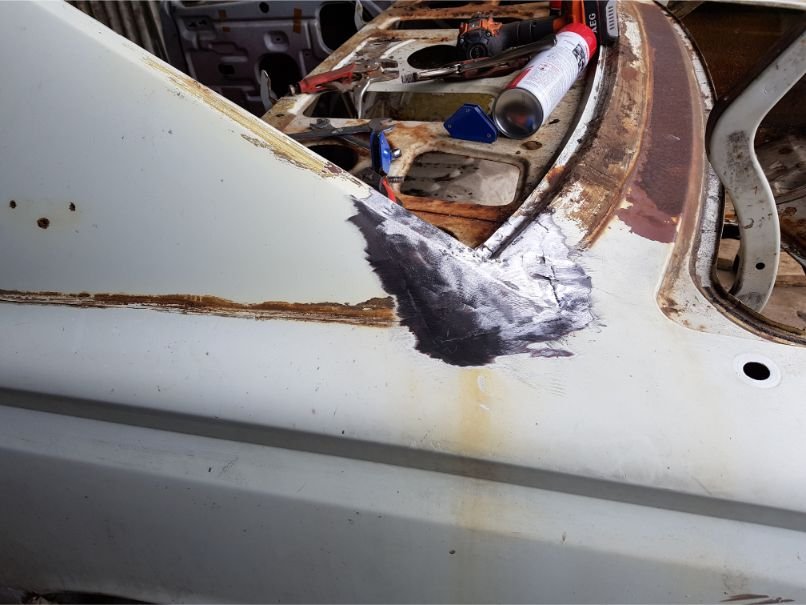
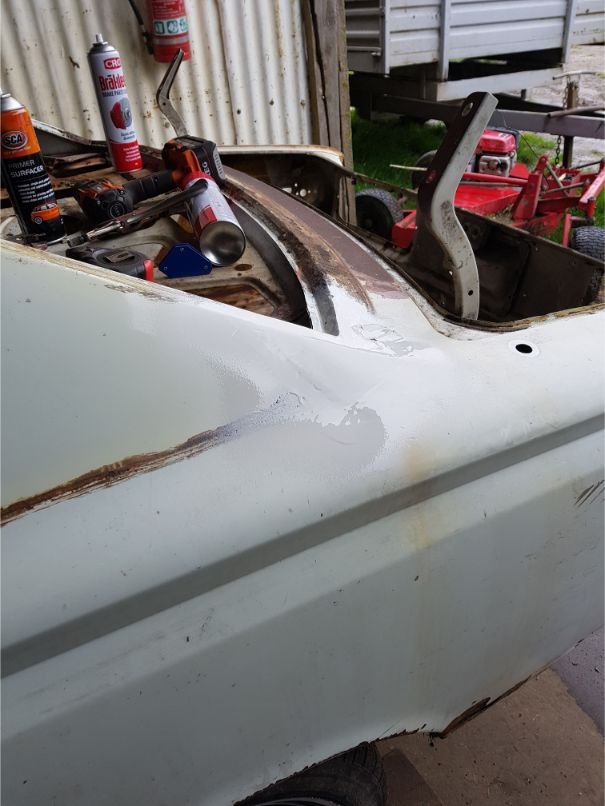
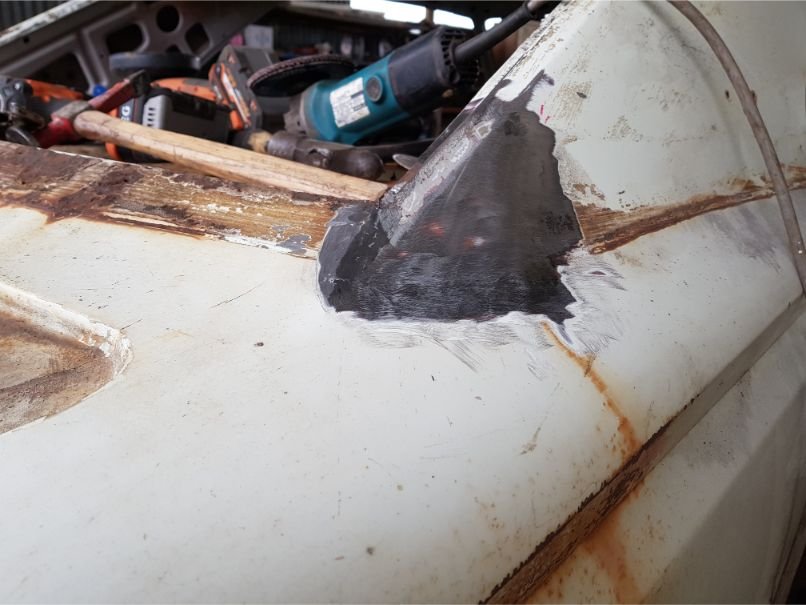
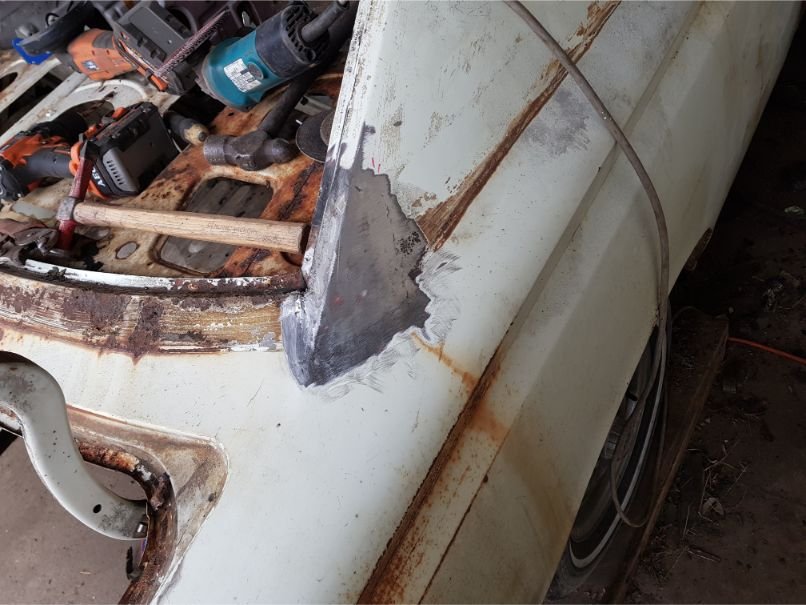
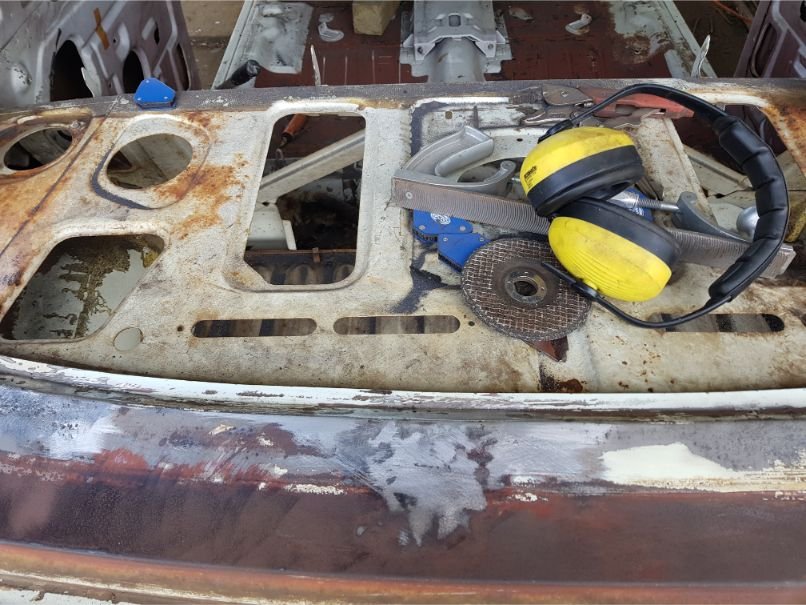
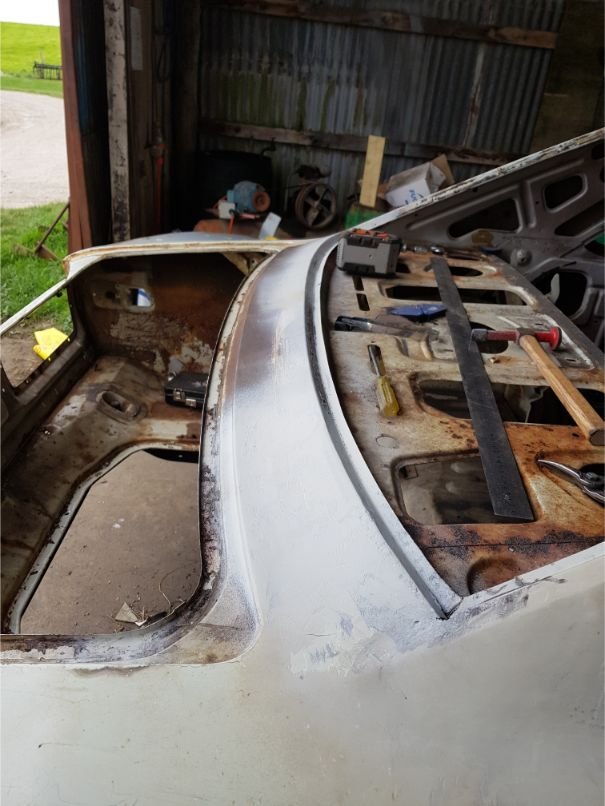
Not even off page 1 and already time for an update! Whaka yeah! Bought a turbo manifold, seems pretty ok? Like is new, which is good but has obviously been sitting for a bit before being freshly powdercoated and sent to me, but will allow the attachment of the hairdryer for the turbo noises and that's what really matters. Is strong too so should be cool. Bolted manifold to engine, bolted turbo to manifold, clocked turbo. Bottom of both A-pillars looked like this. Then they looked like this... Cut the rust riiiiiight back. Most of this I am fairly certain was caused by poorly repaired rust at the top of the A-pillars, which allowed water behind the windscreen sea at the top, down the pillars, and then pooled in the wiper tray. Still needs a fettling and tidy up, but all 3 skins are in and replaced and strong af. didn't remember to get a photo of the passenger side but that's done too. Also in the above photo you can see the *ahem* clearancing needed for the turbo and manifold, this is fine as this area isn't occupied by wheel and tyre, as they stick way outside the factory guards. I will close this in with sheet steel shortly. Should be getting the pieces of steel I have had cut up for the body mounts today, been getting a really good deal on these through the engineer we use for work, he cuts them out of steel he has and just charges me the rate they pay for steel, no cost for cutting or anything. The labour may or may not get charged to whatever job we have going on at work at the time, but i wouldn't be surprised haha. A lot easier and more accurate than doing it myself, I don't have a bandsaw so I have to cut everything with an angle grinder, which isn't the best for parts I want to match perfectly side to side. Also bought my clutch, so will bolt the engine to the gearbox, and that will be that (here's hoping). Also bought a flange for the turbo to start the downpipe, and a heater matrix to try and start looking at where that will fit and how it will all work. Plans for the next week: - Get flywheel surfaced, bolt up clutch. If I get the body mounts tacked up, take off body, remove gearbox, mate together. - Tack in remaining body mounts. - Finish engine cover frame. If I have any extra time, start to close in with panel steel. Have teed up a guy at work to do the final welding for the body mounts for some liquid refreshments. He is a good/ticketed welder so will be good to have confidence that the body won't fall off while I drive it down the road. Let me know what I am doing wrong/I am a fool for thinking I can get this frankenstein done for Nats 2020. On a serious note, anyone who can help/has suggestions to do with tuning/ecus/wiring, please hit me up. I am no expert on most things, but wiring is something I worry may be a serious stumbling block, and I don't know if I will have the money available in time to just pay someone else to do it.1 point
-
Okeley dokeley, Did some more on this. Pulled the diff apart, as far as didn't take out axles or anything, just cosmetically, will check to see what it's like once it runs and go from there. Drained the oil and that looked fine, which was good, was honestly quite worried it would be half full with seawater. Put some new rotors on bacause shiny/old ones were shot and well past a skim to get them right Painted the rotors, baked them in the benchtop oven I conveniently already had (how cute) then kitted them out with new slide pins (only 1x cause it was munted), pistons, seals, etc. Shiny.... And all together. Shocks are RAW monotube 4" lift, should do the business. Wheel are new ROH 15x8 -22 with the secondhand 33x12.5R15s I acquired from @Stu They will do until it's done, didn't want to buy fresh rubber only to have it sit around and dry rot. The dummy engine, an RB25DE that doesn't have all its insides, long story, but it will do for mockup. Put it in the engine bay, got a couple of bellhousing bolts in just to get the faces together so I could see where it would sit. Which meant this had to happen... I will be incoroporating a hatch in the top of the gearbox tunnel to allow access to the rear plug/coil. The hole has been somewhat refined since I took this photo, and will need to be further dependant on intake and exhaust manifolds. I plan on running a forward facing plenum, but a cut n' shut may hug the block more and work better, I am not sure yet. If anyone has a Greddy type FFP on a RB25DET, if you could measure the distance from the intake flange face to the furthermost away point at both the front and rear of the manifold, that would be super helpful and appreciated. Not the best photo, but you can sort of see clearances will be minimal on intake (driver) side, exhaust should be fine (I hope) Heaps of clearance to the radiator at least in this position, this is with it just sitting there behind the rad support panel. Going to pick up this beast of a tray this afternoon, it has been made to suit a Safari ute conversion already so the mounts suit, it's almost perfect! Just need to shorten it a little at the head board end. Even comes with a 200l auxilliary tank if I ever feel like having $500 fuel bills. So that saves a lot of work adapting the other tray I had for the mounts, and is waaaaay more solidly built than the tray I had, so I am happy. Did this, which makes clearance for the front wheel/tyre, may need further trimming, will check once I can flex/articulate it, once the body is mounted. Trimmed this also, will be getting a tube/plate bumper eventually which will follow that line. Took this one as I was leaving the shed one day as I thought it looked tough, but also shows the rad support chop. (If anyone wants to buy the little gas/gasless welder in the picture here for a reasonable price, message me, it is getting in the way at the moment since I bought my new setup). The body is sitting slightly higher than the final height here as it is on the hoist, and I lifted it up, because I was test fitting these: This was after the first chop just to see that they would fit in the space I made, they got refined more, then I tacked the top on: Still needs some more refining, and a mirror image made for the other side, but I have a bench sander turning up this week that will make the job easier (easier to sand interior curves/straight lines) so moved on temporarily, and painted the rear half of the chassis. Will do the front half when I take apart the front for a freshen up, which will be once I have the rear back together. Makes it easier to move about should I need to move it/get it off the hoist if it can still roll on one set of wheels. After sanding: After a coat of POR15: Painted to just in front of the lower trailing arm mounts, so I can get the back end back together completely without worrying about getting paint on anything. And that is essentially where I am up to! Got to go and pick up that tray now, let me know what you think in the discussion (linked at TOTP). -Hayden.
1 point


This leaderboard is set to Auckland/GMT+12:00