
Leaderboard


Popular Content
Showing content with the highest reputation on 11/11/19 in all areas
-
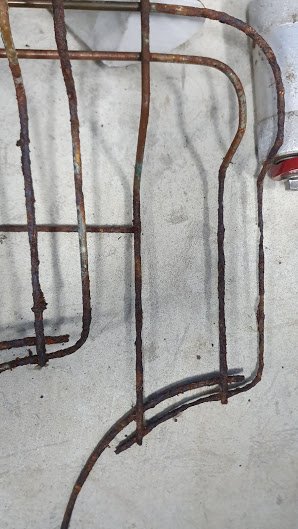
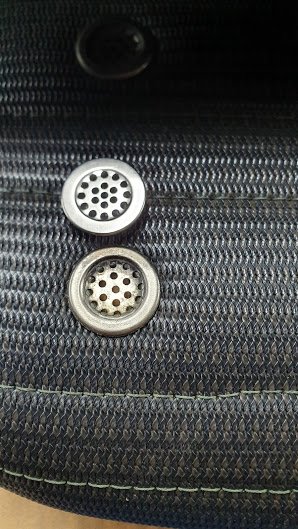
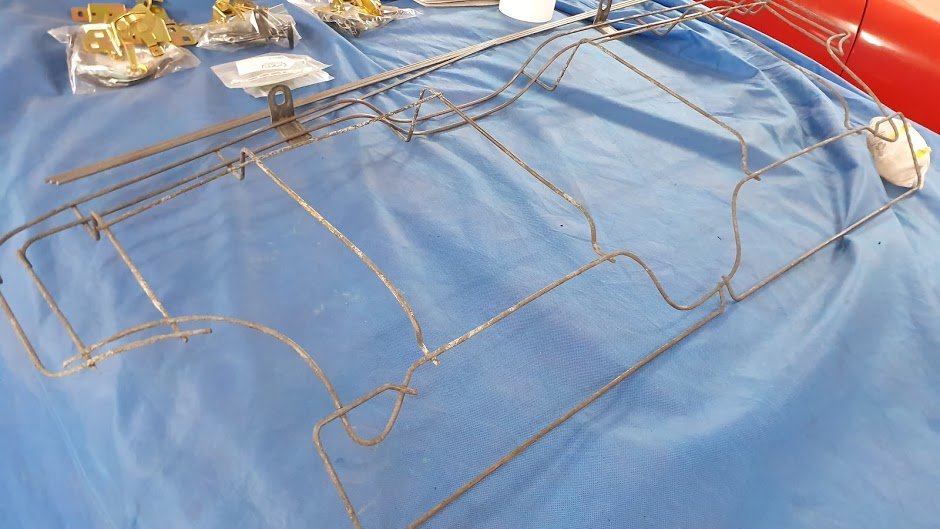
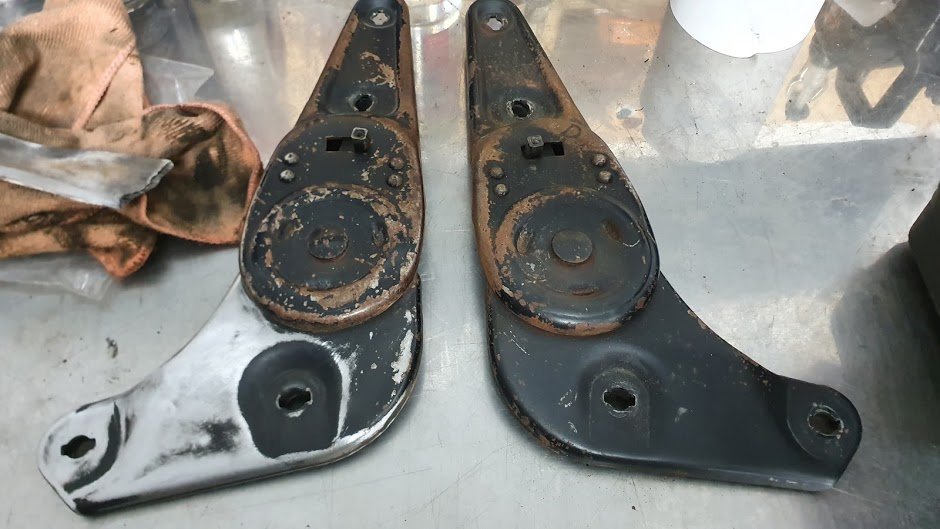
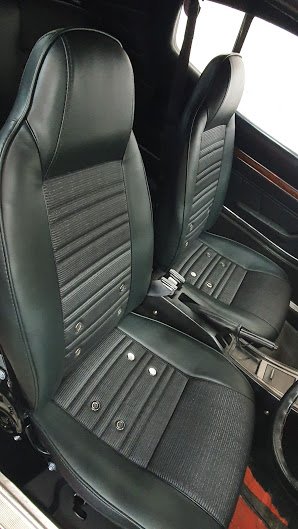
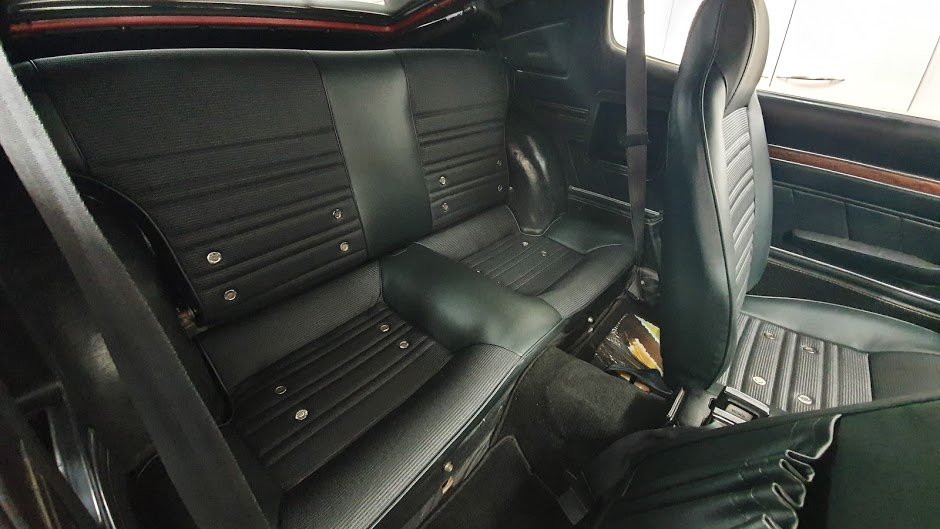
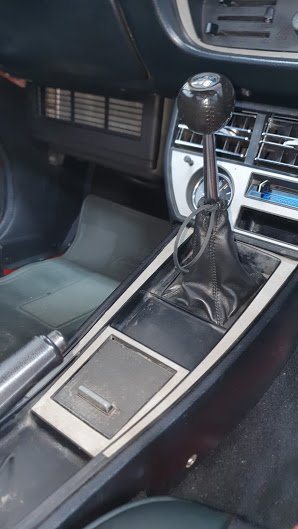
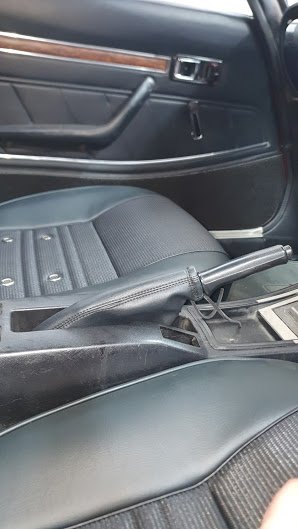
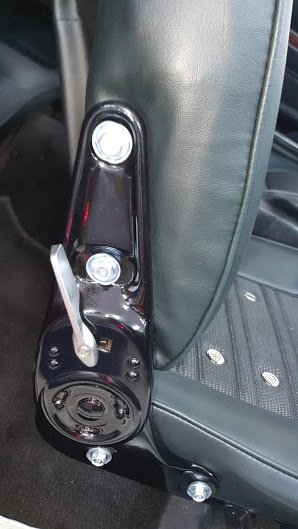
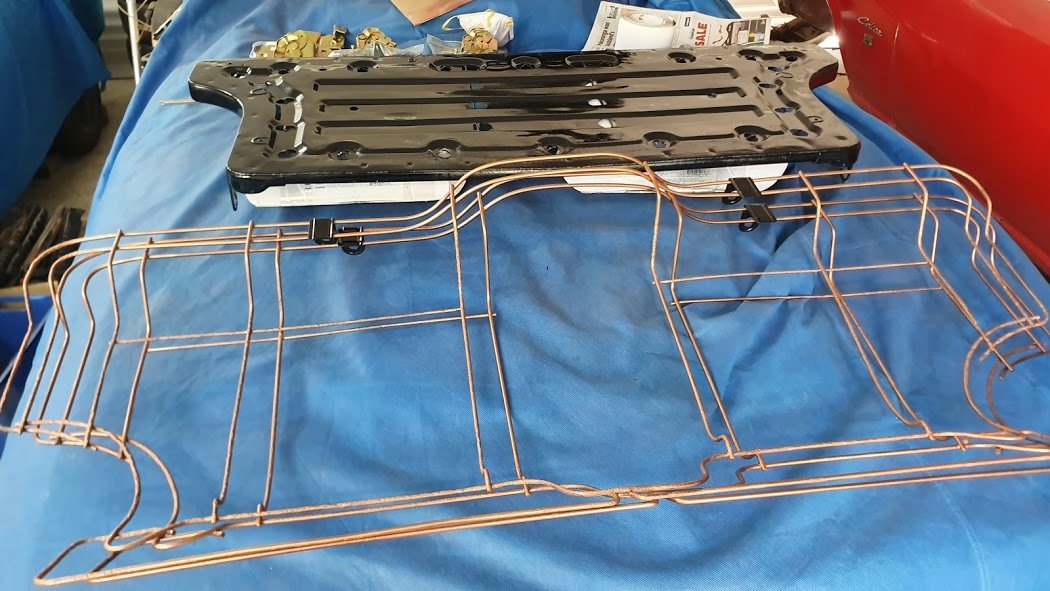
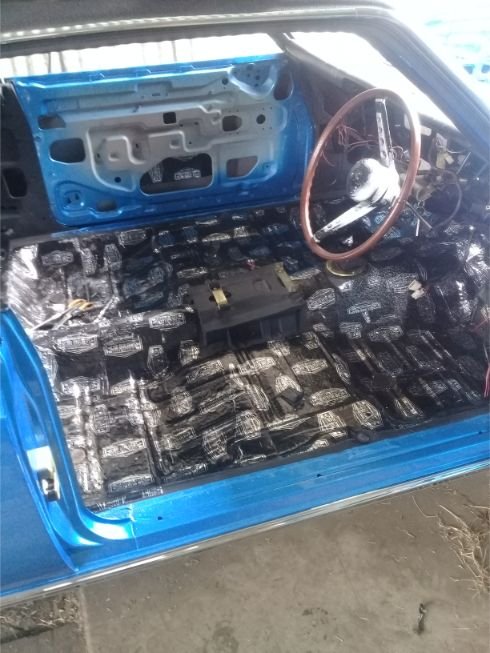
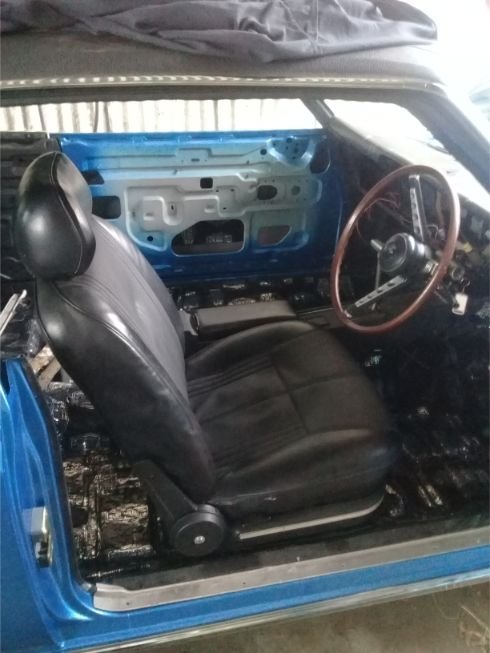
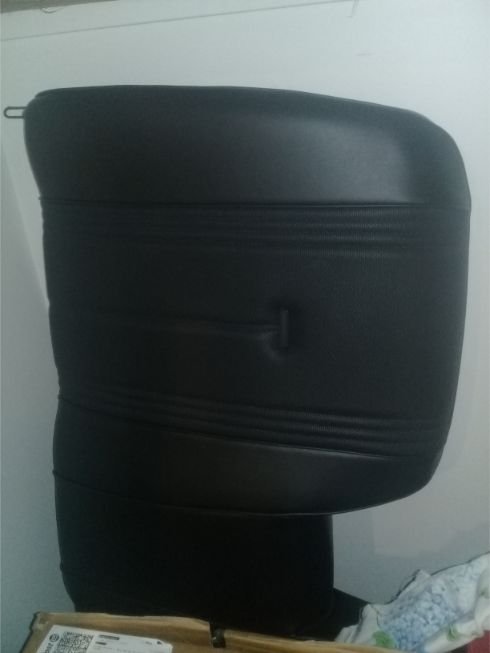
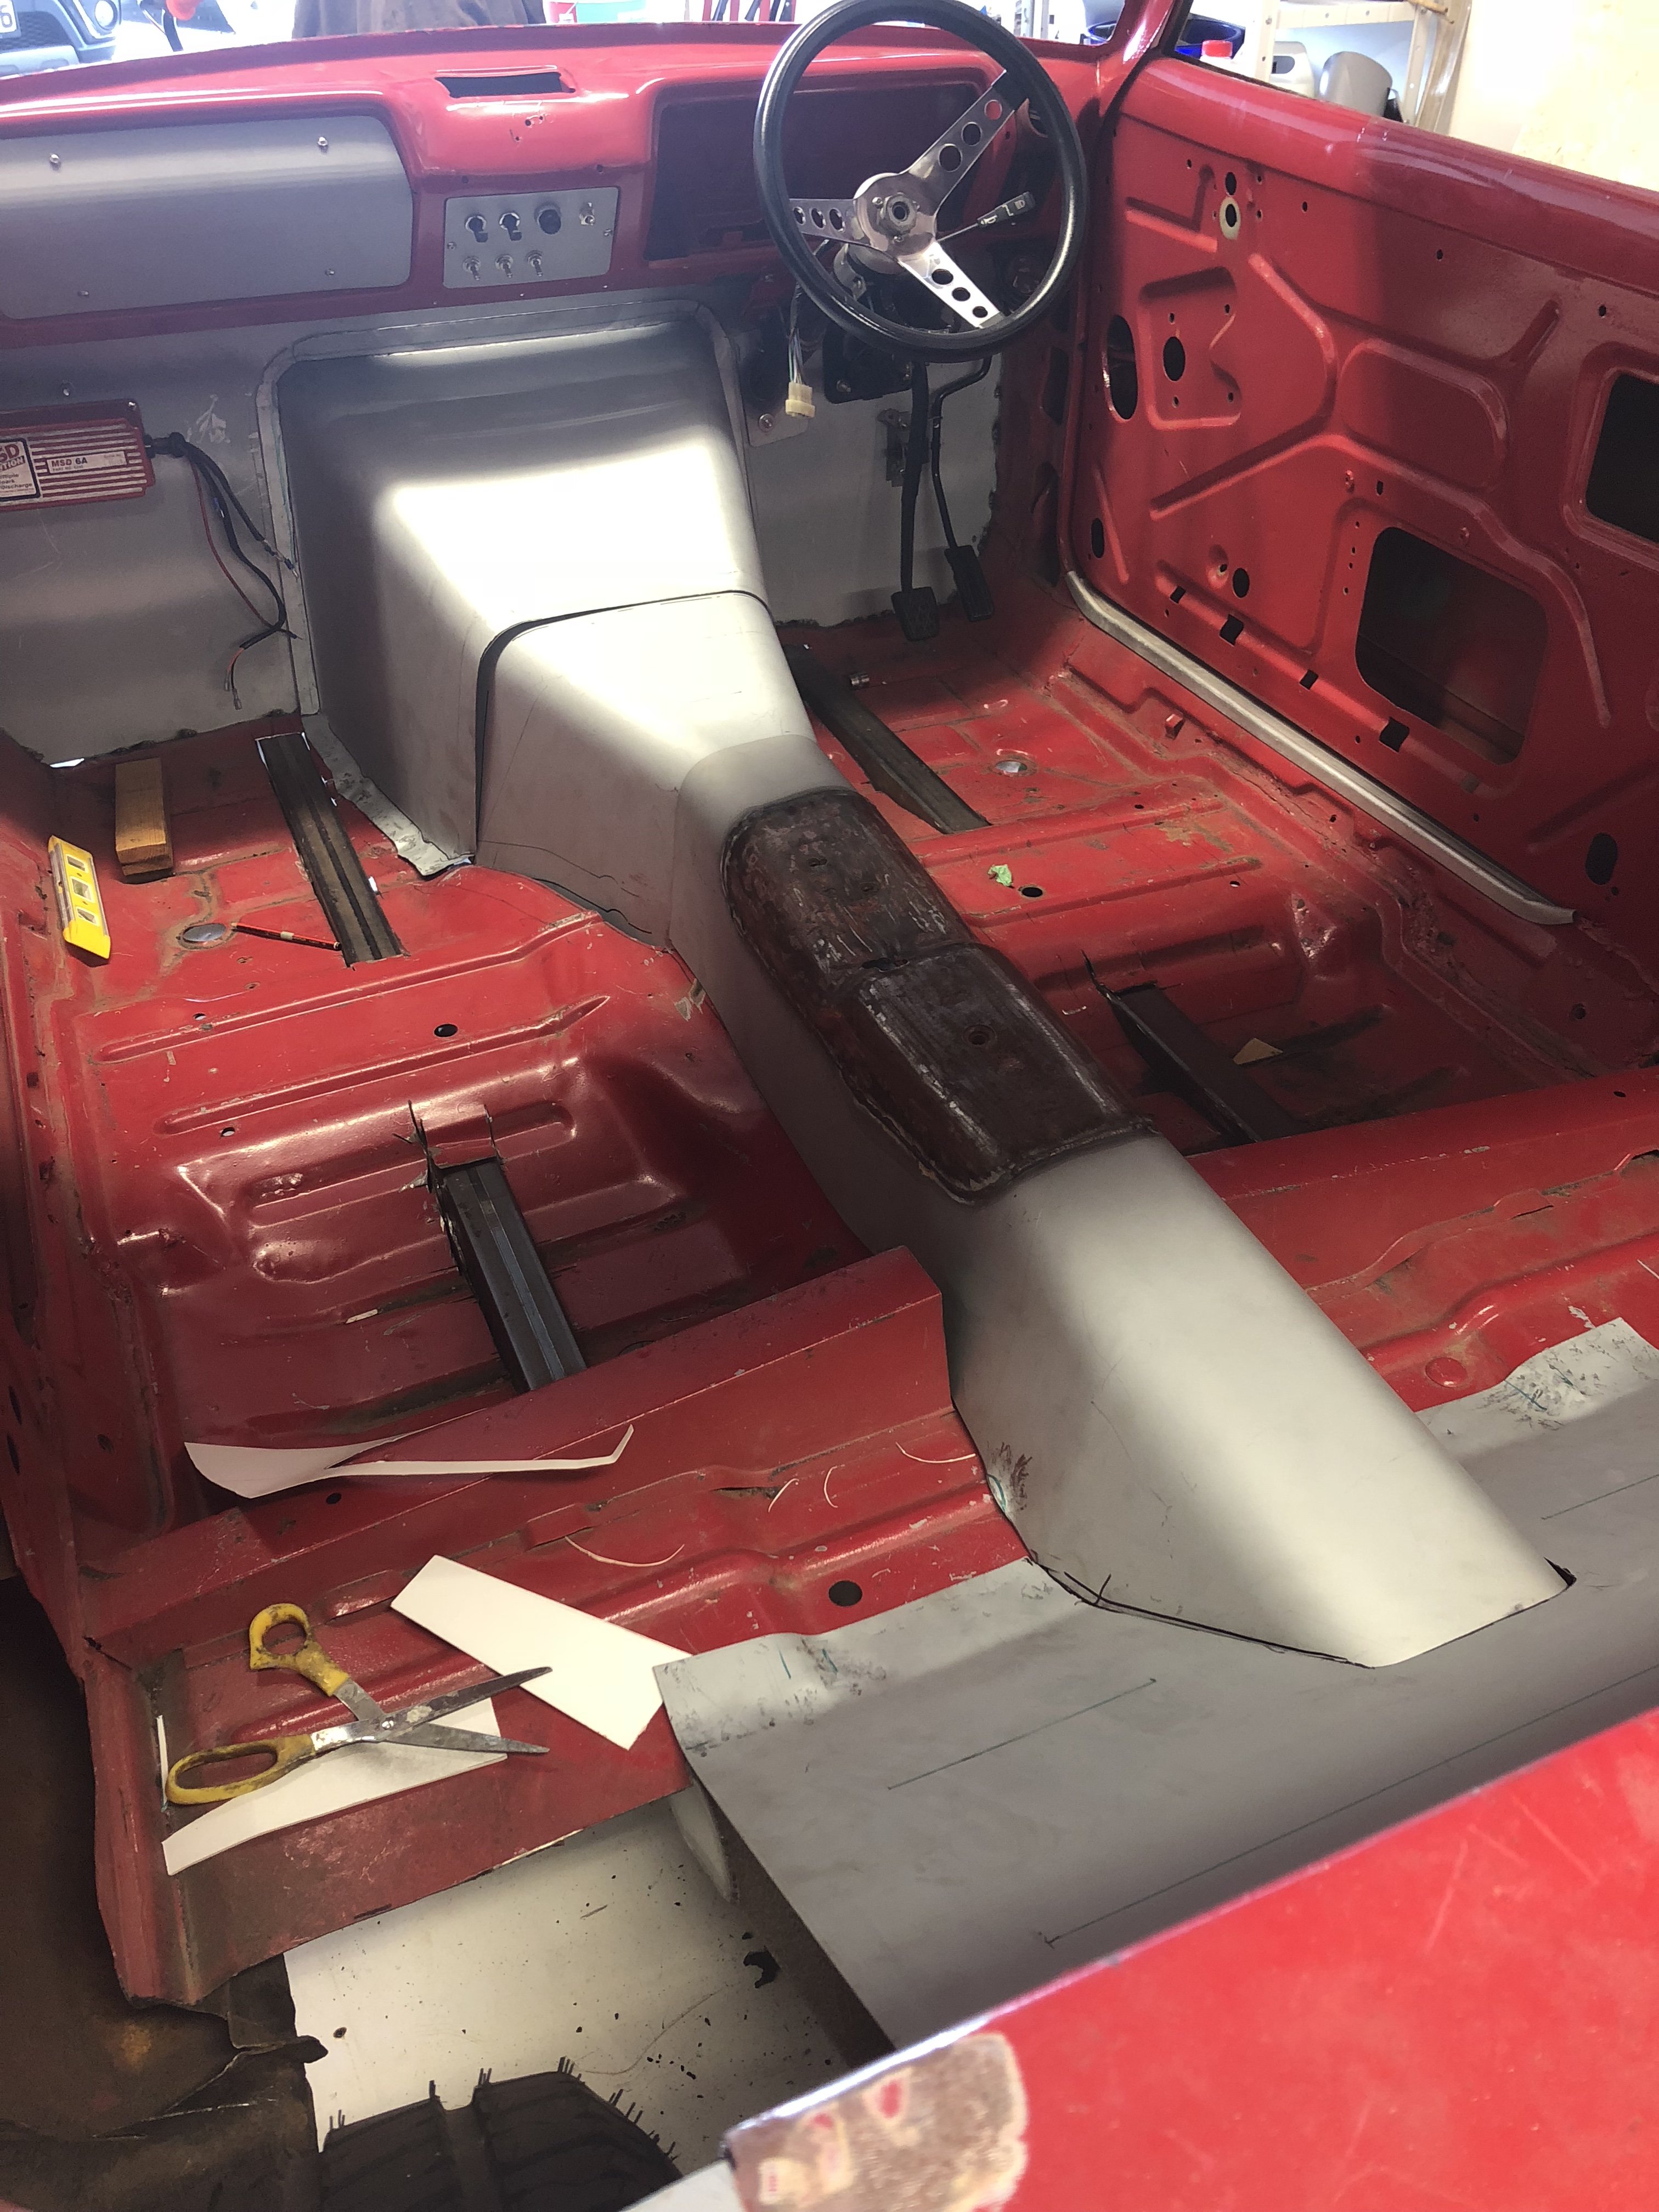
As well as the underside/diff above, In parallel i was called up by an upholsterer (Grant) I have been on a waiting list for about 2 years... He is known world wide for the fantastic replica celica seat covers he makes. I have had a roll of the original rare GT seat vinyl material squirreled away for years, waiting for the right time to redo the seats. I also sourced some seat vents that were as close to the originals i could get. Plus I sourced a second lot of Ivory vinyl to do the RA28 celica too - so i got 2 sets made by him. So i gutted the interior out. The back seat frames are known to get damp and rust .. So i repaired it and repainted it in copper paint like original. And repainted the back too. cleaned/painted the rails and tilt mechanisms I got the seat covers re-fitted by Grant and reassembled SLEEEK's seats at the weekend. He also kindly remade the original handbrake and gearstick boots
 14 points
 -
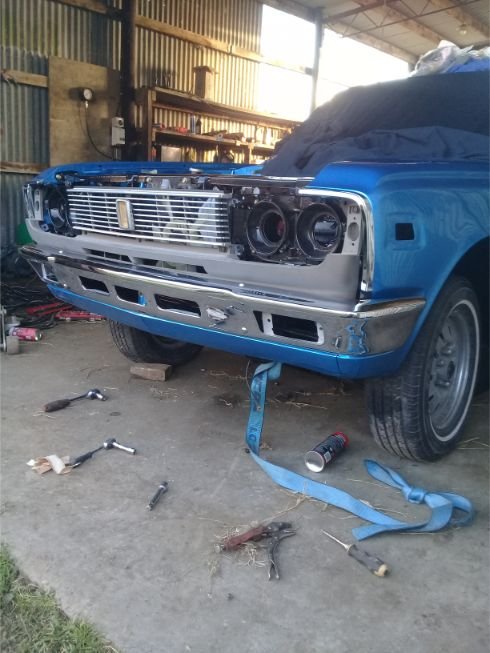
some bling
11 points
-
Such a poor choice of words, knowing your history, lololols.10 points
-
Inner core patterns for the cam tree complete.7 points
-
Yeah something like that would be good, try get here early enough to give yourself time to unload, fuel up, pack your bag, chase that fault, top end rebuild. You know7 points
-
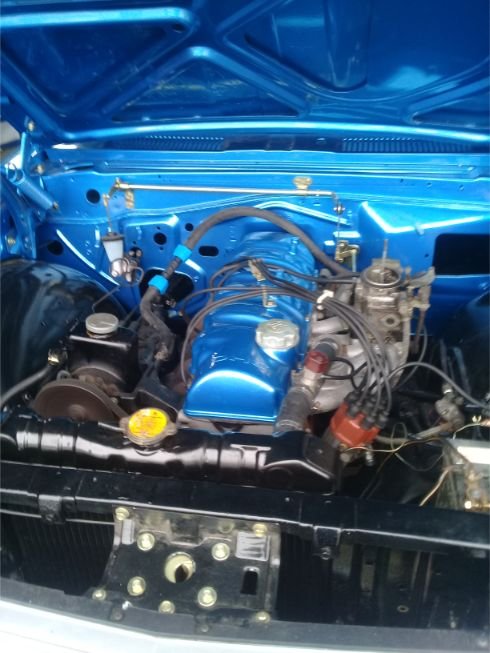
My little ol town was covered in the sweet smell of Bogan(red neck?) perfume recently (tire smoke). The Waimate 50 NZs longest running street race was on for three days. Got to hand it to the drift boys – put on a wicked show. Primed up the old Nailhead. was so easy. With in 30 seconds oil started dripping and after a min or two of constant oil pressure we left it at that. Dropped the front seats back in – good old mexican blanket covers a world of horrors. Front fenders on, fluids added and it was time to push the old gal out the door to get a few pics and then finally turn the key. Oh My Golly it was an exciting time I tells ya. Sitting nice in low. Below is not even the lowest part of the car With the chief garage cat supervising on. We turned the key… engine turns.. oh so exciting ! the starter at least works and we have oil pressure!!! Then after VRROOOMMM it starts! no messing about it just roars right up. no feking about with anything at all. Happy grins as the un-capped exhaust loudly roars. …. hmm whats that I hear… Clunk! clunk! clunk! engine off. Kinds sounded like down below. hmm guess the crank weight was pointing up and wasn’t noticed when this was fabed up. bugger. Cat was about as impressed as I was. With that culprit removed and confidence high we start again. tick tick tick…. phuze nut! turn it off, shove some wet rags in the side pipe openings so we can hear better. https://drive.google.com/open?id=1KNN_1E4qhxXvlvvJkmMiKFL15qixBPxu Yip its ticking. cant seem to track it down and didnt want to leave engine running till we talked to engine builder. Drove it into the garage. Draining the oil. Builder says it could be the lifters. Doubts bottom end. But recommends we carry on with the Run In procedure. And see how it goes after. Will pull the pan and have a look. Will pull the rocker covers as well and run my eye it all as well. on the bright side… if it is lifters I can use it as an excuse to get a new cam ^.7 points
-
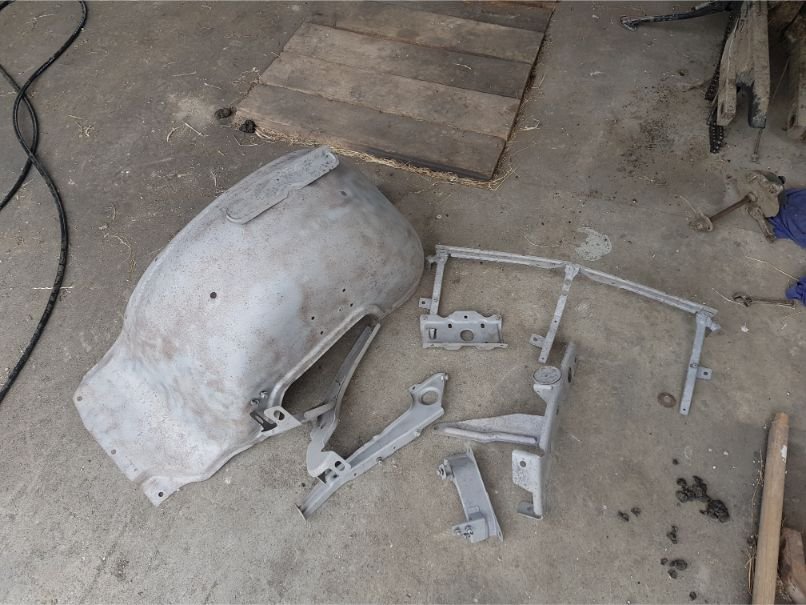
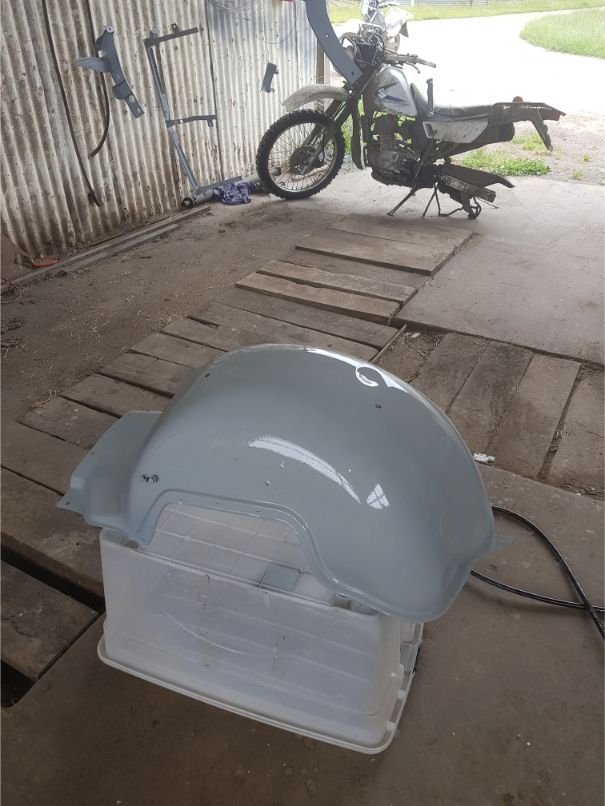
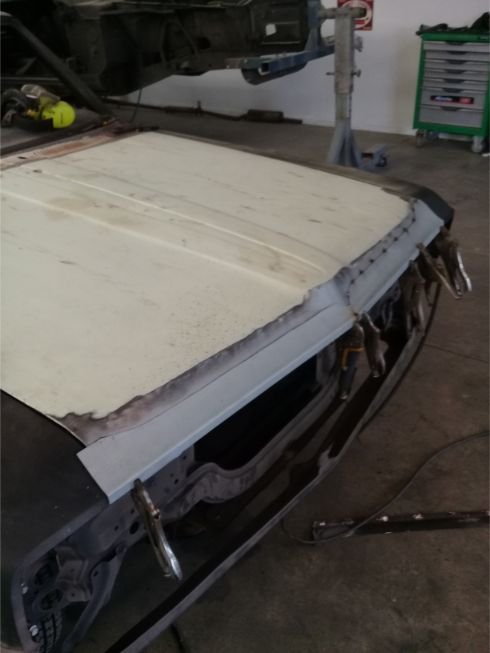
Blasted and painted anything I could. Pretty tedious work bit real happy with the result. Think from memory I replaced the bottoms of those inner guard things because they were all rust fucked too
6 points
-
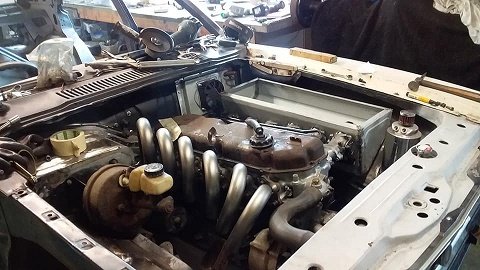
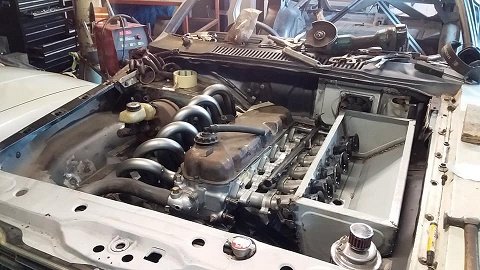
This is running again. with some some mixed results. Makes the same power as the old setup, with almost identical power curve. This is good, wasn't expecting it to make anymore power. runs nice. Swapped in the big inlet cam. As on old setup made another 15kw on same boost, but ran junk. (see top of this page) Ran better on this setup but still rough idle. Now where it gets weird; Had to add a decent amount more fuel, but only had very small power gains over stock cams. Tried all sorts, no dice. Still unsure whats going on. Ended up swapping back to stock cams. One major benefit of the itb setup is how well it runs down at idle. before with the big plenum and single throttle it would stall out real easy. much below 1000rpm and would just die. now it will go right down to 500rpm and keep chugging along. Have also added a simple on/off air bypass solenoid. programmed for idle up on cold start and when fans come on. Also doesn't vibrate it self to bits like the old setup. Still need to fix and tidy some stuff up. plus finish the tune. then im a gonna go destroy the paddock Next up steering servo for full scale rc hilux:6 points
-
Yo Johnny I think us ppsc dicks are Ken to stay st your pad Thursday night xox prob can tent camp on ya deck/dick/sleep inside the landy in ya shed if that’s ok. Kisses purple goanna walrus made my teeth hurt heck5 points
-
Massive thanks to my dad for panelbeating and polishing every single piece of stainless on the car of which theres a lot. Hate to think how long that took Also a big thanks to @toy-mota fior selling me his nos grille and surround thing, It really finishes off the front of the car
5 points
-
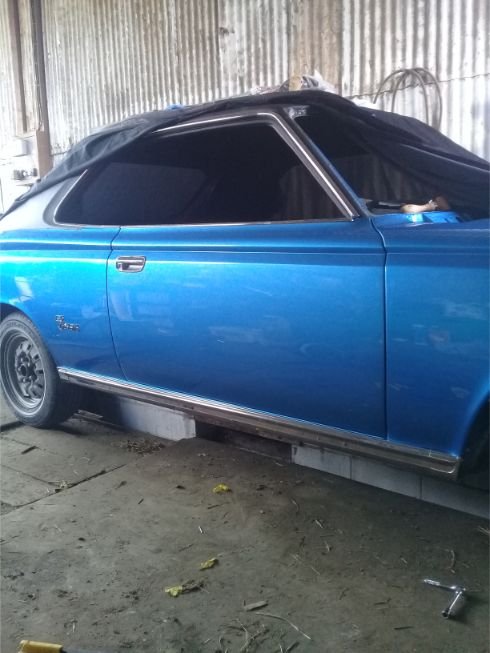
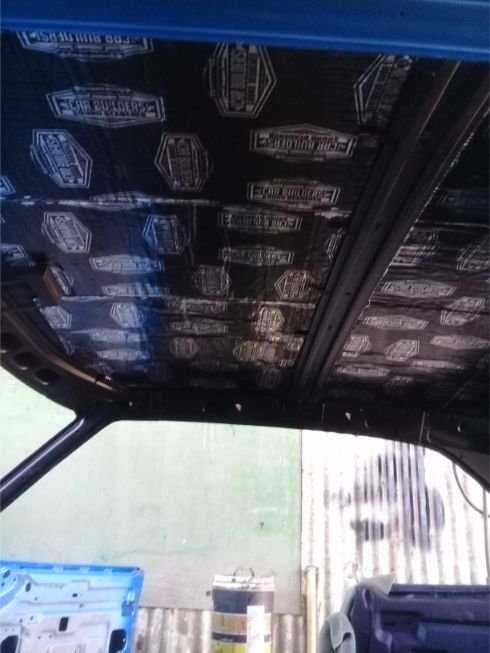
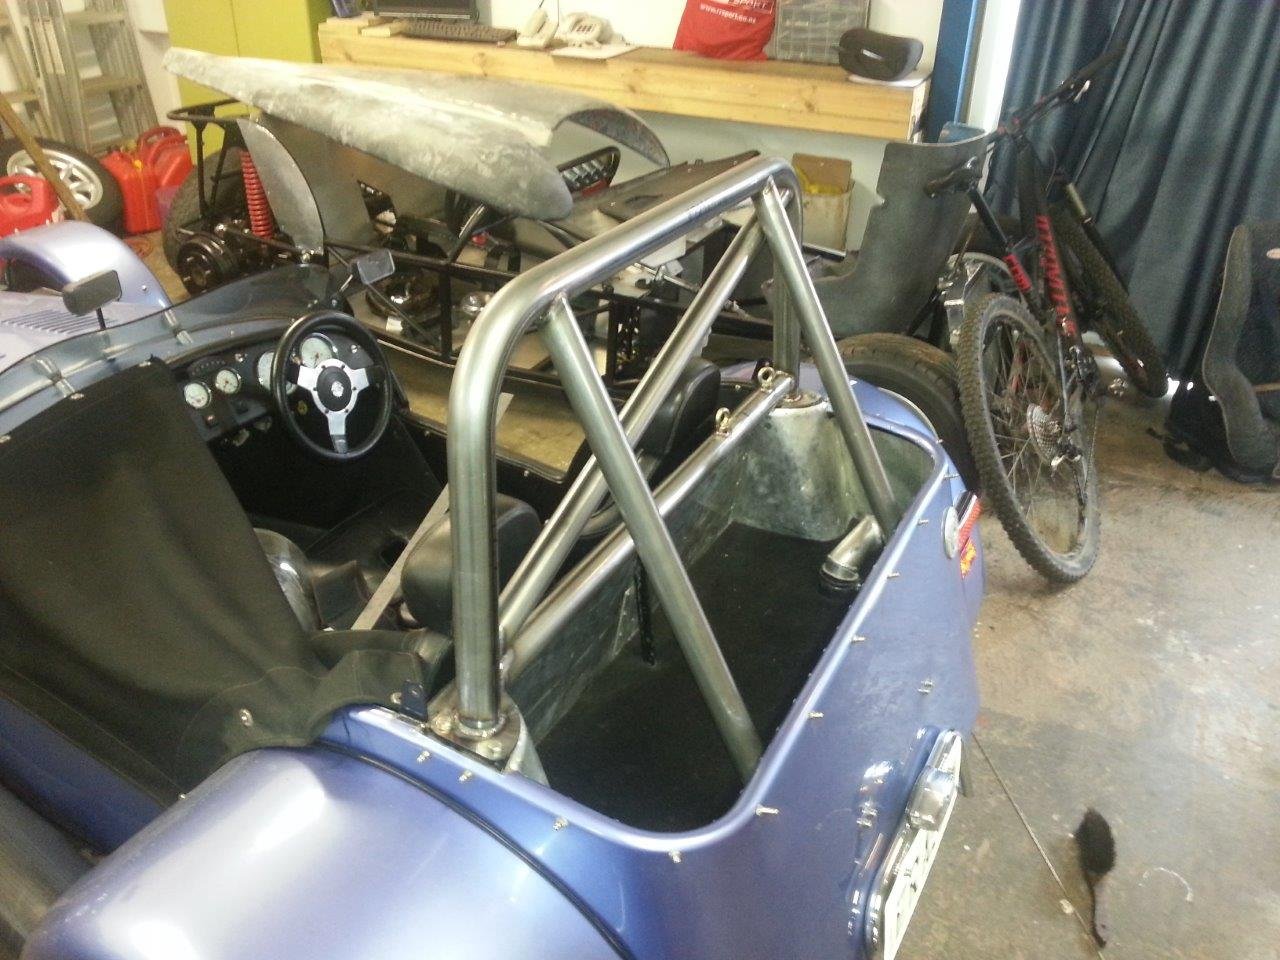
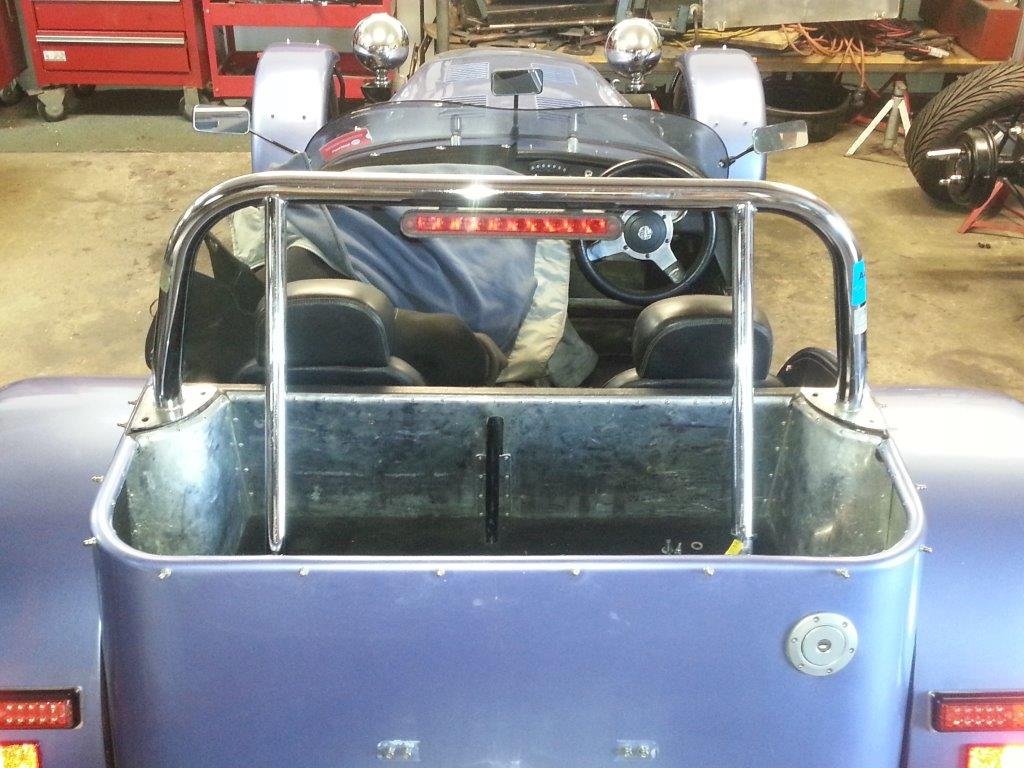
sound deadening and off to the upholsters
5 points
-
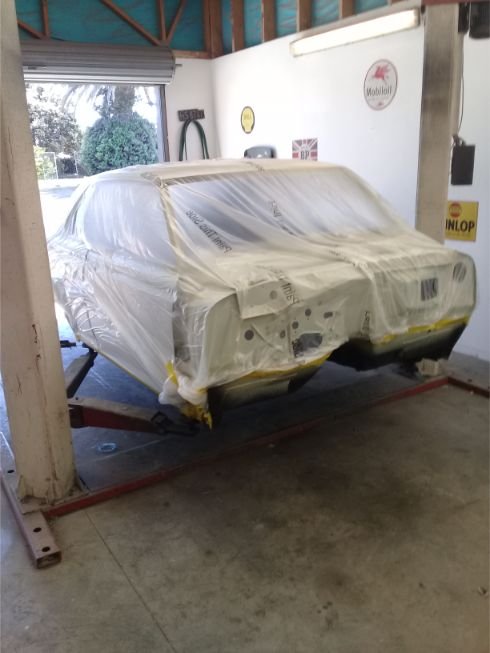
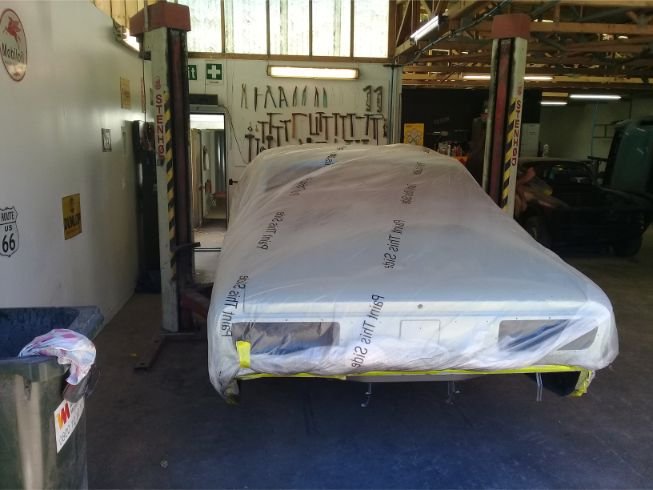
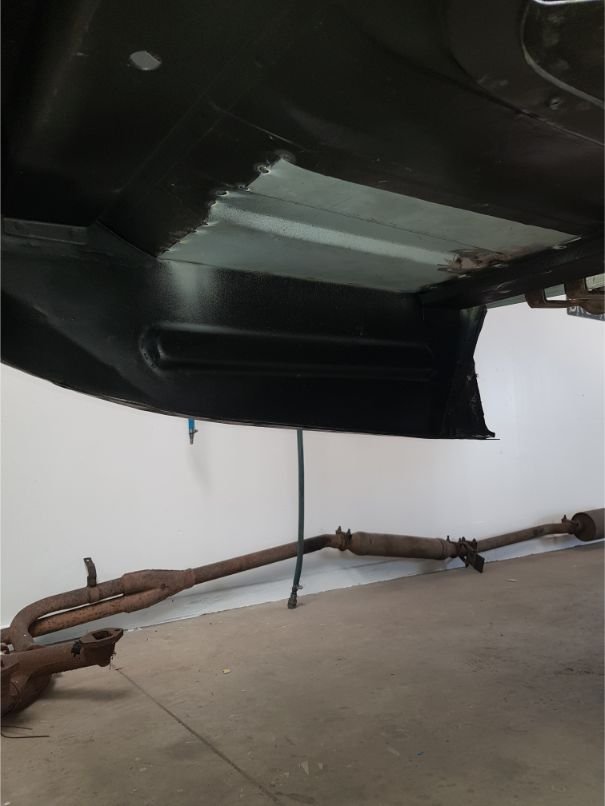
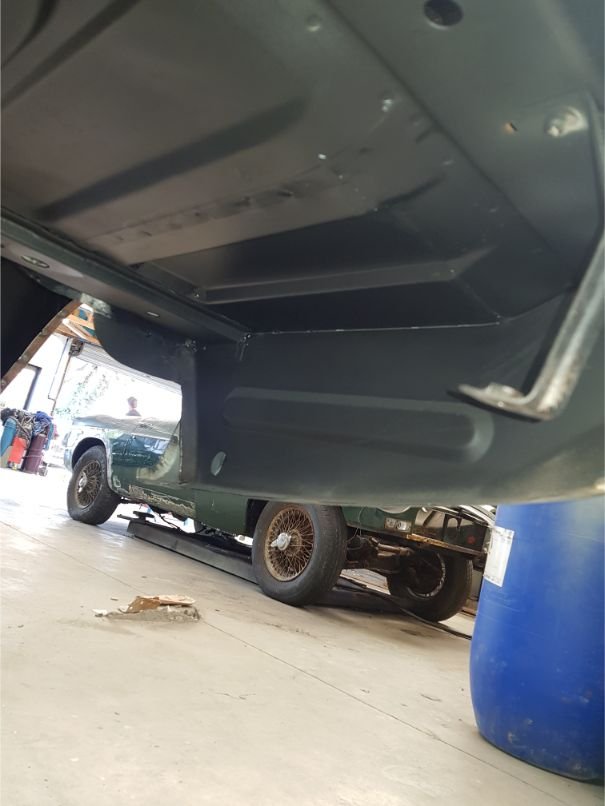
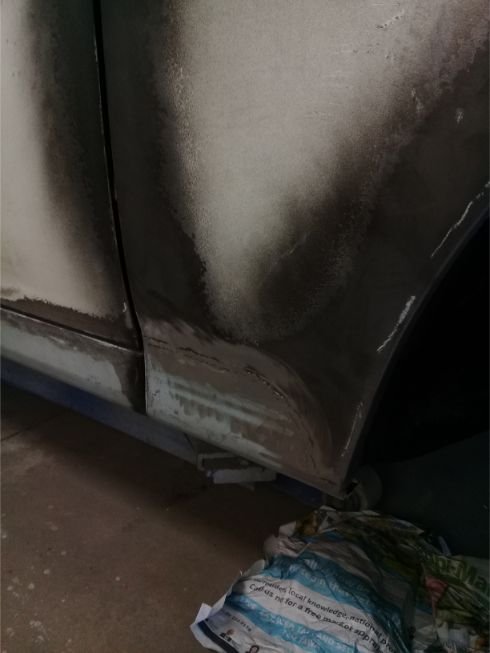
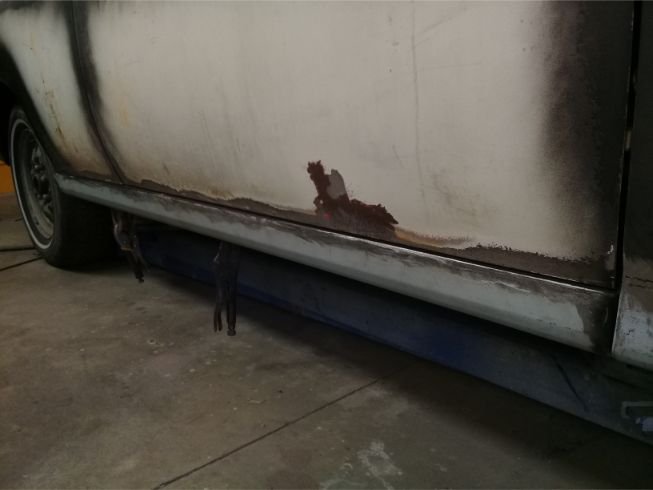
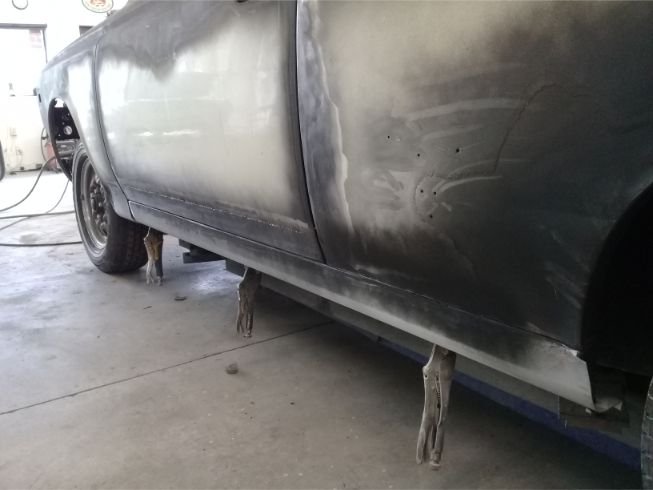
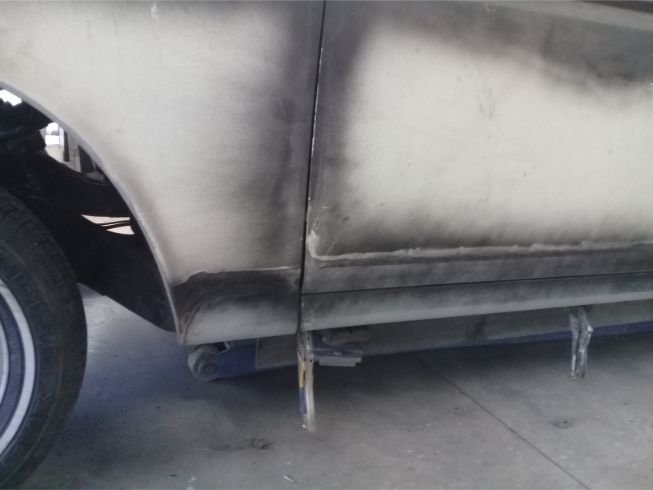
primed up and undersealed
5 points
-
some exhaust bits turned up so i made a start on my 1st set of headers ive made.... just need to get somemore bits and ill fully make them up.
4 points
-
Oh boy i cant wait for PGs4 points
-
Hells yeah getting pretty excited for some of this
4 points
-
@BLIZZO is pretty good at making google maps you can download to your phone with a route. You can then download the maps and cache them prior to leaving so you don't need signal. Better living?4 points
-
Then this happened
4 points
-
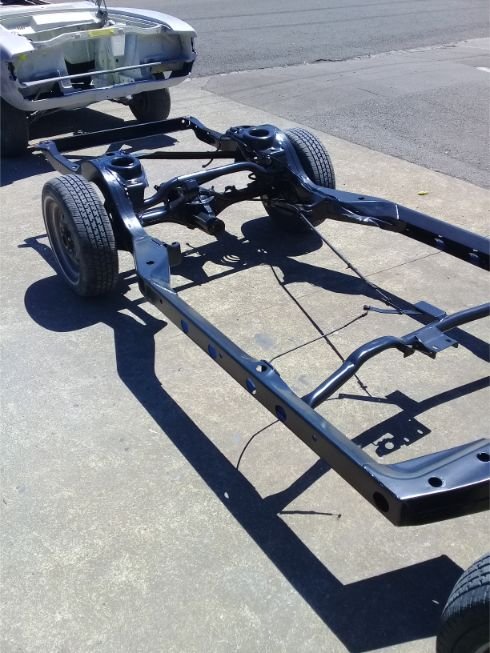
Heeps of work going on in the background while the body was getting done, sourced alot of parts from japan, sandblast and painted chassis, was all in pretty good nick, think it had only done 96000kms
4 points
-
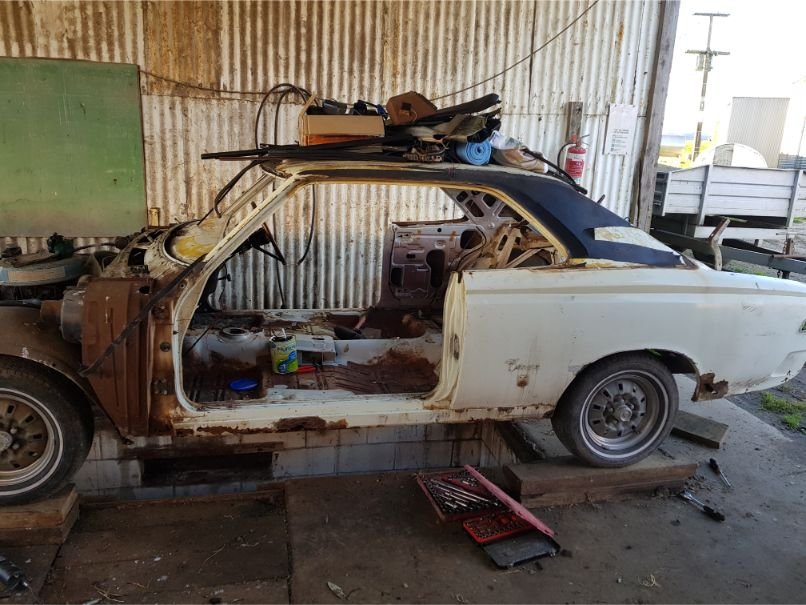
So did something I never do and went and booked in a panel beater. Was due in a months time so I had a deadline which is the only way im likely to get things done. Stripped car down, plenty of rust
4 points
-
Righto bitches. @cletus pointed out the issue with my turbo positioning, ie the drain and the slope and the strong possibility of non draining etc. This caused me to spend considerable time looking for both electric and mechanical scavenger pumps, including a brief talk with Skidfactory's Al about what pumps he uses (which I only mention to give myself the opportunity to let you know that Big Al himself thinks the truck is 'mint'. I know, I am a cunt, but shit its Big Al). Whatever, this all caused me to decide to move the turbo so it can drain properly, it now sits thus; This meant a very stubby adaptor manifold that I forgot to take pics of but you can glimpse in the first pic. You can also see the beginnings of a dump pipe, things looked like they were getting pretty tight for an OEM one so I cracked on with a custom jobbie. Probably not the approved use of a band saw. A long time with the die grinder got me this. I also built an airbox with a prado panel filter; I was going to make a snorkel, but thought it would be a bit wanky. Maybe later. I then made some shit to brace up the rear spring perches as the internet tells me these are weak. I was going to weld some bracing in but I wasnt sure of the airbag situation so thought I had better wait. I have some things going to the powdercoaters tomorrow, I will chuck this in with that so it ends up all pretty like. Lots of other little stuff got done as well, screwing down the decking, running the diff and tranny vents, finishing up some wiring, sorting the heater and vacuum hoses, finding a thermo switch to run the fan etc etc... The list is getting shorter though.4 points
-
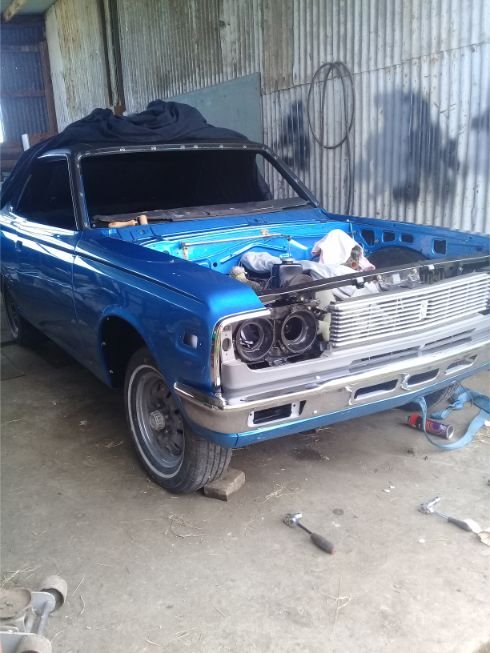
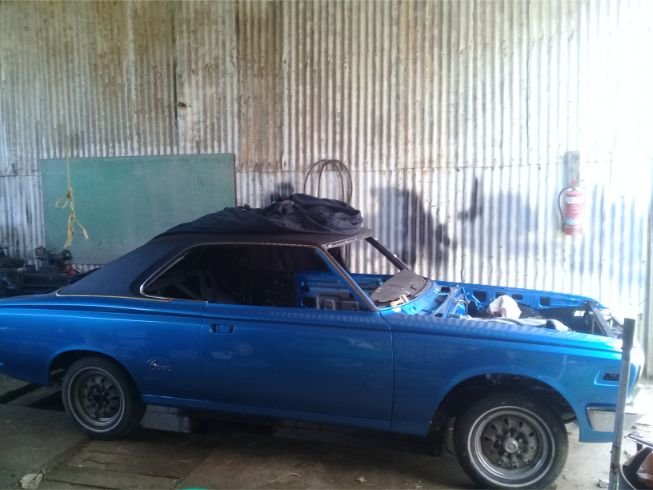
So brought this about 14months ago off @horndog He imported it for a parts car, got the jdm front and a few other pieces for his project Over the next while Ill chuck up some photos of progress to date. Plans where just a quick tidy up to get it legal and drive it. Got a bit carried away. Low kms and pretty straight bit rusty
3 points
-
This is a very sensible time to be checking things if you're like me and use your bike twice a year. Tyres Chain Sprocket Drive rubbers Brakes Wheel bearings Spark plug Fuckin bang out the checks over a weekend, or sneak in an hour after work. Enough time to order parts and get them fitted before the ride.3 points
-
Replace train with mopeds and this is FOAMERS thinking about Te Eastcape. (and also heritage equipment)3 points
-
NZ Rail Fan spec train spotting + small bike gravel road pesting ? I’ll have to bring an extra towel for the additional foam Ill be spreading3 points
-
Here is the original bar And here is the new bar Obviously I put the bolts in them when using it for real! The car is out in North Canterbury, you are more than welcome to have a look sometime if that is useful.
3 points
-
Forgot a photo, here's the inside in all its dusty shitness. Should clean up good though. Wont make it to OS drags but I'd rather get this together properly than thrash on it and have to do it again later.3 points
-
Yeah ticketed welder for rust repairs is a wives tale, I don't think there are any tickets for such work. the closest would some kind of panelbeating/sheetmetal qualification? doesn't mean a ticketed welder is bad at rust repairs, but it doesnt mean theyre good at it either - it is a somewhat different type of welding. welding tickets are typically for structual steel, pressure equipment and airplane stuff, maybe other safety critical applications. and even then there is not actually anything called a welding ticket. You have weld procedure specifications (WPS) and welders can then be qualified to the WPS and gain a procedure qualification record (PQR) is the correct terminology. The PQR is completely specific to what is on the WPS, e.g if it is pipe welding it might be carbon steel, in a certain position, tig root run and SMAW (stick) cap. the type of tig wire and stick electrodes will be specified, the range of allowable welding settings, sheilding gas type, the piping will have fitup dimensions and bevels specified, minimum temperatures, allowable interpass temperatures, a range of diameter and thickness above and below the tested qualifying weld that the WPS can be used for. Then if you need to weld structual steel sections, or stainless steel, or significantly larger or smaller pipes you then need another WPS and PQR appropriate for the application. then for each PQR you need to have tested qualifying welds on a regular basis - it is not an indefinite qualification. tl:dr welding qualifications (tickets) for industrial welding have almost no application to most automotive repair work.3 points
-
first drive
3 points
-
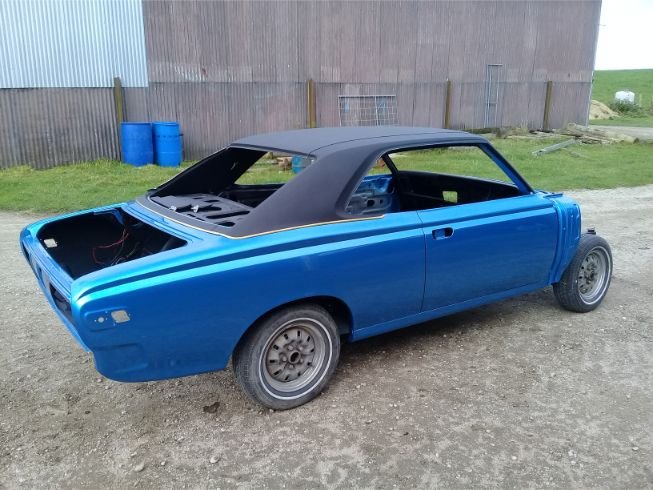
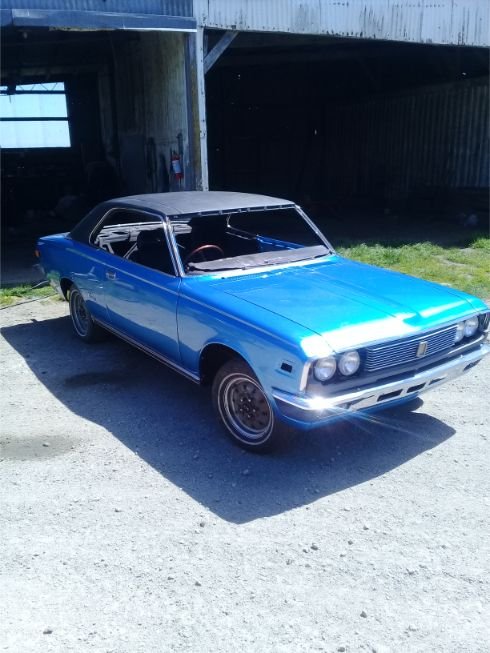
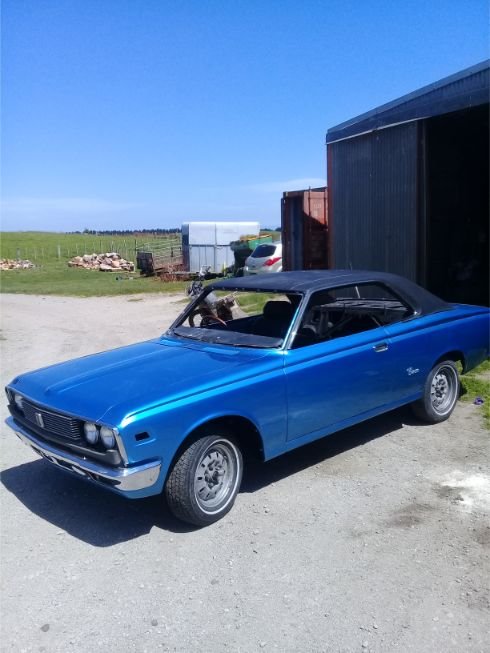
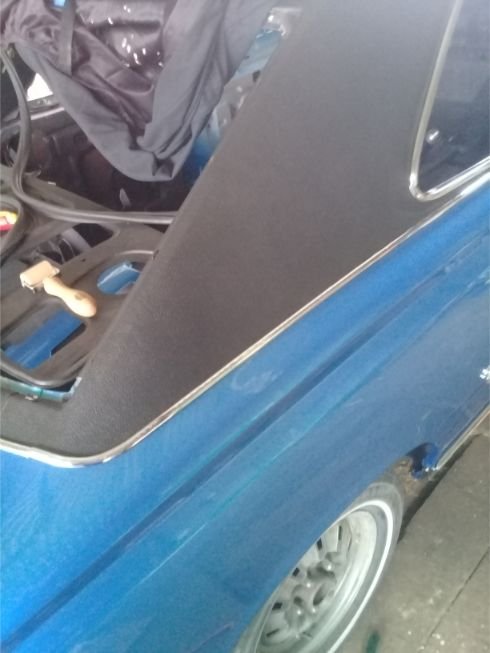
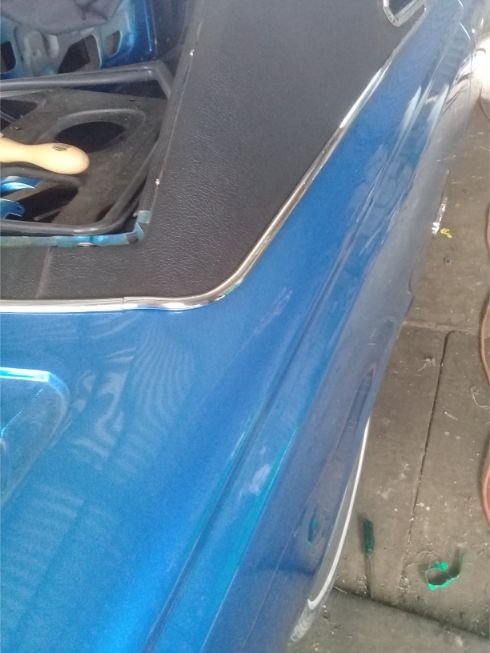
rear seat recovered, front seat used the origanil upolstery but rebuilt the foam and srpings in it, sound deadening fitted
3 points
-
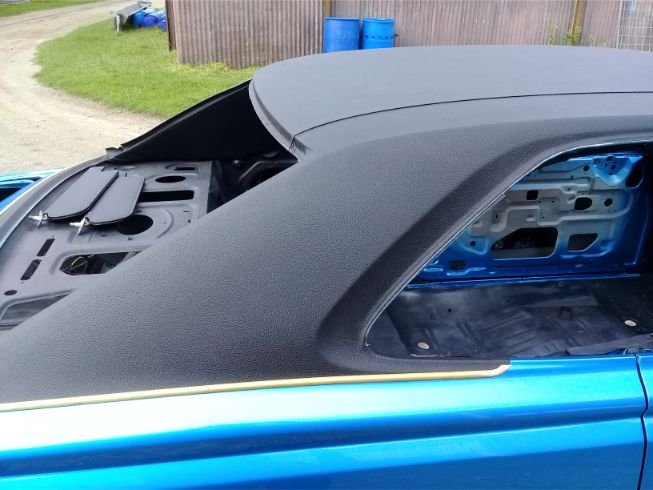
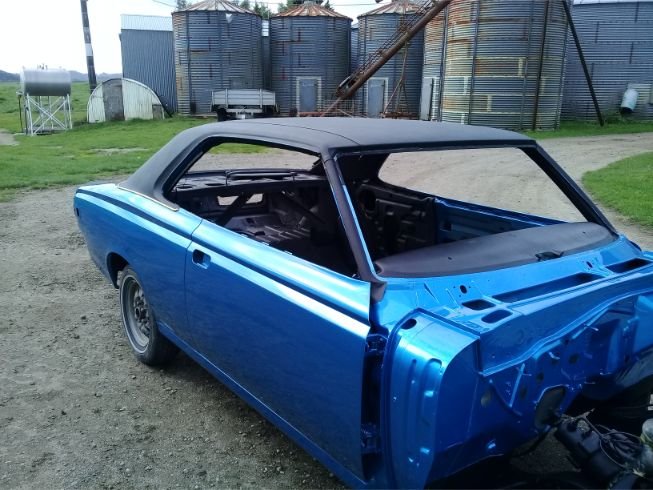
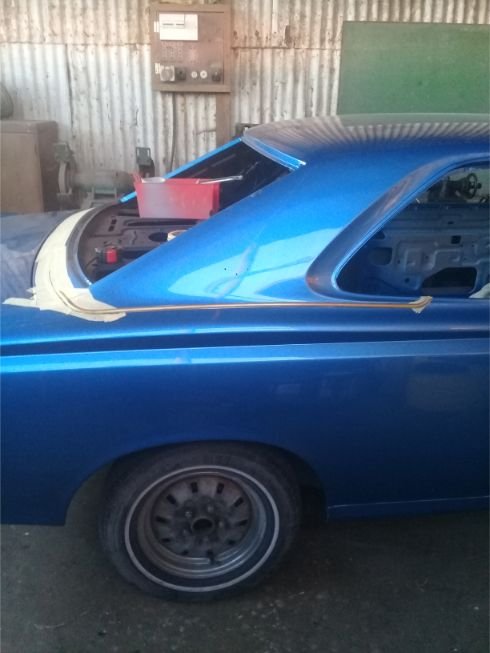
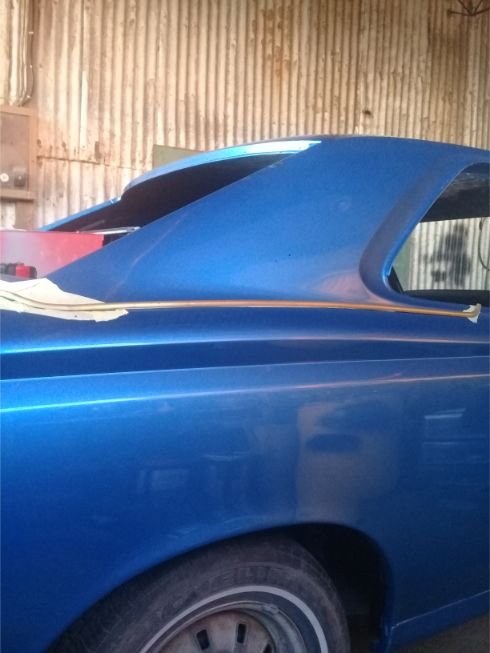
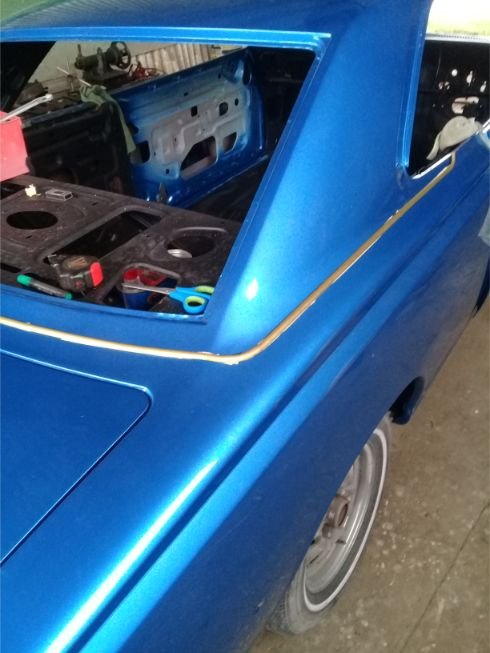
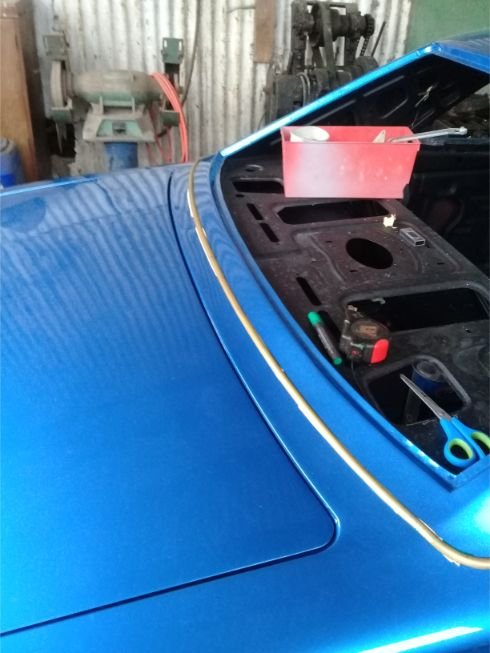
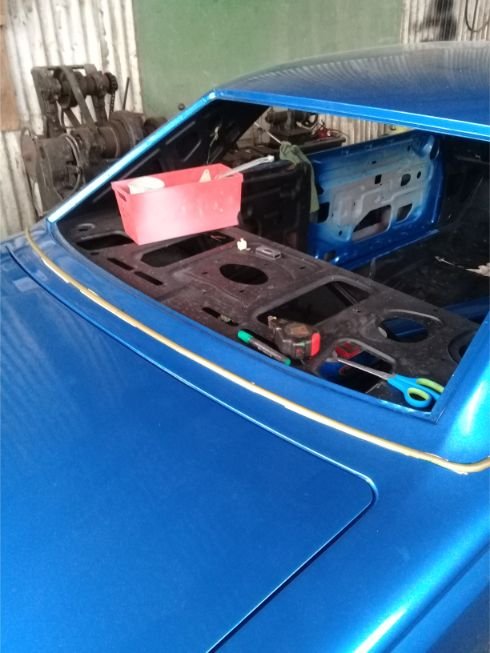
And because Im impatant I had to make the vinyl roof trim on the car after it was painted which is definately a dumb thing to do. Managed without any scratches which really surprised me Used brass this time , heeps easier to work with and came out real well
3 points
-
So entered this ol thing at the Smash Palace Bike show this yesterday. Seen a bike show near Gold coast earlier in the year and all the bikes had thier own displays so took some inspiration from it and I created a display that was fitting to and a Monty Python skit Im a LumberJack and im ok. I work all night and sleep all day. Quite fitting for me as ive worked night shift the whole time ive been building this bike. So I scored some wood chip from work and a few rounds and put a Axe and Saw into them and had this as my displaye. I won MVP of the show for my display which I was quite surprised about.
3 points
-
3 points
-
Picked up a new muffler today. Yes my car is a mess Chopped old one out Tacked in place Fully welded in place and painted. I didn't fit that shortened resonator as I ran out of time to be making noise. Its a MUCH better volume now so I'm happy. Will still chuck that short reso in since I went to all the effort of shortening it to suit2 points
-
Sandblasted the fuel tank and was rusted from the outside in. Ended up brazing up the holes and putting gas tank sealer stuff in it.Was nice and clean inside bit wanted to seal up where id been welding. Seems to have worked a treat.
2 points
-
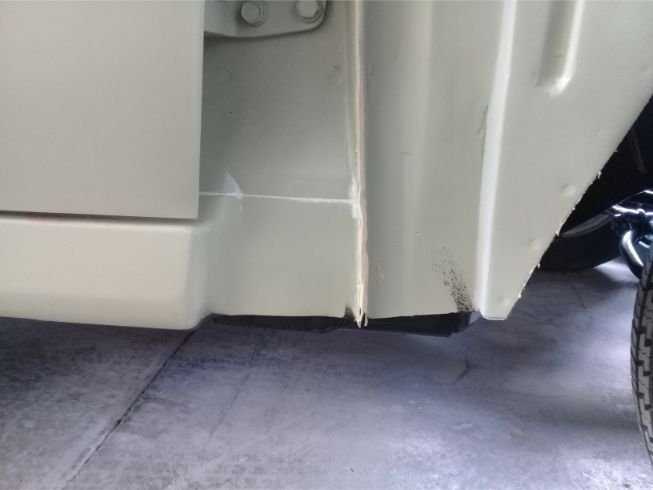
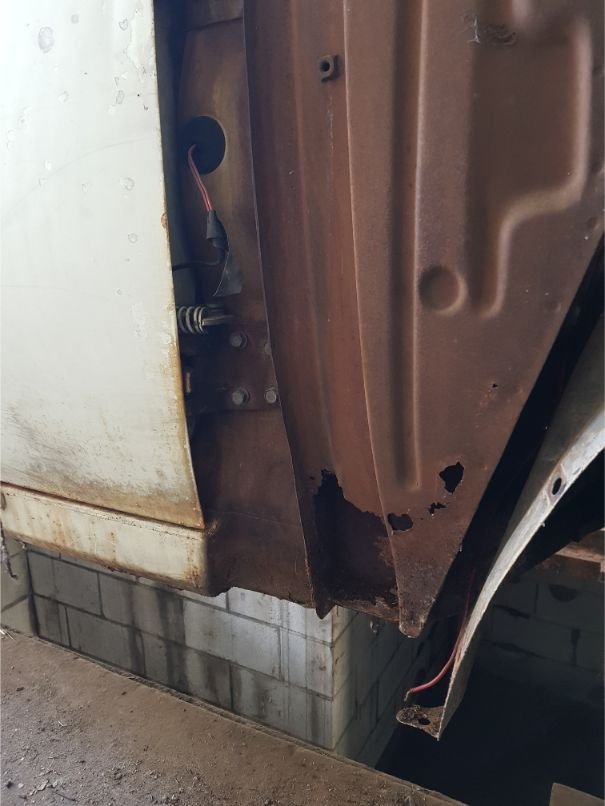
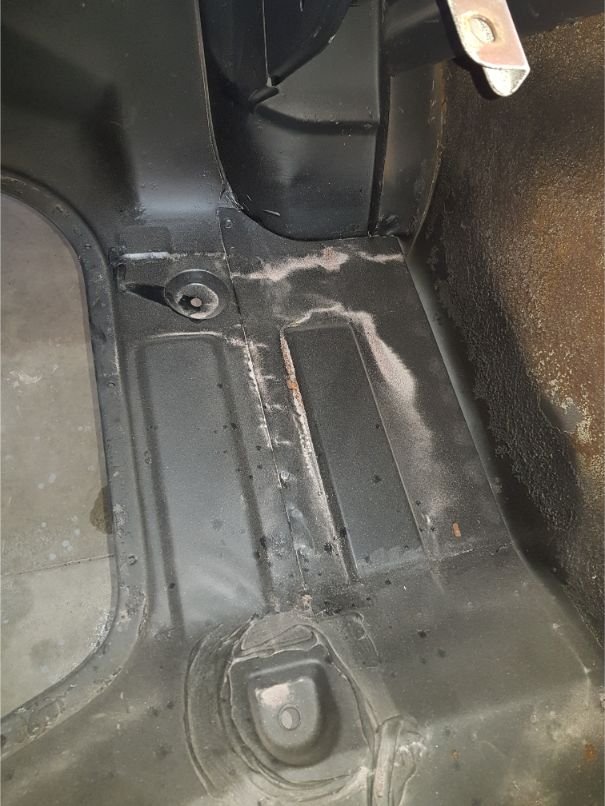
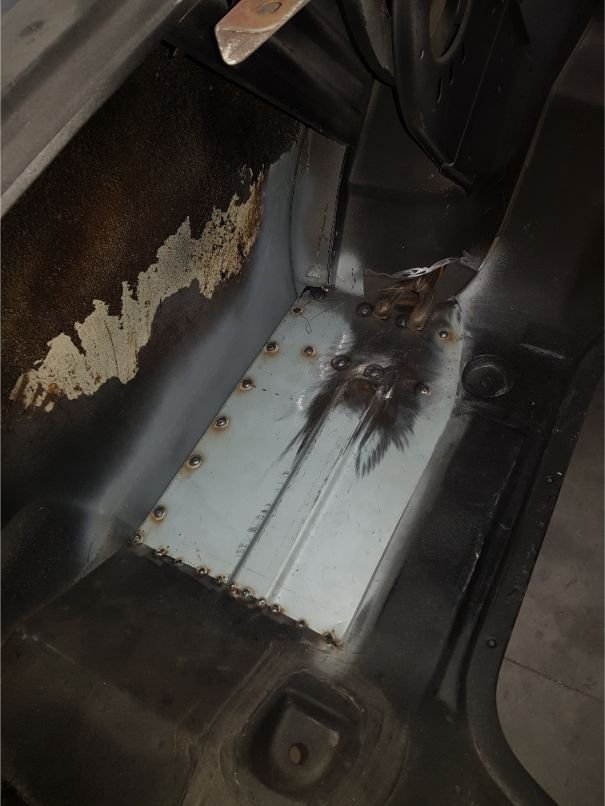
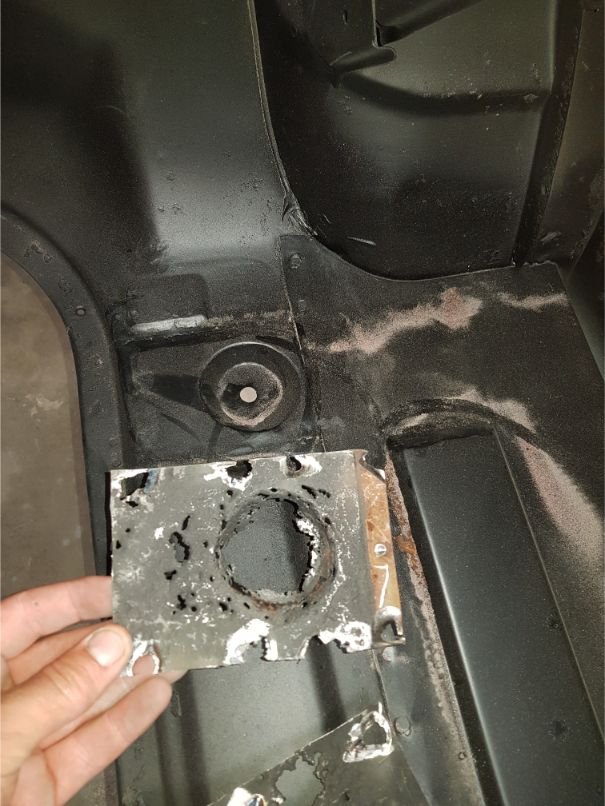
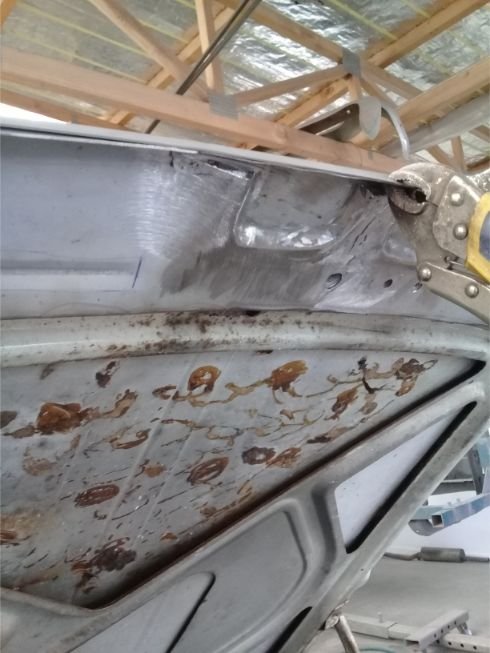
all out of order bit found more photos of rust repairs to boot floor , inner and outer rear guards, just everywhere really
2 points
-
40mm bump 40mm droop from ride height. Depending on the car and suspension and bumpstop type, can include some bumpstop compression in that figure2 points
-
One year ago yesterday an unassociated group of bikers finished a ride formerly known as Eastcapescapade:
2 points
-
You know me so well.2 points
-
There is a section on day one in some forest, that google maps just won't path through, technically a patch of it might not be 100% public road, but either side of it is. Not sure if this link will work, but it should be shown here, Pokairoa Road runs parallel and is a bit of fun. https://www.google.co.nz/maps/dir/-38.1588809,176.8036599/Pokairoa+Road,+Matahina+Forest/Kopuriki,+Galatea+3079/@-38.2504003,176.6732776,37475m/data=!3m2!1e3!4b1!4m15!4m14!1m0!1m5!1m1!1s0x6d6ee654a6cf147d:0x1300ef61069b5310!2m2!1d176.7809974!2d-38.2299165!1m5!1m1!1s0x6d6edc8645c5fe1b:0xf99965bddfd05a26!2m2!1d176.783314!2d-38.3484559!3e02 points
-
Condolences, I'm not sure you'd entered either though? @sentra if you've got your accomodation etc sorted and you're dead keen we'll fit you in2 points
-
2 litres of neck snapping fury, got it bodgied up and running so could drive it and get interior finished, goes surprisingly well ....for now
2 points
-
And back to those brass strip things i made for the roof, so stoked with how they came out
2 points
-
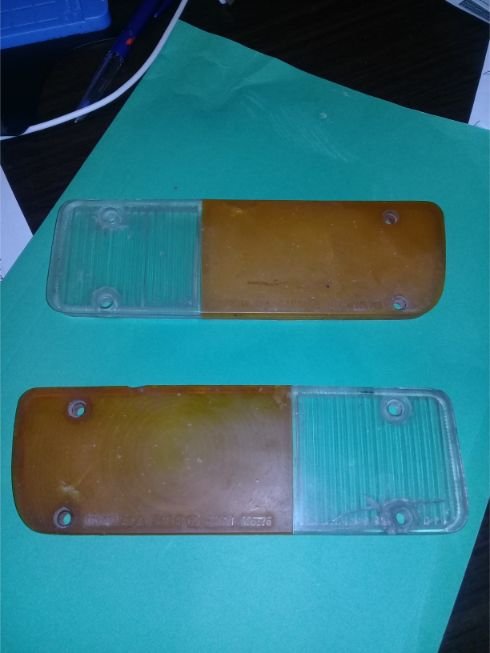
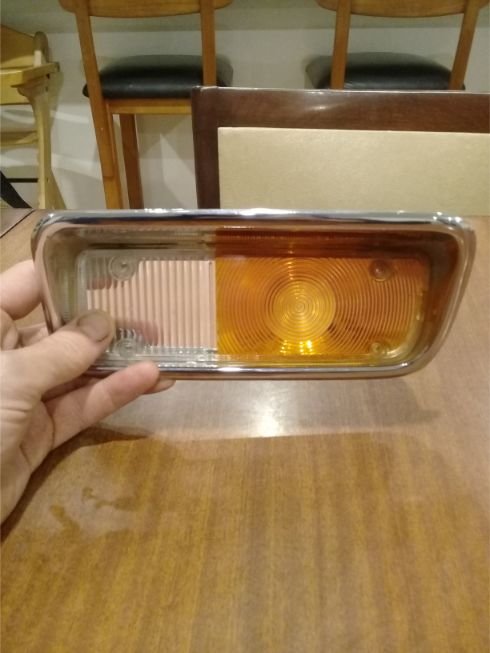
Front indicator lenses were rubbish, got talking to gc in aussie who was kind enough to sell me a mint spare set he had
2 points
-
Might dab a bit of 'direct to rust' satin black on the bits that need it... Did some things today. Stripped the Villiers carb, not too bad inside, a few previous bodges made it tricky to get apart, but they're a simple beast... And cleaned, lubed, reassembled and ready to go... And assembled the ignition too. Didn't feed the brown wire corrrectly but didn't notice till I checked old pics. Should run under the insulation plate in the points box, but soldered now so she'll be right. There's a new Villiers condenser under there too... And araldited a new felt pad to the sprung steel arm... Looks good, hope it works...2 points
-
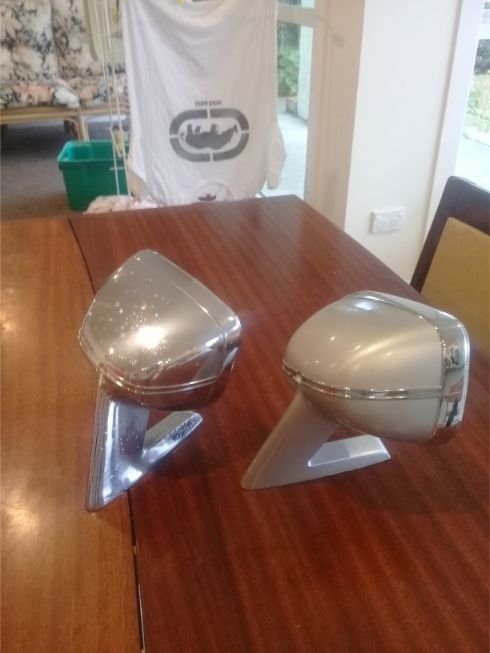
somewhere along the way I got all the crhome redone , dunno where all the photos are bit heres one of the mirrors finished Had too diegrind out all the corroded parts and fill and sand without scratching my new chome, came up all good though. Same process with the door handles and other parts made up out of that cast muck metal rubbish
2 points
-
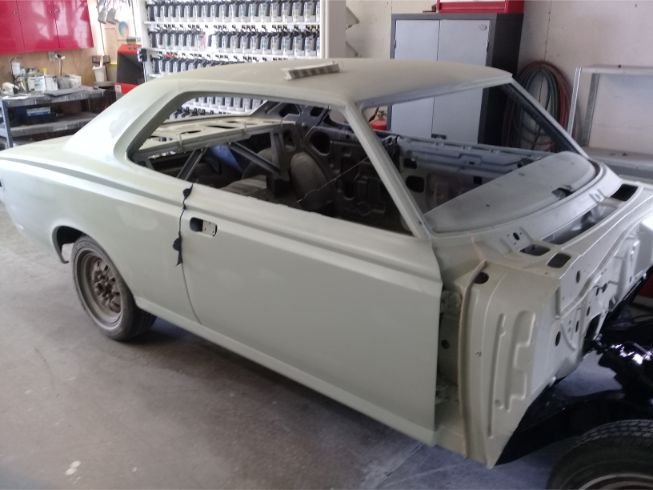
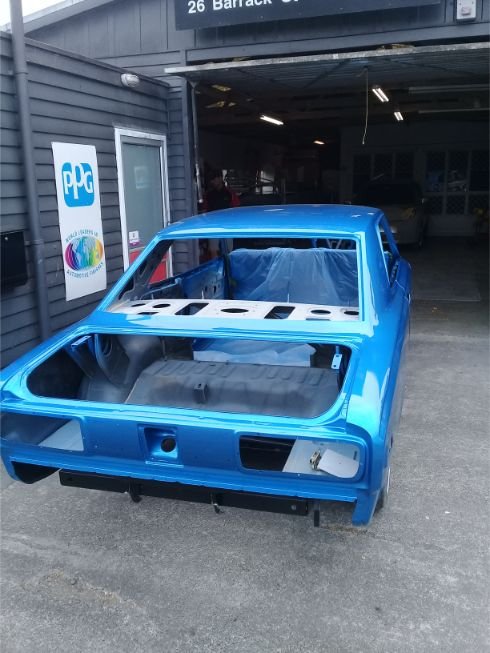
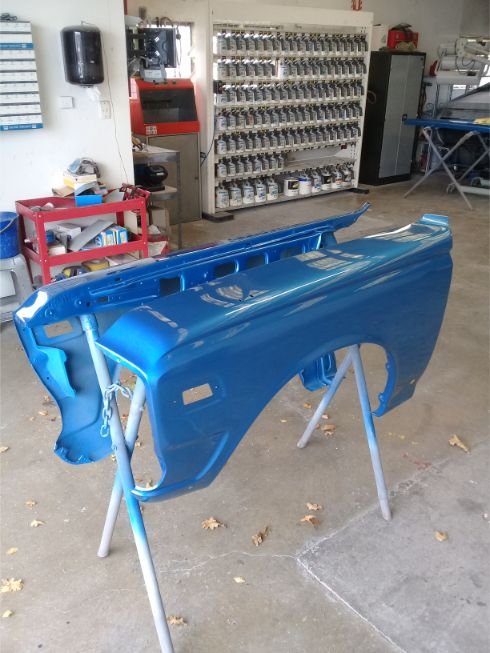
Car went off the panel beaters and I was blown away at how quick things happened. Usually would take me a year or more to sort all this mess out bit not three weeks later I get a call asking what colour I want it
2 points
-
Cause couldnt help myself and what toyota doesnt need a v12 The whole front sump crossmember steering box in the way makes this pretty unlikely to work but dreams are free
2 points
-
Carpe diem: seize the day. I blarped around town all morning yesterday - the bike is fun! Tried to ride it out of town with @Beaver and got about 1km at 85kph, then it locked up. It’s had quite a bit of lean-hang and I probably should have looked into it more.... I suspect the left hand crank seal is the cause. Pulled the flywheel and stator plate off and you can see evidence of oil that’s made its way out. I’m going to throw some crank seals at it this week, clean up the piston / barrel and hope for the best. 2 stroke 4 lyfe.
2 points
-
Making a bit of progress on the trans tunnel.
2 points
-
After a 20year apprenticeship she got the job. My bird got her ring finally and I scored some major points. Cracker weekend at Banks Peninsula that sports one of my favorite winding roads ever. ha. 20 years. "Good things take time" - well thats what the cheese advert says. Keeping that in mind... Who else can be out in the shed for a whole day and at the end of it look at what you did and see so little progress? Say a job you thought 30 minutes maybe or an hour tops turns out to take seemingly forever. We seem to be stuck in this pattern with all these little jobs that just eat up the time. As a quick summery viewers plumbing and wiring has been the culprits for the most part. All the hoses have been ran and plumbed up. Much of the hydraulic power-steering/hydro-boost brakes is done in black nylon covered steel braided hose with some stupid high PSI rating. Came with the brake kit and looks ace but I can see it will get dirty with use. Right angle impact driver was a must for fastening some of these as no way in hell a standard cordless could get in the confined spaces like between engine or exhaust and rails. Heater lines are the same as the radiator. That flexi corrugated metal pipe that holds its shape. Have put heavy duty clamps on it all. Tucked away as much as possible to keep it out of sight. Then all rest of the fuel and brake lines are PTFE / Teflon braided stainless. Only the trans cooler has normal rubber hose but it will be tucked away unseen - although I have braided heat shrink in long lengths I guess I could use. The two cables on the valve cover are for the trans kick down and the accelerator. Also tucked in the Lokar trans dipstick behind the engine to the right. Moved on from there to the wiring. To simplify things I got an American Autowire Highway 22 kit. Well impressed with it. Good gaug wire with nice thick insulation and thick strands in extra long lengths. The coloured wires are all labeled every 20 cms - such as "Headlight Lowbeam", "rear park", "Dash lights" etc etc. Well labeled fuse panel. comes with dimmer switch, ignition/keys, light switch and more. I decided to make things even easier I would make up my own wiring diagram. Man that took longer than expected! Think a few days. Glad I did it as its made the process easy. Its changed a little since I have started and those changes are not shown on that diagram but once im finished I will add the alterations and tidy it all up to show the looms better. Note some of the security is not shown there along with a few other things I forgot to add at the time. But ya- totally recommend people make up a diagram it just helps so much and designing it really brings the whole system into your head. Got a thick plastic board (10mm) that I cut to shape for the area it will be mounted. Will be up on risers to keep wires behind it out of sight. Mounted up much of the electrics-shaved door kit, fan controller, gauges controller and fuse panel. Will still be some relays and other bits in other spots around the car. Had to cut up the old stainless on the dash a bit to add things like the above keys(Drill, dermal and file job to get that shape). The other hole is for the trans lockup whats just a on/off switch(modified old Hudson ignition switch). Lights fitted in with out much work using an old hole but the new wipers are two speed plus intermittent and the switch is huge out the back so had to be massaged a tad. Using the old Hudson knobs on the new bits to keep the look. Drilled new holes for the vintage air heater unit that has three knobs - still need to get some old hudson knobs for them. Still all the effort paid off and they look stock. Started the wiring doing under the hood first as its is the easiest area. Battery is mounted in the boot/trunk and comes up to the front then to a 175Amp fuse that branches off to everything. Epoxy pertronix coil in a finned cover to keep the look im after. Mentioned the braided shrink fit before. For those who have not came across it - its great. Shrinks on down like regular shrink fit. is supposedly flame, oil and gods know what resistant. But just adds an older look to the wires whilst keeping them nice and safe. Then it was lay out the wires. What with all the wires being colour coded and labeled this wasn't to bad. Have a few extra wires in each bundle that are not attached to anything just for a bit of future proofing - never know down the track what you may suddenly wish to hookup. Feed the wires through the right holes leaving a decent amount out the back then screwed them on down nice and secure. Put in an earthing/ground bar since I have so many grounds up under the dash and around the fuse panel. It grounds right onto to the chassis next to it but also I ran a thicker black earth all the way to the back and it will attach to the battery as well. Im not in the mood for electrical issues caused from crappy grounds so with luck this will help that. Since the firewall got modified its meant we needed a new heater. Bit of a shit as I rather liked the old 49 Hudson WeatherMaster - it was in working condition, fan went, radiator didnt leak and knobs all did what they meant to do. Anywho to replace it I got a Vintage Air heater with demisters for windscreen. Man they are small but should put out the heat if the reviews are anything to go by. Mounted up with plenty of room under the dash. Hudsons had the gauges mounted in the center of the dash and then a second glovebox behind the steering wheel. Im using the door to that glovebox to mount my new gauges. Will show all the important info at a glance whilst keeping the analogue look. Hooks up to gauge control box via a single ethernet cable. Nice n easy and better yet - its in metric. These Dakota Digital control boxes have multiple speed out's. So im thinking I may try to hook up the old analogue Hudson gauge as well. Its in imperial/miles as back then NZ used the old system and not metric like now... still be kinda cool. Anyone got any recommendations or experience hooking up digital to old mechanical analogue speedo? I see DakotaD and other brands have some box thing with a motor in it that can convert but they are pricey. Thought maybe get a digital gauge with the same sweep and swap the guts about? ideas? Other than that its been springtime roadtrips. Till next time ... latter.2 points


.thumb.jpeg.384ff72c8d2b0ee0d34a7bdedb55bdcf.jpeg)


This leaderboard is set to Auckland/GMT+12:00