
Leaderboard


Popular Content
Showing content with the highest reputation on 11/02/19 in all areas
-
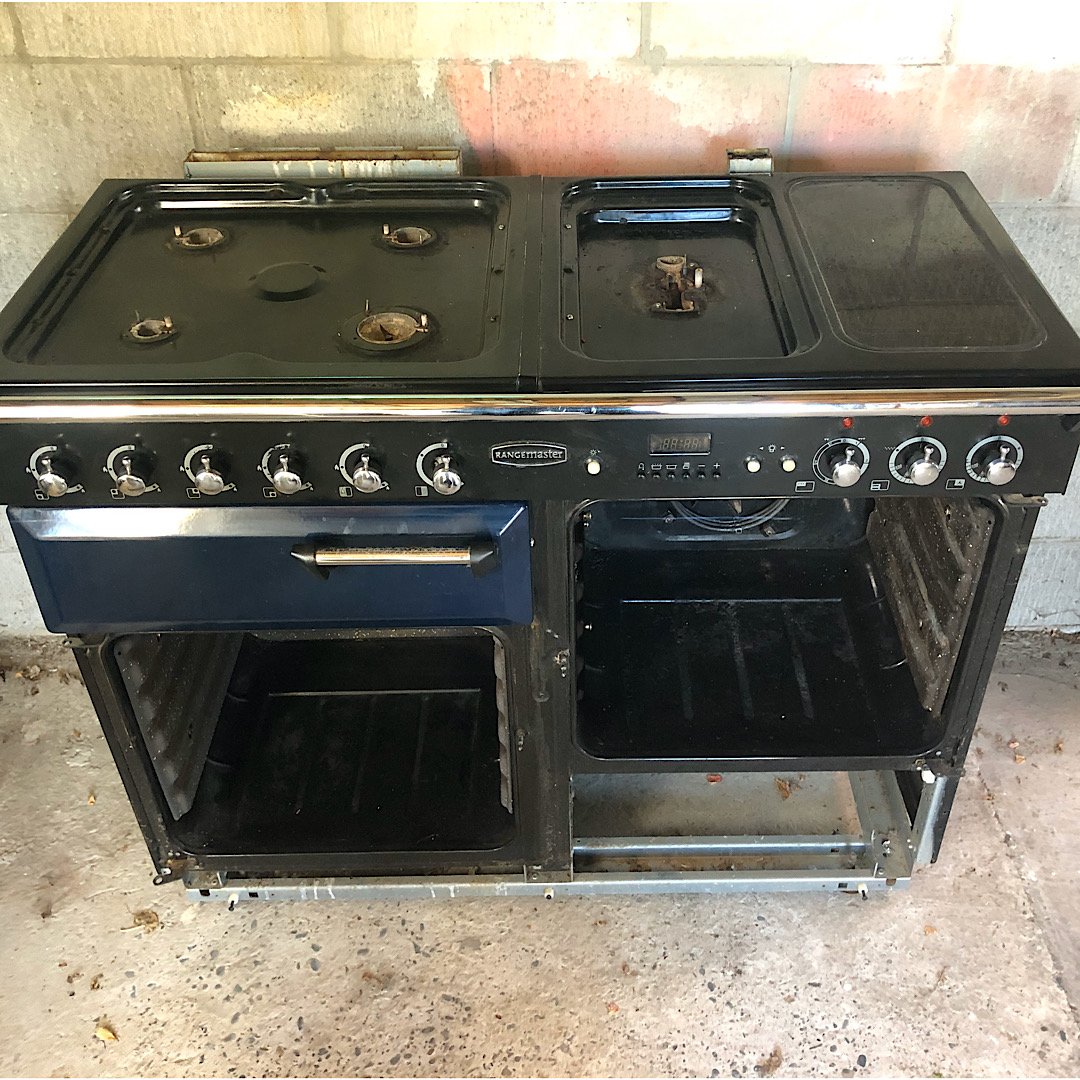
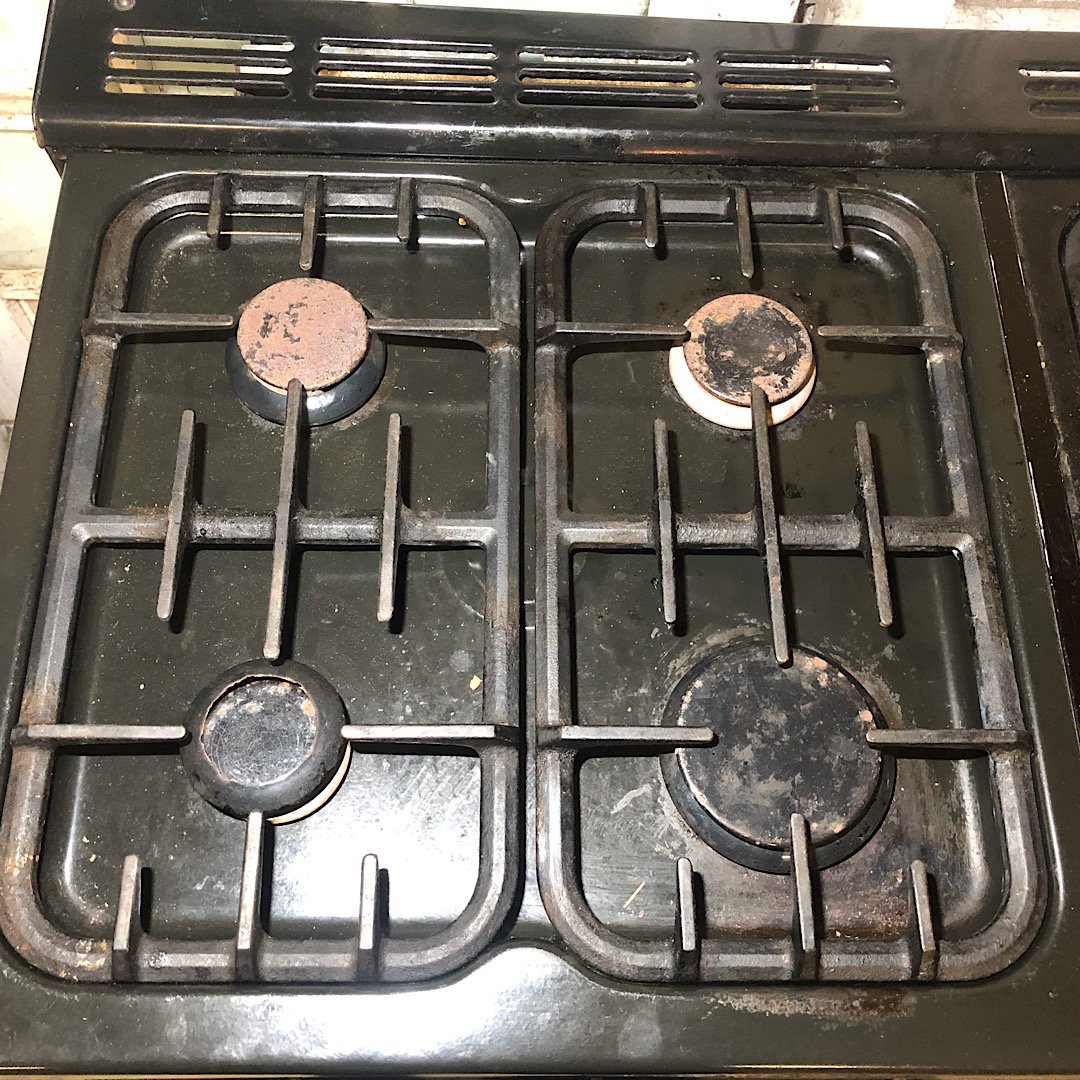
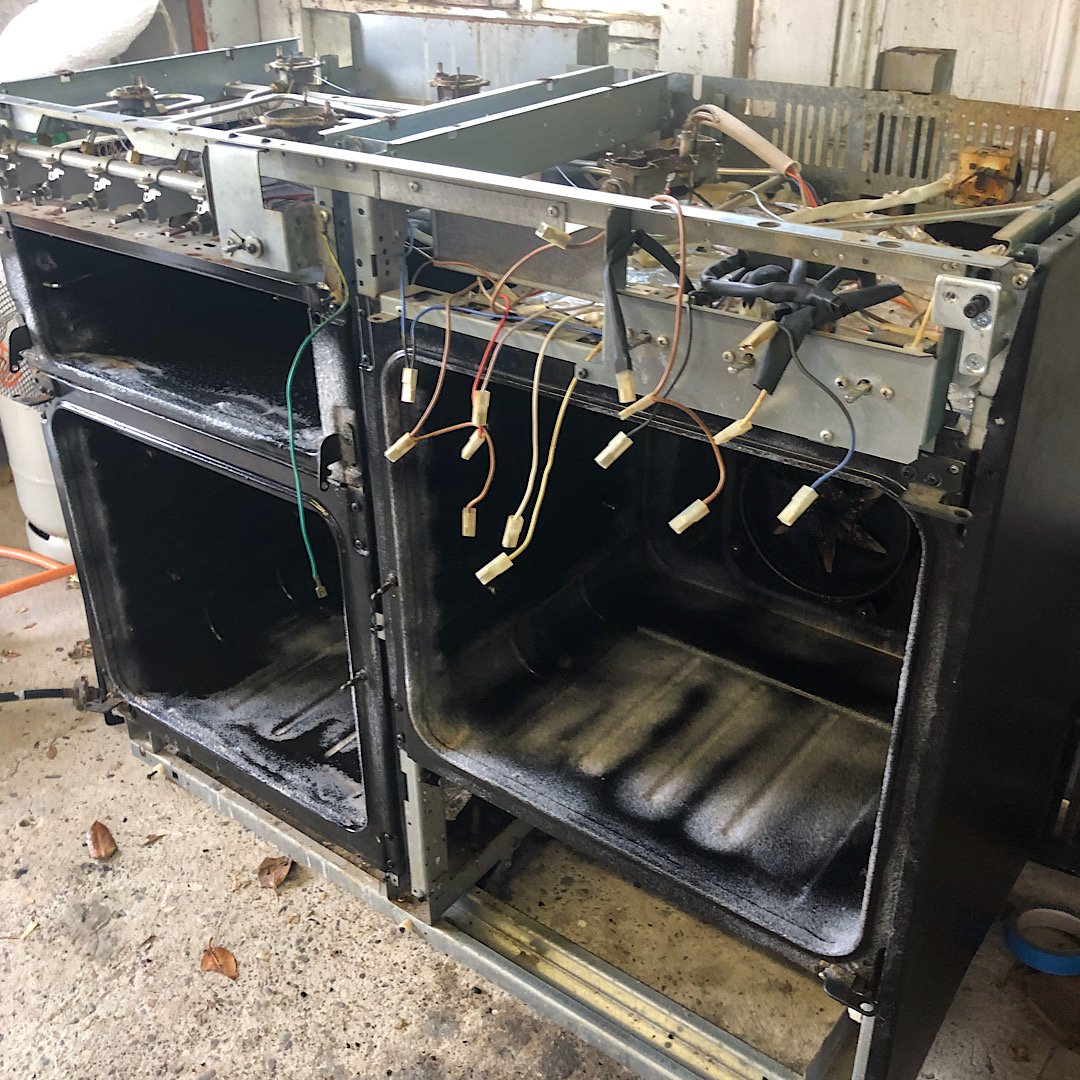
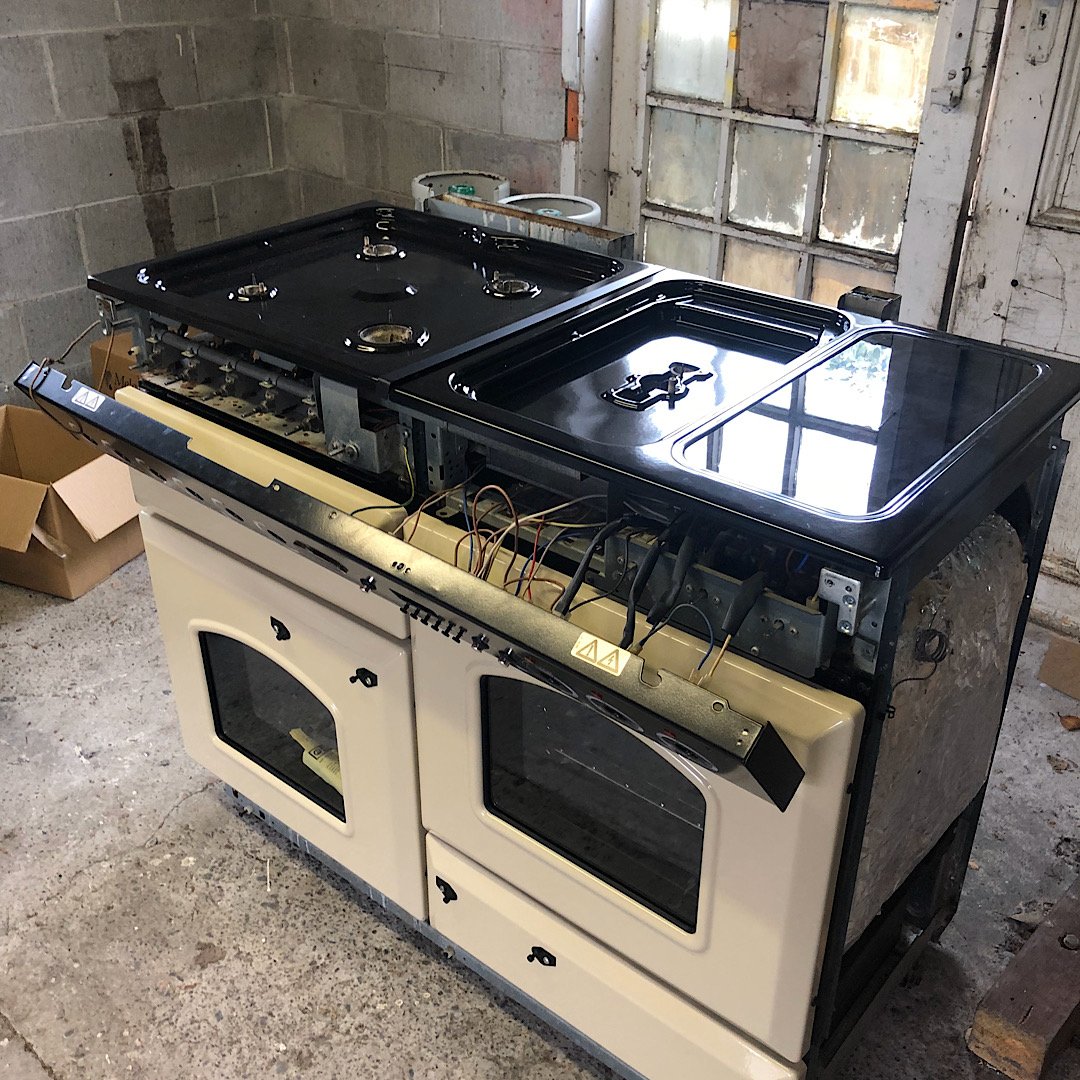
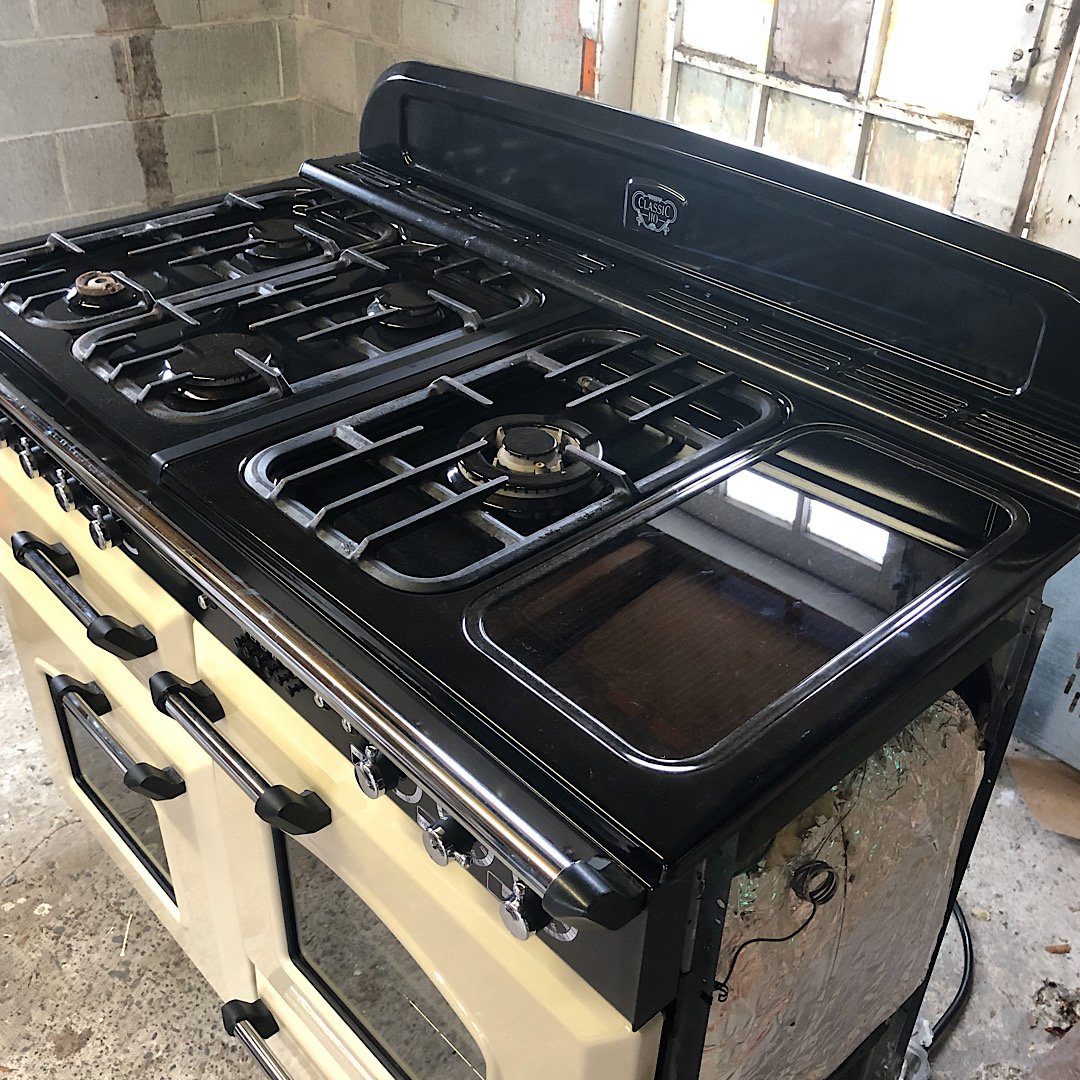
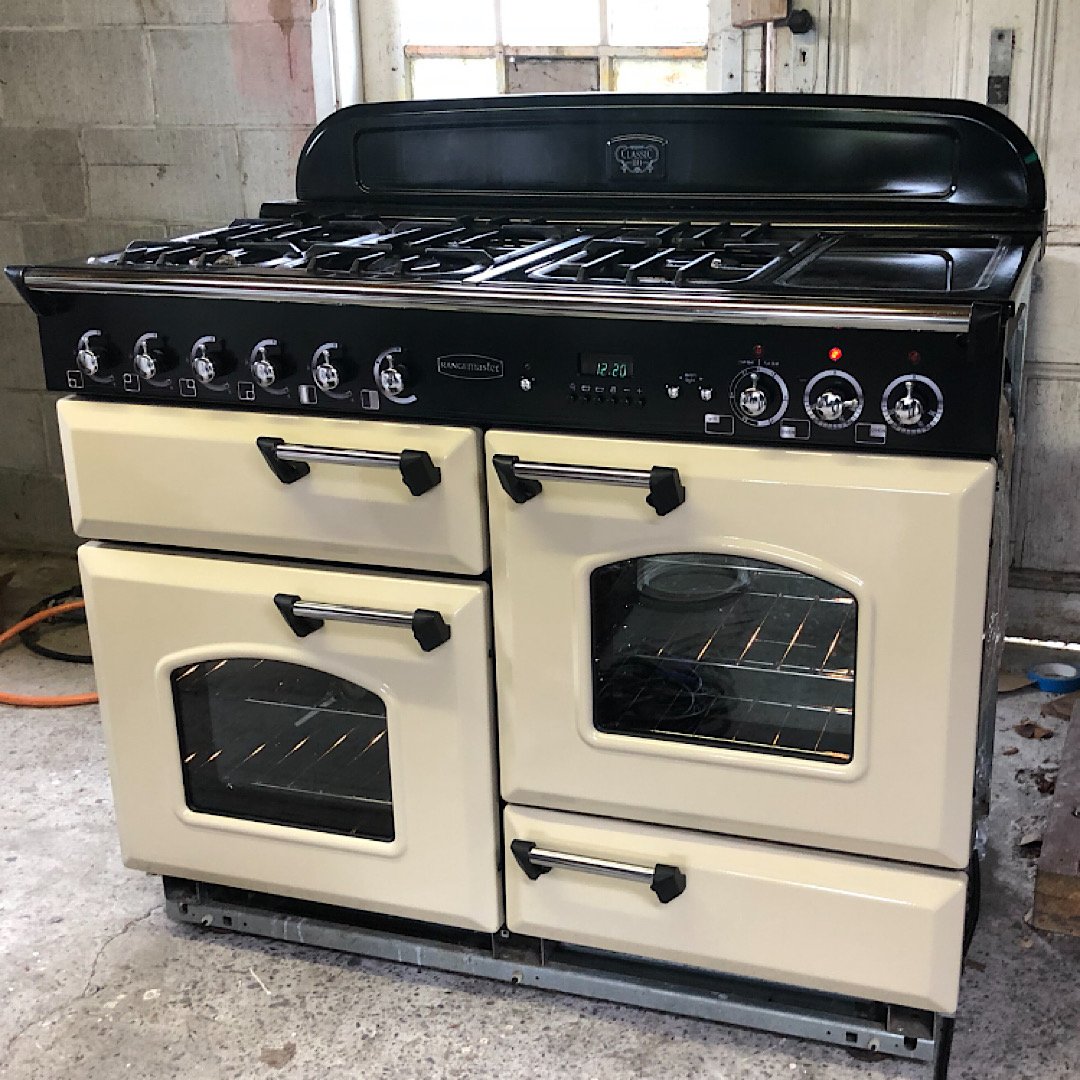
I wanted to upgrade our oven for the wife’s 30th, but there seems to be some kind of kitchen tax on nice ranges. I had no idea you could spend so much on a glorified indoor BBQ! So I got a ratty old one of Trademe that was supposedly a good brand and got stuck in. It was in a poor state, looked like it had never been cleaned a day in its life! I found most parts needed replacing and there were a few mouse nests inside... Friends and family were keen to help out which was great. After a few weeks of scrubbing and some parts hunting I could put it back together. I lucked out with a UK crowd that were dirt cheap on shipping and had most parts I needed. I had to get some bits locally, like some lengths of towel rails for the handles. It came out mint, and a fraction of the cost of a new one! Now I’ve just got to shoe horn it into our small kitchen!
 23 points
 -
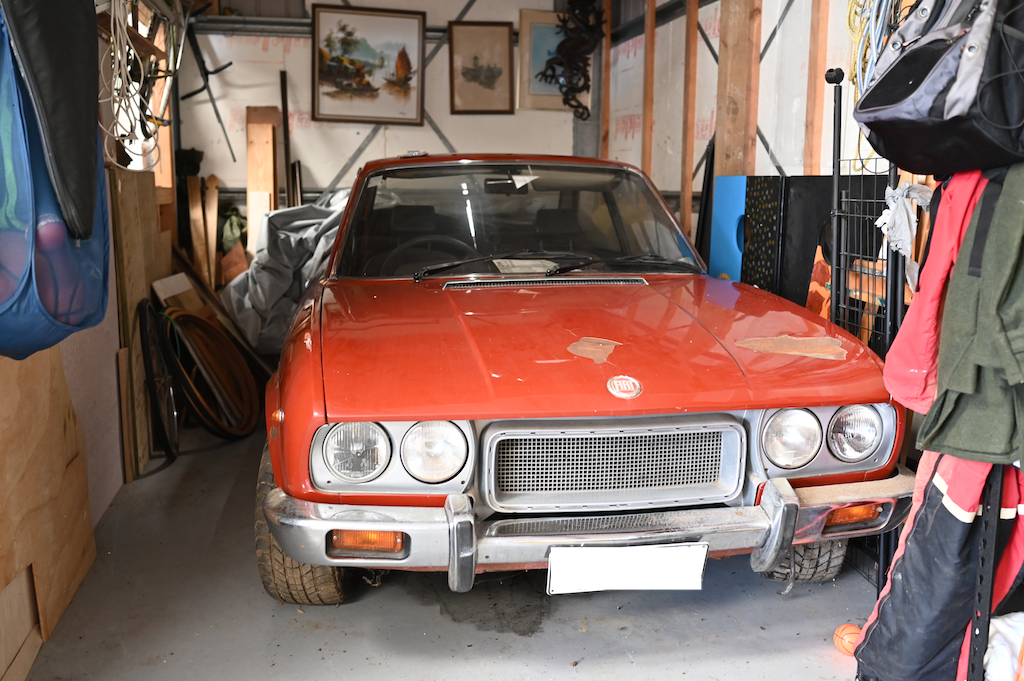
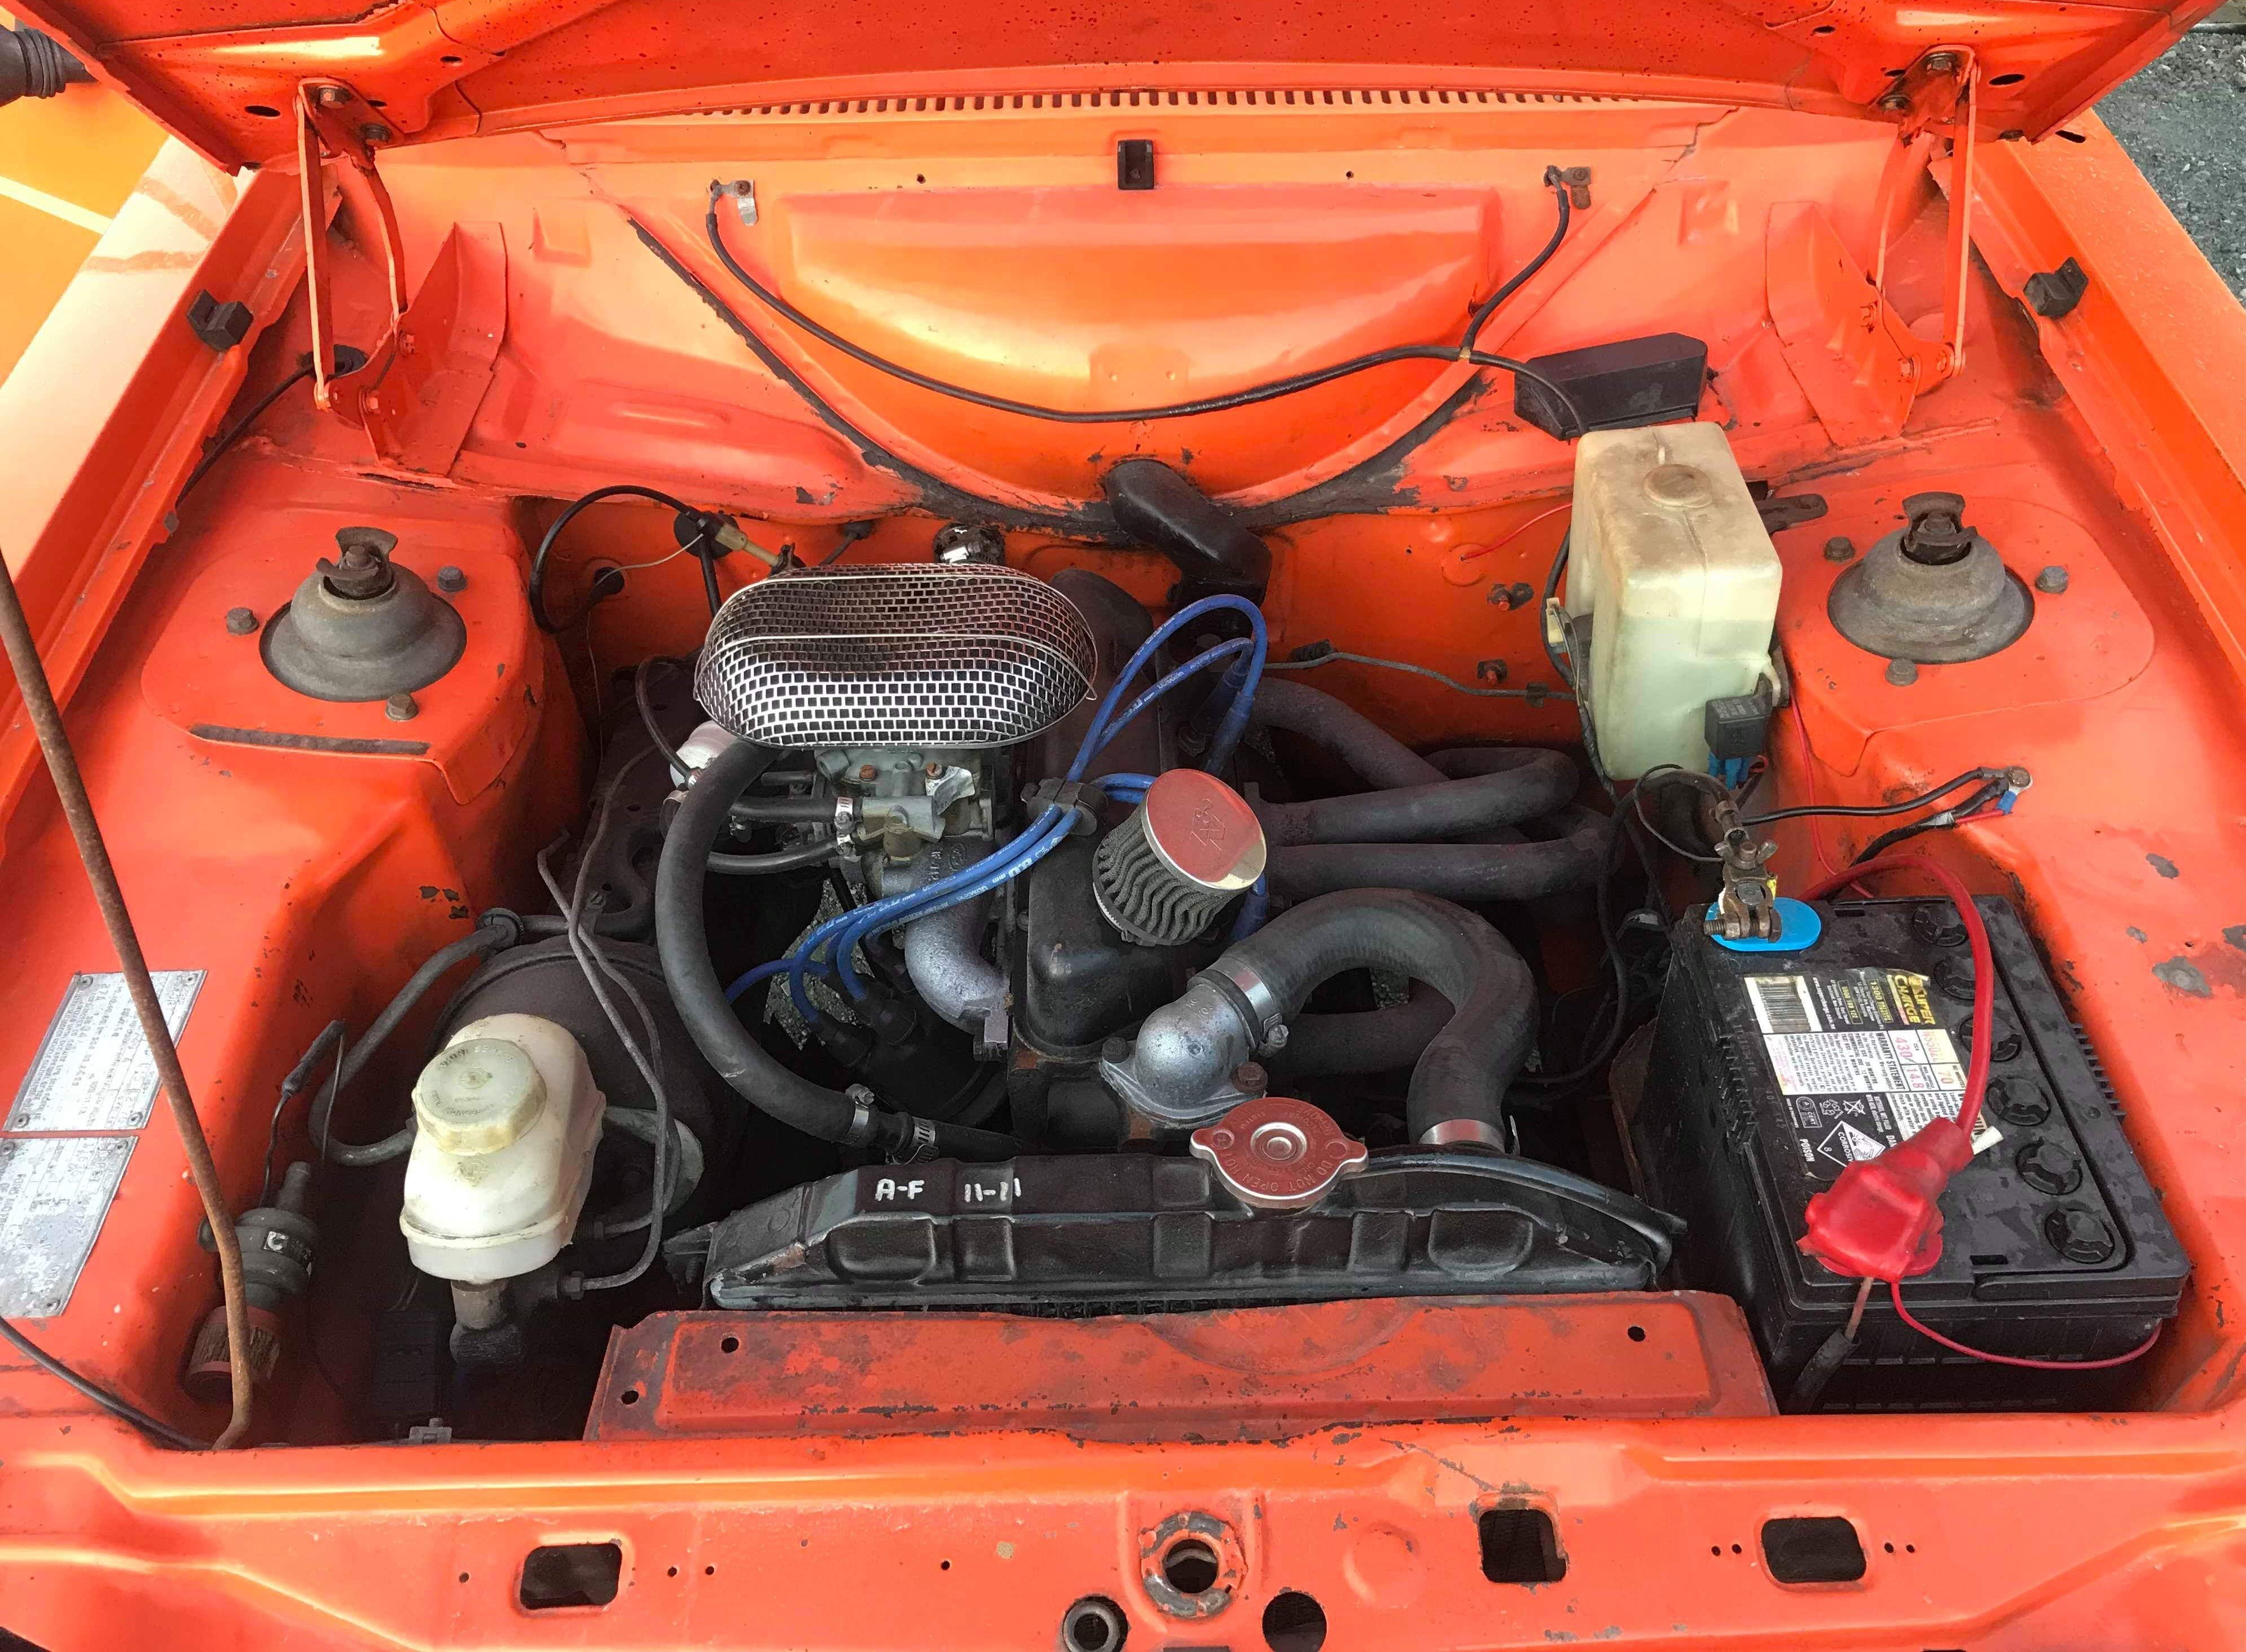
I've owned this car for over 20 years now, after buying it off my Dad while it was off the road. We stripped it back to bare metal, rebuilt the 1800 engine, and put it back on the road. Then came an engine swap to a 2L supercharged engine from a Lancia Beta Volumex. It was great to drive, but I have my gripes. Then life moved on and I parked it, as it wasn't the best daily driver at the time. Unfortunately weather triggered rust, it went into a state of disrepair before I found some dry storage. More than a decade later I'm ready to restart the project, with a number of changes. This seems like a good place to document the build for others. Immediate plans are to strip the exterior of trim, windows etc, pull the engine, strip the interior of the dash, carpet, seats. Then prep the rust affected panels. There is a lot of paint lifting straight off bare metal, so something in the original prep must have gone wrong. Will be addressing that this time around. Discussion thread here.
14 points
-
When i dropped of the sedan, i dug this out of its hidey hole next to the wagon Change the jetting on the webers a bit, put in 50 idles (up from 45) which has mostly cured the off idle flat spot (have 55s to try, and cold starts) and 125 mains which did not fix the rich on WOT issues as much as i thought (down from 145, i also ordered 135s but i guess that was a waste. I may order a small set of mains (like 100 size) and some jet drills. damn carbs. Anyway, running well enough to be put to work Final dump/scrap run loaded up and ready to ship out Looks so smol on the road next to modern traffic Scrap dudes came over for a barry when were on the weigh bridge **////** and next to the 1969 original14 points
-
Been pretty busy getting my shit sorted and moving to dunedin. Settling in now, so a bit of a belated update on the ol 125. On the way to the WoF man, gave it some doort and it started running on 3. FUUUCK Turned out the old greasy filter sock got cookie cuttered. Ripped them all off and ran #nofilter Underside up on the hoist, i never see this view otherwise oil is mostly cavity wax, but there a pretty bad diff leak, again, not enough to fail tho, so woot! Thats all 3 road legal ready for convoy in a couple of months. Then pretty much straight into storage, not actally had these side by side before, Spot the differences, 1969 model italian mid sized executive family sedan vs 1989 model polish farmers truck storage for the next couple of months9 points
-
Entries as of 2-11-19, is in first post also. Not everyone on the list has usernames, they just have names, they even might be real people that don't live on the internet like the rest of us. Theres one that I know of that isn't on there yet, but will be happy at this number, please no giant influx of entries lol! @johnnyfive @Vintage Grumble @MopedNZ @GuyWithAviators @Shakotom @cletus @tortron @datlow @keltik @Truenotch @TimShadboltfan27 @WankBankA100 @BLIZZO @MaxPower @Dolan @Mitch.W @Tumeke @Tumeke's brother Brett @UTERUS @Ned @RUNAMUCK @Zeubin @Atex Lee Dan Shannon @Deano Mike @mark1056 points
-
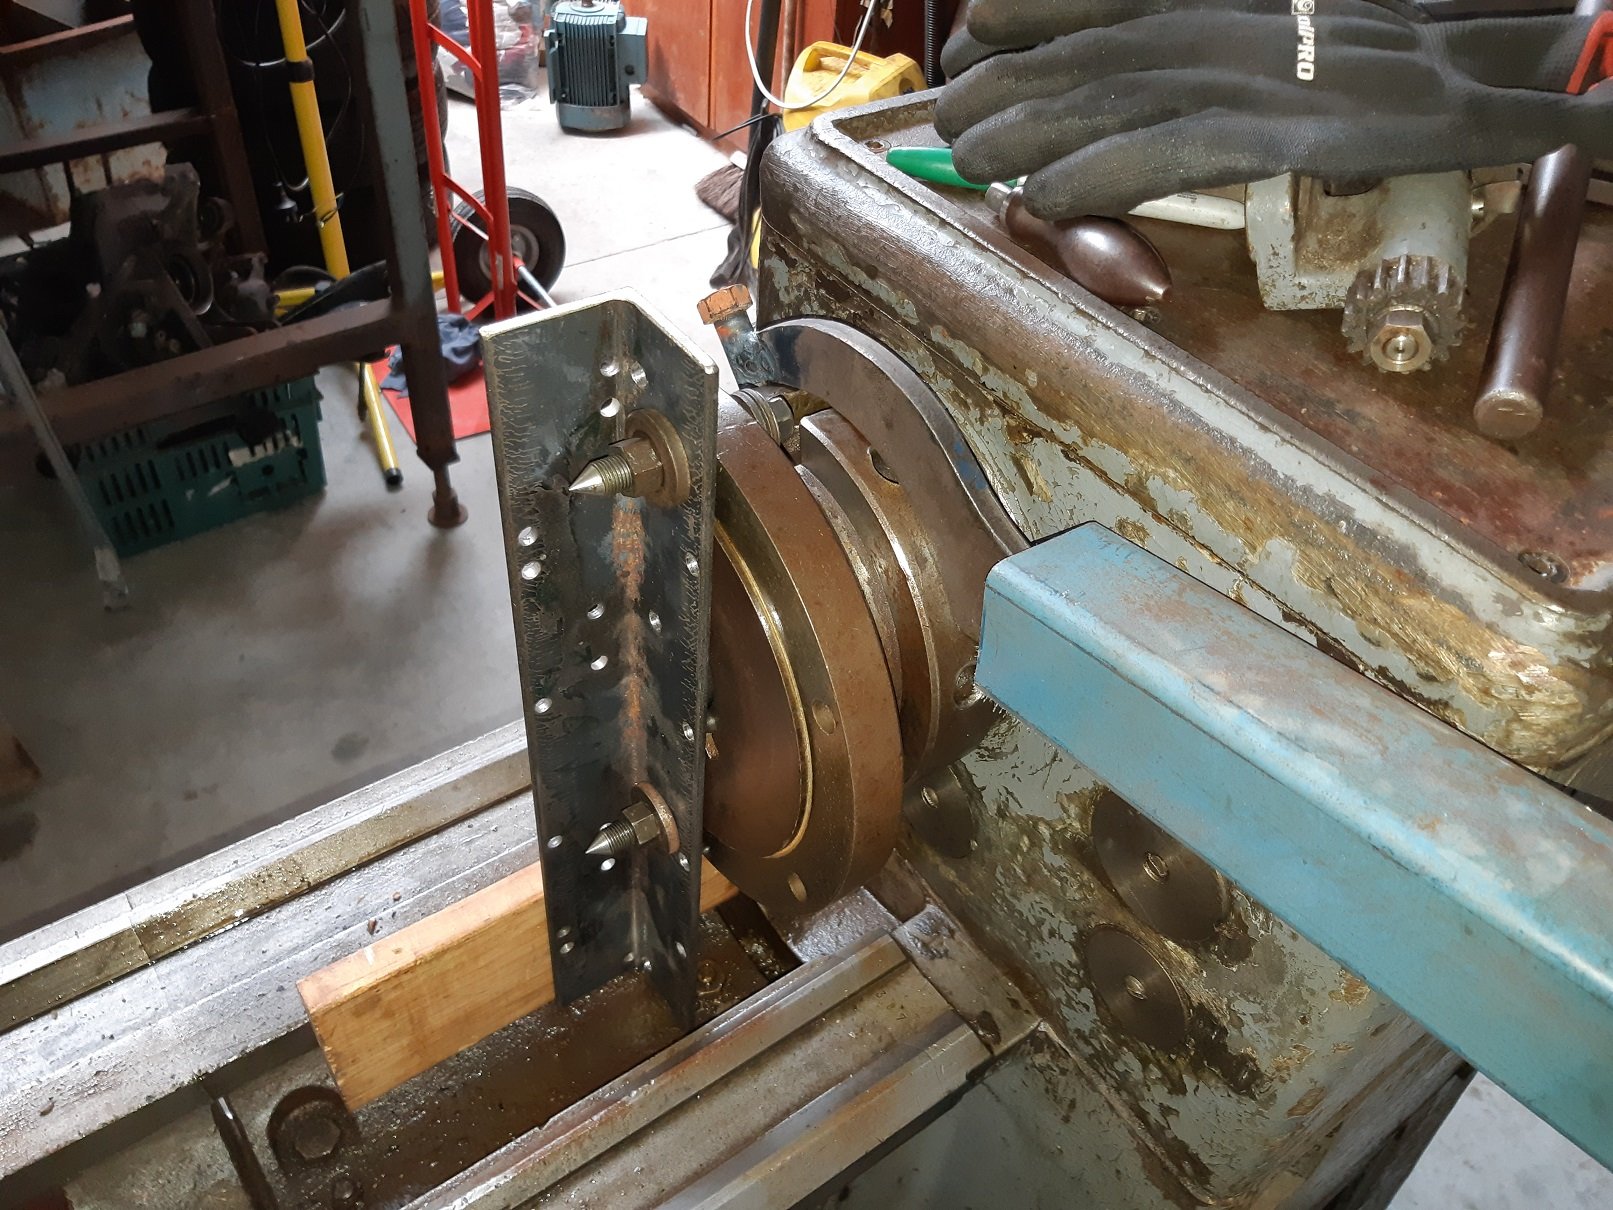
So the threaded collar that pulls the chuck mounting flange onto the spindle taper was stuck. The guy I bought it off said the previous owner also could not get it off and broke the big c-spanner trying to undo it. So this thing has been stuck for YEARS. I reckon some gorilla had been trying to "undo" it with a big fucking hammer..... the wrong way, so they were tightening it. Enter....ME. Right! big fuck off levers must solve this! So I tigged a 12mm bolt onto the c-spanner to fix it. Then made this no-turning-for-you thing. And put a long big of bar on the spanner handle. And discovered that my 82kg is insufficient weight to hang off the lever. So I swapped to the other side so I was lifting the lever up..... and proceeded to start tilting the lathe over.... Hmmmm Then I tried putting the trolley jack under the lever so the lathe was just starting to tilt, and whacking the collar with a hammer....Nope. So then I tried wedging a big bit of timber between the bed and the drip tray to give me a place to put a scissor jack. And jacked up on the end of the spanner. There was creaking from the jack and cracking from the wood. I got a whole lot of pressure happening and I was just waiting for it to explode in my face. I gave the collar a smack with the hammer and BANG! it fucking turned. HAH! It still didn't want to push the mounting flange off the spindle taper. So I started hammering on the back of the bit of angle. SUCCESS! The taper came loose and I could push it off by winding the collar by hand. It was a bit grubby in there. Here it is after I gave it a scrubbing with WD40 and a scourer pad. So the 2.2hp motor I want to try put on it has a 24mm shaft. The dual belt pulley that needs to go on it is for a 28mm shaft. I will try make a sleeve to make it fit. I'll also have to find a taller key.
6 points
-
So this thing is still in a million bits, I'm still in the process of painting. All the bolt on bits are done, just have to finish and paint the frame. I wasn't happy with the battery tray thing, so going to redo that with a box of some kind. Story time: So a long time ago I got plans for one of these, I started collecting parts, but when I realised the cost and time involved in building one, I canned the idea. I had already purchased a second hand set of front callipers/discs/stubs from one, but the guy kept the hubs. Recently Edge products in OZ had a sale on, so I ordered the missing hubs, so I now have the compete set up. So sometime in the future I will make new front arms and put these bad boys on. I'd like to put flasher shocks on all round too, but they are spendy. Ages ago I also got a nice set of alloy rims and tyres from a racing ATV off trademe, they were listed retardedly so got them super cheap. And in a stroke of luck, the front rims are the correct PCD for the new braked hubs, neat. The back rims don't fit on the current hubs, but I've started collecting parts to make an independent suspension set up for the rear, so will make new hubs to suit when the time comes. Other than that, I've drilled some big ass holes in the 12mm plate at the back, to try shed some weight, and make it look racey. I also got offered an absolute abomination of a go kart for a box of beers, so got it against my better judgement. Its based on a kawasaki quad with a weird name that I can't remember, has front discs even. I'll probably just keep the front suspension and steering, rear axle and all the wheels, and bin the rest as its super grot. Plan is to make a simple two seater for the wife n kid to blast round in. Probably 13hp lifan with cvt set up or something. It has a 2 or 300cc honda atv engine on it, chain drive with low range, if anyone's interested? Regards, VG.6 points
-
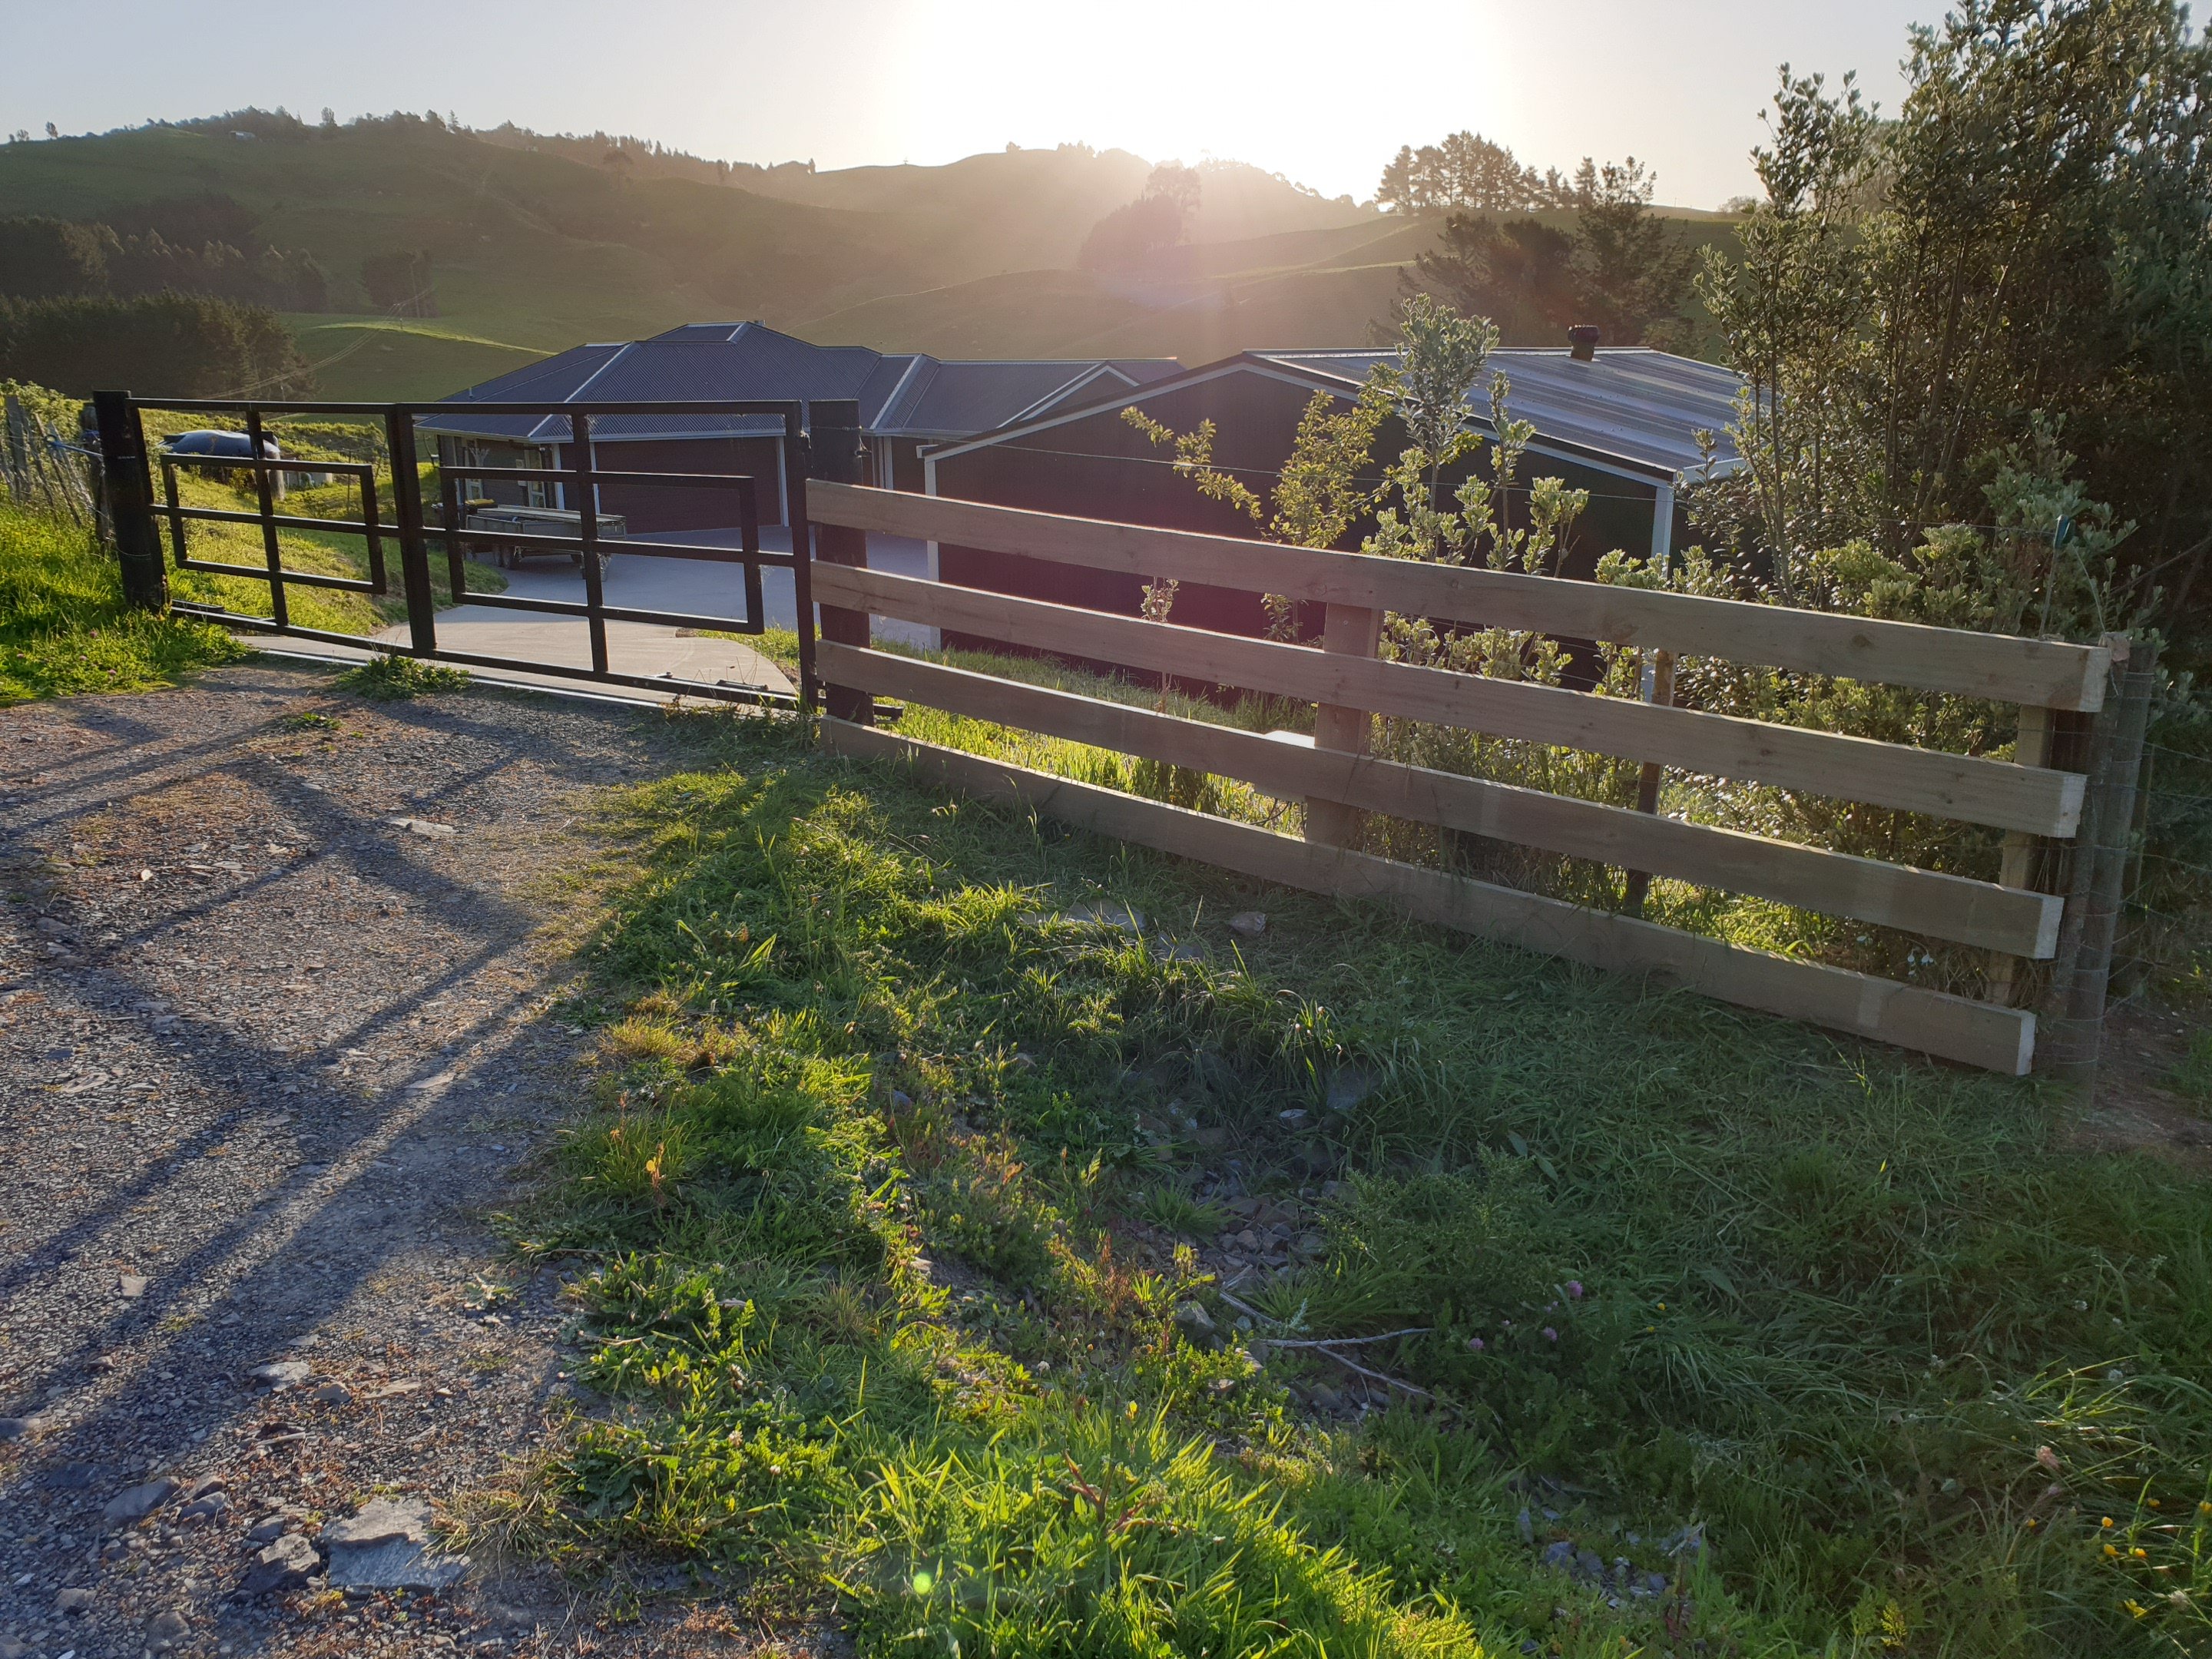
I'm not in love with this fence, but it's a million times better than what was there. Hopefully when painted black, it'll blend in better? Hard to see, but there's a hot wire on top to stop cows eating my trees!!! Those trees were all planted on the same day about 4 years ago, the ones the cows can't reach are 3m tall, the ones they can reach are 1m high bonsai trees...fucken cows!!!
5 points
-
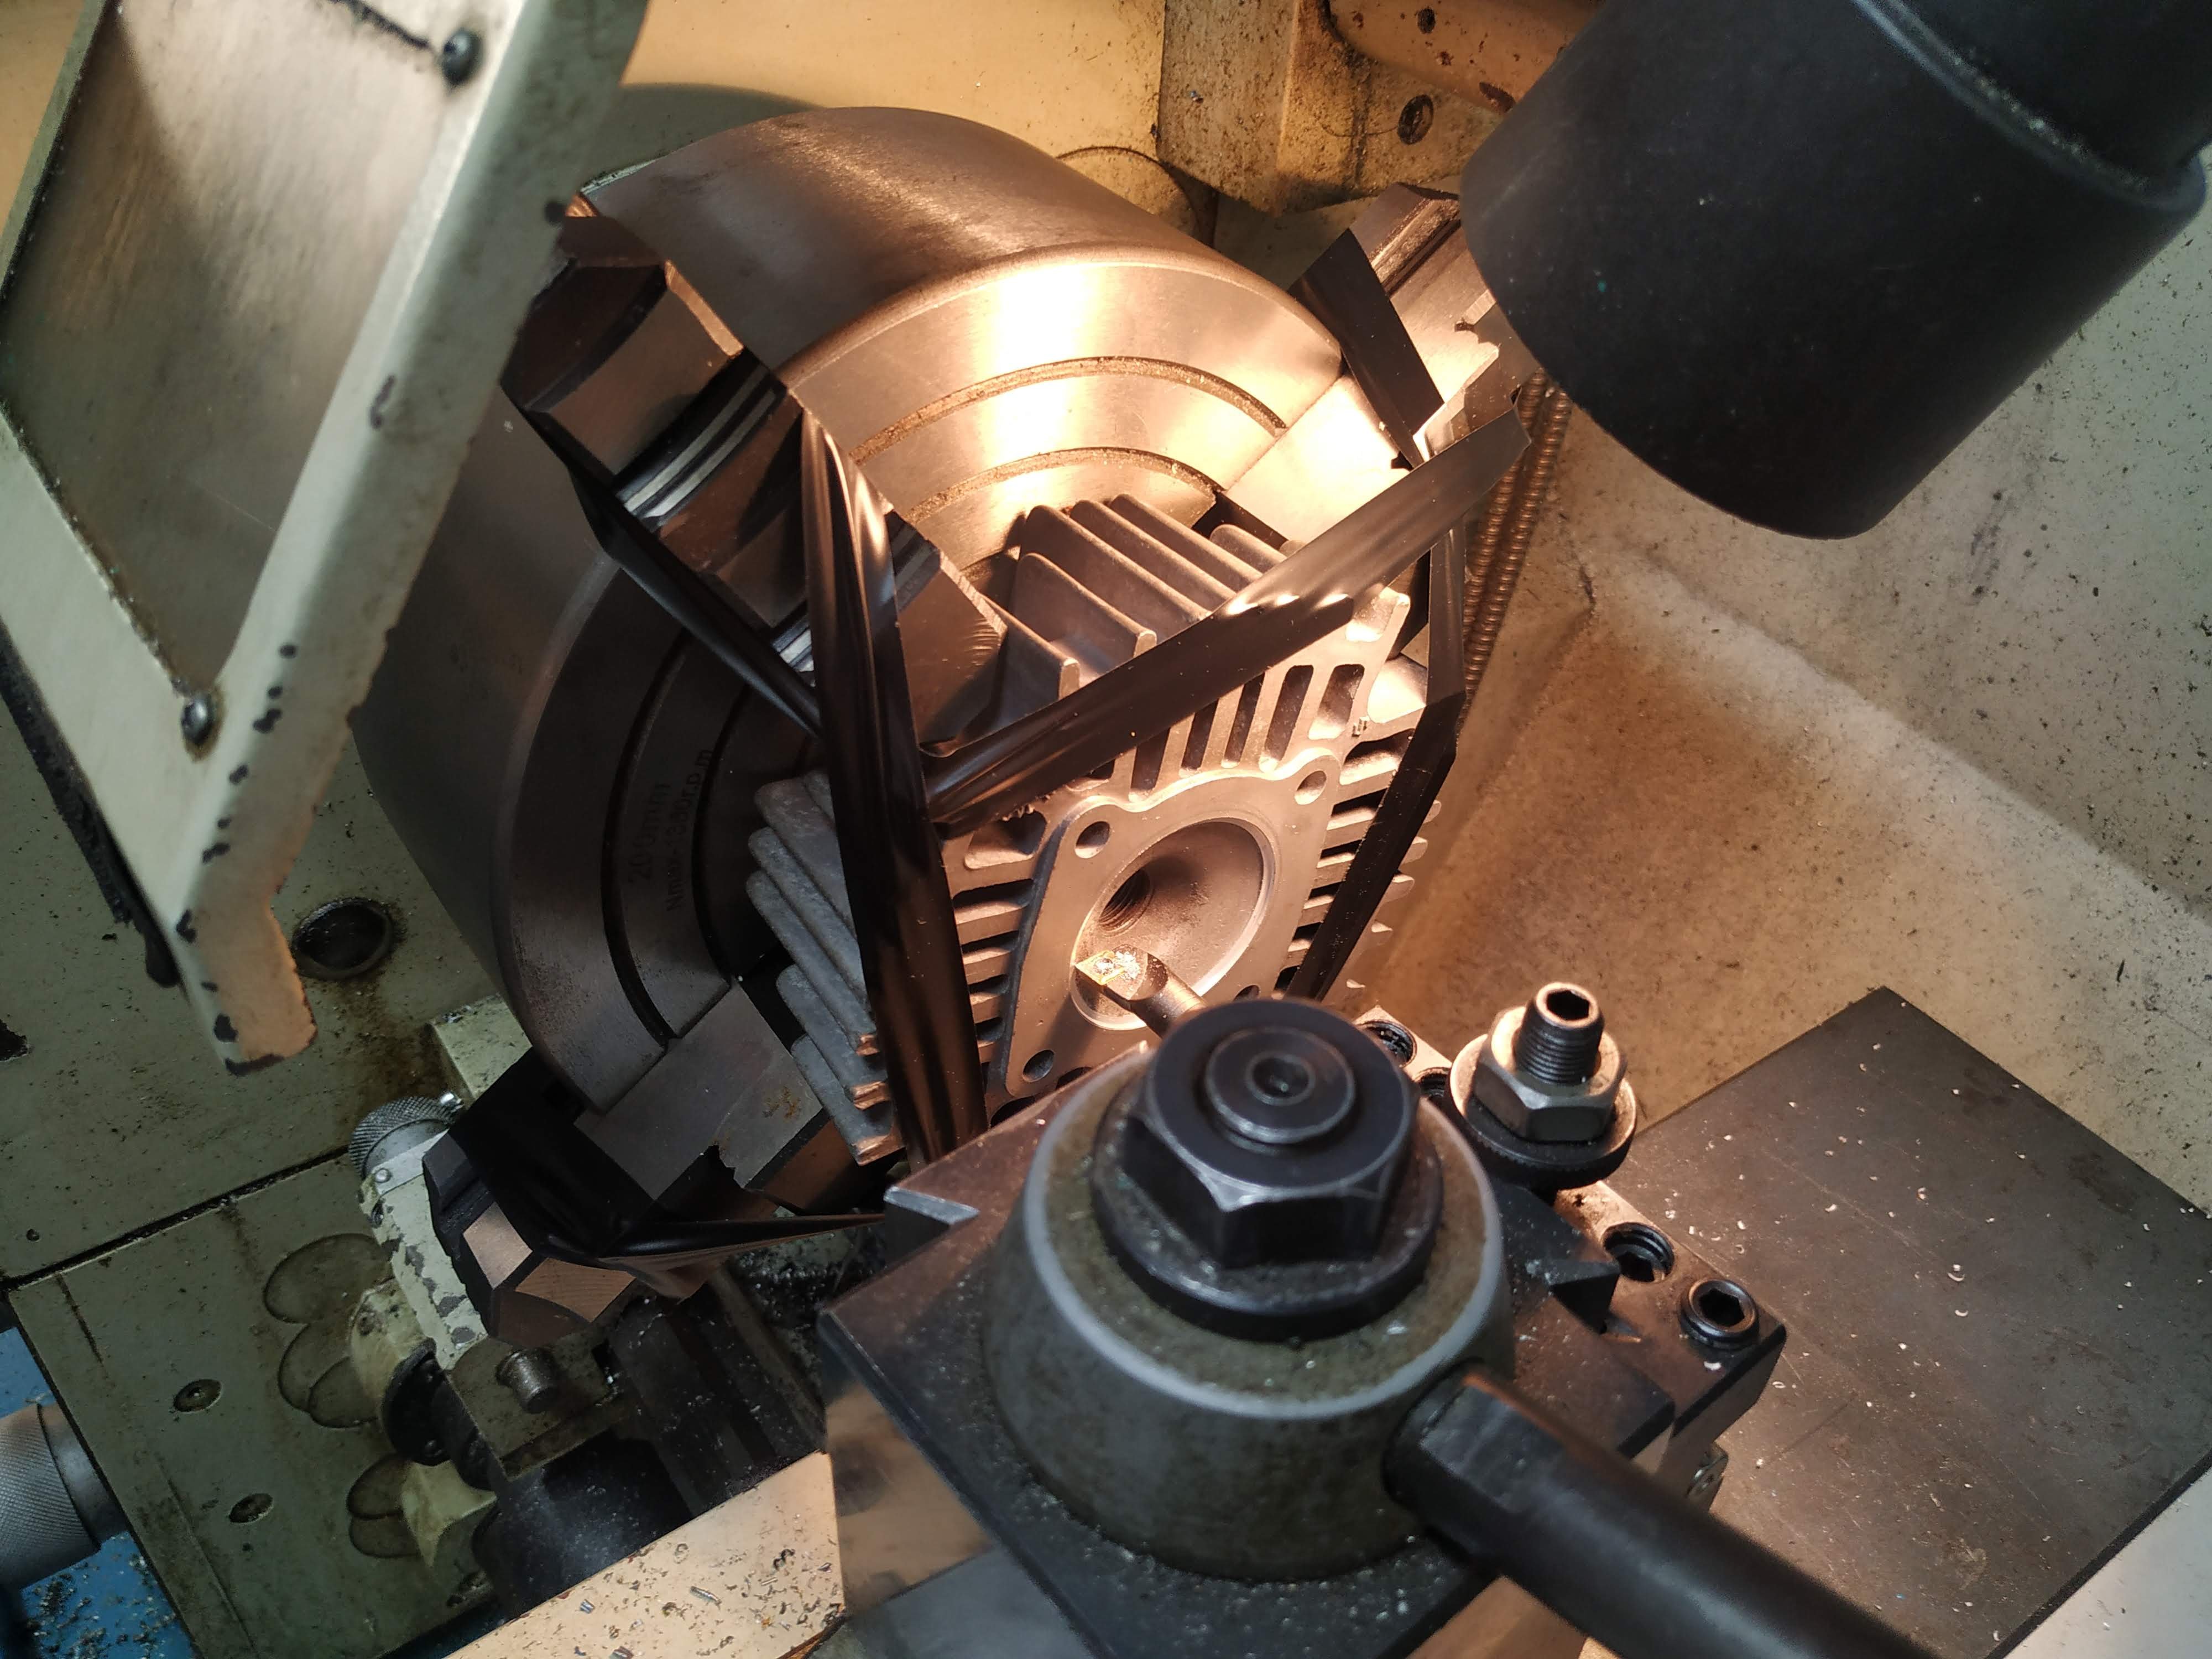
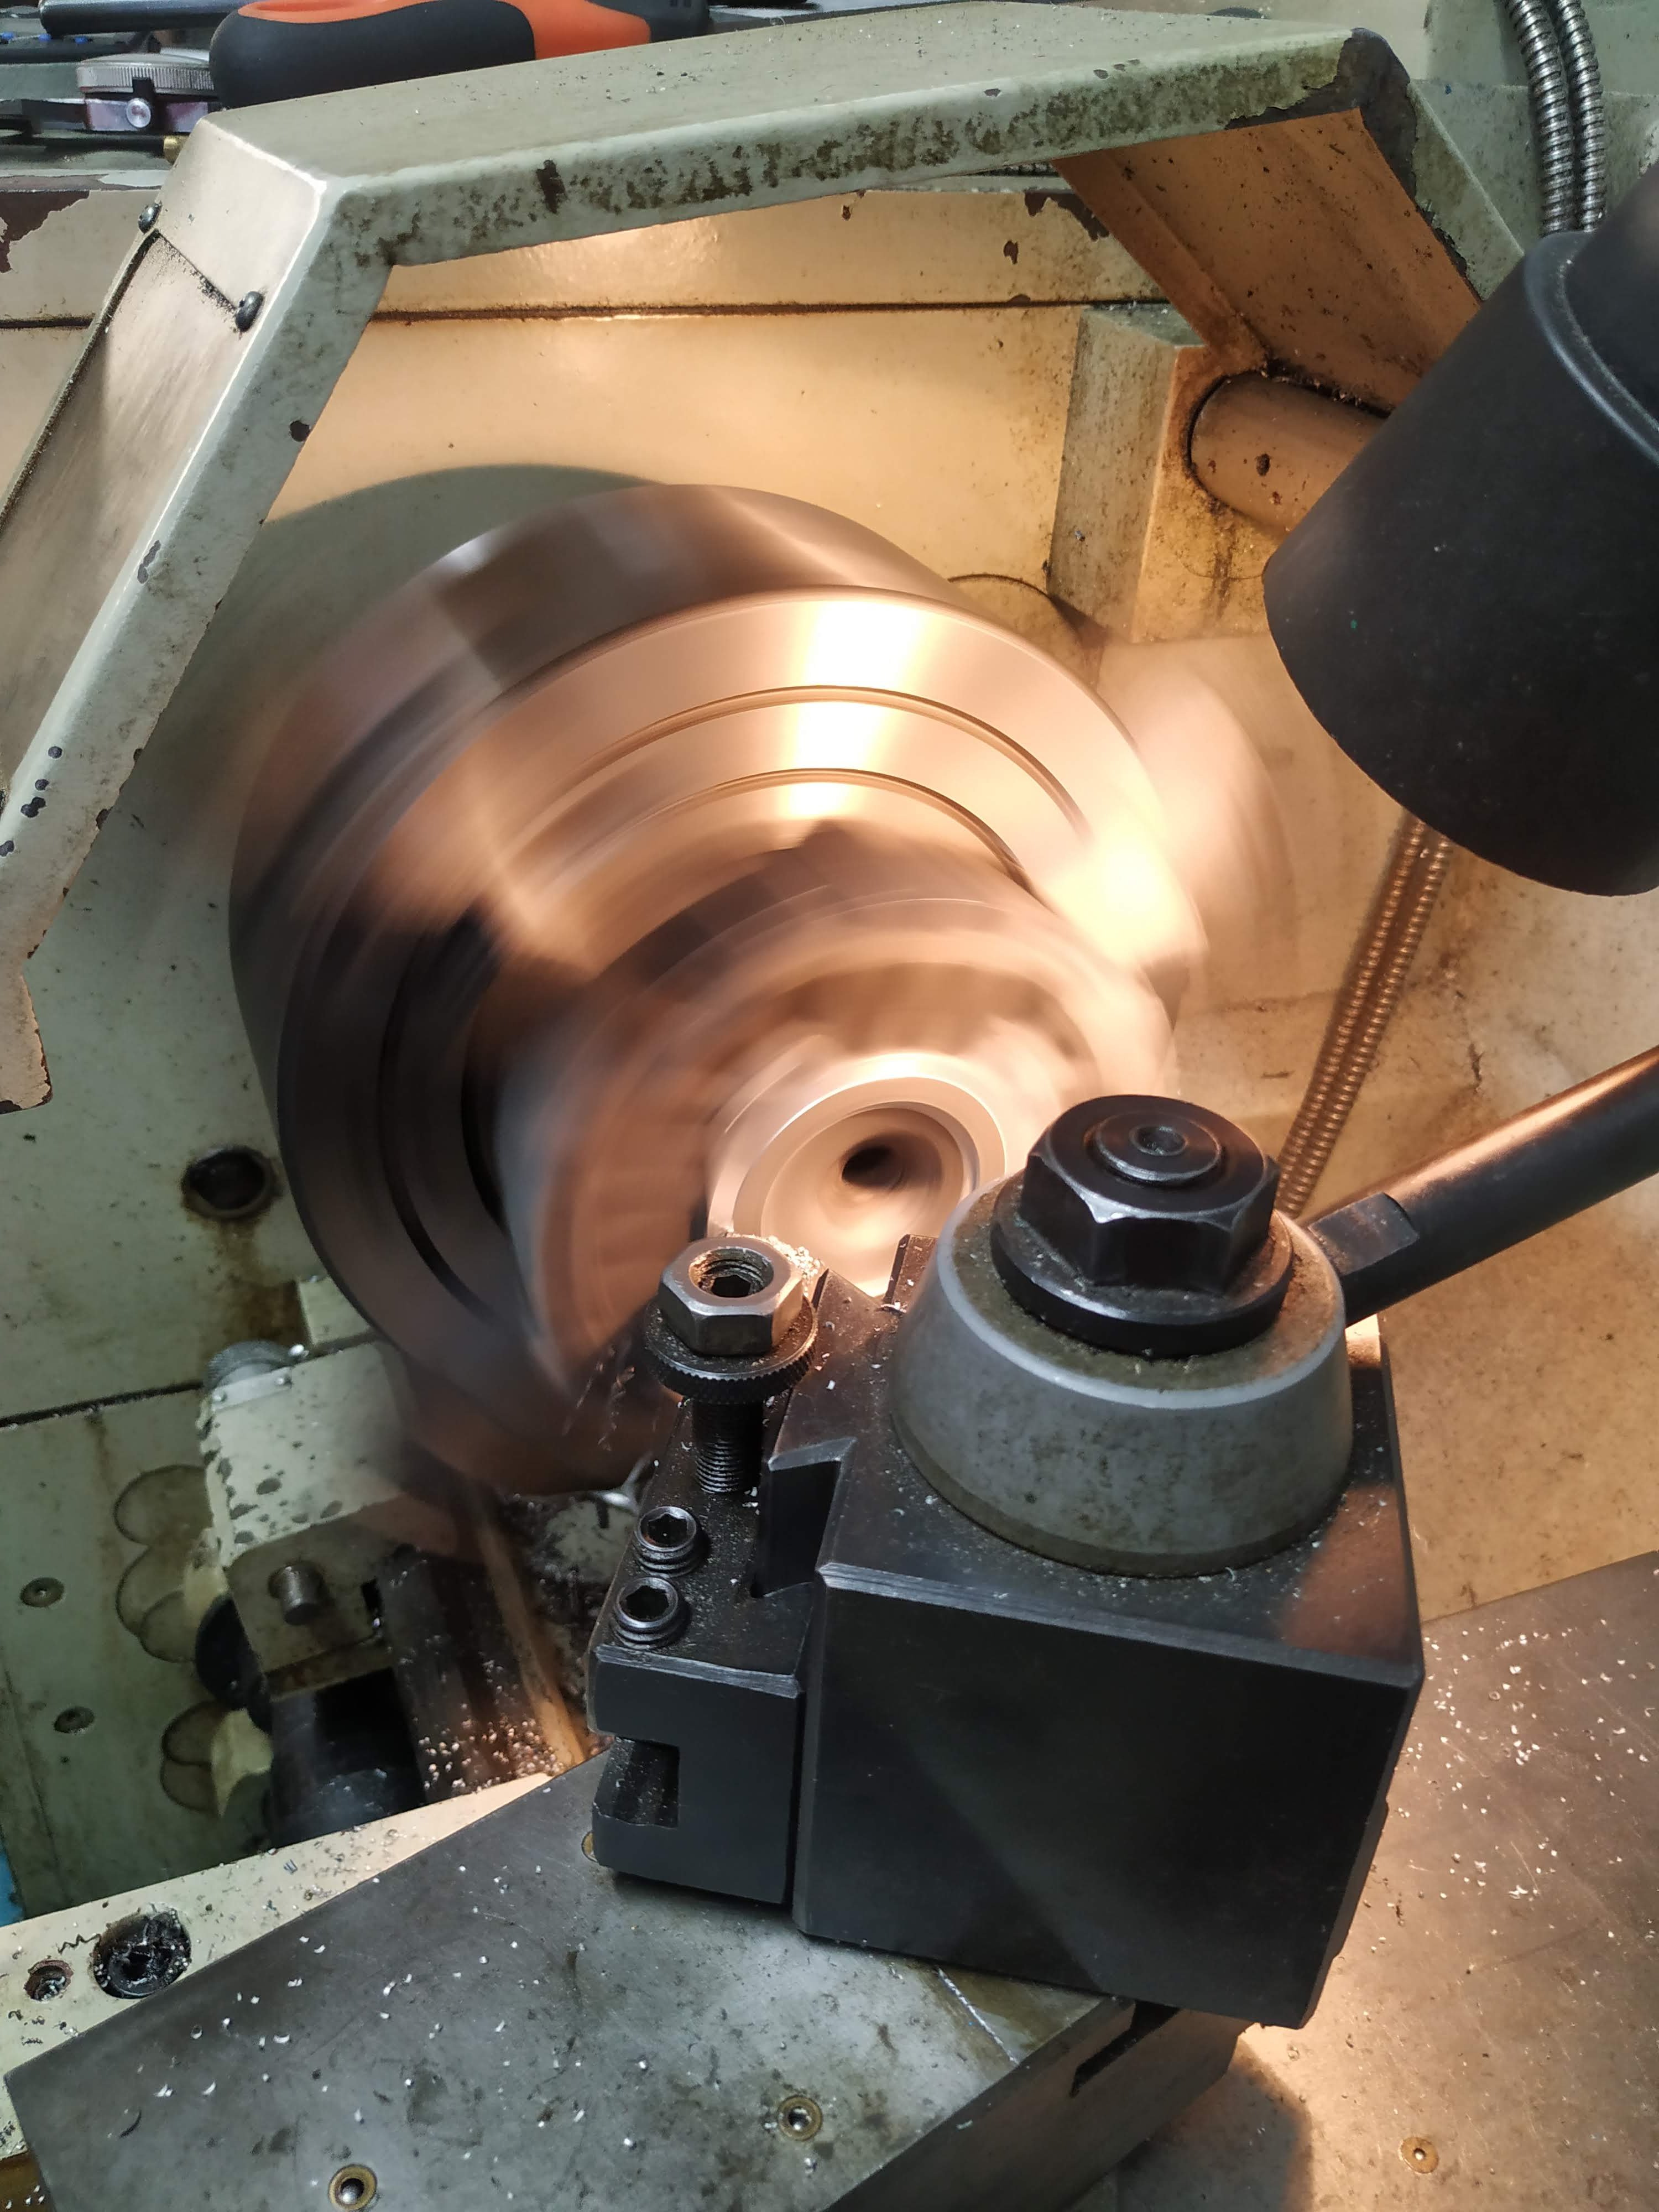
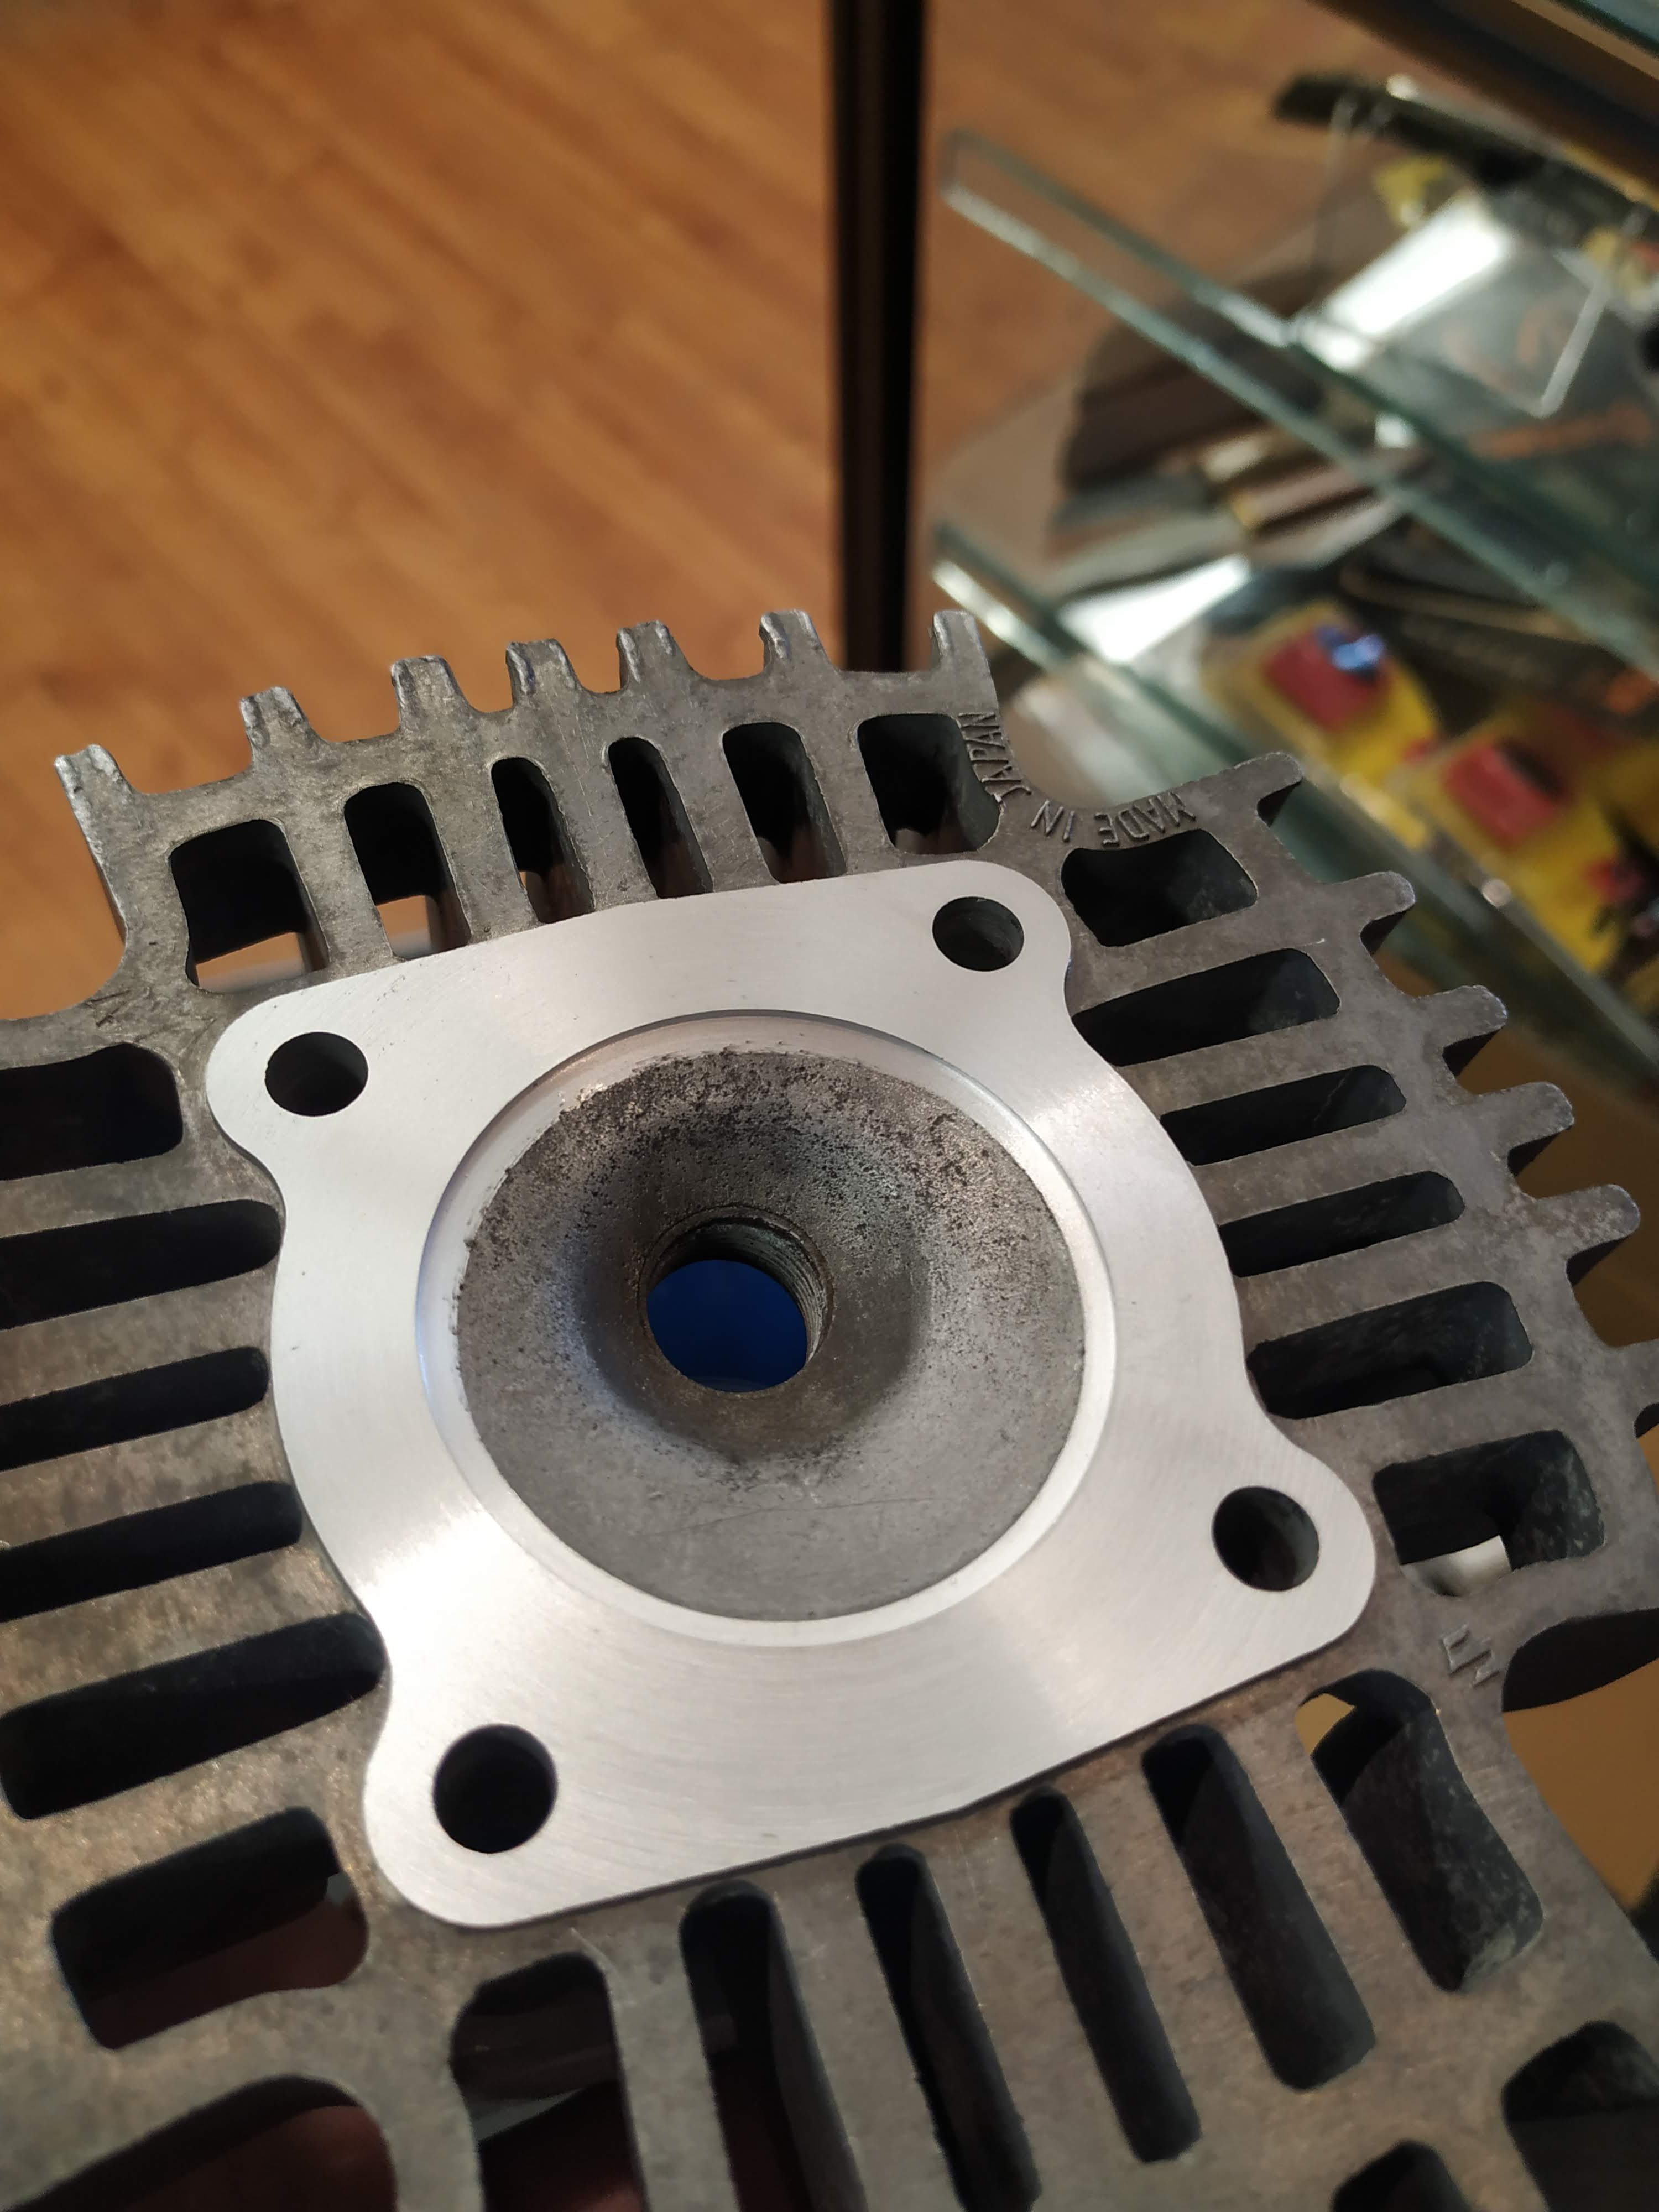
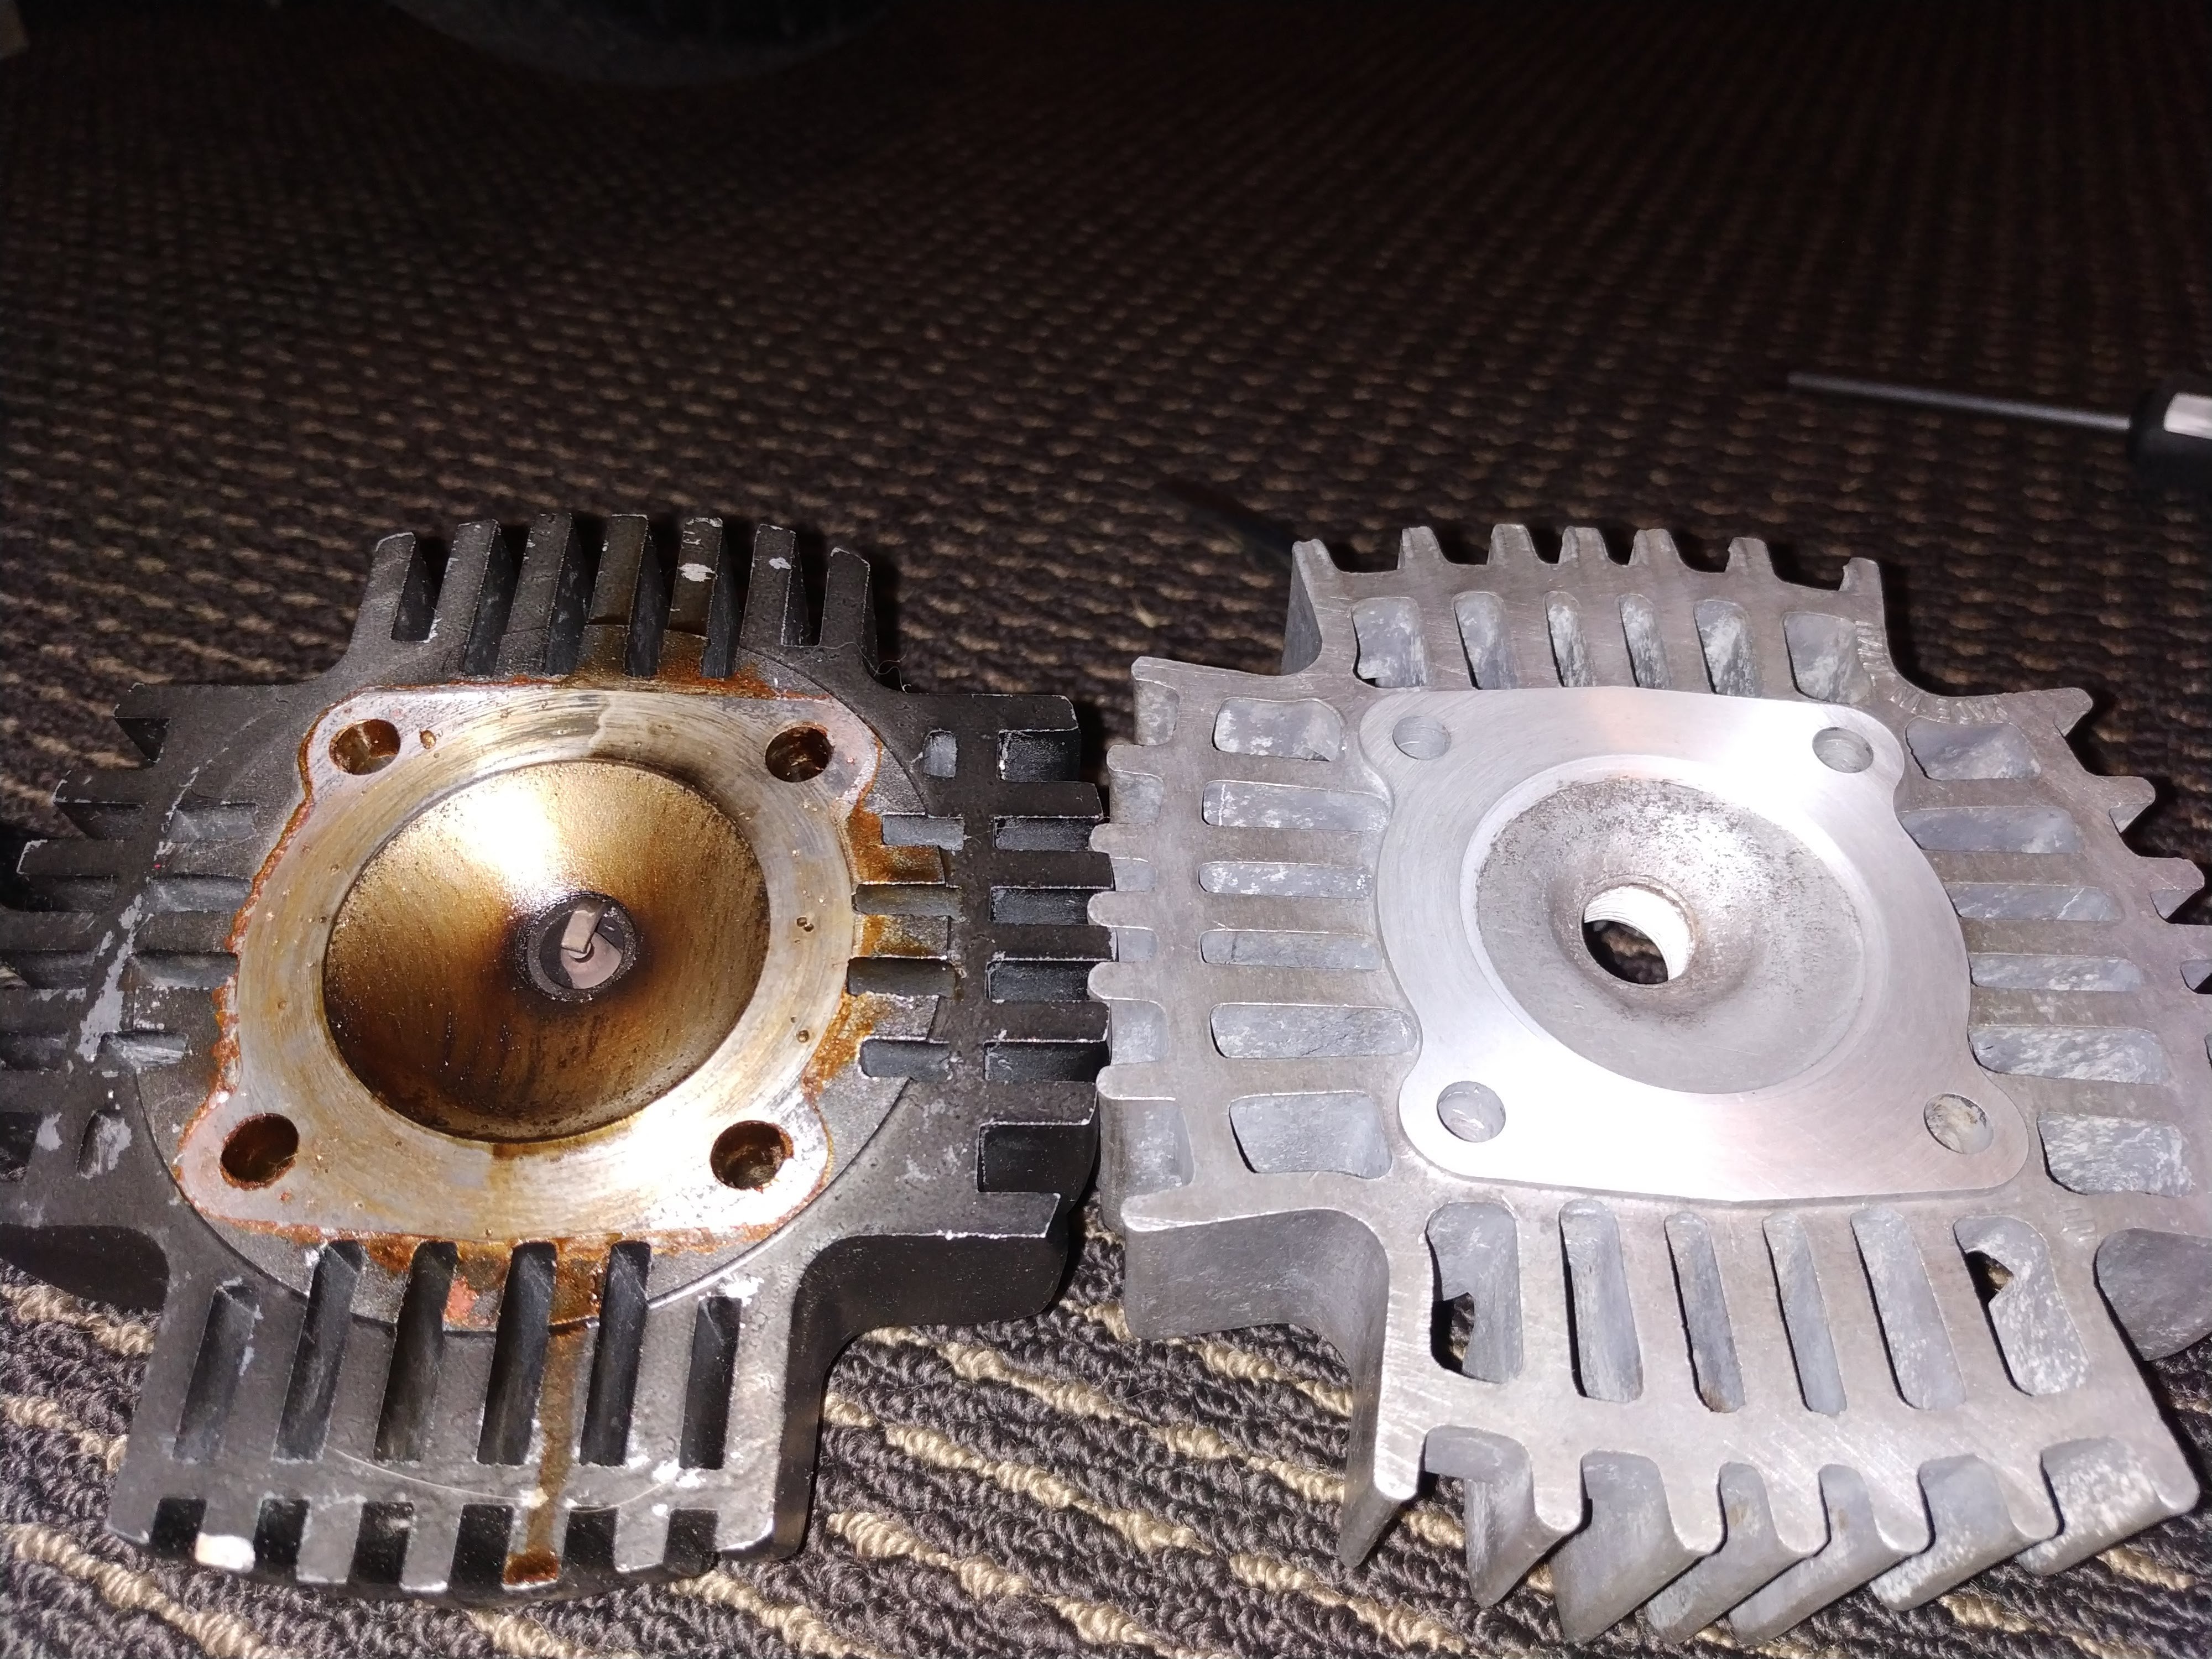
Back to the engine, 120psi-ish and zero acceleration in fifth or on any incline wasn't going to cut it!! Soo back to the lathe!! That's the factory 41mm bore head, added a 2mm squish band to take it out to the 45mm it needed to be to suit the cylinder and also took .5mm off the face for luck! Can see just how much deeper the aftermarket finned soup bowel is! And the plug after pesting about in Auckland, looking a touch rich if anything. So added another .45mm base gasket, .4mm head gasket and ended up at .86mm squish with the refreshed factory head fitted, looking for some .2 copper sheet to make another head gasket out of to gain just a little bit more nang. Much better! And I think it would have come up a bit higher if I could have got the rubber push in fitting to seal better in the plug hole. Drastic improvement to power, shift at the right time to keep it on pipe and it will pull to the top of fifth now! BUT now that it has compression it wants a lot more fuel!! Have to order some pilot jets from MikuniOZ for it as once warmed up it is running HOT and has the worst lean hang I've ever come across Suzuki used a non adjustable version of the Mikuni VM16 so there's no screw to fiddle with to try and make it happier in the mean time, so a little A50 waits again as I've put too much into this thing just to melt it down in the quest to pest! Oh and as it turns out, having more than 6 and 8 or so psi in the tyres really improves acceleration... Who'd of figured... Think this post has the engine work pretty much up to date, until the bits I ordered yesterday arrive in NZ at least So here's a pic of @Archetype hard at work transforming the whole look of the bike
5 points
-
Oh yeah, thanks for completing the entry form with your wives/girlfriends/mums phone numbers, ooooohhh yeaaaaah4 points
-
After selling my Mk1 2 door, I brought a 1995 WRX Sti type Ra because who doesn't lust after rally spec cars. Hell of blast, but I want to keep the km's down as I see it appreciating in the future. I needed something that milage or a few shopping market dents wouldn't worry me too much. Found this on fb down in the south island.
4 points
-
Did some churbro related stuff. Turns out the OEM dump pipe heads off into the chassis area which probably wont work, so I need to make a dump pipe. Probably not a bad thing as then I can get the outlet pointing in a good direction and have a pretty straight exhaust. The internet say anything less than 3" all the way is for losers and I despite what my wife says I aint no fukken loser. Two 50mm pipes into each inlet, should be enough to feed the beast. Nuggety wee intercooler, possibly could have gone wider but it would have made the plumbing a bit harder. A freakishly long inlet pipe. Probably need something to scrub the insides out from welding slag, I dont imagine sucking it all into the engine would provide superior results. But it arrives at a convenient place... That outlet from the turbs is a 45mm pipe, the intercooler and everything else is 63mm/2.5". I can flare it out to 63mm if needed as I have a thing suitable but maybe there is a suitable 45 deg joiner/reducer? Fuck knows will have to have a google. Edit; I have never done this before, tell me if you see any dumbfuck.4 points
-
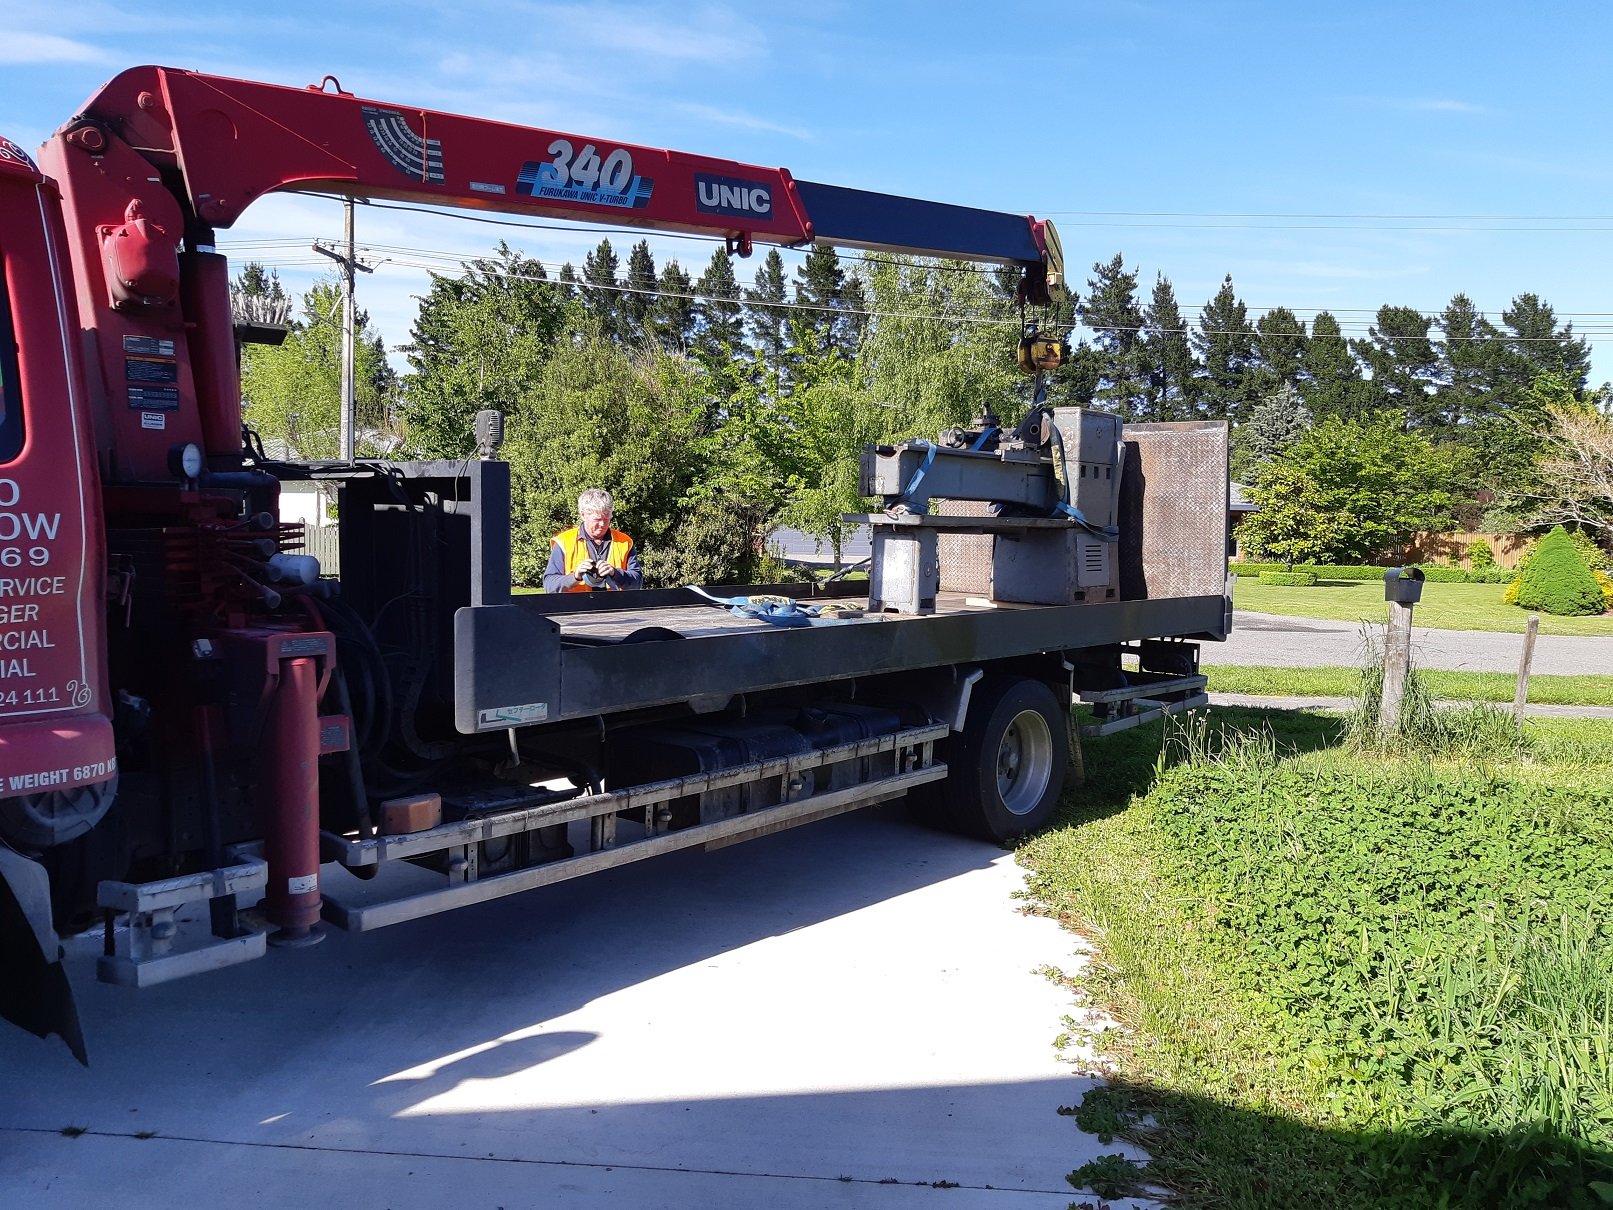
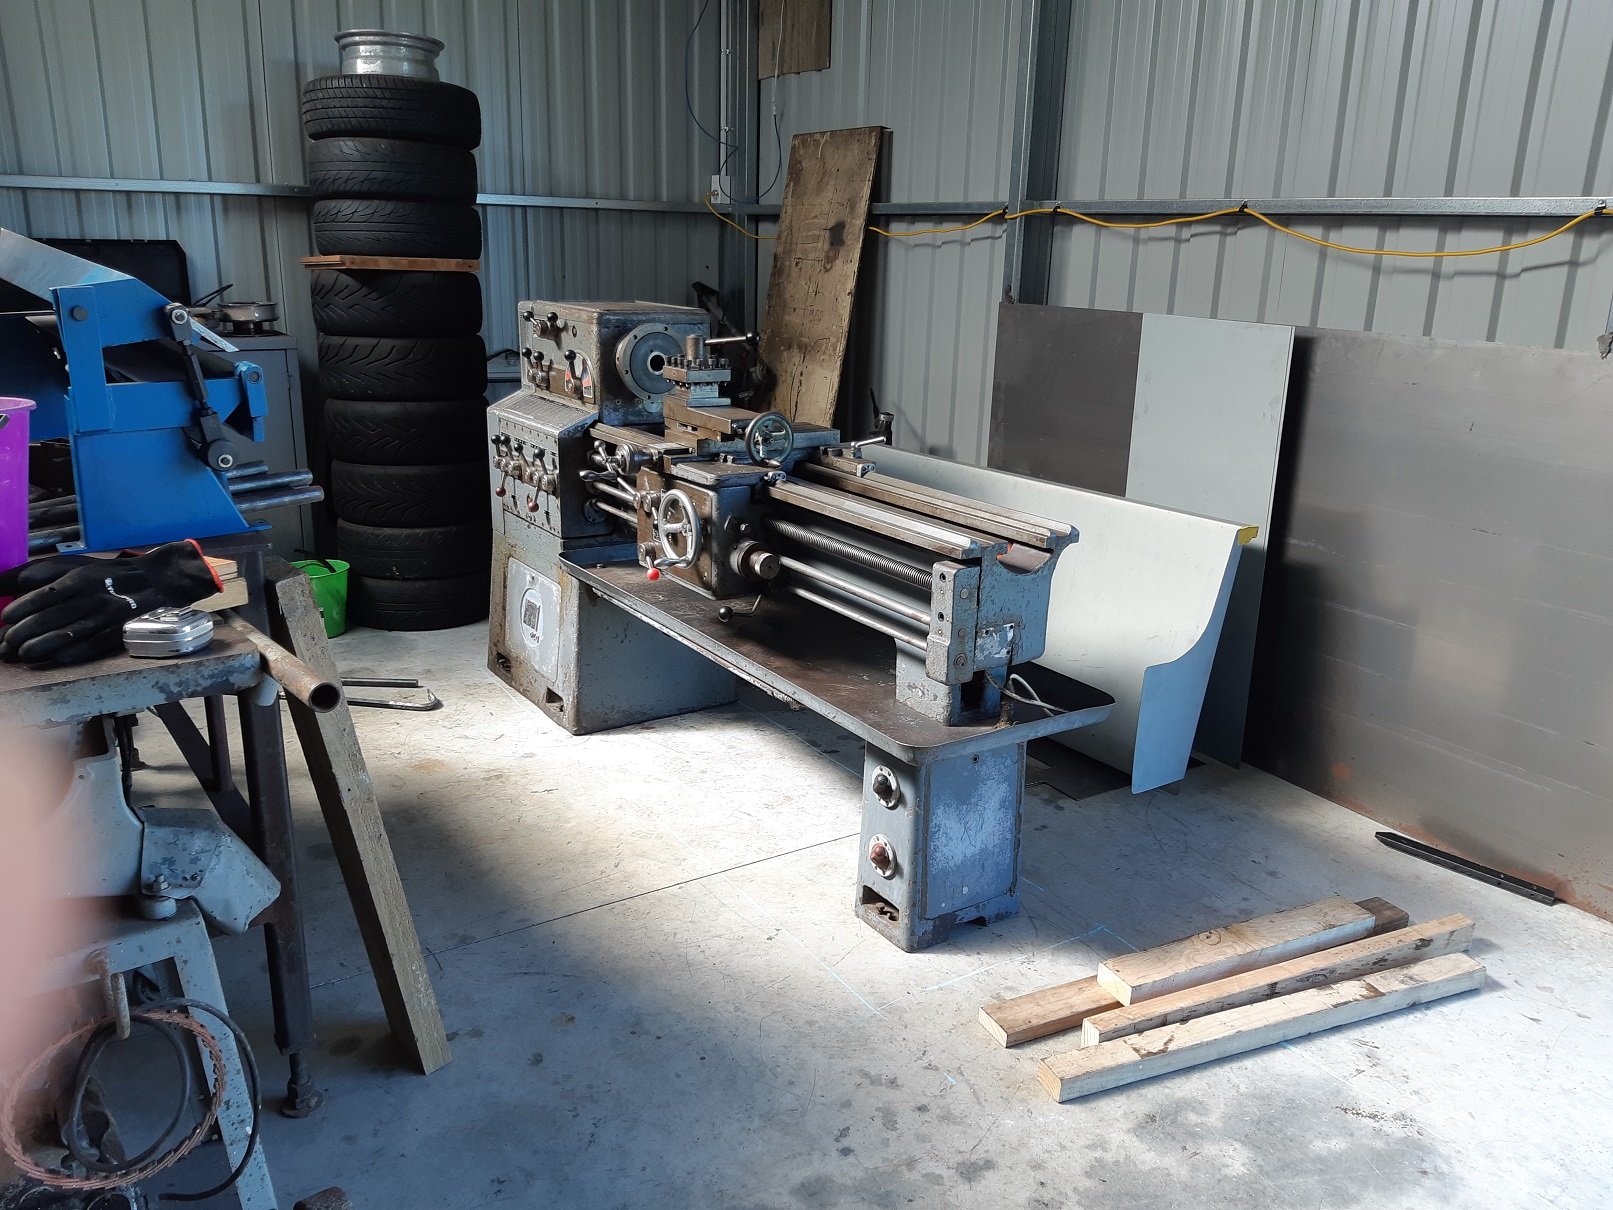
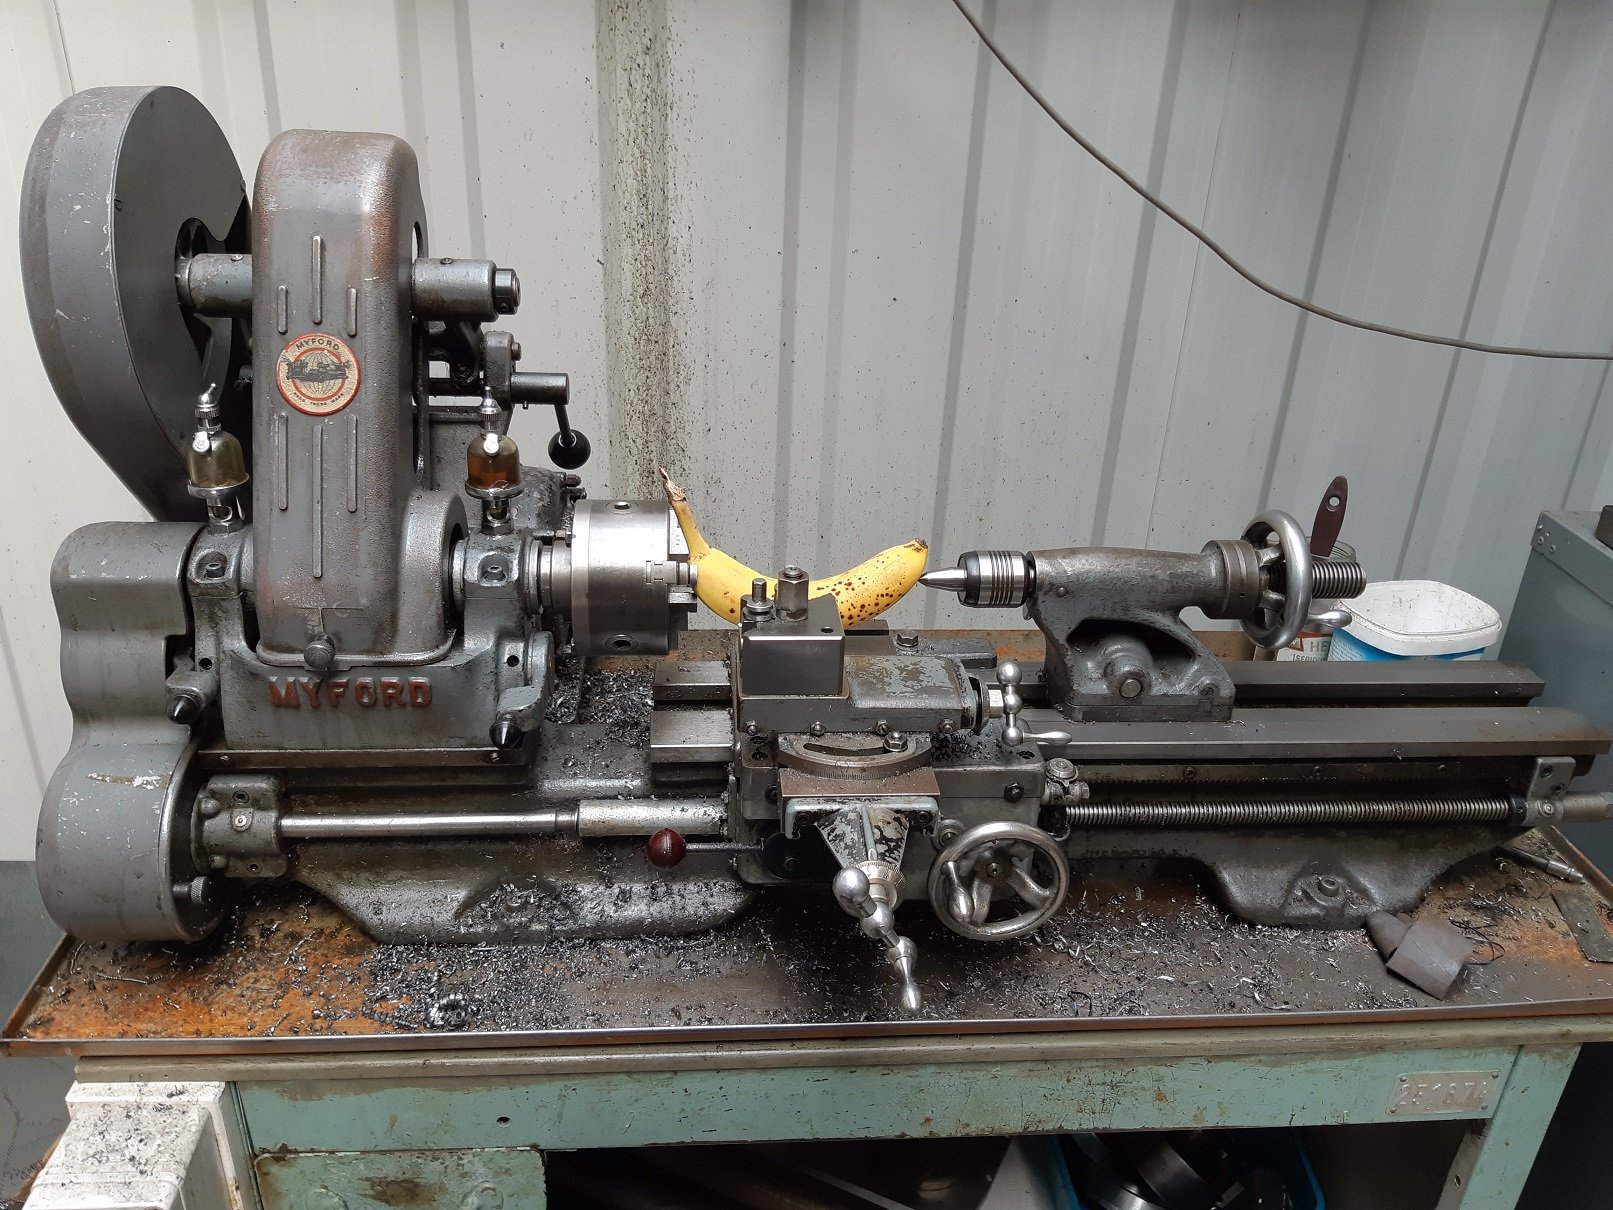
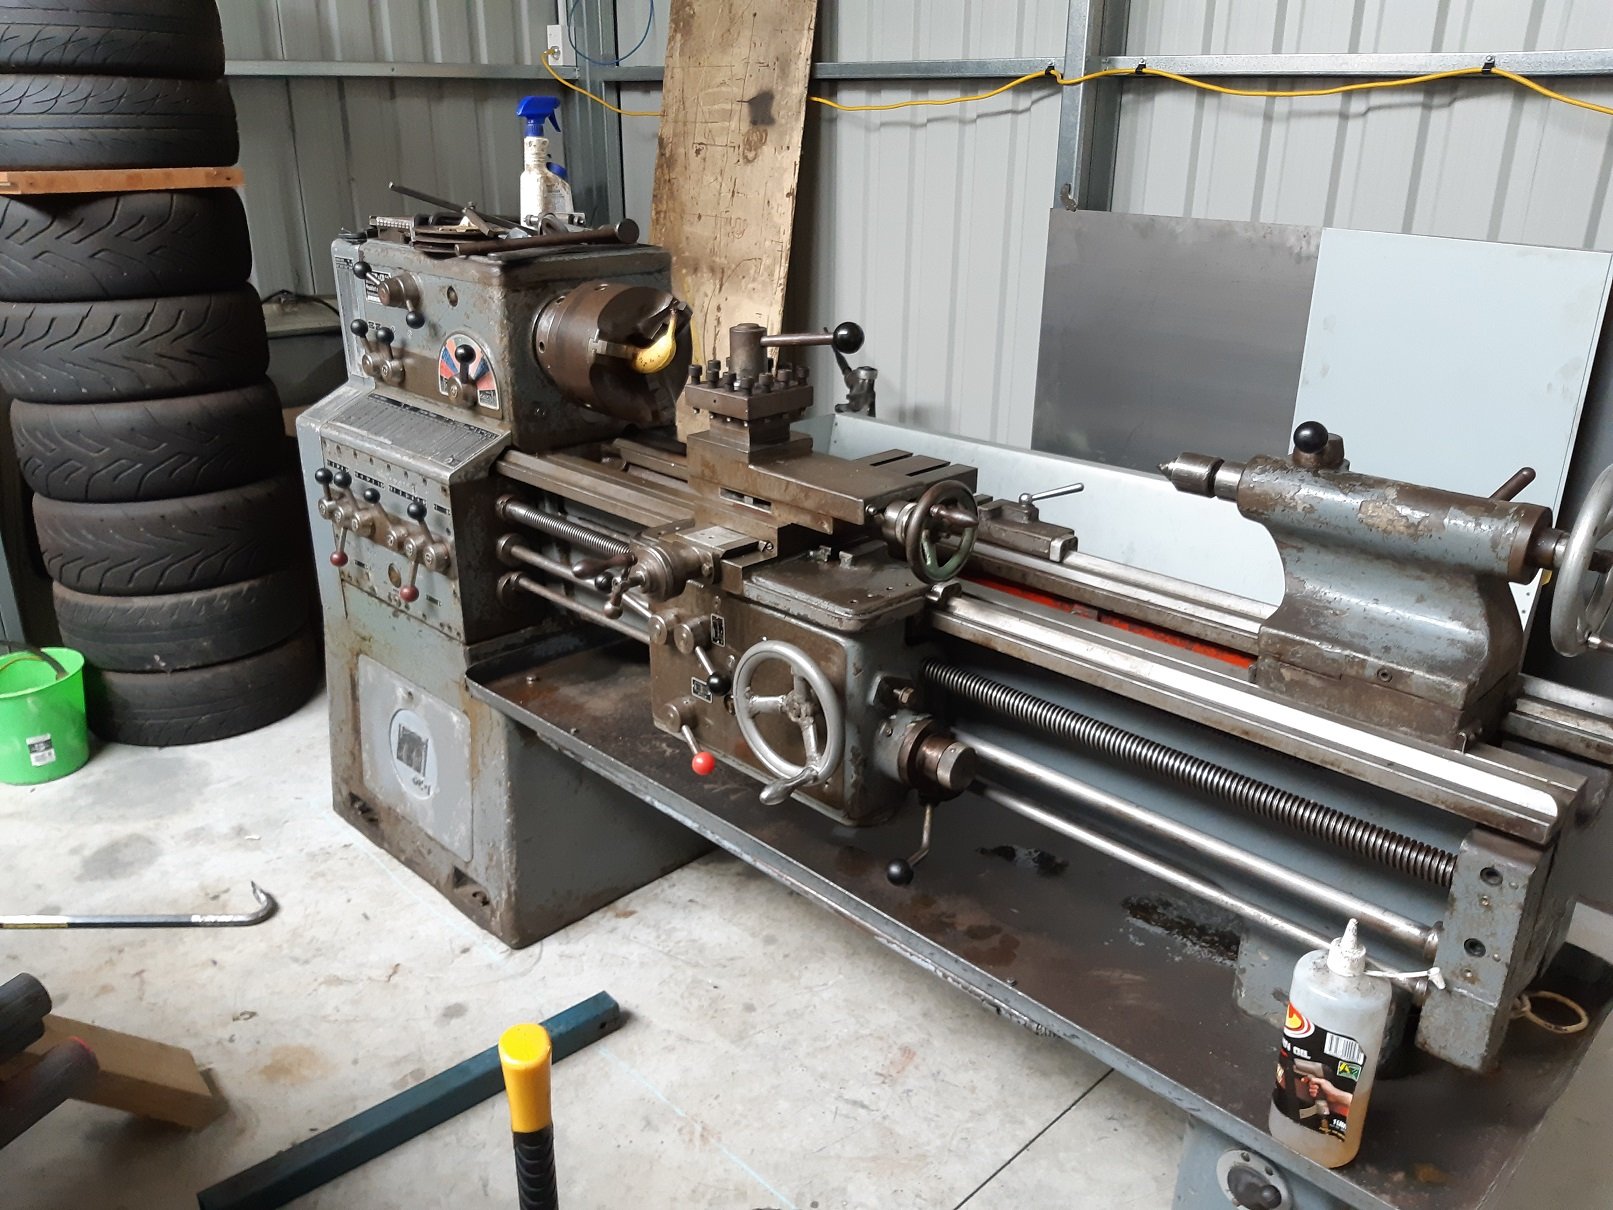
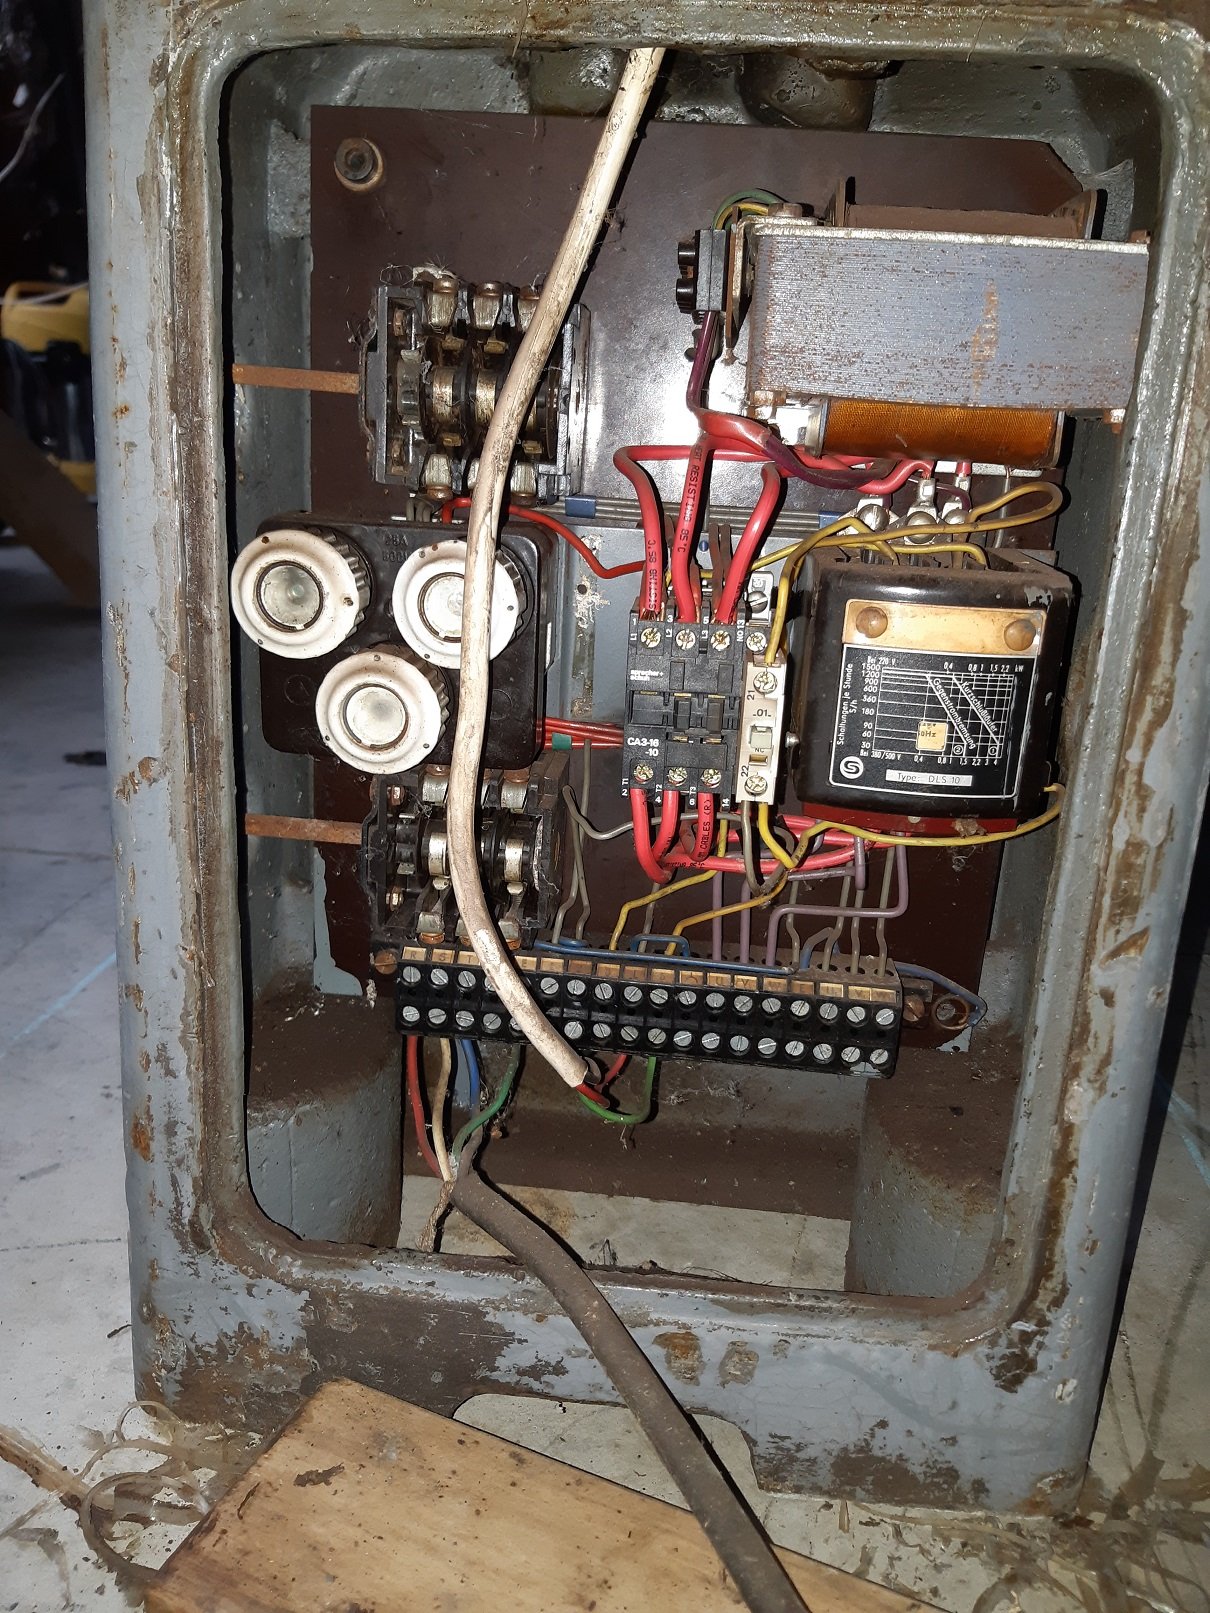
So I got this. It was so close to home, only 3.6km, I just had to click buy now. I got the local towie with his HIAB to pick it up and move it. It took ~1.5 hours. $120. We had to do a bit of manual handling because the truck could not get close enough and the crane boom was too high to fit in the garage door. At the pickup, the old fulla used/abused his engine crane to get it to the door. Then used the hiab to drag it over some bits of ply so it was close enough to lift. At my place, ideally he needed to park across my garage door.... but the driveway doesn't really let you do that. So we ended up with this compromise. My garage door is 3m, but the crane only barely could get under it. We got the headstock in, and placed it on some 25mm round bar. Then picked up the tailstock end and got it just in the door. Once it was in, I found it was pretty easy to roll on the bars. I took some size comparison photos to compare with the myford. And "What's behind the SCARY DOOR"? Buuuuuhhhh... Obviously it's 3 phase. It came with a motor, that was not installed, because he was going to install a different one. I'm going to see how I go with a 2.2HP single phase motor. I'll just wire it independently... But back to the scary door. It was sealed closed with some old as silicone. The black cable is the 3 phase feed. The white cable goes to two limit switches on two of the feed screws. The cabling to the motor comes out from behind this lot. The thing in the middle appears to be newer than everything else. As far as I can tell, it's an anti tamper breaker/switch, I believe the door presses down on the white bit when it's closed. That box to the right.... no fucking idea. Those three round things on the left... uuuh, fuses maybe?? There are two big rotary switches. Not sure what both do. I assume one makes the motor go. The other could be reverse maybe? They have no names, just 1 and 0. And a transformer. But why?? I've found fuck all documentation. I'm not even sure what the model is. They don't seem to have model numbers on their lathes. I suspect it might be a version of the M0 model.
3 points
-
Whoops will do now3 points
-
Hmmm, that'll make changing the tyre a pain... Perfect! But then the K50 cylinder came with this: And just to make tyre changes easy Dropped it 25mm, ended up with the swingarm level, which for some reason is pleasing to my eye on any bike3 points
-
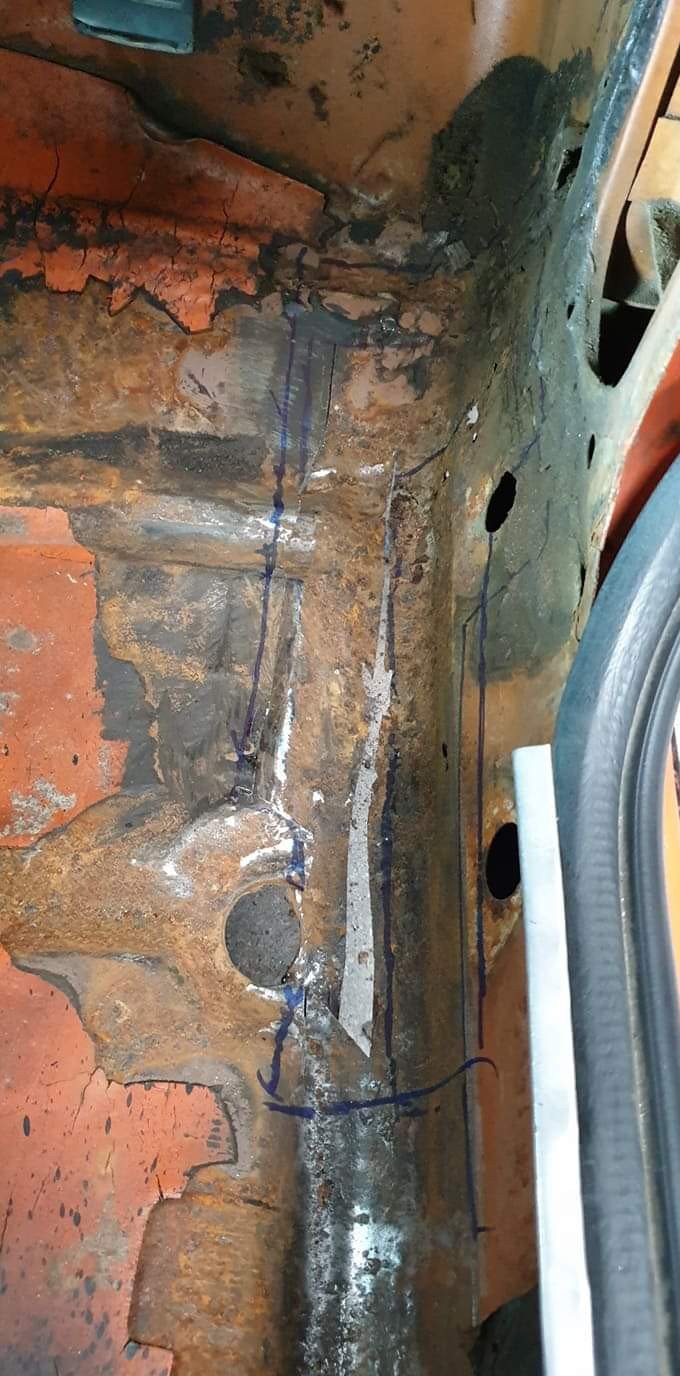
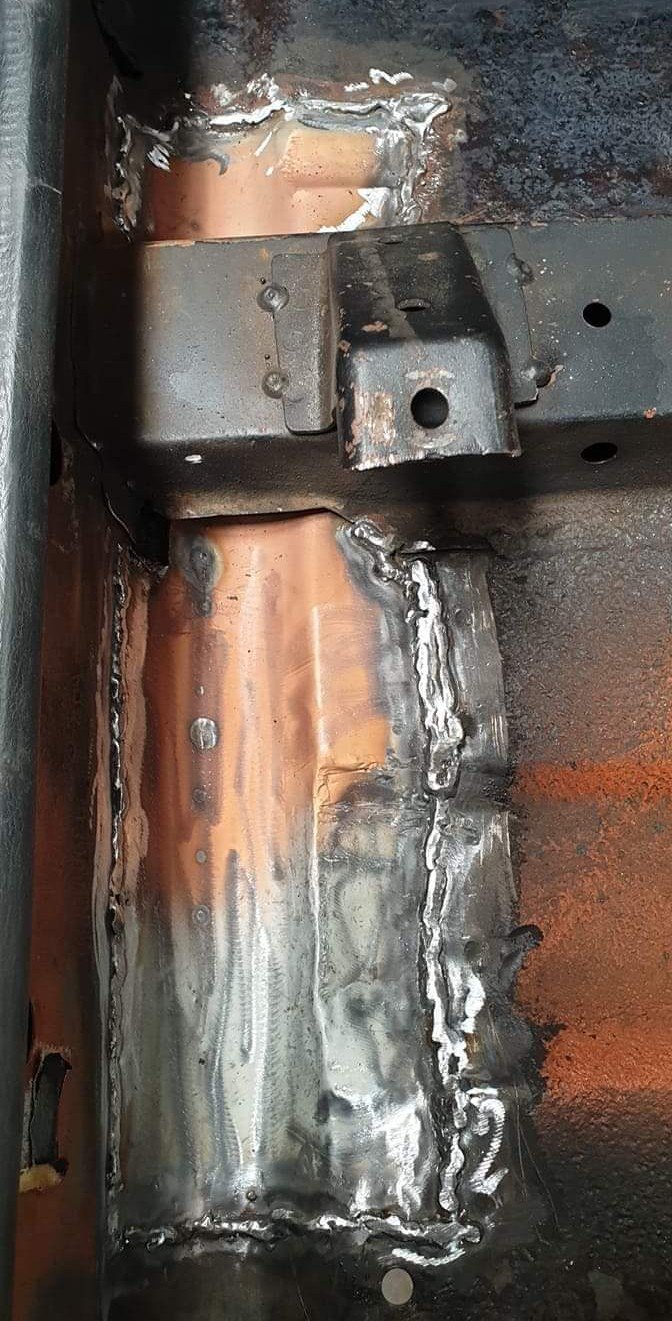
So after a few months of limited use due to winter weather, it was time for a new WOF. I was worried after all news about NZTA and with sweat running off my brow I took it to the AA testing station. Didn't take long to get called over to the pit. Three patches in the floor /sill had rust. No worries I'll send it to the panelbeater I thought. Then as I waited for it to go through the rest of the test, I heard the tester having trouble getting it into gear. Thought that was strange. Failed on the rust, one tyre a bit bald, surface rust on the brake booster. No problem. Jumped into it and I had trouble getting in gear. I dont live far from the testing station so felt I would make it. But there were major road works and Friday traffic was at a standstill. Then on the GI roundabout the clutch shat itself. Wouldn't go into any gear and traffic was too bad to start in gear. Pushed it into a car park and waited for my son to tow me. Done a few gearbox replacements on the old esky so thought no worries. Had a Friday night with the family out so ripped into it. Had lots of problems getting the gearbox out, ended almost dropping the engine out to get clearance. Different tunnel and rs2000 box! Release bearing lugs broken was the problem. Problem was I didn't know at the time it was a rs2000 box so had trouble getting the clutch and bearing. Finally sorted and back in. Off to the panelbeaters again for the floor repairs. Then got a great deal on some new tyres so got four. A few months passed then back to the testing station. Sweated, but passed. Yay.
3 points
-
It's been a good summer winter chugging all over the place. I'v noticed some bubbles here and there. The bonnet is of concern I'll never get another one. So lets look at some rust. A true feature of H330's rear seam wheel arch where the back joins on corner of a door bonnet full of filler. yay3 points
-
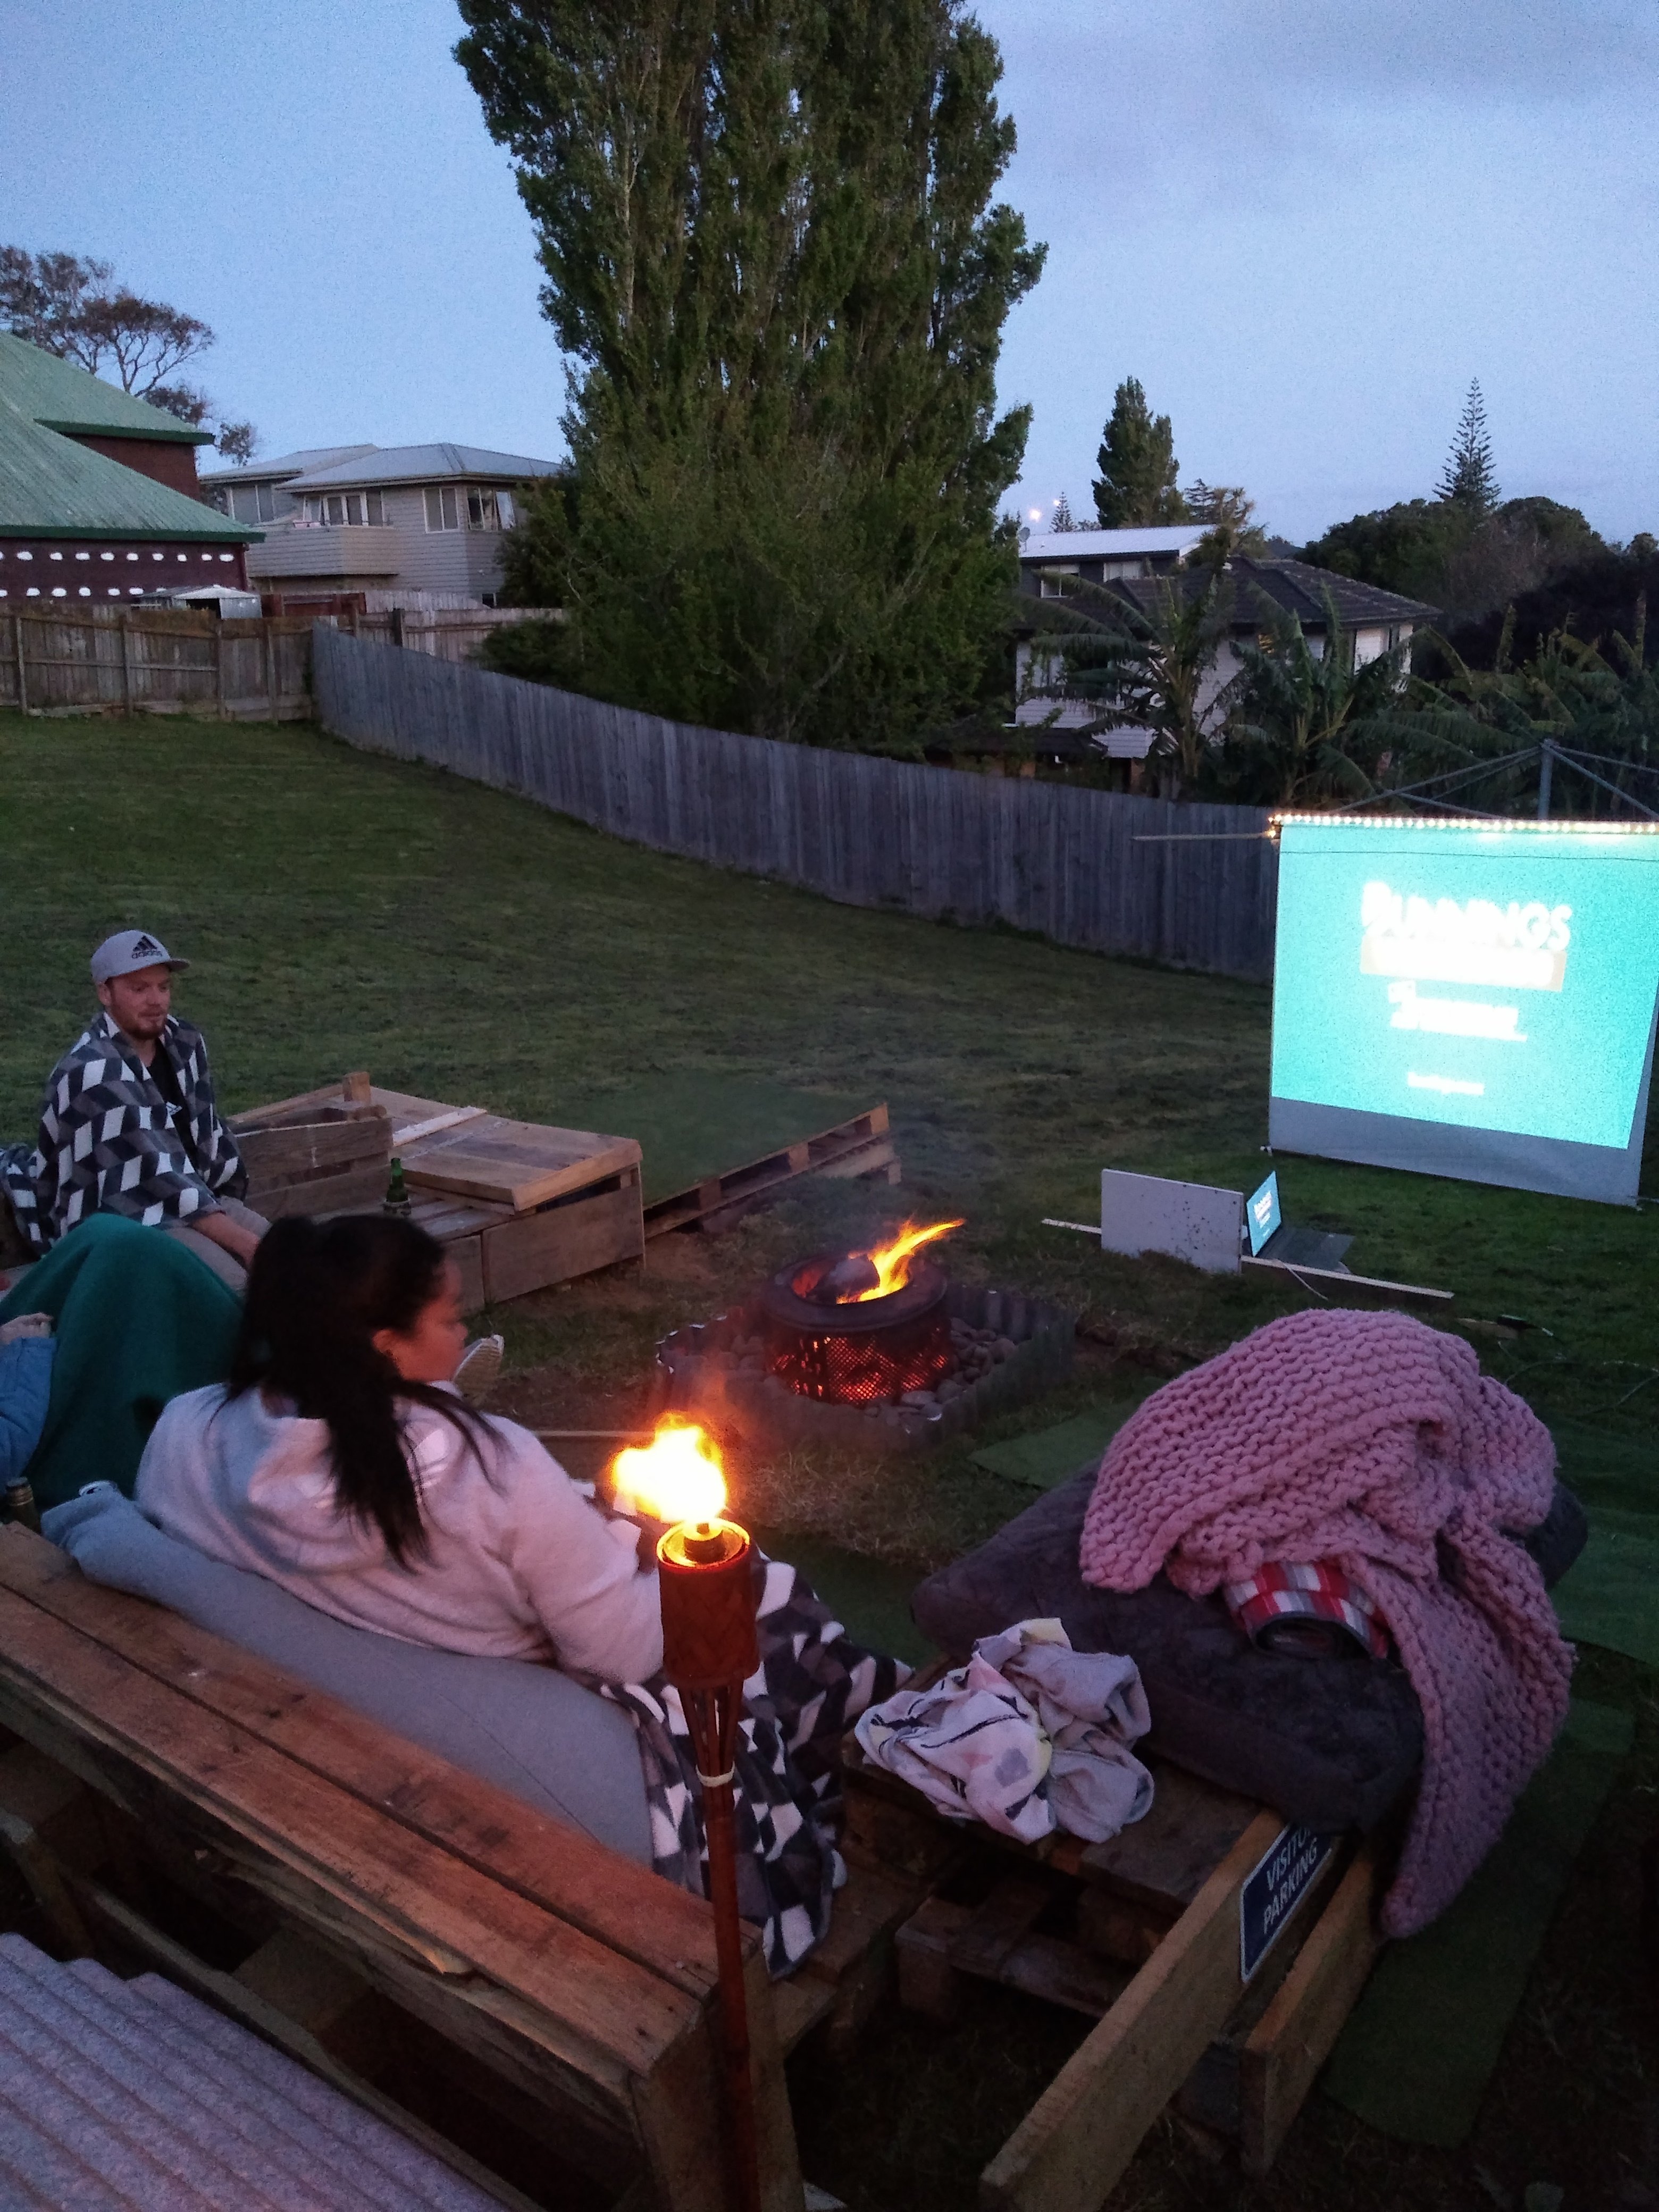
Last night's set up
3 points
-
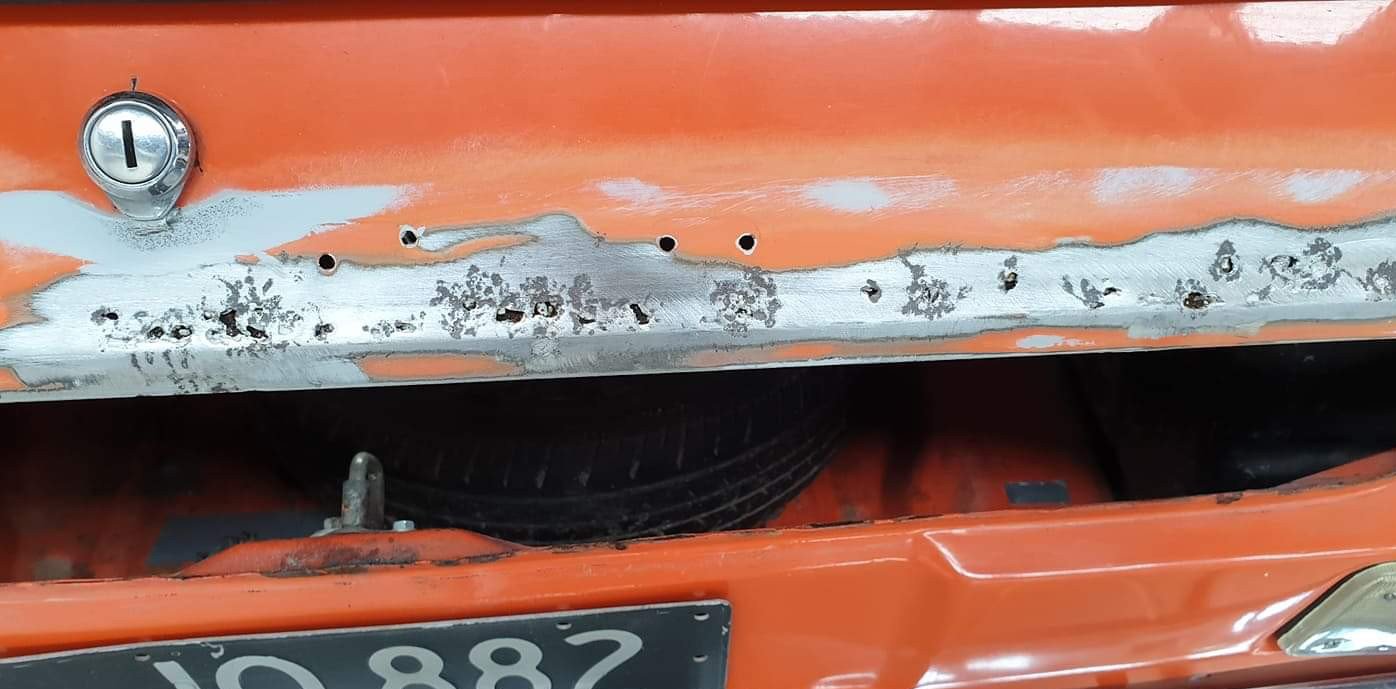
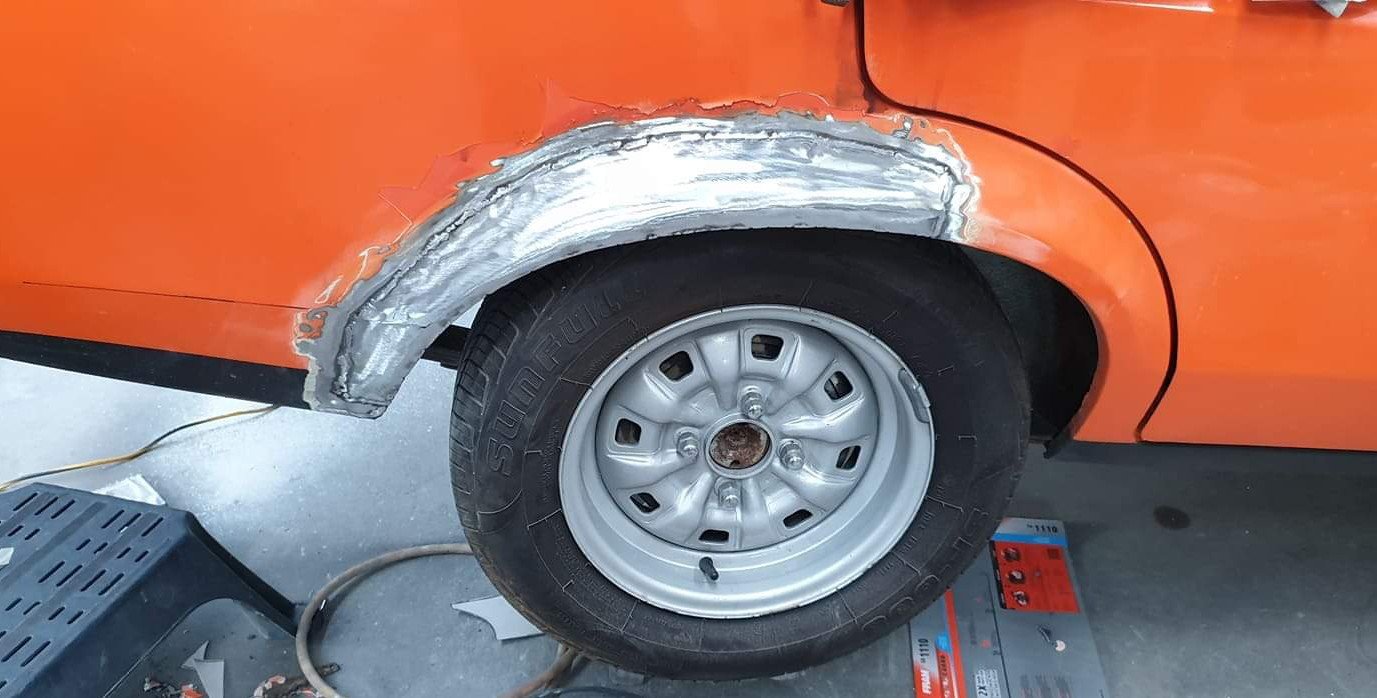
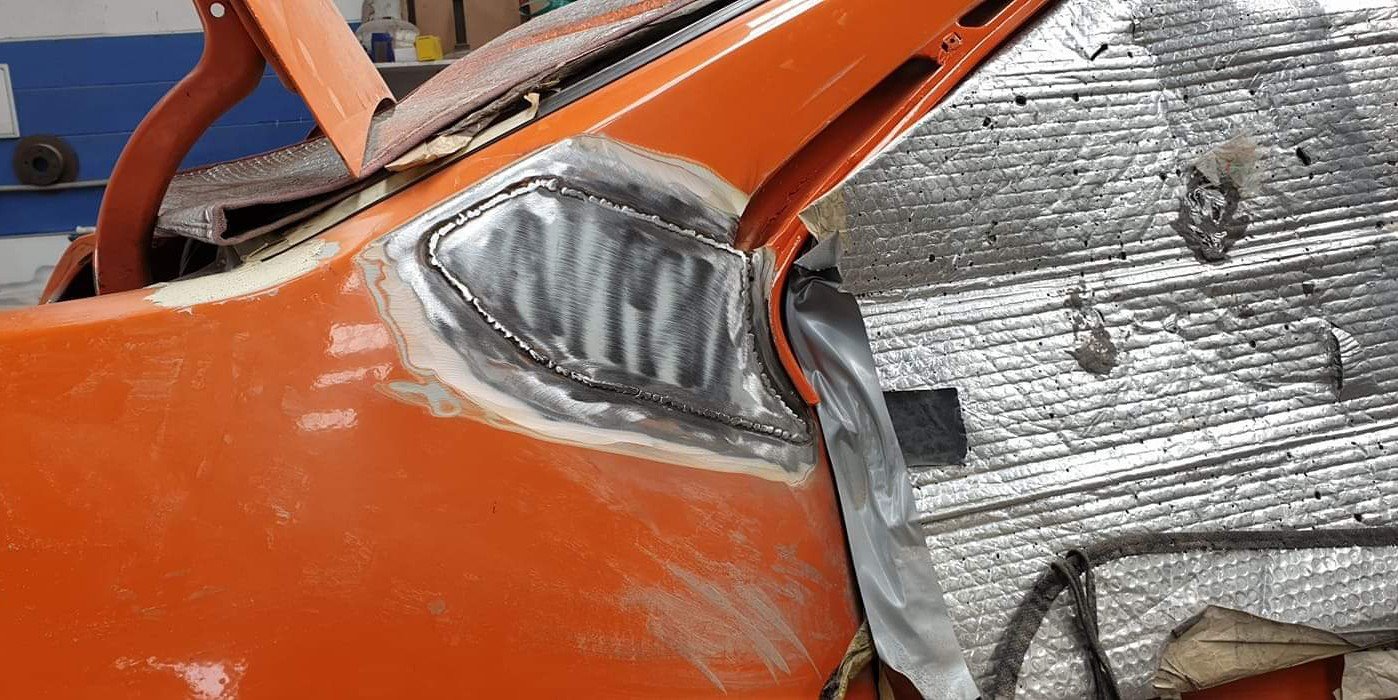
So the rust on the right hand side was bugging me. It's not something I can do, deep respect for panelbeaters and painters. So off it went. About as bad as I thought. Few weeks later it was back. Now to save for the other side.
2 points
-
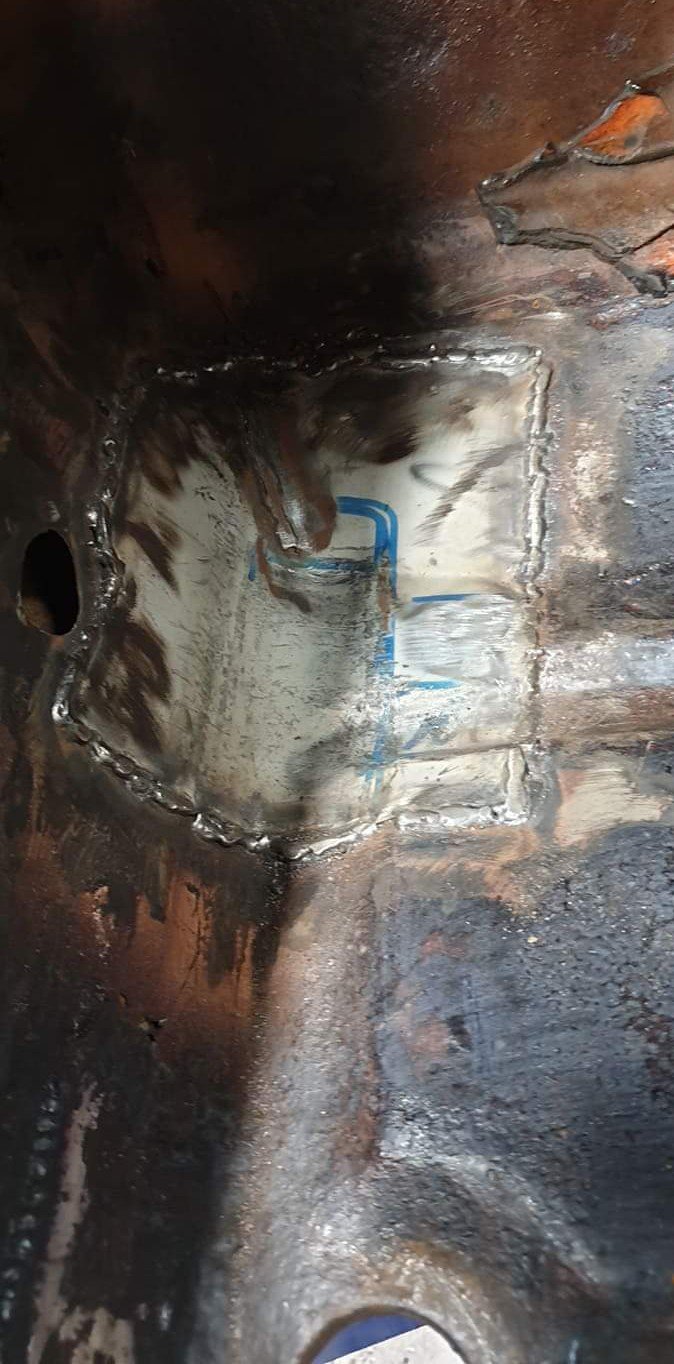
I scrounged around pick a part today and came away with a jazz filler/cap assembly and a alto rad hose/thermostat housing. 16 dollars sure beats the 40-100 for inline fillers that are too big anyway. Next week the rad should arrive and I'll get the filler welded up and i'll be away laughing... hopefully Can pretend it looks factory too.2 points
-
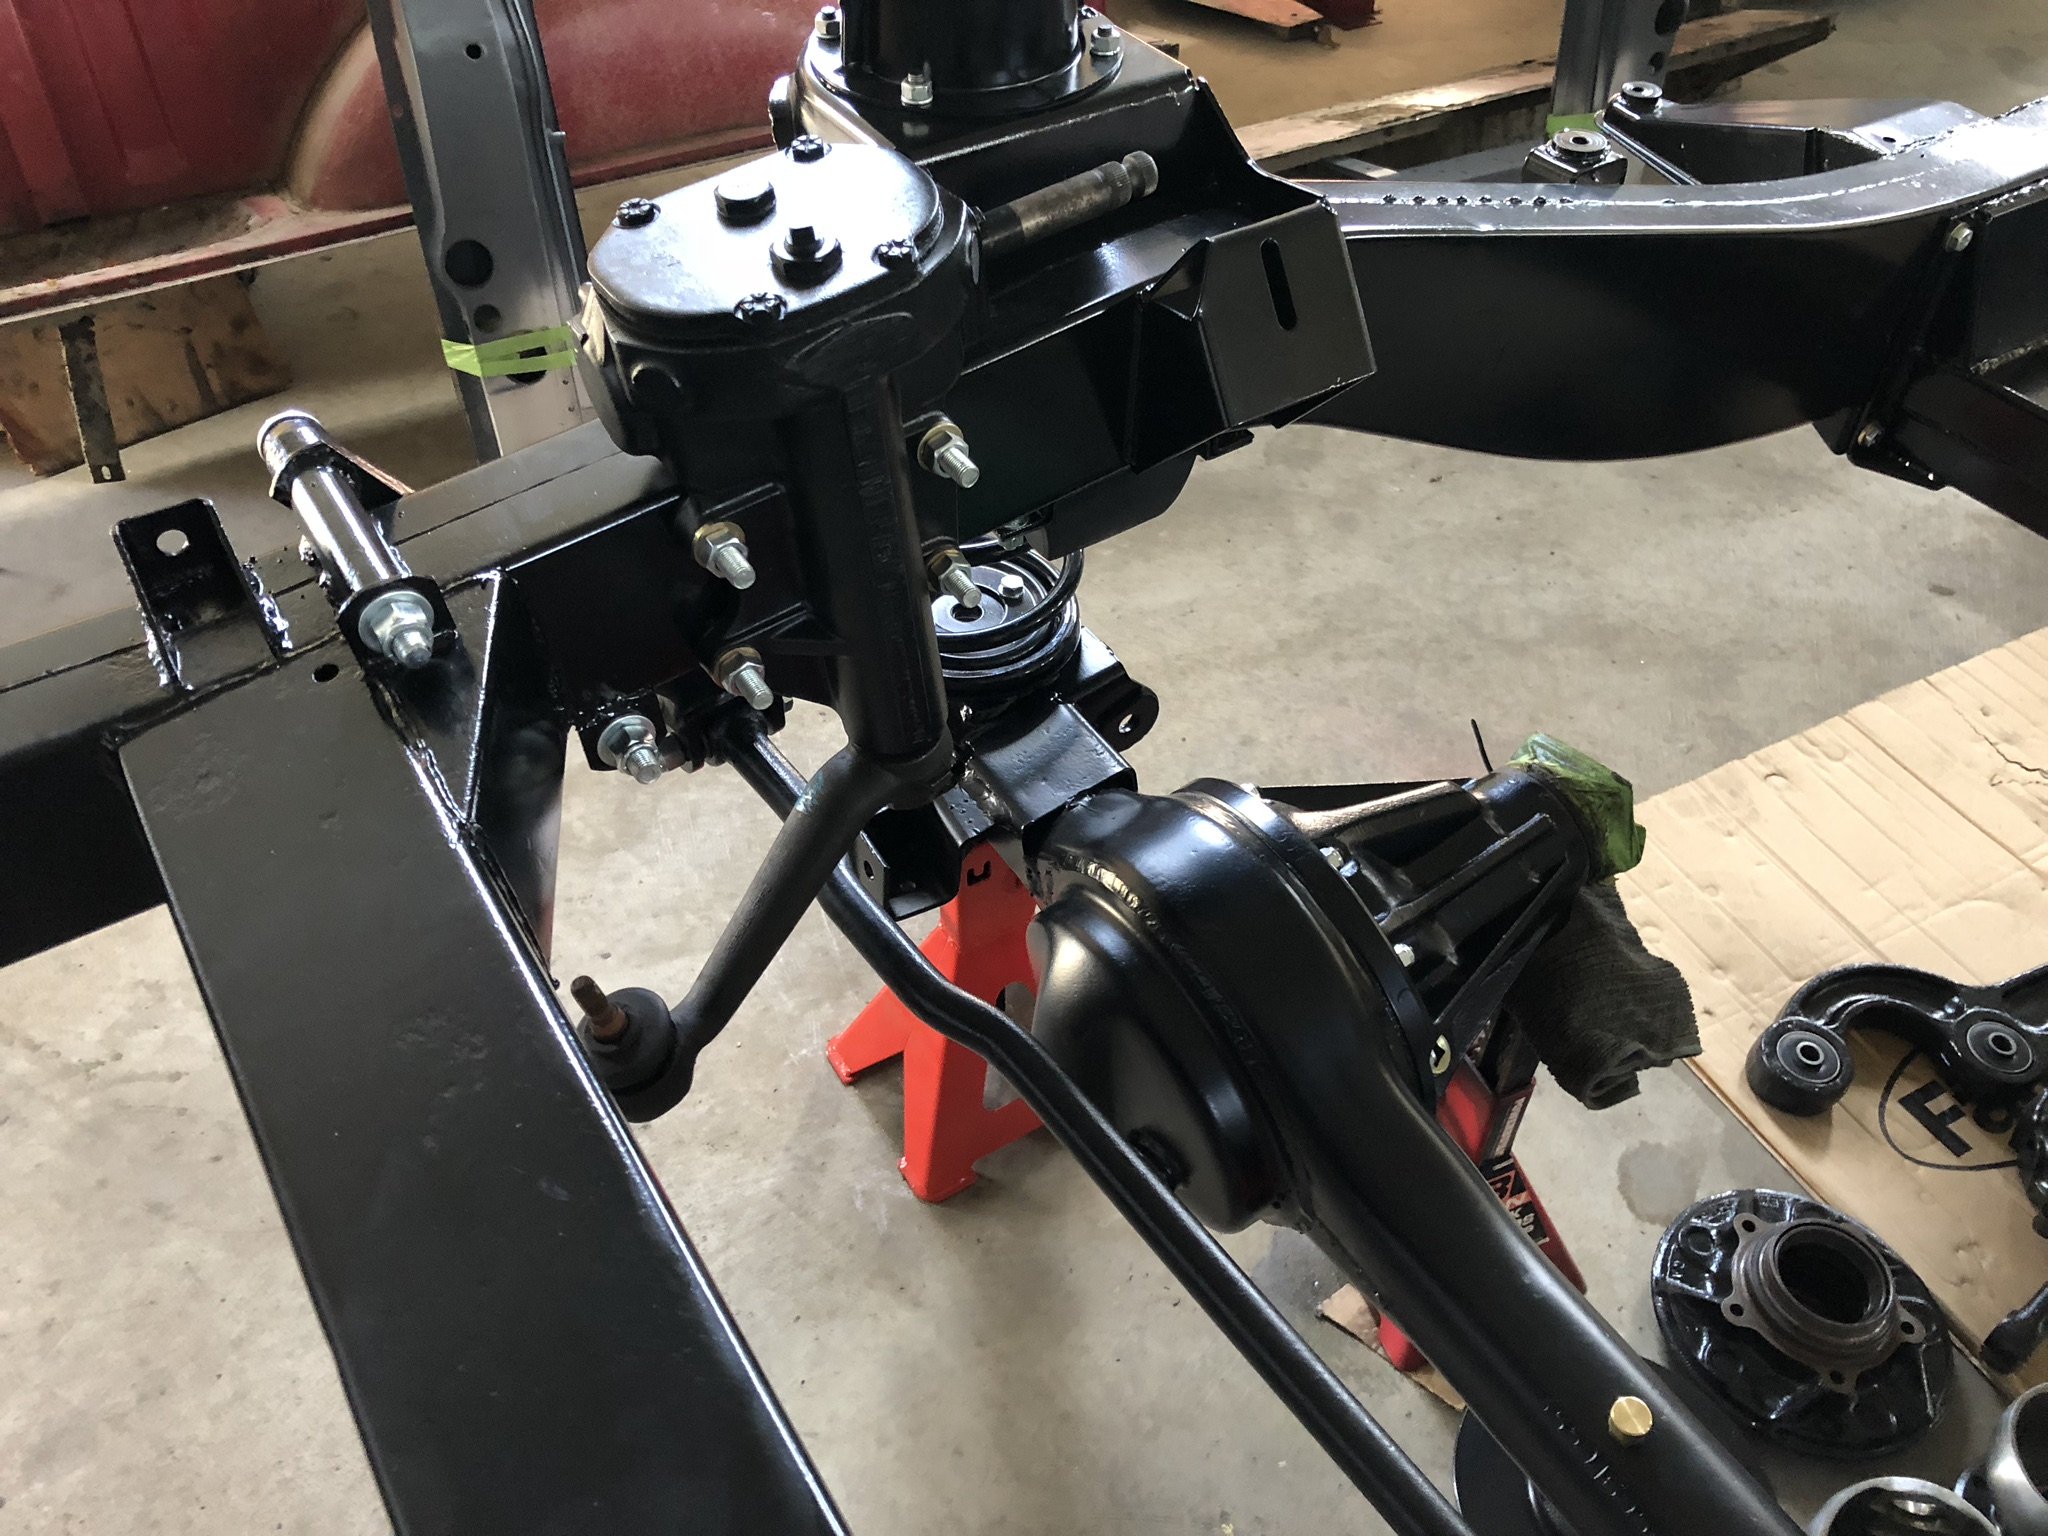
Long time no update! Bathroom renovations and other life suff getting in the way of projects. Front axles and swivels all built up with new rotors, bearings seals etc. Refurbished Borge Self levelling unit fitted with new balljoints and gaiters. Original Rostyle wheels got blasted, primed and 2k painted by Paul from Darth Vapour Blasting Service out West. Damn he did a good job. Much better than the factory would have ever! Fitted up a set of old tyres I had laying around so I can get it rolling, still need to nip a few bits up in the suspension department but I had to stick them on to feel some progress. I will need to replace the tyres with a nice set of Michelin's when I find a place in the UK will to send me a set. Paul also went to town on my gearbox and engine. Can't believe how good they came out with a squirt of the vapour blaster. Before After!
2 points
-
Owning this thing has been very fun! On my first day of ownership i thought i'd go for a ride with some tractor and saddlebag enthusiasts down Central Hawkes Bay to the Patangata Tavern for a shandy and sharn. After fueling up, the battery died on me which i thought was odd. at least i had plenty of big hefty harley riders to give the only japanese bike in the group a push start. I quickly learned that these bikes do not like running with a dead flat battery. After a while it wouldnt even push start, which left me stranded somewhere on highway 50. thank god for AA plus! The previous owner had told me the bikes battery would go flat after a while if not riding it often, these old bikes tend to have pretty tired charging systems so didnt think much of it. Didn't realise it would shit the bed within a day of owning it... Started with the regulator/rectifier. a quick diode test showed it was chooched. A second hand article was had from a wrecker in chch. The bike now held charge, but every time it started up it would blow the main fuse. I found some helpful info on the GS resource forum, which helped me diagnose a faulty stator. A common issue with these bikes, as they are tiny, dont get a lot of cooling from oil in the cases and are just generally shit. tracked down a local replacement. Its a Ricks Motorsport Electrics aftermarket jobby. the thing is super beefy and has like double the copper windings on it than the factory article. Now just waiting for a gasket for the stator cover and can finally start getting some more miles on it! yay for old shit2 points
-
Just sit right back and you'll hear a tale, a tale of a fateful trip That started from this tropic port, aboard this tiny ship... Bought an old Seagull outboard as it was local and I was inspired by @Abarth 's spectacular glitter flake blue model. I know nothing about these things, apart from old and two-stroke. That seems reason enough. Serial number denotes a 1957-58 Century model, nominally 4hp, and first thing I did was knock up a wooden stand so I could have a decent look and see what's missing (it turns over at least)... On getting it home I remembered I had an old dinghy behind the shed. This was a bad debt recovery job, and was covered in years of grime and tree trimmings. Dragged it out for a look and water blasted it. Seems ok actually, a Reflex Funfisher model, but needs rotten wood replaced and has some cracks in the glass from tree branches hitting it that need repaired... Back to engine, made up a pull start cord and heaving on it gave no spark, suspected a shorted primary lead looking at the tape on the wire, so popped the flywheel off by the official service sheet method of lifting the thing up and clouting it with a hammer. Sure nuff, the primary lead insulation was koozed, and the condensor had seen better days... unfortunately the coil had no reading on the secondary winding, so looked into options. There are all sort of Barry fixes, and some insist it is normal to have no continuity and they work alright when the HV jumps any gaps, but I'd rather have as much confidence as possible in a 60 yr old engine out on the water. Looked at replacing with a different type of coil altogether, but found another Villiers coil that should work, though it is a bit shorter and I'll have to make some spacers... Was a mission getting old coil out. Managed to get the screws out, with penetrant, heat, tapping, more heat and a proper screwdriver, but the studs resisted all methods using two nuts locked together, so instead of stripping the nuts I got them out with vice grips. They are probably usable again, but as they're a weird cycle thread/BA mix I just tapped out the pole pieces to M5 and will use stainless studs when I reassemble it... Currently waiting for bits, so might just clean things up a bit till they arrive...1 point
-
Hello and welcome. Due to popular interest in another small bike endeavour, this year we plan to not do what we've done, and do do, what we don't done. This has been on the want to do list for a little while, but thought it was a bit hard logistically to link it up with anywhere else on small bikes. After looking at things a bit closer, it seems doable while staying off a lot of the main roads. There are some sections unfamiliar to us, but if Google says you can drive there, we can drive there, there is one place Google says you can't drive there, and we're still gonna drive there. The date will be 2019 Nov 29, 30 and Dec 1. Still over 3 days this route appears shorter than previous East Cape trips at about 540km, but I believe there to be significantly more gravel so your average speed will be down a bit overall, exact route might get some fine tuning if we manage to get some recce/expert advice. An estimate of the gravel portions of this ride comes to ~250km. Play along at home here https://goo.gl/maps/w5Z1CH4tkfX5SiyR9 ride '19 final by John Bell, on Flickr Day One, Nov-29. We believe day one will be the most taxing. ~200km. Starting right off the bat with ex rally stage Stanley Road. From there we head over East over an ex-rail bridge, through Awakeri and over Matahina hydro dam. Decent gravel stretch on Pokairoa Road, head past the Kopuriki store ,Galatea area, and further south to the borders of Te Urewera. Onwards onto rougher roads through Ruatahuna and finally to stay at Lake Waikaremoana Holiday Park (or nearby). 2019Day1 by John Bell, on Flickr Day Two Nov-30. This is easy day, from Waikaremoana out to Gisborne. ~155km. Hopefully some opportunity to look at hydro power stuff. Back roads, maybe lunch at the Tiniroto pub and hopefully more gravel. Hopefully time for recreation on getting to Gisborne. I'm not particularly familiar with much this days ride. 2019Day2 by John Bell, on Flickr Day Three Dec-1. Medium day. ~180km. We sneak out of Gisborne parallel to SH2, gravel on ex rally stage Whakarau Road in the direction of the Motu village. From Motu its familiar going on another ex rally stage to the Bay of Plenty coast. Through Opotiki, and headed back to the starting point via a few bonus squiggly gravel bits. 2019Day3 by John Bell, on Flickr Fuel is probably less available then up the cape, I reckon less people too if thats even possible. Less food opportunities also. Night one will likely be a frugal, quiet one, pretty sure theres no pub or restaurant there. Save party time for Gisborne. Theres proabably more to say, but its early days yet. There'll be a lot to discuss, but if you could keep the complete spam to a minimum for those looking for info. Holla at cha boi. Okey, Not everyone on the list has usernames, they might be real people outside of the internet. 27-11-19 @johnnyfive @Vintage Grumble @MopedNZ @GuyWithAviators @Shakotom @cletus @tortron @datlow @keltik @Truenotch @TimShadboltfan27 @WankBankA100 @BLIZZO @MaxPower @Dolan @Mitch.W @Tumeke @Tumeke's brother Brett @UTERUS @Ned @RUNAMUCK @Atex Lee Dan Shannon @Deano Mike @mark105 @Geophy @Duke Blackwood @Geophy's Dad @peteretep @Beaver @Archetype Lance/Julio Ryk Chris/Tofa @anglia4 @anglia4's Dad Paul ThatSlowGuyOnTheRuckus/Dan @slacker.cam @sentra Entry form now available, please ensure you have accommodation secured at Waikaremoana before completing form, as this will be the limiting factor for numbers.1 point
-
1 point
-
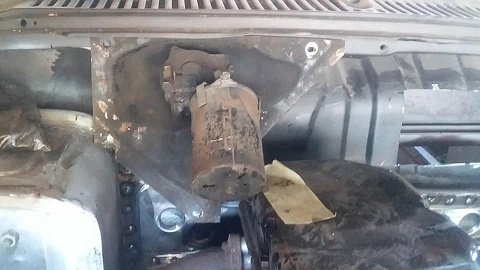
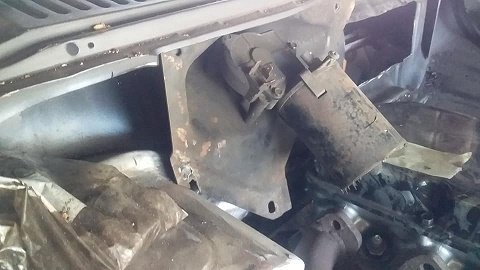
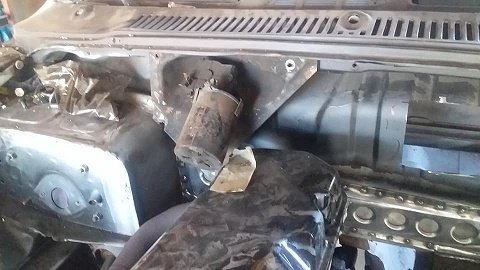
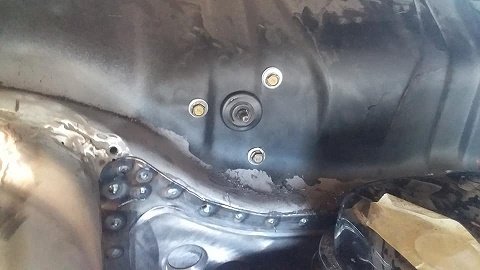
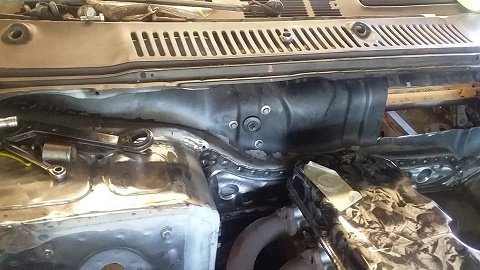
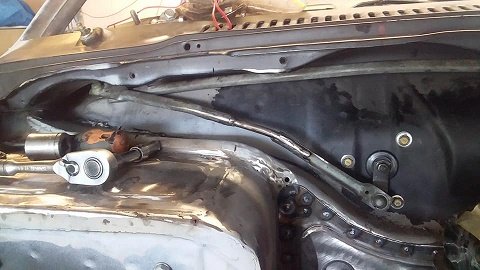
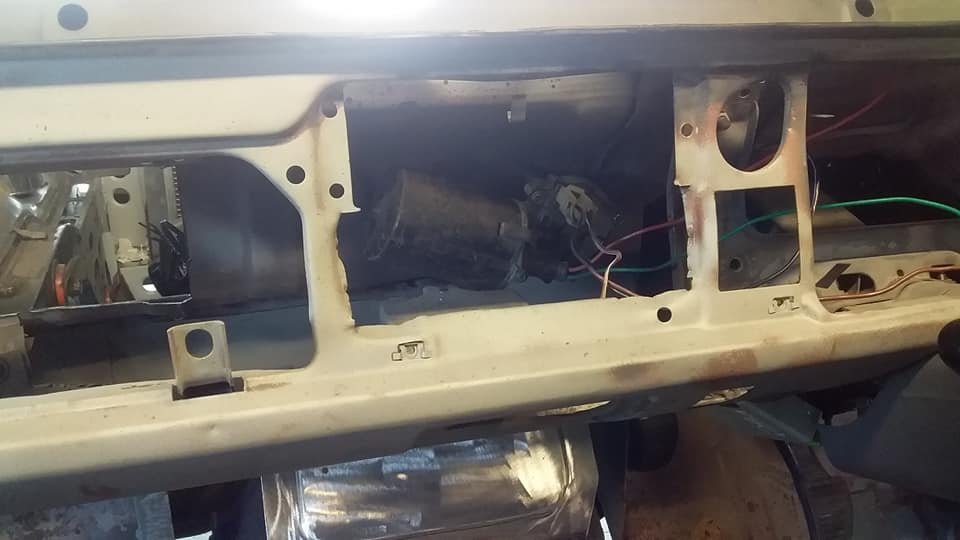
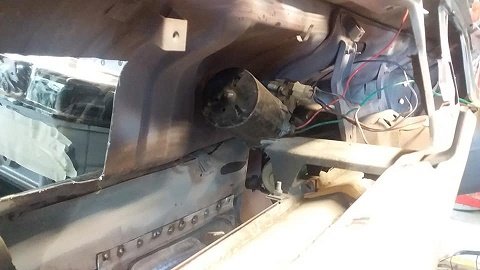
i was wanting to have a look at the wipers and see what can be done. ive never been a fan of the ugly motor bolted to a plate screwed to the firewall setup... and when i tried it in place .....seems the flacon motor is in the way.........lucky me. i could have just unbolted the wiper motor and clocked around a bit and drill new hole......but it would still look crap. so i maked out where the center of the motor kind of needs to be and looked at some option..... i found i could just bolt the motor under the dash and bolt it threw the firewall using roofing rubber sealing washers then i just had to cut the rod turn the end around and weld a rod into join them. much better.....hopefully the heater core i bought turns up soon so i can start making a heater.....or even the bends so i can have a go at making headers.
1 point
-
This thing goes still my boy has finally got the hang of properly giving it shit as of this weekend..... not sure whether i should be proud or shake my head.1 point
-
Will be welding the 2-1 collector on the turbo flange this weekend needs to be done with mig as our tig at work where I'll do the pipes is a bit better suited to light stuff. Going to be doing tuned length if possible like whats on there now but in stainless its 1" into 1 1/2" tube to keep the velocity of gases up right up till they smash into the turbine. Should be fun.1 point
-
Clocked life right there!1 point
-
This is one of those weird things where the more bits you put on it the smaller it looks1 point
-
Nah the one i used was same colour as yours had been retrofitted for modern cutting tools etc. probably went up for sale about 6 years ago. I learnt on my granddads myford from around 5 years old. Lathe is on my bucket list.1 point
-
Plan is to finish wiring Richies KP then hit this thing hard. For now have swapped out the front carpet as it was a bit shit, and fitted the lights. Its back in storage now. There's a looooong way to go.1 point
-
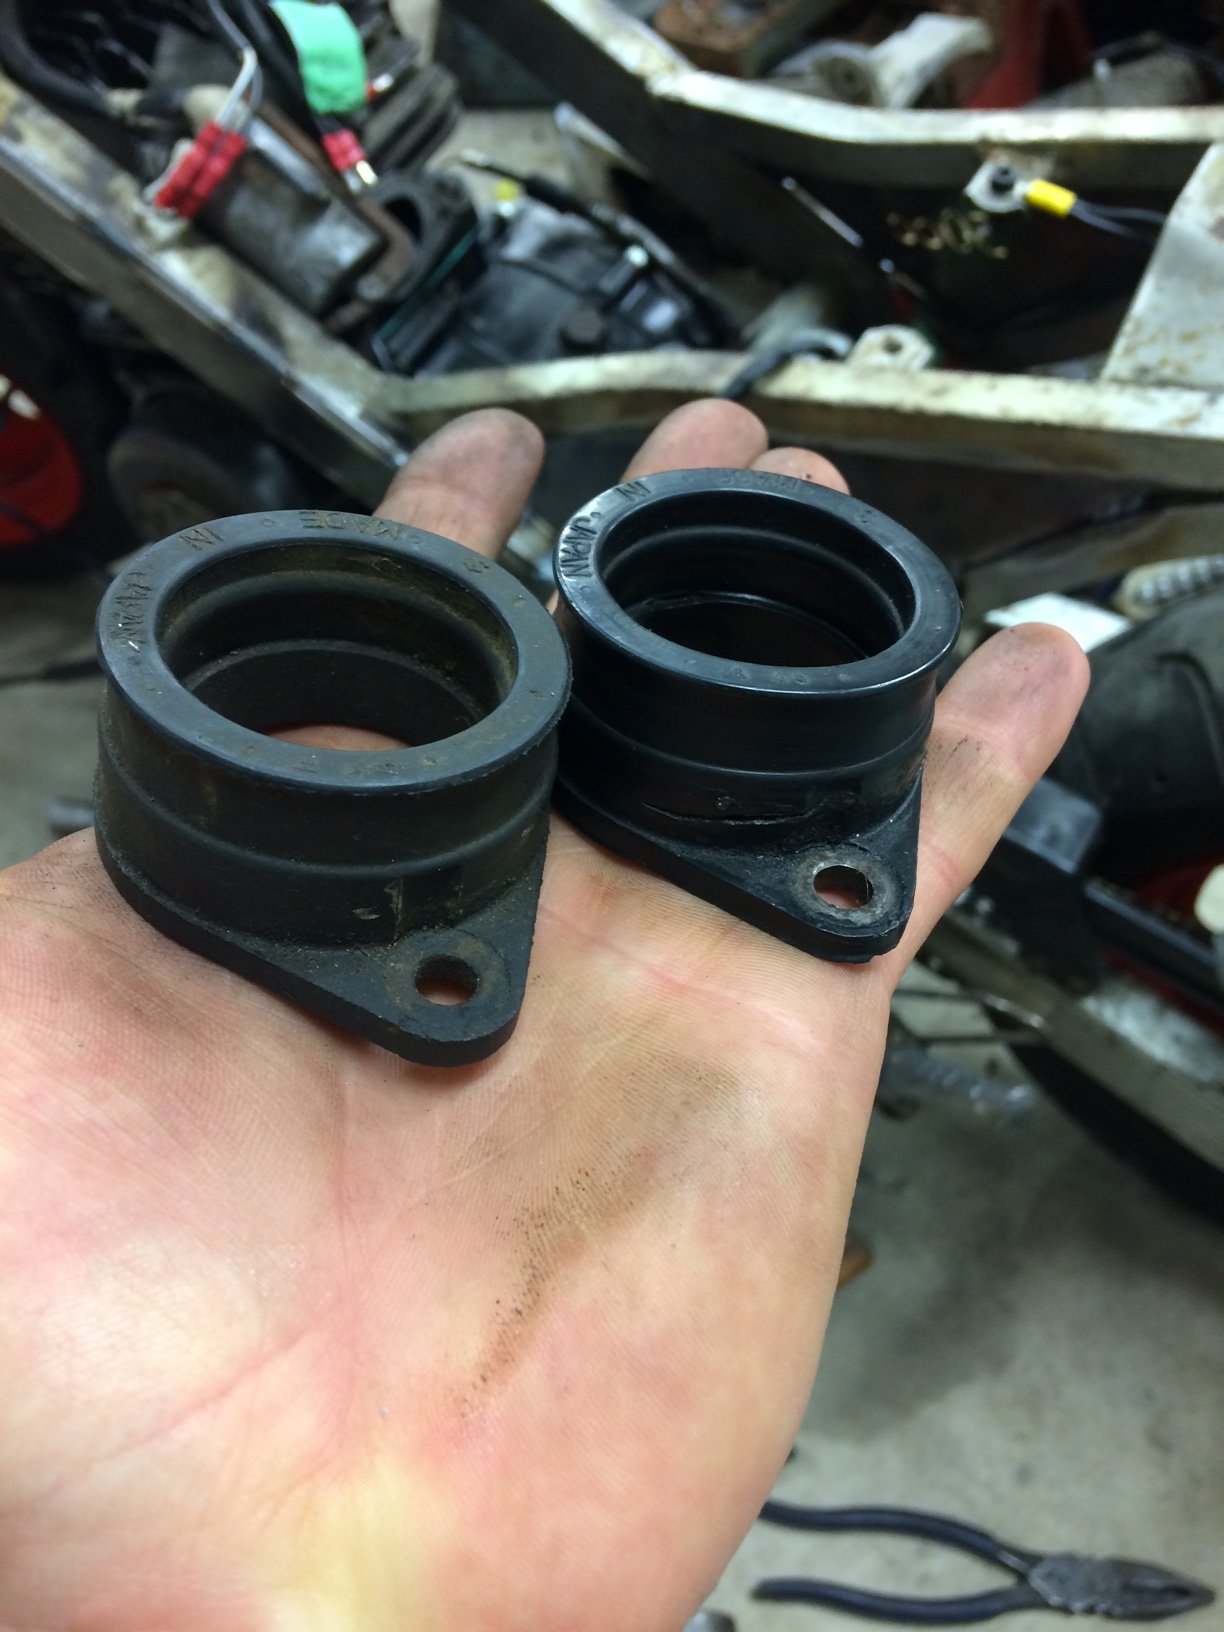
I opted not to modify my motor and instead have simply re-installed it with fresh gaskets. I’ll worry about my oil setup once I’ve got her assembled; I’m really starting to fret about the looming Urewera trip and ensuring that she’s ready and reliable. I’d really like to be looking at a shakedown ride in the next couple of weeks, but there’s a lot left to do. Getting all the lights to work and secondering a legit plate will be two major hurdles. Repairing and installing the kick start and shifter will be bigger jobs as well. In the background I have sourced a replacement intake manifold from the local wreckers for $20 (win) and Dad Blackwood machined me a new rear shock pin to reduce the massive swing arm play. I’m also one weld away from having a functional exhaust system. Gotta maintain momentum otherwise I’ll have to ride, ‘gulp’, a normal bike...
1 point
-
I think the issue came about because I had a couple bits of rubber hose filling the gap on the pin/pad to centralize the pads. This was to stop them rattling when not braking. I'd had it like this for a longtime with no bad experiences... however this drew attention to this part, and he wanted a better solution. He wasn't happy for me to just take it out and restore the factory rattle, as it's a shit design to begin with. The way I look at it, any problems that can be solved with a bit of time or money is a real problem. So just get on with it...1 point
-
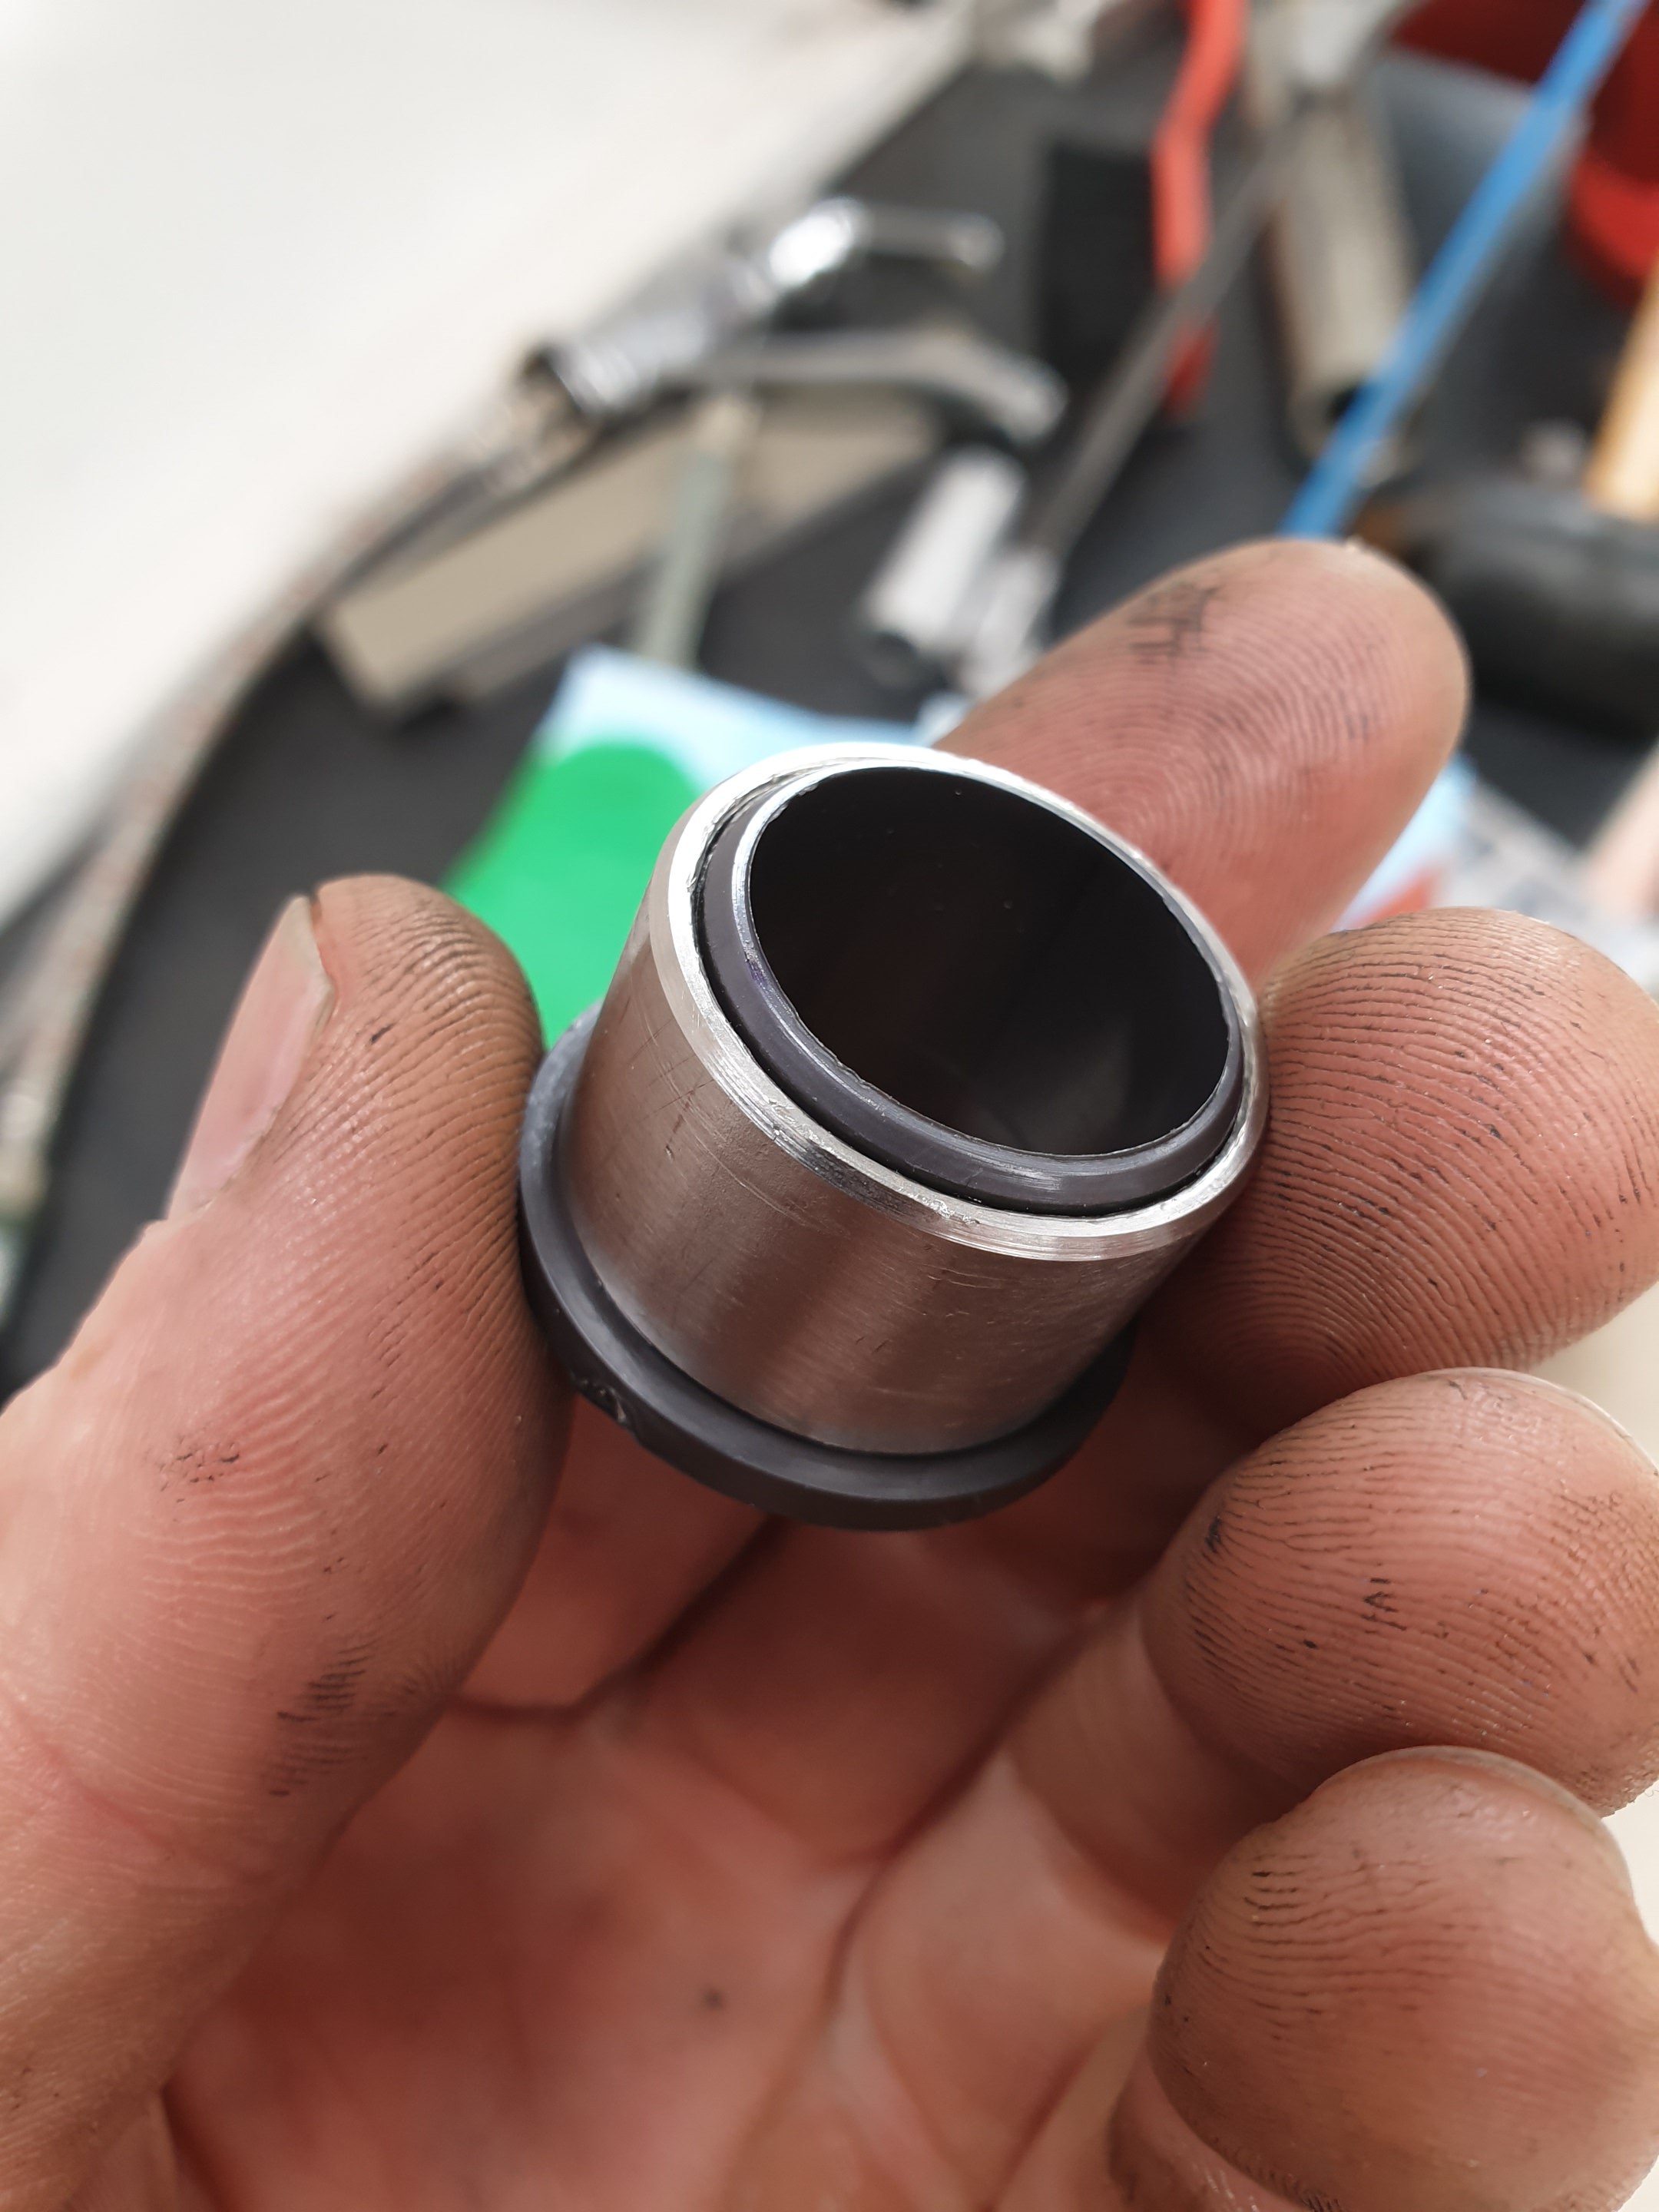
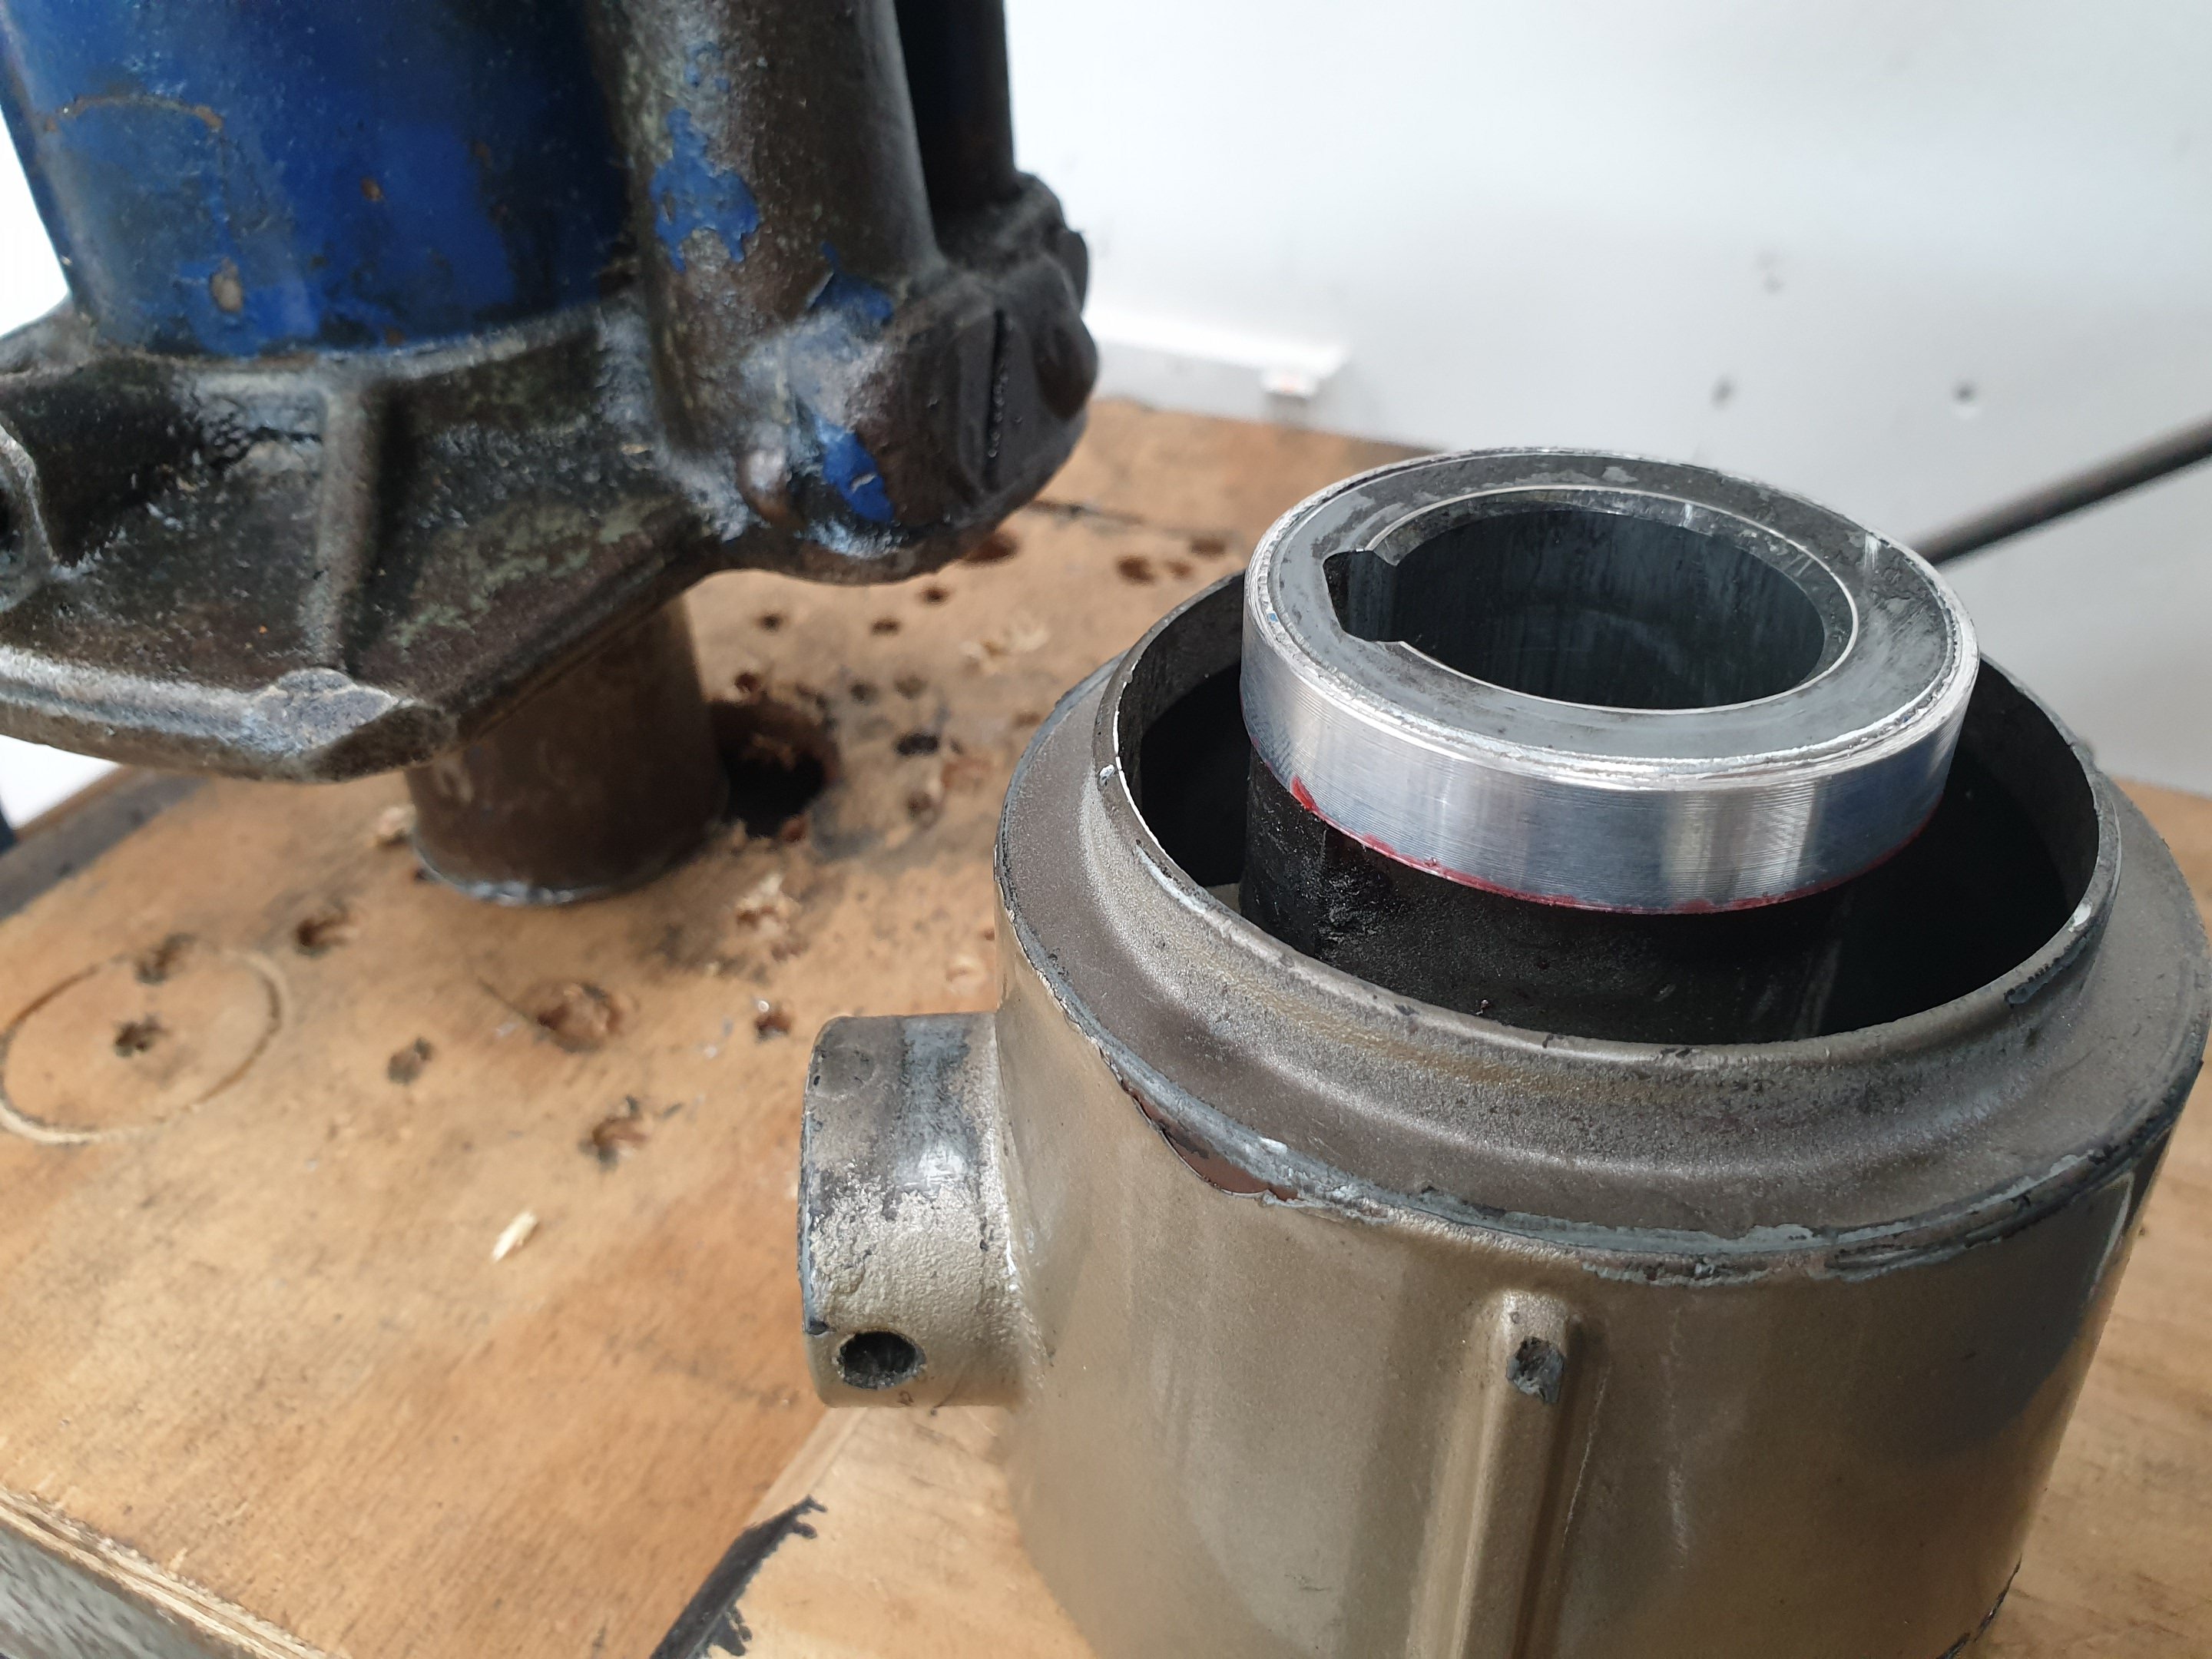
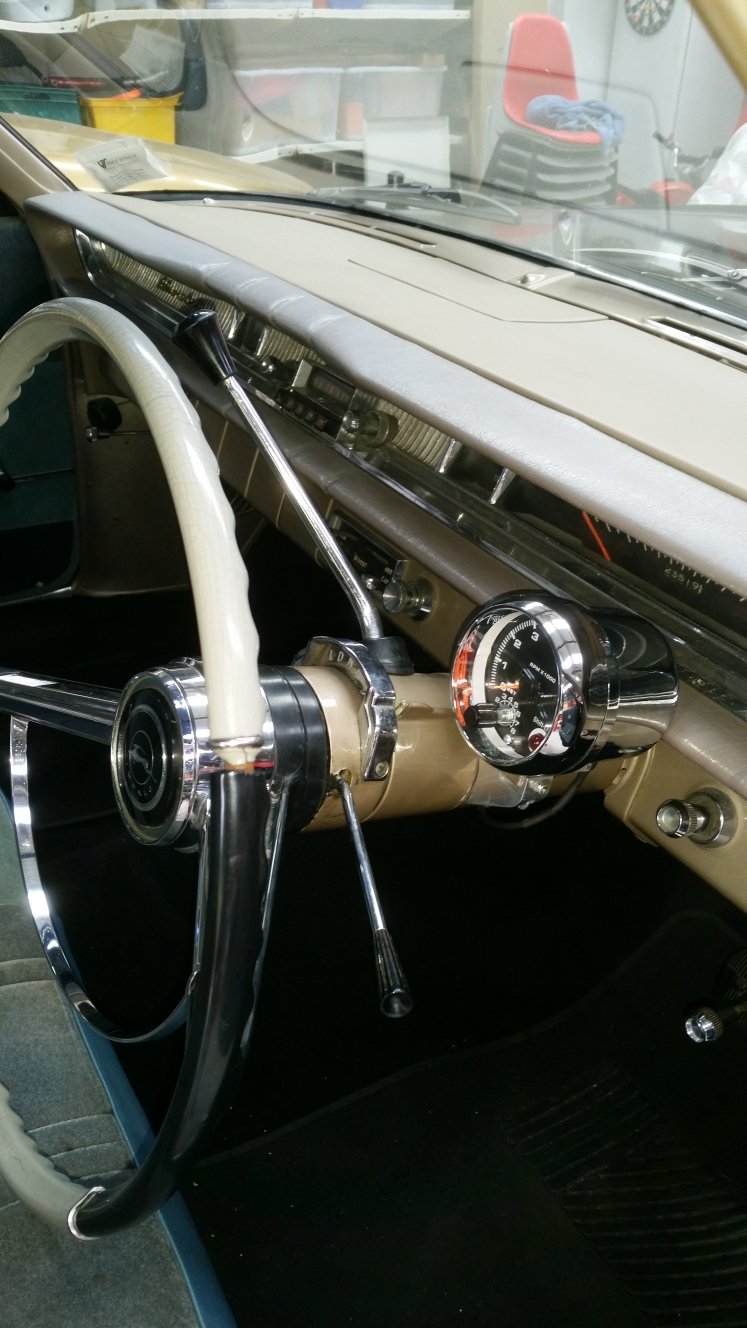
Had excessive play in my steering column. Stripped it down and there really wasn't anything worn or actually wrong as such. Some parts still had paint under the grease...so it wasn't flogged out. I think the factory clearances are just very sloppy and because it's a shaft, within a tube, within another housing - that equals compounding errors x3 that all add up to felt play at the steering wheel. I pondered this for a while, wondering how I was going to keep my certifier happy and tick this box? Then came up with a solution. I turned up this bushing on the lathe from stainless and then press fit (plus epoxied) a nylon insert. The actual steering shaft within the gear selector tube can now run on this to remove any minor bearing movement there was before. The ractory fit bearing is still in there too, should this ever wear out...though my 20 year old ride on mower uses these bushes on the steering shaft and no supporting bearings at all and it hasn't worn out yet. Then I made a jig up to hold the gear selector boss in the lathe. I took a few cuts off the tip only (the keyed shaft inside runs full length) and then turned up a shim to add more material back on than what I started with. I press fitted these parts together using loctite just to make sure it stays together. This shim ring perfectly centres the gear selector inside the main steering column housing. A liberal coating of grease and I put it all back together. This part only moves about 60° from Park to 1st on the colum change, so it's not going to wear out this century. Its rock solid now, zero unwated movement, better than the factory ever made it...
1 point
-
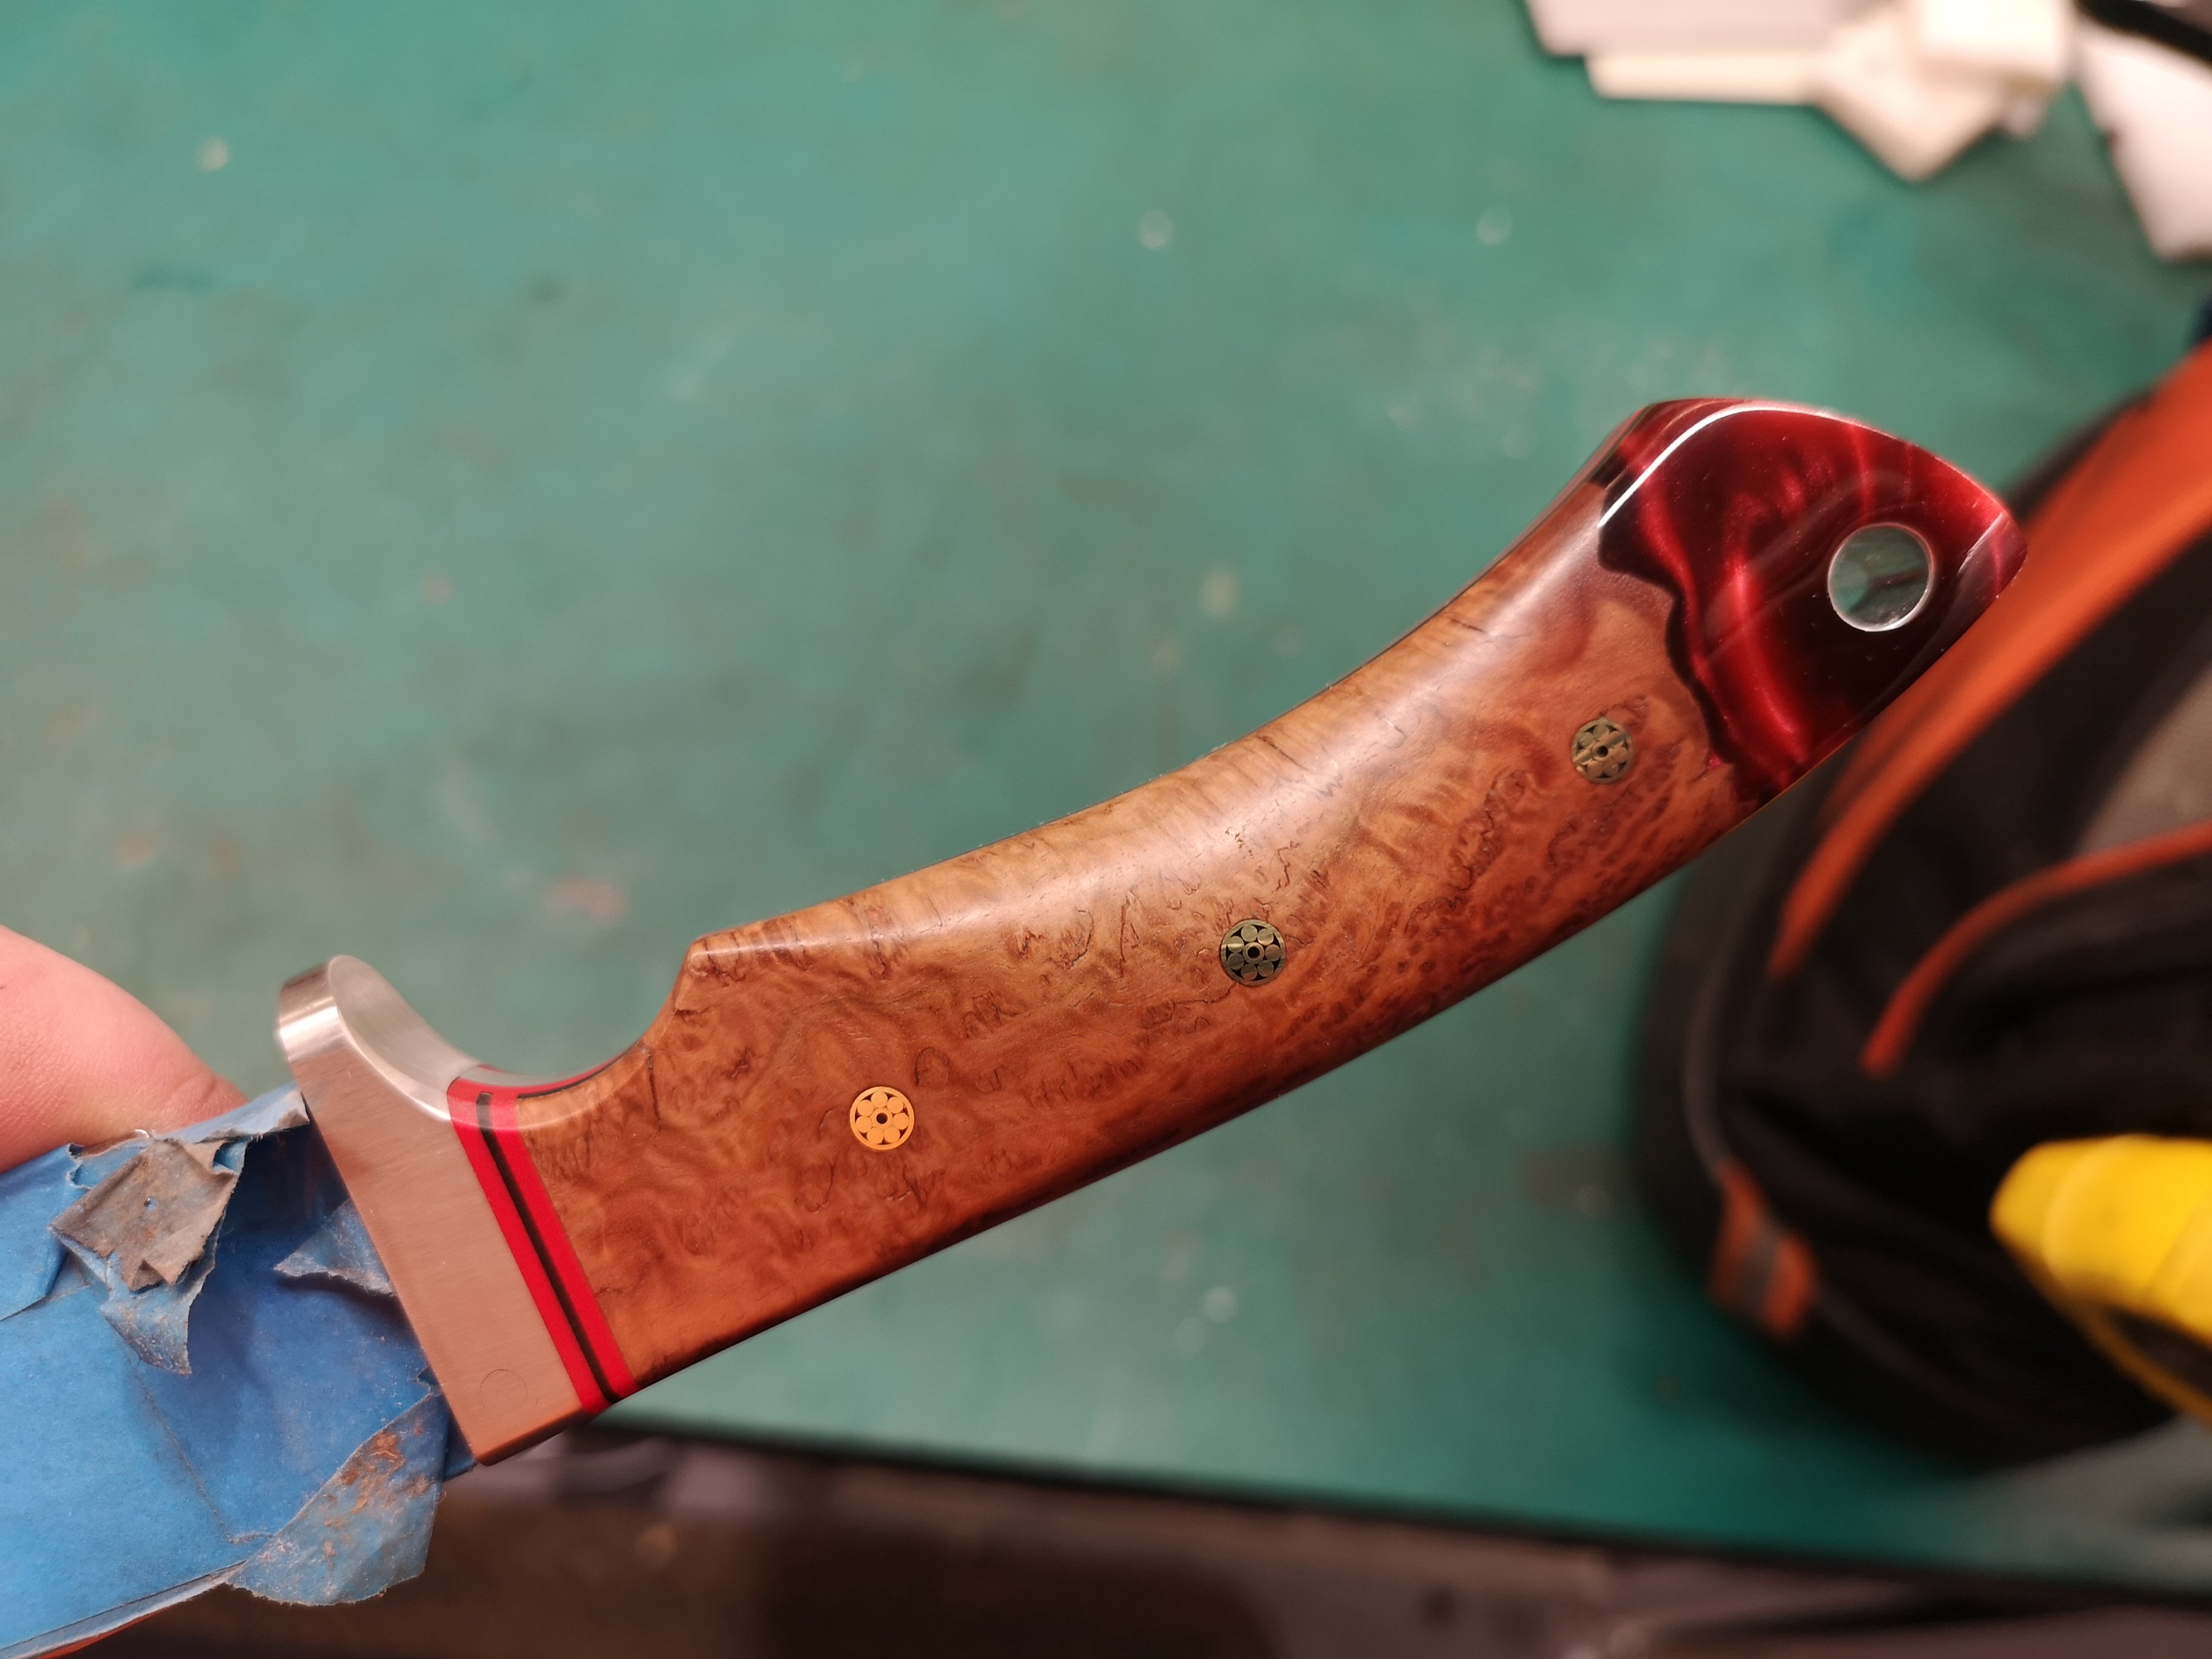
Made up another blank with some wood, workmate turned it into a handle for one of his knives he makes.
1 point
-
Yeh nah yeh, so after that ^ I got a bit of 4140 CG shaft, had some keys chucked in it for a box, and slapped it back in. Keys are tiiiight and everything fits much snugger due to shaft being correct size, so that's tops. I cut the keys a bit longer, so everything had a key under its total length for strength, and I went for internal threads on the ends as its way easier to do. Once it was back together, we took it back to the beach again, to finish off testing. It was running much better (put tape restrictor back in) and we thrashed around in it for hours with no dramas. I didn't get video of it, but i'm blown away by what it can get up, considering it has no articulation in the rear. It was strolling up stuff that decent 4wd's couldn't get up. I tried to keep the vid short, and not totally mind numbingly boring. You can't really tell in the video, but the road is bumpy as all heck, quite pleased how well the suspension works for how shit it is/road bike shocks and pivoting on bolts. I accidentally drove it through a few small streams on the beach, so washed it down when I got it home. While pushing it back into the shed I discovered one of the back axle bearing housings was broken, I think it may have been damaged when the axle broke, as its on the side that got wrenched around when we were towing it off the beach. By reviewing the footage, I worked out it broke on the last run of the day, so didn't do any real damage, thankfully. Hows that serenity? I decided if the suspension and steering didn't break after all that testing, it was probably good enough, so stripped the whhhooollllleeeee thing down for painting. So now i'm going to clean up some welds, cut out some weight, and then paint it. Regards, VG.1 point
-
I flattened out a bit of coronated iron and turned it into a steampunk top hat, made the googles to.
1 point
-
Its still held together with G clamps and cable ties, so we weren't going too crazy, but you get the idea.1 point
-
BEST DAY EVER. I got new leads, fitted the new plugs that came with it, and headed for the hills/forest. First off it ran like absolute shit, I was cursing the new leads/plugs, but with @keltik 's help we determined I was a dingus, and had put two leads around the wrong way. Correcting this made things much better, but it wouldn't pull past around 5.5k rpm. We removed the restrictor plate, which made things bettererer, but still couldn't get past about 8k rpms. I then half covered the intake pipe with duct tape, and BINGO, spot on. It will pull happily into the late 10k rpms, which is about what this old donkey is meant to do. Fucking stoked to get it running well so quickly. And shit me, 75ish hp seems like a lot in this thing, it's quite scary. Thrashed around in it for a few hours with pretty much no issues, apart from grub screws in the drive sprocket coming loose. There's a few small improvements to be made, but pretty minor. I took a couple shitty vids which I'll slap up in a min. Pretty stoked it didn't disappoint me after all these years!1 point
-
So it took longer than expected to sort the wiring, which still isn't finished, as I need to make a dash plate and get some new switches n shiz, before I can finish the wiring off. I've been having problems with my trailtech dash giving weird rpm values, and I was darned if I could figure out why. Turns out Dave, being the Barry he is, installed solid copper leads on the motor, so I get an rpm signal even when the wirings not connected to the trailtech, so much zap, lewlz. I might have to put standard leads on it, as I kinda need the rpms to read correctly. Anyways, this evening I halfassedly finished the wiring and put cable ties all over the place, and decided it was a good idea to take it for a quick test drive. In the dark. With no lights. Up my residential street. It was quite exciting. All the controls work well, which is nice, but the motor is not running correctly. I think it's leaning out up in the revs, not that I know how many revs it's doing, so I will have to play with the tune. The gearing seems good, it's definitely not over geared now. After a couple of rips around the neighborhood, I had a quick look over it, and noticed one of the rear sprocket grub screws had stripped out, so I had to pull the rear end to bits so I can drill the 8mm grubs out, and upgrade to 10mm. I'll loctite the piss out of them too. I'll try sort a few issues out, and hopefully take it somewhere this weekend for a second test drive, to see if things are better. But yeh, not too bad, but still lots to do. At least it's now moved under its own power for the first time in nearly two decades, so that's a win. Regards, VG. xoxox1 point
-
Got a little bit more done. Got an out of date unused 6 point harness, modified it to be 5 point, and fitted that. Just had to make a mounting bar for behind the seat. Then I got a small car battery (will have electric reverse + winch + lights in the future, so didn't use motorbike spec battery) and set about making a shitty mount for it. It used to be in the nose, but got the bash, so I've mounted it on the side. I might have to make a cover to stop it getting owned by debris in the future. I recycled a bit of seat belt and buckles, but couldn't get it tight, so changed it to good old fashioned rods N nuts. I also put a speed sensor on the front wheel for the trailtech dash. I just have to reroute some wiring and mount the magic electrical boxes, and it's ready for a gentle shake down run, hopefully this weekend weather permitting. If all goes well, I'll make a new front bash plate thing, as the old ones a bit rooted, Then paint all the bits that need painting (probably just rattle can it, as shit will keep getting modified) then start fitting all the alloy panels. I also have to make a dash that the bonnet will join up to. Hopefully the next post will have evidence of a successful test run. Regards, VG. XOXOX1 point
-
The crazys in the workshop have been at it again....
1 point
-
bit more carb tutuing, upped the main jet to 135, better on transition, but maybe too rich on WoT. diddled with the the idle mix, ok, but still a bit funny. Read and reread my various carb books. decided to tweaked the floats, as the carbs are on a 12* angle to horizontal, (max recommended is 5*), the lower or inside side float will tend to cut off the needle valve earlier than it should making the fuel level low, especially in the upper or outside fuel well: ...and as it is written, so it comes to pass... Bent the inside float up a bit, and left the outer as it was (factory 25mm). Average fuel level is probably still a bit low, but too high will be bad too. WAAAAAAAY better now, i think the idle jets were sucking a bit of air every know and again or something, and the progression flat spot is much improved as the ETs have a few more holes covered. Tweaked the timing a bit more advanced as well (12-15* at idle) and the whole thing is now much livelyer. Idle is smoother and i leaned it back to a 'steady' 13.5 AFR, at 800rpm, when before it wouldnt idle under 1000rpm or 12.5 AFR At WoT AFR is dipping into the low 10s sometimes even the 9s, so i will try the 125 mains again. Time for a few other things (there is always something!) REDUCING NOISE Steering tie rod vs exhaust downpipe interference caused a disconcerting rattle though the steering wheel on hard right (parking style) turns These pipes are 80's muffler shop specials and will be replaced eventually, meantime a wee tickle from Mr Grinder on the excess threads appears to have the desired effect INCREASING NOISE 'customised' some op shop $5 low impedance (6ohm) speakers using a skill saw, ply offcuts and builders adhesive that i really think have nailed the 'builders least favourite apprentice' aesthetic. They fit under the back of the seats where no one can see them, and are 11ty times better than the old 4inch pioneer box speakers, and were within my budget, I am not ashamed. Related, I also installed a switch so the head unit will run without the key in the ON position (dash lights on, fuel pump chunting away). This hack is needed because my 'cheapest on ebay' Ducato ignition switch doesn't have a flippin ACC position. Now that's austerity. Chucked on a new sticker holder sticker And piled the girls in for a hoon. For the first time it feels like its actually running well, which means i will be using it quite a bit more.1 point
-
Almost finished! Bores have cleaned up without any defects. Ports look a fraction off on some of the bores though so hopefully I can cut some valve seats that work! Not going to lie, its quite exciting!1 point
-
Bit of CAD. Slowly slowly getting there. Most major parts are detailed. A lot to go.1 point
-
Been talking a bit with the guy that owns the Hamilton car museum. He bought the T57 from the Baillon collection in France. His engine is essentially the same as what im building. Hes given me access to any parts I want when hes got it in bits. To copy and 3D scan etc. So Ive got some pretty cool parts sitting around the living room now. The sump is a beast First ali bit cast! Right hand cam gear cover. Using a David 3D light scanner. Sort of useful to help with drawing in CAD More 3D printed moulds. Perfect for part this big with this detail. Would of taken me days to machine it. Still have to do a lot of sanding and paint to get a good finish. Playing with different filter runner designs. Think im getting a better idea of how to do it. 2016 on the left and 1938 on the right! 70hours from start to finish. But only bout 3 hours to make another one. So I plan to make atleast 3 of each part.1 point


.thumb.jpeg.384ff72c8d2b0ee0d34a7bdedb55bdcf.jpeg)


This leaderboard is set to Auckland/GMT+12:00