
Leaderboard


Popular Content
Showing content with the highest reputation on 10/14/19 in all areas
-
Decided to try and get this thing riding a bit nicer, previous suspension setup was a little soft and hit the bump stops a bit too often, and with the extra weight of a 4age it would of been worse. Went with a set of Fortune Auto's coilovers all around, since I'll end up chucking an F series or similar diff in and I have the skills to strengthen the rear strut towers. Picked up another pair of struts, cut them down and and blasted them. Wound them all the way down and the front ended up a little higher and the back's a bit lower. Might try and get the front down a bit more, to at least were it was. Made a stainless distributor blanking cover. Bought a Flo's upper water outlet, as it looked to be the much simpler and tidier way of doing the cooling system. Needed a RWD waterpump (inc pulley), thermostat housing and a little bypass pipe to complete the setup. And of course with everything else, when you change one thing you have to change something else. The FWD alternator bracket fouled on the thermostat housing, so I got a RWD one from Japan. Borrowed some Flo's 4age to K series engine mounts and made up my own. Sitting in the hole. Had to space the engine mounts out by 8mm, possibly because of the Cusco mounts being thinner than factory ones? Dizzy relocation kit installed, had to cut a bit of a hole in the fire wall for some clearance. Stripped the interior, pulled out the dash, heater, seats, carpet and scrapped off some sound deadening around the gearbox tunnel. Cut a big ol' hole for the J160 to fit. Probably didn't need to cut so much out, but to make it easy to drop out and fit, some extra clearance was needed. Also wanted it to sit up above the sills and chassis rails. Made up a gearbox mount. Added two extra body mounts further back so that it spreads the load a bit. Has heaps of ground clearance as well. The J160 shifter needed moving forward as it lined up with the end of the handbrake. Cut up the original shifter housing and welded it on to some ali tube and 12mm plate. Spent hours on our little lathe turning up the adapter bits. Works mint, barely any flex and feels like it should. Moved it 200mm forward from the Altezza position, 50mm more than the SQ kit and 40mm back from where the factory Starlet one was.21 points
-
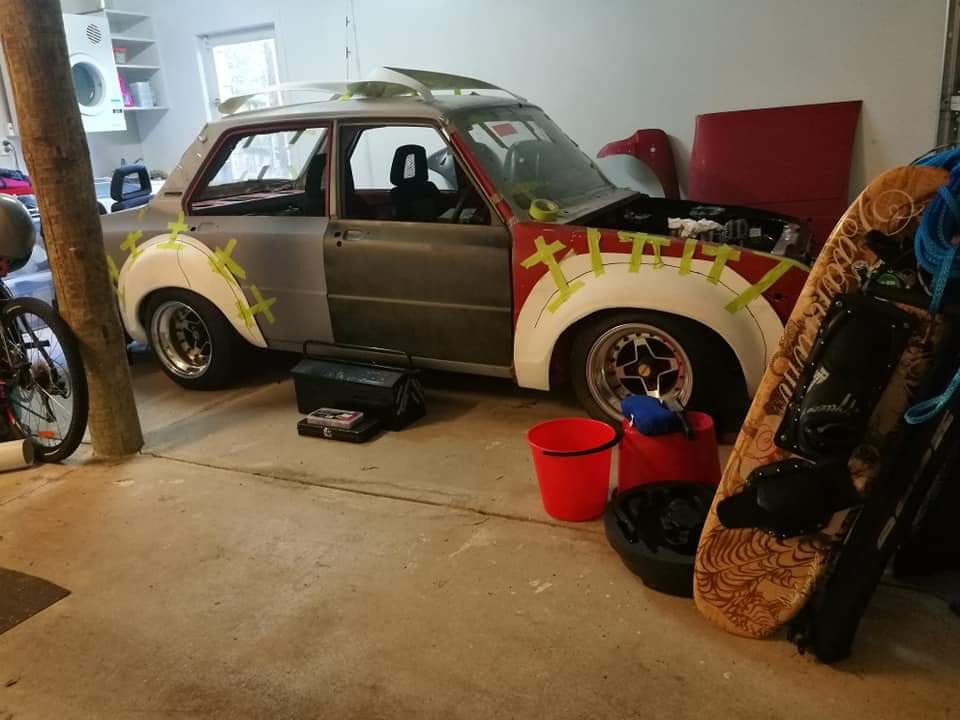
I hit a bit of a brick wall with progress because at some point I want to paint the engine bay and underside, and was trying to do things in a way which meant I could get that done, get the engine sorted and painted and in for good and then do things like make the exhaust afterwards Then I realised that was stupid and I was wasting time mucking around trying to figure out things with the engine on the stand, and whacked the motor and box back in . I need to get everything done then I'll take it apart for paint last Shifter mounted, i wanted it up high so it's not far from the steering wheel to the shifter, @RXFORD/matt from tin tricks helped me out again with that by folding up a shifter mount and putting some fancy holes in it And put the carb and hat on, the bonnet doesnt shut so I'll have to figure out what I'm going to do with that
 15 points
 -
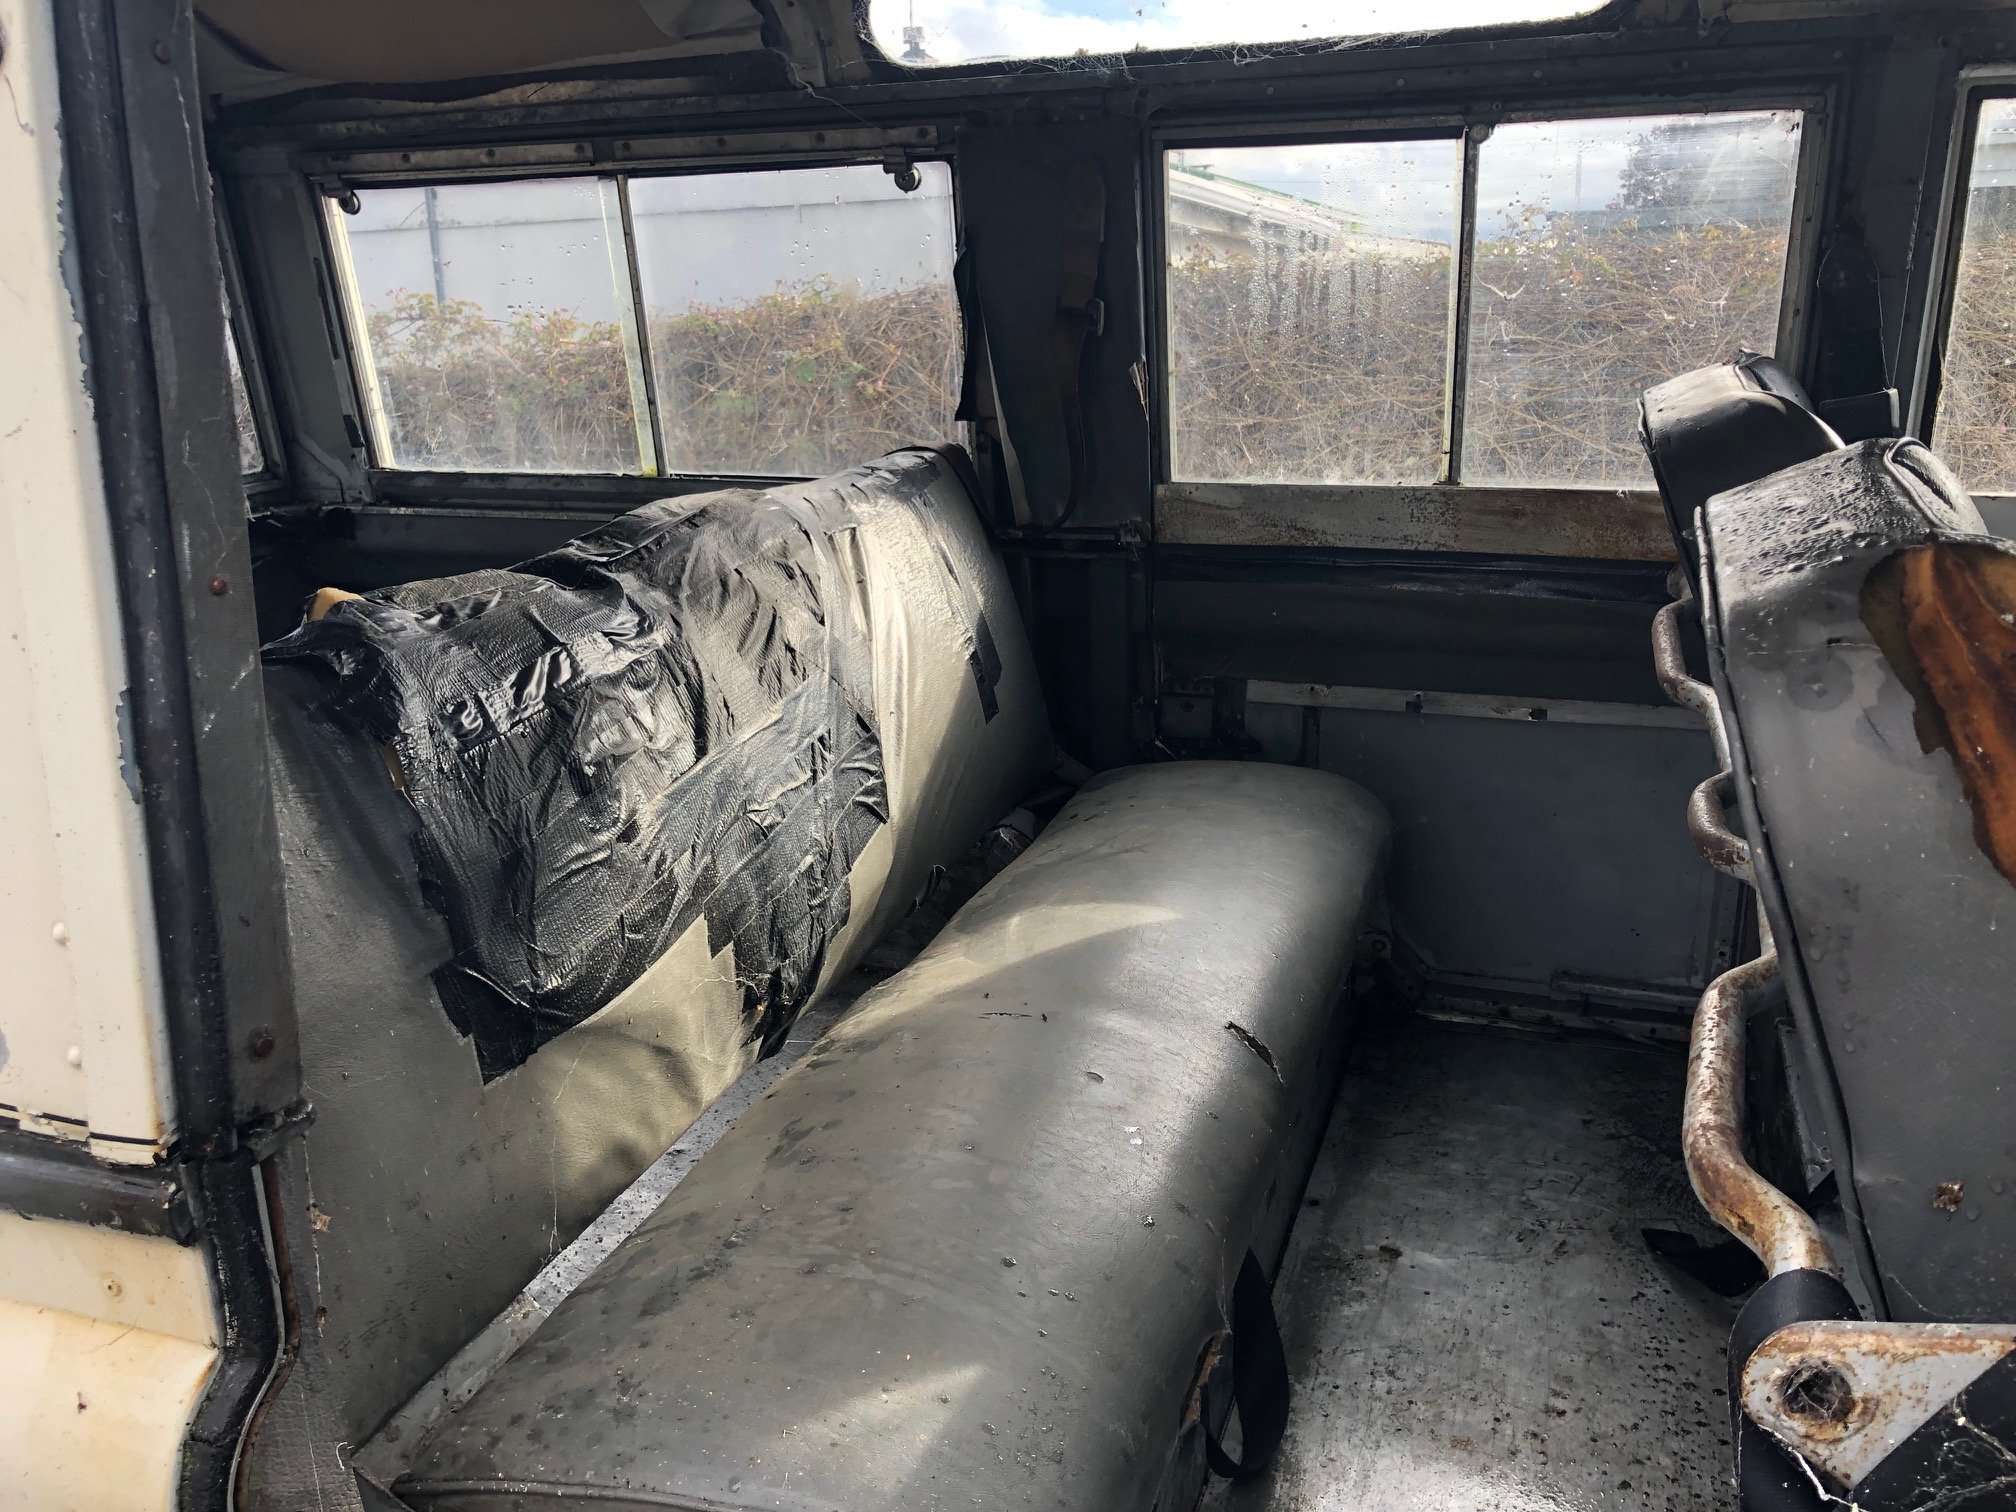
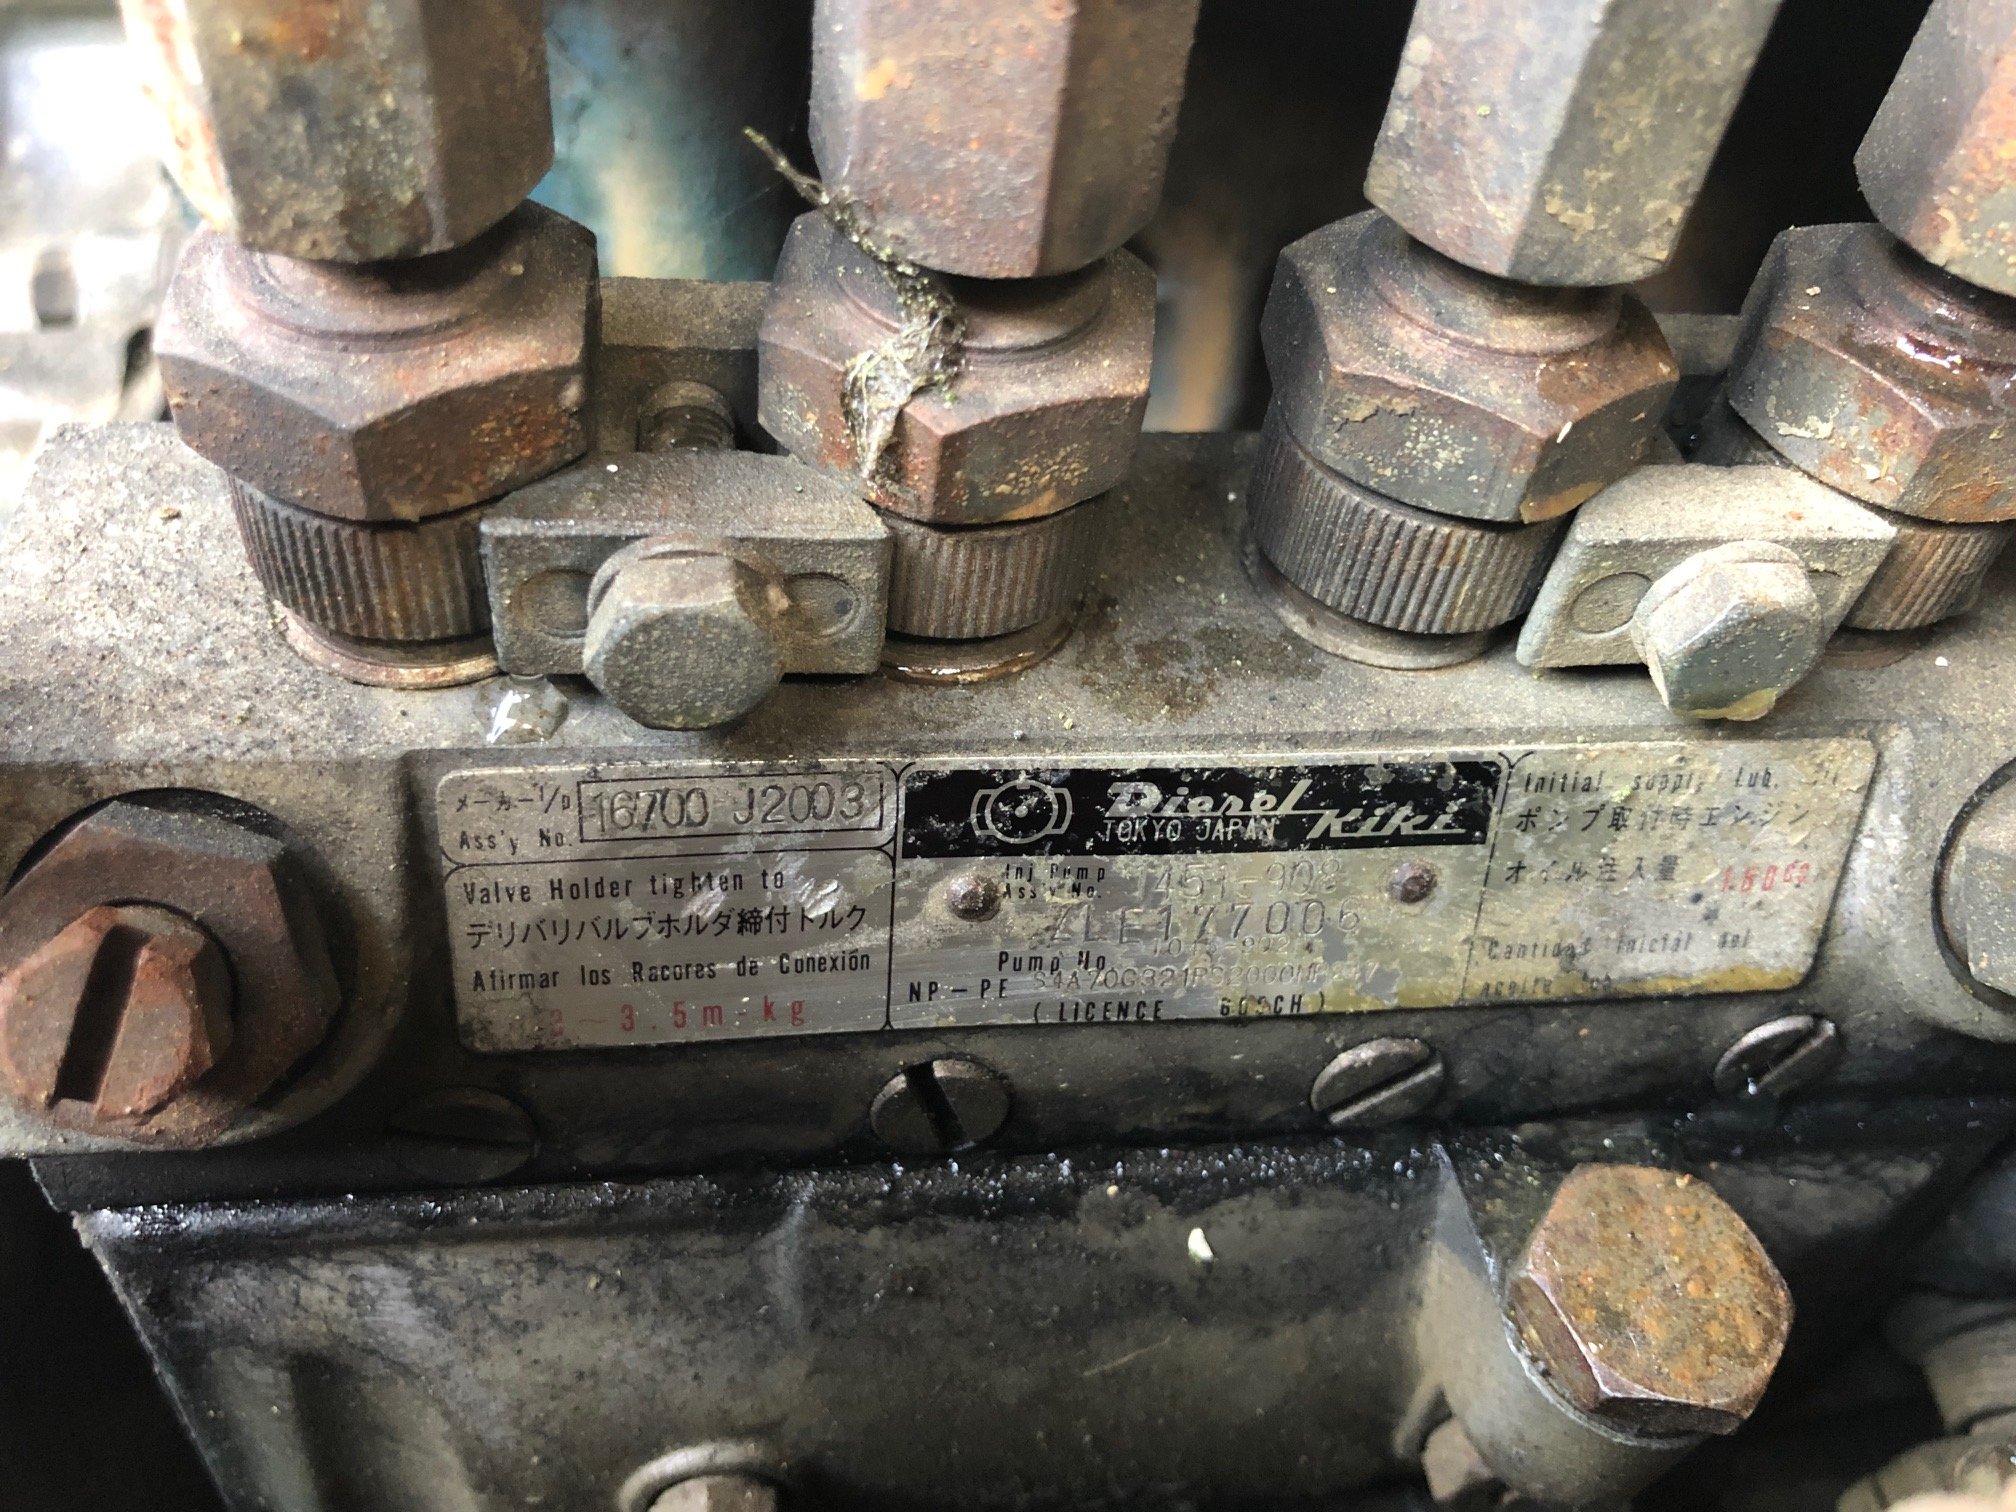
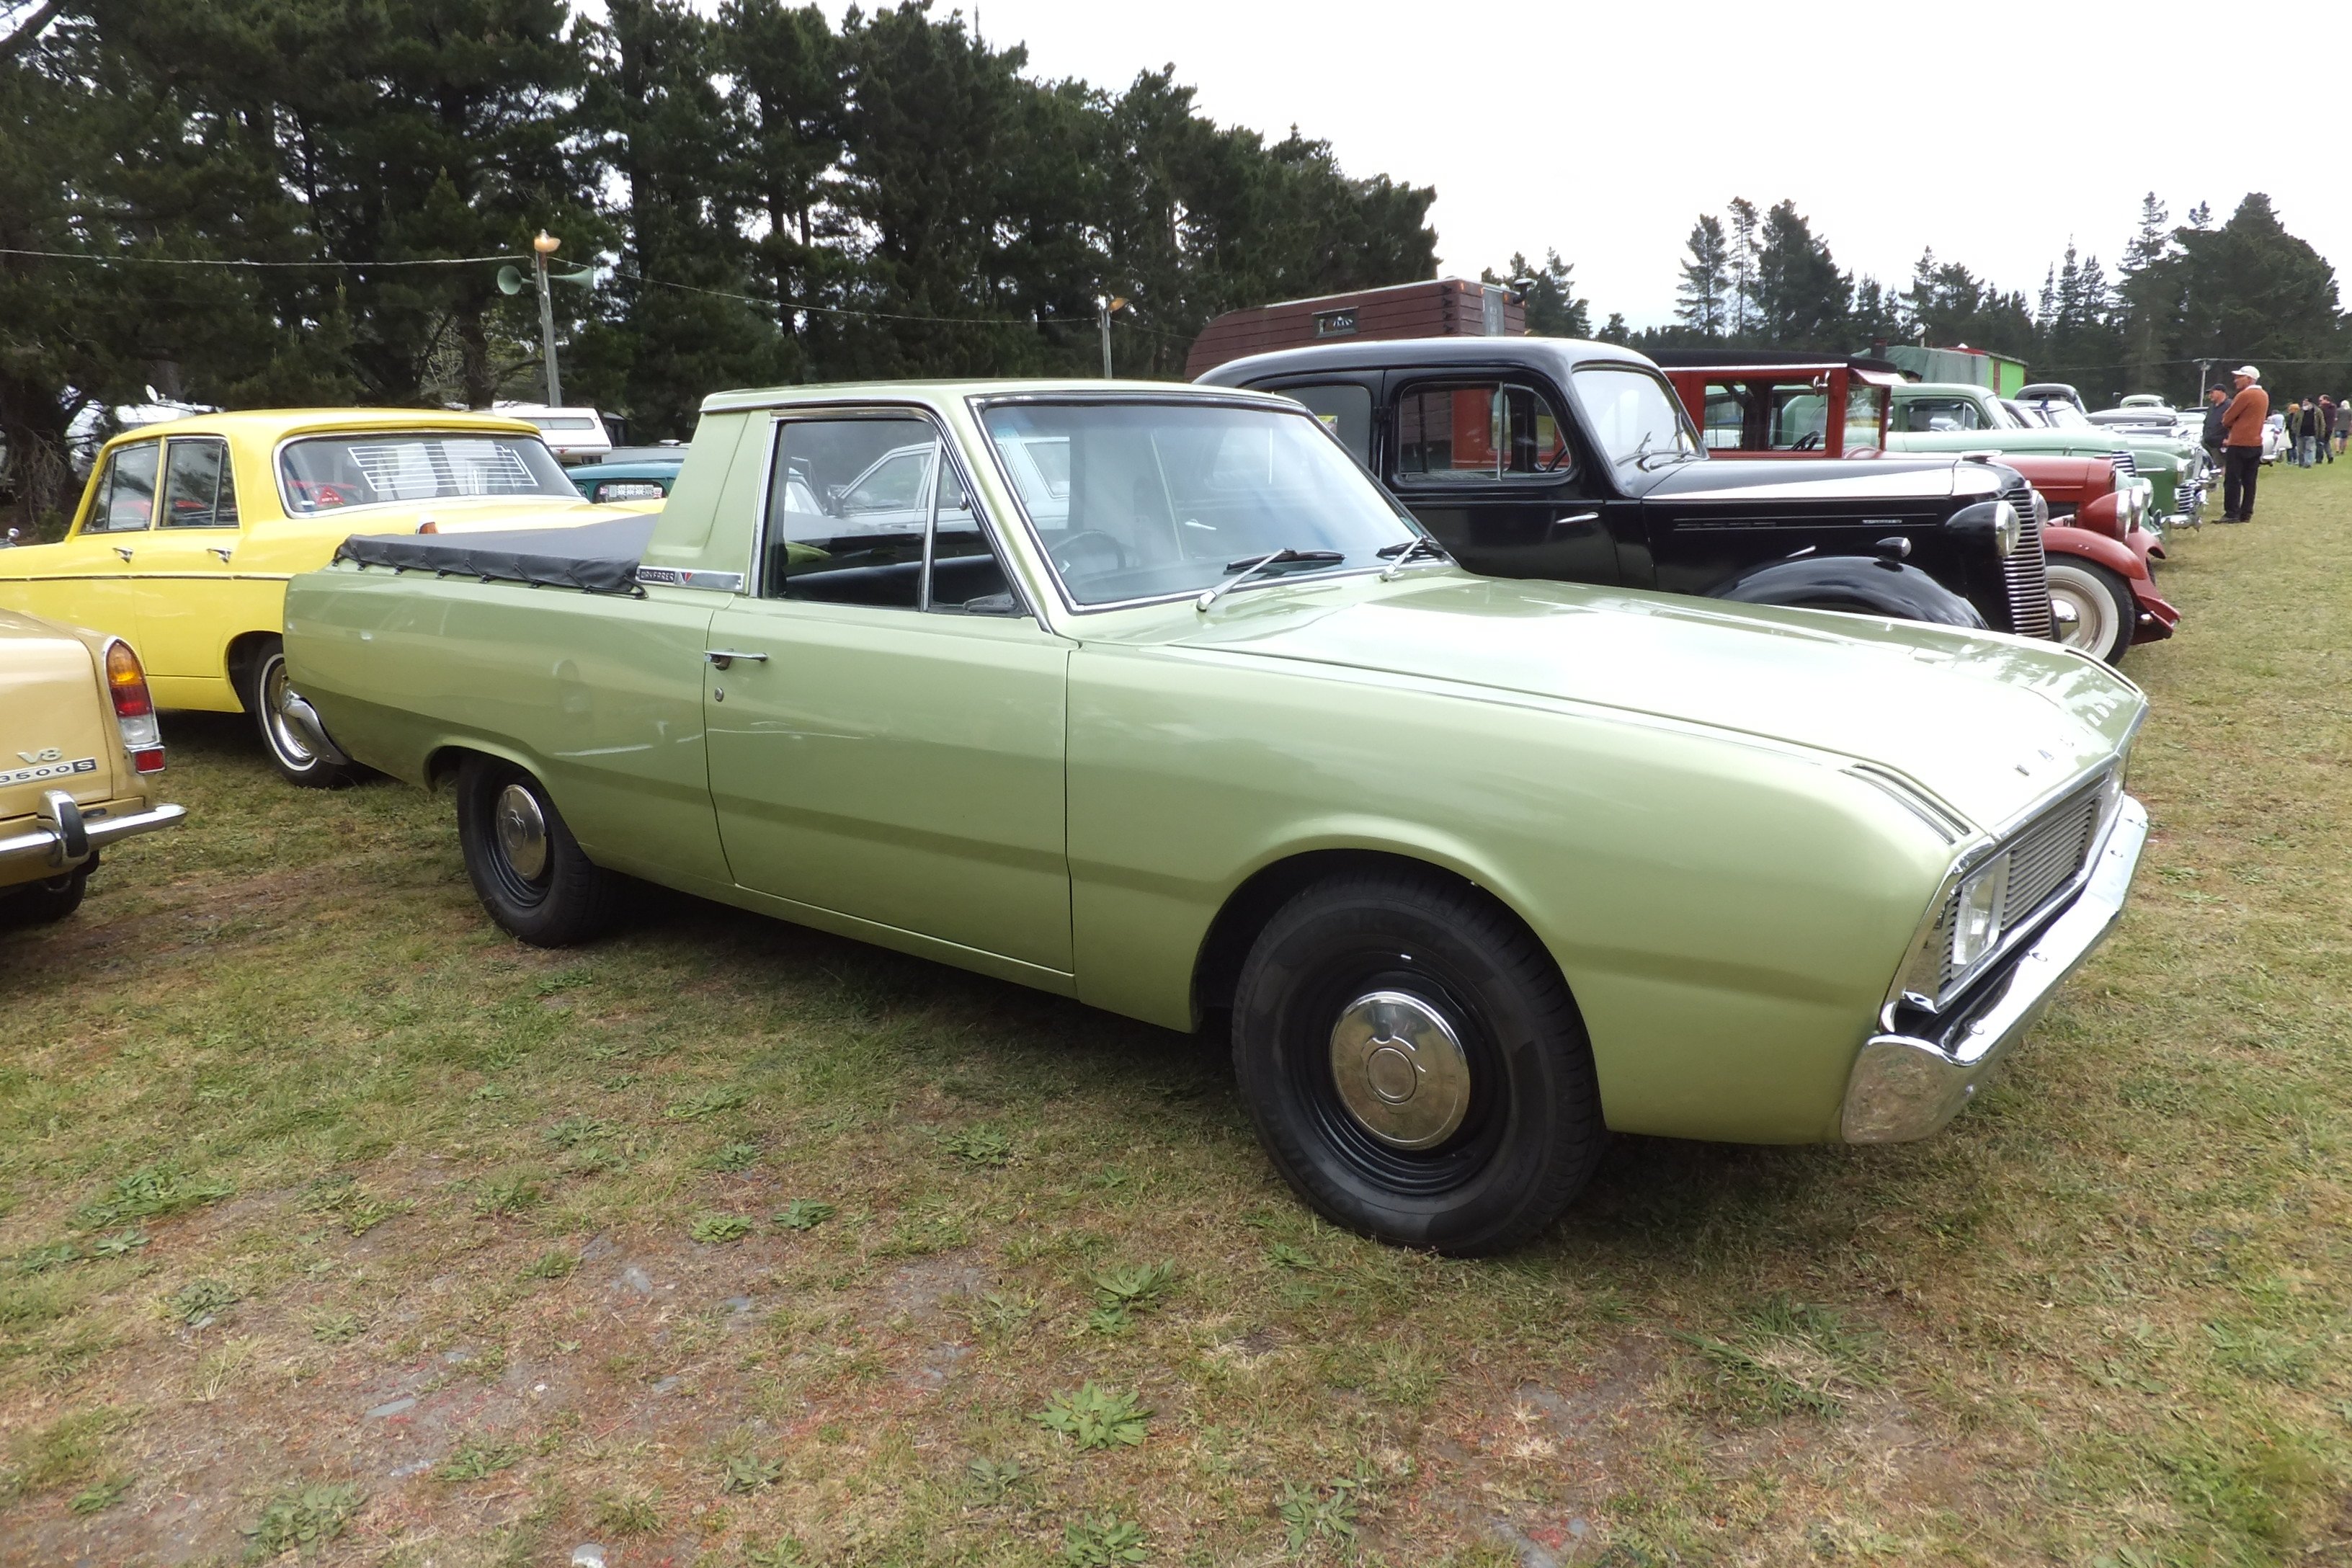
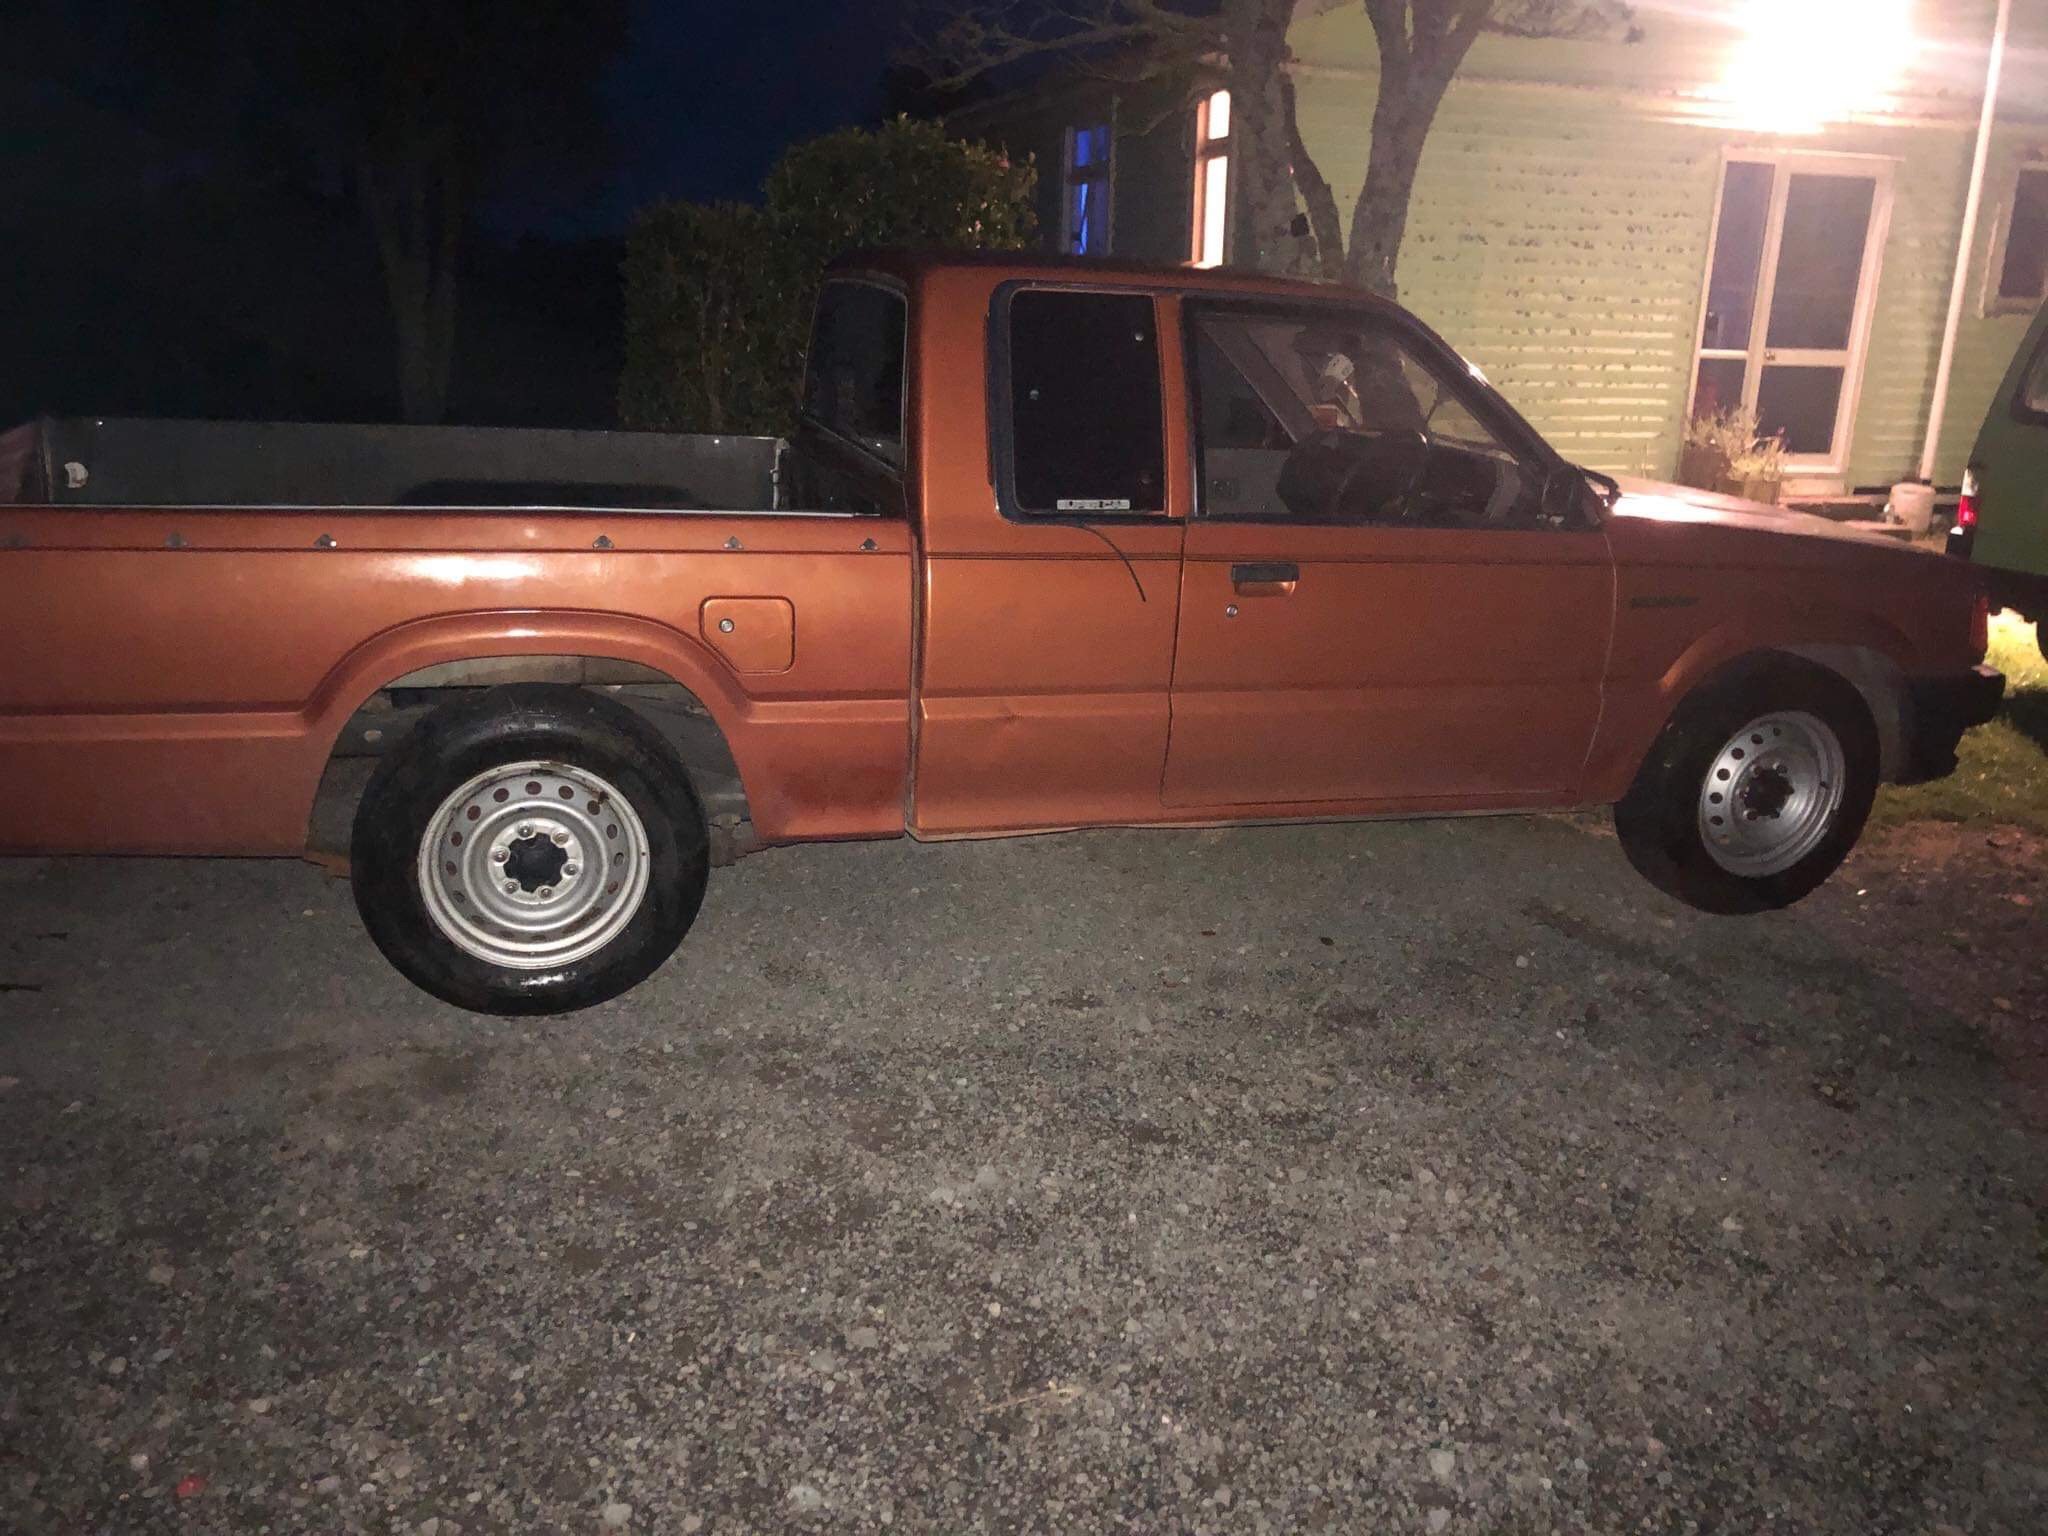
Who knows about injector pumps? A bit smokey when you put your foot down (but otherwise fine) makes me think there is something worn in here... So whats the plan....? Firstly, I cant touch it until my mini is done... Last WOF was in 2018 so somewhat thinking of just putting it through seeing if the list is managable and using it from there. But long term I want to pull the whole thing down a do a chassis swap to a late model hilux/navara etc and build it up from there. Will respray and refit as much interior as possible to make as comfortable as possible. Only thing which would prevent that is if I have to rego as a 'scratch build' and do a cert from there. Otherwise would either repower or rebuild the running gear and do a disc brake/power steering modification. Time will tell.... Discuss
10 points
-
Not a bad 3 day rummage around. Got to meet some new faces of old schoolers. Bought a km48 Sachs, a bunch of ammo boxes, a nice mecjar keg, a Carter afb, a bunch of Street rodding magazines and a few other bits. Was looking for a nice original Seagull, most were around $200 to $250.00 but had odd wingnuts or Bodgey fixes. An old guy yesterday morning unloaded quite a nice one as we were walking by. Had a yabber and he mentioned the price would be around the $200.00 mark. Done the rounds and went back to see $350.00 on it, the fucker wouldn’t budge below $300.00 so I left it with him.4 points
-
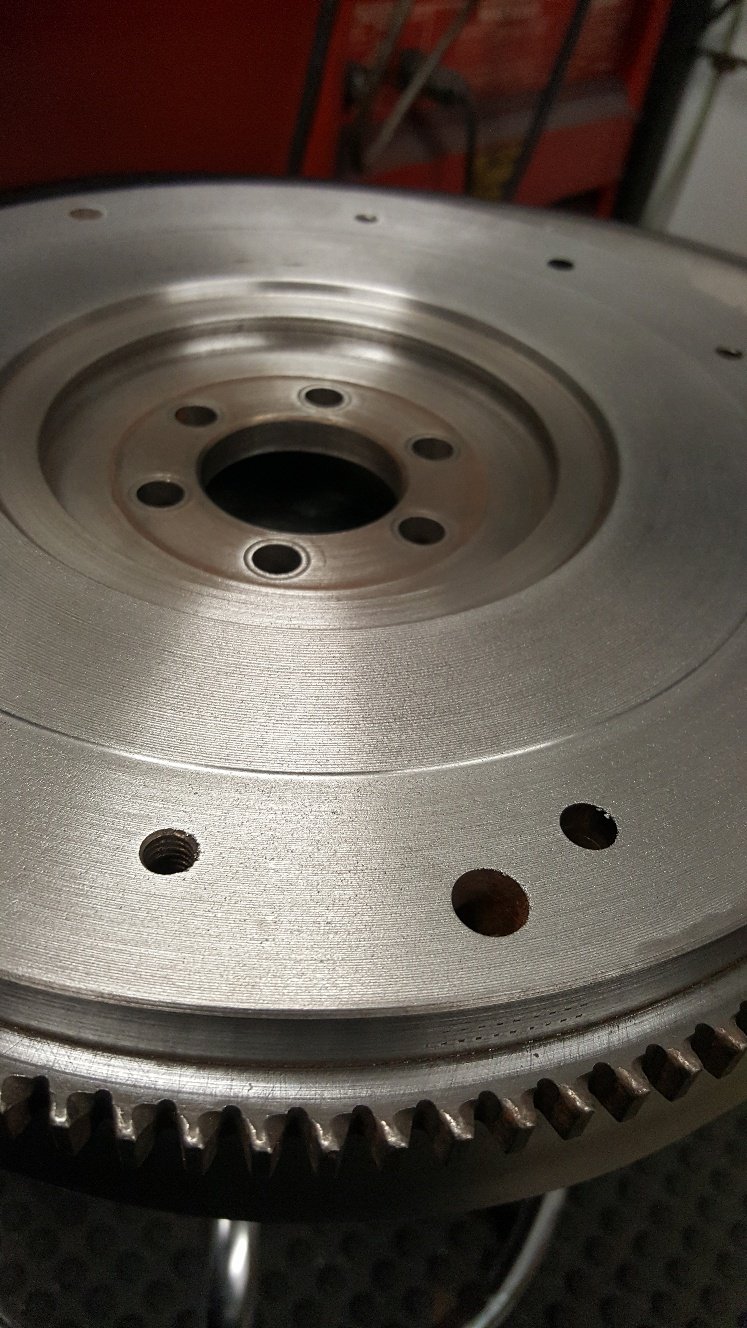
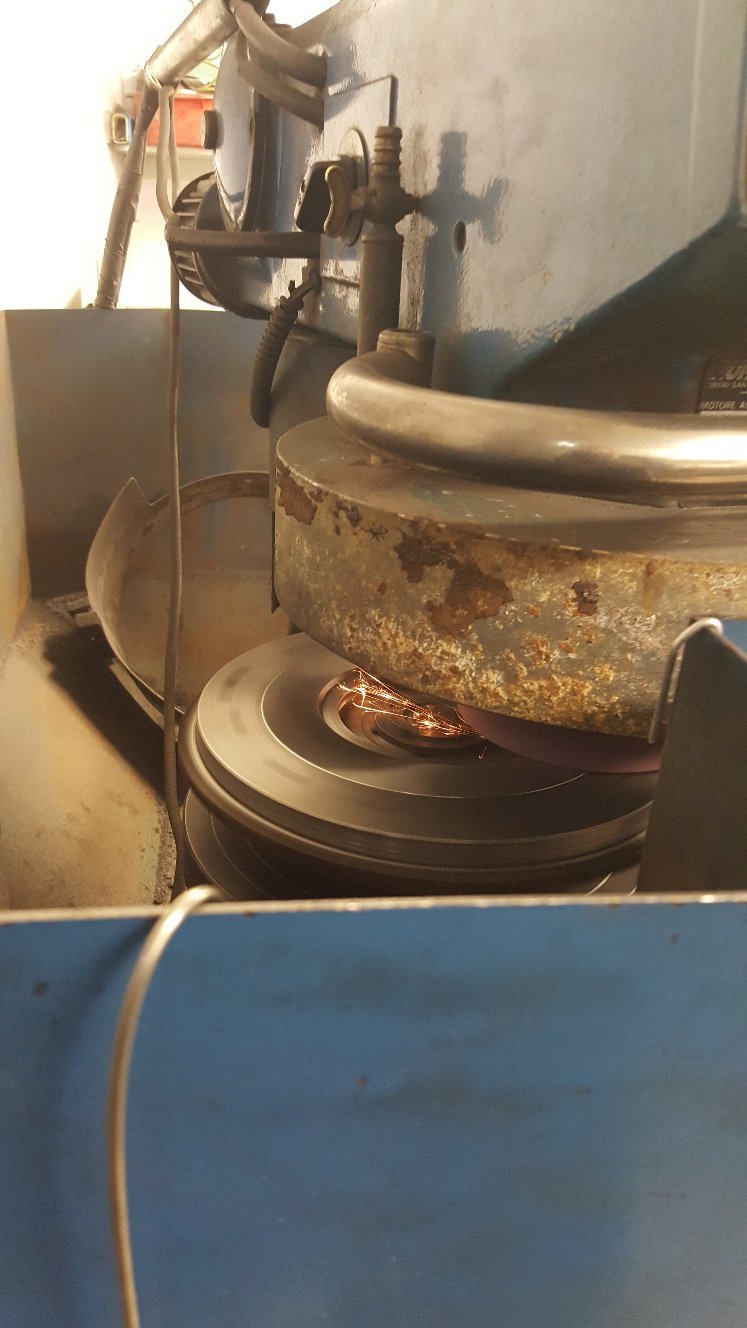
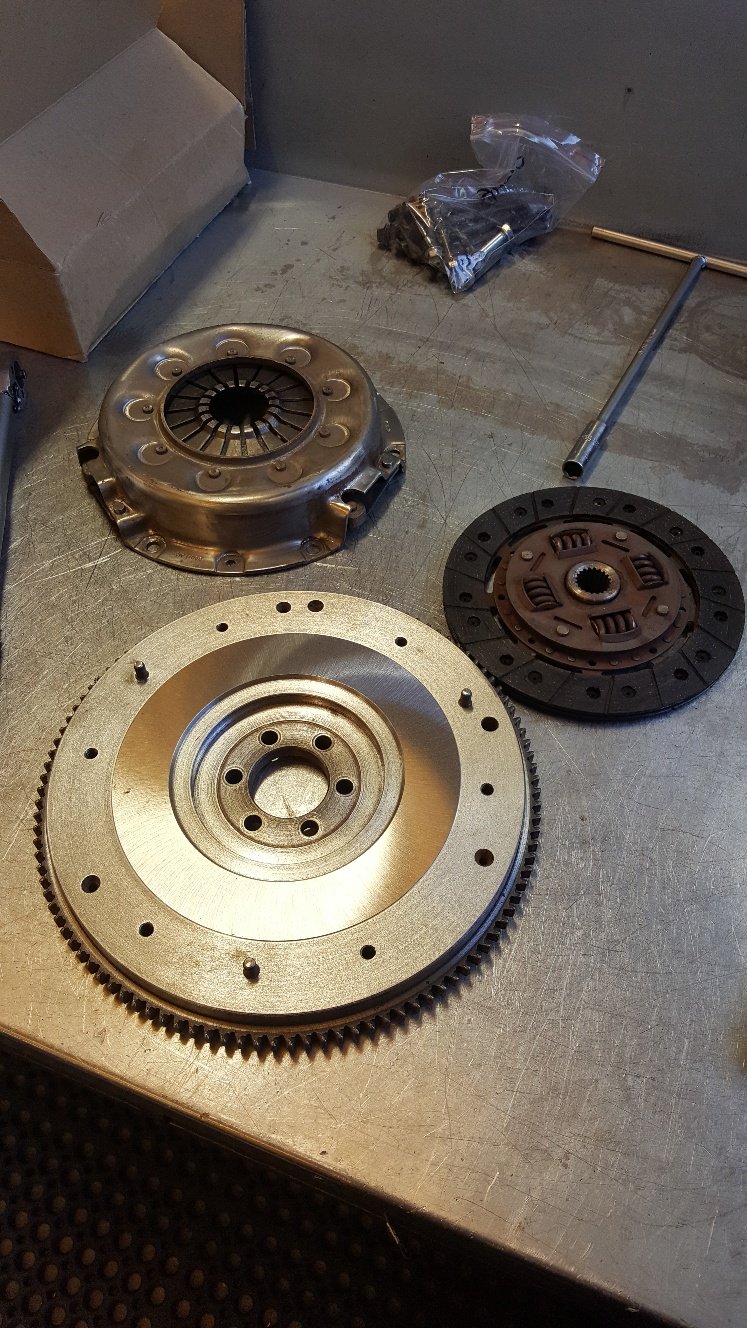
Here's a better shot of the .5mm step This is our flywheel grinder The flywheel get mounted to the round turn table. Then the grinder head swings to the left and you wind the grinder head down onto the flywheel. All sorted and ready to go off for a balance. We don't have a balancer so we use another reconditioner for balancing and he uses us for crank grinding. There's some machines that arnt viable to own as you may only use them a couple of times a week.
3 points
-
Wow- its been bloody ages since I visited this thread. I may well take some photos, before and after spec, if folk are interested. Trees and landscaping growth has been mental. I'm loving it. The place has such a different feel now. Anyway- I went for a stroll up one of the gullies where I new there had been some damage from that Cyclone Gita. I had never gone up for a look siince the event due to the amount of thick mud and caranage to climb over. However the cyclone was two years ago and stuff has settled. I wasnt expecting to find such a massive slip. Its mighty impressive. I could not actually walk up the top half as it was too steep. I had to clamber through the bush up the sides. Perched at the top looking down- Wow! There are some huge trees up there. This we knew but now the bush has been taken away from the bases and you can see them.. phowarr! We have started poisoning all the large pines. I wish we had done this 5 years ago as suggested by so many more onto it folk. The trees are way too big to even consider dropping as they'll take out massive swathes of very very old tree ferns. The trees we have so far poisoned have already dropped their needles and are breaking down from the top. Its so satisfying. The extra light is amazing, no more needles on the ground to smoother and poison the floor. The growth of natives below is already very noticeable. Poisoning them is easy as, cost bugger all. We are so stoked at the amount of time for other better things in life (like riding bikes and hooning in cars) we have gained by not having to deal with these fuckers now I am sort of tempted to drop a couple of big ones (and get an arborist mate who we both work for at times to help- he has better gear). If landed in the right places there is some real good potential for some North shore spec trails to be had in the gully. Speaking of mtb trails- we have made some more and will continue to do so as time allows. Its a fun thing to do but not super urgent when we have an amazing mtb park full of great trails just up the road. The trails we have made certainly dont suit fatty lazy spec riders or heavy clunky bikes- very steep up and down. Which is what I like. Singletrack. I want to make more flowing fast ones across the property and our neighbours have given me the green light to make some runs down through their pines too. We have new neighbours moved in over the road. Hes into mtbing and is my age within two months , born in the same hospital! Really cool folk and we are stoked to have them join our valley. We want to make secret trails down from the park into our valley I'll get some new photos soon, once I've done the lawns (which look great but fuck me @ amount of lawnmowing in spring.... )3 points
-
Trojan Wheel Studs. I use Auto Trail in Hamilton. Show them what you want and they will have a stud to suit. You may have to drill the hub to fit a larger flange size but the Trojan book will tell you the size drill bit to use. I just did my MK2 escort this way. And yes it can be a cert requirement if your not getting enough turns out of your wheel nuts. And this conversation could be totally taken the wrong way if read wrong!!!2 points
-
Thanks again Chris, you and Aaron have got me fizzing about starting my moped build2 points
-
It's a bit lame when factory parts don't meet the certifiers requests.2 points
-
Me & @Geophy went looking for the OS parkup but couldnt find ya. Great to meet up with @bathcollector and also @gazguy dropping by every hour to stash stuff at our site. I sold really well over the 3 days. Brought a pre unit box for my drag bike project. 2 matchbox Vans. A Totara tree and two species of Lancewood trees. Stoked as2 points
-
Another small job I wanted to take on whilst the car was in bits, was to check the valve clearances. I had no history of it being done, and its a fairly important thing to check on these engines, and not hard to do. Valve clearance is the small gap that must exist between the rocker arm and the top of the valve stem. This gap allows for expansion of the parts as they heat up (mainly the valve), so that there isn't either excessive space between the two (valve won't open as far or as long, and will make a loud tapping noise) or too little (valve may not close, and can result in a burnt valve). Some engines have the means to self adjust, usually via a hydraulic lifter (those things that make Mitsis go "tick tick tick"), but on these older engines (and even some modern engines, like Hondas) the clearances were a scheduled service item and needs to be checked and corrected. On this engine it's nice and easy to access with the intake piping out of the way. It's just a matter of removing the valve covers, of which mine were leaking anyway. It turns out that a few of the valve cover bolts weren't even finger tight, so no wonder the oil was getting through the gasket! With the covers off, you need to use a socket and ratchet to rotate the engine so that the crank timing mark lines up with TDC on the front pointer. If its correct, you should find that No 5 cylinder valves are "rocking" and this is when you measure No 1 cylinder clearances. "Rocking" is the term for when you watch the rockers on that cylinder and you will see the both are at the same height, but if you rock the crank one way, one rocker will push down slightly, and if you rock it the other way, the other rocker will push down. Ford Cologne engines are a little special, so the layout isn't quite what you expect. Take note of the layout of the intake and exhaust valves, they aren't always in the same order. The clearances should be as follows. These are done on a cold engine (about 20c ideally). The exhaust has a bigger clearance due to the additional heat the valve is subjected to. When checked with a feeler gauge, there should be a slight drag on the blade, but not too tight, or too loose. You kinda just do it by feel and get to know what it should feel like When one cylinder is done, check the list to see what rockers will be rocking next and turn the crank (in the direction of normal rotation) until those rockers rock, and check the clearances on the opposing cylinder in the list. Easy. If any of them need adjusting, there will be a screw on the opposite end of the rocker, that either needs to be loosened or tightened to open or close the gap. Most cars have a locking nut to stop it rotating, but the Cologne doesn't, so turning the screw will adjust it, and it self locks. Mine were very tight, so I used a six sided socket and rachet to turn them. A little goes a long way though, so sometimes even a slight tweak of the screw will be the difference between loose, and the right amount of drag. Five of six cylinders had valves that were too tight to get the blade into, and one cylinder was loose as a goose. I don't know what this means, hopefully it isn't a sign of valve recession due to a lack of lead, but time will tell. It could also just be bad adjustment from a previous mechanic....2 points
-
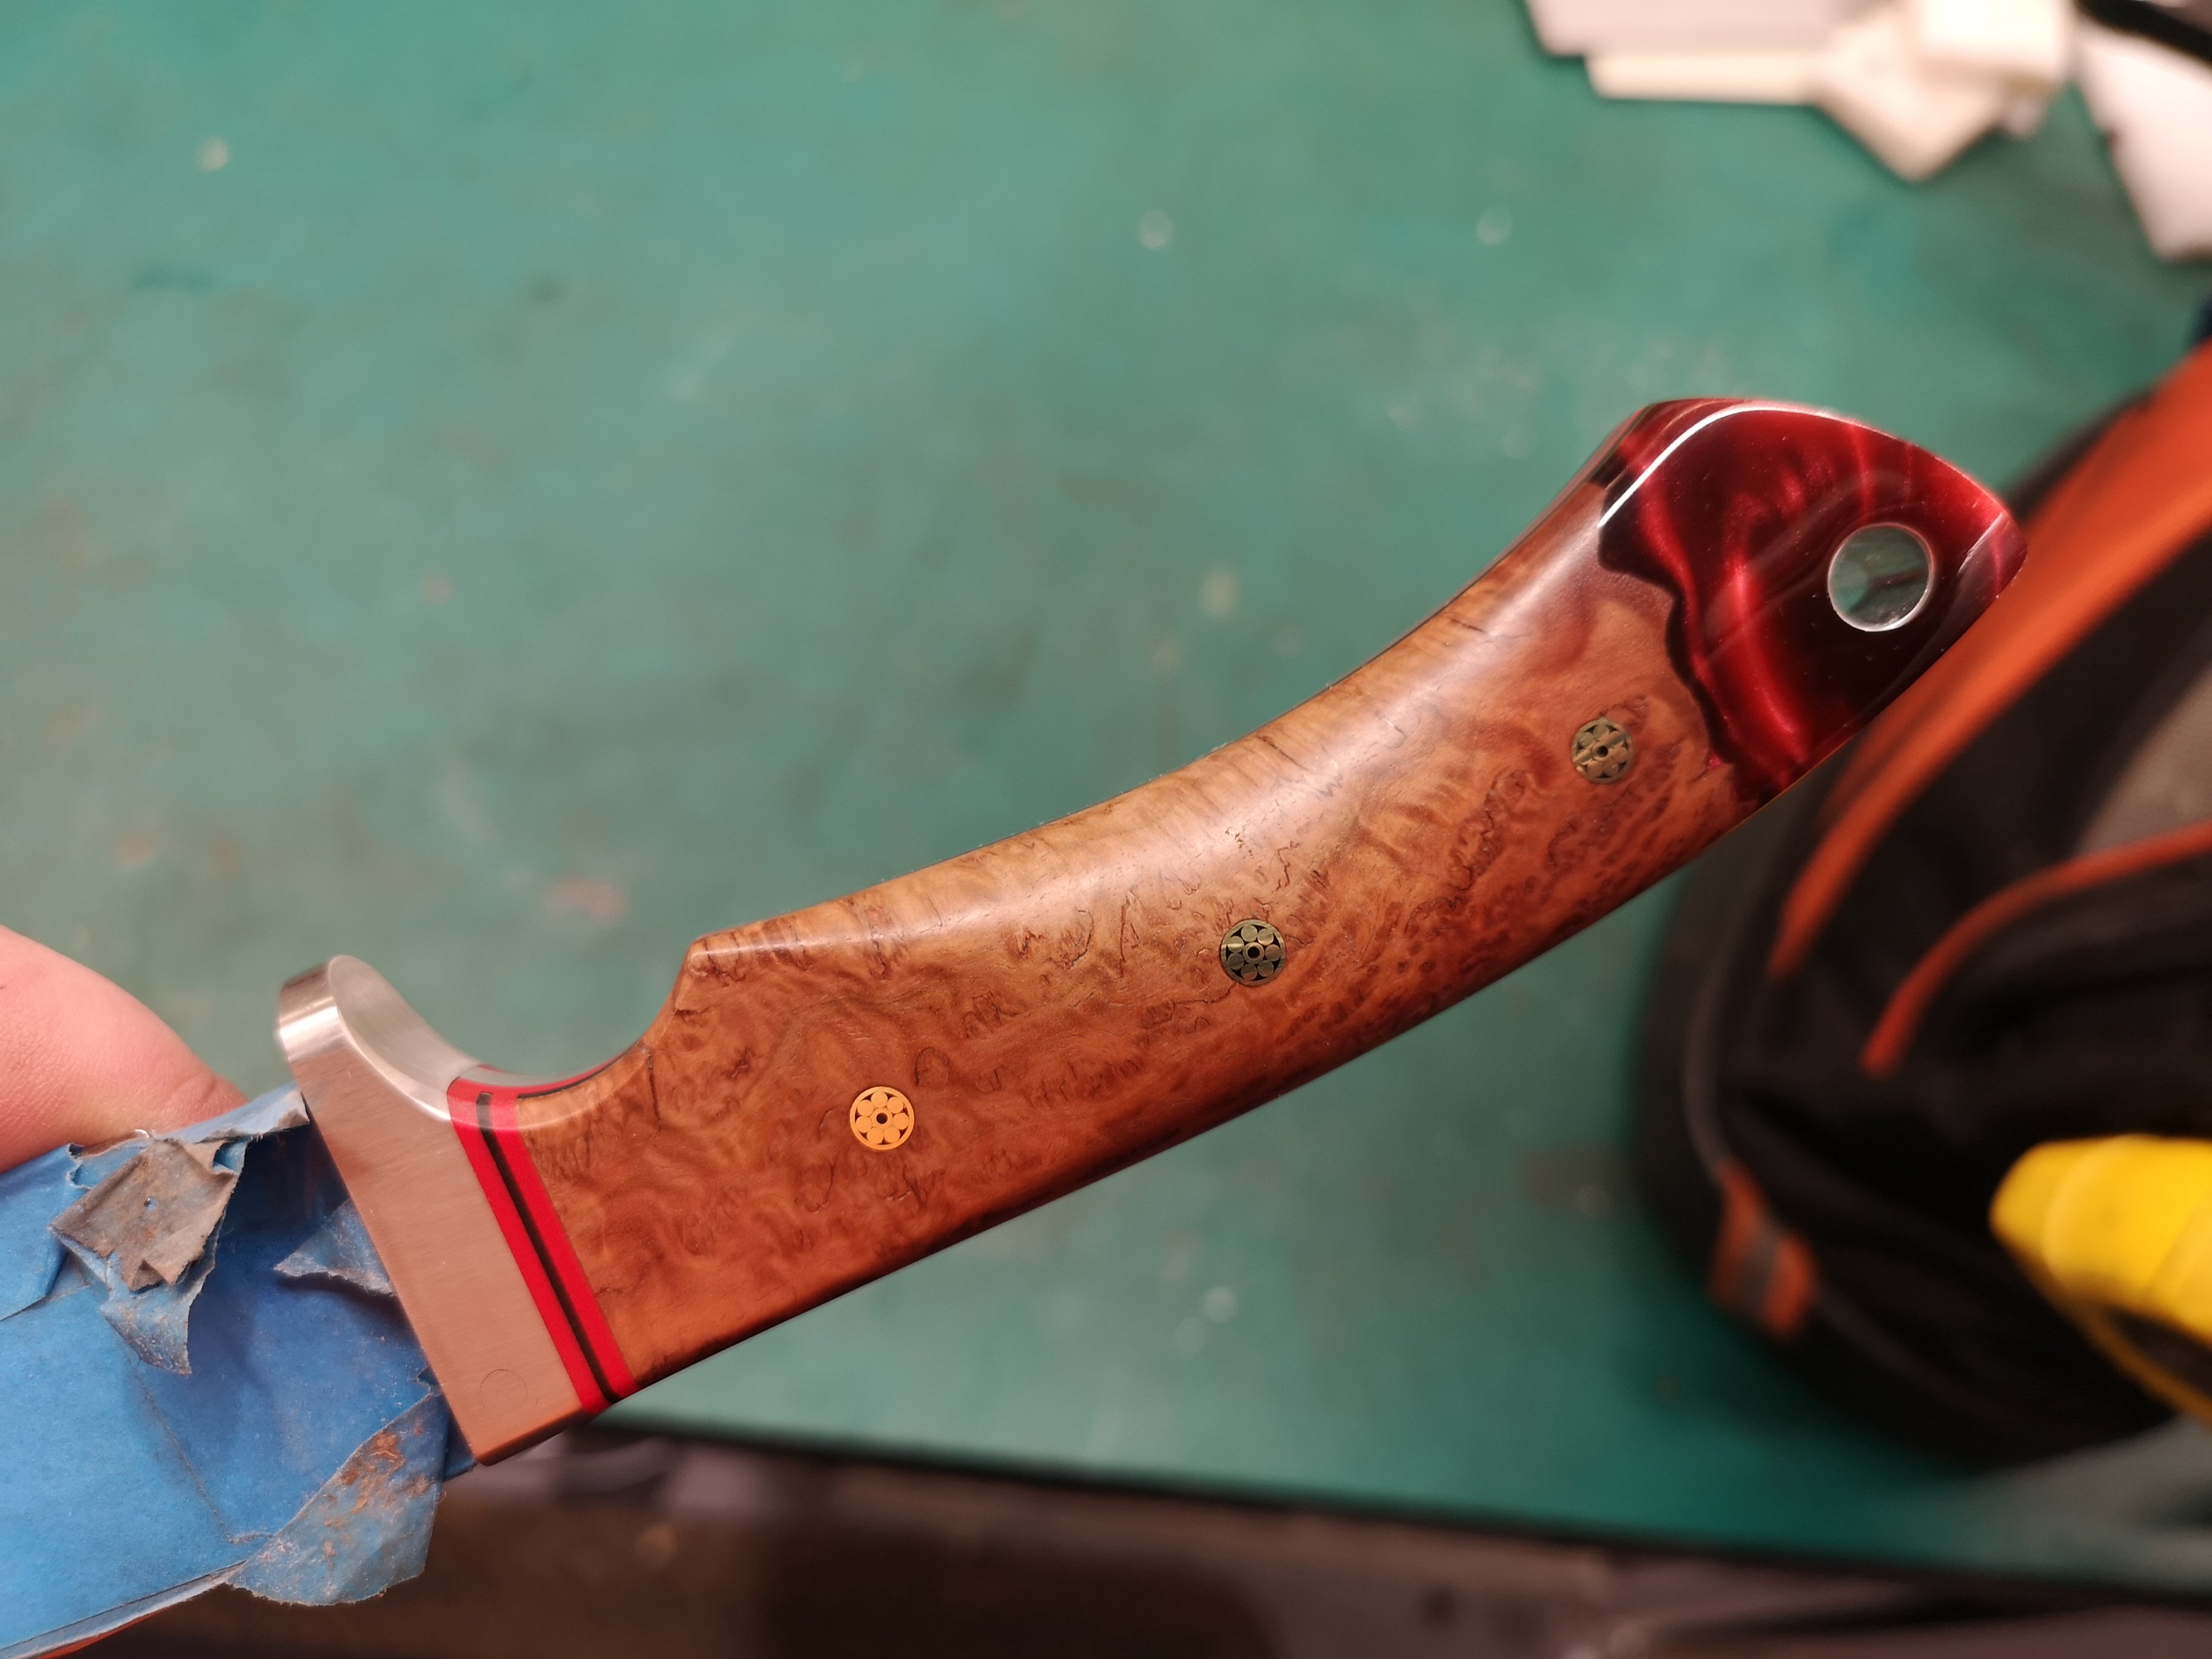
Made up another blank with some wood, workmate turned it into a handle for one of his knives he makes.
2 points
-
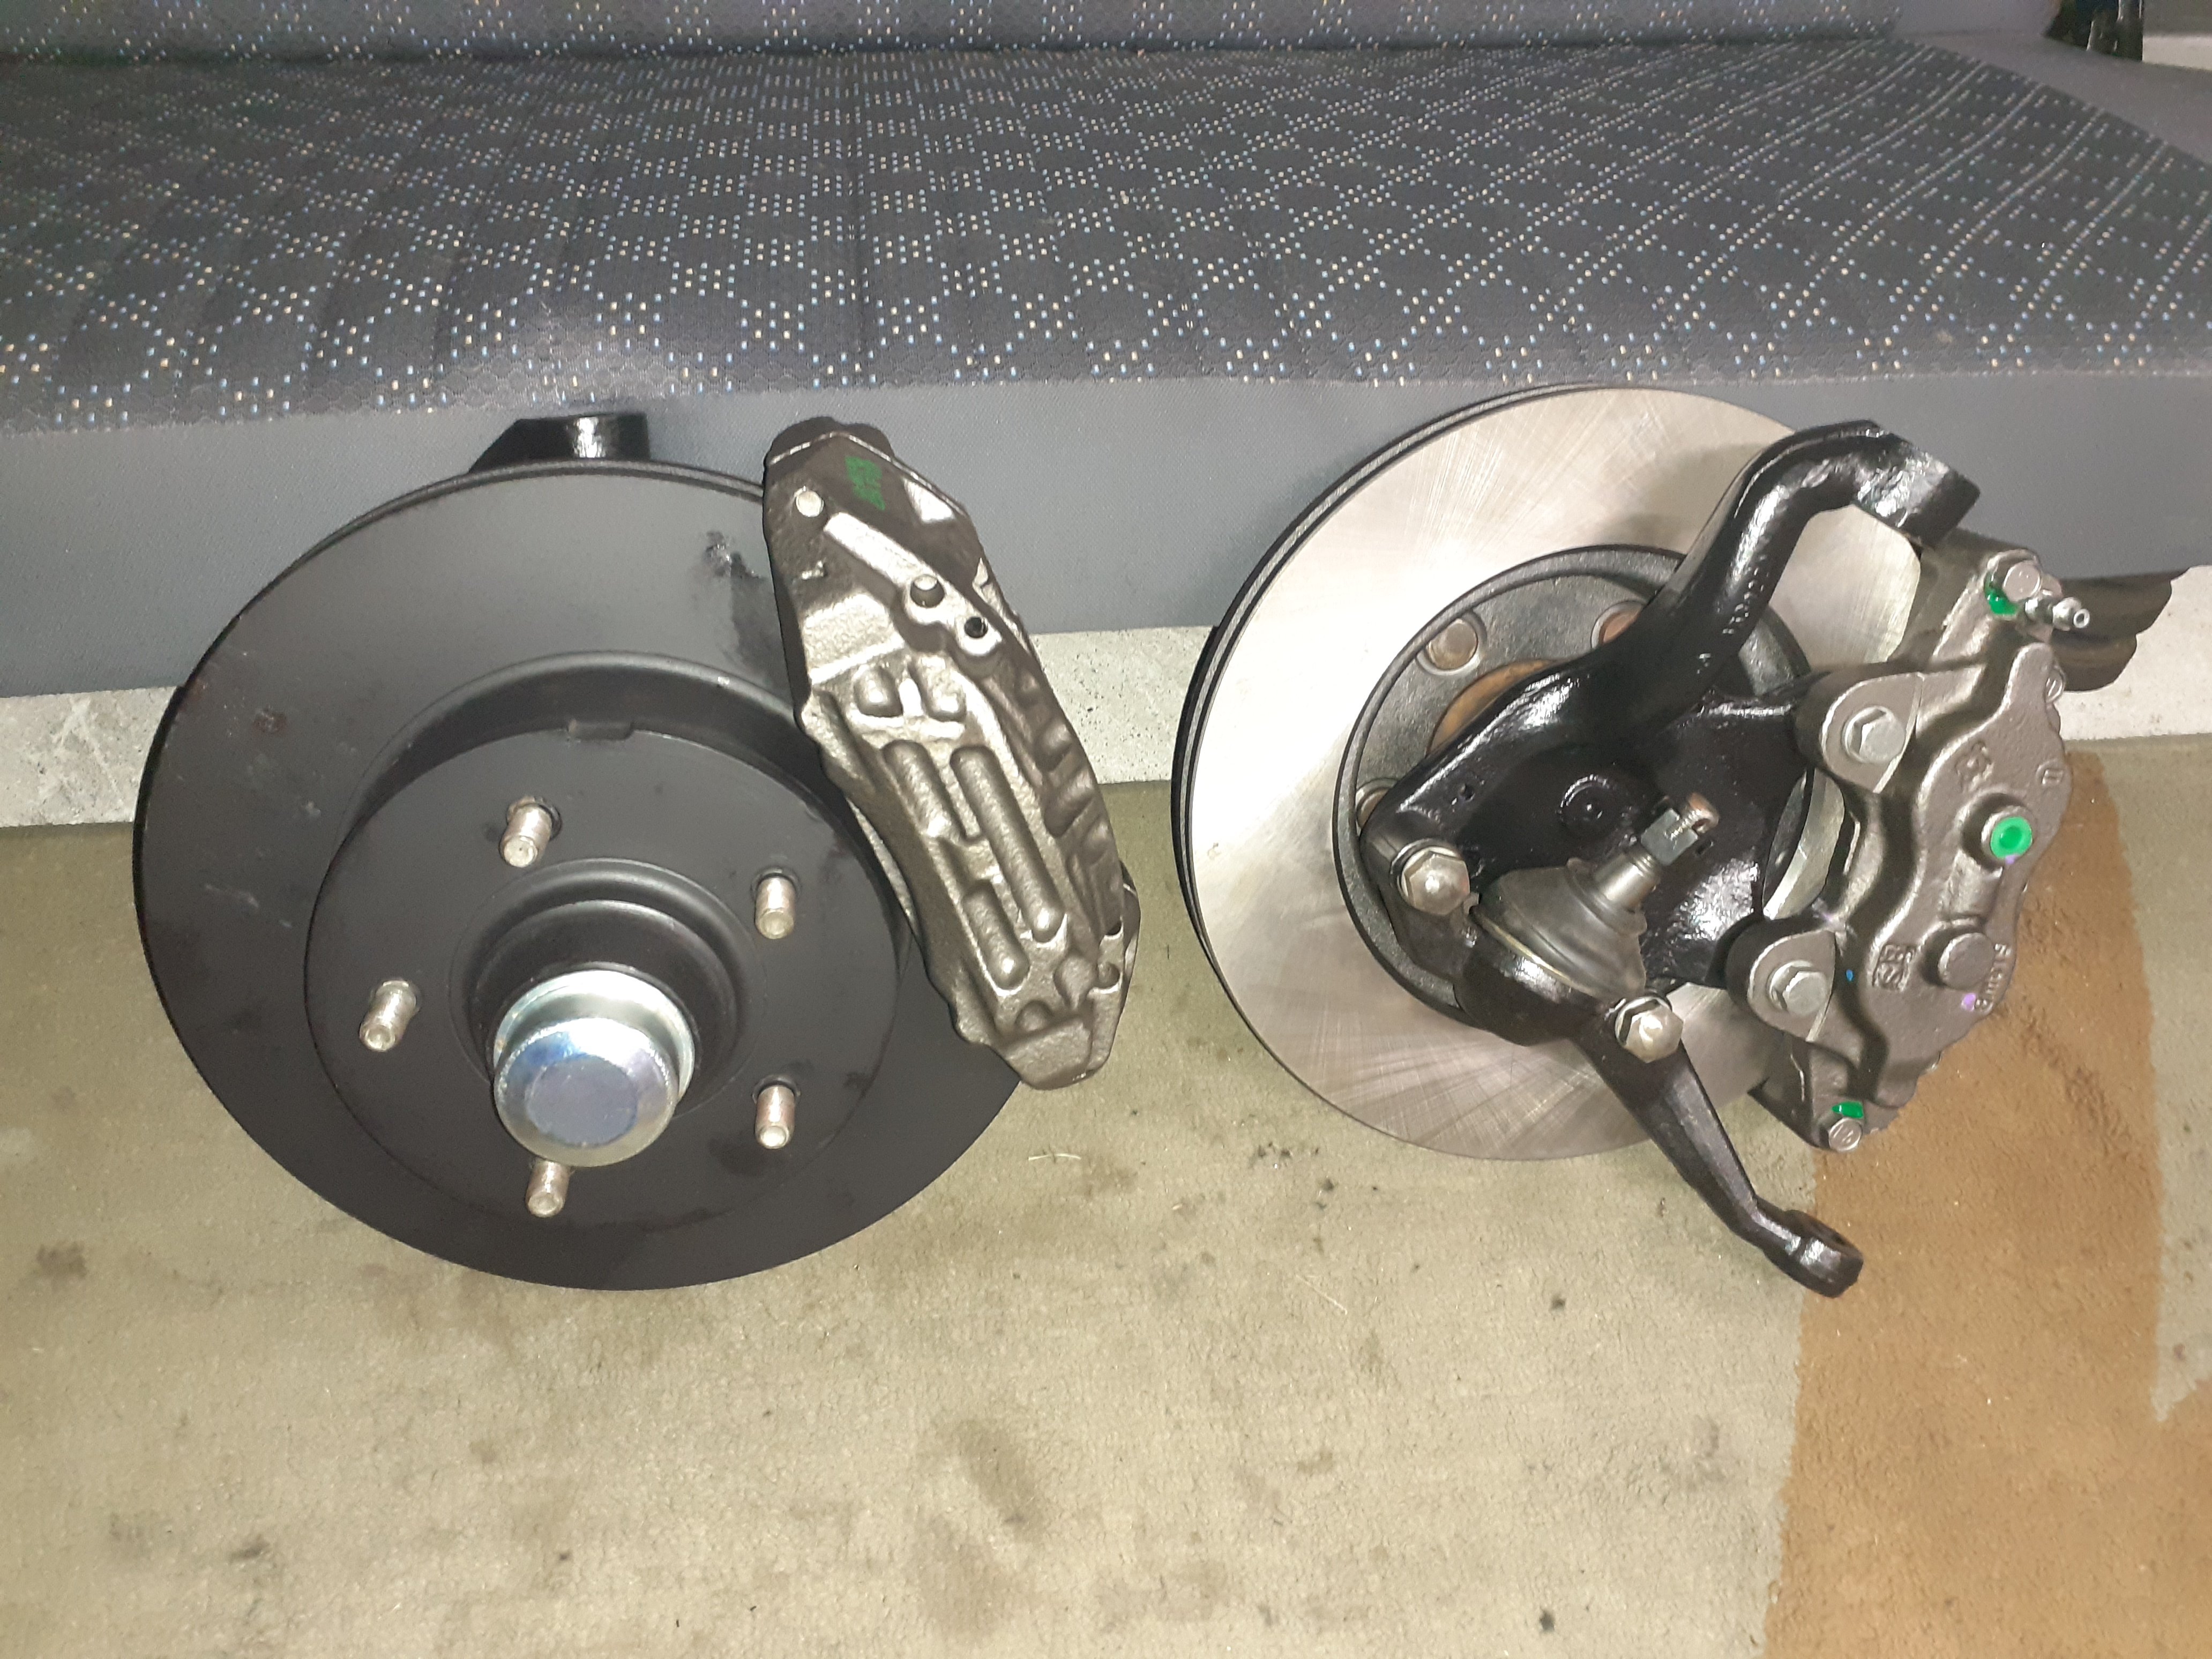
Front brakes ready to bolt on VJ spindles, new discs with 3mm off the od thanks to @RXFORD, then @RUNAMUCK kindly supplied some wheel studs to replace a couple that got mangled on the way out, reco surf calipers, new wheel bearings, aussie valiant lower ball joints which have a shorter steering arm for more hektik drifts, and repco had some new dust caps
2 points
-
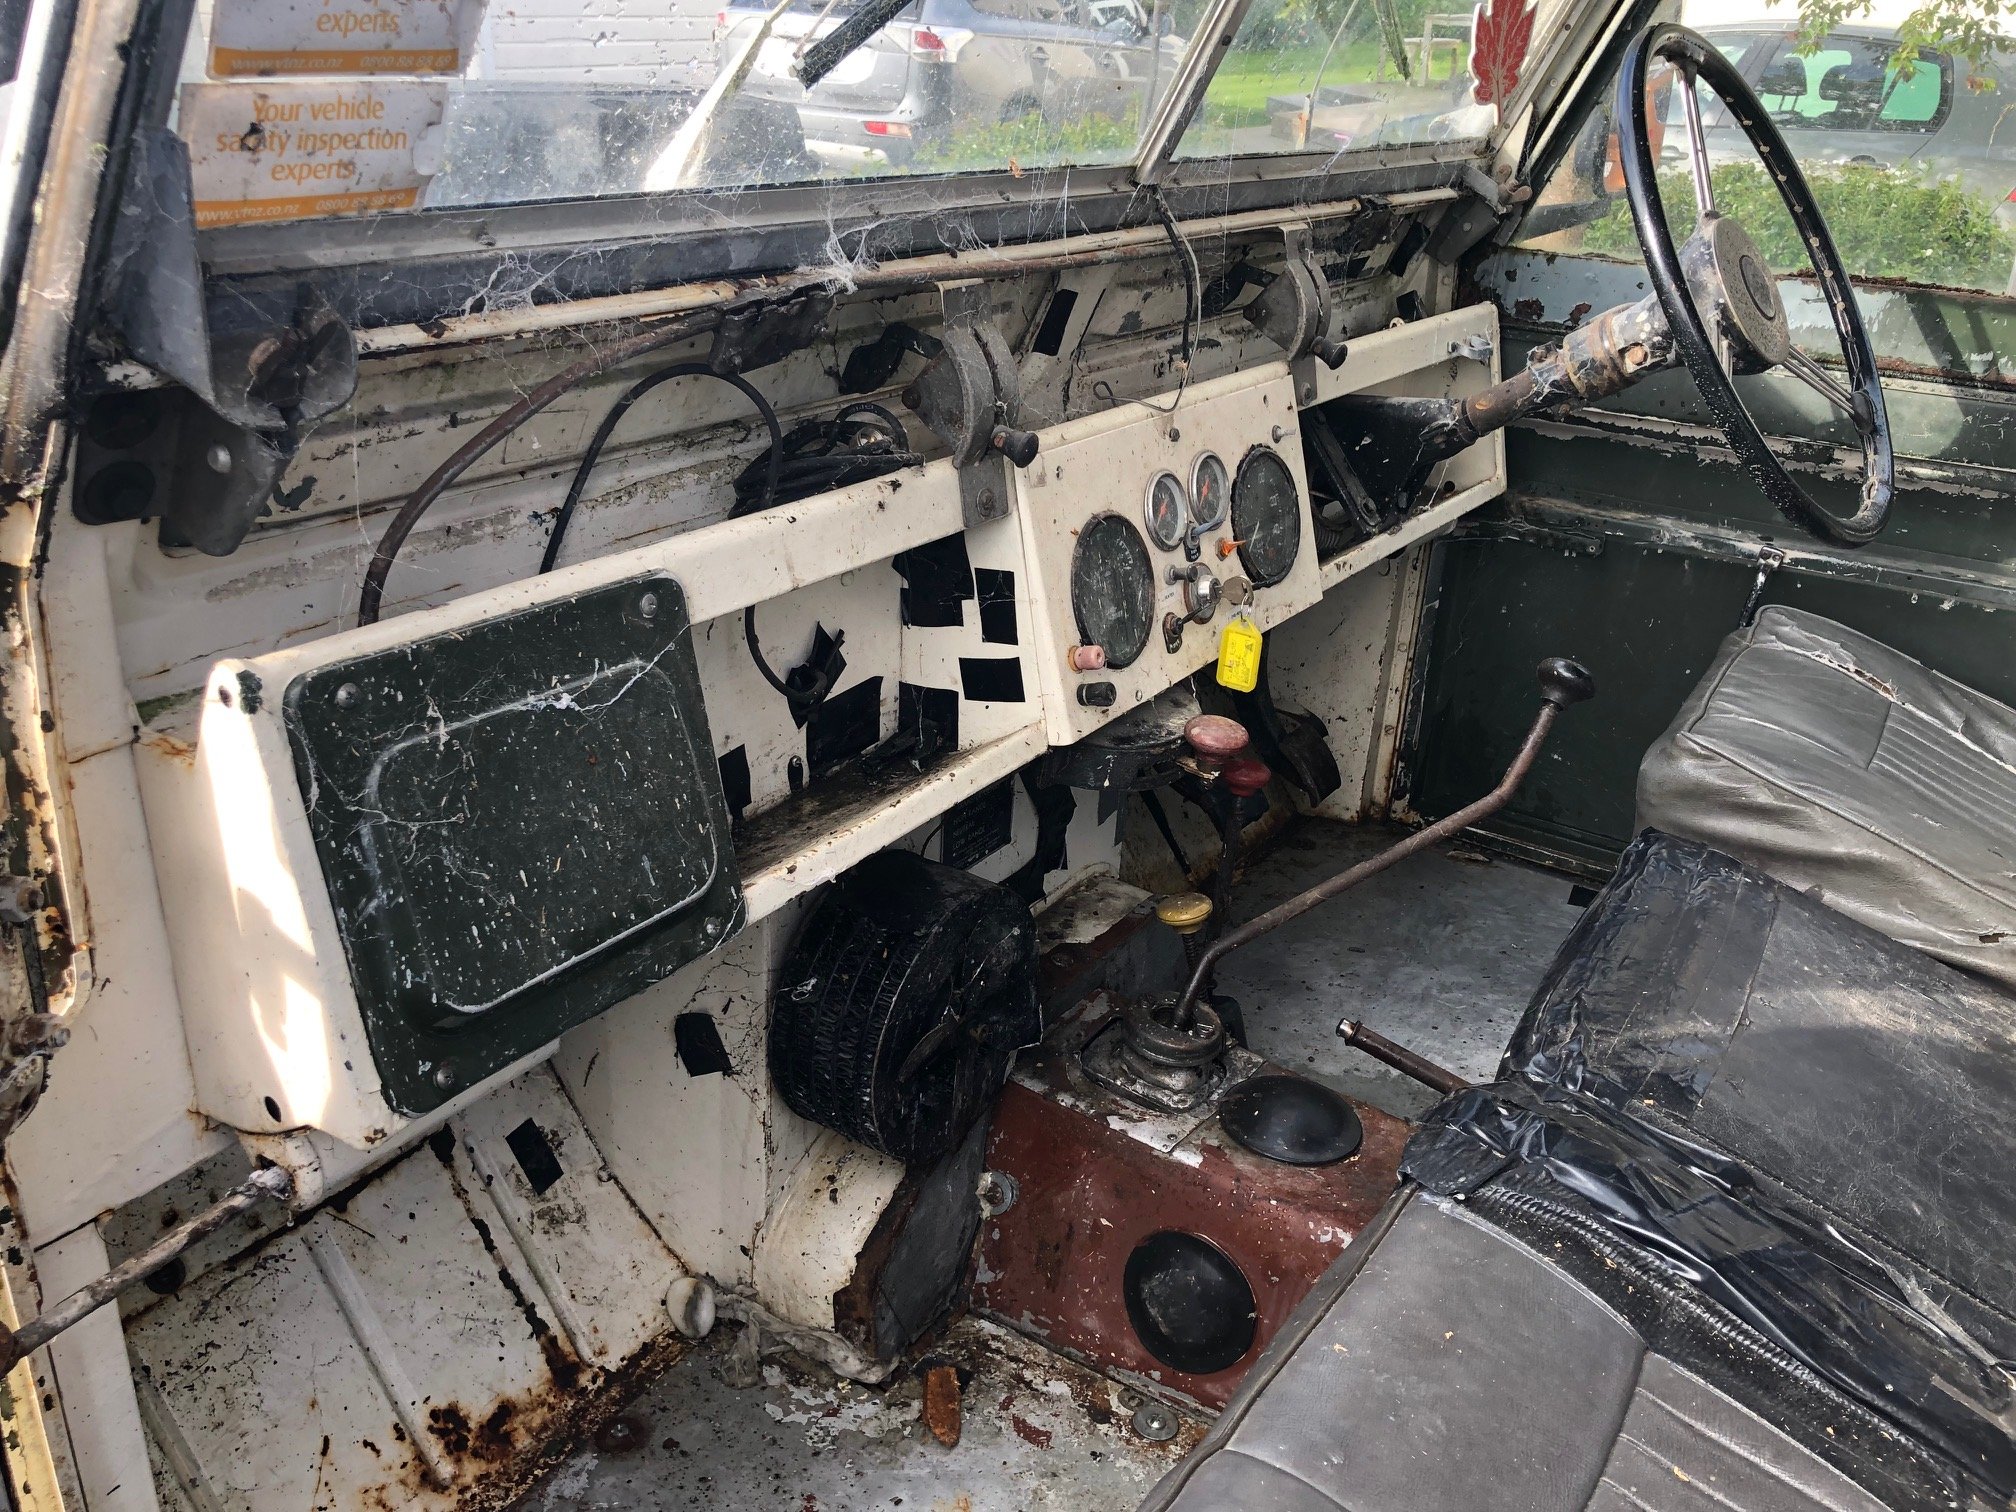
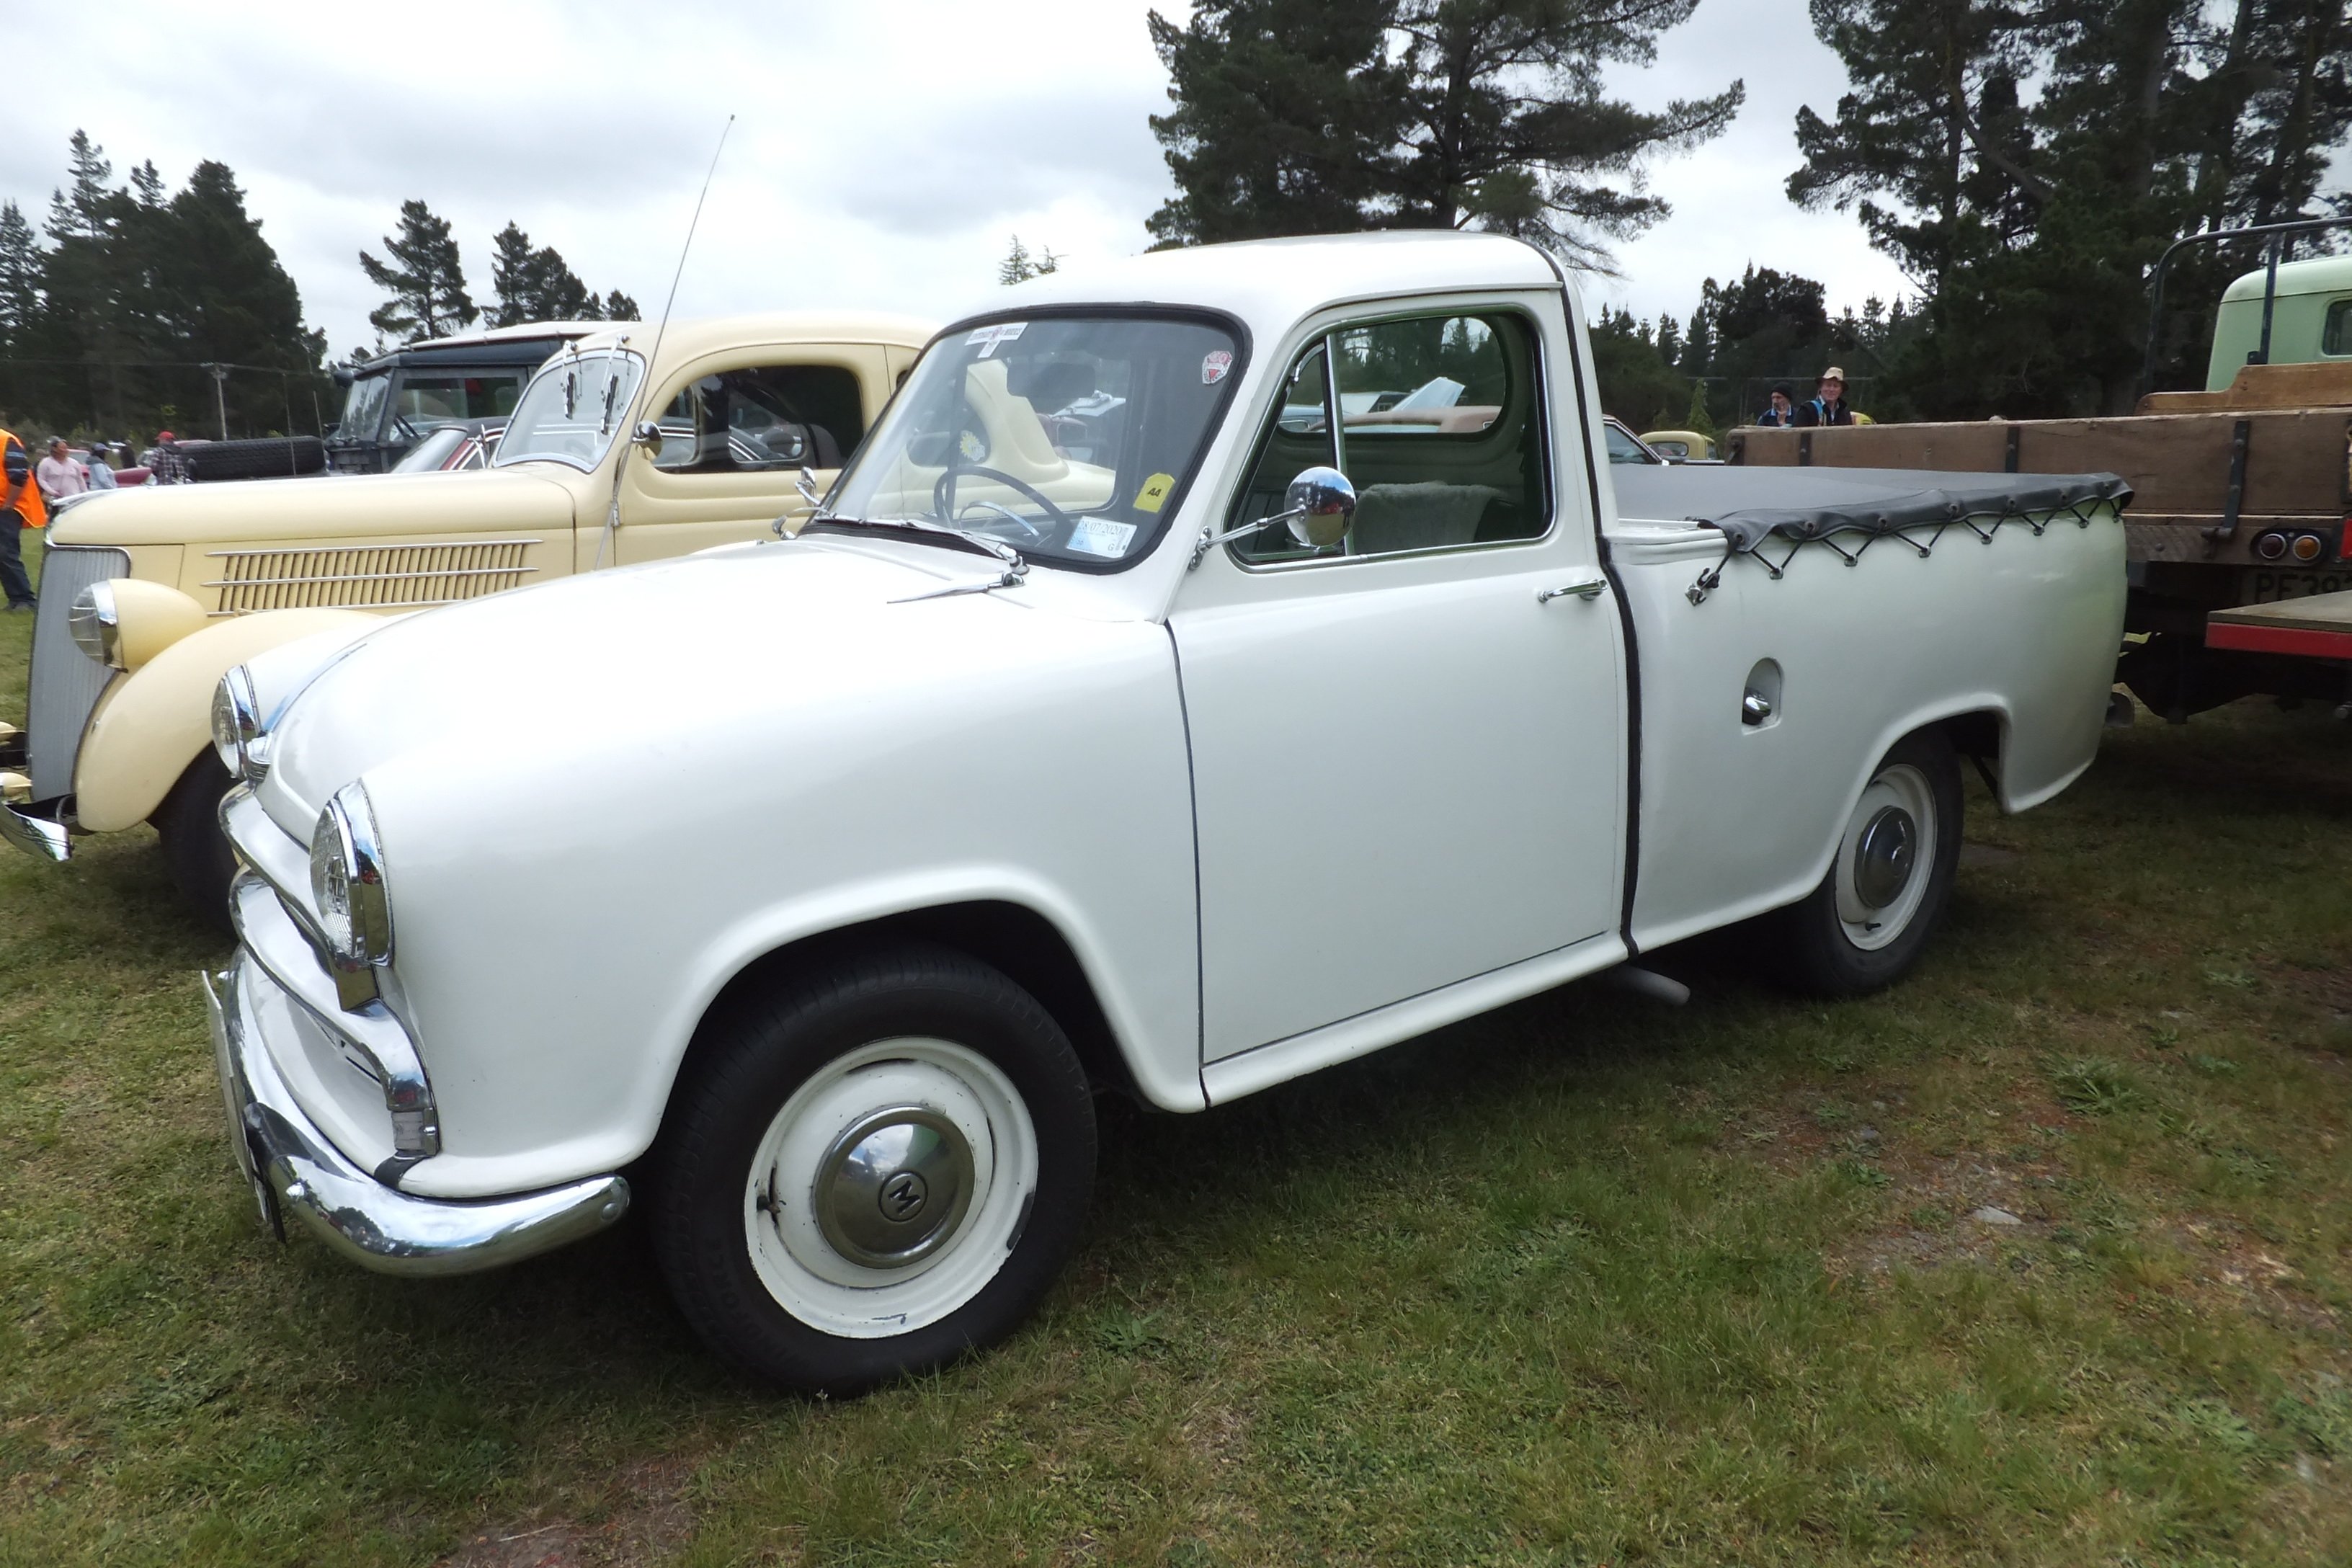
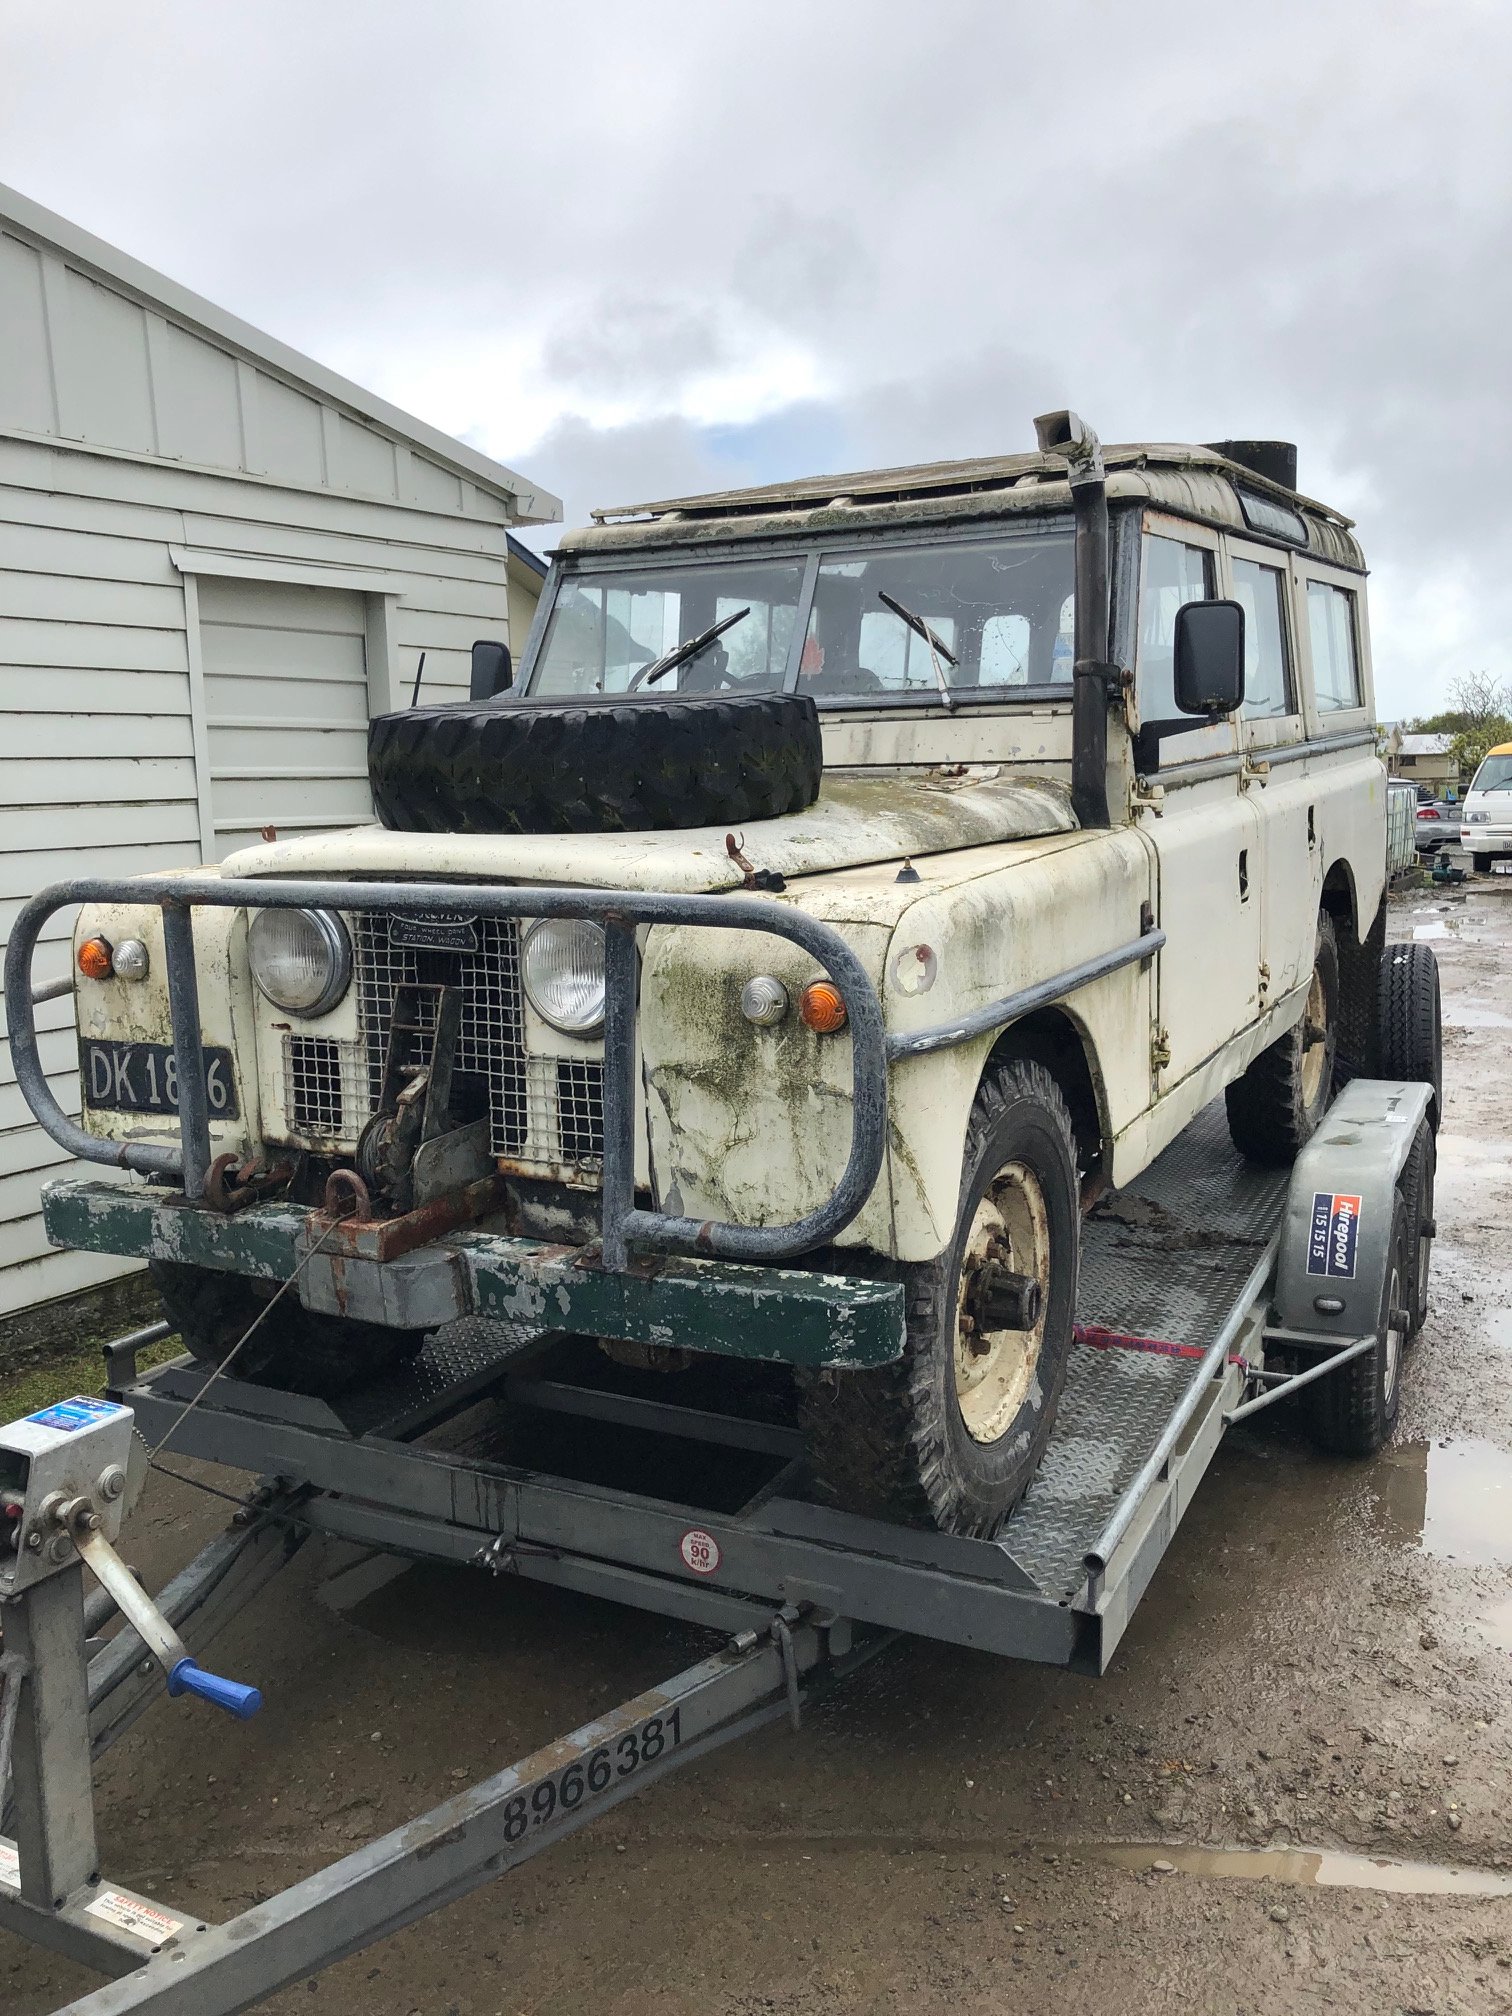
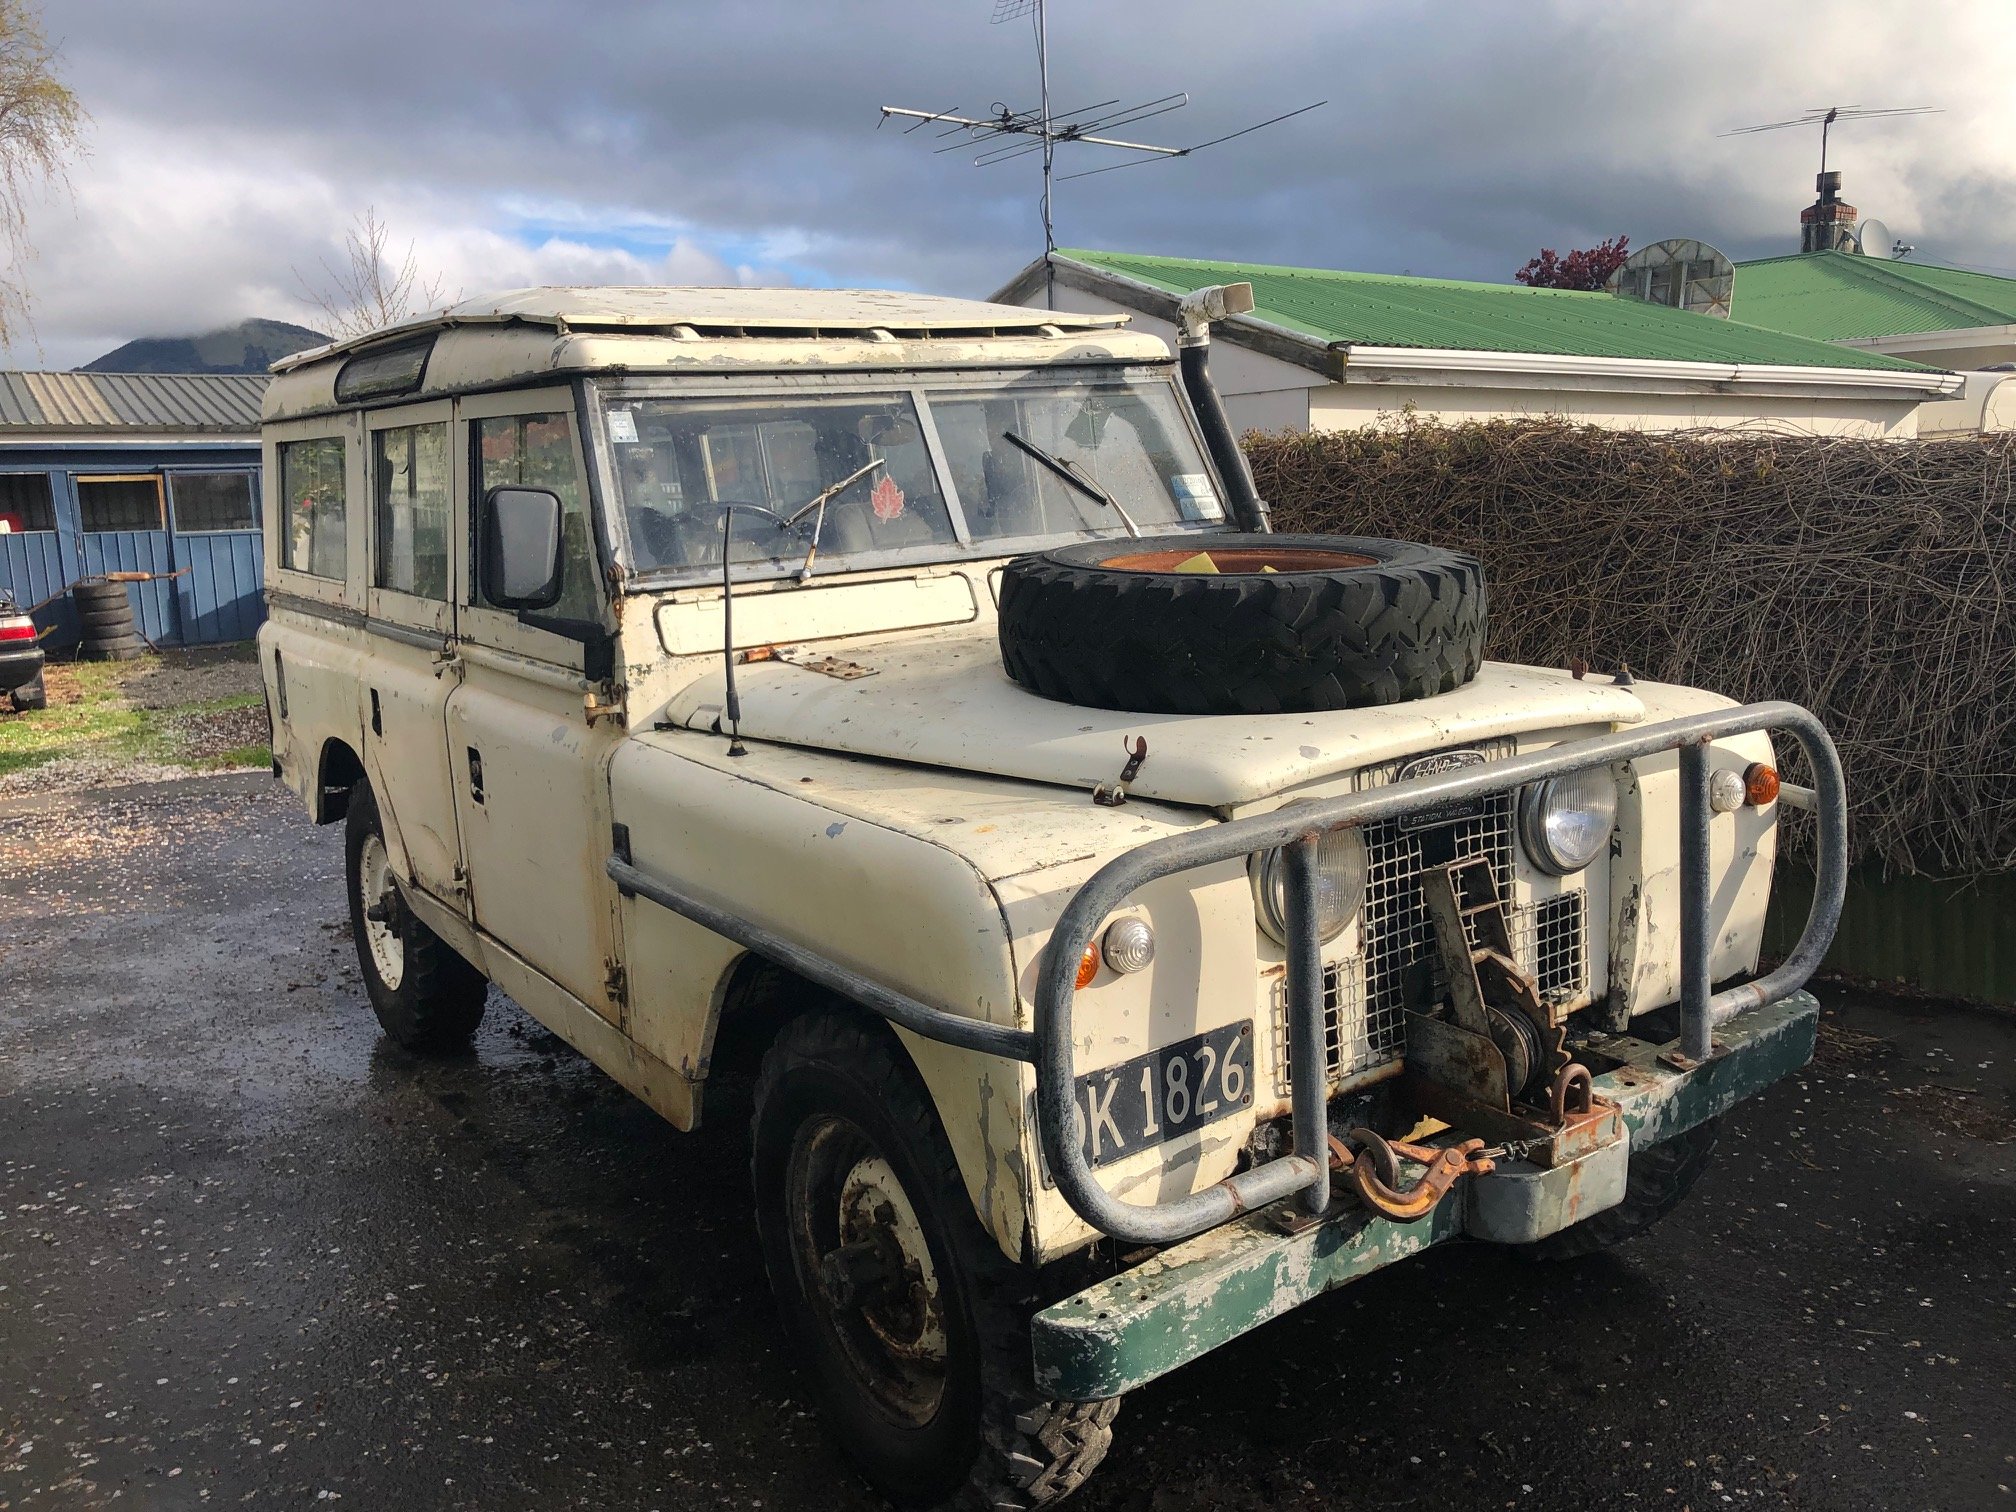
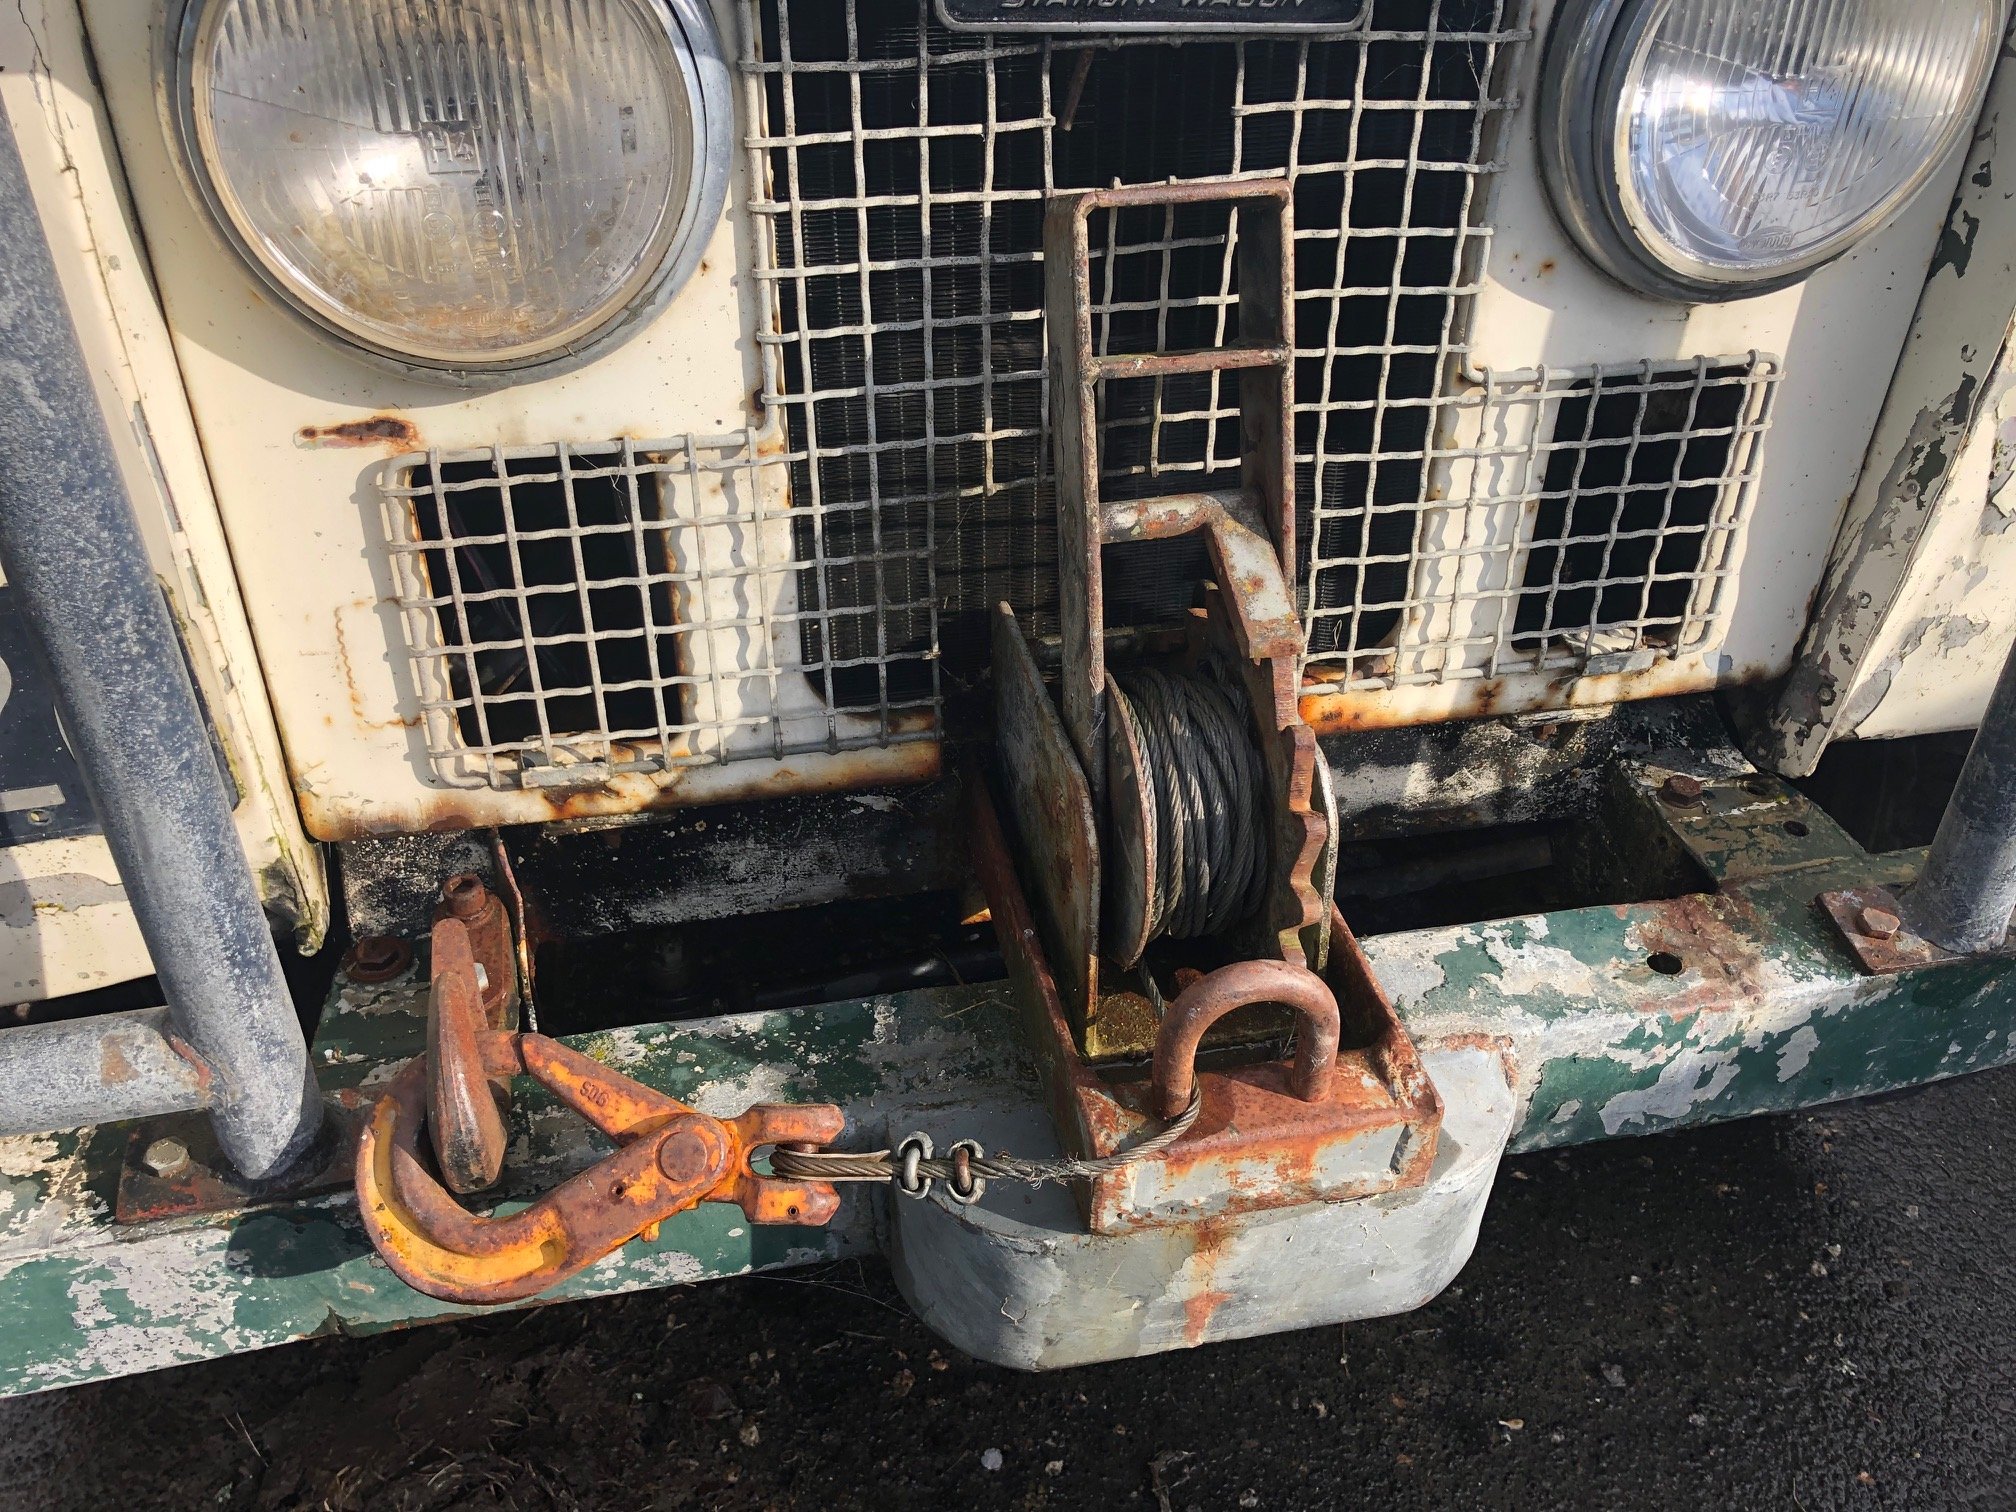
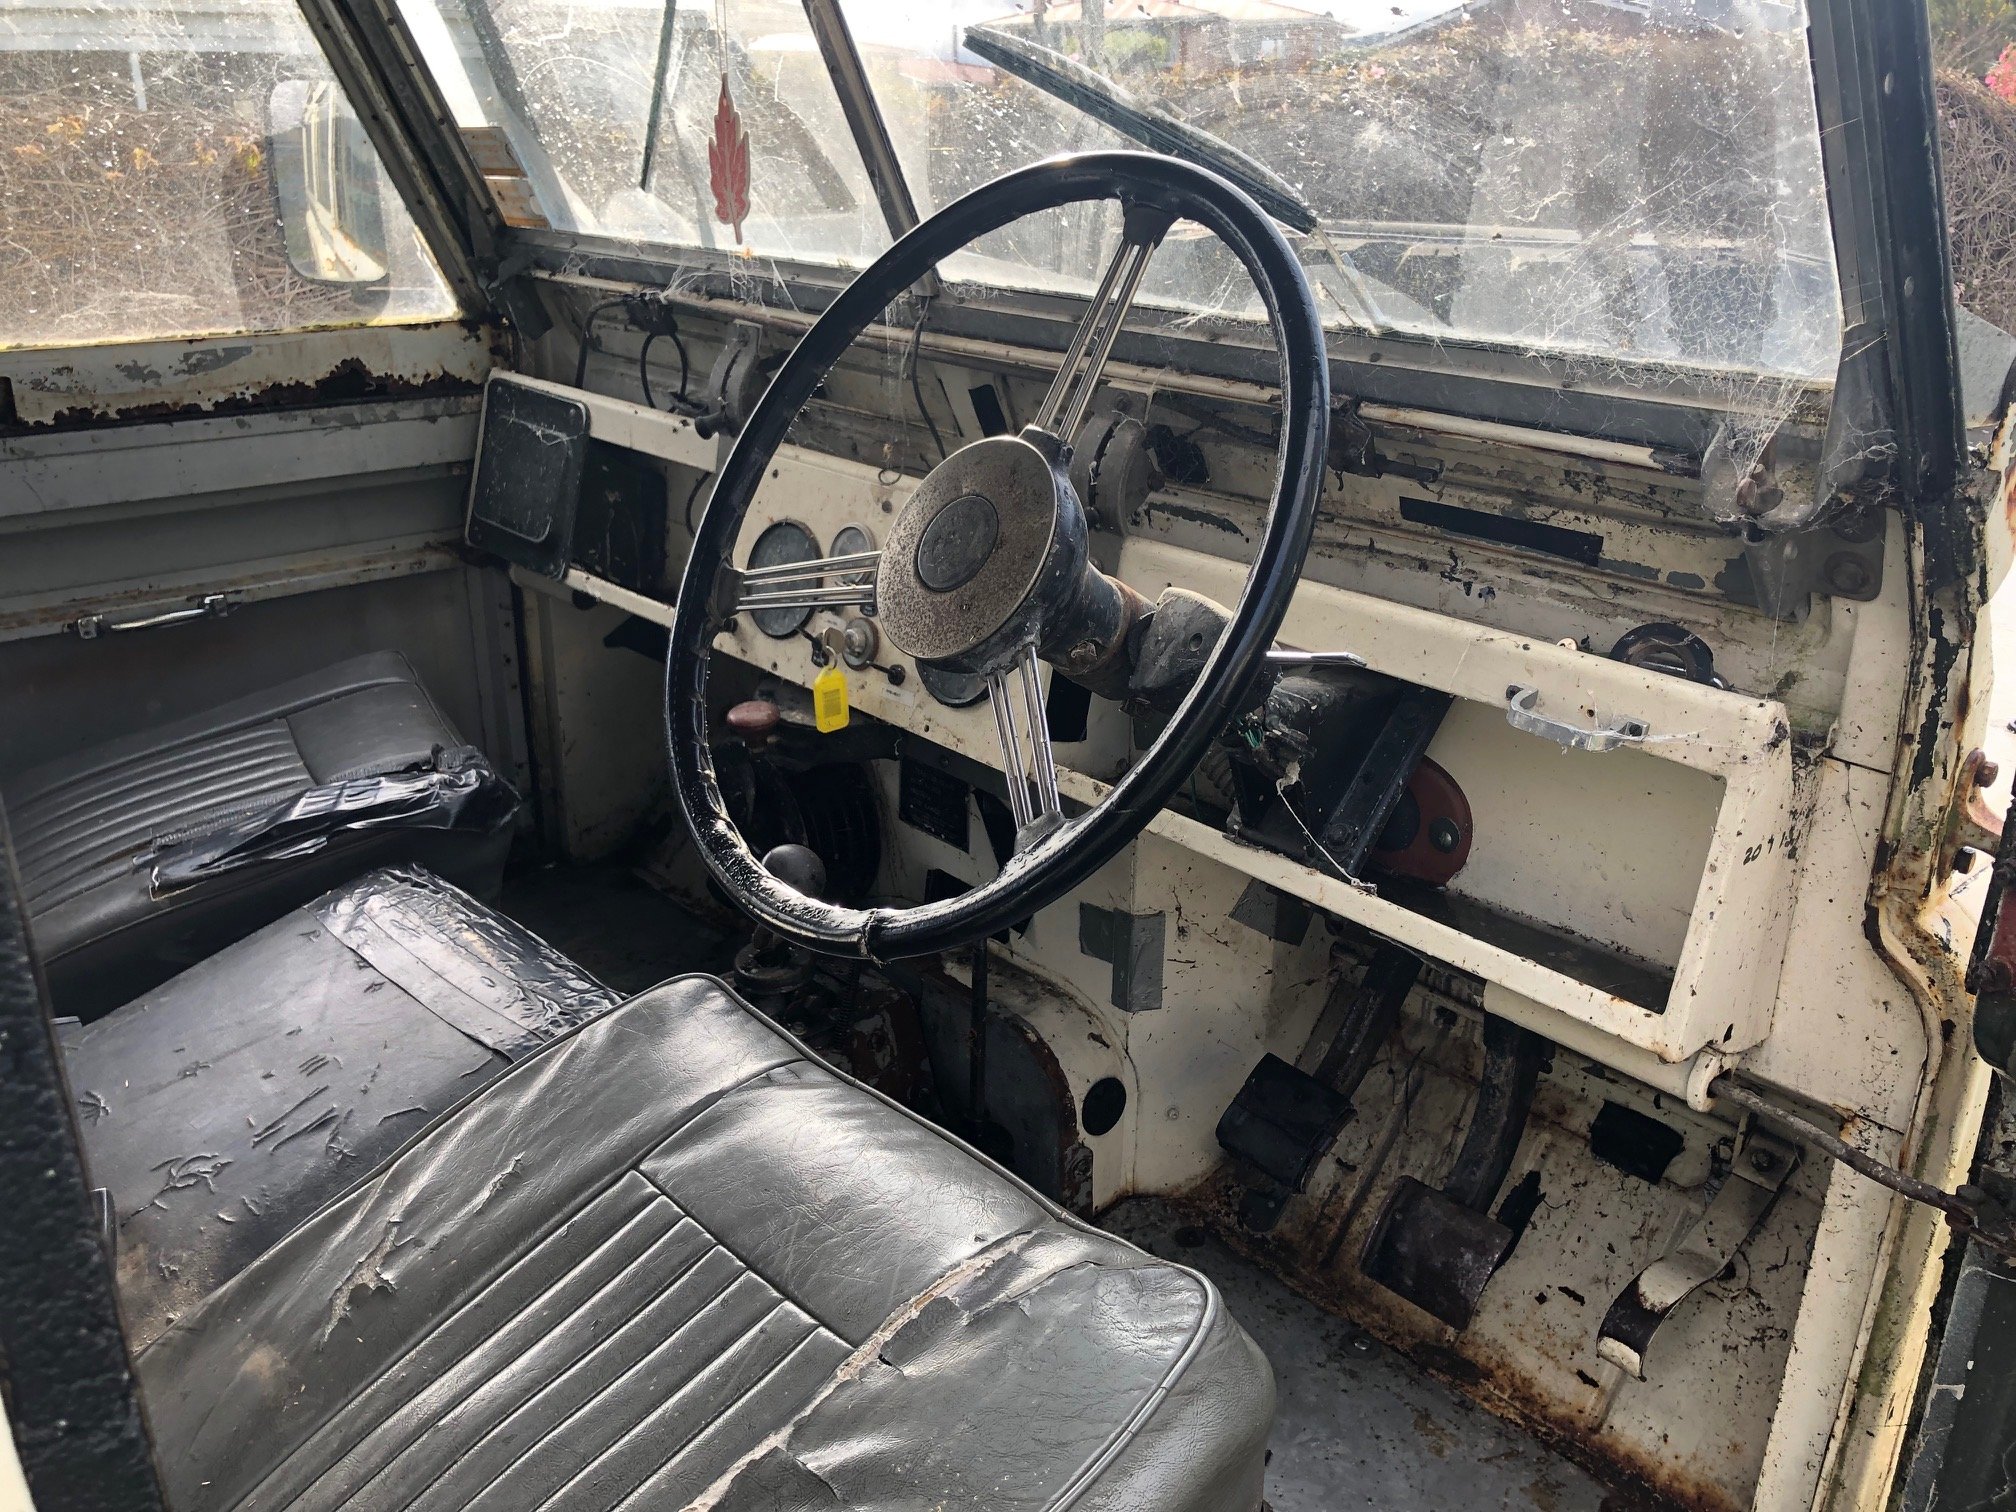
So I've been somewhat pining for my old canvas topped Land Rover since I sold it a few years back.... the prices on these have started to get silly so I've been thinking I need to get back in the game or loose it forever.... But this time I've been on the lookout for a different model to allows the whole family to join in the LR fun and have been somewhat dreaming of overland camping trips in Central with the kids. So something along these lines popped up on a FB page a few months back, messaged the guy, seemed like a good option but had no funds at the time, others were interested so said thanks and moved on. Now I came into $$ and messaged again a low and behold its still available and they want to move it on.... Quick trip up to Timaru to inspect and back a few weeks later (today to pick it up....) So what have I got...? Its a 1962 SIIa (383th of the export model off the line, so early in the run) 109 StationWagon. Its been modified a fair bit (on declaration papers from '92) to run a Nissan ED30 diesel (my old one had an ED33..) into a 5speed Nissan box which is somewhat mated to a LR transfer case. It also has the (very good) later axles from a Stage1 V8 (basically a Dana60) to give 3.9 gearing with freewheeling hubs. A keen eye will note that the nose has been pushed forward - it doesnt need to be to fit the ED30, I wonder if it had an earlier 6cyl conversion. Body is a little rough (as we will see) but is largely complete. Got it home and first thing was to give it a waterblast, the lichen has gone to town on the paint.... Has a 'very period' winch.... I've figure out that most of the gauges work, has a wee heater with an exposed fan (watch the fingers)
1 point
-
1 point
-
I've done a quick doodle, you could potientally get away with one relay but you'd need to test the wiper motor to check something. Pm Incoming1 point
-
Ah man thats a shame they did that. I feel like the swapmeet is on steep decline. Me and my Mate would be amongst the youngest regular site holders and there used to be a que of 100 for a site and this year thay had 80 empty sites. Our Sunday was better than ever though despite the numbers being down1 point
-
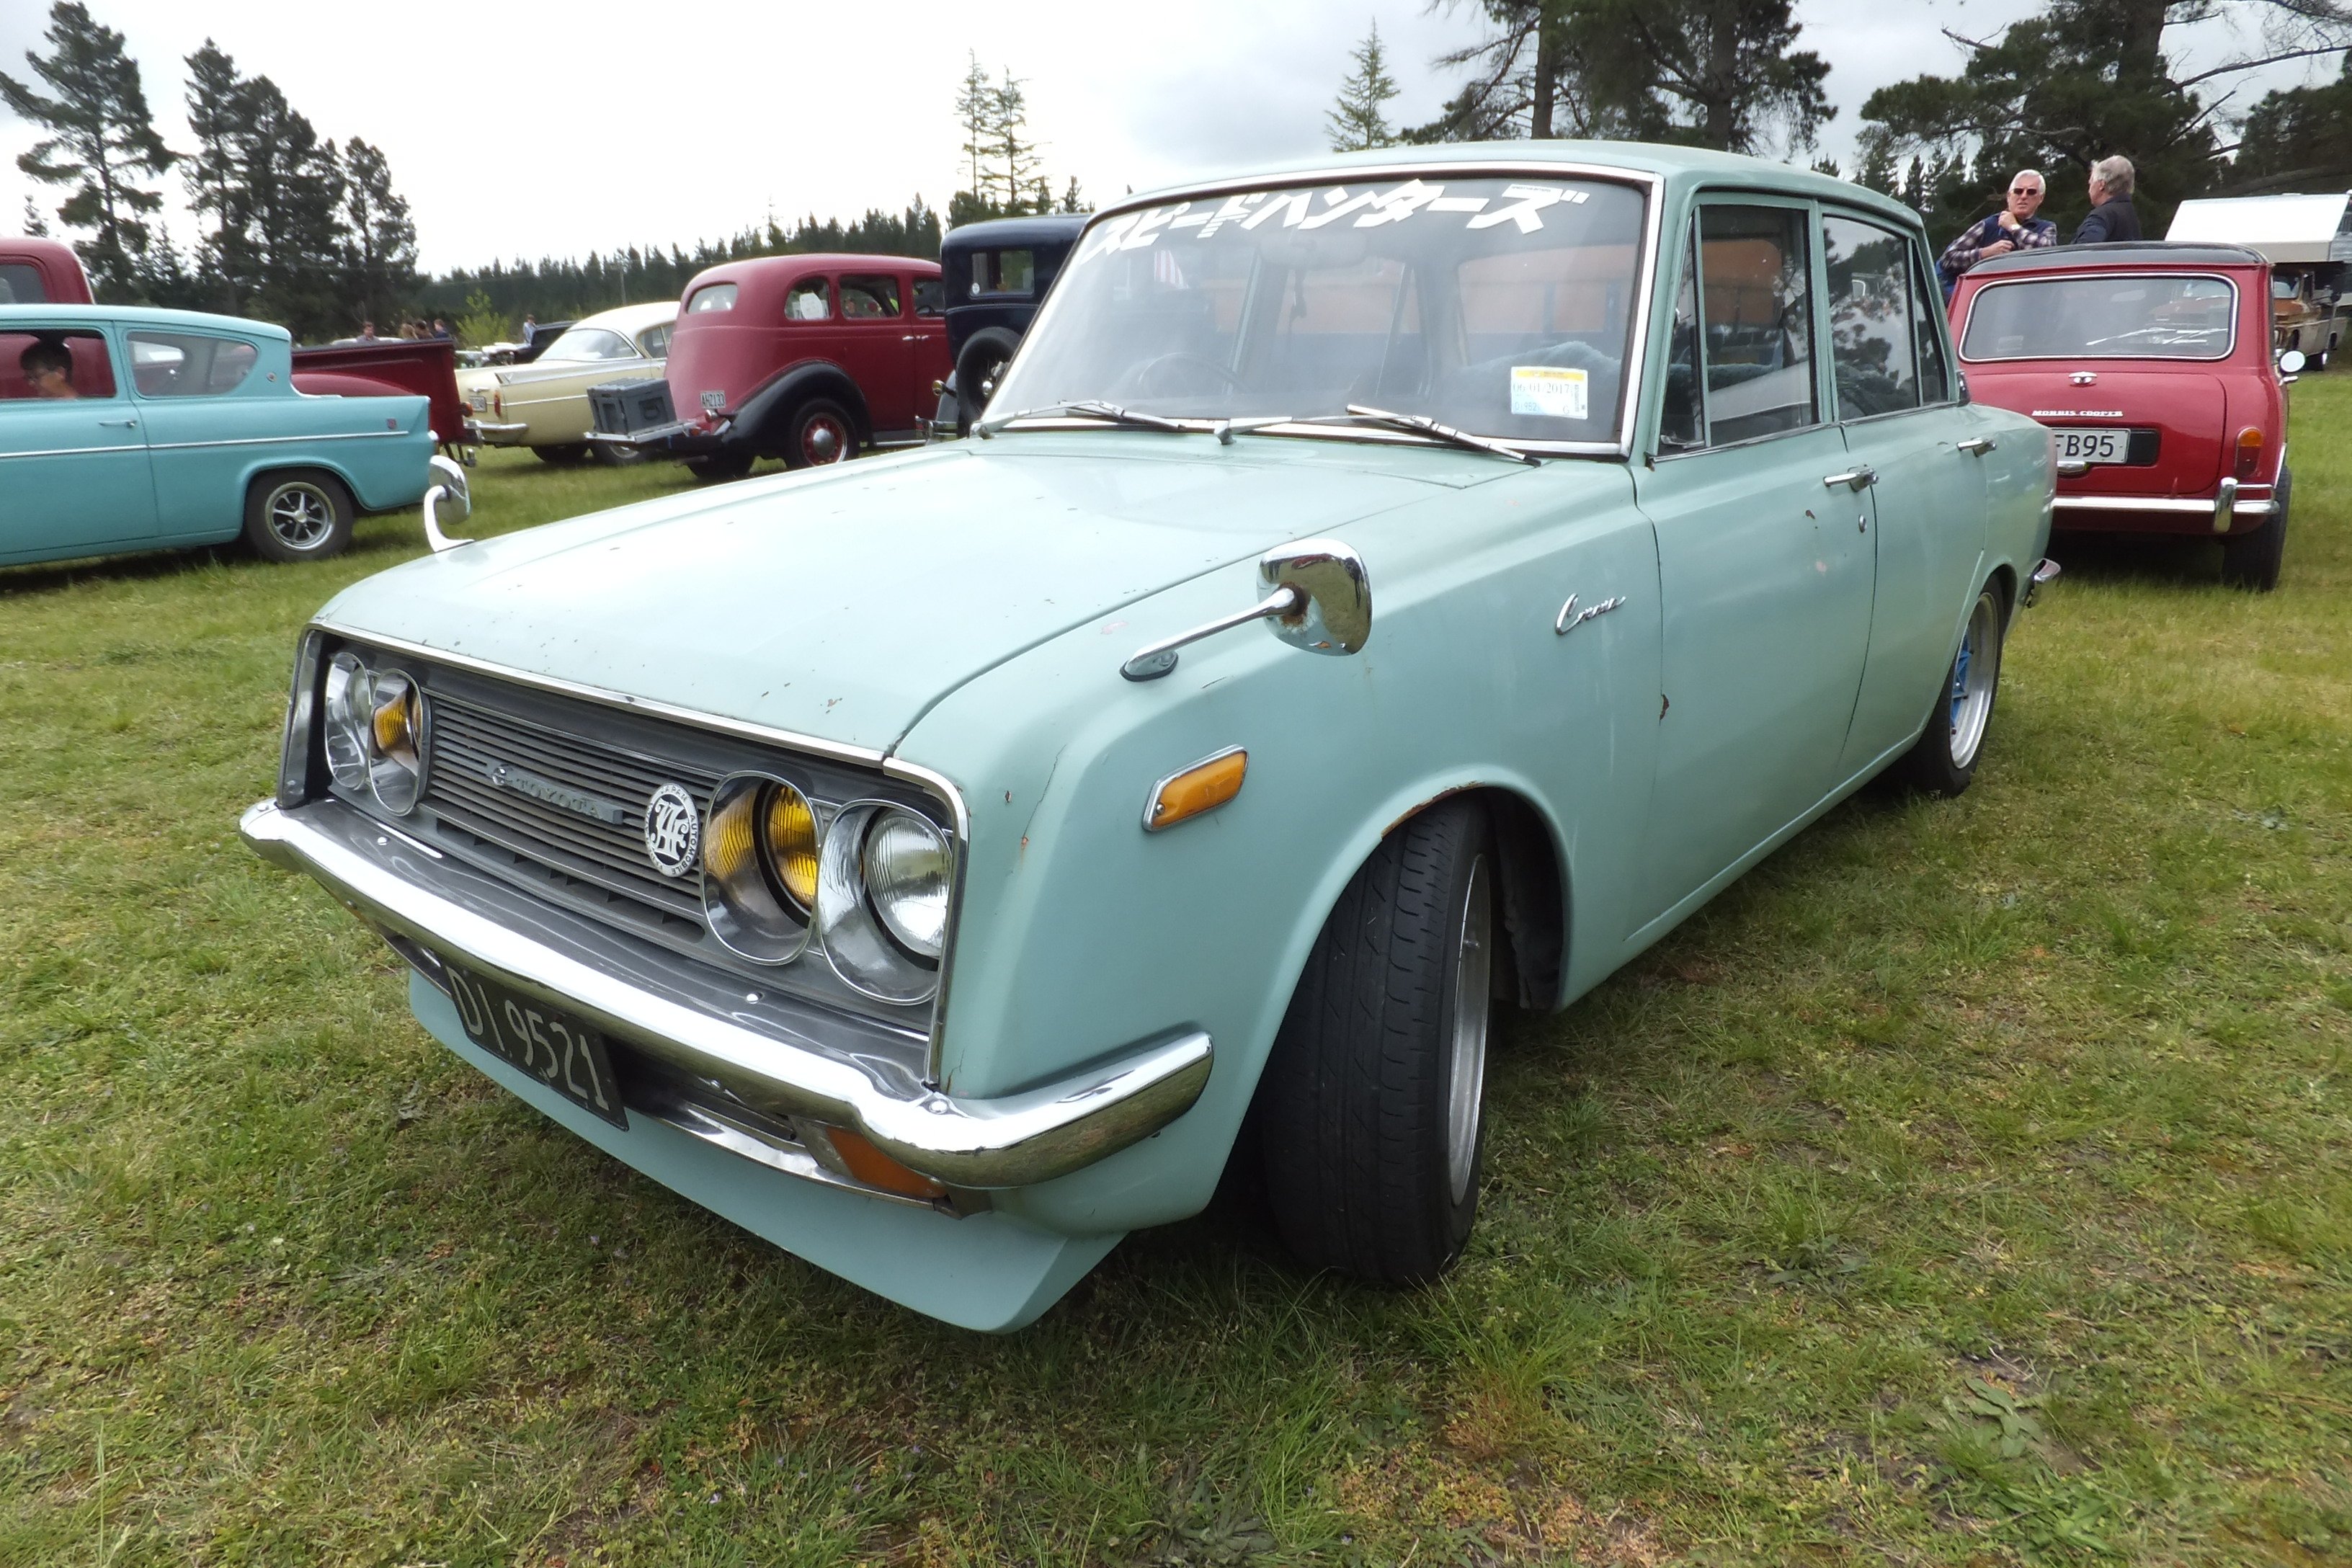
Slowly ticking small jobs off the list. Got speakers in front and rear in the factory locations. Did an LED dash light swap. Which doesn’t make a lot of difference to the dash lights themselves. But the illumination is now clearer and has a whiter glow to it vs the amber glow normal bulbs have. Also got some steely rims sorted that seem to work for me at the moment. shes due for a wof. Couple little things I wanna sort while it’s up on the hoist. But it’s mostly up to the fun stuff now. Really wanna set of wiper louvres. But I haven’t seen any anywhere for years.
1 point
-
So awesome, and loving the snorkel - you should swap the top for a copper downpipe elbow for max future patina. How does she handle highway speeds?1 point
-
Aeons ago, when I worked at Road and Track in lower hutt I got long wheel studs for my Starlet. "Nice" may have been the supplier, but afaik they came from a local stockist. Early 20's me though they were expensive at the time. Suspect it might have been ~$200 for 20. So R&T might be able to help.1 point
-
I've had good luck using the Dorman catalog (pdf https://www.dormanproducts.com/flipbook/dorman/automotive-hardware/2006-automotive-hardware.pdf) Find the stud then look up the application by part number.1 point
-
Okay - rears are sorted. Still after the front ones...soooo...anyone got a go to place? I've never thought of it before, but every old car with aluminum mags will likely need this done. Steel rims are only about 5mm thick, whereas aluminum wheels are more likely to be 20mm or thereabouts...so makes sense in hindsight. However I suspect, like me, most are oblivious to this.1 point
-
Do it... place this came from had a paddock full of em no idea, it’s got a ratchet at the back so basically same design you’d see on s boat trailer1 point
-
Man the urge for me to get a landrover is getting stronger Is that a come-along winch on the front?1 point
-
1 point
-
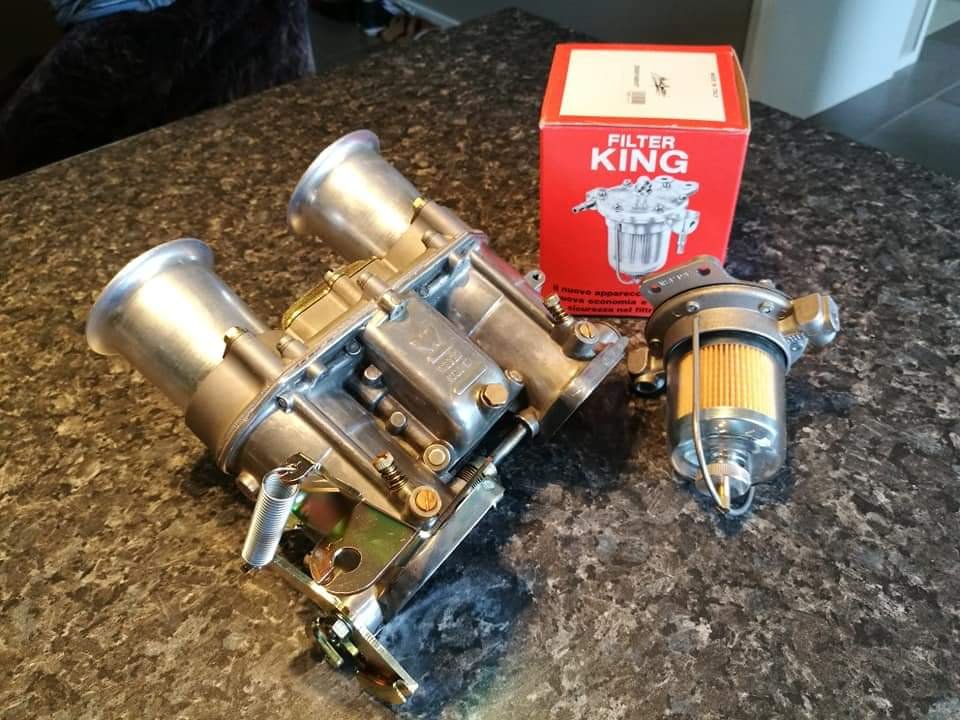
Also finally got my Escort flares off Bruce a few months ago. Going to chop them up and have a crack at fibreglass work, moulding them a bit better to the 1300 and getting the fitment right. Theoretically it looks easy enough but will soon find out. The guards didn't cost a bomb so not a great loss if I butcher them haha. And yesterday I finally got a call from Murray at Weber Specs saying that my carb is ready so shot around after work to pick it up, along with a malpassi fuel pressure regulator. He's done a top job but damn he is expensive, even with mates rates ! Ah well gotta pay for quality so let's hope she's purring when she fires up. That's all for now anyway, off on holiday in a few weeks so probably won't be anything to update until maybe December if I find spare time to work on the old stead. Chur, Tai
1 point
-
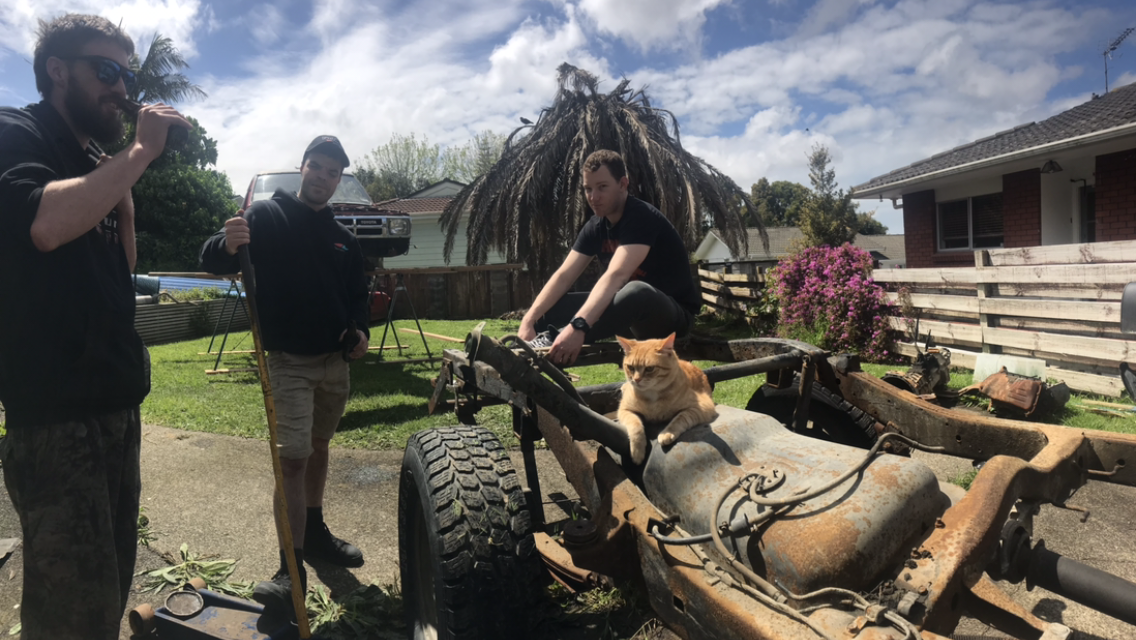
Excuse the palm ive been slowly killing. Bastard got in the waste pipe Put lunch and beers on and got the cab off. Debating weather to acid dip or sand blast still. ill give it a water blast and get all the lines and shit off it 8CDBB3D6-F2DE-4E90-B4A9-2034D84EF311.png
1 point
-
Vivas got such an awkward floor pan.
1 point
-
Still waiting on that LH main bearing and seals, they sed 2 weeks but it has been like a month now, if those parts turn up I can put the motor together. had to repair the front brake plate with my new found skill.1 point
-
More joyous progress on this thing. I got me new clutch pads and springs. The new springs were considerably tighter than the existing ones, they definitely helped a lot. There's a lot of conflicting home-mechanic information on the internet about installing clutch pads, and how long you should soak them in oil for. Some suggest an hour, some a day, and a few "ex-GP" mechanics recommend months. I am impatient and soaked them for an hour. It feels great now, best clutch i've ever felt on a bike so i call that a win. The first couple of mangs it did slip a small amount, but once motor got some heat into it the clutch has felt fine and no further issues. Will be interesting to see how long it lasts. Carb now has standard size pilot jet in it and idles nicely. Still a little rich, but ok for now. Just need to get some miles on it. A lot of faffing around has gone into making it run nicely, i had to make a frankenstein throttle cable out of four, then had a local bike mechanic shorten the upper cable as it was too shlong. With a smooth throttle cable, new front brake and new clutch it feels like i just bought this thing off the show room floor! I just need a mirror and to get both brake switches to work and i am ready to pay a visit to the re-vin man. Much excitement. also spotted this wild as fuck RX125 at the DGR in Wellington - sounds just as wild as it looks. Some inspiration for further down the track...1 point
-
So Hannah and I took the Imp for a two day road trip. Part business and part holiday. On Friday we drove up to Lake Rotoiti, Nelson lakes national park. On the way we checked out some old classic cars a fella owns who wants me to do a load of bodywork on. The Imp drove really well. The sun was out and the music cranking (some ambient tunes from David Tipper since you ask). We had a good coffee and then a nice walk on tracks around the lake. That evening we drove through to my olds place in Blenheim. A nice day out. Here's some photos... Chilled out at my parents, a feed of fish and chips, wine. A grand way to finish a day. Following morning we set to head home. Filled the Imp up, did some maths and allowing for a very optimistic speedo we reckon on around 40 mpg. Not bad considering the gearing at 100kph. Headed home, sadly into rain as a cold front was moving up the Island. Drove long way via Picton and Queen Charlotte drive because narrow twisty roads and go kart car... Over the Rai Saddle, sitting with the flow of traffic. I give the car some stick to pass a motorhome up the saddle and then when cruising down the other side the wee car does that thing.... 'JOLT!' The car does a small but very noticeable stumble. Like a tiny rev limiter. For those that have tuned megasquirt, or maybe other EFI, it felt like when you click burn. "What was that?" Hannah asks. "Shit- I don't know but it felt like an ignition thing, not spluttering fuel thing" I reply. We both go quiet. I almost want to turn the music down and listen for any untoward mechanical sounds that might be there. But I don't. I'll play it cool. Don't worry. Don't get Hannah worried. It was probably just a... fuck. I don't know. I'll just say nothing, drive a little slower and whatever it was will be a memory soon. The silence is piercing. Now I notice every bloody vibration. I'm watching all the gauges like a jet pilot. All the time my mind is going through all possible scenarios. What could that have been. What if we breakdown? 3km pass. It seems ok. I start to relax. Only one big set of hills to go. I pass another rental car, most likely the scurge of the kiwi roads, a Nissan Tiida. I dont know because I'm still having a mini stress.. 'JOLT'. Here we go. This is happening. This time its for good. The car dies and I have to quickly think where I'm going to stop to fix it and quick before I slow too much and that silver blob I just passed drives up my bum. I spot a forestry road on the right, coast across to it (whilst trying to make it look like nothing is wrong so saving face for all classic drivers who get the "oh old cars are so unreliable...") I pull to a stop and the engine splutters to its last road driven rotation with a bang. Bugger. Remain calm. Reception on phone? Not a chance. Tool kit in boot comes out and we go through all the obvious things, concluding that it is indeed the ignition. Annoyingly it was the ignition module, of which I didnt have a spare. If it were points I'd have fixed it. Such is life. Luckily the rain had stopped and double lucky that across the road from the forestry road we parked on was a farm house. The kind farmers wife took us in, let us use her phone and fed us tea and biscuits. I called a mate out with his trailer. We have AA membership however its the basic cover that would have got us to a garage. I knew a Garage wasn't going to fix this and we'd still have to get home. Yeah nah. Stuff that. Mate turns up with his trailer and we have a choice as chilled out trip home. We fed him dinner and it was all good in the end. Big thanks to @Sanfiddy for rescuing us! Oldschool spec favours. I only took one photo of the day... So that was that. On Sunday I removed the dizzy and then the module. It fails the tests as predicted. Here's the troublesome module... Come Monday and at my local wreckers looking for a module. I dont want to spend $120 on a new one when I'm about to fit full engine management. No luck locally but we were in Nelson on Tuesday and I found one at a wreckers there, cheap too. Fitted it that night and brooooooommmmmm The replacement was a proper Hitachi module whereas the one that let its smoke out was a no brand cheap one. Even felt lighter if that means anything. I took the broke one apart and it looks like a little cityscape inside- heck it would scare a Barry used to the kettering system... I also managed to score a spare couple of dizzies, converted with accuspark. My bench looks like a bomb went off in a hitachi factory... I'll need to fix them up, check them out and then I could always have a spare setup in case. That is until I fill the Imp with boxes of electronics and then there's no chance Mr AA man can help me. It'll be like every modern car- useless when broke. In other news- this turned up from China the day we left for the lakes... Its a brand new Hitachi 306 clone, all for not much more then a full carb gasket set costs. I had ordered this before I had scored all the other Megasquirt bits. Anyway- I'm still looking forward to trying it out because my worn out carb is about as good as I can get it. The new one looks so shiny. I'll report back with my findings on how deep the quality goes...1 point
-
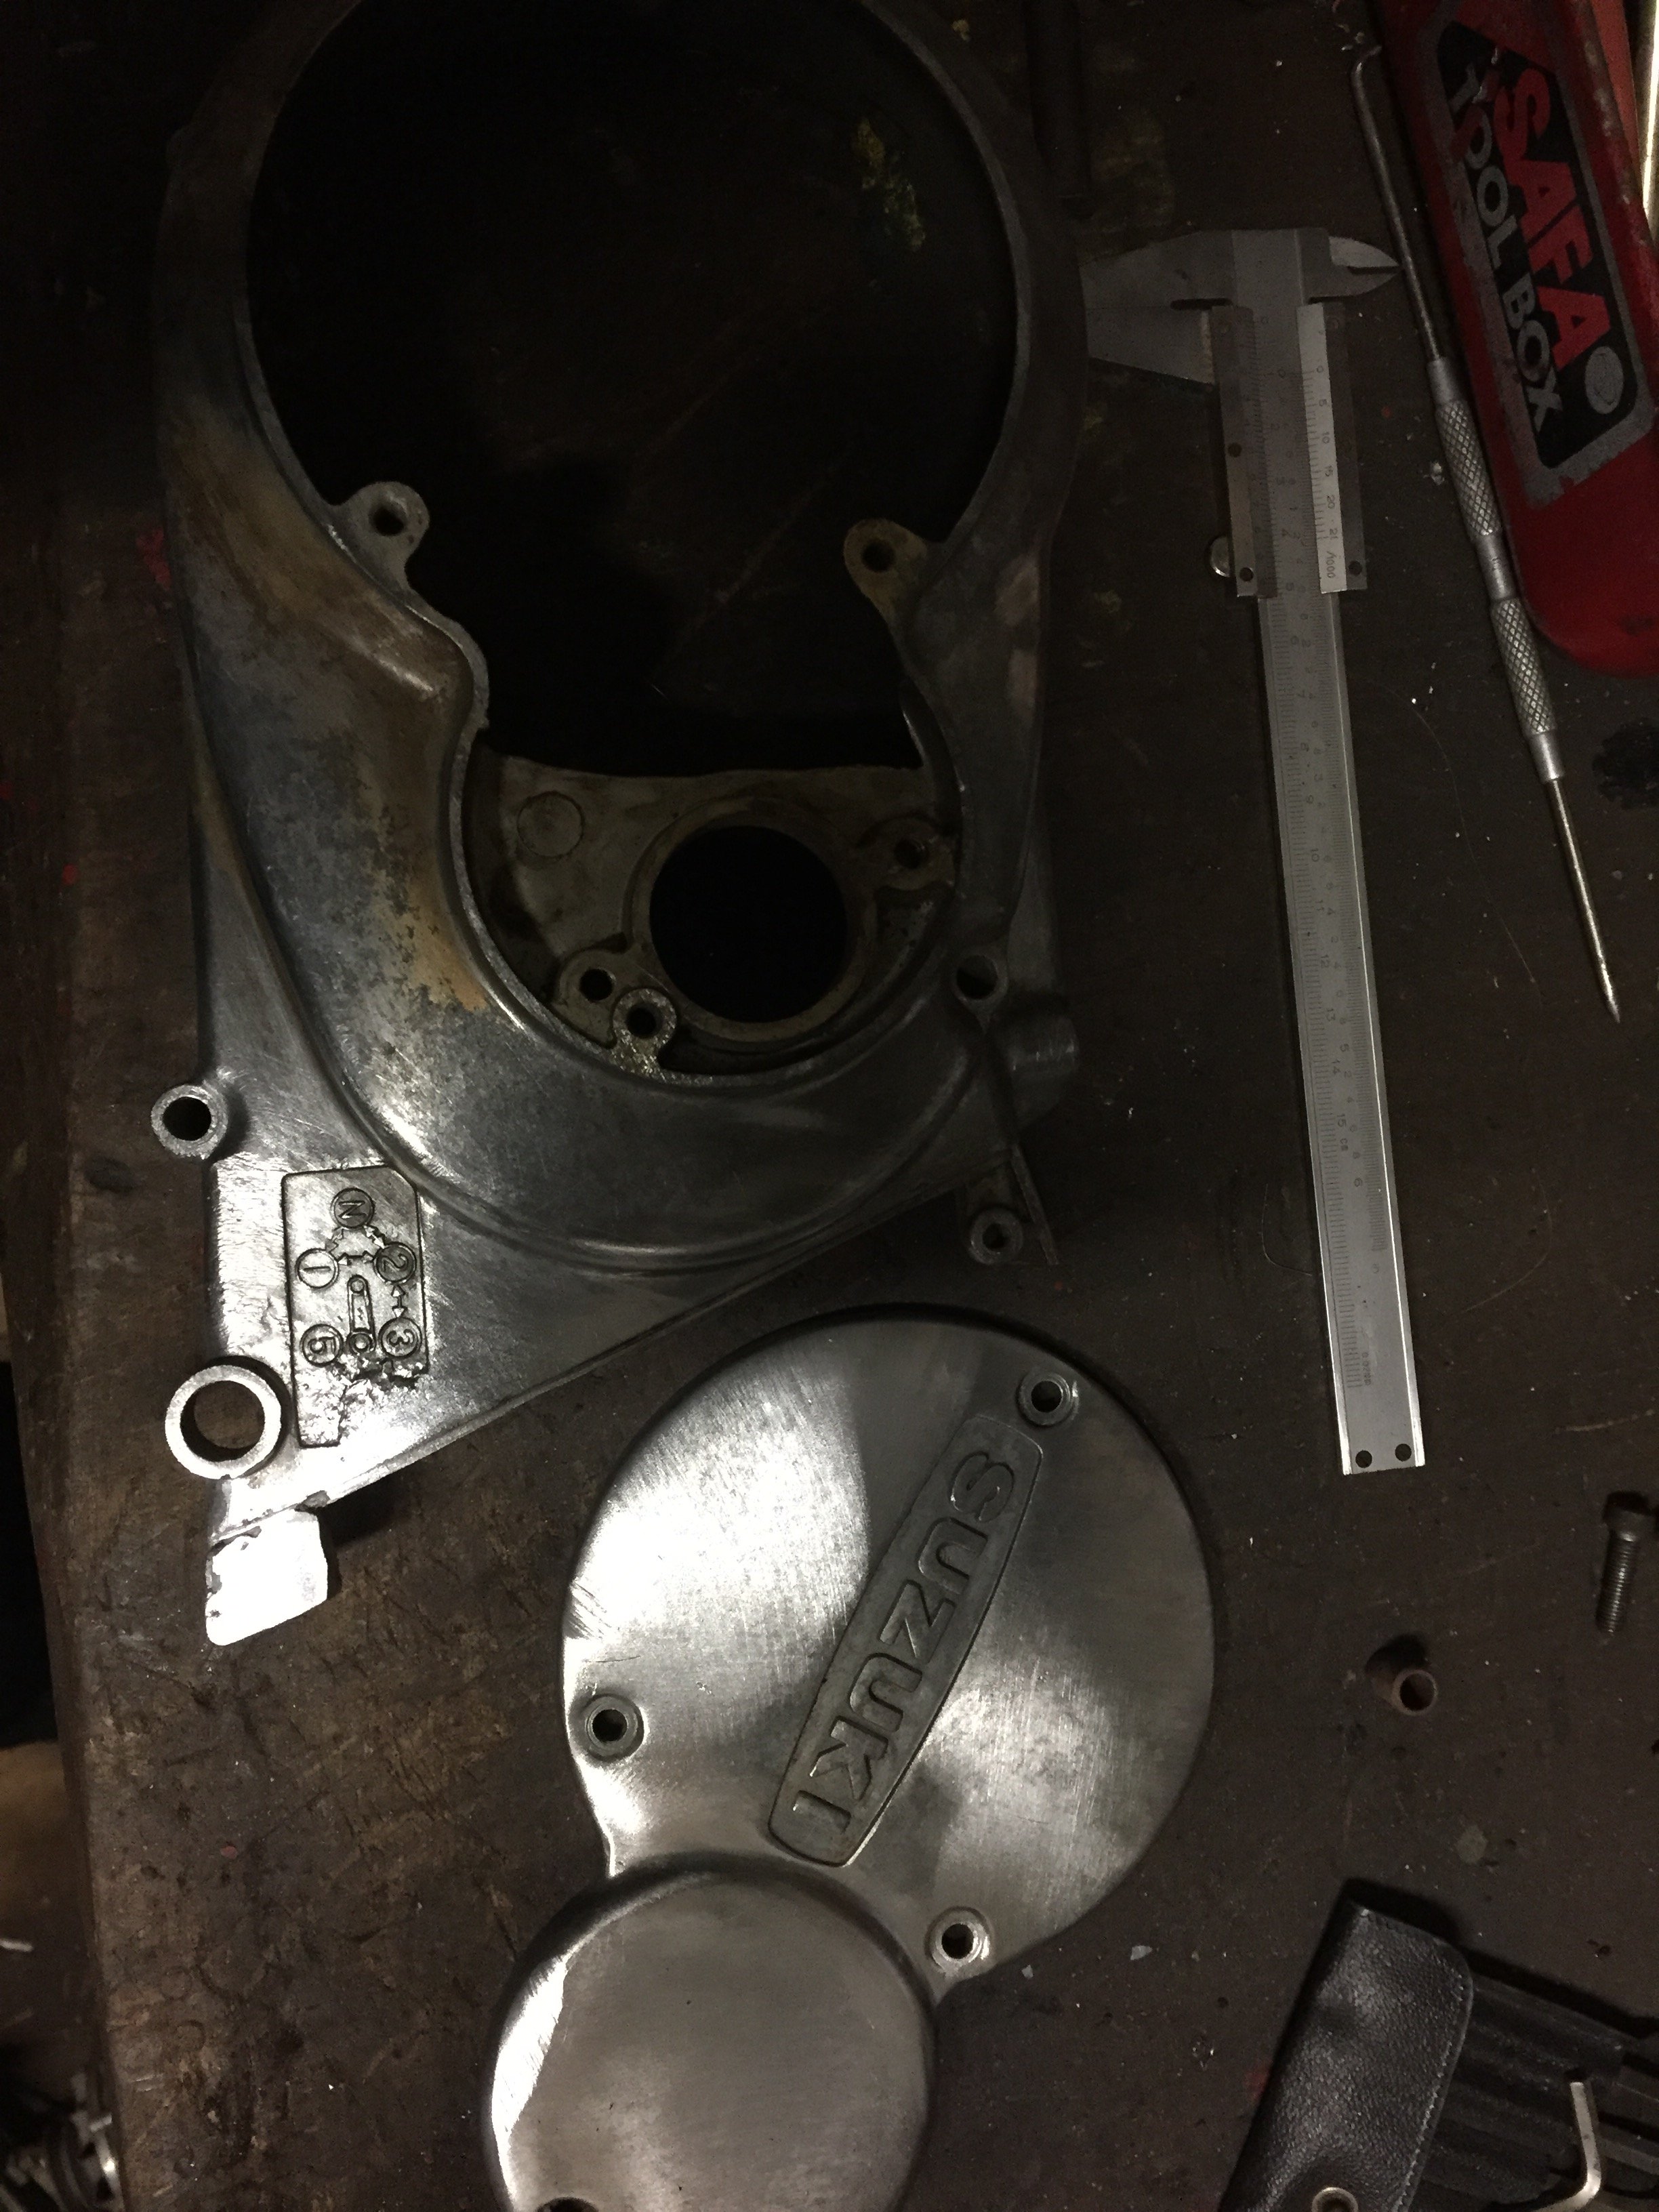
LH inner side cover was all smashed up with 3 chunks missing and the lower sprocket cover tab was missing, I gas welded it up, proper fusion welding not low temperature brazing.
1 point
-
I'm glad nothing's changed since this thread started in 2013. 3" is king.1 point
-
putting motor back together. sump is all back on. the sump had some ground based accidents previously so i made a thing to stop it getting such a kicking. 2019-10-05_12-44-55 by sheepers, on Flickr 2019-10-05_12-44-48 by sheepers, on Flickr then i continued on with the rest of the assembly. i put some playdoh on the piston and checked valve clearance which was all good. got the water and oil pumps on and the heads. the toyota full gasket set does not have lip seals in it which sucks balls so i have no front crank seal, which menas i cant put the timing belt on. 2019-10-05_04-32-32 by sheepers, on Flickr1 point
-
Being a bit useless at keeping updates on track I realised that it's nearly 6 months since the last update. In short, the roof lining is in, looks 7 out of 10 and I should have got it done by someone who knows what they are doing. New reproduction bumpers bought and fitted (over-riders in the front and centre section of the rear are the originals re-chromed). Cold air box built and installed. Steering installed, rack fitted with new boots, cleaned and painted,with the original bus sized steering wheel I don't think the steering will be too heavy. I am having a couple of days away at Ohakune with the family and took a trip up to Horopito and got a replacement gutter trim to replace the one I destroyed with the polisher (that will get its own post), knobs for the heater and vents for the demister. Time now to start knocking off the half finished jobs, run some fuel lines and sort out the wiring. Make noise!!!!! Photos to come.1 point
-
the china re-manufactured 4M carbs i bought were alright, the base plate was out of flatness by about 0.15mm so they had a vacuum leak. once i fixed that (hylomar on the gasket) they worked mint. still rolling on the coupe daily with no issues so far.1 point
-
Picture-less update. While i will still need to dial in the auto-advance curve (the orig' relied on a combination of moving a lever to a basic range, and the magnets on the flywheel ramping up the speed of the points opening) it has a notable improvement in fuel economy, partly due to being able to wind the fuel mixture screw in 1/16th of a turn & have the same performance. It's like having the magneto set perfectly. But requires a battery.1 point
-
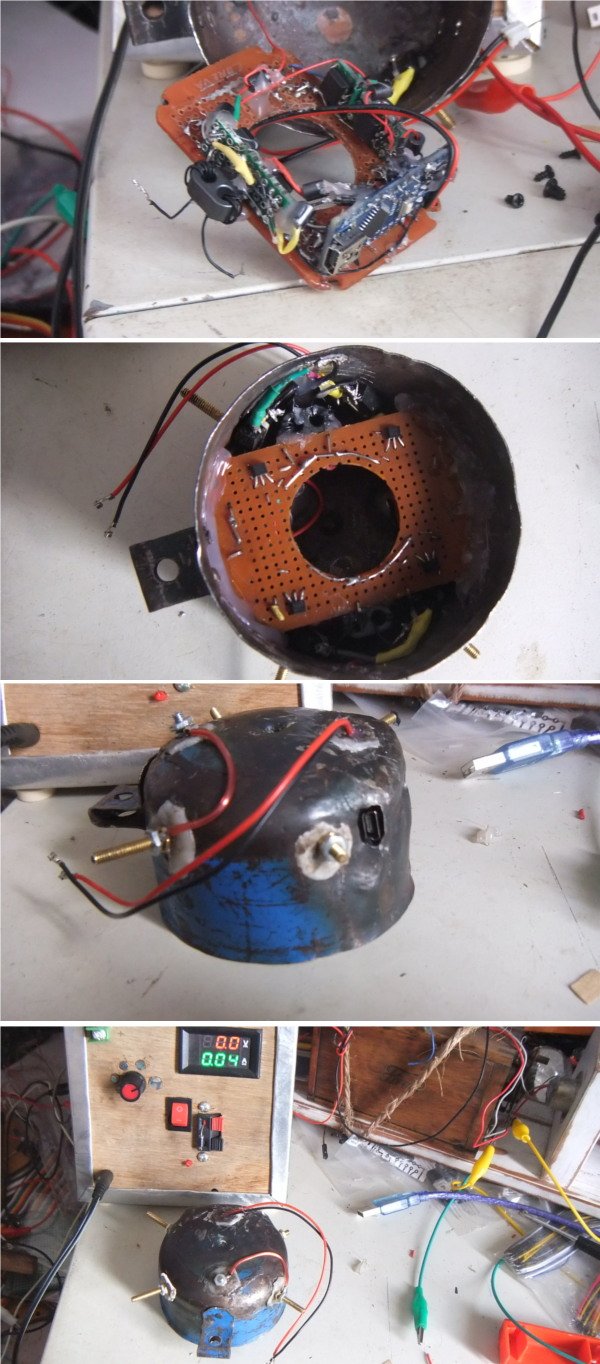
Ardunio nano on a small board with some hall effect sensors. installed in the end of an old can, some melted plastic in the holes, light passes through the plastic so i know where to drill it to put the bolts through.
1 point
-
I flattened out a bit of coronated iron and turned it into a steampunk top hat, made the googles to.
1 point
-
Also, there is a new spartan wideband which is using a new sensor called the LSU-ADV which supposedly has 7ms response time AKA its bloody fast canbus as well so no ground offset errors. Want want want https://www.14point7.com/products/spartan-3-adv1 point
-
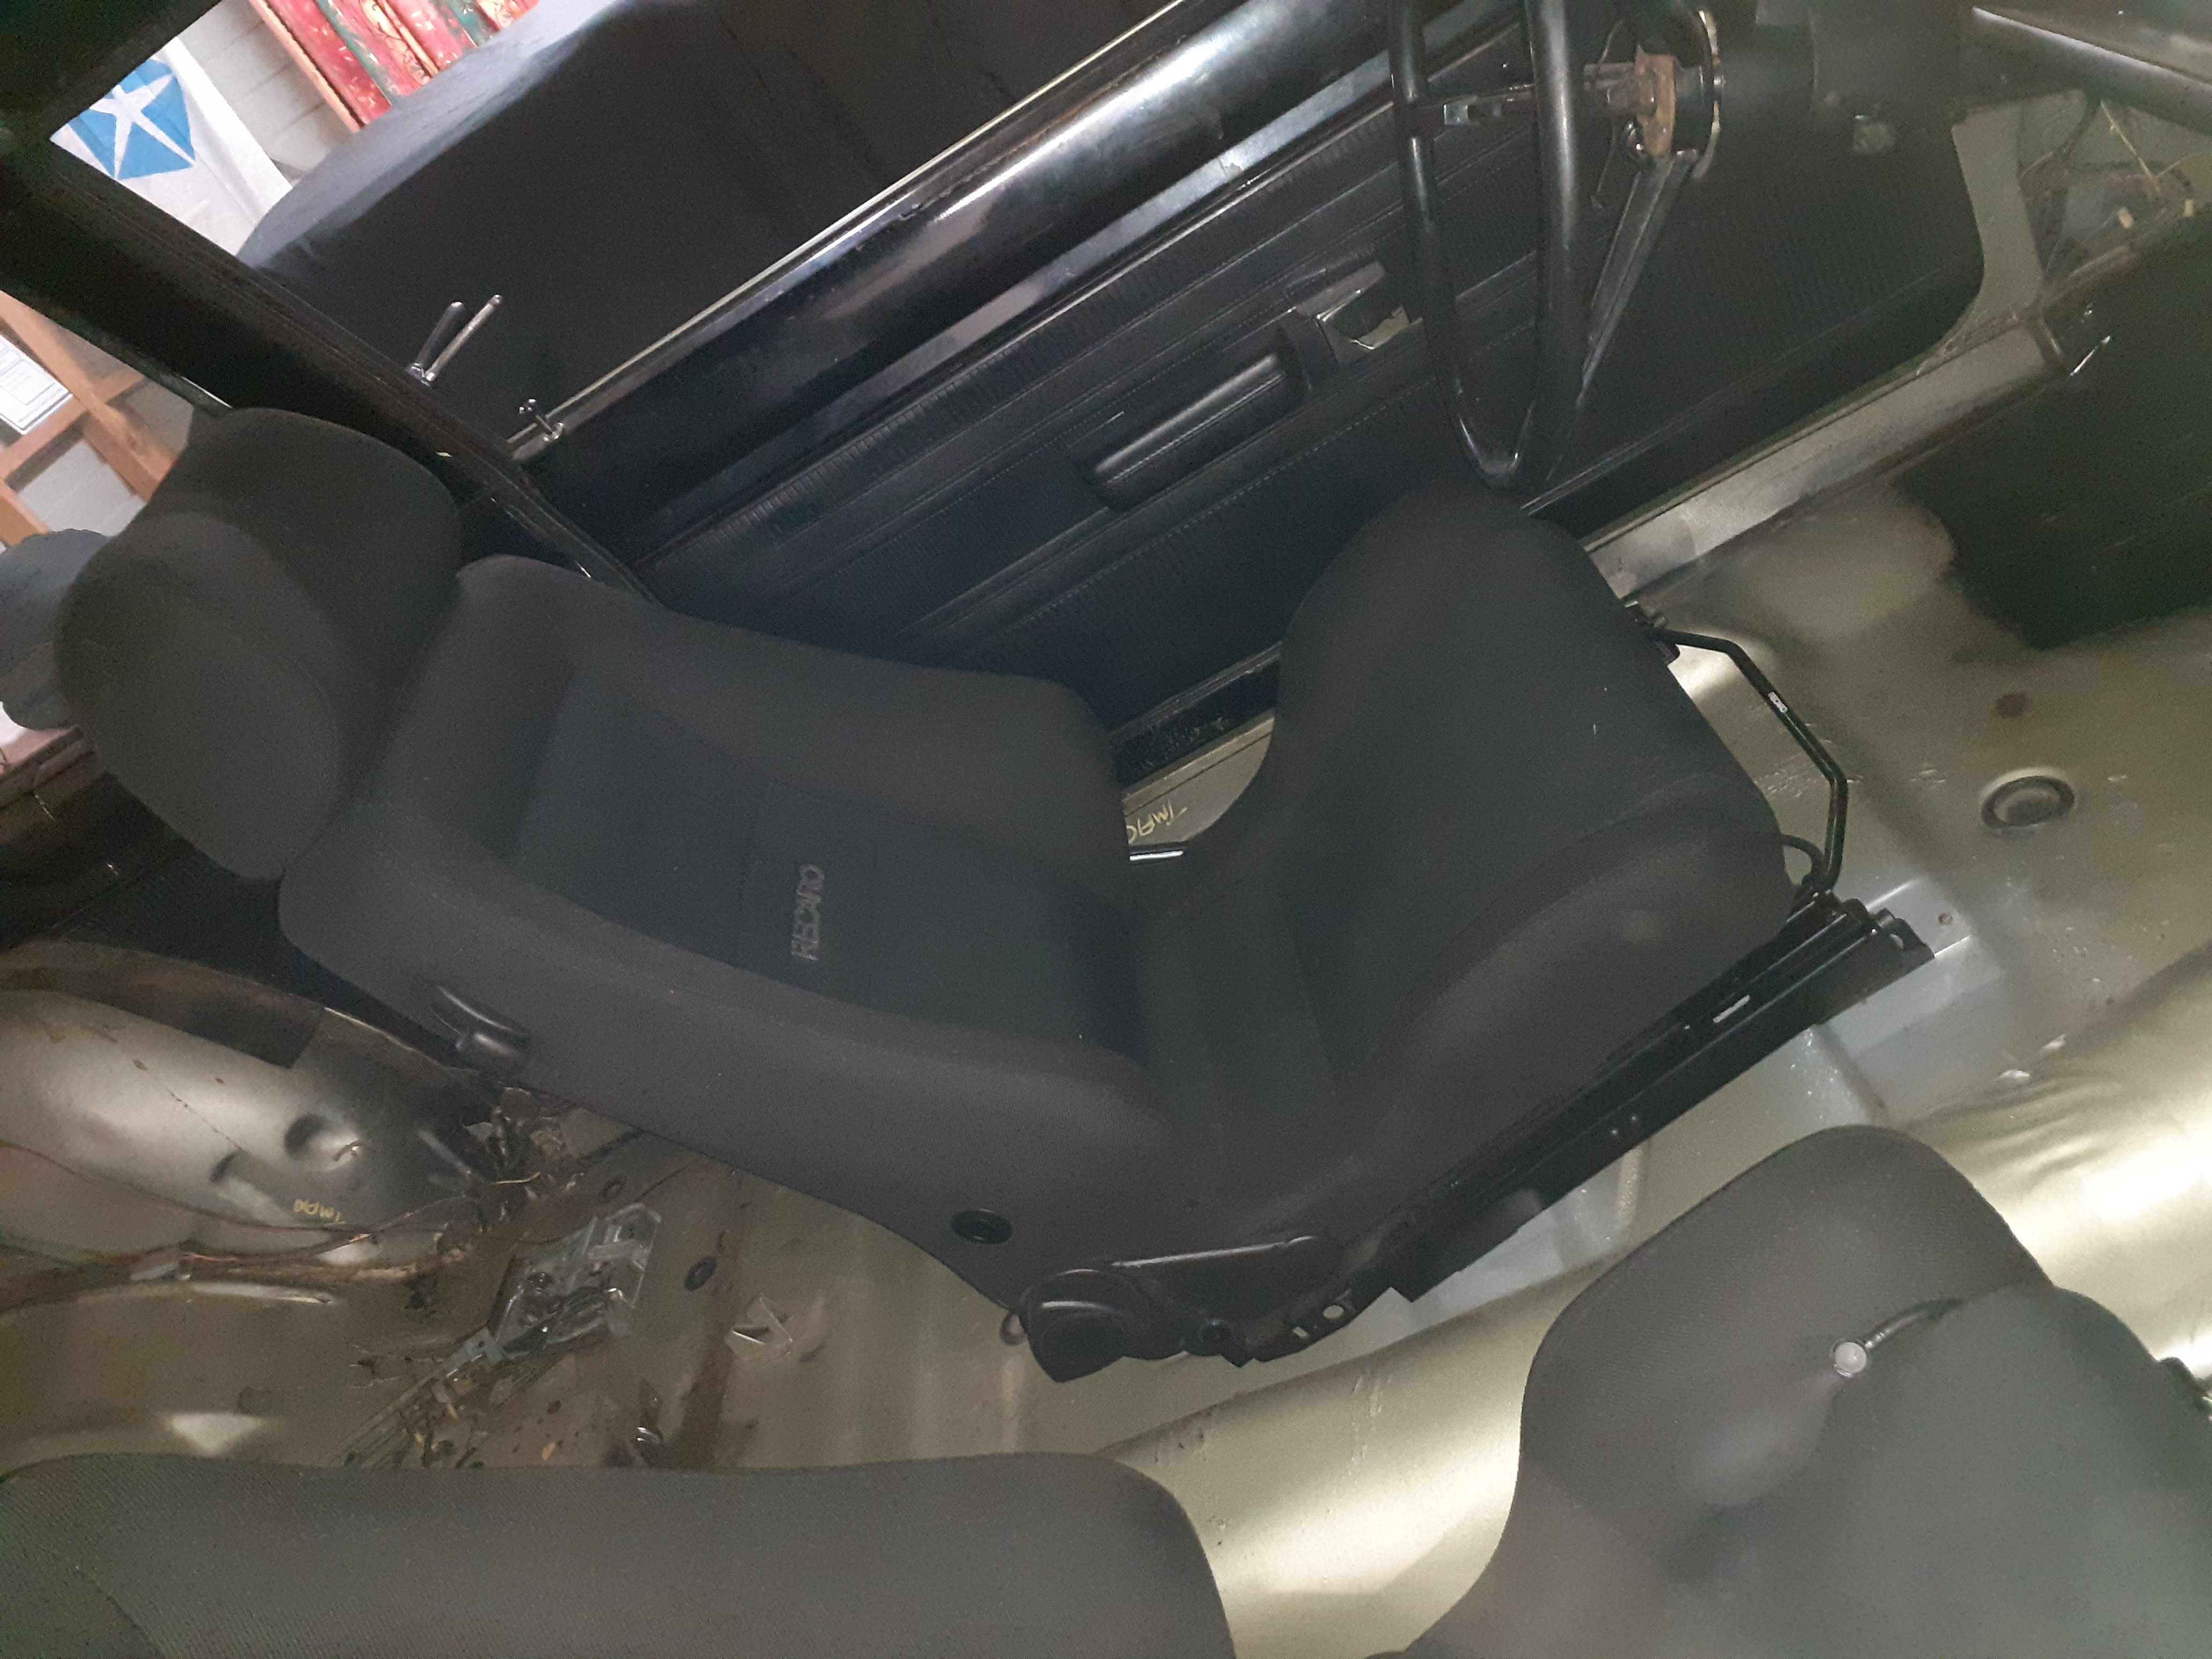
Seats done.
1 point
-
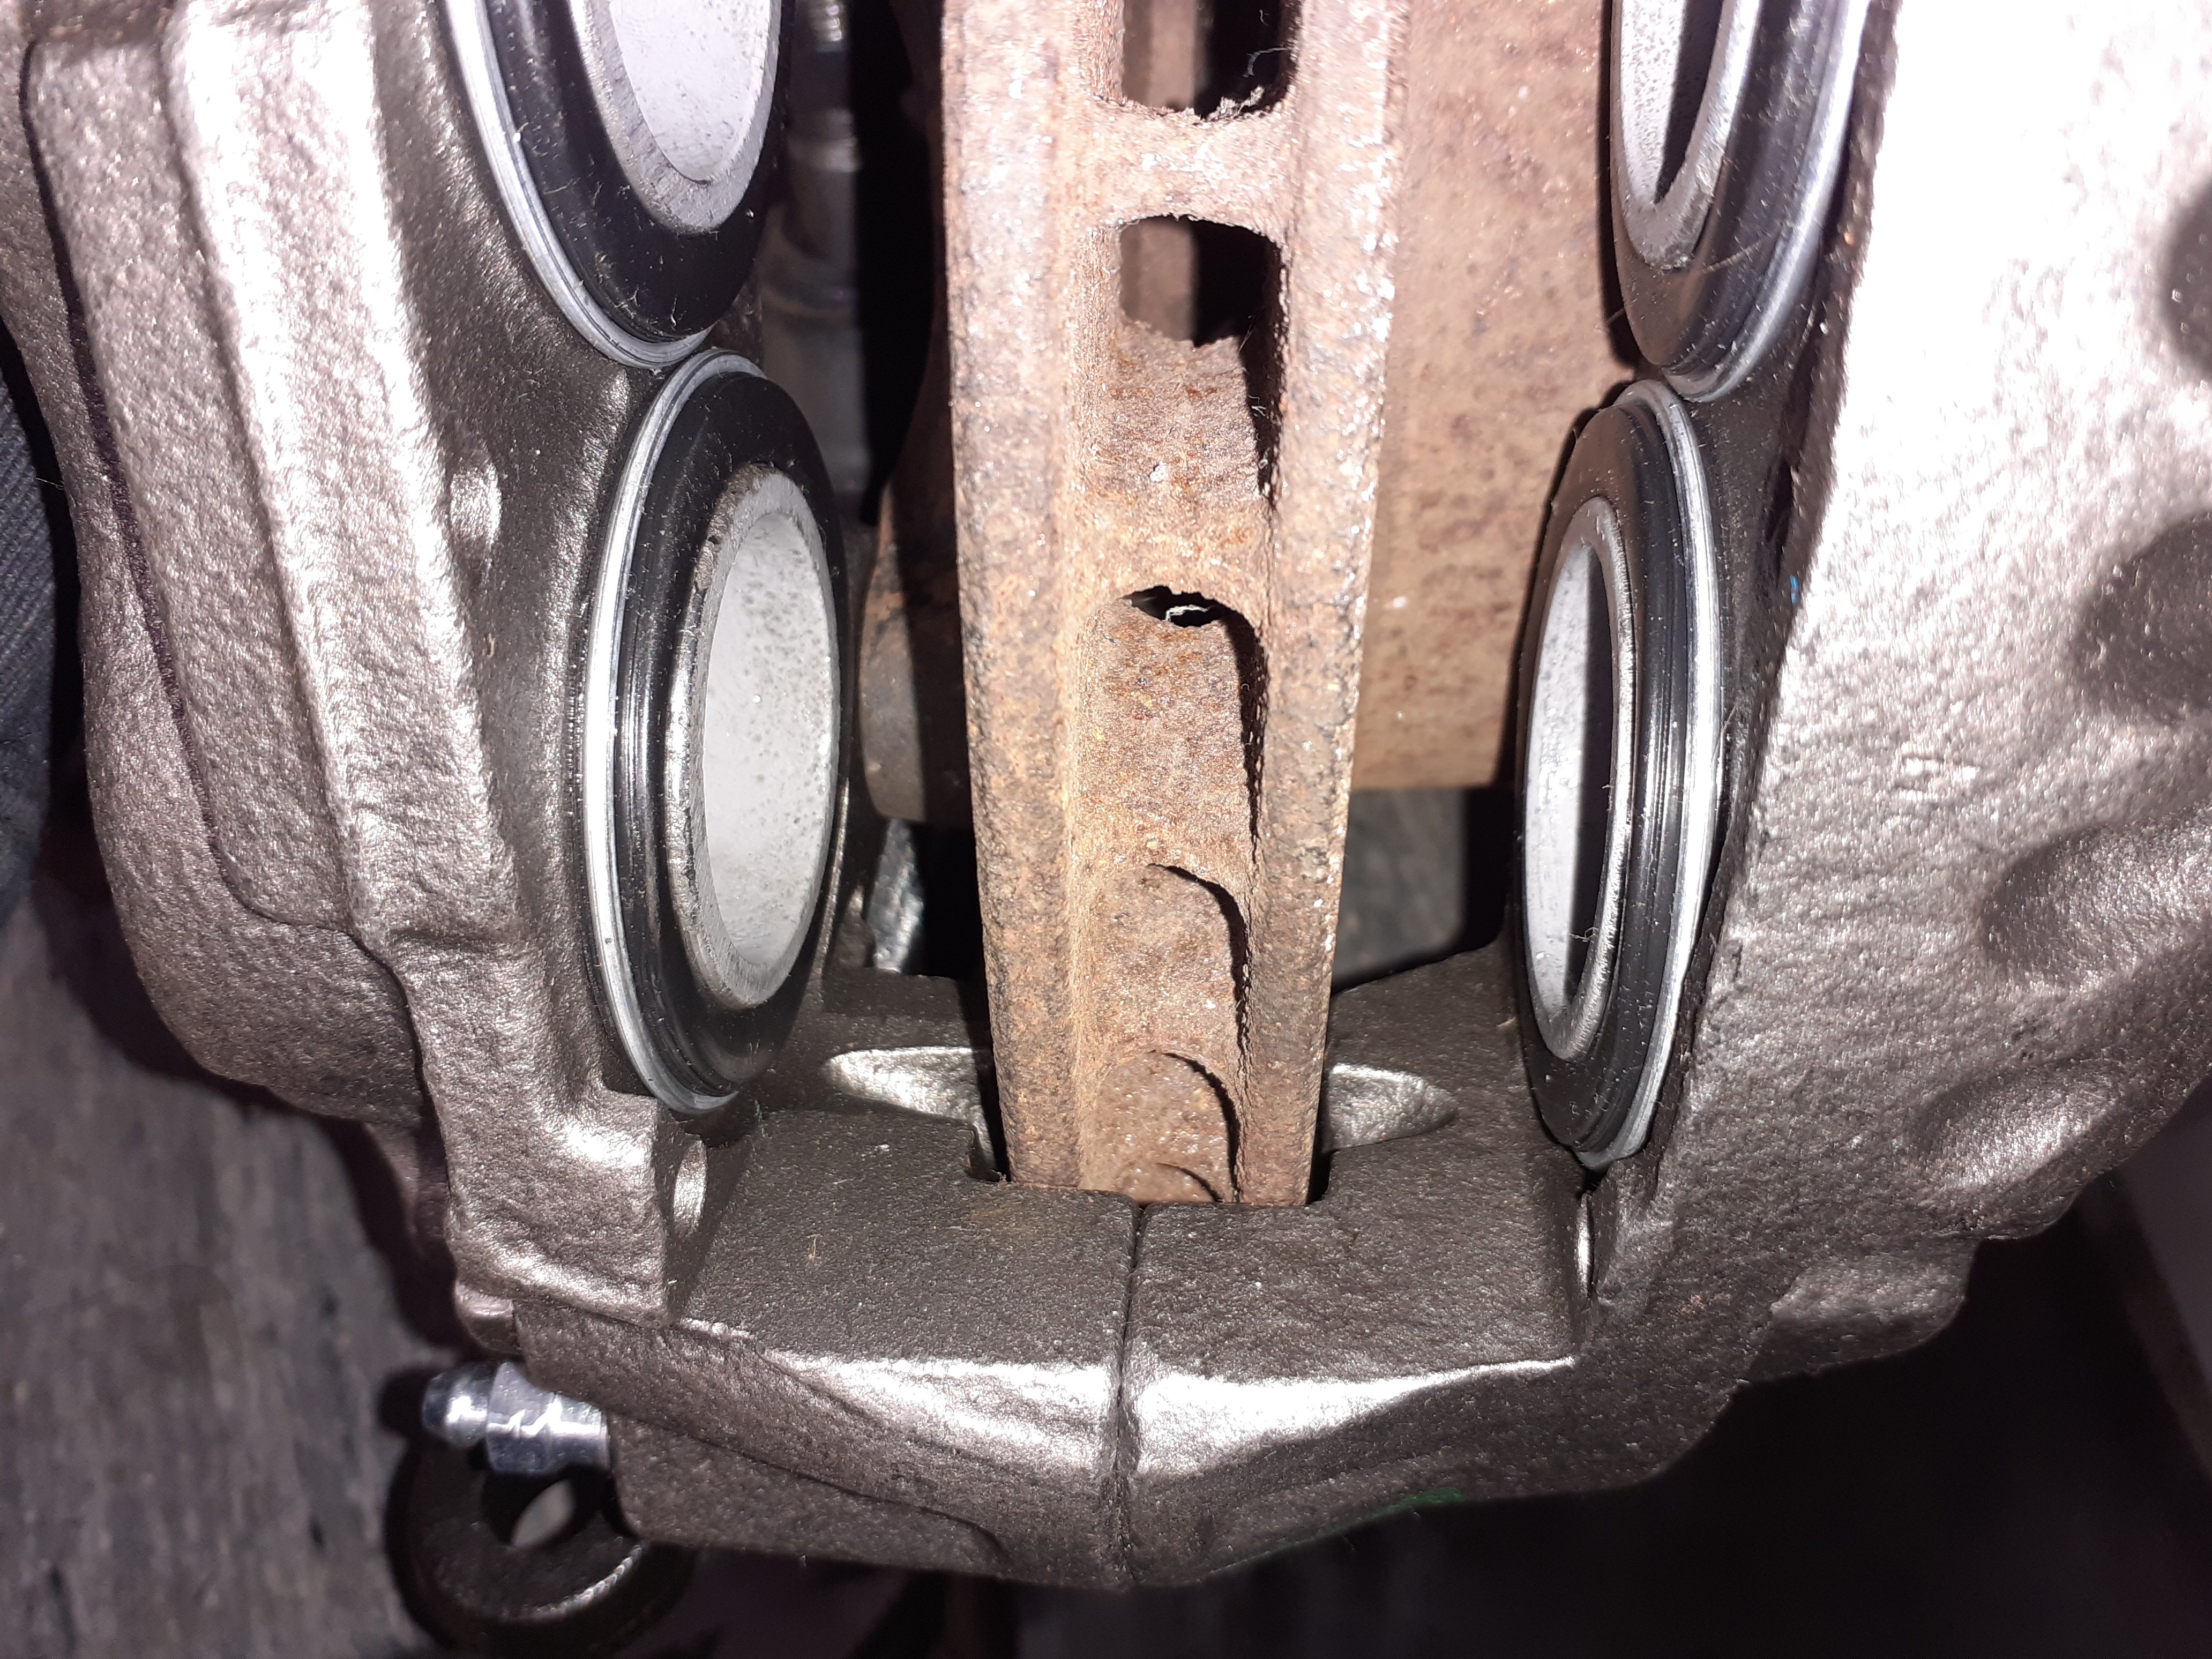
I love rockauto. Have been fiddling about with brake calipers for the front, I had previously got some 4 pot surf calipers from pick a part but the surf disc is narrower than the valiant ones and slightly smaller diameter so I was going to have to mill the caliper slot bigger and then I wasn't sure if the pads were going to be too fat I went to cardwells to see if there was wilwood caliper that was a bolt on, and there was 1 option, but it would have needed a bigger disc and I don't think they would have worked with the wheels I have I was doing a cert on a surf the other day, and saw it had fatter discs than the one I had got the calipers off, went on rockauto, found a v6 one of the same year had the bigger discs so ordered a pair of reconditioned calipers, $25usd each and here within a week. So now all I need to do is get the disc diameter machined down 3mm or so and it will all bolt up, yuss
1 point
-
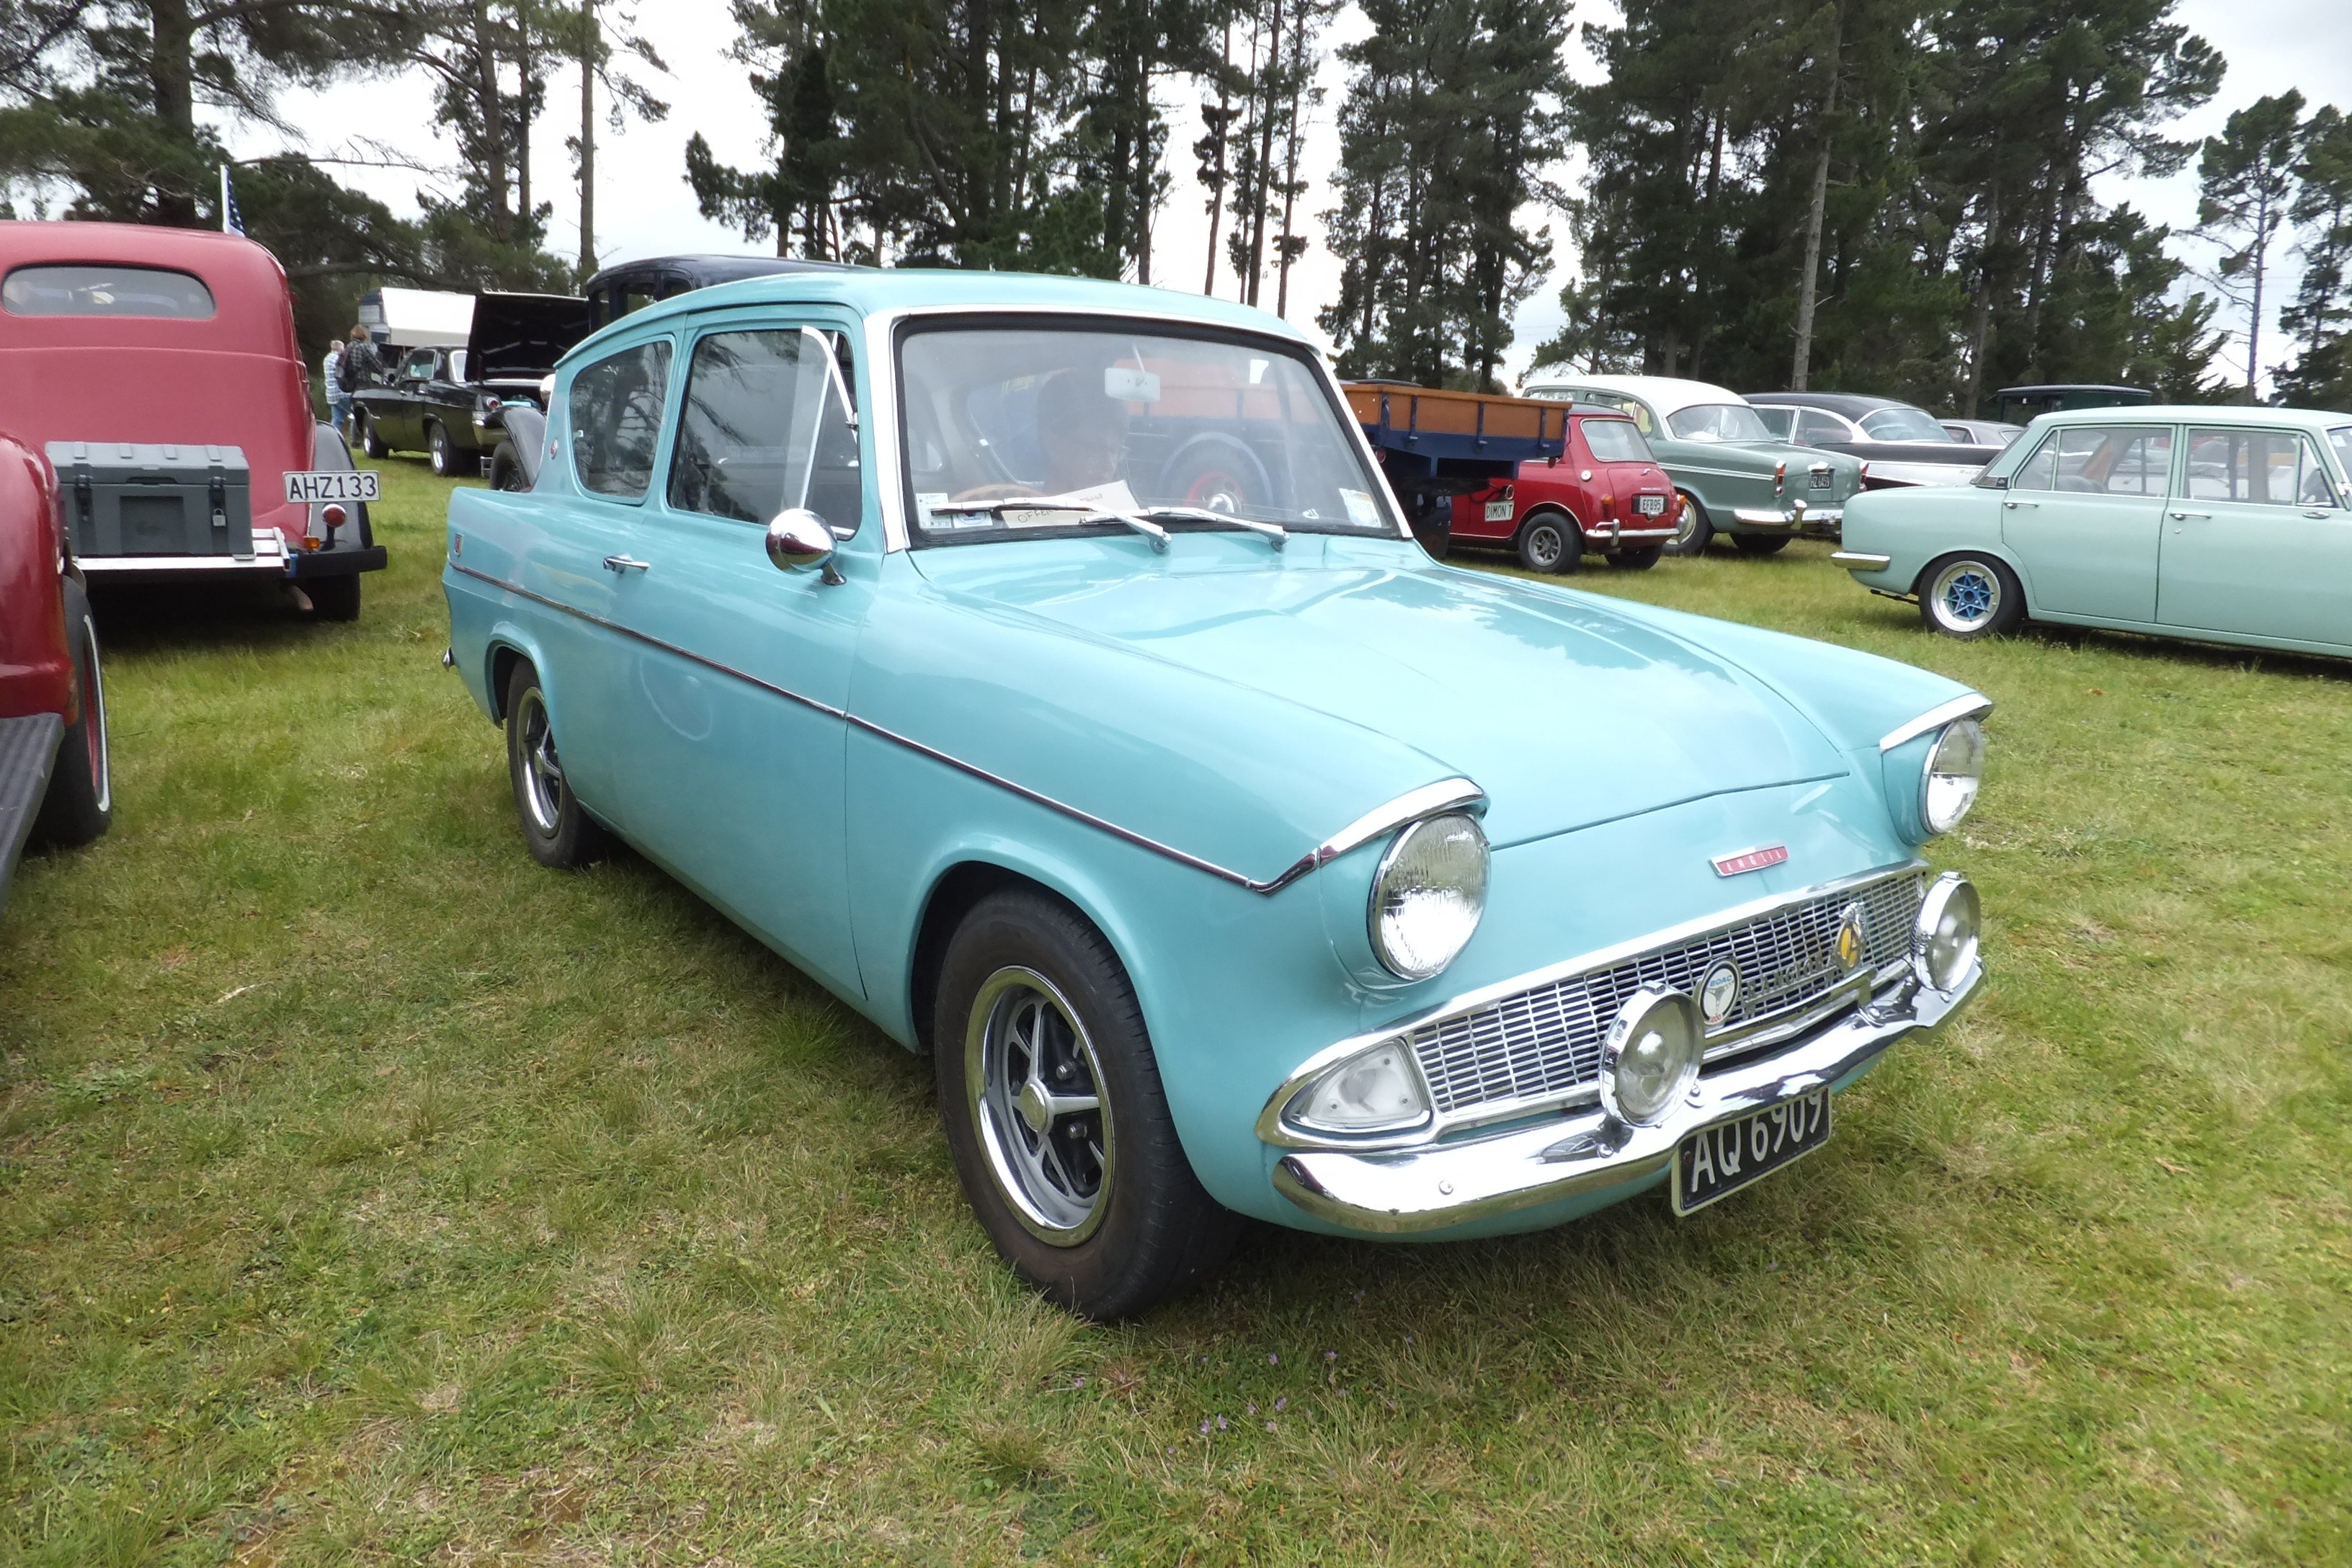
I have a pair of SSR MK2 for it just need to paint and tyres, will be lowered shortly! Its still got a wof atm so should be out, I will attending street meat in a couple of weeks so aimming for that. - Michael1 point
-
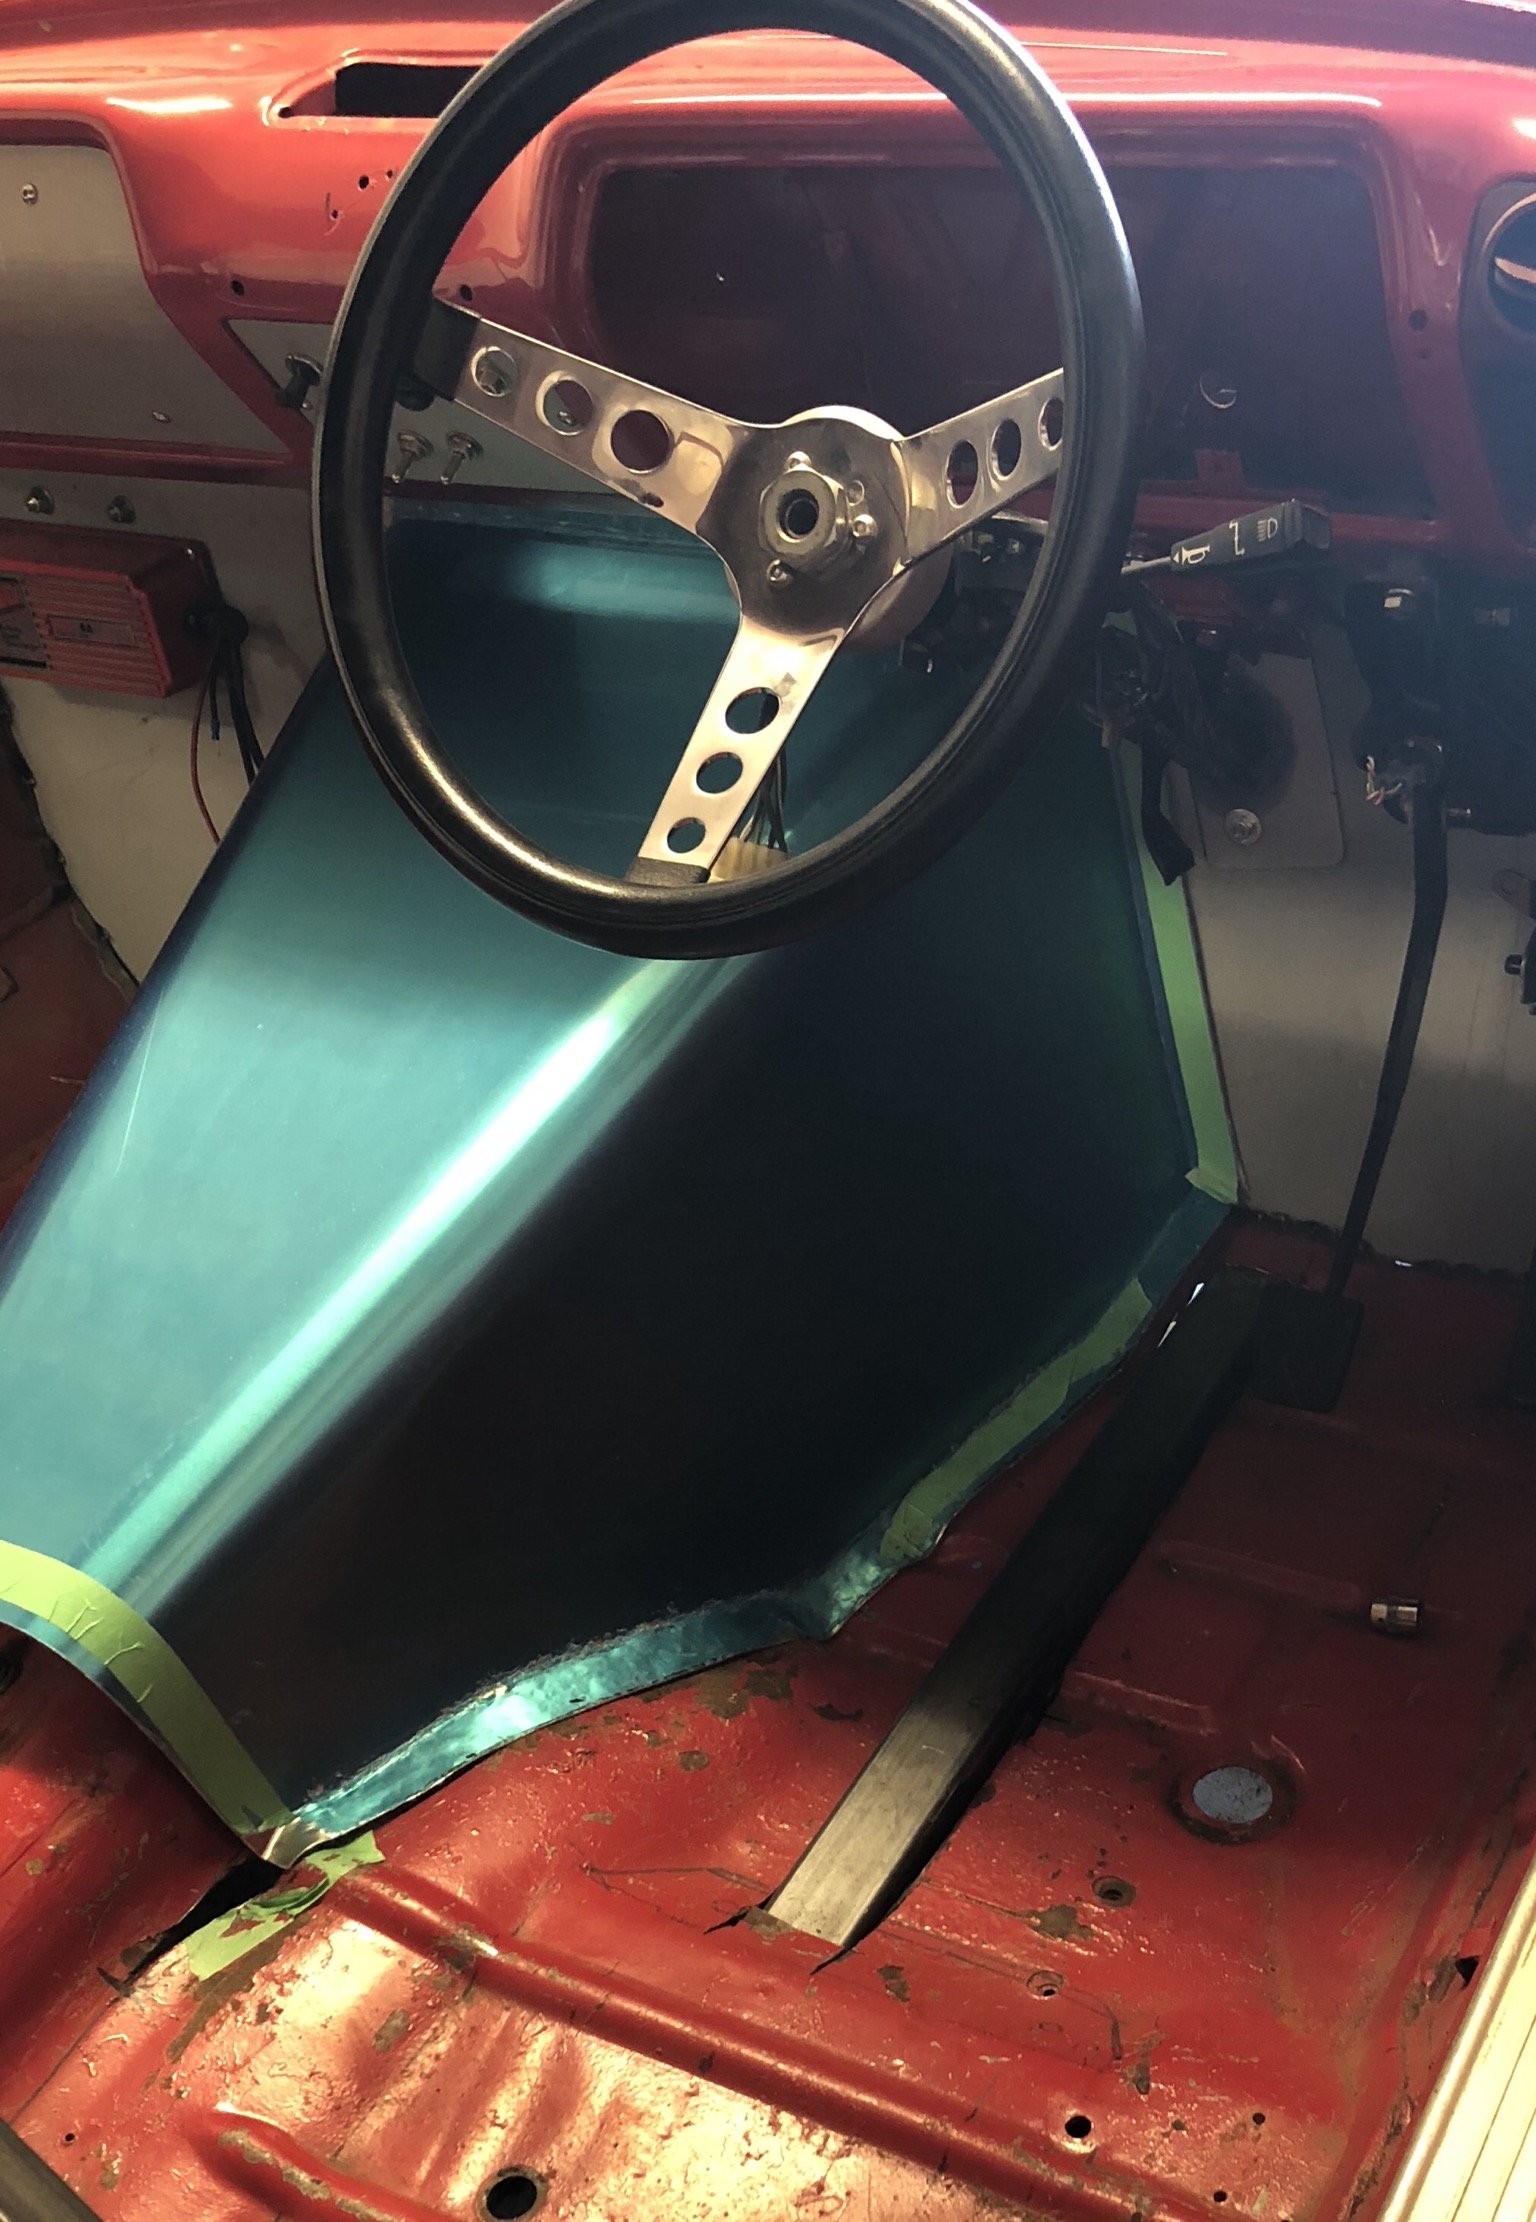
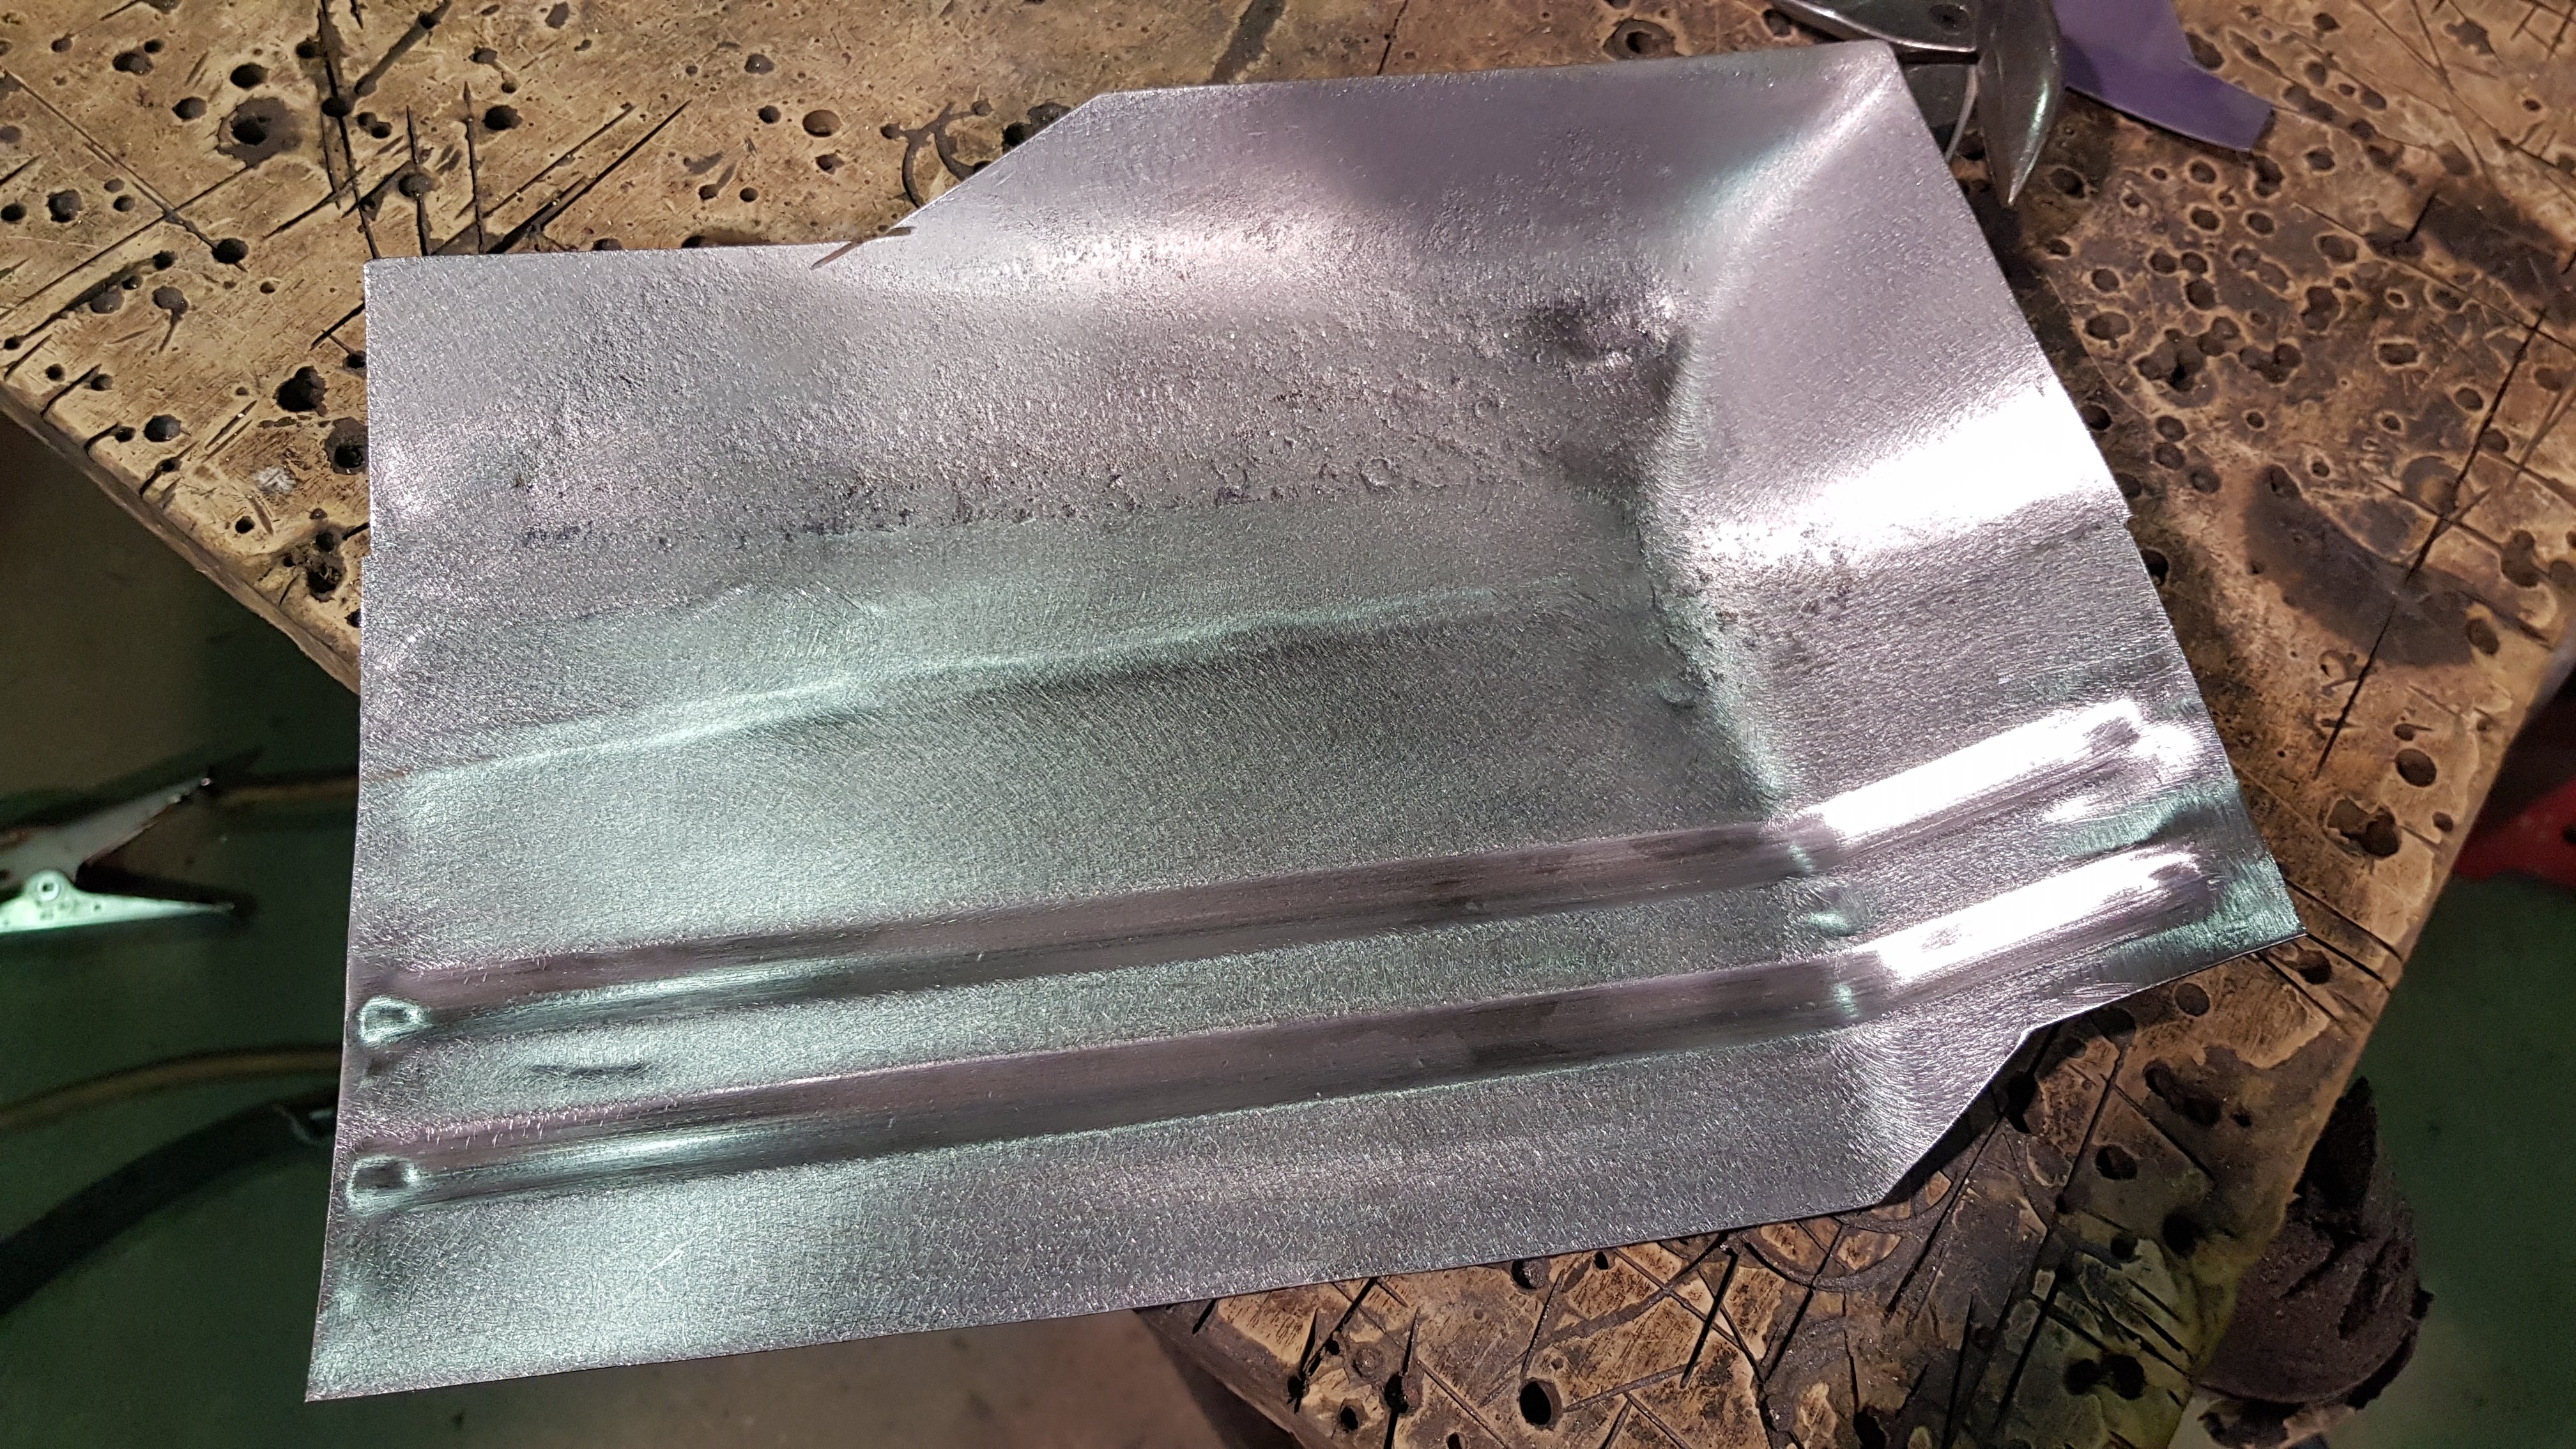
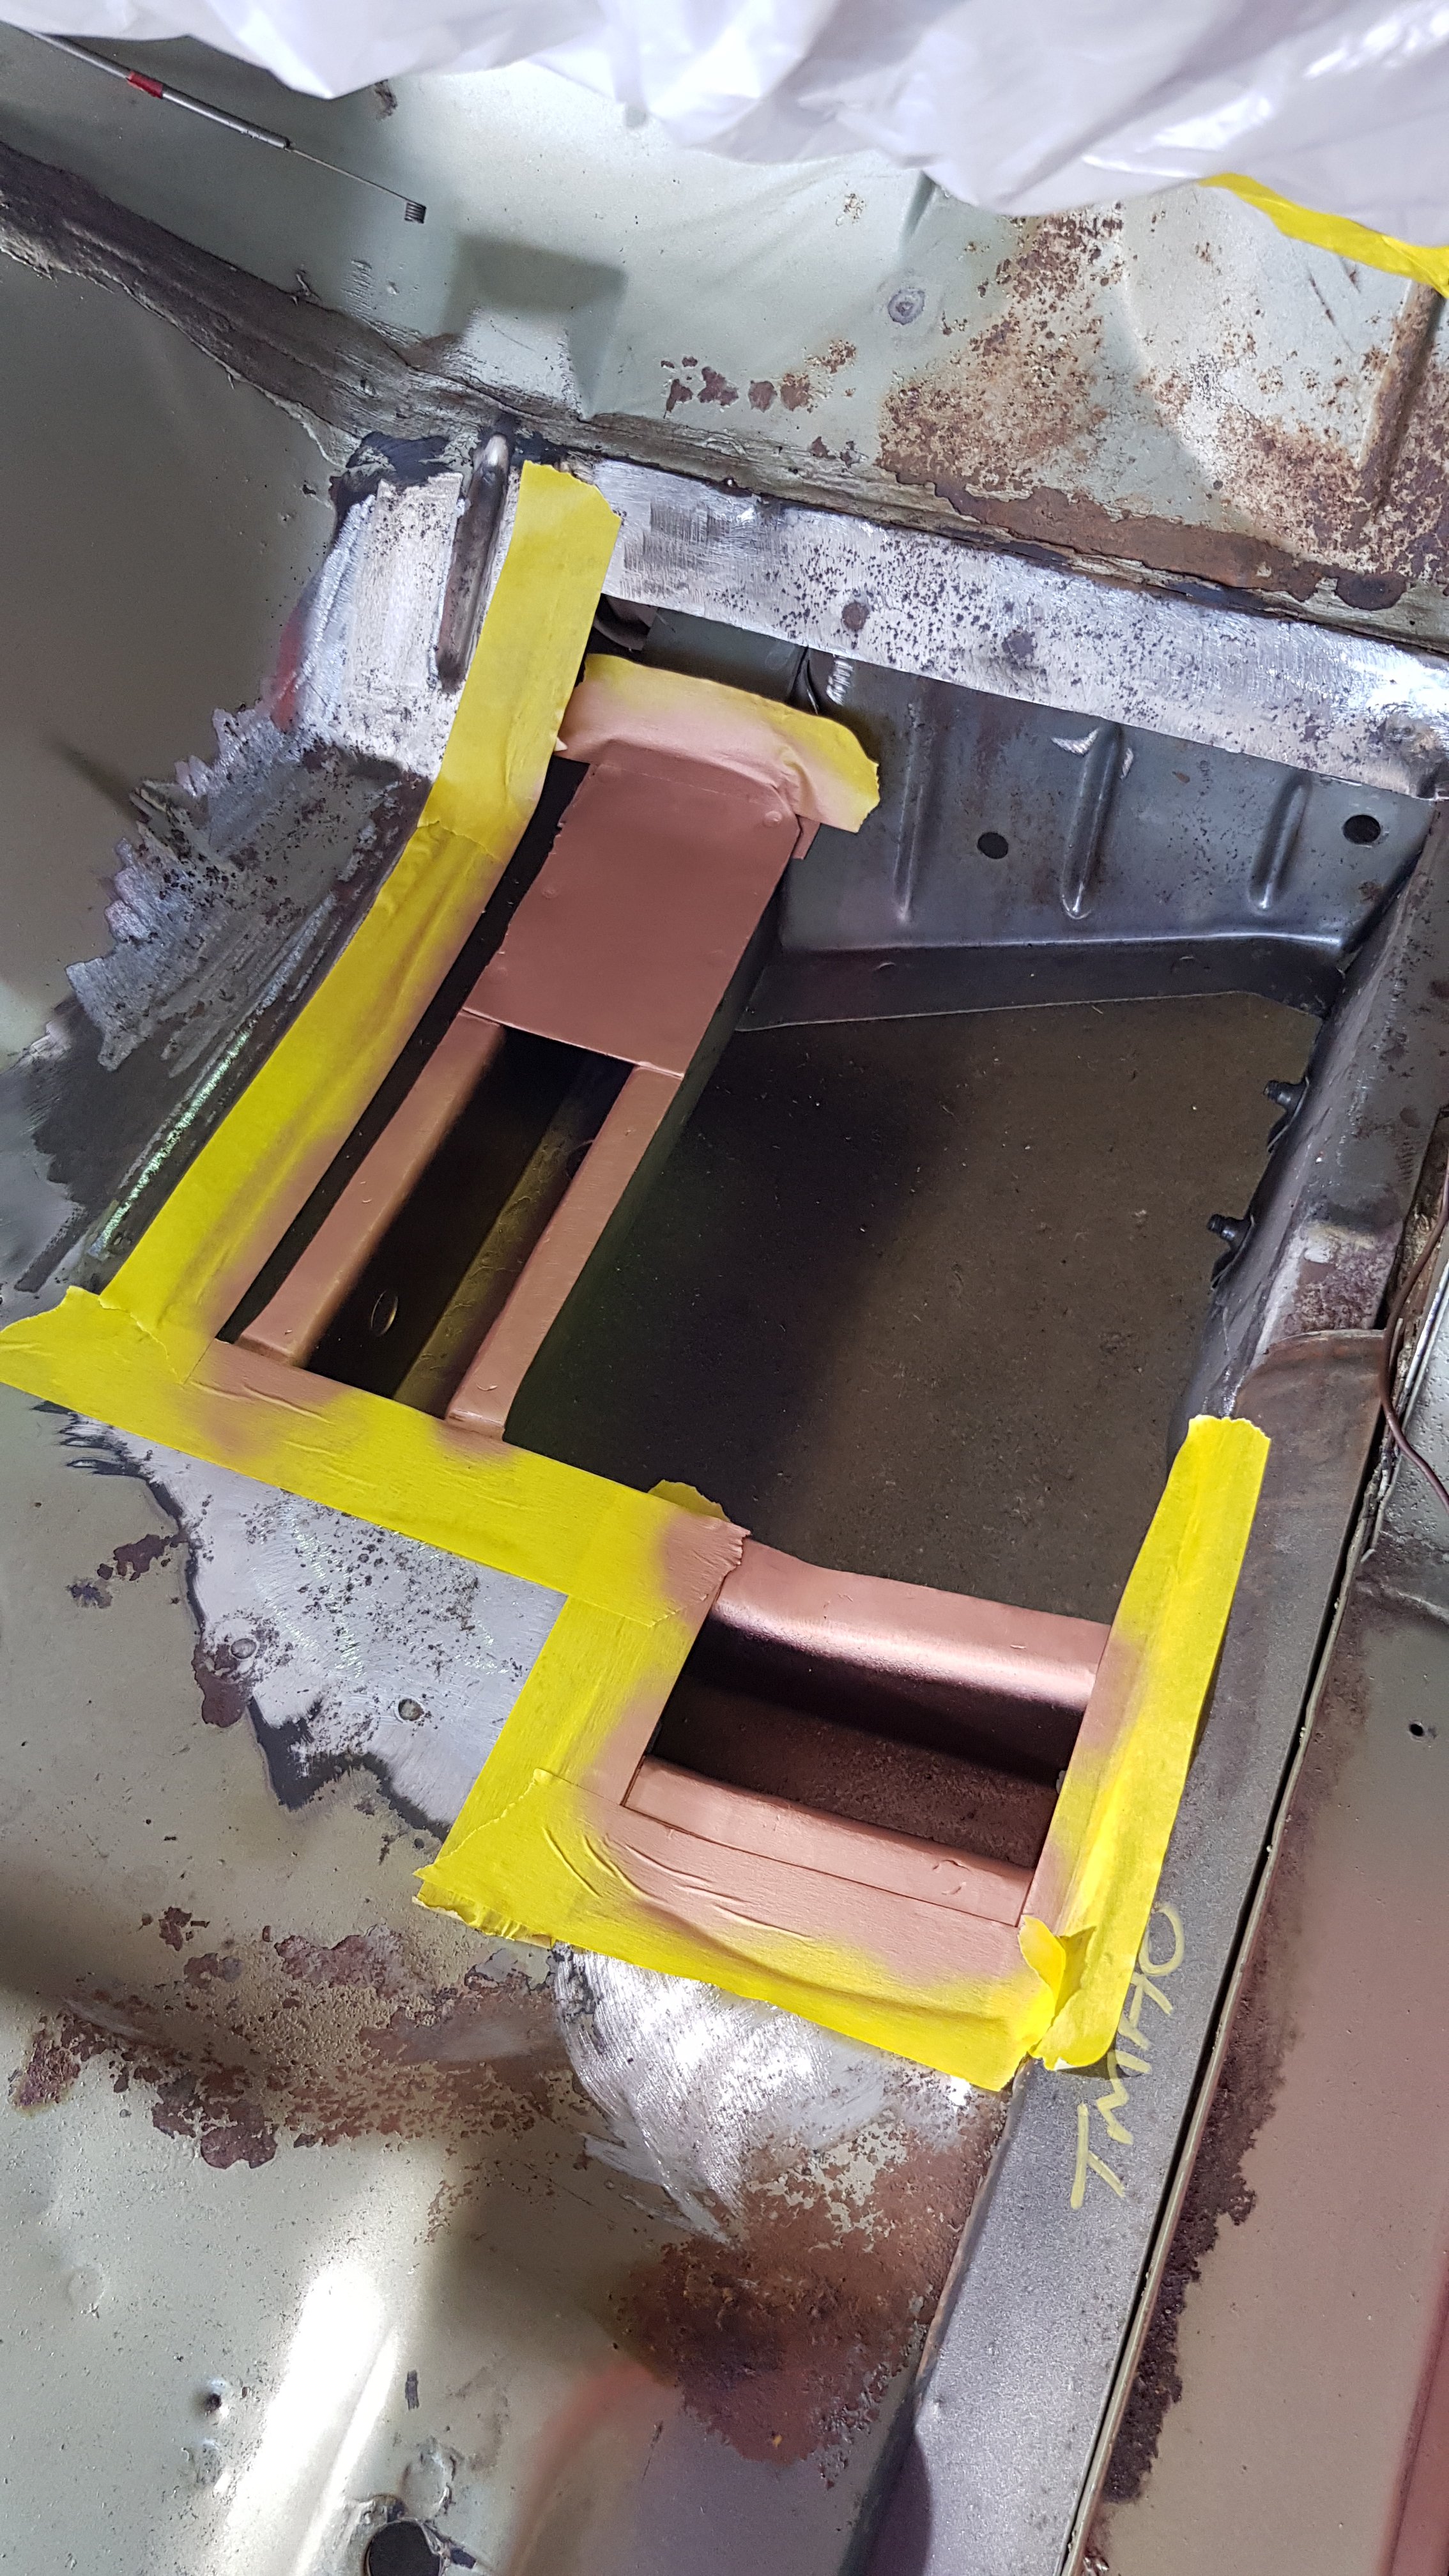
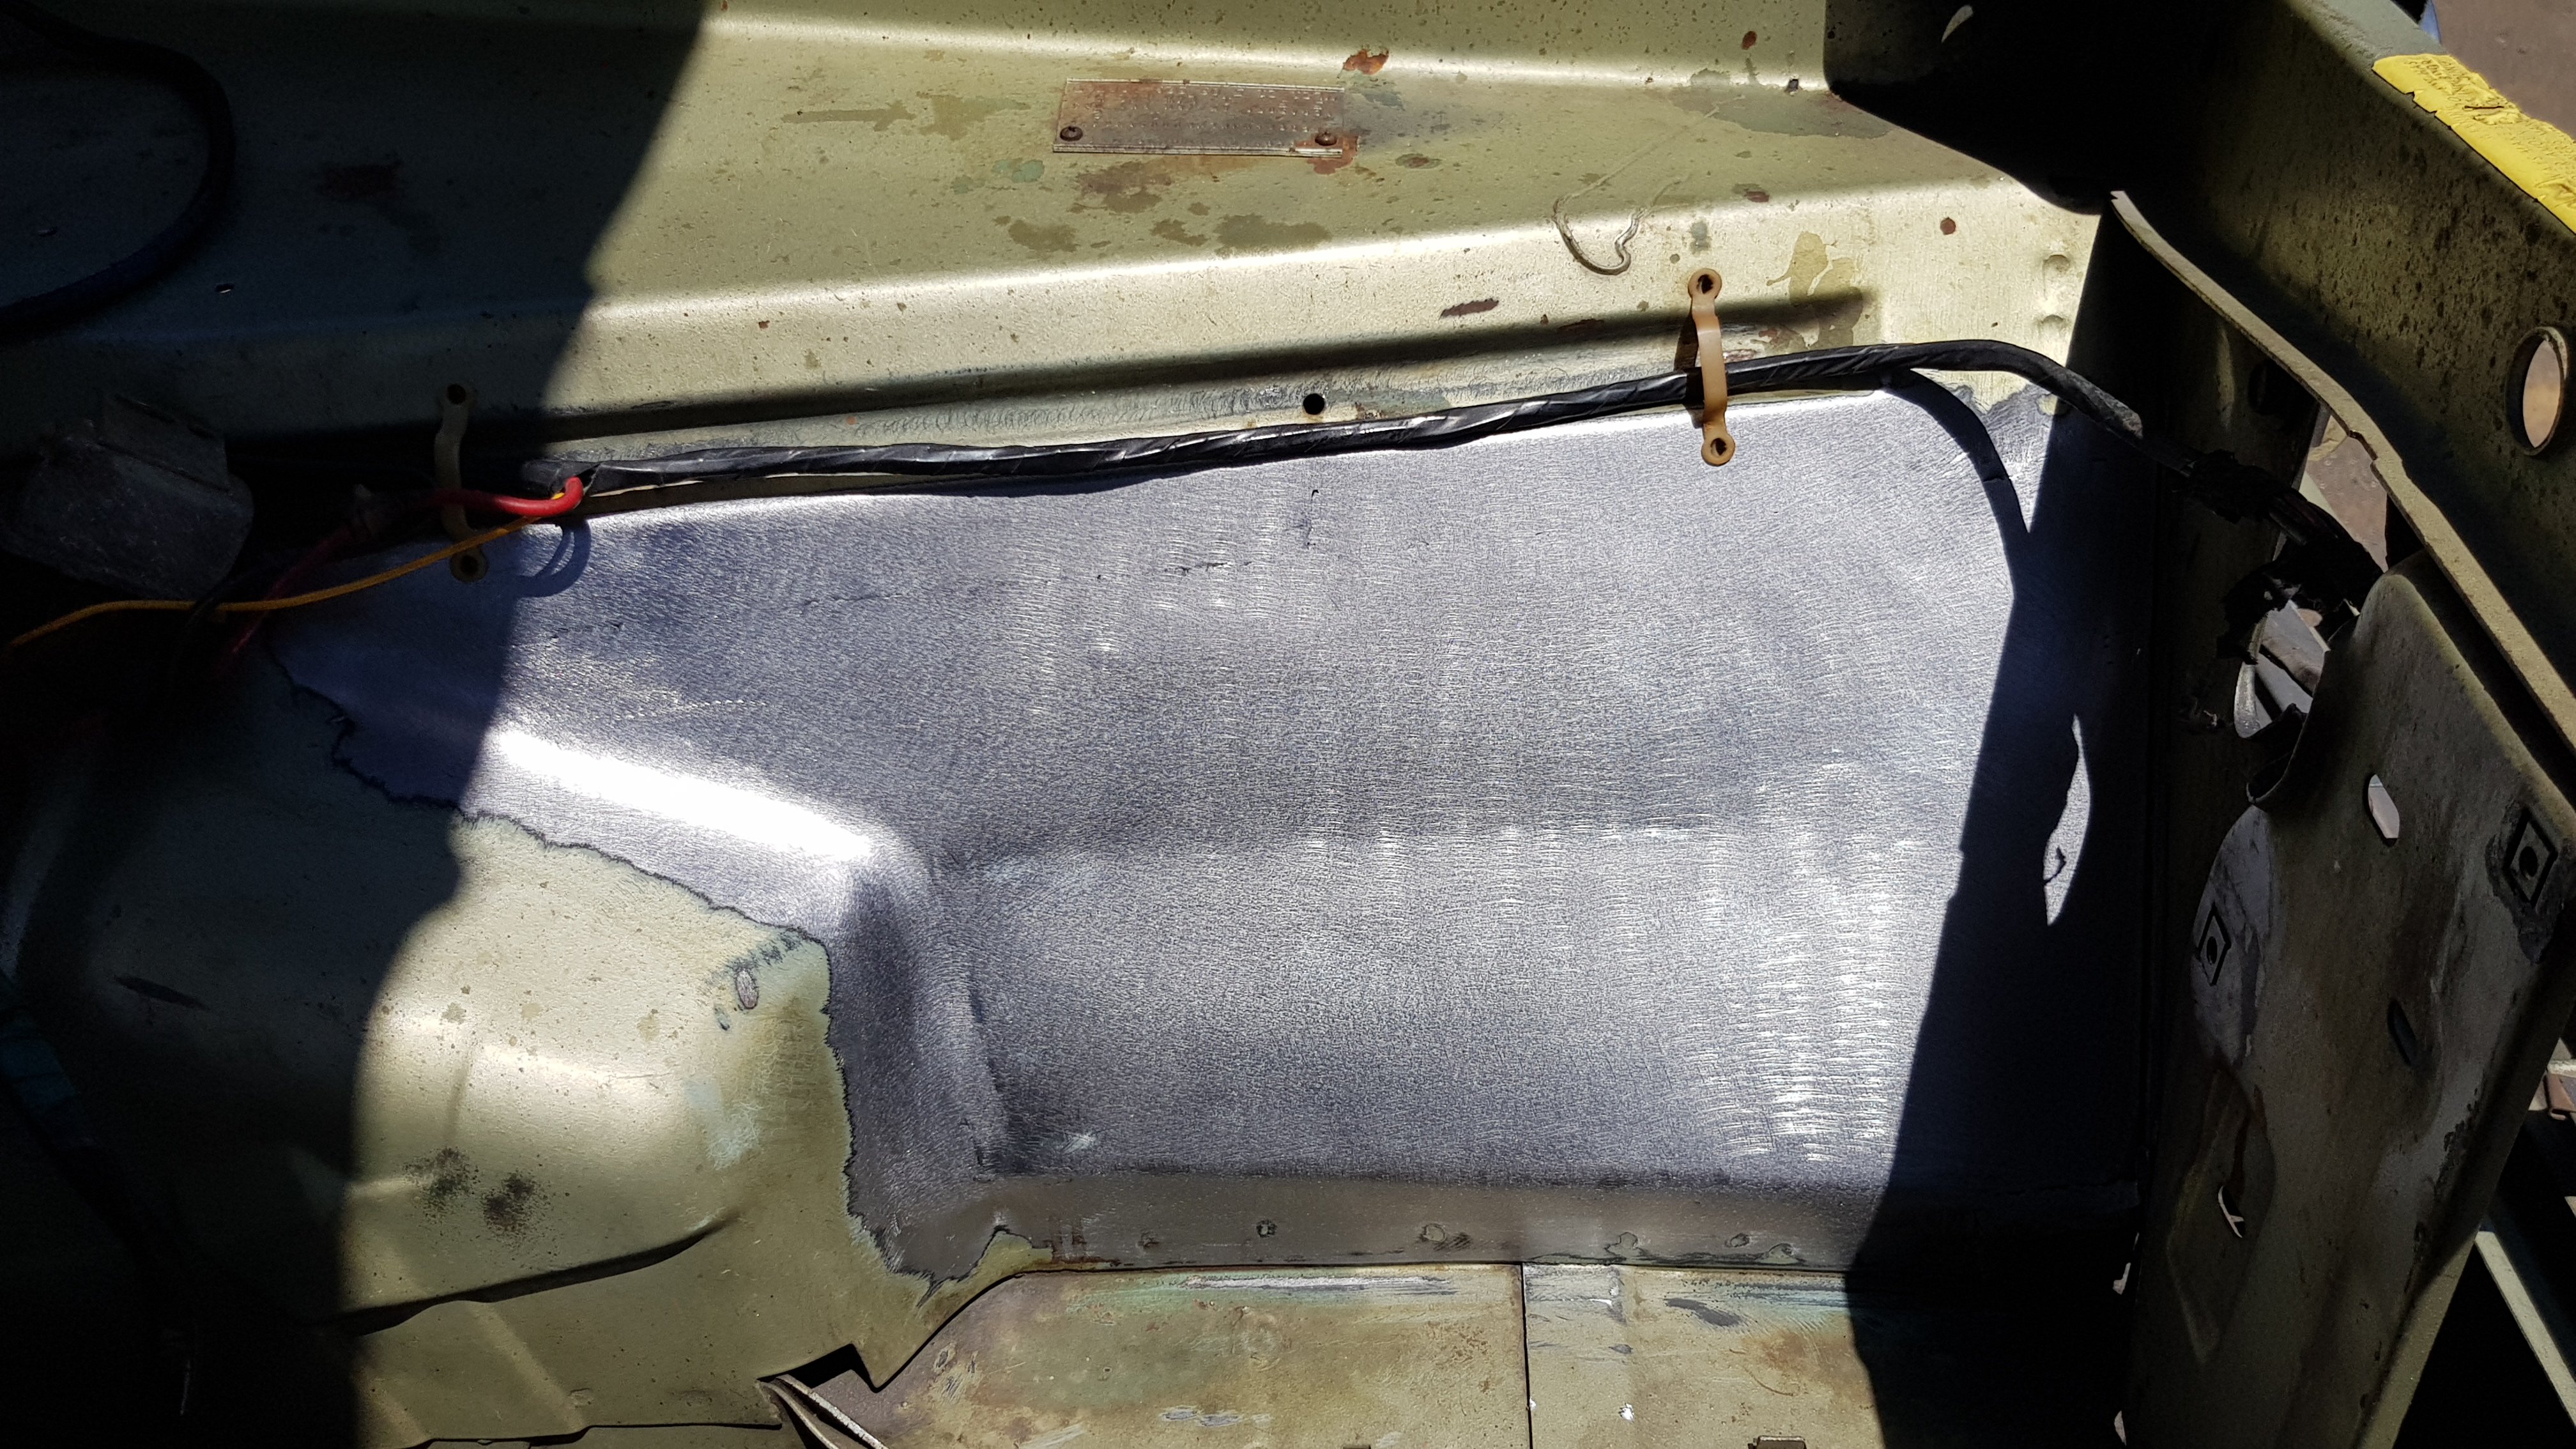
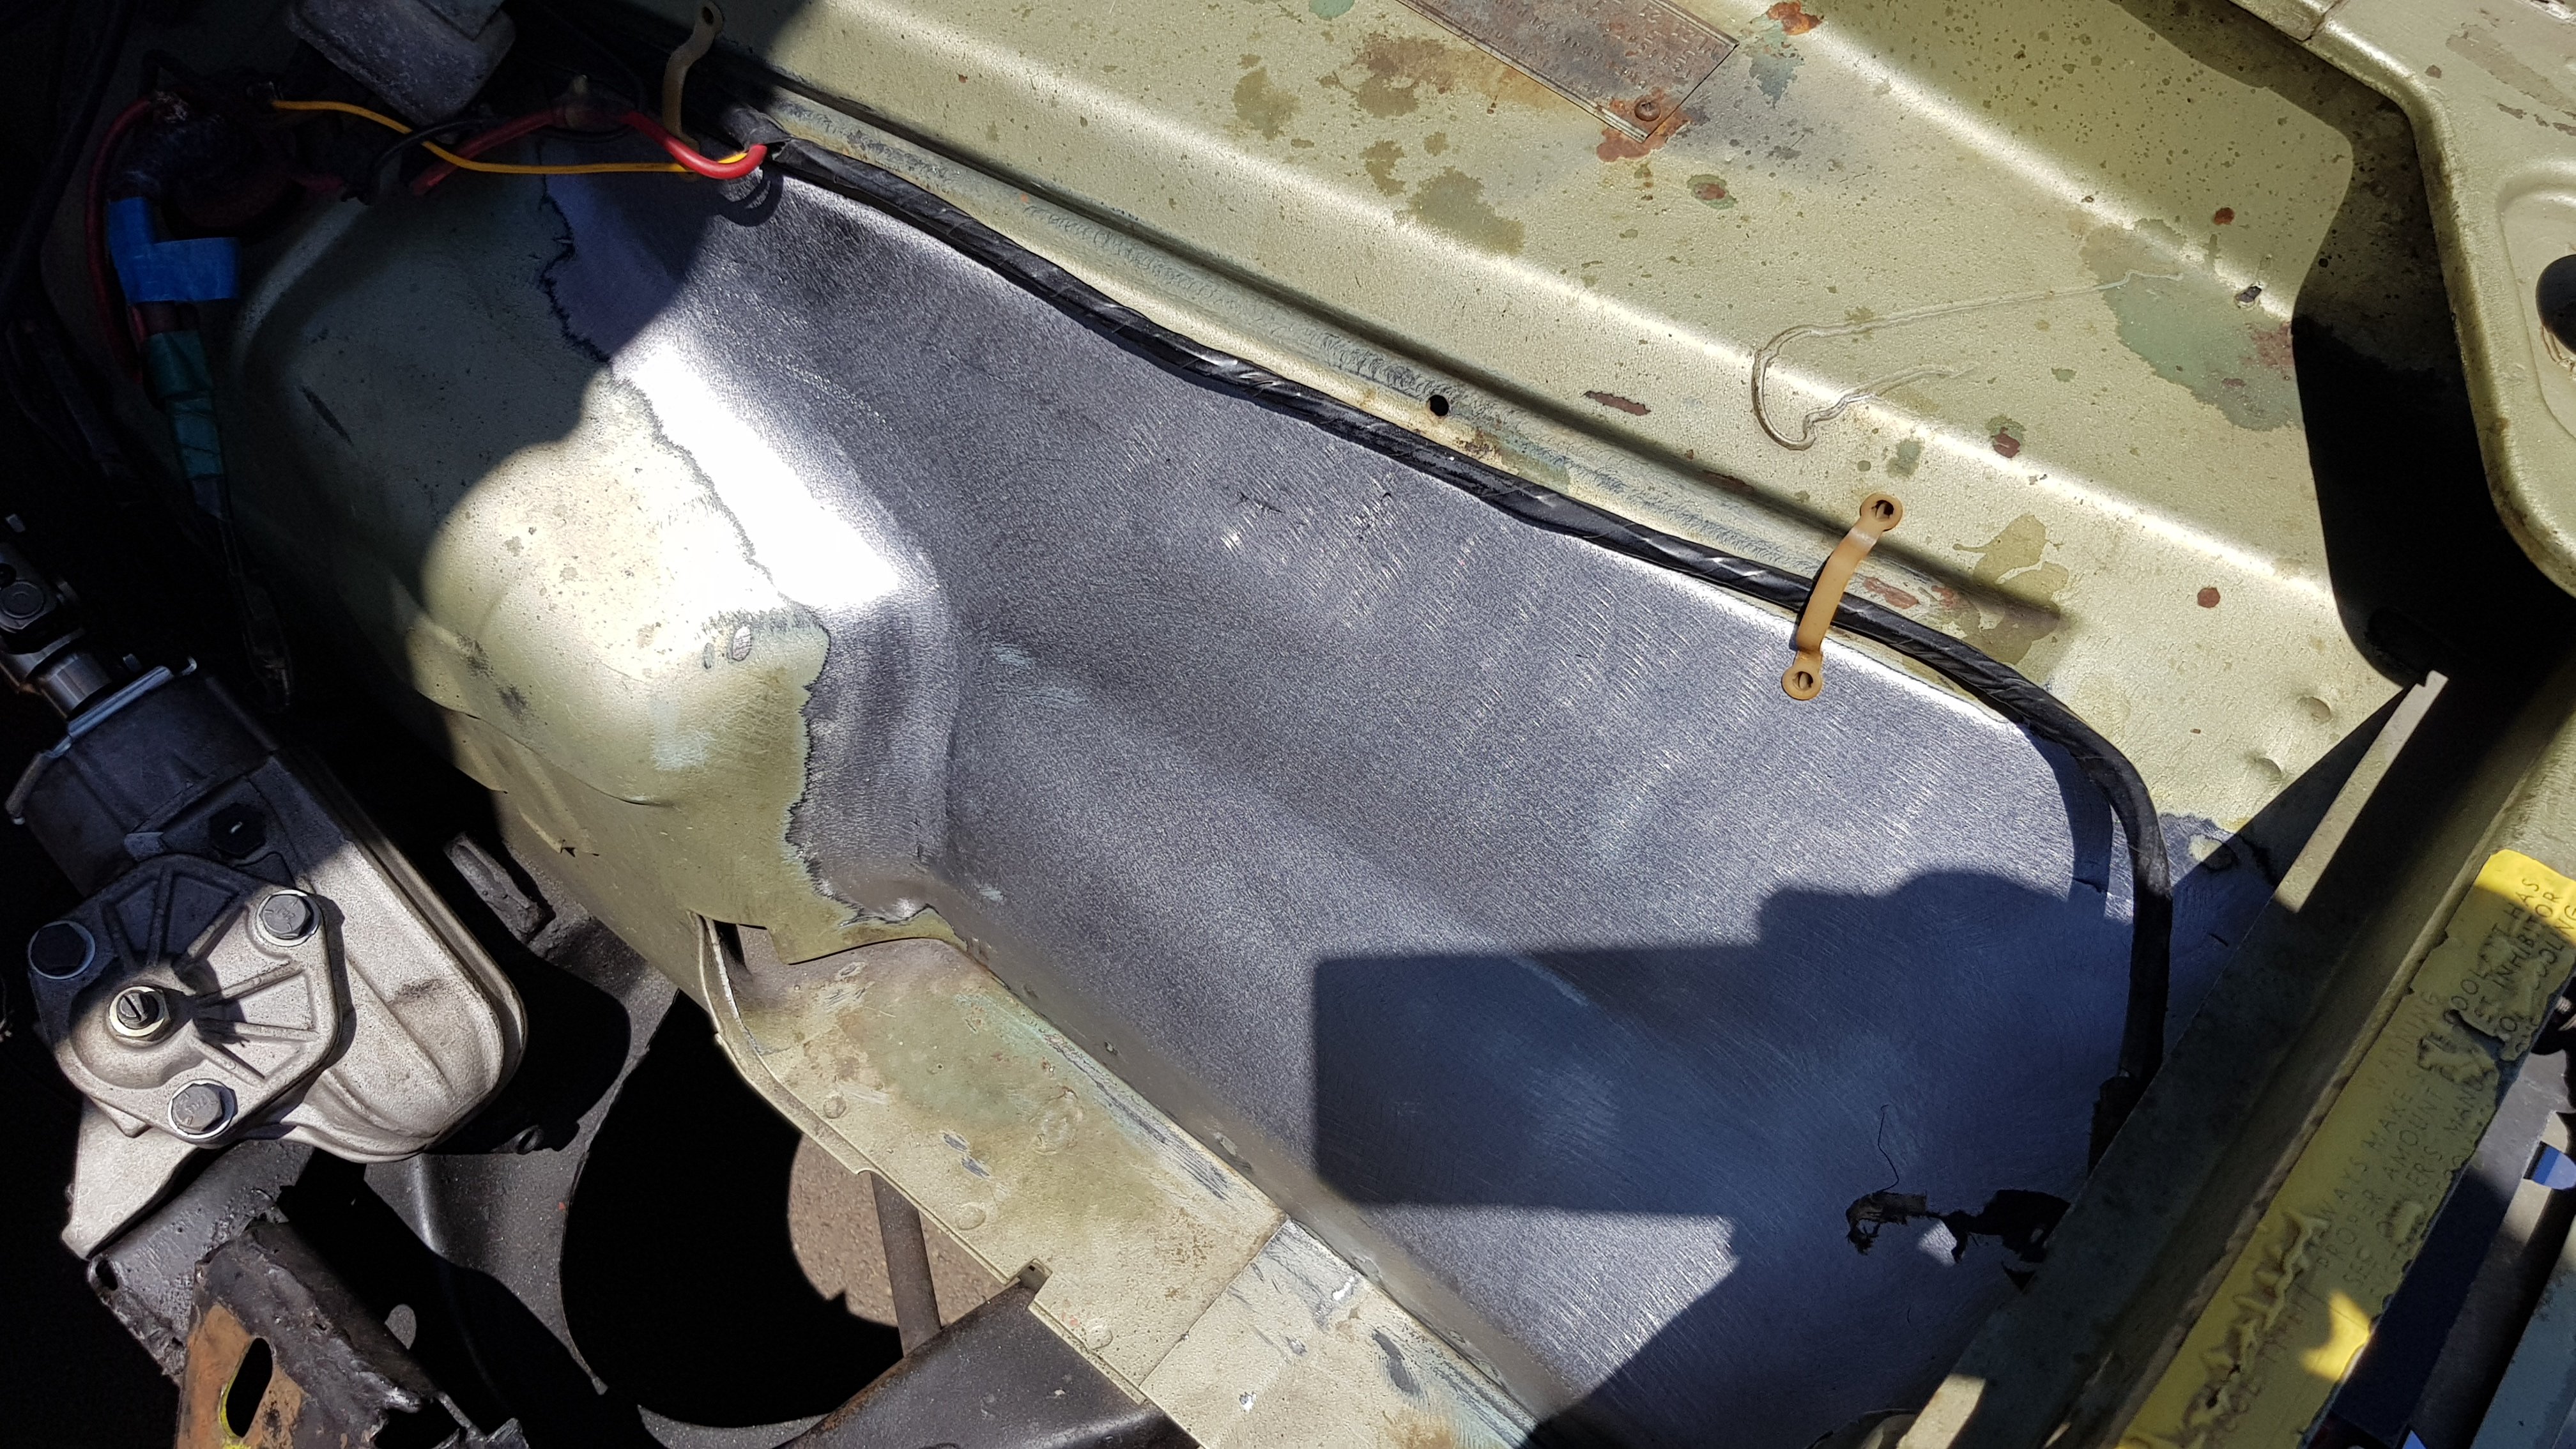
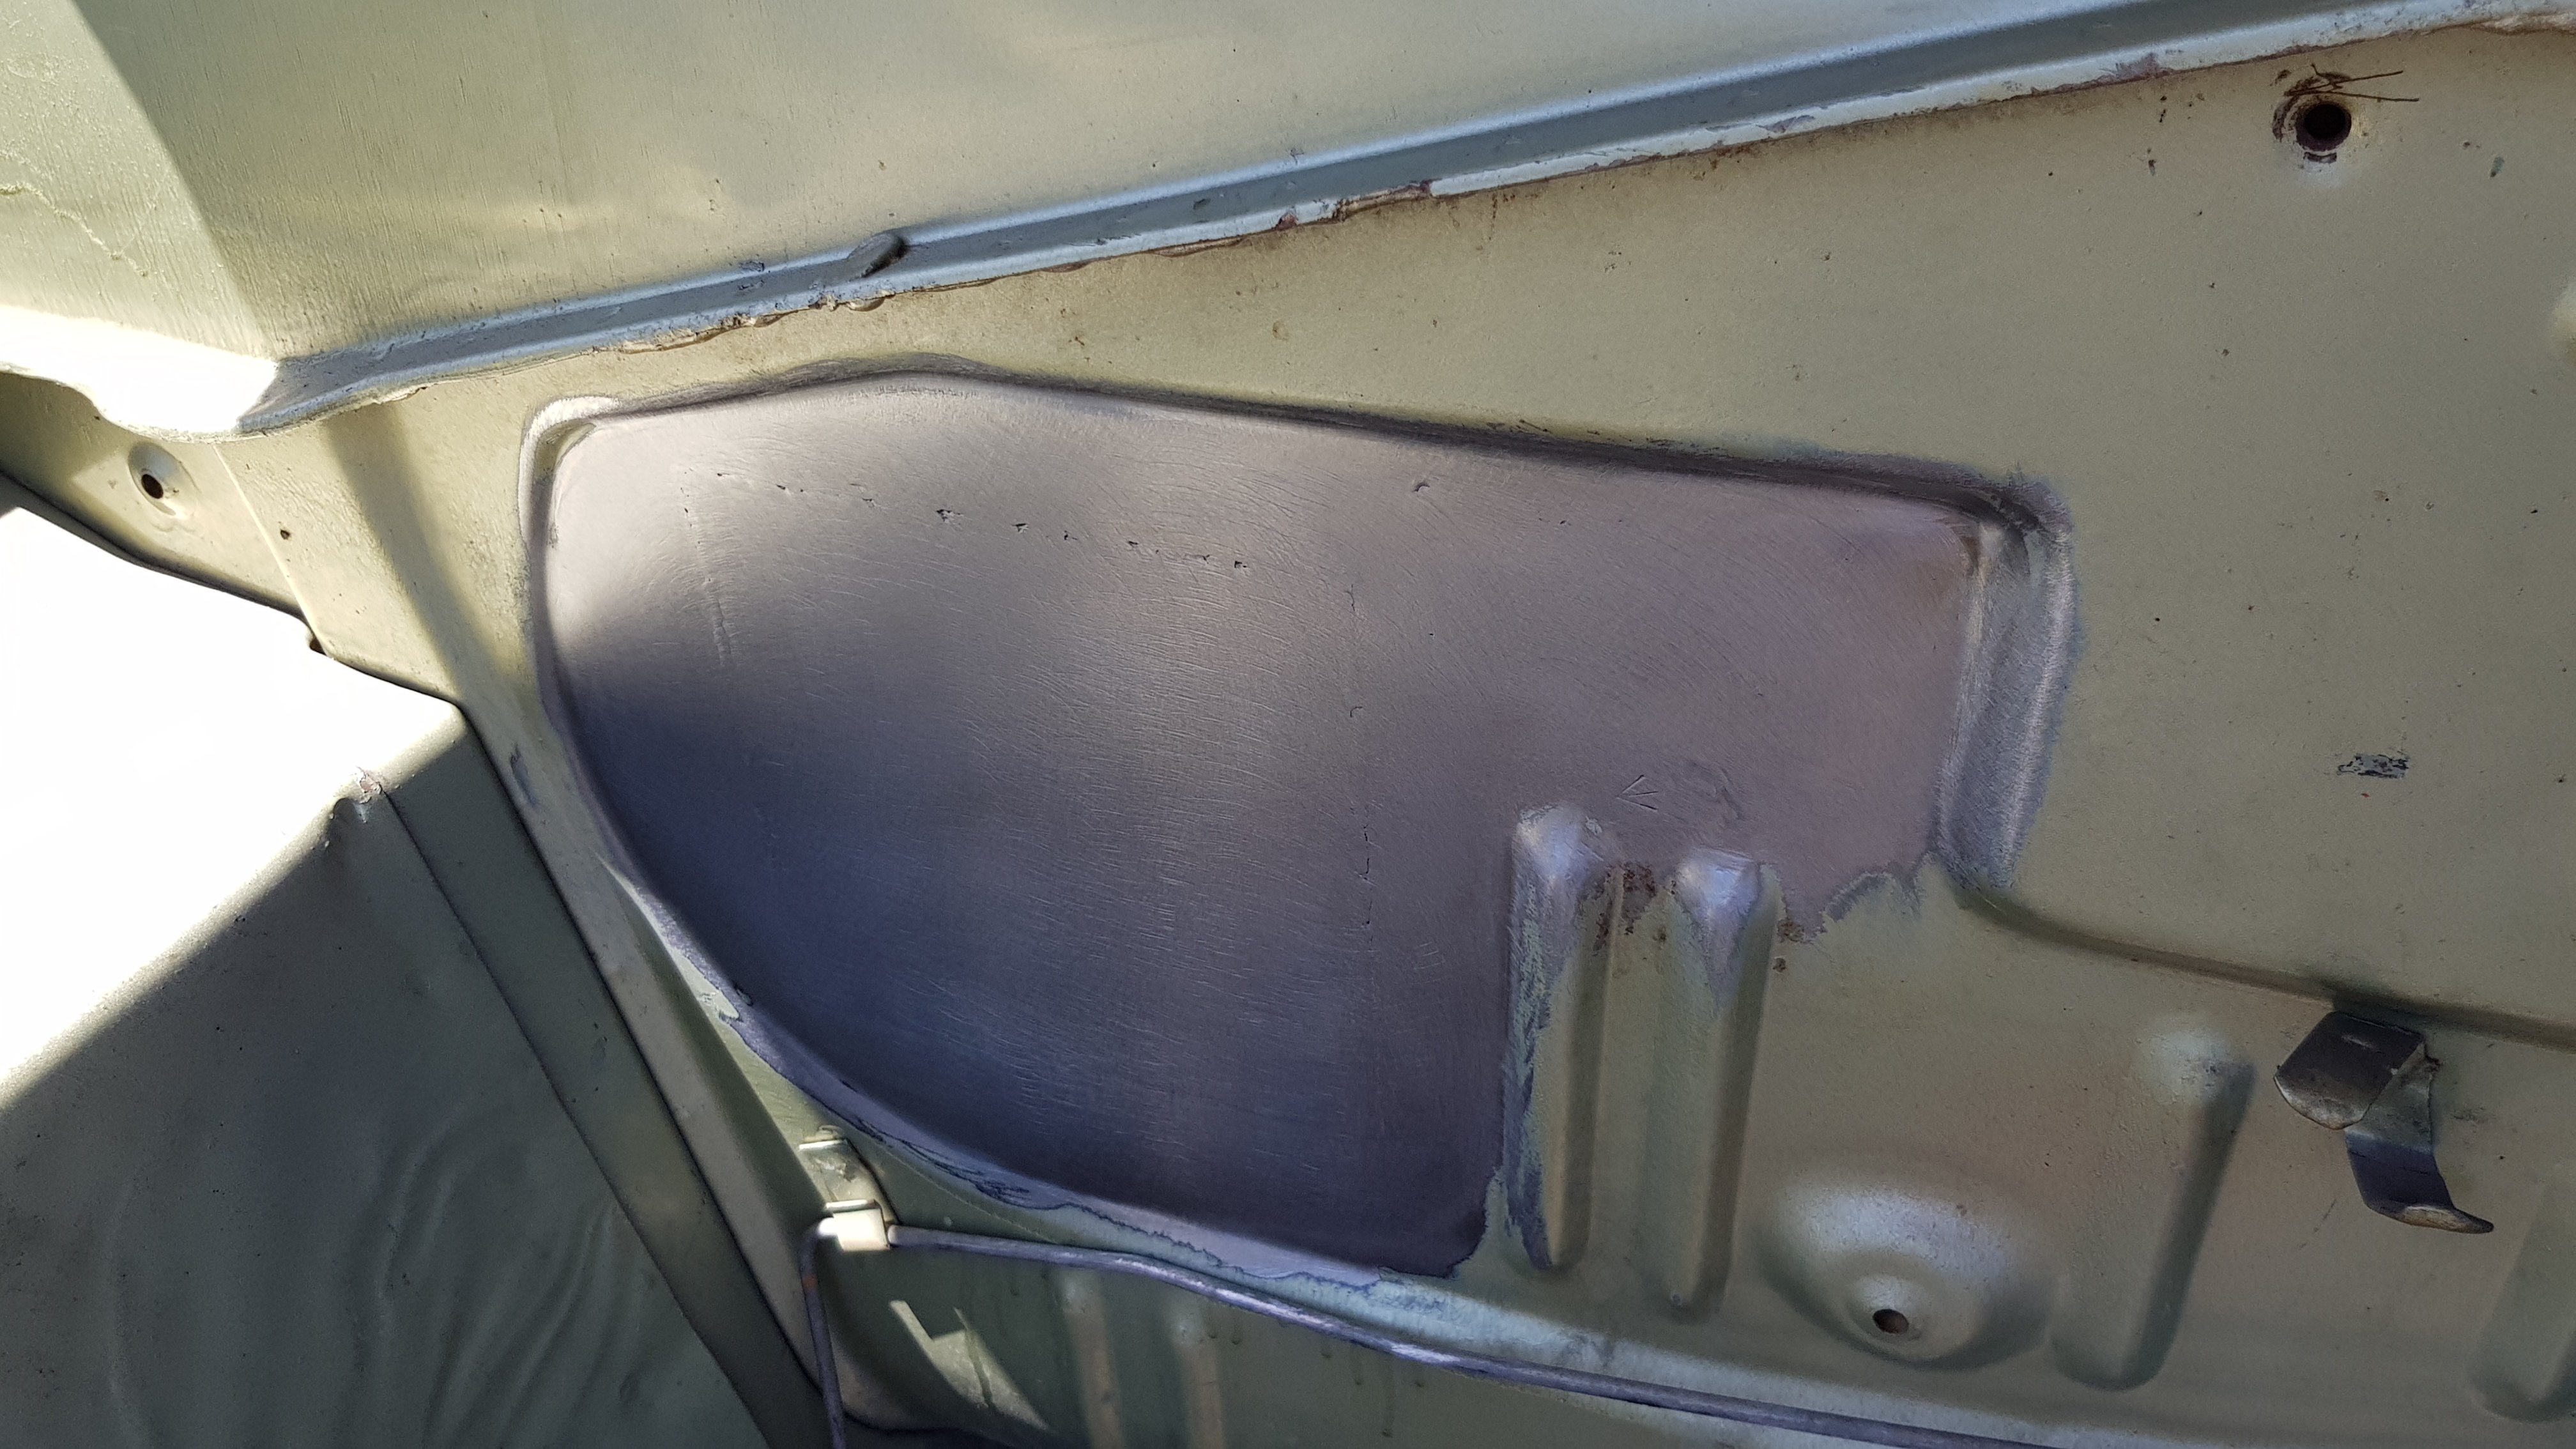
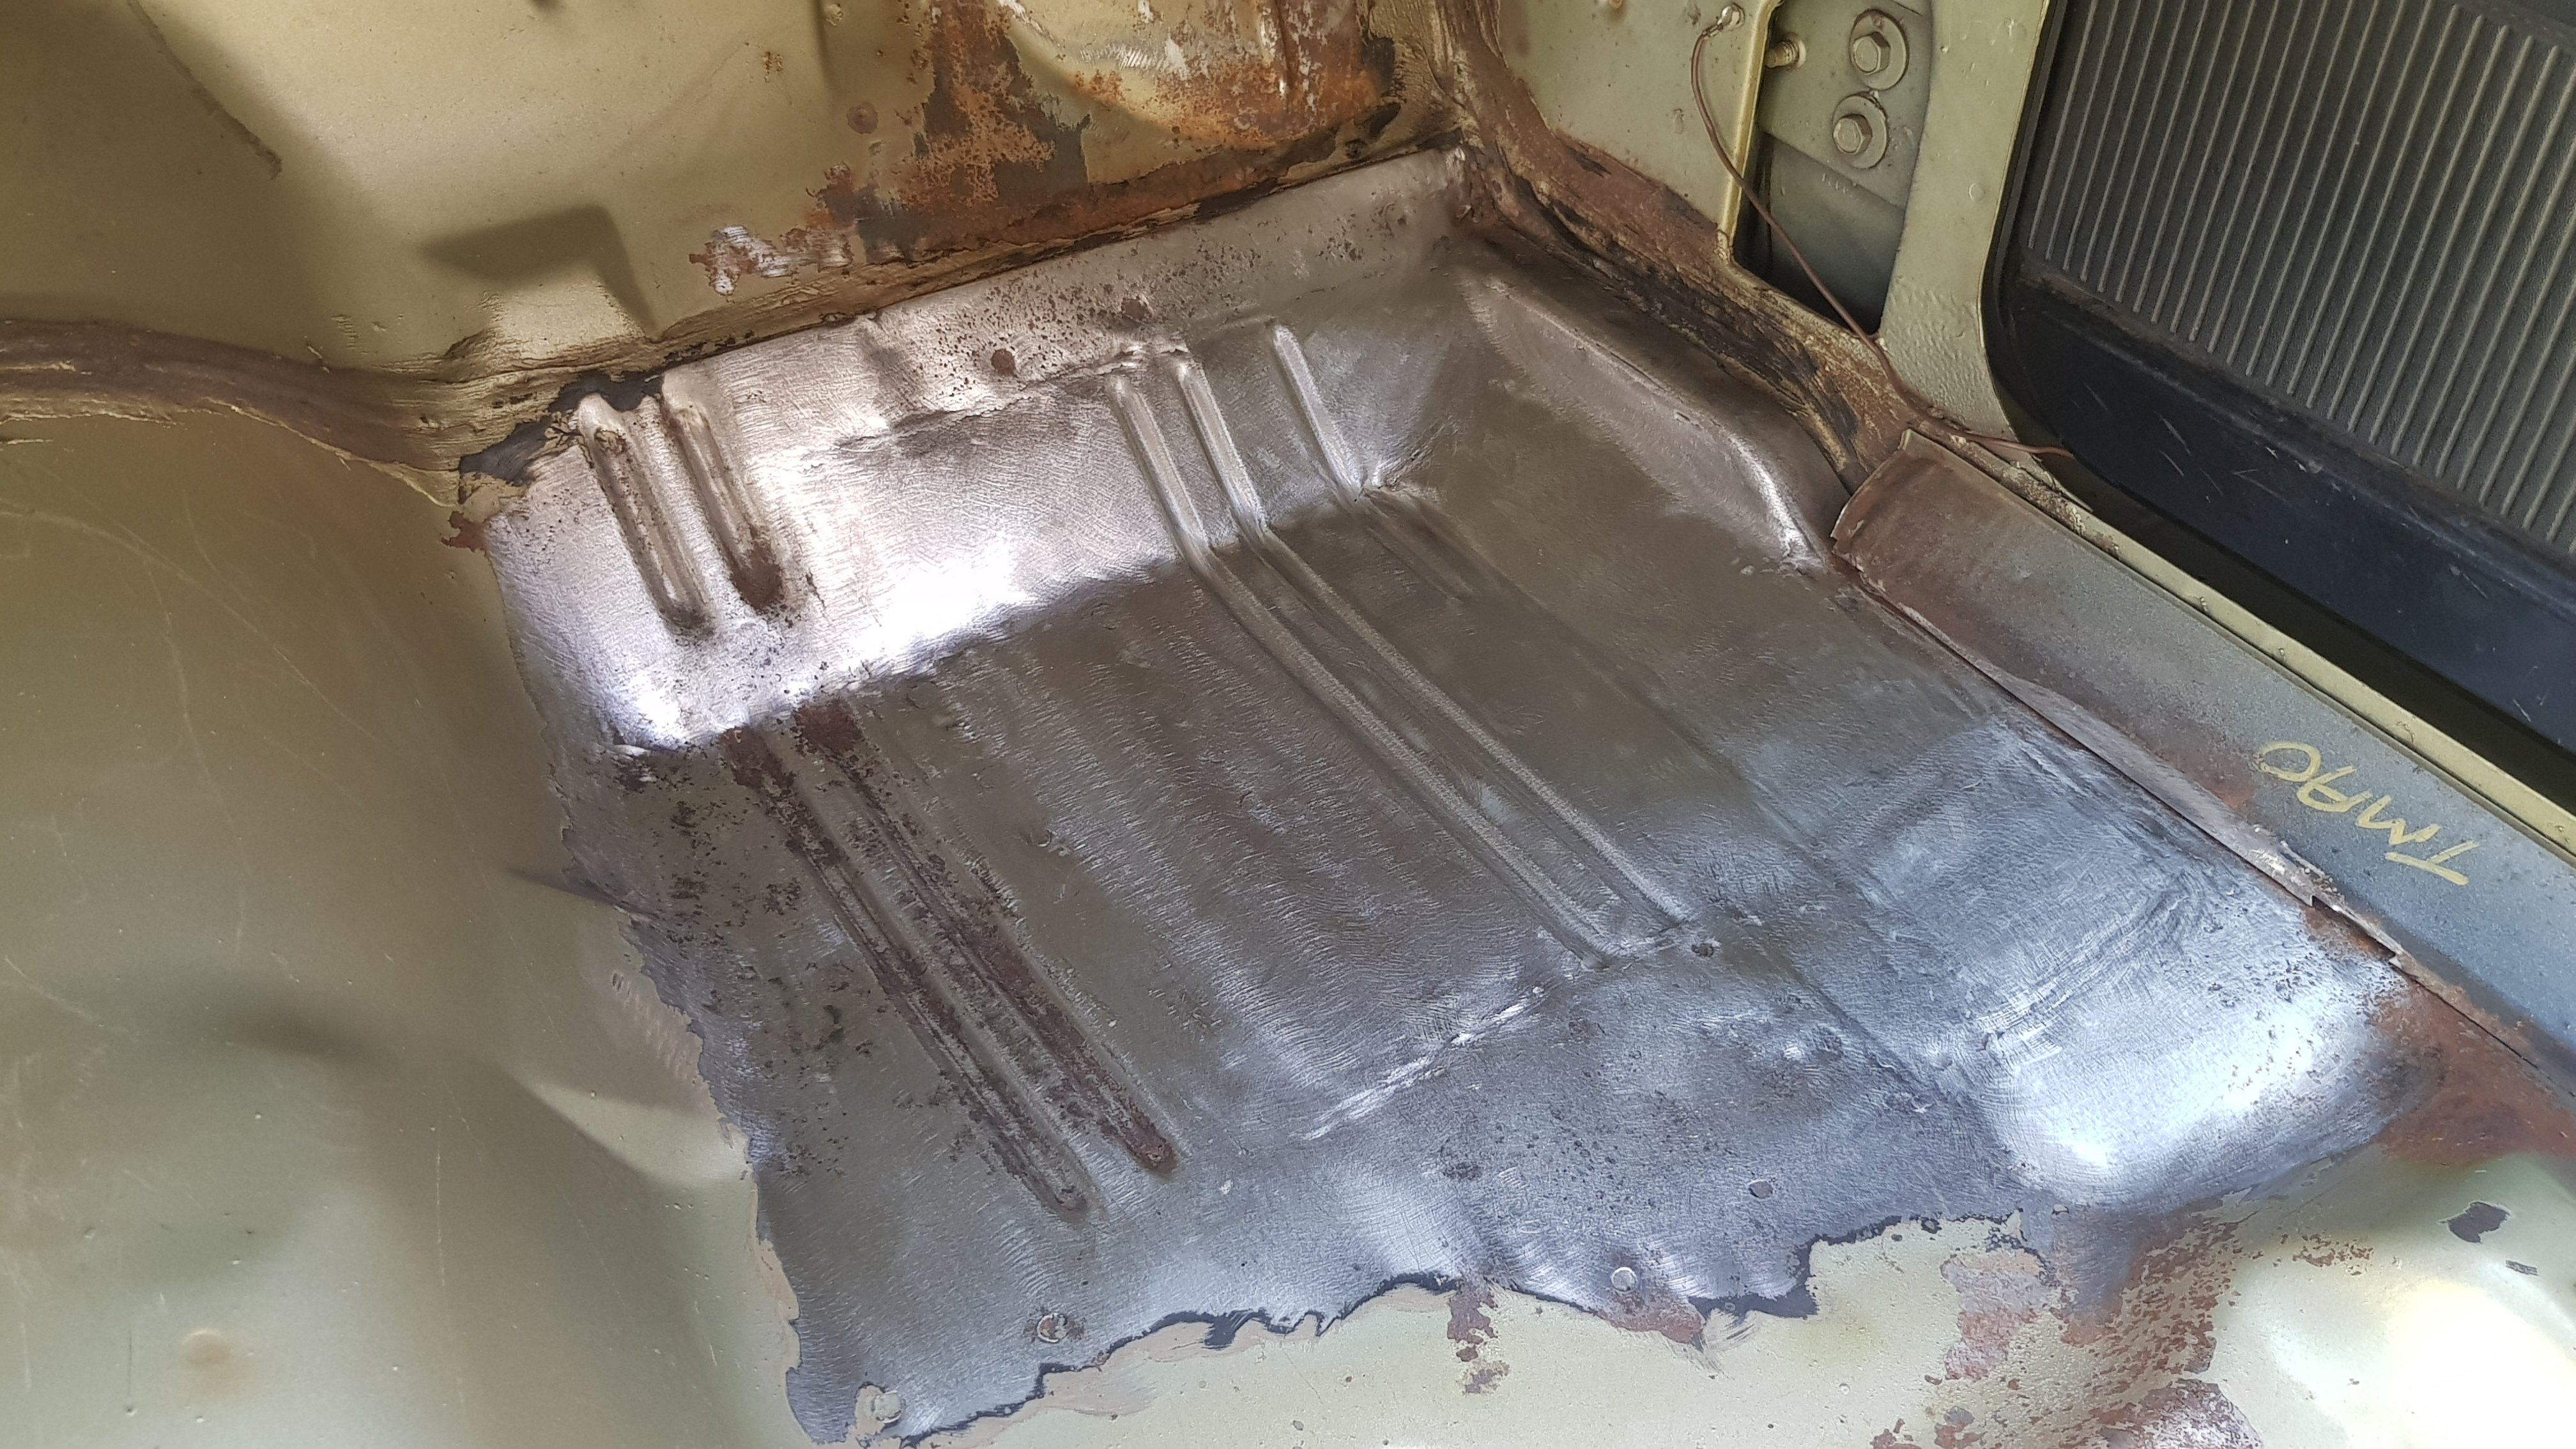
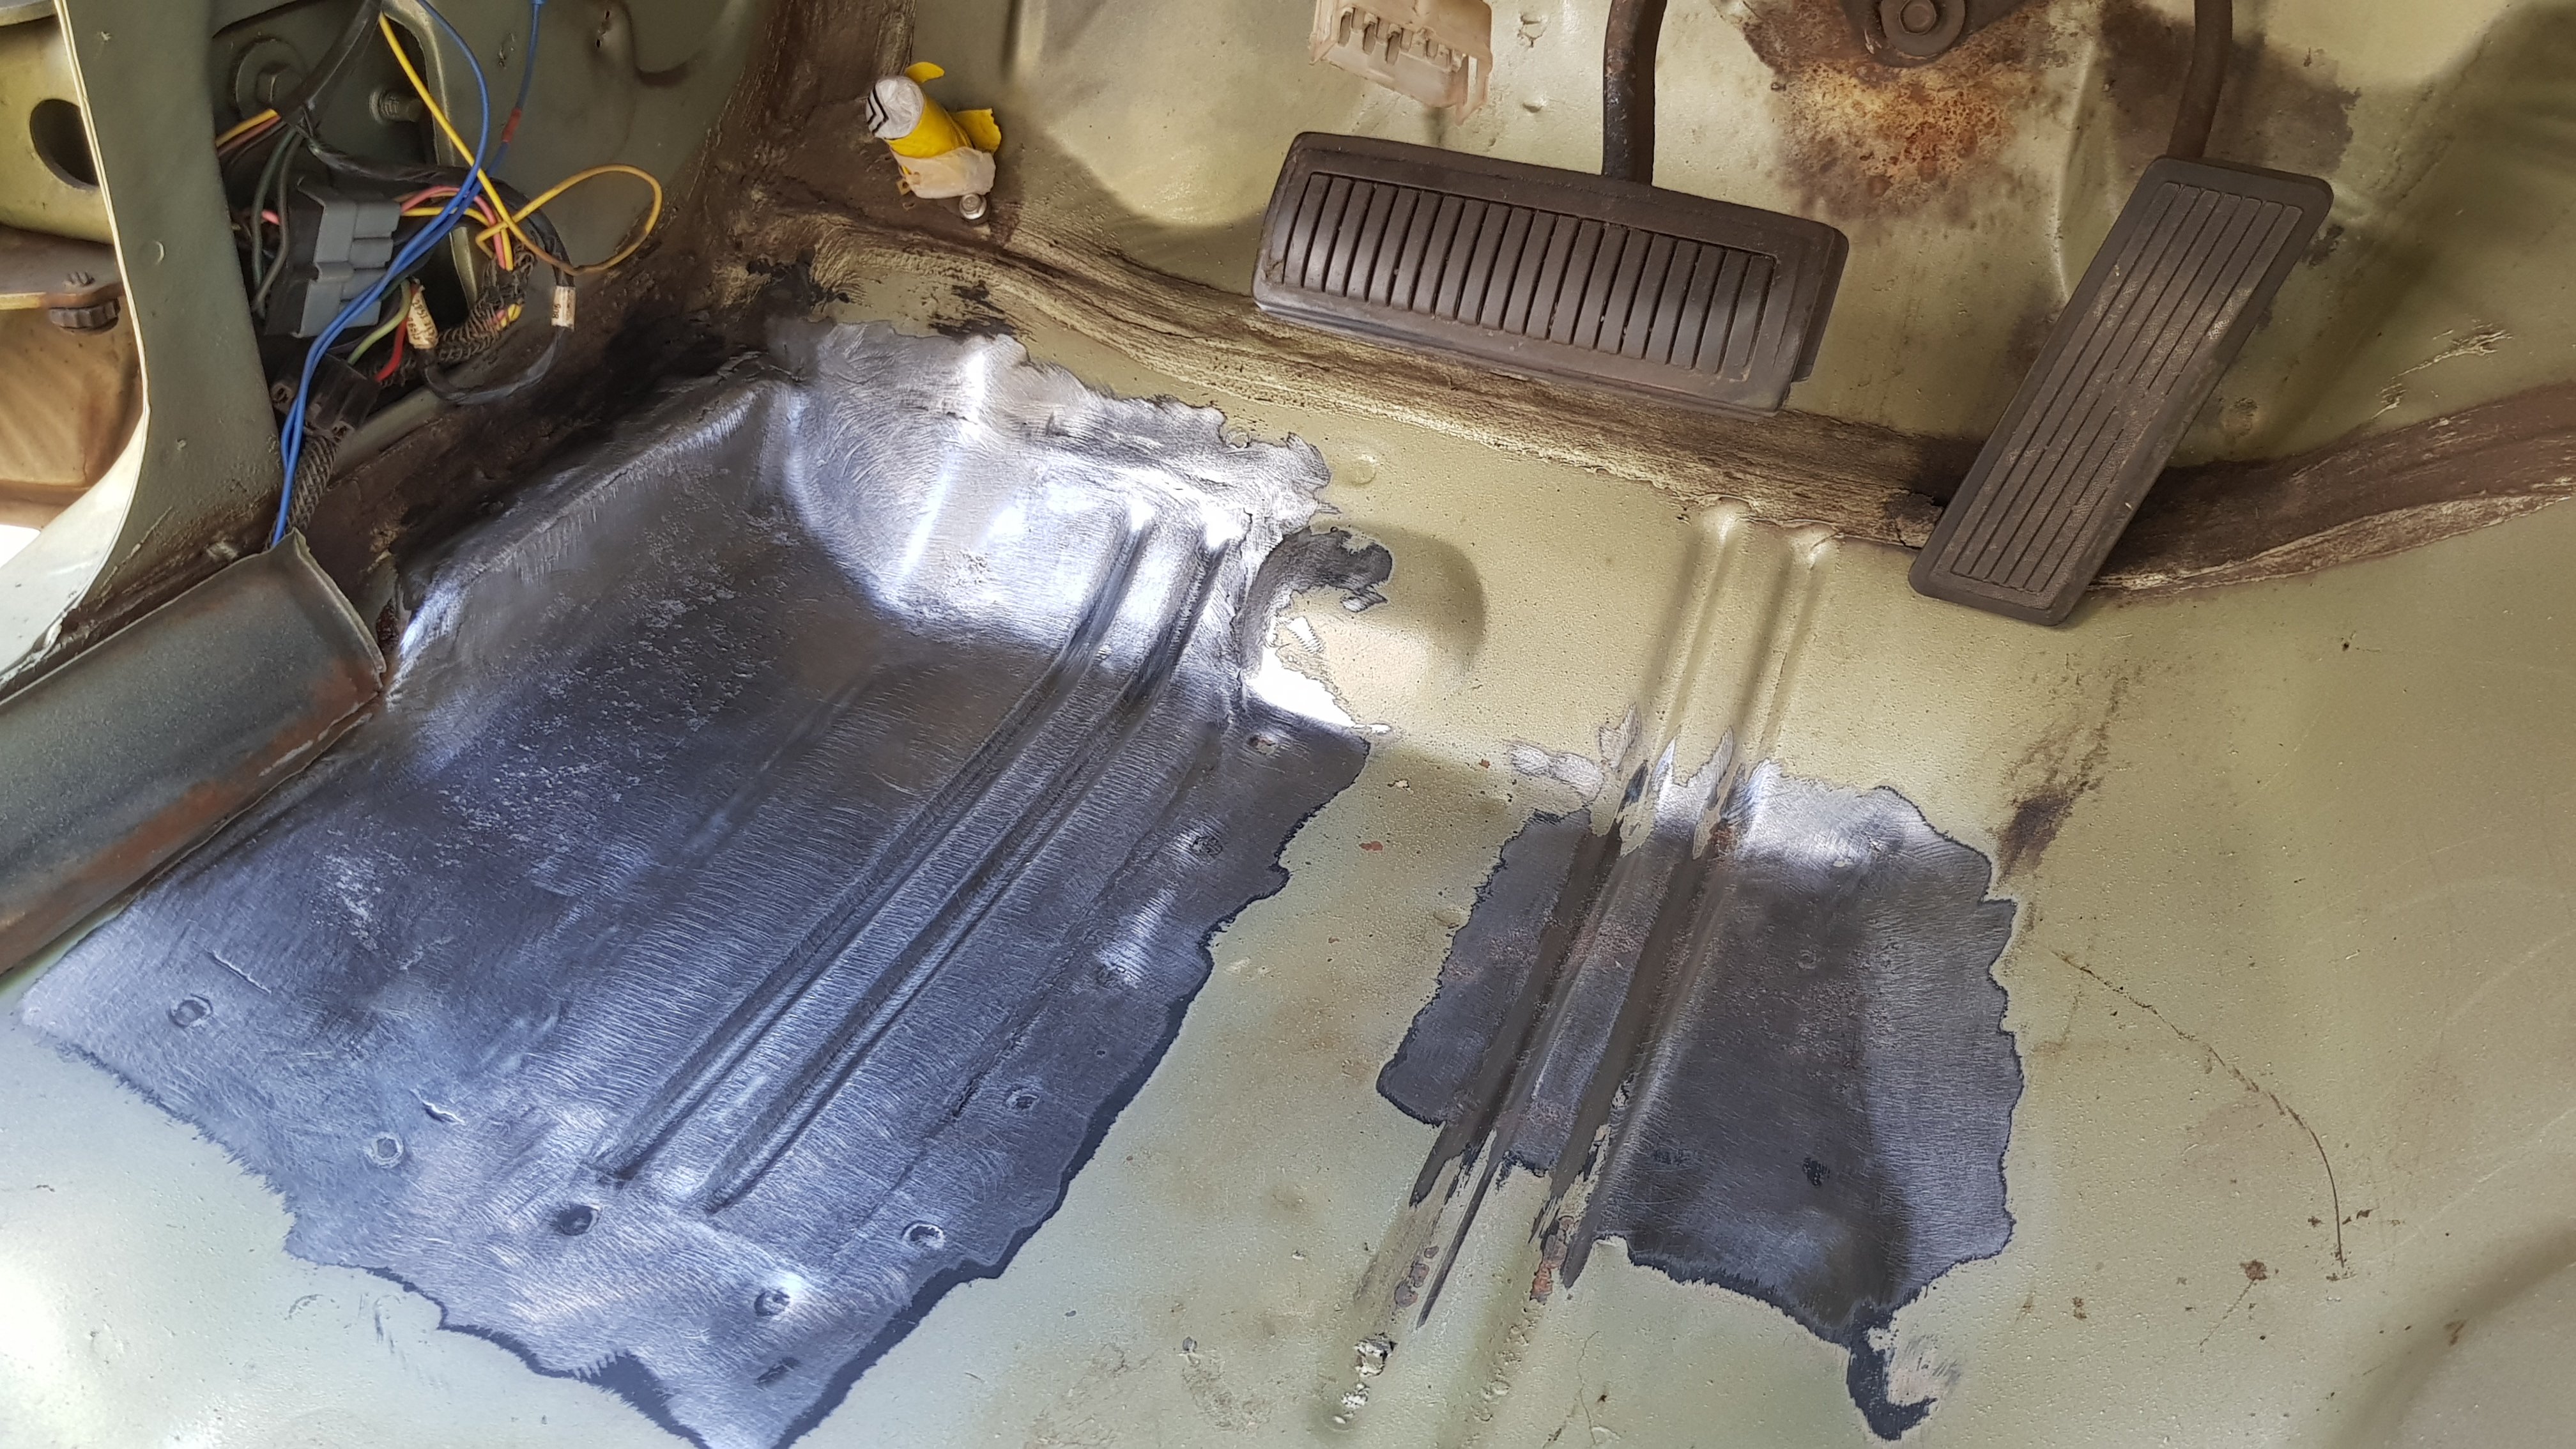
Matt sent me some better pics of when he was doing the floor and stuff
1 point
-
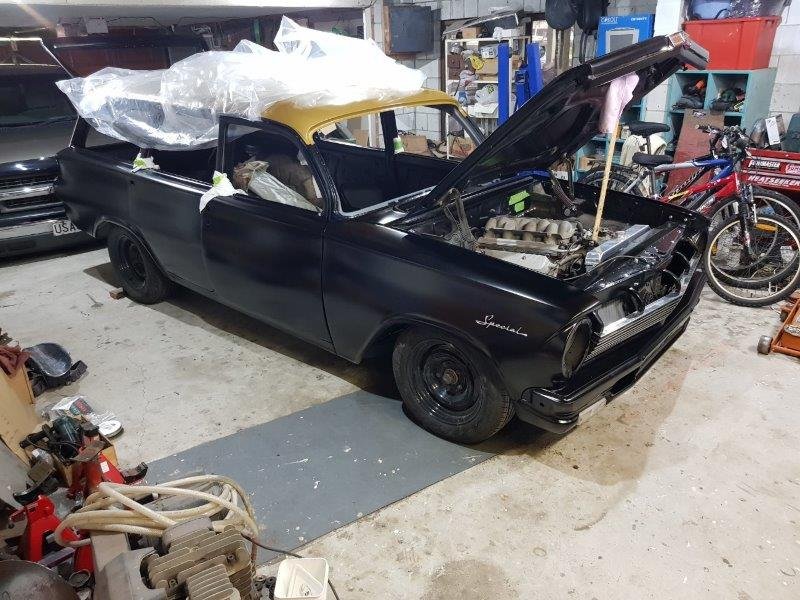
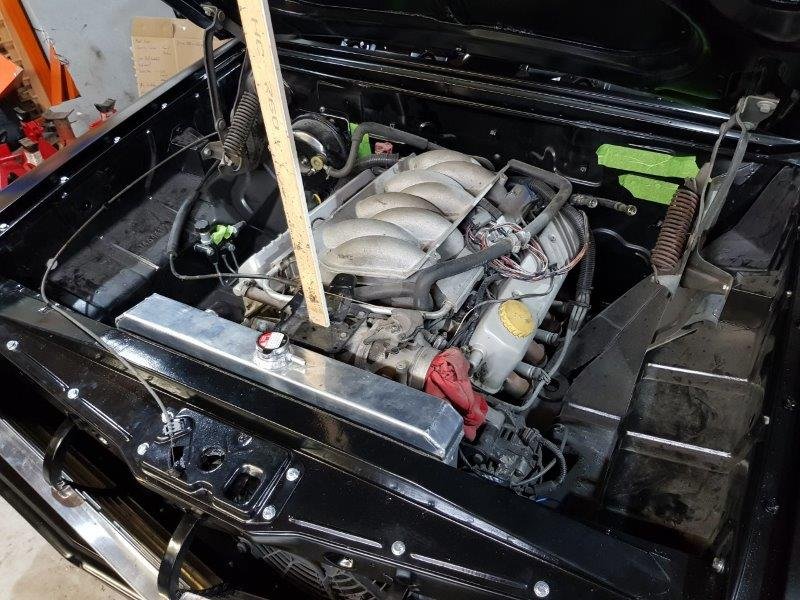
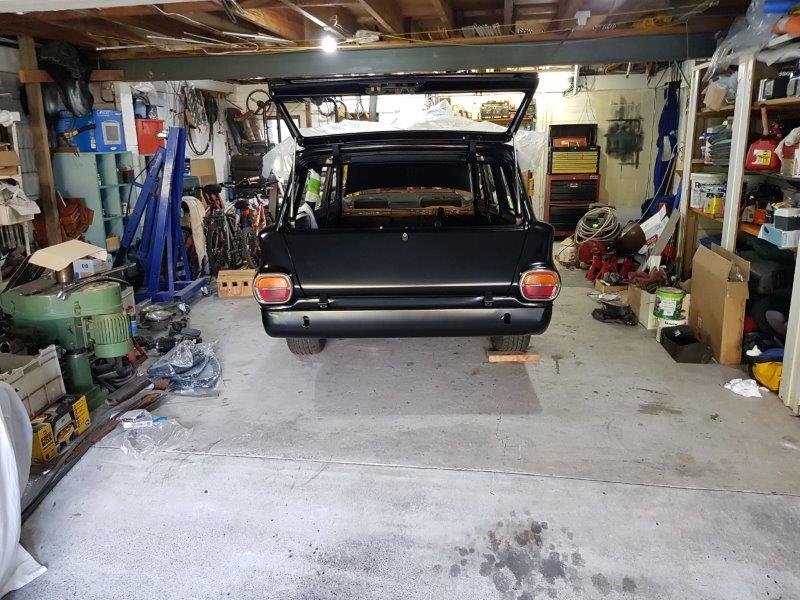
The satin black is a bastard to keep clean so its kept under the plastic sheet. I hit the car with a McGuires product that is for satin finishes. It took a whole day to fit the grill to the front panel, each slat had to be individually made straight then bent to line up. I got pretty good at it by the last one. The front panel got bolted on. Even though it had been together this is the first time all the bolts had been put in. I ran a tap through the threads which made life a lot easier, all the captured nuts were full of paint. The passengers side wasn't too bad, it was the original guard going back on, drivers side was a guard of another car so needed a bit of persuasion. Need the stick to hold up the bonnet. The extra weight of the die cast badge and bits of trim was enough for the bonnet to not stay up. I assembled the hatch and tail gate locks first after it was painted. The tail lights were some I bought about 6 months ago and are really good.
1 point


This leaderboard is set to Auckland/GMT+12:00