
Leaderboard


Popular Content
Showing content with the highest reputation on 10/09/19 in all areas
-
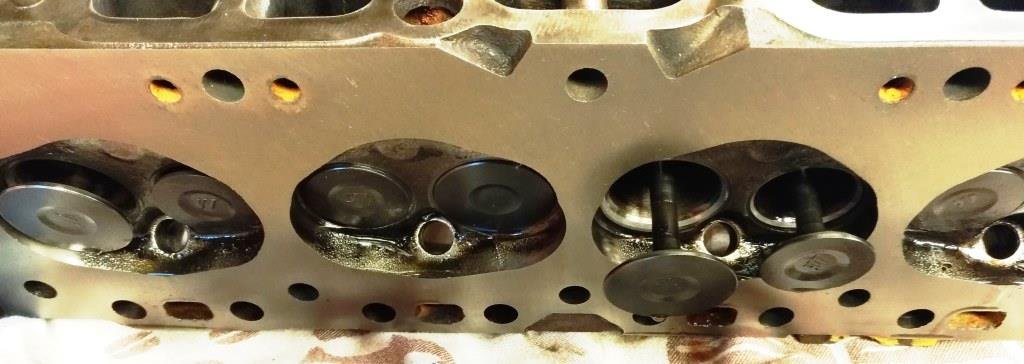
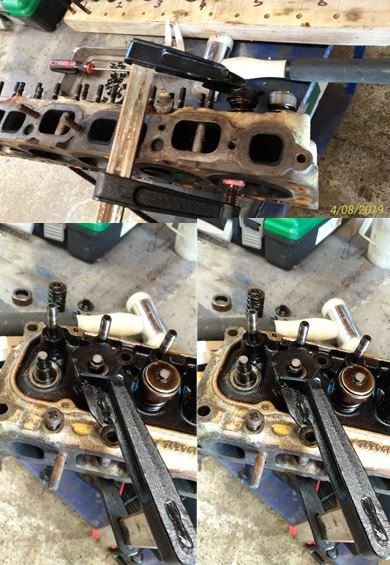
Dropped the head off at a local reconditioners for a leisurely soak in the cleaning bath and a very light skim (I suspect 3 & 4 cylinders had been talking to each other). Have to say I was blown away with how good a condition it was in once all the damn black rich running carbon had been dissolved. Cleaned the valves and gave them a light lap. Enlisted the help of an “Oldschool Holden Spring Compressor” I had lying around which made light work of the double valve springs and all it needs now is a fresh coat of the obligatory “Torana Yellow” paint.
 10 points
 -
Yawn... Might slap some white on this bitch next week. Also might not.7 points
-
Hole in the exhaust was an easy fix, but is somewhere i think i will be visting again eventually Stuck all the many many chrome trims back on And backed it into the sun then down the road and reversed up the drive - this side has been drying for a few weeks so it got a quick polish with the big slow grinder then bunged the trim back on this side too, now its all back together. Last pic of a car in this shed got to be parked on the lawn in waiting for me to bung it into storage for a while sheds now starting to fill with boxes and about 2 vanloads of stuff taken to and from storage and the op shops6 points
-
My brother got his plates approved from pictures, but they weren't from one of those suppliers. We drew them up ourselves and had them CNC machined. Just because it was approved doesn't mean it is legal5 points
-
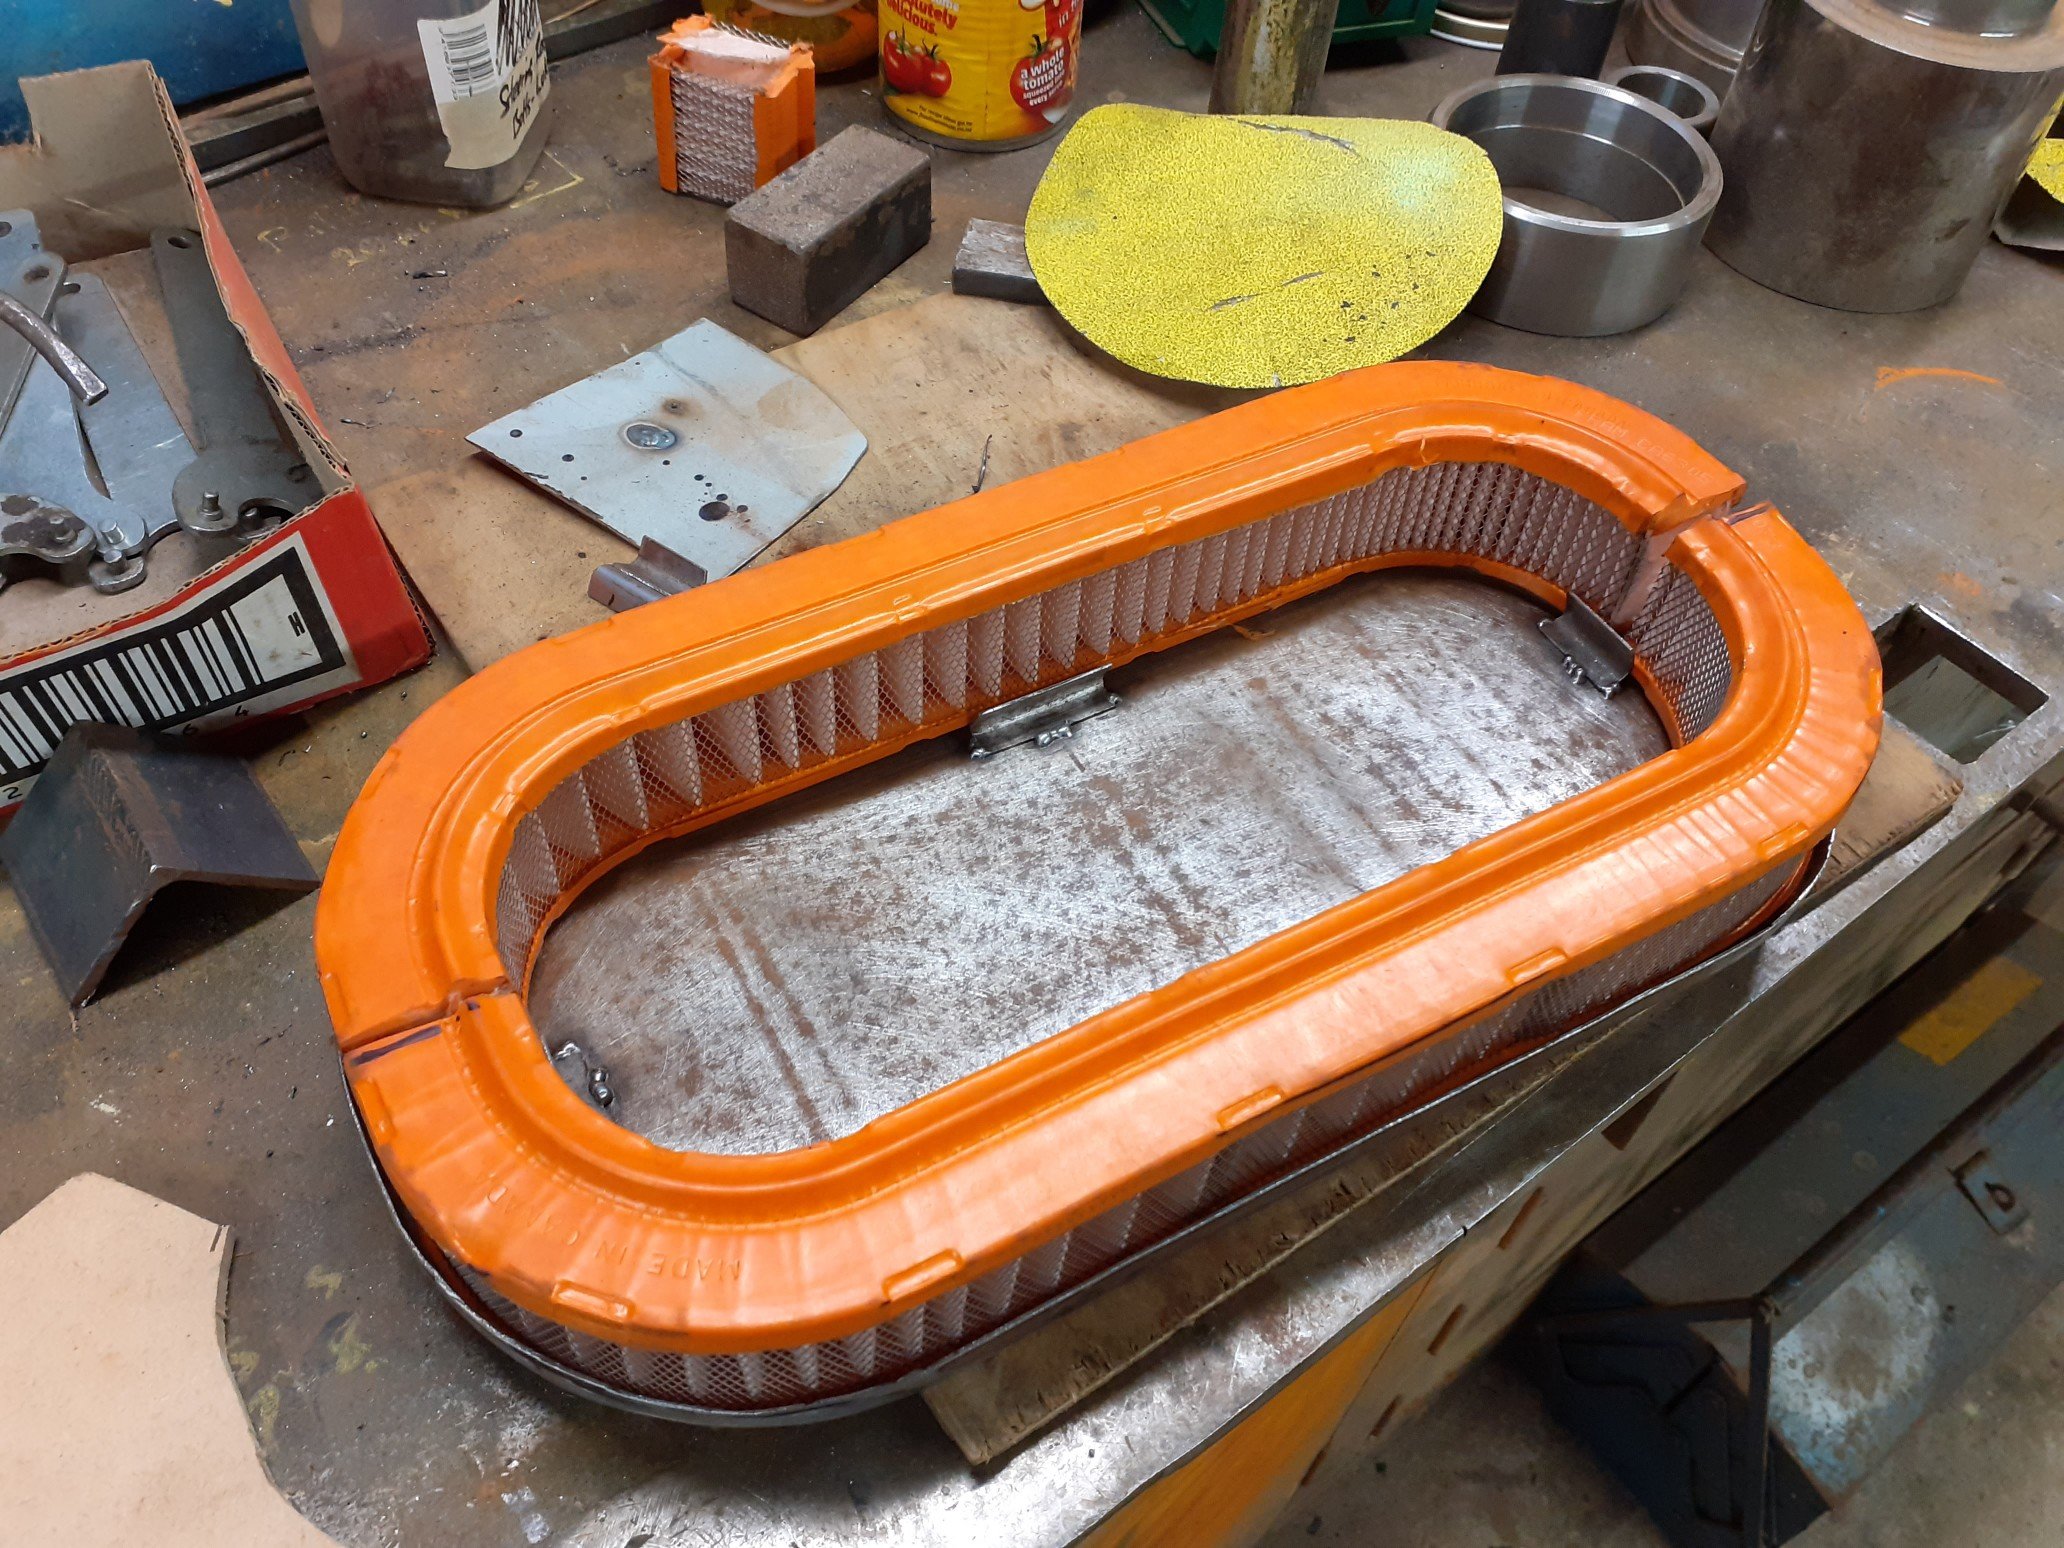
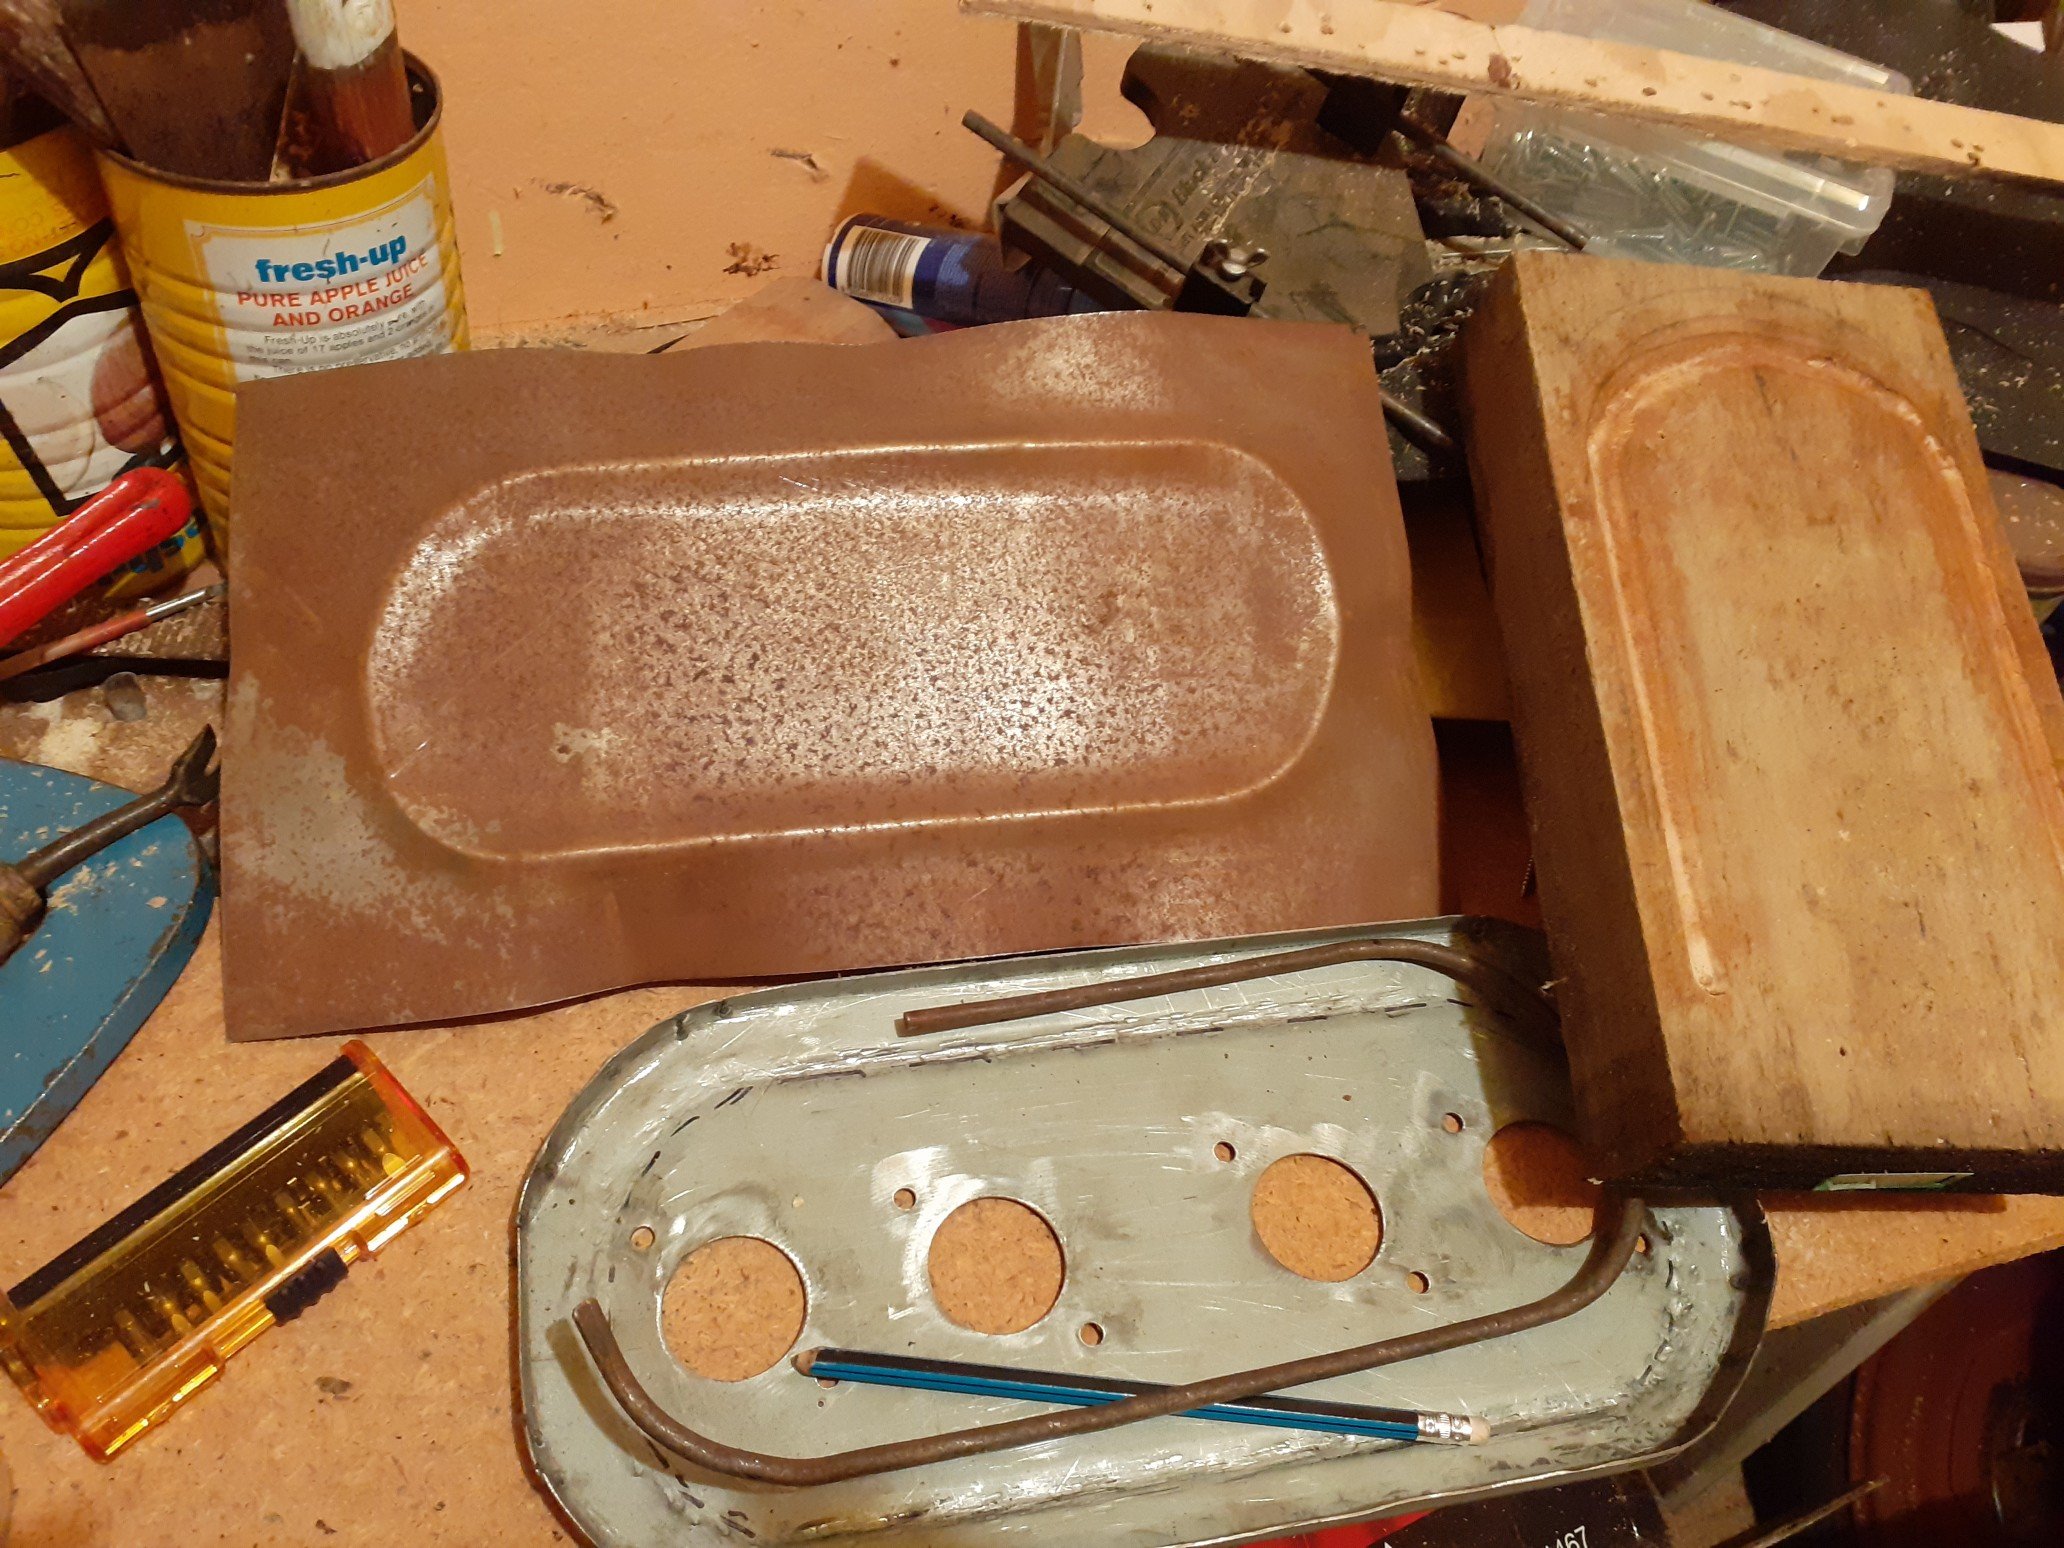
Got this a wof in august. Needed to replace a few things like steering rack, engine mounts and a brake cylinder. Kind of put it on the back burner while working on the orange van and house. I played around with the jets in the bike carbs and felt I got them a bit better. Still seems to run rich at idle, pilot/fuel screw screwed in quite far, and doesn't have the pick up at mid range when I put the foot down. Yet to investigate too much. Have started to make an air filter housing for the carbs. Using a cut down filter from a Hyundai pony? It was cheap at a swap meet so I built the housing around that. Carved up a wooden template and used the press to make the initial swage in the lid. Folded and cleaned up the edges before pressing and drilling holes for the thread studs to hold it all together. Will probably just clearcoat it. Next step is to actually tune the carbs better.
4 points
-
Legally the plate has to have been supplied by the government or in more recent times a government agent for the production of plates.4 points
-
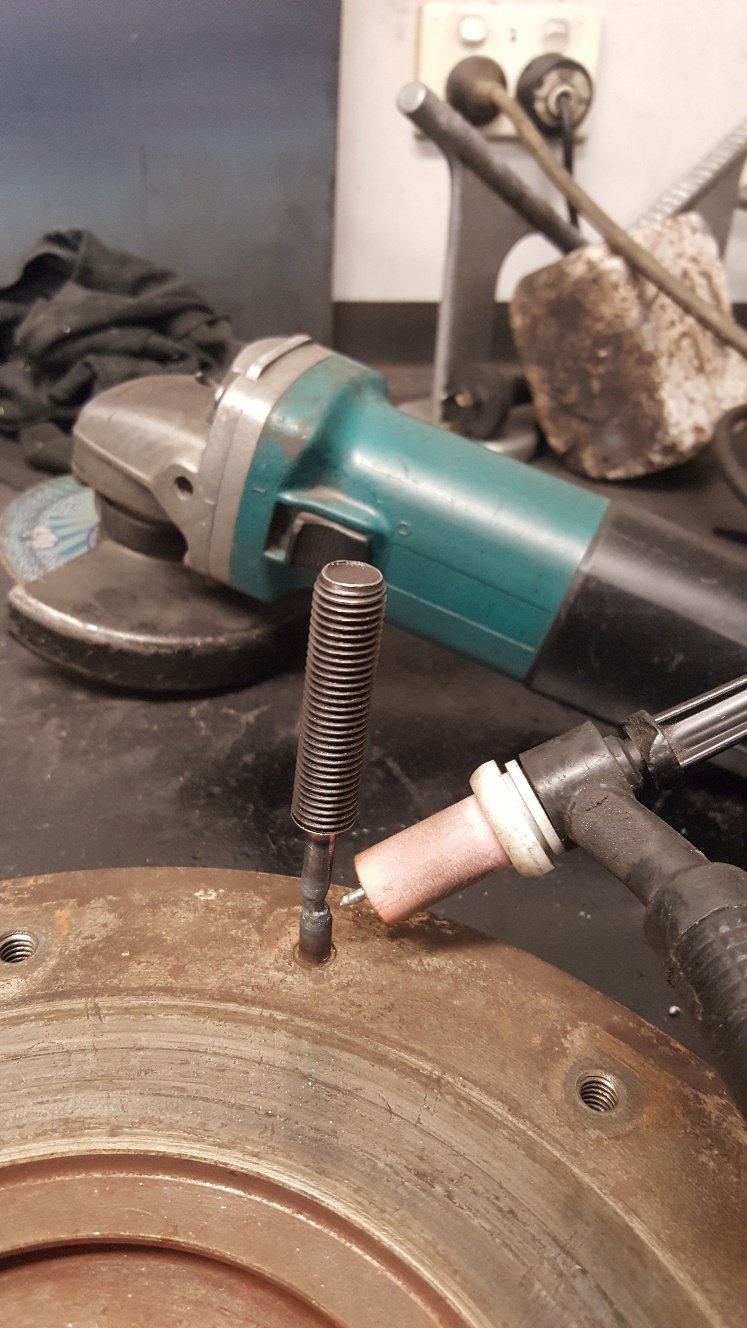
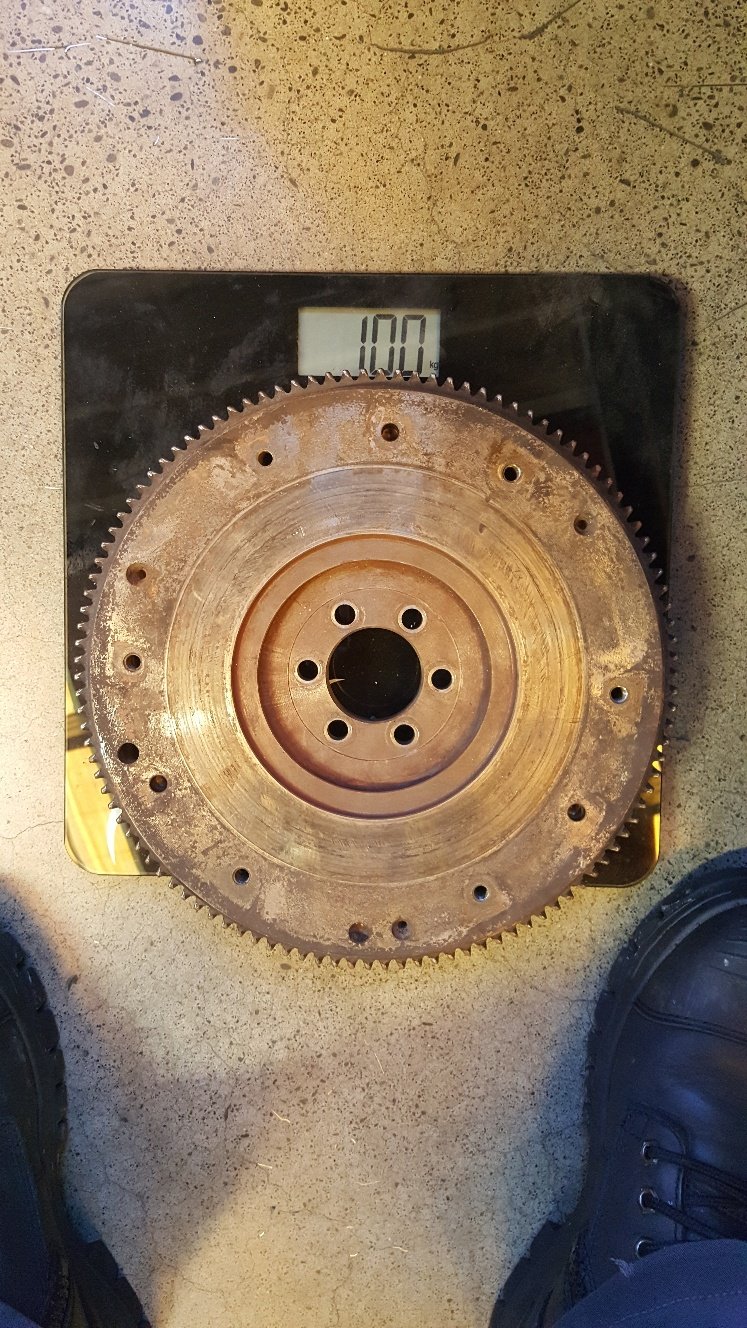
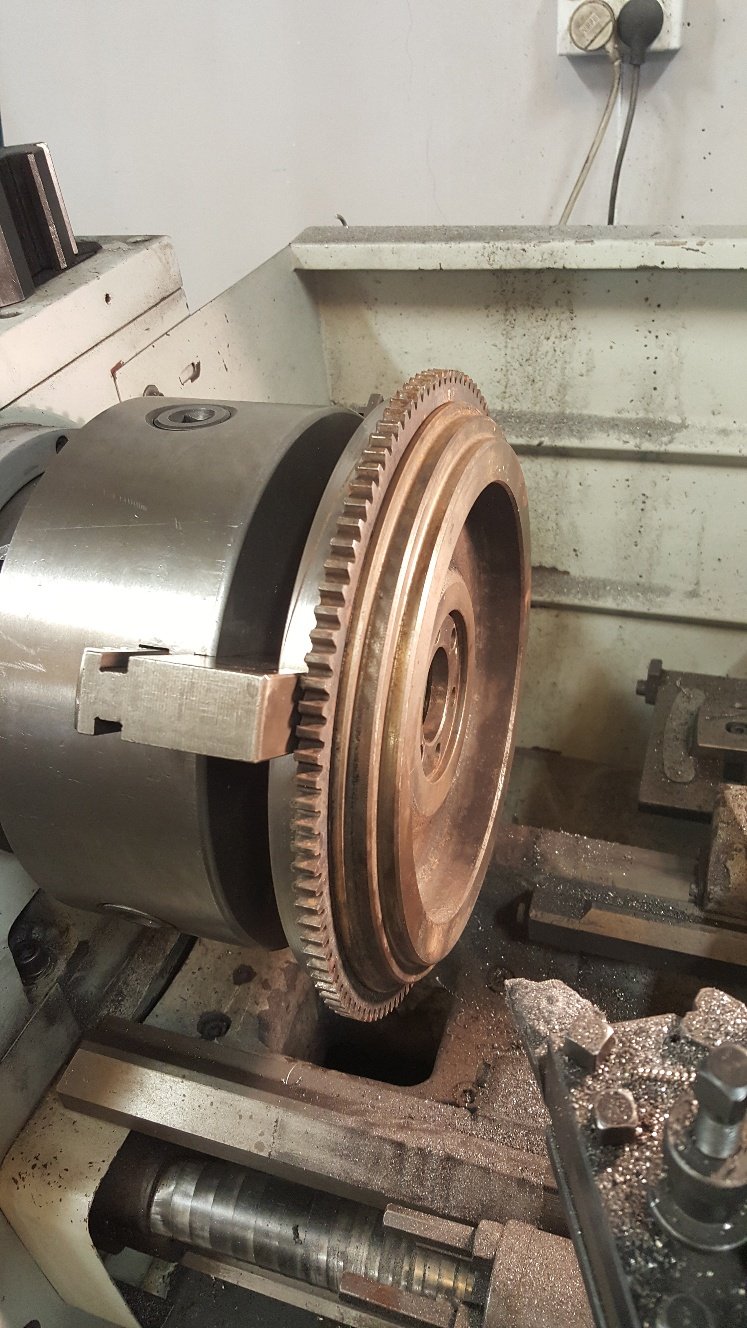
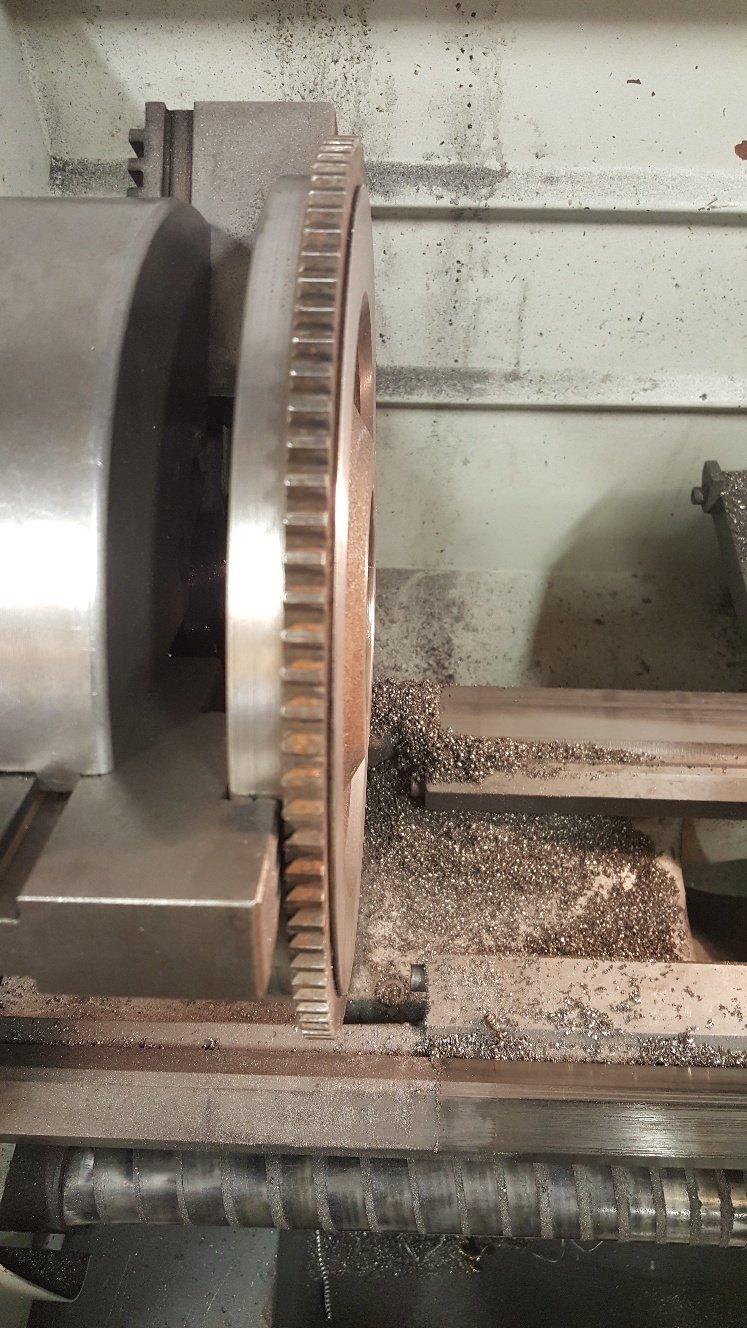
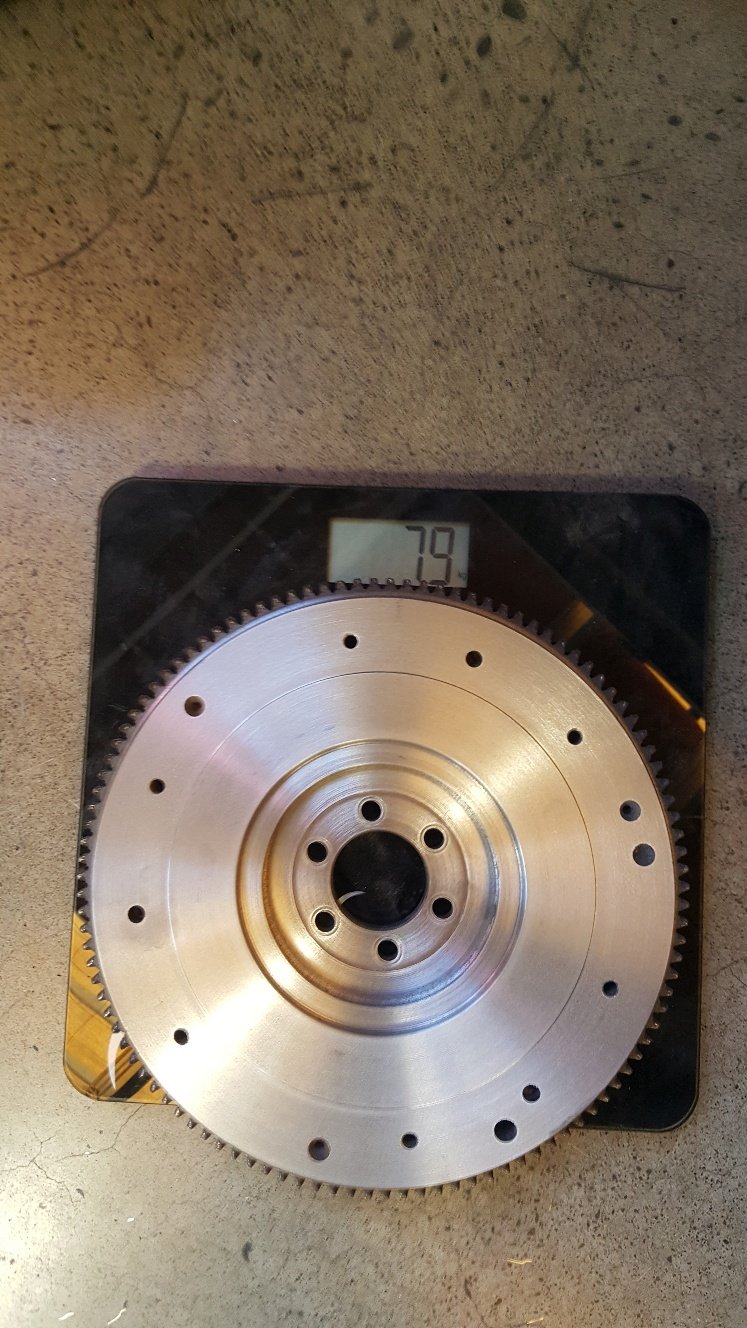
On to the flywheel. First remove the dowels Weld a stud to the dowels to attach the slide puller. Weigh it. Into the lathe. Sorted. I also machined the face in the lathe. I machined the outside area where the pressure plate clamps down .5mm to give the pressure plate more clamping load. Weighed it after.
3 points
-
I've ordered some cable stuff so I can make the clutch, throttle and brake cables for the cub. The new Gy6 head arrived today. The casting quality is pretty shit house. I gave it a bit of a tickle up with the die grinder Finished off the exhaust and intake flanges. They are bigger than factory now. Intake flange is now port matched to the head and ready for me to find sone tubing3 points
-
So Hannah and I took the Imp for a two day road trip. Part business and part holiday. On Friday we drove up to Lake Rotoiti, Nelson lakes national park. On the way we checked out some old classic cars a fella owns who wants me to do a load of bodywork on. The Imp drove really well. The sun was out and the music cranking (some ambient tunes from David Tipper since you ask). We had a good coffee and then a nice walk on tracks around the lake. That evening we drove through to my olds place in Blenheim. A nice day out. Here's some photos... Chilled out at my parents, a feed of fish and chips, wine. A grand way to finish a day. Following morning we set to head home. Filled the Imp up, did some maths and allowing for a very optimistic speedo we reckon on around 40 mpg. Not bad considering the gearing at 100kph. Headed home, sadly into rain as a cold front was moving up the Island. Drove long way via Picton and Queen Charlotte drive because narrow twisty roads and go kart car... Over the Rai Saddle, sitting with the flow of traffic. I give the car some stick to pass a motorhome up the saddle and then when cruising down the other side the wee car does that thing.... 'JOLT!' The car does a small but very noticeable stumble. Like a tiny rev limiter. For those that have tuned megasquirt, or maybe other EFI, it felt like when you click burn. "What was that?" Hannah asks. "Shit- I don't know but it felt like an ignition thing, not spluttering fuel thing" I reply. We both go quiet. I almost want to turn the music down and listen for any untoward mechanical sounds that might be there. But I don't. I'll play it cool. Don't worry. Don't get Hannah worried. It was probably just a... fuck. I don't know. I'll just say nothing, drive a little slower and whatever it was will be a memory soon. The silence is piercing. Now I notice every bloody vibration. I'm watching all the gauges like a jet pilot. All the time my mind is going through all possible scenarios. What could that have been. What if we breakdown? 3km pass. It seems ok. I start to relax. Only one big set of hills to go. I pass another rental car, most likely the scurge of the kiwi roads, a Nissan Tiida. I dont know because I'm still having a mini stress.. 'JOLT'. Here we go. This is happening. This time its for good. The car dies and I have to quickly think where I'm going to stop to fix it and quick before I slow too much and that silver blob I just passed drives up my bum. I spot a forestry road on the right, coast across to it (whilst trying to make it look like nothing is wrong so saving face for all classic drivers who get the "oh old cars are so unreliable...") I pull to a stop and the engine splutters to its last road driven rotation with a bang. Bugger. Remain calm. Reception on phone? Not a chance. Tool kit in boot comes out and we go through all the obvious things, concluding that it is indeed the ignition. Annoyingly it was the ignition module, of which I didnt have a spare. If it were points I'd have fixed it. Such is life. Luckily the rain had stopped and double lucky that across the road from the forestry road we parked on was a farm house. The kind farmers wife took us in, let us use her phone and fed us tea and biscuits. I called a mate out with his trailer. We have AA membership however its the basic cover that would have got us to a garage. I knew a Garage wasn't going to fix this and we'd still have to get home. Yeah nah. Stuff that. Mate turns up with his trailer and we have a choice as chilled out trip home. We fed him dinner and it was all good in the end. Big thanks to @Sanfiddy for rescuing us! Oldschool spec favours. I only took one photo of the day... So that was that. On Sunday I removed the dizzy and then the module. It fails the tests as predicted. Here's the troublesome module... Come Monday and at my local wreckers looking for a module. I dont want to spend $120 on a new one when I'm about to fit full engine management. No luck locally but we were in Nelson on Tuesday and I found one at a wreckers there, cheap too. Fitted it that night and brooooooommmmmm The replacement was a proper Hitachi module whereas the one that let its smoke out was a no brand cheap one. Even felt lighter if that means anything. I took the broke one apart and it looks like a little cityscape inside- heck it would scare a Barry used to the kettering system... I also managed to score a spare couple of dizzies, converted with accuspark. My bench looks like a bomb went off in a hitachi factory... I'll need to fix them up, check them out and then I could always have a spare setup in case. That is until I fill the Imp with boxes of electronics and then there's no chance Mr AA man can help me. It'll be like every modern car- useless when broke. In other news- this turned up from China the day we left for the lakes... Its a brand new Hitachi 306 clone, all for not much more then a full carb gasket set costs. I had ordered this before I had scored all the other Megasquirt bits. Anyway- I'm still looking forward to trying it out because my worn out carb is about as good as I can get it. The new one looks so shiny. I'll report back with my findings on how deep the quality goes...2 points
-
2 months til Urewera nicotine and nangs so time to try make the TS50 go again. After doing a bit of research I figured out that I needed a motor from another mono shock model as the gearcase is a different shape to a TF125/DS80. Much barry spec searching found a late model monoshock TS125 was a thing so started looking for one that was cheap enough to take a punt on the engine fitting. Found a $100 "blown up" shitheap on marketplace that @datlow the GC picked up for me and even delivered it from Wellington. Turns out with some brakekleen in the carb it runs fine, gearbox sounds like a bag of dicks but I put some oil in it and its happier. Piston/rings look fine through the exhaust port Encouraged that my blown up engine runs pretty good I pulled it out this arvo and offered it up to the TSfiddy engine hole. Tight fit but still lots of room to add mounts once I somehow hold the engine square and in line with the chain. Stoked to have something thats finally going to fit with minimal work, just make 3 mounts swap stator and coil to get 12v off the engine then sort out some sort of bodged together spanny2 points
-
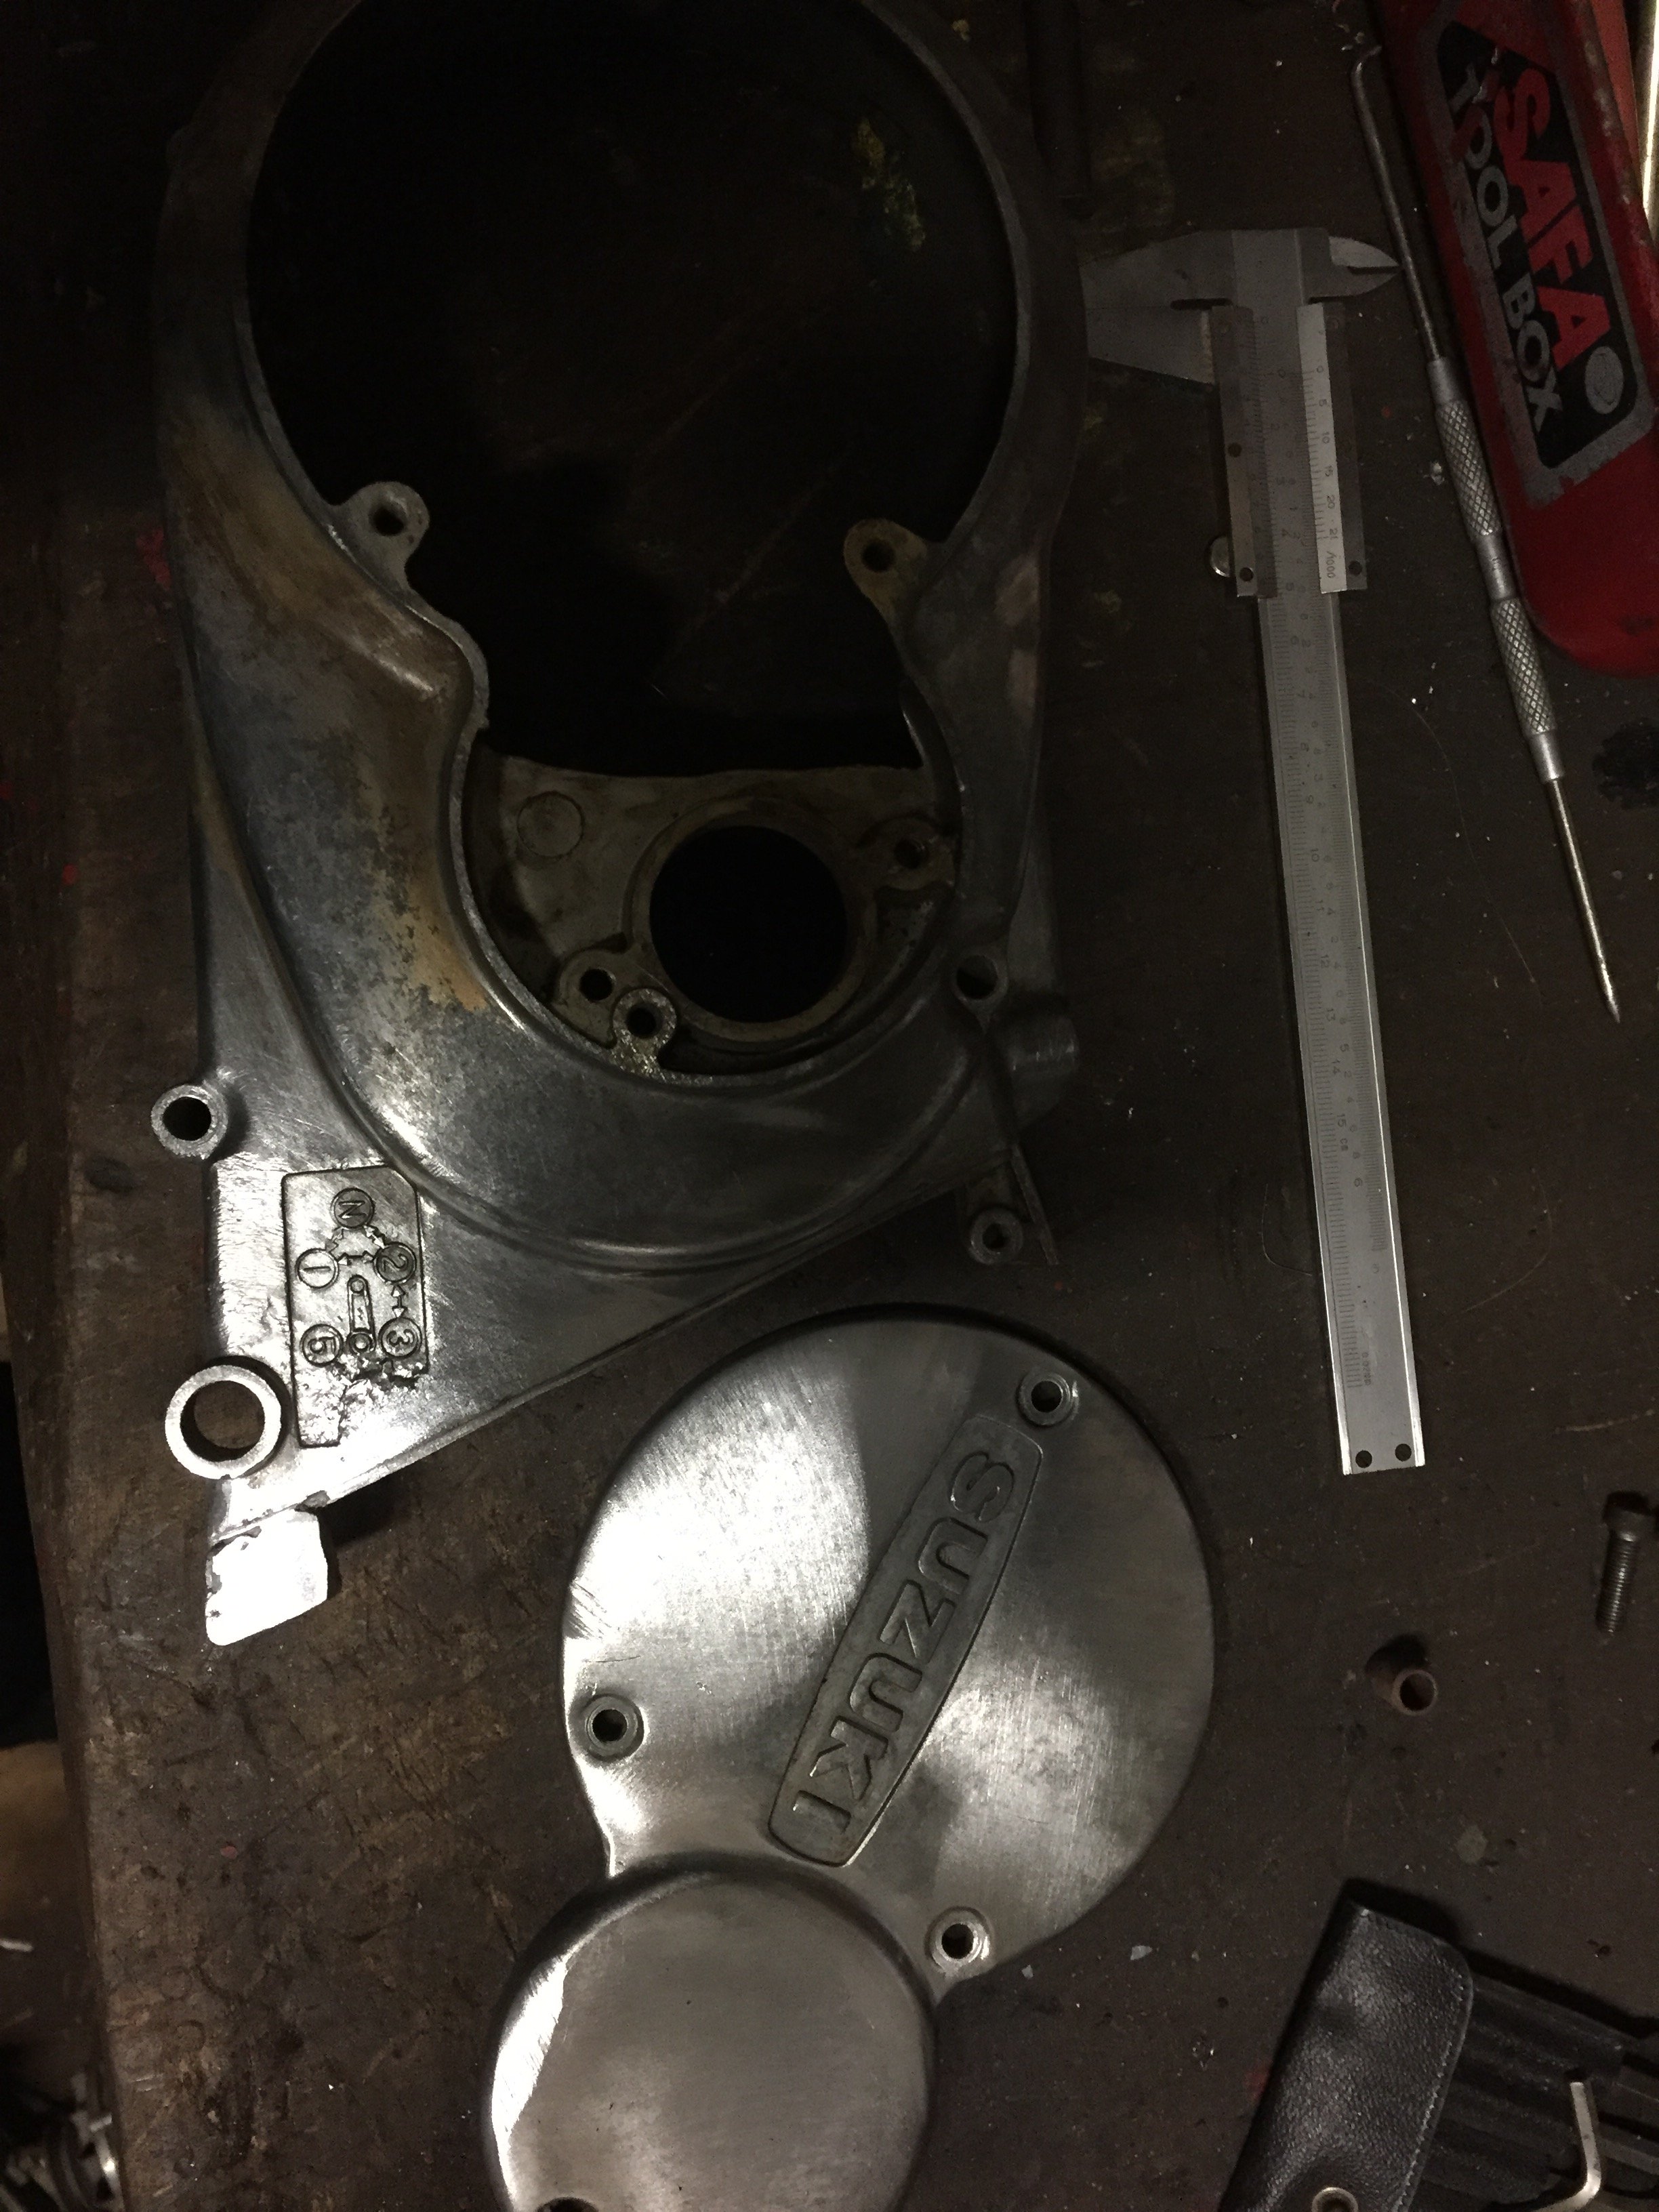
LH inner side cover was all smashed up with 3 chunks missing and the lower sprocket cover tab was missing, I gas welded it up, proper fusion welding not low temperature brazing.
2 points
-
knock detection is easy enough. I just use a donut style sensor and a small audio amp and headphones. Think it was old mate @Roman dave? that was using laptop mic input then headphones out to do similar thing, via some software. i kinda like the amp idea since aren't changing from analog to digital back to analog. but may not be an issue. biggest thing is knowing what your listening for. some engines with noisy valvetrain it can be a pain in the ass to catch it early. quiet engines are easy. using the ecu to detect knock can be done, but is a pain in the ass to setup and alot of them suffer from false alarms. you pretty much need to knock the engine to set it up also. if your octane/knock limited best to go the audio way. advance timing till have light knock. then back it off 2-3 degrees. thats your timing number.2 points
-
Maybe don't fly the union Jack on this trip2 points
-
That's a big 10-nope rubber ducky. You can have power steering deleted in a rack but it must be done by a known and reputable steering specialist and an invoice must be provided to the certifier as evidence. No idea how they do it, but that's why they are the expert and I'm not. LoL (if you are unsure of your steering specialist is known and reputable then talk to your certifier for a name he trusts)2 points
-
Yea that wouldn't pass even with ndt Any welding on a steering component that is critical for steering control cant be welded2 points
-
100 sounds amazing. can get away with a bit more on 98 than 95. just have to try it. tune with knock detection an example: going from 95 to 98. let me run another 4psi boost and gain 30kw on a 1500cc engine2 points
-
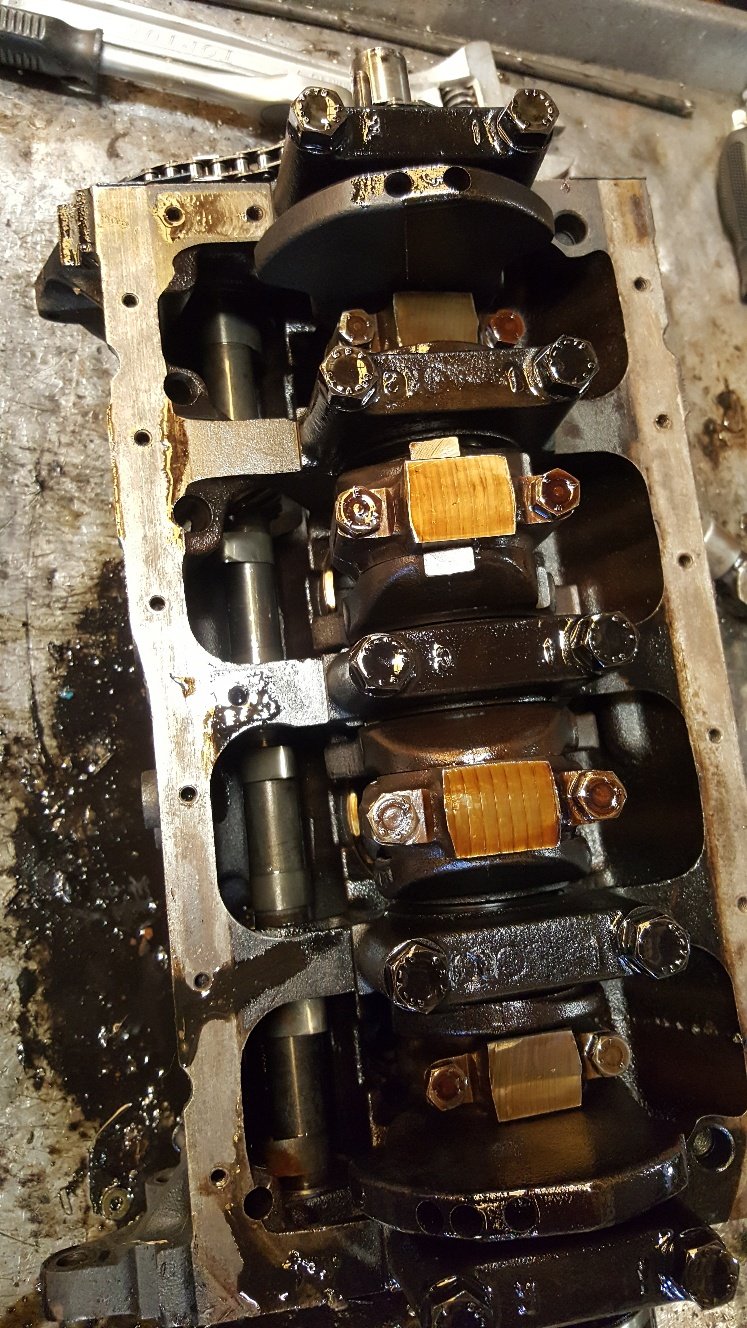
Yep yep Got the deck back from coating, reassembled most of it and bought a couple of sheets of stuff for the decking. By some miracle two sheets 1220 wide fit perfectly in there, it's almost as if some smart cunt had put some thought into that. Then I spent some time this weekend starting to put the engine back together. Much care was taken, including plastiguaging the bearings to make sure that bit wasn't a fuck up. The only thing I didn't do which I potentially could/should was replace the rings, but the bores looked ok and the rings looked fine. We will see how badly it smokes and how shit the compression is, then I will mask all that with a turbo. I figured I would do a proper rebuild on that other engine once I have some funds built back up, if it is needed... Need to put an oil return into the sump before I seal it up. I might even replace the valve seals if I get excited. Also, every time I go down to the shed I see this, it is evocative....2 points
-
putting motor back together. sump is all back on. the sump had some ground based accidents previously so i made a thing to stop it getting such a kicking. 2019-10-05_12-44-55 by sheepers, on Flickr 2019-10-05_12-44-48 by sheepers, on Flickr then i continued on with the rest of the assembly. i put some playdoh on the piston and checked valve clearance which was all good. got the water and oil pumps on and the heads. the toyota full gasket set does not have lip seals in it which sucks balls so i have no front crank seal, which menas i cant put the timing belt on. 2019-10-05_04-32-32 by sheepers, on Flickr2 points
-
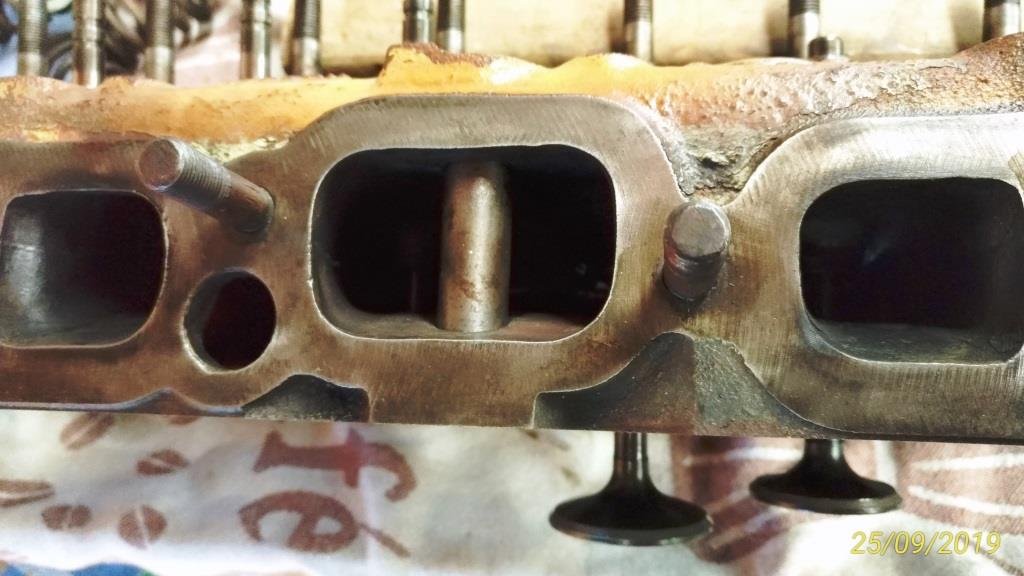
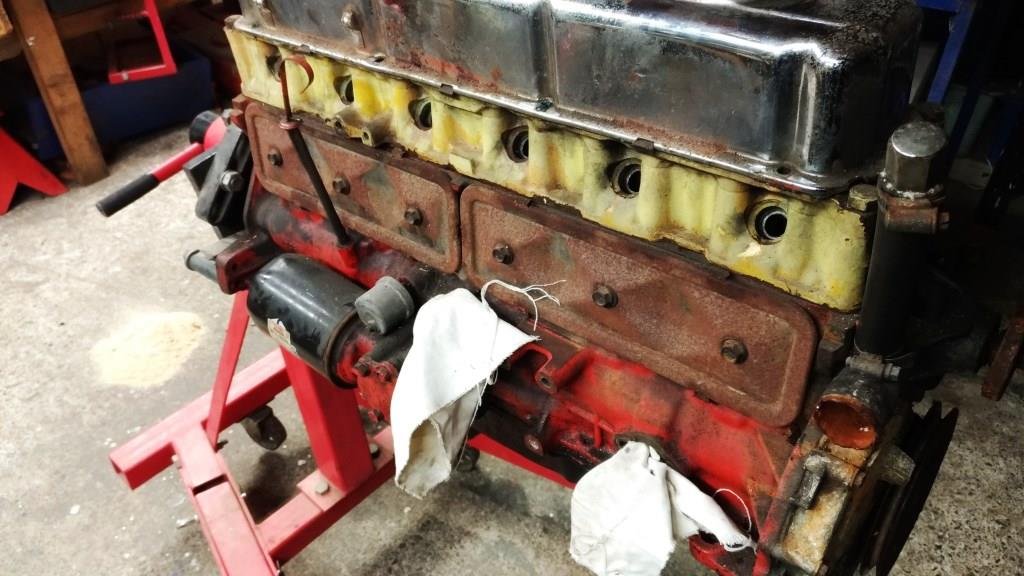
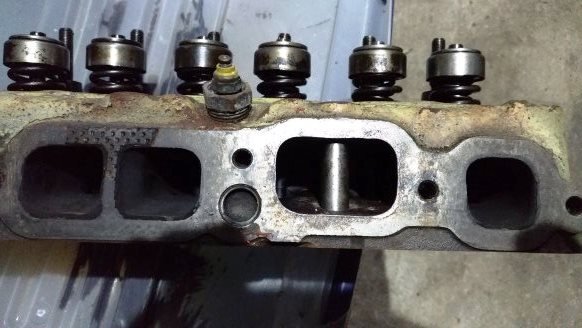
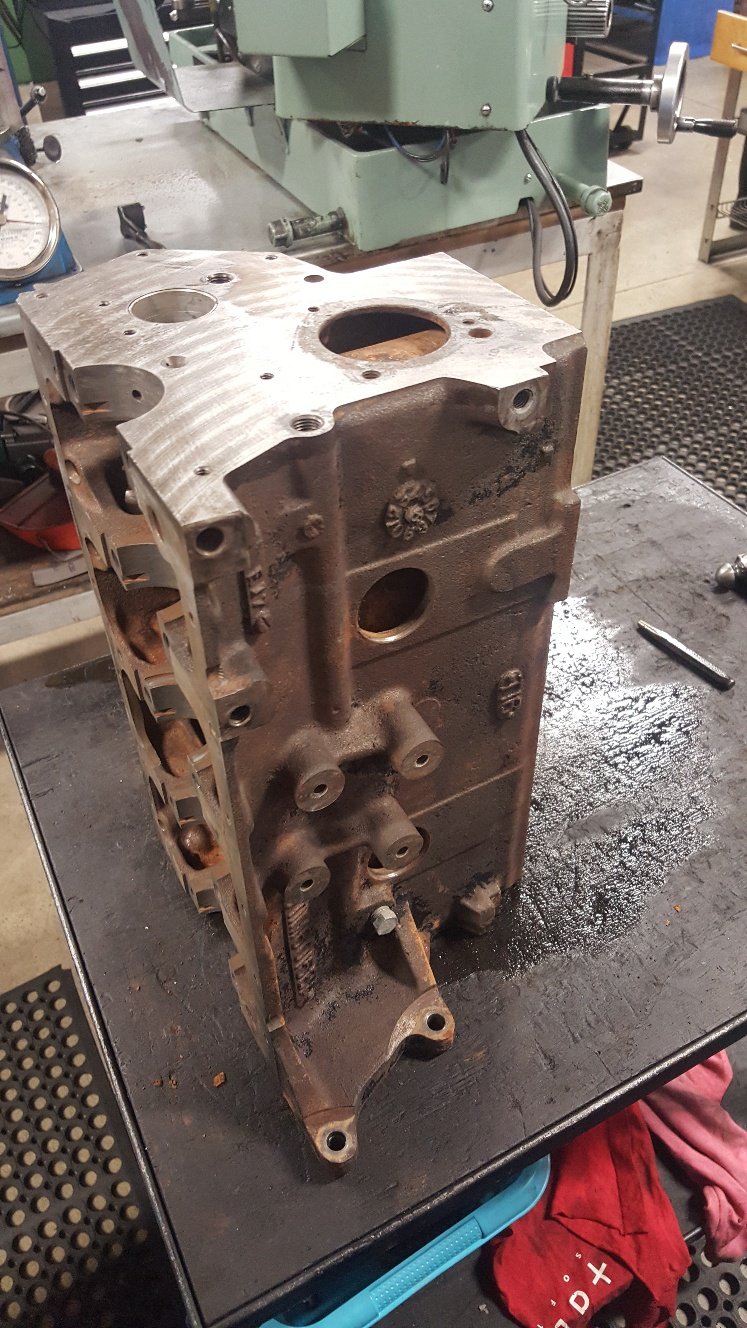
I’d been keeping any eye on a bloke in Whangerai who had been trying to sell a 186 on TM while doing his damndest to scare off any potential buyer by abusing anyone who had the audacity to ask a question on his auction. God I love those grumpy old traders! He was insisting that someone had painted the standard head yellow and refused to post any pictures of the inlet ports. After some months of his relisting I finally put the poor deluded old sod out of his misery by buying it for $300. An early 2-hour drive had me rolling down his driveway at 8 am in the morning, one look at the inlet ports confirmed it had at least a stage 2 Yellow Terra head. When I suggested that as an honest principled rogue, I felt a moral obligation to throw a little more coin in the pot he started accusing me of being a ‘lying young upstart that was talking through a hole in his f***ing head’. As I beat a hasty retreat up the driveway waiting for him to set the dogs on me (with the booty in the back of the van) I had to admit that at 63 years of age, despite the verbal tirade it was great to be called ‘young’ – ya gotta love those grumpy old guys! Couldn’t wait for to to get the head off but work pressure had me waiting for the weekend. As I said in the 1st post of this thread ‘sometimes you just get lucky’ - I stuck it in the engine stand, flipped its lid off and discovered a rather virgin stage 3 Yella Terra covered with the type of carbon that only prolonged over rich running can ever produce. Double valve springs and classic 70’s inlet porting. And just relish in the vintage YT valves! Once cleaned up the flat top 30 thou over pistons felt firm in the bore so Rigamortice and I made the call that we’ll clean up the head, sort out the appropriate sump/pickup combo and see how it runs.
2 points
-
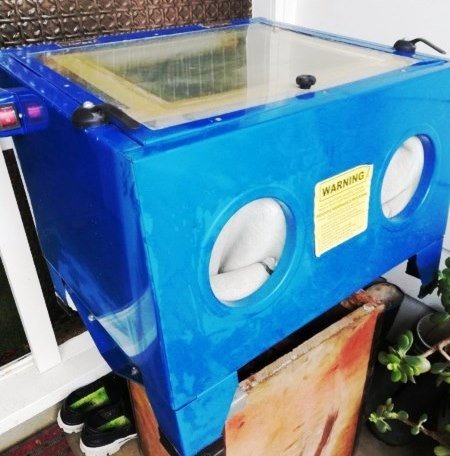
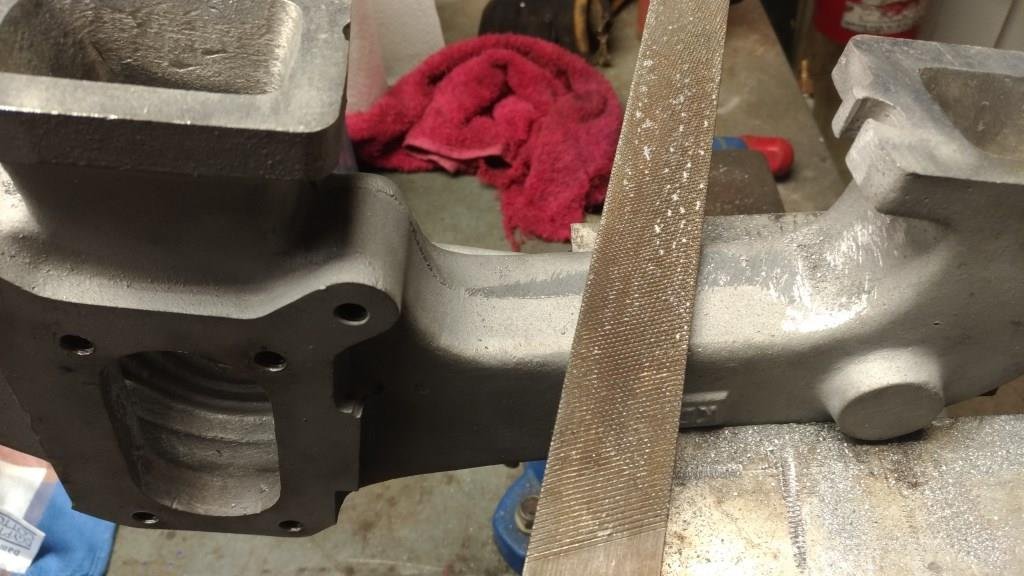
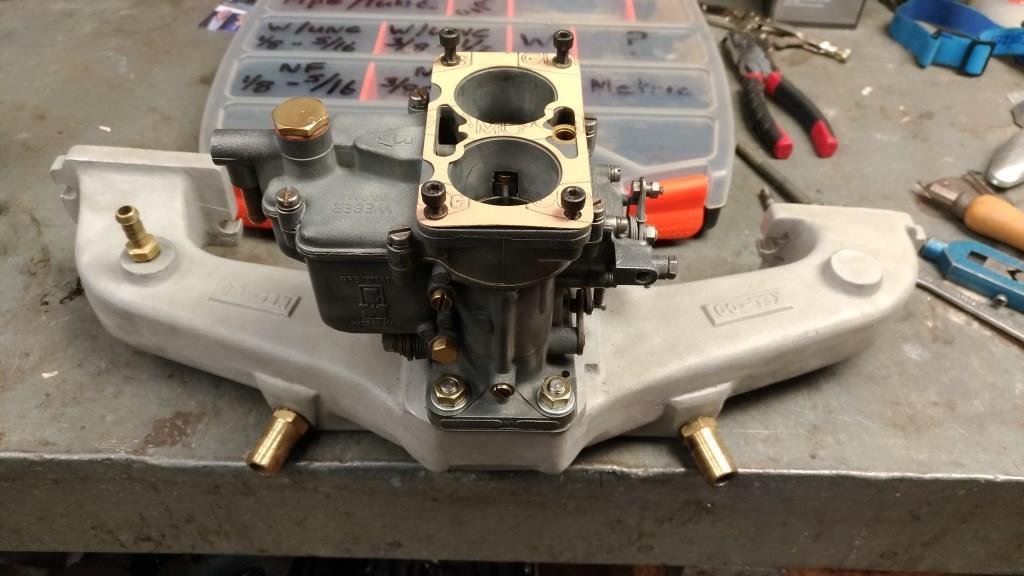
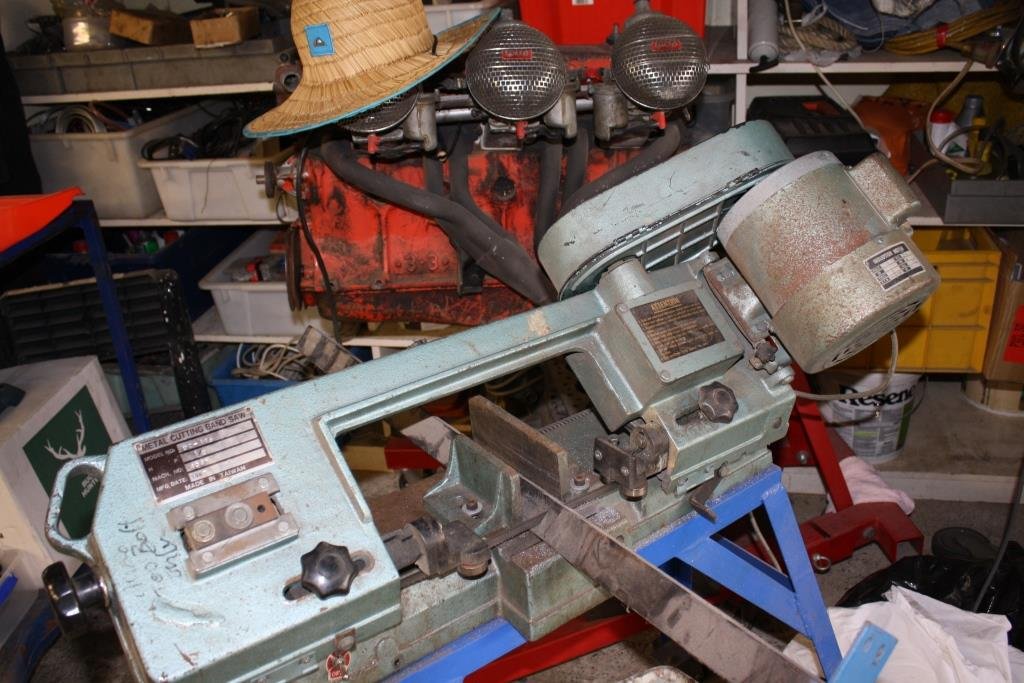
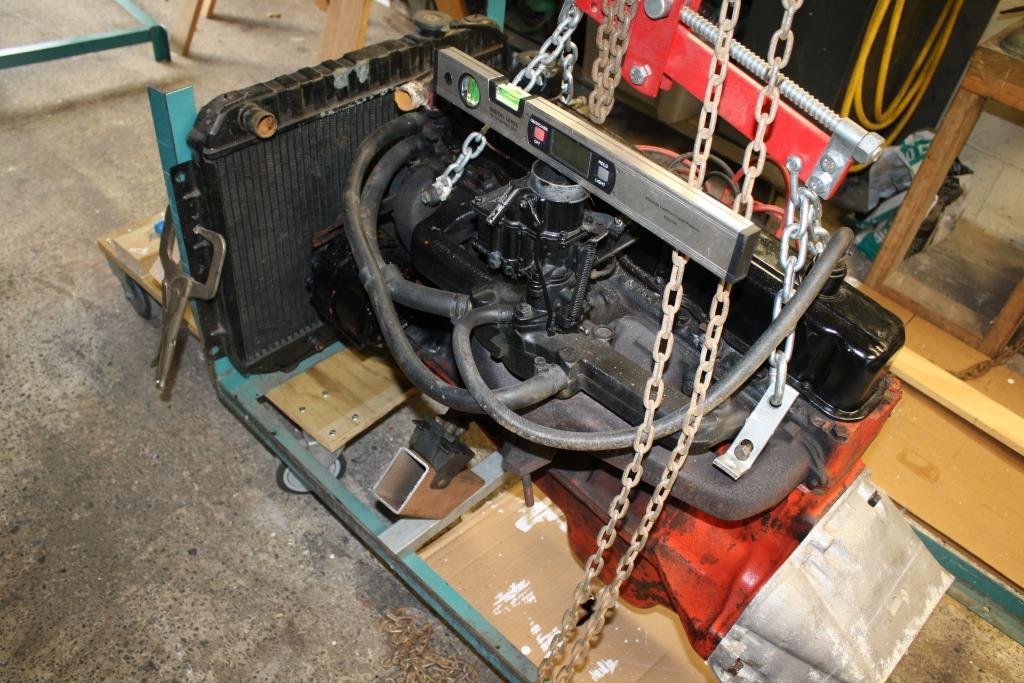
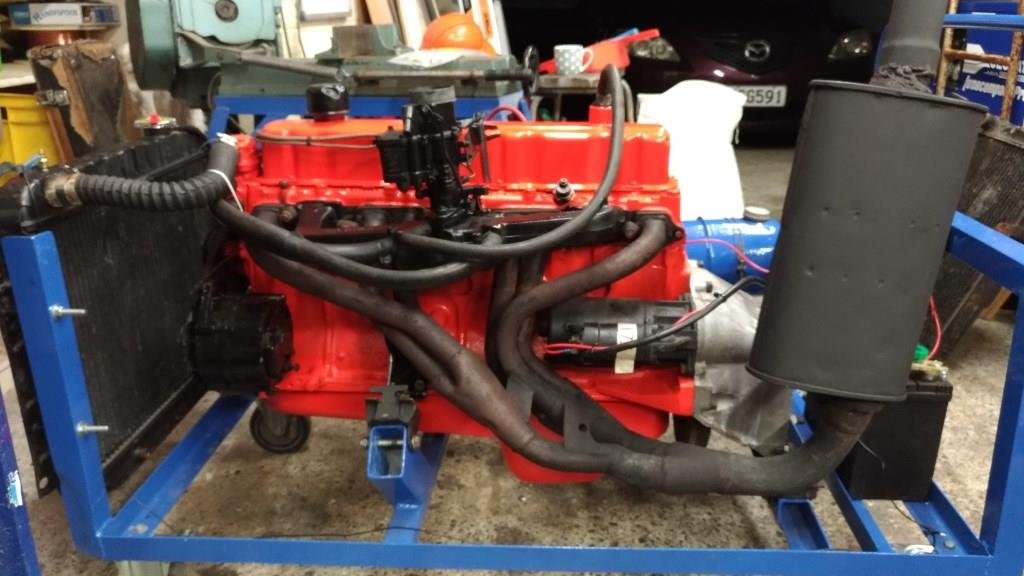
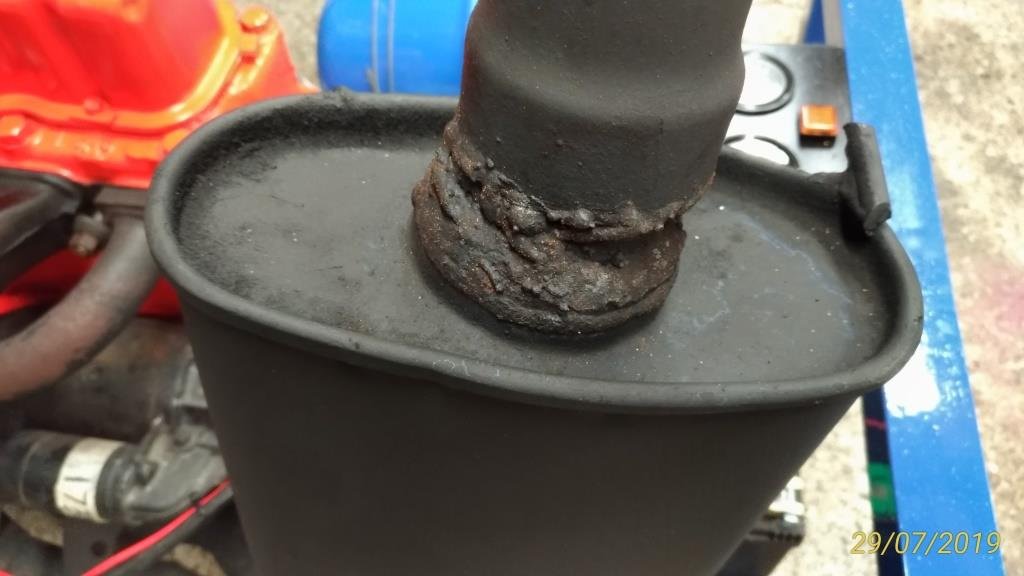
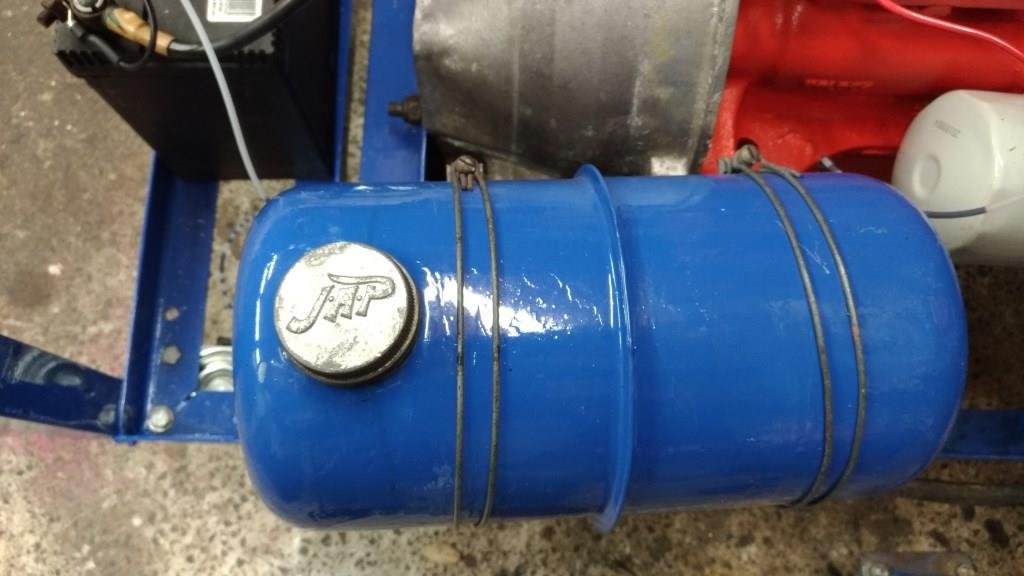
Thought it was time to clean up Rigamortice’s vintage Kel-Co manifold to get the DCD Weber back where it belongs. Couldn’t resist the temptation to cut off unwanted bits, file off casting marks and give it a blast in the new blasting cabinet (only a baby one but all I have is 12 cfm). Have to say I was pleased with the results. I’d been thinking about building an engine start-up cradle for a while, found some old castors, raided the obligatory under bench scrap steel pile and started cutting and welding,……… and cutting and welding,……. Once again happy with the end result, particularly the “Hillbilly headers” fabricated from parts saved from the rubbish bin. I just had to incorporate the “inglorious welding” I found on an old muffler! And how could you not love the 1950’s JAP fuel tank. As an added bonus you can even run motors up on it! (My favourite Torana 2850cc 9 port, stock standard but what little rever – Brock discovered them before anyone else). First 2850 start-up on the new cradle
2 points
-
As those who are more familiar with us will know both Rigamortice and myself have a great affinity for the environment and take climate change (i.e. the thing we used to “call global warming” before it got cold again!) very seriously. Stricken by remorse and overwhelmed by guilt over the tons of negative carbon credits I’ve released on the global economy through years of motor racing, driving cars for the love of it, and behaving like a typically irresponsible older ‘Oldschool’ member I have acquired an EV! You may scoff at the fact that it’s a clapped out old warehouse sweeper with buggered batteries saved from the scrap heap but to Rigamortice and myself it is a powerful symbol of our indefatigable commitment to a green and politically correct future. With help from my brother providing advice, encouragement and the Wild Turkey may I present the definitive green, negative carbon credit, EV solution to taking the wheelie bins out when you live down a long driveway, (what could possibly go wrong!). Commentary and camera work courtesy of the ever lovely Mrs sr2.2 points
-
So I'm still rolling around here... I still have an A35 in the shed and my AE92 GT which needs work one day (plus other things, but really need a decent sized workshop to do it) but I was browsing TM one evening and saw a mini shell for CHEAP which I thought could be a good basis for a project. I've always liked the early minis, so it was chance more than anything as to why I ended up with this one. Now the reason it was cheap is that someone had cut the front of it off (very cleanly though) to make a flip front. Other than that the shell had virtually no rust, is very clean and has been dry stored since the early 90s.... A quick trip up to Cantebury and it was home.... It came with enough bits to make it a roller but very little else. Luck would have it that a very rusty (but mostly complete) one turned up locally on TM a week later, so I made it mine also. So I'm about halfway through aligning this front end to TIG back on..... Plan is to give it a quick scotch n' spray in the British Racing Green it has on it, then start transfering the bits from the yellow and rebuilding along the way. Should be fun, feels great to get into another project like this one.1 point
-
Yeah that is a good price. I've bought loads of ply from that fella. Some good hardwood ply. Its all mainly imported and probably made from Orangutan blood but yeah...its cheap.1 point
-
Had to go do stuff... Re fuel, compression ratios etc. Probabaly noticed have been avioding giving a straight answer; Because to many variables. 95 probably ok going by what you have said. Should be tuneable. But wouldnt expect to get the most out of it. Same reasons haven't posted to many examples. My 4age have run 11.5 compression on 11psi (turbo) with 98 fuel. But different engine and to many variables to compare.1 point
-
Yeah the laptop trick works well, but you need to setup your laptop to have a direct pass through from input to output. So it basically goes Input > amp > output otherwise its too laggy if it needs to go through any processing on the laptop. Cant remember how to do that but its somewhere in the settings for the mic jack I think.1 point
-
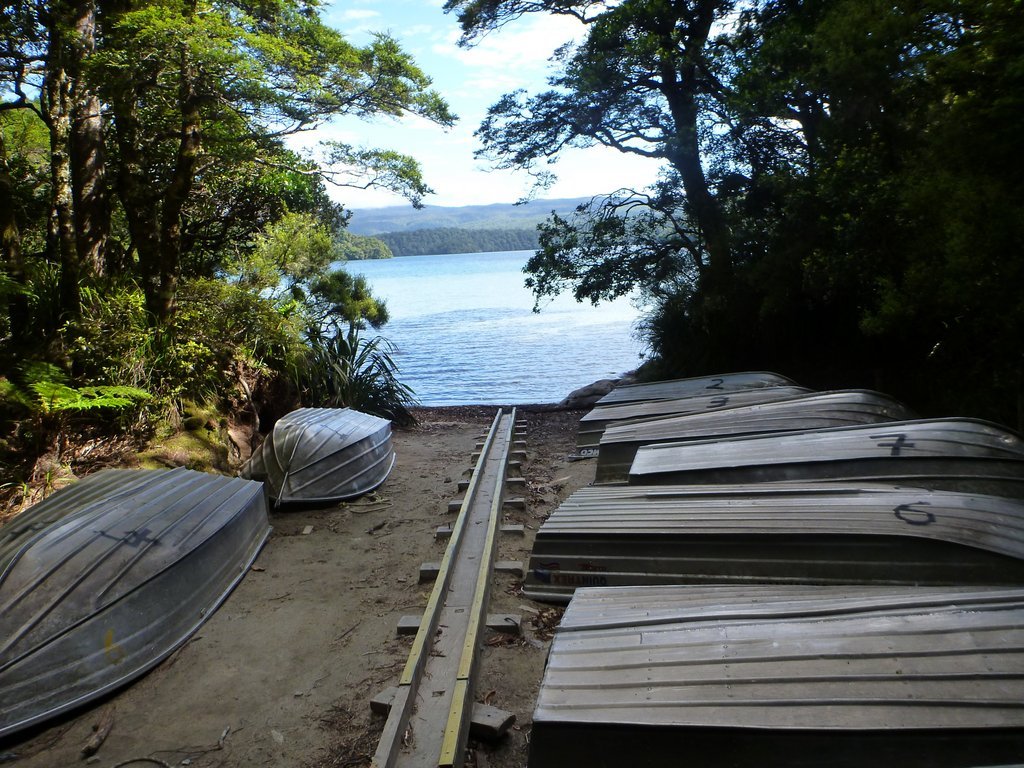
just make sure you put your donation in the honesty box. Don't want to anger the locals,1 point
-
I have no doubt that a Doozi plate would pass the required photo of the plate test.1 point
-
Formply is what it's called. Primary purpose is for making concrete moulds, the smooth outer surface can have a release agent applied so the concrete doesn't stick. As you can imagine fairly hard wearing. $80 a sheet is a pretty good price. EDIT: I am assuming this as that's what it looks like, correct me if I am wrong.1 point
-
Pg hydraulics in east tamaki is the only place I could recommend with confidence for steering work1 point
-
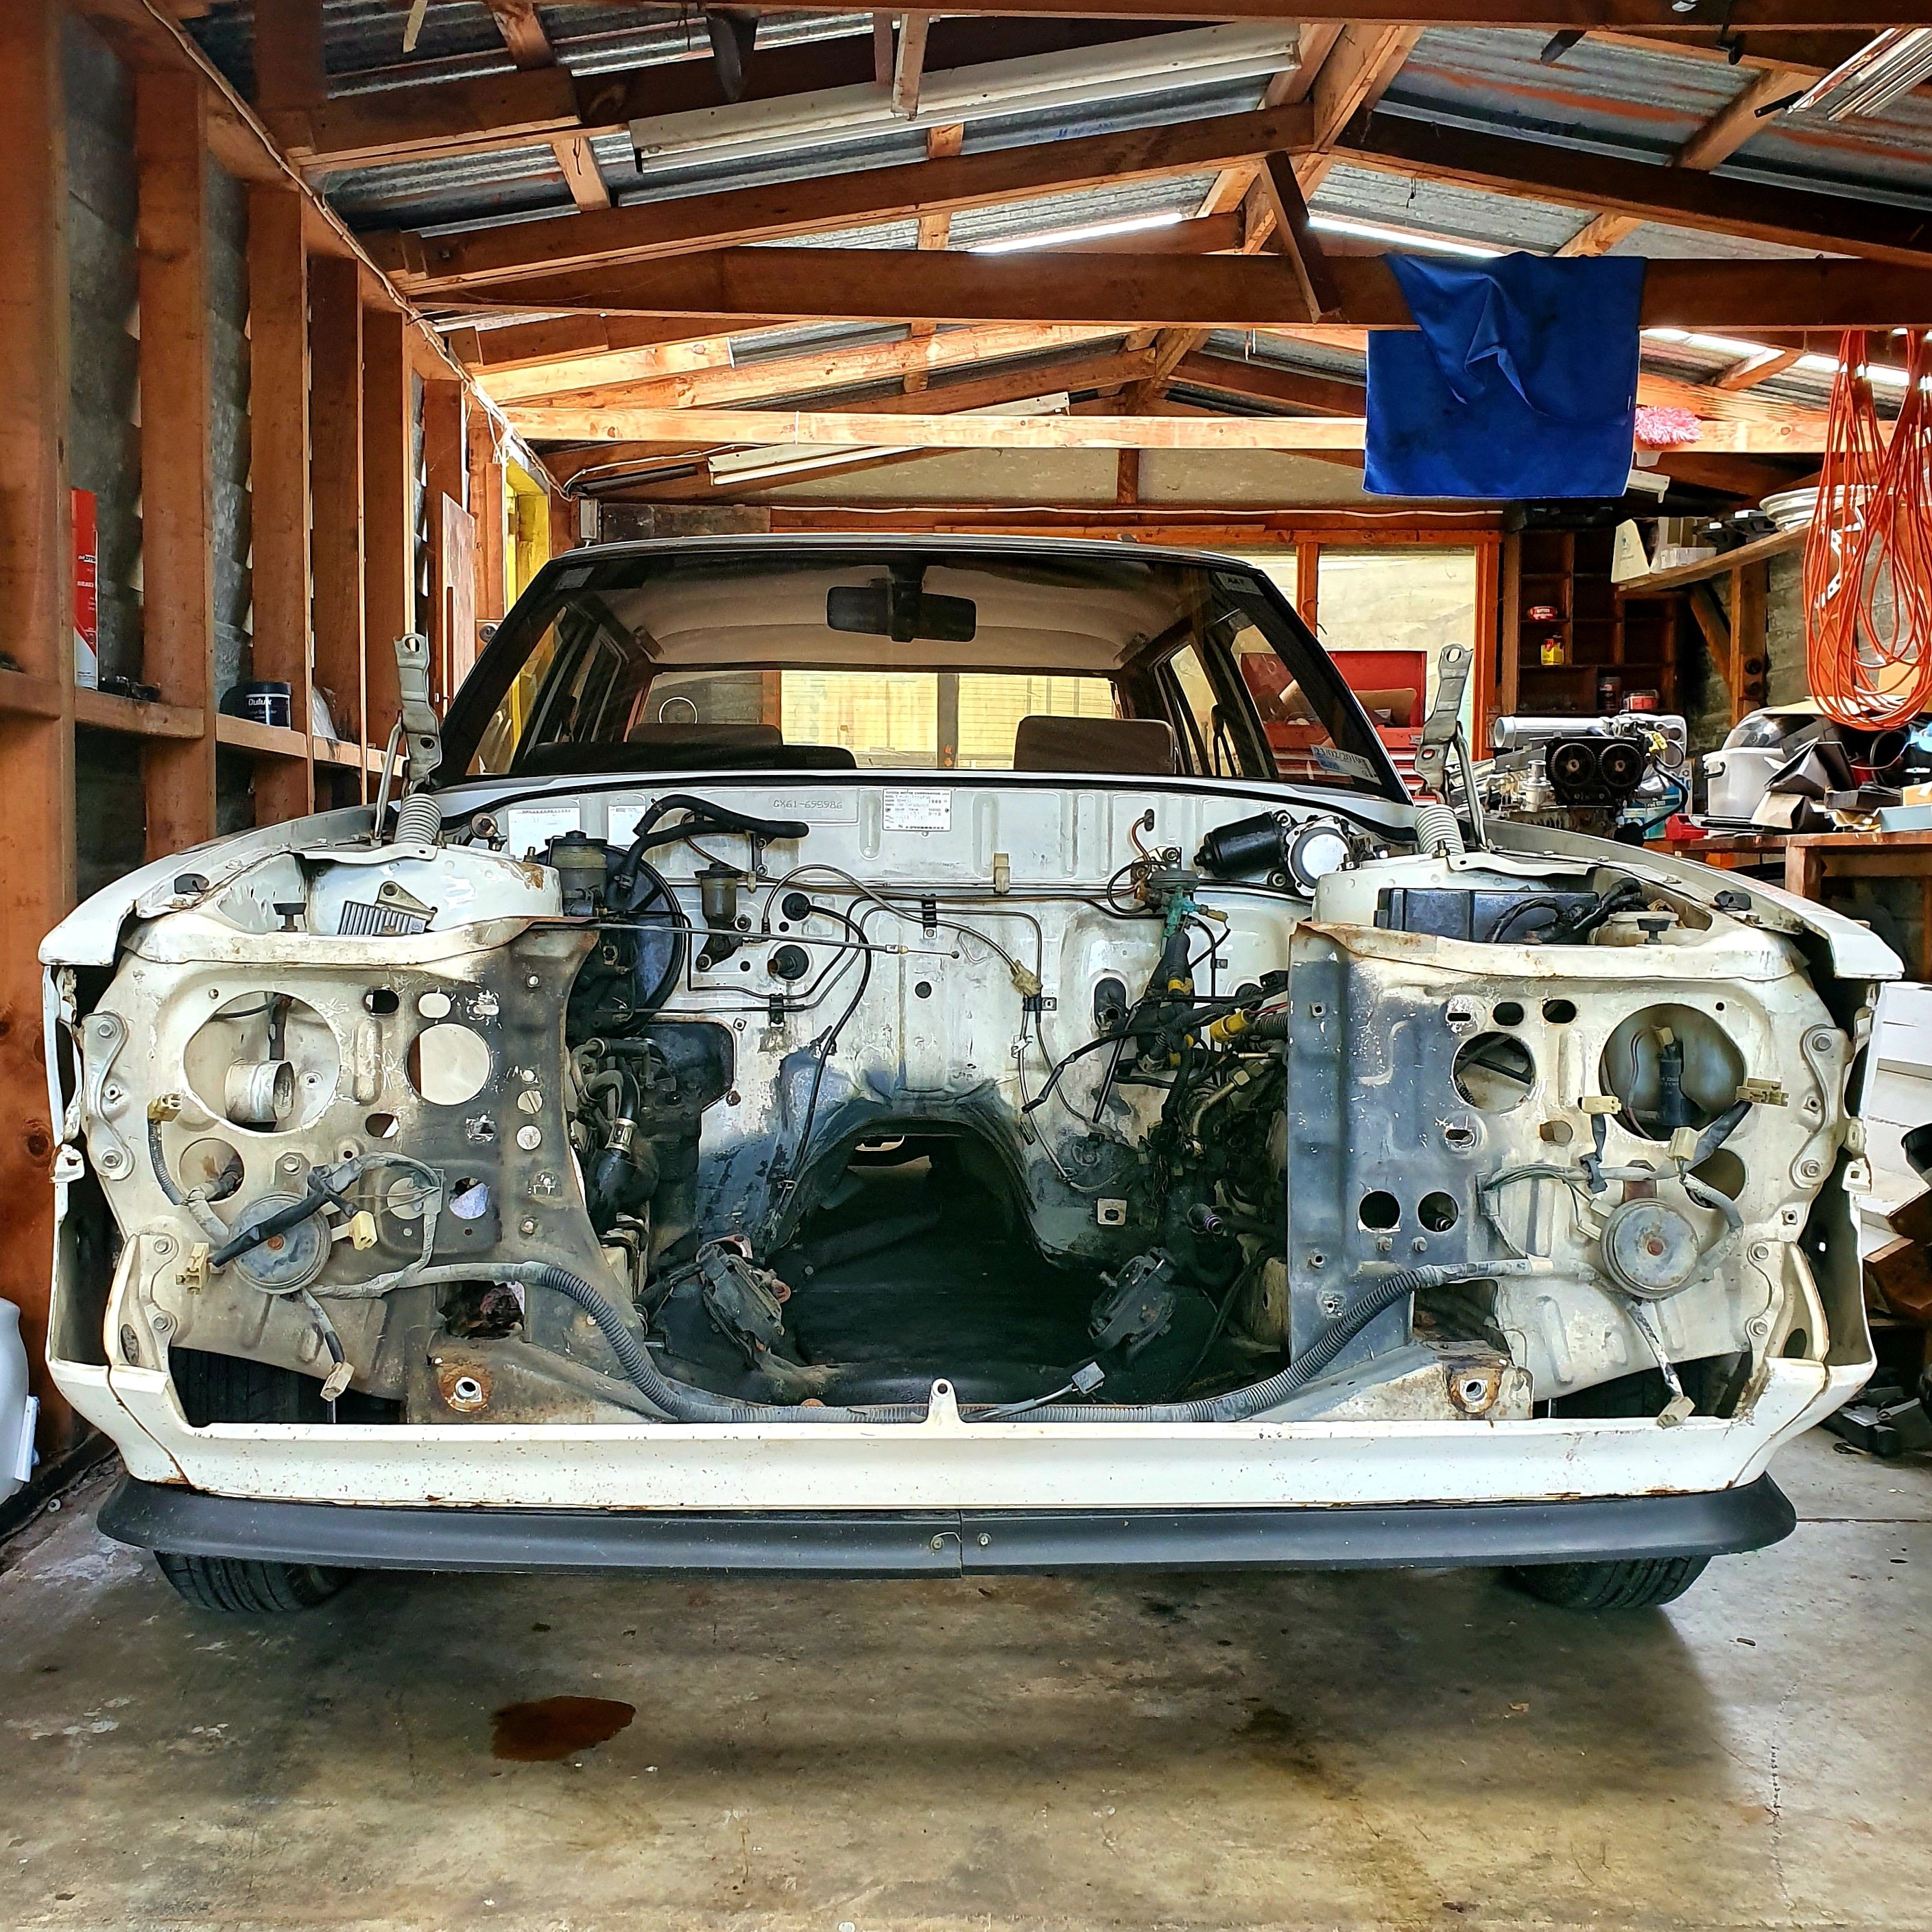
Pulled out 1geu to go to @Hachi-ichi have a hell of a mess to clean up in engine bay but thankfully no rust.
1 point
-
Rust repairs and painting gives me the shits, would much rather be doing exciting things... like smokey 11's Anywho, some more progress, back bumper was hiding some gems which needed dealing to.1 point
-
Found this on a car recently / fab fuck ups
1 point
-
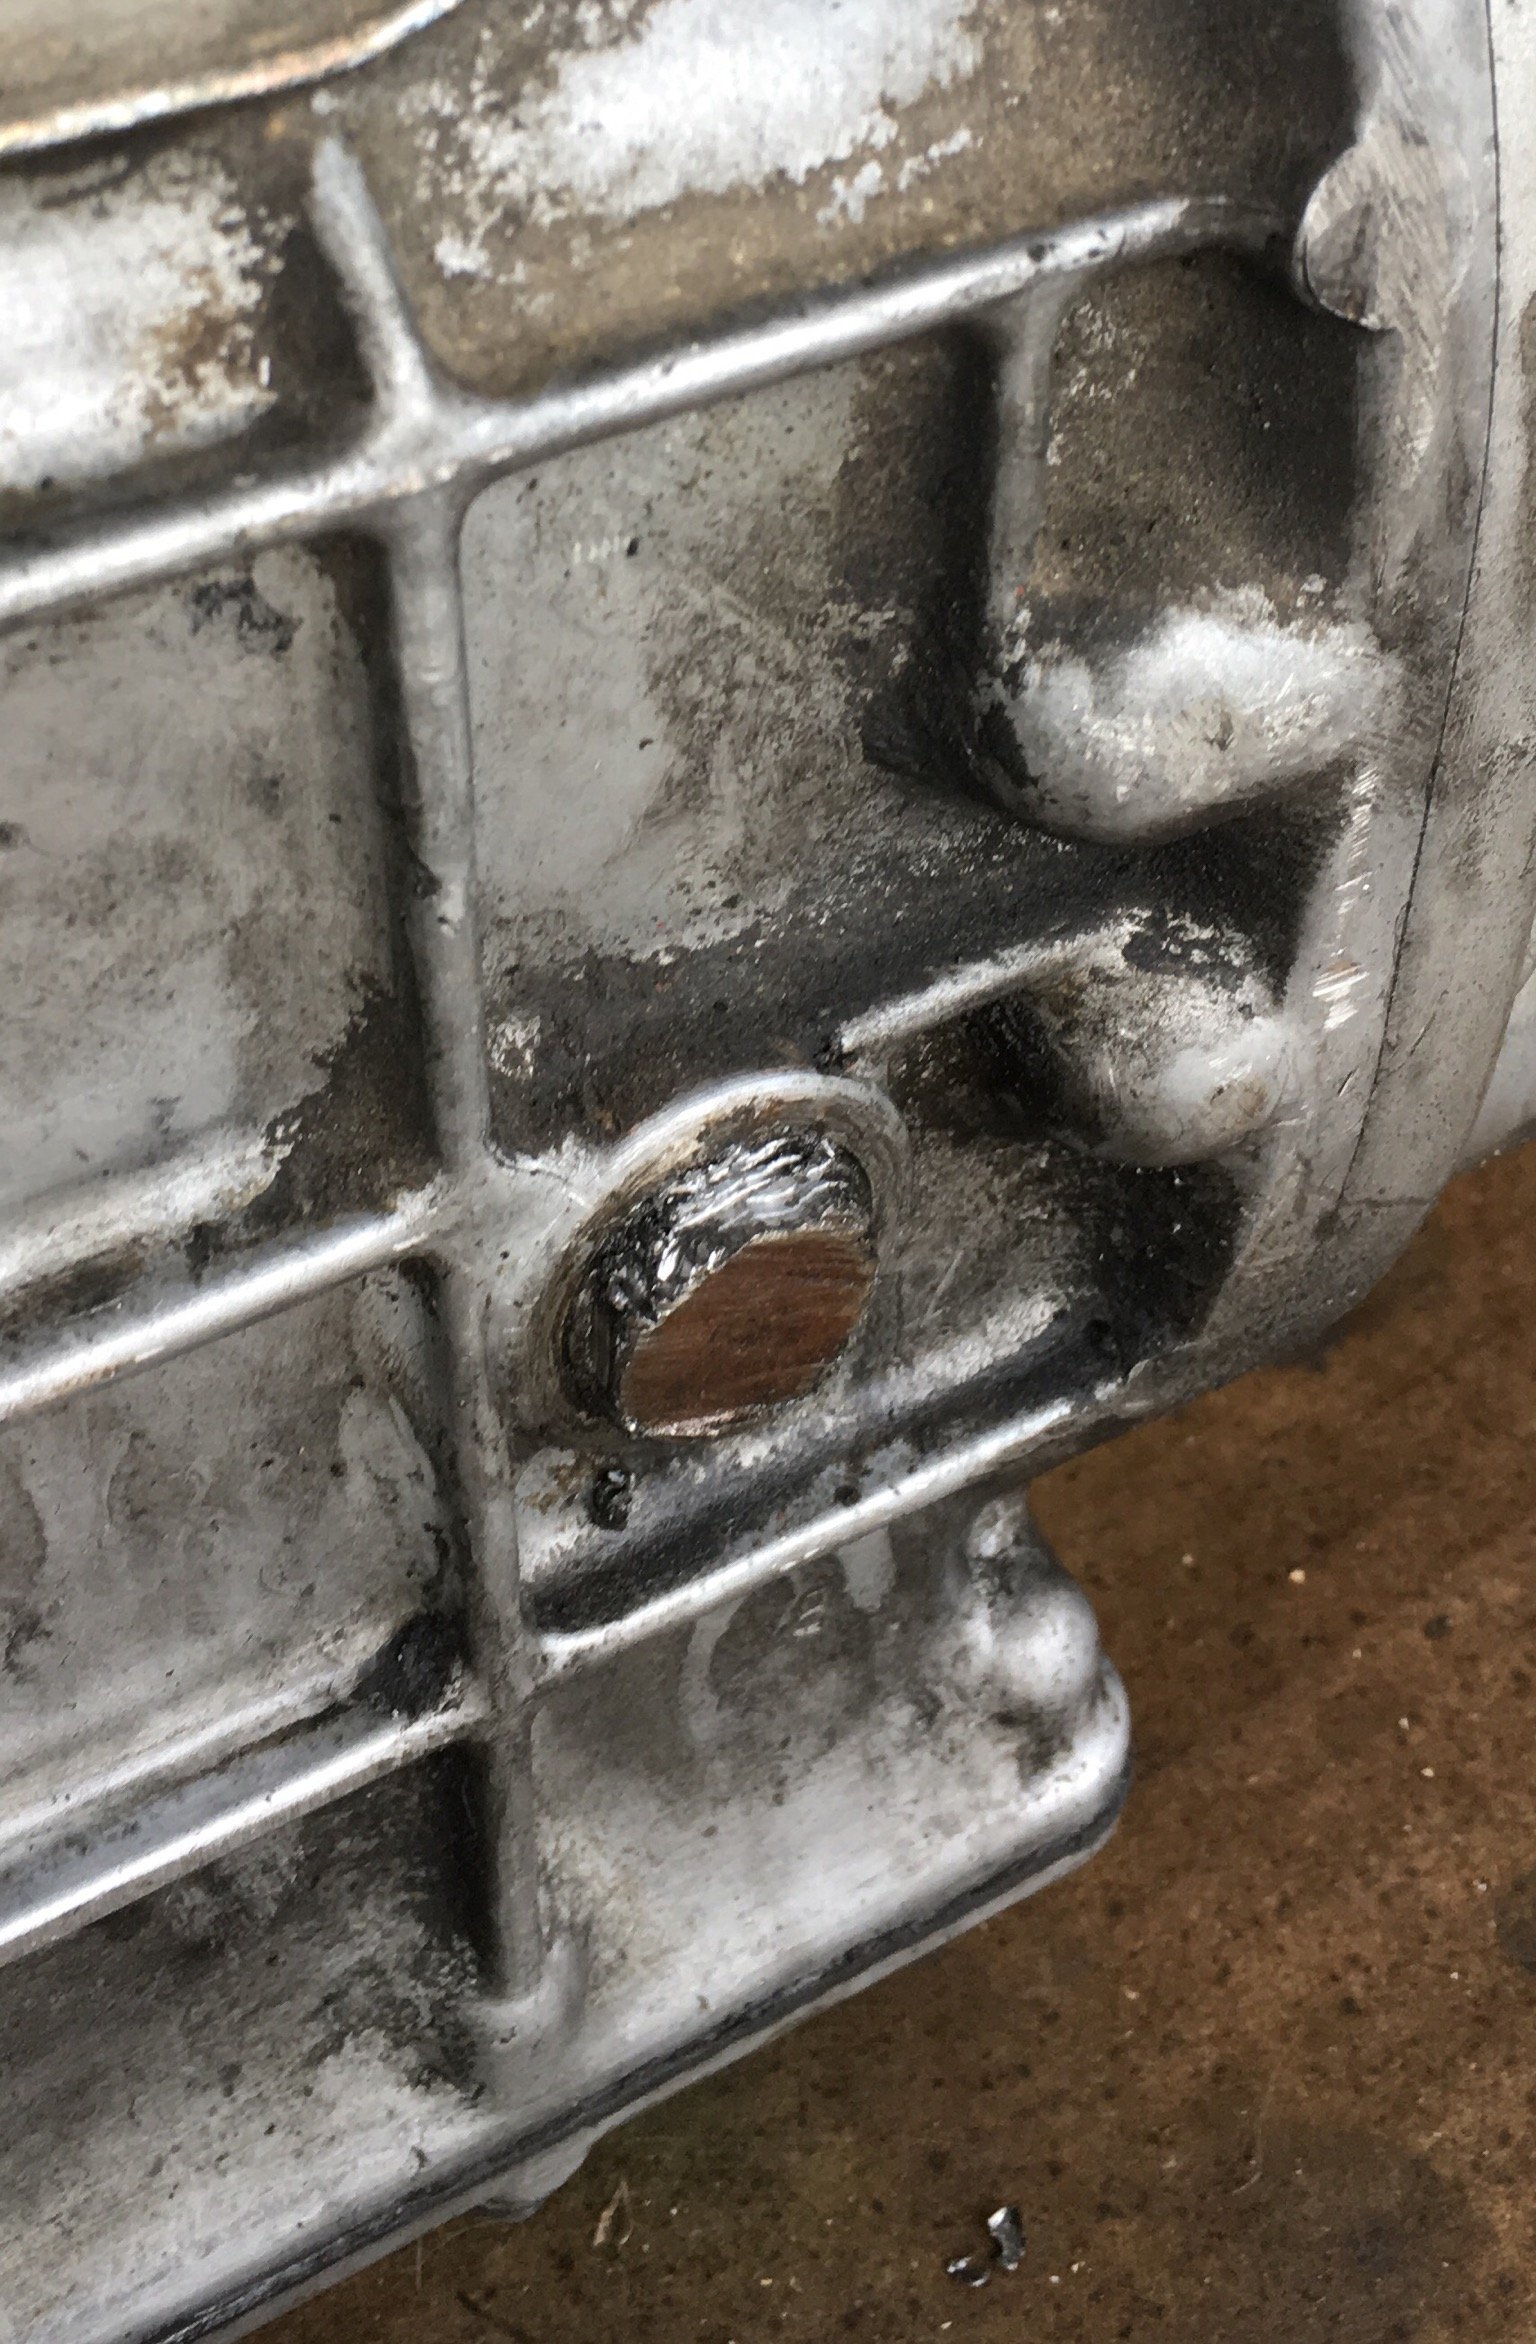
any tips / tricks on removing this damn filler plug from my gearbox? have tried grinding / filing nice(ish) and square shaped, but sockets/spanners still slip off and round it off again
1 point
-
Only if you mention it in public searchable forums...1 point
-
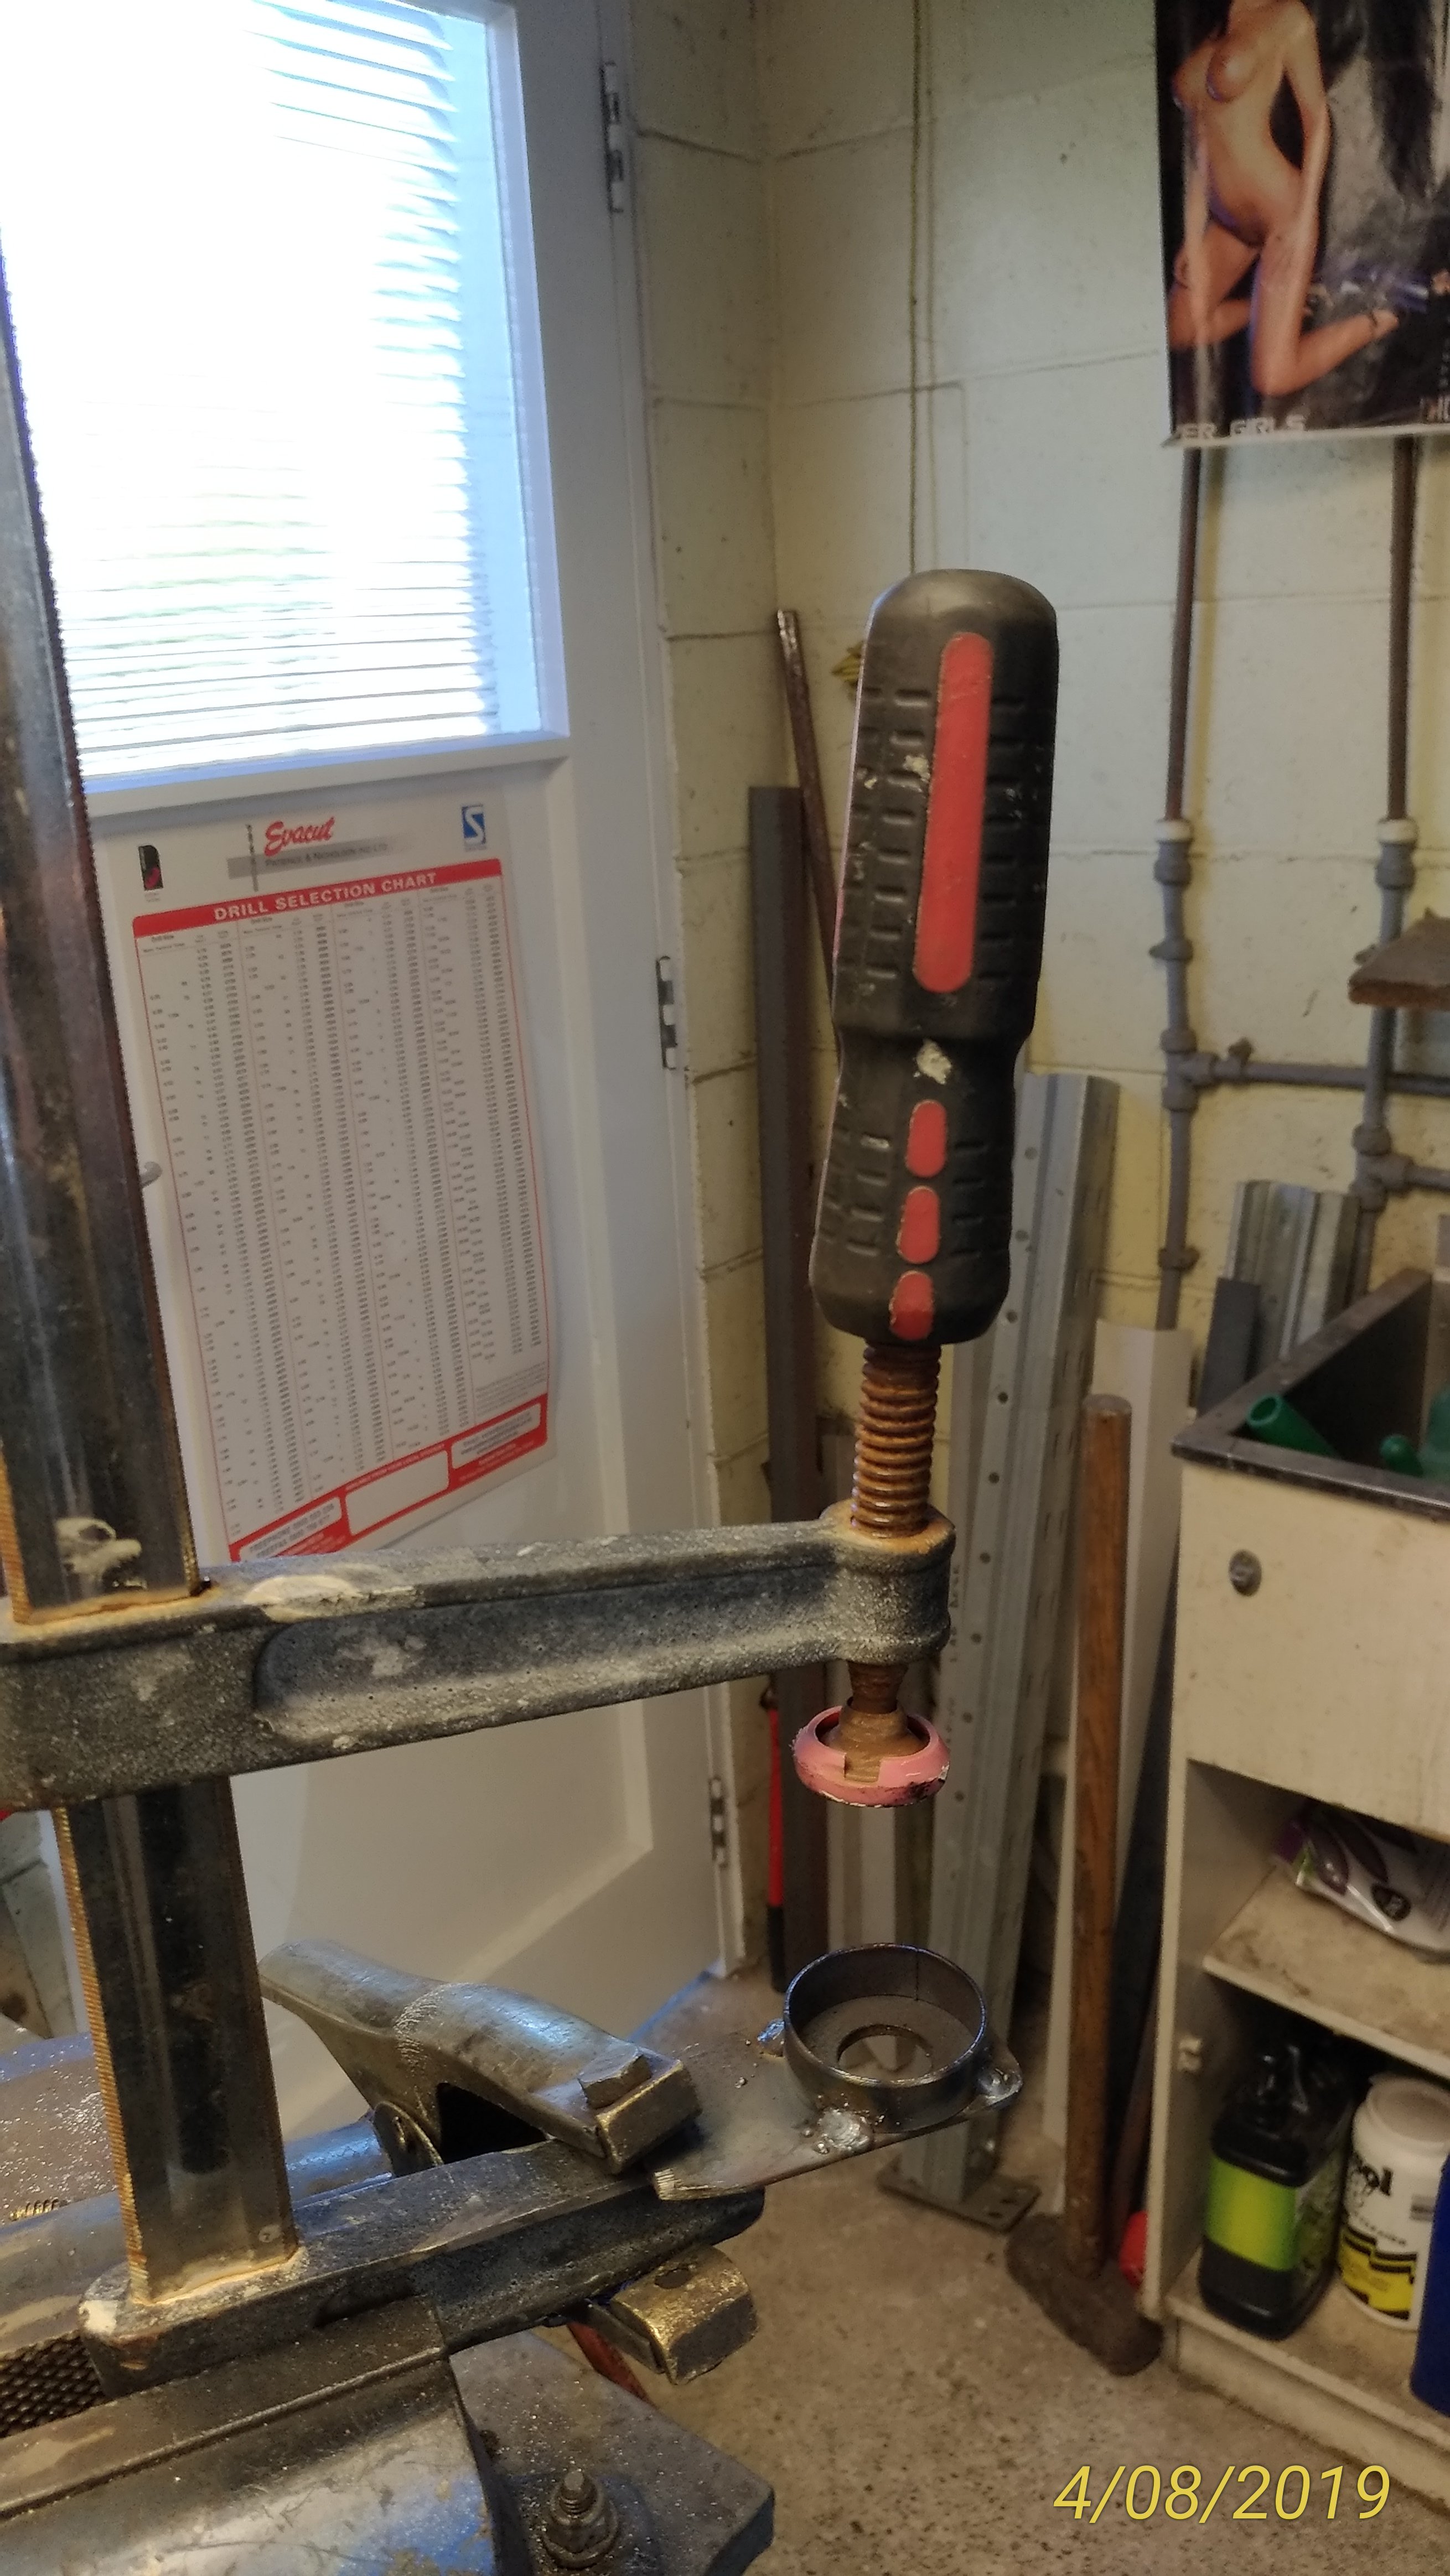
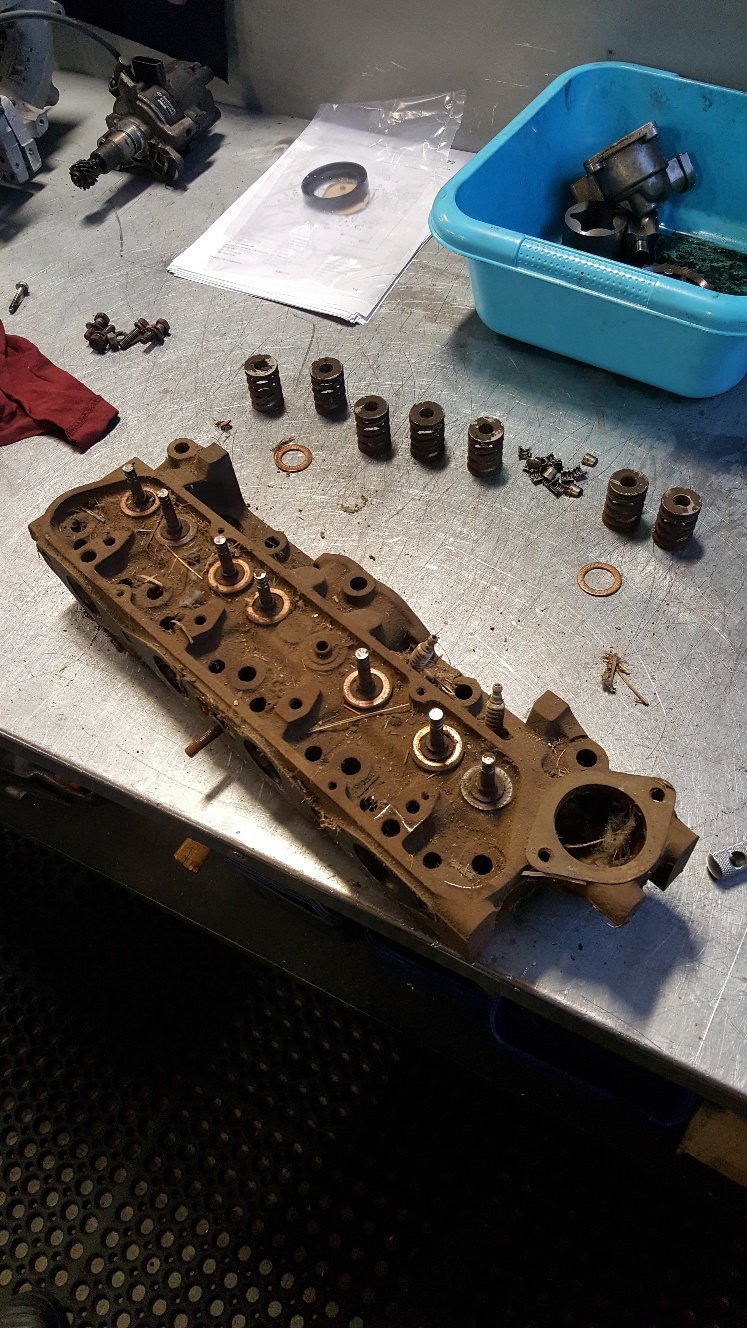
Time to strip the head down. Suddenly I realised I’d lent my valve spring compressor to that guy we all know who never has his own tools (and we always forget his name), who never returns tools……….grrrrrrr! As I’ve said before, combining the lack of an appropriate tool with a good mig welder and the obligatory collection of scrap steel under the work bench is the mother of many a good man-cave invention. Found an old screw Clamp…a bit of cutting and welding. A lick of paint…….. And the custom (i.e. beer, bullshit & bad manners) “Oldschool Holden Valve Spring Compressor” makes its debut.
1 point
-
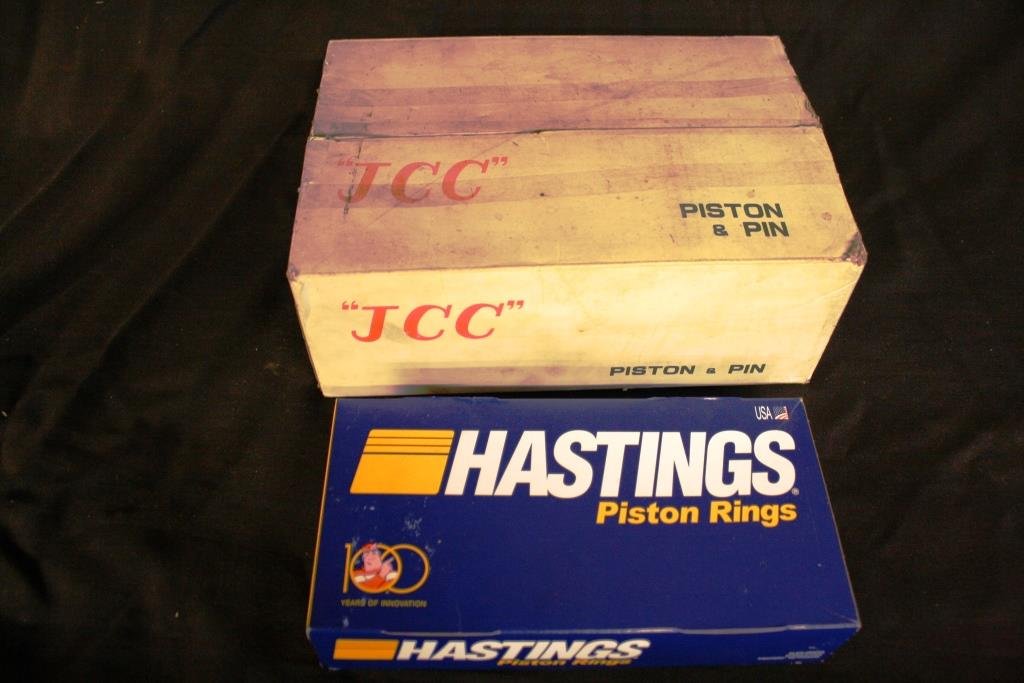
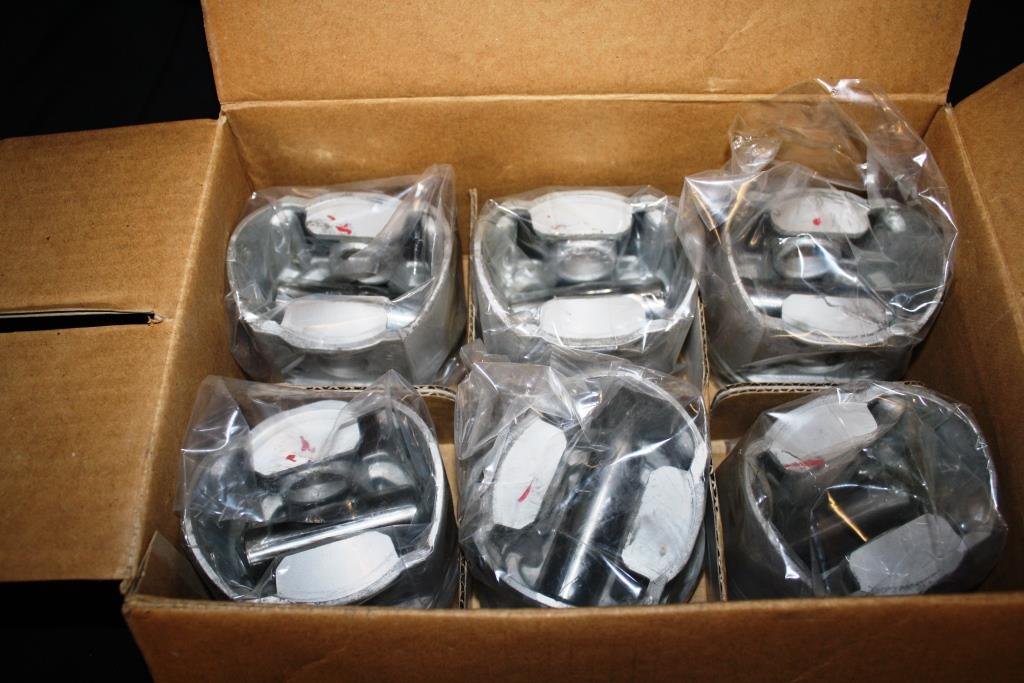
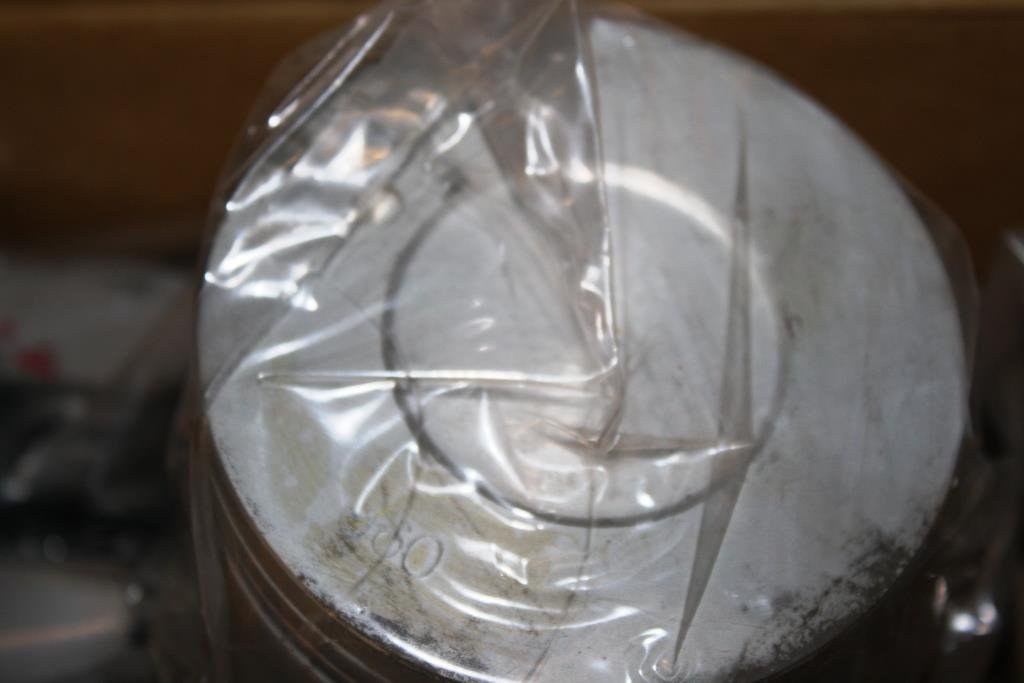
After making the call to take the block out to 60 thou oversize (hard to argue with an internal micrometer) the hunt was on for suitable pistons. Problem is these motors were designed to run on leaded 100 octane petrol (yes real lead, the stuff pre-millennial ‘real jokers’ used to have in their pencils!) and the best we can buy in our modern times is BP98. To add another problem both the head and block had probably been decked a number of times and I was now planning on pushing 208 CI displacement into a 186 head. With flat top pistons off the menu I managed to track down a set of ‘new old stock’ .060” over JCC dished pistons in Australia complete with pins and chrome moly rings. You have to love the 30 plus year old tea cup stain on the end of the box, if they could talk I'm sure these ‘new old’ spares could tell some stories.
1 point
-
Connected the battery and the spark plug leads that i had removed to test something on the ute with, and it fired right up! Hopefully a good sign. Video below is the second start and first drive out of the shed for two years. Went well, but the rear brakes are binding which suuuuuuuuux as this was the last thing i did. Might just need a drive. No road drive due to the 2 of 4 doors missing or not closing and a loose bonnet Good opportunity to hose out the shed too! Somehow it looks even smaller with nothing in it! Made a new metal board rack for the back wall from the old clothesline bars that came in the back of the van, much stronger and can now easily fit 12 instead of 9ish max All the primer spots are areas that i have picked scabs or chopped out rust. None of them look like they have blown out again, so thats nice. Still a few to sort out, including the front passenger door. Front just needs a paint. Both doors on this side need a lot of work or swapping. Engine bay still looks nice (this is after a wash, blast with the air gun and lashings of WD40) Swapped the new welder over to 0.6mm wire (new roller came in - thanks AliExpress!) from the 0.8 i used on the exhaust and turned it right down to melt in a few patches on the front passenger door Goes pretty good, but its tricky to avoid the blow throughs on this old thin steel - i dont think the amps go quite as low as my old one even tho they both say 30A min, i think my old one was 'optimistic' even tho its actually more useful to be able to go lower on thin stuff. I have also (finally) replaced the liner and torch on the old one so i might fire it up and see - i probably should anyway to make sure its ok before selling it (or keeping it!) Happy this is making some progress again.1 point
-
Update time. Firstly there will be no more juggling around shuffling stuff to get the Imp on the hoist, or having to drive it down the slippery grass drive that heads to the back of the workshop to get it onto the hoist. We have the workshop back after having finished building this cabin on wheels. We delivered it to its new home where the owner will continue with the build , fitting windows, door and lining it out. It was a fun job but took up a big chunk of space. Well until we start the next build. We will have a 8 metre trailer to build for ourselves soon once we sell the housetruck. So we could now relax and enjoy the Imp. A few little jobs completed and a fair few miles clocked up. Most important thing to sort out was a leak from the nearside transaxle output shaft. After getting back from the trip to Blenheim it was discovered that oil was coming out from what I thought was the seal and getting spun out off the coupling, marking a perfect line of oil inside the engine bay. So the car ended up in this position getting its trans fluid drained. I removed the shaft, doubled checked the seal land which was fine, checked and tightened the seal by cutting a few mm from its spring because it just didn't feel quite tight enough on the shaft. I also checked the shaft too. The early Imps have a splined shaft that the output spider slides onto and is held on by a large nut. The design went through two revisions ending up with the later shafts being a factory press fit and no nut. I was sure that my late type was fine and solid but just to be sure I cleaned and siliconed the end of the shaft visible from outside. Just in case... Put it all back together, a few drives and the leak was still there. After some advice from a fella on the Imp forum I took the shaft out again and checked it in the vice. It was indeed loose. Loose enough that it could move in and out slightly and had broken the silicone bond so allowing oil to creep past the splines and out. It must have been getting worse as the oil was essentially lubricating the once tight fit of the splines. It knocked apart easily, showing the factory O ring fitted before they press them together. Once clean and dry I tried the fit. It was a touch too loose for my liking so out with the JB weld epoxy. It'll never leak again Yesterday we drove to Nelson and back and I'm happy to report that the leak has stopped ! Yay. Now the only real leak is a dribble from the rear main seal on the engine. I'll change that when I change the worn ring gear in the future. Another job was to sort out some sounds. I like my music and not having a sounds system in a car on long trips is annoying. I had already eyed up and sussed where I would mount some speakers. It seems a fairly common place after having looked at other setups out there on Imps. We had scored a JVC headunit from a customer after upgrading their setup. Then we had scored some speakers from a Nissan Bluebird SSS we had been given and passed on but not before robbing its sounds. I also had some ply left over from lining the rear of the Viva wagon floor. So sorted for a cheap as setup. We made some boxes in the sunshine on what was a cold day.... Later on the sun hid behind clouds so all three of us moved over to the warmth of the log fire.... After Hannah covered the boxes in black vinyl I mounted them under the parcel shelves and wired in the head unit, a neat little unit that due to not playing cds is shorter in depth so fitting under the shelf nicely. It all looks neat enough and sounds fine for the size. Just need to find some protective grills to suit those speakers. Next on the list is to get and active sub and mount it under a seat so we can have some fuller, deeper sound. Another job I had planned to do but kept being put off was to hinge the front number plate. I don't want to mount it any higher and block the grill so where it is makes for a great driveway crown sweeper. Driving along our 500m long stone driveway in a lowered Imp with an even lower number plate gets tiring! So I did this... I'll report back with whether it also swings back at 170mph so avoiding speed camera tickets. The other night we had a lovely sunset and the Imp was looking resplendent in the light. I took a photo.. Next jobs to do are fit some carpet and I'm still really keen on pursuing building a full EFI setup. But its going to be a very busy summer for us so that will have to be a project I pursue in the evenings. Alex1 point
-
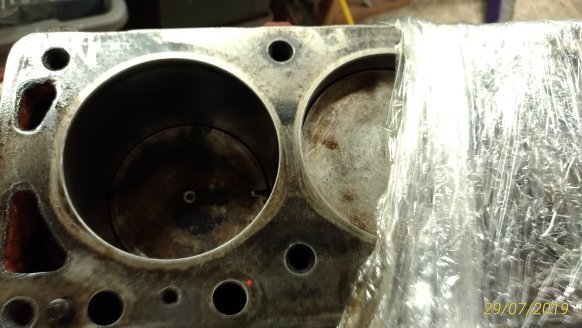
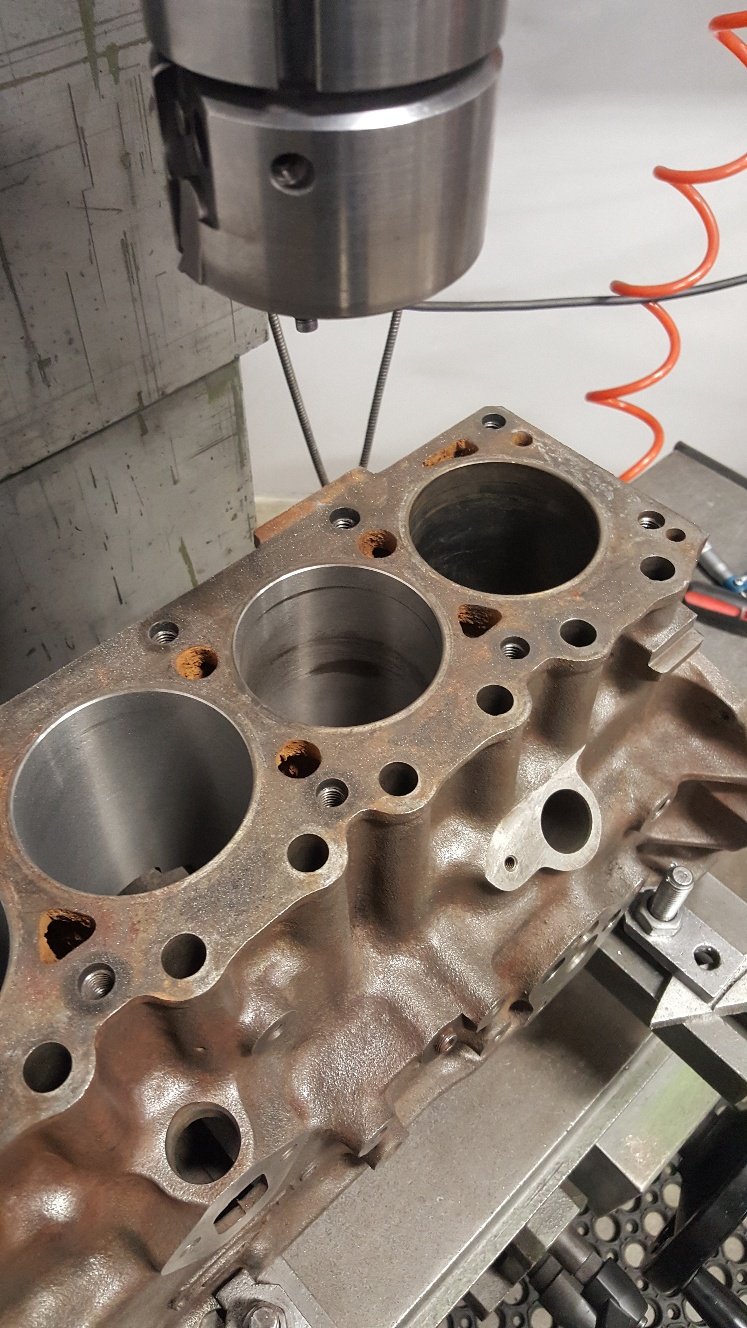
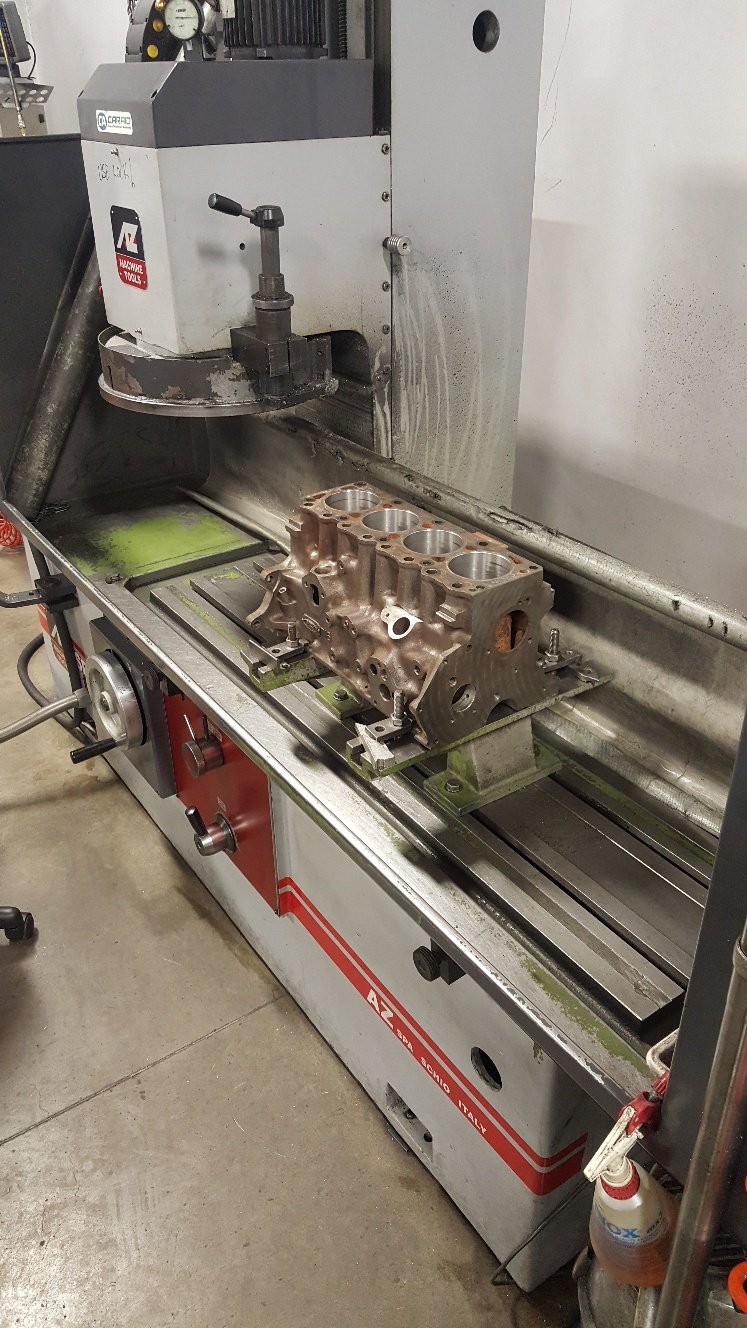
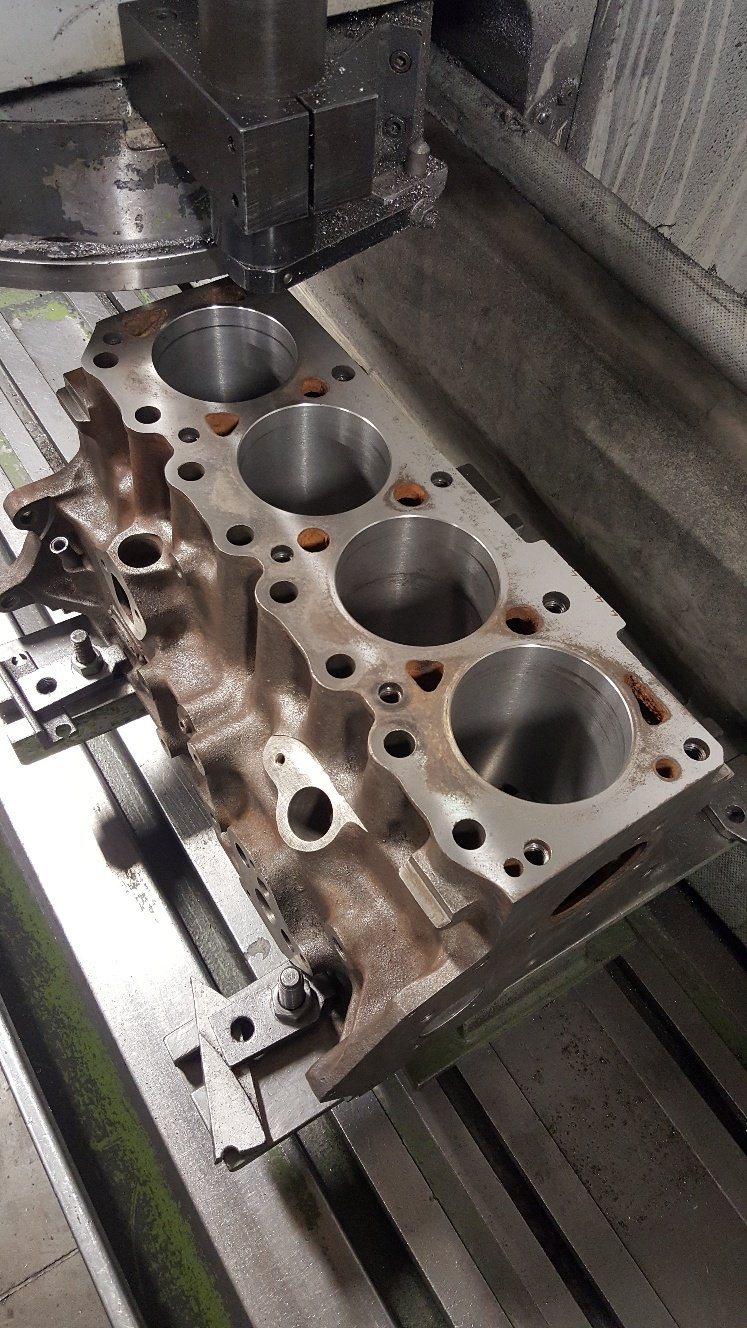
So I got the block into the boring bar. It's pretty straight forward boring a block. Doing a cylinder liner is a bit more involved as far as the boring bar is concerned. This block is at 30thou over or .75mm in metric. I have bought 40thou over or 1.mm pistons. It has a bit of wear. But hopefully it's should clean up once it's honed. This picture is of a test cut. So you dial the boring bar head into the bore. If you have a decent amount of wear it pays to slightly offset the bar towards the wear so you clean all going well at the next oversize. So in this picture you can see the boring bar hasn't totally cleaned with this size cut. I have only set the bar at 81.90mm. So I have .1mm or 4thou to hone out to get to our finished size of 82mm. We generally like to leave this amount to hone to achieve good rk rvk this is the depth of hone pattern. I'll go into that a bit more once we get to honing it. Once we've finished honing we normally go to the surface grinder. The top of the block is a little corroded so I'll probably take a few cuts to clean it up. So I've done a light cut to see how it looks You can see it still needs more off it. In this case it's not a issue to take more off the deck. When you are dealing with a late model diesel or performance engines that have been set up with good tight clearances it pays to watch how much your removing as you may have to detop your pistons as they may start getting to close to the head once assembled. Also valve reliefs can also need deepening. But this is more so a issue in extreme cases. This good old xflow should be fine. But i will be checking all this later once i can dumby the engine up
1 point
-
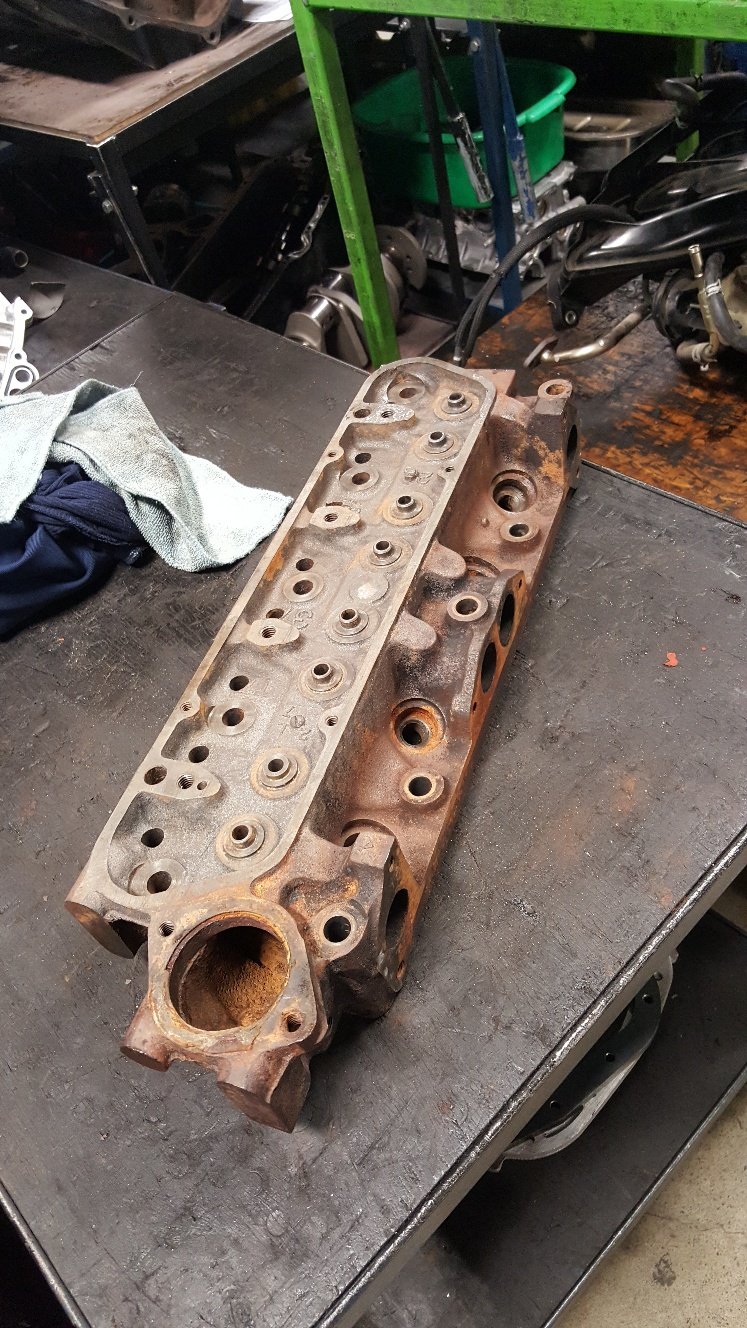
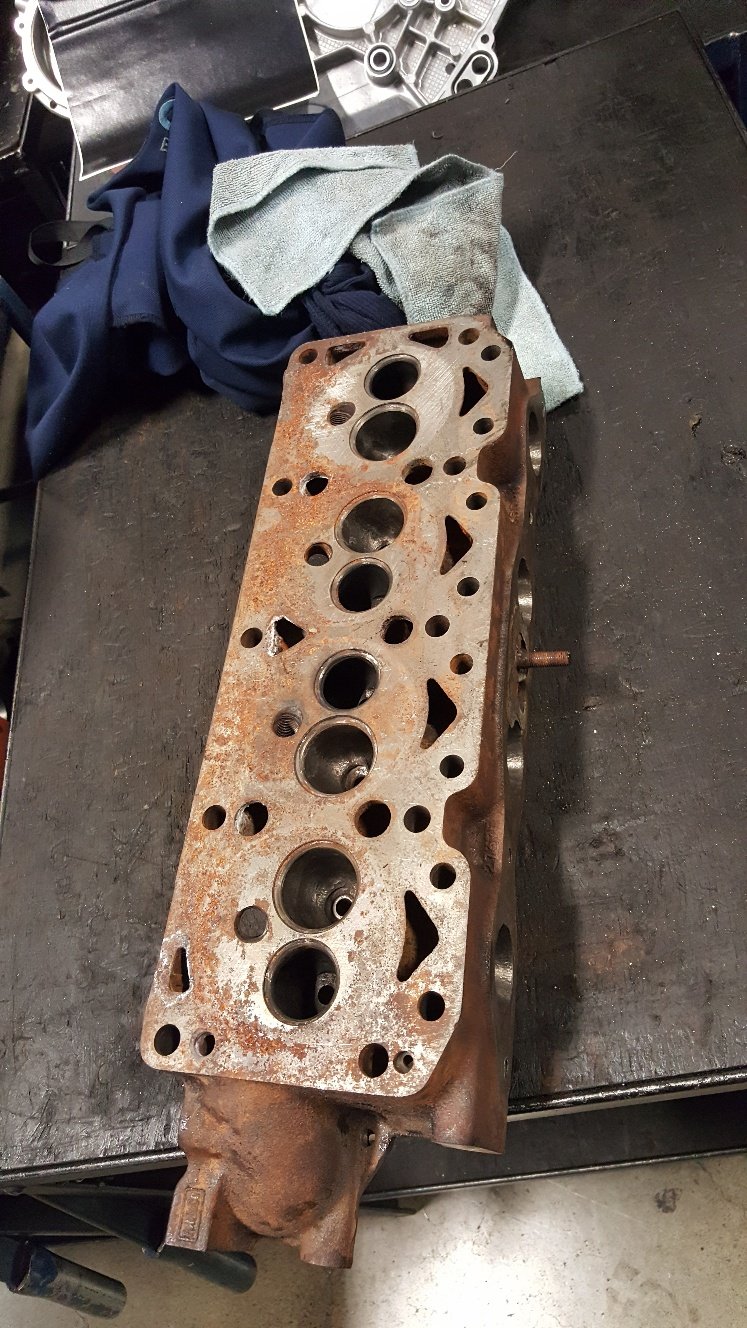
So I forgot to get a picture of the molasses. But here's a couple of pictures of the head once out. The molasses sort of just loosens the rust. Then you have to wire brush to get the rust off. I didn't put the block in what we call our hot tank as I haven't removed the cam bearing.. Our hot tank is only for ferrous metal. And the cam bearings would react with the acid. The cam bearings are in reasonable condition and this is build is on a budget. I run the tap through the head bolt threads and main threads. Removed all the gallery bungs and frost plugs. I found a decent build up of rust at the rear of the block that i chipped out with a screw driver through the rear frost plug hole. And also gave the block a good wire brushing. I gave all the machined surfaces a sand up with emery tape on a file.
1 point
-
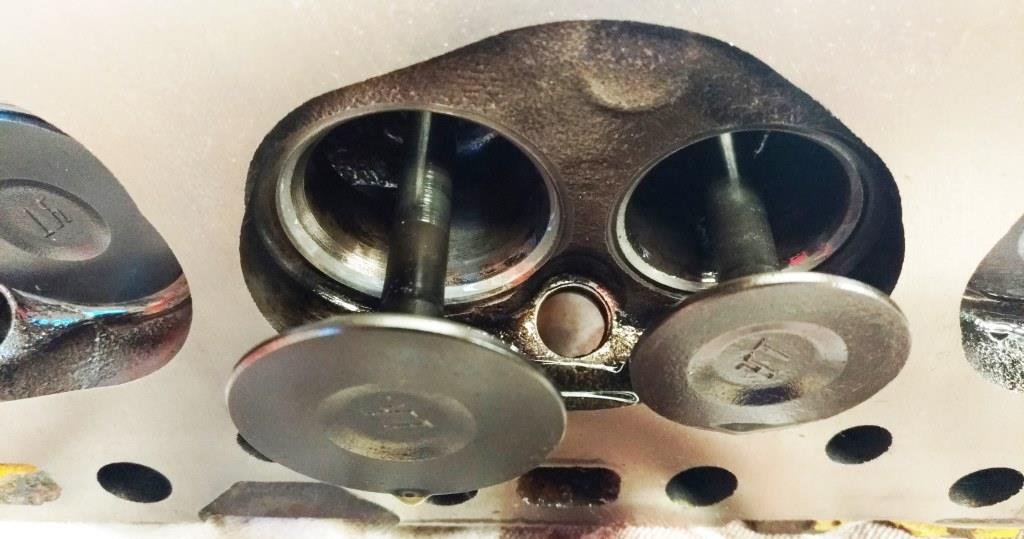
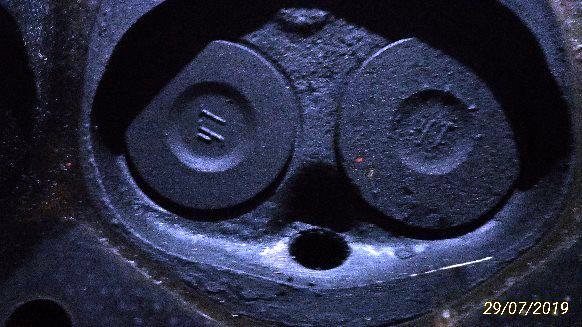
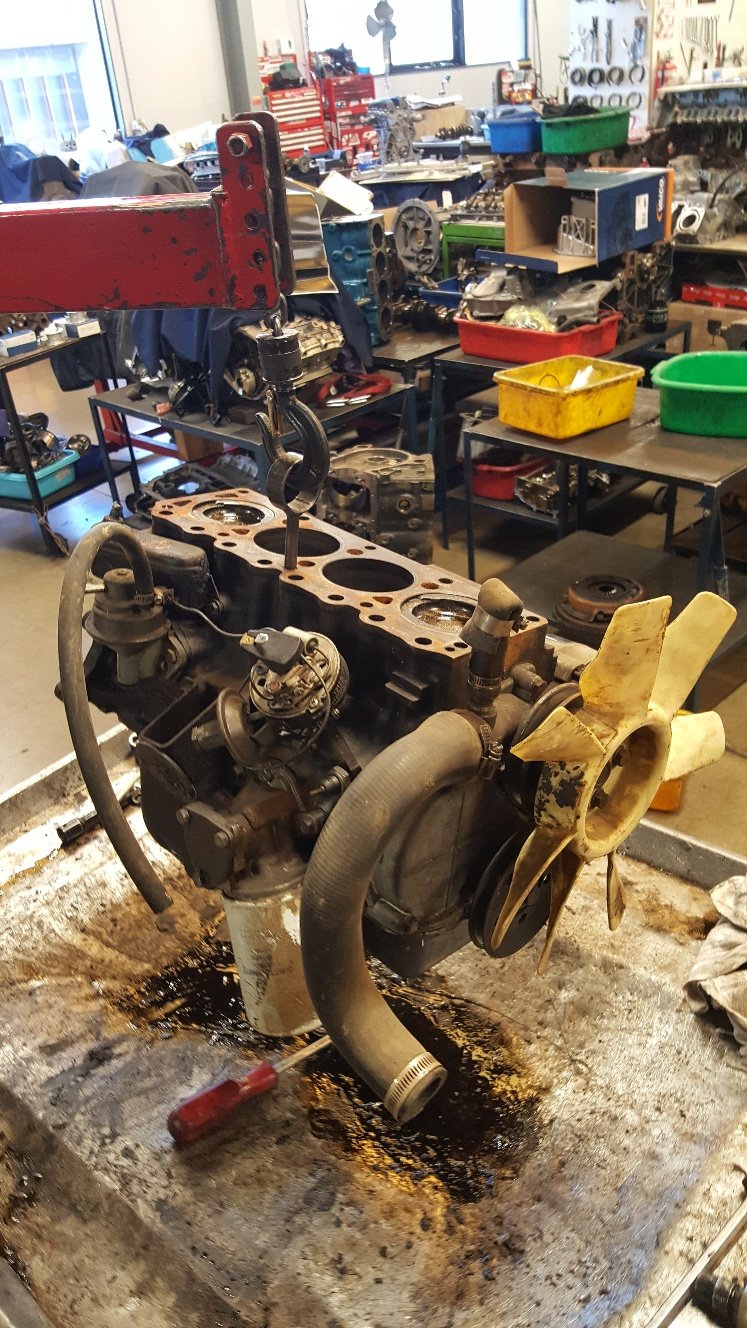
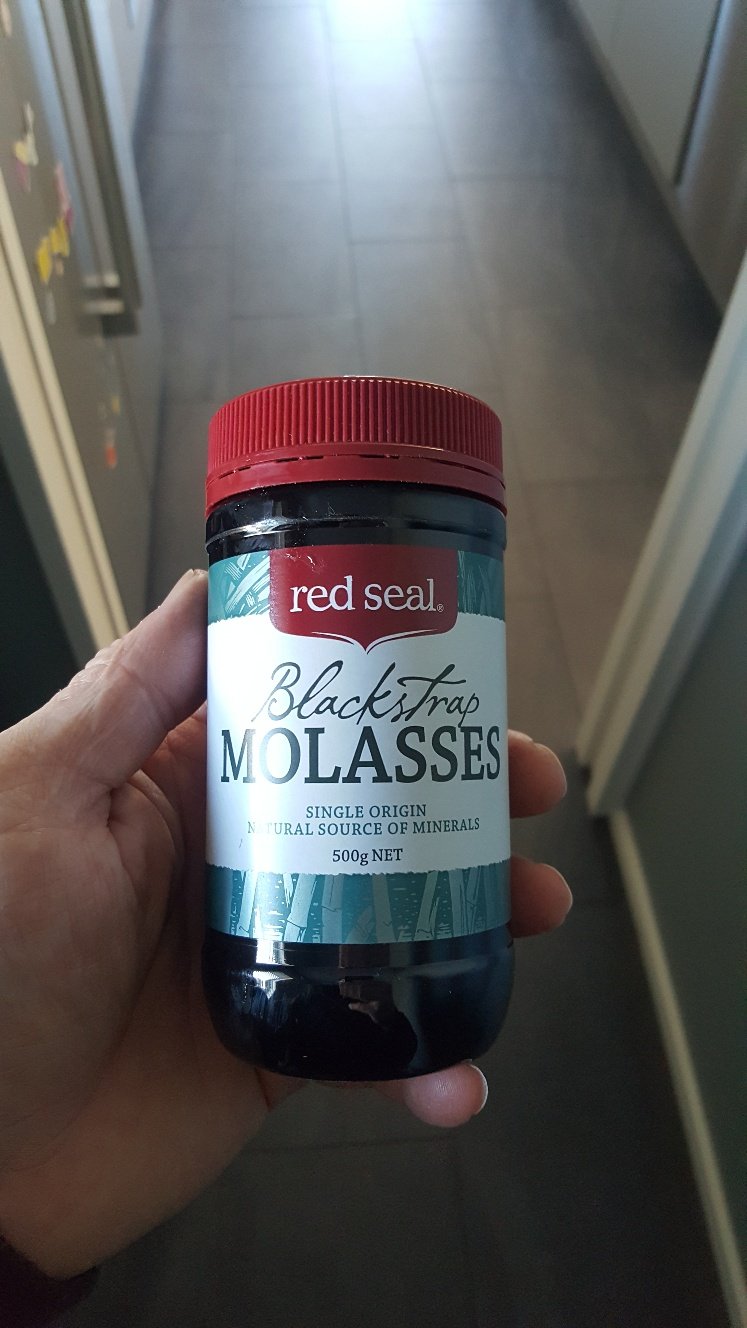
So I took the engine into work to strip and assess the damage. The cylinder head has been sitting around on the ground for a few years, so its pretty rusty. I have bought some molasses. It's pretty good for breaking down rust. We normally mix two of these 500g jars up with about 40 or so litres of water. The mix isn't that critical. I'll leave the head and rocker cover in the molasses solution for three or so days. The damage is pretty minimal. It's must of been idling when it dropped the valve. There's only a very small nic in the top of the bore and a small dent in the valve seat.
1 point
-
Got a new look for the Beat1 point
-
And we have colour...,
1 point
-
So i think i know more about Volkswagen control systems then i ever thought i needed to know. And it boils down to this.....
1 point
-
back to the middle of this side, i was thinking about how to attack this area while doing the other bits. Annoying design and lots of acute angles bleahhhhhggg oh well, chop chop. You can tell why they always rust here! Right behind the wheel into a tight corner with factory leaks into and around the A pillar. This is was replacement (not new) fender, but i needed to chop a lot out to get at the a pillar properly anyway, and it is sized nicely to the end section of the fender thats not welded. the the 'channel' is actually a hook for the top of the fender as there is no access to weld it, so i could just pull it off once i drilled out some spots where it folds over behind the door recess. I rebuilt this whole area last time, all the rest is still good. looking a the piece from the engine side, the 8mm lip hooks on the channel. Thusly: I put a good bead of seam sealer on both sides before tacking it in, and more on after from under neath. The channel will be filled to just below level with seam sealer too, like the other side (i didnt do this last time) And done. A couple more patches on the front valance to do, then its all filler, no killer1 point
-
Skip to the front, same gig: Pick the scab: excise the cancer construct new bits glue bits in remove 90% of glue. Tidied up the bits i could reach inside and painted them, + gobs of seam sealer squished though from the wheel side to hopefully reduce the amount of mud and water that this area collects1 point
-
moar rust :/ started from teh back working my way forward. A lot of bubbles and chips and seam at the base of the C pillar and boot and also boot to valance stripper disced back but no holes, so thats nice, still have to bog it back up again all the same. Anyway thats boring no pics. First holes are in the sill below the rear door, you can just spot a butt weld where i previously replaced the section forward of here: Still nice and solid and clean where i got paint in: This is why you should always do it properly - i tried filling thin spots last time and it doesnt work long term... a bit of CAD and then to the machine shop! And then in lots of time at all, BAM! a bit o primer for appearances sake, tends to catch on fire and contaminate the weld if it gets hot Nice! (this never happens the first go) tack tack tack tack tack tack tack tack tack tack grind then DA, done, and next bit1 point
-
and the wheel arch, there is was a 6mm factory hole just inboard of the tub seam in the apex of the guard for a plastic fuel line clamp to mount. Good one. I have also been here before, check out the thickness of the wob (thats me!) on the right over my last patches and the paint archaeology on the left inner arch repair patches made, getting a solid non popous base for the needed bog skim to join up the previous patches was more important than getting it perfect nice and slow tack wait, move, tack wait for less warpy, but also more grindy after skim number 42, its like it never happened apart from the offerings of oxide Car is now turned around with much the same to do on the passenger side, aiming for drag day1 point


This leaderboard is set to Auckland/GMT+12:00