
Leaderboard


Popular Content
Showing content with the highest reputation on 09/16/19 in all areas
-
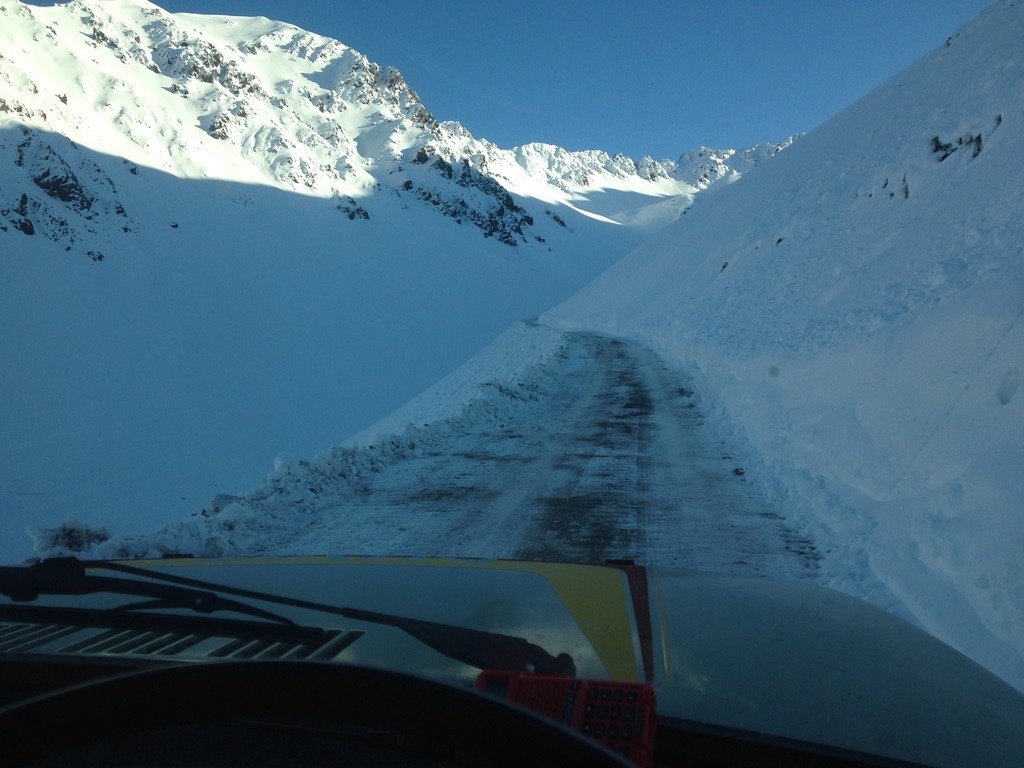
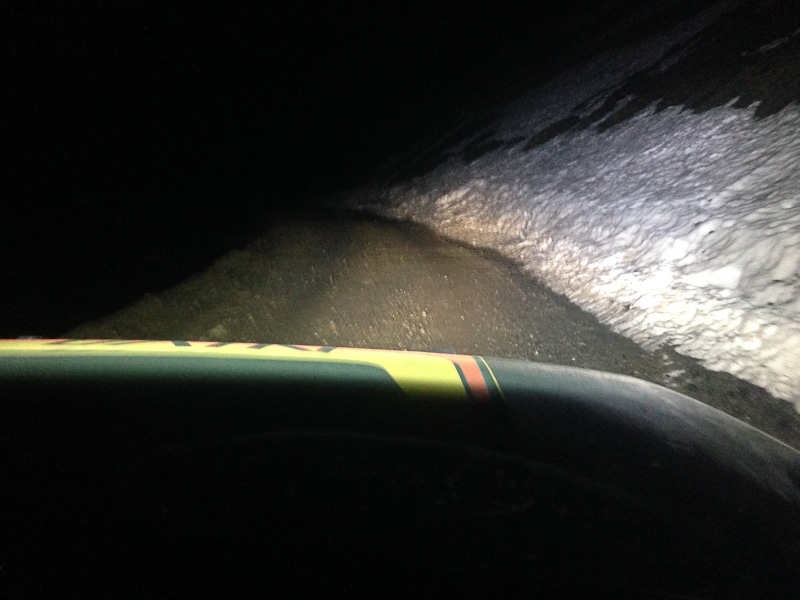
We’d decided we were going to tackle 42 traverse. Which was a great choice for a shakedown ride imo. Adventure50 handled it quite well, 4t motor is just lazy and loves being held wide open to bounce up obstacles. Did a few jumps, bashed through a bunch of puddles, and succeeded at most hill climbs (let down by lack of rider skill mostly) apart from the really wet slippery clay ones (like picture) due to lack of tyre grip, as the SR241 trail tyres just clogged up. Cleared instantly though once back onto the more solid bits of the trail. relocating the airfilter into the frame was good, as it increased the wading depth. However we still had to carry/float the bikes across as a section of this was mid thigh deep. Even made it up to see some snow only issue on the day was I lost the exhaust nuts -my fault for not double nutting/using lock nuts. And could go for some firmer front springs as it bottoms out fairly easily. / less bent fork tubes might help too. however we only did 42 one way as on the way back Andrews bike broke and we had to walk it out. So I need to go back to ride it both ways again. #cape13 points
-
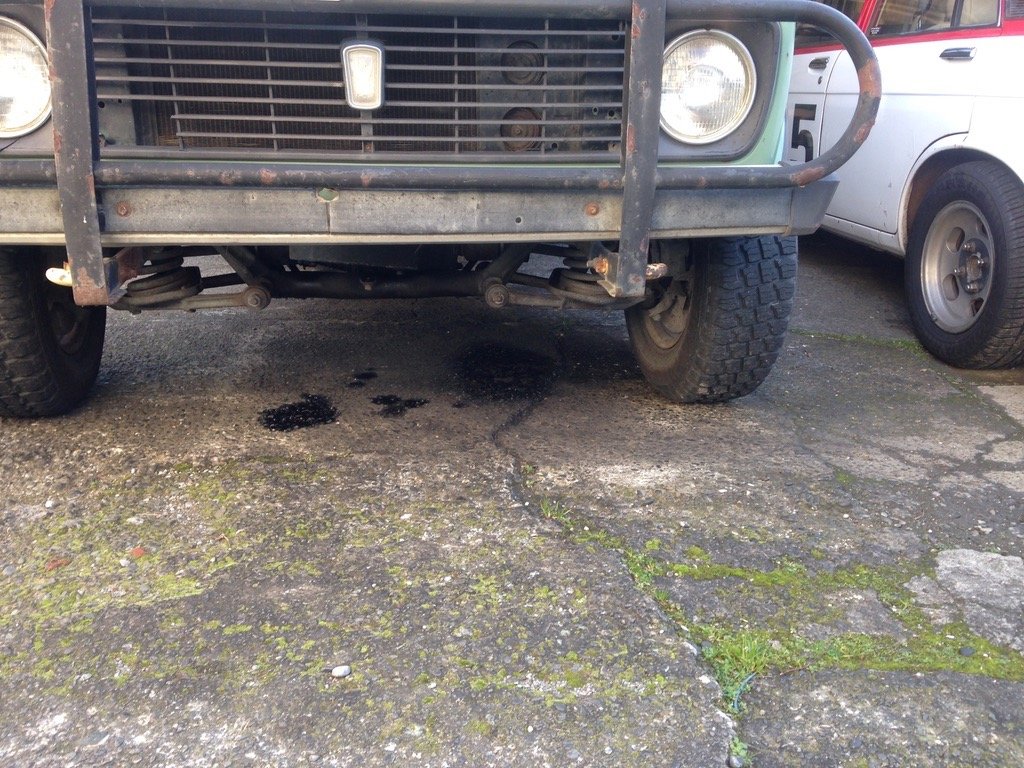
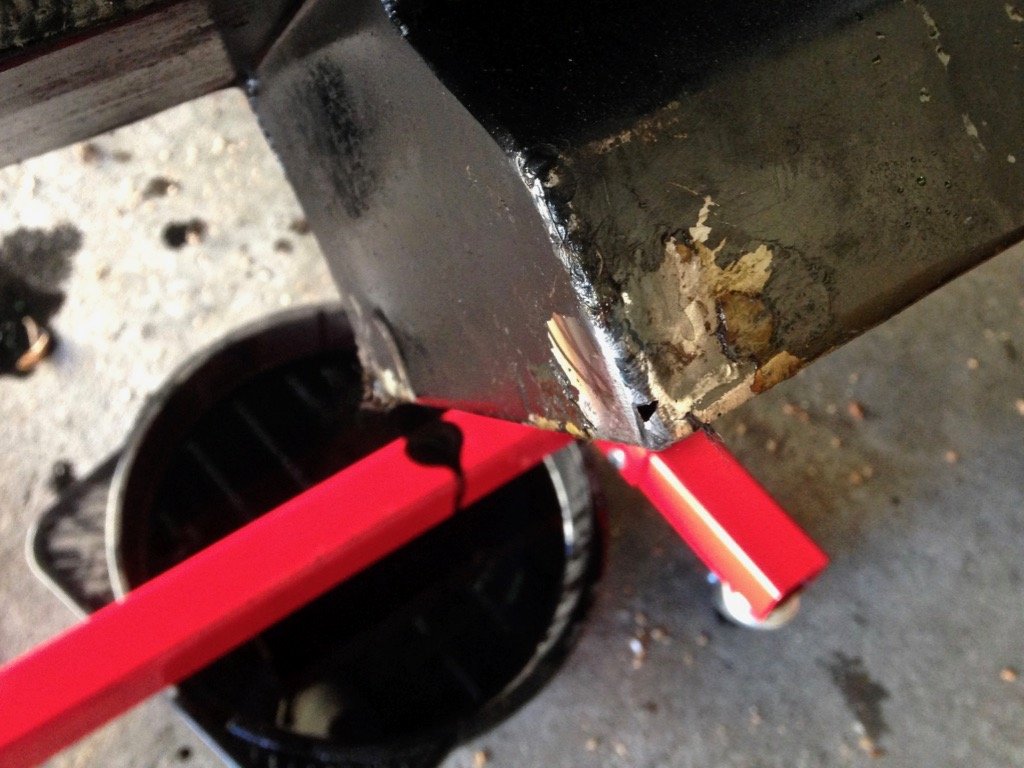
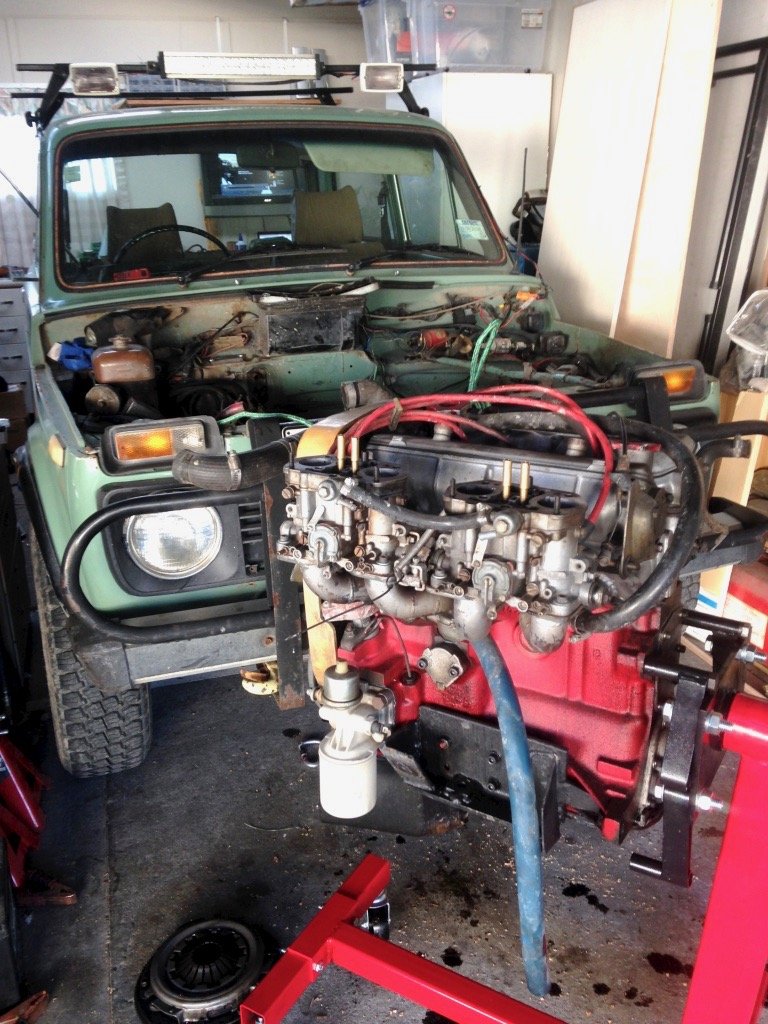
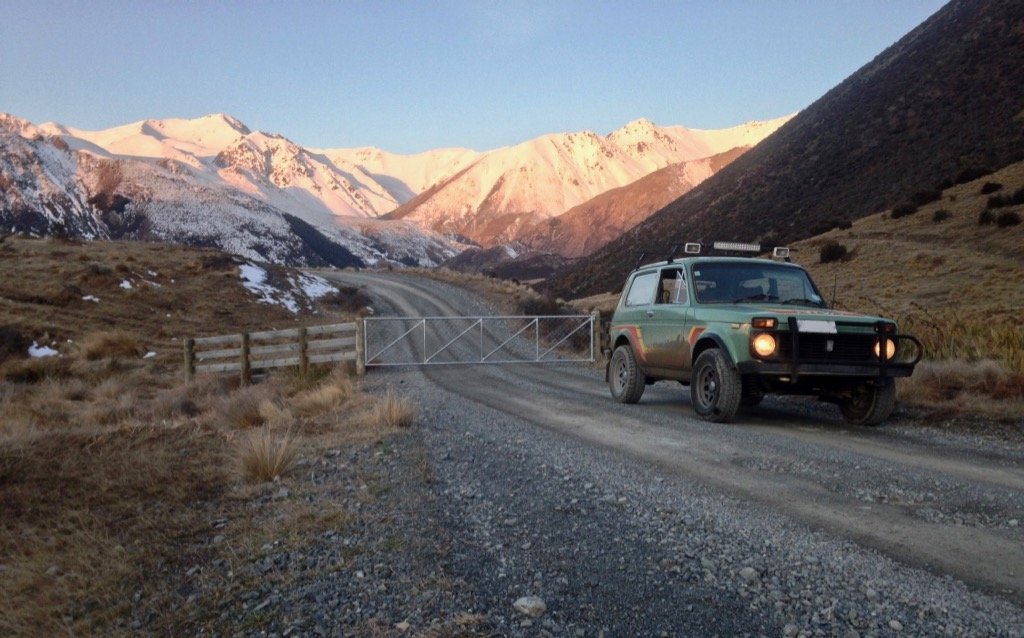
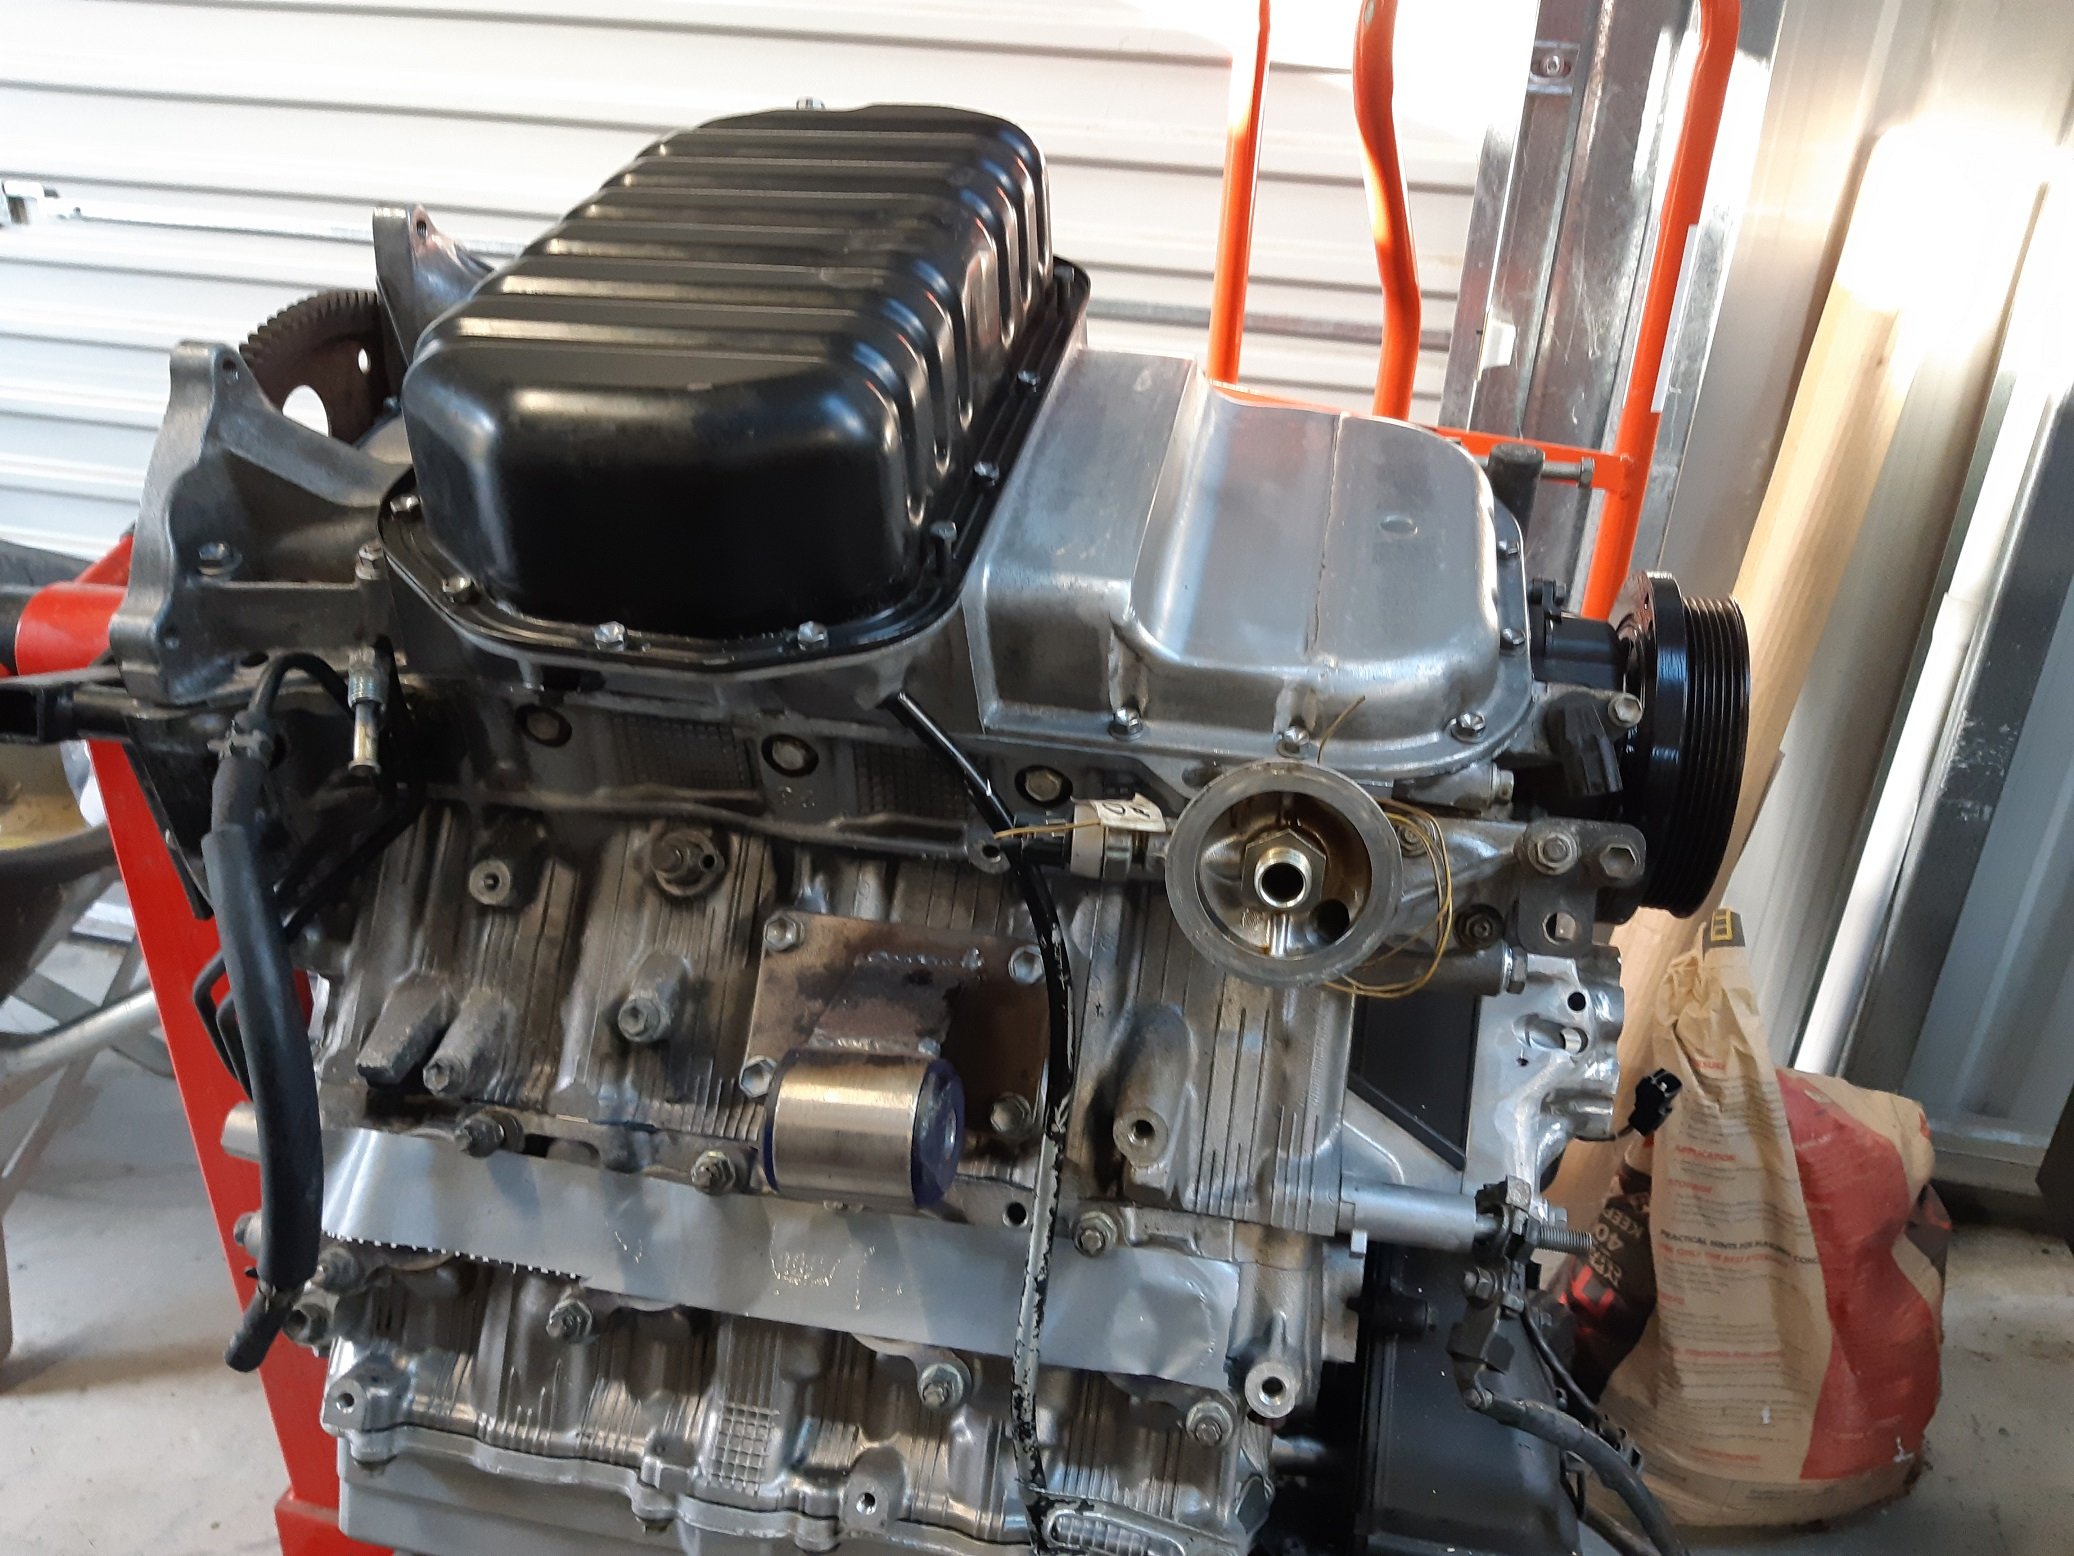
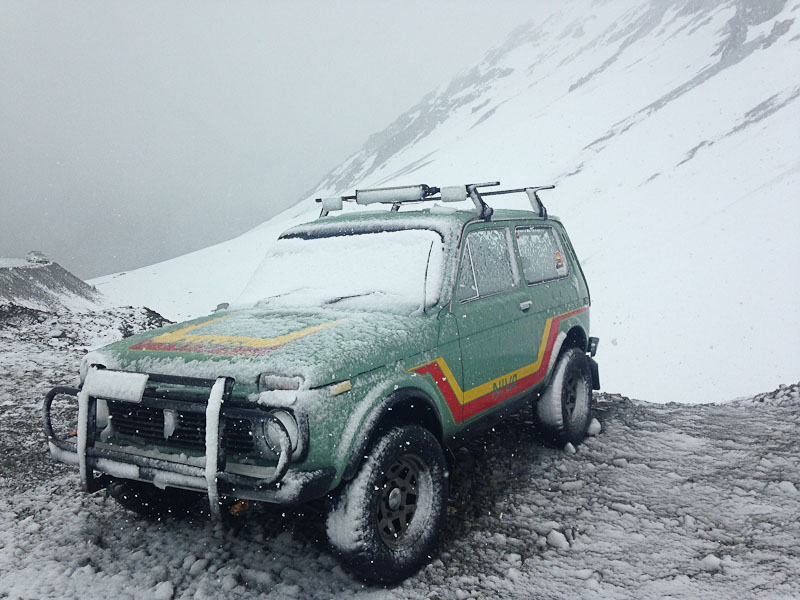
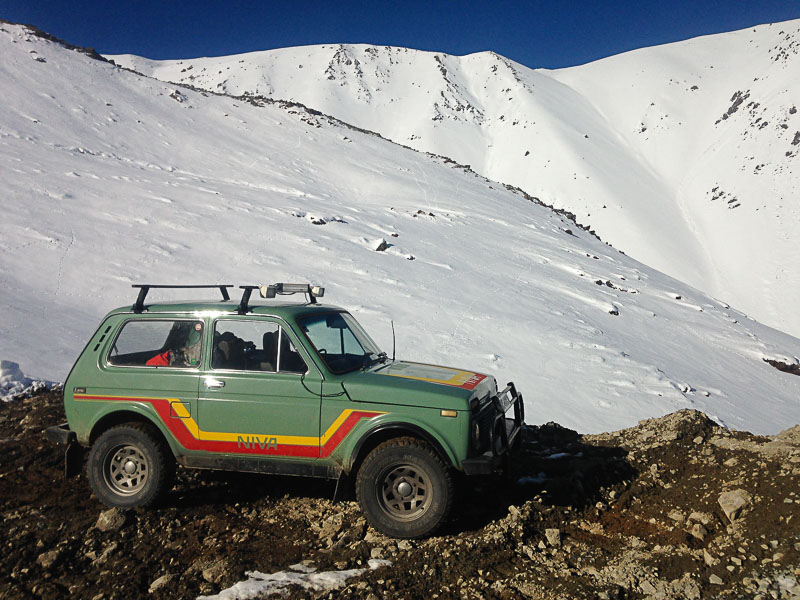
And nearly a year later...... Oil leak finally got to the point of Greenpeace protestors chaining themselves around the car..... Finally got around to setting up the electric winch I brought off @HKM400 ages ago, wish I had one of these since day one, engine removal was a breeze! Turned out the diff mount had been rubbing on the sump leaving quite a hole, once again the lada gods smiled as it also made a reasonable job of blocking the hole. With the engine out I modified the sump to have more clearance and TIGed up the hole in time for a trip to the hills. Always fun taking the Niva up into the snow Also surprising that i've put chains on it twice this year, that doubles the number of times its had chains in my ownership!
 10 points
 -
Finally got the sump back on. Remembered that I had another set of bolts when I bought the sump so I cleaned them up.
8 points
-
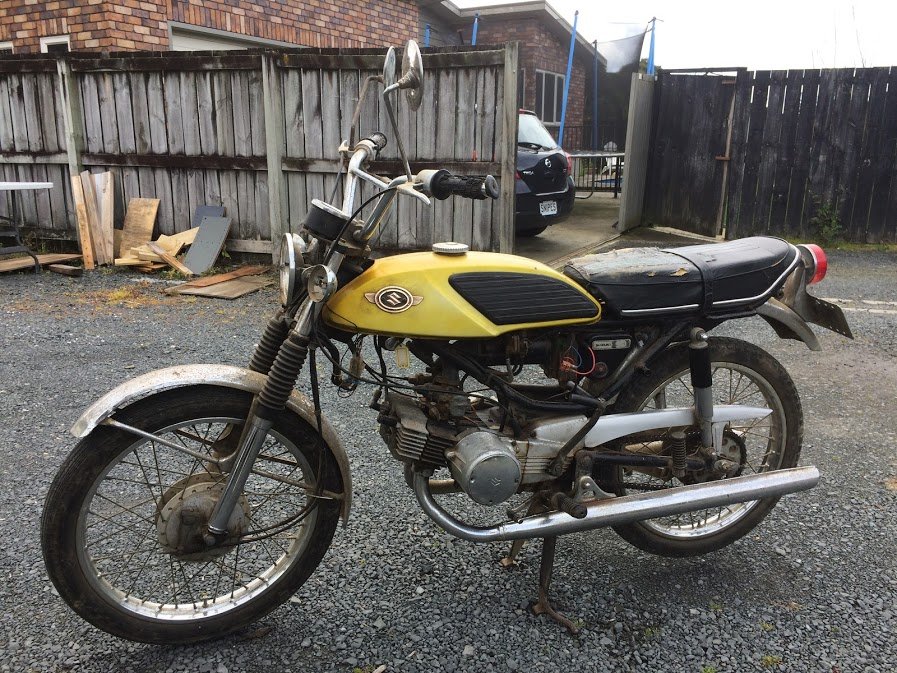
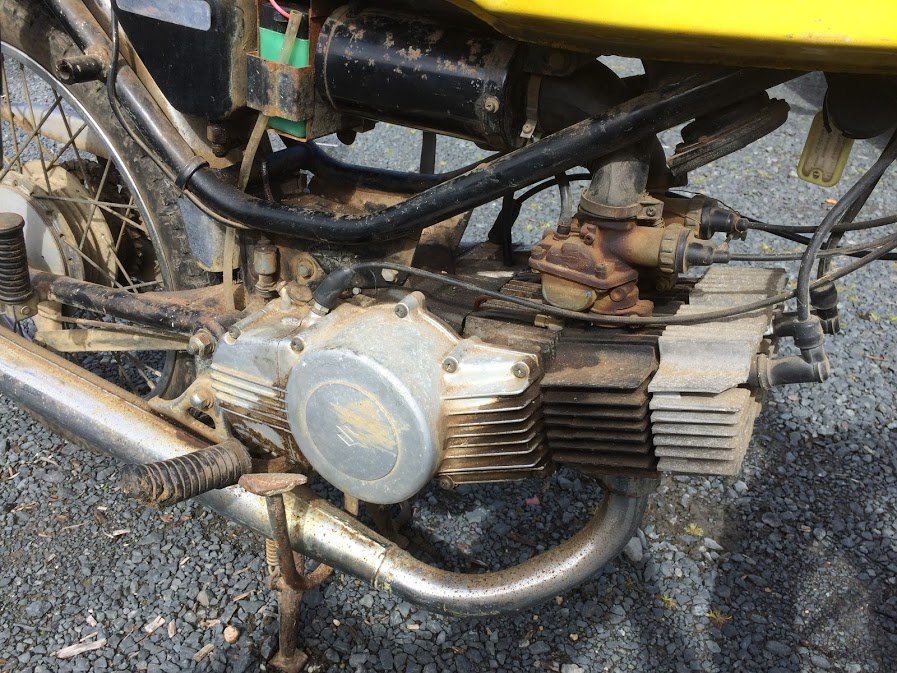
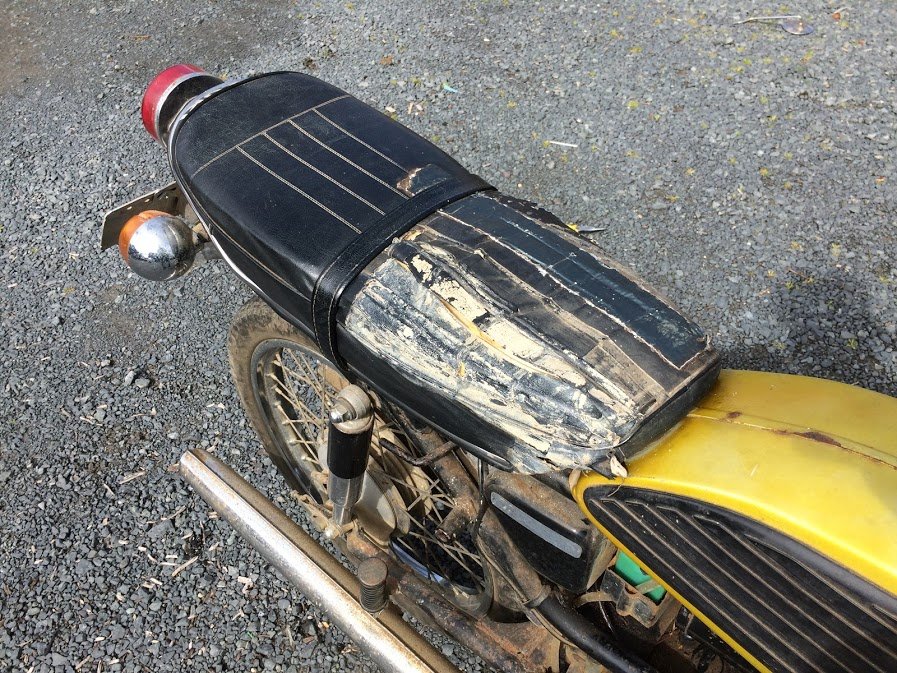
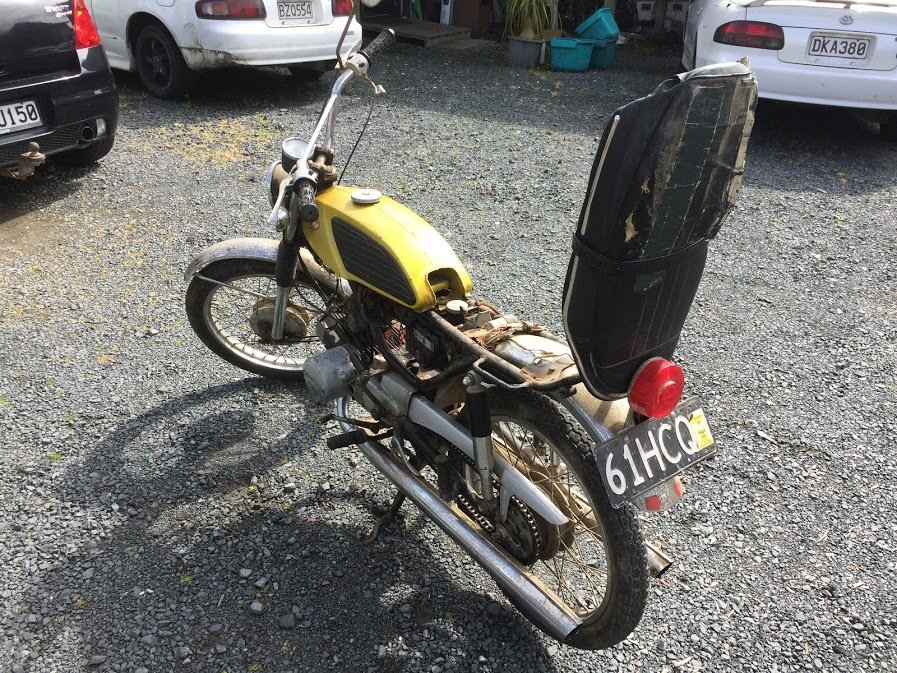
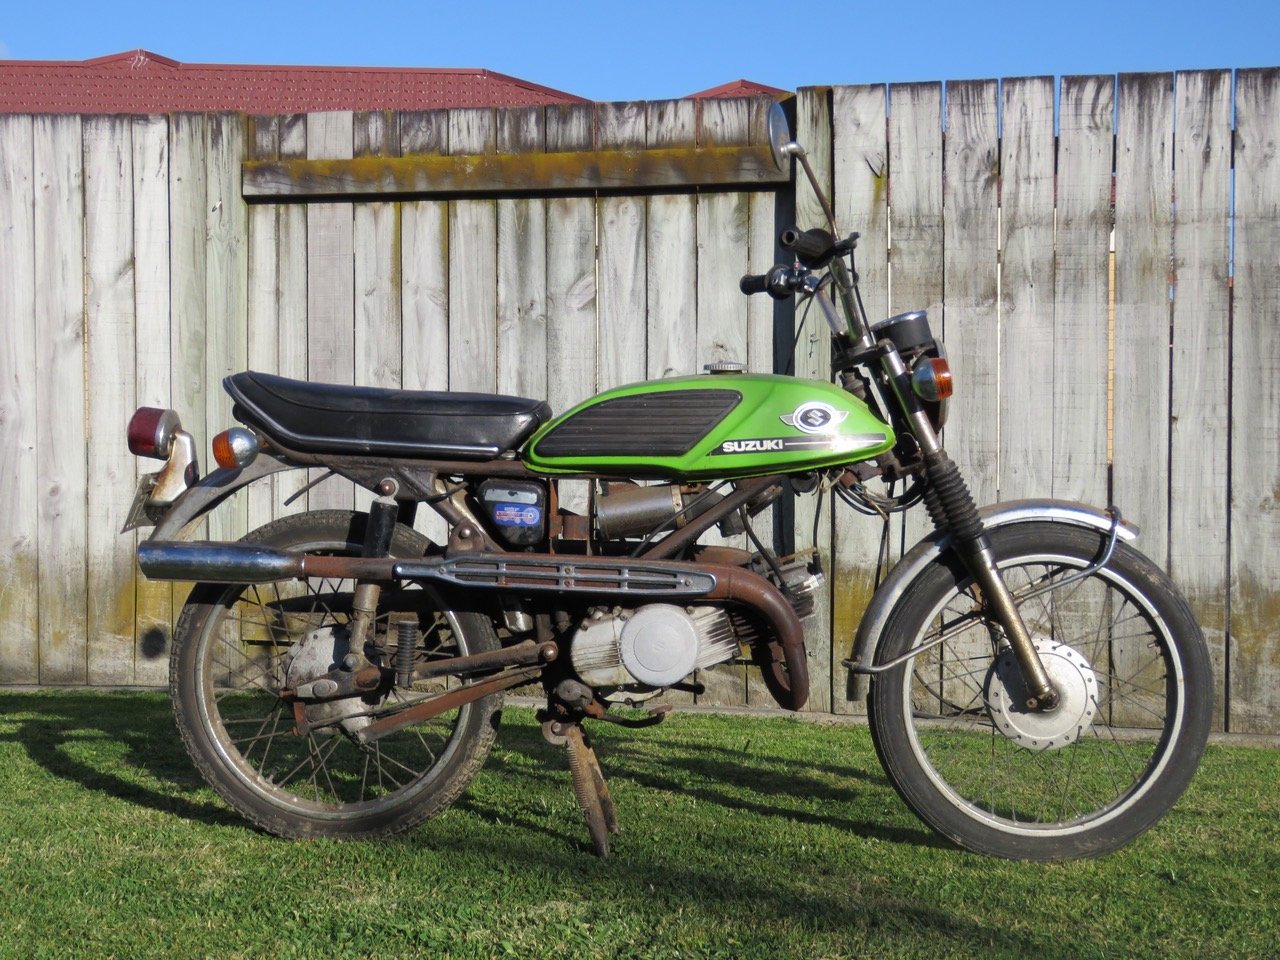
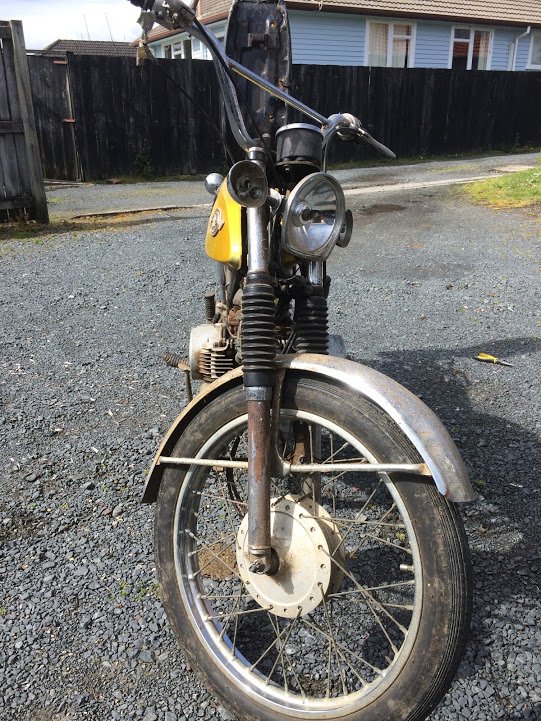
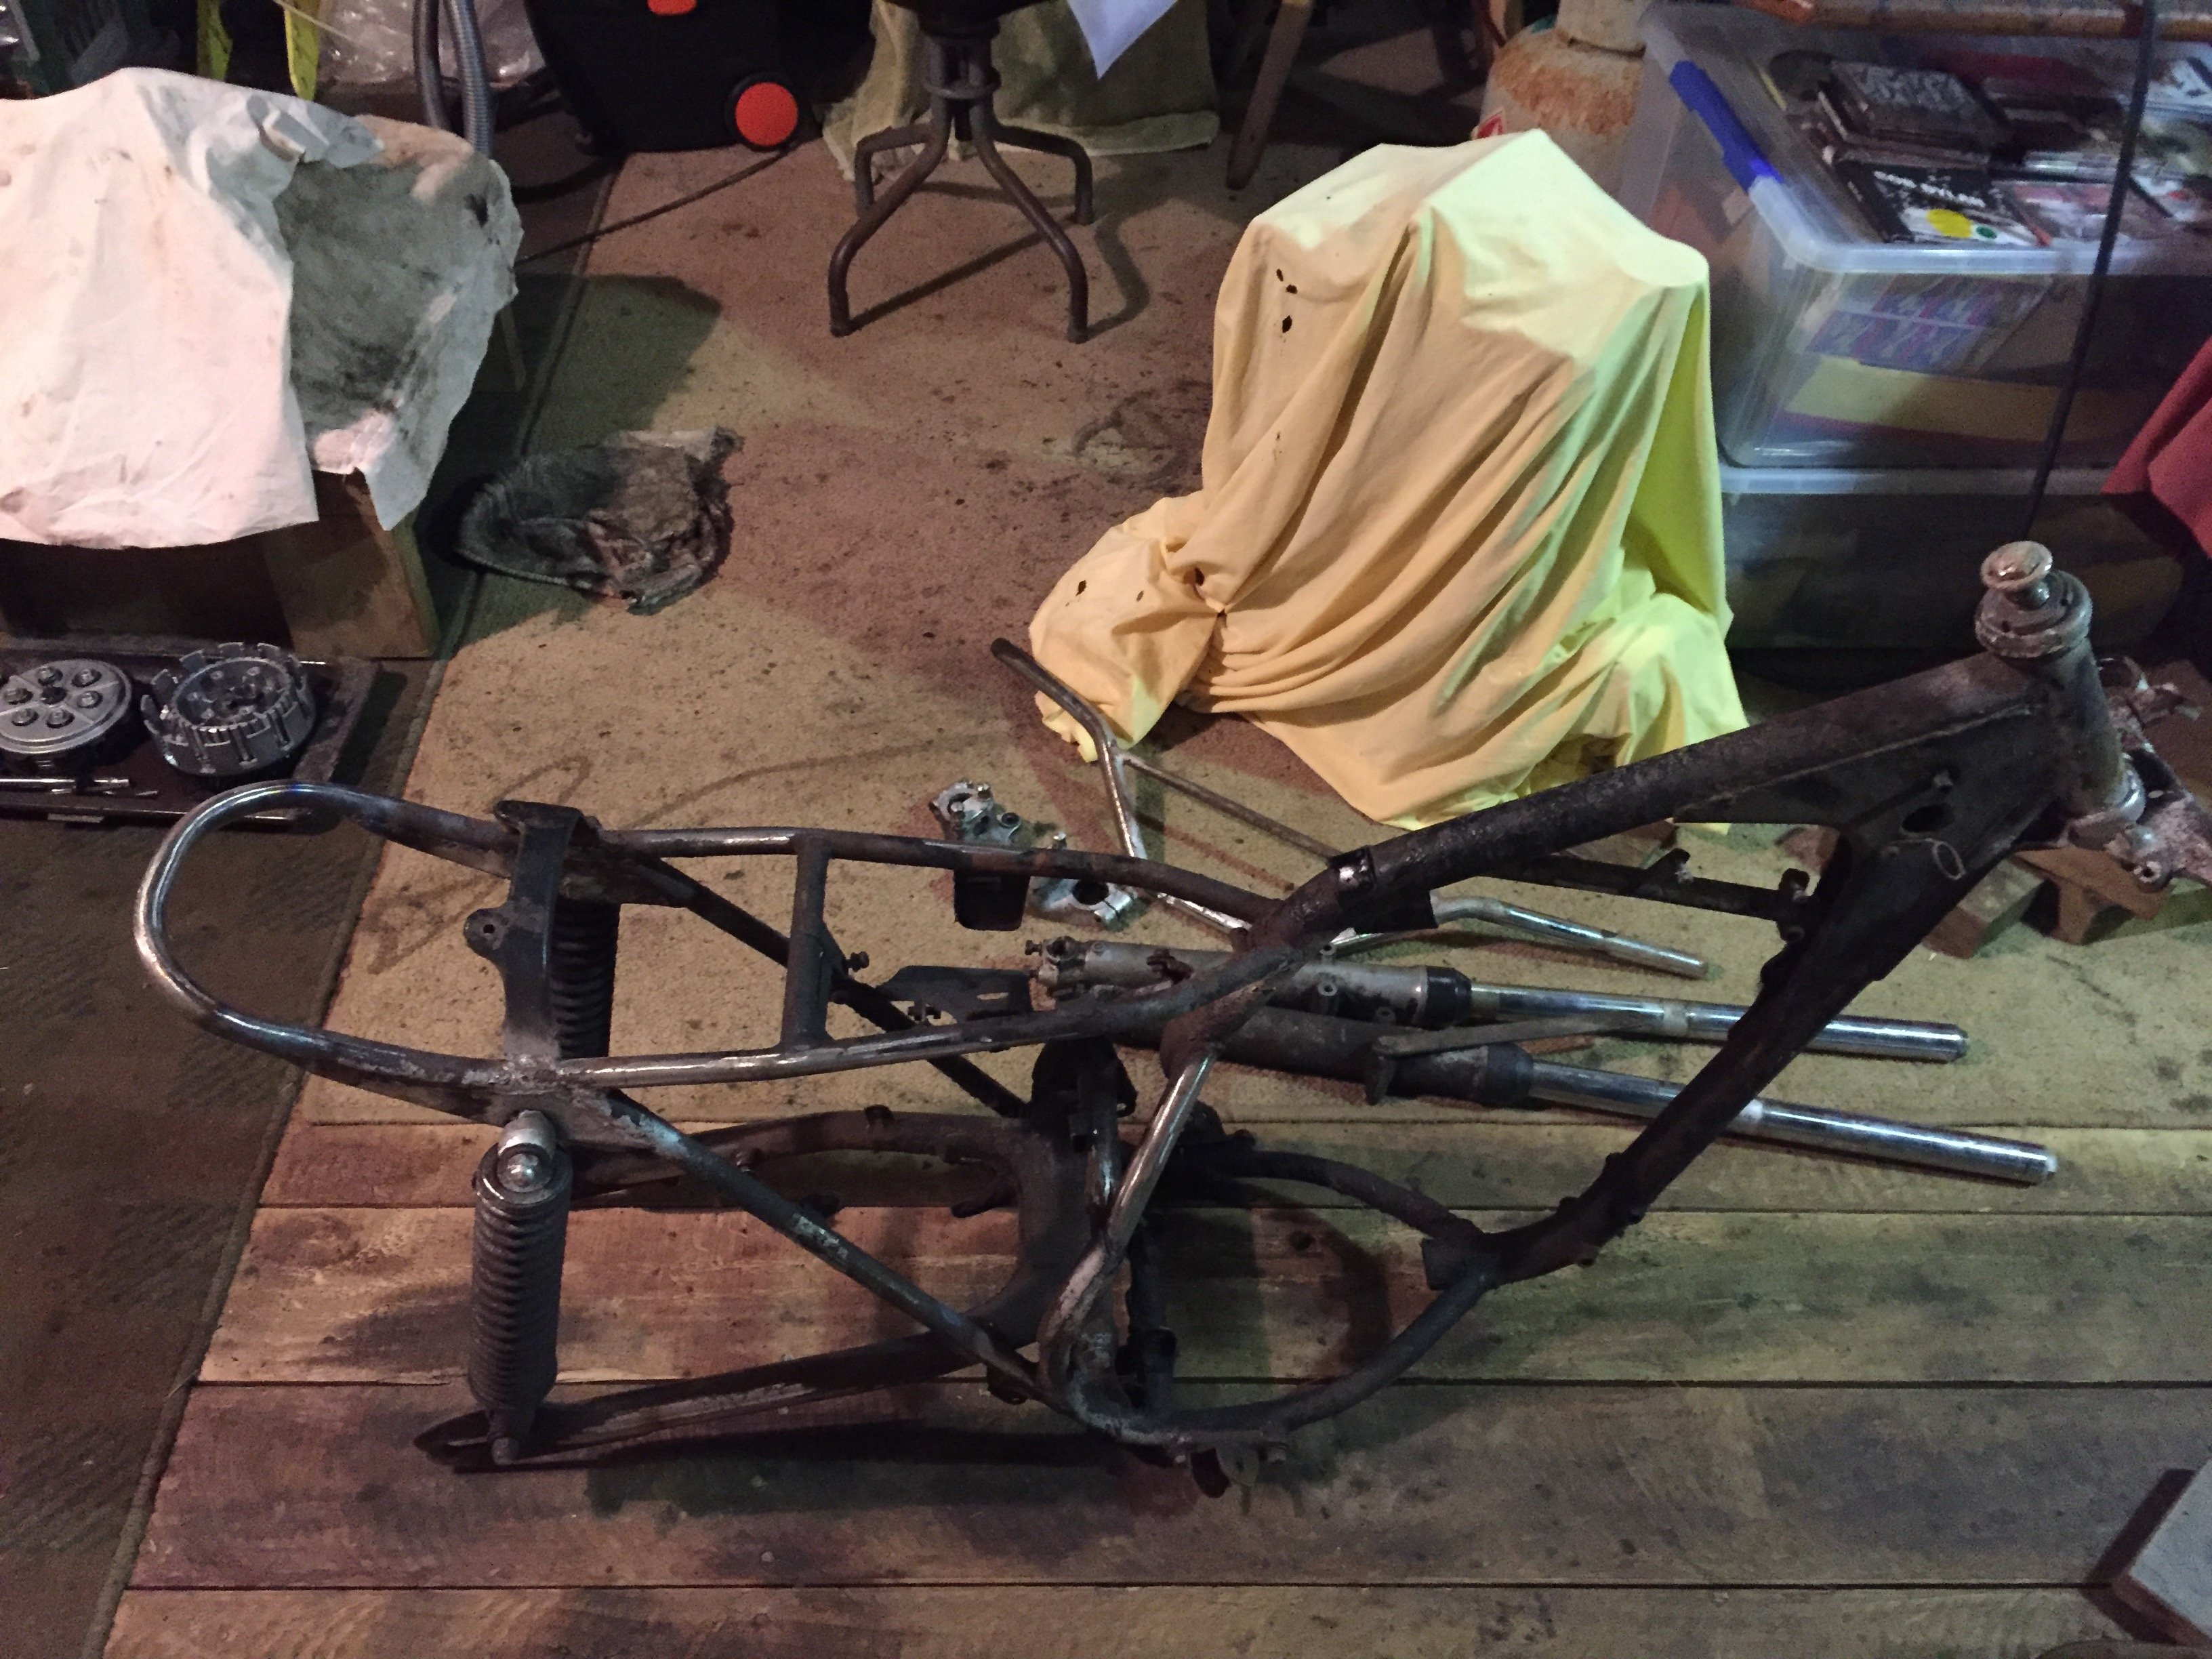
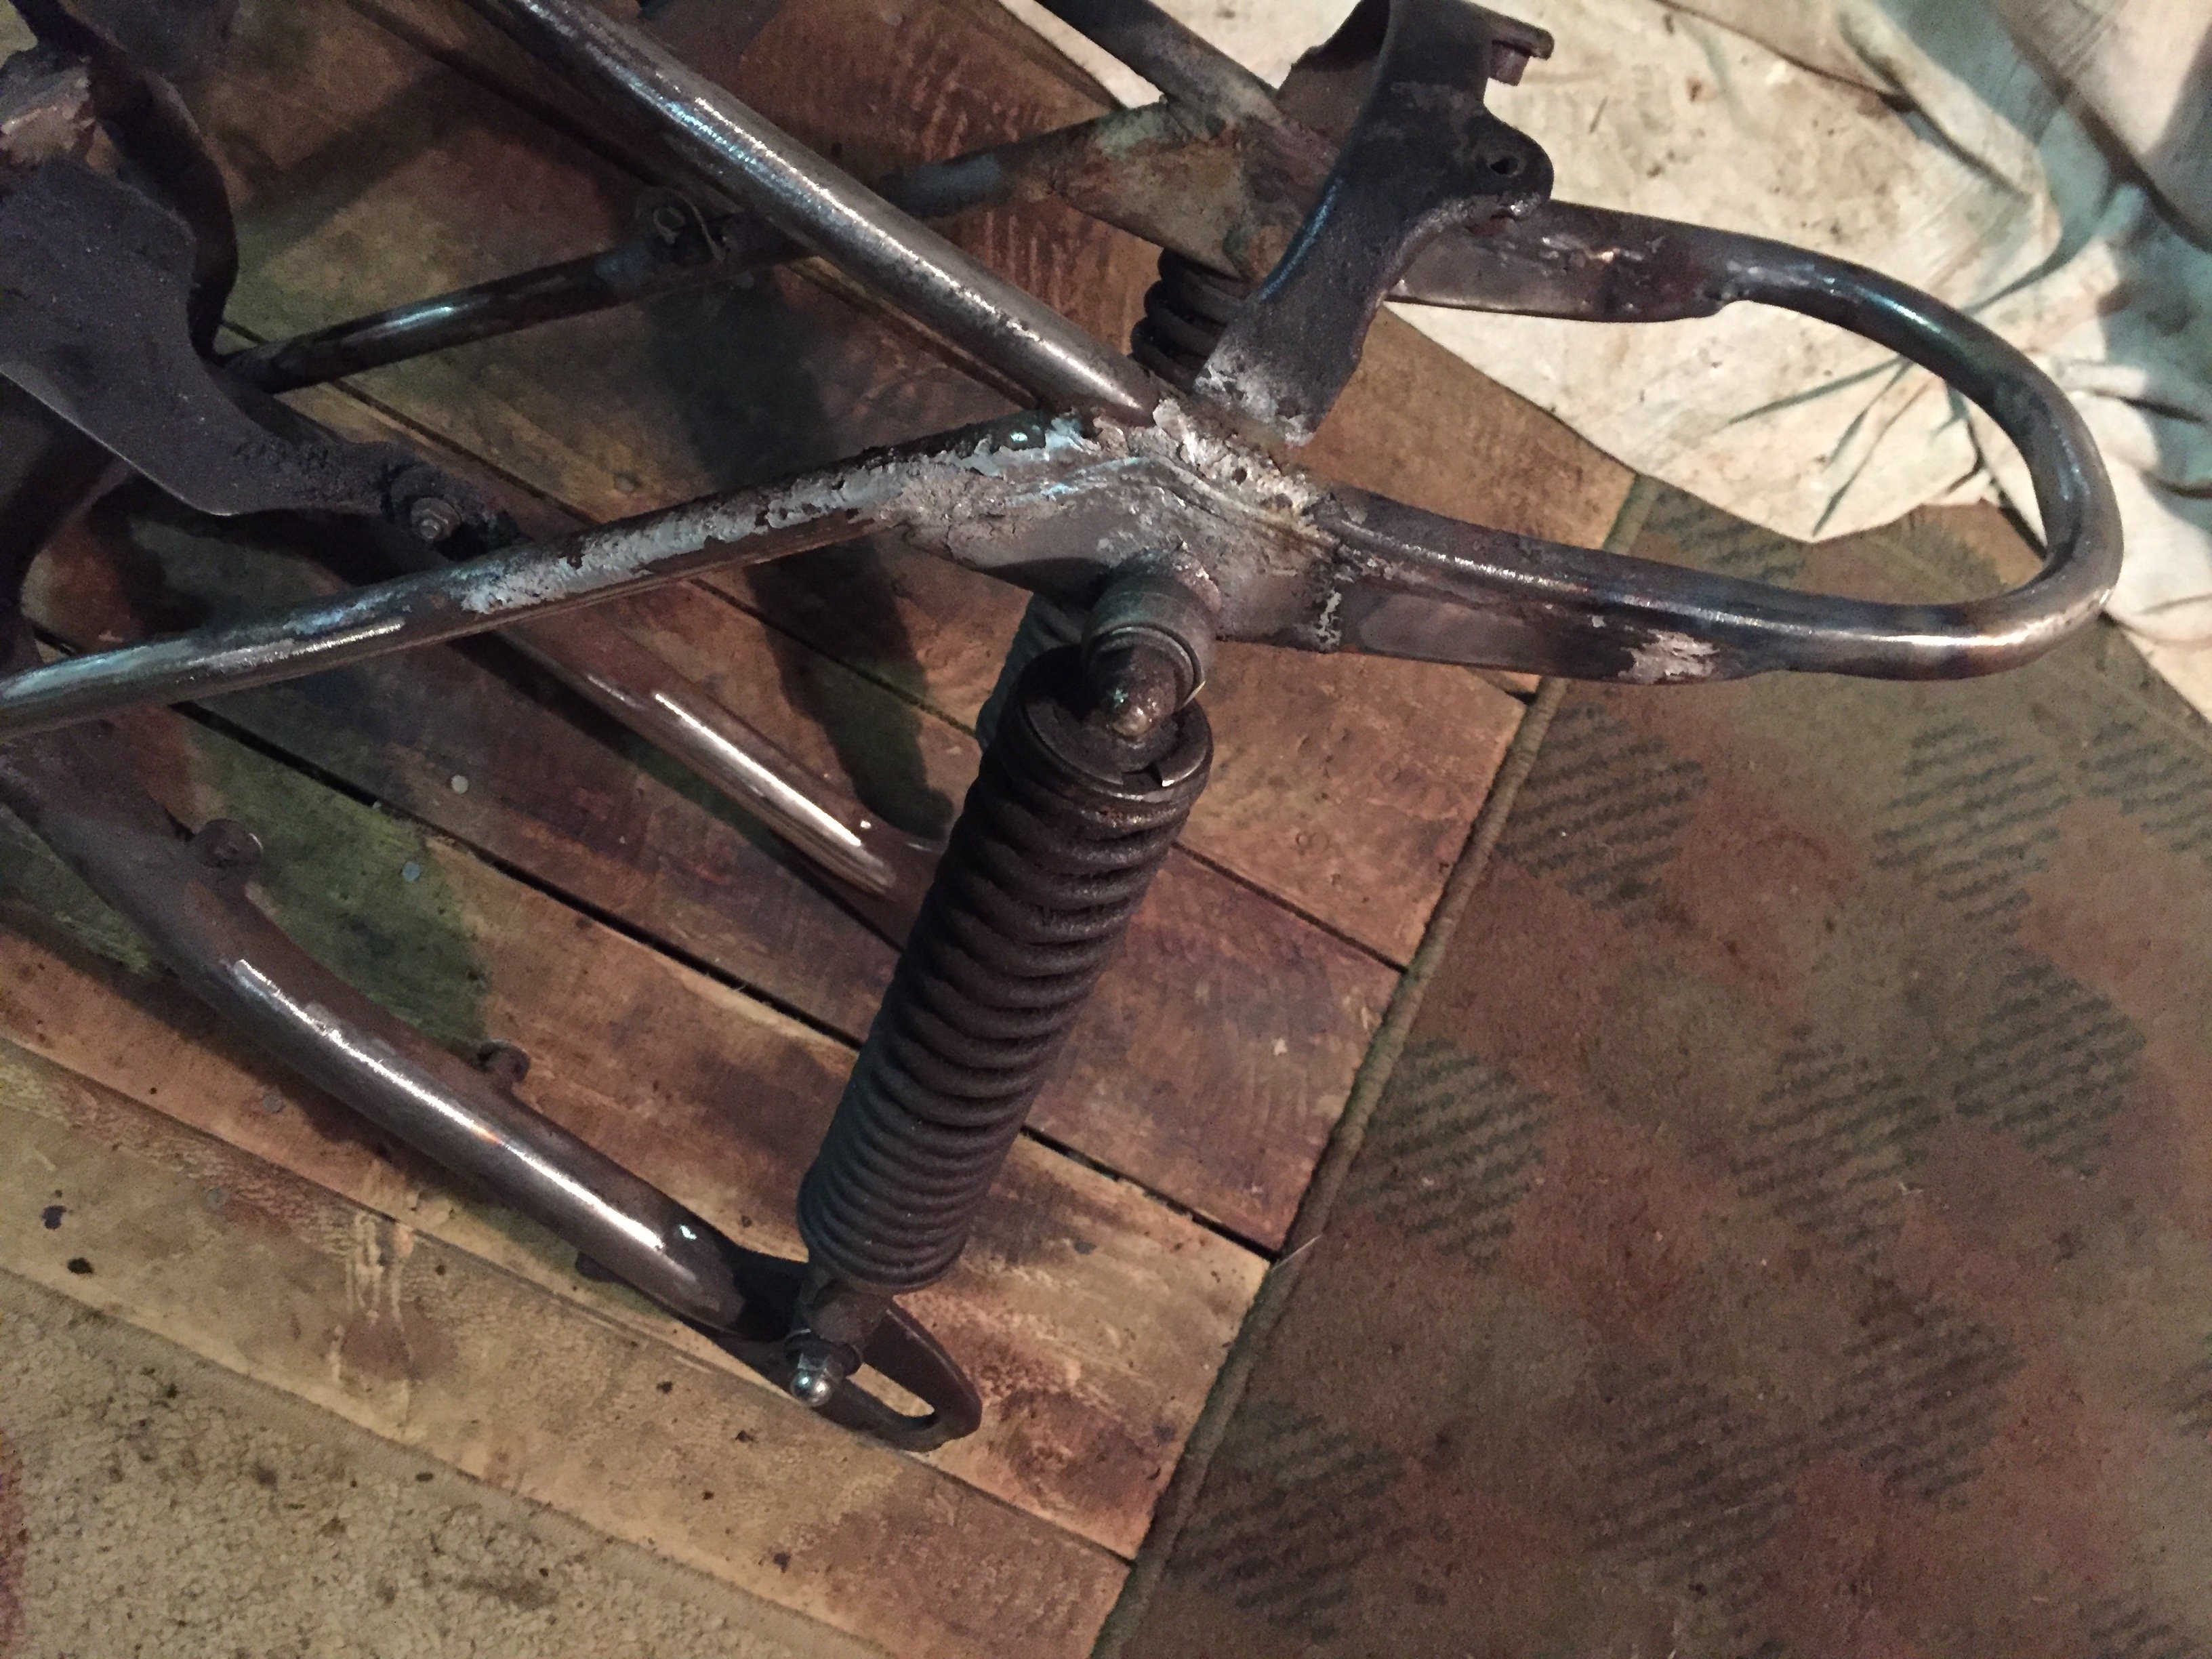
This year has been a real rollercoaster. I've had far too many projects on my plate (and a lack of motivation to finish them), not much expendable income and a huge life change with my 5+ year relationship ending... So I've been planning on thinning the hoard, moving somewhere else and starting a new life. So when an old, rare 2 stroke bike showed up, the logical thing to do would be to pass on it. Right? WRONG. Enter the Wolf. This piece of Suzuki engineering is 1969-1971 Suzuki T90 Wolf. It's very closely related to a T125 stinger. My dad and I missed out on a T125 last year and we were gutted. It was a green one in "barn find" condition- but appeared to be missing the carbs: Then a wee while ago, @SOHC happened upon this old T90 Wolf that he and his friend used to ride around 15+ years ago. He said it would be available, so a deal was struck and I went to collect it over the weekend. It's a quirky wee beast and has some cool features like a seat that hinges backwards - I've never seen this style before. The seat has seen better days and needs a trip to midnight upholstery so @64valiant can work his magic on it. The frame, forks and motor are all bit dirty and there's some corrosion, but it's surprisingly good for a bike that's been sitting for this long. It needs a headlight, indicators, speedo cable (the thread is broken on the underside of the speedo unit) and the forks will need a bit of love to deal with the peeling chrome. I think a strip and re-paint will be good enough for starters. Eventually I'll strip this bike down and give everything a proper clean up. The frame could do with a blast and re-paint, the tank needs a small amount of rust cleaned up and a re-spray. Overall it's a very solid bike though! And runs amazingly well for something that's been sitting in a barn. All it took was a bit of fuel and it fired into life. Jeah! Rare, old, small capacity, 2 stroke, twin cylinder radness. This should be fun.
6 points
-
So I had a short list of things to sort after the last test. First was to make a more permanent restrictor, before the tape went through the carbs. I did lots of math to work out the area, and made a stainless restrictor, but just fitted it temporarily in case it was wrong. Turns out it doesn't work as good as the tape, so will try again. I also redid the top of the brake pedal, to try get more swing/feel. Seems to be a bit better/good enough. Did a bit more of the wiring/cleaned a bit of it up, and mounted the magic boxes. I'm waiting on some components to arrive from China so I can finish this and the dash. Speaking of dash, I started making a new one, with new switches and shit. Waiting on new warning lights to show up. This is the same shape as the hood. I also made a new front panel. It's made of thicker steel than before, with more bars and more mounts, so should be nice and strong. I also fixed a few other bits and bobs, and adjust a few other items. In testing today I discovered the sprocket is still coming loose, I think it's because the axle was welded together under the sprocket (it broke years ago because there was no center bearing) and is slightly undersized, and the key ways are a bit flogged out. I was going to re-key the axle and sprocket a size bigger to see if it would stop it coming loose, but while doing beach donuts, it snapped the axle. So I'll just make a new axle from scratch out of 4140 center-less ground. Luckily I purchased a 4wd last week, and I sighted this very occurrence as my reason for needing one. We managed to drag the offroader back to the trailer with a jammed rear wheel. My fucking sweet rig, Broken, Aftermath, Shitty vid of today's efforts: Regards, VG.6 points
-
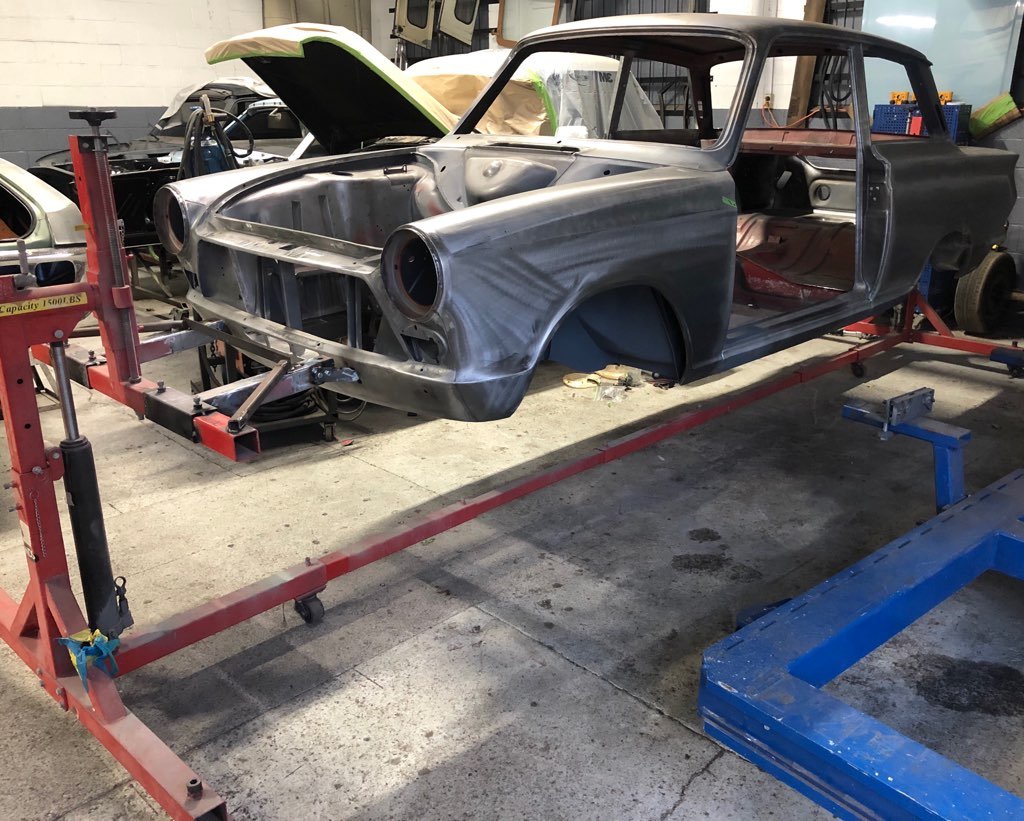
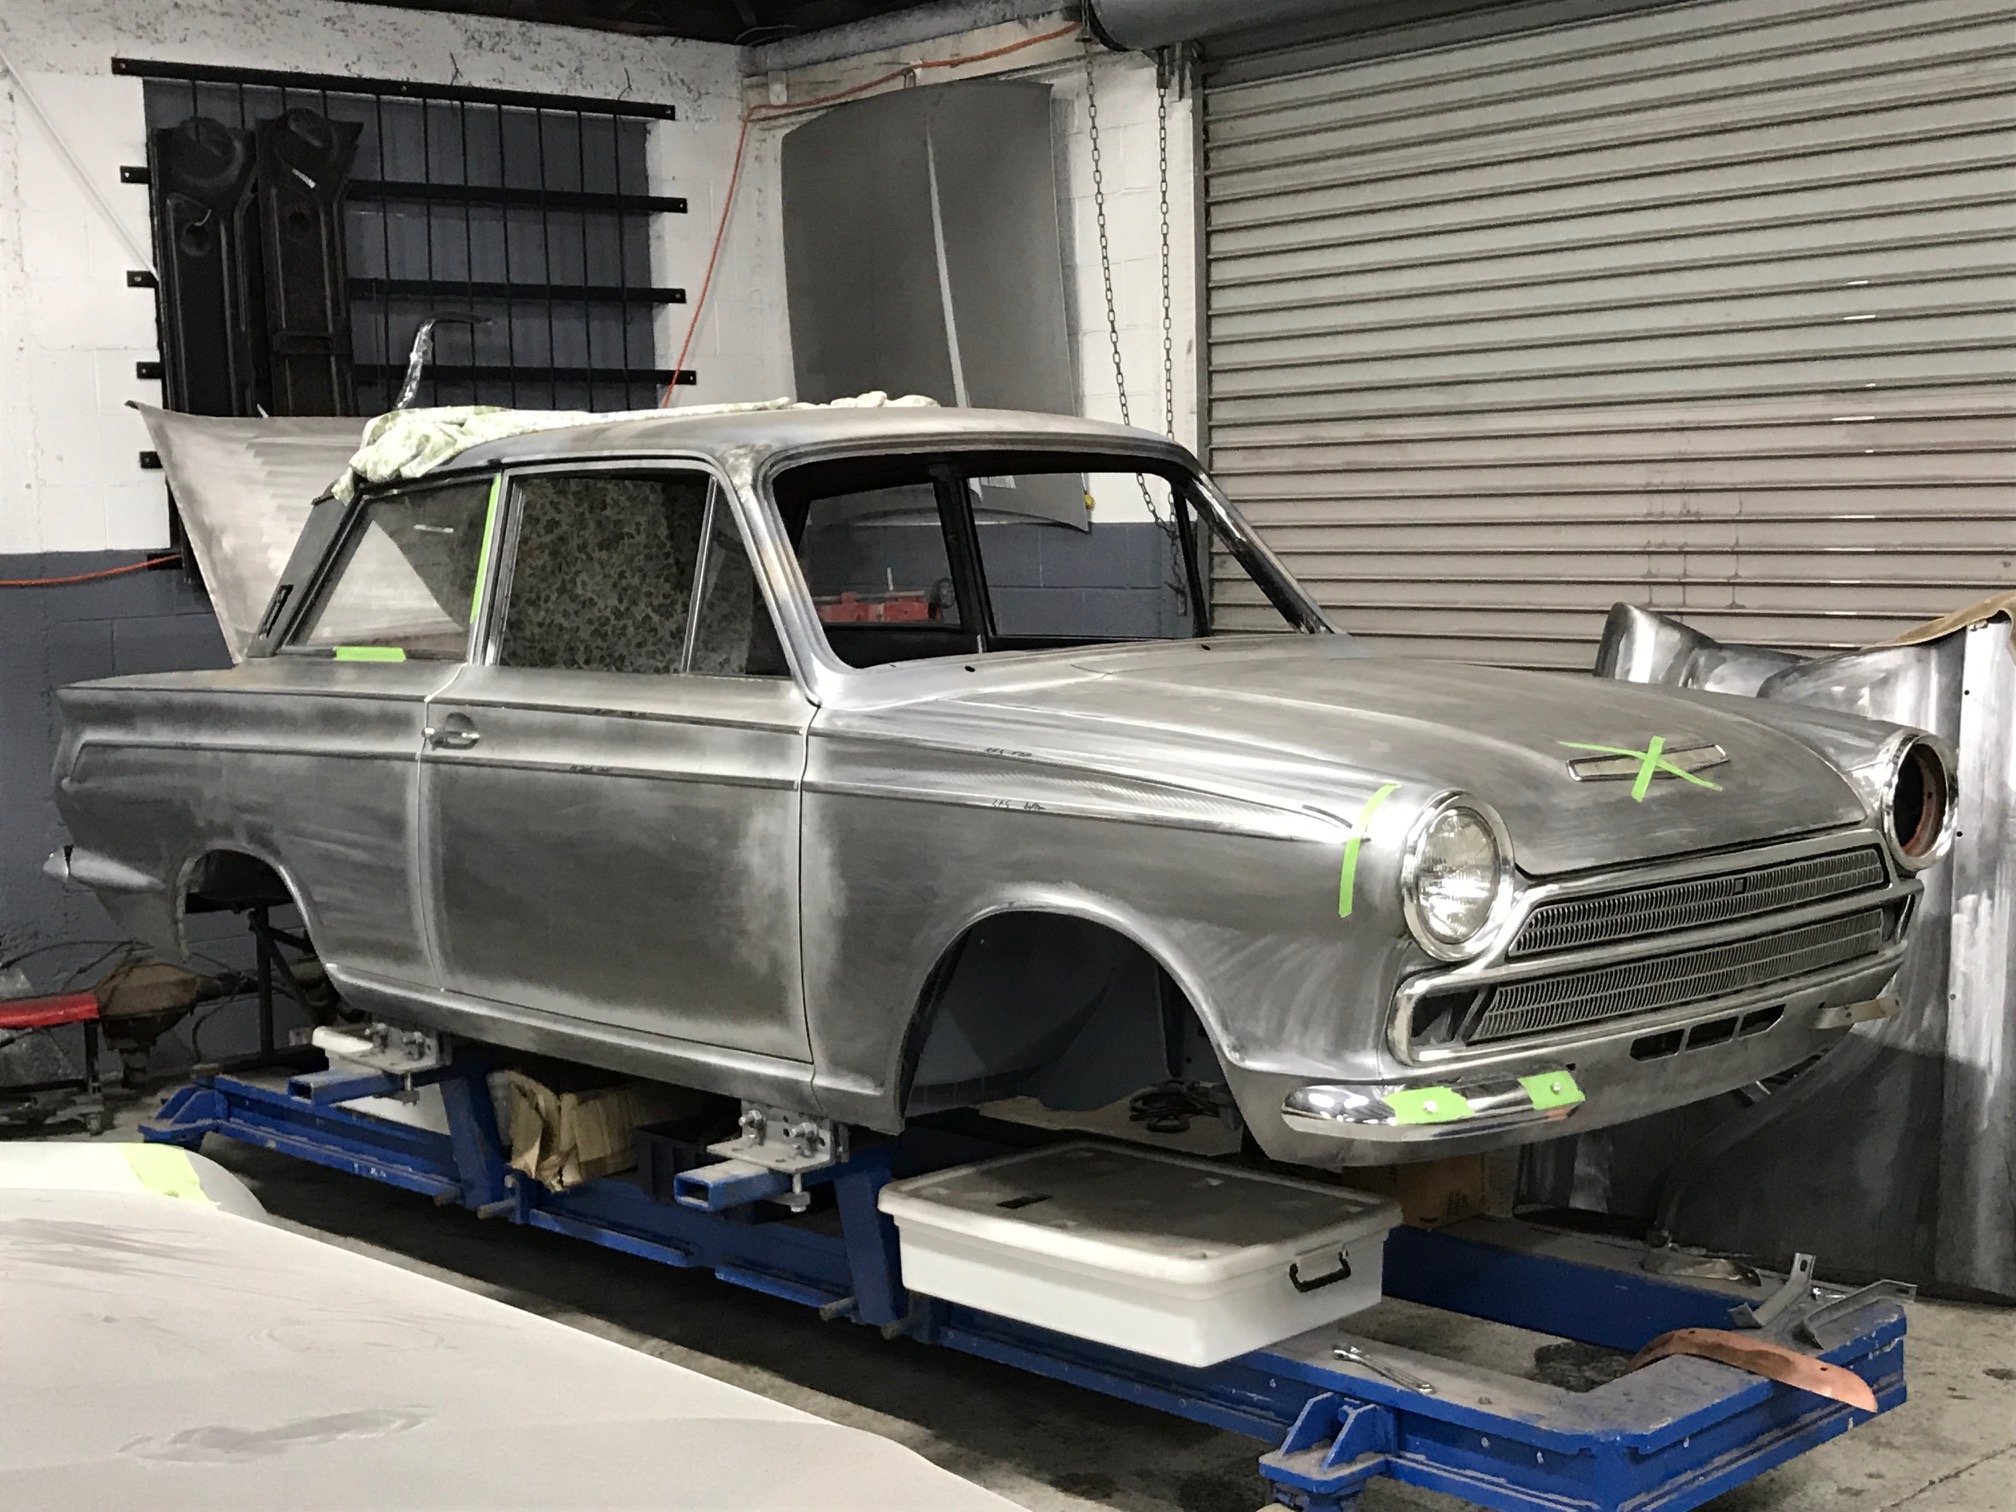
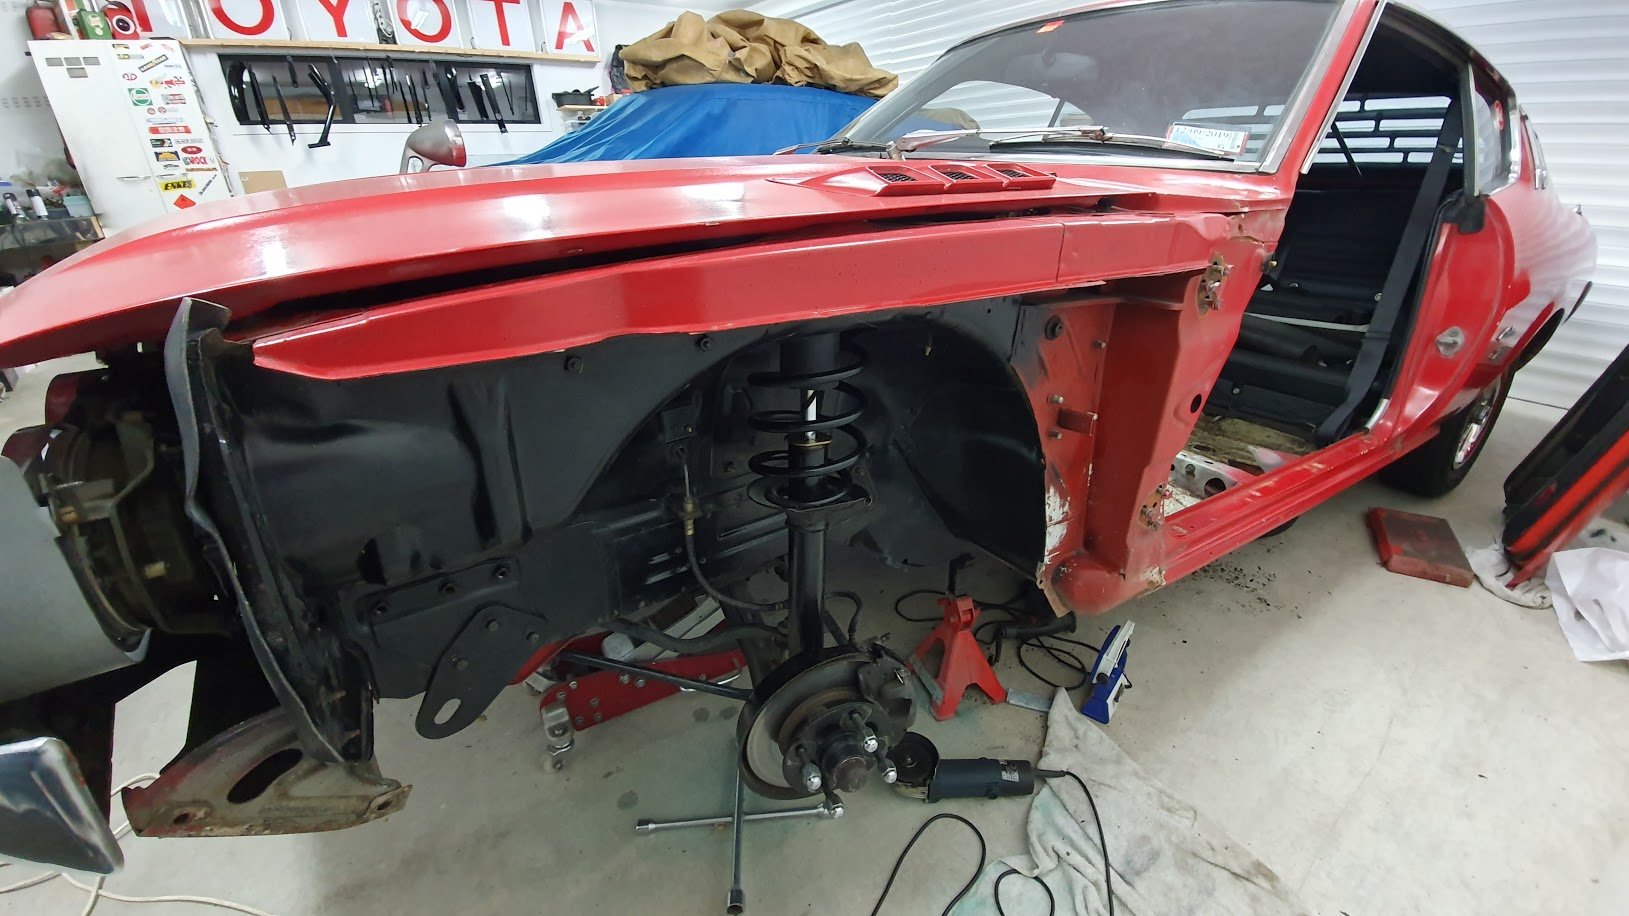
Off for the final blast, then refit the bonnet, doors and boot lid and then off to paint woohoo
5 points
-
It was sunny, so I painted... Getting ready for assembly, I need to pull the cones to replace with some better ones I have here. Also, found a set of new shocks that I received from somewhere.... #biwinnning
5 points
-
One of the things i was busy with was a job interview, and i only bloody got it, so gotta prepare for shifting everything 1400km south So gotta get this thing ready to be transported, or maybe enven driven. So to access the drivers side mans turning it around. It only fired up and drove down the driveway and a lap of my test track, and even did a wee skiddy on the way up the driveway I uncovered this in the rear door in 2017 when i derusted this side. What the hell. There were a few other blebs on the outside and bottom so ive swapped the handles and interior stuff over to another door Its from the 125 i wrecked from Levin, ive used a few panels from it now. Rad stickers and brush painted light blue over midnight blue, actual patina! Fits real good I will repaint the rear quarter, front a-pillar and a couple of other minor primer spots on the body but im not touching the rear door so to the front door i think its more effort fixing the rust (and all the bloody bog and sanding that goes with) in the front and rear lower corners, and elsewhere, and the hinge is a bit worn or bent. so ill swap the interior of this over to the light blue front door to match the rear. It isnt much better shape really, but might fit and close a bit nicer.5 points
-
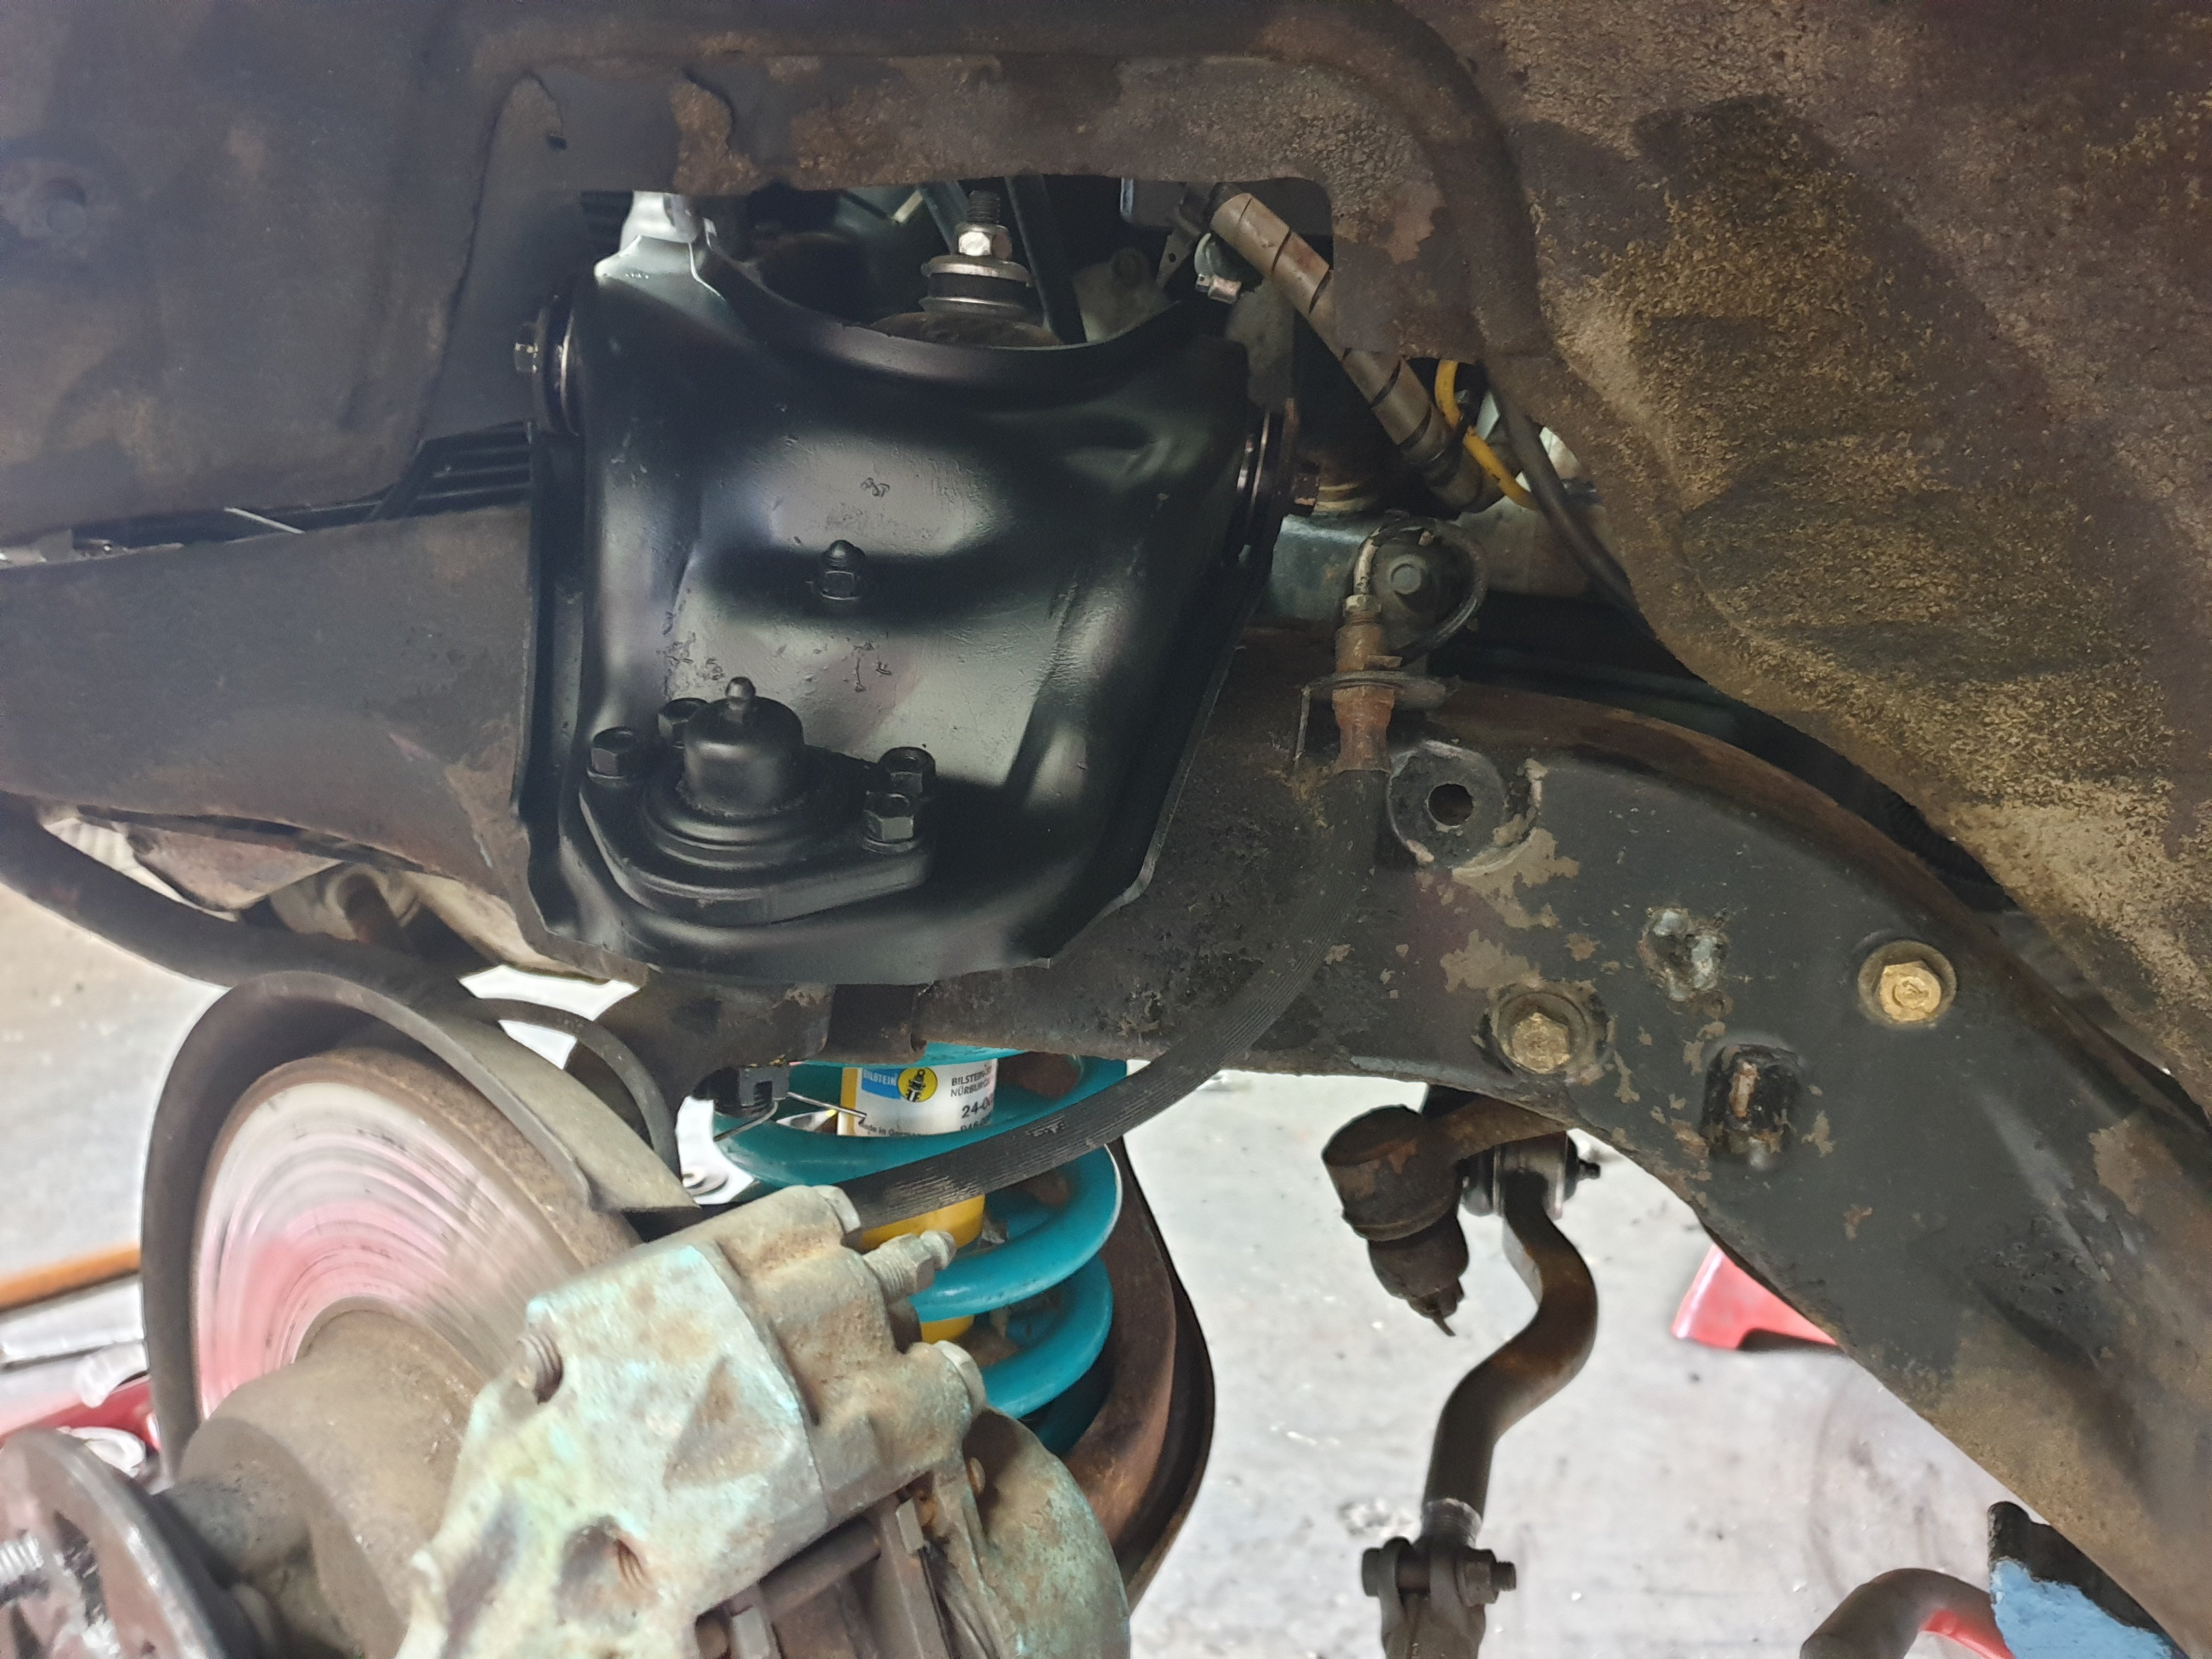
Righto, so ive been driving this to work every day for the last month ir whatever. Hasn't missed a beat. Its fucking slow. Fuck me is it slow but that's not such an issue, it's fucking cool and I like driving it. The front end is a bit all over the show If you have to hit the brakes on the motorway so ive replaced all the bushes. Castor arm bushes and upper inner bushes were completely fucked. Im fairly certain they were original ones. I'll do the back next weekend and put thre disk brake diff in at the same time.
5 points
-
So @GuyWithAviators and I impulse decided we needed to go on an adventure, Id wrangled a Friday off work so the date was set. I made a seat just to get by. -hand beaten pan and custom duel density foam, and glued that on. Loaded the bike onto the trailer and shot down to meet Andrew.4 points
-
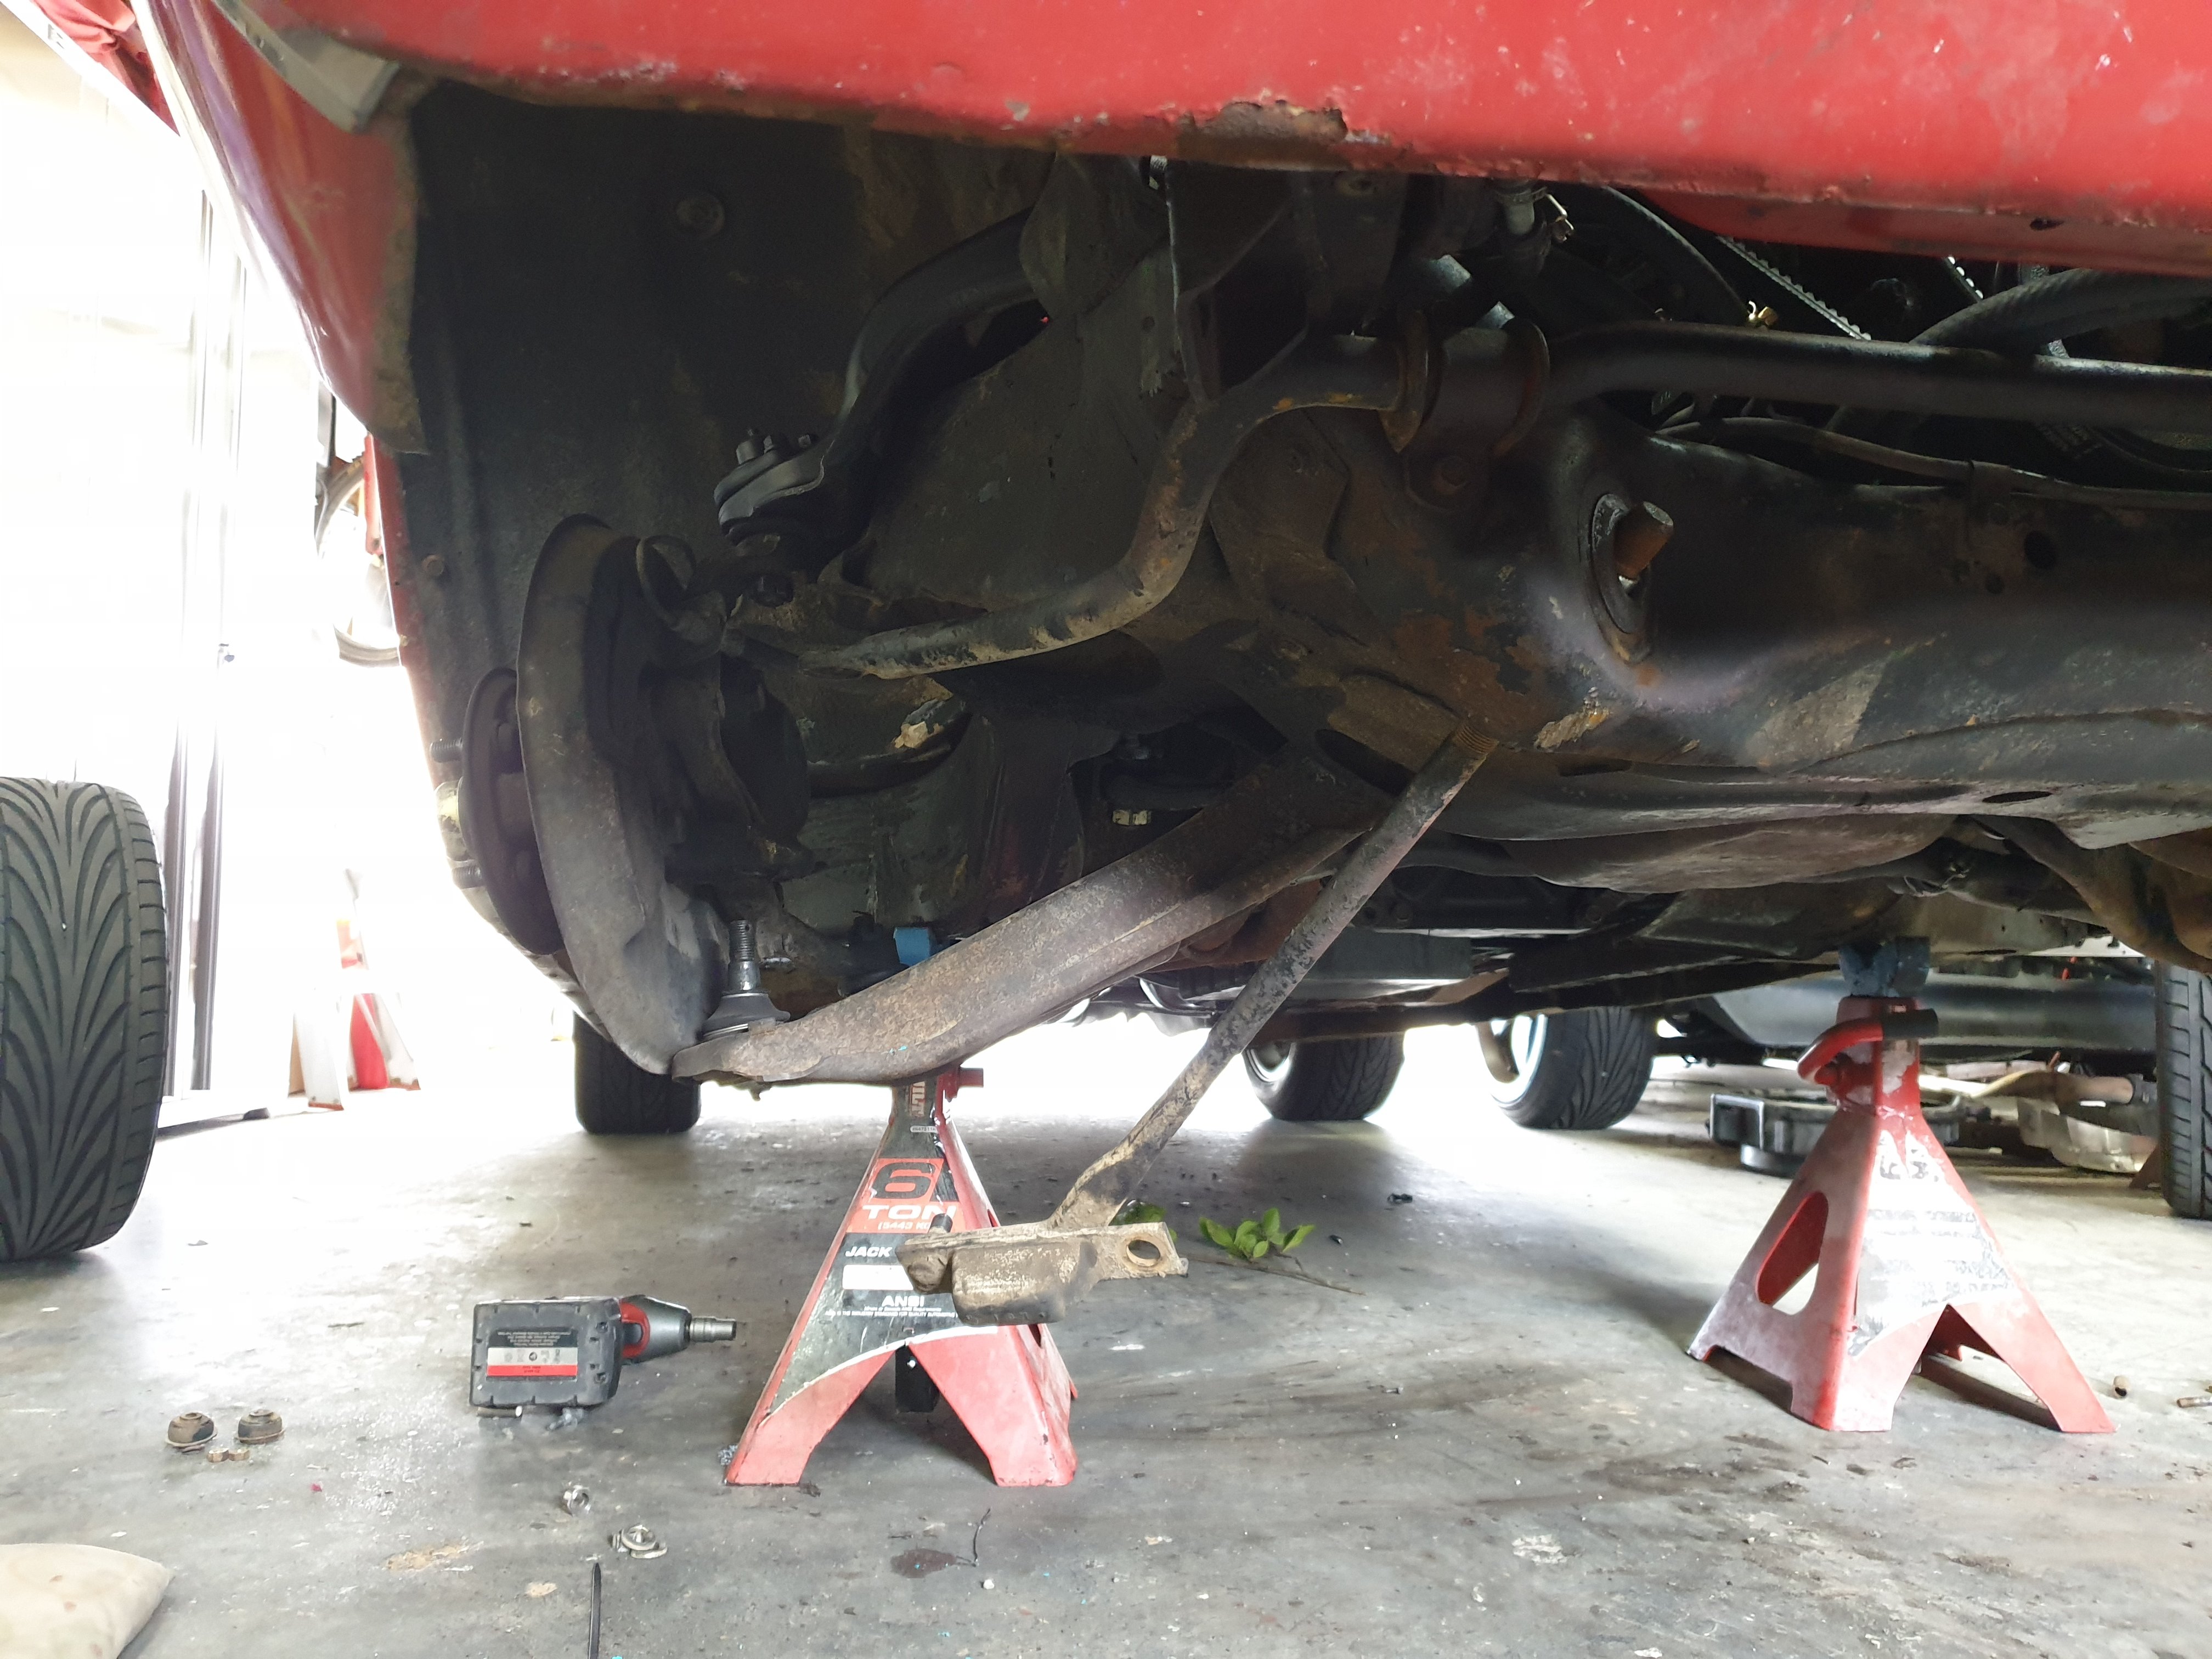
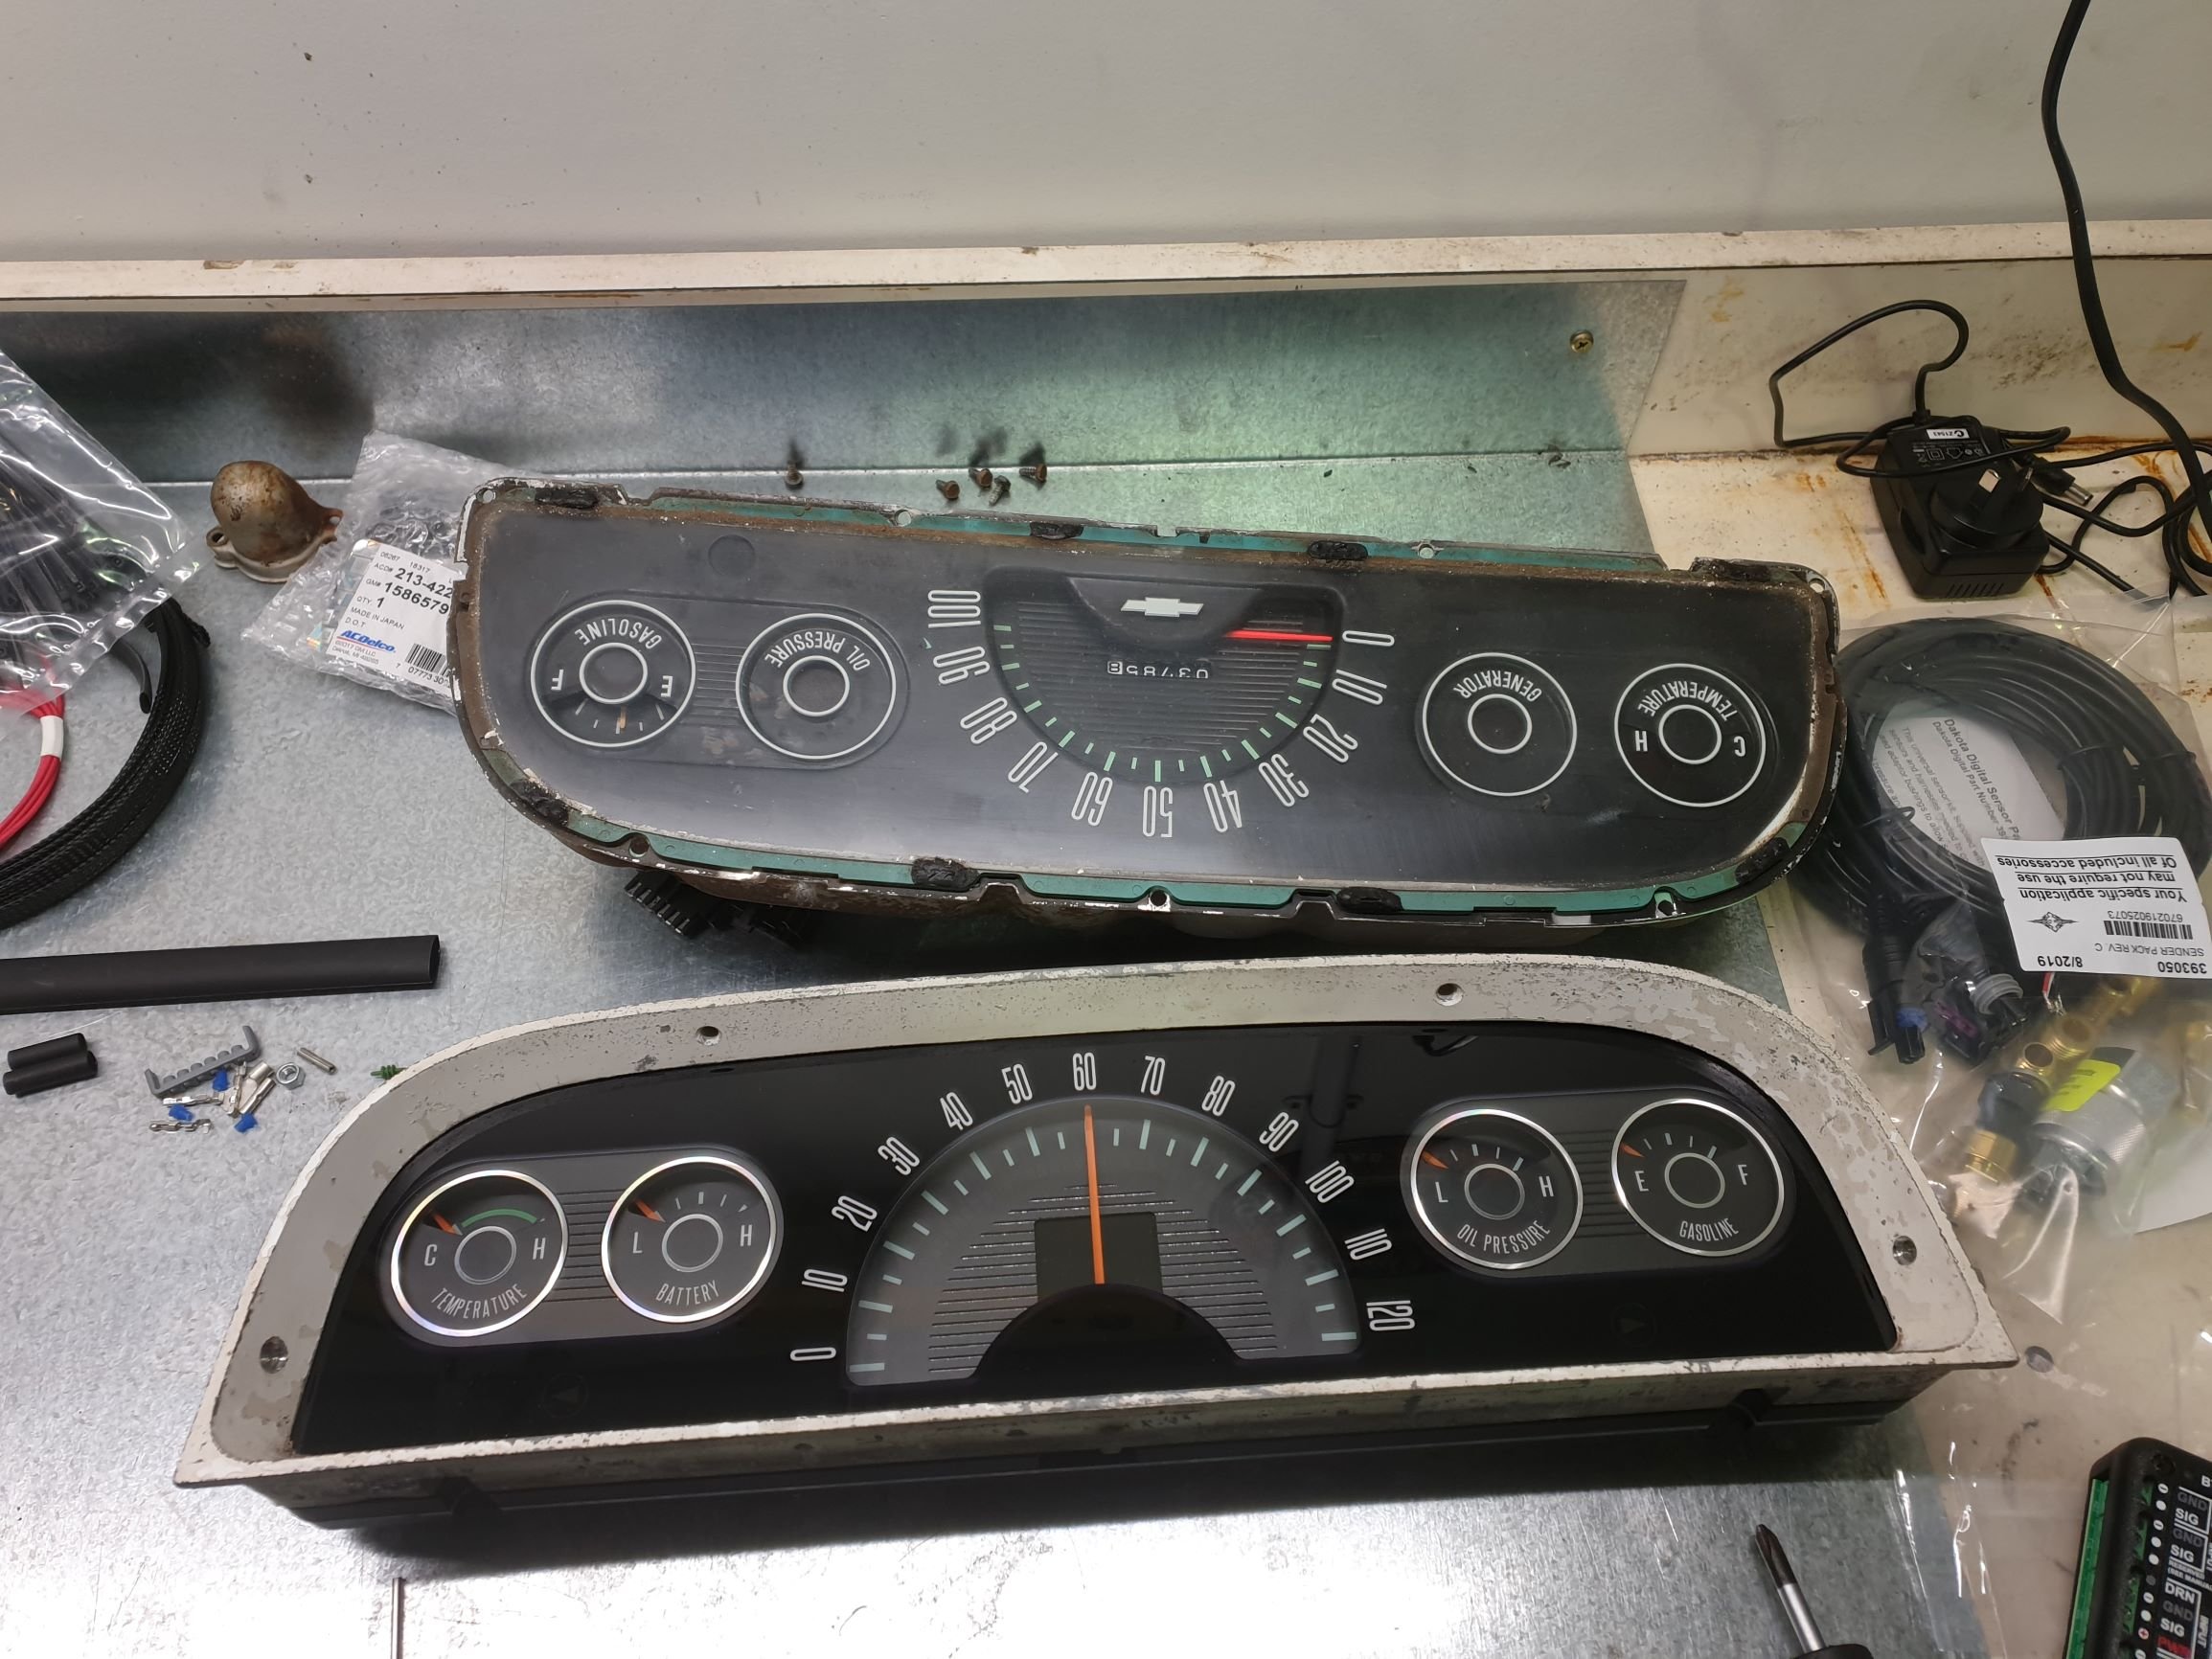
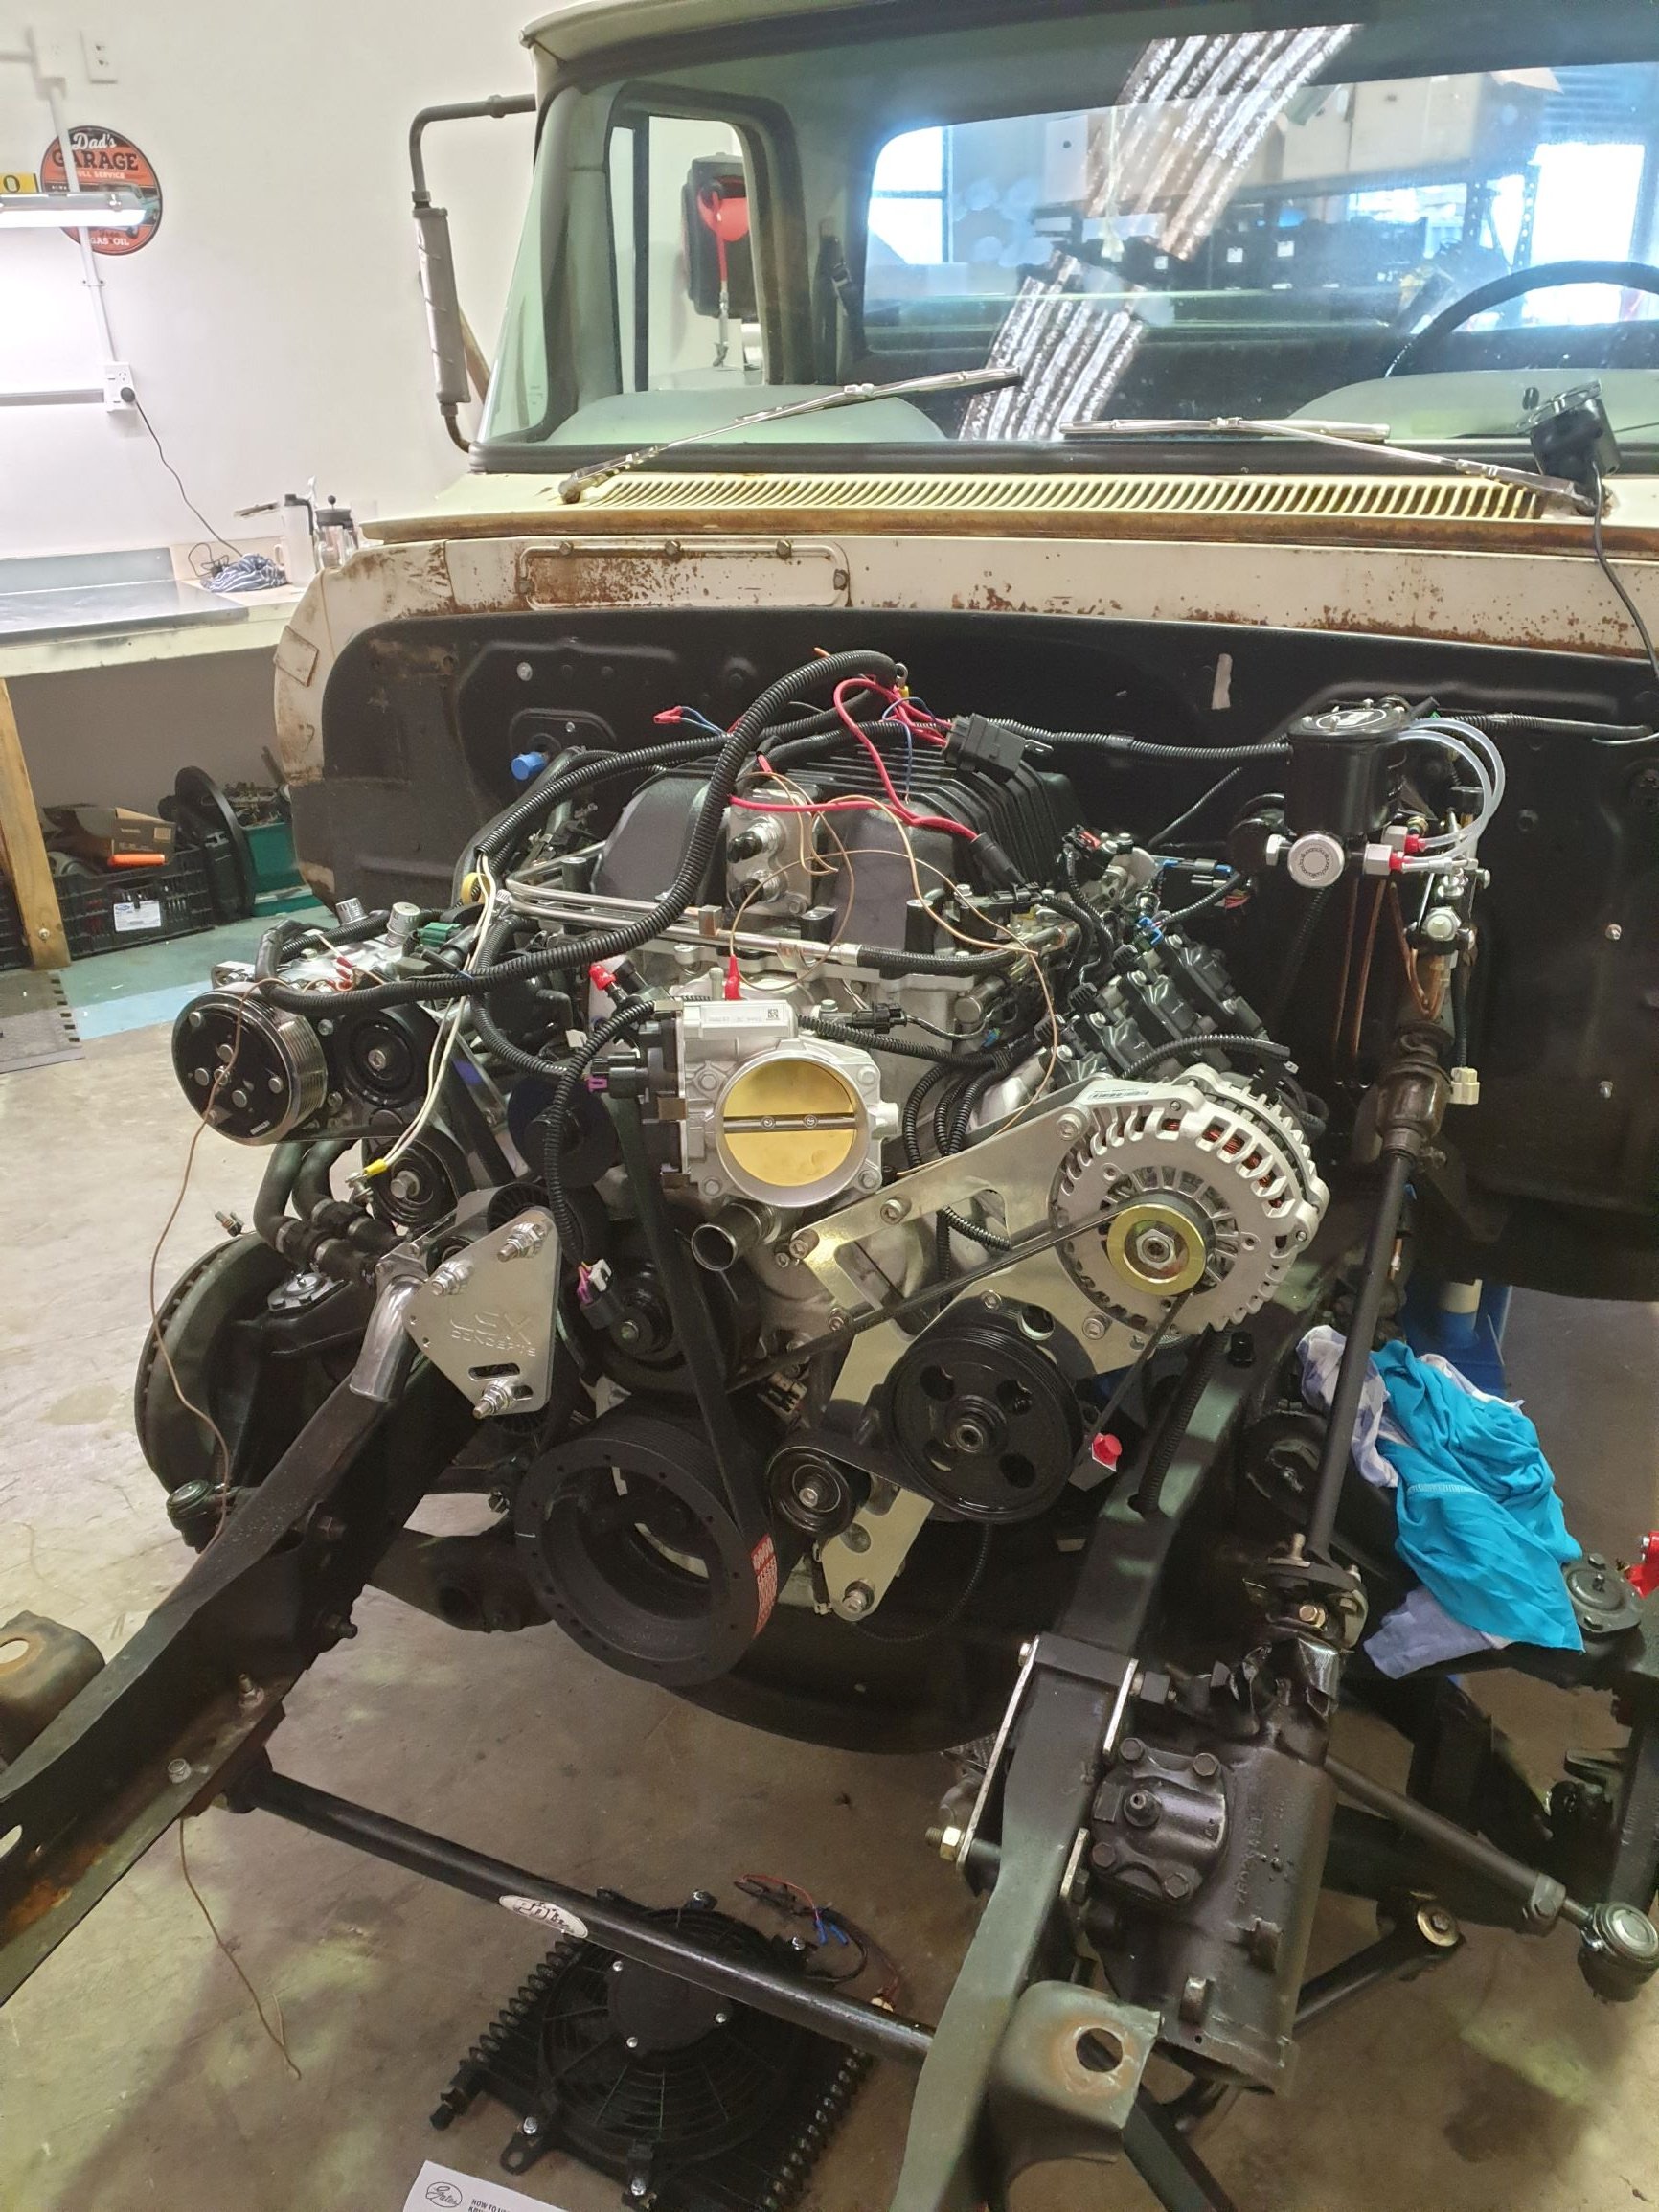
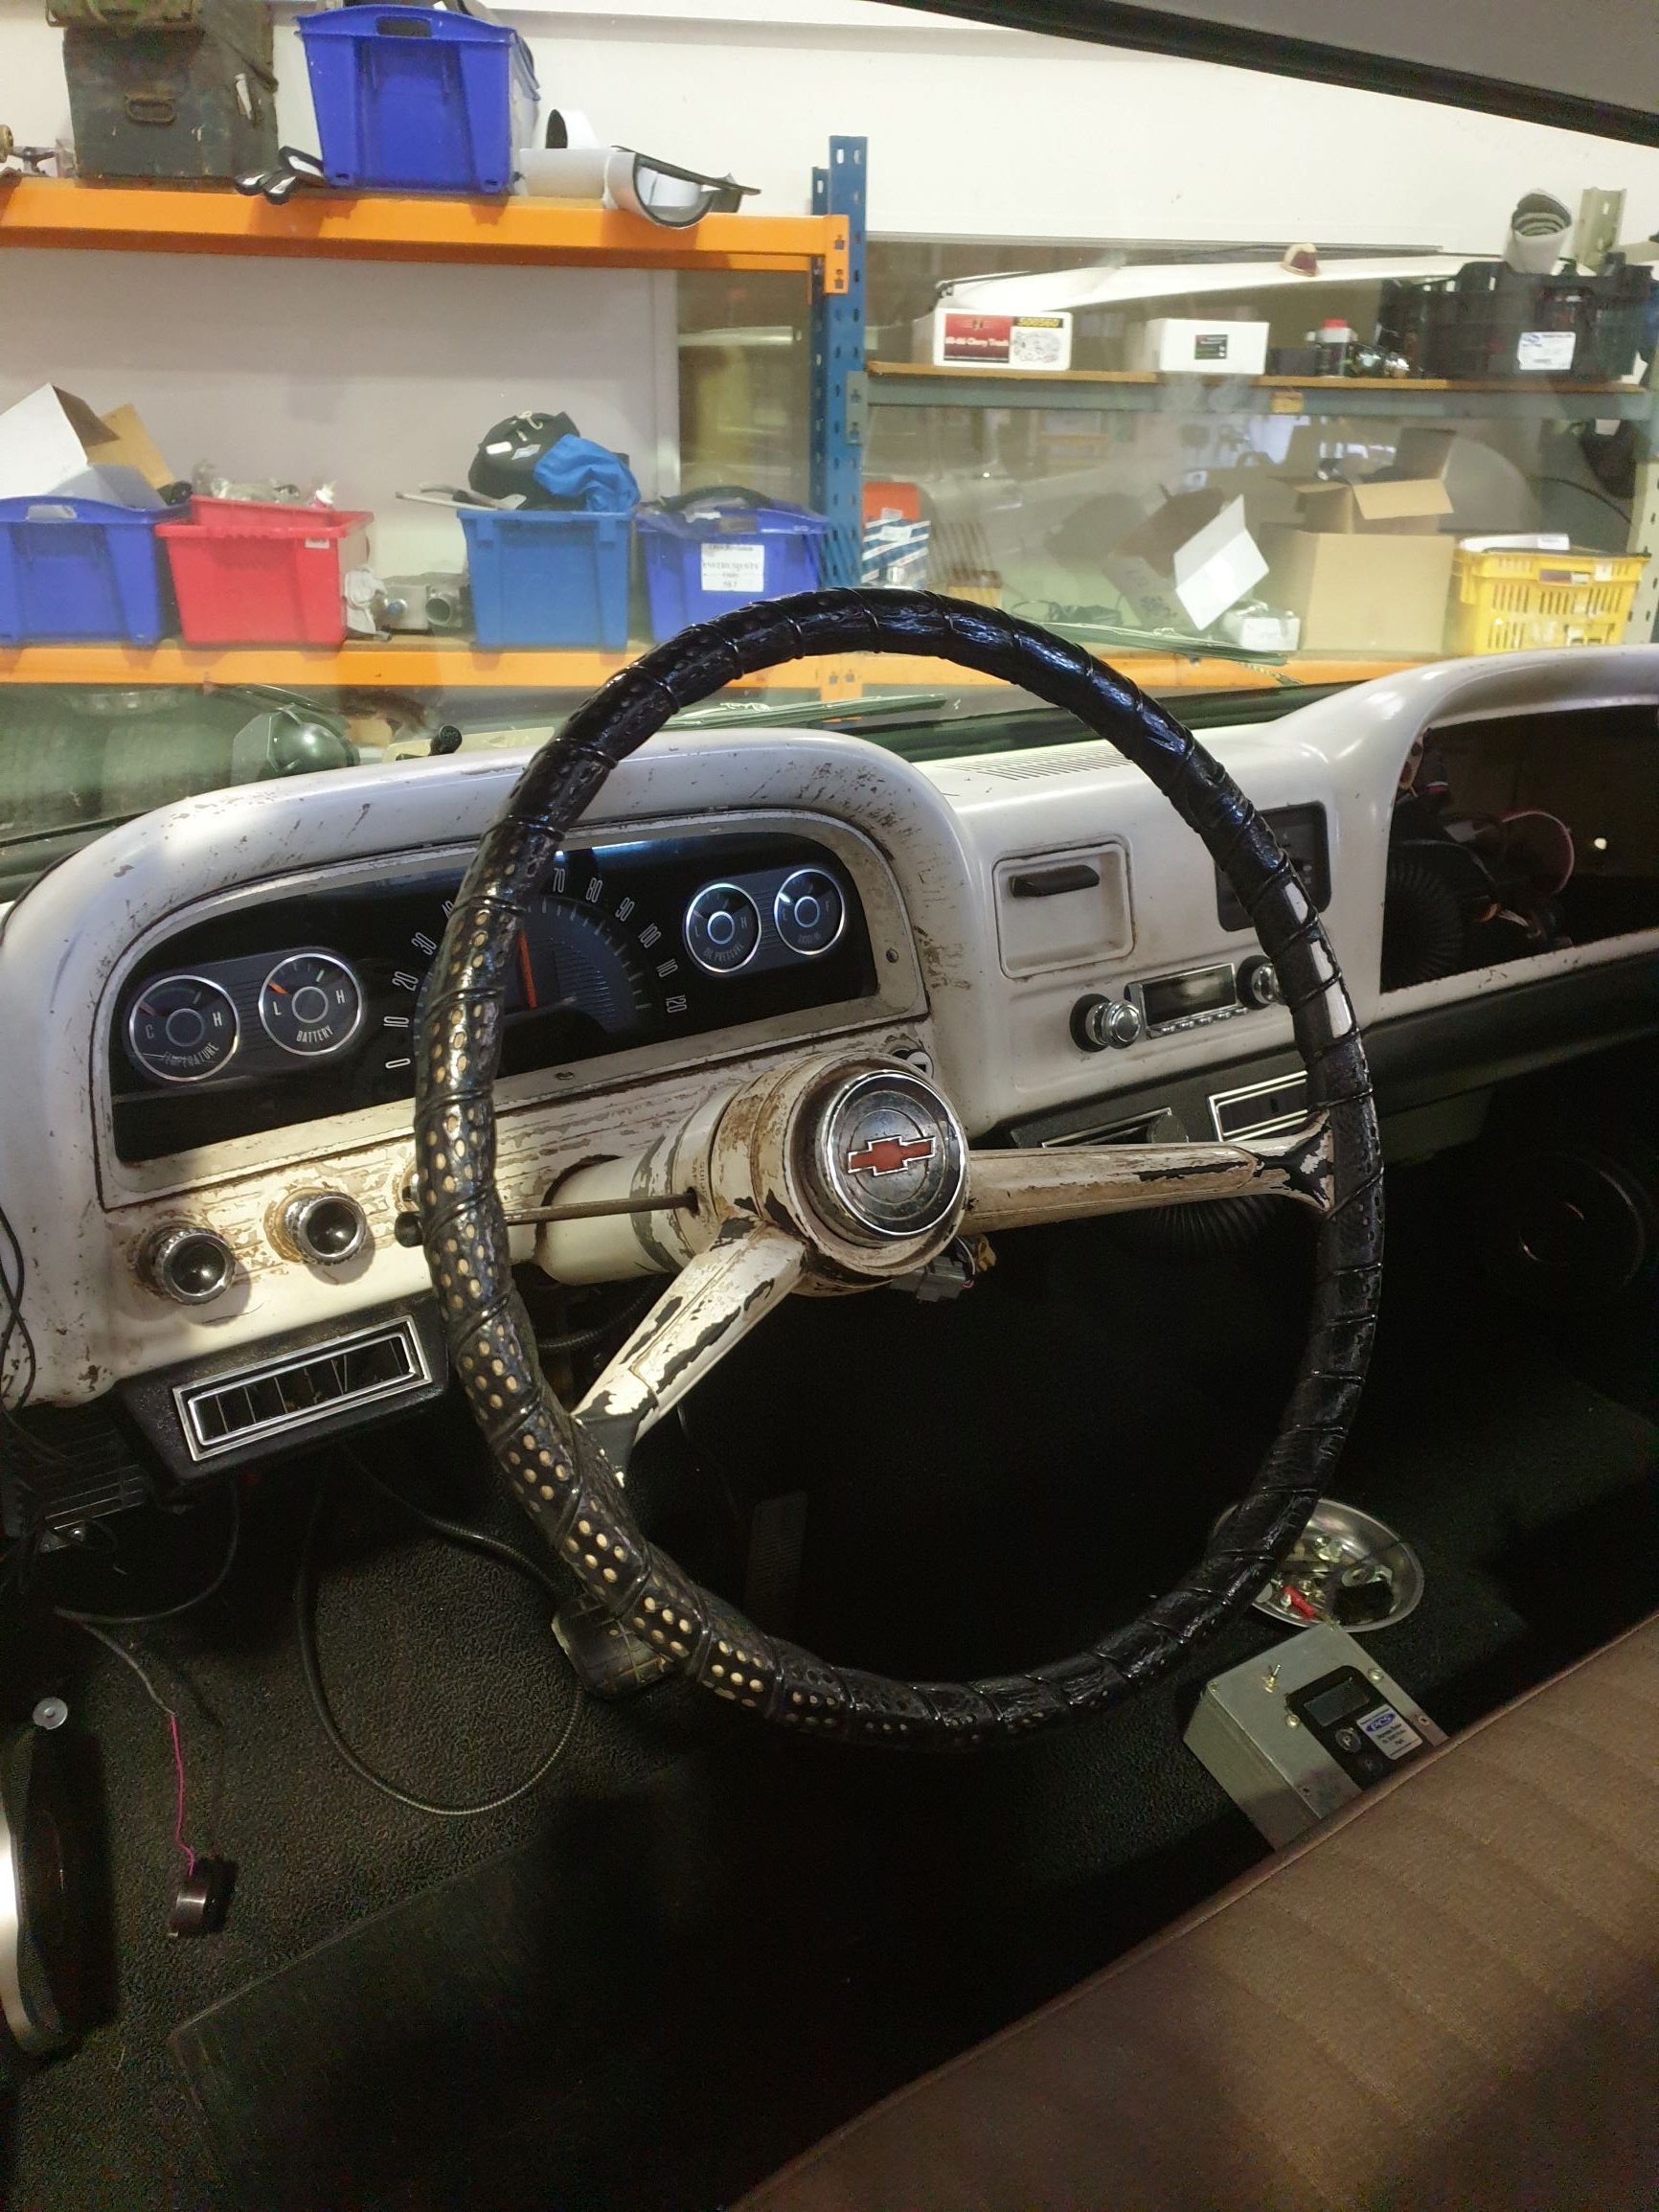
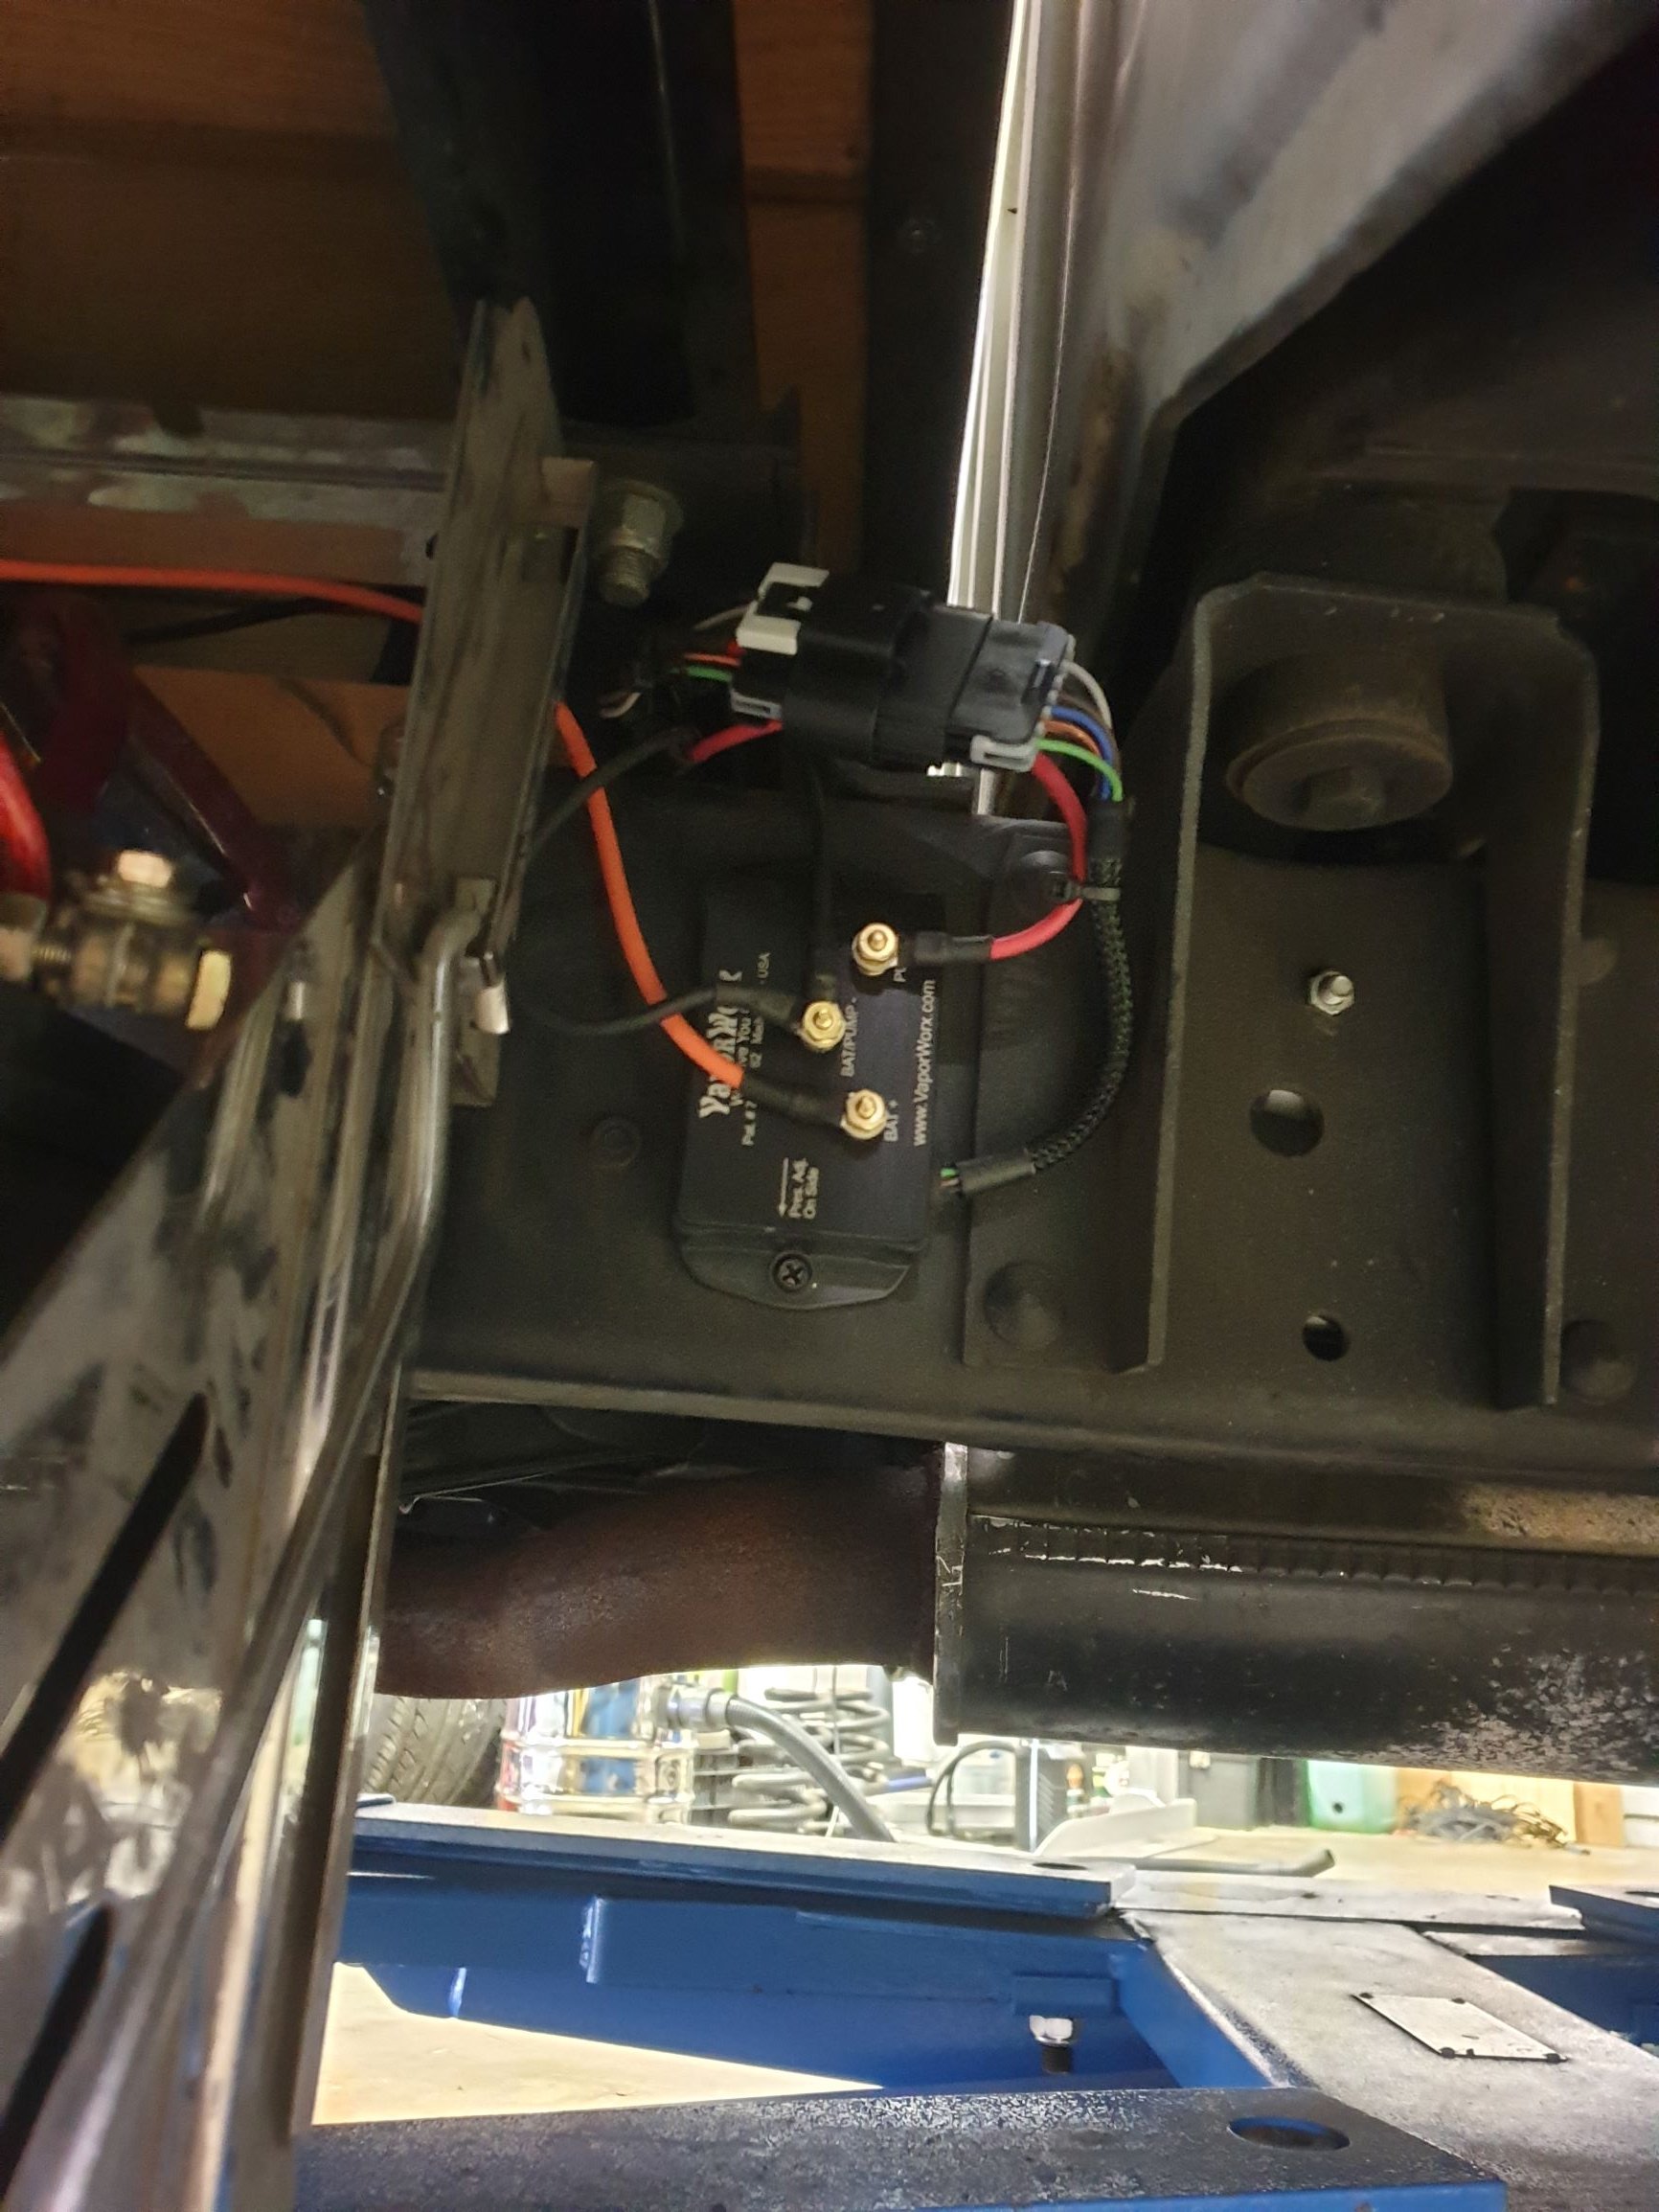
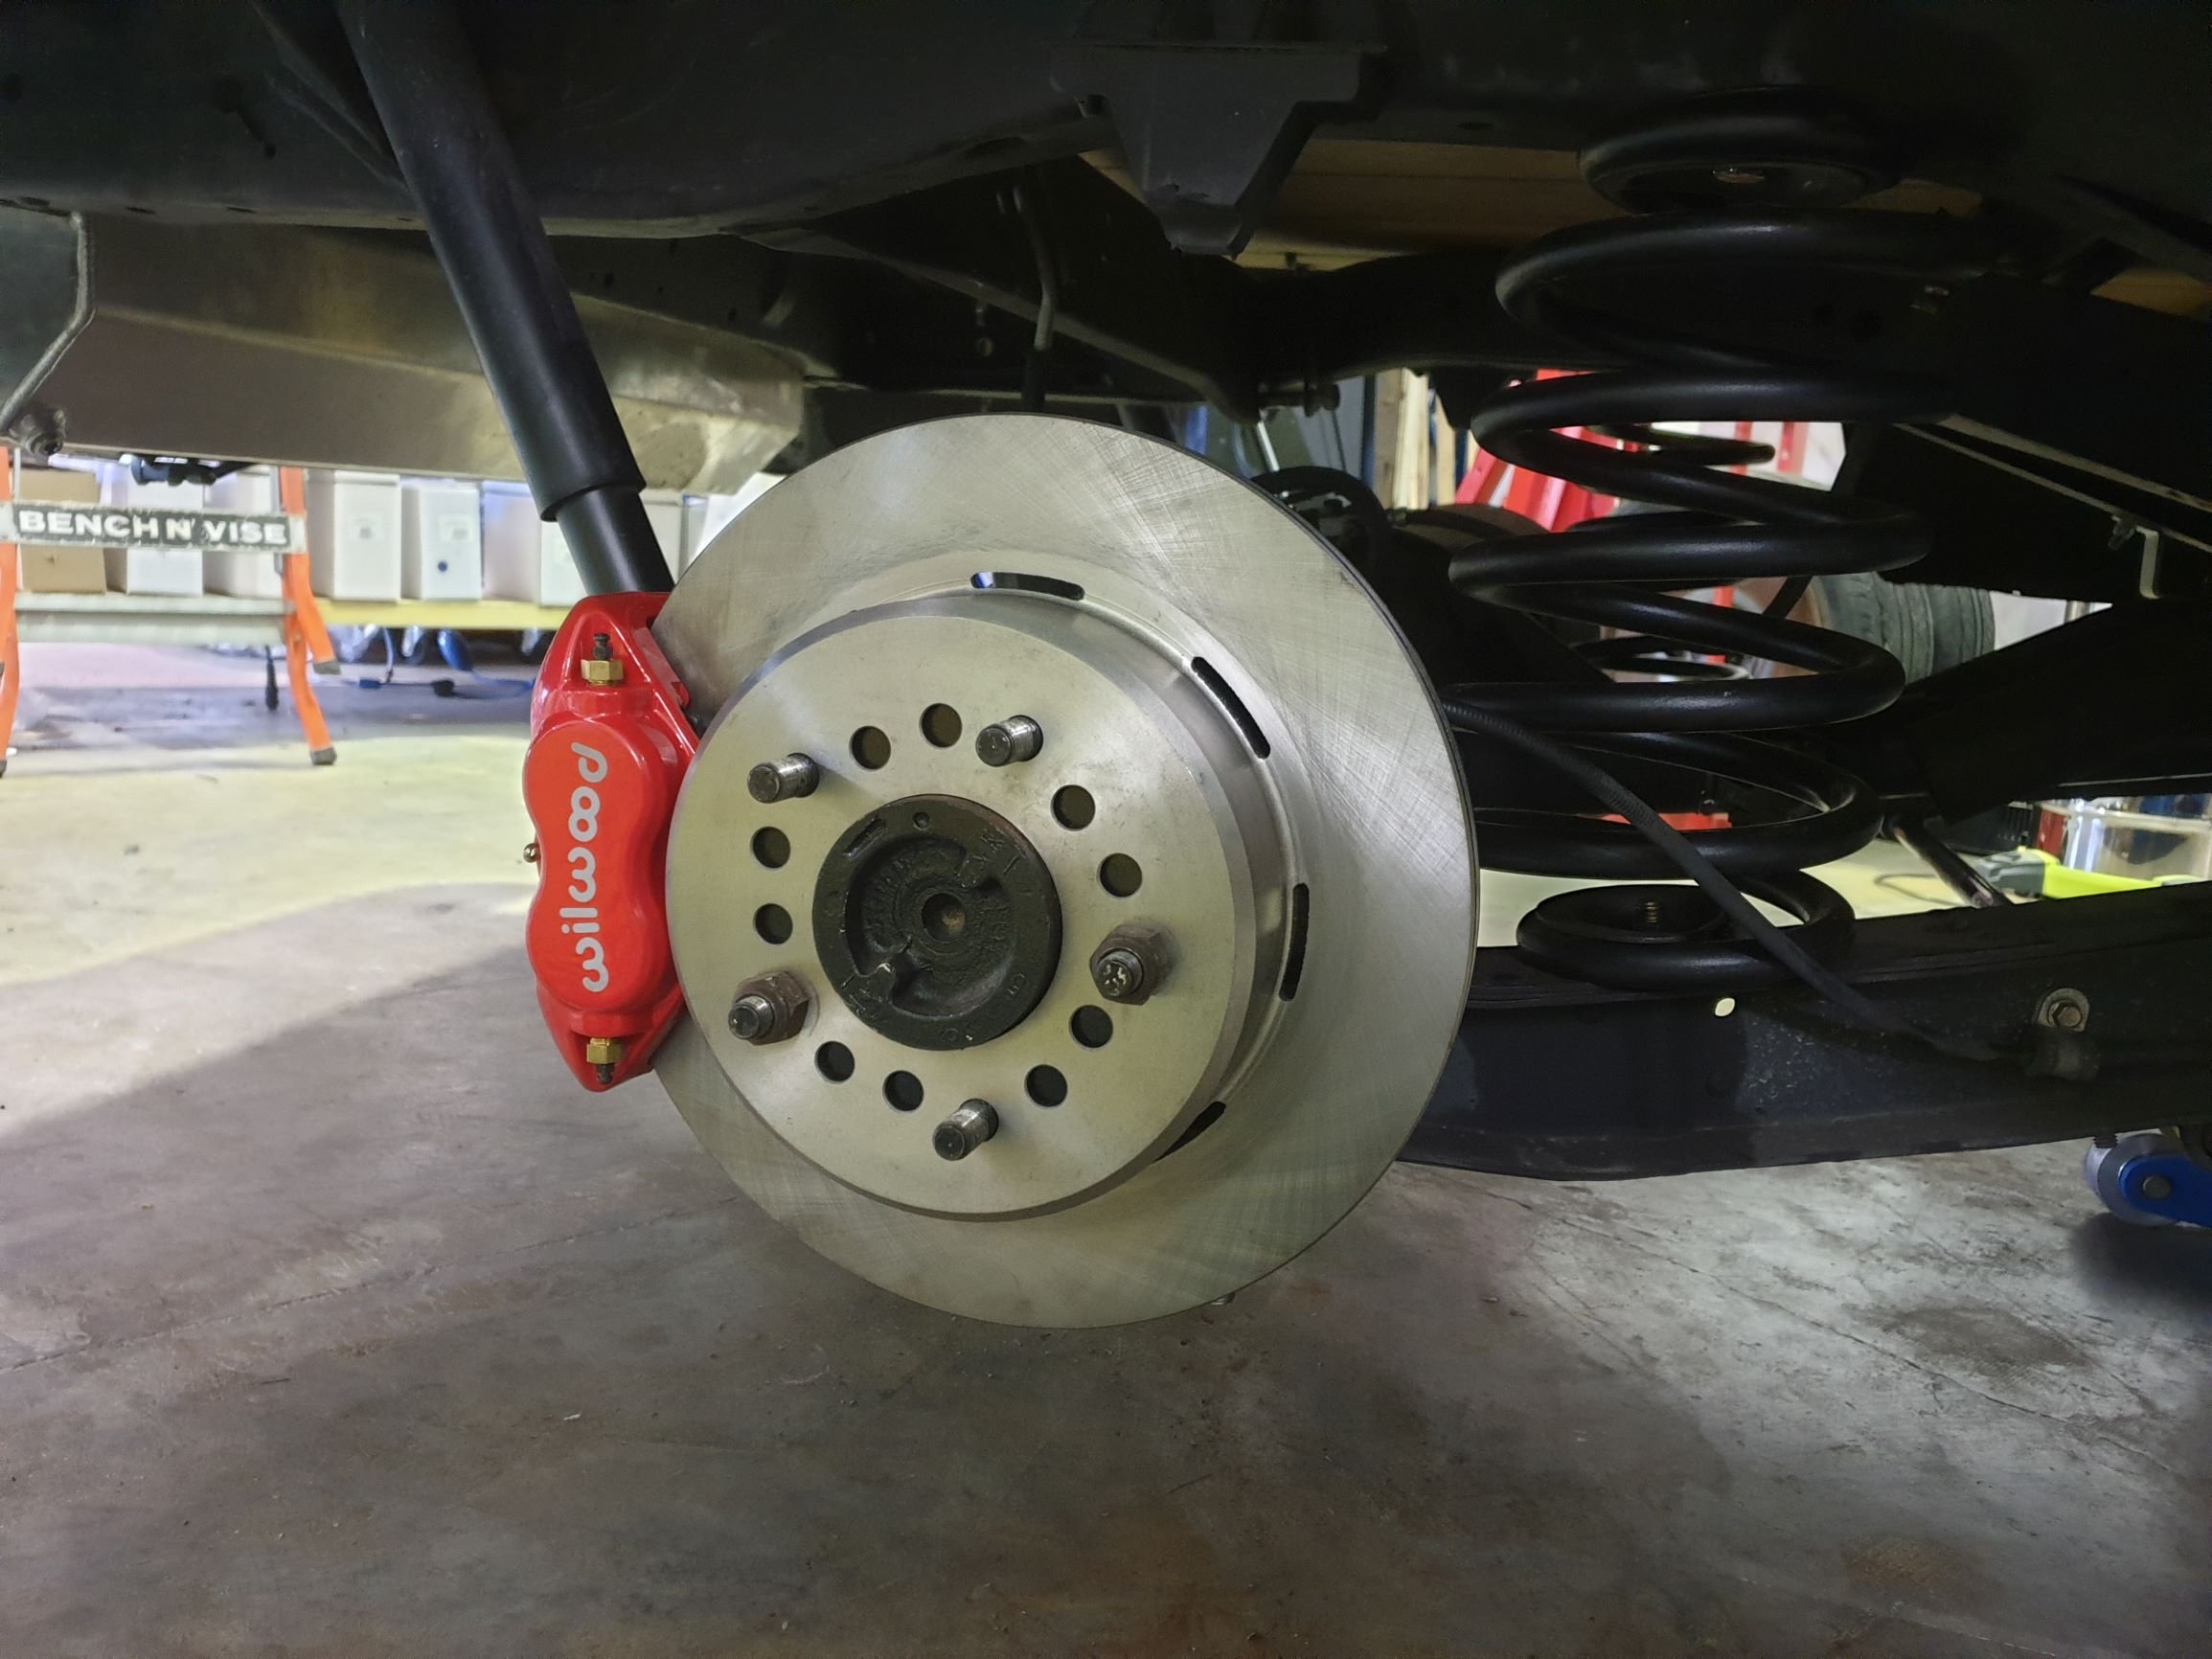
Donkey deep in the swap now. Finished up wiring on weekend, have put a vaporworx pwm set up on the fuel system. It gets fed fuel pressure, MAP, and ecu on off signal and makes the magic happen from there. I reran the fuel line in a 1/2" line, dead headed set up. Trans and engine are in, changed rear stoppers to disc, also changed pinion yoke to 1350 size, it was 1310. Remade all the front brake lines, replaced all ball joints, tie rod ends, basically all the steering/front end stuff is new. Changed the Instrument stuff to a Dakota digital set up that plugs into the Ecu for all the info. Cert check soon !!
3 points
-
This evening I removed all the brackets from the TS frame to turn it into a TM frame, I also welded up the pillion footrest mount holes in the swing arm and shortened and bent the rear frame loop up more, frame is ready for blasting and painting. I am going to be lazy and the swing arm and shocks can stay on, I will take it apart after blasting and painting and clean the shit out as I will be replacing the bearings anyway, shocks will go to the scrap.
3 points
-
Iv had this thing wide open for quite large rides, this was only a few minutes in. Bought a wr200 motor pick up tomorrow. Will have to hassle @64valiant for use of his shop3 points
-
Awesome! I'm hoping to get to a ride or two before the end of the year. Hopefully I get it howling up to the original 68mph (best around the block was 70kph, but it'll get there). Found a headlight and gauge assembly from a T125 for $50. I've bought it and hope it will arrive this week.
3 points
-
left that alone for a while, i was in a huff and also busy with other stuff finally gave it a wet sand and filled all the shitty little fisheyes with icing, and put another pretty thinned coat of blue down and it turned out much better pulling off masking tape is the best. then lashings of dinitrol.3 points
-
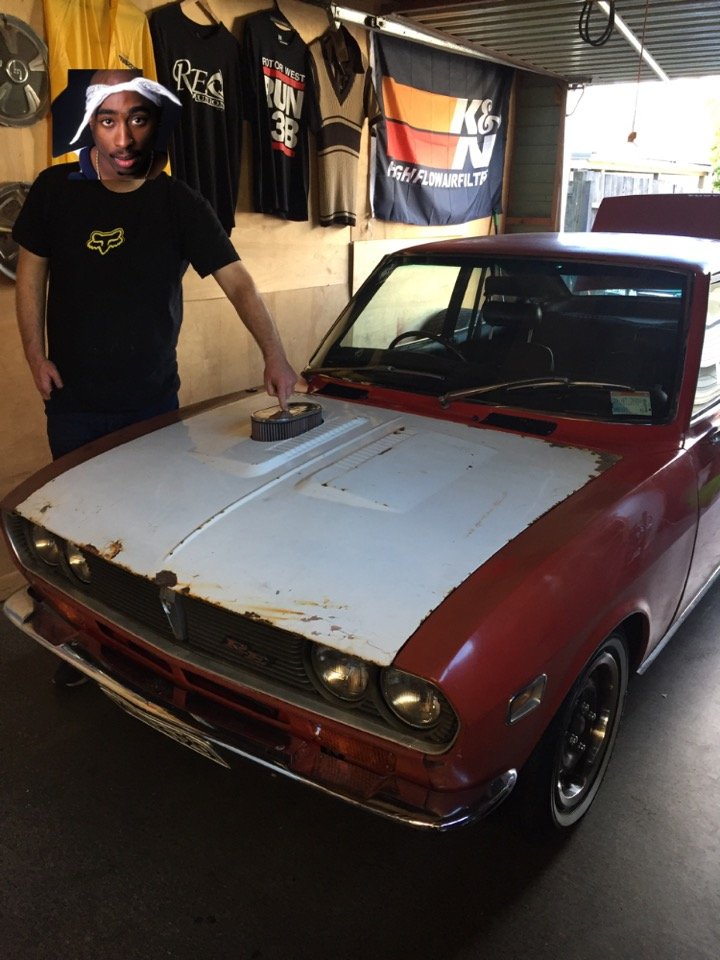
I actually like the rude rude as white bonnet look haha. 2pac likes it and that’s all that counts.
3 points
-
No one cares, just looks odd on the history report2 points
-
You don't need an odometer unless you pay road user charges.2 points
-
eg "Avengers" all have the white part in their tail light, only the higher spec models had them 'working' or the bulbs & wiring fitted2 points
-
Nah you just had a dick of a wof guy, they've never been a requirement.2 points
-
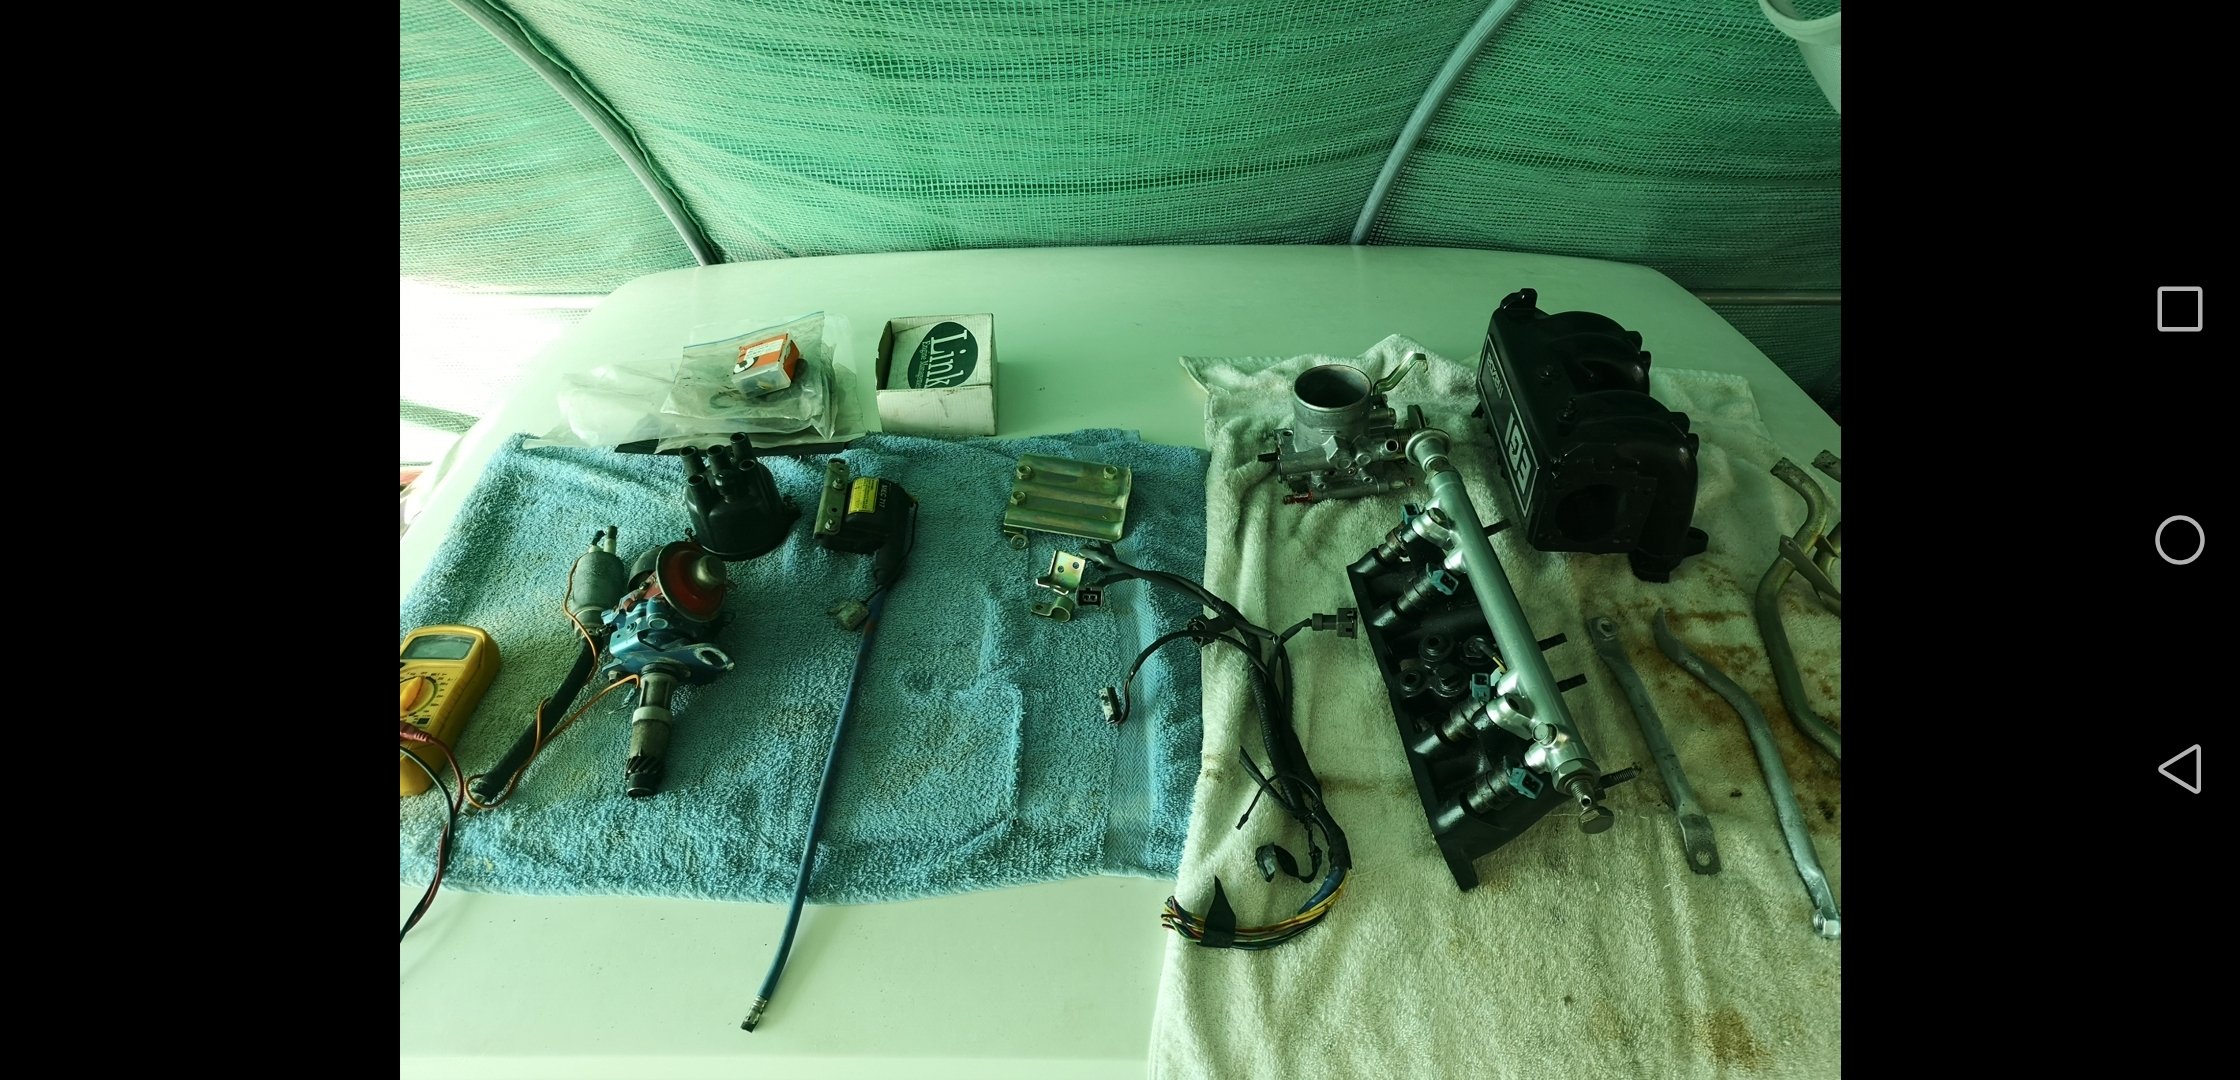
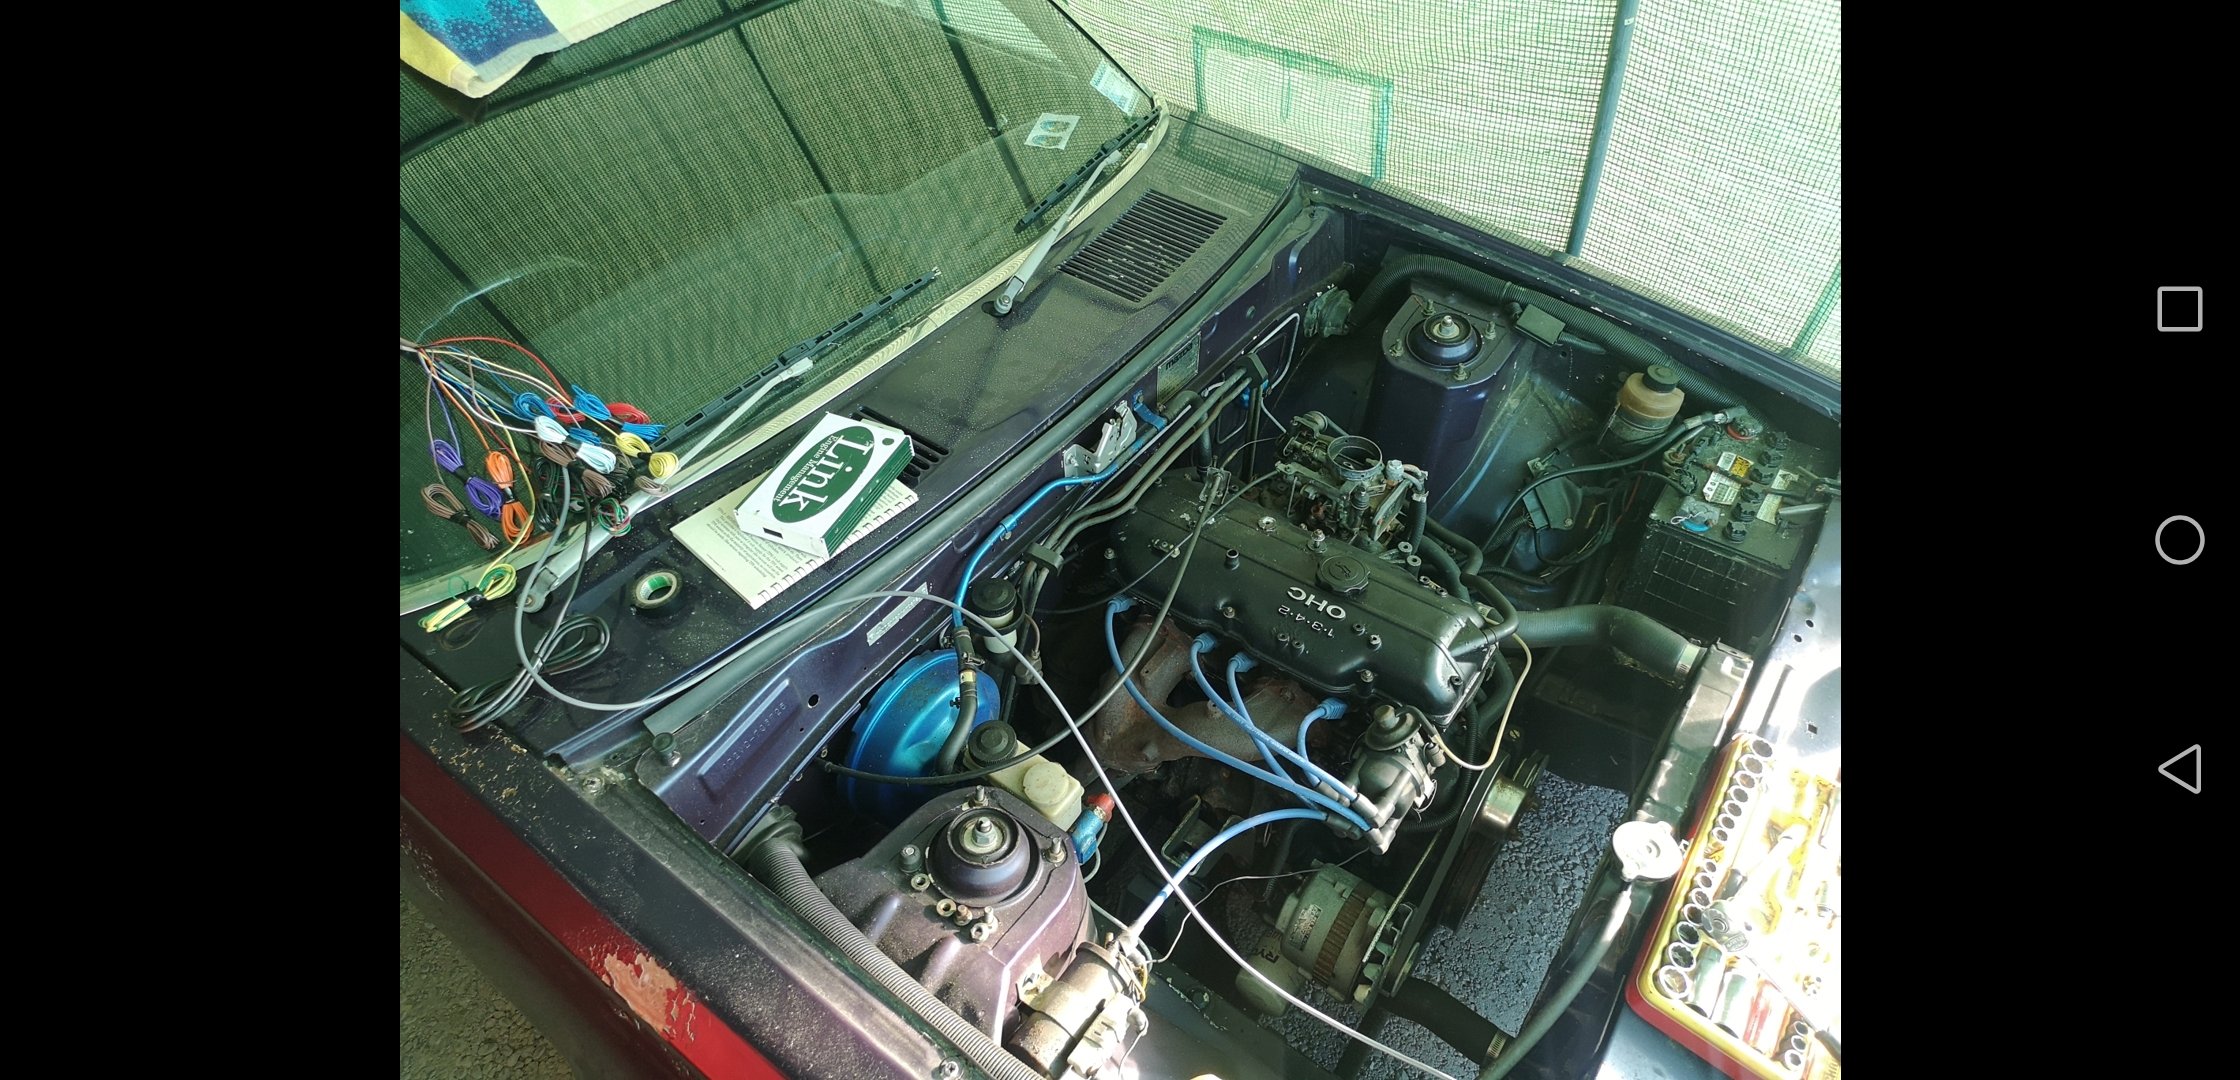
Decided to get off my arse and install the efi, after the last run to hanmer I got sick of the flat spots and rough running.. Got all the gear out to hook it up. Got this far.. Then realised the injector plugs I grabbed from pickapart 5 years ago were wrong and they're for high impendence injectors, so I need to back out and get some others. Also while I'm out there I need a Nissan vg30 tps for the vg30 tb. I also need to buy an Oxy sensor, an ignitor and ballast resistor for the injectors. Speaking of injectors, still haven't been able to find any info on the denso's I have. 195500-0285 is the code if anyone knows.. Bought a new battery today as mine is about 2007 and doing random slow starts..
2 points
-
Yea so there was a wee saga with the engine parts, Trundles rang and said the only crank they had was damaged, so they had only sent the seals, gaskets and bearings. I spent a bit of time trying to find another crank but nothing was available. Plenty of complete engines for too much money, but then what fucking use were all the other parts. So I suggested I send it all back and he got all pissy and said he would find another crank, which he actually did. So we will wait and see what turns up. I have been selling off shit like a demon, I've got 2/3rds of the money to pay for the coating, but I have to wait for some latches I ordered off Ali Express to sort the drawers so I can get it done. In the meantime I have been tidying up the last few things I have to do. I have needed to get some sort of tiedown detail into the deck, but preferably without going any wider, or having them down low and preventing the drawers from opening. I decided to do it this way, which was laborious but reasonably tidy. I can also use the detail as a mount for sides if I need to; I also made something proper for the low range boot to mount too; Might have to start the many jobs I have been neglecting around the house now..2 points
-
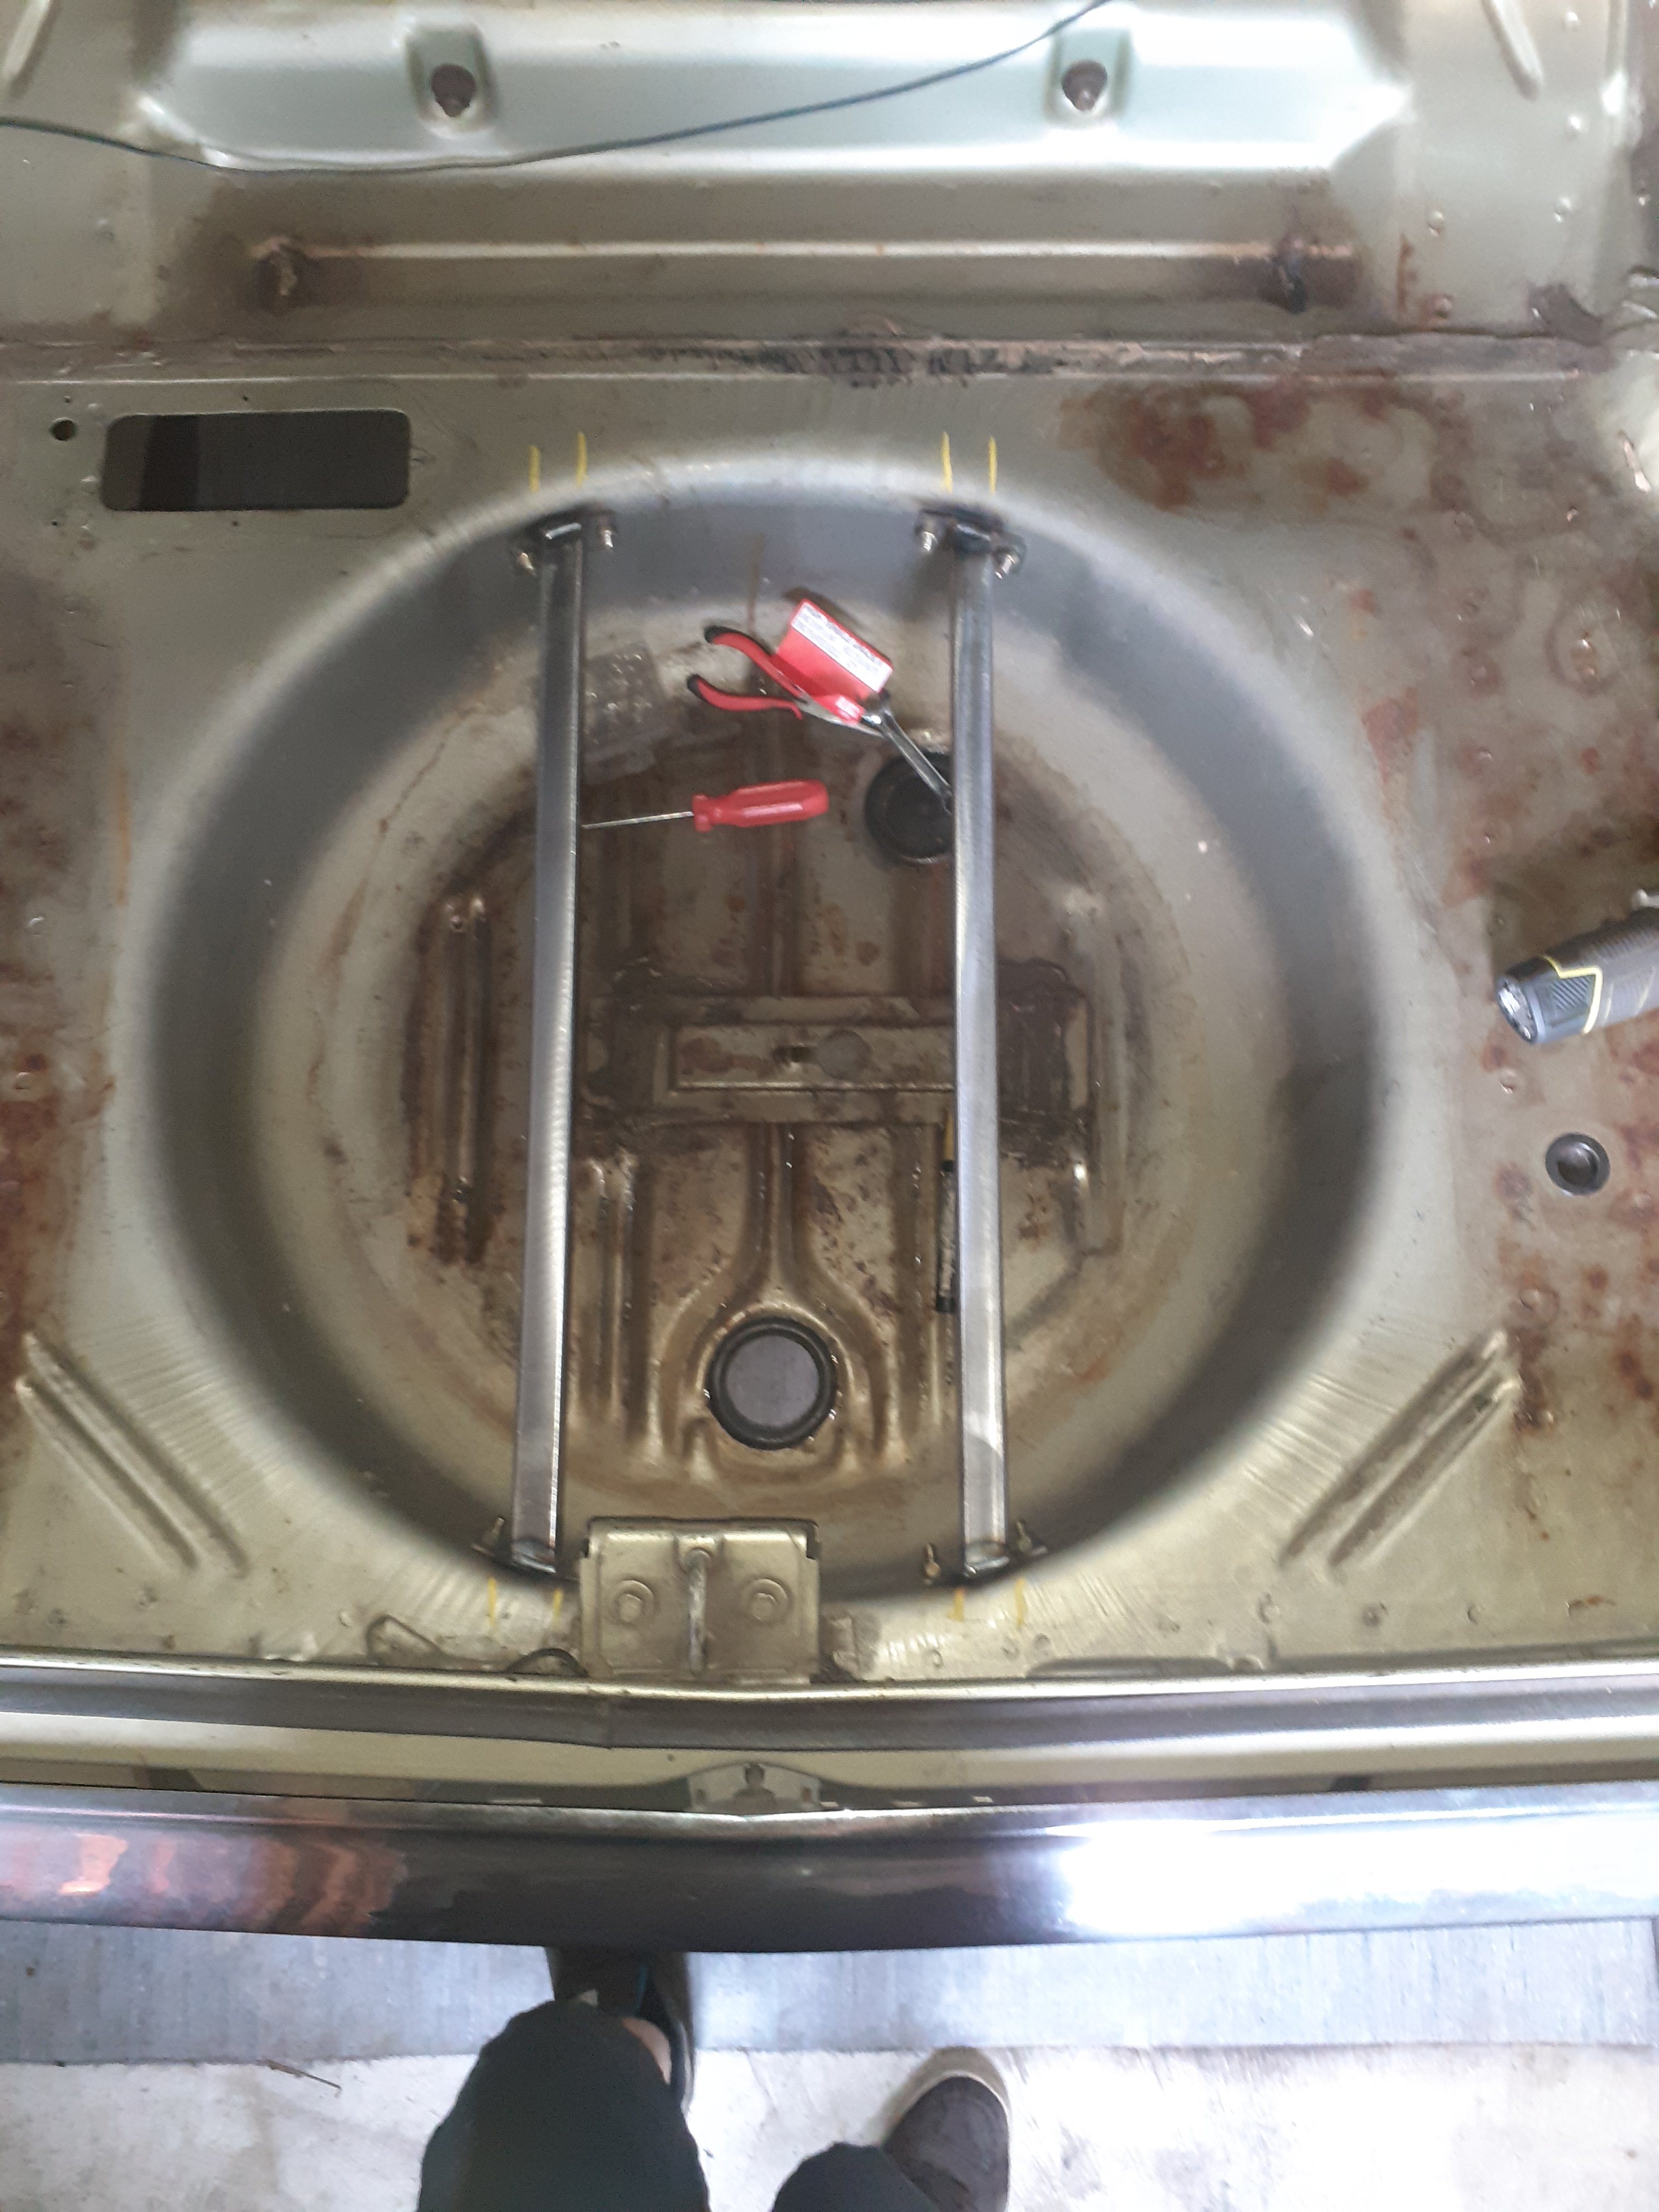
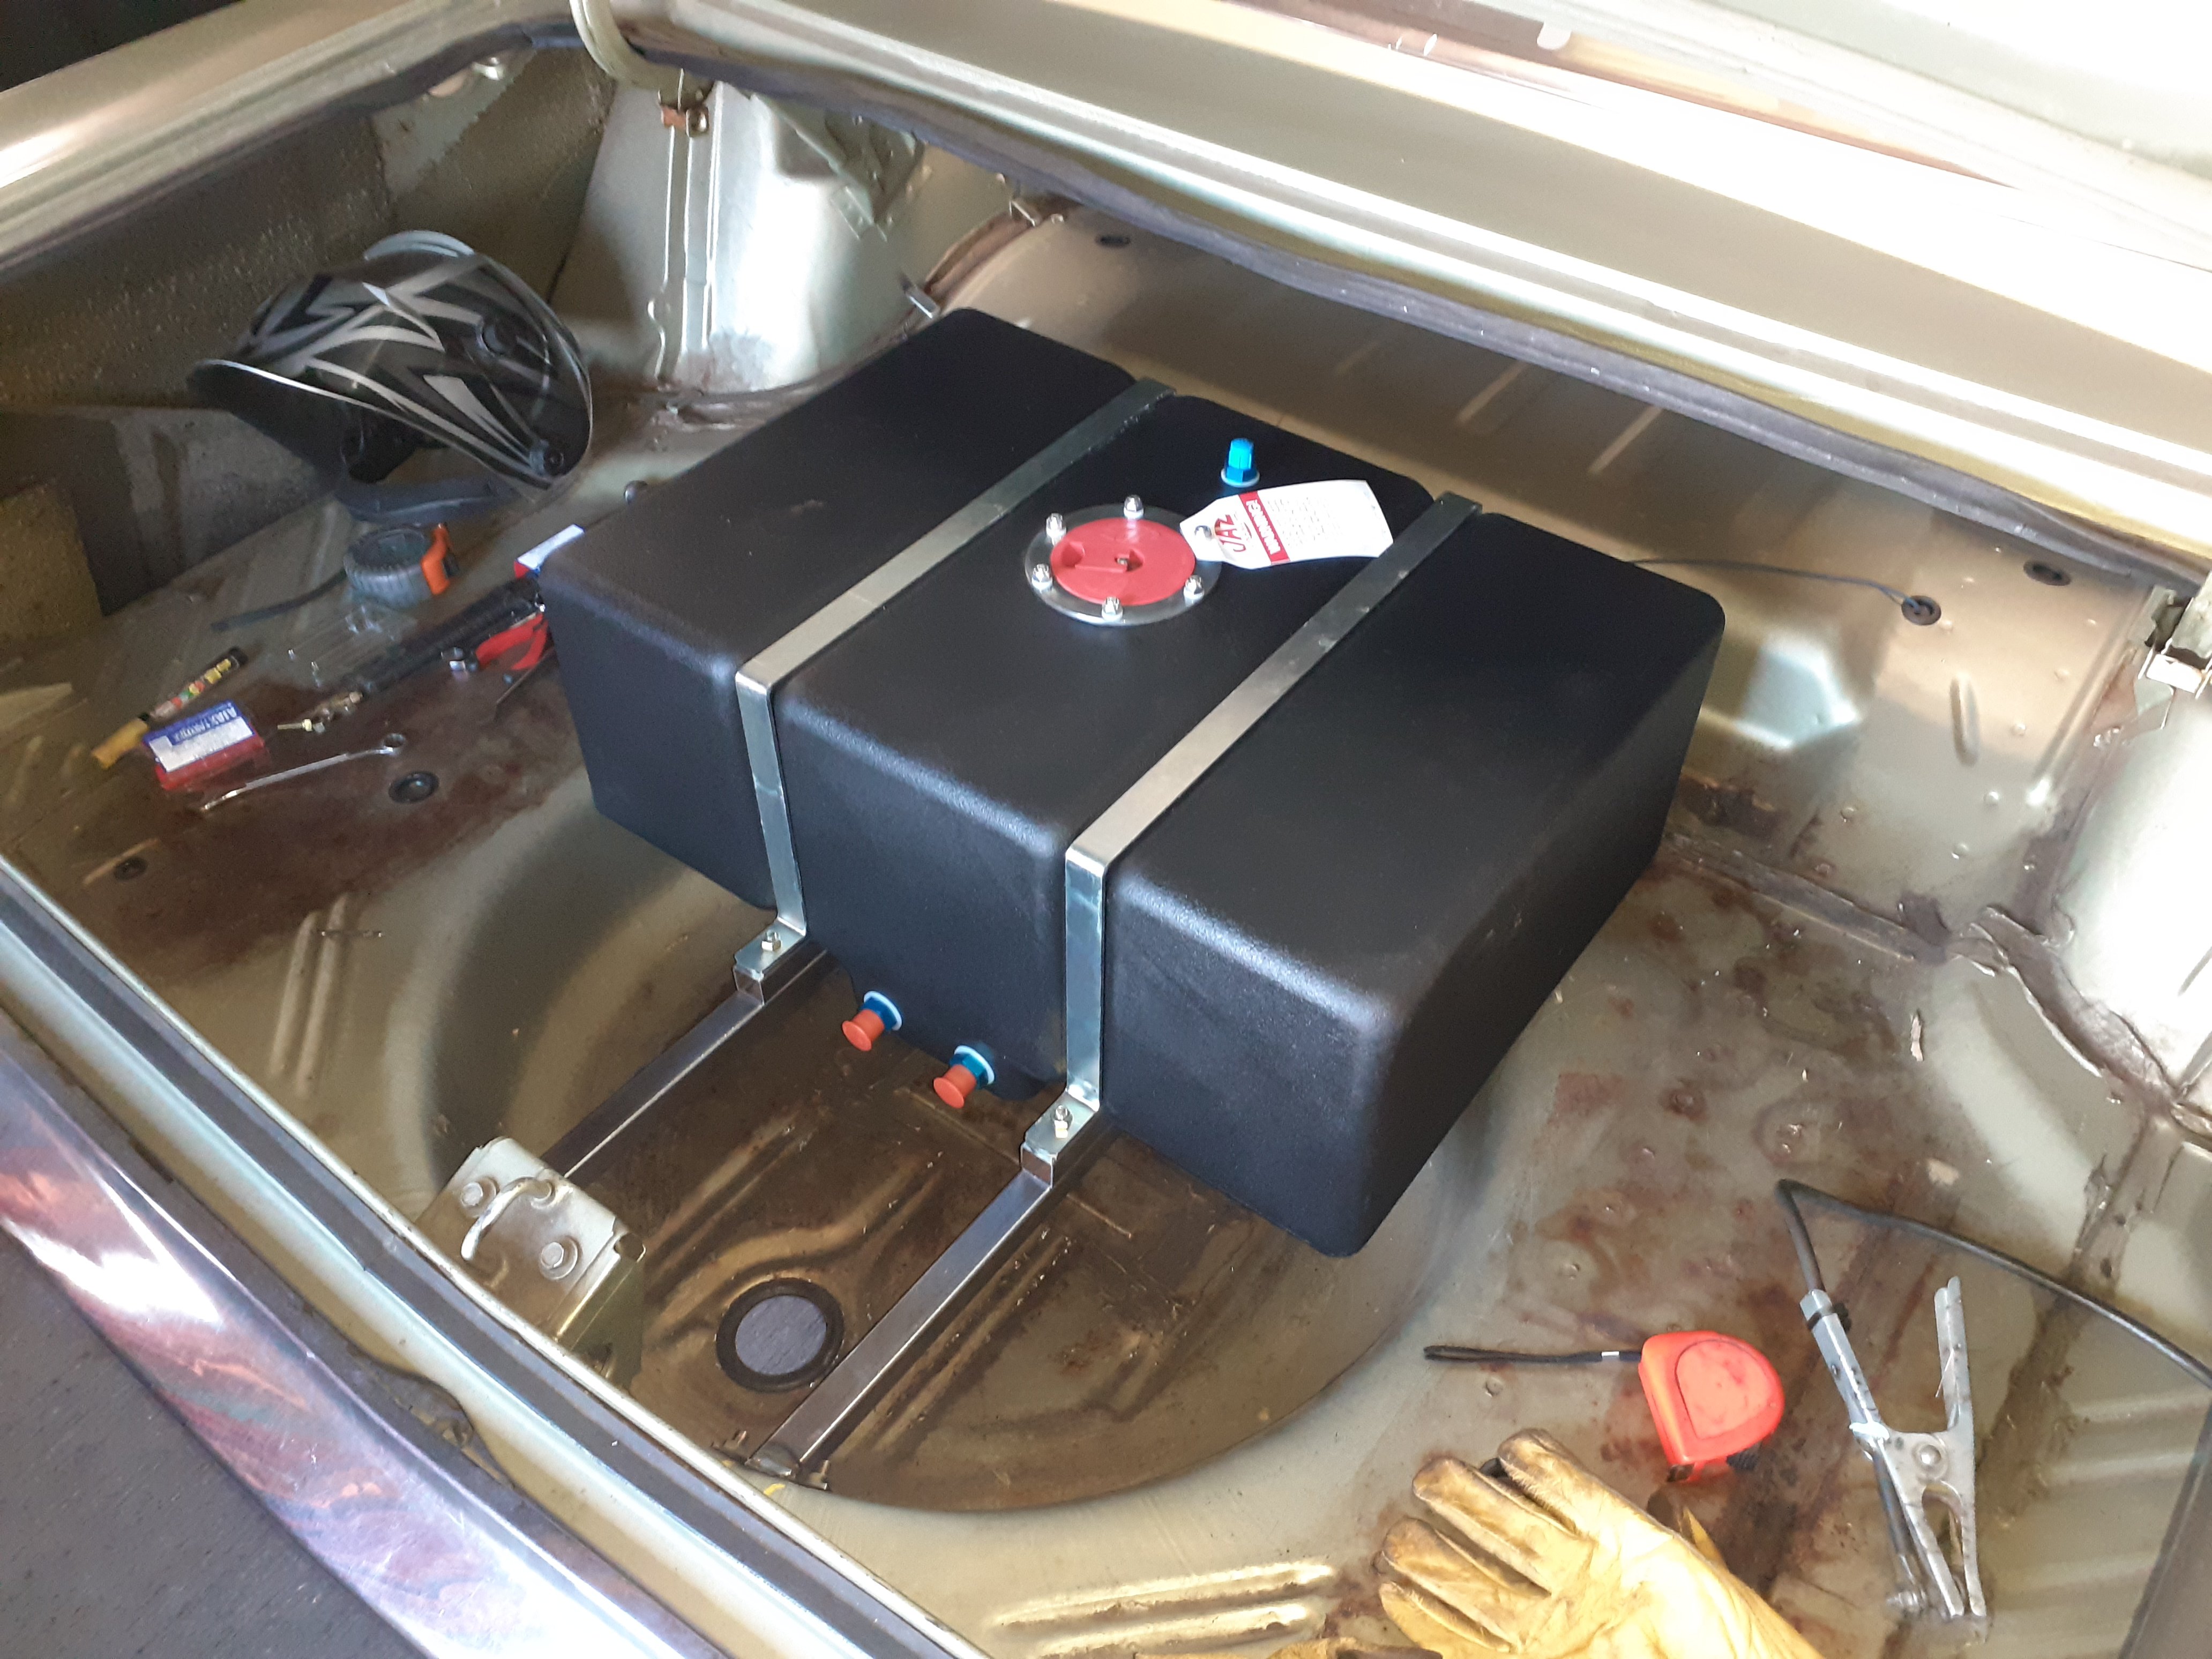
Mounting the fuel tank was today's job, got it mostly done, little bit of welding left to do. Fuel filter and pump will go in the spare wheel well and I'll make a cover that goes over the top of the well I need to sort a sealed cap and a spill ring, and an extra fitting on top for a return
2 points
-
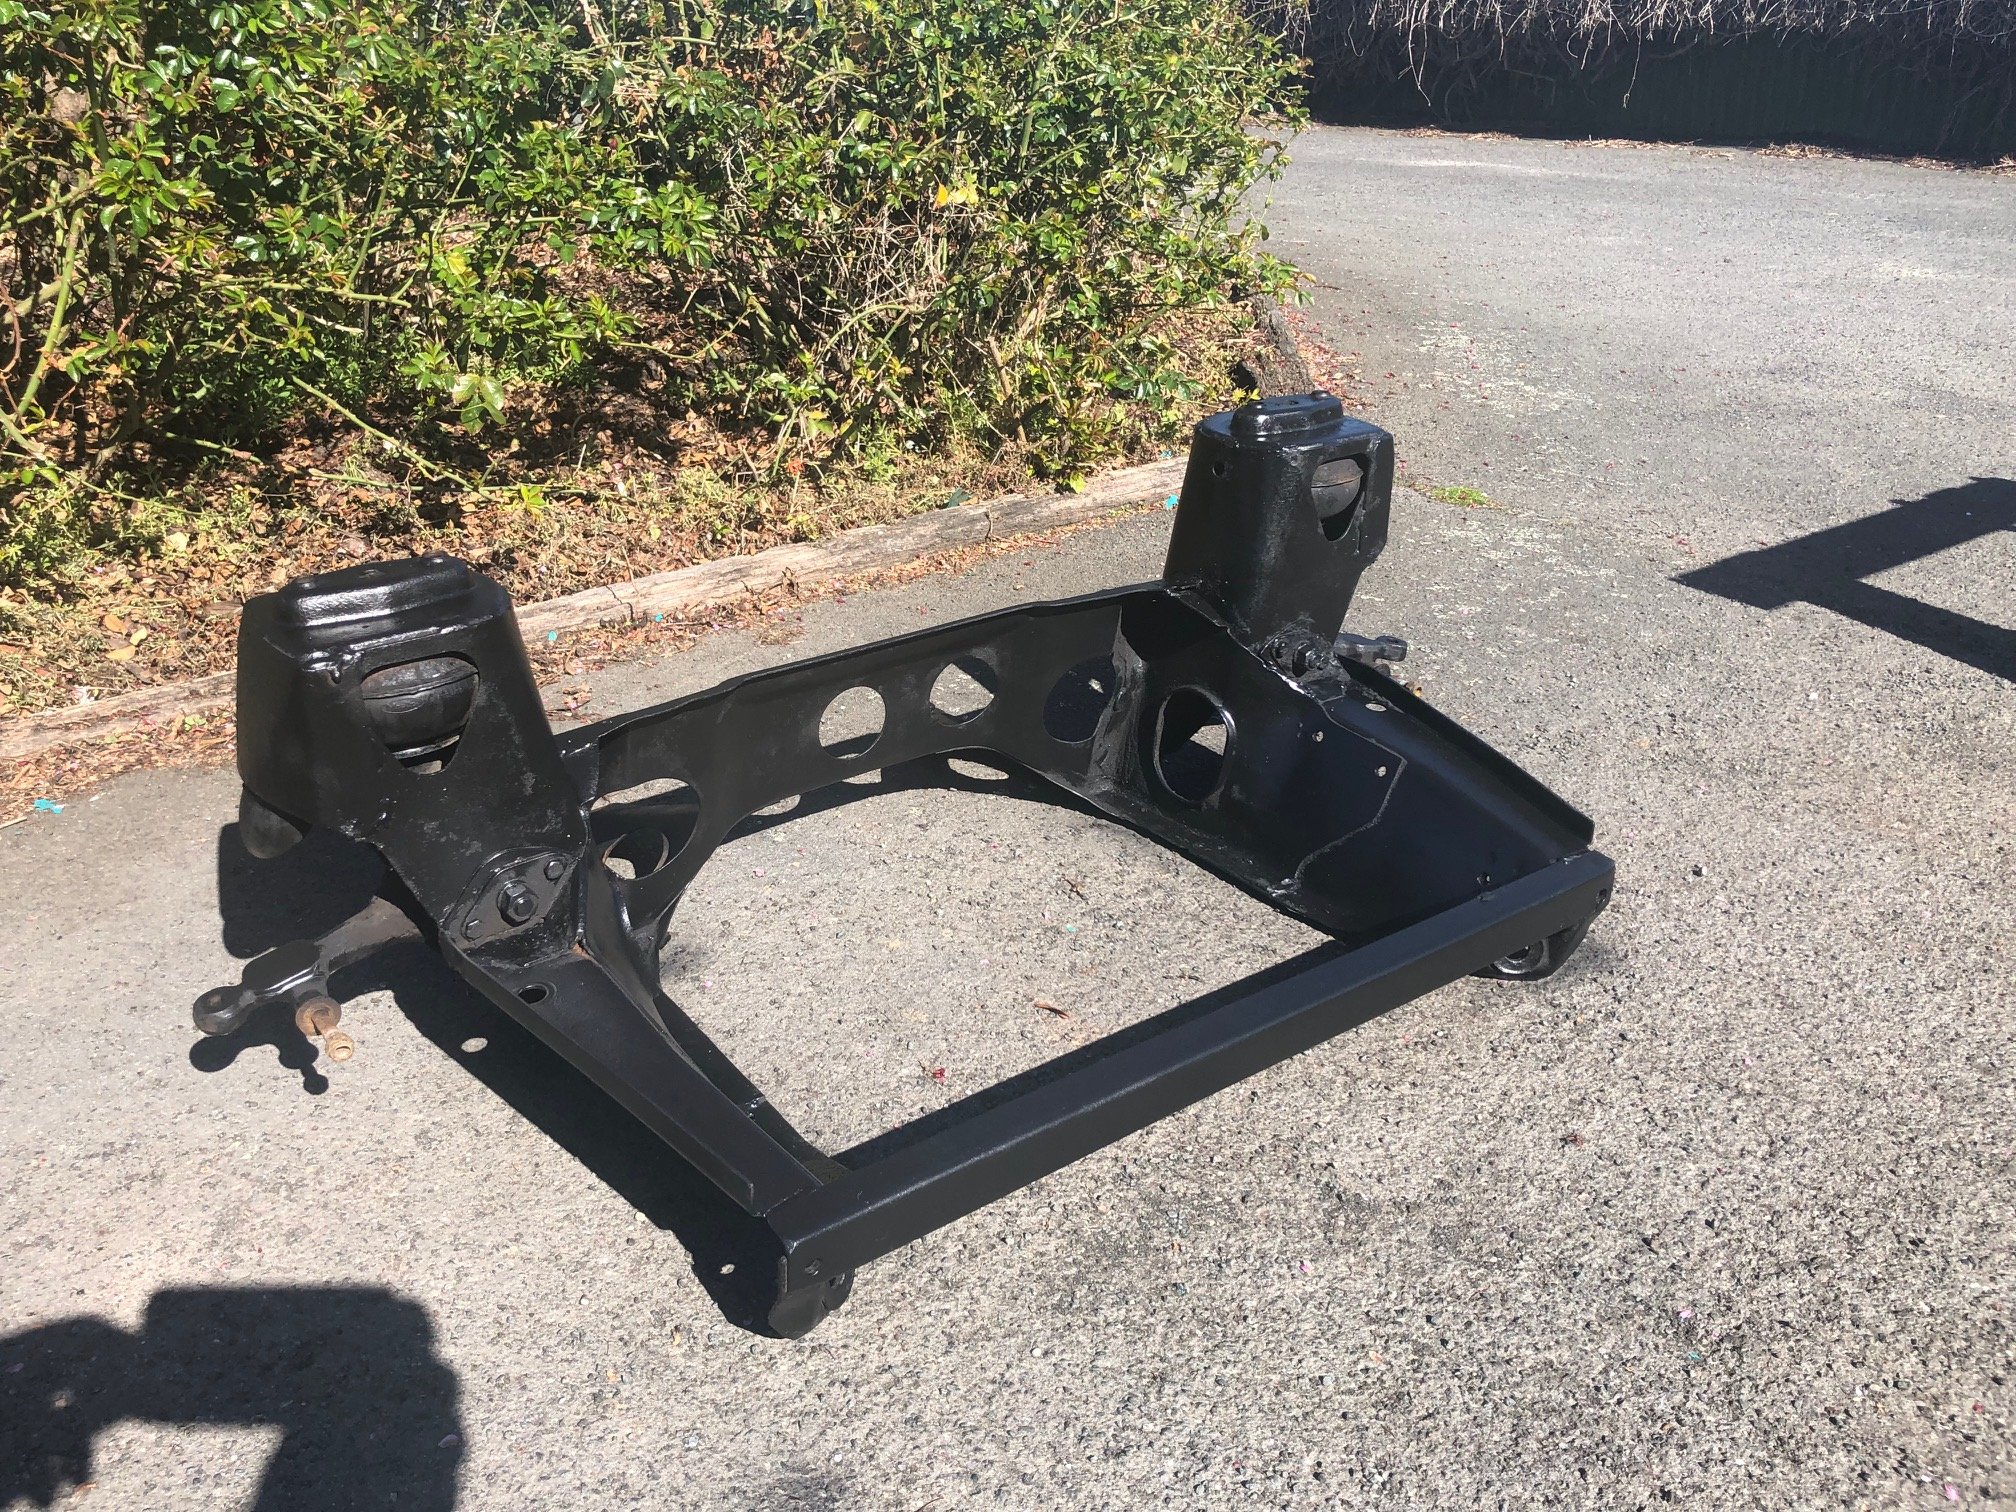
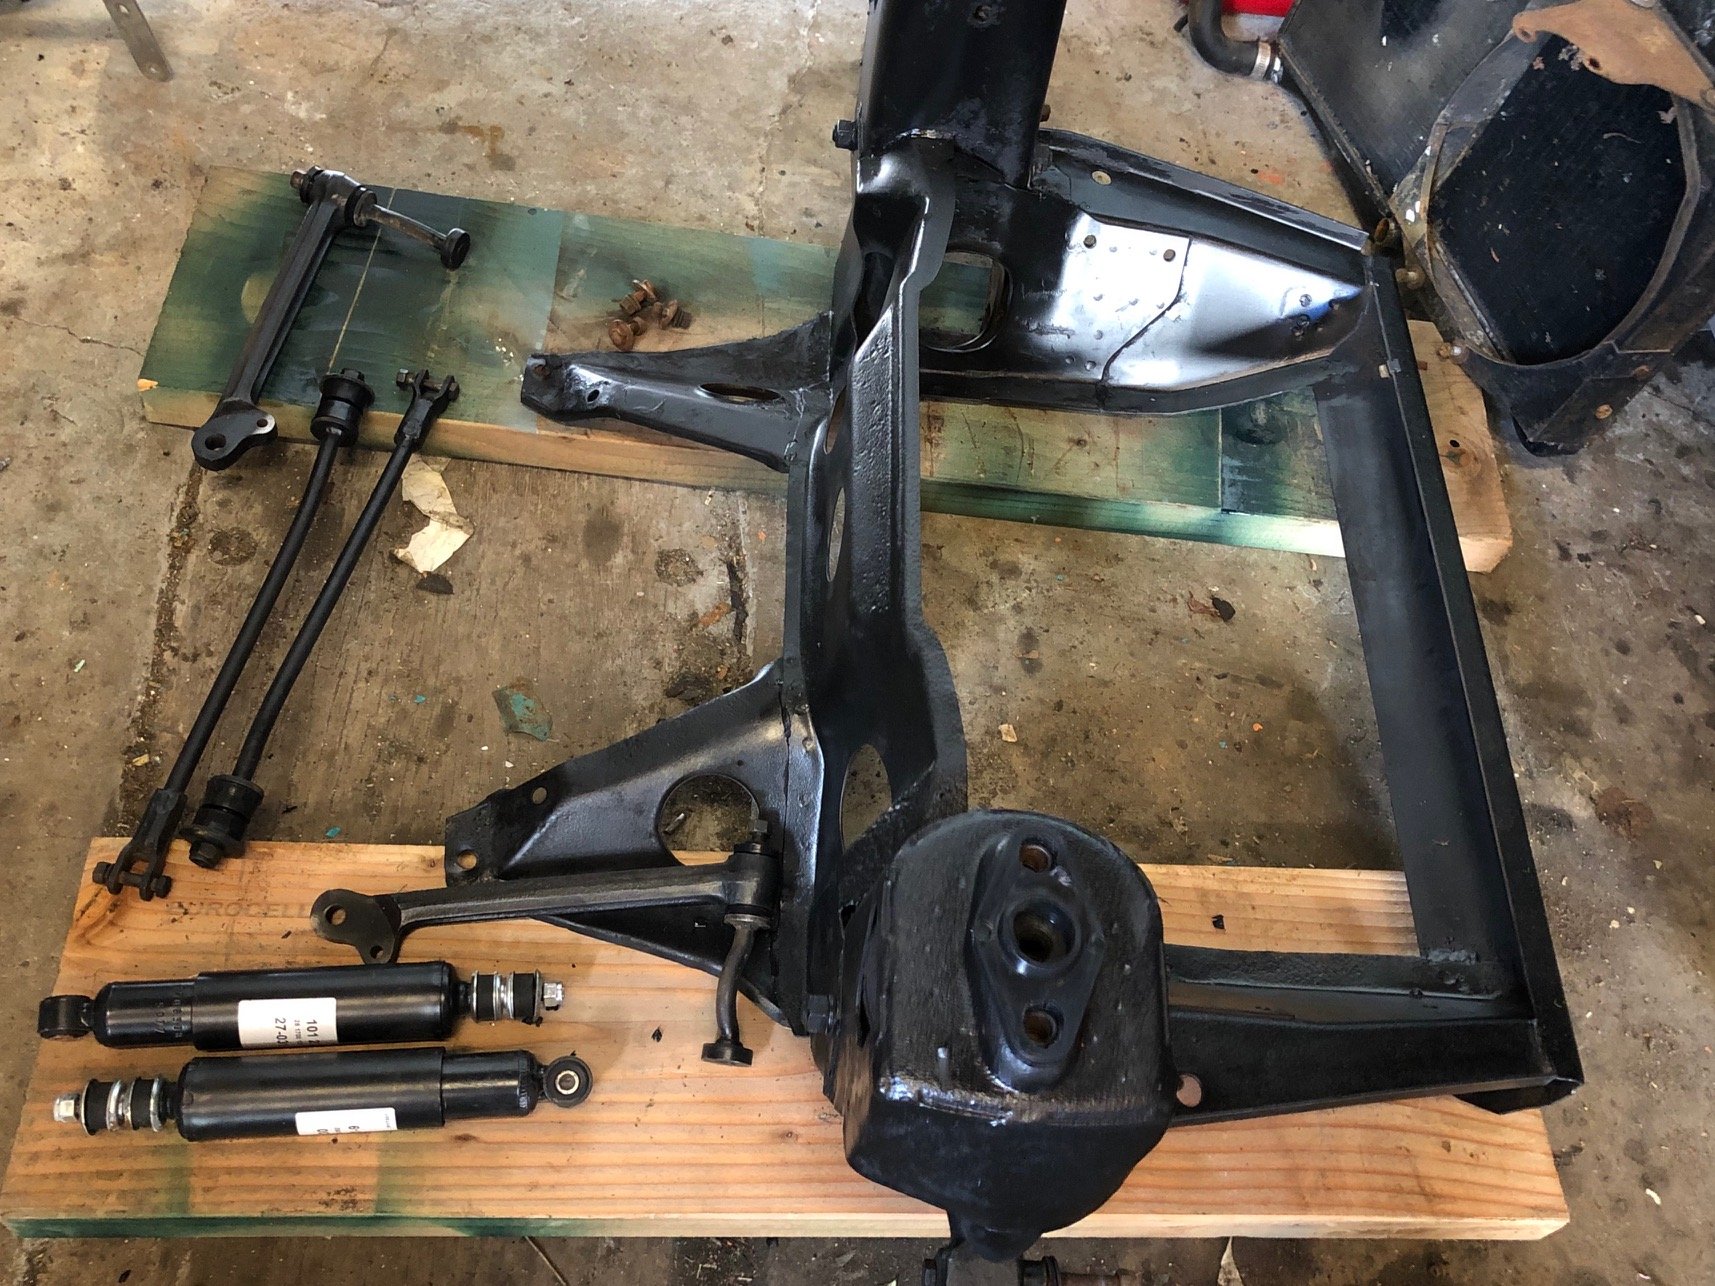
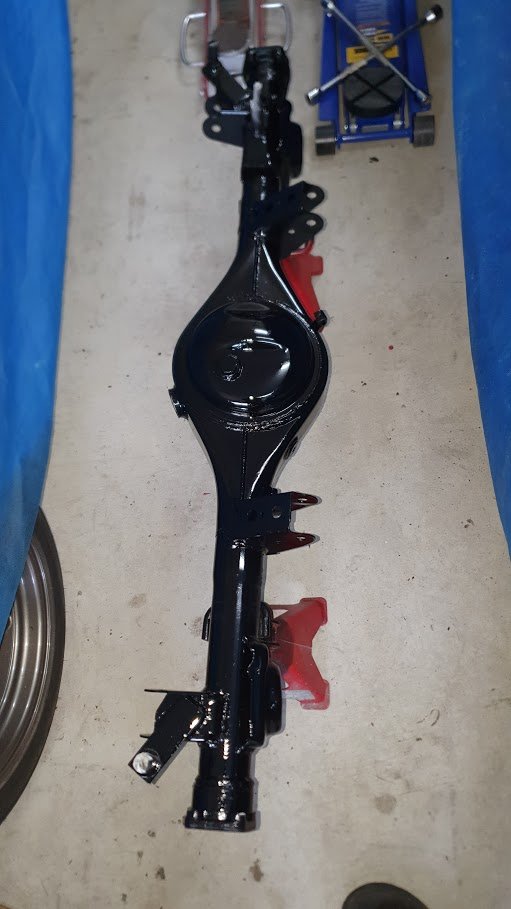
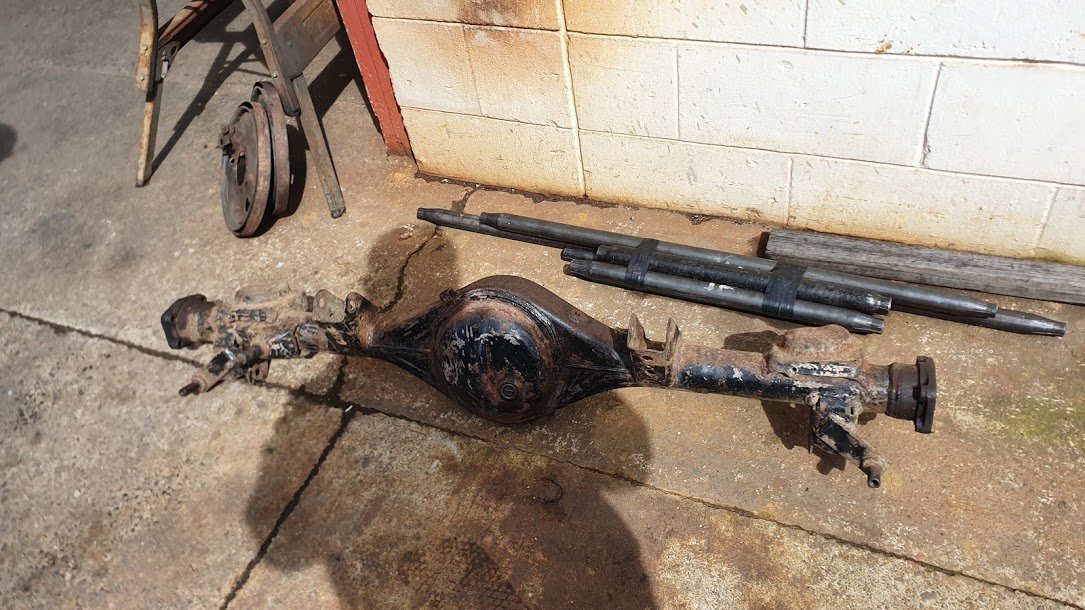
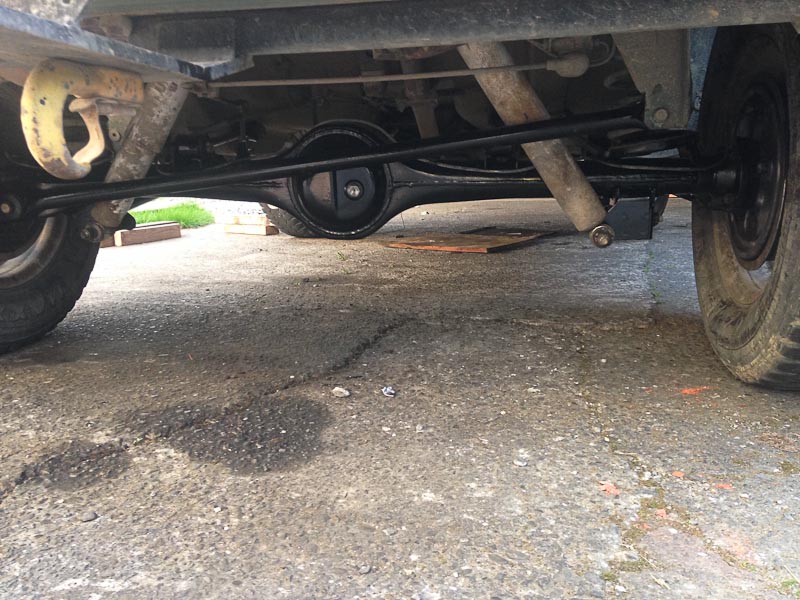
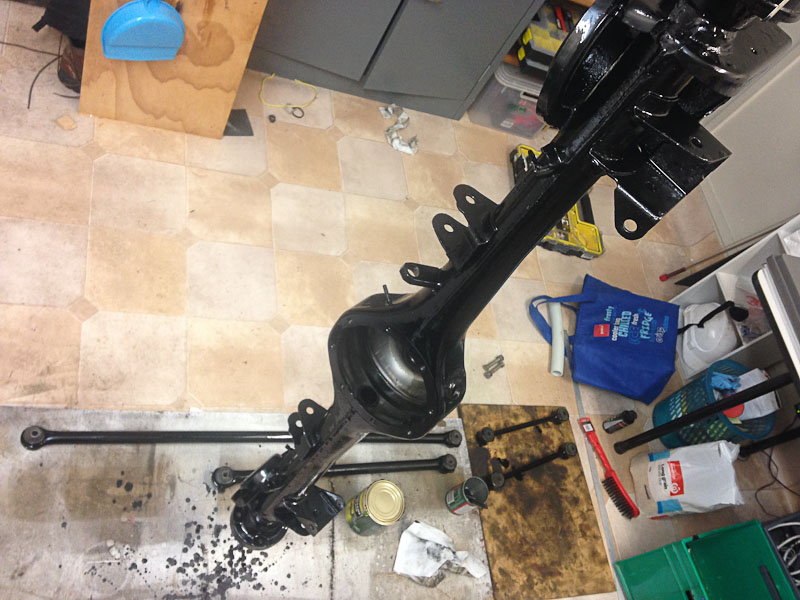
20 years and the diff hasn't been touched apart from brake shoes and wheel bearings. I decided to give it a birthday. Before.. Acid dipped Painted..
2 points
-
kinda boring update. hadn't changed the thermostat forever, so thought would try a lower temp one. seen on engine masters they made some more power running cooler water temps, so cant hurt to try.. new one is meant to be 68 degrees. but seems like more like 76 degrees. the stock Toyota one is 82deg and sits bang on that under normal conditions So yep, robbed. as you would expect no change in power, with only a 6 degree difference in water temp. but did confirm what have been seeing with oil temps; 20deg more oil temp is consistently another 3-4kw. that's going from 80deg to 100deg. faster engine is spinning more gains. in other news, some time ago i put a china alternator on it, because cheap. have been fighting broken bolts and alternator brackets for awhile. which i assumed was my crappy bracket that i made too lightweight. turns out old mate was on his 2min lunch break and this alternator skipped the balancing stop on the production line. spinning it up with my impact driver which maybe spins at 2000rpm it wanted to jump out of your hand. so yeh at 20k rpm... note windings held together with string2 points
-
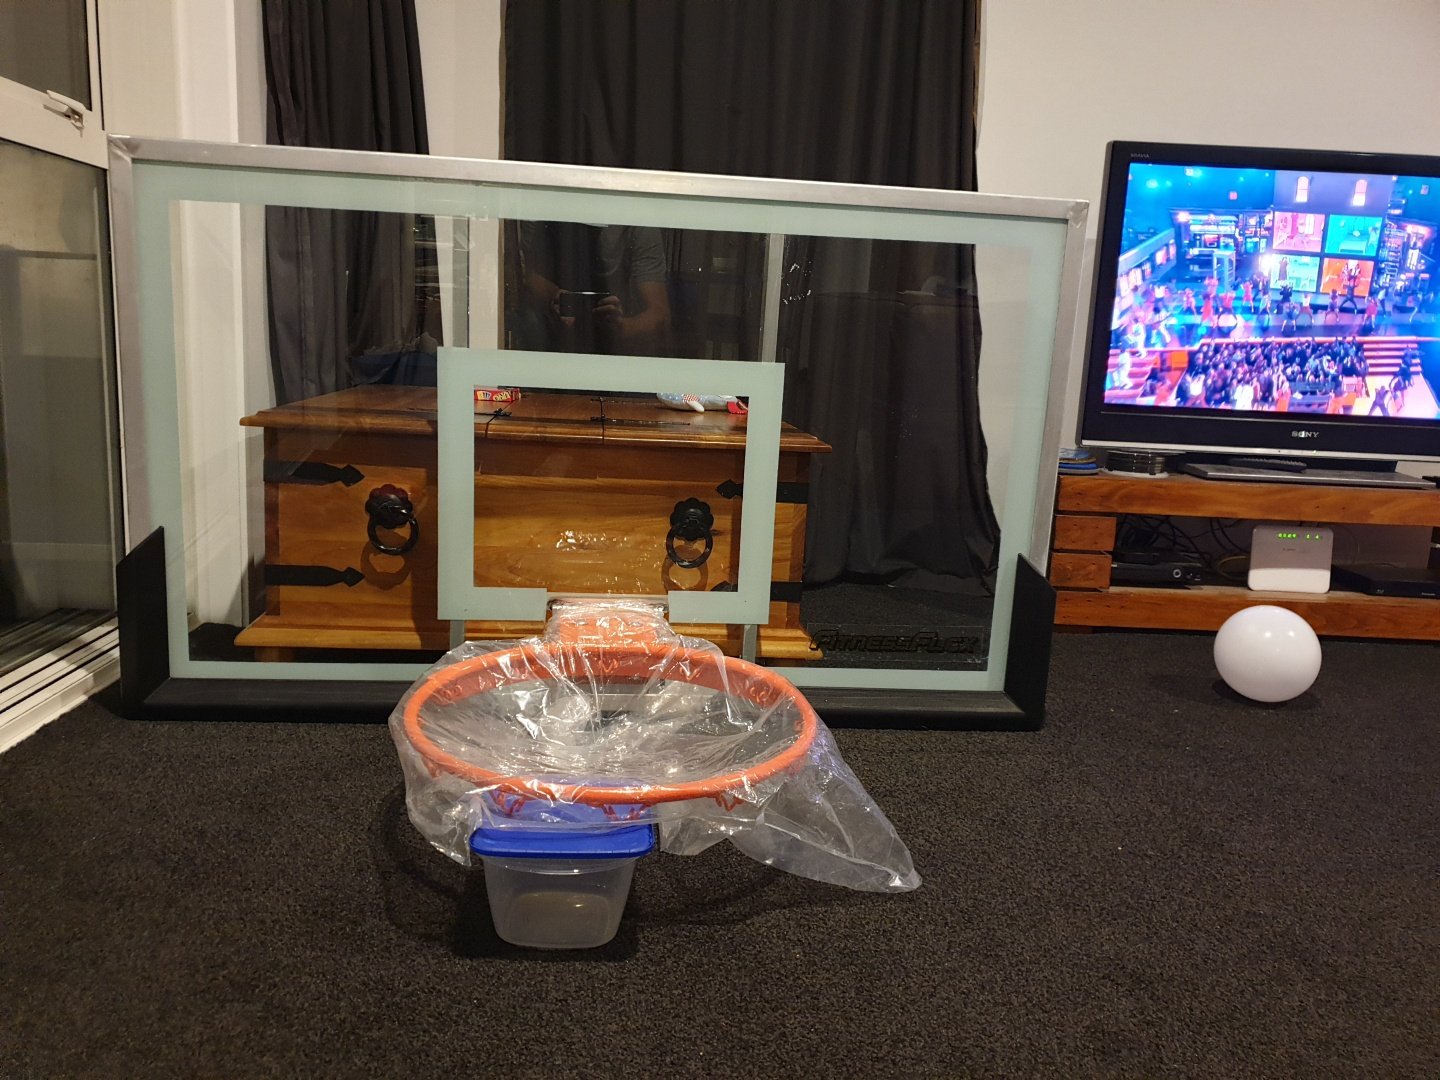
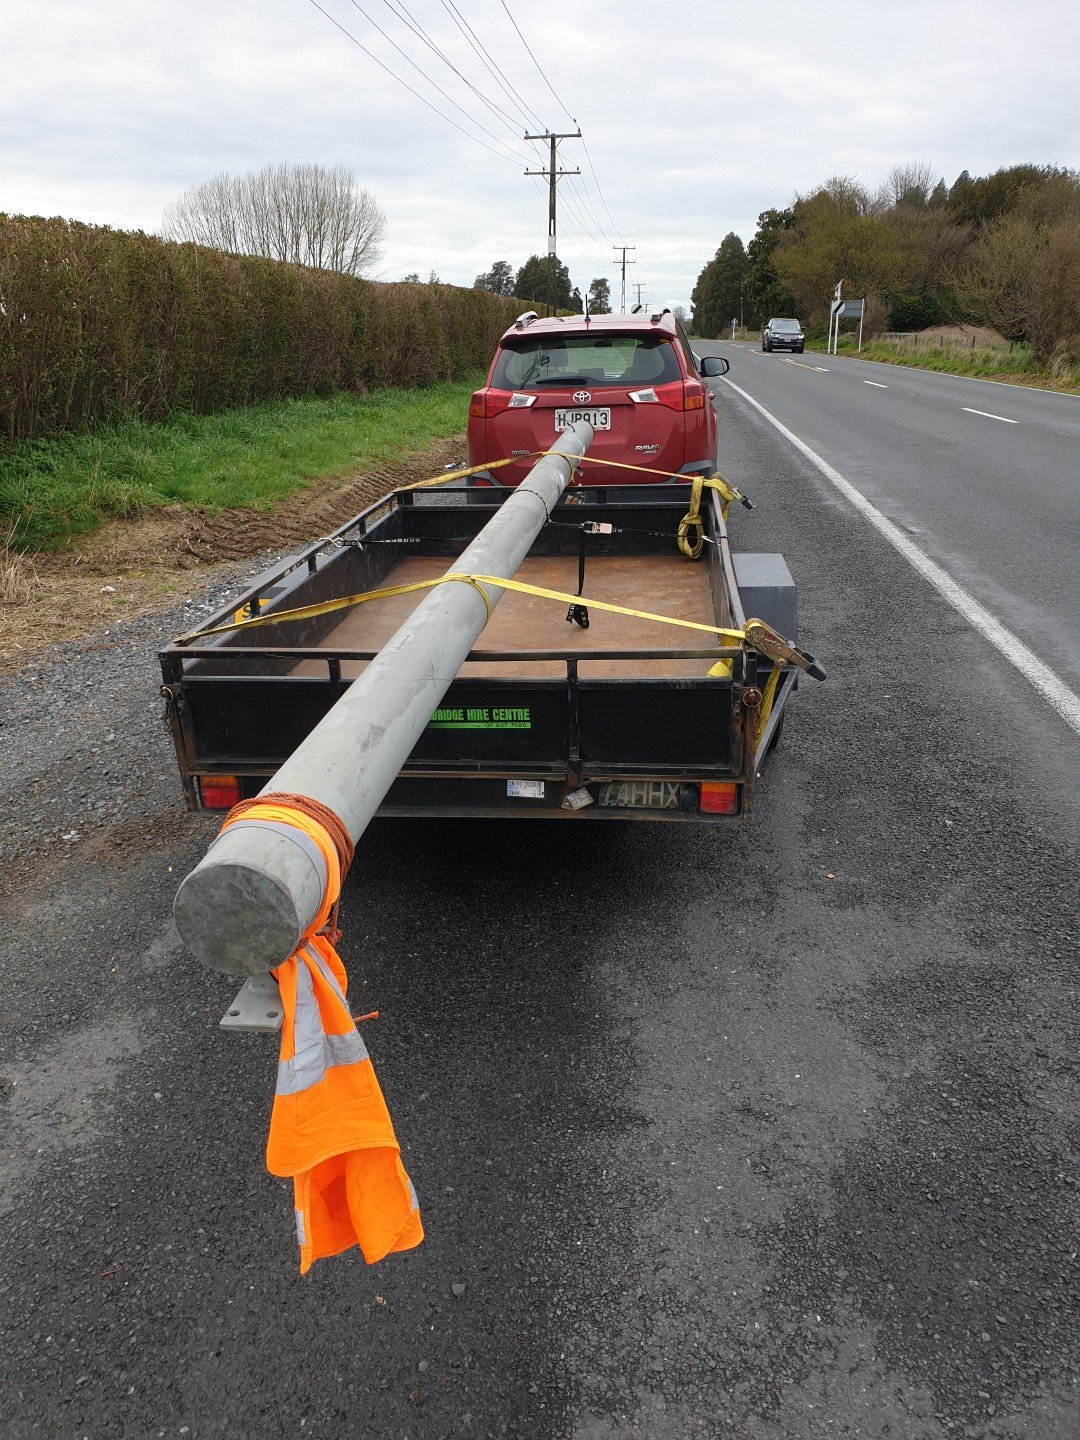
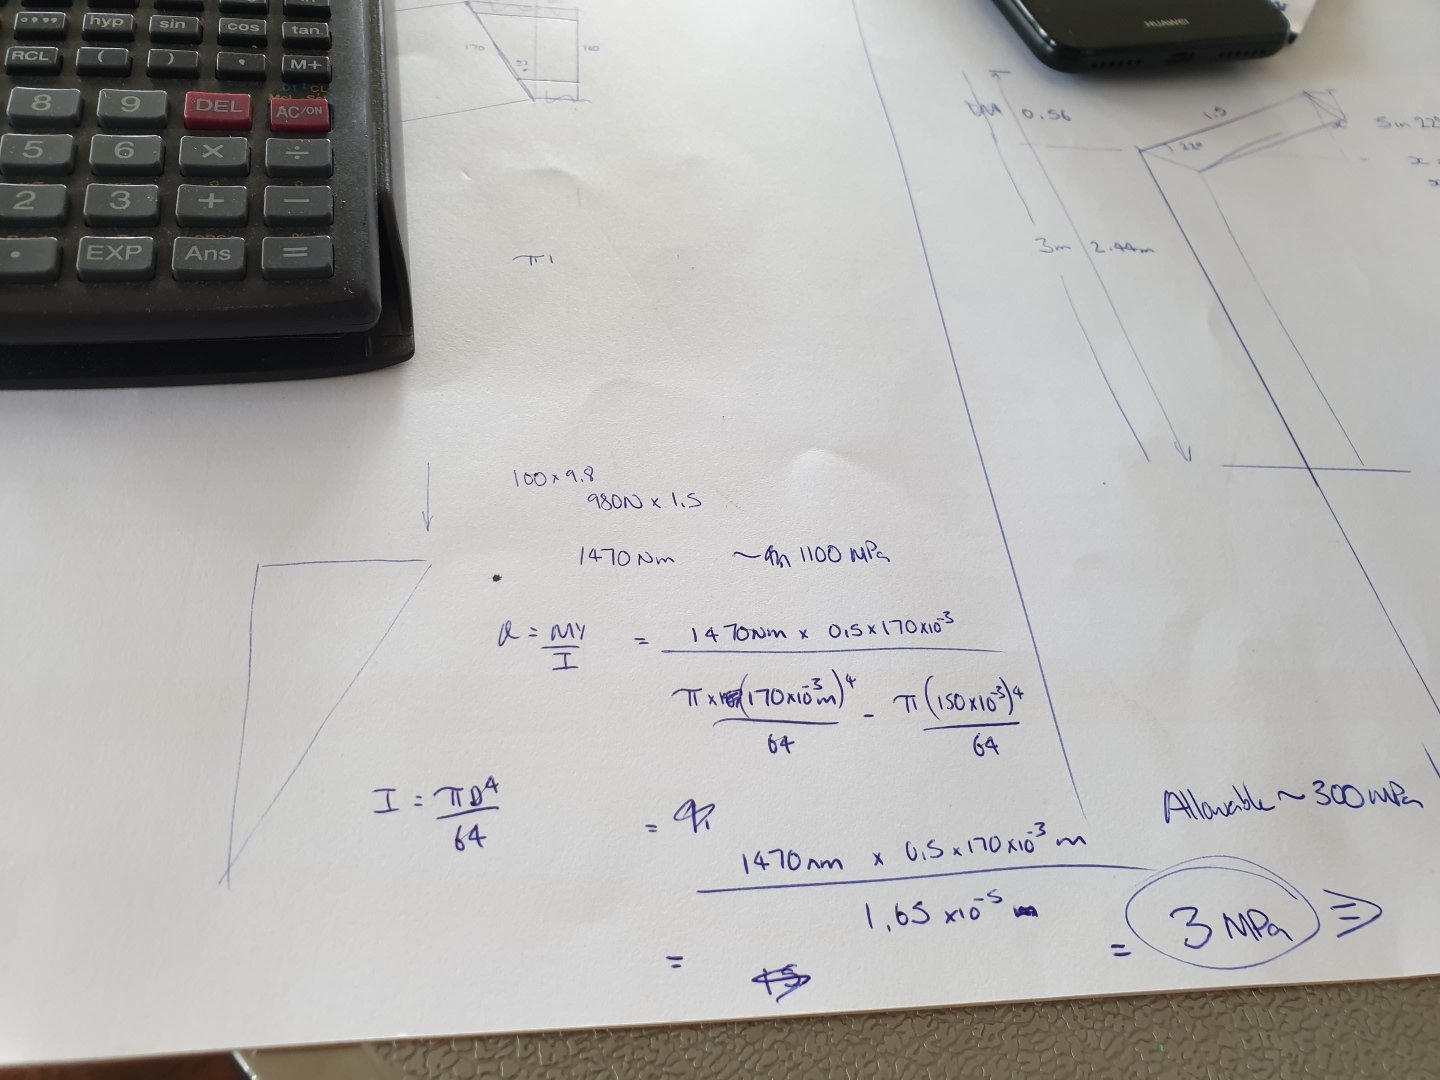
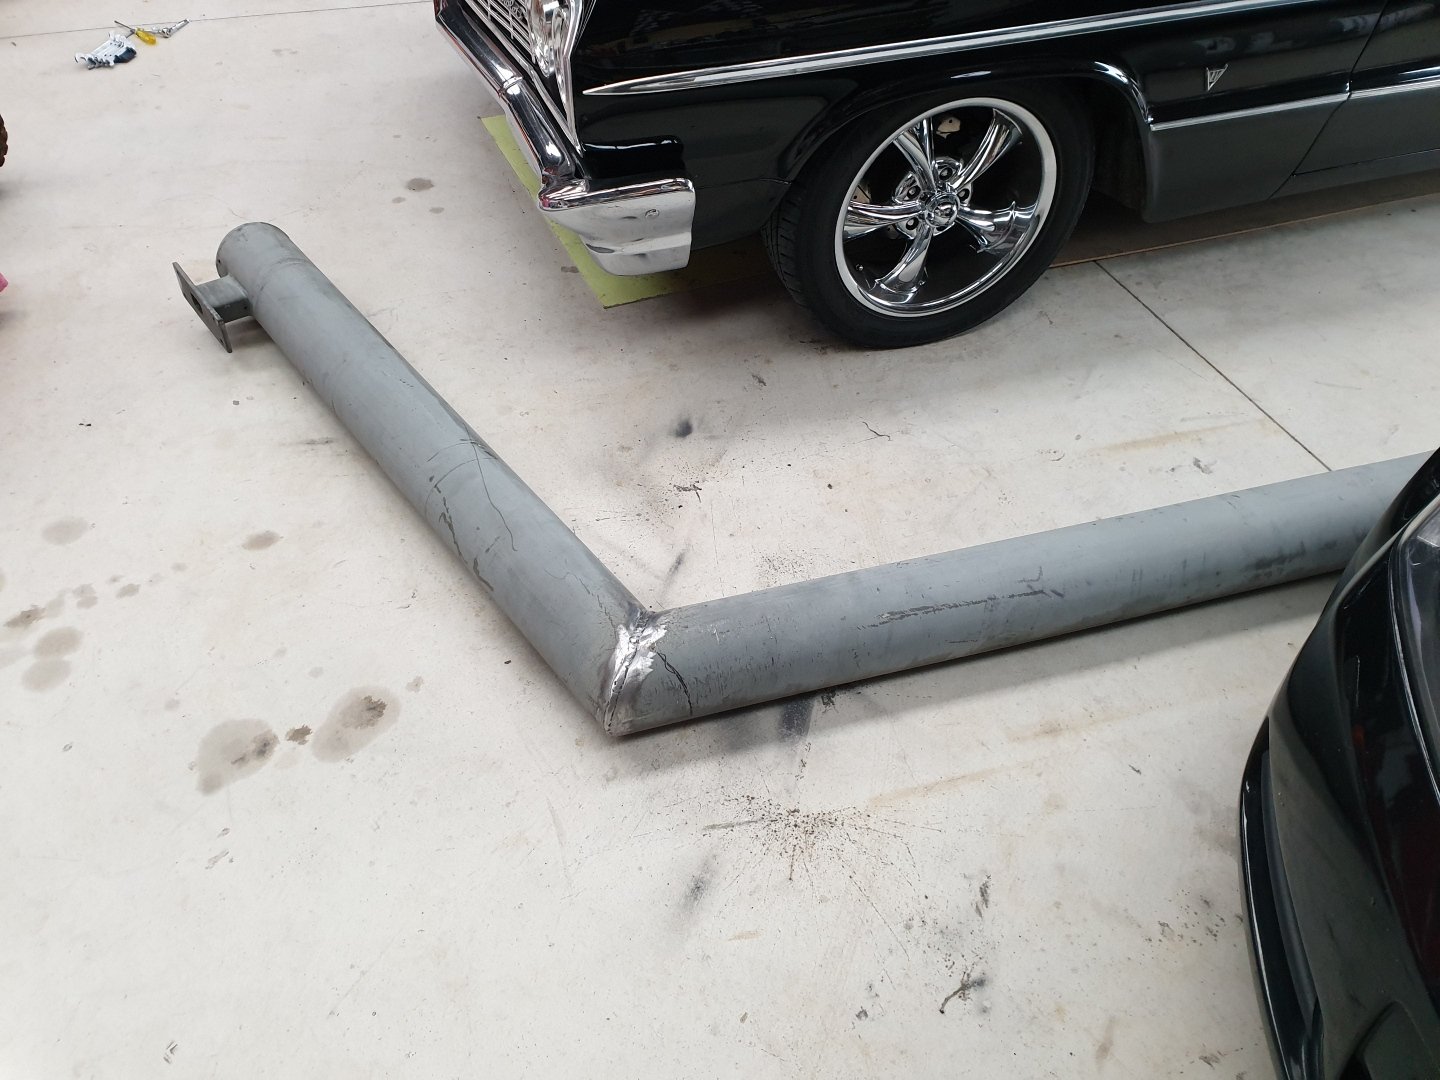
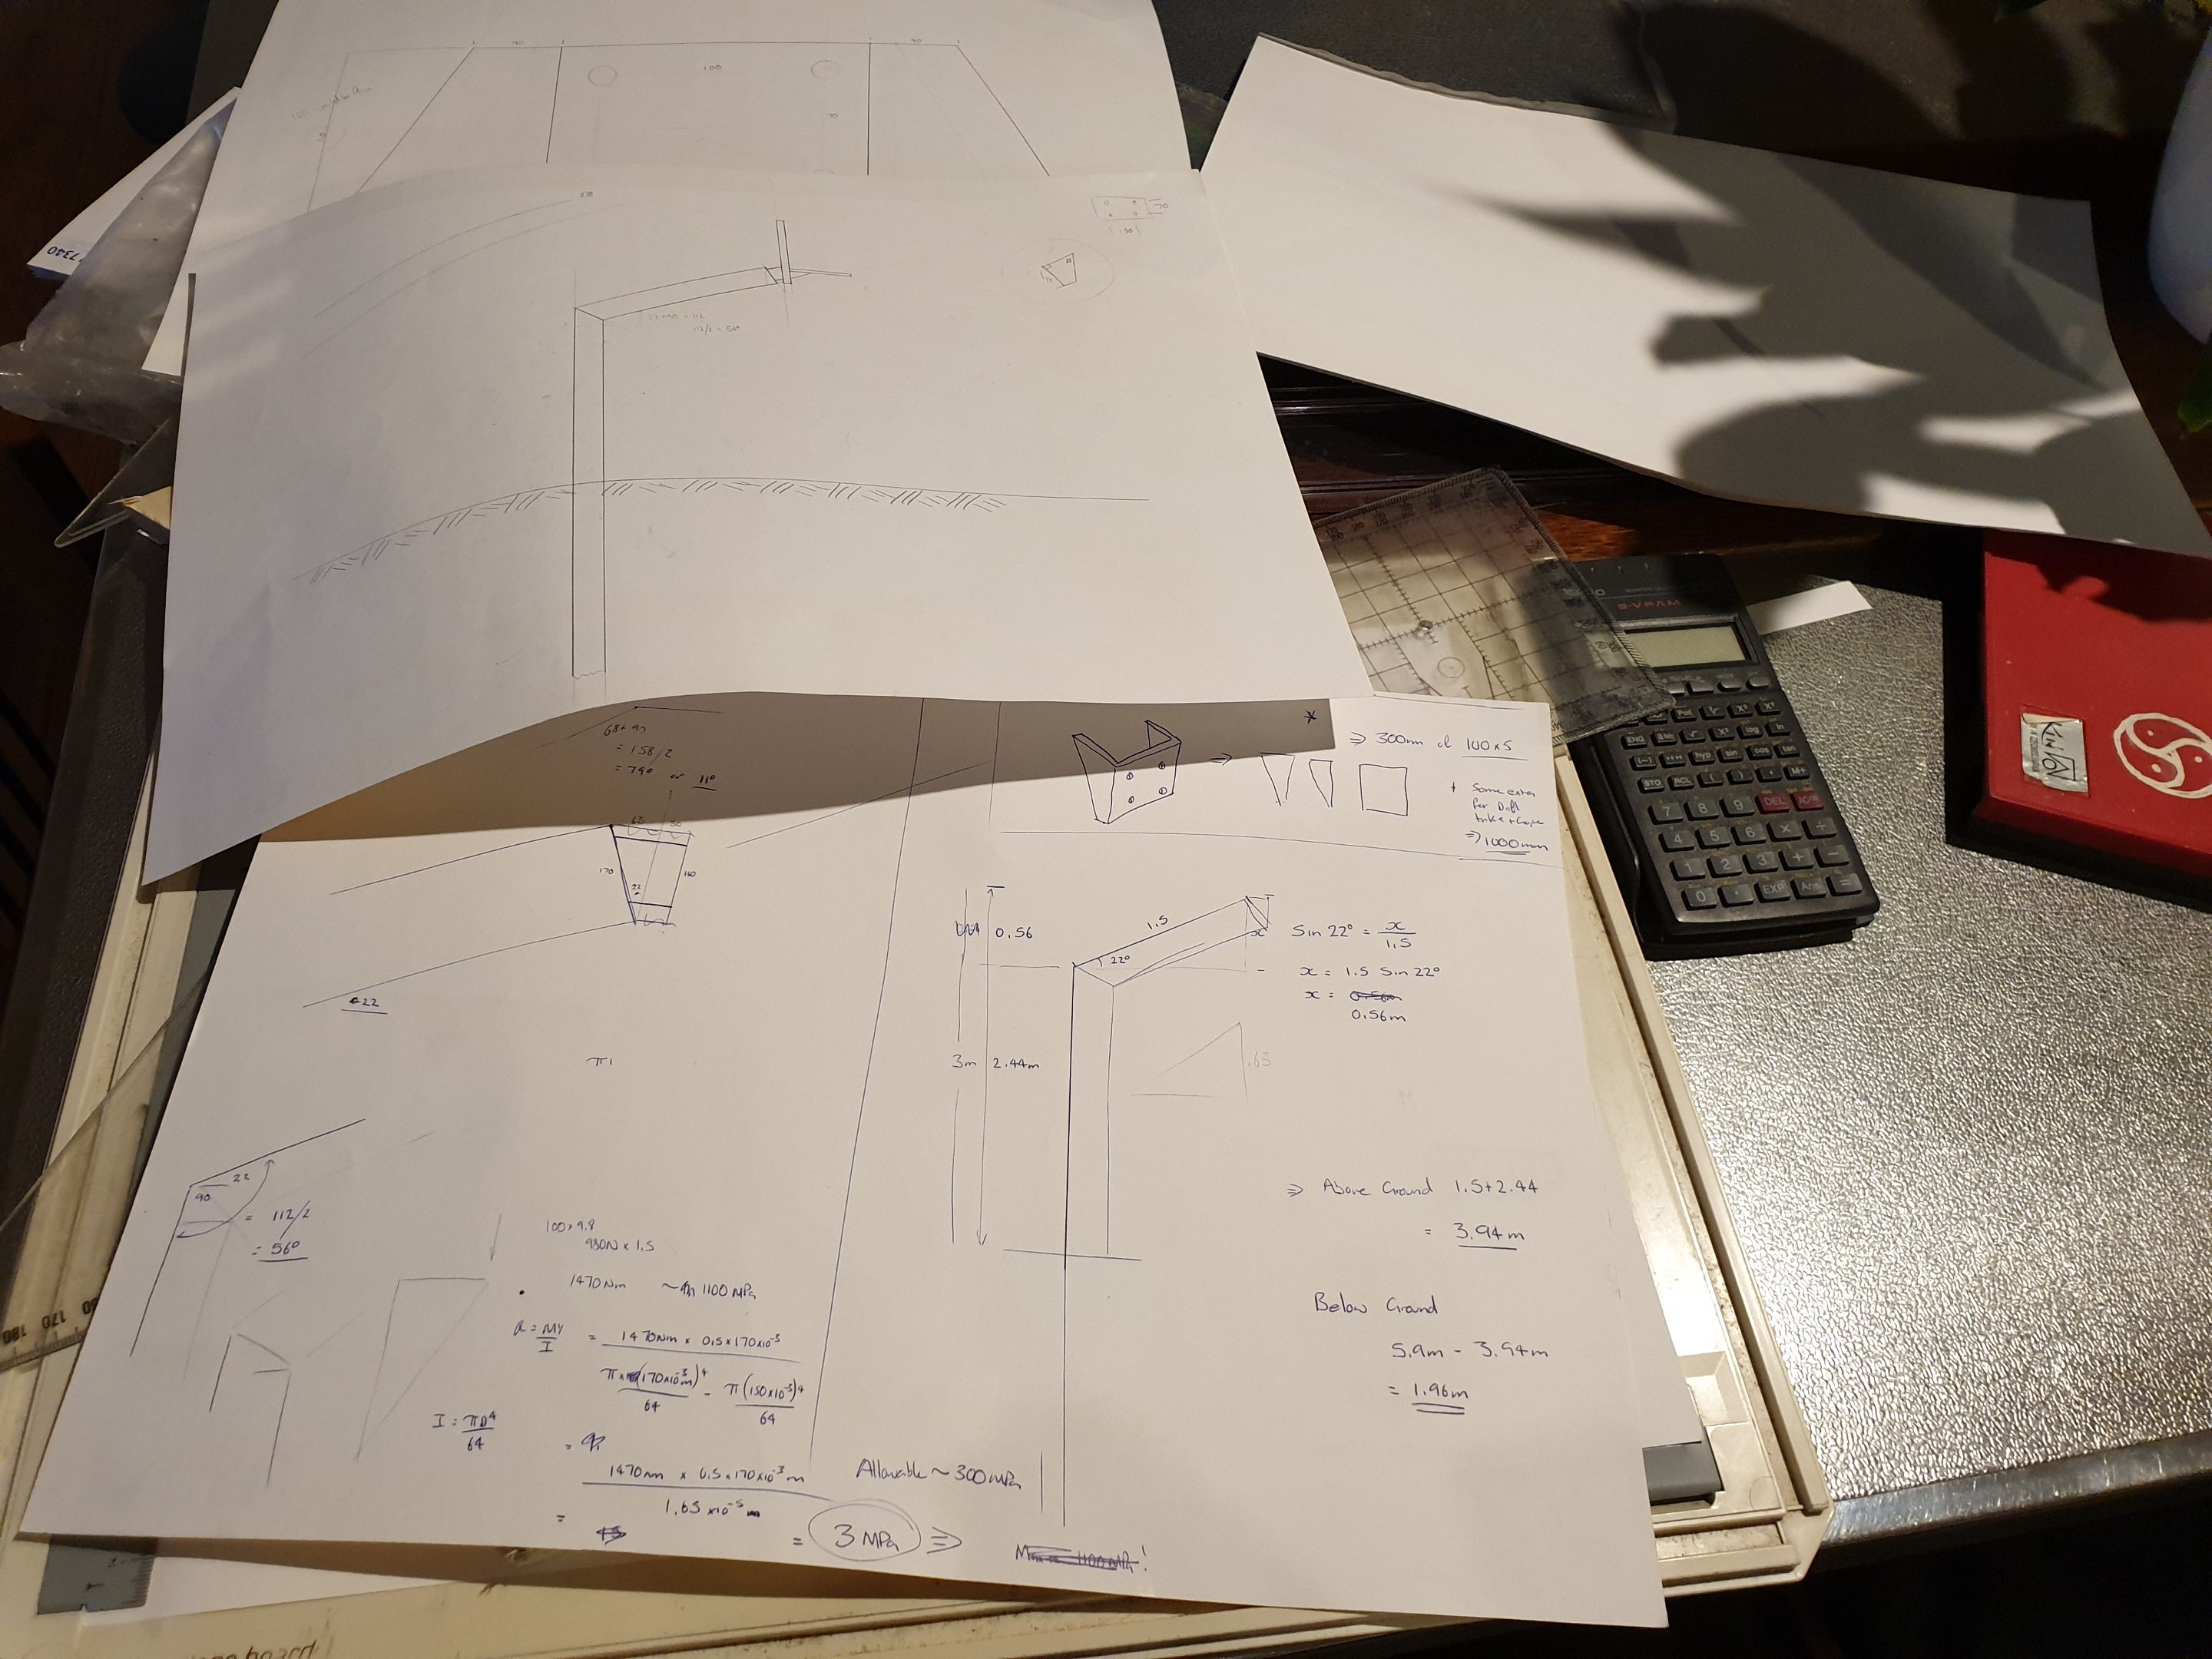
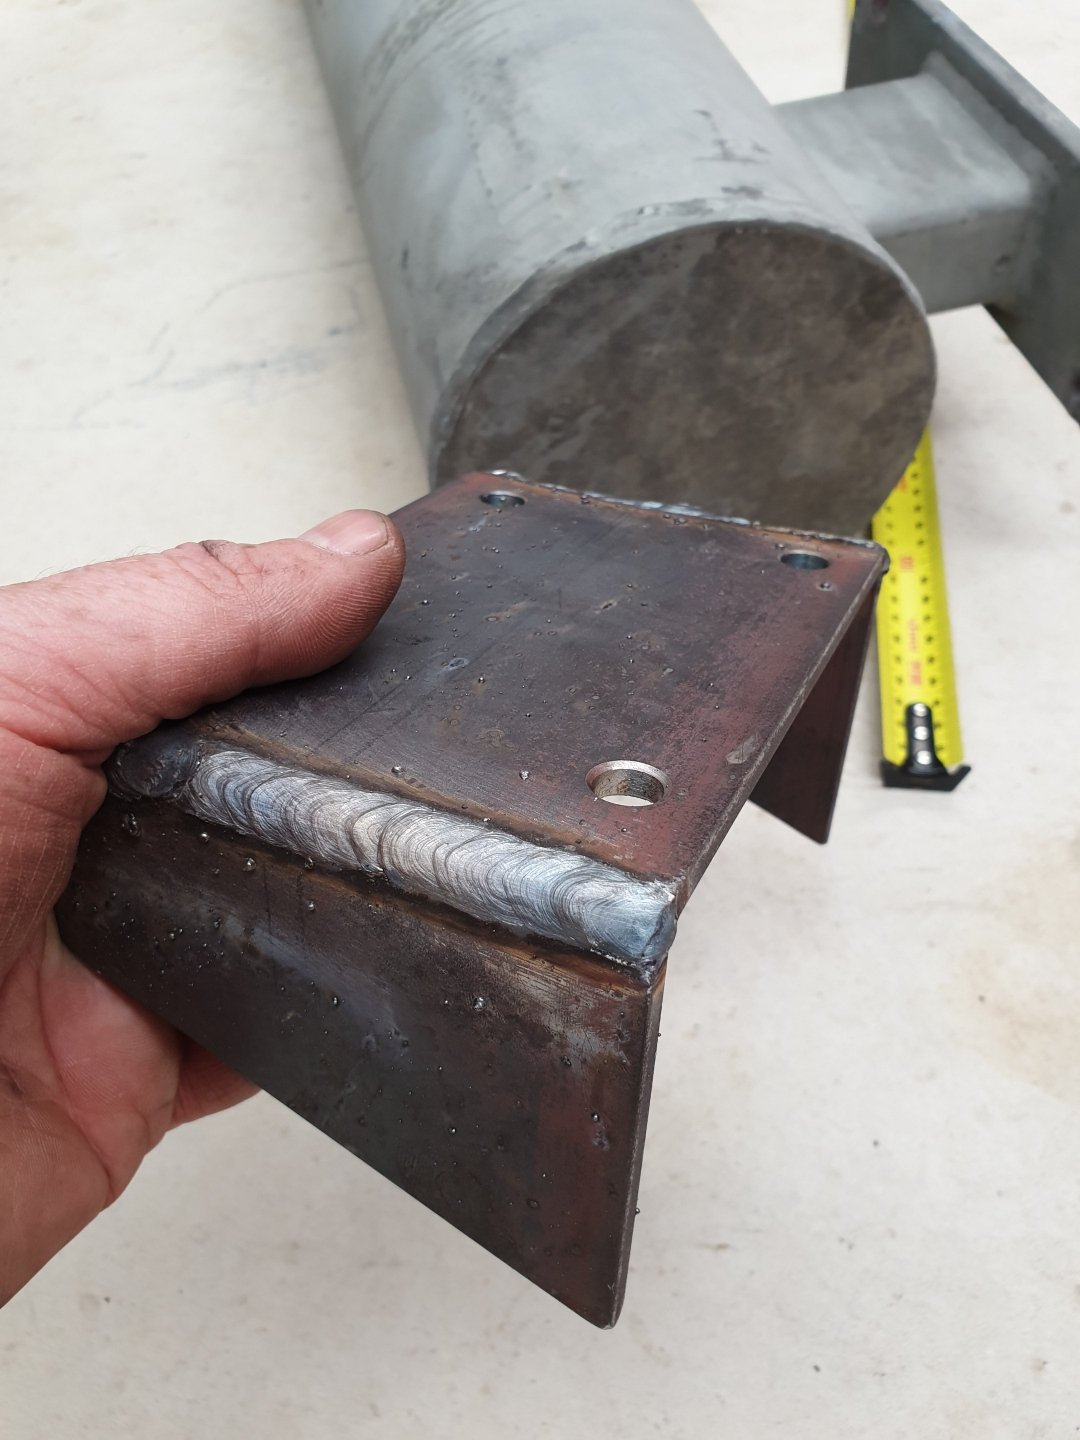
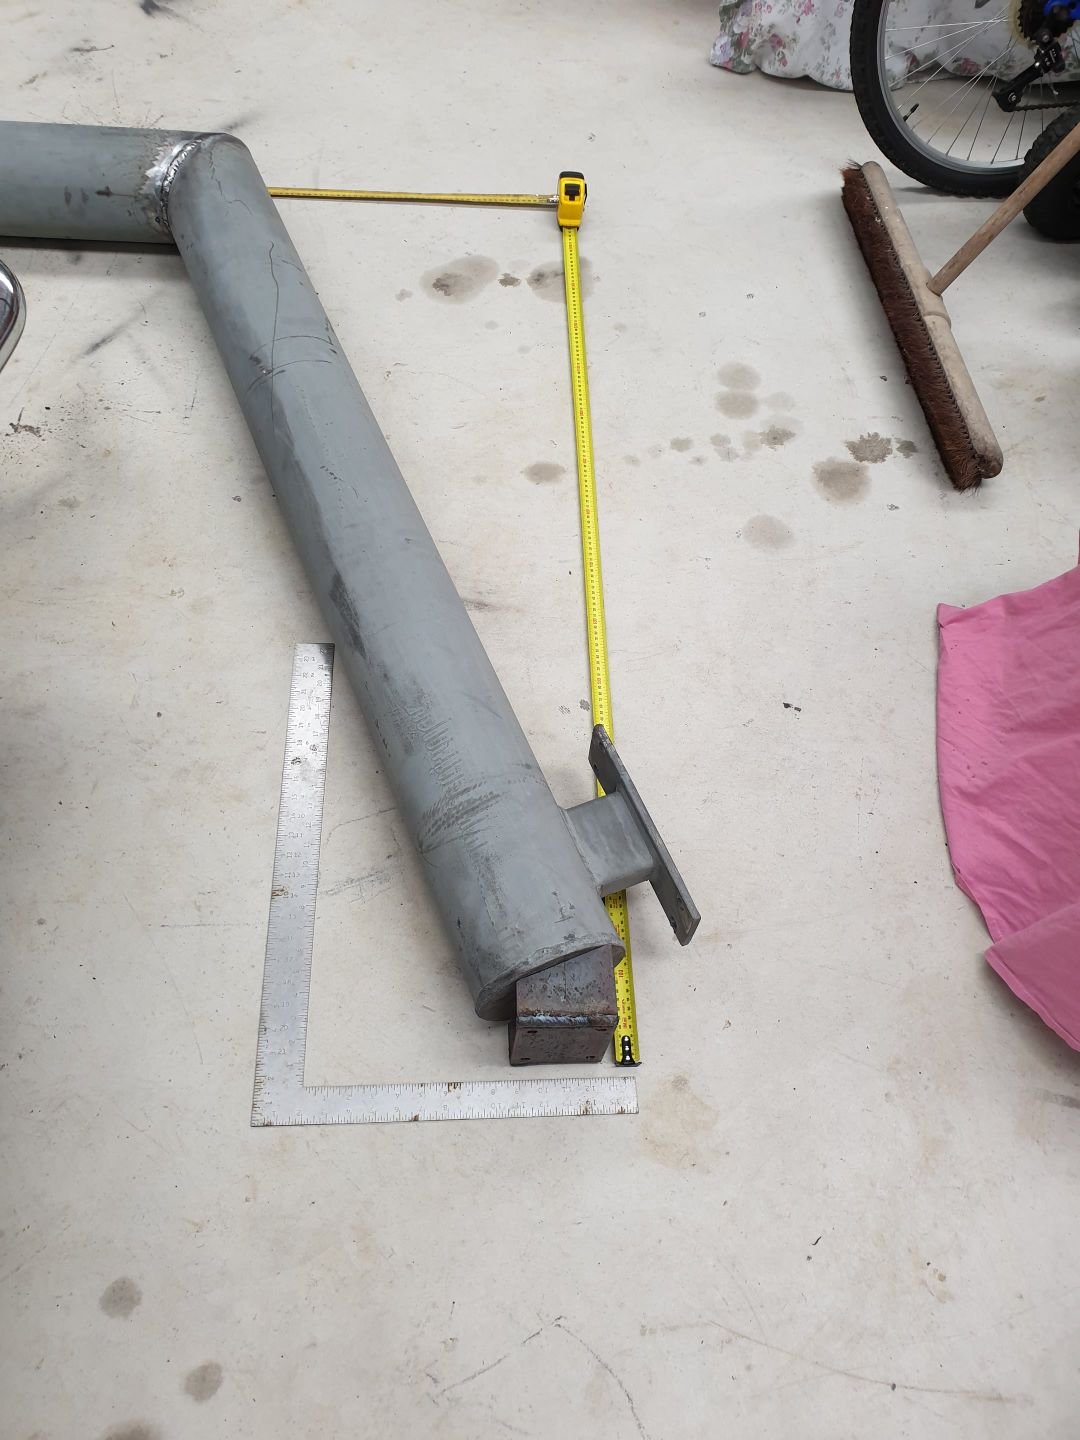
I brought my son this tempered glass basketball backboard for his birthday this week. Problem is I had no idea how monstrous it was in size/weight at the time of purchase (online). Slapping it up on a bit of 2" pipe wasn't going to happen. So: Trademe to the rescue again. An ex stadium spotlight pole at a whooping 180mm diameter, 10mm wall thickness and 5.9m length... "honest truth officer, I'm only moving it just down the road" Some "School-C" level mathematics and equivalent drawing talents soon had a design in place. Let's just say it has a generous factor of safety when I did the calculations for bending stress... And many hours later...cut and fitted, v notched for multiple weld passes...and shitted together using an arc welder. Not my finest work, I certainly wont be sitting any gasline or food grade welding tickets this week that's for sure... but I'm pretty confident it's not going to brake anytime soon. That's as far as I got today. Been up since 4.00am and just sat down now, so 14hrs of picking up and getting shit done today. Must be beer o'clock???
2 points
-
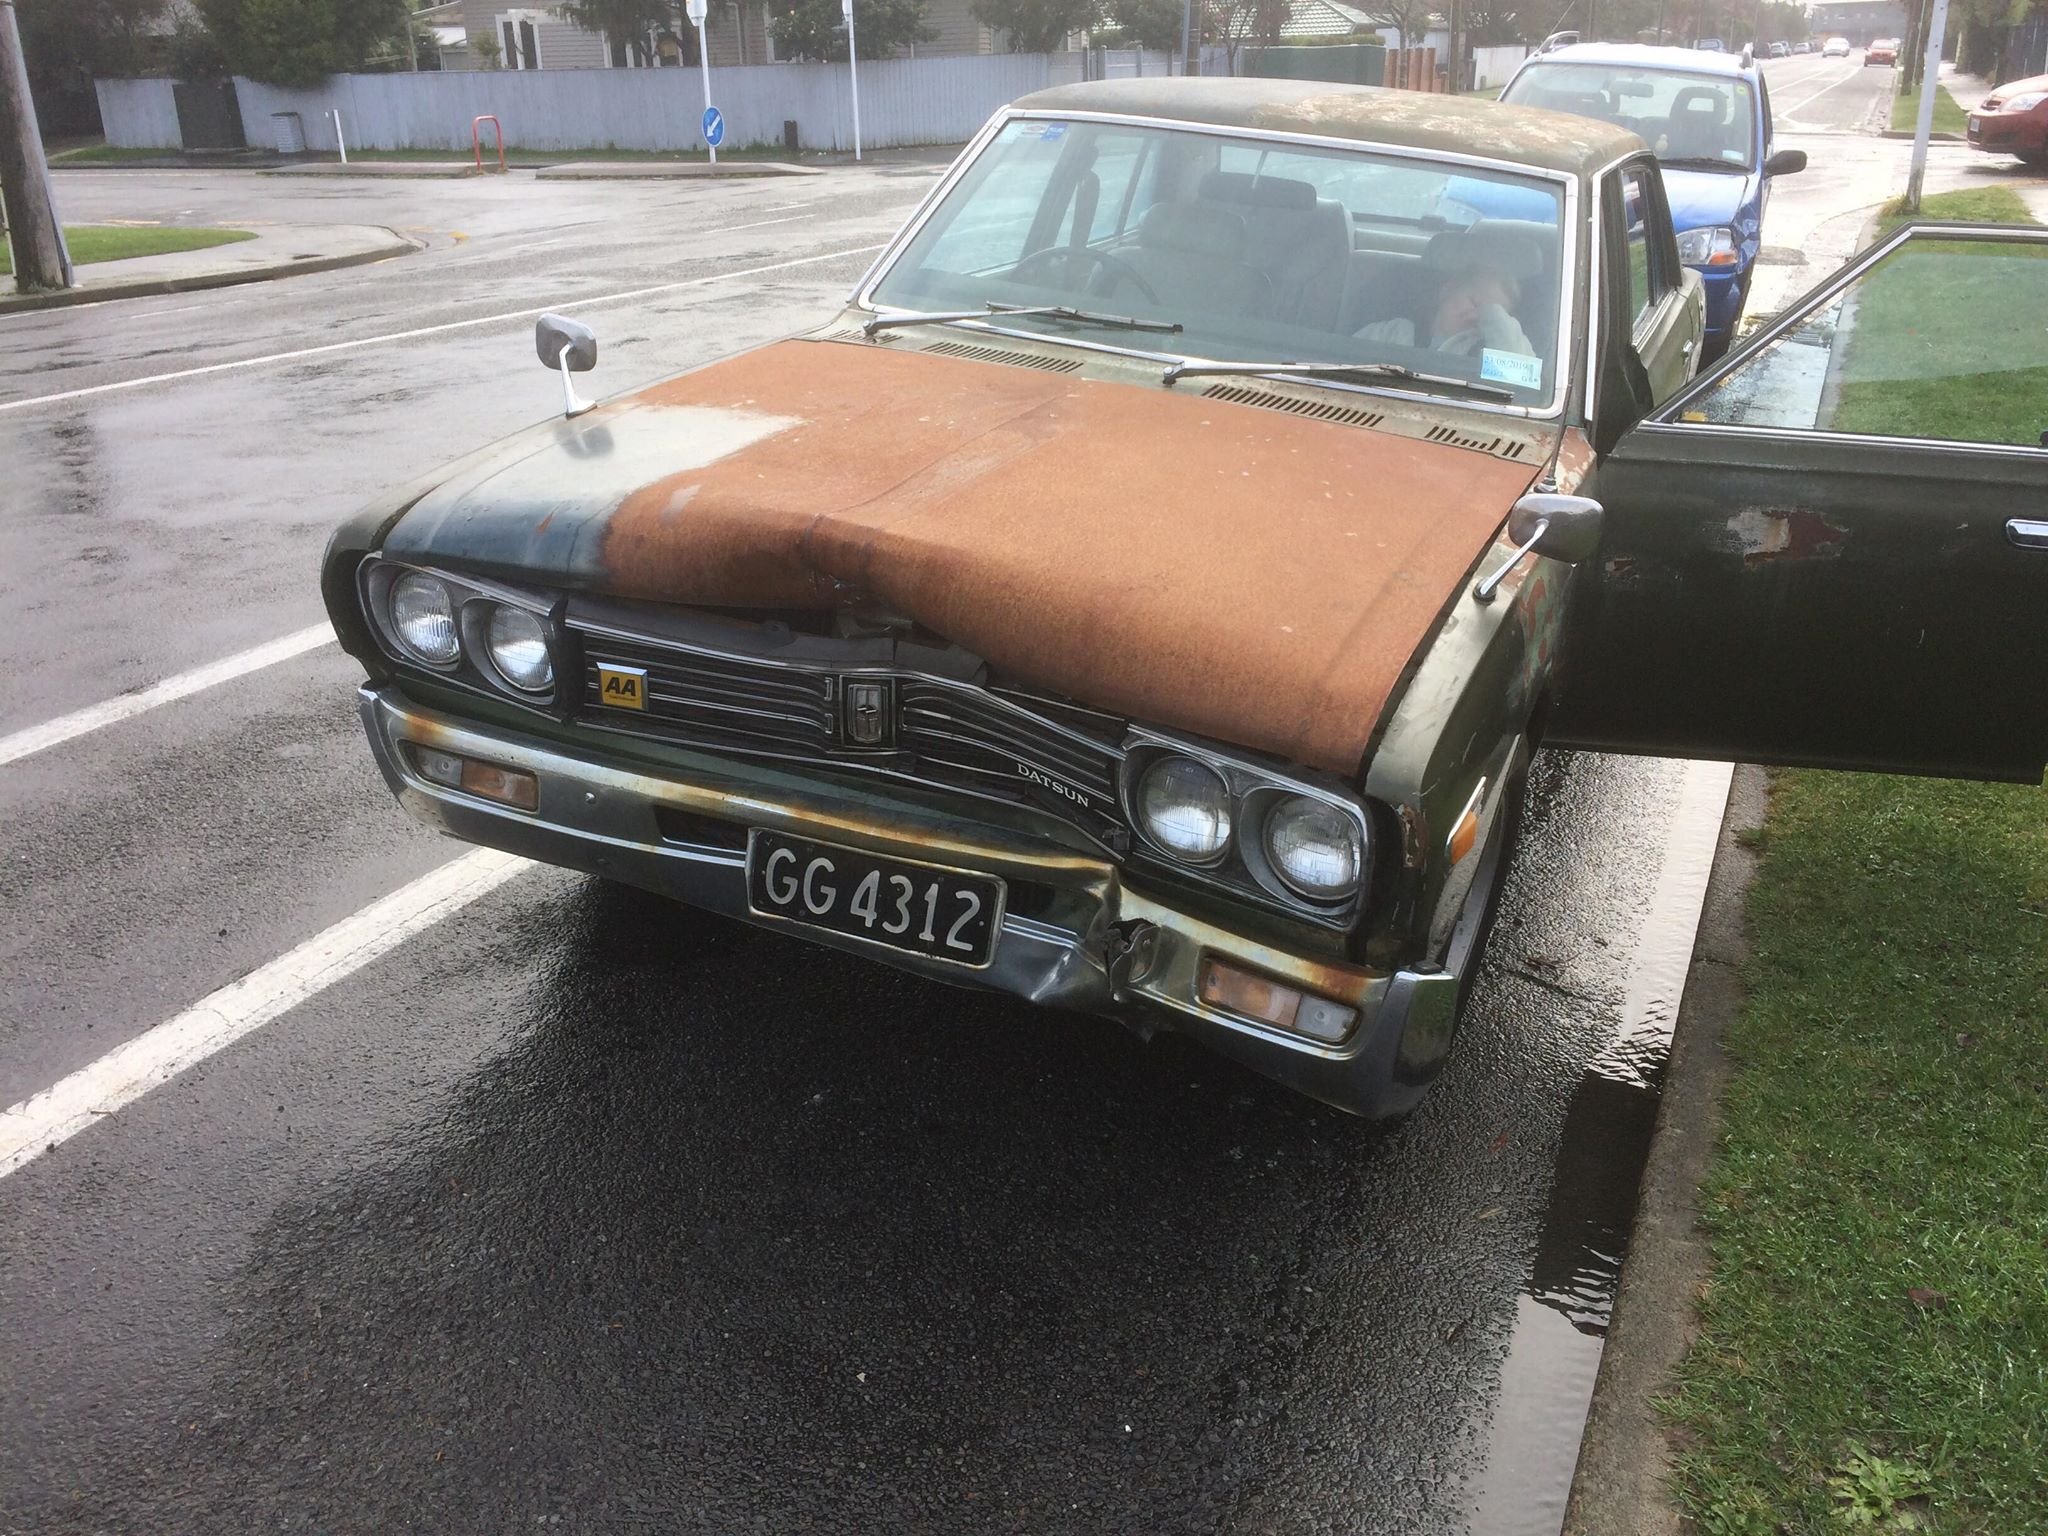
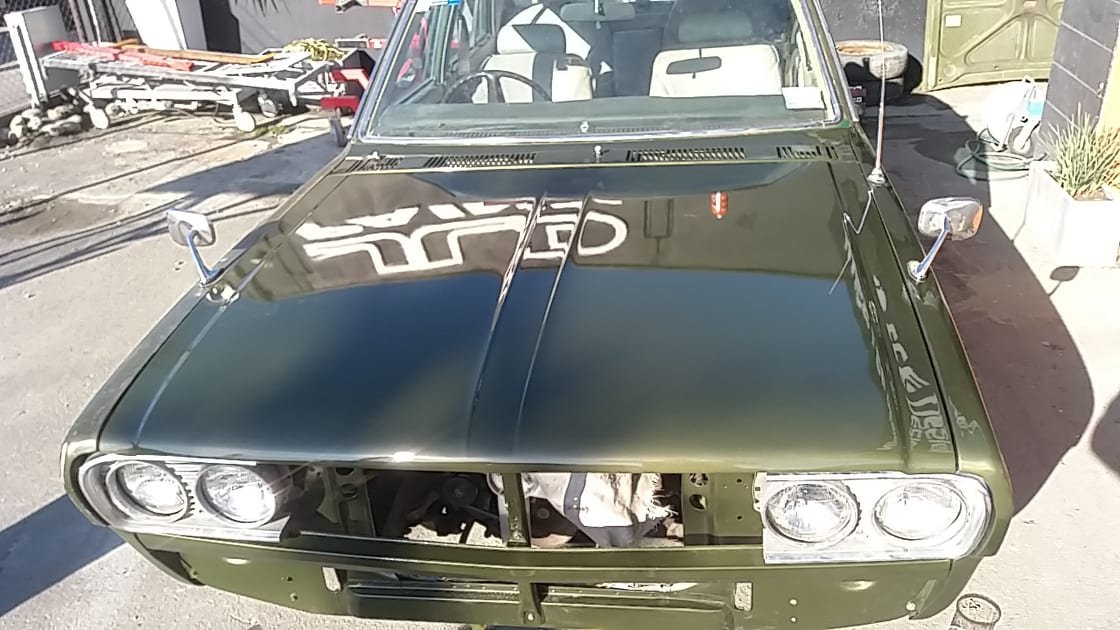
So yeah, I still own this. it ended up getting a full Brake rebuild, new fuel tank etc and some other odds and ends. I have been daily driving it along with the EB Civic. It ended up getting a part respray on insurance thanks to a young driver that pulled in front of me causing a crash... luckily I know of a few parts cars so the insurance company happily repaired it its currently waiting on me to clean up the surface rust on the back of the new bumper and fit it.
2 points
-
Its still held together with G clamps and cable ties, so we weren't going too crazy, but you get the idea.2 points
-
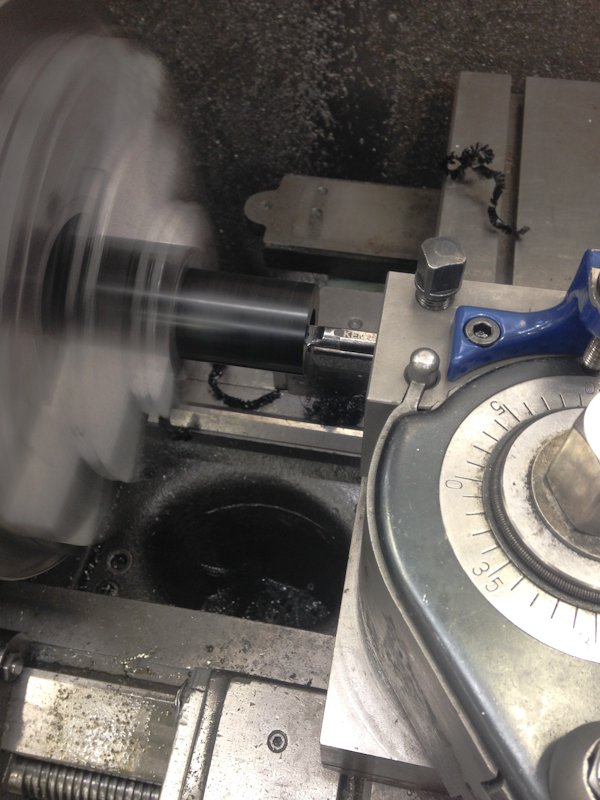
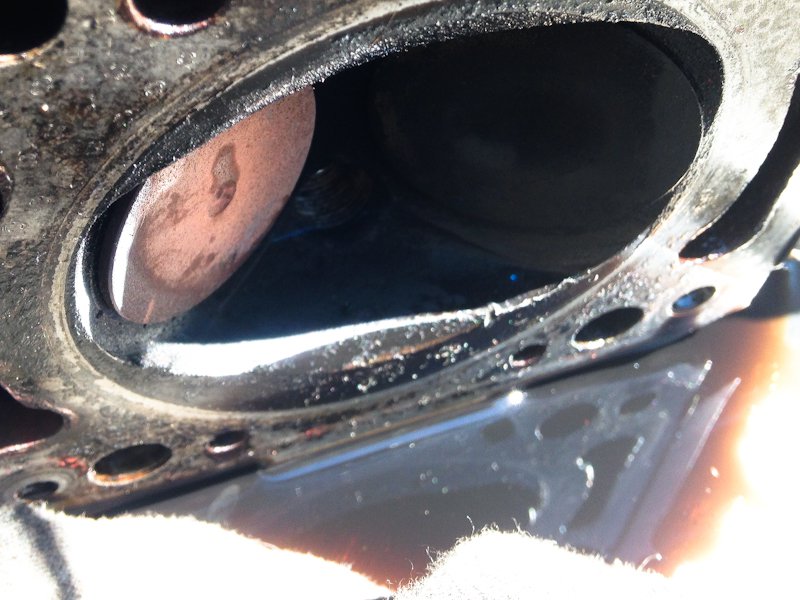
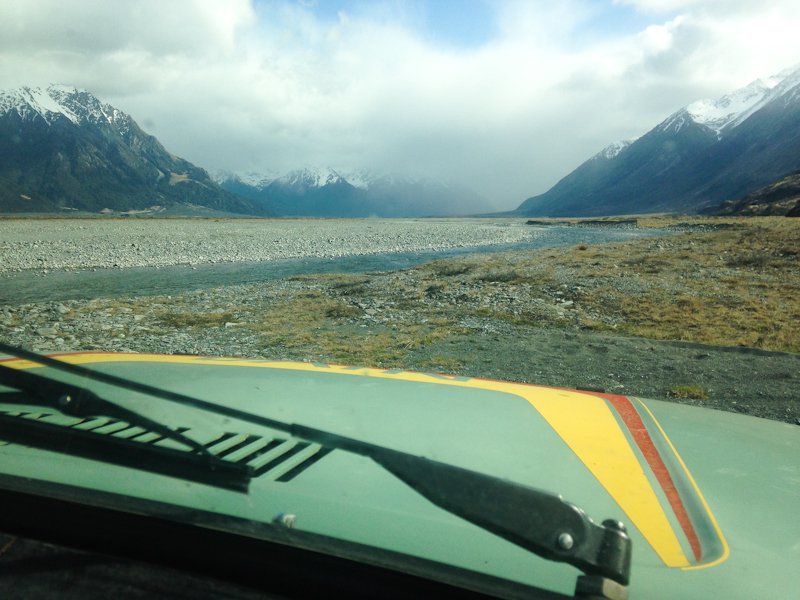
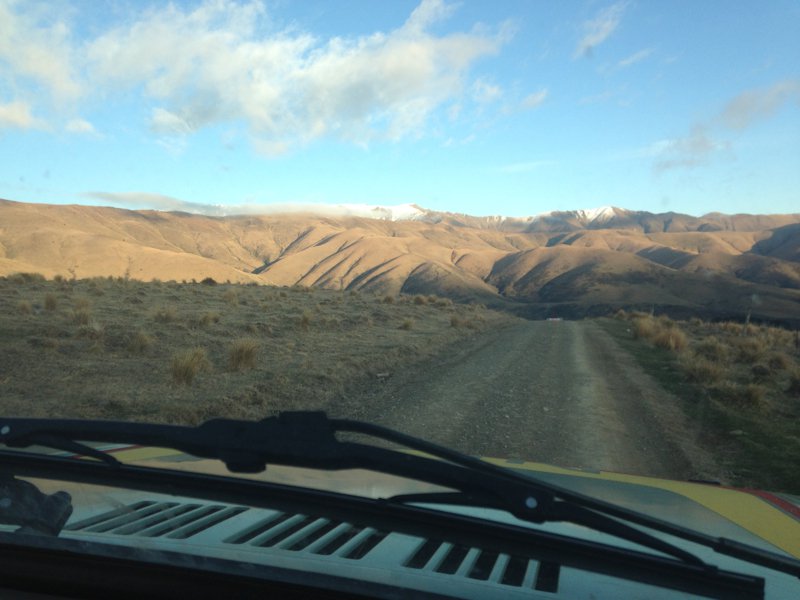
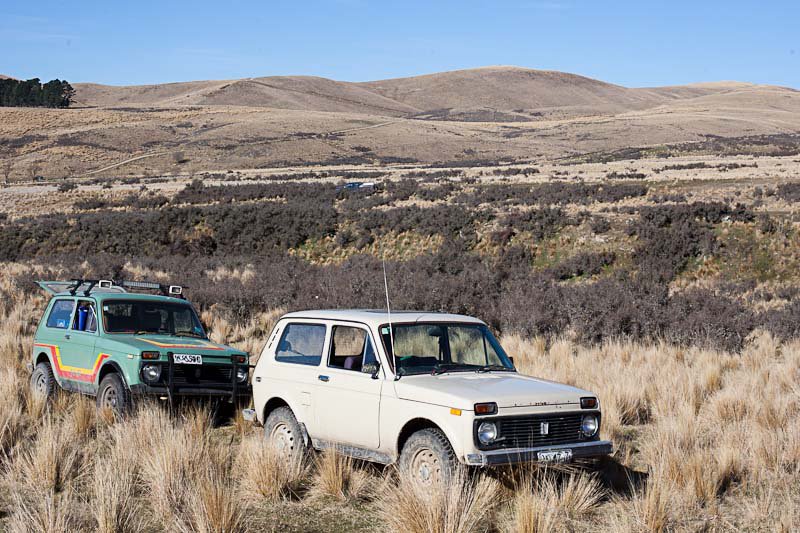
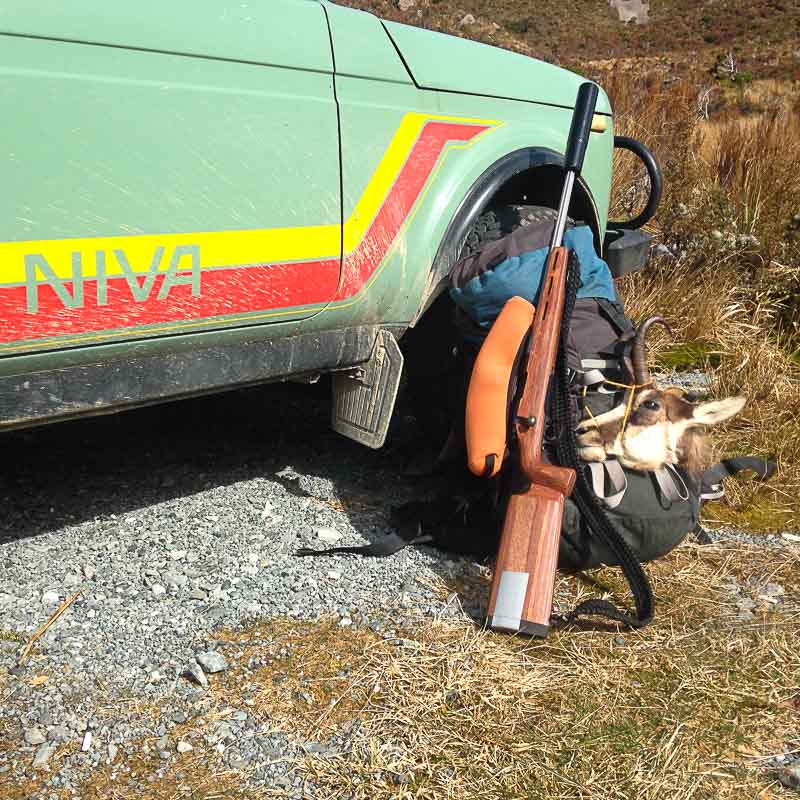
Had a generally good run out of the Niva recently, not that it really does much work, spends most of its life in the shed and then gets rolled out for weekends away. Went for a drive down south Canterbury way and found another Niva hiding away in daily use. Also had a look around a few of the high country valleys over winter: After this trip on rough river stones the steering idler once again slogged out, upon measure up I found the shaft is slightly undersize, that explains years of rapidly wearing out bushes! A quick call to a supplier and I had some nylatron through the lathe with much less clearance. And of course something big had to happen, on checking the car over before a trip I found a missing washer and screw in the intake, the screw was caught in the carb throat, the washer no where to be seen..... After trying the obvious, I made the call to strip the head in expectation of a gouged bore, but no, nothing seen but a few divots in the head and piston, it appears the washer made it to freedom via a brief beating in #4, once again, the gods seem to smile on me! Moving forward the Niva will keep hanging out in the shed with occasional weekends out, but come christmas improvements will slow...... This weekend I picked up part A of my legit black plated new project (cheers Greg!) while a few OS'ers know about my excitement, i'll wait till I pick it up to start the build thread, for now here's a teaser: And for those that don't identify as a drivetrain Barry....
2 points
-
you will find weather and altitude will mean life and death, my KX would ping like hell some days and I would have to change the jets. Wr200 should be fun1 point
-
Tbh the svs vechile soon warming on the dash/low fuel message combined with the no start has me suspecting it’s actually a faulty ECM and not the car key. Especially if it’s disarming the security system fine get it scanned, it’ll probably have some fault code to do with the starter supply circuit stored and will have lost/be loosing the driver to earth the starter relay signal wire Alloytech v6 right?1 point
-
That round headlight looks better than the flat bottom thing, Let me know if you want some chambers made.1 point
-
Opticouple. Contains an LED. It might not might one being conected. Or put a photo-resister over the LED. I've done things like that but the calibration is hard to maintain. Phototransistor might work better.1 point
-
The flasher circuit will be it's own little thing where it just charges and switches, trying to measure it adds more load which messes up it's charge time. IE it's just a dumb analogue flasher with no set frequency.1 point
-
Dewalt battery charger. 150 to 200 bucks to buy outside of a kit but has 1% of the functionality of my cheap multifunction Ali express charger. The main thing i miss is a buzzer to say it's finished- i charge quite a few packs at night so it would be nice. Currently an LED flashes when charging and lights solid when complete. I planned to use simple switch debounce code and arduino to sound a buzzer when the led stops flashing. I stripped charger and wanted to check voltage of led during the charge cycle..but even touching one multimeter probe to one of the LED solder pads upsets its flash cycle- and at that stage i decided to re-assemble before i broke something. Does anyone have any idea what could cause this? Must be extremely sensitive circuitry!!1 point
-
Choice ! Prob needa the pipes de coked to get back up to that orginal top end1 point
-
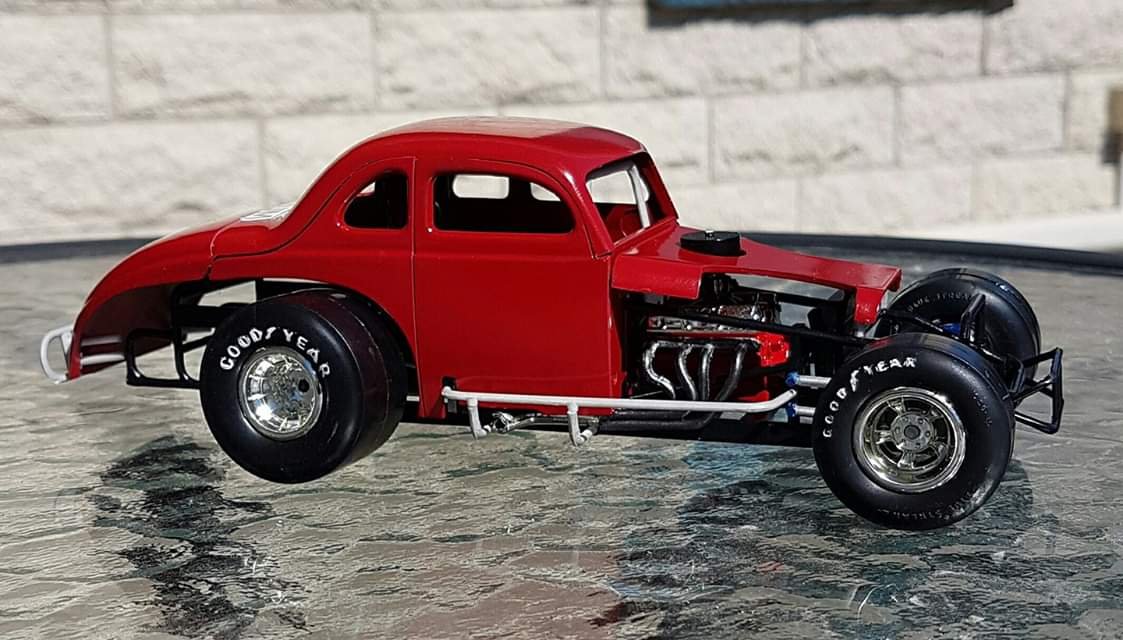
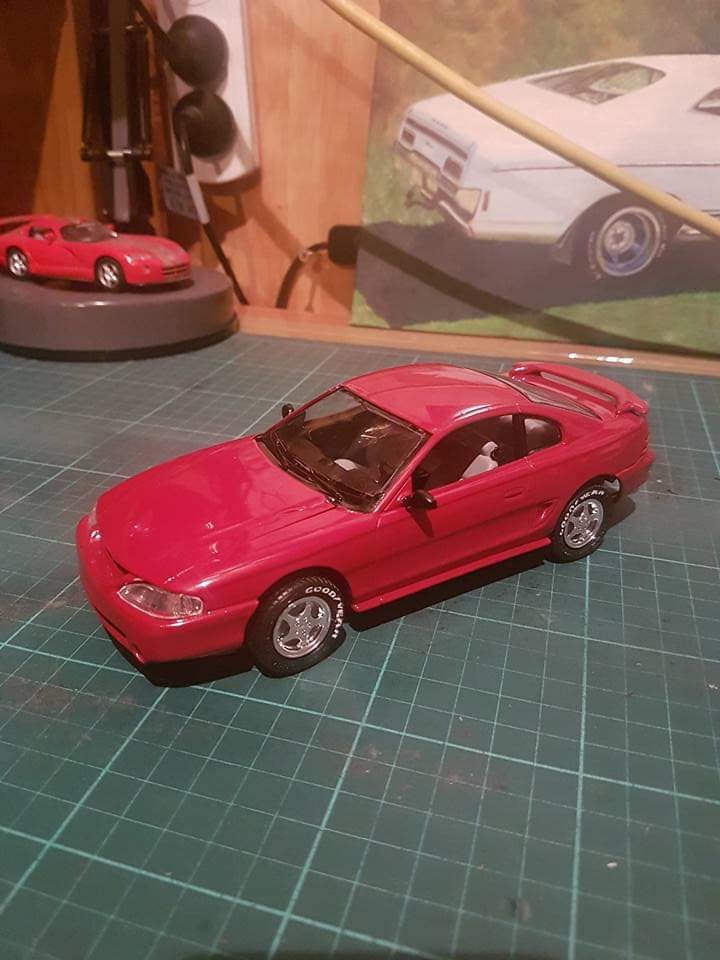
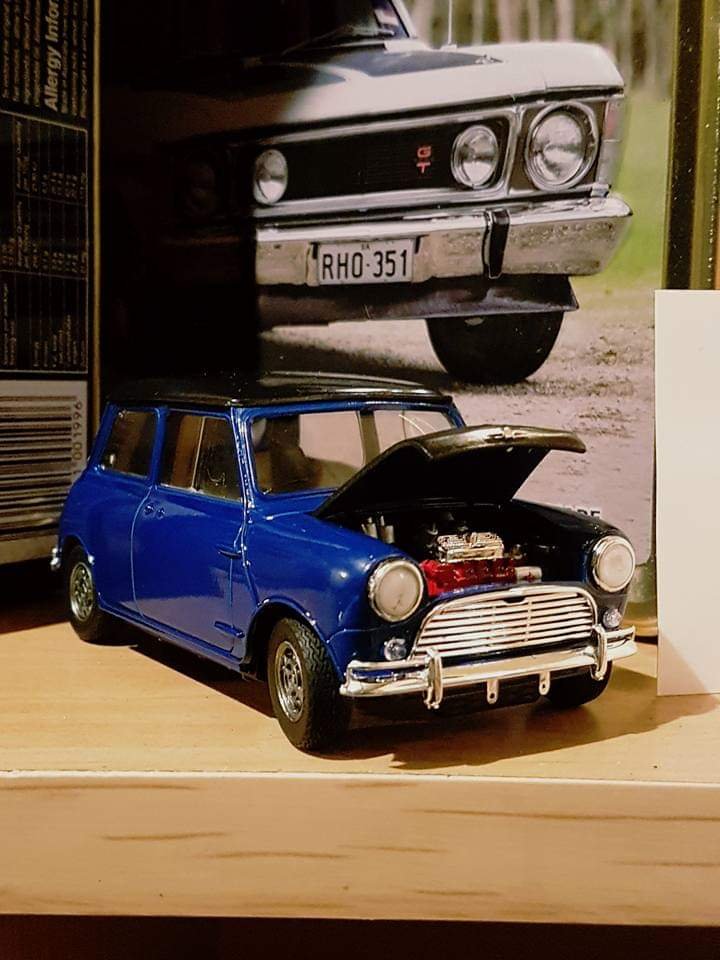
A couple of plastic kitsets that I built last year.
1 point
-
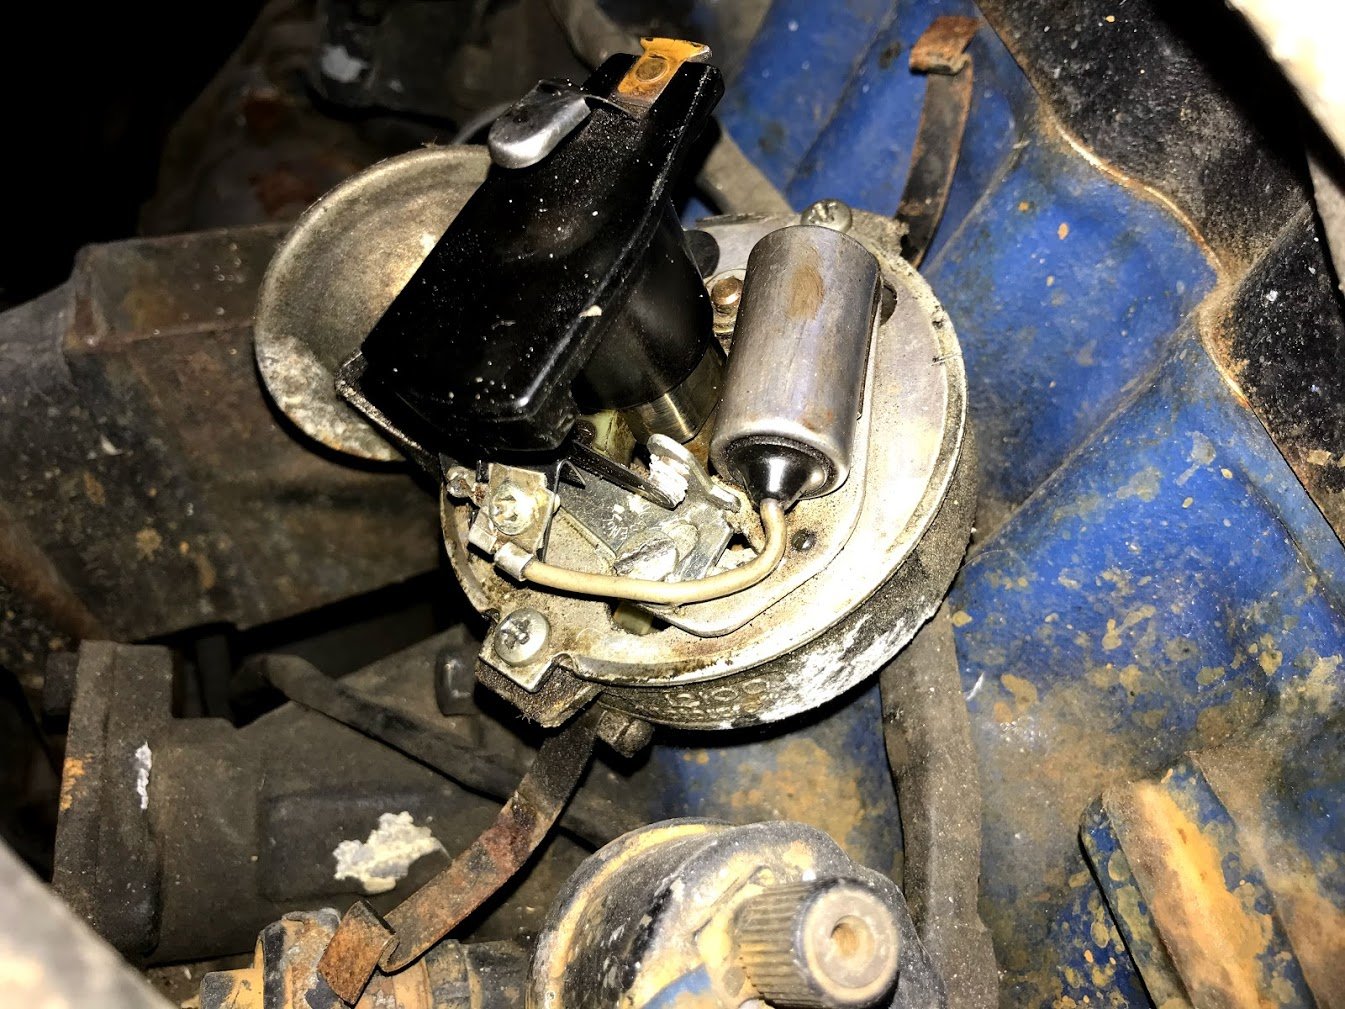
Back from holiday so called Stephen again, very friendly guy. Said he thinks this car might might be the one which the Redcross bought new to raffle off in Wellington. He thinks he should have some kind of paperwork. But it will take a while to look through, it was 40 years ago lol. Ask me to call him again in a couple of weeks. Wife has been sick since we got back so haven't had any time the last few days to work on cars, had the kids play on the driveway so I could have a look at the distributor. Thought maybe the points were stuck. Looks like its oxidized, moved ok. Then the boy sprayed the girl with the hose so I didn't look any further.
1 point
-
Back home again after taking kids to the Gold Coast, still looking around for a job, pressure was off because the redundancy was deferred for a few months. (read: horrifically badly managed restructure). Anyway, back to wiring. I've started pulling out the jzx100 engine loom. Hoping I can sell it with the manual ECU as an engine swap package (maybe with MAF and o2 sensor) since I spent all that time figuring out which wires are which, so its all labelled etc. Have also ordered: 1000cc injectors and plugs/pins, will sell the 540cc's DW400 fuel pump, will use the Walbro in the N360. 3bar Map sensor Will be changing the 1jz wasted spark coils to Coil on Plug, since the factory ones are known to be a limiting factor, either Yaris 1NZ coils or R35 VR38 coils. R35 seems to be the go to coil-on-plug these days, found a supplier of new Genuine Nissan ones for cheaper than the new Toyota Yaris ones (supposed to be pretty good). That's a decent chunk of money I didn't intend to spend for a few years! But I'll save a bunch by wiring it myself and then sell off what I don't need anymore (SAFC II, MAF, ECU, Loom, 02 sensor, Yellowbox rpm jobby etc etc). Will use the Dakota Digital speedo thing on the N360 motorbike engine thing. Also looking to sell my owner Argo Shield bottle, unsure what its worth. Its a big one at 3.2m3 but it's out of test, no reason it shouldn't pass but I'm not sure its worth doing.1 point
-
Got the screens in, what a painful job that is...... came with fixed glass for the rear (which I kind of like) so I've gone with that Need to get my A into G, first weekend with some decent weather I need to paint and start assembling the subframe.....
1 point
-
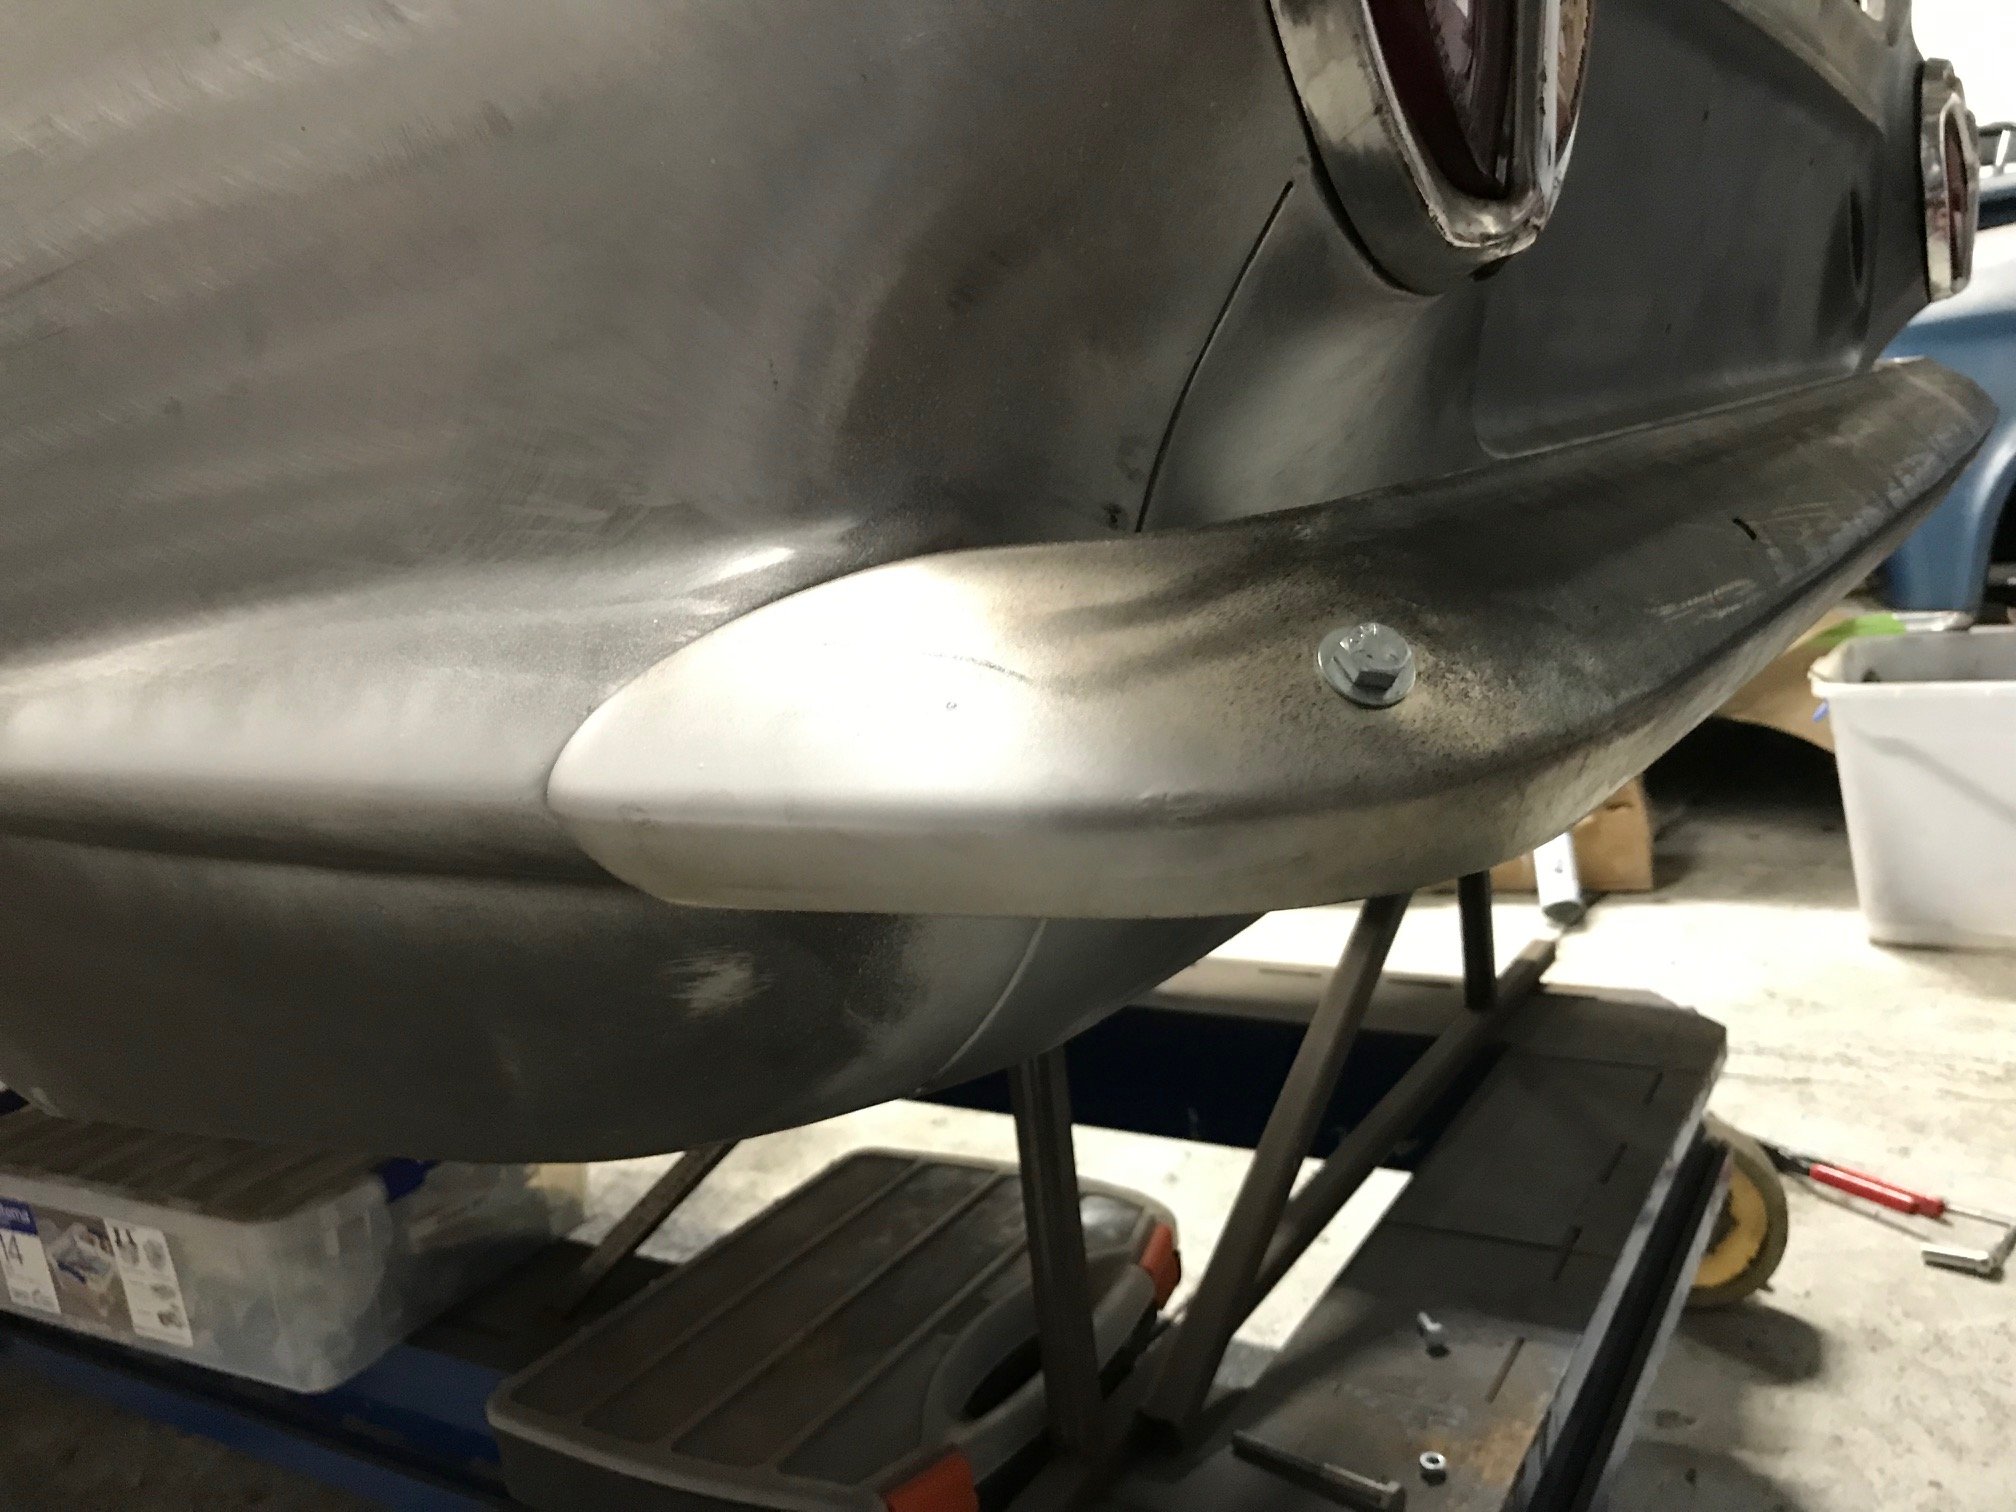
Rear bumper has been straightened up and trial fitted. Looking mint. Just needs a file up and off to the chrome players again. Down to the last few small jobs and off for the final blast.
1 point
-
So it took longer than expected to sort the wiring, which still isn't finished, as I need to make a dash plate and get some new switches n shiz, before I can finish the wiring off. I've been having problems with my trailtech dash giving weird rpm values, and I was darned if I could figure out why. Turns out Dave, being the Barry he is, installed solid copper leads on the motor, so I get an rpm signal even when the wirings not connected to the trailtech, so much zap, lewlz. I might have to put standard leads on it, as I kinda need the rpms to read correctly. Anyways, this evening I halfassedly finished the wiring and put cable ties all over the place, and decided it was a good idea to take it for a quick test drive. In the dark. With no lights. Up my residential street. It was quite exciting. All the controls work well, which is nice, but the motor is not running correctly. I think it's leaning out up in the revs, not that I know how many revs it's doing, so I will have to play with the tune. The gearing seems good, it's definitely not over geared now. After a couple of rips around the neighborhood, I had a quick look over it, and noticed one of the rear sprocket grub screws had stripped out, so I had to pull the rear end to bits so I can drill the 8mm grubs out, and upgrade to 10mm. I'll loctite the piss out of them too. I'll try sort a few issues out, and hopefully take it somewhere this weekend for a second test drive, to see if things are better. But yeh, not too bad, but still lots to do. At least it's now moved under its own power for the first time in nearly two decades, so that's a win. Regards, VG. xoxox1 point
-
This happened today, and I bloody missed it happening. Don’t imagine it’s the first time around the block though being a 5 digit odometer. *next update in 99,996k
1 point
-
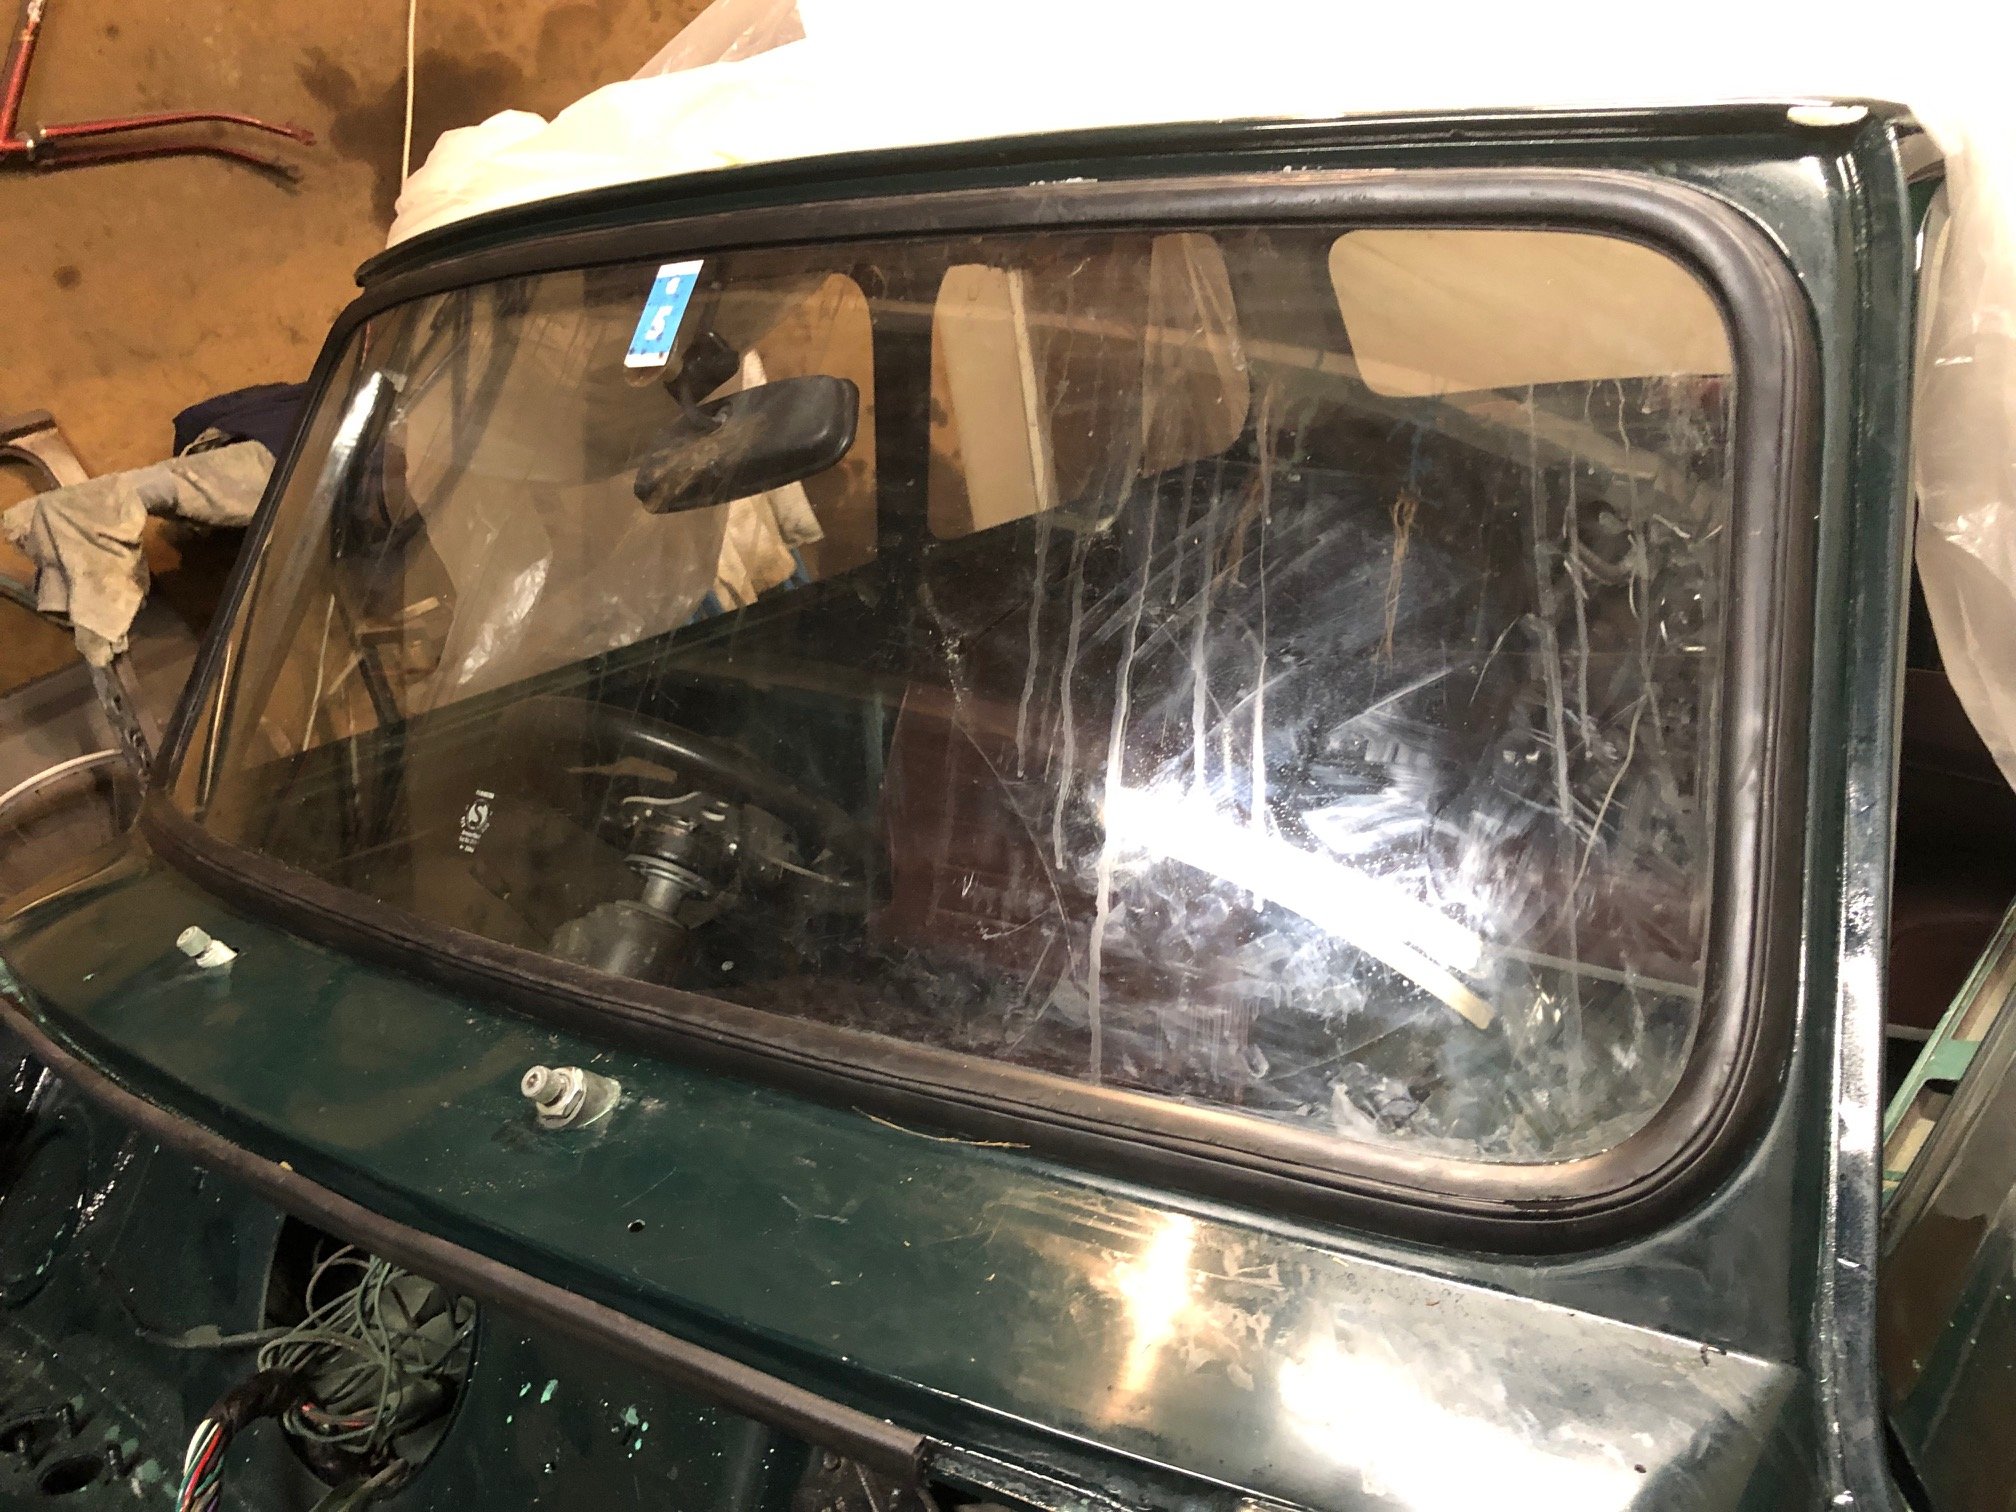
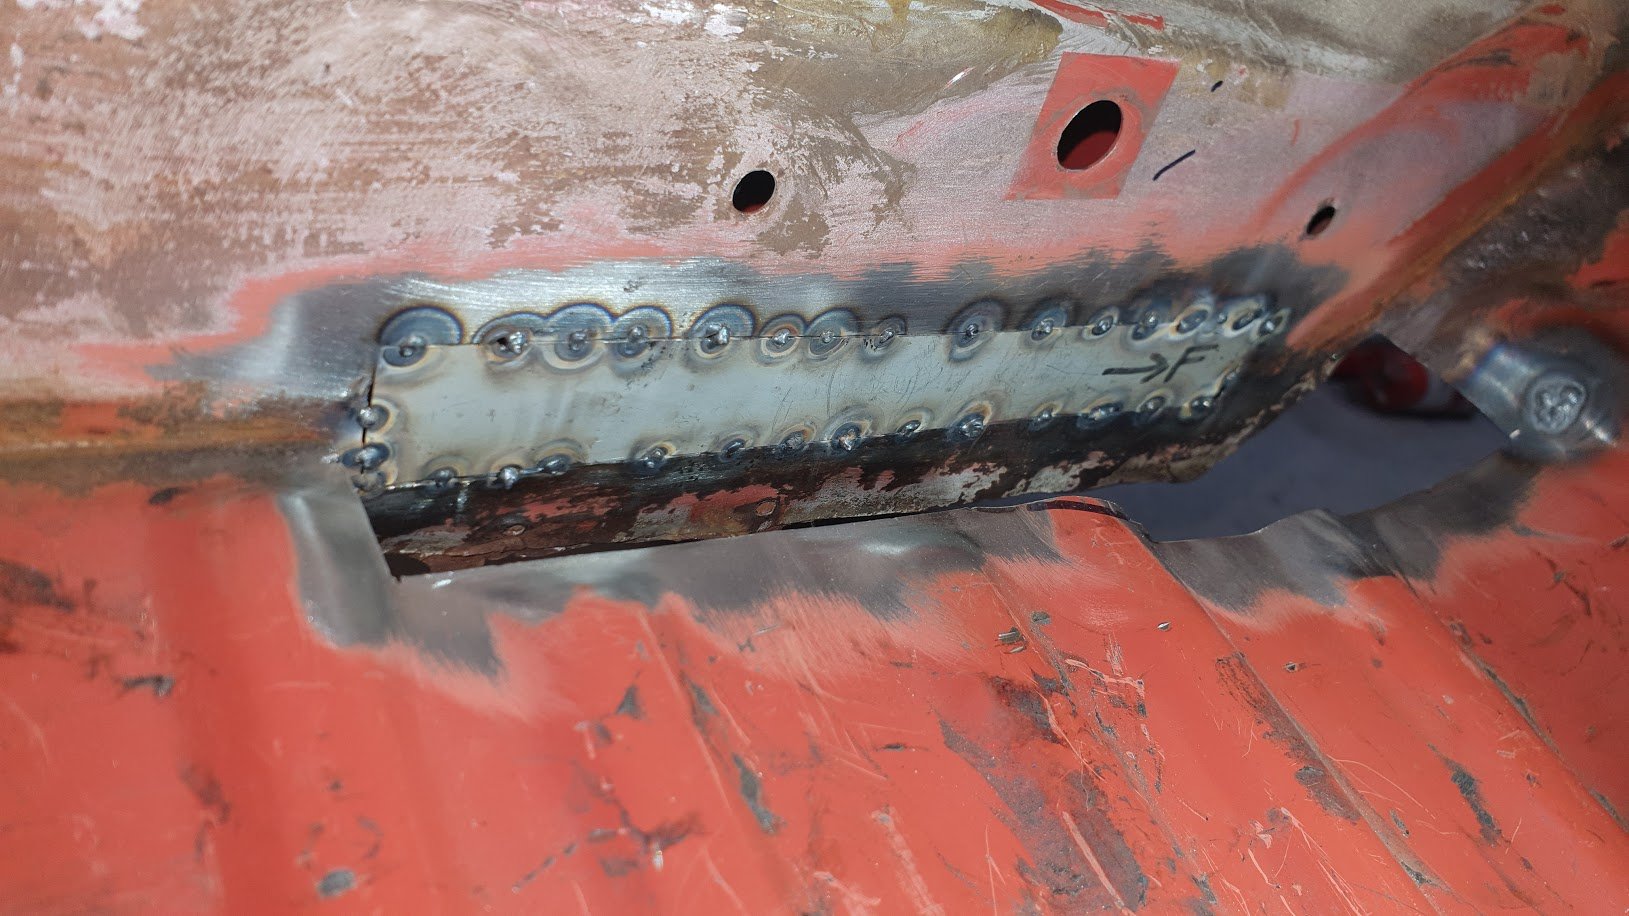
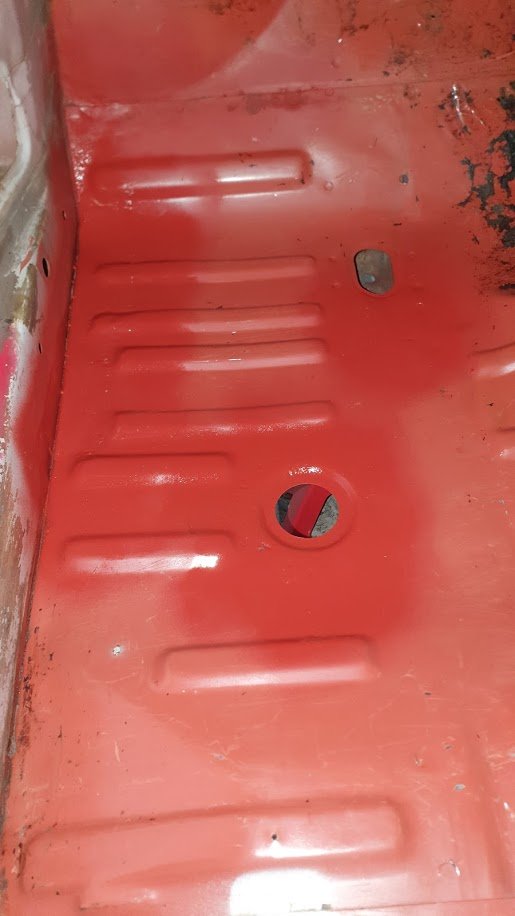
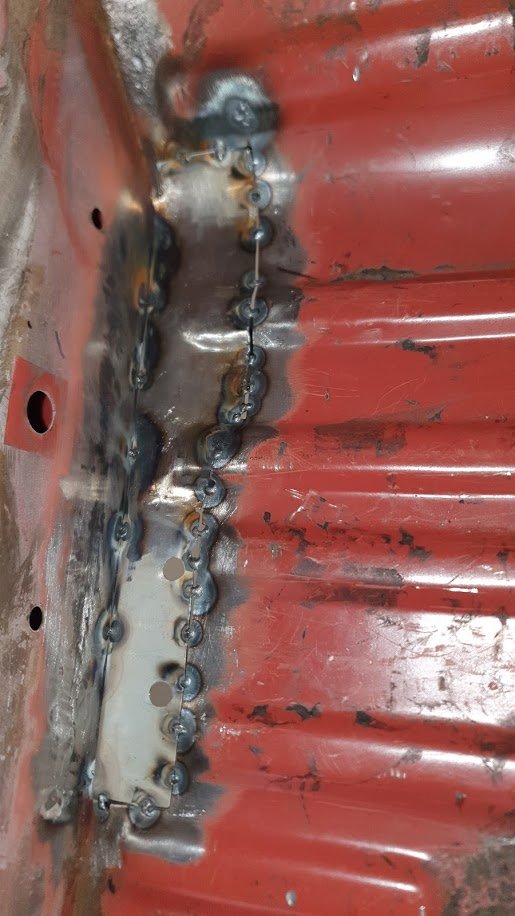
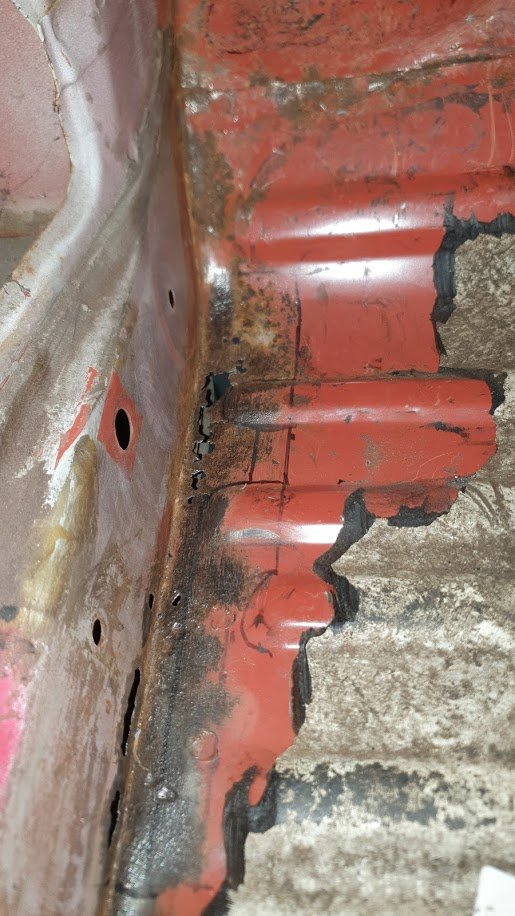
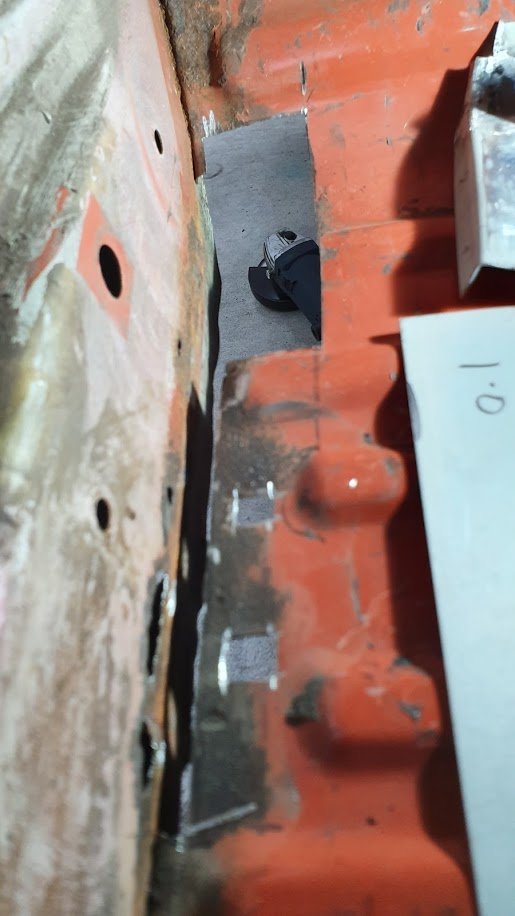
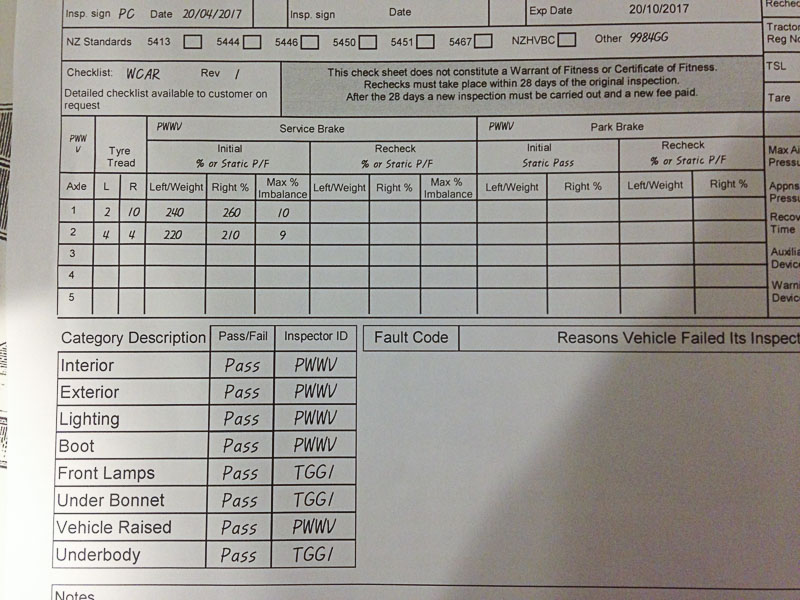
So... a change in the place i took this for a WOF meant it had a bit more of a thorough inspection. It didn't fail but he mentioned that some rust in the passengers floor would need attention soon. So some investigation happened. Turned out that hiding under the sound deadening was a little more serious than anticipated. Likely a leaking windscreen caused this. Out with the cutting disc and I had at it! And then glued it all back together Grind, Sand, and Prime - phone was left in the house so no pics except after And finally a renewal of paint and anti-chip coating. A nice tidy up for it.
1 point
-
So I've done a bit more on this dirty Berty. I flipped it over to finish off the frame extension, and cut off a few unneeded bits. Seeing as it wouldn't rev or idle with no choke, I cleaned the carbs out, they had sea weed growing on the float needle things. I also welded up the plenum, and played around with restricter sizing (had to go down to a 35mm opening) this resulted in it running waaaaay better, and revving out like it should. I also removed all the washers that had been put under the needles (they were trying to make up for them not lifting due to lack of vacuum) and it ran even betterer again! I needed some way of mounting the air filter, and remembered I still had some silicon left over from the hektik Hilux, it was perfect, and pretty! Little vid of it running betterer, the linkage was a bit sticky, hence the high idle then dieing out at the end. Then I took the wrap off the headers as it was fucked, and cleaned the headers up a bit. Then I changed the muffler out for a prettier one, it's from a GSX1200, so even though it has one chamber (the other was straight through) it has a larger outlet than the original, so should flow well. I had a sprocket that needed boring and keying, but decided to go with a plate wheel and bolt it to the original sprocket hub. Bit bigger than the OG one. I then put the back end together, and ran a brake line up to the slave cylinder. Got a few hoses from the wreckers, this female - female clutch line from an AE100 Corolla made life easy, used the mounts and all. Then I made a new gear shifter linkage, as the old one was fucking rank. I also moved it forward a bit to suit me. Next was sorting the steering wheel/shaft/rack. This was a bit of a mission, but it worked out well. Managed to mount the wheel on top of the bar it used to be below, and move it forward a bit, so I can pilot the vehicle, with the added bonus of being able to get in and out of it. Also put the front suspension back together, so I could work out the pedal position, and the position of the bar that mounts the steering bearing, clutch and gas cable mounts, and the brake master thing. The brake master has to be in this funny frame thing to miss your legs and still fit under the hood. Once all that was done, I crimped the cables, but they were too short due to me lengthening the frame, so I made little extension doofers out of D shackles. Now the back ends done, all the controls are pretty much done, and it's running better, I'm getting onto doing the front steering knuckles and tie rod ends. Still much to do, but progress is being made! Regards, VG.1 point
-
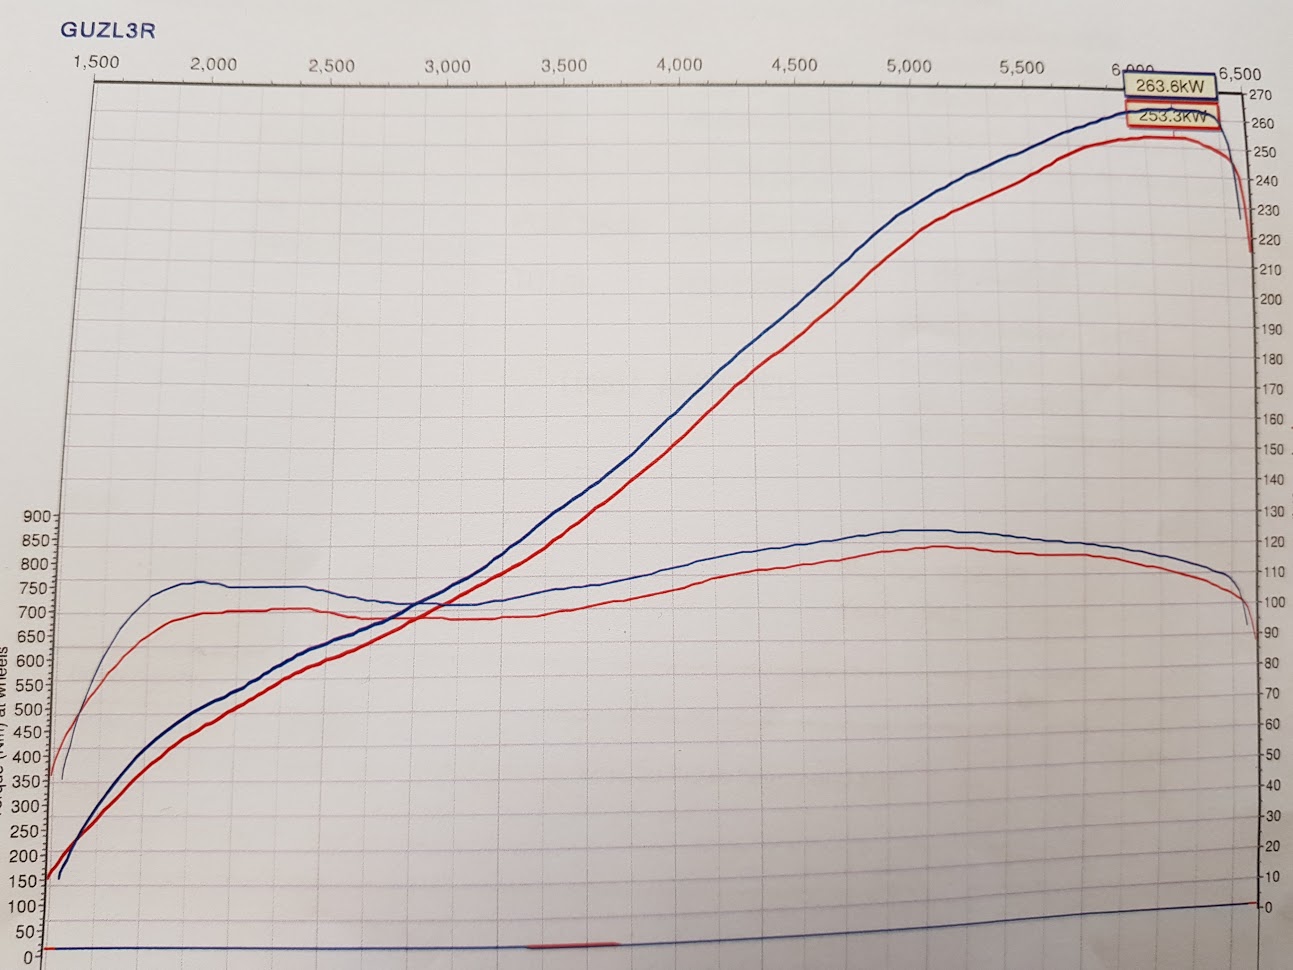
Finally got round to making sure the tune was ok in the pig. Done 4000 ks in it so far hassle free, touch wood, did a bolt check and threw a bit of grease around. Made 353 hp at the rears (263.6 kw). Need to get the filter out of the engine bay, apart from sorting out some spark tables, it was knocking and reverting to low octane fuel tables because of inlet air temps. So theres 15 free (ish) hp available just by using a holesaw and a bit of panel steel... I havent got the tutd working as yet, wired up, but in the comadore it runs through the bcm (body control module) which I dont have in the chev, So I need to keep playing with that to get it working. Also discussed superchargers with the dyno operator. We both think its a great idea.
1 point
-
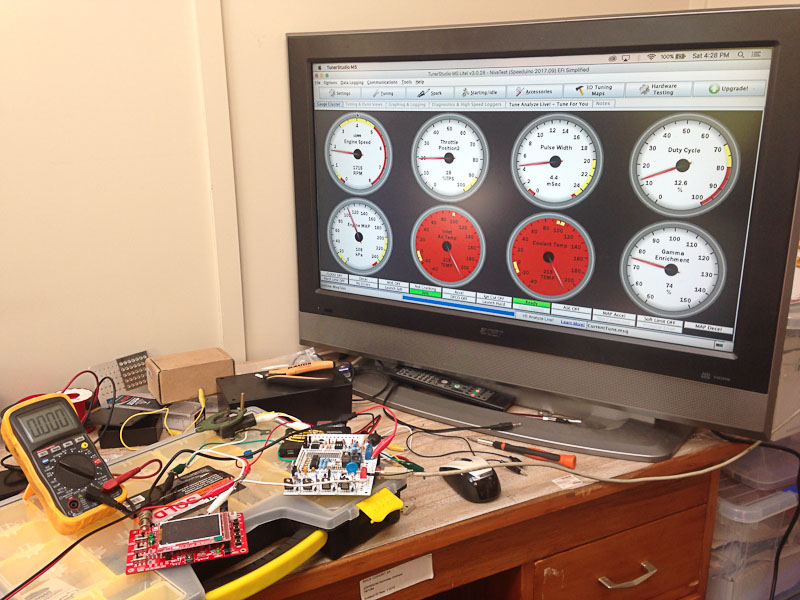
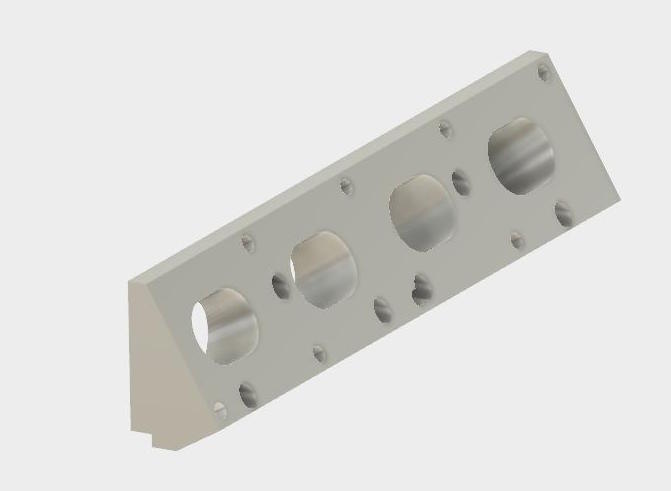
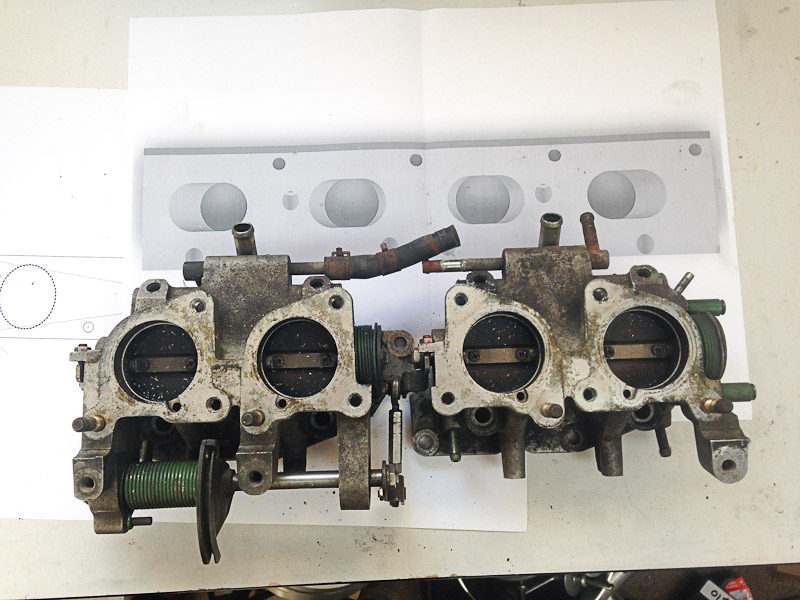
Got the Speeduino running and sat down to give it a bench test, hooked up the tps, fed a simulated crank sensor in and scoped the outputs. Pretty darned stoked to have it this far, found I had installed a few parts wrong during initial assembly which caused some searching, I even contemplated ordering a megasquirt if the fault was too hard to find, but thanks to open source and having all the circuit info available, a reversed capacitor was to blame and all is now working as intended. Drew up a concept for the manifold, while I can't quite make it as I initially though, it will still work with some extra manual labour, the idea being a single piece aluminium adapter plate won't require welding (I just don't have that much time anymore!) bit of manual machining needed and then sitting down with a die grinder for the final match up shouold do the trick. This will also keep the final package tidy in the engine bay, currently the manifold I made to snake around the distributor and dellortos is as large as the head and looks a little out of proportion (say the guy putting all this effort into a Niva) Printed out fullsize for a quick check, good thing as I had the itb sketch upside down! i'll fix that and then look to getting the blank cut out. also need to give them a good clean, a little grimy as well as the token Al swarf from being under a workbench the last few years!
1 point
-
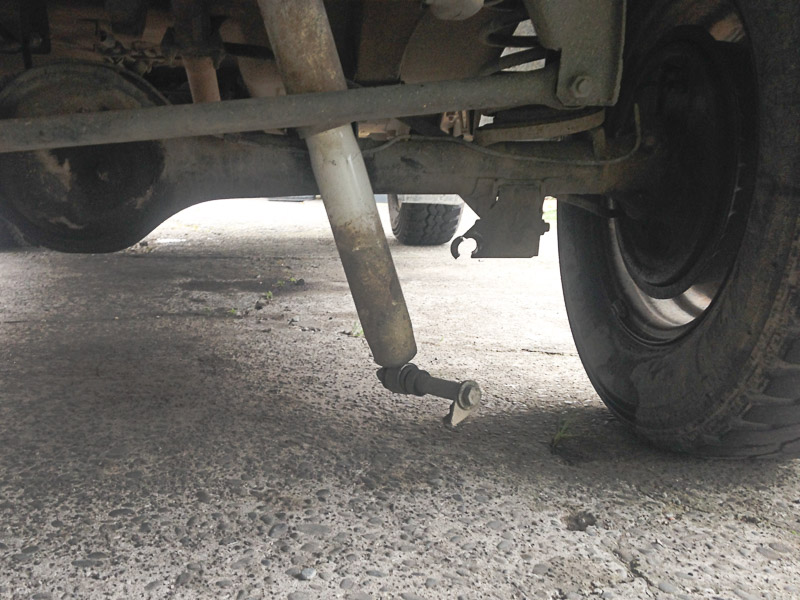
Been a few months since I really updated progress, so Got really pissed off with chasing issues in the carbs, that I traced to a vacuum leak, fixed that for a quick win, got the LM2917 running and lined up all data points on the one plot, this ended up to be very useful and with that and a set of micro drills, I soldered and drilled my way to a decent mixture, eventually settling on 0.5 idles, 1.20 mains and 2.0 air correctors, pretty much the same as where I started! there are a few more gremlins in there, I have reason to believe the pump jets are a tad rich, but economy is acceptable and that was really all I was after! A couple of days later the stalling at idle came back, notably at the gate into work, at the same time one of the older staff members who happened to be a capable mechanic heard it splutter and came over full barry spec commenting the Russians swapped Ladas for butter, oh and plugs are too cold. Sure enough, purchased up a grade and stalling be gone! That would have been the start of winter, with a running Lada, I dug into Niva orientated activities: Drove up mountains to frolic in the snow: Then spring came, so drove up mountains to fill the freezer: Life was good, then on the way home one evening there was a loud bang, followed by nothing but concern, figuring I wasn't in the ditch I carried on carefully, arriving home I looked closer: Hmm, so a few phone calls to my parts man and spun a few spanners on the magic floating Lada Couldn't resist a flick of paint while there Reverse spanner spin All in time for a late night run to the mountains for one last weekend I was promised spring shred, but woke to snow, Niva looked happier than Vladimir necking vodka Returning home the steering box made a few bad noises, being that the wof was a few weeks from dead it was back to the axle stands but this time the front end up high, I then got way too motivated and pulled the steering system out, along with some worn ball joints...... Poor thing is now destined to sit on the stands til after christmas as I just don't have time right now to really do the work right! After all this time and effort to get the Dellortos running correctly i'm 90% convinced they are coming out, I have an efi option on the cards thats just too good to refuse.
1 point
-
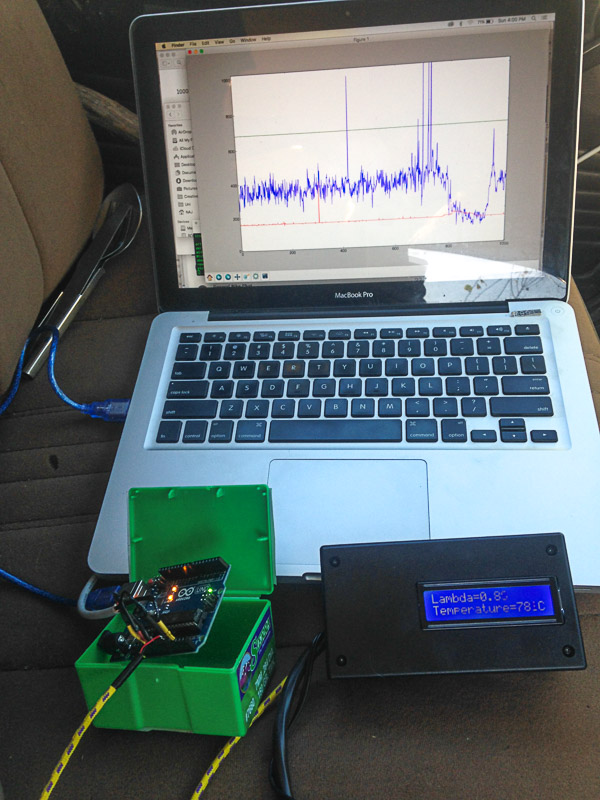
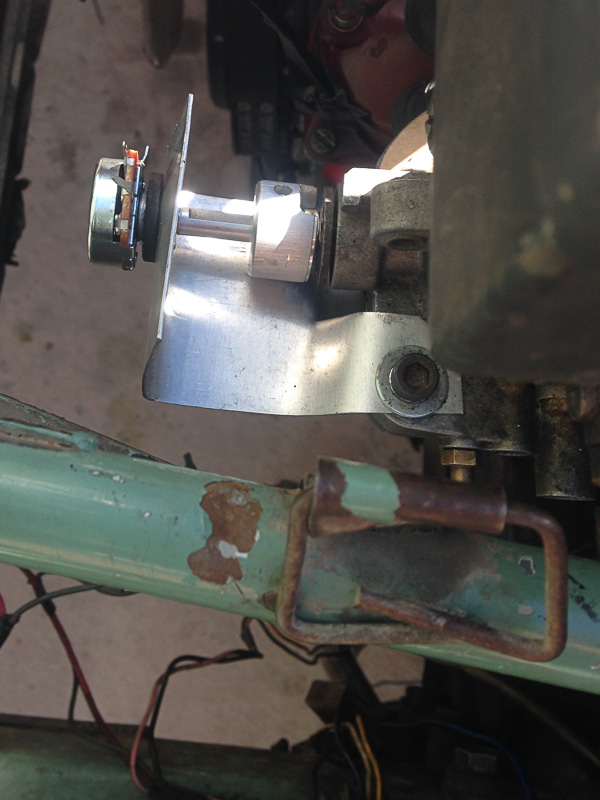
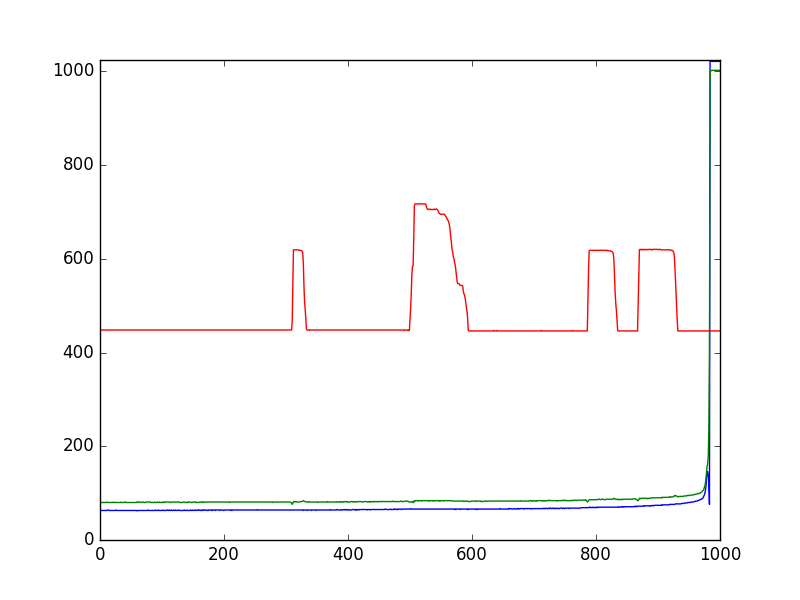
Much to talk about... First of all, #CleansheetVTNZ #Levelimposibleclocked Time to set my mind onto more interesting things, hooked up the wideband to the Niva and had a horrible surprise, all nice at idle and up to 50kmh, but then open up the secondaries and she's rich as, so rich no amount of tweaking and miniature jets could alter, I gave the single carb a full half day of messing about but in the end ditched it for the dellortos, even though these are rich, the results were far more consistent and changes to mixture followed changes I made. With the twins on it was time for some serious thinking, driving around with the wideband on the dash wasn't really the easiest thing to do so I sat down last night with a beer and bashed the keyboard to get python to read throttle position and mixture via arduino, all thats needed then is a tps on the carb, PAP wanted $40 but i'm too cheap for that kind of extravagance, headed down to jaycar and grabbed a $3 10k potentiometer and aluminium knob for $4, mix that with a bit of scrap ali sheet and boom, tps! (well not quite, still had to hack a slot for the shaft to engage in, man I wish I had a mill!) All that set up I dumped the laptop in the passengers seat and had a play Worked out far better than I imagined, managed to tune Idle much quicker than listening, by simply looking at the rev counter and O2 reading, awesome! Pre-drive calibrating of the tps found this wee fella: The 3 equal peaks are me pushing the throttle pedal, the larger peak is holding full throttle on the carbs, few free ponies if I sort the linkages better! With that in mind, I went for a drive and things got tricky... Blue line is O2, red tps, scale is kinda random, but ~500 = good for mixture, tps runs 180->1024 and ignore the green, thats there for when I get engine speed mixed in, but so far its floating along for fun. Oh and graph reads right to left. At cruise and idle mixture is about right, average acceleration (pulling away from lights etc) is lean as, while planting foot runs mega rich(after a brief lean out), my conclusion is the idle jets are a bit small, and needs a size or two up there, and the mains need to be dropped a similar amount with a little more on the pump jets to see about the lean as the pedal hits the floor. Fun times, but man I wish I could just go full EFI without having to cert the darn thing! Discussion about carb tuning tips please:
1 point
-
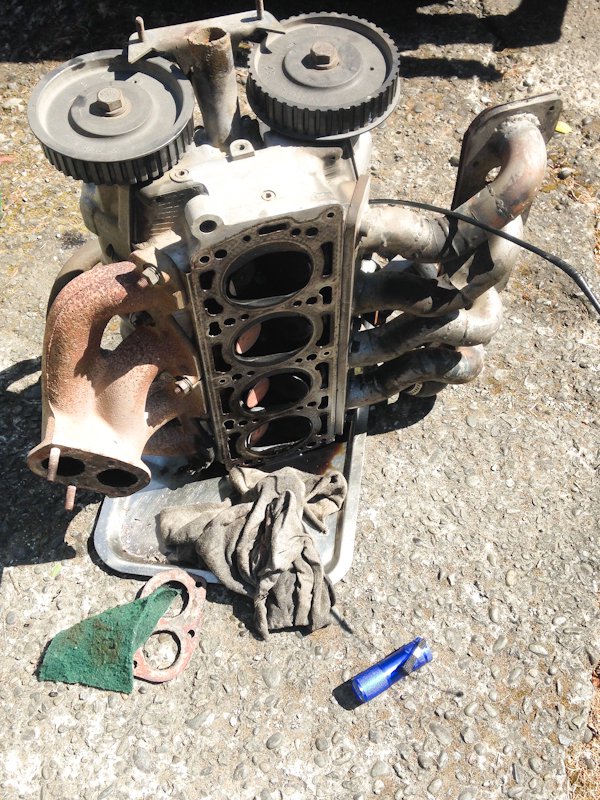
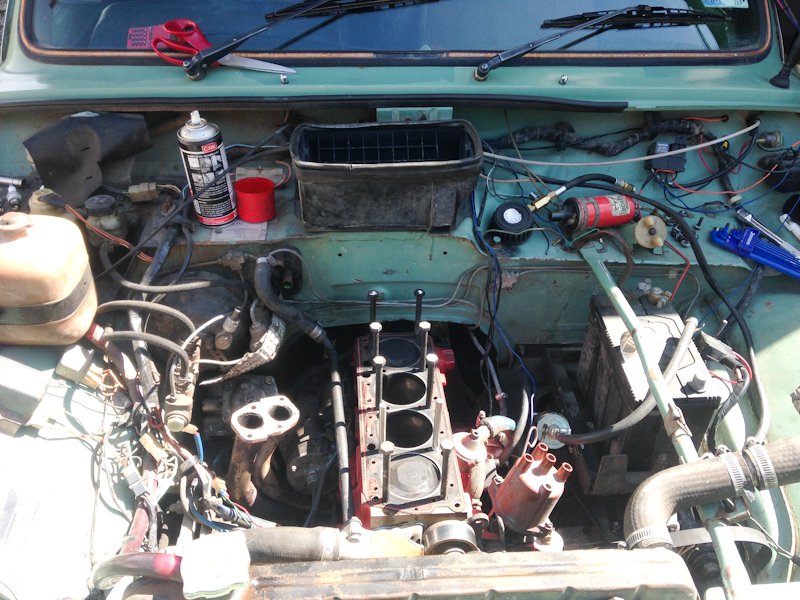
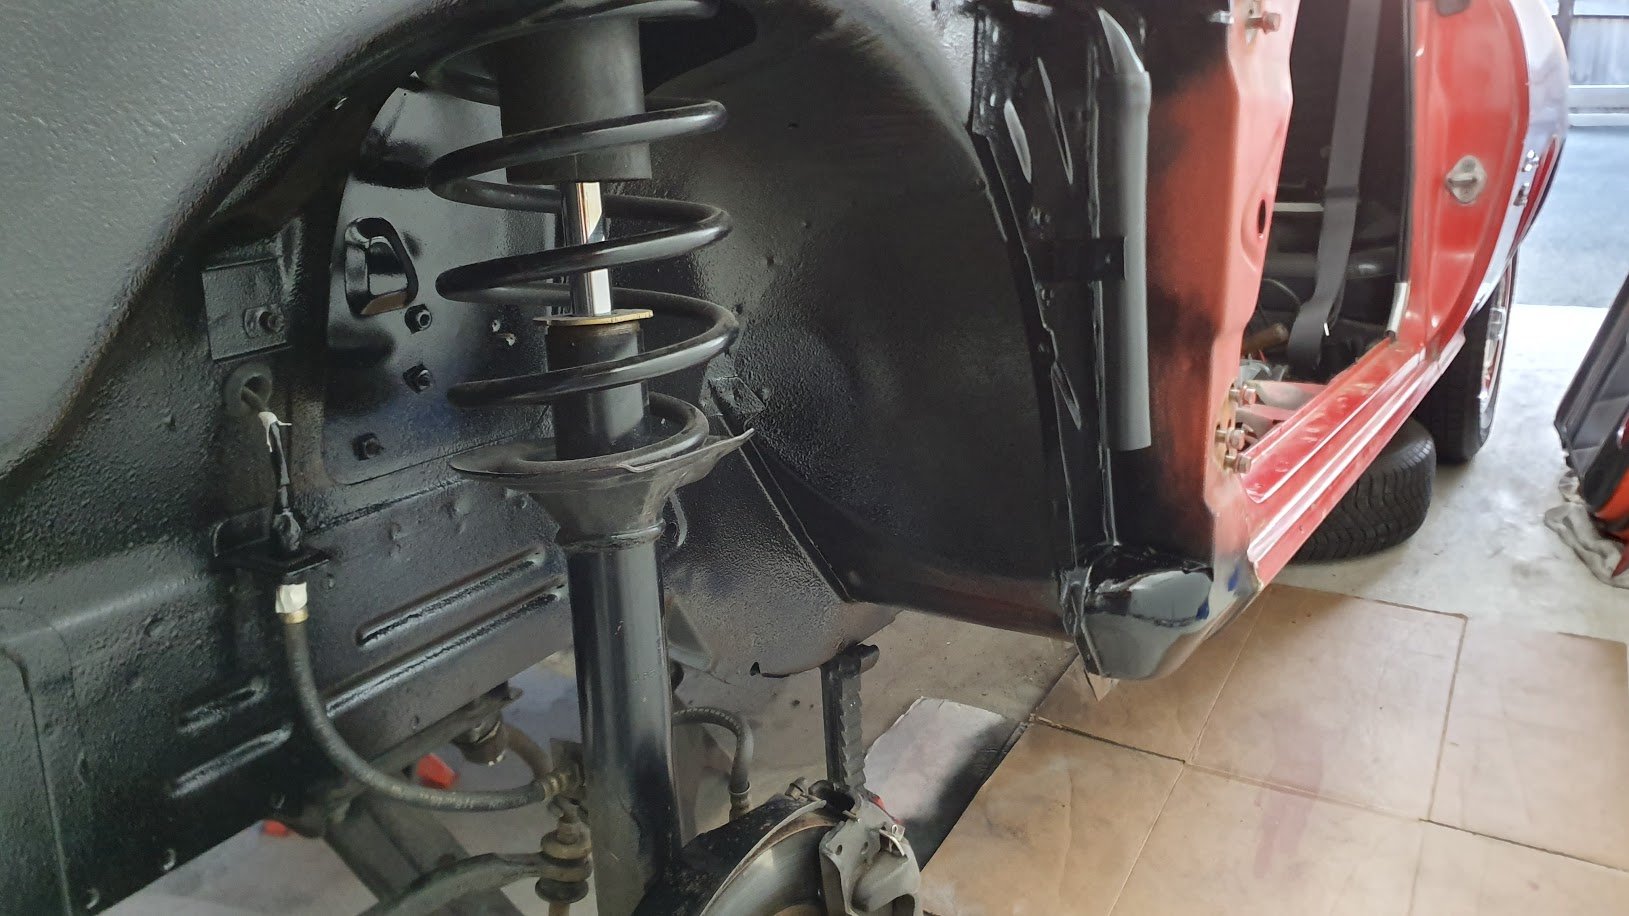
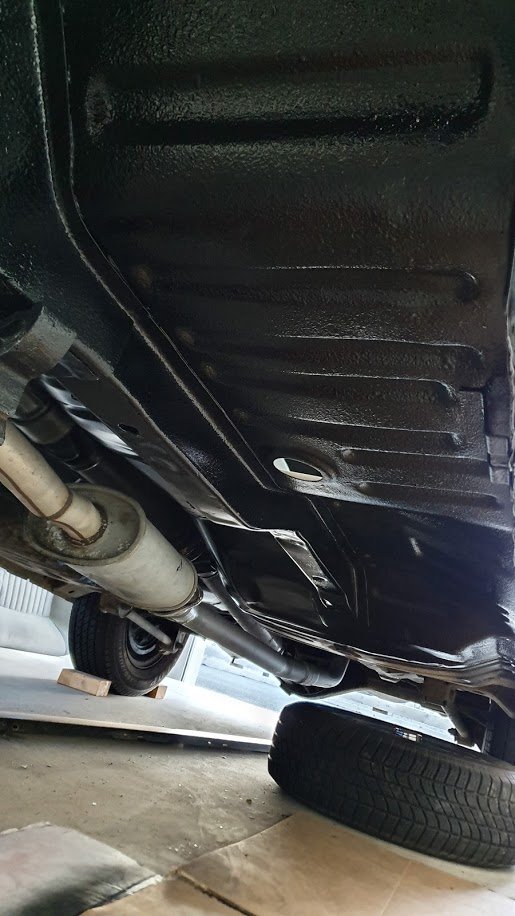
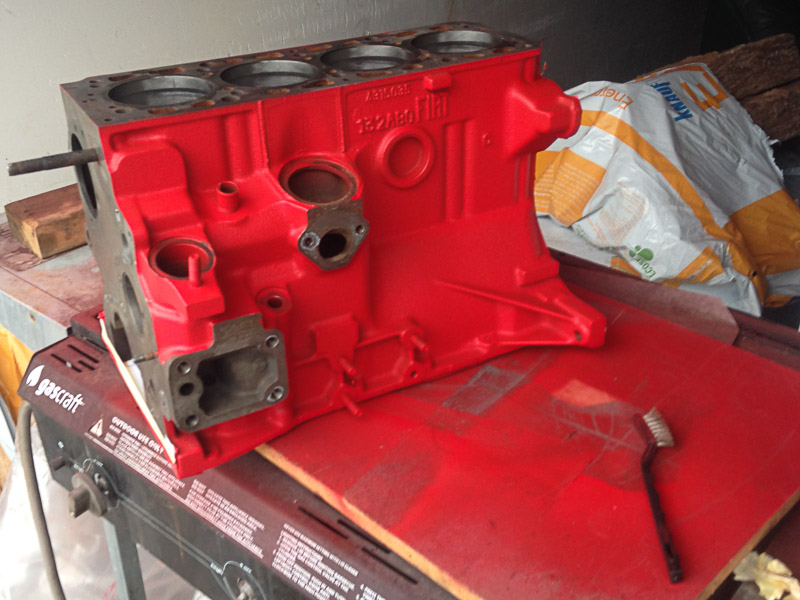
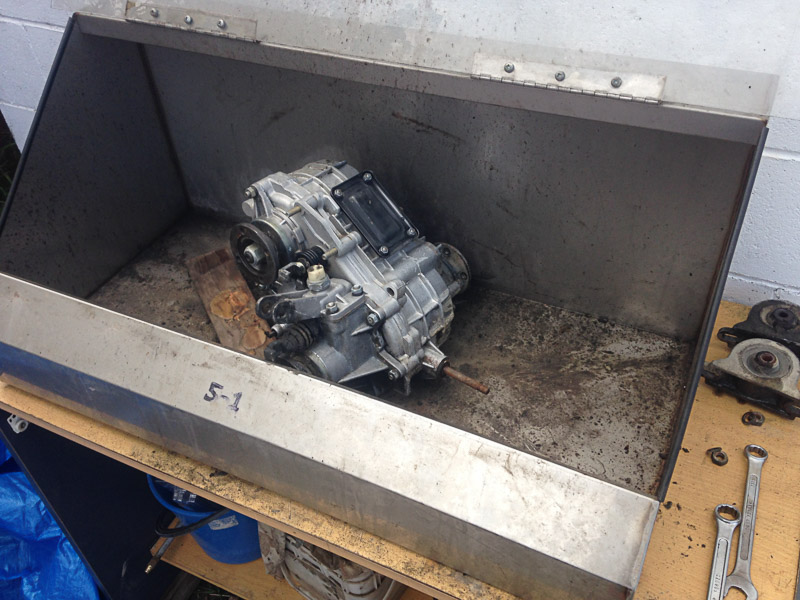
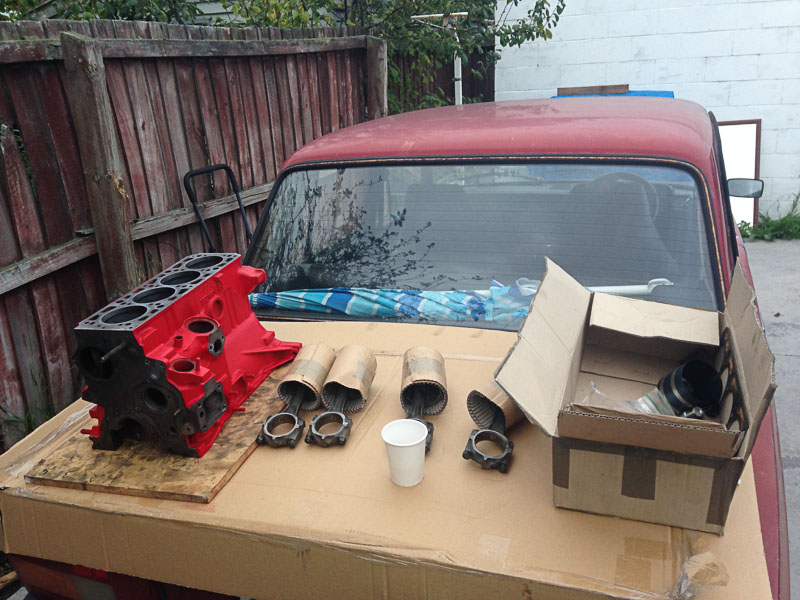
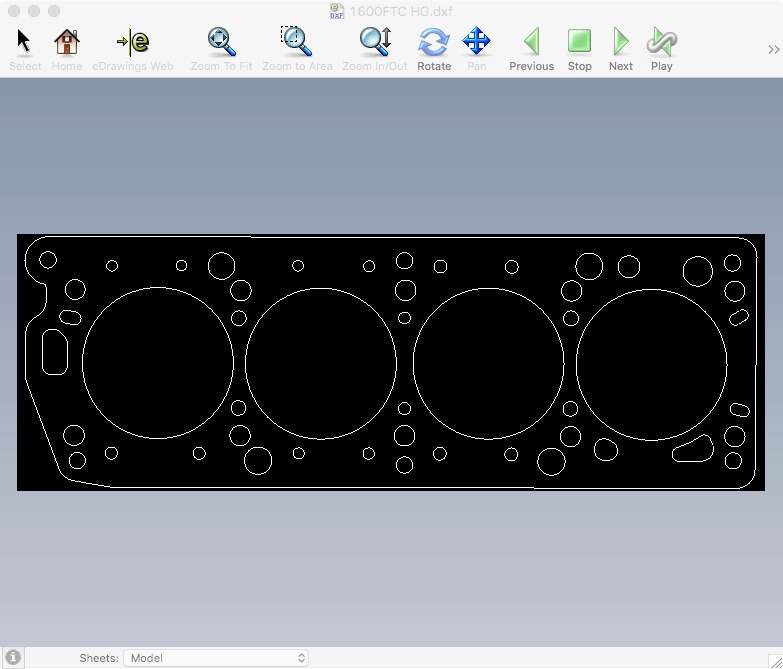
I had plans to get the Niva ready months ago, but work had different plans, I finally dropped the engine off to have all the vitals tickled, while its not going to be a 'performance' build, it will be a darn sight better than previous, i'm hoping to at least have compression back! With Otago rally on this weekend, I was hoping to use the drive there and back to run the engine in, sadly the weather has been absolutely terrible and in my crampt shed with not enough light, achievement has been low. Utilising the parts cleaner obtained off Bart, I've sparkled up the underside bits, ultimately, only the wof man will ever see it... Threw on a lick of speed enhancing red Multifunction 2105 workbench: Forgot how much I enjoy assembling engines, checking, cleaning measuring and torquing, no pics cos its dark, but the block is back together and awaiting a break in the clouds to lift it all into place I've also sealed up a 5 speed box I rebuilt ages ago, 4 just wasn't enough! Sitting out the rain I got onto the computer and drew up a head gasket, my sources have all dried up on standard thicknesses so i'll run a thick one until I get one waterjet cut from copper to give a hoon, hopefully it works......
1 point


.thumb.jpeg.384ff72c8d2b0ee0d34a7bdedb55bdcf.jpeg)


This leaderboard is set to Auckland/GMT+12:00