
Leaderboard


Popular Content
Showing content with the highest reputation on 09/08/19 in all areas
-
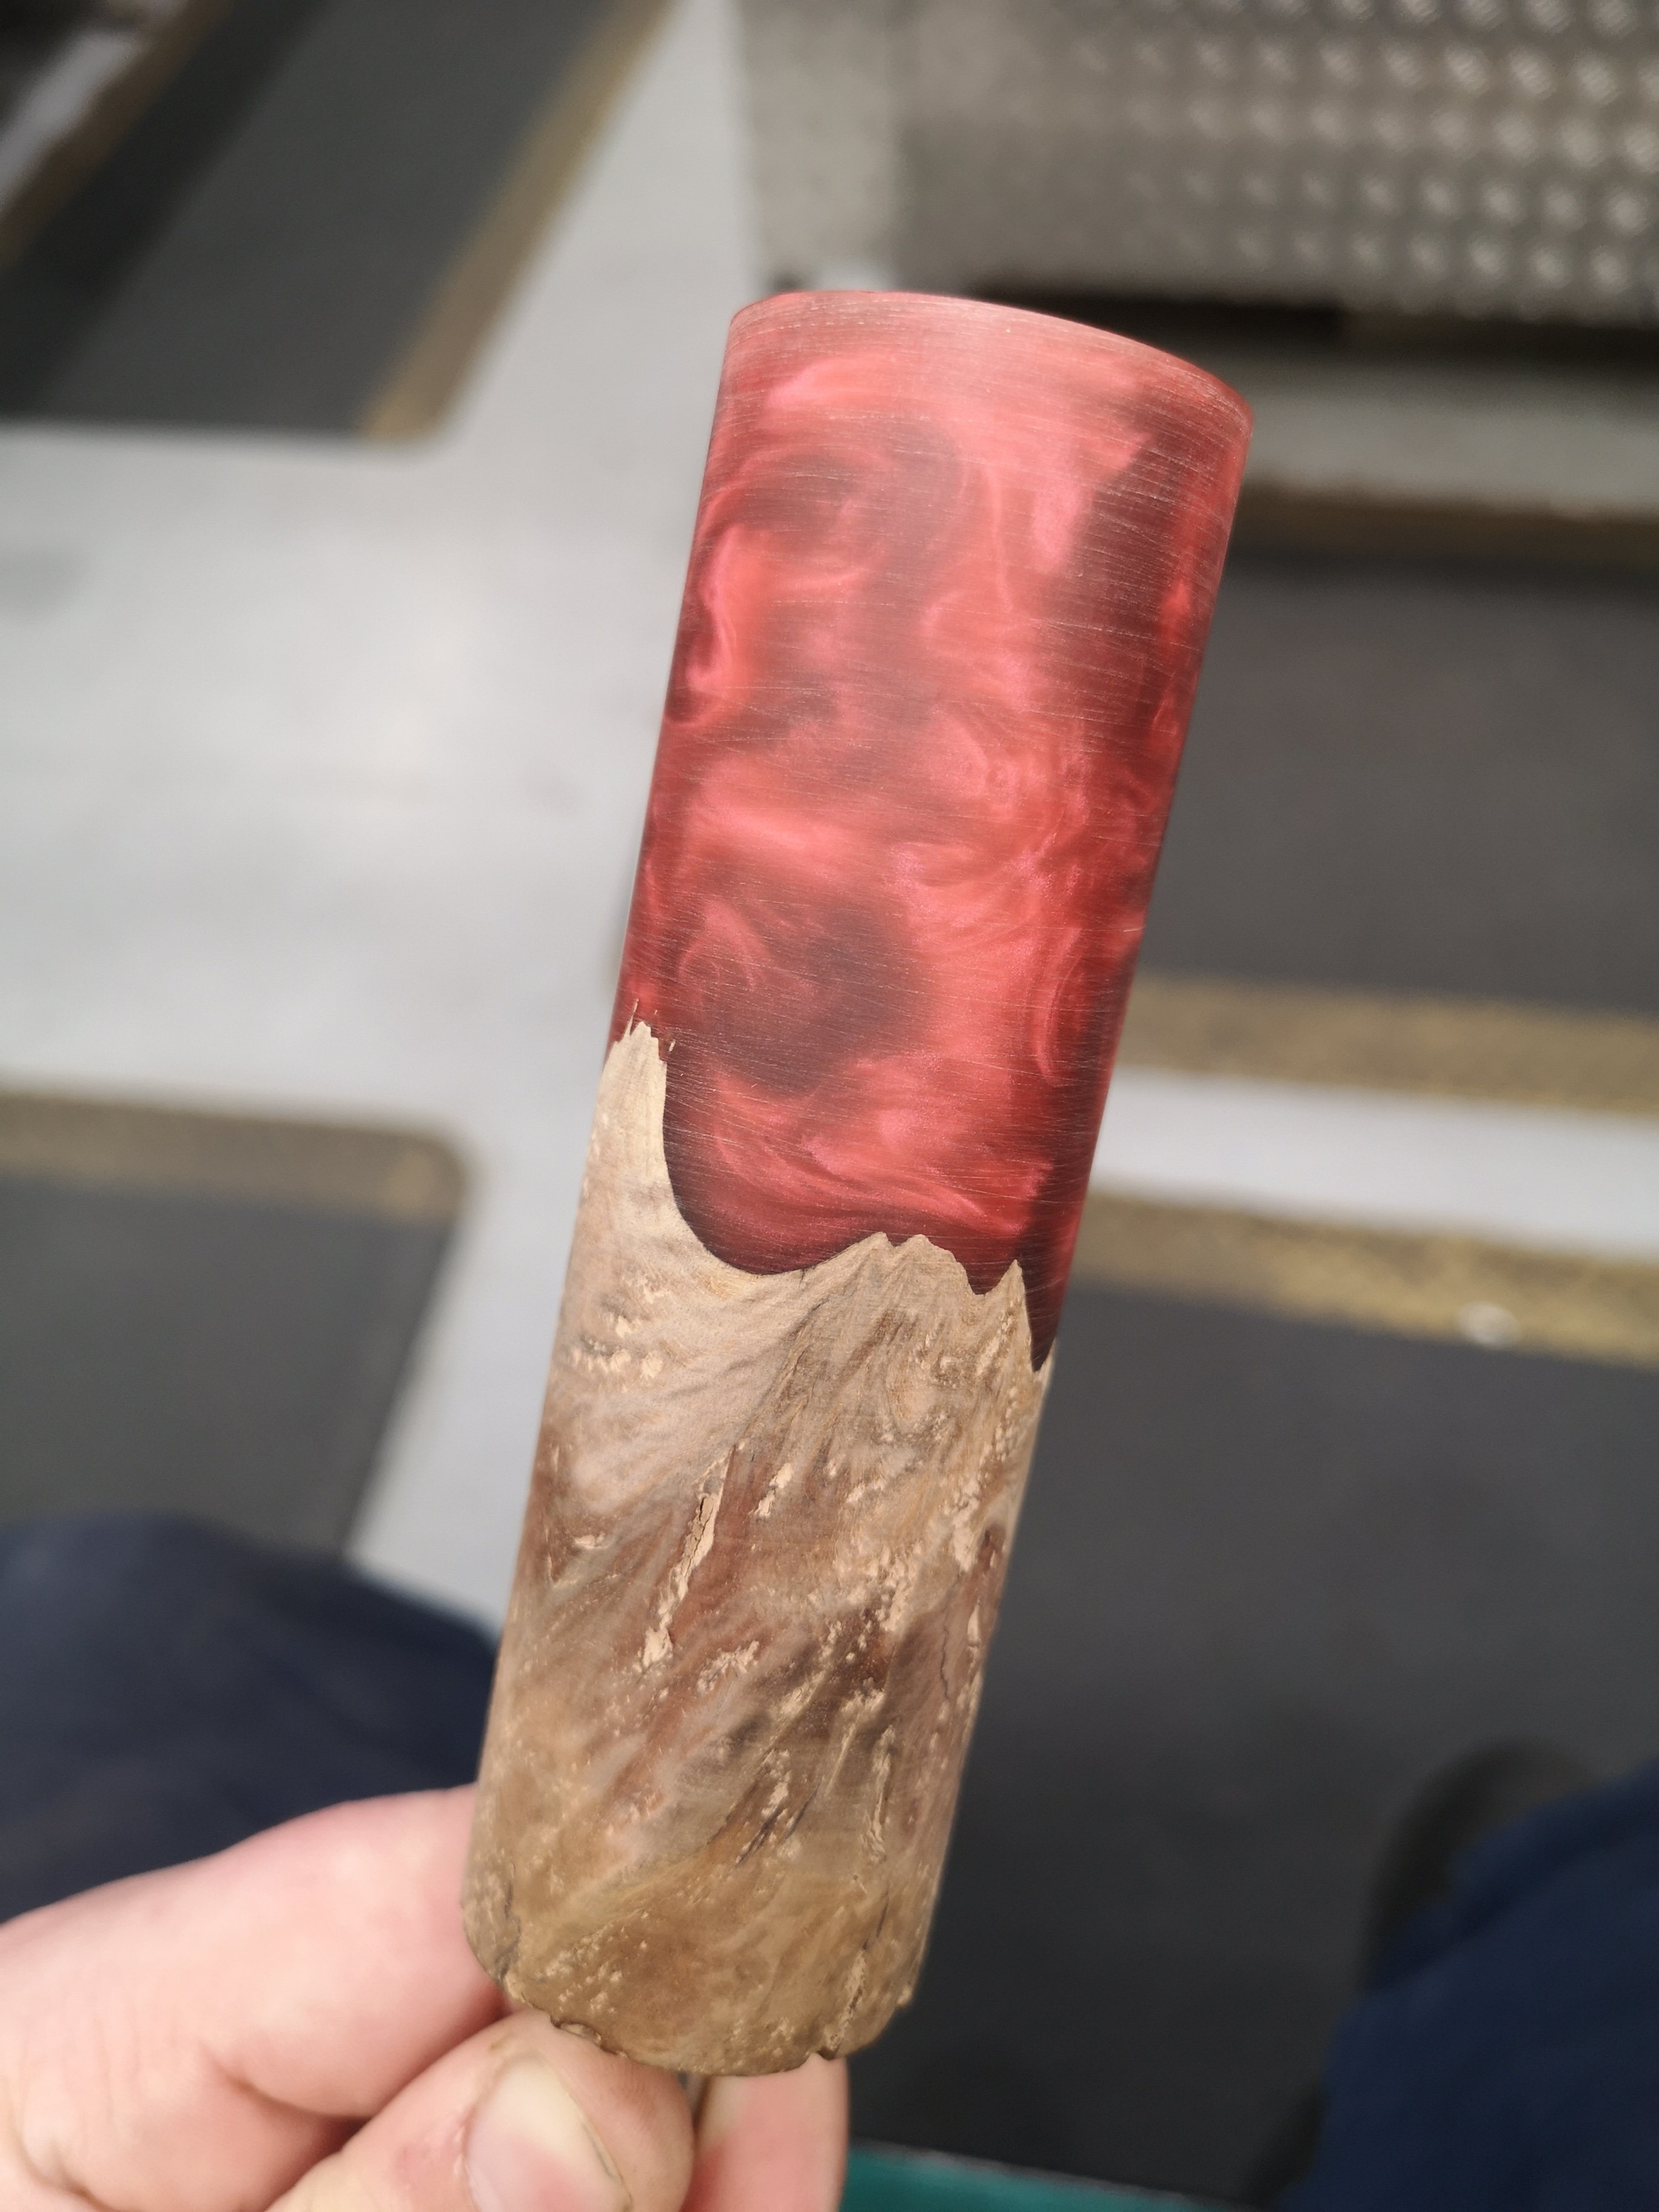
Start of the first one I've done with my own stabilised wood. Needs a shit load more polishing but liking it so far.
 9 points
 -
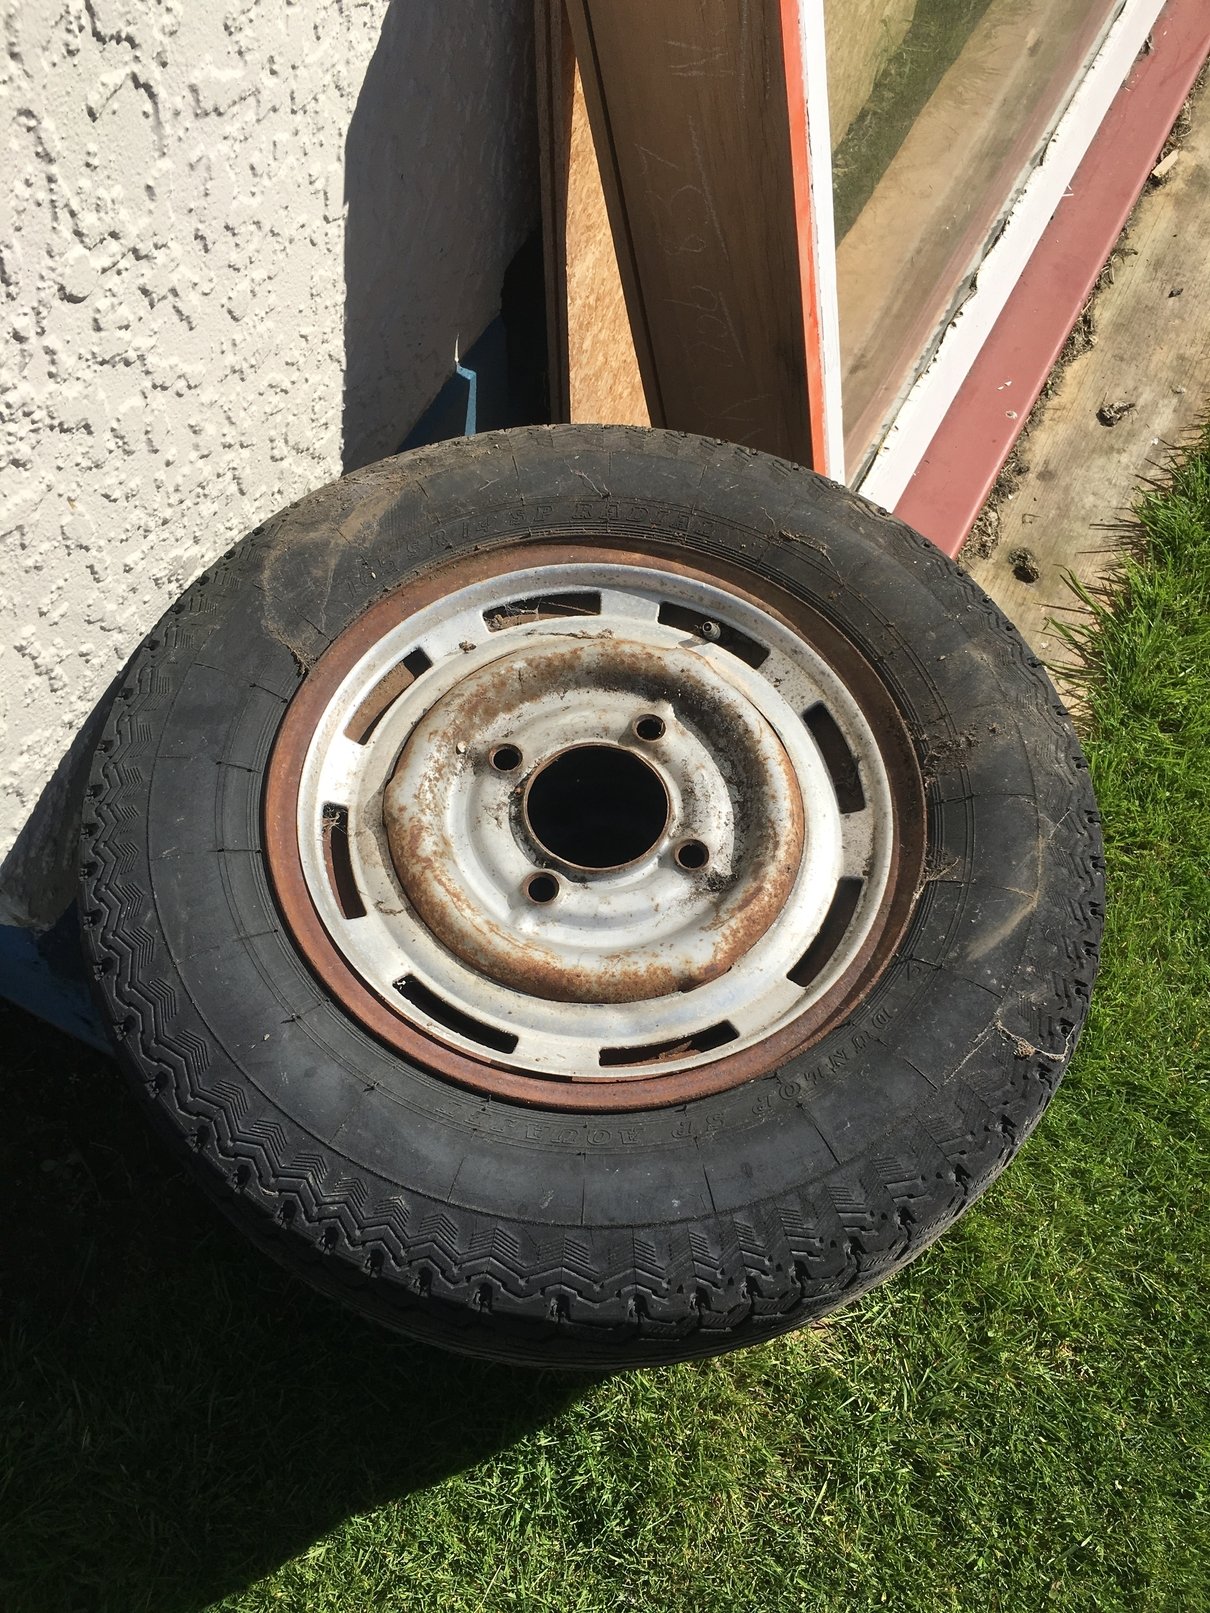
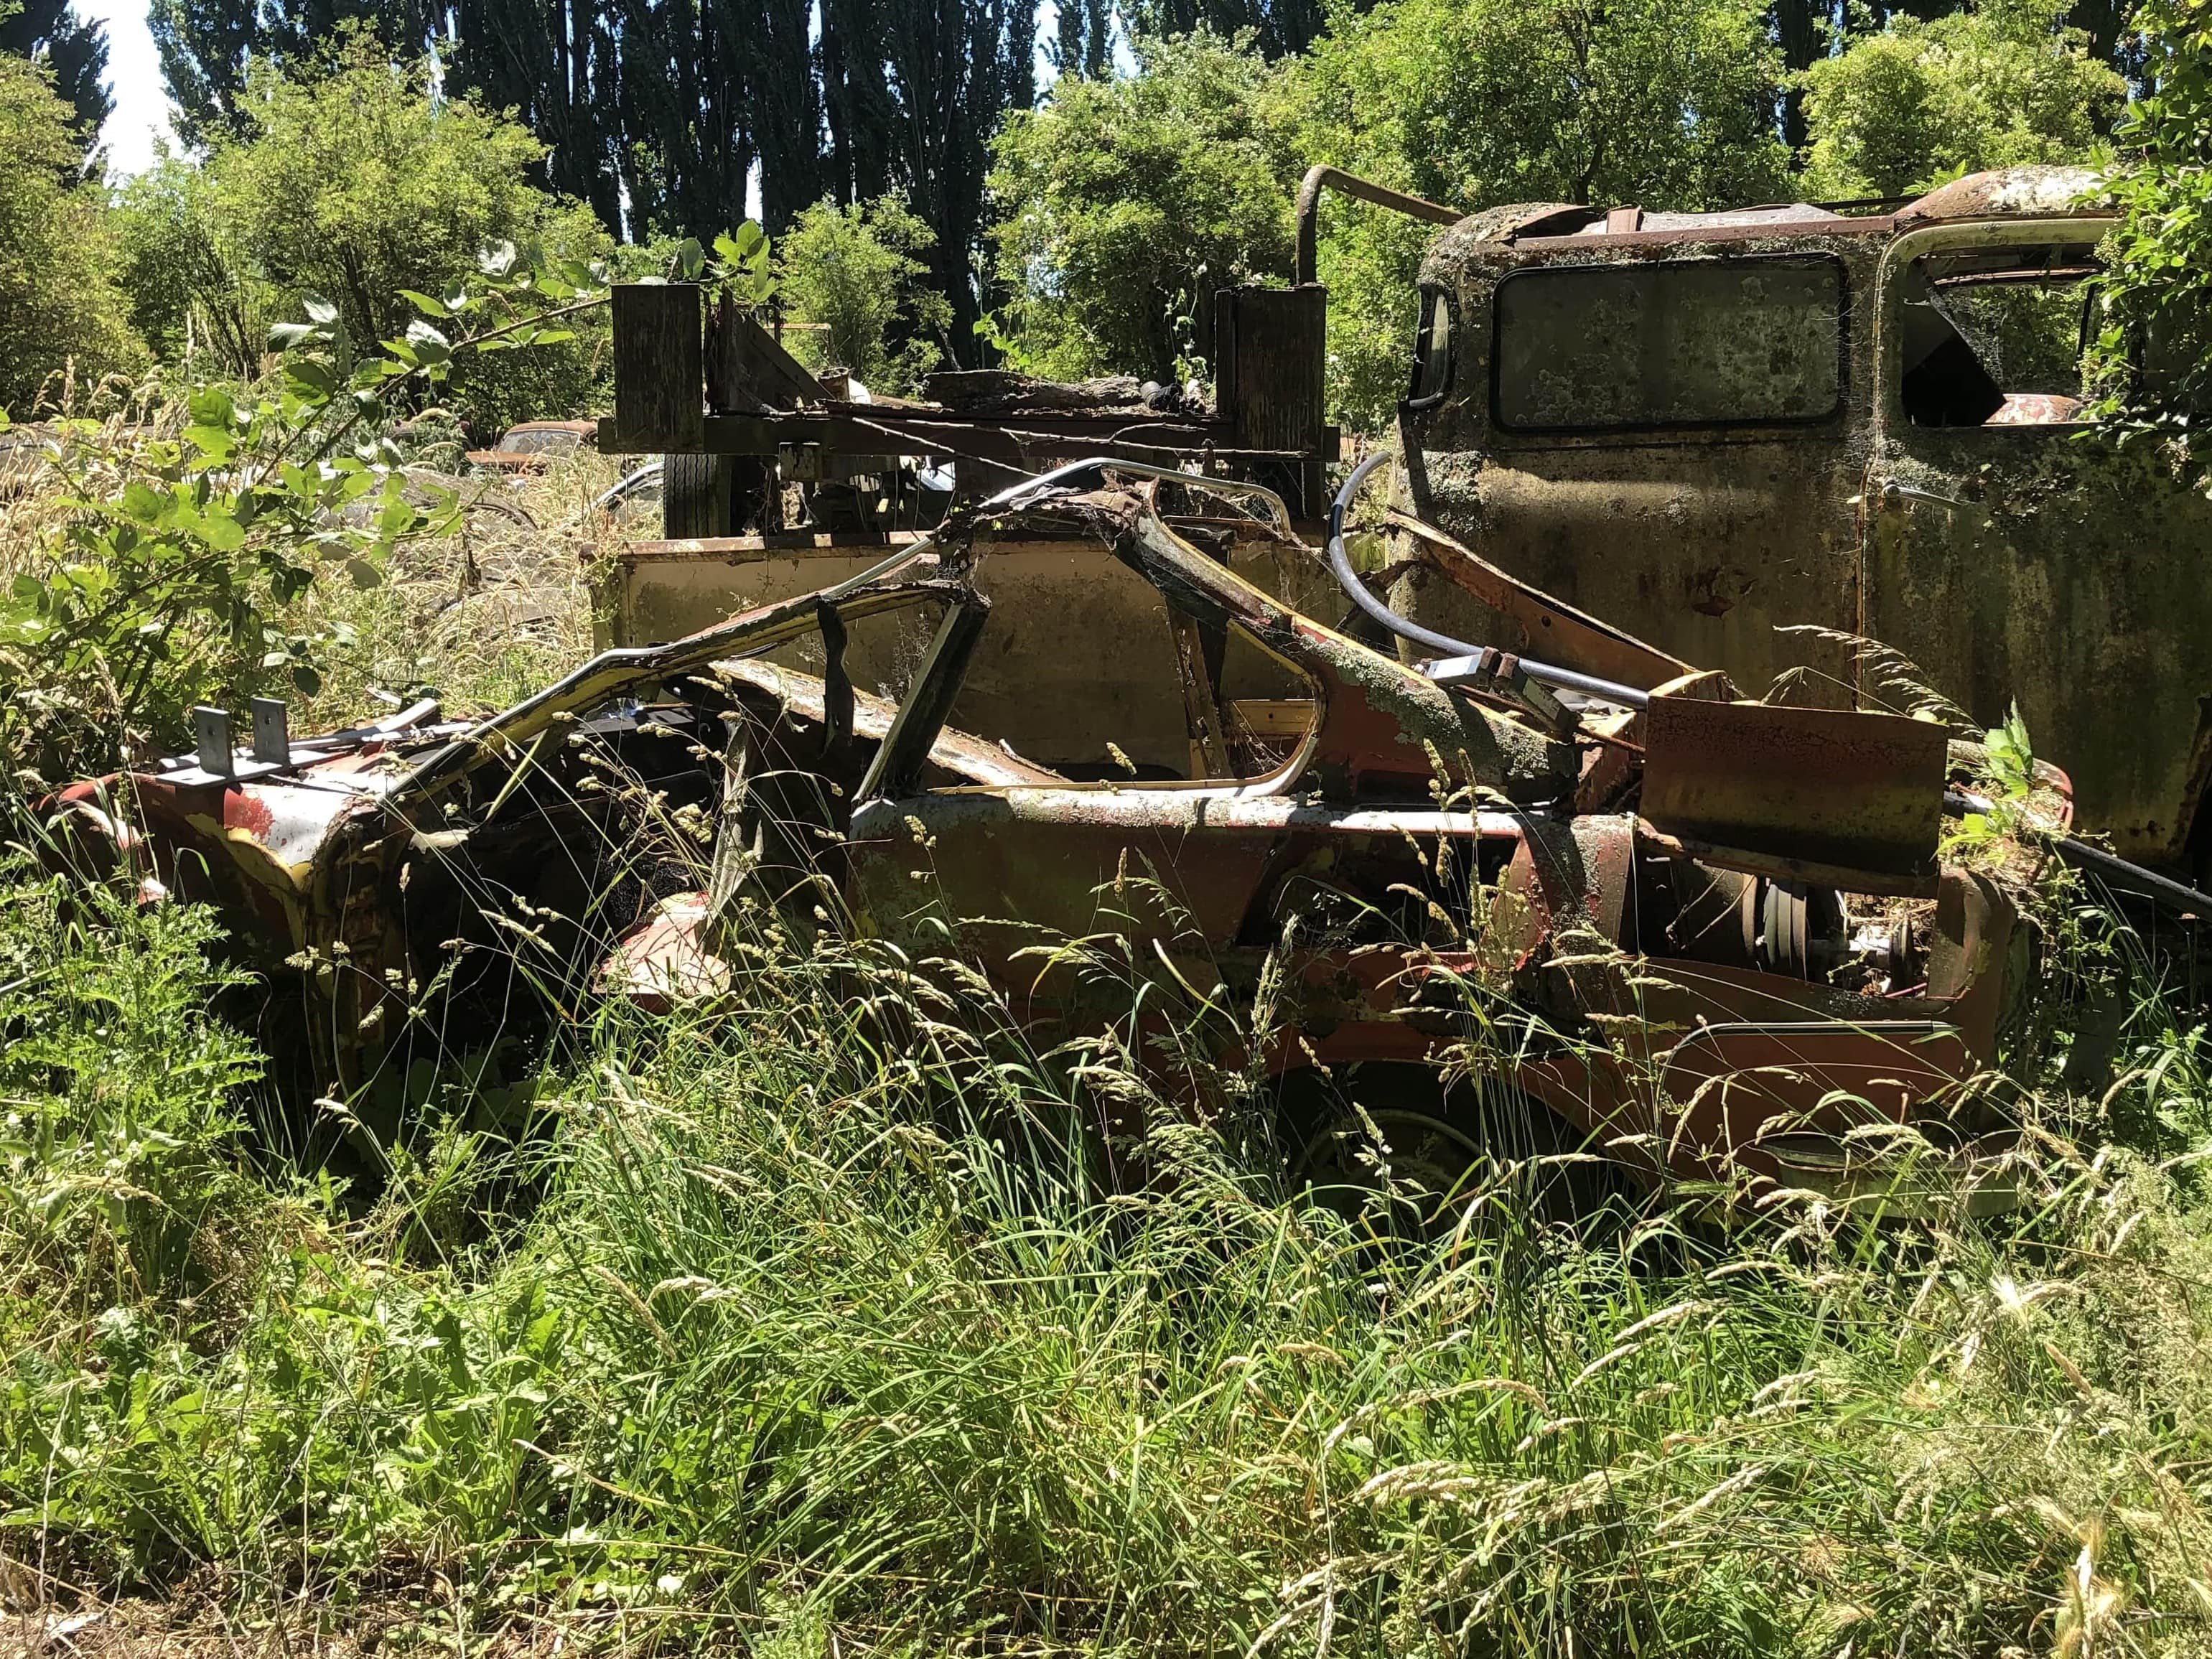
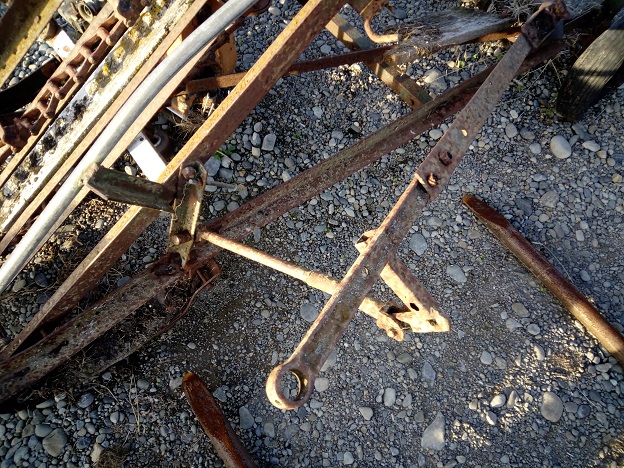
Long time between posts as usual, made another mission back to the Marshland yard before it's all gone. Managed to get four decent 14 inch rims to put the Sabre back to original and so I can fit the NOS hubcaps - will look the part once blasted and painted. Also found a floormat for it amongst the grass, I have the passenger side but had been missing the driver's so I'm a happy lad! Also dragged this monstrosity home because I couldn't bear the thought of it being crushed. I'll clean it up and then decide what to do with it.
8 points
-
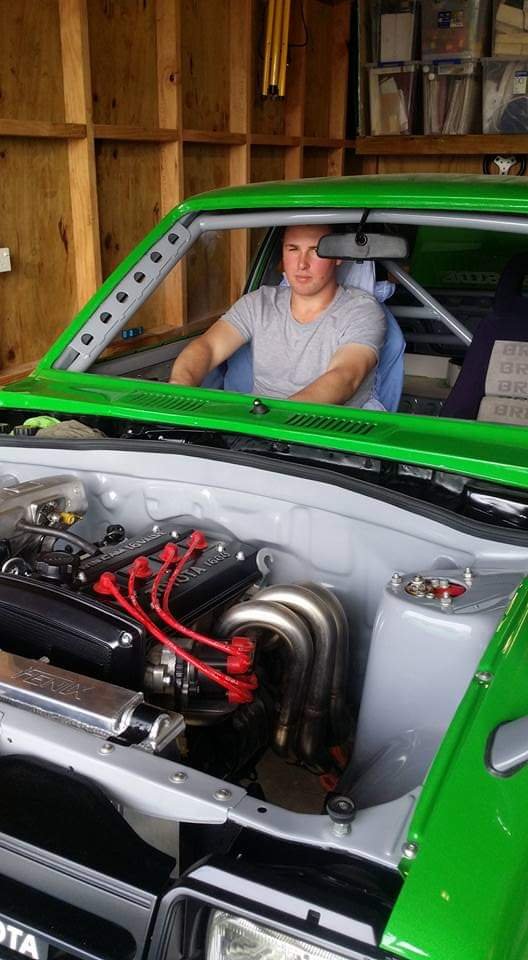
I picked up the completed radiator, the dude supplied a high quality fan and modified the thermo cover to have a rad cap as that's the highest point in the system now. Unfortunately this has evaporated a pretty significant proportion of my financial reserves, so much so that I cannot afford the chassis coating I did scrape together enough wedge to order what I needed from Trundles after checking the rest of the engine, which appears to have been recently rebuilt and looks pretty good. There is some weird shit going on with what happened to it tho, it was probably turboed already, but this had been removed and the oil feed to what I presume was the turbo had no capping on it. This explains the shitload of oil on the diff and engine on that side, and the lack of sump oil, and the seizure.. But why? Anyway, I have been steam cleaning all the bits and prepping to get it back together; Trundles bits should be here next week sometime. I also cleaned up the diffs, with cleaned up caliper insides and new brake lines; Then I put a whole lot of shit on tardme, might have to sell some bikes and shit I don't really want to...7 points
-
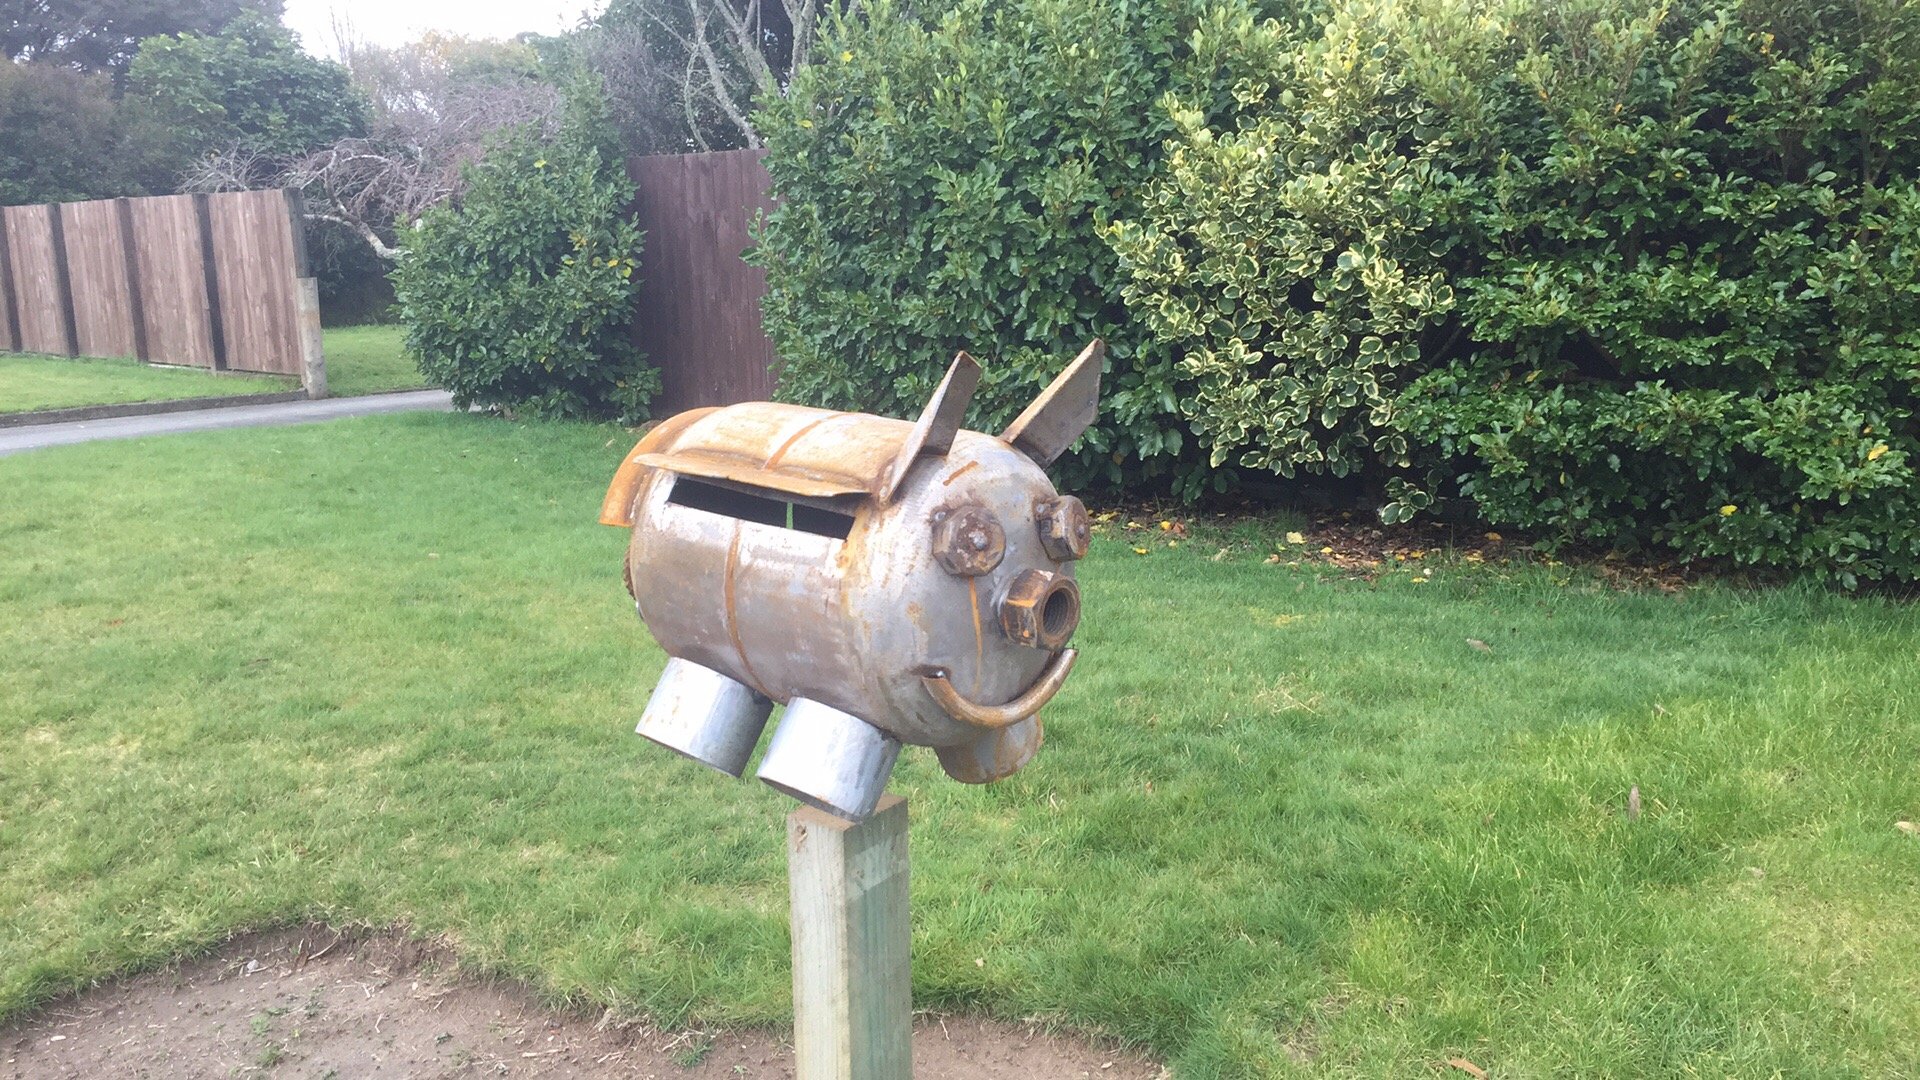
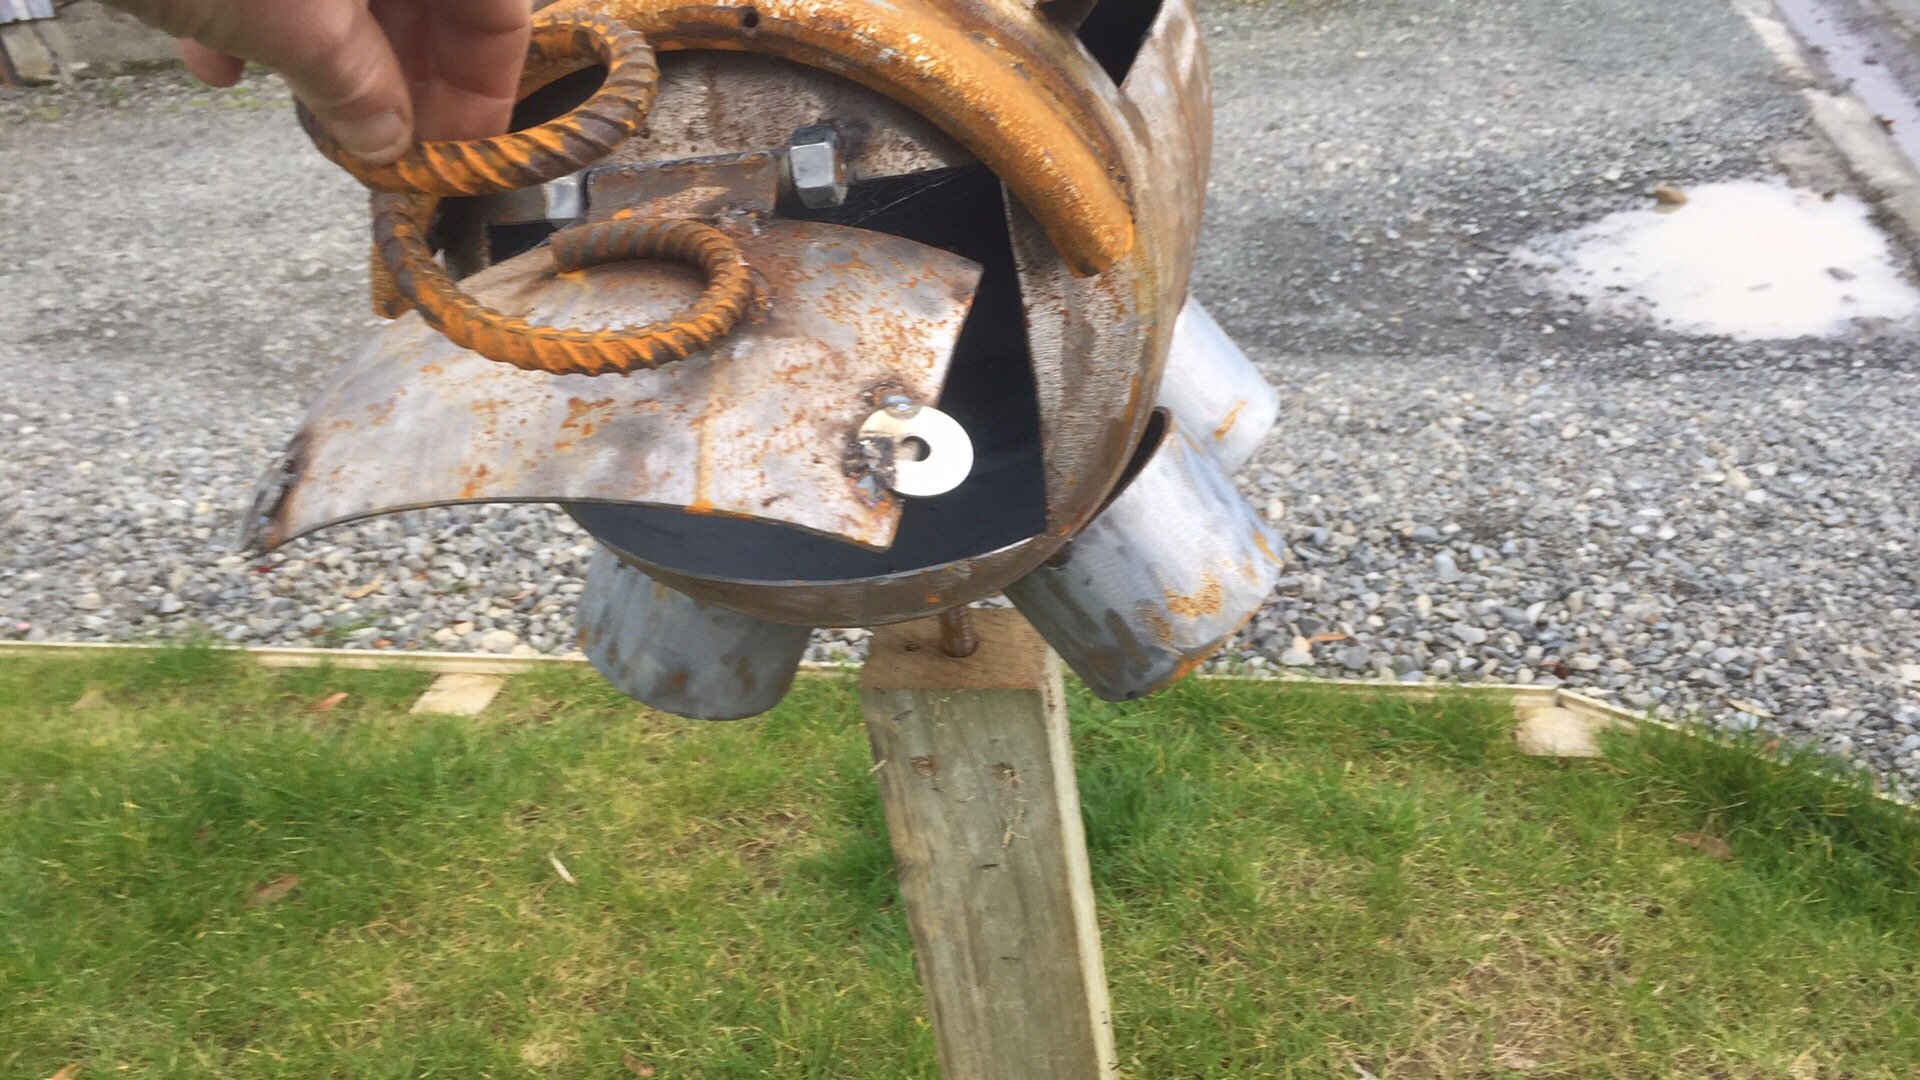
My boy loves checking the mail box every day so I surprised him with this. he thinks the coolest part it taking letters out of the arse. should rust up good.
6 points
-
First stockcar. Only pic I have of it. At that stage it was the oldest standard stock racing in the country. This pic was in 2005. It was built in 1967. Powered by E31 Pacer 245 Hemi. Had a habit of heat seizing. when she was "new"
6 points
-
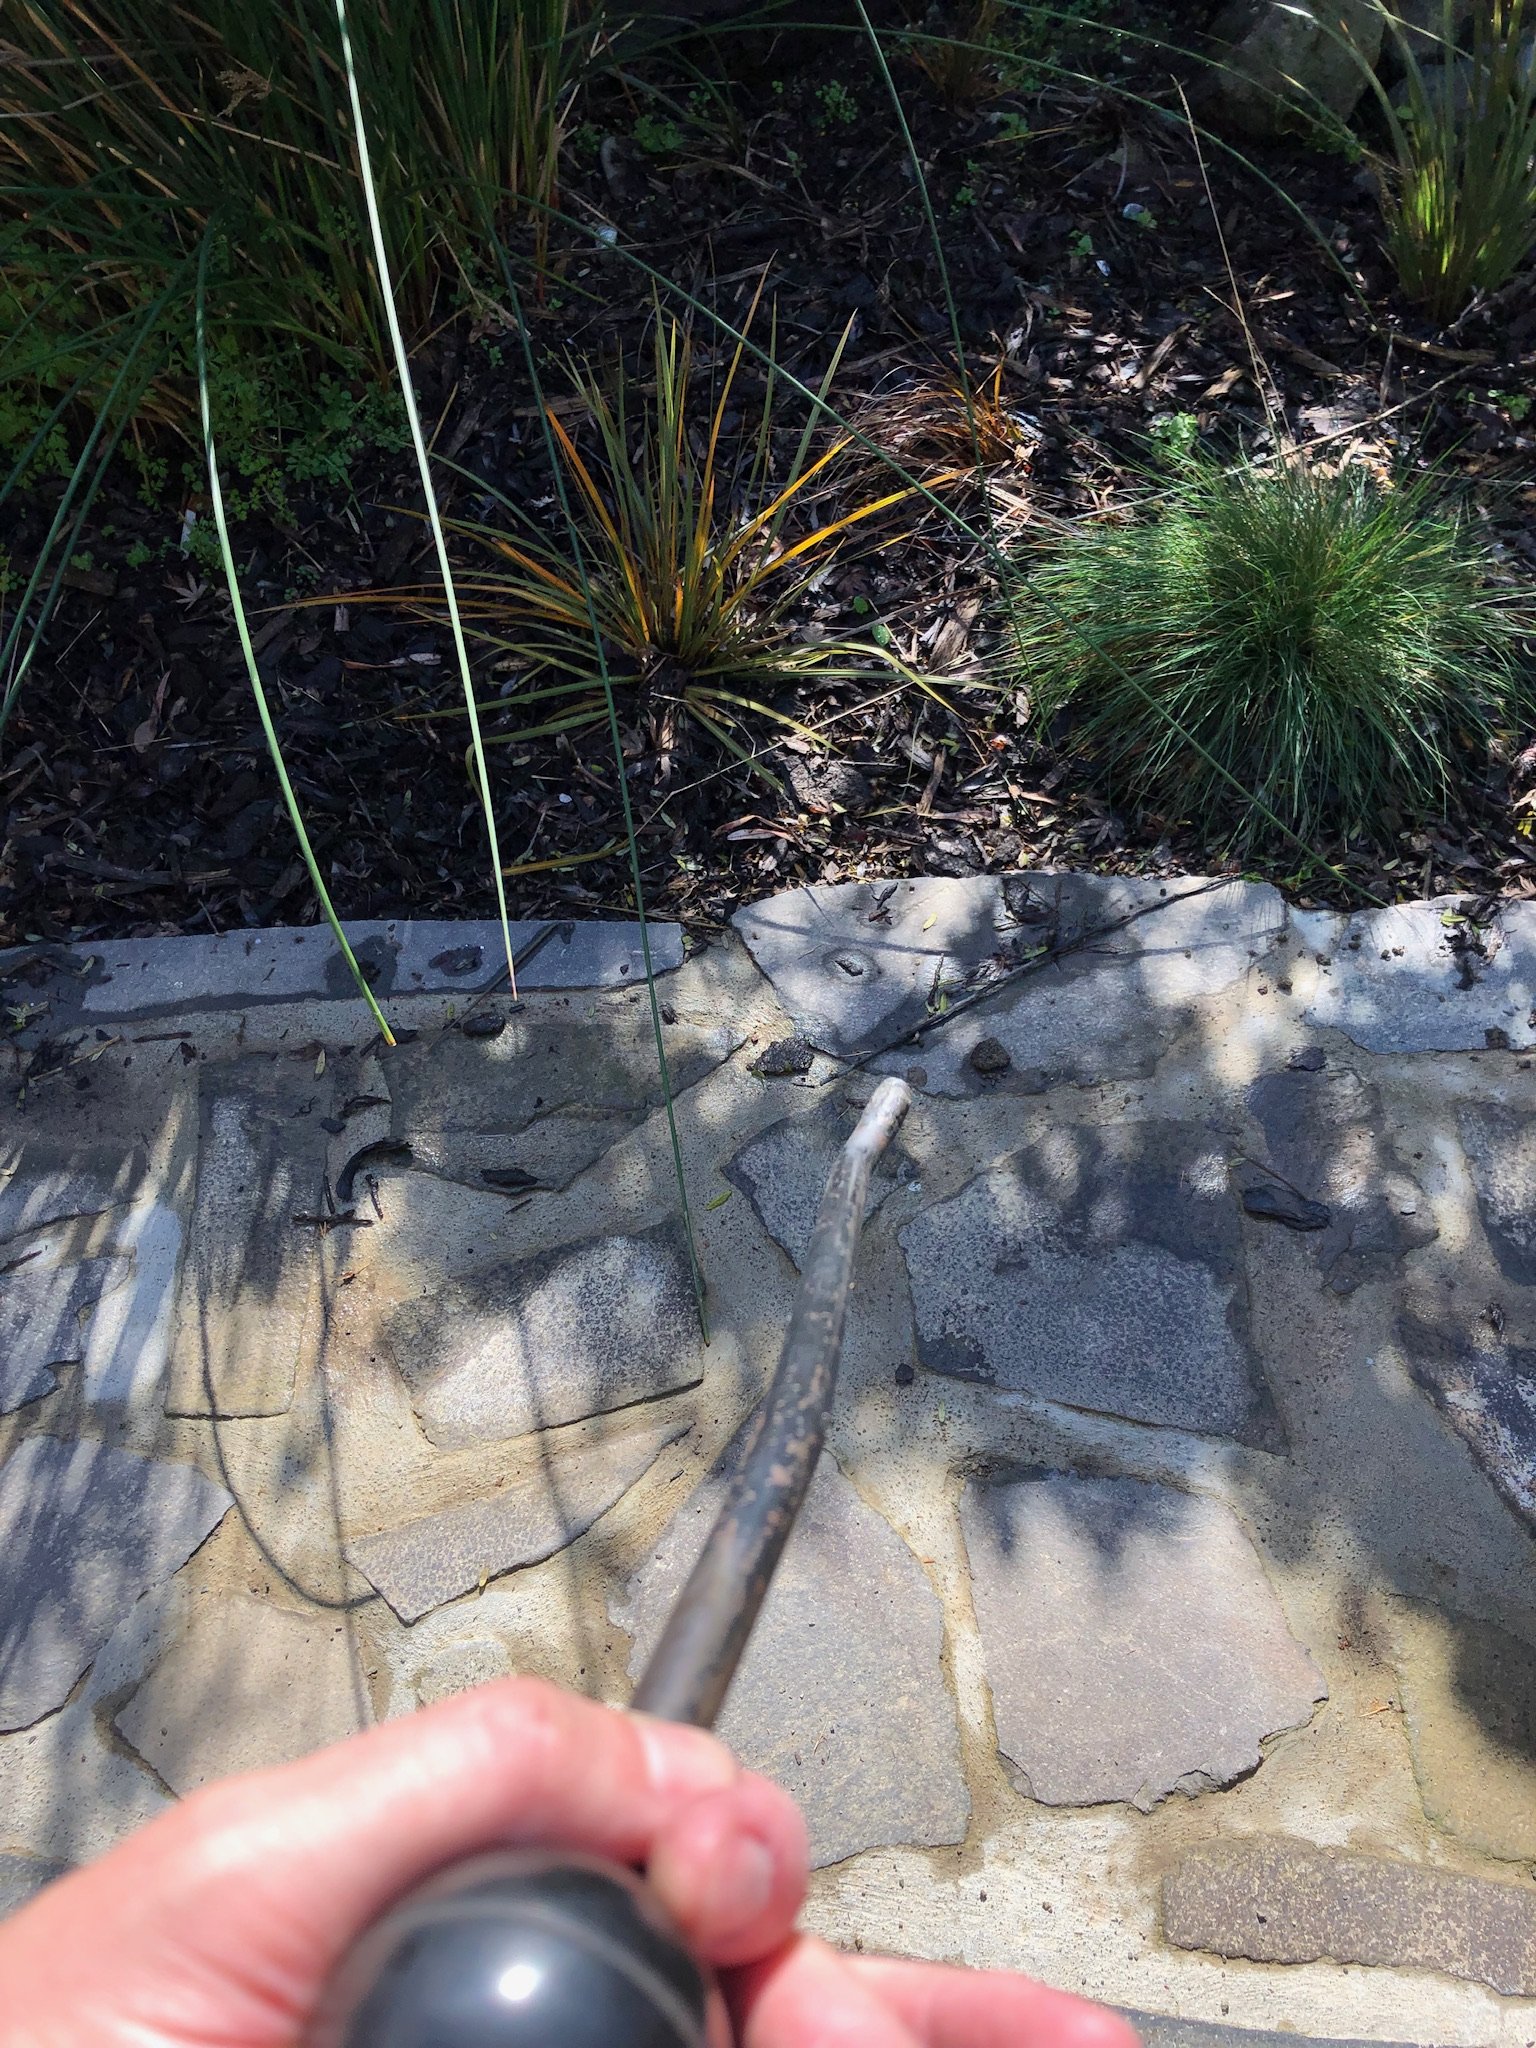
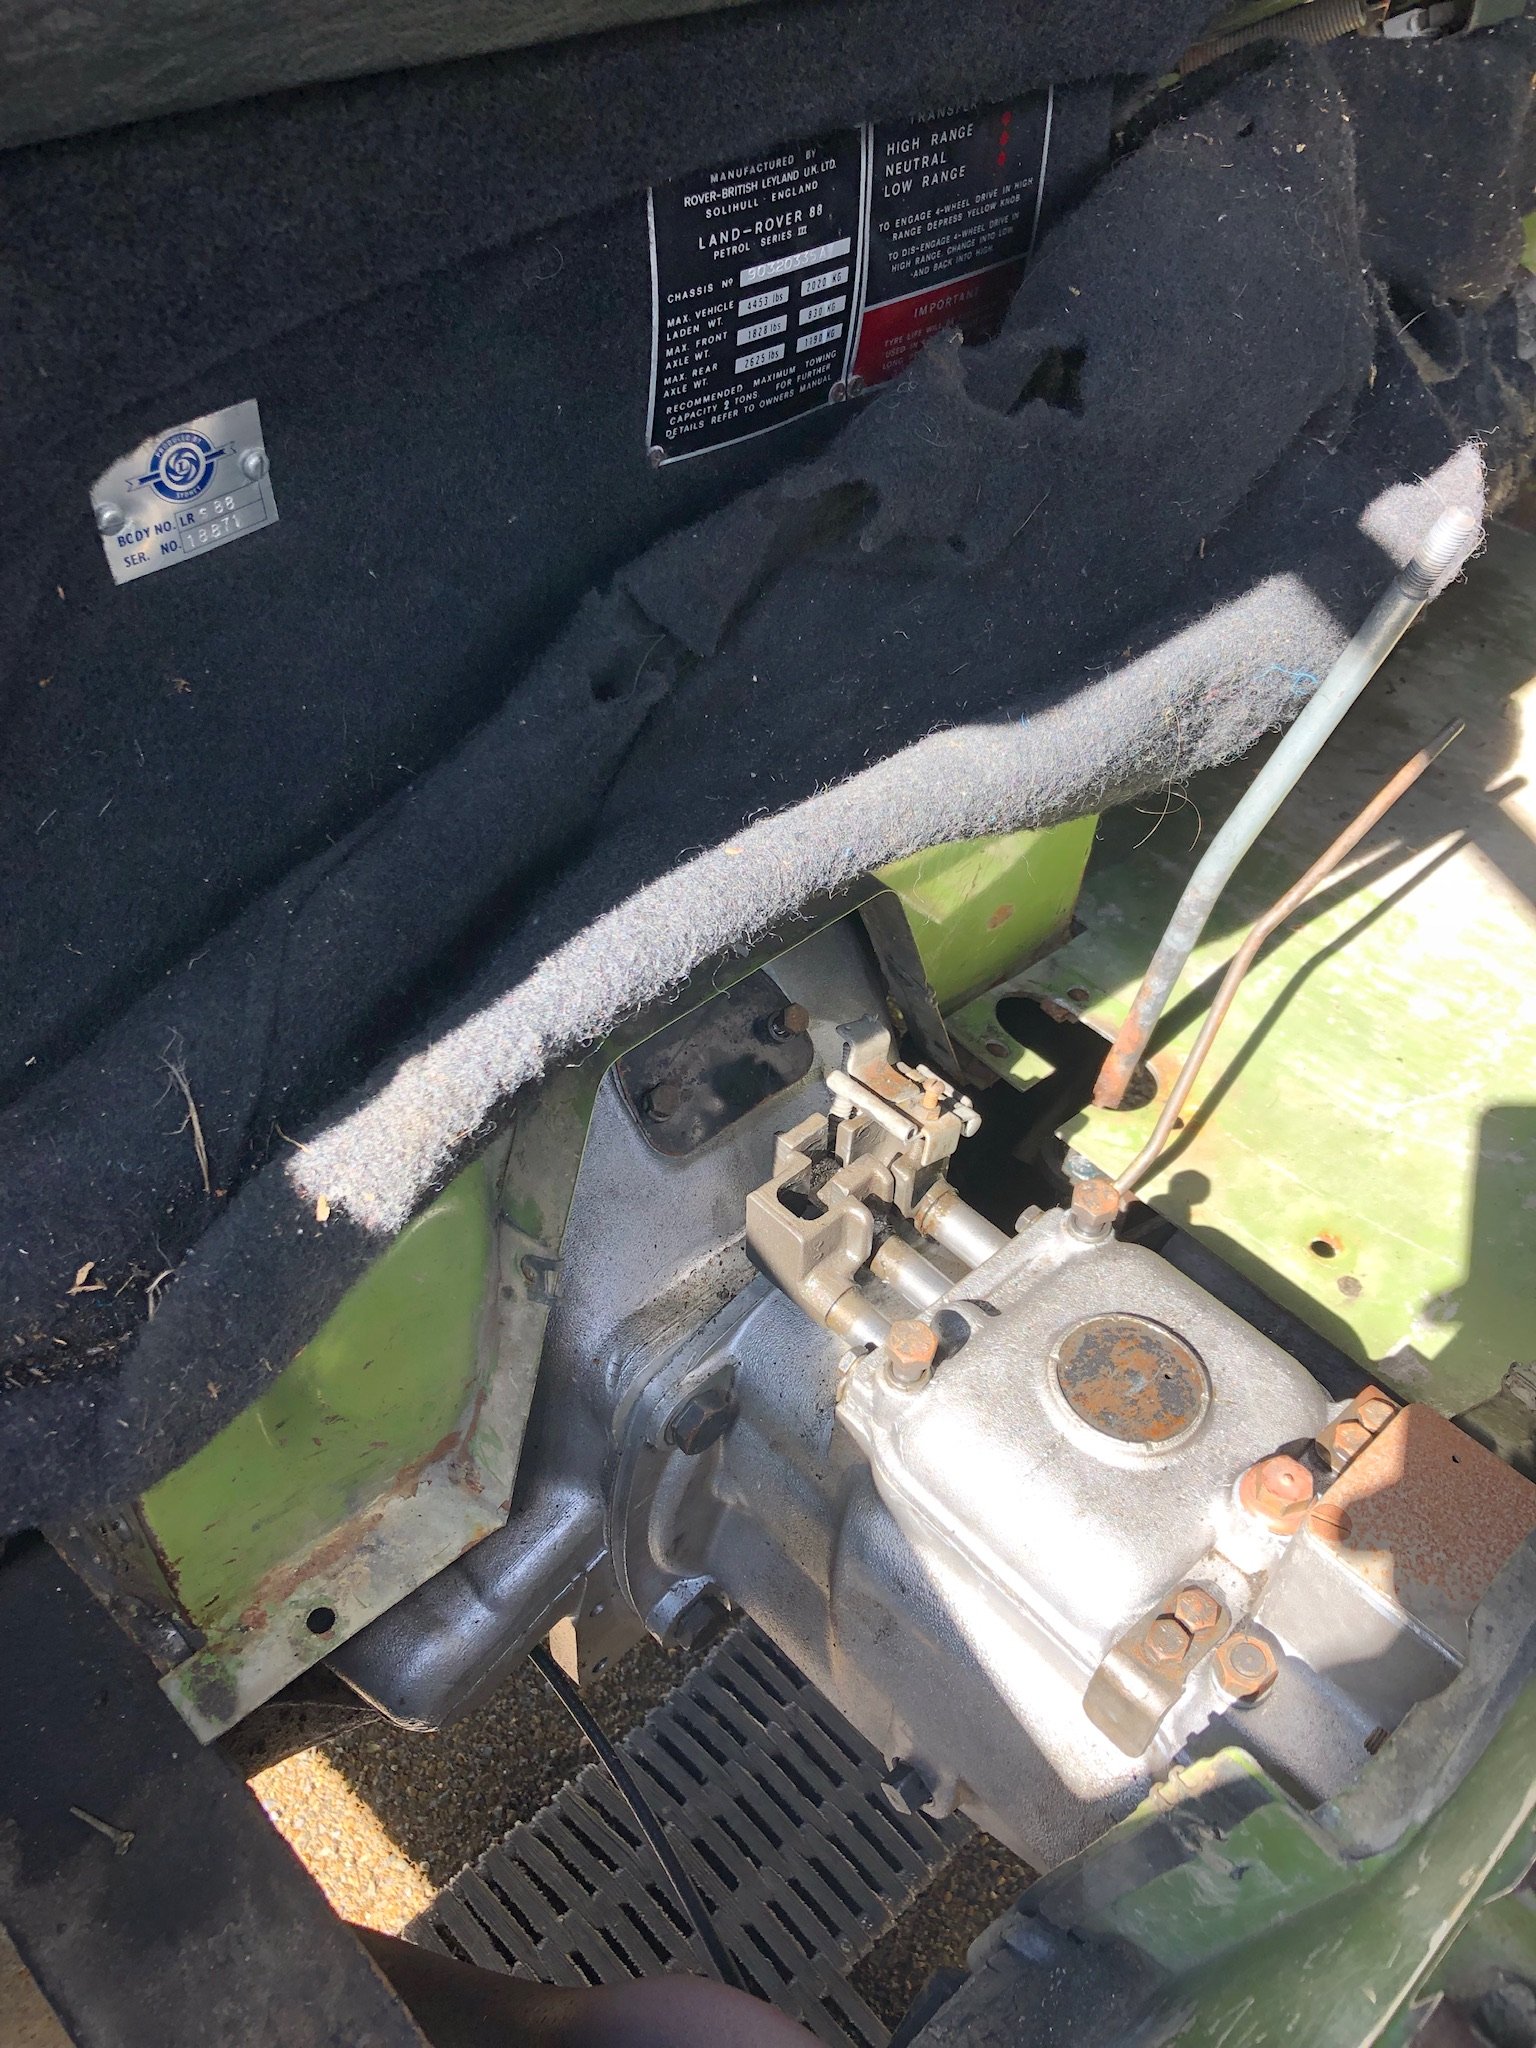
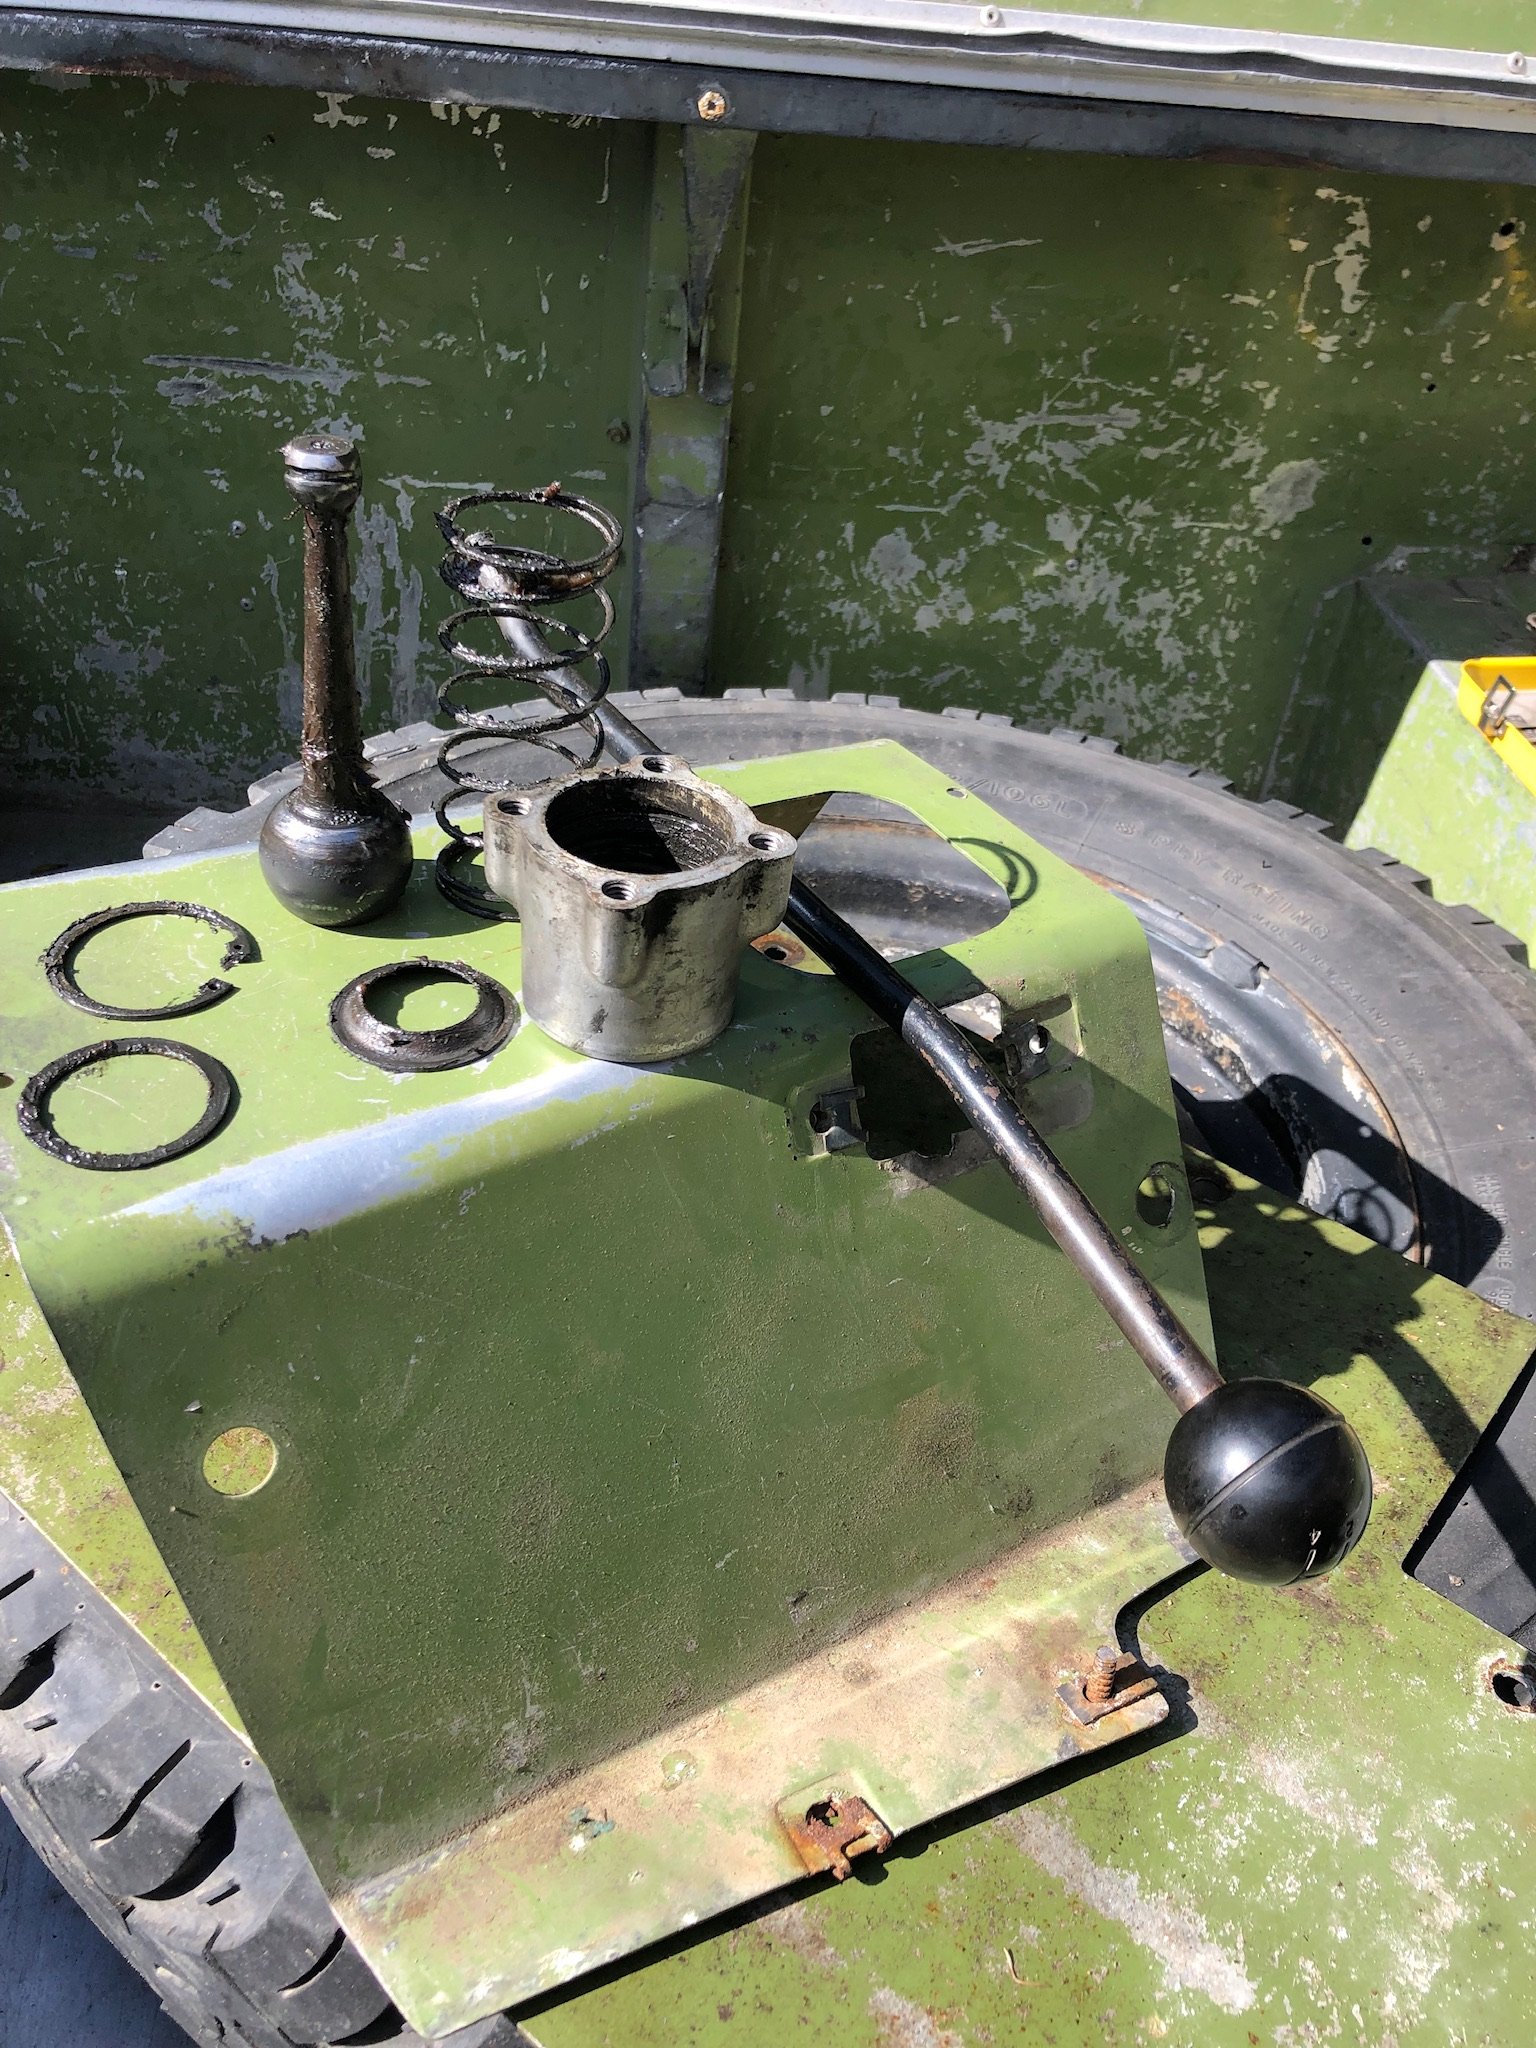
Driving home the other day, and my shifter become incredibly remote. Very odd sensation. Also annoying that it broke off in neutral so I had no drive. Thankfully the underseat storage box contained the ideal assortment of rusty tools, along with a singular used bush, one set of brake shoes, a single u bolt and an owners manual missing multiple pages. Took the high range lever cover off and pushed the selector into second and drove home, chucked it in low range to get up the hill. New one is coming from Australia. Had to take the floor panels out to remove the selector. Currently in flintstone mode. Exploded shifter, the circlip was under a fair bit of tension, didn't expect the spring to be quite that large
5 points
-
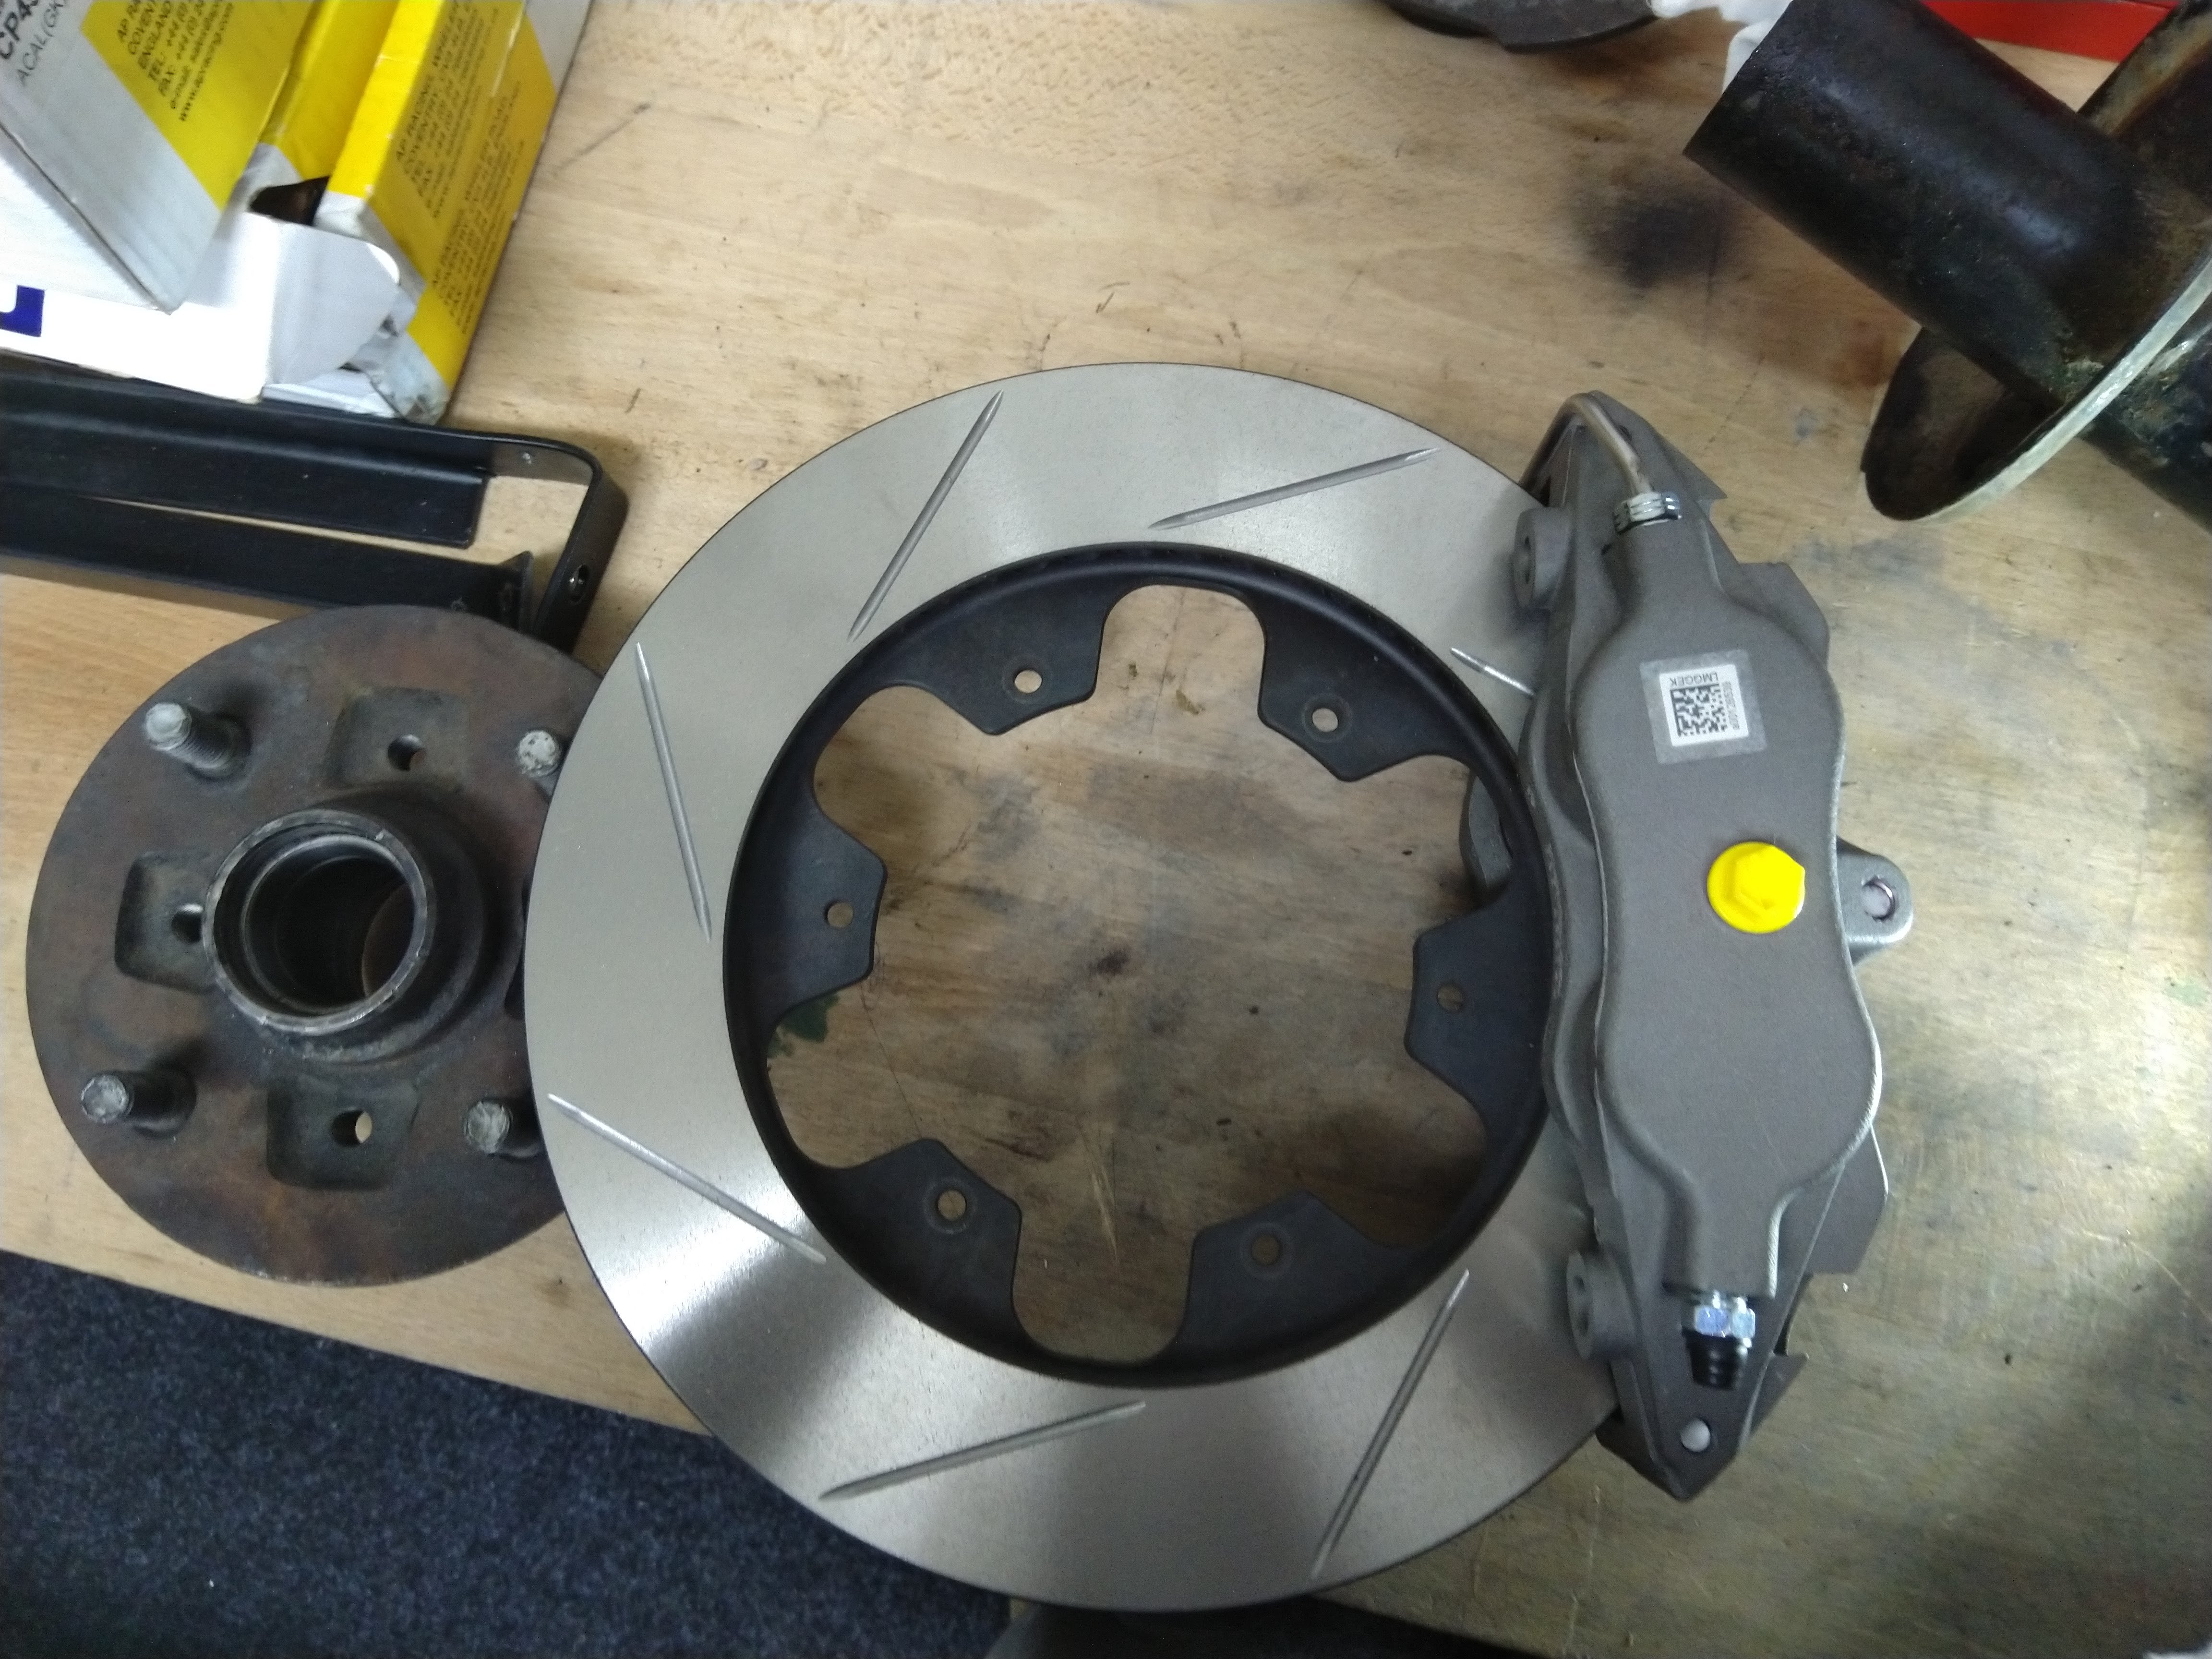
So I've been getting sick of rebuilding my front calipers regularly as they have been getting to hot. After the last club day of the season, the disks were again to hot and so had significant micro cracking and was only a matter of time before the cracked through again. I've also had major issues with pad knock back and stub axles cracking from the forces, also bearing life is an issue. So time to put a big upgrade into motion. I had decided to replace the front calipers and disks once and for all and to do it right. I was running Wilwood calipers with a Toyota Yaris disk (254 x 20mm) machined to fit. I went with AP CP4567 calipers with a 267 x 25.4mm ap disk on a bell (directionally vaned) which is pretty much the biggest i can get in 13" rims without going to another setup which is like twice as expensive. The setup is what's used on rally Escorts and is the Monte Carlo version rather then the forest version. The idea is the wider the disk the more heat capacity it has. Also bigger diameter helps the caliper leverage. I went with the AP's as I wanted a proper motorsport caliper with decent seals, knock back springs and pad availability. I could have made it fit the Starlet stubs axles, but i've had issues with them cracking and with the areo load i plan, i was even more worried about them. So I decided to upgrade to AE86 front stub axles, which meant new suspension, but did let me buy a "bolt on" kit for the brakes. Oh and also a new pedal box as I need different master cylinder sizes for front vs rear. So begins a long process...
4 points
-
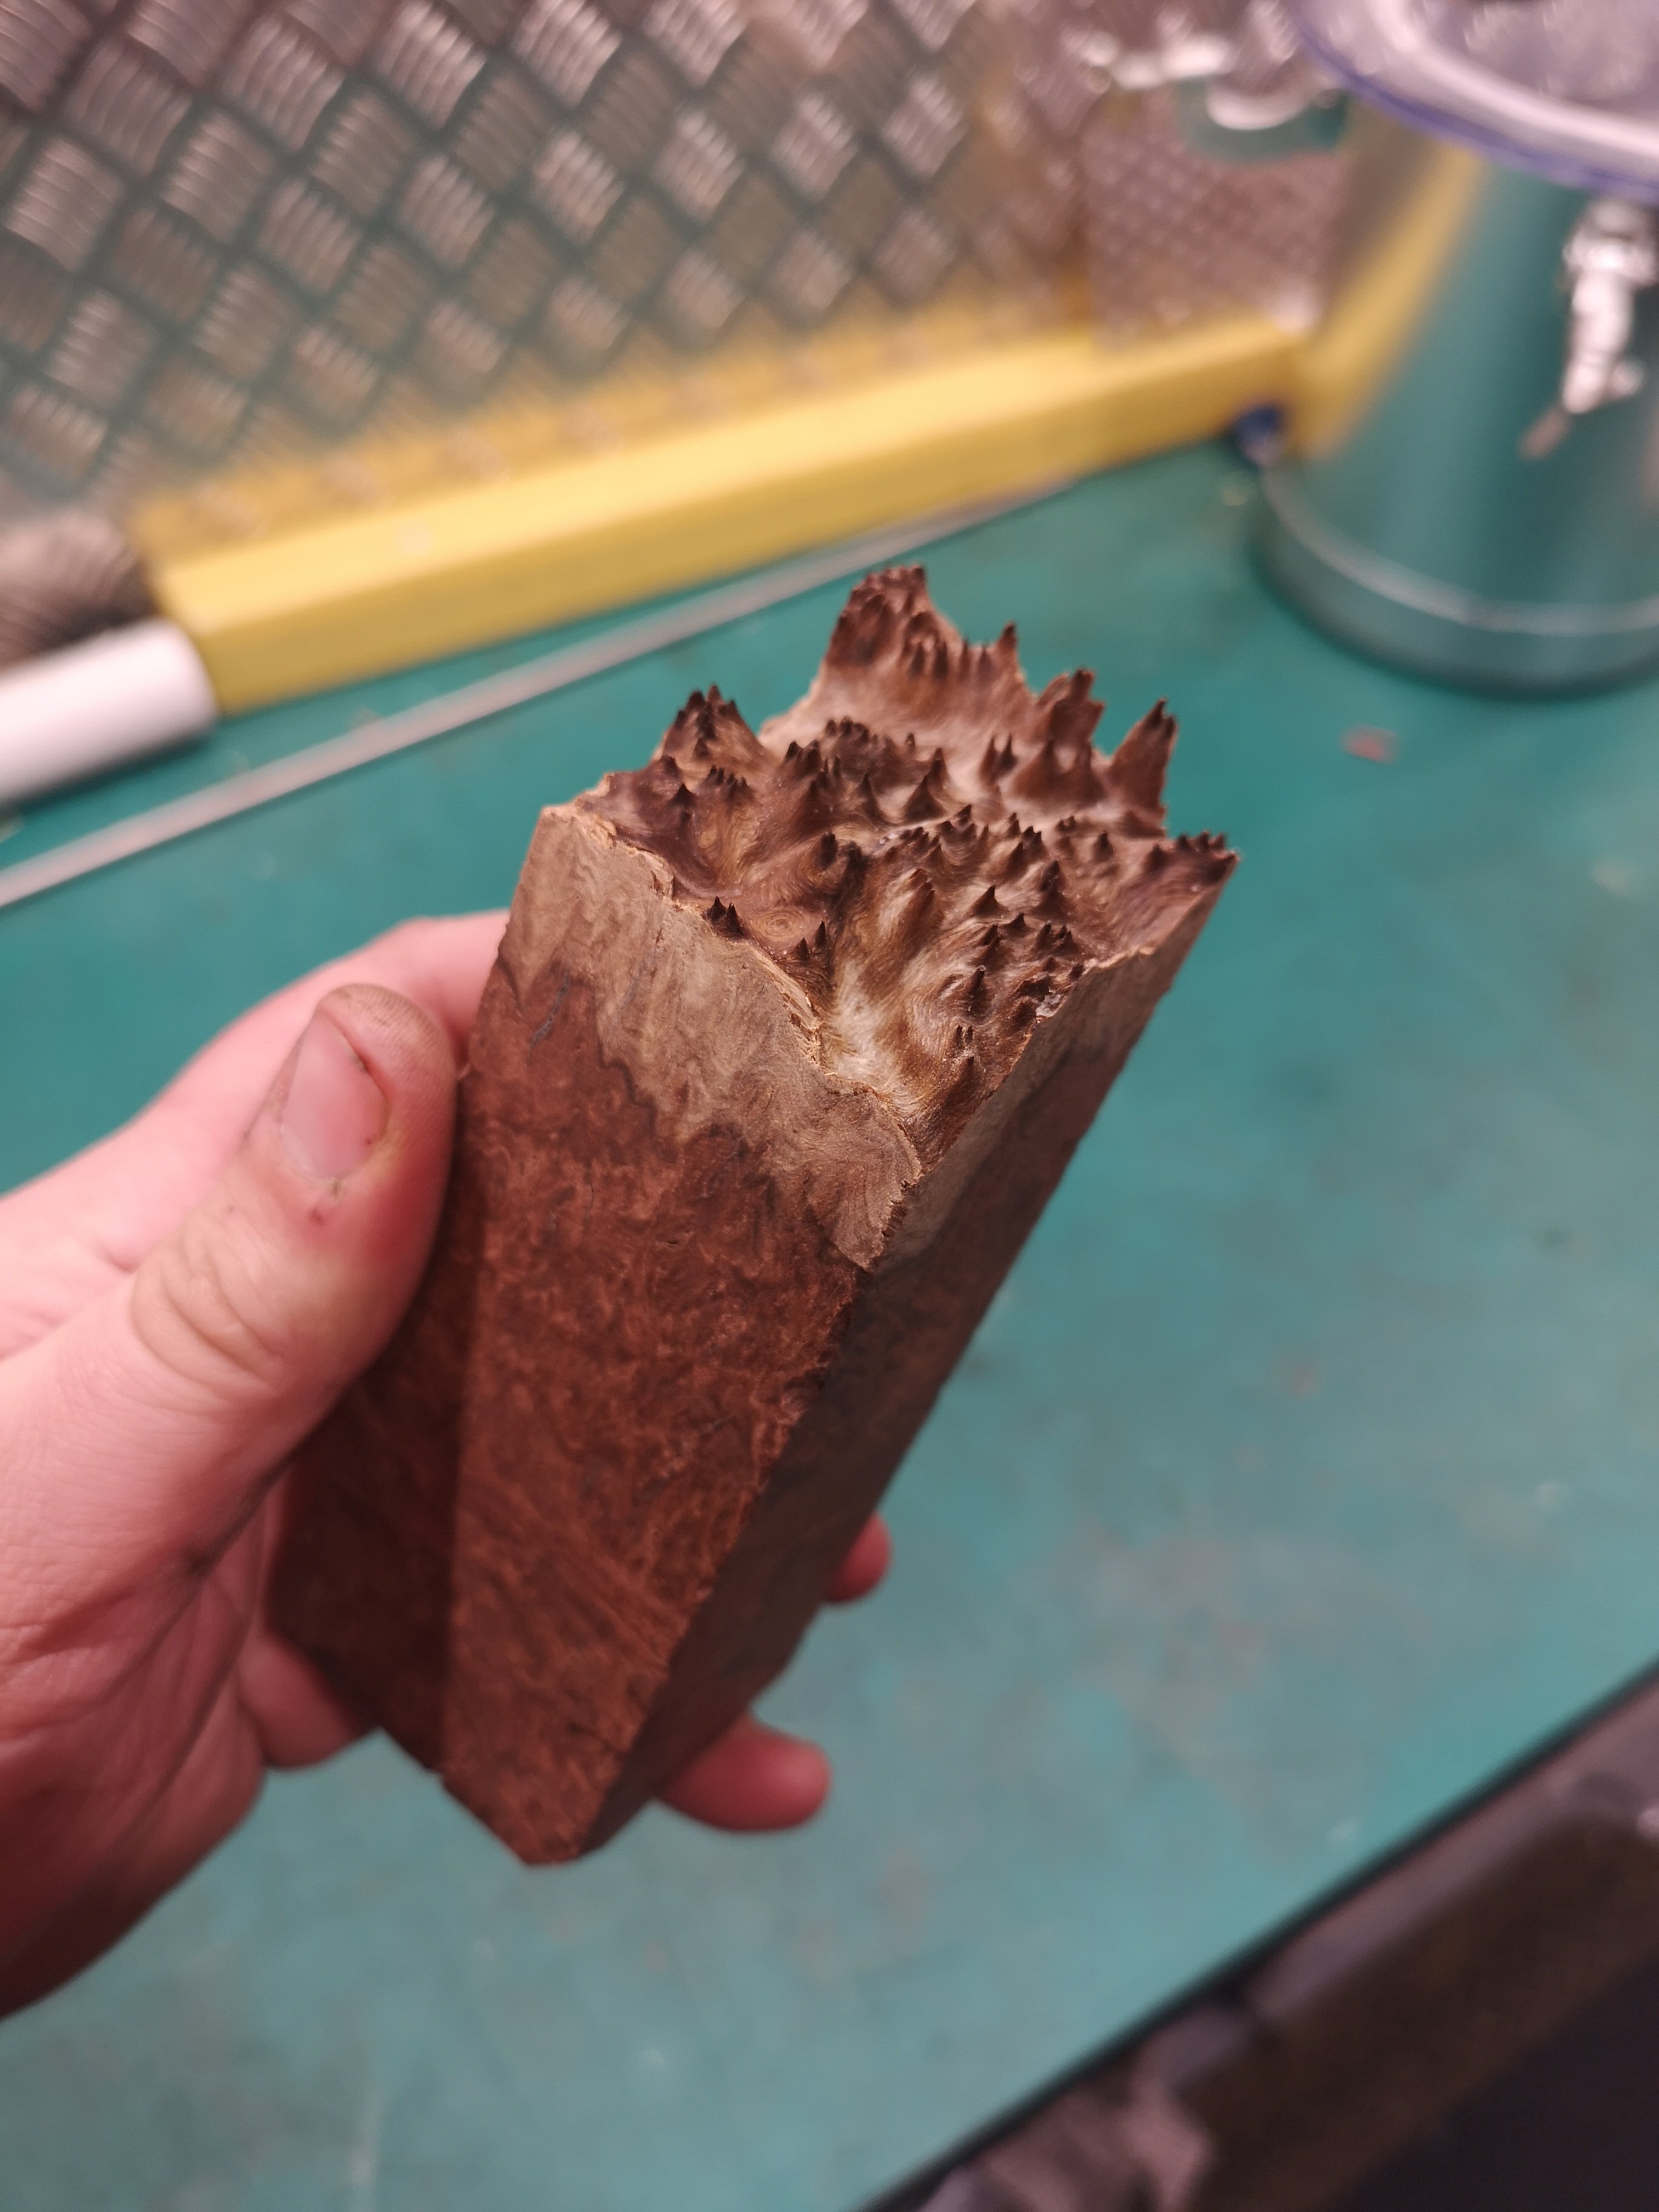
The stabilising resin? Seems to have gone rigtt into the centre, but it's a hard wood so might not have been the best test. The red resin is just on top of it, this was the piece I used.
4 points
-
How it should have always been. The pedal set fits great. I'll need to cut the hole in the firewall for the master cylinder but that's the extent of it it. Seeing three pedals makes me very excited for the future of this car.
4 points
-
Haha, thanks but no. Does it have 28x1/2 wheels? Have a look behind the filter housing, if it does have an oil cooler it's a great place for bits of old bearing to sit then go through your new bearings once it's running again.3 points
-
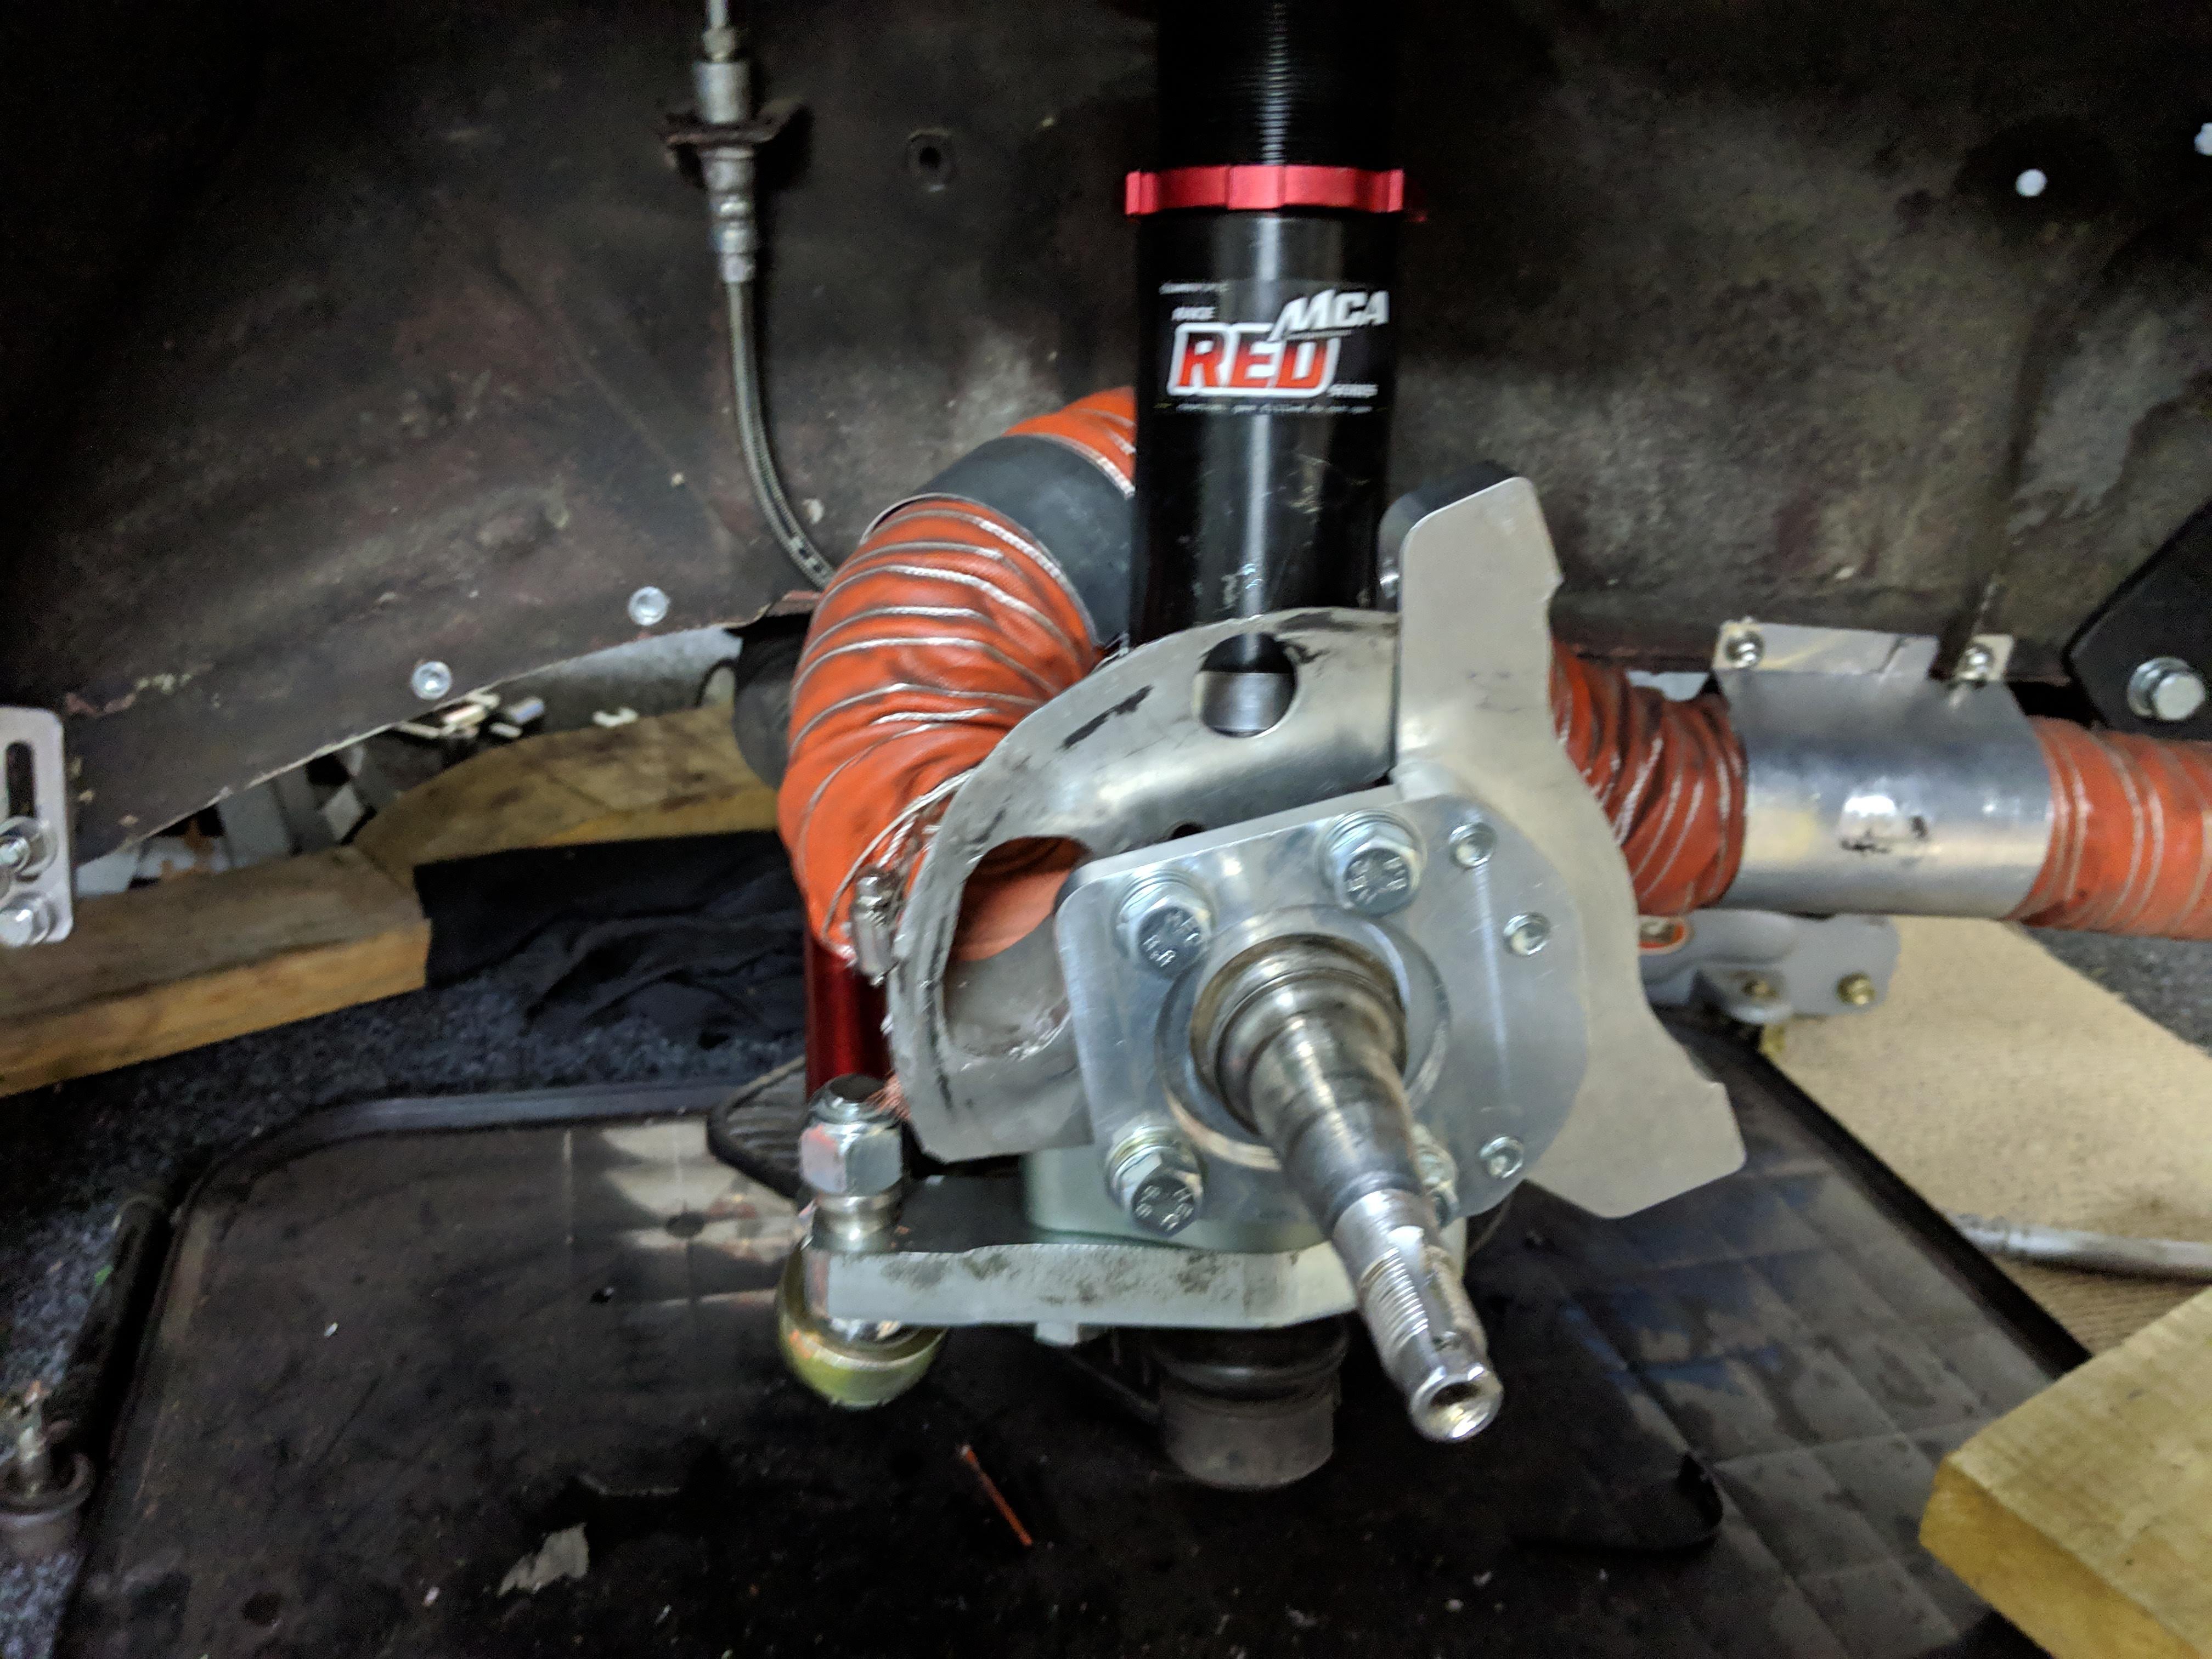
So in the vein of do it once do it properly. I chose a set of custom MCA Reds all round. Here they are fitted up with the brake mounting kit and cooling I adapted to fit. I went with T3 AE86 steering arms and used the T3 Adapter bushings from the standard Starlet Lower Control arms. A set of MRP RCA's finish it all off. The T3 steering arms are shit to be honest, they are far to heavy, far to large, and just over built all round, and I only got them as I couldn't get AE86 PS arms in time. Of course with 13 inch rims there was no way i could fit the steering arms on the outer hole, so I had to chop that hole off and move them in, just means slightly heavier steering, but more responsive which i'm fine with. However with the RCA's the angle of the steering rack ends meant the ball joint (or whatever it's called) hit the steering arm, so we had to do a fair big of clearancing to give a free range of motion. Of course I only got this all sorted just in time for a shakedown on the Friday before the new racing season started on the Sunday, nothing like leaving it to the last minute. Shakedown didn't go well either as I couldn't get the front/rear bias sorted, and flat spotted a set of front tyres. So Saturday I removed my original in line bias valve (supposedly can lock on when high fast pressure applied) I got out to the club day with a new pedal box, suspension and brakes. Took me a wee while to get comfortable with the car... They had discounted the entry fee, so there was a pretty big turn out of cars, which was good. First race I had a fairly good battle with what i believe was a WRX Second race I took advantage of a bit of carnage on the first corner to get a gap to an Integra which was faster then me and managed to hold him off. Handicap race for the last one, a lot of faster cars coming through (mainly porsches), got overtaken while behind traffic, then managed to get it back a few laps later when he got stuck behind traffic. Overall was a weird day with the wind, everyone was a second or two off their normal times, best I did was a 1.37:000 flat. Suspension was a lot more complaint with the bumps, still getting used to the grip, and the brakes were amazing, pedal box with the throttle pedal was a lot better for position.
3 points
-
Fitting a pedal box in a starlet is a bitch of a job at the best of times, but add in an existing roll cage to work around and it becomes a nightmare... Frankly I would not have attempted this without @Snoozin and @sheepers posting their detailed write up of what they had to do to create one for Snoozin's starlet. So a massive thank you to them for sharing their process! Rather then go the normal route of using a Wilwood box, I went for Tilton as I needed to be able to adjust the pedal positions vertically as I had very little room to move the pedal box around, I also wanted to replace the throttle pedal at the same time so I could eventually Heel and Toe if I wanted to. So start with working out the only position the pedal box can go in to clear the firewall, tunnel, steering shaft, bulkhead and cage (get oh so lucky it actually fits)... Get the position right for all 3 pedals: Lots of cutting and fiddling later and a bracket is tacked up: Realise you can't actually get it out now... so adjust slightly and you end up with this... Needed to hook up the brake lights, so used a micro switch which goes to a relay, nice and simple and allows adjustment if required. Since I was changing the throttle pedal, it was no longer a direct pull through the bulk head, so had to make a cam up to translate the movement, this took a bit of thinking to get the right movement in relation to the throttle bodies so it was linear the whole way. Work out that the reservoirs absolutely need to be remote mounted, start buying gold plated fittings to make it work: Reservoirs mounted and plumped in:3 points
-
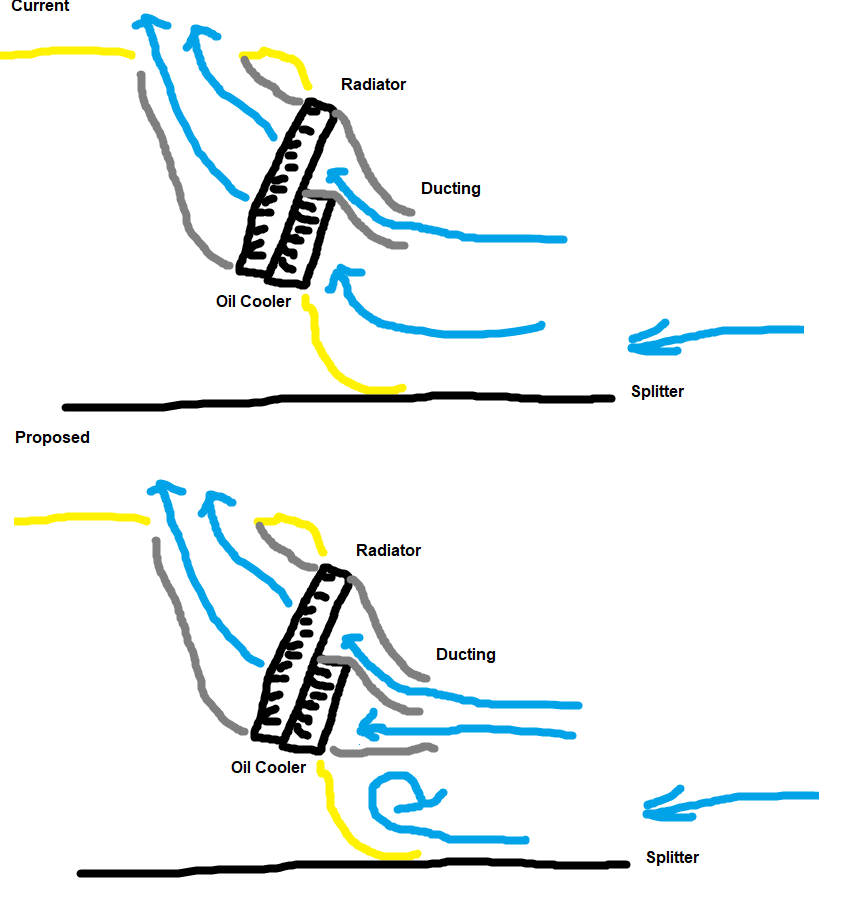
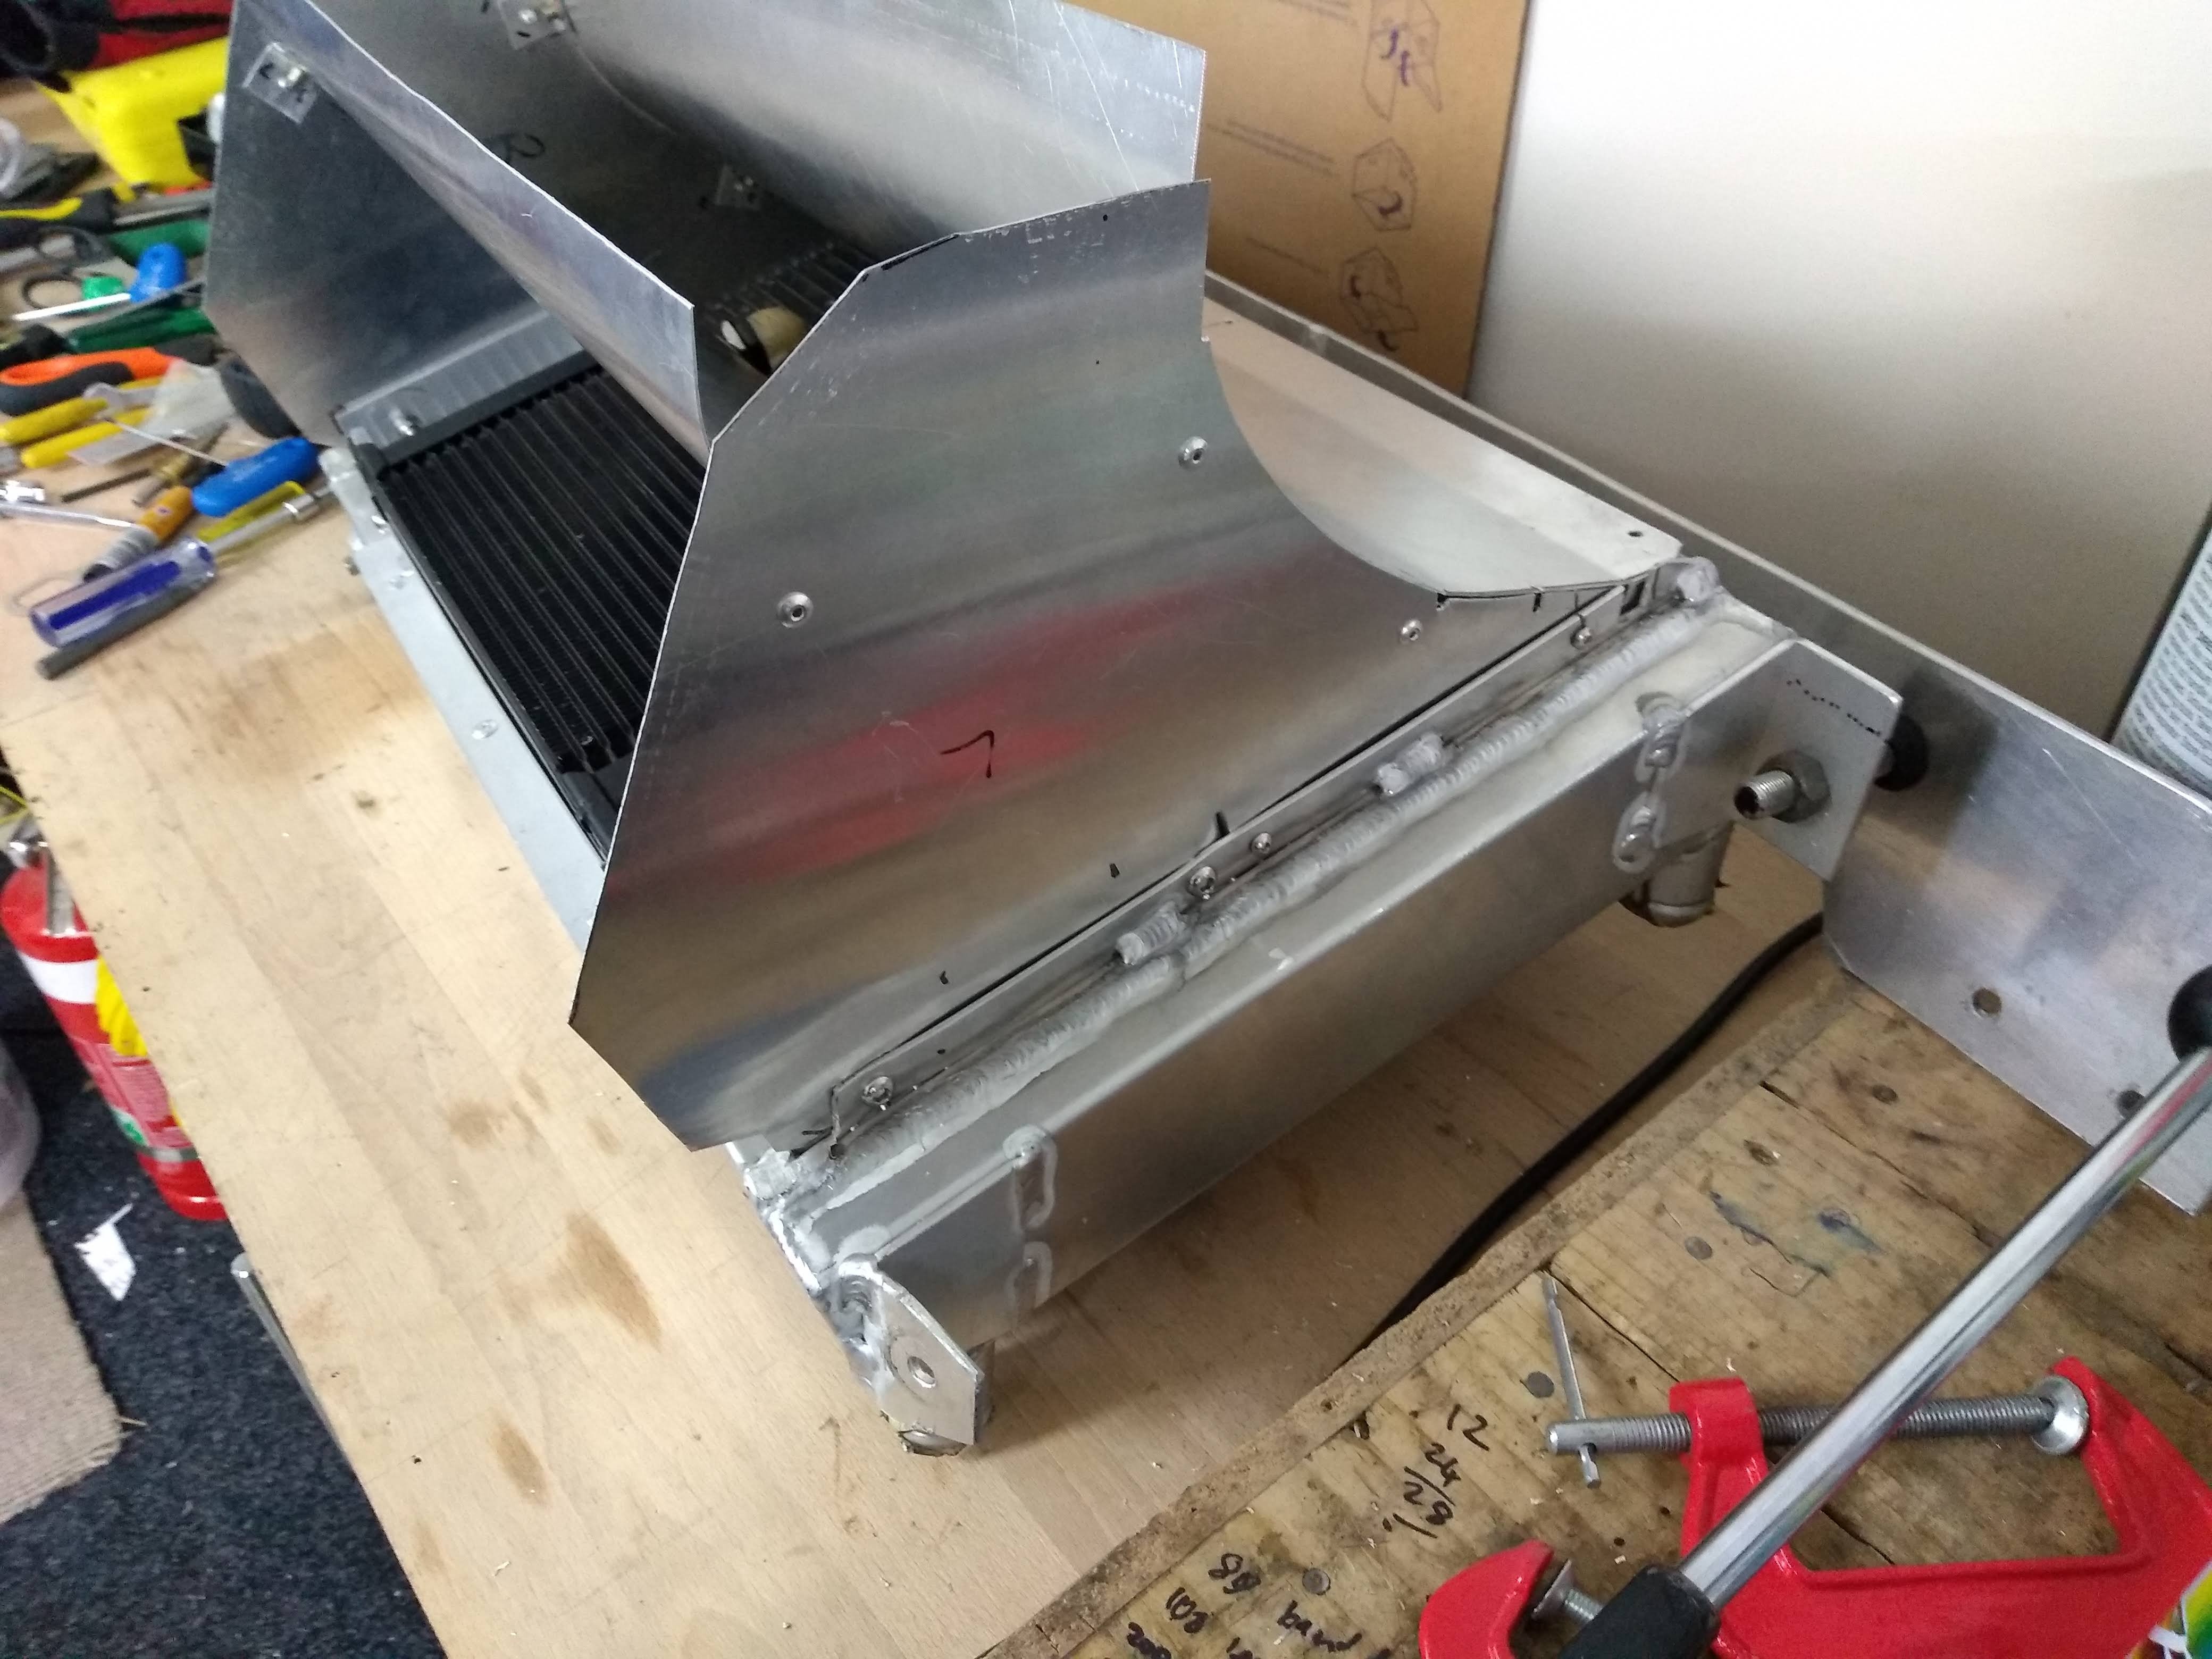
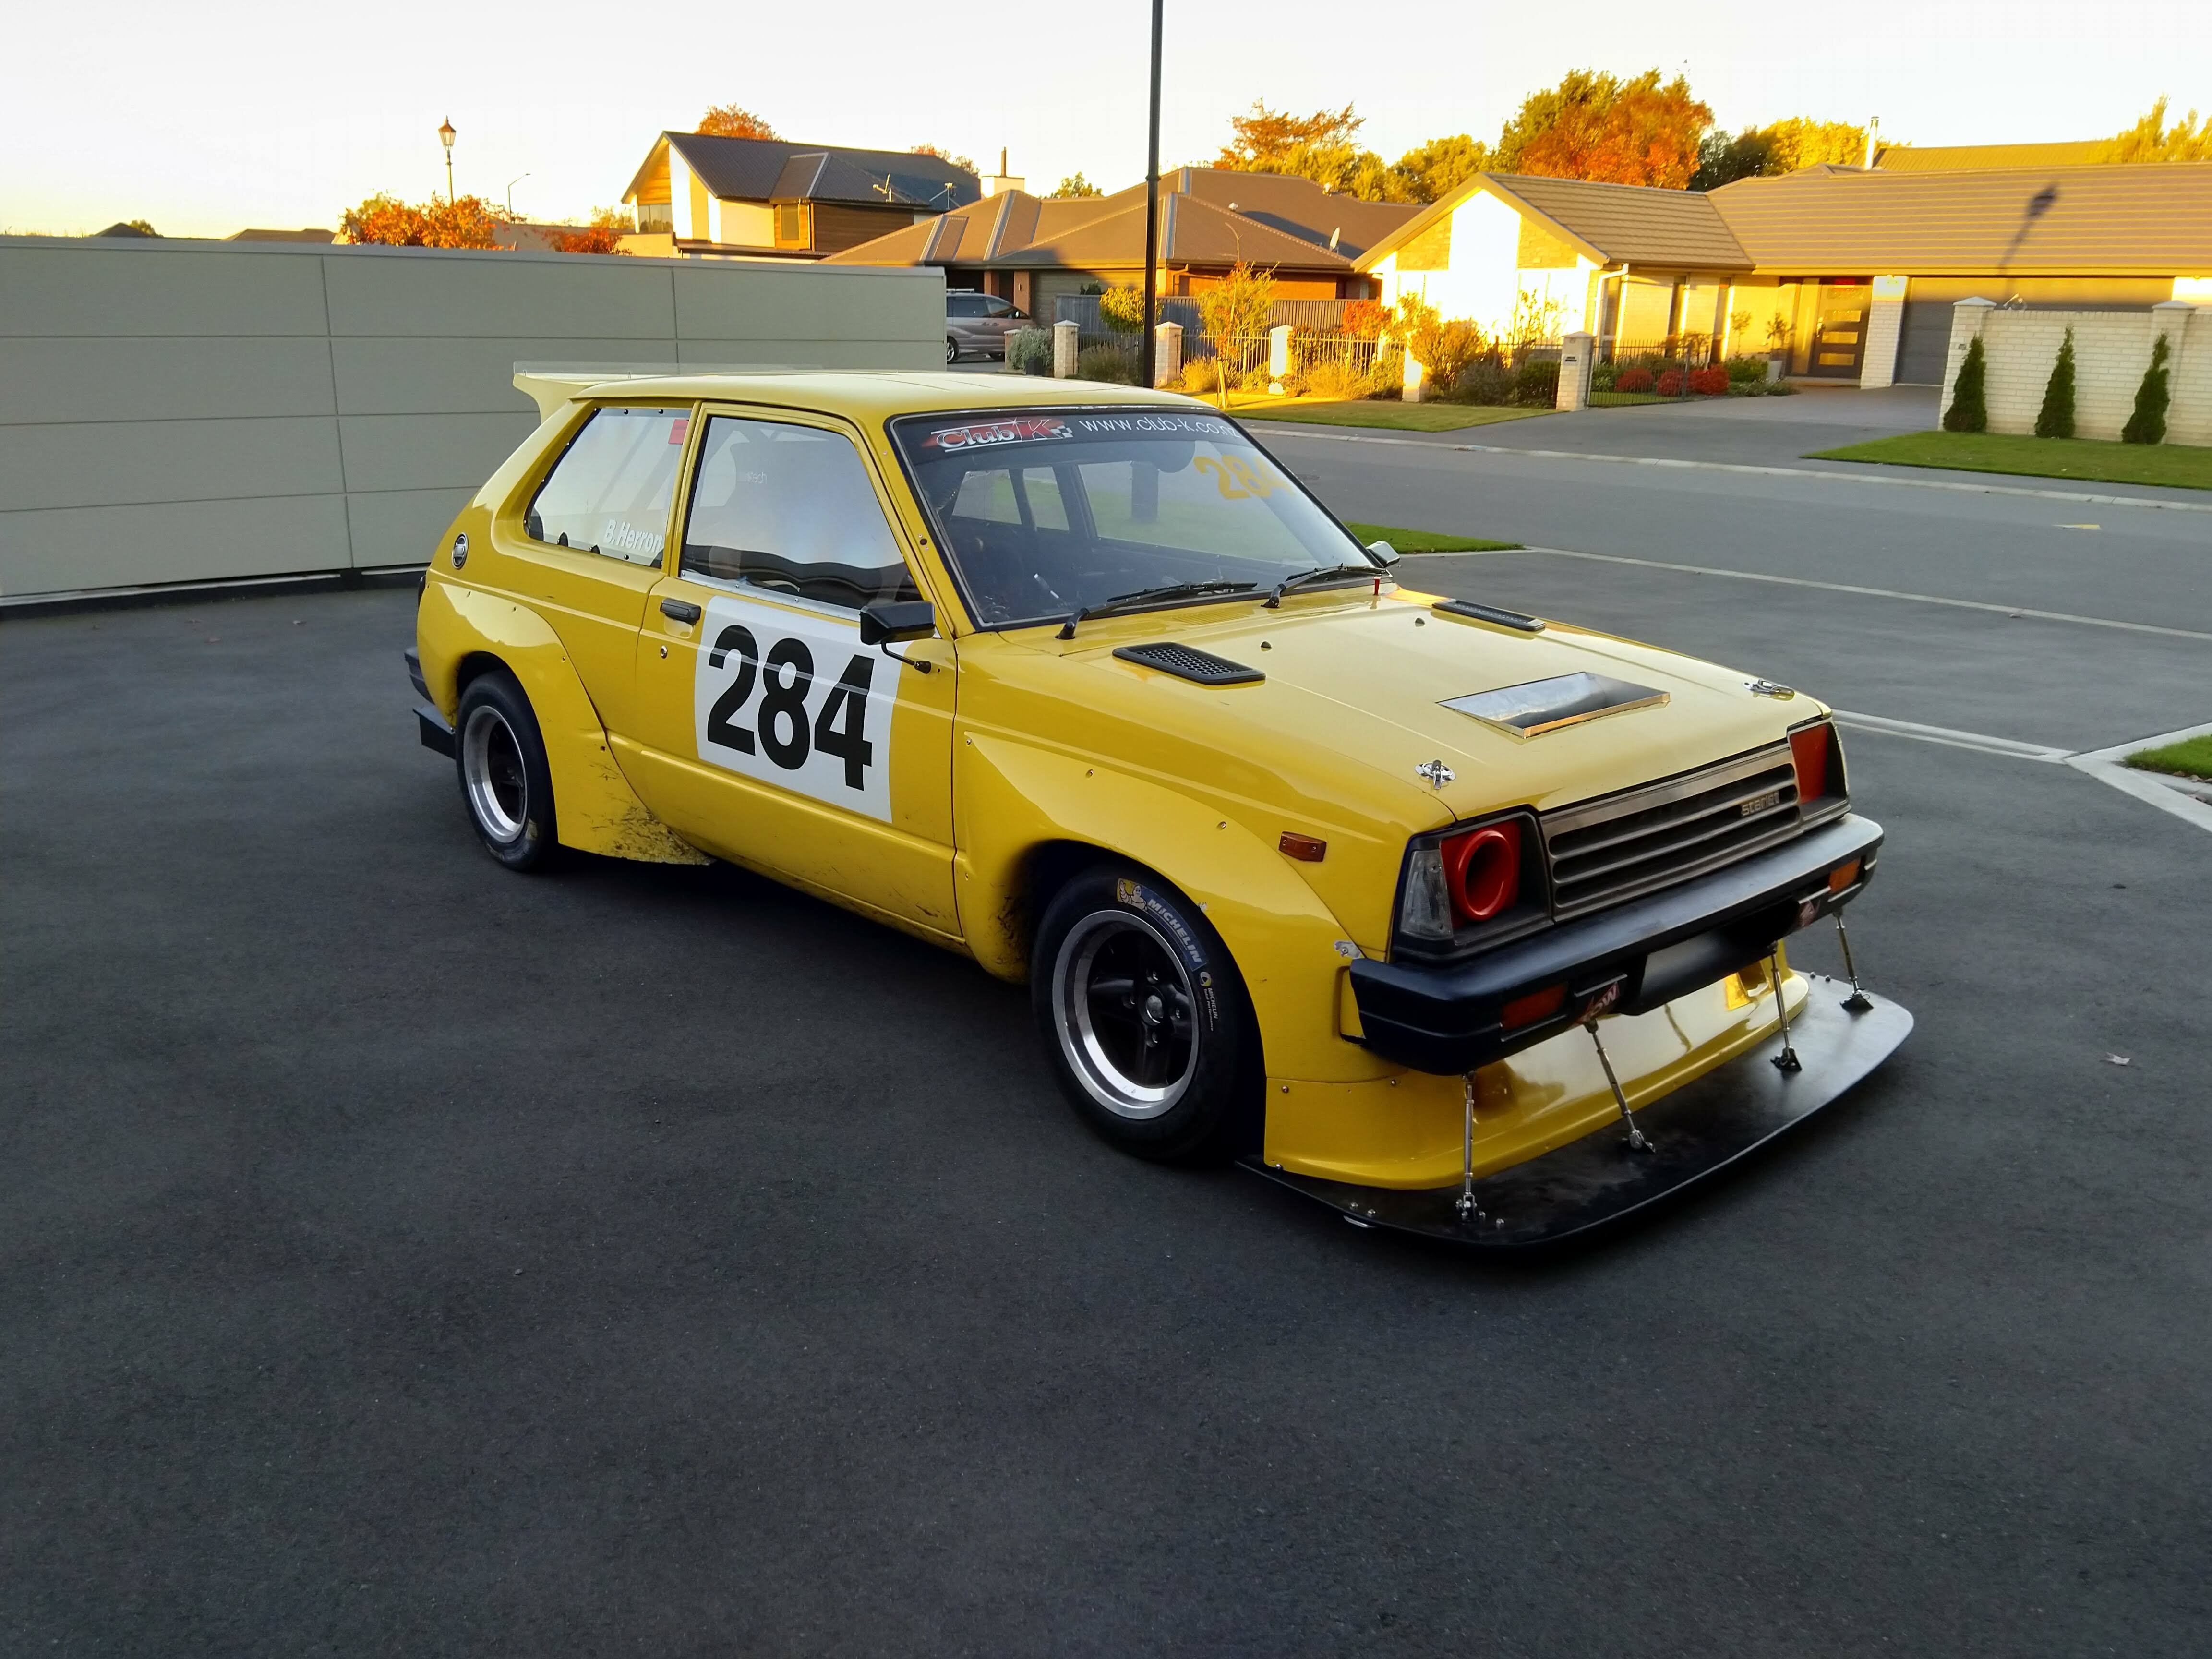
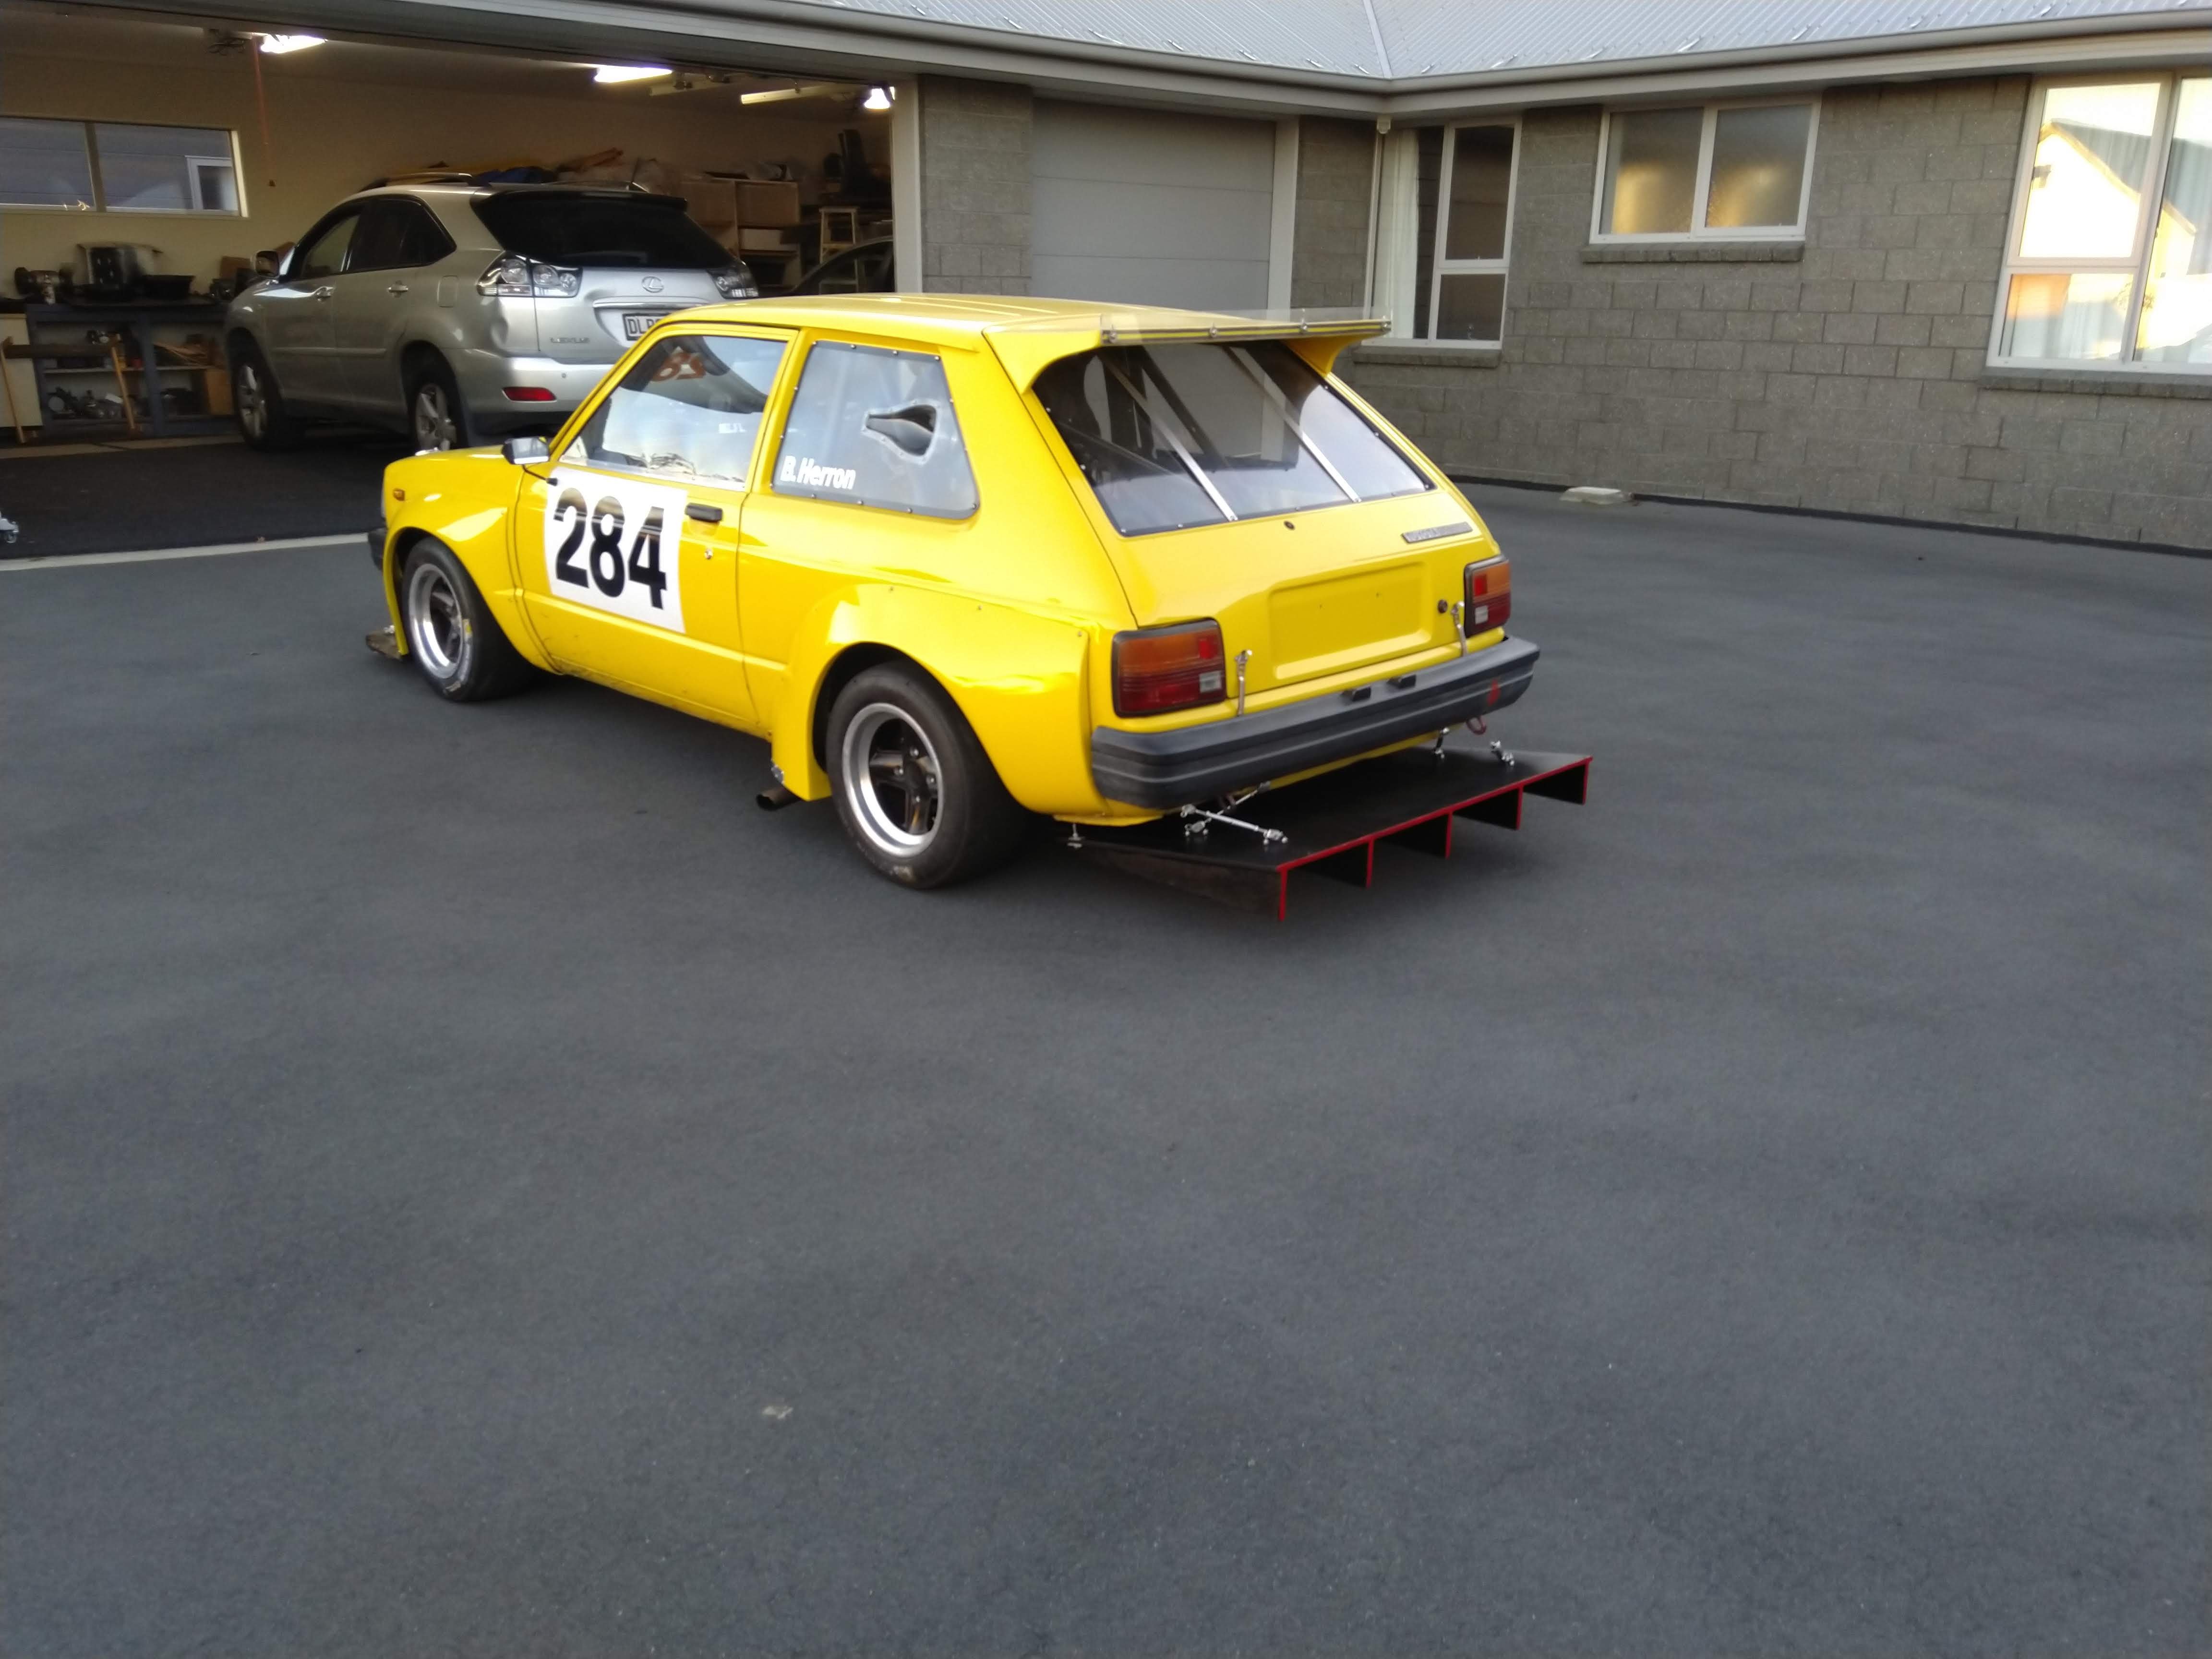
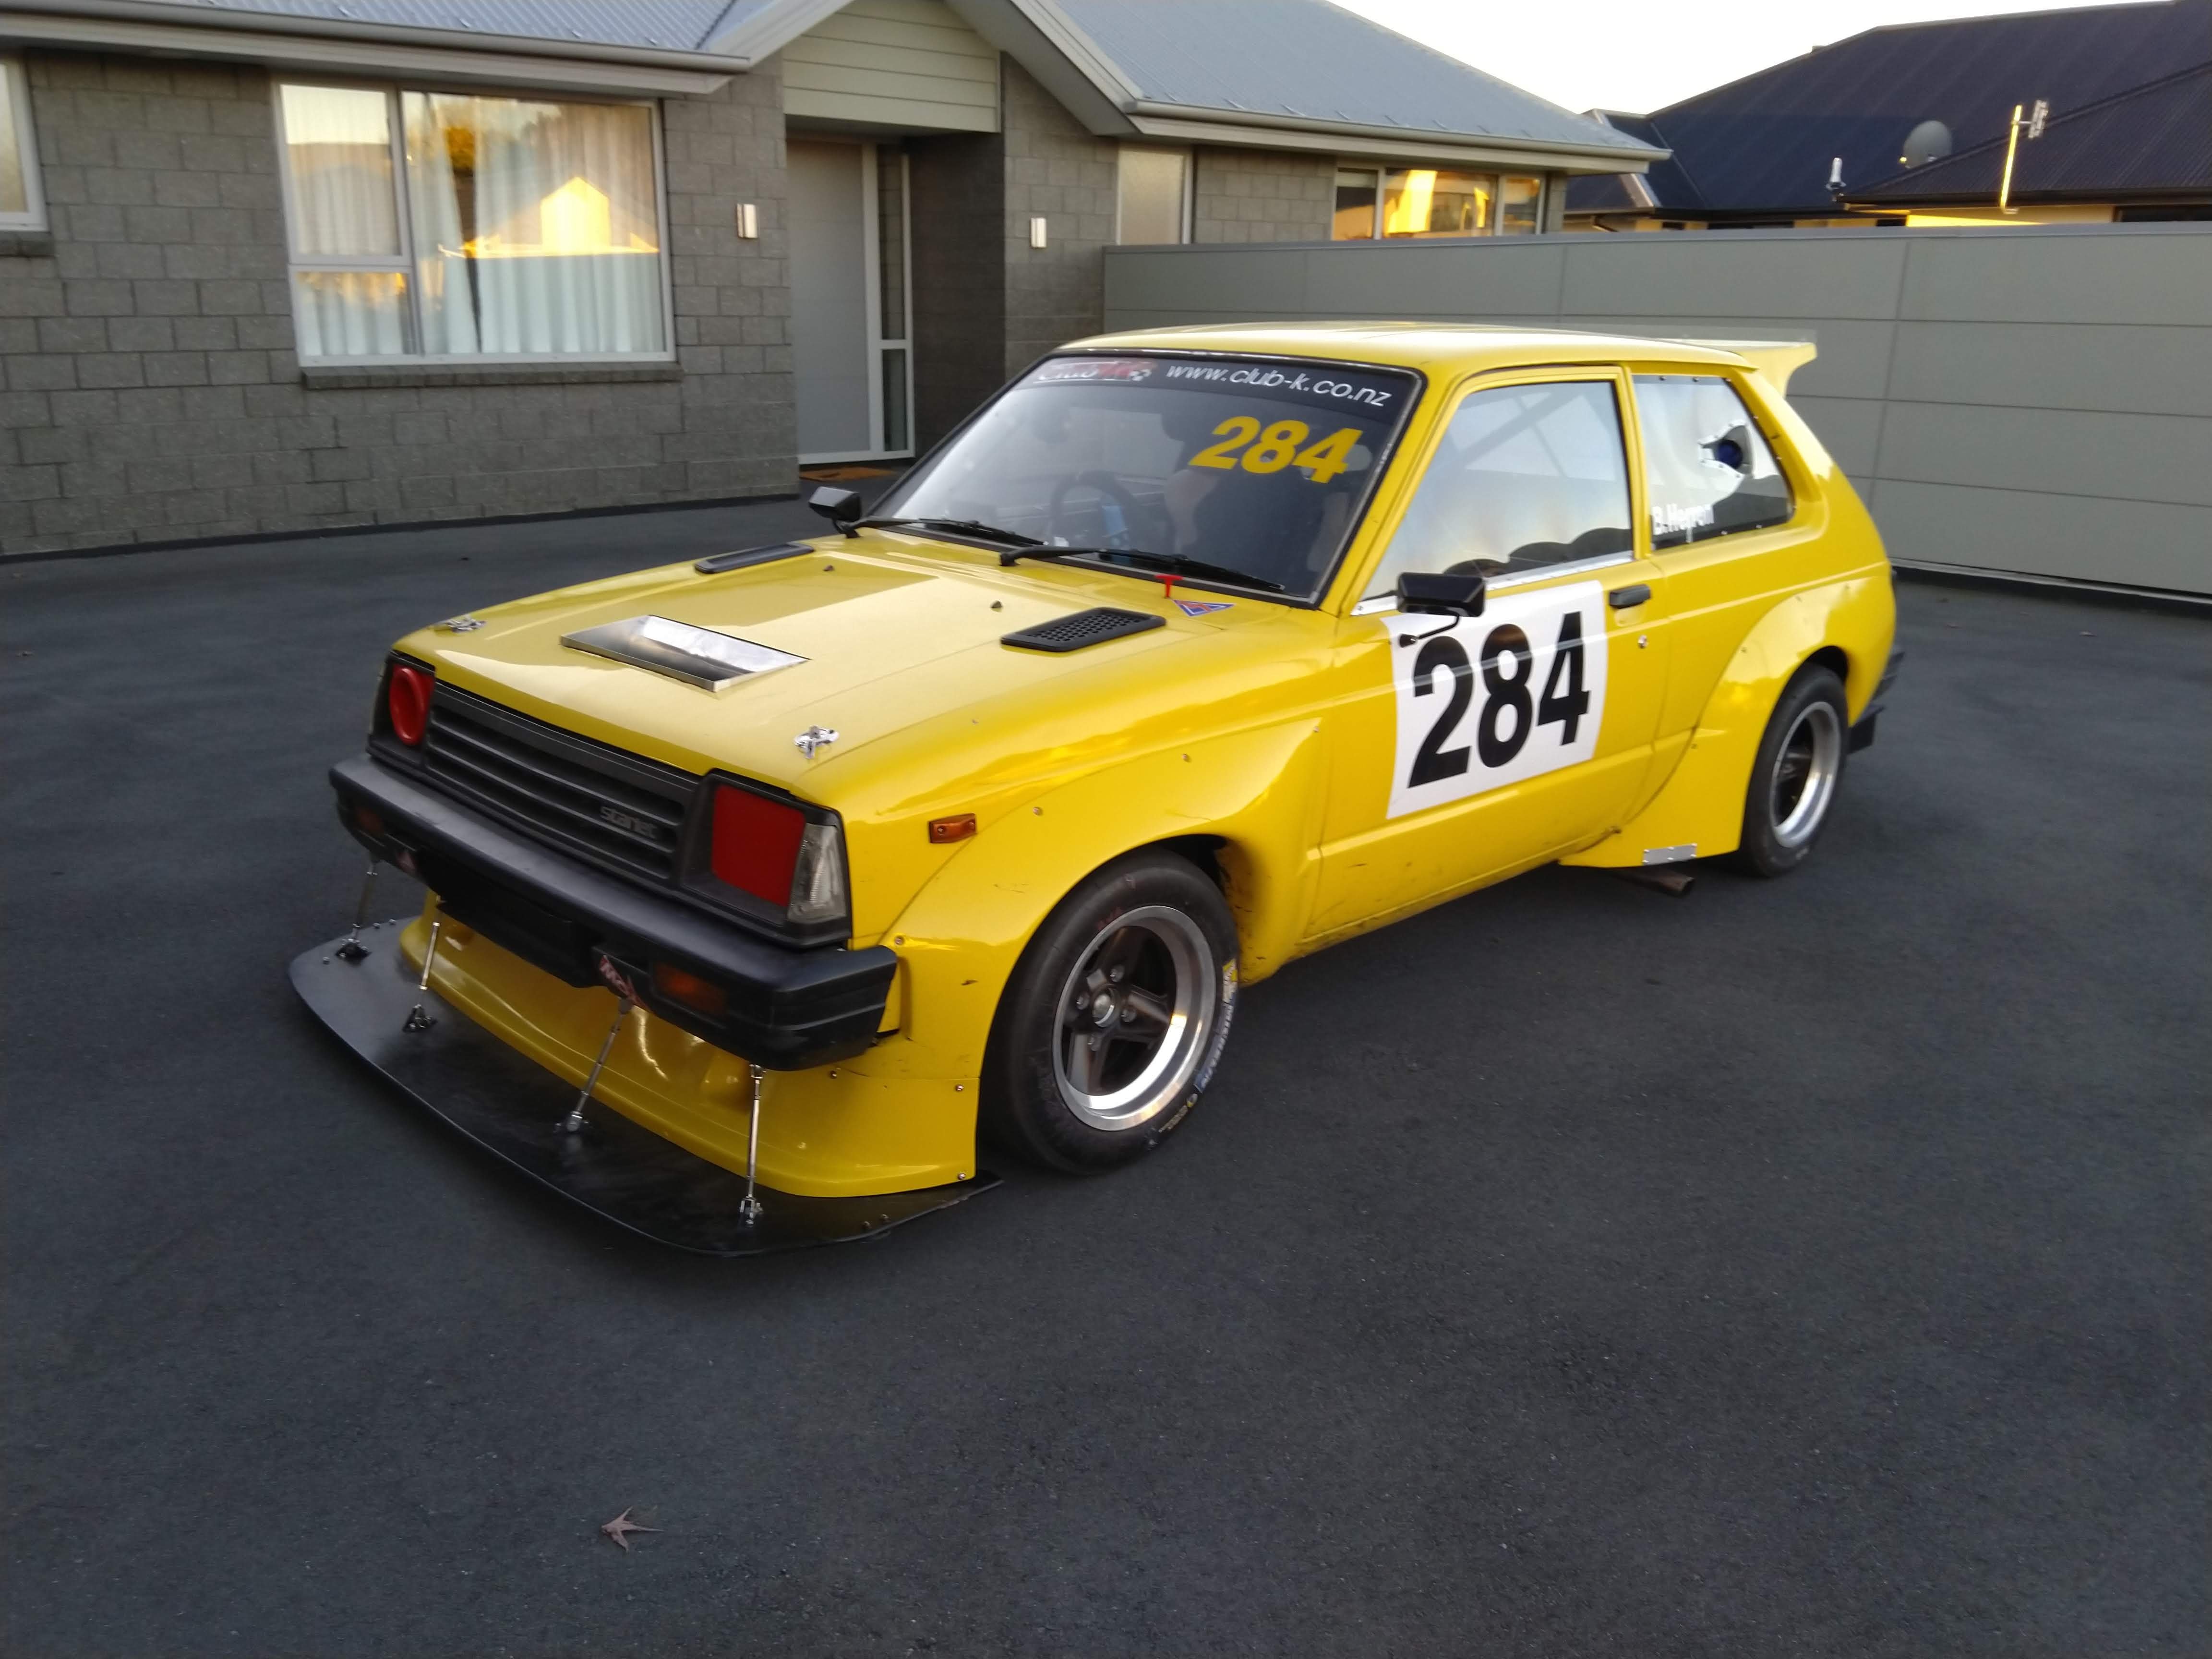
So went out for a shakedown with a new diff of 4.5 from 4.3 and the car looking like this: Some interesting results... It's all very well talking about PB's but in reality while I may hit a time, i'm far from consistent, and repeating it is often a matter of luck (bit between teeth chasing a car etc). So in the past i've always been around the 1.36:800 to 1.37:800 with the diffuser and splitter i was even more inconsistent and the laptimes were down, i just didn't feel comfortable with the car. I had a very unnerving experience going through pothole (fast left hand 150kish turn) where the whole car nearly under steered off the track, I've never ever felt the car like that before. So thinking being that the diffuser was working a little bit to well we pulled it off and just tried the splitter where i've felt I had an improvement in my times before. So so, nothing really different, less understeer but laptimes were about the same. I think where i previously thought it gained an improvement was just me driving better. So pulled off the splitter and just went back to basics, and did a 1.35.800, with consistent times between that and 1.36:500. The new diff made a massive difference, the car is just on song now, and still accelerating well at the end of the straight. So onto the last club day where i had a great day with my previous competition (Honda Integra DC5) unable to keep up: I took out the overall championship again and also won my class for the first time. So breaking it down, the diffuser is working really well, but the car isn't balanced with the diffuser on. I've always been told a splitter adds one second a lap, i've never really felt that with mine, i've actually never felt a major difference in the front end. So I don't think the splitter is doing it's job at the moment. I'm guessing the issue is the bonnet vent, I've now got a straight path from the top of the splitter through the radiator and out the bonnet. I think this is stopping a high pressure zone from forming on the top of the splitter. So i'm looking at changing the flow of air into the bottom of the radiators to create that high pressure zone. <
3 points
-
Tophats are fitted to rotors with a cap screw and a lock-nut, usually a distorted thread type or similar due to the high temperatures involved. In 22 years of motor racing I've yet to see one come loose. If one ever did you'd notice through the steering wheel very quickly, I don't think you have a safety issue there. The main thing I would be concentrating on would be that your tophat was hub-centric on the hub and the rim was hub-centric on either the tophat or the hub.3 points
-
I had one of these cut down into a buggy 30 years ago. Survived a Derby, only thing that stopped it was a fan blade broke loose, threw itself around the engine bay randomly and broke the side off the carb. Adapted a 1500 VW carb onto it. Was insanely fast, we got 80mph out of it on a tarseal road just out of Dargaville. It would wheelstand if you weren't careful. Far faster than mates 1600 VW one. Sharn aside, this car looks a real gem. Good to see someone showing a underrated marque some love it deserves. Keep up the good work!3 points
-
Bonus images. Big thanks to these guys Kieran, stan and the other boys for the endless pumping of the brake pedal.
3 points
-
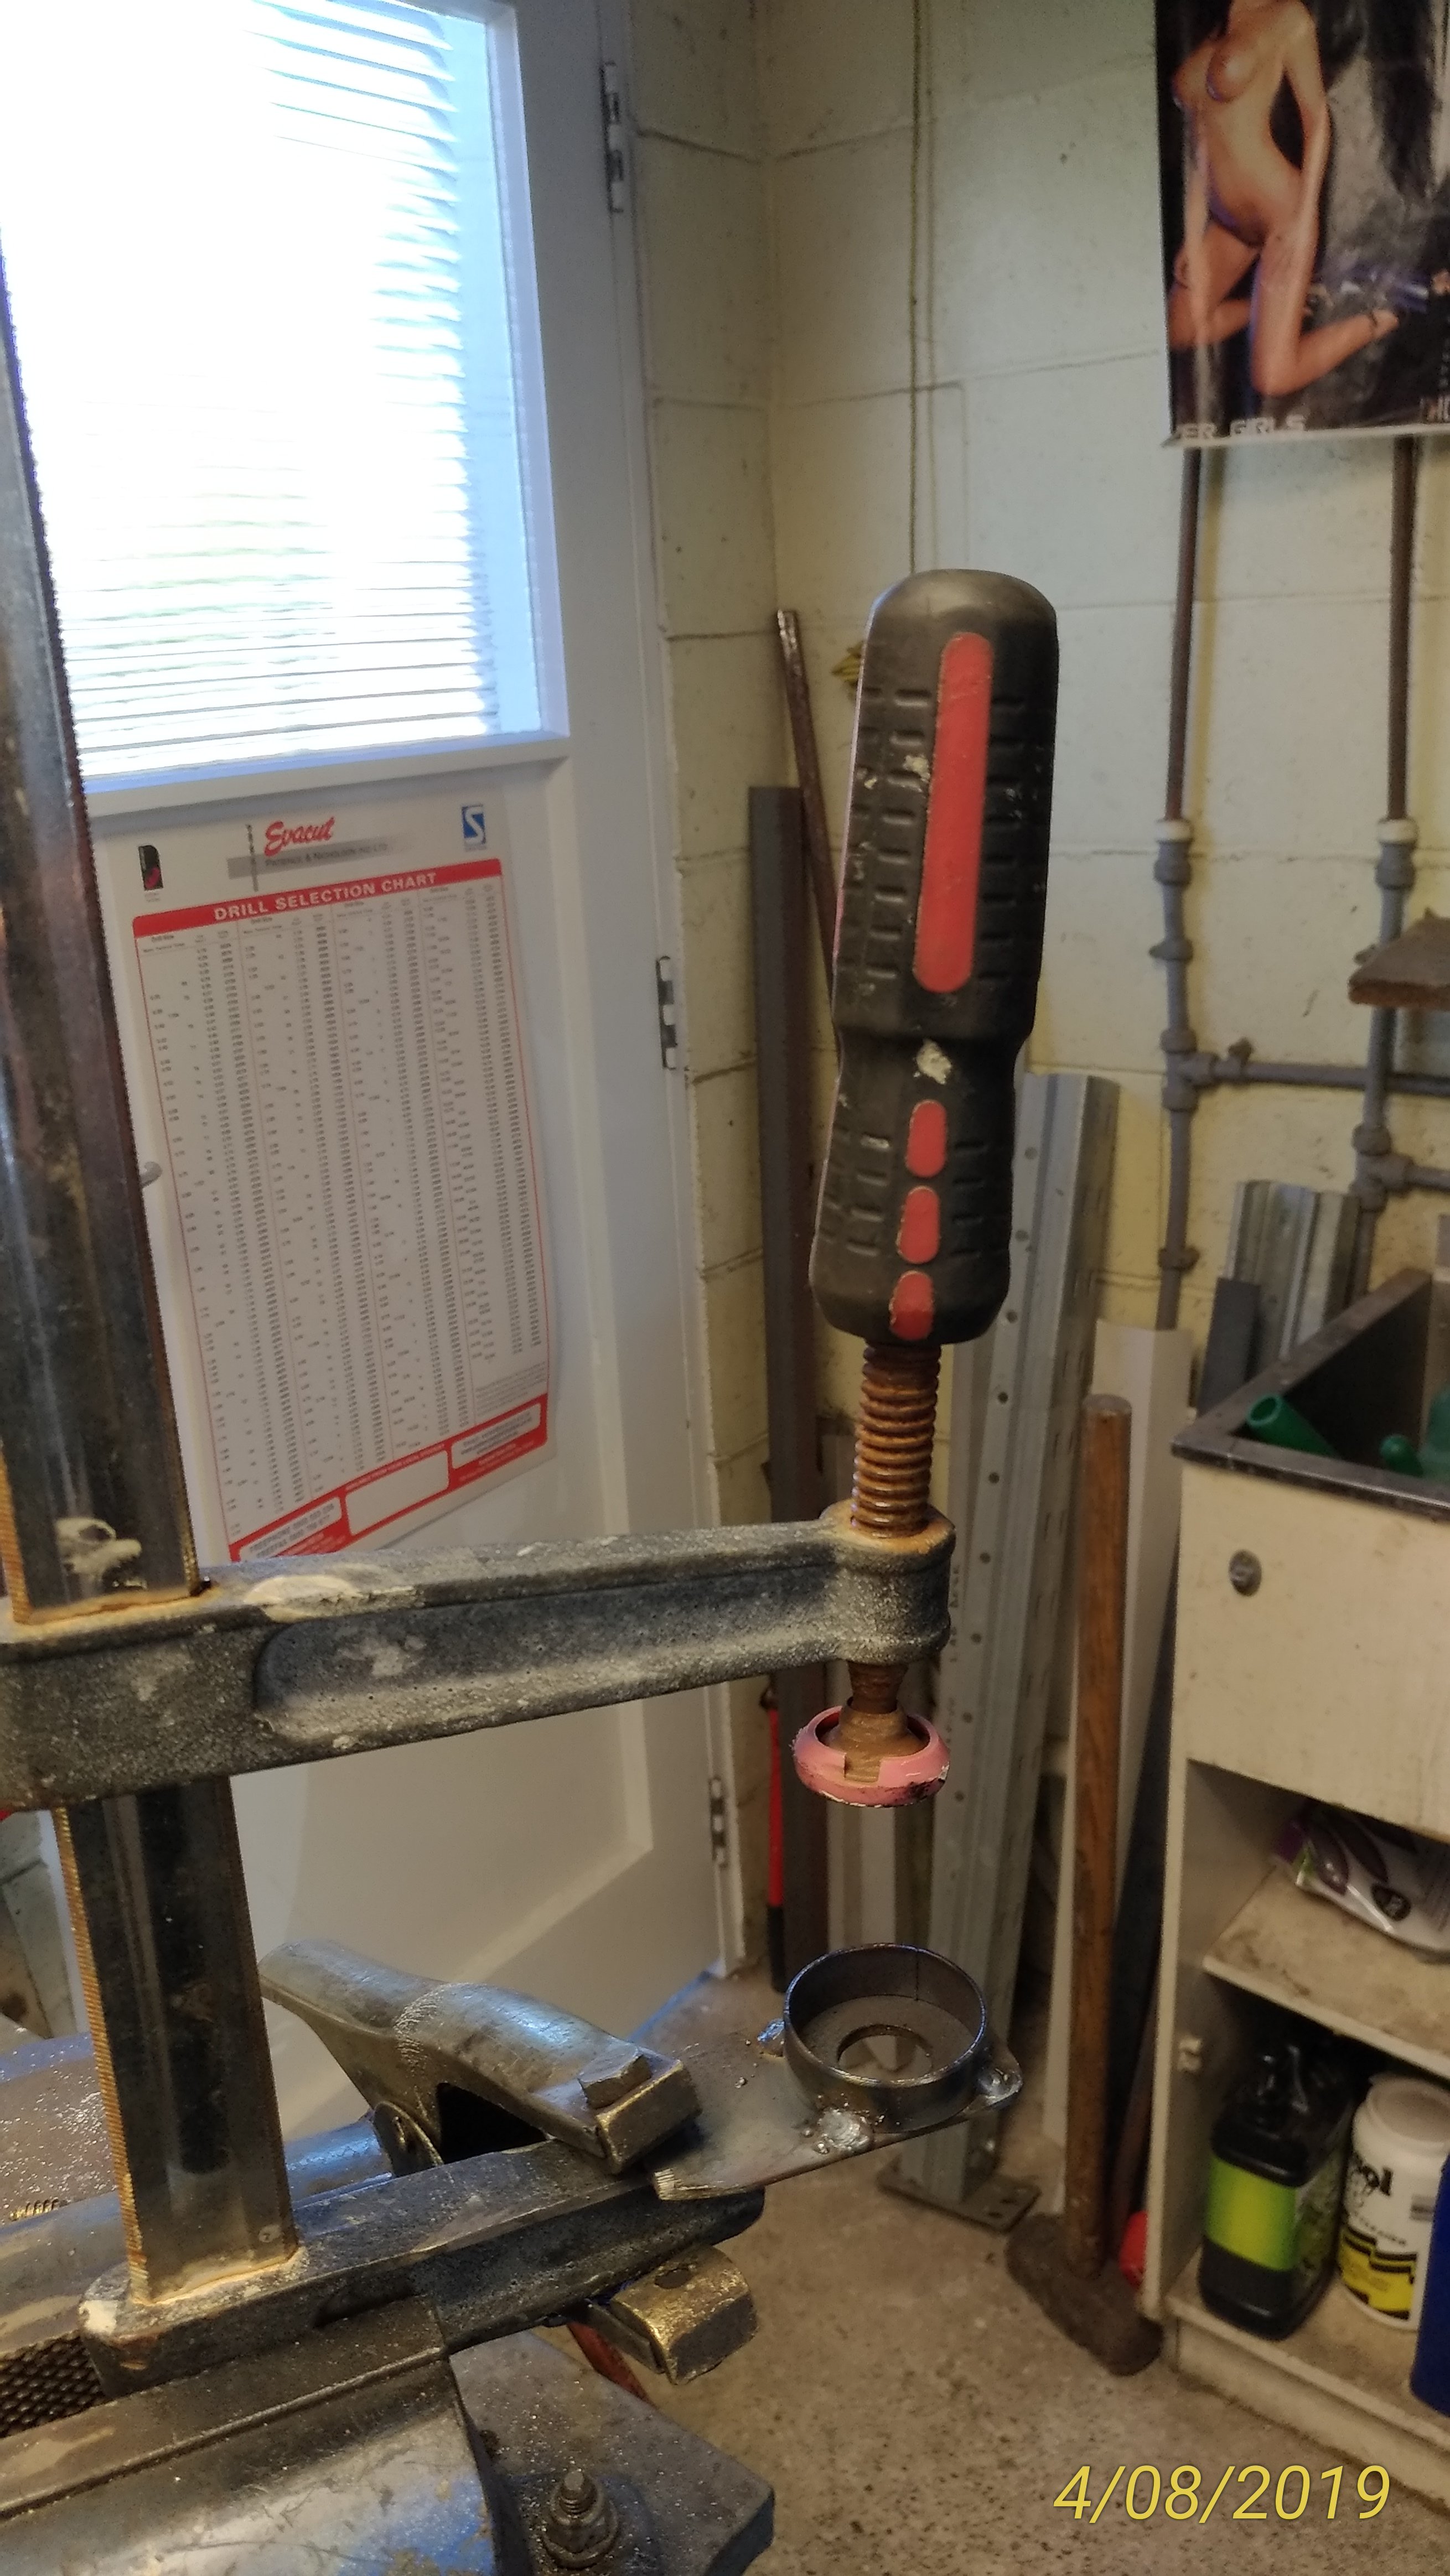
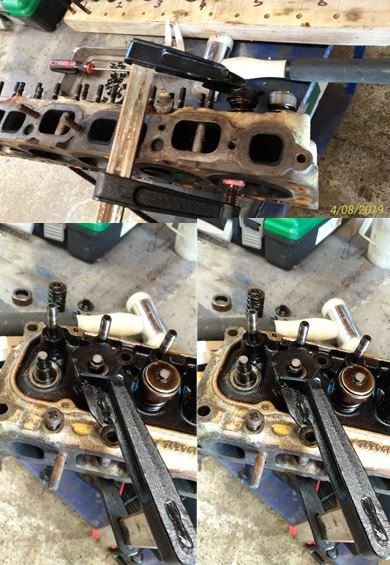
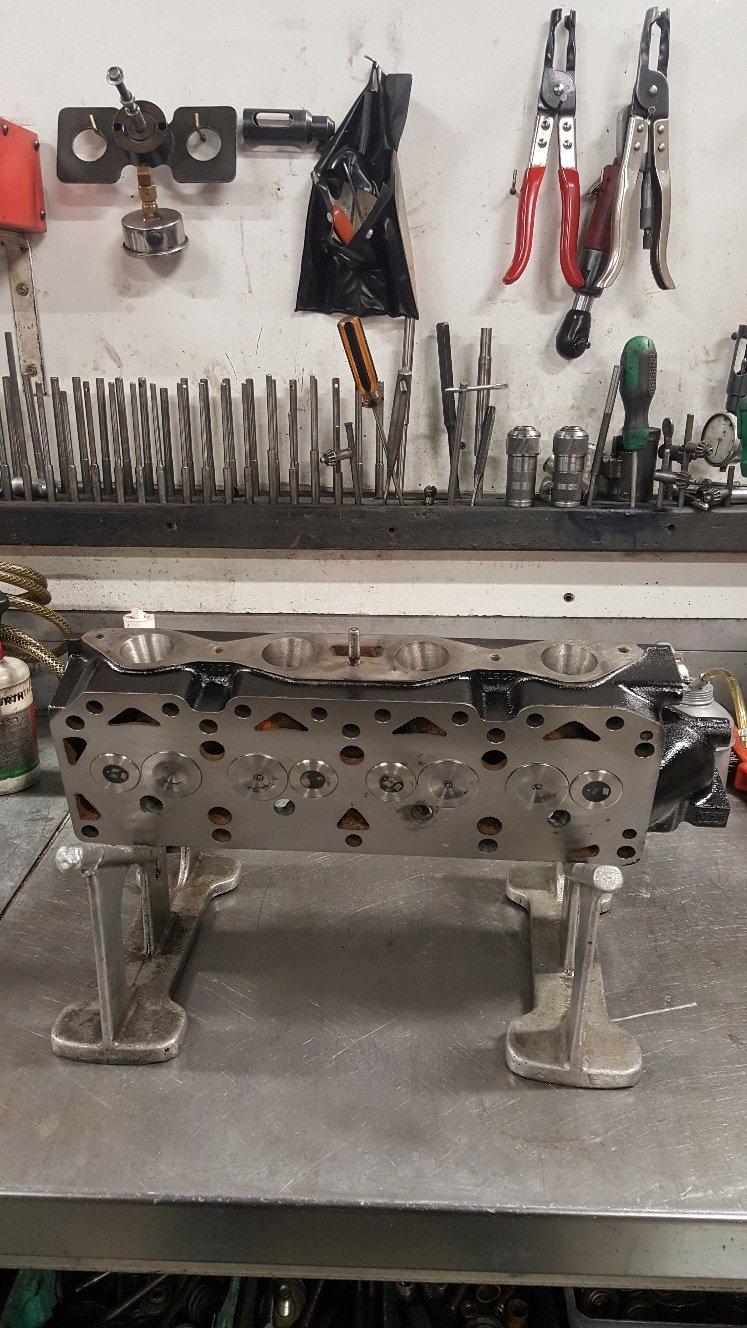
Time to strip the head down. Suddenly I realised I’d lent my valve spring compressor to that guy we all know who never has his own tools (and we always forget his name), who never returns tools……….grrrrrrr! As I’ve said before, combining the lack of an appropriate tool with a good mig welder and the obligatory collection of scrap steel under the work bench is the mother of many a good man-cave invention. Found an old screw Clamp…a bit of cutting and welding. A lick of paint…….. And the custom (i.e. beer, bullshit & bad manners) “Oldschool Holden Valve Spring Compressor” makes its debut.
2 points
-
Yea, alrighty. Good idea looking at that.2 points
-
@MACKAZ Sounds like an absolute weapon! I've heard similar stories re the fan - A guy told me he had the fan explode which threw the blades through the bonnet/bootlit and give it shark gills haha. Cheers2 points
-
Look out manawatu look out... Speed demon we have here haha. Found a spedo for thoes top speed runs wohping speed of 57kmh in the words of the almighty rick flair..........!!whhhhhhhhhow!!............ And extra 35hp atlest electracal tape head lamp for thoes truely sketchy speeds
2 points
-
Don’t need to flash for a wof2 points
-
@Valiant Ep70 starlets have solid rear ends. Same as altos I think there is still a starlets at pickapart2 points
-
Just as a quick follow up. I have ordered a set of new injectors, and will be removing the fuel distributor to inspect/clean the plunger. I'll be setting it up properly from a zero setting after cleaning everything. Just waiting on parts/tools to arrive. I've noticed the AFM sensor plate is way out of setting (should be sitting a lot lower than it is) so either its sticking or its been setup incorrectly (50:50 on either). Chances are the system was running a bit average due to a lack of maintenance, so it was "tweaked" to compensate and now its all out of whack, seems pretty common for people taking on projects with KJet.2 points
-
Also today the horn jammed on, it has never worked, the button dosnt even move but I had to drive past people with it blasting away like some arsehole.2 points
-
2 points
-
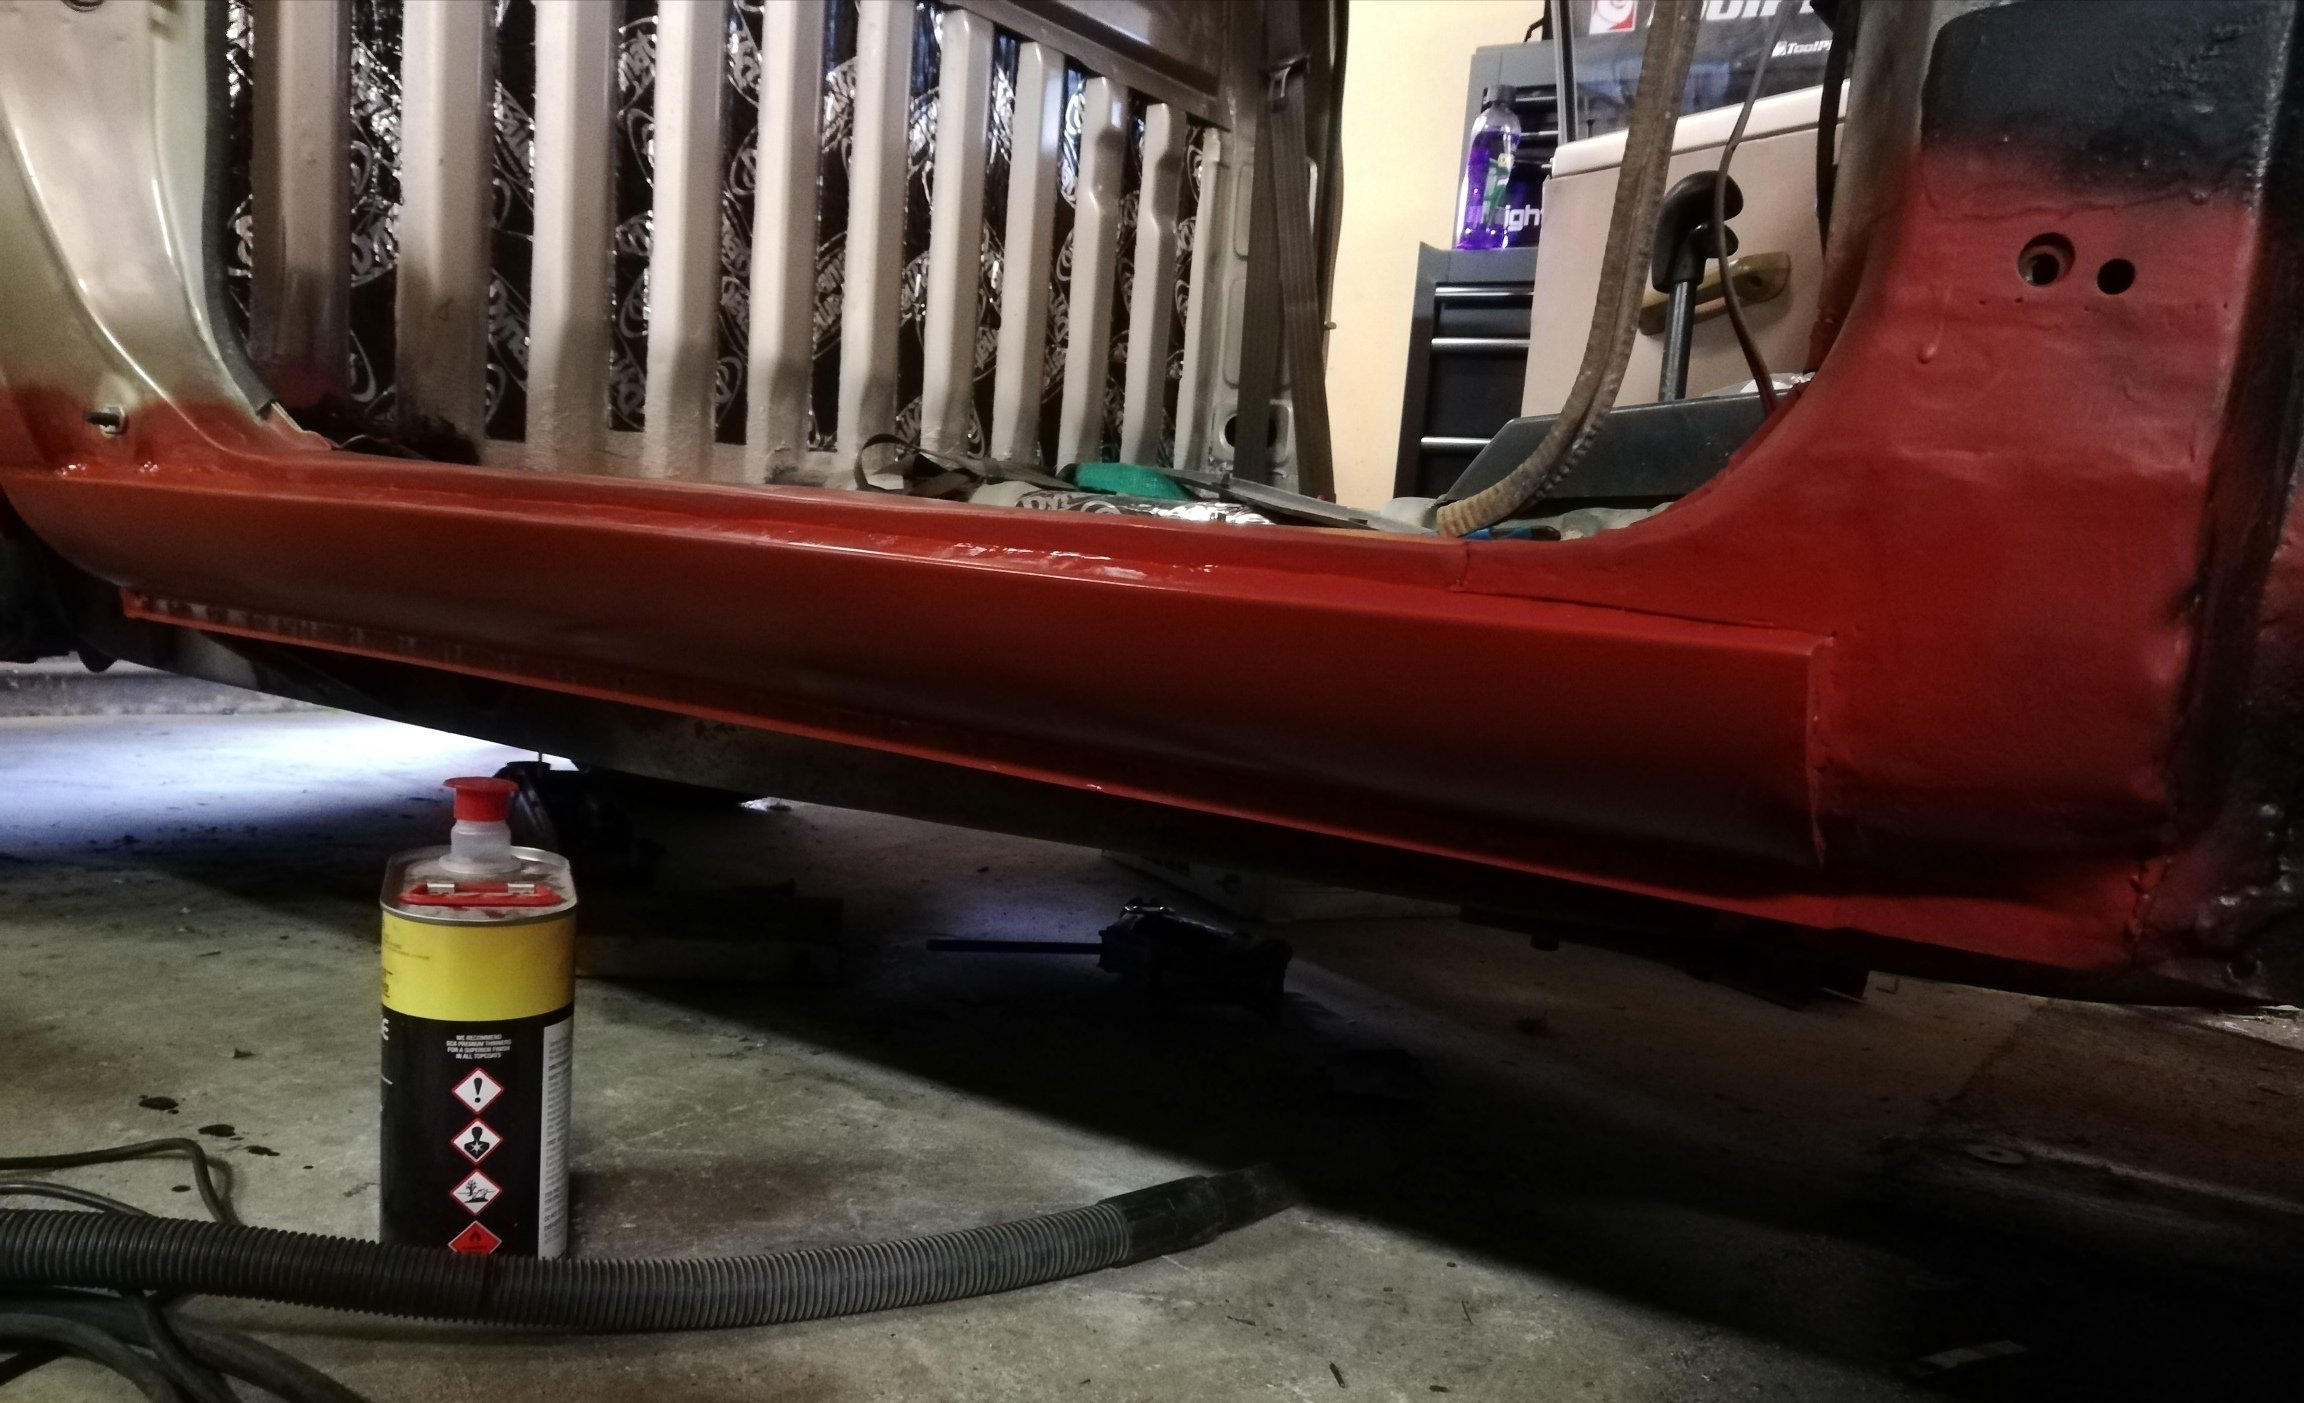
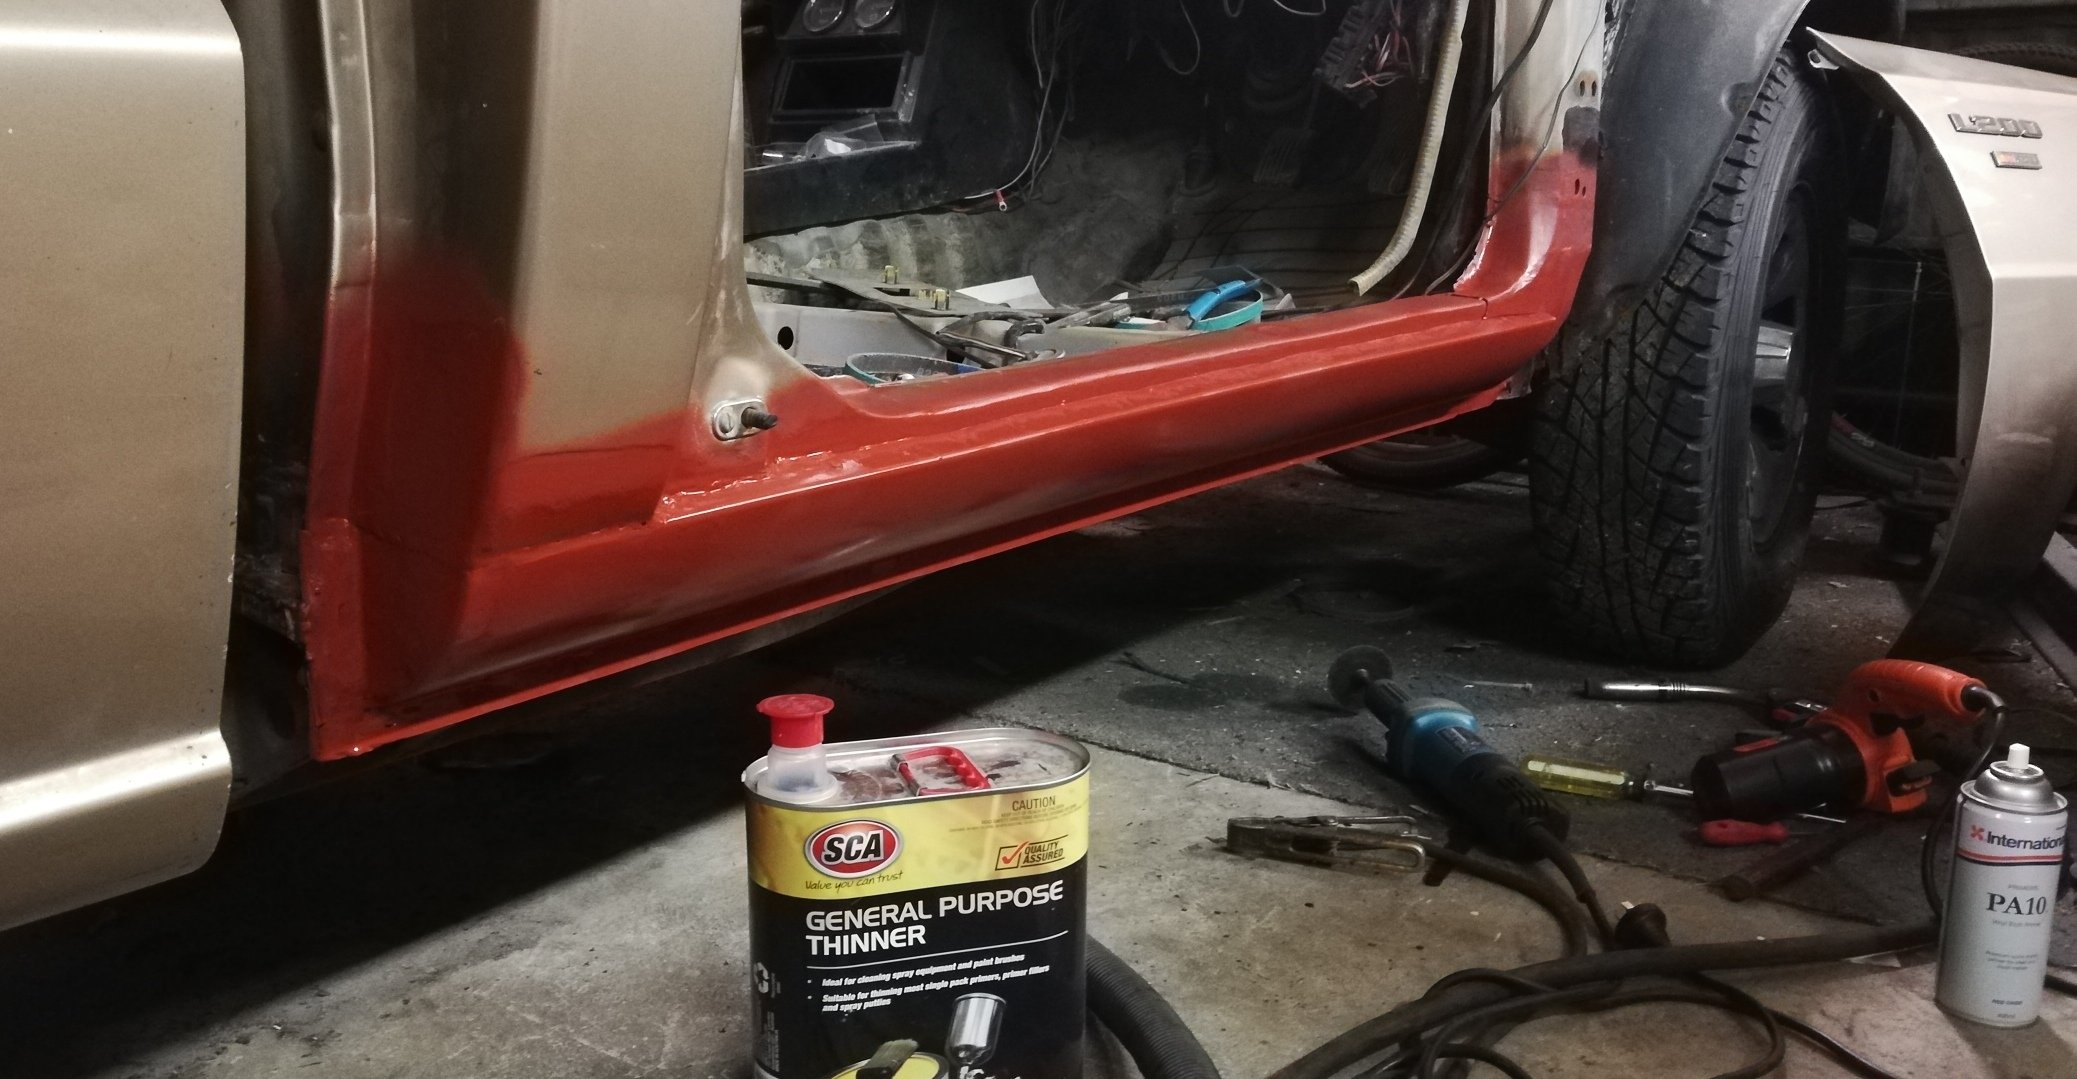
Door is being a pain in the ass to hang. The problem being that every point of reference has been dicked. Got the lines pretty good, but the bottom of the door over hangs the sill by a good 1cm in places How, I measured and checked everything and used the other door frame for reference. The sill is dead straight. Oh the door is bent Some hammer and dolly work and it's coming into shape. Looking at unmolested utes, there is a prominent angle here. Mine is smooth and bulbus . I assume it was either bent out to match the previous sill, or was bent already and the bogged the sill to match. (Same issue with the roof lines, bogged over and rounded off)
2 points
-
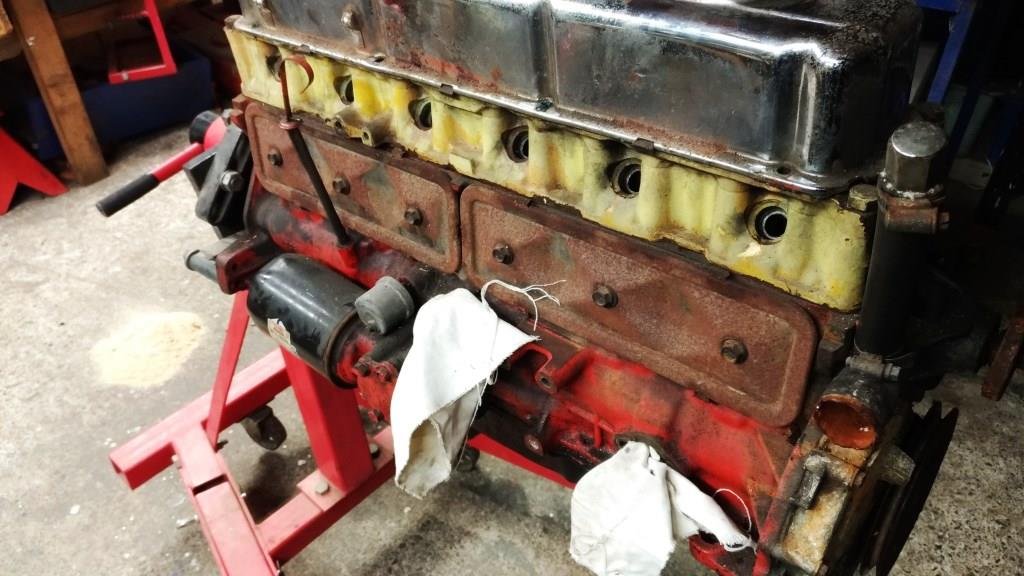
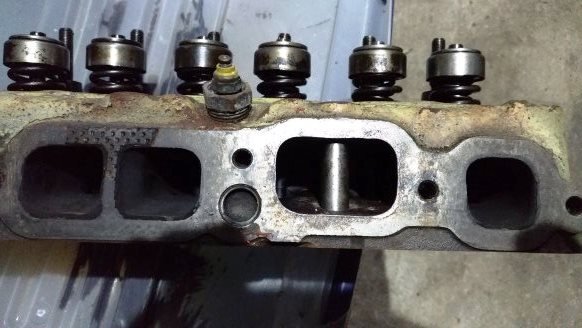
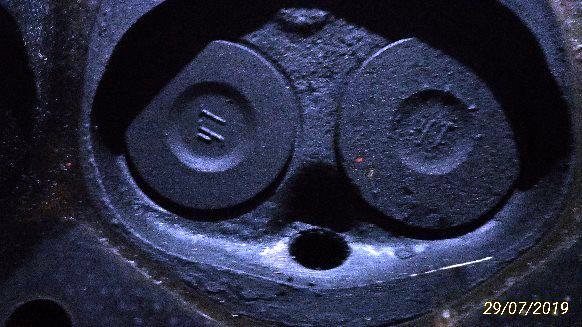
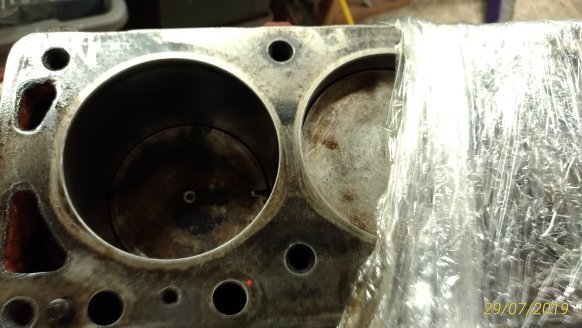
I’d been keeping any eye on a bloke in Whangerai who had been trying to sell a 186 on TM while doing his damndest to scare off any potential buyer by abusing anyone who had the audacity to ask a question on his auction. God I love those grumpy old traders! He was insisting that someone had painted the standard head yellow and refused to post any pictures of the inlet ports. After some months of his relisting I finally put the poor deluded old sod out of his misery by buying it for $300. An early 2-hour drive had me rolling down his driveway at 8 am in the morning, one look at the inlet ports confirmed it had at least a stage 2 Yellow Terra head. When I suggested that as an honest principled rogue, I felt a moral obligation to throw a little more coin in the pot he started accusing me of being a ‘lying young upstart that was talking through a hole in his f***ing head’. As I beat a hasty retreat up the driveway waiting for him to set the dogs on me (with the booty in the back of the van) I had to admit that at 63 years of age, despite the verbal tirade it was great to be called ‘young’ – ya gotta love those grumpy old guys! Couldn’t wait for to to get the head off but work pressure had me waiting for the weekend. As I said in the 1st post of this thread ‘sometimes you just get lucky’ - I stuck it in the engine stand, flipped its lid off and discovered a rather virgin stage 3 Yella Terra covered with the type of carbon that only prolonged over rich running can ever produce. Double valve springs and classic 70’s inlet porting. And just relish in the vintage YT valves! Once cleaned up the flat top 30 thou over pistons felt firm in the bore so Rigamortice and I made the call that we’ll clean up the head, sort out the appropriate sump/pickup combo and see how it runs.
2 points
-
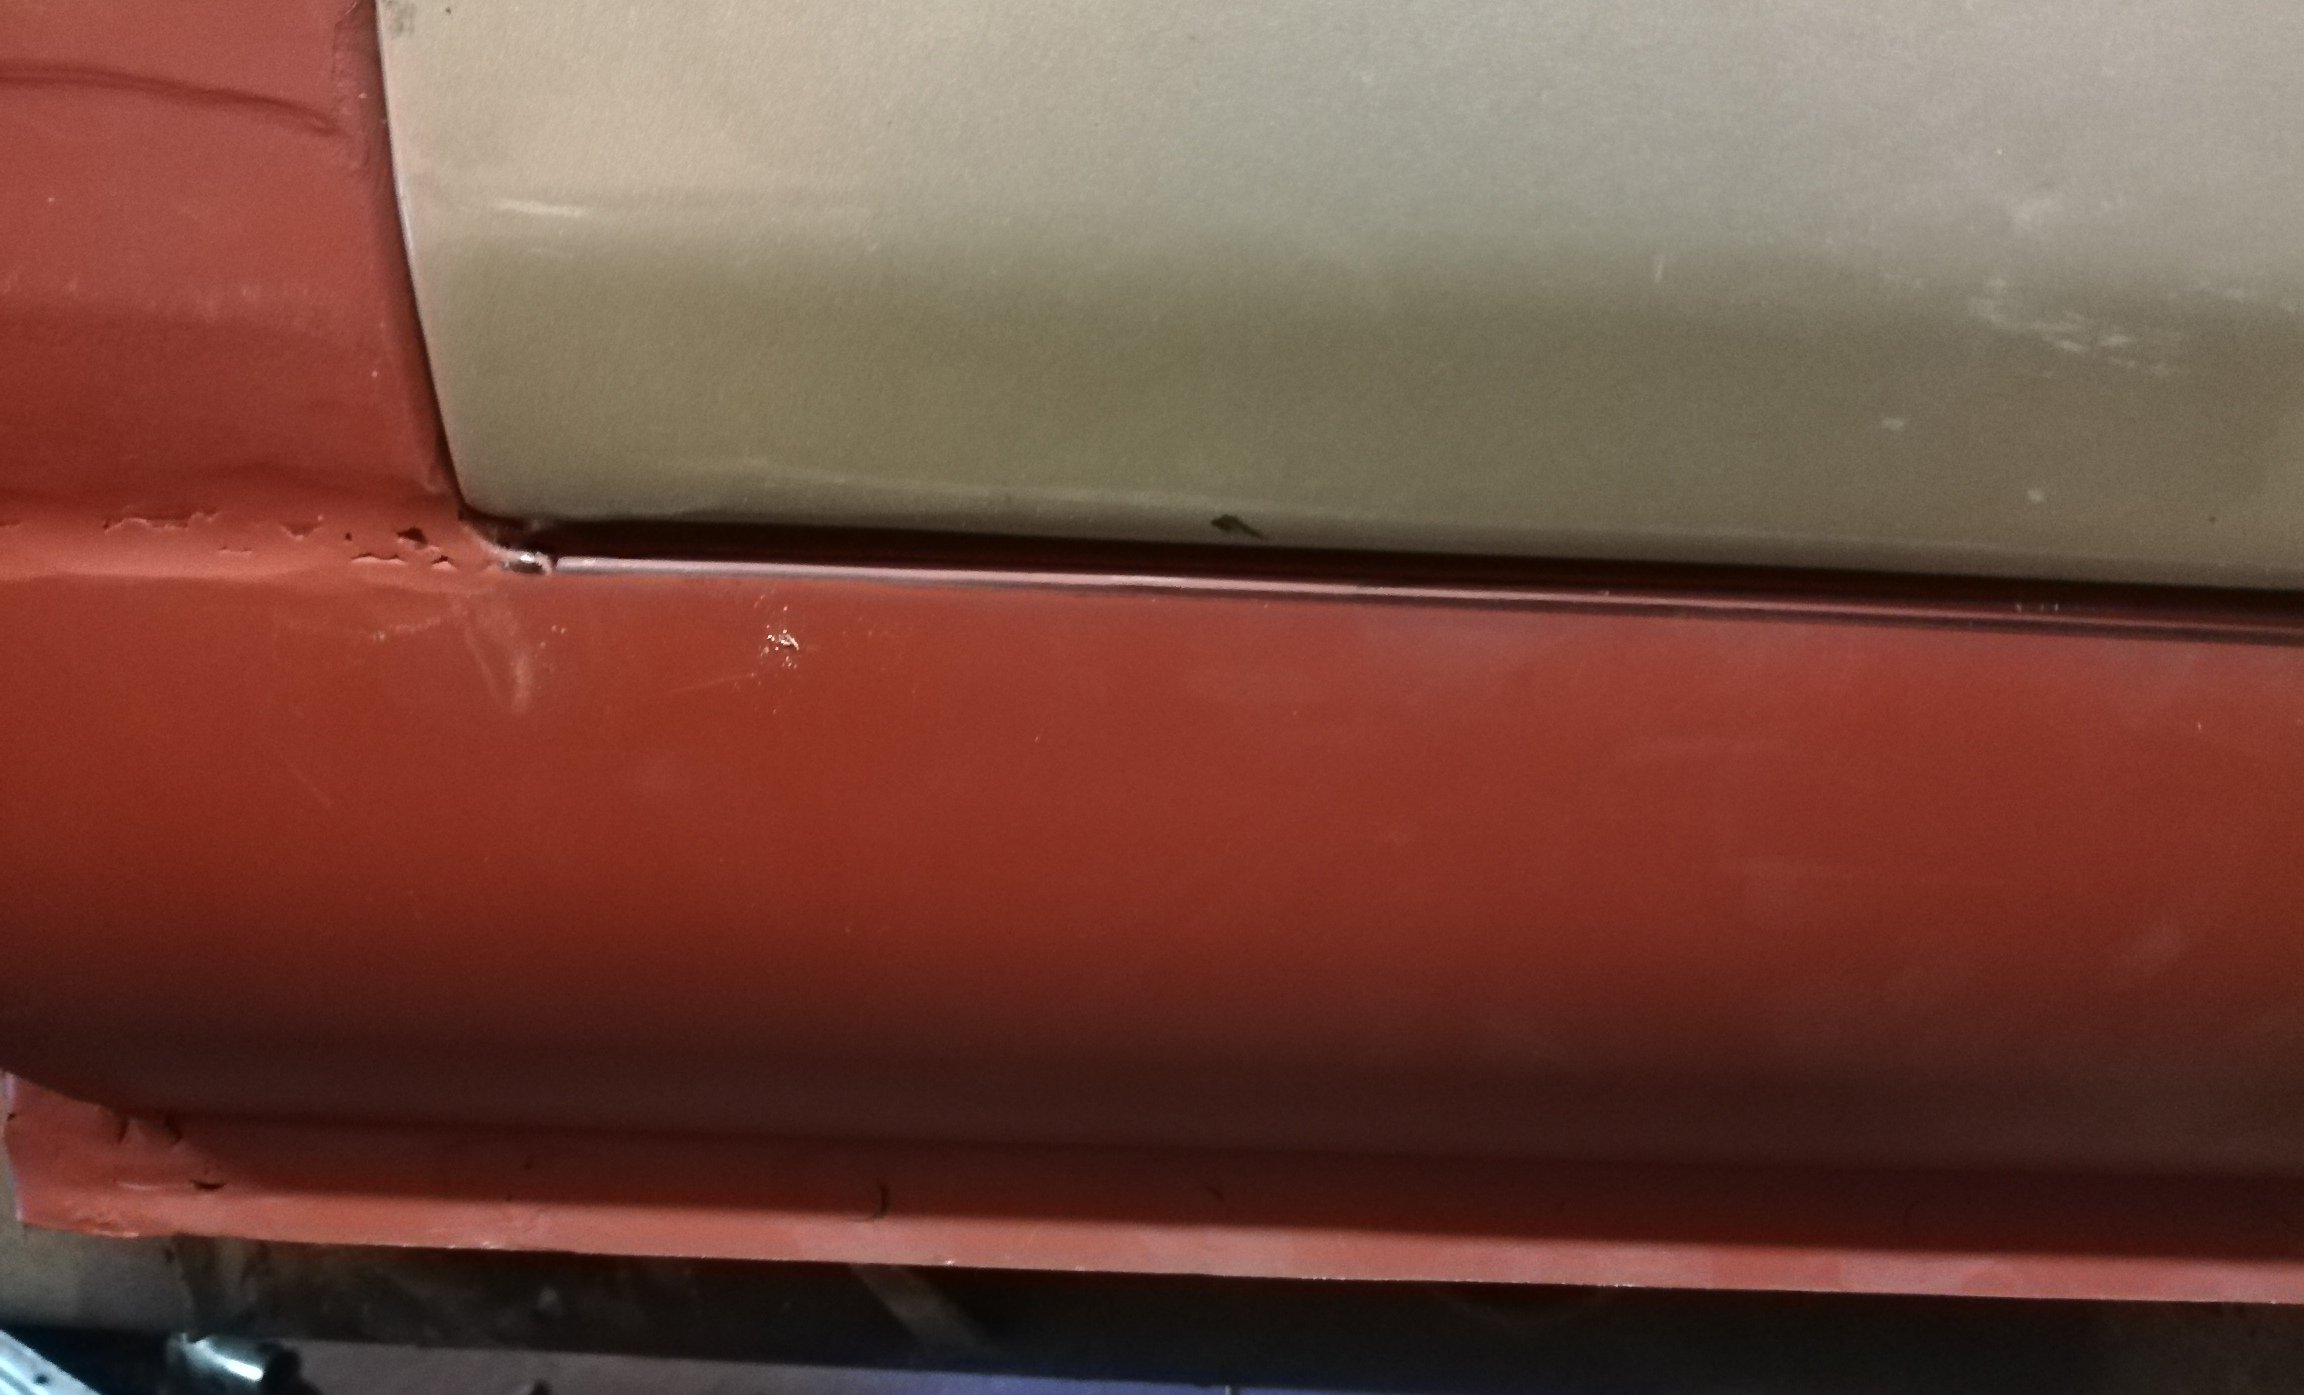
Close enough Fender is a reproduction, so I made a best guess as to panel gap. A little filler, a little seam seal and she's seamless
2 points
-
As those who are more familiar with us will know both Rigamortice and myself have a great affinity for the environment and take climate change (i.e. the thing we used to “call global warming” before it got cold again!) very seriously. Stricken by remorse and overwhelmed by guilt over the tons of negative carbon credits I’ve released on the global economy through years of motor racing, driving cars for the love of it, and behaving like a typically irresponsible older ‘Oldschool’ member I have acquired an EV! You may scoff at the fact that it’s a clapped out old warehouse sweeper with buggered batteries saved from the scrap heap but to Rigamortice and myself it is a powerful symbol of our indefatigable commitment to a green and politically correct future. With help from my brother providing advice, encouragement and the Wild Turkey may I present the definitive green, negative carbon credit, EV solution to taking the wheelie bins out when you live down a long driveway, (what could possibly go wrong!). Commentary and camera work courtesy of the ever lovely Mrs sr2.2 points
-
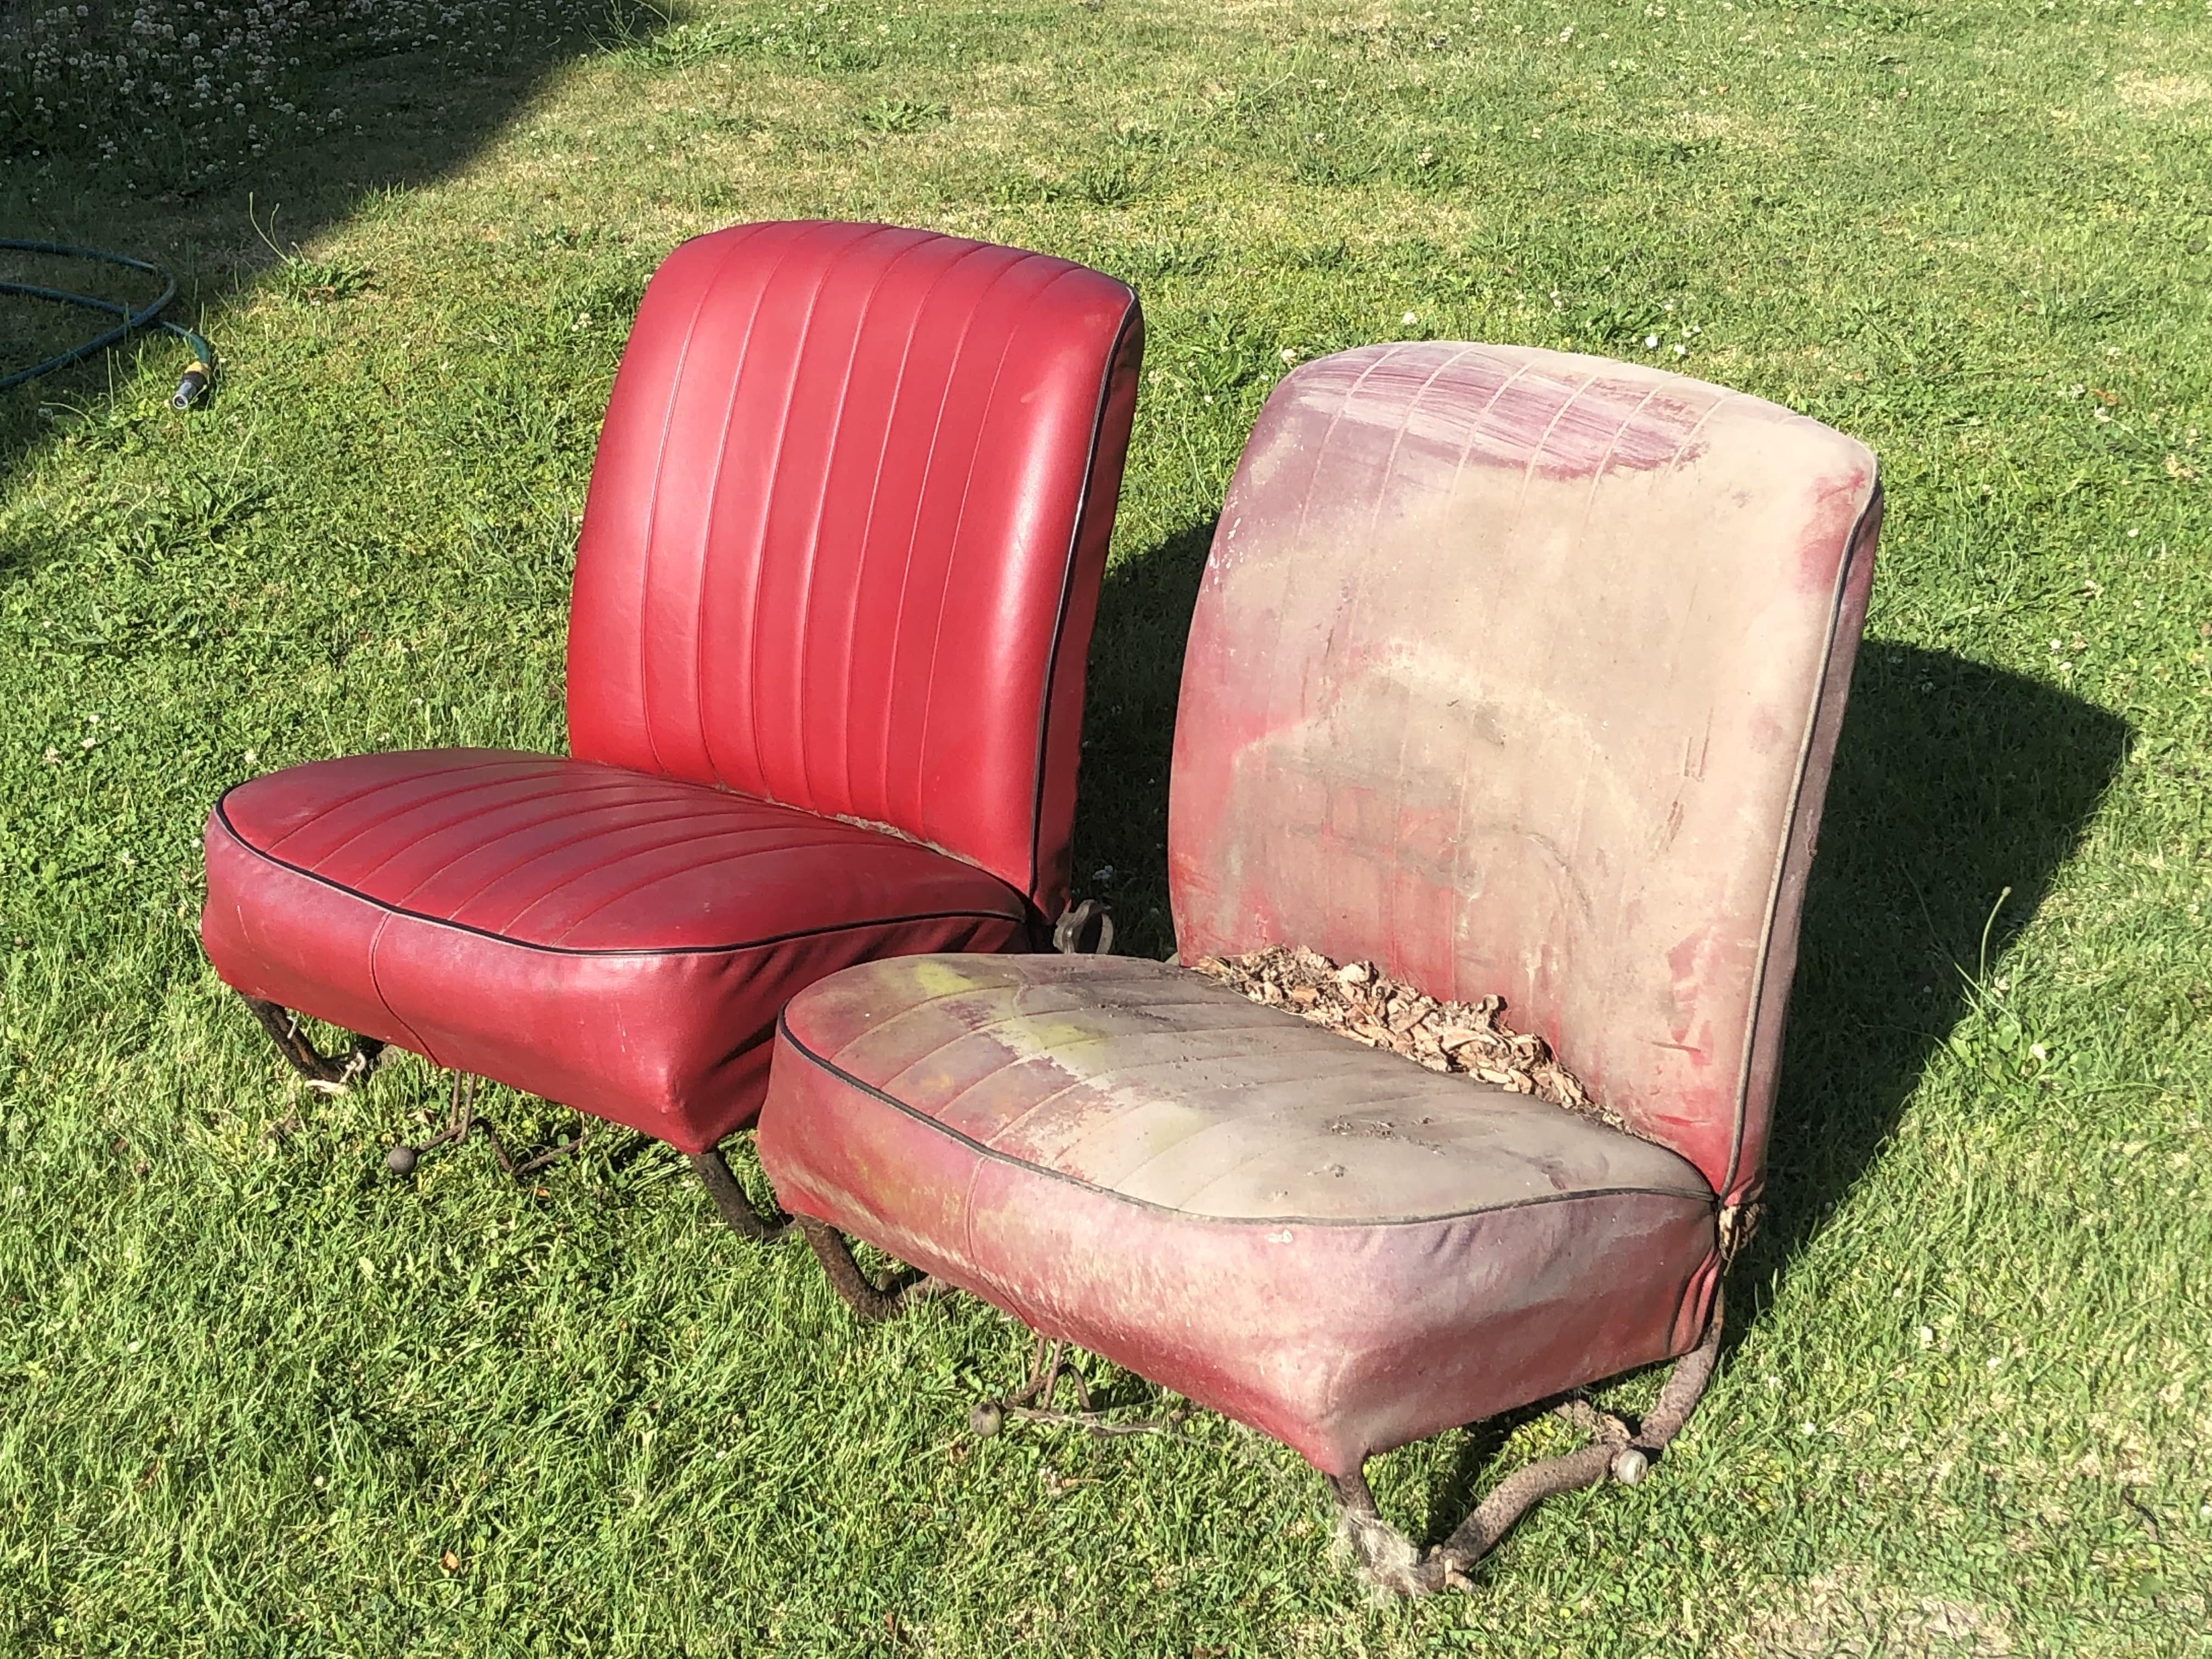
Managed to get the full set of seats out and they look like they will all scrub up like the one on the left - I am one happy lad.
2 points
-
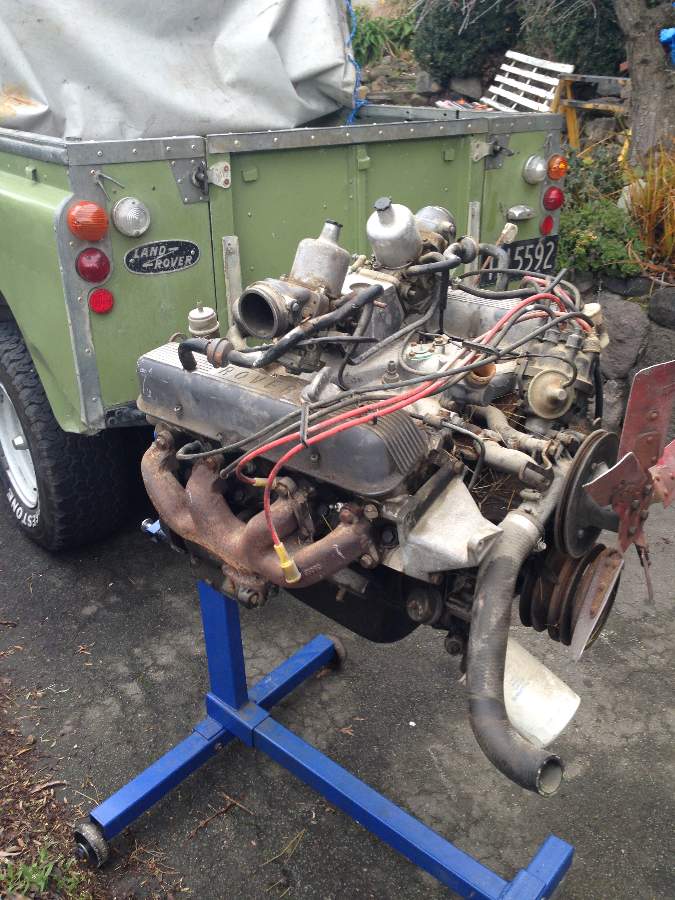
Beginning to feel like that guy with a few projects all of which are unfinished, but there is no way in hell any of them are ending up on trademe. I have mentioned my landy a few times on my other thread and now it's about to get a rebuild it deserves considering it's 10 years of service. I bought the car with my father 10 years ago, and as a 12 year old it was pretty much the coolest thing in the world. Needless to say my lifetime of saving coins and doing odd jobs paid off in the end. This car has been my daily driver since I got my restricted up until the beginning of this year, when I realised the joys of a radio and a heater that wasn't like an asthmatic blowing at you through a drinking straw. Needless to say It's a lovely old thing and well deserving of a full rebuild. I bought it from a man in Timaru however the car spent most of it's life in Central Otago- and guess what that means oldschool lovers? No rust in this one praise the lord. It still has the original running gear, the standard bulletproof massive lump of iron 2286cc petrol- while I have got to the point where it is reliable and hasn't let me down for the last 6 or so years it is getting a bit tired. Improvements I've made over the years include a high ratio transfer box for better road speed and fuel economy (HA). I've also got a full canvas roof for it, it has parabolic springs front and rear, plus the new 15x8 wheels. Numerous fixes have been done to the engine over the years. The rear diff is making some pretty terrible noises and I suspect that the crownwheel has seen better days. At this point I feel that fixing just the diff isn't an economical decision and I have an opportunity to take the car off the road for a few months I may as well do a proper job. So the plan is to do a repower... with a Rover V8 I bought last weekend. Conversion kits come out of the UK for this however I doubt it'll be a bolt in job. Will possibly investigate higher ratio diffs from a rangerover or similar. The new engine This is what it has been used for the most- carting around the lotus 7 throughout that build. I will probably take the body off... considering doing a galv chassis for future proofing. I wouldn't call it a resortation but more a rebuild. I won't bother doing any bodywork, it's as straight as a landy should be and any knocks all add to the character. It will still afterall be a workhorse. Worth saying I'm not going for stupid power otherwise it'll just break axles. It will be more for the torque and towing ability... and who doesn't love a Rover V8. It will drink gas, but probably not as bad as the original unit... it's thirsty as. Discussion or comments are welcome... no doubt someone on oldschool will have done one before. I'll set up discussion on next post so link is available. Cheers
1 point
-
I got a 3 kg roll for about $50 of bronze wire, you have to use straight argon with it,1 point
-
@JustHarry Really empty now, nothing solid left (that is for sale). I've had no problems with him but I heard he'd been getting lowballed by a lot of people and people stealing stuff so I understand why he would just get the scrap guys in (not saying you were doing that!). Wish I had seen the site in its heyday!1 point
-
17th of September is the next meet!1 point
-
Drum Brakes - why do I keep having to bleed the damn things? Where is the air getting in - it seems to be at the wheel cylinders but hard to be sure.........1 point
-
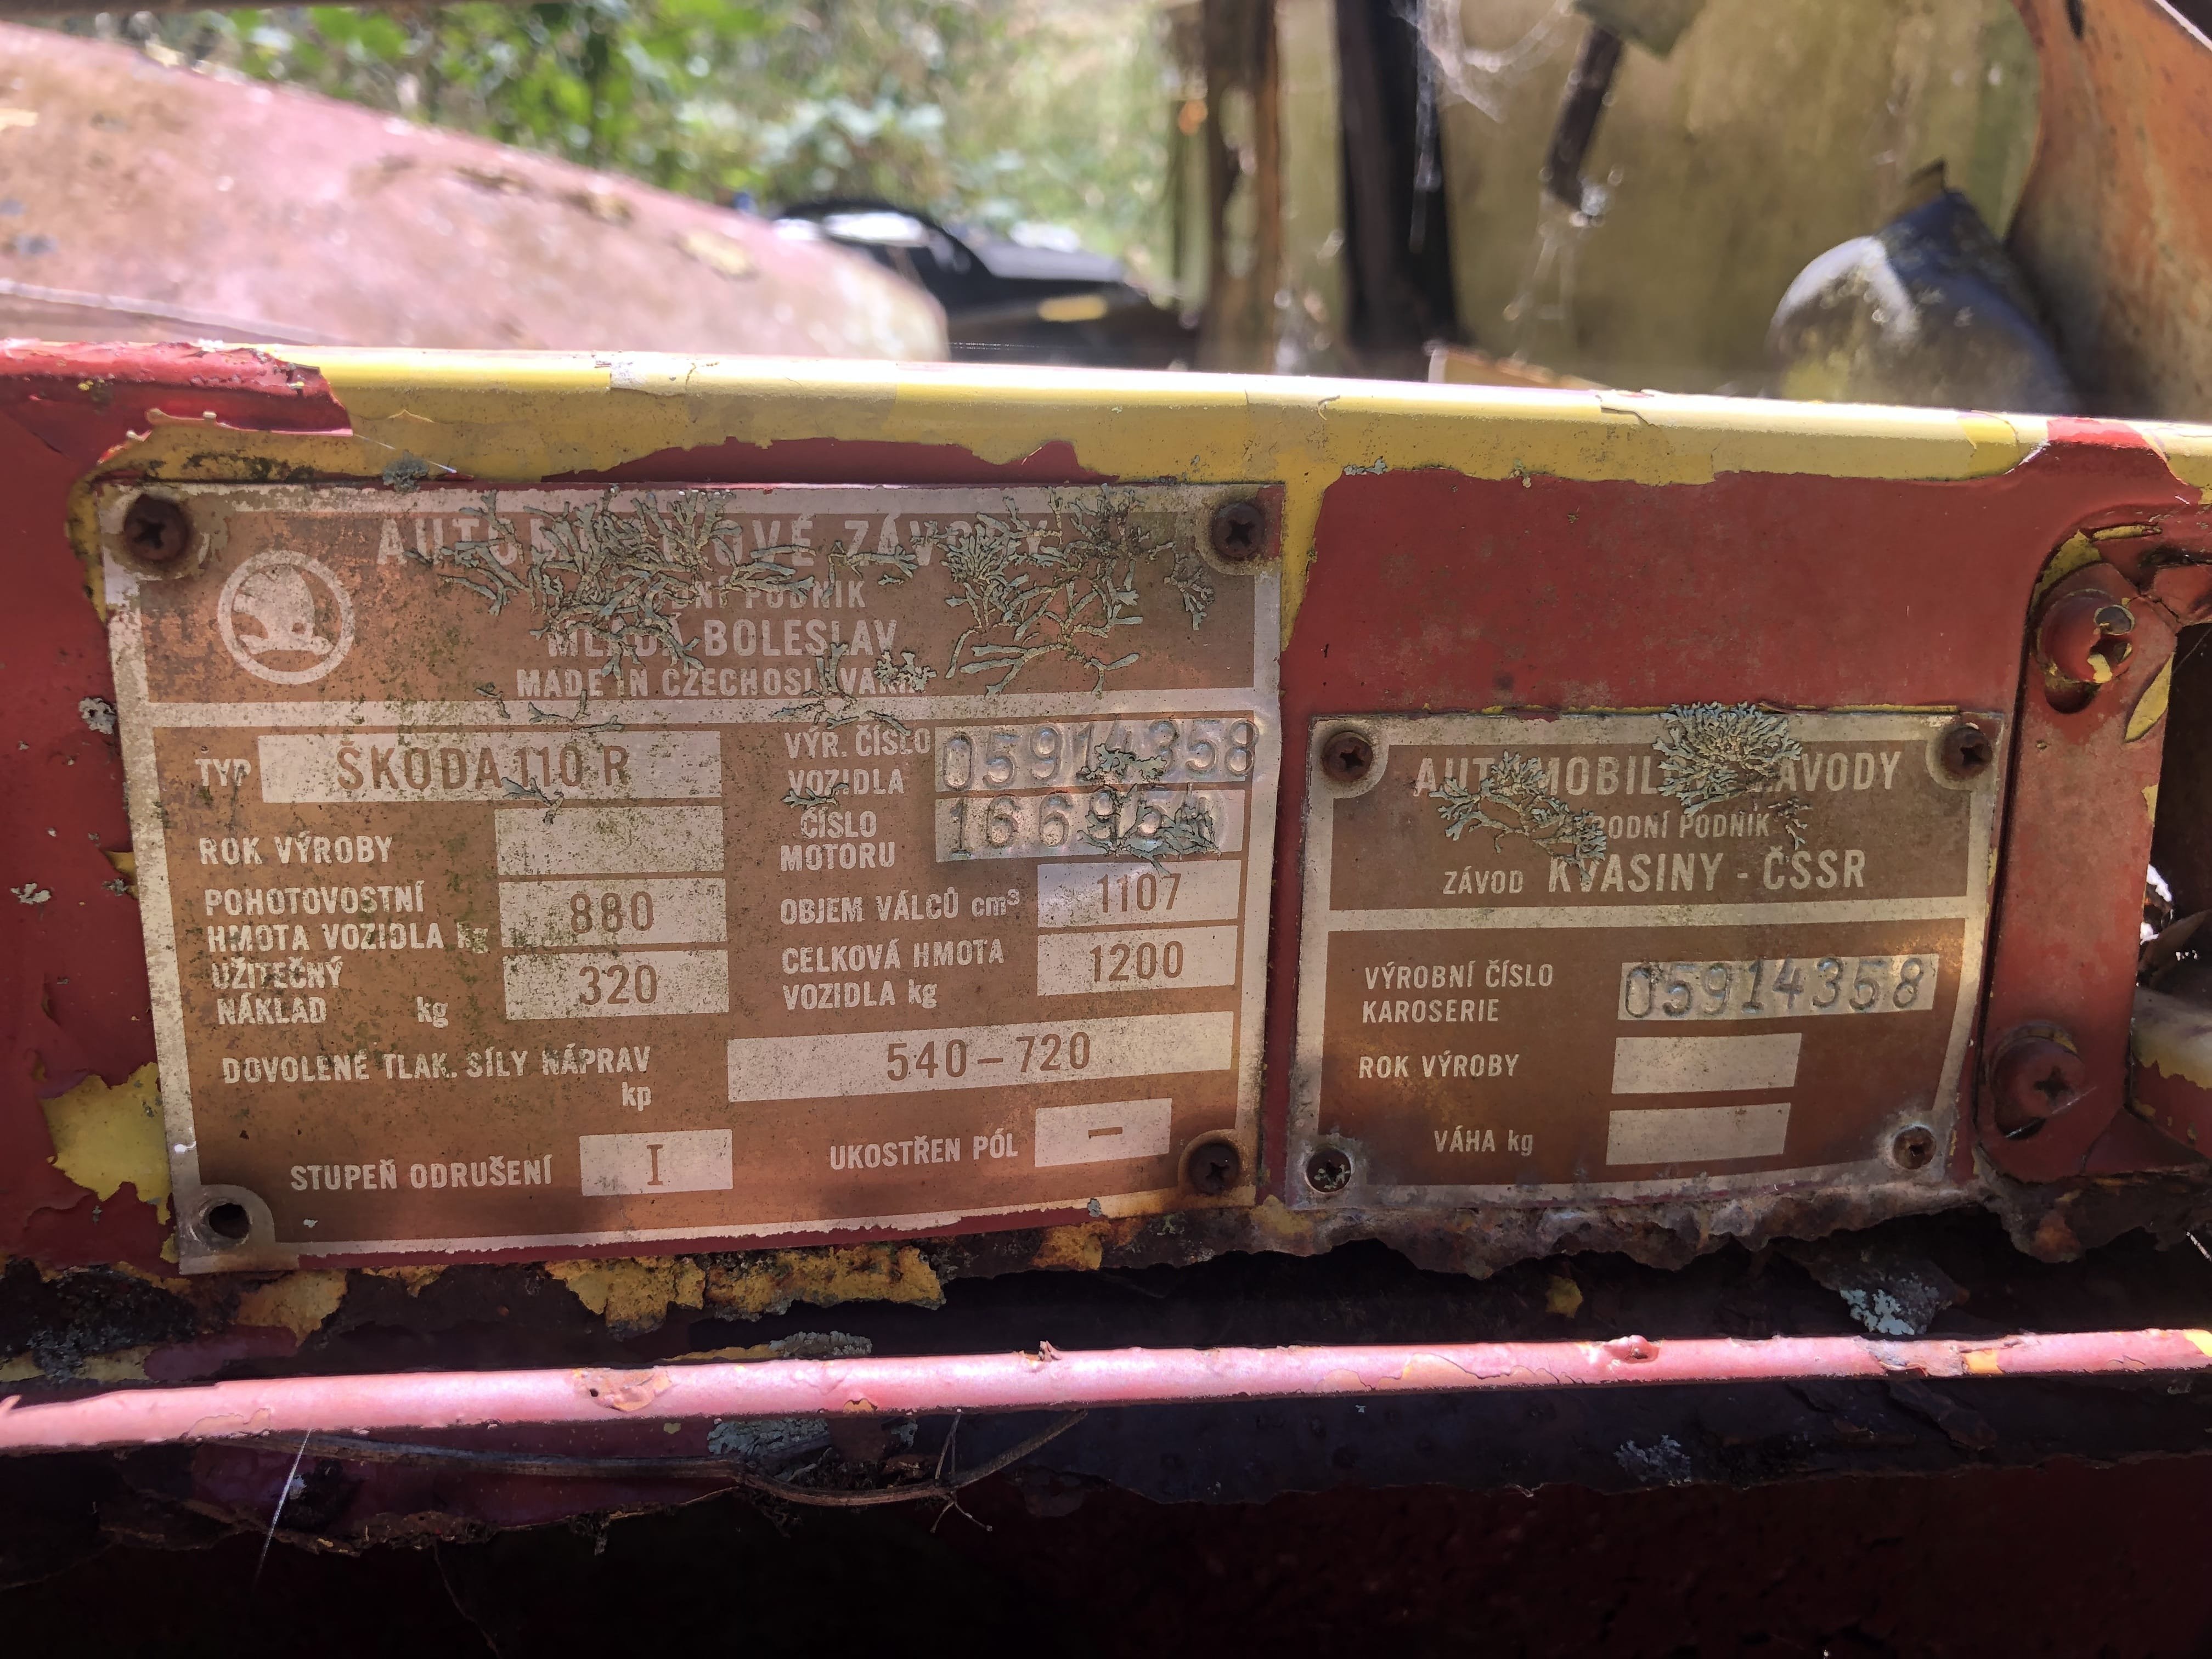
@EpochNZ I'm afraid so, there are still other 110s there but nothing to think of saving. They are still out there though if you know where to look!1 point
-
Dragged some pine logs from a tree that fell down, if you get stuck this thing digs holes till it’s down to the diff in the ground.
1 point
-
I'm going to do my best to remember what order I did stuff. After I came off the buzz of painting the car and took my eyes of it for 5 mins to make some progress I believe the fuel system was next on the list. I had an idea of how I wanted to make it. So first I used the factory fuel tank with welded in ( I think -8 ) bungs into the lid of the tank. One for the pick up, one for return for surge tank and one for the breather /roll over valve. First fuel pump is a Carter lift pump ( can remember the size) from there to the 1L surge tank. I think the high pressure pump I used was a Bosch 070 (not as powerful as the 044) then I had bent up steel fuel lines run under the car one for in one for out. P clipped every 100mm. Had two filters one before first pump and one before injectors. All this was mostly kept inside the spare tyre well in the boot. Was going to make a lid to cover it in case of fire most likely out of aluminum. I dont want to spoil the ending but I have changed some of these things on the car over the years.
1 point
-
Sap two Morrie ones on it? /slow internets suck.1 point
-
Ride the fast post, then there's no worries about blowing fork seals again if the front wheel never touches the ground!1 point
-
Its still held together with G clamps and cable ties, so we weren't going too crazy, but you get the idea.1 point
-
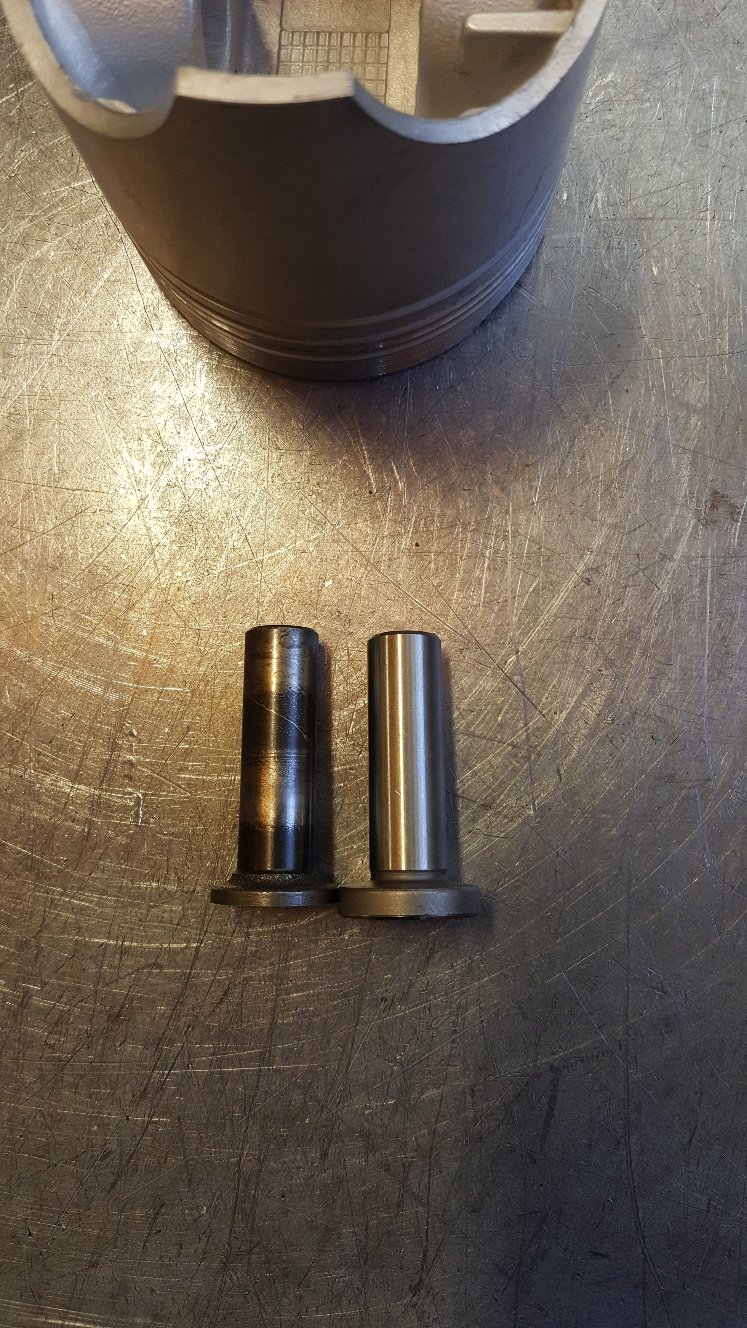
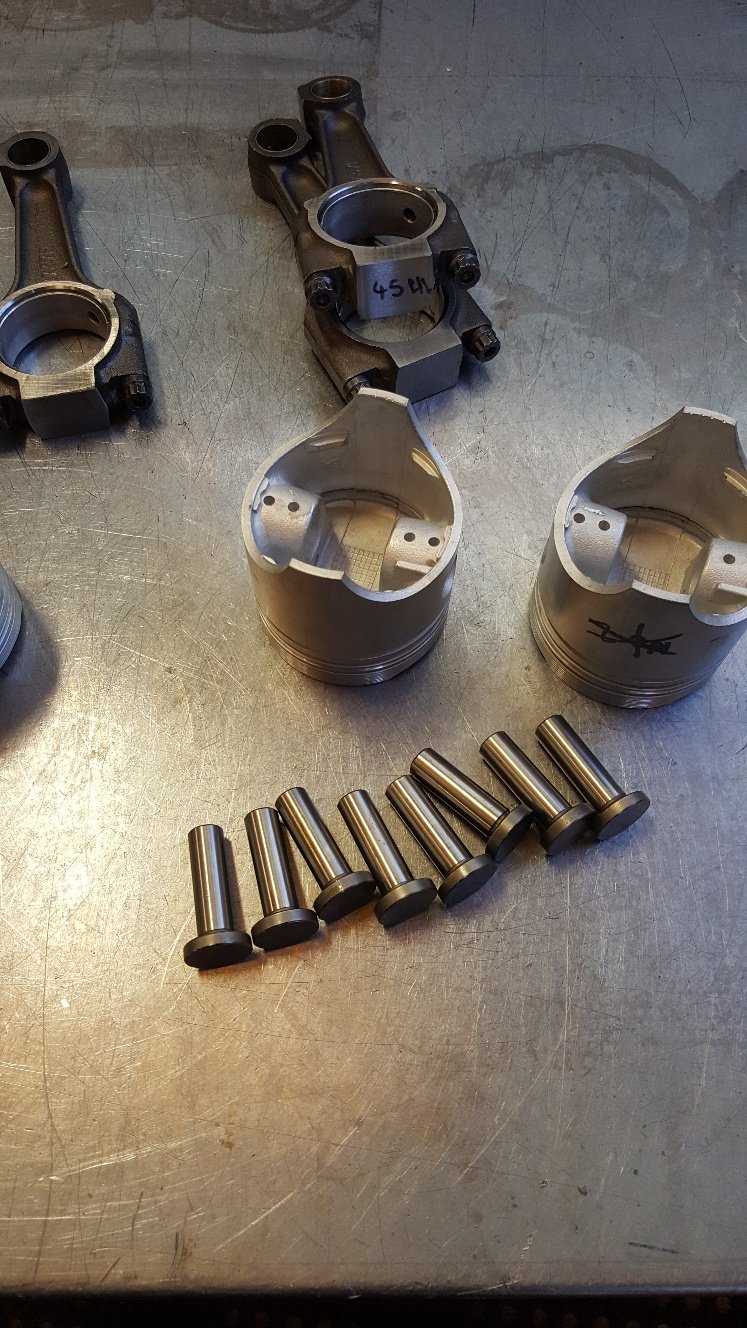
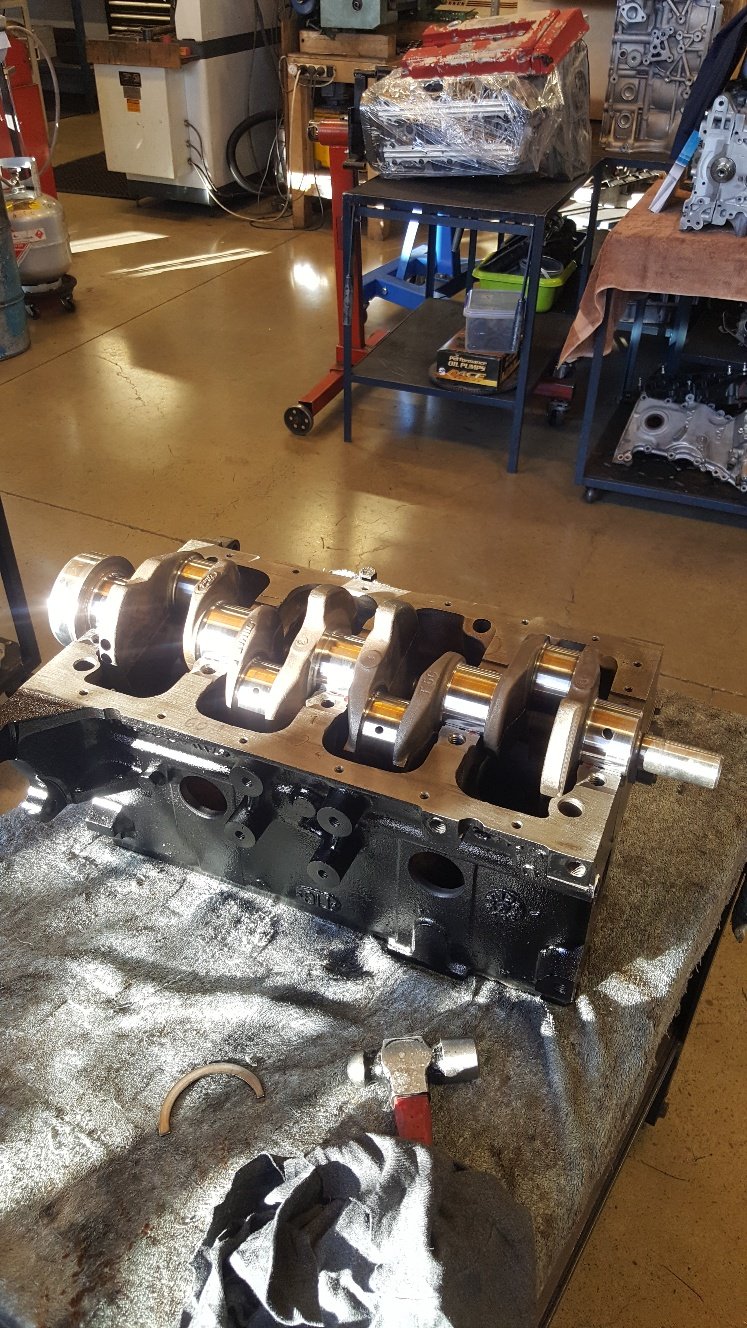
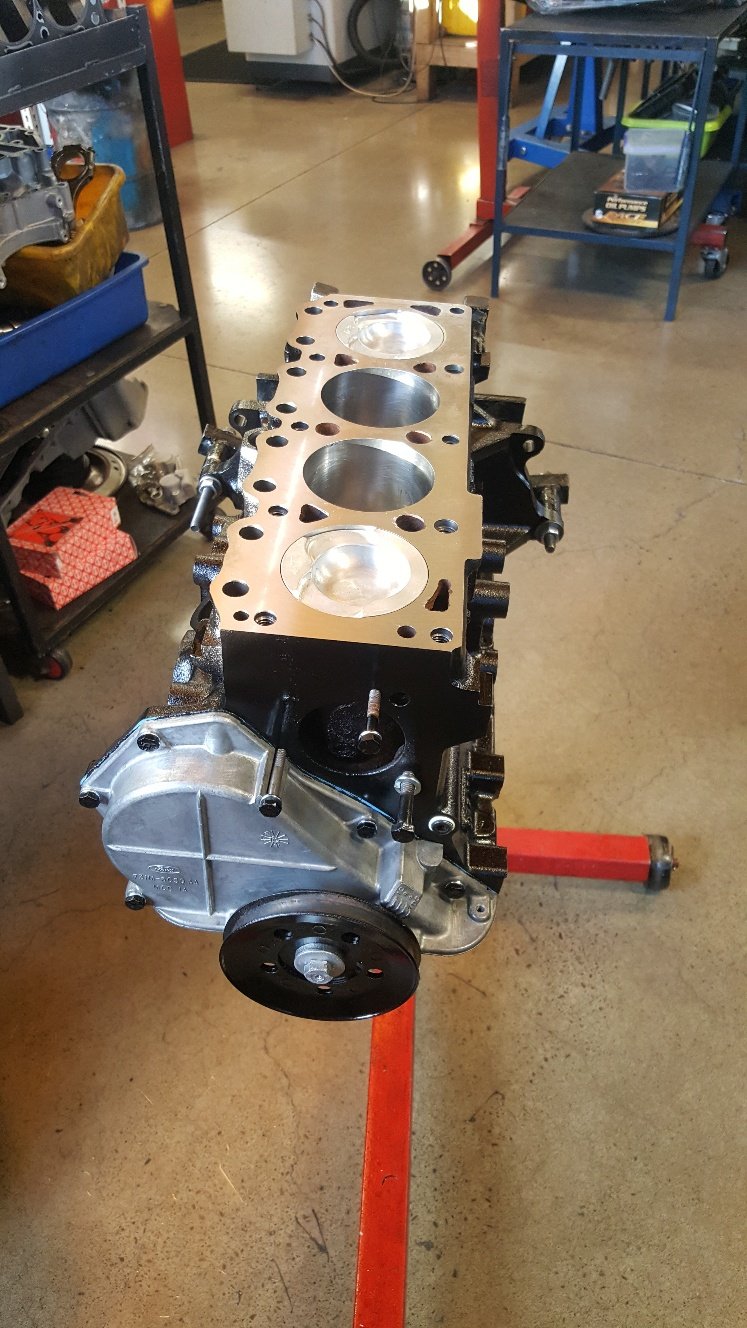
Time for final assembly. I bought a new set of cam followers as the old ones look a bit thin in the head. And I have had one break in another engine. Put the crank in. Short blocked. Checked the front pulley for tdc. It's the best time to check it. Not a common problem with solid front pulleys. But definitely common for old harmonic balancers to move and cause a headache when timing your engine. Assembled the head.
1 point
-
That'd be super cool, matching walnut swirl knob for yer walnut trim dash... Do you finish those on a lathe or do they come out of the mould like that?1 point
-
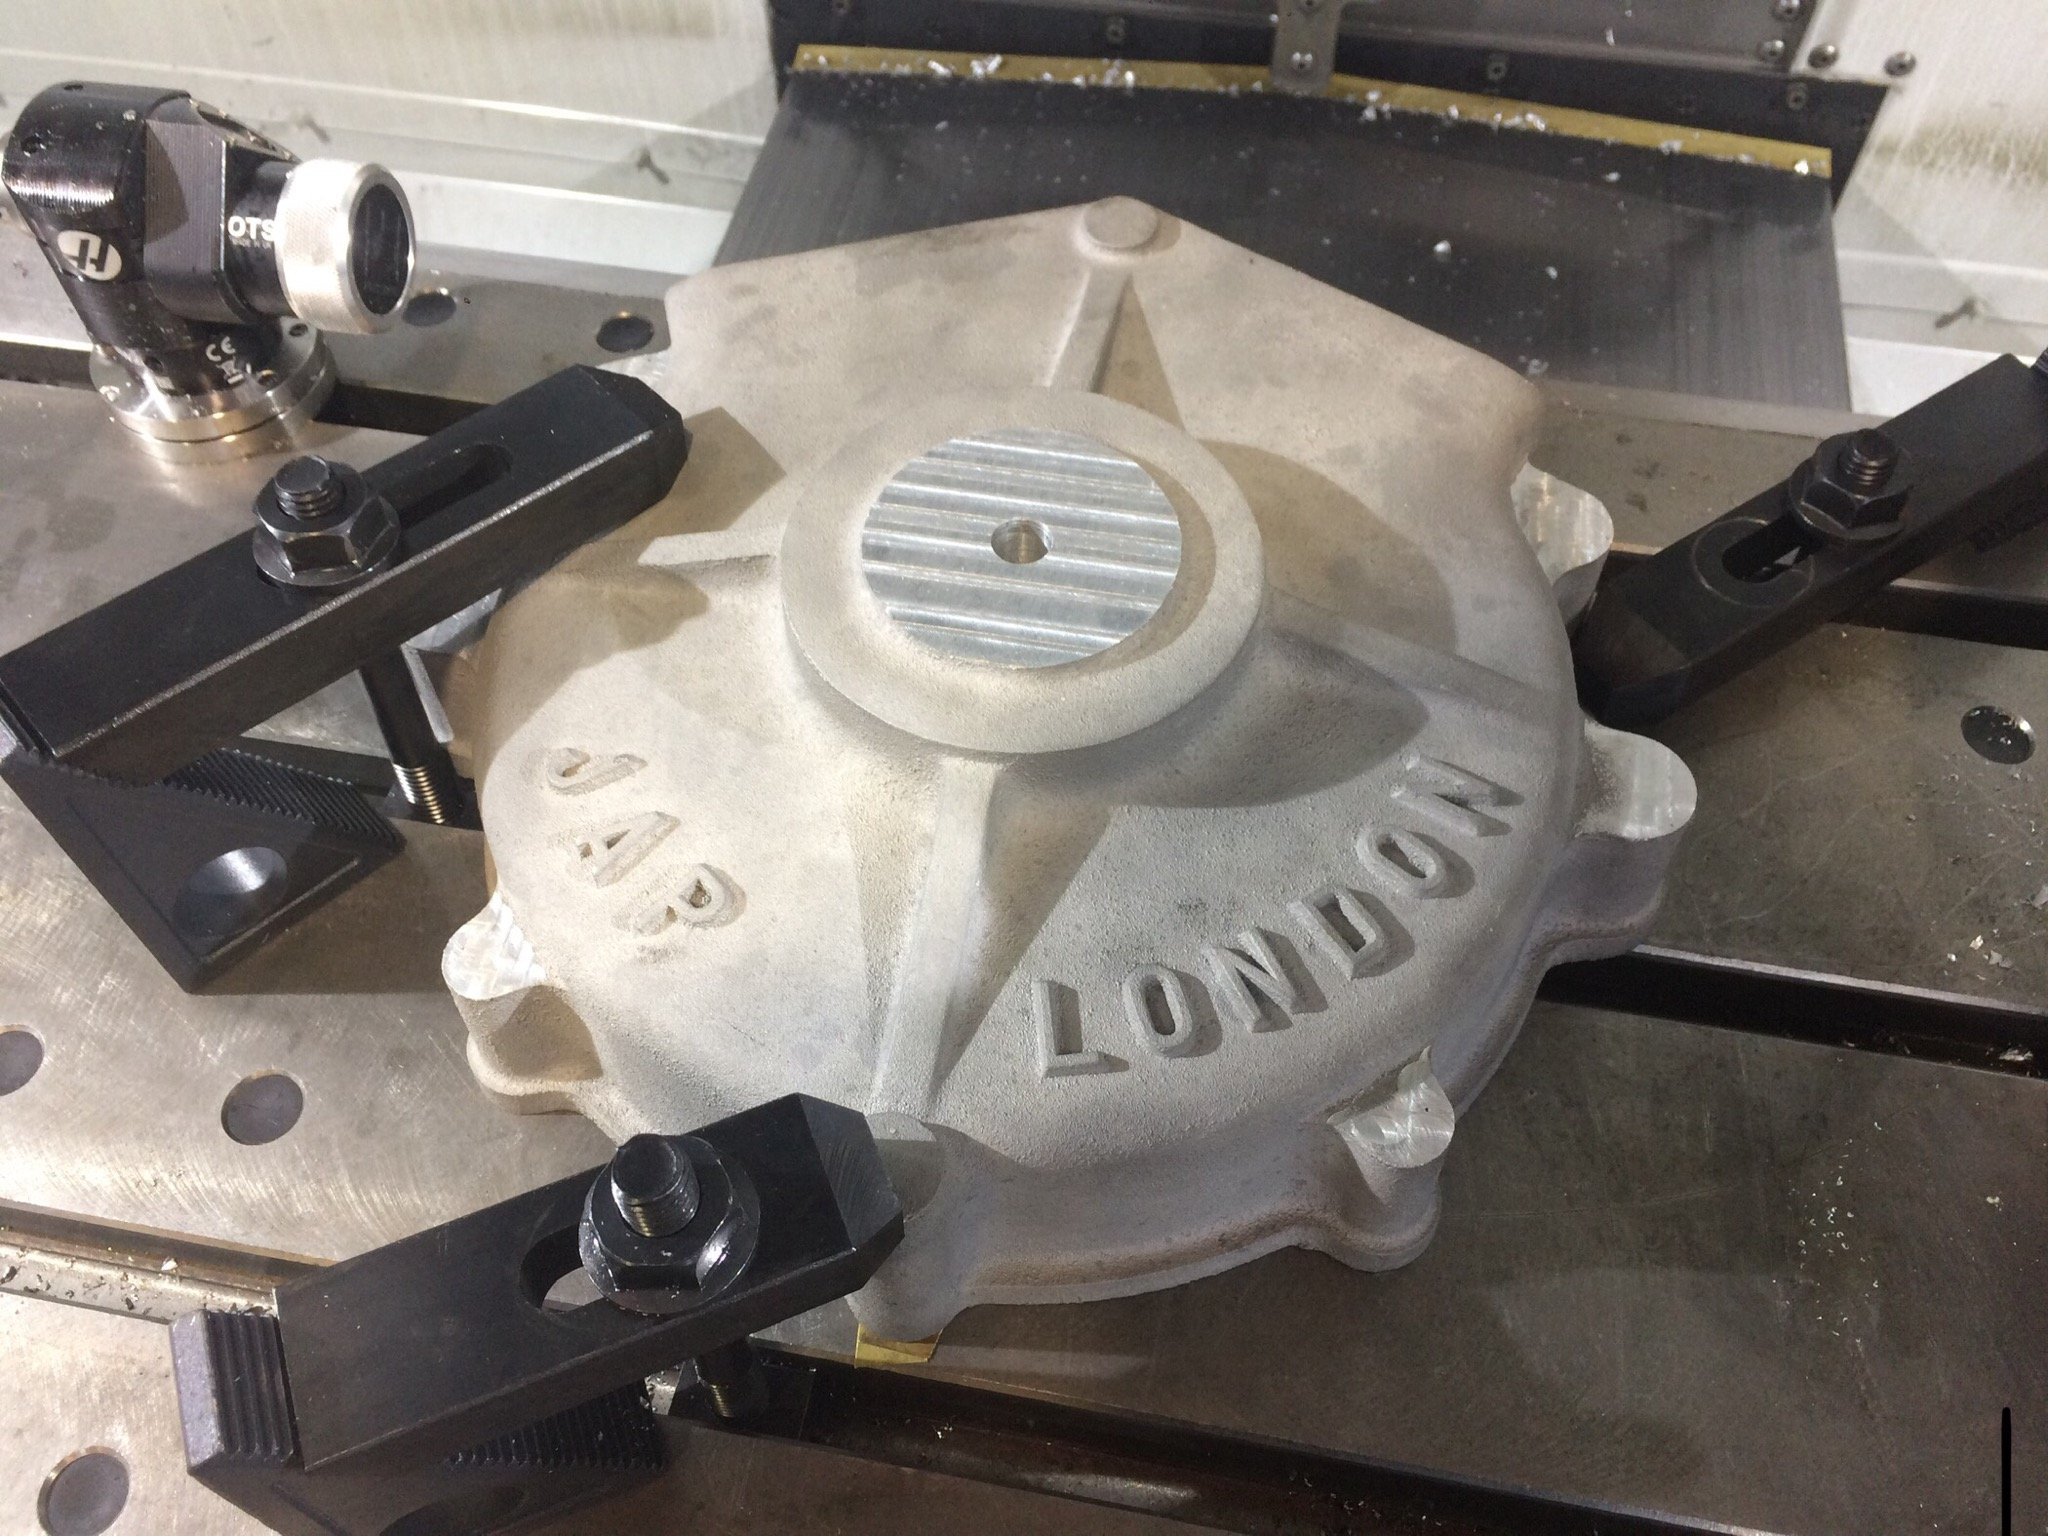
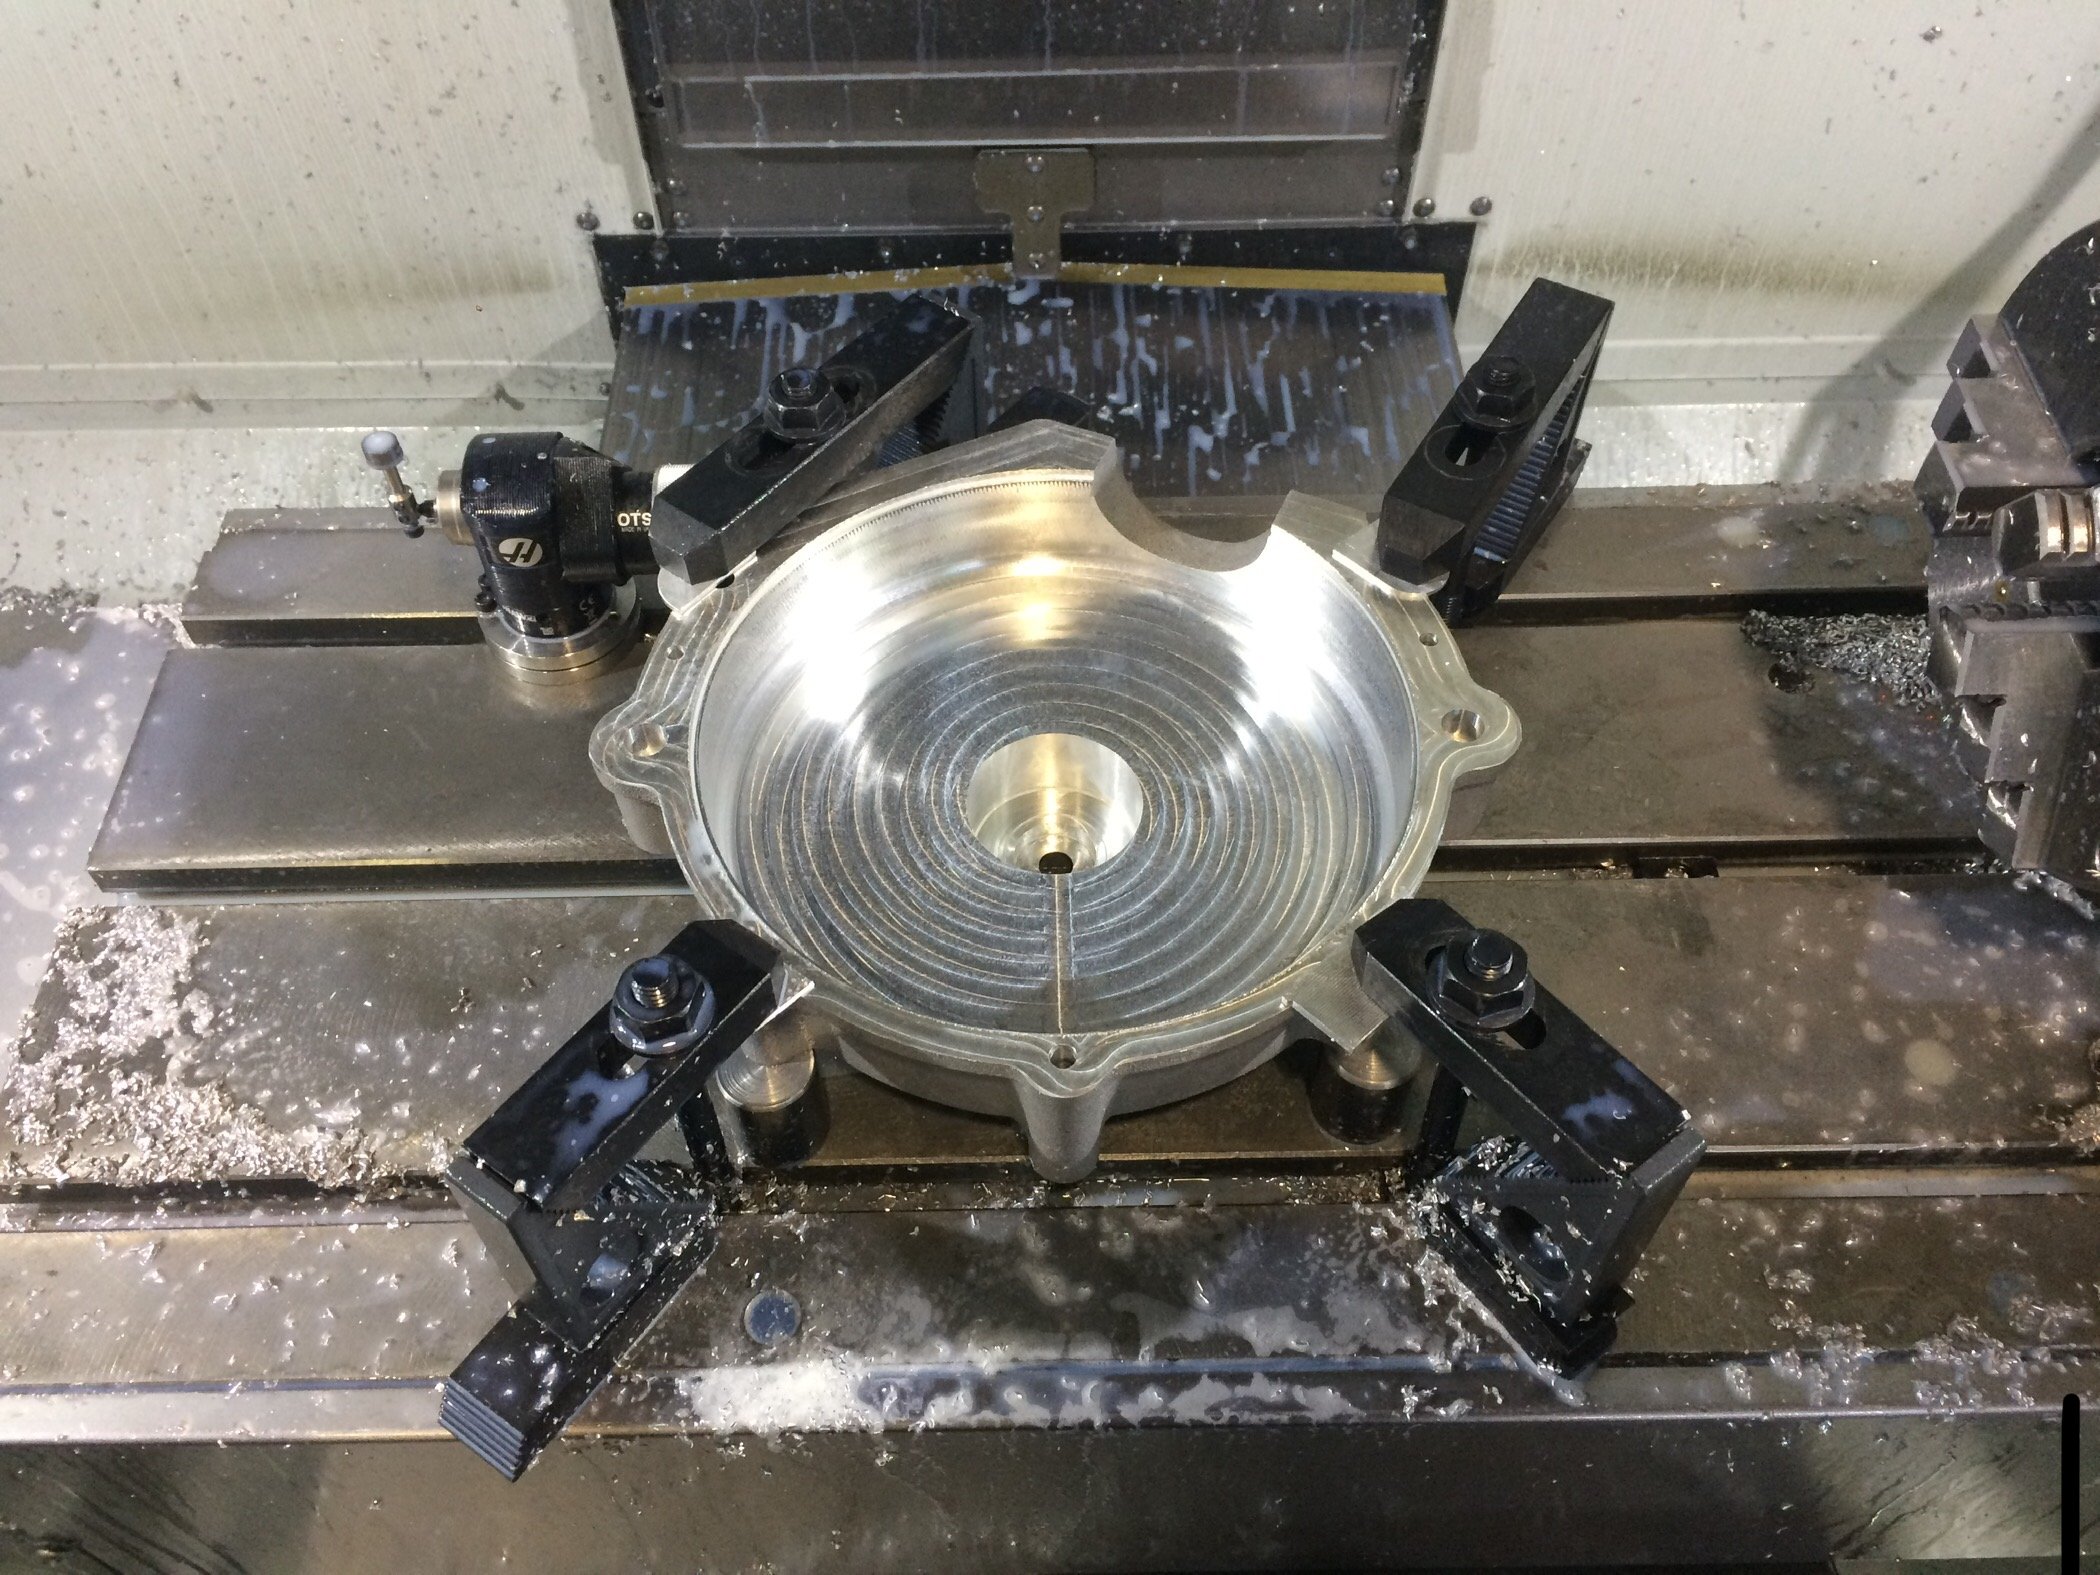
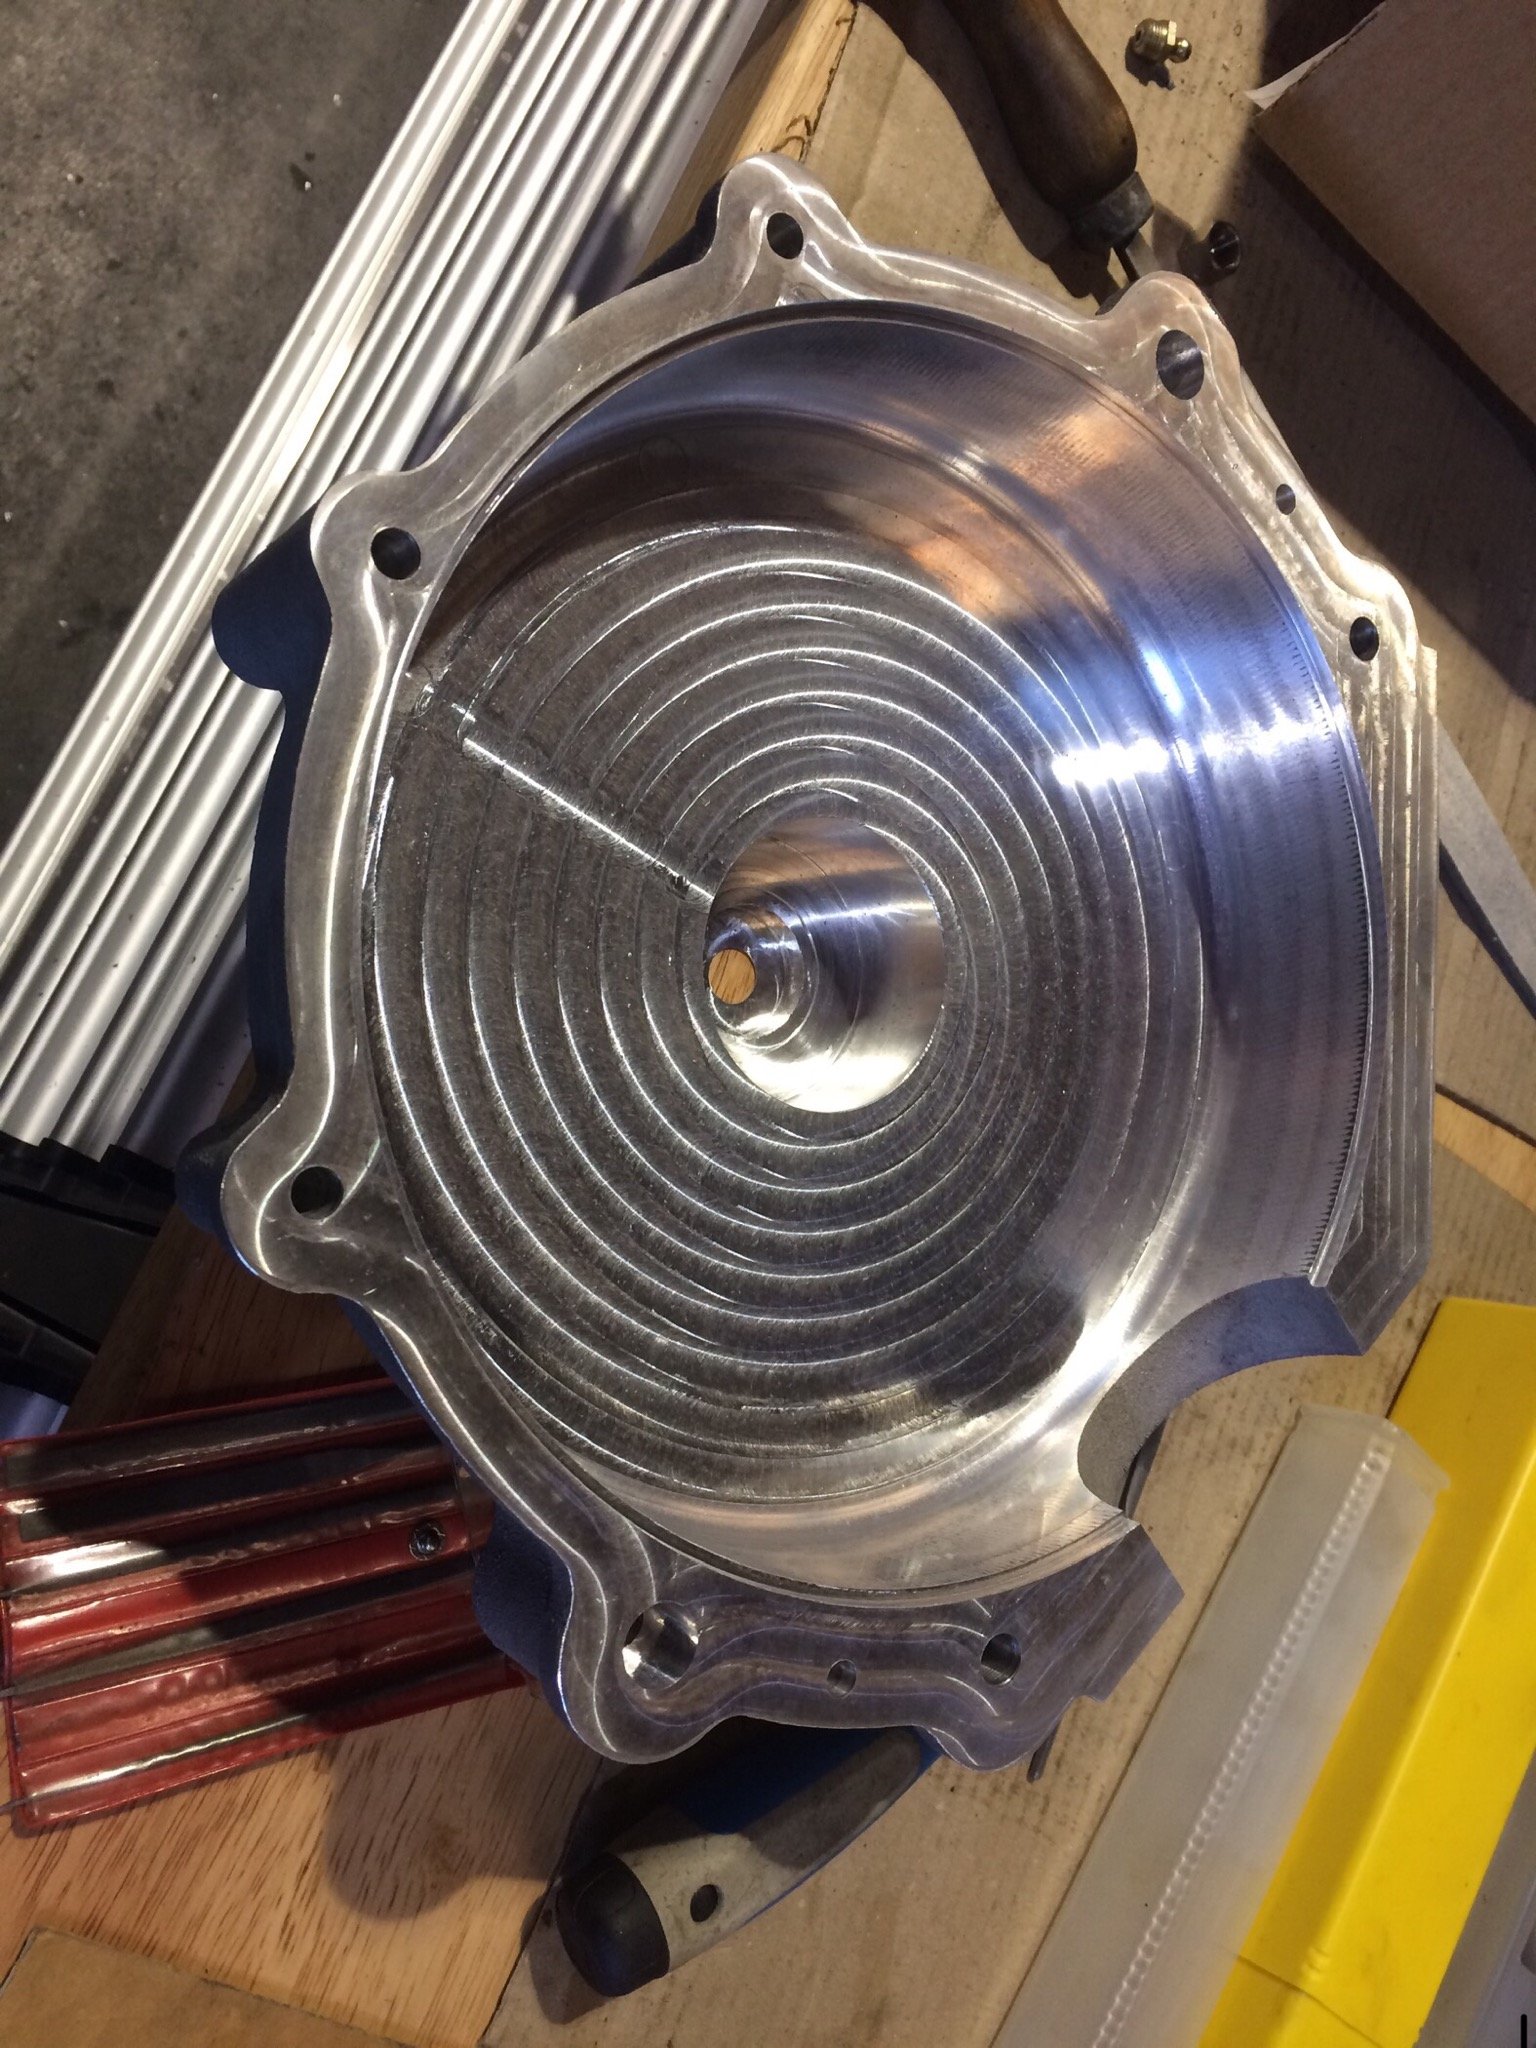
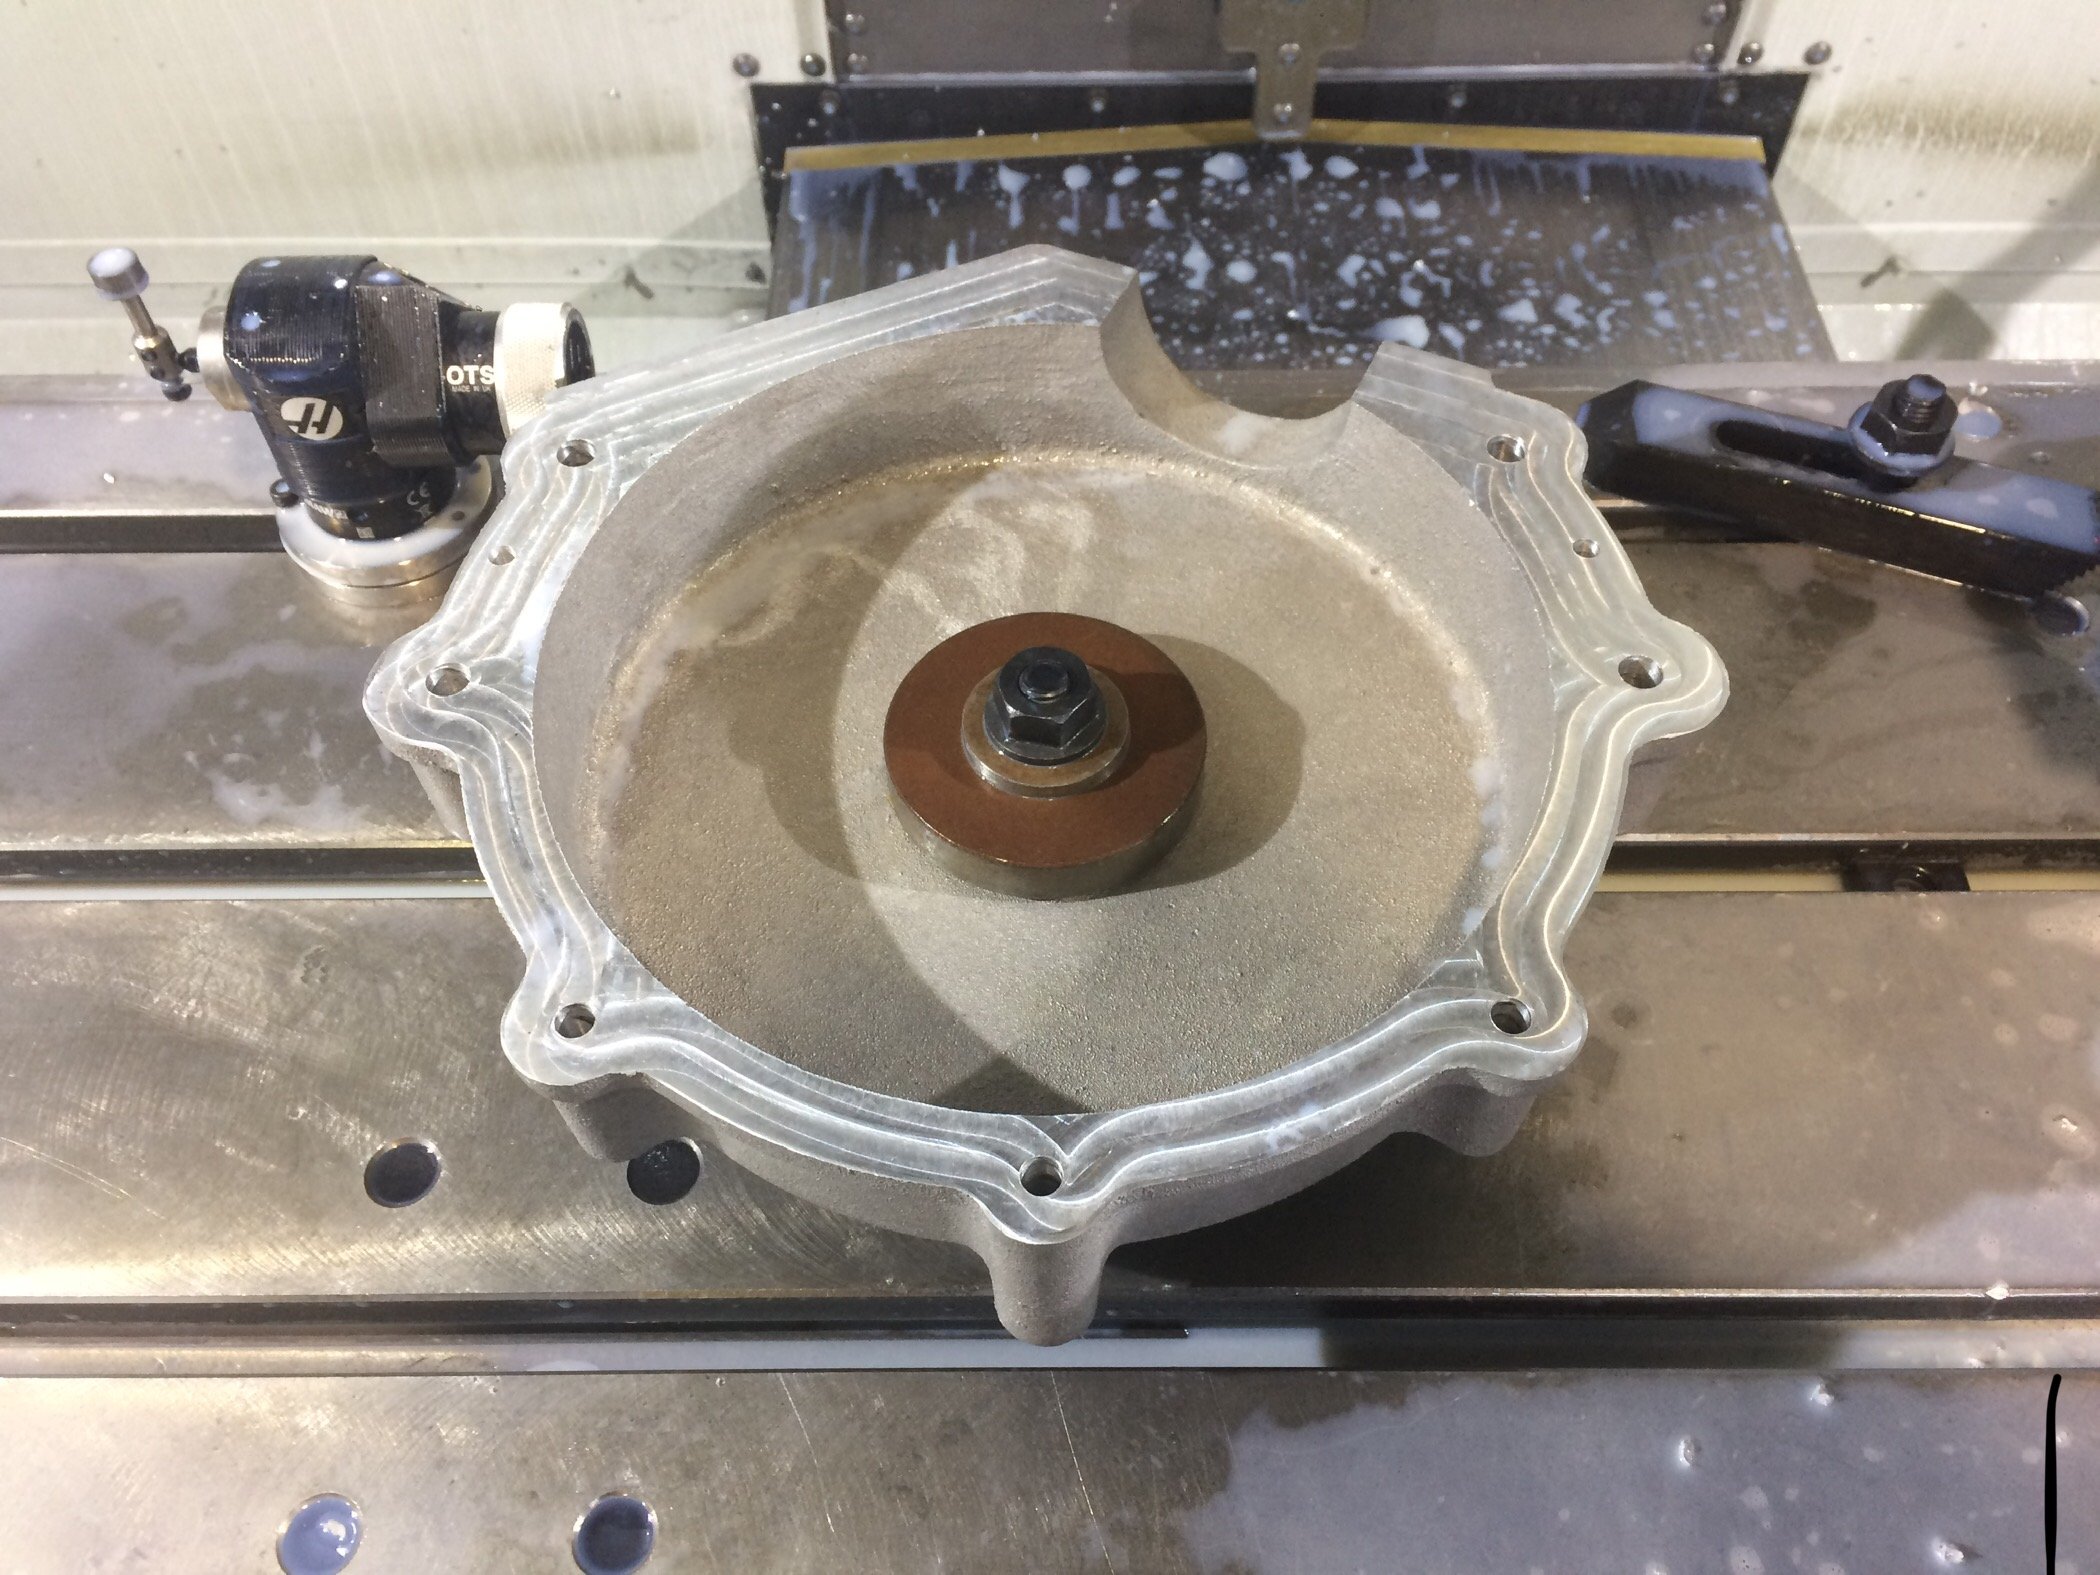
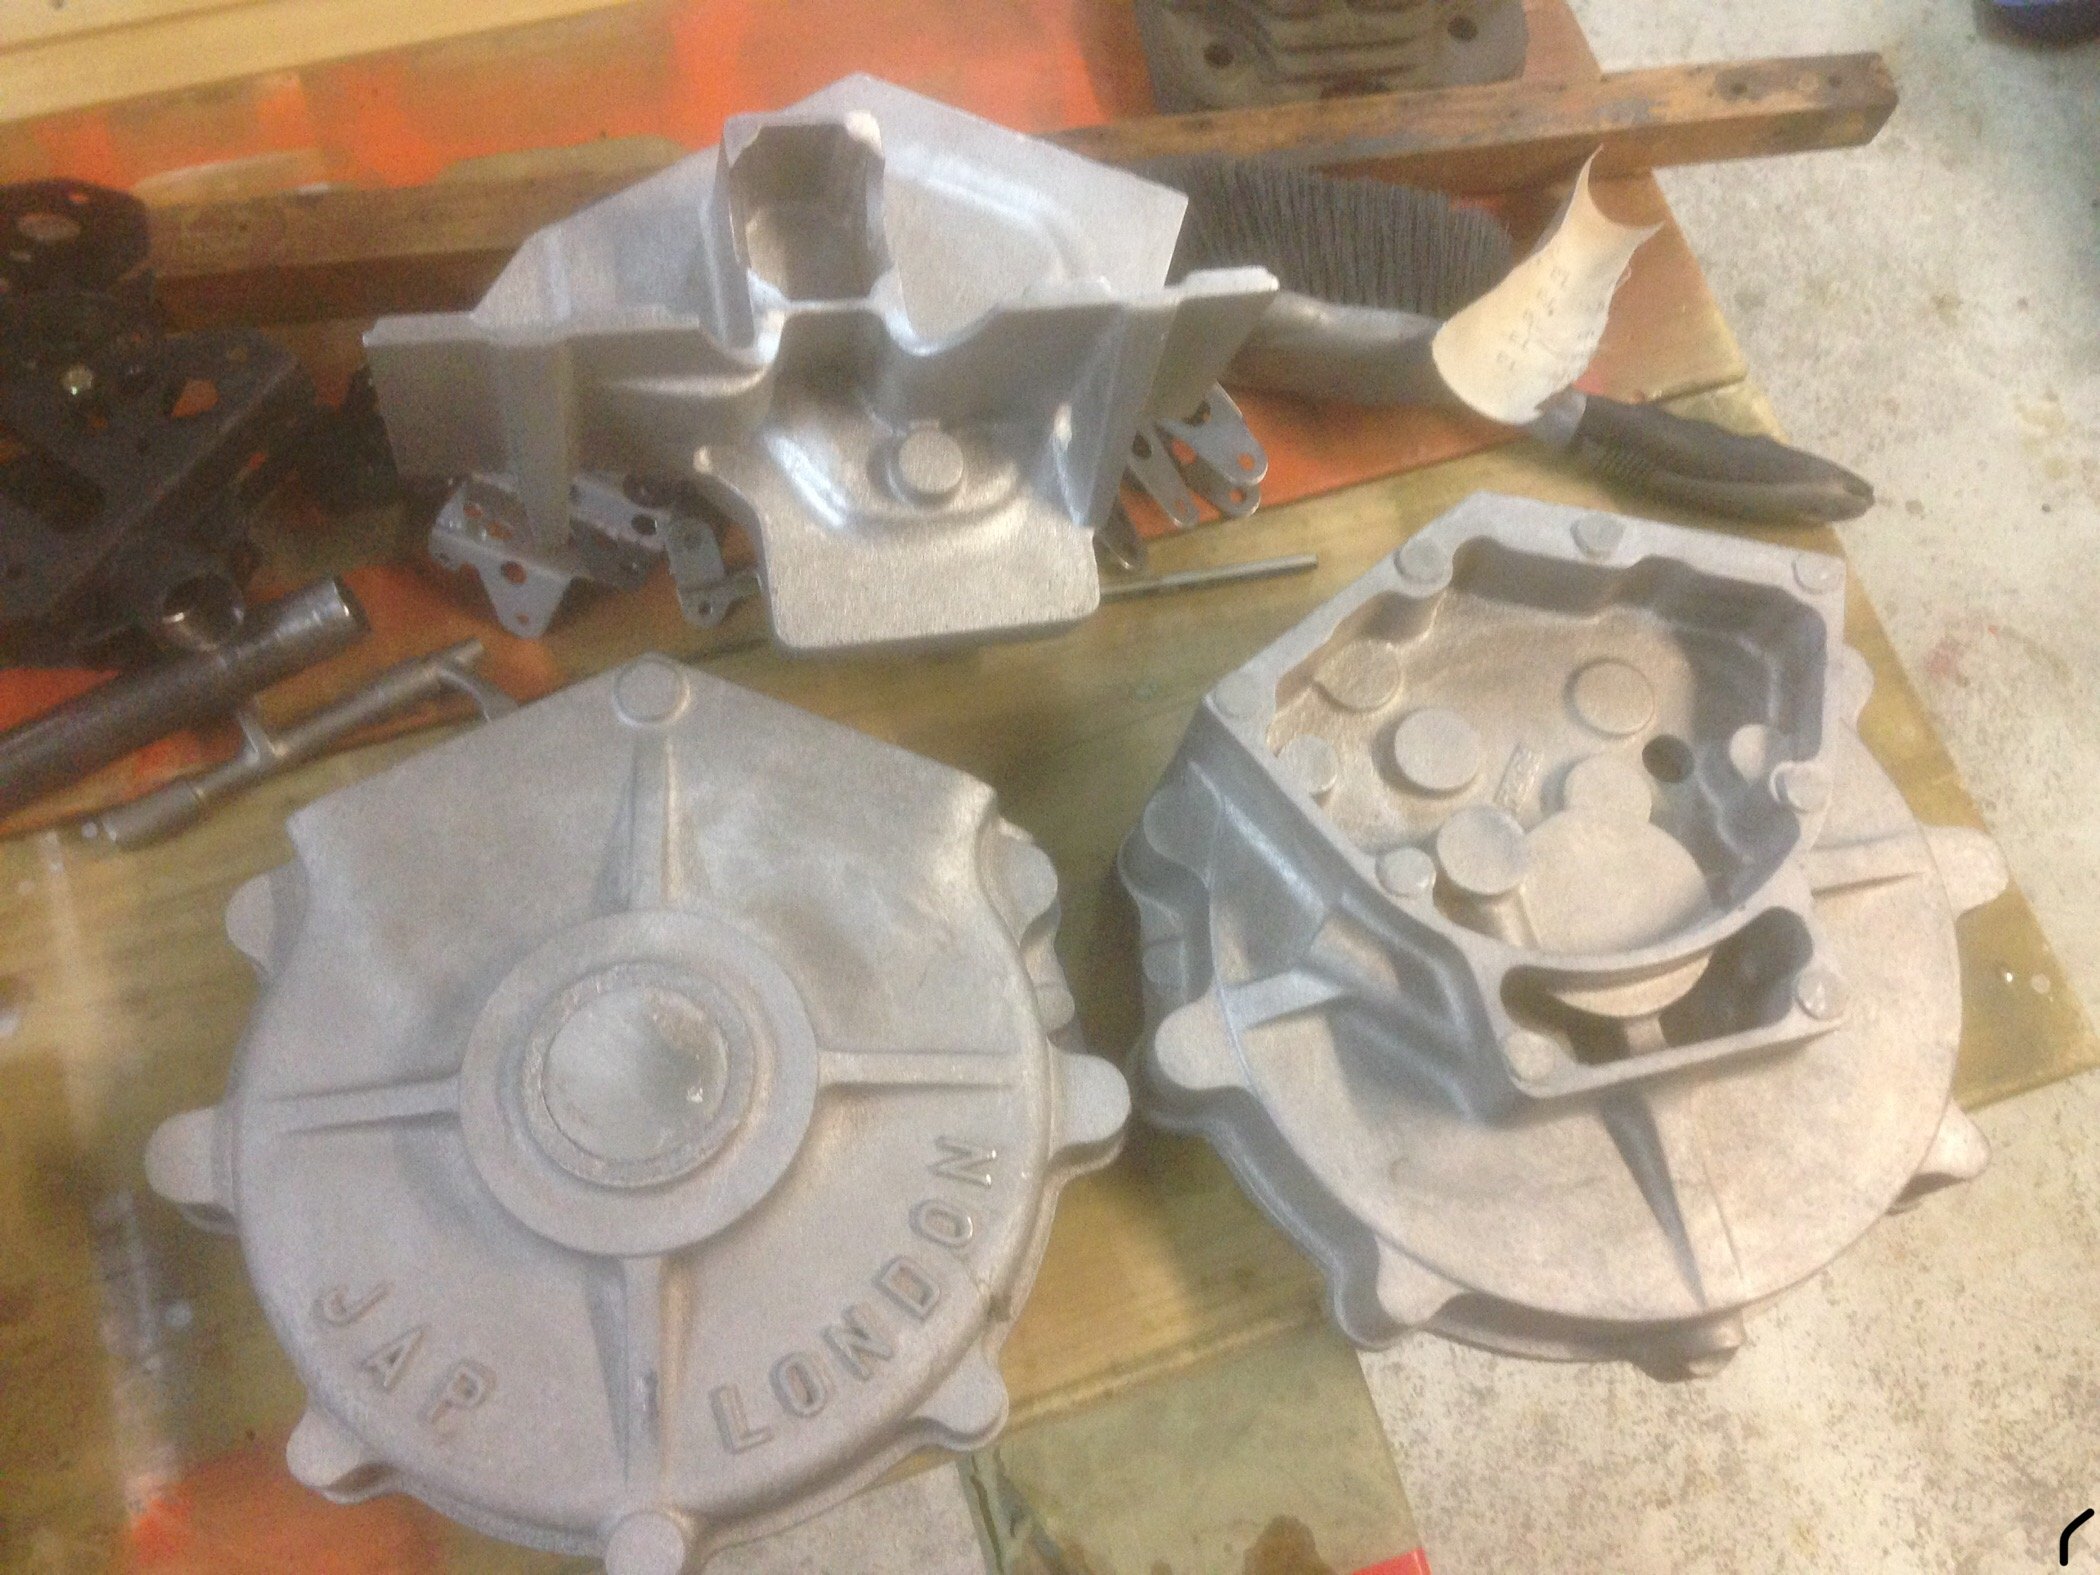
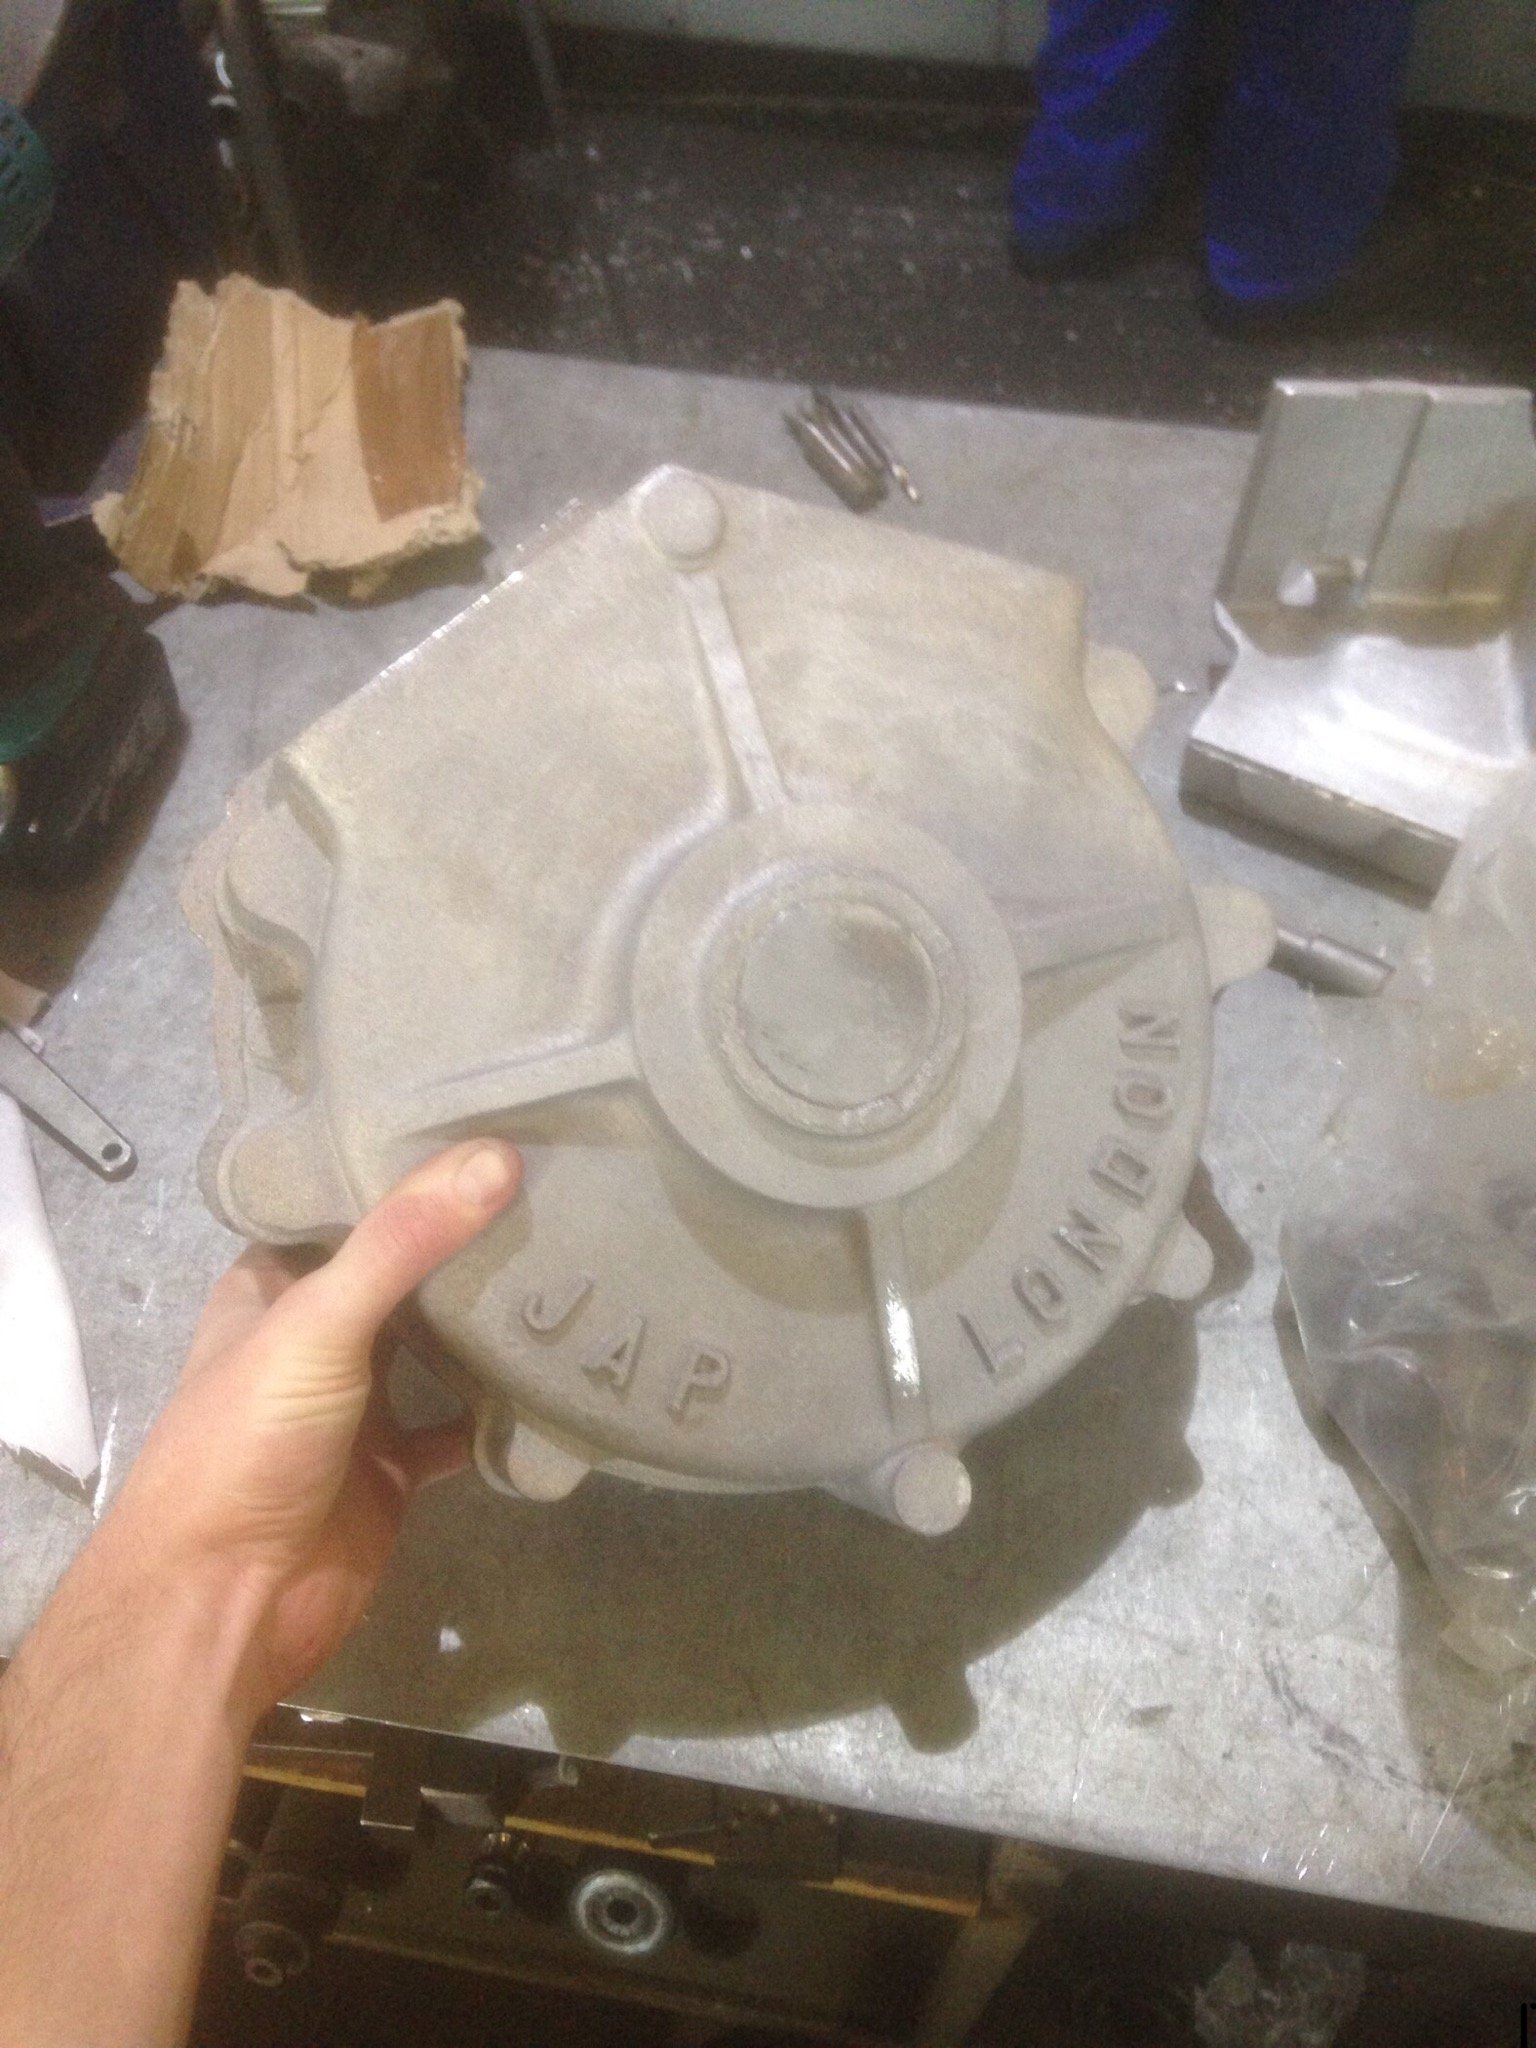
Did you ever see the engine run SOHC? A bit of info on this engine. It’s a 1930 JAP JTOR long stroke racing model of 1000cc. They were used in racing 3 wheel Morgan’s and Brough Superior motorcycles. These v twins are very rare these days and are worth a large amount of money. Lucky a place in the UK has reproduced some accurate castings for anyone mad enough to try make their own. I will be changing a few things with this one to try and get a bit more capacity and power out of it. Made a start on machining the drive side crankcase half. Bearing boss faced off to become the first reference surface Flipped over, mating surface faced and holes drilled. Now clamped down with spacer blocks to machine inner surface and bearing bore Inner features finished Next up timing side
1 point
-
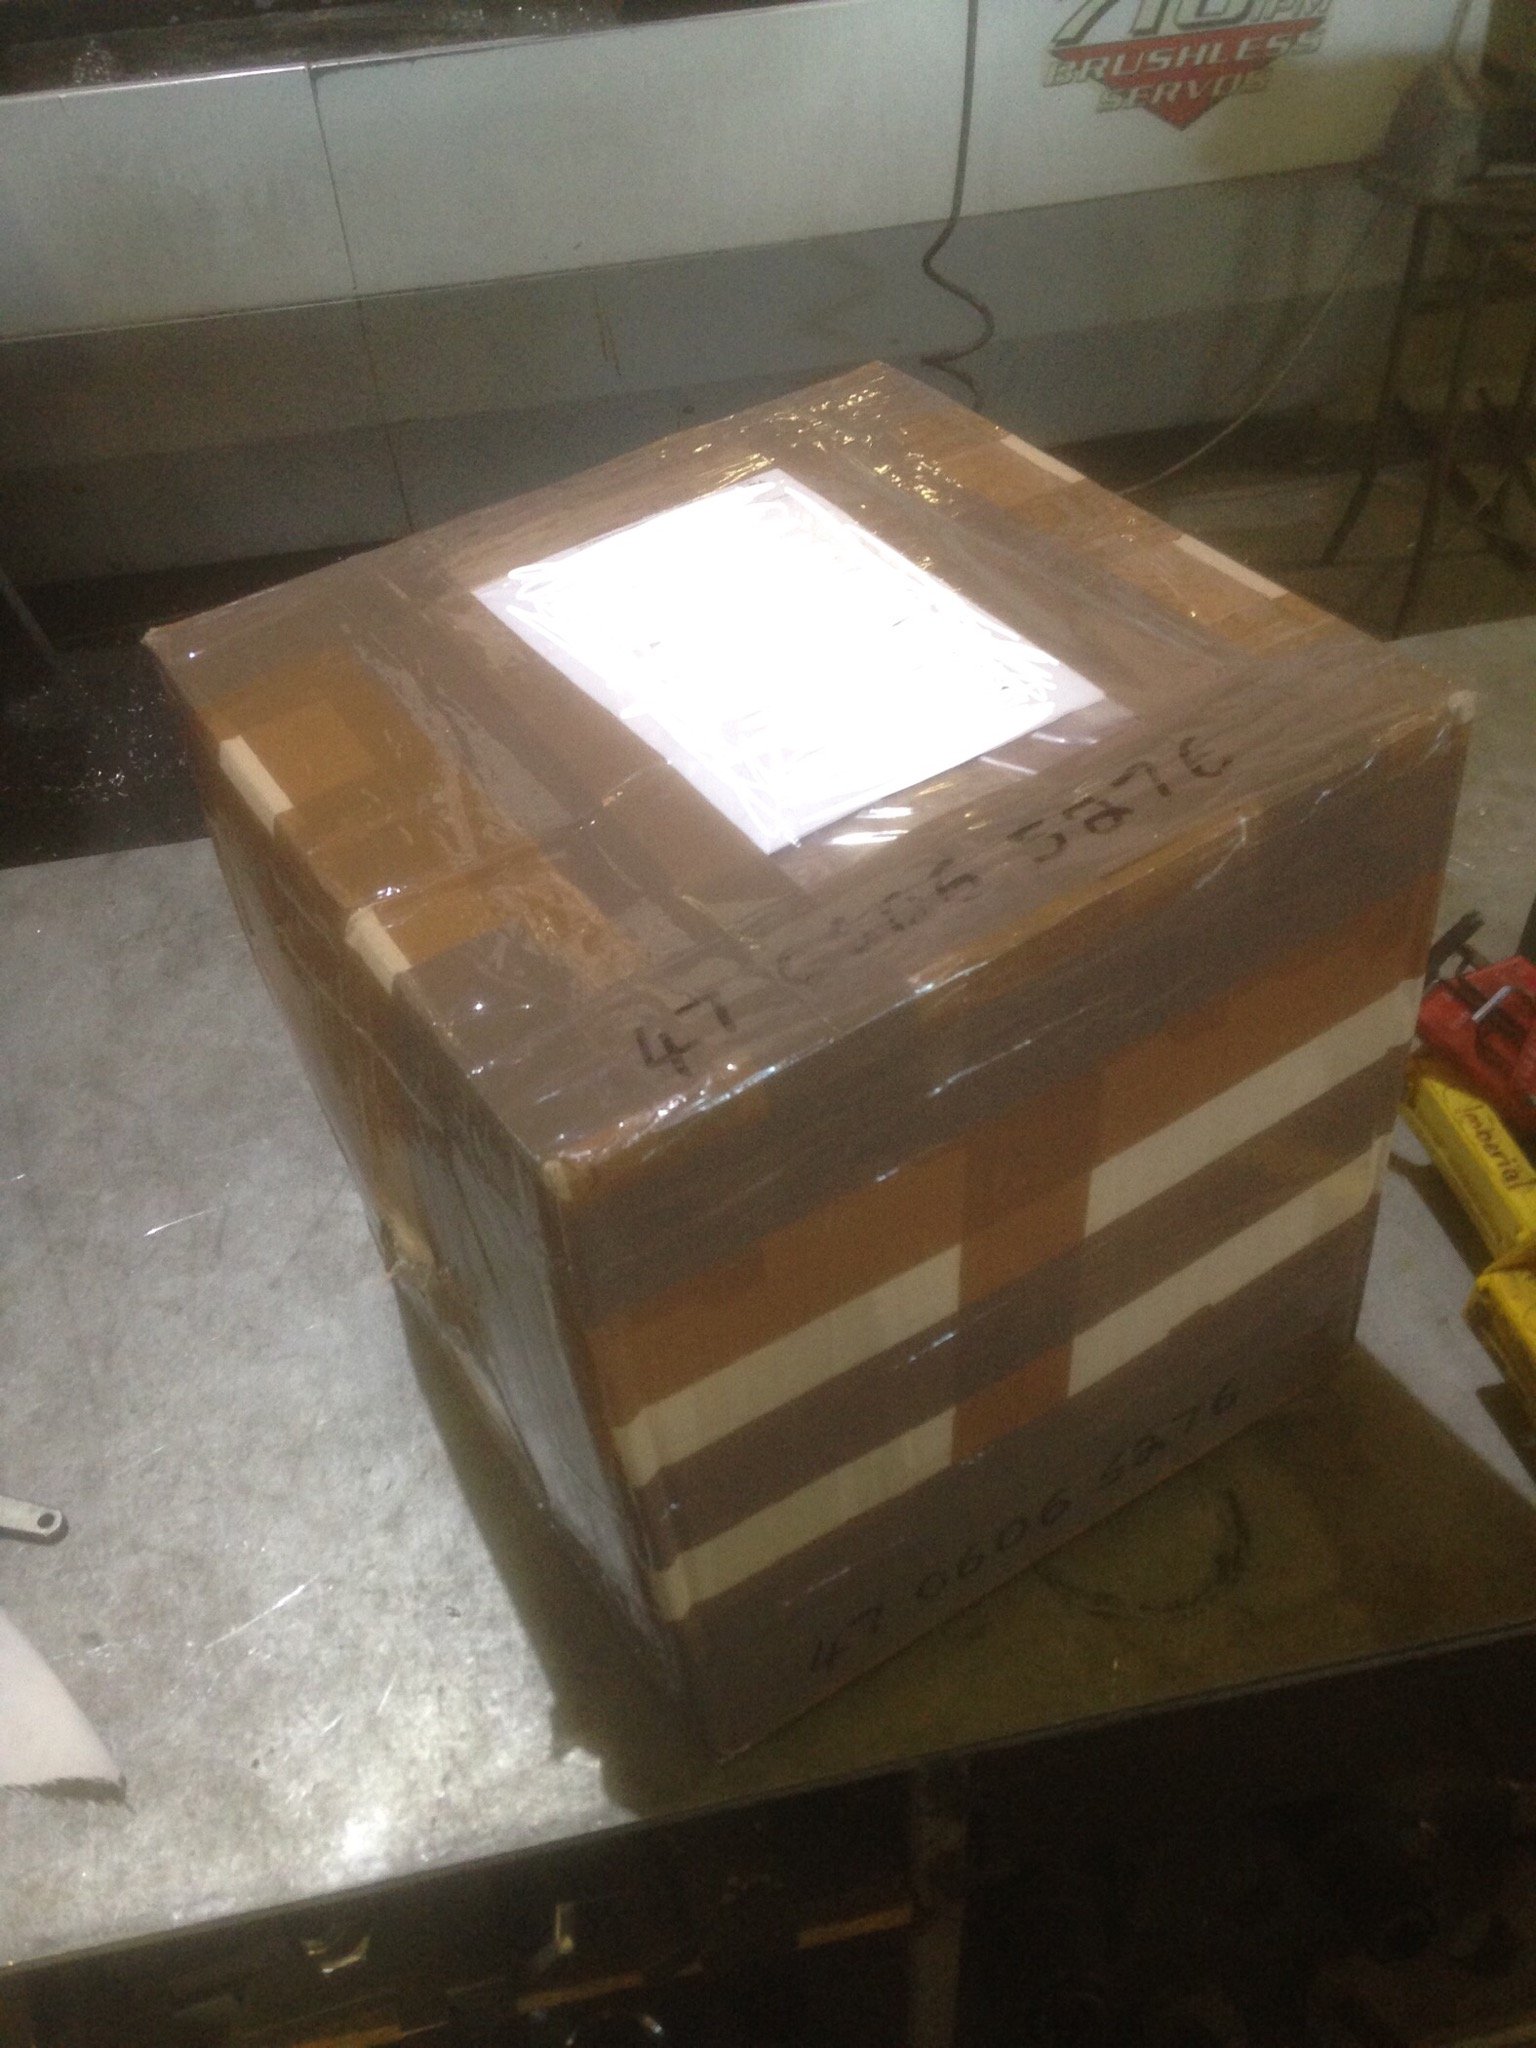
Nice cardboard box arrived from the UK. JAP V twin engine kit set, some assembly required..... Should keep me busy for a bit.
1 point
-
Yeah will definitely have to do a couple of early morning runs.... Have been working on getting a front axle put together. I’m using Austin 7 front drums and stubs. These needed a bit of a rebuild Reamed out the kingpin bushes with an adjustable reamer Set up the stubs in the mill, indicated the king pin to get them square. The dividing head was very good for this job The worn bottom surface that needs remachining And after Then needed to make a couple of new kingpins to fit. 4140 bar stock Finished1 point
-
No, It was the way the Grandad did it. I will only be using the finest selection of Whitworth and British Standard Fine hardware to......
1 point
-
Only recognised this sad sight by the curve of the rear window. Motor looked complete though.
1 point
-
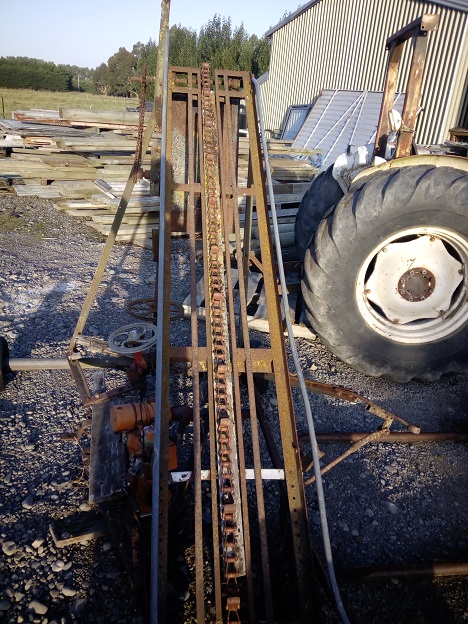
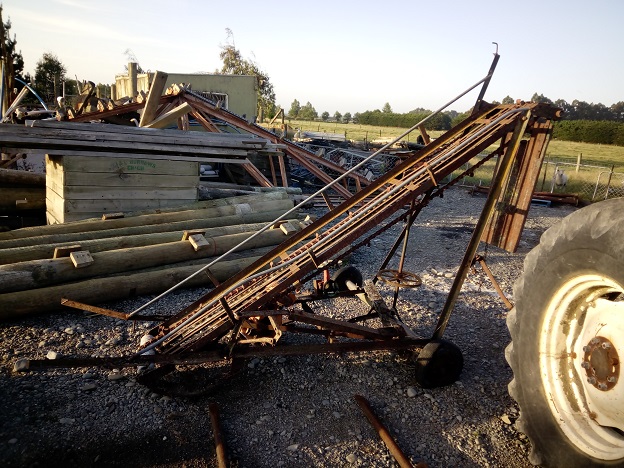
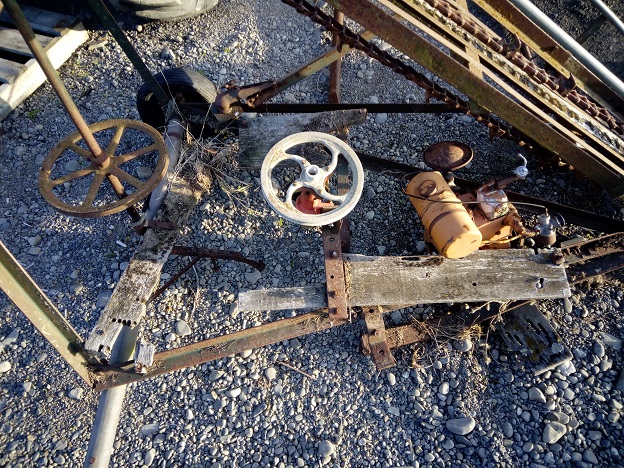
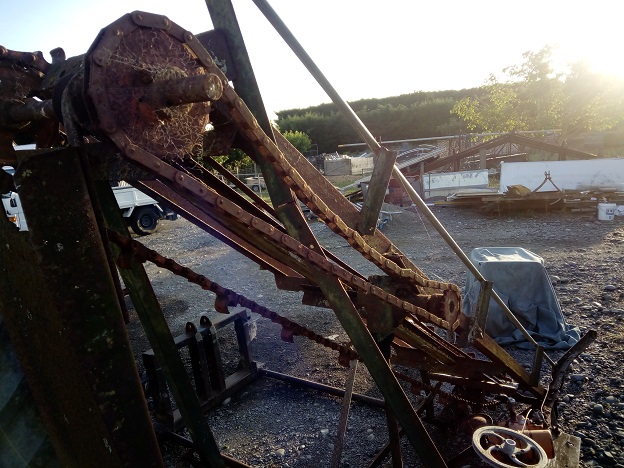
Thread dredge, this thing still goes hard for what it is. I've wanted an elevator/conveyor to work in with this to reduce all the throwing of wood. People often use modified hay elevators but they're pretty hard to find and cost a bit. Until I found this little gem when I was out looking for old bottles. Best part, it was free. It's quite the engineering masterpiece. Plans are. *Make it work. *Make it tow able with a car or ute. So how can you help? I need the back axle out of a small Japanese car to use as a ready made axle for this. It needs wheels and it needs to be cheep. I also need to find a decent vertical shaft motor, what have you got? Thanks OS pests.
1 point
-
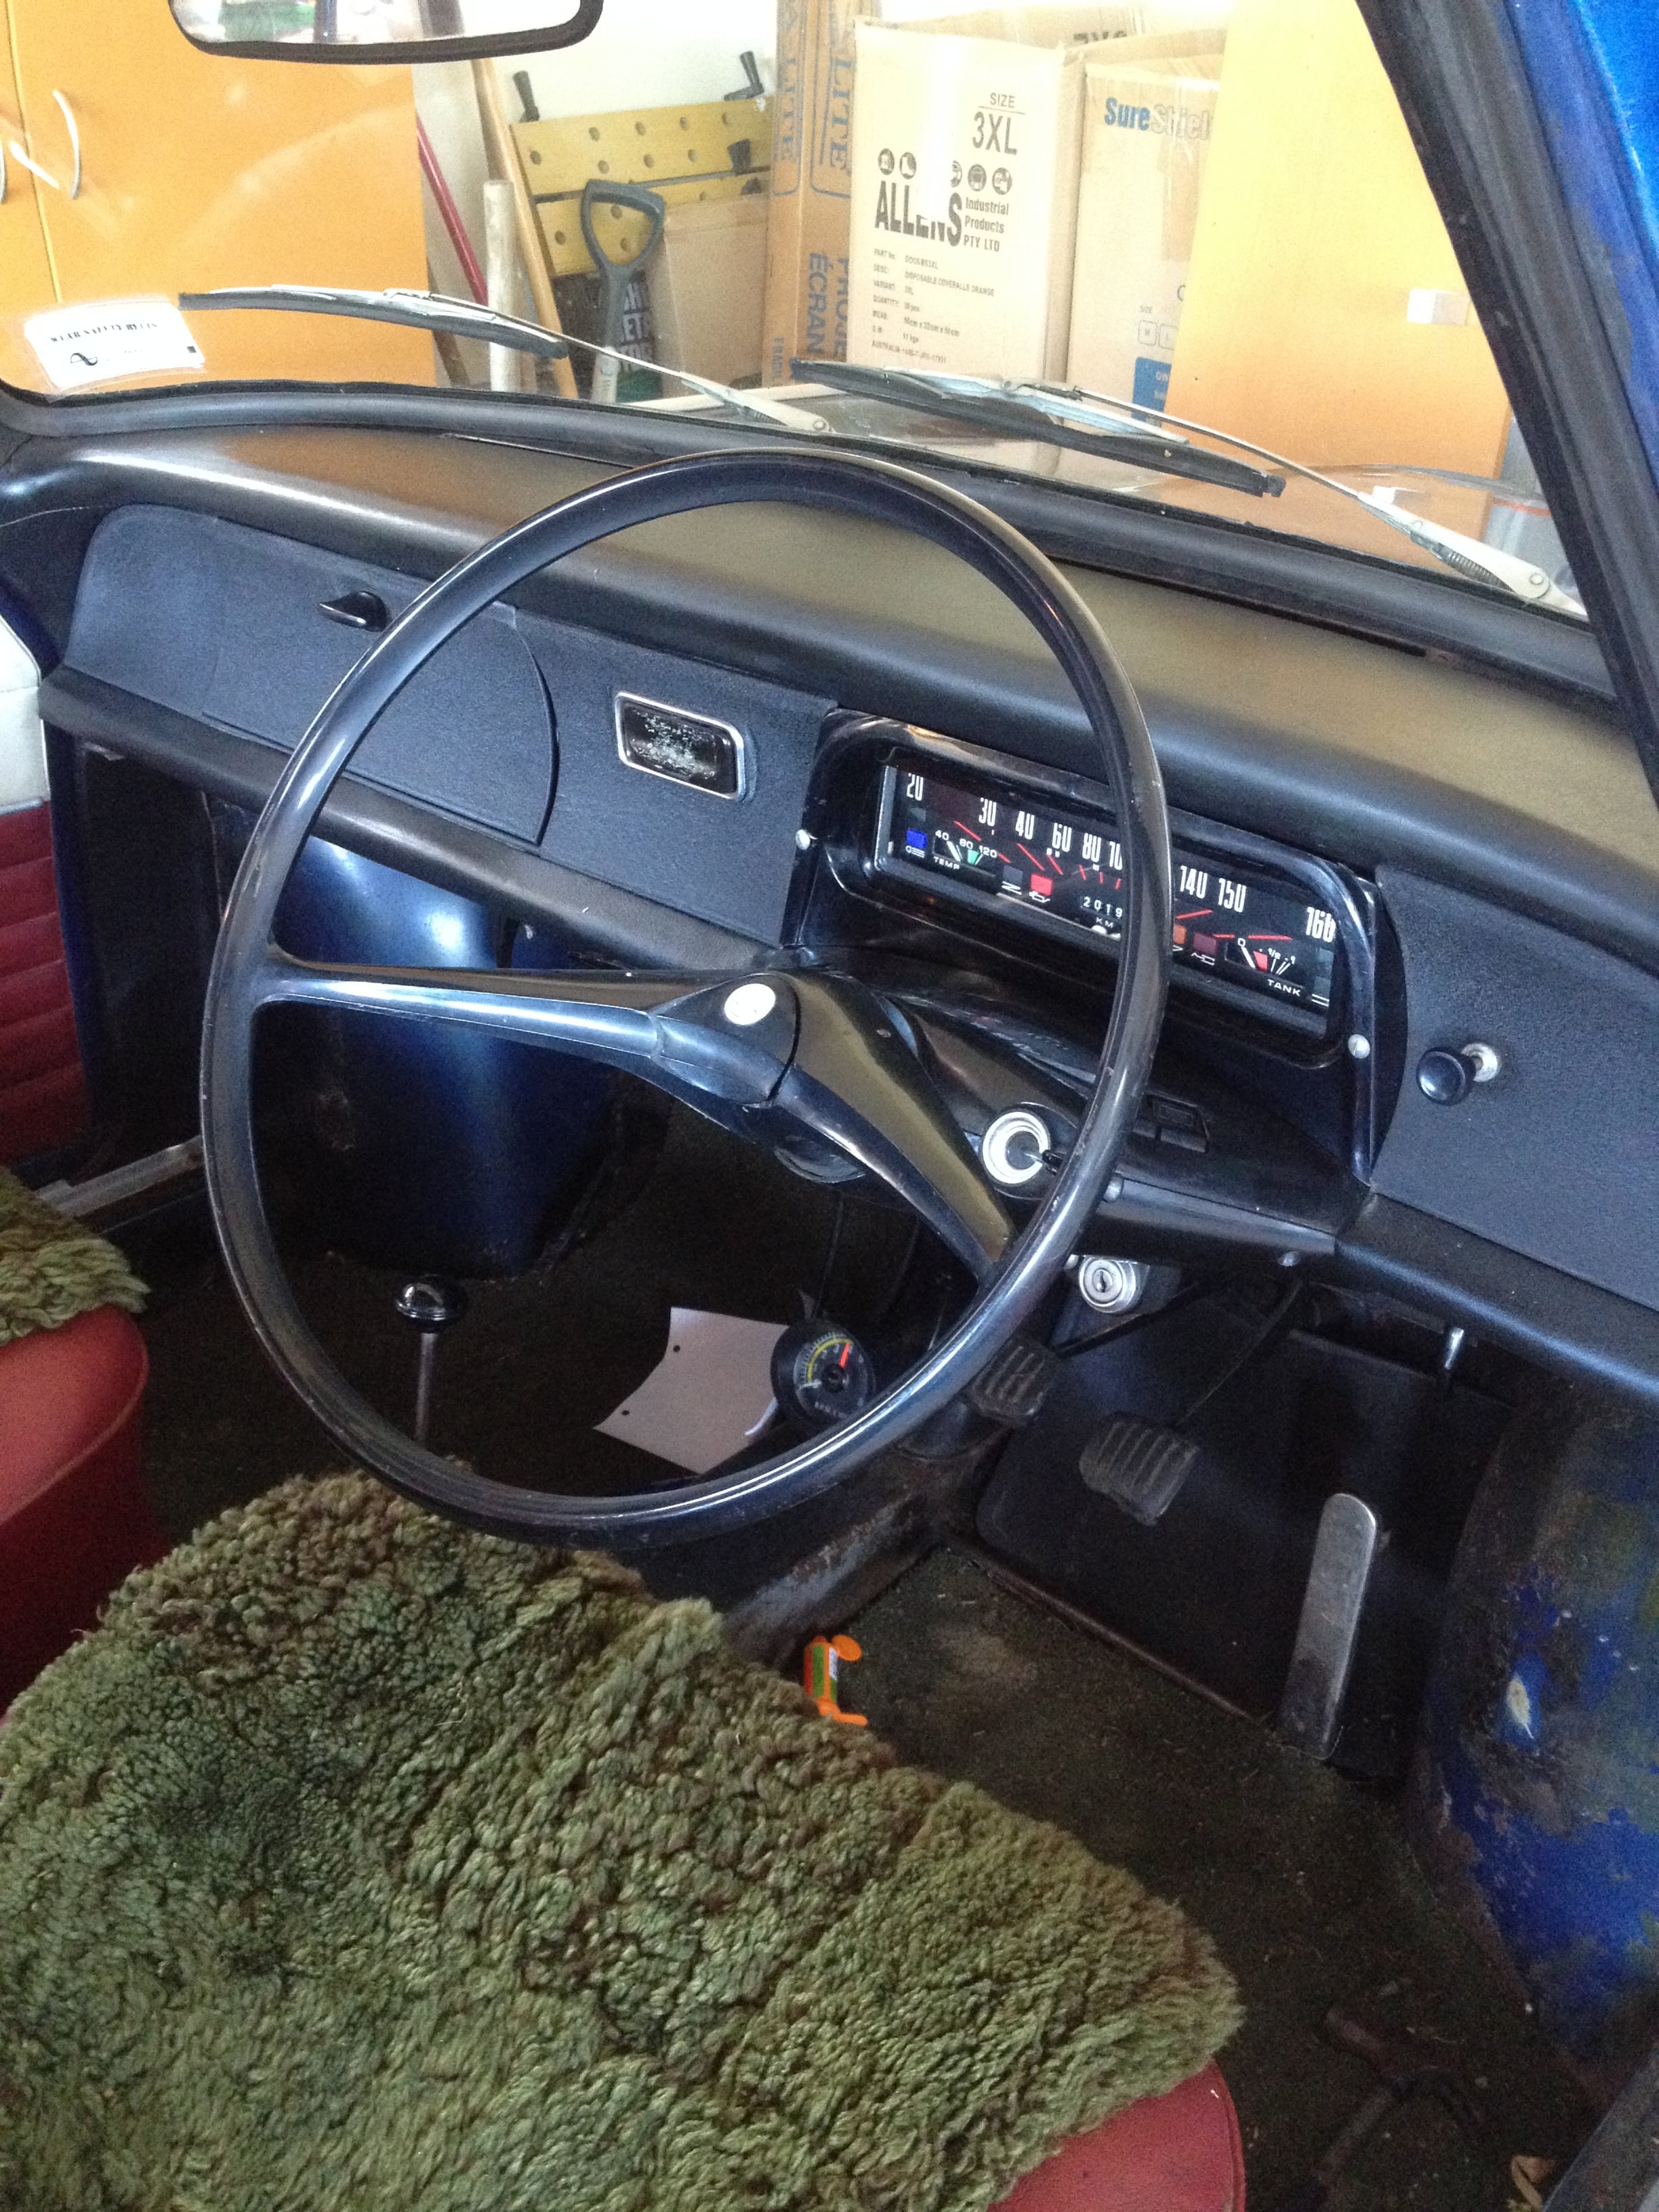
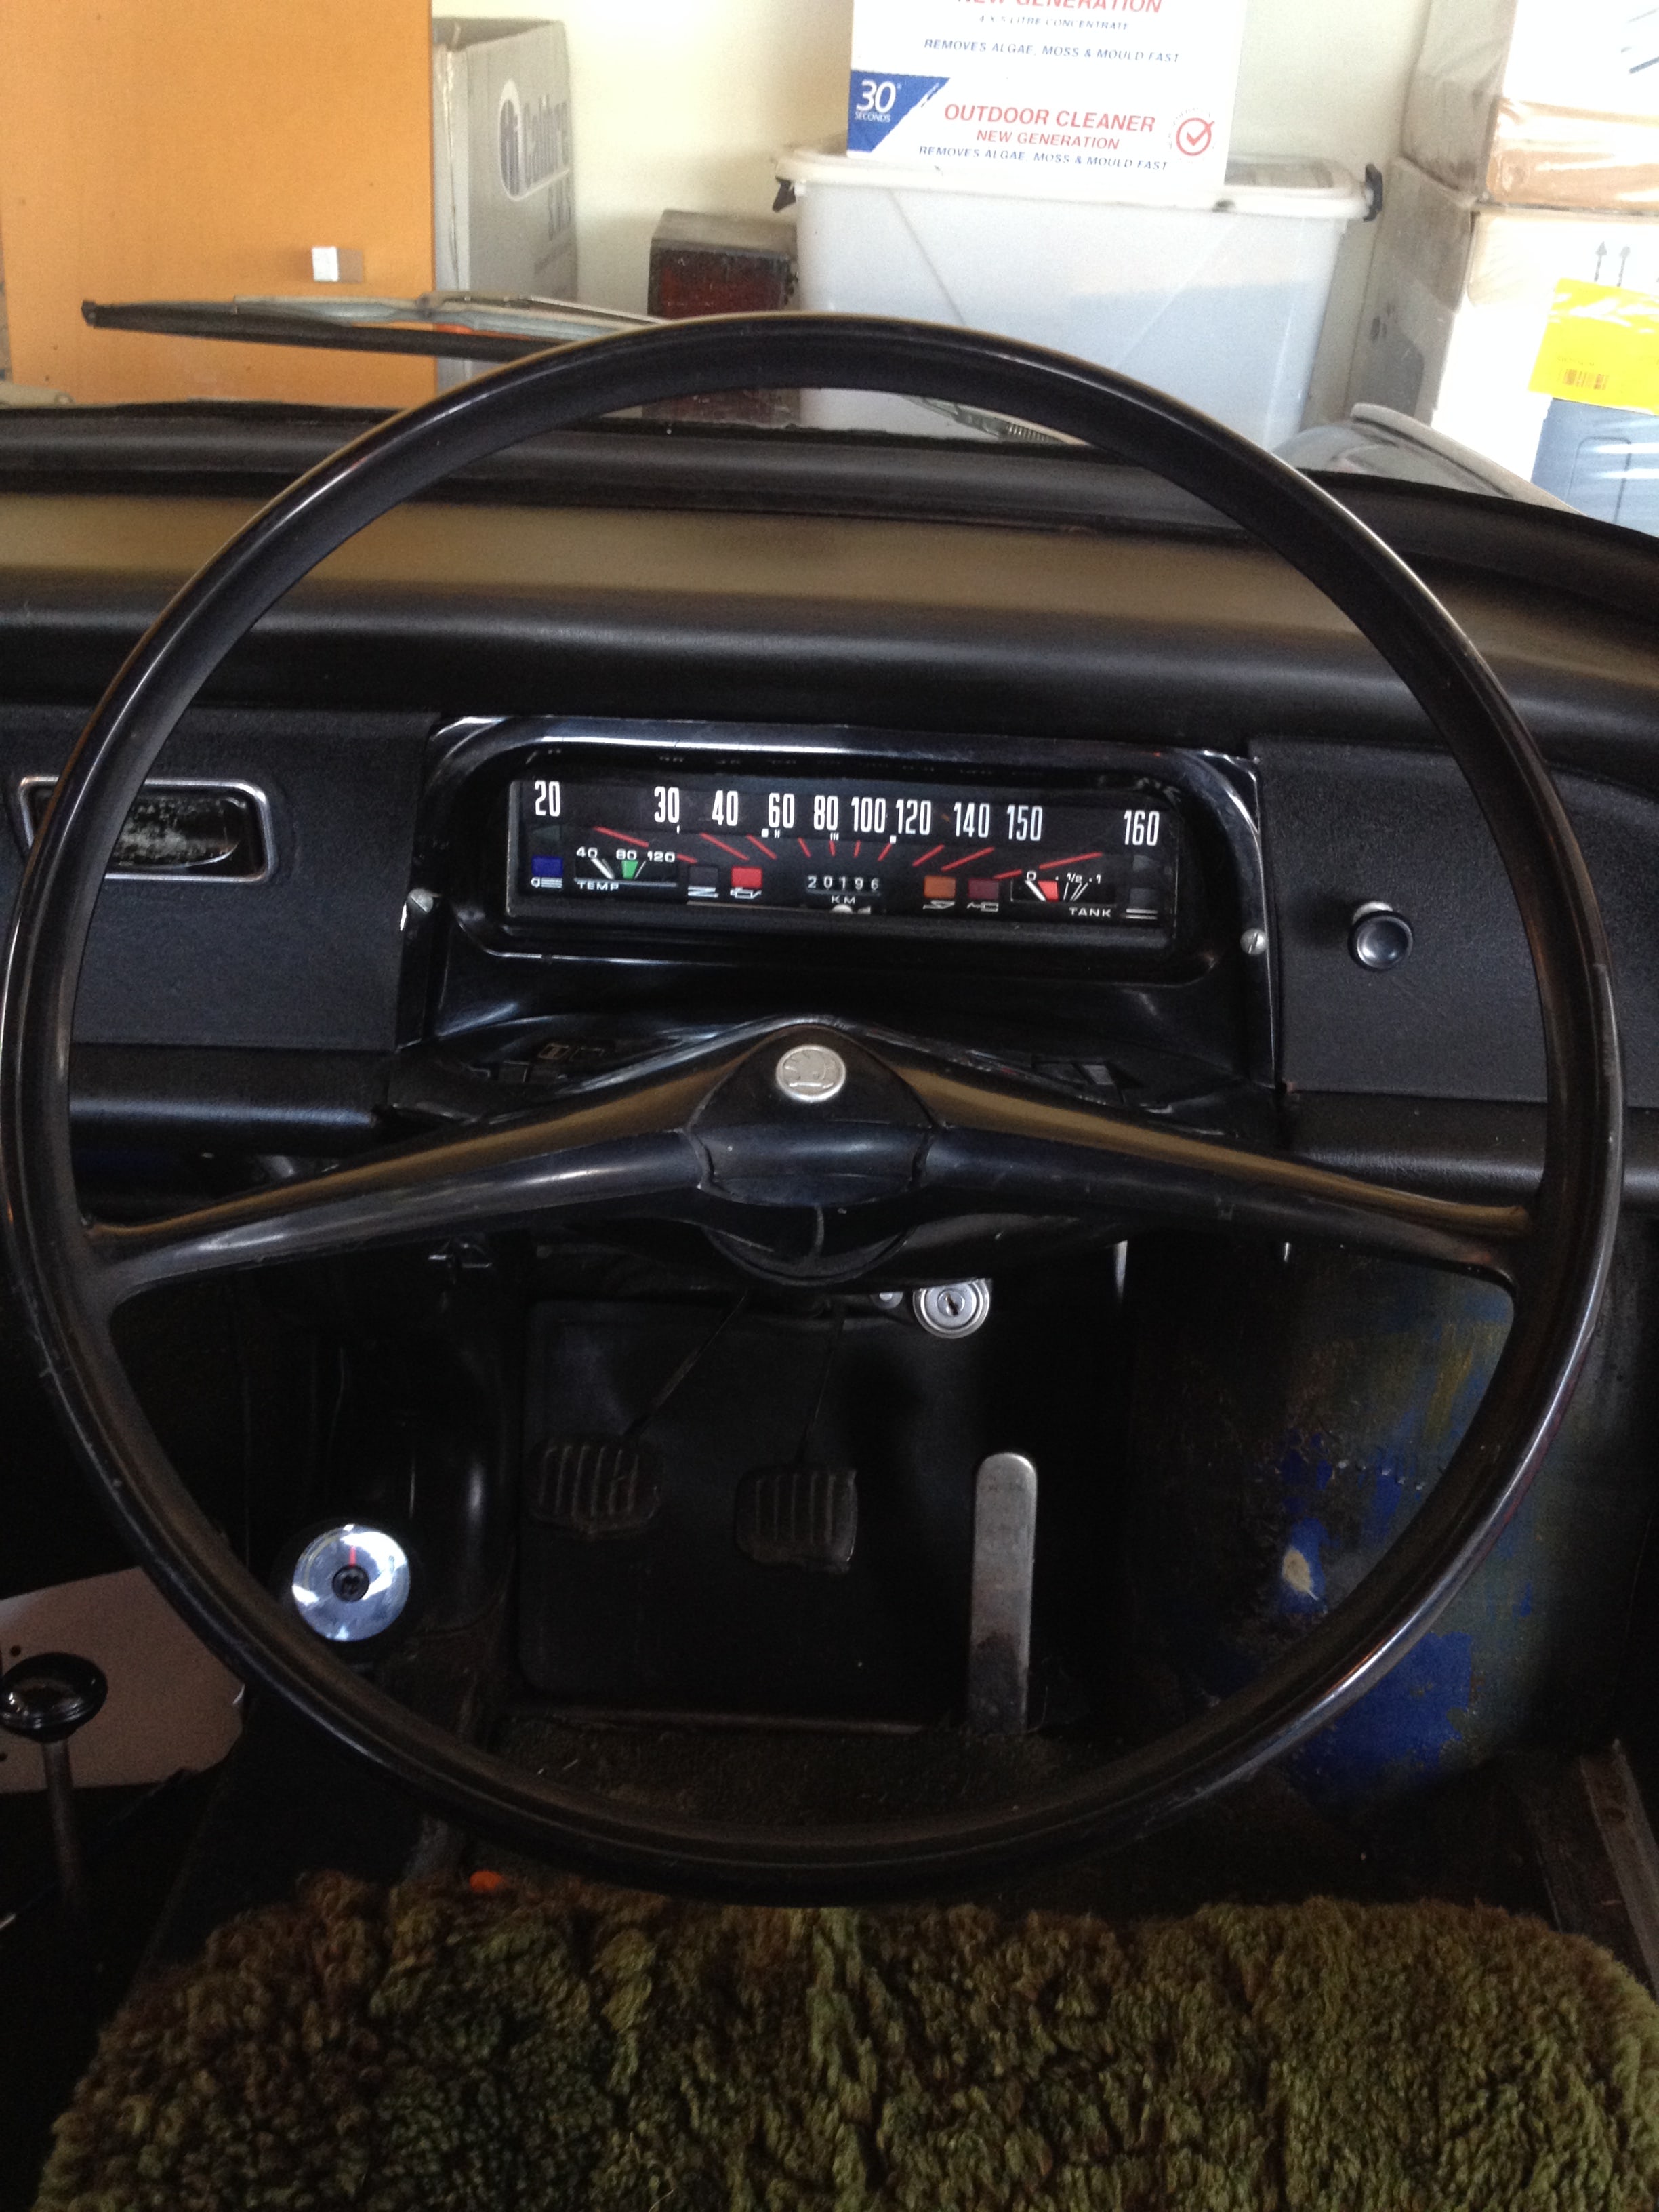
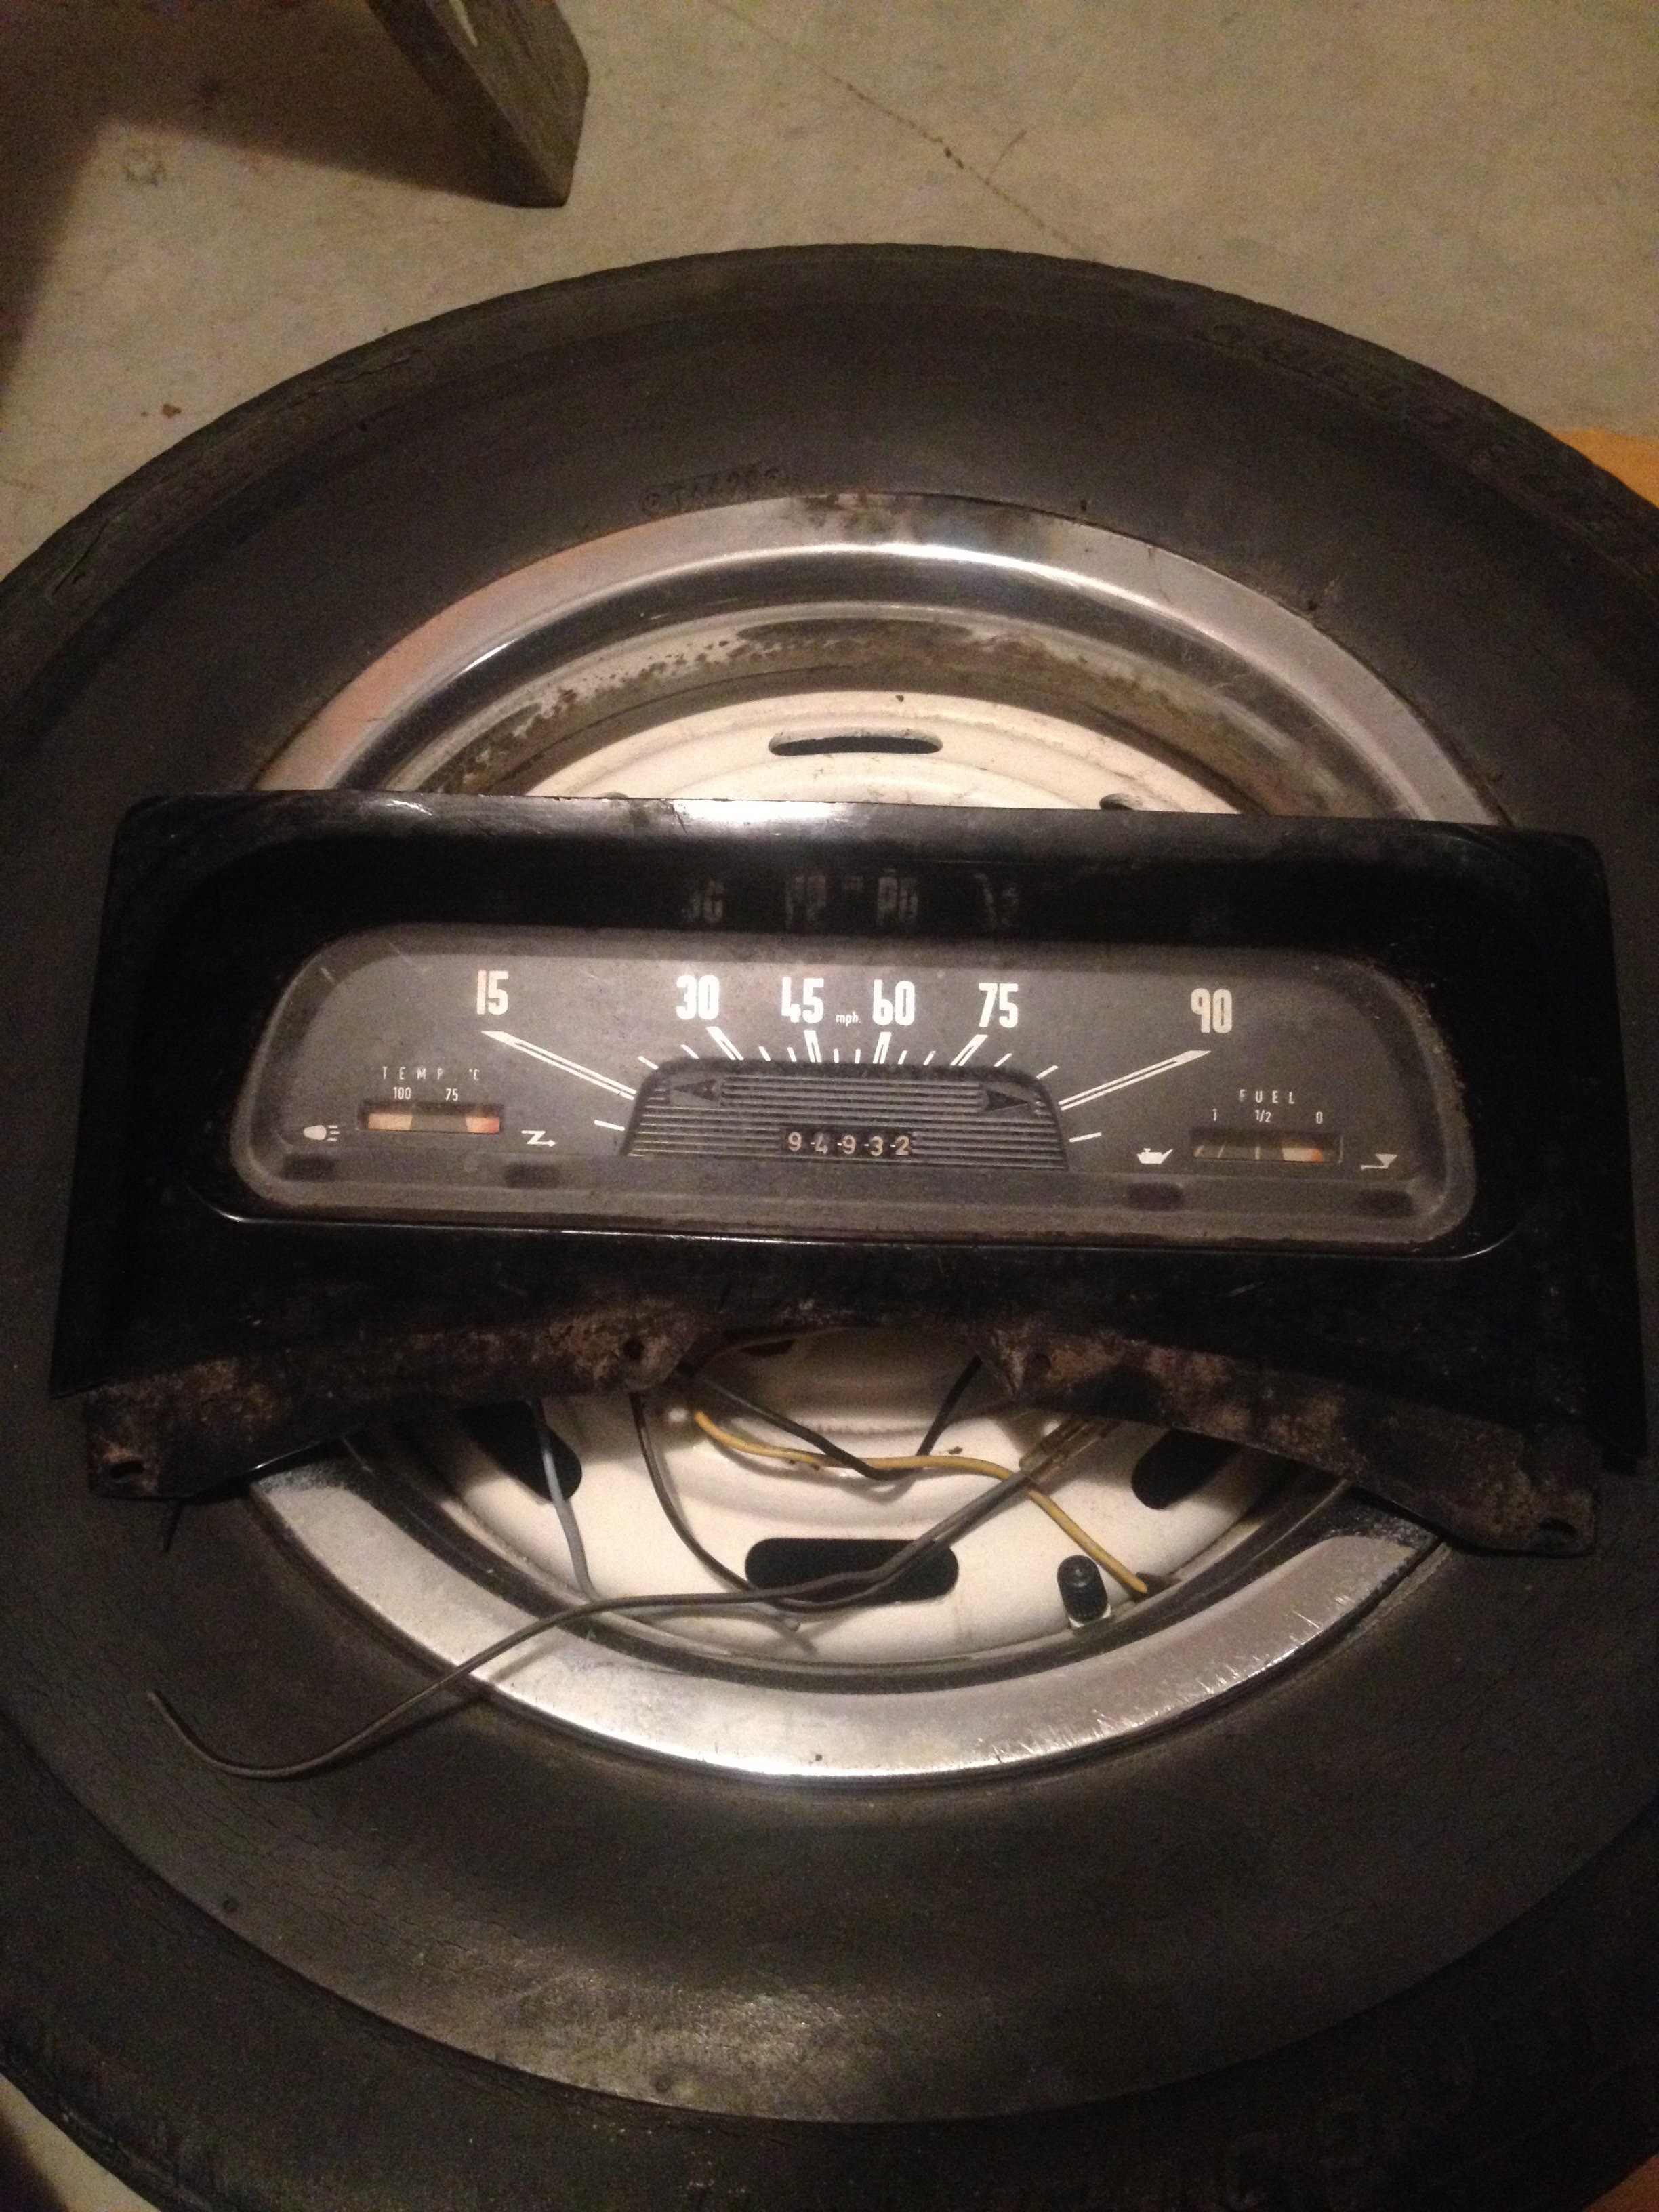
A smaller, more satisfying job has been swapping the 110 steering wheel back for the original which as it turns out is enormous by comparison. Will be interesting to see what it feels like to drive with! Might swap the speedo back to the original although this is more colourful than the old one
1 point


.thumb.jpeg.e0a4bff61111e0c8c7396950fcc94da1.jpeg)


.thumb.jpeg.384ff72c8d2b0ee0d34a7bdedb55bdcf.jpeg)


This leaderboard is set to Auckland/GMT+12:00