
Leaderboard


Popular Content
Showing content with the highest reputation on 09/03/19 in all areas
-
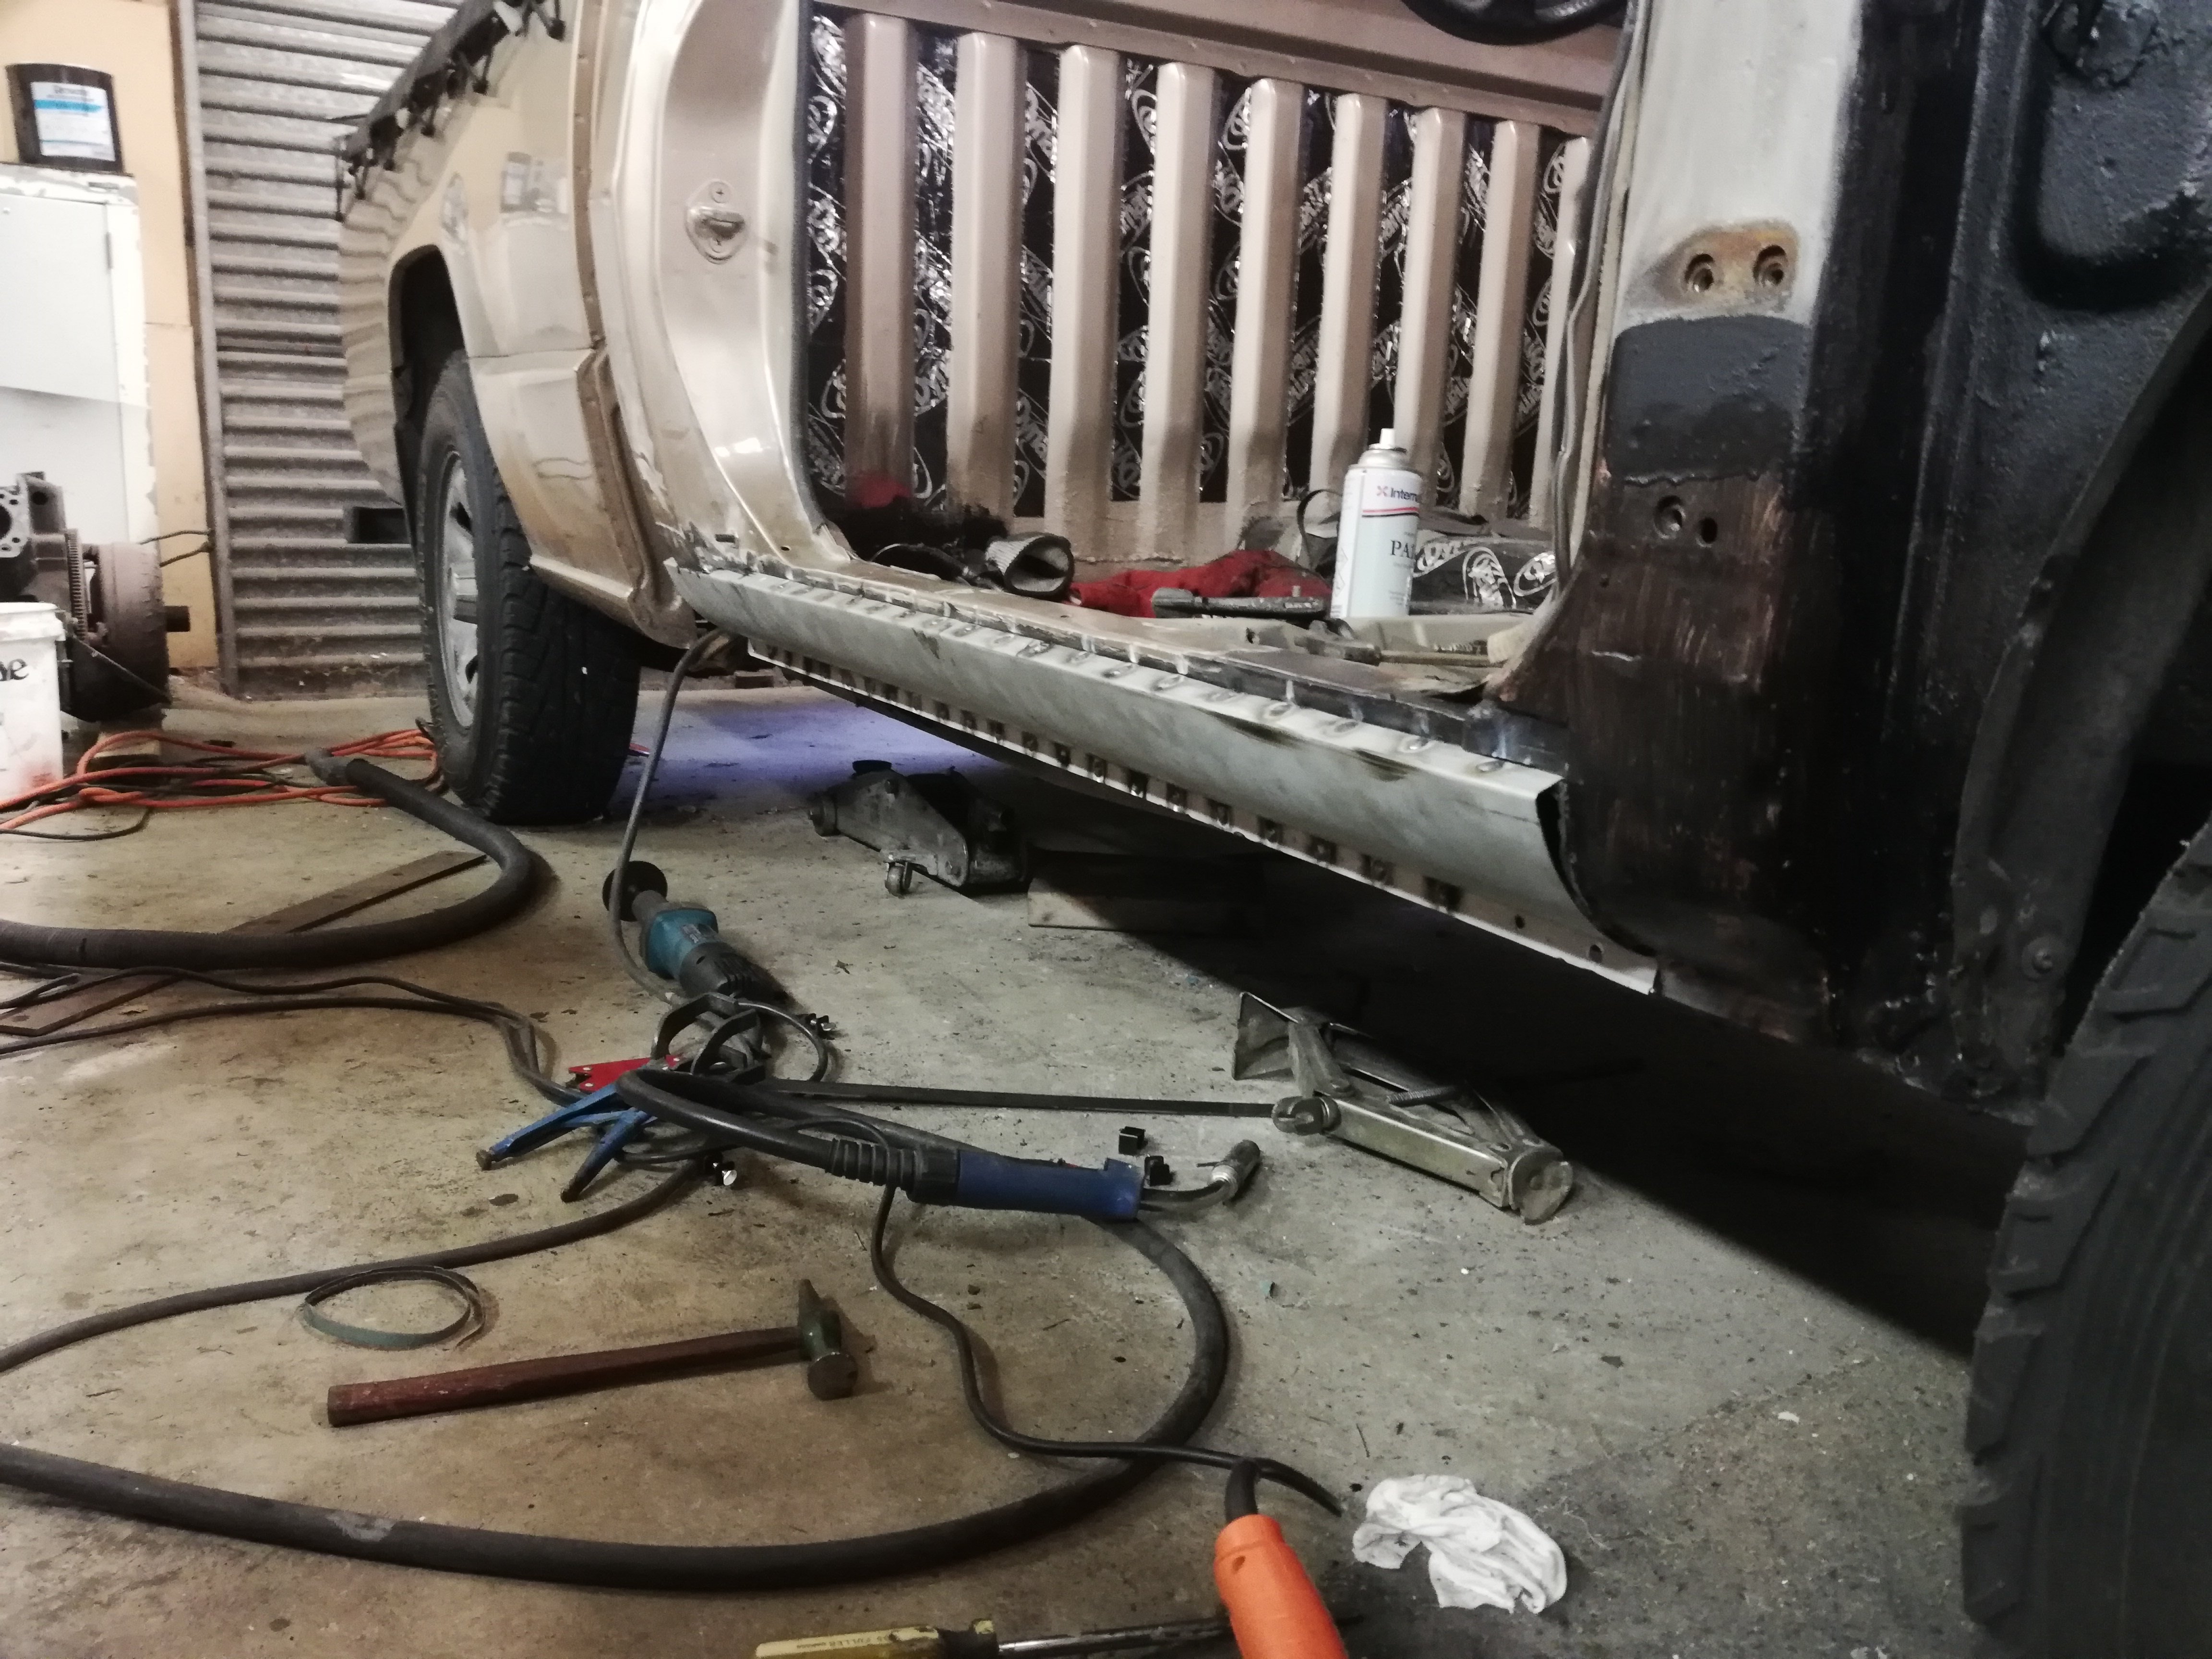
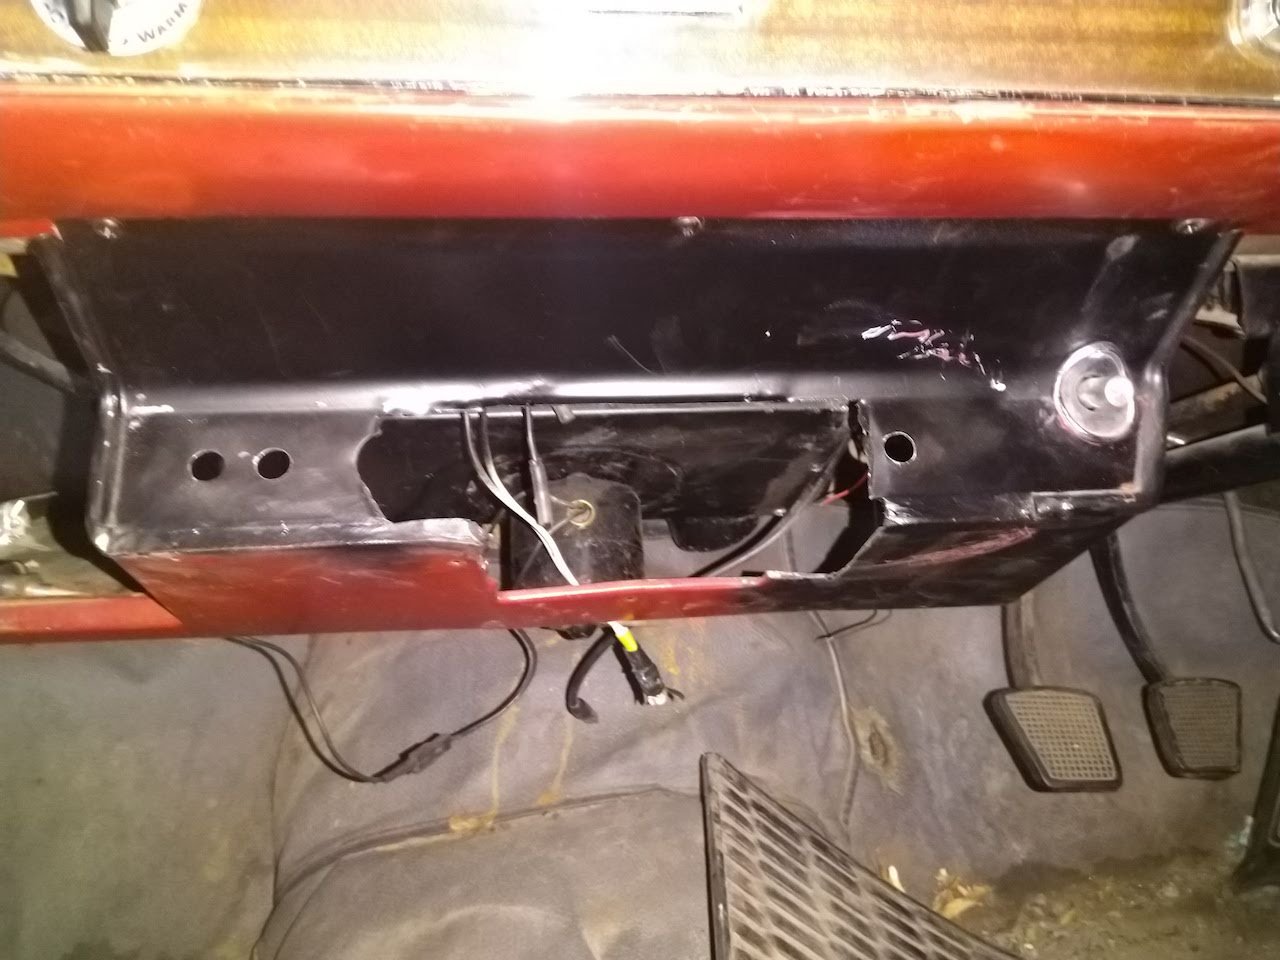
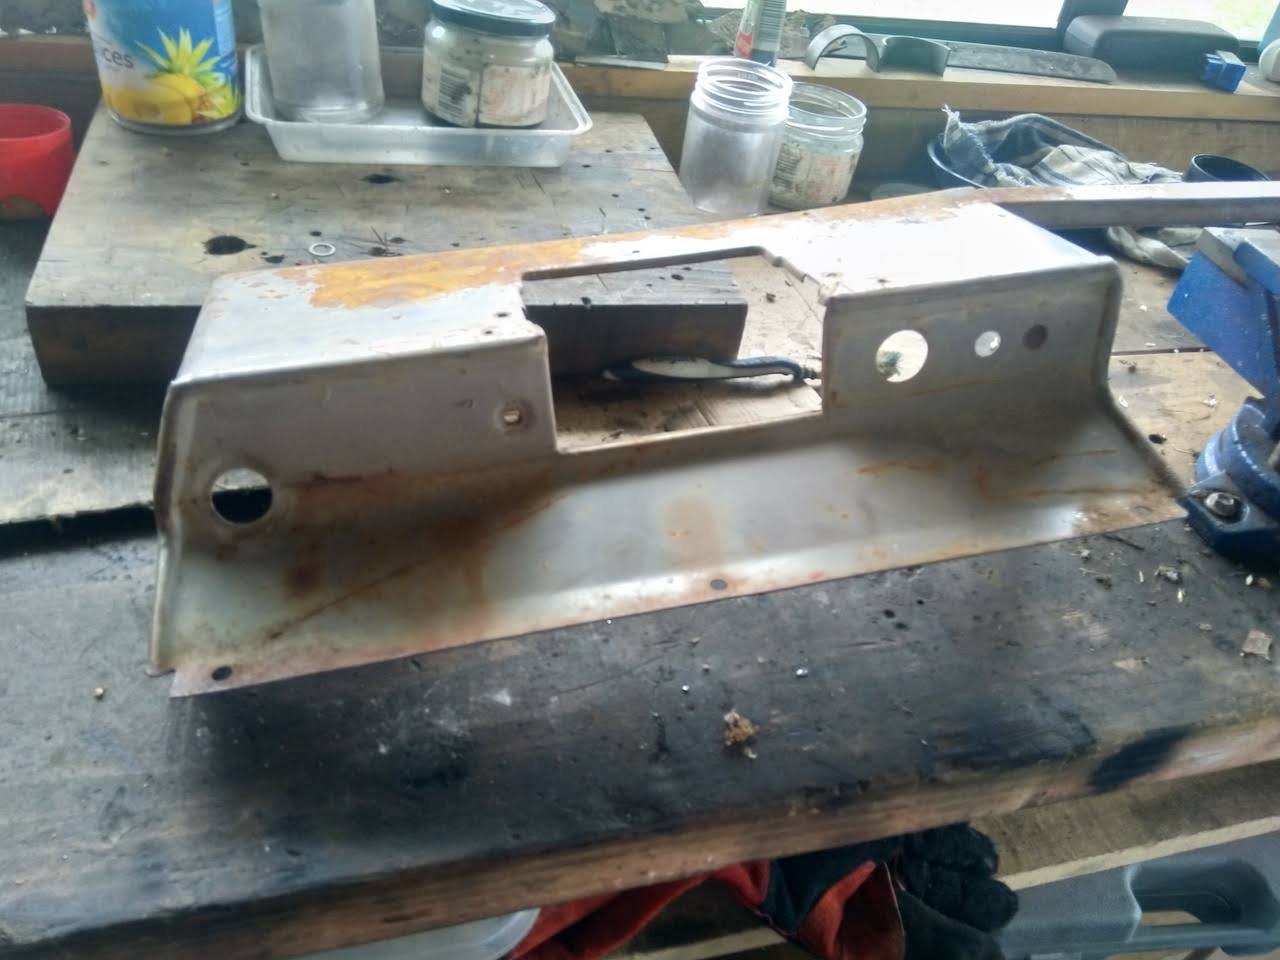
I can't get no satisfaction Except some times I do Was at a bit of a loss as to how to line the new sill up. Luckily A series engine components came to save the day. Looking at the step/scuff panel part of the door frame, it looked pretty squashed. Must have been stood in a few times. The section right in the middle where the seat frame mount is attached was unbent. So I used a rocker shaft from a 1098 Morris minor to reshape it. This must have worked because when I then set the top lip of the new sill where the old one was, the bottom of the inner sill also lined up (it was well out before) Needs another day to make a rear cab corner and join in the front of sill to the bit behind the guard
 7 points
 -
Update coming soon. Some of you may know what ive been up to over the last few years through my instagram account but i thought it would be good if i show you in more detail. stay tuned to find out more. sorry for the click bait. sorry for it being 5years between post.
5 points
-
A lot of labour in that quote. I’ve got a sand blasting gun and paint guns so will do it my self and put up how long it takes and material costs3 points
-
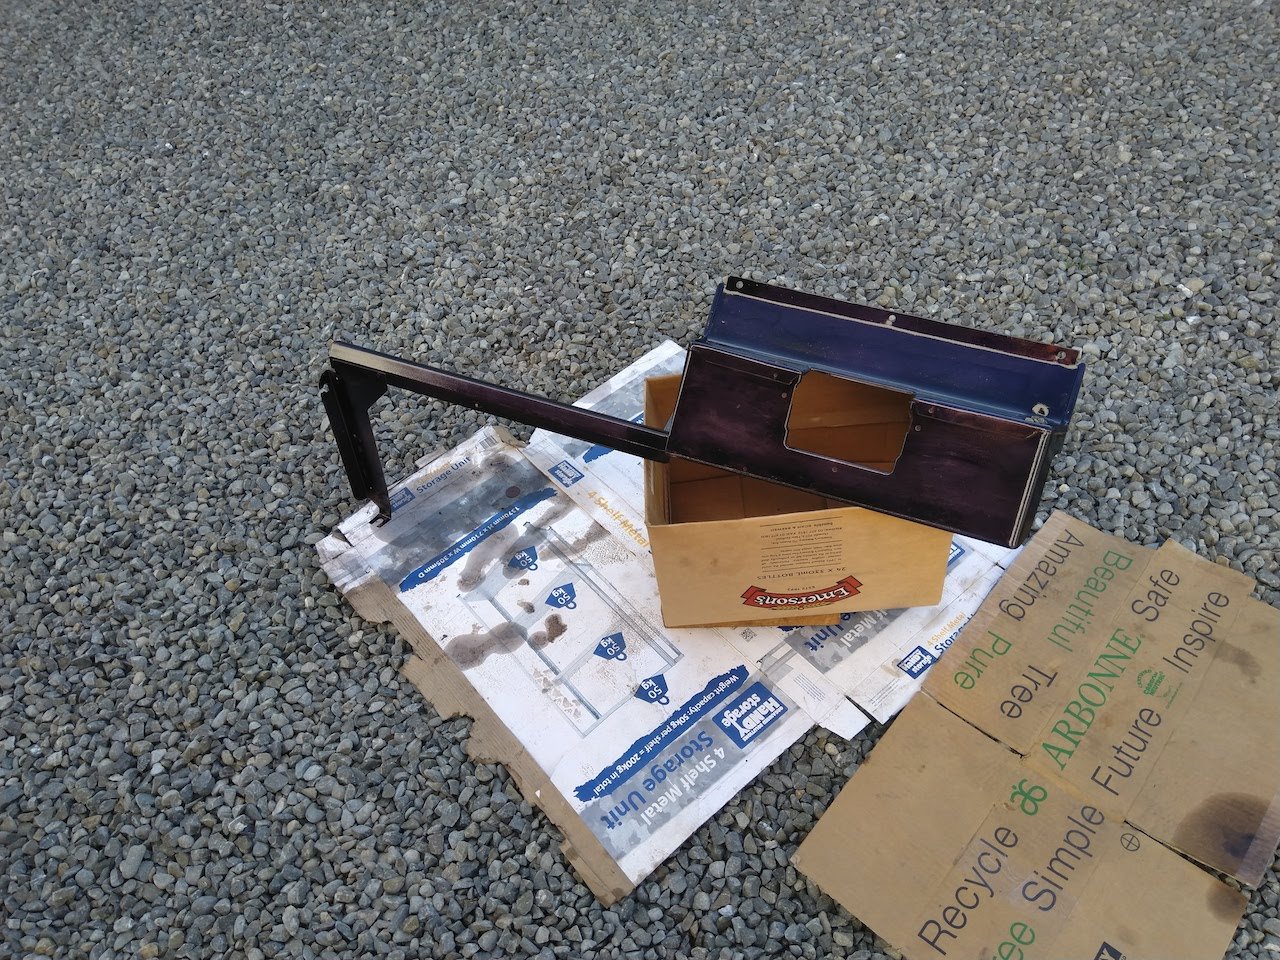
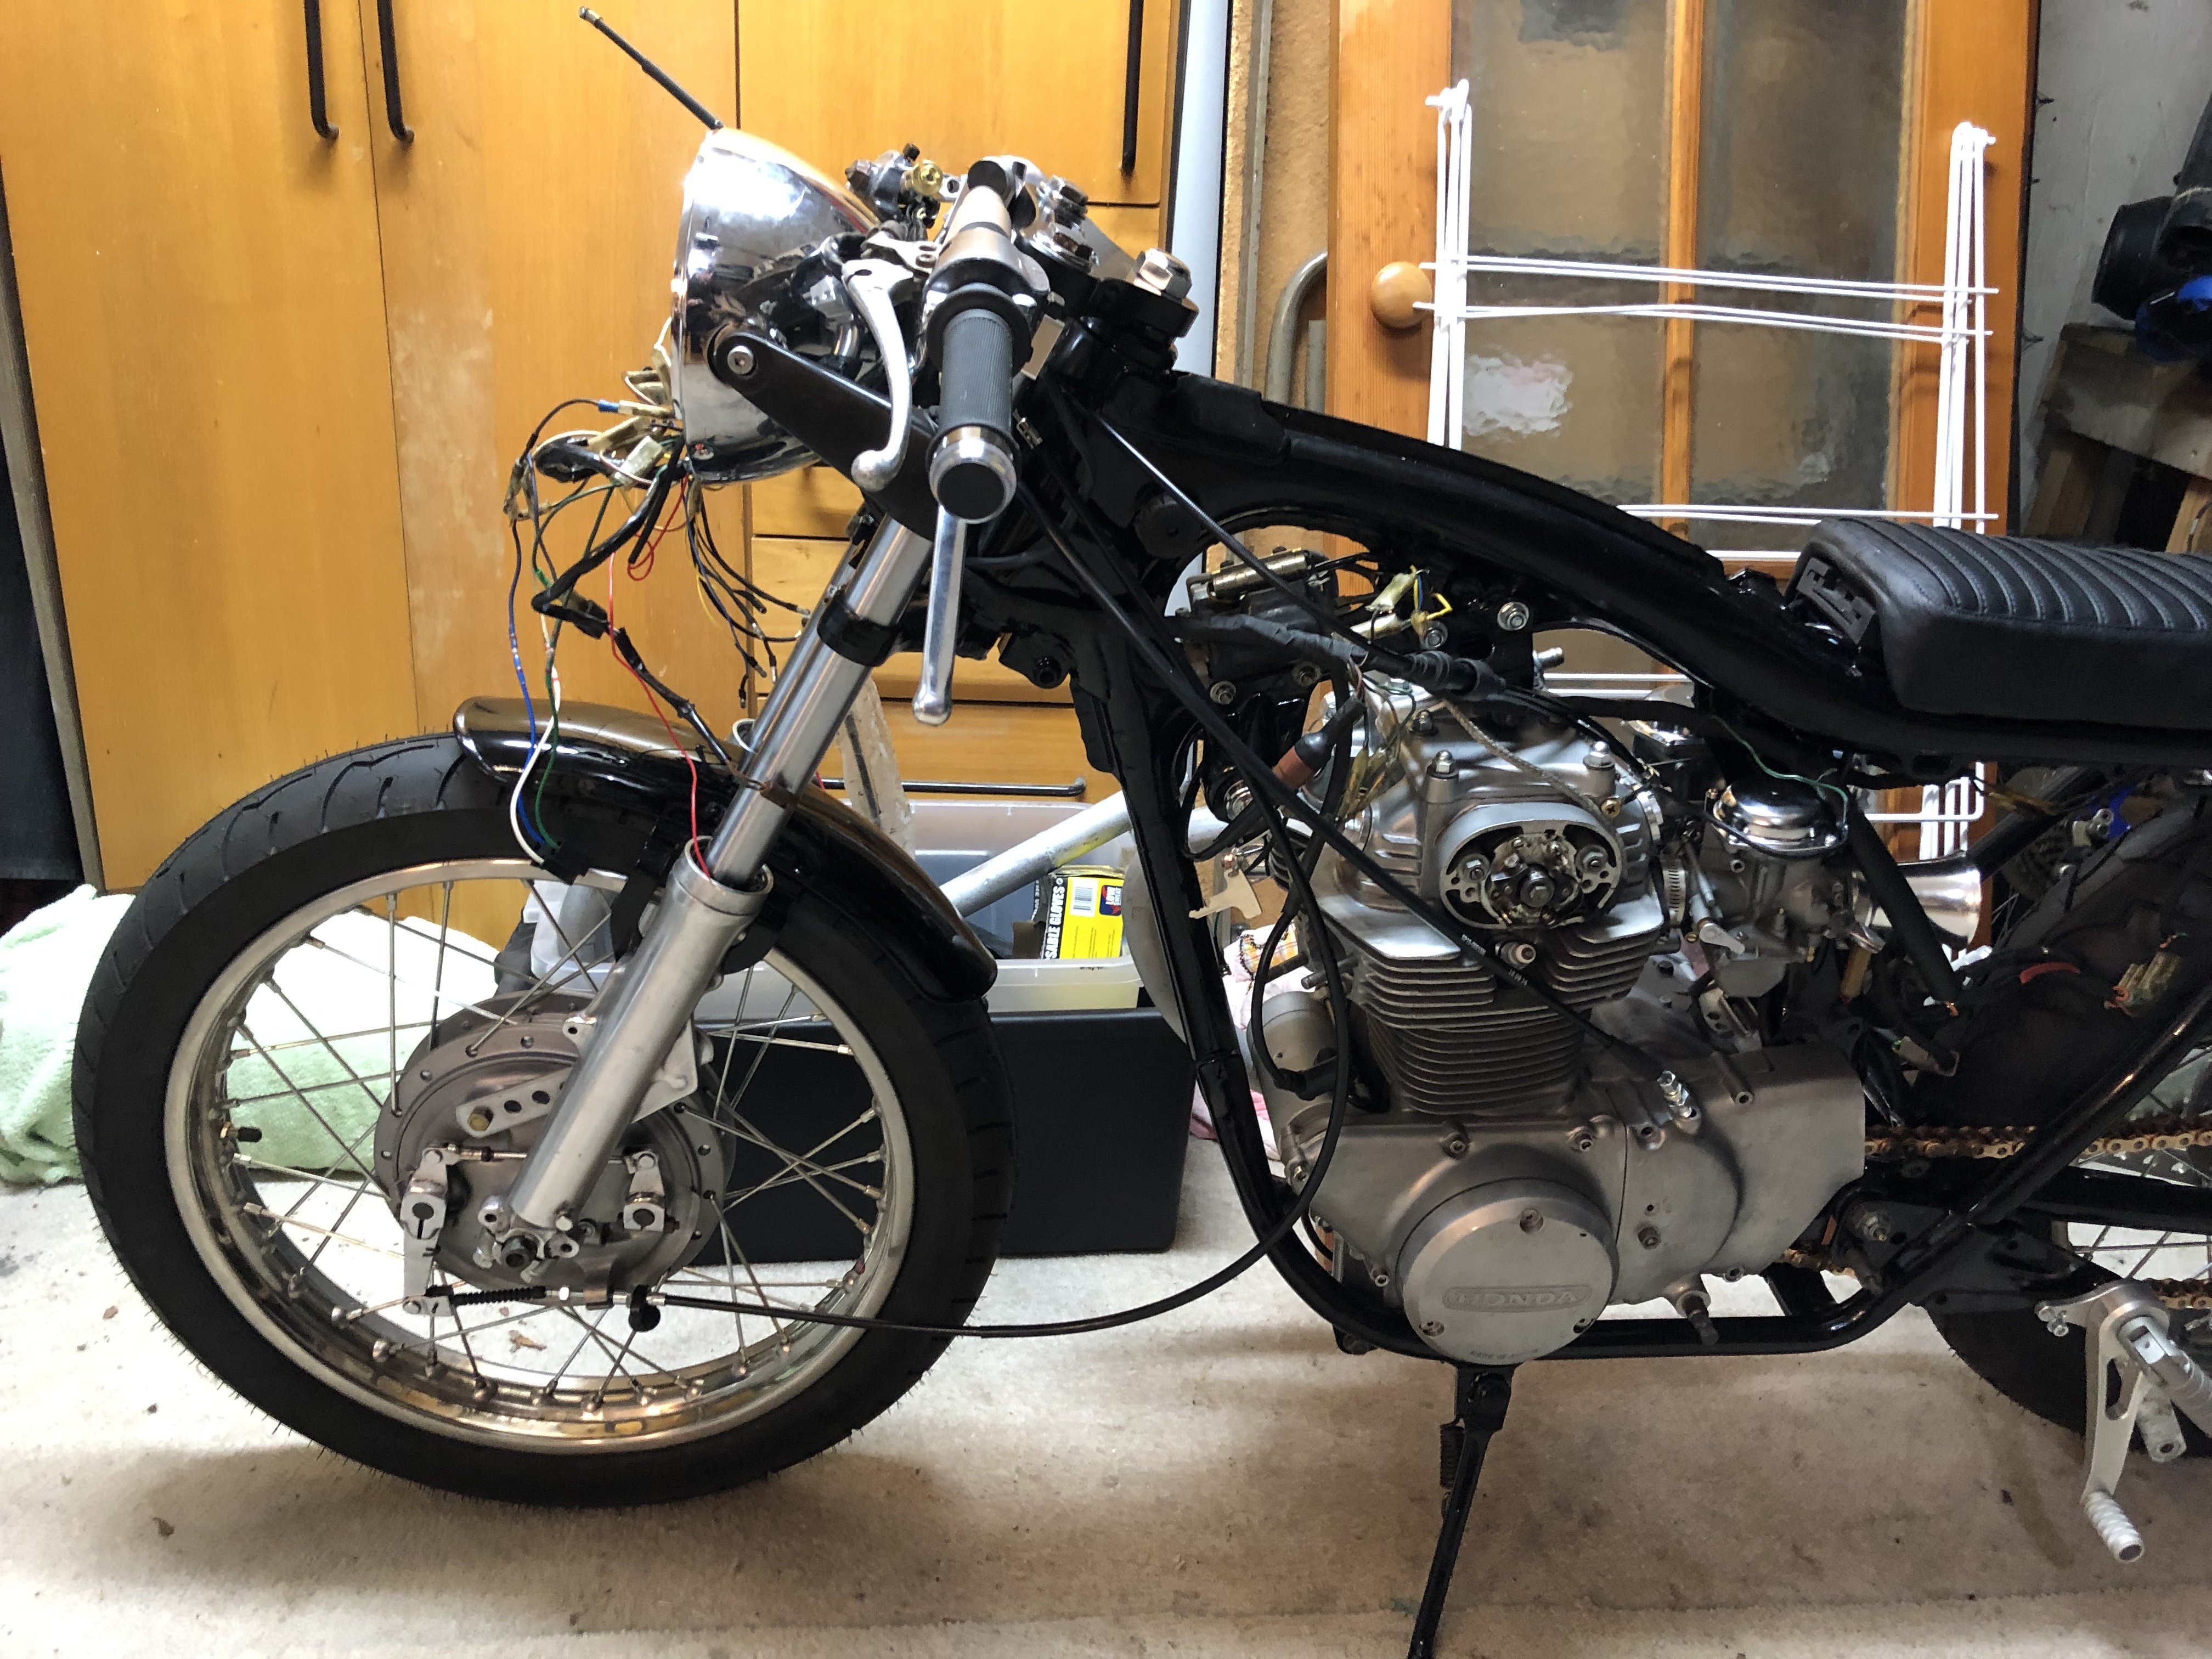
Thanks guys! It’s been a lot of work to get it to this stage. I’ve added an LED flasher unit so I think it’s something to do with the wiring not being quite right. I’ll revisit the wiring once the controls arrive from AE and try to knock it out all in one go. Super Trapp reps should also be arriving too this week as there is an issue with the exhaust and rearset brake hitting. Probably going to make new headers to get the clearances. Anyways she’s come a long way since the Trademe purchase that’s for sure!
3 points
-
Also, it tops out at 120kmh, but that feels plenty fast enough at the moment.3 points
-
This would be awesome if it didn't make so much interference.2 points
-
not the same as a KE, but in my KP i put a new feed and return into the stock plate, so tank is 100% original, just modified this bit Then i ran a filter and a pump externally, as well as some new lines for the feed and return. Another filter in the engine bay, and thats all really. works mint and was reasonably easy2 points
-
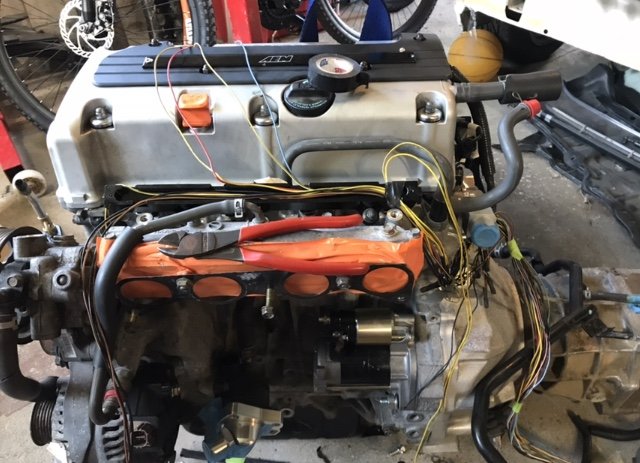
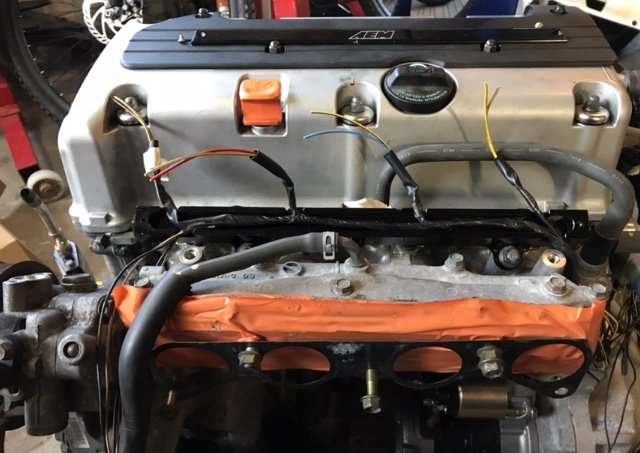
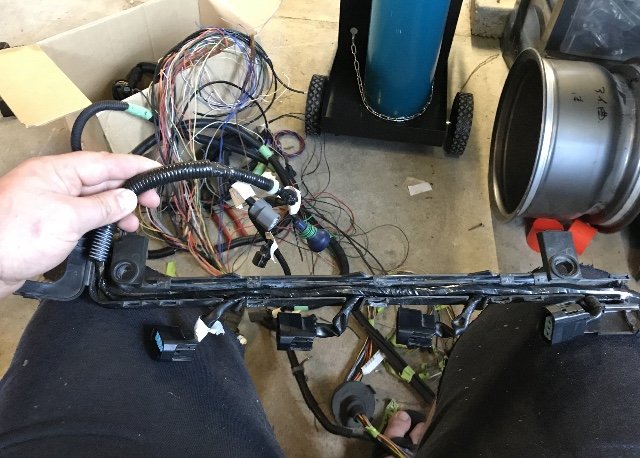
Sorted the loom out for all the sensors, coils and injections. really liking the fuel rail cable support! starting on power harness witch is a bit more tricky without it being in the hole. going to move the battery to the intake side. Witch should also free up room on the turbo side. Try find a large OEM filter box that fits in there nicely. maybe something off a later model 4wd with snorkel and large panel filter
2 points
-
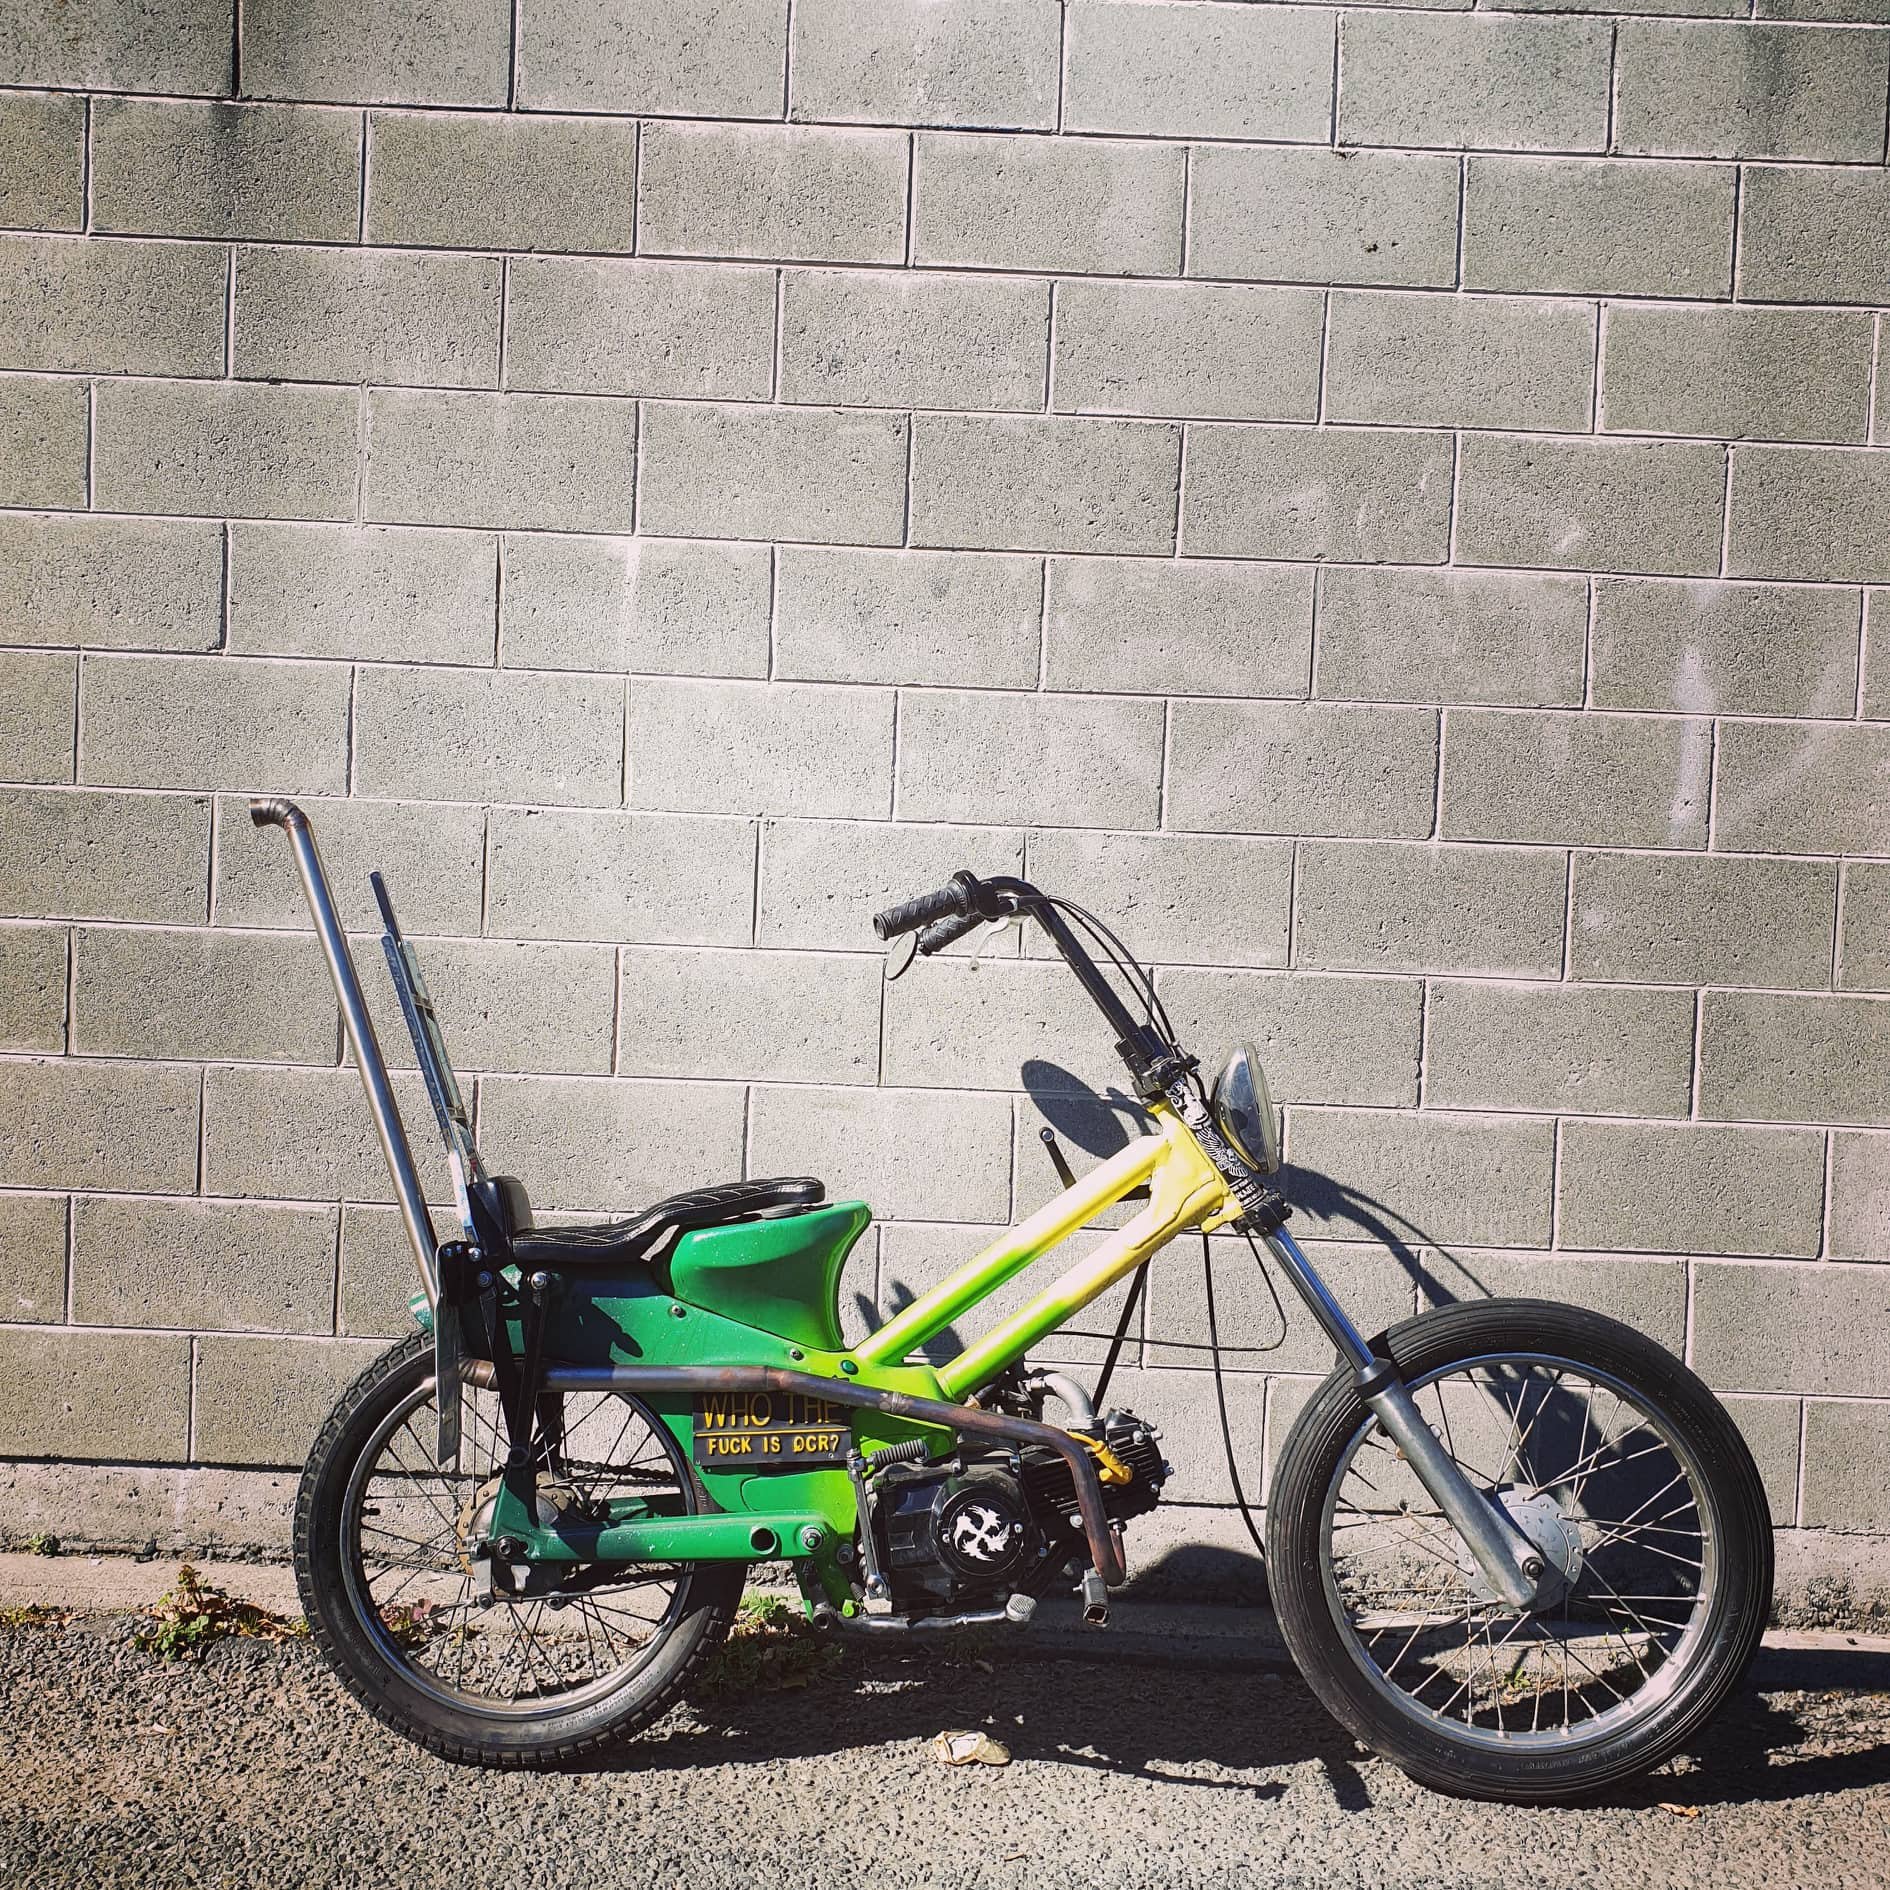
Now its done Featuring a new tall pipe from Rumbler Jesse and a suicide shifter I whipped up out of parts. Stoked as fuck with how it looks now too
2 points
-
Its still held together with G clamps and cable ties, so we weren't going too crazy, but you get the idea.2 points
-
BEST DAY EVER. I got new leads, fitted the new plugs that came with it, and headed for the hills/forest. First off it ran like absolute shit, I was cursing the new leads/plugs, but with @keltik 's help we determined I was a dingus, and had put two leads around the wrong way. Correcting this made things much better, but it wouldn't pull past around 5.5k rpm. We removed the restrictor plate, which made things bettererer, but still couldn't get past about 8k rpms. I then half covered the intake pipe with duct tape, and BINGO, spot on. It will pull happily into the late 10k rpms, which is about what this old donkey is meant to do. Fucking stoked to get it running well so quickly. And shit me, 75ish hp seems like a lot in this thing, it's quite scary. Thrashed around in it for a few hours with pretty much no issues, apart from grub screws in the drive sprocket coming loose. There's a few small improvements to be made, but pretty minor. I took a couple shitty vids which I'll slap up in a min. Pretty stoked it didn't disappoint me after all these years!2 points
-
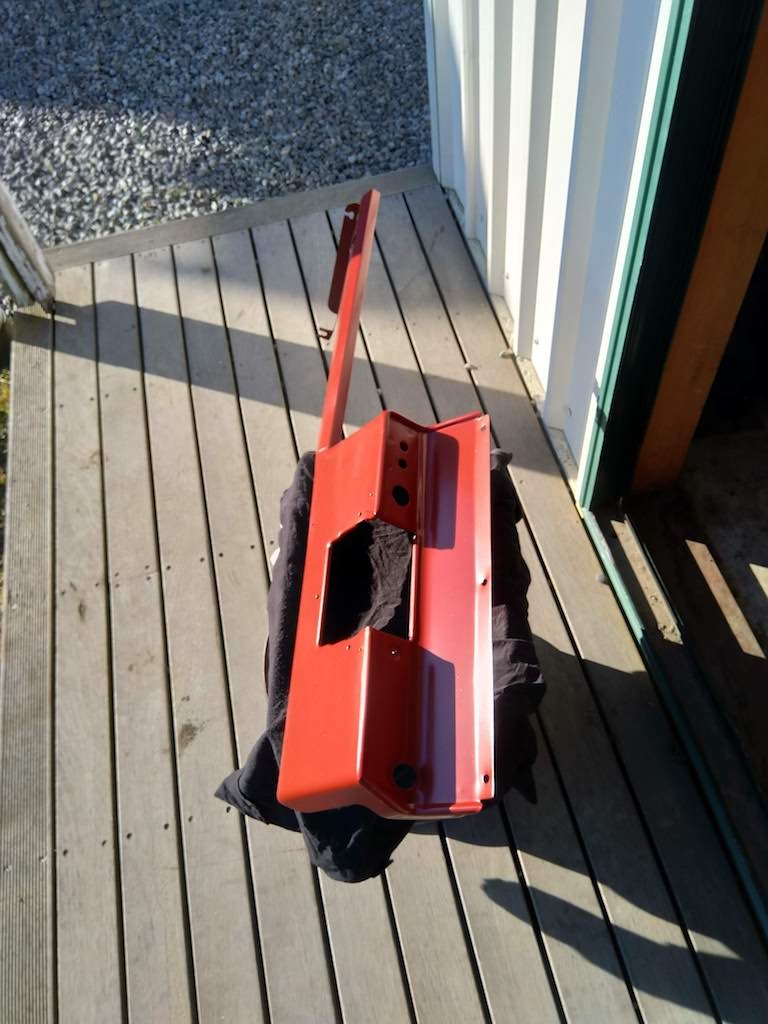
Finally kicked this thing into life this arvo. Started easy as and sat there idleing like a champ. Stoked the motor is working as it should have. One step closer to the DGR ride! Still have so much to go, mainly wiring as the indicators don’t blink, starter motor is dead, rear set linkages etc.....
2 points
-
Does this add horsepower?
2 points
-
Stripped most exterior stuff off, except for the doors. Have cut off the a-pillar rain gutters after ajg193's suggestion, cleaned up all the rust underneath and plug welded them back on. Found some spots of rust on the hatch after removing the window. Most of it is just surface rust. Got carried away and stripped all the paint off the exterior side. Previously someone has stripped it and gone over all the rust spots and ground them out. Which I wasn't too happy about, but it seemed to have stopped it rusting further. Has a little patch welded in on the lower right as well. This top bit, just below the water squirter had a few small holes. Cut it out and made a patch to weld in, after I cleaned up the rust inside and painting it. All welded and cleaned up. Picked up a new engine! 4AGE 20V Blacktop!!! And a J160 6 speed. It already has the SQ Engineering adapter plate. The clutch/pressure plate and starter is already set up ready to bolt the two together. Pulled out the old 4K. Empty and dirty engine bay. Gave it a steam clean, came up heaps better. Test fit of the J160, definitely going to need to pull out the grinder! Laser cut out a 12mm stainless exhaust flange. Planning on building some high-rise headers at some stage. Ordered some goodies from SQ Engineering. Bought some Cusco AE86 engine mounts. Also have an AE86 water pump set up and some other bits on the way.2 points
-
Some goodies arrived during the week, so it was time to get under the Tasmin and rip out some hose. Since working under cars on stands sucks, I had another go at getting the car up on the Quickjacks. This time I was much more successful. I had to use the jacks sideways (an approved method, and the same as I used on Snicket) The reason I wasn't so keen on this initially was that the exhaust hangs so low I wasn't sure it would clear the frames. It did. Just. With the Tasmin in the air, it was much easier to roll around under it on my creeper. I started to rip the old fuel hose from the tanks out. No photos of this process because it was messy.... First I disconnected the feed to the pump. This is from both of the tanks, so I had a 10L fuel can ready. I managed to spill a fair bit, but got it into the can in the end. I filled up with 10L the other day, and about 9L or so came out. Some of that difference would be on the ground (and my arms), but it confirms that the tanks were bone dry when I got the car. The hose came out easy enough. It was worse than I thought though, every section of hose was seriously perished, with cracking all over it. The hose also smelt like fuel on the outside. There were some nasty splits in the ends of the hoses from each tank too Bend the hose, and it isn't pretty The new hose is Continental J30R7 5/8" fuel hose. This is a low-pressure suction feed, so didn't need to be a high-pressure hose, it just needed to be high quality. The hose walls are thicker than the old Aeroflow 400 series hose. The old Tee piece is made from a bunch of Aeroflow bits. In the interests of simplicity, I replaced it with a 5/8" solid brass Tee Old mate wasn't too hot on cutting ends straight, so a couple of clamps were hanging over the edge. Not best practice. The new Tee section And installed into the car. The two tank outlets are very easy to access And the Tee hangs above the drive shaft (and there is evidence that the old setup had been in contact with the driveshaft at some point!). The zip tie is there to hold it up and clear of the shaft. The hose was routed slightly differently to simplify the route, and then cut to length and connected to the pump. The hose was zip-tied to the chassis in a couple of places to secure it, making sure not to pinch the hose as it had been With the tanks connected I want to replace the fuel filter and inspect the accumulator. The whole lot (pump, filter and accumulator) are mounted on a plate above the chassis, in front of the LH side rear wheel. On the later 280i the filter is mounted in the engine bay. The black one is the accumulator, and the silver one is the filter. The pump is out of shot to the left (with hose removed). This is the other side. Let me illustrate the fuel setup with some coloured arrows. Fuel comes into the pump from the tanks (orange), out of the pump and into the accumulator (blue), out of the accumulator and into the filter (yellow) and finally, once filtered, out of the filter and along hard lines to the fuel distributor in the engine bay (green). These hoses weren't too bad visually, but no point in leaving them there. One quick check for seeing if your accumulator is stuffed or not is to disconnect the vent hose from the back of it, and see if fuel comes out. Mine was full of fuel. This vent hose should be dry, because it's only to help equalise the air inside the accumulator, and shouldn't have any fuel contact. The fuel is (usually) separated from that side of the accumulator by a diaphragm. If the diaphragm splits, it lets fuel through and back into the tank instead of holding pressure. My accumulator is stuffed. Thankfully I had planned to remove it completely and will be using new fuel hose to bypass it and route the pump straight into the filter. The fuel filter has banjo fittings on it. The inlet converts to rubber hose, whilst the outlet is to a hard line. Some of the hose clamps on the fuel hoses had been installed by a scumbag and weren't accessible from the underside. I'm not too sure how they were even done up, unless it was off as a complete assembly and clamped whilst on the bench before fitting. Since I wasn't using the hose again I chopped it off, unbolted the accumulator and pump and removed the lot. The accumulator looks very old and probably original to the car. The filter had been replaced, but it had a date of 2005 on it. The receipts say that the "recently replaced" filter was leaking back in 2011, so either it wasn't that recent, or it was old stock when fitted. I ordered a filter online based on the original filter numbers I had, and even with triple checking, it's wrong. Yeah, that's not gonna fit. It's possibly the correct filter for a later car with the filter in the engine bay. Working off the number on the filter, I need a Ryco Z399 instead. One has been ordered, along with a Z71 oil filter. Unfortunately that leaves me at a standstill now. Hopefully the new filter will be here this week and I can fit it after work one day. In the meantime I had ordered a new air filter, so went about fitting that. I had previously checked the filter and noted it was dirty, and the wrong filter. The old filter had rounded corners, so left an unfiltered gap at each corner. The correct one for the early airbox is a Ryco A1345. No gaps Parts bin special I'll probably lose some +6hp gains from closing up those gaps, but at least I know its right, and won't be sucking in unfiltered air anymore. Sigh. Sometimes I just wish some people wouldn't touch cars. A little knowledge is dangerous.2 points
-
Hello guys n gals, currently working on a long time project, just stuck on fuel delivery, converting from carb to efi, n hoping there's someone to point me in the right direction. The motor has been changed from a 2T to a 2T-geu, I'm just wondering if there's a set up I could do without changing the stock fuel tank?? Don't mind getting a surge tank etc. just needing some ideas. thank you
1 point
-
@shizzl I've messaged you some of his details. If no luck I can try track him down.1 point
-
The hydramat seems to work amazing. But wouldn't bother doing both, either just run a hydramat in stock tank, maybe with some fuel foam. or do a good drop section or surge tank. which ever is cheapest / easiest. The hydramats are pretty pricey, but worth looking at if it makes your life easier1 point
-
When I had this problem with the hilux it was just a fucked fuel pump. Wasn't building enough/any pressure. Could idle and free rev fine but as soon as you went to drive it it would run like a sack of shit. On the Starlet when I first did the EFI conversion there was a faulty fuse holder for the fuel pump circuit (it actually managed to melt the fuse). This fault caused the pump relay to occasionally click off, causing instant loss of fuel pressure for like half a second at a time.1 point
-
Nah agreed! I just don’t have that kind of money atm and have most of the gear to do it. ive already got load of DP40 and 2K Black so would only need to get stuff for inside the rail. That and being a 4wd I don’t care to much what it looks like so will just spray outside on the lawn on a sunny day haha1 point
-
You'll save money for sure. You'll likely also spread silica dust as far as you can see and get pissed off while doing so. Post results either way I'd be paying the money and having it done within a week, with no effort required on my part. I pick and choose my DIY battles, that job wouldn't be one of them unless I had all the PPE and a filtered spray booth. I have neither. Same reason i'm paying bank for coilovers, i'd rather just pay the guys that do it daily than trial and error it myself. 2c and all that.1 point
-
I feel like with the way it dies, a spark is a spark. It cuts so hard I would expect at least a period of no spark, but the flashing doesn't miss a beat. I'm resisting the urge to Speeduino it. I have everything here for a full efi conversion, but I would rather learn and master the KJet system. I'm weird like that (aren't we all, on here?). I tried to read the plugs but haven't go far. The old plugs were jet black, and the new plugs still look almost new after a couple of blats around the block. I do know it's not fouling the plugs, so that's a start. I'm suspecting the fuel distributor may be sticking, but want to measure pressures before ripping it to bits.1 point
-
Not Gona lie, sounds worth it because it's a dirty job1 point
-
I would route the return back to the tank. If you keep recirculating the same fuel it might heat up. Also if your surge tank has no overflow/return and the lift pump gets dead headed they're quieter than if they're free manging all the time.* *or so I'm told.1 point
-
That may be a false positive, timing light is just indicating a spark, not quality or at the right time. I do really like the setup though1 point
-
The engines I've seen that would rev out but not under load had fucked spark plugs. One set looked brand new. But they were dead.1 point
-
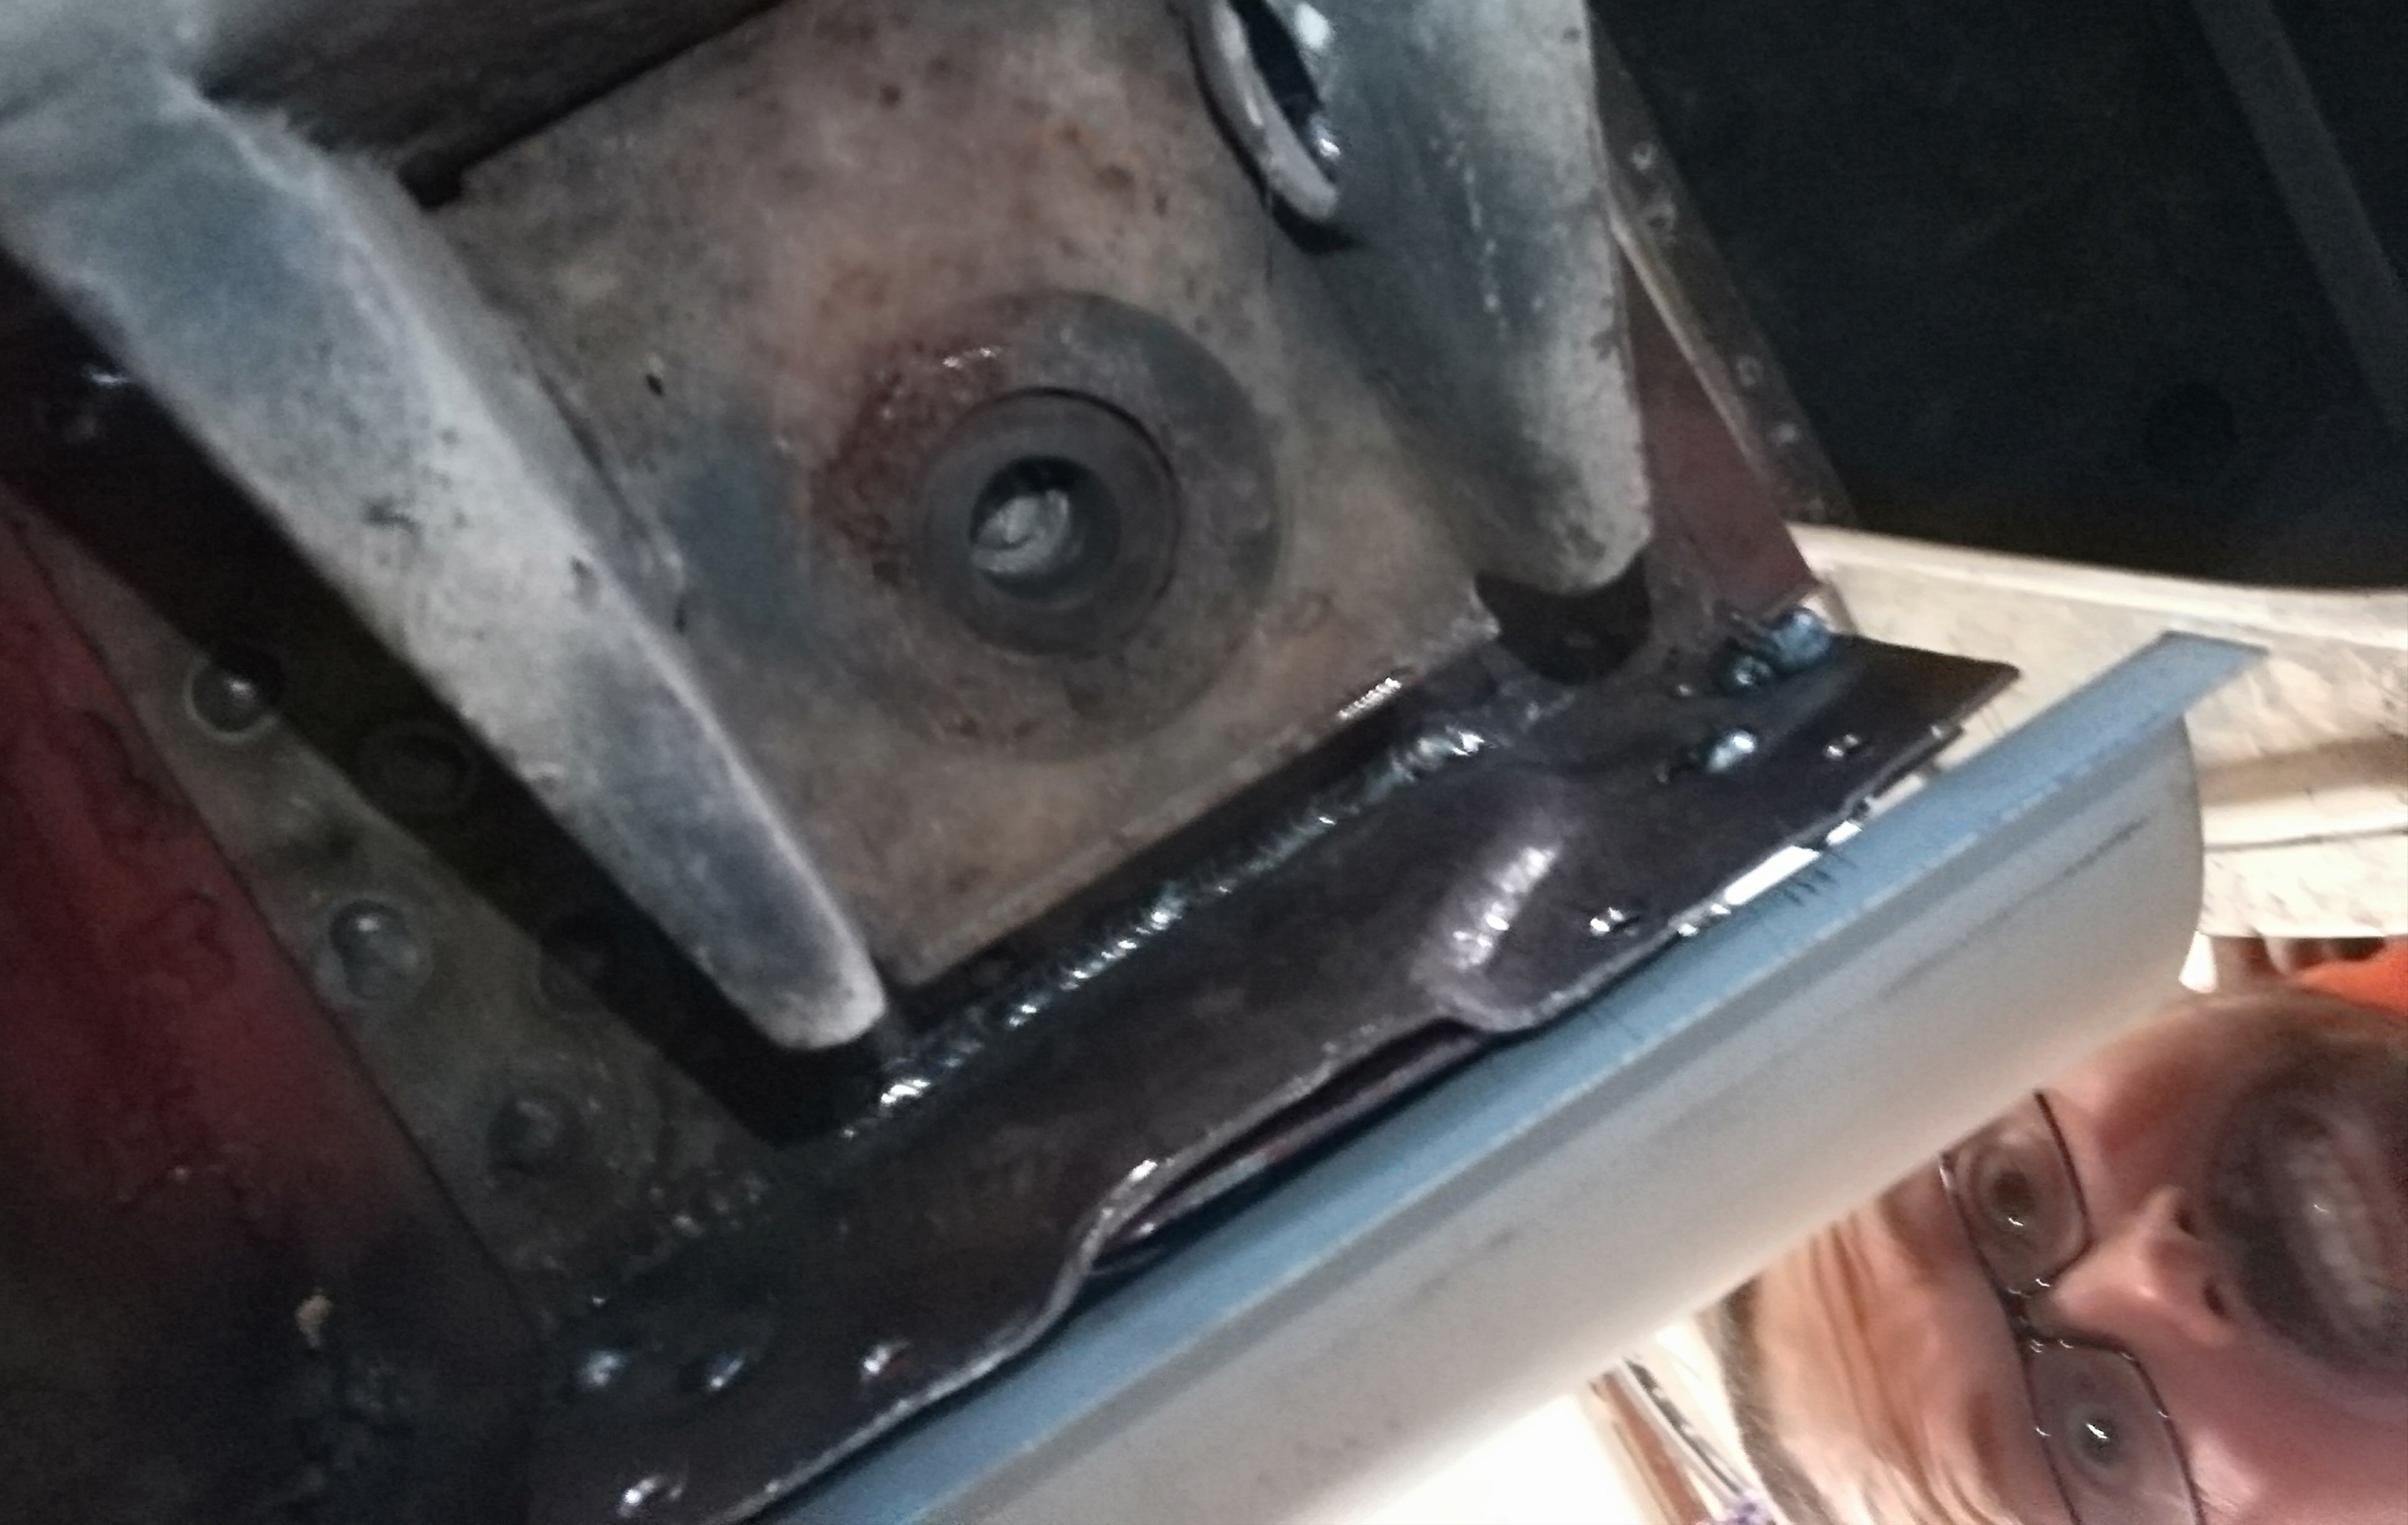
How is he using a laser capable of melting steel, on a reflective surface, and he's not even wearing glasses?1 point
-
I think i have a new fav os bike build!!!!!!! Supercheap and AE both sell solid state flasher relays which work with LED indicators. They are good even without led lamps because they make the slow flashing at idle problem lots better. I do think your headlight is too high and vote flipping those brackets (I'm also not a good judge of style. )1 point
-
My Ute just has an external efi rated pump and a return line and goes fine. Probably better to use a surge tank and lift pump however1 point
-
https://cnptengineering.com/handheld-laser-welding-machine-p00107p1.html Yeah wouldn't mind one eh1 point
-
spent the last month getting this together and ready to paint. I flippin hate sanding Made the door return real purdy and the front bit Got a new paint gun for the top coat to replace my old one that has started spitting. $18 delivered. Flash as. Tried it out on the shuts So i could put the door on for the first time in a long time So i could notice this, and spend a few more evening sorting that till this weekend BOOM Love the contrast Most of it turned out as good as ive ever done, or could expect for doing it in a dusty garage with the cheapest tools but, i had a new issue ive not had (well, nowhere near as bad) , i got a fair few fisheyes, but all in section that followed one of my passes. Maybe my compressor coughed up a lugie, or maybe the wax and grease hadn't dried right off? . Either way Ill have the repaint that bit for sure, bums. Suggestions to prevent reoccurance?1 point
-
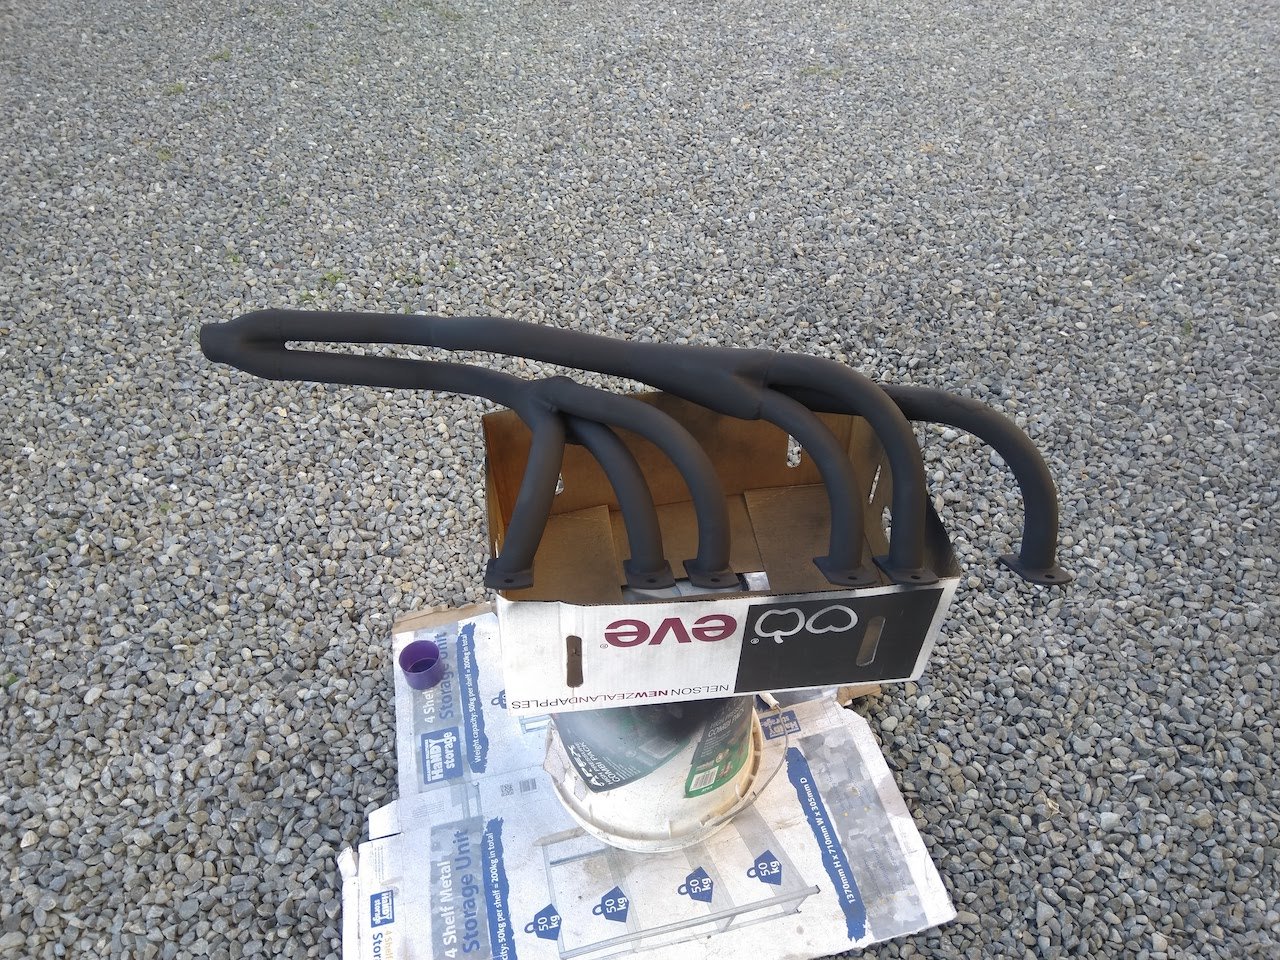
Stil haven't got much major progress on this, ticking away on the little things. I've been slowly working on cleaning and polishing the trims by hand with some autosol, most of them are coming up nicely. The original dash had been hacked up to take a head unit. The car came with a replacement, but it had some rust. Cleaned that up, painted with some Brunox and got a colour match can and some matte clear. Also made a new tray, will cover with some vinyl. Came with a set of extractors that had a couple of rust holes. Welded up the holes, cleaned off the surface rust and painted with some hi-temp paint. Doubt it will last long, but will hopefully keep the surface rust at bay until I get the car up and running.
1 point
-
With the engine blowing on the corona bringing the plan to certify that and daily it while i build the crown to a grinding halt. i came to terms with the fact that i was probably going to have to buy a fourth car to daily while i build the crown asap because i was worried there may be rust hiding that would deteriorate the longer i waited. so with a new cheap cheap boring daily acquired. this weekend i set to stripping the crown down, initially for rust and body work, and then for paint! Big pile of parts removed and stashed untill the mythical day of reassembly? Surprisingly i found very minimal rust. found some where i didnt think there was any (under the rear windscreen) and found next to none where i thought was quite bad (around the tops of the screens) ive yet to remove the front and rear glass so this could change but it looks solid. some minor rust at the base of a couple of doors. but only on the inner skins and the lip that the boot seat presses on is quite bad. none of this will really be my problem anyway, ill just have to pay the money. If your the cunt who bogged over the rust under the rear window. im going to punch you in the dick. some people just shouldn't be allowed out of their cage.1 point
-
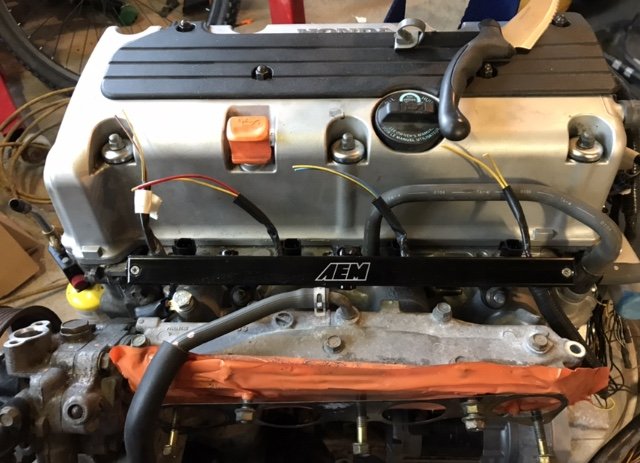
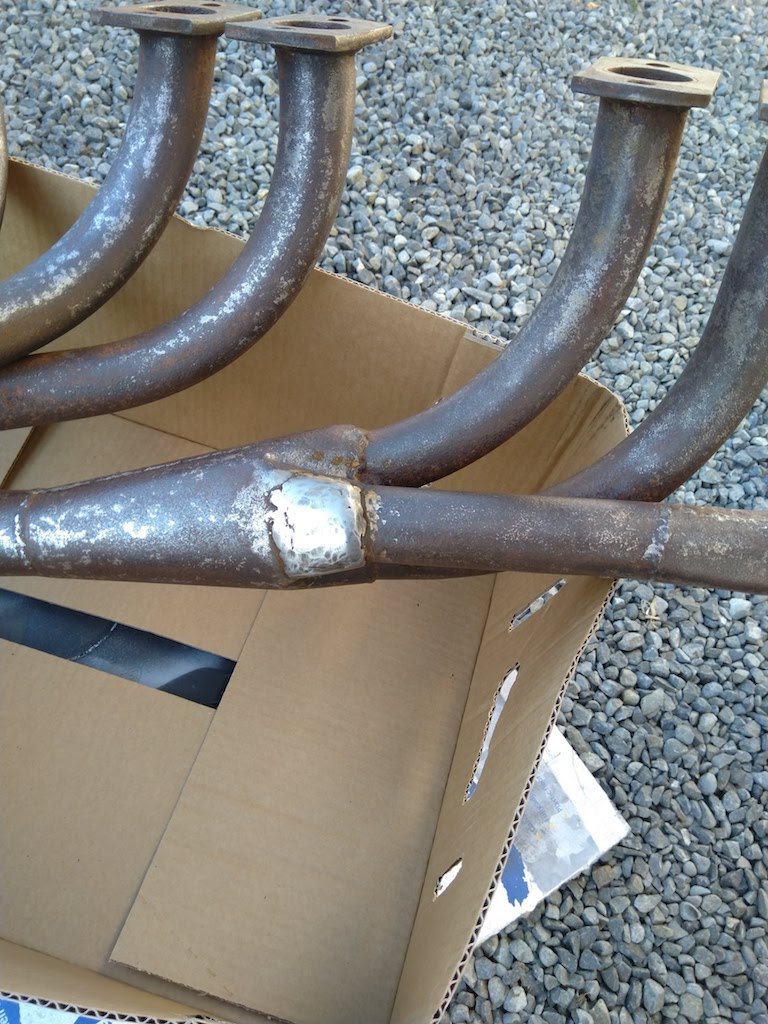
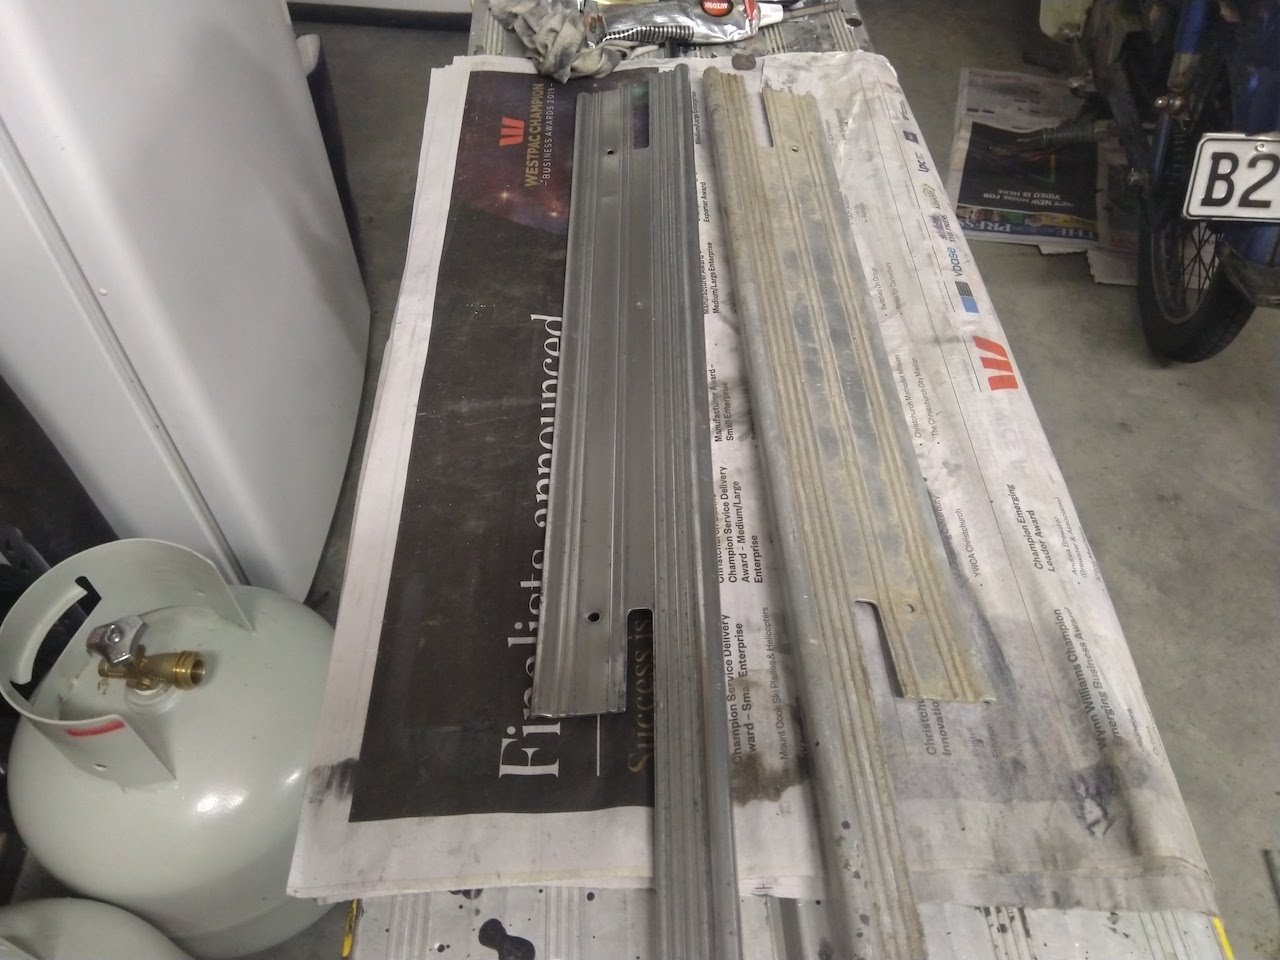
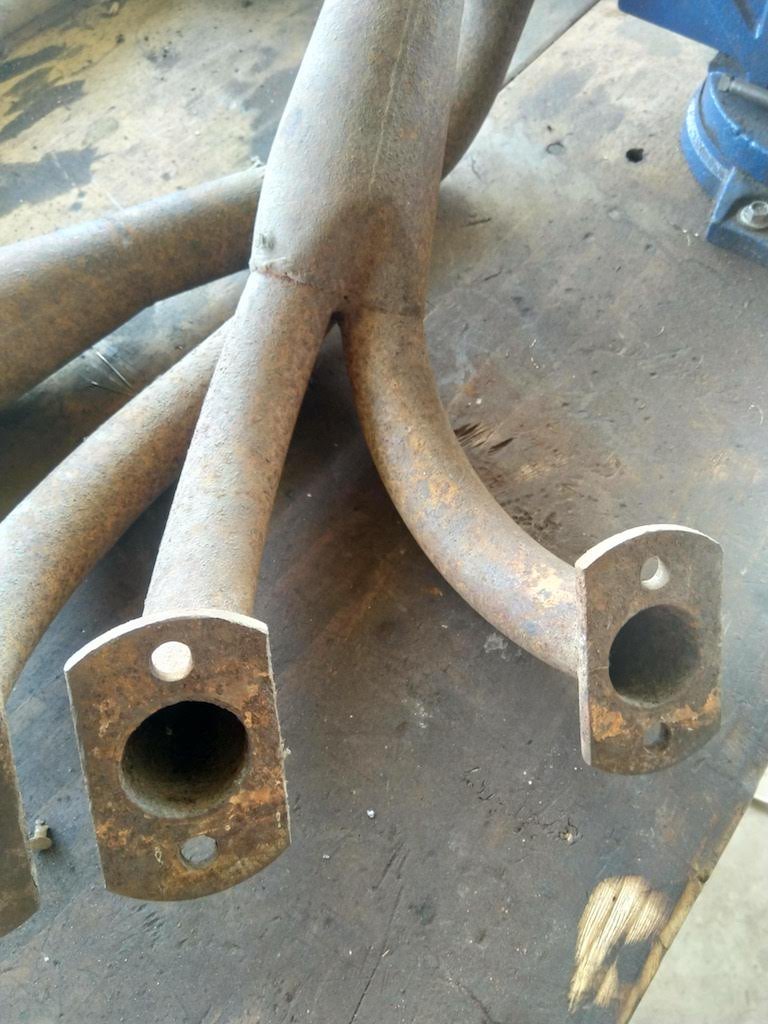
Carried on setting the motor up today. Kept the points instead of a CDI as there is something oldschool mechanical that I like about them. Tensioned the timing chain at 90 degrees after tdc. Then set up the points timing and tested the coils, got good spark so she’s getting very close to starting now! Fitted the headers and noticed there isn’t much room between them and the rearsets. Might have to make some out of 35mm ID pipe to get the clearances.
1 point
-
After you told me about this thread when we met in Blighty 2 weeks ago, I've finally sat down and read it. I wish I'd found it earlier. So cool. Top work on the sympathetic rebuild. It looks great. Also-So neat that Dennis went along to leadfoot with you. I could picture him having a great old time. Presuming he's still able to drive it is there any plan to find a location where he can do so? Fuck I love small cars, especially sports cars that handle well. This car is all that. Thanks for sharing.1 point
-
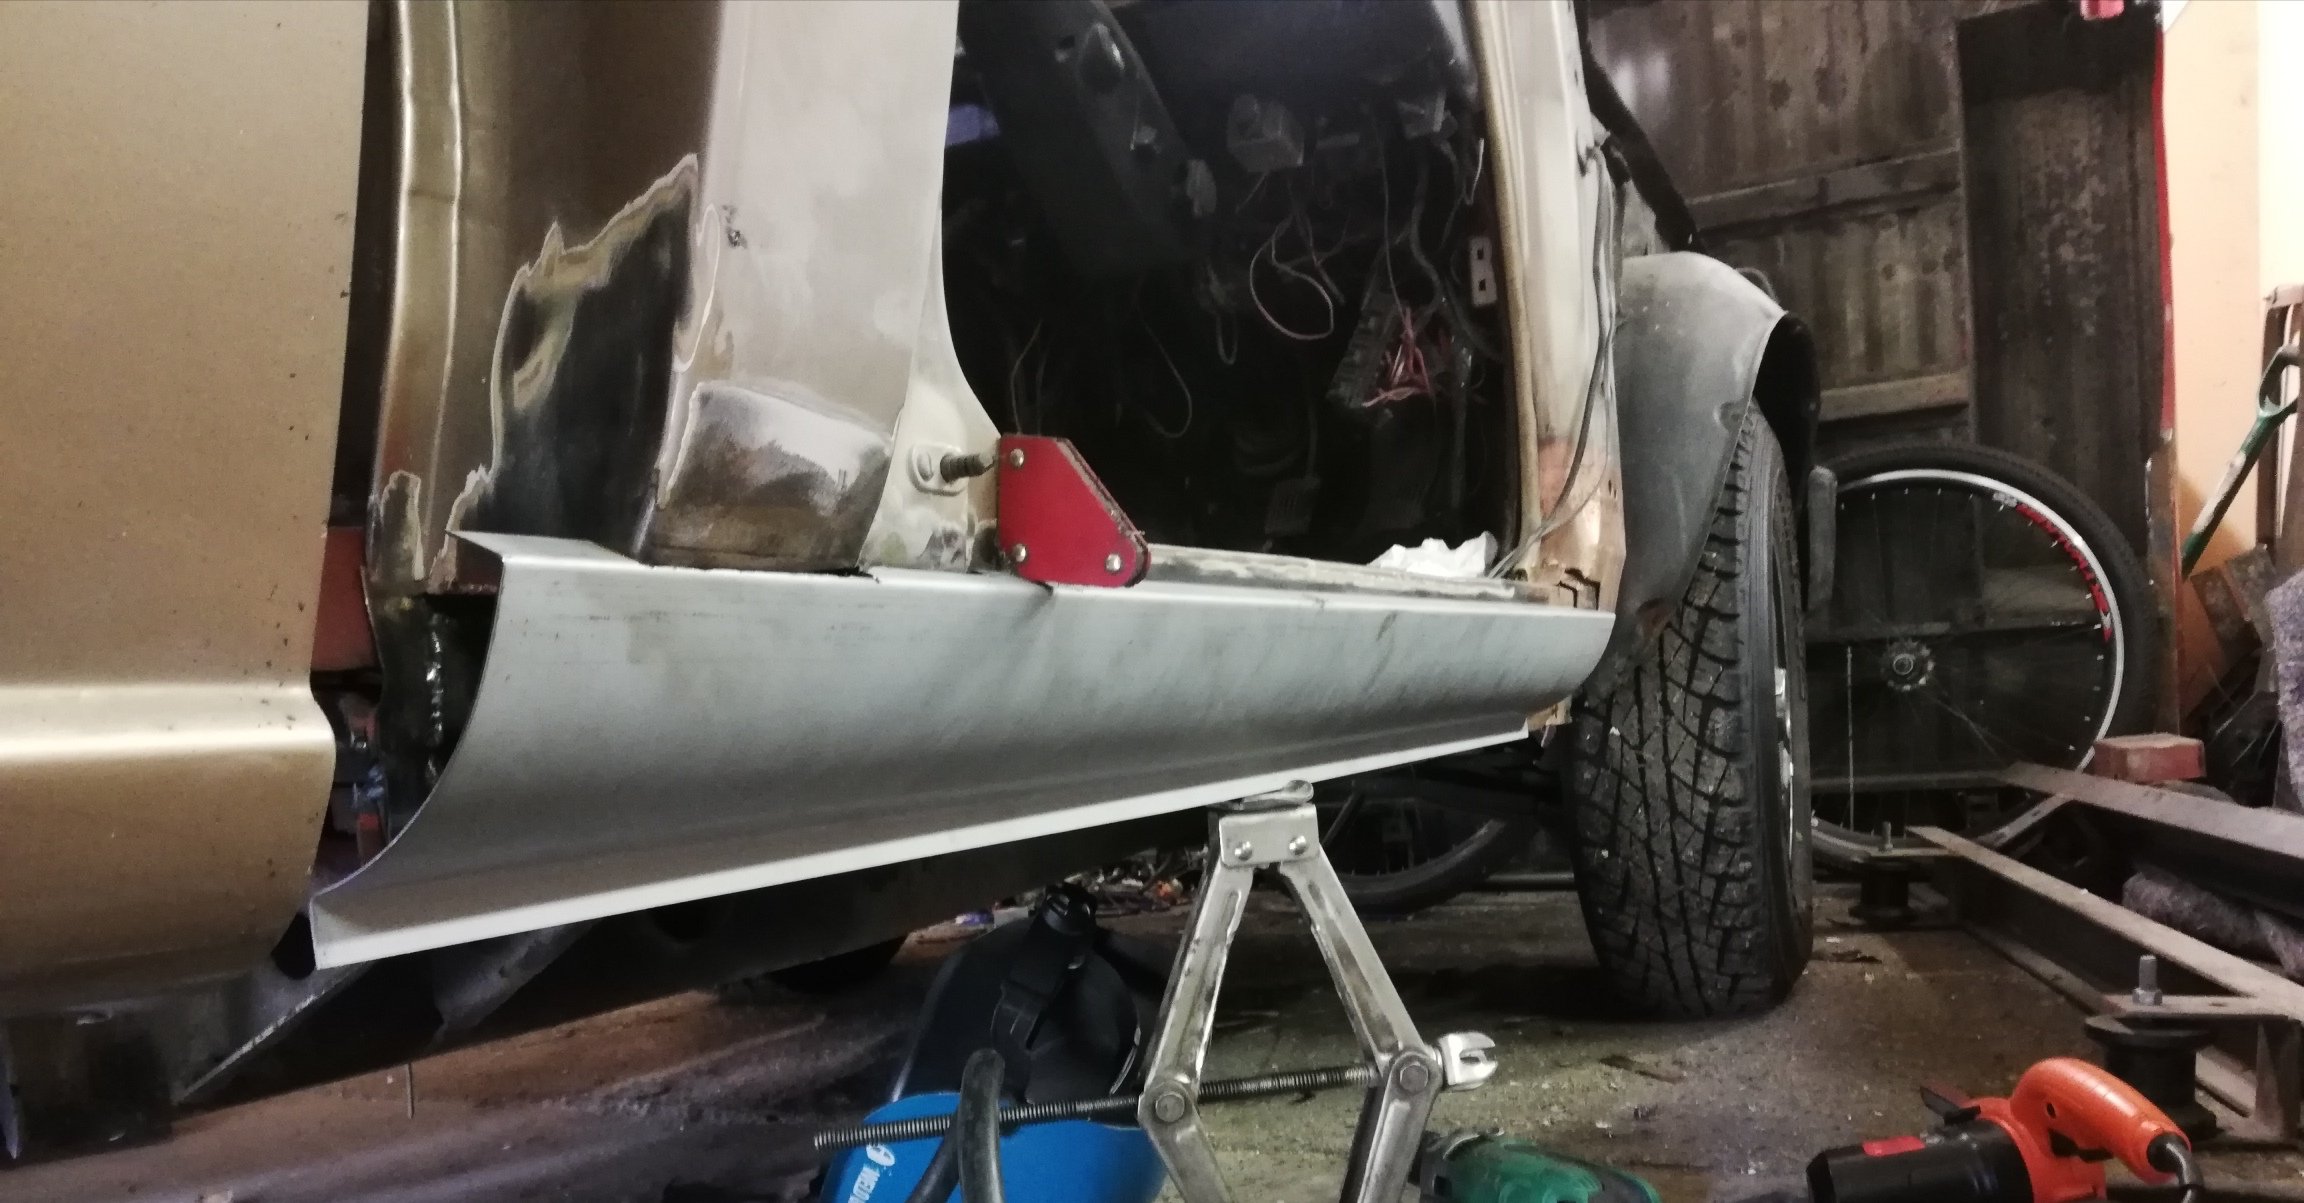
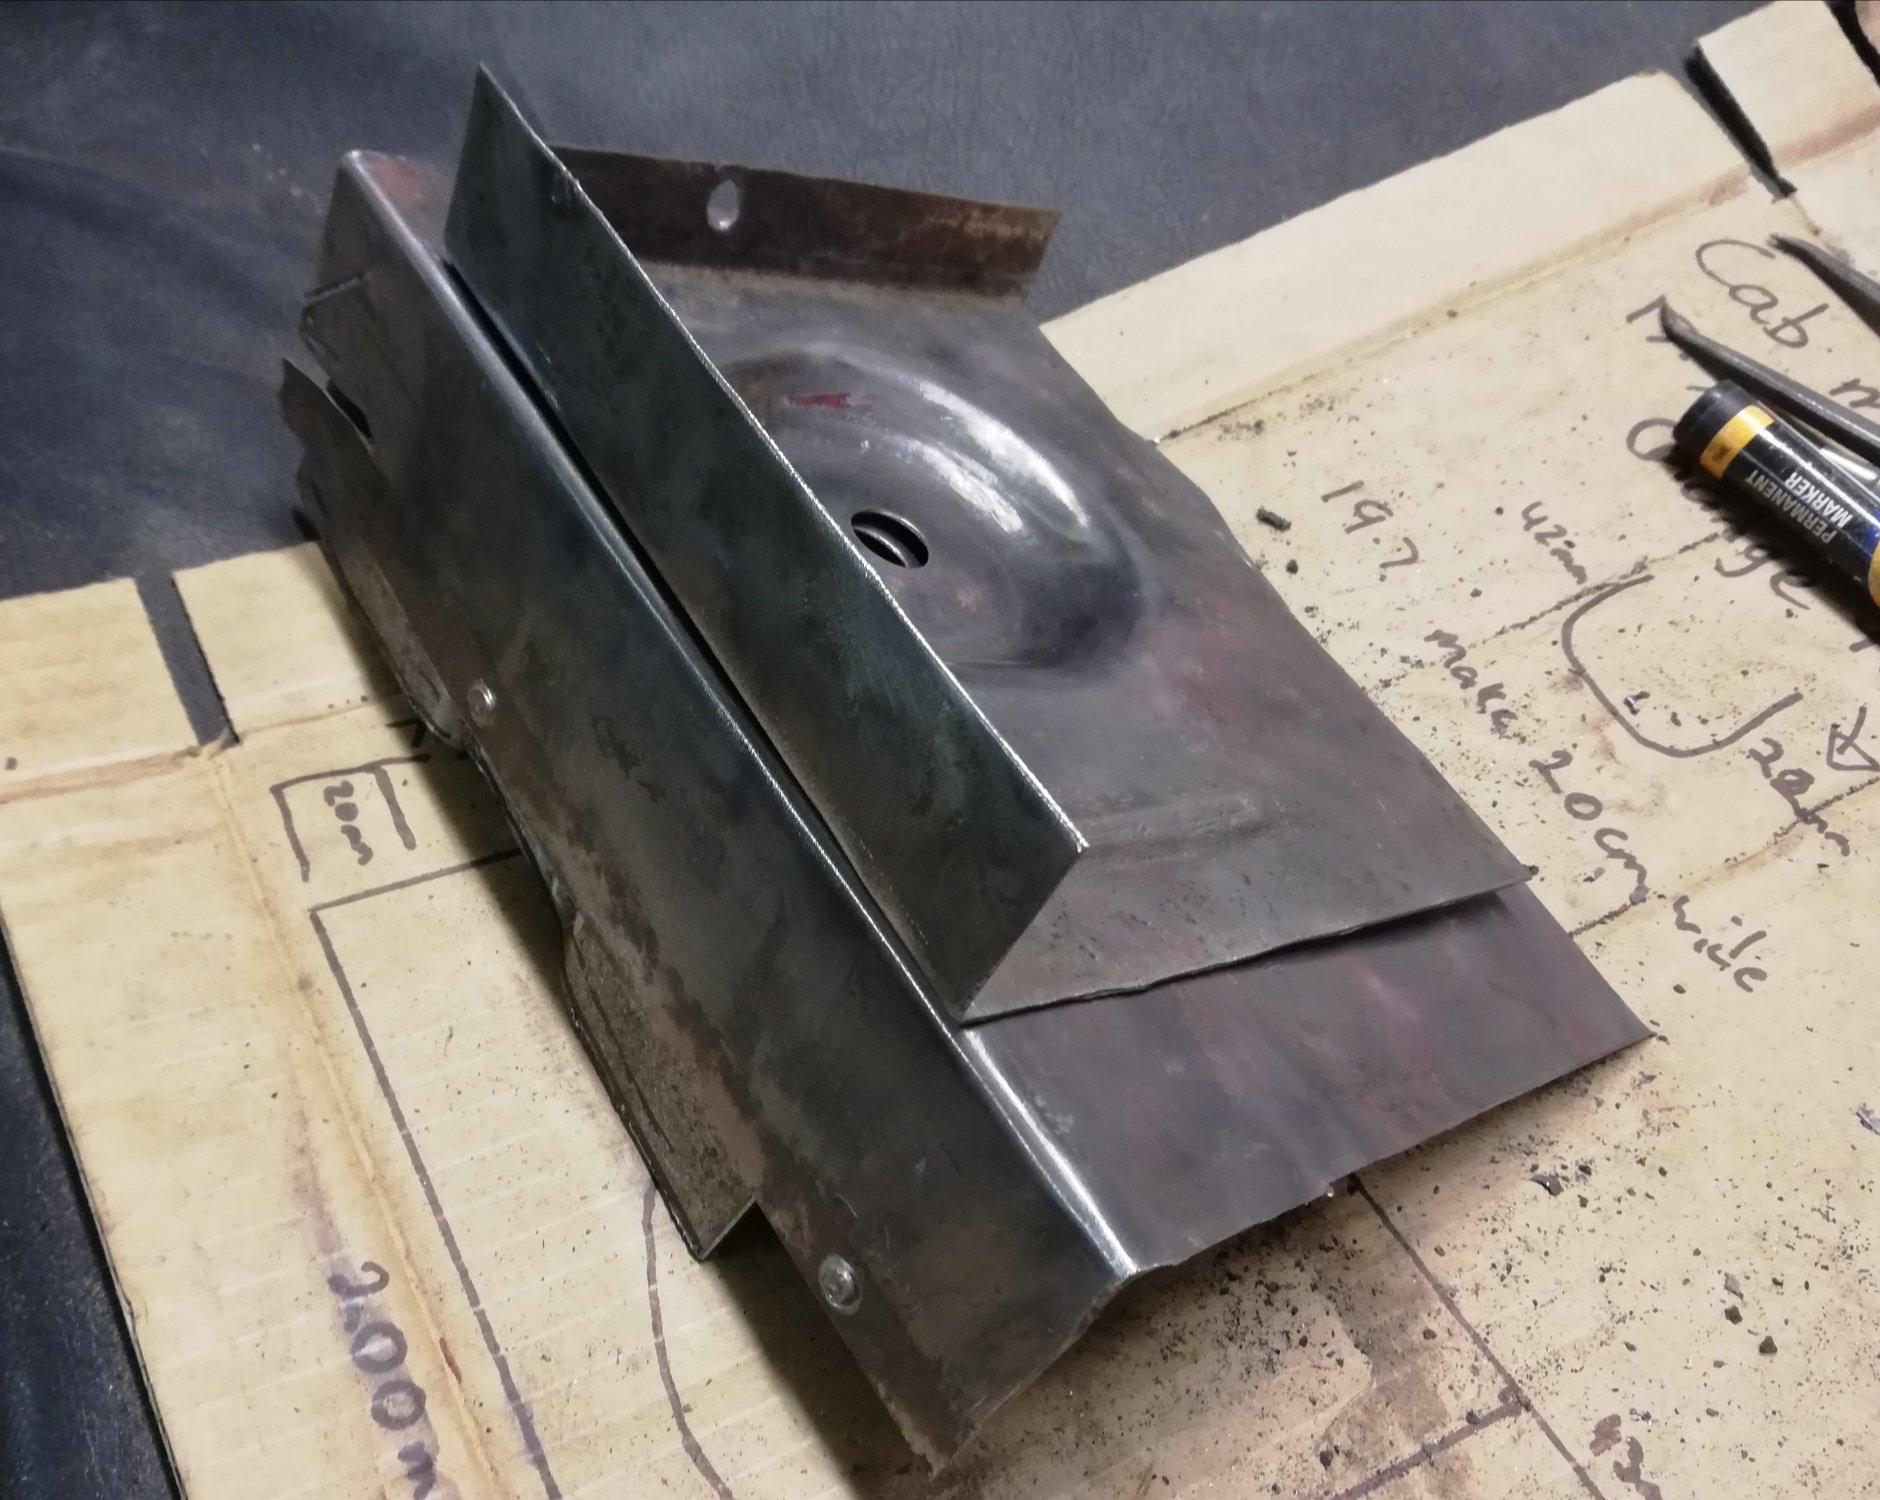
Ok ok What a balls of a job Floor is in Inner sill is in Cab back patch is in Inner cab mount plate is in Outer cab mount is in New sill getting trimmed to fit Not sure if I need an inside sill bracket like what was shown gas axed above, doesn't exist in my parts book.
1 point
-
HAPPY 4AGE FRIDAY!! Well not really. I discovered this morning that the little pesky bit of rust on the edge of my windscreen, has caused my windscreen to crack. Looks like its time for some more rust work and a new screen. I'll also get the bonnet resprayed as its never been the correct shade of blue (due to being painted off the car) and it got a huge stone chip months after I had it painted. I am also, super, suuuppppeeeerrr close to sending my meshies away to be re-banded, lolololols. Regards, VG.1 point
-
So it took longer than expected to sort the wiring, which still isn't finished, as I need to make a dash plate and get some new switches n shiz, before I can finish the wiring off. I've been having problems with my trailtech dash giving weird rpm values, and I was darned if I could figure out why. Turns out Dave, being the Barry he is, installed solid copper leads on the motor, so I get an rpm signal even when the wirings not connected to the trailtech, so much zap, lewlz. I might have to put standard leads on it, as I kinda need the rpms to read correctly. Anyways, this evening I halfassedly finished the wiring and put cable ties all over the place, and decided it was a good idea to take it for a quick test drive. In the dark. With no lights. Up my residential street. It was quite exciting. All the controls work well, which is nice, but the motor is not running correctly. I think it's leaning out up in the revs, not that I know how many revs it's doing, so I will have to play with the tune. The gearing seems good, it's definitely not over geared now. After a couple of rips around the neighborhood, I had a quick look over it, and noticed one of the rear sprocket grub screws had stripped out, so I had to pull the rear end to bits so I can drill the 8mm grubs out, and upgrade to 10mm. I'll loctite the piss out of them too. I'll try sort a few issues out, and hopefully take it somewhere this weekend for a second test drive, to see if things are better. But yeh, not too bad, but still lots to do. At least it's now moved under its own power for the first time in nearly two decades, so that's a win. Regards, VG. xoxox1 point
-
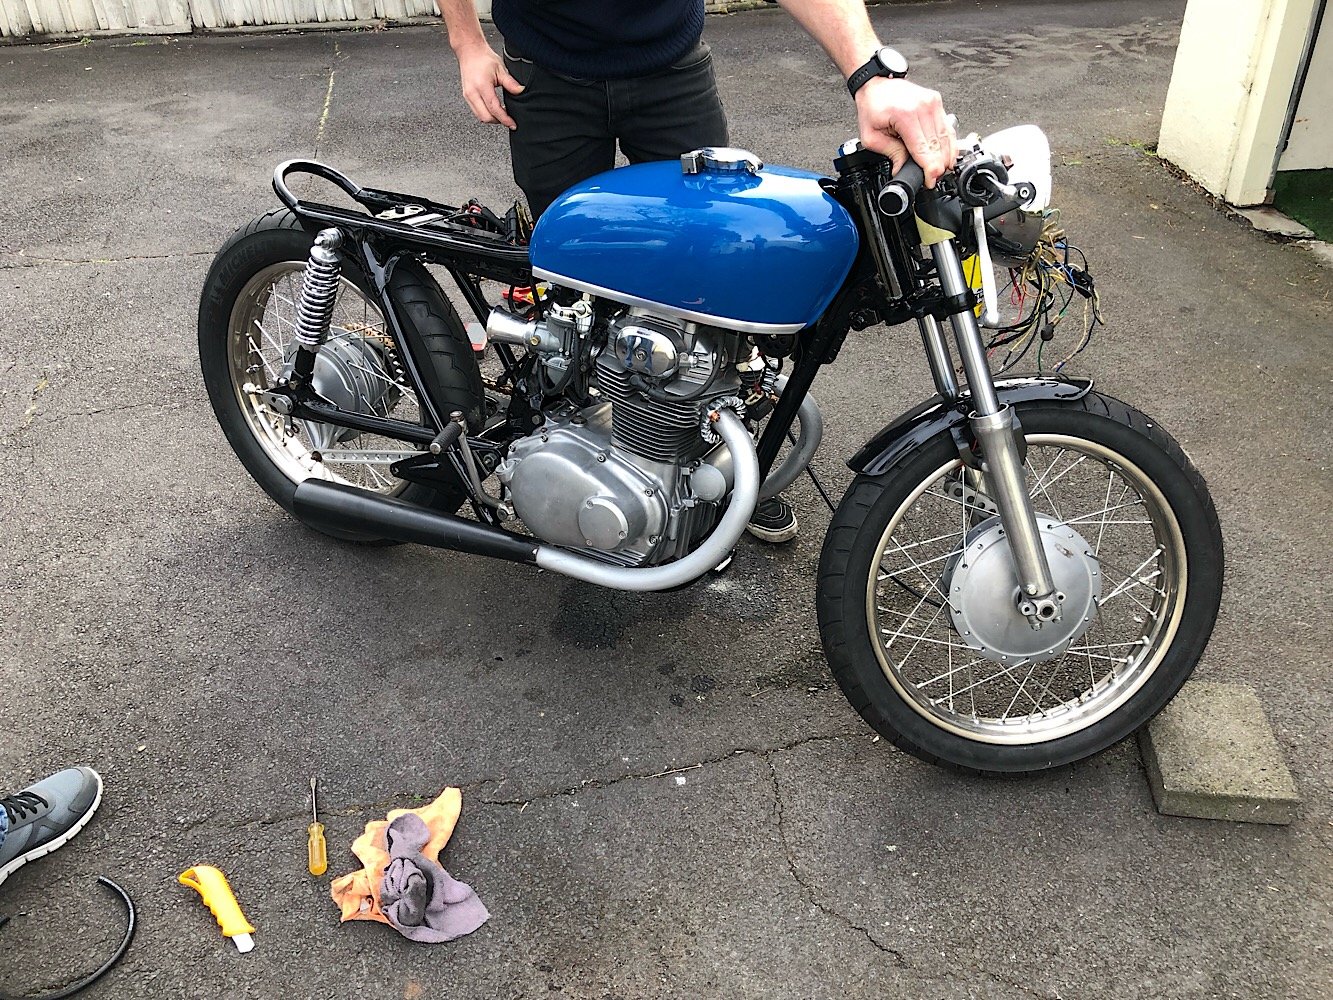
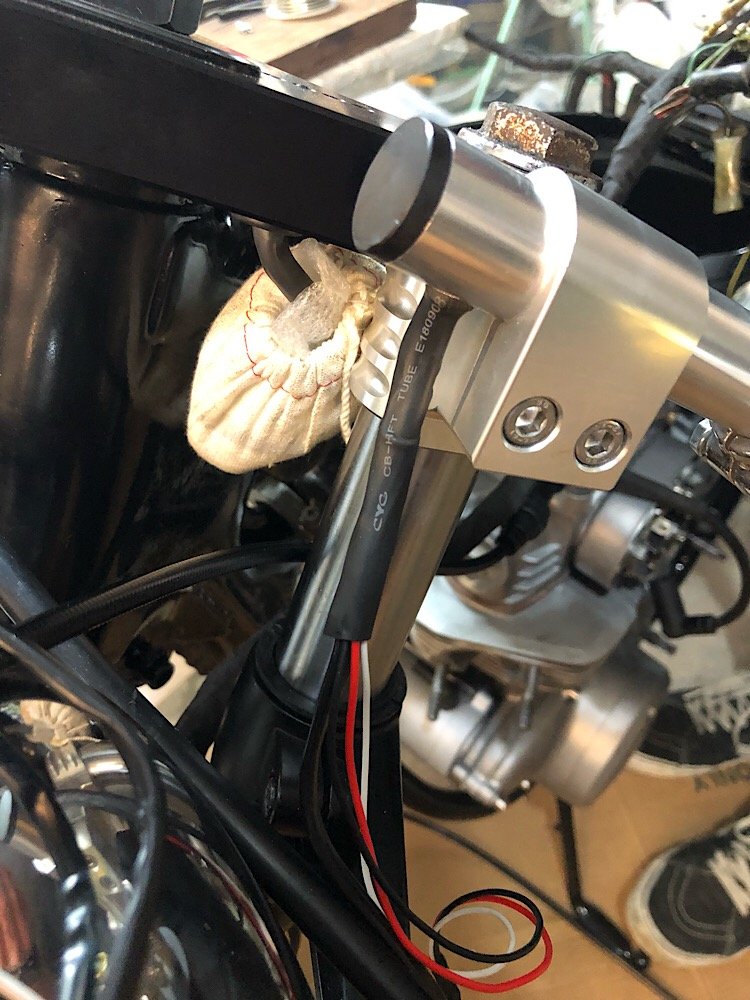
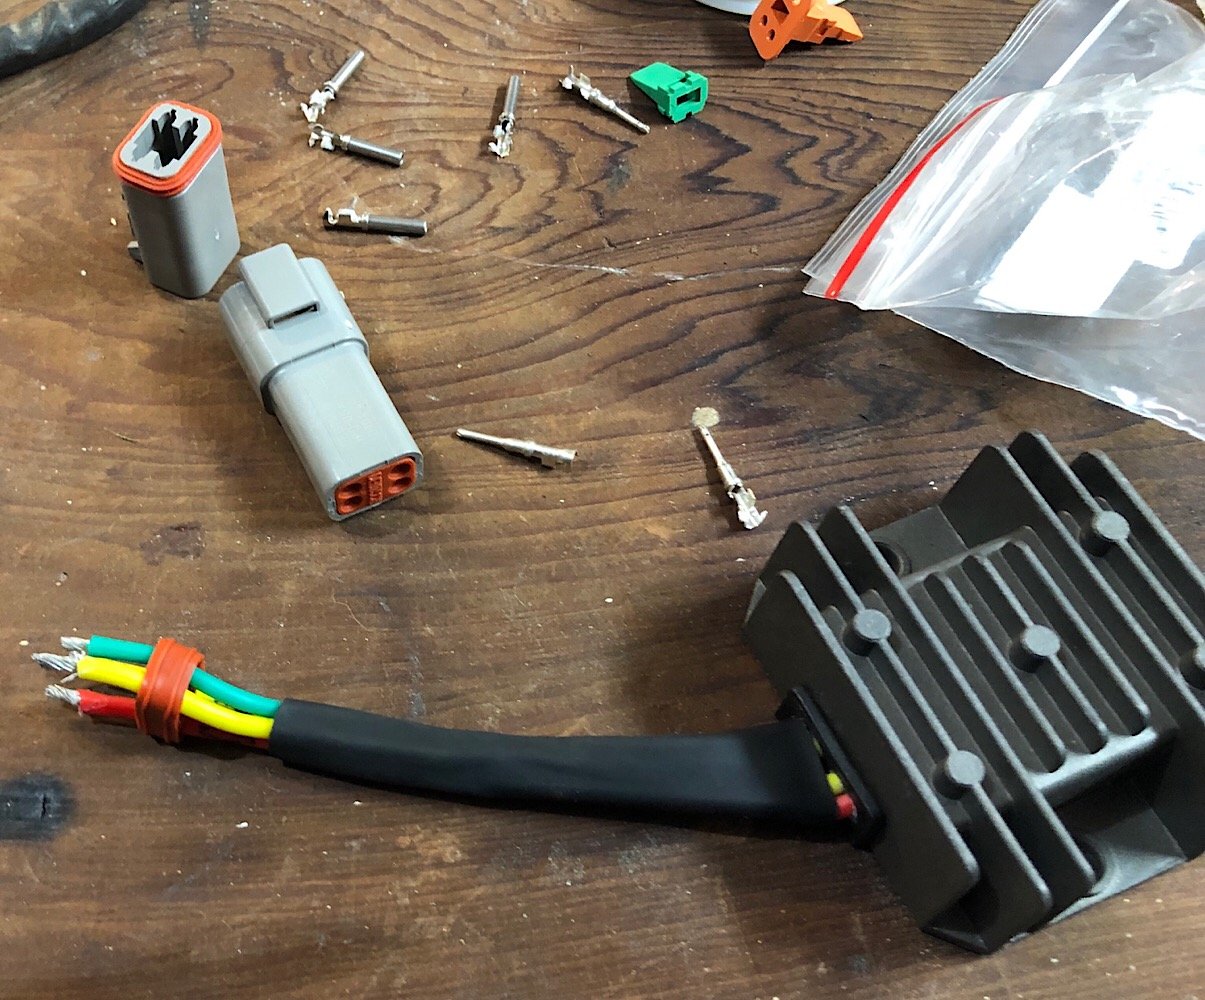
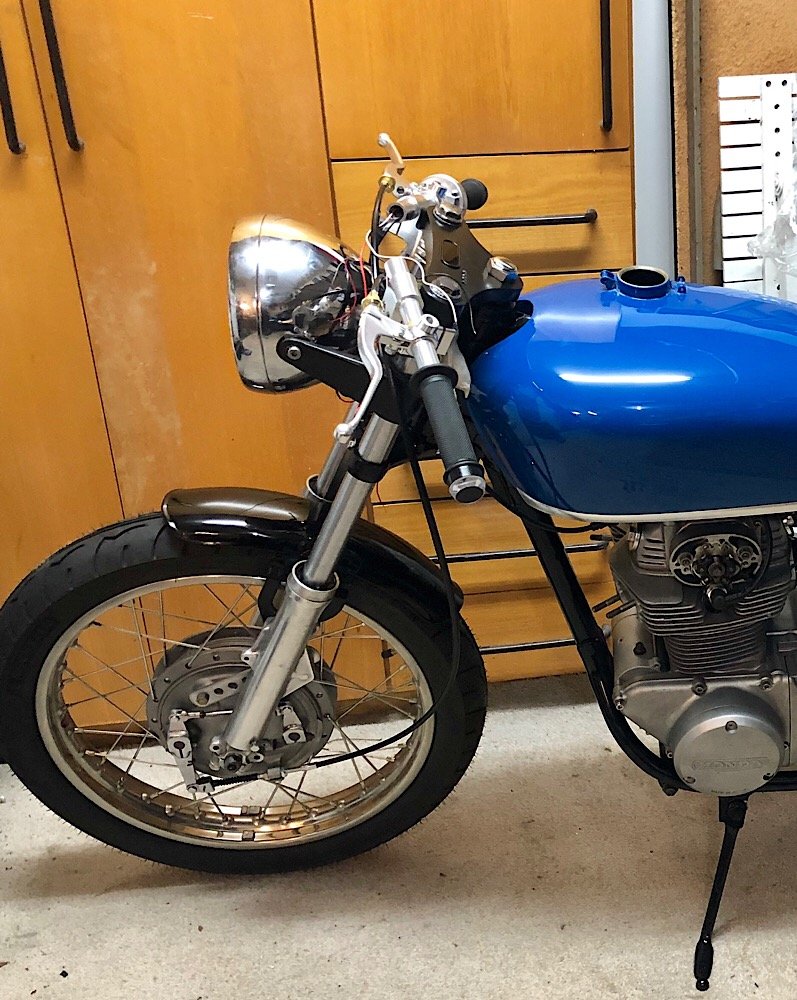
Carried on with the wiring, cleaning up all the old connections and added in modern plugs. Added in a regulator/rectifier to replace the old Honda ones. Drilled holes in the underside of the clip on bars to feed the wires out and down into the headlight. Trying to keep the wiring tidy with some going through the centre of the frame. Had my other Honda round to compare factory spec to cafe spec.
1 point
-
Been dailying it for nearly 4 months now! Awhile ago I took it to Napier and got Simon from Airride NZ to paint on some whitewalls. Looks so much better! A couple weeks a go I drove it up to Auckland. No issues, other than the speedo dying on the way up in Thames. Have been emailing Classic Instruments about the gauge, to see if they can find whats wrong. They have since stopped replying after I did some tests and they figured out it's completely dead. Not the first issue with it either. Have already sent it away to get fixed once, as the odometer wasn't working when I first got it. Not impressed, since they aren't exactly cheap! Brought back an engine and gearbox, a couple storage boxes and a set of wheels from Auckland. The Hoonigans also shared it on their Instagram. Some comments are pretty entertaining haha. Have some bear-claw latches to install one day, as the doors are a pain to get closing properly, keep popping open and rattling. Need to sort some electric solenoids to lock the doors first though.1 point
-
Got a little bit more done. Got an out of date unused 6 point harness, modified it to be 5 point, and fitted that. Just had to make a mounting bar for behind the seat. Then I got a small car battery (will have electric reverse + winch + lights in the future, so didn't use motorbike spec battery) and set about making a shitty mount for it. It used to be in the nose, but got the bash, so I've mounted it on the side. I might have to make a cover to stop it getting owned by debris in the future. I recycled a bit of seat belt and buckles, but couldn't get it tight, so changed it to good old fashioned rods N nuts. I also put a speed sensor on the front wheel for the trailtech dash. I just have to reroute some wiring and mount the magic electrical boxes, and it's ready for a gentle shake down run, hopefully this weekend weather permitting. If all goes well, I'll make a new front bash plate thing, as the old ones a bit rooted, Then paint all the bits that need painting (probably just rattle can it, as shit will keep getting modified) then start fitting all the alloy panels. I also have to make a dash that the bonnet will join up to. Hopefully the next post will have evidence of a successful test run. Regards, VG. XOXOX1 point
-
Been putting the front together. Added in heated elements inside the clip on tubes for those cold days. Indicators are now bar end indicators, they have a white LED and orange LED in them so we’ll hook the white to the headlights and the orange to the indicator relay. Connected all the cables up, we used short versions which were perfect with the clip ons. Found that the headlight bracket we fitted made the headlight stick out too much. On the hunt for brackets with shorter arms. May even use the factory ones as they are short. Ordering some gaiters to fit over the fork too. Anyways this is as it stands at the end of the evening.
1 point
-
Had a play with the headlight. Managed to order the wrong size so it’s huge haha but was keen to see how it looked with a yellow tint. Once the smaller one arrives I think we’ll keep the yellow as it pops against the blue. Next is the wiring, so much to do before the Distinguished Gentlemen's ride in Sept!! Edit: man that rear tyre looks huge, thinking of down sizing as it looks a big out of proportion in the profile shot.
1 point
-
Last week I gave the garage a good tidy up, an unintended consequence was sudden burst of motivation to pull this thing out and get stuck in. The shifter will go here with the hydraulic clutch attached. I have been working on the interior. I was given some aluminium sheet a while ago and used it for the floor. I need to get some more aluminium sheet to make the tunnel and dash... I’ll have a hunt on Monday. Hopefully this motivation lasts and I finish it off! Iv had to change the pedal position significantly as he is 7 now... She wasn’t even born when I started it!1 point
-
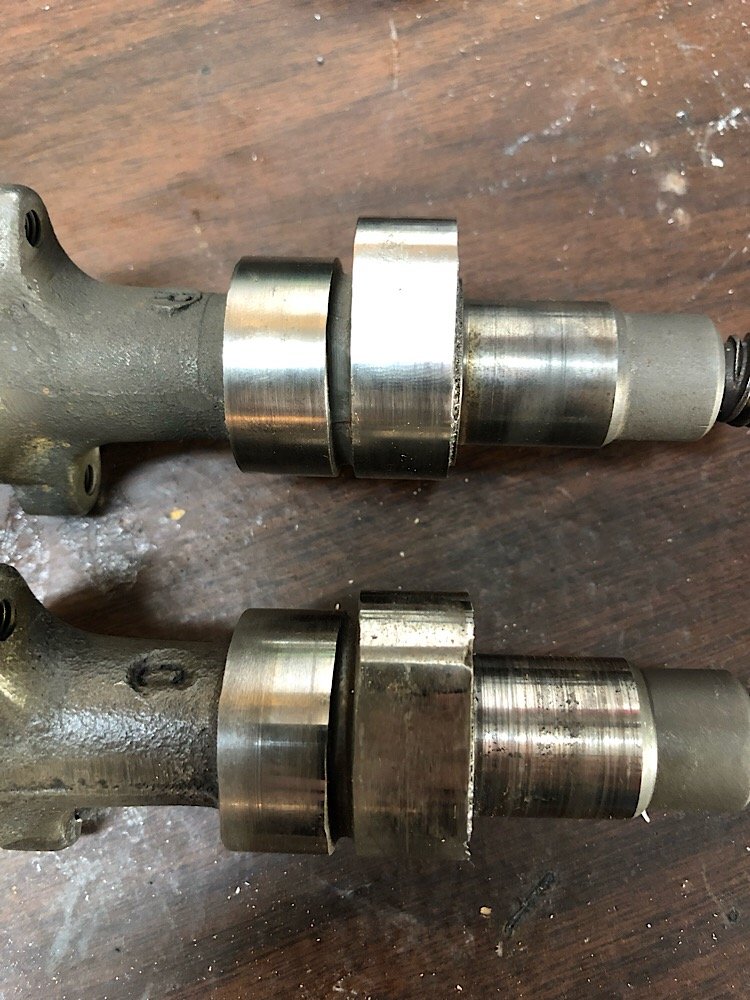
Engine build has been a bit more of a mission than expected. Found a replacement for the cam, new second hand one is mint compared to the old one. Can see the old cam on the bottom with chunks missing from the lobe and grooves ground into the surfaces. Also found some good replacement rockers as those surfaces were equally as worn. Pretty much all the internals are either new or as new in the engine, pistons, gudgeon pins, rings, cam chain, tensioner, cam, rockers, etc... hopefully this thing isn’t rattley when it fires up.
1 point
-
It made it in a few magazines recently. Performance Car in the 4 & Rotary Jamboree section. Petrolhead in the Beachhop section. NZV8 Beachhop Edition. And the recent NZV8 in the editorial. Had the transmission pulled apart and the forward clutch was burnt out. After waiting a month for the trans to be rebuilt and getting a price back, I decided my Dad could have the rebuilt one and I'd pull out the one that was bolted up to a dummy engine in one of his projects. It looked to be in good condition from the outside. Grabbed the bits I needed off my old one and swapped them over. Hooked it all up and put some new oil in. Went for a test drive and it goes way better than it has ever had!! Has been my daily for the past few weeks (sorry neighbours! The 6-7am coldstarts with the compressors kicking in must get annoying haha), haven't had any major issues! Have done over 1000km in it since the new trans has been in. Went out last weekend and took some decent photos of it.1 point
-
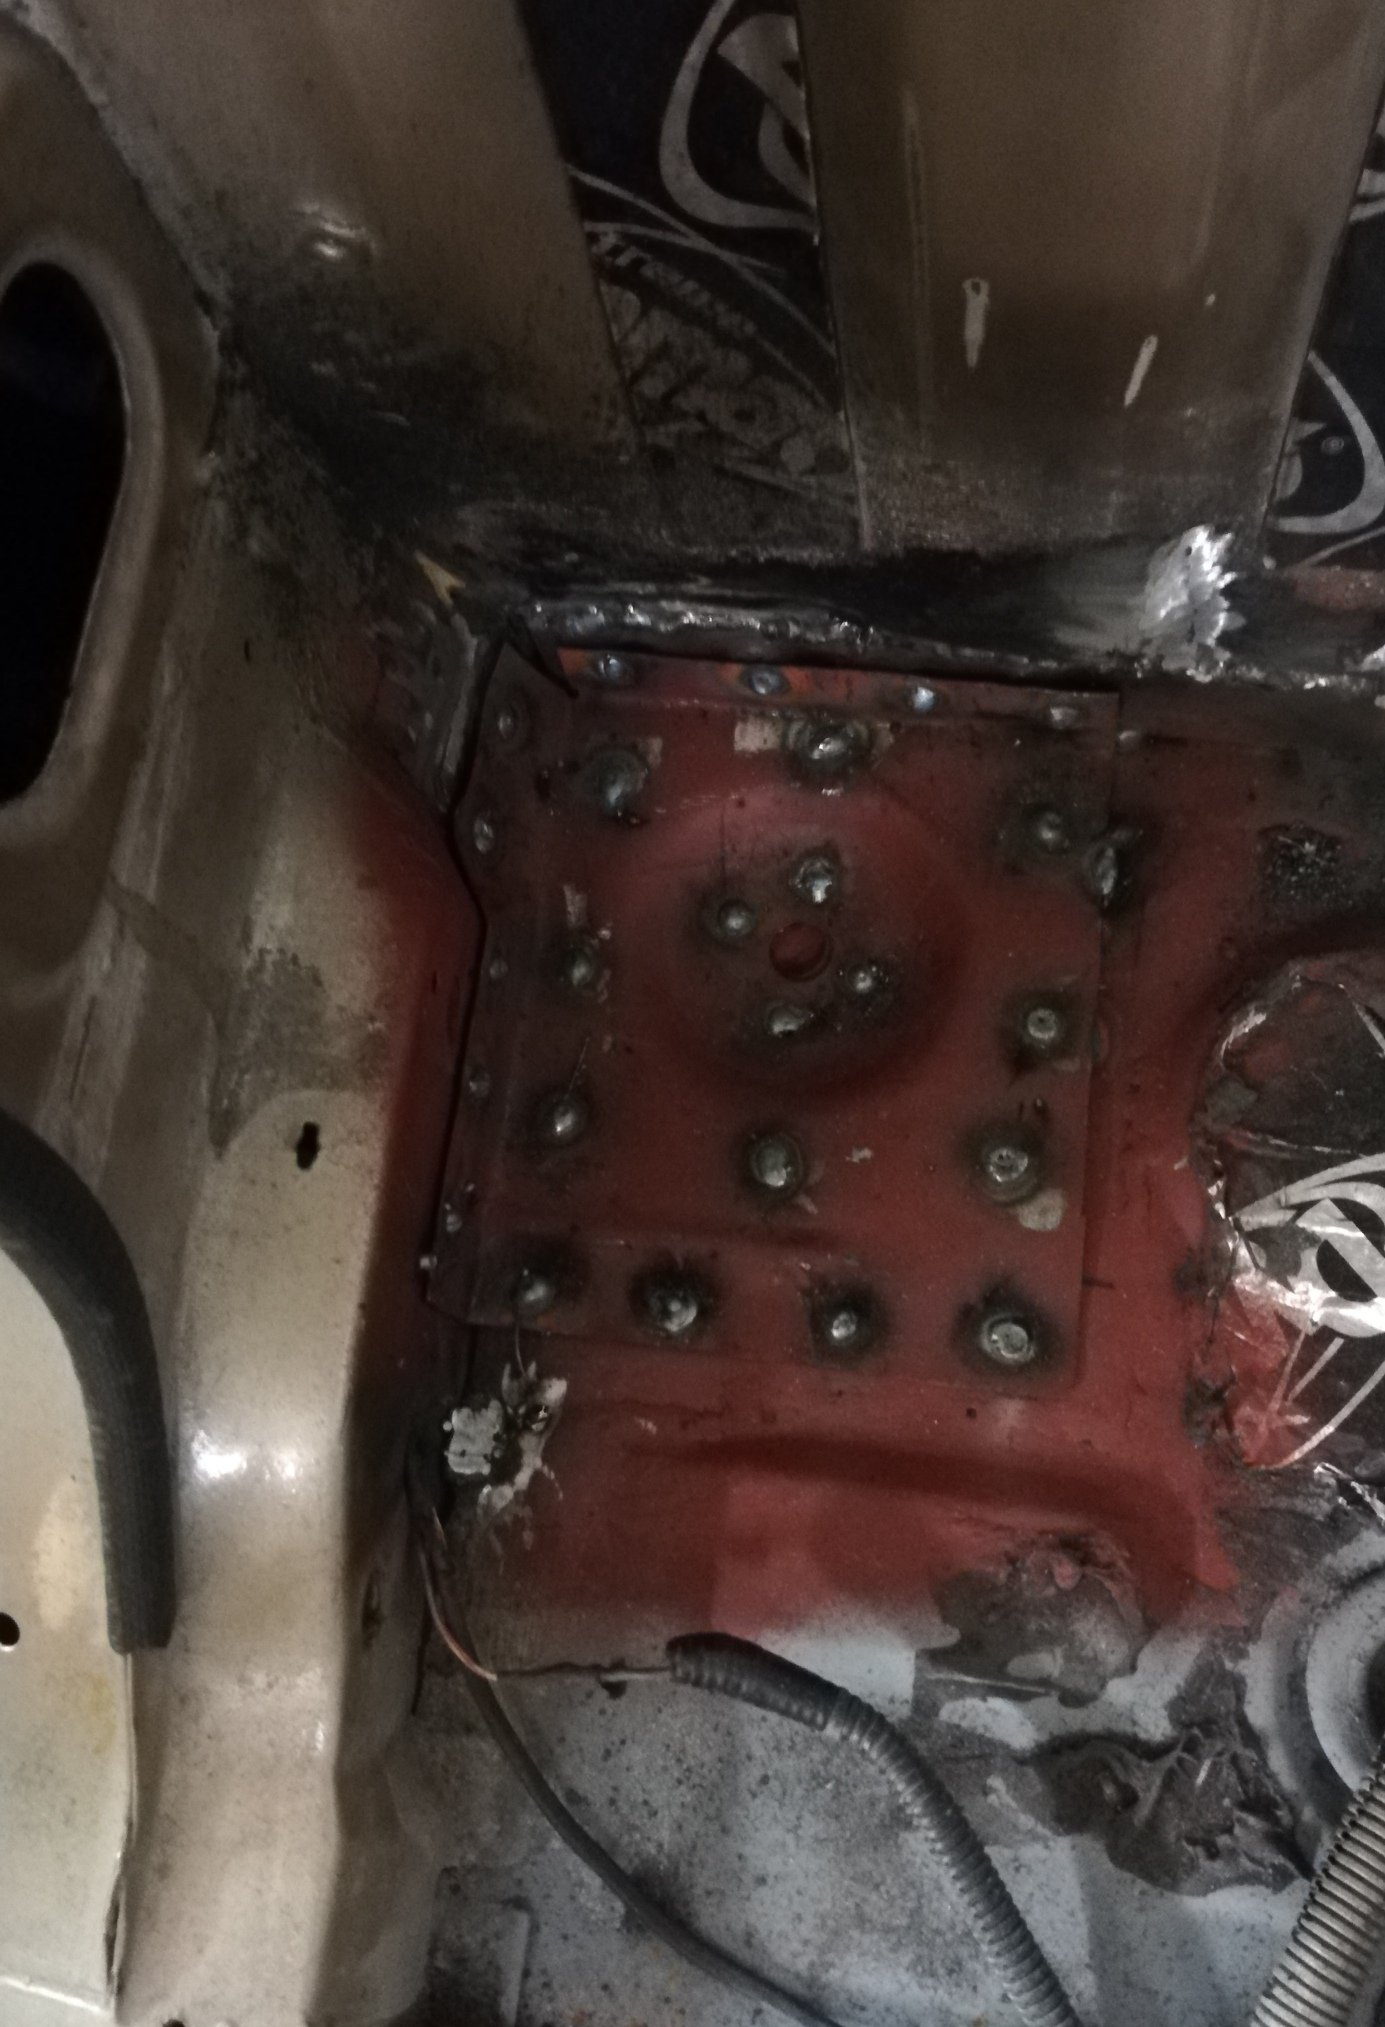
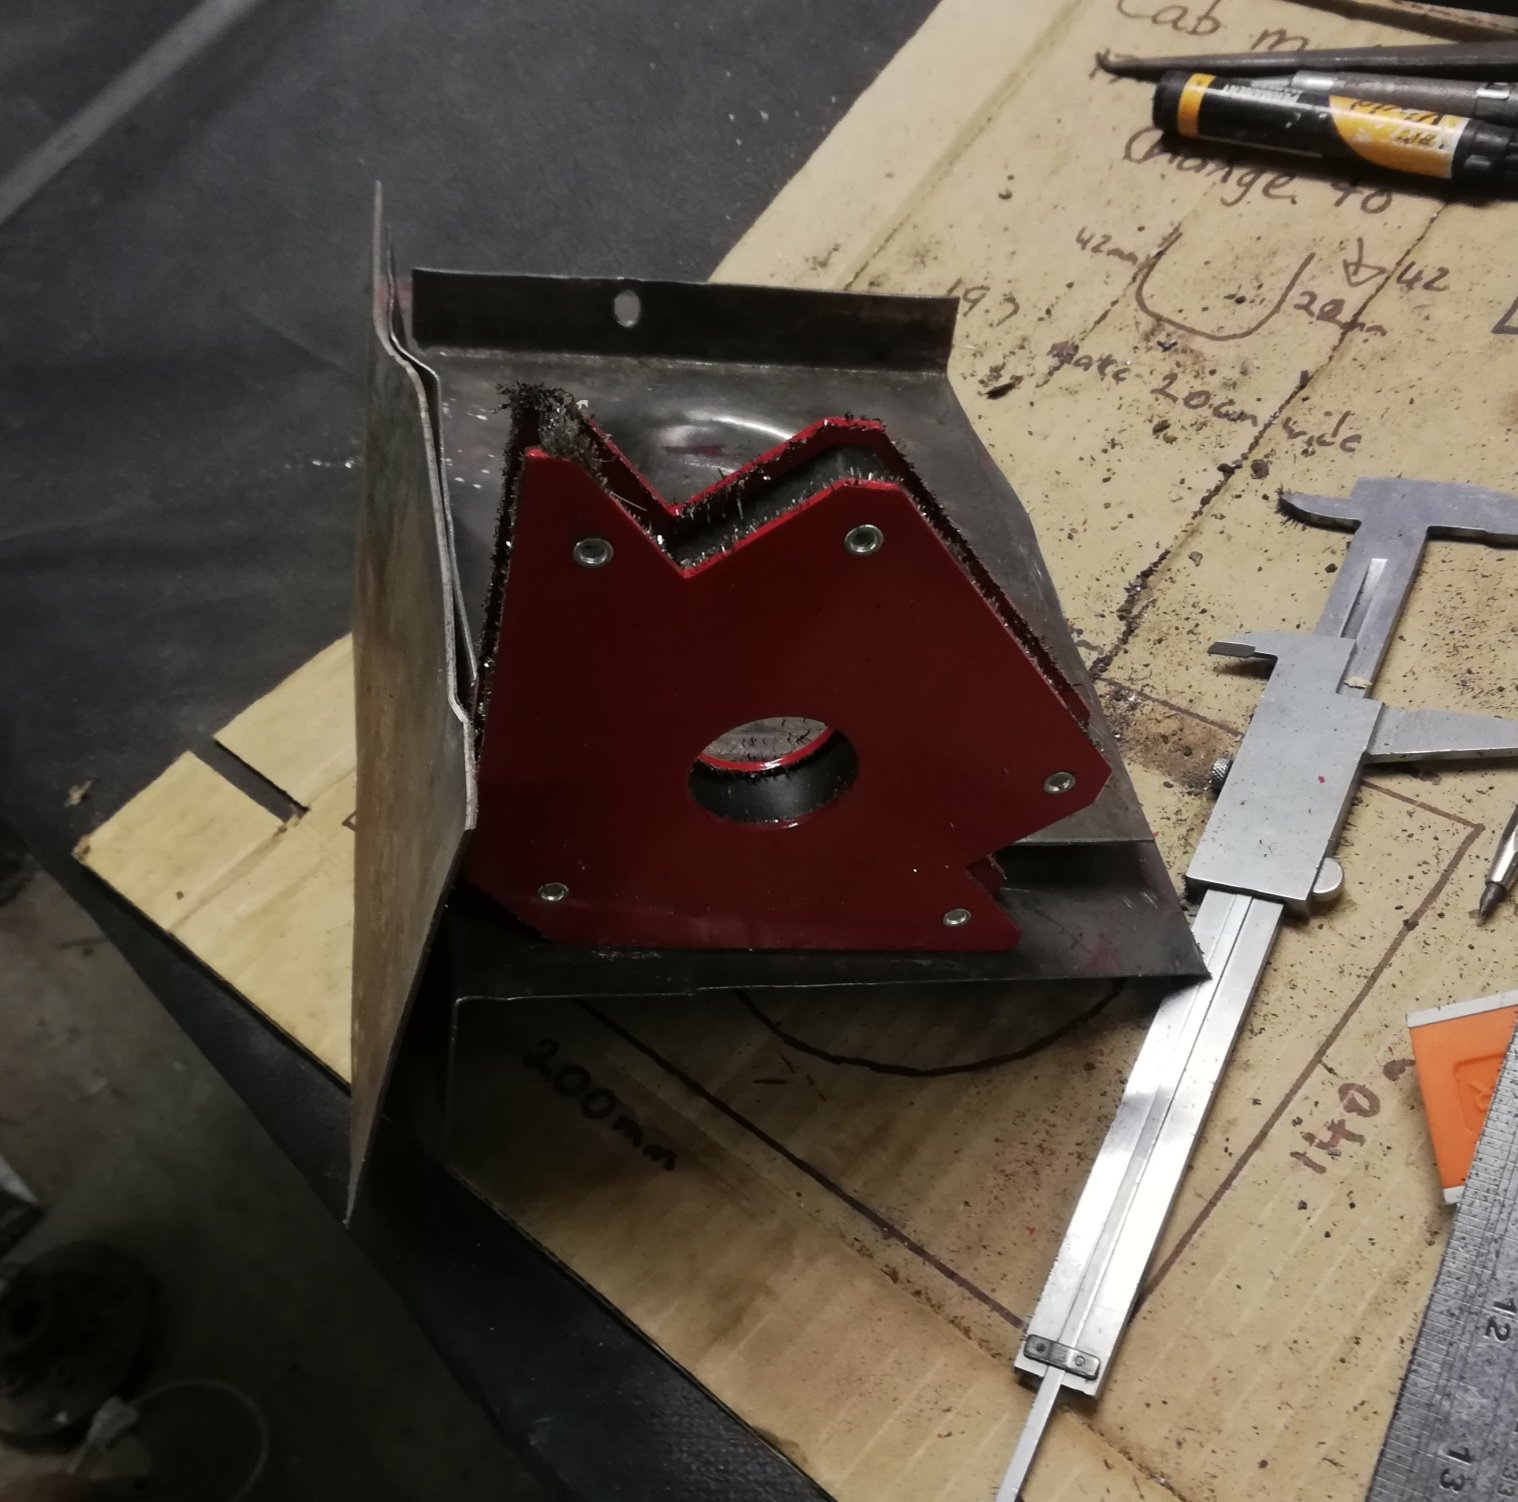
Gotta make sure those rust traps are in the right spot Now to figure out what to do about the cab back. Normally the floor and cab back extend a little past the back of the cab. The entire corner where the two meet has been replaced, however they chose to weld an L section facing inside the cab (leaving the rusty seam in place and bogging to taste). Tempted to cut it all out and do it as per factory, but don't want to take the tray off etc. So might just go to the next bend in the floor and blend it somehow. Now that I have cut out the front and rear of the sill, I'm thinking I my as well cut the middle out too and replace with a single section. Oh yeah, I checked the passenger side mount. I took my glasses off andd turned out the light. Looks fine
1 point
-
So I haven't had a spare wheel for ages, and decided I should get one before I get caught out. I ended up buying a whole set of wheels off @jono007 who was nice enough to drop them off at @Truenotch pad, and he was nice enough to store them for a while. Thank you gentlemen! I decided to fit a set of tyres to them and use them over winter, as my semis are bald and are quite scary in the wet, and I still haven't had my promesh repaired. I've never been so confused by a set of wheels in my life, they are kinda so gross they are Kool, or are they? Regards, V "confused half mongrel" G.1 point
-
Decided I didn't like the stainless trim around the windows enough to keep it, so swapped in the standard one I had. Suits the style better anyway. Then I could put the inner windscreen surrounds in, as well as the sun visors and rear view mirror, but I don't seem to have a photo of them. Took the seat to the upholsterers and got some Mexican blankets put on. Will only be temporary until I can afford to get it done properly in leather or something. Had the center dash panel straightened and polished up, as it was a bit warped. Then I polished up the glove box to match. Cut up some black vinyl strips and put them in the low spots, still need to do the glove box. Got the engine back from being rebuilt. Was mint inside and no other damage other than the piston and conrod. Chucked it back in and assembled everything back together. Started first pop and ran very well! So bolted together the whole front end and put the bonnet back on after a long time it's been off. Made a new intake pipe to get in going in the opposite direction than the standard one. Made a coolant overflow and power steering reservoir, they both seem to work pretty well so far. Attached some peep mirrors onto the doors. I think they look good, although rubbish to see anything through. Bought some tyres, ended up with BF Goodrich's, 205/65/15 front and 225/70/15 rear. Apparently 15x8's with 225/60 tyres don't fit on the front of this without massively rubbing on the fenders. Managed to return the tyres and swap them for some 205/65's and got the wheels split and narrowed to 7" wide. Had it through the cert check the past week and everything was good! Had a wheel alignment and that also went well. Just waiting on the cert plate now and then can take it for a WOF! Drives really nice and smooth, although the transmission seems to be slipping. We think it has something to do with the secondary throttle sensor that doesn't seem to be working, so need to have a look at that.1 point
-
Learnt a lot in the past month and a bit. Main thing being that you should probably lube your fuel injector o-rings when you go to put them back in. Got the engine running, was only running on half the cylinders. Discovered there was no fuel going to the rear half cylinders, so decided to pull out the injectors. Took them into town and put them on an injector tester and nothing happened. Was told they can gunk up after sitting for awhile. So went off back home and gave them a spray with some cleaner and smashed them on the ground until they started clicking freely again with power to them. Got them all sounding really good, so in they went (without any lube, thinking back it should of been something that should of come to mind, but I guess I was just in a rush to get it running!), as they went in they must of torn the o-rings. I got the intake and everything back on and together and we started it up again. Ran mint!! So turned it off to see how it would start again, flat battery. Chucked the charger on, and then decided we'd put the wheels on, piece it a bit more together and go for a drive up the driveway. By time we got it together and off the hoist, a few hours had past and so had a decent amount of fuel past the o-rings and into cylinder no.5. Cranked it over and it didn't want to start very easily, so gave it a few more attempts and finally started up with a lovely knocking noise! We thought maybe it was just something loose in the bellhousing, as when we first started it we quickly realised there were no bolts in the flex plate to the torque converter. Anyway drove it up and down the driveway and then back on to the hoist. Decided over Christmas we'd pull out the transmission to have a look in there, other than the weights on the flex plate being ripped off by the torque converter there was nothing that obvious. Started the engine without the trans in and it still had the knock, which was a disappointment. Our neighbours Tony and Jason, who are a bit more mechanically minded came over on Boxing day after hearing that it wasn't transmission related, and went over everything they could think of. Eventually after a good few hours we narrowed it down and decided to check how high each piston is coming up by sticking a threaded rod with a nut on it and turning the engine over by hand. Got around to cylinder no.5 and it was about 5-6mm lower than the rest. Was obvious at this stage that we had a bent rod that was caused by hydraulicing the engine with fuel. Out came the engine, onto a stand, flipped over and then pulled the sump off. It was pretty bent! The crank smashed up the bottom of the piston, but other than the rod and piston everything else looked good. The engine is now at the rebuilders and injectors have been professionally cleaned with new o-rings. The buggered o-rings on the injectors. Since I had awhile off work over Christmas and the engine debacle halted progress a bit, we decided it was a good time to sand out all the runs in the clearcoat and give it another couple of coats with some flatter clear since I wasn't quite happy with the last stuff I used. Used some PPG autothane clear with flattening base in it this time. Was way easier to spray, looks waaaaay better, a lot smoother and a more consistent flatness. Also the extra coats covered the rust up a bit more, as before it didn't seem to be covered well in the rusty areas. With the engine out it was a good time to go through and tidy up a few things. Made up some stainless heatshields that cover the wiring on one side and the fuel and brake lines on the other. Also wrapped some of the exhaust in heat wrap to try and help keep some heat away. Ignore the plastic cable ties, the ones that came with the wrap were too short, and I'll change them soon. After trying to drain the coolant I decided it'd much easier if there was a drain plug, rather than having to disconnect a hose and having it run straight onto a crossmember. Next thing to do was sort out the fuel filler. Turned out the u-bends I bought for the headers were the correct size I needed, so took one of them, cut it to fit and welded a breather pipe on the side. Made a stainless pipe that goes from the 1 5/8" u-bend to 2" on the tank. Also added some gas struts to the rear bed lift up part. Whilst under the rear end noticed the rear airbags were only mounted on the bottom with bolts and no washers. This was mostly because the mount was so close to the diff tube and the airbag mounting holes had quite a small PCD, you couldn't fit much else in there. Came up with these plates that mount to the airbags with a countersunk screw and then have the studs stick through the outer of the slotted hole in the diff mount. Heaps of room to get a nyloc nut and washer now. Was running out of stuff that I could think of to do, so my Dad made a start planing and fitting the Matai wood planks that I bought quite a while ago. Fitted in they looked a bit weird being natural, too bright or something. Had some Japanese stain lying around that we tried and I quite liked it. So went and wiped that all over it once it was fitting well. Then wiped over some Scandinavian oil and came it out really nice. Got the windows installed, he still needs to come back and finish them off. The front window stainless trim doesn't fit as well as I'd hope it would, sorta sticks out a bit, but we're sure it's in there properly. Probably a combination of the crappy re-pro rubber and trim not being 100% right to start with, as I've heard of a heap of people having troubles with windscreen rubbers not fitting nicely on these. Supposed to be taking this to Nats in less than 6 weeks hahaha1 point


.thumb.jpeg.384ff72c8d2b0ee0d34a7bdedb55bdcf.jpeg)


This leaderboard is set to Auckland/GMT+12:00