
Leaderboard


.thumb.jpeg.384ff72c8d2b0ee0d34a7bdedb55bdcf.jpeg)

Popular Content
Showing content with the highest reputation on 08/18/19 in all areas
-
Picked up the injectors yesterday arvo. fitted them up just now. Car go VROOOOOOOM! /End thread.13 points
-
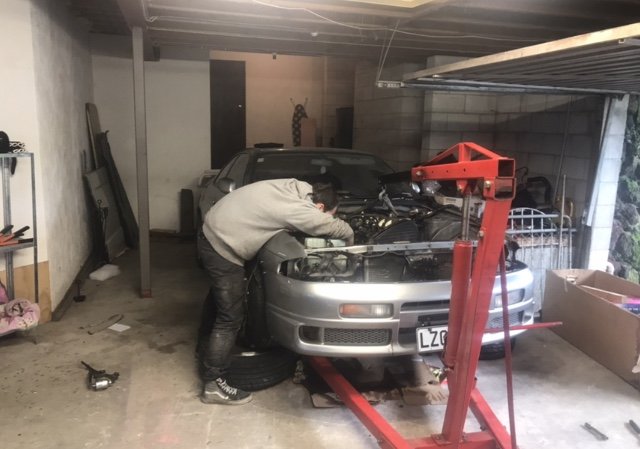
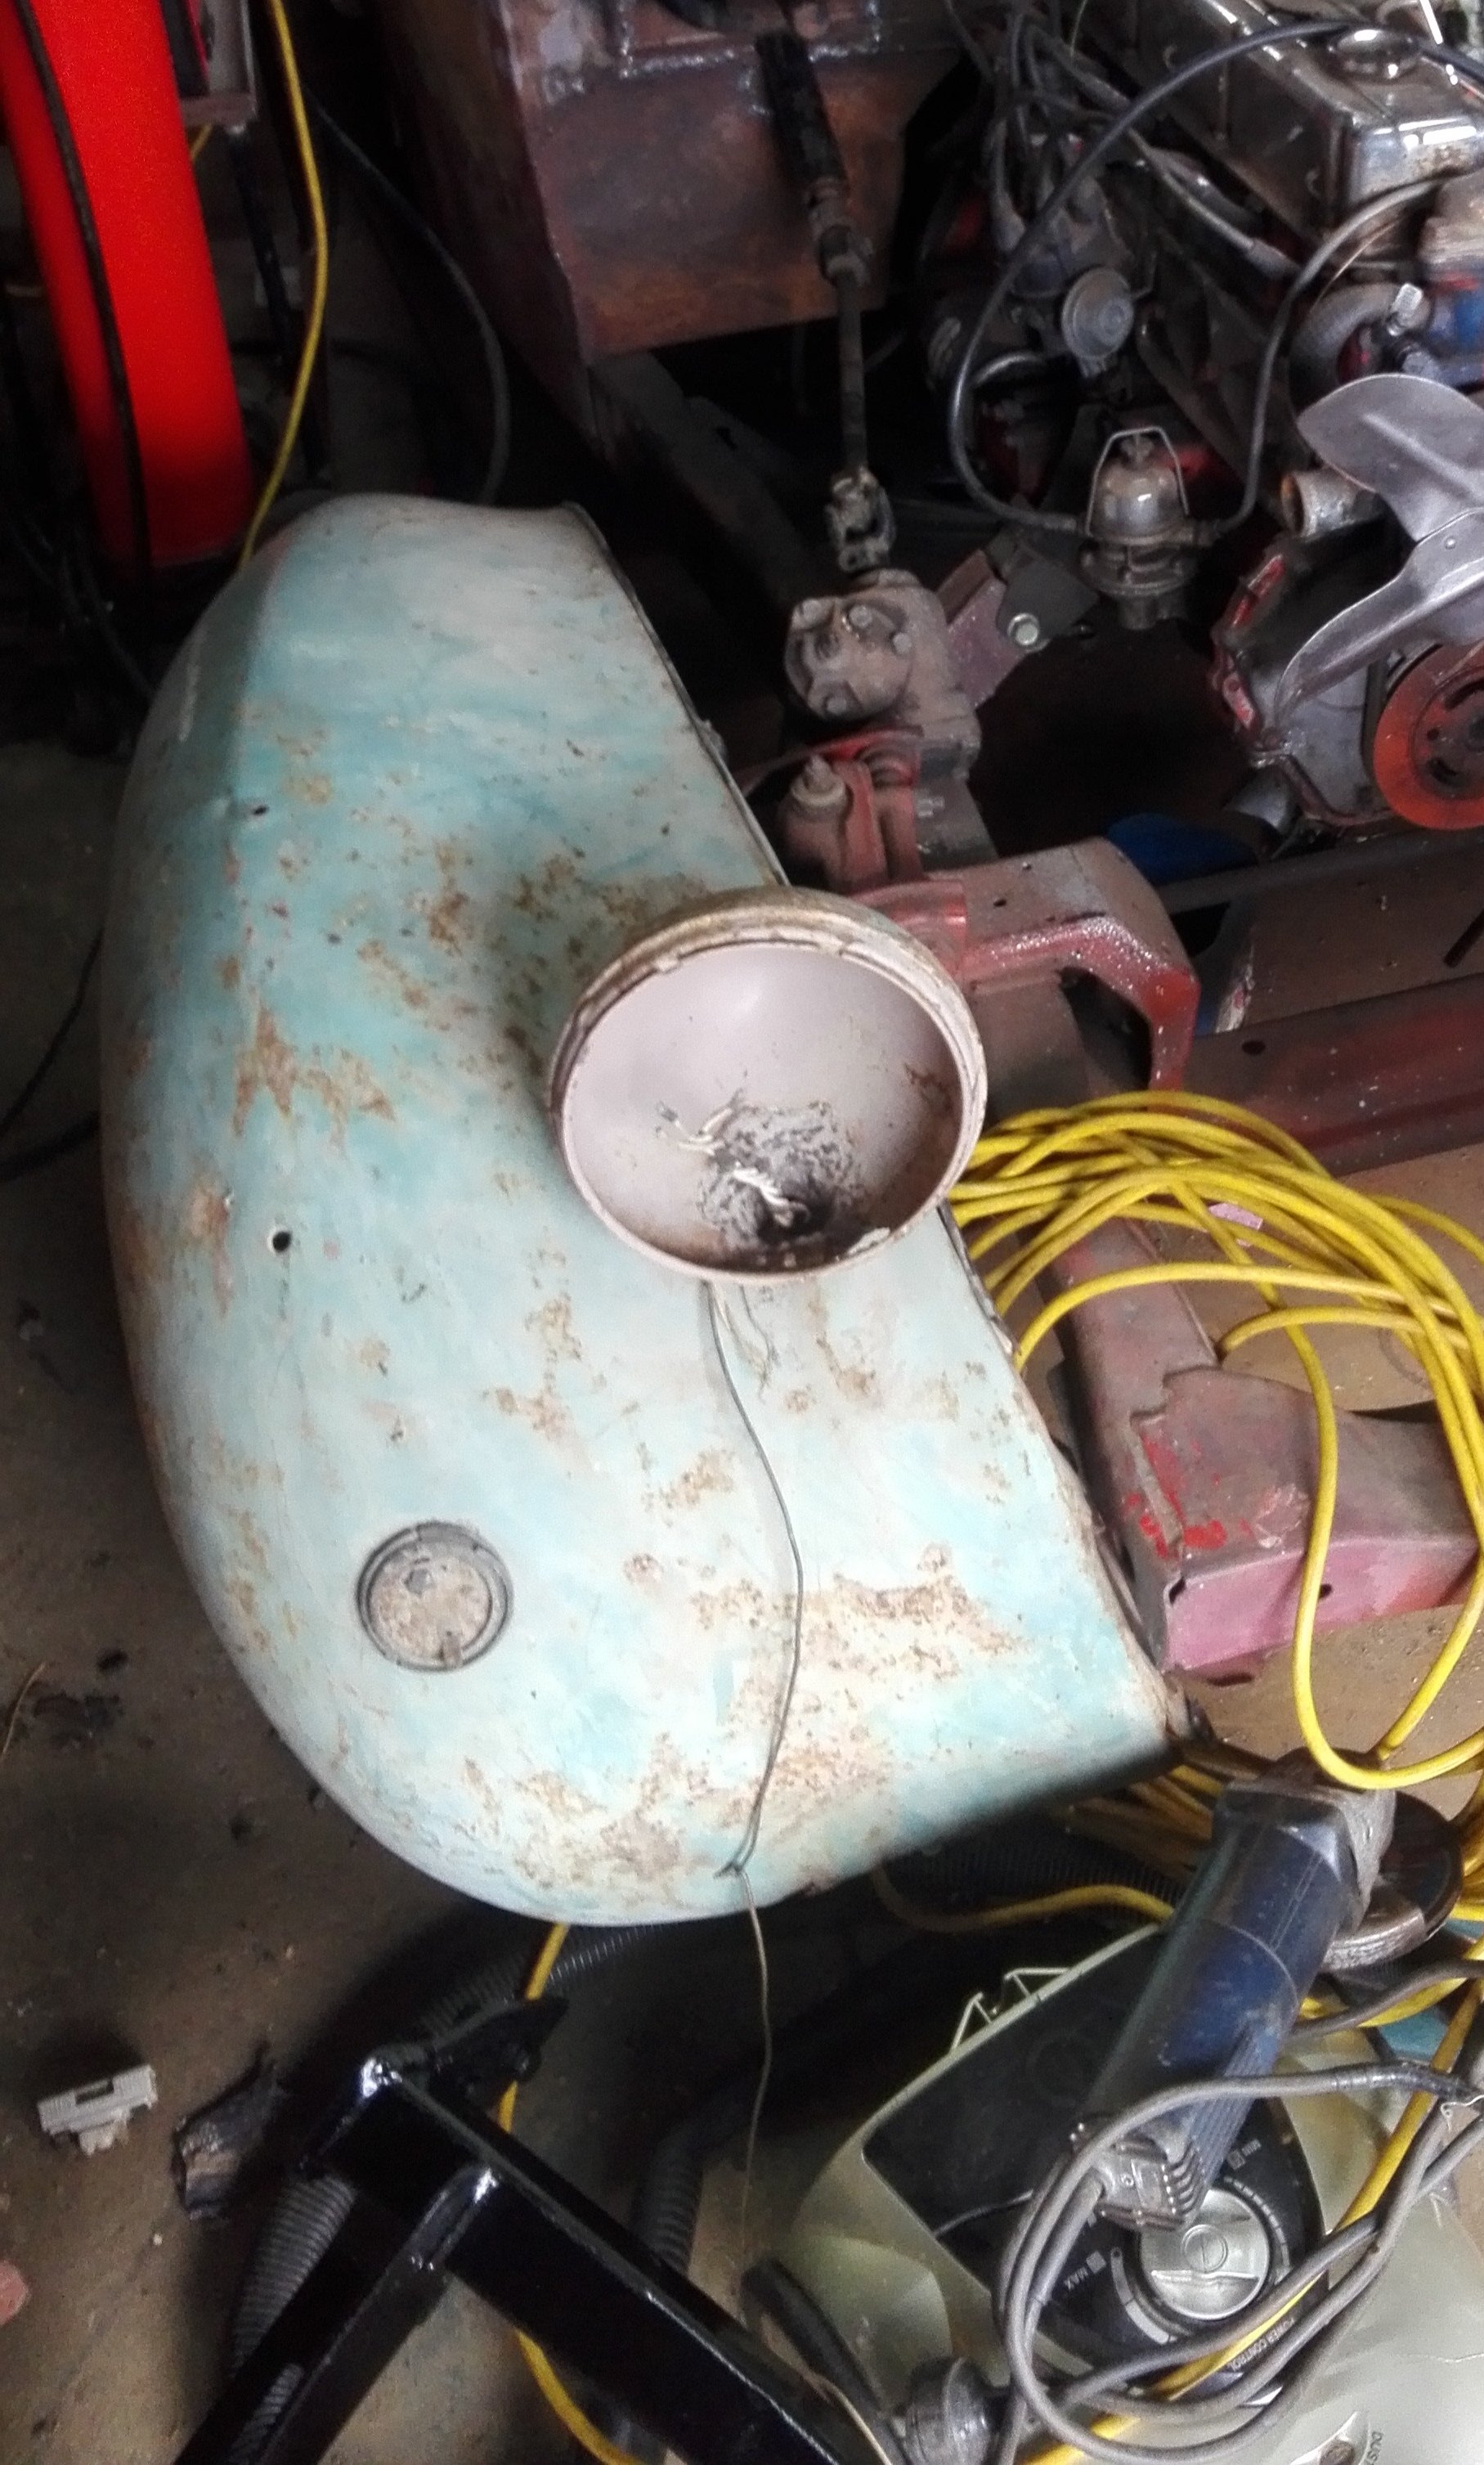
It seems like I'm stuck in a never-ending loop of dodgy fuel hoses. The TVR is no different. After I paid for the TVR and whilst waiting for the transporter to collect it, I was let in on a little... issue... the car had. This is what I was told, as a little "oh btw" side note "And last but not least – I never cured a petrol smell from the tank and guess he hasn’t either … I couldn’t leave the car in the internal access garage cos it stank the house out." Well, that could be interesting, since my only garaging is internal access, under the bedrooms, and my driveway is too steep to park a classic car on (not to mention uncovered). When the car arrived, there was no obvious smell. I suspect that was to do with the fact the tanks were empty. Once I added fuel, a noticeable smell was present at the rear of the car. It wasn't enough to stink the house out, or even the garage, but with only 10L in the tanks I can only imagine it gets worse the more full they are. I have receipts for one of the tanks being removed and repaired in 2011, along with all the fuel hoses as the "recently replaced" filter was leaking. This dashed my hopes that it might just be a simple case of dodgy old fuel hoses causing the issue, as they had been replaced (we'll see). Today I jacked the car up and had a look. Unfortunately I found that due to differences in early and late chassis, despite seeing this car up on QuickJacks, I cannot line mine up with the chassis tubes to safely lift it. The later cars have body mount plates on the chassis, where mine doesn't. Oh well, the old jack and stands come out to play again You can spot the silver fuel pump in the top left of the above photo, behind the exhaust. The tanks are more or less above the pump, on each side. A quick look around and I suspect I found at least one of the causes of the fuel smell. The main feed hose from the tanks to the pump has horrifically perished The way the hose has been run also causes issues too, with the hose being squished flat in at least two places as it goes over chassis tubes (top and bottom photos are good examples). It's not cheap hose either, being Aeroflow. The Tee piece between the tanks has been replaced with Aeroflow parts. The small hoses from the pump are showing signs of perishing too. All in 8 years, and minimal use. So surprise surprise, despite being done before, it's all dodgy looking and buggered. I have my suspicions about the filler and balance tube couplers, but I'll deal with them if replacing the under car hoses doesn't help. They looked ok from what I could see under the car. I have ordered new 5/8" fuel hose for everything to the pump, a new brass Tee piece (to replace the Aeroflow one), a new fuel filter, and I still have stock of good 8mm hose for the other hoses. Once it all arrives I'll drain the tanks, rip it all out and start again. Hopefully that sorts the fuel smell, and may even help the system run better if the hose isn't being crushed. One last little thing; I gave the other side of the rear window a polish today too. Now you can see through both sides. It's far from perfect, but much better. Interestingly, from the inside, I'm pretty sure the clearer spot on the left was my test patch. I'm going to buy a foam polishing cone and try polishing at a higher speed and see what happens, especially with that pitted yellowing. Just need to take care with the surface heat, not to cause more damage.9 points
-
Loads more stuff done, my life essentially consists of real work during the day then smashing out more truck stuff in the evenings and the weekends. My wife is extremely understanding, I reckon I lucked in with that one. Anyway for starters I made most of a heavy duty engine stand in anticipation of stripping the boat anchor down. I'll make the mount to suit the engine once it is out. Then I made some wheel arches and boxes for the deck with the rest of the zintex sheet. The last bit got a little bitsy as I was running out of big offcuts, it looks ok tho. Looks good. Then some little jobs like filling in the steps as these looked a little funny as they were. Modifying the rad mounts so they had some isolation; Mounting the random cooler I got from the wreckers for the power steering. This is just a pipe doubled back on itself in the Safari, but there was no tidy way to mount that in this setup. This will do for now. It's on a removable bracket so I can swap it out if it's shit. It's also out of the way of the main rad airflow which is at a premium. Next I chucked the driveshaft in to see what needs to happen, this will need some more thought but I have most of a plan for the mounting. Excitingly it is the correct length. Also look at that sexy spacer, those are made out of 7075 tooling plate and are very pretty indeed. Because of clearance issues the short shaft may need to be at a slight angle away from the bell housing, this means that things won't be aligned perfectly. It will only be 1 or 2 degrees at most but I imagine it might have an effect due to the single uj by the transfer case. My saving grace is that the shaft will only be spinning when in 4wd and I imagine never at open road speeds. Not too sure about that, I will just have to get it as close as I can and hope for the best. As you were.7 points
-
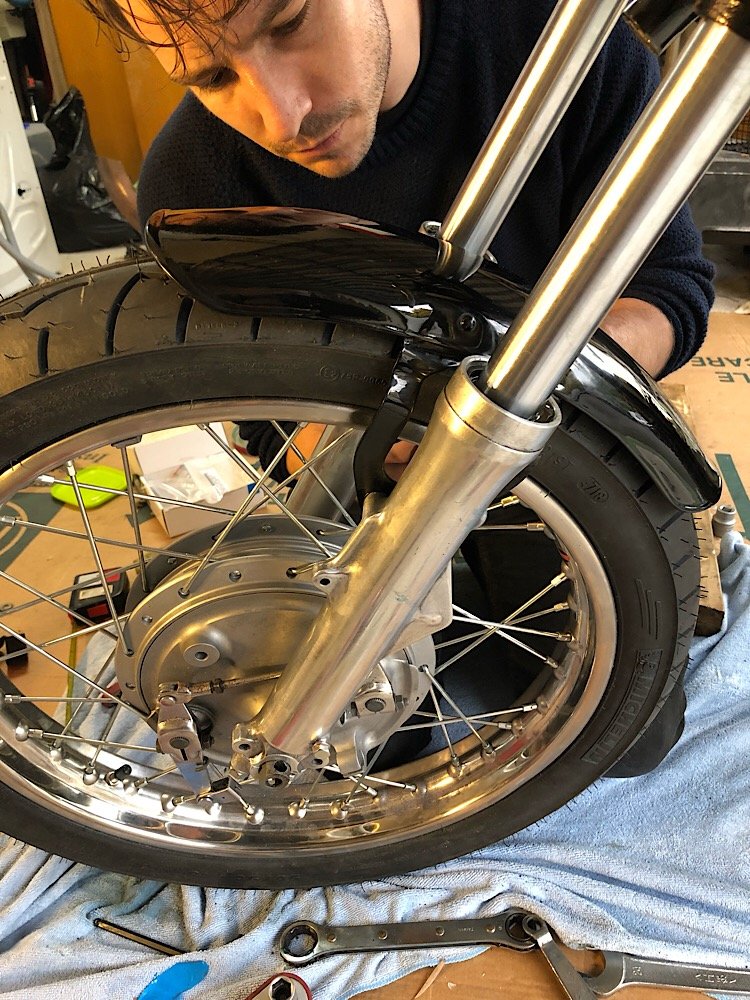
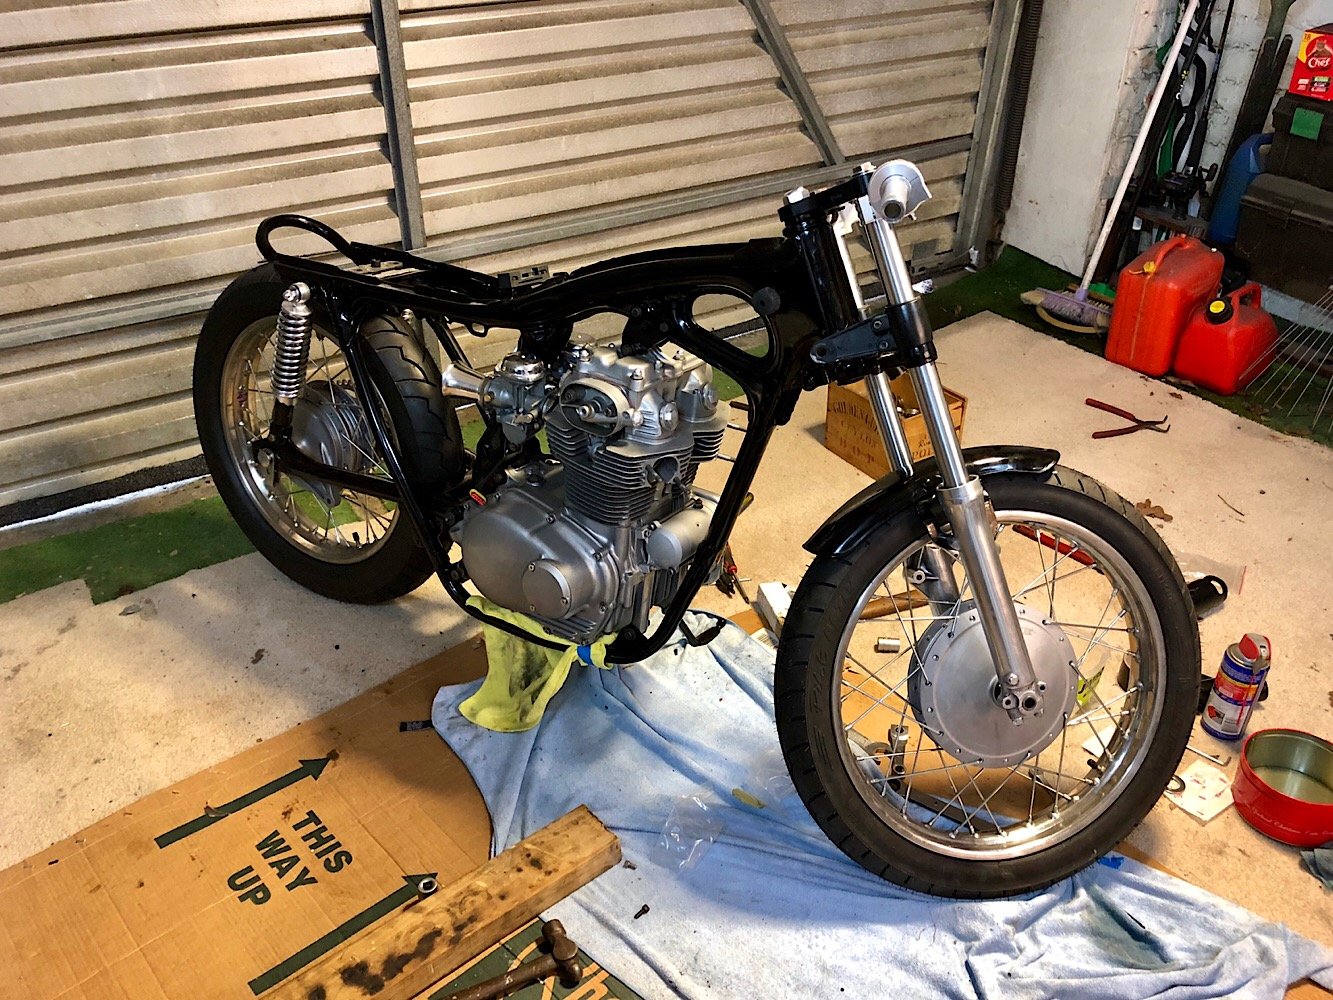
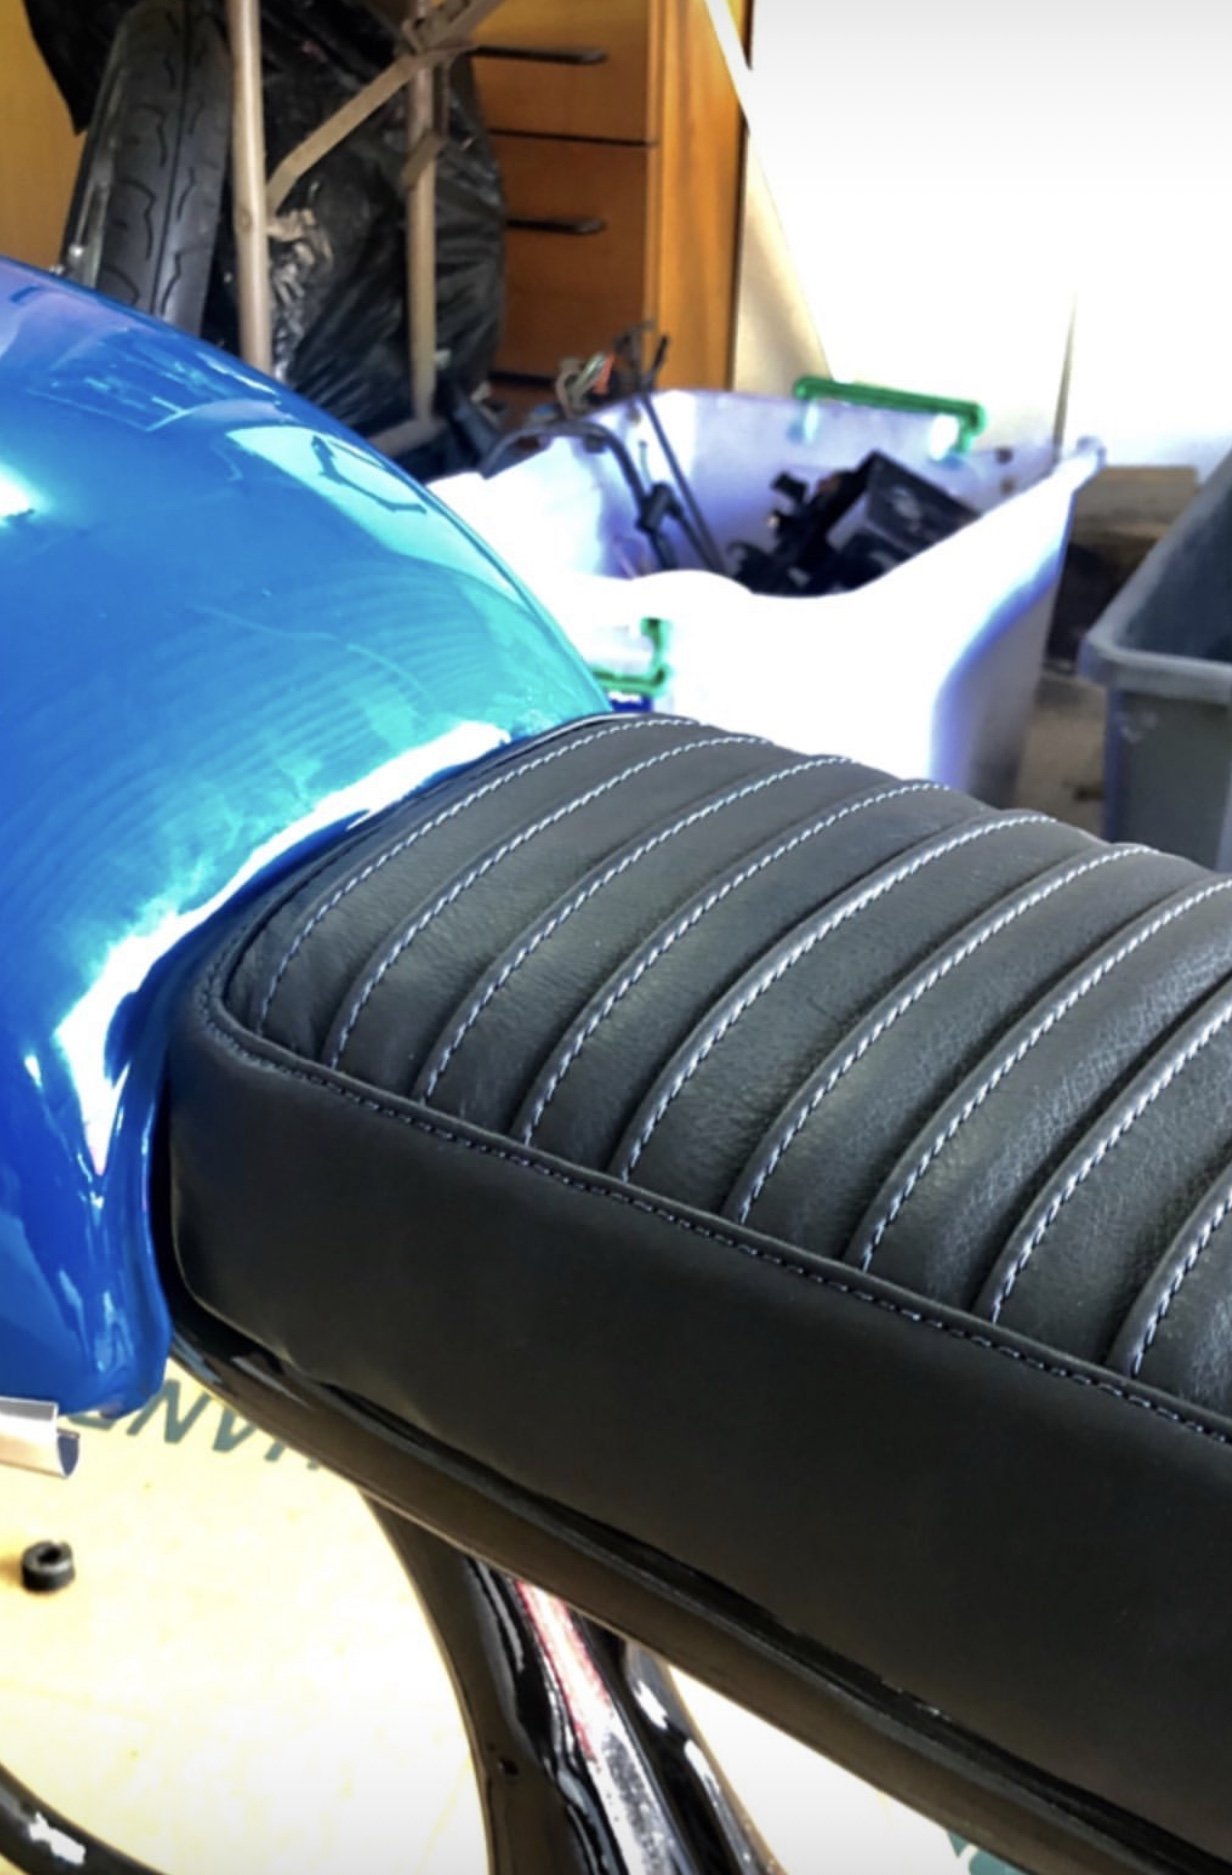
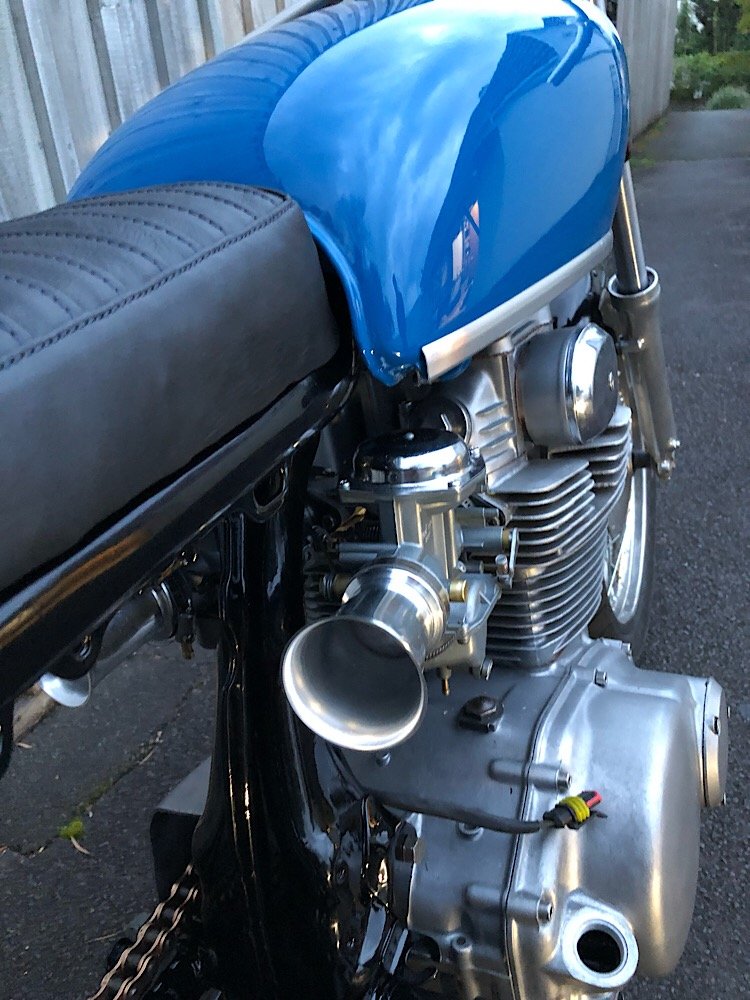
Painted the frame and got the motor back in the frame today. Lots of figuring out where all the bolts went as most of them were sitting in a bucket before buying. Front guard turned out perfect, so many hours spent to keep the rolled steel edge on the front. Stoked with how it turned out. On its feet for the first time! Placed all the pieces to see how it looks all together.. Big shout out to Eliav for doing the upholstery, leather with the dark blue stitching looks mint!
 7 points
 -
More progress was made on the old TVR today. Just small, but important things, again. I had a weird thought last night as I was falling asleep. What if the alignment is OK, but the wheel isn't on straight?! I previously mentioned that the steering wheel is way on the piss, and I thought it was the alignment, but hey, with everything else wrong with this car, could it just be the steering wheel wasn't positioned correctly at some point after being removed? This is a reasonably easy thing to check. First I marked the center top point of the steering wheel, with the wheels straight. Yeah, that doesn't look right! Next, I turned from center to either lock and counted the turns. Both sides had the same amount of turns to each lock from center, so that indicates that the steering rack is centered. Hmm. Also note in the above photo that the steering wheel bolt pattern lines up perfectly. I decided to take the wheel off and see if refitting it correctly would help, so I grabbed a hex key and started to remove the FINGER TIGHT screws from the wheel. Yes, finger tight. The leather wheel is a genuine Momo from '86. Not original to the car then, but still period correct. It's in very good condition really. Plot twist. I changed to the Momo Futura from Effie. I love this wheel, its so nice in the hand, and looks great. This is a much newer wheel, at '96, but still works. It looks sublime Moving right along, before I spend way too much time admiring my wheel, I changed the spark plugs. I whipped one out earlier to check and it was both black as anything, and the wrong heat range. Just a quick note on heat ranges. The number in the spark plug model is the heat range. The ones in the car were a BP6ES and I replaced them with BPR5ES (the R is for Resistor, to reduce electrical interference). Going to a lower number means the plug is "hotter". A hotter plug transfers heat from the plug into the head slower, meaning the plug runs hotter. A hotter plug is better for lower performance engines that rev lower and don't have forced induction. The higher heat in the plug helps to clear carbon and keep the plugs from fouling. There is a science to it all, but that's the basic premise. Love the ease of access. The old plugs came out with no issues. Very black The other bank wasn't much better, and plugs 4 and 6 were wet with fuel I had to remove the intake tubing and air filter to get to the plugs, so went the next step and also checked and cleaned the metering plate (silver bowl looking thing) The intake piping has been split before, but sealed up and had no other obvious splits, so that's good. The metering plate was nice and clean, but the throttle body was oily. I gapped all the new plugs down to the correct 0.6mm and fitted I haven't run the car yet, so it will be interesting to see if the new plugs make a difference to how it starts and runs. I have my fingers crossed. The next thing I attacked was the windscreen wiper. The original wiper arm was removed from the car before I got it, and I suspect someone had intentions to convert the arm from a pin fitting to J-hook (who knows how), as they had butchered the fitting on the end so it couldn't be used. I had to find a replacement. I knew I had a couple of arms from an SD1 in my piles of spares, so dug one out and had a look. The length was bang on, but it had a pretty solid kink in it, unlike the original one which is dead straight (come to think of it, the tailgate wiper is straight, I wonder if I have a spare still. I suspect its way too long though). Hmm, not ideal. Sure, it wipes and works, but its pretty well in the middle of the driver's vision when parked. Apparently, the original arm is a rear wiper arm from some ancient version of the Ford Festiva or similar. I could probably order one online, but I wanted a more local and readily available solution. I went to Pick-A-Part with one goal in mind; Come home with a new wiper arm. And look what I found A rear wiper arm from a MK3 (00-07) Ford Mondeo liftback. It's not perfect; if it sits as low as the above photo the wiper will hit the bonnet. This is due to the arm being slightly bigger at the spindle, and if it sits lower, it doesn't clear the cutout in the bonnet when its shut. I found this the hard way by taking some paint off the bonnet >_< Raising the arm up on the screen slightly means it clears the bonnet, but puts it at the bottom of the driver's vision Even at that height though, it's barely intrusive in the driver's vision. I'll see if I can live with it, otherwise, I'll have to visit Pick-A-Part again. Its an option though, which is more than I had. The last thing I had a go at today was the rear window. It's cloudy as heck and almost impossible to see through. I had seen on YouTube that you can sometimes polish the plastic clear using elbow grease and some Plast-X. I tried elbow grease a while back and got nowhere. Today I tried a couple of different methods. First, as a proof of concept, I used a small buffing pad on my drill to polish a small section with Plast-X. It's hard to see, but there is a slight difference. The arrow points to the line where the "before" is on the right and "after" on the left So the concept works. Now to scale it up. I was meant to sell my spare buffer ages ago, as it just wasn't as powerful as my bigger one for dealing with paint, but as it turns out, it was perfect for this work. I started on the driver's side, with Plast-X on the pad and this was the result Still pretty cloudy, but now you can see through it. You can just make out the steering wheel, but if I move over slightly, no sign of the steering wheel I worked it some more, but moved up to using Ultimate Compound. It's more abrasive than Plast-X, but seemed to take a bit more oxidation off. Polishing both sides made a big difference, clearly it was oxidised on both sides of the plastic Unfortunately as far as i can tell, the yellow sections cant be removed. It's pitted into the plastic, and nothing seems to touch it. I'll just be happy if it's clear enough to see a car behind me, as previously it wasn't. It was like having a white sheet instead of a window. And just because I can, here is a photo of one of the few times the bonnet has been down since the car rolled into the garage5 points
-
I quit my office job as a technical manager 8 months ago and am working on the tools as an engineer now. the quality of my work is going to go up with access to a proper workshop again.4 points
-
Well, it happened again. Somehow awesome old British cars that need loving find me, and of course who am I to turn them down? This car has a bit of a weird story, but I guess it adds to the history of it all. It all started when I had the M328i listed on Trademe, back in March, and in amongst all the useless time-wasters asking me dumb questions, I got asked if I wanted to swap the black leather vaders for white leather seats from another M3. Of course this was a no, white leather is one of the worst wearing colours in the E36. The fellow wasn't done there though, he wanted my seats. The next question he asked on my listing immediately had my ears perk up, and suddenly I was intrigued. Yes, that's right, a TVR. After a bit of googling I worked out an 80s TVR would be a Wedge. Not the most loved TVR, but I like them, and any TVR is a good TVR in my books. It's 80s, it's British, how bad can it be? Of course I was interested, and let him know. Later that night I get a call and discuss the car. Its been off the road for a few years getting some work done at the "local" TVR specialist, in Auckland. Ok, no problem, except the owner is down in Christchurch (about 1000km and a large body of water away from each other, and I'm somewhere in the middle of that). It turns out that he wanted my car, because he was buying a convertible E36 M3, and wanted to swap my black leather into it. He also had thoughts of "Trevors last drive" by flying up to Auckland, picking up the TVR, driving it down to me, swapping to the M3 and for him to continue on his way down south. As I found out later, this would've been a big ask for the TVR. We discuss the ins and outs, and I'm recommended to contact the specialist and discuss the car. I give the specialist a call and discuss the car. Apparently it's all sorted, and basically ready to "fly through" a WOF and to hit the road. Its had various work done, including most of the hard work like suspension. He noted it does have an issue starting, which is possibly down to a failed fuel accumulator, but does run and could be driven onto a truck. His description of the car was that its a good solid, tidy car, but may need some carpets as they are a bit worn. I was very interested, but needed photos to see what condition it was in. Ok he said, he will try and sort some for me. To cut a long story short, I tried for months to get photos of the car, with every reason under the sun for not getting them from the specialist. On the other side of it, the seller of the TVR decided not to buy that M3, and couldn't find one he wanted, so no longer had a need or want for my car. I let him know I was still interested in outright purchasing the car but would need photos. Both him and myself followed up with the specialist, to no avail. Just before I went on holiday at the end of June, the BMW sold, but I still had no proof of life that the TVR even existed, so just left it hanging whilst I chilled out in the UK (more on that in a later post). When I returned, I already had a list of cars on Trademe I wanted to look at. I had basically given up on the TVR at this point, as during the month I was away, still no photos had been sent. I looked at a couple of cars, including an Evo 4 (which I came very close to buying, but the second viewing showed too many issues, and the unmistakable smell of weed inside) and a C55 AMG (nice car, if a bit dull). I wasn't quite set on them, but noticed that the TVR specialists website had been updated, with new photos, and what happened to be dead center in the photos, but a silver Wedge! Well, there was my proof of life I guess; the car did exist! I contacted the owner and confirmed the car was still for sale, and then did the stupid thing; making an offer for the car as it sits, without so much as a real photo. Offer was accepted, and a call was made to the specialist to make sure no money was owing, that the car could come with the spare parts, and that it would drive onto the truck.... oh wait, what's that, it suddenly doesn't run but you will "try to get it going"... I pushed forward anyway, sending my hard-earned money to the seller, and booking my preferred transport, letting him know that the car doesn't run but the specialist will "try" to get it running. After a long week of waiting, this showed up this morning. Yes, that's the proper good fella Brent from Classic Towing dropping off yet another project to me. Can't recommend him enough, as even when things go a bit pear shaped, he has it all under control, and he loves weird cars almost as much as I do. My first question to him was "did it run?" to which he replied with a no, and tightened the winch ready for laying the bed flat. Such a cool truck, it lowers the bed right off onto the ground. This is half way down Brent pushed the car whilst I jumped in and steered it carefully into the garage. This was harder than you would think, being that it was raining on the outside, and inside of the windscreen, and the wiper didn't work (well, it's not even fitted). We made it safely into the garage though. The brakes work, which is something. So, what is this weird little thing? A 1980 TVR Tasmin 280i It's more or less a Ford Capri in a fibreglass body with tube-frame chassis and some weird and bespoke parts. Powered by a 2.8l V6 Ford Cologne engine topped with Bosch K-Jetronic mechanical fuel injection, backed by the latest (for the 70s) in Ford 4 speed manual gearbox technology, and driven via the rear wheels through a Jaguar XJS diff with spiffy inboard disc brakes. The pinnacle of technology, and a real parts bin special. On the plus side it does get some pretty advanced gear for something that is the same age as my green Mini. Independent rear suspension, four wheel disc brakes, fuel injection, electric windows, bonded windscreen and a targa top convertible. It does have a lot of known quirks though, such as a multitude of wiring issues, a wiring loom that consists of only black wires (seriously), diabolical K-Jet fuel injection, and a dual fuel tank system that is no end of troubles. Anyway, this car is the 106th Tasmin off the line, and appears to be the 4th DHC (Drop Head Convertible) made (1st was a concept made from a chopped up FHC). Before the DHC was in production, the FHC (Fixed Head Coupe) was the TVR to have. The FHC was soon phased out though and only the DHC survived until the end of production, albeit with some big changes. Being a very early car, my one has some specific early only "features". The first, and most obvious, is that its a TVR Tasmin, not a TVR 280i. TVR dropped the Tasmin name later on and left the names to just be the displacement of the engine (280i - 2.8 V6, 350i - 3.5 V8 etc). A couple of other early features are the weird little mirrors hanging off the doors. Later cars changed to pods in front of the side windows, like a normal car. One of my favourite really early features though, has to be the gorgeous Stewart Warner gauges The later cars got boring, but arguably more readable (and probably reliable), VDO gauges. There is just something about the way the SW gauges are clocked, and the vertical odometer. So, now that the car has been delivered, how is it? Did i win the blind buying game, or get screwed? It's not as tidy as described, and it doesn't currently run. The battery was completely dead (to the point my ctek charger won't even detect it), but with a replacement battery the electrics are slowly coming to life again. Unfortunately, it leaks like a sieve and is full of water. I tried to dry as much as I could out, but the dehumidifer will have to do the rest. The roof seals will be the major contributor to this, as they are well buggered. The water ingress is what has ruined the carpet, it's literally rotting away. The boot, once I got it open, wasn't much better, with the lid being full of water and covered in condensation on the inside. The seats are in good condition, with no obvious rips or tears, as is the rest of the general interior. The wood grain has some cracks, but overall for a car I suspect spent a lot of time sitting outside, its in good shape. Apparently blue velour and vinyl stand the test of time. Bodywork is very good, with only some stone chips on the front. The rest of the paint appears to be good and will come up well with a polish. The top is also in good condition, with only some damage to the fabric on the removable section, and the rear window is very cloudy. Hopefully, I can polish that out, but it may need replacement. I don't know how the car is mechanically as it does not run. The previous owner advised (only after I had paid for it) that there is a strong fuel smell from the tanks when sitting, but it drove well otherwise. The fuel in the tanks smells like varnish, but cannot be smelt without opening one of the two fuel caps. I will need to drain this out and throw some new fuel in before trying to start. The starting issues could be a few things, but I will get to that in due course. One cool thing about TVRs is the convertible roof with a removable targa section. You can either have the roof up, down, or the rear section up but without the targa section, which fits into the boot (roof isn't locked in this photo, so looks a bit baggy) So that's the TVR. The plan is to get get it running, get a WOF on it and then take it to the British Car Day show in Feb. In between that, just take it out for some top-down Summer cruising. Oh, and keep fixing it. Can't forget that.3 points
-
Been helping a mate all weekend. RD28 in small sea faring vessel, Huge hollset and plenty of boost.
3 points
-
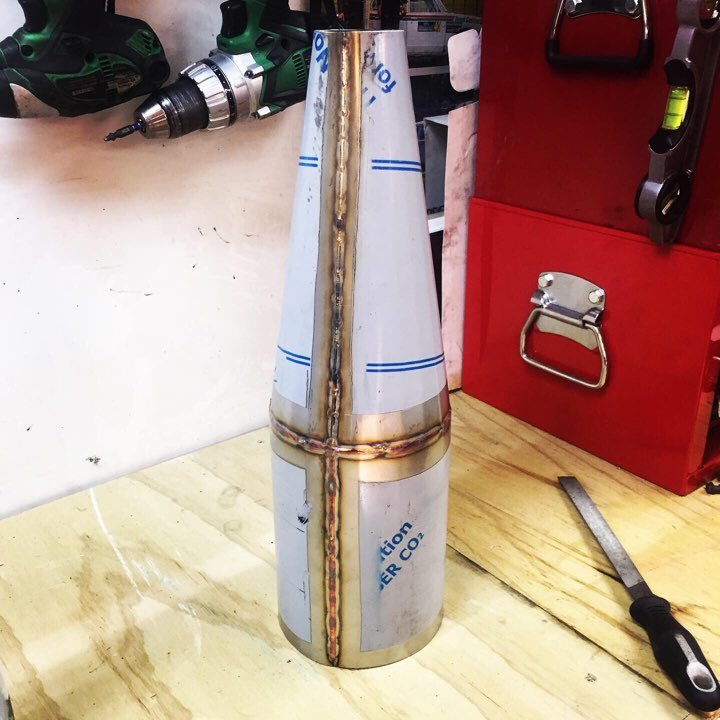
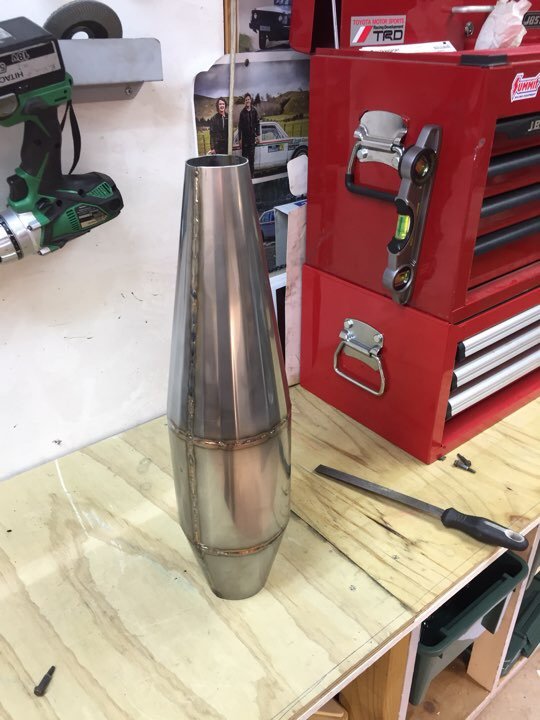
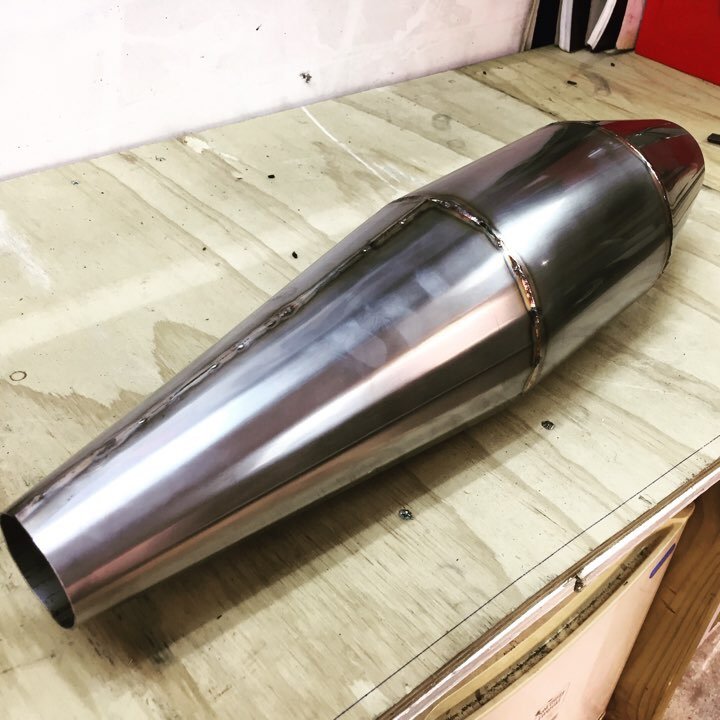
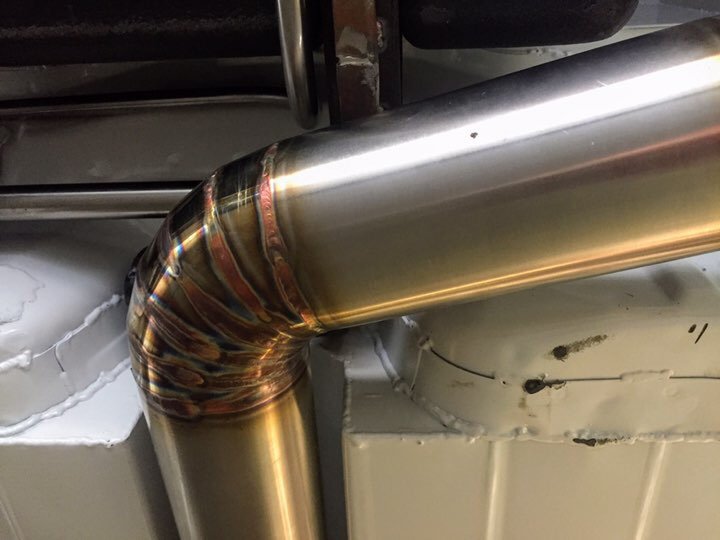
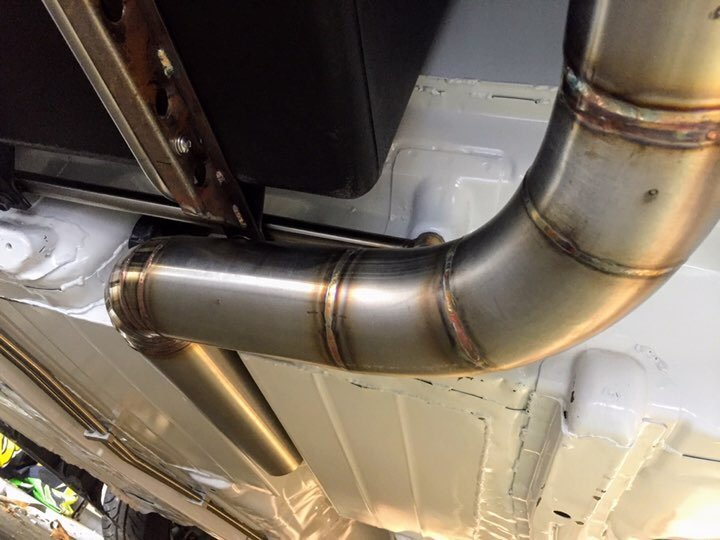
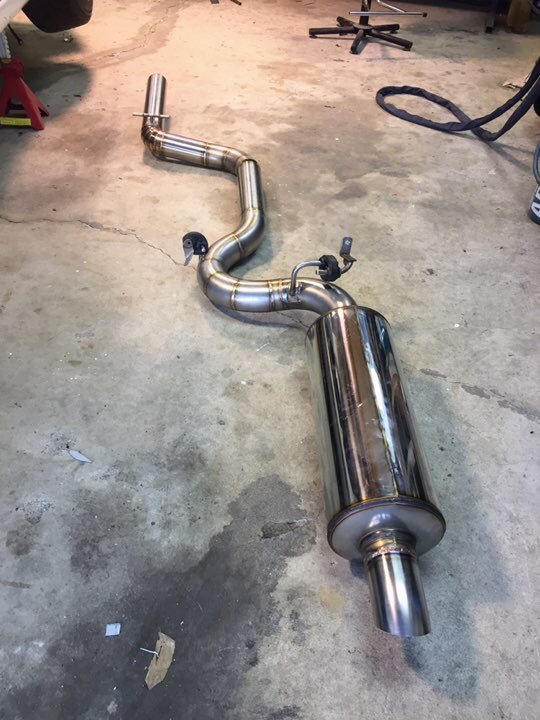
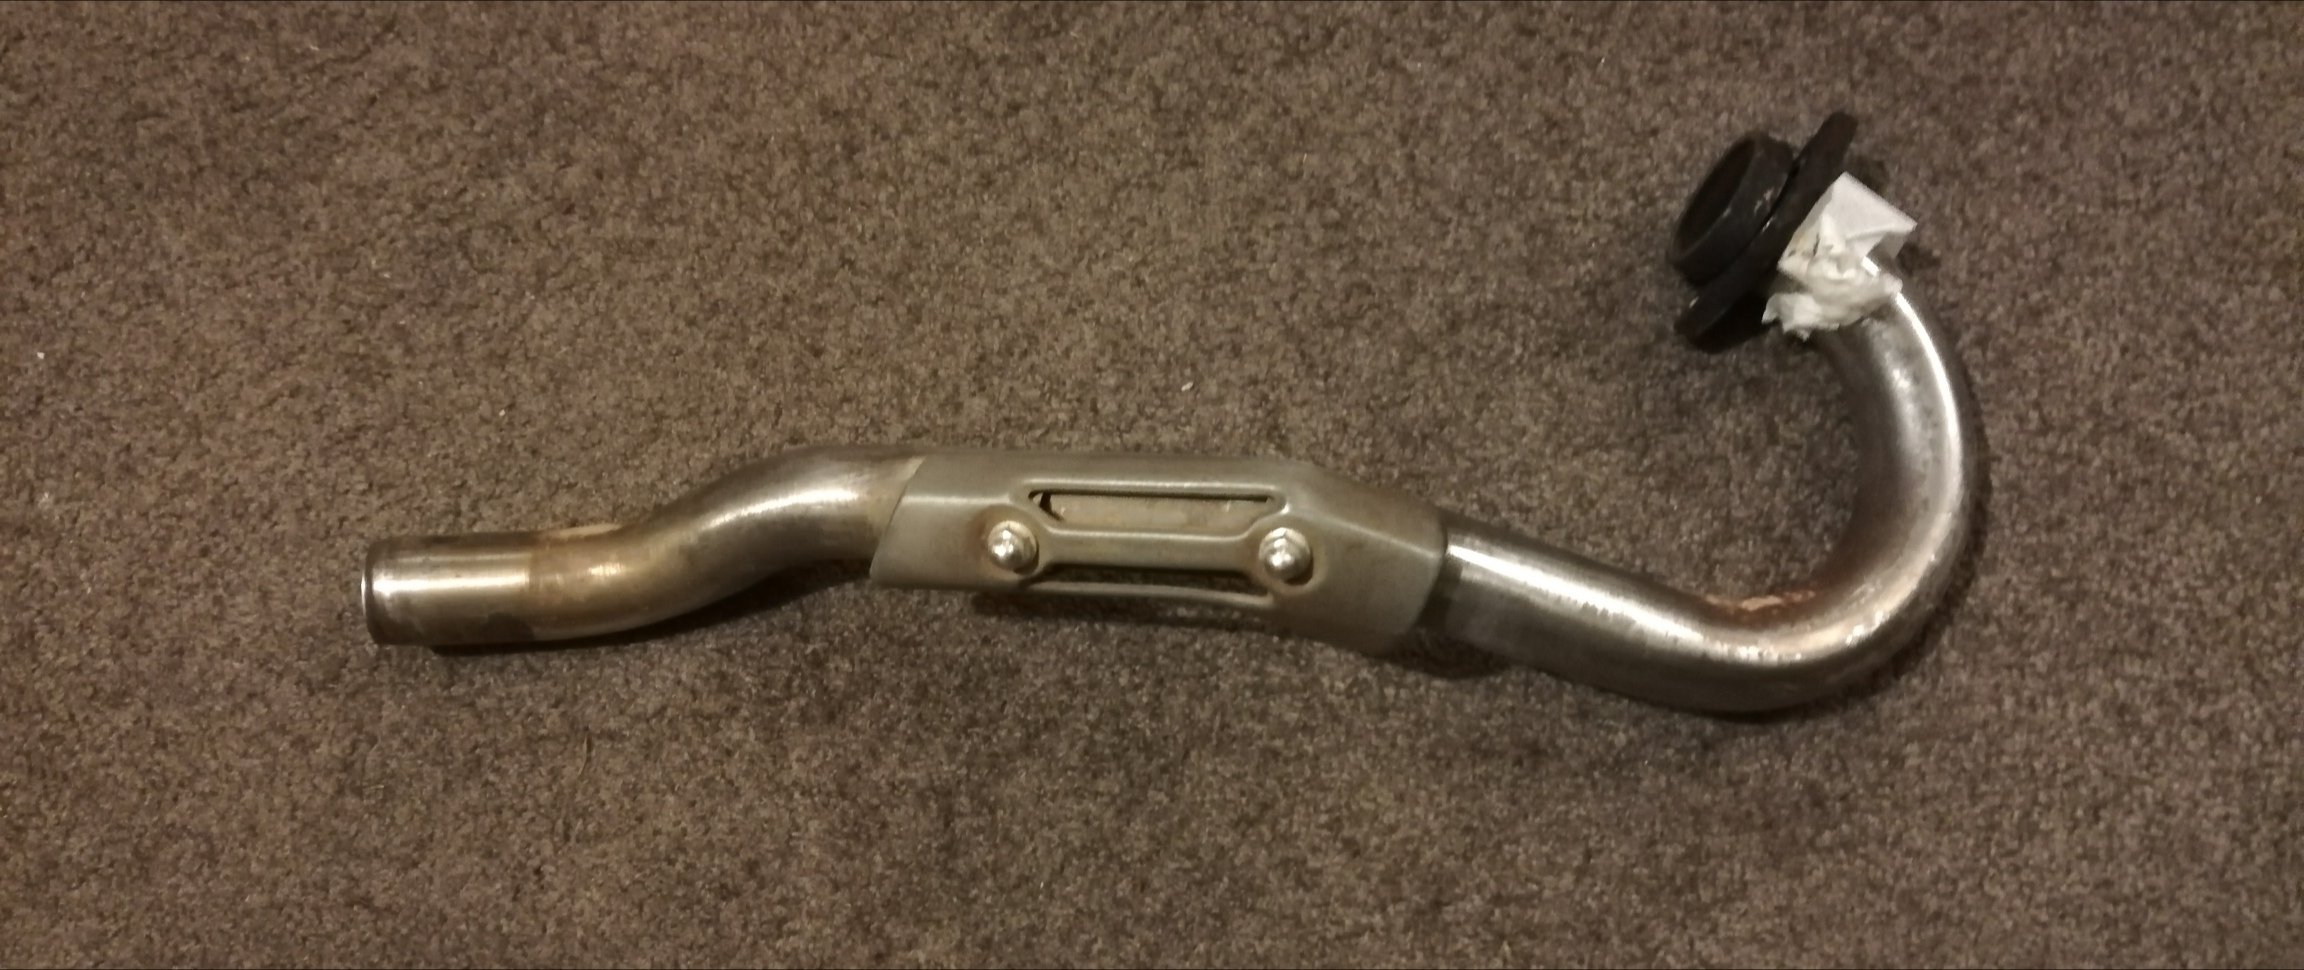
So finally got off my ass and finished this expansion chamber and my exhaust. I ended up rolling the belly section and rear cone of the expansion chamber. Should have done this for the front half too it was tricky but turned out way nicer! and gave it a polish up finished the tunnel end end of my exhaust off too. It’s a pretty tight gap to fit through hence the pie cuts and stupid amount of mounts heres the whole system complete just waiting to build headers and order a Flexi and I’ll be able to install it for good still trying to to find some 41mm od bends for the headers so might need to find something else to sort in the mean time!
3 points
-
So the missus will be reliving her girl racer youth?3 points
-
Got this at work now im 3ks down a private road so its been used to drive between sites by everyone. Currently parked in the engineering bay getting attention on my lunch breaks. Going to start on a new inlet manifold as the original one is choking it stopping it from revving out. The burrs for porting the heads showed up last week as well as the weld on AN fittings for the turbo plumbing. Finally have a use for this thing and a place to work on it. Some photos will come soon.....3 points
-
Enjoying the build thread. The whole 'accidentally bought a weird British thing now fixing it' is proper OS..3 points
-
Sunday evening update time. Fuck the weeks go past fast, I must be getting old. I made some hatches for the rear openings; I added some covers for the drawers so my tools don't fall out; I have yet to find a really good lock system for those big drawers yet... I then made a bracket to hold a power steering reservoir in a place where it was easy to access; I made some radiator supports; After I made these I found the Dyna rad supports in my box of shite, so now that I have adjusted these into the correct position with the cab on I will probably change these over. The Dyna ones have some isolation built in which is a good thing. The rad itself is sitting on two M8 isolation mounts on the underside, connected to that bit of angle. I will cut the angle into two smaller brackets, that shit was just to get them in the right spot during the setup. All snugly in place. The reservoir cap does hit the cover so something will need a cut and shut. I then stood back and admired the goodness; O fuck yes.3 points
-
Still a bit of a work in progress we haven’t proven our theory fully but here’s what I’m basing it on; scavenging can be done 2 ways. Mass flow/inertia - header lengths, pipe sizes and mass airflow velocities helping scavenge airflow out of other cylinders. The key to this is keeping velocities up and preventing reversion so the pressure differential always wants to empty the cylinder. Acoustic - expansion chamber is to reflect the sonic wave that is generated when the valve opens. The expanding of the wave into the chamber causes a reflected negative wave that if it is tuned to the right length can reach the valve on the next cycle of the cylinder. This is based on 2 stroke theory which is well proven. Every example I’ve seen of one being used the car has made a lot more power than expected so just trying to figure it out for myself. @Roman has some fancy gadgetry to hopefully measure and prove all this at some stage.2 points
-
Hopefully the weather plays ball and can bring scooters2 points
-
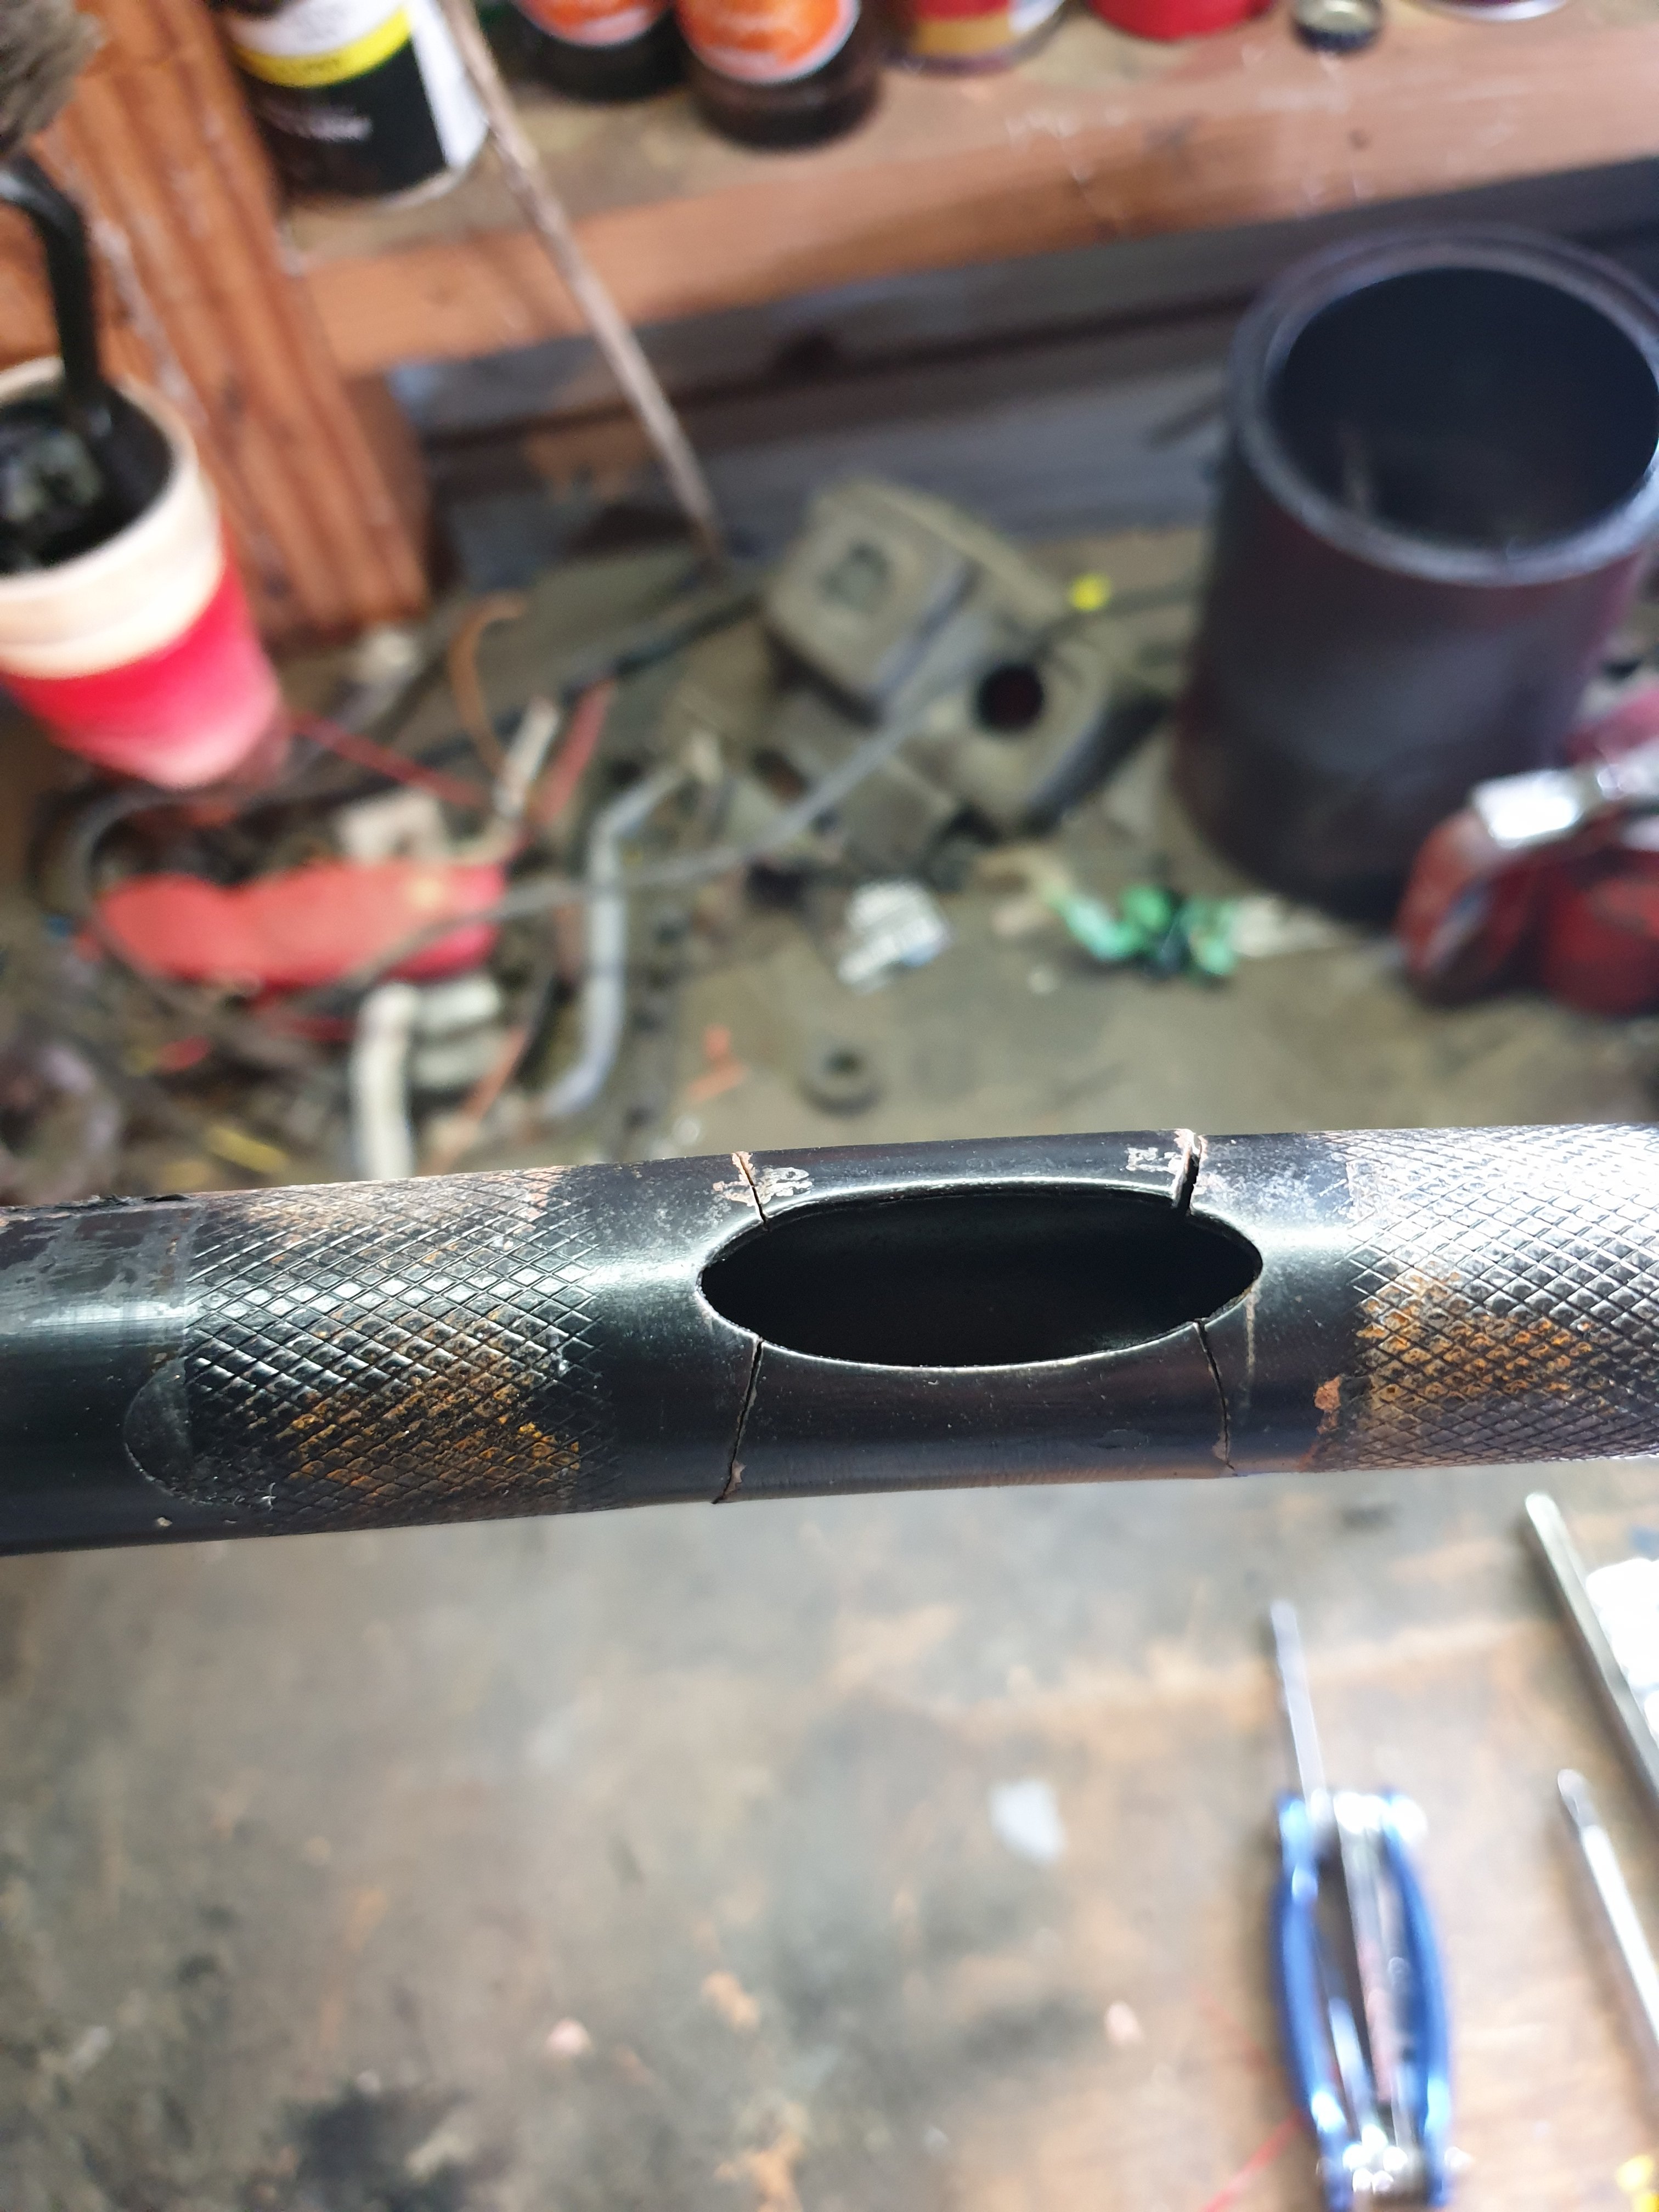
Bugger bugger not good. So by chance saw tht my bars are crackedmost of the way thru..... not good happy i found now and didnt cause a crash... anyway prety gutted need new bars now so if u have 1inch ape bars for sale pls let me know
2 points
-
More rot, damage found this week, front chassis rails seemed ok, but closer inspection revealed issues. A couple of calls later a new left front rail is on its way from Palmside. Which means the body guys can keep going on the front while we wait for a new rear quarter to arrive from the UK. Ive decided to go for white, with black accents and hopefully a carbon fibre rear spoiler. Got an engine builder lined up to give mine a look over, hopefully it can be rescued. I’m trying to find some genuine seats as the original ones have had the adjusters welded up solid. The plan is to have the car running a road legal by the end of the year. i seem to be saying “ hopefully “ a bit just lately .....2 points
-
Well, it certainly makes proper British sports car noises and smells....2 points
-
Had a play with the headlight. Managed to order the wrong size so it’s huge haha but was keen to see how it looked with a yellow tint. Once the smaller one arrives I think we’ll keep the yellow as it pops against the blue. Next is the wiring, so much to do before the Distinguished Gentlemen's ride in Sept!! Edit: man that rear tyre looks huge, thinking of down sizing as it looks a big out of proportion in the profile shot.
2 points
-
When I first read your build thread, I thought sound more wounding than a pipe bomb wrapped in 12 layers of 4 inch nails. But as your thread has progressed, it's actually grown on me. You can pretend you're an early '80s playboy zipping around in your proper british sports car.........2 points
-
Last week I gave the garage a good tidy up, an unintended consequence was sudden burst of motivation to pull this thing out and get stuck in. The shifter will go here with the hydraulic clutch attached. I have been working on the interior. I was given some aluminium sheet a while ago and used it for the floor. I need to get some more aluminium sheet to make the tunnel and dash... I’ll have a hunt on Monday. Hopefully this motivation lasts and I finish it off! Iv had to change the pedal position significantly as he is 7 now... She wasn’t even born when I started it!2 points
-
An exciting day today! first test fit of the huge engine and trans into a mostly stock body mx5. first i started by cutting the 'ears' off the frame and firewall. forgot to grab a pic but its these parts. theyll need plates welded in to re-add the strength lost. this squares up the bay and allows the engine to sit close to the firewall then in goes the engine! its SO close to fitting in unmodified. infact if i was to unbolt the subframe, id be able to fit the sump bowl past the subframe and the engine could sit down properly. however, i dont really want to have to unbolt the subframe everytime i need to pull the engine. which hopefully wont be often, except for during the build, but even thats enough for me. if i want to slide the whole lot in, ill need to cut maybe 60-100mm out of the top of the tunnel. a pretty easy job for the massive benefit of easy install! trans hits here sump just doesnt quite get over the subframe its possible the unmodified hood may even close over it all! most of the bulk ontop is the wiring loom ect what a monster2 points
-
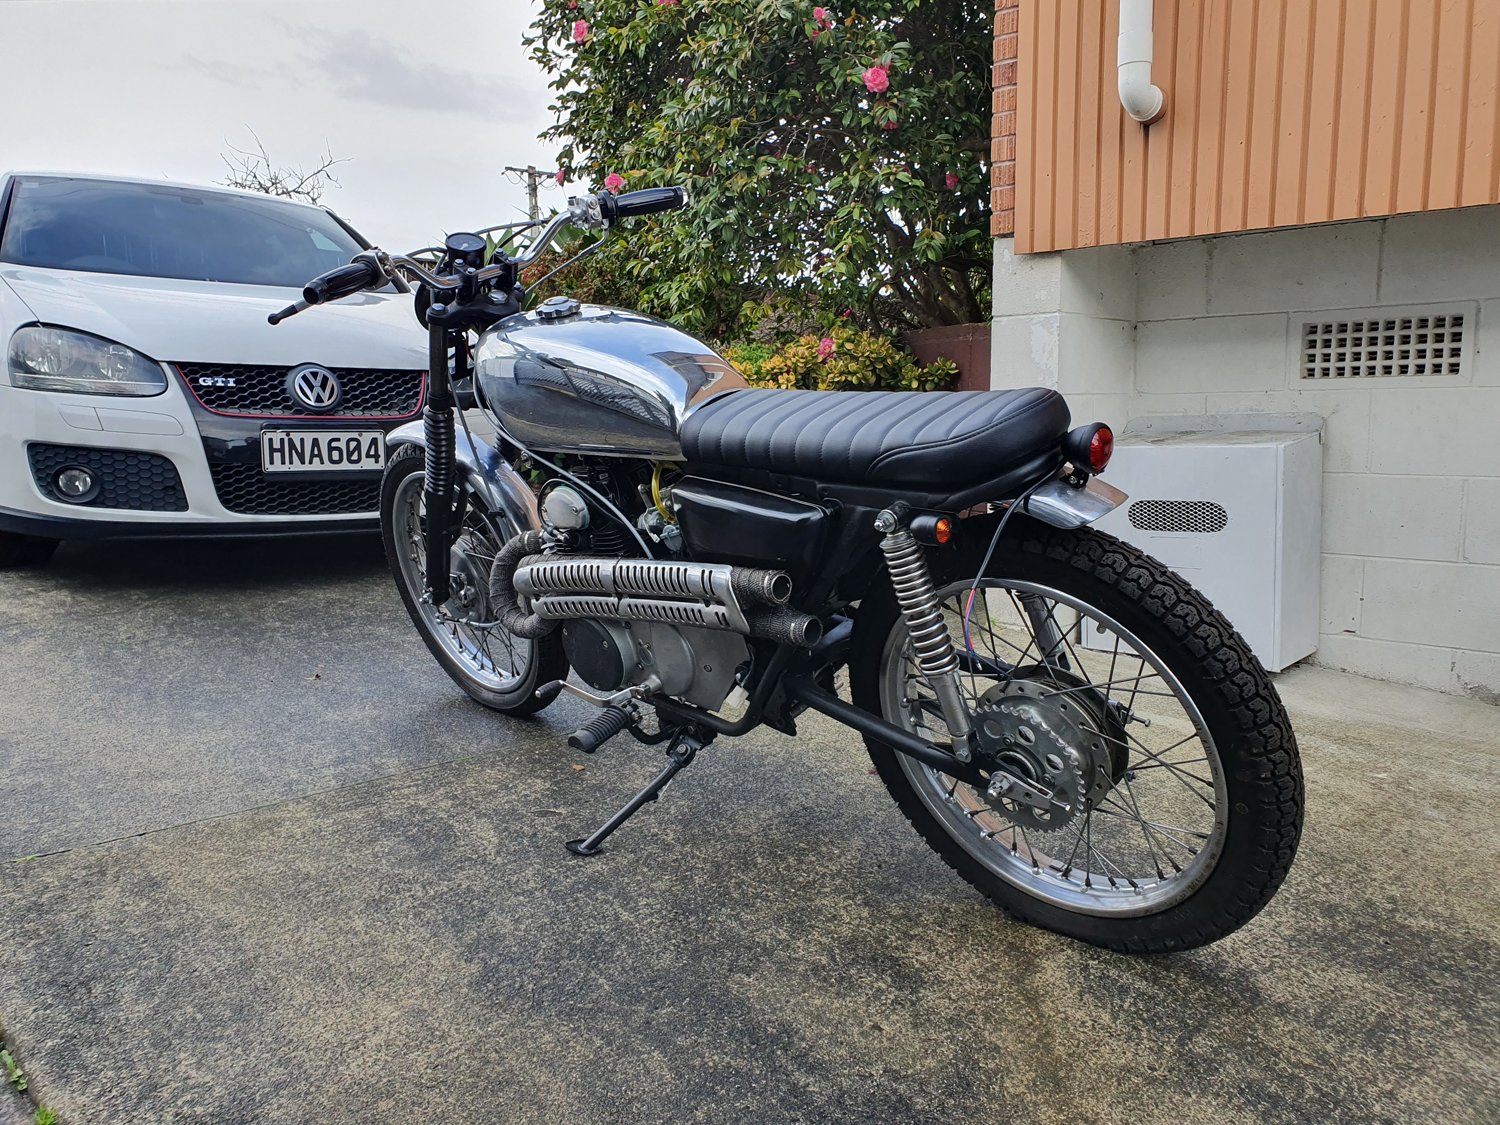
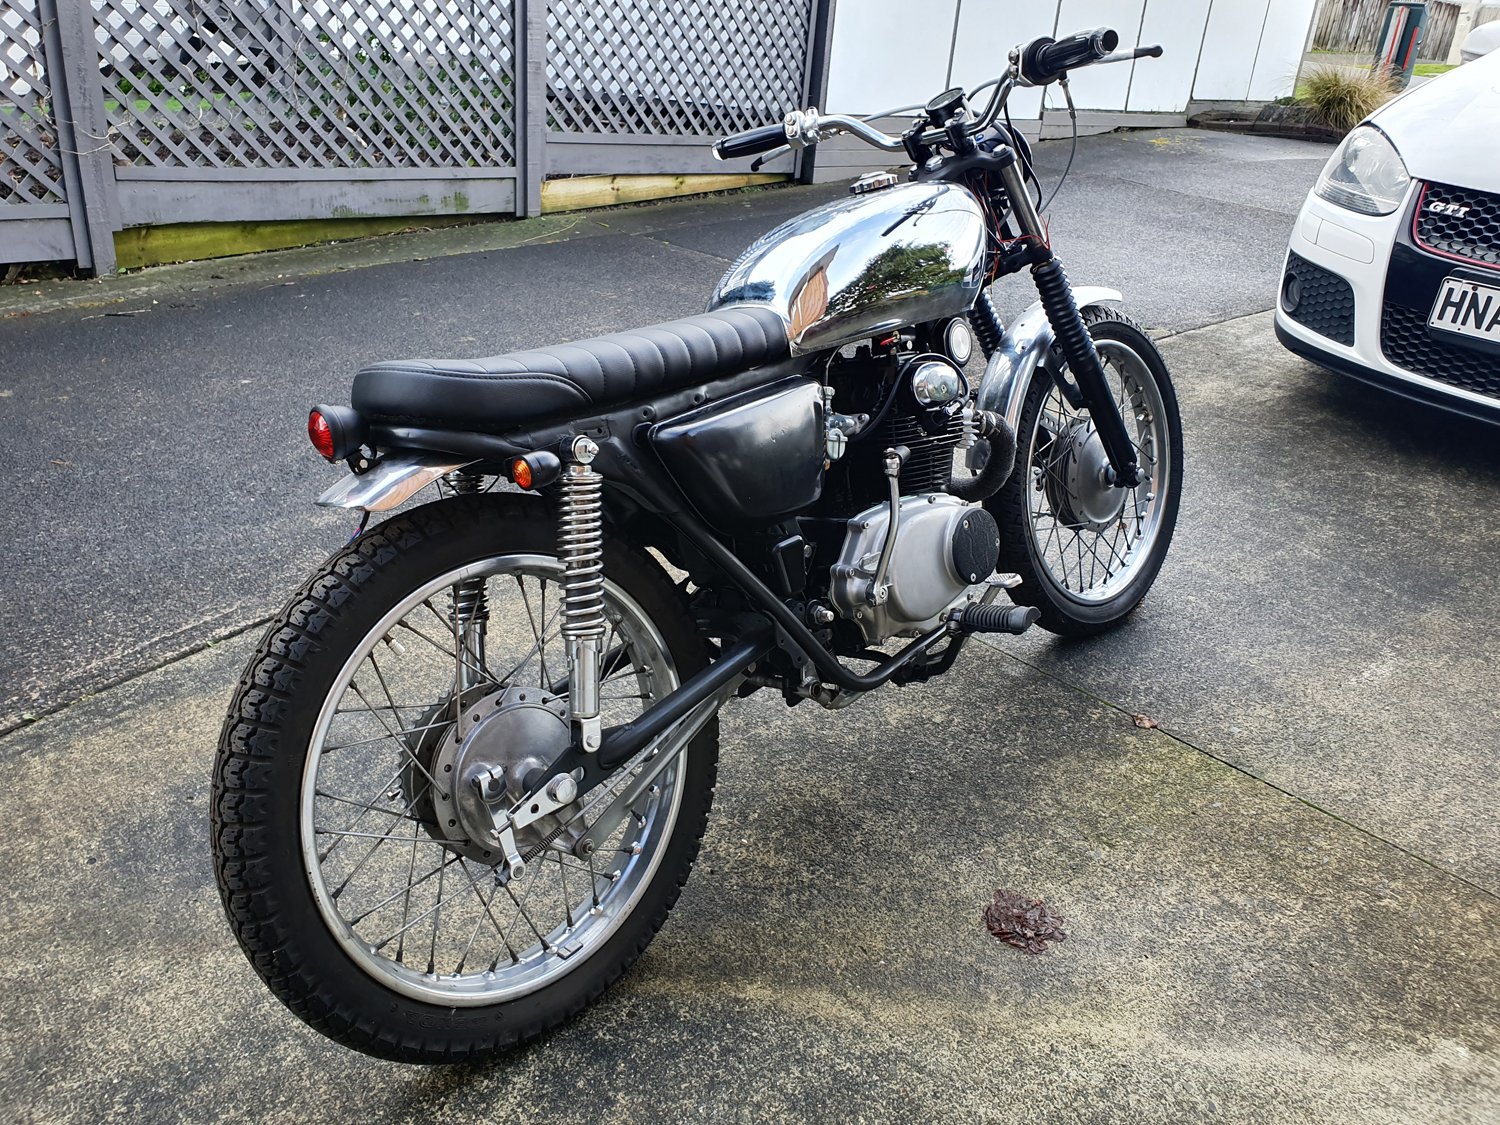
Hi, I’m Shakotom and I have a Motorcycle addiction. It all began with just one FA50 and I’ve been addicted ever since. It just starts with something small and then next thing you know, it spirals out of control and your looking for a bigger fix and that has led me to where I am today. A while ago I had a Suzuki ax100, I really enjoyed the classic aesthetic of that bike but it was punishingly slow for paying $500 a year in rego. I sold that and purchased a ‘87 2KR FZR250, and that’s a weapon of a bike, but sportsbikes aren’t really my jam, and I’m still to cheap to be paying that much in rego. Ive pined over the timeless styling of a Honda CB for many years. I think there a beautiful bike in stock form, and a versatile canvas for creating everything from a full blown classic race bike, A scrambler/Cafe racer or if you get wild enough with a welder, a chopper. Id been looking on and off for a while, I’d decided I wanted a Twin cylinder -either a 350 or a 360 just to keep the weight down. It had to have a minimum of Rego on hold and be pre 79 for cheap rego. Back in April I found a bike that happened to meet all of those requirements at a pretty good price, but I was due to fly out to America in 4 days. So I did the only sensible thing I can think of and went to view it. 8 hours before I was due to be at the airport I was dragging my new acquisition home... It’s a 1974 Honda CB360, black plate, rego on hold, failed cafe racer attempt, that’s been sitting since 2012 that I am very happy to call my own. Its not the prettiest at the moment, but it’s got good bones. I’m fairly happy with the fact someone else has done the initial job of ruining what was a tidy complete bike at some point in its life so I’m not going to have any second thoughts about changing bits and pieces on it to make it fit my requirements. Basic plan is getting it running again, do the basics to it to get it in to see what it needs for a WOF, and ride it a little bit before getting to carried away. First step is sorting out this rats nest of disconnected cables, horrible clip ons, hoses that are the wrong length, loose everything and general terribleness. It’s had the generic cheap clip ons that move if you pull on them fitted, along with headlight and indicator mounts that don’t really hold anything securely. I got a few minutes in the shed and wanged the original bar clamps back into the top plate, and a set of old bars to allow me to throw the clip ons in the rubbish bin. These will do for now to initially ride it on when I get it running, but end goal is some nice Chrome bars. So that’s where I’m at currently. I have the carbs apart and soaking as they’re filthy, waiting on a few ignition parts to fit to replace old junk, wiring for the lights and switches needs a going over, and so do brakes. Basic stuff to get it running and riding and then I’ll write a more comprehensive list once I acquire a WOF. For now however, I’m just happy to have found a bike that fitted all my requirements and here’s to hoping what I’ve learnt from playing with smaller bikes helps out with this one. At this present moment in time, my end goal is to have a fairly clean, simple and reliable bike I can ride daily that will do everything from looking good outside a cafe in Ponsonby to chucking a backpack on to going and find some gravel back roads for an adventure. Stay tuned as I get in over my head and realise I have no clue what I’m actually doing...2 points
-
Not until you have to work.on them1 point
-
Damn straight! With a nice clean spray pattern and NPD 100+ octane gas, I'm quite looking forward to 'tec'n it hard myself.1 point
-
Tachometer on a drift trike anyone? Why sure...here we go. 1990's cool. Now I can see just how slow I'm going:)1 point
-
Sounds like it would be noisy. Slow noisy stuff is lame. High mount stainless header from a dr200. Will check what I can do about muffler placement. Don't want to push the panniers out or burn pillion
1 point
-
all good interesting stuff. I support reading tech sheets. best way to get things prepped correctly. I'm not far away from engaging a repair cert inspector so will see what processes he wants me to use. he has told me to not even blast till he sees the car. When requested I supply a phosphorous wash tergophos and the coating epiphos (same as keyphos253) I have the epiphos in 20ltrs so if any one wants some let me know.1 point
-
As those who are more familiar with us will know both Rigamortice and myself have a great affinity for the environment and take climate change (i.e. the thing we used to “call global warming” before it got cold again!) very seriously. Stricken by remorse and overwhelmed by guilt over the tons of negative carbon credits I’ve released on the global economy through years of motor racing, driving cars for the love of it, and behaving like a typically irresponsible older ‘Oldschool’ member I have acquired an EV! You may scoff at the fact that it’s a clapped out old warehouse sweeper with buggered batteries saved from the scrap heap but to Rigamortice and myself it is a powerful symbol of our indefatigable commitment to a green and politically correct future. With help from my brother providing advice, encouragement and the Wild Turkey may I present the definitive green, negative carbon credit, EV solution to taking the wheelie bins out when you live down a long driveway, (what could possibly go wrong!). Commentary and camera work courtesy of the ever lovely Mrs sr2.1 point
-
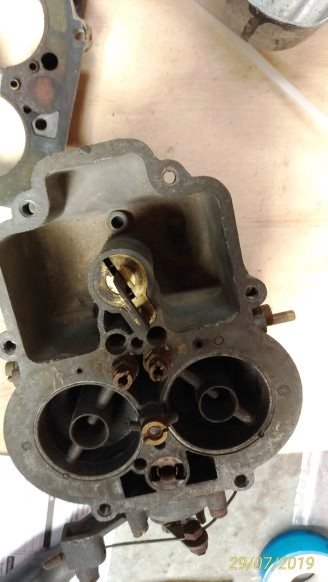
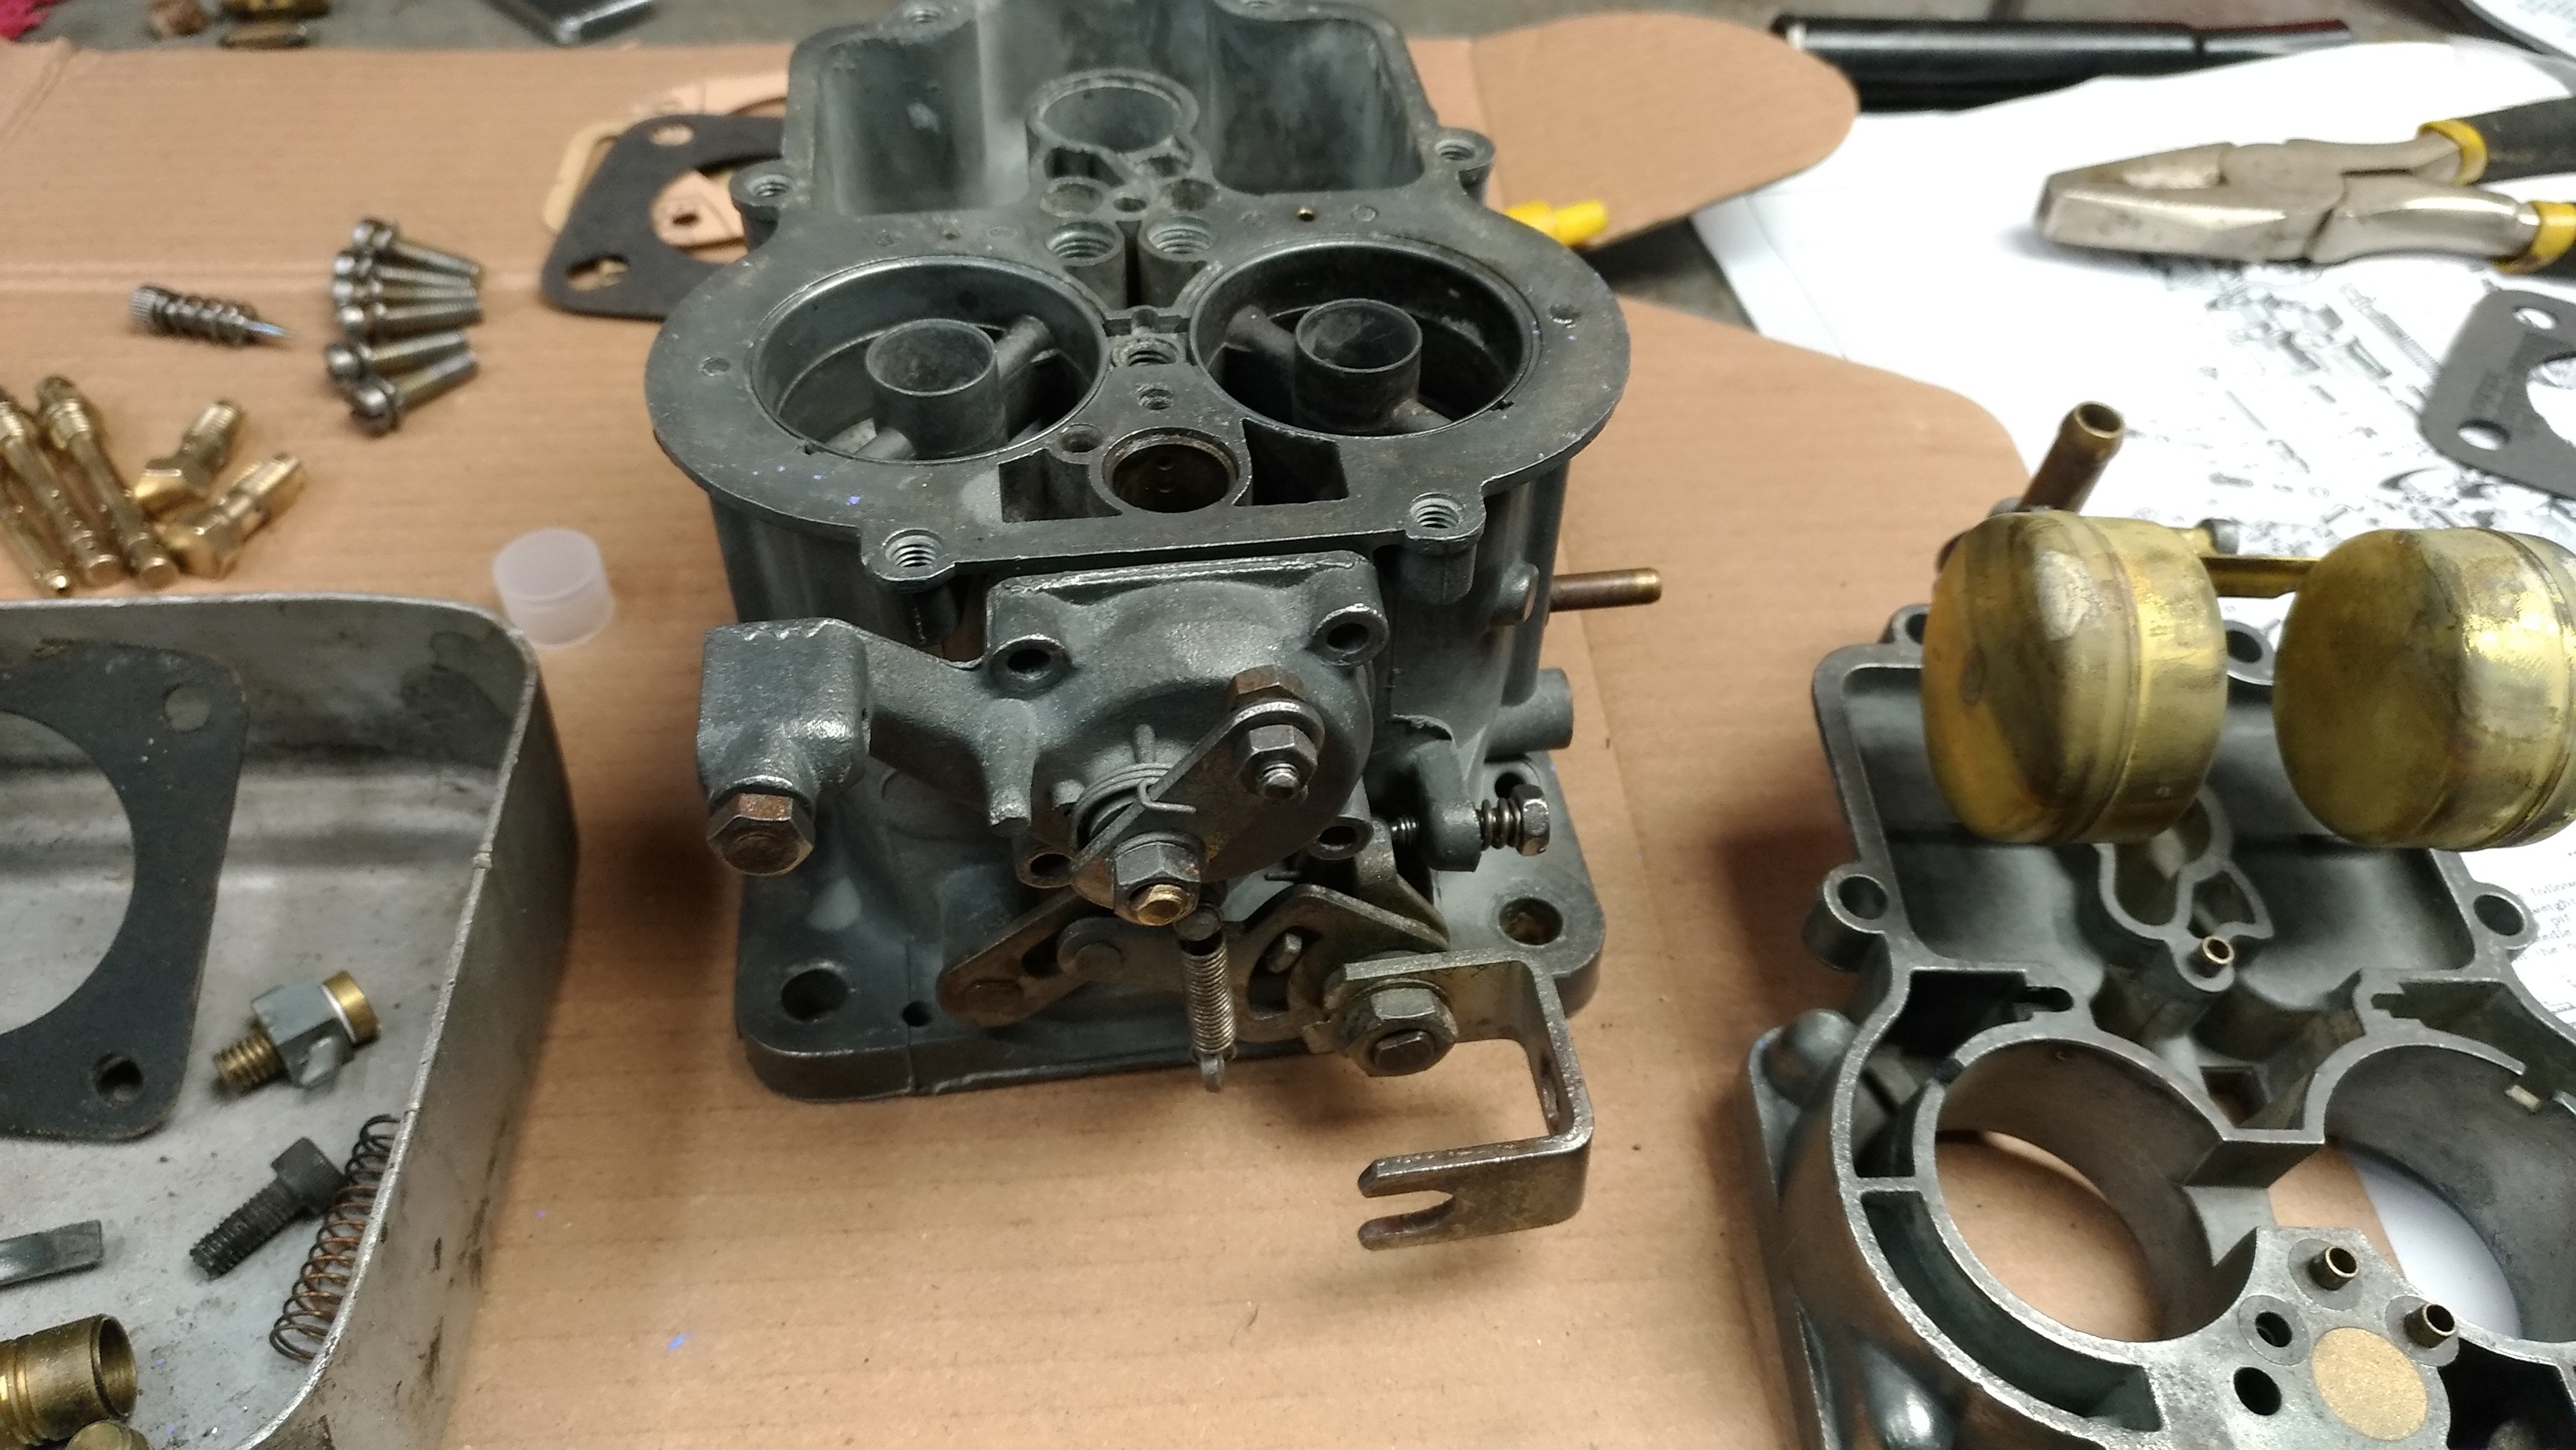
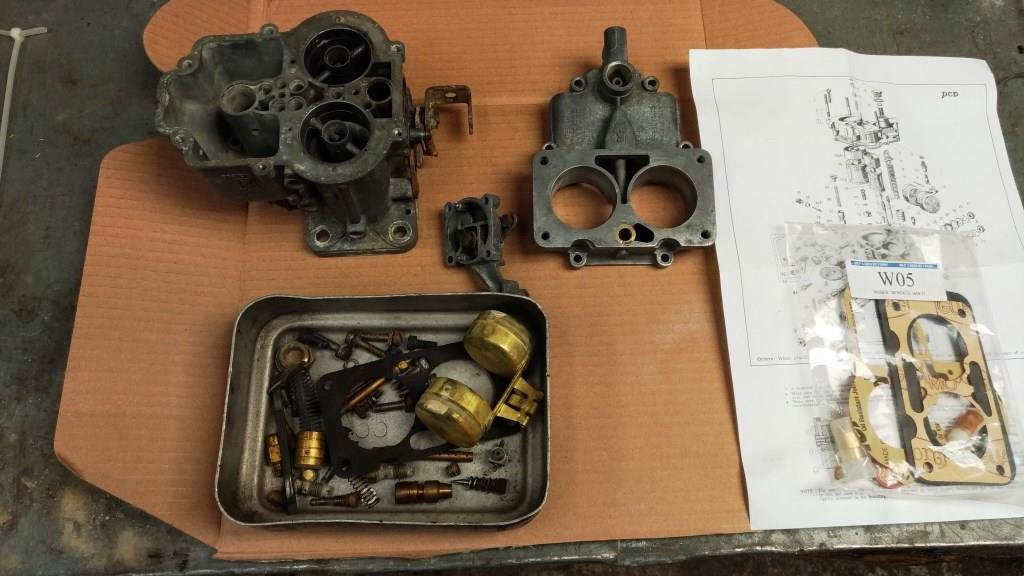
Thought it was about time to have a look at my favorite DCD Weber; we go back a long way, purchased new in 1974 it was looking a little 2nd hand. Stripped it down and on closer inspection the throttle spindles showed little almost no wear and the call was made to give it a good clean and assemble with a new float valve and gaskets. Finally located a rebuild kit from MLP Carbs in Victoria, (don’t you hate it when bloody Aussies turn out to be the good guys……!). After an enjoyable evening in the world famous sr2 man cave rattling the neighbourhood with Pink Floyd playing loud and ½ a bottle of cheap (ish) pinot noir - one more job’s ticked off the list.
1 point
-
hey also, here's a technical tip for those of you interested in the finer details of auto trans setup, if you want it to not leak fluid out the bottom, do up the drain plug. you got that?1 point
-
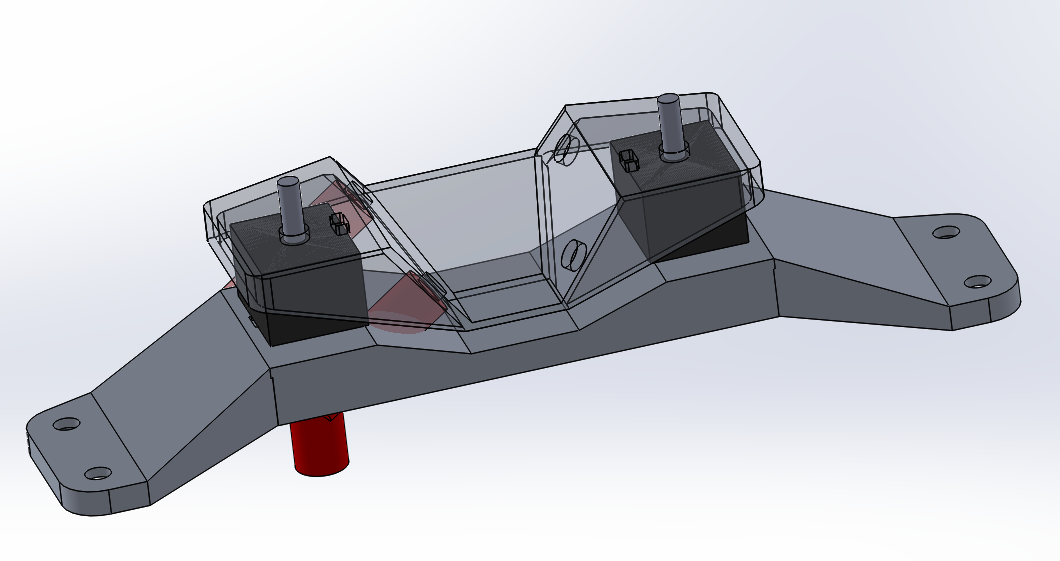
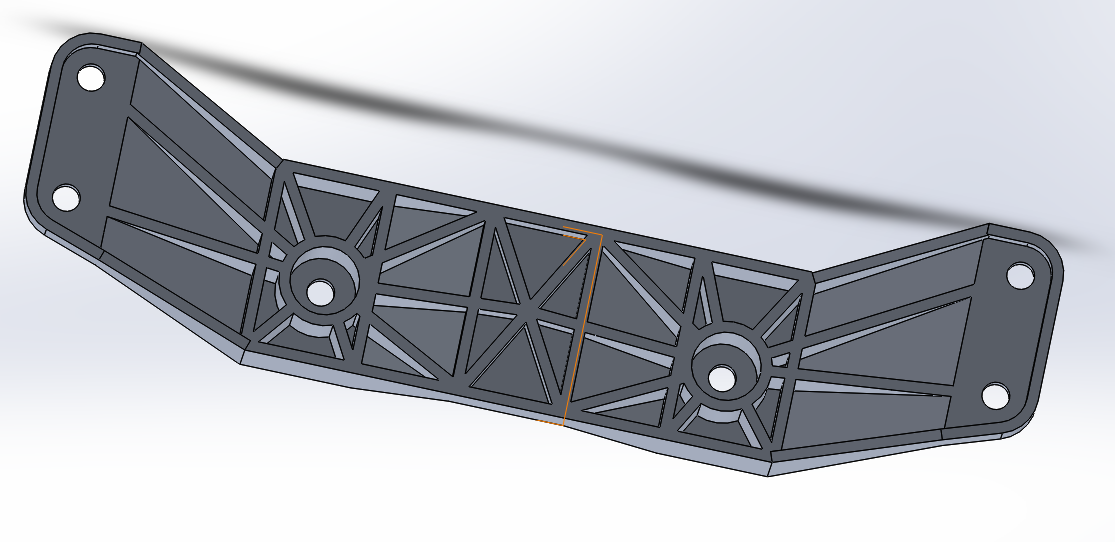
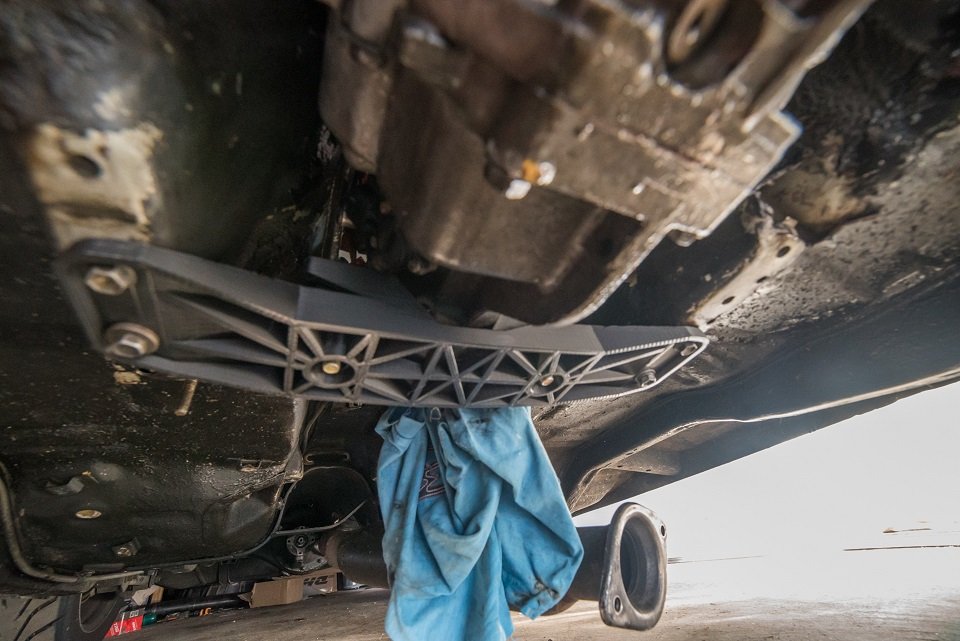
Slow progress, because winter time insanity. Made a prototype for a new gearbox crossmember/mount arrangement. That uses much stiffer bushes and ends up with waayyyyy more ground clearance than the big standard mount. Also, if I got it cast from aluminium the entire assembly is lighter than just the rubber bush part from the standard setup. win. Not sure how to make the final version yet, but it's good to have the gearbox sitting in the right place. And have a decent set of accurate dimensions for making a proper one. Hopefully soon figure out my driveshaft and exhaust situation. I'm on the lookout for a standard 2-1 part of an Altezza exhaust if anyone's got one kicking around?
1 point
-
Yeah something went wrong, 2 part epoxy will usually stick pretty good even to a poorly prepped surface. So using the data sheet for something like the protec 408 epoxy primer it says to sandblast your metal or sand it until clean and coat it. Says if you are using new sheet metal to use their acid wash (which is phosphoric acid) to remove the oils, read the data sheet for the acid wash it says to use steel wool to apply and wash with water so you are washing and scouring it, then wax and grease before painting. This is how I learnt from a couple restoration body work guys, backed up by the data sheets of most paint systems. Now epoxy is used as a sealer of old paint so it does stick to other shit and usually well. But you want to test it out and if you go all the way to bare metal I don't see why you would want anything else under it, especially a rust converter primer, they don't have the same adhesion as magic chemically cured 2 part epoxies. http://www.ppglic.com.au/uploads/tds/408 Epotec Epoxy Primer (2).pdf So for all applications its pretty much clean white sanded/scotch brite steel clean with wax and grease and then apply 2 part epoxy. If you have pitting or want to clean it then acid wash with phosphoric, neutralise with water. I would still key the metal up again with scotch brite after the acid wash to remove everything as you can get some residue if the acid wash got dry. Anything else is garbage IMO. Then for safety as said modern epoxy cures with polyamide, old school ones used amine or something toxic (not a chemist). So 2 part epoxy is very similar as other single stage paints as far as safety goes, ie don't breath it and avoid getting it on the skin and eyes. It doesn't have the extra death factor of polyurethane which cure with isocyanate, anyone who has sprayed urethane clear knows how deadly that shit smells.1 point
-
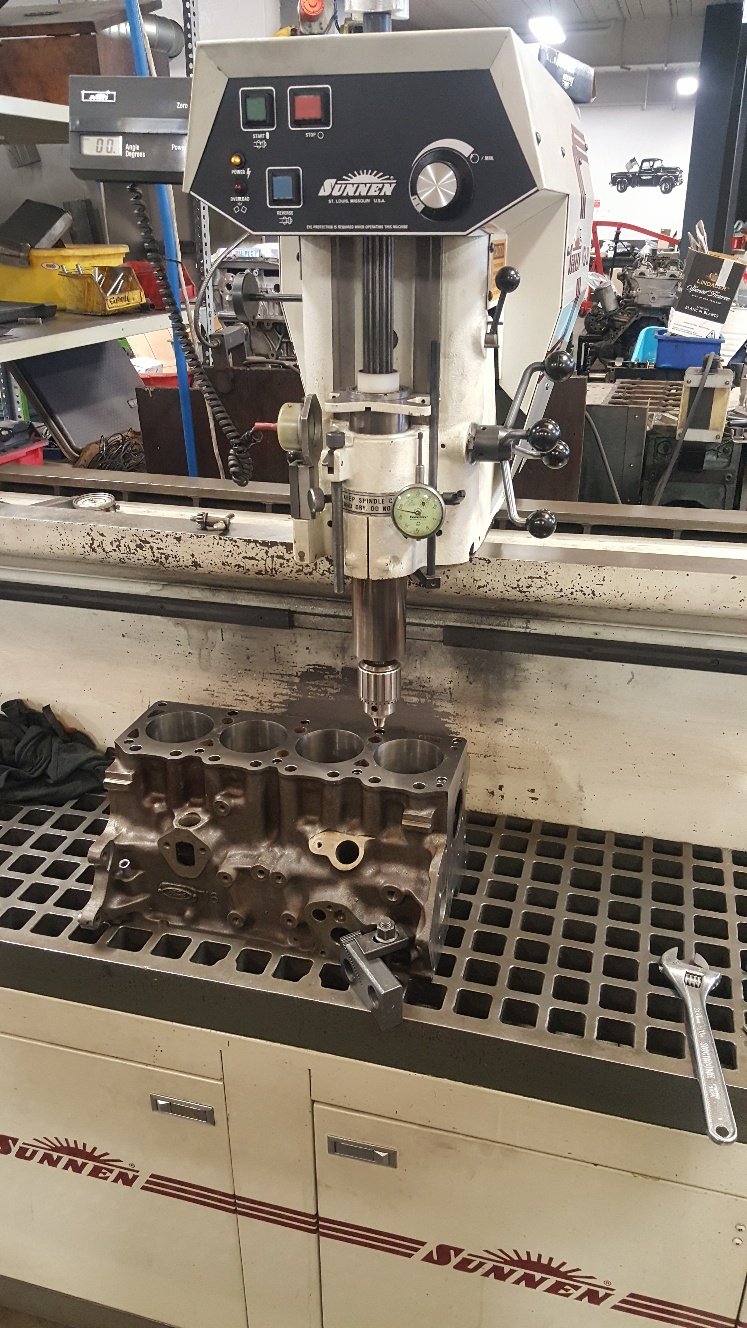
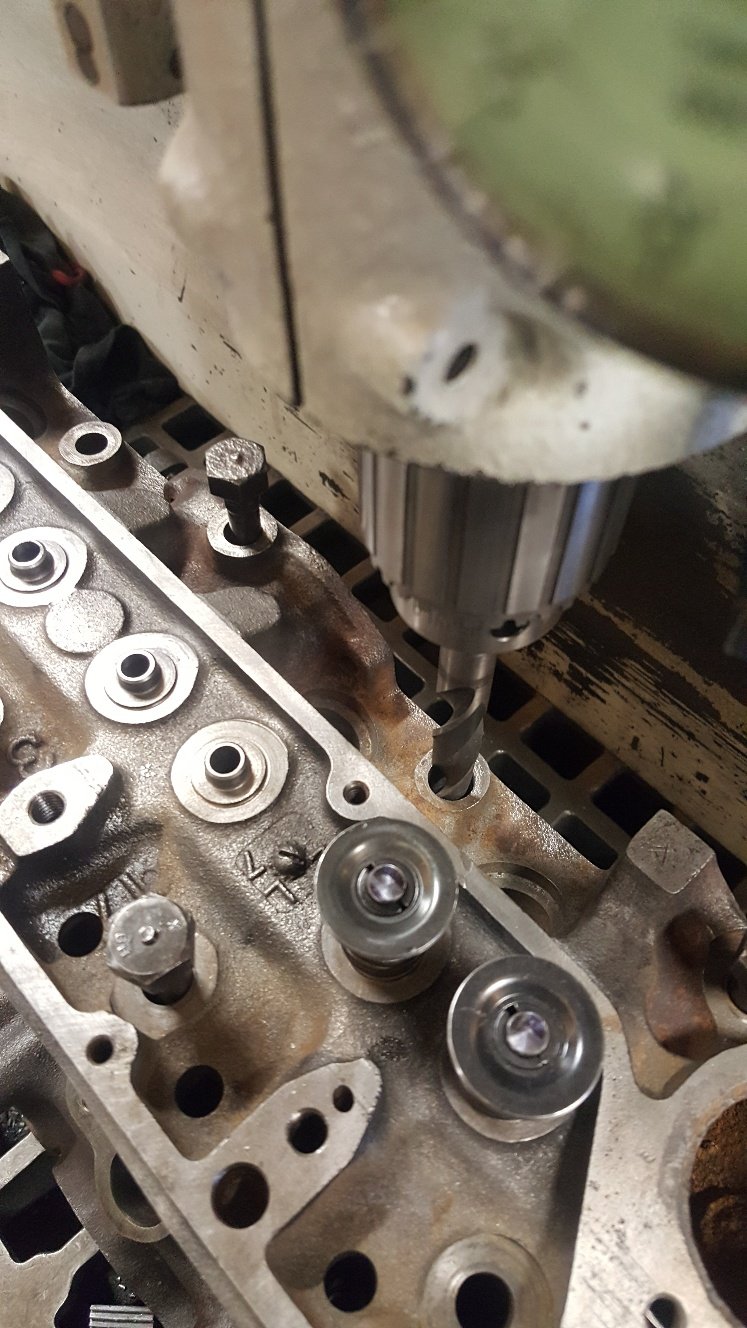
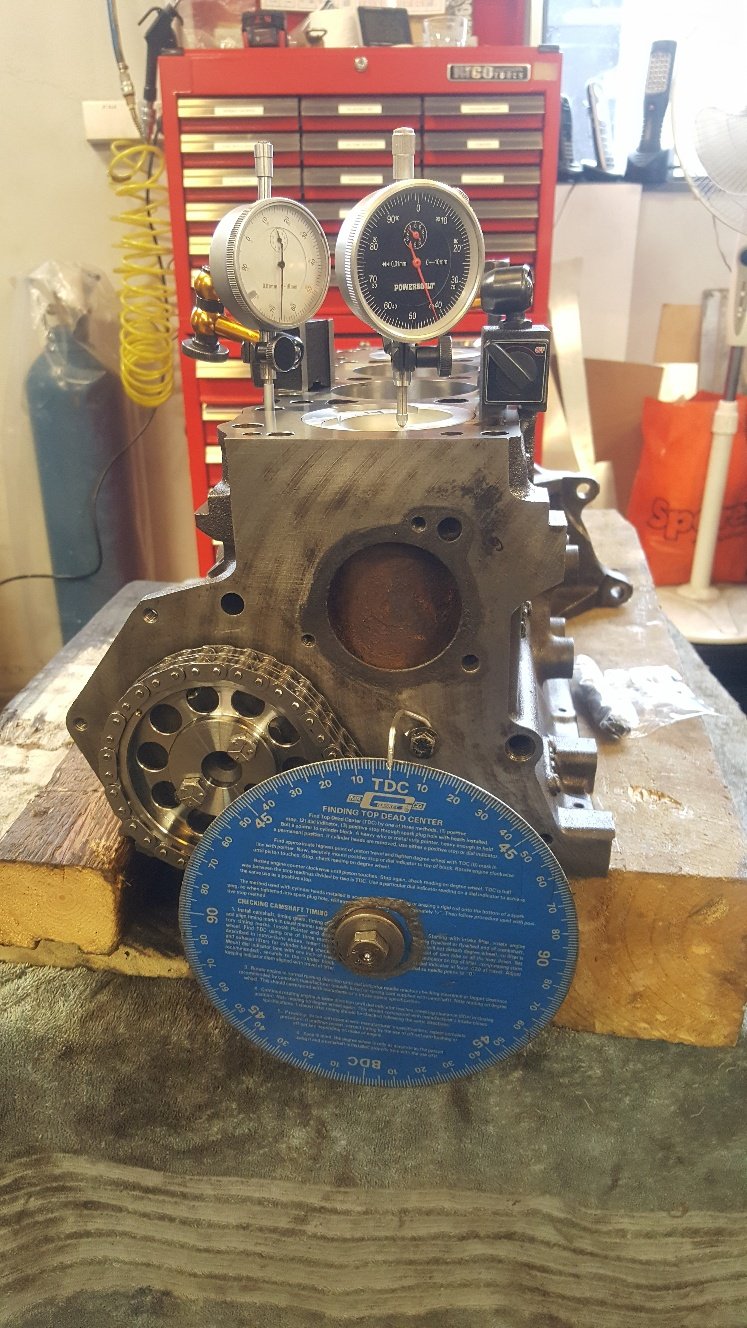
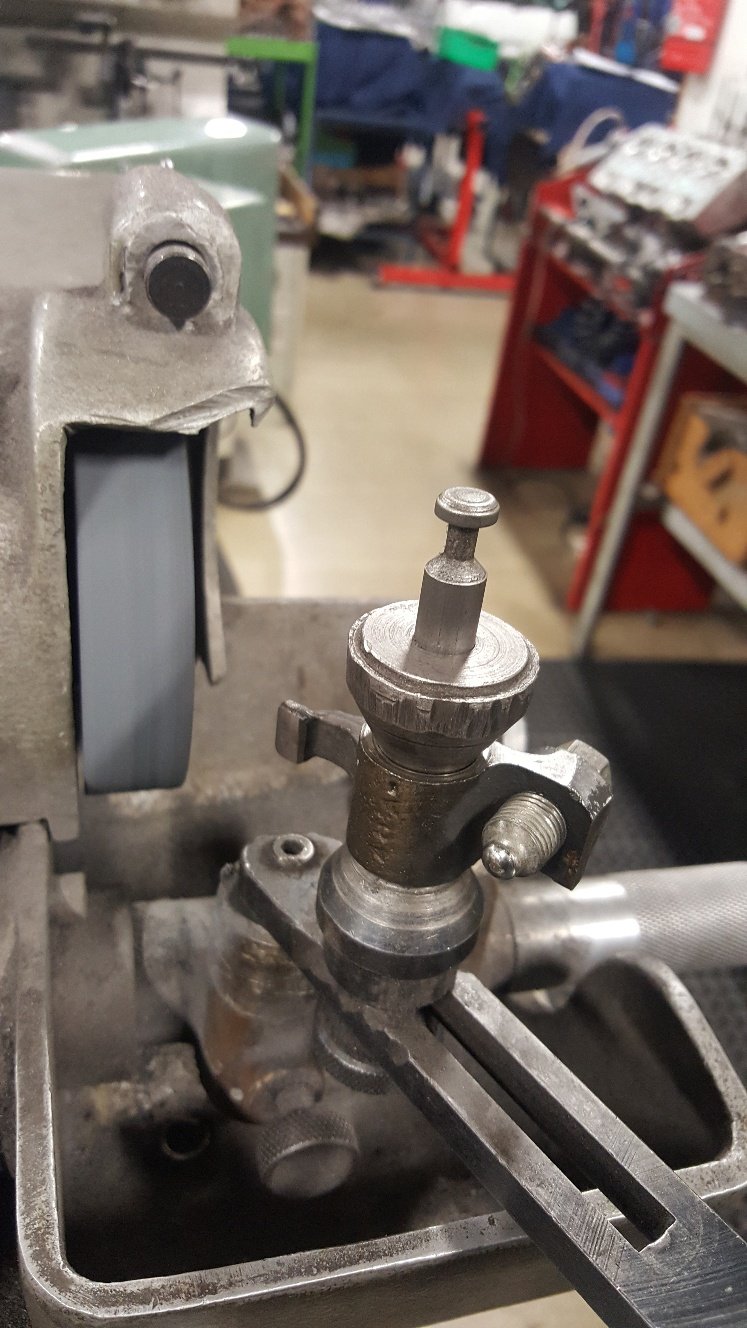
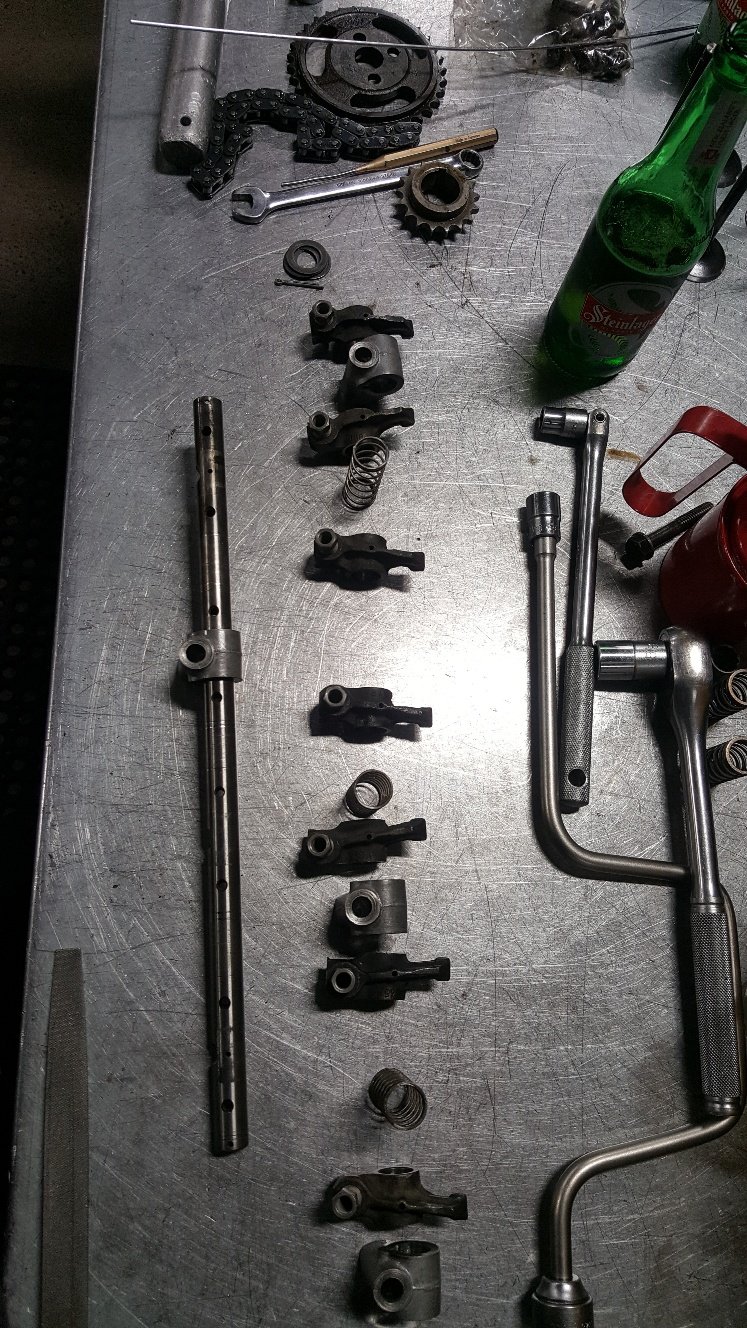
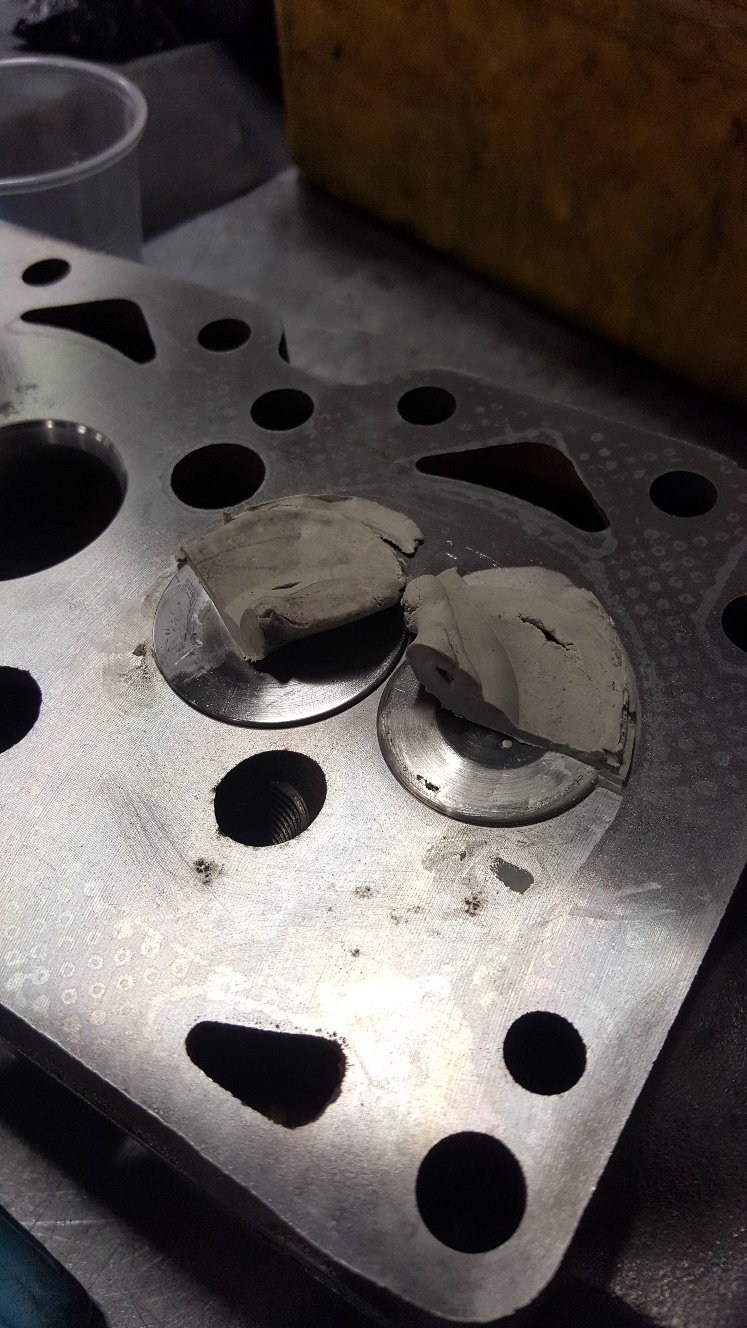
With the head sorted i can put the camshaft in and check piston to valve clearance. But first I need to dowel the head to the block. These old beast come from the factory without any location other than the head bolts. So I center off one of the head bolt holes and drilled it to 14mm. Then bolt the head one without moving anything and drill the head bolt hole out to 14mm. Then fit the head on the dowel and drill the other head bolt hole for the second dowl. So dialed the cam in. Then bolted the head on and found my rockers where a little worn so gave them a tidy up. Forgot to take pictures of the head fitted. But basically fitted the head, put two layers of plastersene on top of the piston in the valve cut outs. Then turned the engine over to get the valves to in print into the plaster. Then I cut half the plaster away to see how thick it is. This gives you a good indication of the piston to valve clearance.
1 point
-
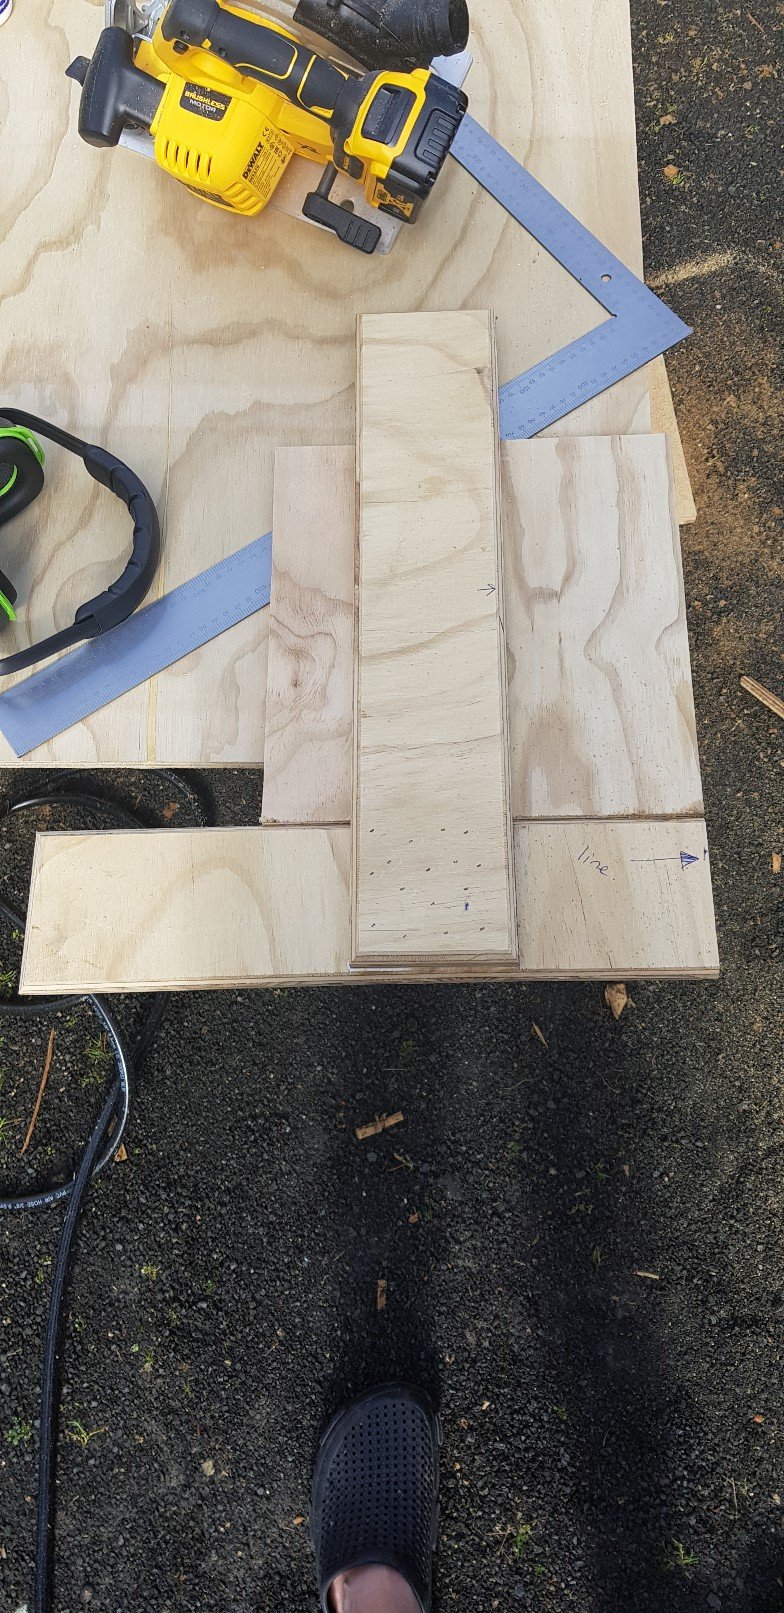
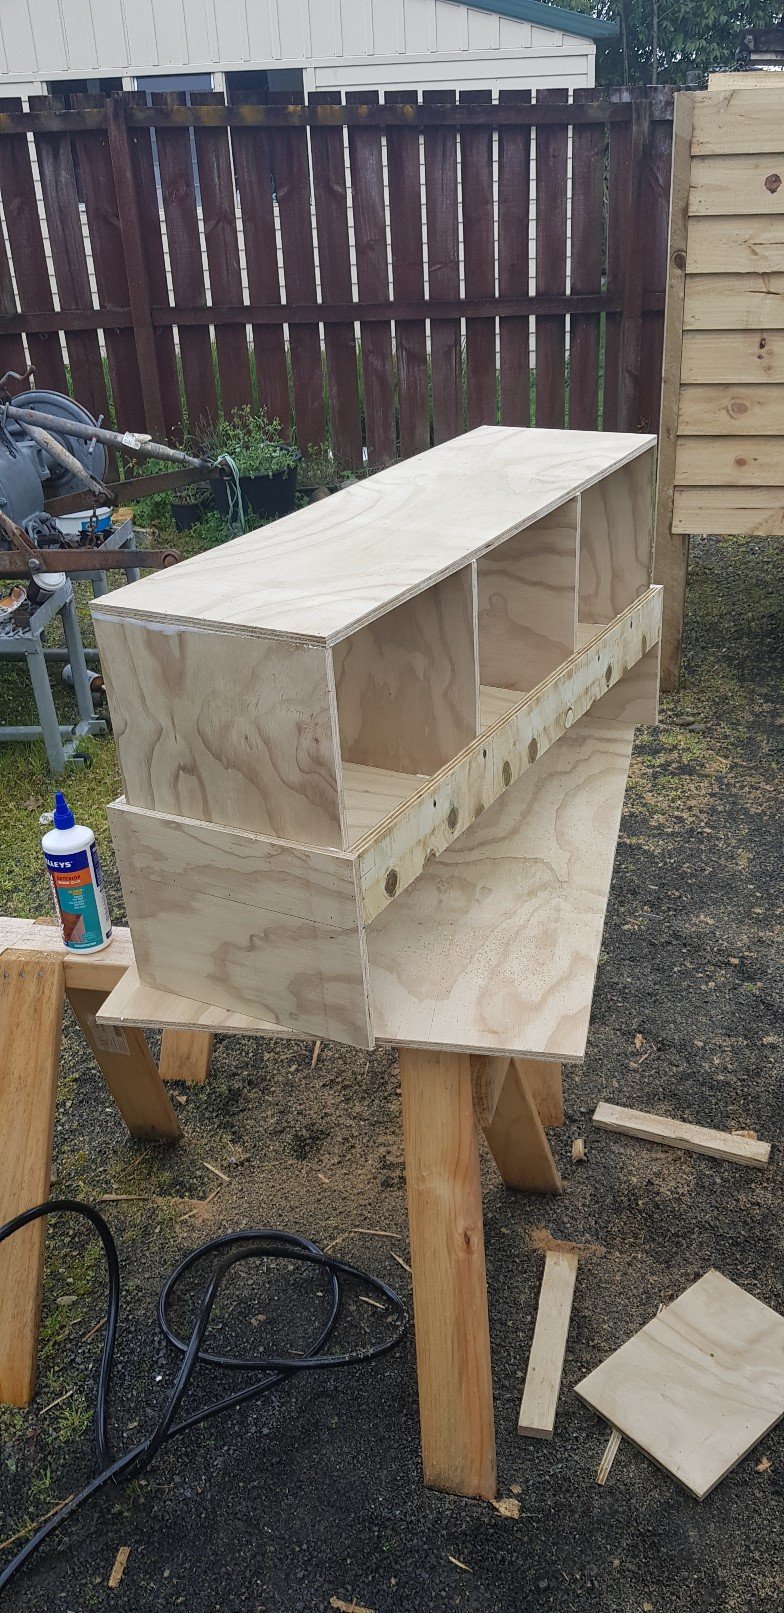
So i thought about this way too much. My floor is fixed but at the right height so that i can open the door, park the wheelbarrow under the opening and scrape the contents straight into the barrow so it can be taken to compost or garden whatever. Made nesting box today. Sits just inside big door(so back of nest boxes are closed in when door is shut) room so we can drag old bedding out under it with a rake type tool, or can lift whole nesting box out and turn upside down into the barrow to clean/ empty it fast. Also.. i gave it a flat top. Videos said to have an angled top so they cant sit up there and make poose. But i dont care! If they like it up there and want to cuddle up high then good on them. Also in photo is my circular saw guide thing/square. Best thing iv made for the saw, omg. Just line up the right hand side edge to the cut line and use the left edge to guide the skillsaw. Cuts perfect square and accurate to the line every time. So good.
1 point
-
First time it's seen daylight in about 3 years. Have just discovered a leaky rear shock so I guess I have to throw some more $$ at it haha.
1 point
-
So I guess this is where we start then. The first port of call today after having the car delivered was to work out why we had no power. I popped the bonnet, and yes there was a battery. Ok, let's remove the battery and see if I can throw some charge into it. Ctek says NO. With the charger connected to the battery, nothing. No lights on the charger, and if anything, the charger started acting weird. Guess that's no bueno then. Hope my charger is OK. A quick trip to Supercheap sorted out a battery for me. There is very little space for a battery, so a bit of digging in the Century Batteries catalogue yielded the biggest battery that would fit the same footprint, an NS60LSMF Connecting this up showed that we finally had power. The dash warning lights come on with the key, the driver's electric window is working, albeit slowly, and the central locking works. Strangely the headlights did not respond to the switch, but some wiggling of the wires behind the switch sorted that out (yeah, I'll need to look into that). The next obvious step was to see what was up with the fuel tanks. Now that I had power I could see the fuel gauge was reading empty. I decided to take a risk and try dumping some of BPs finest 98 and injector cleaner into the tanks and see what happens. I split the fuel and cleaner between the two tanks as evenly as I could. Since I had been told it was possible the accumulator had failed, there is a trick to work around this and still have the car start and run normally. The accumulator works to hold fuel pressure in the lines when the engine is off, but when it fails the lines no longer have pressure, and the fuel pump only runs when the engine is turning, so it takes ages to build that pressure back up. The trick to work around this is to have the pump run when the key is turned to ON so it primes the lines. The simplest way on early cars like mine is to disconnect one connector from the side of the fuel distribution unit. This causes the pump to run when the key is on. Easy. Its the blue connector in the top photo, and the green plug goes onto it (strangely... why arent they matched colours?) I connected the battery and turned the key. Sure enough, I heard the familiar whine of a pump turning, and then the woosh of fuel heading down the lines into the fuel distributor. Now it was the moment of truth. I turned the key, and the engine turned smoothly over. It spluttered a couple of times, but wouldn't start. What a tease. Eventually, this happened. It was rough, but running, and even idling. I ran it for a while, and everything looked good. No obvious signs of leaks, but blimey does it make a noise! The longer I ran it, the smoother it was getting I checked and it seems to have gears, and a clutch, so that's a big win. It still hesitates a bit, but that's to be expected for an engine that has been sitting around. I'll take the plugs out and give them a clean (or replace), and check the cap and rotor condition. If everything looks OK, it may even be time for a quick run around the block. One must wonder though; if I can get it running with little effort, why couldn't the "specialist" have it running for the truck? Oh well, best not to dwell on it I guess.1 point
-
Adventure GN never fails to impress This friggan thing can do wheelies if you dump the clutch hard enough1 point
-
Finally after two years of sitting down viking spec for a shower.. Was a bit of a fuck around trying to find something other than that mactrack shit. Ended up going for a round extrusion from a company in Hastings, had almost the exact same bend radius I needed (300mm) so because they couldn't do a full 180 bend I had to get two halves and join them together.. The reason I went with this is because I wanted to be able to move the curtains 360deg around the track.. Made a couple of joiners out of plastic, Then I screwed and epoxied them together.. The one thing I didn't think about with this method was how, once I got one end together, I was gonna get the other end in. Solved it in the end by just pushing the joiner 80% off the way into one side, aligning the ends and sliding it back.. Was a cunt1 point
-
Another typical MACKAZ pictureless update. Been put on hold again so I can get my house completely finished off. I'm gonna have a go at fitting a Holden MC6 "Torquemaster" 4 speed gearbox behind the Hemi. Workmate and I intend to strip the box down, cut the belhousing casting away, then Mill the front flat and build an adapter plate to mate it to the Valiant bellhousing. Am I mad? Yep. For added wank factor it's the same gear pattern as an original Chrysler 4 speed I had in my Charger, to the left and up1 point
-
Some things arrived. The rad is just mocked up for now, I will add some mounts and change the lower outlet angle.. The driveshaft is sorted, I had some adaptors machined out of 7075 ally at Topliss (I am sure I have a pic somewhere), then dumped it all at marine and turbochargers to get shortened and balanced. The shortened extension (you wot mate???) Is a 2wd Hilux shaft. I bought a new hangar bearing for it as well, so that shit represents over a grand of accumulated investment. Gulp. After having a quick check to see that it basically fit (and damaging the fins and spending 20mins with a tiny screwdriver pushing them all into place again and taping some cardboard over the tiny little fucks so I didn have to do it again), I made a fake one out of rod to get the position roughly right. Cable tied in place. Tacked in place I removed the cab to make this bit easier, I have quite a few cab off jobs to get through anyway. I did some other shit but forgot pics so that's all you get for now.1 point
-
Floor, firewall, sills and door posts so far......
1 point
-
Progression. I drilled the steering knuckles out on a 20 deg angle, and then fucked around for aaaaaagggggggeeeeeees playing with different hights and angles on the struts, trying to get the best all-round set up. Once decided, I welded the piss out of them with Mr Miggins, and then put the front end together. It's got some decent steering angle, I just hope the racks quick enough. It's 3 turns lock to lock, and the steering is nice and light. Looking more like an offroader, I also did some highly scientific suspension testing, It's got about 5 inches of travel in the front, and 7 in the back, which is not too bad really. I started it last weekend and managed to free up the clutch (was seized from sitting so long) by standing on the brake while powering on in first gear, so pretty stoked that worked. Excellent. Regards, VG.1 point
-
1 point
-
It'll fit. probably1 point
-
Got the missus to oil me wood a bit..
1 point
-
Still toiling away on this, got the sills and facings on before Xmas, looks a lot better just with these on.. The after the hols (which were way to short) I started on the cladding final, till I ran out of screws that is.. Was a bit of a cunt figuring out how to space everything as they're all different widths, but just measured the total amount per sheet of ply and cut a spacer to suit, 17-21mm is the variation so far. Then trying to hold everything up whilst screwing it off, for under the windows I had to put a bead of mastic at the top of the board then brad it on to the ply, in my infinite wisdom I forgot to put any nailing up for the cladding under the sill, should hold on there ok. For the full size boards I just Pre-drilled the very top, held them up with a spacer and screwed the top in, then spaced the rest of the boards out while they were hanging there and screwed them on, taken me about 2 days to do this side.. Cracked open the stash of seasoning mac for the first time in two years.. Continued on, Cut the bottoms of off on an angle so I can run a bit of trim along the bottom to finish it off, then got the missus to oil it, Then started on the front till I ran out of screws, Initially I was a bit worried that I'd gone too narrow with the negative detail, but its grown on me. Now to get some more screws and oil and finish this bitch off...1 point
-
Swap meet purchases today, 39-47 Hillman guards, and pair of straight Buckeye bumpers, ones missing the centre bracket. $120 the lot, stoked!
1 point
-
Cut the holes out, flipping mission of a job, but got a result. Lost pics1 point
-
well i will start off with the fact that i took a week or so away from the project. Didn’t want to walk in the garage or acknowledge the existence of the motor or trans. Using the ol if i dont see it then it never happened reasoning. All this was brought about by the rather unpleasant sound of cast aluminium cracking. Now if you have never had that distinct displeasure of hearing this then im jelouse. So the story goes i was having a great ol time. tunes blaring, woodstocks sunk and it seemed like the best time to mate up the trans to the engine. Pop some fluid in the torque converter & slip it on hearing the clunks as it fitted on snugly. Place the newly worked trans on a trolly jack and position it. Easy i think and start tightening it up. CRACK!!! I freeze as heart skips a beat. Trans bellhousing around one of the bolt holes has a crack. I didnt swear or curse. just stared at it in shock. laid down my tools. Stood up. collected my tools and put them away then exited the garage to find a beverage. My dearest who was helping balance and hold stuff had the sense to not say a word as i went about these duties in silence. So guessing the dowls didn’t line up as well as i thought. Not the end of the world. Can be TIGed back up. Just frustrating, annoying and plain old Grrrrr…… This was done a few weeks ago. I have taken a lesson from our cat. that being ignoring it. So its still in the same place i left it – that being middle of garage and even though i walk around it i have chosen not to look at it. This method seems to work well for the cat. “I ignore your existence and you reward me with temptations” So I have moved on from that debacle to the ignition system. I dont like the HEI nailhead distributors. Big and ugly. dont look old school for my tastes. I had two old GM Delco distributors. Media blasted, reconditioned to make one good & smooth operating with no end play. New cap and rotor along with a paint job and its looking better than new. Will use the other as an oil primer once i get to the fluids phase. Ripped out the old points and condenser and have put in a Pertronix Ignitor II electronic ignition unit. So should never need to worry about that side of things again. Although i have kept the old parts to keep in the cars tool box just encase the new electronic ignition ever plays up. The conversion is all done inside the distributor so i can always swap back with no issues. Also got the Pertronix Flame Thrower II coil. Its like 45k Volts so way more than i need i guess but i decided to get the coil made to work with the new electronic ignition. Black of course ( i really cant help my self) yet the thing is going to be covered by the finned metal coil cover anyways. For leads i went with Taylors ThunderVolt 8.2MM custom wire kit. things run at 40ohms so will carry the spark to problems. Nice and black so wont be an eyesore under the hood. The lengths of wire are ubber long whats good i guess. I sure did have alot of left over wire after cutting to length & crimping all the terminals up. Only down side with the kit is that it dosnt come with a crimper. But have a MSD one so that wasnt a biggie. The wires will be out of sight mostly due to the finned spark plug covers. Also the old Nailheads have the dissy at the back behind the intake so the duel carbs and airfilter will hide it all whats great. tested my leads and ALL had 39ohms or lower resistance. think the lowest was near 37ohms. Alot of people seemed to recommend the old AC Delco R45S sparkplugs to work for Nailheads. So i went for those. The R45S are a tad longer than the normal ones. And thats basically it for the ignition side at the moment. As for the car it self. I need to get in contact with Flockie to talk over the plan of attack i guess. With luck he has had a good ol poke about underneath and came up with a few ideas. Im chaffing at the bitt to finally get things going. Patience has never been one of my strong points – a trait i believe i picked up from my father then compounded by working in ICT where everything progresses fast if not instantaneous. Constantly telling my self slow down (or i may break something like a transmission…)1 point


This leaderboard is set to Auckland/GMT+12:00