
Leaderboard


Popular Content
Showing content with the highest reputation on 08/08/19 in all areas
-
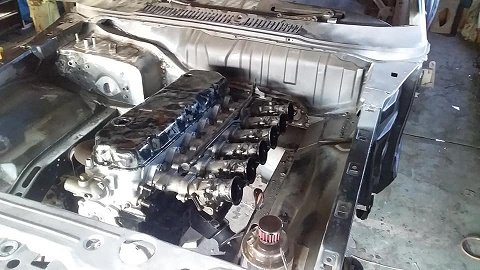
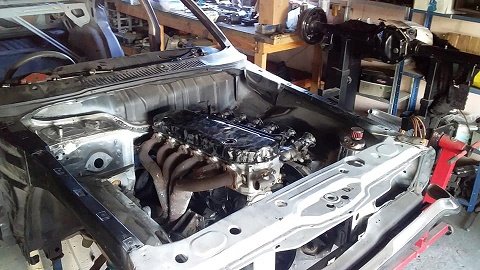
motor and box back in so i can make the tunnel ....airbox and and few other things before it goes back on rotisserie......might make some new headers as well
 9 points
 -
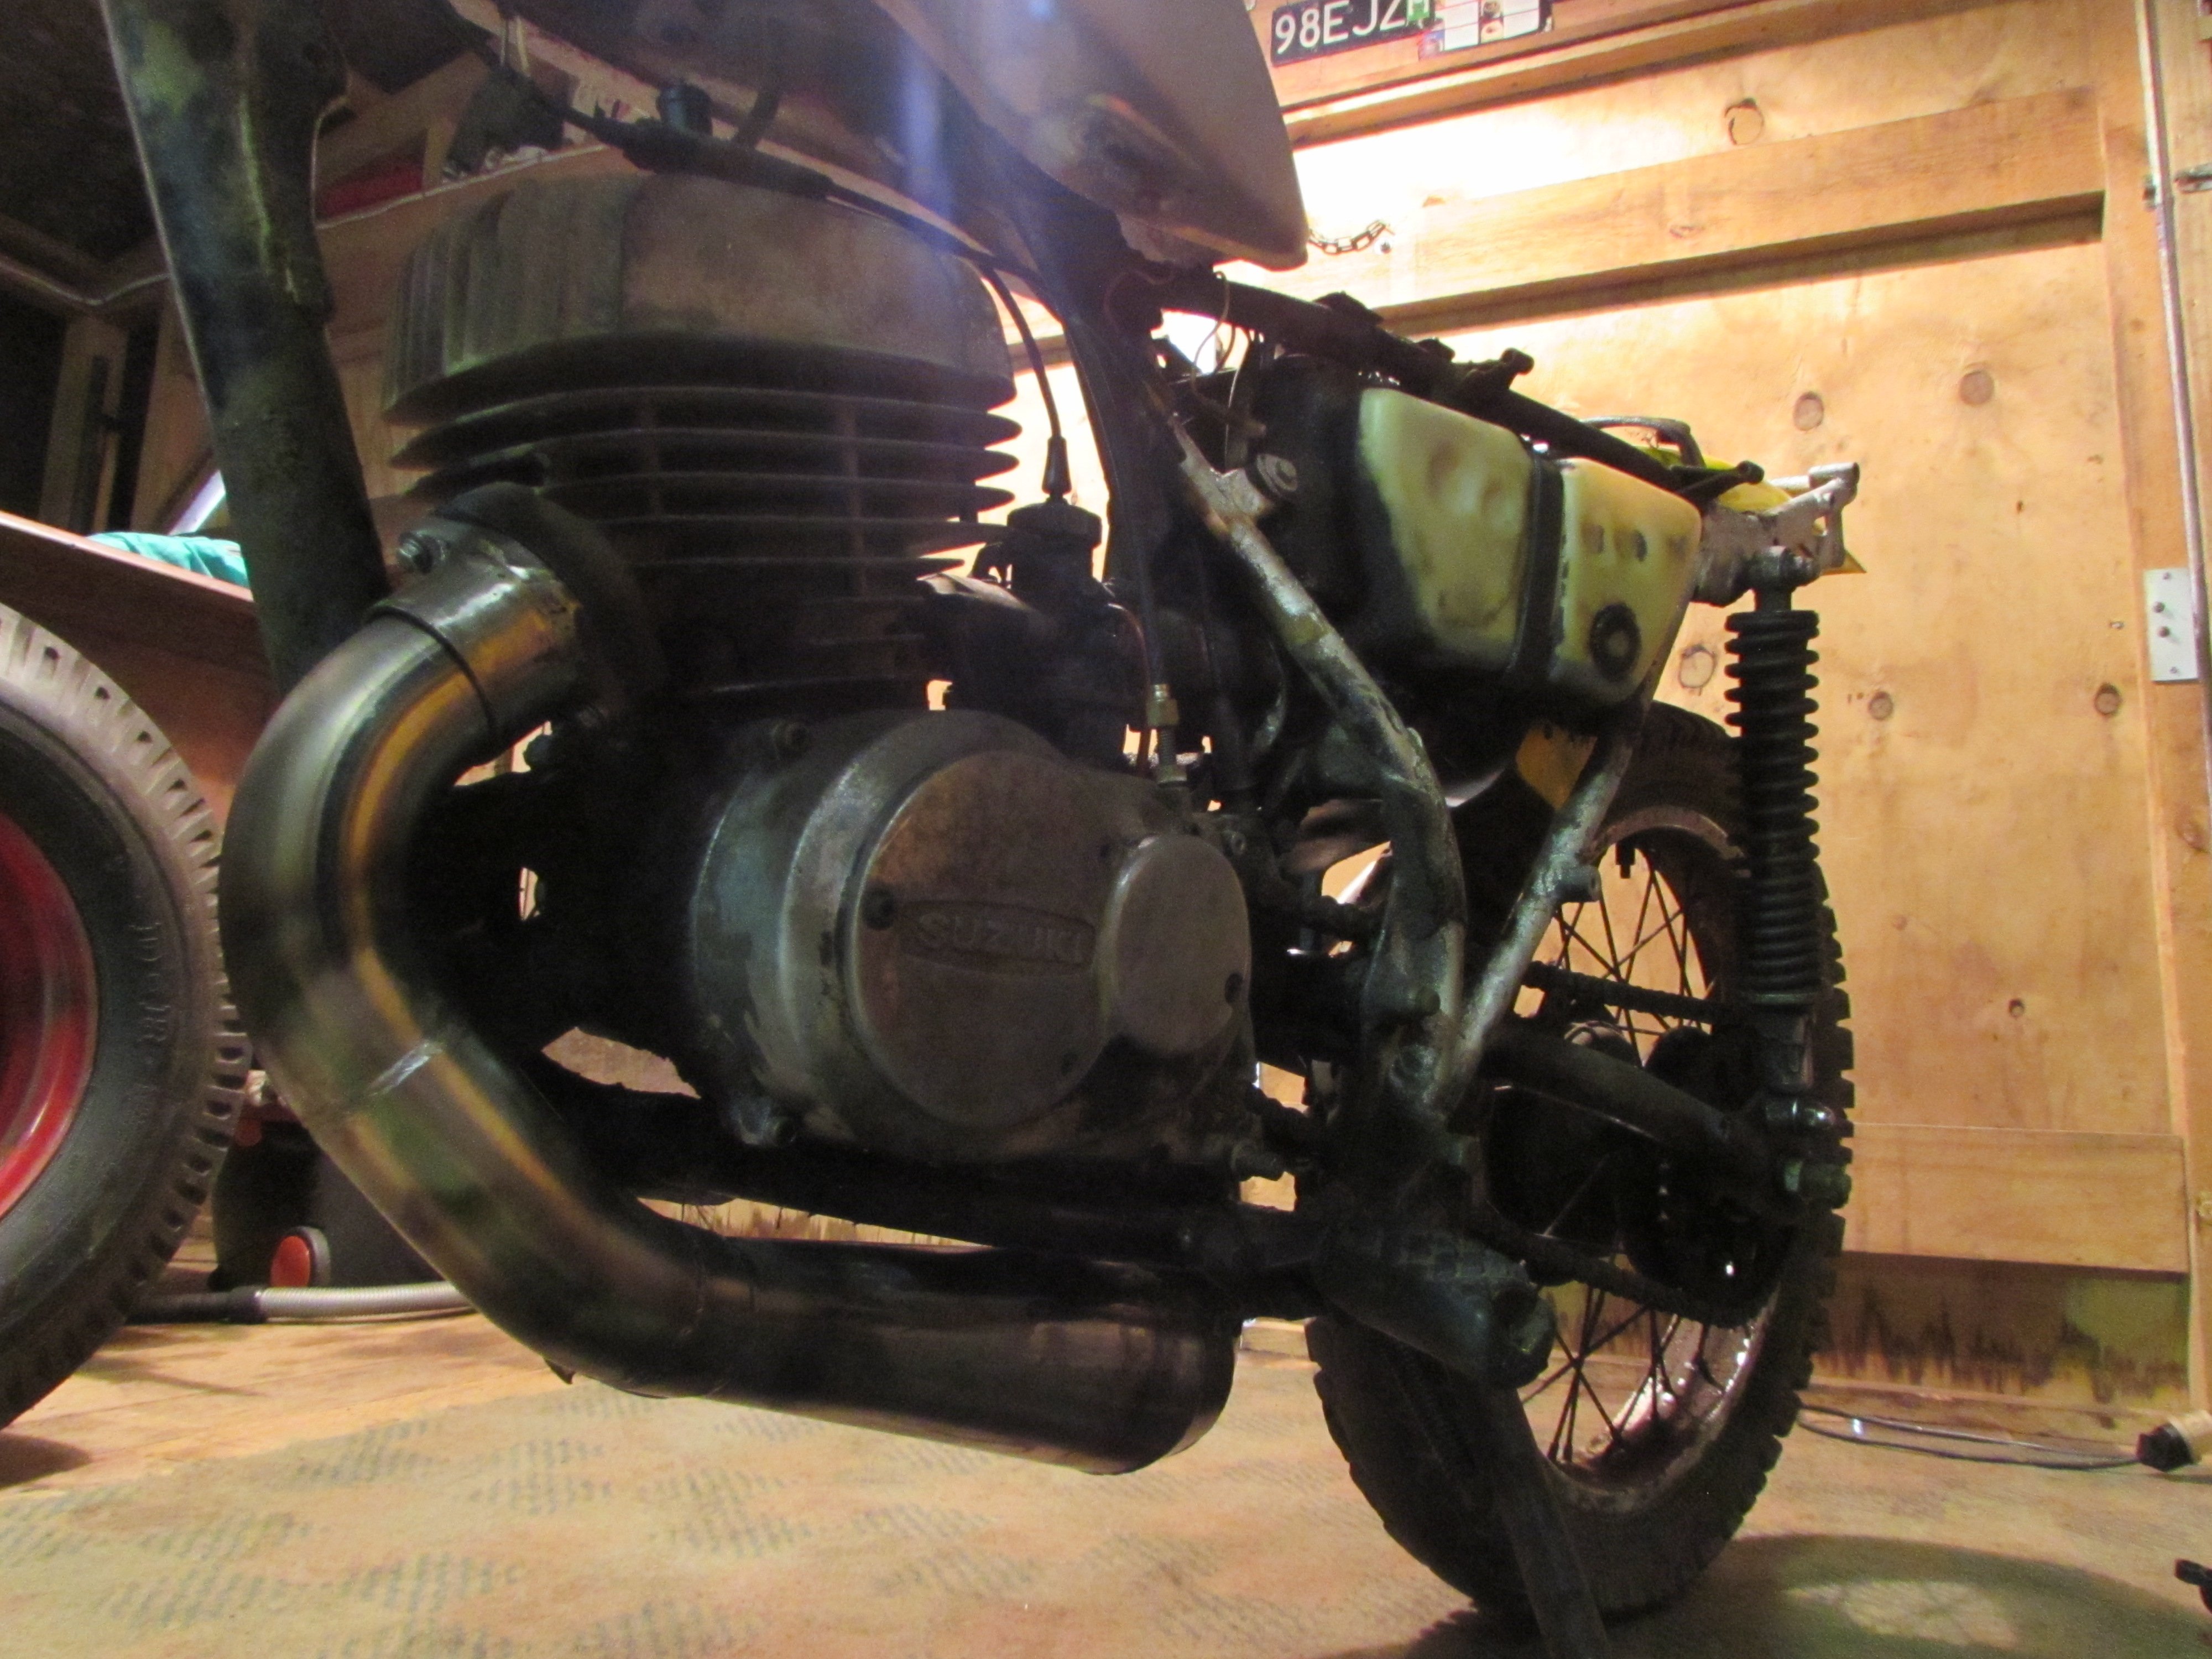
by gee by jingo by crikey, i have been beavering away for a few weeks smashing out some work on this bad boy. Made some good progress, accumulated all my parts and proceeded to smash it all together. Assembled front brake, bled system and got the front end fully fitted. The aliexpress master cylinder feels like garbage to in all honesty, but still more inspiring than the original excuse of a master cylinder they came with. I then proceeded to reassemble the rest of the bike. Motor went in no dramas, but shag me sideways, there are some things on this bike that drive me bananas. the exhaust has a small stud which located on a tab at the bottom of the frame. usually most of these bikes bolt up to the cylinder and then a support to the swing arm bolt, but this extra stud/locator thing makes fitting this exhaust a cunt. The footpegs also have to come off for removal of zorst, and those are also a pain in the ass to remove. But alas, we pushed on and got the bitch back together. To be completely honest these bikes are so much more pointlessly complex than its competitors, honda cb125 suzuki gp125 etc. While i was in p naughty for swap meat, i popped over to see @Flauski and he gave my carb a hoon in his ultrasonic cleaner. Turned out grouse. I then smashed a carb rebuild kit in it and slapped it on the motor. lastly was a new chain, and the bike was back together for the first time in 6 months! i proceeded to get it running, and it would idle all on its own which was great, but the carb leaks badly, so investigation is required. But sounds healthy, throttle response is acceptable, and the smell, oh by crikey the smell of mineral 2 stroke being consumed at an alarming rate. pretty stoked at how far this thing has come, just need to finish putting bits on like the clutch cover, button cables up and do a bolt check, then take it for a hoon!! pinch me im dreaming.9 points
-
Slowly but surely8 points
-
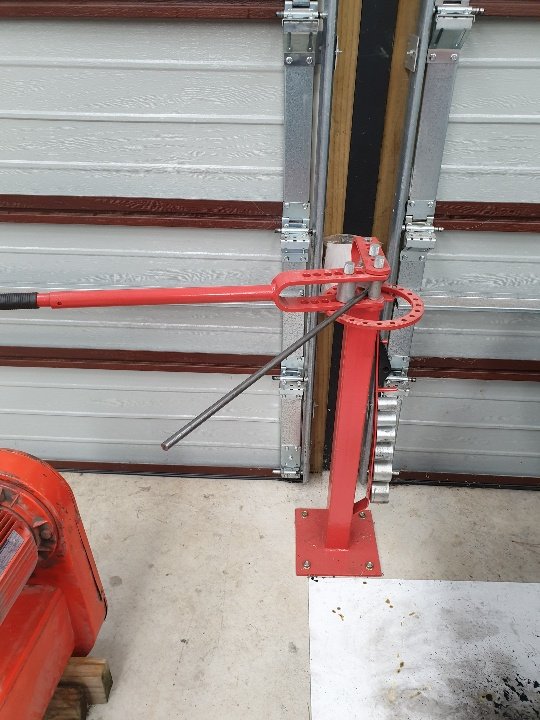
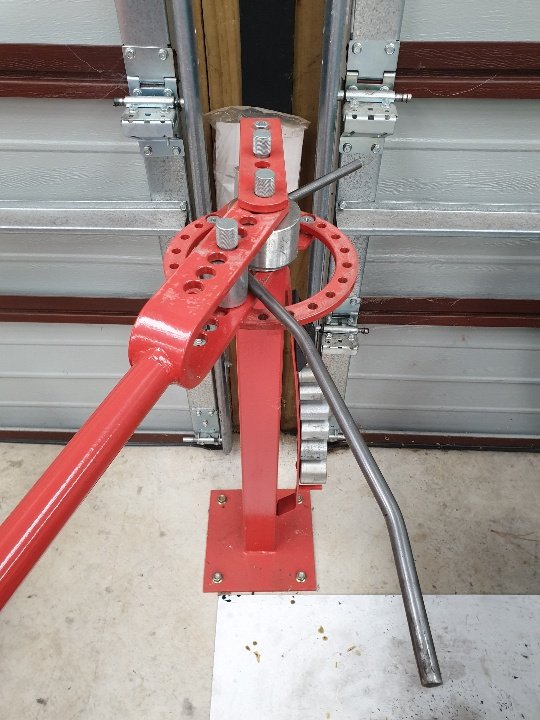
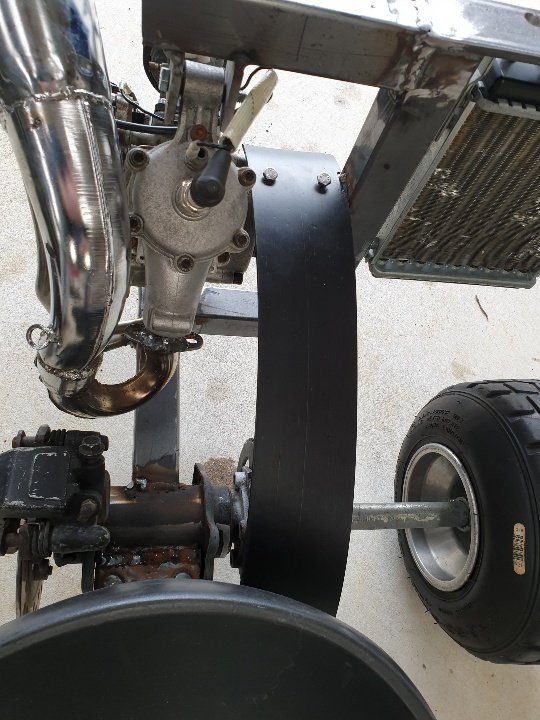
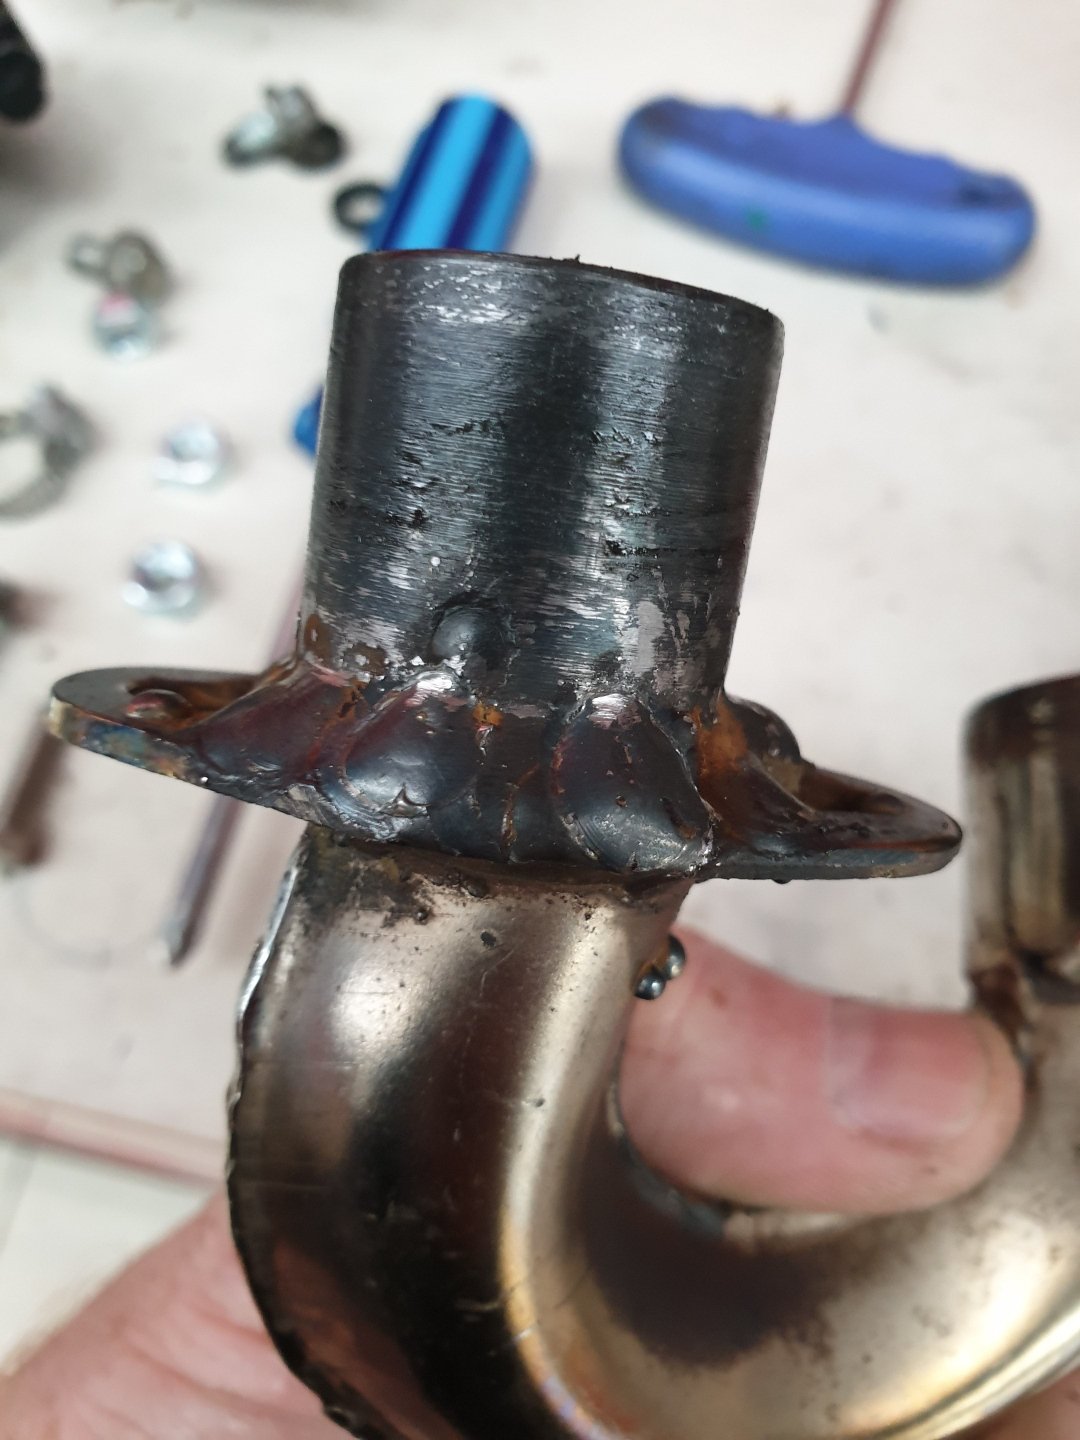
If my calculations are correct it should go well, I still have to advance the exhaust port to get the full benefits, this is going to be horrible on the ears.
7 points
-
Adventure GN never fails to impress This friggan thing can do wheelies if you dump the clutch hard enough5 points
-
Hell yes!!! So close... just waiting on a few parts to arrive in the post.
5 points
-
oh yeah & these, I make these they sometimes come back for repair with Price tags attached over $1100, I've made 18 in the last year alone, & they've been a NWC product since early 2000's... one of our Higher end Products5 points
-
You can also loop your test wire through the clamp to increase the reading if your meter does not go low enough. Eg loop it 10 times through the clamp to move the decimal place by 14 points
-
replaced all the lip seals on the crank and both ends of the gearbox. tapped and fitted some 1/8 NPT hose tail fittings to the fluid cooler lines and then i put the box in the car. it fits. dont have the gearbox crossmember in yet, ill make the mods to that tomorrow night. 2019-08-08_07-51-57 by sheepers, on Flickr 2019-08-08_07-51-47 by sheepers, on Flickr3 points
-
3 points
-
I have a cheapish UniT clip on multimeter, which also does dc down to ~3mA. Holy shit this makes finding current leaks easy. Neighbour was getting a soggy battery. instead of all that undoing and inline metering with the other multimeter terminals, it was just: set to DC 2A scale hold near wire(s) to reset/calibrate for the moon's magnetic field clip around wires(s). 105mA 5 minutes to check all the wires on a 24V system. --wrong link-- Added advantage, you don't then forget to put your probes back in the usual meter terminals, to it doesn't blow up the next time you measure a battery /mains.3 points
-
The better half and my self have been honing our skills of late. Thats right boss. Hours of hard yards have been put in out in the garage. You all know it and have no doubt also spent many hours doing it. .... Standing there with a beverage staring at an old jalopy, talkn shit and do'in sweet fek all. But seriously what have we been up to other than throwing back jars and chin wagging you say whilst dressed in trendy garage attire. Well ladies and gentlemen wait no longer for here is yet another riveting update to cover the little bit of work we actually did. Radiator all plumbed up. the finned metal hoses bend and hold shape well. like how its kinda central in the engine bay. Replaced the hose clamps that came with it with stronger jobbies as I couldn't be feked with hoses blowing off and coolant going everywhere. Moved on to hooking up the column shift to the trans. Using an IDIDIT GM/700R4 universal shift kit. Thinking being since im using an IDIDIT column it would all just be bolt on. Well that was the theory anyway. Basically it would work fine if I was LHD. the instructions are nice and simple and kit straight forward and well made. Would just bolt in. Being RHD its all opposite though and naturally the American brand dosnt included any instructions and when I contacted support I got no help and basically told me to fek off. LHD shifting would pull the cable out as it moves from park through the gears. RHD we push it in as we move through the gears from Park - 1st. Rejigging at the column is an easy fix. just throw the car in park pull out the cable and hook it up (As pictured). Basically doing opposite as instructed. The bracket that fits to the trans had to be bent so the tab that holds the cable pointed upwards not downwards. Then an extension made up for it. Reason being that the shift arm on the trans is made to point downwards and pull through the gears. Since im pushing through the gears it had to be mounted up top. So the bracket that holds the cable in place had to also point up. Simple enough I know but thought since IDIDIT support and engineers where about as useless as tits on a bull I would flick it up encase any other Kiwis or RHD owners needed a bit of help. Shifts easy though the gears. Clicks from Park to 1st. Ordered a heap of fittings for the fuel system. But before I start hooking all that guff up it was deemed time to finally finish up the gas tank thats mentioned in a previous post. Its made to nestle up nice and happy in this rather large hole that was cut in the boot/trunks floor. Its hard to tell but the hole has been braced up fro the underside so when its all together the floor will be sandwiched and nice and sturdy. Since the lid was still off it seemed a good time to put together the in tank fuel pump. Overkill to be sure since its only driving a few carbs and not fuel injection. But it has good reviews and is supposed to be pretty quiet so I was like mehhh seems easy enough and should be "hook it up and forget about it". Its an Aeromotive Phantom in-tank carb setup. Basically meaning it has a regulator (pictured there front center) that drops the 320psi pump down to 15psi. Also has its return blocked with a removable cap. Comes with pre-filter pictured along with that sponge tube that you cut a tad higher than your tank and acts as a filter and a baffle. Also put together the Dakota Digital universal sender. As with all there stuff its a nice bit of kit with simple instructions. Has the ability to fit in a huge range of depth tanks and works with many gauges. Anyway lid all TIGed up. Thanks lads at Kirk Irrigation for that by the way. Also got them to attach the filler neck and drain. Holes added before assembly to make life easier. Then the sender and pump just all dropped on in to place. Under the car it sits up nice. tucked just above the lowest part of the chassis. Should be no scrub line issues. Also still has a nice amount of clearance from exhaust - its why its an odd T shape. Up top it is about level with the lip of the opening. Will have a floor mounted above it latter down the track. The rest of the other bits of the fuel filler neck still to attach pictured above. Also pictured is the cradle to hold the battery box that we wiped up to hold it all nice and secure on the right side. Just using a standard marine battery box. Fits up nice in the back fender as shown. Can vent it through the floor. Will have a panel to hide it from view down the track. The battery only just fits in whats good i guess - no slipping about. The big bugger should power everything I need and flick over the engine no worries. Looking at either welding cable or 1guage wire to carry the current up the front. earths all over the place of course. So picture the above with panels. sides to hide the battery and tool kit along with fuel neck that will live on the other side. floor to protect the tank then front panel to hide the airtank and amp whilst also adding sound deadening to the shut up those two pumps. Now getting back to my original comments in this post. That being the standing staring at the car. Maybe moving something a fraction taking a drink and repeating the process. Side pipes seemed like a good excuse to practice this. We had to go through the process of draining a few cans to use to hold the pipes in place first of course. Sacrifices we make aye. Note the said cans are crimpled in the middle otherwise they are much to high to suit the air out stance with the pipes. Front grill also seemed like a good excuse. Pondering a 1950 Buick grill. Middle section should fit in well once pushed back but its overall width is wider than the car. Dont really want to cut the chrome as it is so nice so I guess if we use it we may need to flair the guards a bit. Already planned to do this a bit to get better wheel travel for steering when air out but hmm I think this is something a few more brews and staring might require. All this is much down the track of course. Tiki - such a great helper. You got a wire he will attack it. Drop a nut and he will soon have it flying across the garage floor ending up down the side of some thing out of reach or under some other heavy obstacle. Told him I would stuff him is such a pose if he keeps annoying me. Guess he is happy with that idea as the little shit hasn't stopped.3 points
-
The one you linked is AC current only. I also have the DC one, it's an awesome little toy. (UT210E) https://www.aliexpress.com/item/32956426086.html?spm=a2g0s.9042311.0.0.3fe74c4du2XSnc Except that listing only cost me $49 at the time. Only thing that you need to be careful of with the DC measurements is that the Earth's magnetic field/anything steel will interfere with the reading if you move it after you hit the zero button.2 points
-
Wow, that looks really good!2 points
-
Keen to hear that 2smoke nang!!2 points
-
Has it got good strong spark? Are the plugs clean and new? Is the battery in good condition and fully charged? Try and squirt a small amount of fuel into the intake and see if it will fire.2 points
-
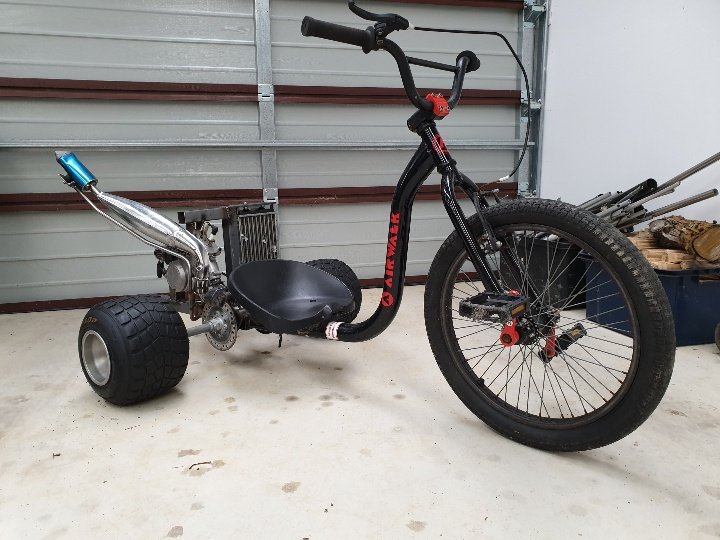
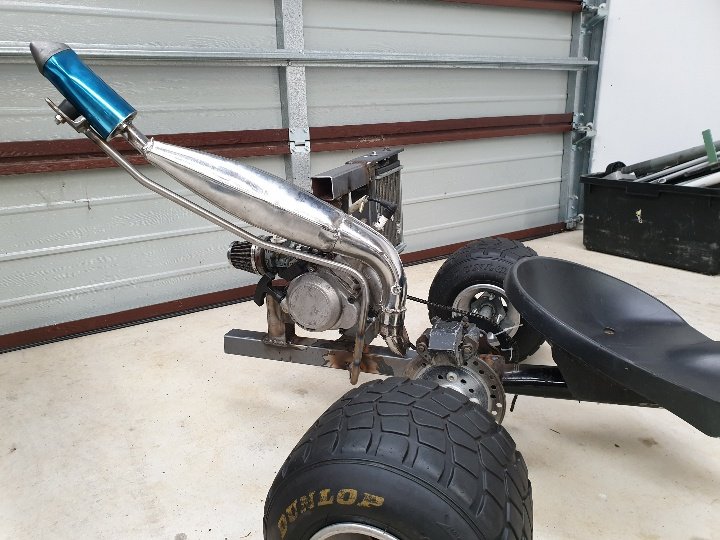
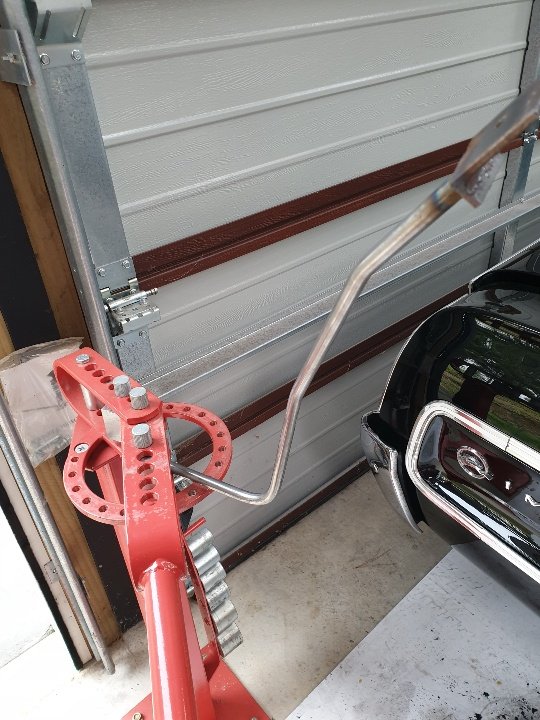
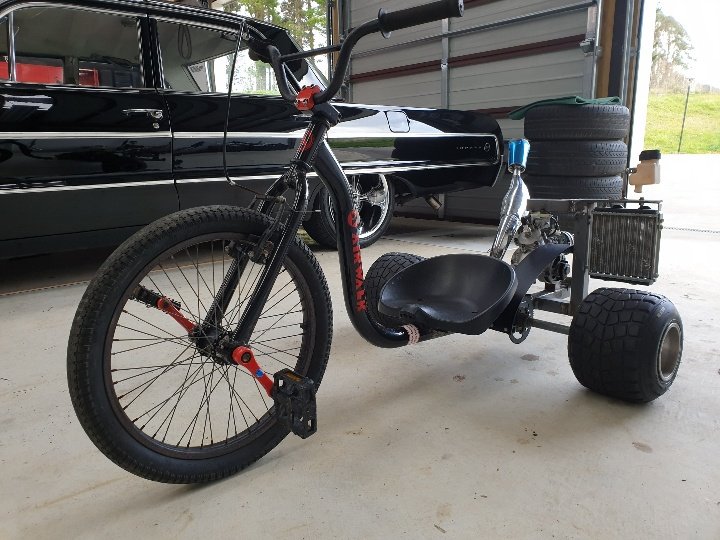
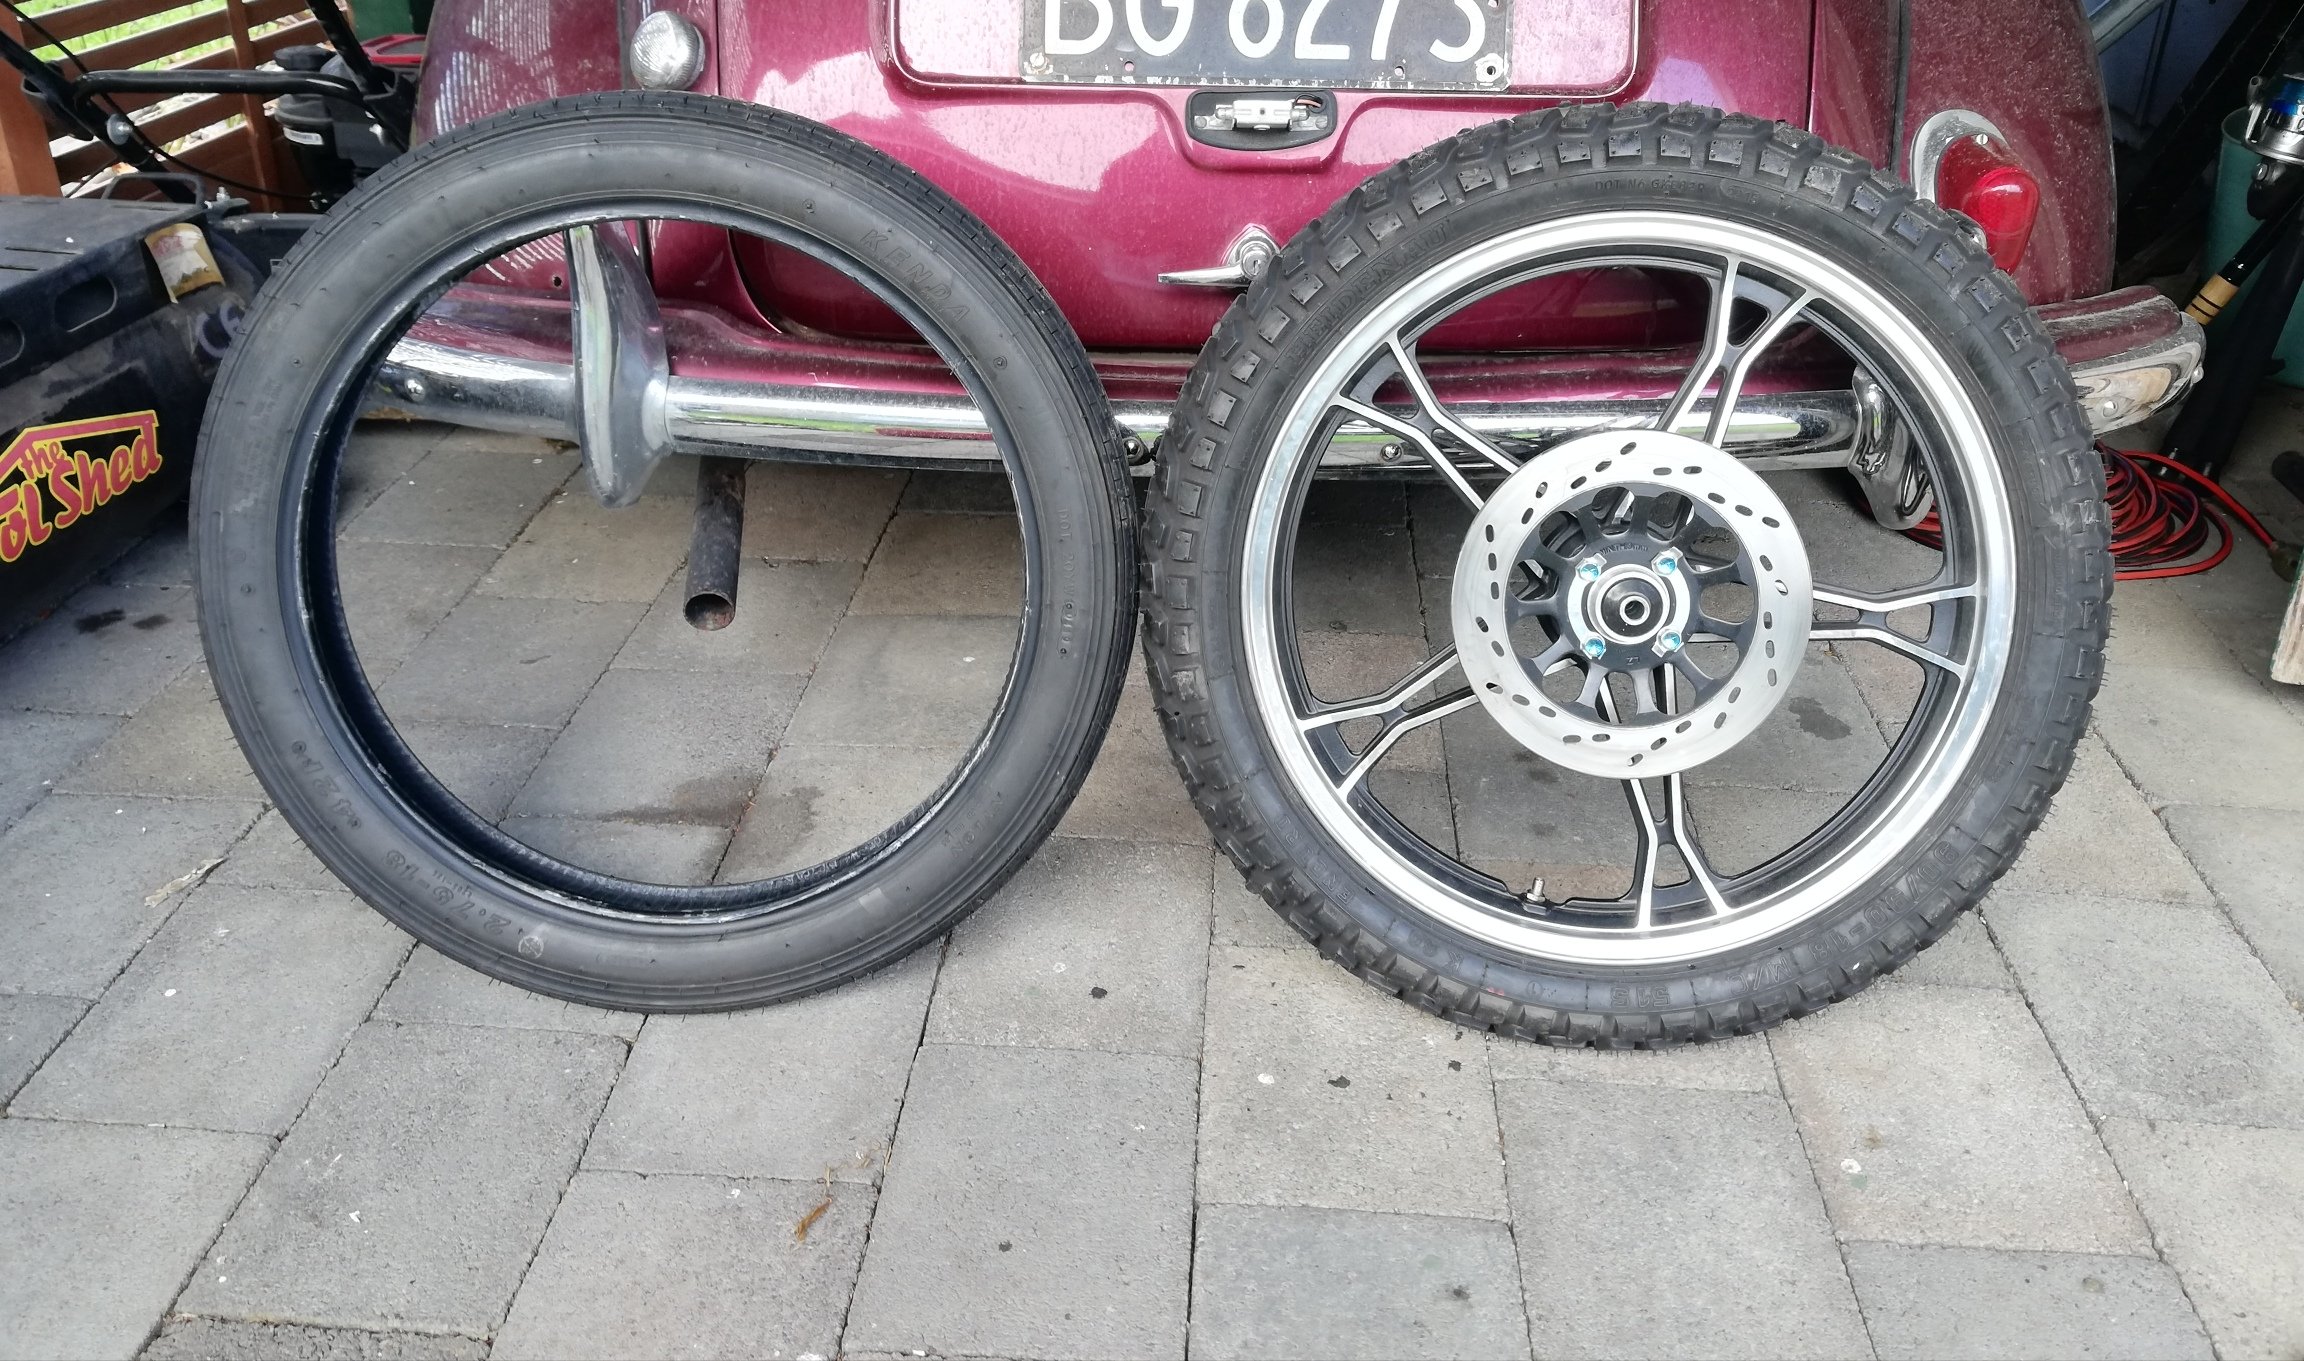
Phone has no credit but expansion chamber is mostly finished, its tuned for doing wheelies and fucking peoples grass. since the chrome if fucked on the rims I might blast the whole wheel and paint the rims black at home and send the frame to a place to be blasted and 2K chassis paint if its cheep. I am trying to find a 1973 TM cylinder head2 points
-
if you get a brand new buffing wheel you can polish plastic to an extent2 points
-
Kids wanted to do better skids on their pedal kart so a quick hunt thru the offcuts and random stuff at work got me a short length of mains water pipe at almost a perfect id to go over the wheels. A bit of pre heating of the sleeves to soften then then worked them on with a hammer. A quick test run tonight proves it has enough traction to get speed up and can drift with enough entry speed I need to fold up some flat bar to lock the diff so to speak then it should slide alot better.2 points
-
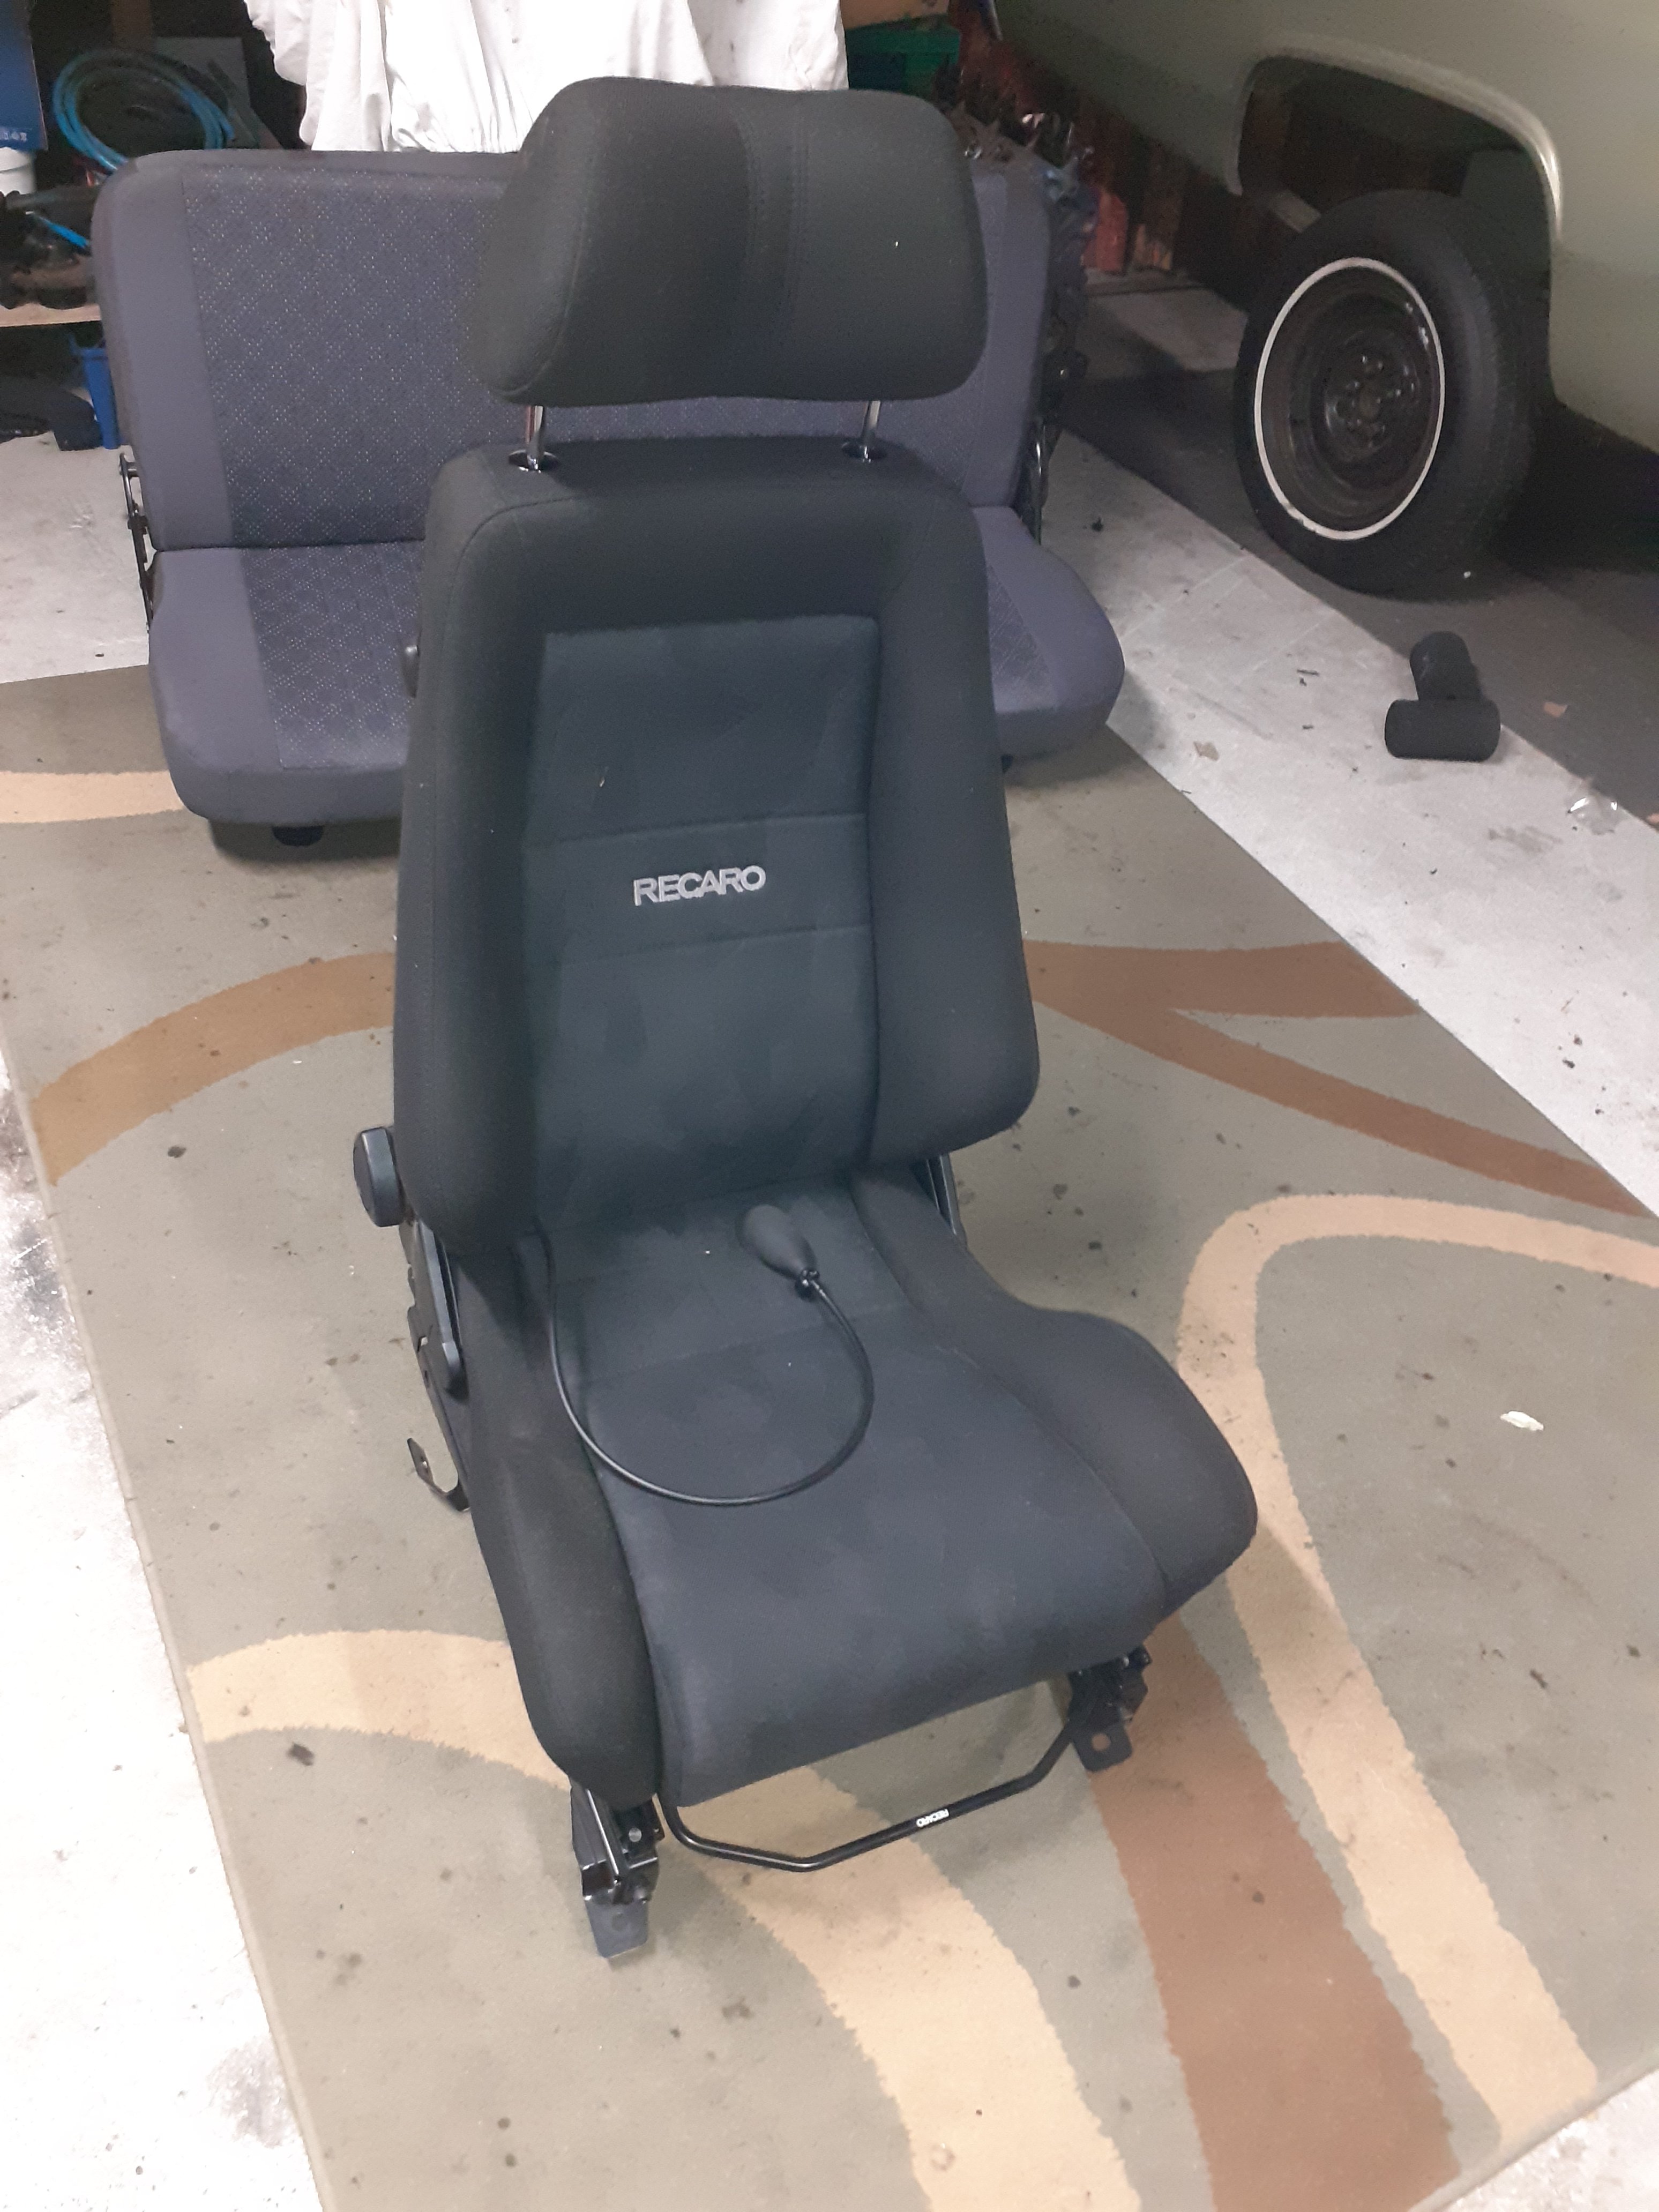
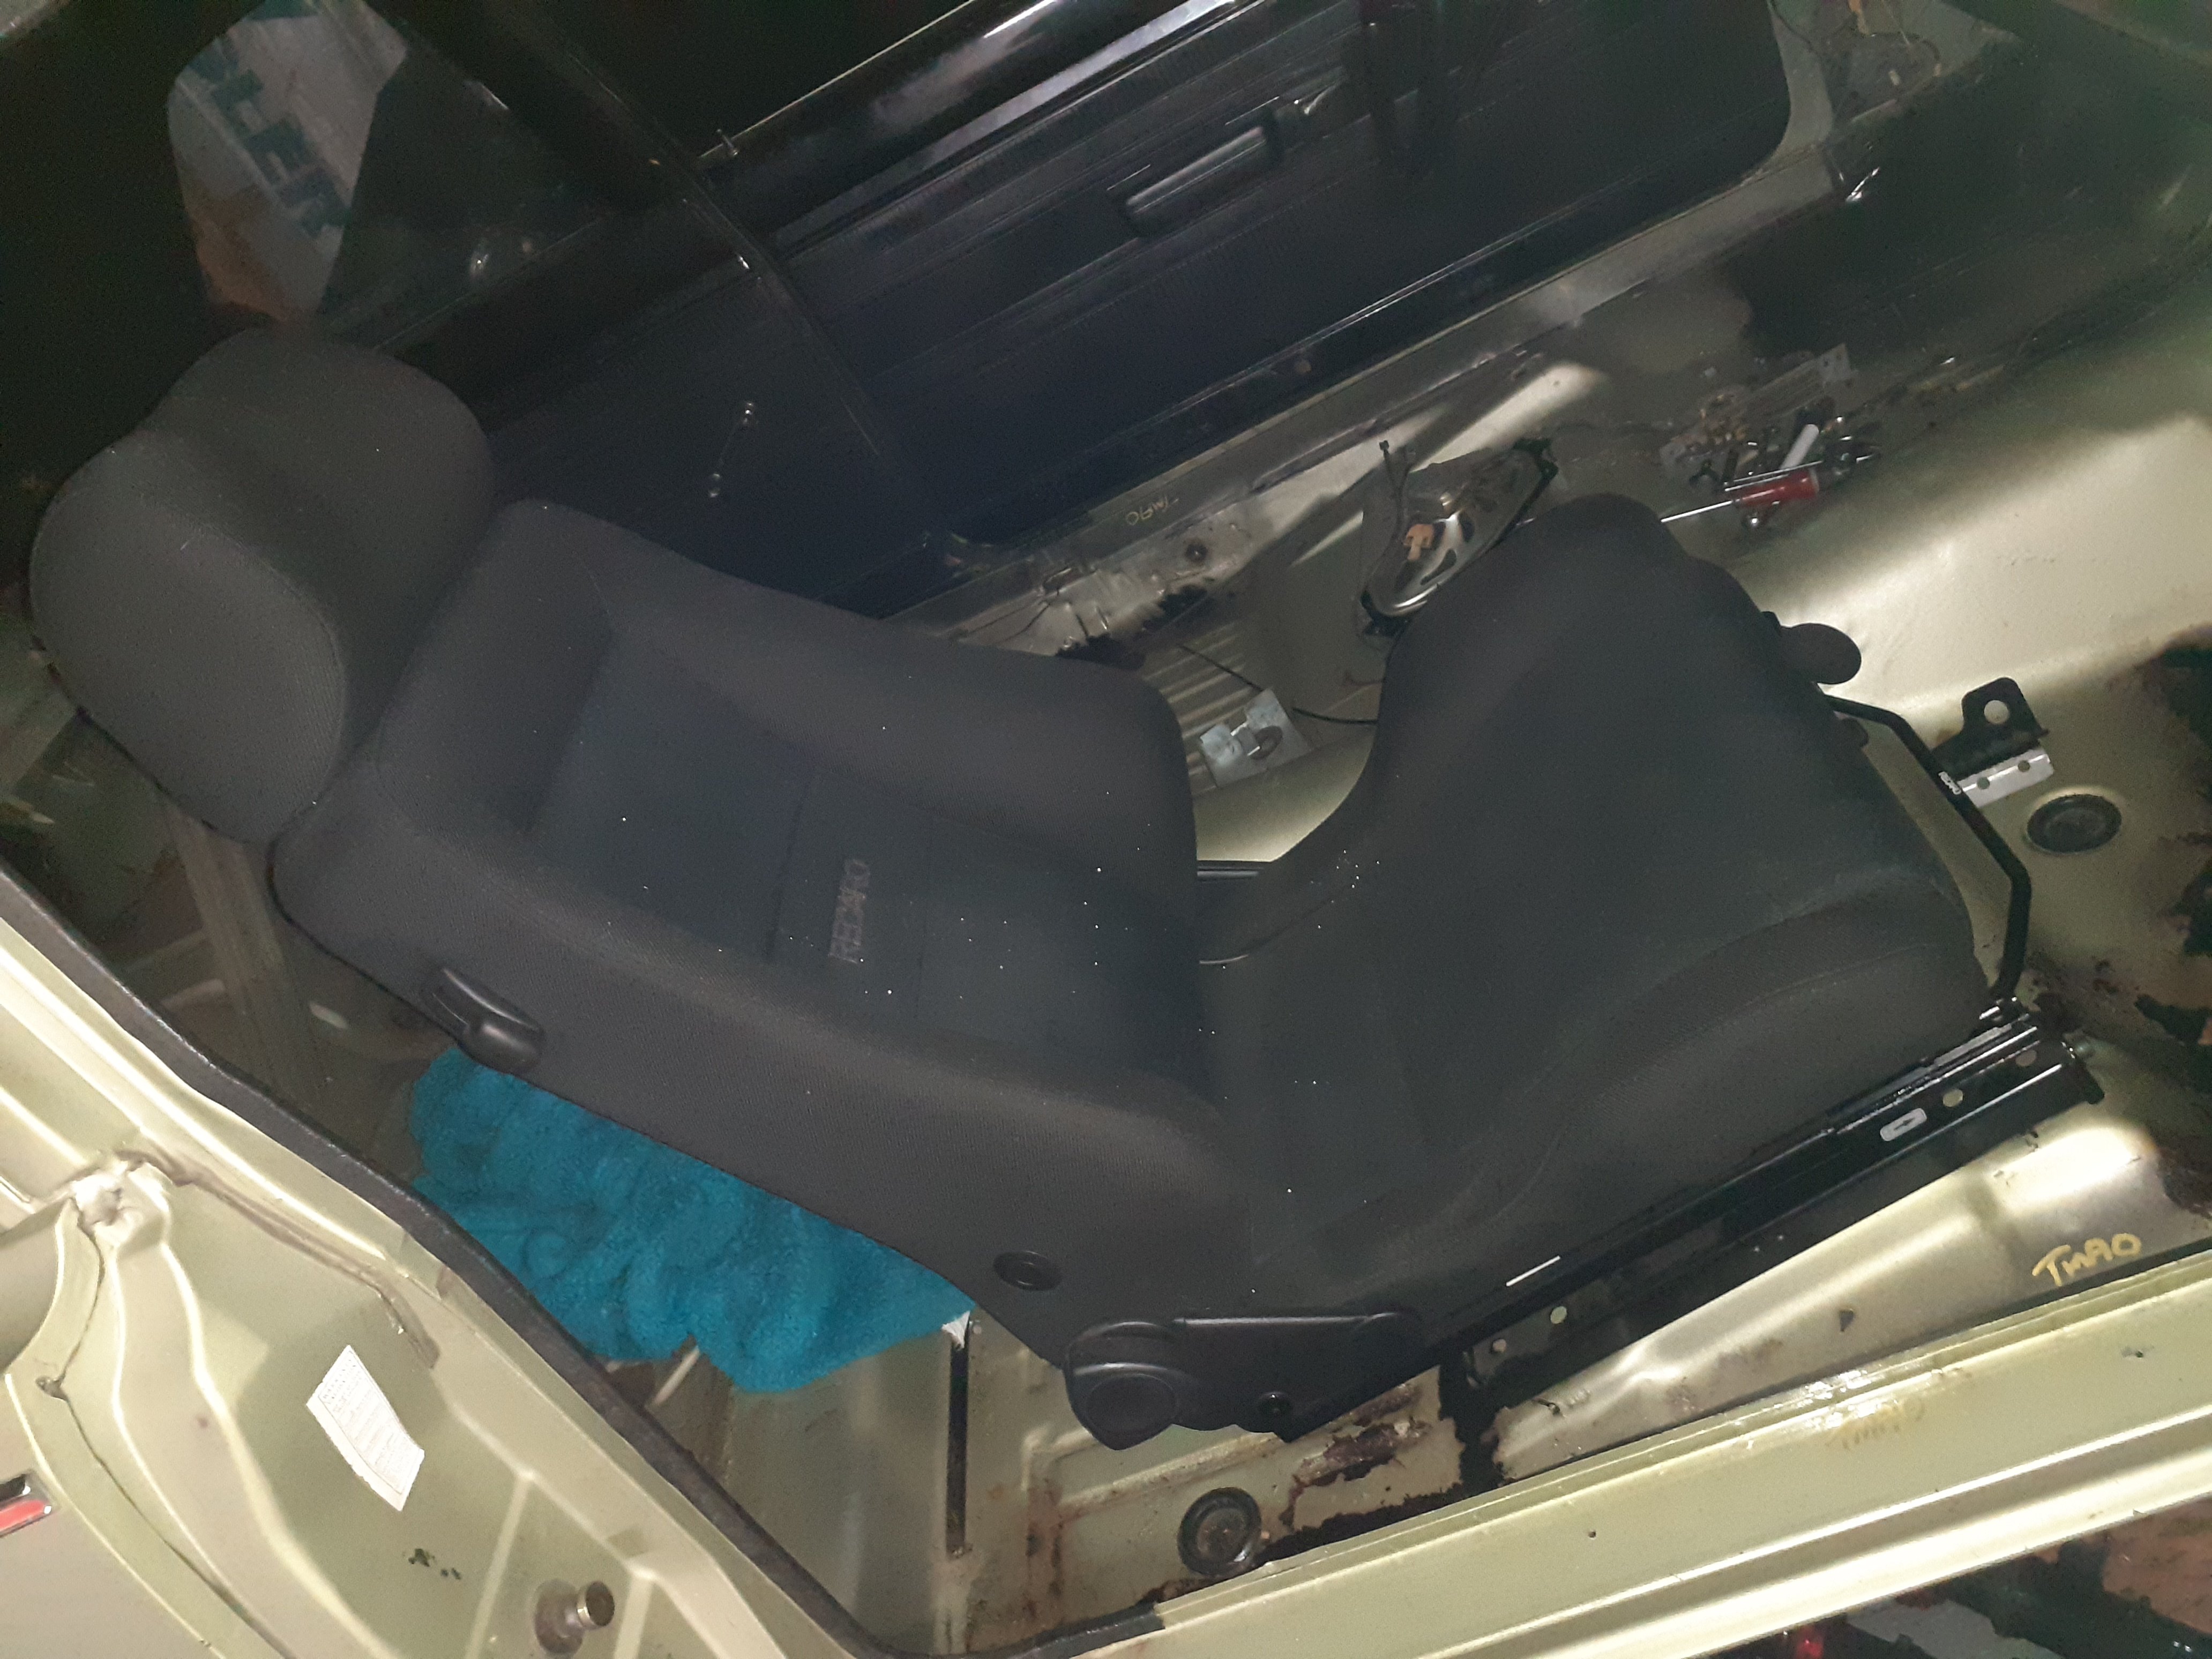
Was at a compliance center today and they had a pair of seats they had taken out of a Prius of all things... anyway I asked if they were for sale and now I own them. Head rests are a bit big, but they are very tidy with no rips and the foams in the base are good. I put one in the car and it looks like they are going to be very easy to fit, if I swap a couple of brackets side to side, the inside will bolt in with some doubler plates, and the outer will bolt on to the bench seat mounts. They even have a pump up lumbar thing so I can take old man @sheepers for a ride and his vertebrae will be suitably supported
2 points
-
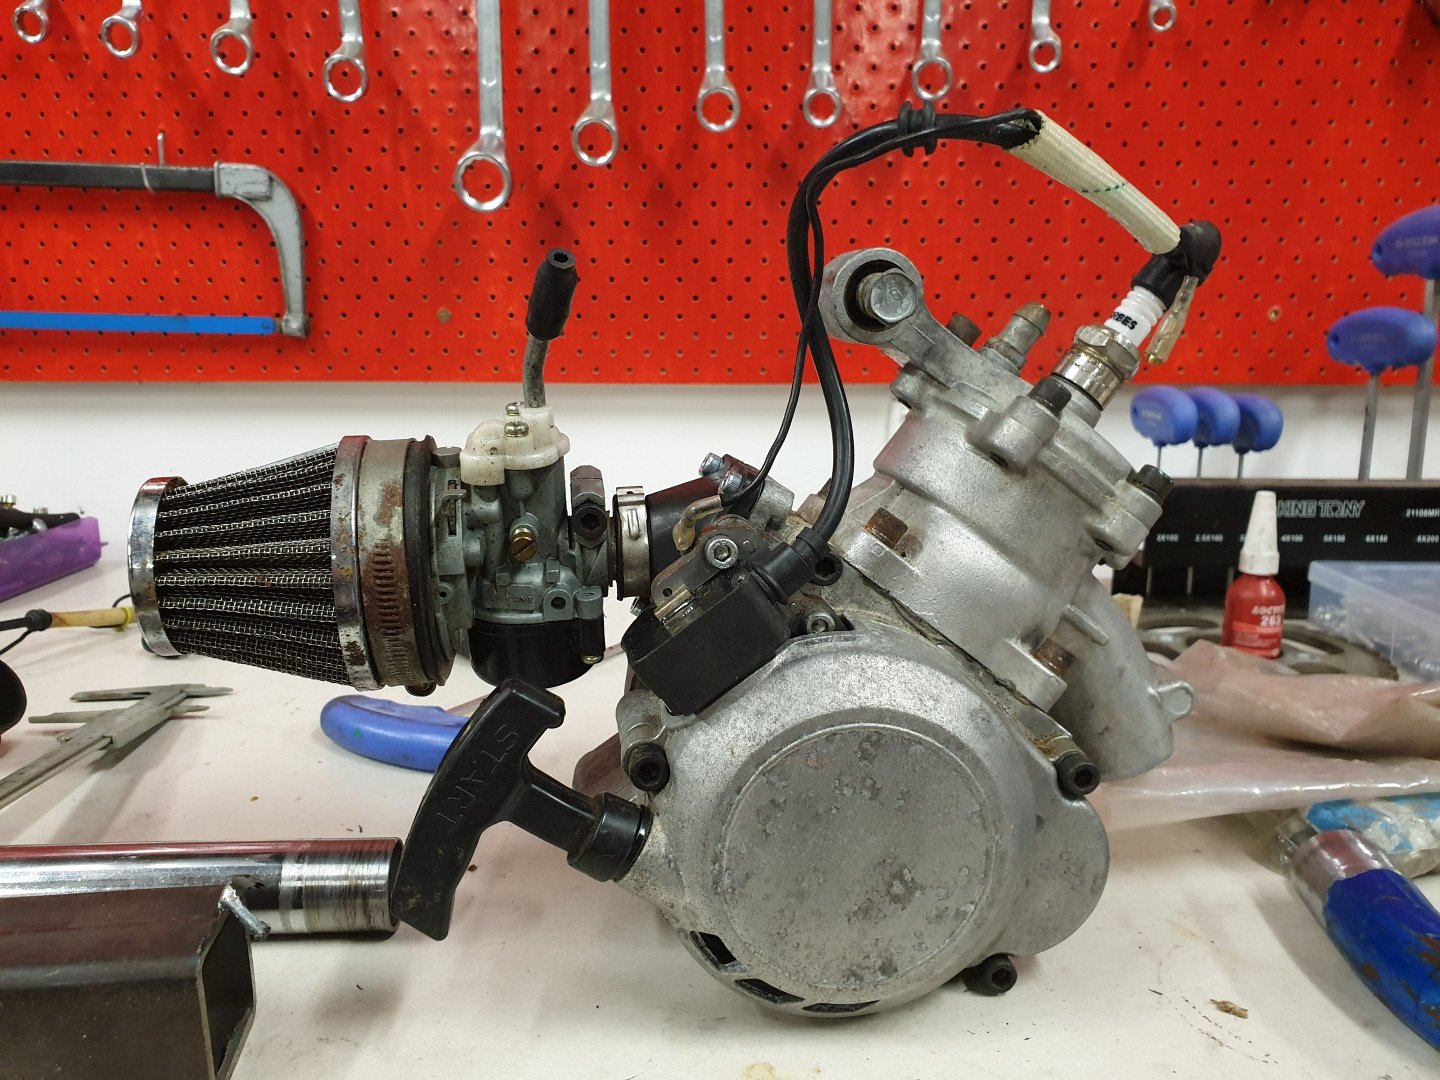
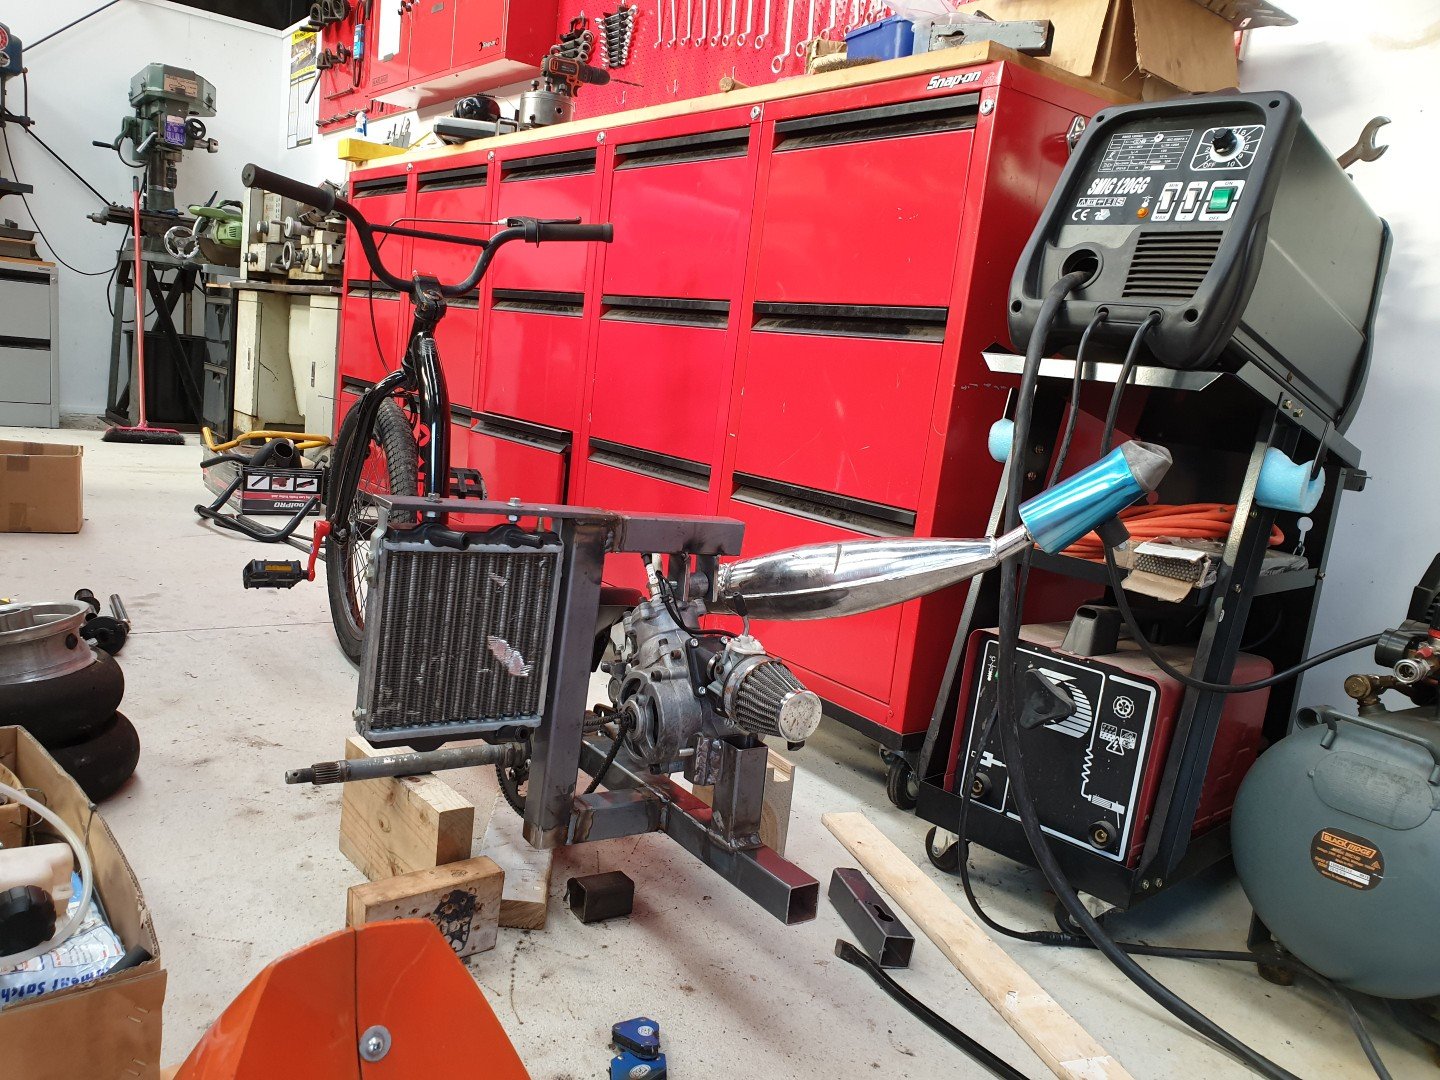
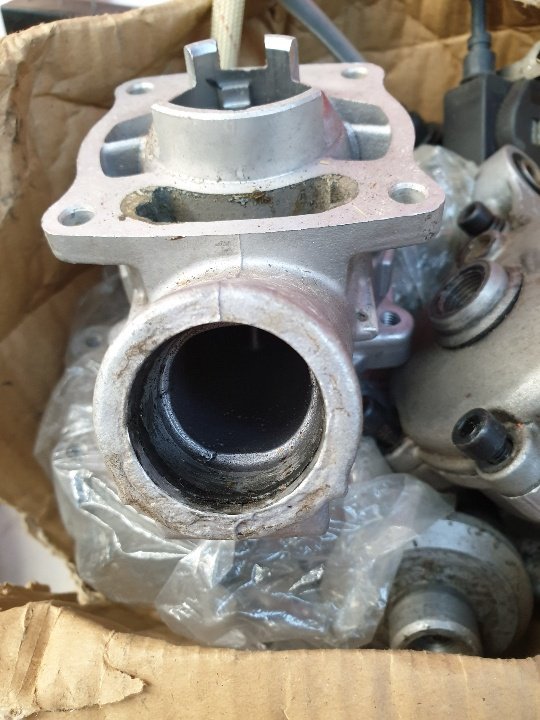
Out of the parts I got, I made the best out of what I had and put this together today. I squirted some engine start into it and it fired straight up... so I know it'll work. This is likely the direction I'll go.
2 points
-
we will rebuild today smashed in some new headset bearings, feels pretty nice up in there i tell ya. new tyres were fitted also. i went for Pirelli City Demons front and rear, both 3.00 x 18.tried and tested good quality road tyre, be interesting to see how it fears on the waikaremoana gravel.. Front rubs on the fender a little bit so i am going to have to grind down the side brace things. Still need to do a yambits order for rear sprocket, front brake pads, oil seal for kickstart, and air filter. then i will have accumulated everything i need to fully reassemble! fizzing!!!2 points
-
My name is Stu, and I like 4ages. So much so that about 16 years ago I made one fit into a EP71 because I couldn't afford an AE86. Yes its wrong wheel drive, yes its too loud, yes the intercooler is too big, yes there are many other sins, but it eventually ended up being reasonably fast-ish and just quietly it is a little bit of fun to drive. But recently I redeemed myself by acquiring an AE86 Levin, so I thought it was about time to supply you the reader with double the amusement of watching me waste many hours and many dollars on a couple of examples of Toyotas best metal > rust conversion products from the 1980s... I'll do a decent post on each of them eventually but here's a snapshot to get the ball rolling. The EP I'll start with this, bore you with the details, then switch to the more exciting 86... It started out as a white 1985 Toyota Starlet Si - featuring the worlds smokiest 2e-elu. It had a couple of redeeming features in that it was straight, and complete, had 120k on the clock, and came from a very quiet family who loved it and were very sad when i drove away in it. It drove quiet and smooth and apart from the smoke screen everywhere it went, it was a nice car. I wrecked all that by fitting a 4age, adding boost, vibration and lots of noise and smoke. It currently has a fairly basic engine setup comprising of an cobbled together 8.0:1 bottom end with some arp bits, lightly tickled blacktop head, single throttle intake, long merge turbo manifold to a GT2876r and stainless exhaust. Its runs a Link G4+ Storm that I wired and tuned (the later with the help of KPR who I have been annoying for years... oh the shame of tuning a fwd). It has run a slippery best 11.81@121mph on the quarter mile at a peak of 17psi with a 2.3 60ft so there's more potential there. Its currently tuned to 23psi but haven't run that much on a track yet. It only been on a dyno once way back in the day on a aw11 bigport ze and T04e where it made 195kw on 16psi. No idea what its making now as its street tuned, will one day find out. It will surprise most but this thing does go around corners and runs surprising straight without too much torque steer #notlies. Anyway, other than that is fairly simple, some strengthening work in the front, coil overs, turret dropped rear, sway bars, fancy short ratio gearbox with LSD etc etc. Ive done pretty much everything myself bar the paint. Its been a great learning curve and through practice has lead to me wiring and tuning ALOT of other cars for guys I know. Will go into that another time. Here's some photos: The 86 This is newly acquired from a mate who I have been pestering about 86's to for years. I have yet to find time to work on it, but its straight and virtually rust free, and comes with a non-running bluetop with quads, Jasma headers and some HKS bits apparently... = win. This isn't my first AE car, but I'm hoping to build it into as close to my dream 86 as possible (except for the small fault of not being a notch but you can't win them all). Will update on this reasonably regularly this year as I want to get this on the road asap and enjoy it while I piece together a different setup for it. Its not going to be silly like the EP ended up... well, that's the intention. That'll do for now. PS: Hi Dave. Abuse here1 point
-
Chain guard and reservoir bottle brackets made and then welded in place. About all I can do until the postman comes with all the shit I ordered off trademe last night.
1 point
-
On a side note distributors/coils seem a common issue with B series. Seen a few friends racecars have them fail1 point
-
Sanded rear guard and looked at fixing cracks. Main one was about 5mm wide and would spring open if held closed... So hit it with hot air gun and held it in position till it cooled... Then bodge-welded from the back with a soldering iron... And roughed up underside surface, degreased, applied fibre tape and 4:1 epoxy resin... Front guard had cracked mounting point... Did similar, held in position with some plastic 'welding', cut sticky fibre tape to shape and applied... Covered holes with duct tape and poured in some resin. Will drill holes when set, hopefully the poxy sticks to the plastic? Did some QA50 guards yrs ago and they held up ok ...1 point
-
i found a rope mop worked the best, soft one didn't do anything1 point
-
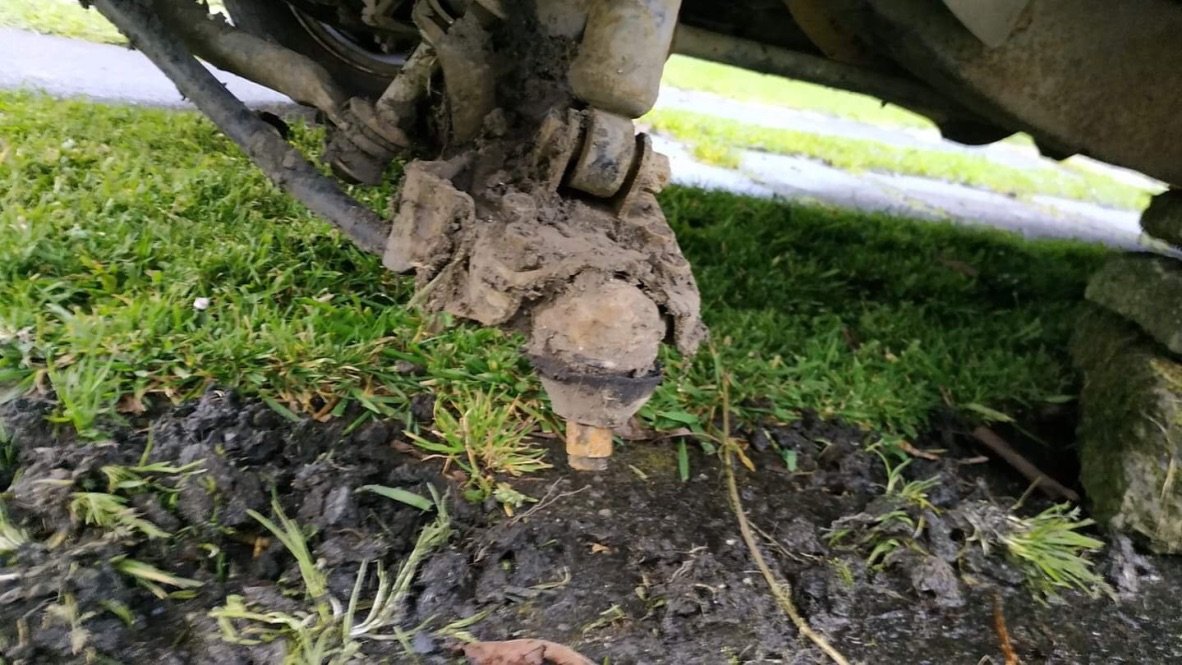
That's my offroad gokart. Its rough as...but such fun! My mate nicknamed it "the Somali battle wagon" It's got no working brakes, but engine compression works good enough to slow you down. In that video I was been a pussy, as I'd just fixed it and was testing my fix. Its solid as now.1 point
-
And a few hours later... Its starting to come together.
1 point
-
So, the more I open up this vehicle the more shades of shit I come across. Those leaf springs that I didn't really have a proper chance to look at? Heated to lower... What fuckery is this? I've heard of Barry's doing it. I'd never actually seen it. If I'm completely honest with myself. I never looked over the car properly to begin with. So it's my own fault. In an attempt to find anyone else to blame for the vast amounts of money it's starting to cost me (And find someone else to share in pouring money into it) I decided to make a visit to the issuing garage. In general garages, WOF inspectors, And the LTSA really don't give a fuck what state the car is in. If it got a wof. It got it on the day because it was legit on the day. It's just on the day and it's pretty much damn near impossible to prove a car was bullshited through a wof. It's a system that protects the inspecting authority. And let's be honest. Fair enough too. Otherwise we'd have no inspectors out of fear of themselves being blamed for everything. I spent the entire morning with the NEW wof inspector at said establishment. And they admitted the previous wof inspector was "Let go" for "reasons we'd rather not go into"... The fact that I'm getting some kinda Grimmy discount on labour tells me that as much as they daren't accepted responsibility. They are wanting to keep me as a customer and are prepared to go an extra couple steps to fix the issue. And take some blame on board. So. The ute is now in the hands of the local Mom & Pop workshop. Brand new bushes and suspension all round. Spares are coming from the donor. New rubber. Alignment, Fresh wof. And all the half ass attempts to make it cool and low are being done the right way. Which was kinda my plan for it anyway Oh yeah... remember how the guy that sold me the donor was going to rip the flat bed off but couldn't be fucked? He's been in touch and keen to get the tray back. And he's a panel beater by trade. "Yeah, you can have the tray. My ute needs straightening out in a couple places. you bring your hammers and dollys when you come to get the tray and we'll call it a day." As far as my own recovery after the slam. At the time I didn't think I'd been hurt. I'm the sorta guy that walks shit off. Pain heals, Chicks dig scars, Glory last forever. Mumma didn't raise no sissy. But my back still isn't quite right. (Don't fuck around with your back guys, If it ain't right after something like a wheel falling off at 100 clicks... Get it checked!) So after checking in with my GP, having X-Rays, and getting some serious pain killers. I should be back to "normal" within the next week to 10 days.
1 point
-
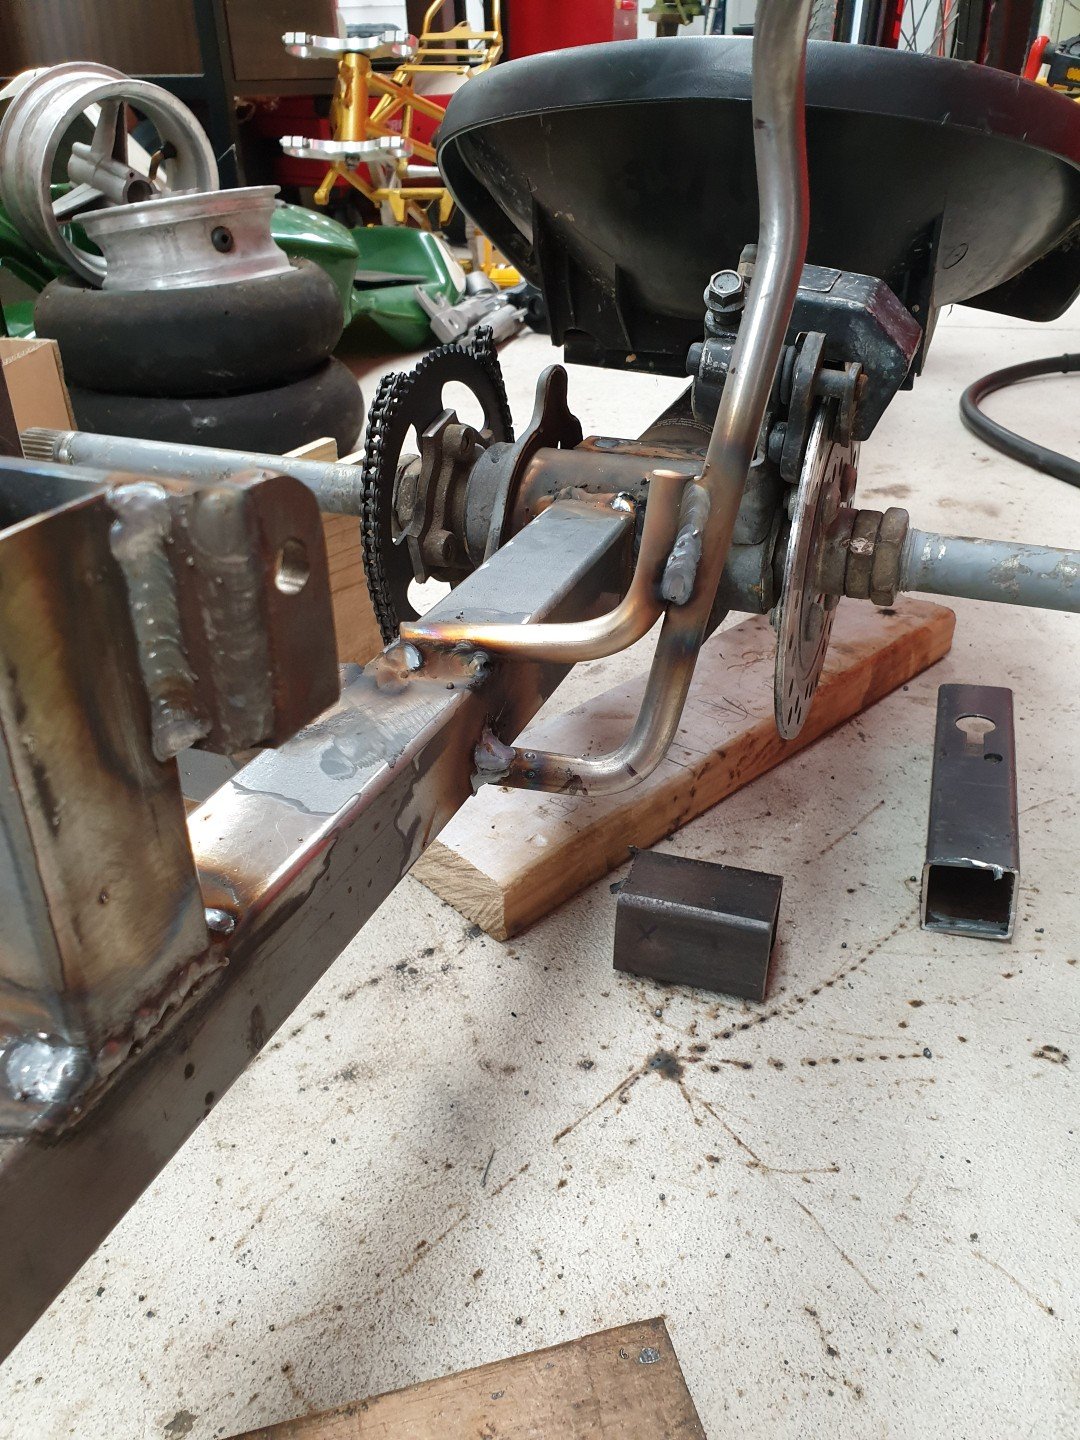
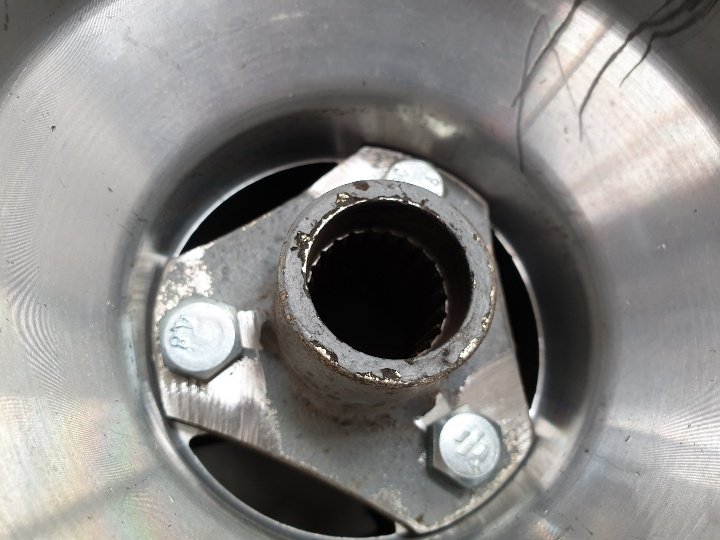
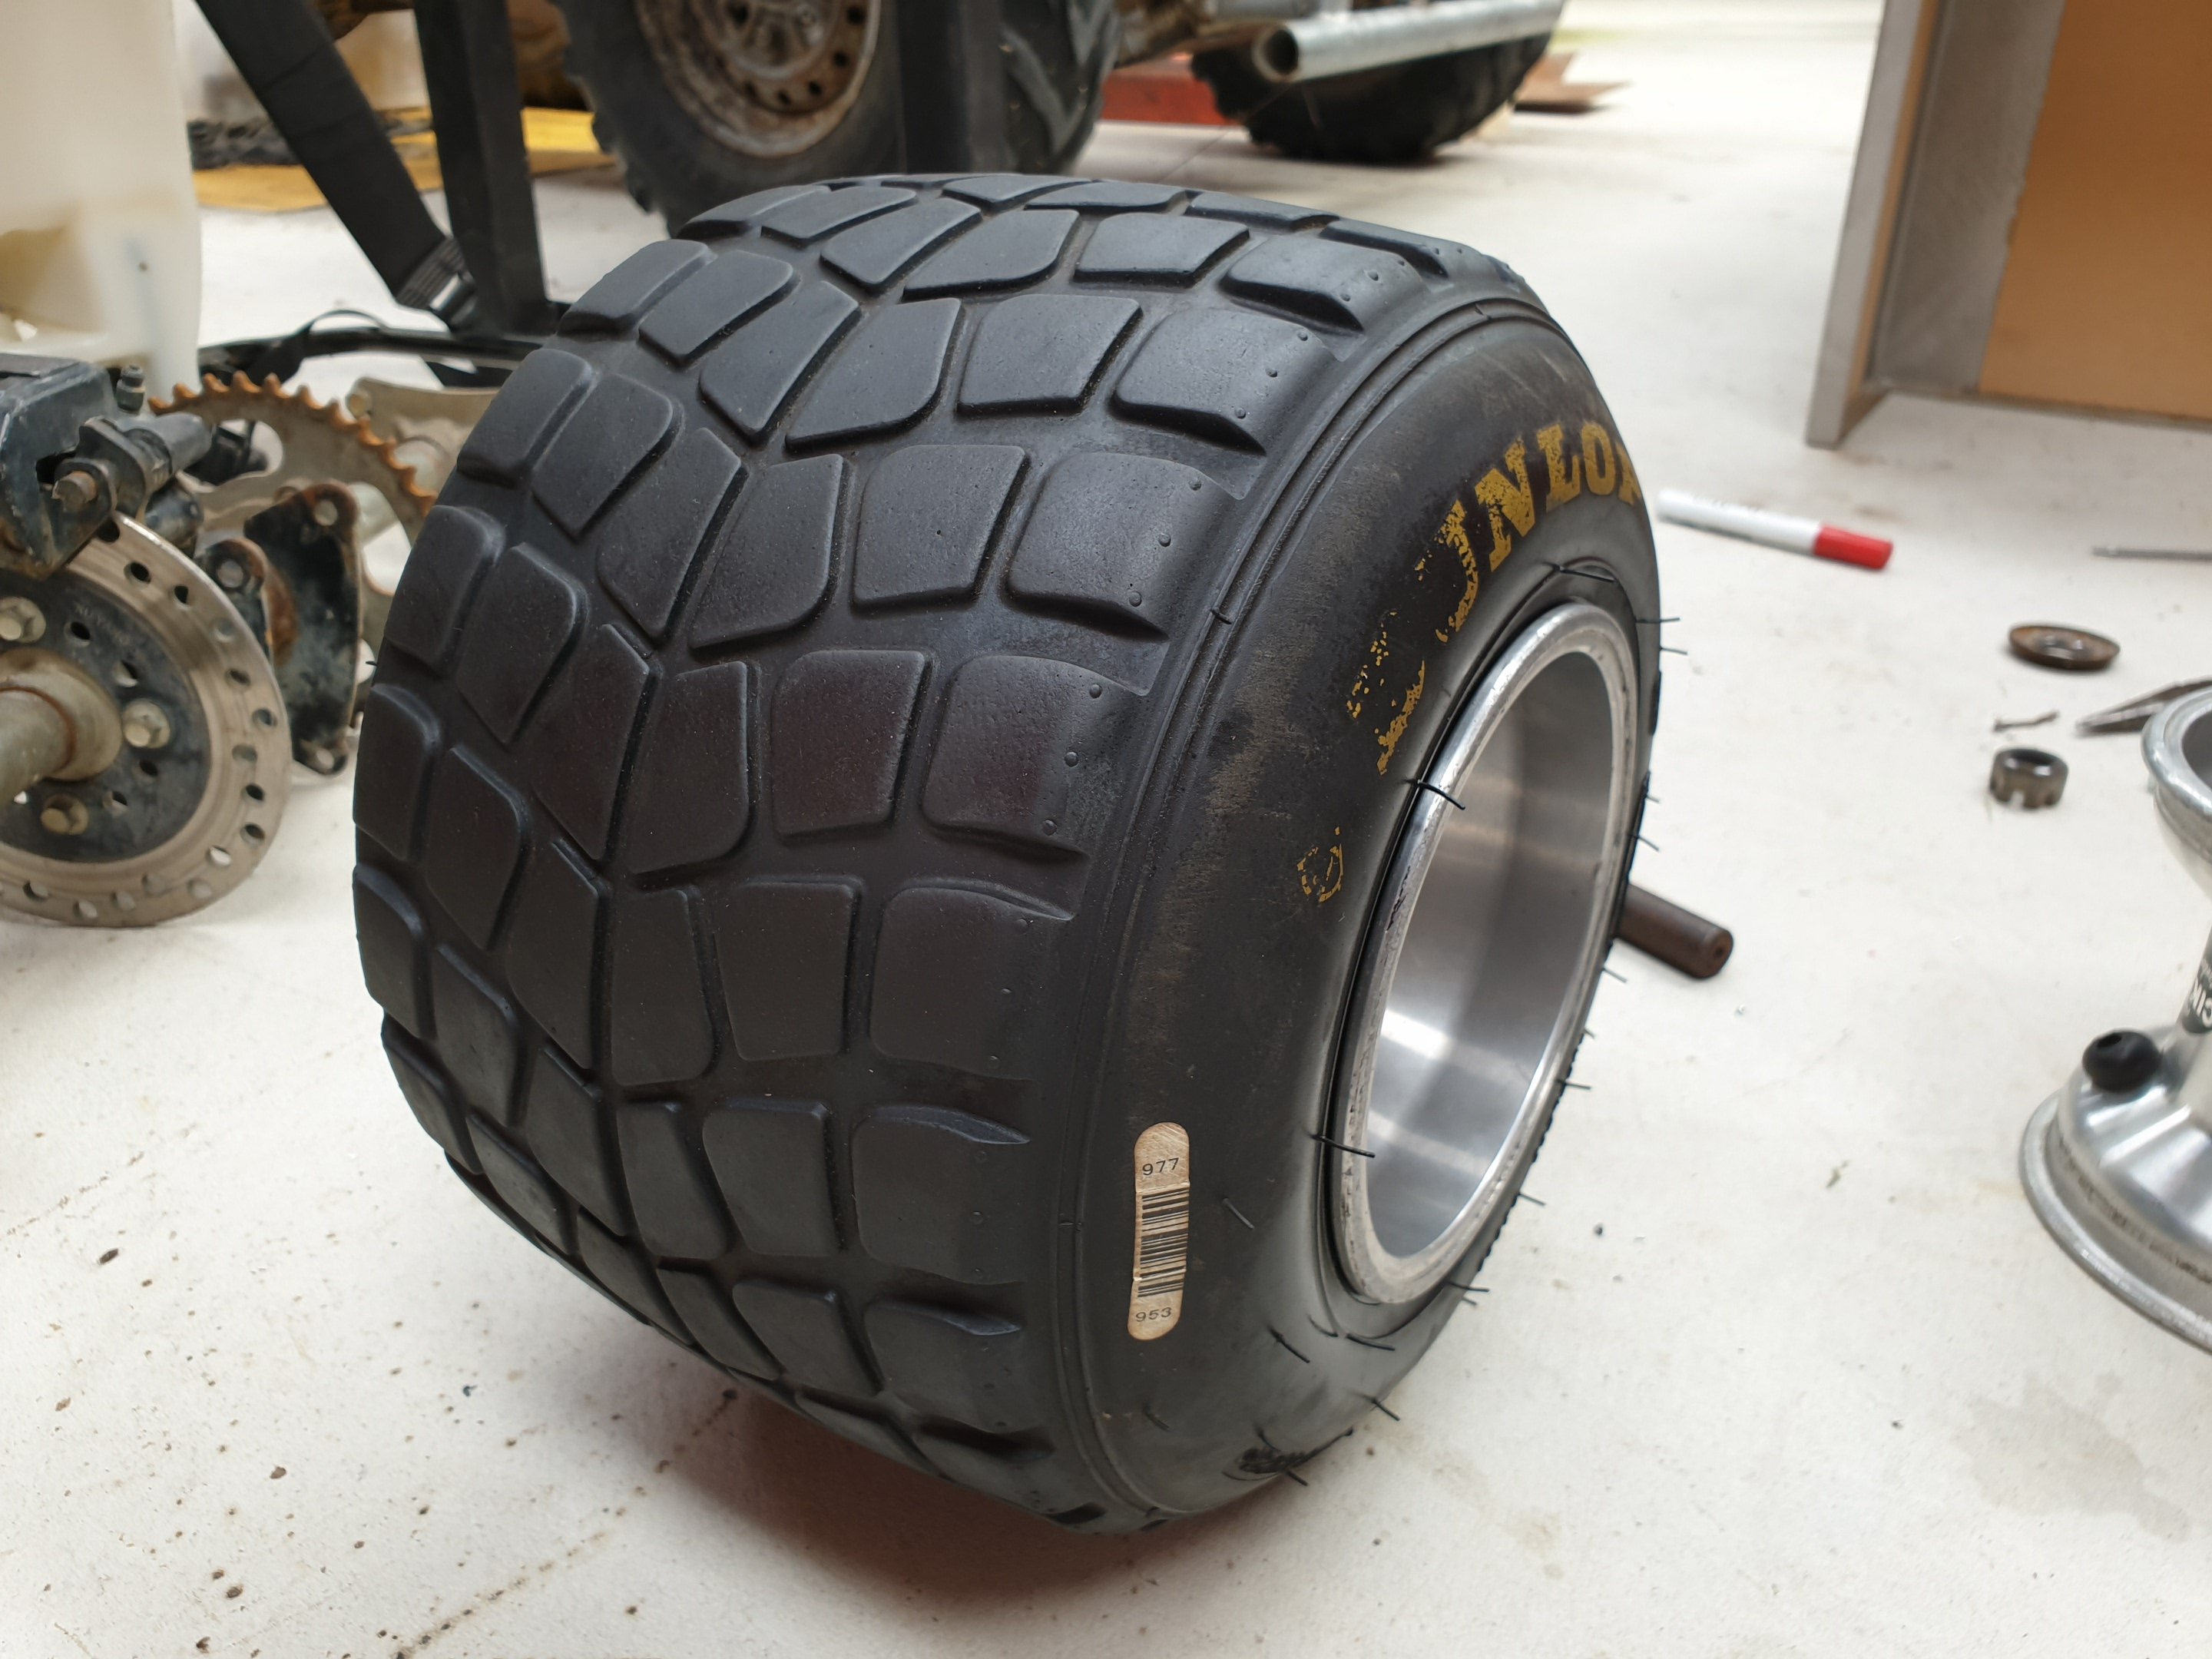
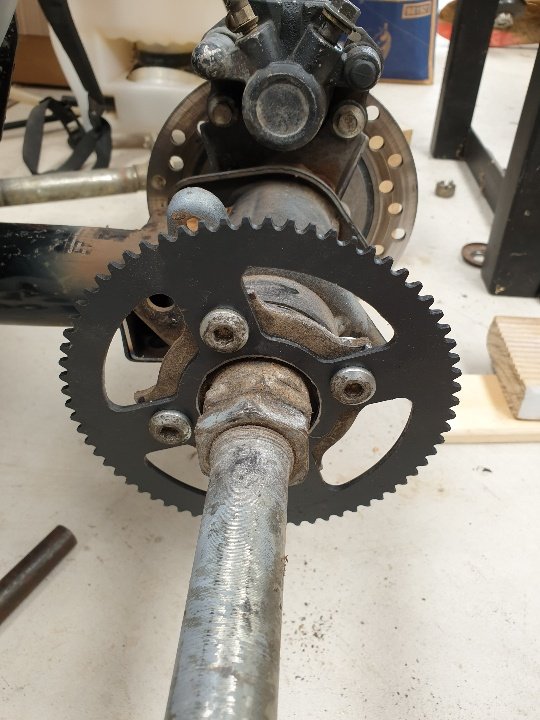
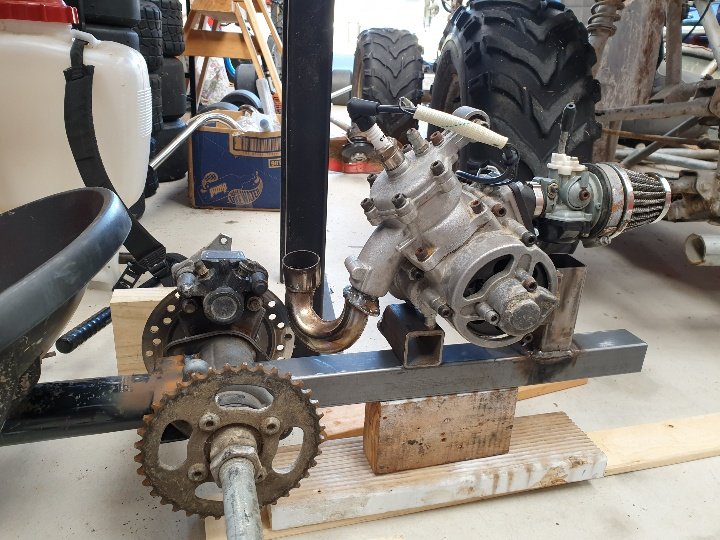
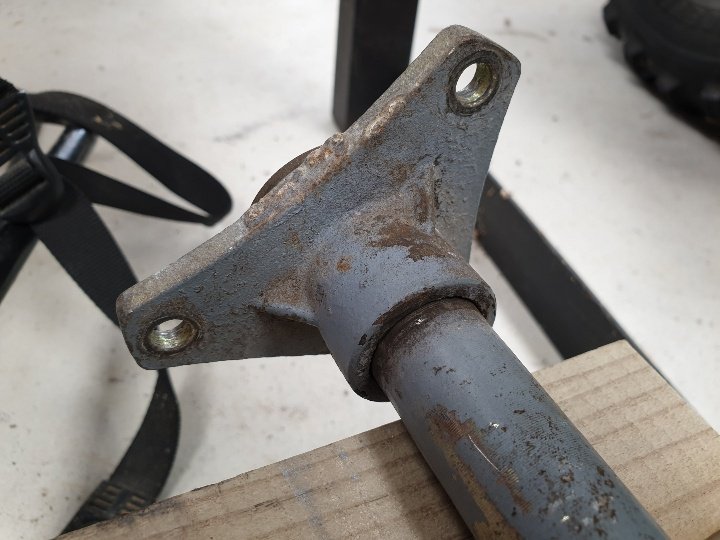
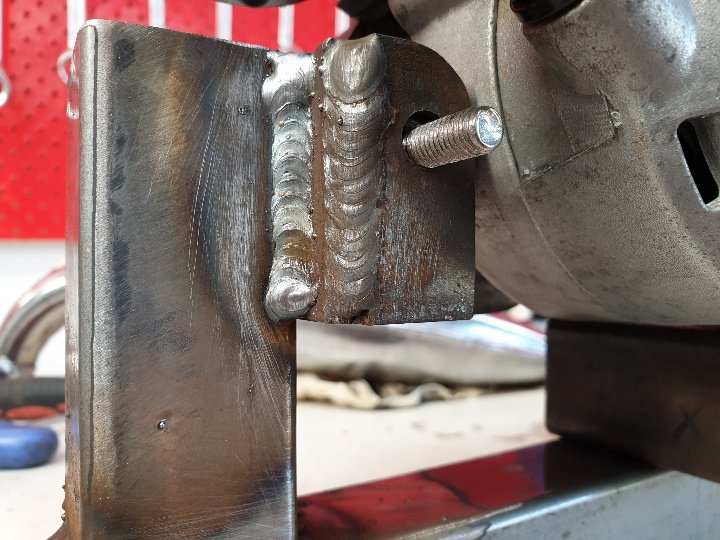
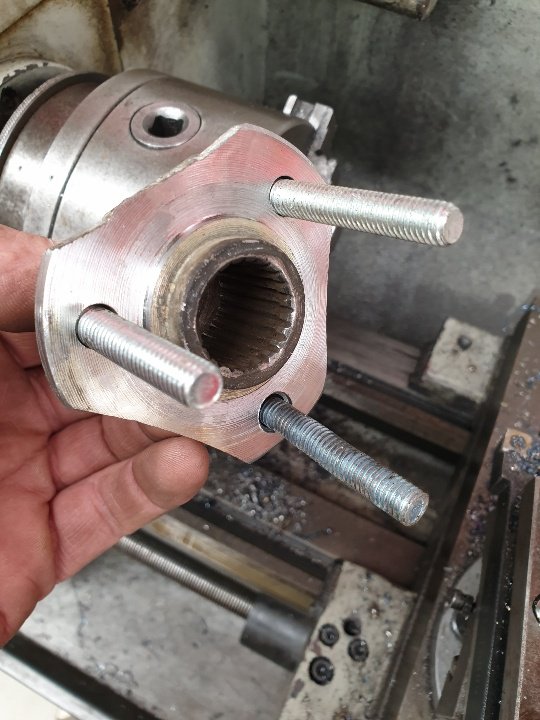
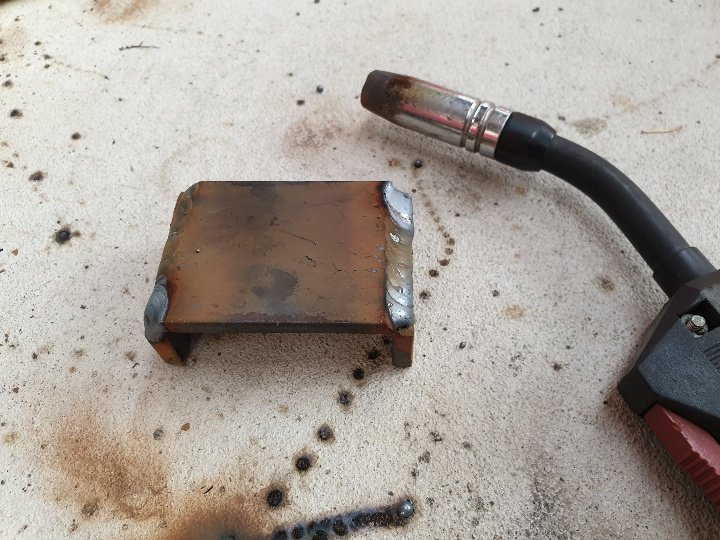
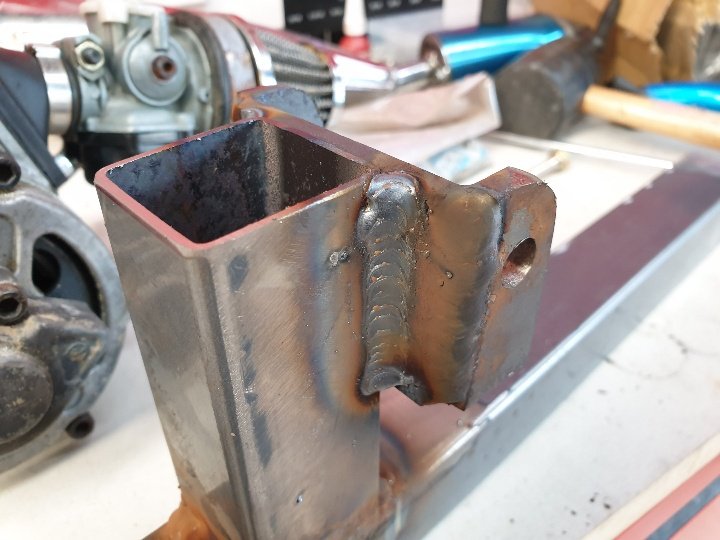
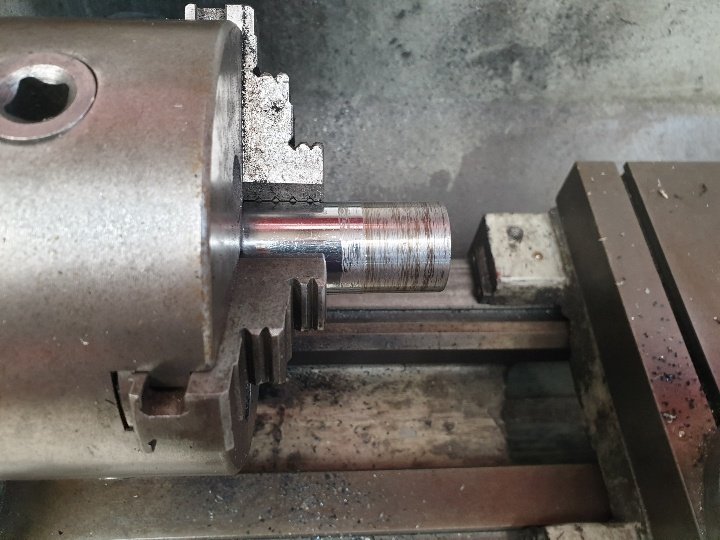
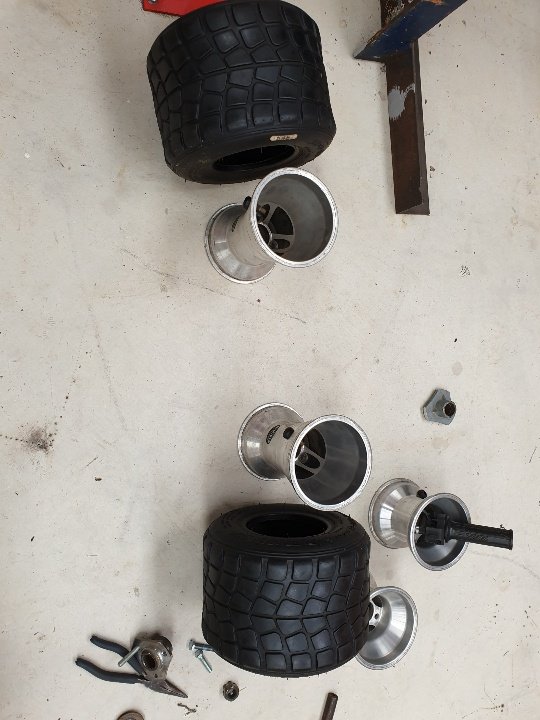
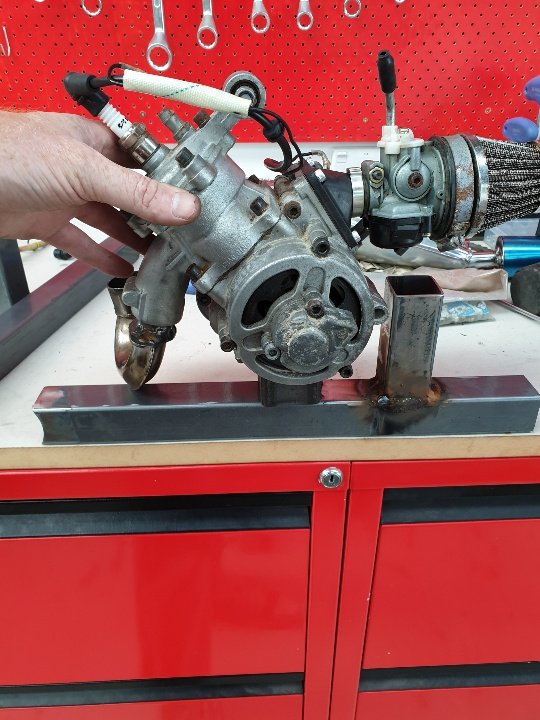
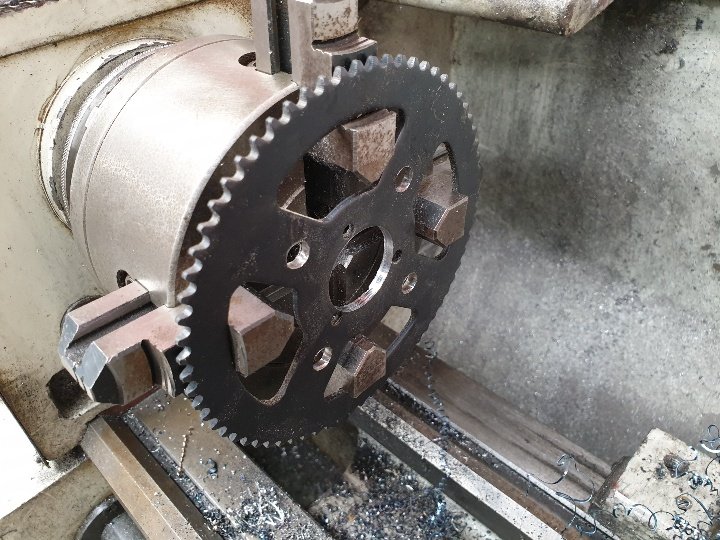
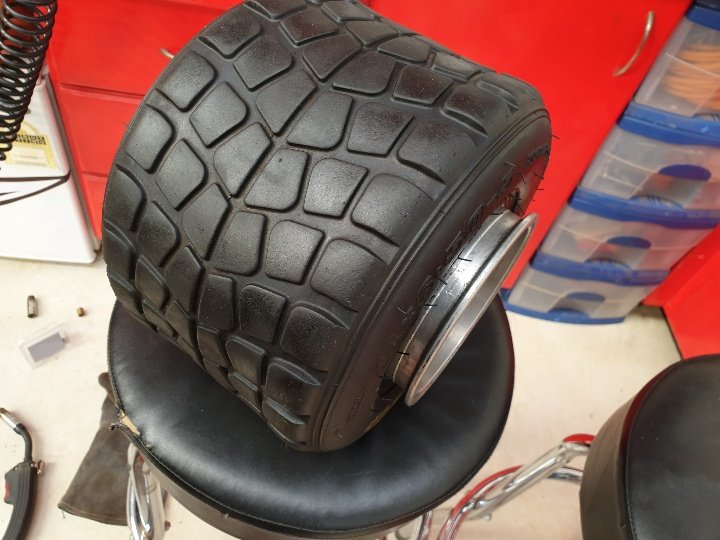
Put 4hrs work into this today, picture time: Exhaust all sorted. Hubs cut down, latched, re-drilled new pcd. So much work in these...its the hardest part of the build and the least fun to do. Got stance? Stretched tyres onto much wider rims. Sprocket: new pcd drilled, centre bored out, old sprocket cut down and used as a spacer. Engine mounts. Only solved half the problem so far. Need to fit other stuff before finding a solution for the next bit. But happy with progress so far.
1 point
-
Finally after two years of sitting down viking spec for a shower.. Was a bit of a fuck around trying to find something other than that mactrack shit. Ended up going for a round extrusion from a company in Hastings, had almost the exact same bend radius I needed (300mm) so because they couldn't do a full 180 bend I had to get two halves and join them together.. The reason I went with this is because I wanted to be able to move the curtains 360deg around the track.. Made a couple of joiners out of plastic, Then I screwed and epoxied them together.. The one thing I didn't think about with this method was how, once I got one end together, I was gonna get the other end in. Solved it in the end by just pushing the joiner 80% off the way into one side, aligning the ends and sliding it back.. Was a cunt1 point
-
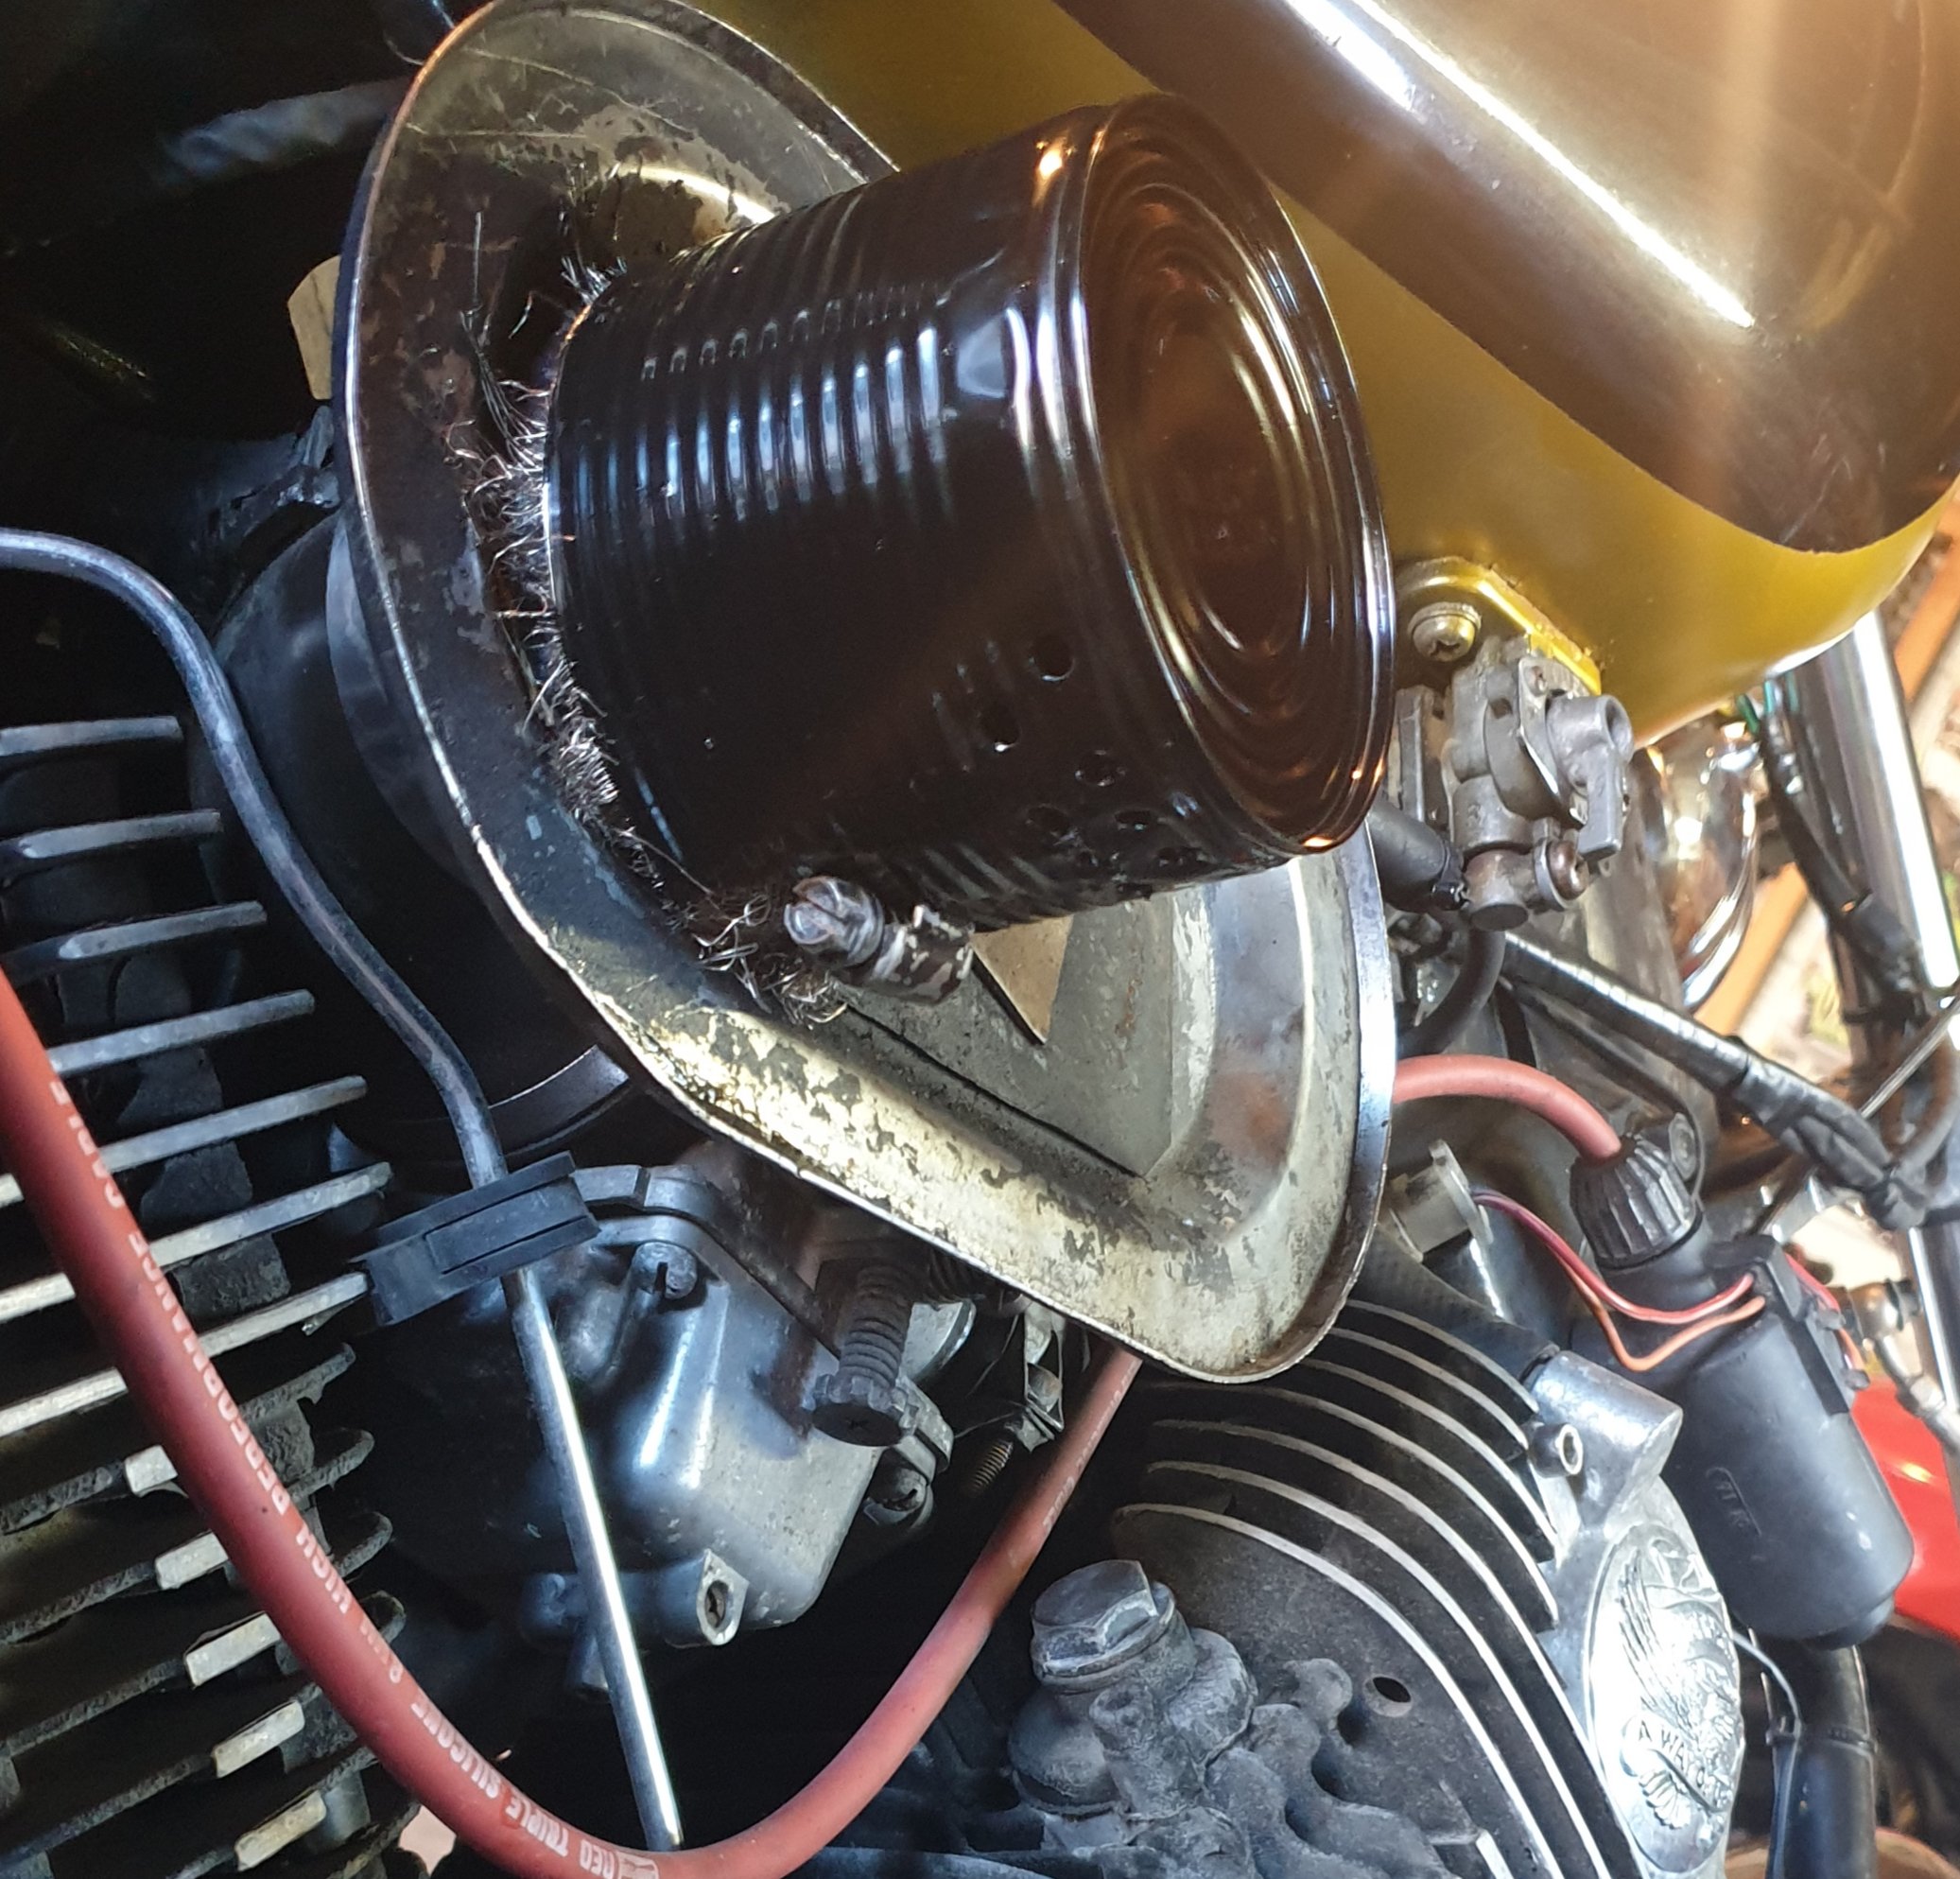
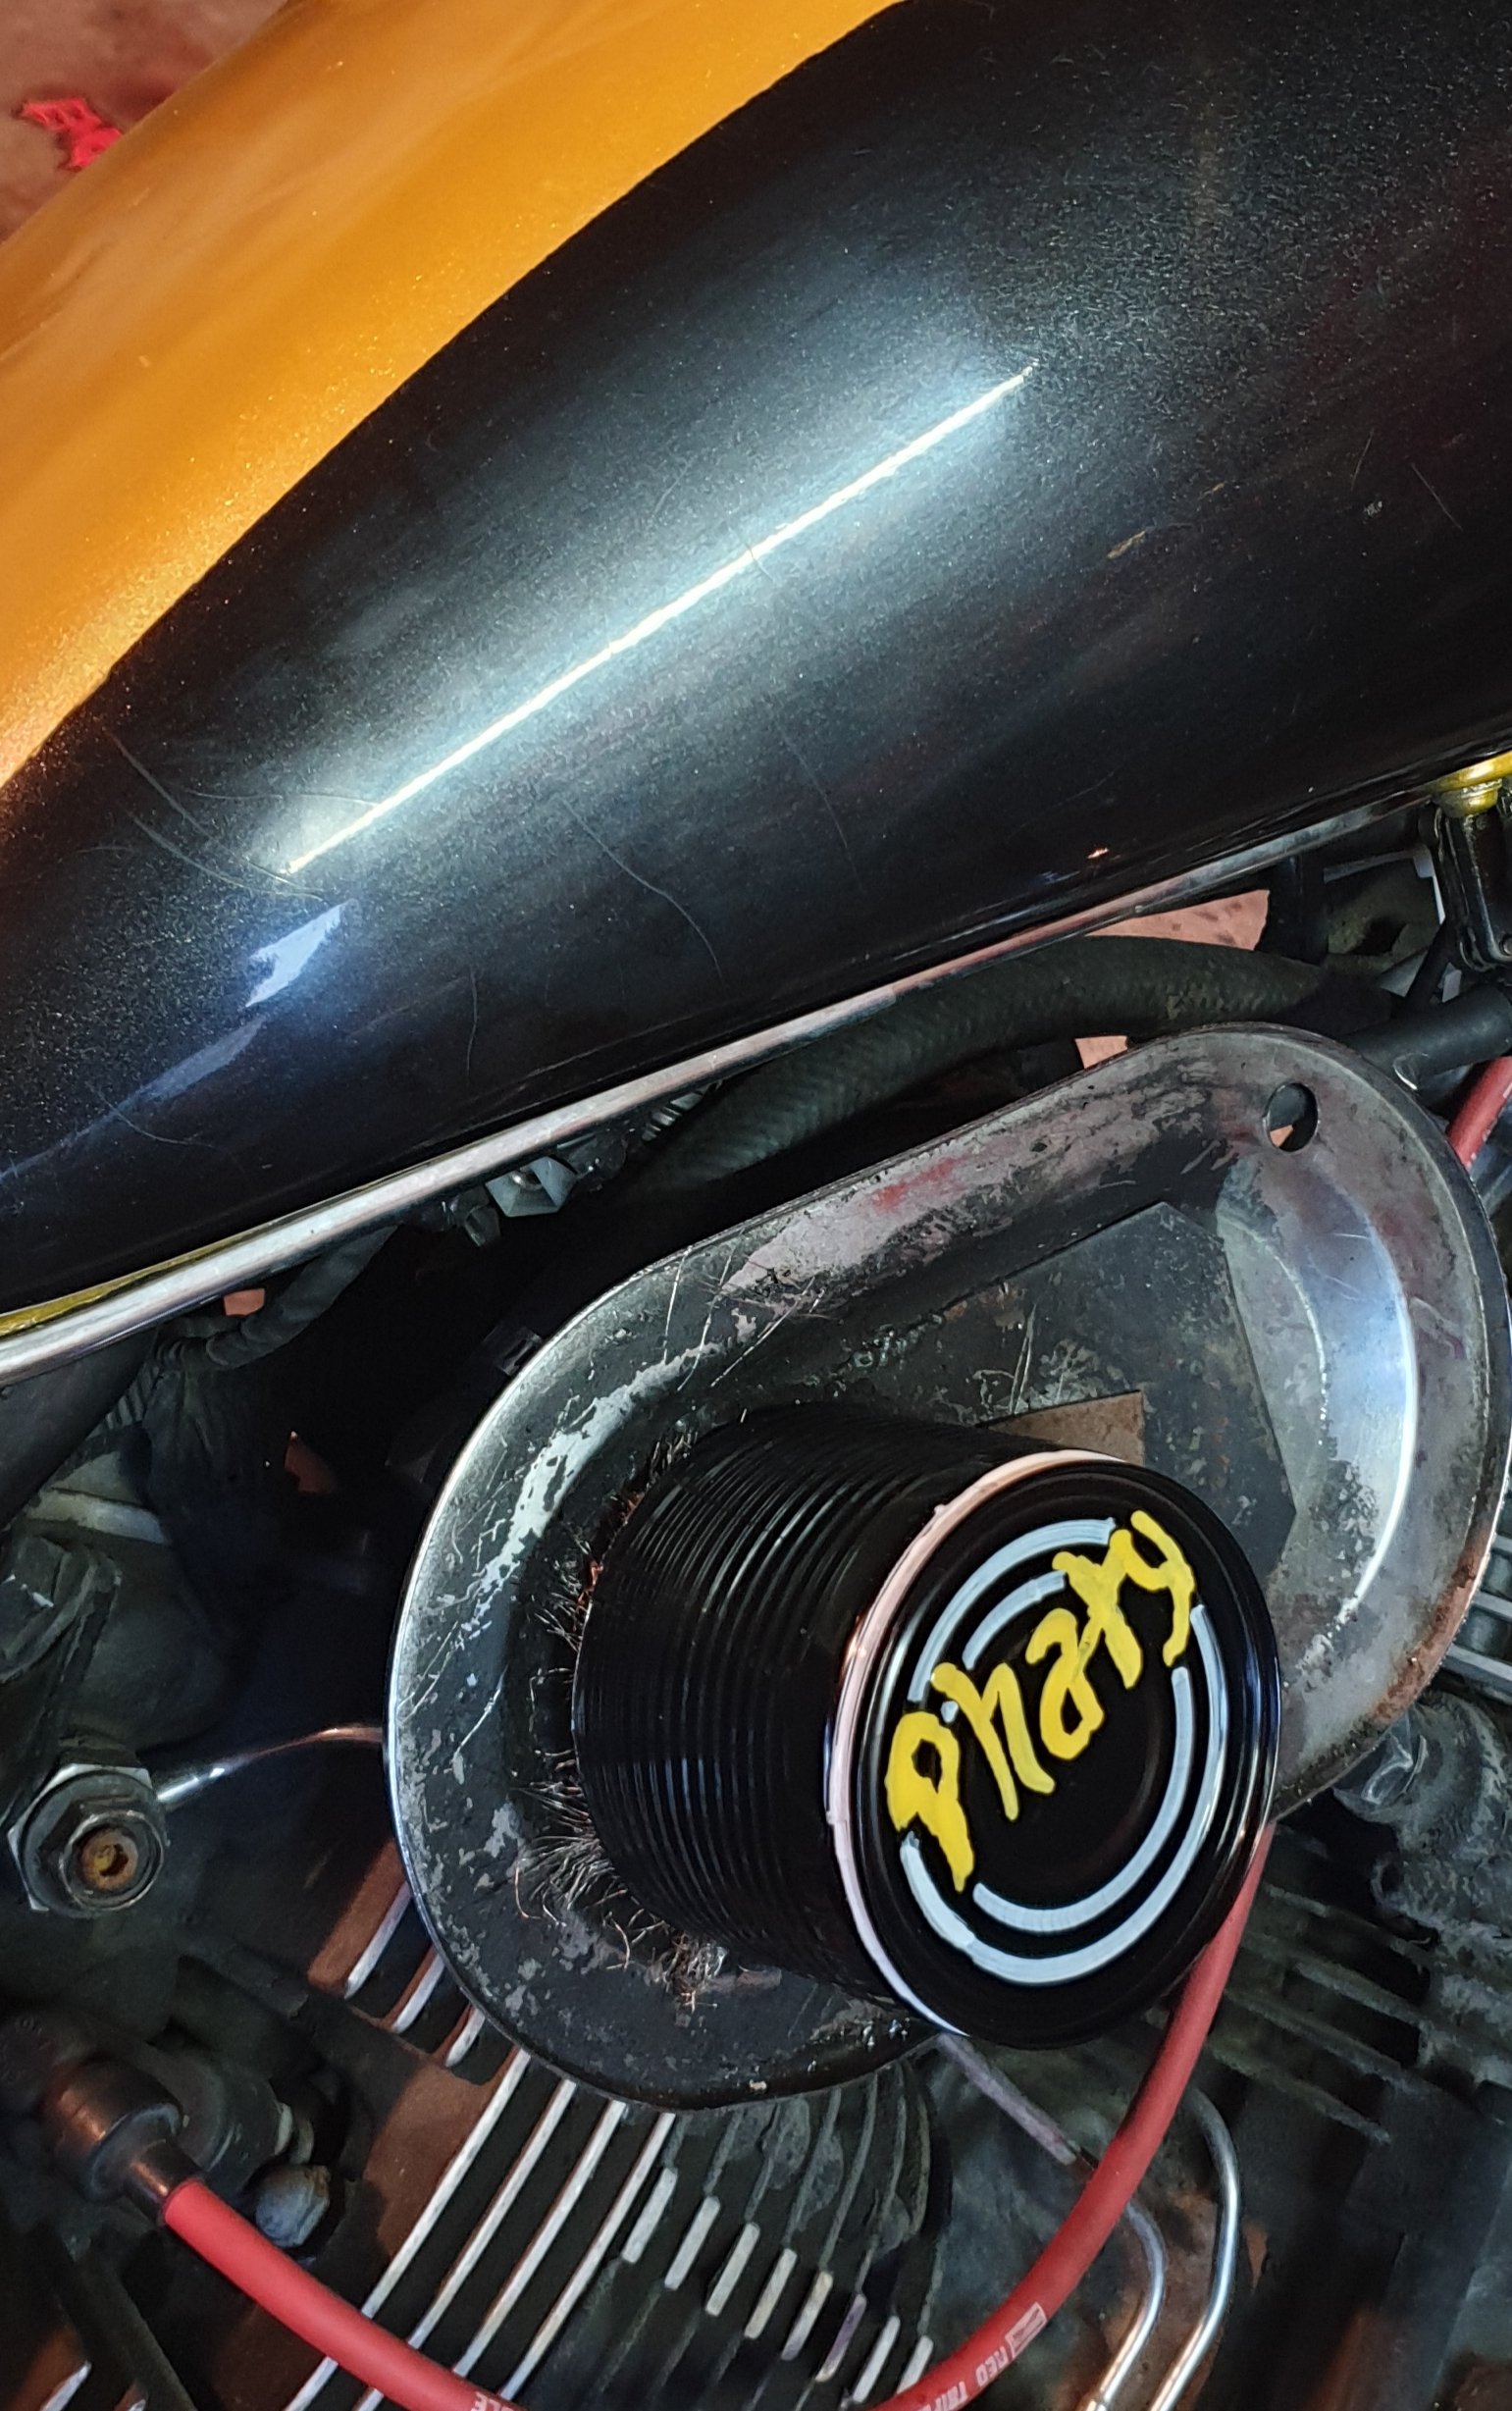
Haha so money tight to do cold kiwi.. likely to rain or snow.... so as a that will get me home sorta job. Spagitti can cut some holes on bottom black paint hose clamp down should stop water getting in... had it happin before not fun...
1 point
-
1 point
-
Spent another day machining stuff. Finished tapered tubes. Machined more off the back of trumpets, as was pointless weight. Made some bosses to make a new vac chamber which sits on the under side of the throttles. Cant use plastic bmw one (in bottom picture) since have moved the throttles closer together1 point
-
I had a lot of issues with the printer. Clogging, warping, delaminating, poor quality 10kg of material wasted and 3 weeks changing parameters but learnt a lot and got it sorted. Now I need to figure out if I can recycle this stuff!1 point
-
Outer pattern prints complete.1 point
-
Wired in the relay etc for the 12v sockets. Deutsch connectors so at least my wiring won't be the ones to fail. Turns out there is an unused socket under the tank, at least 3 of the wires are for a fuel gauge that NZ models don't have. One is an ign switched 12v so easy wiring. Don't have the usb one for the other side yet, but wires are ready to go1 point
-
Progress has been made. well a little anyway. I completed the loom and taped it all up. looks heaps better now. mess before. and after also blanked off the egr port Plan was to weld something there. but after getting all set up found that the argon bottle was empty. so a temporary fix for now. Also cut the heater return line that runs under the turbo right down as the heater leaks anyway so it inst needed and took up to much space. Both that and the EGR delete has opened up allot of space at the back of the intake manifold. Then came time to start the car. Was trying for a while with no luck. laptop showed good trigger signals and ignition and injector test proved everything was working but the car refused to fire. A spray of MAF sensor cleaner into the manifold yielded some sign of life but not enough to get the car running. Add in the timing sitting at an unknown angle and you have a good recipe to set the car on fire. Luckily it wasn't a major and i managed to pat the flames out with a rag, but with images of another video i have seen of an mx5 owner unable to extinguish a fire in similar circumstances i decided this was not the way to go. I then remembered the car has not had any fuel put into it since around the july 2017 update so maybe time to drain the fuel tank and put some fresh fuel in. so i drained the tank. Quite easy to do when i can just switch the pump on with the laptop connected. so the tank drained and i switched the pump off as soon as i heard the tone change, put in some fresh 98 and turned the key to prime the pump. The pump didn't sound right. Tried a couple more times and no joy. Bugger fuel pump had crapped itself. It is the factory starion pump so it was due for replacement. So i replaced it with a high volume fuel miser pump. I was going to run a bosch 044 but the price was right for this pump and it was rated for a turbo application. So new pump fitted and it primed up nicely so it was again time to start the car. I turned it over and it was trying but pretty reluctant. it finally fired and proceeded the run like a hairy arse. A few more goes at running the engine i noticed the fuel table was only moving along the horizontal axis. No MAP. Checked settings and no internal MAP turned on. WTF i thought and turned map on in analog input 5. Straight to an error reading. Shit maybe it was meant to be on 4. Nope no reading. Double checked book and yep. meant to be on 5. Back on and attempt to calibrate. Link says NO. Shit had me thinking and frustrated a little. Then remembered i had encountered this before. After a firmware update the fault settings for the analog inputs changes to weird values. I should have picked this up straight away as i had just previously had to change the ECT values for the same reason. Now with values set correctly it let me calibrate the MAP sensor. Success! Now to run this car. it started less reluctantly and ran long enough for me to adjust the dizzy to get the timing somewhere near where it needs to be. Set timing by ear and let car run. then after around 20 seconds rev limiter initiates and car dies. WTF again. it was just idling. Repeat about for times. Start getting mad. Check trigger settings. Trigger 2 set for 4x cam. cool. trigger 1 set for 1x crank. O.. it is running off the cam so kinda suprised it ran at all. May also explain mixture leanness possibly? wasn't sure. At this stage i thought fuck it. I had a file for the car saved from when i knew it actually ran. so instead of mucking around i just loaded the old settings in and went from there. and what do you know the car ran. and kept running. YAY!! So today i had to get the car to my work which is around 15km. And had to do it by driving it. Loaded the bike in the back. filled the water and let it run for a bit and set the timing with a light. was only 4 degrees out. Only started and ran on 3 cylinders. O well prob a fouled plug. Though i better take the laptop so plugged it in and off i went. A few minutes up the road i noticed the car was cruising very lean, like 16.5:1 lean. Still on 3 cylinders i made it to a BP. topped up with some fuel and then Highlighted the bottom half of the fuel map and page upped until i was satisfied i would be a safer mixture. fired it back up and set off again. still on 3 cylinders and realizing i had forgotten to inflate the tires at the BP which were at 10psi. haha O well. at least the air fuel looked allot better. As i was entering a 100k zone the last cylinder joined us. Better late than never aye. car felt pretty smooth now. wanted to give it some but balloon tires and low psi felt kinda dodgy. Made it out to work. Put air in the tires. unloaded shit and decided to go up the road. With eyes on the o2 reading and kinda watching the road i lent on it a bit. air/fuel ratios looked acceptable so i lent on it some more. Wow. this is the first time boosting it since the bigger throttle body was put on. it has made a big difference to turbo response from what i can remember. And car actually goes really well. Still only running 9-10psi. with the speedo climbing faster than i think it ever has i decided that was enough fun for the day and put the car away in the workshop. I still need to take it out for a good tuning run anyway. So Basically the car drives but in a way i haven't made much progress. Just went backwards and now back to where i was before, with a little improvement. haha and the concludes today's long winded story. Thanks for reading.1 point
-
today went better than last night thank fuck. the super good cunt @Yowzer has the flex plate i need and im going to go down the the ham tomorrow and get it. i spent most of the today measuring things and modifying the shift linkage. i made a new detent lever because i didn't have one and i shortened the shifter arm. the bell housing clears and there seems to be enough room for that part of the trans. i will need to mod the end of the shifter lever that pokes through the floor to clear the back of the box. also need to move the gearbox cross member back about 60mm which shouldn't be a drama. 2019-08-03_04-11-29 by sheepers, on Flickr 2019-08-03_04-11-38 by sheepers, on Flickr1 point
-
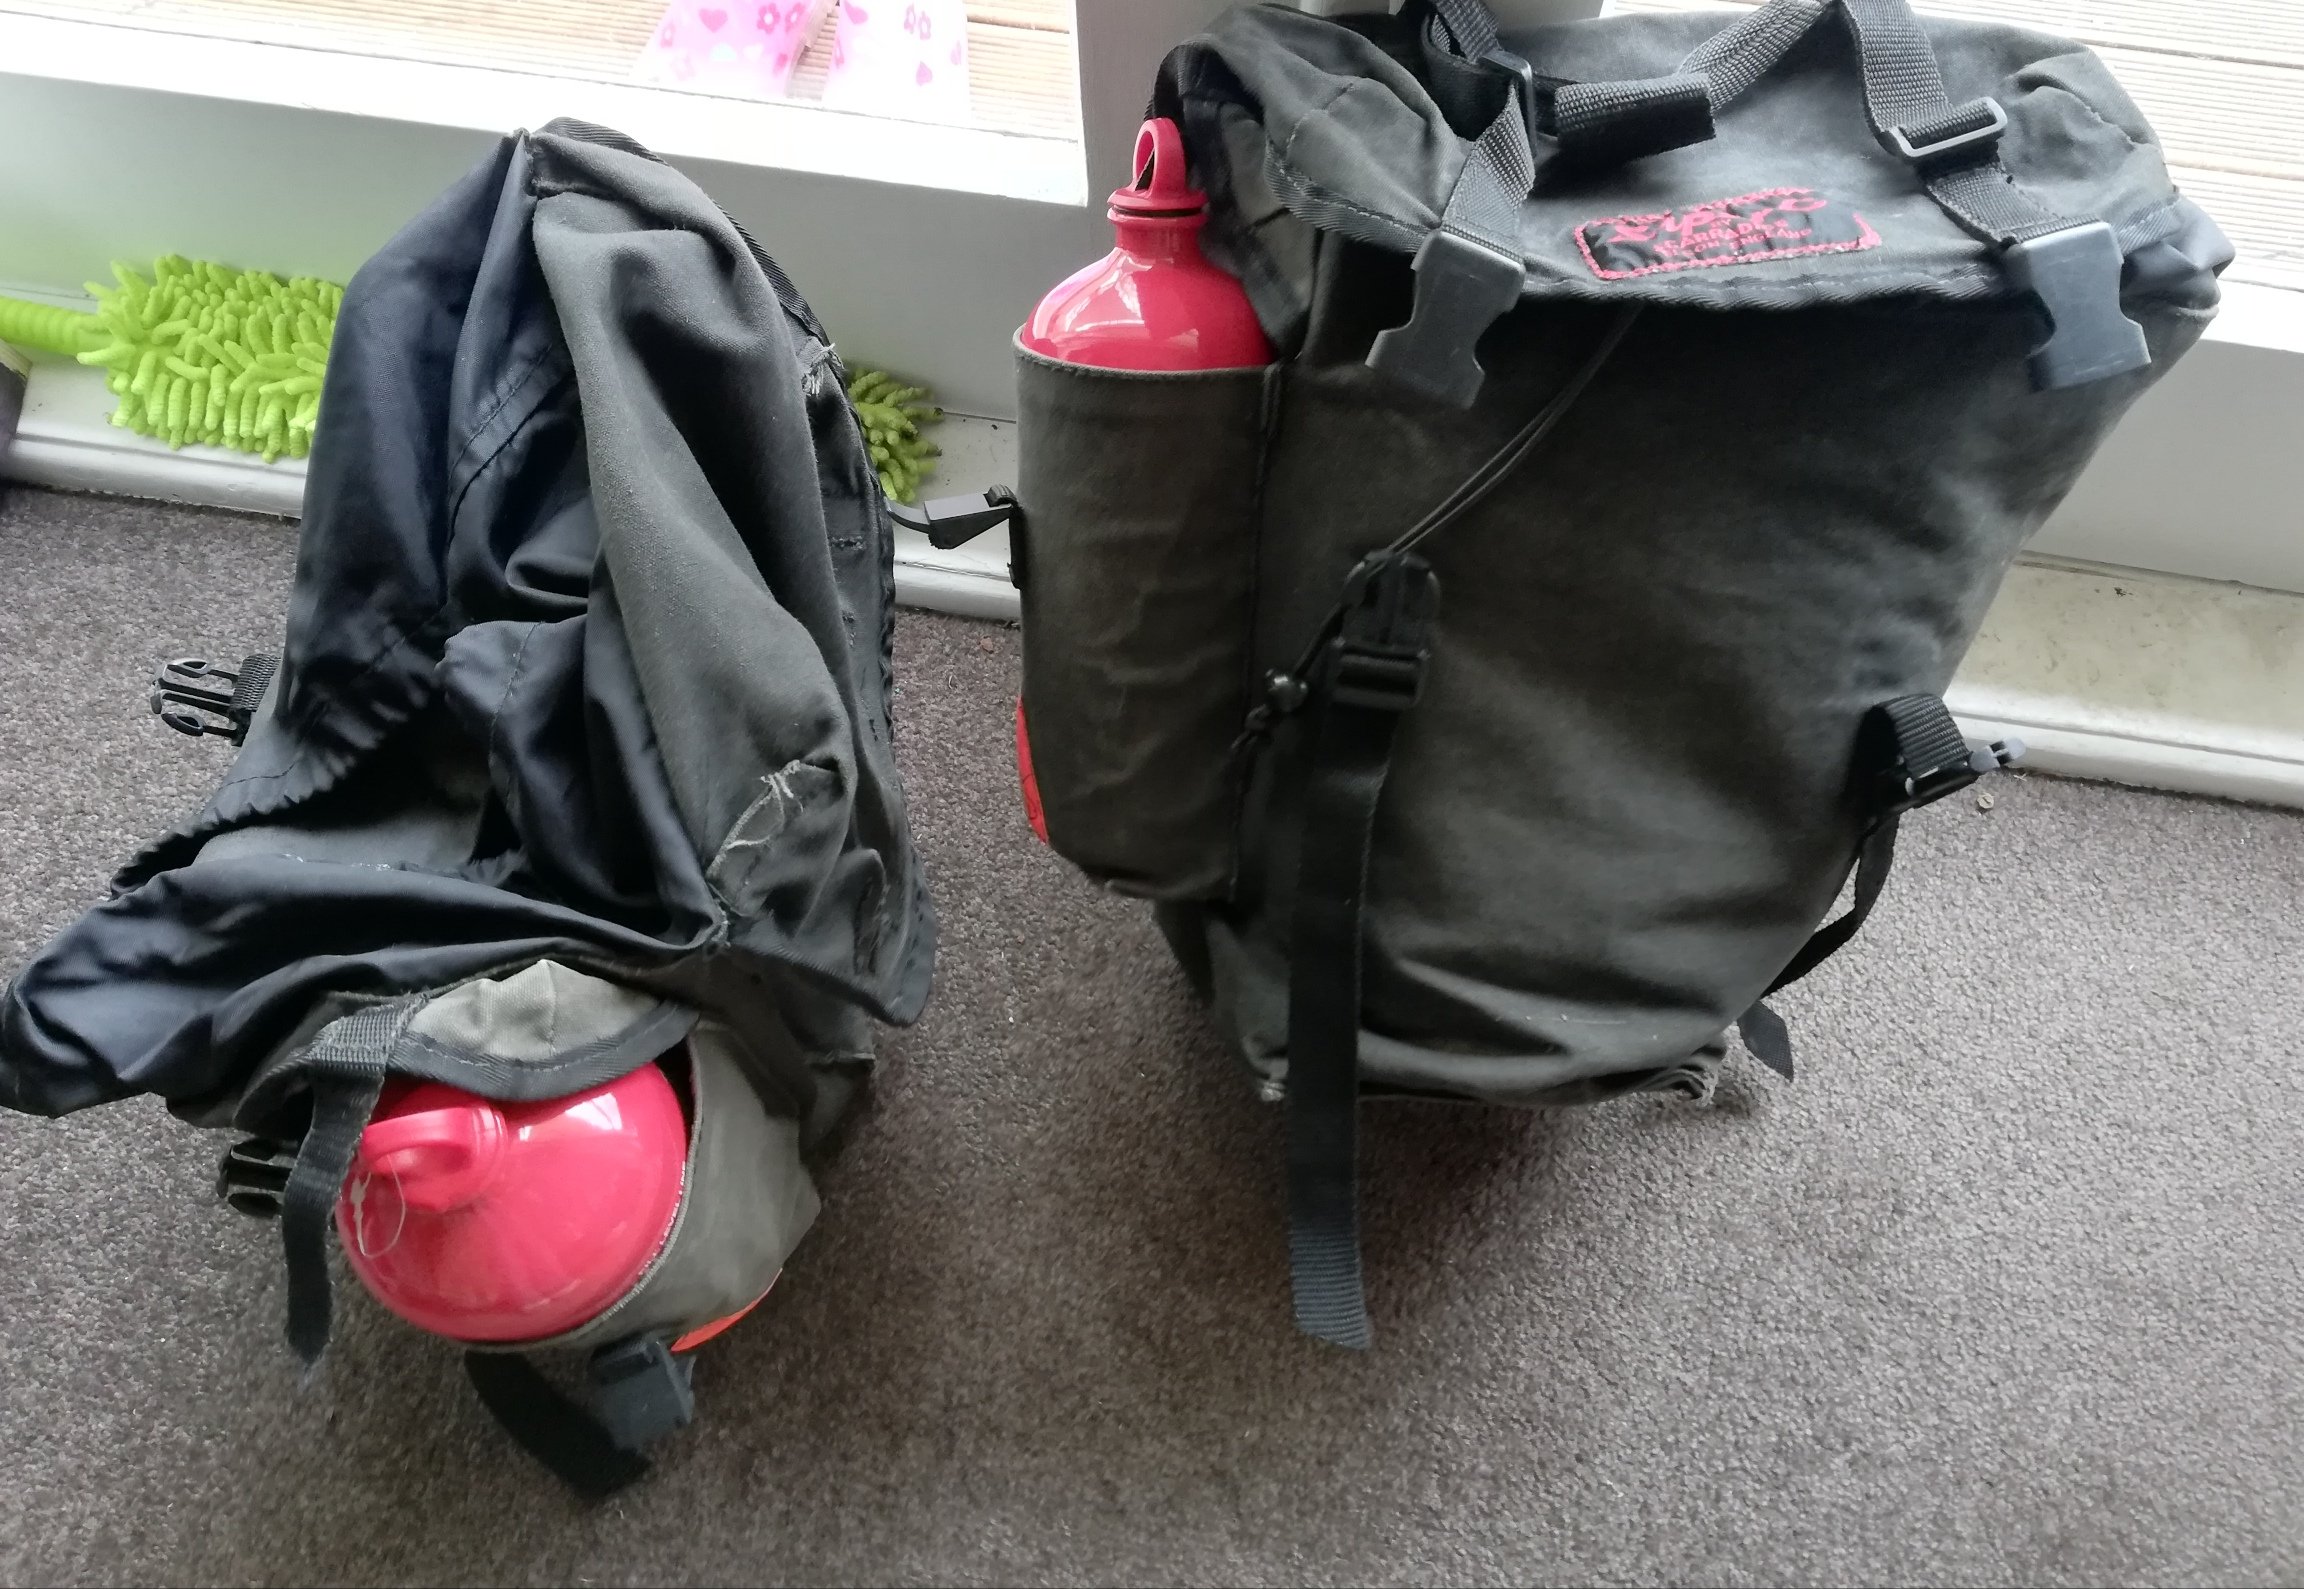
Banged the scout on this morning Looks the part The nips touch the fender, which isn't too much of a problem for commuting, but I will probably raise the fender a little to avoid getting it full of mud/gravel when adventuring Also got a pair of 1.5L fuel bottles. These will work with my msr stove and give me about 110km more range for those out of the way places
1 point
-
Got another throttle body adapter plate made in ali this time, thanks to @Stu . Plus some more throttles, which still need more mods, but done enough for test fitting. Been working through some clearance issues. chopped up and shortened water outlet as fouls on the front throttle, it welded horrible because old cast ali, but should be good enough. alternator is in the way, think have a solution sorted with a smaller alt and modding the bottom water pipe so it sits closer to the block. Blah, pictures:1 point
-
thats better. also it works. 2019-07-29_05-40-57 by sheepers, on Flickr 2019-07-29_05-41-07 by sheepers, on Flickr1 point
-
today i drove took the car for a decent drive, first drive since power steering install. fuck me, its a different car. the old steering box was fucked which didnt help but man its a different car, both in carparks and on the motorway. so much better! and during the night time i decided i wasnt happy with the sub box i made yesterday so i made another one today. its much better, sub faces forward instead of sideways and the box fits into the car better. the internal volume is closer to what i was trying for as well. every body's a winner! 2019-07-28_04-20-39 by sheepers, on Flickr1 point
-
made a thing to mount the little front amp and the crossovers. it goes under the parcel tray which is above the passengers feet. its all installed and working. 2019-07-27_05-45-31 by sheepers, on Flickr this is the stuff ive used for the soundz 2019-07-27_05-45-44 by sheepers, on Flickr in other news i got the power steering sorted. with parts from @JustHarry and @Yowzer i got all the bits i needed to make it work. i had the pump and the box (which i got rebuilt) but i was missing the brackets and pulleys and shit. all installed and working fucking mint. 2019-07-27_05-44-36 by sheepers, on Flickr heres a tip for anyone doing a manual to power steering swap. the shaft that comes out of the end of the column and bolts to the rag joint is longer on the manual cars. to shorten it you can take it out of the end of the column (a cunt of a job to get it out, it has a swaged over lip that you have to fold back and its fucking difficult to do) once its out you can very carefully drill another hole approx 40mm further down the shaft and move the pin down to shorten it. then cut the end off. job done. the picture should explain this better. 2019-07-27_05-45-10 by sheepers, on Flickr also made a sub box today. i dont like the carpet stuff i used so ill re-do that. 2019-07-27_05-44-50 by sheepers, on Flickr1 point
-
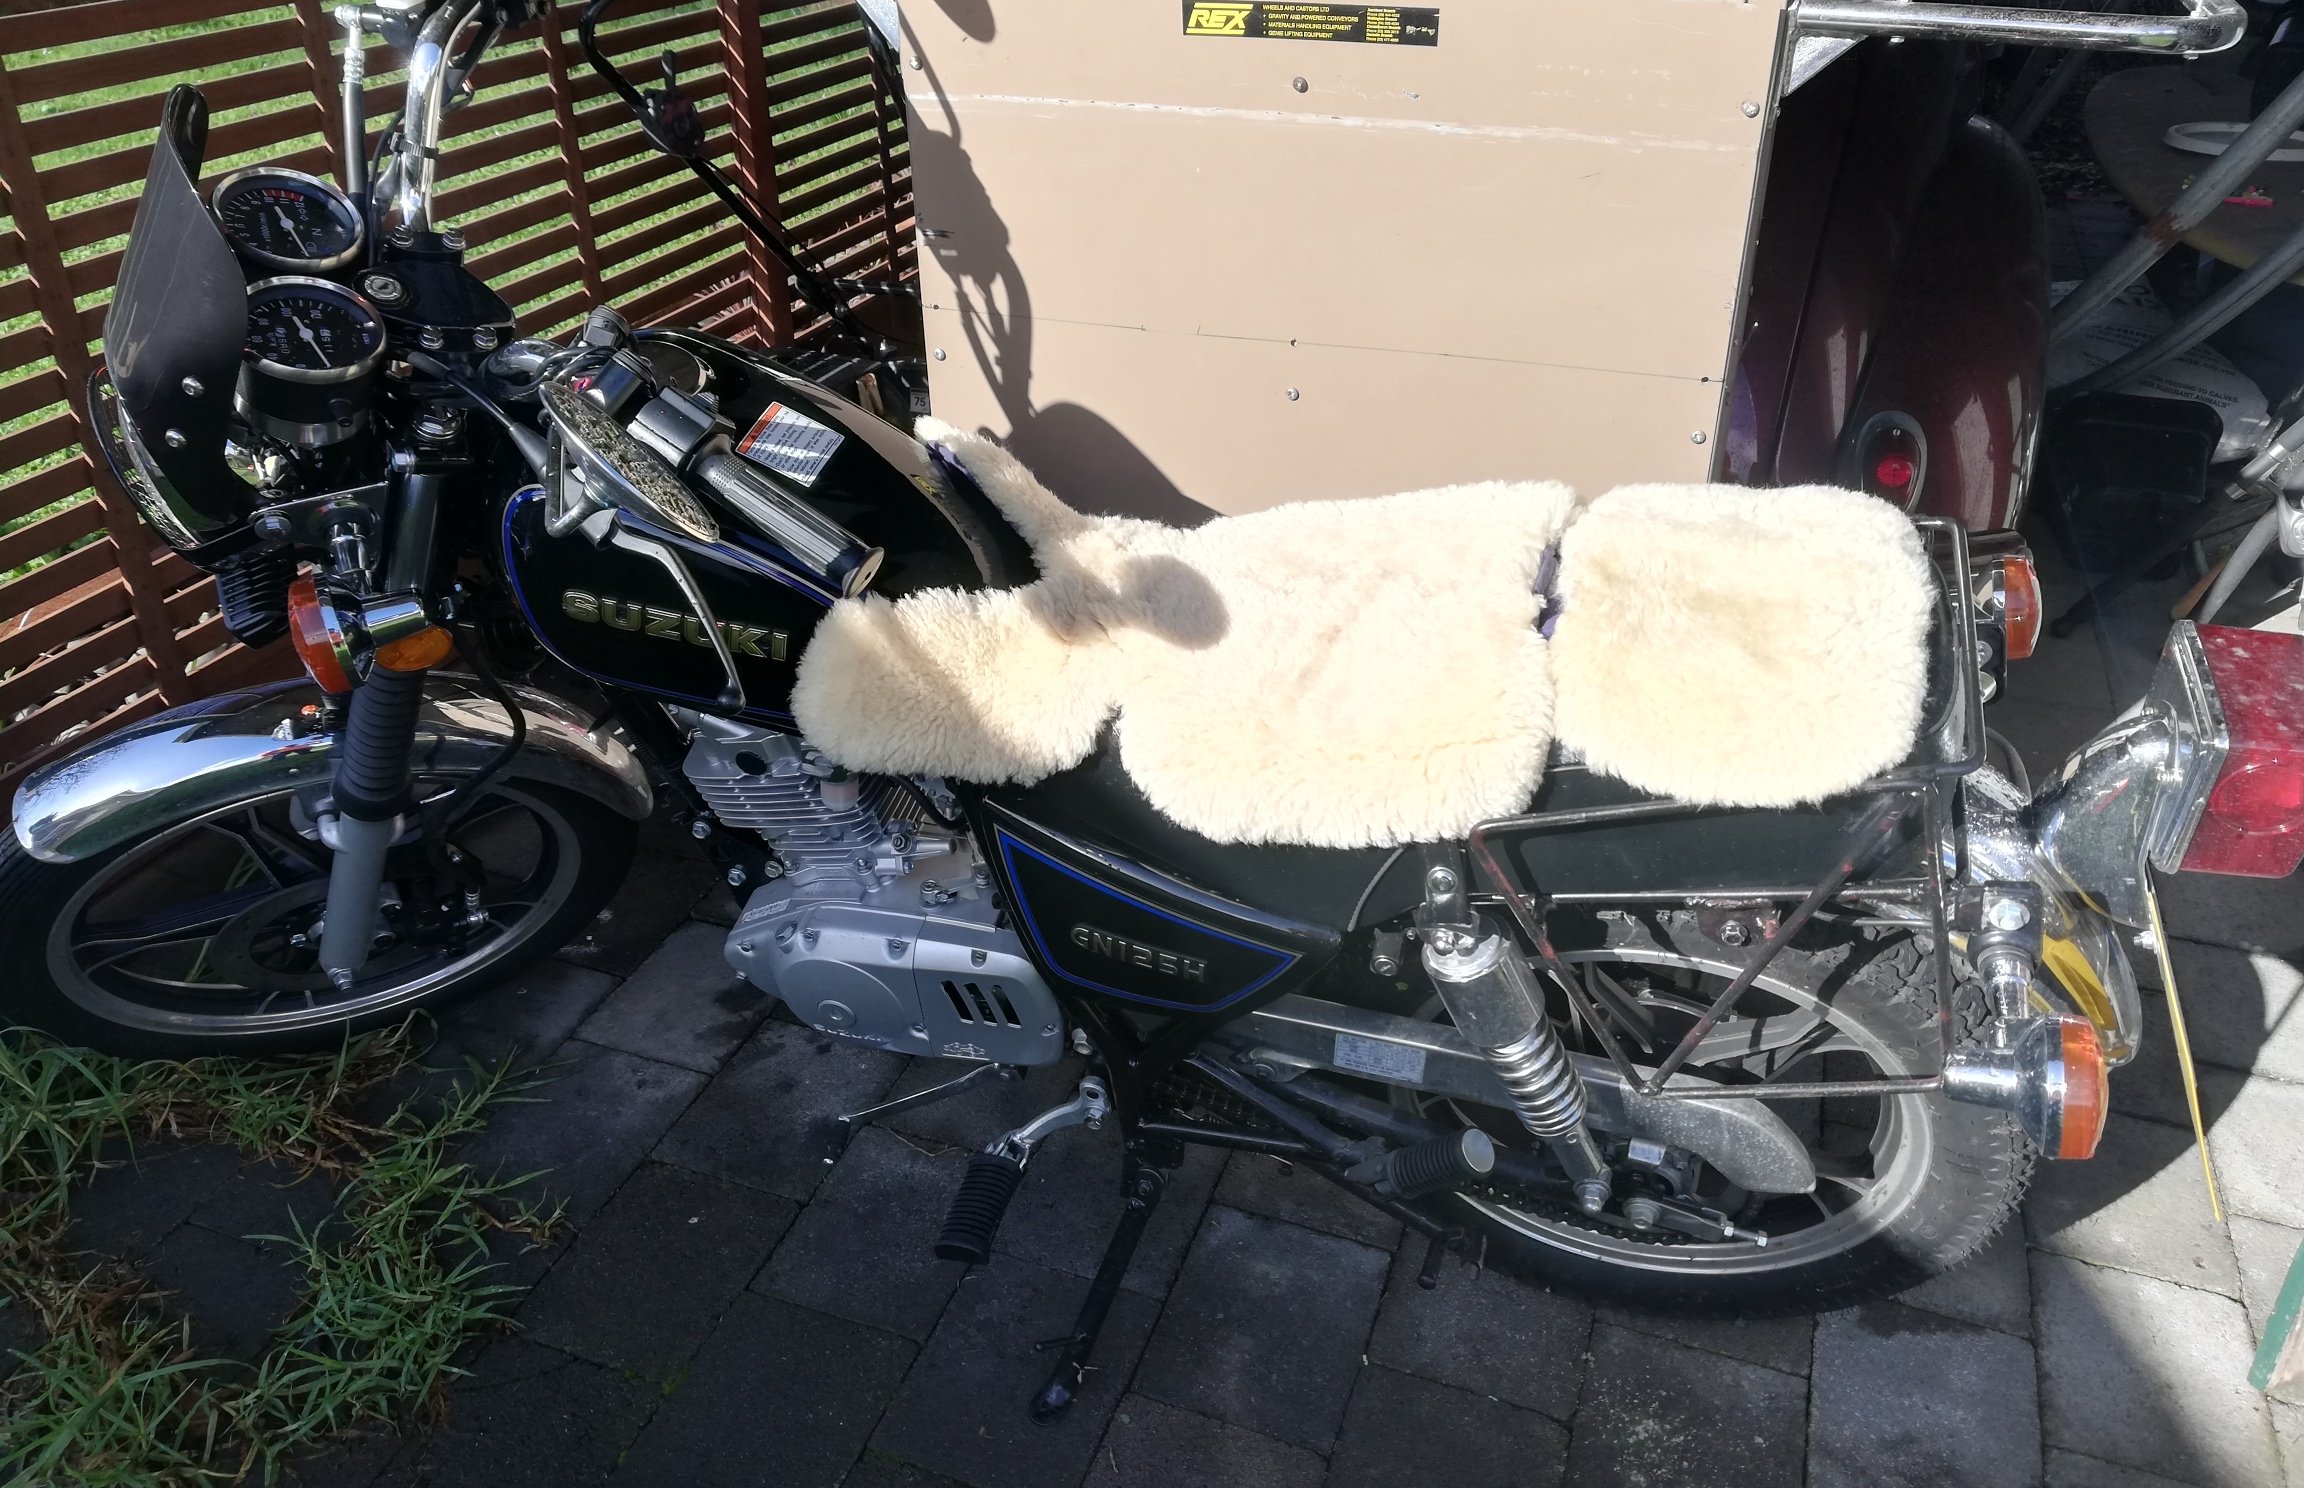
Got a sheepskin pram liner Amazingly it's a perfect fit Head piece is velcro'd on and adjustable. So could use it all in one piece, but I think il remove it and slip it on like shown. Pretty much round the world ready now...
1 point
-
I need a bigger garage.1 point
-
Welcome back viewers to yet another ever so thrilling update on the old Huddyson. Sitting here and looking back over the last few years I must scratch my head and ask where has all that time gone. I really did believe it would of been driveable by now - road legal or not legal. Life has its way of derailing such grand time frames as im sure you all are aware and the fact that even though the parts im using may not be the most expensive out there they sure dont come cheap. To paraphrase Oedipus, Hamlet, Lear, and all those guys, "I wish I had known this some time ago." Everything was such a damned nice idea when it was an idea yet as with everything How you look at it is pretty much how you'll see it I guess. And looking at it I can see the old gal ride low n slow down the street fast n loud on the highways everytime im out working on the old beast. God i got a tad philosophical there for a moment... what are they adding to the water around these parts. /twitch Enough of that nonsense. let start the normal barrage of images and brief explanations. Back floor all patched up over four link brackets. Holes added for access & removal of the top bars bolts. Sparks and smoke flying up front as the Trans cover was all made up like a big jigsaw. To help pull the drivers side floor up the brake boosters cover has been incorporated onto the trans cover to add rigidity. Since the brakes are all tucked away under the floor and me being a bit of a lazy sod im using a remote reservoir. The brake pedal was a bit of a sod that took up a heap of time. Due to the floors sloping angle and other factors we couldn't do a normal pivoting bar as the inside push rod where you stand would be pointing towards the floor. So a duel/tandem lever was made up. its somewhere between 4:1 and 5:1 ratio. Still got to get the adjustable top links. but tested with a bit of bar and have heaps of travel for the booster. Grease nipples all over the place. Machined up brass bushes and ya its solid as. Have to get the actual pedal and the other lever bar it connects to tested still. Moving on to smaller jobs now. Power steering. As i have mentioned I think some time ago im using a PSC setup made for rock-crawlers. So if its powerful enough to drive and survive the crazy setups they have it should be fine for my setup. Now I didnt want to take away from the finned engine dress-up stuff when you open the hood. So a low mount bracket was fabbed up. The little pump has a heap of adjustment, lines up nicely with the other pulleys and is tucked nice and low that will not only keep it out of eye sight but since the pump is gravity feed from the reservoir that will be mounted up by the radiator it will have ample full as well. Mounted up the trans cooler up front of the radiator after I drilled a few holes and added grommets for the hoses. Should be hidden away enough not to be noticed. Got the cad skills out again to design up the gas tank. Its about 19Gallons/72litres. The tail pipes are rather close together so the plan is cut a hole in the trunks floor and have half the tank through this and then the other half taking up much of the trunks floor space. Baffles will also add bracing for those times I may throw heavy loads like tires ontop of it. The bottom should be flush or just tucked up with the bottom of the chassis whilst the top will come nearly up to the trunks lip/bottom of the door. So it shouldn't be a hindrance or noticeable. One end is slightly deeper for the pump and sender. Josh and the guys at Apex in Oamaru cut n folded it up. Top guys with some great kit that I highly recommend. They also made up that Hudson logo for a bit of fun what was nice of them and chucked it in. Until I figure out what to do with it I plan to use it as a stencil to tag a few things around the garage. \,,/(-.-)\m/ On a bit of a separate note the missus has taken up slinging a bit of one shot paint of late. Hell yeah I say. Im more than happy to buy the brushes, paints and what ever if it means I can get some lines laid down on pretty much what ever I want. I think she is busting it out but naturally I may be a tad one eyed, biased and not the best judge in the matter. Take a look any way. Some panels up near the top of below pic in my garage. Cooler to go with her Morrie Door she made up for Flockie on an old 40s Ford pickup door. And of course hand bags... she has a thing for handbags.1 point
-
So this happens when you leave random carparts in reception at your business by mistake: And I received a care package from @KPR :1 point
-
Small progress is better than no progress: The fuel rail looked pretty shitty and I want to run -6 lines so I did the old weld it up trick that I've done for many customers over the years. Also needed to add a wideband bung and slightly change the angle of the collector outlet as it was a bit close to the floor: But shit news, the LSD I have is dead and I really cant be arsed measuring and drawing it all to make new parts on the mill. Anyone have a decent T series LSD for me before I go and buy one? TRD/Kaaz/Cusco etc, anything considered.1 point


This leaderboard is set to Auckland/GMT+12:00