
Leaderboard


Popular Content
Showing content with the highest reputation on 07/25/19 in all areas
-
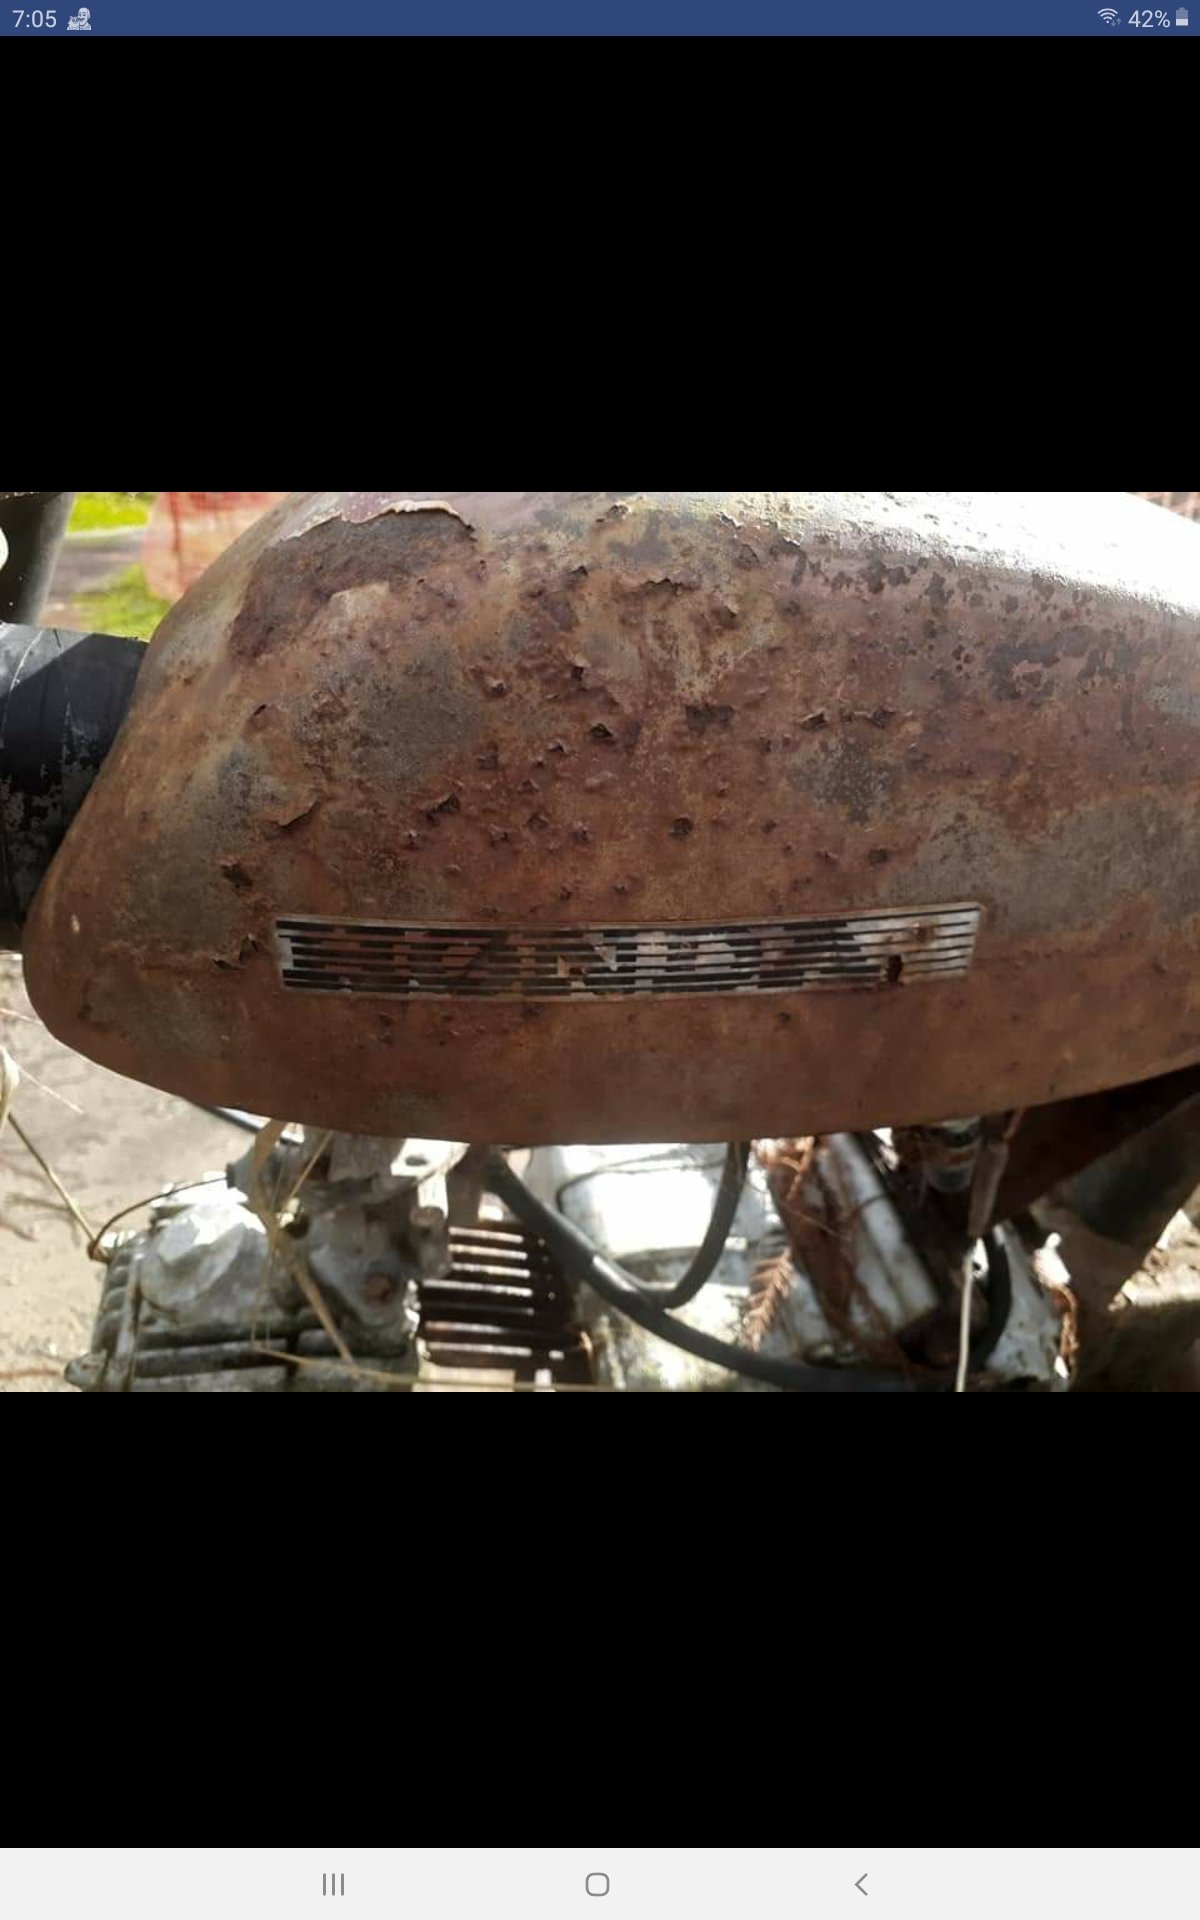
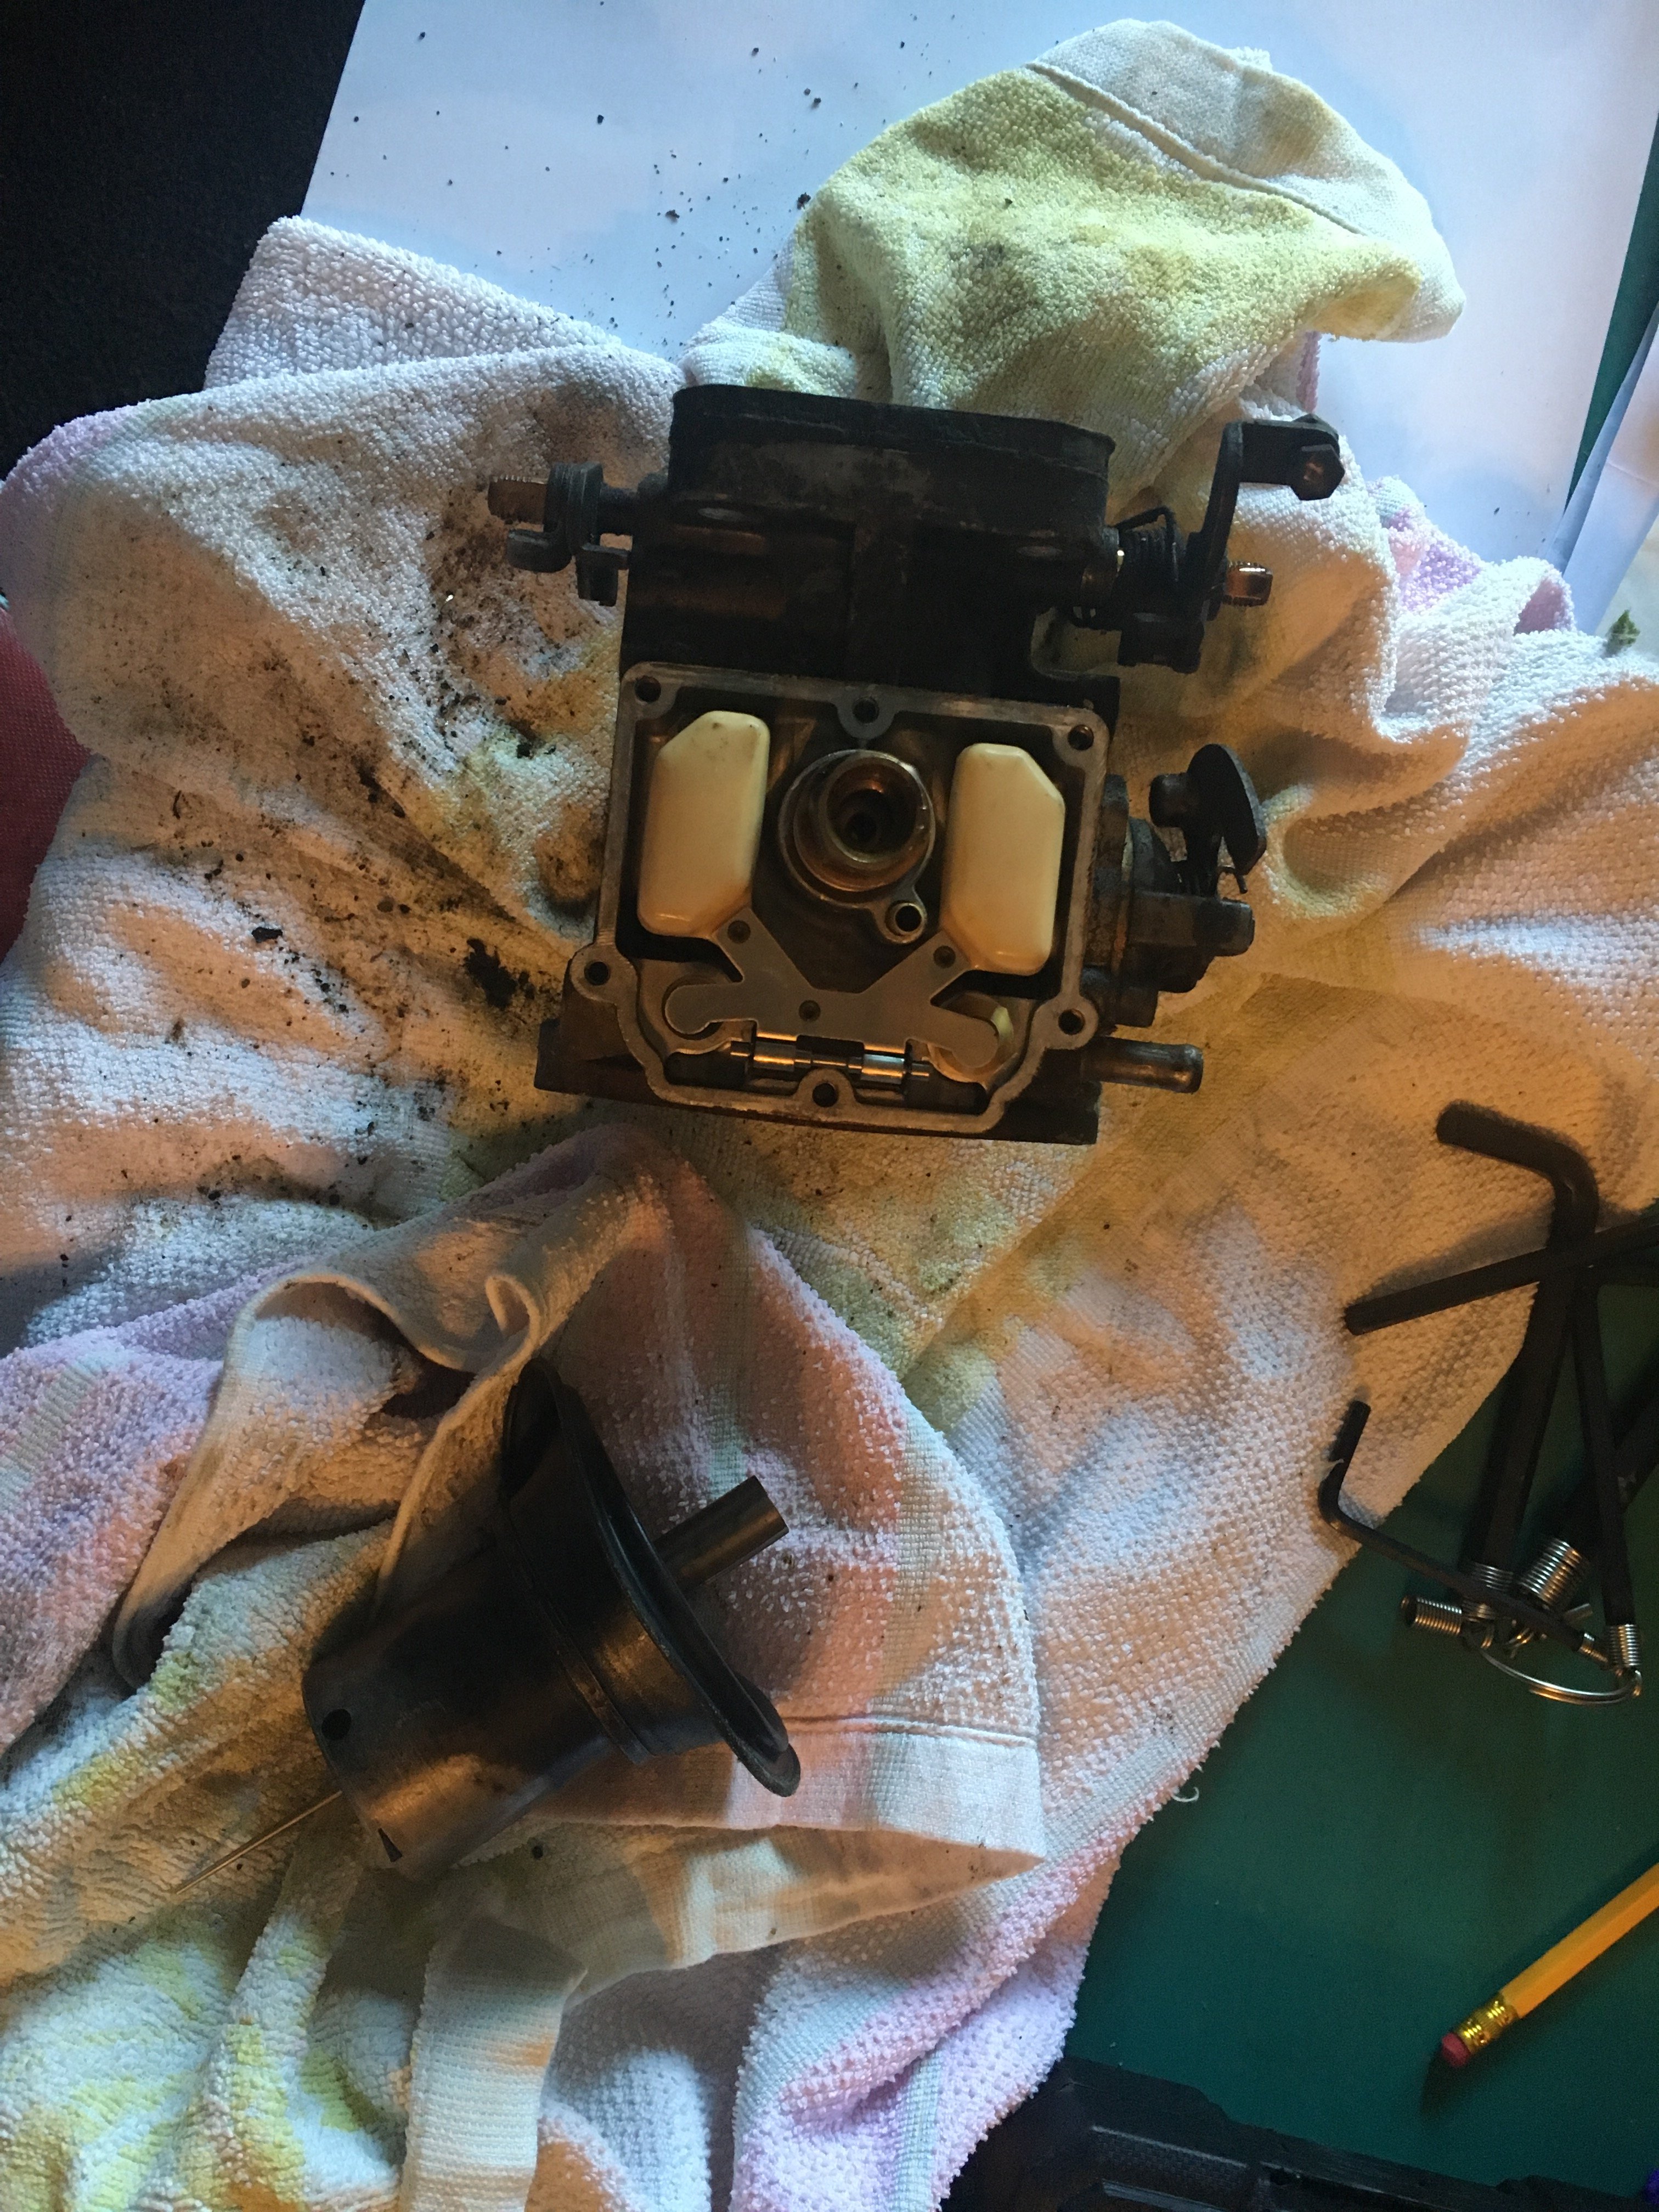
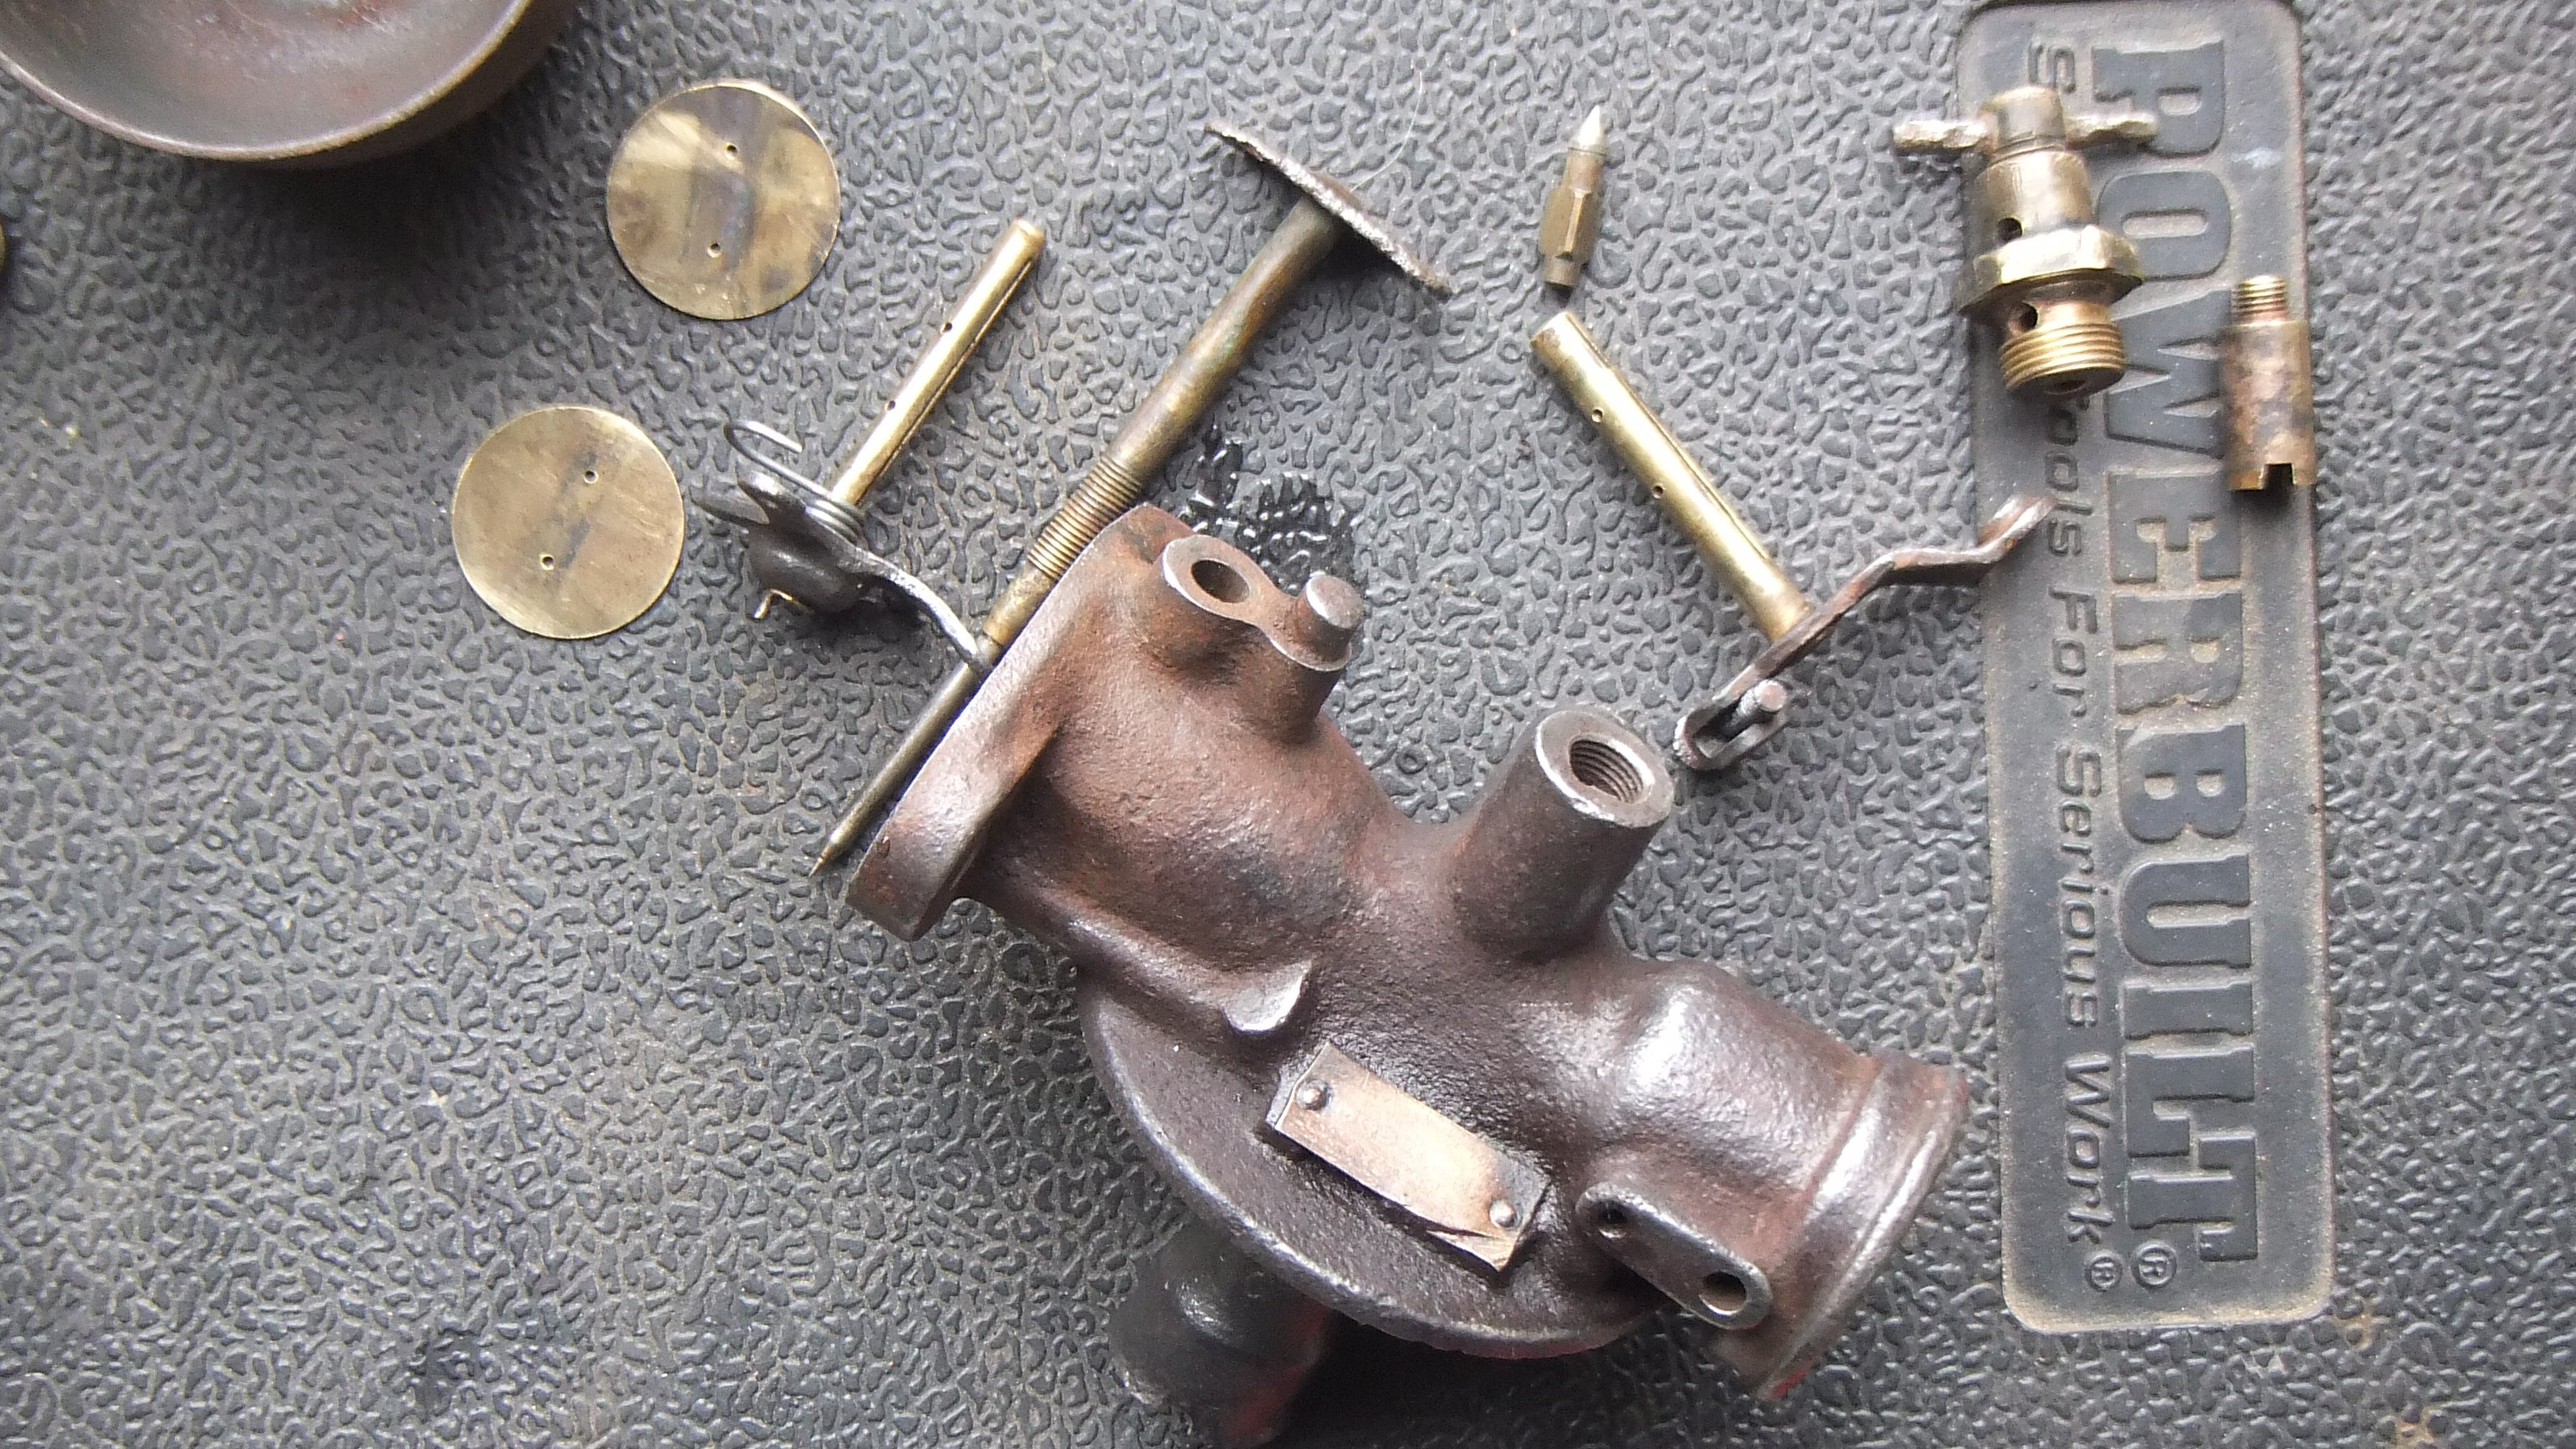
"Straight through" Holley NH carb's share many parts with the economy version carb'. Same basic thing, but the economy version had more restriction. I'd be tempted to smooth the venturi a little, as it has a rough finish, but don't want to mess it up. I'll choose to believe that rust pitting help the mixture. So i filled in some pitting around the rim of the bowl seal with an epoxy. Used white metal normally used for engine bearings to build up work throttle shafts. Drilled small holes in the broken castings and poured white metal into them to build up the areas where casting had broken off. Built up the worn nut with more white metal. First i tried to replace the bronze throttle link with chunks cut from a worn bronze bushing, that turned out to be fragile. So i riveted and soldered, with more white metal (more resilient to vibration than solder due to no lead content) copper strips. I choose to believe i have improved this carb's condition compared to when i found it.
 11 points
 -
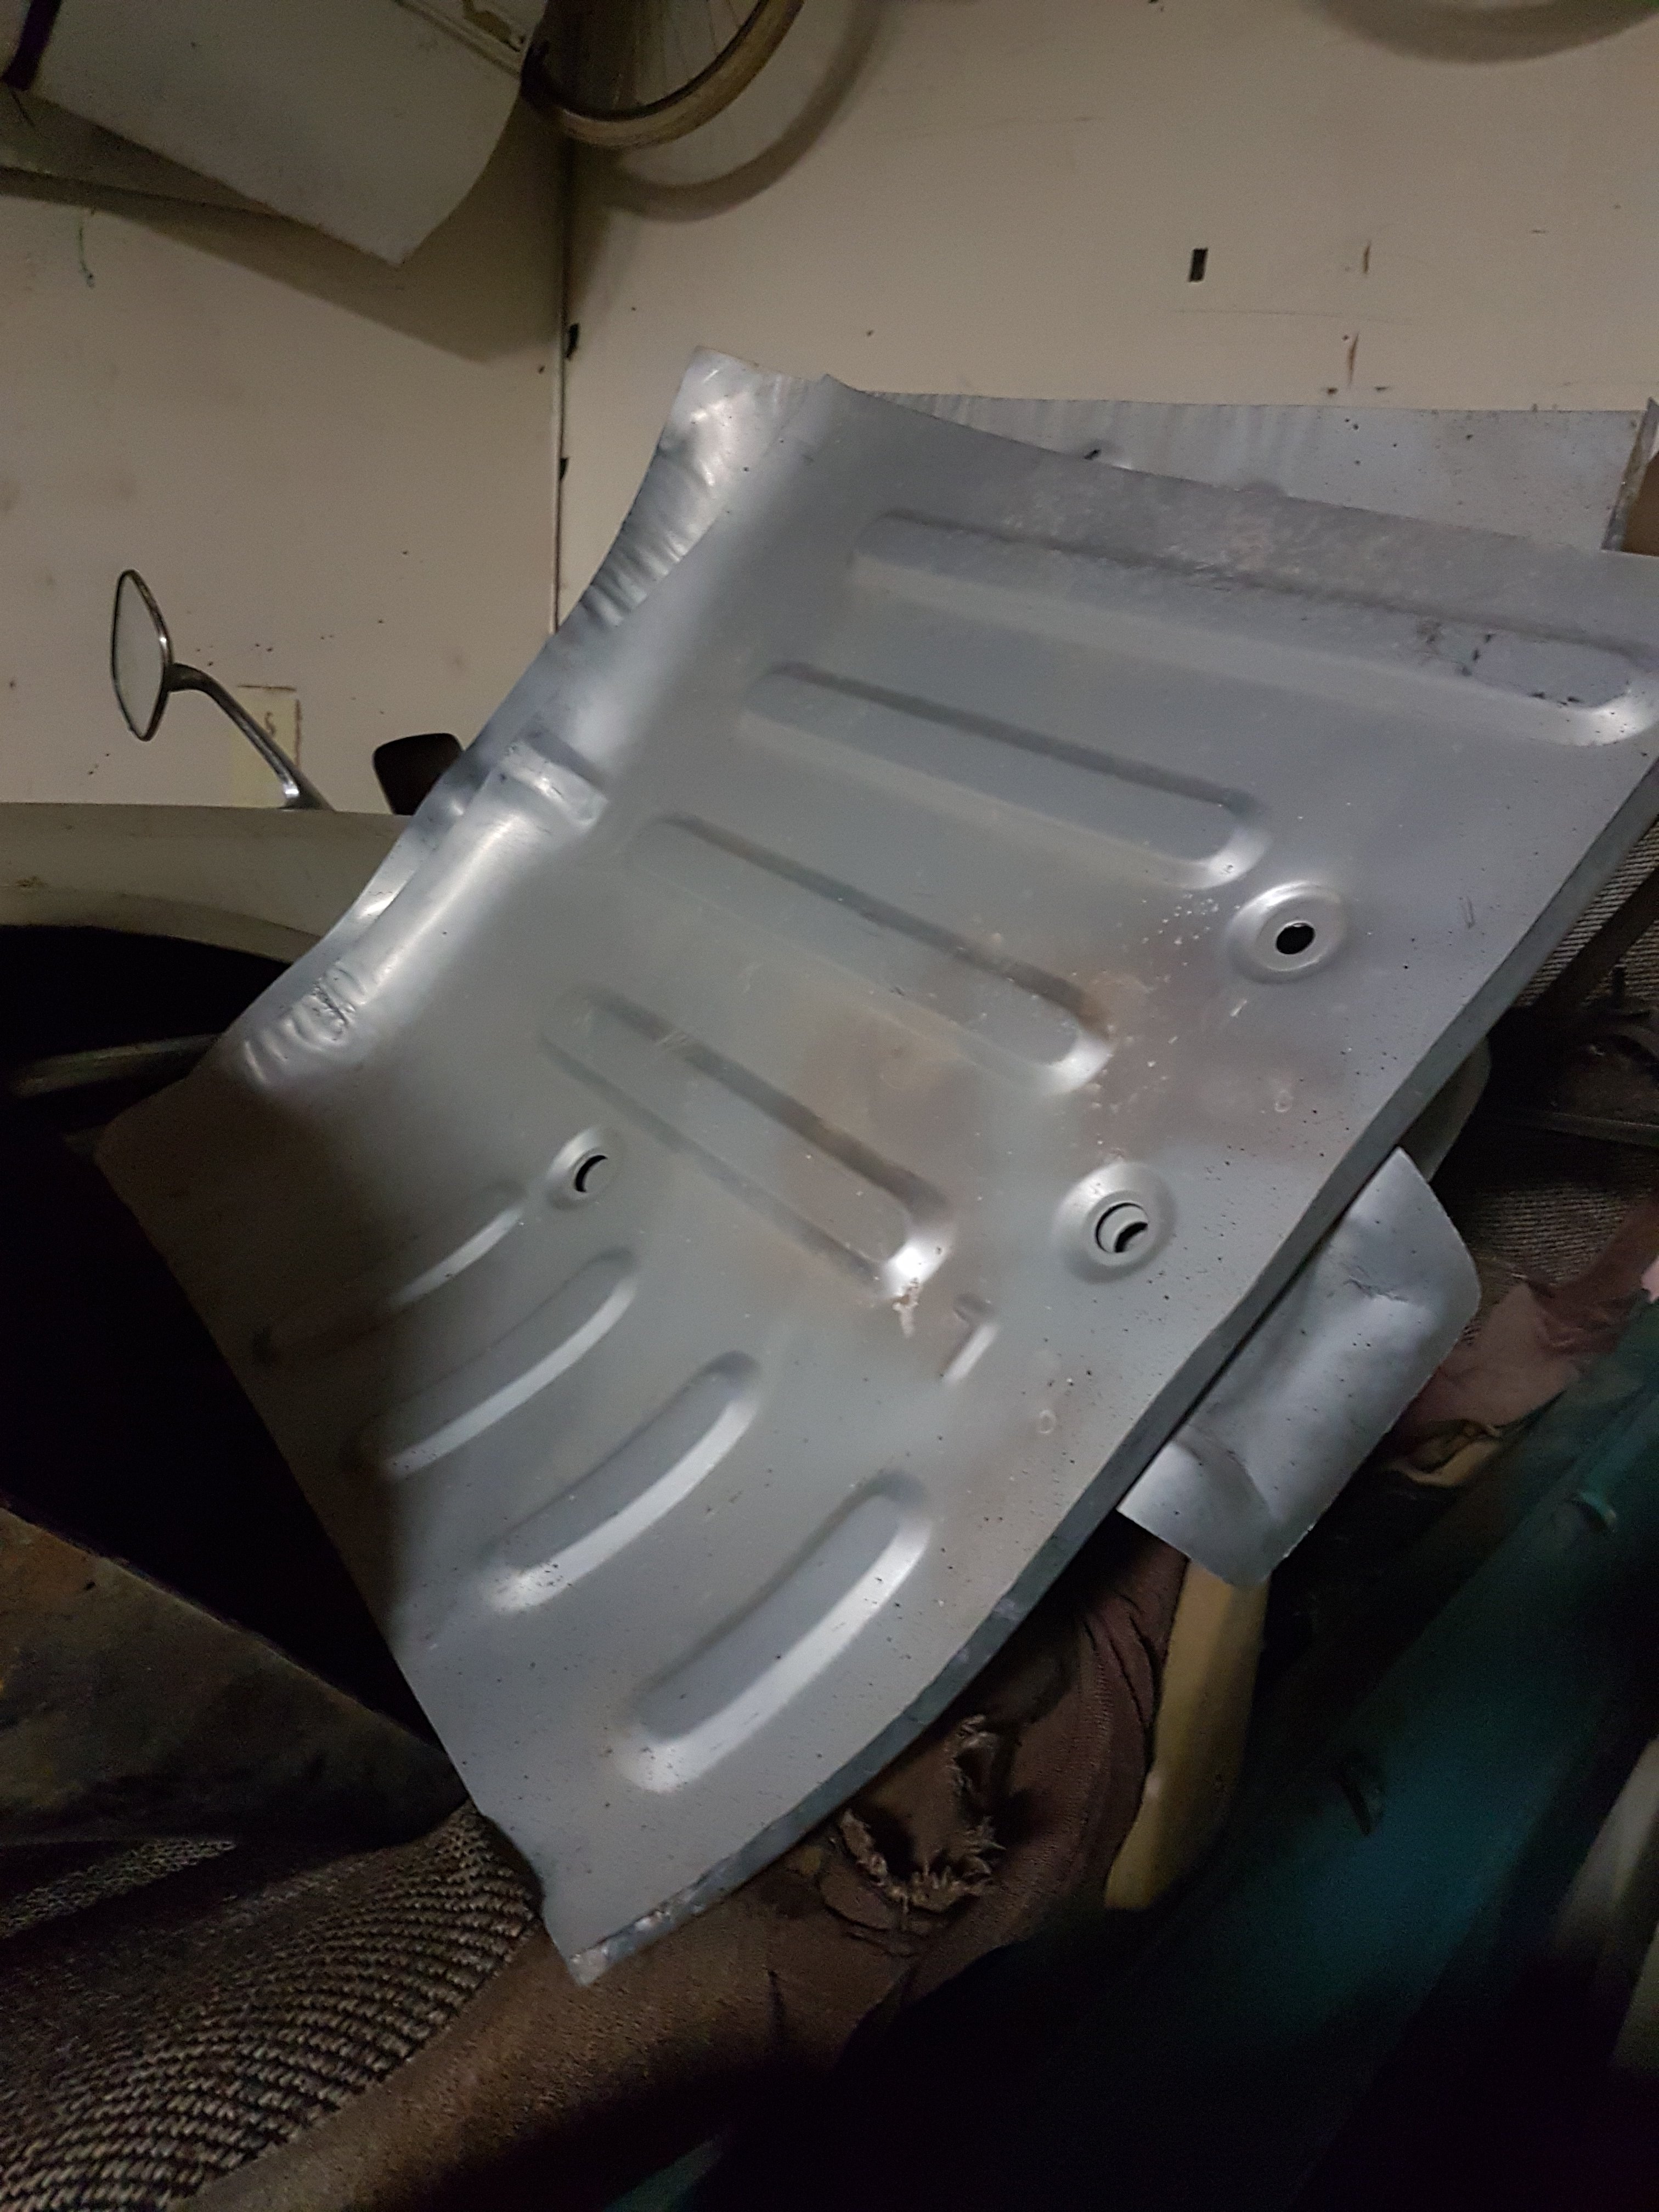
Actually, i did buy some floor pans! Kinda progress..
9 points
-
Update! I never said progress....
7 points
-
Show me your Swedish bits..... Admittedly via Britain but its the thought that counts. Bill at SaaBits is an all round GC and will be getting much more of my money. Was asked when it was going in. I replied "When the outside temperature gets over 20...."
6 points
-
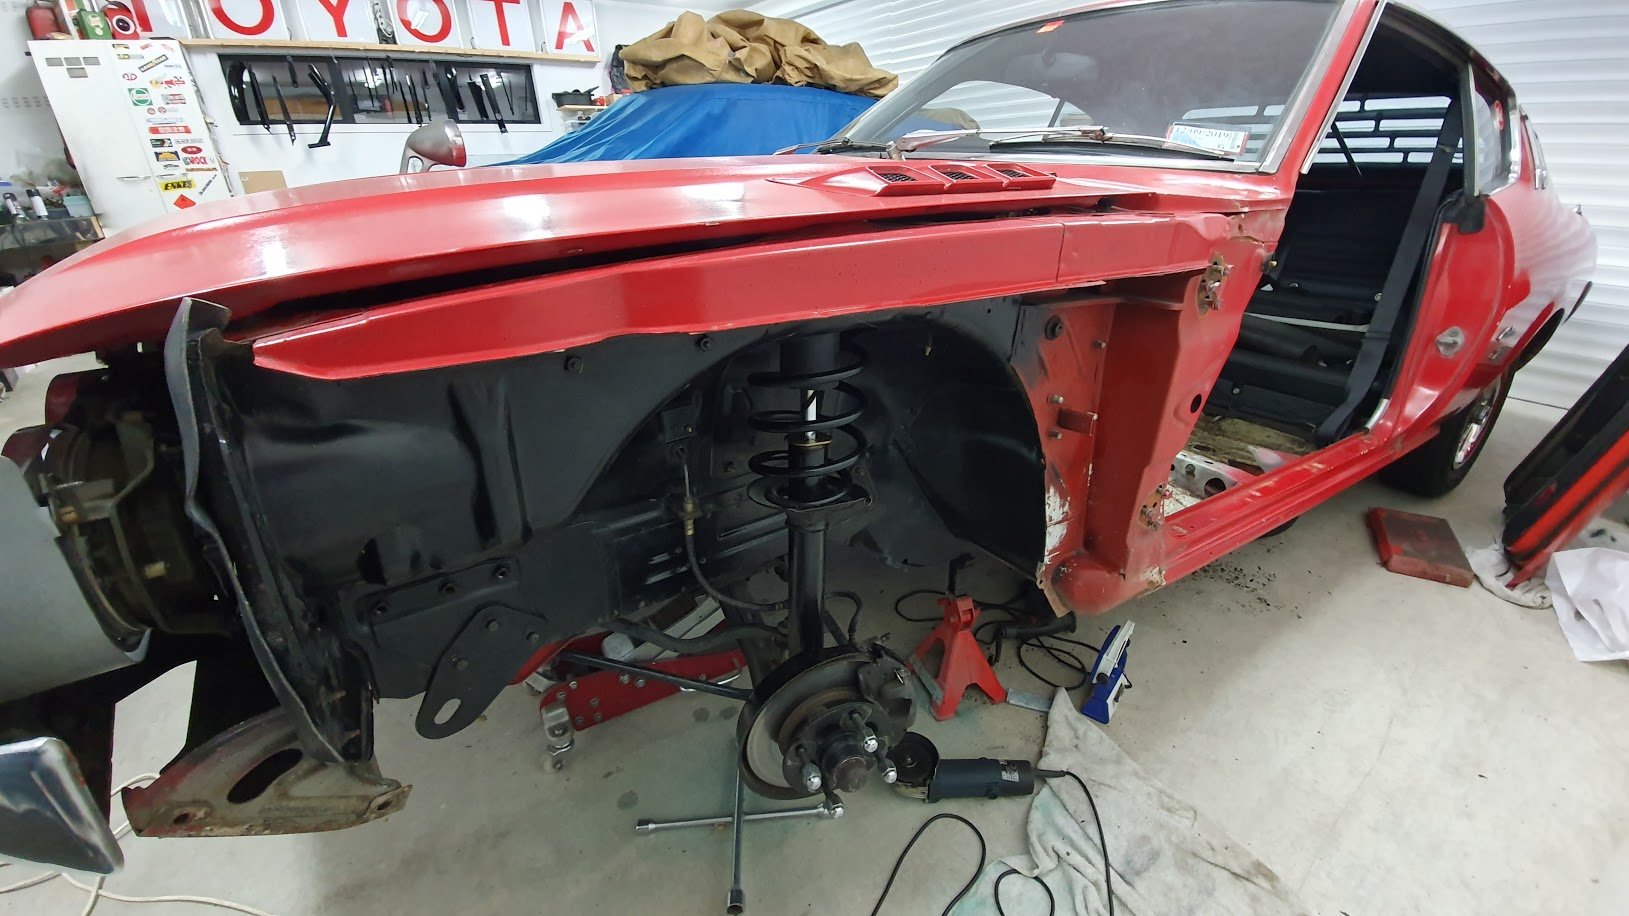
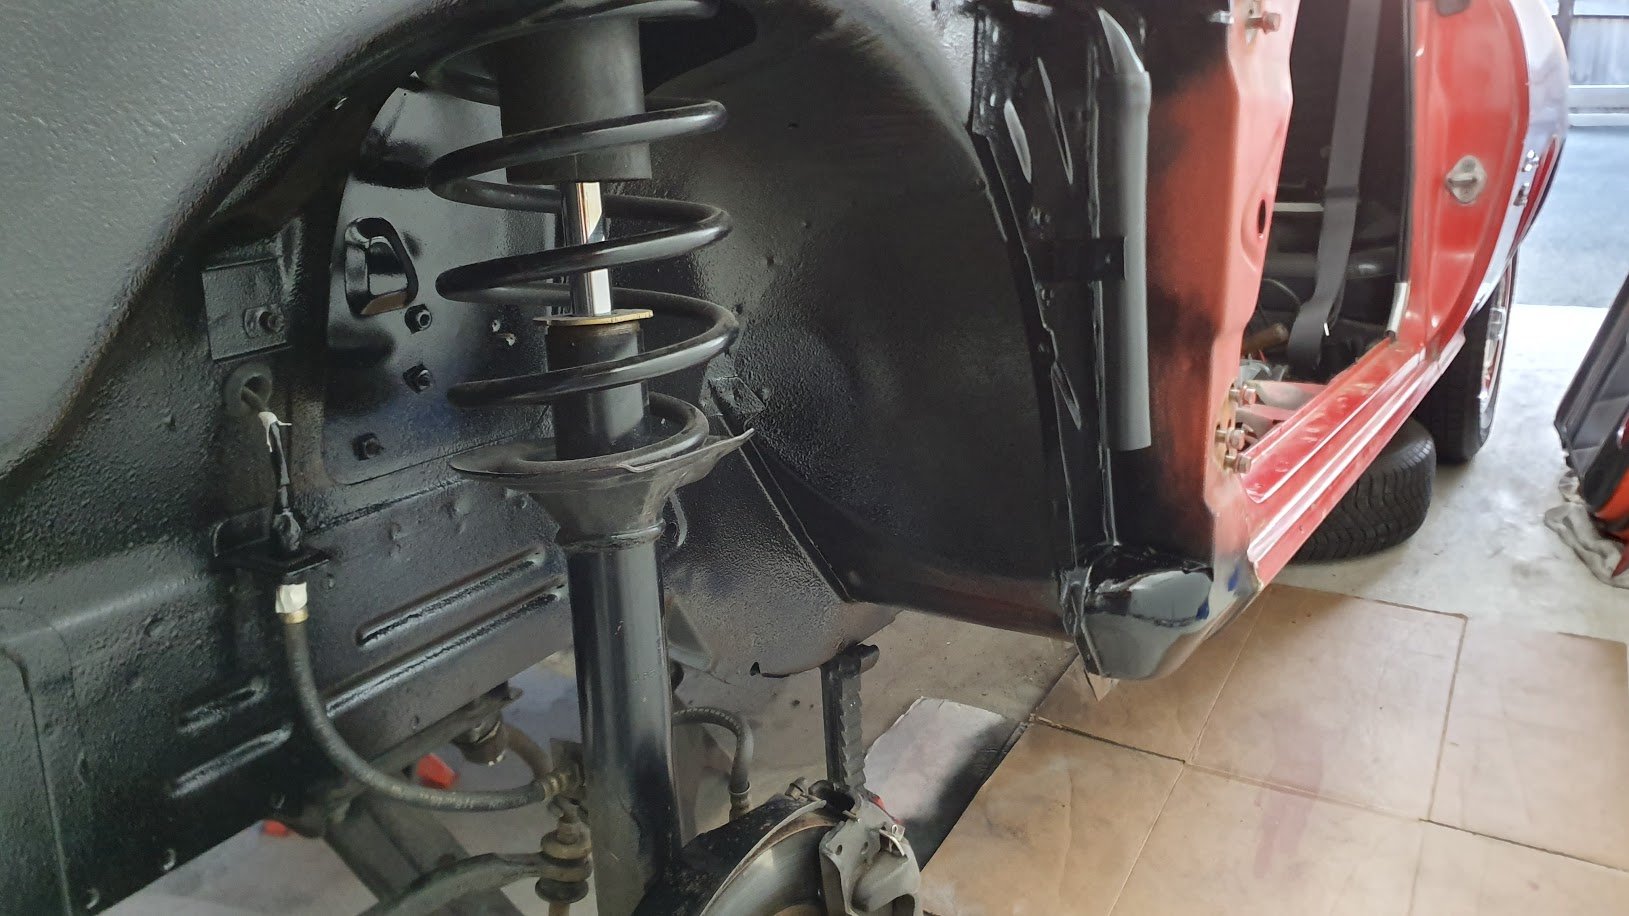
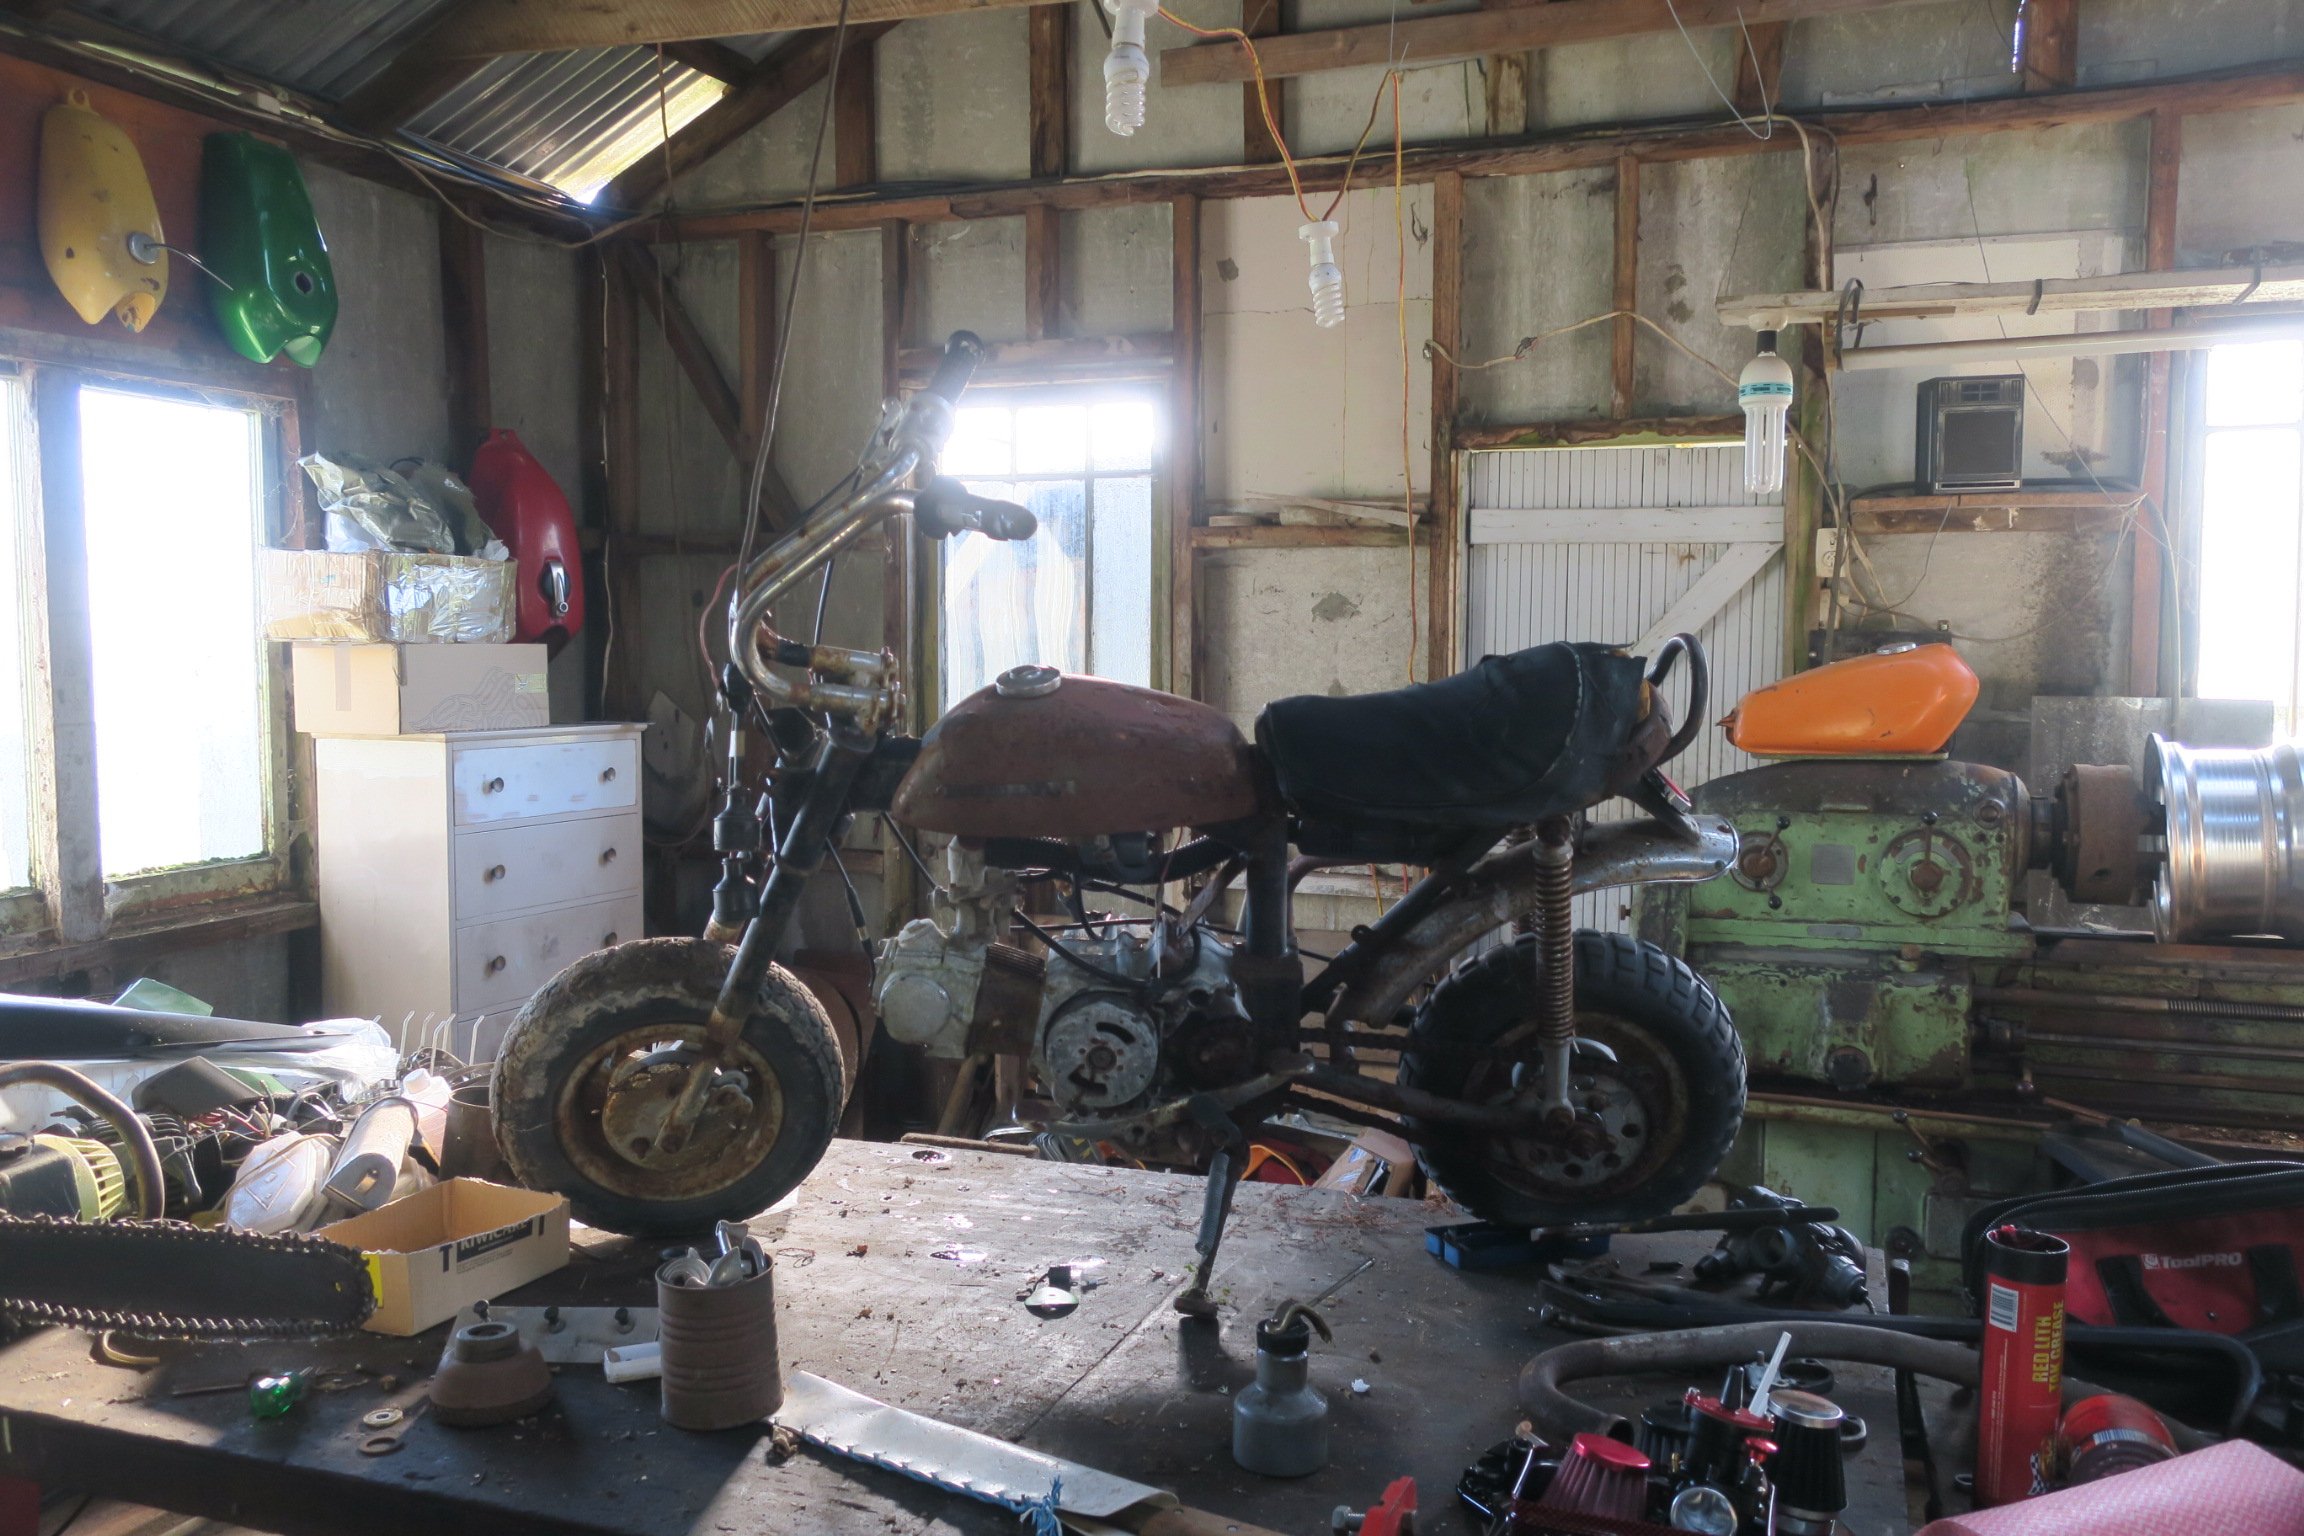
So I've done a bit more on this dirty Berty. I flipped it over to finish off the frame extension, and cut off a few unneeded bits. Seeing as it wouldn't rev or idle with no choke, I cleaned the carbs out, they had sea weed growing on the float needle things. I also welded up the plenum, and played around with restricter sizing (had to go down to a 35mm opening) this resulted in it running waaaaay better, and revving out like it should. I also removed all the washers that had been put under the needles (they were trying to make up for them not lifting due to lack of vacuum) and it ran even betterer again! I needed some way of mounting the air filter, and remembered I still had some silicon left over from the hektik Hilux, it was perfect, and pretty! Little vid of it running betterer, the linkage was a bit sticky, hence the high idle then dieing out at the end. Then I took the wrap off the headers as it was fucked, and cleaned the headers up a bit. Then I changed the muffler out for a prettier one, it's from a GSX1200, so even though it has one chamber (the other was straight through) it has a larger outlet than the original, so should flow well. I had a sprocket that needed boring and keying, but decided to go with a plate wheel and bolt it to the original sprocket hub. Bit bigger than the OG one. I then put the back end together, and ran a brake line up to the slave cylinder. Got a few hoses from the wreckers, this female - female clutch line from an AE100 Corolla made life easy, used the mounts and all. Then I made a new gear shifter linkage, as the old one was fucking rank. I also moved it forward a bit to suit me. Next was sorting the steering wheel/shaft/rack. This was a bit of a mission, but it worked out well. Managed to mount the wheel on top of the bar it used to be below, and move it forward a bit, so I can pilot the vehicle, with the added bonus of being able to get in and out of it. Also put the front suspension back together, so I could work out the pedal position, and the position of the bar that mounts the steering bearing, clutch and gas cable mounts, and the brake master thing. The brake master has to be in this funny frame thing to miss your legs and still fit under the hood. Once all that was done, I crimped the cables, but they were too short due to me lengthening the frame, so I made little extension doofers out of D shackles. Now the back ends done, all the controls are pretty much done, and it's running better, I'm getting onto doing the front steering knuckles and tie rod ends. Still much to do, but progress is being made! Regards, VG.5 points
-
Time for a rebuild
4 points
-
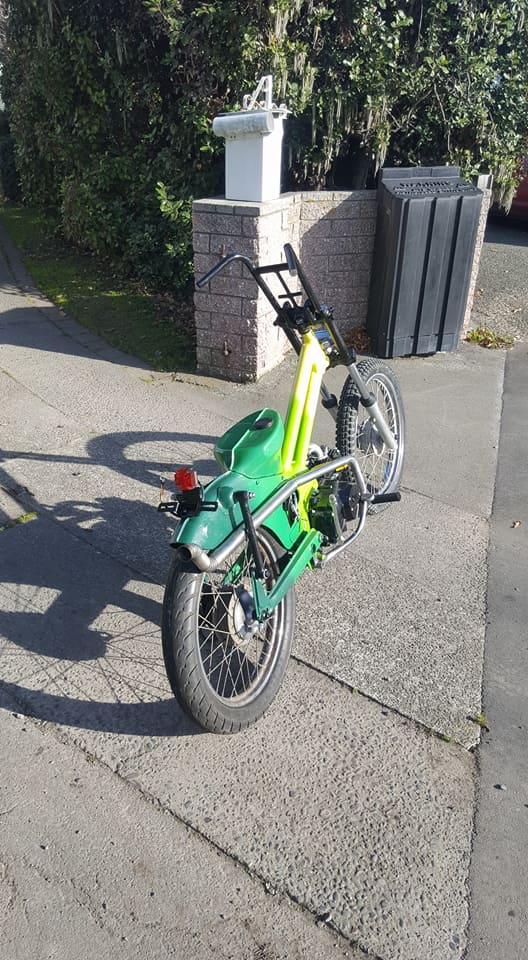
this took WAY longer than it should have. i decided to mount the speakers as flush as possible. both Celcia's have sticky out type "pods" with the speakers in them and i have knocked the shit out of them getting in and out of the car with my big work boots on and the speakers have taken a hammering because of it. and i kind of wanted to cause the least amount of disruption to the look of the door cards as i could. so i did it like this. 20mm spacer which has black carpet on it but ill probably put some matching red vinyl on them eventually. while i was in there i ran wires for the central locking and put some sound deadening in the doors. now i need to run a power feed for the small front amp, mount the crossovers and finish the wiring. all the wires are run to where the amp and crossovers are going to be so that should make life a bit easier. i'd also like to get the power steering installed this weekend but we'll see how we go. 2019-07-25_09-12-23 by sheepers, on Flickr3 points
-
The 20 year wait is almost over, I remember waiting 10 years to have a hoon once. I hope you have a better experience than mine. In the 10 years the chassis had sagged, there was gravel rash and excessive piston slap. Mind you I only got a bottle of Marque Vue into her as prep, you have done the full rebuild. Well done Sir!3 points
-
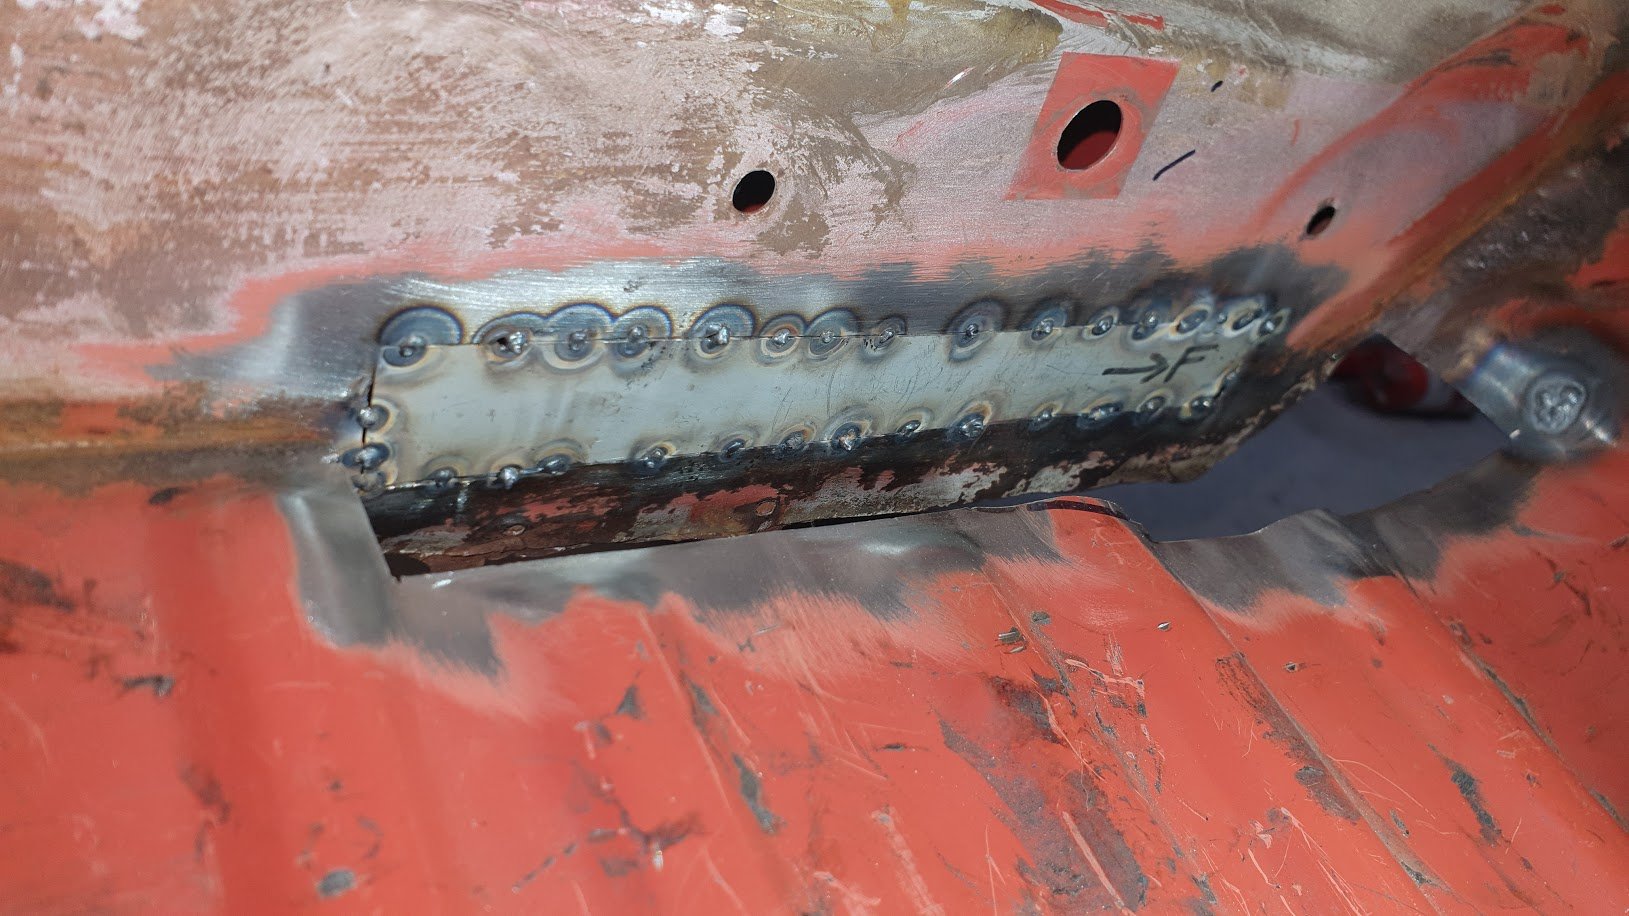
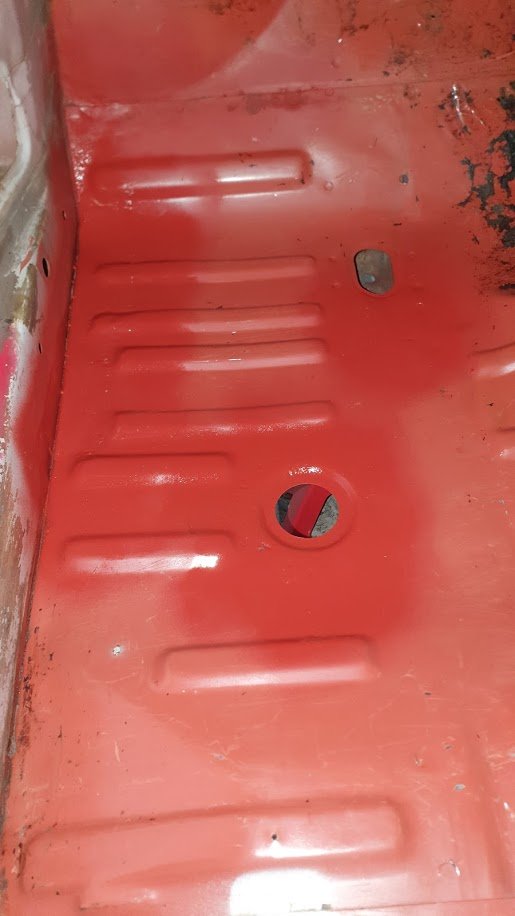
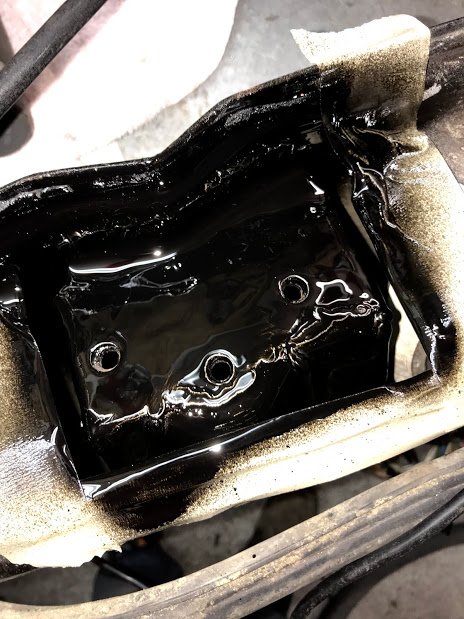
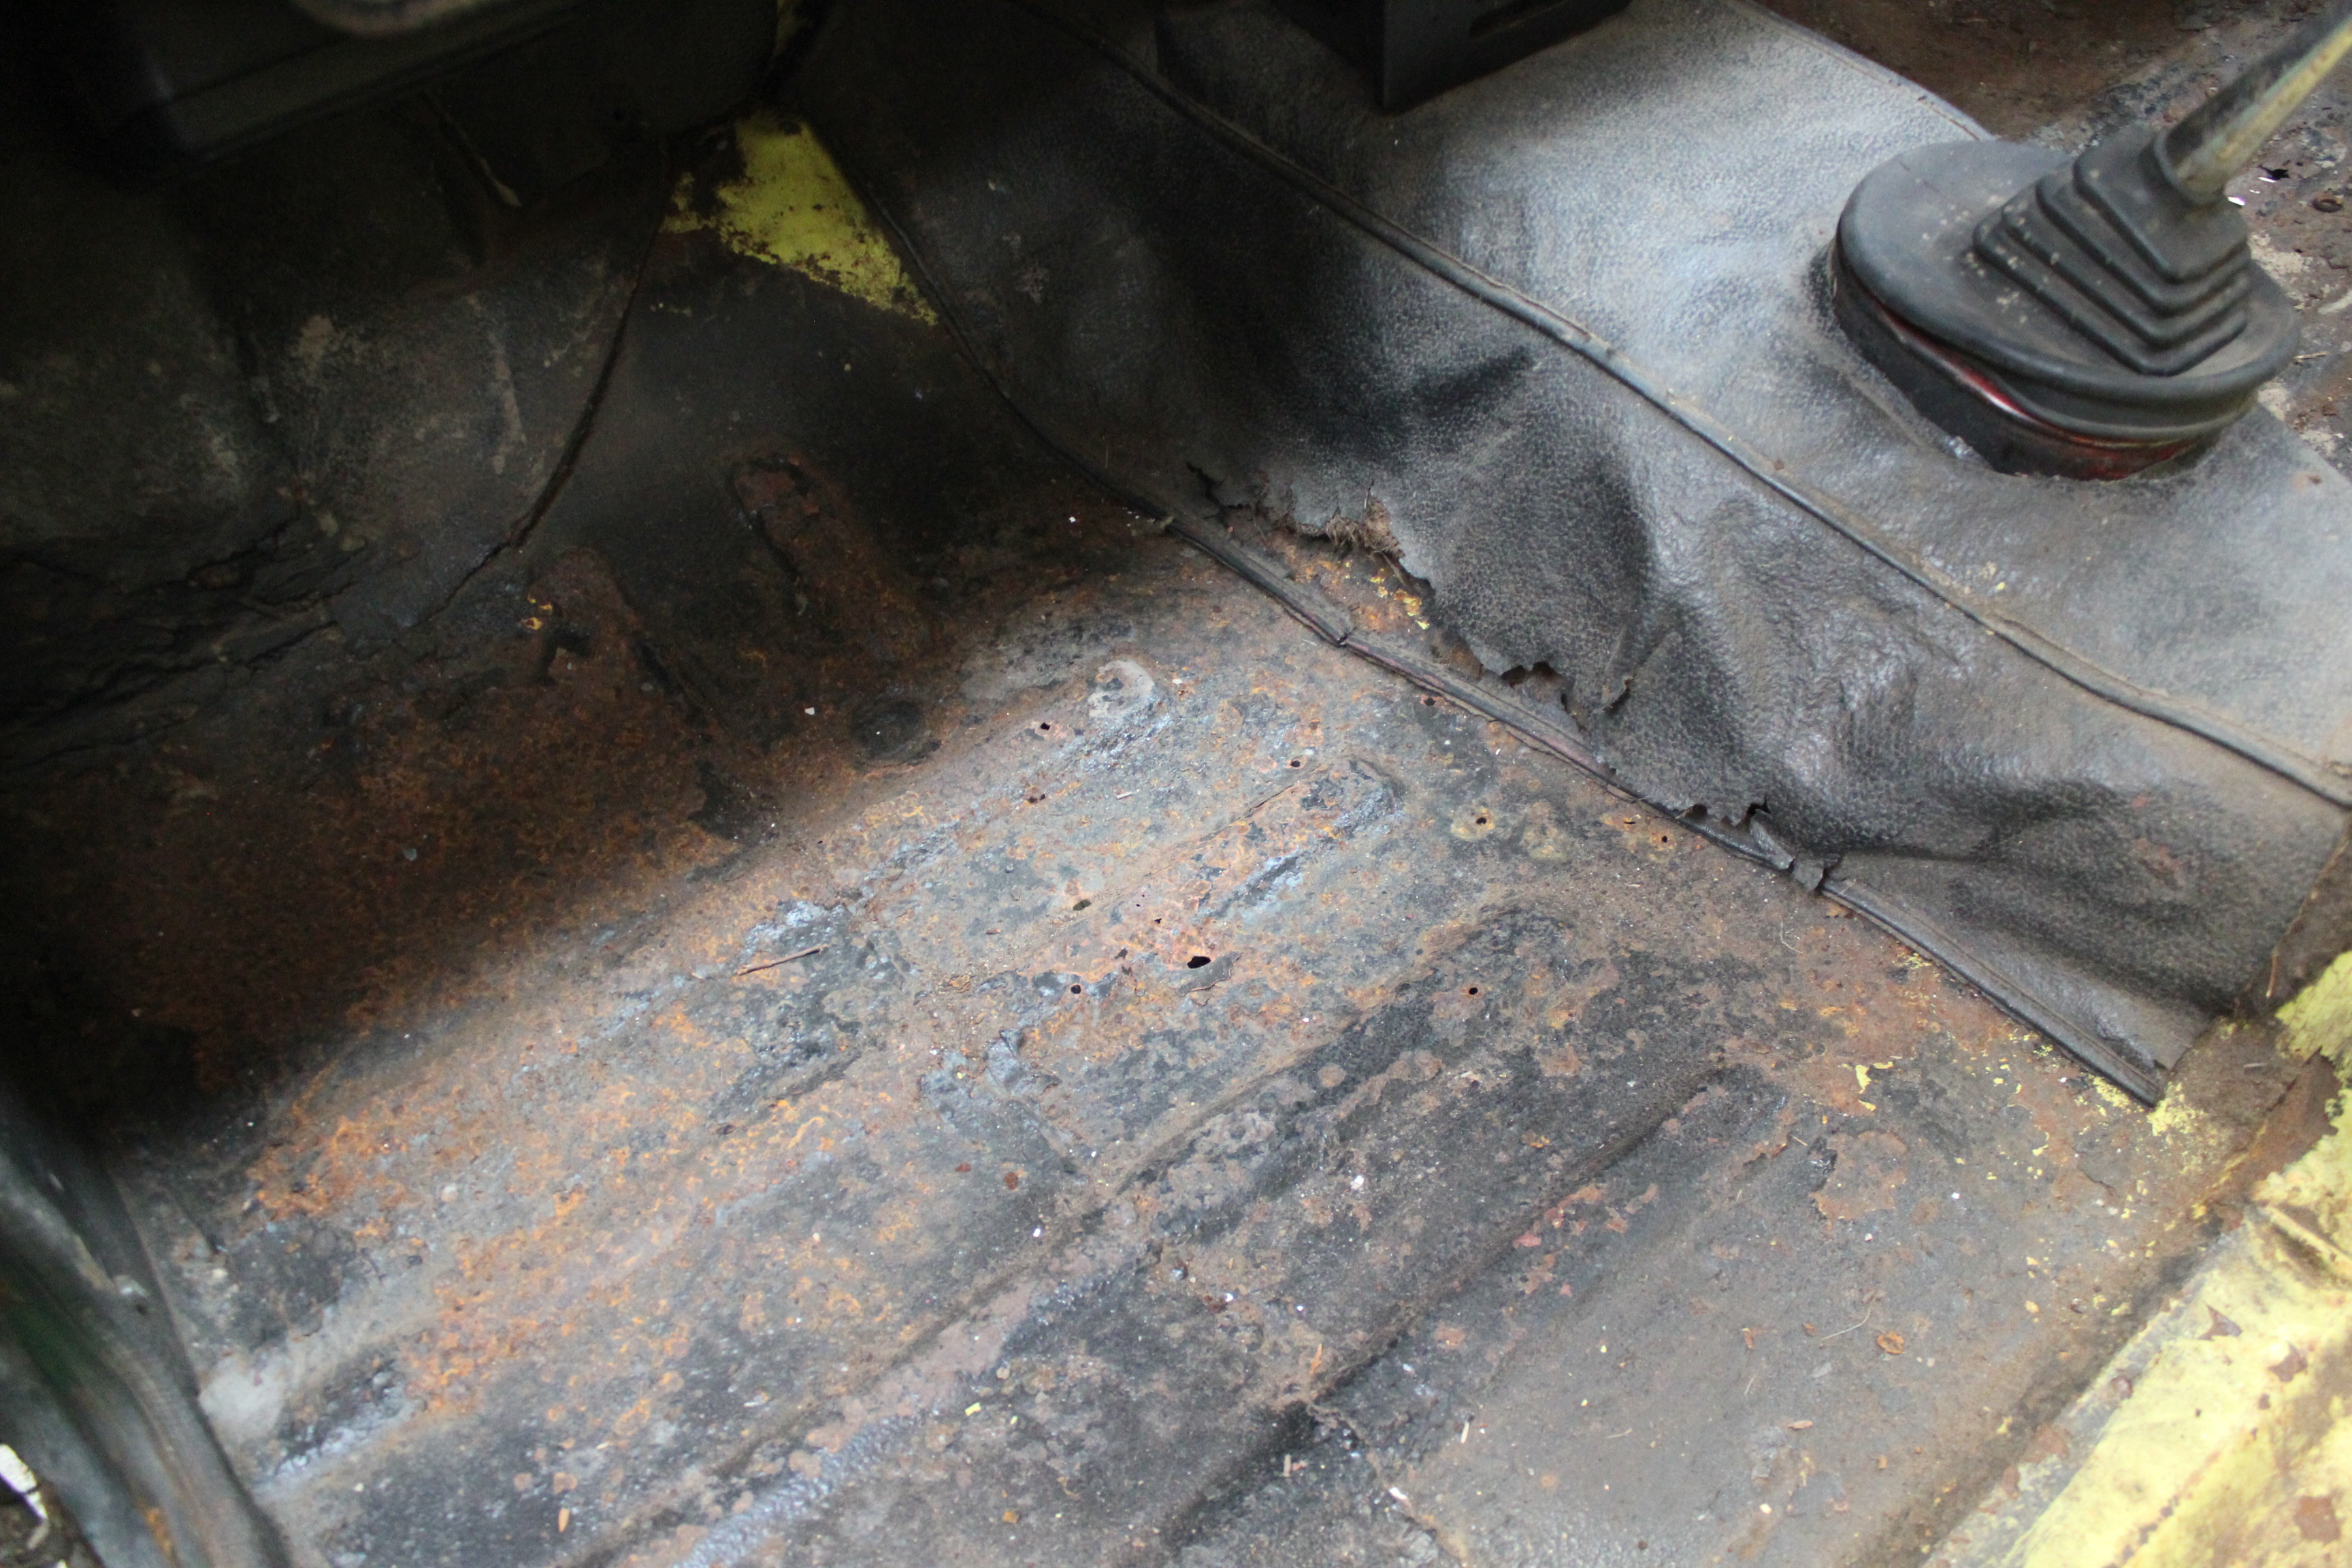
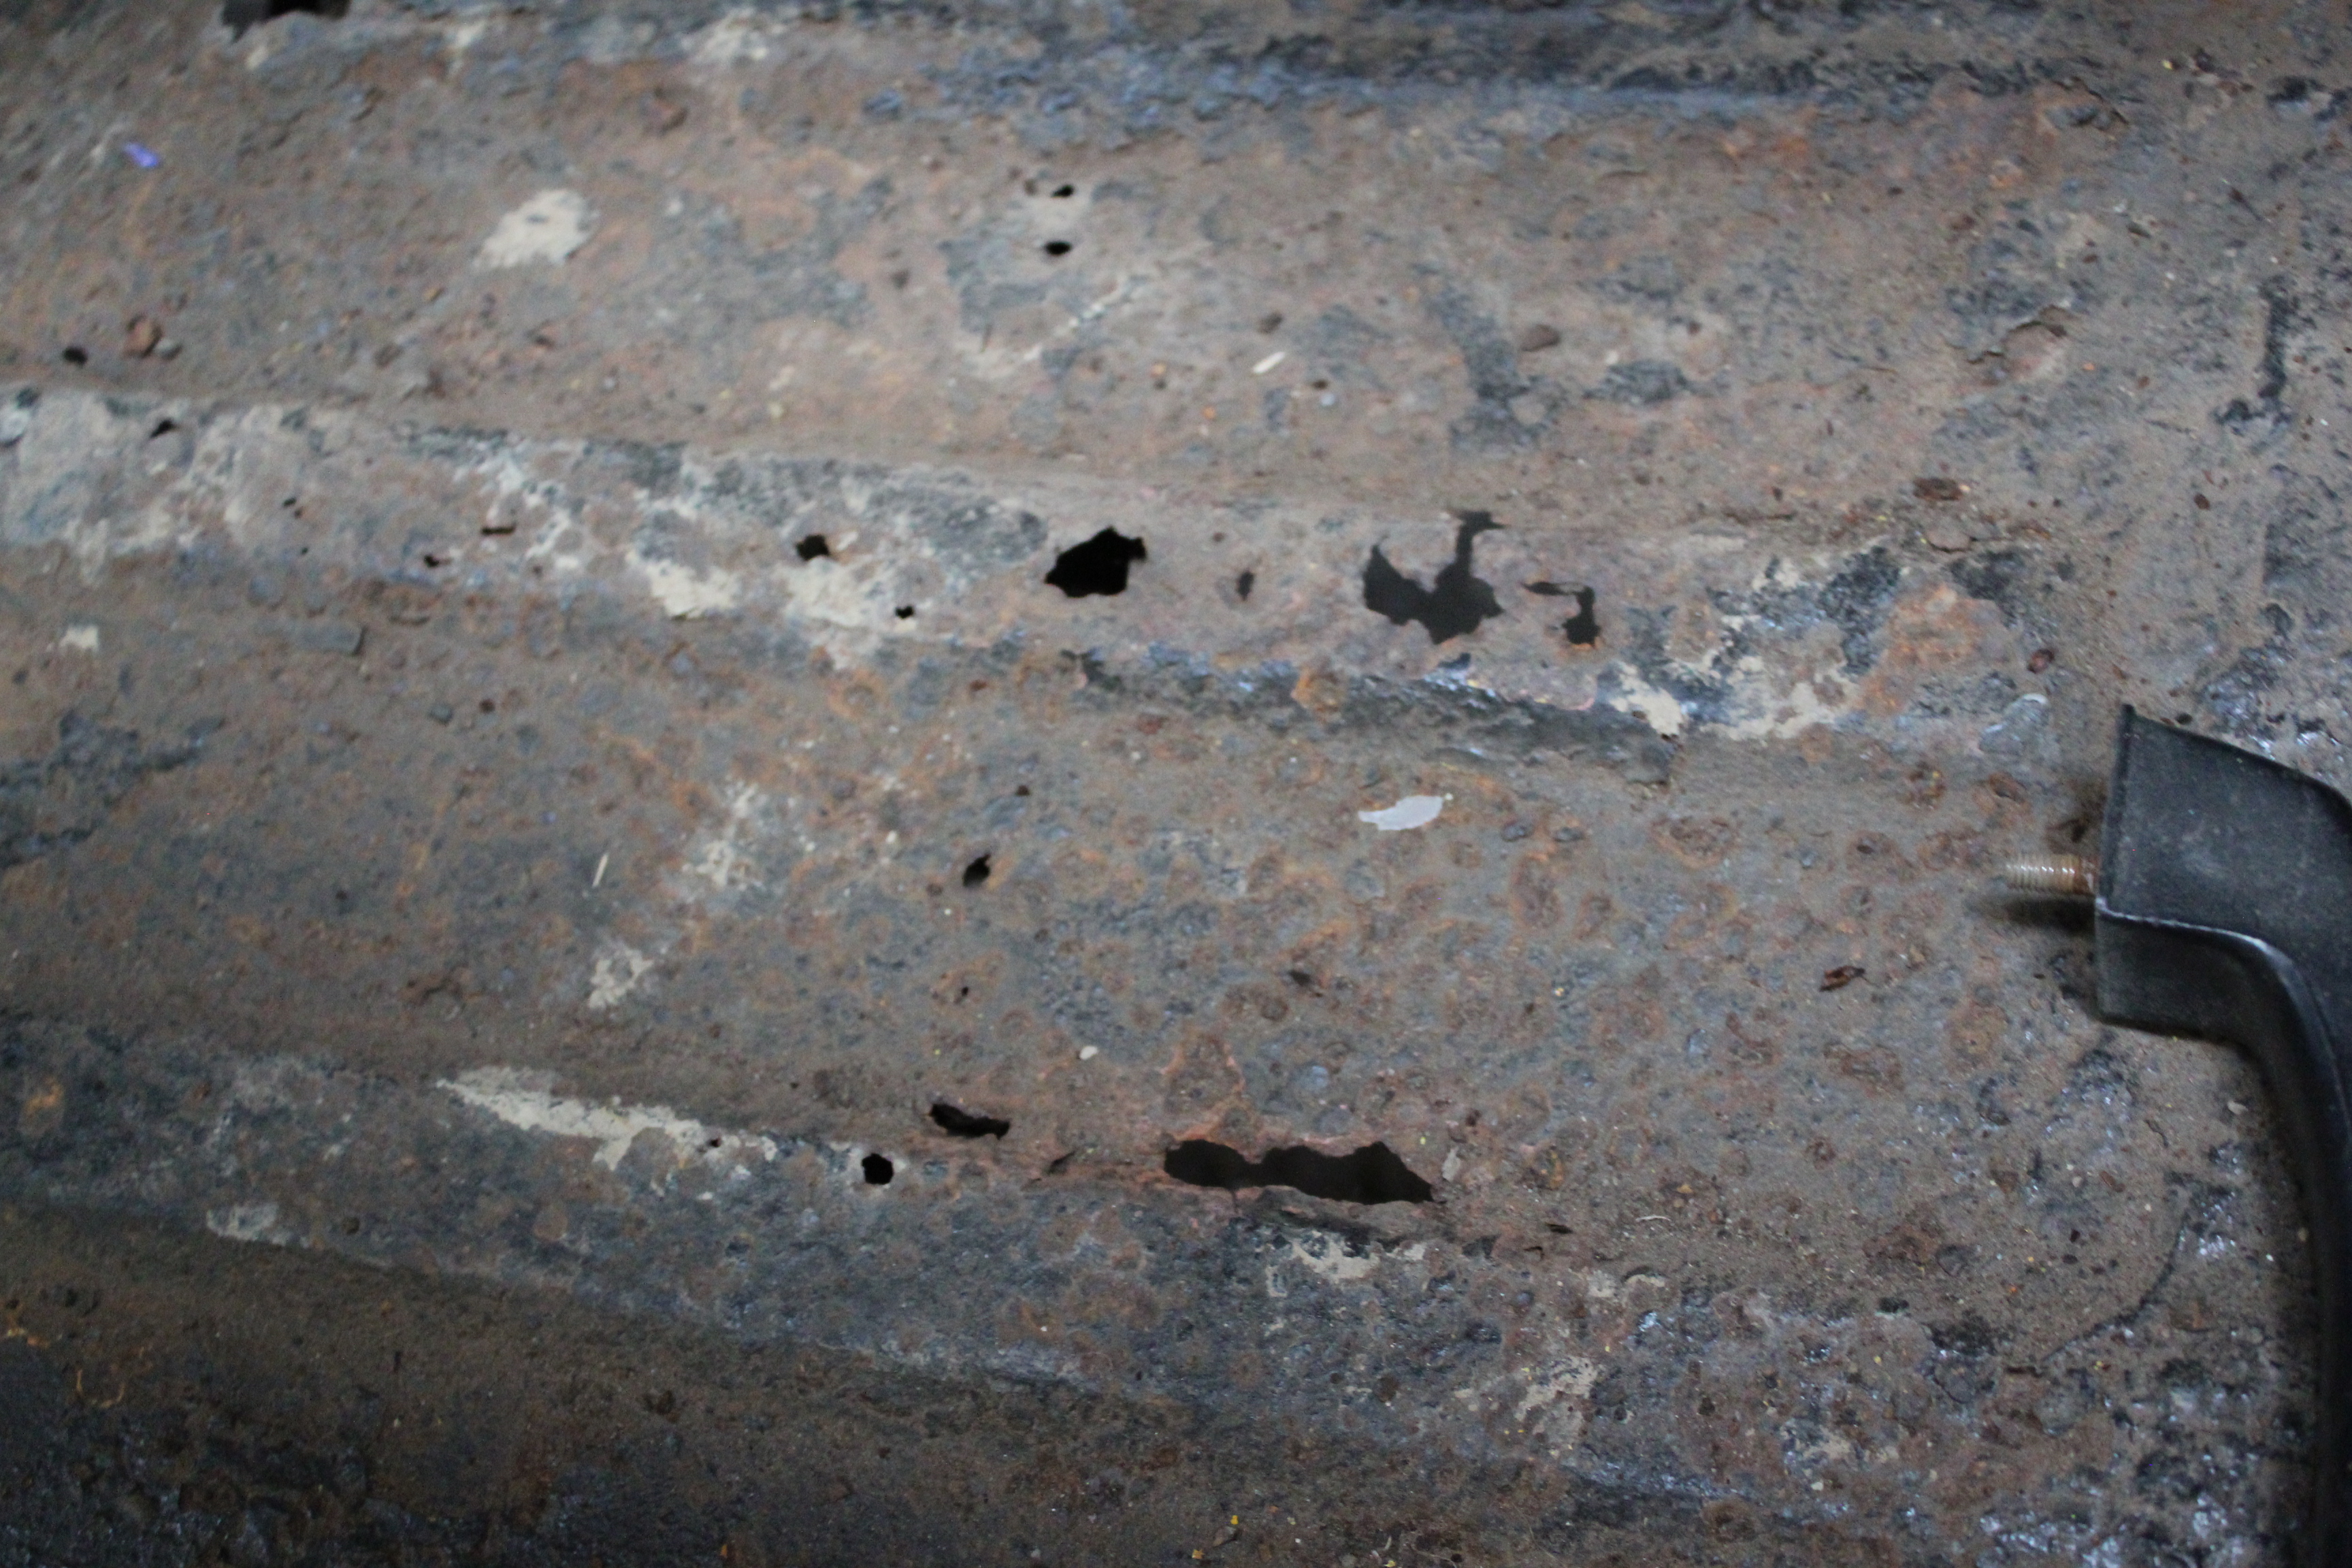
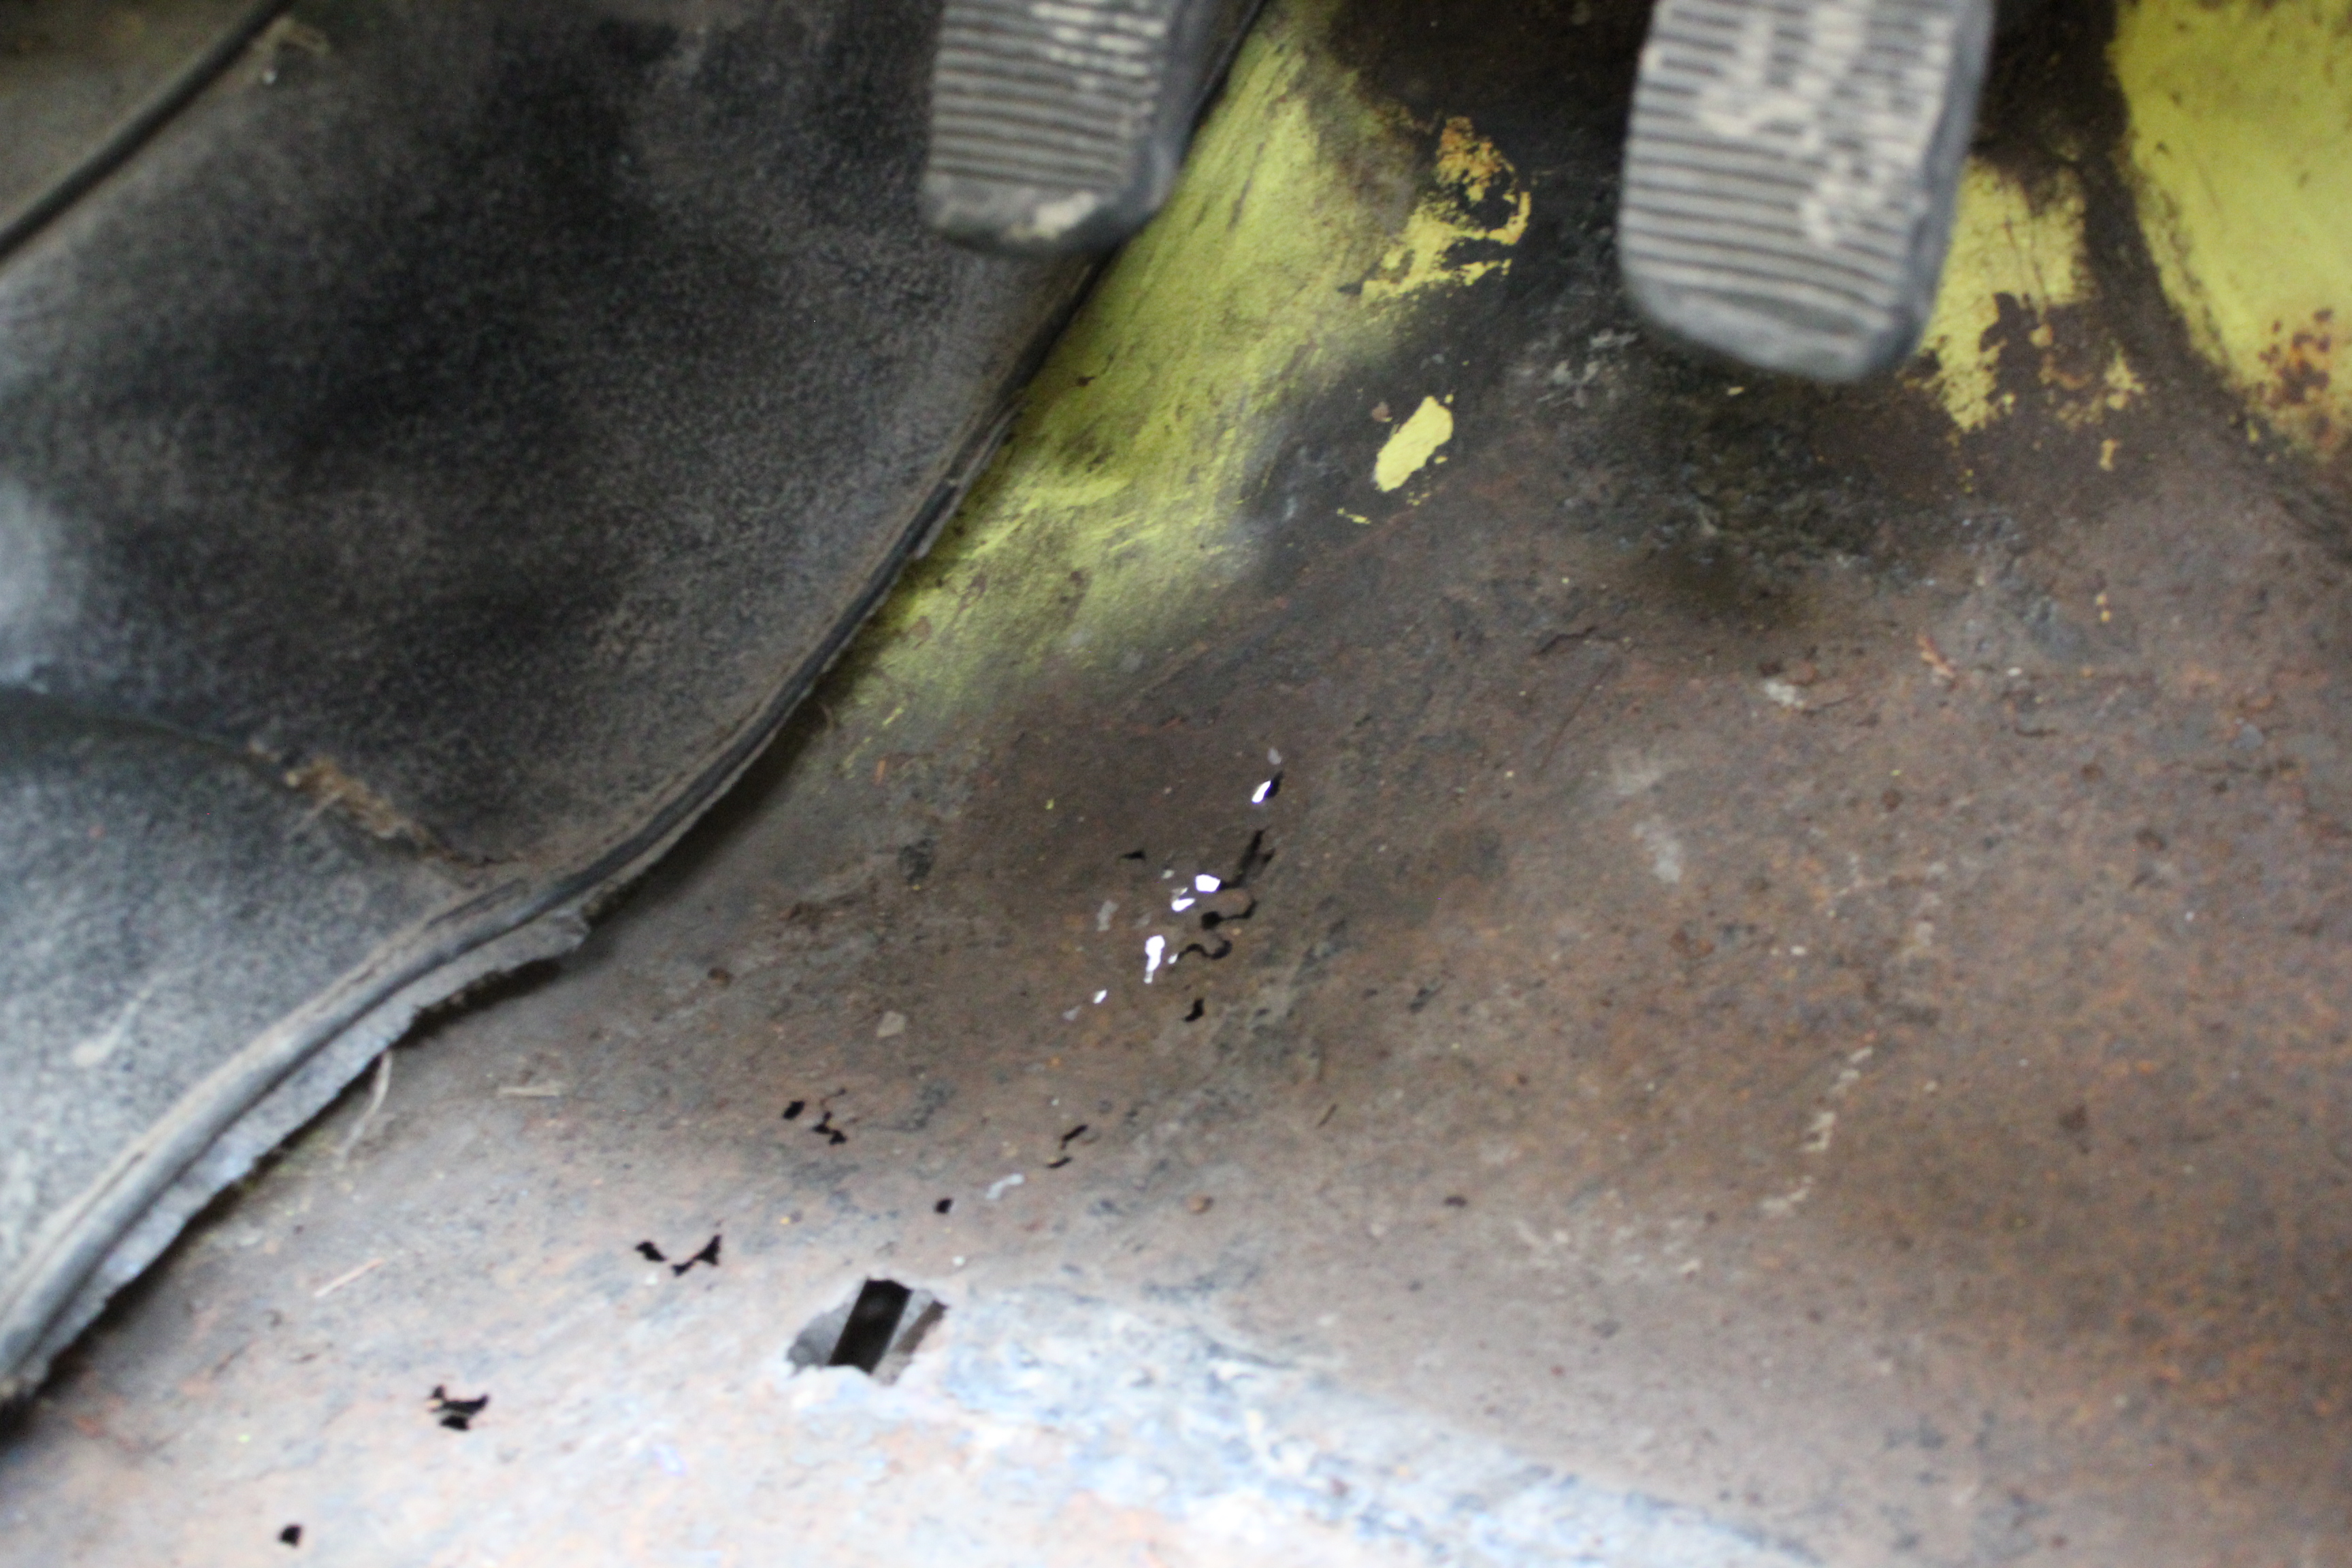
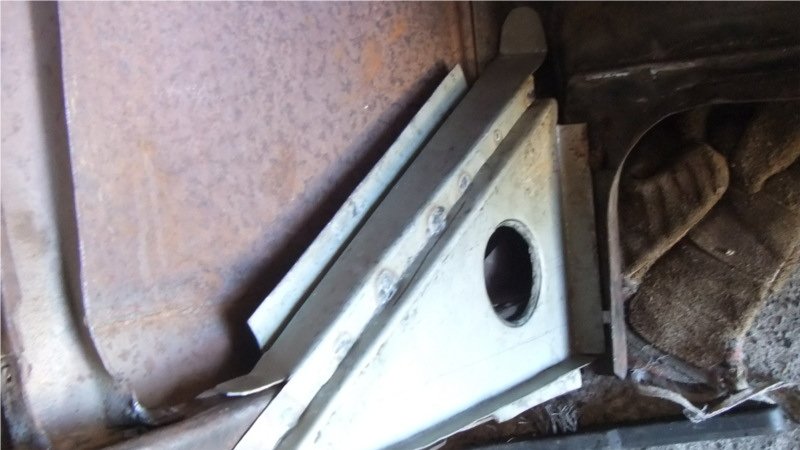
So... a change in the place i took this for a WOF meant it had a bit more of a thorough inspection. It didn't fail but he mentioned that some rust in the passengers floor would need attention soon. So some investigation happened. Turned out that hiding under the sound deadening was a little more serious than anticipated. Likely a leaking windscreen caused this. Out with the cutting disc and I had at it! And then glued it all back together Grind, Sand, and Prime - phone was left in the house so no pics except after And finally a renewal of paint and anti-chip coating. A nice tidy up for it.
2 points
-
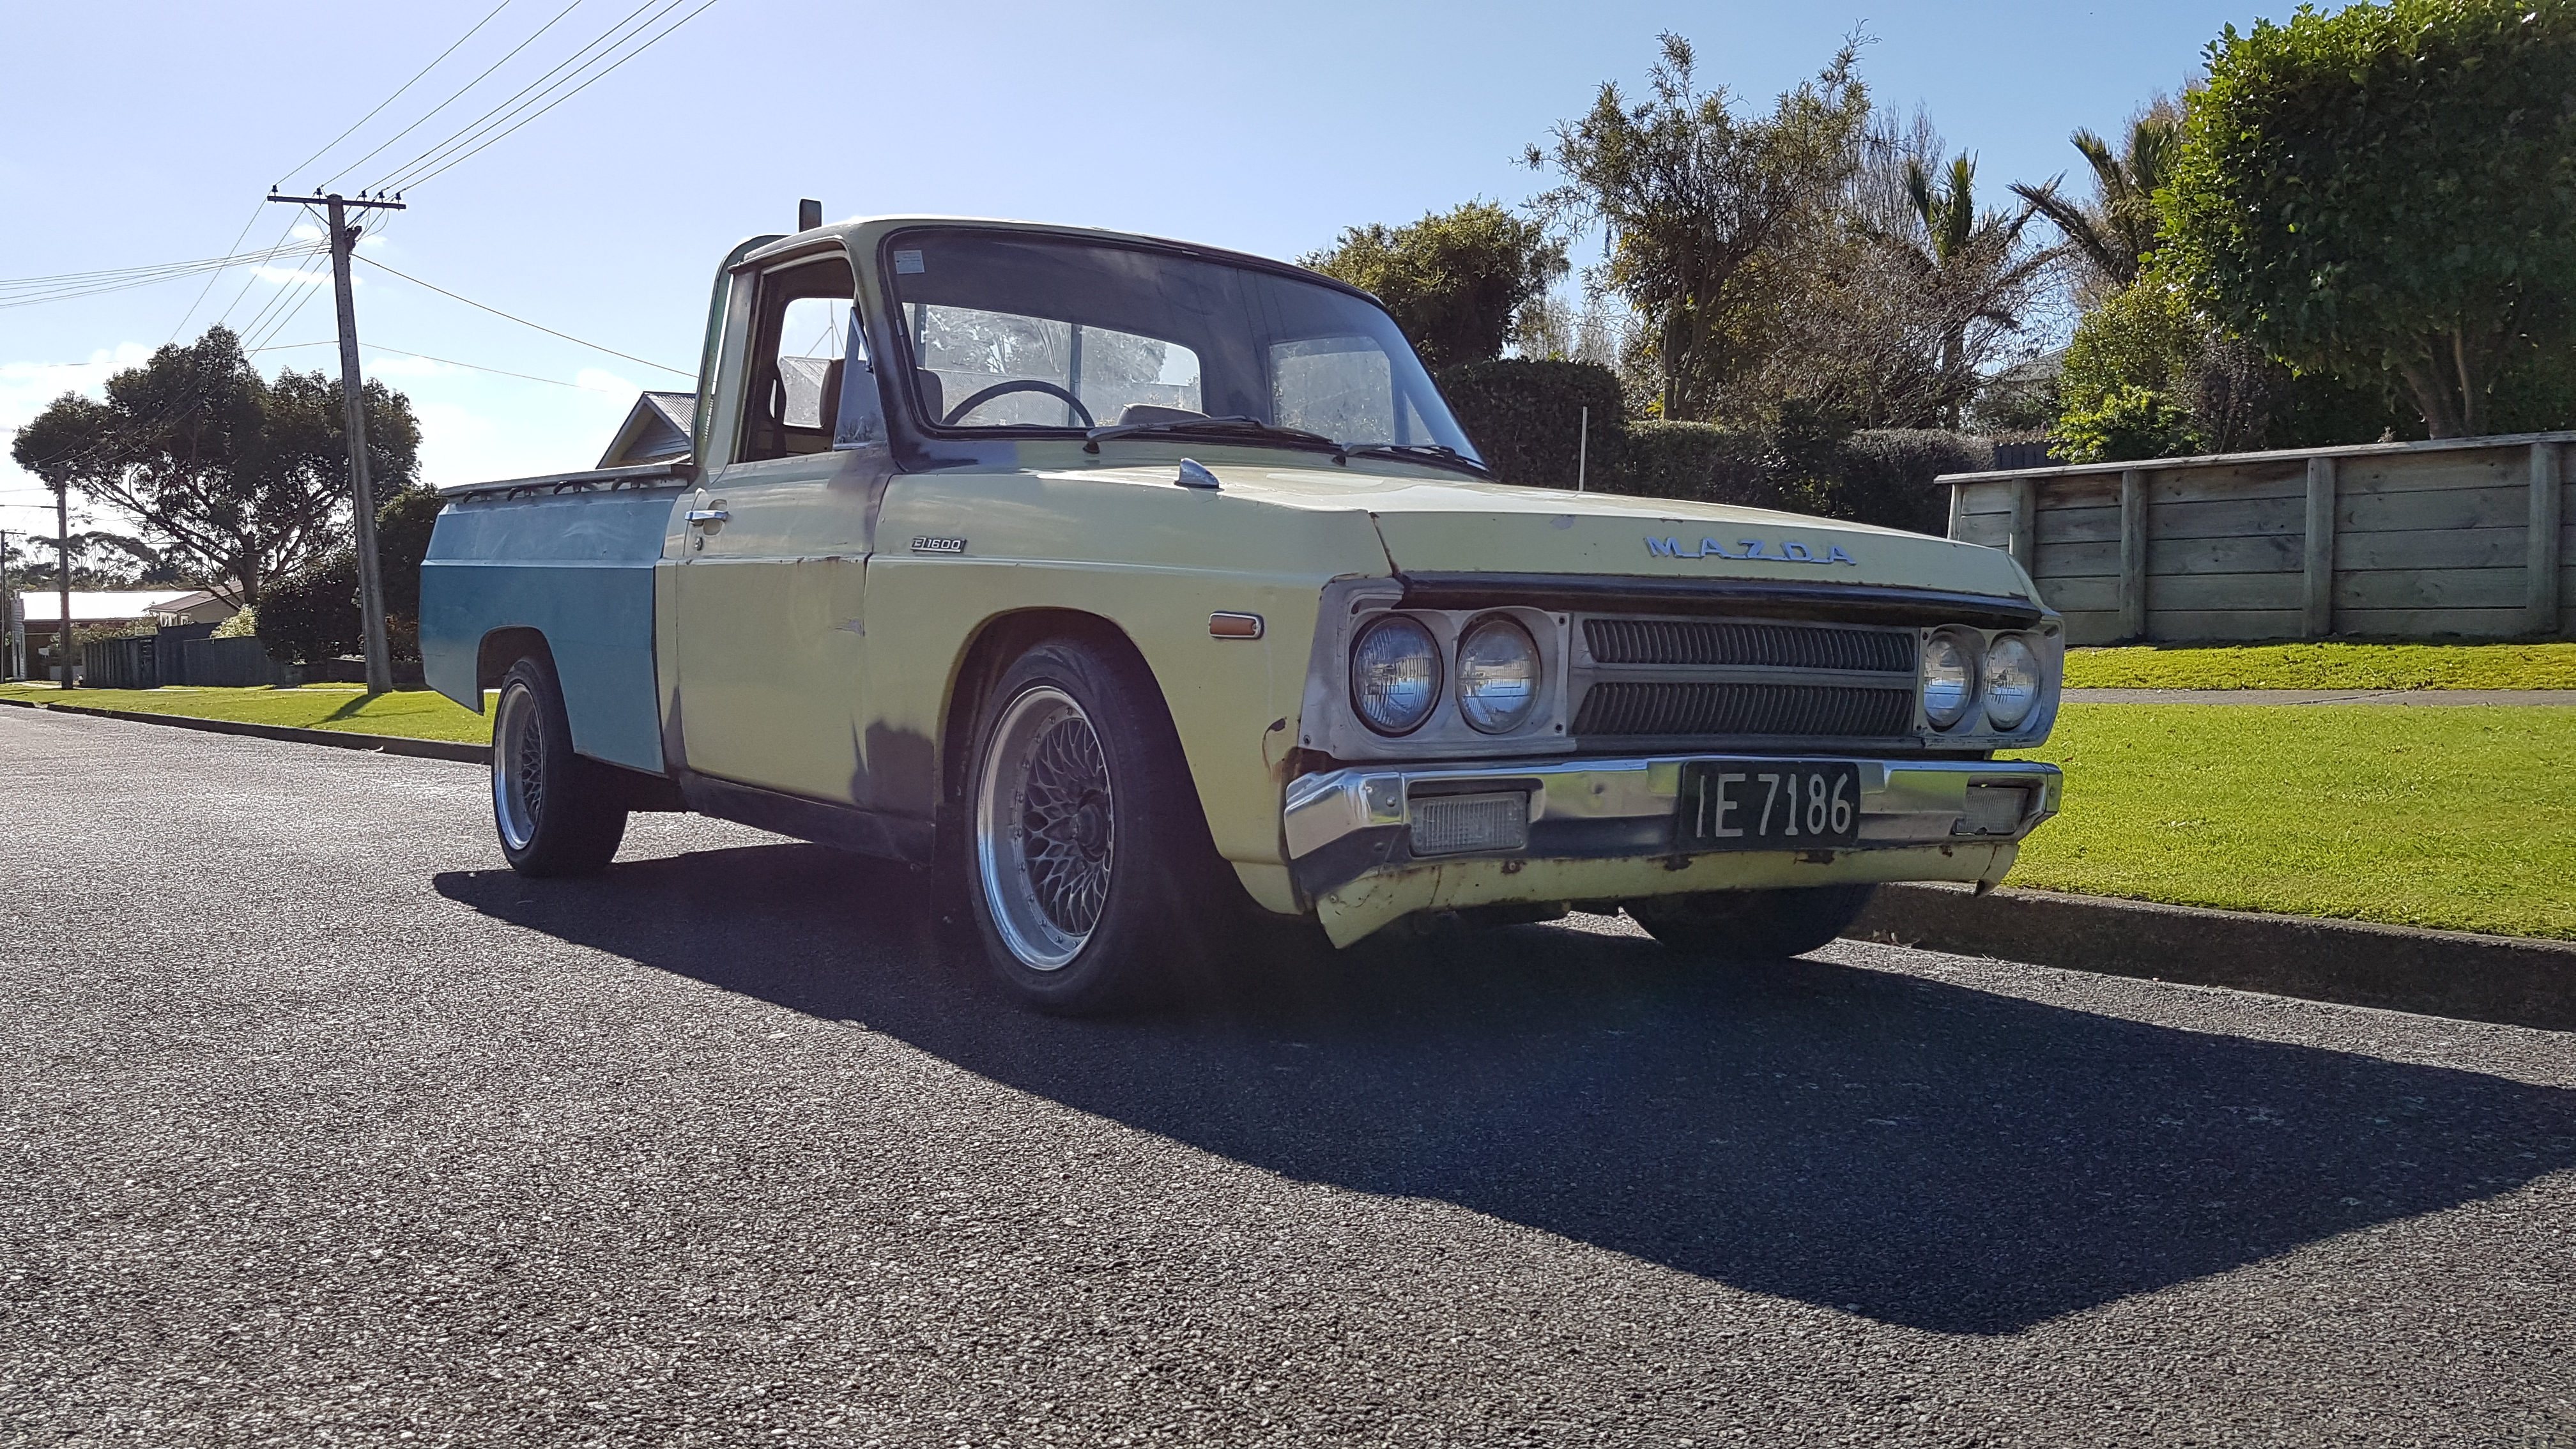
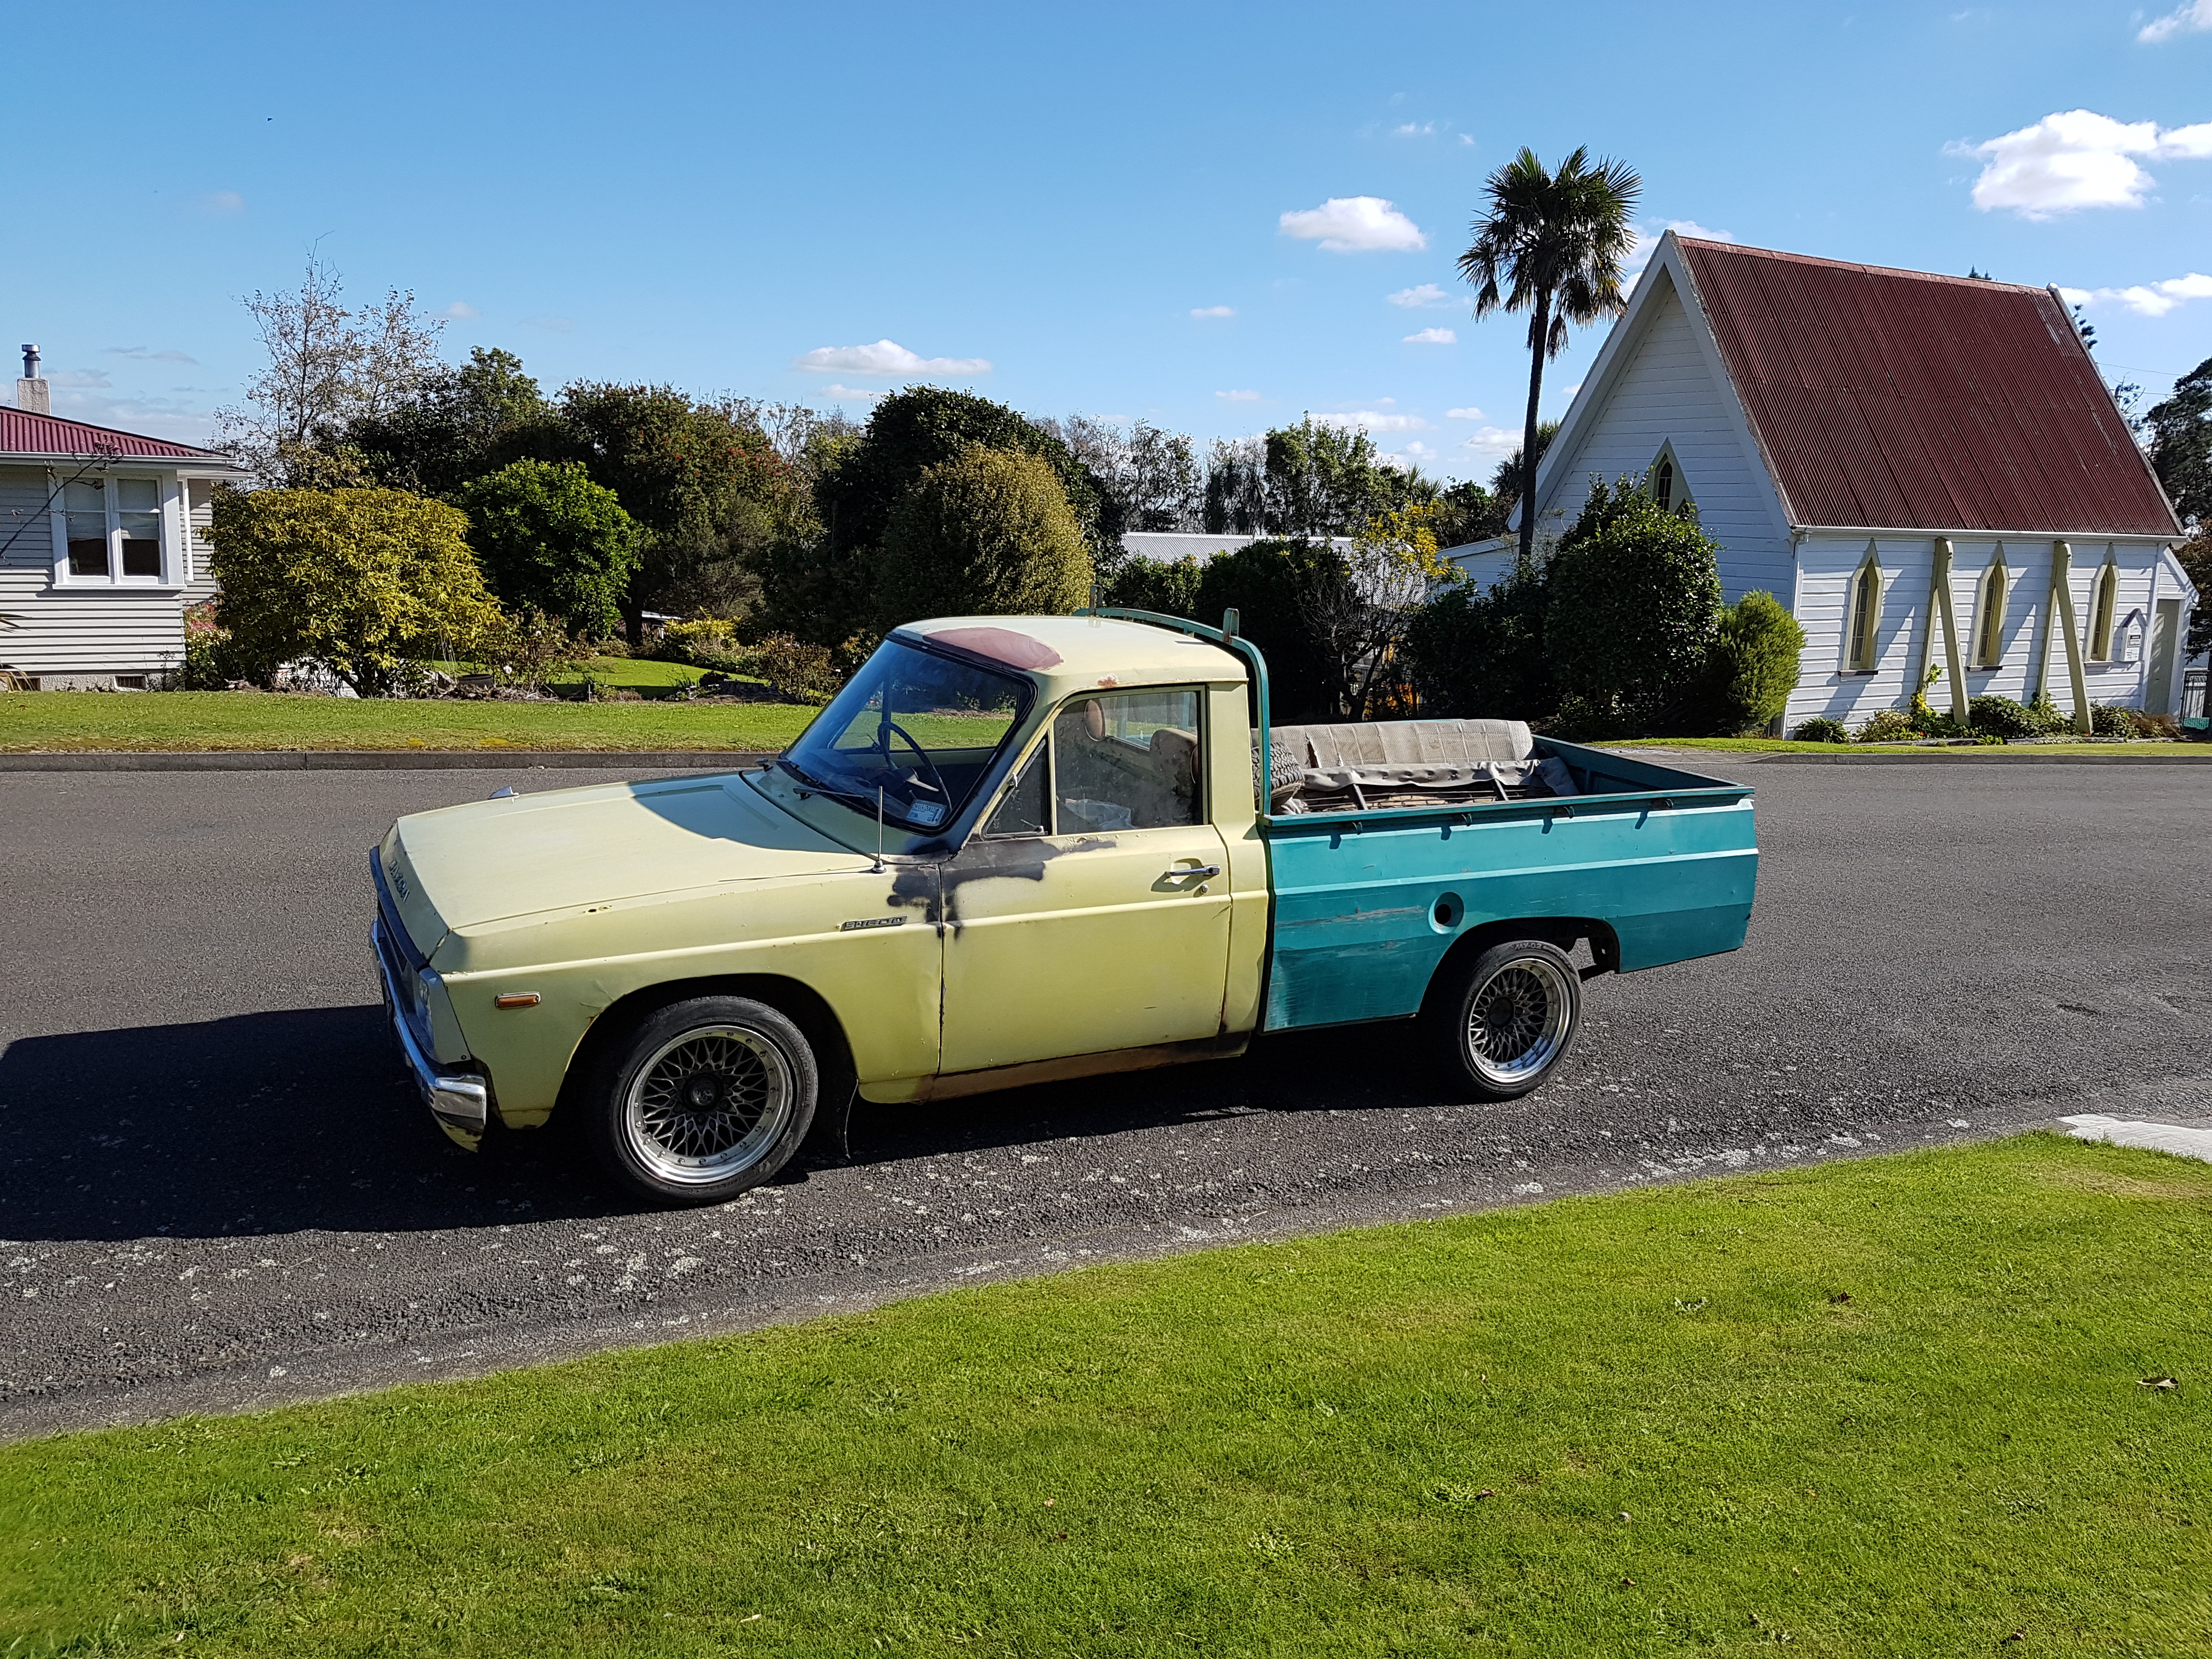
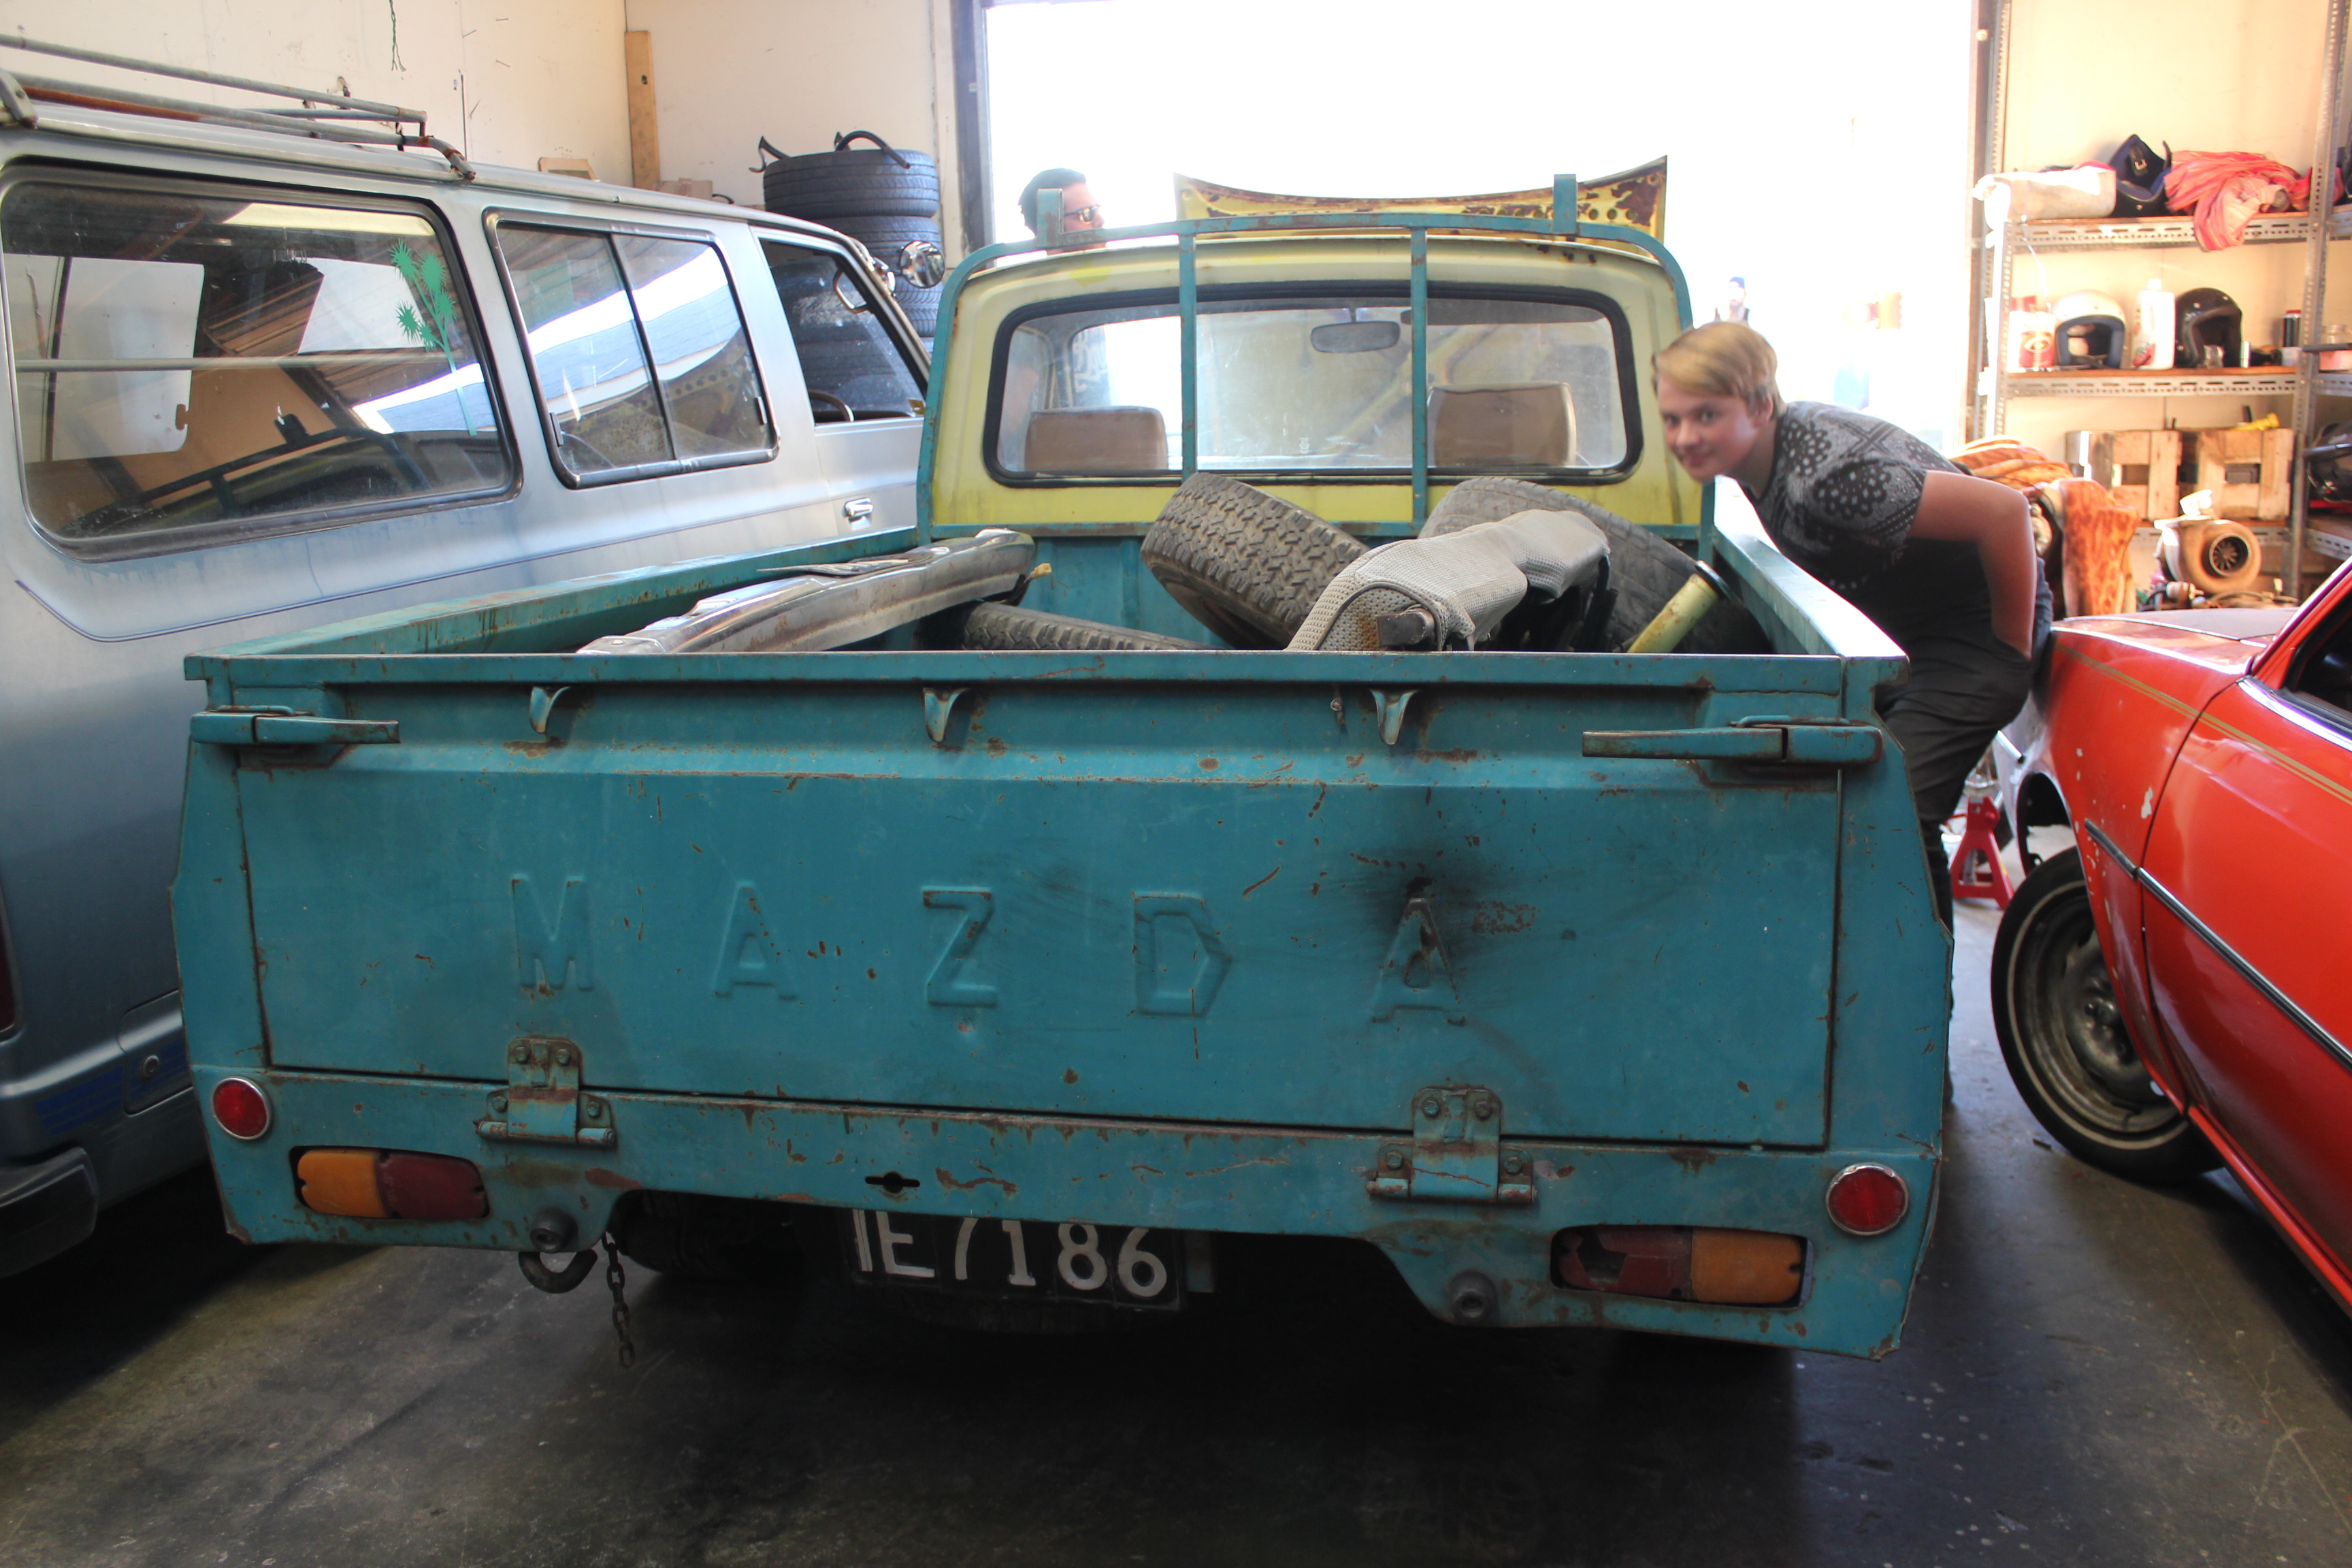
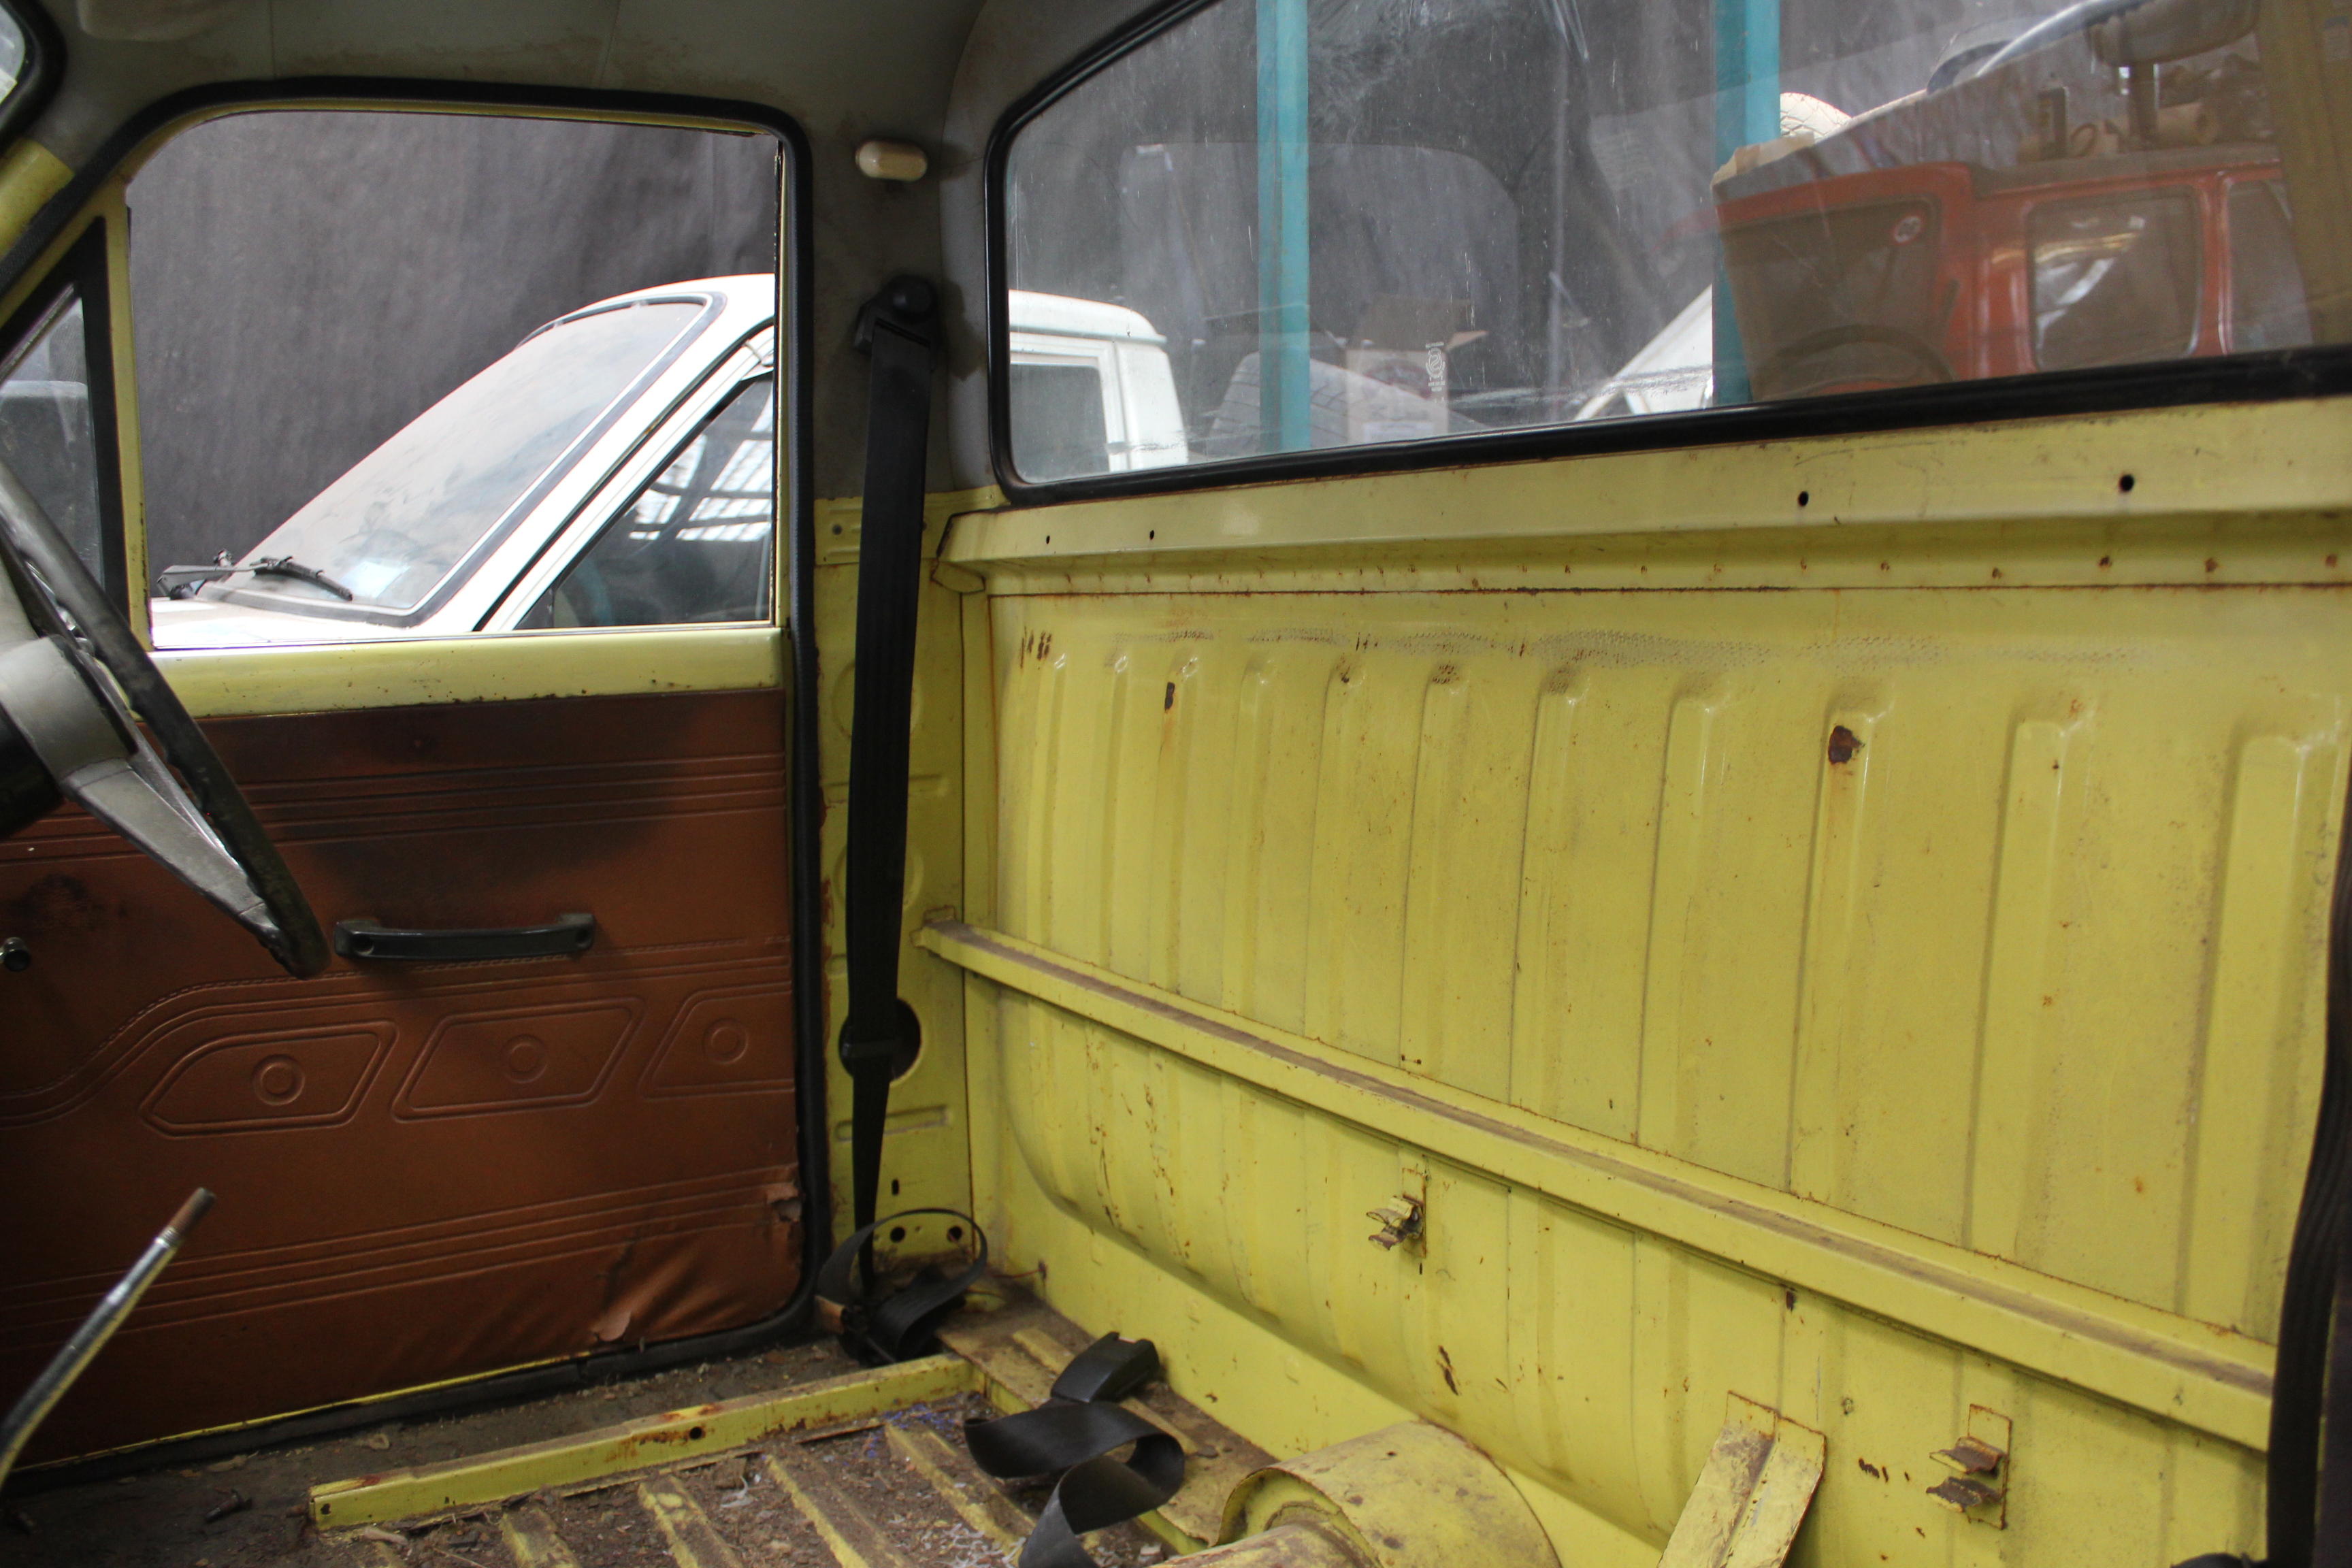
This beauty popped up on Facebook. I say I want it. Allan says (without even knowing what it is) buy it. Next thing you know Allan, Joe and I are sitting in traffic on our way up to Tokomaru to have a look at this magnificent beasty. Wellside is in pretty good condition, no concerns with that. The cab however is a different story... Swiss cheese floor pans and the passenger sill is a similar story. But no worries they said! So buy it I did. The bench seat that was in it looks to be out of an older model, but he had the original one, so plan to whack that back in. Also came with some more leaf springs to get the back sitting even with the front. First thing to do, learn how to weld! Discussion
2 points
-
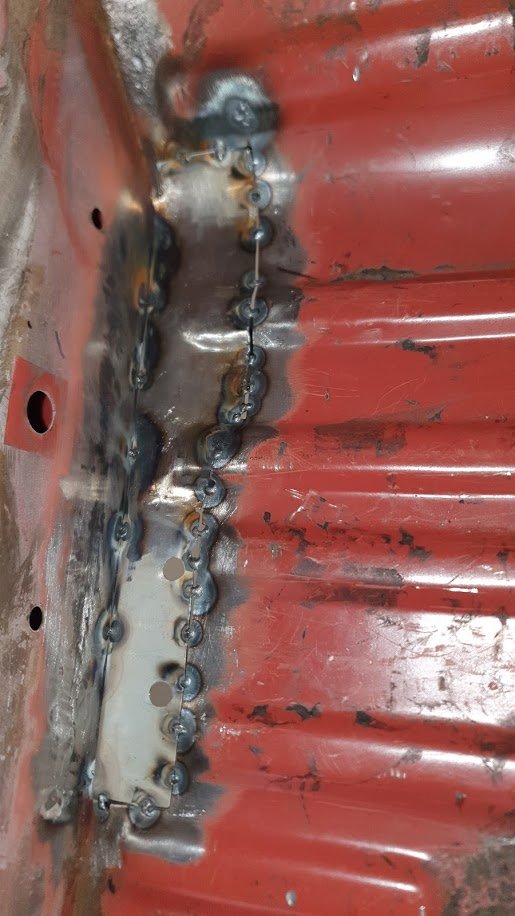
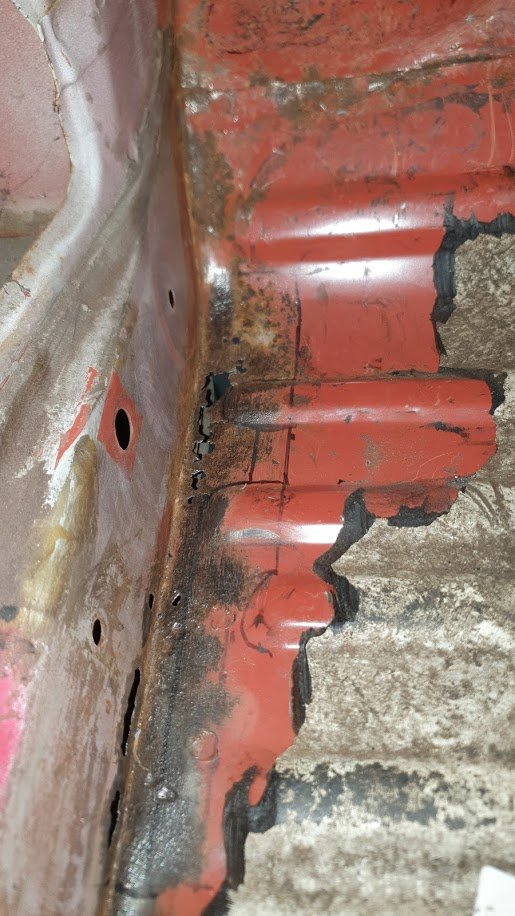
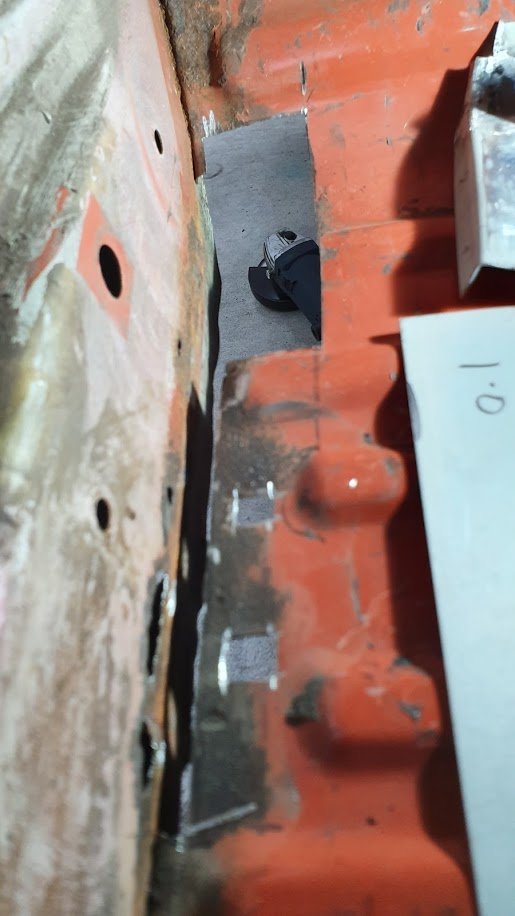
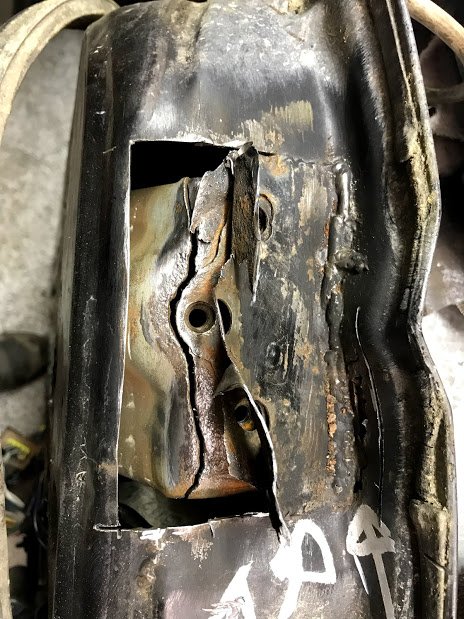
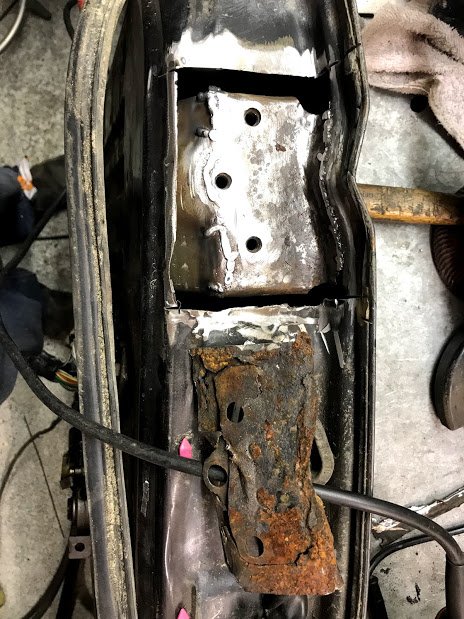
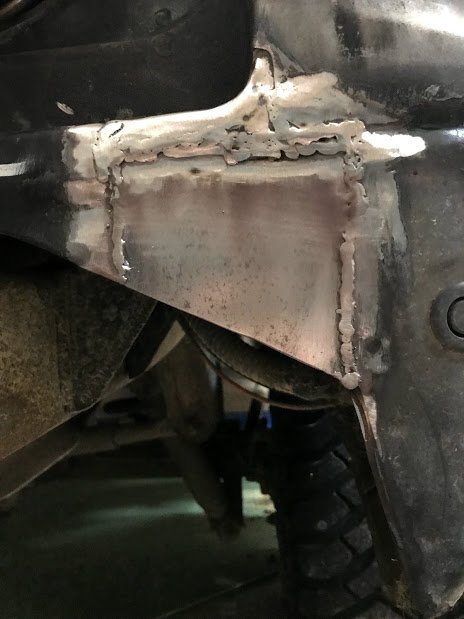
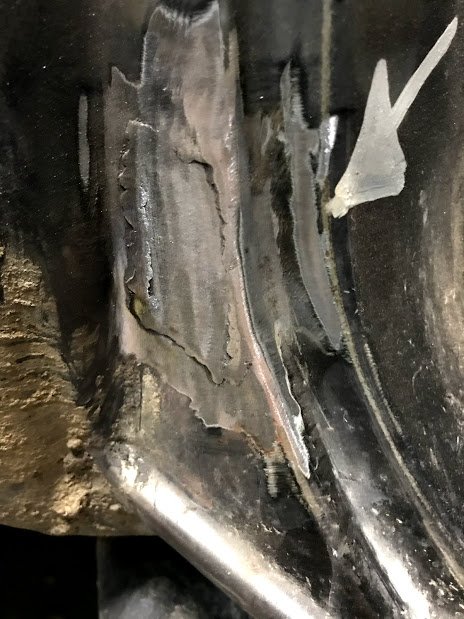
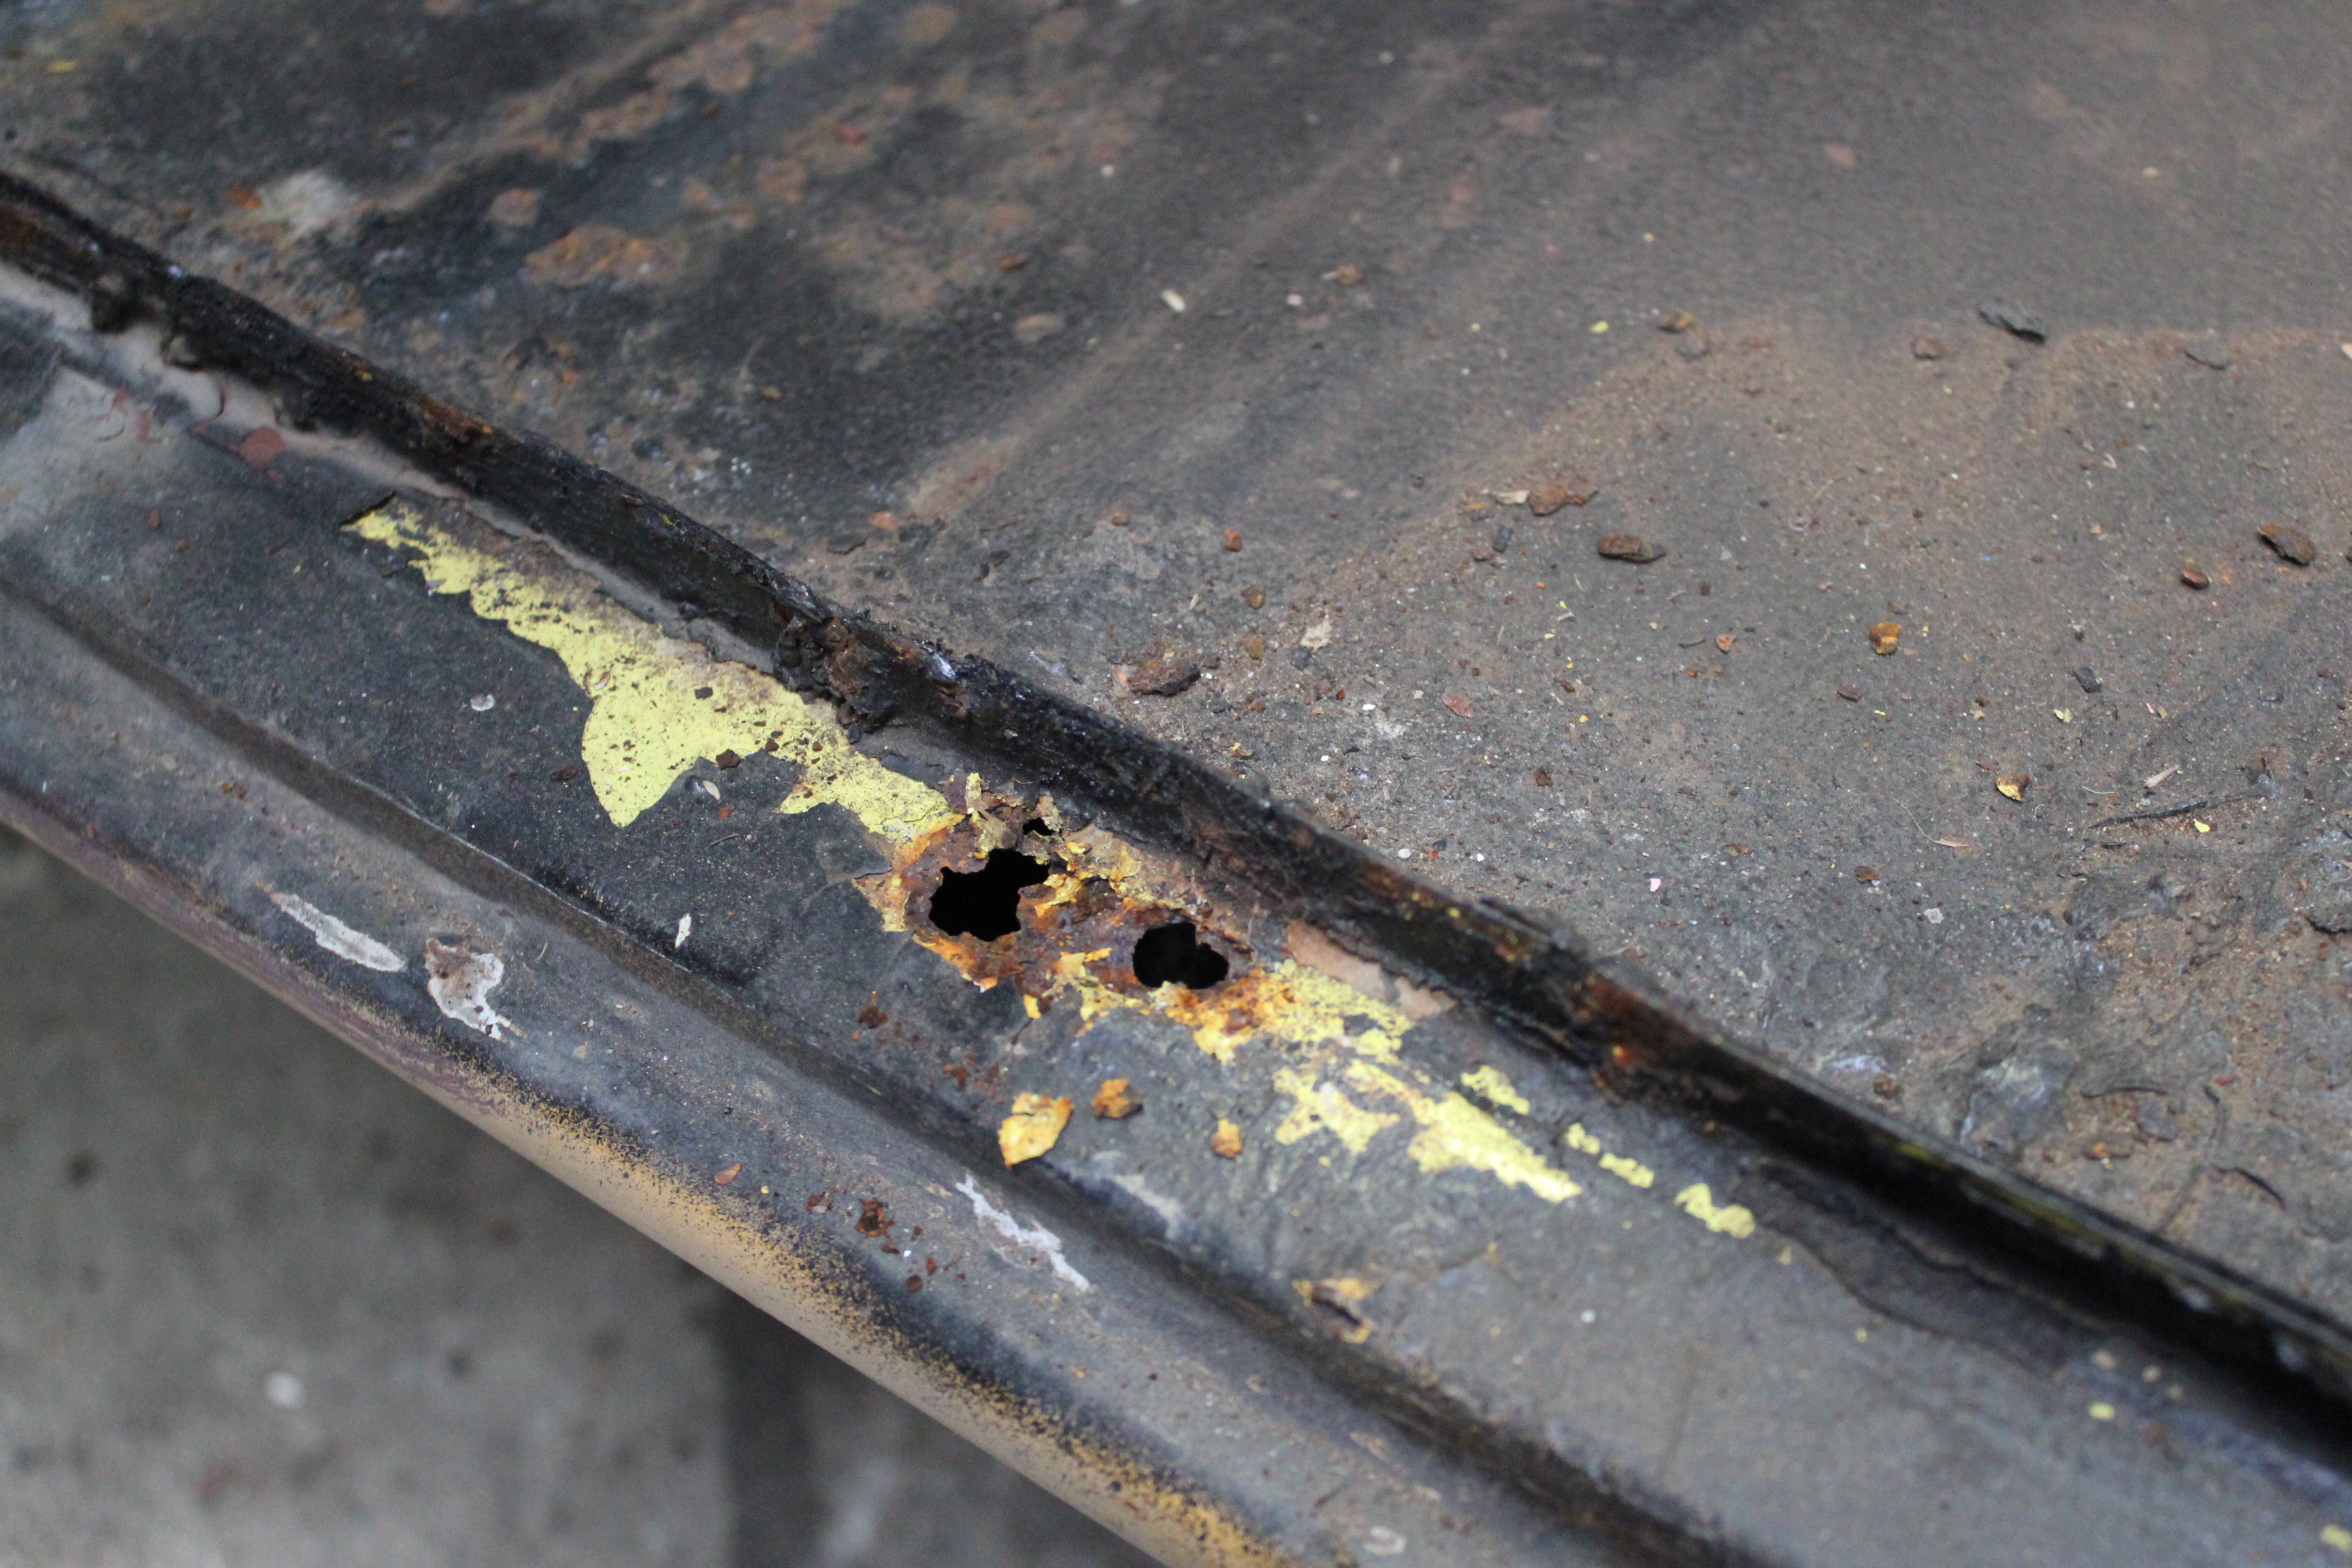
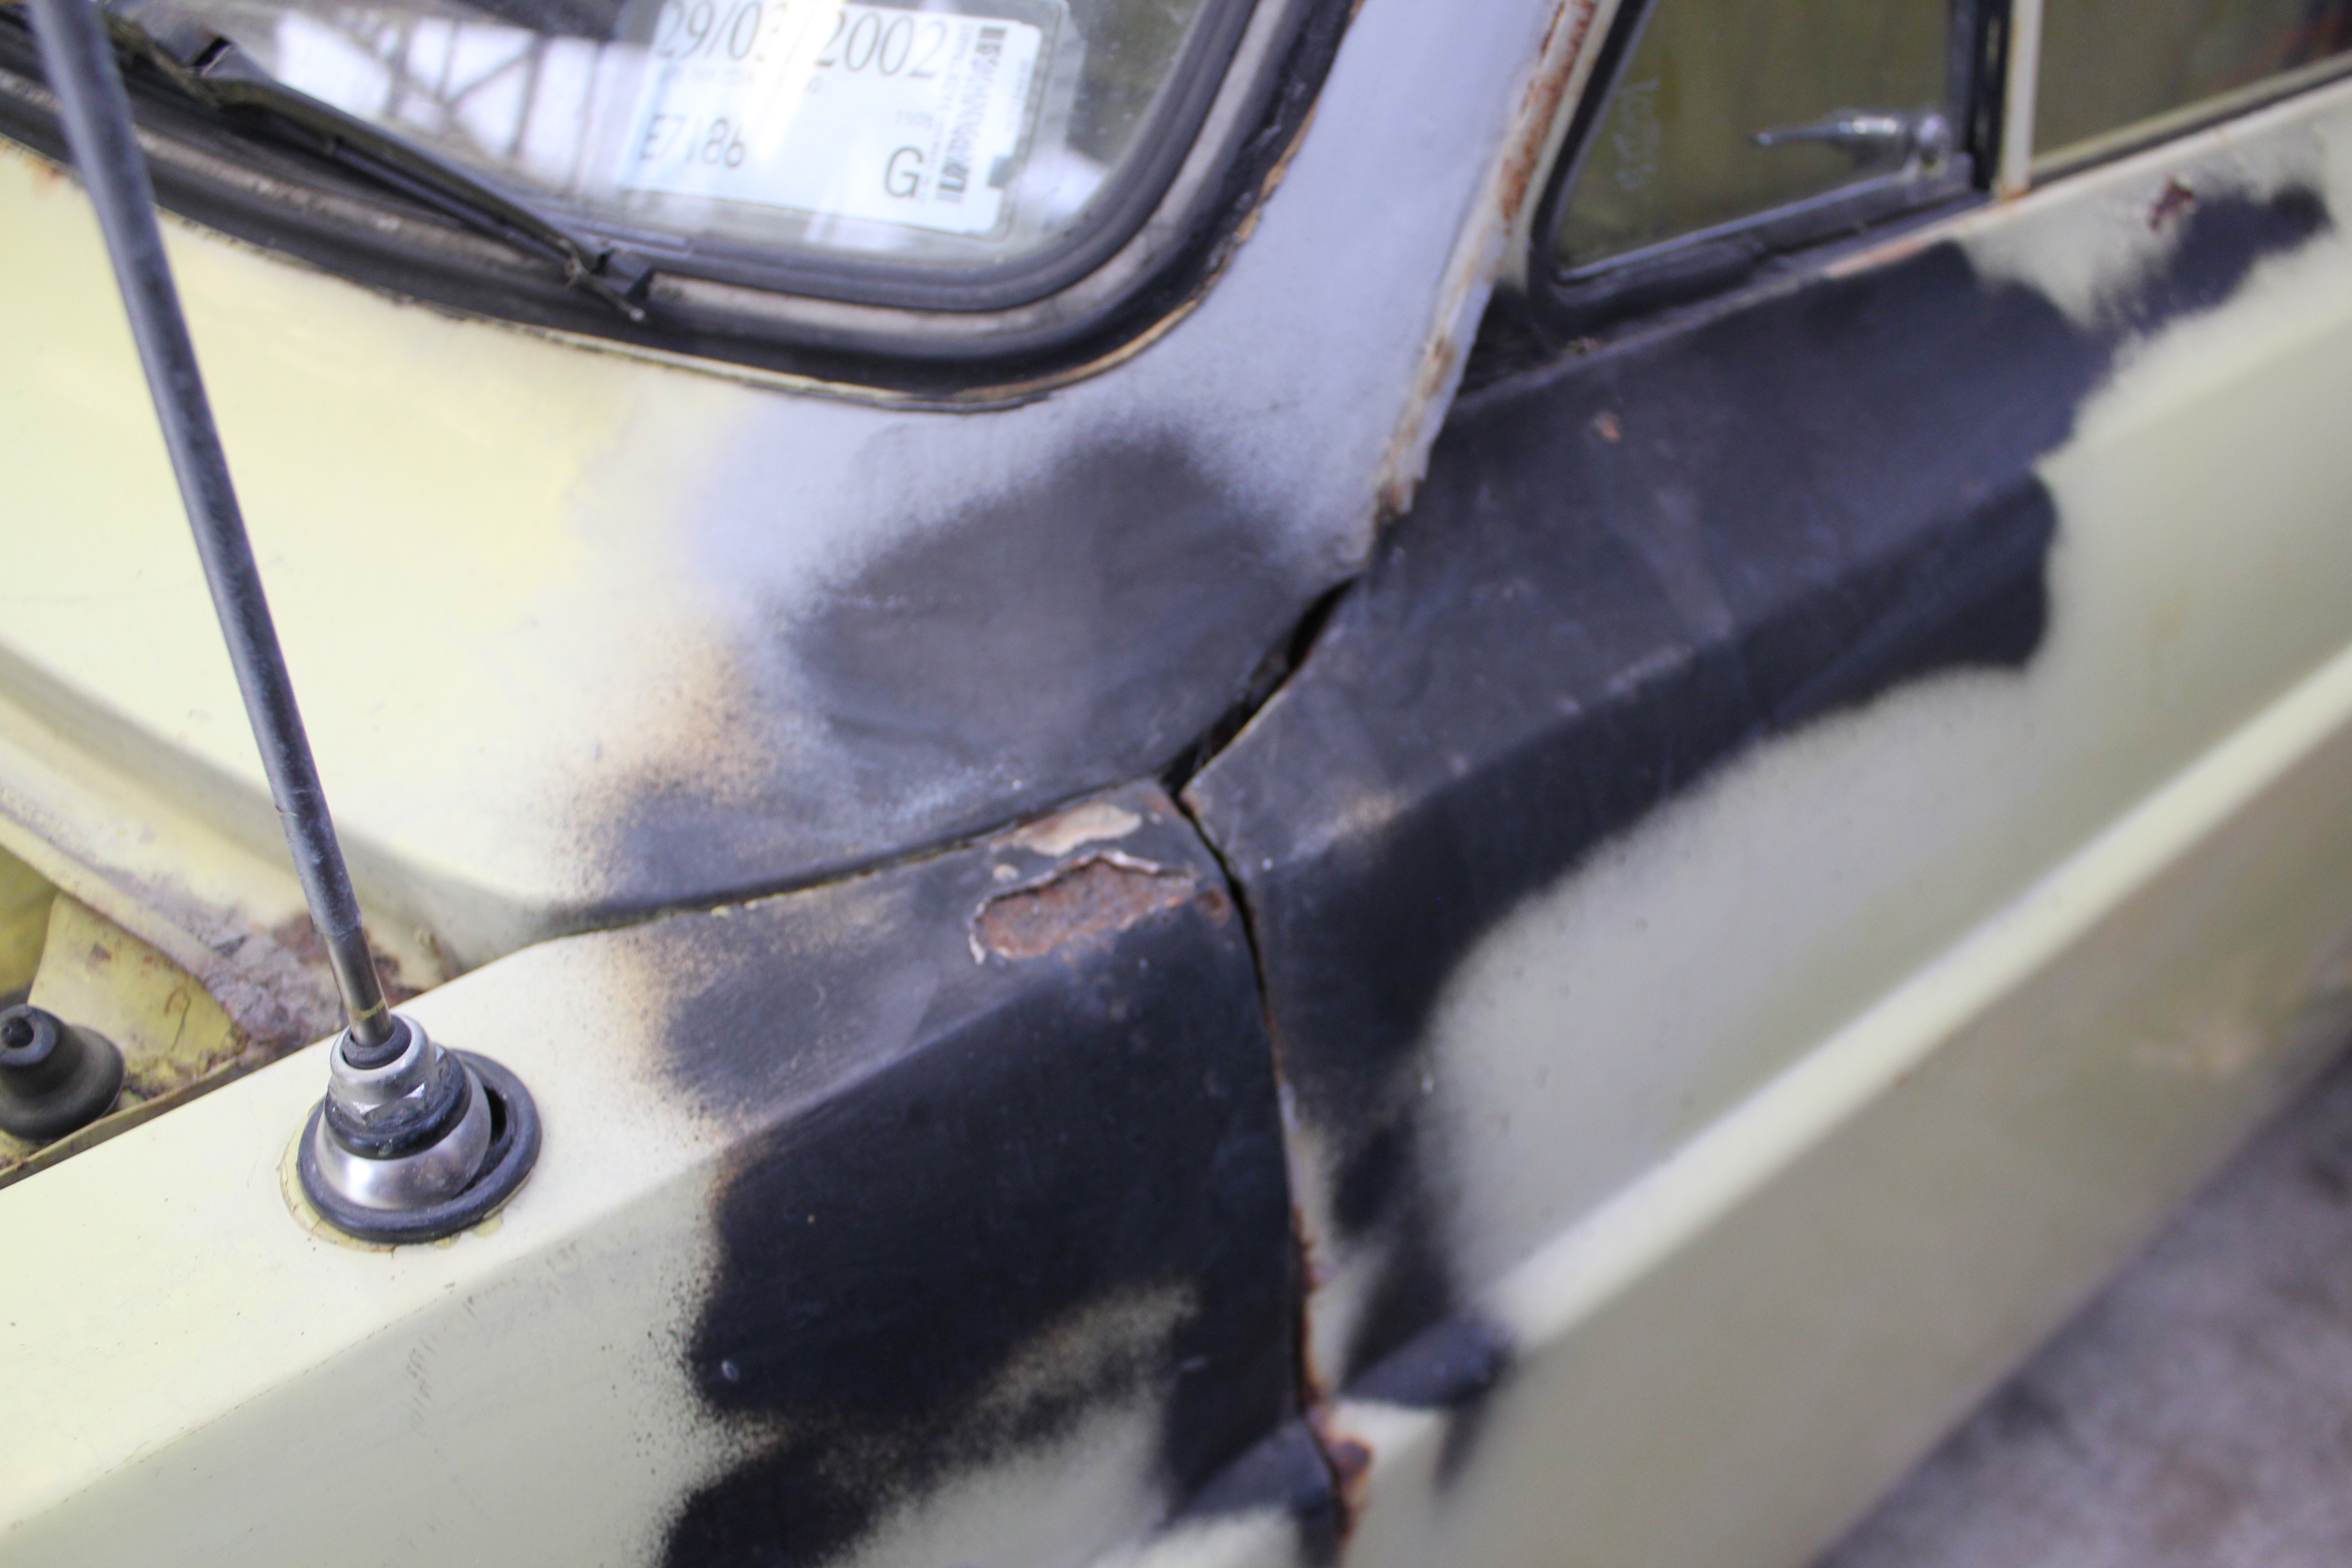
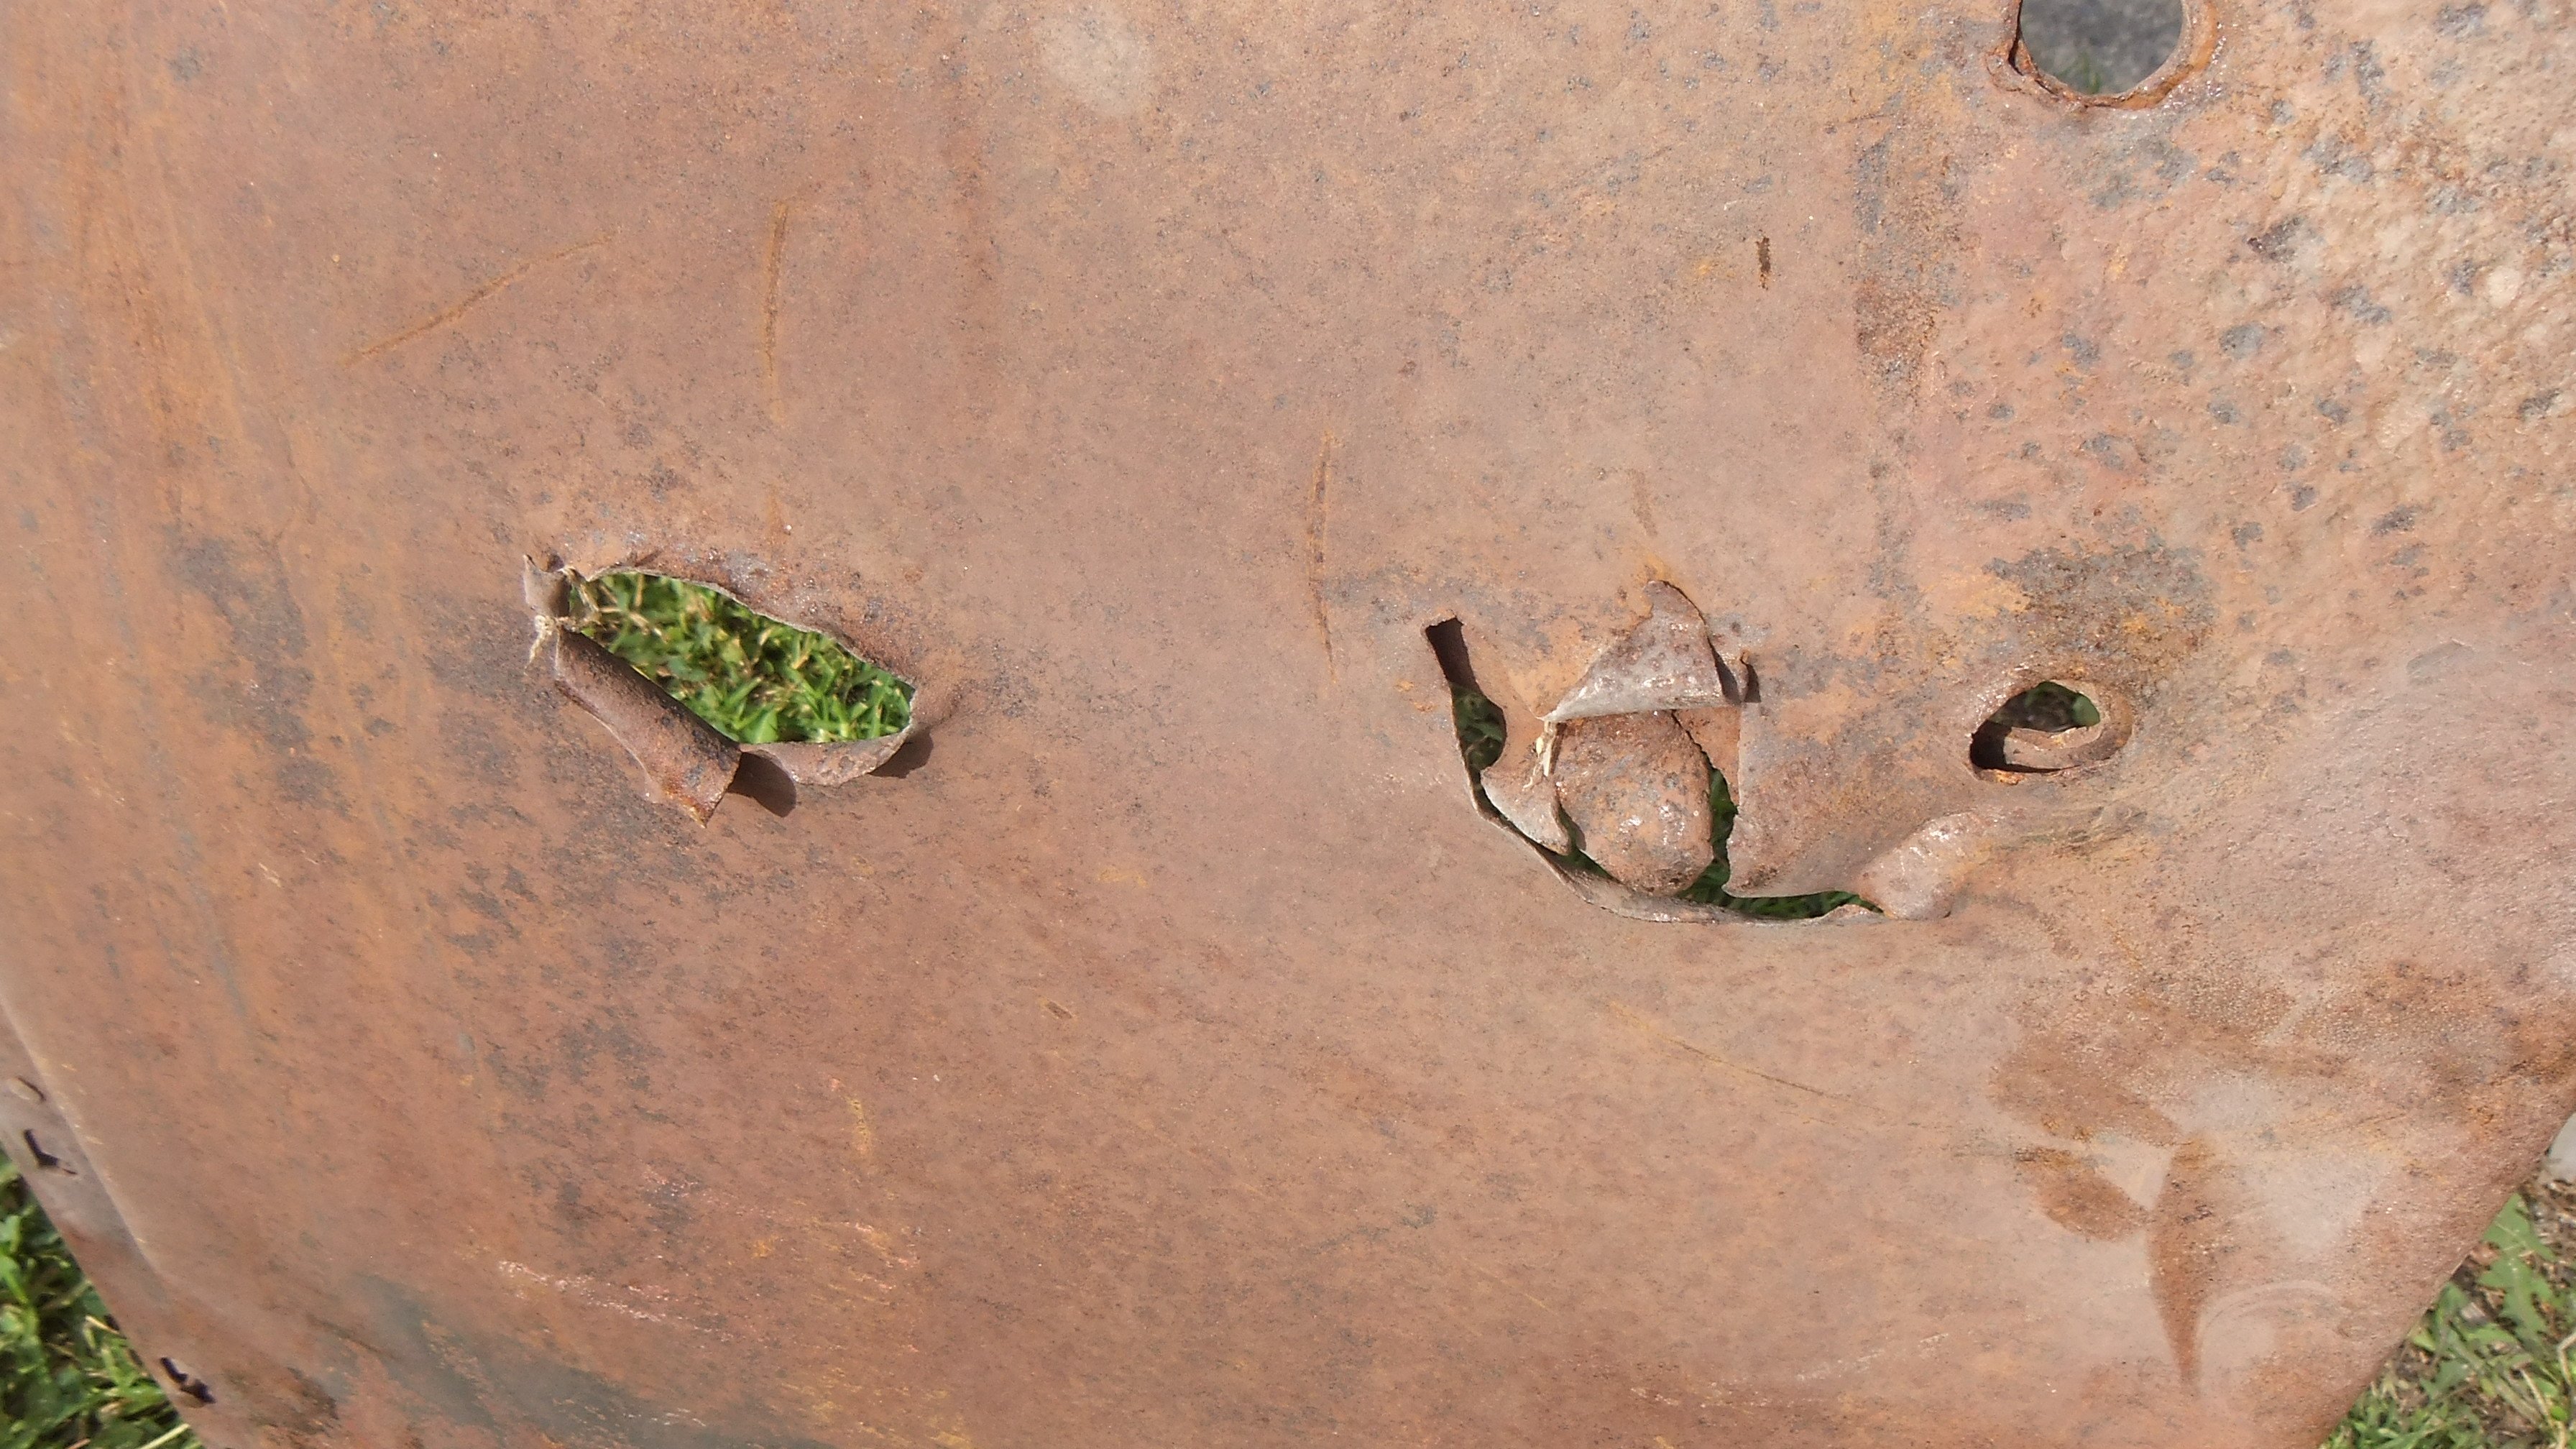
Wof man noted rust, I knew about the bit on the back but had never been a problem. Difficult one was around the door hinge where I hadn't seen it. Looks like it was repaired previously and not rust protected behind the plate. Started cutting it out and found a support behind it which had cracked, strange break... Had a look inside the door and everywhere else is rust free so it was worth doing the work. Arrows from wof man showing rust coming through on the original steel behind the previous owners weld. I've had this 6 or so years now I think and never saw this welded on plate. Then found the support cracked: Once I had a couple of spot welds on the crack I could completely cut out the plate knowing it would all line up again: Bucket of paint on the welded support thing, I welded some ribs going down from the weld figured it can't hurt. Plate welded over the top, bit of a rush job so not my best work but its solid and flat: Removed rear bumper to cut out this section and weld in a new plate, had a couple of reactions with something but again its solid and not a show car lol. Can't see most of it with bumper on anyway: And the rear door jam, this one was caused by rust starting around the plastic screw female insert jobby to hold on the wheel arch trim. Had a look inside when cut out and its totally rust free everywhere else in there which is great. Again wasn't worried too much about finish because its mostly under the trim. Good for another 30 years? EDIT: also failed on door hinge play on drivers door and the rear barn door is fcked from the weight of the spare wheel. Tried some suppliers and that lower rear barn door hinge must be pretty common. No one that I tried had stock, one offered to bring in from Japan but that was a 6 week wait. There's a guy who wrecks Safari's down south, he says he has some with no play. So bought those to get wof. Hopefully they really do have no play.
2 points
-
Some years ago I found a four cylinder Ford manifold with a Holley carb on it lying in the grass behind one of my sheds. Looks like it's off a T or an A. Don't know enough about them to pick the differences. No idea if it has any usable parts left on it but if it's any use to you you're welcome to have it.2 points
-
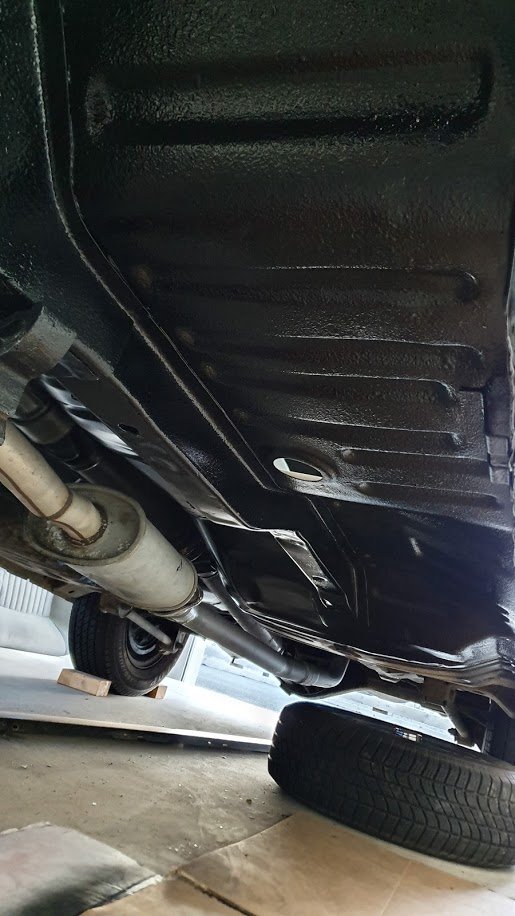
Rockauto delivers again. This time I ordered parts Monday. Received them Friday. just for the size comparison here is the later model dodge starter vs the factory one. Fairly sizeable difference still plodding away on cleaning and painting suspension parts and replacing the bushes. No pictures as I’ve not actually finished any this completely yet. And now I’ve run out of etch primer Got the bill from the machinist for the engine work which ended up being a reasonable amount more that planned (there was extra work done to justify it) which has completely drained the bank account. Also my headers are in the country now so just waiting for them to clear customs etc, all in all still chipping away at it.2 points
-
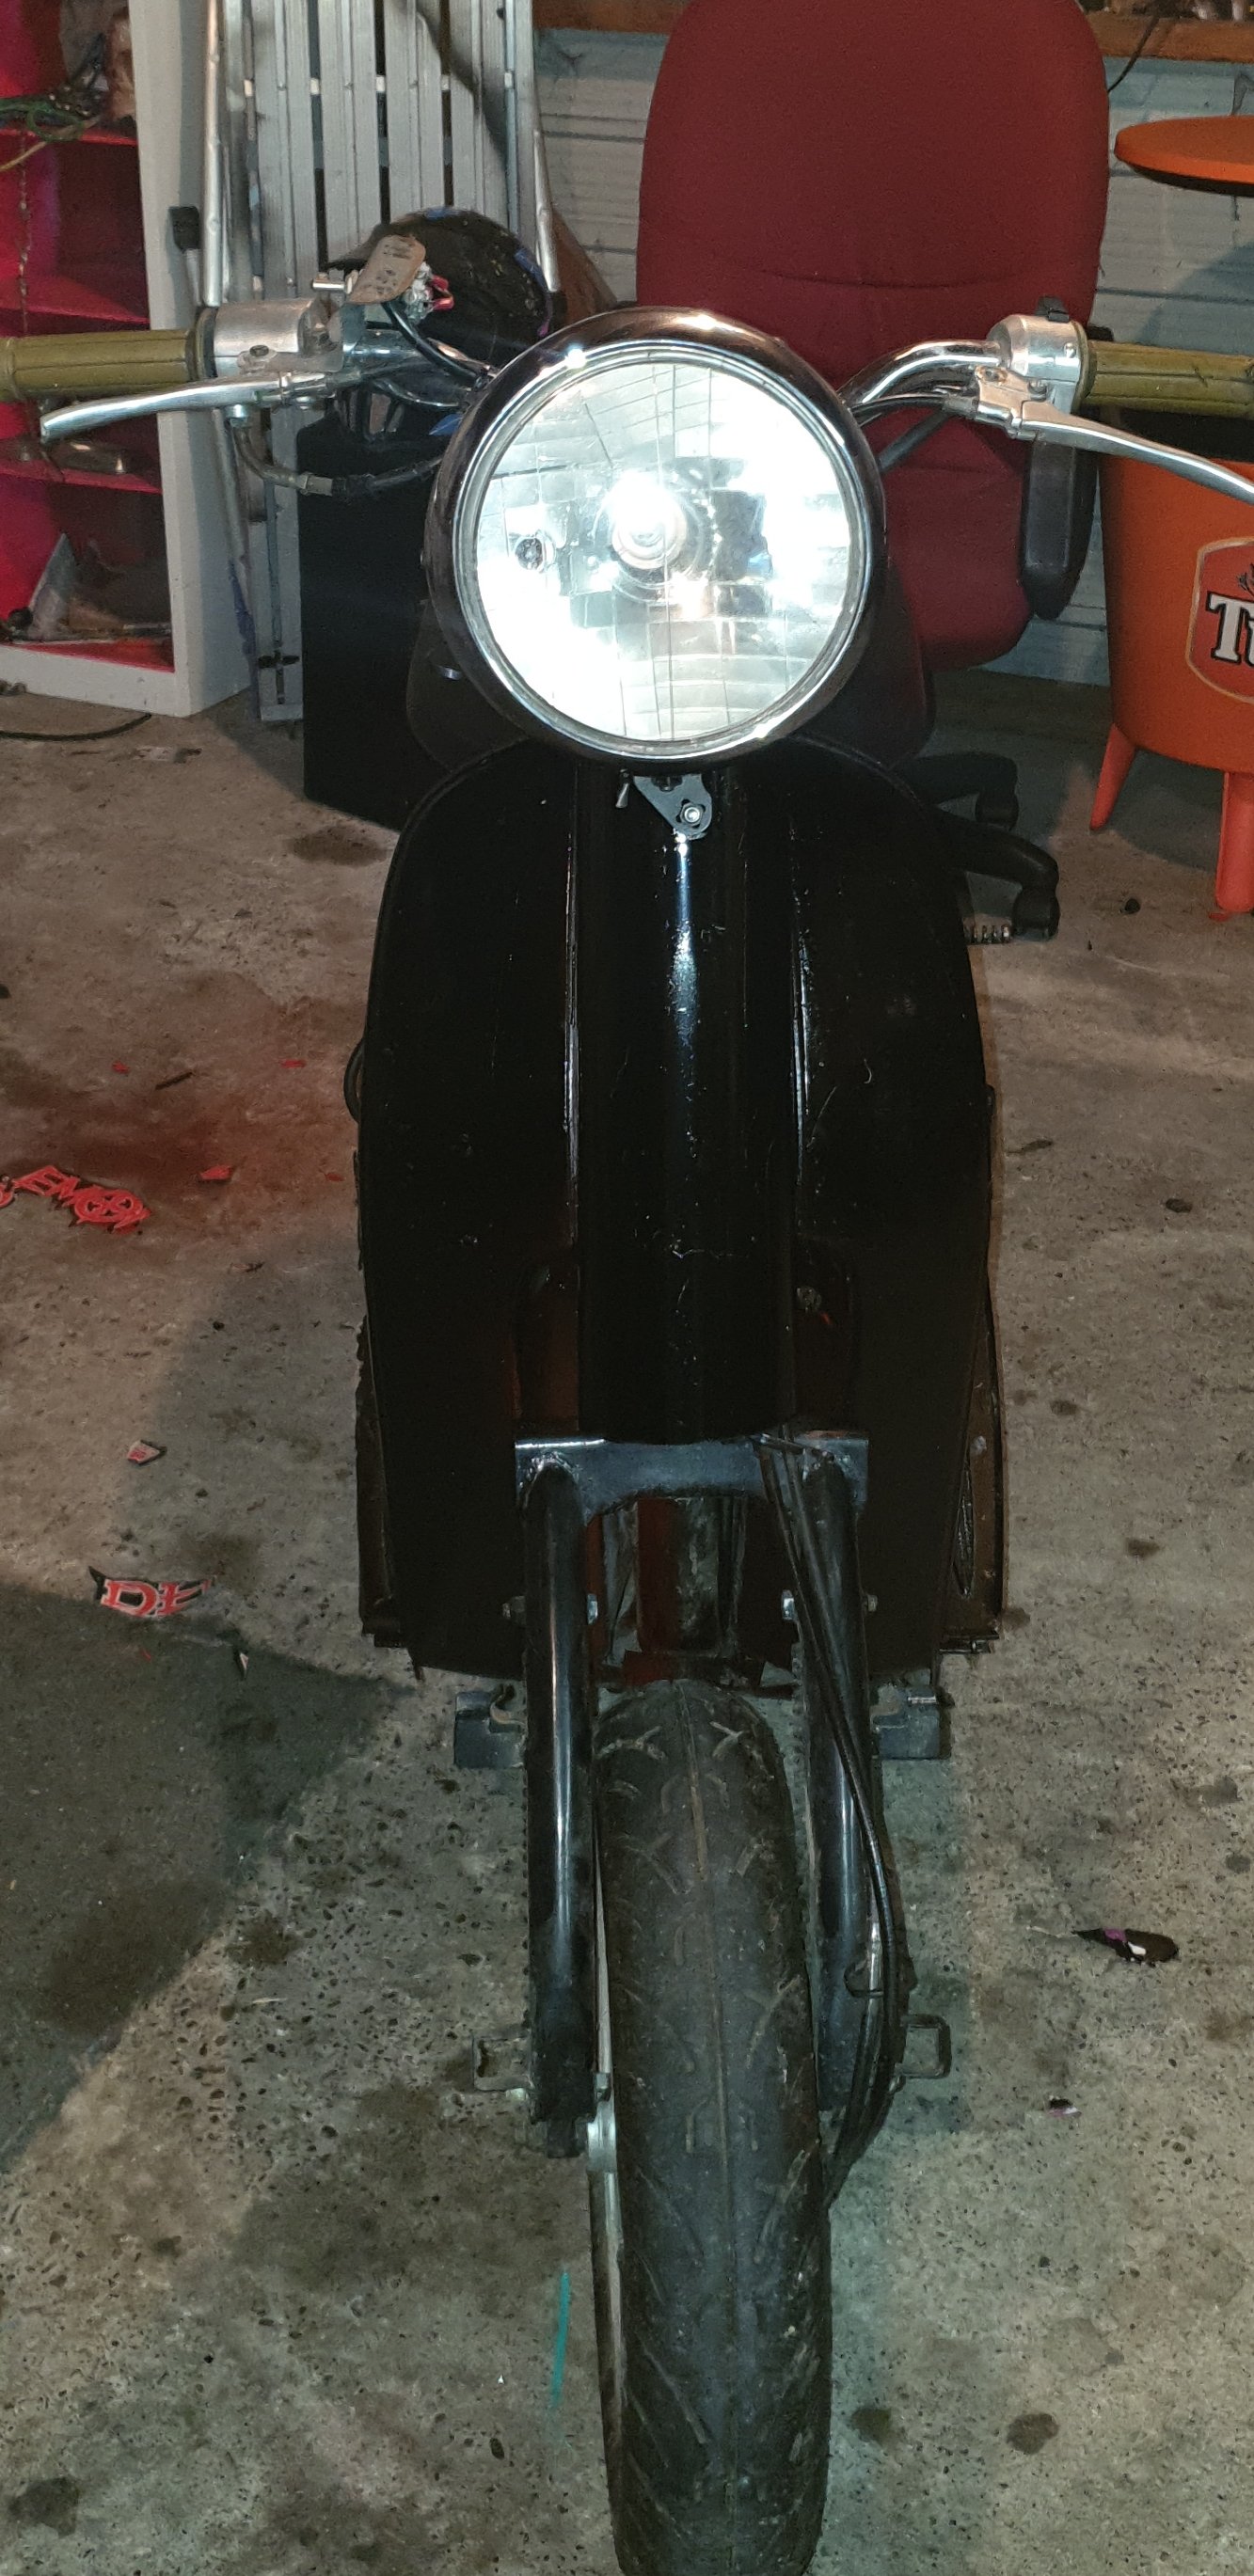
Have i tried to sell you on the merits of LED lights lately? Even on high beam the amps draw is maybe... 1.2 amp? According to a century old gauge anyway... much less than the 10 amps they were previously drawing. And other people can actually see the lights now.
2 points
-
Ugh, close enough. Cant be bothered fitting it better at the moment. Think i'll sand the paint off though.
2 points
-
Must be a wall ornament? 70ish vintage, seized as. Rusted though. Any idea of the vintage? Thinking of either bolt it to the building or rebuild the engine and leave it ratty as.
1 point
-
Ohhh god were do i start... So this i beleve is a honda im not sure. Not sure it matters anyway hahha. My friend more or less trew it at me haha. Hadnt gone in a long time. Got home atached a light from my parts box. And a can on start ya bastard down it 2 kicks latter walla. Not sure where im going with this sexually confussed pile of broken but hay. It runs and works so worth a laugh
1 point
-
Yeah it’s the Landy fella out Nelson, had a little break from this but getting back into the landy again work is calming down1 point
-
the dude helping me seems to have a direct line to the dodge system where ever he works. i asume a dodge dealership, or an auto sparky. ill dump all the info he gives me in my build thread once ive got it all and hopefully any other people can find that info that simply wasn't freely available. although he called my project ambitious... i told him thats how we like it in NZ1 point
-
Looks like euro gn125's are geared to do max 80kph. I guess that's why so many posts are about them being too slow This one does an indicated 110km at 9000rpm with a full tank of gas, 2 loaded panniers and a duffle bag on the back, and me. That's pretty legit tbh. Now that I have a 12v socket and a 300kg hanging scale I'll swing it off my engine crane to get a weight and do some gtech runs. Also have an O2 sensor I may put on the exhaust to see if I can squeeze a little more from it1 point
-
1 point
-
Hole is probably too high for it to be used as a bong.. but what I really wanted to comment is, as someone who has experience cutting glass etc, that is IMPRESSIVE that he managed that with a hand drill !1 point
-
Sometimes the chain and the jack swap positions, but pretty much like this for the most part. I use heat with this setup too sometimes. I use big blocks of wood too. It depends how much it needs to move and which part needs to do the moving. I don't (ever, lol) bend it with the bar running right through either. The bar is basically for checking. Some cunts actually weld them up with the bar still in them then wonder why it becomes stucked' in there.
1 point
-
Took the day off yesterday because i missed the bus, so took this thing down to my usual WoF place. For some reason i only took this blurry potato while it was up on the hoist. GREAT SUCCESS! (one of the two number plate lights blown but he passed it on the basis i would replace it asap) Celebrated by slopping drippy subway all over the seats and my pants ate my lunch watching the kite surfers hoping for a massive tangle up Bought this on the way home too, hopefully slow down the cancer a bit In other WoF advisory related news, changed the brake pads on Lady Azzurro's daily, i think we got our monies worth! And after tidying a lot of crap from on and under this thing, pumped up all the tyres and dropped it off the axle stands for the first time in nearly two years,1 point
-
Episode 104: Loading up on dem carbs.... So after a weekend of migraines and feeling shitty I decided that some progress is better than none (no shit, Sherlock) so decided to get all down and funky on the carb. After a pre-emptive raid on @h4nd's toolkit I dodged the rain showers to wrestle off my prize.....Strombergs finest (175CD for those following along at home). This afternoons trick was to get it in bits ready for a bit of a clean (come in @Mr Vapour, I've got a job for you!)....and much to my surprise it looks like, despite having sat in a paddock for the last 10 years, the scrotes who were the last owners had the decency to at least get the carb overhauled before parking her. As such, the float bowl, butterfly and diaphragm all look in seriously good nick. Sure, the outside is a tad, crusty, be we know how to fix that, dont we? Right, now my eyes are out on stalks again (with attendant headache) so its drugs and back to bed....still, its progress init?
1 point
-
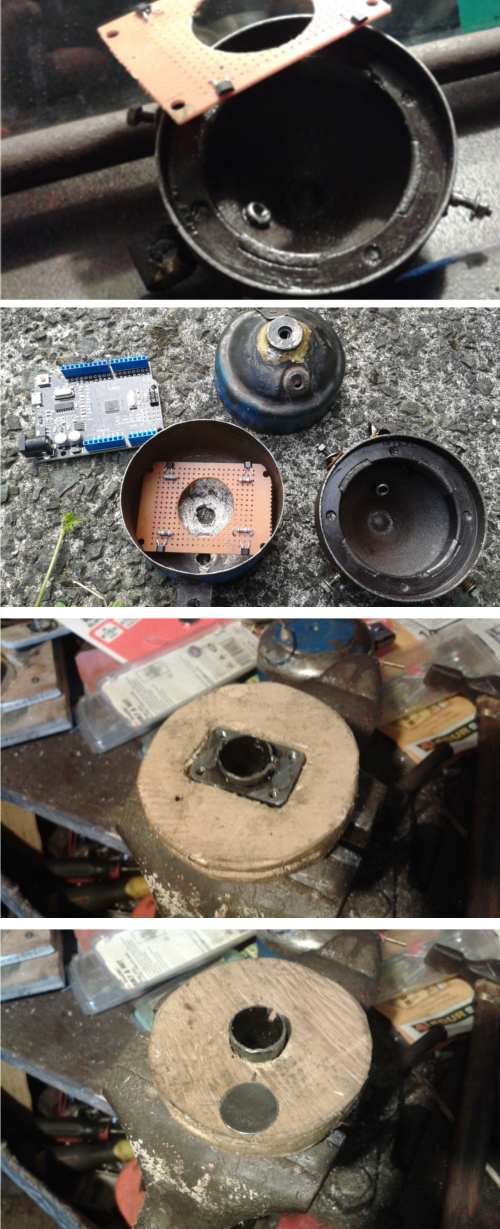
So some of you are really into programmable ignition and electronic sensors. I tried to make my own electronic ignition. After 3 seconds one of the MOSFETS running a coil shorted out. After 7 seconds all of them had. Each mosfet was rated at 20 amps. But considering they were dealing with the primary and ... lets face it. some of the secondary output (These old timers are like that) i don't think they were up to the million volt task. At least 2 hall effect sensors survived. Barely.
1 point
-
Mate I'm worried your at risk of being patched over. In my head I thought you guys were out at it at the local water hole once a week looking after the turf1 point
-
1 point
-
First update, coz lazy it's the same day as finally starting this thread. Today Ty helped me pull out the bench seat and clean up all the crap and assorted rust flakes from in the cab so we could get a proper look at the swiss cheese. Can definitely see alot of daylight through there. We also (with some assistance from the lovely Allan) pulled off the door cards to take a look at how bad they are. Not too bad it turns out. Most of the rust is from mid cab forward. The rear is pretty good. With just one hole on the outside where I may or may not have been poking around with a screwdriver....
1 point
-
New brake lining. It's a bit too thick but i will make it work. Edit: Someone donated me some V12 Lincoln wheel studs to replace those crappy galvanized bolts.
1 point
-
It's like working on a lawnmower carb' but bigger and no plastic anywhere. Not sure if you can read that but the name plate reads "Holley carburetor Detroit Mich" The whole car is like a mechano set.
1 point
-
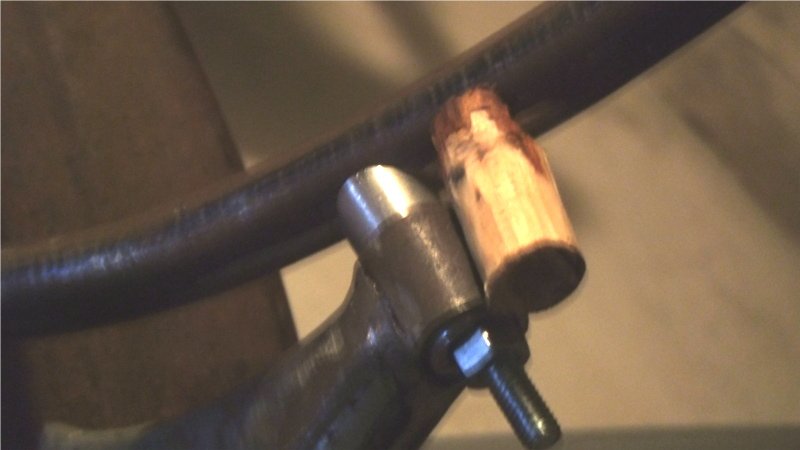
For lack of steel to fit an old time aftermarket cylinder head i am trying to fit the old head and carb'. Amazing how well those nuts rusted to little strips of thread held the carb' onto the intake manifold. Look how much i could port the manifold by if i had flexy grinder things... Fuel fittings made from bits of tractor, bits from a gas regulator i found at the rubbish dump and a broken fitting that was left in the fuel inlet of the carb'. Unscrewed the broken piece from the carb' and drilled it out enough to slide some tubing in it. Soldered the tubing into a piece from the gas regulator and used the end from the tractor fuel fitting to fit it to the fuel line. Probably was a simpler method if i could get more parts.. So the story behind my obtaining the tube cutter was i found it at the dump, someone threw it away thinking it was useless, looks like they simply wound the cutting wheel closer and closer to the little wheels the pipe is supposed to roll on and squashed the tube flat and they kept winding it until it pressed it's way through the tube? That's not how it's supposed to work.1 point
-
Made some square nuts. So when i sleepwalk i sometimes make mirror brackets. Not even mad about it. Thanks to a donor i have some leather to cover the seats with. Found some springs too but they were a bit harsh so i took them out to maybe rework them or swap them out later. Maybe give the foam underneath some better shape later but for now i'll live with the plain bulge. Here is the now leather seat base. Pretty sure it was BangBug who was the donor.1 point
-
This battery terminal lead end started life as A copper pipe clamp.1 point
-
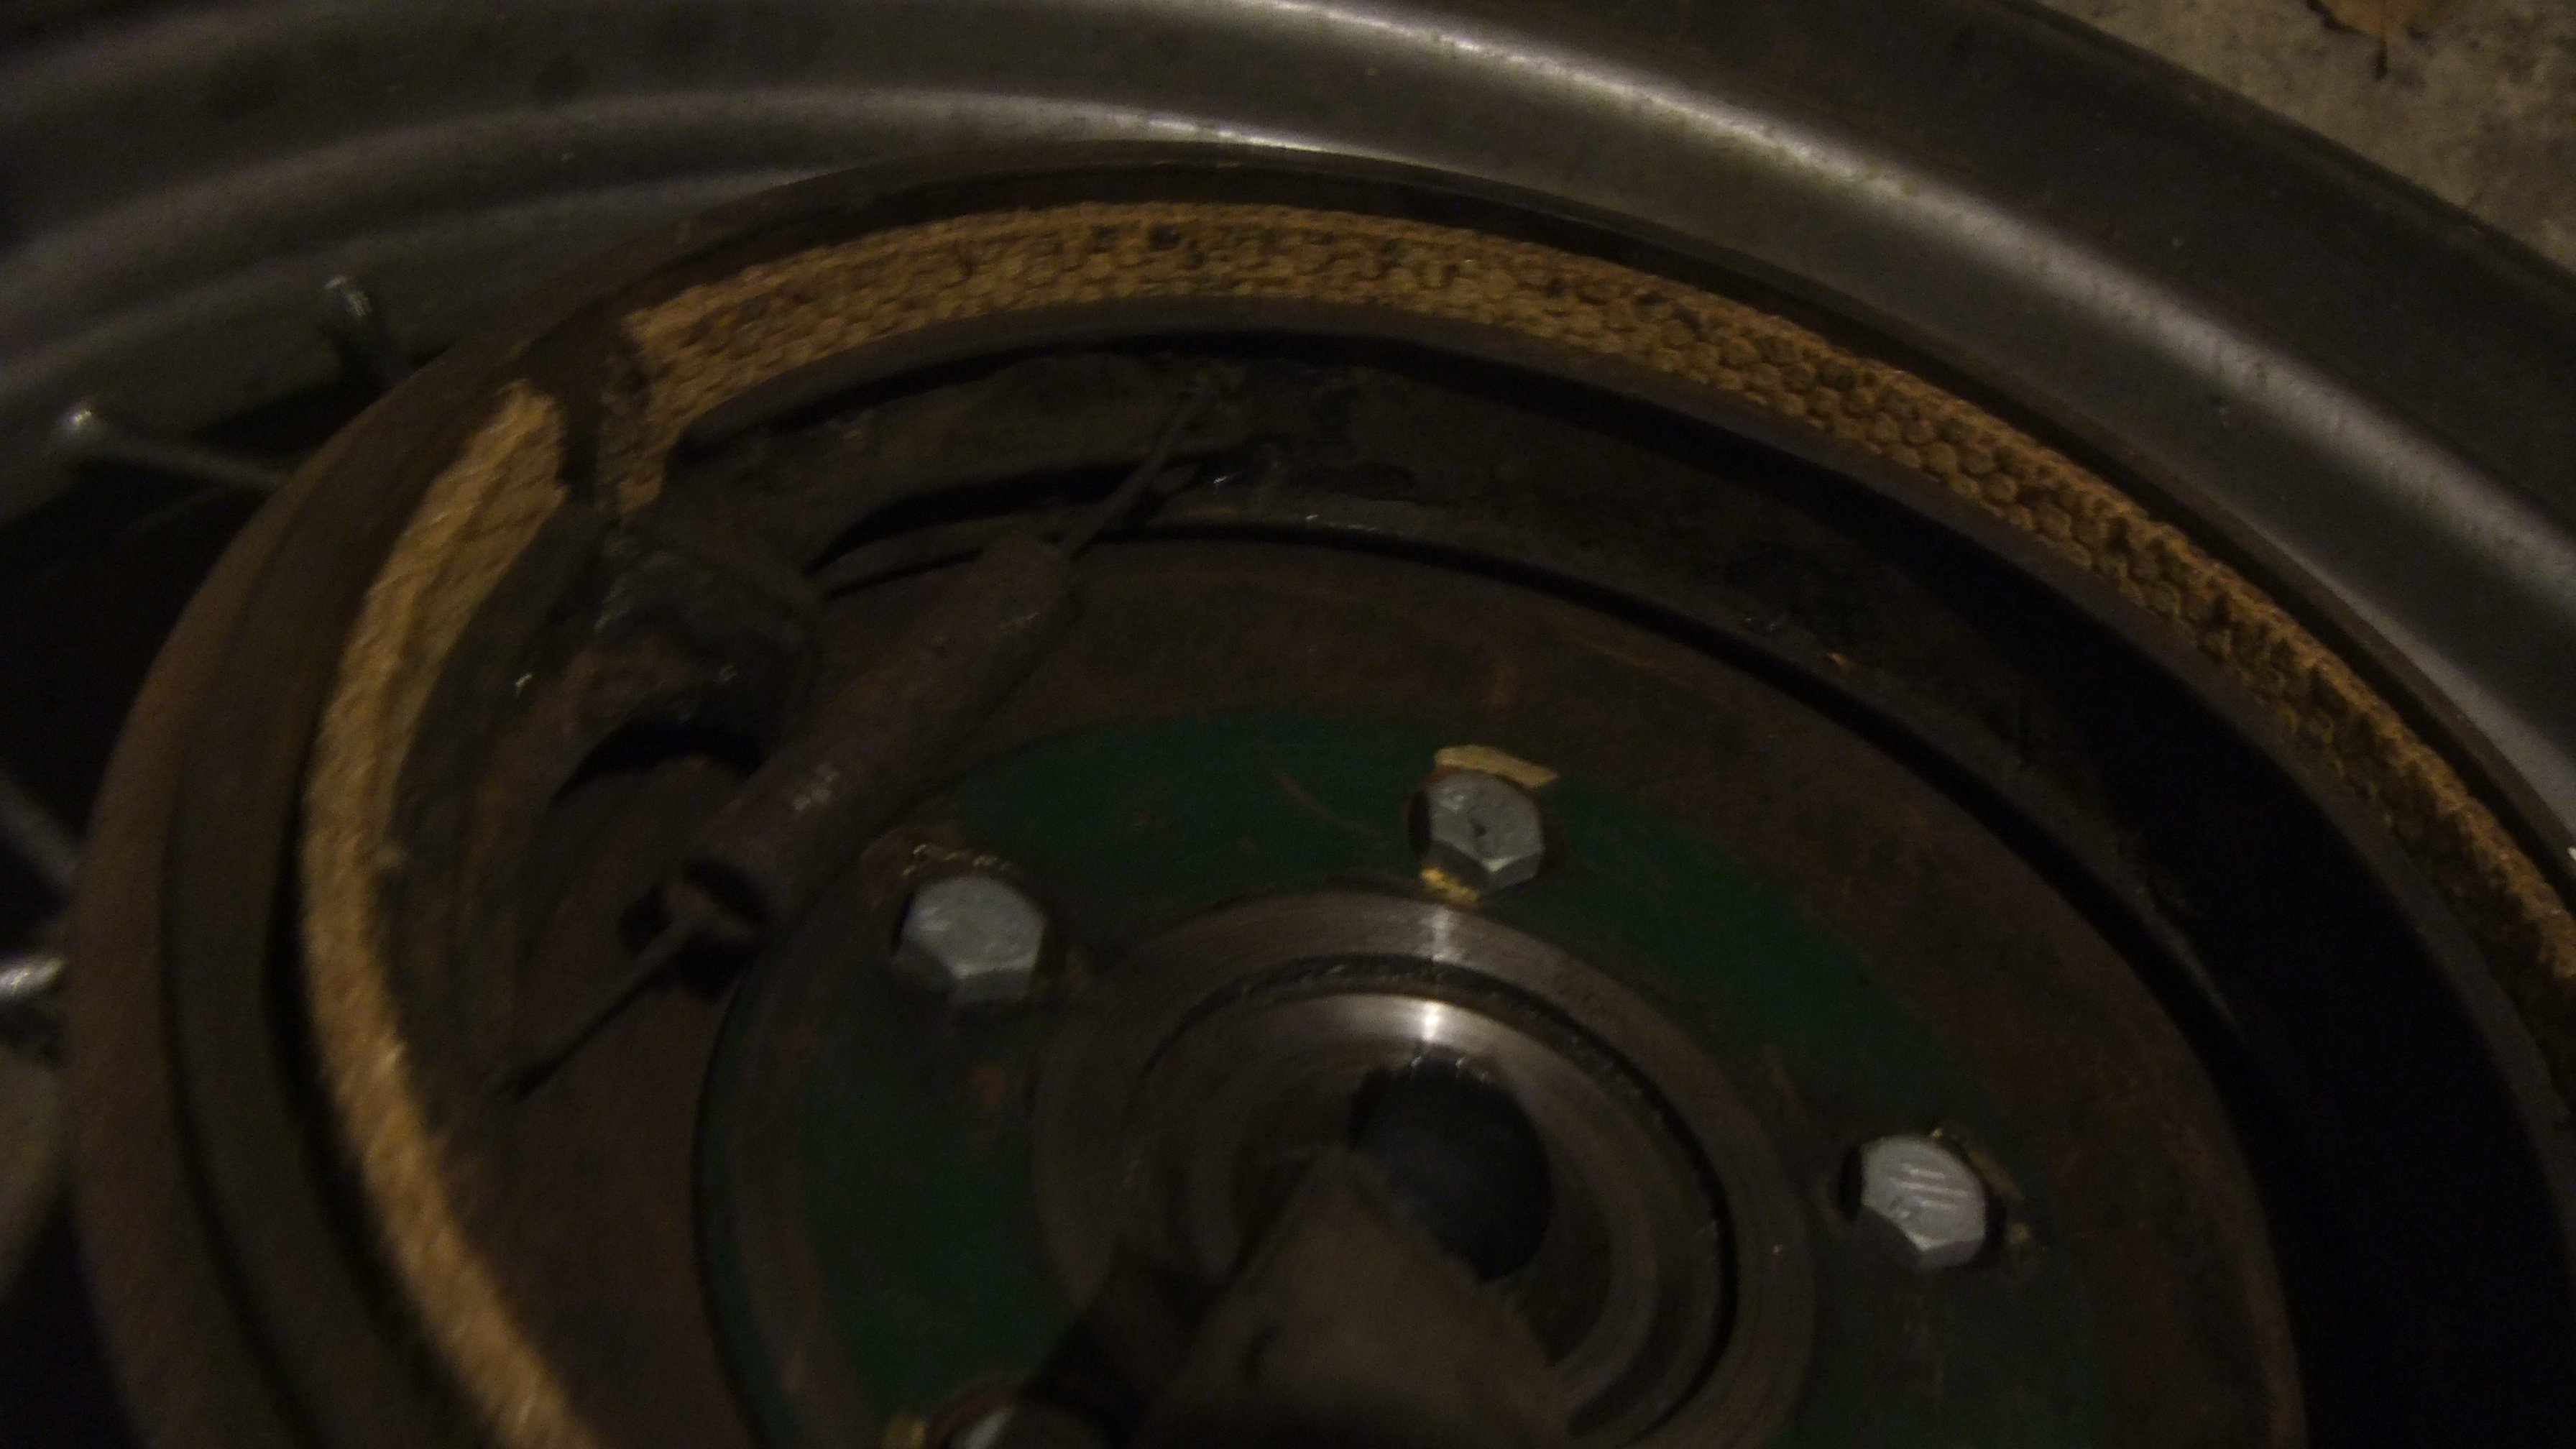
New brake plates fitted.
1 point
-
Bog and fibreglass shape. Add a little petrol and the polystyrene core disappears instantly. Tail light has some glass now That fibrebog bowl painted to match.1 point
-
New handle, not much happening.1 point
-
This week i spent way to long making and remaking parts. Replaced wooden things with metal ones. Repaired the old oil fired tail light. And by repair i mean replace most of it.
1 point
-
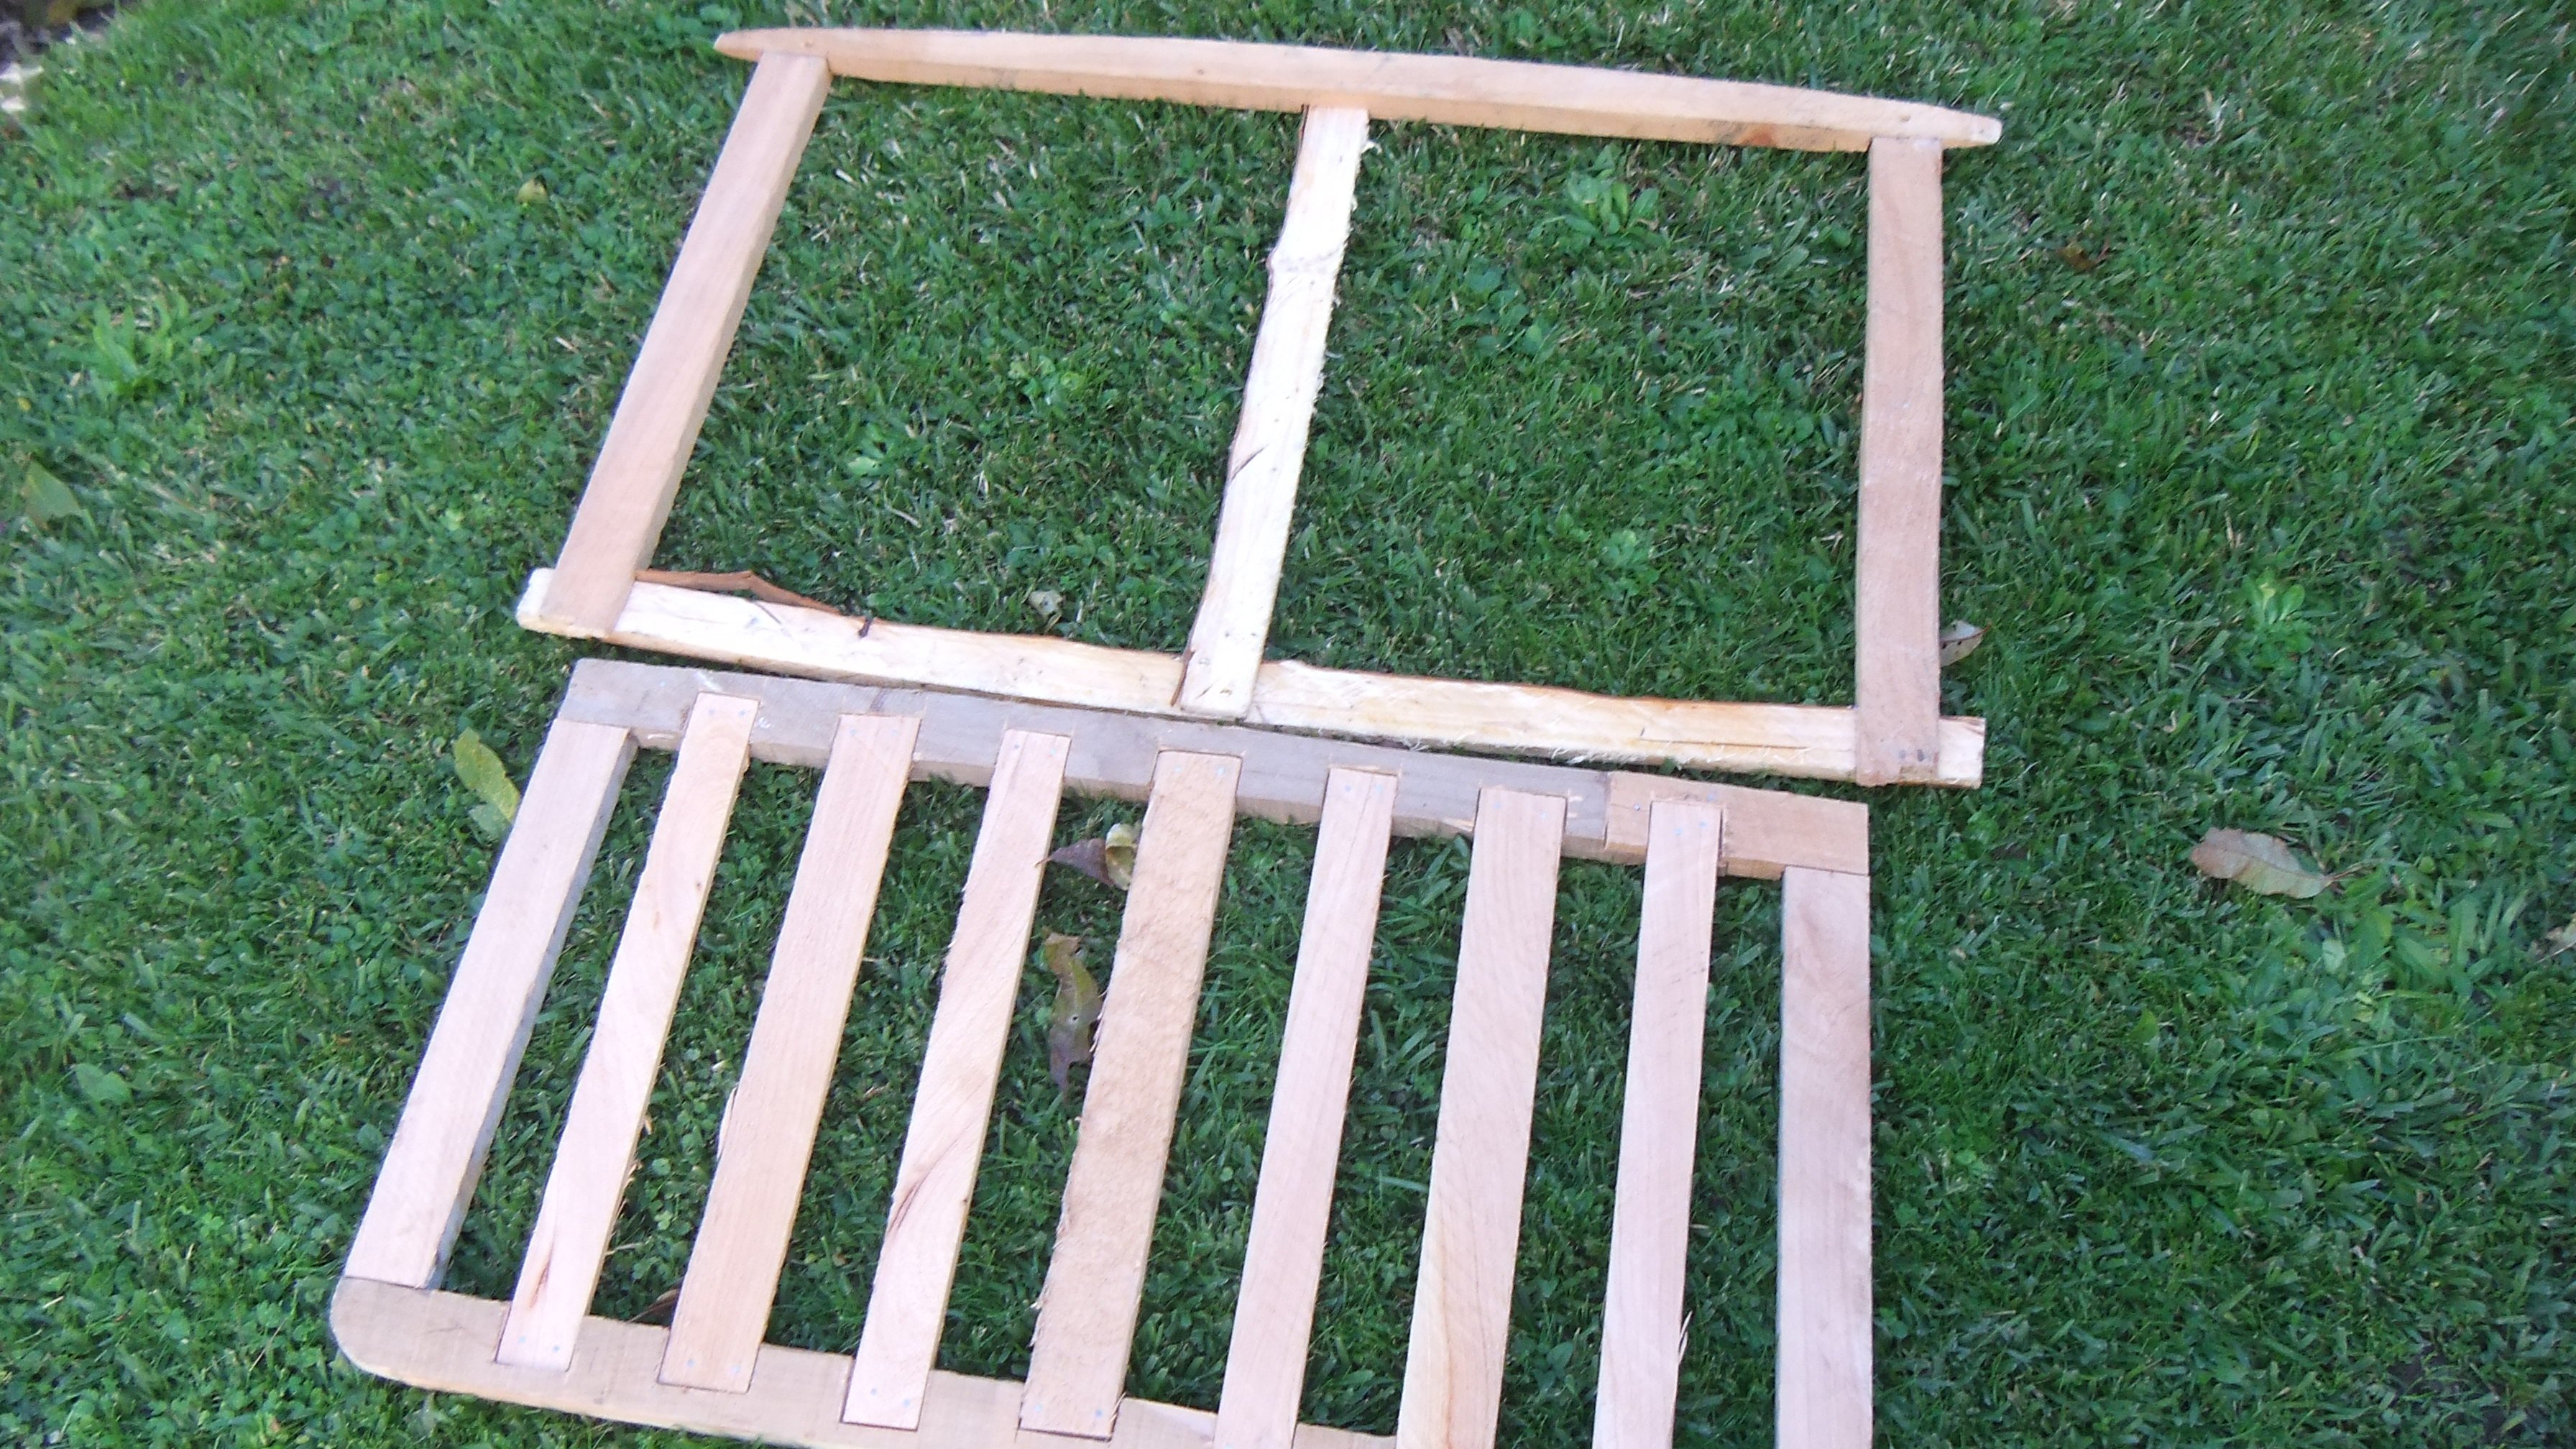
This seat is lacking in padding. Has more padding than the alloy bomber seats i was thinking of making. The wooden frame is based on the original seat frame, except the originals had coil springs and horse hair padding. i don't know how to make horse hair or coil springs. Bundled reeds tied up with flax as padding. Not that comfortable. Probably alloy buckets would be slightly more comfortable? Edit: After 3 years of driving, the bundled reeds have proven to be good enough, at the time. Only now (February 2020)are they losing their springiness. Guess i should find some seat foam soon. Lucky the 'wastelands' as some people jokingly refer to the place i live, is no longer suffering from the 2009 GFC. Could be a new GFC with concerns over that virus (common cold?) coming from wuhan lately though..
1 point
-
Wooden parts need to be replaced with metal and the metal needs to have someone go over it with a better welder, i really need to acquire a proper MIG or TIG..1 point
-
Reworked the latch until it worked. The rusty door knob was for setting it up but it's growing on me.. not sure they'd VIN a car with it though so i'll make another handle.1 point
-
Believe it or not this is not the fabrication disaster thread, i really did make the deck lid from a discarded road sign that was run over by a car, and then another car. And this is the inside of it.1 point
-
Made a terrible mistake Looks yuck. rear curve is wrong. Might just live with it. Looks like i should have used more cardboard during design instead of bending wire and saying "close enough". Looks like someone tried to blend a 32 rear and a 26 rear.
1 point
-
This is progress right? Just so you know i'm not making this up out of my head. i even had a workshop weld the steering column mount. This is a new floorboard riser thing, i made it myself and had someone redo my welds because my welder kinda died. Only 2 exit wounds that i can find but little bullet shaped dents are evident in the dash and firewall, focusing on the gas tank.
1 point
-
Here is a problem i believe i tried asking in one of the technical threads but those posts are apparently deleted for being weird. Today while measuring whether i can fit ford wide5 hubs on the old spindles i found i cannot, so i tried measuring up the hubs next to each other. i believe the hub flange will sit slightly inward of where the wide5 hub flange would be, but the original hub was designed to carry the weight in between the 2 flanges it has on wooden spokes. The ideal place to have the wheel adapter wound be between those 2 and they are 30mm apart. From what i read on some government looking website http://www.lvvta.org.nz the most you are allowed to space the wheel is 20% of the rim width, the wheels i would like might only be 4-5 inch wide (they still have tyres on so i can't measure very well ATM) So what do you recommend the wheel adaptors be made from? i would like steel, 5mm would be be about right weight wise and be thicker than the wheel pressing but 8 would look beefier, but stupidly heavy. Would i still be allowed spacers behind the adapter? It's ok if not allowed but i would like to have the weight of the wheel nearer where the factory intended.1 point
-
Slowly getting this thing sorted. Goes around corners now without falling over.... New complete bottom arms with hd bushes. New drop links. New tyres (not on photo) and a decent alignment1 point


.thumb.jpeg.384ff72c8d2b0ee0d34a7bdedb55bdcf.jpeg)


This leaderboard is set to Auckland/GMT+12:00