
Leaderboard


Popular Content
Showing content with the highest reputation on 07/20/19 in all areas
-
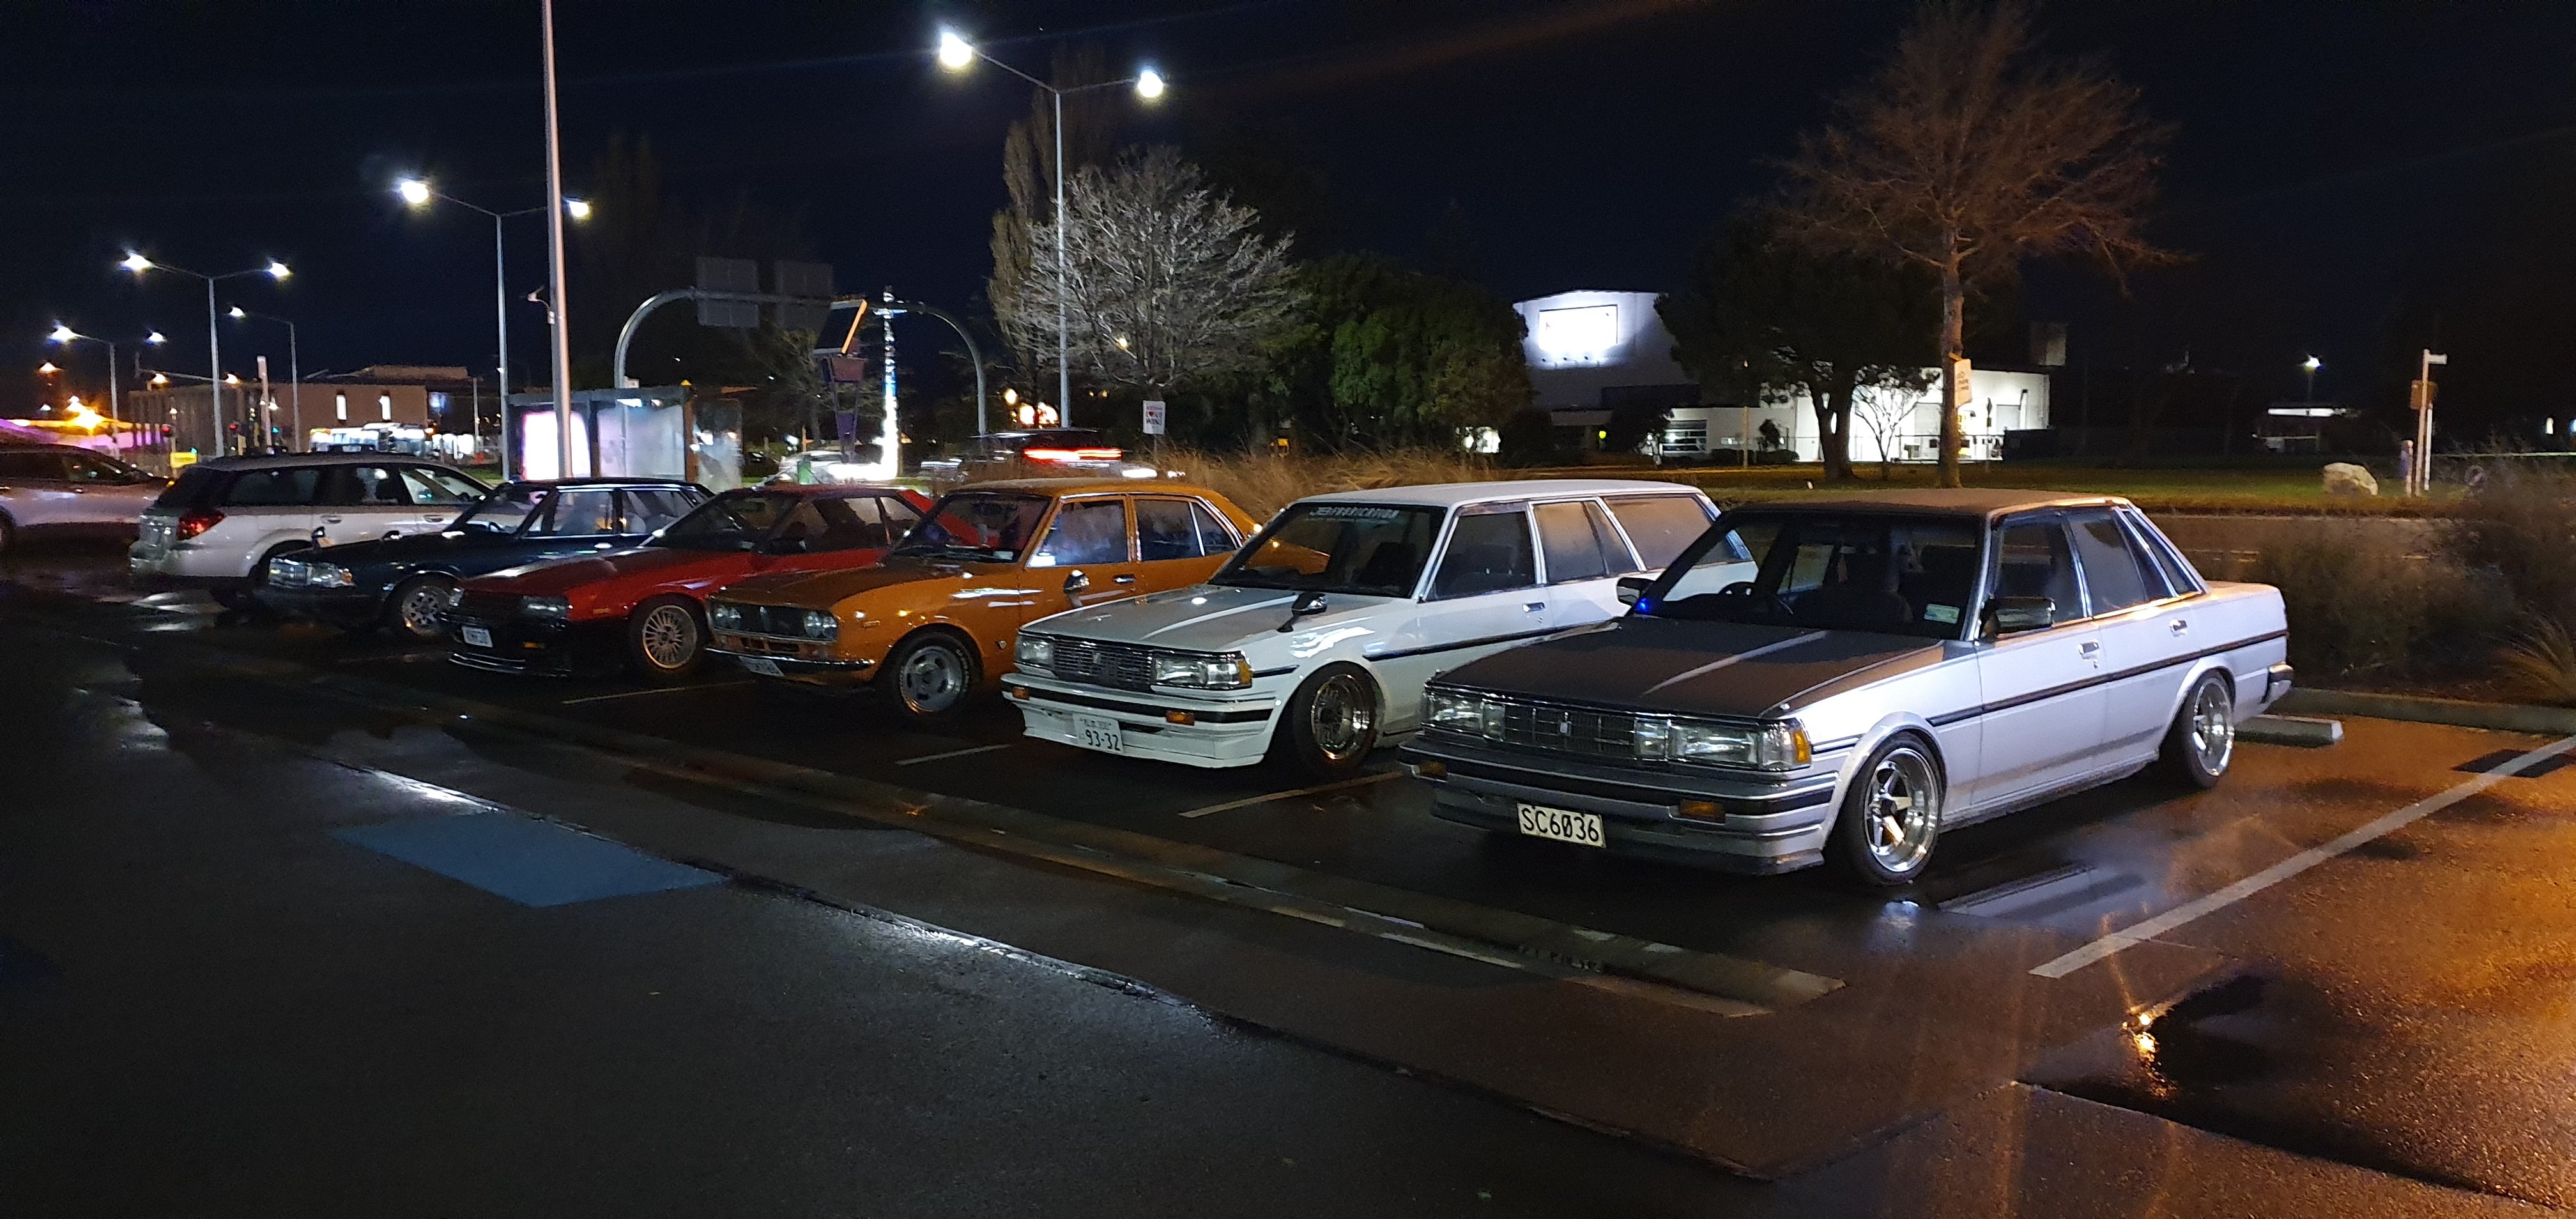
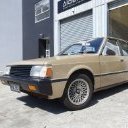
Ive fixed a few small job on the starlet and took it for a hoon and goes bloody well for a 1300 with 300,000km on the clock.So i im going to keep it. The wee hoon that made me want to keep it It looks a bit ruff but almost rust free Frist get the wof sorted .Roll cage and as its efi maybe getting a turbo.12 points
-
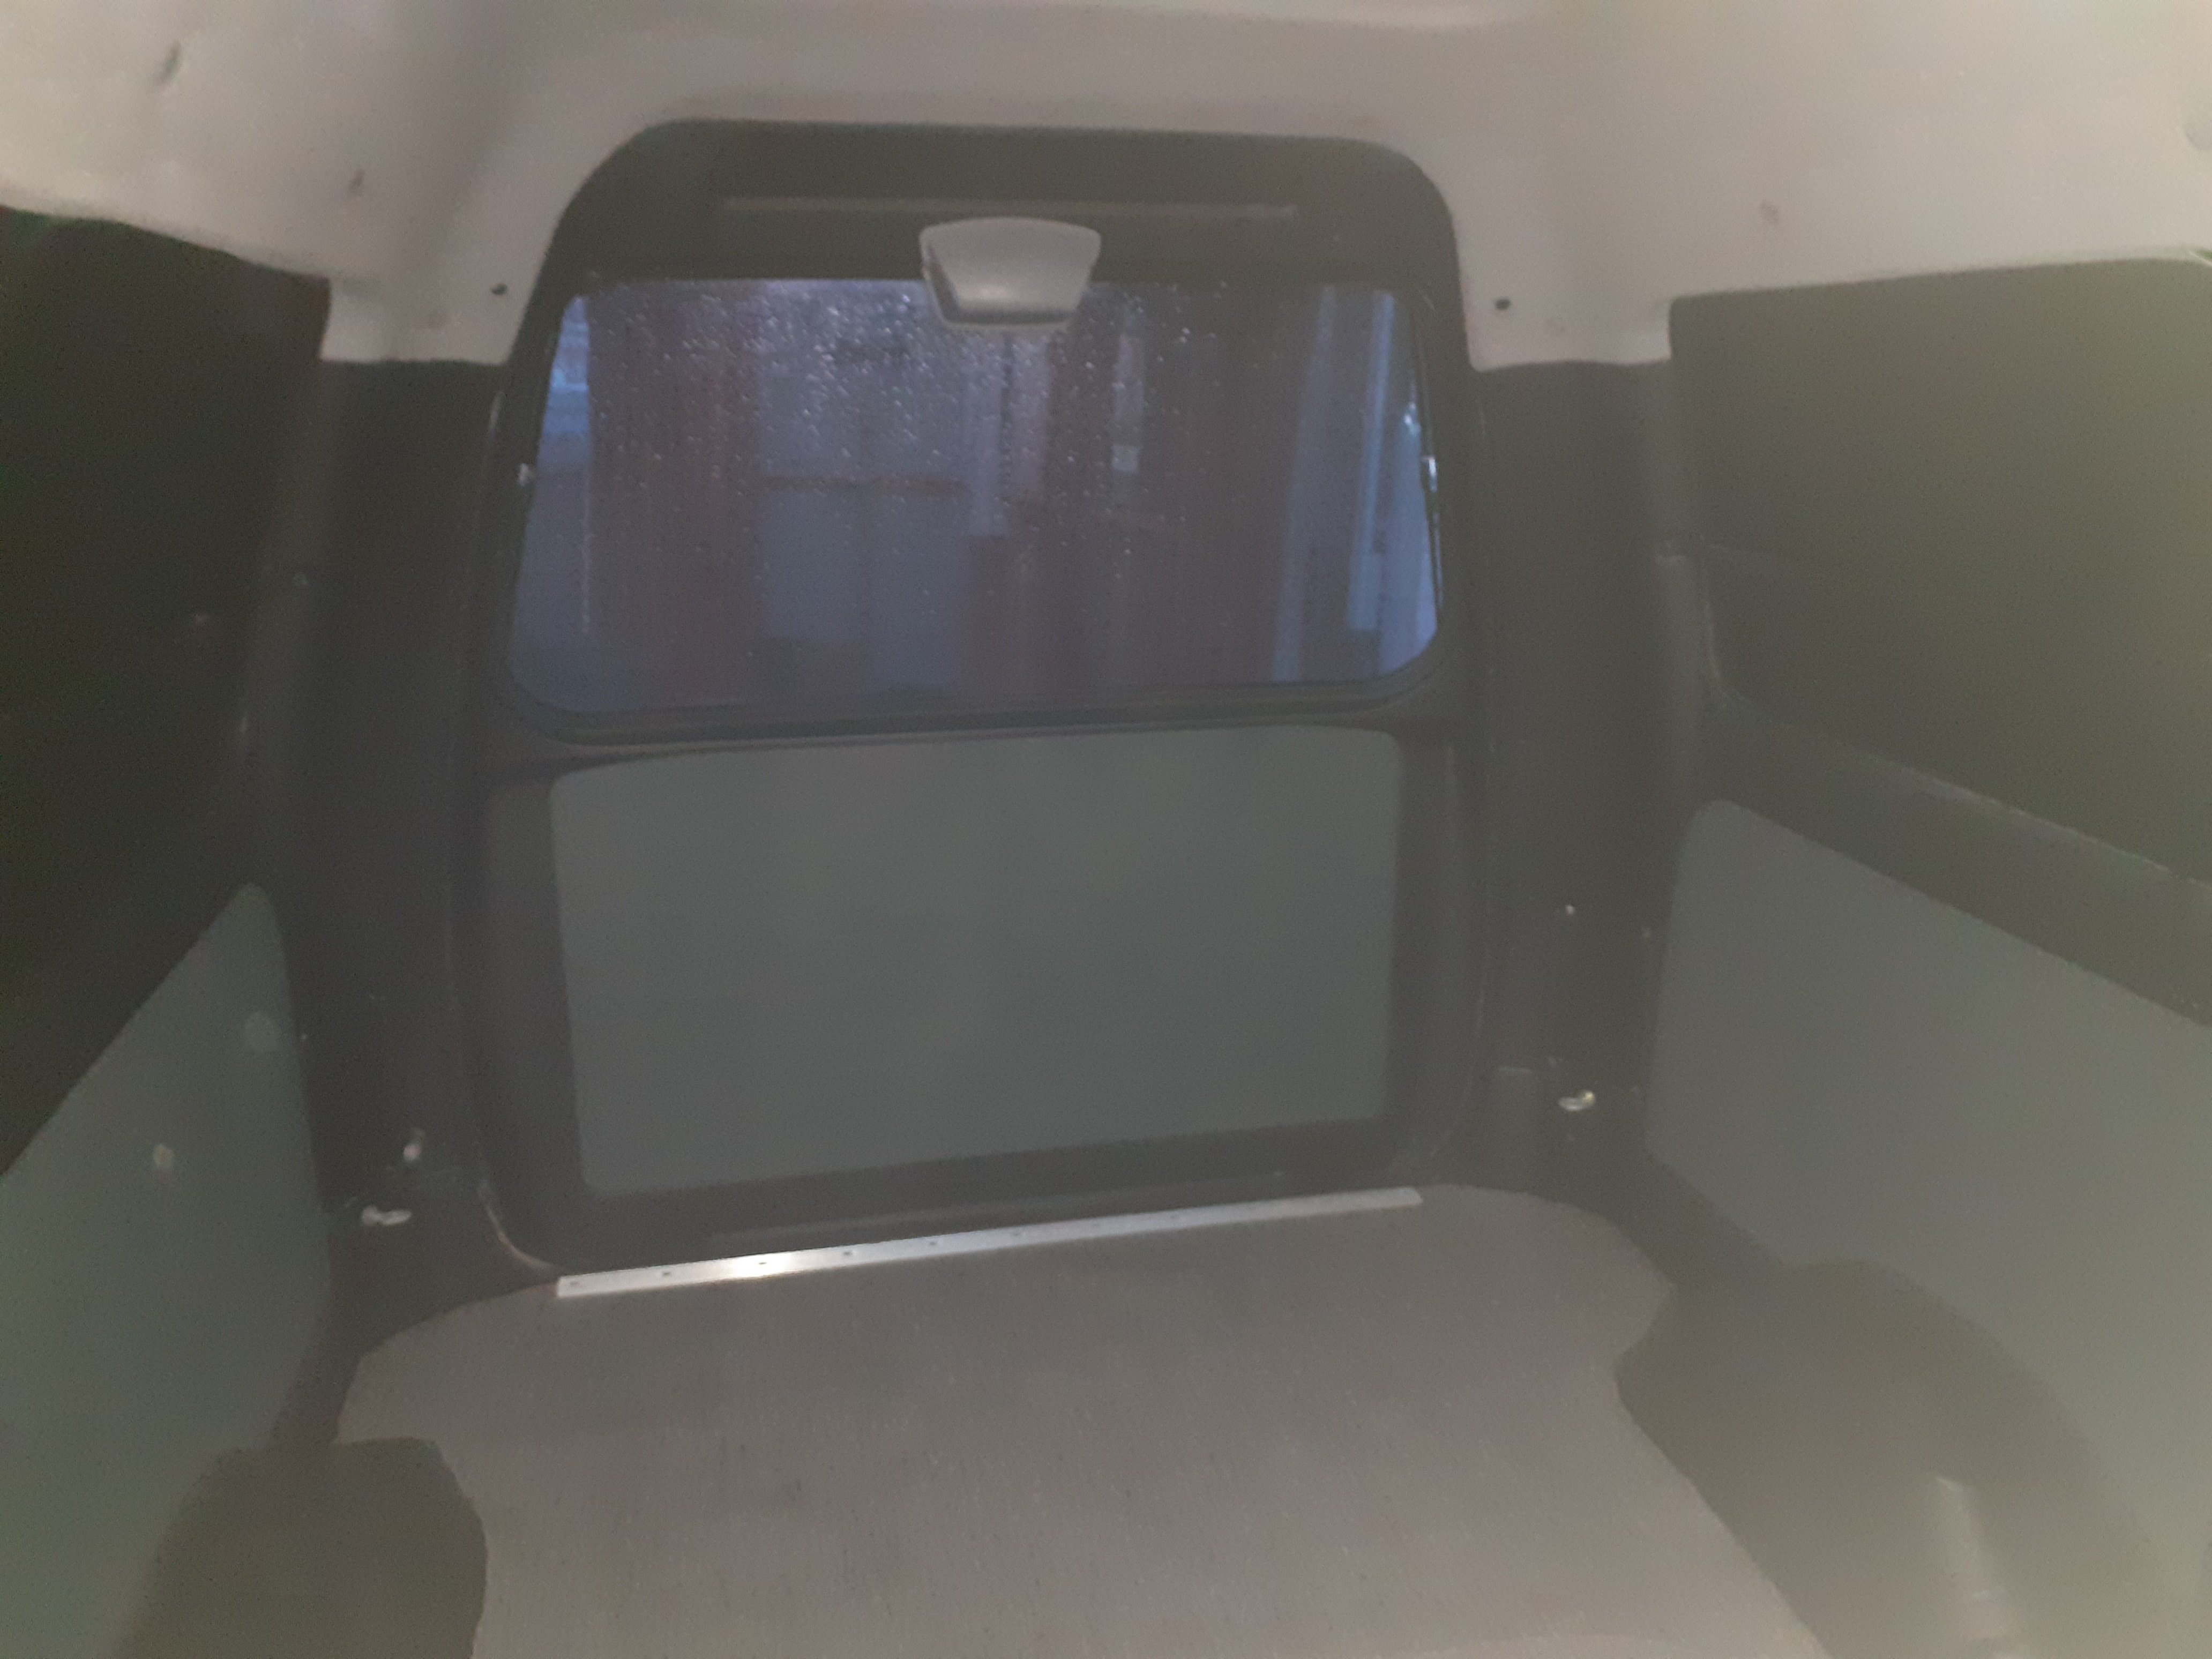
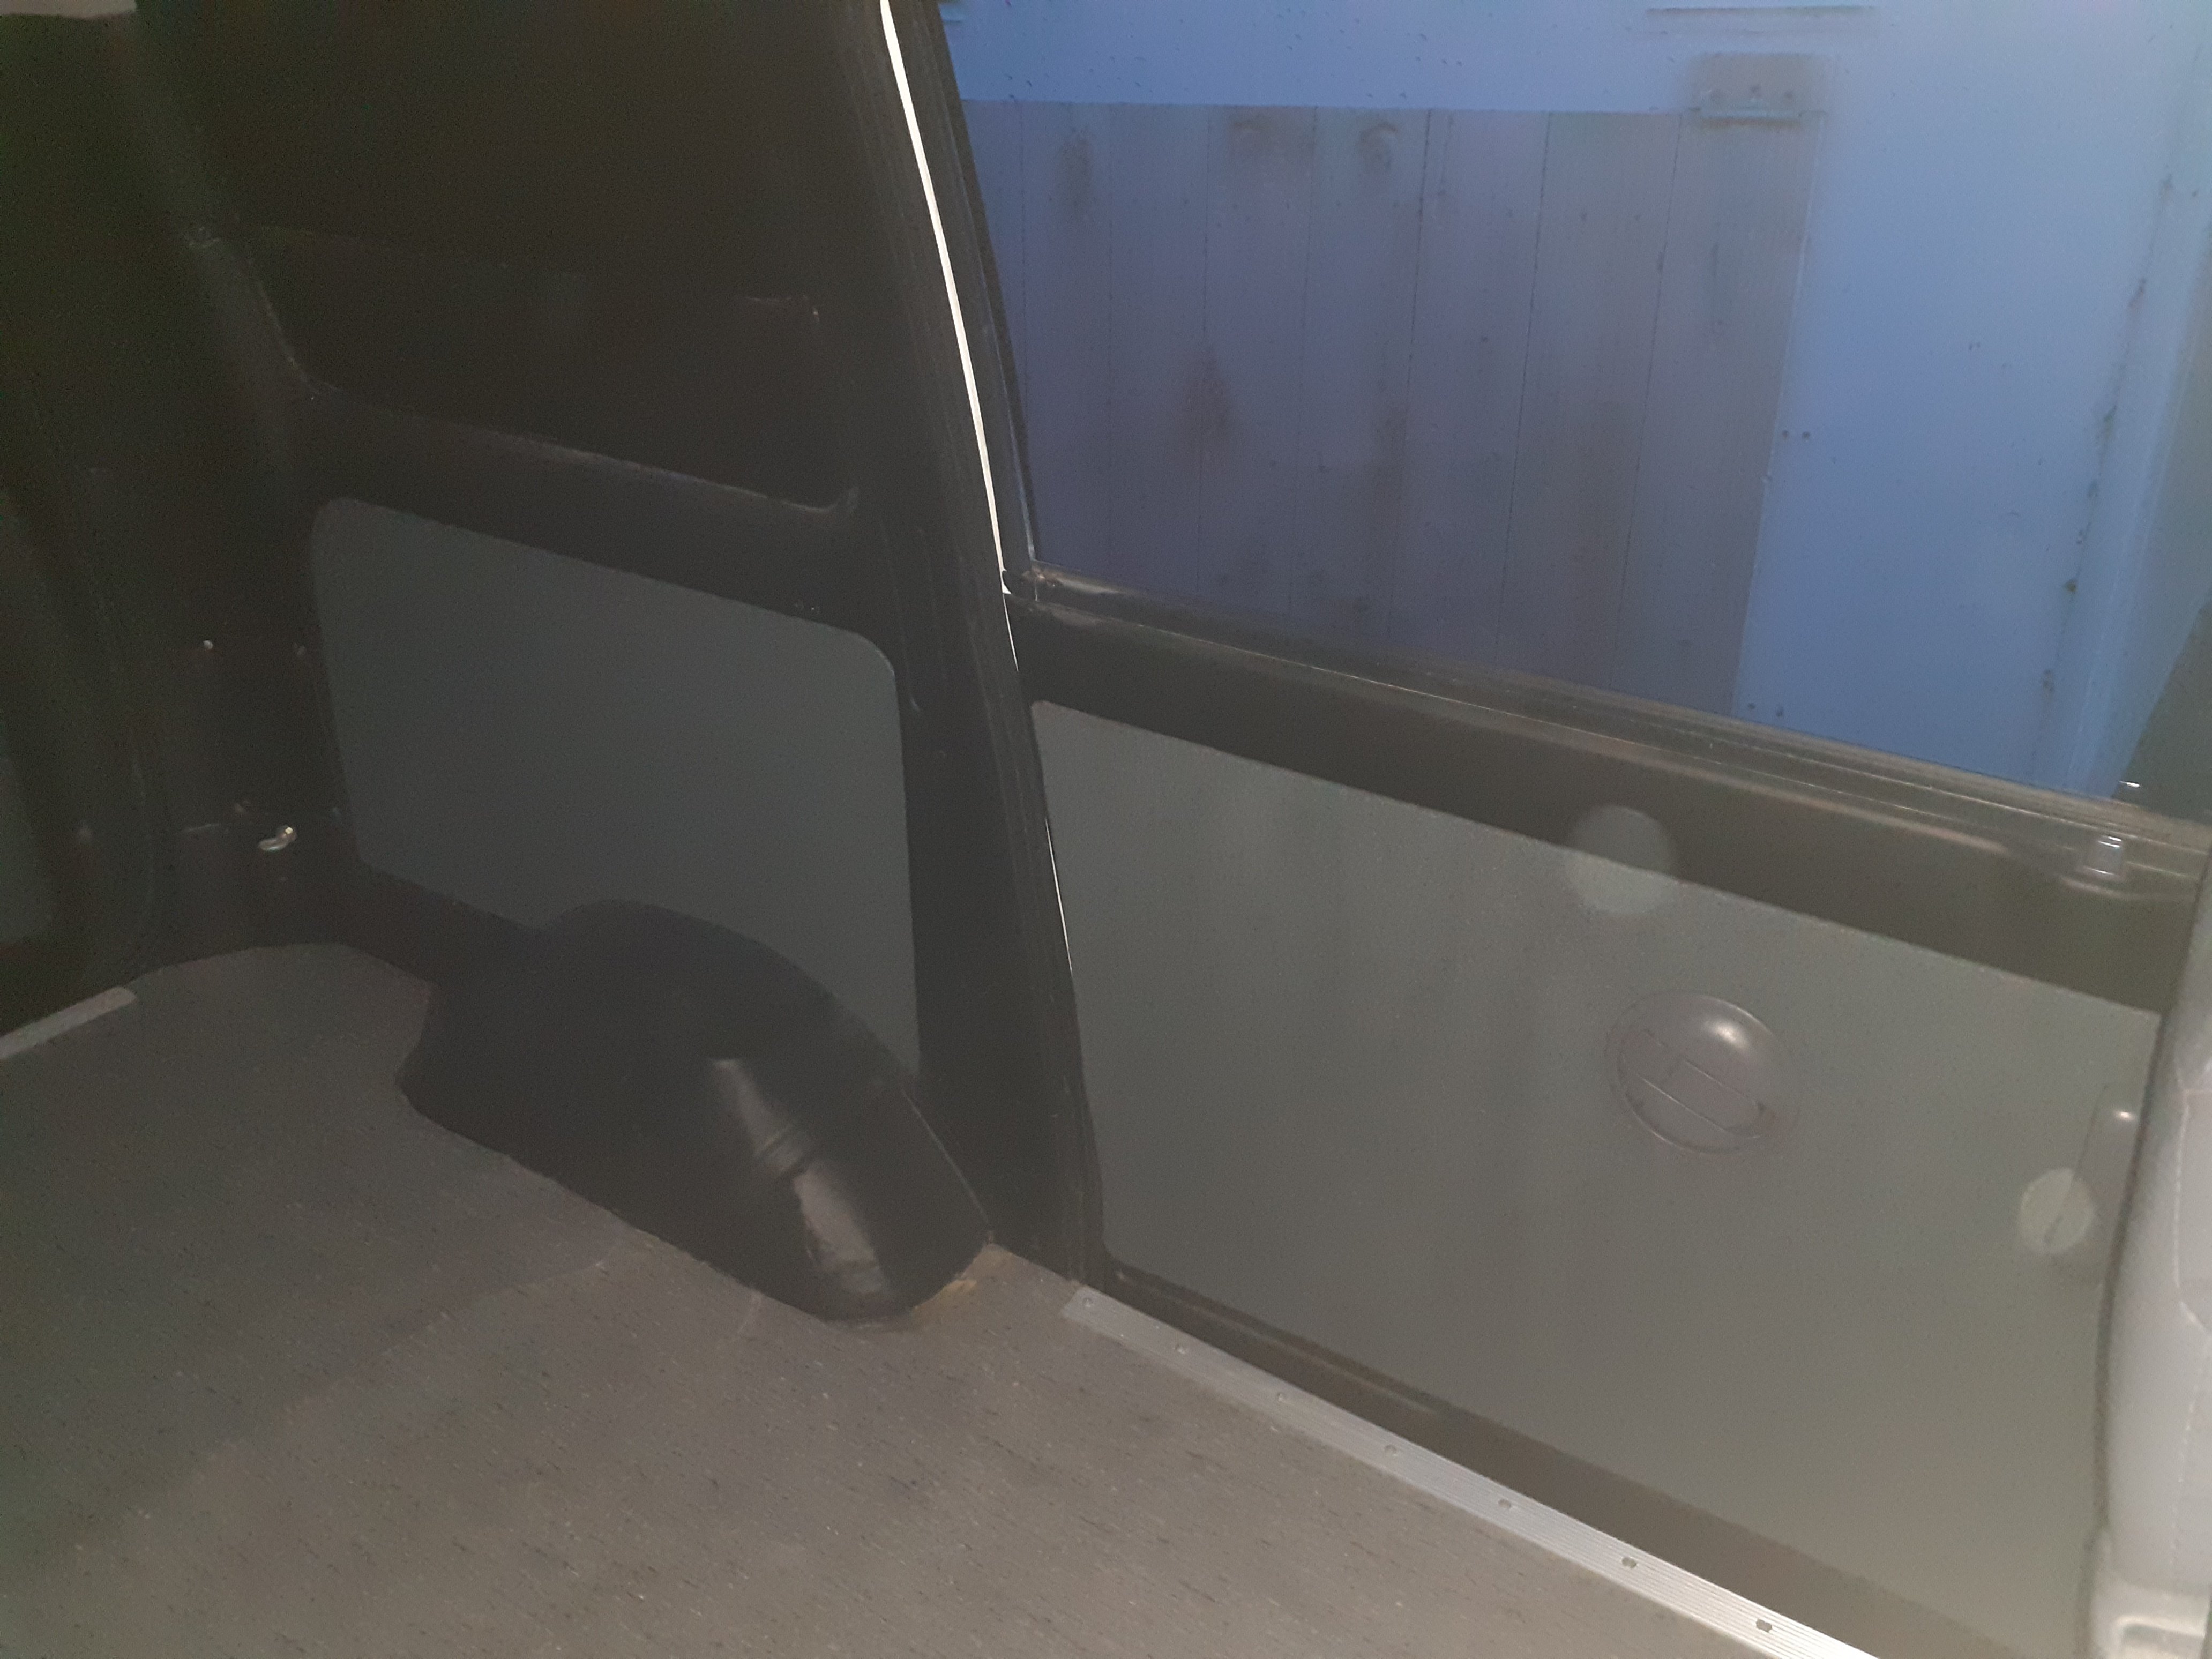
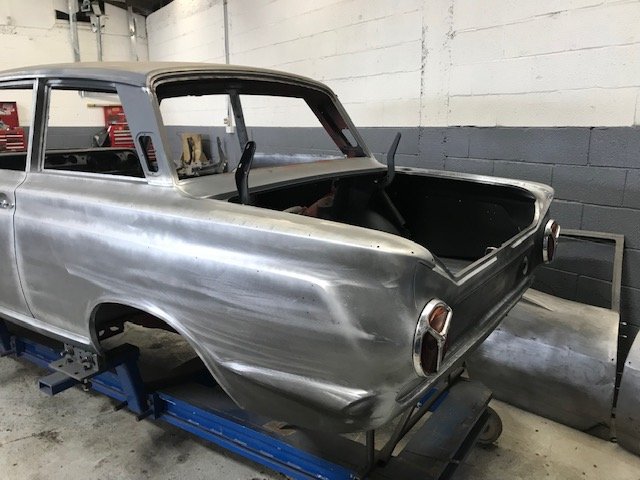
Nah they masked around it. If I did it again I'd strip more out I think Chur. I have a bit of a thing for povo spec Japanese cars with unpainted bumpers and door handles etc. I don't know why I covered the rear interior panels today, stole an idea from someone else's build thread. Went to the warehouse, got 2 $5 blankets and a can of ados, got glue all over my fingers, done.
 6 points
 -
Last night I had been in the shed working on one of my bikes, finished and packed up but still had half a bottle of beer left before I could leave. So I wandered over to the little 7, which has been sitting with the pistons soaking in CRC for a couple of weeks now, and as expected, I lifted it off the stands by the crank handle Had a couple more mouthfuls of my beer, lifted the head back off and gave the pistons a fairly gentle tap with a hammer and block of wood. nek minit NO FUCKING WAY! i’m chuffed to bits, it turns over beautifully smooth, and has no real marks in the bores that I’ve seen yet. We pulled the dipstick and it’s full of oil that looks better than the stuff in my daily. The original goal of “get the wheels to turn” has crept now into “let’s see if we can drive it out of the shed”6 points
-
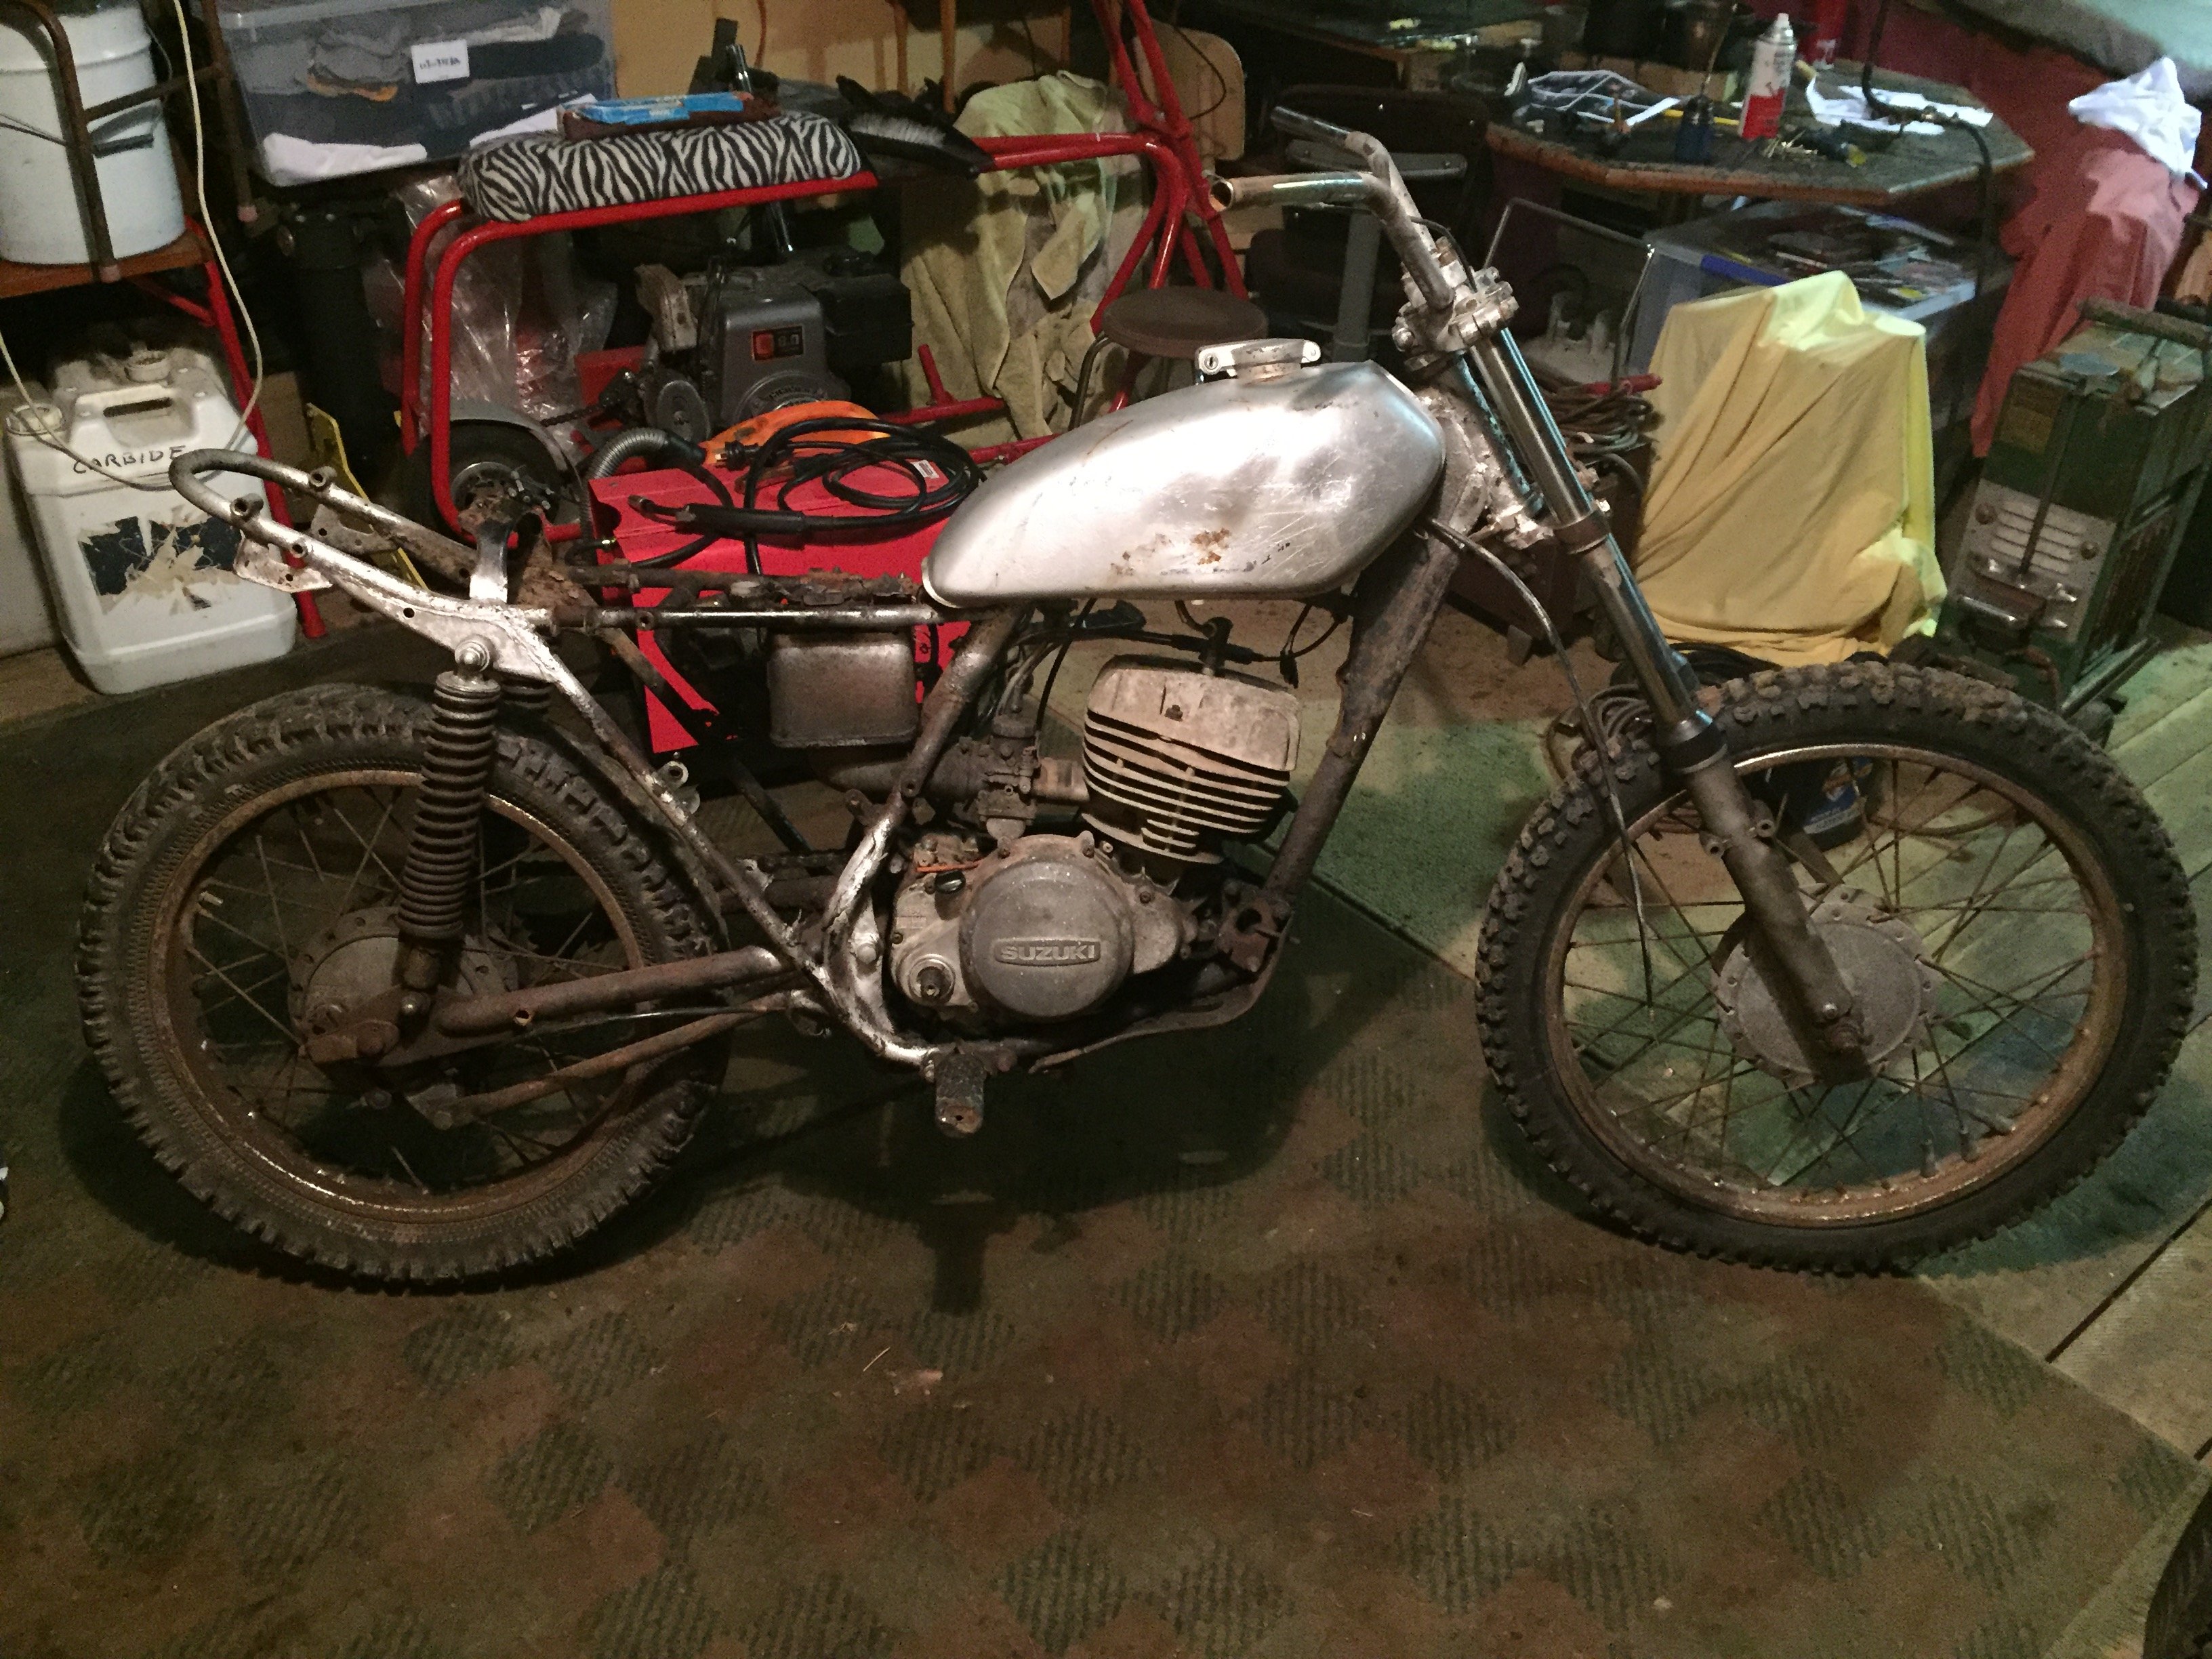
Sold all the crap today, people were fighting over it. Now I can start making the parts o need before a total strip down, de bracket the frame etc.
4 points
-
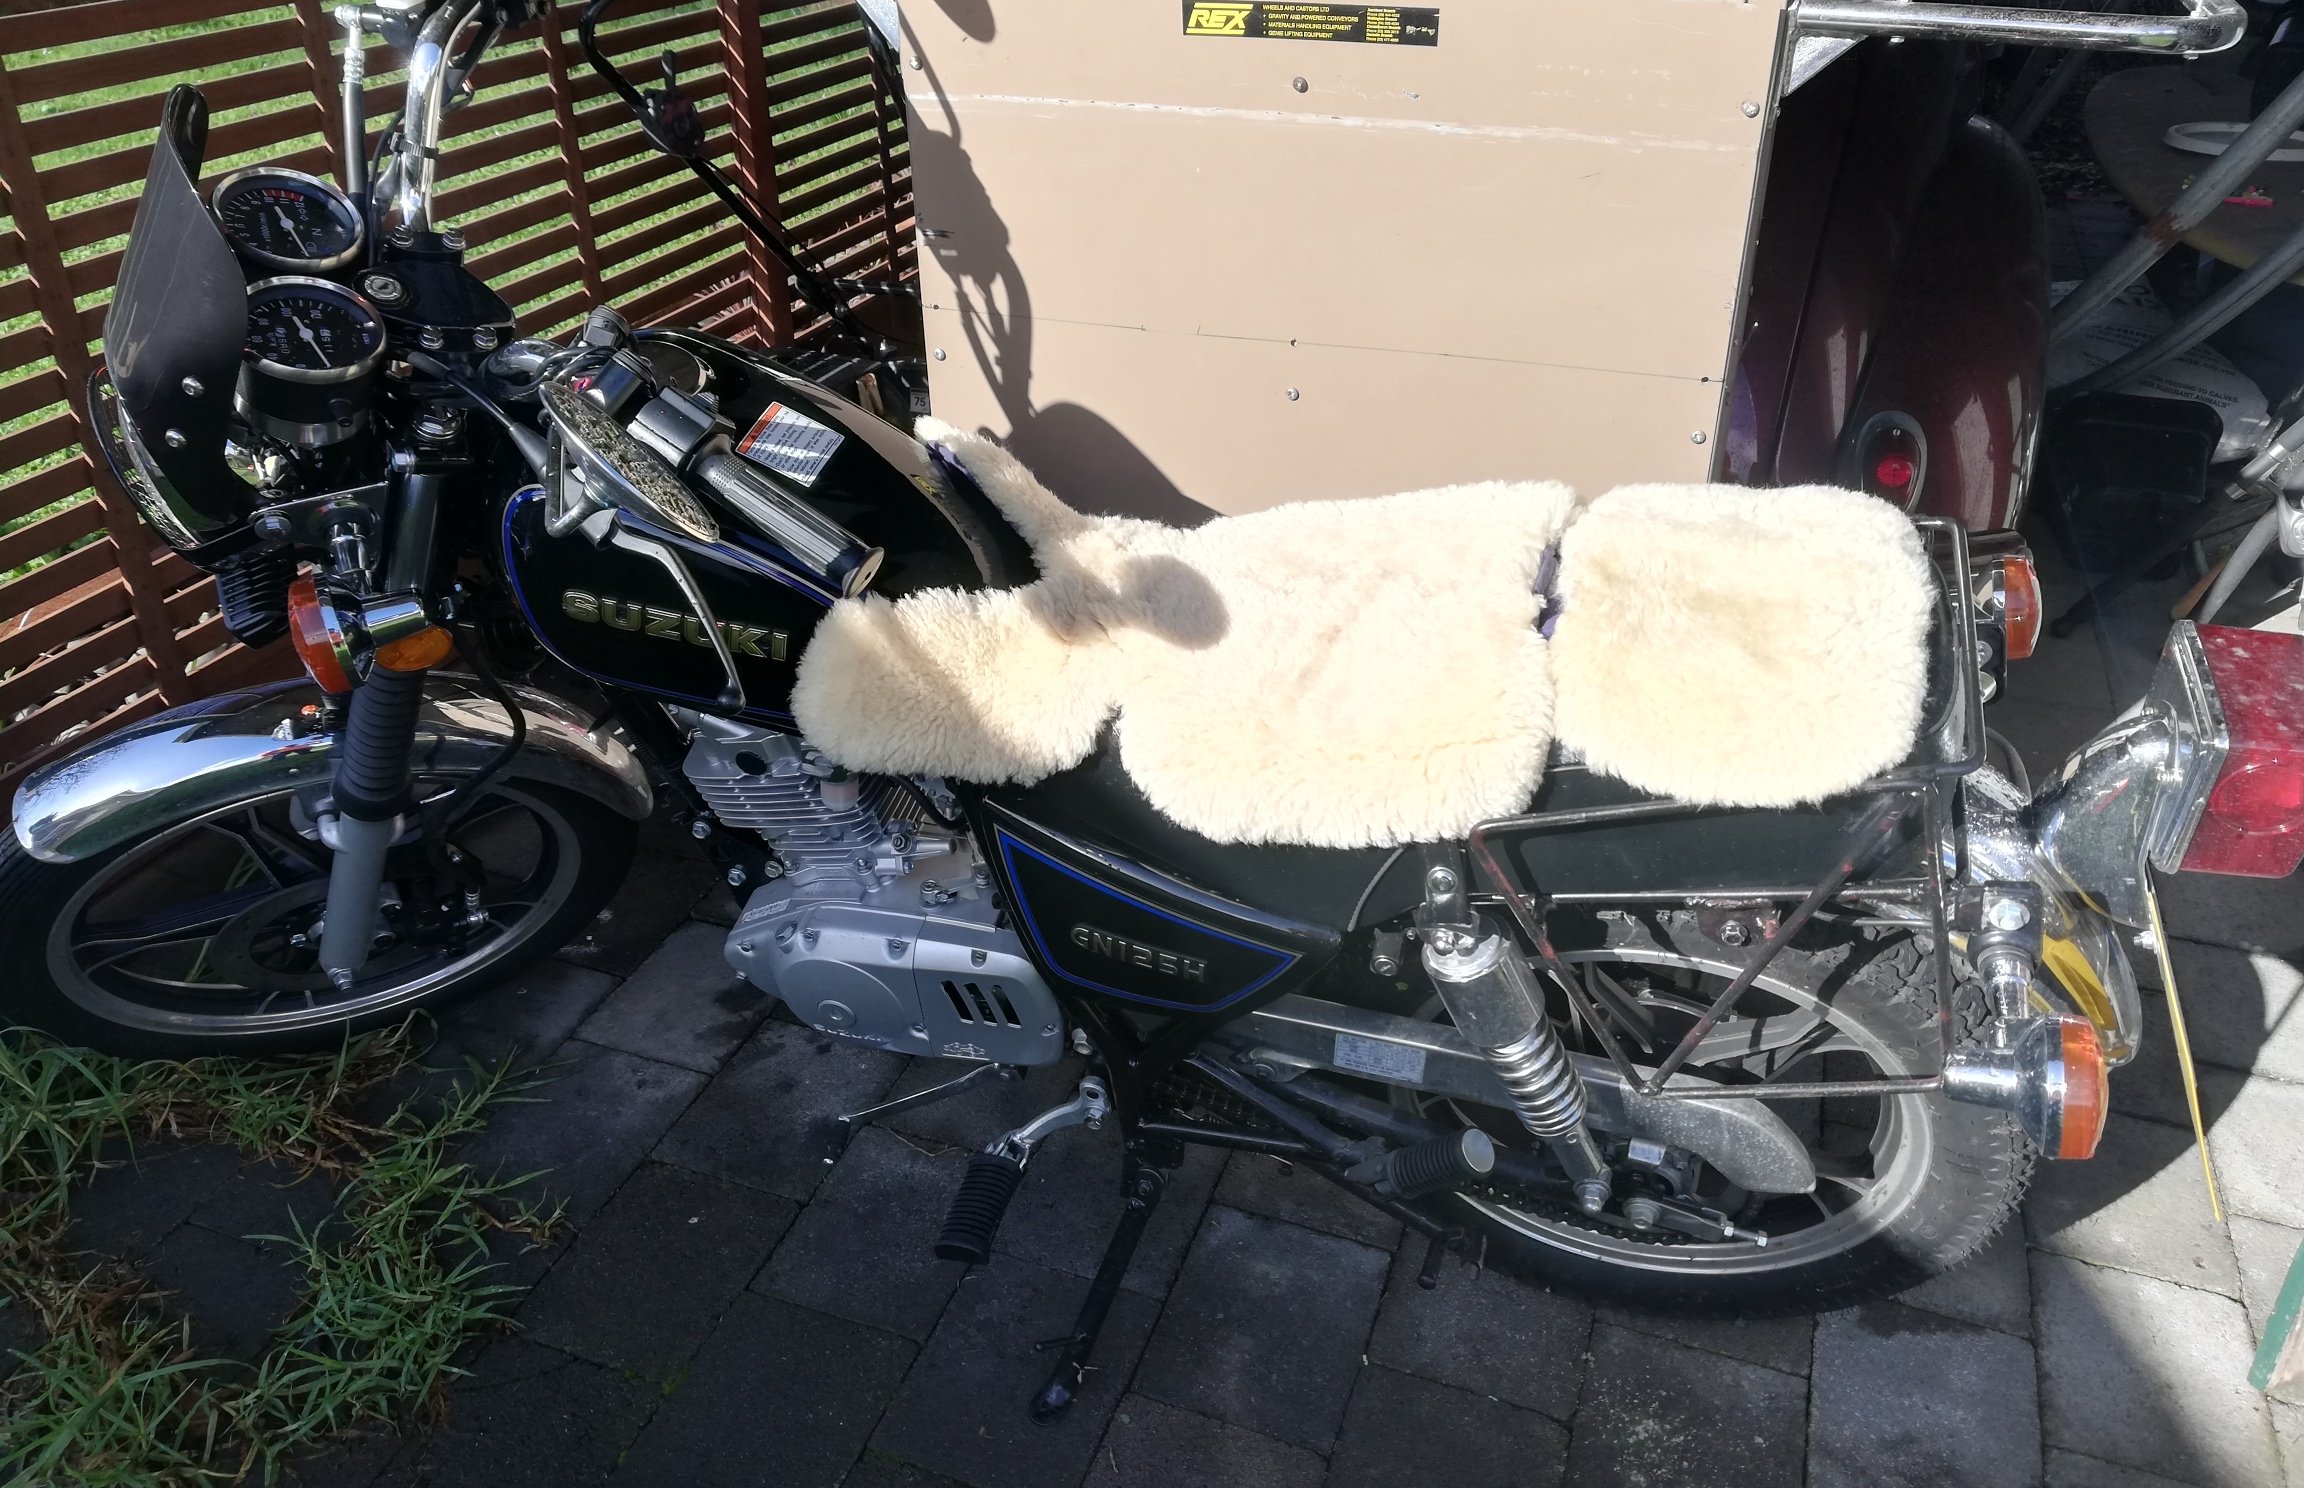
Got a sheepskin pram liner Amazingly it's a perfect fit Head piece is velcro'd on and adjustable. So could use it all in one piece, but I think il remove it and slip it on like shown. Pretty much round the world ready now...
4 points
-
Ditto that man ^ please do nothing more then is needed t to make this legal to drive on the road and roll it as is. Don't even clean the windows.. Except for windscreen. Its so cool!4 points
-
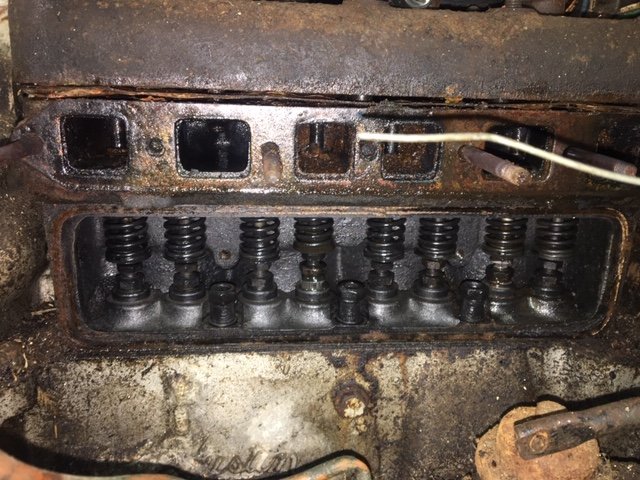
At this point the efforts to try and get the engine free'd up had been to grab the crank handle and lift the car off the axle stands while seeing if it will turn... some 2 stroke oil and CRC down the spark plug holes didn't help, so I pulled the head to see what the state of things was. I was worried that the valves might be stuck in the guides and didn't want to damage them trying to force the crank around, so I took off the manifolds and exposed the valve springs to see if they were free. All but one moved nicely so I fed the one some CRC and left it for a week or so.
4 points
-
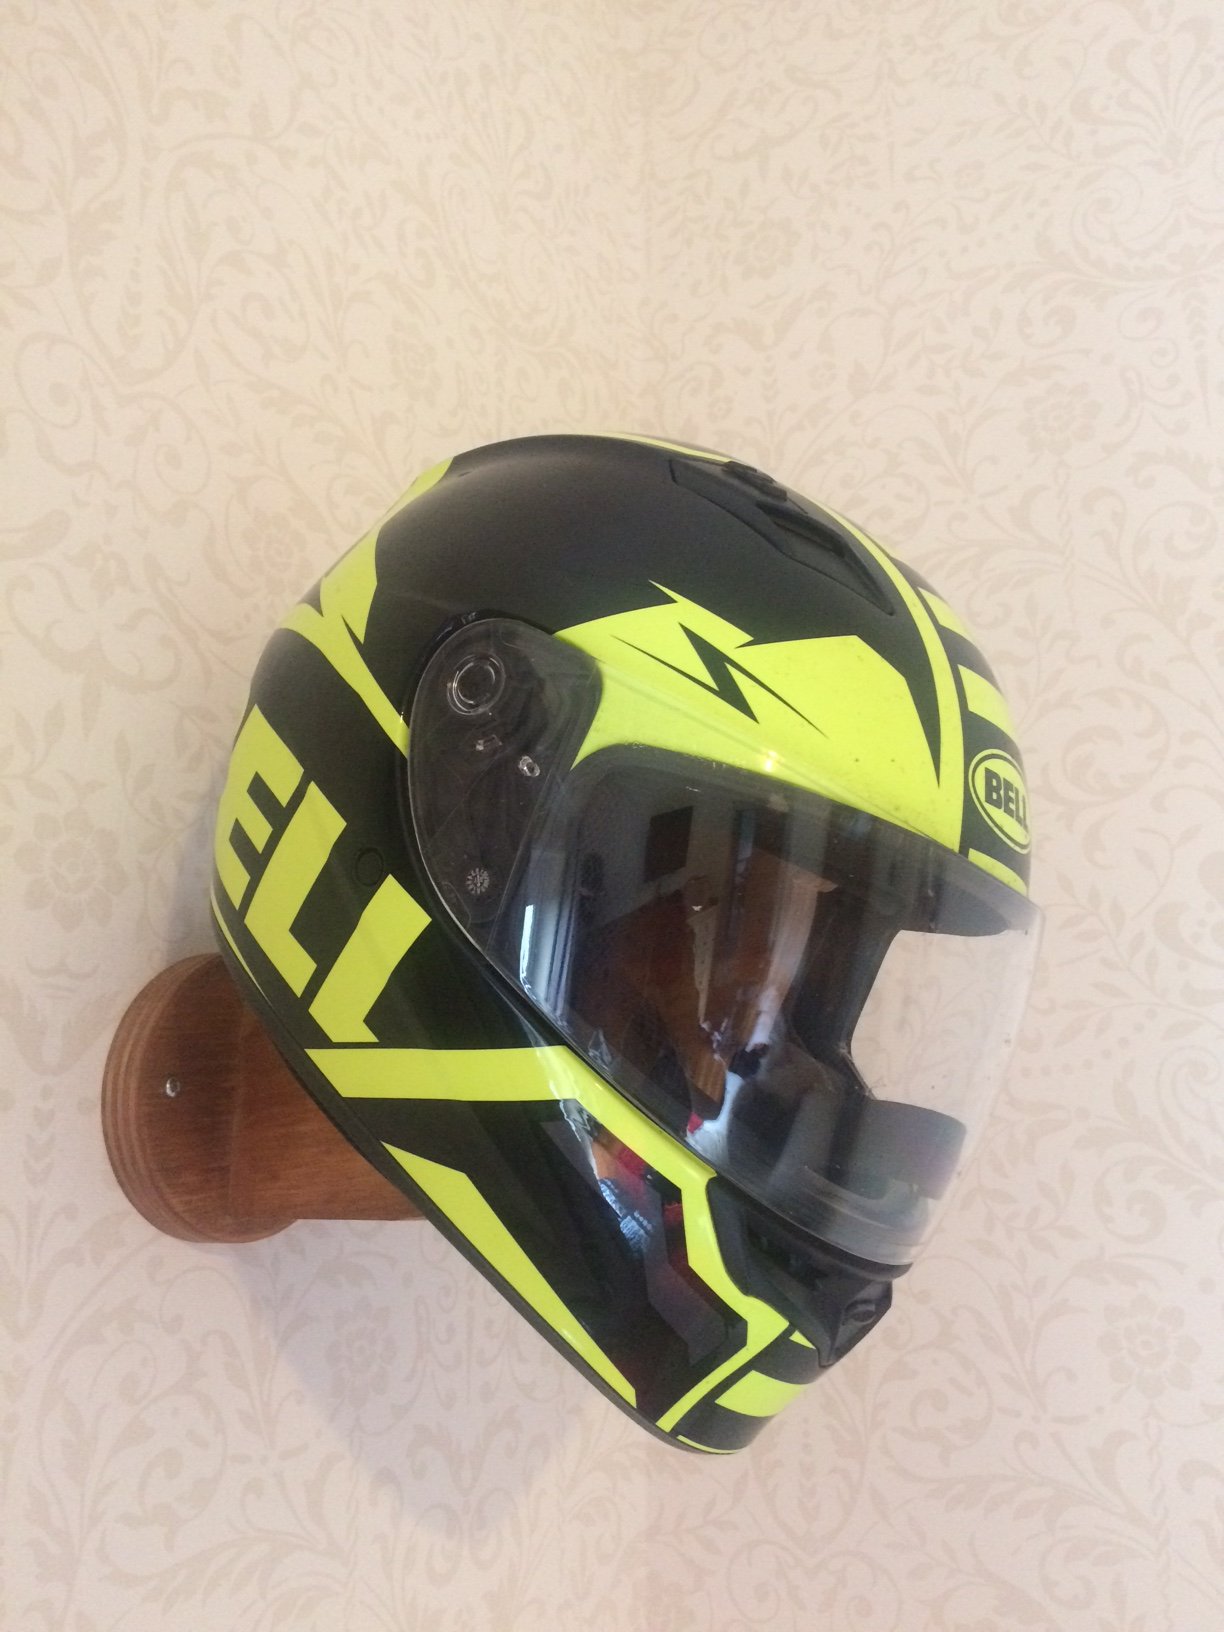
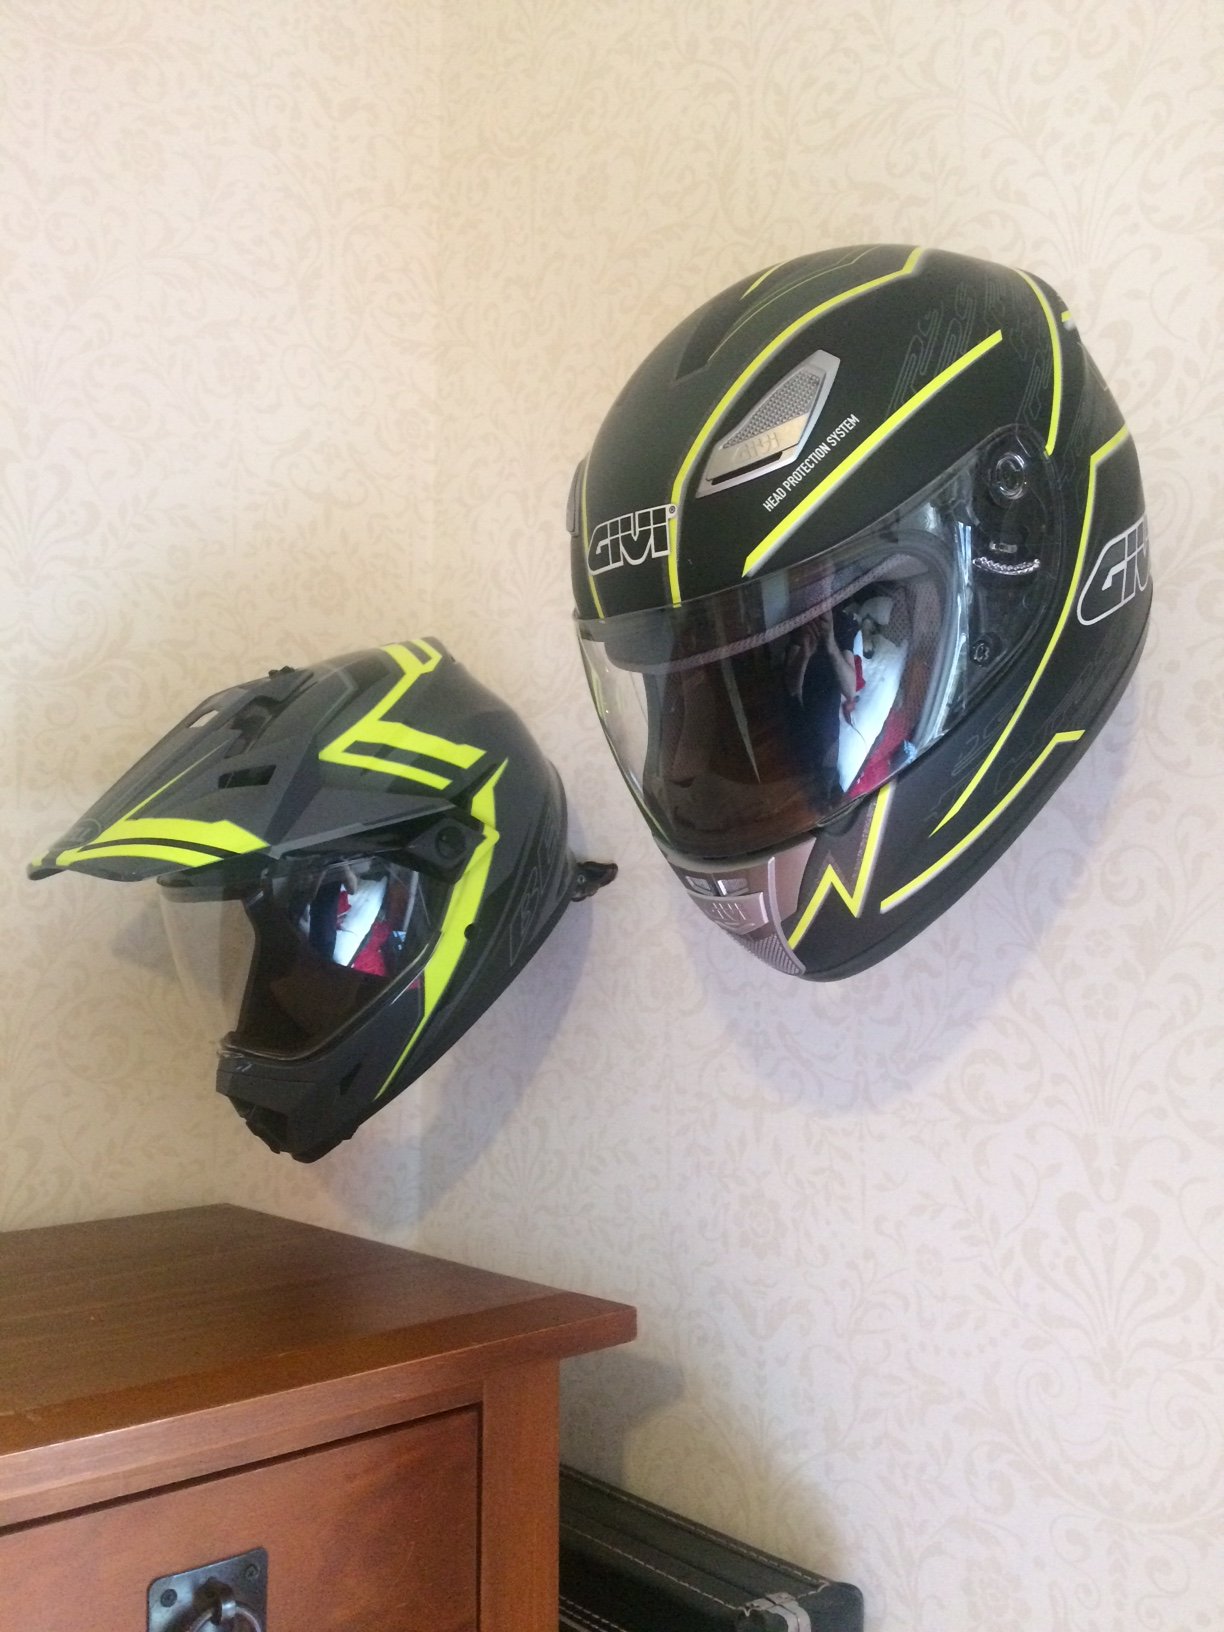
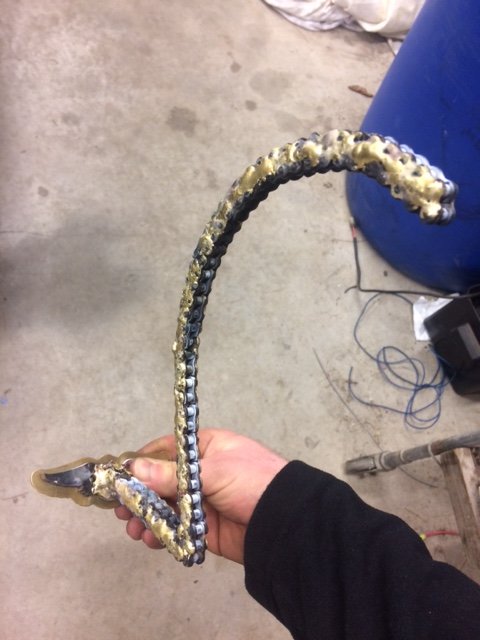
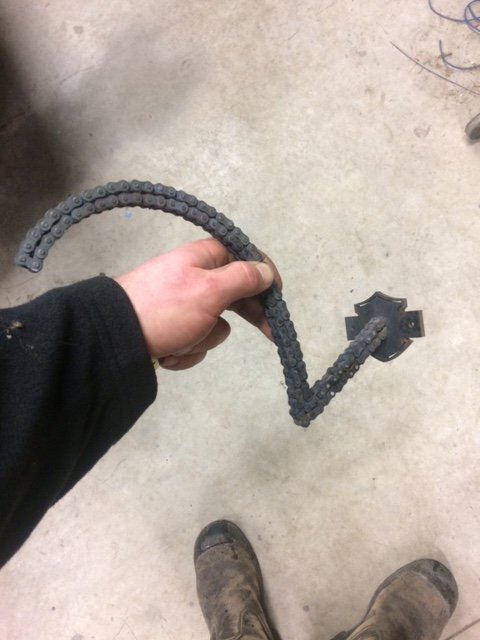
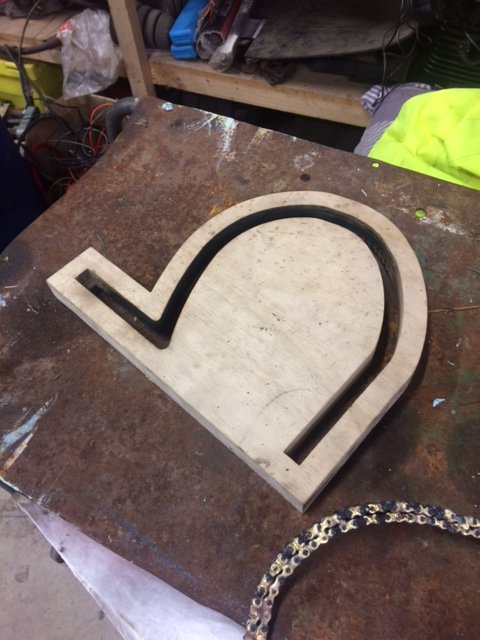
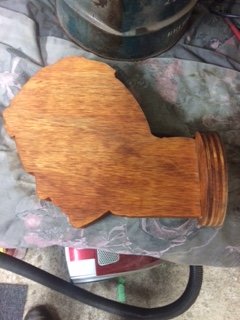
Got distracted at shed night, was supposed to be working on the pole smoker but wound up making more helmet racks since I was so happy with the first one. Welded up some go kart chains in a plywood jig and then welded them to some ‘Harley-esque’ non-copyright waterjet cut mounting plates. Lay some brass over one to make it a bit different. I’ll be working on the pole smoker again tonight and will have an appropriate update. Otherwise I’ll change the thread name to ‘Helmet Storage Chat’.
3 points
-
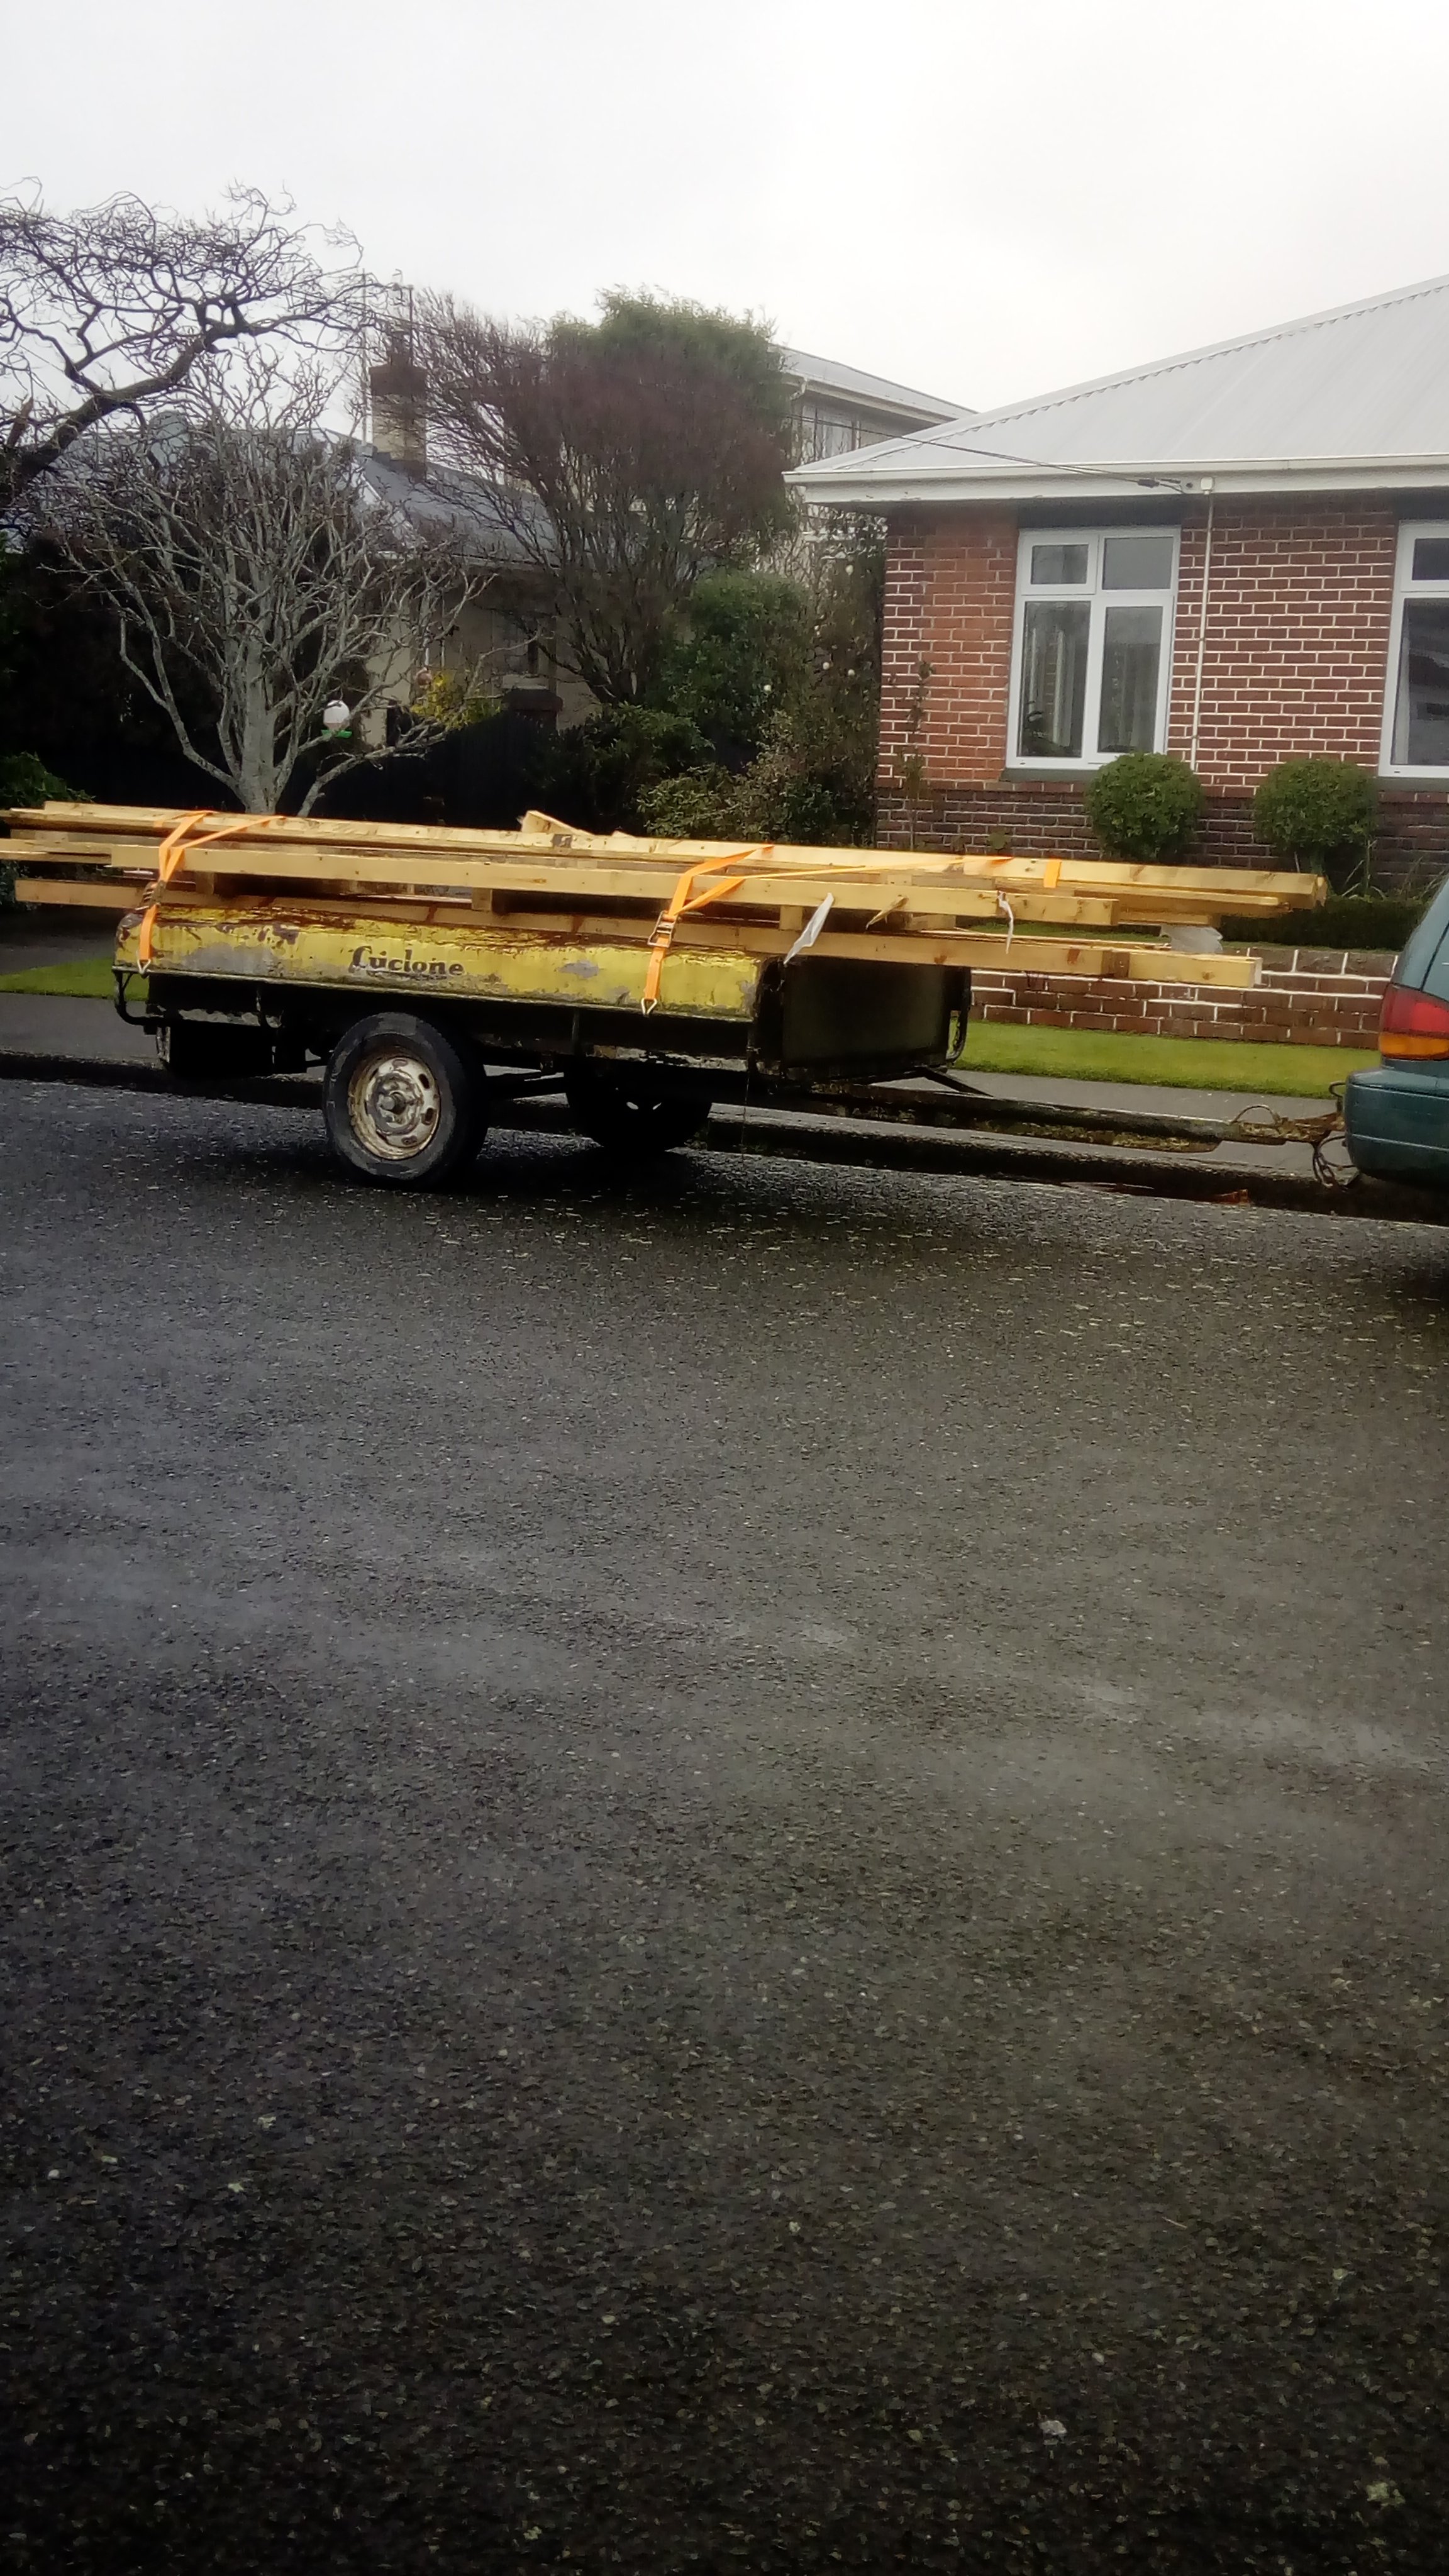
Been shopping for framing timber. Cheaper than Mitre10 & lengths I need Pallets from local boat builder, more than long enough....... & Free! Just need bloody weather to play ball
2 points
-
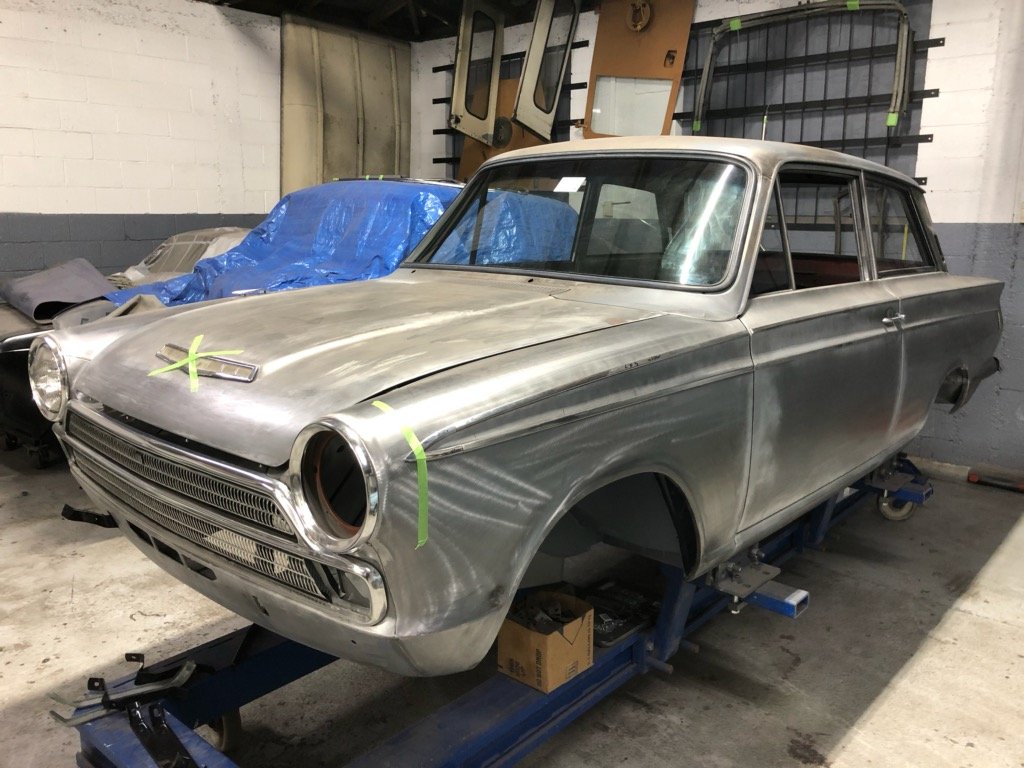
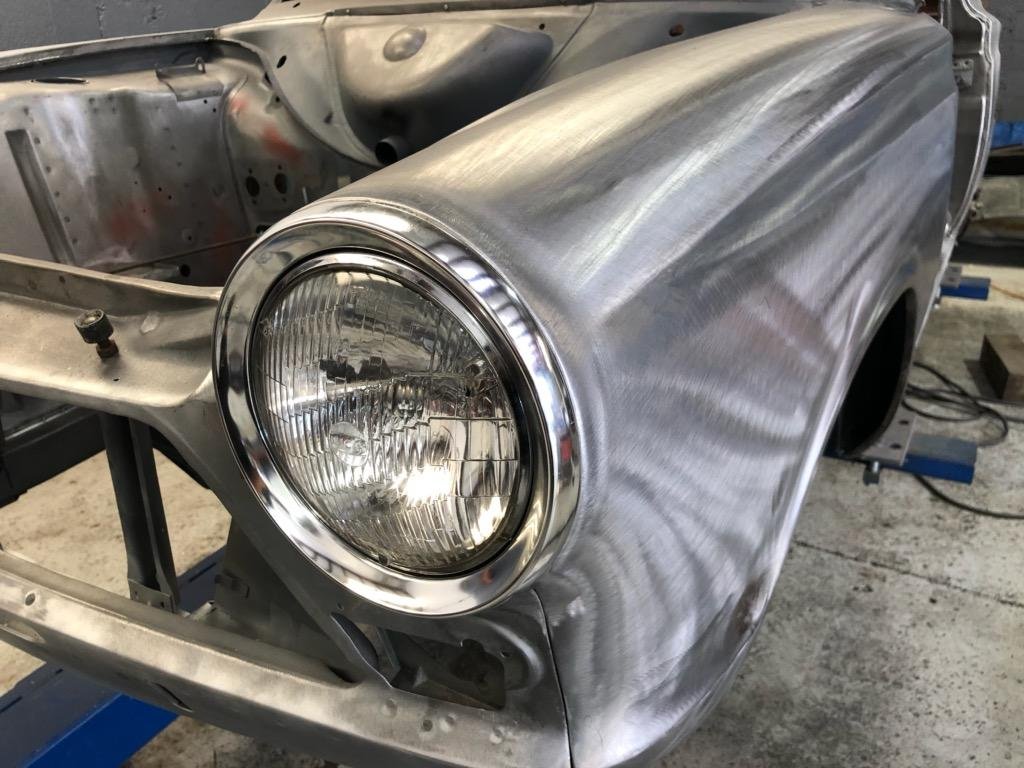
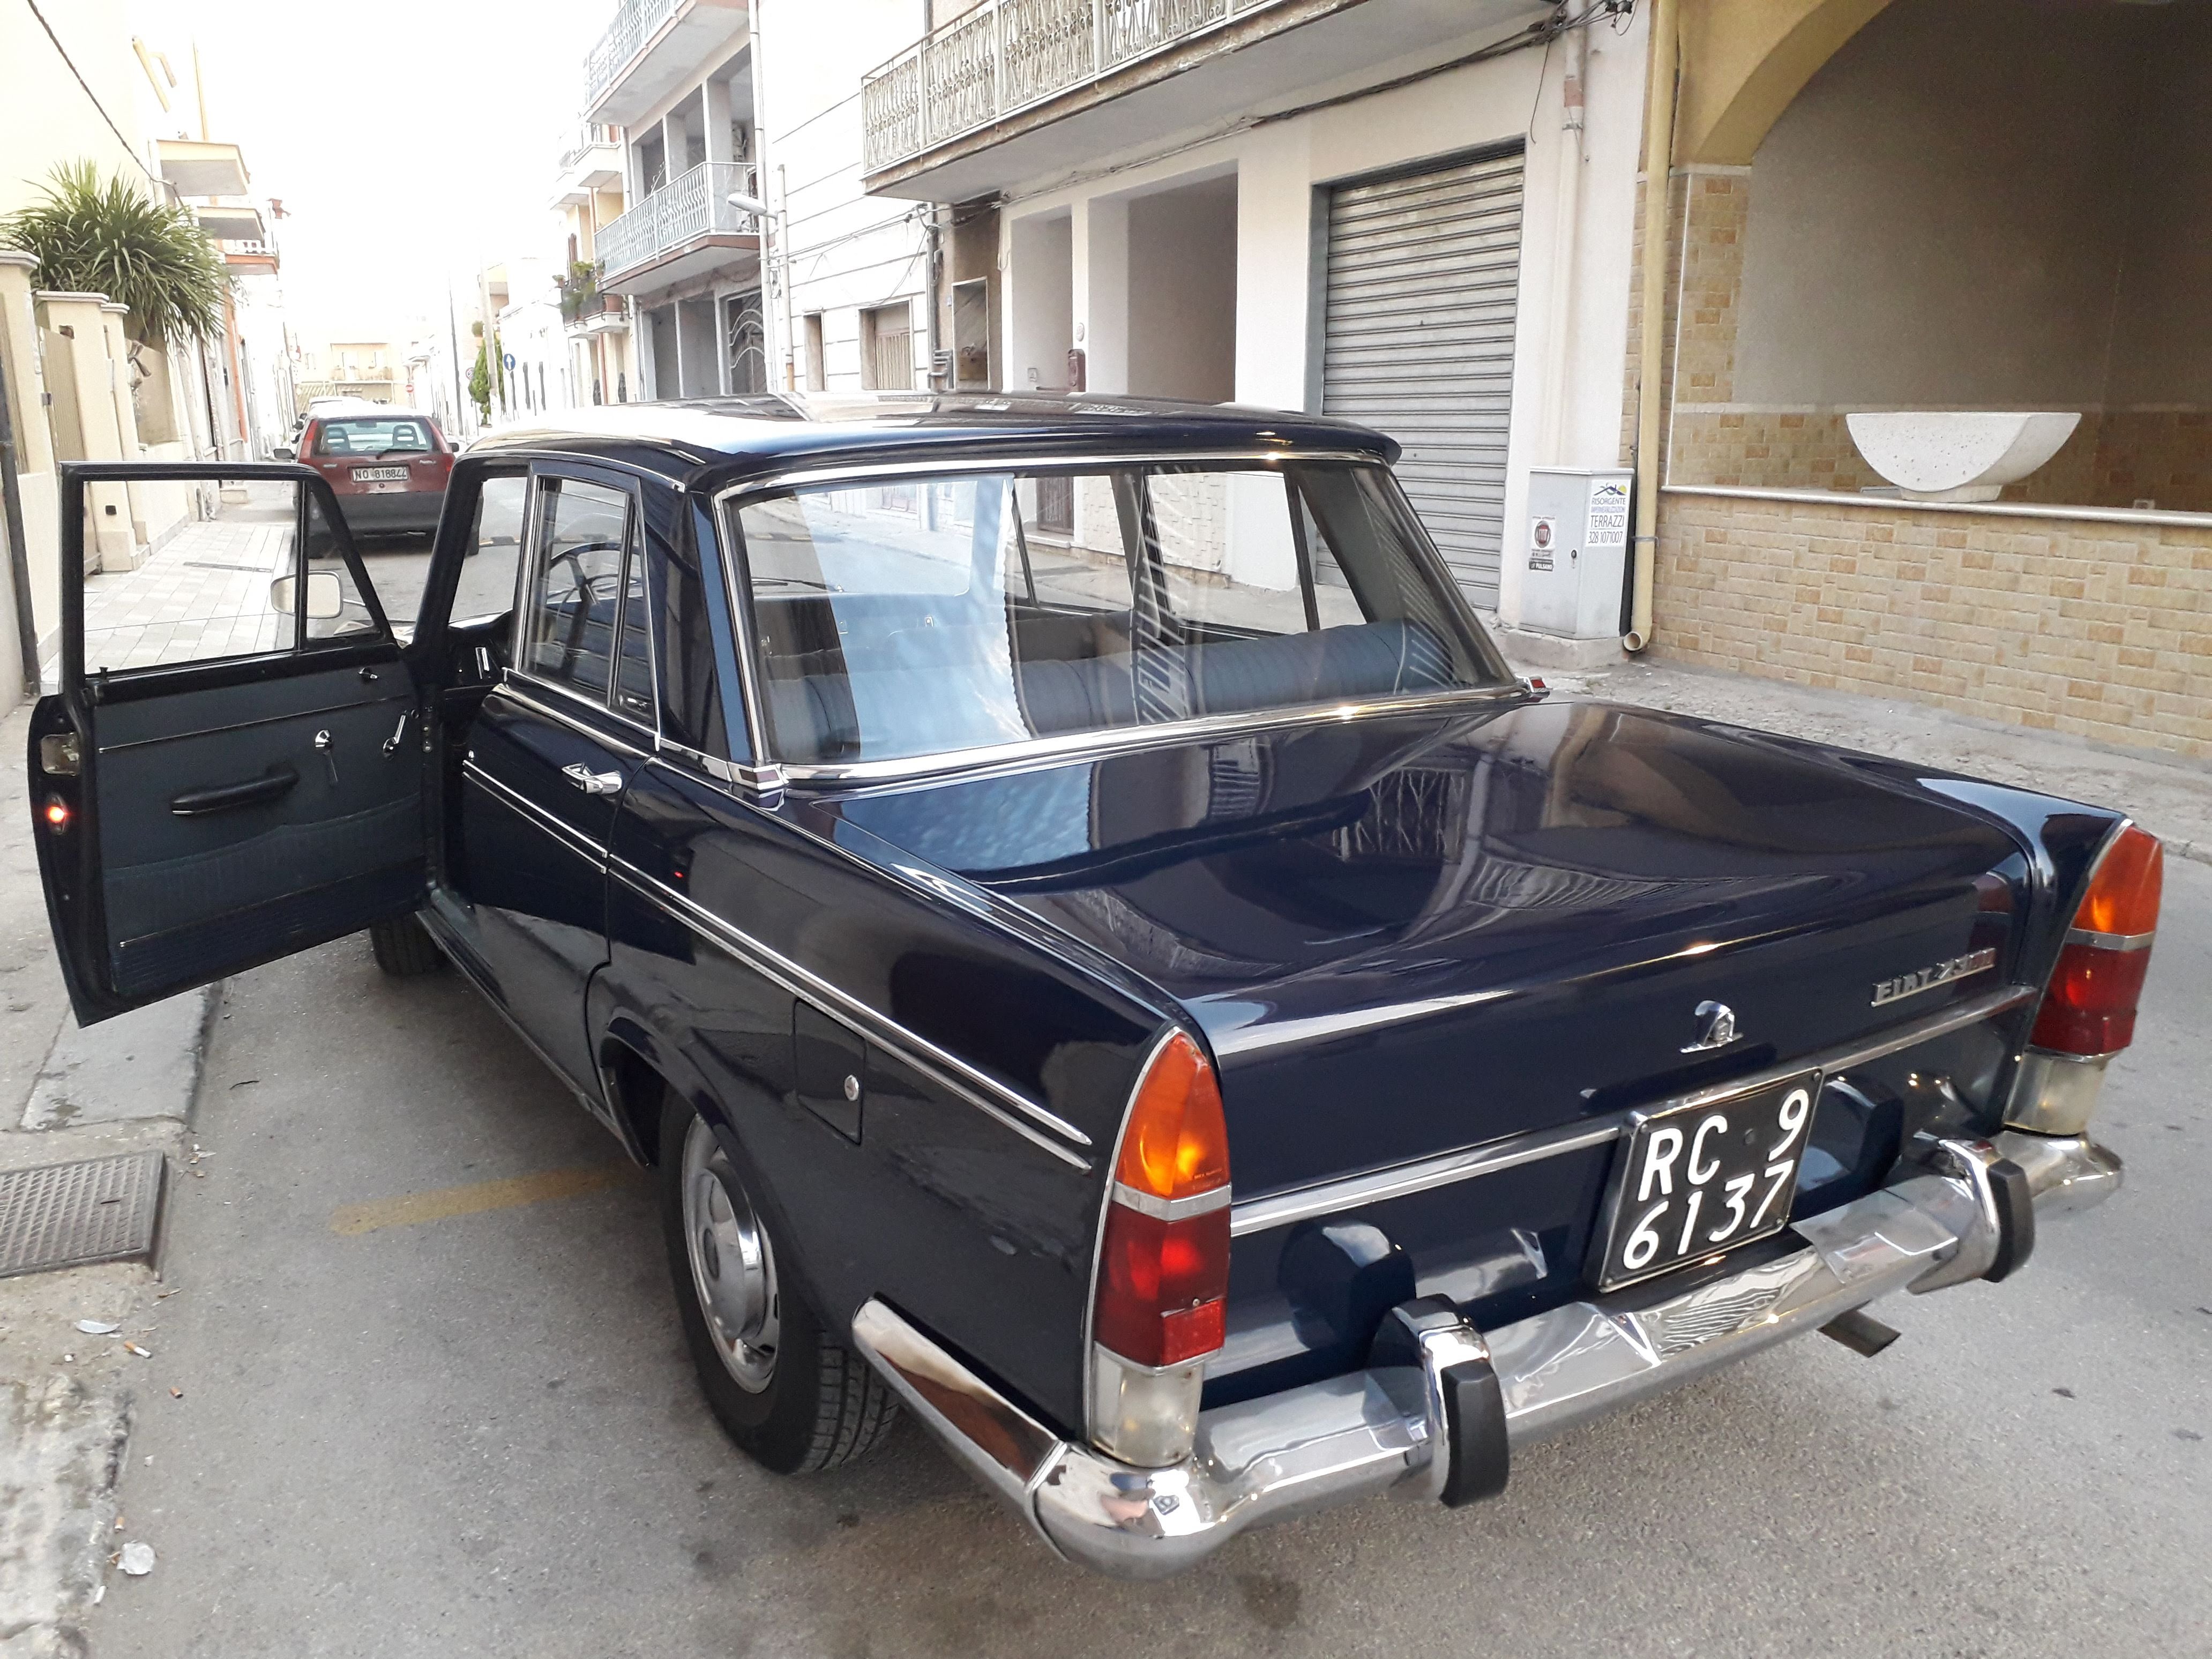
Got it back last Saturday and spent all weekend and a few nights this week cleaning parts and reassembling. I got a mystery pack of plastic trim clips off Ali which was very handy for replacing all the broken ones Paint is.... meh. It cost $1600 all up, that was to tidy up a couple of dents, do the outside, inside the rear door and touch up one of the front door shuts. There's a few runs and badly masked bits and all of the dust inside when I picked it up Realistically it's better than I could have been bothered to do though and it looks ok all back together I painted the bumpers with black plasti dip type paint which makes them look heaps better, I'll be interested to see how it lasts
2 points
-
Oh I’ll get it open lol having the opening front windscreen is mandatory. yup it will get painted. I’m thinking 2-tone blue or blue/black. Inspired by one I sat in in Nelson a while back. I’d quite like to do light blue body and dark blue guards with light blue interior, dark blue accents/piping etc
2 points
-
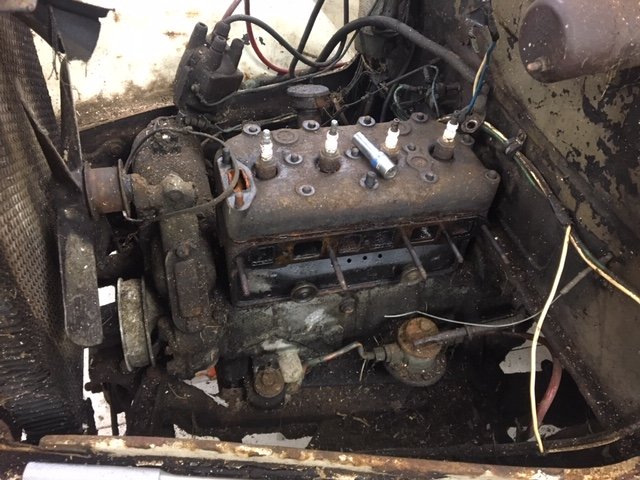
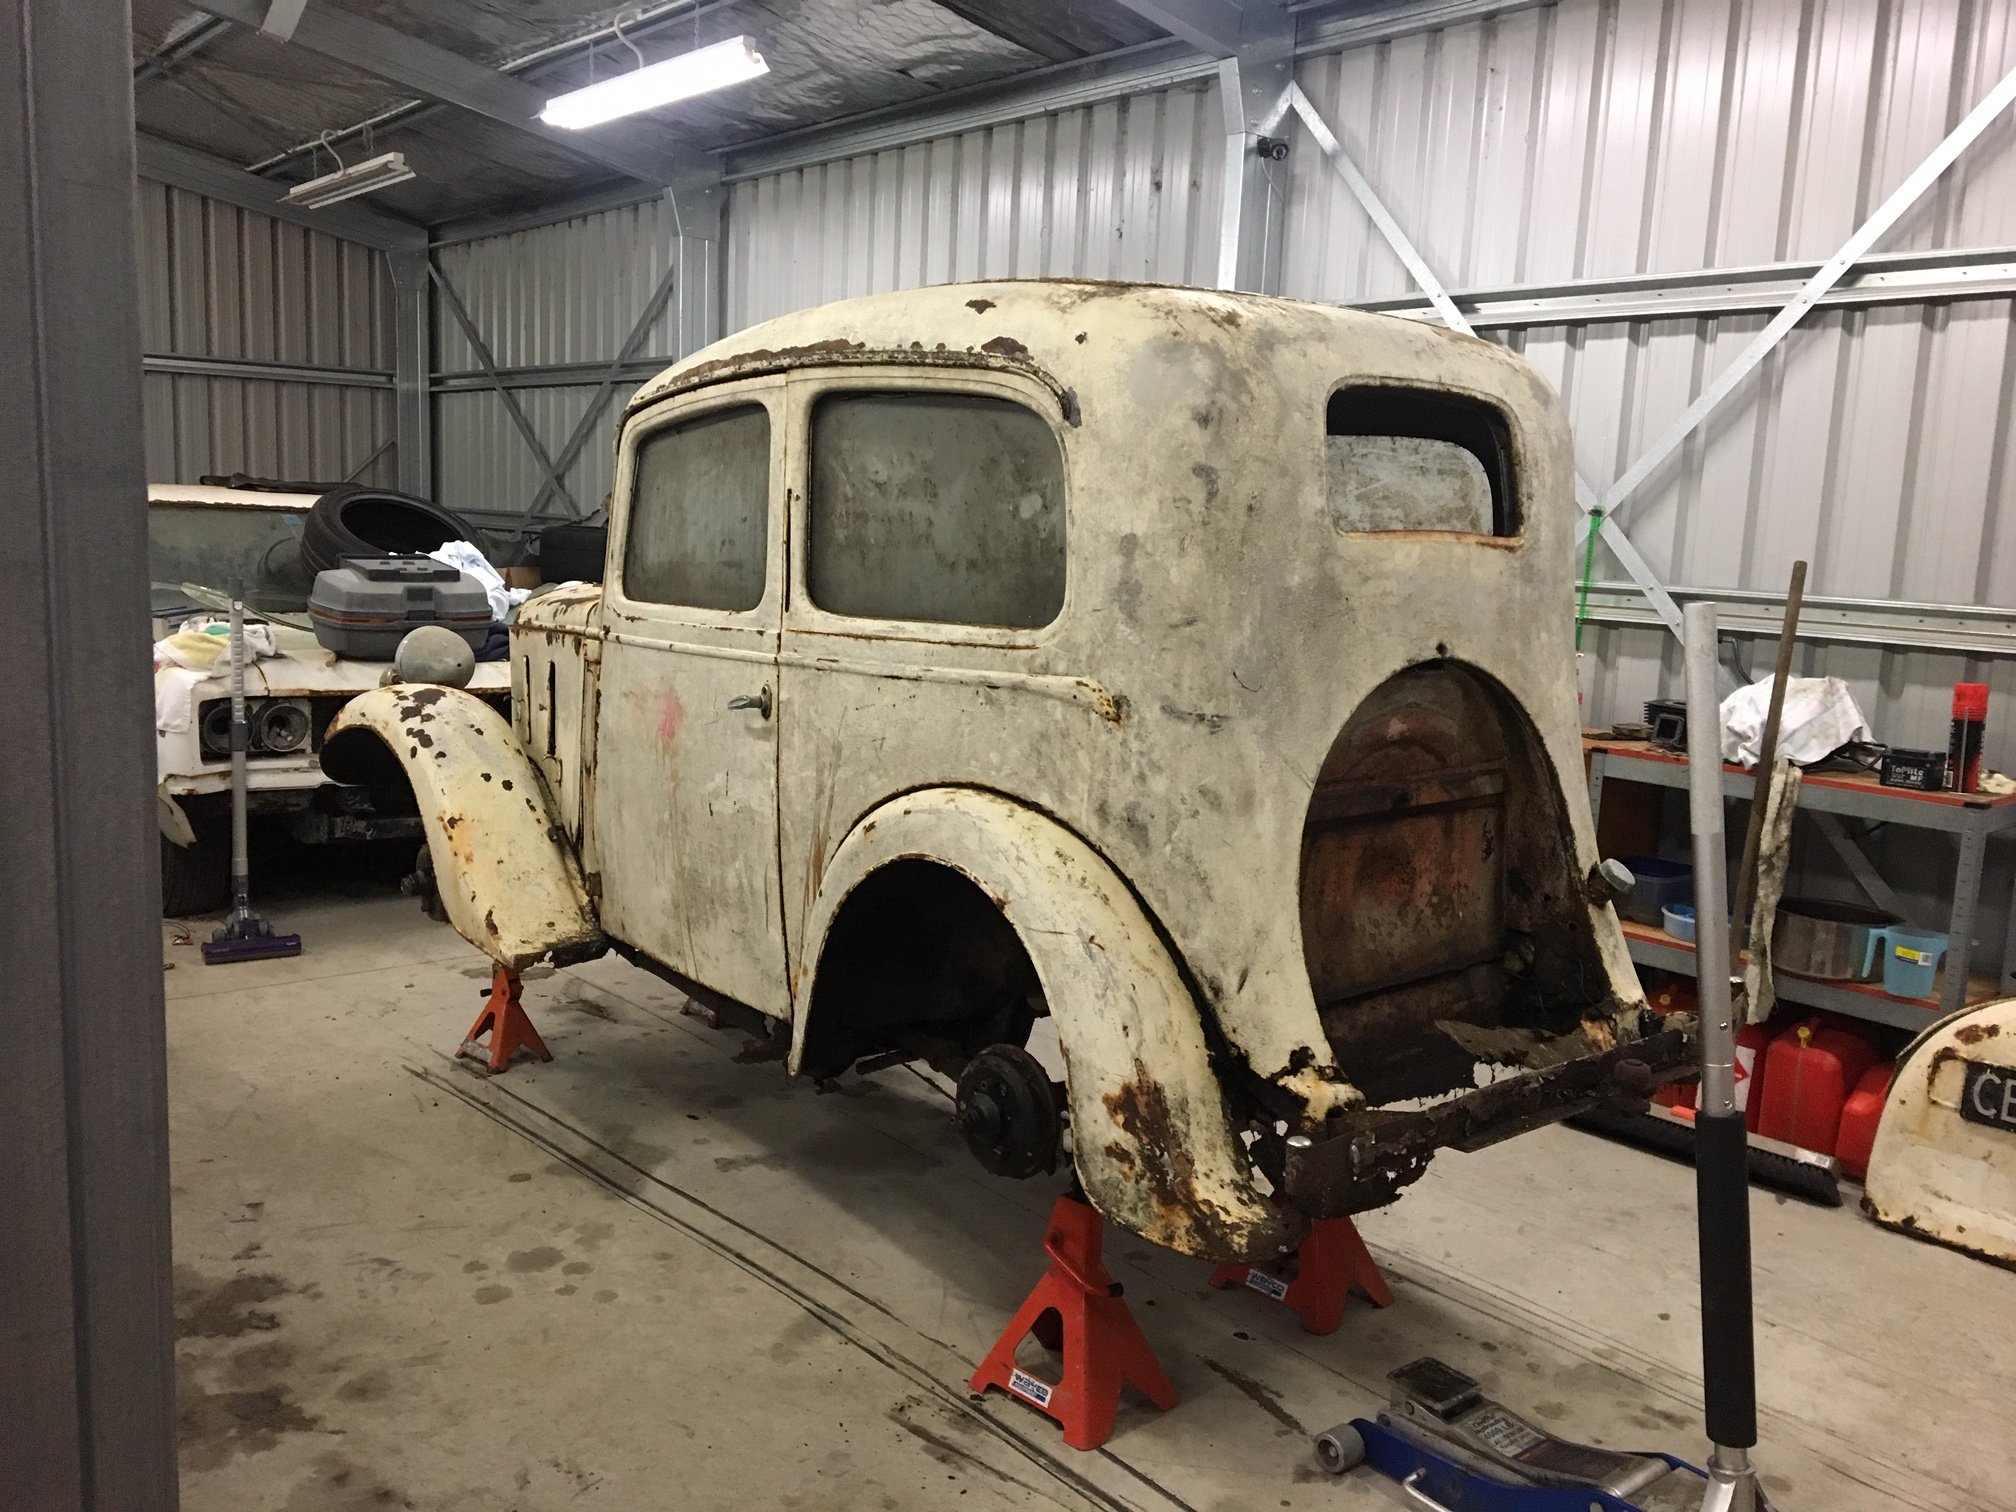
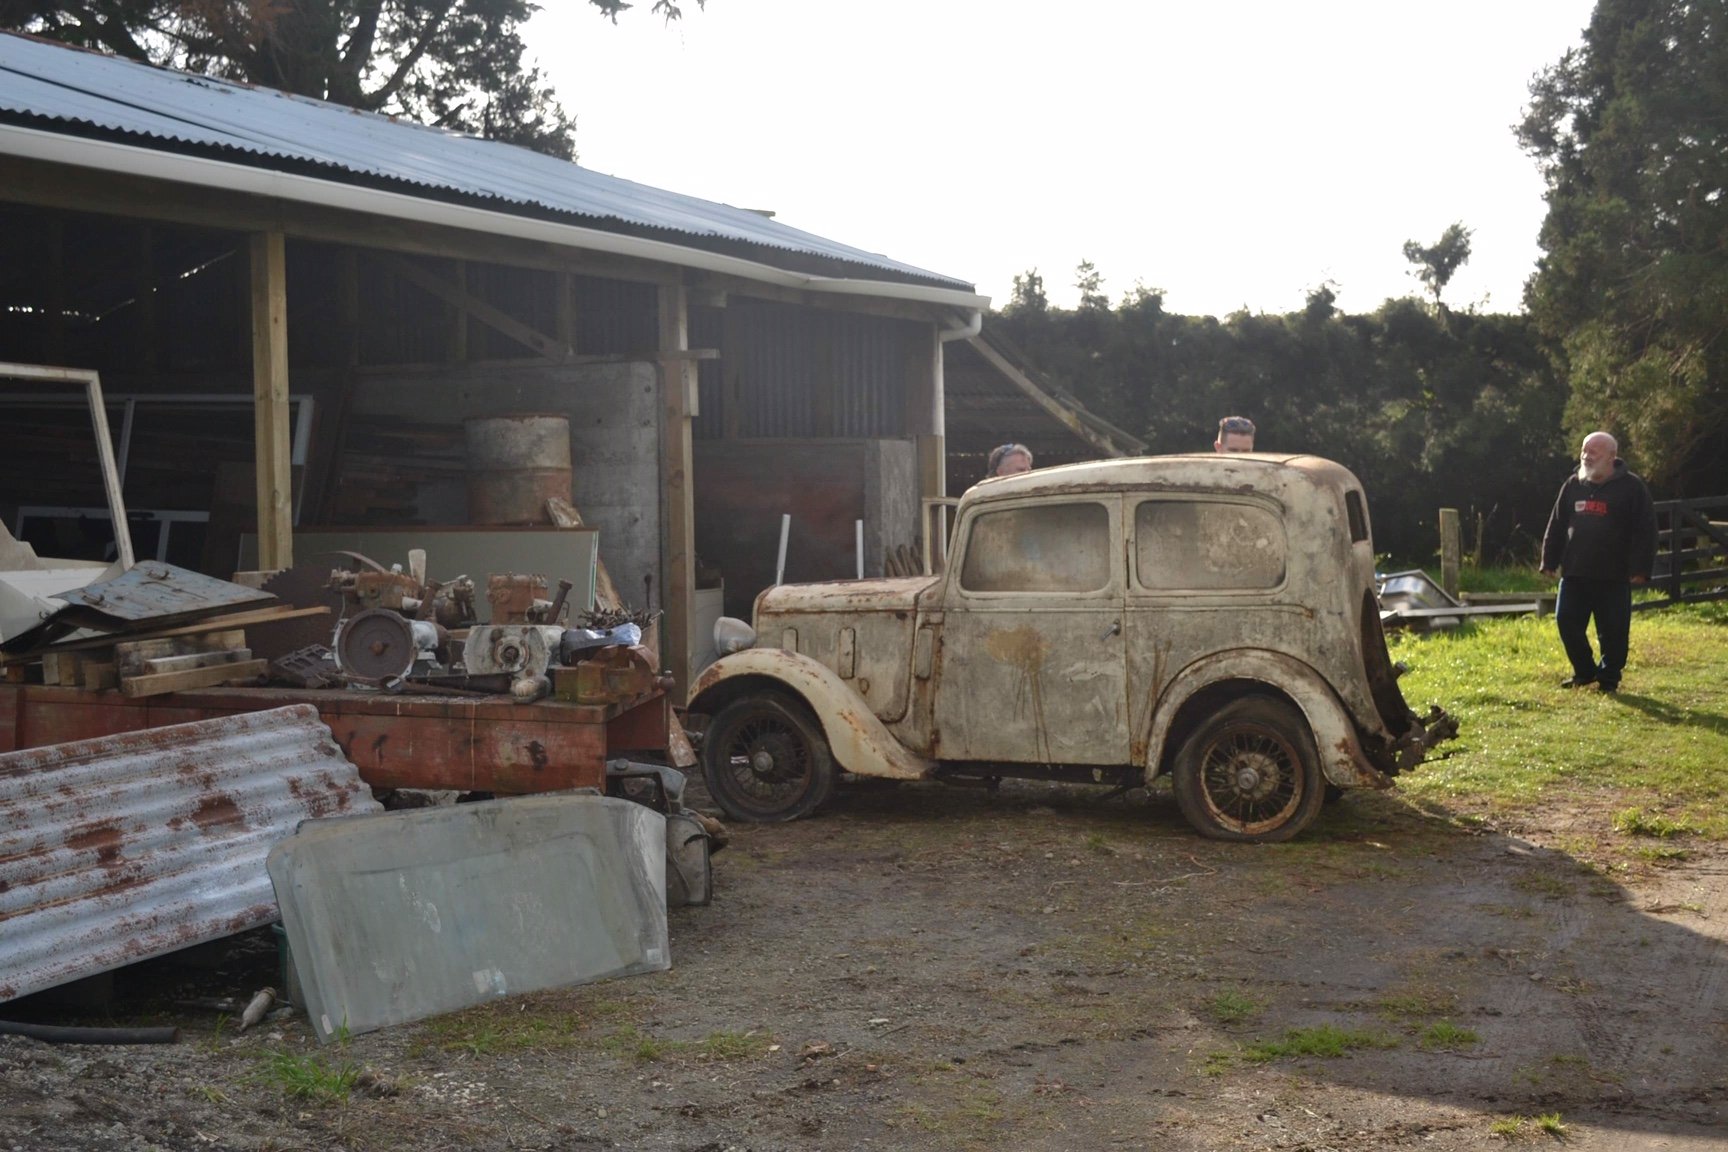
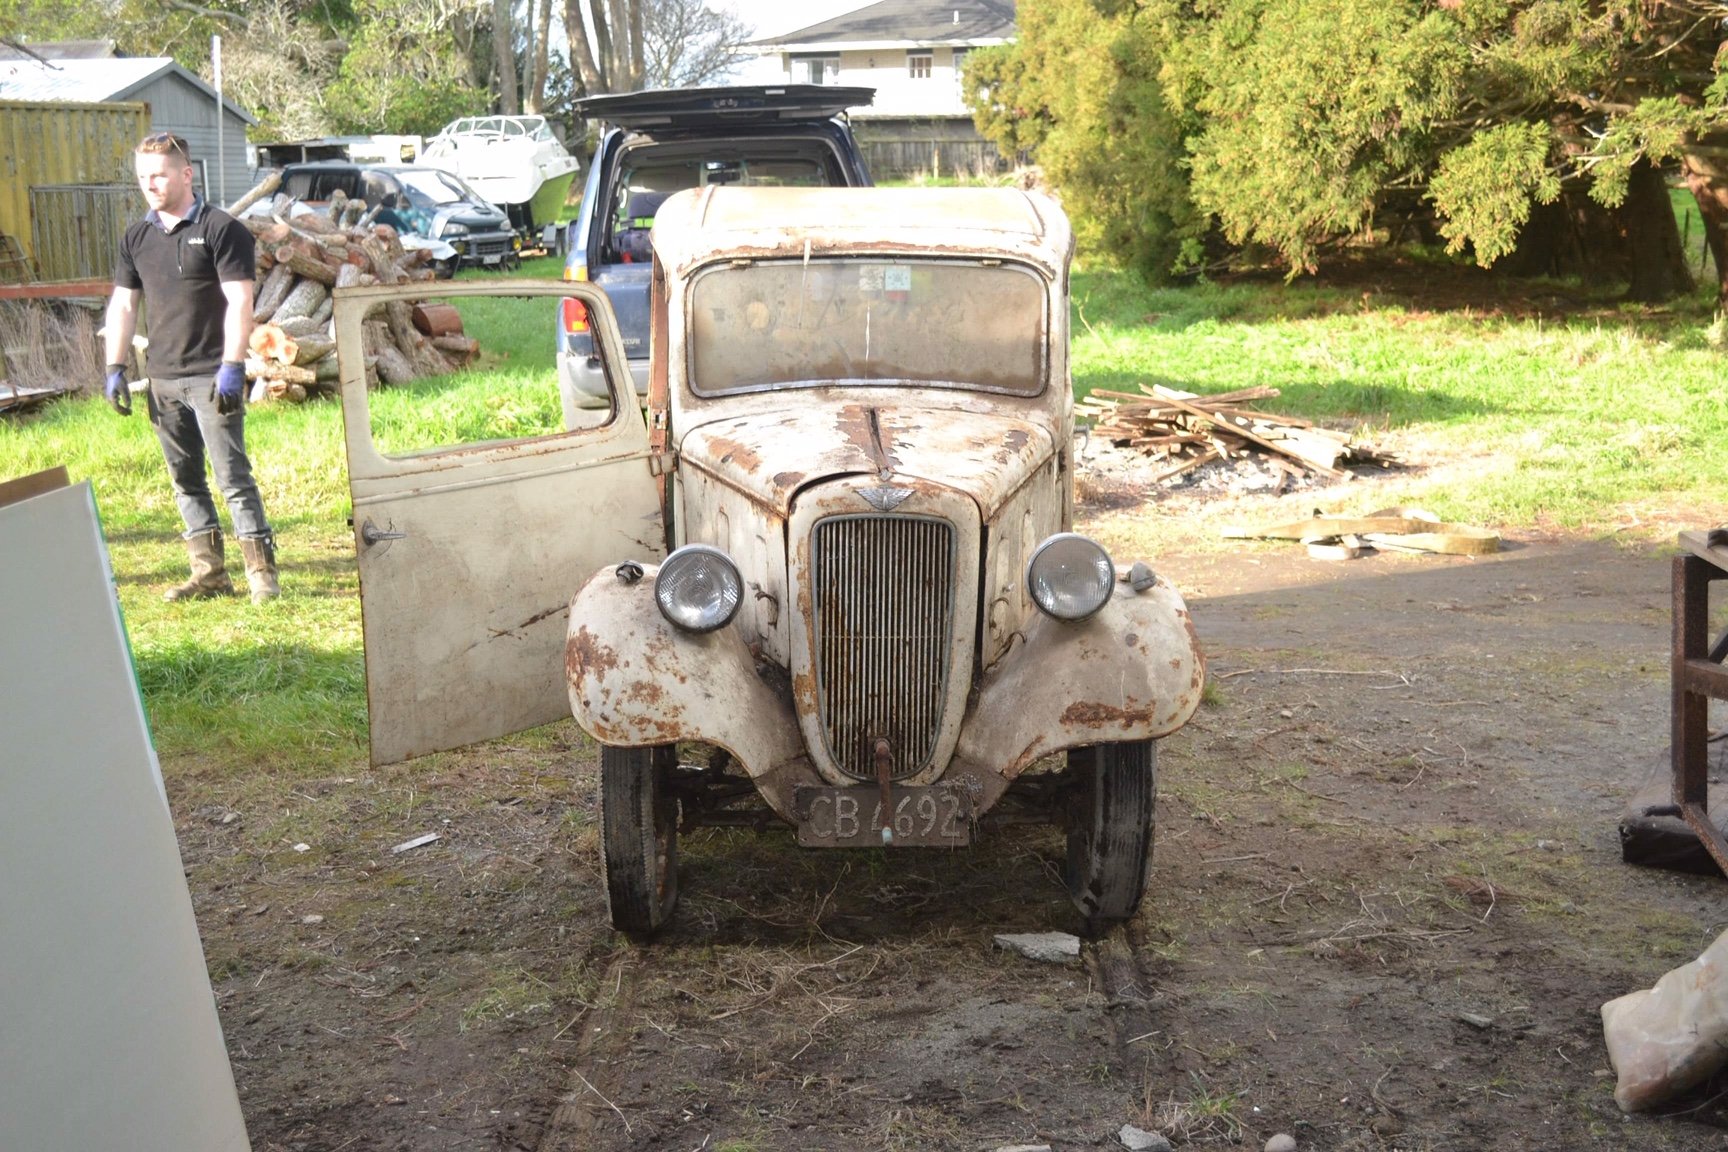
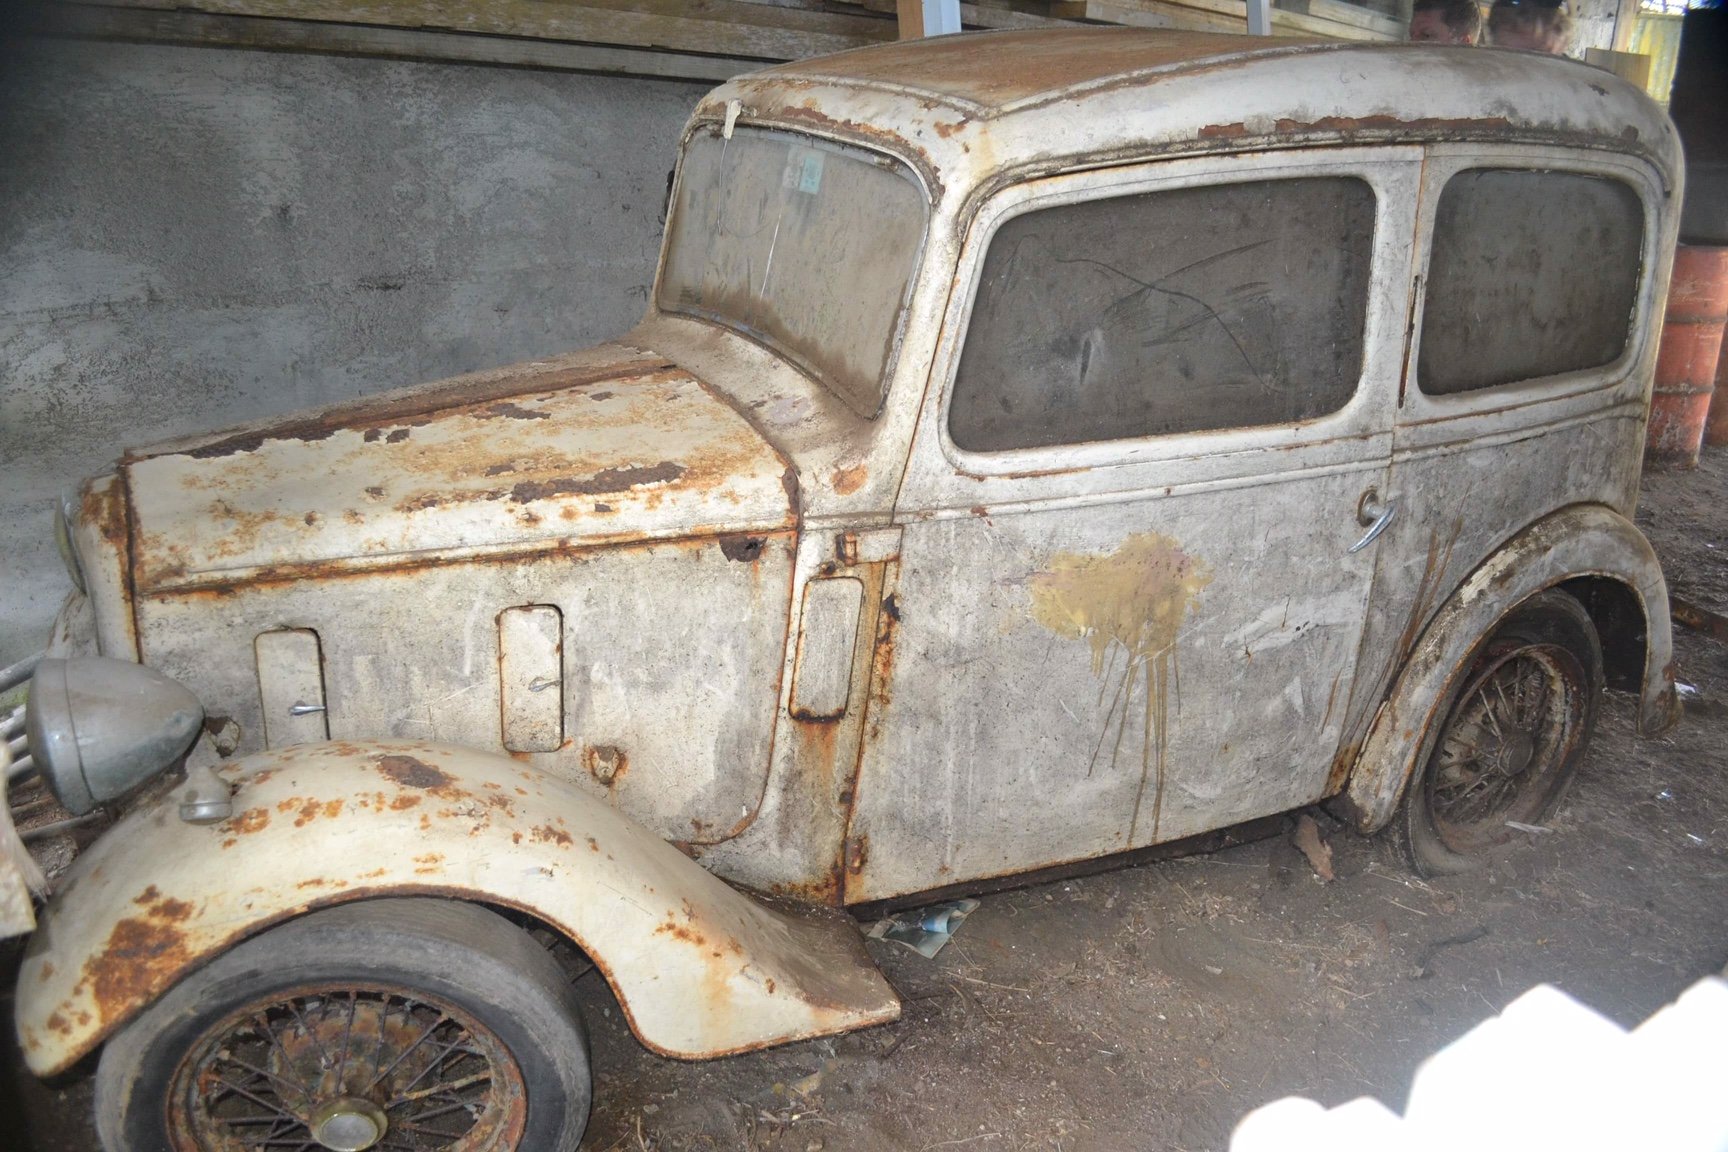
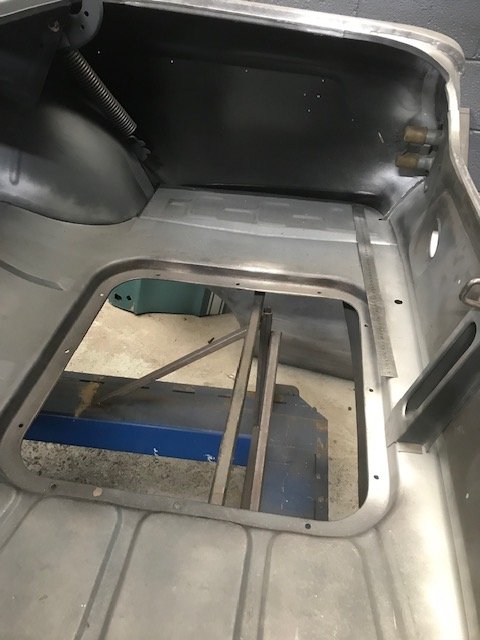
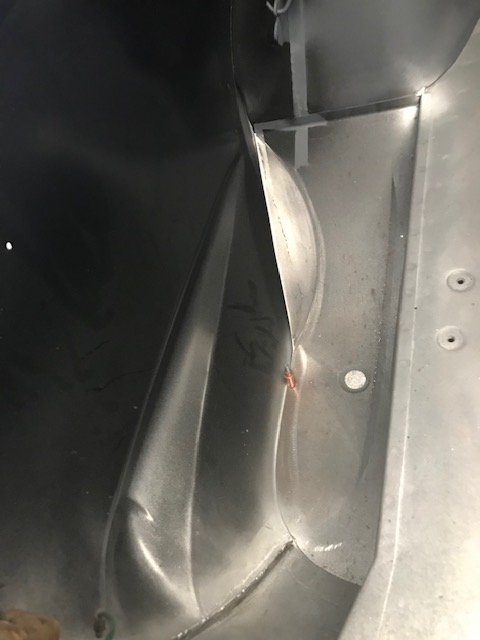
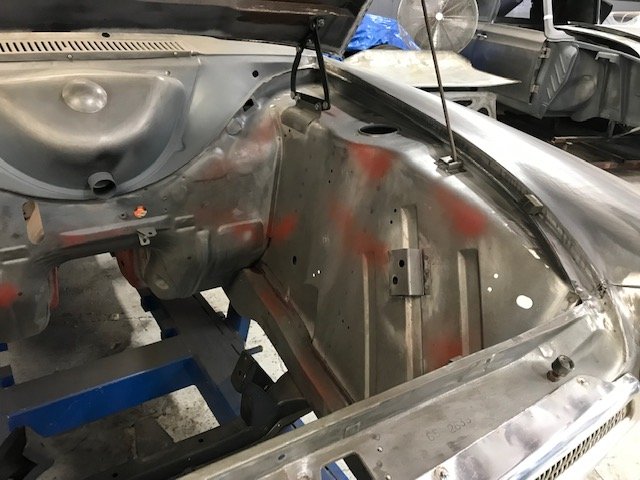
We took the car to my dads workshop as he has a bit more gear than me for getting things free'd up, the initial goal being to get it to a state where it could be pushed around and easily moved about the limited space of my own workshop. We got it into the shed, jacked it up, squirted some CRC at the wheel studs and left it overnight. I came back the next day to start the mammoth task I was expecting to get the wheels off. Armed with a range of metric and imperial sockets, I found the nearest I had to the BSW (*shudder*) wheel nuts and gave an exploratory lean on the breaker bar for the first nut. It turned easily and then came off by hand... NO FUCKING WAY... I repeated this for all 12 nuts, yes it has 3 stud wheels! What I had set aside an afternoon for, took me less than 5 minutes. I later went to take the bonnet off it, it wasn't attached properly and only had one bolt in it. No tools required here, I undid this 82 year old bolt with my bare fingers... As I said earlier, this thing has given me a few surprises about how easy it is coming apart. This is probably a good point for an explanation... When grandad parked up a car for what he thought might be quite a lengthy period of storage, he had a habit of pouring a few gallons of waste oil over them. Makes a hell of a mess and collects every spec of dust and dirt, but it does an impressive job of keeping everything working. The 68 Rambler Rebel in the background was in the shed next to this, and everything on it moves and functions and it has minimal rust due to the oil protection. The floor pans in the austin look as though they have had a tube of grease smeared over them, but zero rust there. The only real rust on the Austin is around the spare wheel, and in the sills, where the oil didn't really get. I've been having a tinker to try and get the engine free'd up. So far I have managed to remove the head, exhaust manifold etc, all without any broken studs. Thanks grandad! In fact the only thing I have found seized up on the entire car so far is the lever for the folding front windscreen (and the engine...)
2 points
-
2 points
-
So given this complete bombshell of how easy this was looking like being, we put a strop around the diff. Put the VX landcruiser in low ratio, and gently towed it out of the shed. To blow my mind even more, I think I jokingly said, "wouldn't it be easy to steer if I could wind the window down" at which point I grabbed the window winder and wound down the bloody window! This little car blowing my mind with how much of it still works is kind of becoming a theme.
2 points
-
2 points
-
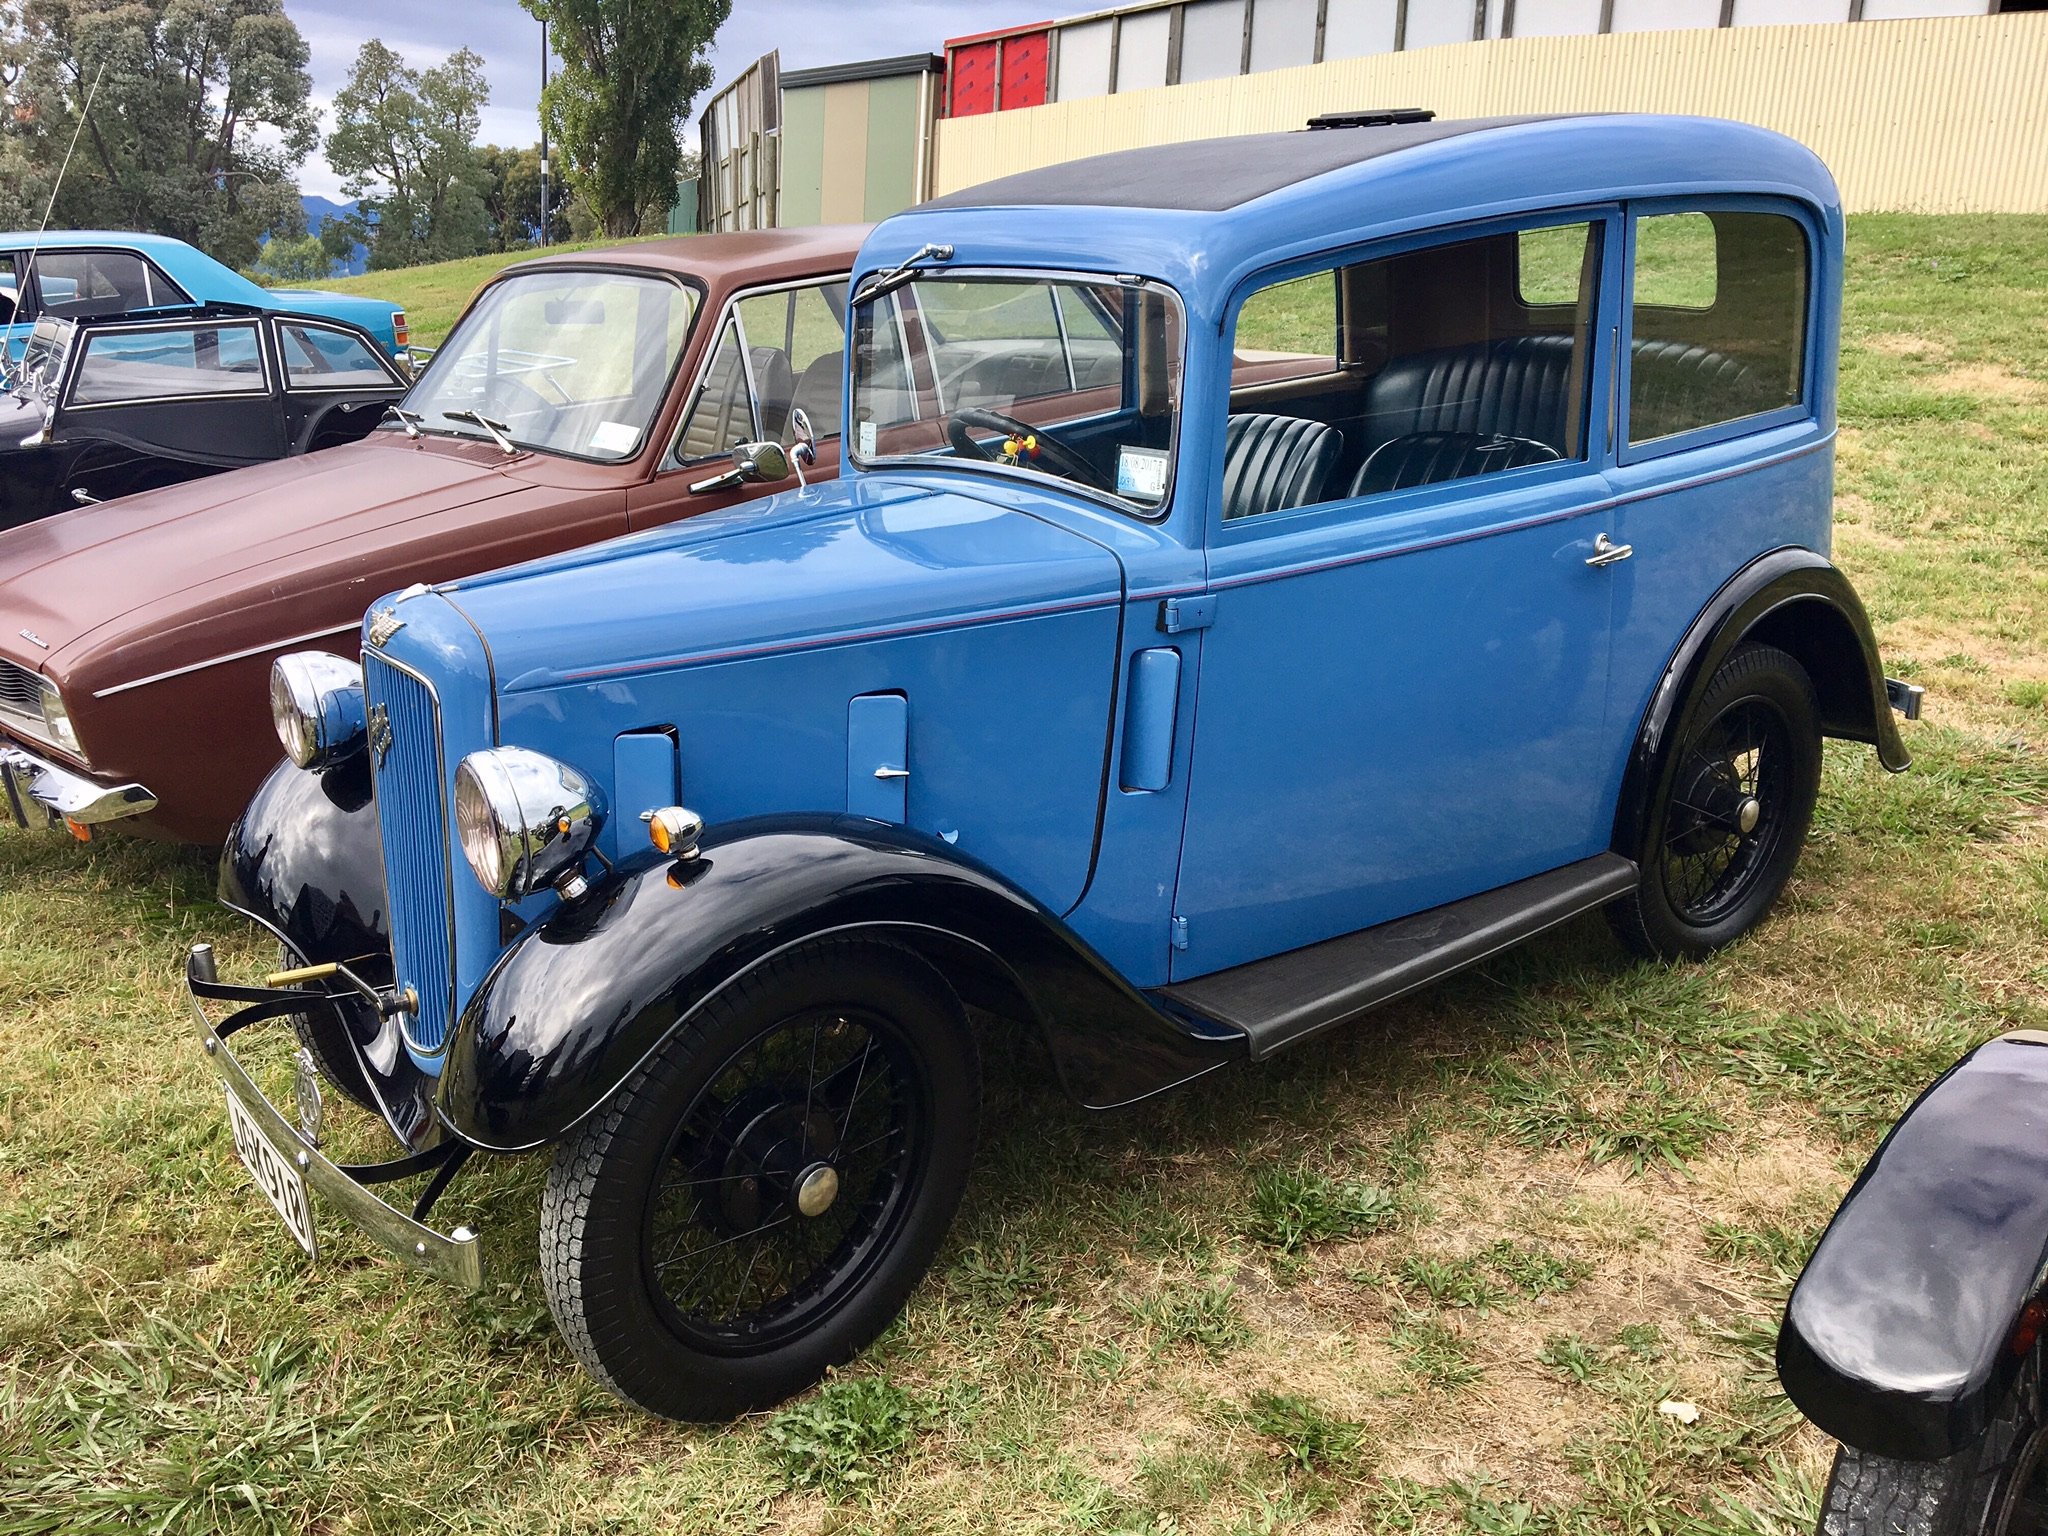
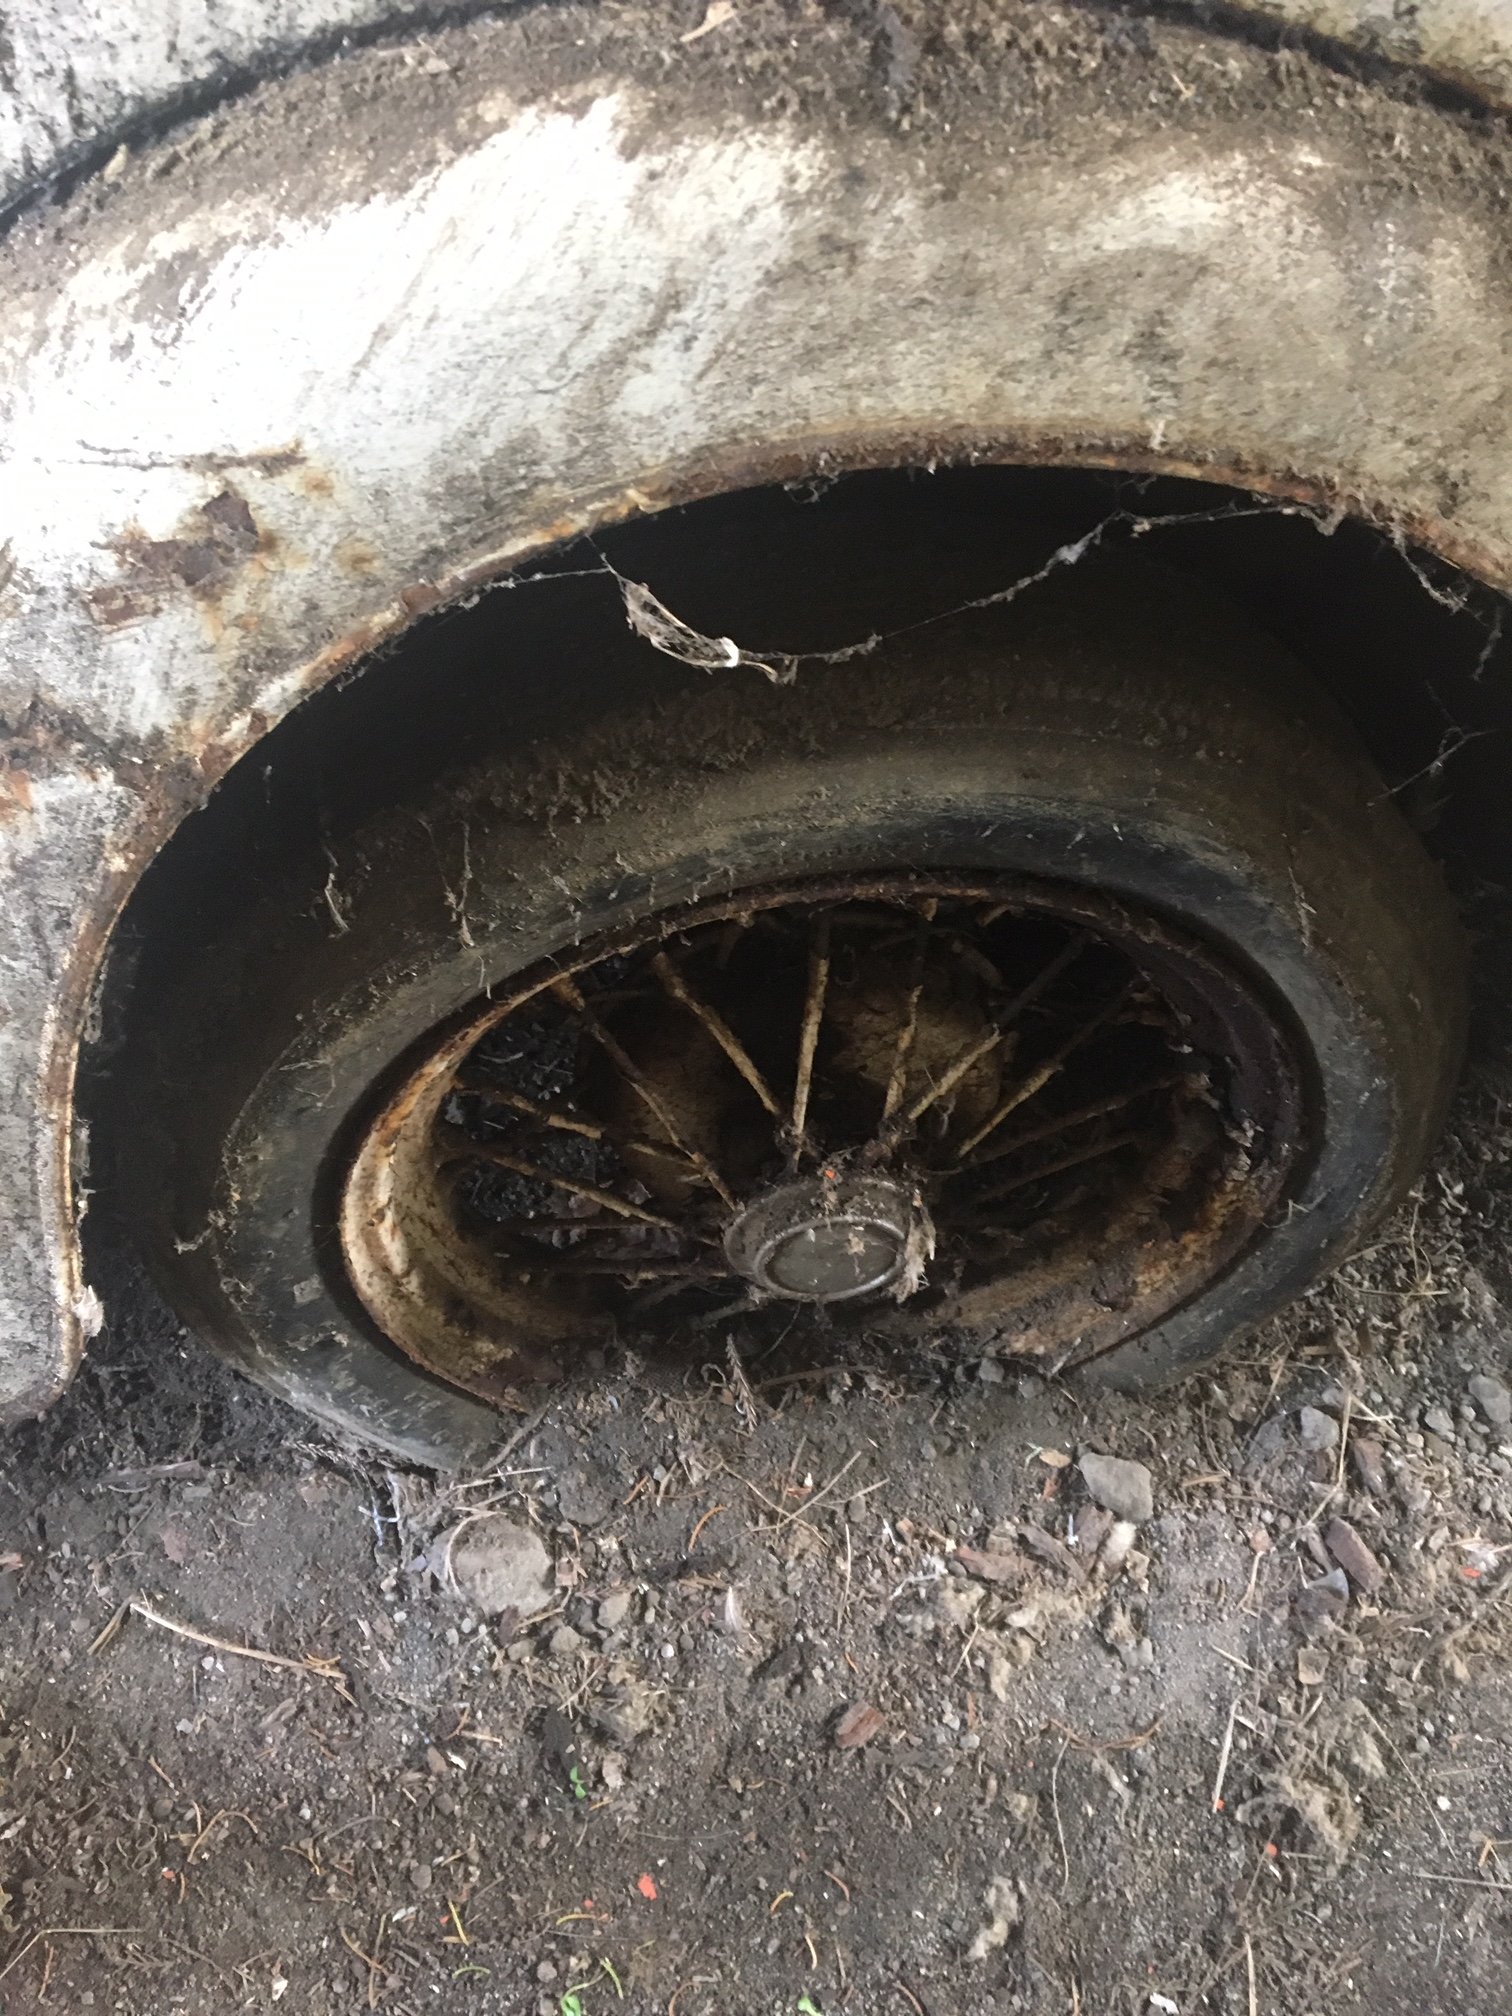
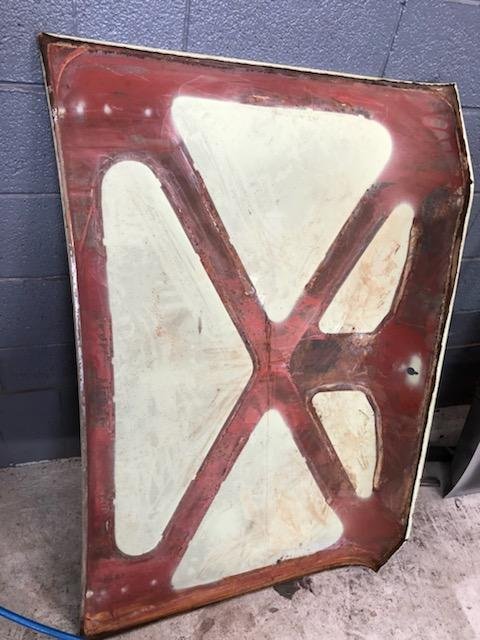
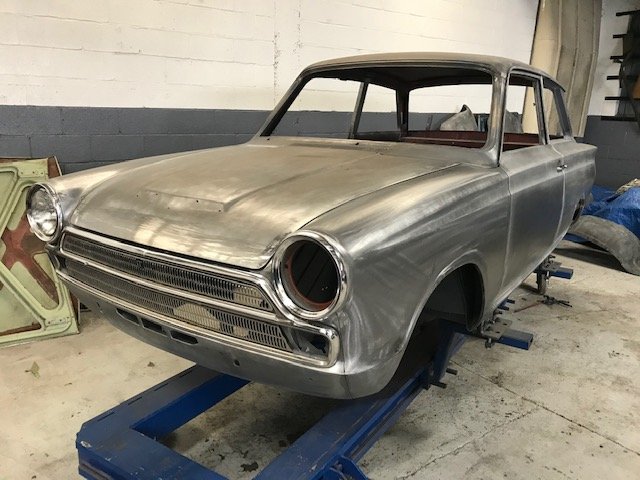
Discussion: Lurking in the back shed at my grandads farm for all of eternity has been an old Austin 7. There was a bunch of old cars there that as kids we used to play in, but the Austin had been there for so long that it was completely buried under hoarded shit and was far too scary to play in, but was always interesting to see if you peered past the old L300, Fergie 19 & piles of old timber. As a 10 year old kid, I was smart enough to know that this one was well beyond rescue... Fast forward 20 years: Grandad has passed on and the sheds have been mostly cleaned out for the next generation of hoarding, revealing this little Austin. Now 30 year old Jeff is not half as smart as his 10 year old self... So now I look at it and think "I reckon I can save that... maybe..."
1 point
-
Hole is probably too high for it to be used as a bong.. but what I really wanted to comment is, as someone who has experience cutting glass etc, that is IMPRESSIVE that he managed that with a hand drill !1 point
-
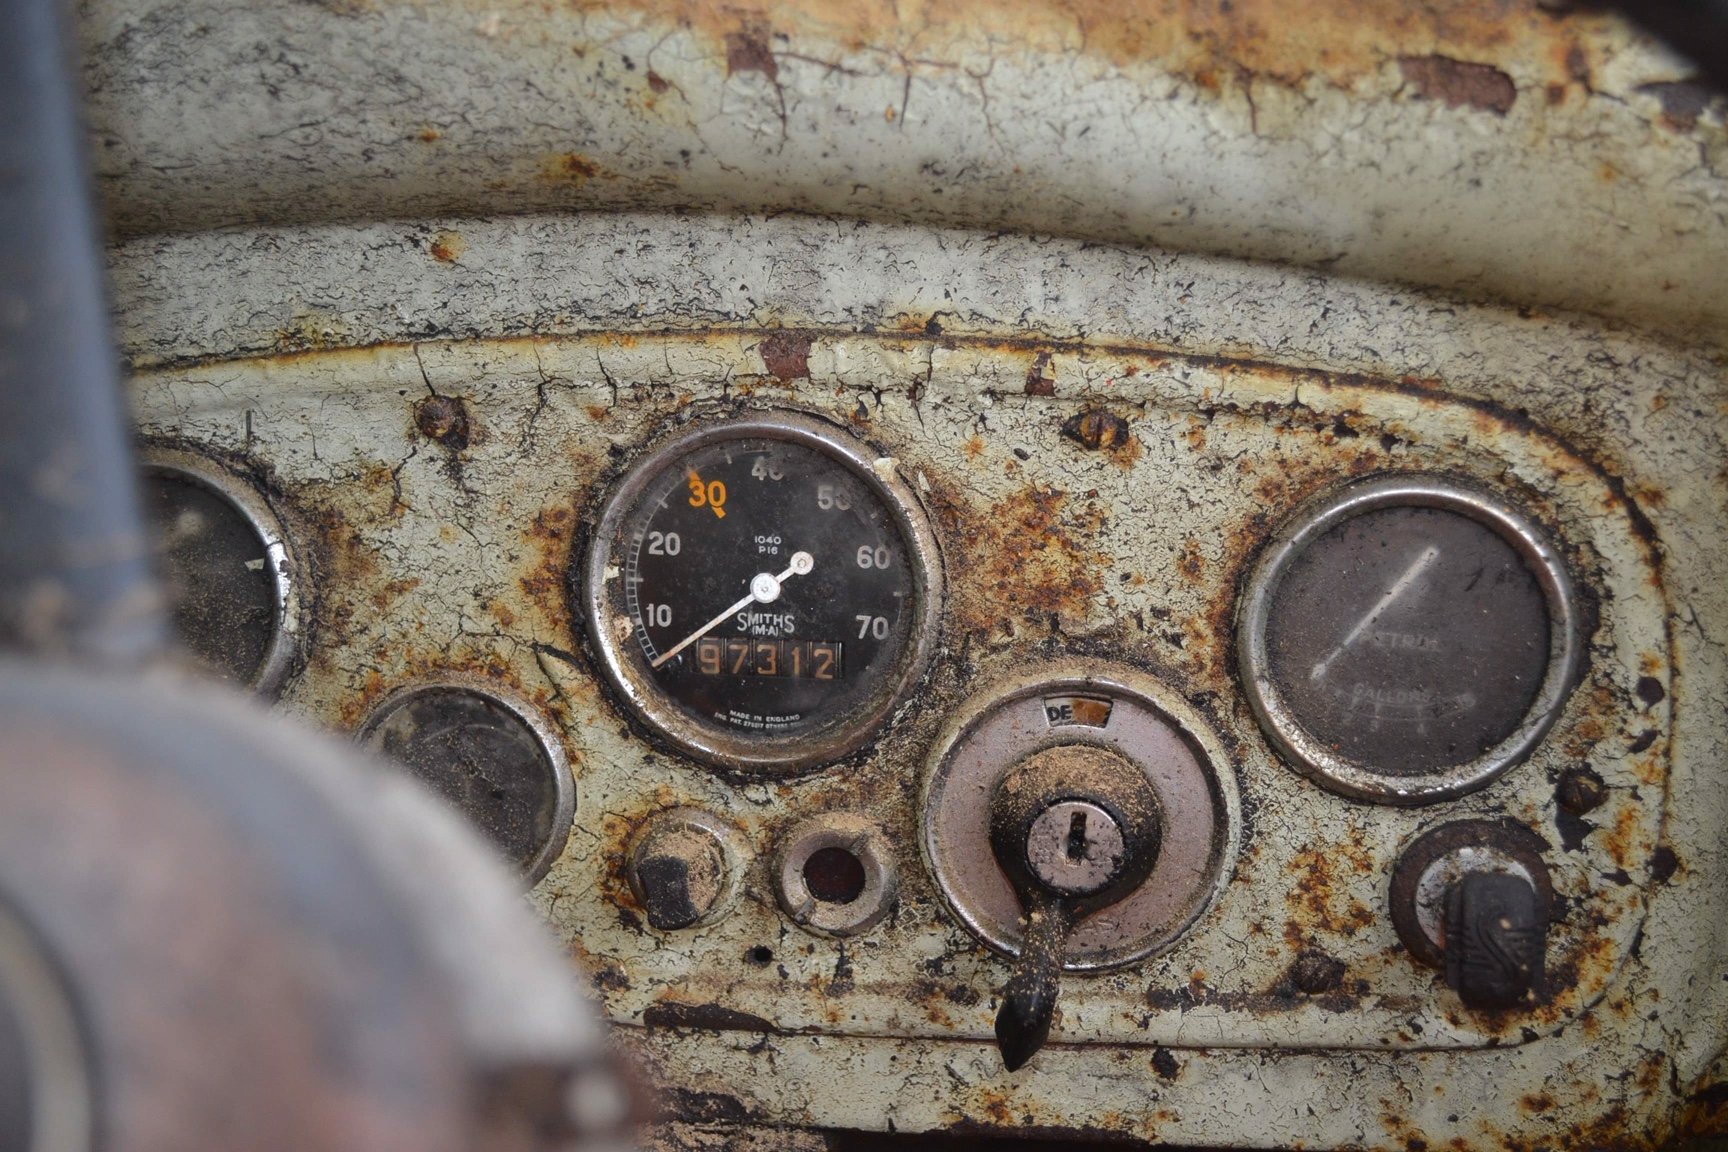
Love digidashes, found this page a while back, some of them are nuts haha! Like, I cant believe the likes of Aston Martin would run such an atrocity haha The Subaru XT one just rules my face right off though. So cool http://www.joost.net.au/1 point
-
Ask your mum, she takes a few.1 point
-
Also last nights meat was another goodie! Made it to BP to pump tyre up on the van and made it back home sweet as. She's dead flat today though hahaha.1 point
-
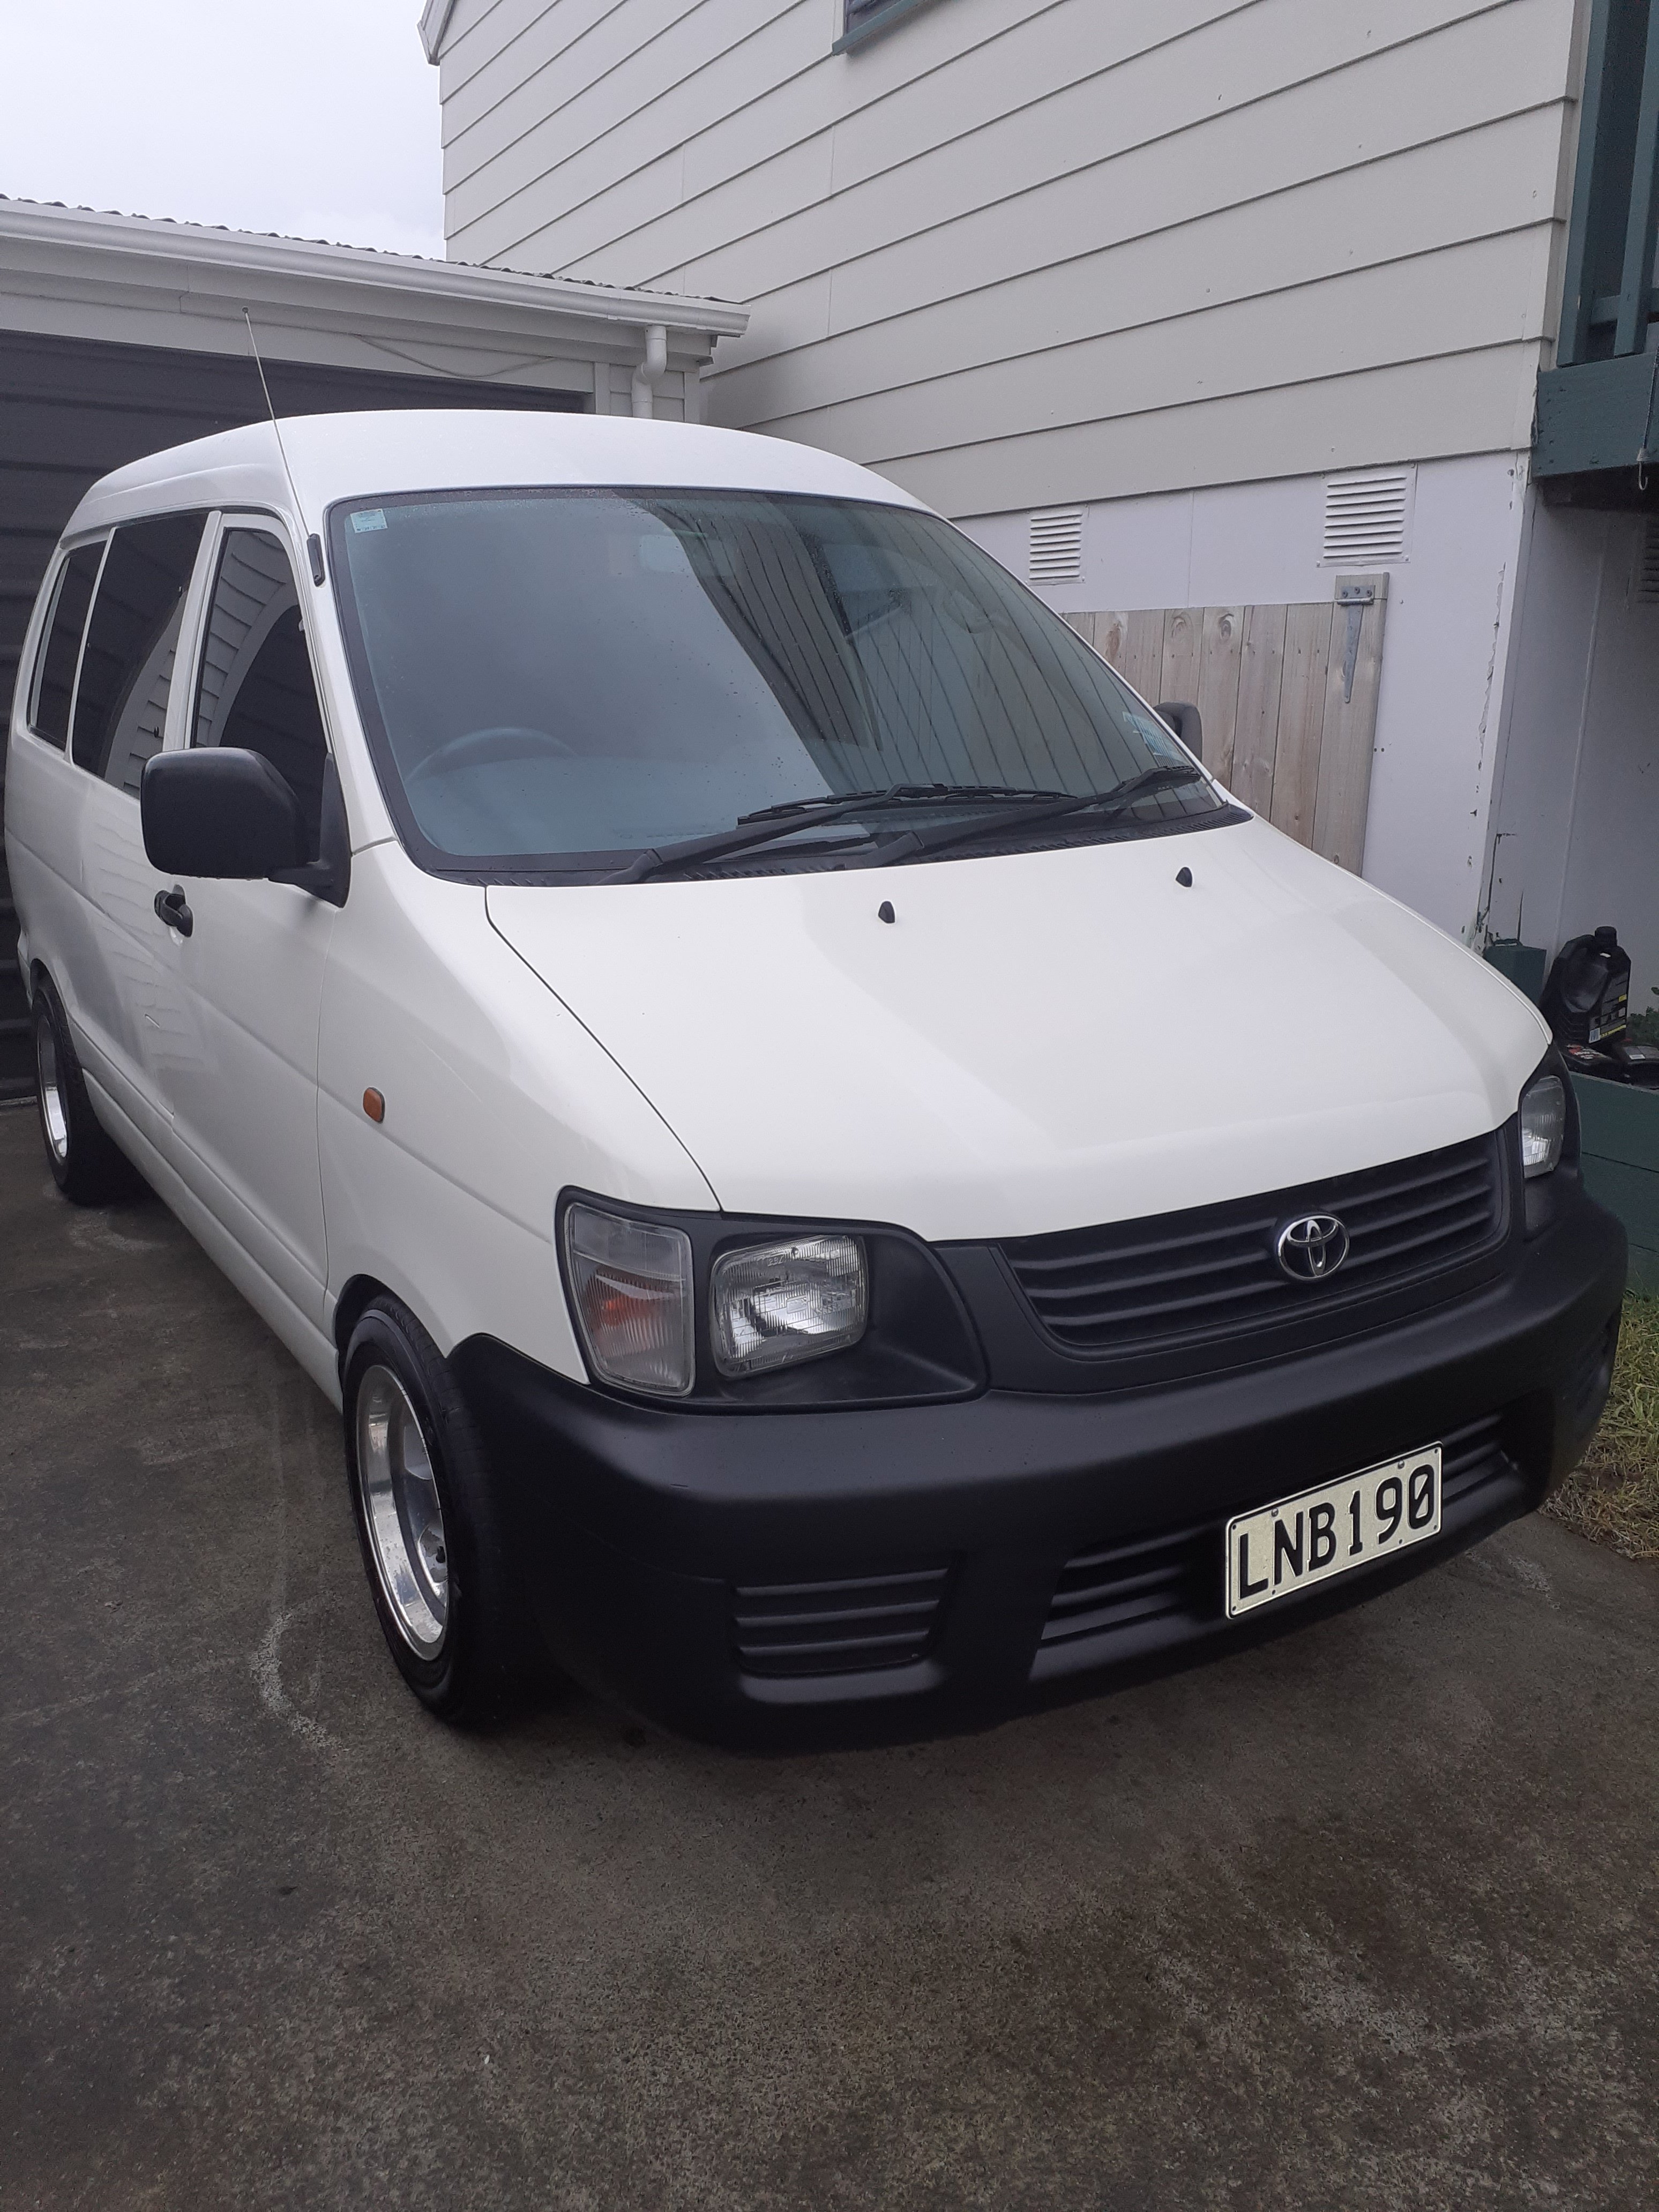
Took the day off yesterday because i missed the bus, so took this thing down to my usual WoF place. For some reason i only took this blurry potato while it was up on the hoist. GREAT SUCCESS! (one of the two number plate lights blown but he passed it on the basis i would replace it asap) Celebrated by slopping drippy subway all over the seats and my pants ate my lunch watching the kite surfers hoping for a massive tangle up Bought this on the way home too, hopefully slow down the cancer a bit In other WoF advisory related news, changed the brake pads on Lady Azzurro's daily, i think we got our monies worth! And after tidying a lot of crap from on and under this thing, pumped up all the tyres and dropped it off the axle stands for the first time in nearly two years,1 point
-
Hoping to setup a YouTube account soon and put up videos of me gapping Busa’s at the lights etc. In the meantime, here is my solution to a problem that plagues all of us: where to store all my damn helmets. On a damn handsome helmet rack.
1 point
-
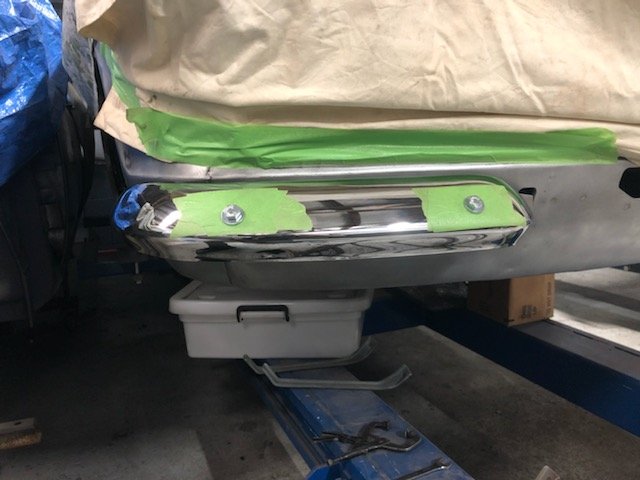
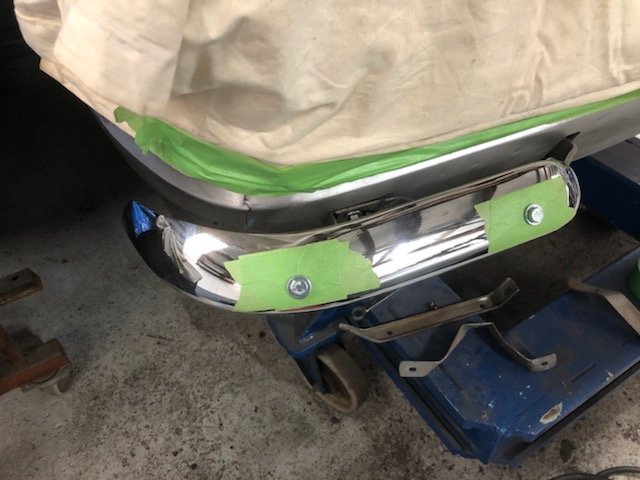
Been away lots lately so no progress on the rubbers. Back in NZ next week so need to get them sorted. Fitted off the front quarter bumpers and had to do a few adjustments to the brackets to get them sitting right. Unfortunately the left front one has had a crappy repair before caroming so it’s off to the strippers for that and the rear bumper and Greg will get them mint before getting chrome plated again.
1 point
-
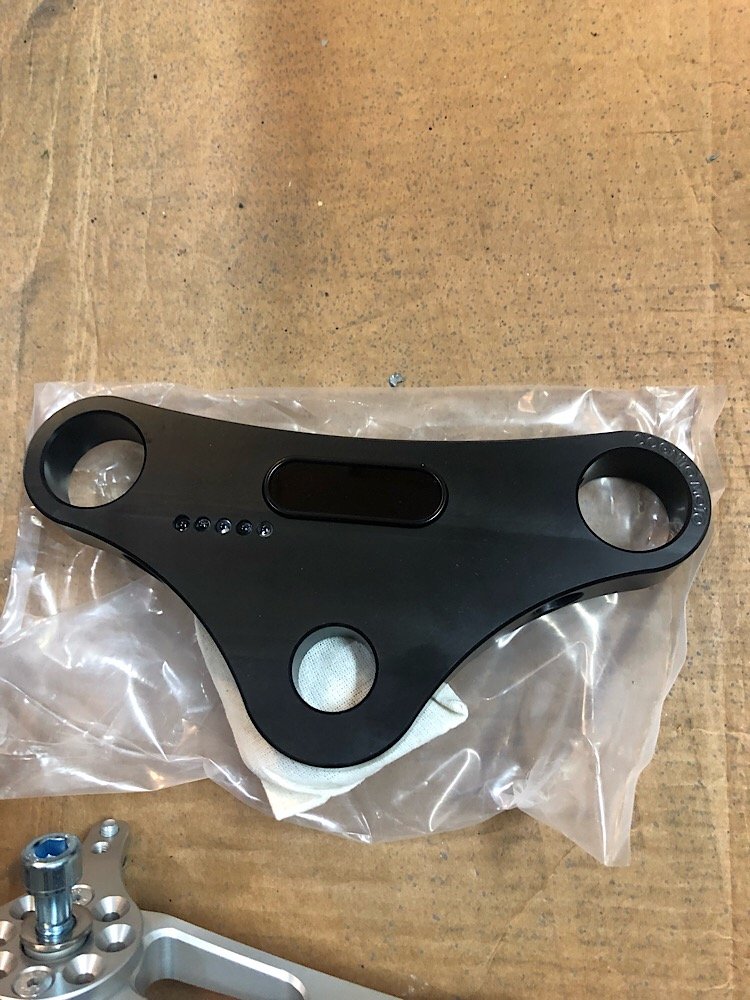
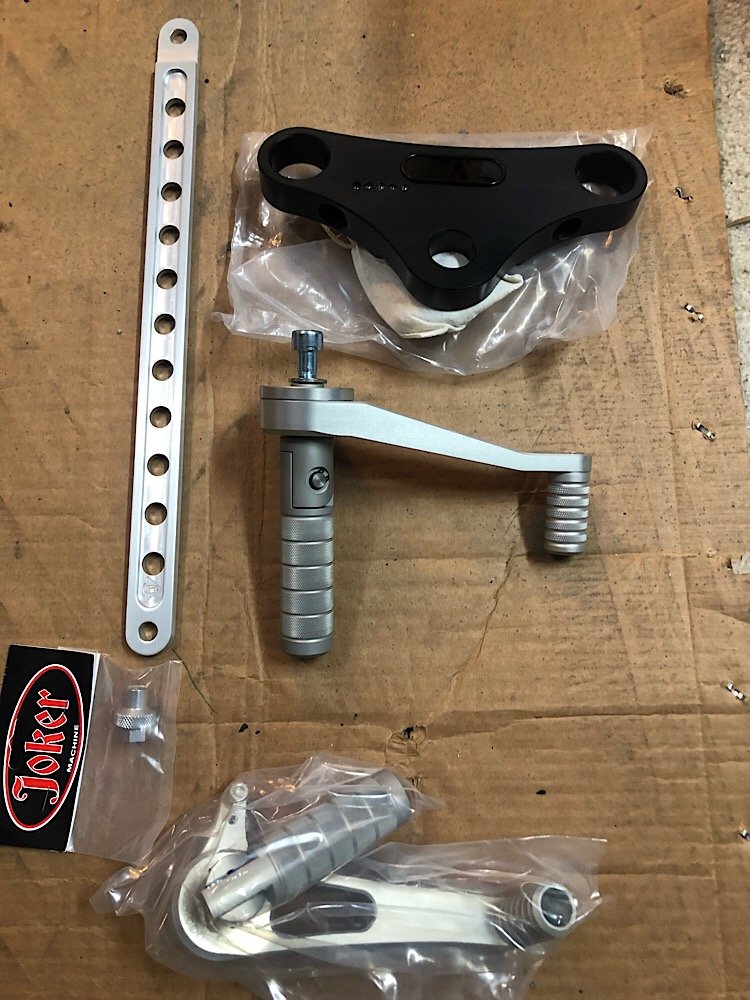
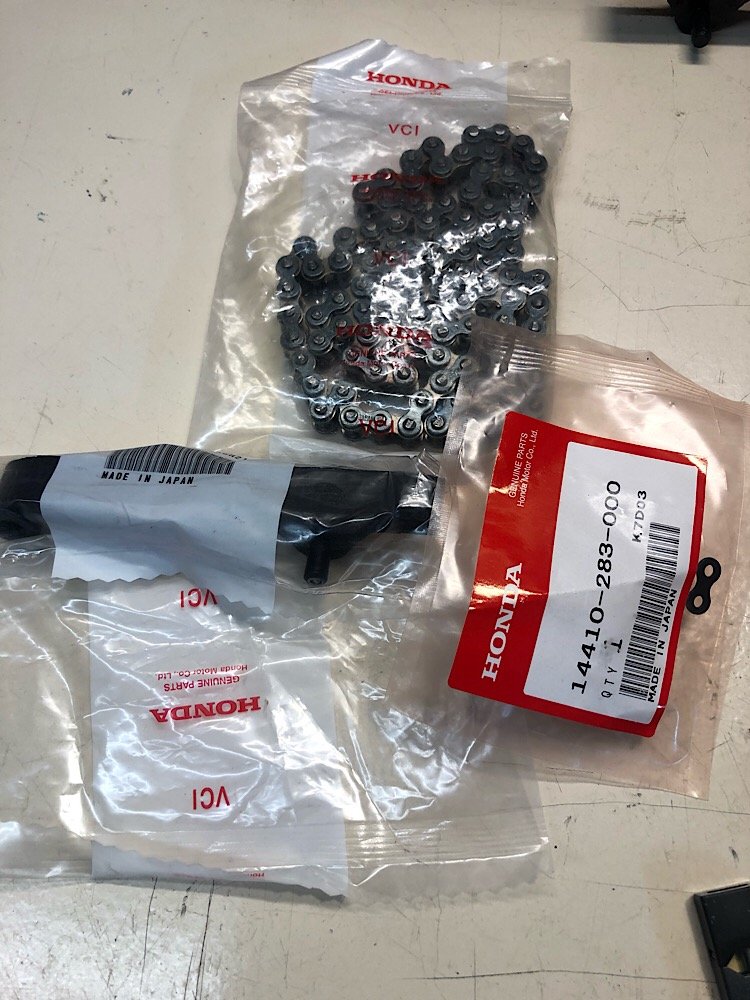
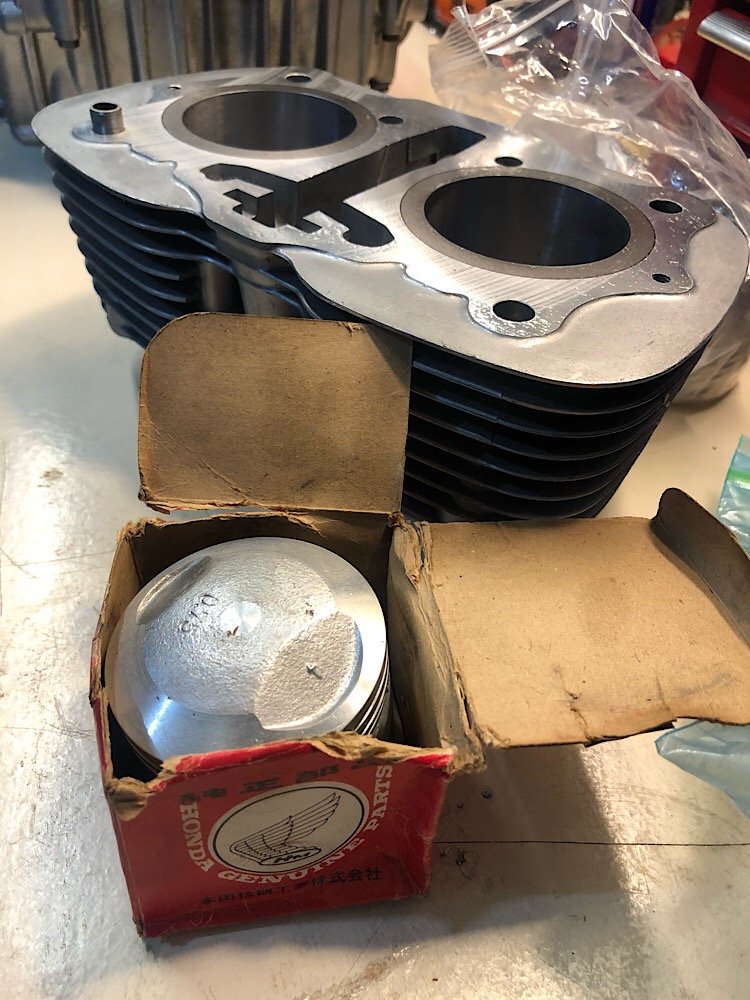
How to blow your CB350 build budget CNC cognito tree with Motogadget Mini and warning lights built in. A few Joker Machine parts, rear brake strap, tachometer cable plug, rear wheel and brake adjusters. Then cognito rearsets, these are beautifully engineered. Anyways, pistons arrived so got started with the engine build. Added in all new cam chain and tensioner. Had the pistons matched to the bores by Taylor’s Engineering, they also gave the head and cylinder faces a skim. Checked the piston ring gap clearance at 0.010, well within spec. All was going well till we got to the gudgeon pins; in short these are rooted. So back to waiting for new ones to arrive.
1 point
-
Decided to sort the slipping A43D yesterday. Did a sump drain and fill. In the morning, I realised being lazy would prob fuck me over so went and bought a filter kit and an extra bottle of DEX III. I grabbed some new clamps and a top rad hose to sort the coolant leak too. 5Ms don't need coolant leaks and I doubt they tolerate them either. Swapped the hose, tightened the ho. A+ no leaks. I was pretty sure ol mate at Repco would give me the wrong filter kit. He was pretty certain A43DL kit will suit A43D, I didn't think it would and it appears I was right. Pretty sure valve bodies are a little different across most A series autos. Good lesson learnt! Oh well, means I have to go back and do the filter some time, but the sump I managed to clean out and then flush the trans. I cycled like 6 liters though it so I'm pretty confident it will love life a little more now. It pulled MUCH better tonight and I took it for a good wee drive. Success. Also, the sump had a magnet sitting in it. I take it this is a thing with autos? I've never done an A-T pan drop before so seeing an object in the pan took me by surprise lmao. (Yes there were axle stands before I went under it)1 point
-
Ahhhh... Just like a good Morris engine should be. Sweet cheers for tip. Yeah I'll do the sump to be sure and can pop a cap off and look at bearings. ".... And that folks is where the complete and utterly expensive engine build began, leaving the little Imp to fester in the corner of the workshop, leading Alex to buy a succession of other shit old cars to see him through whilst he built the race engine of dreams... "1 point
-
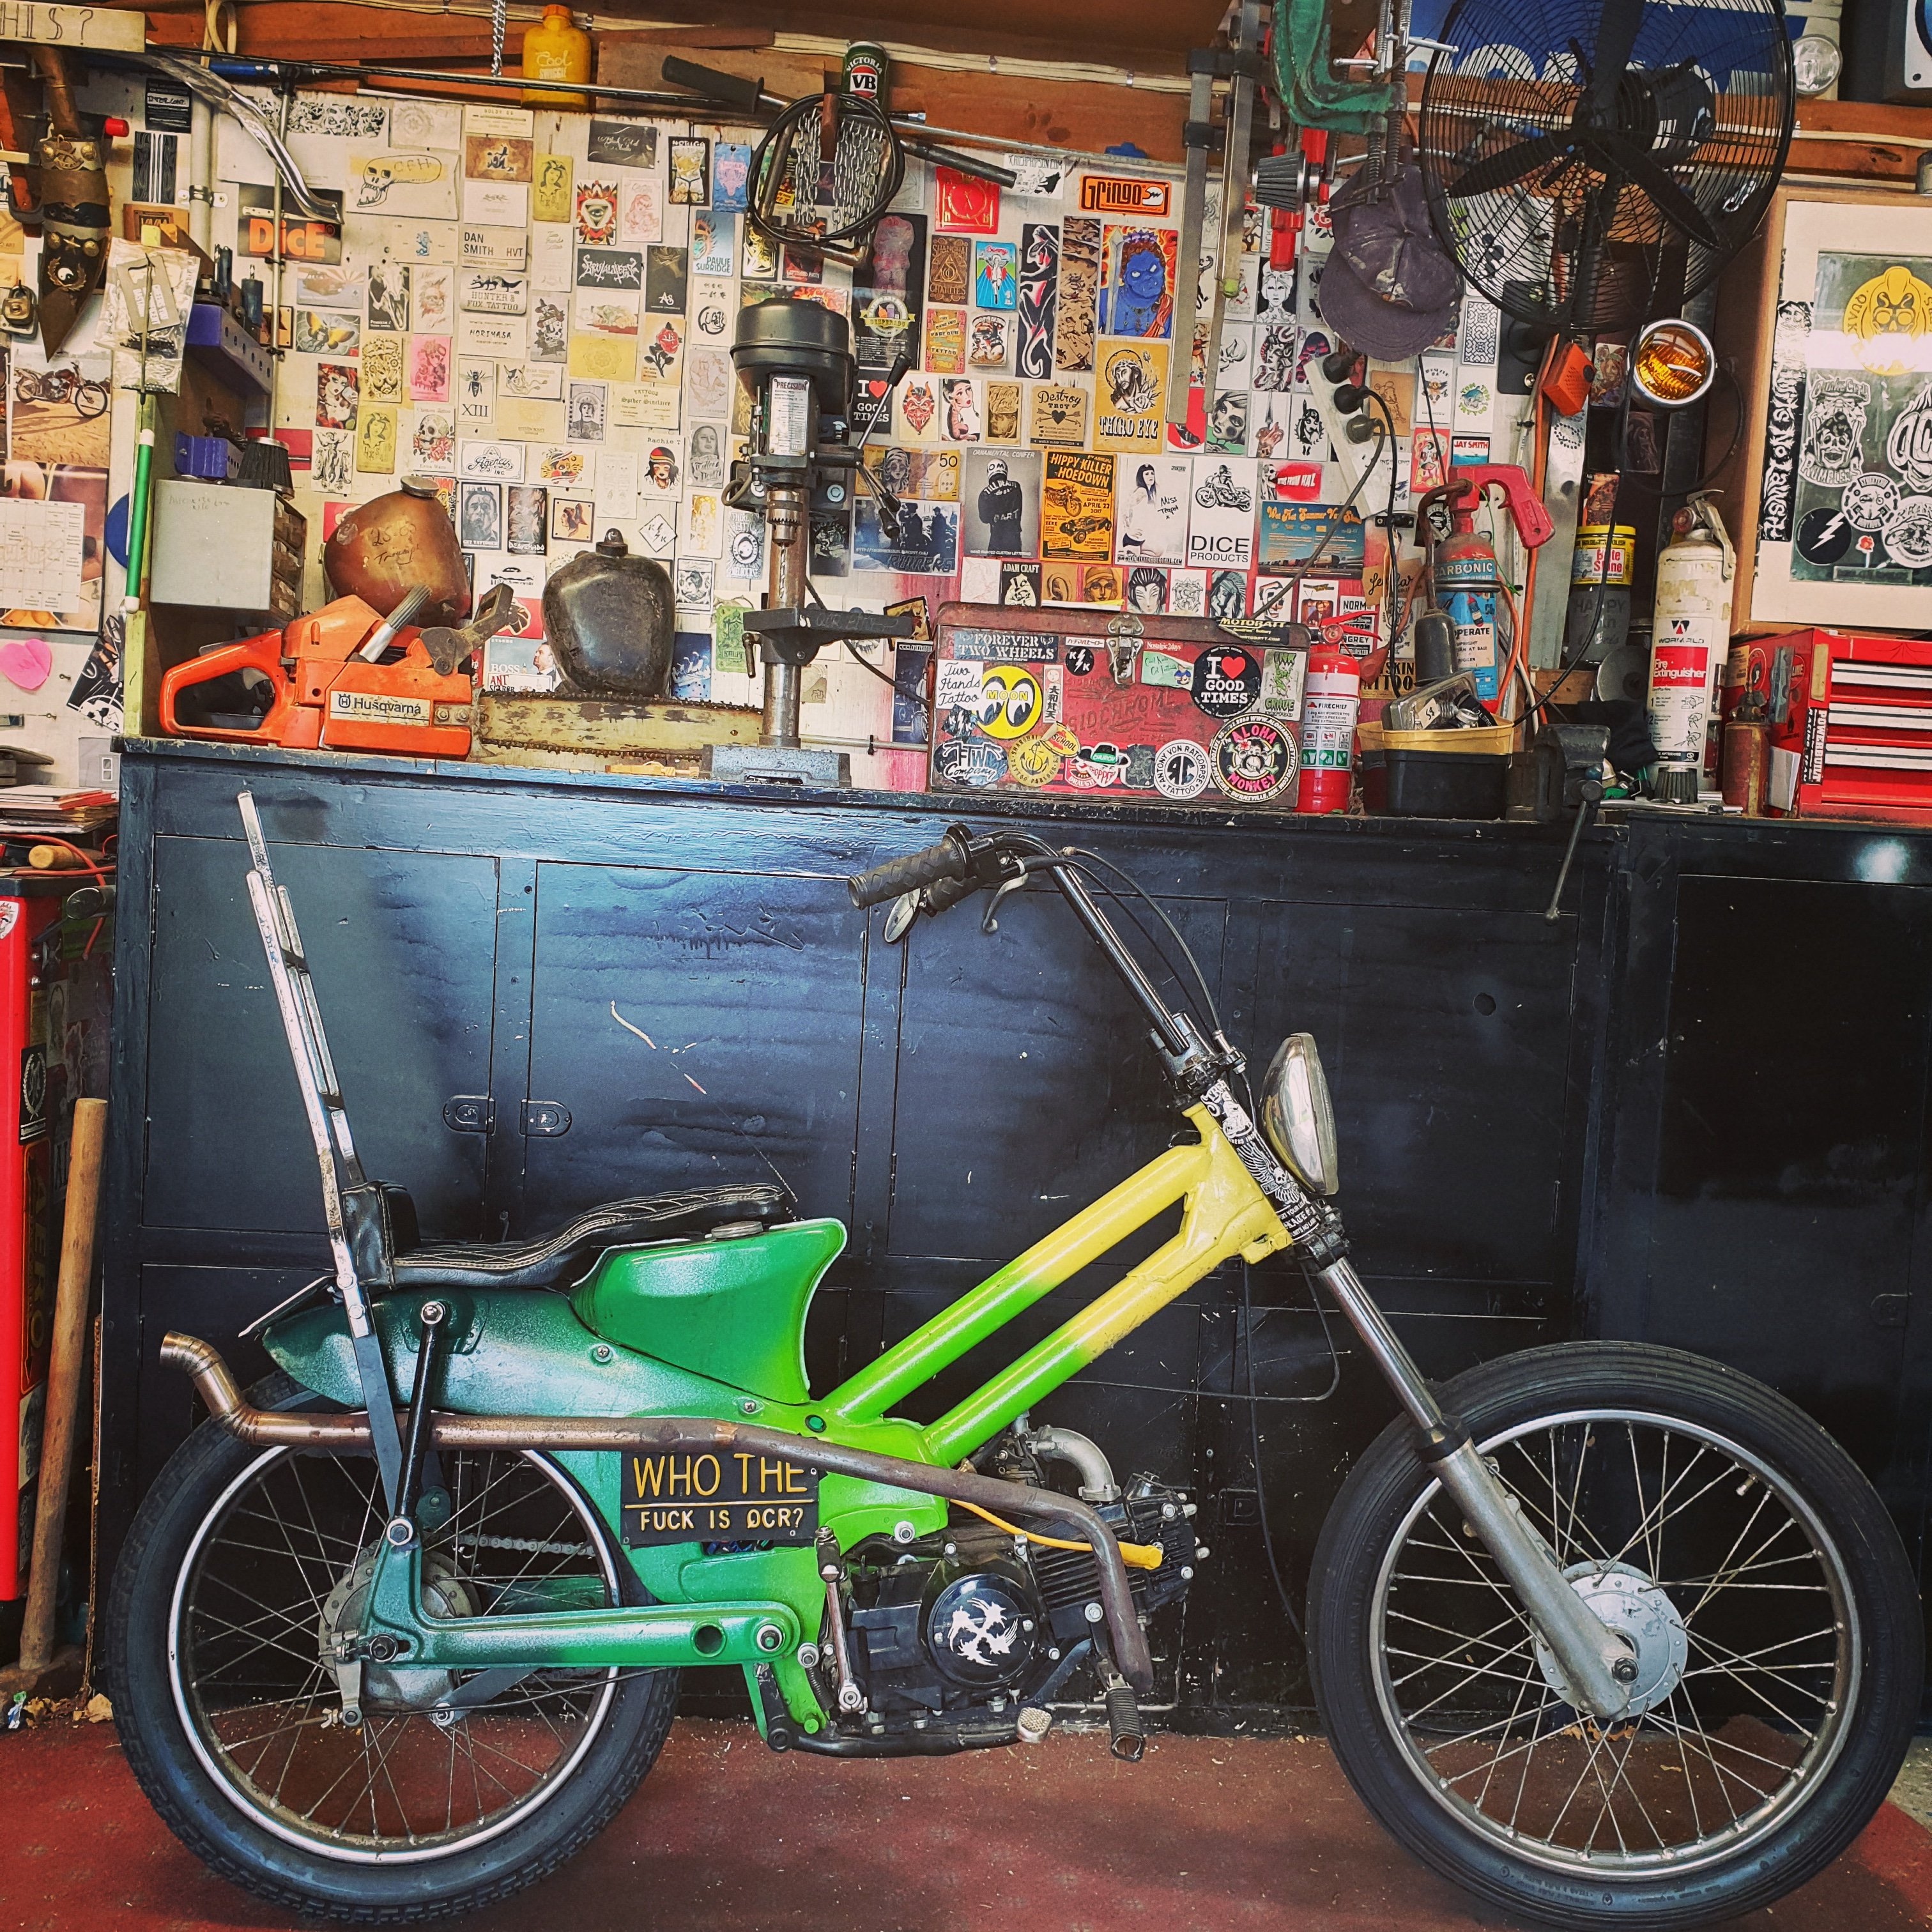
This thing has been reliable as fuck and still makes lots of noise and goes hard for what it is. Decided to add a vintage sissy bar ive had for awhile. Next up is a suicide shifter
1 point
-
Update time. Firstly there will be no more juggling around shuffling stuff to get the Imp on the hoist, or having to drive it down the slippery grass drive that heads to the back of the workshop to get it onto the hoist. We have the workshop back after having finished building this cabin on wheels. We delivered it to its new home where the owner will continue with the build , fitting windows, door and lining it out. It was a fun job but took up a big chunk of space. Well until we start the next build. We will have a 8 metre trailer to build for ourselves soon once we sell the housetruck. So we could now relax and enjoy the Imp. A few little jobs completed and a fair few miles clocked up. Most important thing to sort out was a leak from the nearside transaxle output shaft. After getting back from the trip to Blenheim it was discovered that oil was coming out from what I thought was the seal and getting spun out off the coupling, marking a perfect line of oil inside the engine bay. So the car ended up in this position getting its trans fluid drained. I removed the shaft, doubled checked the seal land which was fine, checked and tightened the seal by cutting a few mm from its spring because it just didn't feel quite tight enough on the shaft. I also checked the shaft too. The early Imps have a splined shaft that the output spider slides onto and is held on by a large nut. The design went through two revisions ending up with the later shafts being a factory press fit and no nut. I was sure that my late type was fine and solid but just to be sure I cleaned and siliconed the end of the shaft visible from outside. Just in case... Put it all back together, a few drives and the leak was still there. After some advice from a fella on the Imp forum I took the shaft out again and checked it in the vice. It was indeed loose. Loose enough that it could move in and out slightly and had broken the silicone bond so allowing oil to creep past the splines and out. It must have been getting worse as the oil was essentially lubricating the once tight fit of the splines. It knocked apart easily, showing the factory O ring fitted before they press them together. Once clean and dry I tried the fit. It was a touch too loose for my liking so out with the JB weld epoxy. It'll never leak again Yesterday we drove to Nelson and back and I'm happy to report that the leak has stopped ! Yay. Now the only real leak is a dribble from the rear main seal on the engine. I'll change that when I change the worn ring gear in the future. Another job was to sort out some sounds. I like my music and not having a sounds system in a car on long trips is annoying. I had already eyed up and sussed where I would mount some speakers. It seems a fairly common place after having looked at other setups out there on Imps. We had scored a JVC headunit from a customer after upgrading their setup. Then we had scored some speakers from a Nissan Bluebird SSS we had been given and passed on but not before robbing its sounds. I also had some ply left over from lining the rear of the Viva wagon floor. So sorted for a cheap as setup. We made some boxes in the sunshine on what was a cold day.... Later on the sun hid behind clouds so all three of us moved over to the warmth of the log fire.... After Hannah covered the boxes in black vinyl I mounted them under the parcel shelves and wired in the head unit, a neat little unit that due to not playing cds is shorter in depth so fitting under the shelf nicely. It all looks neat enough and sounds fine for the size. Just need to find some protective grills to suit those speakers. Next on the list is to get and active sub and mount it under a seat so we can have some fuller, deeper sound. Another job I had planned to do but kept being put off was to hinge the front number plate. I don't want to mount it any higher and block the grill so where it is makes for a great driveway crown sweeper. Driving along our 500m long stone driveway in a lowered Imp with an even lower number plate gets tiring! So I did this... I'll report back with whether it also swings back at 170mph so avoiding speed camera tickets. The other night we had a lovely sunset and the Imp was looking resplendent in the light. I took a photo.. Next jobs to do are fit some carpet and I'm still really keen on pursuing building a full EFI setup. But its going to be a very busy summer for us so that will have to be a project I pursue in the evenings. Alex1 point
-
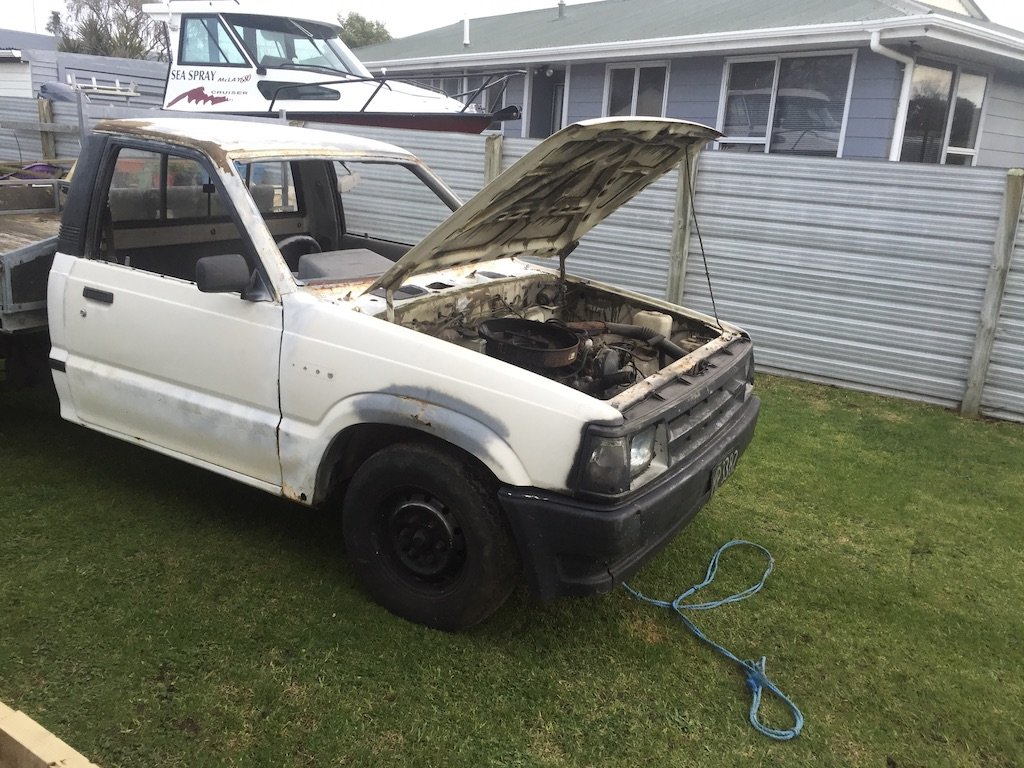
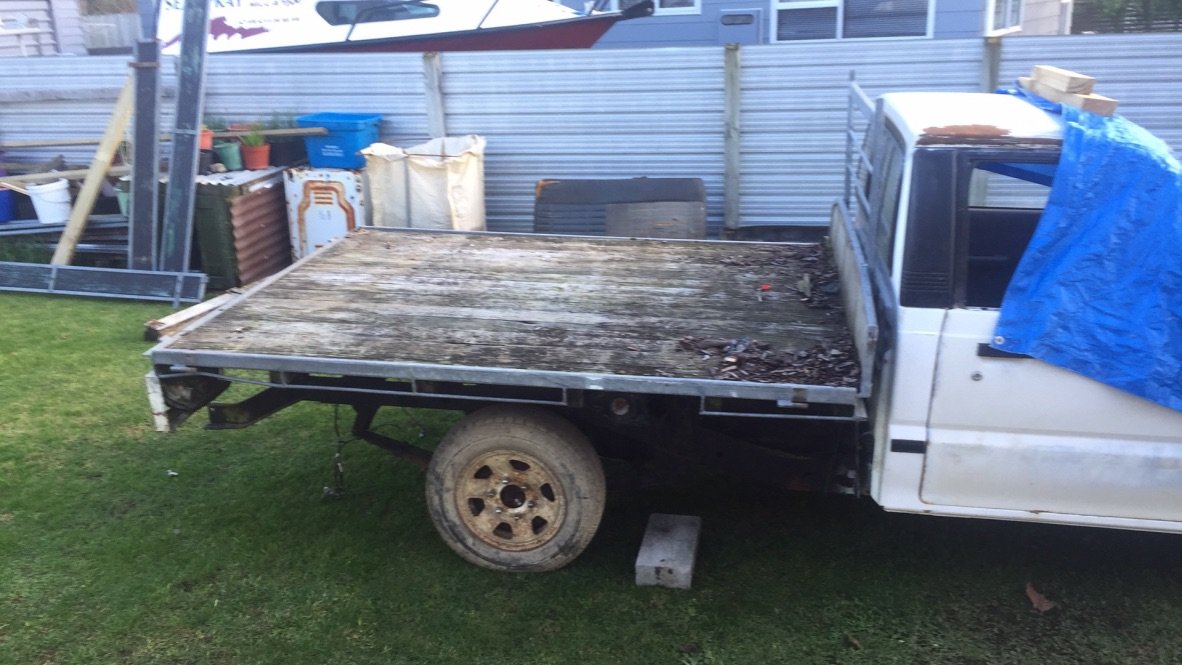
Massive change of plans and a heap of ratshit weather saw us off to pick up the donor on the weekend. Description on Facebook was "Rusty, Burnt clutch, I'm keeping the flat deck, on hold. Bring your own wheels. No Rad, No glass" After talking to the guy, I only had to take 1 wheel, And he left the flat deck on because CBF. Got it back to mine and started stripping it in the back yard because despite the fact I have 3 car+ garage space. I actually have no room. And then proceeded to somehow funnel rain water straight into the carb (F%$K MY LIFE!) I'm tempted to keep the flat deck. I'd get far more use out of the flat deck than the well side. Would need cutting down. But that's actually not a big issue. Anyway. Supercheap are doing some club card deals on jack stands and trolly jacks, and I need some gaskets. Not that I ever need an excuse to spend money on tools. But my current axel stands are left over deck piles, and my trolly jack is at least as old as I am and leaking fluid. I could fix it. But NEW TOOLS. Got a mate with an "Engine crane in my 40ft container at work. Might need fluid, I've never used it. You want it?" Yes. Yes I do. Sure beats the endless chain in the carport. So stripped a heap of worthwhile things out of the donor. Belts, Bench seat, trim pieces, screws, Jesus handle for the drivers side etc. Full loom, tow bar. Diff and gearbox will be coming out too. Along with leafs and the rest of the suspension. Been trolling the mazda mini truck forums and a cortina downdraft weber with headers and HEI is the done thing on these there. Makes sense. Totally into the rebuild the original motor idea. Something I can do in the garage over the rest of the winter. then the donor motor only really needs to survive a few months (OK lets be honest, it's going to need to last longer than that, because budget and time always goes out the window.) My compressor is an hour away at my brothers place, so I'm tempted to get a battery rattle gun. Thoughts on Air rattle guns vs Battery ones? To keep or not to keep the flat deck... That is the question.
1 point
-
I need a bigger garage.1 point
-
A few photos were taken and then onto the trailer and off to the workshop. Yes it fits on a fairly standard size trailer!
1 point
-
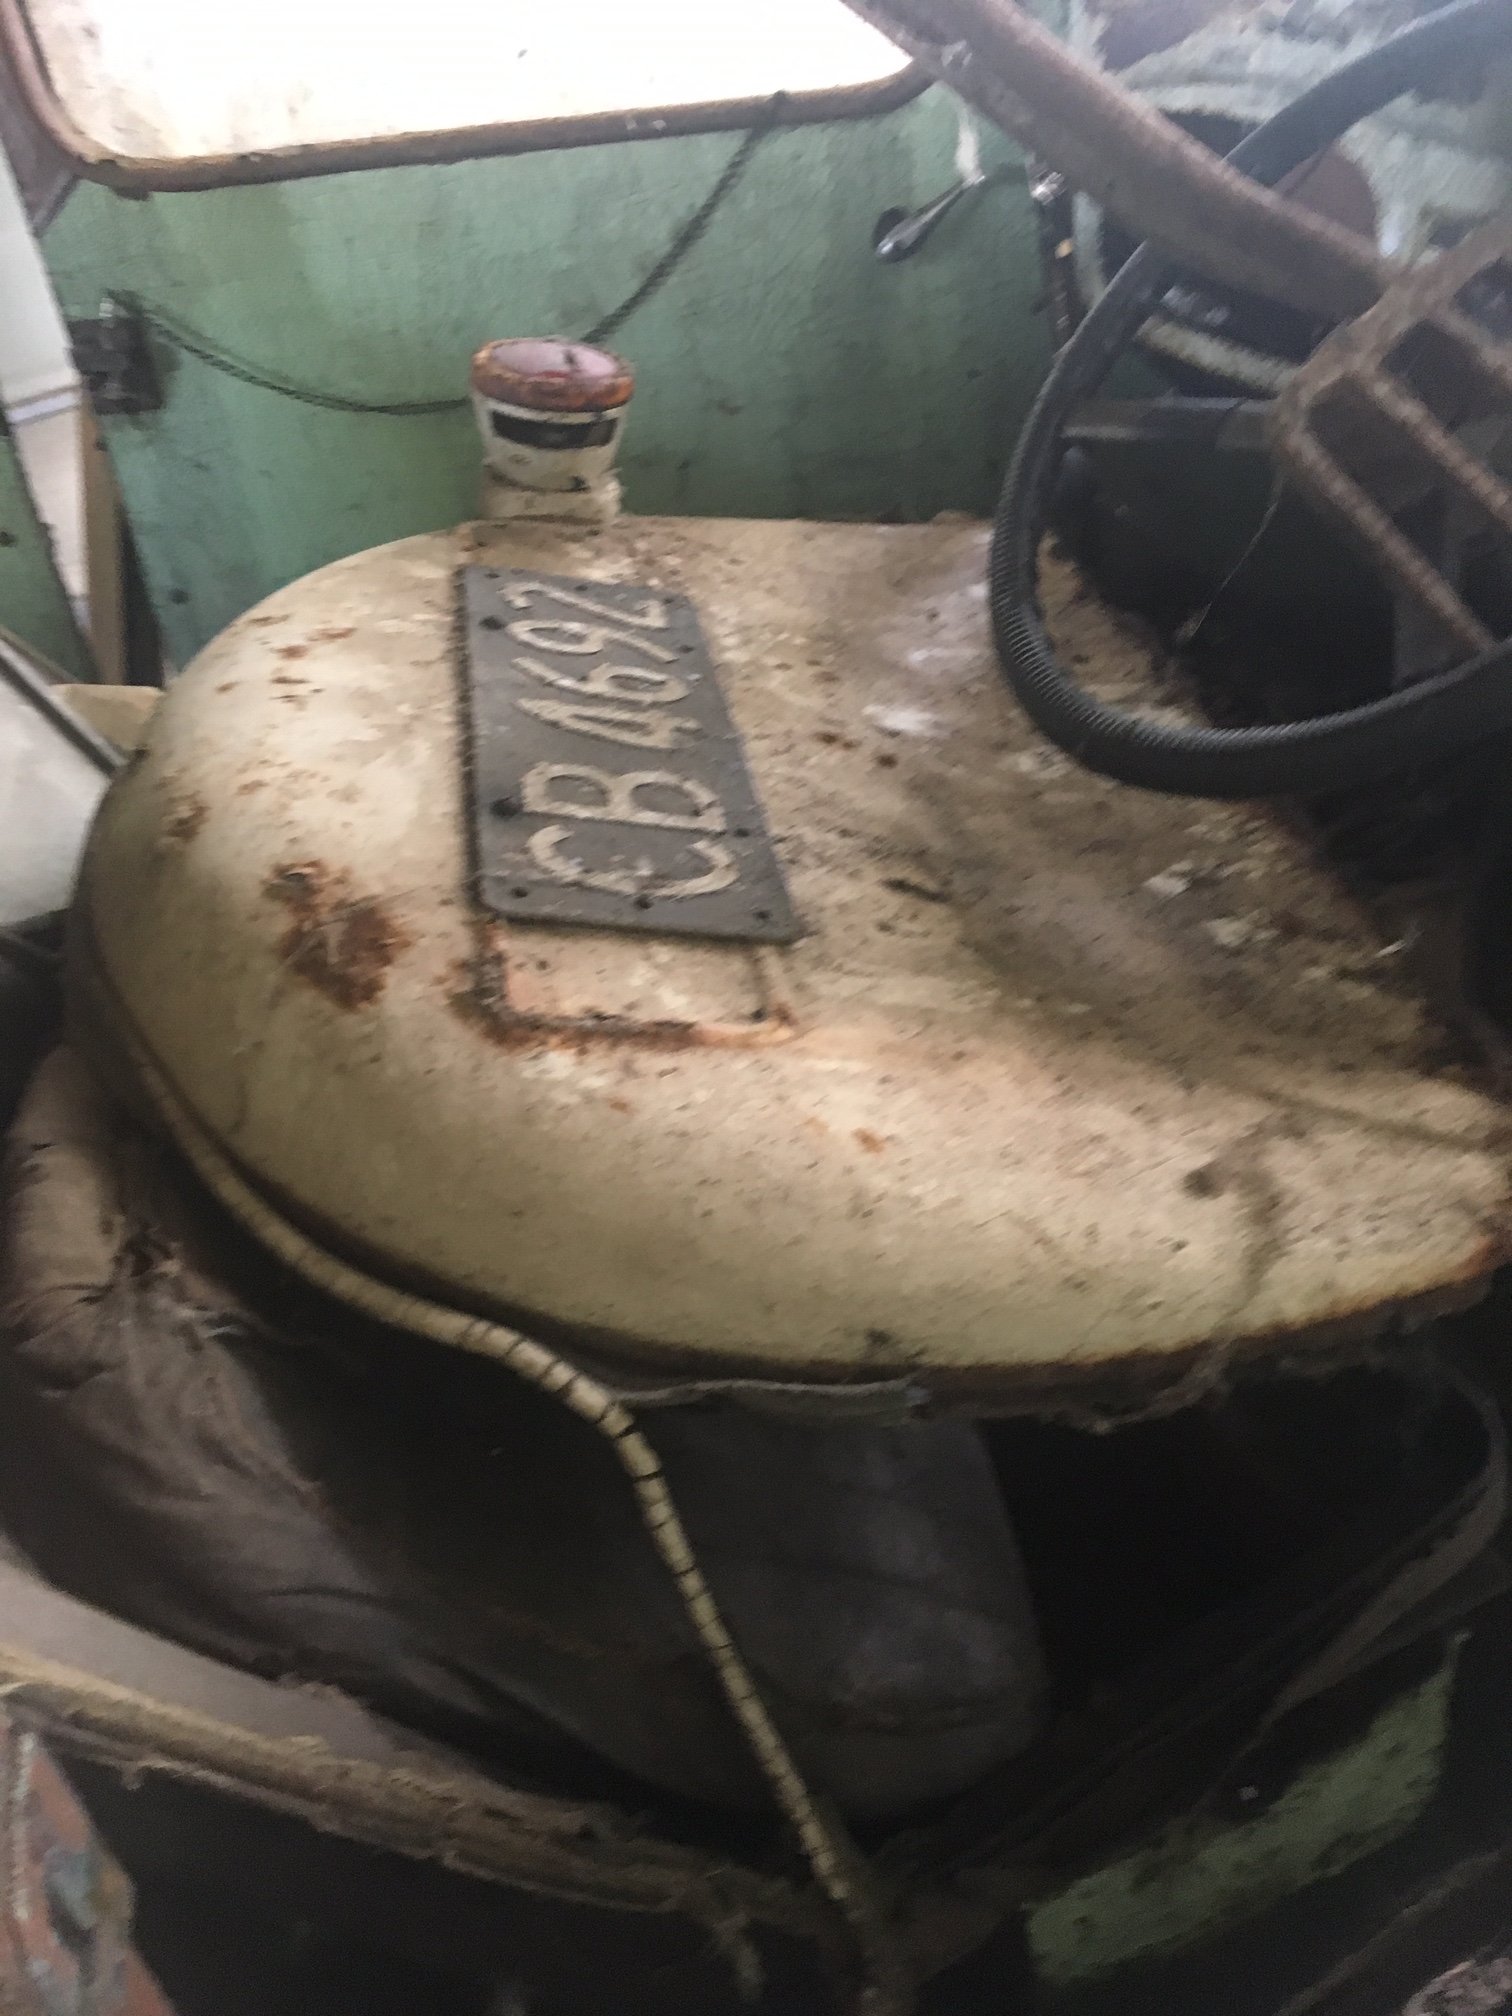
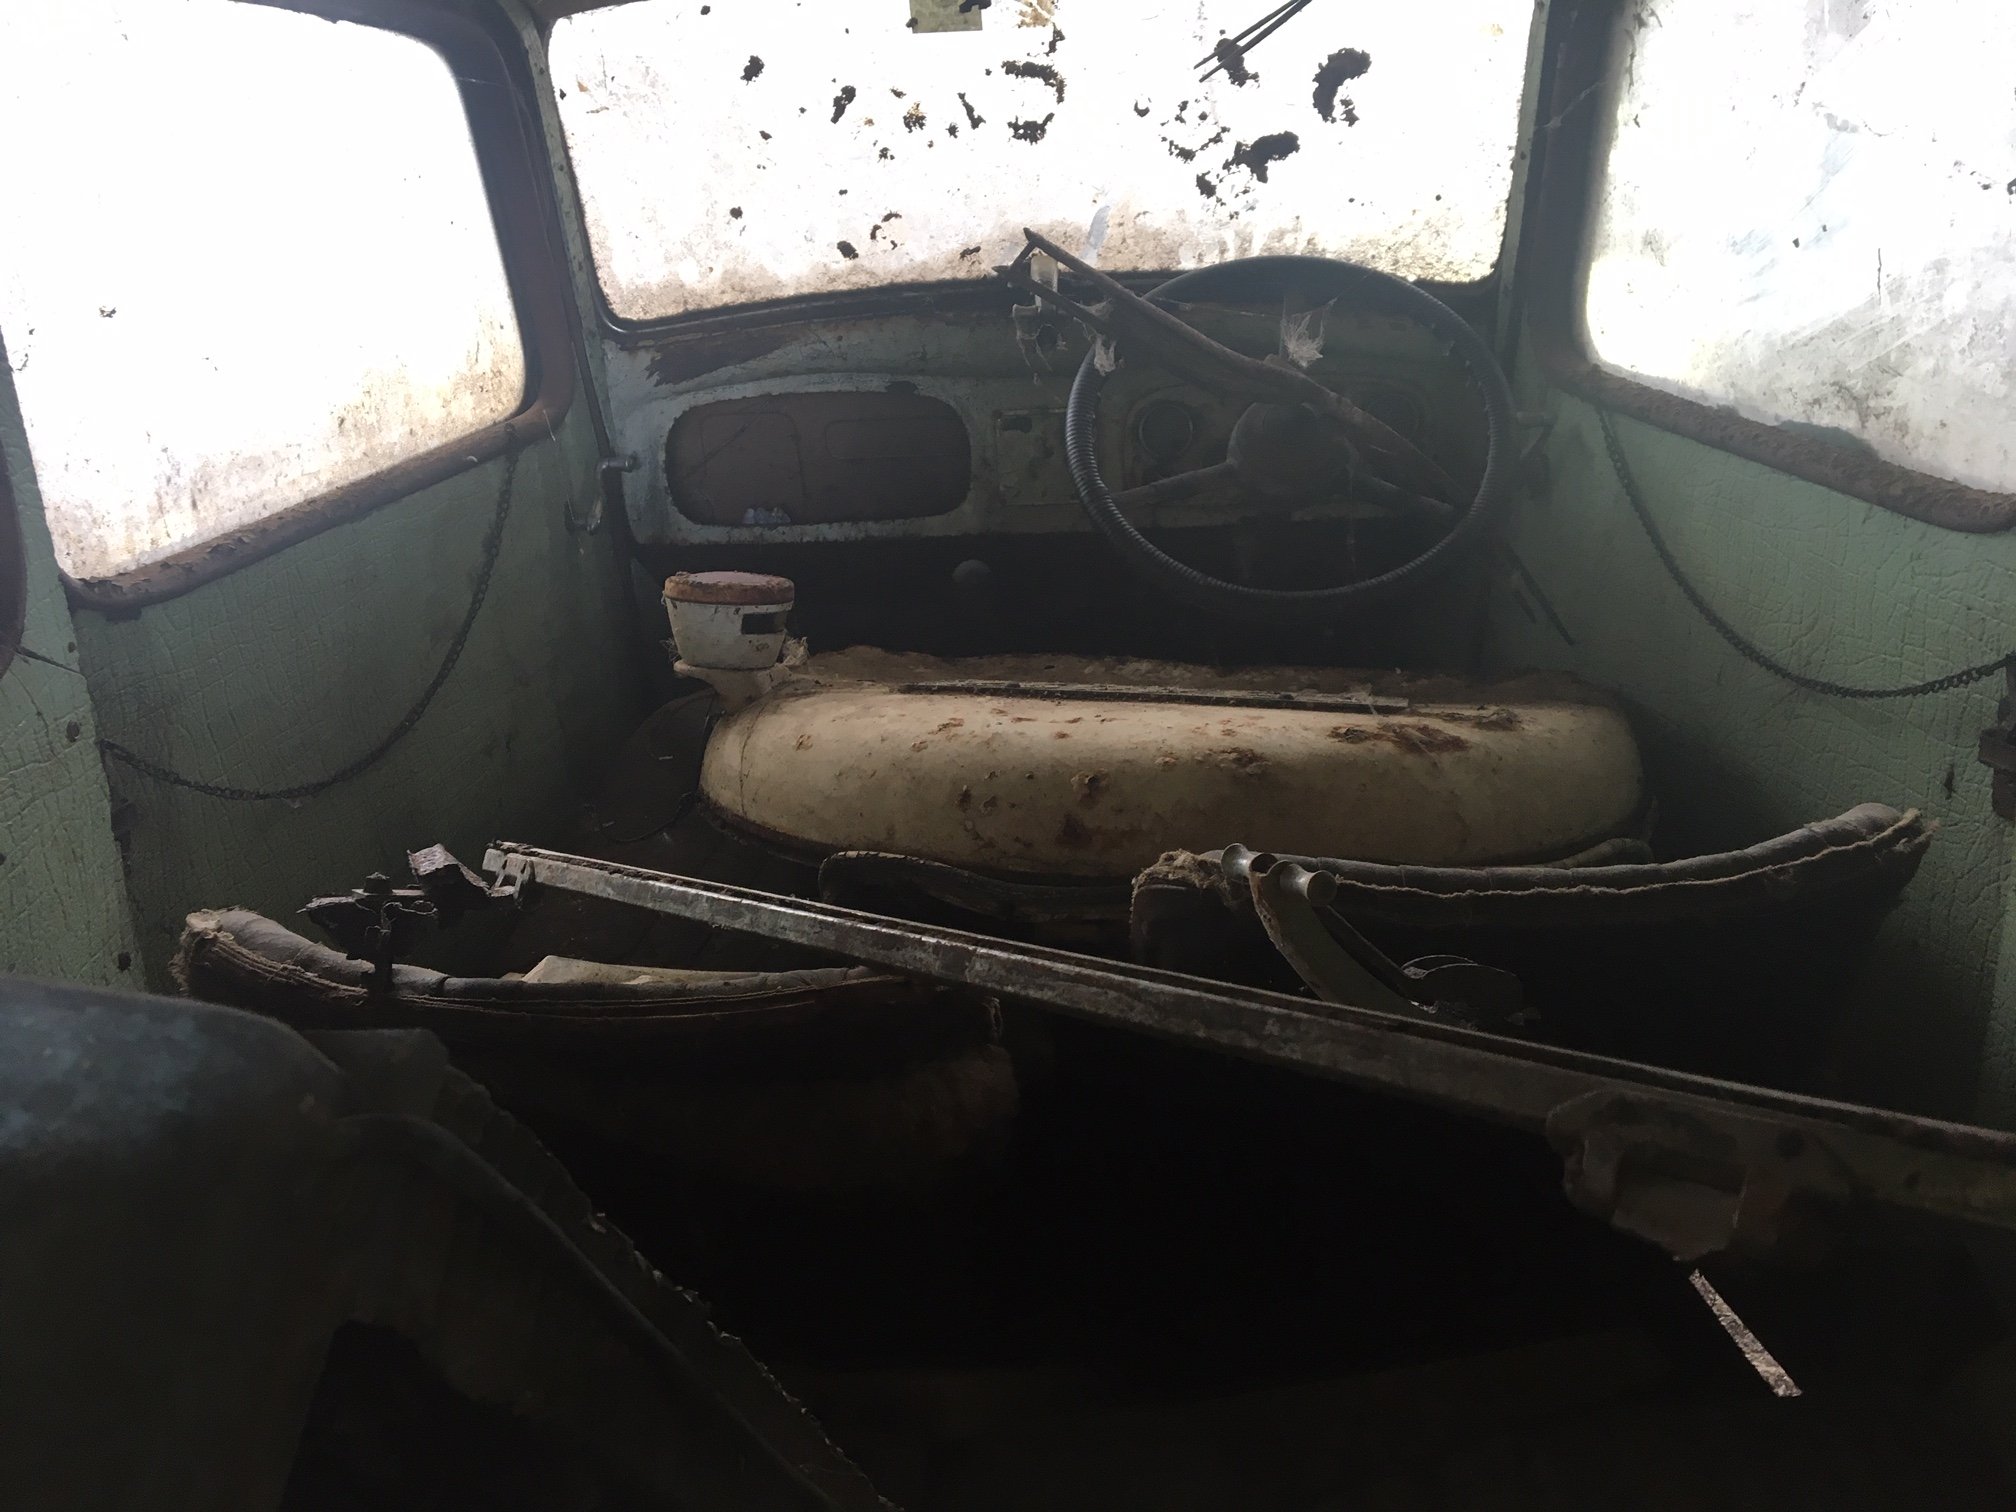
The interior has this lovely shade of green everywhere, which somehow looked quite familiar. I asked dad if it was in fact the same shade as the benching in the kitchen at my grandparents house when I was little. The very same. Jeez grandad was resourceful.
1 point
-
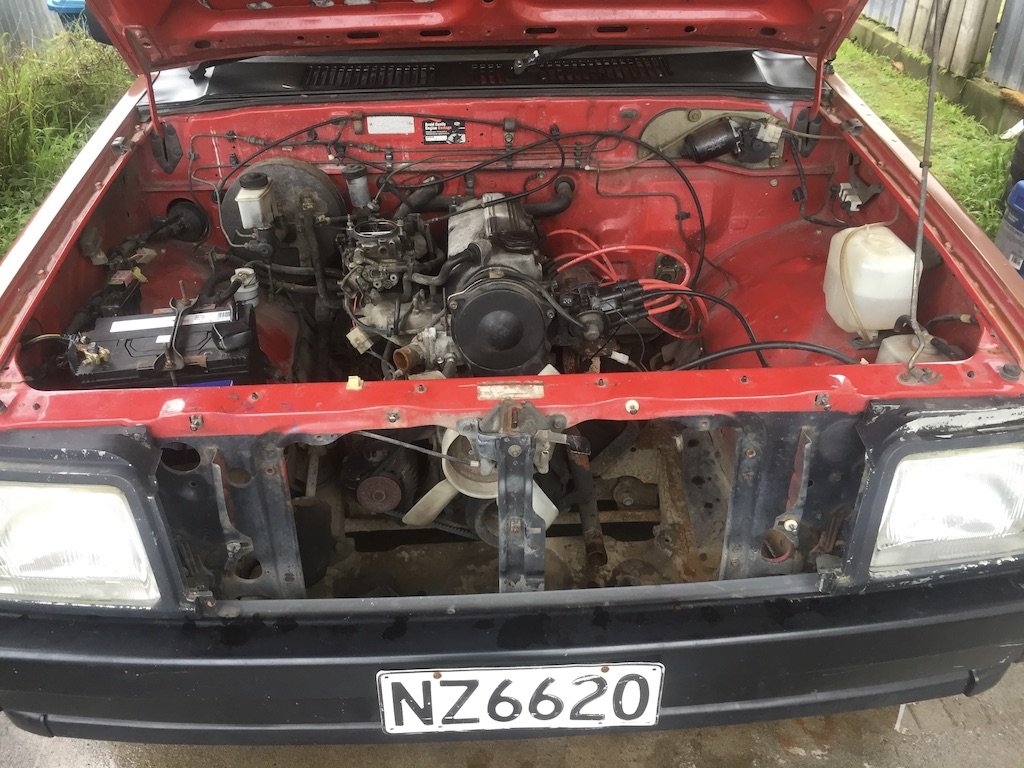
Used to be red. Because Red is faster. Pretty keen on swapping over to the Mazda front end, Saw the chrome Mazda grill on Tard me, and it seems to be just a bonnet swap to make the Mazda grill work. Will know more when I get the donor. And the bonnets have to come off anyway. Rained off work today. So was able to sus a few things. I currently don't have a car with a tow ball. So the first mission was sussing something that can tow a car trailer. And a car trailer. Luckily my brother to the rescue. Has a towbar on his Toyota work shitter. V6 3L Avalon. Not the ideal tow vehicle. But better than none. And booked a trailer with the boys at Tool Hire Taranaki for Tuesday arvo. (Gotta time in with my brother's shift work, my own work, and the owner of the donors work hours) Think I might prep and underbody seal the engine bay while the motor is out. Attempt to get another 30 years out of it. Not overly worried about looks. I quite like the idea of patina rust repairs going on because work ute. And if I do the engine bay now. I shouldn't have to touch it again. (famous last words)
1 point
-
1 point
-
Seems im overdue for another update. Best remedy that I guess and spew forth more pics.To keep all the electricals ticking im using a Powermaster 150amp 1 or 3 wire alternator. As i stated above I wanted all the brackets as low as possible. unfortunitly cooling hoses got in the way in the middle positions and the powerstearing rack when it was really low. So its had to go up higher but is still low as we could get it. Still its not to bad I guess.Also mounted up the radiators overflow seen above.On the other side of the rad we mounted up the PS/hydroboost reservoir. Three port jobbie.Under the car a fly wheel cover was fabbed up. Stock would not work due to the trans adapter. Bit of split pipe was used for the notches to clear the torque converters covers ridges.Car is off the jack stands and front panels are bolted on. not all the bots etc are in but enough to keep it together until I get new bolts for it all and get it done right. Old Nailhead sits in there nicely.Steering wheel thrown on just so we can roll it about easier. GT Performance 9 bolt hub, 15.5" wheel and horn. Really wanted a wheel with a horn ring cus I love those things but ones that suit smaller wheels are bleeping expensive so it can wait.Car is sitting pretty darn low. Like the lowest part is the brace that joins/strengthens the front sub side to side much like the original Hudson setup. I haven't measured it but I guess we have 30-40mm clearance to the road. As you can see with the good old beer bottle next to the car... it low.keep in mind we still have to add side pipes - its that big ol hole you may of spotted in the above pic. You will see also that we will have a heap of room for them under the rockers. They also have a bit of a curve whats a bonus as it will (with luck) keep them out of ankle range whilst keeping them nicely tucked up so we dont rip em off.and moving right along... side shot just cus I like it. yes I know the car is dirty but so is my mind and I like it that way.Now talking about burning ankles on side pipes a subject by gal has mentioned most times I bring up lake pipes. My answer generally goes along the lines of "wear heels" below pic proves it. Ankle out of burn range.. toes on the other hand she has never mentioned.But seriously - like the back tire viewed air out side on.Enough farting around talking about air out this and that. Throw a battery in and test that shiz. Yip yours truly testing it out. We left it air up for a few days and I was pleasantly surprised to find it stayed there with only a few psi drop from what I left it at uniformly across each wheel. I will mark that to atmosphere and not any slow leak due to it being across all four wheels not just one.yeah i know the front could be bolted on a bit better but ahh stuff it it will be off again anyway.And just cus im feeling all gangsta...i know it aint hydraulics but it will do me. When air up we must be around 150mm at that one low point in the middle just behind the wheels. Ass end that has larger bags naturally goes much higher.1 point
-
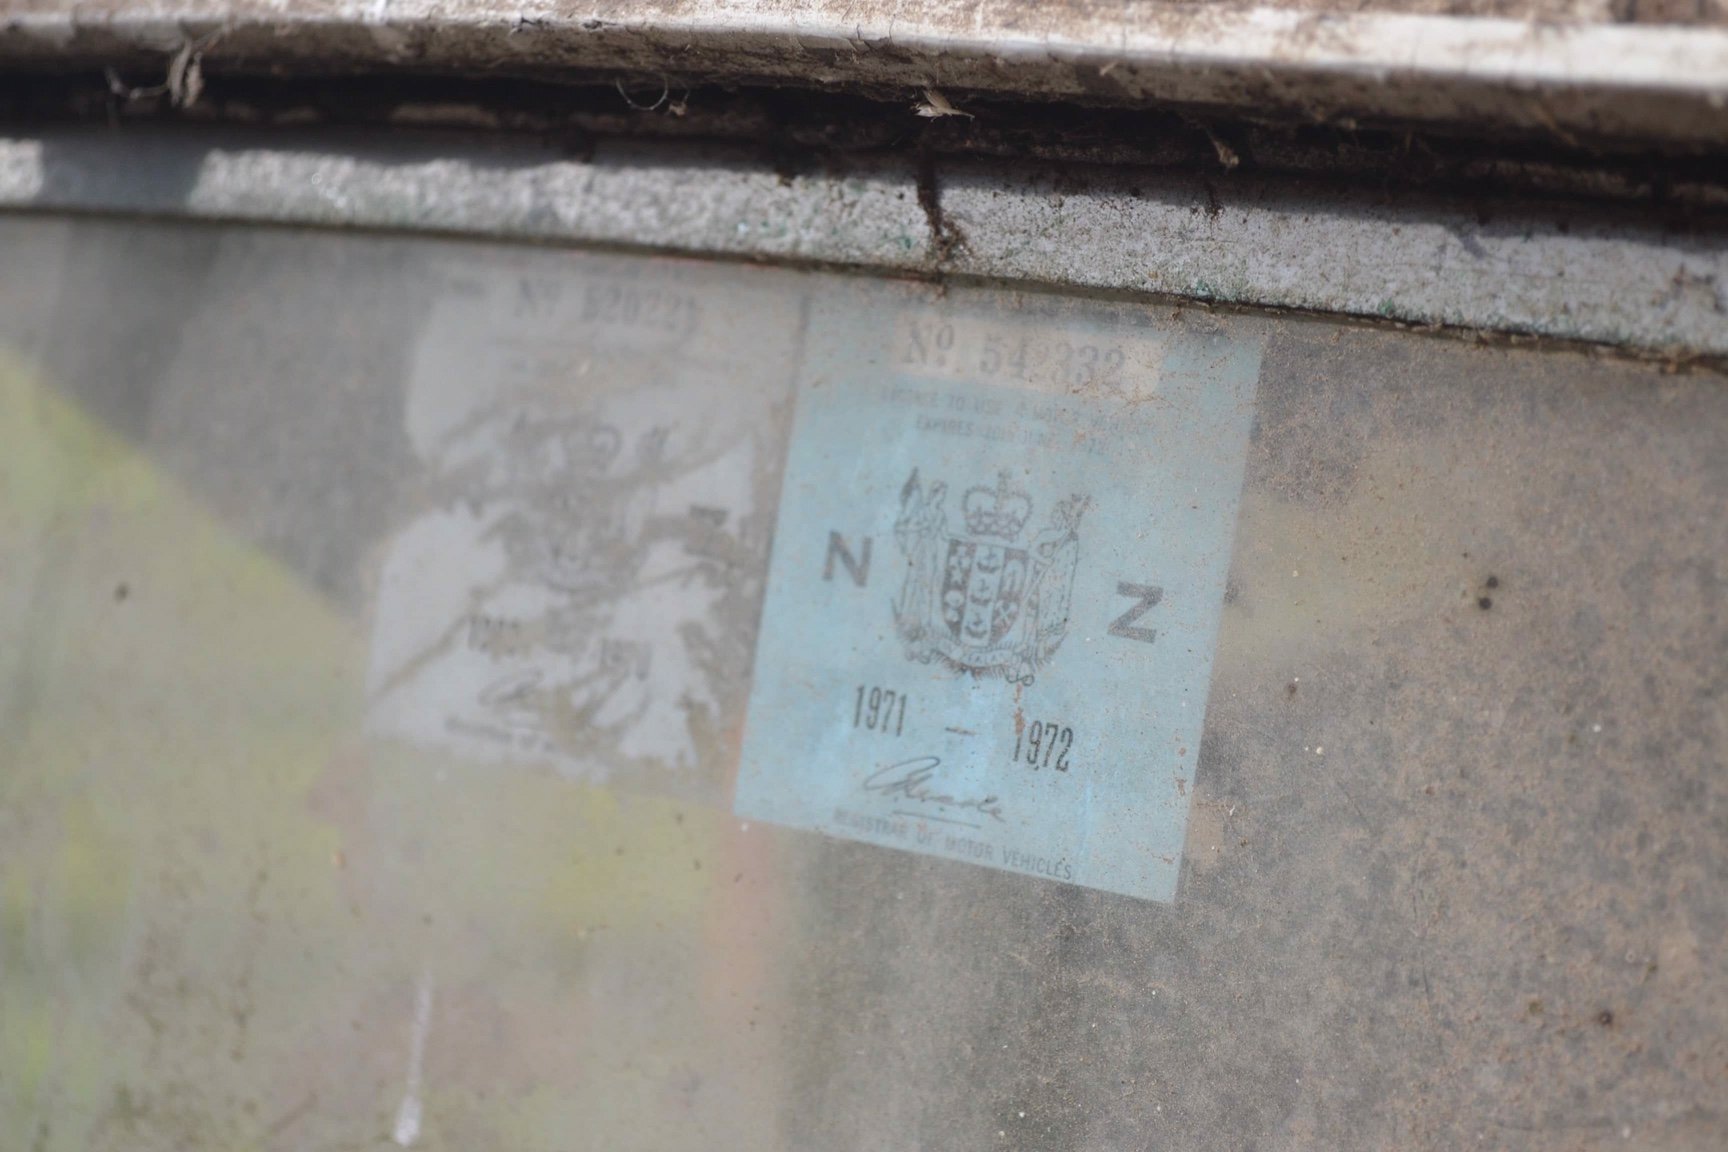
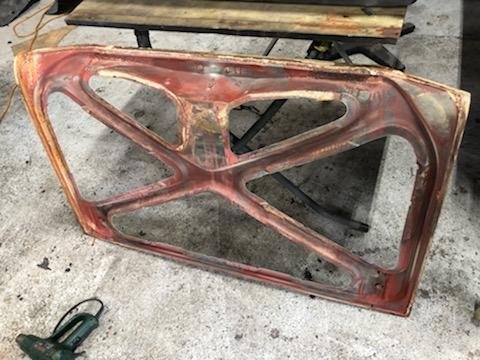
So I started to hatch a bit of a plan. Retrieving it was going to need a decent plan, the poor thing has been parked there for nearly 50 years and had literally started to become one with the earth. I started a tradme saved search for "Austin 7" just to see what kind of stuff came up. I scored a good set of wheels, and then some tires that were just round the corner from home. So armed with knowing that I had decent rolling stock, it was time to start seriously thinking about uplifting it. From the limited access we could get, the underneath of it was looking pretty rusty, so we wanted to be very careful about what we lifted off/pulled on to get it out of the shed. The plan was to put some box section through underneath it from one side to the other, and jack up the box section lifting the car on that. I was going to get it high enough using that method to then wheel the trailer underneath and lower it back down onto the trailer. Lets face it, its been 50 years, those wheels aren't going to turn...
1 point
-
Well now.. its been a few weeks and time for an update. So far the Imp has been reliable and not let us down but it has also been true to its English form and left a few little puddles about. I'll talk about them soon. We took it on its first big road trip which was fun, although a bit noisy. I couldn't really cane it super fast on the hills because Kevin the cat had to come on the trip with us. It was a few days away to visit my parents so we cant just leave the kid at home... The car did the trip with no hassles and returned an OK 35mpg, not bad considering its geared quite low, has had heaps of sitting on the spot being tuned and due to the constant annoying flat spot right off idle I had to accelerate faster then I'd normally bother in average driving. It certainly hoons along very very well although it has an exhaust boom right around 60mph, which is around 4000rpm thereabouts. It became a bit too tiresome however should be better now I have added a load of sound insulation on the back parcel shelf. I am super impressed with the Datsun A12 engine!! Its really peppy and fun, very smooth (allowing for the annoying carb issues) and just works so well. I can totally see why they have such a cult following around the world. Everyone who chats to us about the car (and its ALOT of people.. its a right little magnet this car) think that the Datsun conversion makes so much sense. More often than not folk are full of praise for the Imps they knew, had, learned to drive in etc , except for the standard Imp engines reliability. This is a shame because I think the standard Imp engines are great however one must accept that they do need to be cared for a bit more than many owners obviously could be bothered. But the Datsun engine- first comments are usually " what a great swap- those are bomb proof engines " usually followed with the comment "it must be hard to get those engines now because all the ministock racers have got them all"... So anyway.. the wee Imp ran well and got us to Blenheim and back. But before that big trip I wanted to sort a few things. One job was to build a cold air fed filter box and carb lid to let the engine suck on some cooler air rather then the super hot air floating about in the top of the engine bay, due to Imps not having the luxury of lots of cold air running through over the engine. So I built a filter box, sized to take a modern Honda filter. I have made the box large enough to handle bigger pipes and the volume that might be needed when I plan to upgrade the induction. Box... With filter in place... This box fitted under the parcel shelf above the gearbox. Sort of out of the way and hidden but easy enough to get to. It was fed with a flexy alloy pipe from under the car. Another section of pipe headed backwards to a plenum/tophat thinggee I made for the carb... It was all going so well I thought. I splashed some black paint on it all so it looked a bit neater... Then I fitted the tophat to the carb. This is where things went a bit... tight. It seems that I had completely forgotten to measure how much room I had just above in front of the carb. Not enough it turns out .... The engine lid wasn't able to go back in place! A few choice words that somewhat rhymed with duck along with a sentence that sounded quite similar to 'well you stupid punt' were uttered. I then calmed down, realised that at least I have now got a filter box sorted for future upgrades and with that I removed the lot and refitted the previous air filter I made. At least its winter so a bit of hot air cant hurt I did another couple of jobs before the trip. I swapped out the fuel gauge which wasn't reading correctly for a spare unit I had.. I was also fed up with trying to adjust the clutch. The slave cylinder fitted had a 7/8" (22mm) bore and being pushed by the standard Imp 5/8" (16mm) master cylinder, which happens to be the same size as what the Datsuns use. However- Datsuns use a smaller 17mm slave to get the correct amount of stroke at the slave. I wasn't getting enough stroke so the clutch pedal and release fork clearences had to be set very tight to clear the gears. But I did have a very light pedal... So I worked out that the amount of stroke available from the Imp pedal, whilst being very close to that on a Datsun, was not quite enough I could get a good working system with a slave of around 3/4" (19mm). However- there didnt seem to be any slaves available out there that had the same mounting lugs, in 3/4" bore, with a metric fine hose thread. But I did have some spare random 3/4" seals, some stainless bar for a new piston and a big lump of alloy. So I made a new slave cylinder to suit. I could have sleeved the existing one down and I have a 3/4" reamer to help but I wanted to keep that one intact in case it all went pear shaped. Plus...its more fun making things ! I offset machined the lump of alloy down in the 4 jaw, bored and reamed it to suit, milled the shape up and machined a new piston to suit. But I was having too much fun and forgot to take many photos.. New next to old... It works heaps better! I can now have a bit of slack at the pedal and at the release bearing and still get my gears. Another job was to take the carb apart for the 14th time. I'm getting very quick at this and can field strip a Hitachi 306 carb in under 15 seconds, blindfolded, with both hands tied behind my back, whilst under water breathing through a straw. The carb had a few leaks. I realised that the top lid was pulled out of shape... I carefully filed it and the body flat, cleaned it out again for the 10th time and made a new thicker gasket to suit... On the next test drive the leaks had gone but I had still had not cured the flat spot. So I gave up and made a parcel shelf instead. I did have an original Imp one but it was a bit wobbly and a pain to fit. I made a new wooden one for the passenger side so now actually had somewhere to sit our phones, wallets, bag of Werthers originals, old parking tickets, a broken pen, out of date fuel vouchers and, most importantly, a screwdriver for constantly tweaking the carb settings. Again, so much fun but no photos. I finished the shelf the morning we set to leave. We plonked Kevin the cat into the car and set off. A lovely trip was had with the only downer being that the cold I had caught at fire brigade practice a few days before was really kicking in to full runny nose time, while the weather was a bit... Wintery. Got to test the wipers out though (must fit intermittant control kit I have) On the way over to Blenheim. You can spot Kevin. I took my Dad out for a hoon in the car. He loved it and only complained about the wipers being in the way of his view. Not a car fault but more down to the fact he must only be about 4'5" tall now... Back home and more recently things have happened. I weighed the car at the local tip... 750kg. The guy said the scales are within 10kg. So its in the ballpark for what I was guessing. A bit heavier then a standard Imp to be expected with a heavier engine, seats, exhaust, radiator and associated cowling, water pipes etc. But still light enough I think standard Imps are around 700KG ? More recently- one of the output shafts on the box leaks. I think it might be the shaft moving out just a touch too much on certain corners and the seal running off the land its meant to seal on. Or the seal land on the shaft is too worn. Or the new seal I had fitted has moved. The car will soon go on the hoist and I'll have a look. Cant really drive it until I sort this. Expensive stuff this oil- even more expensive if its loss means a buggered transmission. In other news I have made a parcel shelf for the drivers side. Now I can stash all my own crap within easy reach .. I am going to make some speaker boxes to mount under the shelves alongside a headunit. At a later date when I can afford to do so I'll fit an Amp and sub. I do like my music and there is only so much of Datsun A12 at 4000 RPM booming I can cope with so I need to drown it out. That is about all for now. Wish me luck with my seals...1 point
-
Ore progress on trial fit up, installed glass but not happy with the new rear quarter window rubbers so looking at another supplier. Quarter bumper brackets need so work as well as bumpers don’t sit quite right.
1 point
-
Because I'm such a hardcore Friday night raver I'm here doing an update on an old car whilst my cat sleeps in front of the fire. Rock on. This little Imp...its great fun!!!! I have not really clocked up many miles yet, as you'll find out why soon, but those miles that have been driven have been fun. Its taken a little while to get used to the balance, steering feel, brakes and sheer grip that exists. Still not fully confident at flinging it about but getting there. Its a giggle. I'm just weary of the slippery wet corners that are about now we are into winter here. The little Datsun engine is a gem! Its still not quite perfect at idle and just off idle but once rolling its great. I can really see why the Datsun 1200 cars have such a following- they are about the same weight as an Imp with similar gearing and were well known for being peppy little performers. The engine sounds pretty cool when trashed. I have since found out that this is indeed a completely stock unit and it was a different engine that the previous owner, Rob, had fitted with a supercharger. Anyway- onto fettling. There are always a few things to sort on a fresh build. First off was to sort out the dodgy running carb. In my previous update I thought I had found the problem with the accelerator pump boot being split. Turns out that wasn't the problem... I managed to locate a couple of A12 carbs from a local fella for beer money. One was a complete standard 1200 carb with stock sized jets etc. I took my fitted carb apart and soon discovered that not only were all the jets completely wrong, way too big and pretty butchered as well they were also housed in the wrong carb for my engine! The carb I had fitted was off an A15 which has larger throats and venturis. Great for a slightly hotted up motor but not what I'm after right now. The leaning out issue was because someone had fitted a air bleed that was way too big for the primary jet, among the many wrong other jets. So I rummaged through both carbs, got the best bits from both and assembled a nice new carb that was stock and set to factory specs. I had a page covered in jet numbers and felt happy in the knowledge that I can now possibly join the elite group of carb Barries forever chasing the perfect tune (when the know full well that injection is just soooooooo much better in every way! ) A photo of some carbs in pieces.... So with the Imp now fitted with the right carb I took it for a spin. Because the work shop is now clogged up with the start of a tiny house build I had to drive it out from the back of the workshop and up the grass drive to the cabin. I thought it best to get some photos of it next to the other Imps... I did a few test drives and I had to remove the carb a few times to dial in the float height, getting pretty quick at that process I must say. The difference is huge. Much better all round except for a hesitancy just off throttle. I'll continue to tweak things and see if I can improve it but I am starting to wonder if the vacuum unit I got from another car for my electronic dizzy has too stiff a spring. I think it might not be advancing the ignition enough under light throttle loads as it should. Ill get back on that. Next issue was a funny one. Some of you will have seen it already. Not funny for the amount of pissing about I had to do to fix it but funny in what I found. A work of art really. Rob has to be proud of his handy work at creating such a masterful bit of Barry engineering! The story goes like this.. After getting back from a quick drive checking the carb was OK I noticed a horrible vibration in the engine. I popped the lid to discover a very out of balance main pulley. Bugger. I knew it was a hybrid pulley made up of what I think is Toyota pulley on the Datsun hub but I had never looked further into it because it just worked. But not any more. I removed the pulley to discover this on the back... Hmmmmm. Lovely welding. Purposeful. I'll have to grind that lot off and make a new hub. I'll start by removing those two screws.... Eh?!!! its not weld. Its magic fake weld thats been machined into a flange(like)thing. Its wonderful! Just look at this art ... The Datsun hub had a crack running through down the keyway too. I had no choice but make a new hub to suit. First off I cleaned up the pulley and had its running perfectly true... Then I popped to my local steel supplier and get a big lump of steel bar from which I machined a new hub, with a centre locator to tightly locate pulley central. In photos.. Then the internal keyway. When I was working as a (young) fitter turner back in the 90s I would use either a broaching machine or a shaper, depending on the size of the key way. I have none of those tools. I did contemplate milling it from each side with a end mill and filing it out square but that would take ages on this fairly hard 1040 steel. So I made my own internal shaper bar to use in the lathe and just scraped out the keyway using the carrige. I bought a lump of 20mm bar at the same time as I got the round and cobbled together a tool holder from it. This will now be handy for future jobs I'm sure... and in action (well about as actioney as a photo of a non moving lathe tool can be...) Resulting in a nice neat keyway.. Which fits nicely right here. Beefier then the original Datsun offering too Hub drilled and next to pulley.. And altogether now, in a uniform coat of black paint... Much better. In order to tighten the main bolt, of which I had to buy a new slightly longer one to allow for the beefier hub, I had to make a tool to hold the pulley. I had tried tightening it up with the car in gear, on the ground, with the handbrake on but I didnt like the feel of trying to put the 110 lbft through the transmission like that. so yeah- tool time. Now I have another random tool to got in my wooden box of other random tools specific to only one thing... Doing its random tool thing... So I had a working Imp again that was not going to rattle apart. Best thing I do is to take it for a drive. I took it to town where we met Sam and is son Chris, who jumped at the chance to go for a ride with his Dad in the little blue car. Here they are returning... While in the shop buying stuff a Honda city turned up and parked (badly) next to the Imp. What I always think of as tiny cars looked huge next to the Imp... We went to the steel merchant for some more steel bits for another project. The rear opening window is handy for shopping. Note the lovely old land cruiser... While in town I rang Rob, the previous owner of the original race car shell that donated all the running gear for this restoration. He popped down and met us and had a good look over it. I reminded him of how I'd love the Weber sidedraft manifolds he had left over from his ownership. Well good old Rob actually popped home afterwards, found them in his piles of stuff, tracked us down later on in town and handed over these to me ! ... Wow! awesome. Top bloke. I'll now be able to fabricate a decent inlet setup for injection in the future. Yes!!!! Later on that afternoon we parked next to another small car... This evening Hannah and I took the Imp out for a hoon on our local roads which are just perfectly made for little nippy cars. It was such fun! I love it when the (tiny) little secondary opens up. Its got a lovely induction sound (right behind our ears, even with two thick blankets covering the engine cover..) We went for a nice evening walk and I took a photo of it parked up on the near the beach... Closer... Tune in next time to hear about the stupid mistake I made when buiding a cold airbox setup....1 point
-
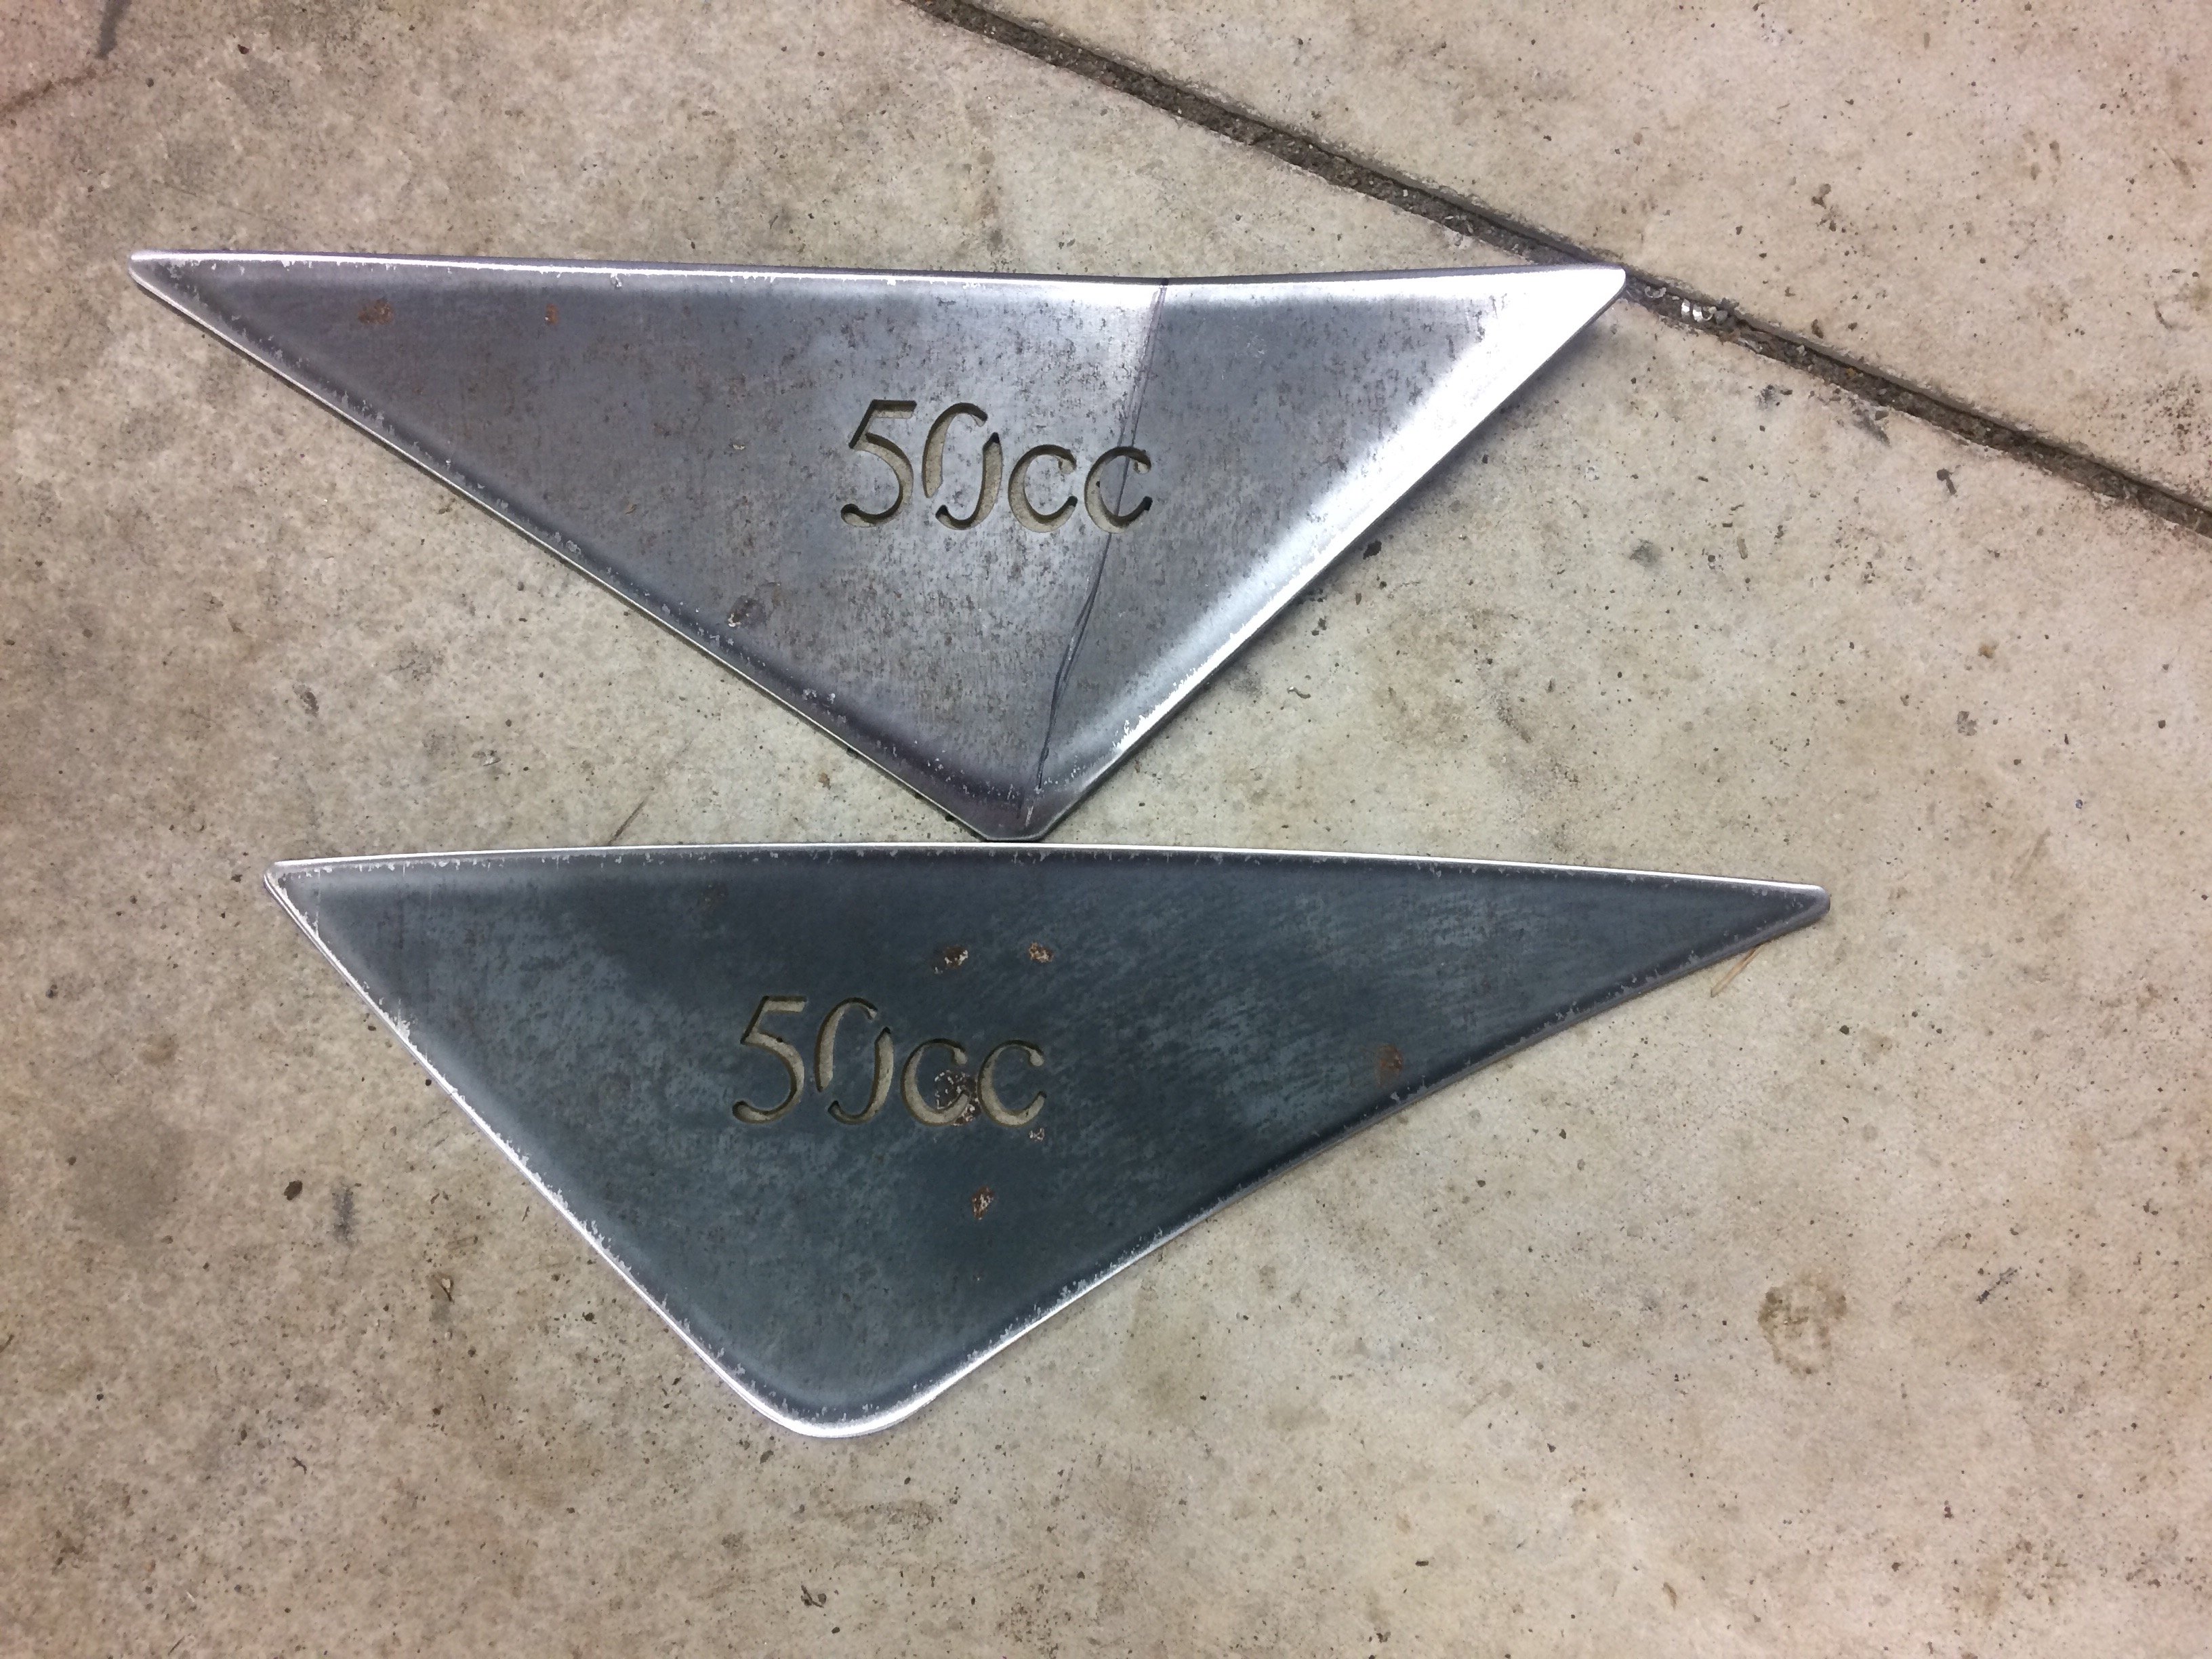
what a wild weekend just been, PPSC clocked up 550 odd kms doing a return trip from Feilding to Kuripapango, on the Napier side of the Napier-Taihape Road. taking nothing but rural back roads through the beautiful inland north island, including plenty of gravel, suspension bridges and angry wife-beating cockys doing a shit job at moving stock, climbing some 900 metres in altitude along the way. To my pure amazement the MT50 rose to the challenge and sat at WOT doing 9000rpm all day with no dramas at all. considering 24 hours prior to the trip we had welded up a very pesky hole in my exhaust which has been an ongoing debacle. after being unable to weld up the hole due to its swiss cheese/rust construction, Blizzshop managed to tack a piece of steel over it. This thing is incredible. I carry a reasonably solid tare at 90 odd kegs, and this weapon sat comfortably at 65-70km all day and climbed hills at reasonable pace, showing no signs of weakness. There's something to be said about nanging a 50cc 2 stroke at its limit, sustaining minimal traction on a gravel road, one of life's greatest pleasures. It takes a lot of riding to keep it in the power band at all times and time your gear changes perfectly to maintain momentum up hills. Perhaps if i can be fucked i might track down a 17" rear wheel and swap the rear, it looks quite funny with the 19 front and 16 rear. And of course keep blasting gravel roads into the sunset. Pic dump for Fred1 point
-
Mrs and kids went down south to her parents place for 10 days over easter, this gave me the much needed opportunity to get into the shed and tick a few jobs off, and also fly to Queenstown to pick up the boomer bike and ride it home. spent a few days chipping away at some jobs on the rally car then got into the trombone. PPSC have a 500km ride coming up next weekend and i needed to get some auxiliary fuel and a little rack to carry a small bag with my wet weathers and beer. i like the idea of the center legsheild racks but im too jew to buy some so i said my goodbyes to the Wifes clothes horse, as i cut it up to get some steel to make this bent up a bit of a profile on one side, then copied it for the other side and it started to take shape. while i was mucking around with it i also make a nice real solid mount for my CT aux fuel can to snug in nice and tight on the back, this should give me some half decent range now with about 6 litres on board in total then i flew down to queenstown on a thursday night, collected the africa twin then heading north on the friday taking a pretty cool route to chch via hawkesburn road to clyde, over the danseys pass to Kurow then over the Hakataramea pass and up to chch where the GC @Chris.QCR housed, fed and beer'd me for the night, and also leant me some waterproof gloves which becuase crucial on the next day where it pissed down the entire time as i went up to Domett, met up with my father in law on his africa twin and then went over kaiwai rd to Culverden and up the rainbow road to st bathans, to his place in havelock for a quick cuppa and then to the ferry terminal. ferry was delayed and i got into welly about 11:30 saturday night and then made the last dash home to feilding. was just over 1600kms in 48 hours in the end, a great ride to get used to the bike, just should have cleaned out the airfilter in queenstown and i might have saved myself like $50 worth of gas, thing sucks it back! cant wait to rip into it and start making it look pretty. Also, i got myself a Blizzshop embroided patch made up for my vest after the GC PPSC aritst callum smacked this logo together for me, i got a bunch of extra ones made up if anyone wants one send me a PM and ill get one out to ya for $10.1 point
-
More progress with gapping the doors bonnet and boot. All welded back together again. Trial fitting allthe exterior body parts to check all good and also fitting the front and rear screens and rear quarter windows to check new rubbers all work.
1 point
-
Bought a house : moved one of the important things in on the weekend both the House & car built in 1976! Some sort of fate / meant to be eh?1 point
-
have been acquiring some bits for a while to build something radical, time to crack on with this1 point
-
oh yeah stuff has happened! well stone the flamin galahs once again @BLIZZO has been beavering away and banged a chain on, it now moves under its own steam. having taking it for a ride it got to 65km/h without any dramas, playing with the sprockets and i could definitely see the needle creeping further. The fuel leak was actually the fuel tap - new article from ebay sorted that. Ordered new shoes for it too, only the finest cheng shins and vee rubbers for this stallion. feat Blizz's hooves also bought aliexpress rear fender with built in light and Blizzshop customs wanged it on. if only sugar were as sweet as him. unfortunately it has a slight miss at mid throttle and cuts out intermittently, probably ignition related. next mission is to fit the tyres, then try and resolve this gremlin and pest into the sunset. here it is next to its big brother XL2501 point
-
thing had no compression when i got it home, thinking it was a stuck ring, had been sitting for a looooong time. someone had done a shit job at replacing crank seal at some stage and pushed it like 15mm more in than it should have been so sorted that. clutch was also rusted together so stripped that and gave it a birthday. Exhaust was so fucking lol, was pretty rusty, there was actually 4, yes 4 bolts wanged into the rust hole, bird pood up and then had JB weld smeared all over them. soot on the bolts indicated that it ran like this, but must have been fucking slow as 60-70% of the header was blocked!! She was incredibly rusty and mucho difficult to weld but i eventually chased my tail enough with it and got it sealed up Bore was in pretty good nick so a quick light hone and new piston and rings got it sorted. seems to run well now, just need to sort that crab.1 point
-
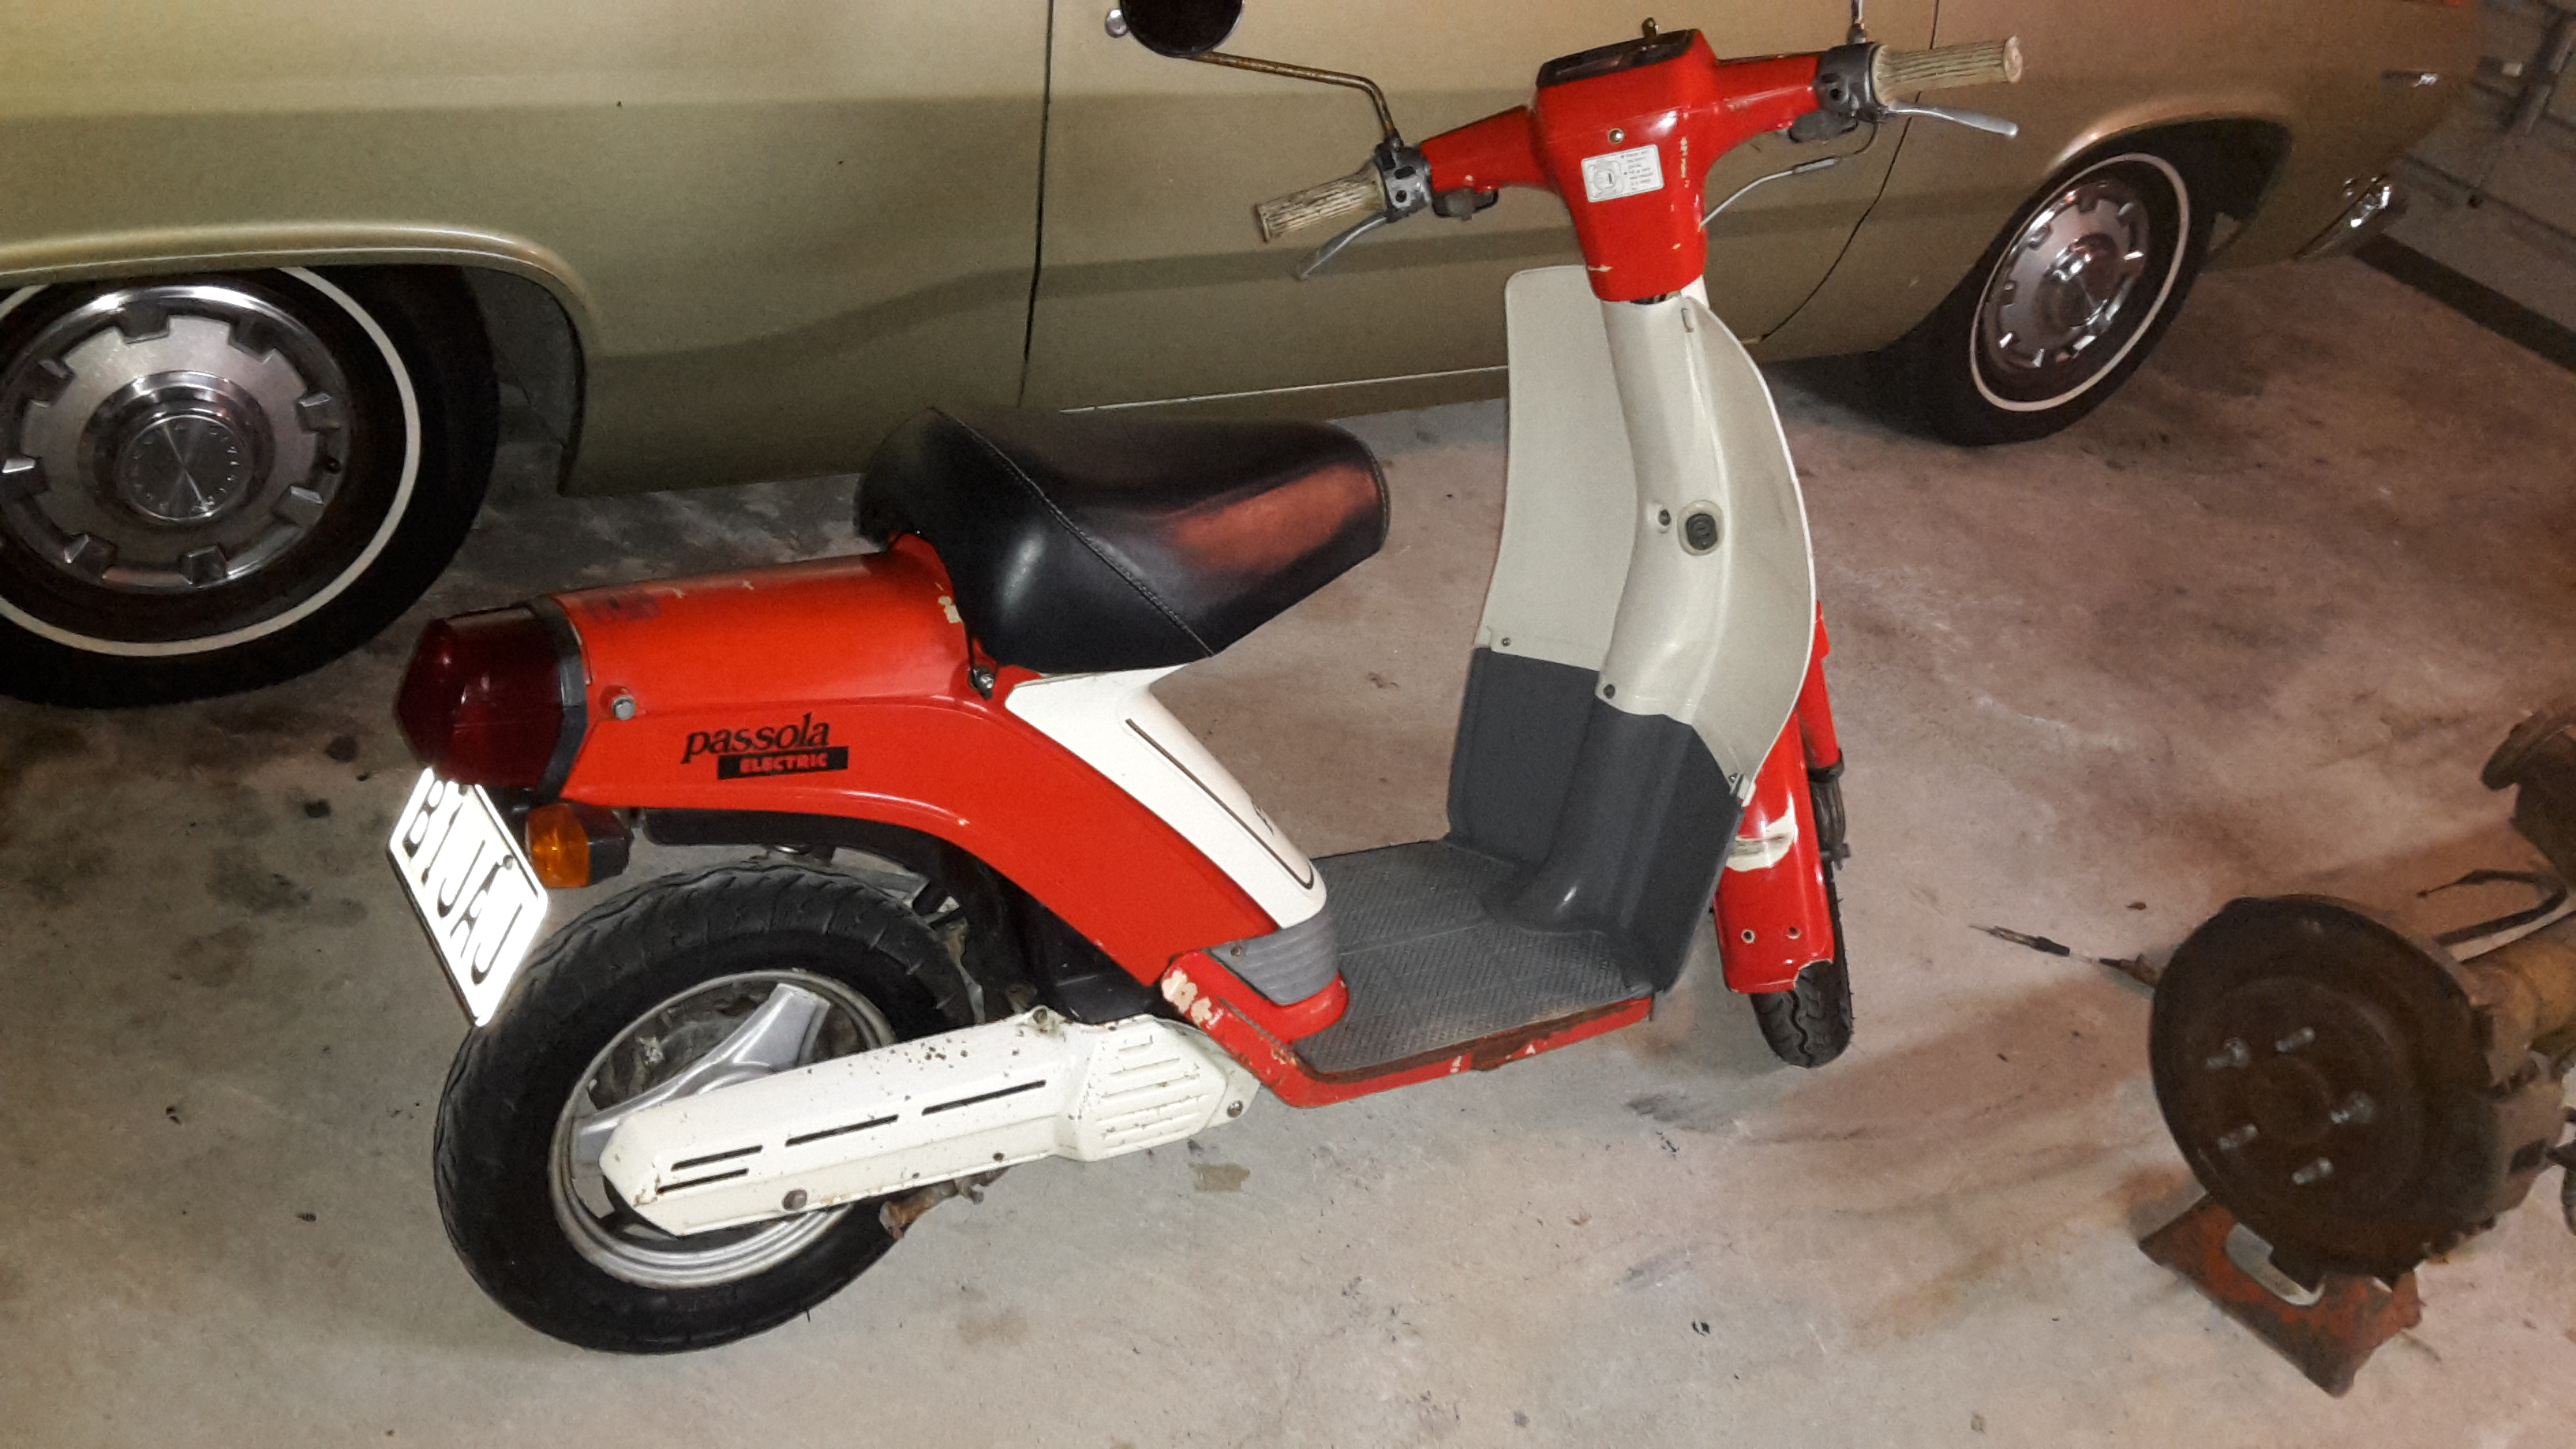
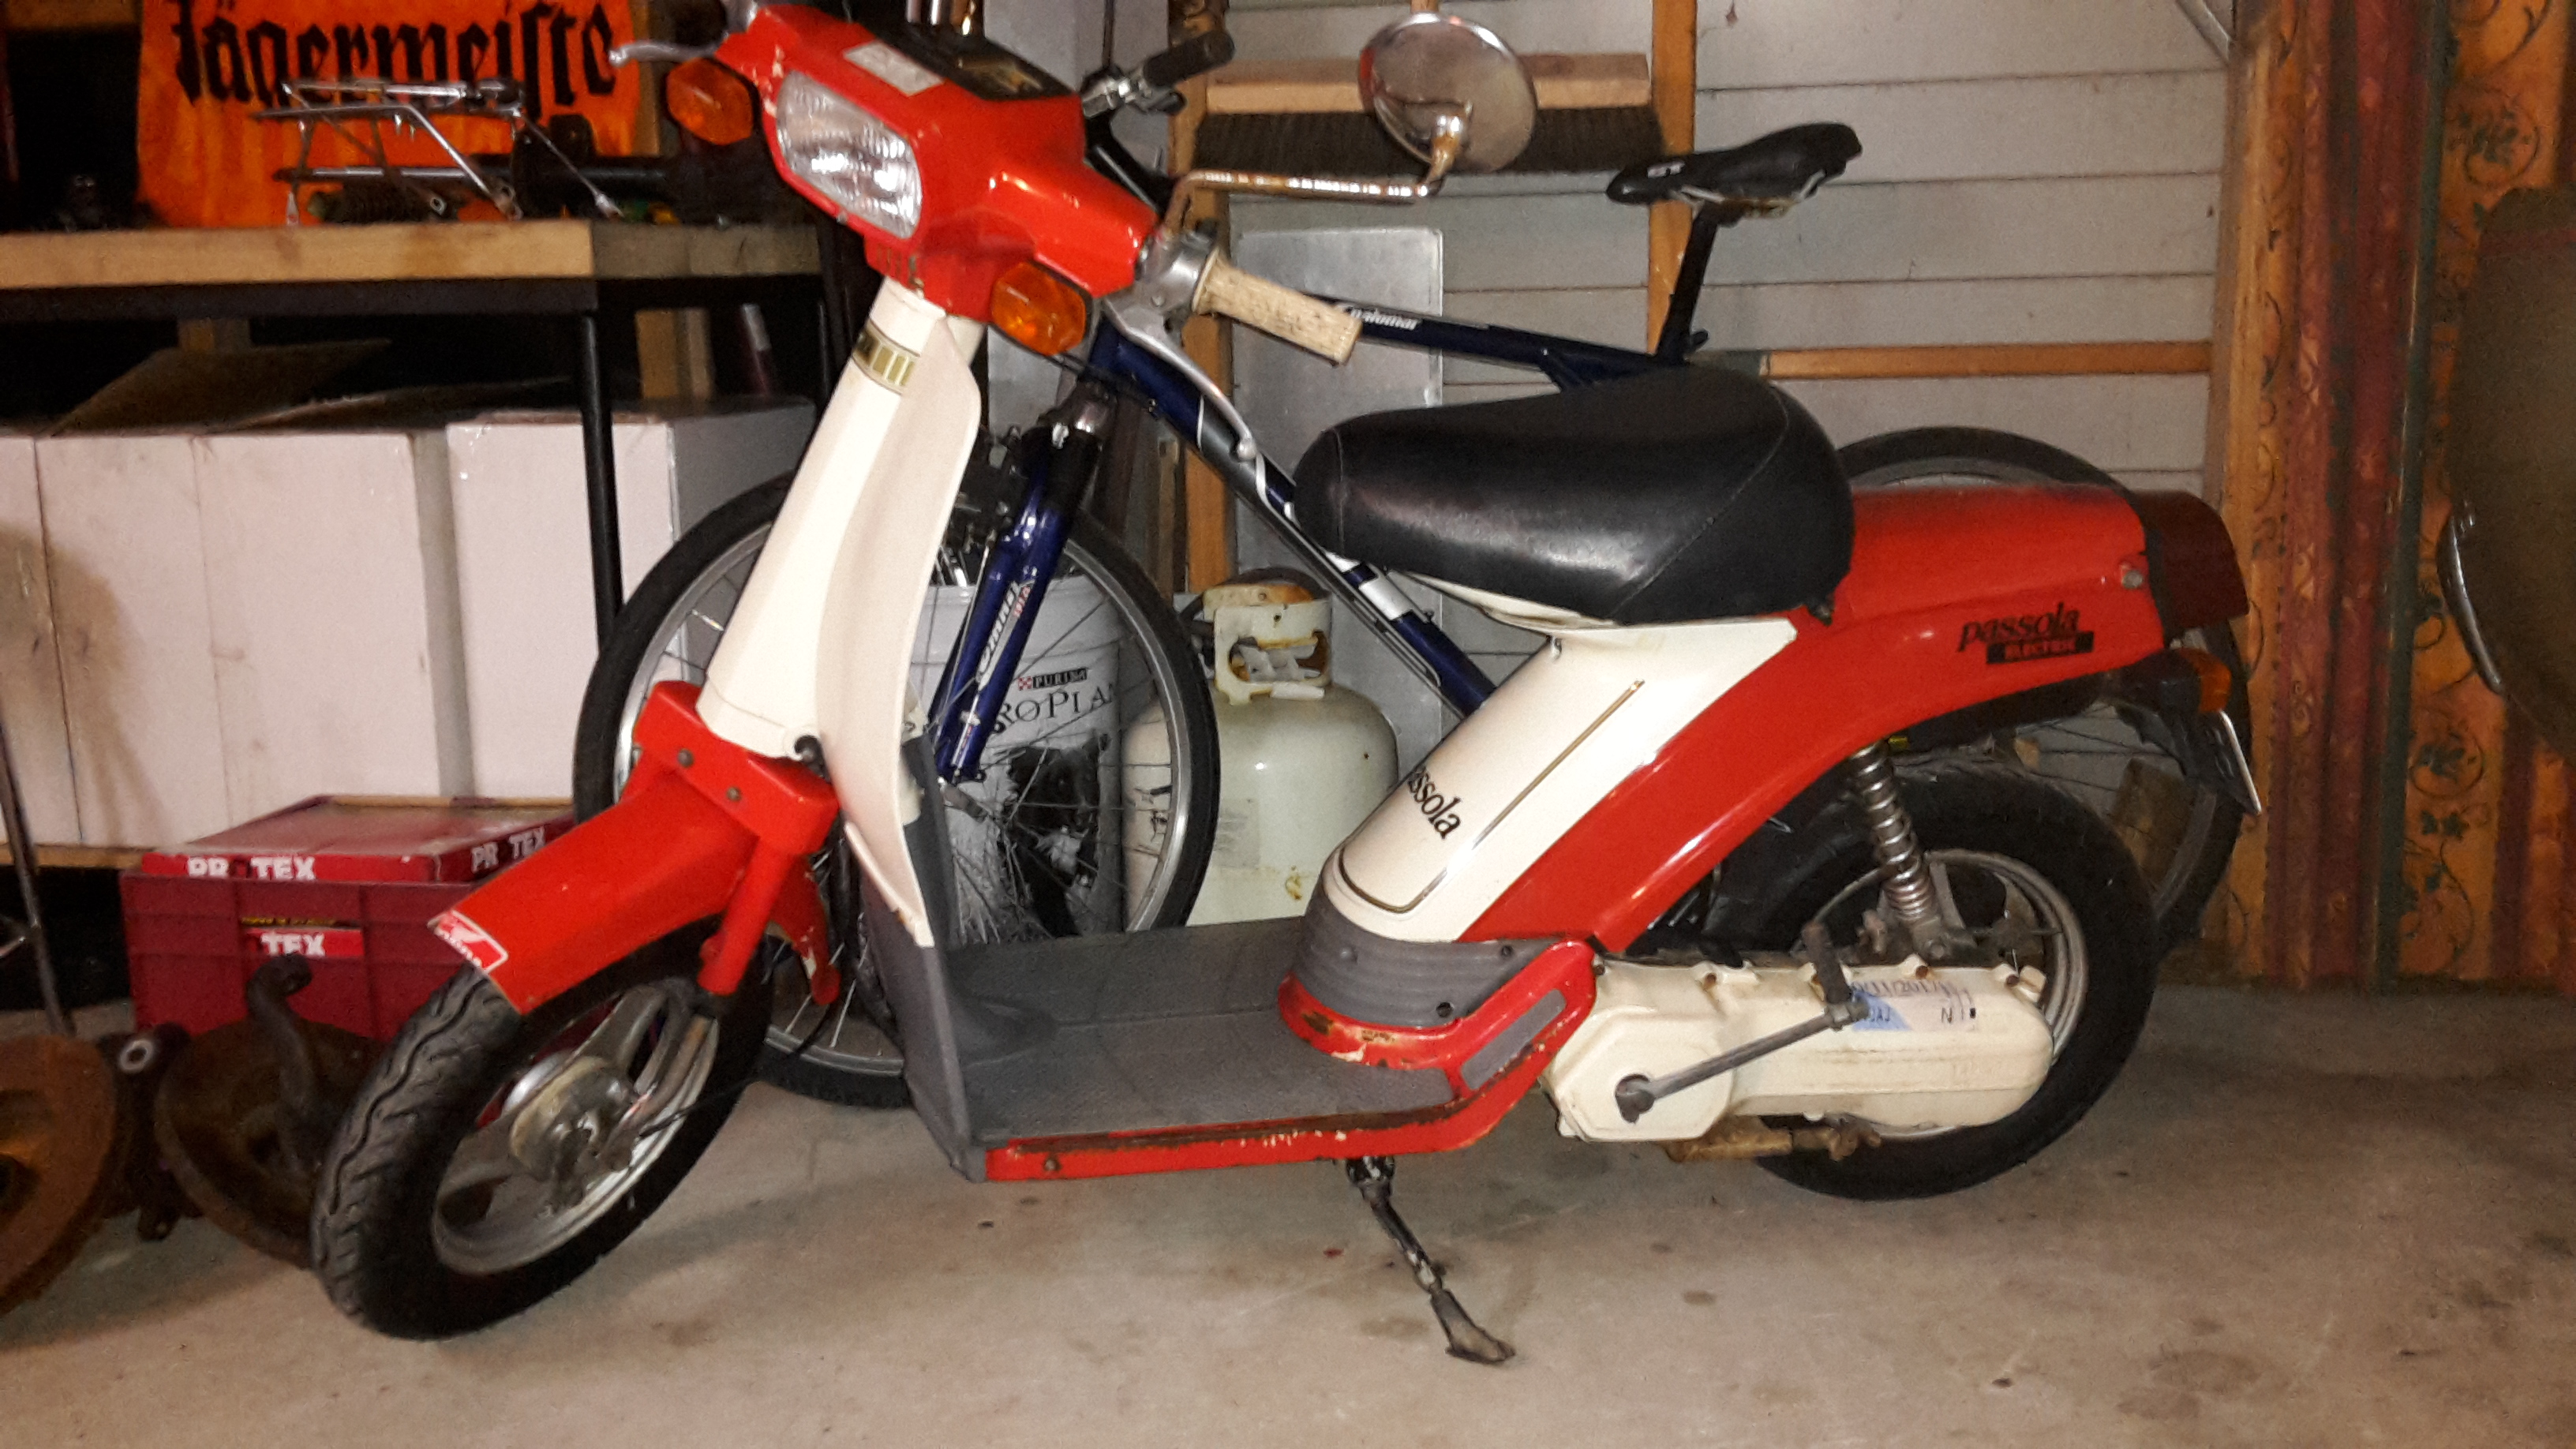
Other end of the engine size scale, I picked up this non running scooter from Scrubb, what a top bloke. I got it home and managed to lose the key somewhere, I disassembled the ignition switch to get that working and it had some water in it, and the air filter foam had fallen to bits so maybe it had sucked some of that into the carb. Anyway after that it started, I fixed the indicators, made a new air filter out of a car wash sponge, cleaned it, and got rego on it. At first I thought there was something wrong with the clutch but it turns out it has a automatic 2 speed. I have had some funny looks when riding it.
1 point


This leaderboard is set to Auckland/GMT+12:00