
Leaderboard


Popular Content
Showing content with the highest reputation on 07/18/19 in all areas
-
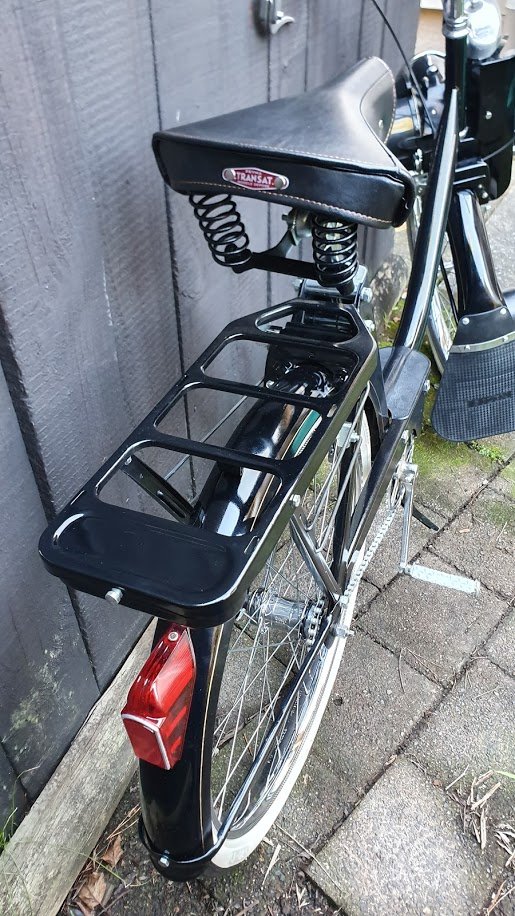
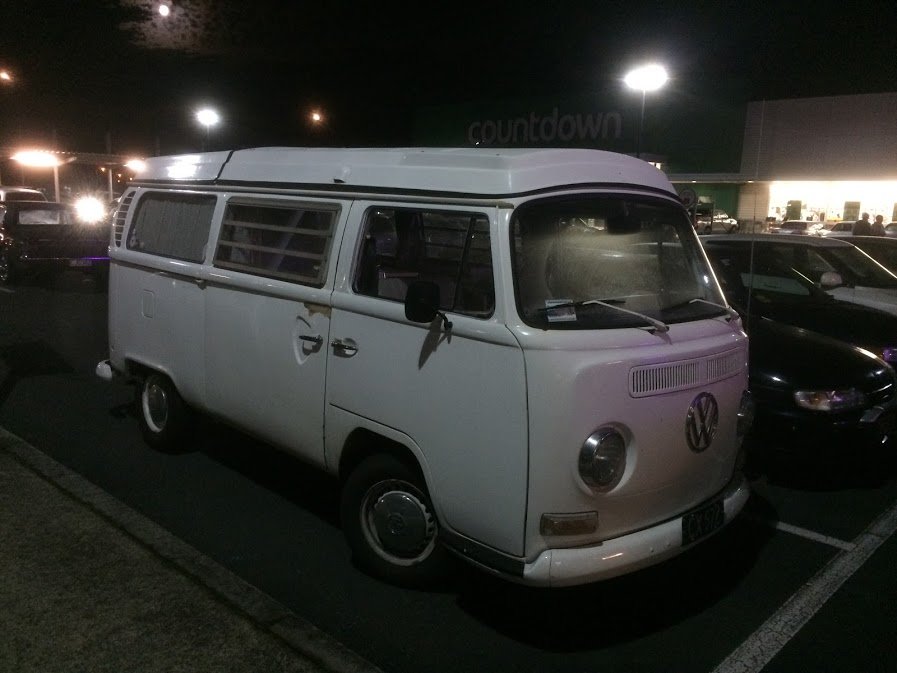
I've actually done heaps to this, like; - source and fit factory airbox and intake pipe (as seen in pics earlier). - fitted nice new K&N filter. - wheel refubishment finished, tyres remounted etc. - replaced dashboard with one that wasn't cut up where the stereo sits in the DIN slot, also a nicer dashtop than the one in there. - installed new audio. Alpine head unit, Focal components up front, Focal 2-way coaxials in the rear. - existing door trims had been hacked to fit some dubious audio, so replaced those with some sourced from same car new dash came from. Full clean/shampoo of upholstery brought them up A1! - rear interior stripped, everything cleaned, all fasteners sourced and replaced (had maybe 1/3 of what was supposed to be holding the side trims in) replaced and there's not 677864254% less rattles. - front bumper resprayed by Brendan at Platinum refinishers, no more stonechips or cracked paint. Scrapes on underside of lip reappeared pretty quickly while negotiating driveway though. - full Royce-spec paint correction and wax. Including ceramic coating on the wheels (OK I did that bit...). - new OEM Type R stickers on quarters, it had non-OEM ones on there and they weren't put on straight. - boss kit acquired to fit my Personal Neo Grinta wheel (although the plan is a red stitch MOMO Monte Carlo in time). - OEM optional rear strut brace fitted, and shock covers cut and trimmed as per the OEM template you received if you bought this new in period. Did it like they did in 1998 basically. - replaced rear boot carpet with a bloody mint example Mr. Jimmy Lucas scored from Zebra for me. - bought a replacement OEM key cos well, choice, and available. - replacement foam inner for the drivers side Recaro has been purchased ex-UK, just need to install/get @64valiant to help me install. - sourced and fitted an OEM clock, mine had a blanking plate fitted but the Type R-x was supposed to have a clock (loom was there etc) Then I got word Honda NZ had a single, solitary one of these NLA Type R cam covers sitting in their stock. So I thought "that's pretty flippin' neat" and I bought it because magpie. Haven't fitted it yet. 2019-06-24_01-57-46 by Richard Opie, on Flickr So we're sort of nearly where I want it to be. Some stock suspension on it's way from Japanland also. I actually haven't taken any other photos of it yet.11 points
-
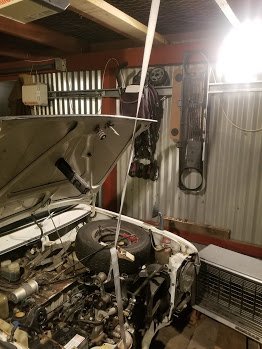
Apart from putting primer on those patches above, nothing has happened with this for nearly two years while ive been playing with the ute and wagon. Both are relatively sorted now, so I have tidied some crap out of the garage and peeked under the car cover and found this: This is after pumping up all the tyres and dropping off the axle stands. Looking forward to pushing it outside and seeing what still needs to be done (probably everything)9 points
-
Took the day off yesterday because i missed the bus, so took this thing down to my usual WoF place. For some reason i only took this blurry potato while it was up on the hoist. GREAT SUCCESS! (one of the two number plate lights blown but he passed it on the basis i would replace it asap) Celebrated by slopping drippy subway all over the seats and my pants ate my lunch watching the kite surfers hoping for a massive tangle up Bought this on the way home too, hopefully slow down the cancer a bit In other WoF advisory related news, changed the brake pads on Lady Azzurro's daily, i think we got our monies worth! And after tidying a lot of crap from on and under this thing, pumped up all the tyres and dropped it off the axle stands for the first time in nearly two years,9 points
-
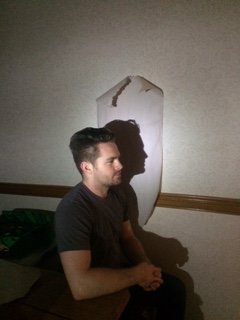
Hoping to setup a YouTube account soon and put up videos of me gapping Busa’s at the lights etc. In the meantime, here is my solution to a problem that plagues all of us: where to store all my damn helmets. On a damn handsome helmet rack.
 7 points
 -
Update time. Firstly there will be no more juggling around shuffling stuff to get the Imp on the hoist, or having to drive it down the slippery grass drive that heads to the back of the workshop to get it onto the hoist. We have the workshop back after having finished building this cabin on wheels. We delivered it to its new home where the owner will continue with the build , fitting windows, door and lining it out. It was a fun job but took up a big chunk of space. Well until we start the next build. We will have a 8 metre trailer to build for ourselves soon once we sell the housetruck. So we could now relax and enjoy the Imp. A few little jobs completed and a fair few miles clocked up. Most important thing to sort out was a leak from the nearside transaxle output shaft. After getting back from the trip to Blenheim it was discovered that oil was coming out from what I thought was the seal and getting spun out off the coupling, marking a perfect line of oil inside the engine bay. So the car ended up in this position getting its trans fluid drained. I removed the shaft, doubled checked the seal land which was fine, checked and tightened the seal by cutting a few mm from its spring because it just didn't feel quite tight enough on the shaft. I also checked the shaft too. The early Imps have a splined shaft that the output spider slides onto and is held on by a large nut. The design went through two revisions ending up with the later shafts being a factory press fit and no nut. I was sure that my late type was fine and solid but just to be sure I cleaned and siliconed the end of the shaft visible from outside. Just in case... Put it all back together, a few drives and the leak was still there. After some advice from a fella on the Imp forum I took the shaft out again and checked it in the vice. It was indeed loose. Loose enough that it could move in and out slightly and had broken the silicone bond so allowing oil to creep past the splines and out. It must have been getting worse as the oil was essentially lubricating the once tight fit of the splines. It knocked apart easily, showing the factory O ring fitted before they press them together. Once clean and dry I tried the fit. It was a touch too loose for my liking so out with the JB weld epoxy. It'll never leak again Yesterday we drove to Nelson and back and I'm happy to report that the leak has stopped ! Yay. Now the only real leak is a dribble from the rear main seal on the engine. I'll change that when I change the worn ring gear in the future. Another job was to sort out some sounds. I like my music and not having a sounds system in a car on long trips is annoying. I had already eyed up and sussed where I would mount some speakers. It seems a fairly common place after having looked at other setups out there on Imps. We had scored a JVC headunit from a customer after upgrading their setup. Then we had scored some speakers from a Nissan Bluebird SSS we had been given and passed on but not before robbing its sounds. I also had some ply left over from lining the rear of the Viva wagon floor. So sorted for a cheap as setup. We made some boxes in the sunshine on what was a cold day.... Later on the sun hid behind clouds so all three of us moved over to the warmth of the log fire.... After Hannah covered the boxes in black vinyl I mounted them under the parcel shelves and wired in the head unit, a neat little unit that due to not playing cds is shorter in depth so fitting under the shelf nicely. It all looks neat enough and sounds fine for the size. Just need to find some protective grills to suit those speakers. Next on the list is to get and active sub and mount it under a seat so we can have some fuller, deeper sound. Another job I had planned to do but kept being put off was to hinge the front number plate. I don't want to mount it any higher and block the grill so where it is makes for a great driveway crown sweeper. Driving along our 500m long stone driveway in a lowered Imp with an even lower number plate gets tiring! So I did this... I'll report back with whether it also swings back at 170mph so avoiding speed camera tickets. The other night we had a lovely sunset and the Imp was looking resplendent in the light. I took a photo.. Next jobs to do are fit some carpet and I'm still really keen on pursuing building a full EFI setup. But its going to be a very busy summer for us so that will have to be a project I pursue in the evenings. Alex6 points
-
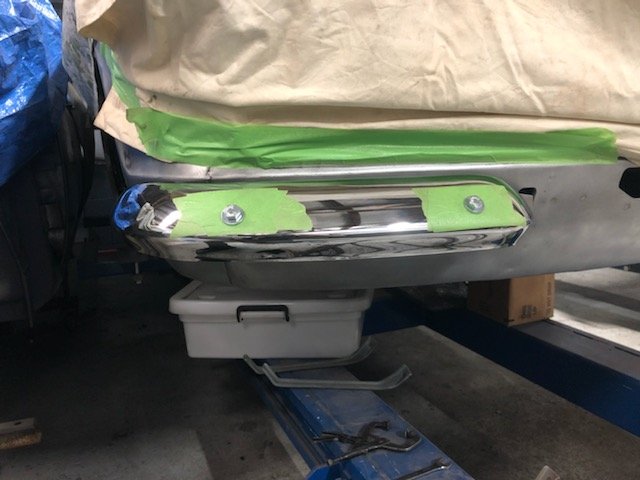
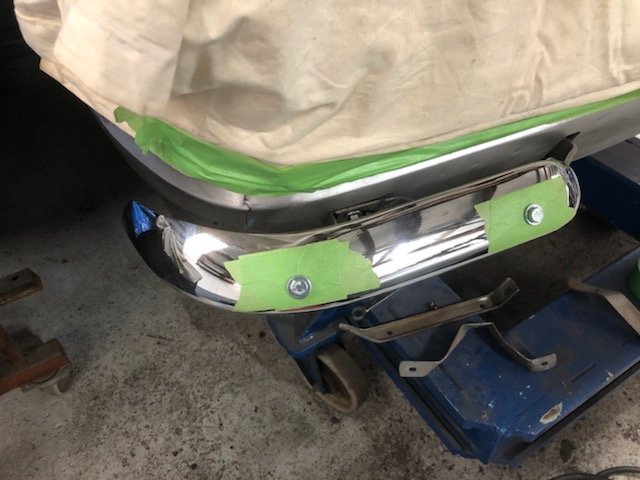
Been away lots lately so no progress on the rubbers. Back in NZ next week so need to get them sorted. Fitted off the front quarter bumpers and had to do a few adjustments to the brackets to get them sitting right. Unfortunately the left front one has had a crappy repair before caroming so it’s off to the strippers for that and the rear bumper and Greg will get them mint before getting chrome plated again.
4 points
-
Negligible I would have thought, really. Heavier though! Yeah they rattle. I have had basically the whole interior out (including dash!), and replaced all fasteners and anything broken, with something that is not broken. And it still rattles. But so do racecars, and racecars go fast. At least that's my justification.3 points
-
- made up an exhaust support from the gear box to the bit before the flexis, similar to how the 125 is set up - put a blob of weld on one holey weld (one! ) - took it for a hoon. Sounds great from inside, very quiet on cruise but a bark on the throttle and right at 2000 rpm and 4000rpm - rear pipe was touching the tow bar so adjusted the donut joint. - You can see the Y joiner at the rear seat, thought i may have needed a muffler in this section but it will hopefully be fine Only one sunny day this weekend, so did a few other little jobs, - after coil and resistance chat earlier in the week i checked the voltage at mine, it was about 10v. Based on googling its number to find out its specs, i think its a Ferrari or 6 cylinder Alfa ? came in a job lot so iunno) its quite a big larger diameter than usual anyway. Didnt even get warm on full 14V checked it after a exhaust sound test run . Si used the power from the fuel pump relay (already triggered by the factory coil feed) to power the coil and it seems a bit less missy when cold. Which reminds me I need to get a new Magnetti Marelli dizzy cap - there are cheaper versions out there but they are not very good. - also adjusted the idle mix on the carb a smidge richer, and i could slowed the idle speed a little more too. Engine now ticks away lovely, with a nice burble that you can only hear from the end of the exhaust, i think that the old one had quite a few more holes i didnt spot. - gave the headlining a scrub, and pulled out carpets, removed rubbish etc. - Put in a pretty subtle magnetic phone holder. - Gave it another wash, and then a wipe with an old polishy towel. Needs some more protection. I reckon its ready for a run to the WoF man one day soon.3 points
-
Also last nights meat was another goodie! Made it to BP to pump tyre up on the van and made it back home sweet as. She's dead flat today though hahaha.2 points
-
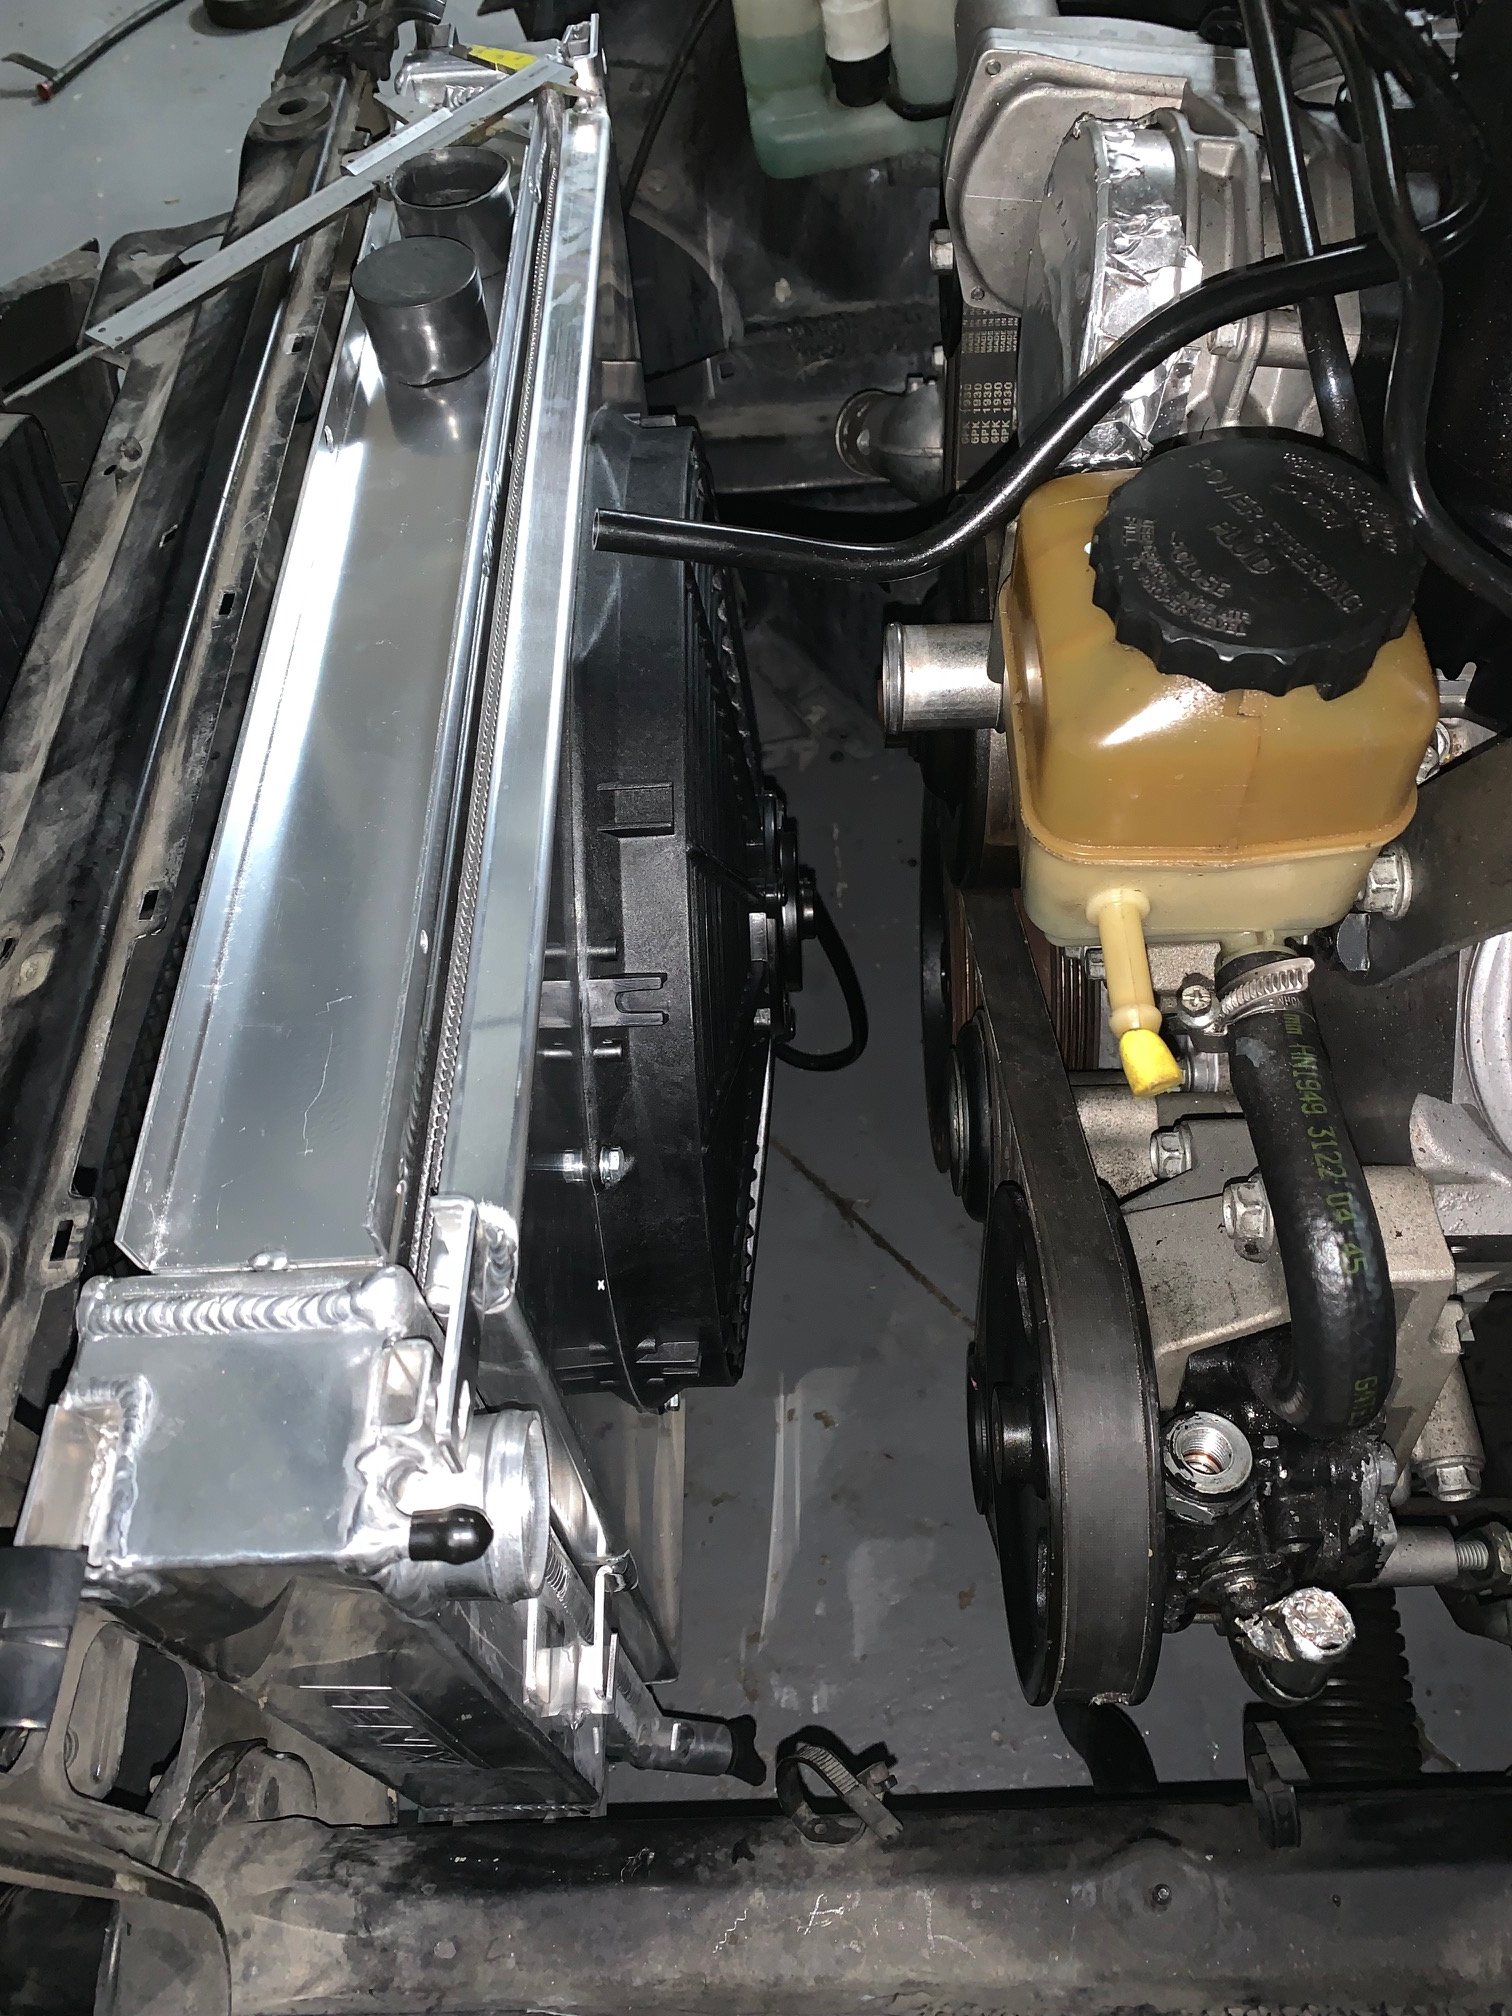
Got my high quality Fenix radiator and shroud today. I suspect they’ve never test fit one into a car but I can make it work. Didn’t come with a filler neck / cap which is a bit gay cos I need to weld one into the end tank. Looks good tho
2 points
-
Better make sure you're there with him when he lights it up!2 points
-
Ahhhh... Just like a good Morris engine should be. Sweet cheers for tip. Yeah I'll do the sump to be sure and can pop a cap off and look at bearings. ".... And that folks is where the complete and utterly expensive engine build began, leaving the little Imp to fester in the corner of the workshop, leading Alex to buy a succession of other shit old cars to see him through whilst he built the race engine of dreams... "2 points
-
next step is the head. i have been gathering up parts for a while. some manifolds and carbs etc here chose a manifold to run and started matching up the ports and chambers Got a couple sets of carbs and rebuild kits, but decided that efi was the way to go, so gutted a pair of them, pressed in some aluminum and bored the centre out. Have fitted some injectors but havent taken pics yet. hope to finish the head in the next week, and get it to the shop for a skim. I got to get my act together, the family is coming with me to chch for nzdatsun nats in october!2 points
-
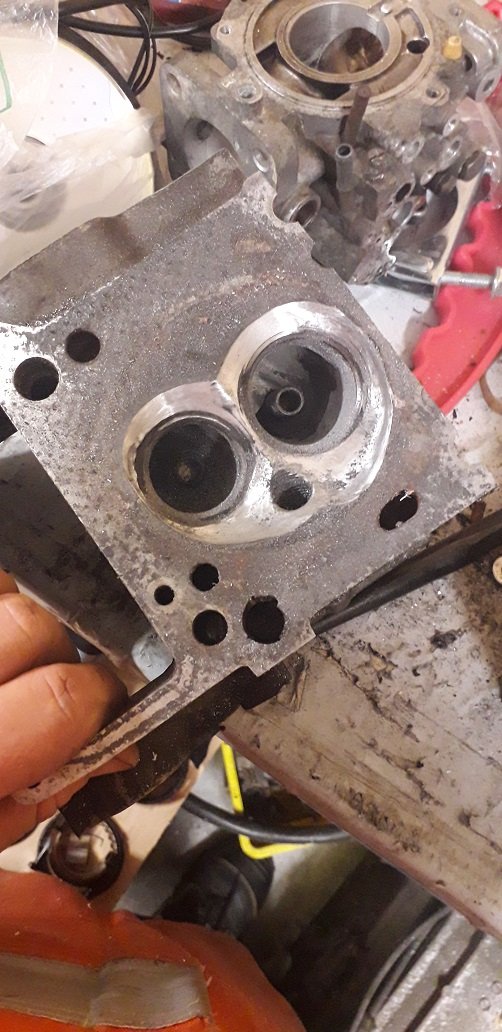
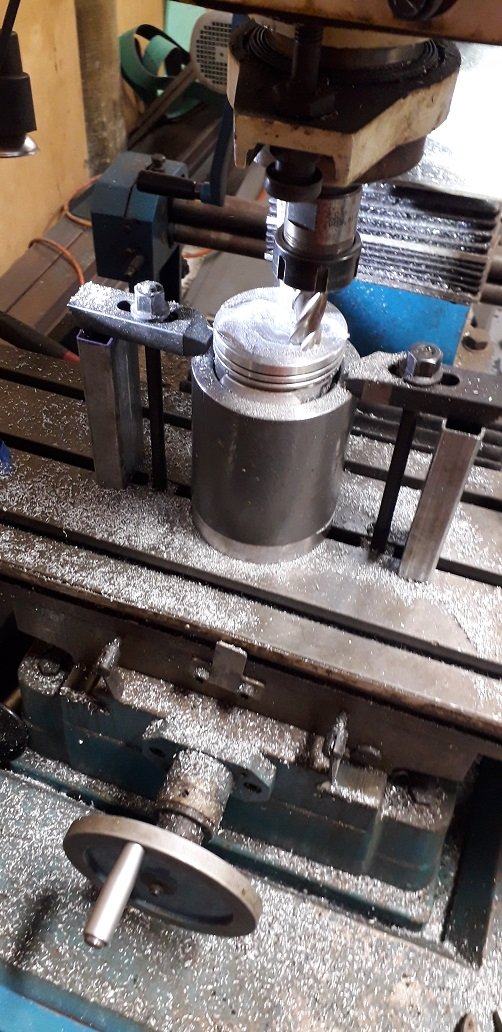
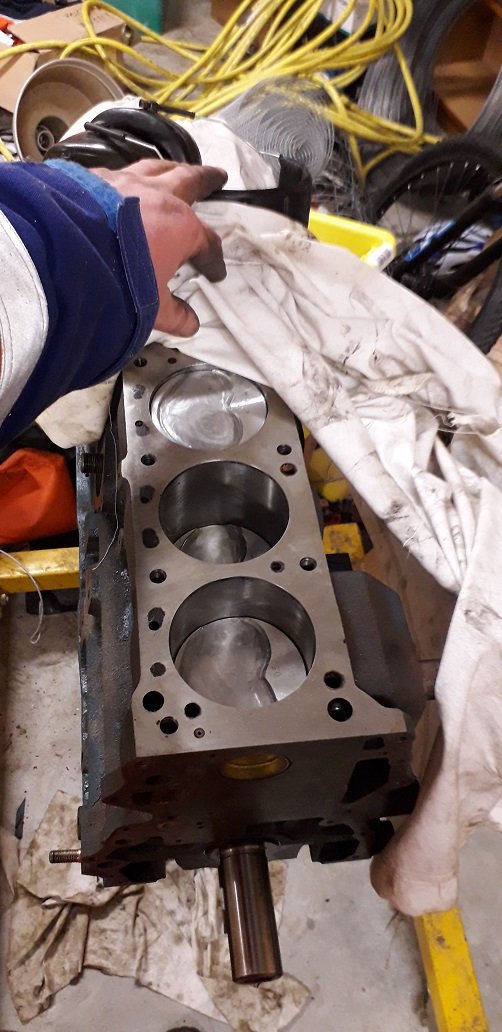
whoa, a year later... so i got the bottom end together But to get to this point took a few steps back and forward. I opened up the combustion chamber a bit and it turned out i would be around 12.5:1 comp which is not daily driver material. The bore spacing of the head chambers to the bores is lol so i had to mark each one to the head. The head gasket is also terrible spacing, but some guy in the us is getting cometic to make him a custom one to his design so ill try and buy one of them Gave the piston a bit of dish to drop the comp a little. Not sure if we did it the right way, but it worked out sweet
2 points
-
Made a start on the plenum I tested the trumpets on the starlet. red line is straight pipe the same length as the bellmouths (blue). Pretty much no difference till airflow demand is high. after that the bellmouths win. Down on power about 10kw to what starlet makes due to runner length. Some goose put a massive suspension tower in the way, so stuck with this length on the hilux2 points
-
and DONE (almost)
2 points
-
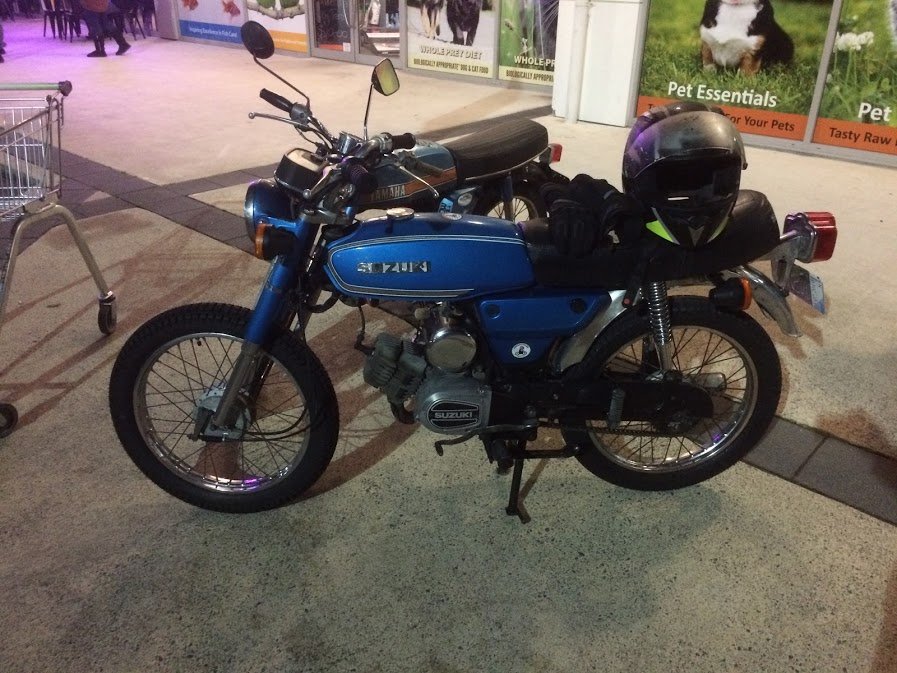
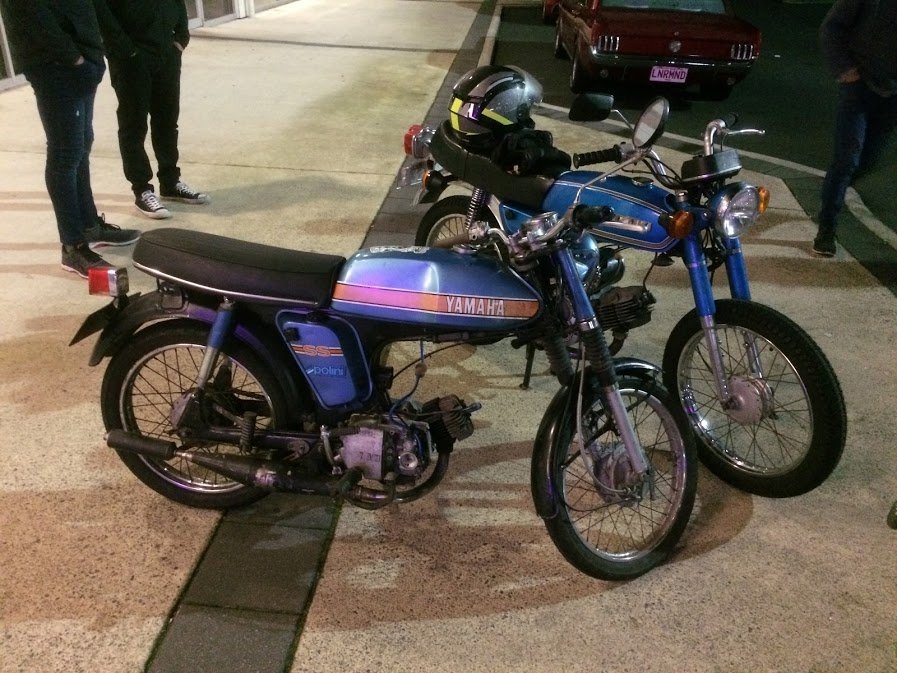
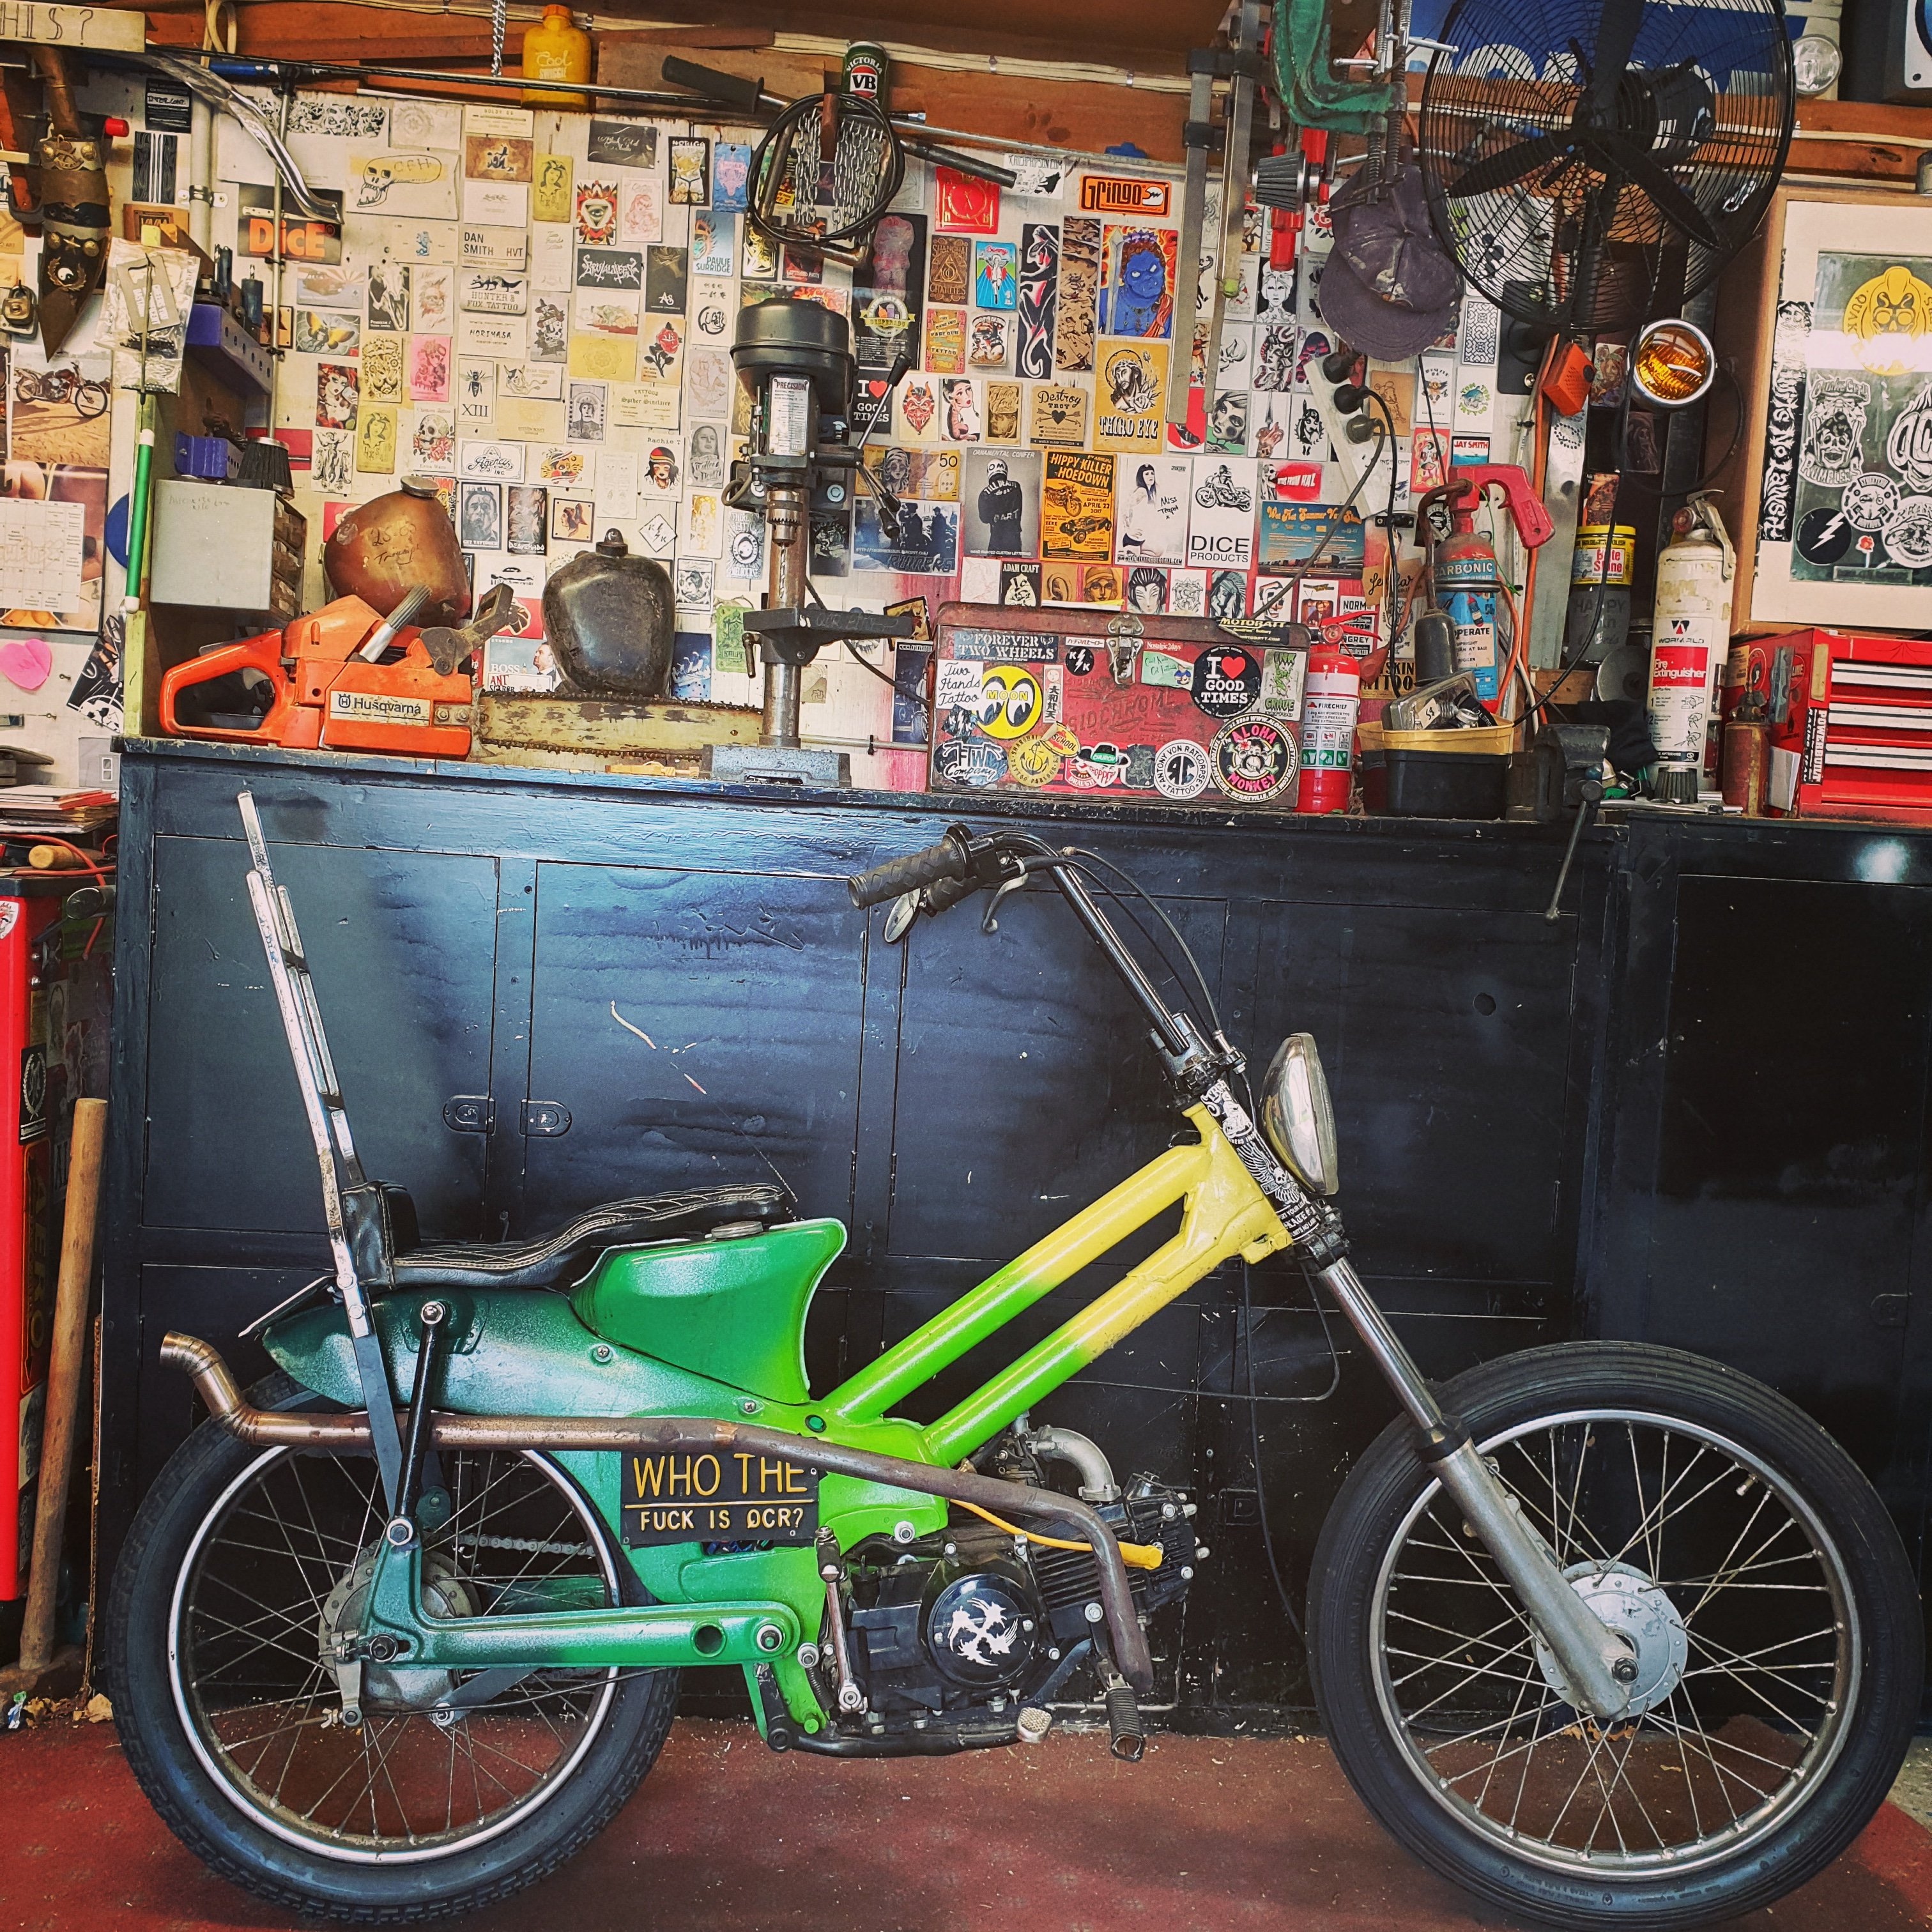
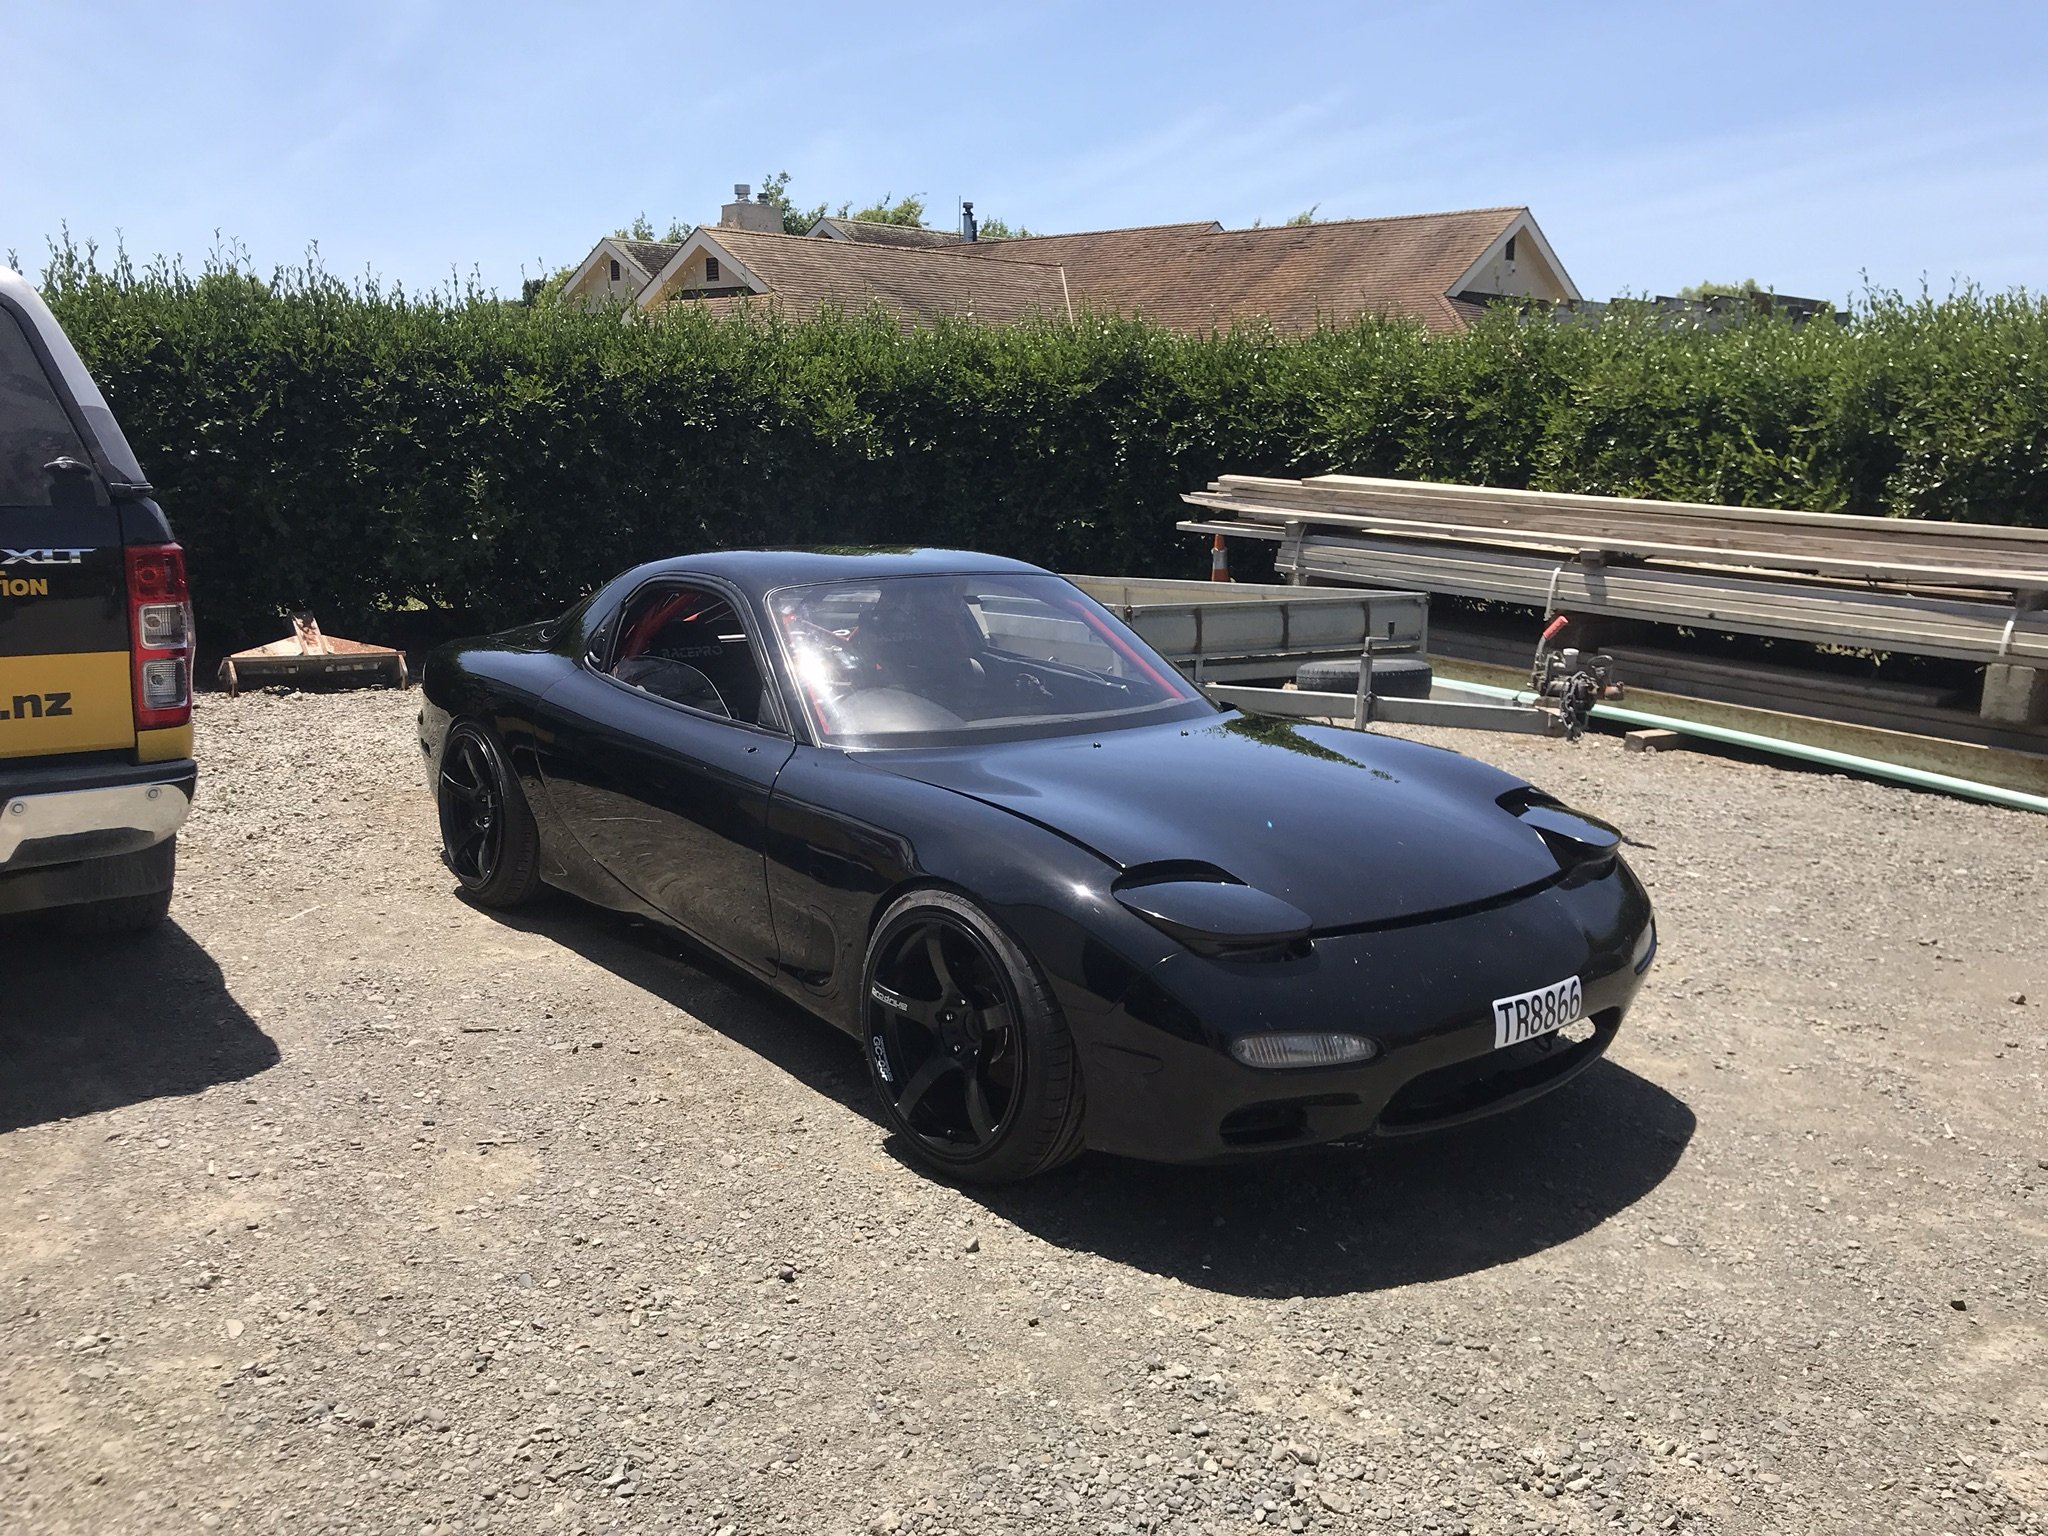
So I flicked the 944. It wasn't something I was intending to do, but a fella on the Porsche Transaxle NZ Facebook page popped up a 'WTB' post and I responded. With a high price. He initially declined, I didn't budge an inch and then a few days late the wife had mysteriously allowed him to purchase the car. He drove across from Tauranga, was rapt with it, and drove it home. Am I upset? No not really, I didn't get especially attached to that one since it burnt me (and my wallet) a lot during my near 2-years of ownership. Decided I wanted another DC2R, some of you might remember my 96-spec I had about 2007-8 and came along to a couple of NZH NIMM's in etc etc way back then. I put the word out that I wanted another one, and happened to meet Tim Bell (unsure if he's on the forum yet?) around this time through some of the other Hamilton fellas and a group chat. Tim being both an excellent human and the owner of a minty fresh DC2R put the word out among of his Type R friends, and turned up this car. DC2R Phone (1)-Edit by Richard Opie, on Flickr It's a 2000 Integra Type R-X. The 'X' is basically the final run of these cars, from late '99 through to mid 2000. You all know what a 98-spec car had over a 96-spec. But the R-X added to the list with a few more luxury mod cons. Power folding mirrors, 6-speaker audio, blue-tinged faux carbon trim, privacy glass, bla bla bla. Basically the best spec they came in, unless you reckon no options at all is the best. Which is kind of is. But anyway. It took a little bit of negotiation. The seller got semi-cold feet about the whole thing, had a change of heart, then another, and I ended up buying it for a fairly premium price. But it's clean and tidy, with absolutely minimal molestation. When I first viewed it, the car was on TE37, had a Recaro SPG on a fixed rail, was running a Neptune-chipped ECU via adaptor harness (yay no splices etc) but I was happy enough to not bother with all of that as I wanted as close to stock as possible. As it stands, the car has a Mugen Gen 1 exhaust (cat delete via welded in stainless pipe), and Ohlins adjustable coilovers as it's only mods. Which is fine. Oh and a very terribad Japan-spec hodgepodge stereo of shitness. DC2R Phone (2)-Edit by Richard Opie, on Flickr But the good! It's clean, straight, has new rotors, Endless pads, 160000km on the odo, a VERY clean engine inside and out, great even compressions, the suspension has $1700 worth of recent rebuild receipts, excellent black Recaros, tidy dash and is the perfect base for what I want. Actually I need to speak to @64valiant about replacing the bolster on one side of the drivers Recaro. DC2R Phone (4)-Edit by Richard Opie, on Flickr My plans? Chuck some nice fresh audio at it - I've bought a stack of Focal speakers, have a nice Image Dynamics amp and an Alpine bluetooth headunit for it. Tidy up the alarm/install a new one, refurbish the tired OEM wheels, go through all of the tarnish fasteners beneath the bonnet and replace with nice fresh ones. You get the idea. DC2R Phone (5)-Edit by Richard Opie, on Flickr I'll leave you with these phone shots for now - once I have the wheels done and dusted I'll be heading out for some proper shots with my big boy camera at some stage. Nice to be back though. Forgot how addictive these wee engines really are. And how rattly and generally shitty they are/racecar.1 point
-
discussion here //oldschool.co.nz/index.php?/topic/45321-fletchs-1974-datsun-260c-wagon/ Bought this car back with me from OZ end of 2013 when i moved back here. Its pretty original, got it from the original owners in Tamworth, NSW. They were getting a bit old so it has slight damage to every corner. 8 seater wagon, factory AC, 3 speed manual an the column, electric rear side window. Pretty flash for its day. It belongs to my mrs. she liked it so i put it in her name. so i can get another one Here's some photos. When i first bought it Back at my place in qld. 2000kms from where i bought it. Only lost 1 hub cap and hit 1 skippy on the way Then i reconned the front end. Yuk Steering arms refurbed with new boots and a few pumps of grease I have had a battle sourcing ball joints before. Its hard to find front ball joints for this model or the earlier 130 model. One option is to fit the whole 330 series front end. I could not find a 330 front end without buying the whole car so i did a bit of creative engineering and reamed out my axles to suit the later, and more importantly, available, 330/720 ball joints Sorted!1 point
-
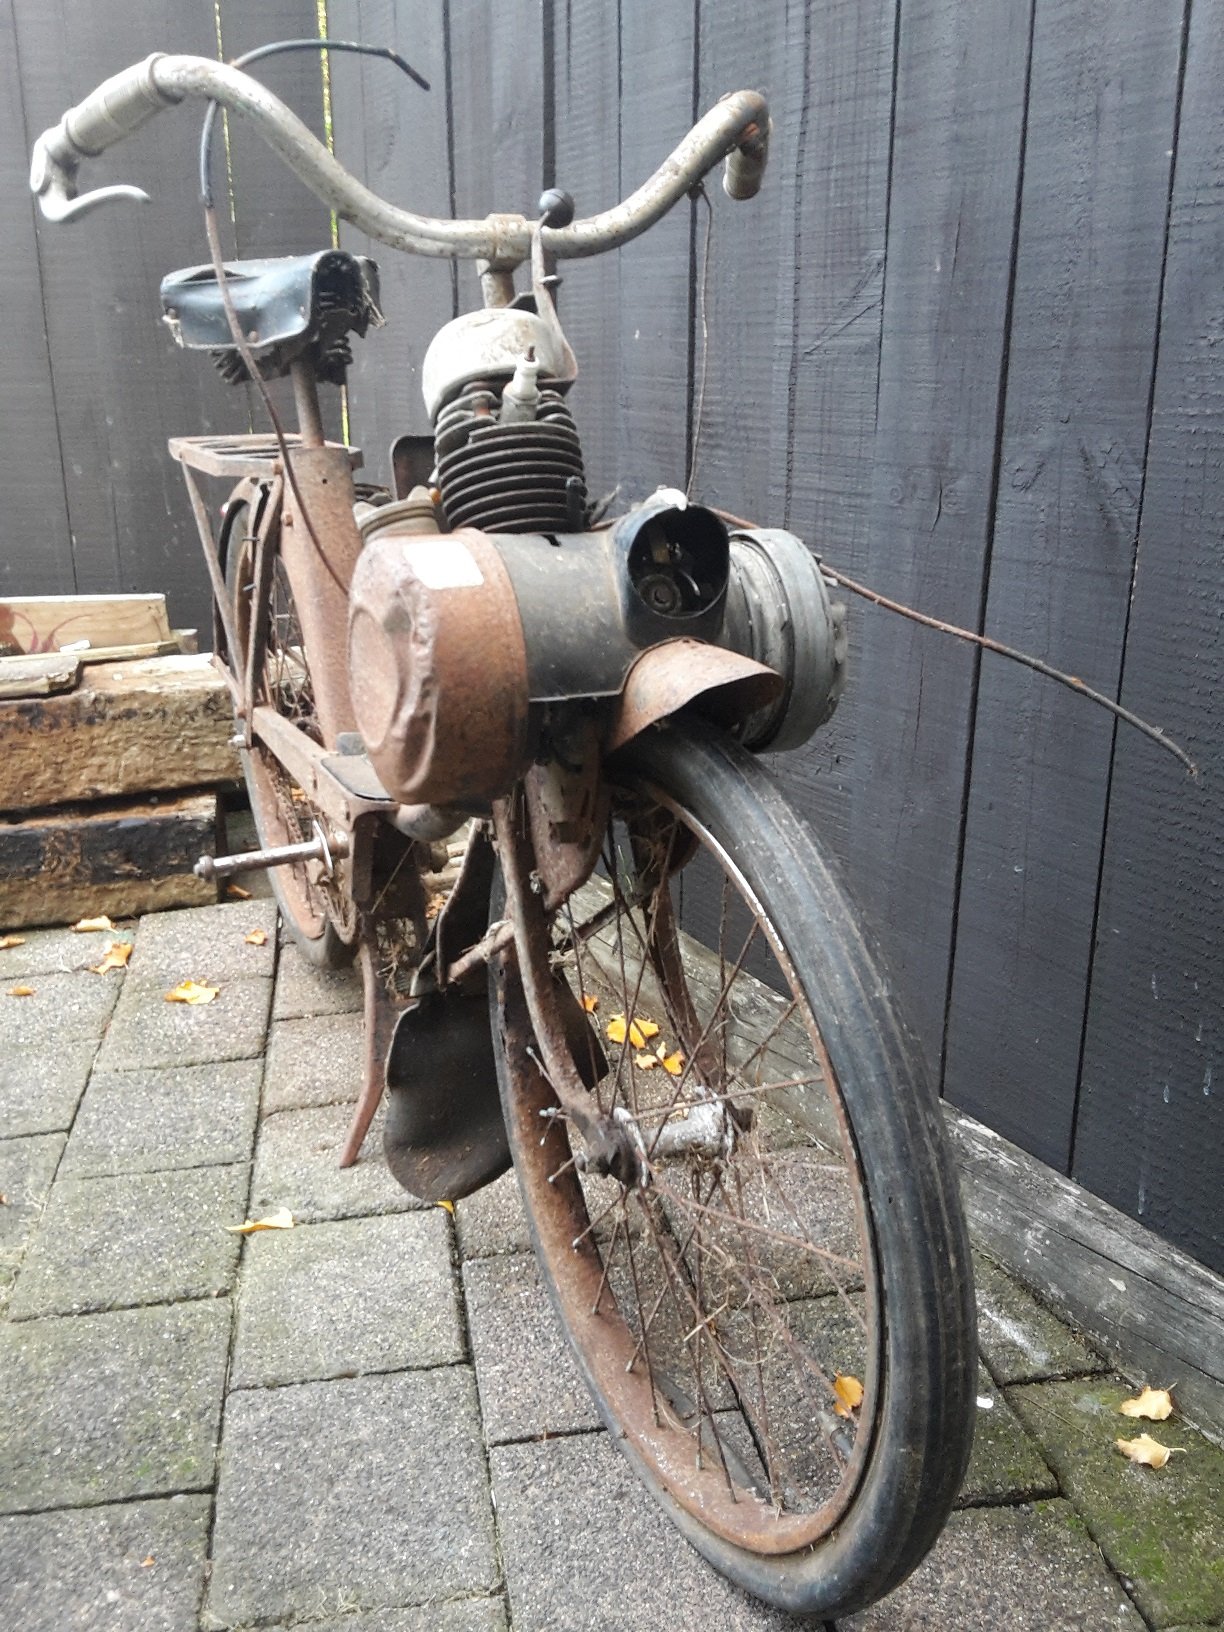
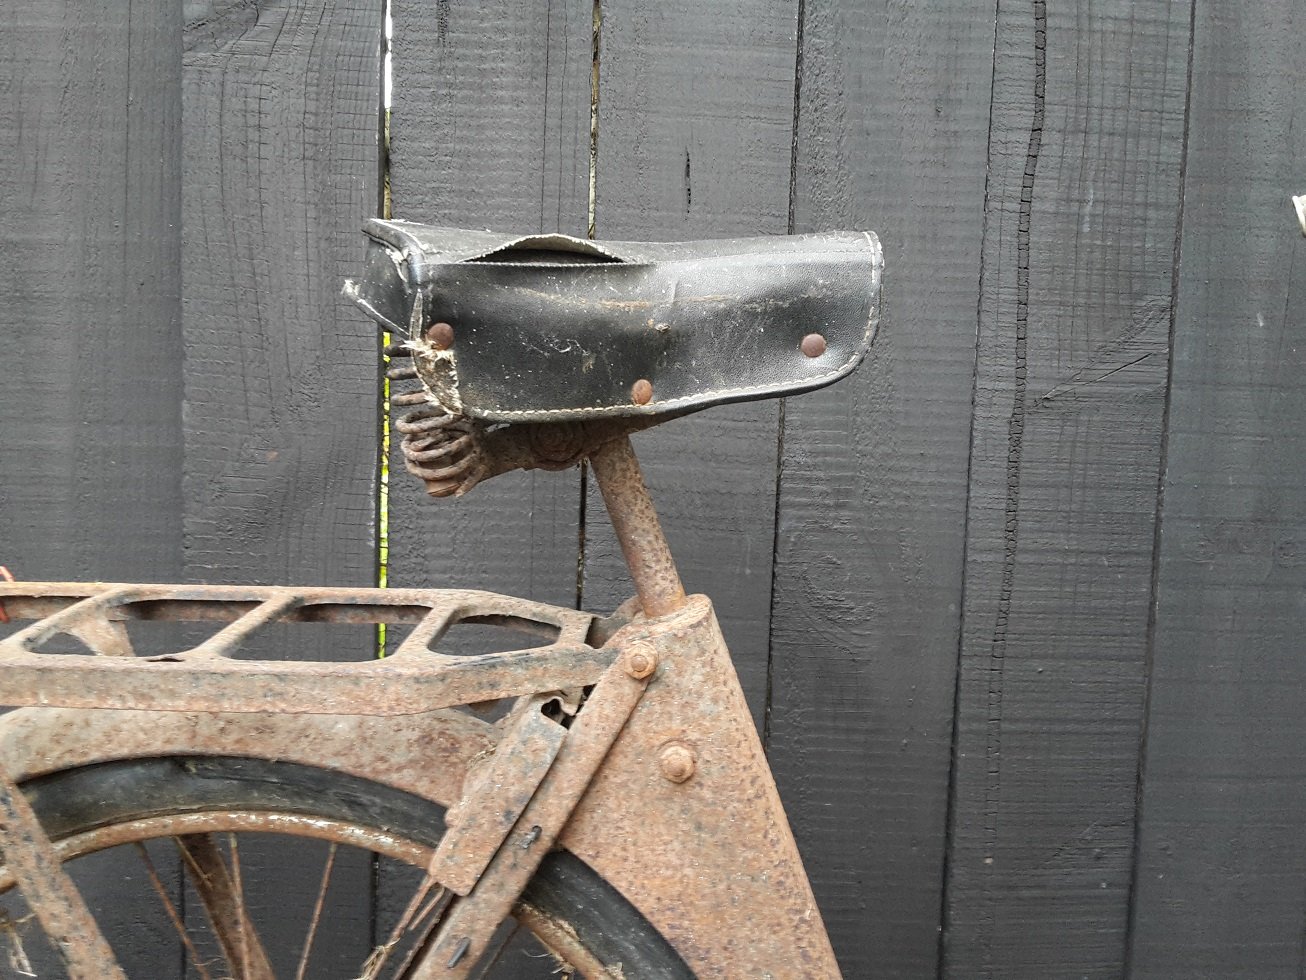
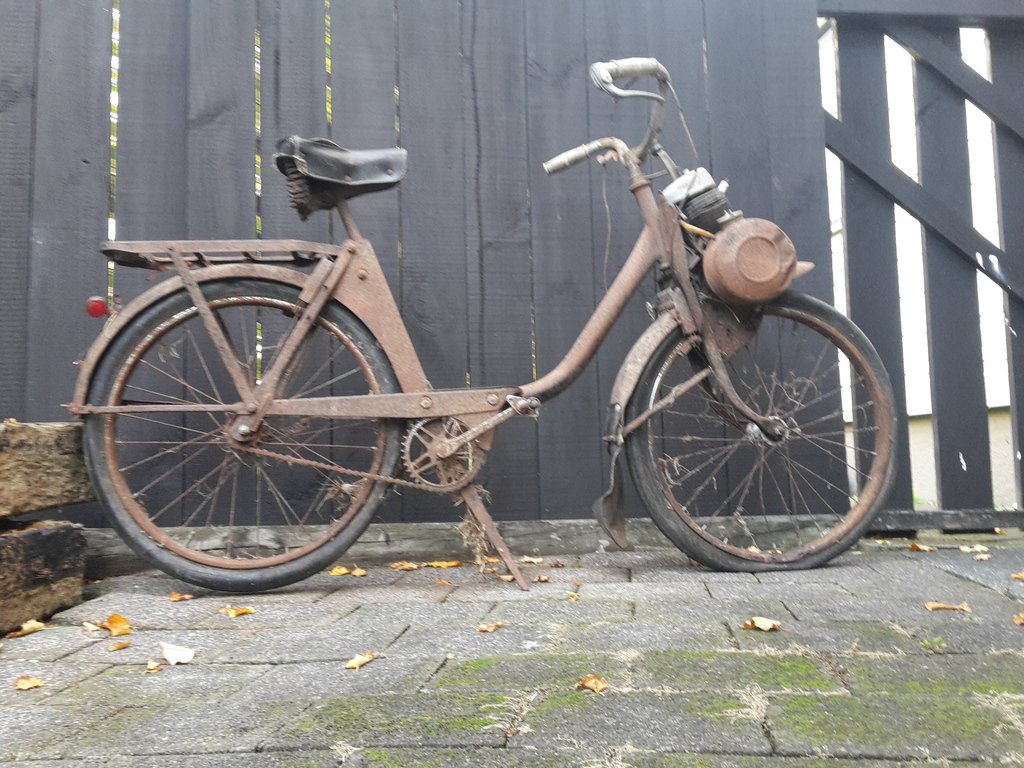
The reed valves seemed OK, so I was scratching my head, (even ordered some carbon fibre sheet to make new ones) and then this happened: So I started pulling it down today. Even with a powerplant the size of a big family box of weetbix, it still looks like I'll have to pull the engine and transaxle in one go. I thought it looked about 50 / 50 that I'd be able to shufty the block out sideways off the transaxle. I'll have a big cuppa, and ponder that tomorrow.
1 point
-
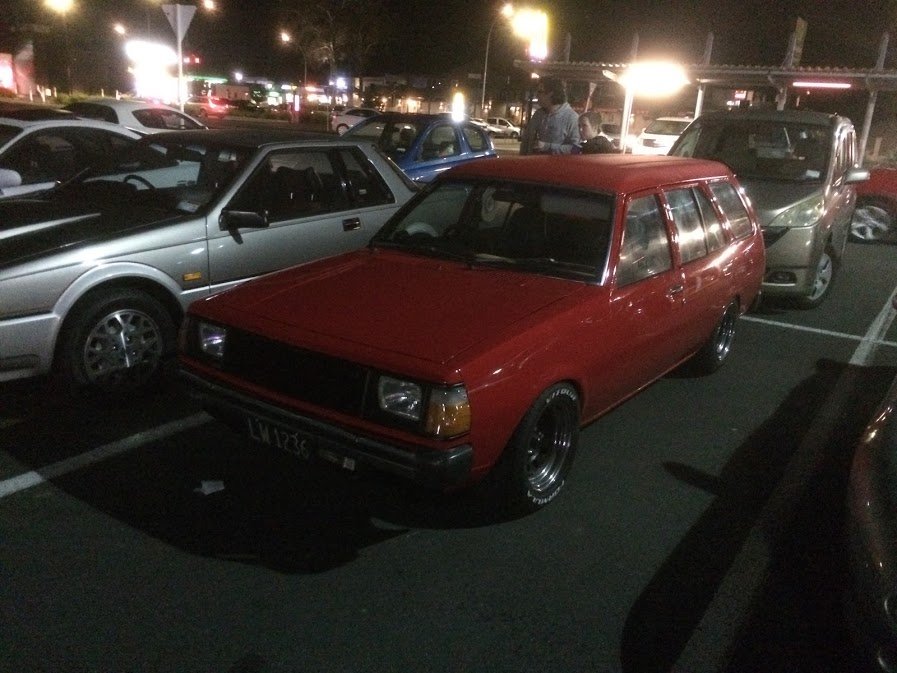
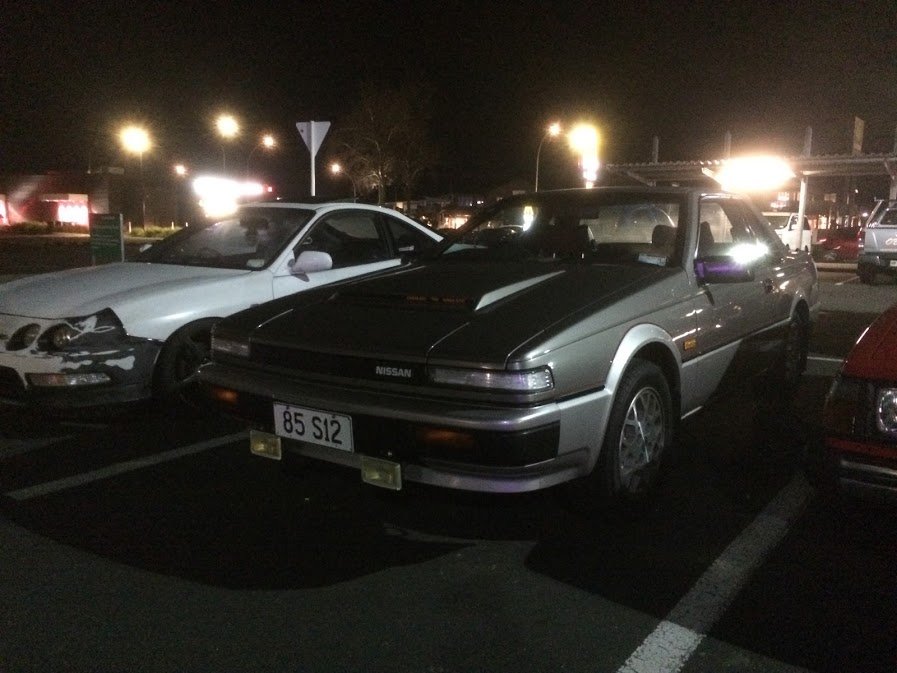
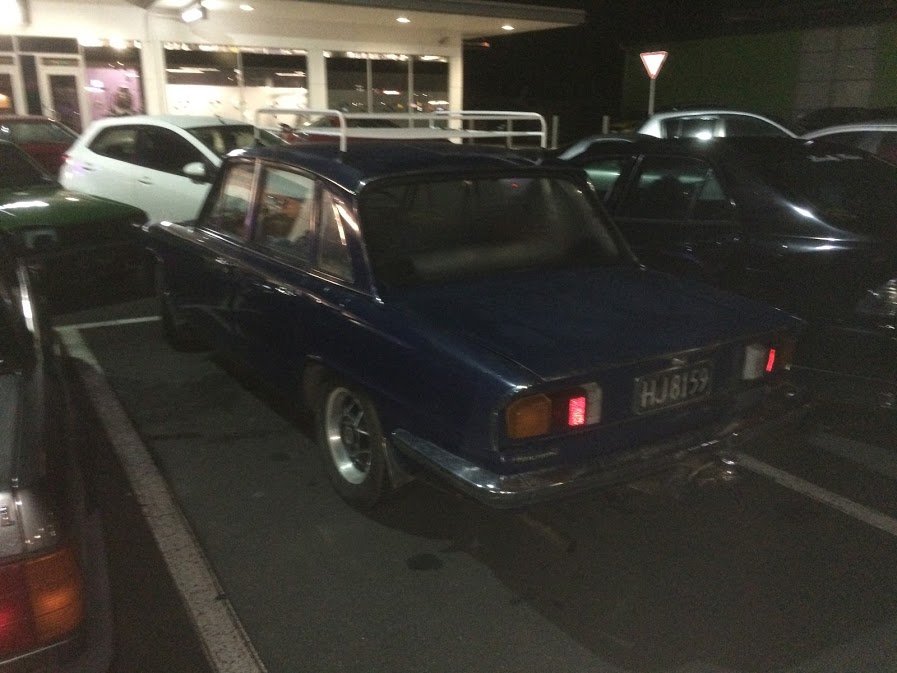
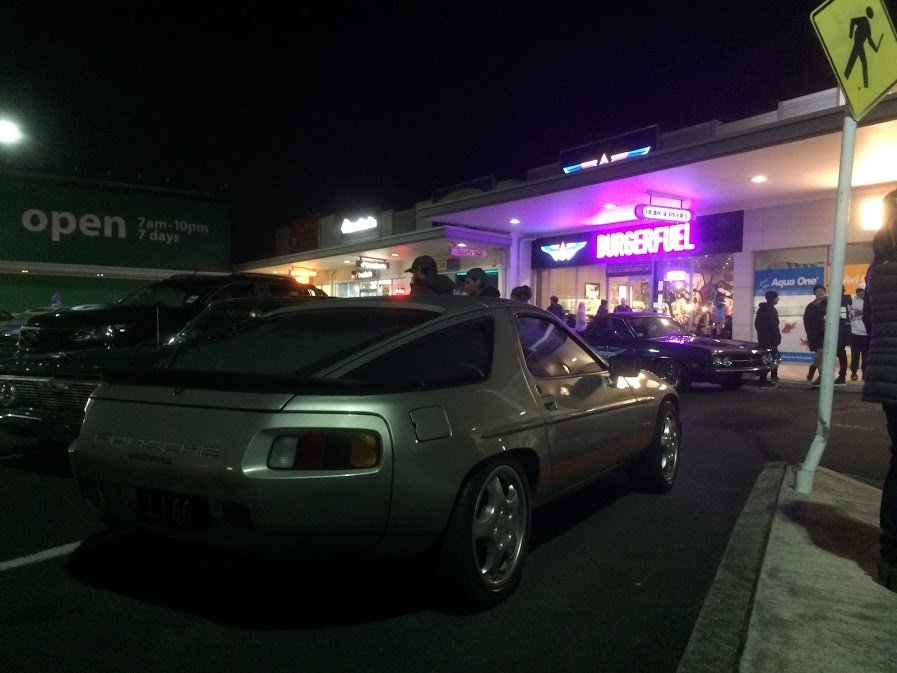
Good meet . Well done to @Archetype for winning 4 FREE BURGERS in the Jalapeno eating competition!! It's amazing what a man will do for free burgers. Well done to @Zeubin for a respectable third place. And cars:
1 point
-
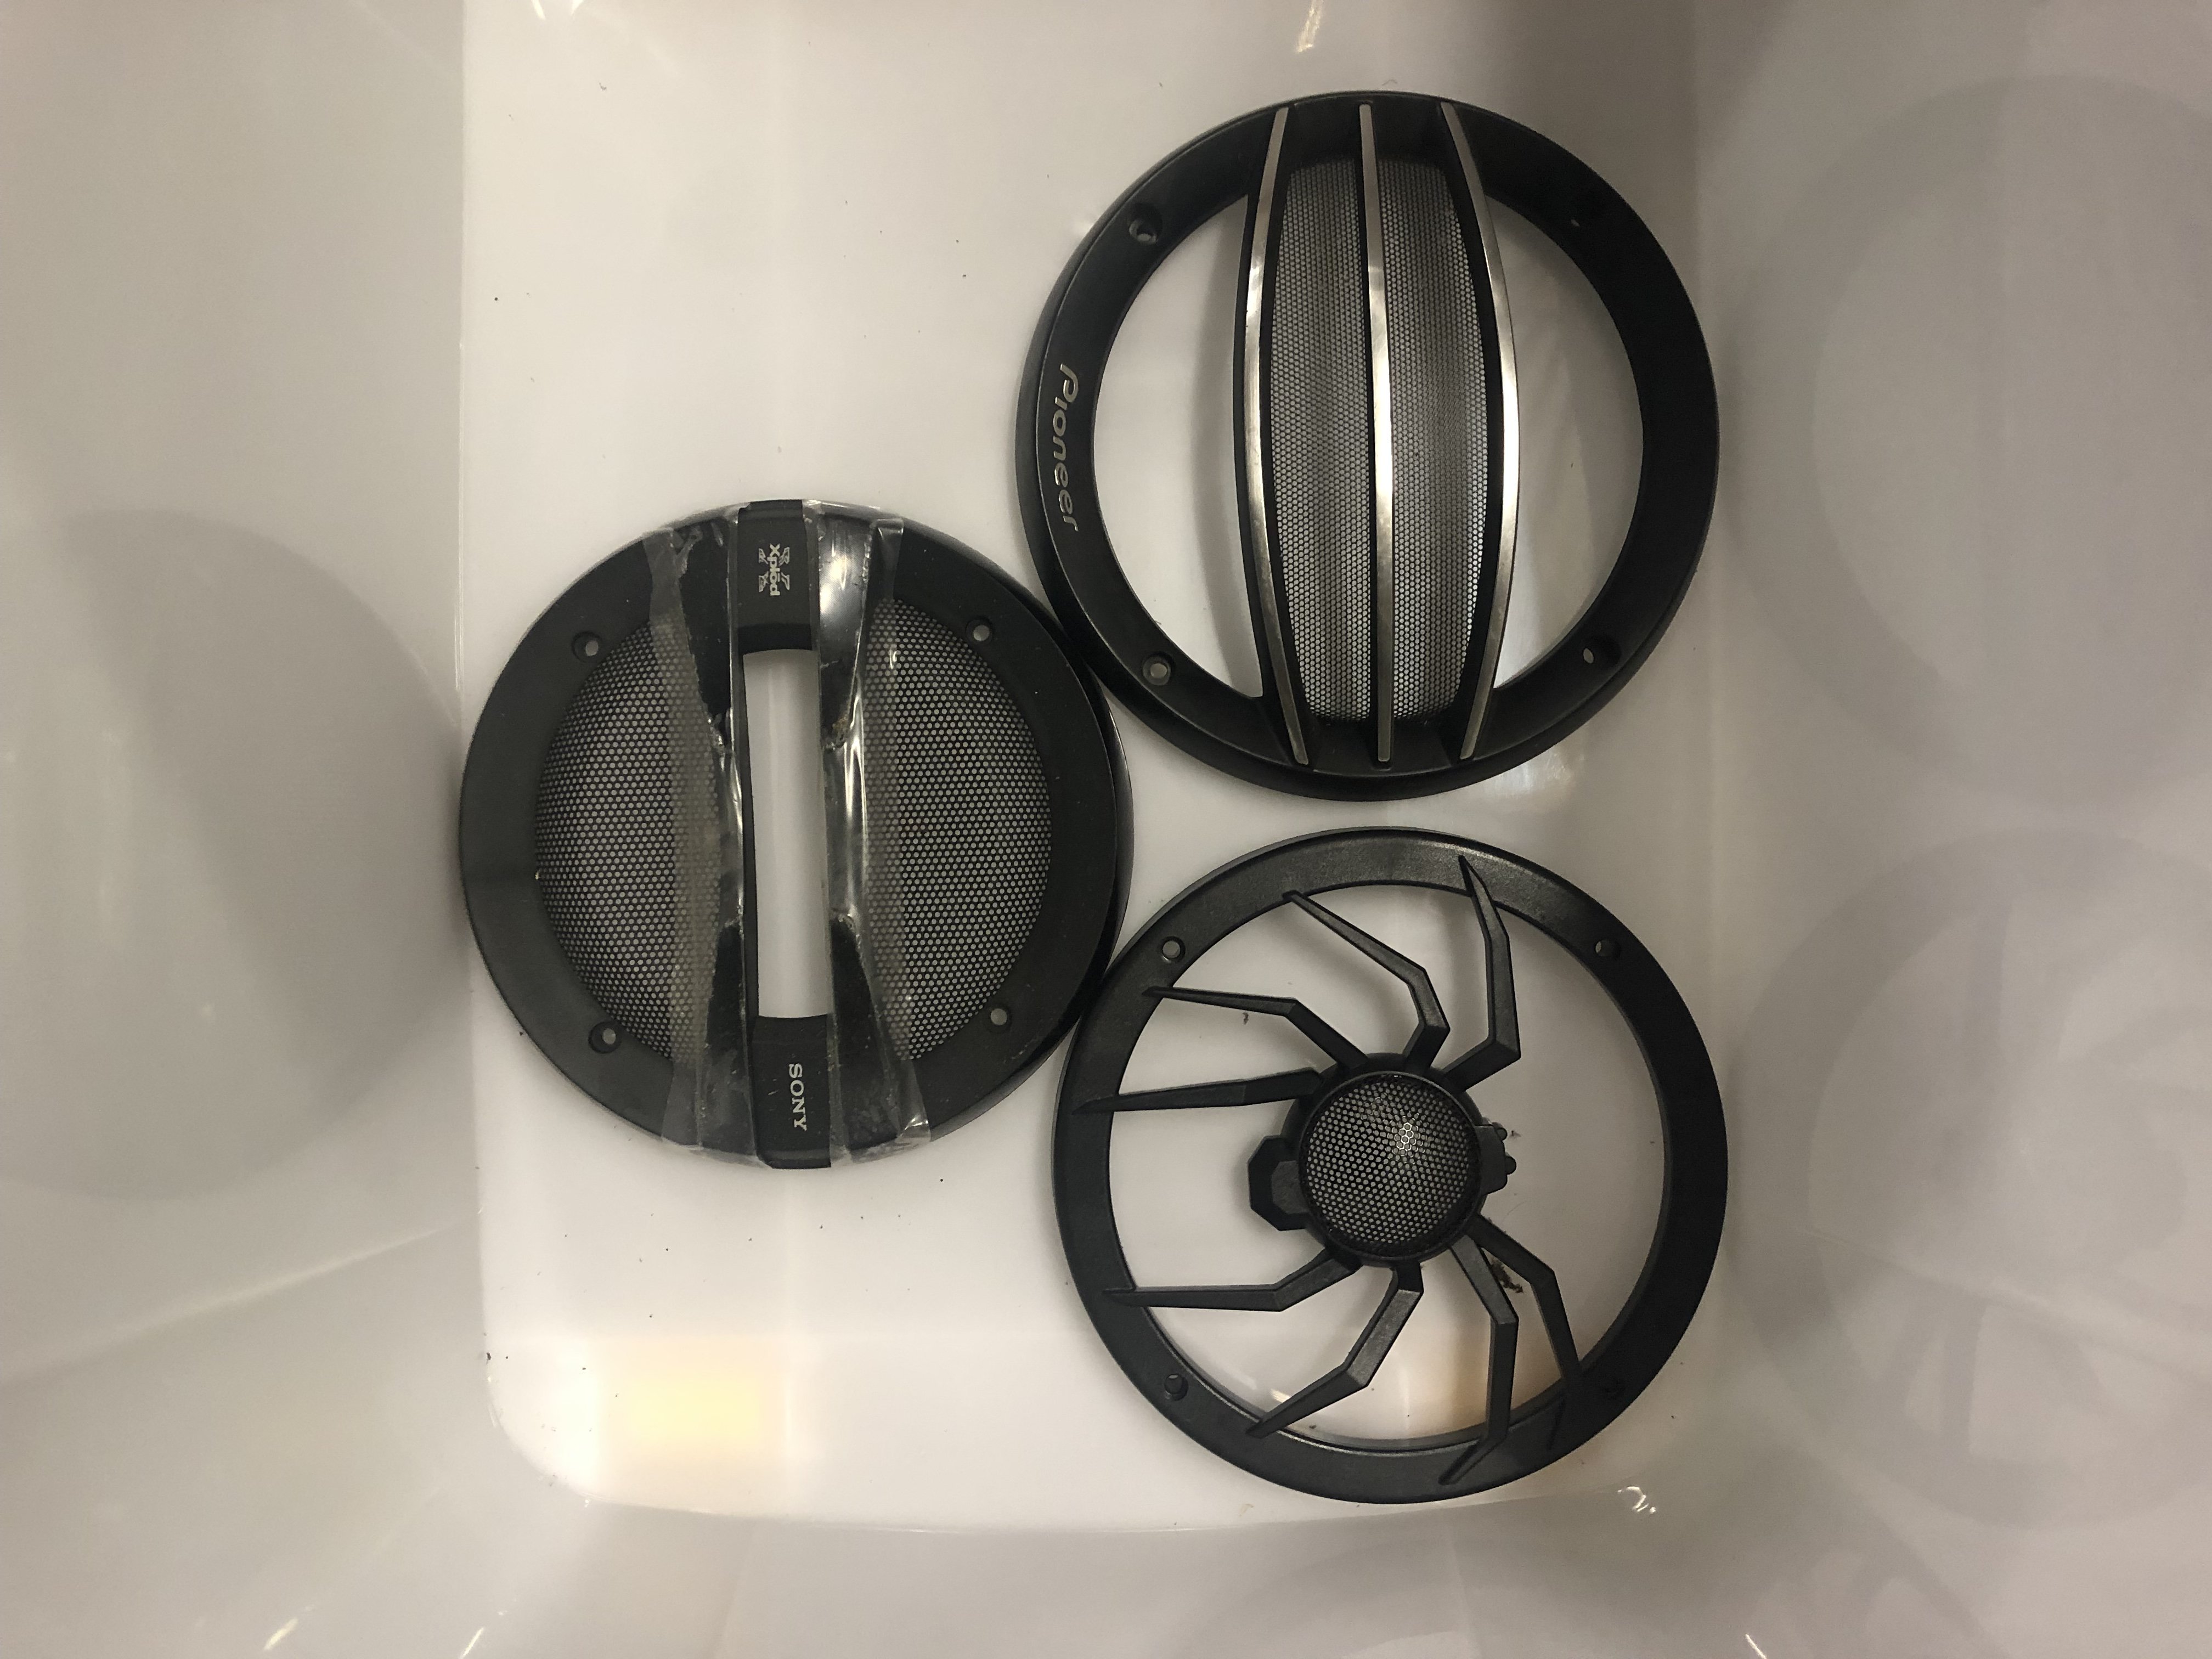
There's two sets of holes. The inner ones are about 142mm pcd. The outer ones are around 159mm. The speakers are pioneer.......so I am figuring that the pioneer covers you have would probably work I'll send you a PM.1 point
-
Might be worth contacting steel and tube as well1 point
-
Drill press + hole saw? that’s how old mate used to cut his titanium tube to make bike frames seemed to work fine, and then you have a drill press1 point
-
Hi VG. Do you have a lathe? If you do it can be made to notch tube for a small investment.1 point
-
+1 for steel cuts on odd size items1 point
-
I have made a private Facebook event for the next meet. I can invite anyone as long as they have a mutual friend and anyone invited can invite as well. If you want an invite send me a message and I’ll try and send you one. I think I can send them to your email or phone number.1 point
-
try steel cuts in onehunga.1 point
-
Can you measure the centre to centre of the opposite screws holding them in to the box? All the type I have sit over top of the speaker and the screw goes through the grill and the speaker screw hole and holds the whole lot in. I’m measuring about 158mm centre to centre on two pairs I have (Soundstream ones and the Pioneer ones with the 3 chrome bars across the middle), the Sony ones are slightly closer together.
1 point
-
Weighed it at the local metal recyclers and it’s about 1239kg with a full tank of petrol. Google says 180sx’s were 1220kg not sure if that’s CA or SR and if that’s full tank or not, but either way that’s not bad at all considering the bigger engine, intercooler stuff, much bigger brakes etc. Still has heavy passenger seat, but that’s probably only about 20kg. Plan to make a fibreglass panel for the sunroof too. Over all not too bad with the 1jz in there. Will be interesting to see the weight distribution. These were never 50:50 though.1 point
-
This thing has been reliable as fuck and still makes lots of noise and goes hard for what it is. Decided to add a vintage sissy bar ive had for awhile. Next up is a suicide shifter
1 point
-
1 point
-
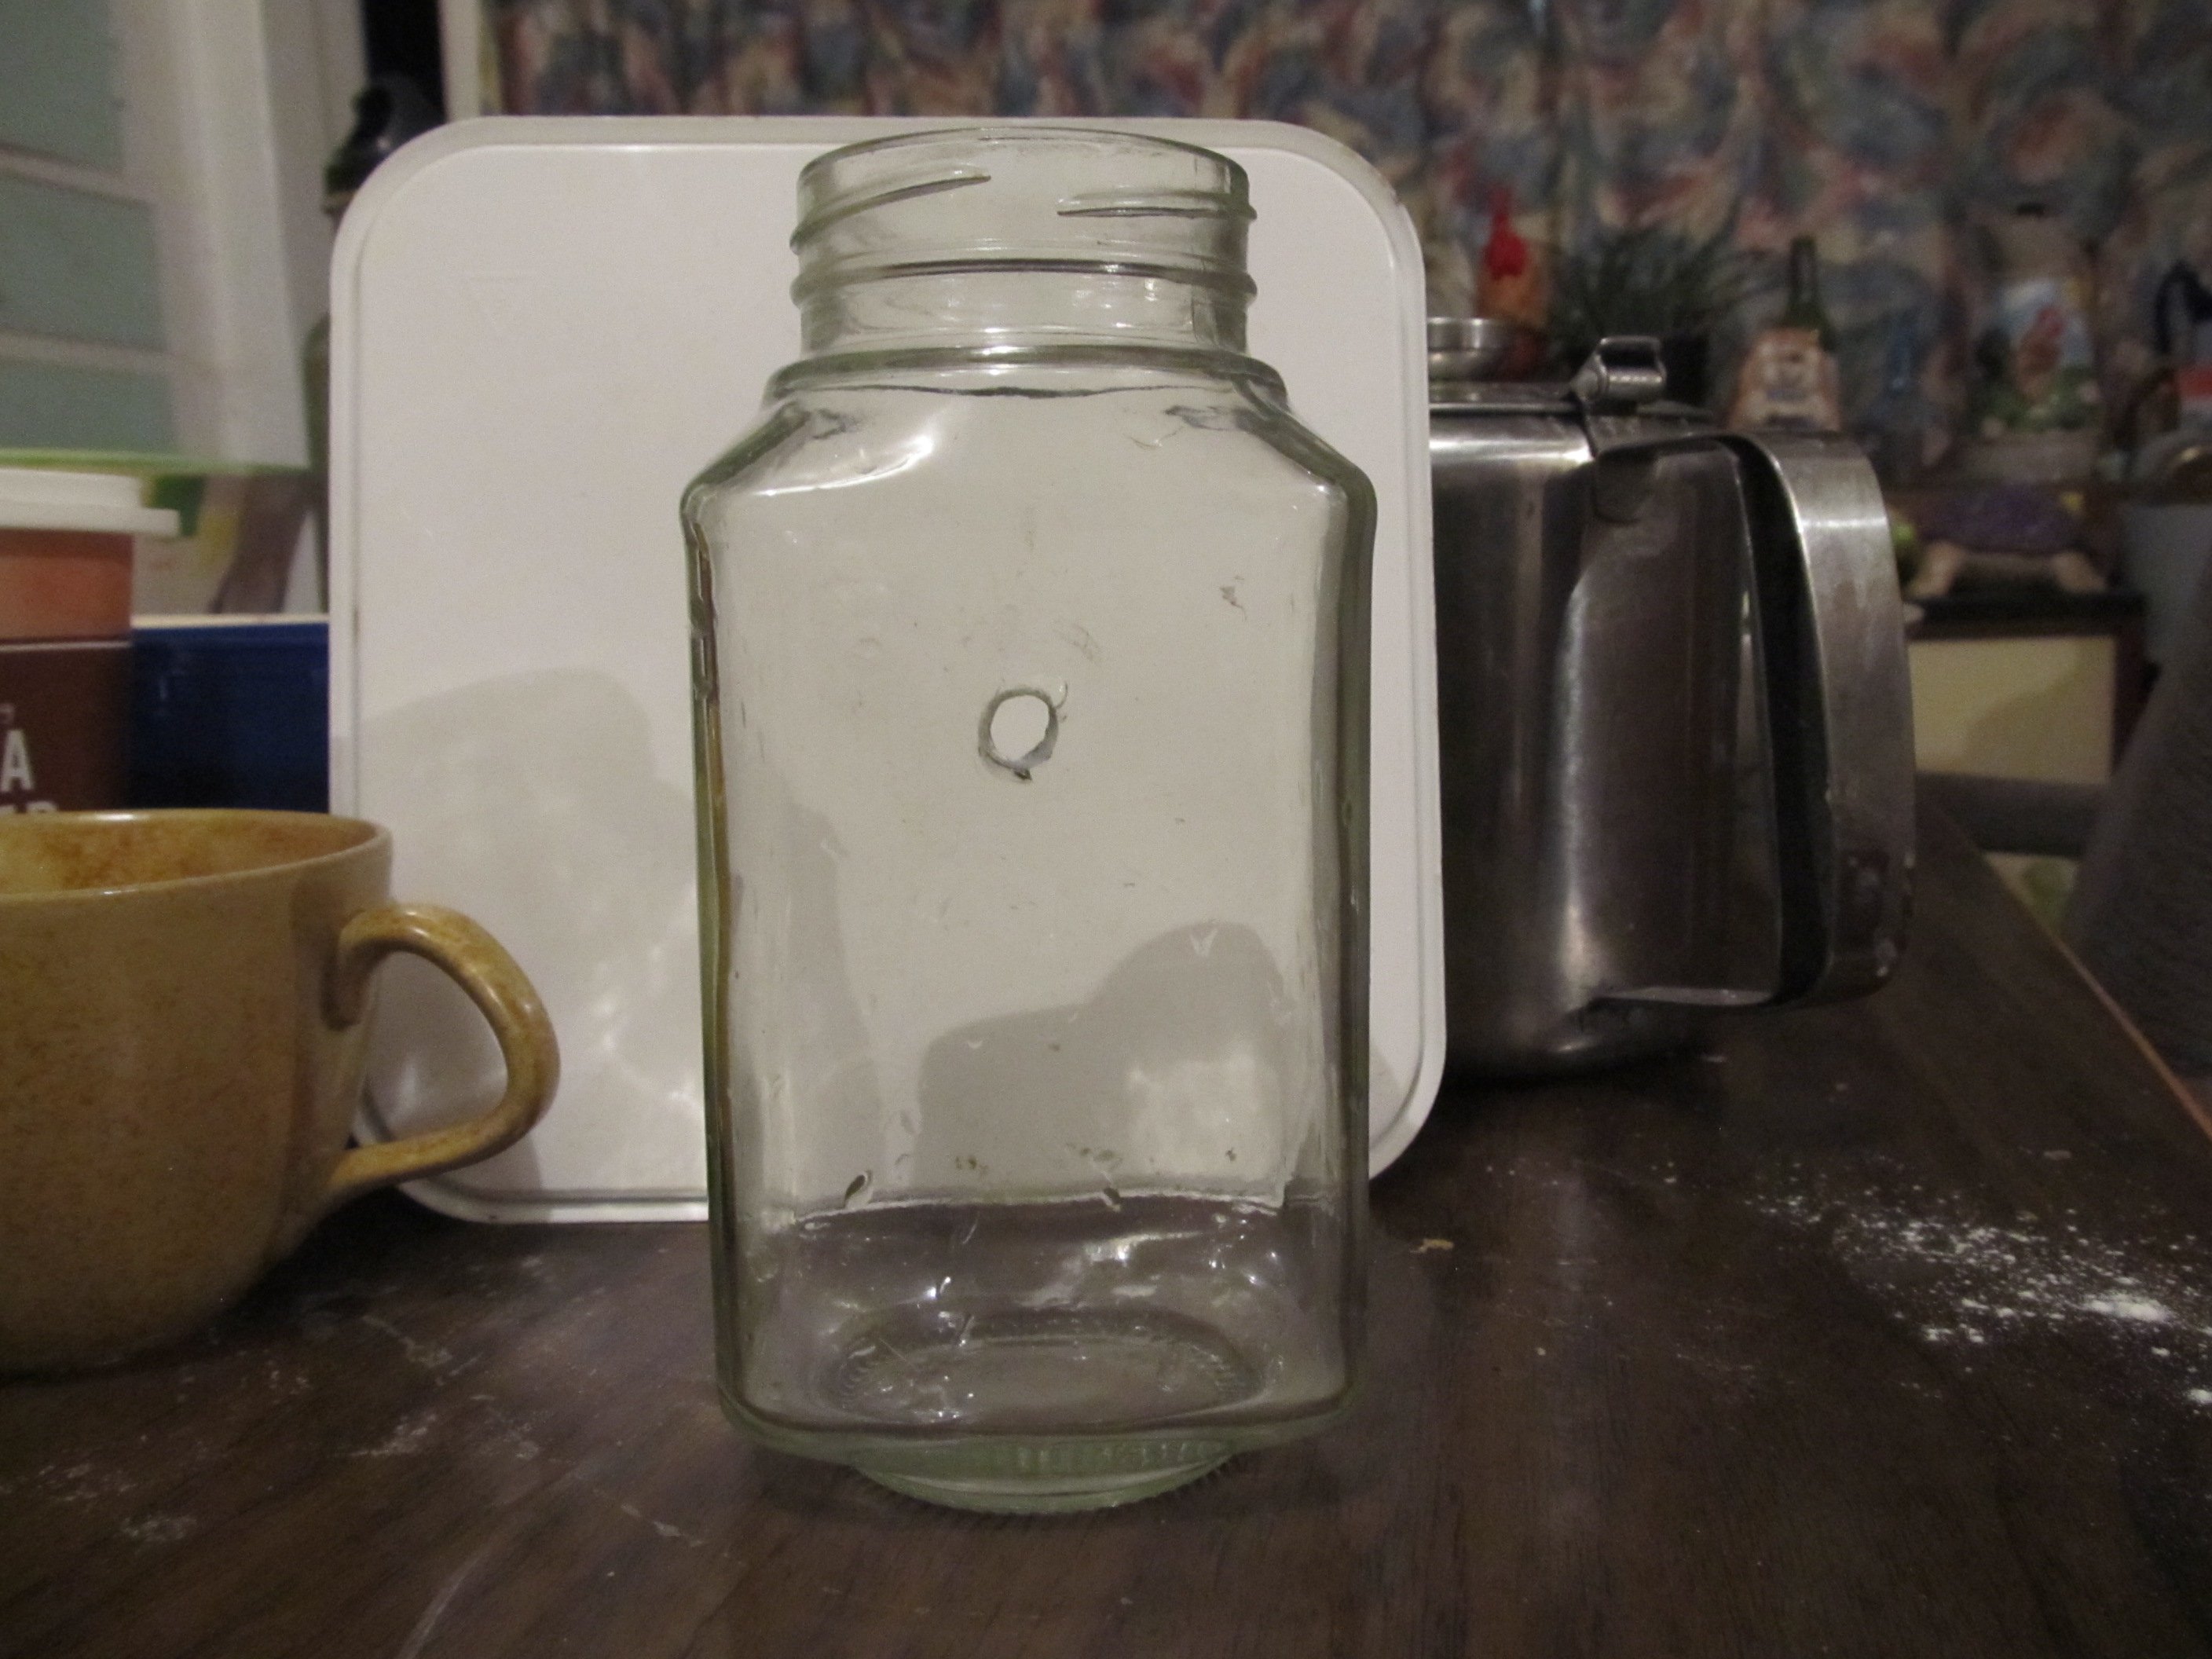
The boy is making a lamp. Today he somehow managed to drill a hole in a glass jar with an egg-beater drill.
1 point
-
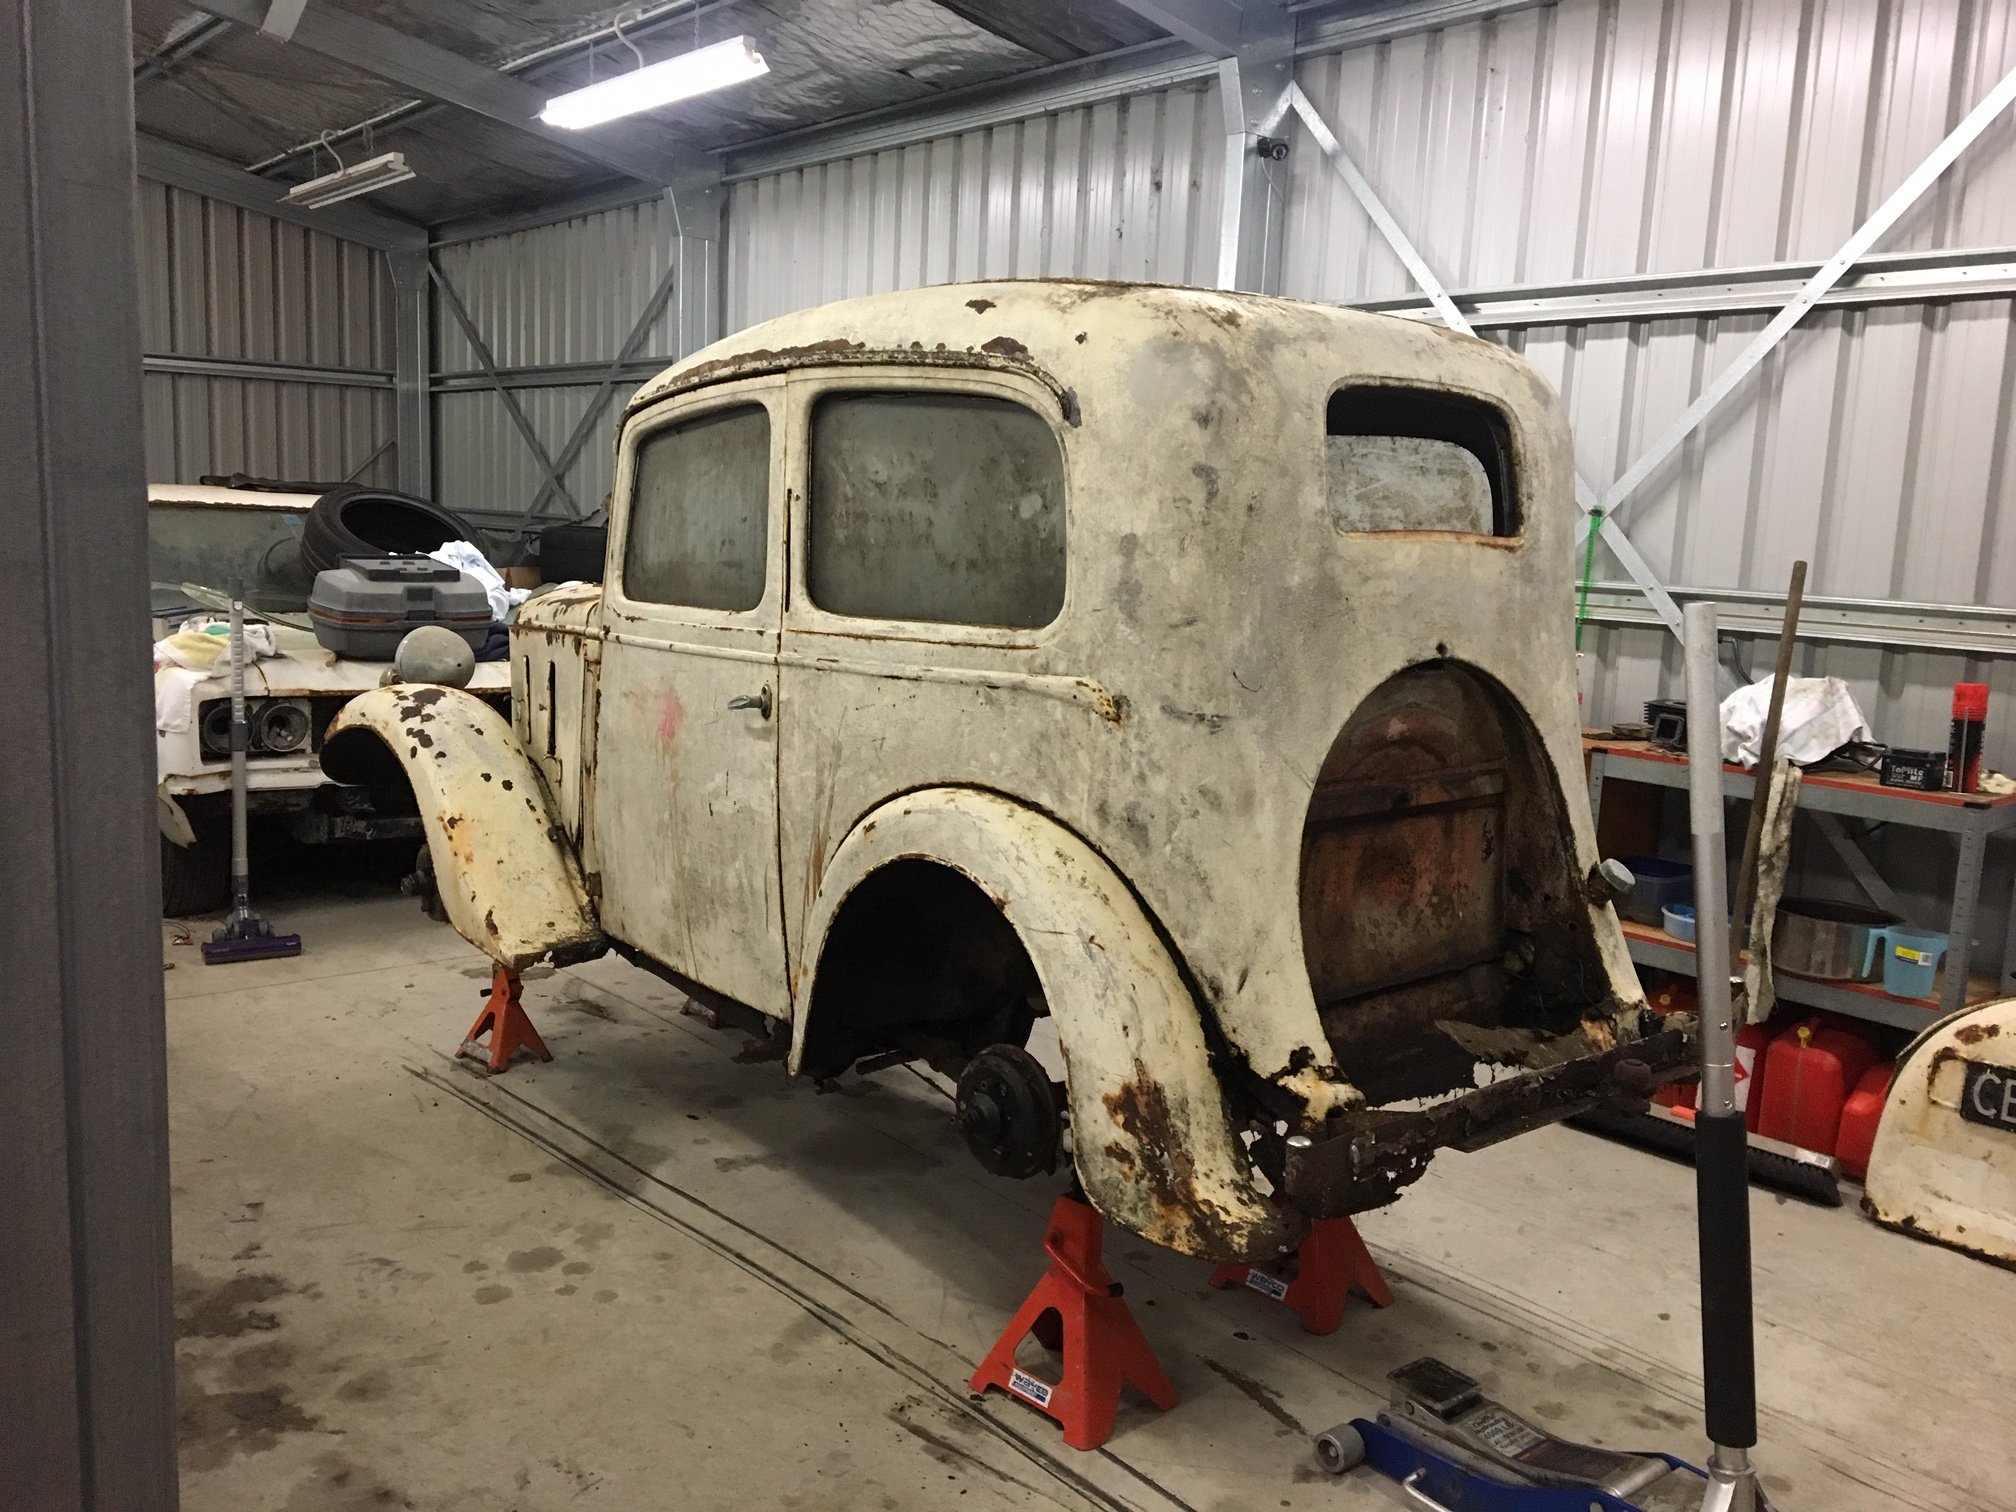
We took the car to my dads workshop as he has a bit more gear than me for getting things free'd up, the initial goal being to get it to a state where it could be pushed around and easily moved about the limited space of my own workshop. We got it into the shed, jacked it up, squirted some CRC at the wheel studs and left it overnight. I came back the next day to start the mammoth task I was expecting to get the wheels off. Armed with a range of metric and imperial sockets, I found the nearest I had to the BSW (*shudder*) wheel nuts and gave an exploratory lean on the breaker bar for the first nut. It turned easily and then came off by hand... NO FUCKING WAY... I repeated this for all 12 nuts, yes it has 3 stud wheels! What I had set aside an afternoon for, took me less than 5 minutes. I later went to take the bonnet off it, it wasn't attached properly and only had one bolt in it. No tools required here, I undid this 82 year old bolt with my bare fingers... As I said earlier, this thing has given me a few surprises about how easy it is coming apart. This is probably a good point for an explanation... When grandad parked up a car for what he thought might be quite a lengthy period of storage, he had a habit of pouring a few gallons of waste oil over them. Makes a hell of a mess and collects every spec of dust and dirt, but it does an impressive job of keeping everything working. The 68 Rambler Rebel in the background was in the shed next to this, and everything on it moves and functions and it has minimal rust due to the oil protection. The floor pans in the austin look as though they have had a tube of grease smeared over them, but zero rust there. The only real rust on the Austin is around the spare wheel, and in the sills, where the oil didn't really get. I've been having a tinker to try and get the engine free'd up. So far I have managed to remove the head, exhaust manifold etc, all without any broken studs. Thanks grandad! In fact the only thing I have found seized up on the entire car so far is the lever for the folding front windscreen (and the engine...)
1 point
-
1 point
-
I also got a new friend for the wagon! just need a coupe now right? Its the best starting L series i have ever seen, low kays, been in a shed 15 years, immaculate interior. Undecided if i will keep it. might start a build thread1 point
-
I need a bigger garage.1 point
-
Video of first start. Is a credit to Al Marsh. 8 year old build, he never had a worry, I was stressing, but oil, water, fuel, and spark, and he was just like "go for it" he never doubted his build. https://www.youtube.com/watch?v=Kxpfsu5Z9ns1 point
-
Last few weeks ive been fiddling with this between rain showers. Starting my using my special tool Ap. 5030/7 for ignition timing inspection: The photo above is after adjusting it back form about 14deg (not a bad eyeball!) rather than 12deg, using the adjusting wheel on the dizzy However all in advance is significantly more than the 36deg max shown on the tool, so might have to look at limiting that in the dizzy. Gave it a quick wash, needs a proper polish and wax and some cavity and underbody wax . Assumed the position When i picked it up from storage i had to clean out the carb of fine brown grit. This was the fuel filter, pretty sure its rust from the lines or tank, but it was not new and could have been from itself? Either way, well over due. Chucked one of these electric fuel pumps in, same as the ute, mainly to to save cranking for ages when its been sitting while the mechanical diaphragm pump sucks gas up from the tank This is the cheap fuel filter after about 10 minutes (you can see the e-pump above it) . However its not got any worse than that after a lot more idling etc, so I might put the nice new K&N replaceable filter glass one in soon.1 point
-
Ones for the brothers FD. We are going exactly the same spec so that we can have a fair race at some point!
1 point
-
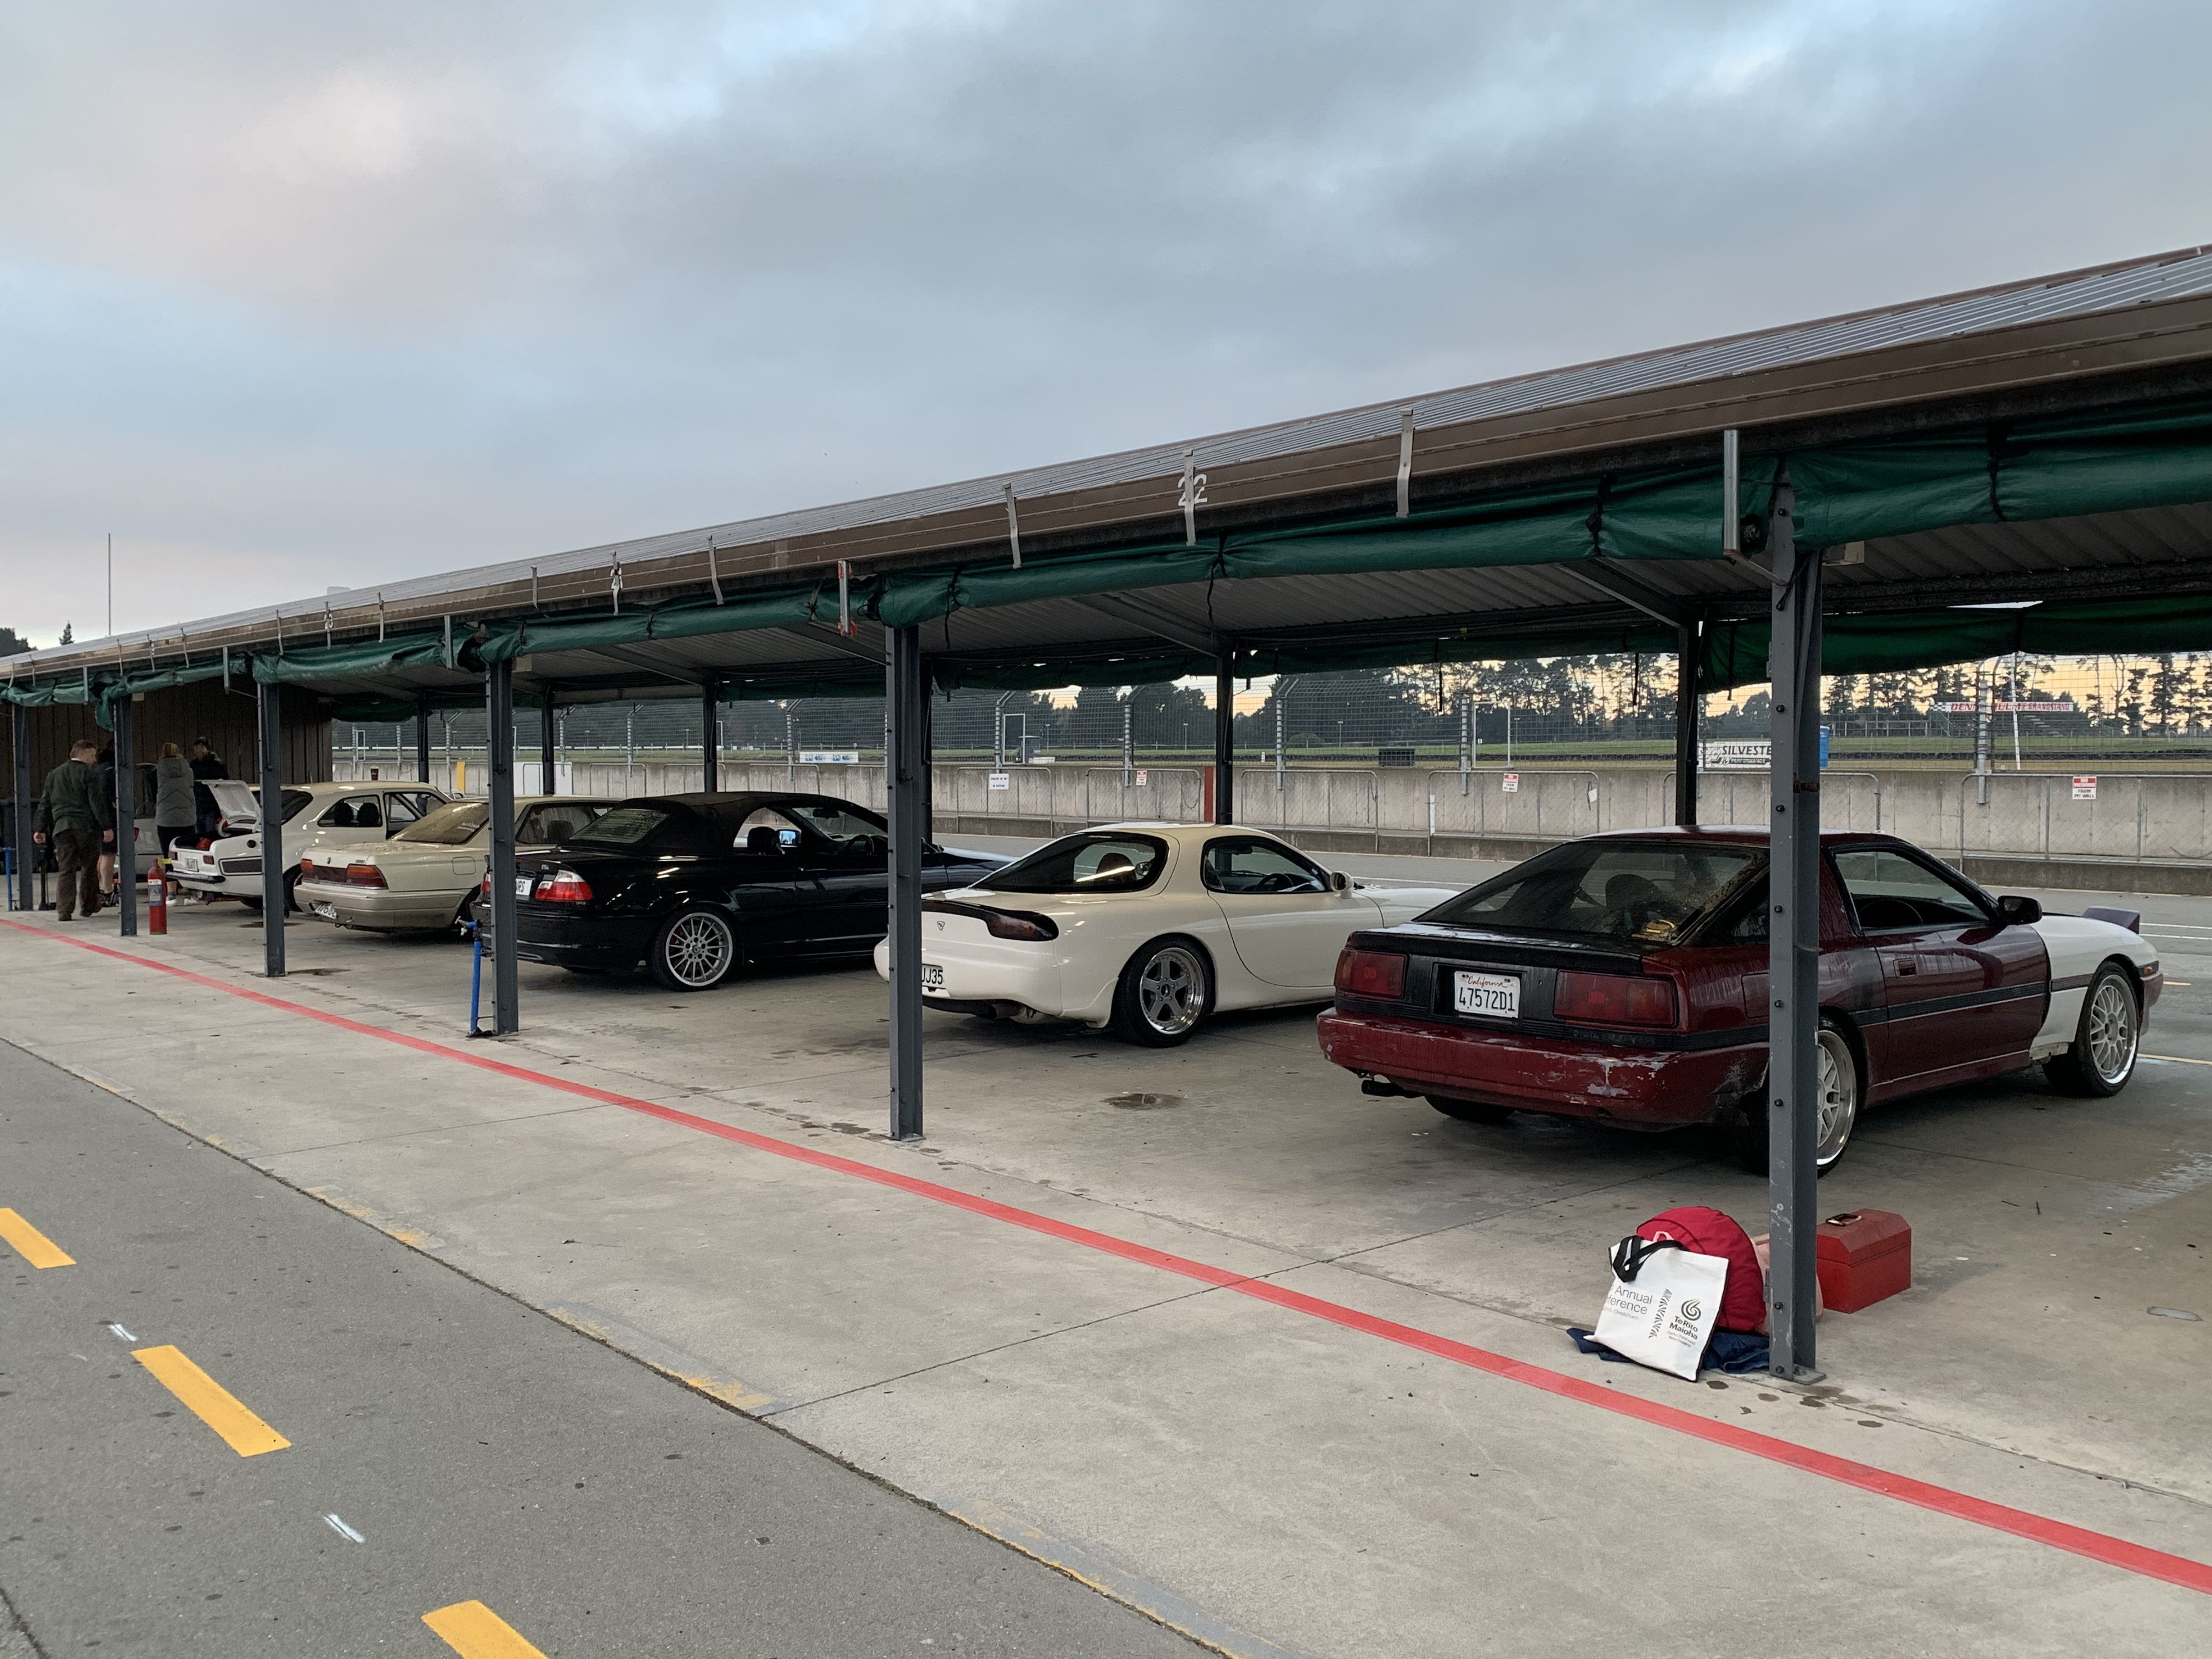
Unpacked engines. They look brand new so I’m stoked about that. This weekend is the big push to get it sitting in the engine bay. I’m assuming this is gonna be the first of about 20 install/removals of it so may as well get good at it! Also took the convertible out for a track day. Got it pretty sideways for heaps of laps. Eventually it went into whiskydick mode so I went home.
1 point
-
Was waiting on my Ali impact hex bits to arrive before I tackled the allen bolt in the fork bottoms, as they weren't moving with normal keys. First one whizzed out perfectly with the battery impact driver, then second one rounded off to a very neat circle. At least I know the Ali bits are hard metal... So no option but to drill out... And worked well. The copper washer was a good indicator how deep and true the drill bits were... Can move on now, good clean up and new seals, not sure if I'll paint or just rough polish the lower fork legs...1 point
-
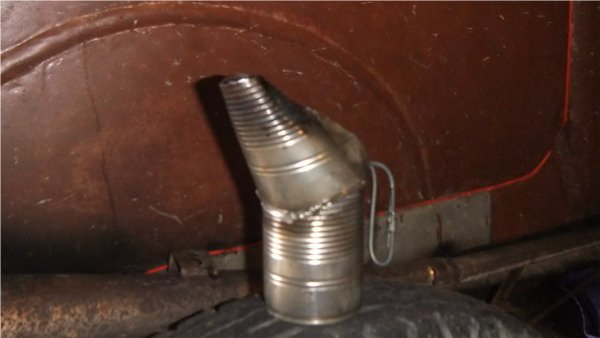
Can't decide if i should have put this in the wombling thread lol. It's an oil can by the way.
1 point
-
All of the diffs have some kind of issue so the the one with the least slop went in. I also parted with some cash for someone to make a new front piece of the driveshaft and balance it. Been burning around in it today to make sure there are no issues. Gearbox - check Driveshaft vibration - check Diff - hmmmm. I'll take some bananas Front end - not so good I pulled the front left apart and the outer wheel bearing has decided to shit the bed. Same bearing as 80 series cruiser kingpins and the 12 roller version that I have is prone to dying. Tomorrow is Taranaki anniversary so no shops open. I'll try and get some overnight parts from Japan from Auckland. Leaving for chch Friday with my 2 yr old son. Don't think he will be that keen on sitting on the side of the road for a day waiting for help. Maybe I should join the aa? No photos of bearings due to me being busy swearing at the fucking thing.1 point
-
Progress has been slow due to general life and family commitments. So I stripped the box to get the short mainshaft, then stripped a long box that I had in stock for the rest of the parts. Stripped Then it got out of hand and I had to rob some parts from another box I had stripped earlier I also replaced the bush in the rear housing. Nissan won't sell you one, only the complete rear housing for $184 usd. I found one for $12 nz and got it yesterday from the US. Changed the box over into the car today. Bad idea doing it over my head on the hoist as I still have a crook shoulder from dromageddon. .. Next, the diff has a lot of slop. So I thought, easy, I'll just swap it over for a spare I have. Well the spare has stuffed spider gears by the feel of it. I have another head but it's unknown condition. I suppose I'll have to make 1 out of 3 next week. Hopefully it won't be @governorsam banana skin spec to get to choose and back...1 point
-
Bit of a late update. So i reassembled the gearbox and it seemed to change gears ok. After i chucked it in i made cut up the navara driveshaft to make a new front half 130mm longer. I used the UJ's off the navara front half as they were sweet and the hanger bearing rubber was still good. I turned the tube off in the lathe and cut a section out of the rear half to go in. A mate gave me a hand to assemble it on his bigger lathe and we arc welded it up. It looks like its sticking out a long way from the box, but its only about 8mm further out than it was in the navara. The column changer shaft on the wagon was a tiny bit short but the navara lower half was a perfect fit. They are splined together to be collapseable in an accident. Also the wagon lever did not have enough in and out travel to select the extra row of gears. The part i am holding is the bush from the wagon which i punched out and as luck would have it, the navara with the spring return fitted perfectly I turned the old stopper off the navara shaft and made a new one to grub screw on Complete Once i had it all installed i used a mixture of the navara and wagon linkages to get the shortest shift travel and also mixed and matched the best bushes for minimum slop. First test drive was around the block then the next day ray and i went to hamilton for the night and the next day went to auckland for the cruise to the leadfoot ranch then back to new plymouth. Around 950kms test drive and it went well. Only problem was the bolt on the column change shaft nearly fell out a few km from home and the gear changes got real sloppy. Also by pure luck the driveshaft that was welded by a pair of low flying seagulls seems to be perfectly balanced. got it up to 136kmh and no vibrations Only downside was my rebuild of the gearbox. I mix and matched the synchros but put the 1st and 2nd around the wrong way. When the box is cold it wont go into 2nd when moving. Its no trouble when warm. Also, the speedo drive is on the other side of the tail housing so the cable hits the exhaust. Im waiting on a right angle drive box for the right price to come up on ebay and ill be away. For now its all good.1 point
-
Some progress on the gearbox front i chose the L series gearset as it had the better ratios. I thought i would just change to the column change selectors and be done with it. one problem with this is that nissan went to a larger 1/2 selector shaft in the later gearboxes I couldnt run the larger shaft as the selector that fits it is for the bigger synchros that the earlier gearset does not have. Here is the larger 1/2 selector on the earlier shaft 14mm vs 16mm The column change 1/2 shaft also has a notch in it for clearance of the selector. I decided to make a sleeve to fit the fork to the shaft. cant be that hard. Using some precision engineering skillz i learned from my brother in law Ray, I lined up the 2 detent notches and marked where the new hole for the dowel pin needed to be. I ground a flat and dot punched it then drilled. Some of my workmates told me i would never drill it as it was some kind of hardened tool steel shit. They were wrong. I used this fine quality chinese drill press and only fucked 4 drill bits Then i made this sleeve up to go from 14mm up to 16mm. Pressed it on, machined a notch in it with 20 axis angle grinder Test fit last night. Its the top one WIN1 point
-
couple of interior pics for those that are interested short people in the back hearse spec http://s470.photobucket.com/user/fraz_bandit/media/260c%20wagon/20141002_165818_zpsb83bc960.jpg.html'> hope to get around to the interior one day. Not really a priority as its all there, just tired1 point
-
So i have been keen to increase the number of speeds in the wagon since i got it. I picked up a z16 column change d21 navara box cheap ages ago, and pinched a l series box from ray recently. the other day i pulled the front housings off both boxes for an inspection and to put the L front on the z rear. The z box is a FS5W71'C' and the L box is a 'B' No major differences, slightly wider gears in the C, larger countershaft bearing, larger 1st/2nd selector fork. The only problem i see is the ratios of the z16 box are terrible. see the table below z16........Lseries.....260c wagon 1st 4.219.....3.321......3.143 2nd 2.539.....2.077......1.641 3rd 1.641.....1.308......1 4th 1...........1 5th 0.818.....0.864 Currently 1st gear in the wagon is not bad, maybe a bit tall, so the 3.321 of the l series box i have would be good. For an overdrive, ill take whatever i can get. Im thinking i should fit the l series internals into the c series case to get a better spread of gears. Or buy a few cheap boxes and mix and match the gear sets.1 point
-
We bought a 40foot container over at the beginning of november. It cost more to get from mackay to brisbane, than brisbane to auckland.................. Got it registered 2 dec. was easier than i thought. Took it to silvia park vtnz. Had no trouble. Kangaroo dent in front bumper. I hope it can be repaired without re-chroming. First job back home was to strip the electric window in the rear quarter. It was only going down 1/4 before tripping the circuit breaker. No photos but i stripped it all apart and greased everything and the slides and now its nice and smooth, and fast. While i had the cover off the inner guard, i popped the dent out of the back quarter. Can hardly see it now. The dash is pretty far gone from 40 years of Tamworth summers, so i got a new one from Japan. It wasnt cheap... Hope to fit it in a few months For new years we went away to the beach with a few mates. around 1200kms all up. The chev had some pretty big running issues on the way there and we discovered a big vacum leak in the inlet manifold. Once that was solved it ran a million times better. The 260c has been running worse and worse and when we got back, I discovered the vacuum hose to the brake booster was all old and hard and split. Fixed it up and it runs far better1 point


This leaderboard is set to Auckland/GMT+12:00