
Leaderboard


Popular Content
Showing content with the highest reputation on 05/03/19 in all areas
-
Wow. As the new title suggests. All those little jobs. As all those who have or are undertaking a car project will agree these little jobs certainly do add up. I can skip them or rush them especially as the canvas upon which they attach is so clean and tidy. So is no particular order, due to the fact that some of them I start, then stop when I realise I am missing a vital part which has to wait until the next visit to the big smoke, start on another job in the meantime, go back to last job, forget where I was at with it, then realise I forgot to get the bit even though it was on a list, then start on another bit. While all this happened there was also a fair bit of mini adventures going on because Hannah's brother was over from the UK on holiday. We did some very nice camping, biking, hiking trips with him. Because we all like pretty pictures here's some from a few of the adventures had in a last few weeks... So yeah- working on a car project is tricky when tempted by the outdoors like that Back to the Imp. First big job since the last update was to sort out the wiring. I basically re-wired the whole car. The original layout was not going to work how I wanted it to. There was a fair bit to add for safety, extra features, ease of disassembly, neatness. I bought an extra fuse box as I realised 6 fuses were not enough for what I wanted to do. Photos.. The wiring shop.... I have a fair bit of automotive cable I have collected over the years to use... I mounted the boxes and relays onto a piece of clear lexan. It worked out a very neat way to do it. I also took the instrument cluster apart and cleaned it out 50 years of dust. You can see the amount of connectors that have to be undone to remove the instruments... It just does my head in when I am so used to a couple of plugs, even on the Viva which is the same era. So I added multi pin plugs to the loom. Easy now. Fuses and relays in position... The race car came with an extra gauge pod below the dash. I bought a new electric oil pressure gauge, got given a very neat wee rev counter by my good friend Dean (cheers!!! ) and kept the Smiths temp gauge in place. I didnt like the way the pod was wider then the heater control bracket I was mounting it to. So I made a tapered mount to fit between them.... Gauges and dash etc as it now... Other things added were a neat wee push button switch for an electric washer pump because all the squeezypush type squirty rubber butons had perished. I added extra wires for a stereo, amp, electric water pump, under dash footwell lighting etc. Moving to the back. I re-wired the whole lot. Not much to see because all the wires are now tucked out of the way. I needed an alternator belt tensioning bracket. The datsun item was horrid.. So I made a new one. However I cocked up and soon found out it didnt quite line up. I had to had a bit.... In the end it turned out sweet and I'm very chuffed with it ... Now moving up to the front. The battery. It needed a home so it wouldn't slide about. I made an alloy box from some thin sheet. It bolts in place to some alloys bars attached to the bulkhead so i only need to remove two cap screws and it can be removed if I need to take the tank out etc. In photos... I made a stainless bracket to take a washer bottle, of which I can not remember where I picked up but have had for years waiting to use on a project. Finally a home for it ... Heater tap. I needed one. The Imp one was knackered so I went to the wreckers and got a couple that would work. Picked the best fitting. I think its from a Honda. Really neat item and should last. Would be an idea replacement for a stock Imp setup too. However I am running both hoses, inlet and outlet, from one side now where they tee off from the main lines. Anyway. Photos. I needed to adapt the old brass fitting so I machined it out and soldered in the straight section of the old u angle pipe... Altered the Honda bracket and made it all fit... Played with some hoses... and ended up with this... Clutch time. hannah and I had a hell of a time trying to get it to bleed up. I finally worked out two things. Firstly- the replacement seal that I had been sold by a 'reputable' brake specialist was the wrong one and its heel diameter was slightly too large meaning the piston was struggling to return. It was a friday, no chance get another so I went through all my seal collection and found this... However it was too large and wouldn't fit. I looked again. Next up out of the box was this... Still no good! Bugger. So instead I machined a new piston to suit a seat that was the right OD but had a larger ID... Now the piston returned. But it still would not drag in fresh fluid. I took the master apart for the 14th time and looked at some other diagrams online. I soon realised that there was a teeny tiny spring washer missing behind the rubber inlet washer. Its not visible in the Haynes manual or mentioned that I could see. I made one from a coil of spring and now had a fully working master cylinder. The clutch bleed up pronto and works fine now! Phew. Latest job I did was last night. I removed the exhaust and added a boss I machined from a 18mm nut for an O2 sensor. Then I was mucking about prepping an 18mm bolt to make a plug for the time being and remembered I still had not only a boss but also a stainless plug left over from the Innovate wideband kit I had fitted in the V6 Viva. Sweet. A nice treat. And that is all for now. Its getting very close. Engine has a new oil filter and oil, coolant needs to be added (and I bet some leaks will need fixing....) and then I just need to make an air filter assembly for the carb. Nothing available to fit the space, at a price I like, so I will build my own from one 5th of a Mazda Van filter I also need to machine up some Nylon bar I bought to make a new pivot ball for the gearlever. Big thanks to John875 from Australia who bothered measure one of his balls for me and post a photo online. It looks like this...21 points
-
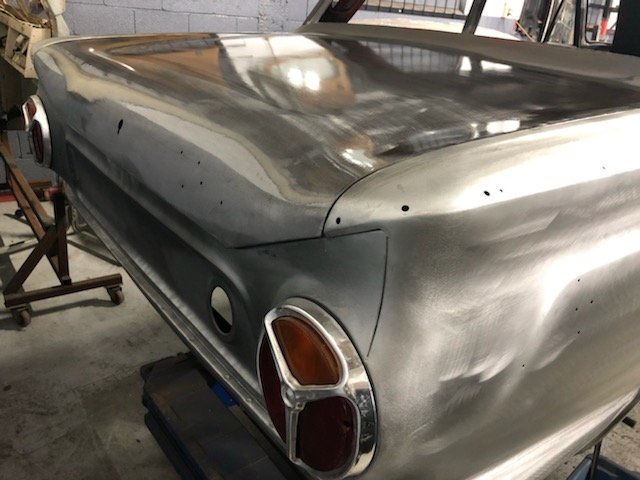
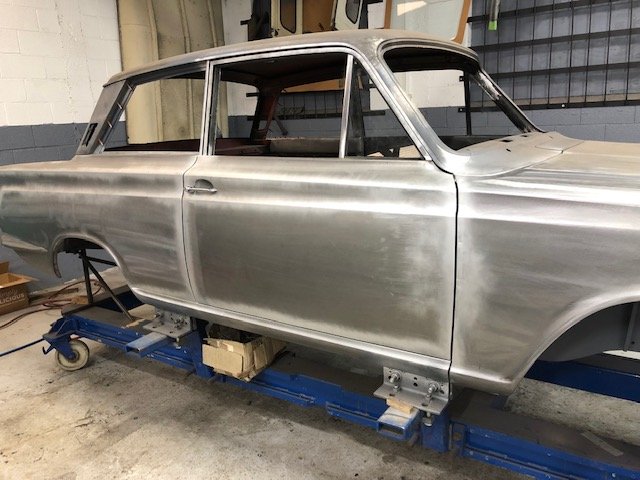
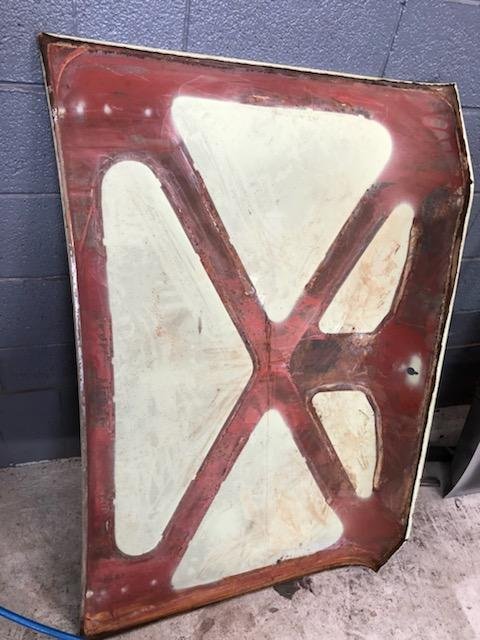
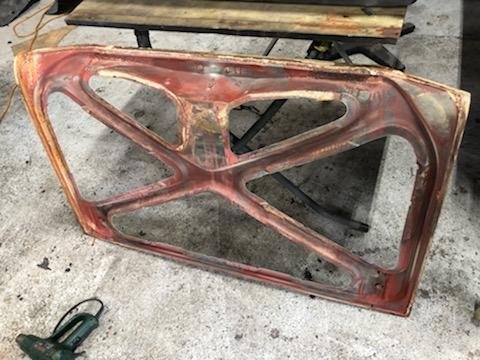
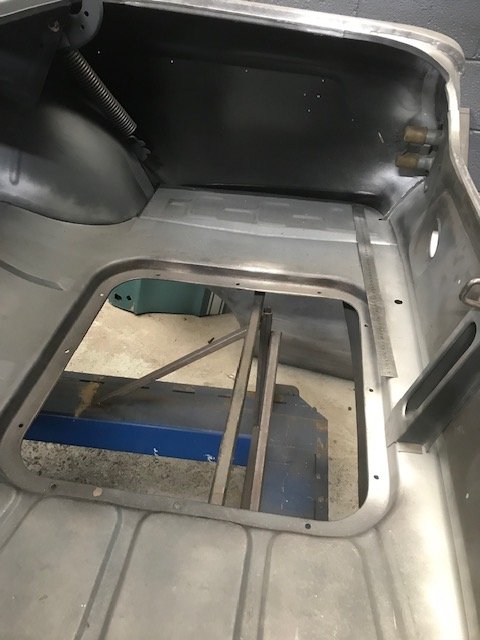
Boot lid finished which pretty well completes the panel. It’s going to be a shame to paint it! Stainless trim already to go to the polishers.
 9 points
 -
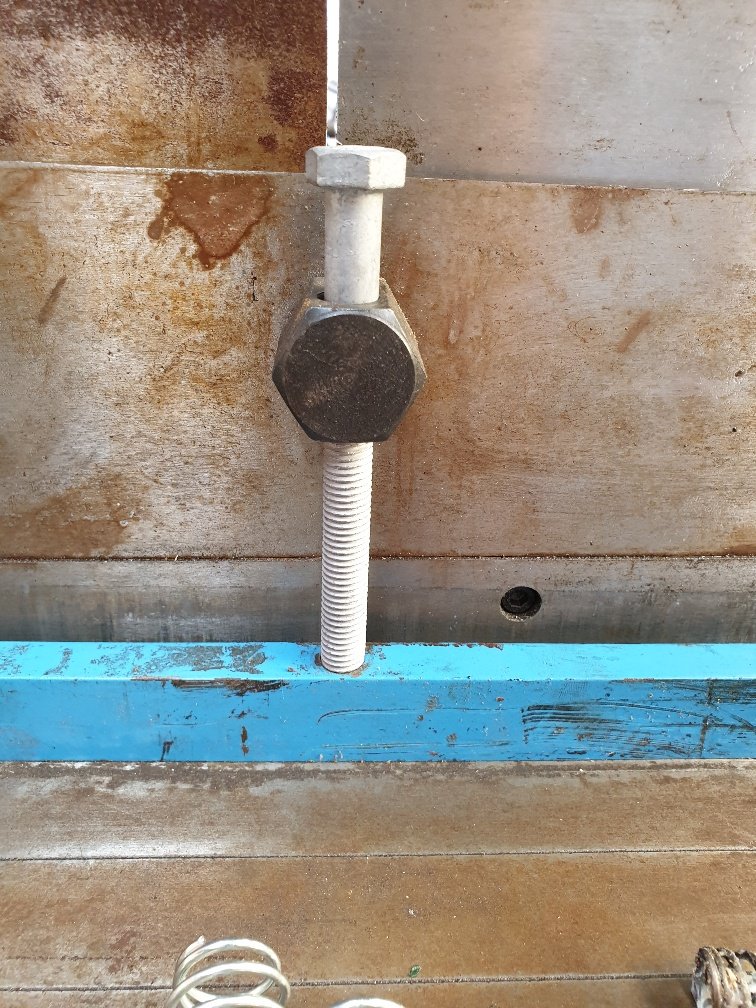
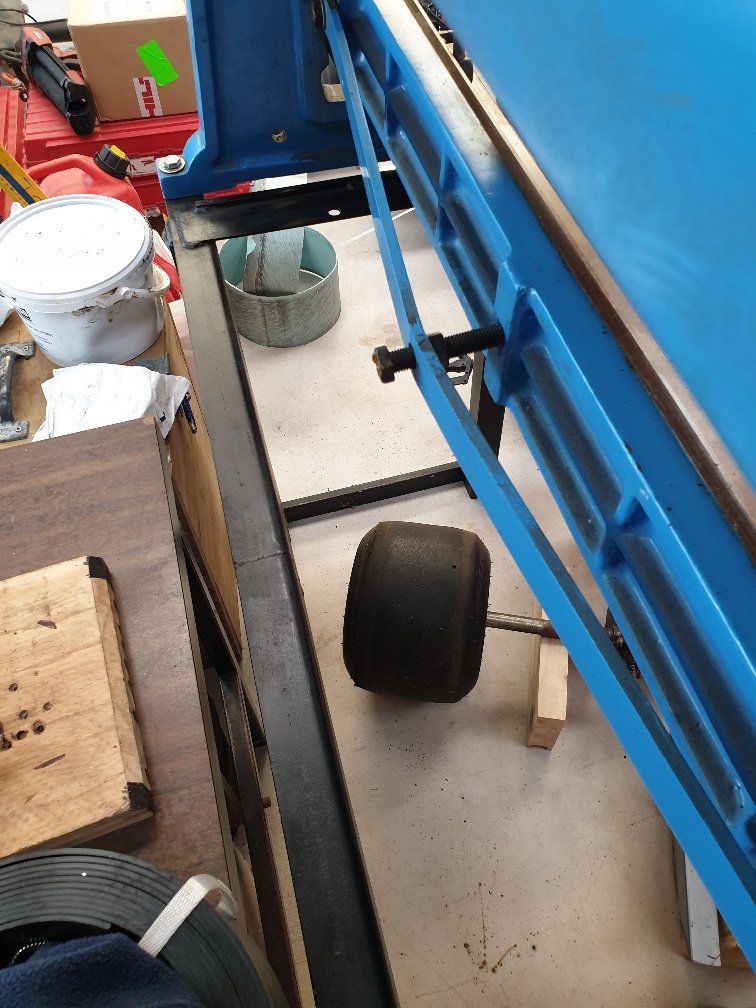
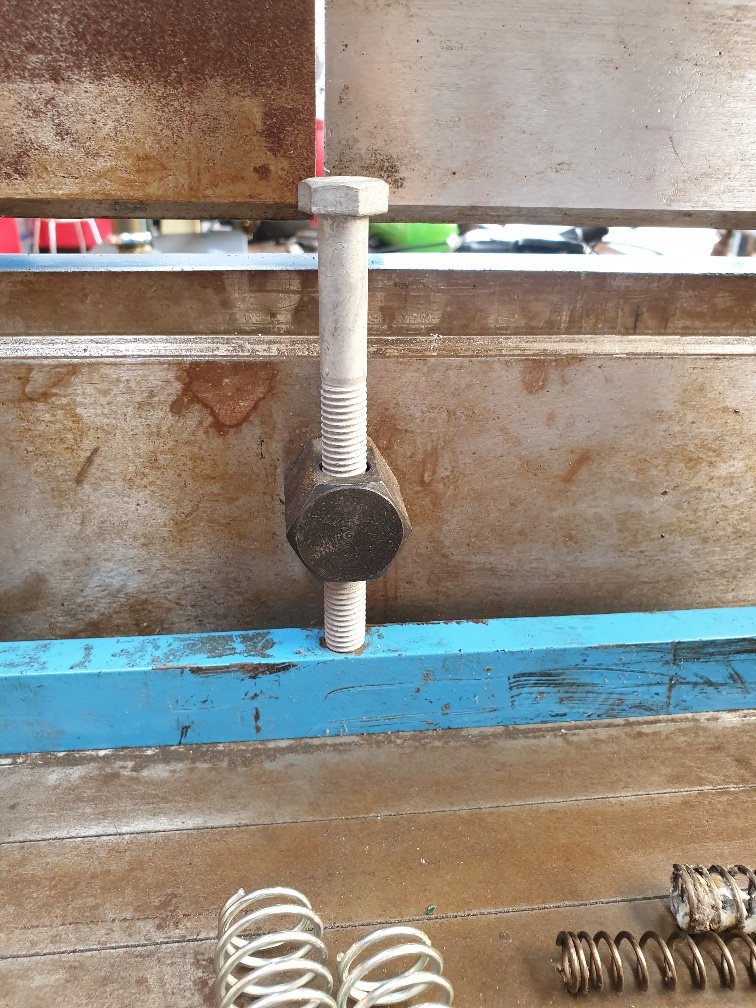
Okay, in limp mode I set about tweaking every adjustable feature this thing has. I'm glad I spent the time doing this as now it feels much better and a couple small test pieces I've toyed around with look pretty good. First up, its missing bits. So a quick rummage around and I had a selection of springs, bolts, washers etc to work with... I checked the up/down travel in the work clamp for the share. Decided to use the kids pink pram springs... Set a gap at full stroke so work can be slid through...boom!!! Done. Next, the sheetmetal shear had a large gap in the middle. Luckily theres additional adjustments for this...so let's use em. And by tightening that bolt...magic happened... Cuts like a lazer now!
7 points
-
.7 points
-
Was needing to bend 7/8' pipe 180deg with a 250mm outside dia so i knocked this up today .Tho not 100% happy as there is a wee kink at the end of the bend6 points
-
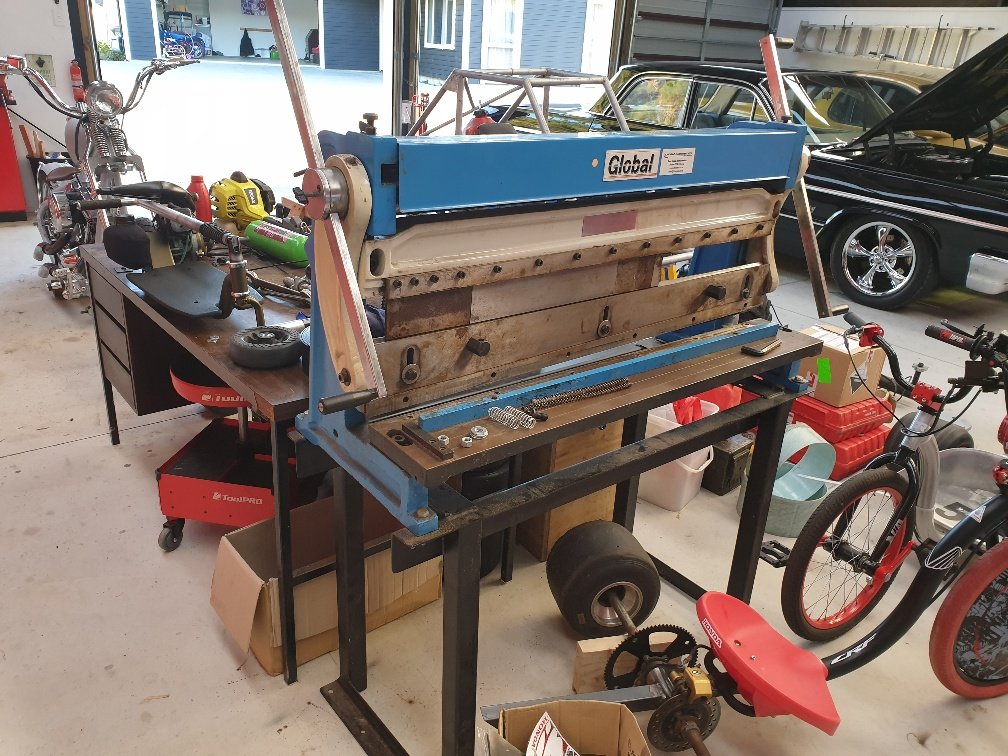
New toy arrived today. Its missing a few bits and isn't set up very well. But I'm sure with a bit more time and playing around I'll get it functioning as its suppose to. Stupid heavy. No idea of actual weight...but I'd say somewhere between "back breaking heavy" and "should have eaten more weetbix heavy"? Anyway, terrible photo. It's a 3 in 1 sheetmetal folder, roller and shear. I've been watching YouTube and all the reviews say it does an okay job at those functions...but not a great job. Considering the fact I have none of those tools - then this has to be an improvement upon what I had???
4 points
-
oh man, good luck! you are now diving into the single worst system in electronics... car ignition shit. Car power is hard because the power supply is NOISY and shit. Add to that a VR sensor or something (which has a 150V signal BTW) and you're up shit creep in regards to noise and weird voltage offsets yada yada yada... Share some schematics of what you have and i'll have a peek, but fuck, what a project to tackle hahaha3 points
-
Dude, you made an electronic ignition and installed it into a car older than microprocessors, and it ran. I'm impressed, and would love to see it.2 points
-
Made an electronic ignition using an arduino. Can leave it running on the bench for hours with an electric drill turning the cam sensor over, no problems. Put it in the car & it kills the arduino in 20 seconds. And for some reason it was putting the whole thing into a boot loop the few seconds before it died this time. Lucky i'm not using genuine, china clones are cheap enough to sacrifice a few but i think i'll stop soon. Used a separate power supply for the arduino & MOSFET drivers this time. Still cooked it. I don't get it.2 points
-
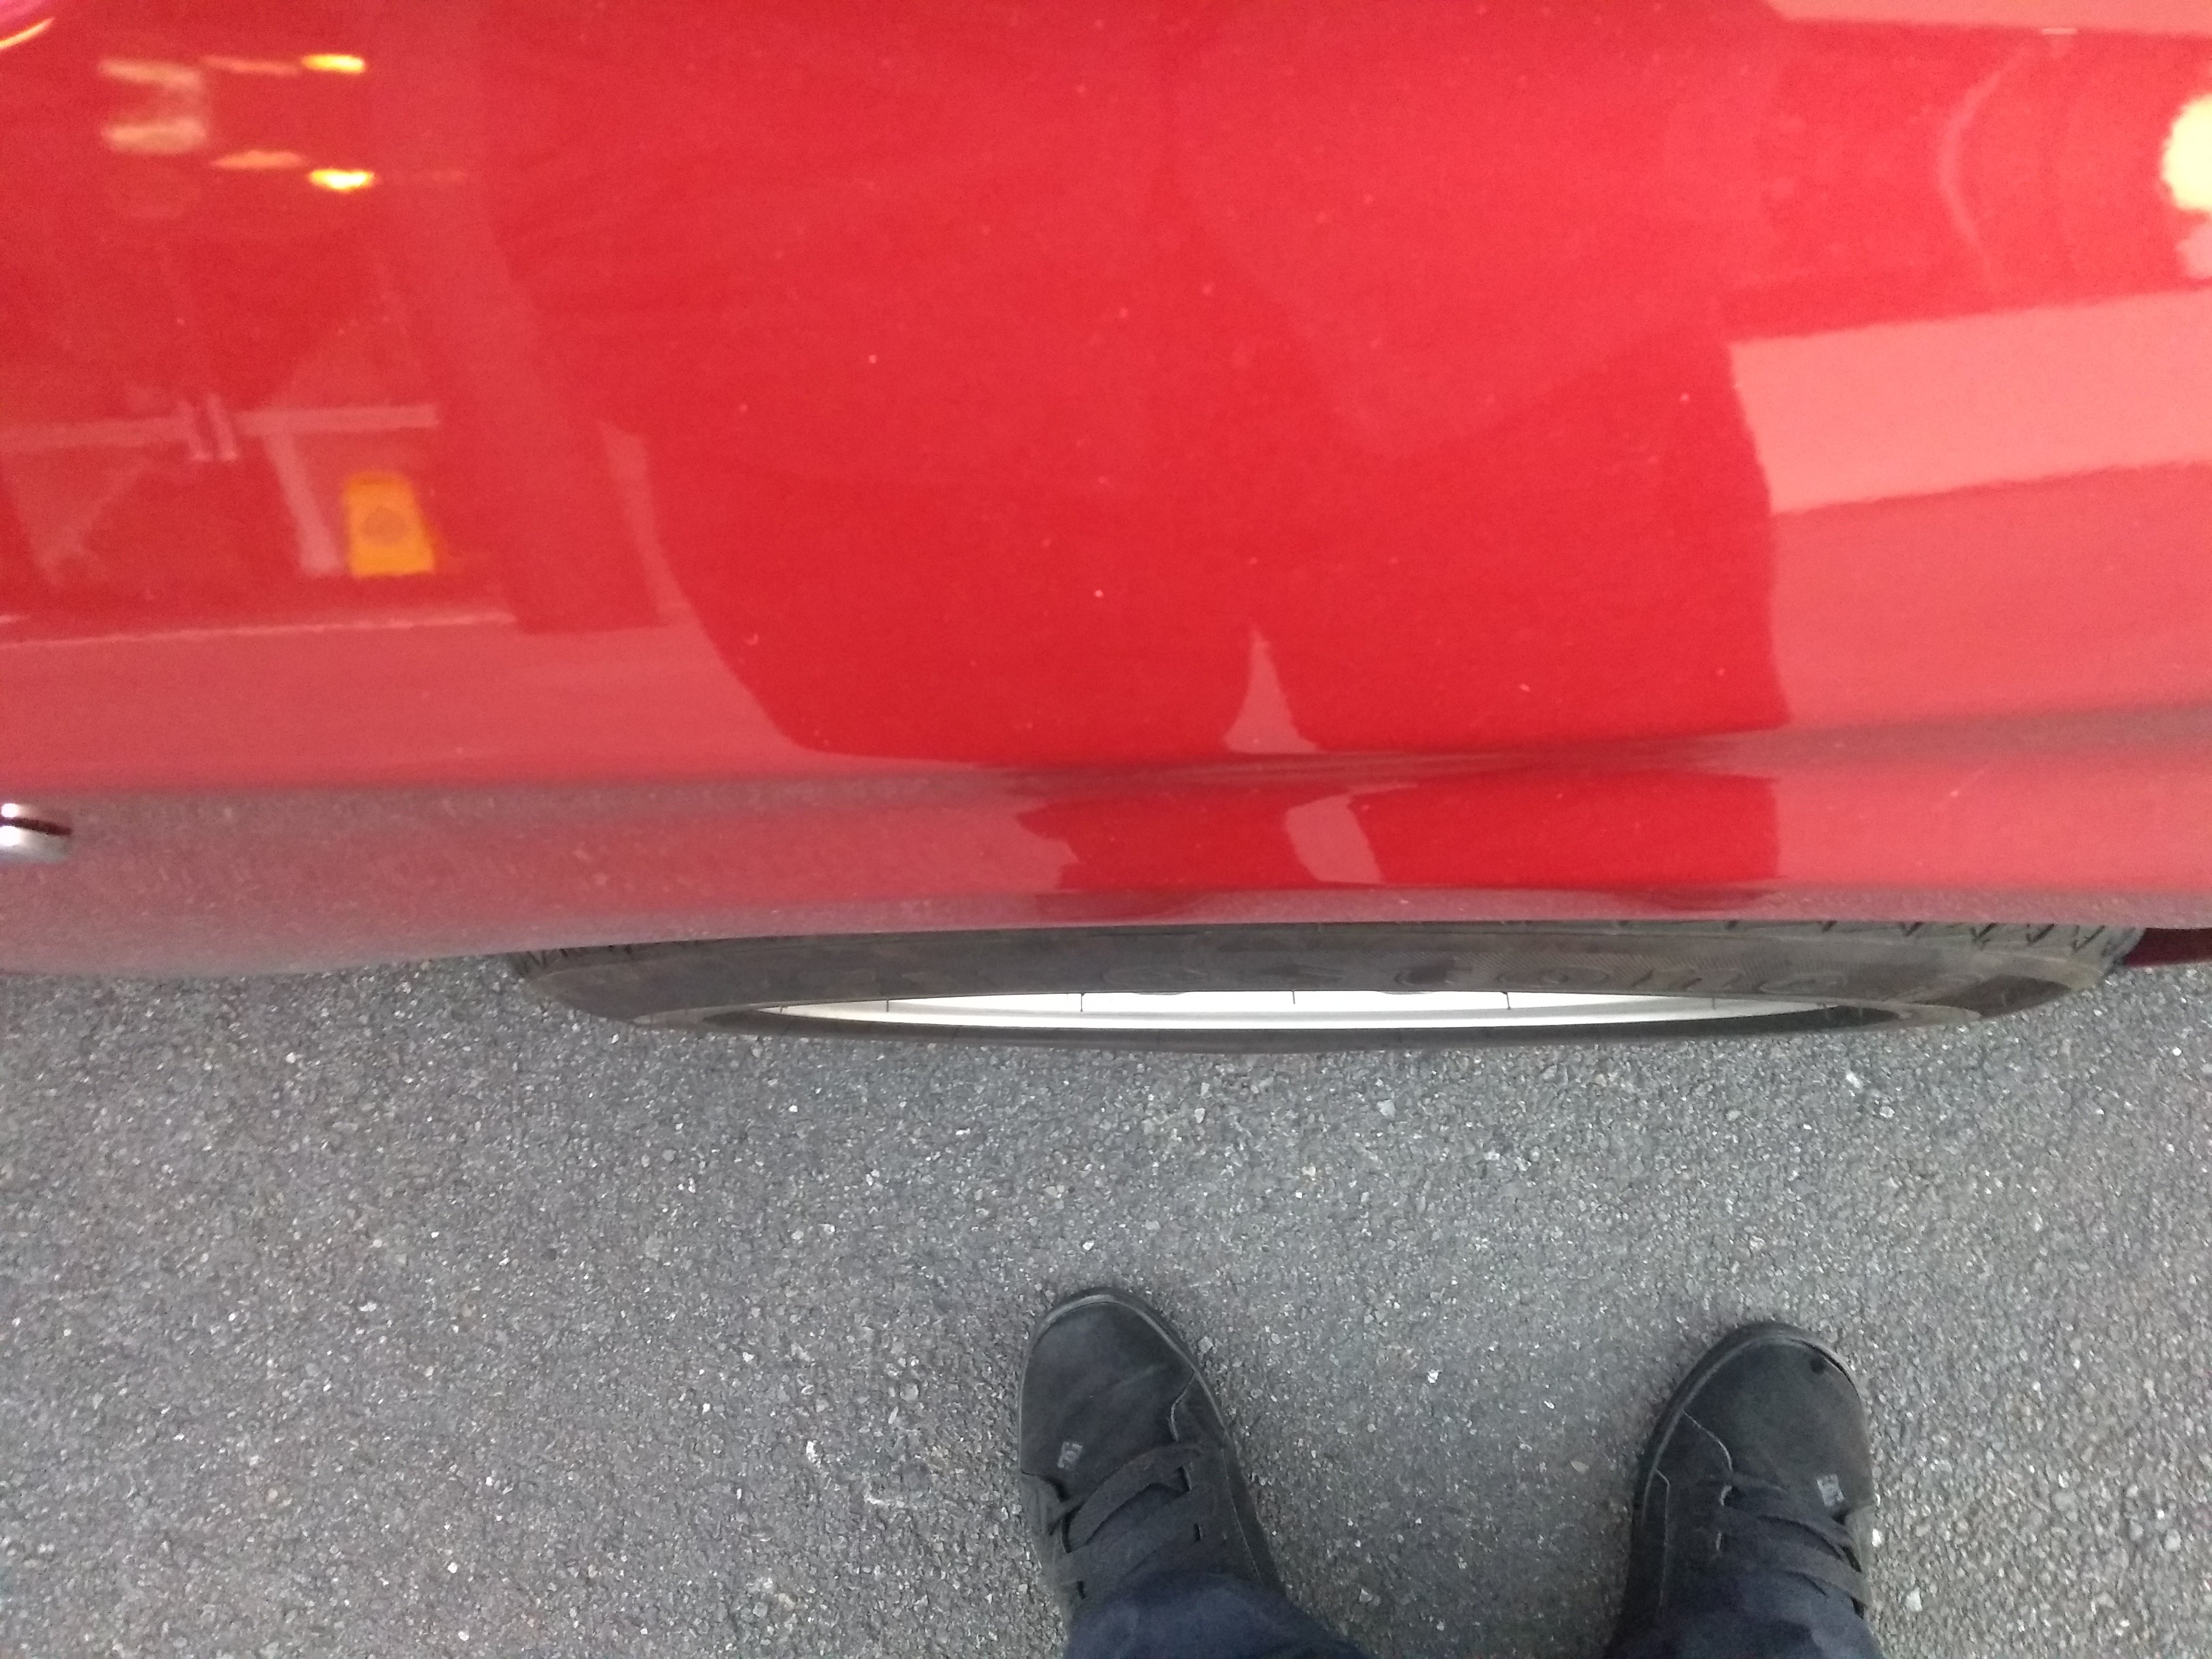
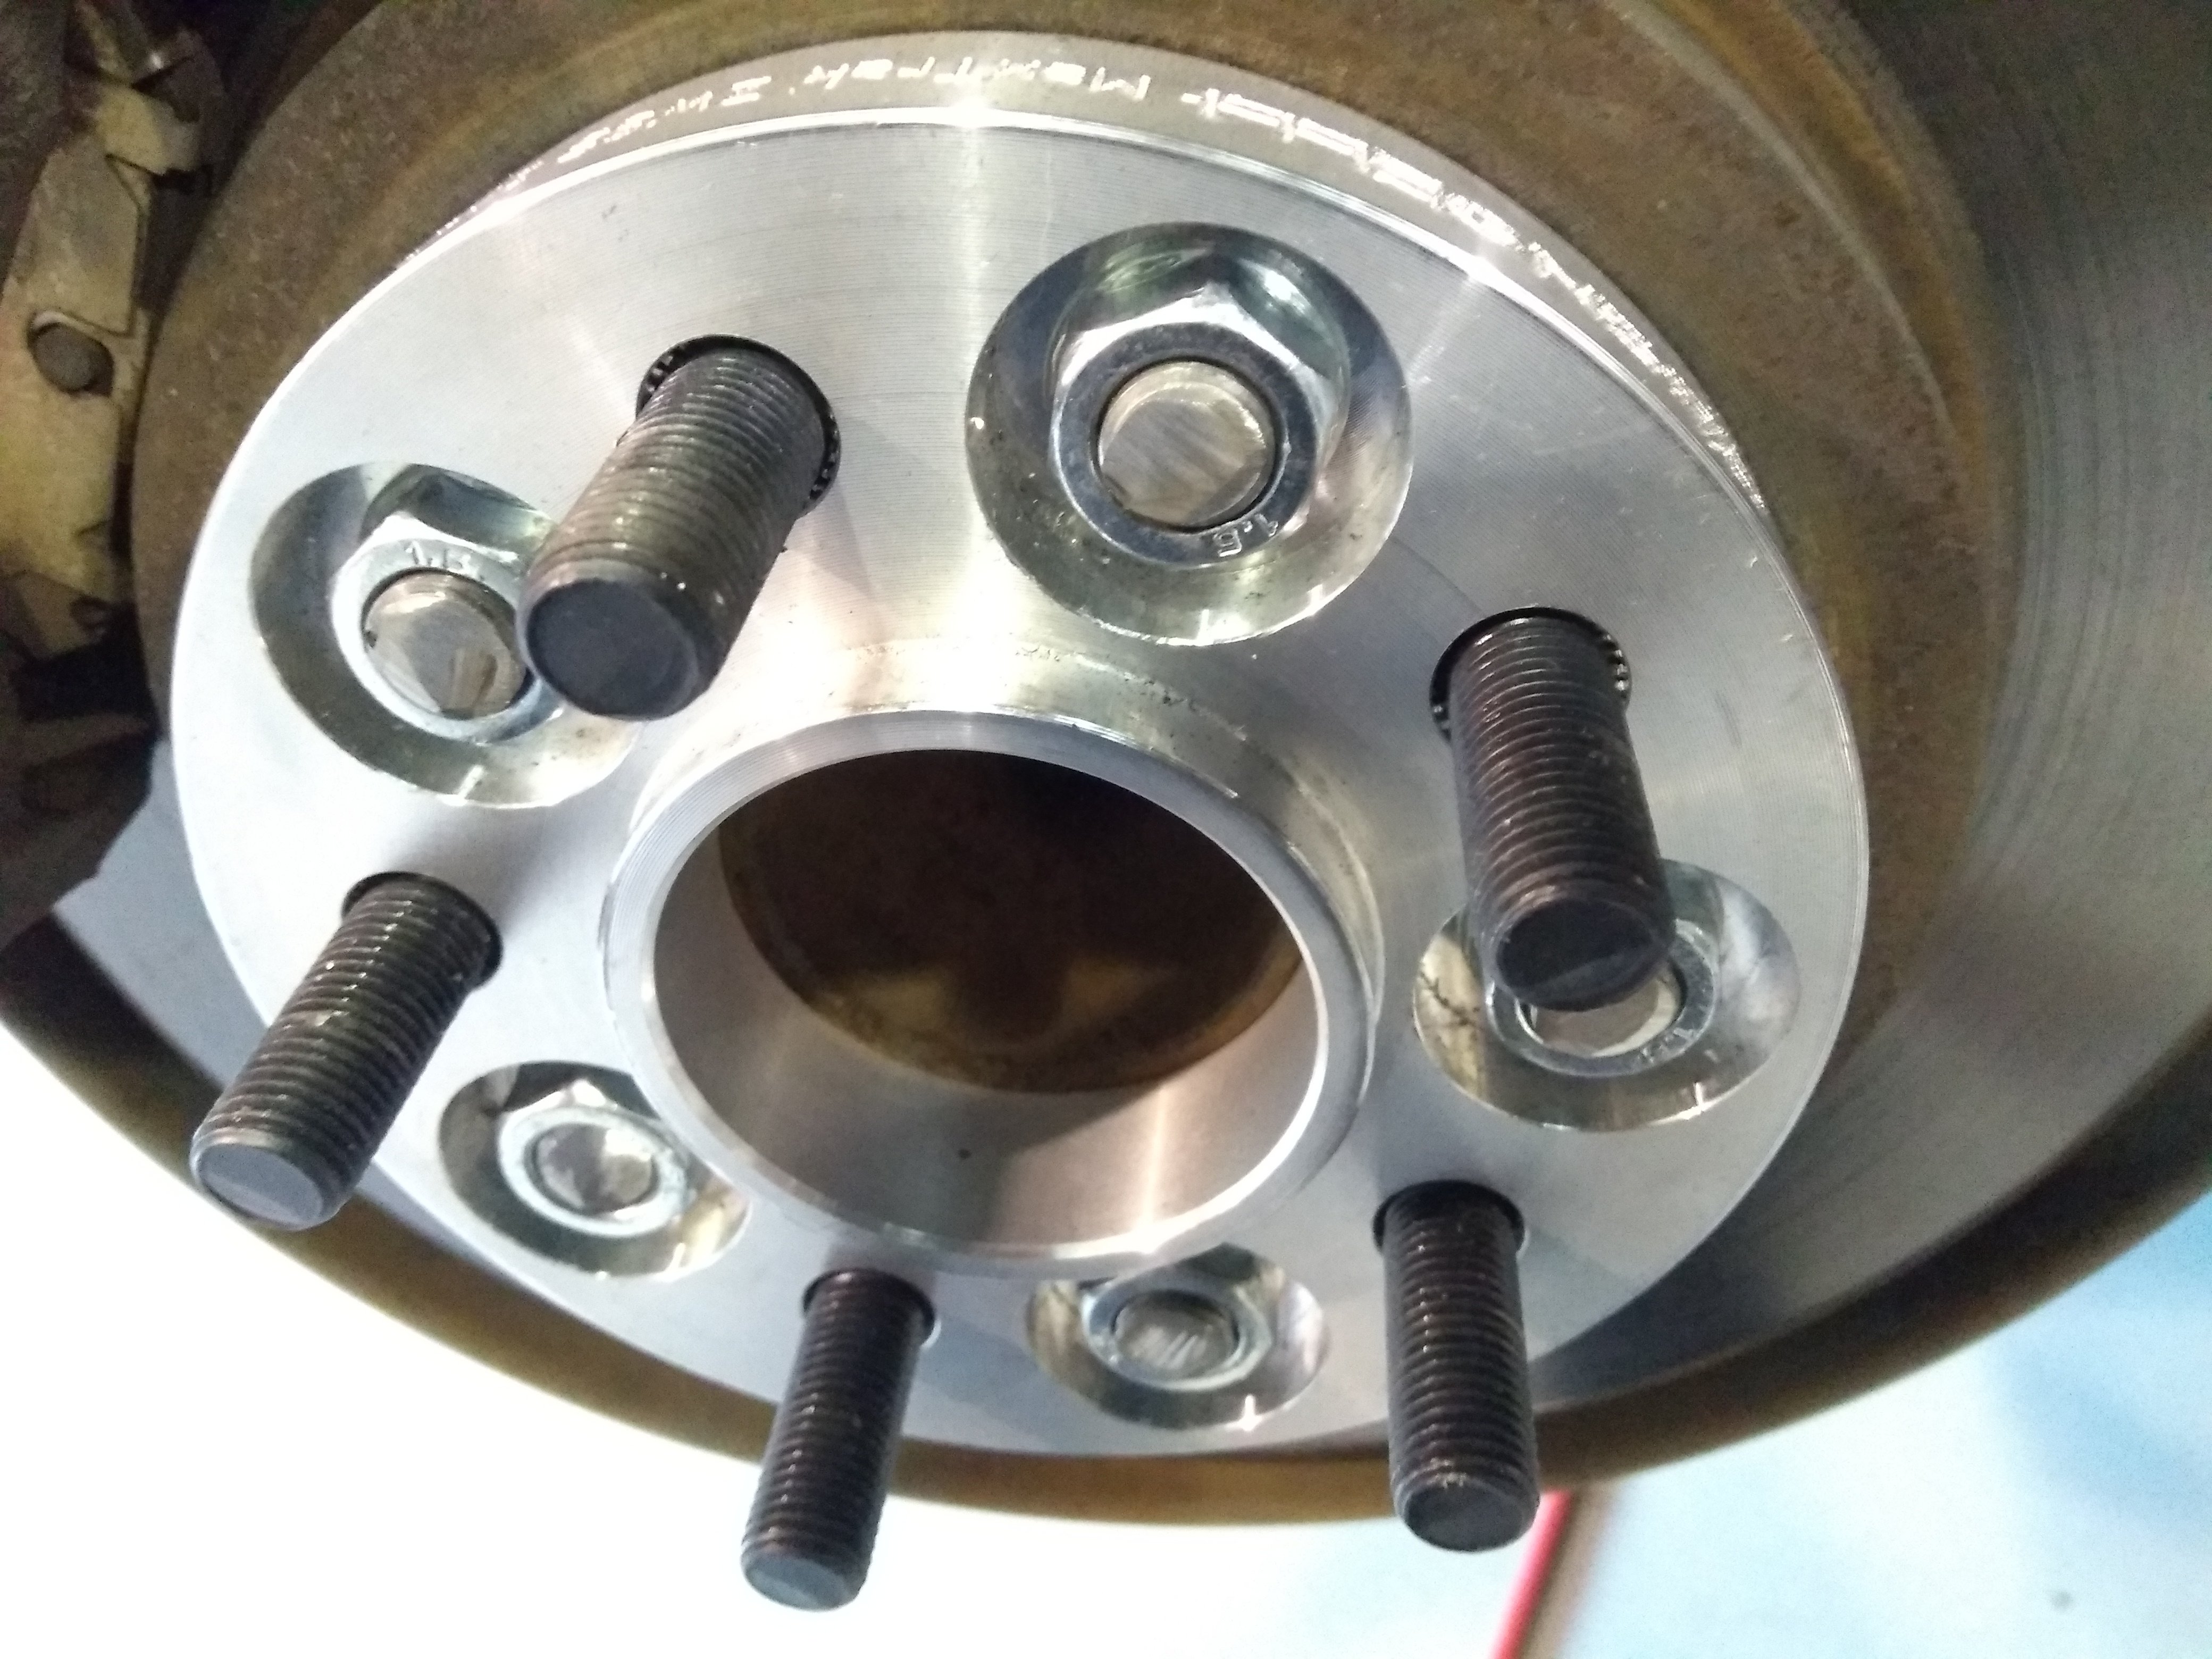
You trimmed the studs wrong there m8 You are meant to do it with the adaptor still on. Make sure you cut into the studs and mangle the face of the adaptor as well. Like this.
2 points
-
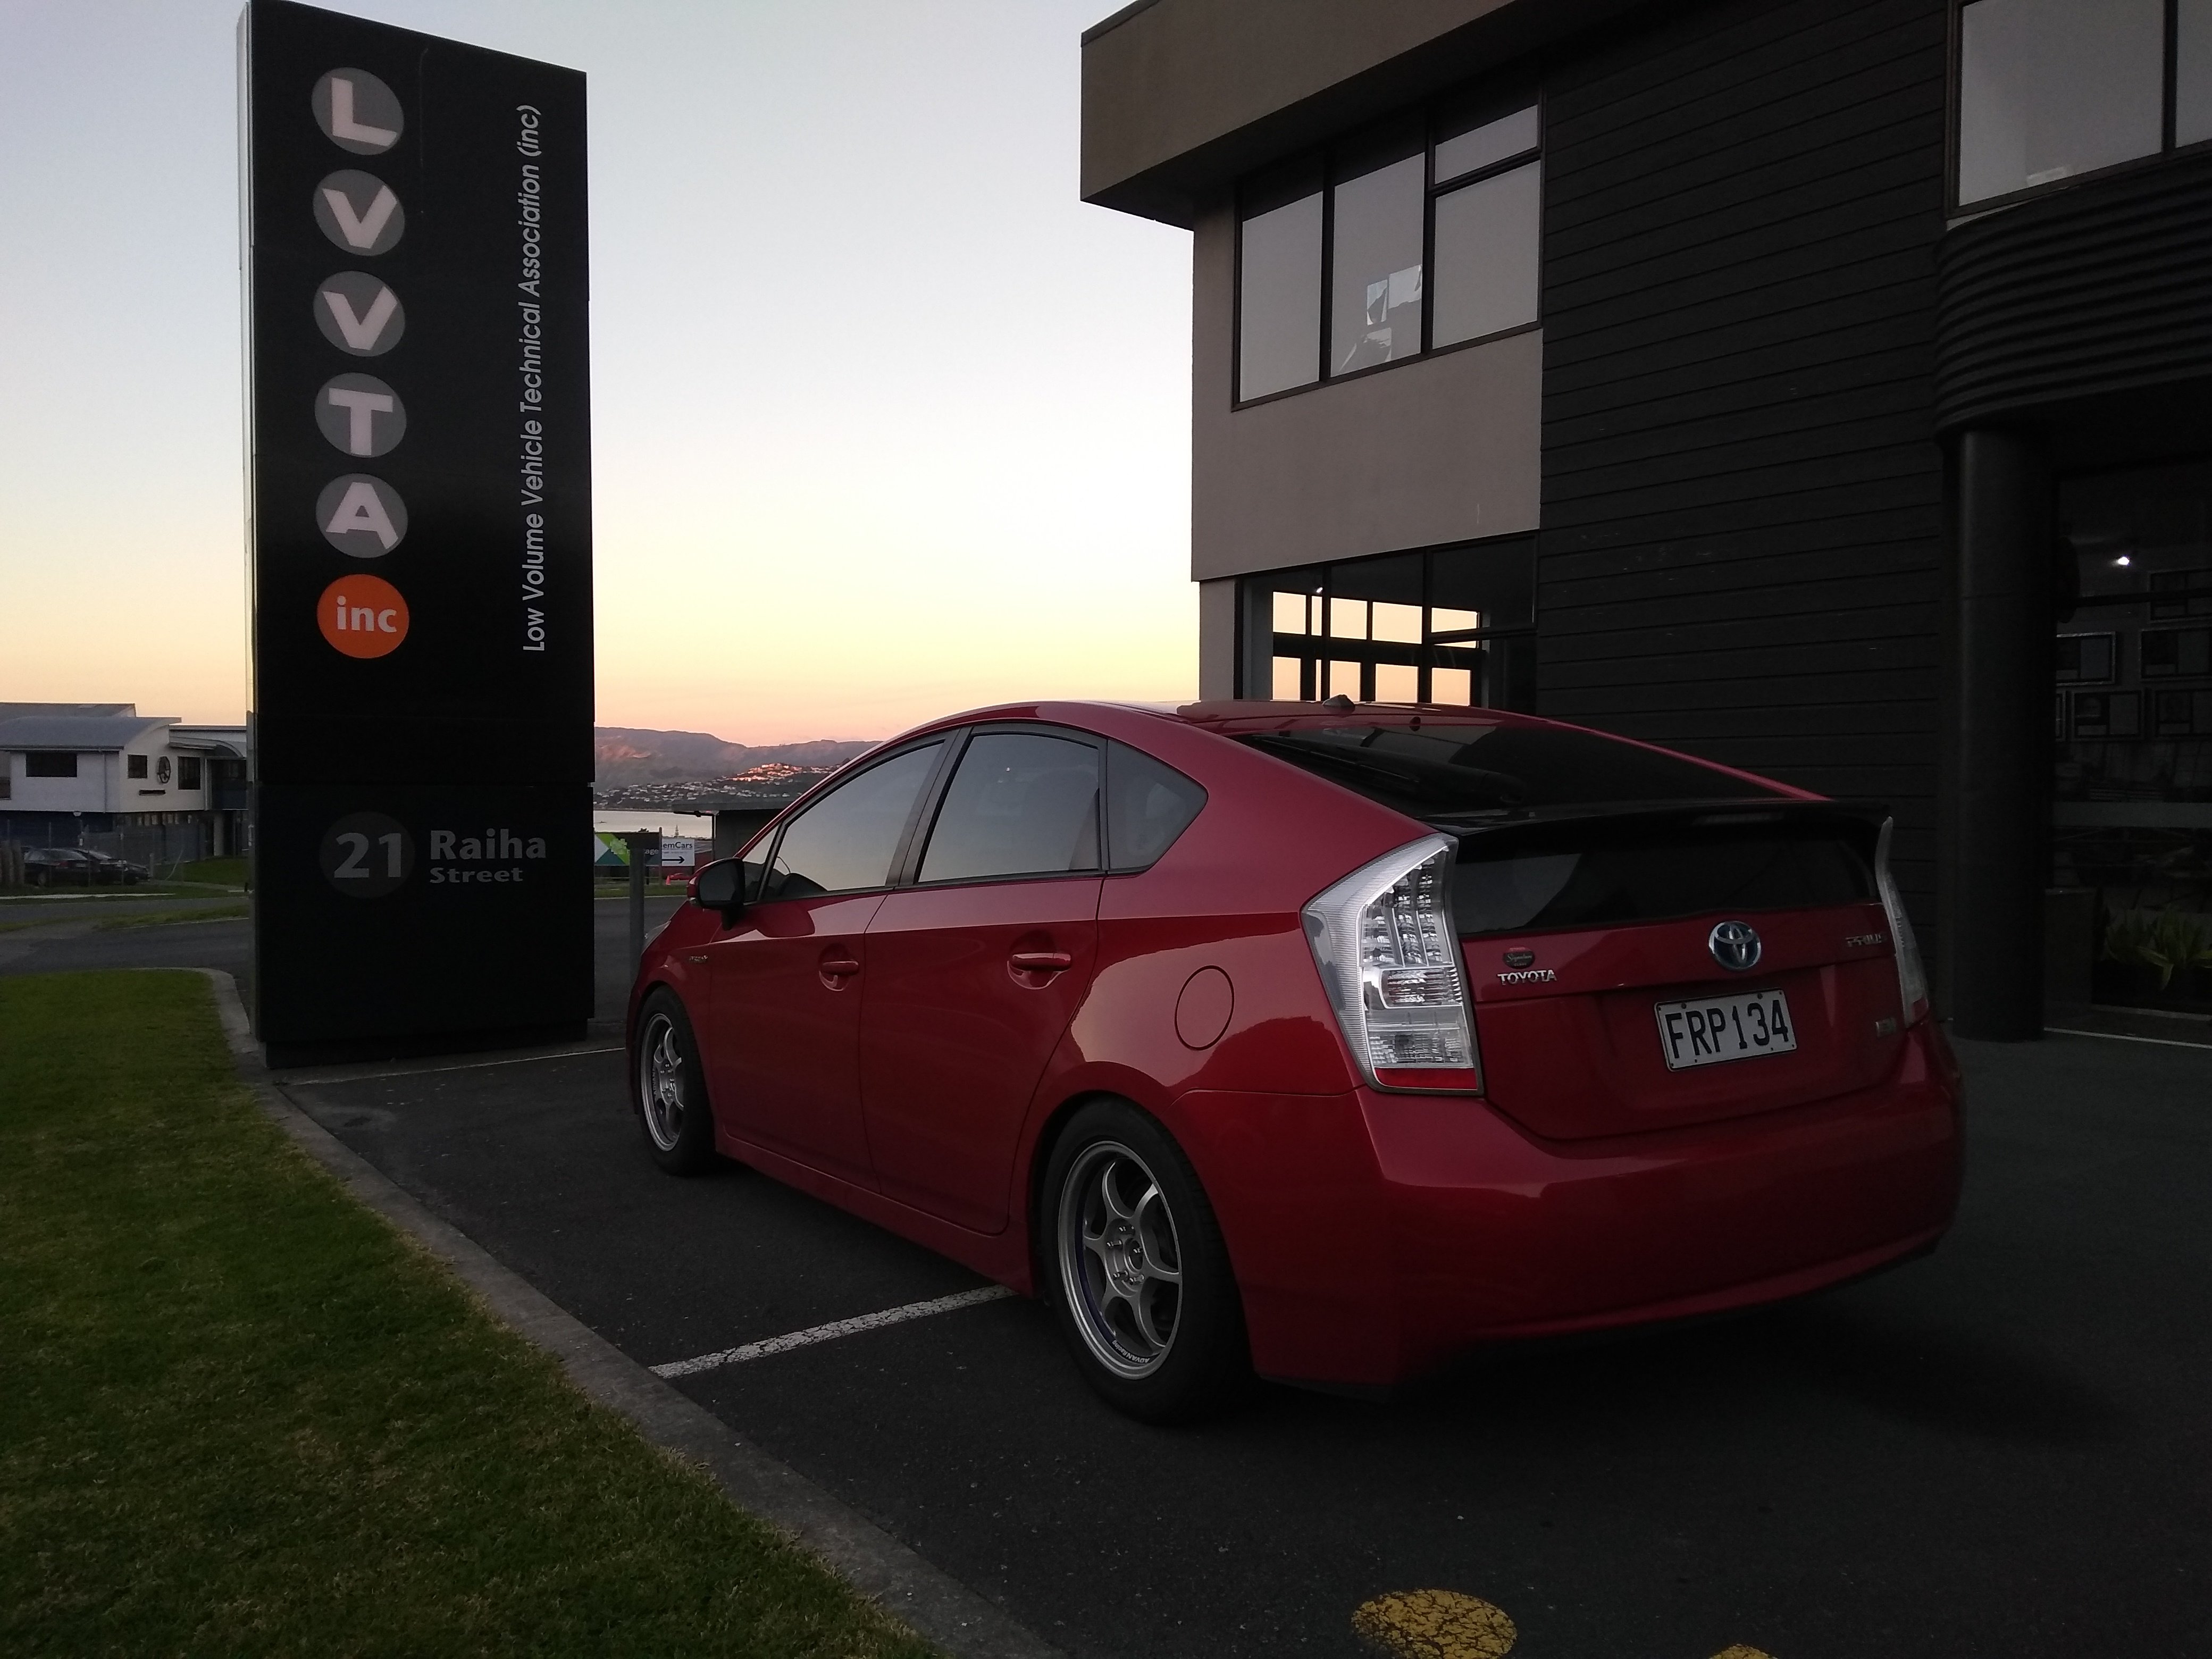
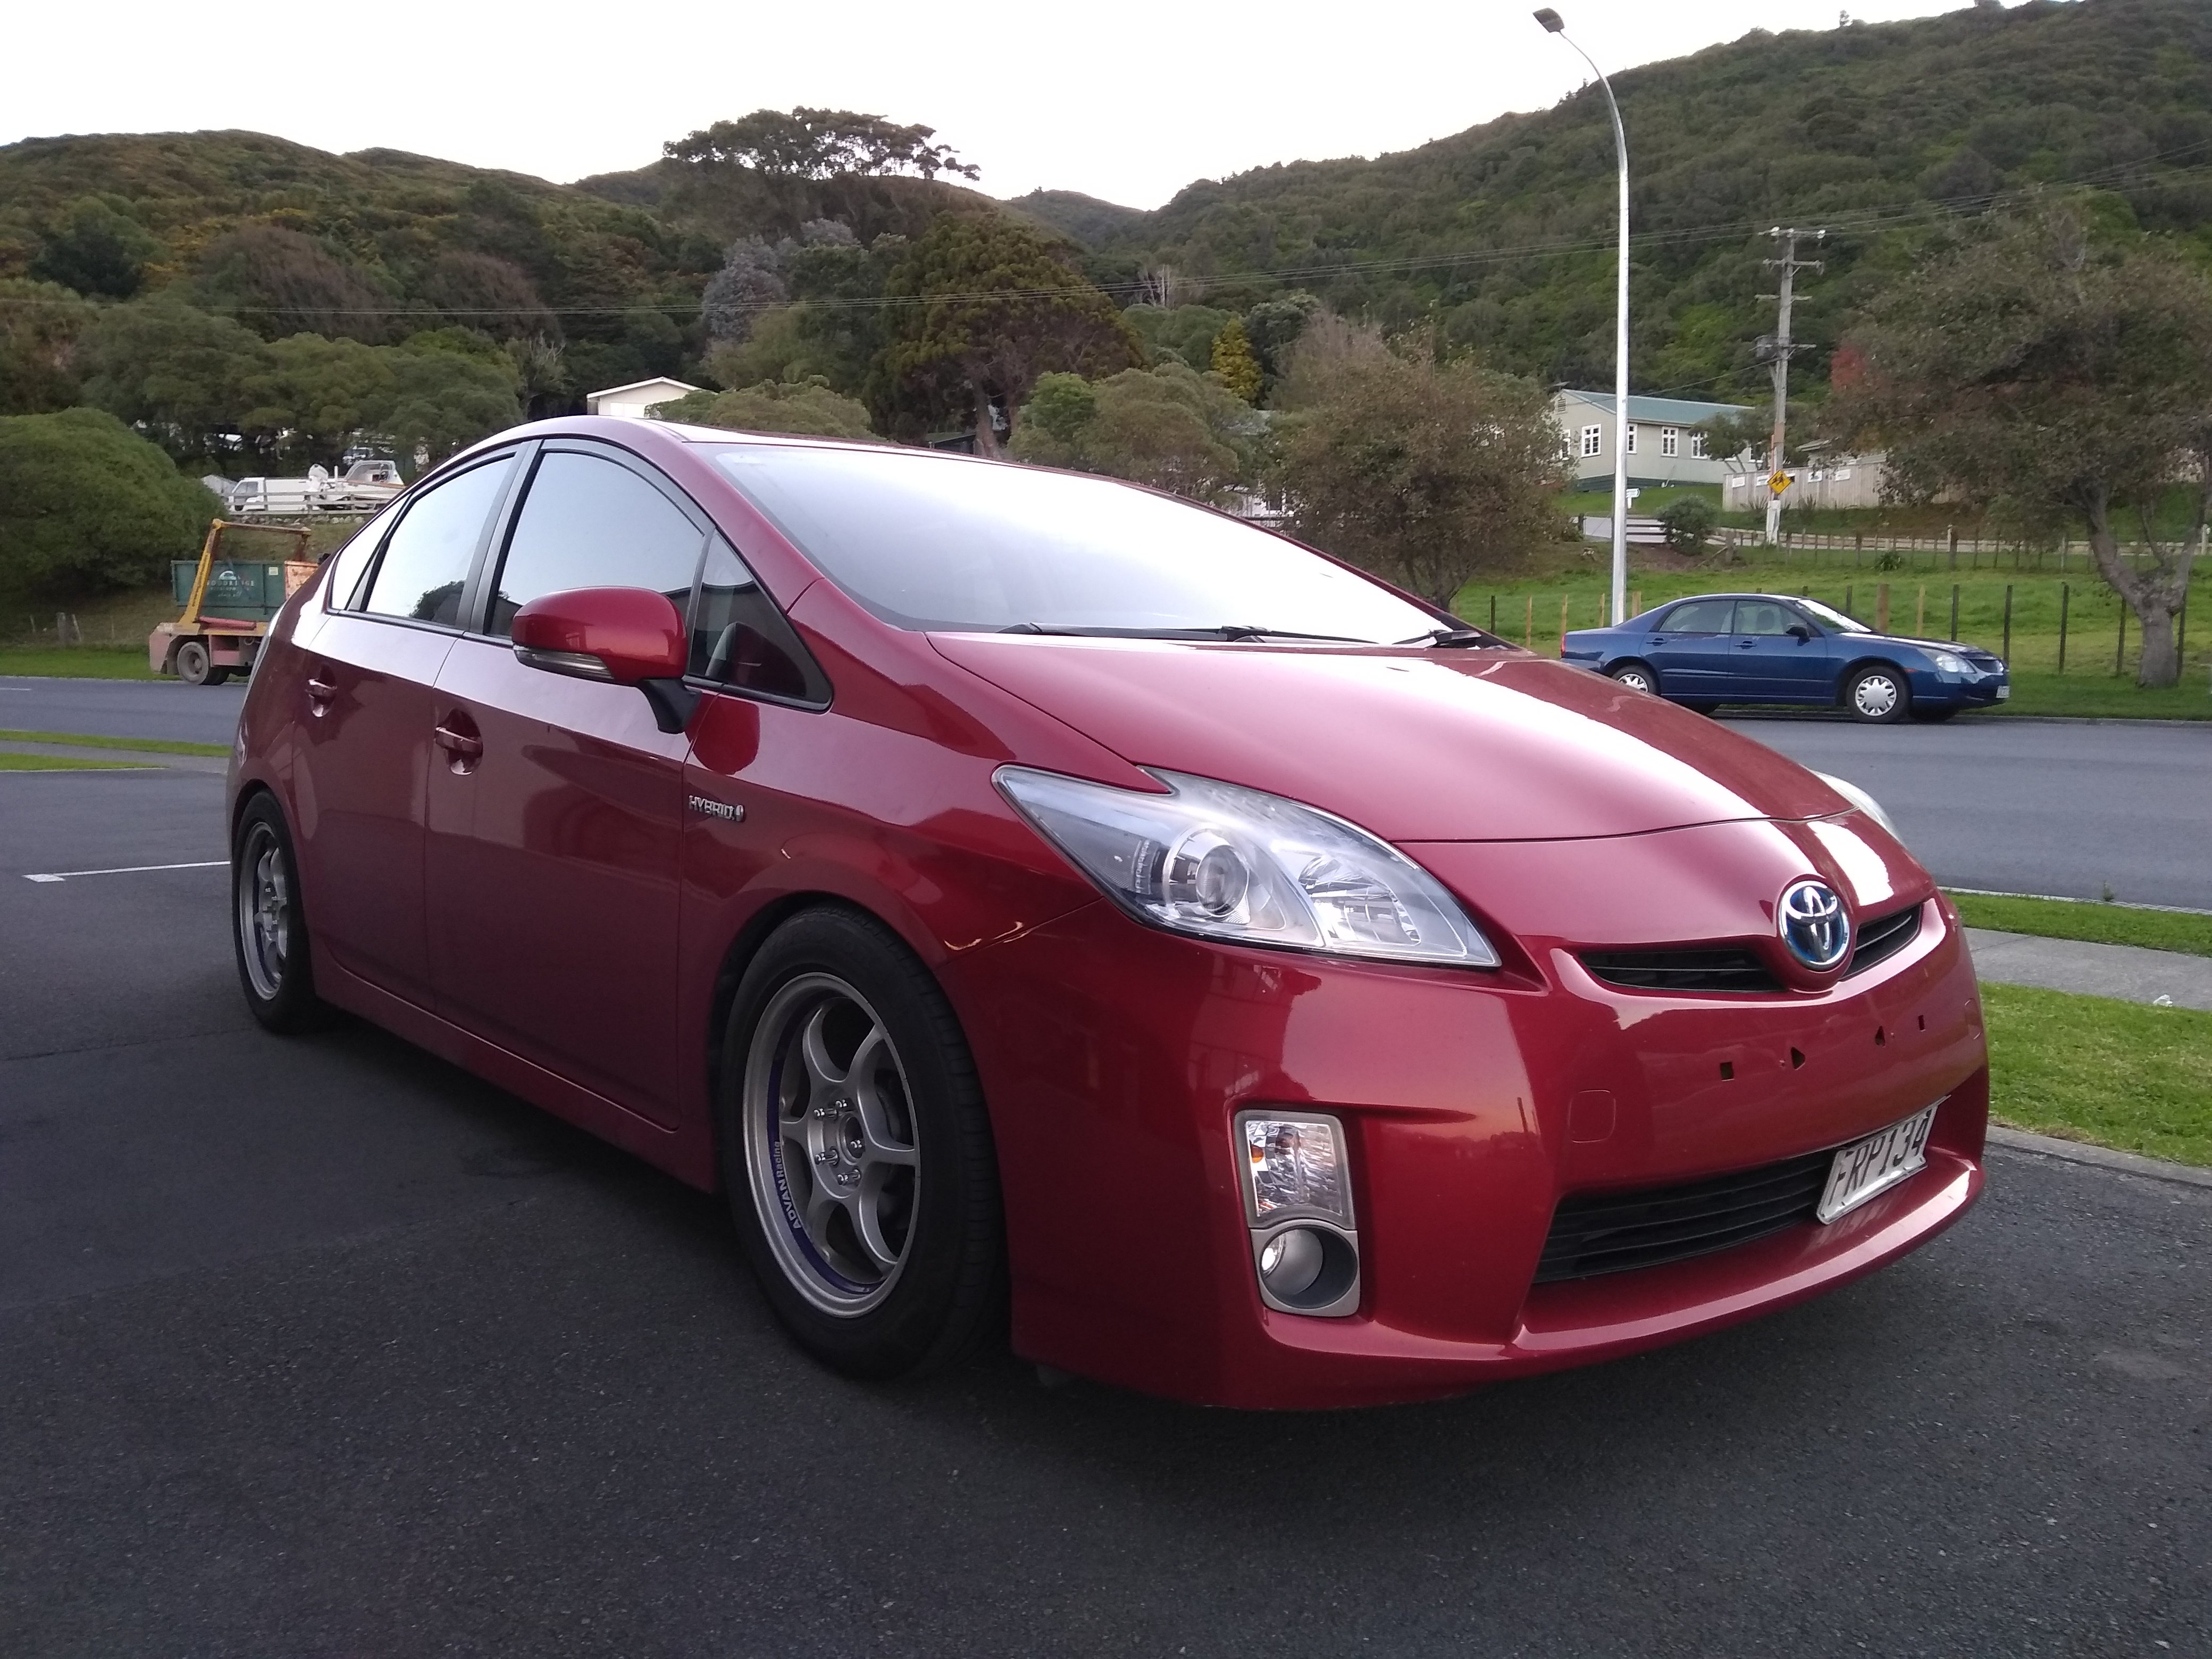
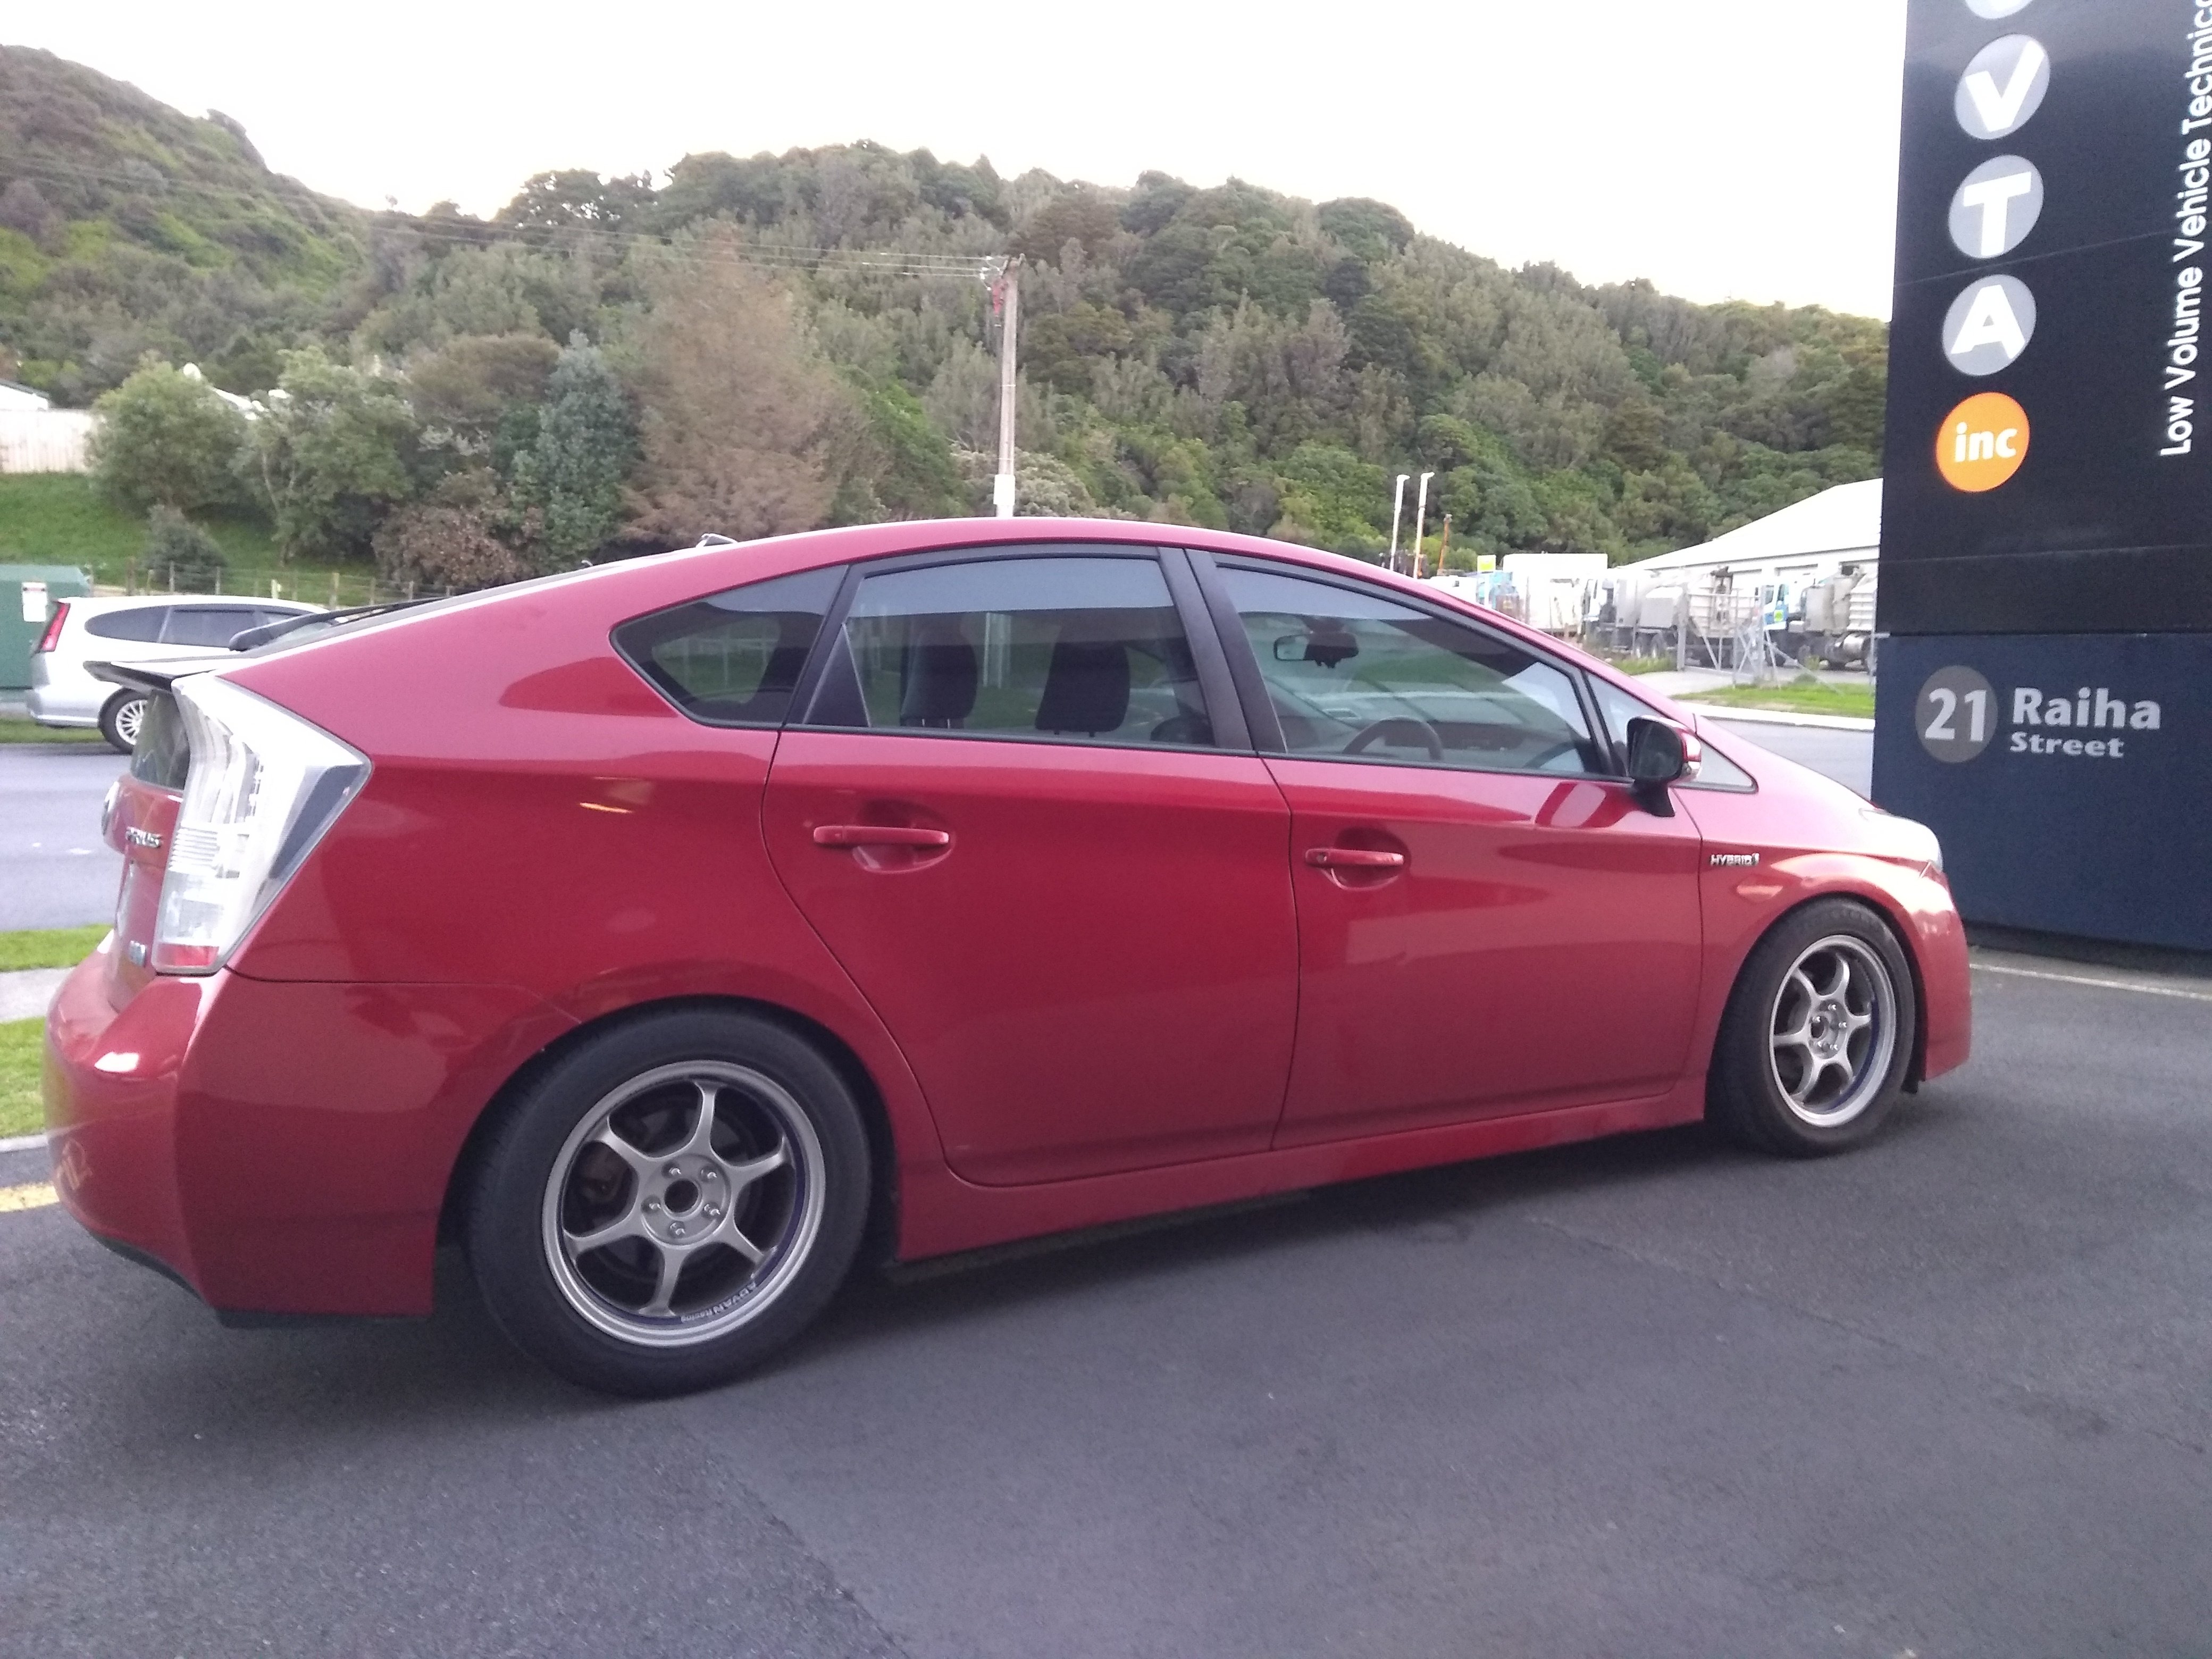
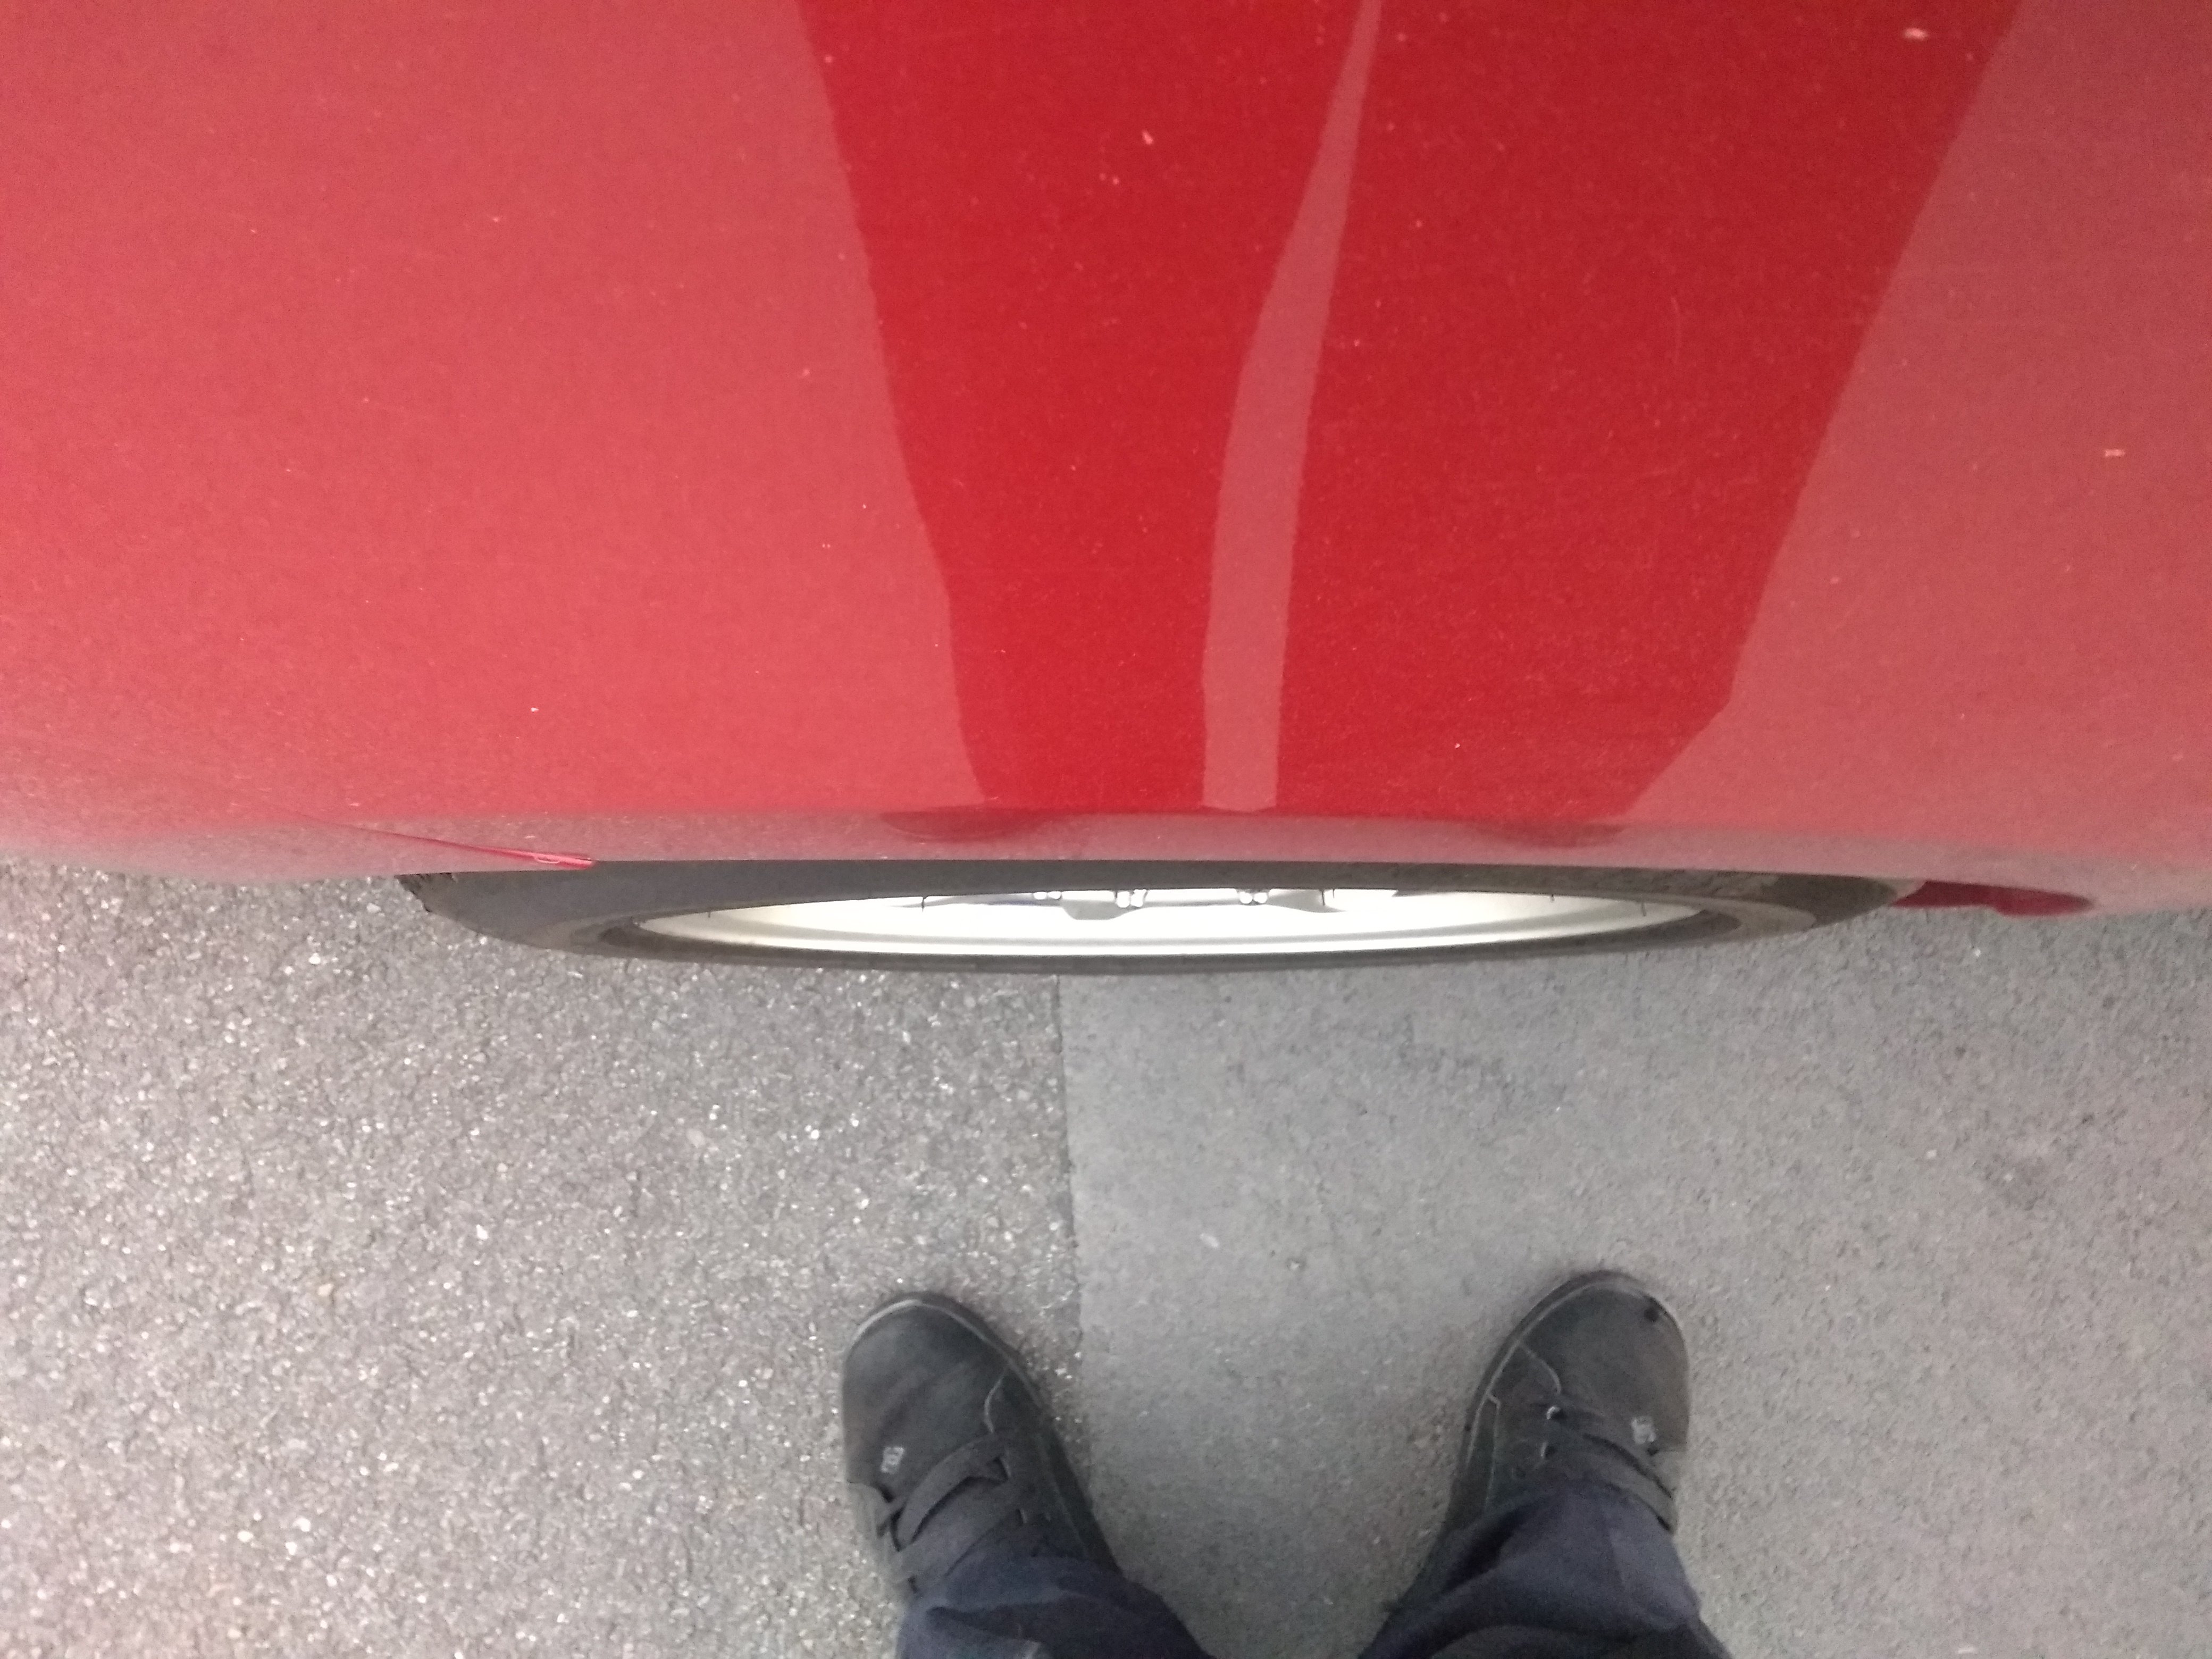
Fitted adaptors to the wheels last night to pump out the wheels a little as the spacers didn't cut the mustard. (custom made jobbies by Znoelli in Auckland - who did a great job on them) Took a nice sunset picture parked outside work last night which was unintentionally framed but caught my eye when going through the pics just now. Getting cert inspection today (fingers crossed)
2 points
-
still angry got stuck in engine is ready to pull once i get my crane back fuck this car. atleast the new engine will actually make power/not surprised this has happend this engine came out of a paddock what initially started as a suspicion the gasket had failed, due to some weird pressurization going on in the radiator, was then confirmed today when it started hemorrhaging out the overflow tank, and on closer inspection there now looks to be water in the oil, so i expect a full blown gasket failure it what i will find. aleast i know this car like the back of my hand and can get the engine out super quick, but thats the cheap part.....
1 point
-
2 days untill cert. Took it into work today to give it a good cleaning and degrease the engine. Blown head gasket, its pumping its coolant out the overflow tank. Rang Ian and cancelled the cert, he was really good about it, even at such late notice, I think he knew it was a genuine blindside and not me being slack. So gutted, so very gutted. This will now mean plans I had for the future to rebuild the engine and add intercooler ect will now need to be brought forward. Which takes time I don't have. Hopeing to atleast use the anger to pull the motor out this weekend.1 point
-
I think offroad regardless of terrain is weight and ratios. you have all seen how slow my old thing is, dunes and not so mudy bush tracks it keeps up with anything. just needs a fucking good run up for sand hills cause it’s go no torque once momentum is lost, nothing more power can’t fix but it weighs 1400kg. Mates 07 rodeo with steps and bullbar is 2100, and safs get over 3t easily. thats a lot of weight pushing tires down into mud, or trying to lift the front wheel over a rock. a lot of those top crawlers are pretty much tube frame chassis, couldn’t imagine many would be over a ton1 point
-
Ok cool. Could be a source for new cheap jaws. Most I've seen are all the same size.. All copies.1 point
-
There's fuck all work on at the mo so took the day off and put the LSD in. Yay for twin spin.1 point
-
So this died a few months back going to the shops, so suspected fuel pump. So it's been sitting round doing nothing, but bought some cheap coilovers for the rear which looked like they'd fit up going by measurements, so fitted them up, but the one crucial measurement I forgot to get was the length haha, so yeah it slammed it to the point of it being undriveable Then decided to throw the 4g63 from the galant in for shits and giggles, and put fuel pump from that in also, now its back up and running and running 2 litre POWAHHH. Very straightforward swap, looms are the same so only had to swap ECUs and a few linkages and mounts as I kept the galant gearbox on the '63 as well. Definitely goes a lot better now, though not as rev happy.1 point
-
Yeah so the 155s on this have been getting a bit low on tread so figured a new set of tyres was on the cards. Was also kind of sick of the stretched look and the fact that they had fuck all grip around any corner. So shelled out for some 185/55r14s. Much happier with how it looks and drives now, wish I'd done it sooner!1 point
-
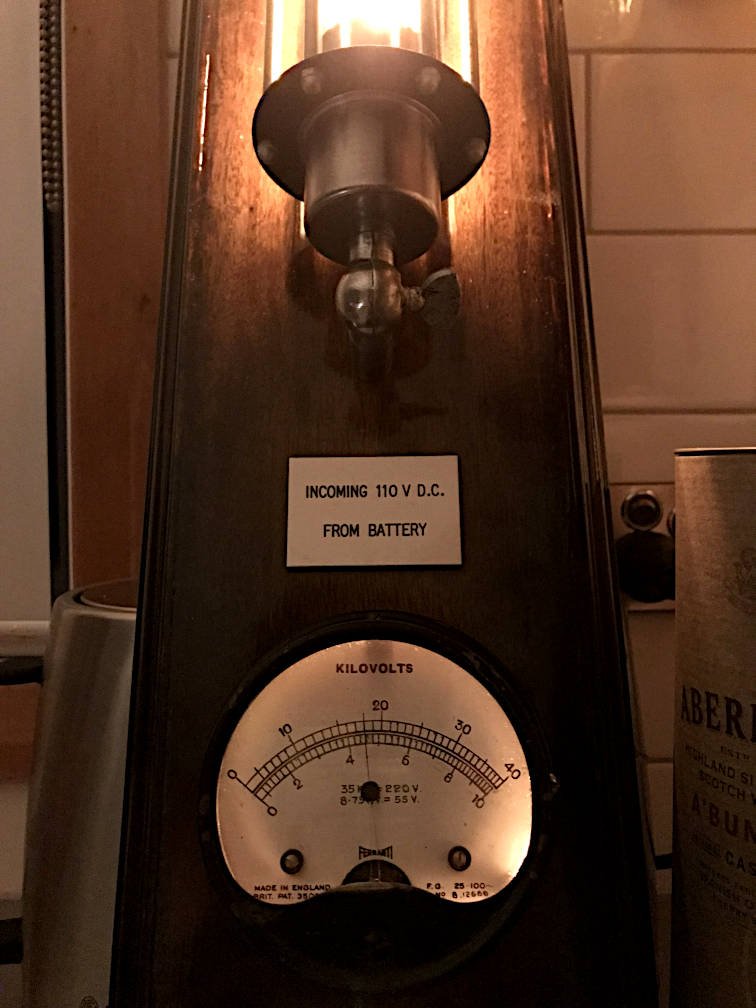
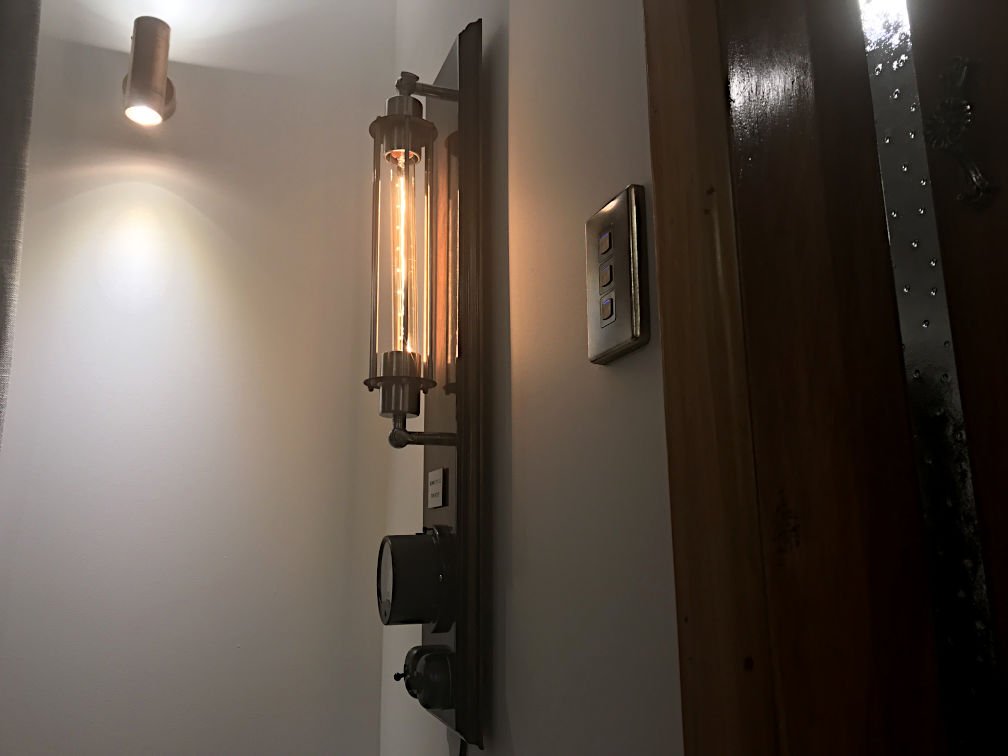
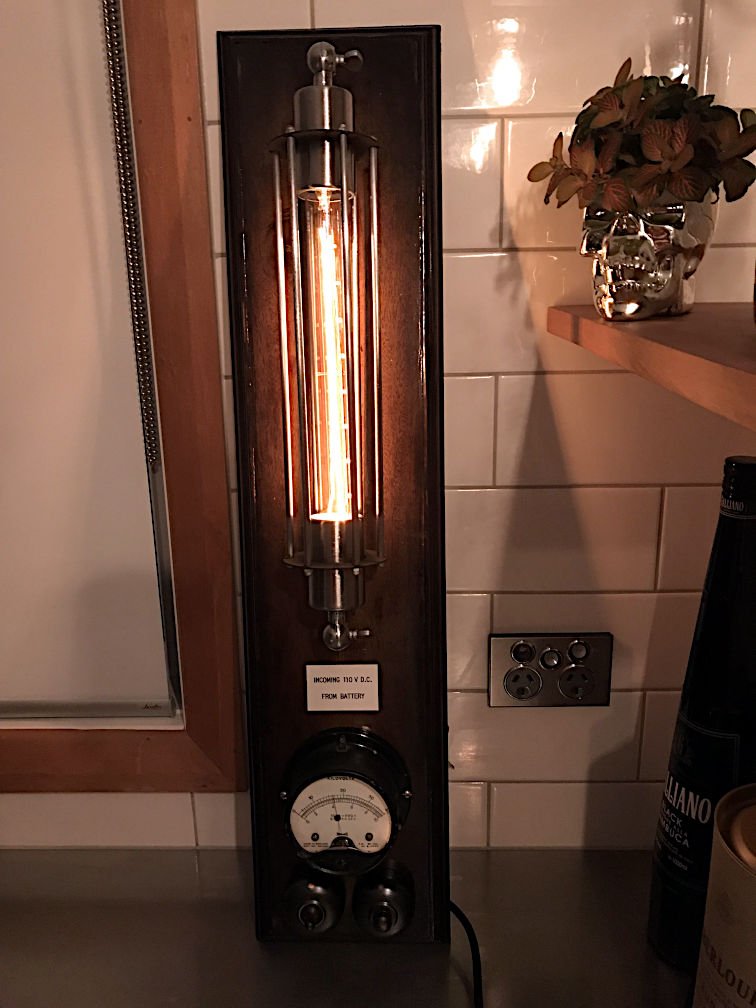
Another one of my patented useless projects which didn't turn out as good as I hoped.. I added some decorative edging to a plank of wood, stained it, mounted an Edison cage sconce light thingy, a retro switch and dimmer, an 'incoming 110V DC' plaque from oldschool Secret Santa, and this old analogue voltage gauge I got off TradeMe: I've attempted to add backlighting to the gauge, using period-correct incandescent bulbs for that extra crappy glow. Conveniently, if you use the right input terminals on the gauge, full scale is about 245V so you get to watch the needle go up and down as you operate the dimmer. Entertainment value: ~5 seconds. Eventually I'll pick a spot on the wall for this stupid thing to live, and if I'm feeling extra keen, I'll find a way to run power to it inside the wall. Artist's impression: The trouble is I really messed up the staining and varnishing of the board, and I don't know if I can be bothered taking the whole thing to bits and redoing it. I sanded through the dark stain in a few spots while trying to fix my first attempt at varnishing. =(
1 point
-
Its been a while, for two main reasons, but I'm still here, and for now, so is the BMW. The first reason has been that despite putting some KM on the BMW, it's been pretty reliable and solid. I even ticked over the magical 300,000KM mark the other week. The other reason is that a while back I was offered a car that I basically only have one chance to own in my life. There is a very long story around how I still don't have that car, but basically I have been trying to sell the BMW to get funds and space to buy the other car, but without success. I have had a stupid amount of stupid people wasting my time, which infuriates me, but still no one has fronted up with the cash. This leaves me in a limbo of sorts. I'm reluctant to give up on this other car and keep the BMW, as I likely won't get another chance for one again, but I also can't keep dropping the price and losing my arse just to push a sale quickly. So since I'm still stuck with the car, I'm also limited on spending money on it, or working on it. There are a few things that I will do to the car IF I keep it, but at this point I still don't know what's happening. In the meantime I have picked up a few things from Pick A Part. They had a coupe with a complete boot carpet, which I picked up so at some point I can rip out the boot install and go back to having a functional boot. I also grabbed a few cosmetic bits that were a bit shabby on my car. All cheap bits that aren't easy to get. One of the most important cosmetic bits I got was a new headlight switch. I hated seeing mine every time I drove the car because it was badly worn/scratched/scuffed. It also didn't light up like it should. You can see how horrible the legend around the dial looks, but even the I/O on the vent above is badly worn. These are super easy to remove, with only one screw on the underside of the dash surround, going up into the switch housing. Remove that, and gently pull the switch forward (I hold it by the dial). Its clipped into place in the top of the vent, but it'll come free with some wiggling. The wiring is fairly short for the foglight switch, so take care not to pull too hard or you can break that switch. The headlight switch wiring connector has a collar that twists around and the plug will come out. The replacement I sourced has a broken switch for the headlights, so when you turn the dial it doesn't click like it should. That's OK, my current one works fine, so I will swap them over. First pull the dial off. It's a press fit There are two things to note when that is removed. First, the light pipe in the back, at about 10-12 o'clock position. This is how the bulb feeds light to the notch on the dial, so it lights up. The other is the large plastic nut. I used a set of large needle nose pliers to turn this and remove it. Once removed, the whole switch will come away from the fascia. This is a really good time to replace the bulb, which is inevitably blown. This can be done with the switch still fitted to the fascia, but it's easier to push the bulb out the front, than to pull it out the back. The bulb is in a large plastic holder. If you push on the top of it, it will push out of the back of the switch The bulb is a small "grain of wheat" 286 bulb. Now, I believe the original BMW bulb was 0.3W and about $10 a piece! Madness. In the past I have chosen to use the much brighter 1.2W bulbs readily available on eBay. They do obviously run hotter, but other than a shorter lifespan, there doesn't seem to be any issue running them, but do so at your own peril. I went this route again this time. Now it's time to strip the good switch from the old fascia. With a new bulb fitted, install the tube into the good switch. The end of the tube is keyed to only go in one way, but be careful that the bulb passes clearly through. If the bulb isn't seated correctly, you can smash the bulb inside the light switch.... I found out the hard way. Now install the good switch on the good fascia, reinstall the nut and dial. Plug it into the car (without installing it) and test that everything works as it should. It should light up with the key on. If all is well, reinstall it into the dash and fit the screw. So much better! I couldn't stop there. I had the bulbs out, and I knew one other thing wasn't lighting up in the car; the climate controls. This is another thing I had to fix in the first M3, as that also had neither the headlight switch or climate controls light up when I got it. This is also an easy fix. First pull all four dials off. They are a friction fit. Next remove the two screws (one under the fan speed dial and the other under the vent control dial). Now the fascia can be gently pried forward until it pops off The back of the fascia is pretty cool. It has a series of light pipes to distribute the light from the single little bulb, to all of the areas around the dials that need to light up. The buttons (recirc, AC, demist) are all lit with little LEDs on the back plate. The little bulb lives dead center near the top of the unit. Gently pull it forward and it will come out of its holder. There is some discolouration around mine, and it did have a bigger 1.4W bulb fitted by the previous owner, but no distortion of the plastic or anything. Pop a new bulb in and turn the lights on. Now clip the fascia back on, insert the two screws, refit the four dials and you're done. Bling bling. And with all the other light up stuff The last thing that didn't light up was the ashtray. Turns out the whole bulb holder is missing, but not to fret, I picked up a replacement at Pick A Part today also. A non-smoker package pocket to replace the ashtray. Fixes the light not working, and also gives me somewhere to put my phone. Win. Great success. Now I can see things in the dark. Hopefully soon I will know what's happening with the car. Either it'll go to a new owner, or I will be ripping the boot install out.1 point
-
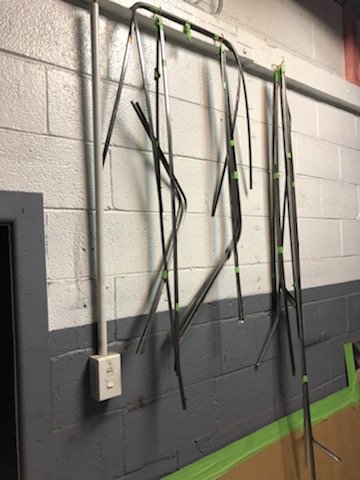
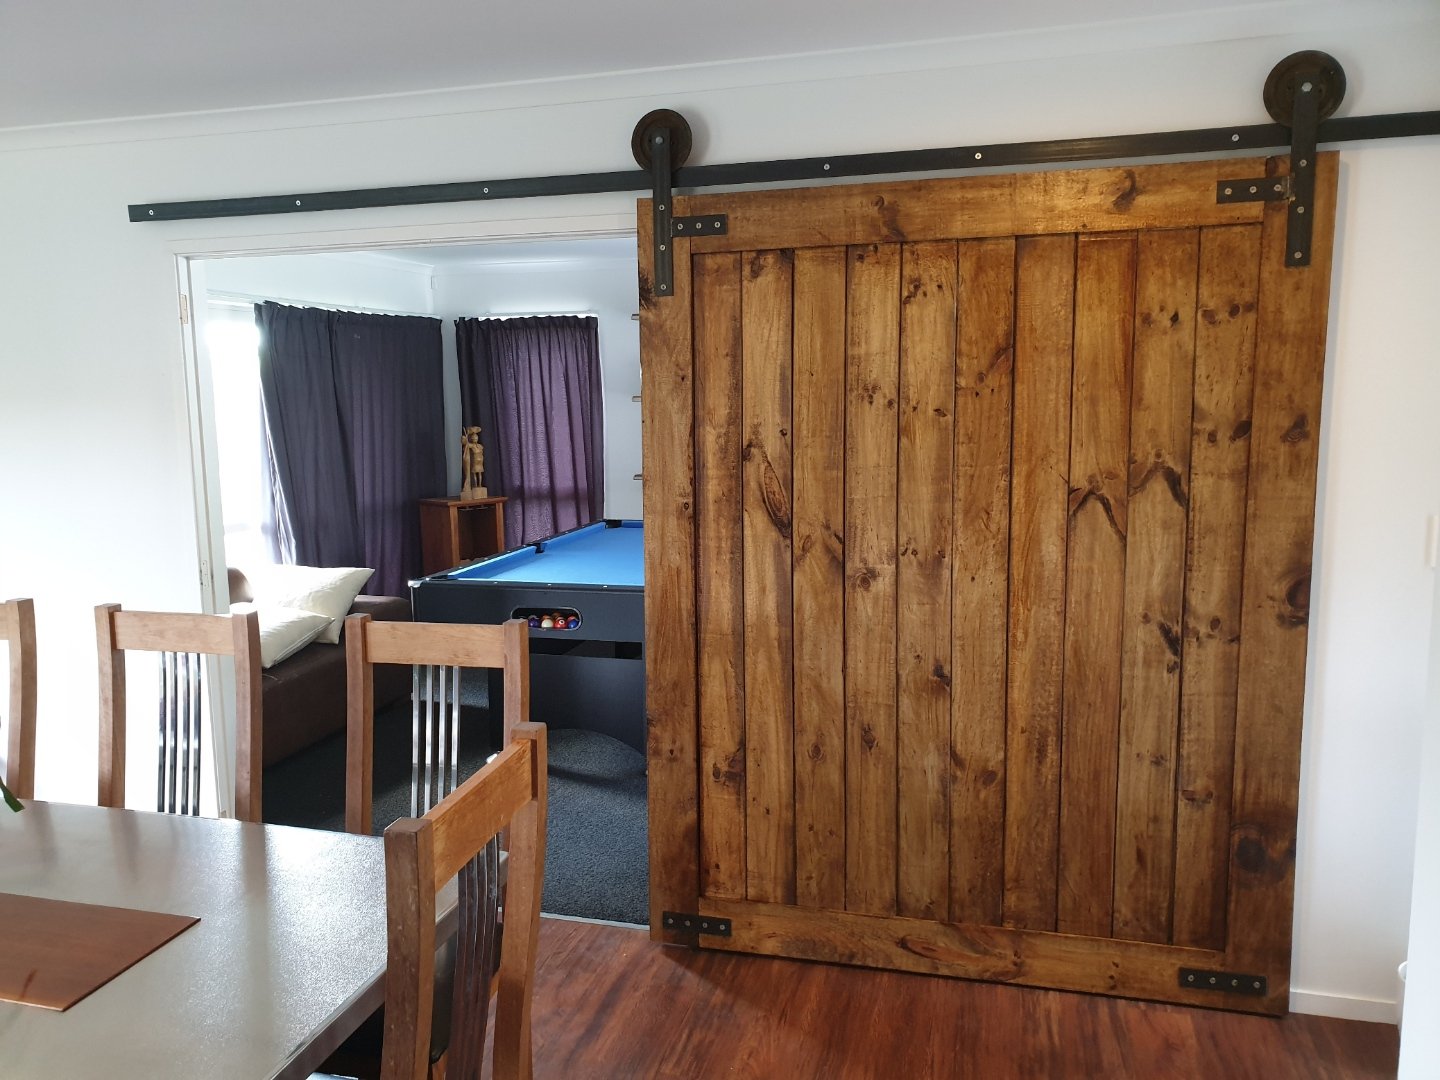
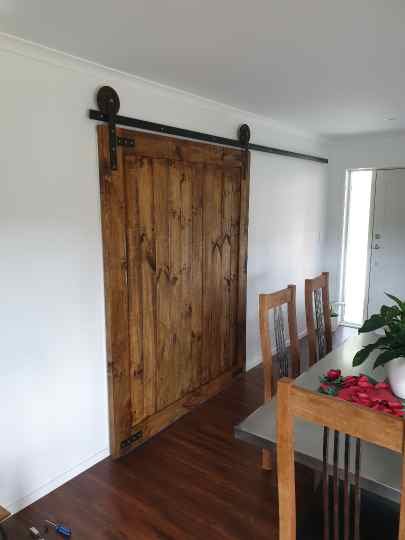
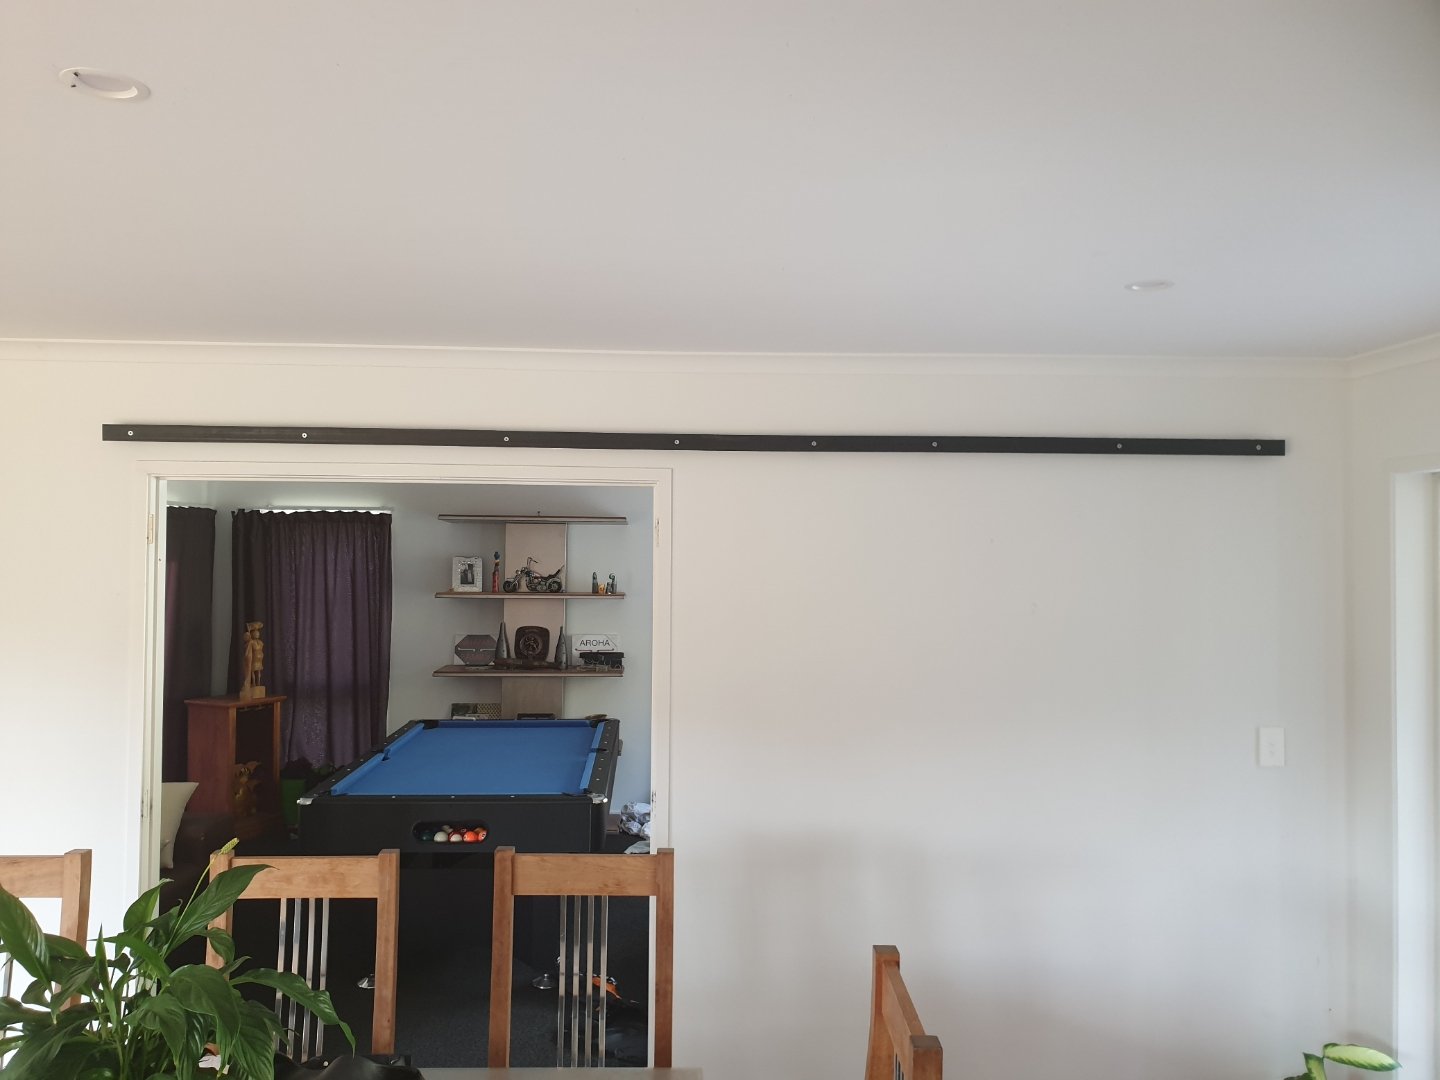
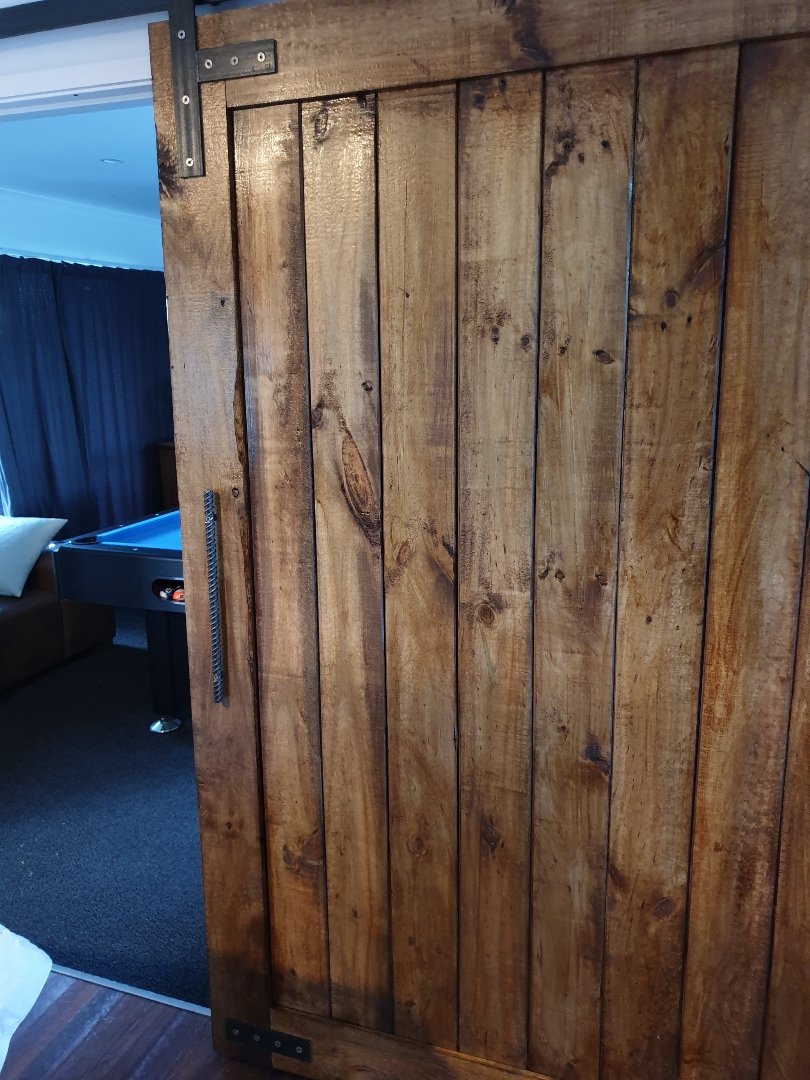
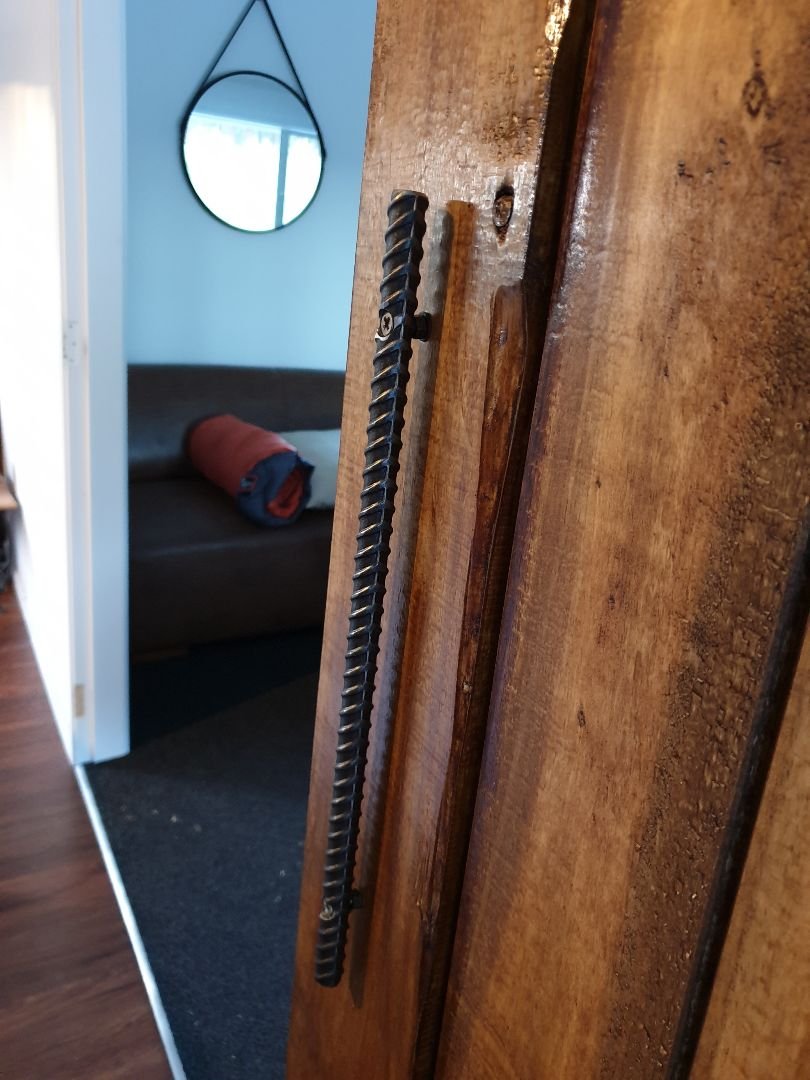
Love the e-kettle above...wicked! Finished the barn door today. Been a public holiday I totally forgot that shops aren't open. However this just made me have to come up with creative solutions, rather than buying ready made. So: Standoffs made. Then using the above standoffs I attached the rail to the wall. It's just 50x6mm flat bar. The same stuff I made the hangers out of. Then I used some left over parts from Pete's velobike. And machined in some recessed pockets to hold some leftover harley bearings. Then I had to make mini stub axles for the bearing to attach to the door hangers. And tadah!!!! It works!!! Added a big handle made of rebar. As they say "big door - big handle"... I've also added some stops, "so it doesn't go off the rails" and a floor guide for it to track on. Pretty happy with it.
1 point
-
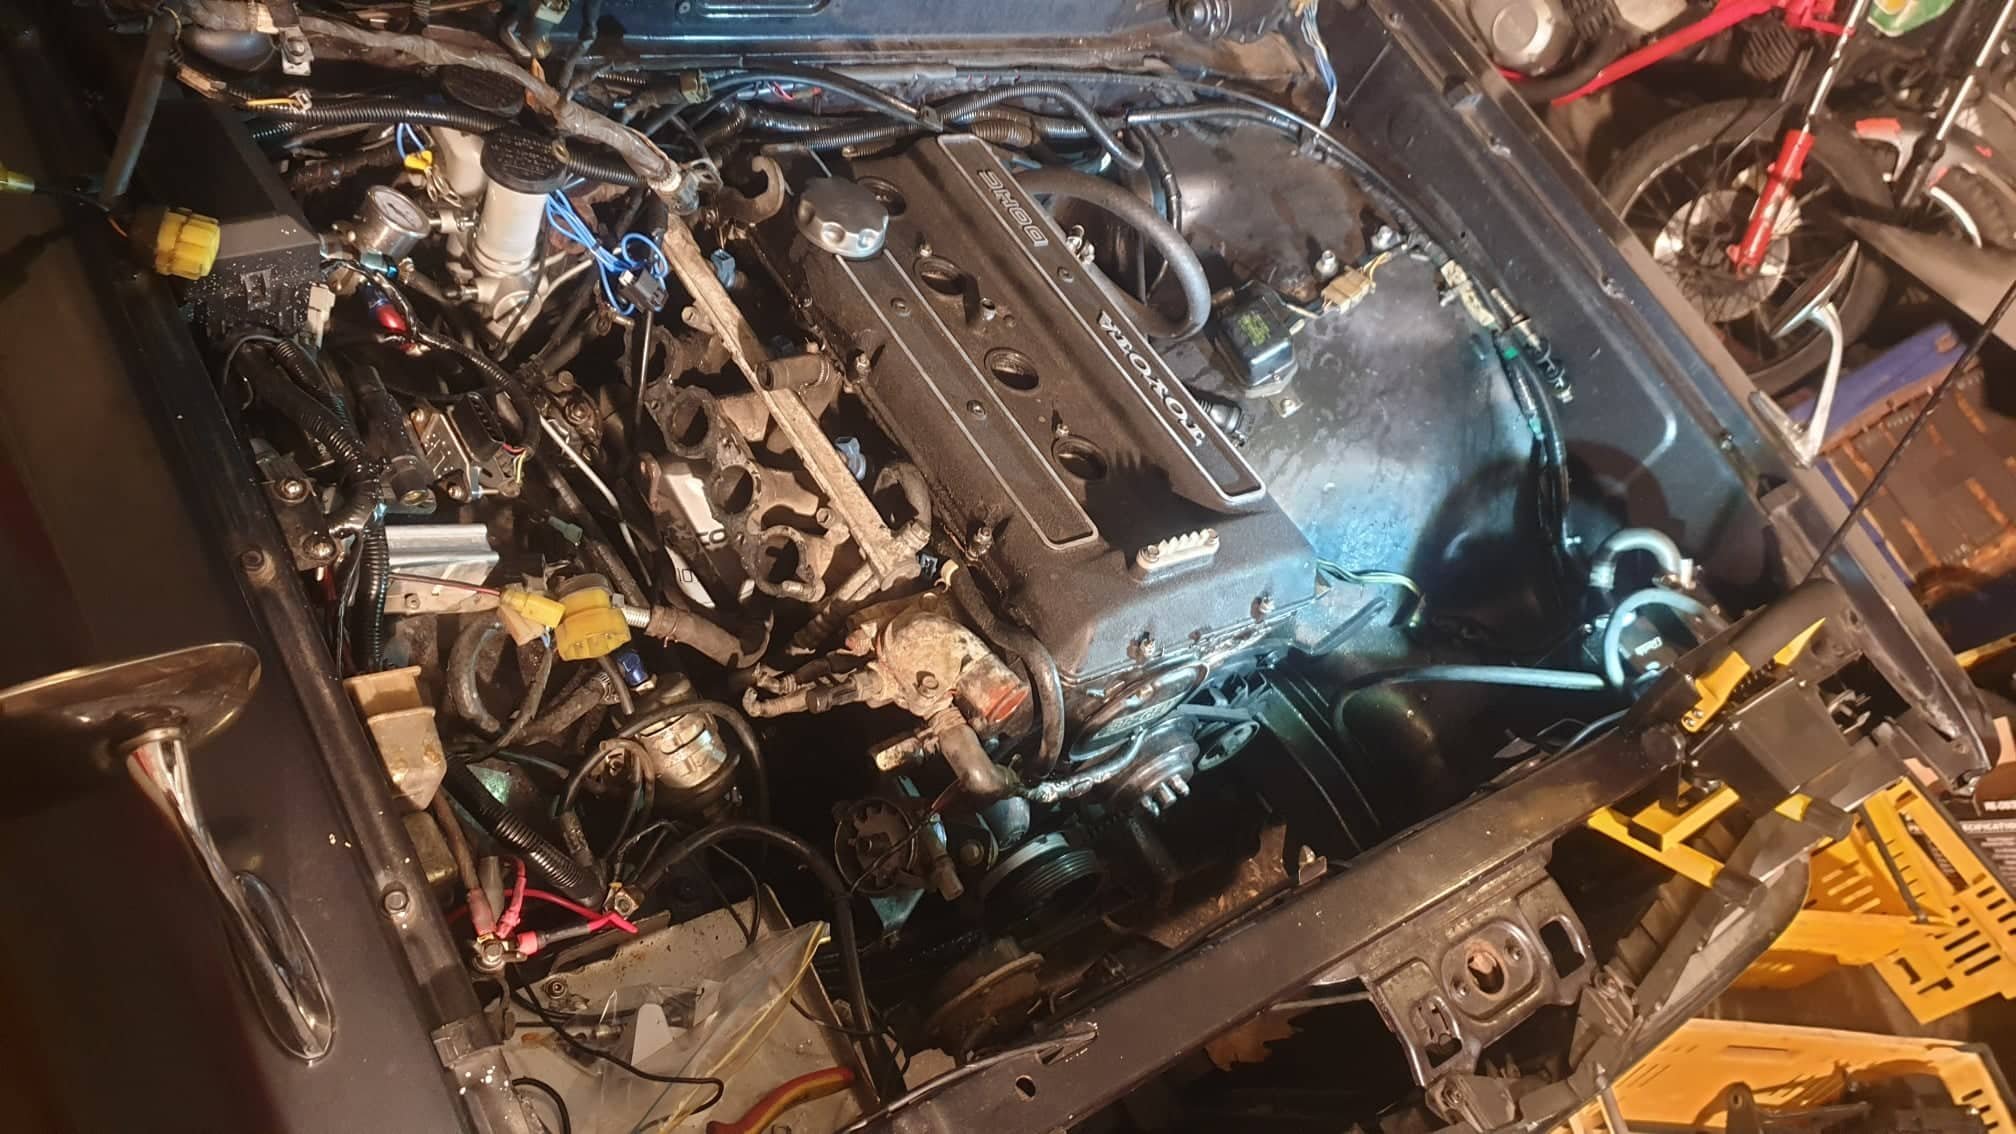
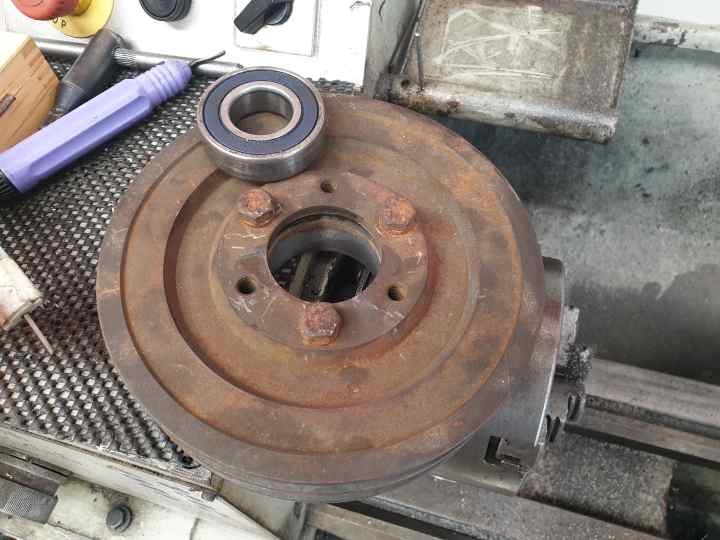
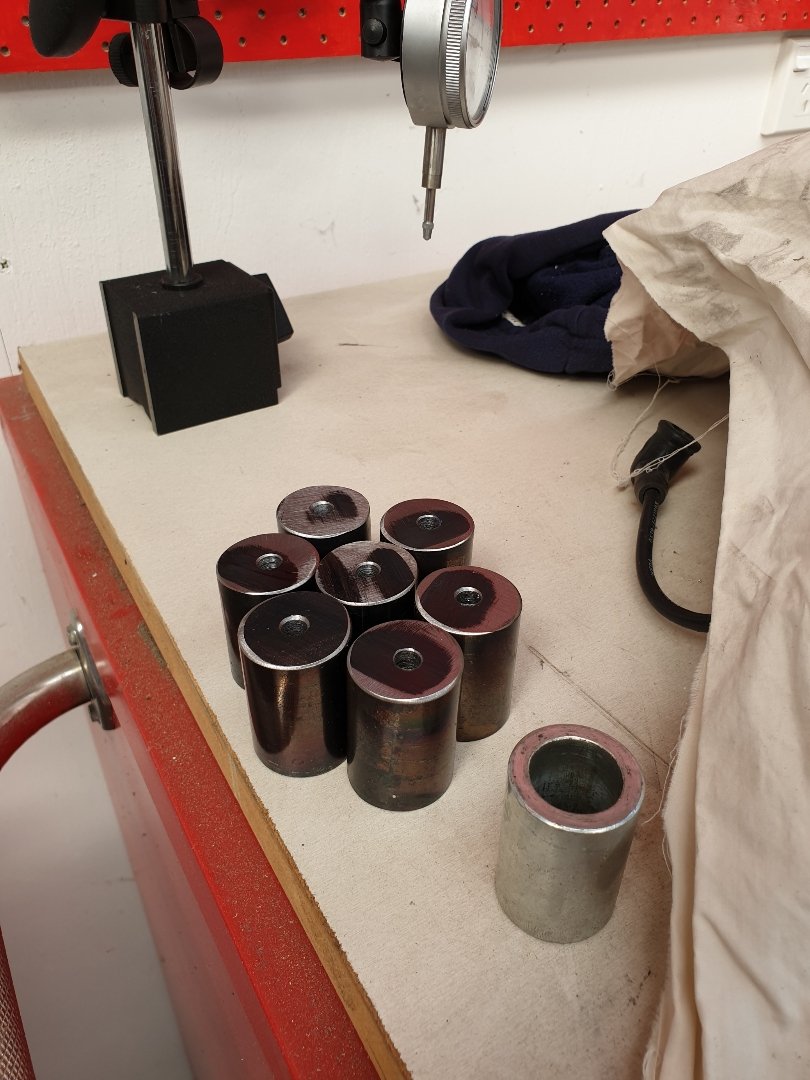
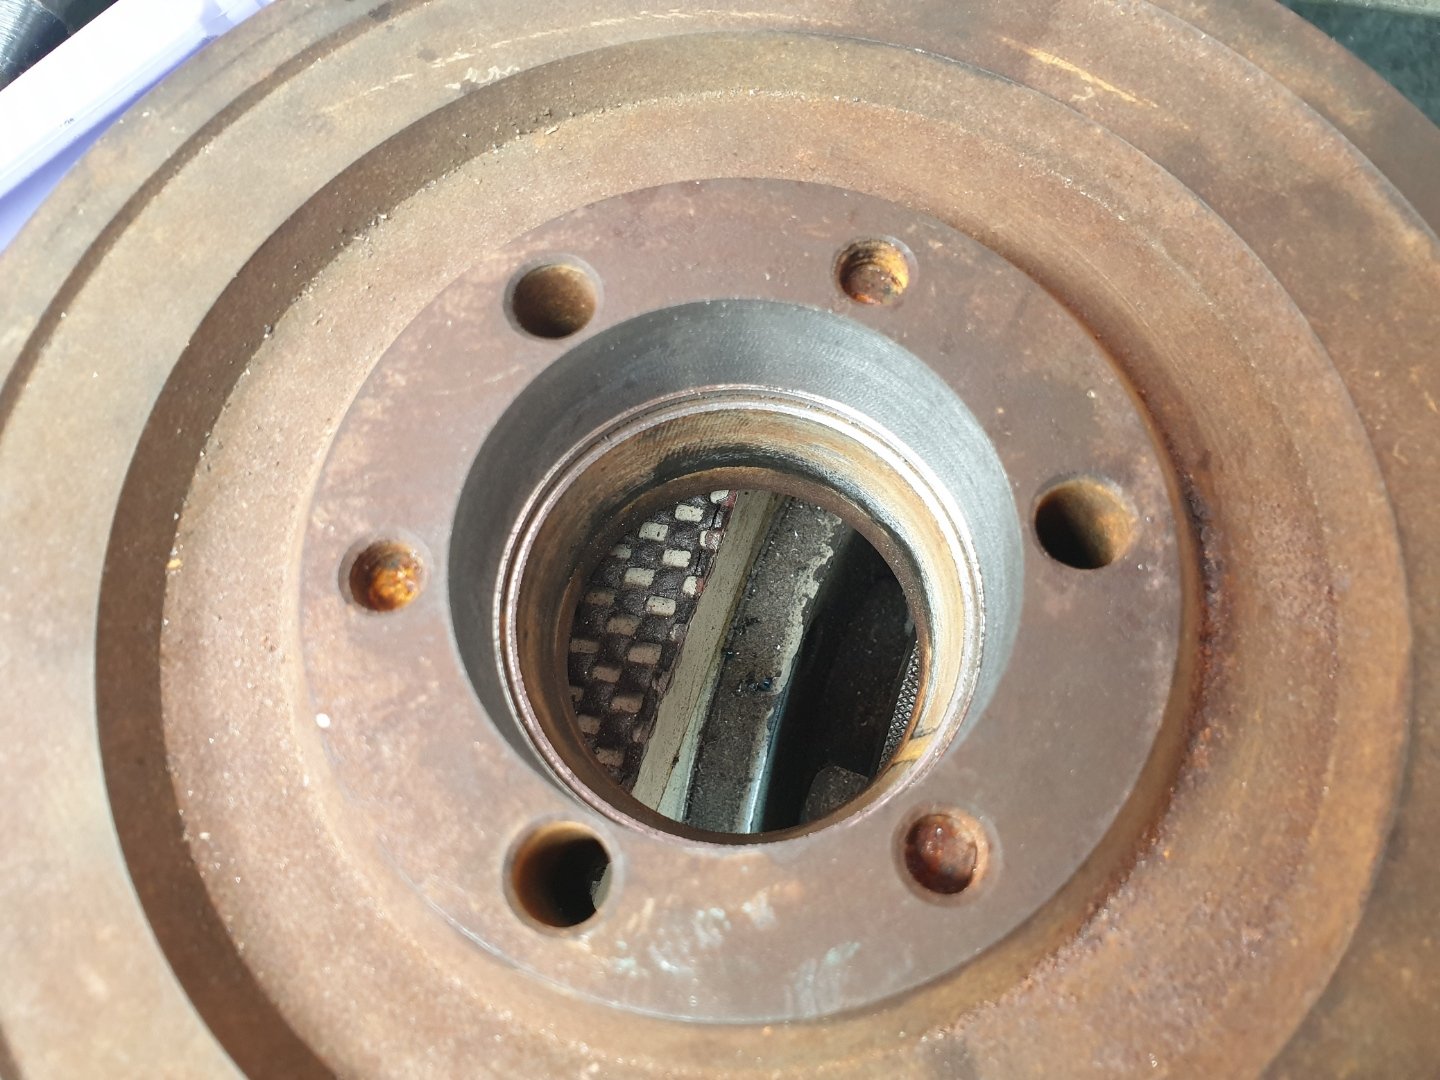
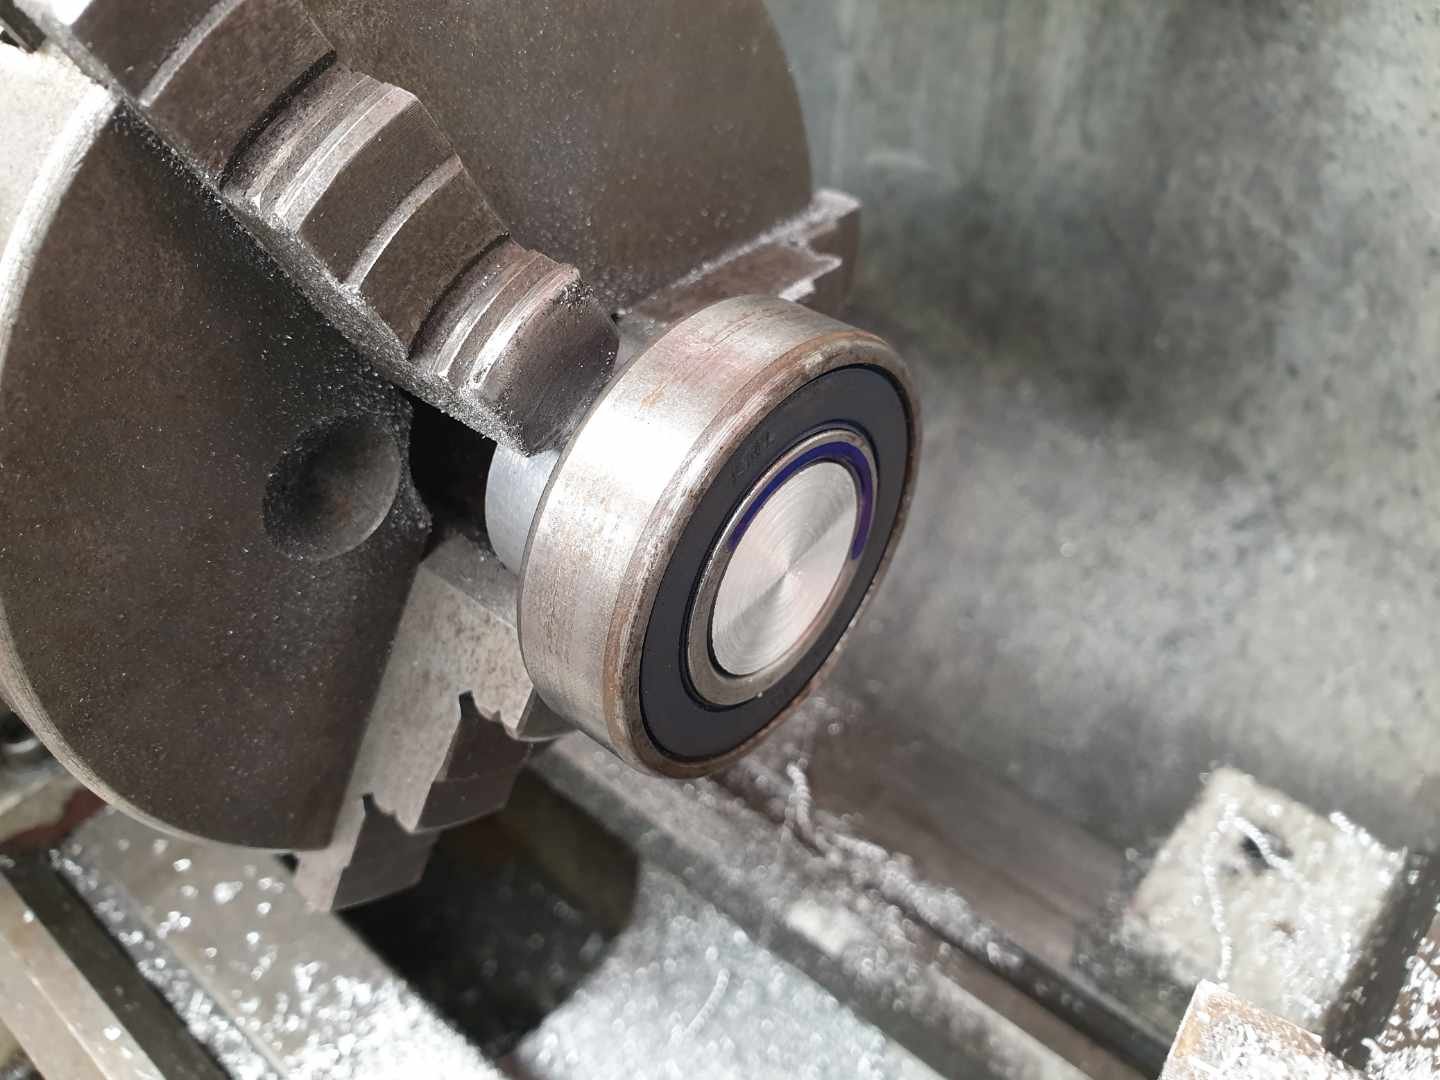
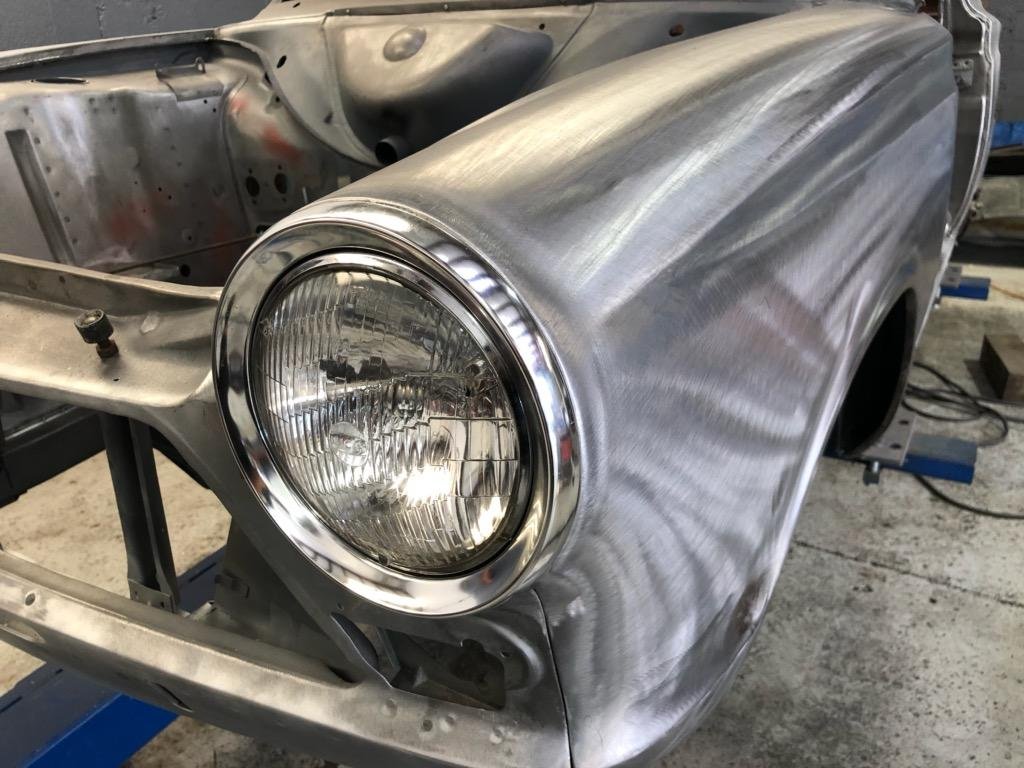
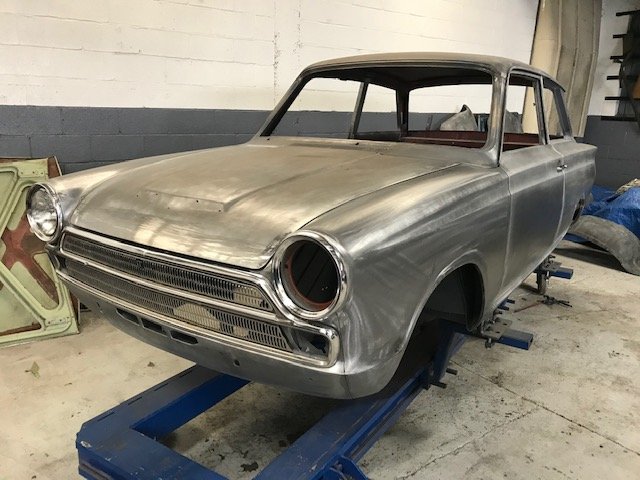
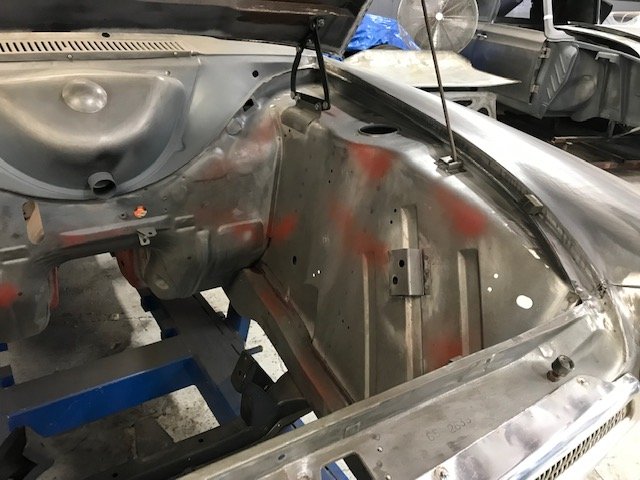
Its been a while since the last update but i have been chipping away at this project. I finished the weldathon on that bus and it was picked up the next day. The owner is really happy with my work and it turns out he has quite a collection of classics. He now wants to bring me some of the cars, including a mk1 mini cooper, for some rust work. Cool! While the bus was taking up space I had been sneaking in some work on the wee Imp. I fitted the engine up to the transaxle, weighing the engine first. 87kg with the flywheel in place. Not too bad at all. Not super light like the standard Imp all alloy unit however I have moved so much stuff to the front that it should still be well balanced. I do love the idea of an all alloy Nissan cg13 twink from a K11 Micra- however that would require a full re-certification. I prefer the idea of a Goldwing engine engine more! I digress. So anyway- I had slung the engine in place using a lump of timber and a ratchet strap. Worked fine. Then started making new engine mounts and cross member. I was not happy with the state or look of the old one and knew it could be far better. Not really a lot to say about making fabricating it all- the usual story of lining the engine up exactly central and building things to connect. I wanted to make sure that the exhaust manifold and starter could be easily removed without touching the cradle. I probably over built it with extra bracing (I even ended up adding extra gussets just before painting it, because ocd paranoia) but all up it still only weighed in at around 7-8kg. In photos. I didn't take many as work progressed on this bit really quickly.. Clearance under the car was still really good, considering how low the sump looks from the back. I think an optical illusion due to the rear panel not being in place. Then painted in black epoxy.. Next up was the exhaust. The manifold that came fitted was running really close to the drive shaft! Enough that it would contact when the car was lifted off the ground. There was quite a bit of damage, dents, poor welds and other bits that needed attention so I chopped it all back and carefully shortened the bottom pipes then systematically pieced it back together. I required quite a bit of forward thinking because the access to weld to pipes all the way round was really tight. No photos of work though as I was so immersed in the process I forgot to take some. Really happy with the result though. Fits perfectly, cleaner runs and still equal length (as if a Datsun A12 with a carb the size of a small cup would care. But hey, every little helps ) Later on I painted it and then wrapped the upper pipes to ward off heat from the inlet and coolant pipe. I know some dont like heat wrap but I think its great! Its worked well on my last several car builds. Luckily I live in a dry enough area to get away with it and not worry about potential corrosion. With that sorted I moved onto the rest of the system. I have always had a picture in my mind of what I wanted it to look like and I wanted it to be rear slung with a side exit to avoid the car filling with exhaust fumes. Apparantly these early Imps with the roof vents can suffer from fumes being pulled into the car by the vacuum. I also had a rough idea on how I would build my own silencer and there wasnt anything available that fitted my ideas with a price I liked. I had built one for the Mazda Rx3 and it worked well. Money is tight (I'm too tight..), time is plenty and I love making things so I started building. Using the pipe from the original straight through muffler.. Then fabricating my silencer using some ideas I nicked from Google along with extensive coffee fueled airflow thinking in my mind. I have no idea on what it will sound like but it was a fun process and looks neat. The stainless pads worked well in my last muffler along with some glass matting I got from the neighbour. I'll report back In photos... I had a pipe bent to 90 degrees and added mount points to the muffler so it slings up under the rear valance. I made a stainless heat shield to deflect heat away from paint and bottom pulley. You'll see that later. I have yet to decide on the length of the exhaust tip, cut it and then weld it on to finish. Then the inlet. Because the Datsun engine sits flat in this Imp, unlike the rear sloping angle in its usual Datsun 1200 home, the carb is not level. I chopped off the mounting face and milled the manifold at angle to suit. Then I welded it back in place. Carb is now level. I filled in an unused vac hole, cut off the extra unused lugs and gave the whole thing a clean up till it was nice and smooth. While I was playing with alloy I made a new alternator bracket... and had to rebuild a very corroded thermostat outlet. it was knackered... I was given a better spare by a nice fella with a Datsun 1200 ute but it pointed upwards. My outlet, most likely from a van, points down and suits the pipework routing I wanted to do. So I had to fix it. I found a suitable piece of alloy pipe on an old scooter handle I had rescued from the local scrap metal pile at the dump... Much better! Then onto the pipe work in the back... Just a case of sussing out a neat route to suit my tastes, remain easy to work on and remove and allowing for a potential Davies Craig electric water pump just in case the Datsun pump is not up to the task (and also because I do rather fancy the geekiness of the little display unit not to mention how much better it could work) With the pipes sorted I replaced the transaxle output seals because well, for $20 it made sense to do them now. I machined up a stepped tool to make sure they went in straight and to the correct depth. New seals.. Then mounted the brand new BMW couplings I bought from Rockauto. I had to make some spacers to suit as they are narrower then the stock Rotoflex couplings. With the car on the ground the driveshafts sit almost bang on parallel to the ground which is good for their longevity. I didn't fancy reusing the red Nolathane couplings that came with the race car because whilst strong in shear and rotation they didn't have much flex in and out which would impose quite large stress on the transaxle casing as the rear suspension went through its motion I felt. I then did some fun little jobs (but its all fun really..) like cleaning and painting the starter and alternator... I dug out my old art oil paints and mixed up a suitable orange to paint the inside of a very faded rear indicator lens. It'll do for now but I do look forward to locating and buying some better ones when I go to Blighty in July! Then began the wiring! Like all my other previous car projects, I enjoy this part immensely. I love the challenge of hiding as much of the wires away, re-configuring the circuits to suit add ons or just to make them better. In the case of the Imp, which has no fuses fitted at all (until the later mk3 Imps came along) this was an essential item to address. It also has a terrible dash wiring layout whereby you have to unplug everything to remove the instruments. Almost everything seems to run off just one piddly feed wire coming from the key. I'll sort that lot out with some plugs. Add in some relays for the lights, fan. Wires for a potential electric pump, sound system, high stop lamp (I have a neat idea floating about in my head for that) and making sure its future proof because later on I would like to inject this engine. I have also added in a tail to attach a trailer plug to. Because that will be a thing So I had two extra looms going spare which I pulled apart. I now had a large amount of extra wires for my project. Wiring isn't the most exciting thing to take photos of. I have now finished the engine bay wiring and I'm pretty happy with it. Now I've refitted the rear valance panel and exhaust and can lower the car down and start on the interior wiring. I'll be making a removable fuse box/relay unit and fit it under the dash if all goes well. Some photos of where I'm at now...log burner in use as the nights get colder. Sofa wheeled over to middle of workshop for max stereo imaging whilst I drink beer and play with wires... Wires hanging from engine bay.. Engine bay completed (missing hose clip noted..) but for an over flow tank from header tank to fit. I will build a better two part tank in the future I think. Exhaust tip length yet to be decided and cut. Note stainless heat shield. Bumper also to go back on, with bottom mounted rego plate.1 point
-
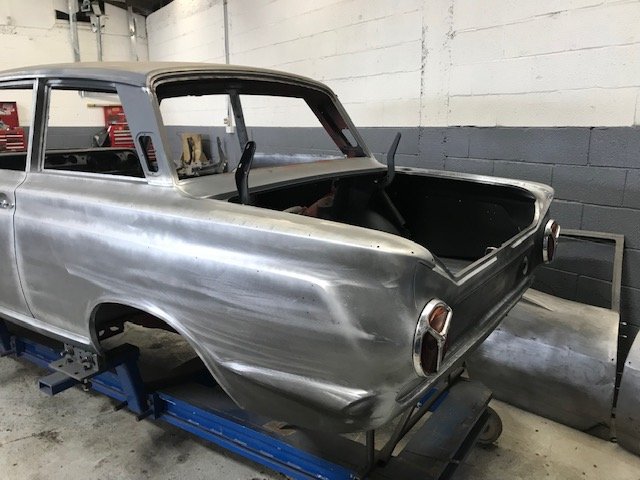
Drivers door complete and only the boot lid to go and body work finished. Still trial fitting parts etc and once done it is off for the final blast and prime then off to paint.
1 point
-
Certs booked - 6th of May. Are you meant to feel this nervous? it should be fine, its not a massive list of mods and its not making huge power. anxious and excited at the same time, this has been a long time coming. nearly 10 years of ownership, i initially bought this car as something to learn on.
1 point
-
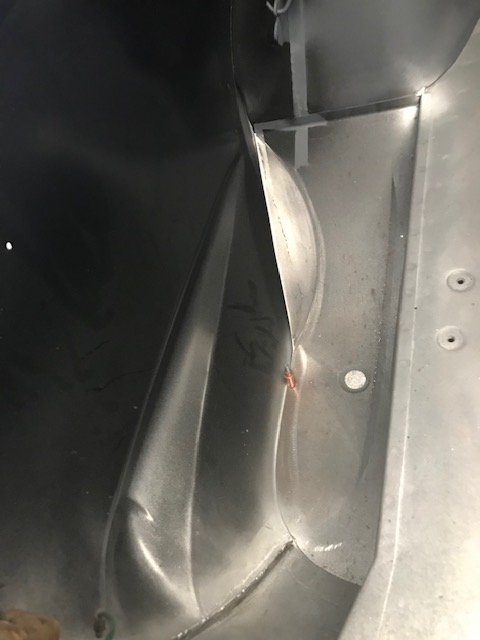
More progress with gapping the doors bonnet and boot. All welded back together again. Trial fitting allthe exterior body parts to check all good and also fitting the front and rear screens and rear quarter windows to check new rubbers all work.
1 point
-
Work has been continuing at pace on my large model car build as we both clean bits and piece it altogether. Its fun. Its taking far more time then I ever remember. I always forget about just how long these 'little jobs' take. Made longer because the car looks so clean and fresh so how can we possibly put dirty or crusty bits back on. I ordered some new 175/60 13 tyres last week. Of course the rims look yucky. Not a fan of all silver rims, especially Minilights. I have always planed to paint them to how I want them to look. Really make the rim dish stick out as much as possible. So my friendly local garage where I now get my tyres from popped the old tyres off, we took the rims home and I did this... Which was fun and quick. Very handy that the Viva shares the same 4" PCD. The rims ended up like this.. I then selected a colour from a book of swatches lent to me by the local paint shop. This process of selection took bloody ages! Just how many 'metallic greys' does the world really need?!!! Paint finally selected, bought and Hannah masked the rims very carefully (I tried to do one rim and gave up- I really have no patience for that). I threw some paint at the rims... Because Hannah had endured the boredom that is masking wheels she got the fun job of peeling off the tape.. They looked fantastic. I was very happy. So here is a sexy rim shot... then with tyres... But they cant go on the car just yet. Many jobs to do with the Imp back on the hoist. First off. Radiator pipe work. I had bought a length of stainless pipe a while back along with some 90 degree bends I could chop up. I measured, cut, tacked, checked, tigged and ended up with these... I blocked the ends up and filled them with water to double check them. Two little pin holes. Glad I checked. Whilst full I weighed one. 3.5kg. Not as heavy as I was expecting. Phew. I then fitted them up... Next step was the brakes. The front calipers and discs are from a ED Honda civic. I had never bothered to check that they were free when I removed them from the race car. Oh. Wish I had. Seized! Bugger. I managed to free the pistons with a bicycle track pump and sure enough the pistons were rooted as were the seals. I priced some up from several places. !!!!!!! Crikey. Rebuild seal kits were horribly expensive in NZ. I wanted to sort them out asap so didnt want to wait to get stuff from the states. So I tried an old place in chch I've used in the past who re-sleeves brakes in stainless. He sold me some seals cheap and I machined up new pistons from some stainless. Made quicker by the larger drills we got from my uncle with the lathe... Front brakes all sorted. While I was there I machined up some nice spacers for the caliper mounts rather then the stack of odd washers that had been doing the job. I also added back in the missing flexible line tabs I'd forgotten to do whilst rebuiding the shell.. I then re-fitted the rear brakes, after having unstuck, cleaned out and reassembled the wheel cylinders which luckily appeared new, as do the shoes and the drums! Then onto the master cylinder. That lovely one from Russia with love. It fits so well into the imp pedal box but I needed to make a push rod, something to secure pushrod in place and a pushrod yoke. All really fun little jobs at the bench. It came up well and fits in nice. Fitted it in place and made all new brake lines and clutch line. Re-used the old 8mm fuel line from the race car but neatly this time. Ideal for future power upgrade... Clutch line was copper, left over from the Rx3 in the UK. Fine for clutch lines but not for brake lines in NZ, which have to be steel. I've made the pipes long enough to swap positions on the master depending on whether it has biased springs inside. Time will tell on that. Added new tubing from the, nicely cleaned and fitted by Hannah, fluid reservoir... While I was in there I had also found an ideal piece of stainless mesh left over from our compost toilet build. Perfect size to fit in here neatly... The steering rack boot had a small split and was leaking like a proper British car does- all over the floor. I was getting bored with placing bits of carboard everywhere I moved the car but I cant afford a new boot plus shipping so instead, as per some advice from a fellow local Imper friend I added some grease nipples. Much better then oil puddles everywhere and no protection within the rack!... Fitted a new universal on one of the driveshafts to replace a knackered one. New one has a grease nipple. Yay for IMProvements We both worked together on the door cards, a job we had been putting off. Glued some new felt on to the new hardboard and then glued on the sweet looking red and black vinyl, which had come with the car from Christchurch. They'll look great against the blue... This afternoon Hannah cleaned up the Datsun engine, masked it up and I sprayed it with Black epoxy (Resene Durapox). I had also cleaned up the rocker cover and fuel tank for the same paint. The rocker cover will get some nice blue next... And that is all for now folks. I was really hoping to have the car on the road for a classic car show next weekend but there are still so many jobs to do. Wiring, put the transaxle back together with its new bearings, make a new improved, tidier engine crossmember, plumb in the engine. However it was great to have a date to aim for and we are both really excited about getting it on the road before Hannah's brother comes to visit in a few weeks time. So I'll just keep cracking on with it (in between the paid work we have building up that is..)1 point
-
Shit yeah, it's like a strawberries and cream theme from the 80's. They knew their market. Doesn't quite smell that pleasant though.1 point
-
You'll require some form of synchronous timing belt for that, with the correct tension too of course1 point
-
Well this is a rather proud post from me, and ive held it back a few weeks while i tidy some stuff up enough to make a video. I can officially state that i own a supercharged corona, the motor is up and running, and running great! with the only thing really going wrong being my maths skills, ive fucked up the pully ratio and not making the amount of boost i want but thats an easy fix, and for now its nice to tune on a really safe boost level. Heres a lame video of some of the more dorty bits of a tuning run i did this evening. i still need to make a post about some of the smaller details. such as the bizzare way i made mrmk1s water pump pulley work for me, and the tensioner pulley grunter so kindly made for me. ill do that at some point. but for now im over the moon about how well my car is running, plenty of tuning to go including winding some more boost into it, which will also net that signiture whine!! but before i do that ive decided ill tear the pistons out and open up the ring gaps, as that is the single thing that bugs me, and ill be so gutted if the engine fails because i didnt take the time to sus it. ive wanted a supercharged car ever since i saw one at the dirt track speedway when i was a kid.
1 point


.jpeg.9a37bc131bbda1b309ba67c93d0194c0.jpeg)


This leaderboard is set to Auckland/GMT+12:00