
Leaderboard


Popular Content
Showing content with the highest reputation on 04/12/19 in all areas
-
Certs booked - 6th of May. Are you meant to feel this nervous? it should be fine, its not a massive list of mods and its not making huge power. anxious and excited at the same time, this has been a long time coming. nearly 10 years of ownership, i initially bought this car as something to learn on.
 5 points
 -
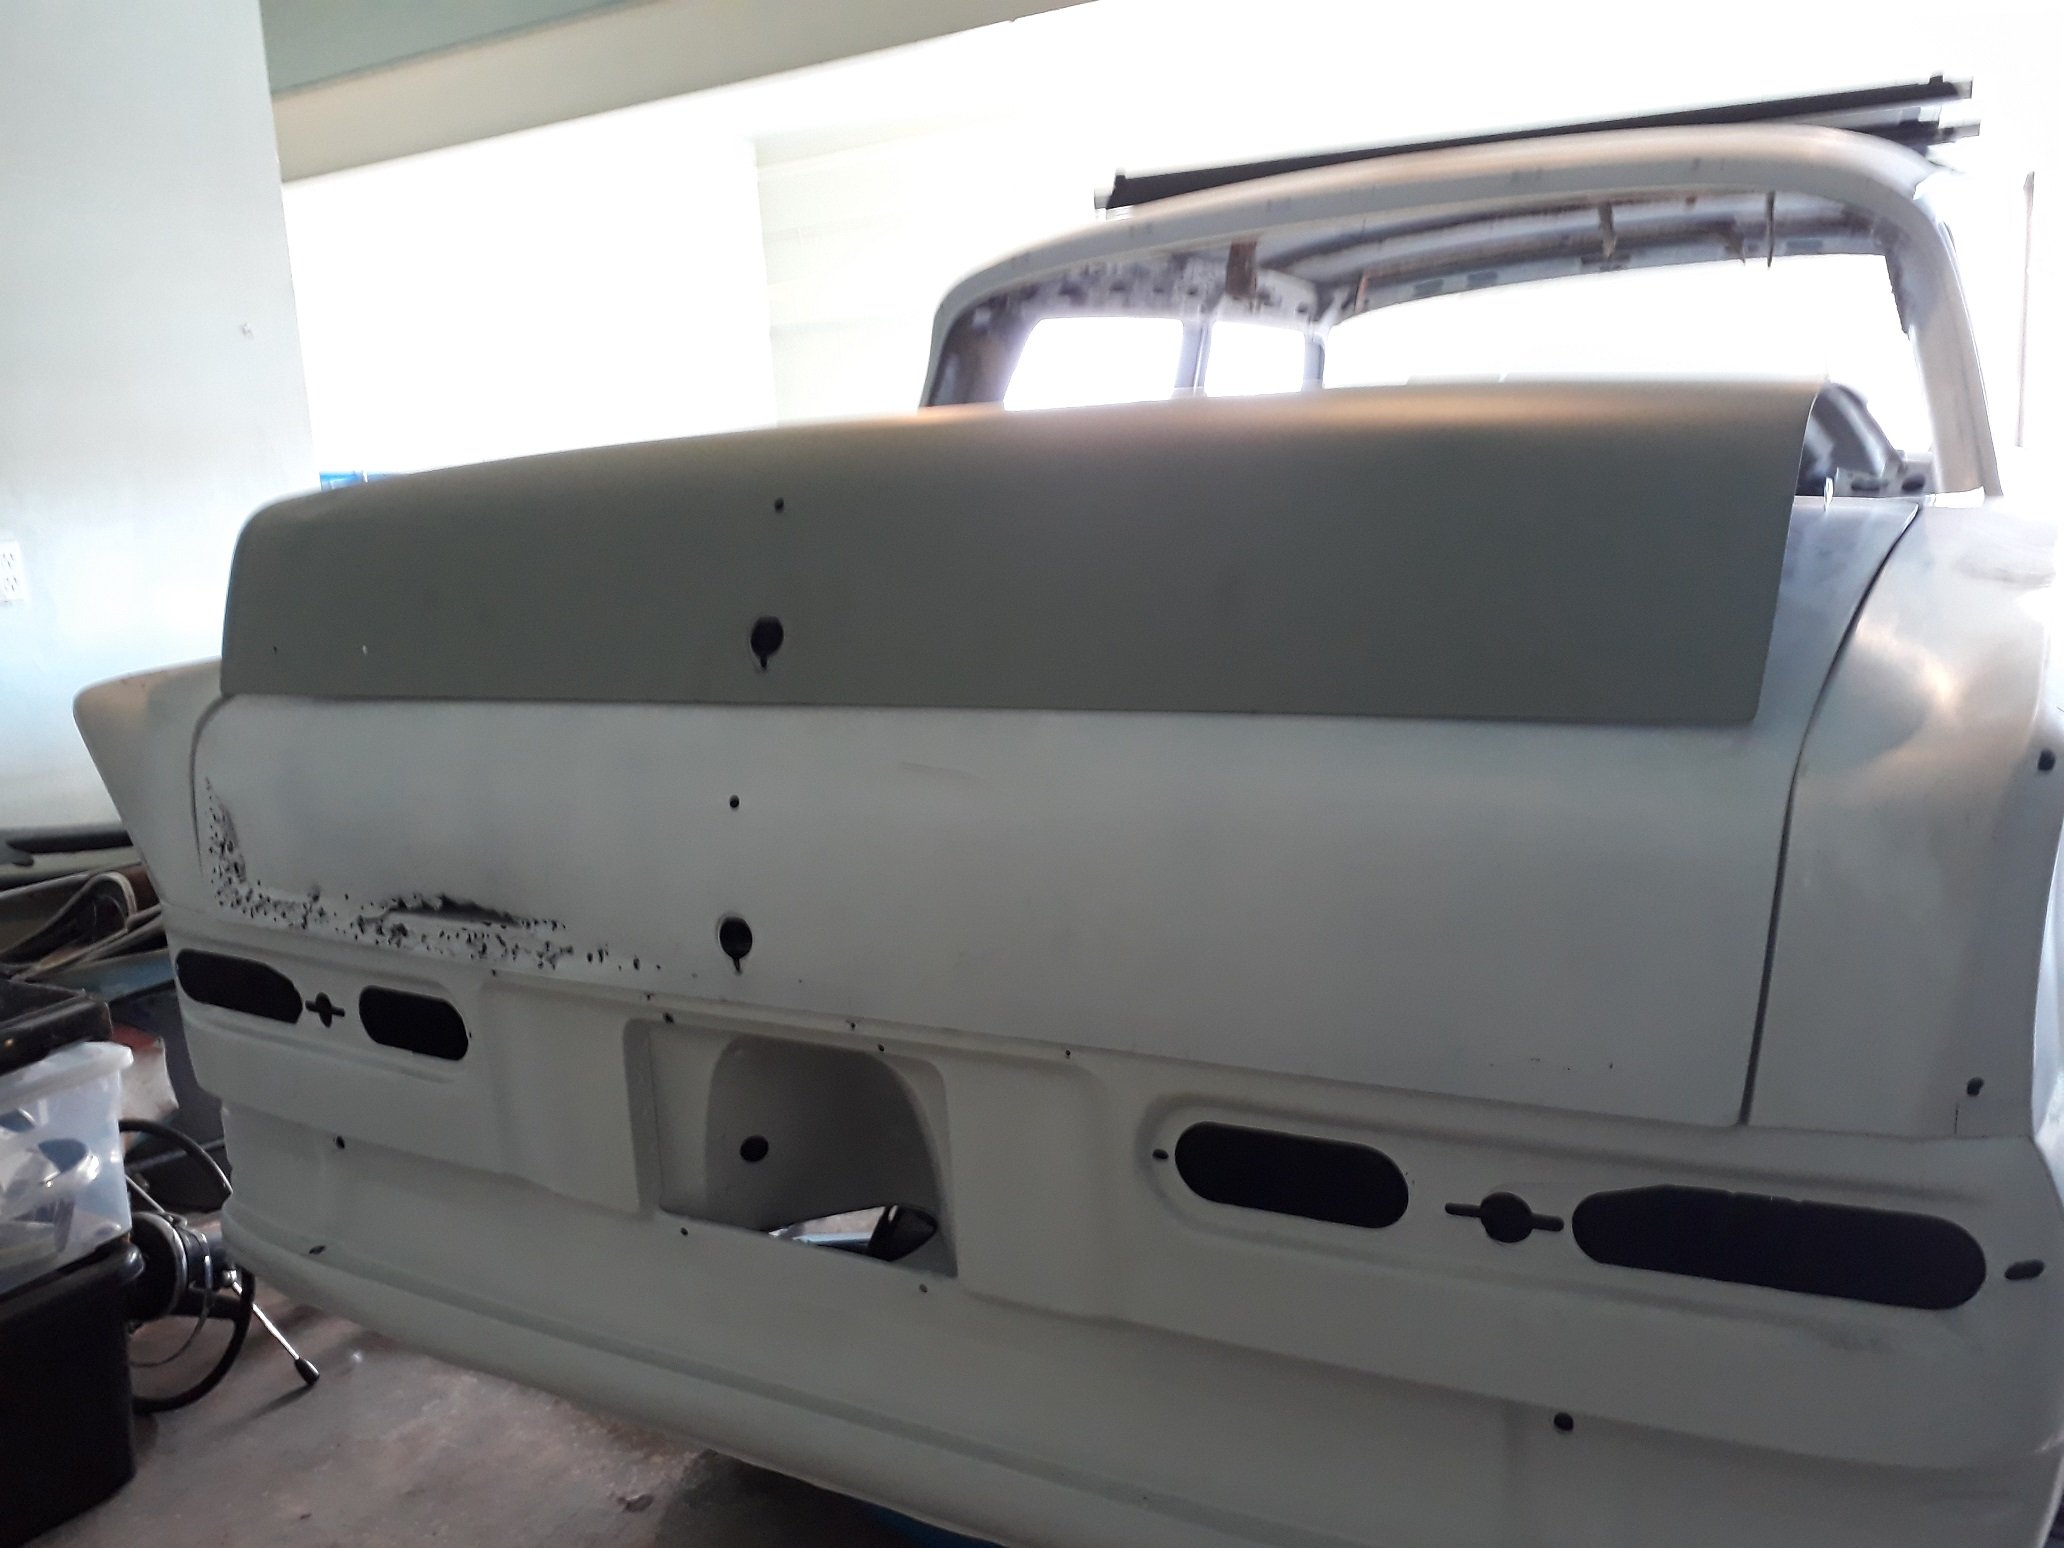
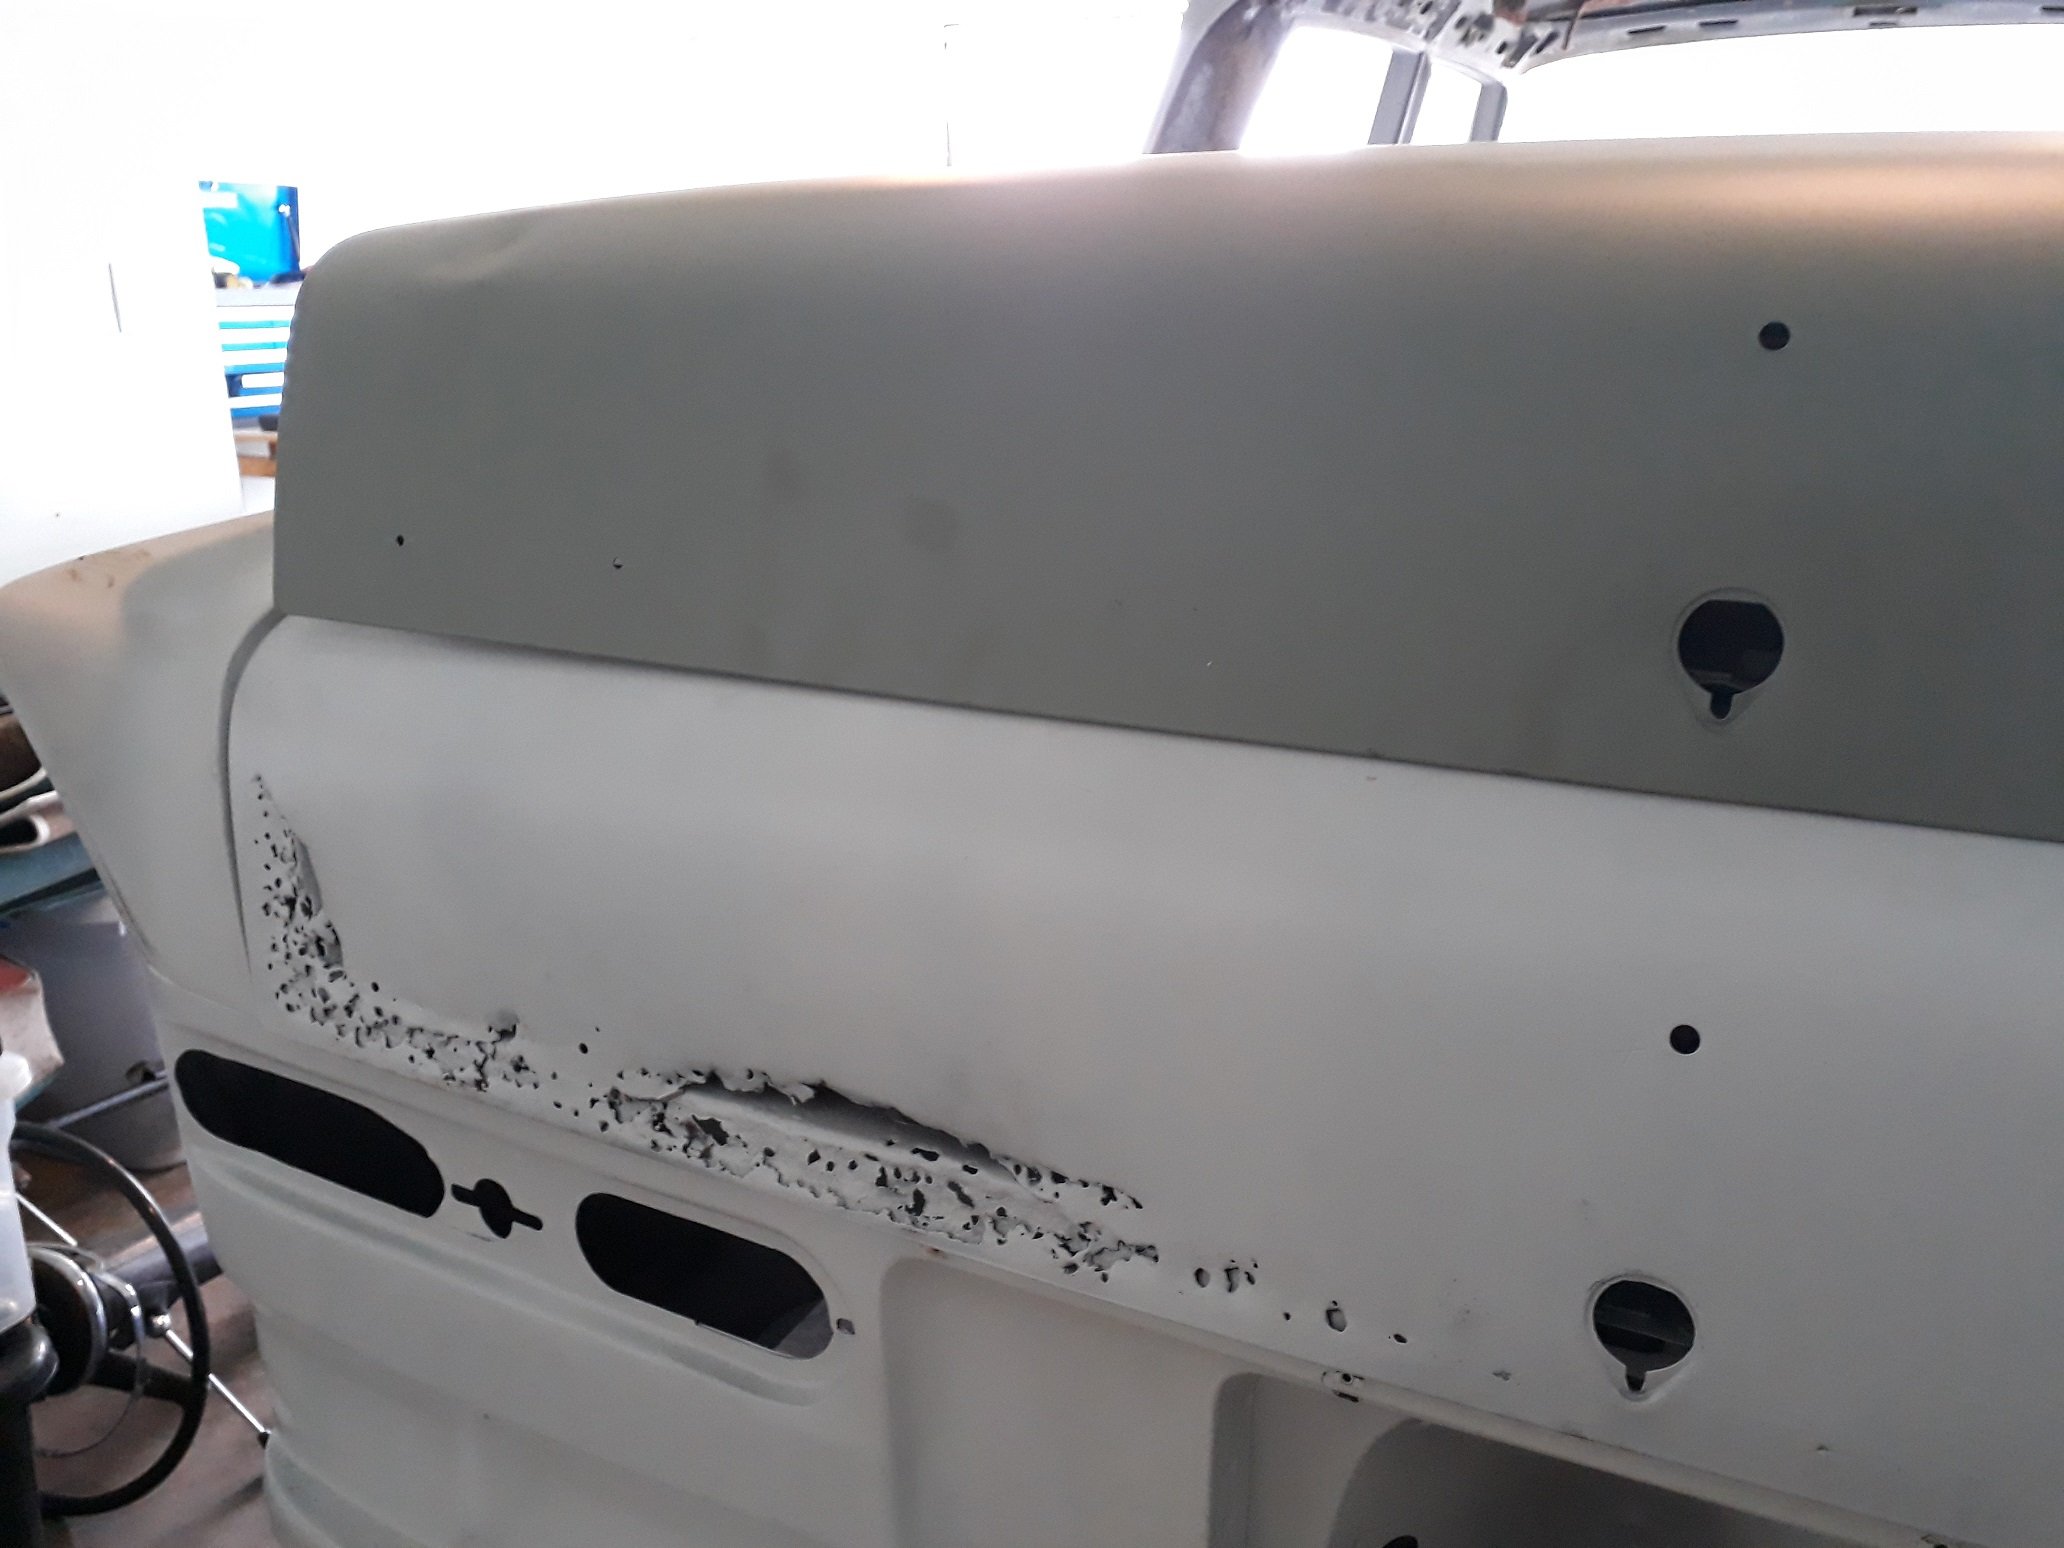
Looks like i-force has pooped itself and all my images are gone. Bummer. Anyway, drove out of the garage for the first time in who knows how long to give it a bit of a rinse and rearrange the garage. Got a real ratrod vibe going on here. Out and about 1 by Thomas Addison, on Flickr Out and about 2 by Thomas Addison, on Flickr Pretty much done with stripping now, just finishing up the underside of the bonnet. This is the first thing I will paint, get some practice in with the paint gun on a big area that doesn't matter much. I've also been buying things. Found a single NOS fender mirror. These are usually astronomically priced for a pair, on the rare occasion they turn up at all. This one was surprisingly cheap and is super mint. There's one slight scuff on the side which I think will probably polish off completely. Nice. NOS mirror by Thomas Addison, on Flickr Got a cool gear knob to match my kitty cat headlights. Gear stick by Thomas Addison, on Flickr And lastly some 70s galant hubcaps. Really tidy and shiney. One has some curb scuffage, but no big deal. They came up on TM pretty cheap and I thought they make for another nice nanna spec wheel option. My current thinking is to have these, widen some steel wheels with the little centre caps and trim rings I have now and get a set of 14 inch japanese, period appropriate mags, as wide as poss without flaring the guards hubcaps by Thomas Addison, on Flickr3 points
-
Is there a thread Barry can’t infect with his high spring attitude?2 points
-
(too harsh?)2 points
-
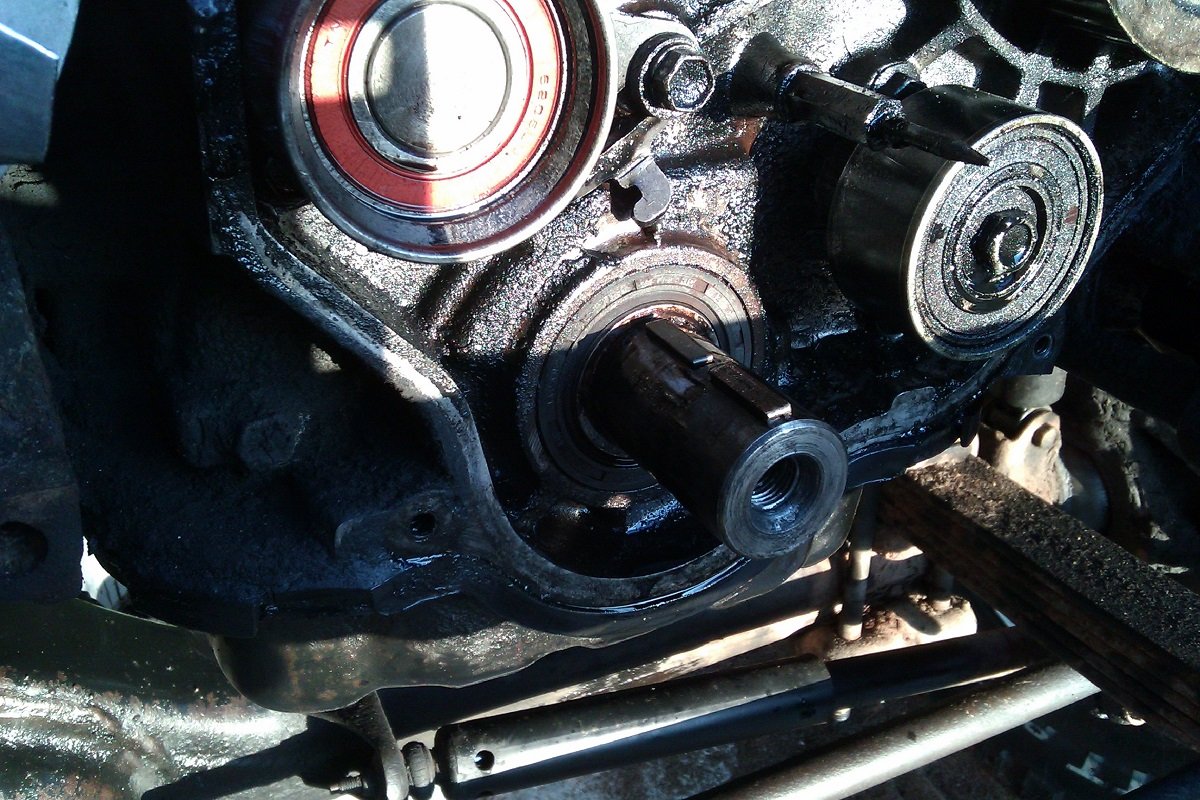
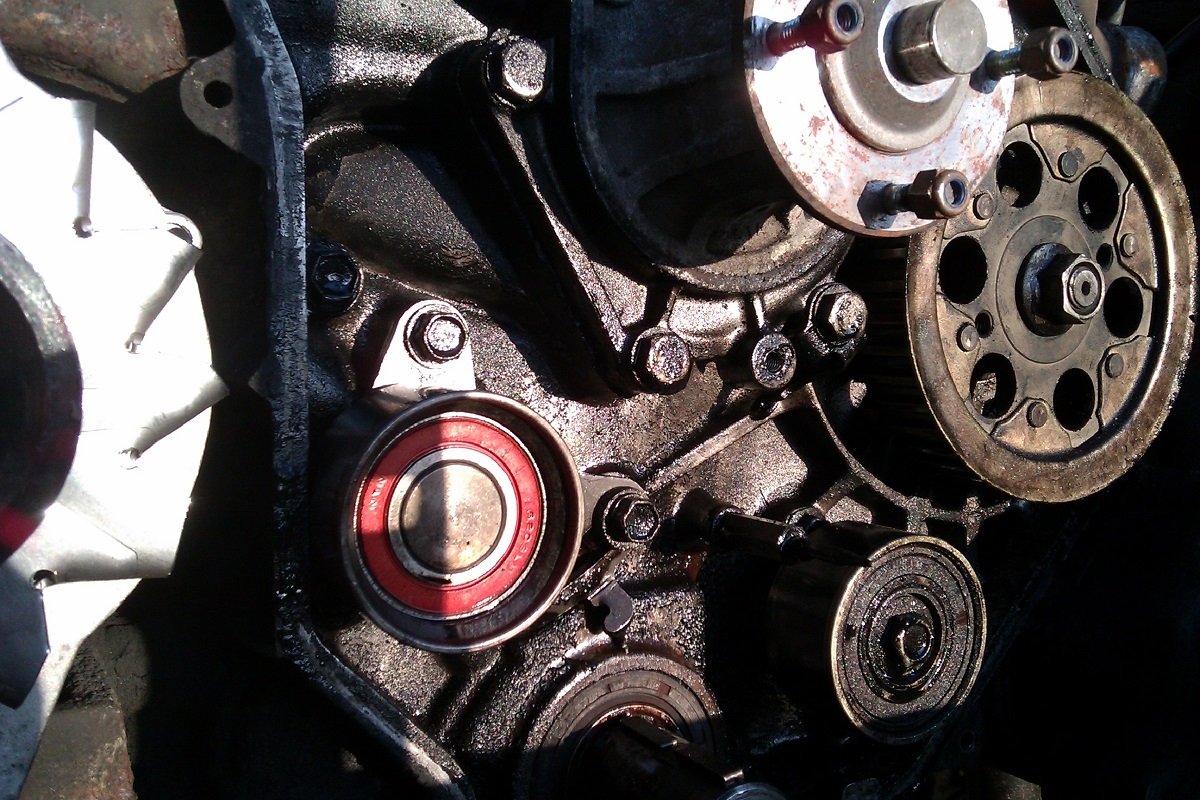
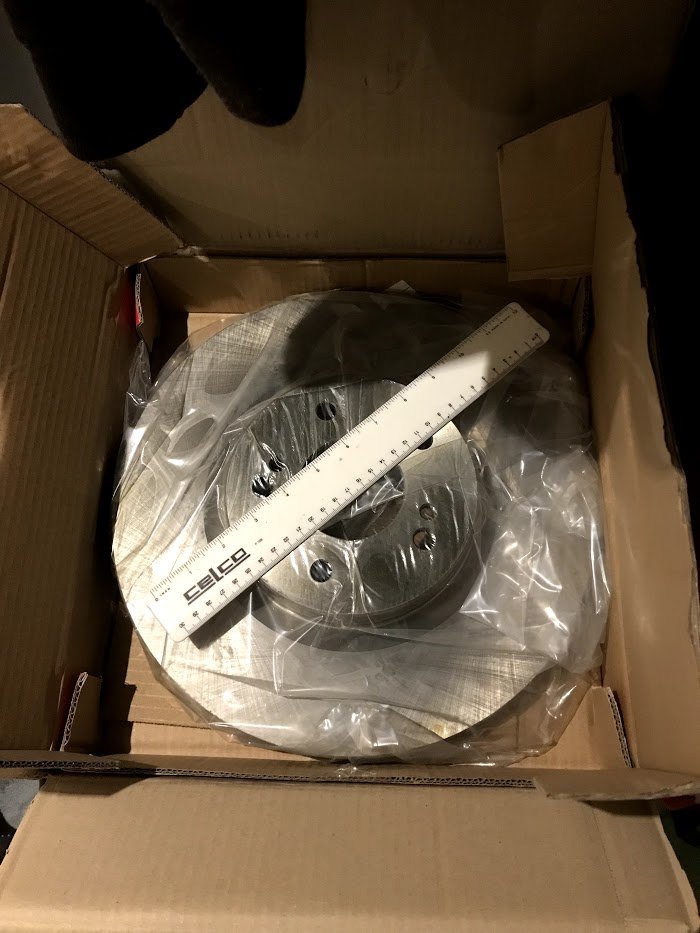
So things didn't exactly go to plan with Cert. Long story short, the rules have changed around suspension. To pass with the Cressida struts and custom knuckles the car would have to pass a bump steer swing check. After failing twice I made the call to switch back to Ae86 front struts and OEM knuckles. Pulled the trigger on some Wilwood front brakes too. So finally after a couple of months of fluffing about the car is finally legal! It looks like iforce hosting has died so I'll go back and update all my photos at some stage. Anyway time to go smash some doorts to celebrate.
2 points
-
i gave the center console a tidy up and a coat of paint. 2019-04-07_11-14-14 by sheepers, on Flickr then i climbed into the boot and started prepping it for paint. managed to get it ready without to much back pain so i decided to try and paint it. 2019-04-07_11-14-36 by sheepers, on Flickr came out really good so now i can put some seam sealer in the gaps and sand it all up ready for some colour.2 points
-
In the amount of time you've spent fucking about talking about trigger wheels you'd have cut and filed one out by now. Honestly--it's not a rocket science job. Tools you'll need. Vice, Hacksaw, File.2 points
-
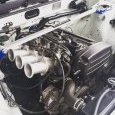
I got this off Zac a few years ago, it's been sitting in storage but I'm getting the bits together so I can assemble it then it'll get sold. I bought some 0.5mm oversize NA (9:1) pistons and bearings from Rockauto. The block was bored by North Canterbury Engine Reconditioners to suit the pistons, he also decked the block and polished the crank for me. I'm converting an Evo 3 head to use the cam and crank trigger setups that some of the other 4G63s ran, I bought new sensors also from Rockauto. I've welded up the injector holes on an Evo 4 inlet manifold so I can use it with the Evo 3 head and have the throttle body facing the correct way. Still need to get lots of other bits, oil pump, sump, turbo and manifold, flywheel and clutch etc etc.1 point
-
That ebay link you sent is UK so it'll do fine thanks.1 point
-
Any of the L-series pumps should work. Could ensure it's for a 6 for extra safety factor but meh. L20A, L24, L26 & L28 should all work both fine and or dandy. eg .https://www.ebay.ie/itm/Water-Pump-fits-NISSAN-LAUREL-JC31-2-0-81-to-84-L20A-Coolant-ADL-21010P7528-New-/3323021784081 point
-
Why are you always such a cunt?1 point
-
There is a preference for cast impellors vs pressed steel, dunno how if there is any difference across the range1 point
-
I've always wondered with the Plug n play ECUs: if you just cut the engine plugs off the loom, could you use them on any engine? Like, take a plugin S15 Link, and use it to run a 4AGE? Other than the connectors, are they actually different?1 point
-
Yellow will pop through the laser cut trd red bash plate Trd autocorrected to turd. So you could get that laser cut in too I guess1 point
-
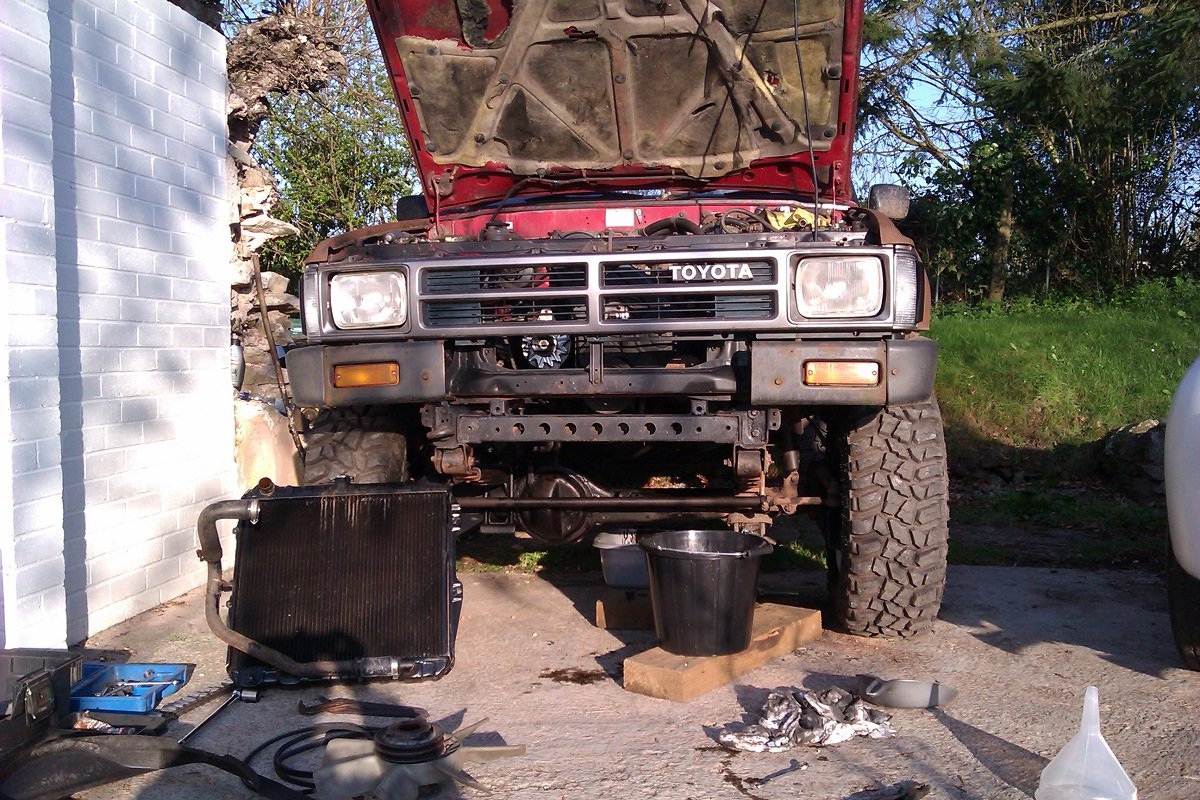
Hey Fred. Hilux has been mostly fine, various bits fitted to make life easier. New window mechanisms, door locks, rad cap, etc. Noticed a few drips of oil on the drive one day. Next day, full Amoco Cadiz spec under there. I dunno, you leave a truck in a field for 10 years.... To be fair I should have put a new crank seal in when I had it apart in the winter, but I was cold and it didn't look too bad. That, and the sump was held on with good luck & optimism. Pics... I thought I'd already done this once. I like to change my cambelt every 1100 miles, better safe than sorry.... Gonna do the sump gasket too, it'll give me a chance to clean the pick up mesh and see if there are any spare parts in the bottom of the sump. Big question is, what colour do I paint the sump while it's off ? Fancying red. Or maybe yellow.
1 point
-
I don't see much point in an axle running over the top so it can't be loaded with stuff in the middle. I've seen trailers with those flexi arm rubber square duratorque things. They have a pricetag though and i don't think they are adjustable. Best i've seen was a trailer with airbags. It was for loading things but, you know...1 point
-
Don't they throw rocks at oncoming cars? Certainly seems like the next thing to be cracked down on.1 point
-
I searched this one for a long time with the quad cam engine. Very hard but it is doable to keep the engines under the deck lid in the quad cam. The physical size difference is huge. And... they get hard to lower because they have sumps. Hope you do it but.1 point
-
the engine weight is more of an issue than hp, so a beetle probably wouldn't need the spindles upgraded for an engine swap, where the engine is in the back draglites/prostars are ok1 point
-
Well they are definitely big óle dinner plates
1 point
-
Slam trailers like that are what will end up causing trailers to require certification.1 point
-
Been having tons of adventures in the wagon. Won a few more awards. Best 8 Cylinder at 4 and rotary jamboree And my favourite, the "What the ?" award from the Automania festival. Pretty much sums up the wagon You put a V8 in what??? So, back to my adventures and what not. I decided on the spark plug cover look I liked the most so I went with just the plain black covers. It worked quite well because I had heaps more people asking what the engine is, so I guess it fools them just enough without the V8 FOUR CAM 32 badge on it Before my trips I figured I would find a new brake pedal pad, I found it a hoot that it is a dodge truck part! Looking sweet, I will have to get another for the clutch at some stage, they are both the same pad So with the engine sorted and the brake pedal sussed I went for a cruise down to feilding for the 4 and rotary jamboree. I stayed at a sweet little B&B just outside of town. Got to Manfeild on Saturday for the track day, super excited because it is the only track in NZ that I haven't done a track day on, so I can tick every track in NZ off my bucket list now. Got out on track then on the first lap disaster stuck!!! The track had been used for field days the weekend before so it was super dirty, and the car in front of my chucked up a rock, smashing my windscreen!!! I drove the rest of the lap with my hazards on and my head out the window. When I got back to the pits I gave my friend Jared (A.K.A @JoKer) a ring and got him to bring me a spare windscreen over from Dannevirke. While he was making his way over I drove down to the local glass place and got them to swap the windscreen over. I got some funny looks cruising down the main road of feilding with a busted windscreen in a V8 Avenger, it was only about 1km from the track so I just drove with my head out the windows. Made it back to the track with the new windscreen just in time for the afternoon session. As a thank you, I took Jared for a cruise around the track. It was quite a blast My favourite picture of the wagon out on the track Out on the track I had a bit of a lean backfire off throttle so I pulled the car off the track early and set it up in the show and shine, After the show and shine I found the problem was the idle adjustment screws on the back right pair of throttle bodies had vibrated up so those throttle bodies weren't closing fully, fixed it in the car park. On the way back home I stopped in at Horopito, AKA Smash Palace to get me some wagon parts. They have a few Avengers there, 2 wagons and 4 or 5 saloons. Got me a good haul of parts, got some rear bumper brackets to replace the ones I had to borrow from the 75 Avenger when I swapped to the NOS Hillman bumper on the wagon. Got me a tow bar because there is nothing cooler than a V8 Avenger wagon towing stuff, am I right?? And also a pedal box for a friend, and a new door card. Got back home and gave the bumper brackets a good sand blast Then painted them with black zinc paint The next weekend I went off to @Ned house warming down in Taupo, So I figured I would camp out in the wagon on his front lawn. I am really digging the wagon for camping. The bed mode is really comfy, so I think I might do that more often rather than staying at hotels. On the way back up I meet up with the Hillman Humber club and we did a run out to a truck museum. Pretty good turn out. We had 3 Avengers there!! Then the weekend after that I had the Automania festival!! I entered my wagon in the indoor show. I figured I should actually get a photo with the bonnet down as 99% of the time it will have it's bonnet up, because V8! I went with a nice little in car display of some of my old Avenger sales brochures. I especially like the one on the back of the drivers seat because it has all the original prices hand written and a dealers stamp on the front, it must have been kept all these years by someone who was thinking of buying one, it's either 1979 or 1980 so it's from the exact era of my wagon, and even has the van pricing on it, and that you only needed 30% deposit, rather than the 60% deposit you needed for a normal car or wagon. I also entered my 1975 Avenger in the outdoor show. It was raining all day so my poor little Avenger Panther felt very unloved while it's younger brother sat warm and dry inside (Can you tell I have a favourite child at the moment?)1 point
-
So last Saturday i headed out to the v-dub shoppe to make a start on my engine. Paul was kind enough to work late and help me out. This is my engine and everything that is ment to go with it. inc the two boxes on the floor. I get all the bitch type jobs, clean this, clean that, and yeah clean that as well. so start with cleaning the crank. a little scotch in the cleaning tub and then we rinse it off with hot water. want to know why we use hot water? well hot water evaporates and doesn't leave any residue and wont rust. unlike cold water. now that that's done onto the casing. his has been machined out to fit the larger barrels and pistons to make it a 1776 so yeah lets crack it open see how many peaces of raw material i can find. oh hello. this stuff has gone everywhere. see if you can spot the peace tucked away here. that little peace of silver on the oil pick up is what you are looking for, well now that they are all cleaned up out side to wash these down with cold water. cause these are not steel and they wont rust away. hey presto we looking good now. 1st things 1st. dizzy gear in. i didn't snap a photo of this but here is one off the net. with that lubed up and in place the dizzy goes in over top. while i was putting that in Paul was putting the bearings in and making sure they lined up and marking them to make our life easier for when the crank slides in. i have also slid on 6 little rubber gaskets over the main bolts. bearing 1st. cam gear next, with some heat slid on over and sitting in place with its key way in next is distributor drive gear. my key way was a little lose, luckily we were in the right place and a few steps to the left was a container with a bunch of them in, found one that fitted better. some heat on this and on it went. bearings for the rods and on they go now. no photo of this stage my hands fill and doing other things but lets drop that on in in she goes and lined up Pauls pink dots and dropped the cam in as well.so far the only things out of the old engine are the gear peaces on the crank and the dizzy, even the dizzy drive was in a pile of other parts to the left of me that Paul just pulled out of old stuff. The rods and cam are from another purchase of parts i ended up with including the bearings and all the gaskets.Next Paul swears at his employees for leaving his gasket goo with out a lid and we put some goo on the casing and he drops the other side of the block on. finds some nuts that should come with the casing and he torques them up. its bloody handy having a store room the size he has, off i went find myself some lock nuts, re stock the draw in the engine build section. they get thrown at the engine and torqued up but to a smaller amount. sump on and well bake to the store room to find some dome nuts for the sump plug and the mesh for in side that, and a stud kit for the fuel pump, oil pump and a few other things. actually here is a photo of the kit, thanks google ahh while this was up side down we also dropped these in. which i learnt the other day is a duel pressure relief, vw casings come out duel and single, only early ones come out single. ended up watching a YouTube video of how it works and where they are. if you want to learn here is the video i watched it was a pretty good Saturday learning and building the new engine. last night i headed in and done some more work. removed all the head studs while Paul was on the phone and cleaned them up, he then came down and gave me some shit about how i didn't get the fly wheel and shims ready for him, few seconds later he had them, he worked out the end float and put some shims in allowing some small amount of thou. he was also trying to calculate out loud and man that shit was confusing as fuck to me. with that all sorted i now have the fly wheel and we are off to get skimmed and it has a really nasty lip where the rear main seal would usually sit so ill take that to geophfey and get him to take the lip off that. all in all shes been a great few days so far.1 point
-
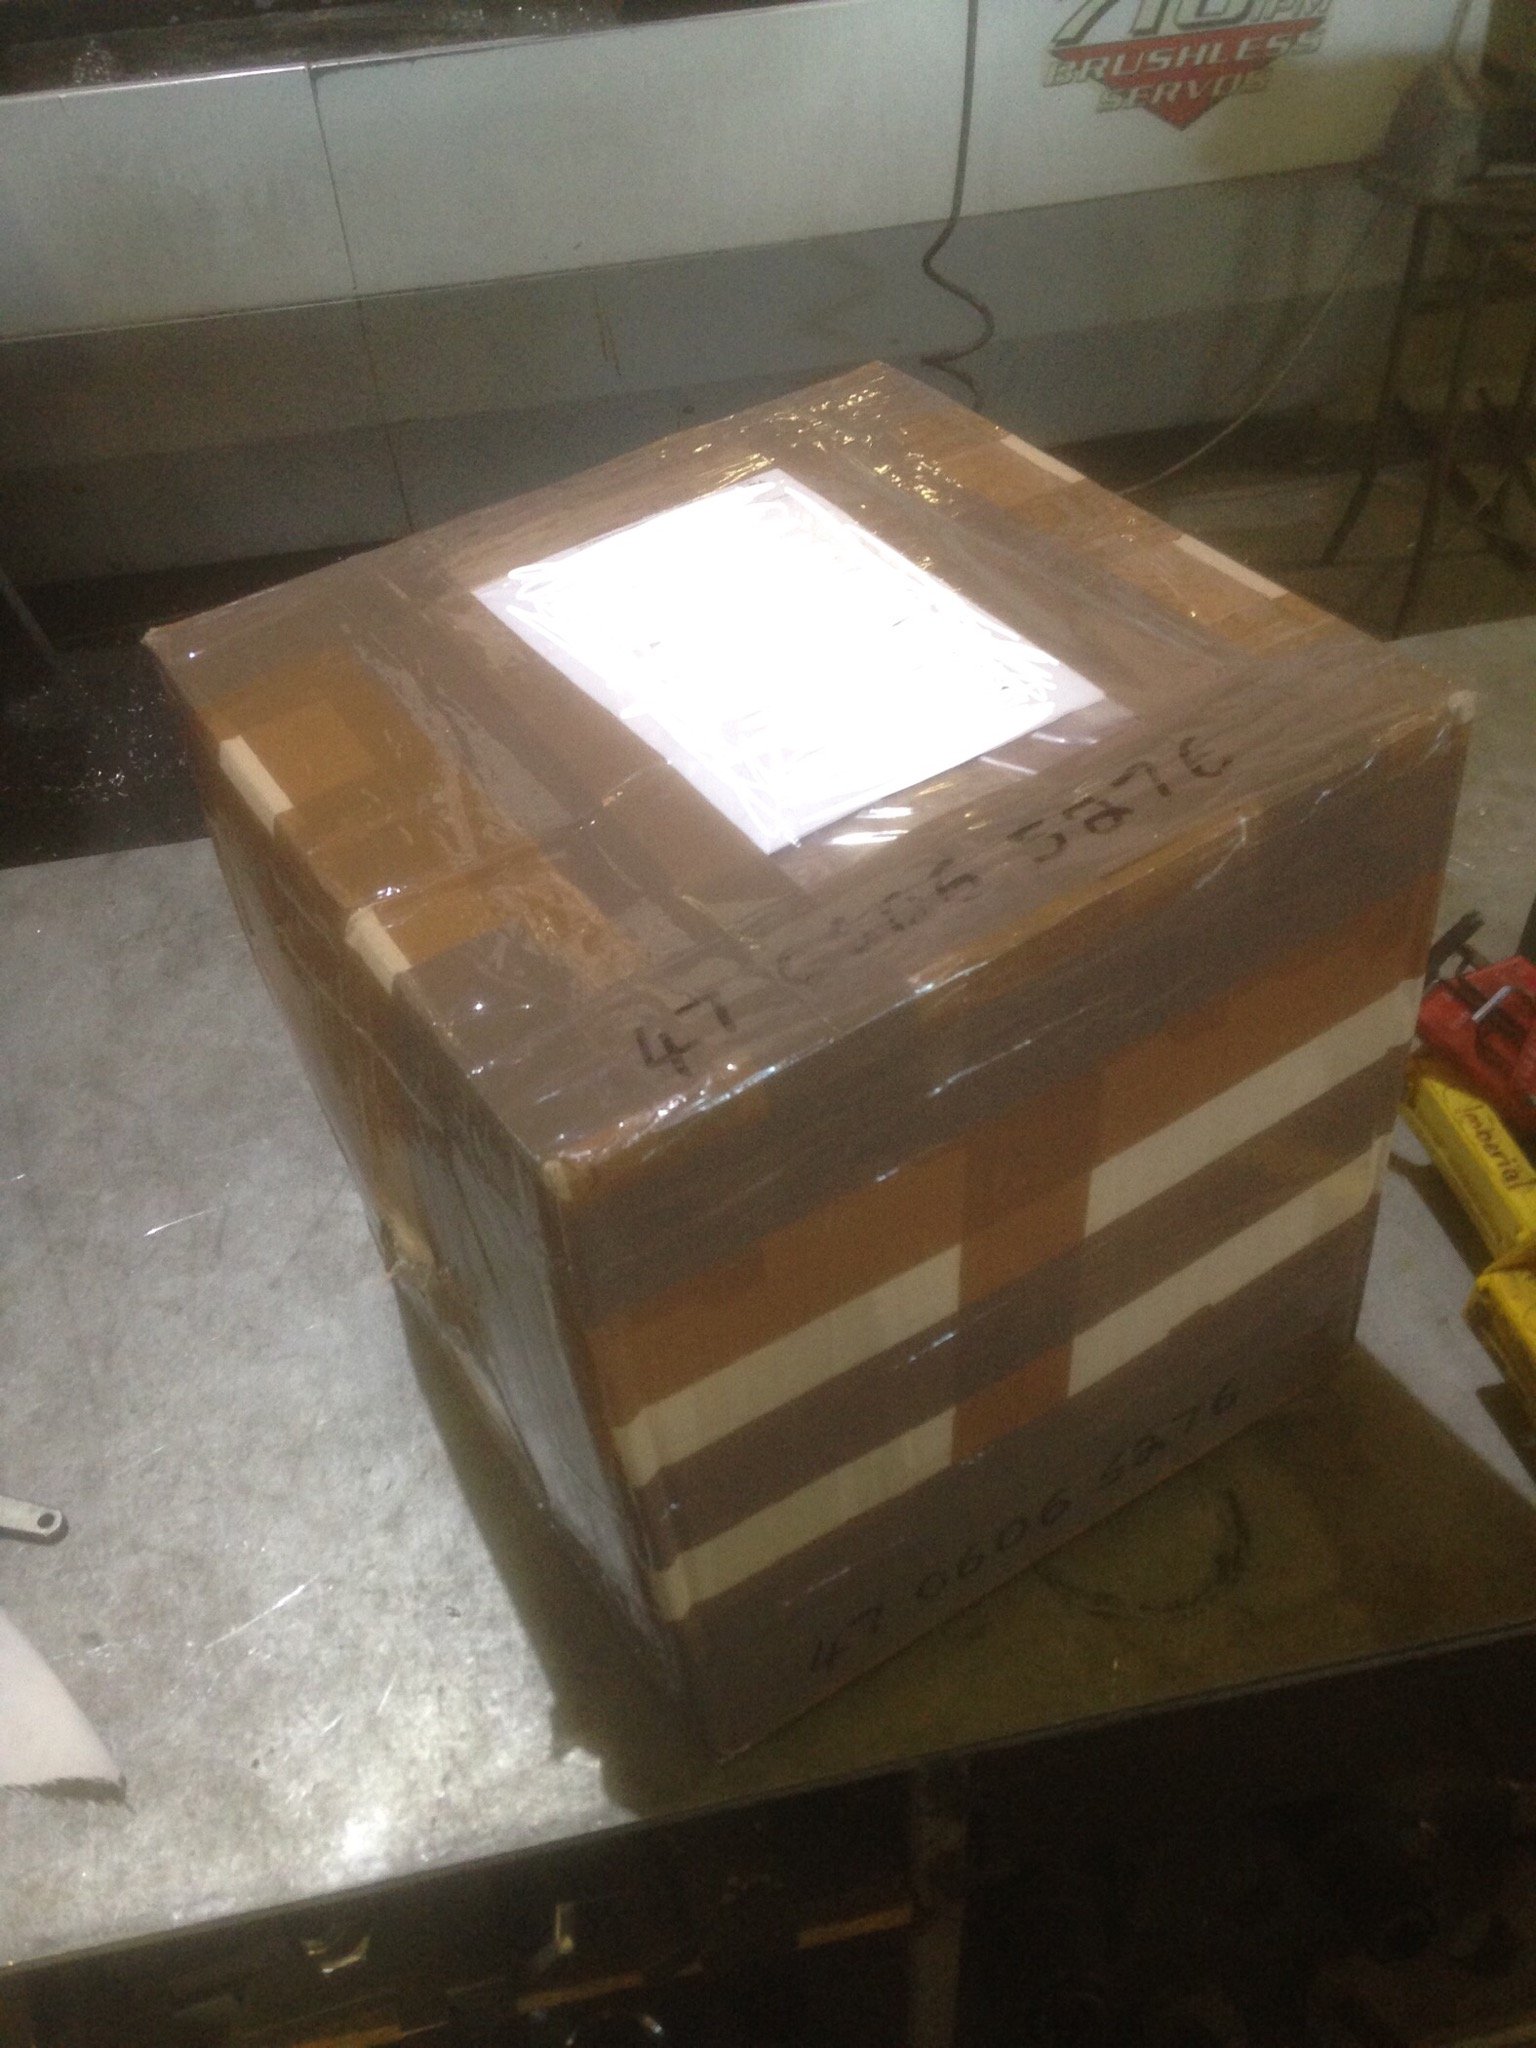
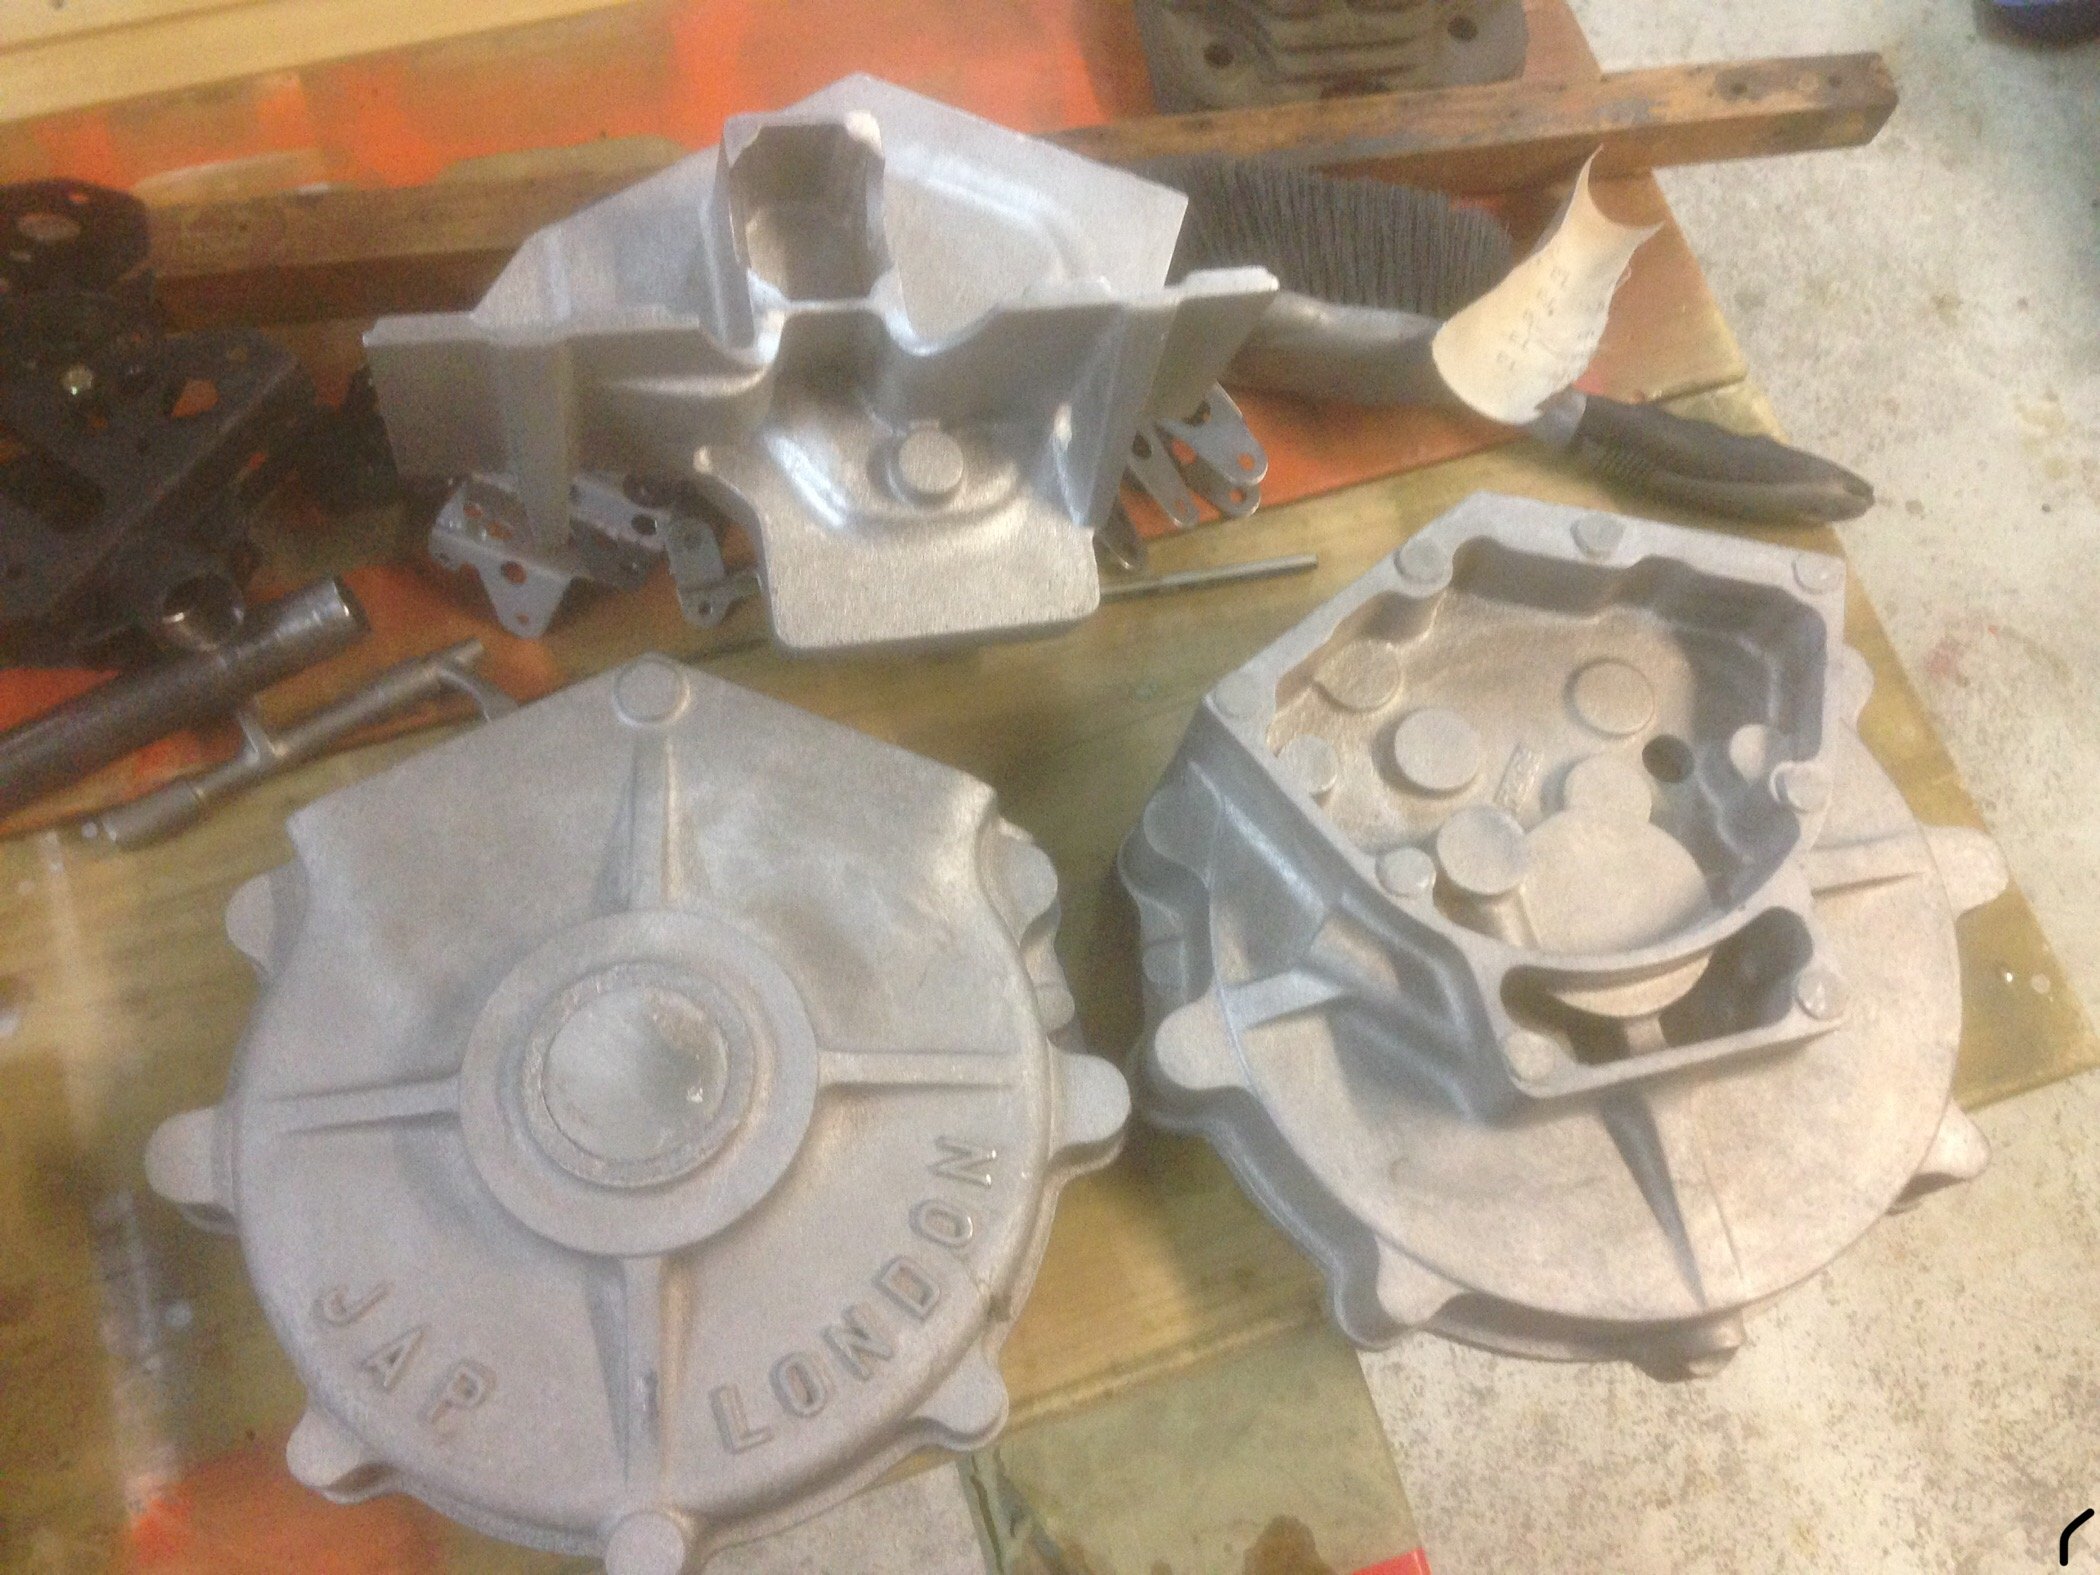
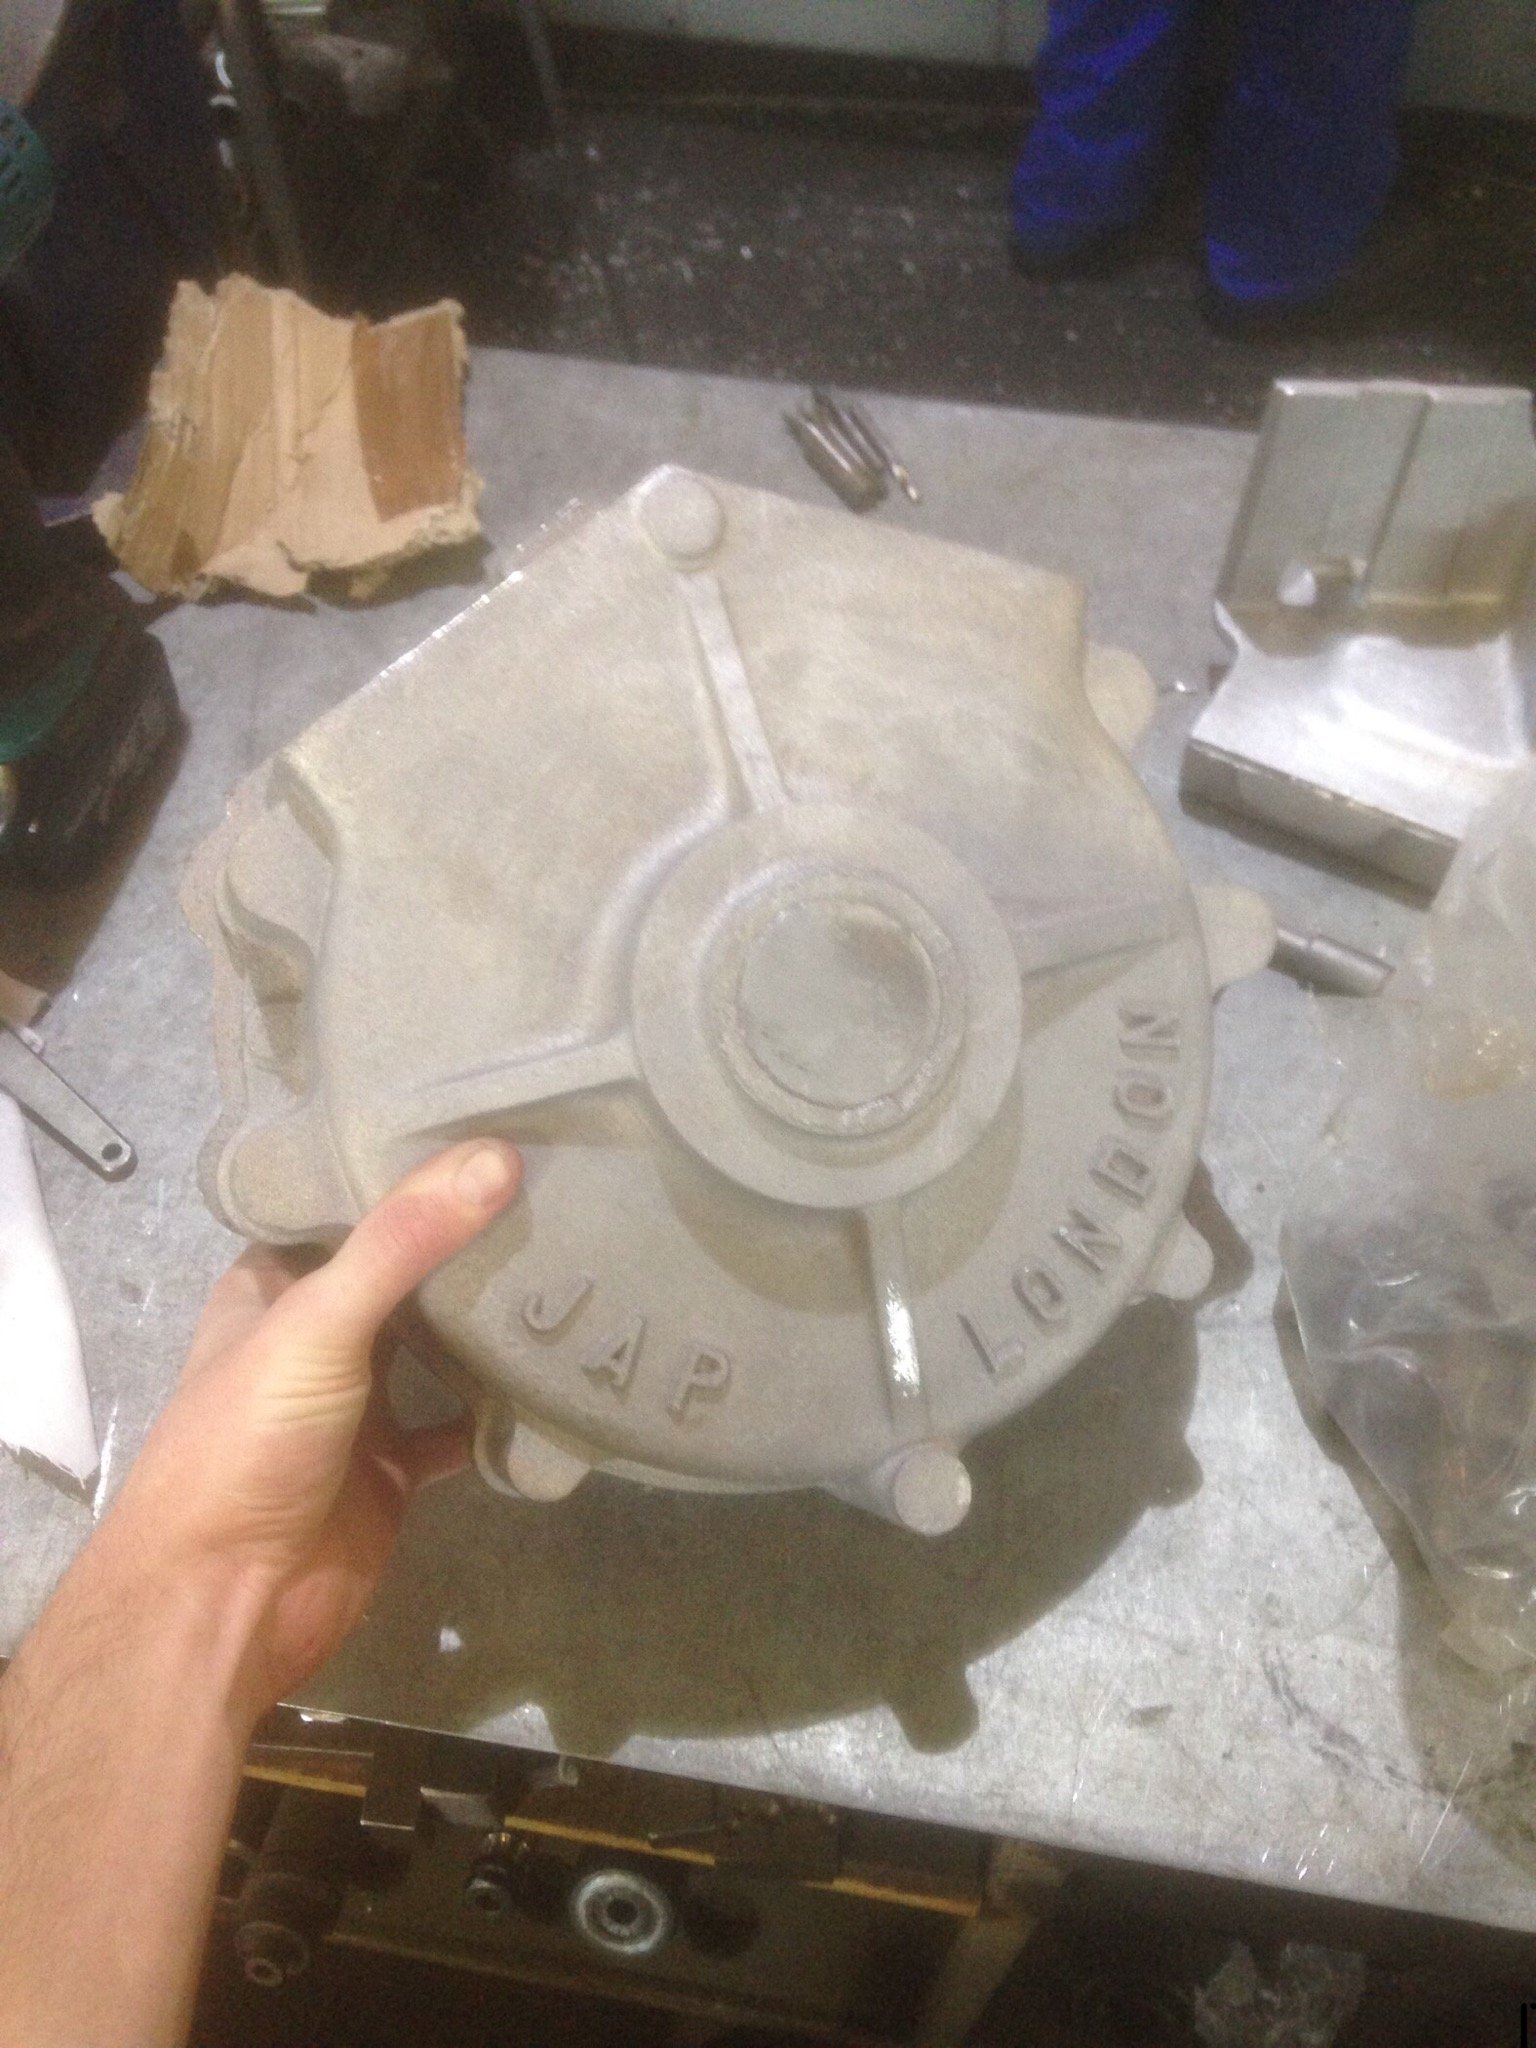
Nice cardboard box arrived from the UK. JAP V twin engine kit set, some assembly required..... Should keep me busy for a bit.
1 point
-
@00quattro00 Have used this stuff at work 2 pack. Kinda tip/ brush on then run a roller over it thG is in the kit. Puts that stippled texture on it. Dries rock solid and water tight supposedly pretty hard wearing
1 point
-
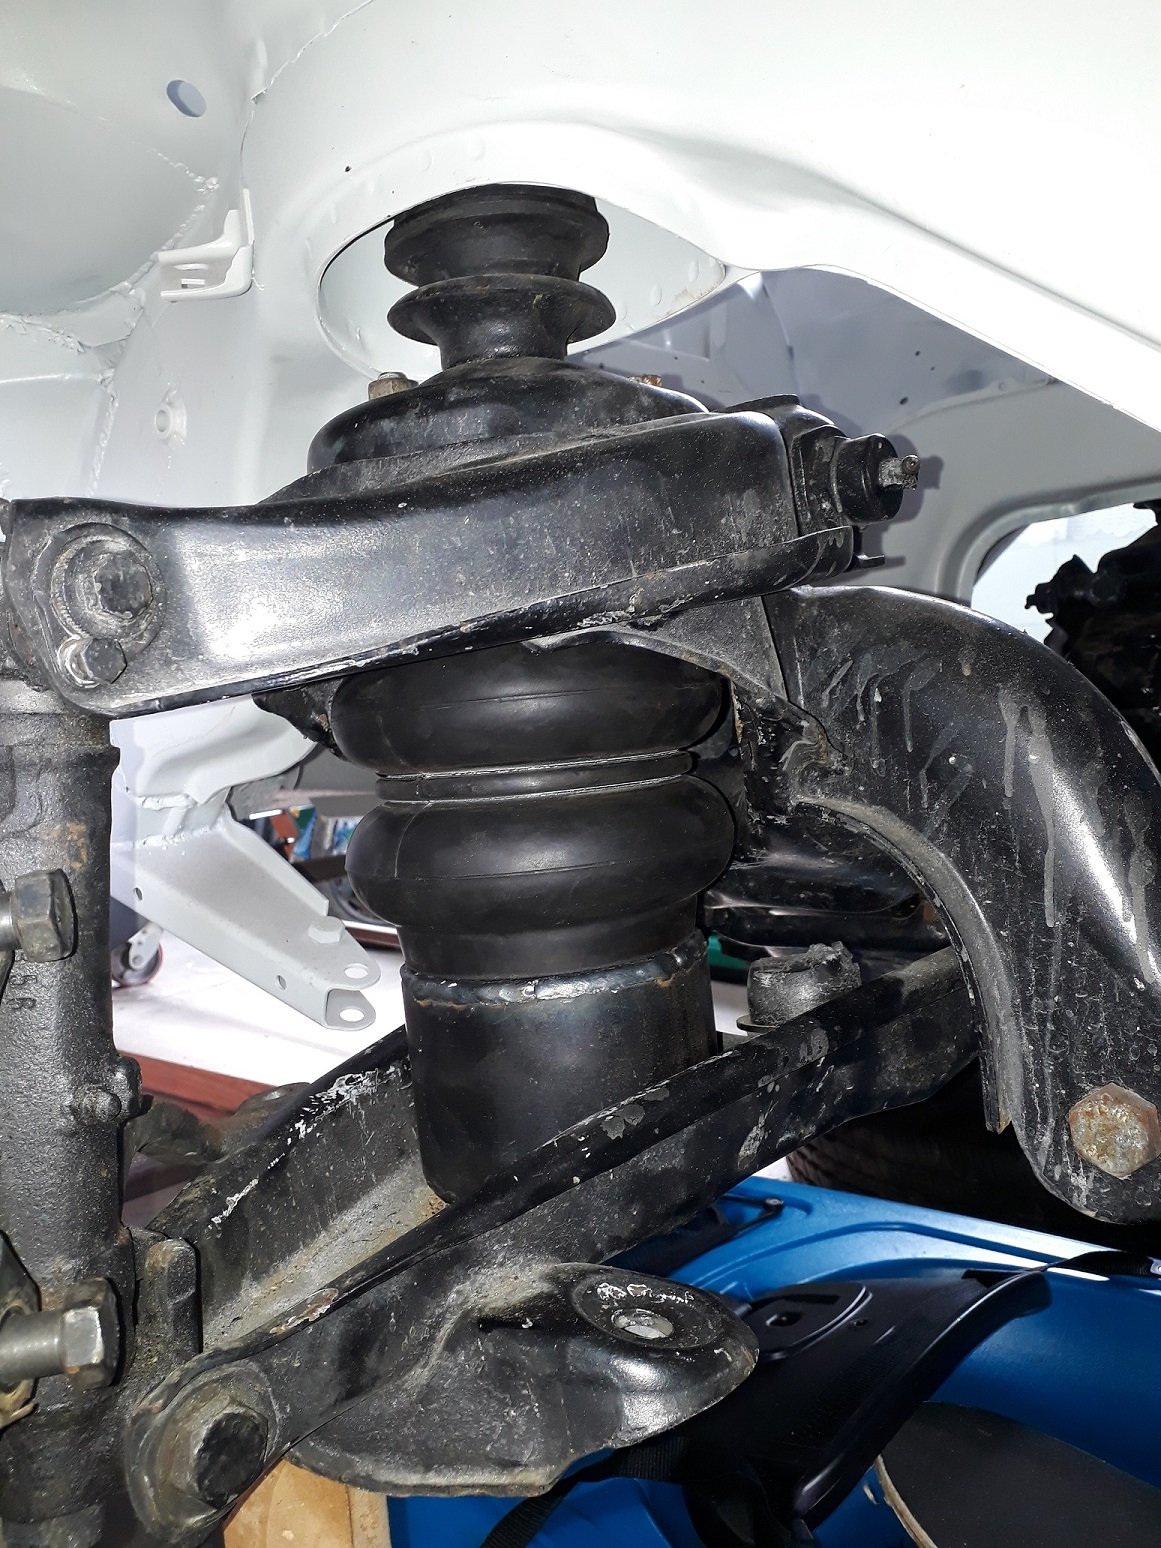
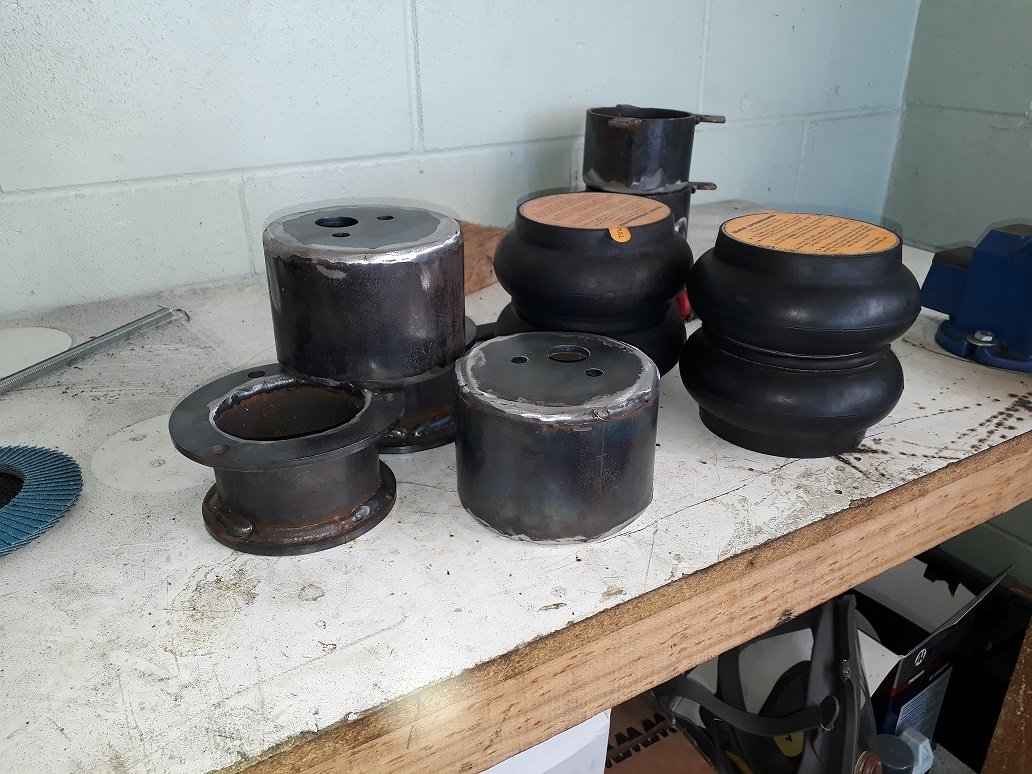
Still plodding away, got a pair of Slam Specialties RE5s for the front, would of likes to run the larger RE6s up front but they're a bit marginal for clearance on the diameter front and I'd rather not risk having a bag rubbing on something. Hot glue gunned some mounts together, all designed to be bolt in: Full Squash (onto factory bumpstops), followed by full droop - looking like I'll need limiting straps at full droop to stop all the weight hanging from the bag. Back when this was at the panel beaters I made a day trip with Ned to Mercworx is Tirau in search of a new boot, as mine was full of cheese. took a punt on one that had a dent in it but look solid. Finally got around to getting it blasted and primed at Autoblast and, other than coming back in the wrong primer and having a couple of dents in it, it looks ace - not a spot of rust in it. New one on top of old one: Have started seam sealing the underside, started with the front left wheel arch. Initially tried masking up the lines to give a cleaner finish but have decided that isn't worth the effort; a finger swipe gives the best outcome. (as an aside when Wurth say their seam sealer is 'brushable' they're using that term very optimistially) Hopefully have the underside seam sealed by the weekend touch wood.
1 point
-
Got the intake all done with a K&N filter, looks pretty good I think. Took a guy for a drive that knows transmission things up the road and back and he reckoned the trans was sweet, shifting how it should, just the engine was massively down on power. Tried to diagnose the problem myself but I couldn't really figure much out. It was throwing error codes for the secondary throttle and knock sensors. Discovered the secondary throttle sensor was only used for traction control so I didn't need to worry about that one. Was hoping the knock sensors were just reading high because the timing was out, so I took it to Danny's Autos in Palmy to go on the dyno and see if they can tune it and figure out what's wrong. They got it on the dyno, they were just bringing it up to speed and fuel started pissing out everywhere. One of the fuel hoses going up to the fuel rail split, don't know if it just happened or if it's been like that for awhile, but we never noticed any fuel in the valley before, where as there was heaps in it then. So off came the intake and manifold to replace it. Whilst they had that off they had a look at the knock sensors and they had seen better days. The wiring pins were pretty corroded and the casings were cracked. They sourced some new OEM ones and chucked them in. They also found one of the breather hoses had a split, as well as one of the igniter modules was only firing 1 of 4 cylinders on that one side. So basically this has only been running on 5 cylinders all this time. Thought it didn't sound quite right haha. The steering rack also decided to start leaking power steering fluid out of a place the fluid shouldn't be. Beach Hop was the next week and the rack had to be sent to Auckland to be rebuilt. Managed to get the engine back together and drive it home on the Tuesday night and pull out the rack to be sent off on Wednesday. Luckily they got around to rebuilding it fairly quick and sent off again so it arrived first thing on Friday morning. Got a different igniter module from the wreckers off a SR20 and it ran waaaaaay better! Chucked the rack back in Friday morning and took it for a WOF, passed with flying colours, so went and got some rego and now it's all legal!!!! On Friday/Saturday the fuel pump must of came out about a dozen times, half of which were on the side of the road. Went for a bit of a drive and the fuel pump kept dying for some reason, thought maybe the wiring in-tank was a bit dodgy, replaced it all and soldered every connector, that didn't make much difference. Discovered that if I gave the pump a good smack it would start back up pumping a bit more fuel or just die completely. Decided to get another fuel pump from Repco and chucked that in. Turns out the brand new "genuine" Walbro pump I got off ebay was shit. Went sooooo much better again!! Took it to the 4 & Rotary Jamboree show and shine at Manfield on the Sunday and took home the Best Commercial Piston trophy. Then on the Monday took it back into Danny's Autos to get dyno'd. Made 100kw at the wheels which I thought wasn't quite right (should be closer to 200kw?), but he reckoned it was running right and just the reading wasn't that accurate, he had trouble getting into 4th, kept changing down, so had to do it in third and that was maxing out the dyno's rolling speed. It had good consistent 02 sensor readings. Took it up to Beach Hop on the Wednesday. Had no issues other than getting some brake fade through the windy bits between Waihi and Whangamata, we think there must of still been some air left in the lines. After that happened I was changing it manually between 2nd and 3rd gear through the windy bits, rather than just leaving it in drive as it engine brakes way more. Survived all through Beach Hop, including going up to Whitianga, Kuaotuna and Onemana as well as cruising up and down the main street lots, the rear bumper took a few scrapes, I think it needs some titanium stripes underneath! I think it was one of the cars that got some of the most attention. Managed to get all the way back down to Marton, then when I was overtaking up a hill, noticed smoke coming from under the dash, so quickly pulled over and checked it out. The transmission sump had either smoke or steam since it was raining coming off of it, also smelt very burnt and the oil was quite dark. My parents caught up and we decided to just keep driving. I then noticed it was revving at 3500rpm at 100km/h, where as it's usually around about 1800rpm. It was only changing from first into second gear and that's it, if I took my foot off the accelerator it would drop straight down to idle. It was a slow drive home from there at 70km/h. Next couple of days I pulled the trans out, pulled off the sump and it had quite a bit of metallic build up at the bottom and just smelt very burnt. I guess it's always been slipping, as to why it didn't make much power on the dyno. Dropped it off today to get a quote on being rebuilt, so hopefully it's not too bad. It used about $400 worth of petrol over Beach Hop, which I think worked out to be 15 l/100km. After driving it for about 1200km I have decided the seat definitely needs redoing, it's way too hard, would also be nice to sit a bit lower and further back as well. Also the accelerator pedal has your foot at too much of an angle back, so gets sore rather quick. Shouldn't be too hard to fix as the seat changes should help and just modify the pedal a little. Also the door latches + door seals are terrible, takes way too much effort to get them closing right. A softer door seal might help, and you can get bear jaw latch kits that are basically a bolt in thing for these which might be the go when I have the spare money.1 point
-
So I made the 24-1 distributor trigger, it works fine. I just cut all 29 teeth off the wheel using my barry lathe and then used a mill at uni to drill 23 holes and welded in 2.4 mm diameter tig rod as teeth. Instead of welding it onto the shaft I made the shaft slightly larger with some weld, turned it down so that it was a little bigger than the wheel and then blasted the wheel with heat and placed it over the shaft. Perfect interference shrink fit. I was having issues with the car cranking slow some times, not cranking at all other times, cranking moderately fast some times and starter motor smoking, and ignition interference while cranking. I pulled out the new starter motor and put in my original starter that I rebuilt the solenoid on and it cranks twice as fast, with no interference and uses half the power and doesn't smoke. Car starts nicely now - just need to play with the cranking advance and cranking fuel values to get them right again. Hopefully they will take the new starter back. It was interfering with my ignition from day one, and was what made me make the ecu controlled ignition system.1 point
-
Youtube for the win....1 point
-
did a bit more. cut open the sill to have a look at the inner piece which was a bit rusty so i cut it out and made a new bit. 2019-01-05_03-17-08 by sheepers, on Flickr 2019-01-05_03-17-43 by sheepers, on Flickr then it was on to making a new outer skin. i cut the whole bottom off and just made one patch to make life easier. i made the arch lip and welded it on first, then stitched it all in. 2019-01-05_03-17-29 by sheepers, on Flickr 2019-01-05_03-17-52 by sheepers, on Flickr 2019-01-05_03-17-58 by sheepers, on Flickr still got a few little bits to do but its nearly finished. tomorrow is my 45th birthday so im not sure if ill work on it tomorrow or not.1 point
-
Well just finished unloading the car and made a start on getting the seats out. Ps here are the cosmic wheels
1 point
-
all nissan water pumps are the same. just go into buntings frightfully dapper auto parts emporium and ask for a nissan water pump. sorted0 points


.thumb.jpeg.e0a4bff61111e0c8c7396950fcc94da1.jpeg)
.jpeg.b7183857fccac9aa4e98e77ab6ec6520.jpeg)


This leaderboard is set to Auckland/GMT+12:00