
Leaderboard


Popular Content
Showing content with the highest reputation on 04/08/19 in all areas
-
"Test Drive" turned into blasting around in it for large parts of the afternoon, reckon I've done about 45 miles or so. Brakes are fine and it goes pretty hard (for what it is). Handles really nice and is no way stock in the springs & shocks department. Tweaked the timing a bit and it's just rattling a little under heavy load, I'll try some octane booster tomorrow that will sort it out hopefully. It was blowing oil smoke for the first 5 miles but a couple of hot & cold cycles seems to have freed the rings up a treat. Haven't revved it beyond 4 grand yet but it feels pretty strong. Over all I'm pretty bloody chuffed with it, it's a really nice car. Bit of a clonk in the drivetrain but it only sounds like a UJ. Water pump bearing's a bit wobbly and it needs a new rad cap but it held temperature & oil pressure despite some enthusiastic driving. Vids for your entertainment... What ? Skid you say ? So, it's all good. Gonna do the wheels bronze and paint the rear panel black between the lights but apart from that, roll on summer.... * Also, side-sharn.... About 5 years ago I was chatting to the in-laws neighbour about cars. Started telling him about the Hako and he said " Fucking Japanese shit, I'm not interested in those useless bits of crap". We popped round to Carols folks earlier and the neighbour drove by as we were leaving. He fucking loved the Skyline, was all over it and asked if I wanted to sell it. I ignored him. Silly bugger.20 points
-
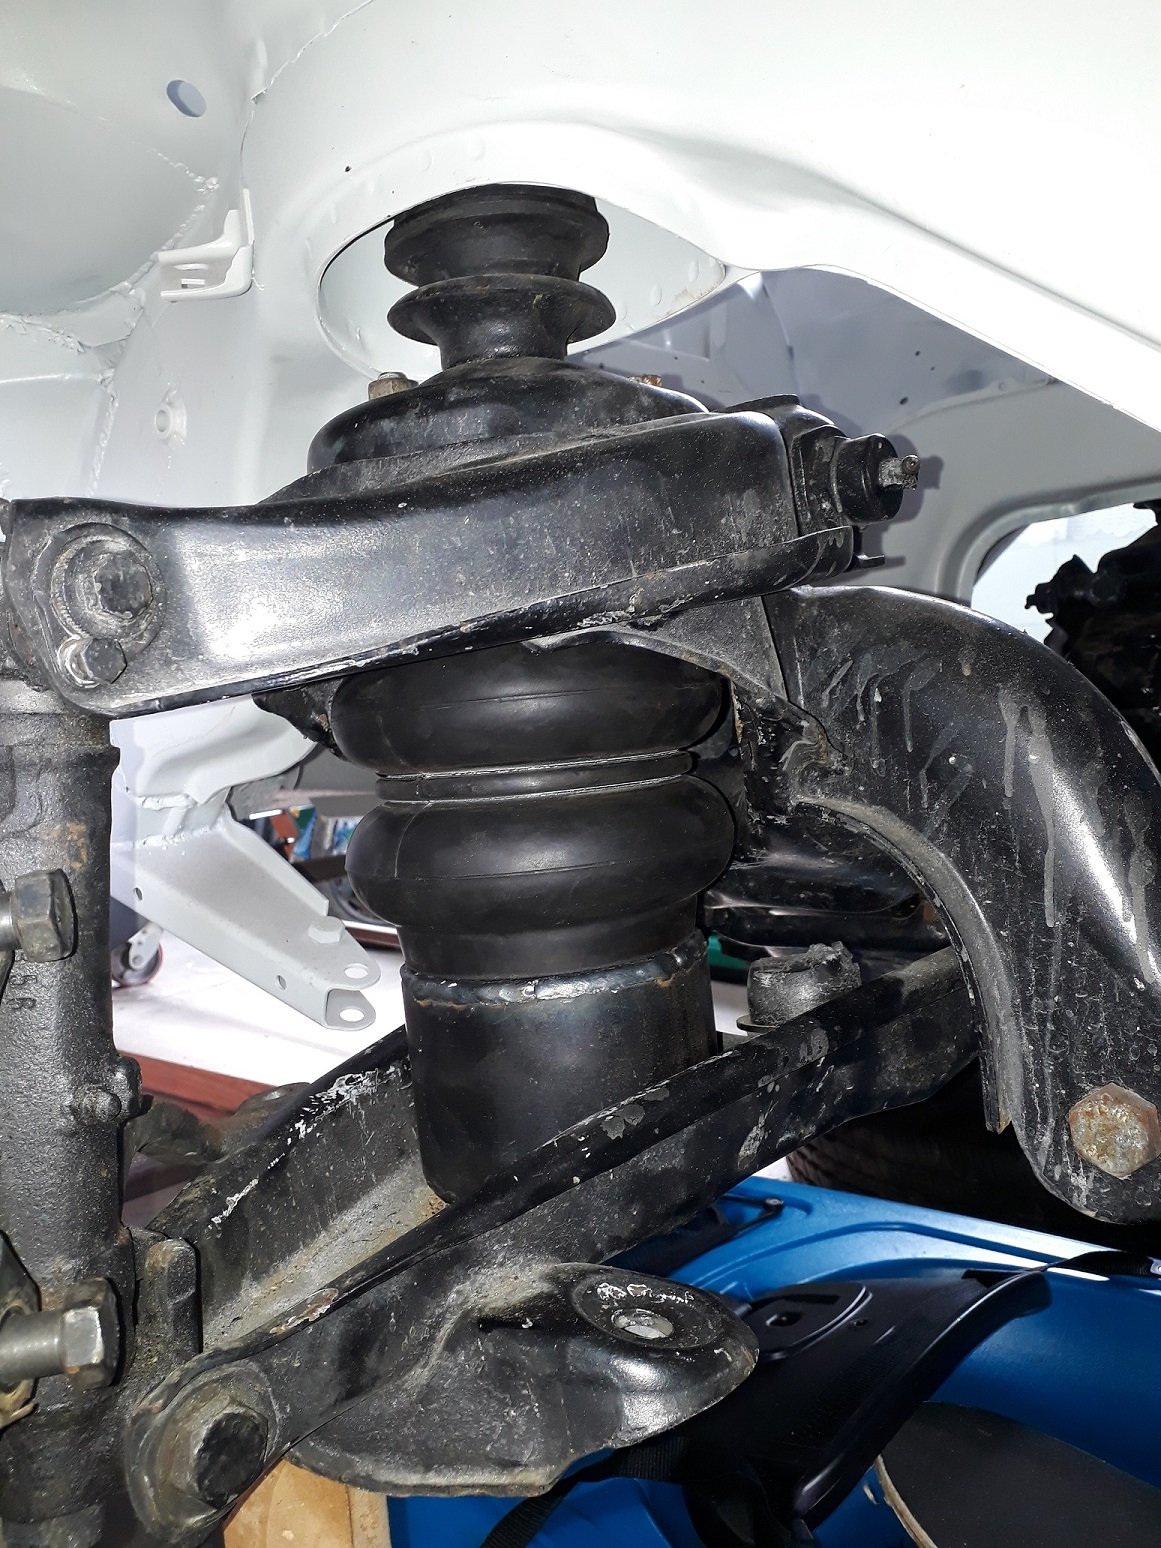
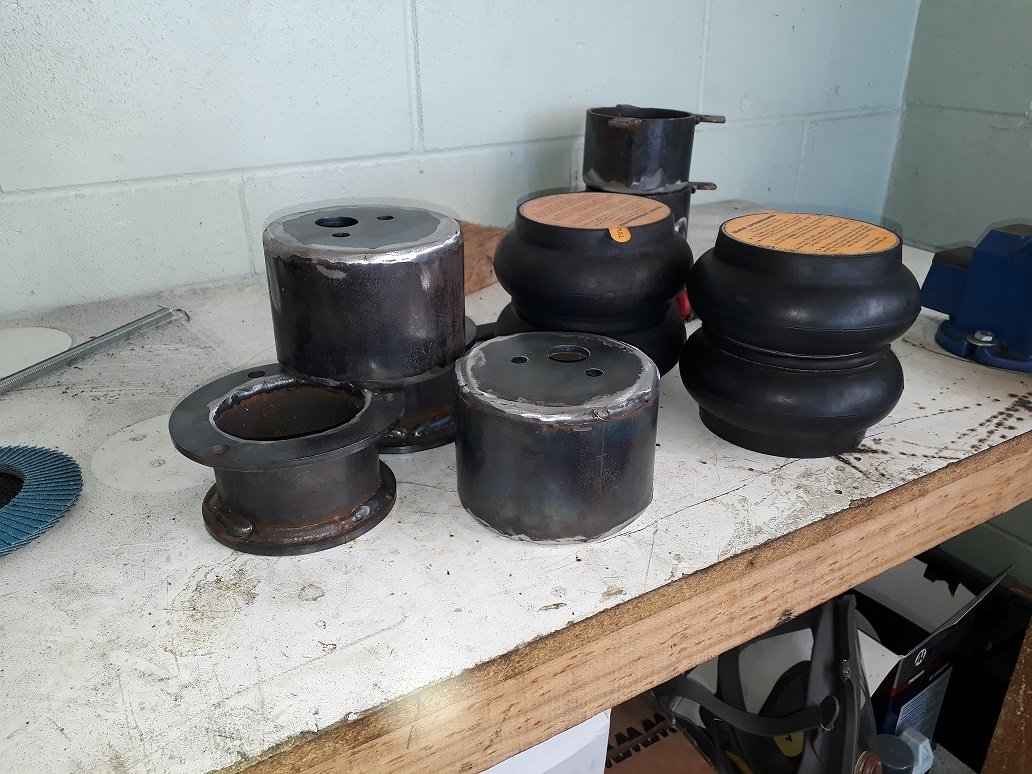
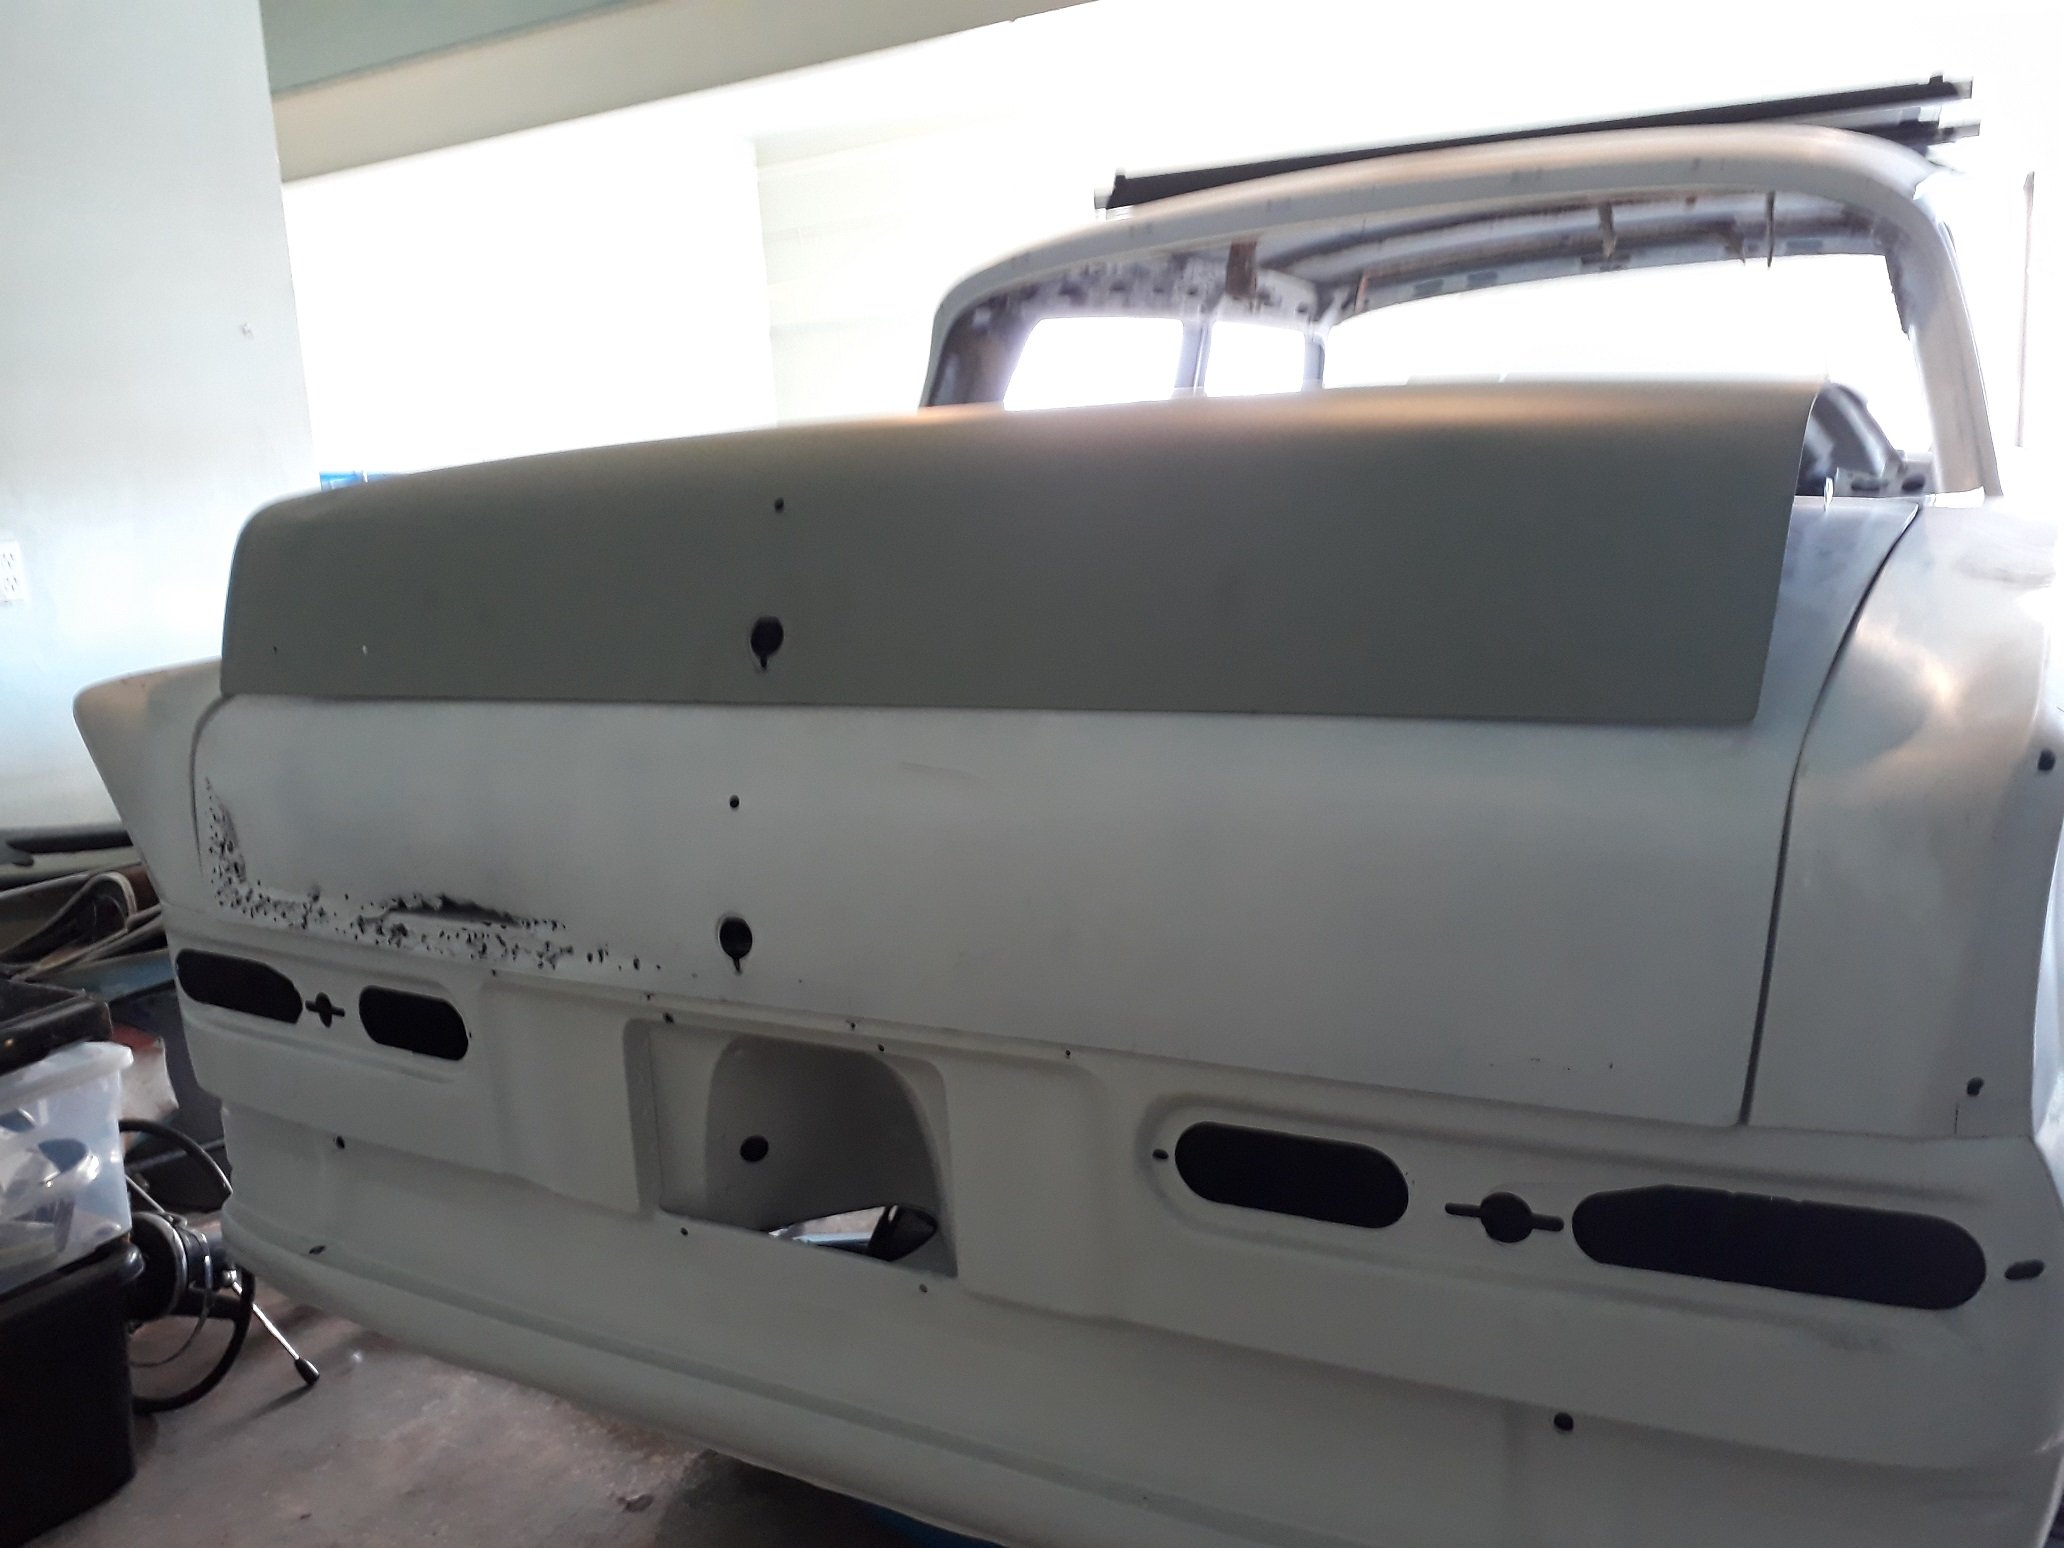
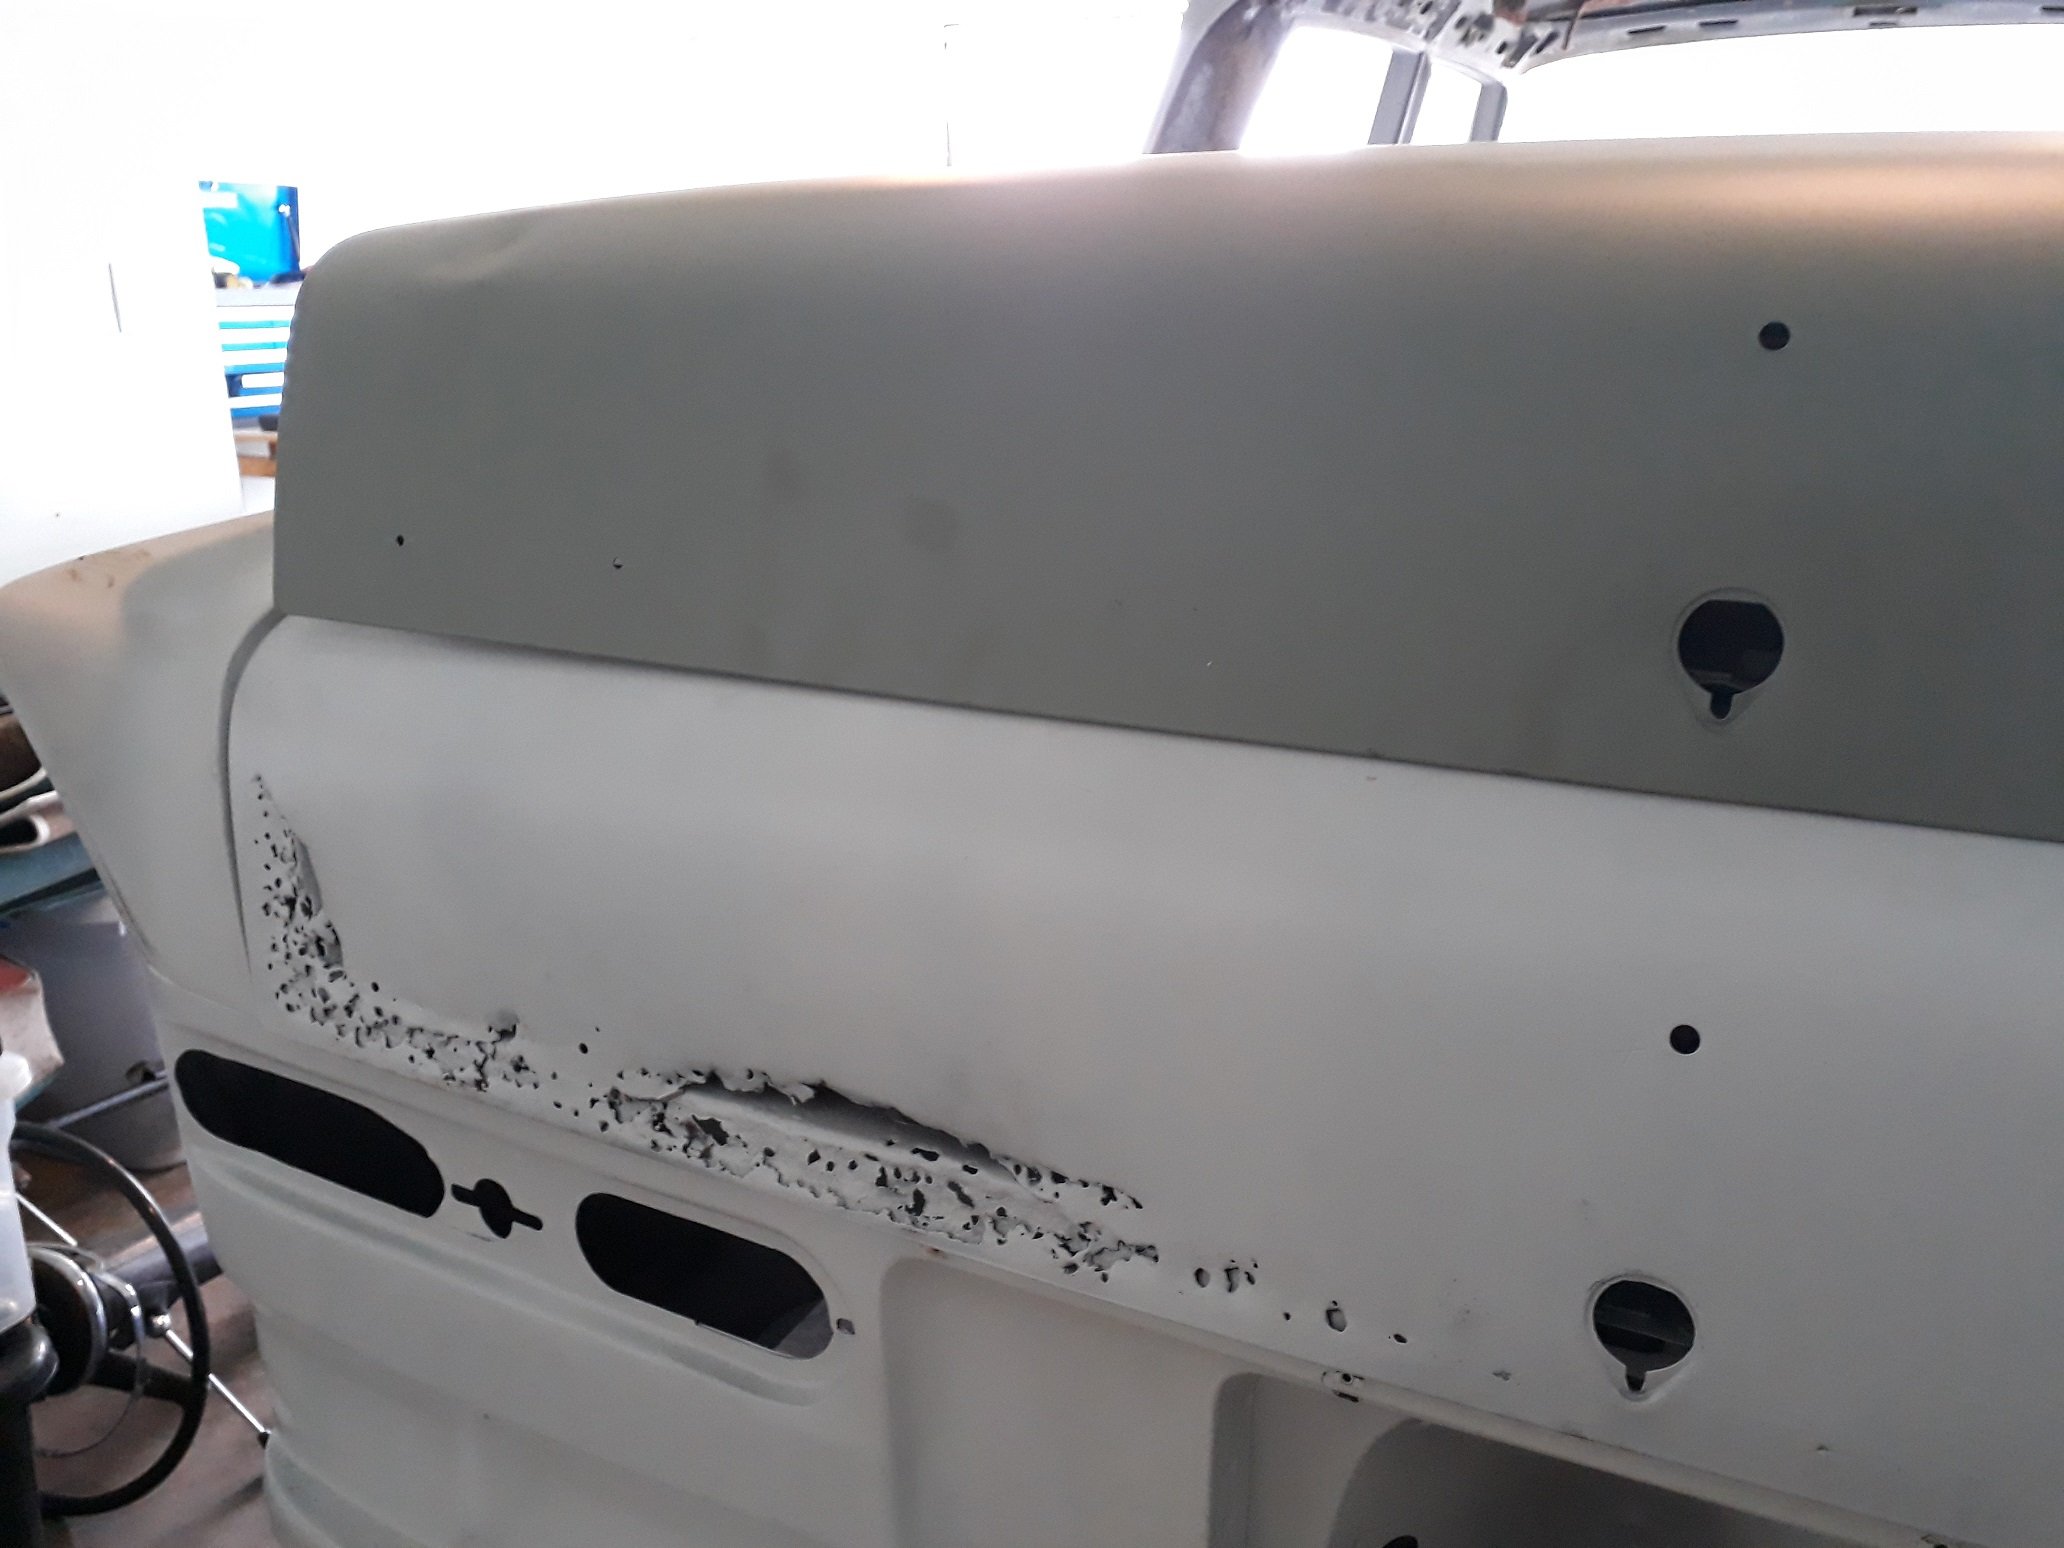
Still plodding away, got a pair of Slam Specialties RE5s for the front, would of likes to run the larger RE6s up front but they're a bit marginal for clearance on the diameter front and I'd rather not risk having a bag rubbing on something. Hot glue gunned some mounts together, all designed to be bolt in: Full Squash (onto factory bumpstops), followed by full droop - looking like I'll need limiting straps at full droop to stop all the weight hanging from the bag. Back when this was at the panel beaters I made a day trip with Ned to Mercworx is Tirau in search of a new boot, as mine was full of cheese. took a punt on one that had a dent in it but look solid. Finally got around to getting it blasted and primed at Autoblast and, other than coming back in the wrong primer and having a couple of dents in it, it looks ace - not a spot of rust in it. New one on top of old one: Have started seam sealing the underside, started with the front left wheel arch. Initially tried masking up the lines to give a cleaner finish but have decided that isn't worth the effort; a finger swipe gives the best outcome. (as an aside when Wurth say their seam sealer is 'brushable' they're using that term very optimistially) Hopefully have the underside seam sealed by the weekend touch wood.
 13 points
 -
Started on the floor at the back. The cover over the diff will be able to be removed should we ever need access to the diff, air bags or what ever from the top. A few folded strips added for both strengthening and to giving us a place to attach the main 2mil sheet cover added first with nutserts. Cover that had been pre cut n folded dropped in place pretty much with a bit of tapping. The shelf is the perfect place for the Ridetech 5 gallon tank, twin pumps and all the other air ride junk. With it up there out of the way it frees up space in the boot/trunk. Positioned to the side to leave space for the stereo amp or what ever else. Need to get a few counter sunk bolts to attach the fuse panel. the 5 gallon tank has 5 outlets (not including drain ofc) three are used by the system. another I have put a tire inflation valve on just encase both the pumps die it gives me the option to pump it up at a service station. the last im thinking of putting a fitting on so I can plug in a hose that can be used to inflate tires. The system comes with multiple ways to control. Bluetooth/cell phone/tablet, remotes, or a control panel. Will mount the control panel on the air pod board at the back there.9 points
-
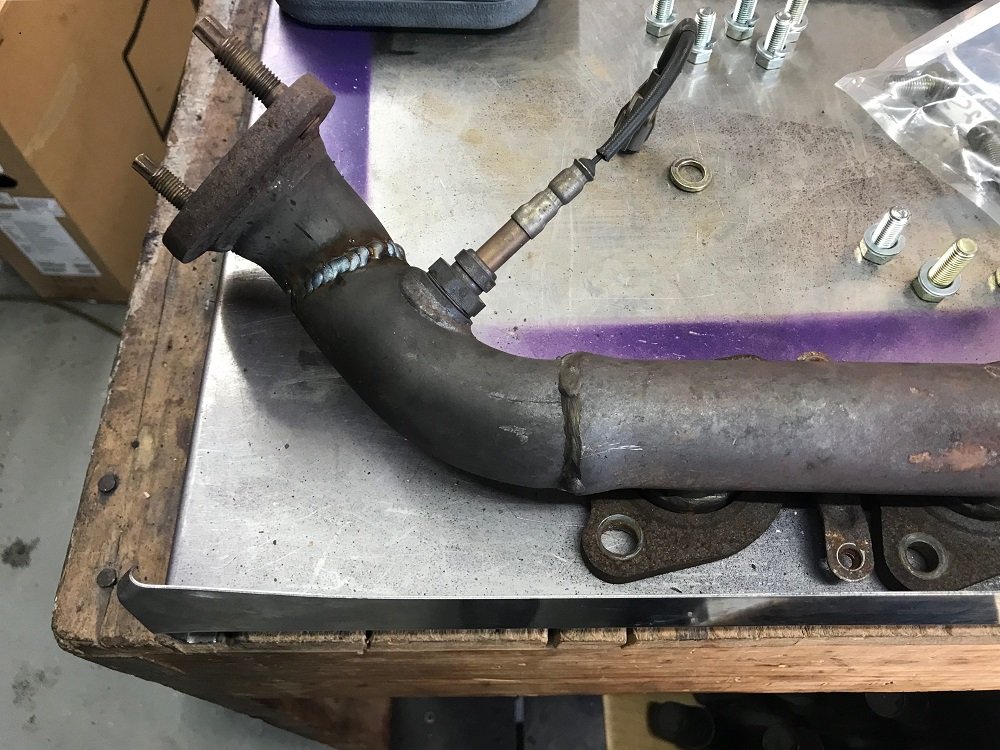
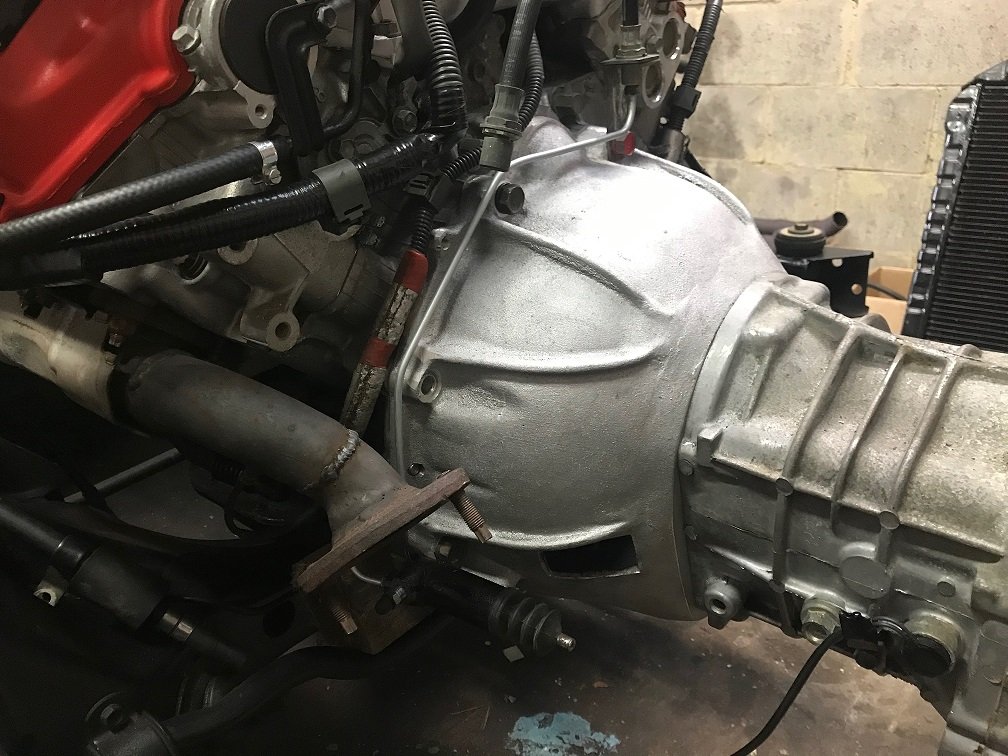
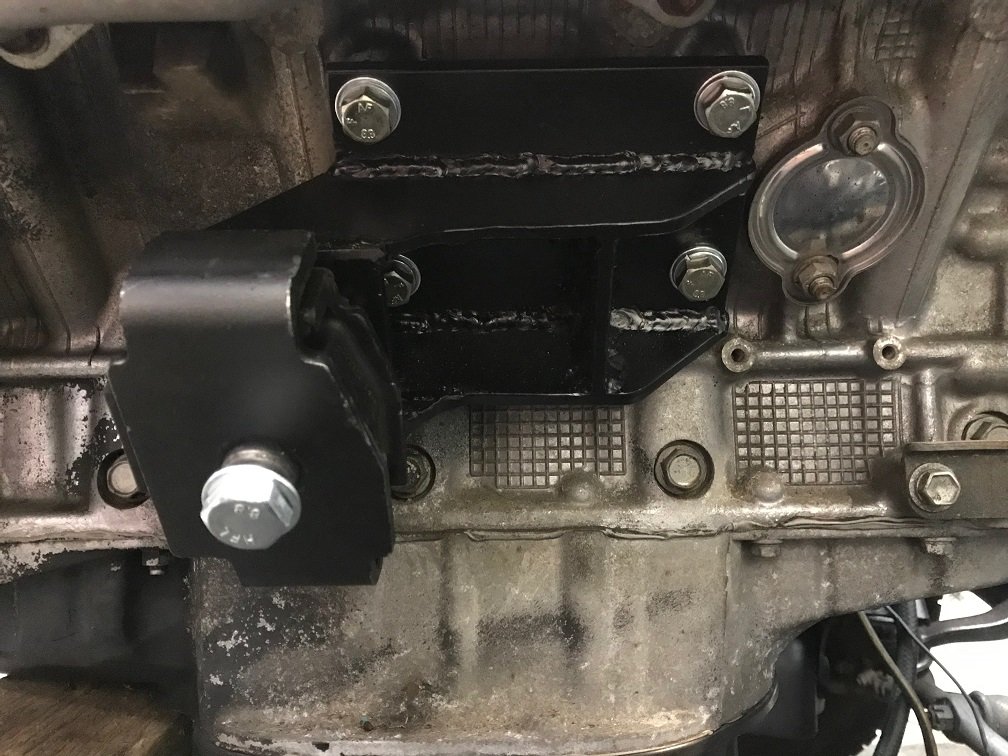
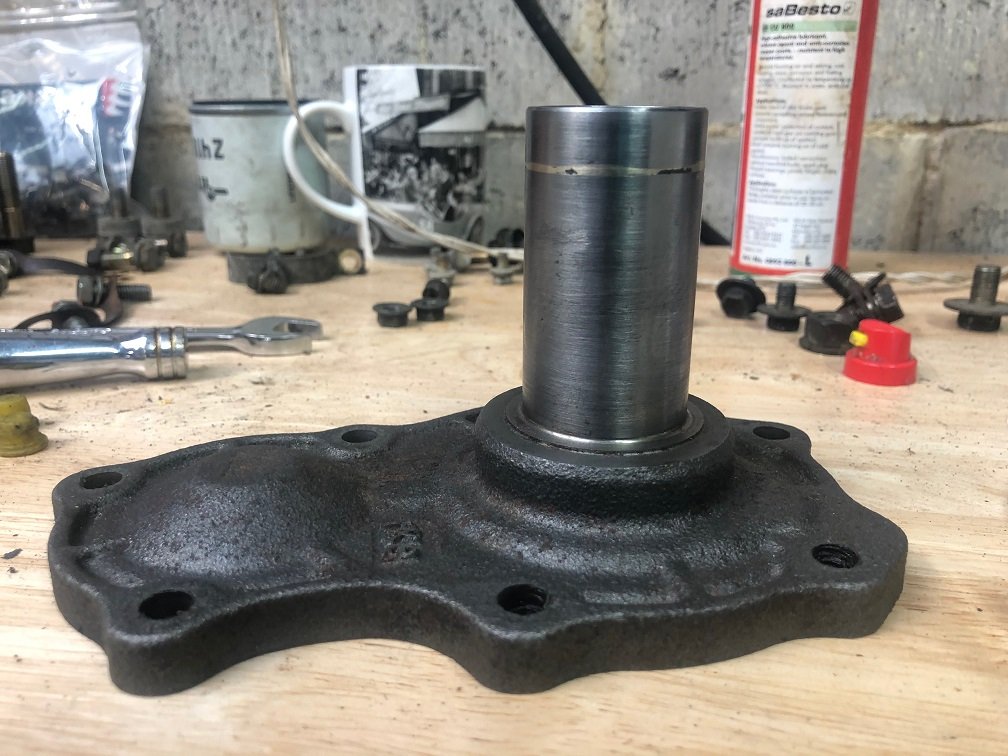
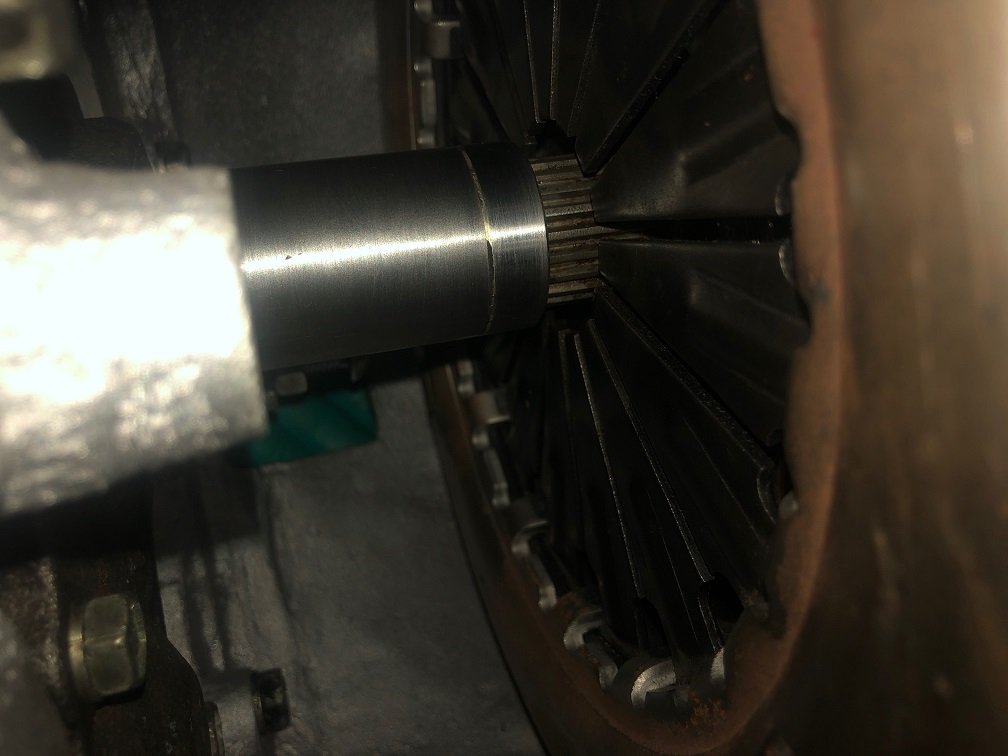
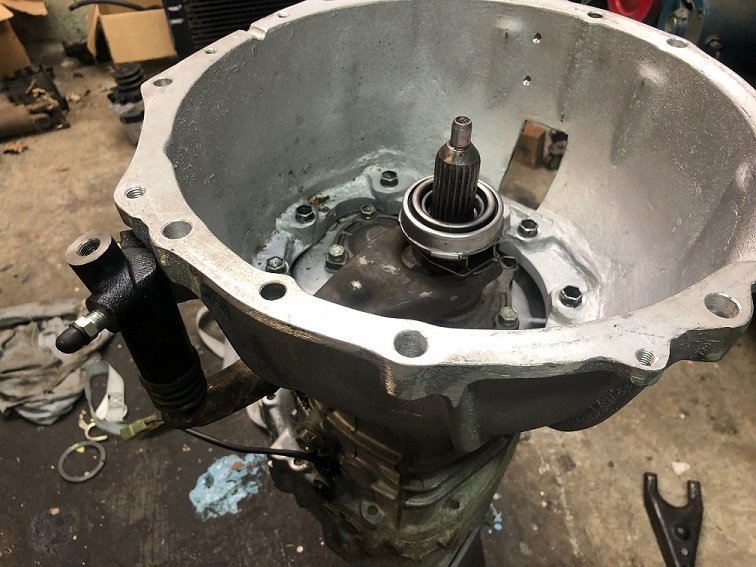
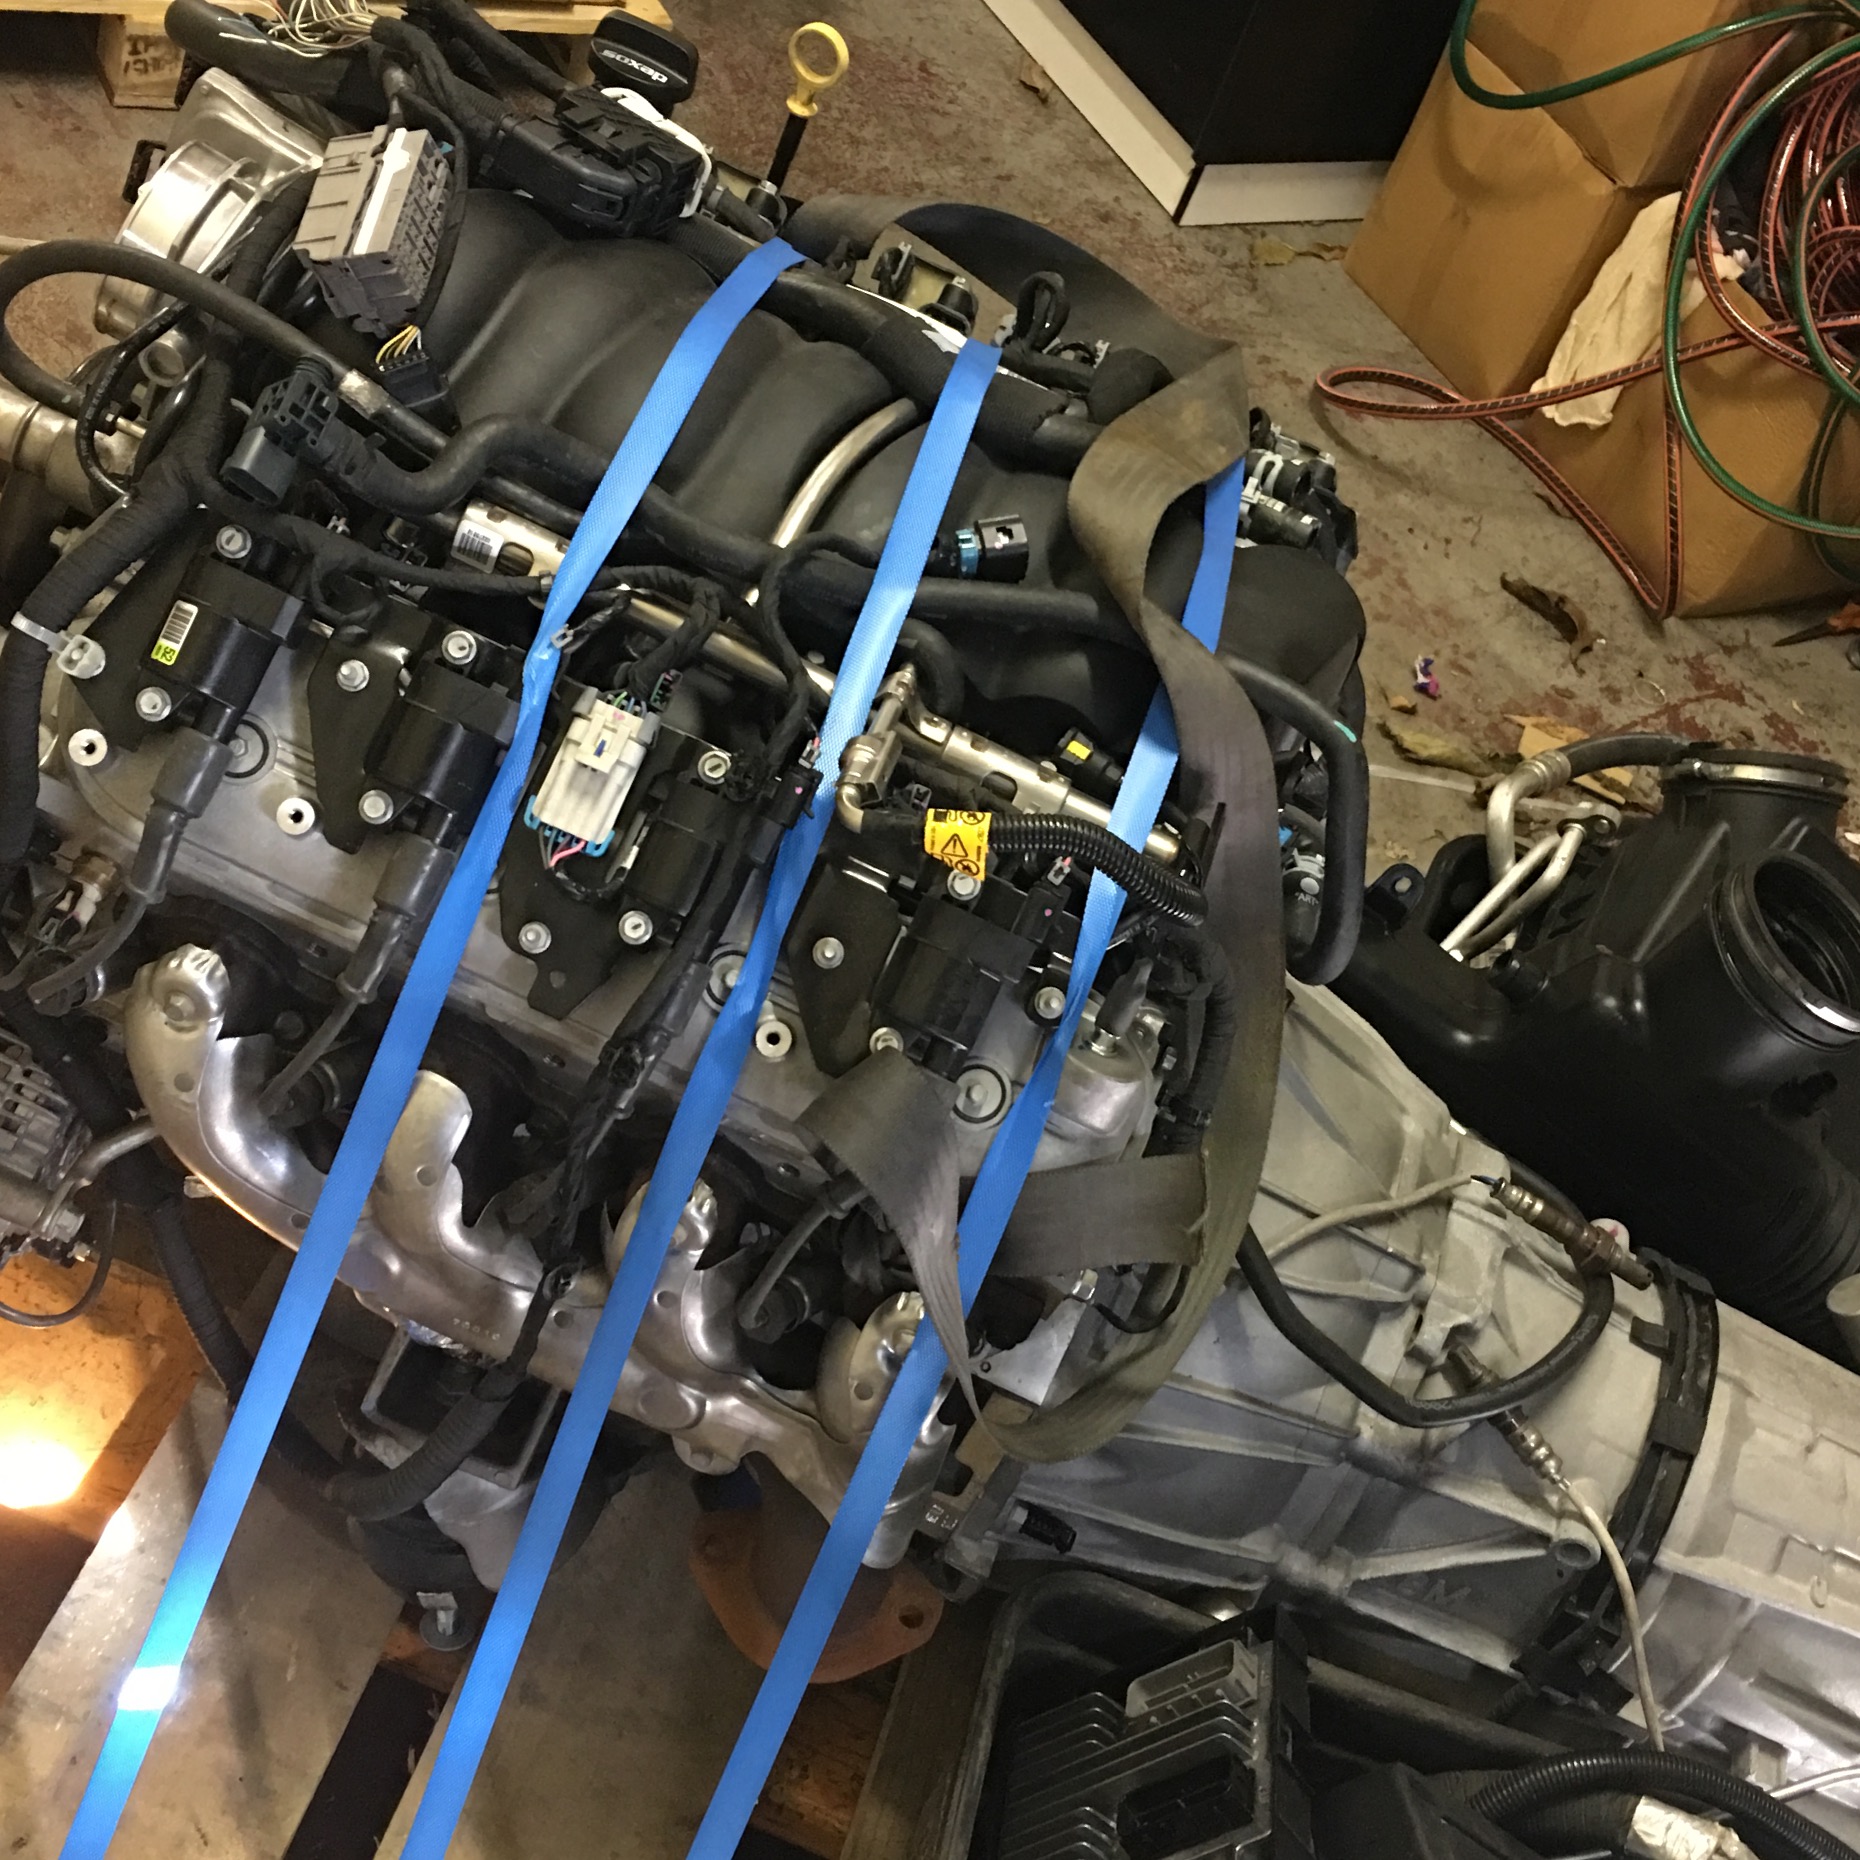
I've had to tweak the L/H manifold to get past the clutch slave, just rotated the flange by 90 degrees. I also made up the new clutch hard line. Engine mounts are done and bolted on for the last time. The new flywheel/clutch/bell housing combo had a weird issue where the thrust bearing would just about fall off the nose of the gearbox before the clutch was disengaged. I guess I could have spaced out the flywheel but I didn't like the reduced starter teeth engagement, so I ended up having the nose lengthened by 10mm by my local engineer. He made a nice job where the extension is pressed in another 10mm inside from the join, I feel much better about it now. I've just got to finish adjusting the pivot ball length & slave cylinder angle, then the whole lump should be ready to bolt in!
7 points
-
Got the intake all done with a K&N filter, looks pretty good I think. Took a guy for a drive that knows transmission things up the road and back and he reckoned the trans was sweet, shifting how it should, just the engine was massively down on power. Tried to diagnose the problem myself but I couldn't really figure much out. It was throwing error codes for the secondary throttle and knock sensors. Discovered the secondary throttle sensor was only used for traction control so I didn't need to worry about that one. Was hoping the knock sensors were just reading high because the timing was out, so I took it to Danny's Autos in Palmy to go on the dyno and see if they can tune it and figure out what's wrong. They got it on the dyno, they were just bringing it up to speed and fuel started pissing out everywhere. One of the fuel hoses going up to the fuel rail split, don't know if it just happened or if it's been like that for awhile, but we never noticed any fuel in the valley before, where as there was heaps in it then. So off came the intake and manifold to replace it. Whilst they had that off they had a look at the knock sensors and they had seen better days. The wiring pins were pretty corroded and the casings were cracked. They sourced some new OEM ones and chucked them in. They also found one of the breather hoses had a split, as well as one of the igniter modules was only firing 1 of 4 cylinders on that one side. So basically this has only been running on 5 cylinders all this time. Thought it didn't sound quite right haha. The steering rack also decided to start leaking power steering fluid out of a place the fluid shouldn't be. Beach Hop was the next week and the rack had to be sent to Auckland to be rebuilt. Managed to get the engine back together and drive it home on the Tuesday night and pull out the rack to be sent off on Wednesday. Luckily they got around to rebuilding it fairly quick and sent off again so it arrived first thing on Friday morning. Got a different igniter module from the wreckers off a SR20 and it ran waaaaaay better! Chucked the rack back in Friday morning and took it for a WOF, passed with flying colours, so went and got some rego and now it's all legal!!!! On Friday/Saturday the fuel pump must of came out about a dozen times, half of which were on the side of the road. Went for a bit of a drive and the fuel pump kept dying for some reason, thought maybe the wiring in-tank was a bit dodgy, replaced it all and soldered every connector, that didn't make much difference. Discovered that if I gave the pump a good smack it would start back up pumping a bit more fuel or just die completely. Decided to get another fuel pump from Repco and chucked that in. Turns out the brand new "genuine" Walbro pump I got off ebay was shit. Went sooooo much better again!! Took it to the 4 & Rotary Jamboree show and shine at Manfield on the Sunday and took home the Best Commercial Piston trophy. Then on the Monday took it back into Danny's Autos to get dyno'd. Made 100kw at the wheels which I thought wasn't quite right (should be closer to 200kw?), but he reckoned it was running right and just the reading wasn't that accurate, he had trouble getting into 4th, kept changing down, so had to do it in third and that was maxing out the dyno's rolling speed. It had good consistent 02 sensor readings. Took it up to Beach Hop on the Wednesday. Had no issues other than getting some brake fade through the windy bits between Waihi and Whangamata, we think there must of still been some air left in the lines. After that happened I was changing it manually between 2nd and 3rd gear through the windy bits, rather than just leaving it in drive as it engine brakes way more. Survived all through Beach Hop, including going up to Whitianga, Kuaotuna and Onemana as well as cruising up and down the main street lots, the rear bumper took a few scrapes, I think it needs some titanium stripes underneath! I think it was one of the cars that got some of the most attention. Managed to get all the way back down to Marton, then when I was overtaking up a hill, noticed smoke coming from under the dash, so quickly pulled over and checked it out. The transmission sump had either smoke or steam since it was raining coming off of it, also smelt very burnt and the oil was quite dark. My parents caught up and we decided to just keep driving. I then noticed it was revving at 3500rpm at 100km/h, where as it's usually around about 1800rpm. It was only changing from first into second gear and that's it, if I took my foot off the accelerator it would drop straight down to idle. It was a slow drive home from there at 70km/h. Next couple of days I pulled the trans out, pulled off the sump and it had quite a bit of metallic build up at the bottom and just smelt very burnt. I guess it's always been slipping, as to why it didn't make much power on the dyno. Dropped it off today to get a quote on being rebuilt, so hopefully it's not too bad. It used about $400 worth of petrol over Beach Hop, which I think worked out to be 15 l/100km. After driving it for about 1200km I have decided the seat definitely needs redoing, it's way too hard, would also be nice to sit a bit lower and further back as well. Also the accelerator pedal has your foot at too much of an angle back, so gets sore rather quick. Shouldn't be too hard to fix as the seat changes should help and just modify the pedal a little. Also the door latches + door seals are terrible, takes way too much effort to get them closing right. A softer door seal might help, and you can get bear jaw latch kits that are basically a bolt in thing for these which might be the go when I have the spare money.7 points
-
So have managed to progress with this some more! Got it all back from painter Doors all on lined up not perfect but will wait till front guards are on Fitted all new door rubbers and window guides Got the motor In Swapped over the end T piece of the steering collumn to the shorter power steering one from a ms110 And fitted it back in car Found out the auto and manual pedal boxes are the same manual just has a mount for pedal so I just removed the clutch pedal and refitted as this will be auto. Painted the brake booster and fitted the new Nissan pajero brake master. That's all for now! Exciting times6 points
-
i gave the center console a tidy up and a coat of paint. 2019-04-07_11-14-14 by sheepers, on Flickr then i climbed into the boot and started prepping it for paint. managed to get it ready without to much back pain so i decided to try and paint it. 2019-04-07_11-14-36 by sheepers, on Flickr came out really good so now i can put some seam sealer in the gaps and sand it all up ready for some colour.6 points
-
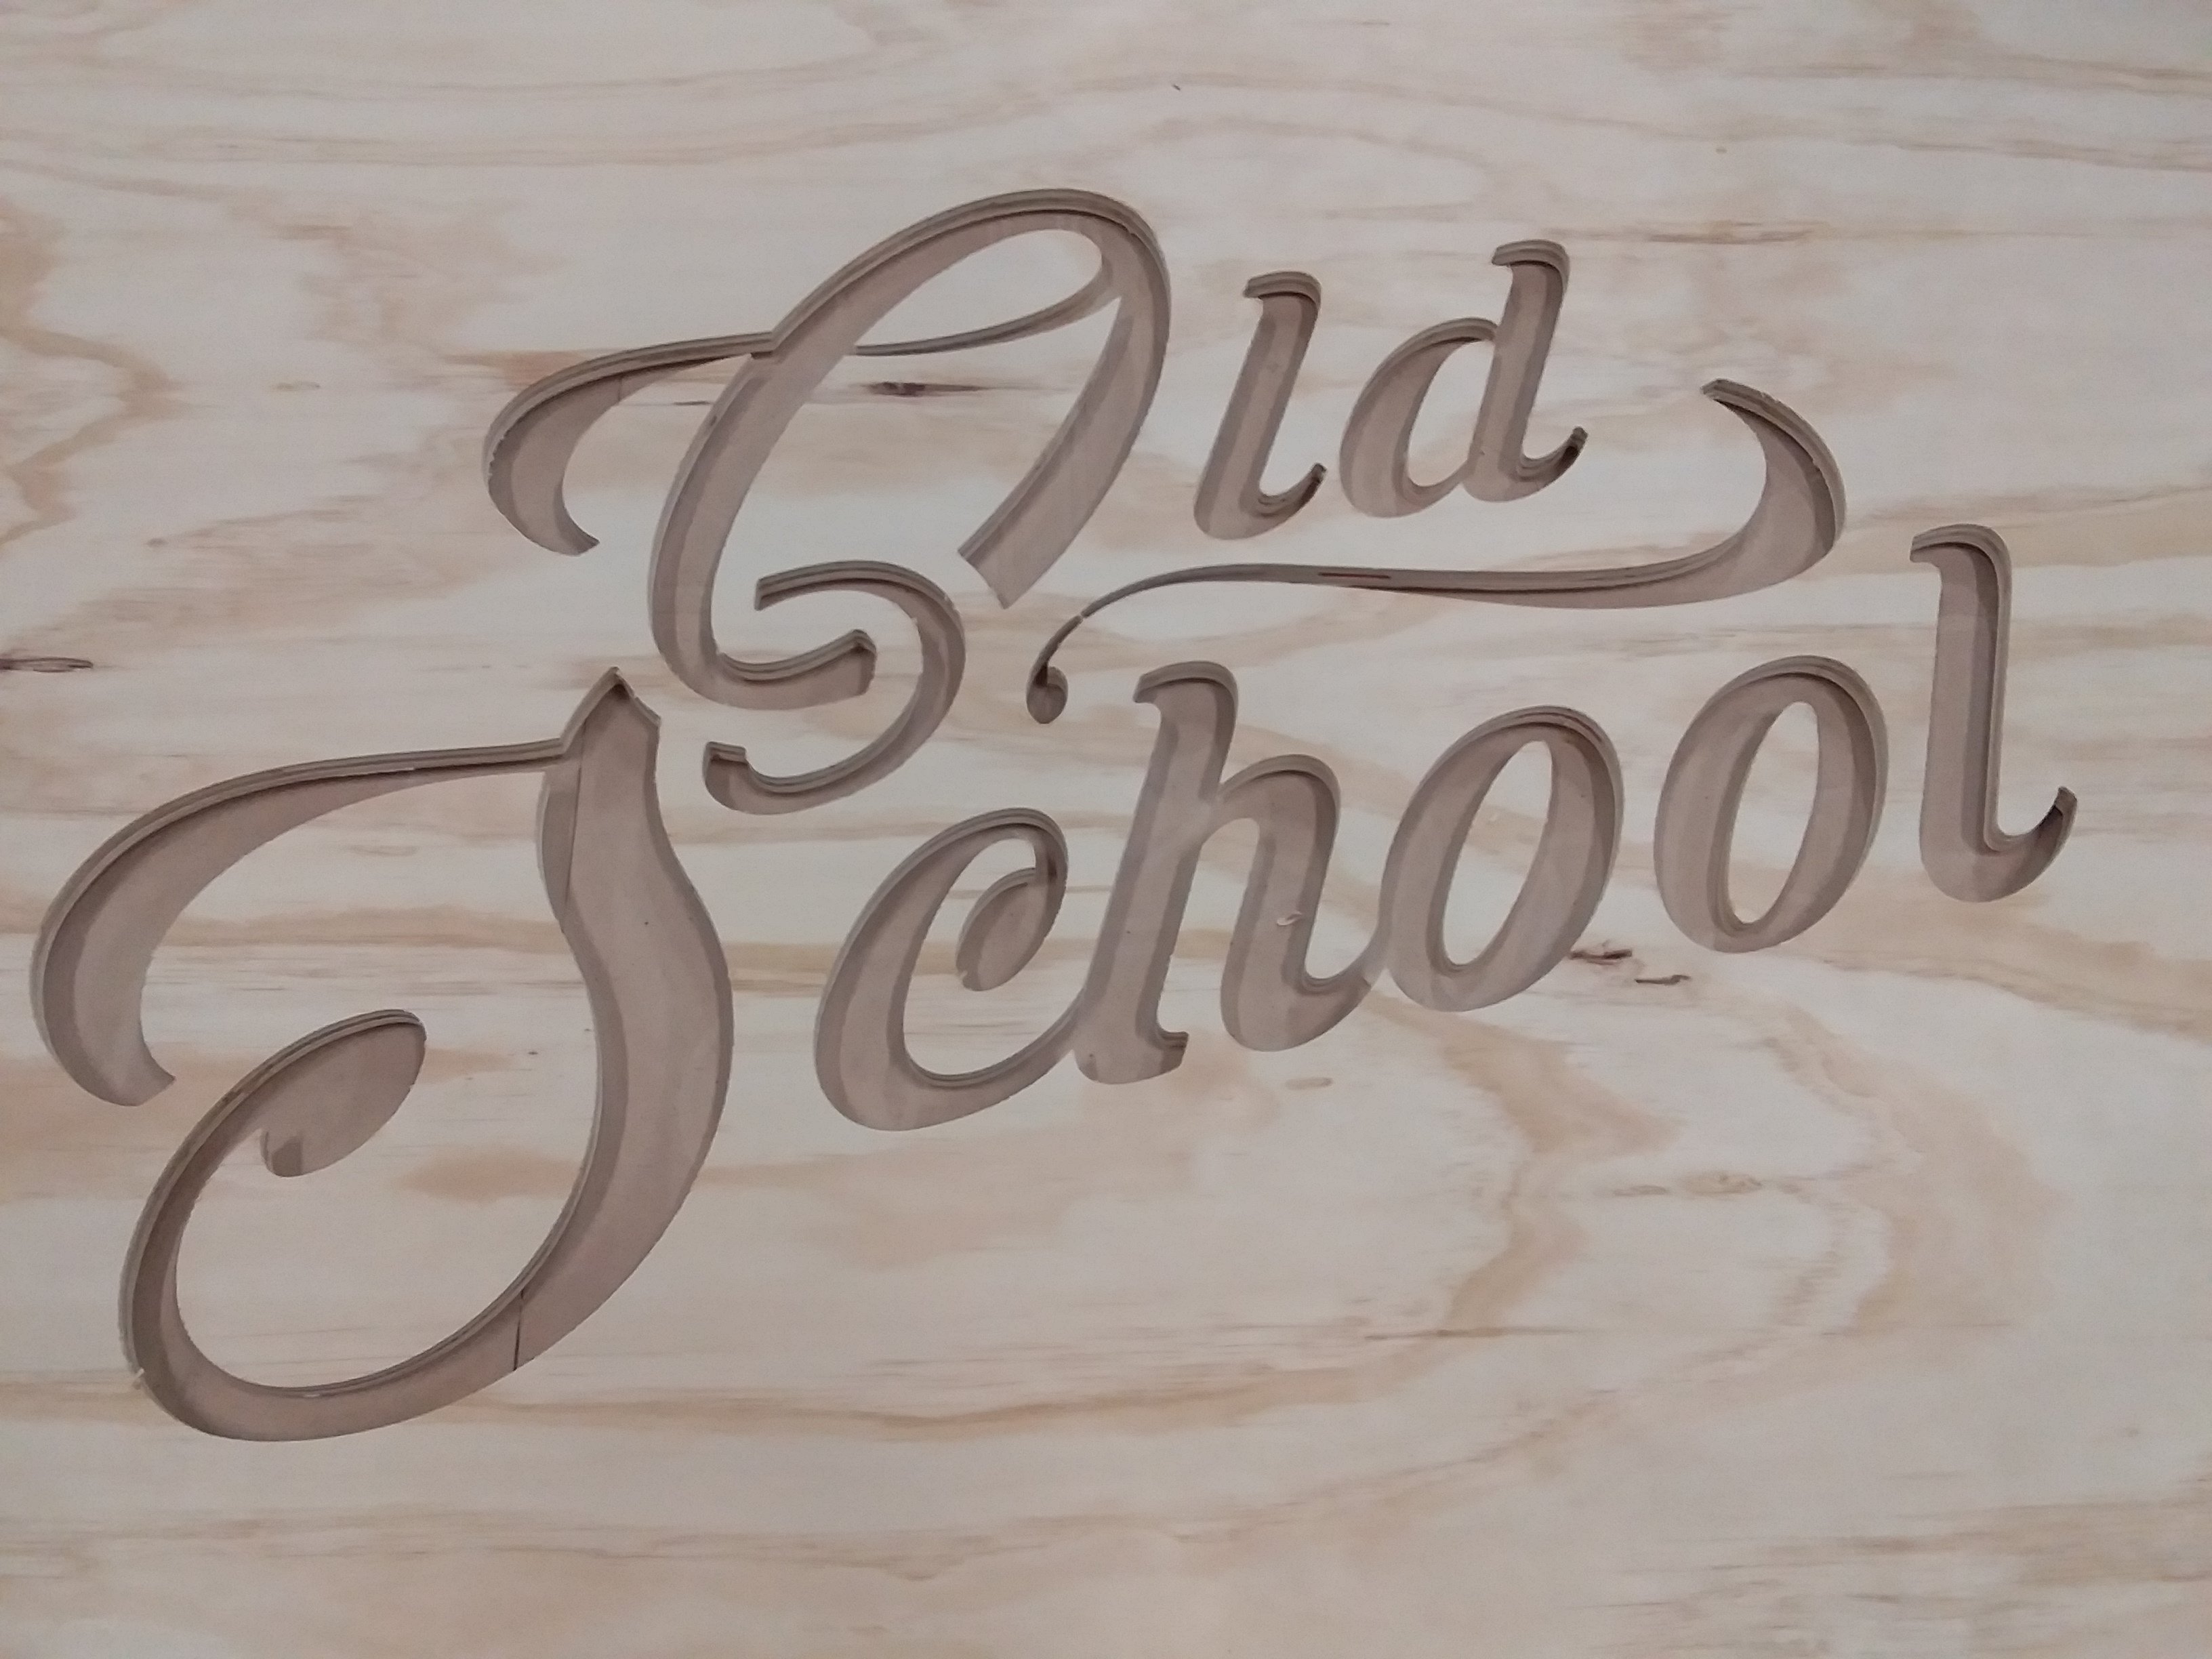
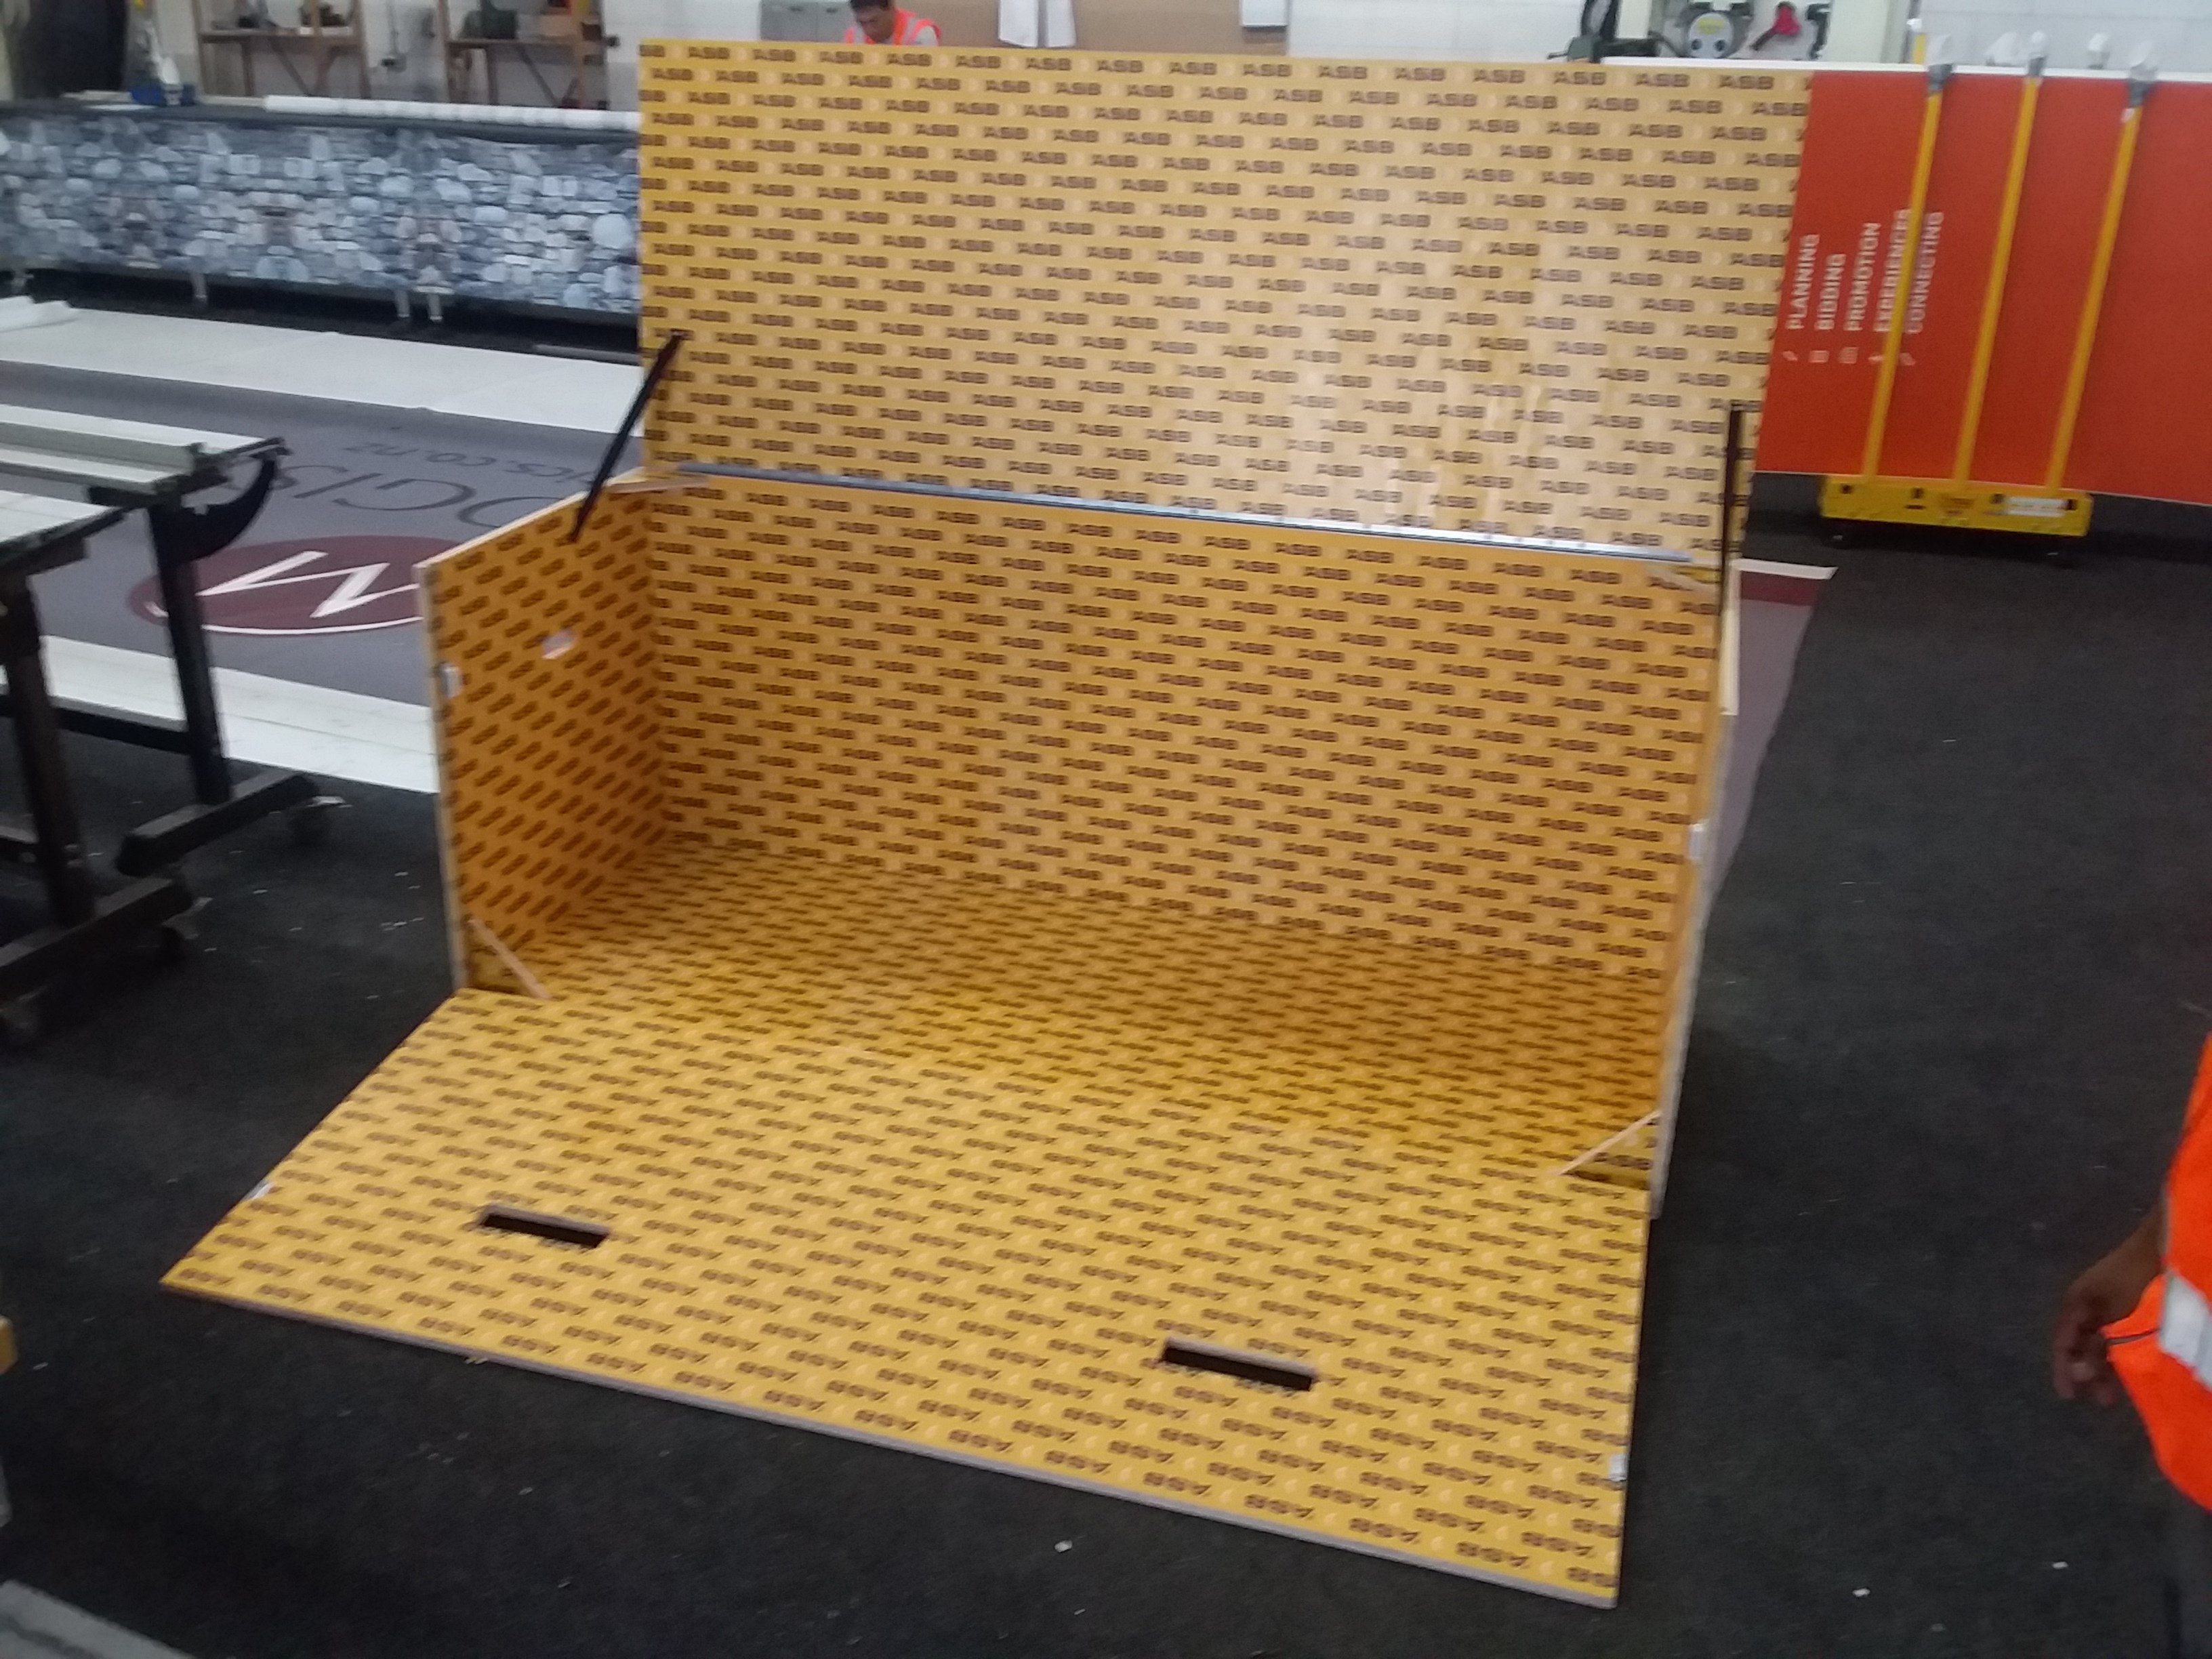
Made this at work.
4 points
-
ka pai waka my bro3 points
-
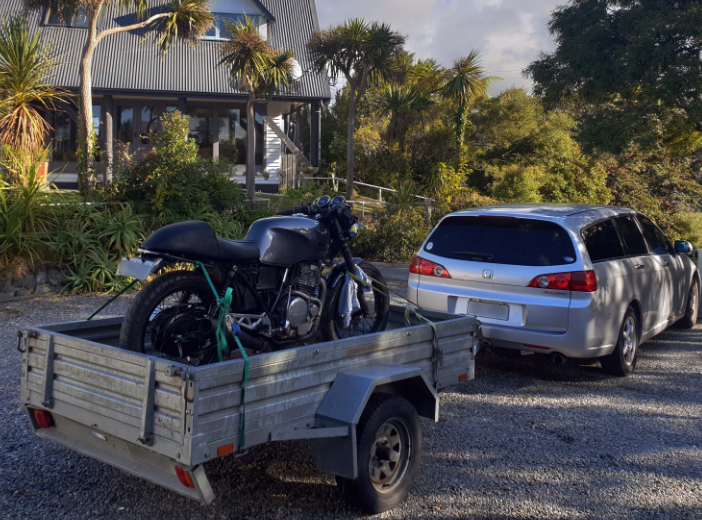
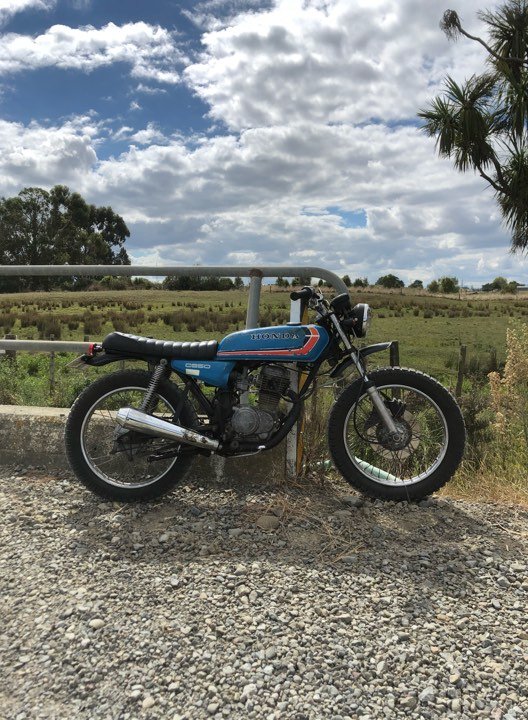
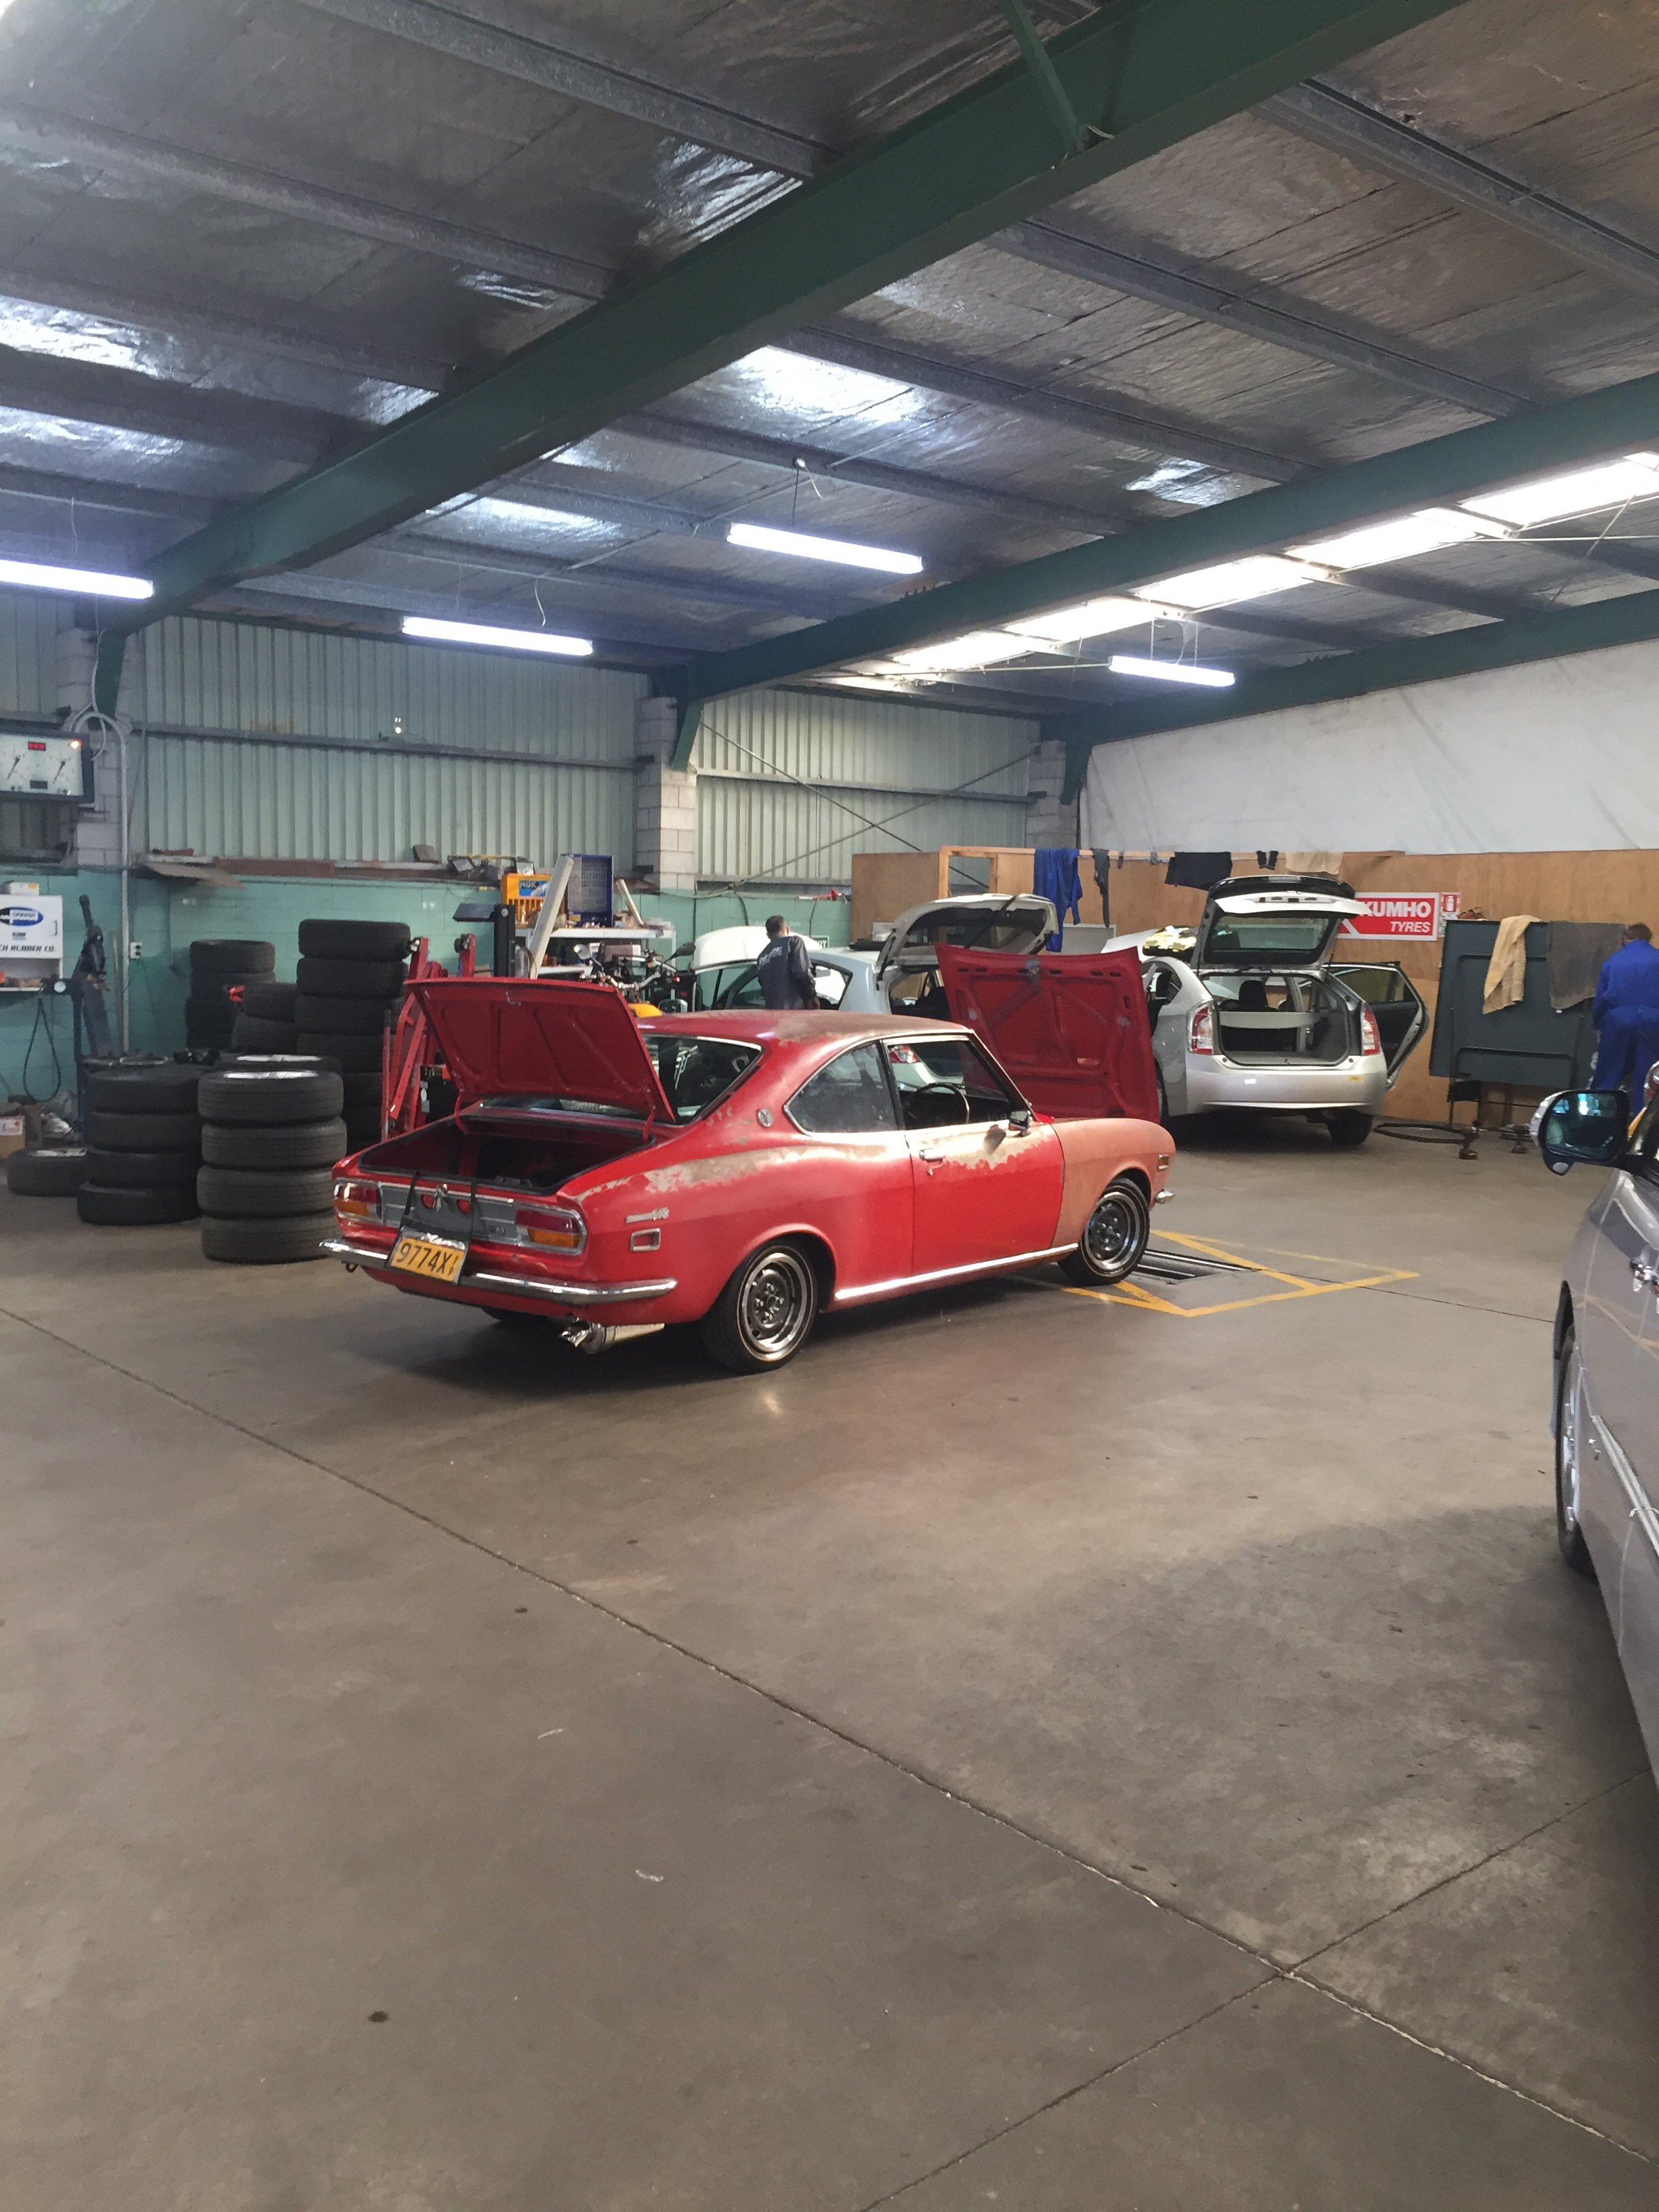
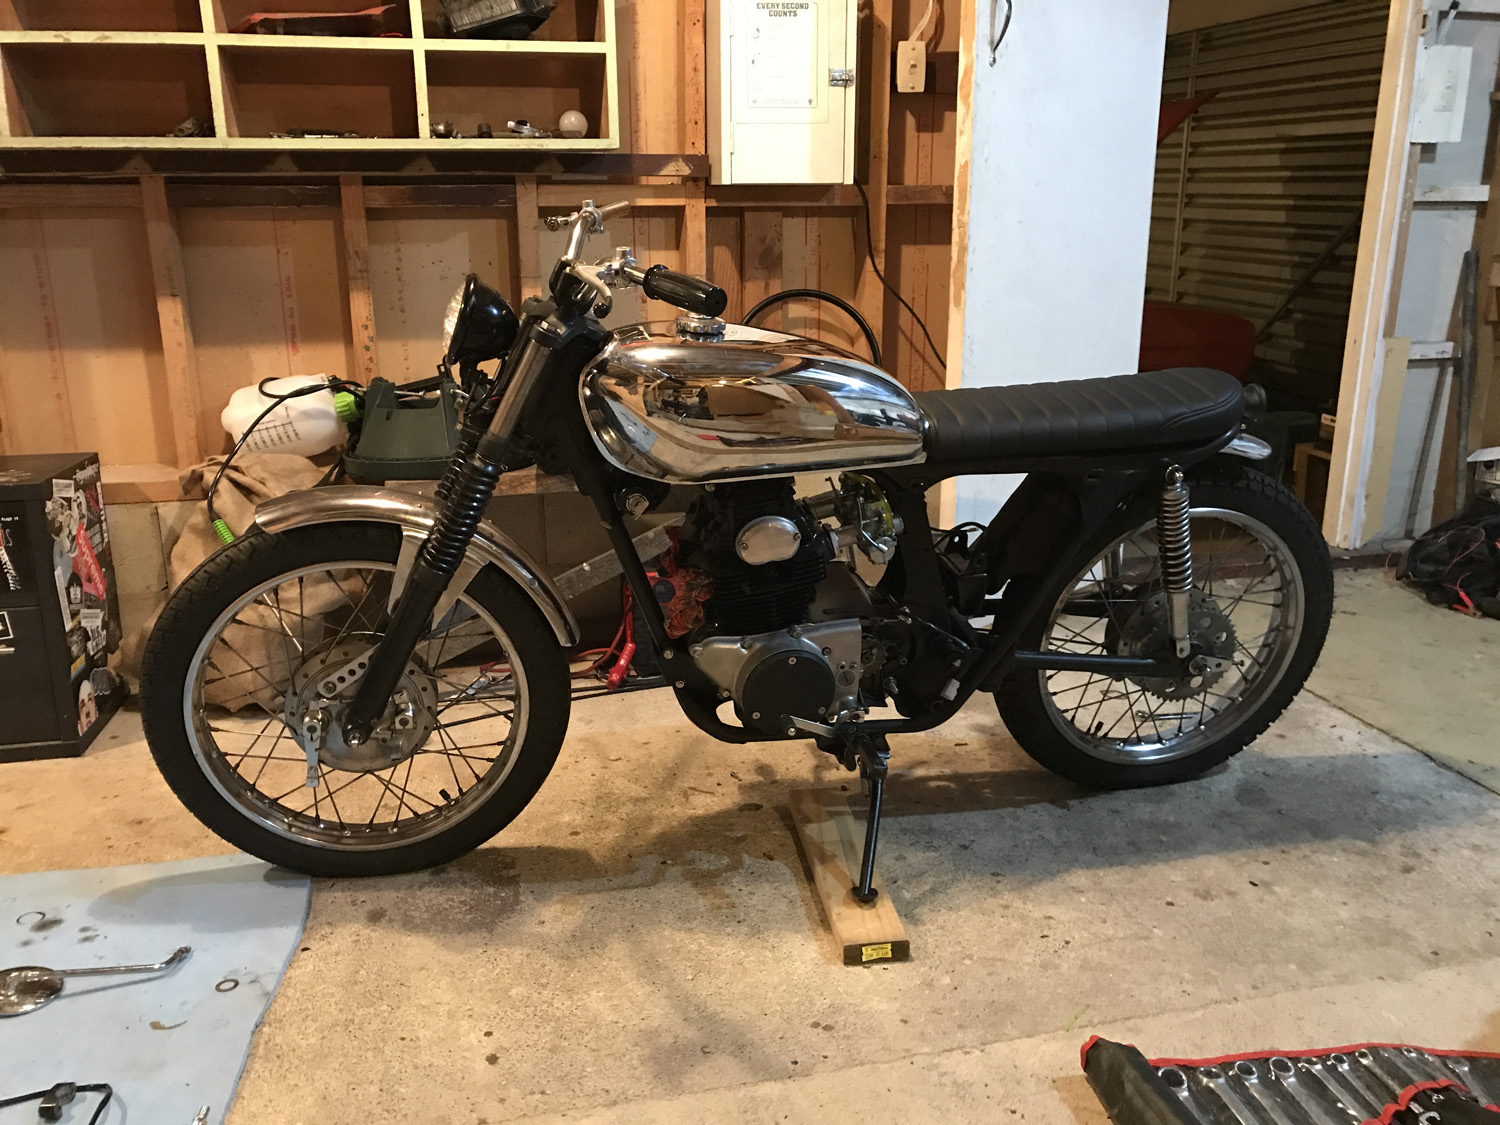
Thanks team! I'm certainly enjoying the process. I banged it on the back of a trailer today and took it down for a WOF check. I've never used this guy before but he comes highly recommended and has had quite a few GB's in there over the year. Seemed like a pretty straight up/no bullshit kind of guy which I like. Not much room between me and the ground so I want a thorough check.. It was cool seeing all the necks it snapped driving through town. I heard a few people make comments about the "cool bike" haha Obligatory photo for thread. Hondaception
3 points
-
these ones had equal length shafts so i left them where they were and trimmed them Good Question! Mainly cause I used up my car time and had to do something else. Next day i did go for a hoon, went ok (better than the single carb!), but rich and lean spots and hanging on idle, etc, carbs not going back to idle in balance, etc So, I pulled off the carbs tweaked/ground back the linkage a bit more (master and slave levers were interfering with each other a bit), drilled the carbs mounting holes to 9mm (from 8.5) for that little extra bit of slack, reset the float levels, (12mm for these newer ones with a 26mm droop vs 8.5 and 15mm for the older style) pulled all the jets and gave them a clean out - two main jet stacks were not fully seated, and one accelerator pump jet was blocked ground some of the dizzy scoop on the manifold some more (while i could feel how thick the wall was with the carbs off) installed carbs and rebalanced/set idles etc hooned Great success, but does have a lean point off idle (progression holes?) and is a bit rich elsewhere esp on WoT, thinking of upping the mains to the 135 i have (up from 125) but also increasing the air corrector to reduce the richness at higher rpm (190 currently, no spares), but that is for later. Engine runs and pulls much better than with the single already, sounds great on song and has a pleasing burble at idle, and near silent on cruise with an instant response to stabs of the jandle. reccomended3 points
-
And these!! Painted rocks with the kids one day.
3 points
-
Saturday morning update.... Got my chores done & picked up my new tyres, got back home and the postie had brought me prezzies. Time for an early lunch and then an afternoon of Skyline shenanigans. /pics
3 points
-
Update for those interested Repair Cert PASS Compliance and WOF all PASSED apart from the below 2 points - tighten hand brake cable - fix slight leak in return line to gas tank brass fitting Cert Clint did the cert on Friday and I’ve attached the list. I just need to work through that list and take it back for the brake road test. I also need the old old owner from USA to email that he sold me the car - I keep in touch so that won’t be an issue. Now to work through the list and get this sled legal. Am I happy? Yes, the answer is YES!
3 points
-
I got this off Zac a few years ago, it's been sitting in storage but I'm getting the bits together so I can assemble it then it'll get sold. I bought some 0.5mm oversize NA (9:1) pistons and bearings from Rockauto. The block was bored by North Canterbury Engine Reconditioners to suit the pistons, he also decked the block and polished the crank for me. I'm converting an Evo 3 head to use the cam and crank trigger setups that some of the other 4G63s ran, I bought new sensors also from Rockauto. I've welded up the injector holes on an Evo 4 inlet manifold so I can use it with the Evo 3 head and have the throttle body facing the correct way. Still need to get lots of other bits, oil pump, sump, turbo and manifold, flywheel and clutch etc etc.2 points
-
Migrane yesterday meant I got nothing done in garage. I chipped away at more stuff today. I got the cv shafts in and reassembled a inner that had popped out. Filled the gearbag with fluid. The rad support got a lick of paint to cover my butchery and make it match. I refitted the radius rods with new bushes and went to bolt in the crossmember only to find it hits the manifold. A quick tickle with the grinder should fix that. I will have to make up a support bracket for the back of the motor as its a long length of pipe to support from just the head. It did start up and is a fair bit quieter now which I'm happy with. I'll only find out if the drone is gone when I drive it. Another couple of evenings and I'll be drivable again2 points
-
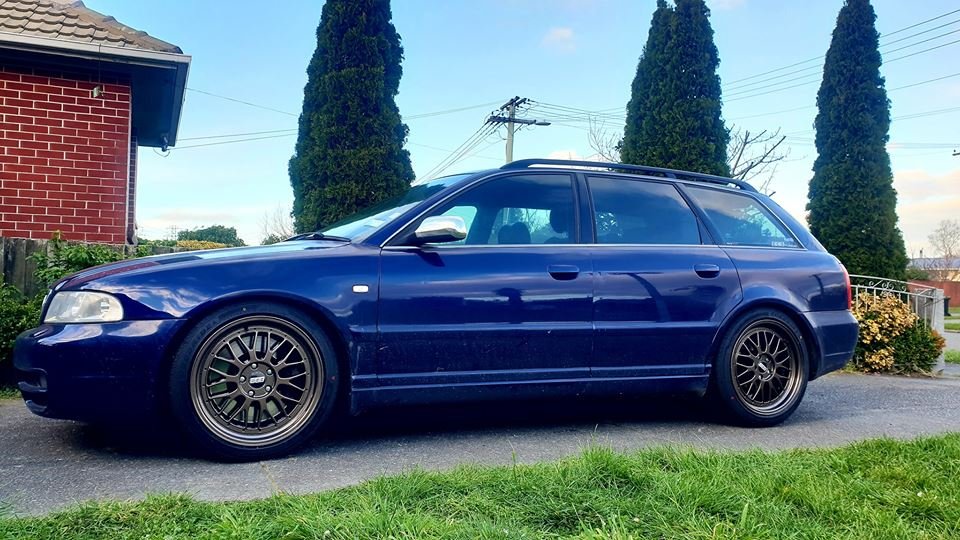
for bronze wheels i highly recommend the bmw paint code 'A32'i had a paint shop mix me up some paint and i used a compressor ect. but you can probably get it made into an aerosol too. i did my old s4 wheels bronze with that code. i did a gloss clear, but a matte or satin clear could be applied depending on what you want.
2 points
-
2 points
-
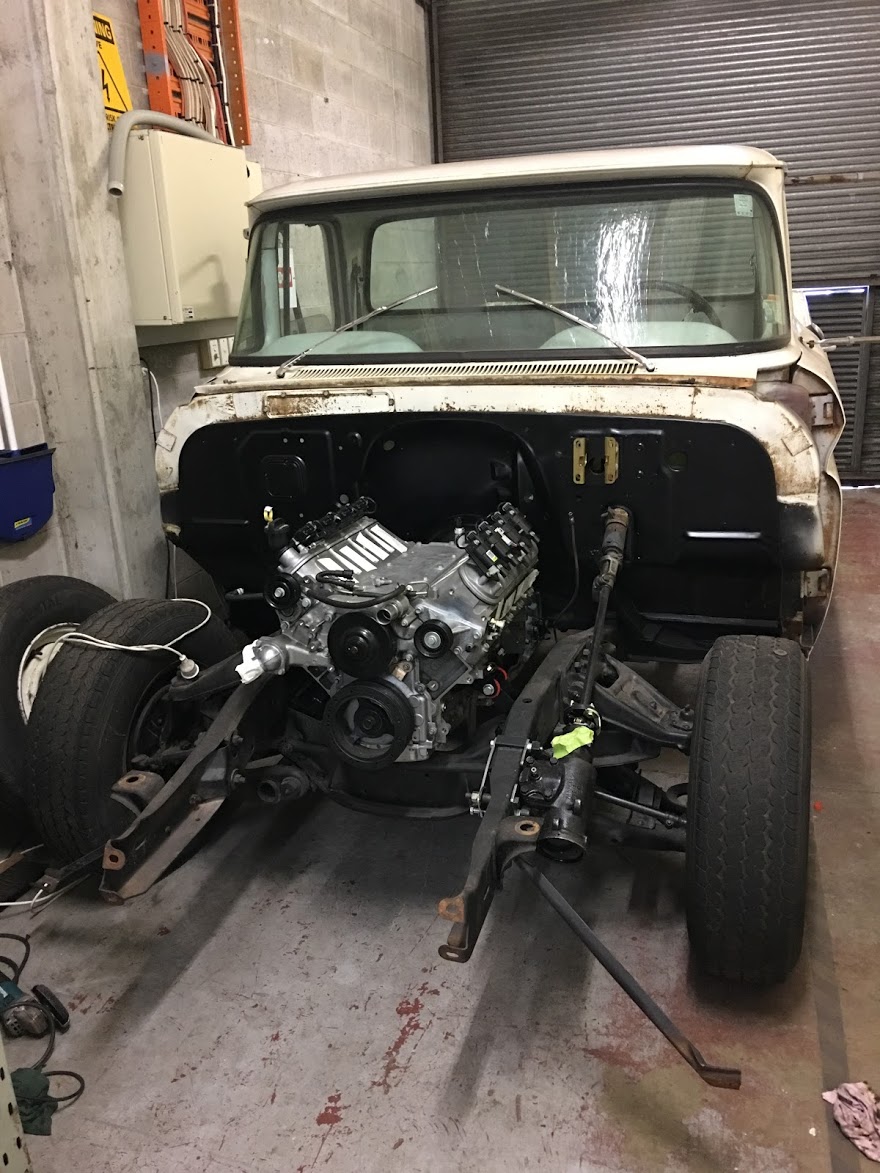
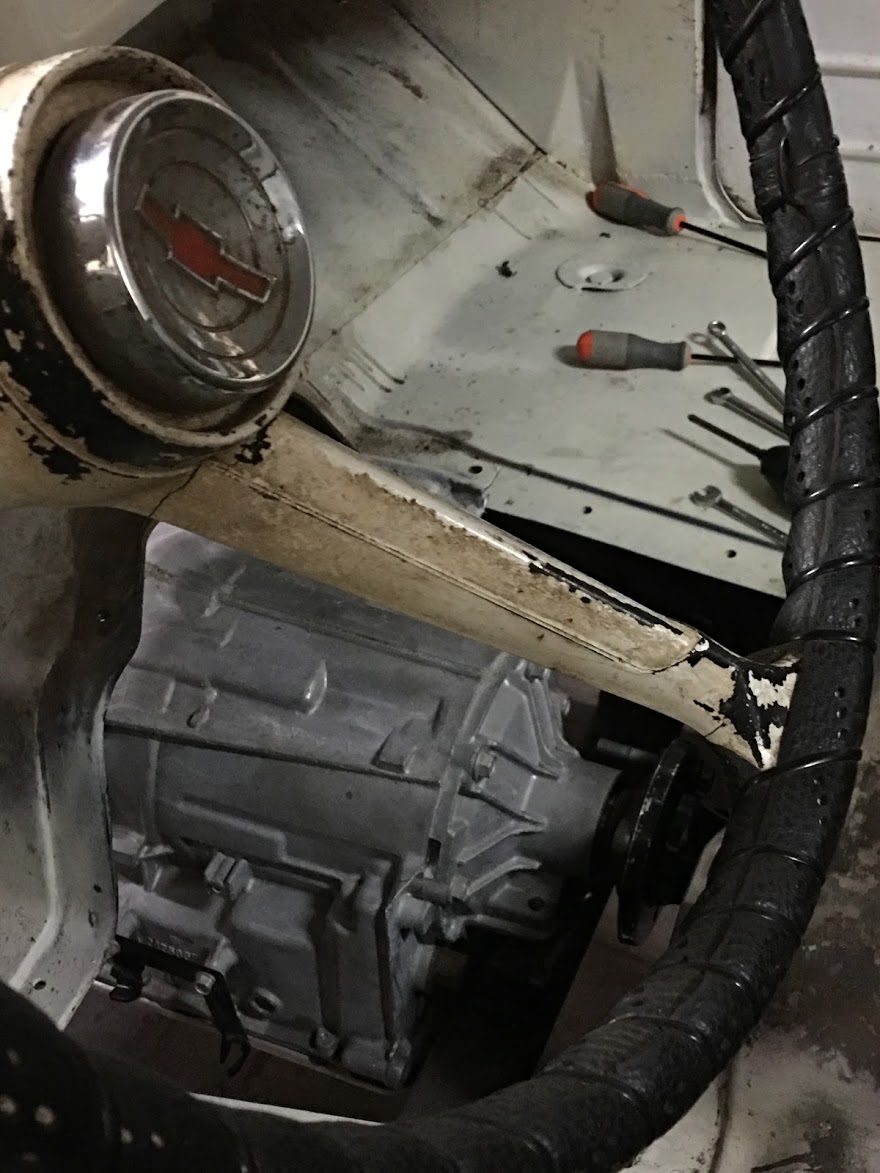
I have been looking around for a while for a new work truck, wanted to go old school and update it to modern running gear and some creature comforts. I didnt have much of an idea but liked the look of older Chev trucks, did some reading and looking and got to this point. Truck will be in the country mid April, it is currently running a 327 and manual gearbox, and pretty much stock apart from that. Plan is to get it complied with existing running gear then modernise a wee bit. I have an LS3 and 6L80 trans and all associated wires and mechanical stuff in my warehouse now (cart before horse) and maybe a front end suspension transplant from a later truck and a diff with a lower ratio. this one will be either a 4.11 or 4.56 ish I believe, so a bit on the highside. While the intention wasn't to start/have another project, Im quite fizzed up about it. Going to keep it stock looking, no fancy wheels or any of that crap. Will get some hand painted signage on it, I want it to look like it was always there.
1 point
-
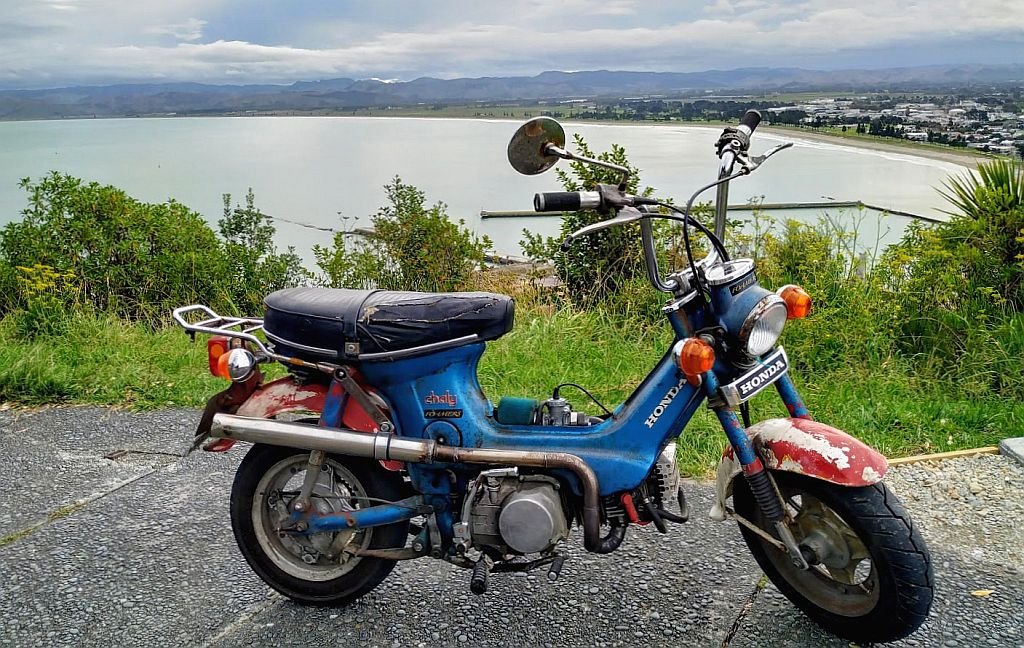
so yet again i failed at finishing a project and sold my honda chaly 90% complete, but for good reason, Blake had chucked his cb50 up forsale and i nabbed it and needed to pay for it somehow. quick rundown for those of you who don't know the bike, its a 85 cb50, with an xl100 motor installed, some bigger tires, coole lights, cool seat, genreal tidy up etc plans are to ride it and enjoy it go on some wild adventures on it, probably source another fuel tank to repaint in some wild colours, strip the wiring loom down to bare essentials and slowly rebuild the spare xl100 motor i have to eventually drop in there. only photo i have of it currently, enjoy
1 point
-
Google translate says "Good Traffic". I concur and I thank you. /although I don't know why.... //blardy poms.1 point
-
Are the brake lines to the cylinders metric or imperial? Pre 71 cedrics had imperial fittings. 71 on had metric.1 point
-
It's a slippery slope! The easiest option would be some R33 gtr 324mm discs and some caliper brackets using these 4 pots and some good pads but then I'd possibly have wheel clearance issues etc. Its about $650 for the brackets and non genuine discs. I plan to use this for closed road events and to begin with just having some fun at Manfeild. My last car cooked the brakes after 5 laps, it improved with ds3000 (from memory) pads and 600deg fluid. What I'm struggling with right now is the slippery slope of just doing a bit more. It's been 5 years now. I just want to drive it. EDIT: techincally a bigger disc would need a recert if I do it later. But so would a retune and more boost...1 point
-
Congrats bruddah. That's awesome.1 point
-
Been collecting a few bits. Another radiator for the supercharger water/air intercooler, water pump and reservoir. Plus just chucking the acc drive on and getting a length on the blower belt... Waiting for trans. And to add a spanner into the works, looking for another warehouse for work, so this may have to wait until after the move to do the swap... Anyway, shiny bits photos1 point
-
so the T3 ones sometimes push the circlip out and the bearing moves in the housing. once that happens they're fucked, you gotta buy another top plate (T3 will sell you just the plate and not the whole assembly) but if its just the bearing fucked you can replace it without to much drama.1 point
-
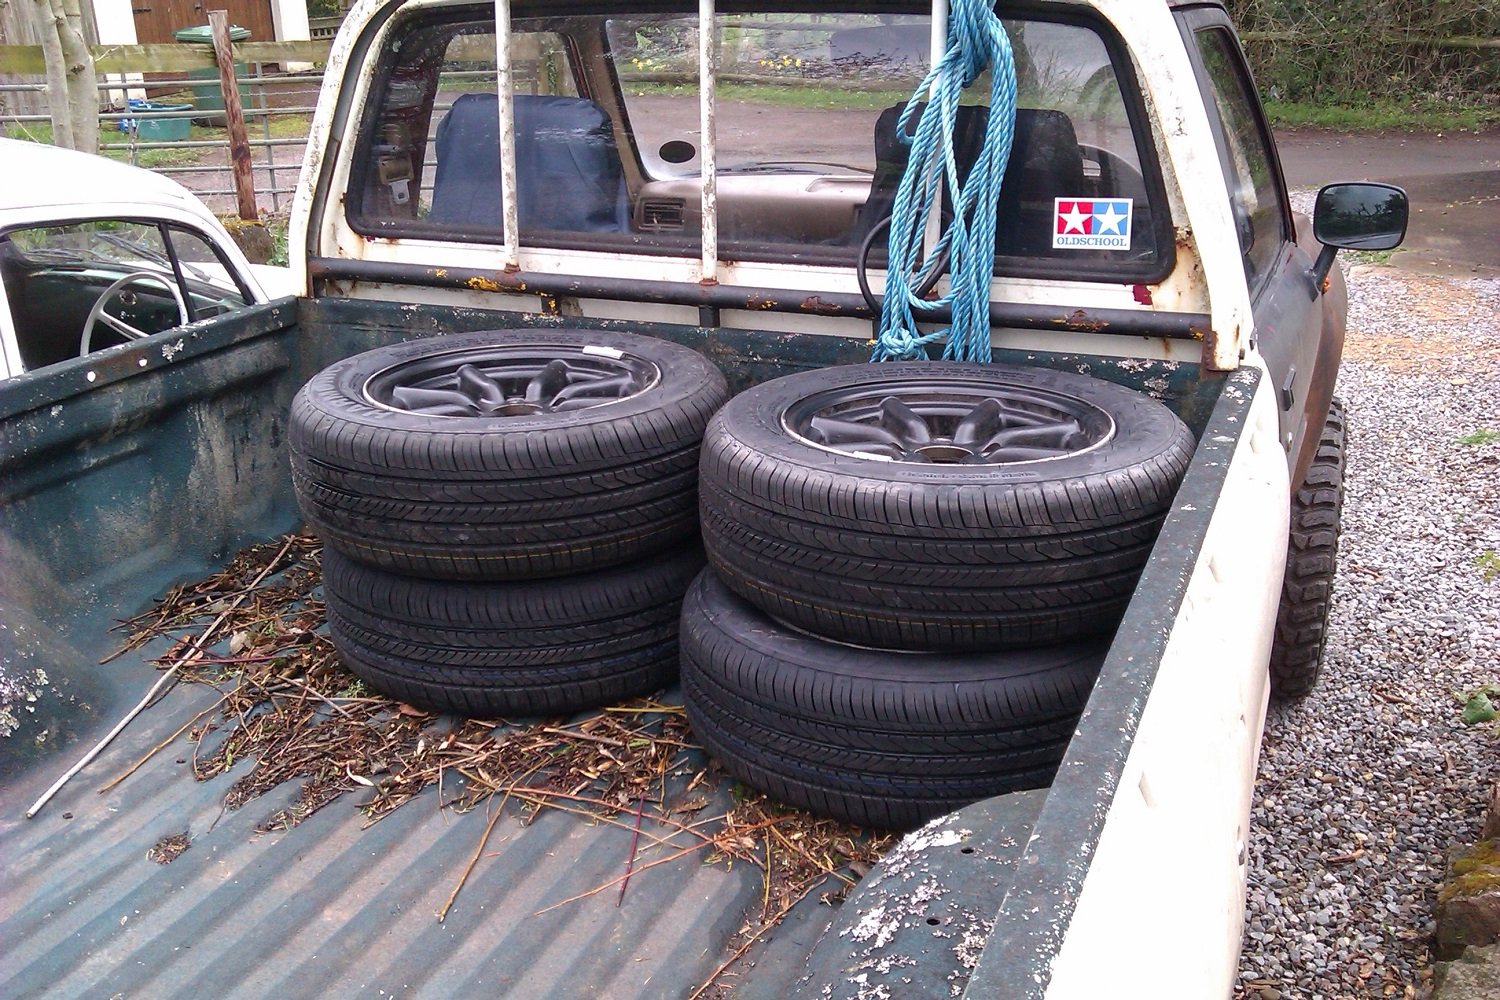
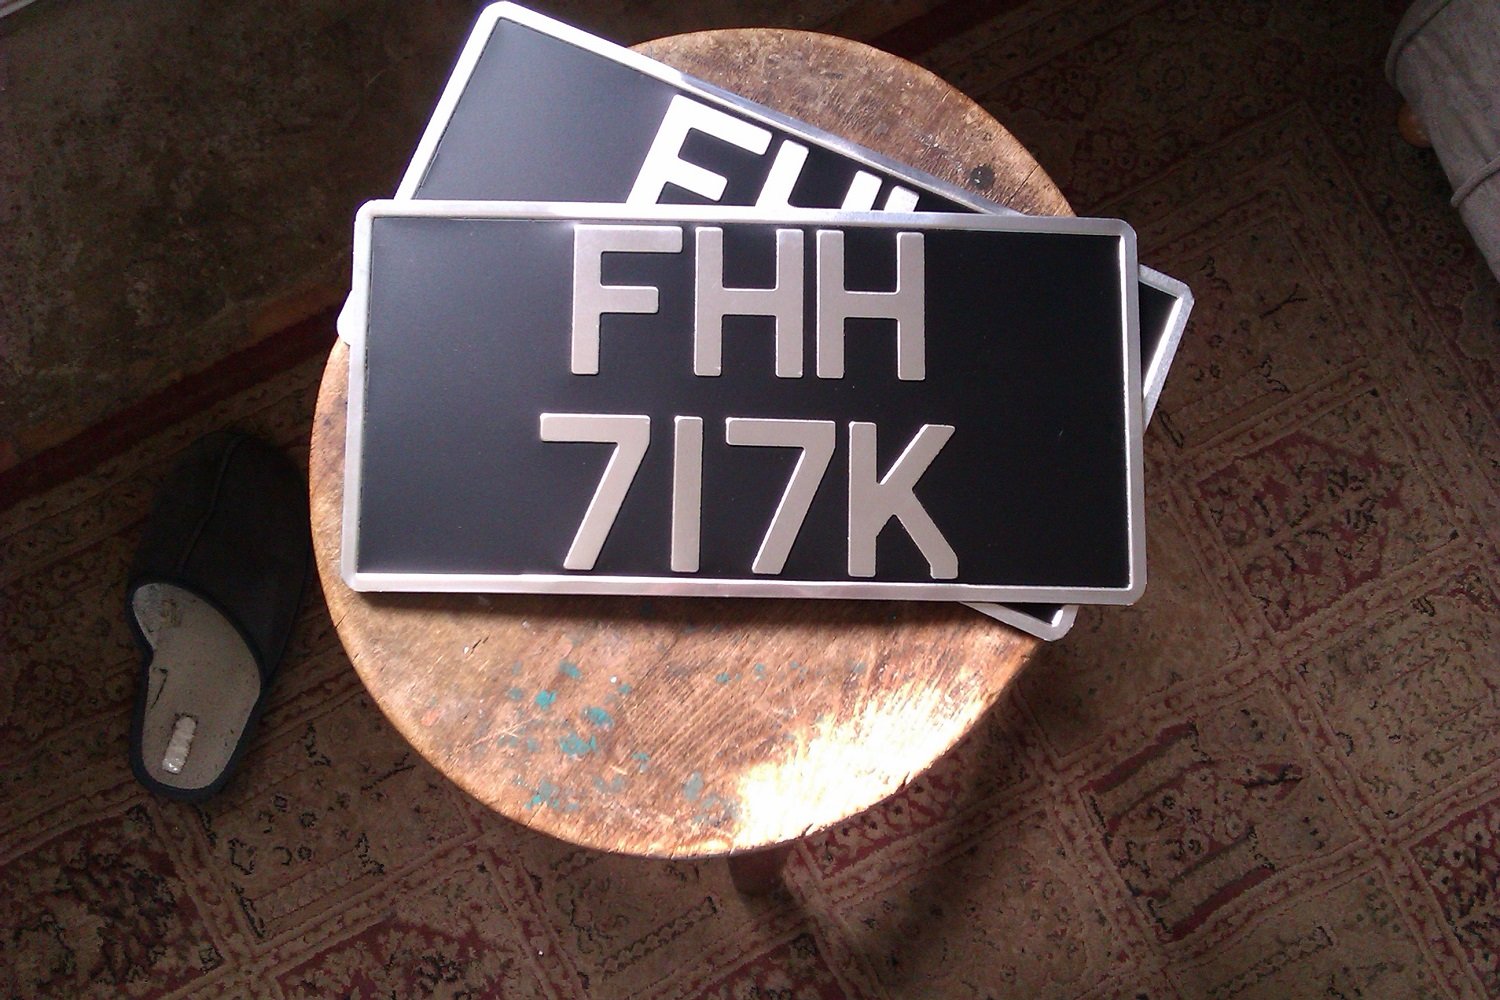
What happened was..... Had a big fuck off pizza for lunch & then got stuck into the car around midday. First job was the clutch, thought the master &/or slave might have been fucked but a bleed & adjust sorted it Brakes next. Calipers were a bit sticky but freed them up to a usable state. For the moment, at any rate. One rear was perfect, if dusty. Nice use of thumb... Other side fucked. Or so I thought. Cleaned it all up, took the cylinder apart and it all seems fine. Once I'd refitted & bled the system there was no sign of a leak, even with repeated pedal stamping/ continual pressure. Go figure... We''ll see how it goes. I wonder if the reason it was all damp and shitty was because on top of the drum was the fave spot for rats to have a wee. Put new plates on. Think I'm going to join the rear lights with a black panel edged with chrome trim. Mrs Shuzz said " Oh, FFH....Fucking Hot Hako ?" Good girl. Finished off as the sun went down touching up the paint on the rims & taking a blurry pic. Messed about with plug leads, etc and came in And that was a bloody good use 7 hours of my Saturday. Test drive tomorrow. Sweeeeet.....1 point
-
Pretty sure I flipped one throttle shaft so the two short ends where facing each other to make mine fit and had to custom fabricate the linkage. But what I really don't understand, how can you balance the carbs and not test drive?1 point
-
Yes, worn brushes. You will only get a few knock starts, so replace soon.1 point
-
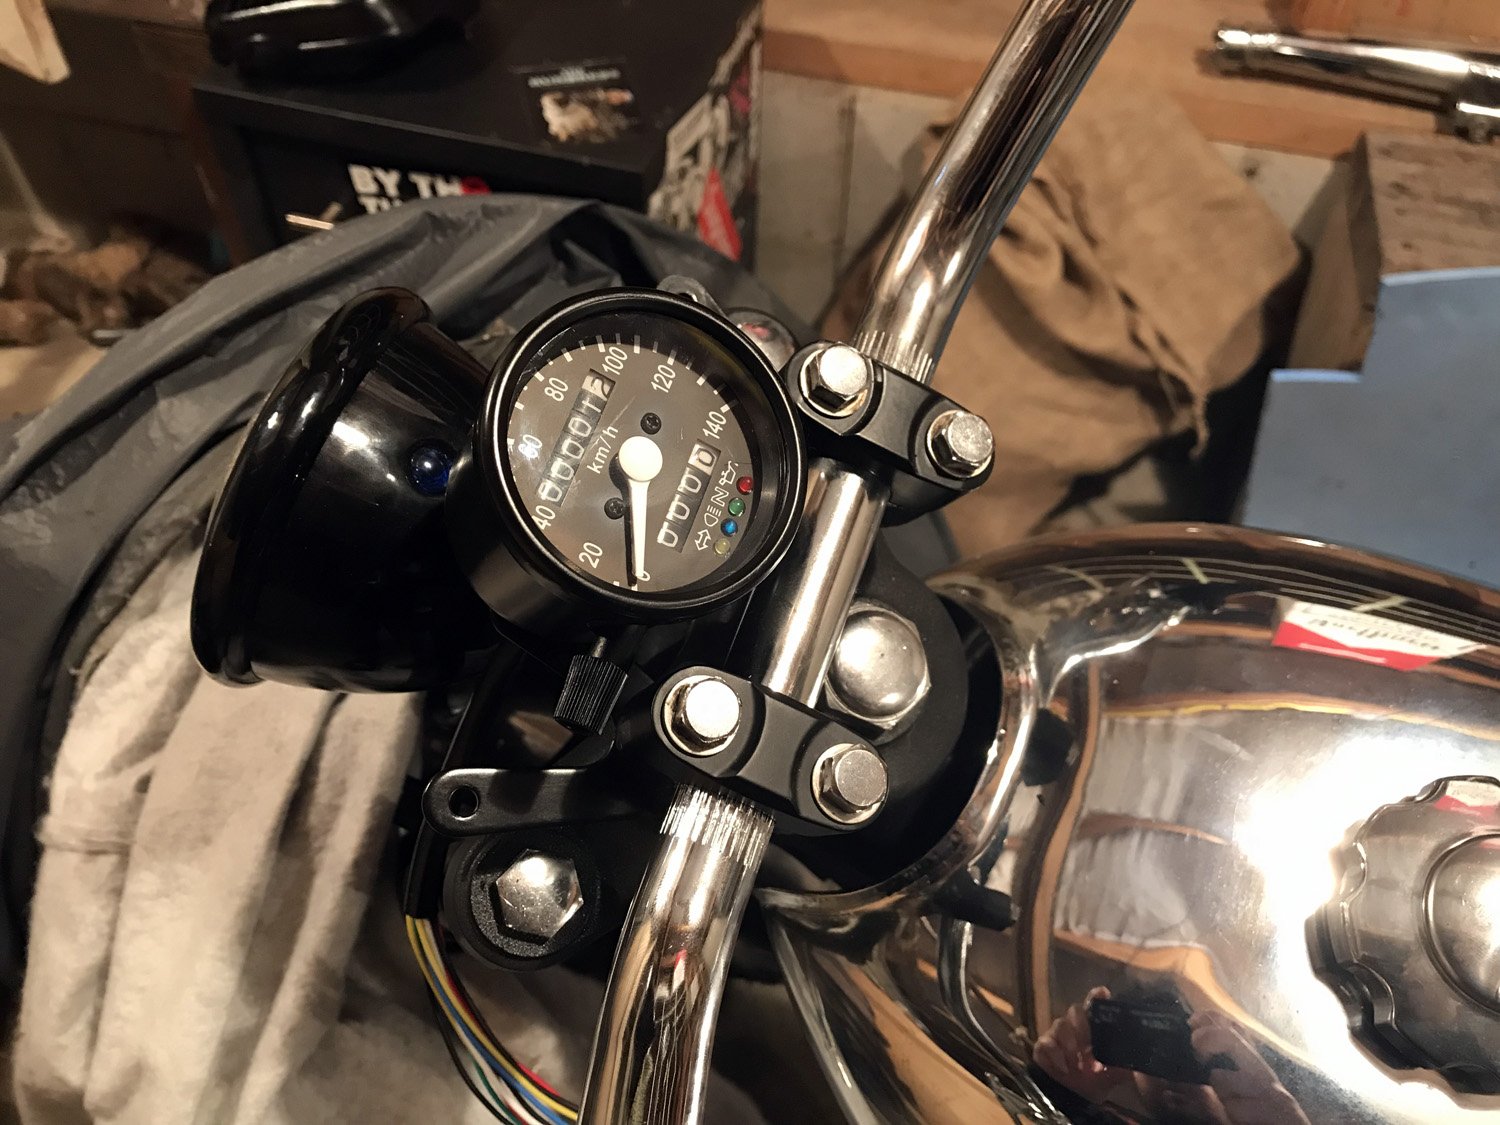
Wow it's been a while. Purchased most of the parts I need to finish this thing off. New cables & switches on their way. Installed a speedometer today. Decided to flag having a tacho as I don't really need it and I like the look of having a single centred gauge.
1 point
-
The last manky fuel tank I had, I took it to a radiator repair shop, gave him $40 and I picked it up the next day all clean.1 point
-
fix it til it is?1 point
-
.1 point
-
Compliance and WOF today. Dealer plated FTW spat some fluid on the way down - shite rad cap. Swapped it out as I had 2 with me in case haha. Gagging for a tune.
1 point
-
Last piece was to fit the 3pt seatbelts to rear outer seating postions And she flew through with no issues at all!! three days before Toyota fest, was a massive mish but we made it Still have a stack of things that i want done, climate control panel is toast which i have a replacement for, rear light seals need replacing etc. Have everything there to go but will slowly get through it all and get the car to where i vision it to be.1 point
-
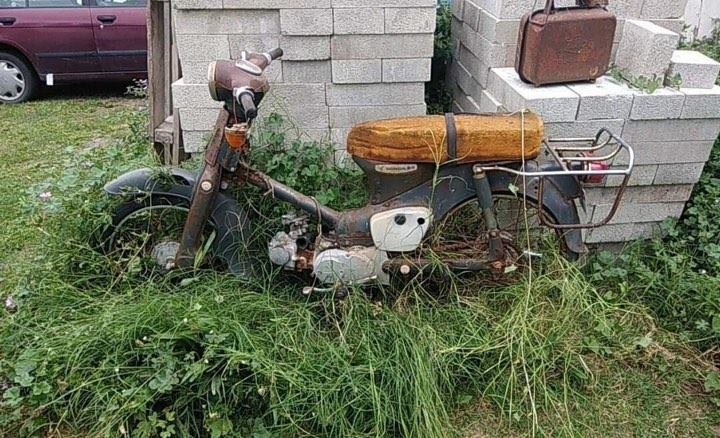
So after getting rolled by the 5.0 on the Chaly, that got its innards stripped to finish another bike. @Raizer found this in a garden in Gisborne, and pulled it from its slumber. It had been sitting under a tarp in the long grass for a while developing a killer patina while actually staying fairly complete with all OG parts, I collected it off him and dragged it home in a 12+ hour round trip from Auckland. The 'GardenCub' Its pretty sweet, fairly ratty and suprisingly solid. The externally rusty wheels were found to be immaculate internally after removing the super cracked tyres. It even had the original, matching patina legsheild. The engine was seized, the carb had an ant nest inside it and the seat base disappeared aftter the strands of foam holding the corroded base together cried enough in the trailer and scattered rust flakes all through the gorge. Id been wanting a Cub since, well, probably seeing QCR on the news / in NZPC and pined over the Peaks Mopeds type style of OG paint, maximum slam and chopped up standard bars. This had been in the corner of the shed, and over time I progressively stripped it down, washed all the gunk out of its crevices, renewed wheel bearings, freed up seized pivots on the brakes, ordered replacement cables, brake shoes, pestered @MopedNZ to find me the style tyres I wanted (He had to get his work to open an account with a supplier just for me <3), put feelers out for a few parts my bike was missing -taillight etc ( hoarded all the old stock parts people were removing to customize there cubs} all while trying to preserve as much of the patina on any externally visible surfaces as possible. I stripped and rebuilt the original engine with a new top end, all gaskets/seals, reconditioned cylinder head and got it running but had a terrible time with the carb so it sat in the corner of the shed while I was caught up with a few other things, Then the chaly got decommissioned so the motor got pulled and Chaly motor swapped into this along with a trailtech, and rewired from scratch. In my pile of other peoples discarded parts I had a spare stock ehaust, so the front of that got chopped off, muffler hollowed and a new header made from misc larger diameter stainless bends to suit the new engine. Handle bars were a spare I acquired to use as a trial for my first attempt at fab work / welding before I committed to butchering the original bars. They've been narrowed about 100mm over stock to get rid of the indicators, aswell as being pulled back and down to match the angles of the legsheild. I also remade the bar cover to follow the lines of the bars while still trying to keep them fairly factory looking in the way they tuck into the switches. I reused the original grips, slide throttle asm, speedo and switch assemblies. They're not as narrow as Id like them to be, but they're the same width as the rear rack, and have super comfortable angles. Fairly happy with them as a first attempt considering at the time I wasnt quite confident enough to go butchering and re making the handlebar mounting points. Bag and spine rack were an ebay special -rate these for chucking drinks/junk in, Legsheilds a repro thats been aged to match the bike as I couldnt bring myself to cut the OG one to fit the carb off the chaly motor, Deluxe fork cover and legsheild clamp are OG stuff pulled from my pile of parts Ive added to add to the OEM+ spec asthetic I was going for. @MopedNZ was kind enough to bring me back a set of Draft Kustom Shop Lowdown links from his previous trip to Thailand in 2018. These are sweet and give a 30mm drop over stock, but that wasn't enough for the look I was wanting so when installing them, along with fresh bushes, They also got the QCR mod done to prevent lift under braking and a couple of other custom touches to chop closer to 60mm out of the ride height to get the guard destroying ride height I was after. resulting in the front guard and fork cover being clearanced nicely by the radial tread pattern of the tyre. PERFECT. The rear got bought down to match via shortening of the factory springs/shocks. Still retains a very little bit of suspension travel which is nice.
1 point
-
Remade the muffler, it isn't quiet but it's much less offensive than it was. The extra restriction cost enough power that I had to rejet to get it back lol. HUGE thanks to @GuyWithAviators who kindly brought a few goodies back from Thailand for Chandler! Not that the needle will ever see speeds beyond 50kmp/h... So stoked with that front badge!
1 point
-
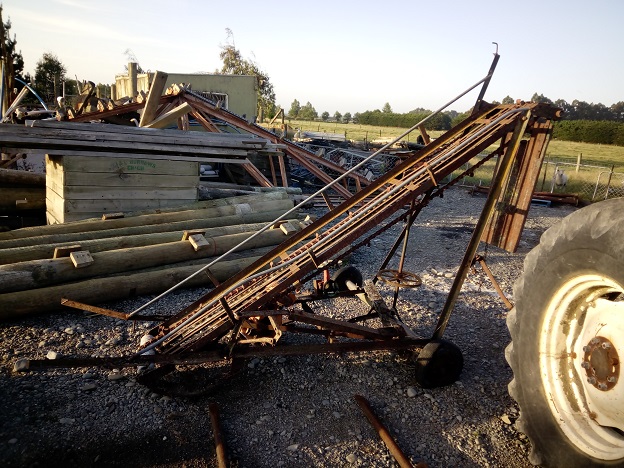
About 18 months ago I picked this up to make into a wood elevator. Thinking it would need a bit of a tidy up and it wold be good to go. I brought a gas set home from work and started to trim off all the shitty bits. Problem being, the only bits left were the main chain and sprocket as all the rest was shitty. Fast forward to today. Ready to lift some wood!
1 point
-
Decided I didn't like the stainless trim around the windows enough to keep it, so swapped in the standard one I had. Suits the style better anyway. Then I could put the inner windscreen surrounds in, as well as the sun visors and rear view mirror, but I don't seem to have a photo of them. Took the seat to the upholsterers and got some Mexican blankets put on. Will only be temporary until I can afford to get it done properly in leather or something. Had the center dash panel straightened and polished up, as it was a bit warped. Then I polished up the glove box to match. Cut up some black vinyl strips and put them in the low spots, still need to do the glove box. Got the engine back from being rebuilt. Was mint inside and no other damage other than the piston and conrod. Chucked it back in and assembled everything back together. Started first pop and ran very well! So bolted together the whole front end and put the bonnet back on after a long time it's been off. Made a new intake pipe to get in going in the opposite direction than the standard one. Made a coolant overflow and power steering reservoir, they both seem to work pretty well so far. Attached some peep mirrors onto the doors. I think they look good, although rubbish to see anything through. Bought some tyres, ended up with BF Goodrich's, 205/65/15 front and 225/70/15 rear. Apparently 15x8's with 225/60 tyres don't fit on the front of this without massively rubbing on the fenders. Managed to return the tyres and swap them for some 205/65's and got the wheels split and narrowed to 7" wide. Had it through the cert check the past week and everything was good! Had a wheel alignment and that also went well. Just waiting on the cert plate now and then can take it for a WOF! Drives really nice and smooth, although the transmission seems to be slipping. We think it has something to do with the secondary throttle sensor that doesn't seem to be working, so need to have a look at that.1 point
-
Haven’t done much over summer, but I have just about finished the mounts. I’ve had to give the engine a small tilt away from the steering box, I’m hoping any torque twist will be under 10mm, that’s about all the gap I’ve got. I’m getting the driveshaft lengthened by 110mm next week, it looks like the A series auto has the same yoke as the W55.
1 point
-
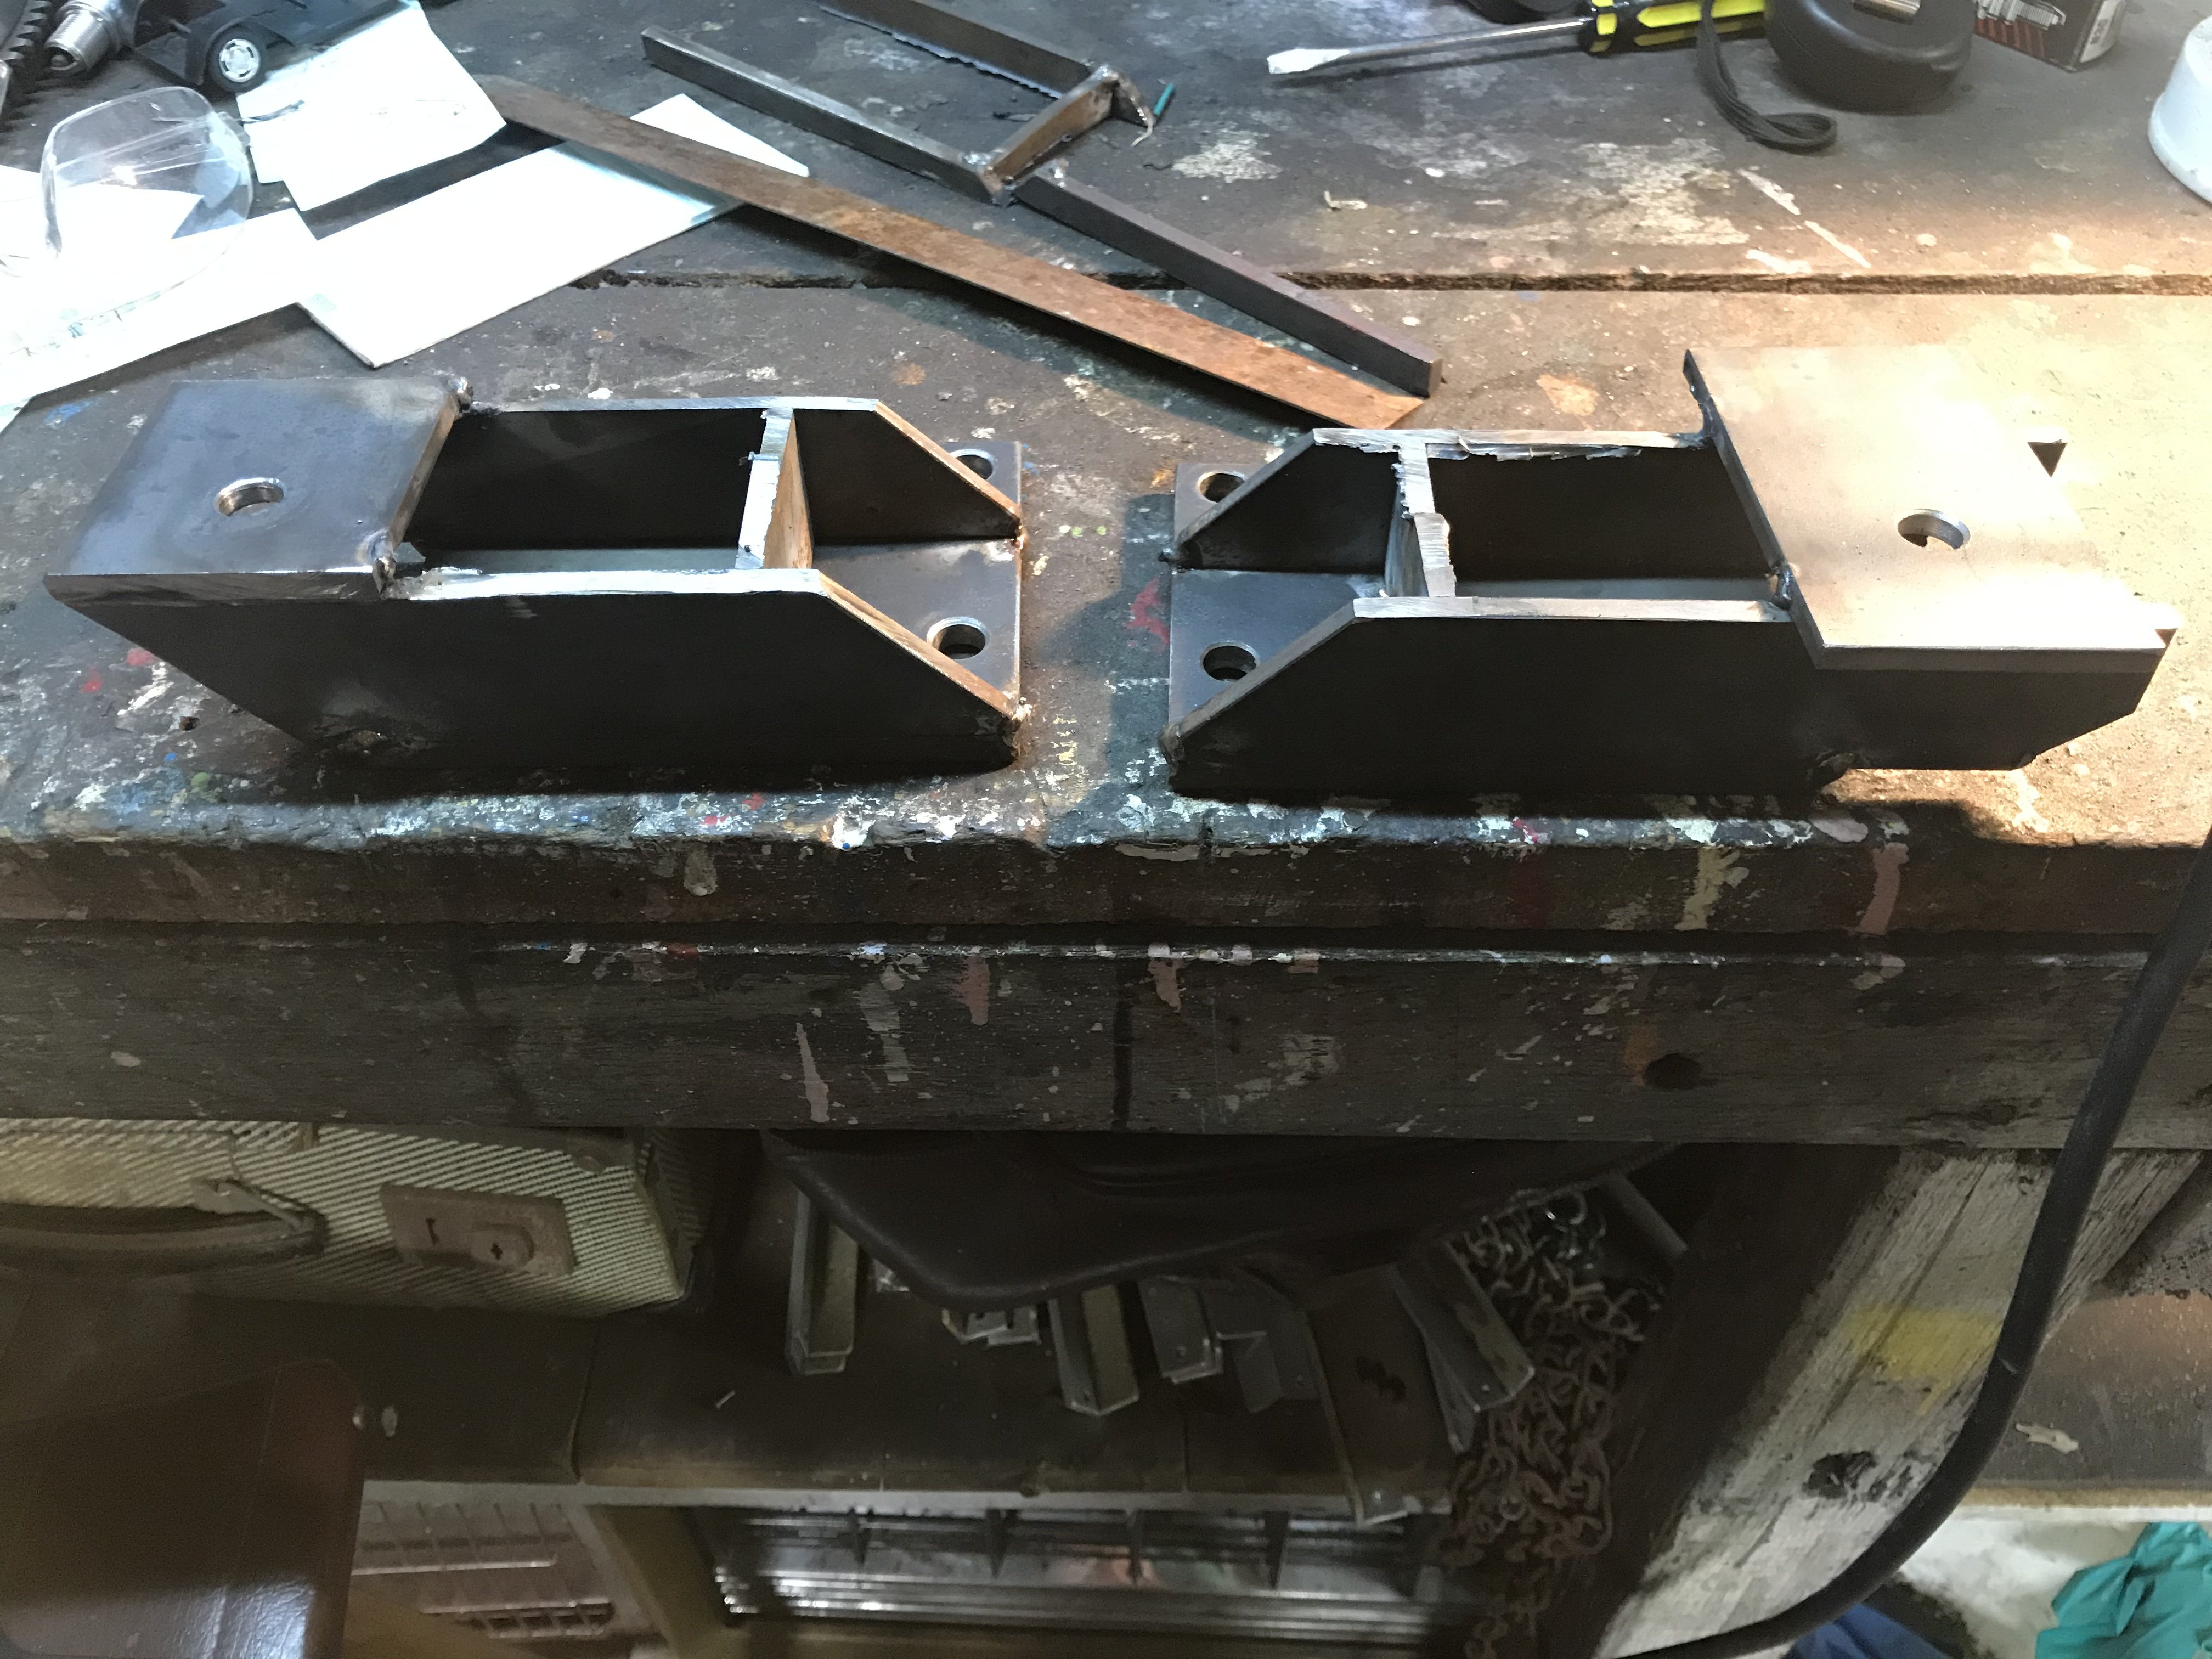
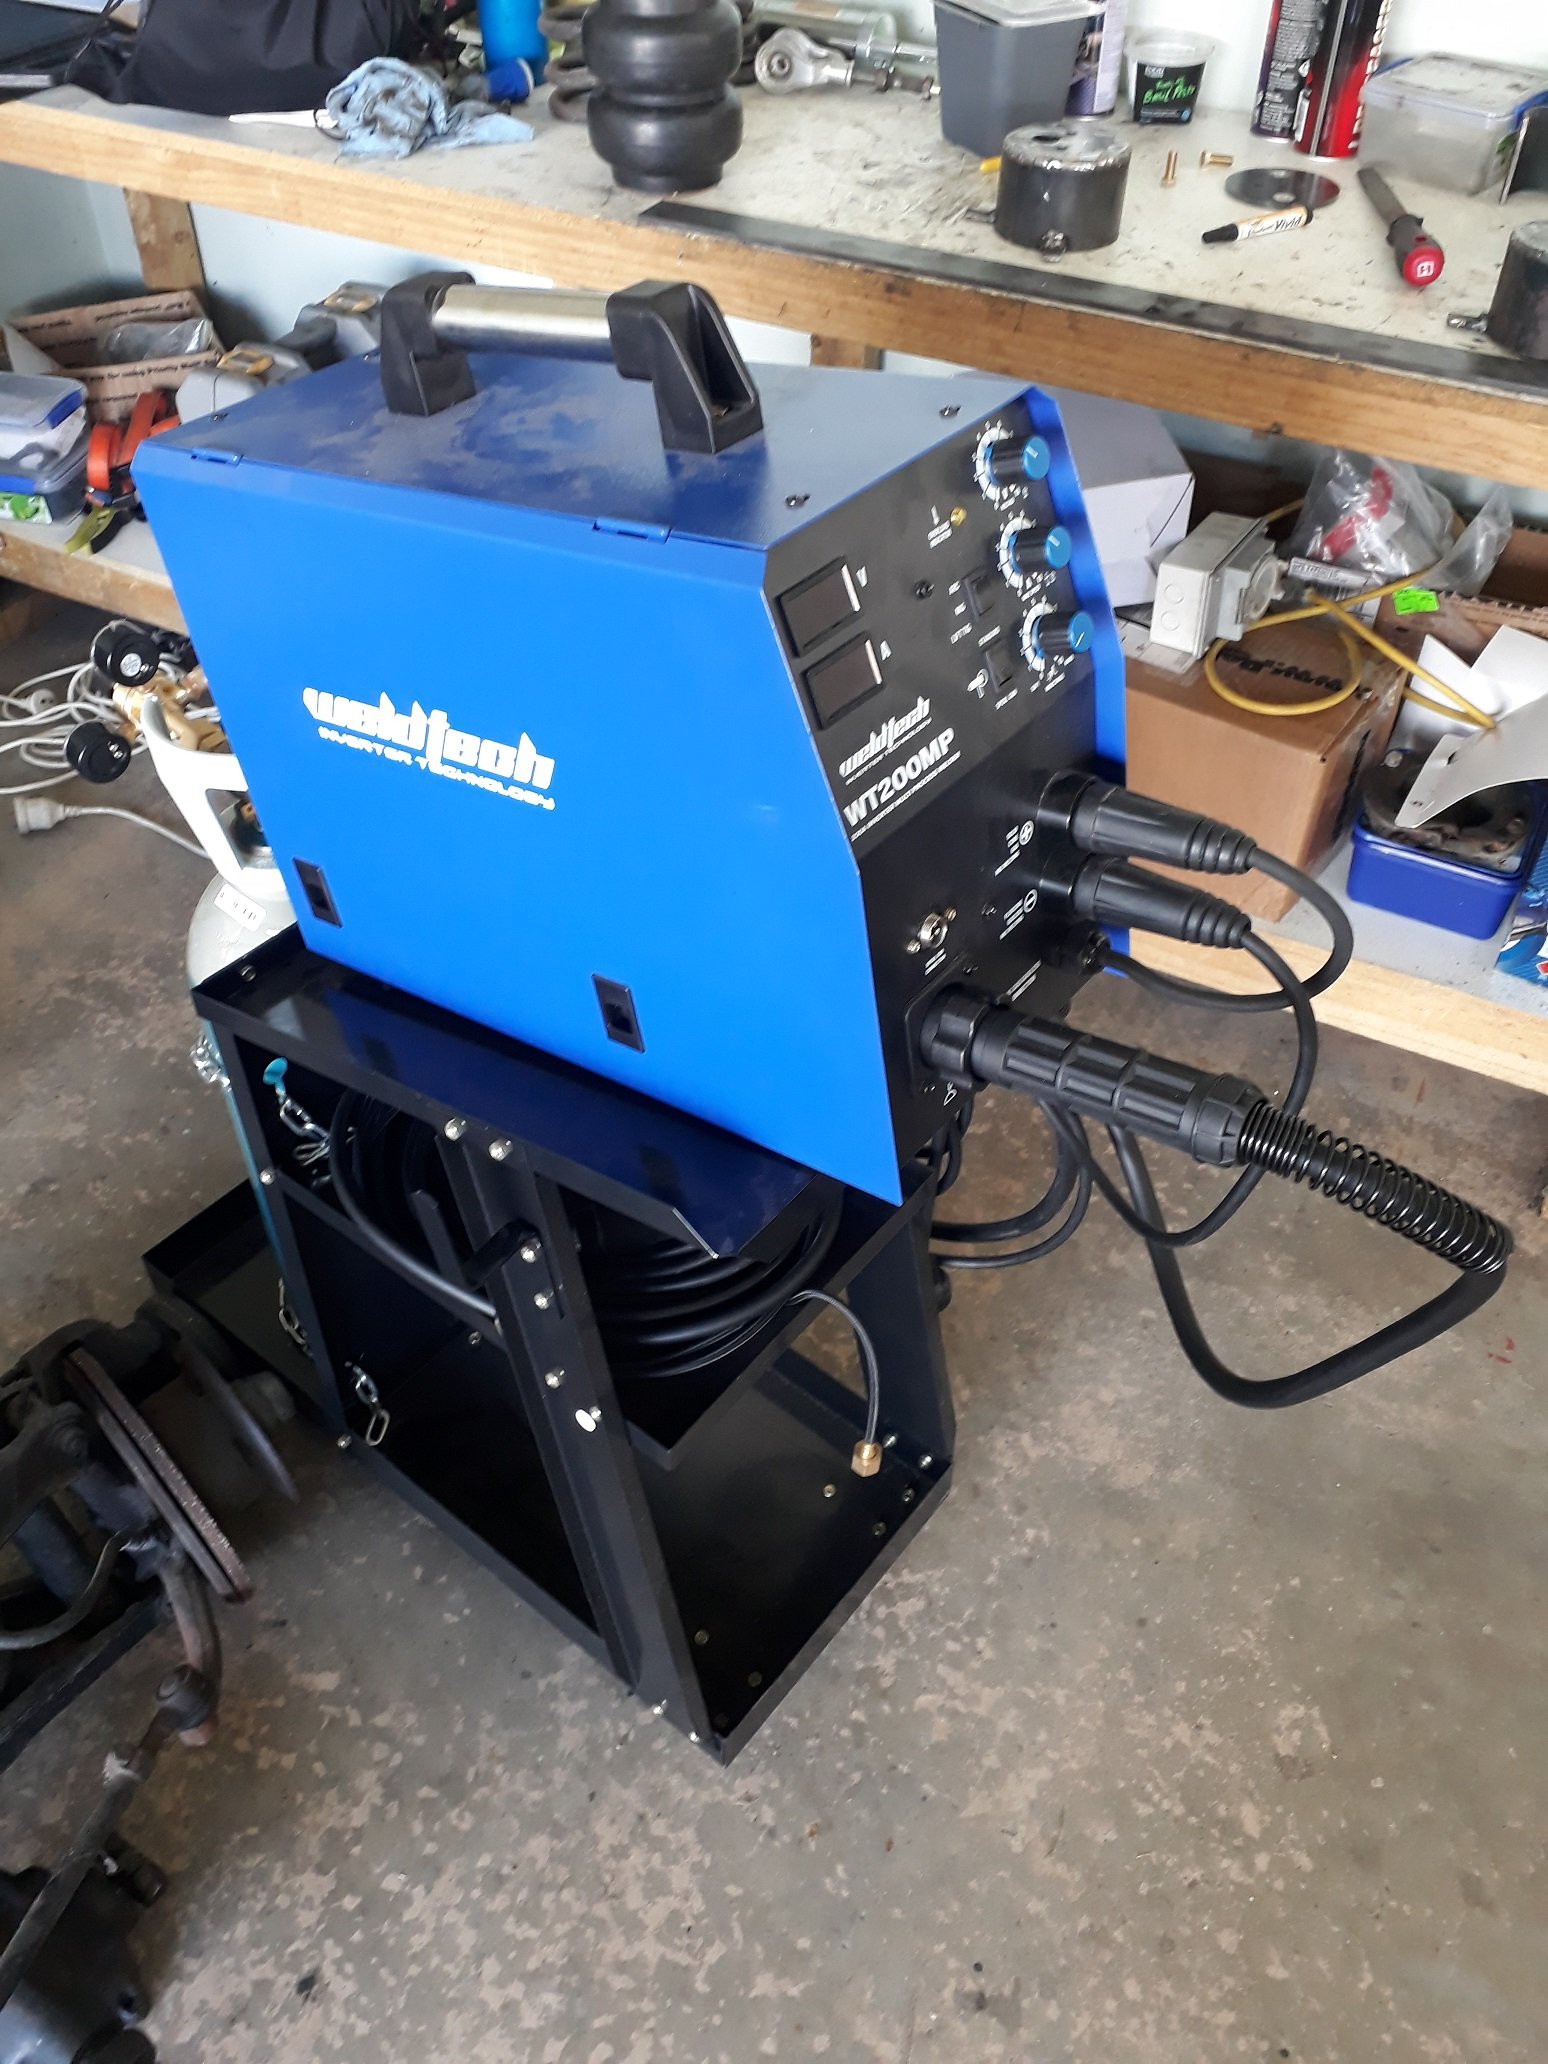
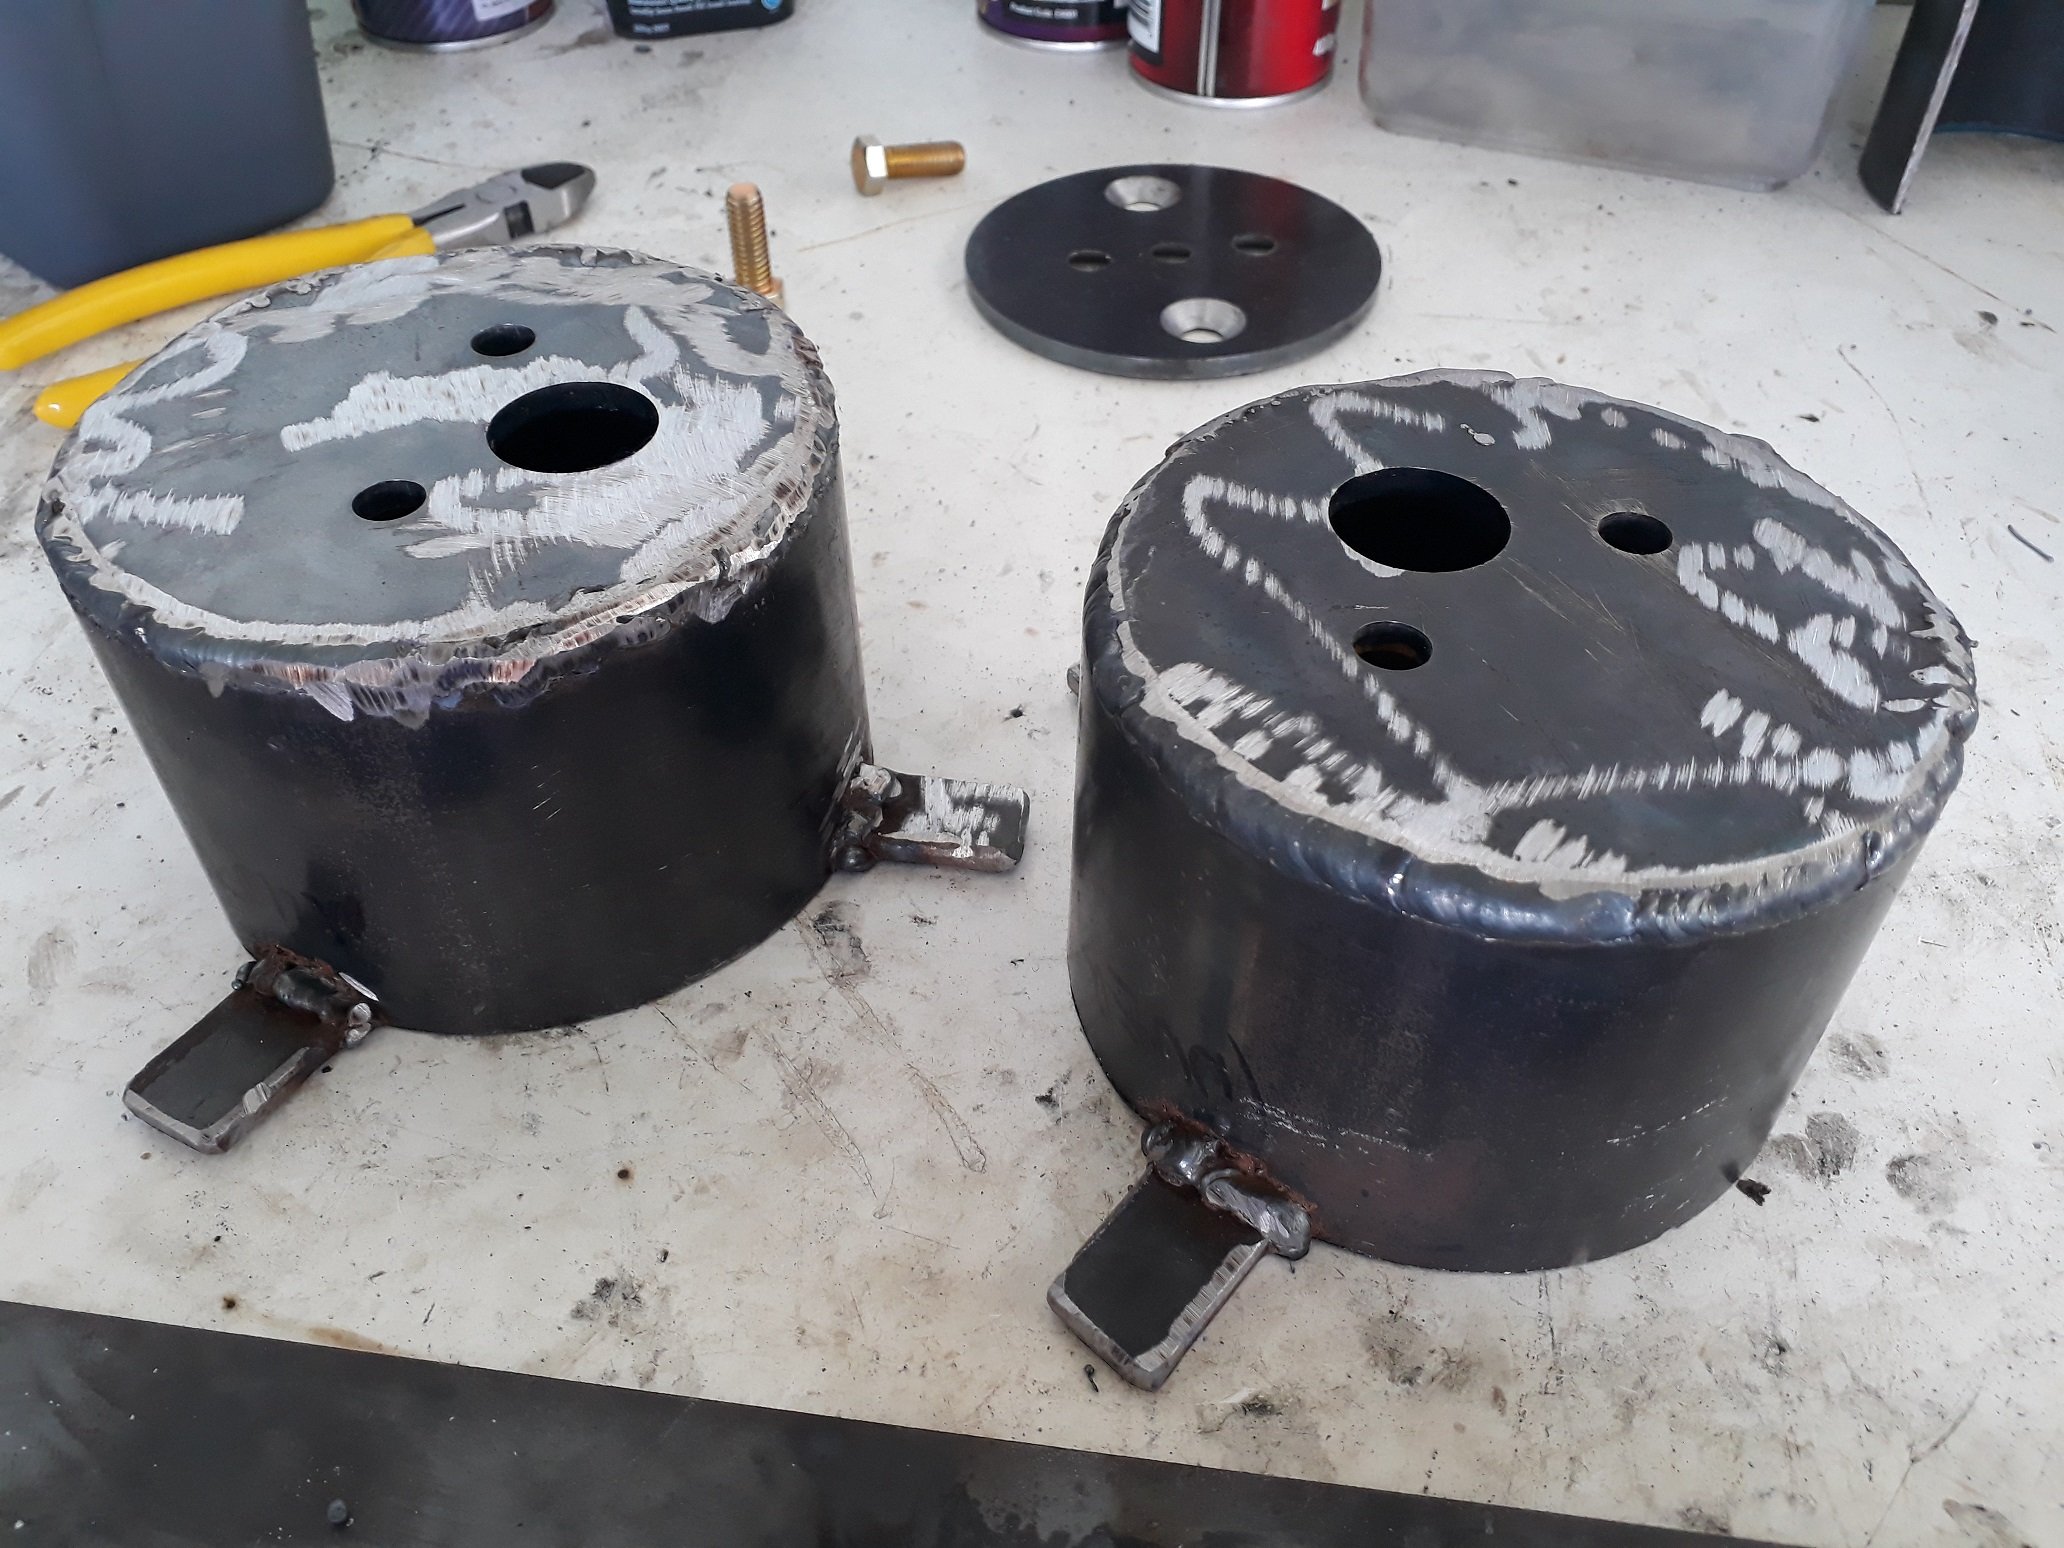
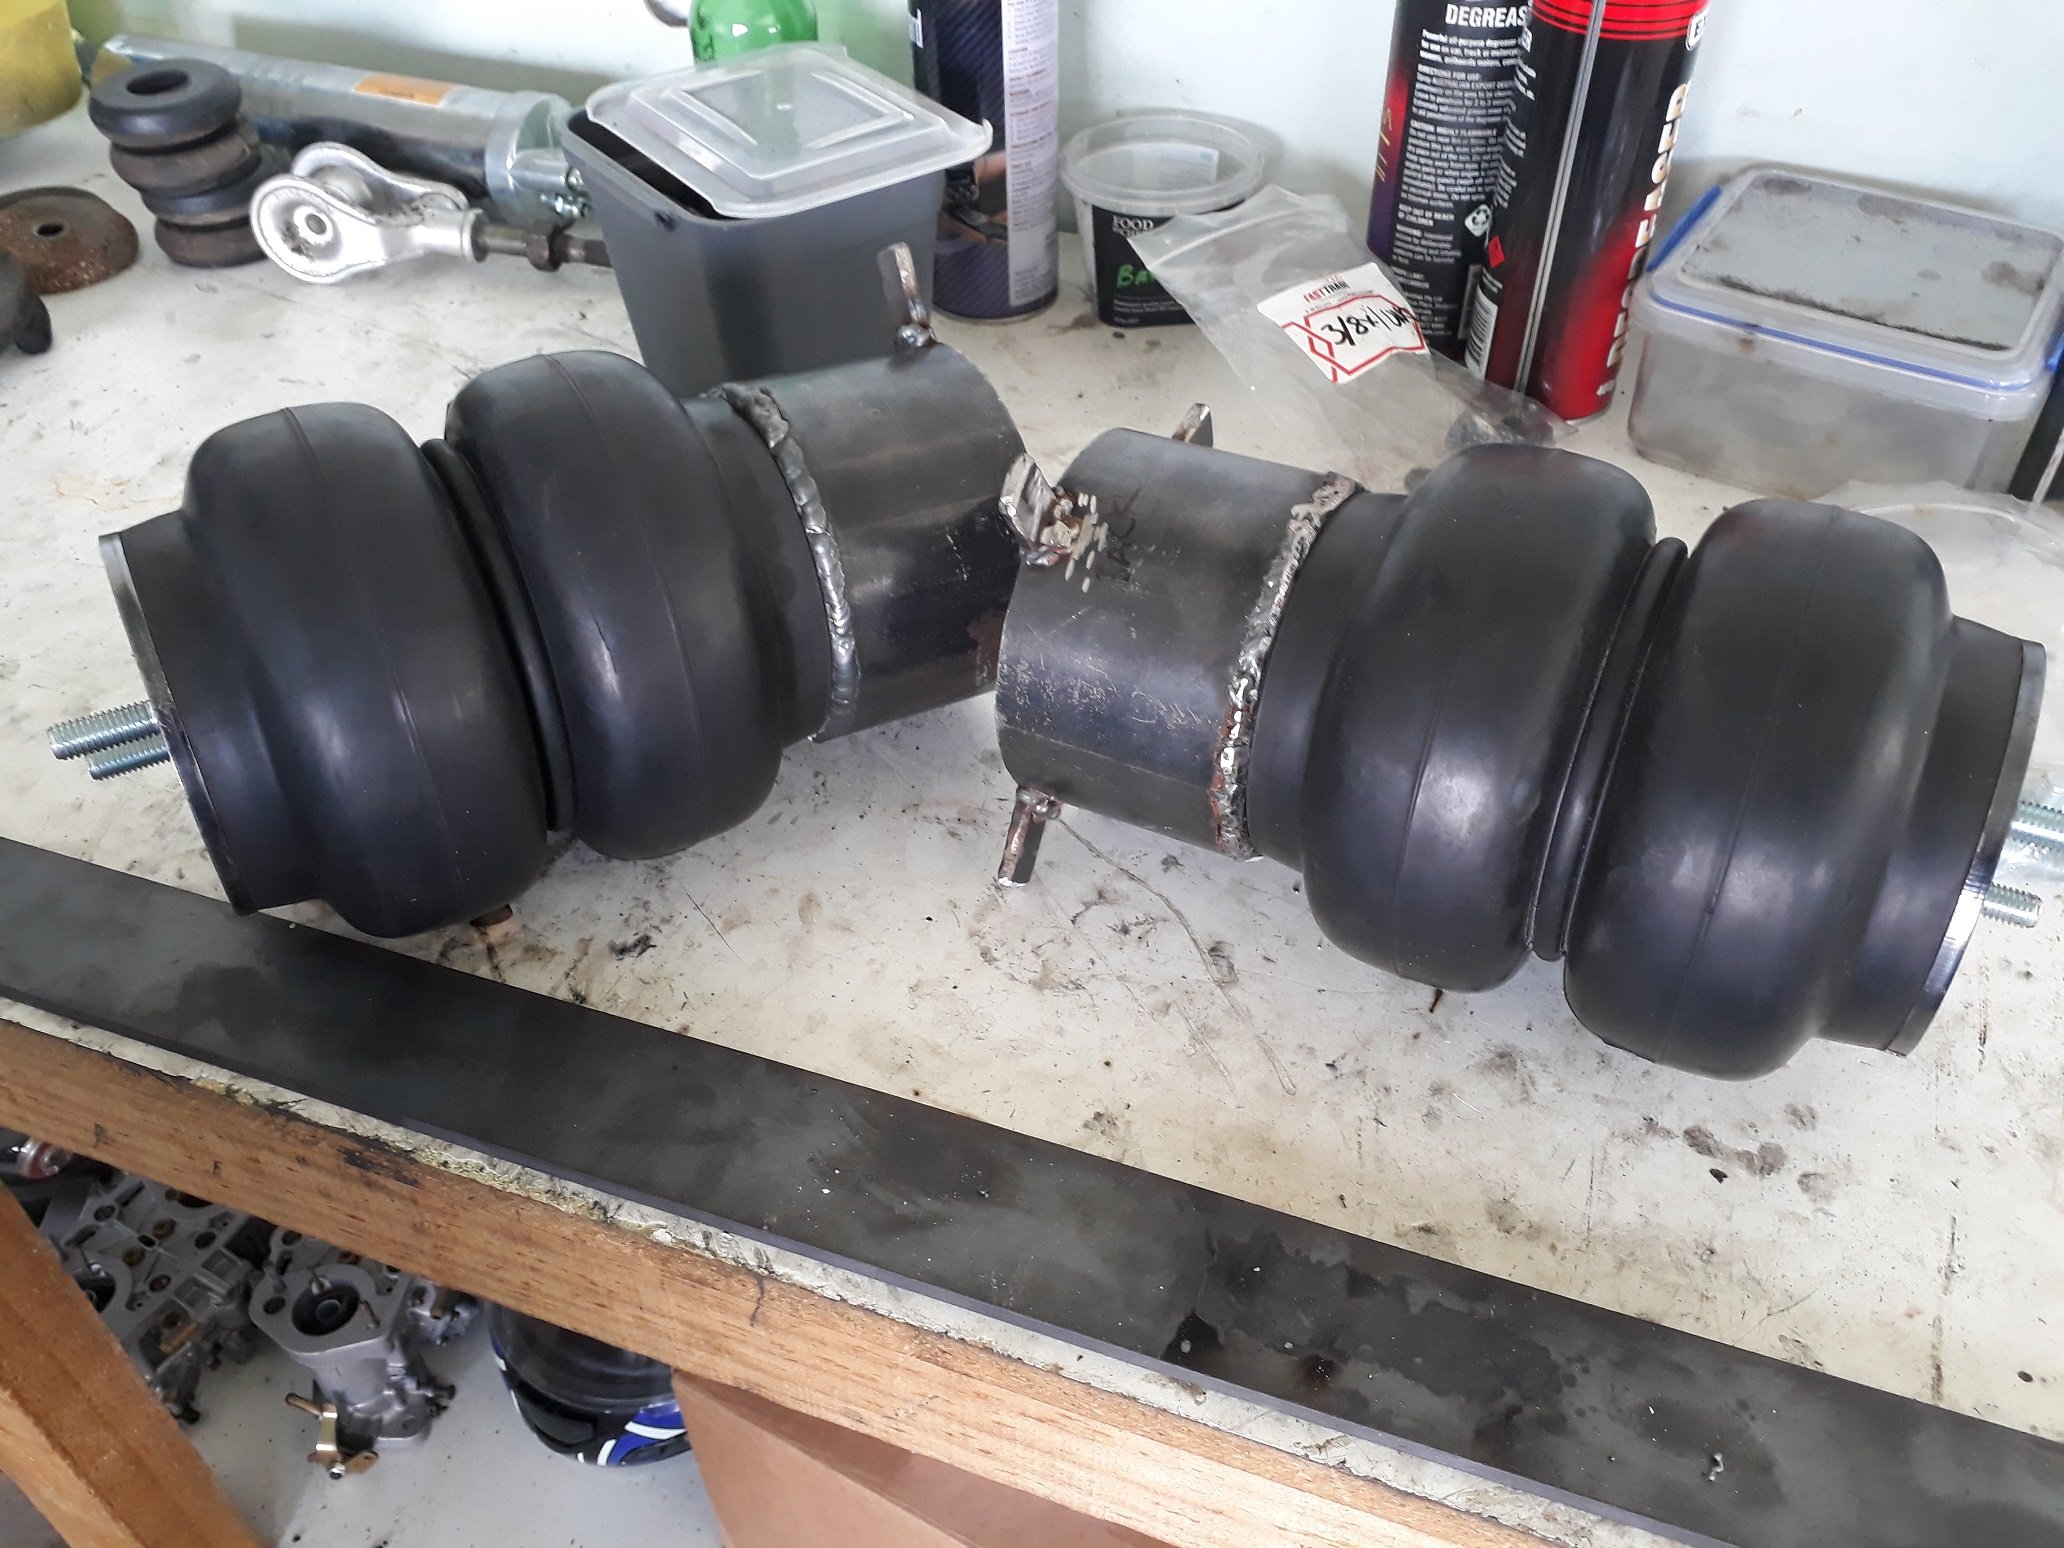
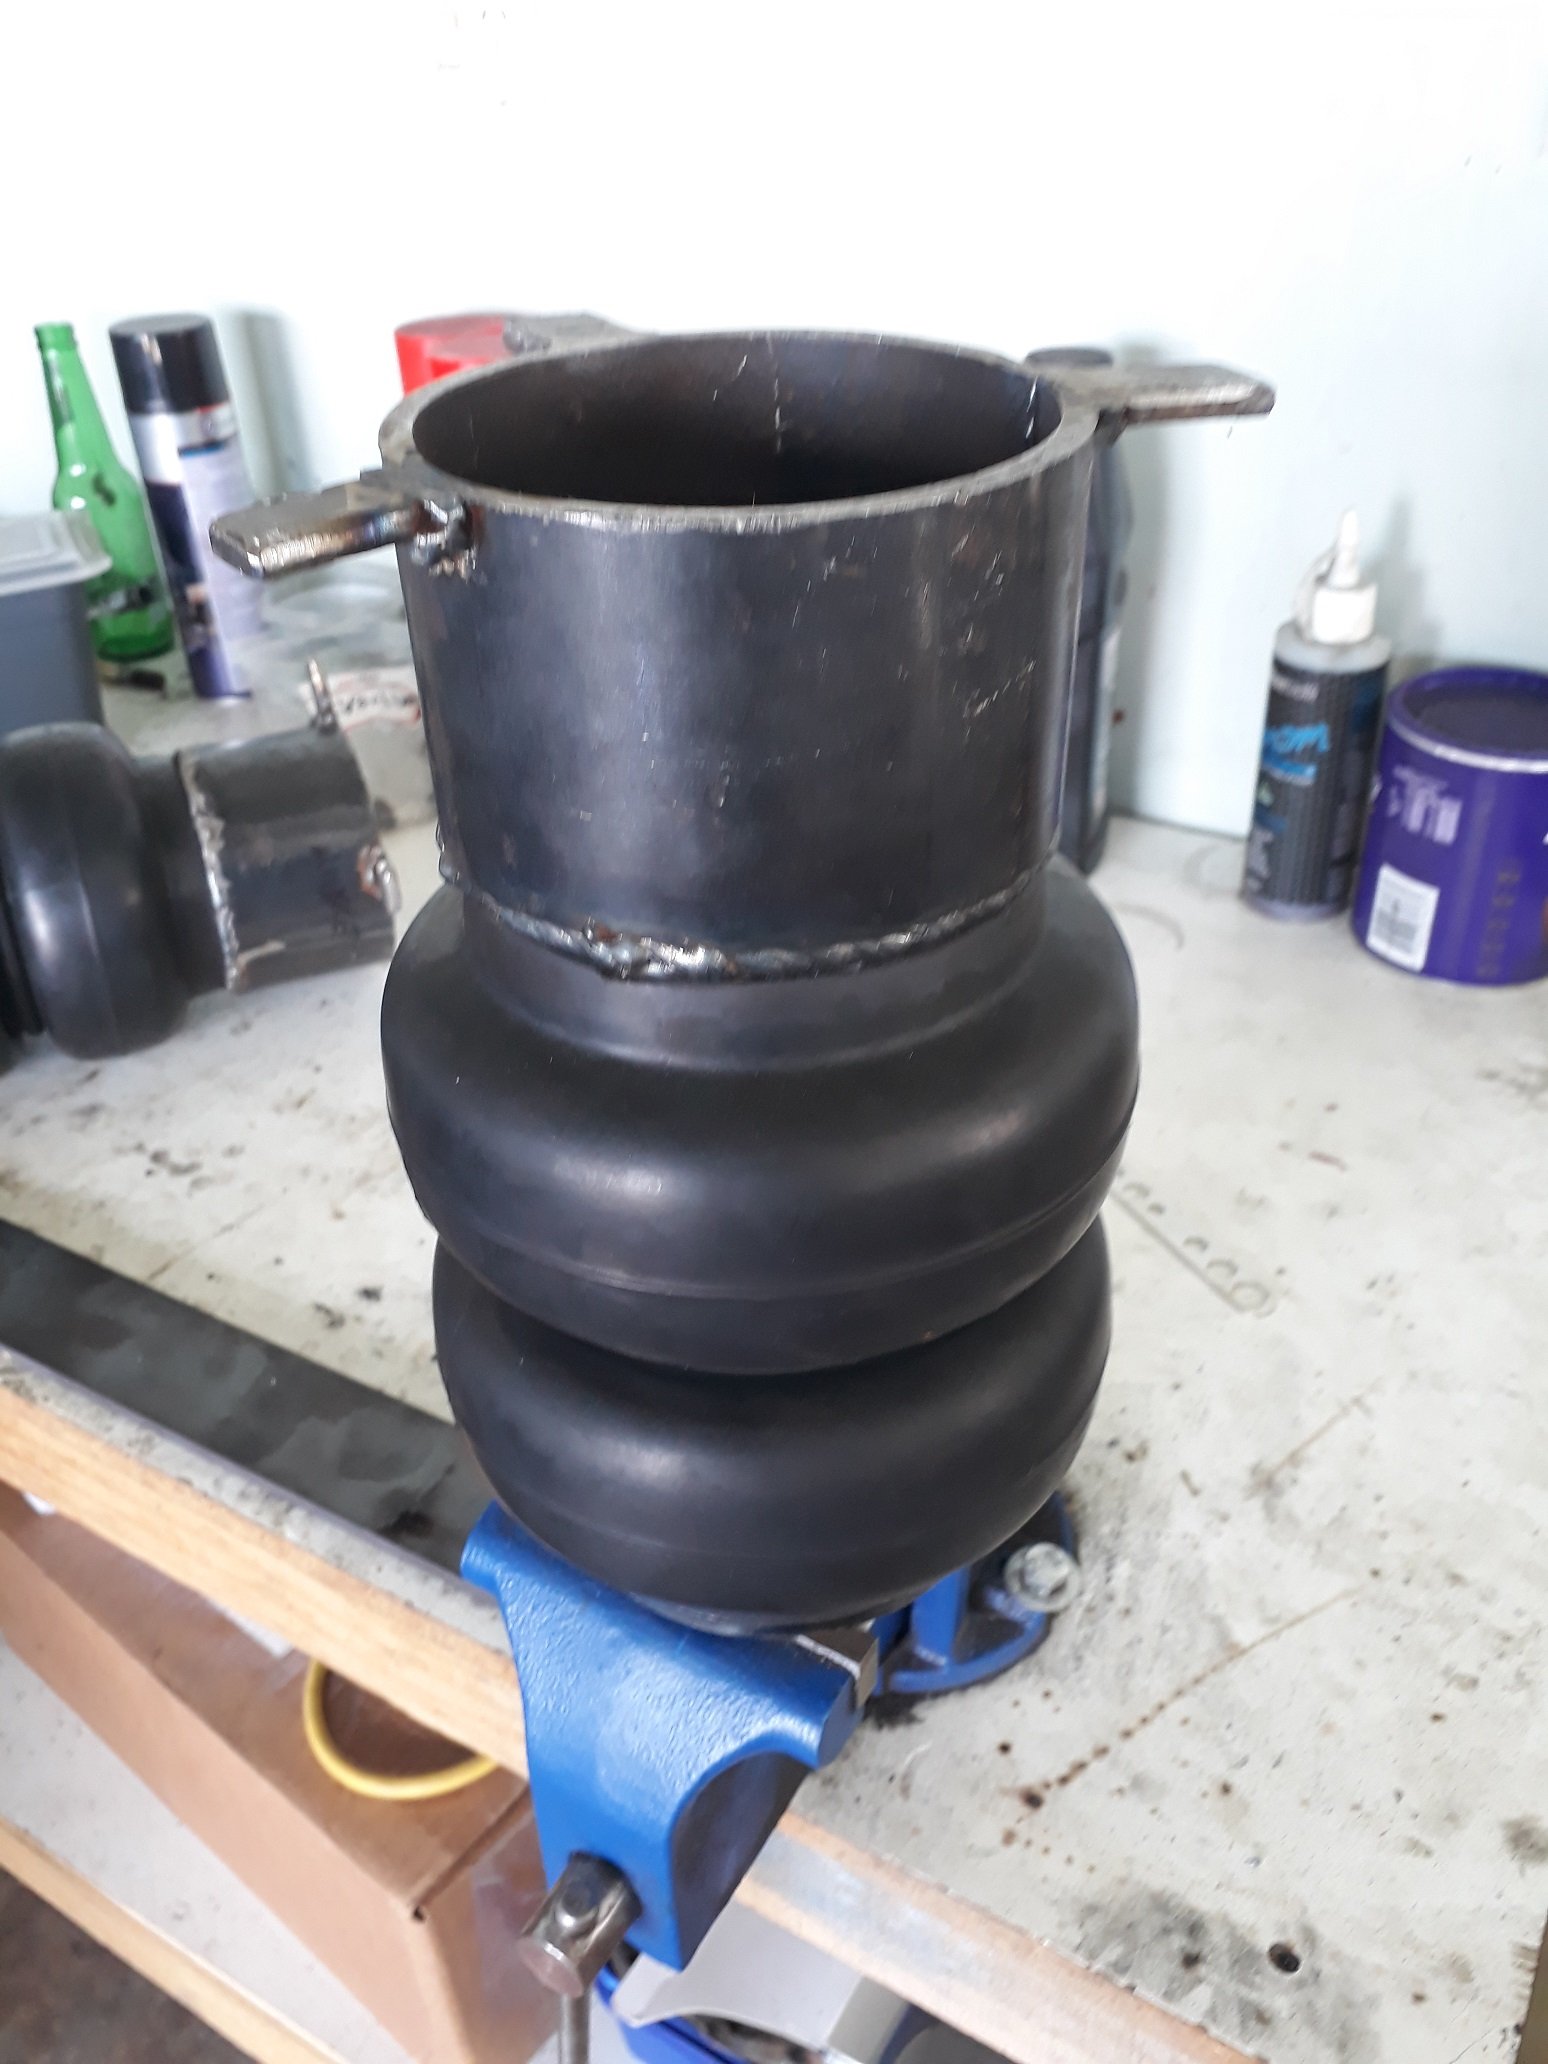
A couple of weeks ago I was window shopping for a welder, it was one of those things I'd been putting off in favour of paying/bribing someone else to do it. Anyway after scrolling through various brochures there was a Weldtech unit I was going to go purchase, Coincidentally I caught wind of one of the guys in the workshop at work had just purchased the same unit along with an additional tig torch for doing his own tig welding; however after he got it he realised it didn't do AC Tig so was no good for the Aluminium welding he was wanting to do. So he offloaded it to me along with a trolley and tig torch for less than the retail cost of the unit itself, score I thought considering he had only turned it on twice and the mig torch was still in the box. So with some larger diameter tube, the aforementioned welder, a new helmet, gloves and bunnings gas bottle I was more or less able to finish off the top mounts for the rear bags Bolted everything together for a test fit I just need to drill a hole through the side of the top mounts for the airline and a hole in each of the 3 tabs you see at the top of the mounts, these slot into 3 recesses in the factory spring perches on the car, by drilling a hole through the spring perch and fitting a rivnut the entire rear bag setup is a bolt in affair, no cutting or welding to the body necessary - which means it can be swapped back to coils at the drop of a hat. Now for the fronts....
1 point
-
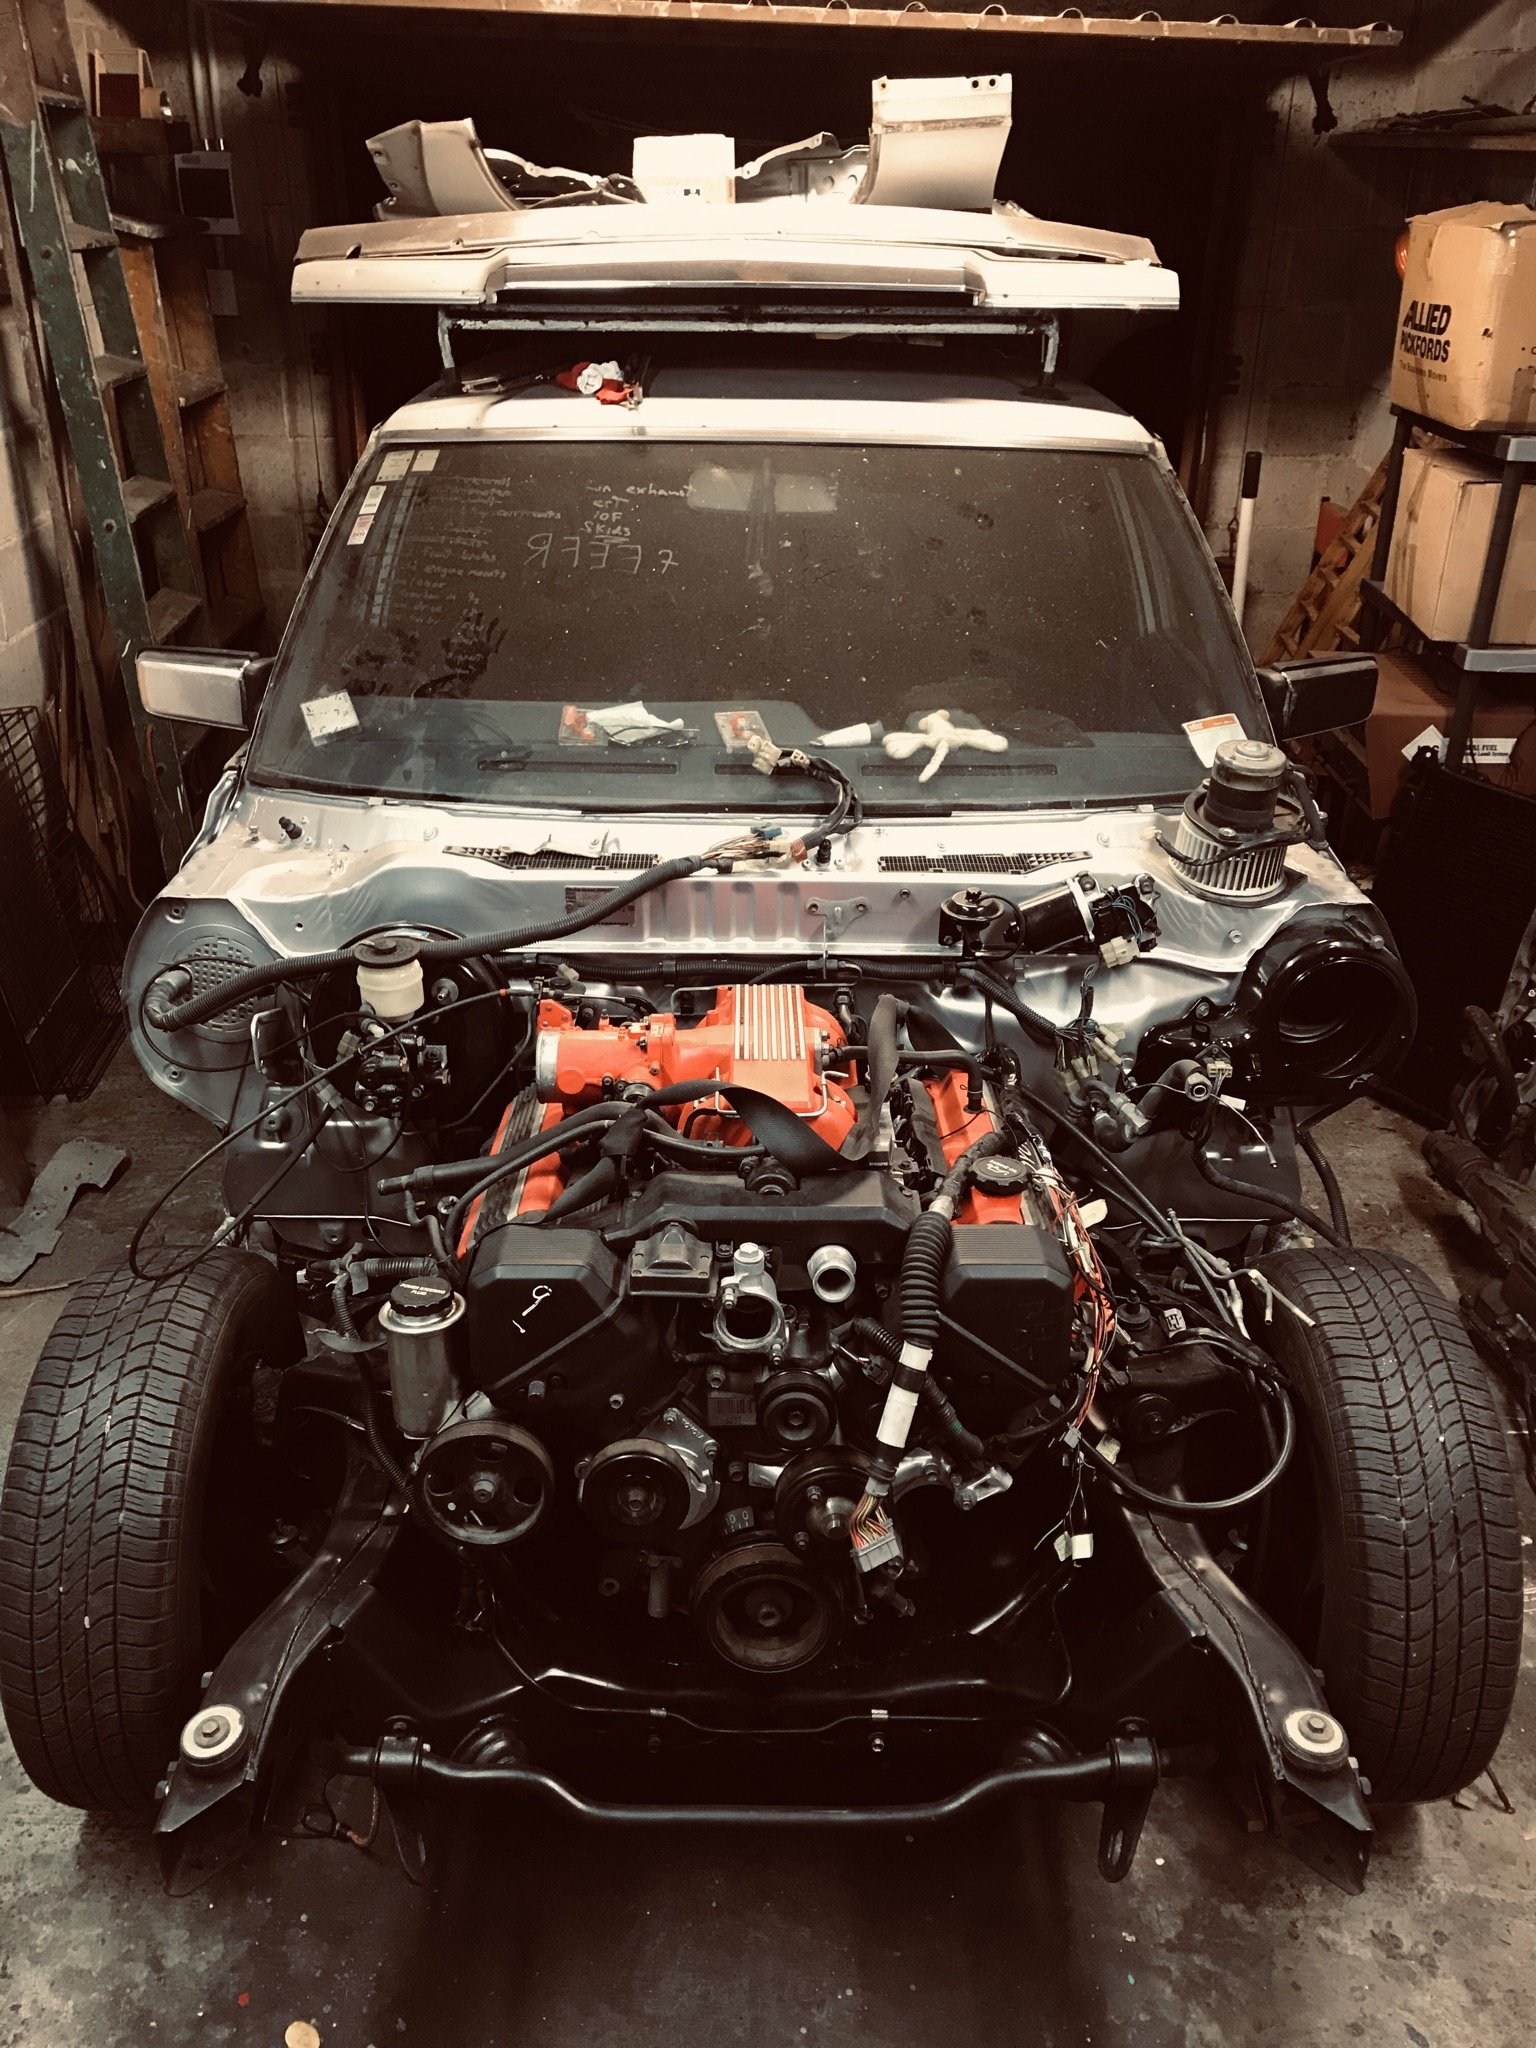
Learnt a lot in the past month and a bit. Main thing being that you should probably lube your fuel injector o-rings when you go to put them back in. Got the engine running, was only running on half the cylinders. Discovered there was no fuel going to the rear half cylinders, so decided to pull out the injectors. Took them into town and put them on an injector tester and nothing happened. Was told they can gunk up after sitting for awhile. So went off back home and gave them a spray with some cleaner and smashed them on the ground until they started clicking freely again with power to them. Got them all sounding really good, so in they went (without any lube, thinking back it should of been something that should of come to mind, but I guess I was just in a rush to get it running!), as they went in they must of torn the o-rings. I got the intake and everything back on and together and we started it up again. Ran mint!! So turned it off to see how it would start again, flat battery. Chucked the charger on, and then decided we'd put the wheels on, piece it a bit more together and go for a drive up the driveway. By time we got it together and off the hoist, a few hours had past and so had a decent amount of fuel past the o-rings and into cylinder no.5. Cranked it over and it didn't want to start very easily, so gave it a few more attempts and finally started up with a lovely knocking noise! We thought maybe it was just something loose in the bellhousing, as when we first started it we quickly realised there were no bolts in the flex plate to the torque converter. Anyway drove it up and down the driveway and then back on to the hoist. Decided over Christmas we'd pull out the transmission to have a look in there, other than the weights on the flex plate being ripped off by the torque converter there was nothing that obvious. Started the engine without the trans in and it still had the knock, which was a disappointment. Our neighbours Tony and Jason, who are a bit more mechanically minded came over on Boxing day after hearing that it wasn't transmission related, and went over everything they could think of. Eventually after a good few hours we narrowed it down and decided to check how high each piston is coming up by sticking a threaded rod with a nut on it and turning the engine over by hand. Got around to cylinder no.5 and it was about 5-6mm lower than the rest. Was obvious at this stage that we had a bent rod that was caused by hydraulicing the engine with fuel. Out came the engine, onto a stand, flipped over and then pulled the sump off. It was pretty bent! The crank smashed up the bottom of the piston, but other than the rod and piston everything else looked good. The engine is now at the rebuilders and injectors have been professionally cleaned with new o-rings. The buggered o-rings on the injectors. Since I had awhile off work over Christmas and the engine debacle halted progress a bit, we decided it was a good time to sand out all the runs in the clearcoat and give it another couple of coats with some flatter clear since I wasn't quite happy with the last stuff I used. Used some PPG autothane clear with flattening base in it this time. Was way easier to spray, looks waaaaay better, a lot smoother and a more consistent flatness. Also the extra coats covered the rust up a bit more, as before it didn't seem to be covered well in the rusty areas. With the engine out it was a good time to go through and tidy up a few things. Made up some stainless heatshields that cover the wiring on one side and the fuel and brake lines on the other. Also wrapped some of the exhaust in heat wrap to try and help keep some heat away. Ignore the plastic cable ties, the ones that came with the wrap were too short, and I'll change them soon. After trying to drain the coolant I decided it'd much easier if there was a drain plug, rather than having to disconnect a hose and having it run straight onto a crossmember. Next thing to do was sort out the fuel filler. Turned out the u-bends I bought for the headers were the correct size I needed, so took one of them, cut it to fit and welded a breather pipe on the side. Made a stainless pipe that goes from the 1 5/8" u-bend to 2" on the tank. Also added some gas struts to the rear bed lift up part. Whilst under the rear end noticed the rear airbags were only mounted on the bottom with bolts and no washers. This was mostly because the mount was so close to the diff tube and the airbag mounting holes had quite a small PCD, you couldn't fit much else in there. Came up with these plates that mount to the airbags with a countersunk screw and then have the studs stick through the outer of the slotted hole in the diff mount. Heaps of room to get a nyloc nut and washer now. Was running out of stuff that I could think of to do, so my Dad made a start planing and fitting the Matai wood planks that I bought quite a while ago. Fitted in they looked a bit weird being natural, too bright or something. Had some Japanese stain lying around that we tried and I quite liked it. So went and wiped that all over it once it was fitting well. Then wiped over some Scandinavian oil and came it out really nice. Got the windows installed, he still needs to come back and finish them off. The front window stainless trim doesn't fit as well as I'd hope it would, sorta sticks out a bit, but we're sure it's in there properly. Probably a combination of the crappy re-pro rubber and trim not being 100% right to start with, as I've heard of a heap of people having troubles with windscreen rubbers not fitting nicely on these. Supposed to be taking this to Nats in less than 6 weeks hahaha1 point
-
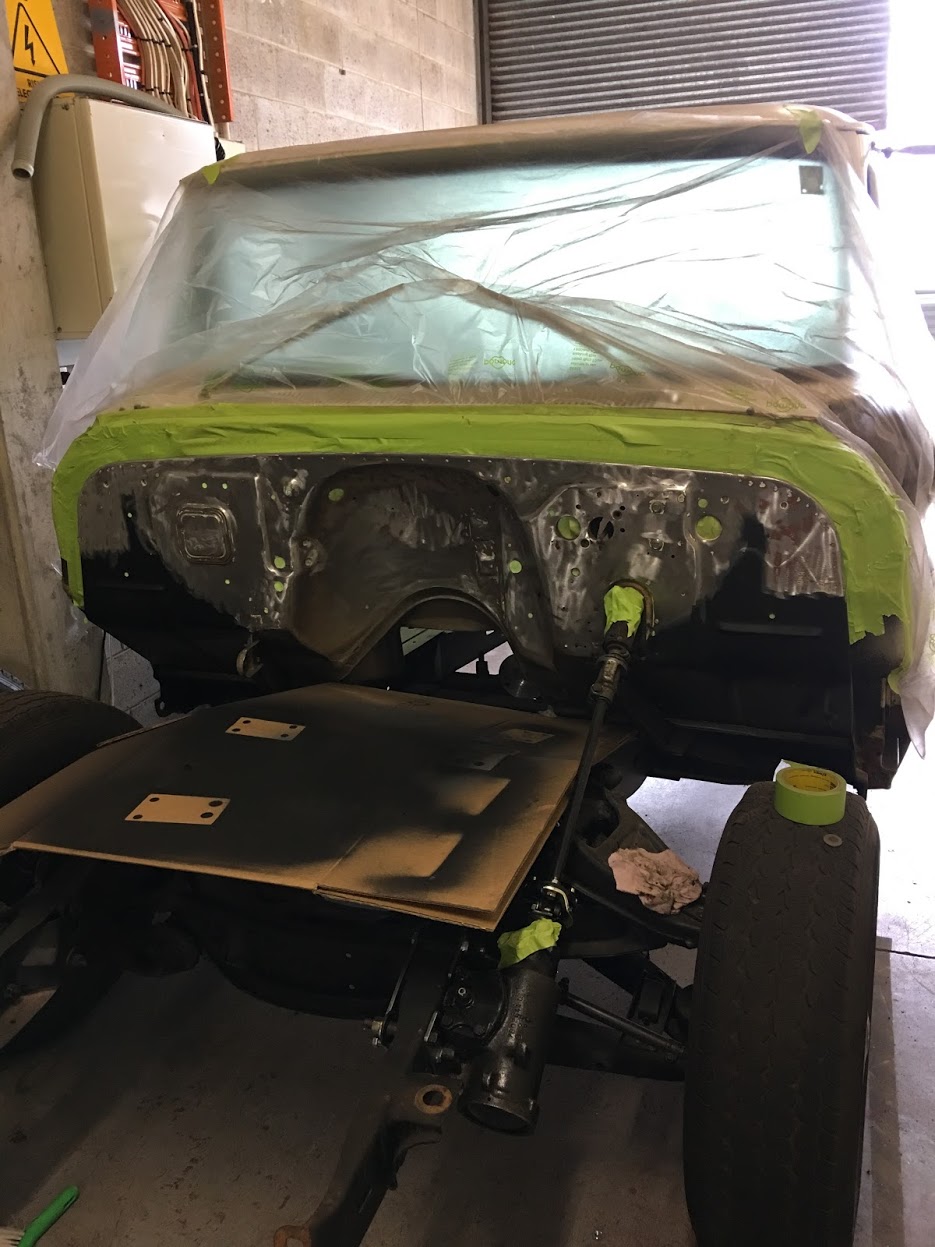
Loves a long weekend Managed to strip all the doors and get them epoxy primed. Blocked down the front 2 doors n bogged them. Still not dry so will leave overnight. Annnnd in other news, the shell has been painted!! Looks a million bucks! Should get all these doors ready by end of weekend n can drop off when i collect shell Heaps mean!1 point
-
This thing is running sweet now. No good. This years plans are, just got a new windscreen washer, multi speed wiper motor (fast slow and delay) to modern it a bit. Need to get some bodywork, rust repair done and seal it up as it spends too much time uncovered. Last but not least, accidentally bought a crate lsa motor have acc drive and loom/ecu/tcm on the way. Will use existing box/diff. Should be another 100hp or so but mega more torque for sideways/circle work and 12s. So I'll be selling the ls3 with loom,ecu,tcm, pedal, power steering, alt, ac compressor... or buying a jetboat. I hate boats but I like fast. Also planning on getting back into the beetle this winter, need to get this at least running1 point
-
I said I should post more often so they're smaller, but here we are, another big post. I didn't think I had much to post because the majority of it has been wiring and that's boring, so not many photos. Air horns are now fully plumbed up. Used one of my dads cast aluminium fuel logs and used it as the manifold which has the main inlet and then each individual line to each horn. Bought the biggest battery that would fit inside the box I made earlier. Then drew up a clamp for it, laser cut it from some ali and folded it up. Getting better at ali welding! Fitted back into the under floor hole. Bought some battery cables and hooked them up to the main engine power junction. Wanted a killswitch mounted somewhere, made up a bracket for it out of stainless steel. Decided under the seat was the best place that is still reasonably easy to access and hidden from sight. Made an aluminium glovebox since the original cardboard one had seen better days. As the dash is quite short, it would of been hard to tuck up the fuse box behind it and not have it being a eye sore. So designed the glove box to fit the fuse box inside out of sight, which also tucks the wiring up. Started with the air bag wiring as it was the easiest to do and I don't have very much experience with it, other than a couple of weeks work experience nearly 5 years ago. Once the airbags were all done and working, I made a start wiring the rest of it. Started at the rear and worked forward. Need to make a reflector of some sort for the licence plate light. Since the engine had already been rewired at some stage, it had it's own fuse box and relays ready to go. Decided to mount the fuses up under the dash, after extending the wires to reach. The relays stayed in the engine bay since they shouldn't need to be accessed as often. Had to rewire the starter relay as it had full power going through the inhibitor switch and apparently that wouldn't be good for the switch, so cut and swapped around some wires. Stole the power steering pump off of my parent's Mercury that also has a Nissan V8, since they won't be needing one for a while yet. Only just fits, the pulley is pretty close to the chassis rail and the tensioner bolt is very close to the crossmember. Got a new high pressure line made up by using the original fitting from the Nissan line and the rack end of the Jaguar line. Assembled the inner and outer fenders and then lifted them in place, to check everything still fits. The engine bay looks pretty nice (other than the ugly engine)! The accelerator cable needed a new bracket to hold it in place since the original didn't work that great anymore. Made up a V2 under dash panel for the ignition switch and other numerous switches. Looks better than the first one, it might end up black eventually I think, brushed stainless doesn't really match anything else. From left to right has the ignition, heater, fog lights, wipers and horn switch. Also charge and oil pressure lights. Made a stainless steel bracket to mount the tacho gauge under the dash. Also above it is the headlight switch. Had to make a bezel for it as the hole in the dash was 25mm and the switch was supposed to only fit in a 8mm hole. Park/indicators and headlights all wired up with some waterproof plugs. Managed to blow the 6v sealed beams in the fog lights, so got some new GE 12v ones from America. Made some stainless steel spacers for them to sit on. Need to get enough courage to drill some mounting holes in the front splash apron now. Noticed the transmission mount was broken, asked around and found Nengun.com had genuine new ones far cheaper than any where else I found. Bought some oil filter relocation sandwich plates, as the oil filter was nearly impossible to access with the inner fenders in place. Had to get a new adapter nut turned up since the supplied one was too short like they seem to be. Made a new mount for the oil filter plate since the one that came with it was pretty pathetic and weak. Then got some fittings and hose, cost way more than what I thought they would.1 point
-
Finished blocking back the car after bogging so laid another 2 coats of epoxy primer then let it dry for a few hours n put 4 coats of 2pack high build primer. The shine is the epoxy primer. High build primer Let it dry overnight and sprayed some guide coat on today. Then blocked out any high/low spots with 240grit. Couple more touch ups needed but not looking too bad now. Cheers1 point
-
All the bits are clearcoated. Came up alright, got way too many runs on the cab, but that's okay as I'll be re-coating it all again once it's assembled with some flatter clear. At least it's all sealed up now. Installed some black fender welt between the bed and the guards. Started installing some of the parts. Put the door latches in, had to replace one of the springs behind the interior handle on the left side as it had snapped. Squeezed some Dynamat on to the outer skin of the doors and wooow what a difference that made to the whole door including the inner skin. Couldn't wait to see what the gauges looked like, so in they went. Got the door windows and quarter windows in, what a frustrating time that was, since they had to be installed in the right order and it all has to be fitted through the small slot in the top. Put an LED in the original interior light housing, wired it up and fitted. Puts out some decent light. Pulled apart the old headlight surrounds and put in new spring and seals. Gave them a bit of a polish up as well. Bought some new sealed beams, no-one could seem to find any semi-sealed ones with the domed glass when I was looking. Found some in America after I bought these though, but will try these out for now and if they're rubbish change them later. Fitted one of the inner guards when the engine was in and realised that trying to make headers was waaaay too much effort, time consuming and there really just is no space in there, plus the factory ones already fitted perfectly. So cut off the ugly heat shields on the factory headers, tidied up some of the welding, ground out the lumpy weld on the inside of the flange, painted them with high-temp paint and then wrapped them in heat-wrap, look much better. Would of really liked to build my own headers, maybe on the next project, as I have 20x 1-5/8" U-bends arriving from America next week haha. Put the cab on so I can see where the brake and fuel lines can run. Looks like it could actually be finished sometime soon haha.1 point
-
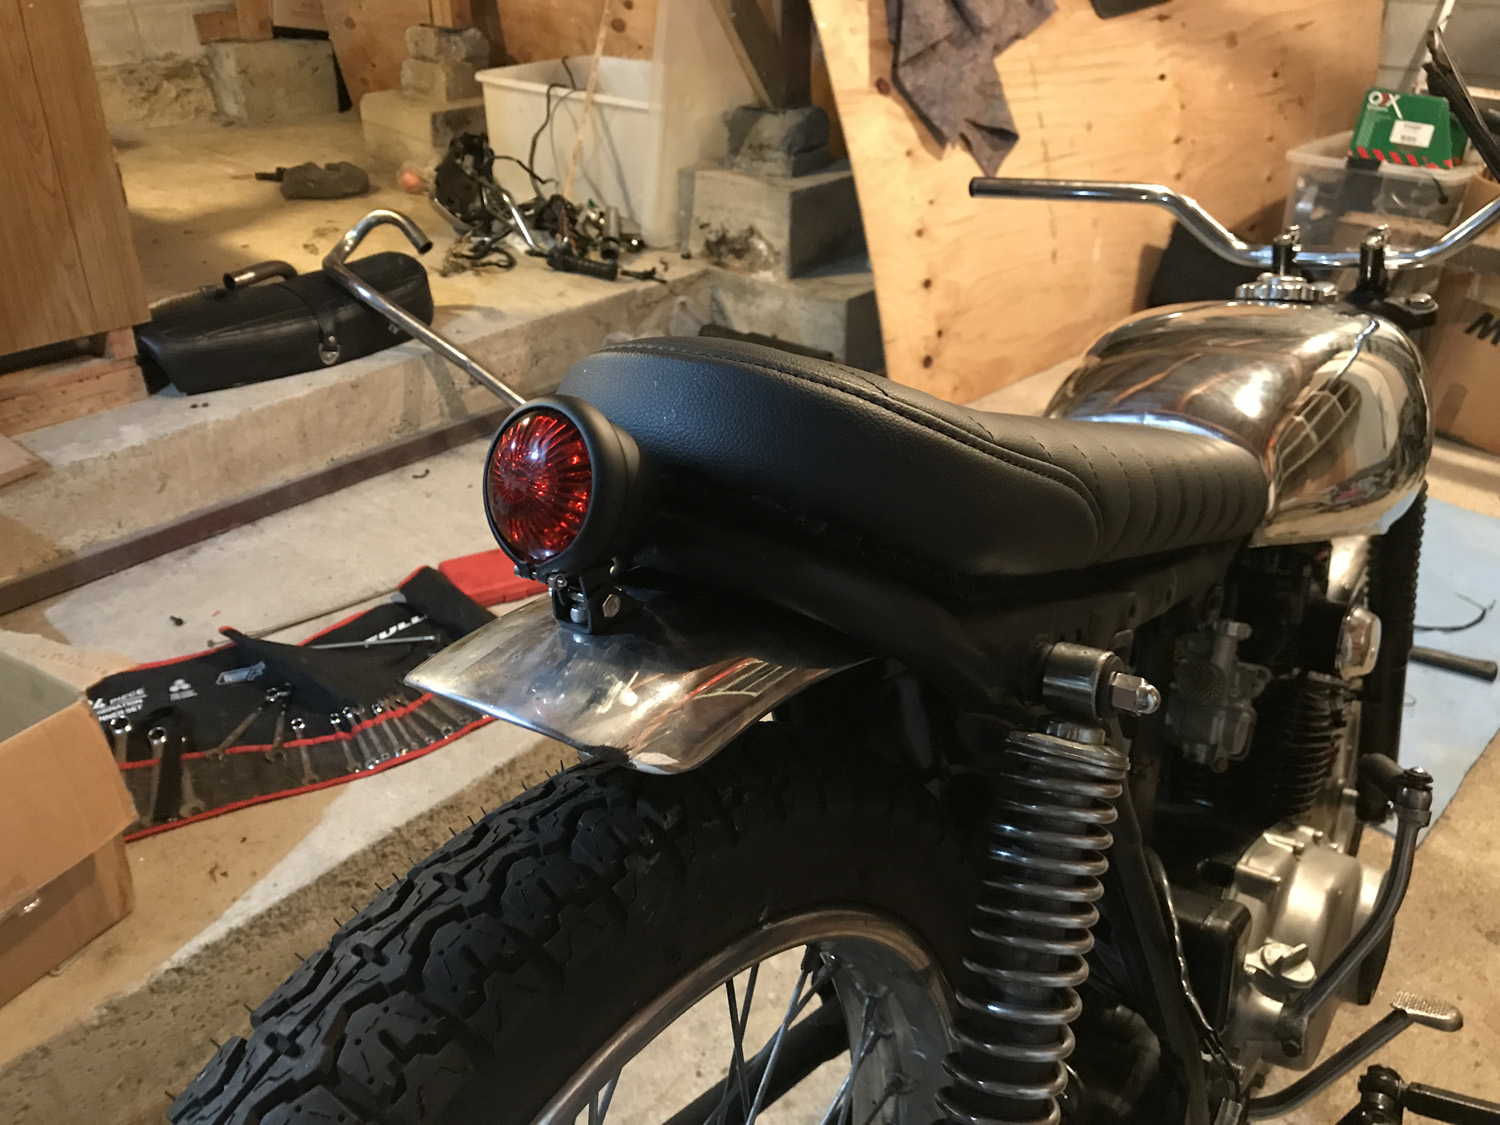
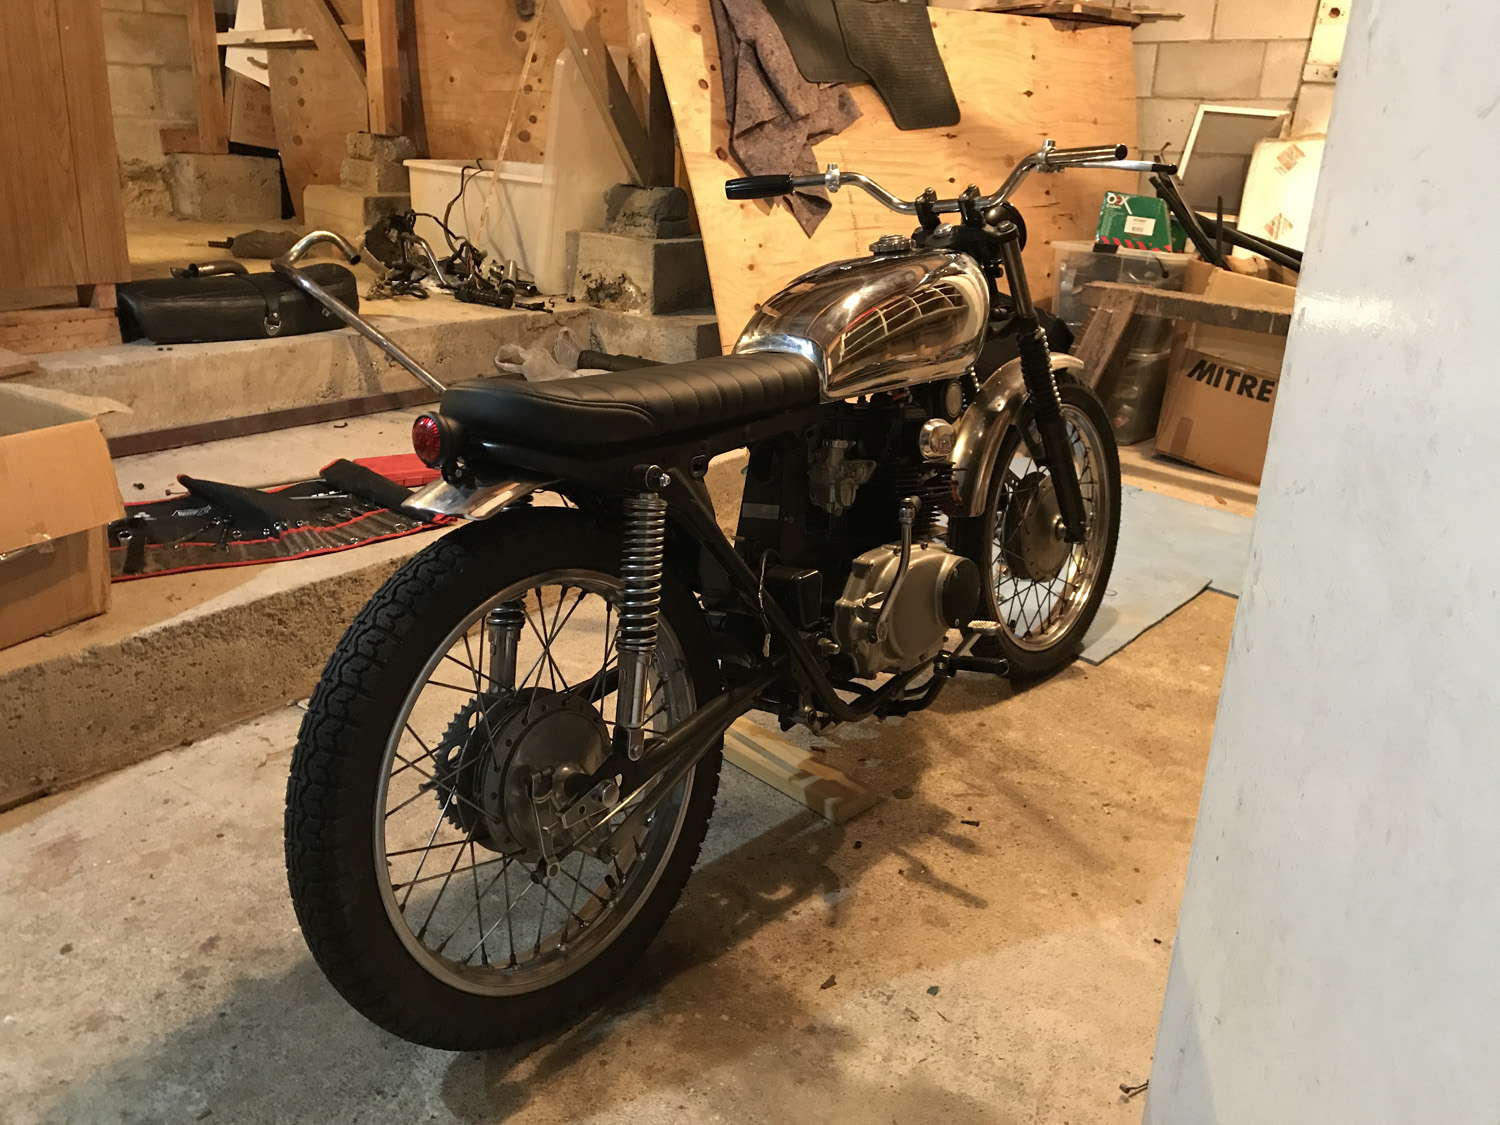
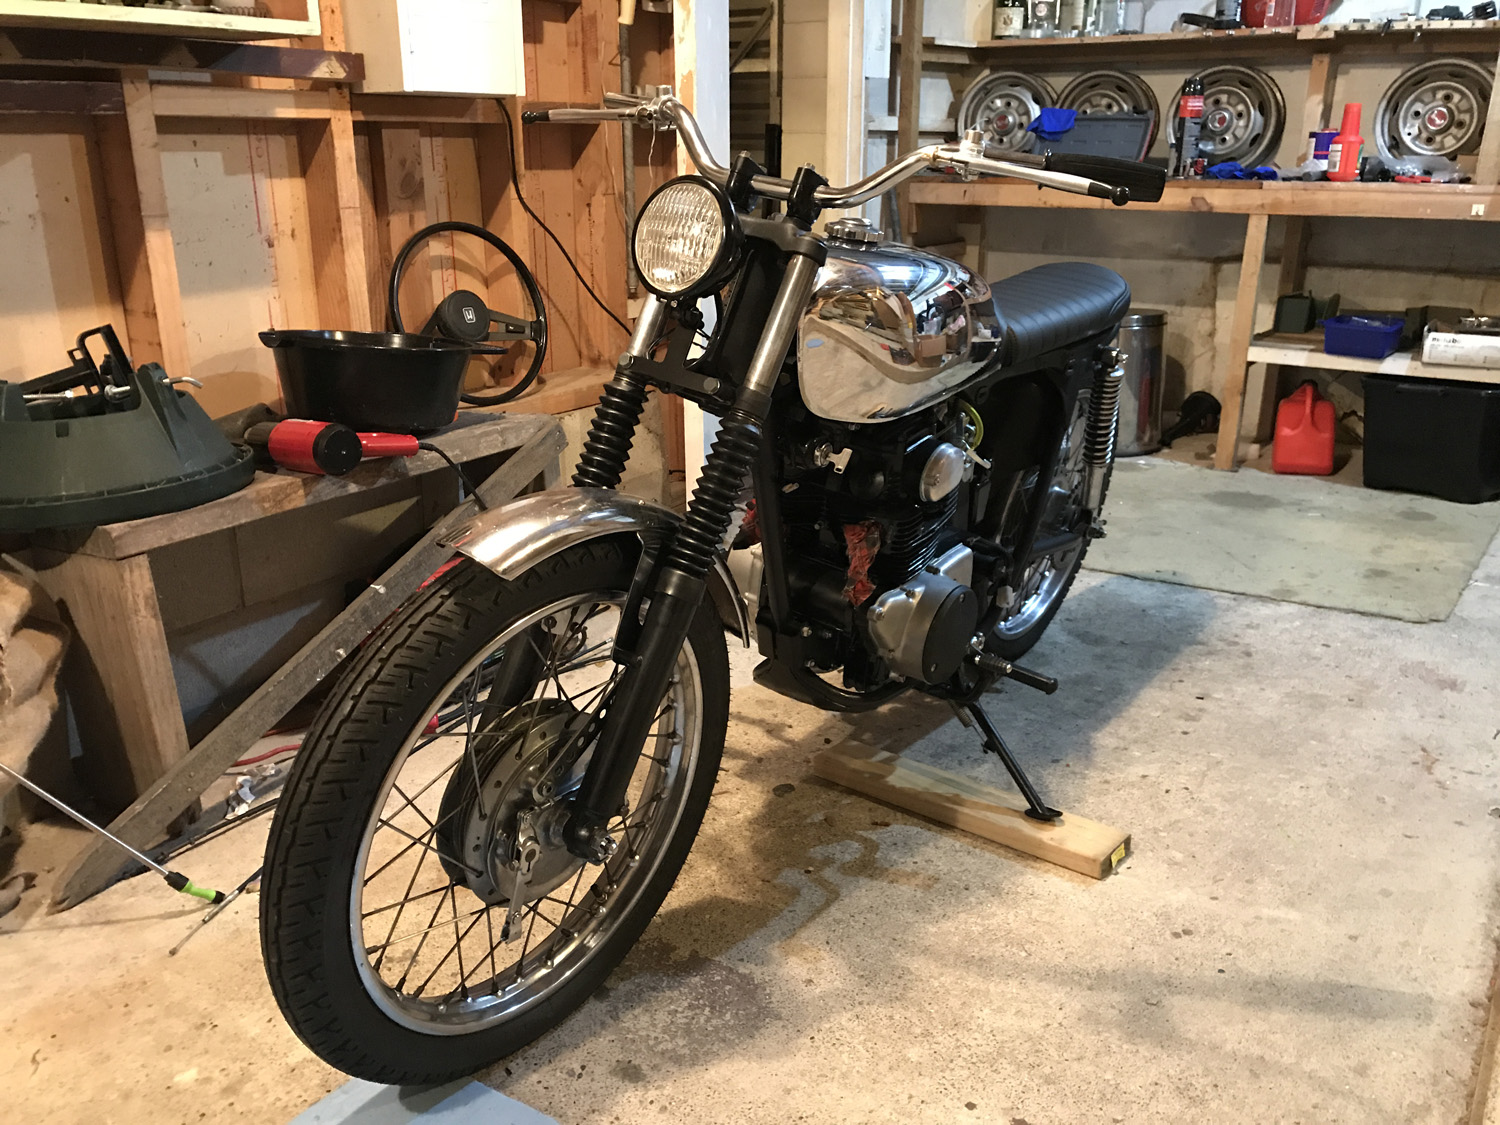
Spent ages trying to find a good looking tail light - ended up going with a $5 one from AliExpress haha. Back off the stand and had my first sit on the bike with the new seat. I'm short, and never thought I'd ride a bike with my legs hunched up and at a height where I can flat foot it - still, it's super comfy and should be a fun zippy bike around town. Next up is finding some indicators that are tiny yet look period correct. Will mock up the exhaust this week. Still deciding whether to run open pipes for maximum rowdiness or fit some sort of silencer. After that it's gauges, side covers, control cables, switches and wiring - then I'll be done! I really wanted the bike to take styling from the likes of a BSA Goldstar and I'm super stoked I've pulled this off.
1 point
-
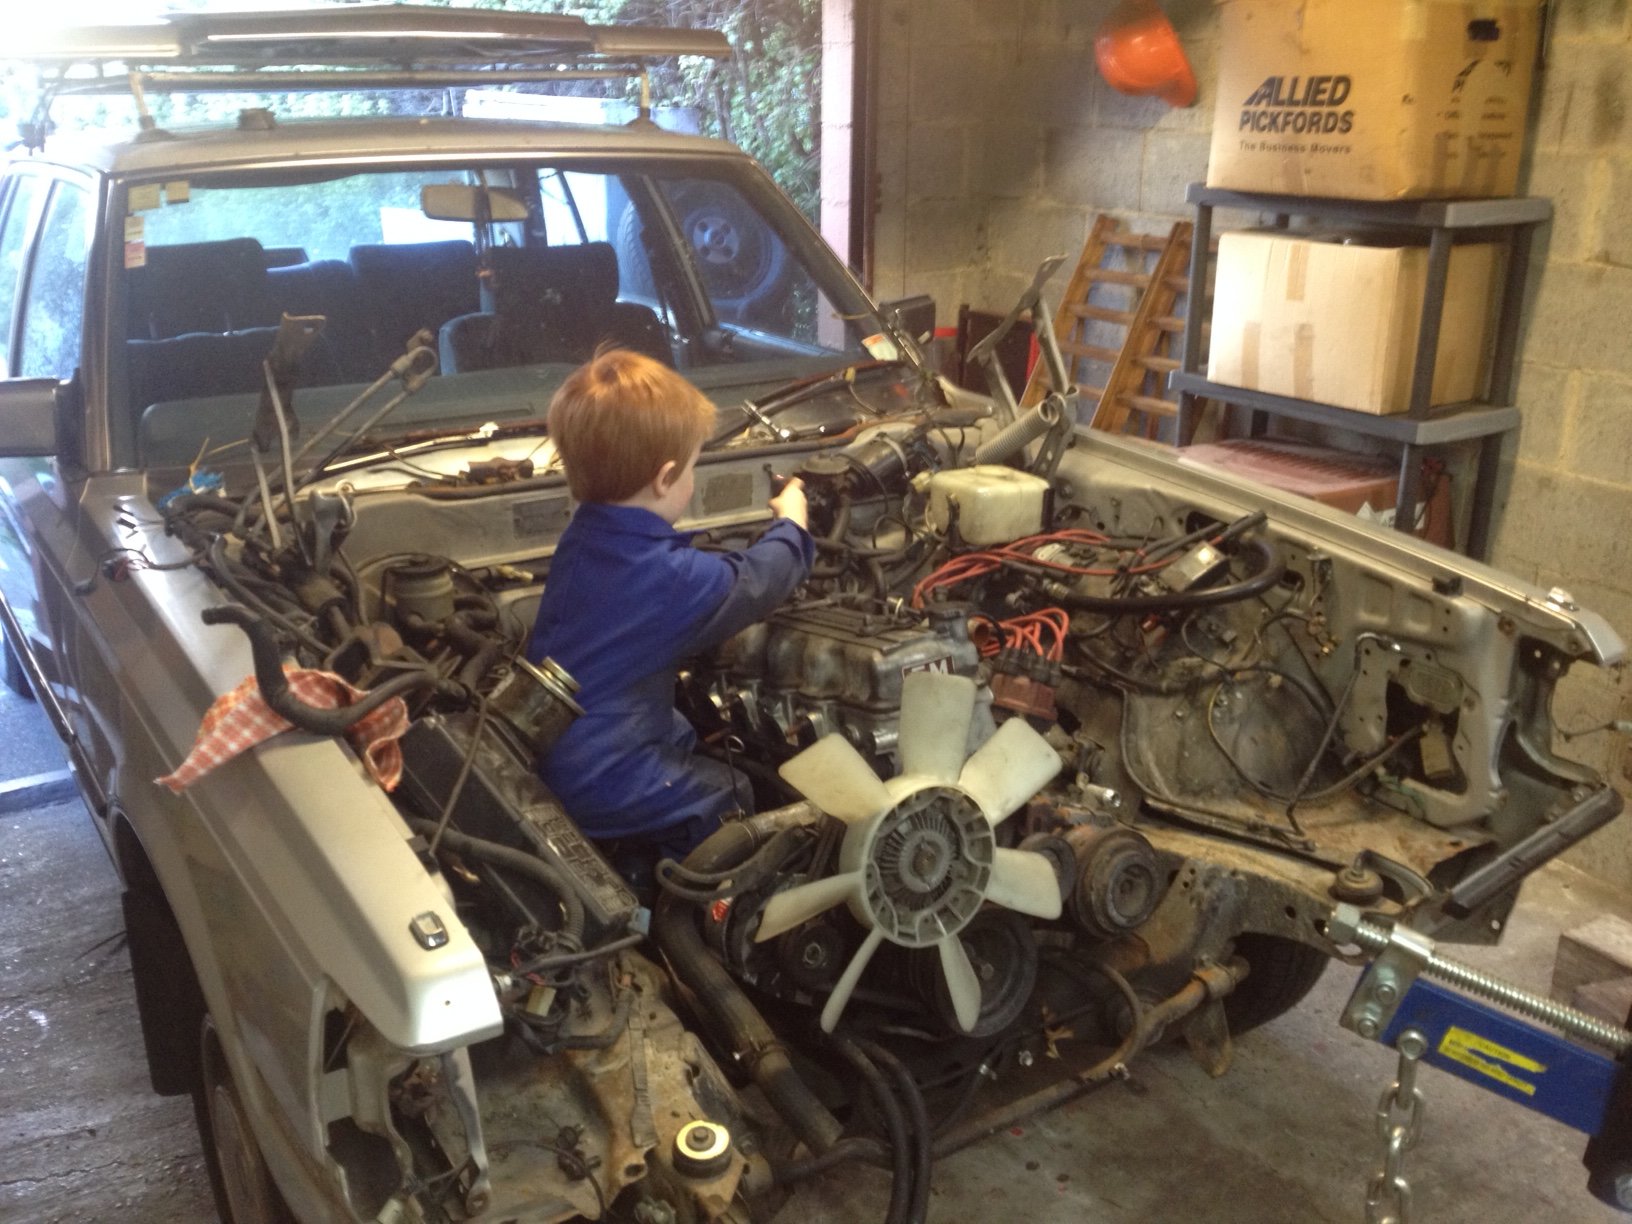
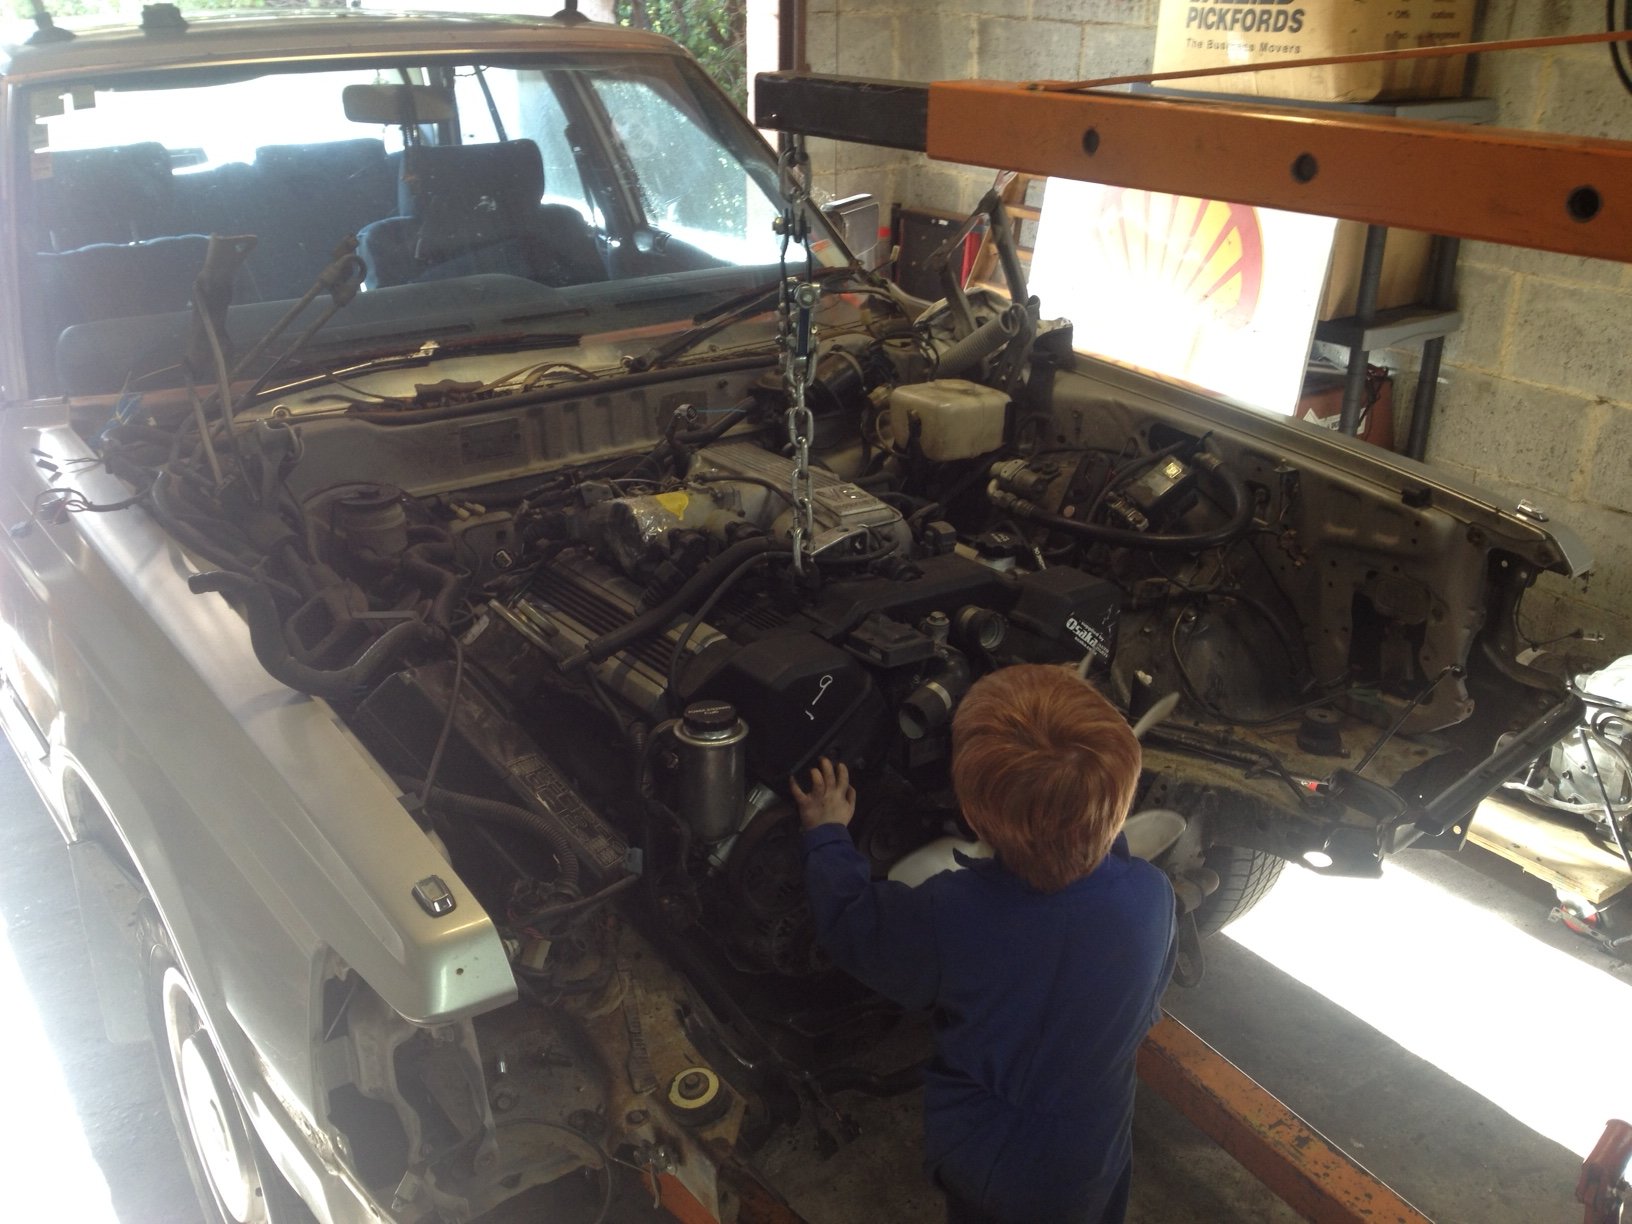
He’s super keen to wrench, good way to spend the long weekend! Had to drop the 1uz in for motivation! I'm surprised how well it fits! Clearance is tight, but tidy.
1 point
-
Been pushing along... 5 lug rear end rebuilt with eaton tru track for 11's. Driveshaft rebuilt and balanced, although I screwed up the size on the last U joint. All the mounts are now fully completed and in, firewall painted with extreme rattle can goodness, fuel lines 90% there. Interior stripped out. Full week on it in a weeks time, hoping to smash out wiring and get the front end on.
1 point


This leaderboard is set to Auckland/GMT+12:00